
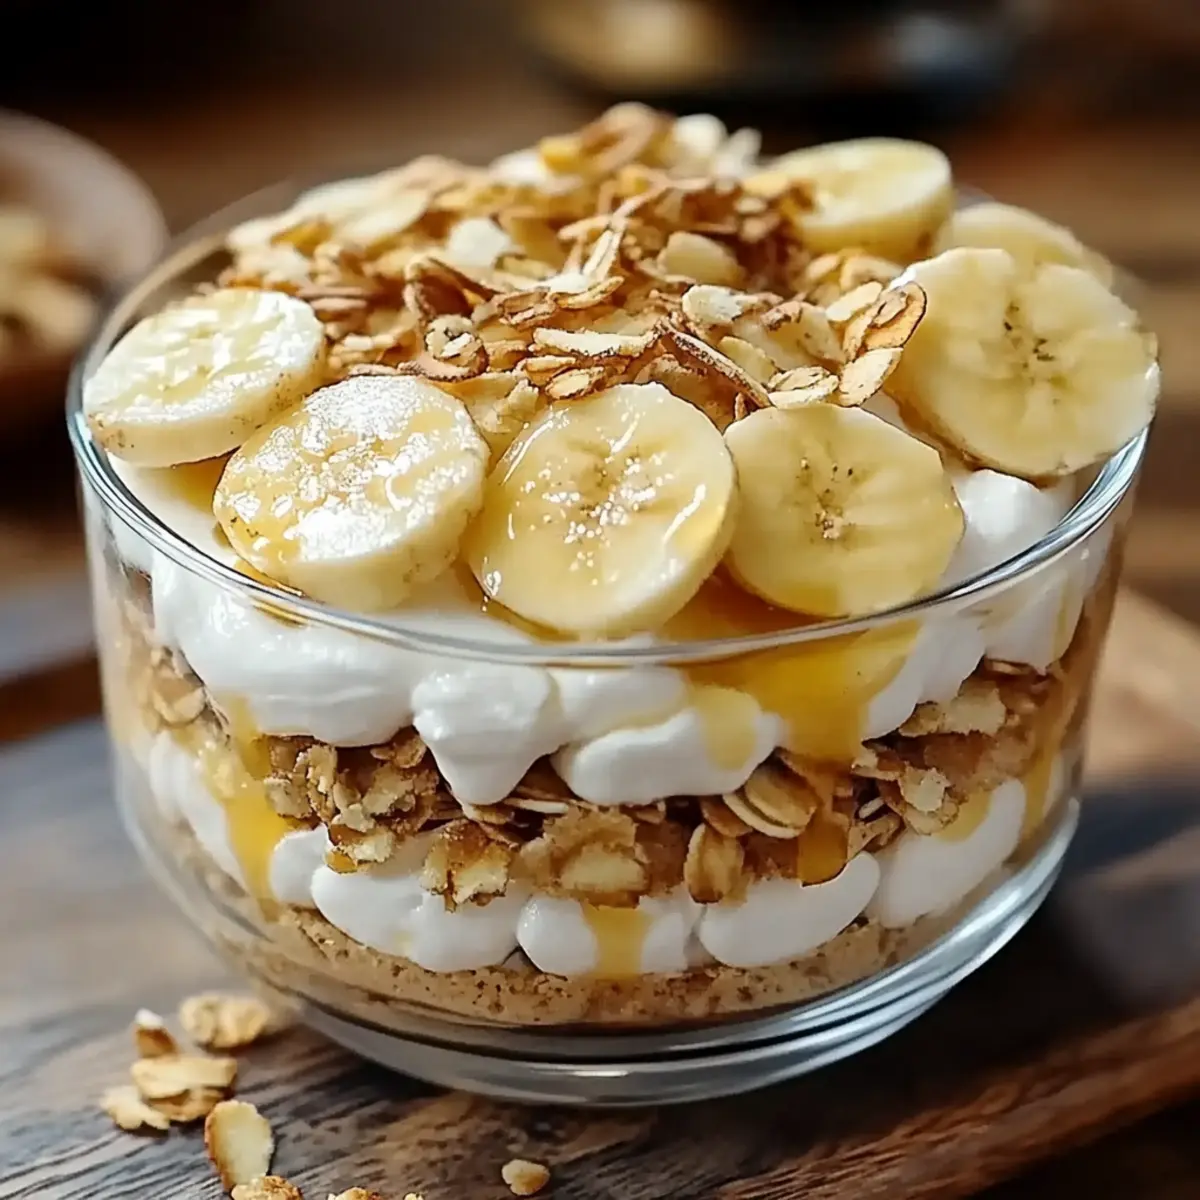
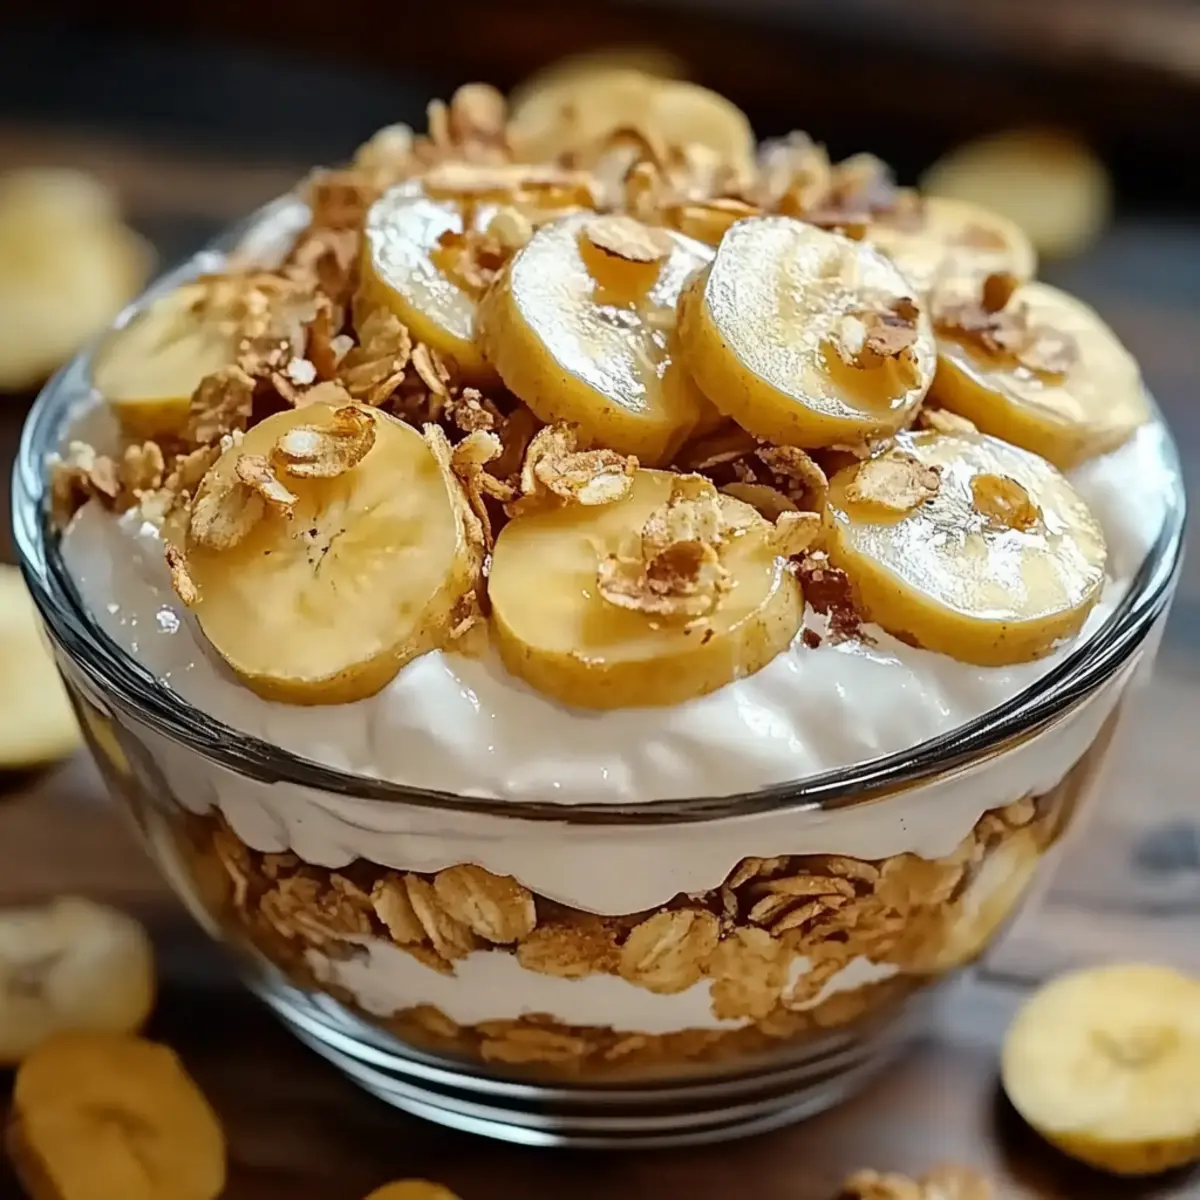
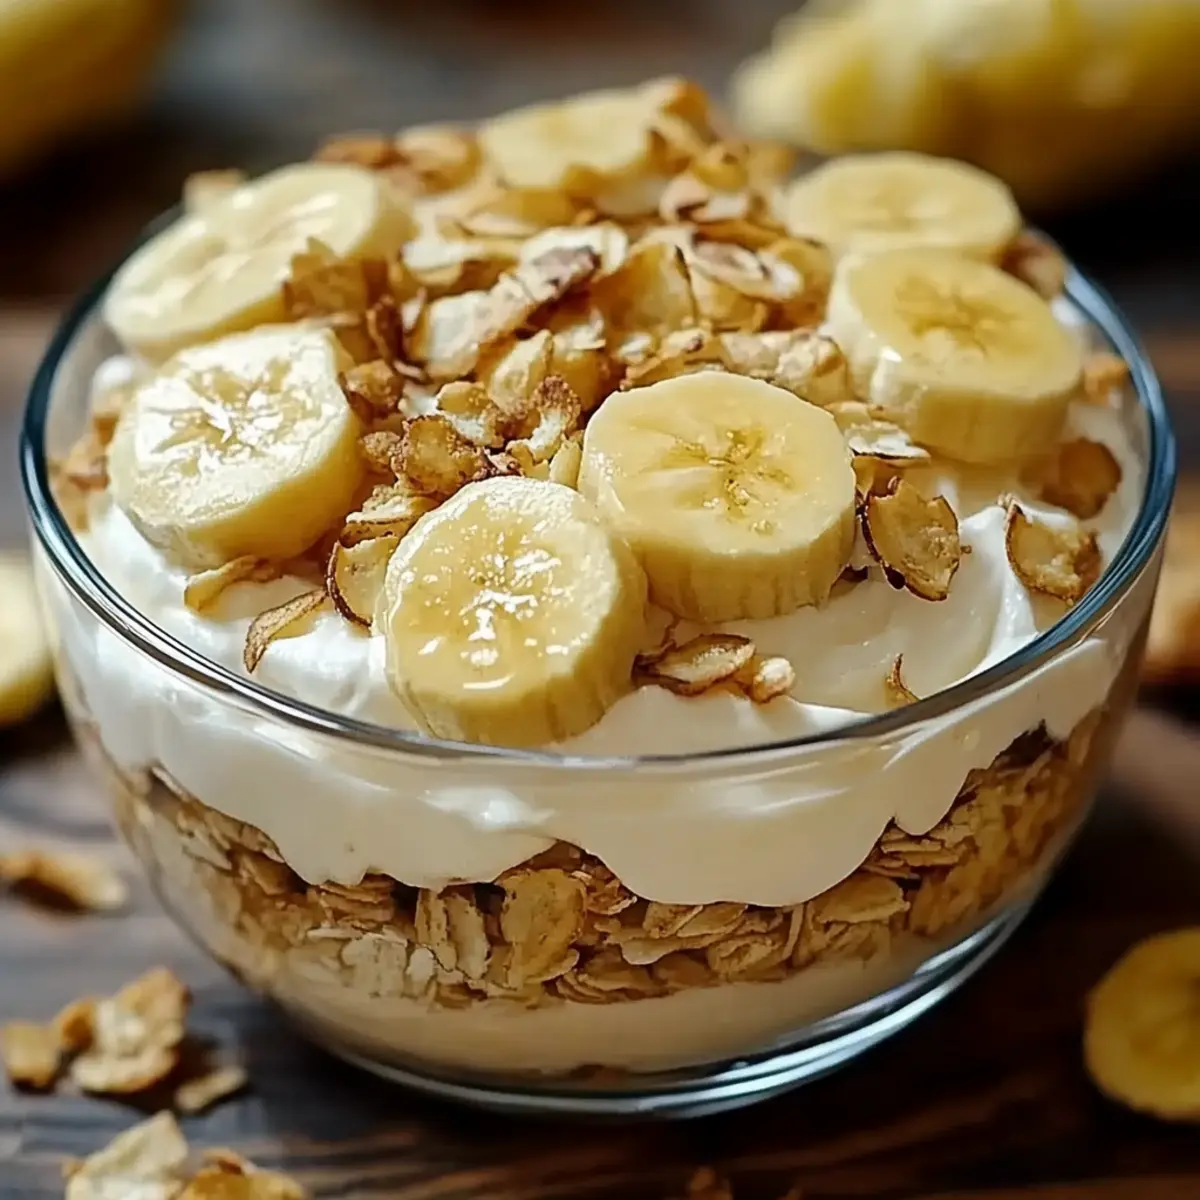
There’s something delightfully enchanting about the way certain foods can transport us to our childhood, isn’t there? One bite of this Old-Fashioned Homemade Banana Pudding and I’m instantly back in my grandmother's cozy kitchen, where every spoonful was served with a side of love. This recipe not only brings comfort to our taste buds but also offers a quick prep time, making it a perfect choice for busy weeknights. With its creamy custard layered over ripe bananas and crispy vanilla wafers, this banana pudding is bound to be a crowd-pleaser at any gathering. So, are you ready to create a dessert that’s as nostalgic as it is delicious? Let’s dive in and bring a taste of tradition to your table!
Why is Banana Pudding So Irresistible?
Nostalgic flavors: This recipe takes you on a journey back to your childhood, evoking sweet memories of family gatherings.
Simplicity reigns: With just a few simple ingredients, you can whip up a creamy dessert that impresses without the fuss.
Layered perfection: The combination of soft bananas, crunchy vanilla wafers, and silky custard creates a delightful texture that keeps everyone coming back for more.
Versatile serving: Whether it's a casual weeknight or a festive occasion, this banana pudding is easily adaptable to suit any setting.
Make-ahead magic: Designed to chill, this dish allows you to prepare it in advance, freeing up your time for other important tasks. Dive into a delicious memory with this fantastic old-fashioned banana pudding!
Banana Pudding Ingredients
For the Pudding
- Milk – 2 cups of whole milk adds a rich creaminess that makes the pudding irresistible.
- Granulated Sugar – ½ cup sweetens the custard perfectly, balancing the flavors of the bananas.
- Cornstarch – ⅓ cup thickens the pudding, ensuring it has the right velvety texture.
- Salt – ¼ teaspoon enhances the sweetness, bringing out the flavors of the pudding.
- Egg Yolks – 3 large yolks contribute to the pudding's rich flavor and custard-like texture.
- Unsalted Butter – 2 tablespoons add a velvety smoothness at the end, making it truly decadent.
- Vanilla Extract – 1 tablespoon infuses the pudding with a lovely aroma and flavor that complements the bananas.
For the Layers
- Ripe Bananas – 3 bananas need to be perfectly ripe to provide the sweetest, most flavorful bites in this classic banana pudding.
- Vanilla Wafers – 12 ounces offer a delightful crunch that contrasts beautifully with the creamy layers of the pudding.
Step‑by‑Step Instructions for Old-Fashioned Homemade Banana Pudding
Step 1: Prepare the Pudding Base
In a medium saucepan, combine 2 cups milk, ½ cup granulated sugar, ⅓ cup cornstarch, and ¼ teaspoon salt. Heat over medium heat, stirring constantly until the mixture starts to thicken, which should take about 10 minutes. You'll know it's ready when it begins to bubble gently and coats the back of a spoon.
Step 2: Temper the Egg Yolks
While the pudding base is thickening, whisk together 3 large egg yolks in a separate bowl. Gradually add a scoop of the hot pudding mixture to the yolks, whisking vigorously to avoid curdling. This process takes about 2 minutes and will help the yolks adjust to the heat before combining them with the main mixture.
Step 3: Combine the Mixtures
Pour the tempered egg yolks back into the saucepan containing the thickened pudding. Continue cooking on medium-low heat while stirring for about 3–5 minutes, until the custard thickens further and is smooth. You’ll notice it’s ready when it has a creamy consistency and gently clings to the spatula.
Step 4: Add Butter and Vanilla
Remove the saucepan from the heat and stir in 2 tablespoons of unsalted butter and 1 tablespoon of vanilla extract until both are fully melted and incorporated. This step enhances the richness of your banana pudding, making it delightfully creamy and fragrant.
Step 5: Create the Layers
In a ceramic or glass serving dish, start layering your old-fashioned banana pudding. Begin with a layer of vanilla wafers followed by sliced ripe bananas, and then spoon over some of the custard mixture. Repeat this process until all the ingredients are used, making sure to end with a layer of custard on top for that beautiful finish.
Step 6: Chill the Pudding
Once you’ve built your delicious layers, cover the dish with plastic wrap and place it in the refrigerator. Allow the pudding to chill for at least 2 hours before serving. This chilling time helps meld the flavors and ensures a refreshing, creamy texture that everyone will love.
Banana Pudding Variations & Substitutions
Feel free to customize your banana pudding for a delightful twist that tickles your taste buds!
- Dairy-Free: Substitute the milk with almond or coconut milk for a lighter version that’s still creamy.
- Sugar-Free: Use a sugar substitute like stevia or erythritol to satisfy sweet cravings without added sugar.
- Flavor Infusion: Add a splash of rum or bourbon to the custard for a rich depth of flavor, perfect for adult gatherings.
- Chocolate Twist: Mix in cocoa powder or layer with chocolate wafers for a luscious chocolate-banana fusion that everyone will love.
- Nutty Crunch: Sprinkle chopped nuts, like walnuts or pecans, between the layers for an added crunch that complements the creamy pudding beautifully.
- Fruit Addition: Layer in chopped strawberries or blueberries alongside the bananas for a vibrant burst of flavor and color.
- Spiced Up: Incorporate a pinch of cinnamon or nutmeg in the custard for a warm, cozy spice that dances on your palate.
- Banana Alternatives: Try using other fruits, such as peaches or mangoes, when bananas aren't in season for a fresh, fruity twist.
No matter how you choose to adapt your banana pudding, each version will create new memories and moments around the table. Enjoy!
What to Serve with Old-Fashioned Homemade Banana Pudding
Creating a memorable meal goes beyond just dessert—it’s about building beautiful moments around the table.
- Whipped Cream: The light, airy texture of freshly whipped cream adds a delightful contrast to the creamy banana pudding.
- Espresso or Coffee: A warm cup brings out the sweetness of the pudding, creating a comforting pairing that's perfect for any time of day.
- Chocolate Chip Cookies: The slight crunch and sweetness of cookies balance beautifully with the softness of banana pudding, making a dynamic duo.
- Fresh Berries: A handful of tart raspberries or strawberries provides a refreshing burst of color and flavor, enhancing the overall presentation.
- Peanut Butter Cookies: Their nutty flavor adds a rich, savory twist that complements the sweetness of the banana pudding in an unexpected way.
- Milkshake: A classic vanilla or chocolate milkshake transforms dessert time into a whimsical treat, perfect for both kids and adults.
- Caramel Sauce: Drizzling a little homemade caramel on top of each serving elevates the indulgence, creating sweet contrasts with the bananas.
- Pineapple Slices: The juicy, tropical flavor of pineapple offers a refreshing surprise and balances the richness of the custard perfectly.
- Vanilla Ice Cream: A scoop of ice cream alongside warm banana pudding turns it into a sundae-style treat, adding creamy loveliness to each bite.
Expert Tips for the Best Banana Pudding
• Perfectly Ripe Bananas: Use bananas that are ripe but not overripe to ensure a sweet flavor without any brown spots.
• Don’t Rush the Cooking: Stir continuously while cooking the pudding on medium heat to prevent lumps and ensure a smooth, velvety texture.
• Temper the Yolks Carefully: Gradually introducing hot pudding into the egg yolks is key to avoiding curdling. Whisk vigorously for the best results.
• Chill Thoroughly: Allow the banana pudding to chill for a minimum of 2 hours. This time is essential for flavors to develop and achieve a creamy consistency.
• Layer with Care: When assembling, make sure to completely coat the bananas with custard to prevent browning and maintain a fresh look.
• Store Properly: If you have leftovers, cover them tightly and store in the refrigerator for up to 2 days, but be aware the wafers may lose their crunch.
Make Ahead Options
These delightful Old-Fashioned Homemade Banana Pudding layers are perfect for meal prep enthusiasts! You can prepare the creamy custard up to 24 hours in advance; simply follow the recipe through to the layering step. To maintain quality, wait to slice the bananas and layer them with the custard until just before serving—this keeps them fresh and prevents browning. When you're ready to impress your family or guests, simply layer the sliced bananas with the custard and vanilla wafers, then refrigerate for a final chilling of at least 2 hours. With this make ahead approach, you'll enjoy restaurant-quality banana pudding with minimal effort, freeing up precious time for other tasks!
How to Store and Freeze Banana Pudding
Fridge: Store your banana pudding in an airtight container for up to 2 days. Make sure it's well-covered to prevent the bananas from browning and to keep the layers intact.
Freezer: Banana pudding can be frozen, but keep in mind that the texture may change. Freeze for up to 1 month in a tightly sealed container. Thaw in the fridge overnight before serving.
Reheating: It's not recommended to reheat banana pudding, as it is best served chilled. If desired, you can briefly chill the pudding again for a refreshing treat.
Leftovers: To maintain crunch, if you plan to store leftovers, consider keeping the vanilla wafers separate until you're ready to serve for the best texture.
Old-Fashioned Homemade Banana Pudding Recipe FAQs
What type of bananas should I use for banana pudding?
Absolutely, you want to use perfectly ripe bananas! Look for ones that are bright yellow with a few small brown spots. They should be firm but yield slightly when pressed—this ensures they're sweet and flavorful without being overly mushy.
How long can I store banana pudding in the fridge?
Banana pudding can be stored in an airtight container in the refrigerator for up to 2 days. To keep the bananas from browning, make sure the pudding is tightly covered and avoid exposing it to air. The longer it sits, the more the wafers may lose their crunch, so it's best enjoyed fresh!
Can I freeze banana pudding?
Yes, you can freeze banana pudding, but keep in mind that the texture might change slightly once thawed. To freeze, scoop your banana pudding into a tightly sealed container and place it in the freezer for up to 1 month. When you're ready to enjoy it, transfer it to the refrigerator to thaw overnight—this helps it regain some of its creamy consistency.
What should I do if my pudding doesn’t thicken properly?
If your pudding isn’t thickening after cooking, there are a couple of things you can check. First, make sure you're cooking over medium heat and stirring constantly. If you notice lumps, you can whisk it vigorously to help break them up. If it still isn’t thickening after about 10 minutes, you might need to cook it a bit longer. If your base is too thin, you can also create a slurry with a bit of cornstarch and water, adding it back to the pot while continuing to stir until it thickens.
Is this banana pudding recipe safe for pets?
It’s best to avoid feeding banana pudding to pets, especially dogs or cats. While bananas are safe for them to eat in moderation, the sugar and other ingredients in the pudding, like vanilla and eggs, can upset their stomachs or be harmful. Always stick to pet-friendly treats for your furry companions!

Irresistibly Creamy Banana Pudding That Reminds You of Home
Ingredients
Equipment
Method
- In a medium saucepan, combine 2 cups milk, ½ cup granulated sugar, ⅓ cup cornstarch, and ¼ teaspoon salt. Heat over medium heat, stirring constantly until thickened, about 10 minutes.
- Whisk together 3 large egg yolks in a separate bowl. Gradually add a scoop of the hot pudding mixture to the yolks, whisking vigorously for about 2 minutes.
- Pour the tempered egg yolks back into the saucepan. Continue cooking on medium-low heat while stirring for another 3-5 minutes until smooth.
- Remove from heat and stir in 2 tablespoons of unsalted butter and 1 tablespoon of vanilla extract until incorporated.
- In a serving dish, layer vanilla wafers, sliced bananas, and custard mixture. Repeat until ingredients are used, ending with custard.
- Cover with plastic wrap and refrigerate for at least 2 hours before serving.


Leave a Reply