
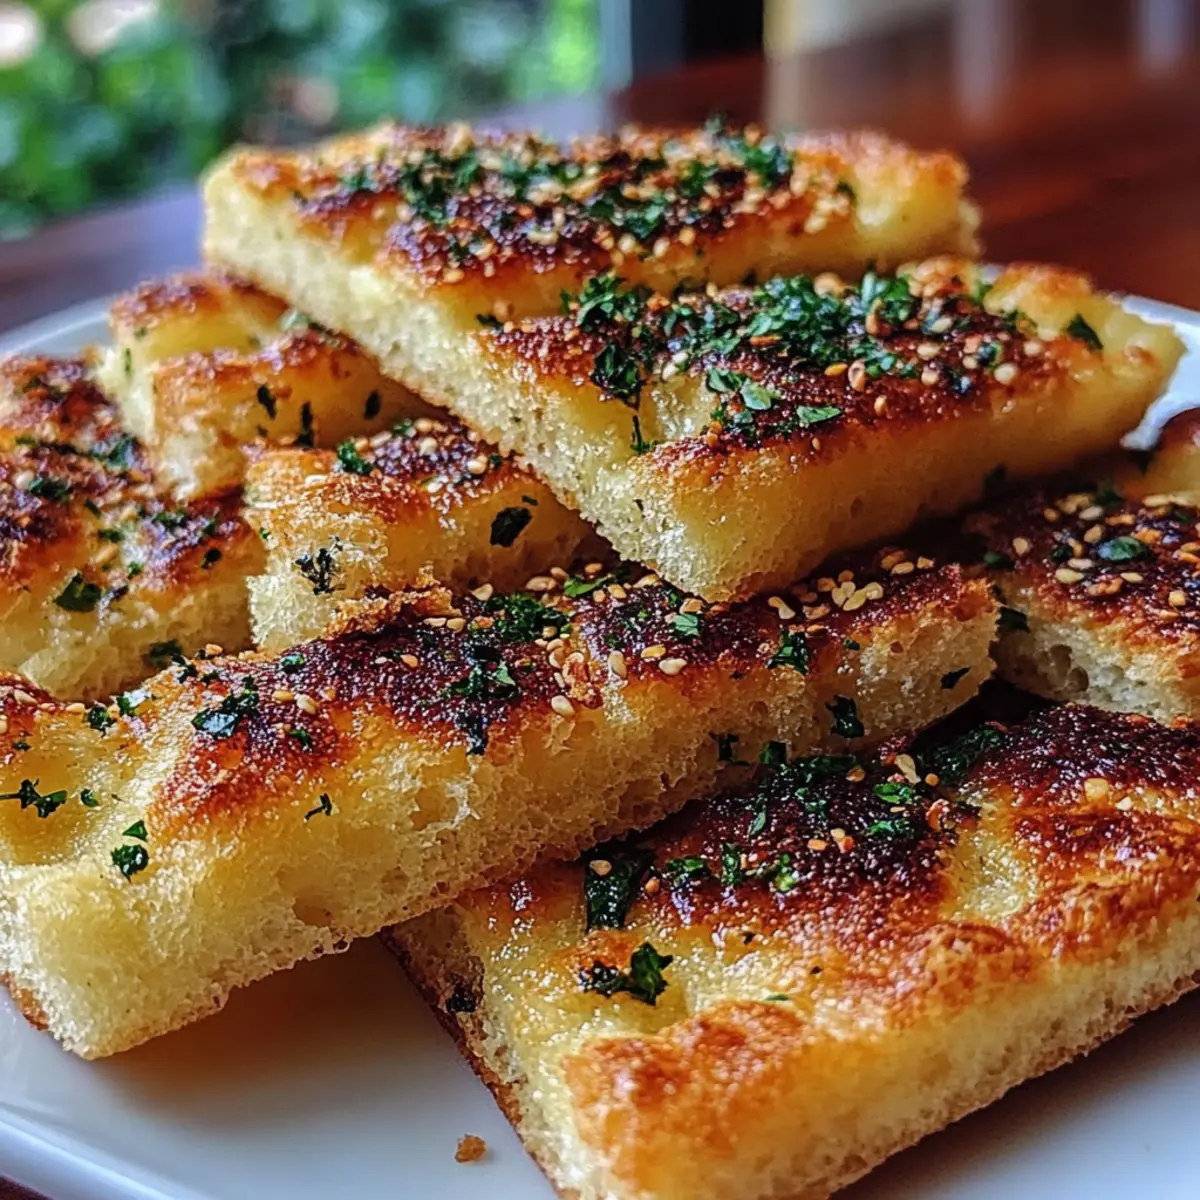
As I stood in my kitchen, the aroma of melting butter and roasted garlic wafted through the air, reminding me just how transformative homemade breadsticks can be. Today, I’m excited to share my favorite recipe for Gluten Free Garlic Pizza Breadsticks, which not only satisfy that craving for something warm and indulgent but are also easy to whip up in just 45 minutes. Packed with flavor and perfect for any gathering, these breadsticks are a delightful crowd-pleaser that even your gluten-sensitive friends will love. Plus, they offer a healthier alternative to fast food pizza side dishes, letting you take control of your ingredients. Curious about how to make these irresistible bites? Let’s dive into the recipe!
Why are these breadsticks so irresistible?
Flavorful garlic blends with melty butter for a mouthwatering experience that contrasts beautifully with the crispy crust. Quick and easy to prepare, these Gluten Free Garlic Pizza Breadsticks take just 45 minutes from start to finish—perfect for last-minute gatherings. Versatile in nature, enjoy them on their own or paired with your favorite dip. Plus, they're gluten-free, making them a hit for those with dietary restrictions. Treat yourself and your loved ones to this homemade delight that beats any fast food option!
Gluten Free Garlic Pizza Breadsticks Ingredients
For the Dough
• Warm water – 1 cup helps activate the yeast for a perfect rise.
• Active dry yeast – 2 ¼ teaspoons gives the breadsticks their fluffy texture.
• Sugar – 1 teaspoon feeds the yeast for better fermentation.
• Gluten free all-purpose flour – 2 cups ensures a yummy, gluten-free alternative.
• Xanthan gum – 1 teaspoon adds elasticity to the dough, binding the ingredients together.
• Salt – 1 teaspoon enhances the overall flavor of the breadsticks.
• Olive oil – 2 tablespoons adds moisture and richness to the dough.
For the Topping
• Melted butter – 2 tablespoons brushed on top gives a luscious finish.
• Minced garlic – 3 cloves infuse a bold garlic flavor throughout.
• Garlic powder – ½ teaspoon amplifies the garlic goodness in each bite.
• Chopped fresh parsley – 1 tablespoon adds a fresh, vibrant touch.
• Grated Parmesan cheese – ¼ cup offers a savory, cheesy finish that can’t be resisted.
Create these Gluten Free Garlic Pizza Breadsticks to bring joy to your family and friends at any gathering!
Step‑by‑Step Instructions for Gluten Free Garlic Pizza Breadsticks
Step 1: Preheat and Prepare Baking Sheet
Begin by preheating your oven to 425°F (220°C). While the oven warms up, line a baking sheet with parchment paper. This will prevent the breadsticks from sticking and help them bake evenly. The scent of the warm oven will set the stage for your delicious Gluten Free Garlic Pizza Breadsticks.
Step 2: Activate the Yeast
In a small bowl, combine 1 cup of warm water, 2 ¼ teaspoons of active dry yeast, and 1 teaspoon of sugar. Allow this mixture to stand for about 5 minutes until it becomes foamy on the surface. This indicates that your yeast is activated and ready to bring life to your breadsticks.
Step 3: Mix Dry Ingredients
In a large mixing bowl, whisk together 2 cups of gluten free all-purpose flour, 1 teaspoon of xanthan gum, and 1 teaspoon of salt. Mixing these dry ingredients thoroughly ensures that the xanthan gum and salt are evenly distributed, which is crucial for the perfect texture of your Gluten Free Garlic Pizza Breadsticks.
Step 4: Combine Mixtures
Once your yeast mixture is foamy, add it along with 2 tablespoons of olive oil to the large bowl of dry ingredients. Stir everything together until a soft dough forms, which should take just a couple of minutes. The dough will be slightly sticky but should pull away cleanly from the sides of the bowl.
Step 5: Knead the Dough
Turn the dough out onto a lightly floured surface. Gently knead the dough for about 2-3 minutes until it becomes smooth and pliable. Be careful not to over-knead; you want it to remain soft and easy to work with. This step helps develop the gluten-free structure needed for your breadsticks.
Step 6: Shape the Dough
Using a rolling pin, roll the dough into a rectangle about ¼ inch thick on the prepared baking sheet. Ensure that it’s evenly shaped, which helps with even cooking and aesthetic appeal. This is the base for your Gluten Free Garlic Pizza Breadsticks, so make it as neat as possible.
Step 7: Add Toppings
Brush the rolled-out dough with the melted butter, ensuring full coverage. Then, sprinkle the minced garlic, garlic powder, chopped parsley, and ¼ cup of grated Parmesan cheese evenly over the top. This combination will infuse rich flavor into your breadsticks as they bake, making them irresistibly tasty.
Step 8: Score the Dough
With a knife or a pizza cutter, score the dough into individual breadsticks without cutting all the way through. This allows them to pull apart easily after baking. Aim for even portions to make them visually appealing and easy to share during your gatherings.
Step 9: Bake to Perfection
Place the baking sheet in your preheated oven and bake the breadsticks for 12 to 15 minutes, or until the edges turn golden brown and crispy. Keep an eye on them as baking times can vary based on your oven. The aroma of garlic will fill your kitchen as they bake!
Step 10: Cool and Serve
After baking, allow the breadsticks to cool slightly for about 5 minutes. Then, gently twist along the scored lines to separate them into individual sticks. Serve warm with your favorite dip or enjoy them as they are—your Gluten Free Garlic Pizza Breadsticks are ready to delight!
Gluten Free Garlic Pizza Breadsticks Variations
Feel free to explore these delightful twists and substitutions to make this recipe your own!
- Herb-Infused: Add dried Italian herbs such as oregano or basil for a fragrant twist that brings a taste of Italy to your table.
- Cheesy Garlic: Mix in an additional ¼ cup of mozzarella cheese in the dough for an irresistibly cheesy center that complements the garlic perfectly.
- Spicy Kick: Incorporate a pinch of red pepper flakes into the garlic topping for those who crave a little heat in every bite.
- Dairy-Free: Substitute the butter and Parmesan cheese with vegan alternatives to create a delicious and inclusive treat for your dairy-sensitive guests.
- Whole Grain: Use a gluten-free whole grain flour blend instead of all-purpose flour for a denser, heartier breadstick that adds a nutritious punch.
- Stuffed Breadsticks: Before baking, fill the scored sections with a blend of cheeses or even pepperoni for a fun and flavorful surprise when you pull them apart.
- Garlic Butter Dip: Whip up a simple garlic butter dip on the side with melted butter and minced garlic to enhance the indulgence!
- Zesty Lemon: Finish with a sprinkle of lemon zest before serving, providing a refreshing and vibrant contrast to the savory flavors.
Experimenting with these variations will make your Gluten Free Garlic Pizza Breadsticks uniquely yours, perfect for serving at family gatherings or cozy nights in. For those looking for more delectable sides, don’t forget to check out my Easy Marinara Sauce and Classic Garlic Butter Sauce recipes that pair beautifully with these breadsticks!
Make Ahead Options
These Gluten Free Garlic Pizza Breadsticks are perfect for meal prep enthusiasts! You can prepare the dough up to 24 hours in advance by following steps 1 through 5; simply store the kneaded dough in an airtight container in the refrigerator. To maintain quality, let the dough come to room temperature for about 30 minutes before rolling it out to prevent any chill-induced stiffness. The toppings can also be prepped in advance—mix the garlic, herbs, and cheese, and store them in the fridge until you're ready to bake. When you're ready to serve, roll out the dough, add your toppings, score the breadsticks, and bake them fresh for just 12 to 15 minutes for delightful results!
How to Store and Freeze Gluten Free Garlic Pizza Breadsticks
Room Temperature: Store leftover breadsticks in an airtight container at room temperature for up to 3 days. They are best enjoyed fresh but can still be tasty when slightly reheated.
Fridge: If you prefer to extend their freshness, place the breadsticks in the fridge for up to a week. Wrap them tightly to prevent them from drying out.
Freezer: For longer storage, freeze the breadsticks after they cool completely. Place them in a freezer-safe bag or container for up to 3 months. When ready to enjoy, simply thaw and reheat.
Reheating: To bring them back to life, reheat in an oven preheated to 350°F (175°C) for about 10 minutes or until warmed through. Keep that irresistible flavor intact!
What to Serve with Gluten Free Garlic Pizza Breadsticks?
Indulging in the warm, buttery aroma of homemade breadsticks can set a comforting mood, perfect for creating a delightful meal experience.
-
Rich Marinara Sauce: A classic tomato dip that adds a delightful tang and complements the garlic flavor perfectly. Plus, it’s fun to dunk!
-
Creamy Spinach Dip: This velvety mix of spinach and cream is a match made in heaven, offering a smooth texture to contrast the breadsticks' crunch.
-
Zesty Salad: A fresh, crisp salad with lemon vinaigrette brightens the table, balancing the richness of the breadsticks with vibrant flavors and textures.
-
Savory Meatballs: Juicy, hearty meatballs served in a marinara sauce can turn your appetizer into a satisfying main course, making these breadsticks even more irresistible.
-
Homemade Pesto: Drizzling a bit of homemade basil pesto over the breadsticks adds an aromatic twist, marrying the garlic notes with herby freshness beautifully.
-
Prosecco or Sparkling Water: An effervescent drink like Prosecco lifts the meal, refreshing your palate and making every bite feel like a special occasion.
-
Chocolate Fondue: For dessert, dip fresh fruit into warm chocolate fondue to round out your meal with a sweet and decadent flair. This contrast will make the meal memorable.
-
Crispy Roasted Vegetables: Add some roasted veggies alongside for a colorful and nutritious option that enhances the meal's overall appeal.
-
Garlic Parmesan Potato Wedges: If you're craving something comforting, serve these alongside; their crispy texture and cheesy flavor echo the breadsticks’ delights.
Expert Tips for Gluten Free Garlic Pizza Breadsticks
Perfect Dough Consistency: Ensure your dough is soft but not overly sticky; this makes it easier to work with and results in lighter breadsticks.
Don’t Skimp on Kneading: Knead gently for just a few minutes to develop the texture, avoiding over-kneading which can make the dough tough.
Scoring Matters: Score the dough fully without cutting through to help the breadsticks pull apart easily after baking while maintaining a nice shape.
Watch the Baking Time: Keep a close eye as baking times can vary by oven; remove the breadsticks once they are golden brown for the best texture.
Serve Warm: Enjoy these Gluten Free Garlic Pizza Breadsticks warm, enhancing their flavor and keeping them irresistibly soft—a perfect treat for any gathering!
Gluten Free Garlic Pizza Breadsticks Recipe FAQs
What’s the best way to choose garlic for this recipe?
Absolutely! When selecting garlic, look for firm heads with tight, unblemished skin. Avoid any bulbs that have dark spots or feel sprouty. Fresh garlic should have a strong aroma and be easy to peel.
How should I store leftover breadsticks?
You can store leftover Gluten Free Garlic Pizza Breadsticks in an airtight container at room temperature for up to 3 days. They can also be kept in the fridge for up to a week, but make sure to wrap them tightly to prevent drying out.
Can I freeze these breadsticks for later?
Yes, definitely! To freeze your breadsticks, allow them to cool completely first. Then, place them in a freezer-safe bag or container, where they will keep well for up to 3 months. When you're ready to enjoy them, simply thaw at room temperature and reheat in a preheated oven at 350°F (175°C) for about 10 minutes.
How can I troubleshoot my dough if it’s too sticky?
If your dough becomes too sticky while making these Gluten Free Garlic Pizza Breadsticks, don’t worry! Simply sprinkle a bit more gluten free flour a tablespoon at a time until the dough reaches a workable consistency. Be careful not to overdo it; you want to keep it soft and pliable.
Are these breadsticks safe for my gluten-allergic friends?
Yes! These Gluten Free Garlic Pizza Breadsticks are made entirely with gluten-free ingredients, making them a wonderful option for anyone with celiac disease or gluten sensitivities. Just be sure to check your ingredients, especially the yeast and flour, to ensure they are labeled gluten-free.
Can I add other toppings to the breadsticks?
Very! Feel free to customize your breadsticks by adding toppings such as Italian herbs, mozzarella cheese, or sun-dried tomatoes. You can even switch the parsley for fresh basil for a delightful twist! The more, the merrier!
Irresistible Gluten Free Garlic Pizza Breadsticks You’ll Love
Ingredients
Equipment
Method
- Preheat your oven to 425°F (220°C) and line a baking sheet with parchment paper.
- Combine warm water, active dry yeast, and sugar in a bowl. Allow to sit for 5 minutes until foamy.
- Whisk together gluten free flour, xanthan gum, and salt in a large mixing bowl.
- Add the foamy yeast mixture and olive oil to the dry ingredients. Stir until a soft dough forms.
- Turn the dough out onto a floured surface and knead gently for 2-3 minutes.
- Roll the dough into a rectangle about ¼ inch thick on the baking sheet.
- Brush the dough with melted butter, then sprinkle minced garlic, garlic powder, parsley, and Parmesan cheese on top.
- Score the dough into individual breadsticks with a knife.
- Bake for 12 to 15 minutes until edges are golden brown.
- Allow to cool for 5 minutes and then twist along the scored lines to separate.


Leave a Reply