
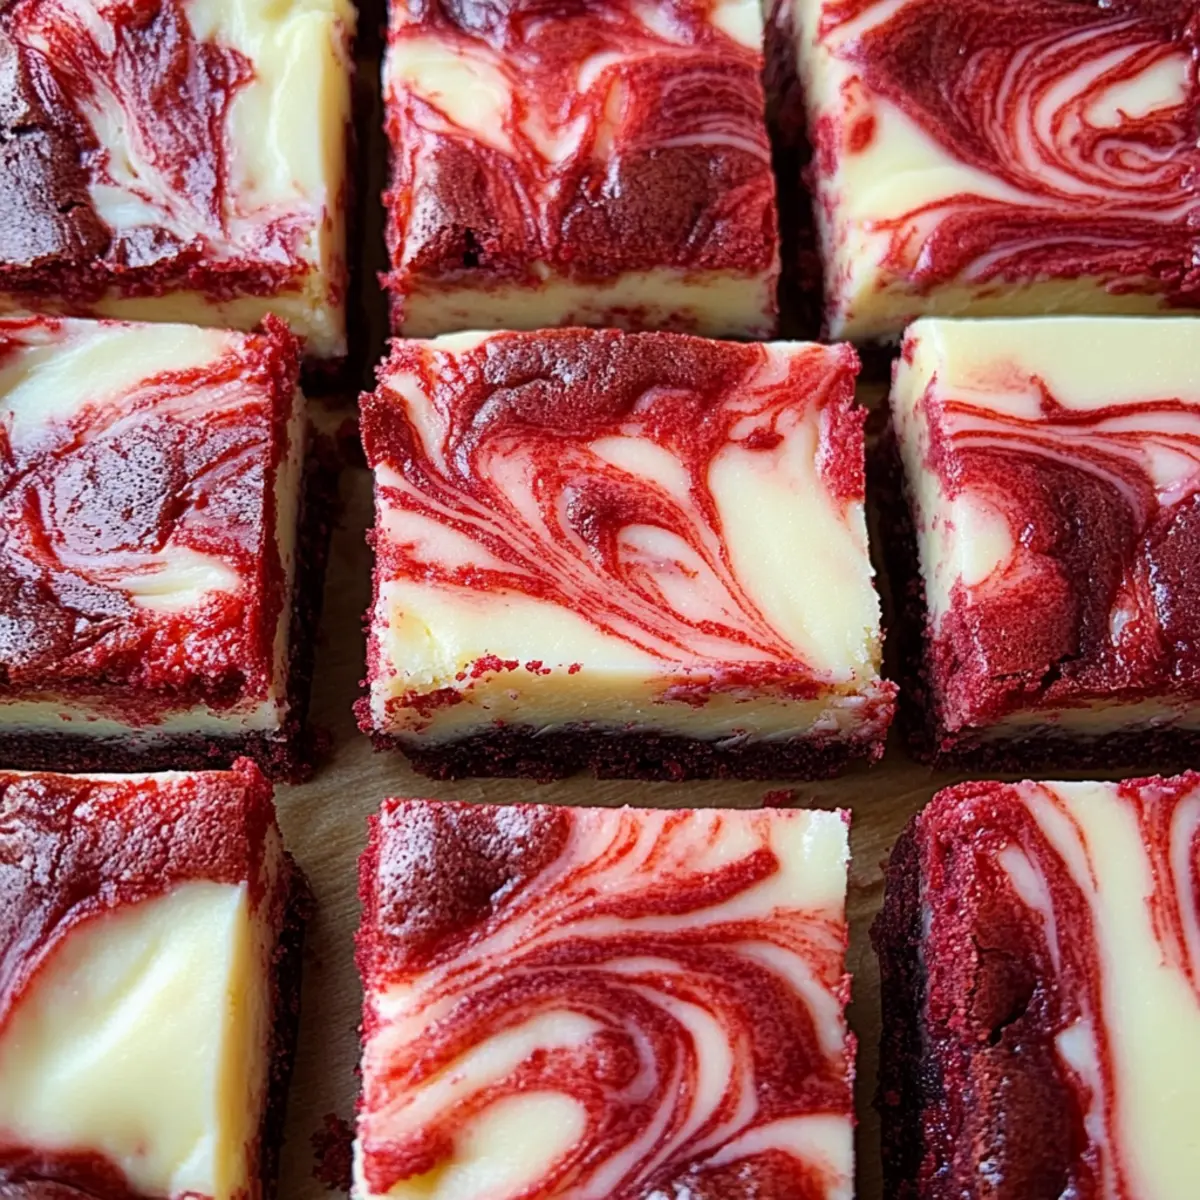
I still remember the first time I surprised my family with these delightful Red Velvet Cheesecake Brownies at a holiday gathering. The moment I pulled them out of the oven, the rich, enchanting aroma filled our kitchen, wrapping us in warmth and anticipation. As we took our first bites, the fudgy red velvet brownie layer mingled perfectly with the creamy cheesecake topping, creating a harmony of flavors that sparked pure joy.
This recipe is my go-to for any occasion—be it a potluck, birthday, or just a cozy night in. Not only are they visually stunning with their vibrant red hue, but they also boast a deliciously indulgent taste that appeals to both young and old. Plus, the combination of a soft, dense brownie base with that luxurious cheesecake layer makes these brownies a showstopper. So, roll up your sleeves and get ready to impress everyone with this decadent two-layer treat that’s surprisingly easy to make!

Why are Red Velvet Cheesecake Brownies so popular?
Irresistible Flavors make Red Velvet Cheesecake Brownies a true crowd-pleaser! The decadent pairing of rich chocolate brownie and creamy cheesecake strikes a perfect balance of sweet and savory. Their vibrant, eye-catching color brings a festive touch to any occasion, making them the star of birthdays, holidays, or simply a delightful dessert after dinner. Not only do they impress your guests, but they also offer a fun twist to traditional brownies. Plus, these treats are surprisingly easy to whip up, saving you time without sacrificing elegance. Serve them warm with a scoop of vanilla ice cream for an unforgettable experience! If you’re looking for more show-stopping desserts, check out this Red Velvet Fudge recipe for a sweet encore.
Red Velvet Cheesecake Brownie Ingredients
• Here’s what you'll need to create these luscious Red Velvet Cheesecake Brownies!
For the Red Velvet Brownie Layer:
- Unsalted Butter (160g), melted – Provides richness and moisture for a fudgy consistency.
- Granulated Sugar (250g) – Sweetens while creating the structure needed for the brownie.
- Vanilla Extract (2 teaspoons) – Adds a depth of flavor, enhancing the overall taste.
- Eggs (4) – Acts as a binder, giving the brownies that perfect, chewy texture.
- Plain Flour (120g) – Essential for structure; make sure to measure accurately!
- Cocoa Powder (15g) – Delivers a deep, rich chocolate flavor without overpowering the red velvet taste.
- Salt (½ teaspoon) – Balances the sweetness and enhances the flavors.
- Red Food Colouring – Gives the signature vibrant hue to the brownies.
For the Cheesecake Layer:
- Cream Cheese (300g) – The star of the cheesecake layer, it provides creaminess and tanginess.
- Granulated Sugar (80g) – Sweetens the cheesecake while balancing the tang of the cream cheese.
- Corn Flour (20g) – A thickening agent that helps set the cheesecake layer beautifully.
- Vanilla Extract (2 teaspoons) – Boosts the flavor of the cheesecake for a delightful taste experience.
- Double Cream (100ml), warm – Adds richness and a lovely smooth texture to the layer.
- White Chocolate (60g), melted – Enhances the creaminess and gives an extra layer of flavor.
Step-by-Step Instructions for Red Velvet Cheesecake Brownies
-
Prepare the Red Velvet Brownie Batter Preheat your oven to 325°F (165°C). In a mixing bowl, combine the melted unsalted butter, granulated sugar, and vanilla extract. Whisk in the eggs one at a time to ensure a smooth texture, then gradually add the flour, cocoa powder, and salt. Finally, mix in the red food coloring until you achieve an even, vibrant hue; this step is crucial for the characteristic look of your brownies.
-
Make the Cheesecake Filling In another bowl, beat the cream cheese until smooth. Gradually mix in the granulated sugar and corn flour until well combined. Then add the warm double cream and melted white chocolate, followed by the vanilla extract. This filling will add a creamy layer that balances the richness of the brownie layer, elevating your dessert to new heights.
-
Assemble the Brownies Grease a square baking dish (8x8 inches works best) and pour the red velvet brownie batter in, spreading it evenly. Carefully dollop the cheesecake mixture on top of the brownie layer, gently swirling it with a knife for a marbled effect. This is important as it creates a beautiful visual contrast and allows the flavors to meld beautifully during baking.
-
Bake the Brownies Place the assembled batter in the oven and bake for about 55-60 minutes. To check for doneness, insert a toothpick into the center; it should come out with a few moist crumbs attached, but no wet batter. This step is vital—overbaking will lead to dry brownies, while underbaking can result in a gooey texture that's less than ideal.
-
Cool and Set Once baked, remove the brownies from the oven and let them cool in the baking dish for about 20 minutes. Then transfer them to the refrigerator to chill for at least 1 hour before cutting into squares. This cooling time ensures that both layers set properly and slice cleanly, resulting in a gorgeous treat that looks as wonderful as it tastes. Enjoy your indulgent Red Velvet Cheesecake Brownies!

Turn It Into A Party!
When you're looking to impress your guests, look no further than Red Velvet Cheesecake Brownies! These decadent treats are not just visually stunning, but they also offer an irresistible combination of rich flavors that can win over any crowd. Serve them at your next gathering with a side of whipped cream or a scoop of ice cream, and watch the magic happen! 😉 A few tips if serving for a crowd:
- Keep them warm! If possible, serve the brownies slightly warm for a delightful gooey texture (microwave for 10-15 seconds right before serving).
- Make ahead for convenience! Bake the brownies a day in advance, then chill them in the fridge; they taste even better the next day as the flavors meld beautifully!
- Seasonal variations are fun! Try adding festive sprinkles or a drizzle of caramel sauce for extra flair (perfect for birthday parties or holidays)!
With these tips in hand, you're ready to host a memorable event that everyone will be raving about! 🎉
How to Store and Freeze Red Velvet Cheesecake Brownies
Room Temperature: Store leftovers in an airtight container for up to 2 days, but keep in mind that the cheesecake layer is best enjoyed chilled.
Fridge: To maintain optimal flavor and freshness, refrigerate in an airtight container for up to 4 days. They taste delightful straight from the fridge or at room temperature!
Freezer: Freeze individually wrapped brownies for up to 3 months. Just thaw them in the fridge overnight when you're ready to indulge again.
Reheating: For a warm treat, microwave each brownie for 10-15 seconds. This helps restore that gooey, decadent texture of the Red Velvet Cheesecake Brownies.
What to Serve with Red Velvet Cheesecake Brownies?
Indulging in a slice of Red Velvet Cheesecake Brownies is just the beginning of your delightful dessert journey!
- Vanilla Ice Cream: The creamy, cold ice cream perfectly contrasts the warm brownie, creating a dreamy mouthful.
- Chocolate Sauce: A drizzling of rich chocolate sauce enhances the chocolate notes, elevating each bite into an indulgent experience.
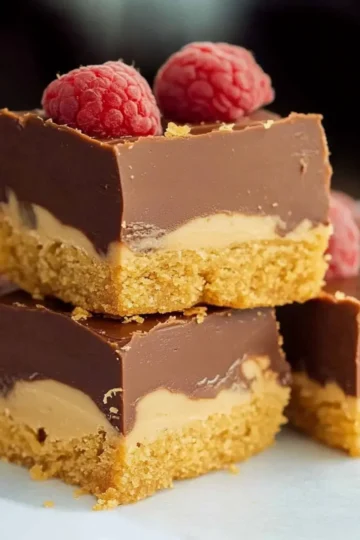
- Fresh Berries: The tartness of raspberries or strawberries provides a refreshing balance, cutting through the sweetness beautifully.
- Whipped Cream: Light and fluffy whipped cream adds a touch of elegance while complementing the richness of the brownies.
- Coffee: A steaming cup of coffee harmonizes well with the dessert, enhancing the flavors with its warm, bitter notes.
Bring your loved ones together with this exquisite treat, and don’t forget to pair it with your favorite beverages or accompaniments to make the moment even more special!
Tips for making the most flavorful Red Velvet Cheesecake Brownies
-
Baking Time: Keep in mind that every oven is a little different. I recommend starting to check your brownies around the 50-minute mark. You’re looking for a toothpick that comes out with a few moist crumbs—this means the brownie layer is perfectly fudgy, not overbaked!
-
Cooling Properly: I know it’s tempting to dive right in, but letting your brownies cool in the fridge for at least an hour is crucial. This chilling time not only helps the cheesecake layer set beautifully but also makes cutting them easier. You want those clean edges for presentation!
-
Ingredient Substitutions: Don’t have certain ingredients on hand? No worries! For the red food coloring, beet juice is a great natural alternative. If you want to lighten the recipe a bit, Greek yogurt can replace cream cheese in the cheesecake layer—just ensure you use less sugar since it’s sweeter!
-
Swirling Technique: When dolloping the cheesecake batter on top of the red velvet layer, I’m a big fan of using a knife or even a skewer to gently swirl the two mixtures together. This creates that beautiful marbled effect and allows the flavors to blend more harmoniously while baking.
-
Serving Suggestions: For an extra special touch, consider serving these brownies warm with a scoop of vanilla ice cream and a drizzle of chocolate sauce. That contrast of warm and cold elevates the experience and makes it a true showstopper!
-
Storage Tips: If you happen to have leftovers (which I bet you won’t!), store your brownies in an airtight container in the fridge. They’ll stay fresh for about 3-4 days. Just give them a quick zap in the microwave before serving to bring back that gooey freshness!
Substitutions
Can't find a few of these ingredients? No problem! They can easily be replaced with the suggestions below:
- Unsalted Butter: Replace it with unsalted margarine. (Use the same measurement for a creamy texture.)
- Granulated Sugar: Replace it with coconut sugar or brown sugar. (Brown sugar will add a slight molasses flavor.)
- Vanilla Extract: Replace it with maple syrup or almond extract. (Use the same amount, but start with 1 teaspoon of almond extract as it's stronger.)
- Plain Flour: Replace it with almond flour or oat flour. (With almond flour, you may need to use ¼ less due to its density.)
- Corn Flour: Replace it with arrowroot powder or all-purpose flour. (Arrowroot works well for thickening without altering taste.)
Red Velvet Cheesecake Brownies Recipe FAQs
How do I choose ripe ingredients for Red Velvet Cheesecake Brownies?
Absolutely! For the best results, ensure your cream cheese is soft and at room temperature for easy blending. Fresh eggs should be used, and the butter should be melted but not hot, to prevent cooking the eggs when mixed. Always check that your cocoa powder is fresh and free from any lumps.
How should I store my Red Velvet Cheesecake Brownies?
To keep these brownies fresh, store them in an airtight container in the fridge for up to 4 days. They can also be kept at room temperature for about 2 days, but the cheesecake layer is best enjoyed chilled. Remember, the flavor continues to develop as they sit!
Can I freeze Red Velvet Cheesecake Brownies?
Yes, you can! To freeze, wrap each brownie individually in plastic wrap and then place them in a freezer-safe bag or container. They’ll stay deliciously fresh for up to 3 months. When you’re ready to enjoy, simply thaw them in the fridge overnight for the best taste and texture!
What if my brownie layer comes out too dry?
Very! If your brownies are dry, it often means they were overbaked. To avoid this, always check for doneness about 5-10 minutes before the end of the recommended baking time using a toothpick; it should come out with a few moist crumbs. If you find yourself with dry brownies, you can serve them warm with a scoop of ice cream to help restore moisture and enjoyment.
Are there any dietary considerations with this recipe?
Absolutely! These Red Velvet Cheesecake Brownies contain gluten, dairy, and eggs, which may not be suitable for those with allergies or intolerances. If you're looking for alternatives, you can use gluten-free all-purpose flour and a plant-based cream cheese to accommodate gluten and dairy sensitivities. Just make sure to adjust the sugar in the cheesecake filling accordingly, as substitutions might alter the sweetness!
Decadent Red Velvet Cheesecake Brownies You Can't Resist
Ingredients
Method
- Prepare the Red Velvet Brownie Batter: Preheat your oven to 325°F (165°C). In a mixing bowl, combine the melted unsalted butter, granulated sugar, and vanilla extract. Whisk in the eggs one at a time to ensure a smooth texture, then gradually add the flour, cocoa powder, and salt. Finally, mix in the red food coloring until you achieve an even, vibrant hue.
- Make the Cheesecake Filling: In another bowl, beat the cream cheese until smooth. Gradually mix in the granulated sugar and corn flour until well combined. Then add the warm double cream and melted white chocolate, followed by the vanilla extract.
- Assemble the Brownies: Grease a square baking dish (8x8 inches works best) and pour the red velvet brownie batter in, spreading it evenly. Carefully dollop the cheesecake mixture on top of the brownie layer, gently swirling it with a knife for a marbled effect.
- Bake the Brownies: Place the assembled batter in the oven and bake for about 55-60 minutes. To check for doneness, insert a toothpick into the center; it should come out with a few moist crumbs attached, but no wet batter.
- Cool and Set: Once baked, remove the brownies from the oven and let them cool in the baking dish for about 20 minutes. Then transfer them to the refrigerator to chill for at least 1 hour before cutting into squares.
Nutrition
Notes
- Baking Time: Keep in mind that every oven is a little different. Start checking your brownies around the 50-minute mark.
- Cooling Properly: Letting your brownies cool in the fridge for at least an hour is crucial for the best texture.
- Ingredient Substitutions: Beet juice can replace red food coloring, and Greek yogurt can substitute cream cheese in the cheesecake layer.
- Swirling Technique: Use a knife or skewer to gently swirl the cheesecake batter on top of the red velvet layer for a marbled effect.
- Serving Suggestions: Serve warm with vanilla ice cream and a drizzle of chocolate sauce for a delightful treat.
- Storage Tips: Store leftovers in an airtight container in the fridge for 3-4 days.


Leave a Reply