RecipeCrown

Easy & Delicious Recipes

  • Home
  • Breakfast
  • Main Dishes
  • Dessert
  • About
  • Contact
You are here: Home / Archives for grace bellamy

Delicious Pear and Almond Cake for Cozy Dessert Moments

September 16, 2025 by grace bellamy Leave a Comment

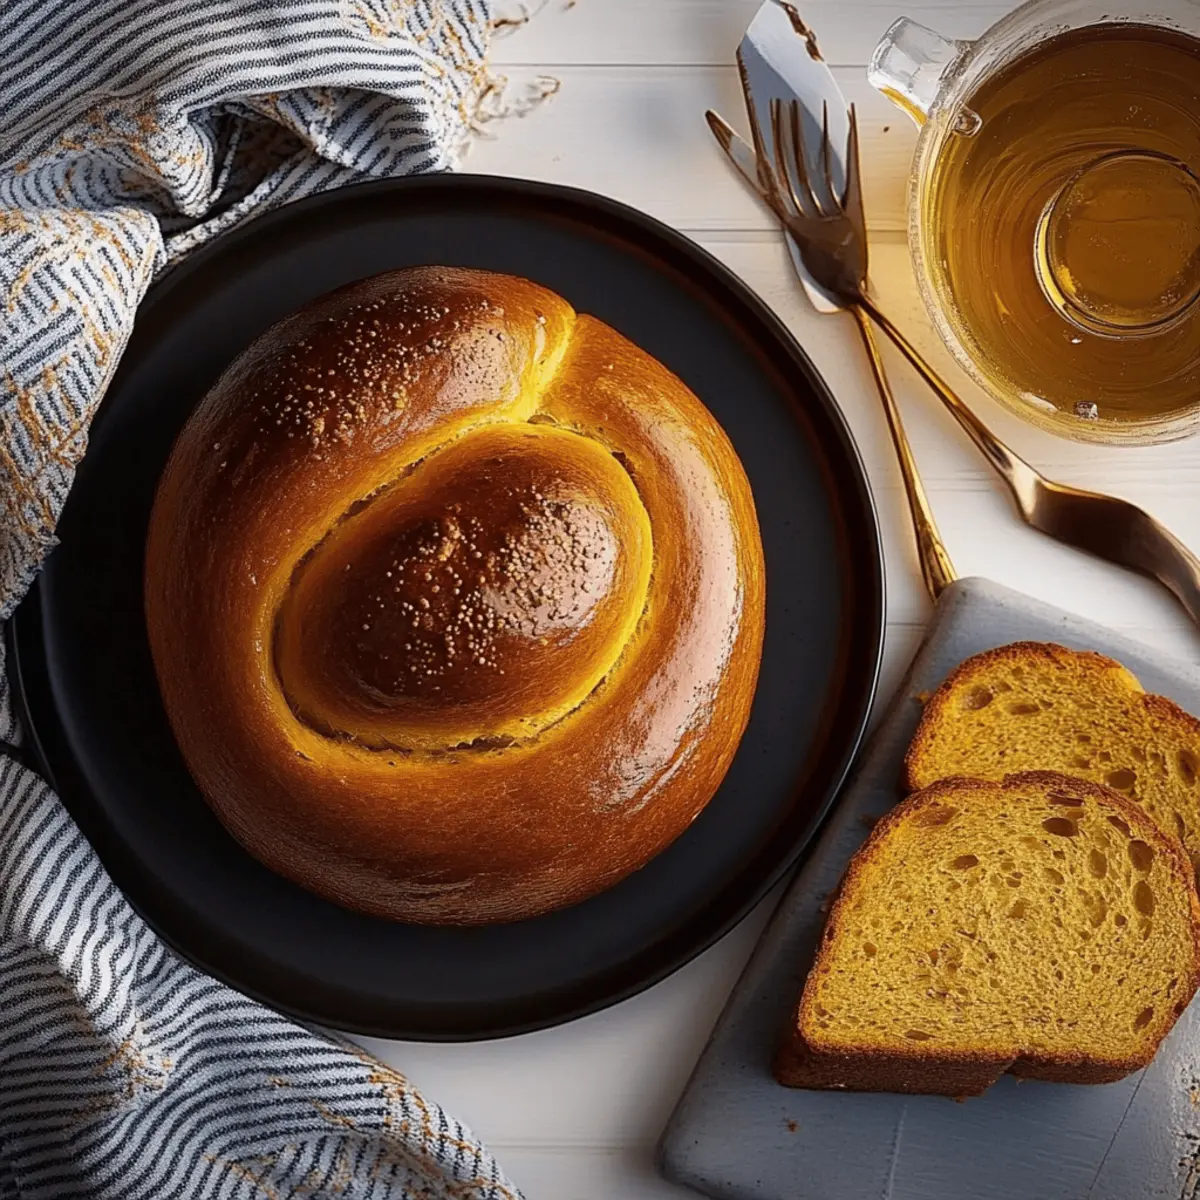
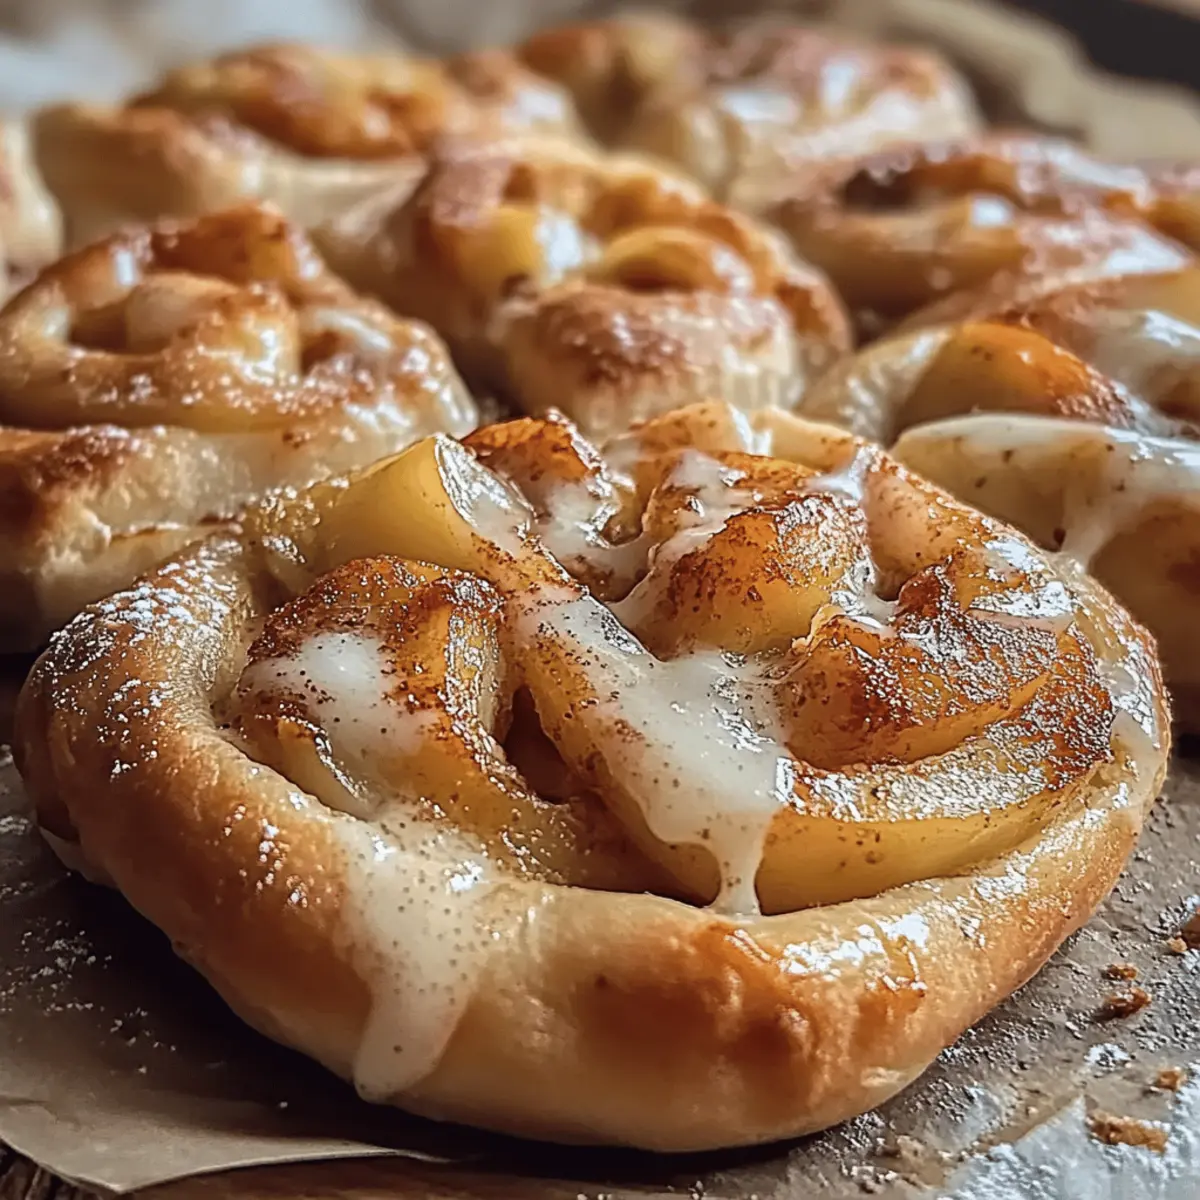
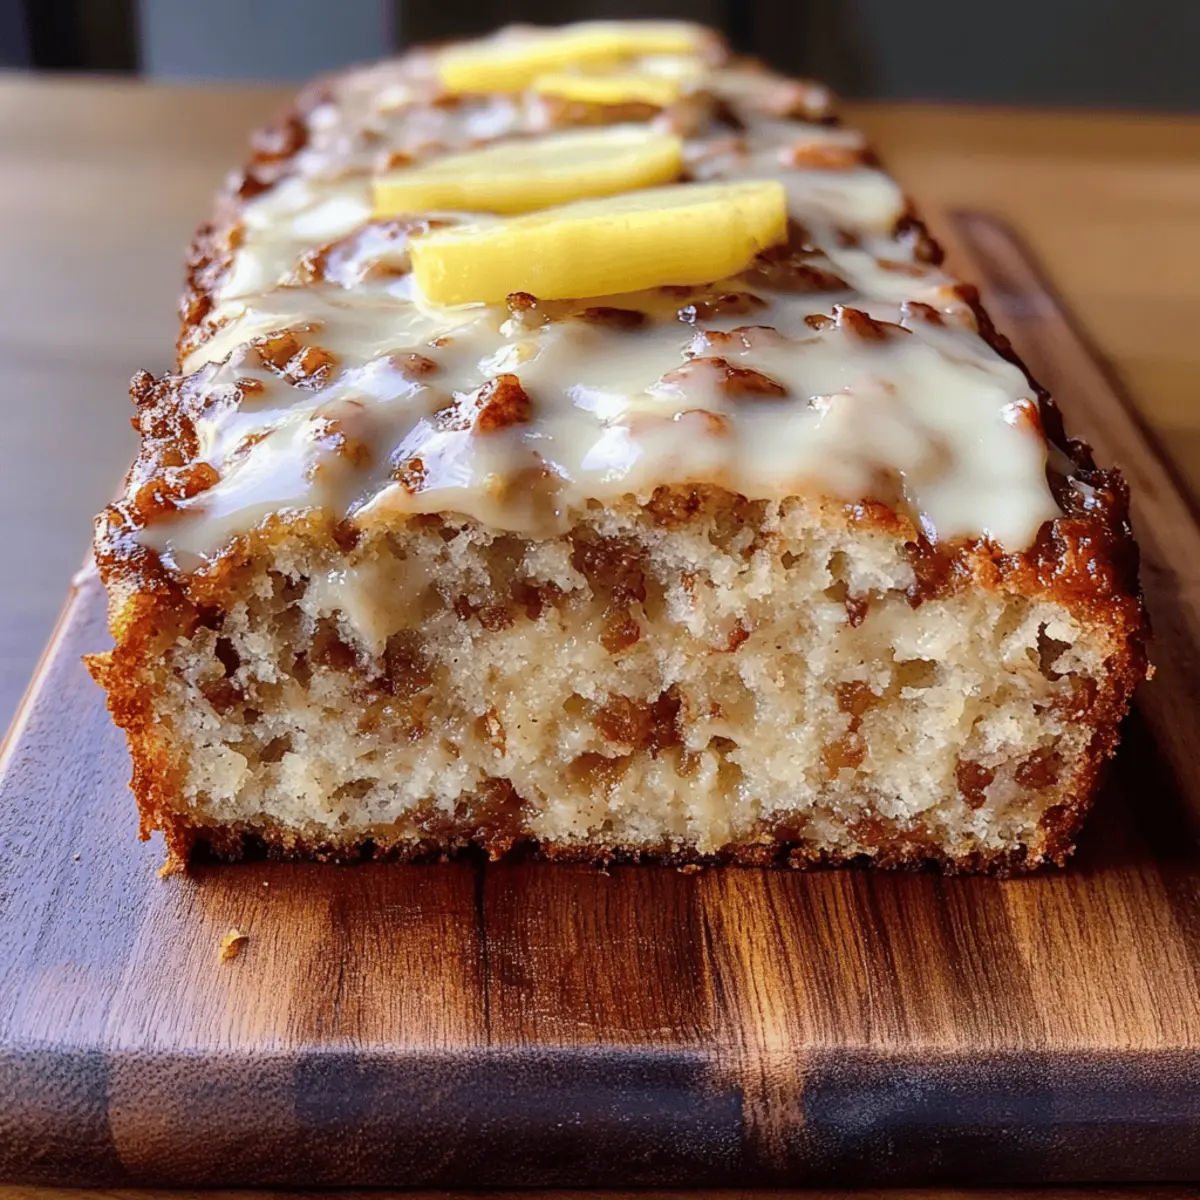
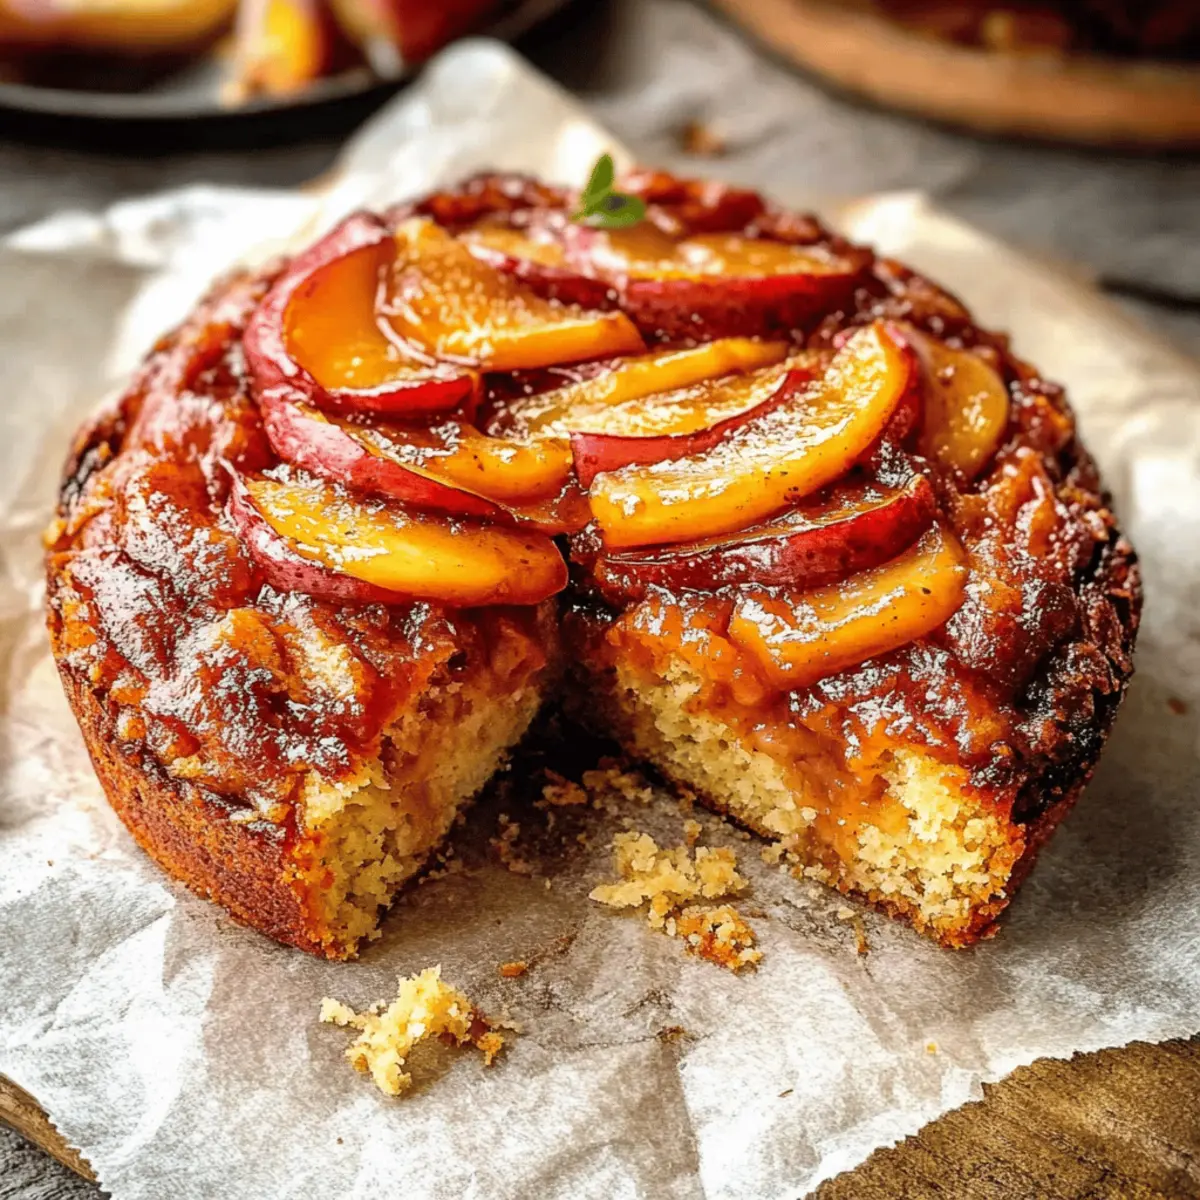
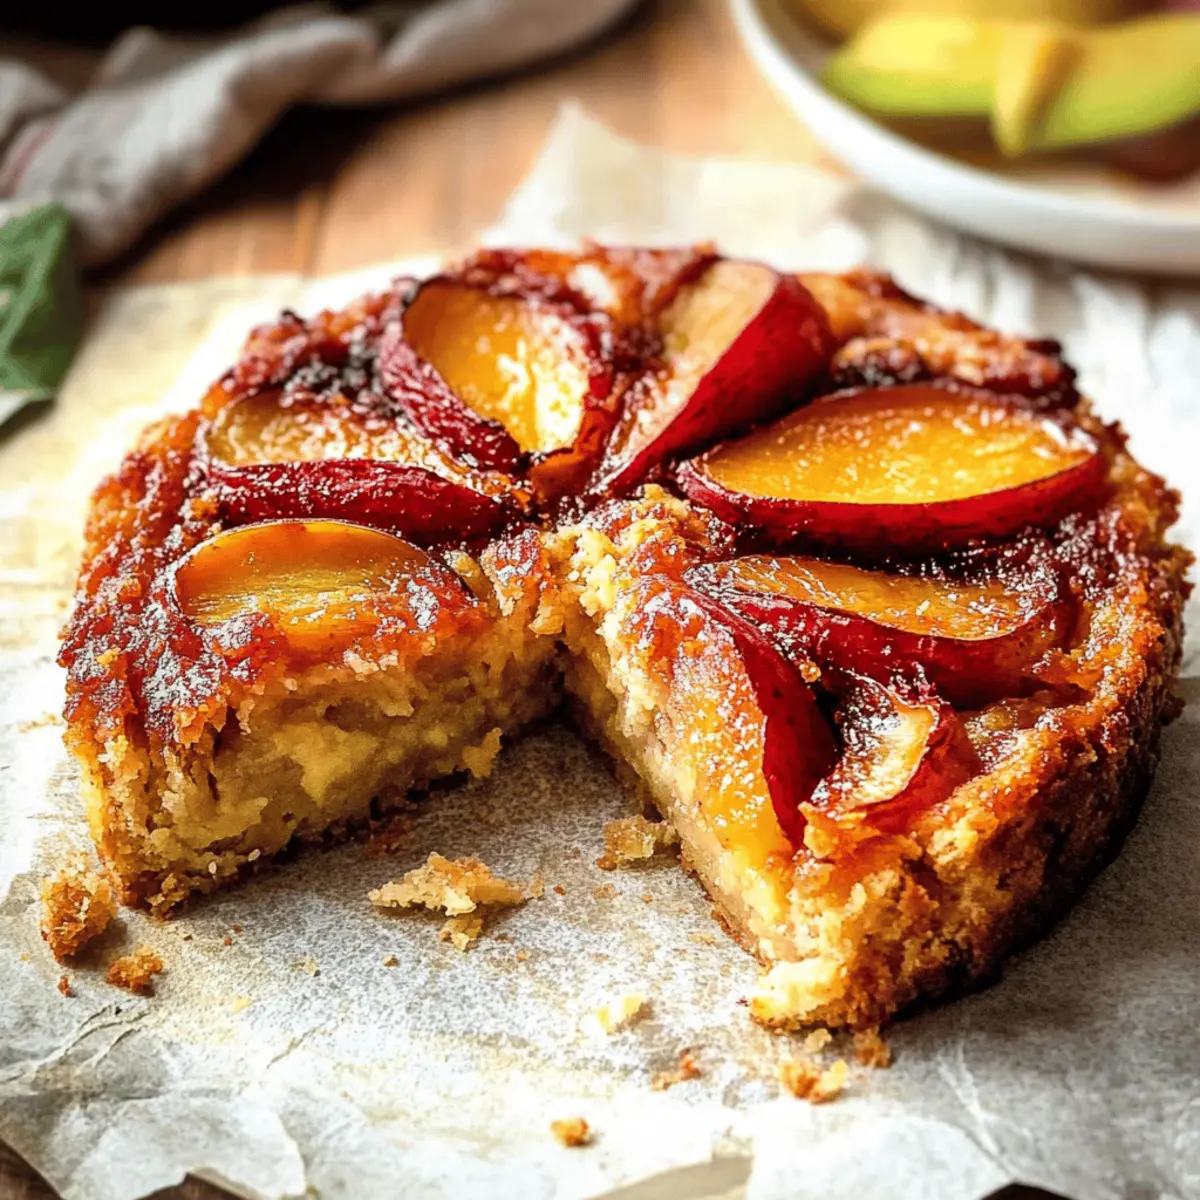
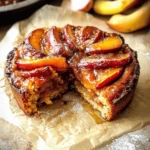
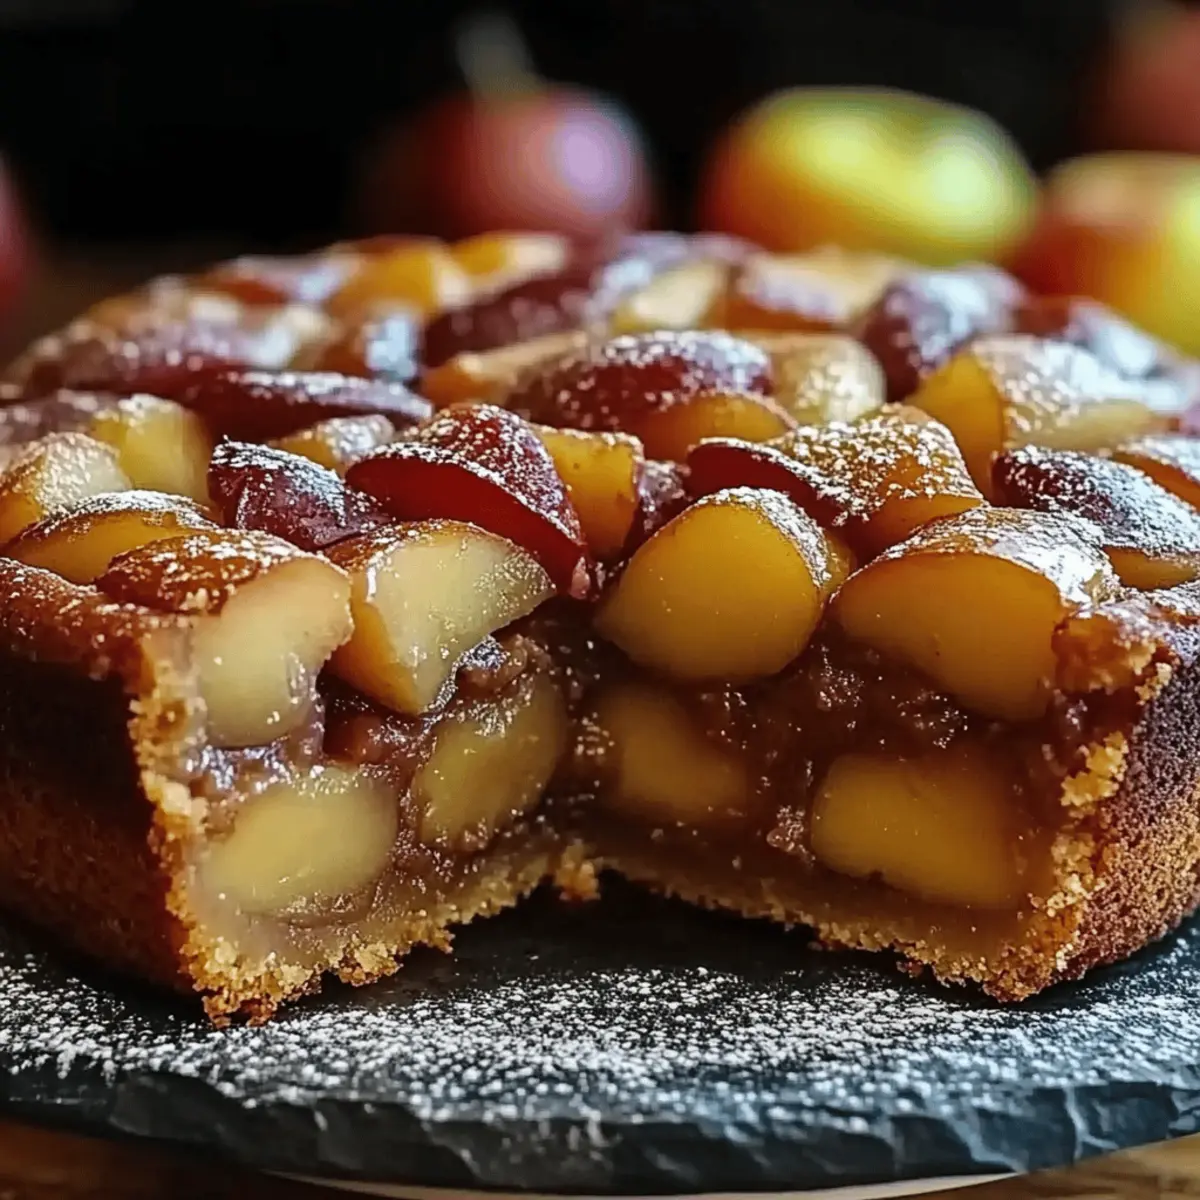
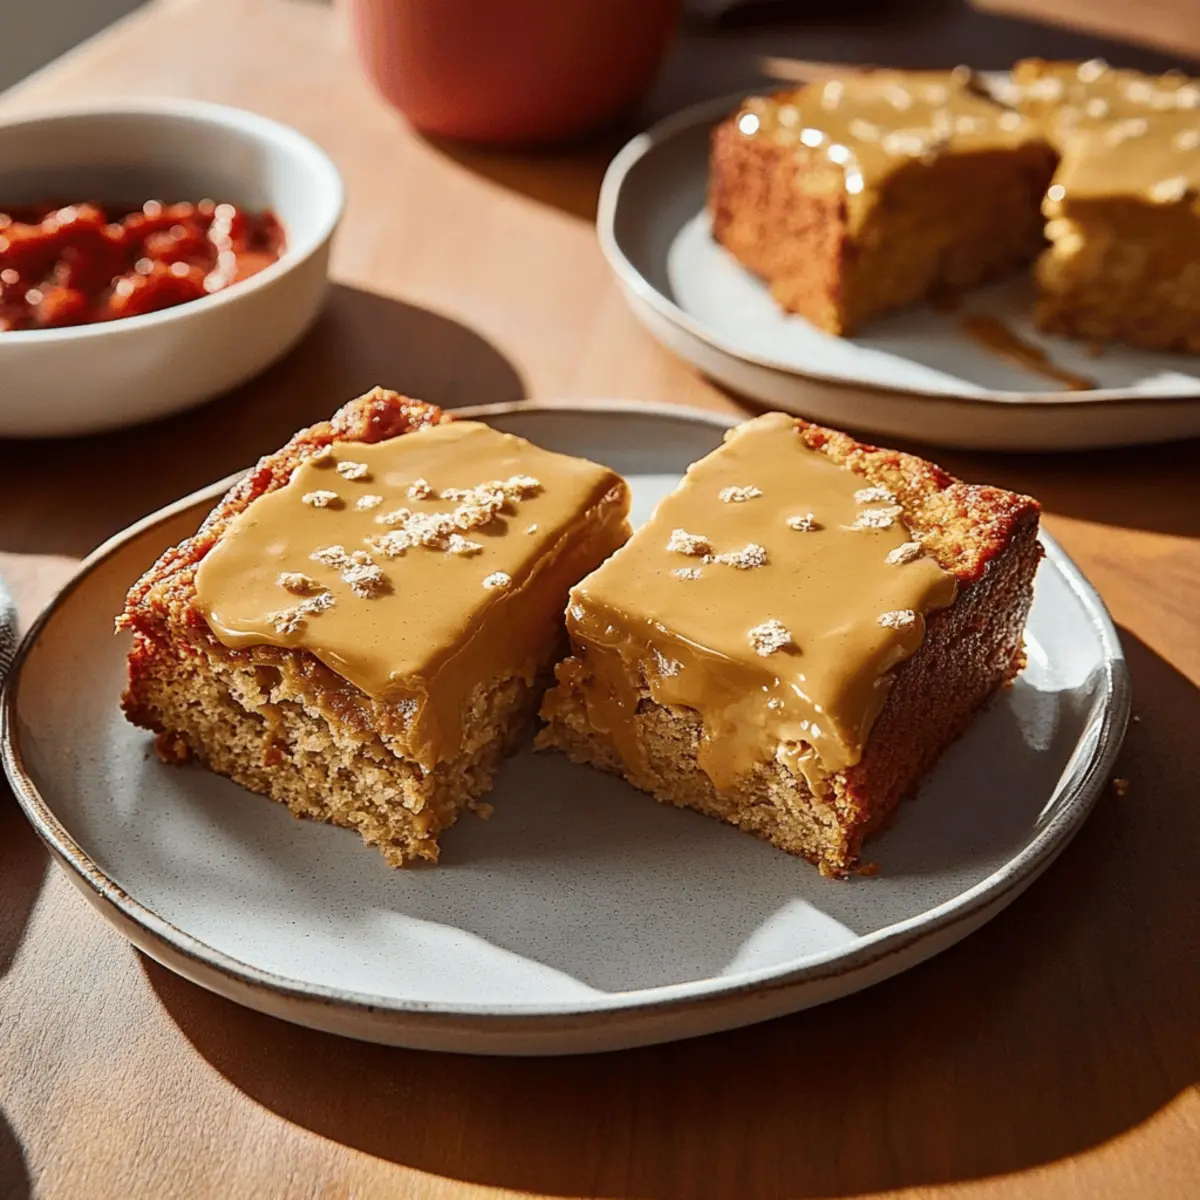
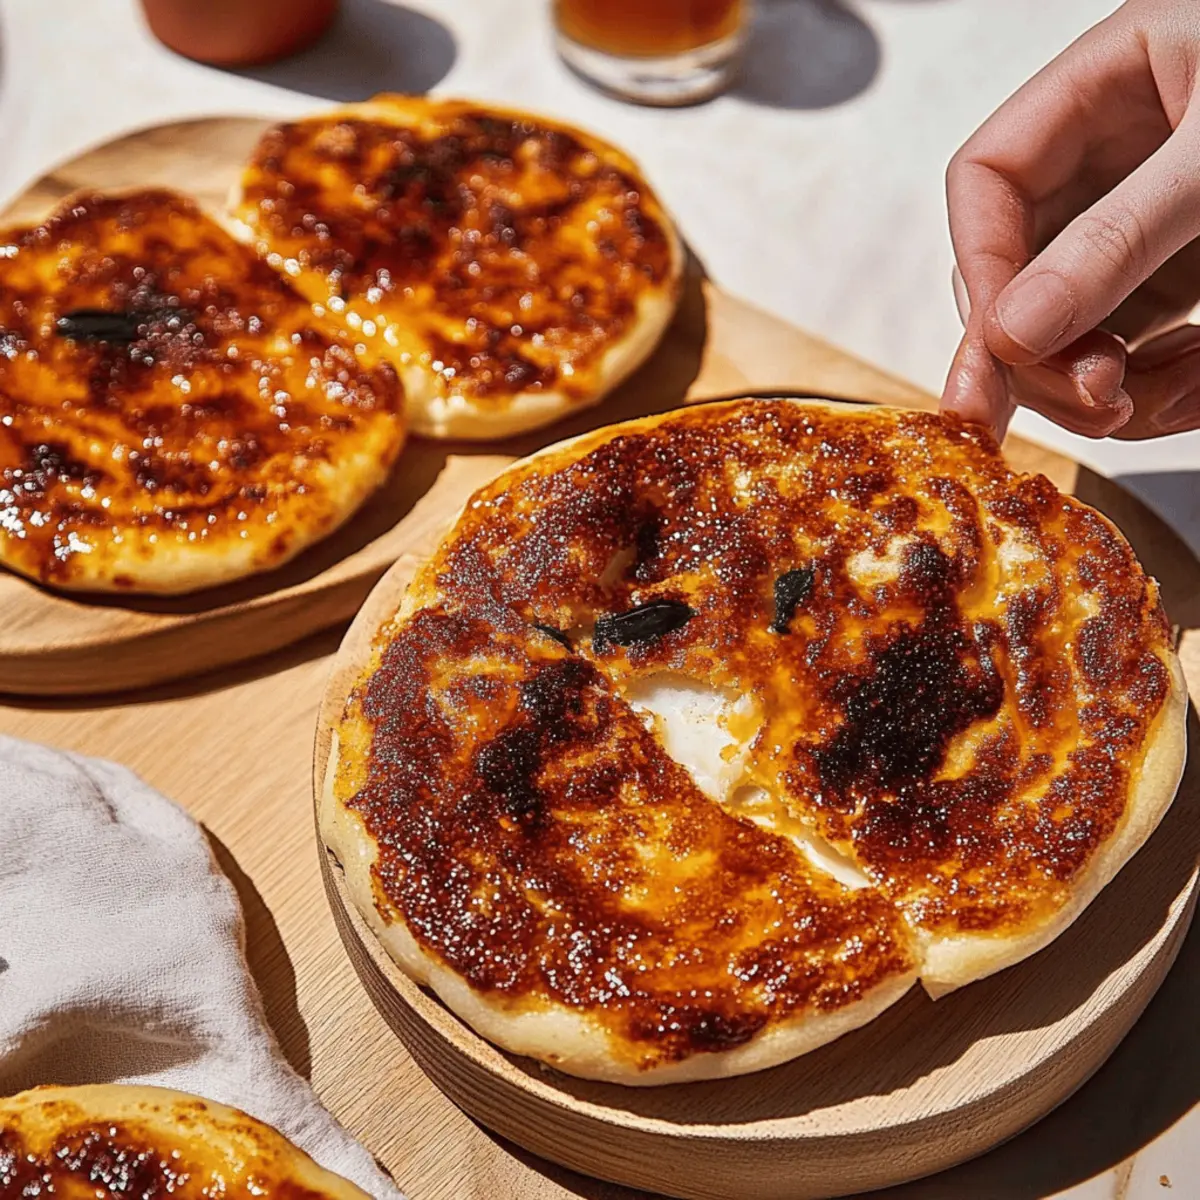
As I stood in my kitchen, the sweet aroma of ripe pears filled the air, instantly transporting me to sun-drenched orchards. Today, I’m excited to share my delightful Pear and Almond Cake recipe, where these juicy fruits meet the nutty warmth of almond flour. This cake not only offers a beautiful rustic touch to your dessert table but also boasts a quick prep time that makes it perfect for even the busiest home chefs. With its light texture and irresistible flavor, it’s bound to be a showstopper for any gathering. Plus, it’s a wonderful way to indulge your sweet tooth without reaching for processed treats. Are you ready to tantalize your taste buds and elevate your baking game? Let’s dive into this scrumptious recipe!

Pear and Almond Cake

Why is Pear and Almond Cake irresistible?

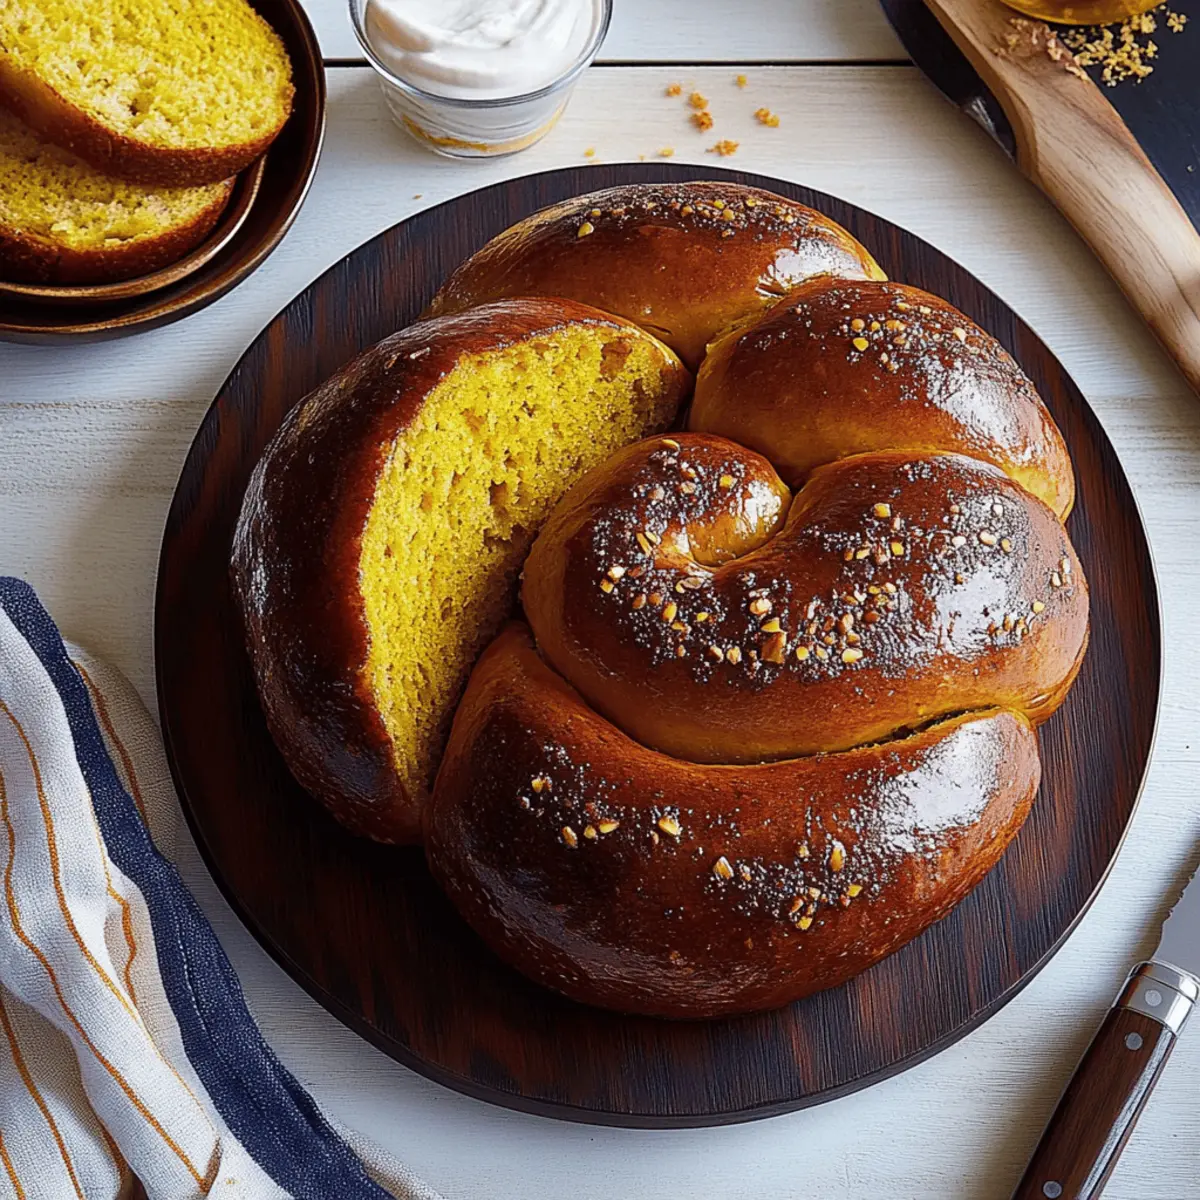
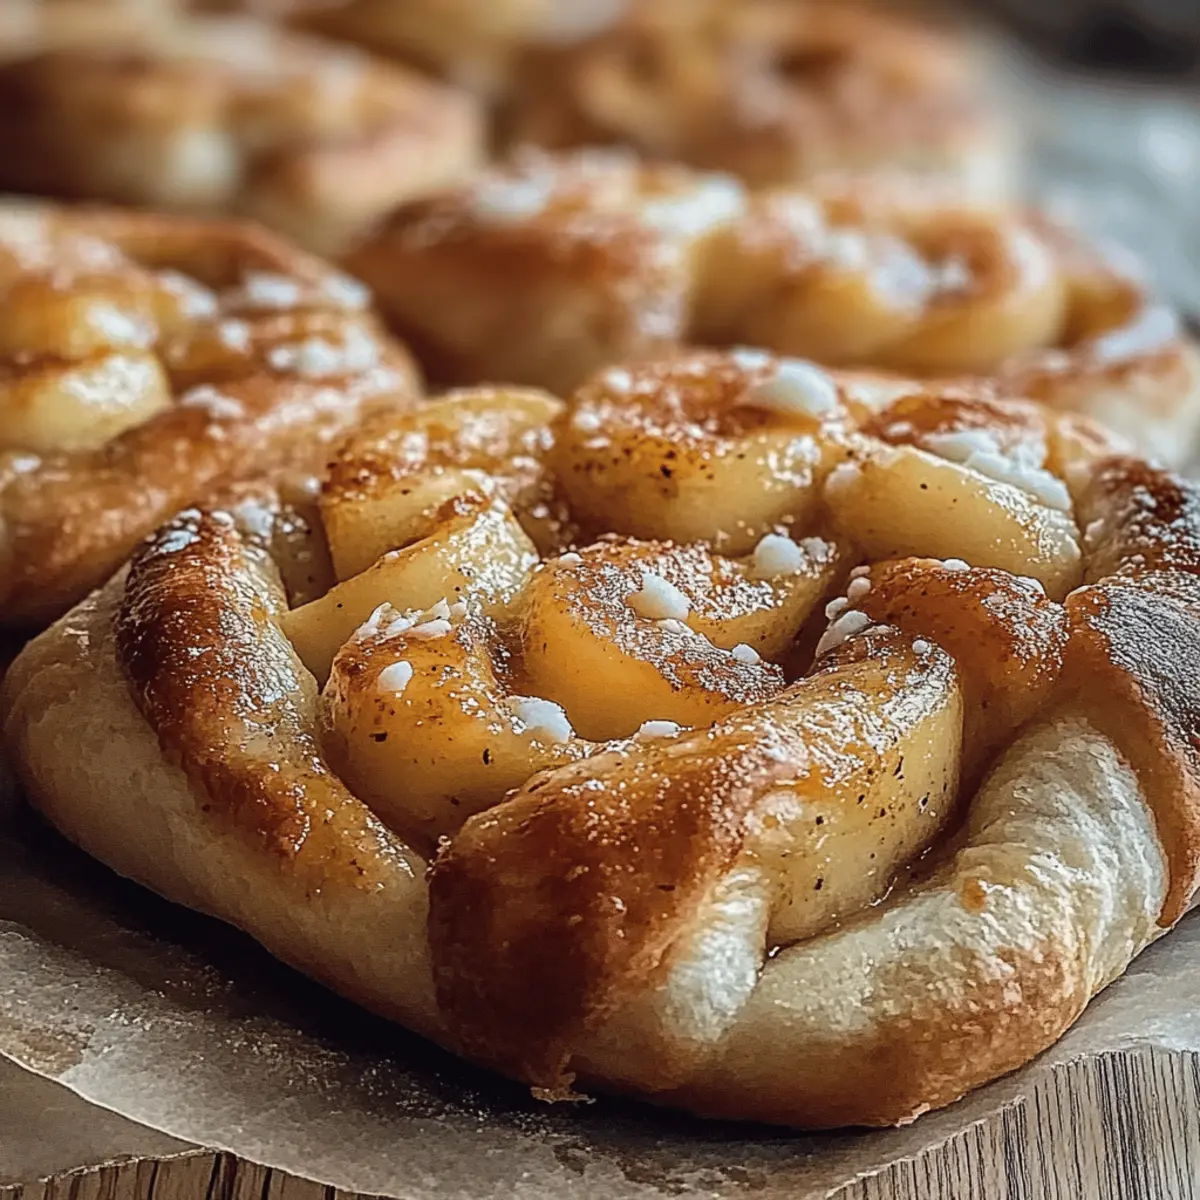
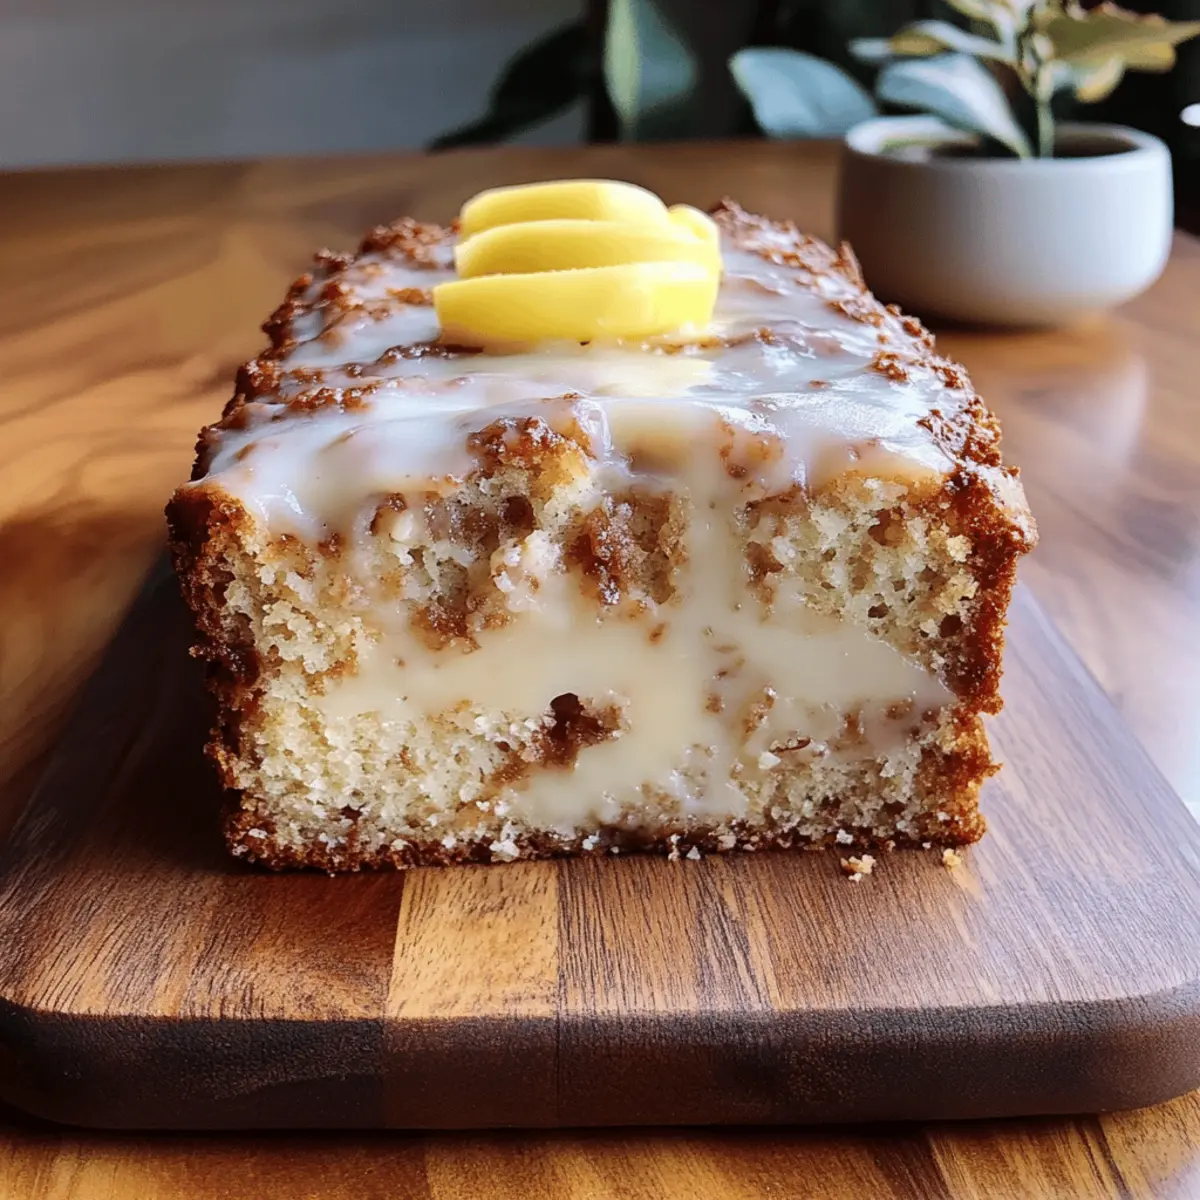
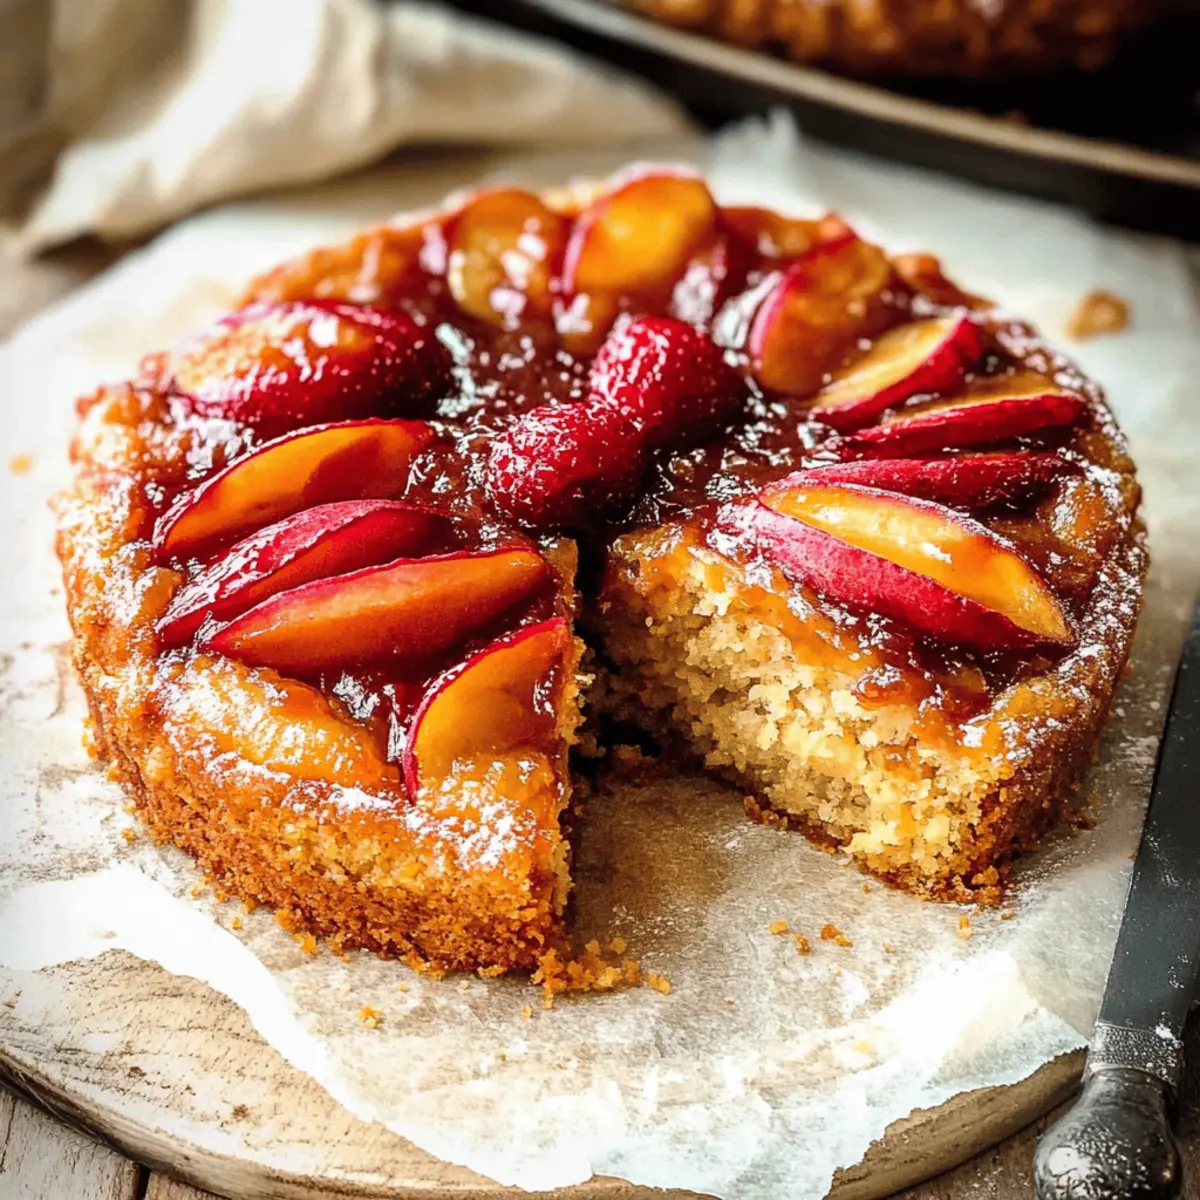
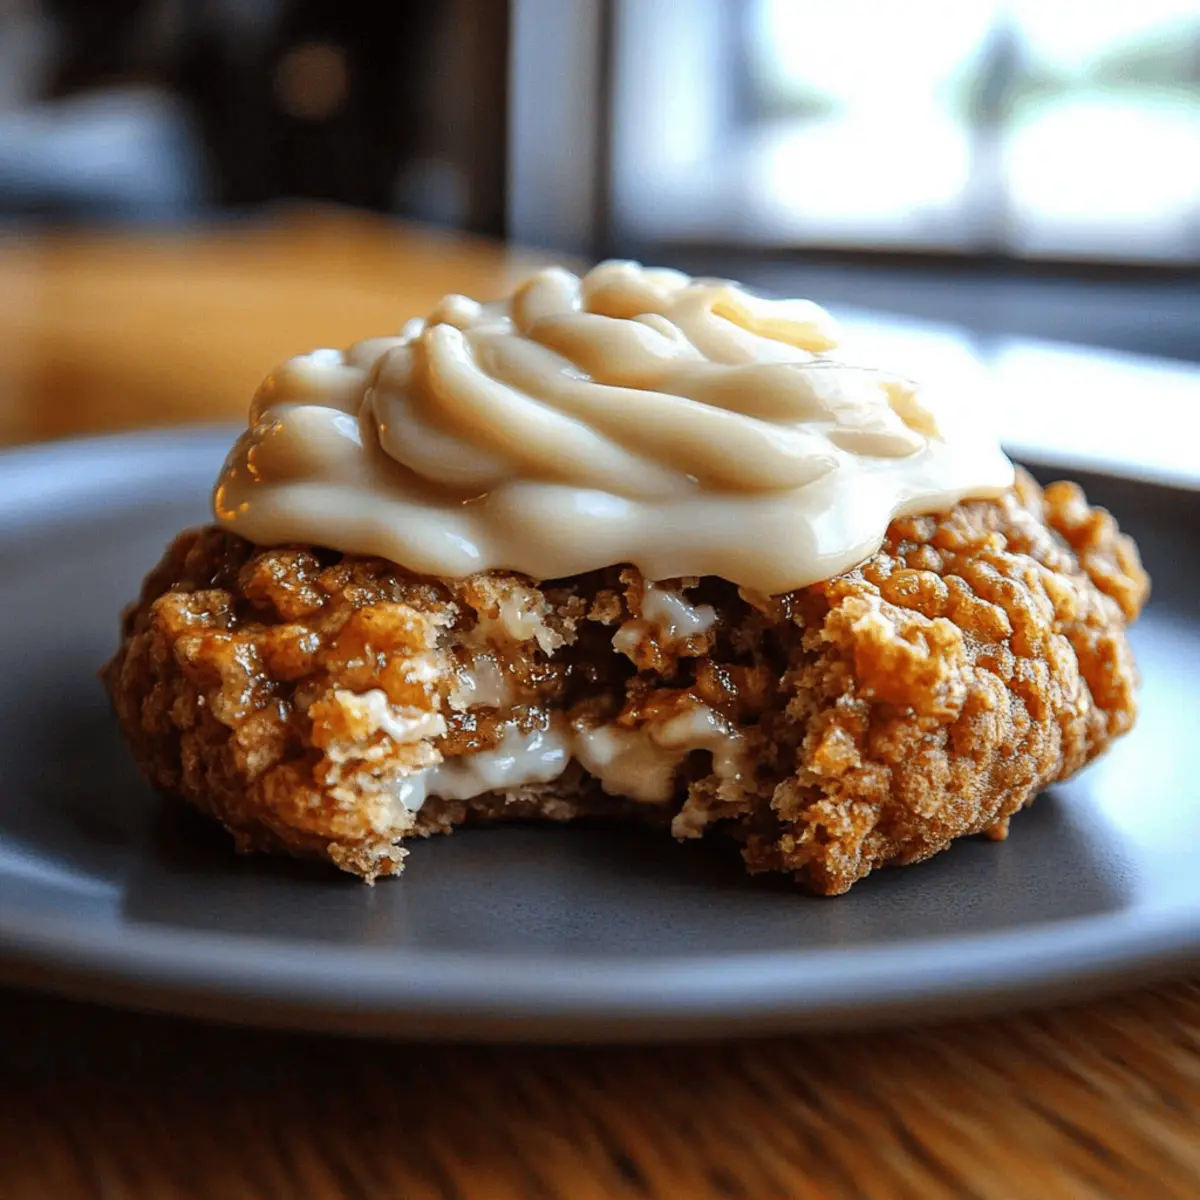
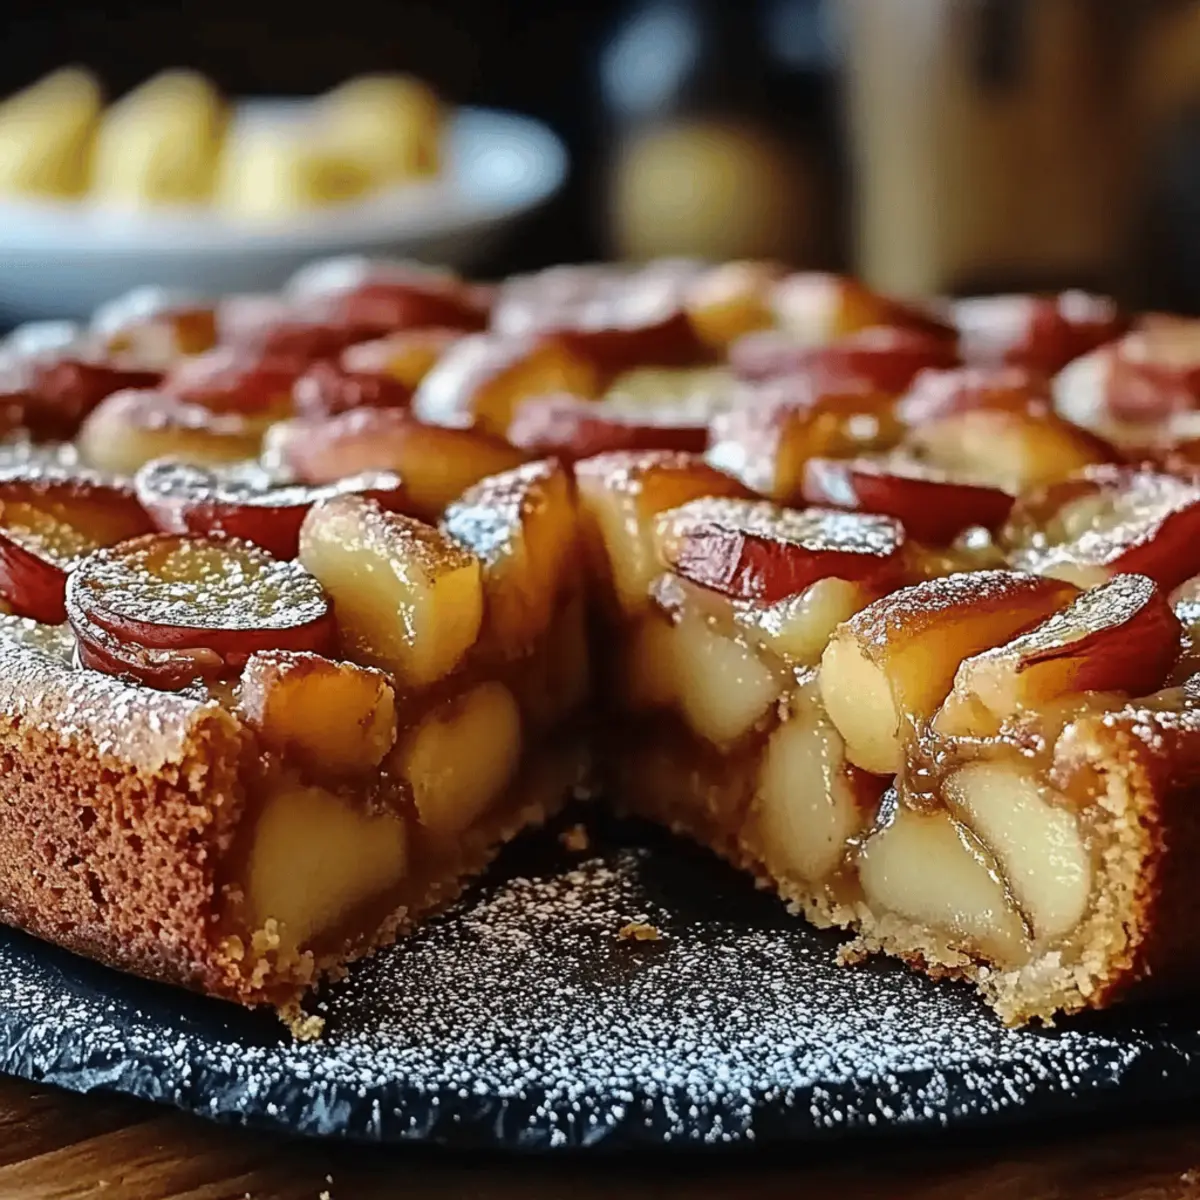
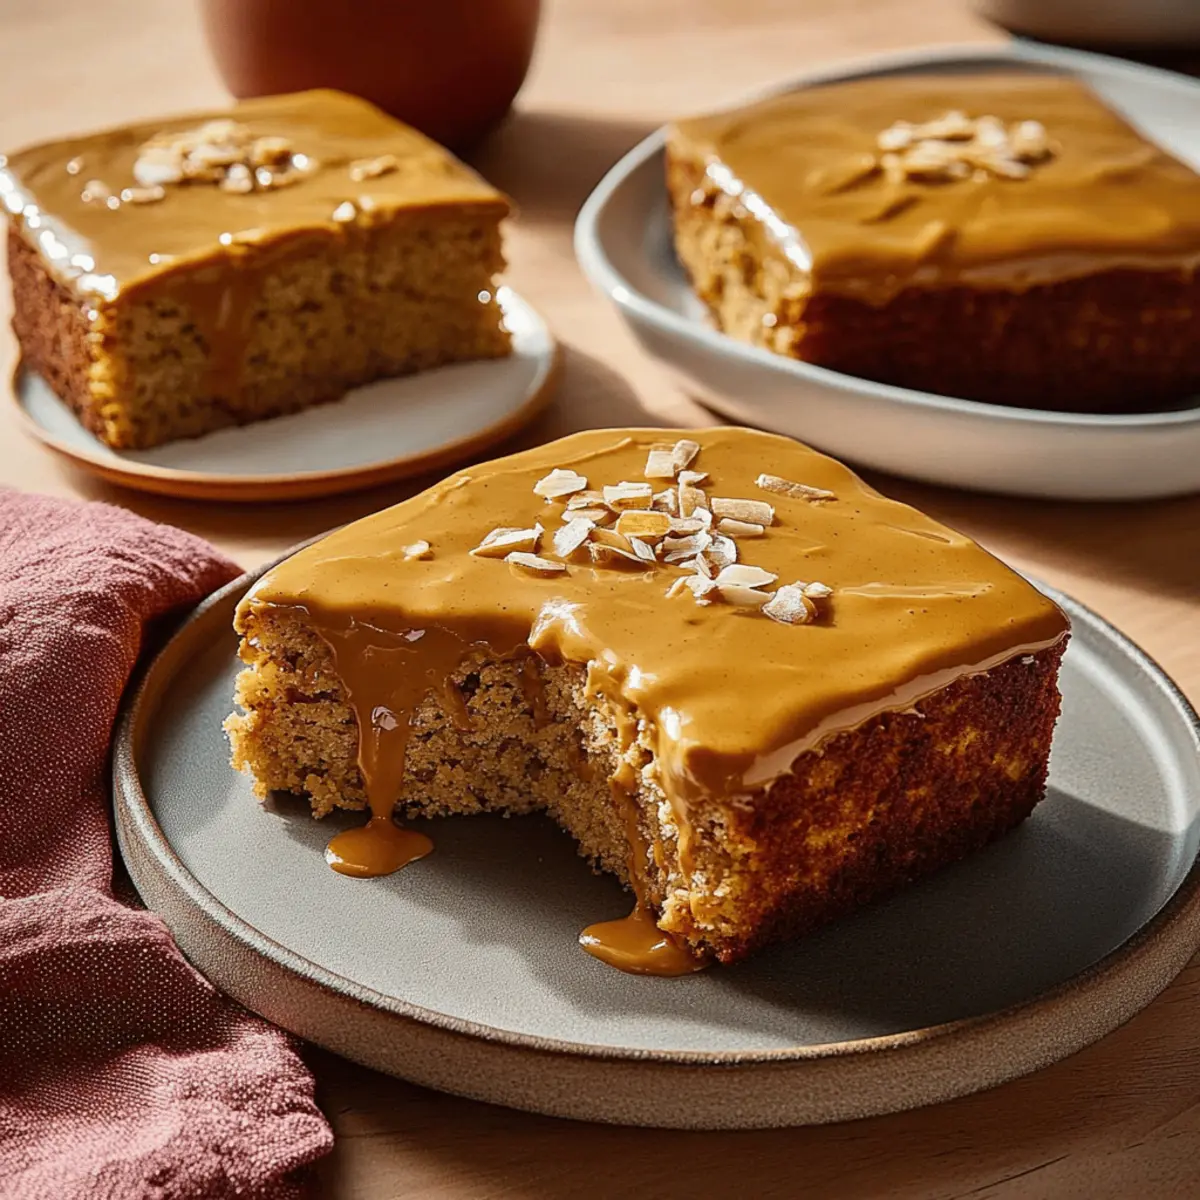
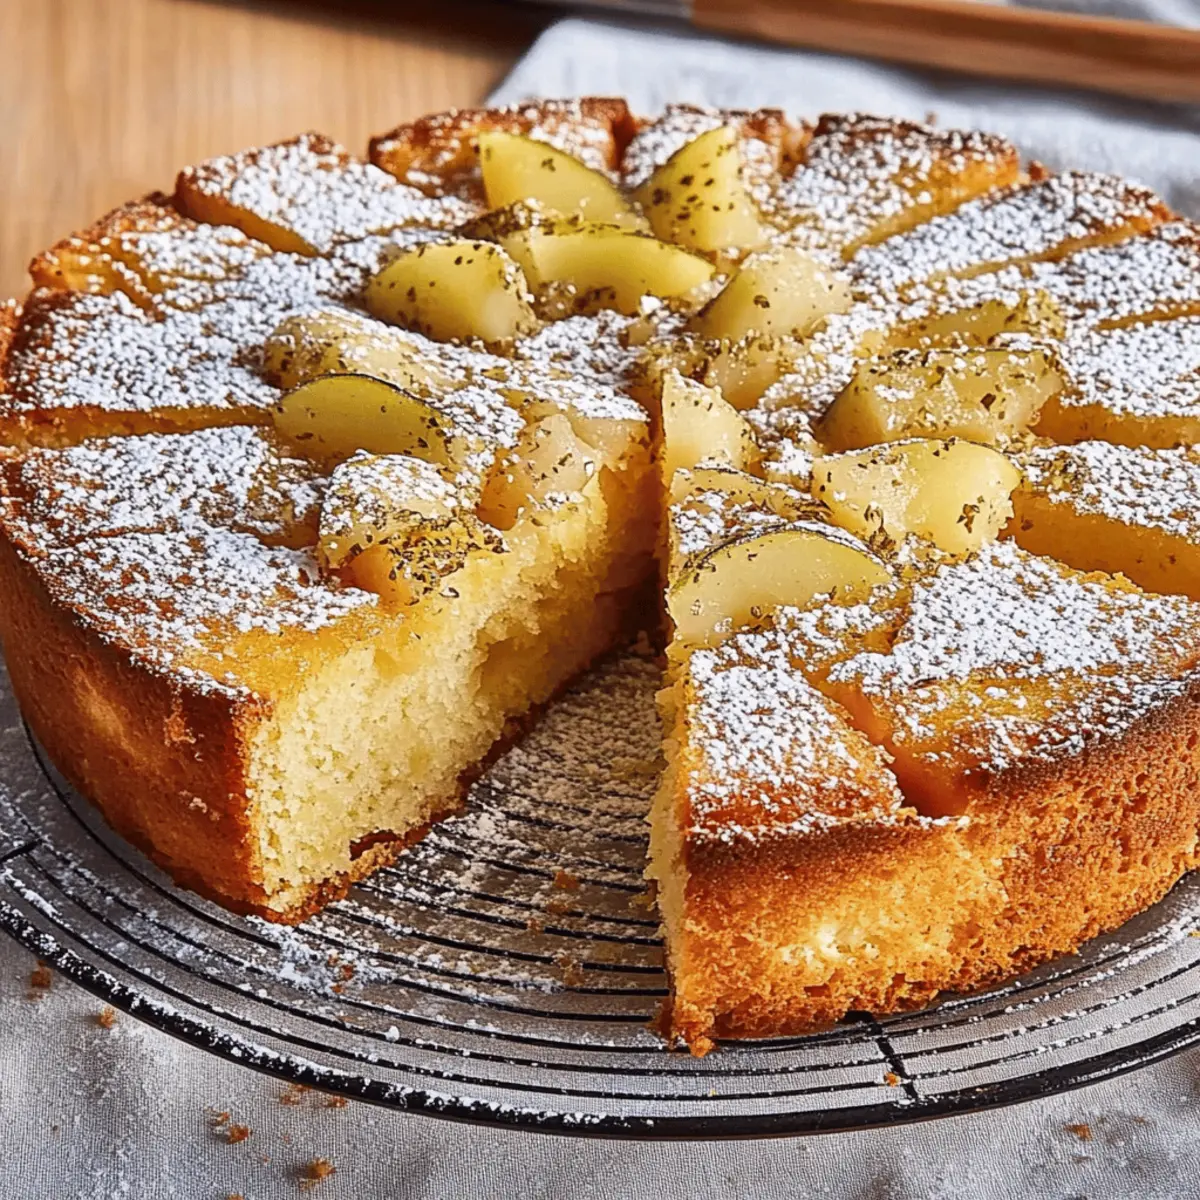
Delectable Flavor: The sweet and juicy pears paired with rich almond flour create a delightfully moist cake that’s bursting with flavor.

Speedy Prep: With only 15 minutes of prep time, this quick recipe is perfect for spontaneous gatherings or cozy weeknight desserts.

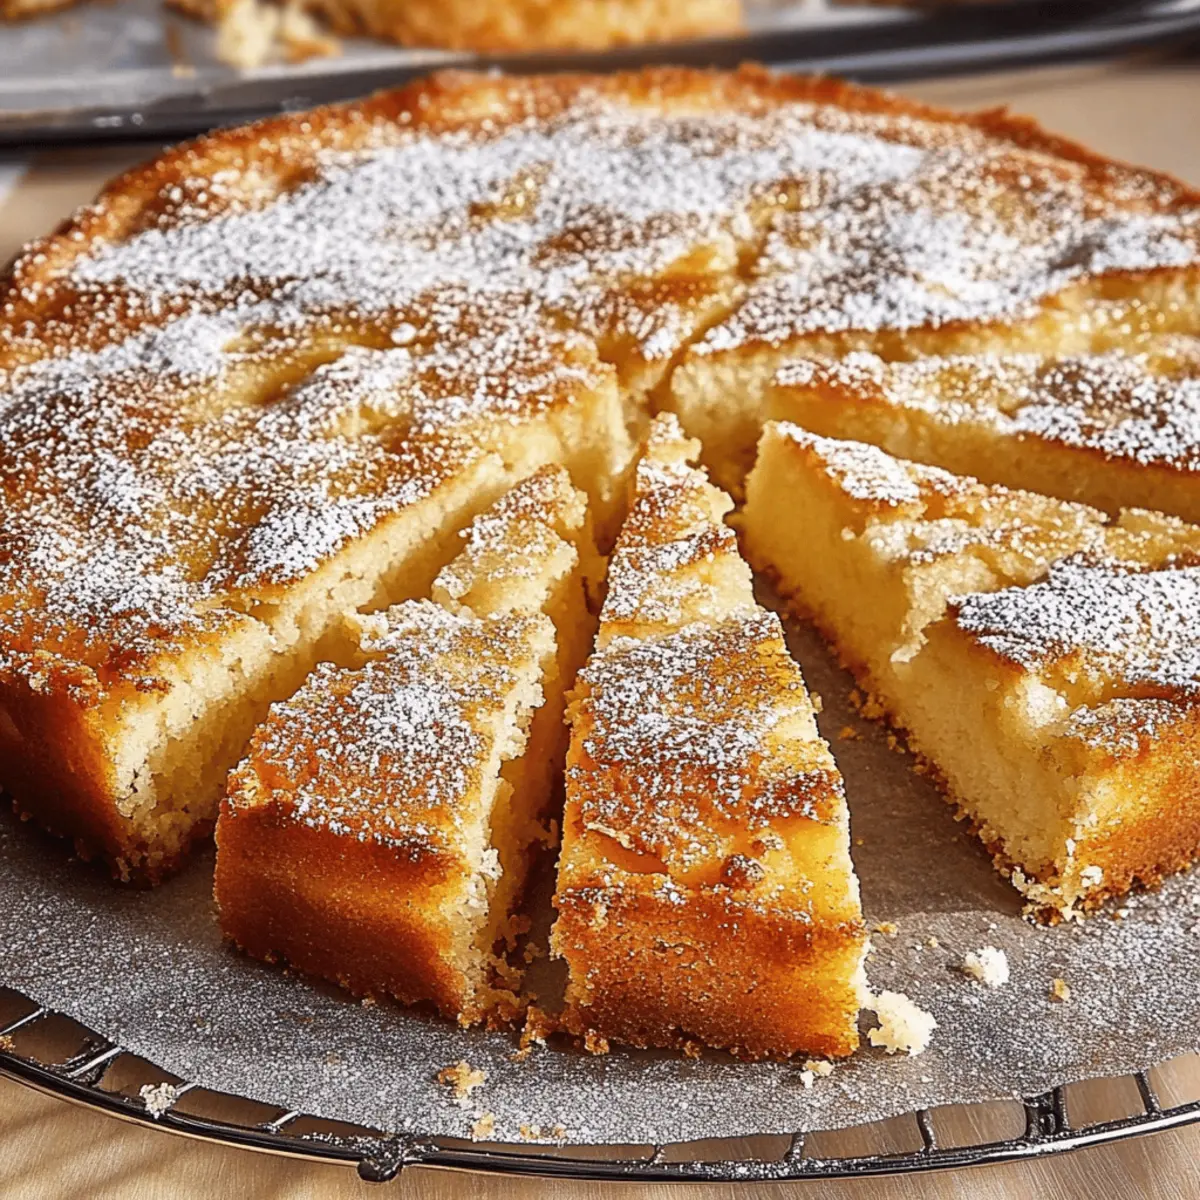
Impressive Presentation: Dusting it with confectioners’ sugar gives it a beautiful finish, ensuring it’s a true showstopper on any dessert table.

Versatile Delight: Whether enjoyed warm with a scoop of ice cream or as an afternoon treat, this cake suits all occasions.

Healthier Indulgence: Using almond flour adds a nutty flavor and gives a gluten-free twist, making it a satisfying yet lighter choice for sweet cravings.

Get ready to bring a touch of warmth and sweetness to your table with this incredible Pear and Almond Cake!

Pear and Almond Cake Ingredients

• Get ready to create bliss!

For the Cake Batter

  • Almond Flour – Adds a nutty flavor and makes the cake wonderfully moist.
  • All-Purpose Flour – Provides structure to the cake, balancing the almond flour’s texture.
  • Baking Powder – Helps the cake rise, resulting in a light and airy finish.
  • Salt – Enhances the overall flavor and balances sweetness.
  • Granulated Sugar – Sweetens the cake and helps create that lovely golden crust.
  • Unsalted Butter – Brings richness and moisture to the batter.
  • Large Eggs – Bind everything together while adding richness and helping the cake rise.
  • Almond Extract – Infuses a delightful almond aroma and flavor into the cake.
  • Vanilla Extract – Provides a warm, comforting undertone to enhance the overall flavor.

For the Pears

  • Ripe Pears – Fresh pears bring natural sweetness and moisture, making the cake irresistible.
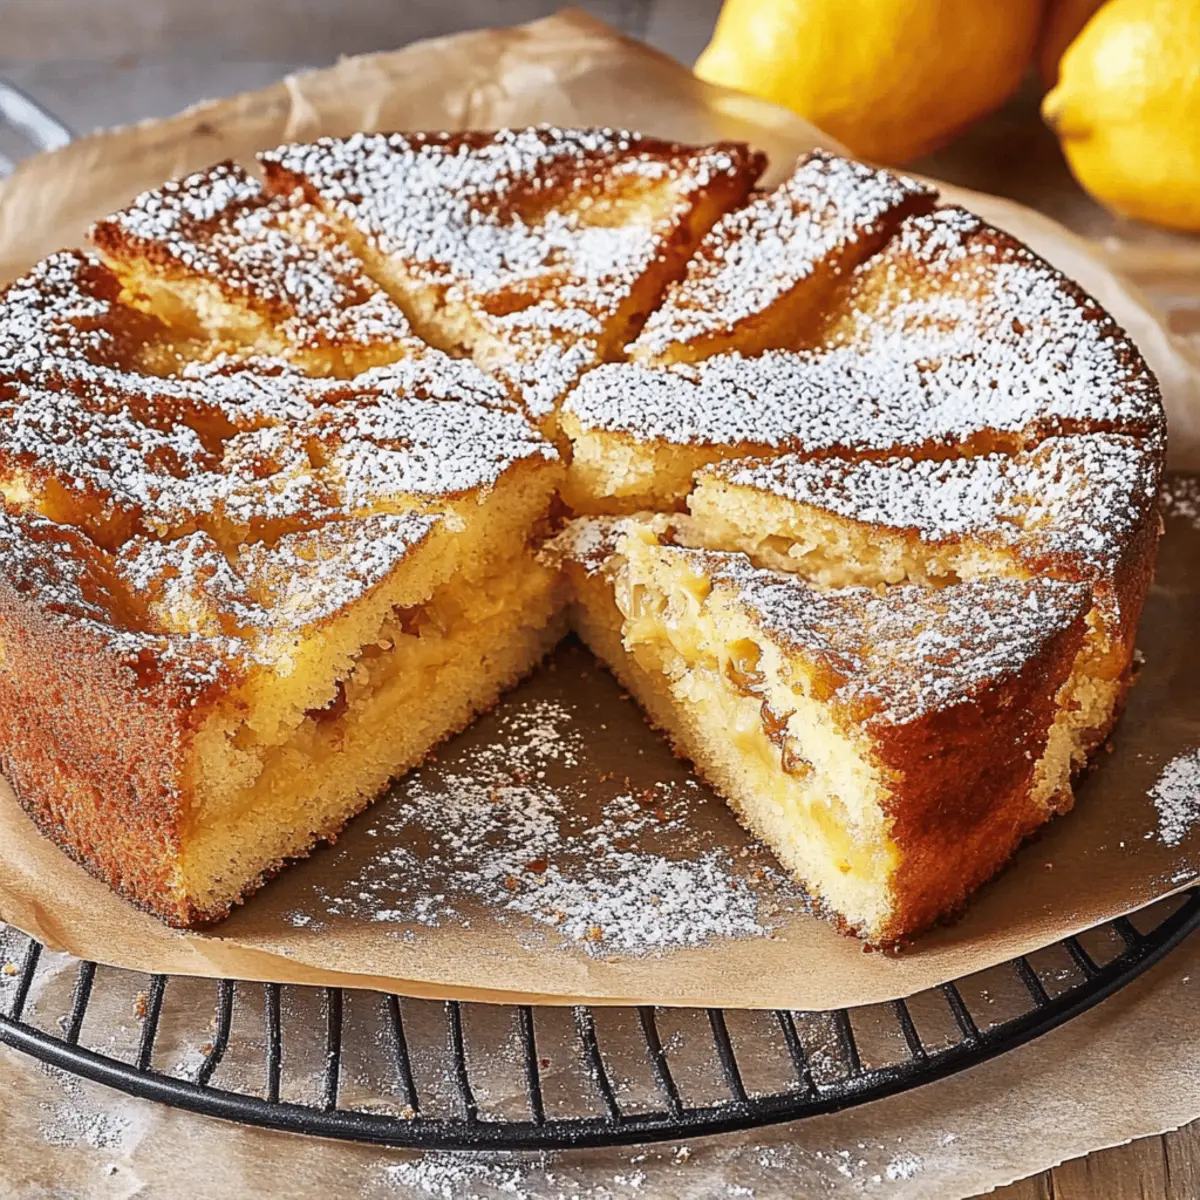
  • Lemon Juice – Prevents the pears from browning while adding a zesty brightness.
  • Salt (for pears) – A small amount amplifies the sweetness of the pears.

For the Topping

  • Granulated Sugar (for topping) – Creates a subtly caramelized crust on the pears during baking.
  • Confectioners’ Sugar – A lovely finishing touch to enhance the cake’s aesthetics when dusted on top.

Dive into these ingredients to make the perfect Pear and Almond Cake that will capture hearts and taste buds alike!

Step‑by‑Step Instructions for Pear and Almond Cake

Step 1: Preheat and Prepare the Pan
Start by preheating your oven to 350°F, placing a rack in the center. Meanwhile, grab a 9-inch round pan and line the bottom with a parchment round. Next, butter both the parchment and the sides of the pan generously to prevent sticking. This initial prep will ensure your delicious Pear and Almond Cake comes out easily after baking.

Step 2: Combine Dry Ingredients
In a medium bowl, sift together the almond flour, all-purpose flour, baking powder, and salt until well mixed. This step is crucial for achieving a light and airy texture in your cake. Set aside the mixture, allowing the dry ingredients to settle while you move on to making the batter, which will incorporate these beautiful flours.

Step 3: Cream Sugar and Butter
In a stand mixer or a large bowl with an electric hand mixer, cream together the softened butter and granulated sugar on medium speed until light and fluffy—about 2 minutes. You’re aiming for a soft, pale mixture that’s airy and inviting. This step will help provide a wonderful base for your Pear and Almond Cake, enhancing its flavor and texture.

Step 4: Add Eggs and Extracts
Add the eggs to the buttery mixture one at a time, mixing thoroughly between each addition to ensure a smooth batter. Once combined, scrape down the bowl’s sides and pour in the almond and vanilla extracts, mixing until fully integrated. This combination of ingredients adds depth to your cake, making it irresistibly fragrant and flavorful.

Step 5: Mix Wet and Dry Ingredients
Gently add the dry flour mixture to your wet ingredients. Mix on low speed until just incorporated, taking care to scrape down the sides of the bowl. You want to avoid overmixing, as this can toughen your Pear and Almond Cake. The batter should be smooth, with no visible dry streaks left behind.

Step 6: Transfer the Batter
Pour the smooth cake batter into your prepared pan, using a spatula to spread it into an even layer. Make sure it reaches the edges of the pan for uniform baking. Your batter is now ready to be adorned with the luscious pears that will elevate the flavor and appeal of the Pear and Almond Cake.

Step 7: Prepare the Pears
In a small bowl, toss the chopped pears with lemon juice and salt. This not only prevents the pears from browning but also brightens their flavor. The juicy sweetness of the pears will perfectly complement the nutty almond cake, making each bite a delightful experience.

Step 8: Add Pears and Sugar
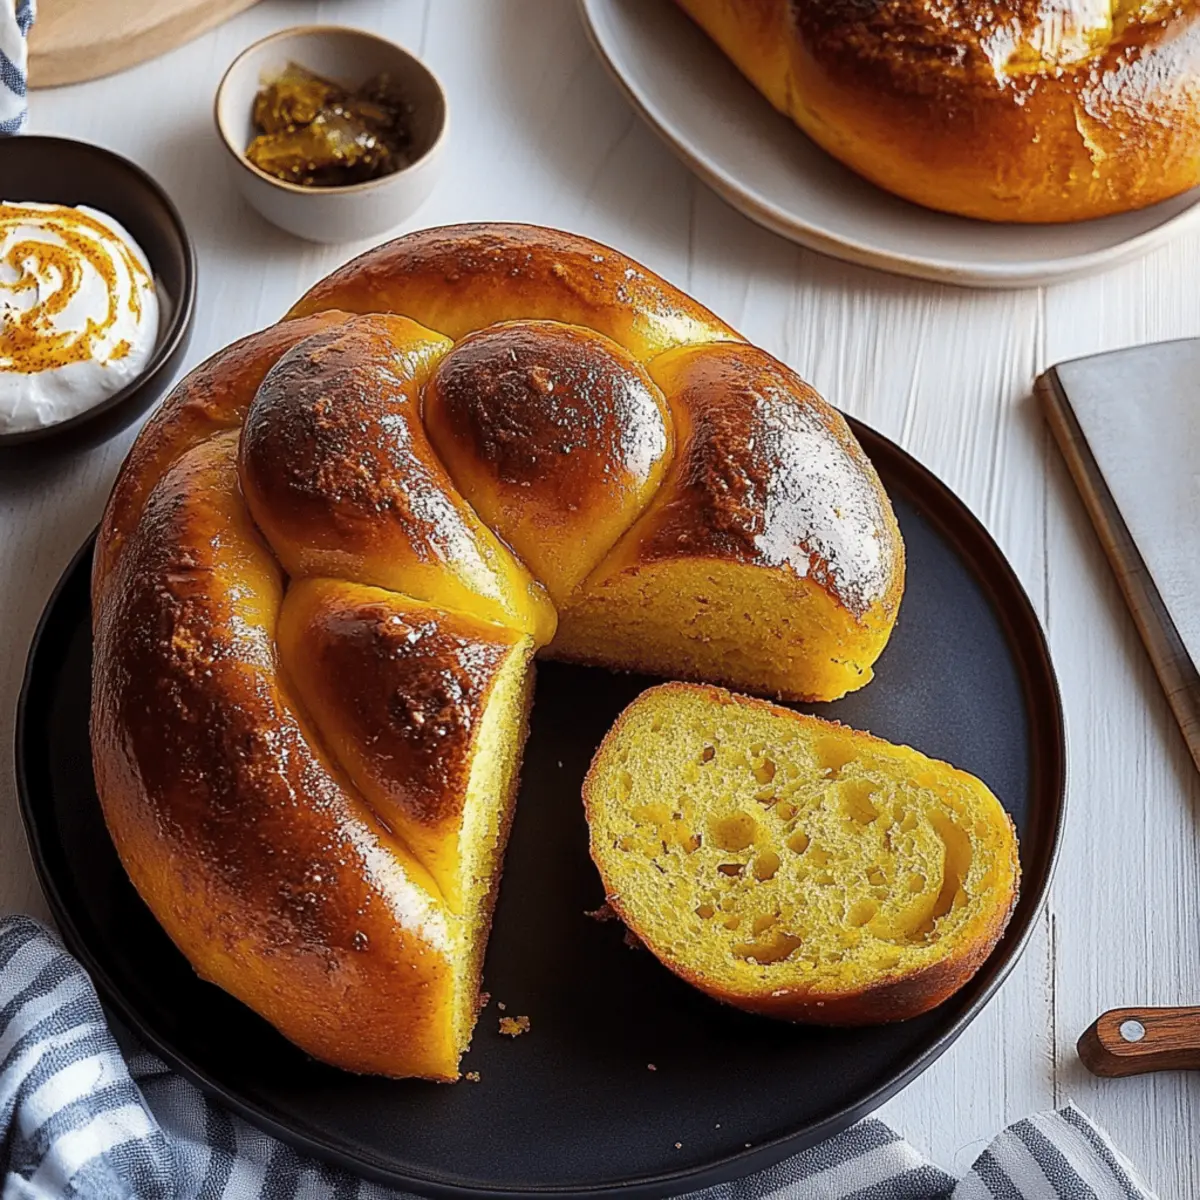
Distribute the pear pieces evenly over the top of the cake batter, pouring any remaining juice from the bowl over everything. To finish, sprinkle the cake’s surface with granulated sugar, which will caramelize during baking and create a golden crust. Your Pear and Almond Cake is now ready for the oven!

Step 9: Bake the Cake
Place the pan in your preheated oven and bake for 40 to 45 minutes. Keep an eye on it; the cake is done when a toothpick inserted in the center comes out clean. This step is critical, as it ensures your Pear and Almond Cake is perfectly cooked, light, and airy, ready to provide a satisfying texture.

Step 10: Cool the Cake
Remove the cake from the oven and gently run a knife around the edges to loosen it from the pan. Let it cool in the pan on a wire rack for about 20 minutes. This cooling period allows the cake to set properly, making it easier to transfer, while the delightful aromas of pear and almond fill your kitchen.

Step 11: Final Touches
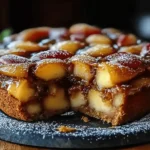
Once the cake is sufficiently cooled, carefully transfer it to a wire rack to cool completely. Before serving, dust the top generously with confectioners’ sugar for a delightful finishing touch. This final step enhances the beauty of your Pear and Almond Cake, making it a lovely centerpiece for your dessert table.

Pear and Almond Cake

Make Ahead Options

These delightful Pear and Almond Cake are perfect for busy home cooks looking to save time! You can prepare the cake batter up to 24 hours in advance; simply mix and store it in an airtight container in the refrigerator to keep it fresh. For the pears, chop and toss them with lemon juice and salt, then refrigerate for up to 3 days before you’re ready to bake. When you’re ready to bake, just pour the batter into the pan, top it with the prepared pears, sprinkle with granulated sugar, and bake as directed. This method ensures your cake is just as delicious and moist, saving you effort when you need it most!

What to Serve with Pear and Almond Cake

Elevate your dessert experience by pairing this delightful cake with accompaniments that amplify its flavors and textures!

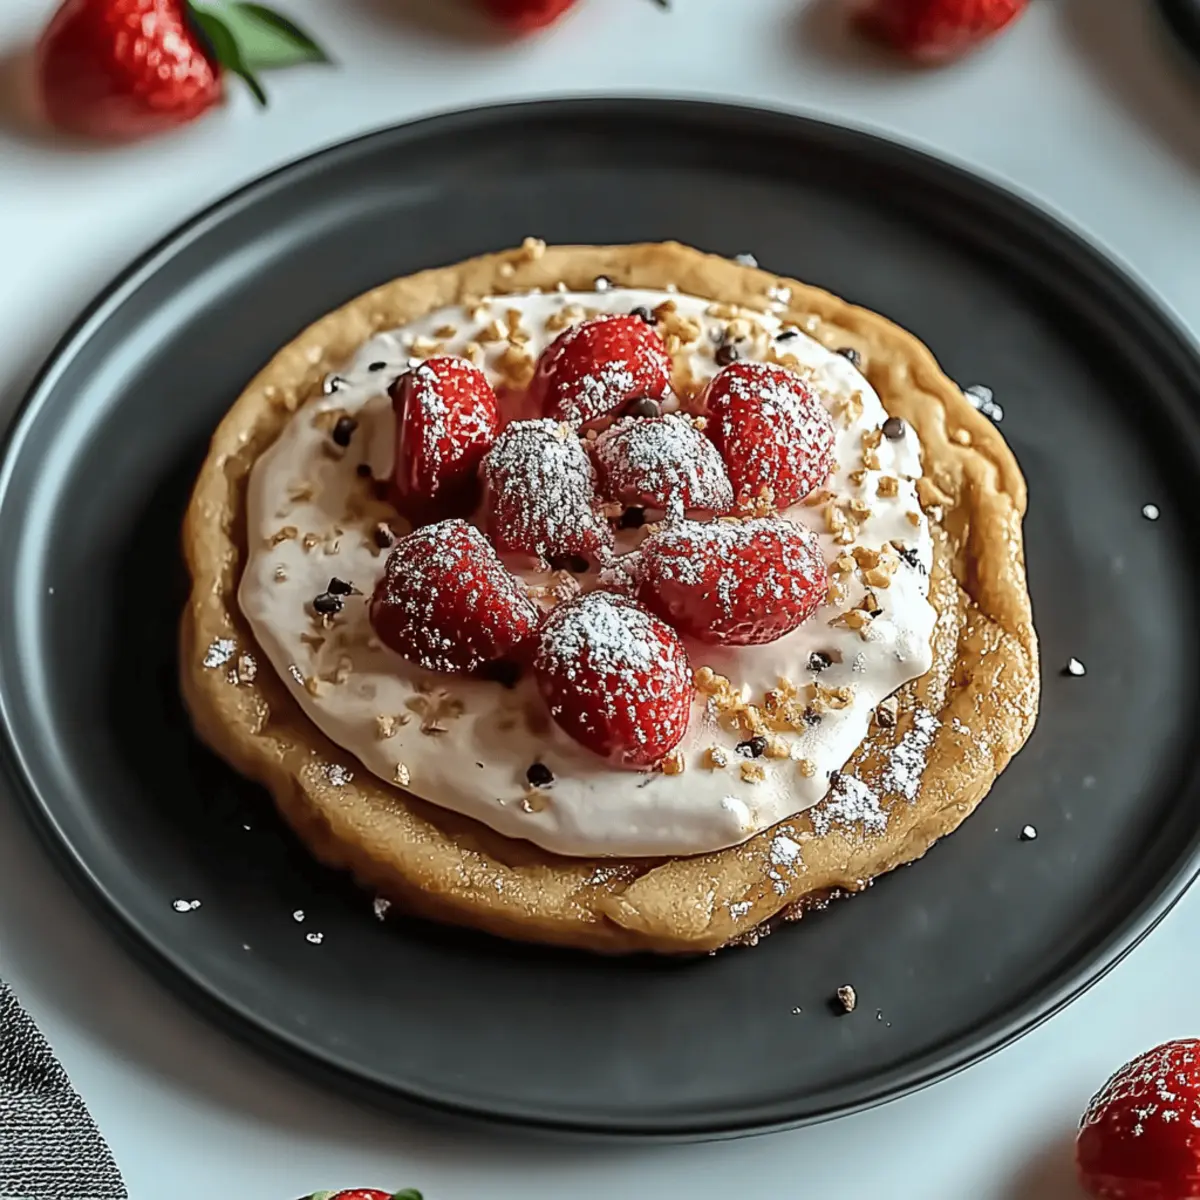
  • Whipped Cream: A dollop of lightly sweetened whipped cream adds a luscious and creamy texture that complements the moistness of the cake beautifully.

  • Vanilla Ice Cream: Serve warm slices topped with a scoop of creamy vanilla ice cream for a comforting dessert that melts in your mouth.

  • Fresh Berries: A mix of raspberries and blueberries provides a tart contrast, brightening every bite and adding a burst of color to your plate.

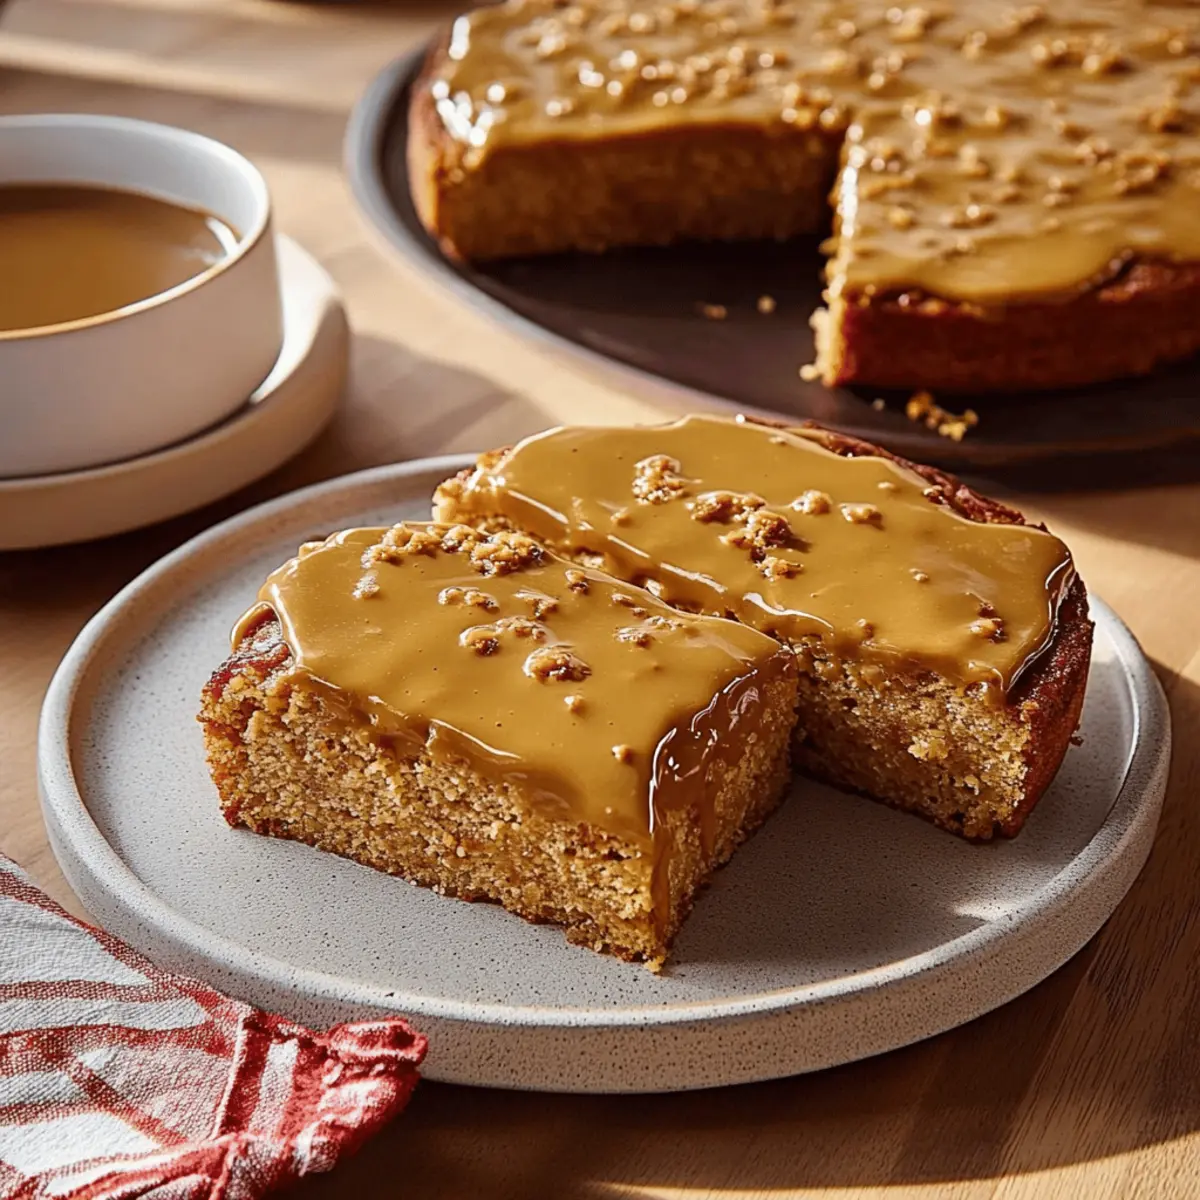
  • Coffee: Enjoy with a rich cup of coffee, whose bold flavors balance the sweetness of the cake—ideal for a delightful afternoon treat.

  • Almond Milk: For a nutty twist, pair it with chilled almond milk—its subtle sweetness harmonizes perfectly with the almond notes in the cake.

  • Citrus Sorbet: A scoop of zesty lemon or orange sorbet offers a refreshing palate cleanser between bites, enhancing the fruity flavors of the pears.

  • Chocolate Drizzle: Elevate each slice by drizzling a warm chocolate sauce on top for a decadent touch that pairs surprisingly well with the almond and pear.

By selecting any of these delightful accompaniments, you can transform the simple pleasure of Pear and Almond Cake into a memorable dessert experience!

How to Store and Freeze Pear and Almond Cake

Room Temperature: Keep the cake in an airtight container at room temperature for up to 3 days. This helps maintain its moist texture and flavor.

Fridge: If you prefer chilled cake, store it in the refrigerator in an airtight container for up to 5 days. Just let it come to room temperature before serving for optimal taste.

Freezer: To freeze, wrap the cooled cake tightly in plastic wrap and then in aluminum foil. It can be stored in the freezer for up to 2 months. Thaw it in the fridge overnight before enjoying.

Reheating: For a warm treat, slice the cake and reheat in the microwave for 10-15 seconds. This will refresh your Pear and Almond Cake, making it feel freshly baked!

Expert Tips for Pear and Almond Cake

Perfect Pears: Choose ripe pears that are firm but slightly soft to the touch; this ensures a juicy, flavorful filling in your Pear and Almond Cake.

Avoid Overmixing: When combining wet and dry ingredients, mix until just combined. Overmixing can lead to a dense cake instead of fluffy goodness.

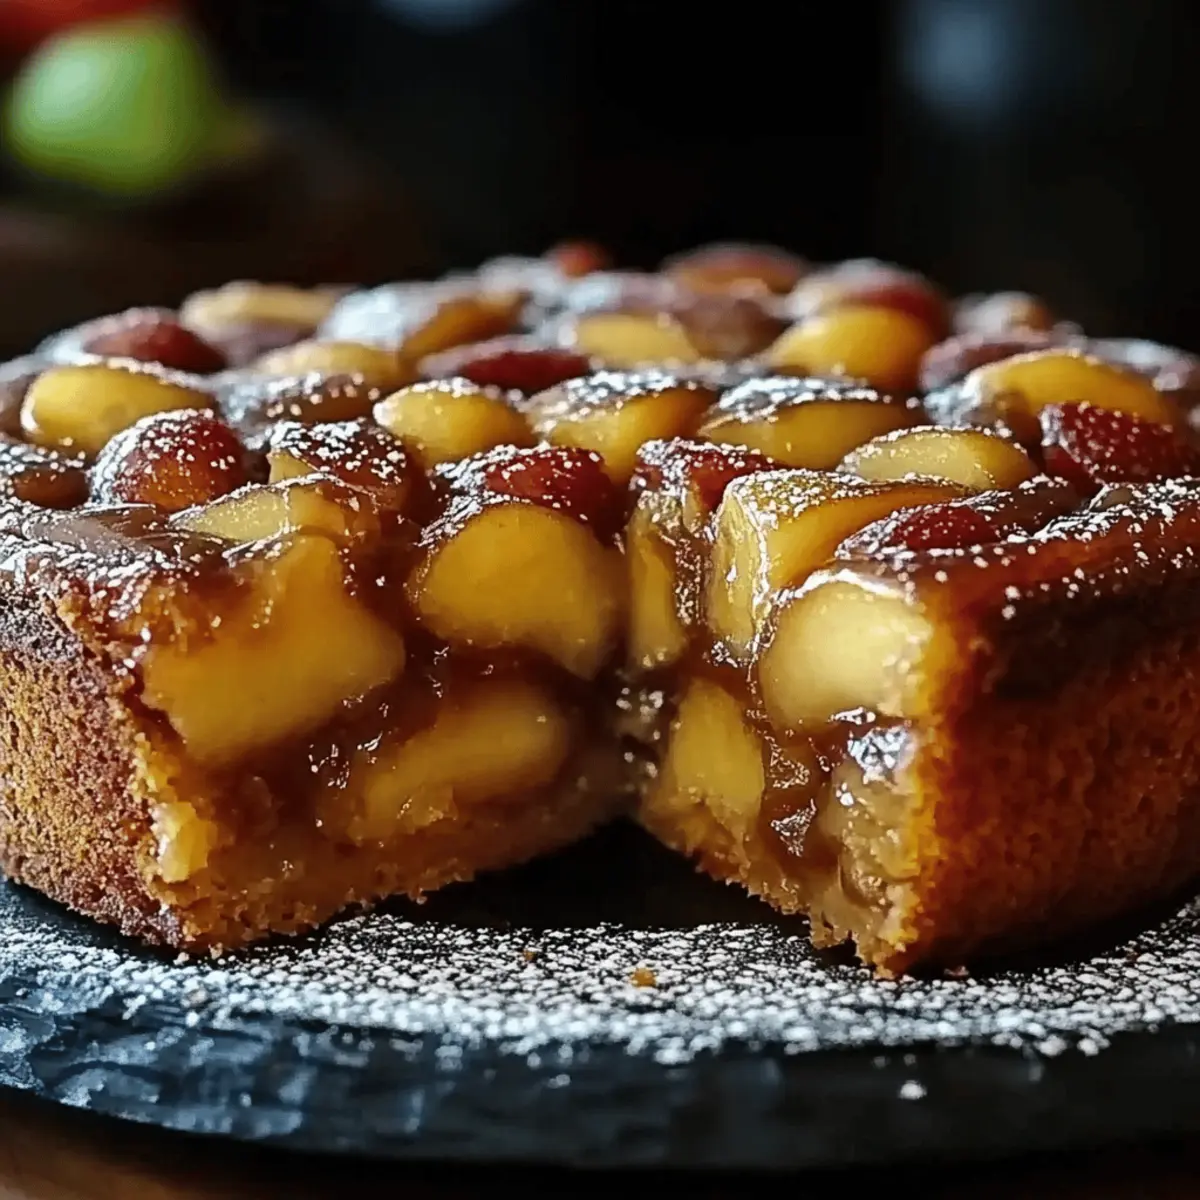
Sugar Crust: For an extra caramelized crust, sprinkle a little brown sugar on the pears before baking, enhancing both texture and flavor in your Pear and Almond Cake.

Cooling Matters: Allow the cake to cool completely before dusting with confectioners’ sugar. This will ensure the sugar doesn’t dissolve into the warm cake, keeping that beautiful finish intact.

Storage Secrets: Store any leftovers in an airtight container at room temperature. It stays delicious for up to three days, perfect for enjoying with coffee or tea!

Pear and Almond Cake Variations

Feel free to add your personal touch to the Pear and Almond Cake for even more deliciousness!

  • Gluten-Free: Replace all-purpose flour with a 1:1 gluten-free flour blend. This way, everyone can enjoy a moist and delightful cake!

  • Nut-Free: Use all-purpose flour exclusively, omitting almond flour to create a classic cake. It’s still lovely and full of flavor!

  • Fruity Twist: Add peaches or apples instead of pears for a different fruity profile. Each will bring its own sweetness and texture to this delightful cake.

  • Spiced Up: Mix in 1 teaspoon of cinnamon or nutmeg for a warm spice kick. It will add a cozy aroma and flavor, perfect for chilly days.

  • Chocolate Drizzle: Top the cake with a chocolate ganache for added indulgence. The rich chocolate pairs beautifully with the almond and pear flavors.

  • Vegan Option: Substitute eggs with flax eggs and use dairy-free butter to make this cake completely vegan. Everyone deserves a slice of this soft delight!

  • Almond Cream Filling: For a rich addition, incorporate an almond cream filling in the middle of the cake. This will create a luscious and creamy texture with every bite!

  • Citrus Splash: Add 1 teaspoon of orange zest to the batter for a bright citrus note. It complements the pears beautifully and elevates the cake’s flavor!

Feel inspired to mix it up and make this Pear and Almond Cake uniquely yours. You might even find a new family favorite recipe to cherish! Don’t forget to serve it alongside a steaming cup of coffee or a scoop of vanilla ice cream for the ultimate experience.

Pear and Almond Cake

Pear and Almond Cake Recipe FAQs

How do I choose the right pears for this recipe?
Absolutely! Look for ripe pears that are firm yet slightly soft to the touch. Varieties like Bartlett or Bosc work wonderfully, as they offer a delicious sweetness and moisture to the cake. Avoid pears with dark spots or bruises, as those might indicate overripeness.

What’s the best way to store leftover Pear and Almond Cake?
Very! Keep your cake in an airtight container at room temperature for up to 3 days. This helps retain its moistness and flavor. If you prefer it cool, you can refrigerate it in an airtight container for up to 5 days—just let it warm to room temperature before serving.

Can I freeze Pear and Almond Cake?
Absolutely! To freeze, wrap the cooled cake tightly in plastic wrap, then cover it with aluminum foil to prevent freezer burn. It can last up to 2 months in the freezer. When you’re ready to enjoy it, simply thaw in the fridge overnight and serve it at room temperature or warm it in the microwave for a cozy treat!

What if my cake doesn’t rise well?
Very! If your cake doesn’t rise, it could be due to old baking powder or overmixing the batter. Always check the expiration date on your baking powder before use. When adding the dry ingredients to the wet ingredients, mix gently until just incorporated to keep that fluffy texture intact.

Are there any dietary considerations for this recipe?
Absolutely! This Pear and Almond Cake contains eggs and butter, so it’s not suitable for a vegan diet. If you need a gluten-free option, you can substitute the all-purpose flour with a gluten-free blend that includes xanthan gum. Additionally, ensure that the almond flour you’re using is certified gluten-free to avoid any contamination.

Delicious Pear and Almond Cake for Cozy Dessert Moments

This Pear and Almond Cake combines sweet pears with almond flour for a delightful and moist dessert experience.

  • 9-inch round pan
  • stand mixer
  • Mixing Bowl
  • spatula

For the Cake Batter

  • 2 cups Almond Flour (Adds a nutty flavor and makes the cake wonderfully moist.)
  • 1 cup All-Purpose Flour (Provides structure to the cake, balancing the almond flour’s texture.)
  • 2 teaspoons Baking Powder (Helps the cake rise.)
  • 1/2 teaspoon Salt (Enhances overall flavor.)
  • 1 cup Granulated Sugar (Sweetens the cake.)
  • 1/2 cup Unsalted Butter (Brings richness to the batter.)
  • 3 Large Eggs (Bind everything together.)
  • 1 teaspoon Almond Extract (Infuses almond aroma.)
  • 1 teaspoon Vanilla Extract (Provides a comforting undertone.)

For the Pears

  • 3 cups Ripe Pears (Brings natural sweetness.)
  • 2 tablespoons Lemon Juice (Prevents browning.)
  • 1/4 teaspoon Salt (Amplifies sweetness.)

For the Topping

  • 2 tablespoons Granulated Sugar (Creates a caramelized crust.)
  • Powdered to taste Confectioners’ Sugar (A lovely finishing touch.)

Step‑by‑Step Instructions for Pear and Almond Cake

  1. Preheat your oven to 350°F and prepare a 9-inch round pan by lining with parchment and buttering it.
  2. In a medium bowl, sift together the almond flour, all-purpose flour, baking powder, and salt until well mixed.
  3. Cream together softened butter and granulated sugar on medium speed until light and fluffy, about 2 minutes.
  4. Add eggs one at a time to the buttery mixture, mixing thoroughly after each, then mix in almond and vanilla extracts.
  5. Gently add the dry flour mixture to your wet ingredients, mixing on low speed until just incorporated.
  6. Pour the smooth cake batter into your prepared pan, spreading it into an even layer.
  7. Toss chopped pears with lemon juice and salt in a small bowl.
  8. Distribute pear pieces evenly over the top of the cake batter and sprinkle with granulated sugar.
  9. Bake for 40 to 45 minutes until a toothpick inserted in the center comes out clean.
  10. Remove the cake from the oven, run a knife around the edges, and let it cool in the pan for about 20 minutes.
  11. Transfer to a wire rack to cool completely and dust with confectioners’ sugar before serving.

For an extra caramelized crust, sprinkle some brown sugar on the pears before baking.

Dessert
American
baking, cozy dessert, Easy Recipe, fruit cake, gluten-free dessert, Pear and Almond Cake

Filed Under: Dessert

Irresistibly Soft Pumpkin Challah for Cozy Mornings

September 16, 2025 by grace bellamy Leave a Comment

As I stood in my kitchen, the warm aroma of spices and pumpkin enveloped me, instantly taking me back to my grandmother’s home during autumn. This sense of nostalgia is perfectly captured in my Pumpkin Challah recipe, a delightful twist on traditional challah that will elevate your fall baking game. With its tender texture and inviting scent, this bread is not only a beautiful centerpiece for any gathering but is also surprisingly simple to whip up at home. One of the best parts? It’s freezer-friendly, so you can enjoy delicious homemade bread anytime without the stress. Plus, it’s an excellent way to incorporate seasonal pumpkin into your meals, making it a win-win in my book! Are you ready to fill your kitchen with warmth and sweet scents? Let’s dive into the recipe that will make your heart—and belly—feel at home.

Pumpkin Challah

Why is Pumpkin Challah a Must-Try?

Warmth and Comfort: This Pumpkin Challah brings the cozy flavors of fall right into your home with its sweet and spiced aroma.

Simple Ingredients: With basic pantry staples and pumpkin purée, this recipe keeps things easy without compromising on taste.

Perfect for Sharing: Whether for breakfast, brunch, or as a delightful snack, this loaf is sure to impress family and friends alike.

Versatile Options: Try it as toast with butter, or make sandwiches—this challah adapts brilliantly to any meal!

Freezer-Friendly: Make ahead and freeze, so you can have fresh bread anytime—ideal for those busy days!

Let’s get started on creating this scrumptious bread, and if you’re interested in expanding your baking repertoire, check out my post on how to make perfect Challah Bread.

Pumpkin Challah Ingredients

• Gather these essentials to create your delicious Pumpkin Challah!

For the Dough

  • King Arthur Unbleached All-Purpose Flour – 5 3/4 cups (690g) ensures a soft and chewy texture.
  • Granulated Sugar – 1/2 cup (99g) adds just the right amount of sweetness to complement the spices.
  • Instant Yeast – 2 1/4 teaspoons (7g) helps the dough rise quickly, resulting in fluffy bread.
  • Table Salt – 1 1/2 teaspoons (9g) enhances the flavors and balances the sweetness.
  • Cinnamon – 1 teaspoon brings warmth and that classic fall flavor to your Pumpkin Challah.
  • Water – 1 cup (227g), lukewarm, activates the yeast and helps bind the ingredients together.
  • Pumpkin Purée – 1/2 cup (113g) is the star of this recipe, infusing it with moisture and flavor.
  • Vegetable Oil – 1/4 cup (50g) contributes to the bread’s softness and keeps it fresh longer.
  • Large Egg – 1 for richness and a tender crumb, making this loaf oh-so-satisfying.

For the Egg Wash

  • Large Egg – 1 (beaten with 1 tablespoon water) creates that beautiful golden-brown crust that’ll have everyone asking for more.

Now that you have all your ingredients ready, it’s time to bring that cozy aroma to your kitchen with this delightful Pumpkin Challah!

Step‑by‑Step Instructions for Pumpkin Challah

Step 1: Prepare the Dough Ingredients
Start by weighing 630g of flour or accurately measuring 5 1/4 cups by gently spooning it into a measuring cup and leveling it off. In the bowl of a stand mixer equipped with a dough hook, combine the flour, granulated sugar, instant yeast, table salt, and cinnamon, mixing well to ensure even distribution of the ingredients.

Step 2: Combine Wet Ingredients
In a separate small bowl or a liquid measuring cup, whisk together 1 cup of lukewarm water, 1/2 cup of pumpkin purée, 1/4 cup of vegetable oil, and 1 large egg until fully combined. This mixture will add moisture and a rich flavor to your Pumpkin Challah, making all the difference in the end result.

Step 3: Form the Dough
Pour the wet ingredients into the dry mixture and mix until a shaggy dough forms, which should take about 1 minute. Use a rubber spatula to scrape down the sides of the bowl, ensuring all flour is incorporated and you have a cohesive dough before proceeding to kneading.

Step 4: Knead the Dough
Knead the dough for about 6 minutes using a stand mixer on medium speed or manually for about 10 minutes, gradually incorporating the remaining 1/2 cup of flour. The dough should become elastic and slightly tacky but not overly sticky. Once ready, it will spring back when lightly pressed.

Step 5: Allow Dough to Rise
After kneading, transfer the dough to a greased bowl or keep it in the stand mixer bowl and cover it with a damp kitchen towel or plastic wrap. Let it rise for approximately 2 hours at room temperature, or until it has doubled in size, indicating that the yeast has worked its magic.

Step 6: Shape the Loaves
Once risen, gently deflate the dough and transfer it to a lightly greased or floured work surface. Divide the dough into two equal pieces, roughly 620g each. Working with one piece, pat or roll it into a rectangle approximately 12″ x 5″, ensuring even thickness for uniform baking.

Step 7: Roll the Dough
Starting from one long edge, tightly roll up the dough to form a uniform log. Pinch the seam to seal it well. This tightly rolled shape is crucial for achieving that lovely texture in your Pumpkin Challah, adding to its irresistible softness.

Step 8: Lengthen the Dough
Gently use your palms to roll the log from the center outward just 2 to 3 times to lengthen it into a 24″ rope. This step helps create a light and airy crumb in your final bread and enhances its beautiful presentation on the baking sheet.

Step 9: Coil the Dough
Transfer the formed dough to the prepared baking sheet, loosely coiling it like a snail. Ensure there’s ample space for the dough to expand as it rises again. Tuck the end of the log under the coil to maintain its shape while baking and create a lovely visual appeal.

Step 10: Prepare for Second Rise
Repeat the shaping process with the second piece of dough and arrange it on the same baking sheet, keeping at least 3 inches apart from the first loaf. Cover both shaped loaves with lightly greased plastic wrap and let them rise at room temperature until puffy, which should take about 1 hour.

Step 11: Preheat the Oven
While the shaped loaves are rising, preheat your oven to 350°F (175°C), positioning a rack in the center. This preheating step is essential for achieving the right baking conditions for your Pumpkin Challah, ensuring it rises beautifully and develops a golden crust.

Step 12: Apply Egg Wash
After the second rise, brush the loaves gently with the prepared egg wash, made by beating 1 large egg with 1 tablespoon of water. For a deeper golden color, apply a second layer of egg wash after a few minutes. This adds a glossy finish that highlights the beautiful bread.

Step 13: Bake the Loaves
Place the loaves in the preheated oven and bake for 35 to 40 minutes. You’ll know they’re done when they turn a deep golden brown and a digital thermometer inserted into the center reads 190°F (88°C). The delightful aroma will fill your kitchen as they bake!

Step 14: Cool the Bread
Remove the loaves from the oven and transfer them to a cooling rack. Allow your delicious Pumpkin Challah to cool completely before slicing. This final step is essential; it lets the bread set and ensures you have perfect slices for serving!

Pumpkin Challah

How to Store and Freeze Pumpkin Challah

Room Temperature: Store your Pumpkin Challah in an airtight container at room temperature for up to 3 days to maintain its softness and flavor.

Fridge: If you want to keep it longer, place it in the fridge. It will stay fresh for up to a week, though it may lose some freshness.

Freezer: Wrap your cooled Pumpkin Challah tightly in plastic wrap, followed by aluminum foil, and freeze for up to 3 months. Thaw overnight in the refrigerator or at room temperature before serving.

Reheating: To regain that fresh-baked texture, slice and pop pieces in a preheated oven at 350°F for about 10 minutes. Enjoy your delightful Pumpkin Challah anytime!

Expert Tips for Pumpkin Challah

Use Fresh Ingredients: Ensure your yeast is fresh for optimal rising. Expired yeast can lead to dense bread.

Knead Well: Take the time to knead the dough until it’s elastic but still slightly tacky. This texture is key for a light, airy Pumpkin Challah.

Check the Temperature: The internal temperature should reach 190°F for perfectly baked loaves—don’t skip this step!

Avoid Overbaking: Keep an eye on your challah as it bakes; overbaking can dry it out. Look for a deep golden-brown crust.

Don’t Rush the Rise: Allow the dough to rise until it has doubled in size. Patience here will reward you with a wonderfully fluffy bread.

Store Properly: If you have leftovers, store them in an airtight container at room temperature, or freeze for future enjoyment of your Pumpkin Challah!

Pumpkin Challah Variations & Substitutions

Feel free to make this Pumpkin Challah your own with these fun and flavorful twists!

  • Gluten-Free: Substitute King Arthur All-Purpose Flour with a gluten-free blend for a celiac-friendly option. Just be sure to choose a blend designed for bread.

  • Dairy-Free: Use coconut oil instead of vegetable oil and replace the egg wash with almond milk for a plant-based alternative. This will keep the bread moist without any dairy!

  • Spice Up: Add 1/4 teaspoon of nutmeg or ginger to the cinnamon for an extra layer of warmth and spice that’ll make your taste buds dance.

  • Pumpkin Spice: For a bolder pumpkin flavor, increase the pumpkin purée to 3/4 cup and reduce the water slightly. It’ll be a delicious hit!

  • Nutty Addition: Mix in 1/2 cup toasted walnuts or pecans for a delightful crunch. The nutty flavor complements the soft bread beautifully.

  • Sweet Surprise: Incorporate 1/2 cup of chocolate chips into the dough for a sweet breakfast treat or dessert. Chocolate and pumpkin? Yes, please!

  • Herbal Twist: Add 1 tablespoon of fresh rosemary or thyme into the dough for an herbaceous surprise that pairs wonderfully with the sweetness of the pumpkin.

  • Heat It Up: Sprinkle in some red pepper flakes or cayenne pepper to the dough for a spicy kick that contrasts deliciously with the sweetness!

With these variations, you can create a unique Pumpkin Challah that suits your taste and mood. Don’t hesitate to explore and enjoy these delightful alternatives!

Make Ahead Options

These Pumpkin Challah loaves are perfect for meal prep enthusiasts! You can prepare the dough up to 24 hours in advance by following steps 1-6 and letting it rise in the refrigerator (cover it tightly to prevent drying out). The dough will rise slowly, allowing for enhanced flavor development while you enjoy some well-deserved time back. Once you’re ready to bake, simply bring the dough to room temperature for about 30 minutes before shaping and proceeding with steps 7-14 for freshly baked bread that’s just as delicious as if made the same day. This method not only saves you time but ensures you have warm, comforting Pumpkin Challah ready to impress your family any day of the week!

What to Serve with Pumpkin Challah

Bring the aroma of fall into your home and create a complete meal with these delightful pairings.

  • Creamy Mashed Potatoes: The rich creaminess of mashed potatoes perfectly balances the sweetness of Pumpkin Challah, creating a comforting duo.
  • Savory Pumpkin Soup: Continue the pumpkin theme with a warm bowl of pumpkin soup; its depth of flavor enhances the sweetness of the bread beautifully.
  • Fresh Green Salad: A light, zesty salad with lemon and herbs adds a refreshing contrast to the soft challah, making each bite vibrant.
  • Cinnamon-Spiced Apples: Sweet, sautéed apples with a hint of cinnamon mirror the flavors in our challah, making it a delightful side.
  • Honey Butter Spread: A dollop of honey butter on warm pumpkin challah elevates your experience, blending sweetness with a creamy texture.
  • Herbal Tea: Pair with a soothing cup of herbal tea to create a calming atmosphere, perfect for winding down with your baked loaf.
  • Apple Cider: The crisp and refreshing taste of apple cider complements your pumpkin flavors and adds an autumnal touch to your meal.
  • Cheese Platter: A variety of cheeses with fruits pairs beautifully with challah for a delightful sweet and savory experience.
  • Chocolate Chip Cookies: For dessert, enjoy soft chocolate chip cookies that contrast the bread’s softness, satisfying your sweet tooth delightfully.

Pumpkin Challah

Pumpkin Challah Recipe FAQs

How do I select the right pumpkin purée for my Pumpkin Challah?
Absolutely! Look for canned pumpkin purée without added sugars or spices to maintain the intended flavor of your challah. If using fresh pumpkin, select a sugar pumpkin, which is smaller and sweeter. You’ll want to roast and purée it until smooth, ensuring no fibrous bits remain.

What’s the best way to store leftover Pumpkin Challah?
I recommend storing your Pumpkin Challah in an airtight container at room temperature for up to 3 days. If you’re looking to keep it longer, you can place it in the fridge for up to a week, although it may lose some of its freshness. Just make sure to seal it well to prevent it from drying out!

Can I freeze Pumpkin Challah, and if so, how?
Absolutely! To freeze your Pumpkin Challah, wait until it has completely cooled. Wrap it tightly in plastic wrap, followed by aluminum foil, and then place it in the freezer for up to 3 months. When you’re ready to enjoy, simply thaw it overnight in the fridge or at room temperature, and for the ultimate fresh-baked taste, reheat slices in a preheated oven at 350°F for about 10 minutes.

What should I do if my dough doesn’t rise?
Very! If your dough isn’t rising, it might be due to inactive yeast. Check your yeast for freshness before adding it to the mixture. Also, ensure that the water you used was lukewarm but not too hot, as this can kill the yeast. If you want to encourage a rise, try placing the dough in a warm, draft-free area. You can even create a cozy environment by preheating your oven for a minute and turning it off before placing the covered dough inside.

Is Pumpkin Challah safe for pets or people with allergy concerns?
It’s important! While the ingredients in Pumpkin Challah are generally safe for humans, be cautious with pets; many ingredients, such as bread and certain spices, might not be ideal for them. For allergy considerations, this recipe contains wheat and eggs, so those with gluten or egg allergies should seek alternative flour and egg substitutes, like flaxseed meal or applesauce in small amounts.

How can I make my Pumpkin Challah even more flavorful?
To enhance the flavor of your Pumpkin Challah, consider adding a mix of nuts like walnuts or pecans into the dough. You can also incorporate various spices such as nutmeg or ginger for an even more festive taste. These additions can elevate your bread to new delicious heights!

Irresistibly Soft Pumpkin Challah for Cozy Mornings

This Pumpkin Challah is a delightful twist on traditional bread, perfect for cozy mornings with its soft texture and warm spices.

  • stand mixer
  • Measuring Cups
  • Measuring Spoons
  • Mixing bowls
  • Baking Sheet
  • Plastic wrap
  • Cooling rack

For the Dough

  • 5.75 cups King Arthur Unbleached All-Purpose Flour (ensures a soft and chewy texture)
  • 0.5 cups Granulated Sugar (adds sweetness)
  • 2.25 teaspoons Instant Yeast (helps the dough rise quickly)
  • 1.5 teaspoons Table Salt (enhances flavors)
  • 1 teaspoon Cinnamon (brings warmth)
  • 1 cups Water (lukewarm, activates the yeast)
  • 0.5 cups Pumpkin Purée (infuses moisture and flavor)
  • 0.25 cups Vegetable Oil (contributes to softness)
  • 1 Large Egg (for richness and tender crumb)

For the Egg Wash

  • 1 Large Egg (beaten with 1 tablespoon water)

Dough Preparation

  1. Prepare the dough ingredients by combining flour, sugar, yeast, salt, and cinnamon in a bowl.
  2. Combine wet ingredients in a separate bowl, whisking water, pumpkin purée, vegetable oil, and egg.
  3. Pour wet ingredients into dry mixture and mix until a shaggy dough forms.
  4. Knead the dough for about 6 minutes using a stand mixer or manually until slightly tacky.
  5. Transfer the dough to a greased bowl and let it rise for 2 hours or until doubled in size.

Shaping and Baking

  1. Gently deflate the dough and divide it into two equal pieces.
  2. Roll each piece into a rectangle and tightly roll up to form a log.
  3. Lengthen the log into a 24″ rope and coil it onto a prepared baking sheet.
  4. Cover the loaves with greased plastic wrap and let them rise for 1 hour.
  5. Preheat the oven to 350°F (175°C).
  6. Brush the loaves with egg wash and bake for 35 to 40 minutes.
  7. Remove from the oven and cool completely before slicing.

Ensure yeast is fresh and knead well for best results. Store leftovers in an airtight container.

Breakfast
Baked Goods
Autumn Bread, breakfast recipe, cozy recipes, fall baking, homemade bread, Pumpkin Challah

Filed Under: Breakfast

Irresistible Vegan Apple Cinnamon Buns for Cozy Mornings

September 16, 2025 by grace bellamy Leave a Comment

As the sweet aroma of cinnamon swirls through my kitchen, I can’t help but feel transported back to my childhood, where warm treats and laughter reigned supreme. These Vegan Apple Cinnamon Buns are a delightful twist on a classic favorite, making them a perfect treat for anyone looking to swap fast food for homemade goodness. With quick prep and a comforting essence, this recipe invites you to transform simple ingredients into fluffy, satisfying indulgence that even non-vegans will adore. Imagine biting into a warm, gooey bun, bursting with apple filling and cozy spices—doesn’t that sound like a hug on a plate? So, shall we roll up our sleeves and dive into this scrumptious adventure together?

Vegan Apple Cinnamon Buns

Why are these buns so irresistible?

Heavenly aroma: The sweet scent of cinnamon and apples wafts through your home, instantly elevating your mood.
Quick prep time: In just under 50 minutes, you’ll have fresh, warm buns that wow both family and friends.
Vegan-friendly: Perfectly satisfying, these buns are a great way to indulge without compromising your dietary choices.
Crowd-pleaser: Even non-vegans will be asking for seconds—imagine their delight!
Adaptable filling: Feel free to experiment with different fillings, like berries or pecans, to suit your taste.
With every bite, you’ll discover a comforting blend of flavors that makes this recipe perfect for transforming everyday moments into something special. Try your hand at these delightful buns and explore more comforting recipes like Vegan Banana Bread to satisfy your sweet tooth!

Vegan Apple Cinnamon Buns Ingredients

To whip up these scrumptious Vegan Apple Cinnamon Buns, gather the following essentials that promise comfort and joy!

For the Dough
• 350g strong white flour – This flour provides the perfect structure for soft, fluffy buns.
• 7g dried yeast – Essential for a lovely rise, ensuring your buns are light and airy.
• 2 tbsp soft brown sugar – Adds a touch of sweetness and a hint of caramel flavor.
• 1/2 tsp salt – Enhances all the flavors and balances the sweetness.
• 400ml plant-based milk – Use your favorite milk alternative for a rich, creamy texture.
• 1 tbsp olive oil – This helps to keep the dough moist and enhances its elasticity.

For the Filling
• 2 tbsp soft brown sugar – Provides a delightful caramel-like sweetness in the filling.
• 2 tsp cinnamon – A warm spice that’s key to that cozy flavor in your buns.
• 1 tin apple fruit filling – Simple and convenient, it gives the buns their fruity core.

For Brushing
• Vegan butter – A generous brush of vegan butter on top adds richness and a beautiful golden finish.

It’s time to embrace the warmth and comfort of homemade treats with these easy-to-follow Vegan Apple Cinnamon Buns that will have everyone coming back for seconds!

Step‑by‑Step Instructions for Vegan Apple Cinnamon Buns

Step 1: Warm the Milk
Begin by warming the plant-based milk in the microwave until it’s warm but not hot, about 30-45 seconds. This step is crucial for activating the yeast, so ensure it’s just right. You want it to feel comfortably warm to the touch, not scalding, which will invite your yeast to do its magic.

Step 2: Combine Dry Ingredients
In a large mixing bowl, whisk together 350g of strong white flour, 7g of dried yeast, 2 tablespoons of soft brown sugar, and 1/2 teaspoon of salt. Mix until thoroughly combined; this helps to ensure even distribution of ingredients. This dry mixture will serve as the foundation for your Vegan Apple Cinnamon Buns, so make sure it’s well-mixed.

Step 3: Make the Dough
Pour the warmed plant-based milk and 1 tablespoon of olive oil into the bowl with the dry ingredients. Stir with a spatula or your hands until a cohesive dough forms. This process takes about 2-3 minutes; the dough should be slightly sticky but come away from the bowl’s sides.

Step 4: Knead the Dough
Flour a clean surface lightly and tip the dough onto it. Knead the dough for about 3-5 minutes, stretching and folding it until it’s smooth and elastic. You’ll know it’s ready when it bounces back to the touch and forms a smooth ball. This step develops the gluten, ensuring your buns will be fluffy.

Step 5: Let It Prove
Clean the mixing bowl and coat the inside with olive oil to prevent sticking. Place the kneaded dough back in the bowl, cover it with a damp cloth, and let it prove in a warm spot for about 1 hour, or until it doubles in size. You’ll know it’s done when the dough feels puffy and has expanded visibly.

Step 6: Prepare the Baking Tin
While the dough is proving, line your baking tin with baking paper. This creates a non-stick surface for your Vegan Apple Cinnamon Buns, ensuring they release easily after baking. Prepping the tin early means you’re ready to assemble the rolls without any delays once the dough is ready.

Step 7: Roll Out the Dough
Once the dough has proved, flour your work surface again, and tip the dough onto it. Roll it out into a large rectangle, about 1/4 inch thick. Ensure the dough is even and smooth, as this surface will be covered in filling. Take your time for a nice, uniform roll!

Step 8: Add the Filling
Spread 2 tablespoons of soft brown sugar, 2 teaspoons of cinnamon, and the tin of apple fruit filling evenly across the rolled-out dough. Use a spatula for a smooth application, making sure to cover the entire surface. The aroma of cinnamon will fill your kitchen, hinting at the delightful buns to come.

Step 9: Roll Up the Dough
Starting from one long side, roll the dough tightly towards the other end. Make sure to keep it snug but not so tight that the filling spills out. Once rolled, pinch the seam together and position the rolled dough seam-side down to keep it intact while slicing.

Step 10: Slice Into Rolls
Using a sharp knife, slice the roll into pieces about 1.5 – 2 inches thick. You should see swirls of filling in each piece. Arrange them snugly in the prepared baking tin, leaving a little space between each roll to allow for rising during the second proving.

Step 11: Second Proving
Cover the tin with clingfilm and set it aside to prove for another 45 minutes. During this time, the rolls will puff up beautifully. You’ll notice they grow noticeably larger, and the anticipation of those Vegan Apple Cinnamon Buns will be hard to contain!

Step 12: Preheat the Oven
While the rolls are proving, preheat your oven to 180 degrees Celsius (350 degrees Fahrenheit). Preheating ensures that when you’re ready to bake, the temperature is just right for creating those golden tops and a perfectly baked interior.

Step 13: Brush with Vegan Butter
After the second proving, melt some vegan butter and brush it generously over the tops of the buns. This step not only adds flavor but also gives the buns a lovely golden color as they bake. Each brush stroke should coat the surface evenly for maximum richness.

Step 14: Bake the Buns
Place the baking tin in the preheated oven and bake for about 25-30 minutes, or until the buns are puffed and a beautiful golden brown. You’ll want to keep an eye on them towards the end of the baking time, as they should look irresistibly tempting and smell heavenly.

Step 15: Cool and Serve
Once baked, allow the Vegan Apple Cinnamon Buns to cool in the pan for about 10 minutes before carefully removing them. This cooling time helps them set up a bit, making them easier to handle. Serve warm and enjoy the delightful combination of flavors!

Vegan Apple Cinnamon Buns

Make Ahead Options

These Vegan Apple Cinnamon Buns are perfect for meal prep, allowing you to savor homemade goodness even on your busiest days! You can prepare the filling and shaped rolls up to 24 hours in advance. Simply follow the recipe until the second proving stage, then cover the baking tin with clingfilm and refrigerate. When you’re ready to bake, let the rolls sit at room temperature for about 30 minutes to rise before brushing with vegan butter and baking. This method ensures your buns are just as fluffy and delicious, saving time without compromising quality. Enjoy the convenience of fresh, warm buns ready in no time!

Vegan Apple Cinnamon Buns Variations

Feel free to mix things up with these delightful twists to make your Vegan Apple Cinnamon Buns even more exciting!

  • Gluten-Free: Substitute strong white flour with a 1:1 gluten-free flour blend to cater to gluten-sensitive friends.
  • Different Fruit Filling: Swap the apple fruit filling for other fillings like spiced pears or juicy blueberries for a refreshing twist! Experimenting with flavors can lead to scrumptious surprises.
  • Nutty Crunch: Add chopped walnuts or pecans to the filling for a delightful crunch that complements the soft texture of the buns.
  • Extra Sweetness: Drizzle a vegan caramel sauce on top after baking for a decadent finish that creates an irresistible sweet layer.
  • Coconut Cream Frosting: Whip up a simple coconut cream frosting to slather on top, adding richness and a tropical touch that’s pure indulgence.
  • Chai Spice: Replace cinnamon with chai spice mix for a warm, fragrant alternative that infuses each bite with exotic flavor.
  • Spicy Kick: Incorporate some finely grated ginger or a pinch of cayenne pepper into the filling for a surprising kick that will awaken your taste buds!
  • Savory Option: For a savory take, use sautéed apples with a hint of rosemary or thyme and skip the sugar entirely for a unique breakfast treat.

And while you’re at it, why not try pairing these delightful buns with a warm cup of Vegan Chai Latte or some fresh fruit salad to elevate your breakfast experience? The combination is simply comforting!

What to Serve with Vegan Apple Cinnamon Buns

Delight in creating a cozy meal experience that perfectly complements the warm, spicy sweetness of these delectable buns.

  • Creamy Vegan Coffee: A comforting cup of creamy vegan coffee enhances the flavors of your warm buns, creating a relaxing start to your day. Imagine sipping on this while indulging in a soft, gooey treat.

  • Fruit Salad: A refreshing fruit salad adds a burst of color and brightness, balancing the rich cinnamon. Juicy berries and tart apples provide delightful contrasts to the sweet filling.

  • Maple Glazed Carrots: The earthy sweetness of maple-glazed carrots harmonizes beautifully with the cinnamon, introducing a hint of savory satisfaction to your meal.

  • Warm Oatmeal: A bowl of warm oatmeal topped with nuts and berries offers a wholesome side that complements the indulgence of the buns while still being filling.

  • Coconut Yogurt Parfait: Layer coconut yogurt with sliced fruits and granola for a creamy, tropical parfait that pairs wonderfully with the spices of the buns, bringing a delightful freshness.

  • Herbal Tea: A calming cup of herbal tea, such as chamomile or peppermint, makes the perfect drink pairing. Its gentle flavors won’t overpower those luscious apple cinnamon notes.

  • Vegan Chocolate Cake: For the sweet tooth, a slice of rich, vegan chocolate cake provides an indulgent choice that contrasts beautifully with the warm spices of the buns, taking dessert to a new level.

  • Almond Milk Hot Chocolate: Treat yourself to a rich, dairy-free hot chocolate that mirrors the sweetness of the buns. It’s like a hug in a mug—perfect for cozying up during chilly mornings.

How to Store and Freeze Vegan Apple Cinnamon Buns

  • Room Temperature: Keep leftover buns in an airtight container at room temperature for up to 3 days. This keeps them soft and ready for your morning treat!
  • Fridge: For longer freshness, store them in the fridge for up to 5 days. Make sure they’re tightly wrapped to prevent drying out.
  • Freezer: Freeze buns for up to 3 months. Wrap each bun in plastic wrap and place in a freezer-safe bag. Thaw at room temperature for a few hours before enjoying!
  • Reheating: To enjoy warm, reheat in the microwave for about 15-20 seconds or in a preheated oven at 180 degrees Celsius (350 degrees Fahrenheit) for 5-10 minutes until warmed through.

Expert Tips for Vegan Apple Cinnamon Buns

• Temperature Matters: Ensure your plant-based milk is warm but not hot to activate the yeast effectively; too hot can kill it!

• Knead Well: Kneading for 3-5 minutes ensures the right elasticity, giving your buns the fluffy texture they deserve.

• Don’t Rush the Proving: Allow the dough to double in size for a light, airy bun; patience is key for the perfect Vegan Apple Cinnamon Buns!

• Slice Evenly: Use a sharp knife to cut the rolls evenly, as this helps them bake uniformly, resulting in perfect golden tops.

• Check for Doneness: The buns should be golden brown when baked; tap the bottom for a hollow sound to confirm they’re done!

Vegan Apple Cinnamon Buns

Vegan Apple Cinnamon Buns Recipe FAQs

What should I look for when selecting apples for the filling?
Absolutely! When choosing apples for your filling, look for ones that are firm with a slight sheen and without any dark spots. Apples like Granny Smith or Honeycrisp work wonderfully due to their balance of sweetness and tartness, bringing that perfect flavor to your Vegan Apple Cinnamon Buns.

How should I store leftover Vegan Apple Cinnamon Buns?
To keep your delicious buns fresh, place them in an airtight container at room temperature for up to 3 days. If you want to preserve them for a bit longer, store them in the fridge for up to 5 days, wrapped tightly to prevent drying out. They’ll continue to taste amazing!

Can I freeze these buns, and how?
Yes, you can! To freeze your Vegan Apple Cinnamon Buns, wrap each bun tightly in plastic wrap and place them in a freezer-safe bag. Write the date on the bag, and they’ll keep well for up to 3 months. When you’re ready to enjoy one, just thaw it at room temperature for a few hours or reheat straight from the freezer in the microwave for about 20 seconds.

What if my dough doesn’t rise properly?
Very! If your dough doesn’t rise, it could be due to cold ingredients or inactive yeast. Make sure your plant-based milk is warm (not hot!) when you add it to the dry ingredients. If you suspect your yeast is not active, you can proof it separately by mixing it with warm water and a pinch of sugar before combining it with the rest of the ingredients. If your dough sits for too long without rising, it may also be due to a cold environment; placing it in a warm, draft-free spot can help!

Are these buns suitable for those with allergies?
Absolutely! These Vegan Apple Cinnamon Buns are egg-free and dairy-free, making them a great choice for vegans and those with lactose intolerance. However, if you have gluten allergies, consider using a gluten-free flour blend instead of the strong white flour. Always check the packaging for potential cross-contamination if you have severe allergies!

How can I make these buns even more flavorful?
Feel free to get creative! You can add chopped nuts like walnuts or pecans to the filling for a delightful crunch or a splash of vanilla extract to elevate the sweetness. A drizzle of maple syrup over the baked buns can also add a lovely finishing touch. The more, the merrier! Enjoy experimenting!

Irresistible Vegan Apple Cinnamon Buns for Cozy Mornings

These Vegan Apple Cinnamon Buns are a delightful twist on a classic favorite, perfect for cozy mornings.

  • Mixing Bowl
  • spatula
  • Baking Tin
  • Oven

For the Dough

  • 350 g strong white flour (Provides perfect structure for soft, fluffy buns.)
  • 7 g dried yeast (Essential for a lovely rise.)
  • 2 tbsp soft brown sugar (Adds sweetness and caramel flavor.)
  • 1/2 tsp salt (Enhances all flavors.)
  • 400 ml plant-based milk (Use favorite milk alternative.)
  • 1 tbsp olive oil (Keeps the dough moist.)

For the Filling

  • 2 tbsp soft brown sugar (Provides sweetness in the filling.)
  • 2 tsp cinnamon (Key spice for cozy flavor.)
  • 1 tin apple fruit filling (Gives buns their fruity core.)

For Brushing

  • Vegan butter (Add richness and golden finish.)

Step-by-Step Instructions

  1. Warm the plant-based milk in the microwave until warm.
  2. Combine strong white flour, dried yeast, soft brown sugar, and salt in a mixing bowl.
  3. Pour warmed plant-based milk and olive oil into the bowl and stir to make a dough.
  4. Knead the dough on a floured surface until smooth and elastic.
  5. Let the dough prove in a warm spot until doubled in size, about 1 hour.
  6. Prepare a baking tin by lining it with baking paper.
  7. Roll out the dough on a floured surface into a large rectangle.
  8. Spread soft brown sugar, cinnamon, and apple filling evenly across the dough.
  9. Roll the dough tightly from one long side to the other.
  10. Slice the roll into pieces about 1.5 – 2 inches thick and place in the baking tin.
  11. Cover the tin and let the rolls prove for another 45 minutes.
  12. Preheat the oven to 180 degrees Celsius (350 degrees Fahrenheit).
  13. Brush the tops of the rolls with melted vegan butter.
  14. Bake for about 25-30 minutes until golden brown.
  15. Allow to cool in the pan for about 10 minutes before serving.

Store in an airtight container at room temperature for up to 3 days or freeze for up to 3 months.

Breakfast
Vegan
baking, Cinnamon Buns, comfort food, homemade treats, Sweet Rolls, Vegan Apple Cinnamon Buns

Filed Under: Breakfast

Roasted Garlic Potato Soup with Grilled Cheese Croutons Bliss

September 16, 2025 by grace bellamy Leave a Comment

The aroma of garlic wafting through the kitchen takes me back to cozy evenings spent huddled around the table with family. Today, I’m excited to share my Roasted Garlic Potato Soup with Grilled Cheese Croutons, a delightful bowl of warmth that’s perfect for any night of the week. This recipe not only boasts a creamy, rich texture but also brings together the irresistible crunch of grilled cheese croutons, making it an instant crowd-pleaser. Plus, it’s so quick to whip up, you’ll have a hearty meal ready in just over an hour! Whether you’re looking for comfort or a way to impress guests, this soup is sure to be a hit. Curious about how to achieve that perfect blend of flavors? Let’s dive in!

Roasted Garlic Potato Soup with Grilled Cheese Croutons

What makes this soup so irresistible?

Creamy, Comforting: With its velvety smooth texture, this Roasted Garlic Potato Soup will warm your soul and satisfy your taste buds in every spoonful.

Ultimate Flavor Duo: The roasted garlic adds a sweet, nutty depth, perfectly complemented by the gooey, cheesy grilled cheese croutons that you won’t be able to resist.

Quick & Easy: With a total prep and cook time of just over an hour, this dish is a time-saver for busy weeknights—leaving you more time to enjoy with family or savor your meal.

Crowd-Pleasing: Whether it’s a chilly evening or a gathering with friends, this recipe will elevate your dining experience and leave everyone asking for seconds!

Feel-Good Ingredients: Packed with wholesome ingredients like hearty potatoes and fresh herbs, this soup is a nourishing choice for you and your loved ones. Ready to take it to the next level? Check out my delicious guide on making homemade stock to enrich the flavor even more!

Roasted Garlic Potato Soup with Grilled Cheese Croutons Ingredients

For the Soup Base
• 1 head garlic – Roasting this elevates its flavor to a sweet, caramelized delight.
• 2 tablespoons olive oil – A healthy fat that enhances the roasting process.
• Salt and pepper – Essential for balancing and enhancing flavors.
• 4 large russet potatoes – The starchy base that gives the soup its creamy texture.
• 4 tablespoons butter – Adds richness and depth to the dish.
• 1 medium onion – Brings sweetness and aromatic charm to the soup.
• 1 leek – Offers a subtle onion flavor while keeping things sophisticated.
• ¼ cup all-purpose flour – Helps thicken the soup for a luscious consistency.
• 4 cups chicken or vegetable broth – The liquid foundation; homemade broth can elevate your Roasted Garlic Potato Soup even more.
• 1 cup milk – Perfect for achieving creaminess without heaviness.
• ½ cup heavy cream – Takes the creaminess to another level, ensuring every spoonful is indulgent.
• 1 teaspoon dried thyme – Adds an earthy aroma and enhances the overall flavor profile.

For the Grilled Cheese Croutons
• ½ cup grated Parmesan cheese – Adds a salty, nutty flavor that pairs beautifully with the soup.
• 4 slices bread – Choose your favorite loaf for the perfect crunch.
• 1 cup Gruyère cheese – Melts beautifully, bringing a rich, nutty flavor to your croutons.
• Additional Parmesan cheese – For garnishing; a sprinkle elevates the presentation.
• Chopped chives – Freshness that brightens up the final dish with color and flavor.

Now that you have all the delicious ingredients ready, let’s move on to the magic of combining these elements into a heartwarming bowl of Roasted Garlic Potato Soup with Grilled Cheese Croutons!

Step‑by‑Step Instructions for Roasted Garlic Potato Soup with Grilled Cheese Croutons

Step 1: Preheat and Roast Garlic
Begin by preheating your oven to 375–400 °F (190–200 °C). Slice the top off the head of garlic, then drizzle it with olive oil and season with salt and pepper. Wrap the garlic snugly in foil and place it in the oven to roast for 40–45 minutes, until it’s soft and fragrant, making your kitchen smell divine.

Step 2: Boil Potatoes
While the garlic roasts, peel and chop the four large russet potatoes into even cubes. In a large pot, bring water to a boil, adding the potatoes once bubbling. Cook them until fork-tender, which should take about 15-20 minutes. Once done, drain them, let them cool slightly, then set aside.

Step 3: Sauté Onions and Leeks
In a large pot or Dutch oven set over medium heat, melt four tablespoons of butter. Add diced medium onion and sliced leek to the pot, stirring occasionally for about 5-7 minutes until softened and translucent. This creates the aromatic base for your Roasted Garlic Potato Soup.

Step 4: Thicken the Soup Base
Once the onions and leeks are ready, lower the heat to medium and stir in ¼ cup of all-purpose flour. Cook the mixture for about 1 minute, allowing it to turn lightly golden. This flour will help thicken your soup, making it luxuriously creamy.

Step 5: Add Liquid Ingredients
Gradually whisk in the 4 cups of chicken or vegetable broth, followed by 1 cup of milk and ½ cup of heavy cream. Stir in 1 teaspoon of dried thyme and season with salt and pepper. Heat this mixture on medium until it slightly thickens, about 5-7 minutes, to form a rich, flavorful soup base.

Step 6: Blend and Incorporate Potatoes
Add the cooked potatoes and the squeezed roasted garlic cloves to the soup base. Using an immersion blender, blend until smooth and creamy. If you don’t have an immersion blender, you can carefully transfer the soup to a blender in batches. This step creates the velvety texture of your Roasted Garlic Potato Soup.

Step 7: Adjust Consistency and Seasoning
If your soup is thicker than desired, feel free to add up to 1 cup of additional broth until you reach your preferred consistency. Taste and adjust the seasoning with extra salt and pepper as needed. Your soup should be rich and flavorful, ready to be served.

Step 8: Prepare Grilled Cheese Croutons
While the soup simmers, butter one side of each slice of bread. On the non-buttered side of two slices, layer the Gruyère cheese generously, then top with the other slices (buttered side out). Cook the sandwiches in a skillet or panini press for about 5 minutes per side, or until golden brown and the cheese melts beautifully.

Step 9: Cut and Serve Croutons
Once the grilled cheese sandwiches are perfectly toasted, let them cool briefly, then cut them into 1-inch croutons. This adds a delightful crunch to your comforting Roasted Garlic Potato Soup and elevates the entire dish.

Step 10: Garnish and Enjoy
Ladle the creamy soup into bowls, garnishing with a sprinkle of additional Parmesan cheese and chopped chives for a burst of color. Top each bowl with the grilled cheese croutons you’ve prepared. Dive in and enjoy the luscious flavors of your homemade Roasted Garlic Potato Soup with Grilled Cheese Croutons!

Roasted Garlic Potato Soup with Grilled Cheese Croutons

How to Store and Freeze Roasted Garlic Potato Soup

Fridge: Store leftover Roasted Garlic Potato Soup in an airtight container for up to 3 days. Reheat on the stove over low heat, adding a splash of milk or broth to adjust the consistency.

Freezer: For longer storage, freeze the soup in freezer-safe containers for up to 3 months. Thaw overnight in the fridge before reheating. Avoid freezing the grilled cheese croutons, as they may lose their crispness.

Reheating: When ready to eat, gently reheat the soup on the stovetop, stirring occasionally, until hot. If too thick, simply add a bit of broth or milk. Enjoy with freshly made croutons for the best experience!

Cooling Before Storing: Let the soup cool completely before transferring to containers to prevent condensation and maintain its creamy texture.

Make Ahead Options

These Roasted Garlic Potato Soup with Grilled Cheese Croutons are perfect for busy home cooks! You can prepare the soup base, including the roasted garlic and sautéed onions and leeks, up to 3 days in advance. Simply store the soup in an airtight container in the refrigerator. For optimal quality, blend in the cooked potatoes and liquid ingredients right before serving, and reheat gently on the stove to prevent curdling. The grilled cheese croutons can also be made ahead—just store them in a separate container and reheat briefly in a skillet to crisp them up before adding them to your soup. Enjoy a comforting meal with minimal effort any night of the week!

Roasted Garlic Potato Soup Variations

Feel free to play around with different ingredients to make your Roasted Garlic Potato Soup delightful and unique!

  • Dairy-Free: Substitute regular milk and cream with coconut milk or almond milk for a creamy, dairy-free twist.
    This will add a subtle sweetness that pairs beautifully with the roasted garlic.

  • Herb Explosion: Add fresh herbs like rosemary or parsley to elevate the soup’s flavor profile.
    A handful of fresh herbs can transform your bowl into a fragrant experience.

  • Spicy Kick: Incorporate a pinch of cayenne pepper or a splash of hot sauce for a warmth that lingers.
    This will surprise your taste buds and make each spoonful a flavorful adventure.

  • Bacon Lover’s Delight: Sauté some chopped bacon along with the onions and leeks for a savory crunch.
    The smoky flavor will add depth and richness that complements the creamy soup.

  • Vegan Version: Use vegetable broth, and replace butter with olive oil and heavy cream with cashew cream.
    This swap ensures everyone can enjoy a luscious bowl without sacrificing flavor.

  • Cheesy Goodness: Mix in additional cheeses like cheddar or blue cheese to create a rich finish.
    This will add layers of flavor and create a gooey texture that is irresistible.

  • Smooth Texture Upgrade: For an even silkier soup, blend in some cauliflower alongside the potatoes.
    This not only enhances the creaminess but also adds extra nutrients without changing the flavor profile.

  • Add Vegetables: Toss in chopped carrots, celery, or kale for a delightful crunch and burst of color.
    These veggies will not only add nutritional benefits but also create a heartier soup experience.

What to Serve with Roasted Garlic Potato Soup with Grilled Cheese Croutons

A comforting bowl of soup pairs beautifully with a variety of sides and drinks that enhance your dining experience.

  • Crispy Green Salad: A refreshing mix of greens and veggies offers a crisp contrast to the creamy soup, balancing textures and flavors perfectly.

  • Honey Butter Cornbread: Slightly sweet and buttery, this soft bread complements the savory garlic tones in the soup beautifully.

  • Steamed Asparagus: Tender, vibrant asparagus drizzled with lemon brightens your plate, adding a fresh element that elevates the meal.

  • Garlic Breadsticks: These oven-baked delights add a comforting, garlicky crunch that echoes the soup’s flavors while providing an extra heartiness.

  • Roasted Vegetables: A medley of seasonal roasted vegetables provides a vibrant splash of color and nutrients, enhancing the cozy feel of your meal.

  • Sparkling Cider: For a non-alcoholic option, this bubbly drink’s sweetness and effervescence beautifully cut through the richness of the soup.

Indulging in these pairings not only rounds out your meal but also creates a delightful feast for the senses, making your Roasted Garlic Potato Soup with Grilled Cheese Croutons the star of the show!

Expert Tips for Roasted Garlic Potato Soup

Perfectly Roast Garlic: Ensure you cut off just the top of the garlic head—this allows the cloves to caramelize evenly, enhancing flavor in your Roasted Garlic Potato Soup.

Don’t Overcook Potatoes: Fork-tender is the key! Overcooked potatoes can break apart, making your soup gritty instead of smooth.

Blend Smartly: If using a regular blender, allow the soup to cool slightly before blending in batches; this prevents hot soup from splattering.

Adjust Your Broth: If the soup is too thick after blending, add broth gradually until your desired creaminess is reached. Taste test for seasoning before serving.

Crouton Creativity: Experiment with different cheeses for your croutons! Fontina or cheddar can add a unique twist to your grilled cheese topping.

Garnish for Style: A sprinkle of extra Parmesan and fresh chives not only looks beautiful but also adds final touches of flavor that enhance the dish.

Roasted Garlic Potato Soup with Grilled Cheese Croutons

Roasted Garlic Potato Soup with Grilled Cheese Croutons Recipe FAQs

How do I choose the right garlic for roasting?
Absolutely! Look for a head of garlic that feels firm and has dry, tight skin. Avoid any that have soft spots or dark discolorations, as these may indicate spoilage. When you roast it, the flavor transforms, creating a sweet, caramelized delight!

What is the best way to store leftovers of Roasted Garlic Potato Soup?
Very! If you have any leftover soup, store it in an airtight container in the refrigerator for up to 3 days. For reheating, warm it on the stovetop over low heat, adding a splash of milk or broth if the soup thickens too much. This ensures it remains creamy and delicious!

Can I freeze Roasted Garlic Potato Soup?
Yes, you can! To freeze, let the soup cool completely, then pour it into freezer-safe containers, leaving some space at the top for expansion. It will maintain its best quality for up to 3 months. When ready to enjoy, simply thaw it overnight in the fridge and reheat on the stove, stirring occasionally.

What should I do if my soup is too thick?
No worries! If your soup turns out thicker than desired, add broth or milk gradually—up to 1 cup—until you reach the desired consistency. Just reheat it gently on the stovetop while stirring, and remember to taste test before serving!

Are there any dietary considerations for this dish?
Definitely! Since this soup contains dairy, if you’re serving someone with lactose intolerance, you can substitute the milk and heavy cream for lactose-free versions or non-dairy alternatives like almond milk or coconut cream. Just make sure to adjust your seasonings accordingly.

Can I make the grilled cheese croutons ahead of time?
Of course! While these croutons are best enjoyed fresh, you can prepare them in advance. Simply store them in an airtight container at room temperature for a day or two. If you want them to be crispy again, quickly toast them in a skillet just before serving the soup. Enjoy!

Roasted Garlic Potato Soup with Grilled Cheese Croutons Bliss

Delicious Roasted Garlic Potato Soup with Grilled Cheese Croutons, perfect for a comforting meal any night.

  • Oven
  • Large Pot
  • skillet
  • Blender
  • Foil

For the Soup Base

  • 1 head garlic (Roasting this elevates its flavor to a sweet, caramelized delight.)
  • 2 tablespoons olive oil (A healthy fat that enhances the roasting process.)
  • Salt and pepper (Essential for balancing and enhancing flavors.)
  • 4 large russet potatoes (The starchy base that gives the soup its creamy texture.)
  • 4 tablespoons butter (Adds richness and depth to the dish.)
  • 1 medium onion (Brings sweetness and aromatic charm to the soup.)
  • 1 medium leek (Offers a subtle onion flavor while keeping things sophisticated.)
  • ¼ cup all-purpose flour (Helps thicken the soup for a luscious consistency.)
  • 4 cups chicken or vegetable broth (The liquid foundation; homemade broth can elevate your soup even more.)
  • 1 cup milk (Perfect for achieving creaminess without heaviness.)
  • ½ cup heavy cream (Takes the creaminess to another level, ensuring every spoonful is indulgent.)
  • 1 teaspoon dried thyme (Adds an earthy aroma and enhances the overall flavor profile.)

For the Grilled Cheese Croutons

  • ½ cup grated Parmesan cheese (Adds a salty, nutty flavor that pairs beautifully with the soup.)
  • 4 slices bread (Choose your favorite loaf for the perfect crunch.)
  • 1 cup Gruyère cheese (Melts beautifully, bringing a rich, nutty flavor to your croutons.)
  • Additional Parmesan cheese (For garnishing; a sprinkle elevates the presentation.)
  • Chopped chives (Freshness that brightens up the final dish with color and flavor.)

Instructions

  1. Preheat your oven to 375–400 °F (190–200 °C). Slice the top off the head of garlic, drizzle with olive oil, season with salt and pepper, wrap in foil and roast for 40–45 minutes.
  2. Peel and chop the potatoes into cubes. Bring water to a boil, add potatoes and cook until fork-tender, about 15-20 minutes. Drain and set aside.
  3. In a large pot, melt butter over medium heat. Add diced onion and leek, stirring occasionally for 5-7 minutes until softened.
  4. Stir in flour and cook for about 1 minute until lightly golden.
  5. Gradually whisk in broth, milk, heavy cream, thyme, salt, and pepper. Heat until slightly thickened, about 5-7 minutes.
  6. Add cooked potatoes and roasted garlic. Blend until smooth and creamy.
  7. Adjust soup consistency with additional broth as needed and taste for seasoning.
  8. Butter one side of each slice of bread. Fill two slices with Gruyère cheese and top with the other slices. Cook in a skillet until golden brown.
  9. Cut grilled cheese sandwiches into croutons.
  10. Ladle soup into bowls, garnish with Parmesan and chives, and top with grilled cheese croutons.

Perfectly roast garlic by cutting off just the top. Don’t overcook potatoes for a smooth soup. Adjust broth gradually for desired creaminess.

Main Dishes
American
comfort food, easy dinner, Grilled Cheese Croutons, Hearty Soup, Roasted Garlic Potato Soup

Filed Under: Main Dishes

Delicious Strawberry Cheesecake Cookies to Sweeten Your Day

September 16, 2025 by grace bellamy Leave a Comment

As I sifted through my pantry the other day, a burst of inspiration struck—what if I could blend the creamy goodness of cheesecake with the fun of freshly baked cookies? That’s exactly how my Strawberry Cheesecake Cookies were born! These delightful treats not only capture the essence of a classic dessert but also come together in just under thirty minutes, making them perfect for a quick baking escape. With their fluffy texture and pockets of fresh strawberries paired with the luscious creaminess of cream cheese, these cookies are bound to impress at your next gathering or simply satisfy your sweet tooth anytime. Ready to conjure up this sweet magic in your kitchen? Let’s dive into the recipe!

Strawberry Cheesecake Cookies

Why are Strawberry Cheesecake Cookies irresistible?

Decadent Flavor: Imagine biting into a cookie bursting with fresh strawberries and swirls of rich cream cheese—each bite feels like dessert and treat rolled into one.

Quick and Easy: With just 27 minutes from start to finish, even beginner bakers can whip these up effortlessly. Your kitchen will soon fill with delightful aromas!

Crowd-Pleasing: Perfect for gatherings, these cookies are a guaranteed hit that will leave everyone asking for the recipe. They combine two loved desserts into one!

Versatile Joy: Customize these cookies by adding white chocolate chips or even mixing in your favorite berries. Each variation can bring a new twist to this classic cookie.

Perfect Texture: These cookies are soft with chewy edges and creamy centers, creating a perfectly balanced bite every time. They’re a great alternative to store-bought snacks!

Strawberry Cheesecake Cookies Ingredients

For the Cookie Dough
• Softened Butter – 1 cup to give the cookies their rich, creamy texture.
• Granulated Sugar – 3/4 cup sweetens the dough for a delightful flavor.
• Brown Sugar – 1/4 cup adds a hint of caramel-like depth.
• Large Egg – 1 helps bind the ingredients for a perfect cookie structure.
• Vanilla Extract – 1/2 teaspoon enhances the overall sweetness and flavor.

For the Dry Ingredients
• All-Purpose Flour – 2 cups provides stability and structure to your cookies.
• Baking Soda – 1/2 teaspoon helps the cookies rise beautifully.
• Salt – 1/2 teaspoon balances the sweetness and enhances flavor.

For the Creamy Filling
• Softened Cream Cheese – 1/2 cup brings that classic cheesecake flavor within each cookie.

For the Mix-Ins
• Chopped Fresh Strawberries – 1 cup infuses the dough with fresh juicy bites and a bright burst of flavor.
• White Chocolate Chips – 1/2 cup for a sweet, creamy contrast that elevates the cookie experience.

Dive into these Strawberry Cheesecake Cookies and prepare for a culinary adventure that’ll sweeten your day!

Step‑by‑Step Instructions for Strawberry Cheesecake Cookies

Step 1: Preheat and Prepare
Begin by preheating your oven to 350°F (175°C). While the oven warms up, line a baking sheet with parchment paper or a silicone mat to prevent your delicious Strawberry Cheesecake Cookies from sticking. This simple prep ensures an easy cleanup and beautifully baked cookies.

Step 2: Cream the Butters and Sugars
In a large mixing bowl, combine 1 cup of softened butter, 3/4 cup of granulated sugar, and 1/4 cup of brown sugar. Using an electric mixer on medium speed, cream the mixture until it becomes light and fluffy, which should take about 3 minutes. This crucial step helps create the rich base for your cookies.

Step 3: Incorporate the Egg and Vanilla
Next, add in 1 large egg and 1/2 teaspoon of vanilla extract to your butter and sugar mixture. Continue to beat it on medium speed until everything is fully combined, which will give your Strawberry Cheesecake Cookies a delightful flavor and a smooth texture. Take a moment to pause and appreciate the aroma!

Step 4: Mix the Dry Ingredients
In a separate bowl, whisk together 2 cups of all-purpose flour, 1/2 teaspoon of baking soda, and 1/2 teaspoon of salt until thoroughly combined. This step is important for evenly distributing the baking soda and salt, ensuring your dough rises perfectly. Set this bowl aside as you prepare to combine the ingredients.

Step 5: Combine Wet and Dry Mixtures
Gradually add the dry ingredients to the wet mixture, mixing slowly to prevent flour from spilling out. Use a spatula or wooden spoon to gently fold until just combined. You want to avoid overmixing here, allowing the texture of the cookies to remain soft and tender—perfect for your Strawberry Cheesecake Cookies.

Step 6: Add the Cream Cheese
Now it’s time to introduce the star of the show! Add 1/2 cup of softened cream cheese to the cookie dough, beating until smooth. This ingredient brings that luscious cheesecake flavor that is so heavenly. Make sure it’s fully integrated for that creamy goodness in each cookie!

Step 7: Fold in the Strawberries
Gently fold in 1 cup of chopped fresh strawberries using a spatula. Be careful to distribute the strawberries evenly without squishing them too much. Their fresh, juicy bites will add a delightful burst of flavor, making these Strawberry Cheesecake Cookies so irresistible!

Step 8: Add the White Chocolate Chips
Next, stir in 1/2 cup of white chocolate chips until they are well mixed through the dough. This sweet addition complements the tartness of the strawberries and the richness of the cream cheese, creating a delectable contrast that enhances your cookies’ delightful flavor!

Step 9: Scoop the Dough
Scoop rounded tablespoons of dough onto the prepared baking sheet, making sure to space them about 2 inches apart. This spacing allows the cookies to spread without merging into each other while baking. The anticipation of those Strawberry Cheesecake Cookies coming to life makes the process even more exciting!

Step 10: Bake All Together
Place the baking sheet in your preheated oven and bake for about 10 to 12 minutes. Keep an eye on them; you want the edges to turn golden brown while keeping the centers soft. When you see this visual cue, your cookies are nearly ready to be enjoyed!

Step 11: Cool the Cookies
Once baked, carefully remove the cookies from the oven and let them cool on the baking sheet for about 5 minutes. This slight cooling period helps them set properly before transferring to a wire rack, where the cookies will cool completely and develop their delightful texture.

Strawberry Cheesecake Cookies

Strawberry Cheesecake Cookies Variations

Feel free to personalize these delightful Strawberry Cheesecake Cookies to suit your taste buds and dietary needs!

  • Gluten-Free: Substitute all-purpose flour with a 1:1 gluten-free baking blend for a delicious cookie everyone can enjoy. Make sure to check the texture as gluten-free flours can vary.

  • Dairy-Free: Replace cream cheese with a dairy-free alternative, like cashew cream, and use dairy-free butter. This swap still gives a creamy, luscious flavor!

  • Low Sugar: Use a sugar substitute like erythritol or stevia to reduce sugar without sacrificing sweetness. They can help keep these cookies guilt-free!

  • Nutty Crunch: Add 1/2 cup of chopped nuts, like pecans or walnuts, for a delightful crunch. The nuttiness pairs beautifully with the strawberries and creaminess.

  • Chocolate Lover’s Twist: Mix in 1/2 cup of dark or semi-sweet chocolate chips alongside the white chocolate for a rich, fudgy surprise. The chocolate complements the fruity notes exceptionally well.

  • Spice It Up: Add a teaspoon of cinnamon or a pinch of nutmeg for a warm, inviting flavor profile that enhances the sweetness of the strawberries nicely.

  • Heat It Up: Incorporating a dash of cayenne pepper or chili powder can give a surprising kick. Spicy and sweet make a delightful combination!

  • Seasonal Fruits: Swap out strawberries for seasonal fruits like blueberries, raspberries, or peaches. Each fruit twist creates a new delightful flavor experience, keeping things exciting!

Take these variations as an opportunity to create your perfect version of Strawberry Cheesecake Cookies and share your success stories with family and friends. Cooking should be fun and personal, after all!

Expert Tips for Strawberry Cheesecake Cookies

  • Use Room Temperature Ingredients: Make sure your butter and cream cheese are softened to room temperature for a smoother batter and even mixing.
  • Don’t Overmix: When combining the dry and wet ingredients, mix until just combined. Overmixing can lead to tough cookies instead of soft Strawberry Cheesecake Cookies.
  • Quality Strawberries: Use fresh, ripe strawberries for the best flavor. If they’re too mushy, they won’t hold their shape in the cookies.
  • Watch Your Bake Time: Keep an eye on your cookies as they bake. They should be golden around the edges but still soft in the center for that perfect chewy texture.
  • Cool Properly: Allow the cookies to sit on the baking sheet for a few minutes before transferring them to a wire rack. This helps them set and reduces the risk of breaking.

Make Ahead Options

These Strawberry Cheesecake Cookies are a fantastic choice for busy home cooks looking to save time! You can prepare the cookie dough up to 24 hours in advance. Just mix all the ingredients, including the strawberries and white chocolate chips, then wrap the dough tightly in plastic wrap and refrigerate it. To prevent browning and maintain freshness, soak the strawberries in a bit of lemon juice before adding them to your dough. When you’re ready to bake, simply scoop the dough onto a prepared baking sheet and pop them in the oven as directed. With this make-ahead option, you’ll have warm, delicious cookies ready for any occasion with minimal effort!

How to Store and Freeze Strawberry Cheesecake Cookies

  • Room Temperature: Store cooled cookies in an airtight container at room temperature for up to 3 days. This keeps them soft and fresh for when your sweet tooth cravings hit!

  • Fridge: If you want to extend their life a tad longer, place the cookies in the fridge, where they will stay good for about a week. Just remember to let them come to room temperature before enjoying!

  • Freezer: For longer storage, freeze your unbaked dough in a sealed freezer bag for up to 3 months. You can bake them straight from frozen—just add a couple extra minutes to the baking time!

  • Reheating: To enjoy leftover Strawberry Cheesecake Cookies warm, pop them in the microwave for about 10–15 seconds. It’ll give you that fresh-baked experience all over again!

What to Serve with Strawberry Cheesecake Cookies?

Building a delightful meal around your sweet Strawberry Cheesecake Cookies can elevate any occasion, turning an ordinary day into a moment to cherish.

  • Creamy Vanilla Ice Cream: A scoop of vanilla ice cream adds a creamy contrast to the warm cookies, creating a blissful combination that feels indulgent. The coolness of the ice cream complements the soft, fruity cookies beautifully.

  • Fresh Fruit Salad: A vibrant mix of berries and melons refreshes the palate and balances the sweetness of the cookies. The natural juices from the fruit enhance the strawberry flavor, making each cookie irresistible.

  • Chocolate-Covered Strawberries: This elegant treat not only looks gorgeous on the plate but combines the same strawberry-rich flavor that pairs perfectly with the cookies. Their richness adds a sophisticated twist to your dessert spread.

  • Mini Cheesecake Bites: Offering bites of cheesecake alongside your cookies can create a delightful theme, combining two desserts into one experience. They echo the cheesecake essence, making each bite a rich delight.

  • Sparkling Lemonade: A refreshing, bubbly drink that cuts through the sweetness of the cookies. The citrus notes complement the strawberry flavor, leaving you with a refreshing aftertaste that invites another cookie!

  • Coffee or Espresso: The warmth of coffee or espresso provides a wonderful balance to the sweetness of the cookies. Each sip accentuates the flavors of strawberries and cream cheese, enhancing the whole experience.

  • Milk or Almond Milk: A classic pairing, milk adds a nurturing touch to your cookies. Dipping the cookies in milk brings out the creamy notes, making experiencing every bite feel like a comforting hug.

Each pairing brings a unique touch to the table, ensuring your Strawberry Cheesecake Cookies shine while harmonizing with flavors and textures that everyone will love!

Strawberry Cheesecake Cookies

Strawberry Cheesecake Cookies Recipe FAQs

What kind of strawberries should I use for these cookies?
Absolutely! For the best flavor, I recommend using fresh, ripe strawberries. Look for strawberries that are vibrant red without dark spots or excessive mushiness, as they’ll hold their shape better during baking. If your strawberries are overly ripe or bruised, they may not give you that delightful burst of flavor in each cookie!

How should I store my Strawberry Cheesecake Cookies?
You can store your cooled cookies in an airtight container at room temperature for up to 3 days. If you want them to last longer, place them in the fridge for about a week. Just remember to let them come to room temperature before enjoying for the best taste and texture!

Can I freeze the cookie dough for later use?
Very! Freezing your unbaked dough is a fantastic option. Just scoop the dough into rounded tablespoons and place them on a baking sheet to freeze individually for about an hour. Once frozen, transfer the dough balls to a sealed freezer bag and store them for up to 3 months. When you’re ready to bake, just pop them straight into the oven—add a couple of extra minutes to the baking time, and you’ll have fresh cookies in no time!

What should I do if my cookies turn out too dry?
If your Strawberry Cheesecake Cookies bake a bit dry, there are a few potential culprits. Make sure you’re using the correct measuring technique—spoon and level your flour to avoid packing it down. Also, check your oven temperature with a thermometer, as inaccurate heat can lead to dryness. Lastly, be sure to watch the baking time closely; pulling them out when the edges are golden but the centers are still soft is key!

Can I make these cookies gluten-free?
Absolutely! To make gluten-free Strawberry Cheesecake Cookies, you can substitute the all-purpose flour with a gluten-free flour blend that measures cup for cup. Just be sure to check that all other ingredients, like the baking soda and white chocolate chips, are gluten-free as well. Your delightful cookies will still turn out deliciously!

Are these cookies suitable for pets or people with allergies?
Great question! Since these Strawberry Cheesecake Cookies contain common allergens such as butter, cream cheese, and wheat, it’s important to keep them away from pets and those with dairy or gluten allergies. For those with lactose issues, you could use lactose-free cream cheese and a gluten-free flour as substitutions. Always check with guests before serving, just to keep everyone safe and happy!

Delicious Strawberry Cheesecake Cookies to Sweeten Your Day

These Strawberry Cheesecake Cookies blend creamy cheesecake goodness with soft cookie texture, perfect for a quick treat.

  • Mixing Bowl
  • Electric mixer
  • Baking Sheet
  • parchment paper

For the Cookie Dough

  • 1 cup Softened Butter (gives a rich, creamy texture)
  • 3/4 cup Granulated Sugar (sweetens the dough)
  • 1/4 cup Brown Sugar (adds caramel-like depth)
  • 1 large Egg (binds the ingredients)
  • 1/2 teaspoon Vanilla Extract (enhances sweetness)

For the Dry Ingredients

  • 2 cups All-Purpose Flour (provides stability)
  • 1/2 teaspoon Baking Soda (helps cookies rise)
  • 1/2 teaspoon Salt (balances sweetness)

For the Creamy Filling

  • 1/2 cup Softened Cream Cheese (brings cheesecake flavor)

For the Mix-Ins

  • 1 cup Chopped Fresh Strawberries (infuses fresh flavor)
  • 1/2 cup White Chocolate Chips (adds sweetness)

Step-by-Step Instructions

  1. Preheat your oven to 350°F (175°C) and line a baking sheet.
  2. In a mixing bowl, cream together softened butter, granulated sugar, and brown sugar.
  3. Add the egg and vanilla extract to the mixture and combine well.
  4. In a separate bowl, whisk together flour, baking soda, and salt.
  5. Gradually add the dry ingredients to the wet mixture, mixing until just combined.
  6. Add softened cream cheese and beat until smooth.
  7. Gently fold in chopped strawberries.
  8. Stir in white chocolate chips until well mixed.
  9. Scoop rounded tablespoons of dough onto the prepared baking sheet, spacing them apart.
  10. Bake for about 10 to 12 minutes until golden around the edges.
  11. Let the cookies cool on the baking sheet for about 5 minutes before transferring to a wire rack.

Ensure all ingredients are at room temperature for the best mixing results. Store cooled cookies in an airtight container at room temperature for up to 3 days.

Dessert
American
baking, cheesecake, cookies, dessert, easy recipes, Strawberry Cheesecake Cookies

Filed Under: Dessert

Delicious Apple Fritter Bites You Can’t Resist

September 16, 2025 by grace bellamy Leave a Comment

Late afternoon sunlight streamed through my kitchen window as I pulled out an aromatic batch of Apple Fritter Bites from the oven. The smell of cinnamon and freshly baked apples danced around, inviting me to take just one more. These delightful little bites are a quick triumph in homemade comfort food, combining the essence of a classic apple fritter into adorable, bite-sized pieces. Not only do they come together in under 30 minutes, but they’re also a fantastic way to impress family and friends with minimal effort. Perfect for an afternoon snack or a sweet breakfast treat, each fritter is a hug in the form of food. Are you ready to bring a sprinkle of joy into your kitchen with these Apple Fritter Bites?

Apple Fritter Bites

Why Are Apple Fritter Bites Irresistible?

Quick and Easy: In just under 30 minutes, you can indulge in these delicious Apple Fritter Bites without any fuss. Minimal Effort, Big Flavor: The delightful combination of cinnamon and fresh apples provides a warm, comforting taste that’s truly nostalgic. Perfectly Portable: These bite-sized pieces are ideal for sharing at gatherings or enjoying as a cozy afternoon snack. Versatile Serving Options: Enjoy them warm, dusted with powdered sugar or paired with a dipping sauce for added decadence. Impressive Household Favorite: Watch as loved ones flock to the kitchen for more, making these a crowd-pleaser that’s sure to be on repeat.

Apple Fritter Bites Ingredients

• Delightful and simple ingredients await!

For the Batter

  • All-purpose flour – This forms the base of the batter, ensuring a fluffy texture.
  • Baking powder – Helps the fritter bites rise and gives them a light, airy quality.
  • Ground cinnamon – Adds warmth and irresistible flavor, essential for classic Apple Fritter Bites.
  • Sugar – Sweetens the batter perfectly, balancing the tartness of the apples.
  • Milk – Keeps the mixture moist and helps achieve a lovely consistency.
  • Large egg – Binds the ingredients together, giving structure to each bite.
  • Chopped apples – Fresh Granny Smith apples add a delightful crunch and tartness, enhancing the overall flavor.

With these simple ingredients, you’re just a whisk away from creating magic in your kitchen. Enjoy the journey to crafting these sweet bites!

Step‑by‑Step Instructions for Apple Fritter Bites

Step 1: Preheat the Oven
Begin by preheating your oven to 375°F (190°C). While it’s heating, line a baking sheet with parchment paper to ensure your Apple Fritter Bites do not stick. This preparation step sets the stage for perfectly cooked bites, allowing them to crisp up nicely and brown evenly.

Step 2: Mix Dry Ingredients
In a mixing bowl, combine 1 cup of all-purpose flour, 2 teaspoons of baking powder, 1 teaspoon of ground cinnamon, and 1/4 cup of sugar. Whisk these ingredients together thoroughly until they are well-combined, creating a dry mixture that promises fluffy and fragrant fritters once baked. Set this bowl aside for now.

Step 3: Combine Wet Ingredients
Next, take another bowl and beat together 1 large egg with 1/2 cup of milk until the mixture is smooth and homogenous. Slowly pour this wet mixture into your dry ingredients, stirring gently until just combined. Be cautious not to overmix; a few lumps in the batter are perfectly fine, as they will dissolve during baking.

Step 4: Fold in Apples
Now, gently fold in 1 cup of chopped Granny Smith apples into your batter until they are evenly distributed. This addition not only amplifies the apple flavor but also enhances the texture of your Apple Fritter Bites. Picture the colorful bits of apple peeking through the batter as you mix.

Step 5: Portion the Batter
Using a spoon or a cookie scoop, drop spoonfuls of the apple batter onto your prepared baking sheet, spacing them about two inches apart. This spacing allows the fritter bites to expand and rise as they bake, ensuring they don’t merge together and lose their bite-sized shape.

Step 6: Bake Until Golden
Place the baking sheet in your preheated oven and bake for 15–20 minutes, or until the Apple Fritter Bites are golden brown on top. Keep an eye on them during the last few minutes – they should look puffed and slightly crisp, signaling that they’re ready to come out and be devoured.

Step 7: Serve Warm
As soon as they’re done baking, remove the Apple Fritter Bites from the oven and let them cool slightly on the baking sheet. Serve them warm, dusted with powdered sugar or alongside your favorite dipping sauce for an extra treat. Enjoy the aroma and flavor of these delicious bites!

Apple Fritter Bites

Make Ahead Options

These Apple Fritter Bites are perfect for busy home cooks looking to save time! You can prepare the batter up to 24 hours in advance; just store it in an airtight container in the refrigerator. To maintain the delightful texture, make sure to gently stir the mixture before using, as some separation may occur overnight. Additionally, you can chop the apples ahead of time and store them in a bowl of water with a splash of lemon juice to prevent browning. When you’re ready to bake, simply drop spoonfuls of the chilled batter onto a baking sheet and bake as directed, achieving warm, fresh-baked treats with minimal effort!

Apple Fritter Bites Variations

Feel free to add your own spin to these delightful Apple Fritter Bites for a unique twist that excites the palate!

  • Gluten-Free: Swap all-purpose flour with a gluten-free blend for a delicious alternative that everyone can enjoy.

  • Dairy-Free: Use almond milk or oat milk instead of regular milk, and replace the egg with a flax egg for a dairy-free delight.

  • Spicy Kick: Add a pinch of cayenne pepper to the batter to give your bites a surprising and delicious heat.

  • Nutty Flavor: Mix in 1/2 cup of chopped walnuts or pecans for a delightful crunch and nutty essence that complements the apples.

  • Fruity Fusion: Incorporate diced pears or peaches along with the apples for a delightful fruit medley that adds complexity to the sweetness.

  • Maple Glaze: Drizzle a mixture of powdered sugar and pure maple syrup over the warm bites for a sweet finish that enhances the maple flavor in fall.

These variations will allow you to customize your Apple Fritter Bites and keep things exciting. Enjoy exploring all the flavors these juicy twists can bring, and consider pairing them with a warm cup of coffee or a sweet dipping sauce to elevate your snack game!

Expert Tips for Apple Fritter Bites

• Use Fresh Apples: Always opt for fresh Granny Smith apples; their tartness complements the sweetness of the batter beautifully and prevents them from becoming mushy.

• Don’t Overmix: When combining wet and dry ingredients, mix just until combined. Overmixing can lead to tough fritters instead of light and fluffy Apple Fritter Bites.

• Spacing is Key: Make sure to space the spoonfuls of batter at least 2 inches apart on the baking sheet. This allows for proper expansion and prevents them from sticking together while baking.

• Check for Doneness: Keep an eye on the baking time; every oven is different. Look for a golden-brown color and a puffy appearance as signs that they’re ready to come out.

• Serve Immediately: These Apple Fritter Bites are best enjoyed fresh out of the oven. If you have leftovers, reheat them briefly to bring back their warmth and fluffiness.

• Experiment with Flavor: Feel free to add a pinch of nutmeg or a splash of vanilla extract to the batter for added depth of flavor in these delightful bites!

What to Serve with Apple Fritter Bites

Warm, delicious bites of sweetness can be beautifully complemented by a variety of dishes and drinks.

  • Creamy Vanilla Ice Cream: A scoop of creamy vanilla ice cream adds a delightful cold contrast to the warm fritter bites, making each delightful bite even more indulgent.

  • Cinnamon Sugar Donuts: Pairing the fritter bites with cinnamon sugar donuts complements the apple and cinnamon flavors, enhancing the overall sweet experience. Imagine the smiling faces around your table as they enjoy this tasty duo.

  • Maple Syrup Dipping Sauce: A drizzle of rich maple syrup creates a sweet harmony that binds the flavors together, inviting a sticky-sweet delight that takes the fritters to another level.

  • Coffee or Tea: A warm cup of coffee or soothing herbal tea makes a perfect beverage to sip while enjoying the bites, enhancing the cozy atmosphere of your homemade treat. The gentle warmth of the drink echoes the comforting vibes of the fritter bites.

  • Fresh Fruit Salad: A colorful fruit salad adds freshness to the meal, balancing the sweetness of the fritter bites while introducing a lively textural contrast. Think vibrant berries, citrus segments, and crisp apples all harmonizing beautifully.

  • Caramel Sauce: For an extra special treat, serve with a side of luscious caramel sauce for dipping. The rich, buttery sweetness elevates the apple flavors and creates a mouthwatering experience.

  • Sparkling Cider: A glass of fizzy sparkling cider provides a bubbly refreshment that cuts through the sweetness of the fritter bites, making for an extra festive pairing.

  • Chocolate Ganache: Velvety chocolate ganache drizzled over the bites brings a decadent twist, especially for chocolate lovers. The combination of chocolate and apple is a match made in heaven!

  • Whipped Cream: A dollop of light, airy whipped cream on the side allows for an extra creamy bite with every fritter, offering a soft texture that contrasts beautifully with the crispness.

  • Warm Milk: For a comforting drink option, warm milk infused with vanilla enhances the cozy vibe, making each bite feel like a sweet hug on a chilly day.

How to Store and Freeze Apple Fritter Bites

Room Temperature: Enjoy these tasty Apple Fritter Bites best when they’re fresh! If you have leftovers, store them in an airtight container at room temperature for up to 2 days.

Fridge: If you prefer them a bit longer, you can refrigerate the bites in an airtight container for up to 5 days. Just know they may lose a bit of their crispy texture.

Freezer: For longer storage, freeze Apple Fritter Bites! Place them in a single layer on a baking sheet to freeze individually, then transfer them to a freezer-safe bag or container. They can be frozen for up to 3 months.

Reheating: When ready to enjoy, reheat frozen fritter bites in a preheated oven at 350°F (175°C) for about 10-12 minutes, or until warm and slightly crispy again.

Apple Fritter Bites

Apple Fritter Bites Recipe FAQs

What type of apples should I use for the fritter bites?
Absolutely! I recommend using Granny Smith apples for the best flavor. Their tartness pairs perfectly with the sweetness of the batter, creating a delightful balance. Look for firm apples with a vibrant green color, avoiding any with bruises or soft spots to ensure a crunchy texture in your bites.

How long can I store leftover Apple Fritter Bites?
You can store your leftover Apple Fritter Bites in an airtight container at room temperature for up to 2 days. For even longer storage, they can be refrigerated for up to 5 days, although they may lose some crispiness. Always be sure to cool them completely before sealing to maintain their texture!

Can I freeze Apple Fritter Bites, and if so, how?
Yes, you can freeze these delightful bites! To do so, first, arrange them in a single layer on a baking sheet and freeze until solid. Once frozen, transfer them to a freezer-safe bag or container, ensuring to remove as much air as possible. They can be frozen for up to 3 months. When ready to enjoy, simply reheat in a preheated oven at 350°F (175°C) for about 10-12 minutes or until warmed through.

What should I do if my batter is too thick?
If you find that your batter is on the thick side, don’t fret! You can add a little extra milk, one tablespoon at a time, until you reach your desired consistency. A thicker batter can lead to denser fritters, so aim for a batter that’s slightly pourable but still holds some shape. Remember, a little adjustment can go a long way toward achieving delicious Apple Fritter Bites!

Can my dog enjoy any of the Apple Fritter Bites?
While it might be tempting to share, it’s best to keep these treats for yourself! The sugar and spices, like cinnamon, may not be great for dogs in large amounts. If you want to share, consider giving them a few small apple chunks without any batter or sugar, ensuring they’re safe and happy!

Delicious Apple Fritter Bites You Can’t Resist

Try these irresistible Apple Fritter Bites, perfect for a quick snack or breakfast treat.

  • Mixing Bowl
  • Baking Sheet
  • parchment paper
  • Whisk
  • Spoon or cookie scoop

For the Batter

  • 1 cup all-purpose flour
  • 2 teaspoons baking powder
  • 1 teaspoon ground cinnamon
  • 1/4 cup sugar
  • 1/2 cup milk
  • 1 large egg
  • 1 cup chopped Granny Smith apples

Step-by-Step Instructions for Apple Fritter Bites

  1. Preheat your oven to 375°F (190°C) and line a baking sheet with parchment paper.
  2. In a mixing bowl, combine flour, baking powder, cinnamon, and sugar. Whisk until combined.
  3. In another bowl, beat the egg with milk until smooth, then pour into dry ingredients and stir gently.
  4. Fold in the chopped apples until evenly distributed in the batter.
  5. Drop spoonfuls of the batter onto the prepared baking sheet, spacing them about 2 inches apart.
  6. Bake for 15-20 minutes, or until golden brown on top.
  7. Remove from the oven and cool slightly. Serve warm, dusted with powdered sugar or with a dipping sauce.

For best flavor, use fresh Granny Smith apples. Enjoy immediately for optimal taste and texture.

Dessert
American
Apple Fritter Bites, Breakfast Treat, dessert, Easy Recipe, Quick Snack

Filed Under: Dessert

Comforting Cheesy Mashed Potato Muffins You’ll Crave Daily

September 16, 2025 by grace bellamy Leave a Comment

Stepping into my kitchen the other day, I was met with a comforting aroma that transported me to family gatherings where laughter mingled with delicious food. It was in that moment of nostalgia that I thought of sharing my recipe for Cheesy Mashed Potato Muffins. These delightful bites are not only a fun twist on classic mashed potatoes but also serve as a crowd-pleaser for any gathering, making them perfect for everything from casual weeknight dinners to festive celebrations. With quick prep and a cheesy heart that brings smiles, these muffins are bound to win over even the pickiest eaters. Are you ready to impress your family and friends with a homemade treat that’s both comforting and satisfying? Let’s dive in!

Cheesy Mashed Potato Muffins

Why are Cheesy Mashed Potato Muffins irresistible?

Comforting flavors that remind you of home-cooked meals, these muffins redefine traditional mashed potatoes. Easy to make, the straightforward recipe lets both novice and seasoned cooks shine. Crowd-pleasing for any occasion, they are the perfect addition to potlucks, gatherings, or a cozy family dinner. Versatile enough to enhance with your favorite mix-ins—think crispy bacon or vibrant veggies—these muffins fit any palate. Plus, they can be enjoyed warm or stored for later, making them a time-saving staple that you’ll crave daily!

Cheesy Mashed Potato Muffin Ingredients

For the Muffin Base
• Mashed potatoes – Use prepared and cooled mashed potatoes for the right texture.
• Shredded cheddar cheese – This adds a creamy, tangy flavor that blends beautifully.
• Large eggs – These help bind the muffins together, ensuring a perfect rise.
• Sour cream – It adds moisture and a hint of tanginess to the muffins.
• Unsalted butter – Melted for richness, it enhances the overall flavor.

For Seasoning
• Garlic powder – A delicious addition that brings warmth and depth to each bite.
• Onion powder – Complementing the garlic, it adds savoriness that can’t be skipped.
• Salt – Essential for enhancing all the flavors in your cheesy mashed potato muffins.
• Black pepper – Just a touch to give it a little kick.

Optional Add-ins
• Chopped green onions – A fresh, vibrant twist that adds a pop of color and flavor.
• Grated Parmesan cheese – Sprinkled on top for added cheesiness and an appealing crust!

These Cheesy Mashed Potato Muffins are perfect for creativity—mix in your favorites for a personal touch! Enjoy their warm, comforting presence at your table.

Step‑by‑Step Instructions for Cheesy Mashed Potato Muffins

Step 1: Preheat the Oven
Begin by preheating your oven to 350°F (175°C) to create a perfectly warm environment for baking your Cheesy Mashed Potato Muffins. While the oven heats up, take a moment to grease a muffin tin or line it with muffin liners, which will make for easy removal once baked and ensure a delightful presentation.

Step 2: Prepare the Mashed Potatoes
If you haven’t prepared your mashed potatoes yet, now is the time. Boil your potatoes until tender, then mash them until smooth and creamy. Allow the mashed potatoes to cool slightly before incorporating them into the muffin mixture, as warm potatoes can cook the eggs if added too soon, altering the texture of your muffins.

Step 3: Mix the Wet Ingredients
In a large mixing bowl, whisk together the two large eggs, ½ cup of sour cream, and ¼ cup of melted unsalted butter until the mixture is smooth and well combined. This creamy base adds richness to your Cheesy Mashed Potato Muffins, setting the stage for a mouthwatering flavor.

Step 4: Combine Wet and Dry Ingredients
Once your mashed potatoes are cooled, gently fold them into the egg mixture until fully incorporated. Next, add in 1 cup of shredded cheddar cheese, mixing well to ensure even distribution. This cheesy goodness is key to achieving that delightful flavor and texture that defines your muffins.

Step 5: Add Seasoning
Enhance the flavor profile by mixing in 1 teaspoon each of garlic powder and onion powder, along with ½ teaspoon of salt and ¼ teaspoon of black pepper. If you have chosen to use them, fold in the chopped green onions for an extra burst of freshness. This blend of seasonings will elevate your Cheesy Mashed Potato Muffins to a new level.

Step 6: Fill the Muffin Tin
Spoon the delicious mixture evenly into the prepared muffin tin, filling each cup about three-quarters full. Use a spatula to smooth the tops if necessary, ensuring each muffin has an even surface for consistent baking. This step ensures that you’re ready to enjoy perfectly shaped muffins straight from the oven.

Step 7: Optional Topping
For an extra cheesy finish, sprinkle grated Parmesan cheese on top of each muffin before baking. This optional topping will create a delightful, golden-brown crust that adds both flavor and visual appeal to your Cheesy Mashed Potato Muffins, making them irresistible from the first glance.

Step 8: Bake the Muffins
Carefully place your muffin tin into the preheated oven and bake for 25 to 30 minutes. Keep a close eye on them; they should emerge golden brown on top, and a toothpick inserted in the center should come out clean. This baking time creates that perfect fluffy interior while ensuring a pleasant crust outside.

Step 9: Cool the Muffins
Once the muffins are done baking, remove the muffin tin from the oven and let them cool in the tin for about 5 minutes. This slight cooling period helps them set and makes it easier to remove them without breaking. The aroma of your Cheesy Mashed Potato Muffins will surely fill the room!

Step 10: Serve and Store
After cooling slightly, transfer the muffins to a wire rack to cool completely if you’re not enjoying them right away. Serve these delightful cheesy treats warm, or store them in an airtight container for later cravings. Either way, your Cheesy Mashed Potato Muffins are sure to be a hit!

Cheesy Mashed Potato Muffins

How to Store and Freeze Cheesy Mashed Potato Muffins

Room Temperature: Store Cheesy Mashed Potato Muffins at room temperature for up to 2 days in an airtight container to maintain freshness.

Fridge: Keep them in the refrigerator for up to 5 days if you haven’t consumed them all—simply reheat in the microwave or oven to enjoy warm again.

Freezer: Freeze muffins for up to 3 months for long-term storage. Wrap each muffin tightly in plastic wrap and place them in a freezer bag to prevent freezer burn.

Reheating: To reheat, simply pop them in the microwave for about 30 seconds or warm in a 350°F (175°C) oven for 10-15 minutes for that freshly baked taste.

What to Serve with Cheesy Mashed Potato Muffins

Stepping beyond just a delightful side, these muffins can complement various dishes beautifully for a well-rounded meal.

  • Grilled Chicken: Juicy, herb-marinated chicken adds a savory note that pairs perfectly with the cheesy, creamy texture of the muffins.

  • Roasted Vegetables: Vibrant, seasoned veggies bring a crunchy contrast, adding freshness to your plate.

  • Caesar Salad: Crisp romaine with a tangy dressing balances the richness of the muffins, creating a refreshing offset.

  • Tomato Basil Soup: A warm, comforting bowl of this classic soup elevates your muffins to a complete dining experience.

  • Crispy Bacon: The smoky, salty flavor of bacon intertwines delightfully, creating a harmonious flavor profile that’s hard to resist.

  • Stuffed Peppers: Flavorful, stuffed bell peppers can serve as a hearty main dish that complements the muffins beautifully.

  • Sparkling Lemonade: Crisp and refreshing, this drink adds a zesty touch that cuts through the cheese’s richness.

Enjoy these pairing ideas, and watch as your Cheesy Mashed Potato Muffins shine even brighter on your dining table!

Expert Tips for Cheesy Mashed Potato Muffins

• Perfect Potatoes: Make sure your mashed potatoes are completely cooled to avoid cooking the eggs in the batter, which can lead to an undesirable texture.

• Cheese Choices: Mix and match different types of cheese like Monterey Jack or pepper jack for varying flavors in your Cheesy Mashed Potato Muffins.

• Don’t Overmix: Gently fold the ingredients together to maintain the muffins’ fluffiness. Overmixing can lead to dense muffins—no one wants that!

• Serving Size: Fill each muffin cup about three-quarters full to allow room for rising. Too much batter can create overflow and mess.

• Storage Advice: Enjoy fresh, but if storing, let muffins cool completely before placing them in an airtight container to keep them moist.

Cheesy Mashed Potato Muffin Variations

Feel free to customize your muffins; the possibilities are endless and oh-so-delicious!

  • Dairy-Free: Substitute shredded cheese and sour cream with plant-based alternatives like almond or coconut cream for a creamy texture.
  • Spicy Twist: Add 1-2 diced jalapeños or a sprinkle of chili flakes to bring some heat to your muffins. This kick can transform your cheesy delight into a zesty snack!
  • Herb-Infused: Mix in fresh or dried herbs like rosemary, thyme, or dill for a fragrant touch that elevates the flavor. Each bite will transport you to a lush herb garden!
  • Vegetable Boost: Fold in steamed veggies like broccoli, spinach, or corn to add nutrition and colorful vibrancy to your muffins. This not only enhances the taste but makes them visually appealing too!
  • Bacon Lovers: Crumble crispy bacon into the batter for a savory crunch that’s hard to resist. Who doesn’t love the combination of cheesy potatoes and smoky, salty bacon?
  • Savory Meat Options: Substitute 1/2 cup of mashed potatoes with ground turkey or sausage to make these muffins a heartier meal option. It’s a filling twist on your traditional cheesy bites!
  • Low-Carb: Replace regular mashed potatoes with cauliflower mash for a healthier alternative that keeps the great taste. You won’t believe how satisfying these veggies can be!
  • Cheesy Topping: Consider mixing a variety of cheeses like gouda or mozzarella into the batter, and top with a blend of Italian cheeses before baking for a melty, cheesy masterpiece.

With these delicious variations, your Cheesy Mashed Potato Muffins can become a meal that suits every taste and occasion! Why not pair them with a refreshing salad or some comforting homemade tomato soup for a delightful dinner combination? Enjoy the exploration of flavors!

Make Ahead Options

These Cheesy Mashed Potato Muffins are perfect for meal prep! You can prepare the muffin batter up to 24 hours in advance—simply mix all the ingredients and store it in an airtight container in the refrigerator. To maintain their quality, make sure the mashed potatoes are completely cooled before mixing, as this prevents any unwanted steam and moisture. When you’re ready to bake, spoon the batter into your greased muffin tin, and if desired, sprinkle with Parmesan cheese. Simply pop them in the oven for 25-30 minutes, and enjoy delicious, cheesy goodness with minimal effort! Creating these muffins ahead of time helps save you precious moments during busy weeknights.

Cheesy Mashed Potato Muffins

Cheesy Mashed Potato Muffins Recipe FAQs

What type of potatoes should I use for the best Cheesy Mashed Potato Muffins?
Absolutely! For the best results, use starchy potatoes like Russets or creamy Yukon Golds. These varieties create the smoothest, fluffiest mashed potatoes that serve as the perfect base for your muffins. Avoid waxy potatoes like red potatoes as they can lead to a denser texture.

How should I store Cheesy Mashed Potato Muffins for freshness?
To keep your muffins fresh, store them in an airtight container at room temperature for up to 2 days. If you have leftovers, place them in the refrigerator, where they’ll last up to 5 days. Just remember to reheat them in the microwave or oven to bring back their delightful warmth!

Can I freeze Cheesy Mashed Potato Muffins, and how do I do it?
Certainly! To freeze your Cheesy Mashed Potato Muffins, wrap each one tightly in plastic wrap. Then, place them inside a freezer bag, removing any excess air. They can be stored in the freezer for up to 3 months. When you’re ready to enjoy them, simply microwave for about 30 seconds or reheat in a preheated oven at 350°F (175°C) for 10-15 minutes for that freshly baked taste.

What should I do if my muffins come out dense or too dry?
If your muffins turn out dense, it’s often due to overmixing the batter, which can toughen the texture. Always mix just until combined to keep them light and fluffy. If they’re too dry, consider adding a bit more sour cream or butter next time for extra moisture. It’s all about finding the right balance, so don’t hesitate to experiment a little!

Are Cheesy Mashed Potato Muffins suitable for people with dietary restrictions?
You can certainly adjust these muffins to fit various dietary needs! For a gluten-free option, simply ensure your ingredients are certified gluten-free. If you have allergies to dairy, try using almond or coconut yogurt instead of sour cream, and a plant-based cheese substitute. These adaptations can help everyone enjoy these delicious muffins!

Can I add extra ingredients to the Cheesy Mashed Potato Muffins?
The more the merrier! You can enhance these muffins by adding crispy bacon bits, sautéed spinach, or even chopped bell peppers for a pop of flavor and color. Just remember that after adding extra ingredients, you may need to adjust seasoning to maintain that perfect cheesy goodness.

Comforting Cheesy Mashed Potato Muffins You’ll Crave Daily

These Cheesy Mashed Potato Muffins are a comforting twist on classic mashed potatoes, perfect for any gathering and sure to delight both family and friends.

  • Muffin tin
  • Mixing Bowl
  • Whisk

Muffin Base

  • 2 cups prepared mashed potatoes (cooled)
  • 1 cup shredded cheddar cheese
  • 2 large eggs
  • ½ cup sour cream
  • ¼ cup unsalted butter (melted)

Seasoning

  • 1 teaspoon garlic powder
  • 1 teaspoon onion powder
  • ½ teaspoon salt
  • ¼ teaspoon black pepper

Optional Add-ins

  • ¼ cup chopped green onions
  • ¼ cup grated Parmesan cheese (for topping)

Step-by-Step Instructions

  1. Preheat your oven to 350°F (175°C) and grease a muffin tin or line with muffin liners.
  2. Prepare your mashed potatoes by boiling until tender, then mashing until smooth and letting them cool.
  3. In a large bowl, whisk together the eggs, sour cream, and melted butter until smooth.
  4. Fold the cooled mashed potatoes into the egg mixture, then add and mix the shredded cheddar cheese.
  5. Mix in the garlic powder, onion powder, salt, and black pepper, and fold in green onions if using.
  6. Spoon the mixture into the prepared muffin tin, filling each about three-quarters full.
  7. Sprinkle grated Parmesan cheese on top of each muffin before baking, if desired.
  8. Bake for 25 to 30 minutes until golden brown and a toothpick inserted comes out clean.
  9. Let cool in the tin for 5 minutes before transferring to a wire rack to cool completely.
  10. Serve warm or store in an airtight container.

These muffins can be customized with various mix-ins, such as crispy bacon or different cheese types.

Side Dishes
Cheesy Mashed Potato Muffins, comfort food, easy recipes, family gatherings, muffins, potlucks

Filed Under: Side Dishes

Cranberry Feta Pinwheels with Cream Cheese Easy & Delicious

September 15, 2025 by grace bellamy Leave a Comment

As I stood in my kitchen, the vibrant colors of dried cranberries and fresh herbs caught my eye, instantly sparking a creative culinary adventure. With the holidays just around the corner, nothing feels more festive than whipping up a batch of Cranberry Feta Pinwheels with Cream Cheese. These delightful bites are not only a crowd-pleaser, but they also come together in just 15 minutes. They’re perfect for entertaining or even as a fun snack to elevate your weeknight routine. Plus, the combination of creamy and tangy flavors will have everyone reaching for more! Are you ready to impress your friends and family with these irresistible pinwheels? Let’s dive in!

Cranberry Feta Pinwheels with Cream Cheese

Why are these pinwheels so addictive?

Simplicity: With just a few basic ingredients, these pinwheels come together in no time, making them perfect for any occasion.

Bursting with Flavor: The combination of creamy cheese, tangy feta, and sweet cranberries creates a taste sensation that’s hard to resist.

Perfect for Parties: These bite-sized snacks are not only visually appealing but also fantastic for gatherings — a sure hit with guests!

Versatile Snack: Enjoy them as a quick appetizer or a flavorful addition to your lunch spread. Don’t forget to try them alongside a refreshing homemade dip for added flavor!

Crowd-Pleasing Appeal: Everyone will love the delightful contrast of textures, making these pinwheels a must-have for your next get-together.

Cranberry Feta Pinwheels Ingredients

For the Filling
• Cream cheese – adds a rich, creamy base that binds the flavors beautifully.
• Feta cheese – provides a tangy kick that perfectly complements the sweetness of the cranberries.
• Dried cranberries – these delightful bits add a chewy texture and a burst of fruity sweetness.
• Fresh parsley (optional) – a bright touch that freshens up the flavor and adds color to your pinwheels.

For the Wrap
• Flour tortillas or puff pastry – versatile options that can wrap your delicious filling; tortillas offer a soft bite while puff pastry adds a flaky crunch.

Use these ingredients to create your mouthwatering Cranberry Feta Pinwheels with Cream Cheese, perfect for any occasion!

Step‑by‑Step Instructions for Cranberry Feta Pinwheels with Cream Cheese

Step 1: Prepare the Filling
In a mixing bowl, combine 8 oz of softened cream cheese and 4 oz of crumbled feta cheese. Using a spatula or mixer, blend them together until the mixture is smooth and homogeneous, which should take about 2 minutes. The creamy texture should be easily spreadable. This creamy base is the heart of your Cranberry Feta Pinwheels with Cream Cheese, so make sure it’s well-mixed.

Step 2: Add Cranberries and Parsley
Next, stir in 1 cup of chopped dried cranberries and optional 1/4 cup of fresh parsley into the cheese mixture. Mix gently for about 1 minute until the cranberries and parsley are evenly distributed throughout the creamy blend. The vibrant colors should be visible, adding a festive touch to your pinwheel filling.

Step 3: Spread the Filling
Take your preparation to a clean countertop and lay out 4 large flour tortillas or puff pastry sheets. With a spatula, evenly spread the filling across each wrap, leaving about a half-inch border around the edges. This ensures that the filling won’t spill out when you roll them up. Aim for a smooth, consistent layer that covers the entire surface of your tortillas.

Step 4: Roll the Tortillas
Begin rolling each tortilla tightly from one end to the other, creating a log shape; make sure to maintain even pressure. If you’re using puff pastry, ensure that you seal the edges properly to prevent any filling from escaping. This rolling process should take about 1-2 minutes for all wraps, forming the delicious foundation of your Cranberry Feta Pinwheels with Cream Cheese.

Step 5: Slice the Pinwheels
Once rolled, use a sharp knife to slice each log into bite-sized pinwheels, approximately 1 inch thick. Each slice should reveal the colorful filling inside. You might want to wipe the knife with a damp cloth between cuts to ensure clean edges, creating appealing little rounds that are inviting for your guests.

Step 6: Chill Before Serving
Arrange the sliced pinwheels on a serving platter and place them in the refrigerator. Let them chill for at least 30 minutes. Chilling not only makes them firmer, making them easier to handle, but also allows the flavors of the Cranberry Feta Pinwheels with Cream Cheese to meld beautifully together before serving.

Cranberry Feta Pinwheels with Cream Cheese

Cranberry Feta Pinwheels Variations

Feel free to customize your delightful Cranberry Feta Pinwheels with these tasty twists that will tickle your taste buds!

  • Gluten-Free: Use gluten-free wraps to enjoy these pinwheels without the guilt. Many stores offer a variety of flavorful options that still deliver delightful texture.

  • Spicy Kick: Add a pinch of red pepper flakes to the filling for a zesty twist. A little heat balances perfectly with the sweetness of the cranberries, making each bite even more exciting.

  • Herb-Infused: Swap out fresh parsley for fresh basil or dill for a fresh, herbaceous flavor. Each herb adds its unique character, giving your pinwheels a whole new personality.

  • Nutty Crunch: Toss in some chopped walnuts or pecans for texture and nuttiness. The added crunch contrasts beautifully with the creamy filling, elevating your snacking experience.

  • Fruit-Filled Delight: Mix in small chunks of fresh apples or pears for an extra fruity surprise. This twist adds a refreshing crunch and elevates the overall flavor profile of your pinwheels.

  • Yogurt Sauce Dip: Serve with a homemade yogurt dip for a cooling sensation alongside the tangy flavors. Just mix Greek yogurt with a splash of lemon juice and herbs for a delightful addition.

  • Breakfast Version: Use a breakfast burrito wrap and fill with scrambled eggs, cheese, and cranberries for a tasty morning boost. This creative approach turns your pinwheels into a hearty meal.

  • Smoky Flavor: Add a touch of smoked paprika or smoked gouda in place of some feta for a unique twist. The smokiness intertwines well with the tangy and sweet ingredients, creating a complex flavor profile that’s simply irresistible.

Make Ahead Options

Cranberry Feta Pinwheels with Cream Cheese are perfect for meal prep, saving you time on busy days! You can prepare the filling, combining the cream cheese, feta, cranberries, and parsley, up to 3 days in advance; just refrigerate it in an airtight container. When you’re ready to serve, spread the filling on the tortillas or puff pastry, roll them up, and slice them into pinwheels. To maintain quality, be sure to chill the assembled pinwheels for at least 30 minutes before serving, as this enhances the flavors and helps the pinwheels hold their shape. With these make-ahead tips, you’ll enjoy delightful pinwheels with minimal last-minute fuss!

How to Store and Freeze Cranberry Feta Pinwheels with Cream Cheese

Fridge: Keep your pinwheels in an airtight container for up to 3 days. This helps maintain their flavor and texture, making them delightful to enjoy later!

Freezer: For longer storage, freeze the pinwheels unwrapped for up to 2 months. Once frozen, place them in a freezer-safe bag to prevent freezer burn.

Thawing: When ready to enjoy, thaw pinwheels in the fridge overnight before serving. This allows for the best texture and taste to shine through!

Reheating: If you prefer warm pinwheels, reheat them in a preheated oven at 350°F (175°C) for about 10 minutes. This will revive their delightful crunch!

Expert Tips for Cranberry Feta Pinwheels

  • Cream Cheese Consistency: Ensure your cream cheese is softened enough for easy blending. This prevents lumps and creates a smooth filling for your pinwheels.

  • Avoid Wet Tortillas: If using flour tortillas, ensure they aren’t too moist to prevent sogginess. Drier tortillas hold the filling better, keeping your pinwheels intact.

  • Chill Time Matters: Don’t skip the chilling step! Letting the pinwheels rest in the fridge for at least 30 minutes helps solidify them, making slicing easier and enhancing the flavors.

  • Slice with Care: Use a sharp knife to cut the pinwheels into clean, even pieces. Wipe the knife blade between cuts to maintain nice edges.

  • Experiment with Fillings: Feel free to get creative! You can add nuts for crunch or substitute the feta with your favorite cheese, all while keeping the delightful essence of Cranberry Feta Pinwheels with Cream Cheese intact.

What to Serve with Cranberry Feta Pinwheels with Cream Cheese

Elevate your gathering with delightful pairings that complement the creamy and tangy flavors of your pinwheels.

  • Fresh Garden Salad: A light salad with mixed greens and a zesty vinaigrette balances the richness of the pinwheels beautifully. The crunch and brightness will refresh your palate.

  • Honey-Glazed Carrots: Sweet and tender, these roasted carrots offer a delightful contrast to the savory pinwheels, enhancing each bite with their natural sweetness.

  • Crispy Potato Chips: Their crunchy texture adds a fun element to your spread, while saltiness beautifully contrasts the sweet-and-sour flavor profile.

  • Olive Tapenade: The briny depth of an olive tapenade brings a Mediterranean twist, creating a savory counterpoint to the fruity pinwheels. Serve it alongside for dipping and delight.

  • Sparkling Water with Lime: The fizz provided by sparkling water lightly cleanses the palate, while a hint of lime adds a refreshing zing, perfect to accompany your pinwheels.

  • Mini Fruit Platter: Incorporate a variety of seasonal fruits like grapes and apple slices—this vibrant tray adds freshness and color to the table while complementing the sweetness of the cranberries.

  • Cheese Board: Selection of cheeses, including sharp cheddar and creamy brie, will elevate your appetizer hour, making it a sophisticated spread that pairs well with your Cranberry Feta Pinwheels with Cream Cheese.

Cranberry Feta Pinwheels with Cream Cheese

Cranberry Feta Pinwheels with Cream Cheese Recipe FAQs

How do I select the right cream cheese for my pinwheels?
Absolutely! When selecting cream cheese, look for full-fat varieties as they provide a creamier texture and richer flavor. Make sure it’s softened before mixing for easy blending. You’ll know it’s ready when it’s easy to spread, almost like frosting!

What’s the best way to store leftovers?
For the freshest pinwheels, store them in an airtight container in the refrigerator for up to 3 days. Keeping them sealed will help maintain their flavor and prevent them from drying out. I often place a small piece of parchment paper between layers to keep them intact!

Can I freeze leftover pinwheels?
Yes, you can! To freeze, first slice the pinwheels, then arrange them in a single layer on a baking sheet and freeze for about 1-2 hours. Once they’re firm, transfer them to a freezer-safe bag and enjoy for up to 2 months. This method prevents them from sticking together.

What should I do if my pinwheels become soggy?
Very good question! If your pinwheels are soggy, try ensuring your tortillas are dry before spreading the filling. Also, limiting wet ingredients and chilling them for a longer time can help firm them up. If you’ve already made them soggy, a quick reheat in the oven at 350°F (175°C) for 10 minutes can improve the texture.

Is there a way to make these vegetarian-friendly?
Indeed! The Cranberry Feta Pinwheels with Cream Cheese are naturally vegetarian, but if you want to swap out any ingredients, consider using vegan cream cheese and feta alternatives for a completely plant-based version. This way, everyone can enjoy a delicious bite!

Can dogs eat cranberries?
Yes, but in moderation! Dried cranberries are generally safe for dogs, but watch out for any added sugar or preservatives. Cut a small piece of your pinwheel without the spices and fillings like garlic or onions to treat your furry friend—just remember not to share the ones with cream cheese!

Cranberry Feta Pinwheels with Cream Cheese Easy & Delicious

Delightful Cranberry Feta Pinwheels with Cream Cheese, perfect for entertaining or as a fun snack, combining creamy and tangy flavors.

  • Mixing Bowl
  • spatula
  • Knife
  • Refrigerator

For the Filling

  • 8 oz Cream cheese (softened)
  • 4 oz Feta cheese (crumbled)
  • 1 cup Dried cranberries (chopped)
  • 1/4 cup Fresh parsley (optional, chopped)

For the Wrap

  • 4 large Flour tortillas (or puff pastry sheets)

Step-by-Step Instructions

  1. In a mixing bowl, combine softened cream cheese and crumbled feta cheese. Blend until smooth and spreadable.
  2. Stir in chopped dried cranberries and optional fresh parsley. Mix gently until evenly distributed.
  3. Lay out tortillas or puff pastry sheets and evenly spread the filling, leaving a half-inch border.
  4. Roll each tortilla tightly from one end to the other to form a log shape.
  5. Slice the rolled logs into bite-sized pinwheels, approximately 1 inch thick.
  6. Place the sliced pinwheels on a platter and refrigerate for at least 30 minutes before serving.

For best results, ensure cream cheese is softened and avoid using moist tortillas to maintain texture.

Appetizer
American
Cranberry, cream cheese, Easy, feta, Pinwheels

Filed Under: Appetizer

Cinnamon Roll Banana Bread: A Sweet, Cozy Delight at Home

September 15, 2025 by grace bellamy Leave a Comment

As I rummaged through my kitchen one rainy afternoon, I stumbled upon three overly ripe bananas staring back at me, begging for a delicious rescue. That’s when the idea for Cinnamon Roll Banana Bread struck—a delightful fusion that combines two beloved comfort foods into one. This recipe not only lets you elevate those neglected bananas but also transforms your kitchen into a warm, inviting haven. With a quick prep time and a delightful gooey cinnamon swirl, this bread is bound to become a crowd-pleaser, whether enjoyed warm for breakfast or as a sweet afternoon snack. And the best part? It’s vegan! Are you ready to transform your bananas into something magical? Let’s dive into this cozy baking adventure together!

Cinnamon Roll Banana Bread

What makes this bread so irresistible?

Irresistible comfort food: This Cinnamon Roll Banana Bread brings together the homespun goodness of banana bread and the delightful swirl of cinnamon rolls into one delicious loaf.

Quick prep time: With just 10 minutes required to whip up this delightful mixture, you can have a warm treat baking in your oven in no time!

Vegan-friendly option: Perfectly suited for those following a plant-based diet, it’s now easy to indulge in a sweet treat without any guilt.

Gooey cinnamon swirl: The generous drizzle of cinnamon syrup creates a heavenly aroma while ensuring each slice is bursting with flavor.

Perfect for any occasion: Enjoy it warm for breakfast, as a snack, or even with a cup of tea in the afternoon. Trust me; this delicious bread will captivate everyone who tries it! For more creative ways to make overripe bananas shine, check out my guide on delicious banana recipes.

Cinnamon Roll Banana Bread Ingredients

• Get ready to bake up some magic!

For the Batter

  • Ripe bananas – The softer they are, the sweeter the flavor!
  • Melted vegan butter – This adds richness and moisture, making your bread tender.
  • Maple syrup – Not only for sweetness, but it also complements the cinnamon beautifully.
  • Almond or oat milk – Use your favorite plant-based milk for a creamy texture.
  • Vanilla extract – Enhances the overall flavor and rounds out the sweetness.
  • All-purpose flour – The base for your bread; don’t forget to sift for fluffiness!
  • Baking powder – Helps your bread rise and become light and airy.
  • Baking soda – Works hand-in-hand with the baking powder for that perfect lift.
  • Ground cinnamon – A star ingredient that brings warmth and comfort to your bread.
  • Salt – Balances sweetness and enhances flavors.
  • Rolled oats – These add texture and a wholesome feel to each bite.
  • Light brown sugar – Offers a hint of caramel flavor, enriching the bread’s taste.

For the Cinnamon Swirl

  • Melted vegan butter – Ensures that the cinnamon filling is wonderfully gooey!
  • Light brown sugar – Gives your swirl a lovely depth of flavor and sweetness.

For the Glaze

  • Powdered sugar – Sweetness is essential here for that perfect drizzling glaze.
  • Melted vegan butter – Helps to achieve a smooth and glossy finish.
  • Softened vegan cream cheese – Creates a dreamy creaminess in the glaze.

Enjoy this Cinnamon Roll Banana Bread with family and friends, and savor every sweet, cozy moment!

Step‑by‑Step Instructions for Cinnamon Roll Banana Bread

Step 1: Preheat and Prepare
Begin your cozy baking adventure by preheating your oven to 350°F (175°C). While it warms up, grab a 9×5-inch loaf pan and generously grease it with vegan butter or non-stick spray. This ensures your delicious Cinnamon Roll Banana Bread releases easily later on, making for perfectly formed slices!

Step 2: Mix Wet Ingredients
In a large mixing bowl, combine the mashed ripe bananas, melted vegan butter, maple syrup, almond or oat milk, and vanilla extract. Mix these ingredients together thoroughly until the mixture is creamy and well blended. This will serve as the flavorful base of your batter, enhancing the cake-like texture and sweetness of the bread.

Step 3: Combine Dry Ingredients
In a separate bowl, whisk together the all-purpose flour, baking powder, baking soda, ground cinnamon, and salt. Ensure there are no clumps for a smooth batter; sifting your flour can help. Gradually combine this dry mixture with the wet ingredients, stirring gently until just mixed. Be careful not to overmix, as this could affect the softness of your Cinnamon Roll Banana Bread.

Step 4: Add Texture
Fold in the rolled oats into your batter, which adds a delightful chewy texture and enhances your bread’s wholesome feel. The oats give a welcoming, hearty touch, making every slice of the Cinnamon Roll Banana Bread even more satisfying. Gently mix until the oats are evenly incorporated without overworking the batter.

Step 5: Create the Cinnamon Swirl
In a small bowl, mix together the melted vegan butter, light brown sugar, and ground cinnamon to create your gooey cinnamon swirl mixture. Stir until it forms a smooth and luscious consistency. This rich blend will add a lovely swirl of flavor throughout your banana bread, making each bite a sweet surprise.

Step 6: Assemble the Batter Layers
Pour half of the prepared batter into the greased loaf pan, using a spatula to spread it evenly. Next, drizzle half of the cinnamon swirl mixture over the batter, creating a delightful contrast. Repeat the process by pouring in the remaining batter and topping it with the rest of the cinnamon swirl. Swirl it through gently with a knife for an artistic touch.

Step 7: Bake to Perfection
Place your loaf pan in the preheated oven and bake for 45–55 minutes, or until a toothpick inserted into the center comes out clean. The top should be golden-brown, inviting you with that warm cinnamon aroma. Keep an eye on it during the final minutes to ensure it doesn’t overbake.

Step 8: Cool and Transfer
Once baked, remove the loaf pan from the oven and let the Cinnamon Roll Banana Bread cool in the pan for about 10 minutes. This cooling time helps it set and become easier to handle. After that, carefully transfer the bread onto a wire rack to cool completely, allowing its flavors to develop further.

Step 9: Prepare the Glaze
While your banana bread cools, whisk together the powdered sugar, melted vegan butter, and softened vegan cream cheese in a small bowl until the mixture is smooth and drizzly. This luscious glaze will bring an extra layer of sweetness to your Cinnamon Roll Banana Bread, making it truly irresistible.

Step 10: Drizzle and Serve
Once your bread has cooled completely, drizzle the creamy glaze generously over the top. Slice into warm or room temperature pieces, and relish every bite of the Cinnamon Roll Banana Bread. Whether for breakfast or a cozy afternoon snack, this delightful treat is sure to bring smiles all around!

Cinnamon Roll Banana Bread

How to Store and Freeze Cinnamon Roll Banana Bread

Room Temperature: Store your Cinnamon Roll Banana Bread in an airtight container at room temperature for up to 3 days. This keeps it moist and delicious.

Fridge: To extend freshness, you can refrigerate the bread for up to a week. Make sure it’s wrapped tightly to prevent it from drying out.

Freezer: For longer storage, wrap slices in plastic wrap and then place them in a freezer-safe bag. They can be frozen for up to 3 months.

Reheating: To enjoy your frozen bread, simply thaw it in the fridge overnight and reheat in the microwave or oven for a few minutes until warm.

What to Serve with Cinnamon Roll Banana Bread

Escape into a world of coziness and delicious pairings that make every slice of this delightful bread shine!

  • Fresh Fruit Salad: Bright, juicy fruits balance the sweetness of the bread and add a refreshing crunch, perfect for brunch.

  • Almond Butter Spread: A creamy layer of almond butter enhances the nutty flavors while providing a rich, satisfying contrast to the bread’s sweetness.

  • Chai Tea: This spiced tea warms the soul and complements the cinnamon notes beautifully, creating a complete comfort experience.

  • Coconut Yogurt: The silky texture and creamy tang of coconut yogurt add a delightful freshness that lifts every slice into a new realm of deliciousness.

  • Maple Syrup Drizzle: For an extra touch, a drizzle of pure maple syrup brings added sweetness that harmonizes with the cinnamon and banana flavors.

  • Chocolate Almond Milk: Enjoy a glass of chilled chocolate almond milk for a sweet and creamy drink pairing that kids and adults alike will adore.

  • Homemade Granola: Serve alongside a bowl of crunchy granola sprinkled on top for added texture and a wholesome bite with every mouthful.

  • Caramel Sauce: Drizzling warm caramel over your slices introduces a luxurious, gooey sweetness for an indulgent afternoon treat.

Expert Tips for Cinnamon Roll Banana Bread

  • Ripe Bananas Work Best: The sweeter and softer your bananas, the more flavorful your Cinnamon Roll Banana Bread will be. Aim for bananas with brown spots!

  • Gentle Mixing: When combining wet and dry ingredients, mix just until combined. Overmixing can lead to a dense bread—nobody wants that!

  • Swirl it Right: For a stunning cinnamon swirl, don’t just layer—use a knife to gently cut through the batter in a figure-eight motion. This avoids clumping and creates a more beautiful distribution.

  • Check for Doneness: Oven temperatures can vary. Start checking your bread at 45 minutes; it should spring back when touched and a toothpick should come out clean.

  • Cool Before Glazing: Allow your Cinnamon Roll Banana Bread to cool completely before adding the glaze. This helps it adhere better and prevents a puddle of glaze on your plate.

  • Store Properly: Keep leftover bread in an airtight container at room temperature for up to 3 days, or freeze it for longer storage. Enjoy the sweet comfort later on!

Make Ahead Options

These Cinnamon Roll Banana Bread ingredients are perfect for meal prep enthusiasts looking to save time on busy mornings! You can mash the bananas and combine the wet ingredients up to 24 hours in advance, storing them in the refrigerator to maintain freshness. Additionally, the dry ingredients can be pre-measured and kept in a sealed container for up to 3 days. When you’re ready to bake, simply combine the wet and dry mixtures and follow the baking instructions. To ensure the best quality, keep the cinnamon swirl mixture refrigerated until you’re ready to assemble. This way, your delicious Cinnamon Roll Banana Bread will turn out just as scrumptious with minimal effort!

Cinnamon Roll Banana Bread Variations

Feel free to unleash your creativity with this recipe—there are so many delightful twists you can explore!

  • Nutty Addition: Stir in 1/2 cup chopped walnuts or pecans for added crunch. Their earthy flavor perfectly complements the sweetness of the bread.

  • Fruity Flavor: Toss in 1/2 cup of blueberries or diced apples. They’ll add a burst of juiciness, making each bite even more enticing!

  • Gluten-Free: Substitute all-purpose flour with a 1:1 gluten-free flour blend. This makes the recipe accessible to those with gluten sensitivities, without sacrificing flavor.

  • Spicy Kick: Mix in a pinch of cayenne pepper or nutmeg for an unexpected twist. This subtle heat enhances the warm flavors of cinnamon beautifully.

  • Extra Moisture: Replace 1/4 cup of almond milk with unsweetened applesauce. This boosts the bread’s moisture and adds a hint of fruity flavor—all while keeping it healthy!

  • Creamy Delight: Swirl in 1/4 cup of plant-based yogurt into the batter. This adds a luscious creaminess and enhances the overall texture of your bread.

  • Jazz Up the Glaze: Add a dash of almond extract or a splash of espresso to the glaze. It will give a lovely depth of flavor that elevates your bread to the next level!

  • Make it Chocolatey: Fold in a handful of chocolate chips before baking. This irresistible addition will add a sweet surprise that chocolate lovers won’t be able to resist!

Feel inspired to give these variations a try? Let me know how they turn out! And if you’d love to learn more on how to elevate other home-baked goods, check out my guide on delicious banana recipes.

Cinnamon Roll Banana Bread

Cinnamon Roll Banana Bread Recipe FAQs

How do I know when my bananas are ripe enough?
Absolutely! For the best flavor, look for bananas with plenty of dark brown spots. The riper they are, the sweeter your Cinnamon Roll Banana Bread will be. Ideally, bananas should be soft to the touch and easy to mash.

How should I store leftover Cinnamon Roll Banana Bread?
You can store your bread in an airtight container at room temperature for up to 3 days. This keeps it moist and delicious! For extended freshness, wrapping it tightly and refrigerating can allow it to last up to a week without drying out.

Can I freeze Cinnamon Roll Banana Bread?
Very! To freeze, wrap slices of the bread tightly in plastic wrap and place them in a freezer-safe bag. Your banana bread can be frozen for up to 3 months. Just remember to label your bag with the date! When ready to enjoy, thaw it overnight in the fridge, then reheat briefly in the microwave or oven until warm.

What if my bread doesn’t rise well?
If you find your Cinnamon Roll Banana Bread hasn’t risen as expected, it’s possible that your baking powder or baking soda is outdated. Always check their expiration dates before using. Also, remember to mix the wet and dry ingredients gently, as overmixing can create a denser loaf.

Can I make this recipe nut-free?
Absolutely! If you have nut allergies, substitute the almond or oat milk with a seed-based milk, like sunflower seed milk or rice milk. This way, you can enjoy the sweet comforts of Cinnamon Roll Banana Bread without any worries!

Is this recipe suitable for pets?
While the Cinnamon Roll Banana Bread is safe for human consumption, it’s best to avoid giving it to pets. Ingredients like maple syrup and certain spices can be harmful to animals. Always stick to pet-friendly treats when pampering your furry friends!

Cinnamon Roll Banana Bread: A Sweet, Cozy Delight at Home

This vegan Cinnamon Roll Banana Bread fuses two beloved comfort foods into a gooey, delightful treat perfect for breakfast or snacks.

  • 9×5 inch loaf pan
  • Mixing bowls
  • Whisk
  • spatula

For the Batter

  • 3 medium ripe bananas (The softer they are, the sweeter the flavor!)
  • 1/3 cup melted vegan butter (Adds richness and moisture)
  • 1/2 cup maple syrup (For sweetness and complements cinnamon)
  • 1/2 cup almond or oat milk (Use your favorite plant-based milk)
  • 1 teaspoon vanilla extract (Enhances overall flavor)
  • 1 cup all-purpose flour (Base for the bread; sift for fluffiness)
  • 1 teaspoon baking powder (Helps the bread rise)
  • 1/2 teaspoon baking soda (Works with baking powder for lift)
  • 1 teaspoon ground cinnamon (Brings warmth and comfort)
  • 1/4 teaspoon salt (Balances sweetness)
  • 1/2 cup rolled oats (Adds texture)
  • 1/2 cup light brown sugar (Offers caramel flavor)

For the Cinnamon Swirl

  • 2 tablespoons melted vegan butter (Ensures gooey swirl)
  • 1/4 cup light brown sugar (Provides depth of flavor)

For the Glaze

  • 1 cup powdered sugar (Essential for drizzling glaze)
  • 2 tablespoons melted vegan butter (Achieves smooth finish)
  • 4 ounces softened vegan cream cheese (Creates creamy glaze)

Step-by-Step Instructions

  1. Preheat your oven to 350°F (175°C) and grease a 9×5-inch loaf pan with vegan butter or non-stick spray.
  2. In a large mixing bowl, combine mashed bananas, melted vegan butter, maple syrup, almond or oat milk, and vanilla extract until creamy.
  3. In a separate bowl, whisk together all-purpose flour, baking powder, baking soda, ground cinnamon, and salt. Gradually mix with wet ingredients.
  4. Fold in rolled oats gently until incorporated without overworking the batter.
  5. Mix melted vegan butter, light brown sugar, and ground cinnamon for the cinnamon swirl until smooth.
  6. Pour half the batter into the loaf pan, drizzle half the cinnamon swirl mixture, and repeat with remaining batter and swirl.
  7. Bake for 45–55 minutes or until a toothpick inserted comes out clean.
  8. Cool in the pan for 10 minutes before transferring to a wire rack to cool completely.
  9. Whisk together powdered sugar, melted vegan butter, and softened vegan cream cheese for the glaze.
  10. Once cooled, drizzle glaze over the bread, slice, and enjoy!

Perfect for breakfast or a cozy afternoon snack. Store in an airtight container at room temperature for up to 3 days.

Breakfast
Vegan
baking, Cinnamon Bread, Cinnamon Roll Banana Bread, comfort food, Vegan Banana Bread

Filed Under: Breakfast

Delicious Autumn Harvest Cupcakes with Creamy Cheesecake Core

September 15, 2025 by grace bellamy Leave a Comment

As the leaves begin to change and the air turns crisp, there’s nothing quite like the aroma of baking that warms up your home. These Autumn Harvest Cupcakes celebrate the essence of fall, combining the comforting flavors of pumpkin and warm spices into bite-sized delights. With a creamy cheesecake center and a graham cracker crust that adds texture, these cupcakes are not only a visual treat but also a fantastic crowd-pleaser. Plus, they come together quickly, making them perfect for your next gathering or a cozy day at home. Ready to impress your friends and family with a dessert that embodies the spirit of the season? Let’s dive into the deliciousness of these Autumn Harvest Cupcakes!

Autumn Harvest Cupcakes

Why are Autumn Harvest Cupcakes a must-try?

Fall Flavors: Experience the ultimate taste of autumn with delicious pumpkin, cinnamon, and nutmeg. Creamy Surprise: Each bite reveals a rich cheesecake core that perfectly balances the cupcake’s sweetness. Textural Delight: The crunchy graham cracker crust adds a satisfying contrast to the tender pumpkin cake. Quick to Make: With just 45 minutes from start to finish, you can whip up a festive treat in no time. These cupcakes are perfect for gatherings—Serving Suggestions abound, so share them with friends!

Autumn Harvest Cupcake Ingredients

• Dive into the cozy flavors of the season with these essential components!

For the Crust

  • Crushed graham crackers – adds a sweet, crunchy base that complements the pumpkin perfectly.
  • Dark brown sugar – enhances the molasses flavor, giving depth to the crust.
  • Cinnamon – infuses warm spice notes that evoke autumn vibes.
  • Melted butter – binds the crust together, ensuring it’s rich and delicious.

For the Cream Cheese Filling

  • Cream cheese – provides a smooth, rich layer of creamy goodness.
  • Granulated sugar – sweetens the filling, balancing the savory aspects of cream cheese.
  • Vanilla bean paste – adds elegant flavor notes with visible specks for a gourmet touch.

For the Pumpkin Batter

  • All-purpose flour – forms the structure of your cupcakes for that perfect rise.
  • Baking soda – aids in achieving a light texture while helping the cupcakes puff up.
  • Baking powder – provides an extra lift for a fluffy cupcake.
  • Salt – balances sweetness and enhances overall flavors.
  • Cinnamon – repeated here to deepen the autumn flavor profile of the batter.
  • Nutmeg, cloves, ginger – these spices combine to create a cozy and fragrant autumn spice blend.
  • Large eggs – contribute to structure and moisture in the batter.
  • Granulated sugar (additional) – provides sweetness to the pumpkin cake.
  • Light brown sugar – adds moisture and a touch of caramel flavor.
  • Canola oil – ensures the cupcakes are tender and moist.
  • Pumpkin purée – the star ingredient that embodies the spirit of the season!
  • Sour cream – enhances moisture and adds a slight tang to counterbalance the sweetness.

For the Frosting

  • Butter – creates a creamy base for a fluffy and decadent frosting.
  • Sour cream – adds richness and surprisingly lightens the frosting’s texture.
  • Vanilla – rounds out the flavors for a pleasing finish.
  • Powdered sugar – sweetens the frosting while providing the best consistency for piping.

Embrace the autumn spirit with these Autumn Harvest Cupcake ingredients, perfect for sharing with family and friends!

Step‑by‑Step Instructions for Autumn Harvest Cupcakes

Step 1: Prepare the Crust
In a mixing bowl, combine 1 ½ cups of crushed graham crackers, ½ cup dark brown sugar, and 1 teaspoon of cinnamon. Pour in ½ cup of melted butter and mix until the texture resembles wet sand. Press approximately 1 tablespoon of this mixture firmly into the bottom of each cupcake liner placed in a muffin tin, creating a sturdy crust for your Autumn Harvest Cupcakes.

Step 2: Make the Cream Cheese Filling
In a separate bowl, beat 8 oz of softened cream cheese with ½ cup of granulated sugar and 2 teaspoons of vanilla bean paste until the mixture is smooth and creamy. Once well combined, transfer this delightful cream cheese filling into a piping bag, ensuring it’s ready to swirl into your cupcakes later on. Set it aside until you are ready to assemble.

Step 3: Prepare the Pumpkin Batter
In one bowl, whisk together 1 ½ cups all-purpose flour, 1 teaspoon baking soda, 1 teaspoon baking powder, ½ teaspoon salt, 1 teaspoon cinnamon, ½ teaspoon nutmeg, ½ teaspoon cloves, and ½ teaspoon ginger. In a large mixing bowl, whisk together 4 large eggs, ¾ cup granulated sugar, ¼ cup light brown sugar, ½ cup canola oil, and 1 ½ cups of pumpkin purée until smooth and well blended. Gently fold the dry ingredients into the wet mixture just until combined to keep the batter airy.

Step 4: Assemble the Cupcakes
Carefully fill each prepared cupcake liner with the pumpkin batter, filling them halfway. Next, pipe about 1–2 teaspoons of the luscious cream cheese filling into the center of each cupcake, allowing a creamy surprise in every bite. Top with more pumpkin batter until the liners are about ¾ full, making sure not to overfill to ensure even rising.

Step 5: Bake to Perfection
Preheat your oven to 350 °F (175 °C). Place the muffin tin in the oven and bake the cupcakes for 18–22 minutes until they are set. Use a toothpick to check doneness—the pick should come out mostly clean. Once baked, remove the tin from the oven and let the cupcakes cool completely on a wire rack, creating a perfect base for frosting.

Step 6: Prepare the Frosting
In a mixing bowl, beat ½ cup of softened butter until it’s creamy and light. Add in 1 cup of sour cream and 2 teaspoons of vanilla extract, and mix well. Gradually incorporate 4 ½ cups of powdered sugar while continuing to beat until the frosting is smooth and fluffy, ideal for decorating your cooled Autumn Harvest Cupcakes.

Step 7: Decorate and Enjoy
Once the cupcakes have cooled completely, transfer the frosting into a piping bag and swirl it onto each cupcake generously. For a hint of texture and added flavor, sprinkle the tops with crushed graham cracker crumbs. Serve these delightful cupcakes alongside cider, tea, or coffee for a charming autumn treat that brings joy to your gathering.

Autumn Harvest Cupcakes

Tips for the Best Autumn Harvest Cupcakes

  • Perfect Texture: Use room temperature ingredients like cream cheese and eggs. This helps to create a smooth and well-blended batter, ensuring airy cupcakes.
  • Accurate Measurements: For precise baking, weigh your flour and sugar instead of using measuring cups to avoid dense cupcakes.
  • Avoid Overmixing: When combining wet and dry ingredients, mix just until combined. Overmixing can lead to tough cupcakes that lose their light fluffiness.
  • Cooling Time: Let the cupcakes cool completely before frosting. This prevents the frosting from melting and keeps your cupcakes looking beautiful and inviting.
  • Frosting Fun: Experiment with different piping tips for the frosting to add a decorative flair. The frosting complements the pumpkin flavor in the Autumn Harvest Cupcakes beautifully!

What to Serve with Autumn Harvest Cupcakes

As you savor the delightful flavors of these cupcakes, consider pairing them with delicious accompaniments that enhance your autumn experience.

  • Spiced Apple Cider: A warm cup of spiced apple cider beautifully complements the pumpkin flavors, creating a cozy fall atmosphere.
  • Creamy Vanilla Ice Cream: The coolness of vanilla ice cream contrasts perfectly with the warm spices in the cupcakes, adding a luscious creaminess.
  • Chai Tea: This aromatic tea features warming spices similar to the cupcake flavor profile, making for a comforting match.
  • Caramel Drizzle: A drizzle of homemade caramel sauce can elevate the sweetness of the cupcakes, adding a rich, buttery contrast.
  • Maple Whipped Cream: Light and airy whipped cream infused with maple syrup provides a lovely nod to fall flavors and richness.
  • Cheesecake Bars: For a dessert table highlight, try pairing with creamy cheesecake bars that echo the rich filling in the cupcakes.
  • Ginger Snap Cookies: The spiciness of ginger snaps creates a fun texture and flavor contrast, making for a delightful tasting experience.
  • Pecan Pie: Serve with a slice of classic pecan pie for a sweet and nutty pairing that celebrates the holiday spirit perfectly.
  • Sparkling Water with Citrus: Refreshing and light, this drink helps cleanse the palate while enhancing the autumnal elements of your meal.

How to Store and Freeze Autumn Harvest Cupcakes

Fridge: Store any leftovers in an airtight container in the refrigerator for up to 5 days to keep them fresh and moist.

Freezer: For longer storage, freeze the un-frosted cupcakes in a single layer on a baking sheet until solid, then transfer them to a freezer bag for up to 3 months.

Reheating: To enjoy frozen cupcakes, thaw them in the fridge overnight. Warm them briefly in the microwave for 10-15 seconds before frosting for that freshly-baked taste.

Airtight Storage: Always ensure cupcakes are well wrapped or stored in a container to prevent drying out and to retain their delicious flavors.

Make Ahead Options

These Autumn Harvest Cupcakes are ideal for meal prep, saving you time on busy days! You can prepare the pumpkin batter and cream cheese filling up to 24 hours in advance; simply store them separately in airtight containers in the refrigerator to maintain freshness. Additionally, the graham cracker crust can be made a day ahead as well—just press it into the liners and keep them covered. When you’re ready to bake, fill the liners and pipe in the cheesecake filling before baking them to perfection. These make-ahead tips ensure that your cupcakes are just as delicious and festive when it’s time to serve!

Autumn Harvest Cupcakes Variations & Substitutions

Feel free to get creative and customize these scrumptious cupcakes to suit your palate!

  • Gluten-Free: Swap out all-purpose flour for a gluten-free blend to make these cupcakes friendly for gluten-sensitive friends. Just make sure it’s a 1:1 replacement for best results!

  • Dairy-Free: Use dairy-free cream cheese and sour cream to create a rich yet dairy-less filling, perfect for those avoiding animal products. Enhancing flavors with vanilla or almond extracts can elevate the taste!

  • Pumpkin Alternative: Try using sweet potato or butternut squash purée in place of pumpkin for a slightly different flavor profile that remains wonderfully autumnal. Each option adds its own sweet earthiness to the mix.

  • Nutty Crust: For a twist on the graham cracker crust, substitute half of the crumbs with finely chopped nuts like pecans or walnuts. This adds a delightful crunch and nutty flavor that complements the warmth of autumn spices beautifully.

  • Spice It Up: Increase the amount of spices or add a pinch of cayenne pepper for a delightful kick! A touch of heat can broaden the flavor experience and excite your taste buds with every bite!

  • Egg-Free: Replace the eggs with flaxseed meal or applesauce. For each egg, mix 1 tablespoon of flaxseed meal with 2.5 tablespoons of water. This will keep the moisture while keeping it egg-free, making a soft yet delightful cupcake.

  • Swirl it Up: For a visually appealing dessert, try adding a swirl of colorful frosting. Combine chocolate or caramel sauce with your vanilla frosting for a decadent swirl that takes the traditional autumn flavor to another level!

  • Fancy Toppings: Instead of crushed graham cracker crumbs, top with caramel drizzle or chocolate ganache for an indulgent twist that adds visual appeal and flavor richness. Each cupcake will become a little piece of art!

These variations make it easy to adapt your Autumn Harvest Cupcakes, ensuring everyone at your gathering can enjoy a treat. Whether you’re leaning towards a more decadent option or seeking refreshing twists, these ideas can help elevate your baking game! For more festive serving suggestions, check out our Serving Suggestions or dive into Storage Tips to keep your treats fresh and delectable!

Autumn Harvest Cupcakes

Autumn Harvest Cupcakes Recipe FAQs

How do I select the right pumpkin for my cupcakes?
Absolutely! When choosing pumpkin for your Autumn Harvest Cupcakes, look for canned pumpkin purée made from sugar pumpkins (often labeled as “pumpkin purée”) for the best flavor. If using fresh pumpkin, select one that’s firm, with a deep orange color and no dark spots. The flesh should feel heavy for its size, indicating a great sweetness.

What is the best way to store leftover cupcakes?
Very! To keep your leftover Autumn Harvest Cupcakes fresh, store them in an airtight container in the refrigerator for up to 5 days. Just ensure they are completely cooled before sealing them away to maintain moisture. For an extra treat, reheat them for a few seconds in the microwave before enjoying—it’s like they were just baked!

Can I freeze my cupcakes? If so, how?
Yes, you can freeze your Autumn Harvest Cupcakes for future enjoyment! Here’s how: First, freeze the un-frosted cupcakes in a single layer on a baking sheet until solid. Then, wrap each cupcake individually in plastic wrap and place them in a freezer-safe bag. They can be stored for up to 3 months. When you’re ready to enjoy, thaw them in the fridge overnight, and warm them briefly in the microwave before frosting for that fresh-out-of-the-oven goodness.

What should I do if my cupcakes sink in the middle?
If your Autumn Harvest Cupcakes sink, it could be because of overmixing the batter or underbaking. To avoid this, mix the wet and dry ingredients just until combined and always check that they are baked through by inserting a toothpick. Additionally, make sure to preheat your oven adequately before placing cupcakes inside.

Are these cupcakes safe for people with allergies?
While the Autumn Harvest Cupcakes contain common allergens like eggs and dairy, you can modify the recipe for dietary considerations. For egg-free options, I’d recommend using a flaxseed meal or a commercial egg replacer. For a dairy-free version, substitute with vegan cream cheese and use plant-based butter in the frosting. Always check the labels for hidden allergens when swapping out ingredients!

Delicious Autumn Harvest Cupcakes with Creamy Cheesecake Core

Celebrate fall with these Autumn Harvest Cupcakes featuring pumpkin, warm spices, and a creamy cheesecake core.

  • Muffin tin
  • Mixing bowls
  • piping bag
  • Whisk
  • Electric mixer

For the Crust

  • 1.5 cups crushed graham crackers
  • 0.5 cups dark brown sugar
  • 1 teaspoon cinnamon
  • 0.5 cups melted butter

For the Cream Cheese Filling

  • 8 oz cream cheese (softened)
  • 0.5 cups granulated sugar
  • 2 teaspoons vanilla bean paste

For the Pumpkin Batter

  • 1.5 cups all-purpose flour
  • 1 teaspoon baking soda
  • 1 teaspoon baking powder
  • 0.5 teaspoon salt
  • 1 teaspoon cinnamon
  • 0.5 teaspoon nutmeg
  • 0.5 teaspoon cloves
  • 0.5 teaspoon ginger
  • 4 large eggs
  • 0.75 cups granulated sugar (additional)
  • 0.25 cups light brown sugar
  • 0.5 cups canola oil
  • 1.5 cups pumpkin purée
  • 0.5 cups sour cream

For the Frosting

  • 0.5 cups butter (softened)
  • 1 cups sour cream
  • 2 teaspoons vanilla extract
  • 4.5 cups powdered sugar

Step-by-Step Instructions

  1. In a mixing bowl, combine crushed graham crackers, dark brown sugar, and cinnamon. Pour in melted butter and mix until the texture resembles wet sand. Press 1 tablespoon of this mixture into the bottom of each cupcake liner.
  2. In a separate bowl, beat cream cheese with granulated sugar and vanilla bean paste until smooth. Transfer to a piping bag and set aside.
  3. In one bowl, whisk together flour, baking soda, baking powder, salt, cinnamon, nutmeg, cloves, and ginger. In a large bowl, whisk eggs, granulated sugar, light brown sugar, canola oil, and pumpkin purée until smooth. Fold dry ingredients into wet mixture.
  4. Fill each cupcake liner halfway with pumpkin batter, pipe cream cheese filling into the center, then top with more pumpkin batter until ¾ full.
  5. Preheat the oven to 350°F (175°C) and bake the cupcakes for 18-22 minutes until set. Cool on a wire rack.
  6. Beat butter until creamy, add sour cream and vanilla extract, then gradually incorporate powdered sugar until smooth.
  7. Once cooled, frost each cupcake and sprinkle with crushed graham cracker crumbs. Serve with cider, tea, or coffee.

Use room temperature ingredients for the best texture. Let cupcakes cool completely before frosting to maintain appearance.

Dessert
American
Autumn Harvest Cupcakes, cheesecake filling, easy cupcakes, Fall dessert, pumpkin cupcakes, spiced cupcakes

Filed Under: Dessert

Crispy Honey Garlic Tofu That’s Better Than Takeout

September 15, 2025 by grace bellamy Leave a Comment

As the sizzling sound of golden tofu meeting hot oil fills my kitchen, I can’t help but feel a wave of excitement for this meal. Have you ever found yourself craving something crunchy, tangy, and just downright delicious? That’s exactly where this Crispy Honey Garlic Tofu comes in! Not only is it a fantastic way to elevate humble tofu into a mouthwatering dish, but it also comes together quickly—ideal for those busy weeknights. With a medley of sweet and savory flavors, this recipe is a perfect crowd-pleaser, whether you’re sharing it with family or enjoying it solo. Ready to transform your dinner routine and impress even the toughest critics at the table? Let’s dive in!

Crispy Honey Garlic Tofu

Why is Crispy Honey Garlic Tofu a Must-Try?

Flavor Explosion: The delightful blend of sweet honey and savory garlic transforms tofu into a dish that’s bursting with flavor.

Crispy Perfection: Each bite delivers a satisfying crunch, making it a standout over any boring takeout option.

Quick and Easy: With a total time of just 50 minutes, this recipe is perfect for those busy weeknights when you crave something special.

Crowd-Pleaser: Whether you serve it over rice or in a wrap, it’s sure to impress friends and family alike.

Customizable: Feel free to tailor the sweetness by swapping honey for maple syrup for a vegan twist, or use tamari for a gluten-free option. The possibilities are endless!

Give this delightful dish a try and experience how Crispy Honey Garlic Tofu elevates your home-cooked meals.

Crispy Honey Garlic Tofu Ingredients

• Discover the perfect balance of flavors with these easy-to-find ingredients!

For the Tofu

  • Extra-firm tofu – Choose a quality block for the best texture and crispiness.
  • Cornstarch – This creates that irresistible, crunchy coating; feel free to swap with arrowroot powder for a different texture.

For the Sauce

  • Soy sauce – Offers a savory depth; use tamari for a gluten-free alternative.
  • Rice vinegar – Adds a bright acidity that perfectly balances the sweetness; apple cider vinegar can work in a pinch.
  • Honey – The star of the dish, giving sweetness; substitute with maple syrup for a vegan option.
  • Garlic – Freshly minced for maximum flavor impact in the sauce.
  • Fresh ginger – Grated to add warmth and a zesty kick.
  • Red pepper flakes (optional) – A sprinkle for those who like a touch of heat!

For Cooking

  • Sesame oil – Enhances the dish with a nutty aroma; opt for a little more if you adore its flavor.
  • Cooking oil – Use about ½ cup for frying; canola or vegetable oil works best but feel free to choose your preference.

For Garnish

  • Sesame seeds (optional) – Imparts a lovely crunch and visual appeal.
  • Green onions (optional) – Chopped for a fresh, colorful finish; they brighten up the dish beautifully.

Jump into this Crispy Honey Garlic Tofu recipe and enjoy a homemade meal that’s not just tasty, but also a cinch to prepare!

Step‑by‑Step Instructions for Crispy Honey Garlic Tofu

Step 1: Press the Tofu
Begin by pressing the block of extra-firm tofu to remove excess moisture, which helps achieve the ultimate crunch in your Crispy Honey Garlic Tofu. Wrap the tofu in paper towels, place it on a plate, and weigh it down with a heavy object, such as a skillet. Let it sit for at least 30 minutes, or up to 1 hour for best results.

Step 2: Cut the Tofu
After the tofu has been pressed, unwrap and cut it into bite-sized cubes, aiming for uniform pieces to ensure even cooking. These cubes will become the crispy foundation of your dish. Set them aside as you prepare to coat them, ensuring they’re all ready for the next delicious step.

Step 3: Coat with Cornstarch
Take the tofu cubes and evenly coat them with cornstarch. This step is crucial for achieving that irresistible crispy exterior. Use your hands or a bowl to make sure each cube is thoroughly covered. Once coated, set the tofu aside again while you mix the honey garlic sauce, allowing the cornstarch to adhere.

Step 4: Prepare the Honey Garlic Sauce
In a bowl, mix together the soy sauce, rice vinegar, honey, minced garlic, grated ginger, optional red pepper flakes, and sesame oil. Stir well until combined. This sauce is what will elevate your Crispy Honey Garlic Tofu to a delightful flavor experience, giving it that perfect balance of sweet and savory.

Step 5: Heat the Oil
In a large skillet, heat about ½ cup of cooking oil over medium-high heat. You’ll know it’s ready when the oil shimmers and a small amount of cornstarch dropped in bubbles immediately. This is the perfect temperature for frying and will help achieve that golden-brown color on the tofu.

Step 6: Fry the Tofu
Carefully add the cornstarch-coated tofu cubes to the hot oil in the skillet, taking care not to overcrowd the pan. Fry them for about 3-5 minutes on each side, or until they turn a beautiful golden brown and crispy. Use tongs to gently turn them, ensuring even cooking and a delicious crunch.

Step 7: Drain the Tofu
Once the tofu cubes are nicely browned and crispy, remove them from the skillet and place them on a plate lined with paper towels. This will absorb any excess oil, keeping your Crispy Honey Garlic Tofu light and crunchy. Allow them to drain for a moment while you finish up.

Step 8: Toss in the Sauce
Transfer the crispy tofu cubes into the bowl with your prepared honey garlic sauce. Gently toss them until every piece is generously coated, allowing the sweet and savory flavors to envelop each crispy morsel. This step brings your dish together, highlighting the mouthwatering essence of the honey garlic sauce.

Step 9: Garnish and Serve
To finish, garnish your Crispy Honey Garlic Tofu with optional sesame seeds and chopped green onions for a pop of color and texture. Serve immediately for the best crispiness, whether over warm rice, inside a wrap, or alongside noodles. This dish is sure to impress your family and friends while satisfying your taste buds!

Crispy Honey Garlic Tofu

What to Serve with Crispy Honey Garlic Tofu

As you savor the crunch and sweetness of your dish, consider these delightful pairings to create a full, balanced meal.

  • Fluffy Jasmine Rice: A classic choice, the light and fragrant rice absorbs the sweet sauce beautifully, making each bite satisfying.
  • Stir-Fried Vegetables: Add colorful veggies like bell peppers, broccoli, and snap peas for a vibrant crunch, enhancing both flavor and nutrition.
  • Noodle Salad: Cool, refreshing noodles tossed in a sesame dressing will complement the warm crispy tofu, creating a lovely textural contrast.
  • Garlic Edamame: These protein-packed beans bring a delightful savory flavor that enhances the sweetness of the honey garlic tofu.
  • Cucumber Salad: Freshly sliced cucumbers drizzled with rice vinegar add a cool, crisp element to balance the dish’s richness.
  • Sweet Chili Sauce: For a spicy kick, serve a side of sweet chili sauce for dipping; it elevates the taste profile of the tofu marvelously.
  • Mango Sticky Rice: For dessert, a sweet treat like mango sticky rice rounds out the meal with its luscious creaminess.
  • Green Tea: Pair with a warm cup of green tea; its earthy notes cleanse the palate between bites of crispy goodness.

Storage Tips for Crispy Honey Garlic Tofu

Fridge: Store any leftover Crispy Honey Garlic Tofu in an airtight container in the refrigerator for up to 3 days. This helps maintain some of its flavor and texture.

Freezer: For longer storage, freeze the tofu before adding the honey garlic sauce. Wrap it tightly in plastic wrap and use a freezer bag; it will stay fresh for up to 2 months.

Reheating: To reheat, it’s best to warm the tofu in a skillet over medium heat, adding a splash of oil to regain its crispiness. Avoid microwaving as it can make the coating soggy.

Serving Suggestions: Reheat and serve the tofu alongside rice or in wraps for a quick and delicious meal that brings the takeout flavor home!

Expert Tips for Crispy Honey Garlic Tofu

Pressing Time Matters: Ensure you press the tofu for at least 30 minutes to achieve perfect texture; skipping this step will yield soggy tofu.

Coat Evenly: Use cornstarch liberally but ensure each cube is fully coated to avoid any spots lacking that desired crunch in your Crispy Honey Garlic Tofu.

Oil Temperature Check: Always wait for the oil to shimmer before adding tofu; too cool oil will result in soggy pieces rather than crispy bites.

Don’t Overcrowd the Pan: Fry tofu in batches if necessary to allow room for browning; overcrowding leads to steaming instead of frying.

Toss Carefully: When mixing the tofu with the sauce, use gentle motions to prevent breaking the crispy pieces. You want them to remain intact and crunchy!

Make Ahead Options

Crispy Honey Garlic Tofu is a fantastic recipe for meal prep enthusiasts! You can press and cube the tofu up to 24 hours in advance, storing it in an airtight container in the refrigerator to maintain texture. Additionally, you can prepare the honey garlic sauce ahead of time—just mix the ingredients and refrigerate for up to 3 days. When you’re ready to cook, simply coat the tofu in cornstarch, fry until golden brown, and toss it in the sauce. This method ensures you enjoy that delightful crunch and flavor without the stress on busy weeknights, making your meal planning simple and effective!

Crispy Honey Garlic Tofu Variations

Feel free to make this delightful dish your own with these fun twists and substitutions!

  • Vegan Option: Substitute honey with maple syrup or agave nectar for a completely plant-based version.
  • Gluten-Free: Use tamari instead of soy sauce to keep it gluten-friendly without sacrificing flavor.
  • Spicy Kick: Add diced fresh chili peppers or increase the red pepper flakes for those who love a bit of heat.
  • Crunchy Add-ins: Toss in some chopped nuts like cashews or peanuts before serving to add a delightful crunch and extra protein.

For a fun twist, you could whip up a sesame-ginger sauce using the same base ingredients, but add tahini for rich creaminess. It enhances the flavor profile while still highlighting the crispy tofu.

  • Vegetable Boost: Stir in some sautéed bell peppers or broccoli Rob for a colorful, healthy addition that pairs beautifully with the sweet sauce.
  • Noodle Upgrade: Serve your Crispy Honey Garlic Tofu over a bed of whole grain or rice noodles to create a satisfying, hearty meal. You can top it with a drizzle of sesame oil for a lovely finish.

Don’t forget, you can explore other innovative ways to enjoy this dish, such as in a delicious grain bowl paired with quinoa and fresh veggies! Whether you follow the original recipe or mix it up, it’s bound to be a hit. If you want more options, consider adding some flavorful sautéed greens or a side of stir-fried vegetables to complete your meal! Enjoy your culinary adventure!

Crispy Honey Garlic Tofu

Crispy Honey Garlic Tofu Recipe FAQs

How do I select the best tofu?
Absolutely! When choosing tofu, opt for extra-firm varieties. Look for a block that feels dense and has minimal moisture—this will yield the best texture for frying. Avoid any packages that show dark spots or excessive moisture leaks.

What is the best way to store leftovers?
Very well! To store leftover Crispy Honey Garlic Tofu, place it in an airtight container in the refrigerator. It will keep for up to 3 days. For optimal results, reheat in a skillet with a dash of oil to help restore its wonderful crispy texture.

Can I freeze Crispy Honey Garlic Tofu?
Of course! Before adding the honey garlic sauce, you can freeze the cooked tofu for up to 2 months. Wrap each piece tightly in plastic wrap, then store them in a freezer bag. When you’re ready to enjoy, simply thaw in the refrigerator overnight and reheat in a hot skillet.

What if my tofu isn’t crispy enough?
Great question! If your tofu isn’t crispy, first ensure you’ve pressed it for enough time and coated it evenly with cornstarch. When frying, make sure the oil is hot enough—use a cooking thermometer for best accuracy. Frying in smaller batches also prevents steaming, which can lead to a less crispy finish.

Are there any dietary alternatives I should consider?
Certainly! To make this recipe vegan-friendly, substitute honey with maple syrup or agave nectar. For gluten-free options, ensure you use tamari or a gluten-free soy sauce. Always check ingredient labels for allergies, especially regarding soy, to cater to those with dietary restrictions.

How long should I press the tofu?
I often recommend pressing tofu for at least 30 minutes, but for the best results, go for 1 hour. This helps remove excess moisture that could lead to sogginess, allowing the tofu to turn out fabulously crispy!

Crispy Honey Garlic Tofu That’s Better Than Takeout

Crispy Honey Garlic Tofu is a delightful dish bursting with flavor, perfect for busy weeknights and sure to impress everyone.

  • skillet
  • bowl
  • Plate
  • heavy object

For the Tofu

  • 1 block extra-firm tofu (Choose a quality block for the best texture and crispiness.)
  • 1/4 cup cornstarch (Can be swapped with arrowroot powder for a different texture.)

For the Sauce

  • 1/4 cup soy sauce (Use tamari for a gluten-free alternative.)
  • 2 tablespoons rice vinegar (Apple cider vinegar can work in a pinch.)
  • 1/4 cup honey (Substitute with maple syrup for a vegan option.)
  • 3 cloves garlic (Freshly minced for maximum flavor impact.)
  • 1 tablespoon fresh ginger (Grated to add warmth and a zesty kick.)
  • 1/2 teaspoon red pepper flakes (Optional for those who like a touch of heat.)

For Cooking

  • 1/2 cup sesame oil (Enhances the dish with a nutty aroma.)
  • 1/2 cup cooking oil (Canola or vegetable oil works best.)

For Garnish

  • 1 tablespoon sesame seeds (Optional, for added crunch.)
  • 2 stalks green onions (Chopped for a fresh finish.)

Step-by-Step Instructions

  1. Press the Tofu: Wrap tofu in paper towels, place on a plate, and weigh down. Let sit for at least 30 minutes.
  2. Cut the Tofu: Unwrap and cut into bite-sized cubes for even cooking.
  3. Coat with Cornstarch: Evenly coat tofu cubes with cornstarch and set aside.
  4. Prepare the Honey Garlic Sauce: Mix soy sauce, rice vinegar, honey, garlic, ginger, red pepper flakes, and sesame oil in a bowl.
  5. Heat the Oil: In a skillet, heat cooking oil over medium-high heat until shimmering.
  6. Fry the Tofu: Fry cornstarch-coated tofu cubes in hot oil for 3-5 minutes on each side until golden brown.
  7. Drain the Tofu: Remove from skillet and place on a plate lined with paper towels to absorb excess oil.
  8. Toss in the Sauce: Transfer tofu to the bowl with sauce and toss to coat.
  9. Garnish and Serve: Garnish with sesame seeds and green onions. Serve immediately.

Ensure you press tofu for at least 30 minutes to achieve perfect texture. Fry in batches if necessary to avoid overcrowding the pan.

Main Dishes
Asian
crispy, dinner, Easy, honey garlic, tofu, Vegan

Filed Under: Main Dishes

Indulge in Bliss: Homemade Coconut Chocolate Dome Delight

September 15, 2025 by grace bellamy Leave a Comment

With a gentle crack as you break into the glossy shell, the first glimpse of a Coconut Chocolate Dome promises a delightful surprise inside. This is not just any dessert; it’s a mini retreat from everyday life, perfect for impressing guests or enjoying a quiet moment of indulgence at home. Packed with creamy coconut goodness and rich chocolate, this recipe brings together the best of two worlds and elevates your culinary game. You’ll love the quick prep time, making it an excellent addition to any occasion without the fuss, and the fact that these elegant treats can be made ahead means less stress when entertaining. Have you ever tasted such a luscious combination? Let’s dive into the process of crafting these delightful cocoa wonders!

Coconut Chocolate Dome

Why is Coconut Chocolate Dome a Must-Try?

Decadent Flavors: Rich cocoa and creamy coconut meld together for an unforgettable taste experience.

Elegant Presentation: Impressive for any occasion, these domes look stunning on your dessert table, drawing compliments from guests.

Quick Preparation: Minimal fuss allows you to whip up a luxurious dessert without spending hours in the kitchen.

Versatility: Perfect for parties or cozy nights, they cater to any event, whether you’re celebrating or unwinding at home.

Make Ahead Friendly: Easily prepare in advance, allowing for stress-free entertaining. Want more delightful treats? Check out this Chocolate Fondue for another crowd-pleaser!

Coconut Chocolate Dome Ingredients

Here’s everything you need to create these luscious Coconut Chocolate Domes that will sweep you off your feet!

For the Chocolate Shell
• 12 ounces dark chocolate – Choose high-quality chocolate for a rich, glossy finish.
• 1/4 cup coconut oil (optional) – Adds extra sheen and softness to your chocolate shell.

For the Coconut Filling
• 1 cup coconut milk (refrigerated overnight) – Allows for a creamy texture that complements the chocolate.
• 1/2 cup powdered sugar (sifted) – Sweetens the filling without any graininess.
• 1 teaspoon vanilla extract – Enhances the flavor profile beautifully.
• 1/4 teaspoon almond extract (optional) – A nutty touch that deepens the complexity of flavors.
• 1 cup shredded coconut – Adds texture and a tropical flair to the filling.

For the Ganache Topping
• 1 cup heavy cream – Creates a silky, luxurious ganache that crowns the dome with elegance.

Happy baking as you embark on this Coconut Chocolate Dome adventure!

Step‑by‑Step Instructions for Coconut Chocolate Dome

Step 1: Melt the Chocolate
In a heatproof bowl set over a saucepan of simmering water, melt the dark chocolate and optional coconut oil. Stir occasionally until the mixture is smooth and glossy, about 5-7 minutes. Alternatively, you can melt it in the microwave in 30-second intervals, stirring in between, until completely melted. This chocolate base is essential for your Coconut Chocolate Dome shell.

Step 2: Prepare the Molds
Clean and dry your dome-shaped silicone molds, approximately 3 inches in diameter. Using a brush or spoon, coat the inside of each mold with a layer of the melted chocolate. Ensure even coverage for a nice shell. Once done, place the molds in the freezer for 10-15 minutes, allowing the chocolate to firm up.

Step 3: Add a Second Layer
After the initial layer hardens, remove the molds from the freezer. Apply a second layer of the melted chocolate into each dome, making sure to cover any exposed areas. Return the molds to the freezer for another 15-20 minutes until the chocolate is completely hardened, forming a solid shell for your Coconut Chocolate Dome.

Step 4: Make the Coconut Filling
Scoop the thick coconut cream from the chilled coconut milk into a mixing bowl. Use an electric mixer to beat the cream until it becomes light and fluffy, roughly 2-3 minutes in duration. Gradually add the sifted powdered sugar, vanilla extract, and optional almond extract, mixing until well combined. Gently fold in the shredded coconut, then cover and refrigerate for at least 30 minutes to firm up.

Step 5: Fill the Chocolate Domes
Once the chocolate shells are fully set, carefully remove them from the molds. Spoon the chilled coconut filling into each dome until they are almost full, leaving a little space for the topping. This delicious coconut filling is what makes the Coconut Chocolate Dome a delightful treat.

Step 6: Seal the Bottoms
Melt any remaining dark chocolate and use it to cover the bottom of each dome, sealing in the coconut filling. Carefully place the domes on a baking sheet lined with parchment paper. Refrigerate for at least 30 minutes to allow the chocolate base to set firmly, creating a beautiful finish for your Coconut Chocolate Domes.

Step 7: Prepare the Ganache
In a small saucepan, bring the heavy cream over medium heat just to a simmer—avoid boiling. Pour the hot cream over finely chopped semi-sweet chocolate in a heatproof bowl. Let this mixture sit for 1 minute to soften, then gently stir until smooth and glossy. This decadent ganache will beautifully complement your Coconut Chocolate Dome.

Step 8: Drizzle Ganache and Garnish
Allow the ganache to cool slightly for about 5-10 minutes before drizzling it generously over the chilled Coconut Chocolate Domes. To add a touch of elegance, sprinkle with toasted shredded coconut, chocolate shavings, edible gold leaf, or fresh berries, making your dessert even more visually stunning.

Step 9: Set the Ganache
Return the completed Coconut Chocolate Domes to the refrigerator for another 15-20 minutes to let the ganache set completely. This step is crucial for achieving that perfect bite with each dome—the hard ganache adds a delightful texture contrast to the creamy filling.

Step 10: Serve Your Masterpiece
Once the ganache is set, your delightful Coconut Chocolate Domes are ready to be served. Plate them beautifully and prepare for the compliments! These elegant desserts will be a hit at any gathering, providing an indulgent experience that transports everyone to a tropical paradise.

Coconut Chocolate Dome

How to Store and Freeze Coconut Chocolate Dome

Fridge: Store your Coconut Chocolate Domes in an airtight container in the refrigerator for up to 5 days. This keeps them fresh and the filling creamy, ready for indulgence whenever you desire.

Freezer: If you’d like to keep them longer, wrap each dome individually in plastic wrap and then place them in a freezer-safe container. They can be frozen for up to 3 months!

Reheating: To enjoy, simply thaw them overnight in the fridge, keeping the dome intact for that delightful shell experience. Avoid using the microwave, as it can affect the texture.

Serving Note: For the best taste and texture, serve them chilled after they’re thawed. Enjoy slicing into that beautiful chocolate shell to reveal the creamy filling!

Coconut Chocolate Dome Variations

Feel free to mix things up and make this Coconut Chocolate Dome your own with these fun tweaks!

  • Dairy-Free: Substitute coconut milk with almond or oat milk for a non-dairy filling while keeping the flavor amazing.
  • Nutty Twist: Add 1/2 cup of finely chopped walnuts or pecans to the coconut filling for an irresistible crunch and nutty flavor. This twist takes the flavor profile to a new level.
  • Spicy Kick: Incorporate a pinch of cayenne or chili powder to the filling for a subtle heat that beautifully contrasts the sweet chocolate.
  • Fruit Fusion: Fold in chopped tropical fruits like mango or pineapple for a fruity surprise inside each dome. Each bite will feel like a vacation on a plate!
  • Minty Fresh: Add 1/2 teaspoon of peppermint extract to the chocolate ganache for a refreshing mint-chocolate experience. This pairing gives your domes a festive touch—perfect for holiday gatherings.
  • Extra Sweetness: Substitute powdered sugar with brown sugar for a deeper, caramel-like sweetness in the filling. It creates a deliciously rich flavor you won’t want to miss.
  • Tropical Breeze: Replace the almond extract with a splash of rum or coconut rum for an island-inspired delight that adds just the right amount of boozy flavor.
  • Chocolate Lovers’ Dream: Use white chocolate for the ganache instead of dark for a sweeter, more decadent topping. This switch gives you a beautiful contrast that’s visually stunning, too.

For more delicious dessert ideas, don’t miss my Chocolate Fondue—a perfectly sweet companion to these indulgent domes! Enjoy crafting your unique Coconut Chocolate Dome!

Make Ahead Options

These Coconut Chocolate Domes are perfect for busy home cooks looking to save time during entertaining! You can prepare the chocolate shells and coconut filling up to 24 hours in advance. Simply follow the initial steps, coating the molds and making the filling, then refrigerate the filled domes until you’re ready to seal them. To maintain their quality, keep the chocolate domes covered in the refrigerator to prevent moisture absorption. When you’re ready to serve, simply finish by melting any remaining chocolate to seal the bottoms, drizzle on the ganache, and allow them to set for an additional 15-20 minutes in the fridge. With this prep, you’ll create stunning desserts with minimal last-minute effort!

Expert Tips for Coconut Chocolate Dome

Perfect Chocolate: Ensure your dark chocolate is high-quality for a rich and glossy shell. Mistakes in melting can lead to a grainy texture.

Layering Technique: Apply thin, even layers of chocolate in the molds, allowing each layer to harden fully before adding another. This prevents leaks in the Coconut Chocolate Dome.

Chill Time: Don’t rush the chilling process; proper setting is key for a perfect dome. Skipping this step may result in a messy filling.

Fill to Perfection: Avoid overfilling the chocolate domes to prevent spills when sealing. Leave a little space for a smooth finish.

Garnish Creatively: Enhance your Coconut Chocolate Dome with toppings like toasted coconut or fresh berries for an eye-catching presentation.

Practice Patience: Allow the ganache to cool slightly before drizzling; a too-hot ganache could melt the shell.

What to Serve with Coconut Chocolate Dome

Indulging in a luscious Coconut Chocolate Dome is just the beginning; let’s create a full meal that delights the senses.

  • Creamy Vanilla Ice Cream: A scoop of creamy vanilla provides a soothing contrast to the rich chocolate, enhancing the overall dessert experience.
  • Tropical Fruit Salad: Fresh slices of mango, pineapple, and berries add bright colors and refreshing flavors, balancing the sweetness of the dome.
  • Sparkling Coconut Water: A glass of chilled coconut water adds a light, tropical flair and complements the coconut flavor beautifully.
  • Chocolate Pudding: This velvety treat echoes the rich chocolate notes, creating a harmonious dessert duo that excites the palate.
  • Swiss Cheese Platter: A selection of mild Swiss cheeses with nuts and dried fruits offers a delightful contrast in texture and flavors, perfect as an appetizer.
  • Coconut Macaroons: These chewy bites with a hint of coconut pair perfectly, enhancing the theme of indulgence and tropical bliss.
  • Mint Mojito: A refreshing mint mojito adds zest and balances the sweetness, making it an ideal drink accompaniment for indulgent treats.
  • Coffee or Espresso: A cup of rich coffee enhances the experience, with its bold flavors cutting through the sweetness of the dome.
  • Chocolate Fondue: For a fun twist, serve the dome alongside a decadent chocolate fondue, inviting guests to dip fruits and marshmallows for delightful bites.

Coconut Chocolate Dome

Coconut Chocolate Dome Recipe FAQs

How do I choose the right coconut milk for this recipe?
Absolutely! For the best results, opt for full-fat coconut milk that’s been refrigerated overnight, as it gives a rich and creamy texture for your filling. Light coconut milk may not whip up as well, so your domes might lack that luscious creaminess.

What’s the best way to store Coconut Chocolate Domes?
I recommend storing your Coconut Chocolate Domes in an airtight container in the refrigerator for up to 5 days. This keeps them fresh, and the creamy filling remains indulgent, ready for you to enjoy whenever the craving strikes!

Can I freeze Coconut Chocolate Domes?
Of course! To freeze your Coconut Chocolate Domes, wrap each dome individually in plastic wrap and place them in a freezer-safe container. They can be frozen for up to 3 months. When you’re ready to enjoy them, simply thaw them overnight in the fridge to preserve that delightful shell experience!

What if my chocolate shell cracks during the process?
Very! If you notice cracks in your chocolate shell, it’s often due to being too thick or not allowing enough chill time between layers. To prevent this, apply thin layers of melted chocolate, ensuring each layer firms up fully before adding another. If cracked, you can simply coat the damaged areas with a bit of melted chocolate for a quick fix.

Are there any dietary considerations for this recipe?
Absolutely! If you’re catering to specific dietary restrictions, ensure to use dairy-free chocolate for a vegan option. Also, check for allergies related to coconut or nuts if using almond extract. Always customize to suit your needs, as this recipe can be easily adapted!

Can I substitute any ingredients in the Coconut Chocolate Dome?
Definitely! Feel free to substitute the dark chocolate with a milk chocolate if you prefer a sweeter profile, or replace the almond extract with a touch of orange zest for a citrus twist. The more the merrier, so personalize it to match your taste buds!

Indulge in Bliss: Homemade Coconut Chocolate Dome Delight

Coconut Chocolate Dome is an elegant dessert with rich cocoa and creamy coconut, perfect for impressing guests or enjoying at home.

  • heatproof bowl
  • Saucepan
  • Microwave
  • silicone molds
  • Mixing Bowl
  • Electric mixer
  • Baking Sheet
  • parchment paper
  • small saucepan

For the Chocolate Shell

  • 12 ounces dark chocolate (Choose high-quality chocolate for a rich, glossy finish.)
  • 1/4 cup coconut oil (optional)

For the Coconut Filling

  • 1 cup coconut milk (refrigerated overnight)
  • 1/2 cup powdered sugar (sifted)
  • 1 teaspoon vanilla extract
  • 1/4 teaspoon almond extract (optional)
  • 1 cup shredded coconut

For the Ganache Topping

  • 1 cup heavy cream

Step-by-Step Instructions for Coconut Chocolate Dome

  1. In a heatproof bowl set over a saucepan of simmering water, melt the dark chocolate and coconut oil. Stir occasionally until smooth, about 5-7 minutes.
  2. Clean and dry the dome-shaped silicone molds. Coat the inside with a layer of melted chocolate and freeze for 10-15 minutes.
  3. After the first layer hardens, apply a second layer of melted chocolate and freeze for another 15-20 minutes.
  4. Scoop the thick coconut cream from the chilled coconut milk into a bowl. Beat until fluffy, add powdered sugar, vanilla, and almond extract, then fold in shredded coconut. Refrigerate for at least 30 minutes.
  5. Carefully remove the chocolate shells from the molds and fill with chilled coconut filling.
  6. Melt remaining dark chocolate and seal the bottoms of each dome. Refrigerate for at least 30 minutes.
  7. Heat heavy cream just to simmer. Pour over chopped chocolate, let sit, then stir until smooth.
  8. Drizzle ganache over chilled domes and garnish as desired.
  9. Refrigerate to set ganache for 15-20 minutes before serving.
  10. Serve the Coconut Chocolate Domes beautifully plated.

Store in an airtight container in the fridge for up to 5 days or freeze for up to 3 months. Thaw in the fridge before serving.

Dessert
International
chocolate, coconut, Coconut Chocolate Dome, dessert, elegant dessert, make-ahead

Filed Under: Dessert

Irresistibly Creamy Banoffee Pie That’s a Slice of Heaven

September 15, 2025 by grace bellamy Leave a Comment

On a lazy afternoon, I overheard friends chatting about their latest dessert cravings, and one name popped up repeatedly: Banoffee Pie. Instantly, I was transported back to the first time I tasted this delightful creation—a luscious combination of buttery biscuits, sweet toffee, ripe bananas, and clouds of whipped cream. What I love most about this recipe is its effortless charm; not only is it a crowd-pleaser perfect for gatherings, but it also comes together in a snap—making it ideal for those of us who love homemade treats without the stress. In just a few simple steps, you can whip up a Banoffee Pie that’s sure to impress! Are you ready to take your dessert game to the next level?

Banoffee Pie

Why is Banoffee Pie a Must-Try?

Indulgent, creamy layers: This Banoffee Pie brings together rich toffee and fluffy cream, creating a delightful experience in every bite.

Easy to make: With just a handful of ingredients and minimal prep time, you can create this showstopper with ease.

Crowd favorite: Bring it to gatherings, and watch it disappear in minutes—everyone loves this sweet treat!

Versatile delight: Customize it with toppings like dark chocolate drizzles or cocoa dust, making it perfectly tailored to your taste.

Perfect for busy days: With only 40 minutes of active time, it fits perfectly into your bustling schedule, allowing you to enjoy homemade goodness without hours in the kitchen.

Embrace this wonderful recipe and pair it with our dining tips for a complete dessert experience!

Banoffee Pie Ingredients

• Gather your ingredients for the ultimate treat!

For the Crust

  • Digestive biscuits – A perfect choice for a crunchy base; feel free to substitute with graham crackers if desired.
  • Melted butter – Helps bind the biscuit crumbs together, creating a rich flavor.

For the Filling

  • Sweetened condensed milk – The star of this dessert, transforming into a luscious toffee when cooked!
  • Ripe bananas – Choose bananas that are just starting to brown for the best sweetness and flavor.

For the Topping

  • Heavy cream – Whipped to perfection, it adds a lightness to this decadent pie.
  • Powdered sugar – Sweetens the whipped cream while helping it hold shape; adjust to taste!
  • Vanilla extract – Elevates the flavor of the cream, making it irresistible.

Optional Decorations

  • Dark chocolate – Drizzle over the top for a rich contrast or leave it out for a classic look.
  • Cocoa powder – Dust on top as a finishing touch for a touch of elegance.

This Banoffee Pie is sure to become a favorite in your dessert repertoire!

Step‑by‑Step Instructions for Banoffee Pie

Step 1: Prepare the Biscuit Base
Start by crushing 1 ½ cups of digestive biscuits into fine crumbs using a food processor. Combine the crumbs with ¼ cup of melted butter until well mixed. The mixture should hold together when squeezed. Press this mixture firmly into the base of a 9-inch tart pan or pie dish, creating an even layer. Chill in the refrigerator for 1 hour to set.

Step 2: Make the Toffee Filling
In a medium saucepan, pour in 1 can of sweetened condensed milk and place it over medium heat. Stir the mixture constantly for 5-7 minutes, allowing it to thicken and turn a beautiful golden brown. Keep an eye on it to prevent any sticking or burning, as this will become the luscious toffee layer for your Banoffee Pie.

Step 3: Assemble the Pie
Once the toffee mixture reaches the desired consistency, carefully pour it evenly over the chilled biscuit base. Use a spatula to smooth it out if needed. Allow the toffee layer to cool to room temperature, which will help set it before adding the delicious bananas and cream.

Step 4: Add Sliced Bananas
After the toffee has fully cooled and set, peel and slice 2-3 ripe bananas. Arrange the banana slices in an even layer over the toffee, making sure to cover the surface generously. The sweetness of the bananas complements the rich toffee, enhancing the delightful flavors of your Banoffee Pie.

Step 5: Whip the Cream Topping
In a chilled mixing bowl, pour in 1 ½ cups of heavy cream, followed by 1 tablespoon of powdered sugar and 1 teaspoon of vanilla extract. Use an electric mixer to whip the cream until soft peaks form, which should take about 3-5 minutes. The whipped cream should be light and fluffy, ready to top your pie.

Step 6: Finish and Chill the Pie
Gently spread the whipped cream over the banana slices, smoothing it into an even layer. For a touch of elegance, you may choose to drizzle dark chocolate or dust with cocoa powder on top. Once finished, refrigerate the Banoffee Pie for at least 2 hours, allowing the layers to set beautifully before serving.

Banoffee Pie

How to Store and Freeze Banoffee Pie

Fridge: Store covered in the refrigerator for up to 3 days to keep the pie fresh and delicious.

Freezer: For longer storage, freeze the pie for up to 2 months. Wrap it tightly in plastic wrap and aluminum foil to avoid freezer burn.

Thawing: When ready to enjoy, move the frozen Banoffee Pie to the fridge overnight to thaw slowly, preserving its creamy texture.

Reheating: Avoid reheating; this pie is best enjoyed chilled, allowing all the fresh flavors to shine through!

Expert Tips for Making Banoffee Pie

Choose the Right Bananas: Use bananas that have a few brown spots for the best sweetness and flavor; avoid overly ripe ones that may be mushy.

Watch the Toffee: Stir the sweetened condensed milk constantly while cooking to prevent burning; achieving the perfect golden brown color is key for that rich toffee taste.

Chill the Cream Bowl: For a fluffier whipped cream, chill your mixing bowl and beaters beforehand; this helps whip the cream faster and increases its volume.

Don’t Rush the Chilling: Allow the Banoffee Pie to chill for at least 2 hours before serving; this allows the layers to set and enhances the flavors beautifully.

Decorate to Taste: Drizzling dark chocolate adds a luxurious touch and deeper flavor; feel free to experiment with different toppings for your unique twist on the Banoffee Pie.

Make Ahead Options

These Banoffee Pie components are perfect for meal prep, allowing you to enjoy homemade goodness with minimal effort during busy days! You can prepare the biscuit base and toffee layer up to 24 hours in advance. Simply follow the initial steps, then cover the baked biscuit base tightly with plastic wrap and refrigerate. The toffee should be poured over the base and cooled before covering it as well. When you’re ready to serve, slice your ripe bananas and layer them over the toffee, then whip your cream to top it off. This way, you’ll have a delightful dessert that tastes just as delicious as if prepared fresh, making your gatherings stress-free and enjoyable!

What to Serve with Banoffee Pie

When the sweet, creamy delight of Banoffee Pie graces your table, let’s elevate that experience with perfectly paired delights.

  • Rich Coffee: A smooth cup of freshly brewed coffee brings out the flavors in the pie while balancing its sweetness.

  • Vanilla Ice Cream: The creamy texture and subtle vanilla flavor complement the pie, adding an extra layer of indulgence.

  • Fresh Berries: A medley of tart raspberries or blueberries perfectly contrasts the sweetness of the pie, introducing a refreshing element to each bite.

  • Toasty Nuts: Chopped walnuts or hazelnuts provide a delightful crunch that enhances the overall texture while adding a nutty flavor profile.

  • Chocolate Mint Mojito: This refreshing cocktail combines the brightness of mint and a hint of chocolate, perfectly echoing the flavors of your dessert.

  • Caramel Sauce: A drizzle of warm caramel intensifies the toffee experience, making the dessert even more decadent.

  • Lemon Sorbet: Serve a scoop of lemon sorbet on the side for a zesty, palate-cleansing finish that balances the richness of the pie.

  • Cocoa Dusted Whipped Cream: Elevate your presentation by serving extra whipped cream dusted with cocoa powder for a beautiful touch that pairs beautifully with the dessert.

With these delightful pairings, your Banoffee Pie will not just be a dessert, but a sensational dining experience!

Banoffee Pie Variations & Substitutions

Feel free to let your creativity shine with these delightful twists on Banoffee Pie!

  • Gluten-Free: Substitute digestive biscuits with gluten-free cookies or crushed almonds for a satisfying crust.
  • Vegan: Use coconut cream instead of heavy cream and a dairy-free condensed milk for a plant-based treat! The result is just as creamy, and you won’t miss the dairy.
  • Nutty Addition: Add a sprinkle of chopped pecans or walnuts over the bananas for a crunchy surprise in every bite. Nuts bring both texture and flavor to this indulgent dessert.
  • Caramel Swirl: Drizzle store-bought caramel sauce over the whipped cream for an extra layer of sweetness and richness—it’s pure heaven on a plate!
  • Flavor Infusion: Try adding a dash of cinnamon or nutmeg to the whipped cream for a warm spice that complements the banana. This subtle tweak can elevate your pie to new heights!
  • Chocolate Lovers: For more chocolatey goodness, mix cocoa powder into the biscuit base or use chocolate cookies instead. This is perfect for those who can’t resist a chocolatey dessert.
  • Berry Boost: Sweeten up your Banoffee Pie by adding a layer of fresh berries like strawberries or raspberries atop the bananas. They brighten the flavor and add a beautiful pop of color!
  • Spicy Kick: For those who enjoy a hint of heat, incorporate a pinch of cayenne into the whipped cream. Just a little spice will balance the sweetness and surprise your taste buds!

With these variations, you can create a personalized Banoffee Pie that excites your palate! If you’re eager for more mouth-watering ideas, don’t forget to check out our expert tips for creating the perfect dessert every time!

Banoffee Pie

Banoffee Pie Recipe FAQs

How do I choose ripe bananas for Banoffee Pie?
Absolutely! For the best flavor and sweetness, opt for bananas that are just beginning to show brown spots. This indicates they are perfectly ripe, providing the ideal balance of sweetness without being overly mushy. Avoid bananas that are entirely brown or extremely soft, as they can affect the overall texture of your pie.

What is the best way to store Banoffee Pie?
Very! You can store the pie covered in the refrigerator for up to 3 days. To keep it fresh, I recommend using plastic wrap or an airtight container. If you want your Banoffee Pie to last longer, wrap it tightly in plastic wrap and aluminum foil and freeze it for up to 2 months. Just remember, freezing does change the texture slightly, so it’s best enjoyed fresh!

How can I freeze Banoffee Pie?
The more the merrier! To freeze your pie, first, make sure it’s completely set in the refrigerator. Then, wrap it tightly in plastic wrap, followed by aluminum foil to prevent freezer burn. It’s best to slice it before freezing if you anticipate thawing only a portion. When you’re ready to enjoy, thaw it overnight in the fridge. This slow thaw helps maintain that wonderful creamy texture.

What should I do if the toffee mixture burns?
Oh no, it happens to the best of us! If you notice that your toffee is starting to stick or burn in the pan, take it off the heat immediately. If the mixture has turned too dark, unfortunately, it’s best to start over as the burnt flavor will overpower your Banoffee Pie. For the next attempt, stir continuously and lower the heat to prevent burning.

Can dogs eat Banoffee Pie?
While we love our furry friends, it’s important to keep Banoffee Pie away from them. The sweetened condensed milk and sugar can cause digestive issues for dogs, and the chocolate, if used, is toxic to them. It’s best to stick to dog-friendly treats to keep your pets safe and happy!

Irresistibly Creamy Banoffee Pie That’s a Slice of Heaven

This Banoffee Pie is an indulgent dessert featuring layers of creamy toffee and whipped cream, perfect for any gathering.

  • Food Processor
  • Medium saucepan
  • 9-inch tart pan
  • Chilled mixing bowl
  • Electric mixer

For the Crust

  • 1.5 cups digestive biscuits (Can substitute with graham crackers if desired.)
  • 0.25 cups melted butter (Helps bind the biscuit crumbs together.)

For the Filling

  • 1 can sweetened condensed milk (Transforms into a luscious toffee when cooked.)
  • 2-3 pieces ripe bananas (Choose bananas that are just starting to brown.)

For the Topping

  • 1.5 cups heavy cream (Whipped to perfection.)
  • 1 tablespoon powdered sugar (Adjust to taste for sweetness.)
  • 1 teaspoon vanilla extract (Elevates the flavor of the cream.)

Optional Decorations

  • to taste dark chocolate (Drizzle over the top for a rich contrast.)
  • to taste cocoa powder (Dust on top as a finishing touch.)

Step-by-Step Instructions

  1. Crush digestive biscuits into fine crumbs, mix with melted butter, press into a tart pan, and chill for 1 hour.
  2. In a saucepan, cook sweetened condensed milk over medium heat, stirring constantly until thickened and golden brown.
  3. Pour the cooled toffee mixture over the biscuit base and let it cool to room temperature.
  4. Slice the ripe bananas and arrange them over the toffee layer.
  5. Whip heavy cream with powdered sugar and vanilla until soft peaks form, then spread over the bananas.
  6. Drizzle with dark chocolate or dust with cocoa powder before chilling for at least 2 hours.

For best results, chill mixing bowl and beaters before whipping cream. Allow the pie to rest thoroughly for the best flavor and texture.

Dessert
British
Banoffee Pie, cream pie, dessert, easy dessert, no-bake pie

Filed Under: Dessert

Peanut Butter Banana Overnight Oats for a Yummy Breakfast!

September 15, 2025 by grace bellamy Leave a Comment

As I opened my fridge one sleepy morning, a few ingredients caught my eye, inviting me to whip up something satisfying and nutritious. That’s when I thought of Peanut Butter Banana Overnight Oats—a delightful mix of creamy peanut butter, ripe banana, and hearty oats. This recipe is a game-changer for anyone looking to kick fast food to the curb, offering a delicious breakfast that’s ready when you are. With just five minutes of prep time, these overnight oats make mornings easy and are perfect for meal prep enthusiasts. Packed with protein and fiber, they’ll keep you energized throughout the day. Ready to transform your breakfast routine and savor each spoonful? Let’s dive in!

Peanut Butter Banana

Why Choose Peanut Butter Banana Overnight Oats?

Simplicity at its finest: With just five minutes of prep, you can create a delicious breakfast that practically makes itself overnight.

Nutrient-Rich delight: Bursting with protein and fiber, these oats will fuel your day and keep those cravings at bay.

Versatile flavors: Mix and match with your favorite milk or sweeteners, and feel free to add toppings like nuts or berries for an extra crunch.

Meal Prep friendly: Make multiple jars at once—perfect for busy mornings or cozy weekends when you want something satisfying without effort.

Crowd-Pleasing combo: Who doesn’t love peanut butter and banana? This duo is a classic that appeals to both kids and adults alike!

Say goodbye to fast food and hello to a wholesome breakfast with these Peanut Butter Banana Overnight Oats. For more make-ahead ideas, check out our other easy breakfast recipes.

Peanut Butter Banana Ingredients

• To create your delicious Peanut Butter Banana Overnight Oats, gather these simple ingredients!

For the Oats

  • Rolled oats – Keeps the texture hearty and satisfying; you can also use quick oats for a softer bite.
  • Milk (or dairy-free alternative) – Adds creaminess; try almond or coconut milk for a unique flavor.

For the Flavor

  • Peanut butter – Adds rich flavor and protein; feel free to swap with almond or cashew butter for a twist.
  • Banana – Sweetens naturally and provides potassium for a nutritious boost; use ripe bananas for maximum sweetness.
  • Honey or maple syrup (optional) – Use either for an extra touch of sweetness; agave syrup is a great vegan alternative.
  • Vanilla extract – Adds warmth and depth; pure vanilla extract is best for a richer taste.

With these wholesome ingredients, you’re one step closer to enjoying a delightful bowl of Peanut Butter Banana Overnight Oats!

Step‑by‑Step Instructions for Peanut Butter Banana Overnight Oats

Step 1: Combine Oats and Milk
In a medium-sized jar or bowl, add 1/2 cup of rolled oats and 1 cup of milk (or your preferred dairy-free alternative). Stir these ingredients together until they’re well combined, ensuring the oats are fully submerged in the liquid. This step should take about a minute, and the mixture will be somewhat thick but smooth.

Step 2: Add Flavorful Ingredients
Next, introduce 1 tablespoon of creamy peanut butter, 1 tablespoon of honey or maple syrup (if using), and 1/2 teaspoon of vanilla extract to your oat mixture. Use a spoon to mix everything together thoroughly until the peanut butter is fully incorporated and the mixture is slightly creamy. This should take about 2 minutes, and you’ll notice a rich aroma as the flavors blend.

Step 3: Fold in the Banana
Gently fold in one sliced banana to your oat mix. This should be done carefully to keep the banana slices intact while evenly distributing them throughout the oats. The combination of banana with the creamy peanut butter will create a delicious flavor profile. This folding should take around 1 minute, leaving you with a lovely, colorful mixture.

Step 4: Refrigerate Overnight
Cover your jar or bowl securely with a lid or plastic wrap, then place it in the refrigerator for at least 4 hours, preferably overnight. This step allows the oats to soak up all the creamy goodness and flavors, transforming into a delicious and nutritious breakfast. In the morning, ready the oats should be thickened and slightly fluffy.

Step 5: Stir and Serve
When you’re ready to indulge in your Peanut Butter Banana Overnight Oats, remove the container from the fridge and give it a good stir to re-mix the ingredients. If desired, you can add a splash of milk to loosen the consistency. This final step will take just a minute, and your wholesome breakfast is now ready to be enjoyed!

Peanut Butter Banana

Expert Tips for Peanut Butter Banana Overnight Oats

  • Use Ripe Bananas: Ripe bananas enhance sweetness naturally and blend smoothly with oats; avoid green bananas for better texture and flavor.

  • Choose Your Oats Wisely: Rolled oats provide a hearty texture, but quick oats can give a softer consistency. Avoid instant oats, as they may become mushy.

  • Customize Sweetness: Adjust honey or maple syrup based on your taste preference; start with less and add more if needed to avoid overpowering the peanut butter flavor.

  • Mix Before Serving: Always give your peanut butter banana oats a good stir before serving; this helps distribute flavors evenly and ensures a satisfying bite.

  • Experiment with Add-Ins: Consider adding chia seeds for texture or a sprinkle of cinnamon for warmth; avoid overdoing it to keep the focus on the classic flavors.

Peanut Butter Banana Variations

Feel free to get creative with your Peanut Butter Banana Overnight Oats to suit your taste buds!

  • Nut-Free: Replace peanut butter with sunflower seed butter for a nut-free, allergy-friendly option. The flavor remains rich and satisfying without the nuts.

  • Dairy-Free: Use almond, oat, or coconut milk instead of regular milk to keep it deliciously creamy while catering to dairy-free needs. The oats will adapt beautifully!

  • Extra Crunch: Add a tablespoon of chia seeds or flaxseeds for added texture and a nutrient boost. They’ll lend a delightful crunch and a healthy dose of omega-3s!

  • Tropical Twist: Mix in diced pineapple or mango along with the banana for a refreshing tropical flair. The fruity punch will brighten your morning even more!

  • Chocolate Lover: Swirl in a teaspoon of cocoa powder or a handful of chocolate chips for a decadent twist. The chocolate and peanut butter combo is utterly irresistible!

  • Spicy Kick: Add a sprinkle of cinnamon or a dash of cayenne pepper for a surprising kick of flavor that enhances the sweetness of the banana. It’s a warming touch that awakens the senses.

  • Protein Boost: Stir in a scoop of your favorite protein powder to help keep you full and energized. It transforms these oats into a powerhouse breakfast!

  • Berry Delight: Toss in fresh berries like blueberries or strawberries to add color and freshness. The natural sweetness and juiciness from the berries complement the oats perfectly.

The beauty of these Peanut Butter Banana Overnight Oats lies in their adaptability, so let your imagination run wild! If you enjoy these, make sure to check out our meal prep ideas for more delicious inspirations.

What to Serve with Peanut Butter Banana Overnight Oats?

A delicious breakfast is just the beginning; let’s explore some delightful pairings to elevate your morning experience.

  • Greek Yogurt: Creamy and tangy, it adds a protein punch and balances the sweetness of the oats beautifully.

  • Fresh Berries: Juicy strawberries or blueberries provide a vibrant pop of color and freshness that enhances each bite.

  • Chia Seed Pudding: With its smooth, silky texture, it complements the hearty oats while adding extra nutrition and fiber.

  • Nuts and Seeds: A sprinkle of chopped almonds or sunflower seeds brings a satisfying crunch and extra healthy fats to your meal.

  • Iced Coffee: The robust flavor of a chilled coffee pairs perfectly, providing a refreshing lift to start your day.

  • Smoothie: Whip up a banana and spinach smoothie for a nutrient boost that’s both refreshing and delicious.

  • Cinnamon Apples: Warm, spiced apple slices served on the side create a cozy flavor combination with the oats.

  • Dark Chocolate Chips: A few pieces mixed in or sprinkled on top add a touch of indulgence, satisfying your sweet tooth brilliantly.

Each of these pairings adds unique flavors, textures, and nutrients, making your breakfast not just a meal but a delightful experience!

Make Ahead Options

These Peanut Butter Banana Overnight Oats are perfect for meal prep enthusiasts! You can prepare them up to 3 days in advance, making mornings a breeze. To make ahead, simply assemble multiple jars at once by following the recipe, minus the sliced banana, which can brown if added too early. After mixing, cover and refrigerate your jars. When you’re ready to enjoy, fold in fresh banana slices and give it a good stir. This way, you’ll ensure each container stays delicious and fresh, offering the same nutritious taste with minimal effort on busy mornings. Say goodbye to fast food breakfasts!

Storage Tips for Peanut Butter Banana Overnight Oats

  • Fridge: Store your peanut butter banana overnight oats in the fridge for up to 3 days in an airtight container to maintain freshness and prevent spoilage.

  • Freezer: While overnight oats are best fresh, you can freeze them in individual portions for up to 1 month. Let them thaw in the fridge overnight before enjoying.

  • Reheating: If you prefer warm oats, simply transfer the oats to a microwave-safe bowl and heat for 30-60 seconds, adding a splash of milk to achieve your desired consistency.

  • Add Fresh Toppings: To keep your oats vibrant and delicious, consider adding fresh banana slices or nuts just before serving, as these don’t store well overnight.

Peanut Butter Banana

Peanut Butter Banana Overnight Oats Recipe FAQs

How do I choose the right banana for this recipe?
Absolutely! Look for bananas that are slightly speckled and firm—these are perfectly ripe and sweet without being overly mushy. Avoid green bananas, as they lack sweetness and can affect the overall flavor of your oats.

How should I store my leftover peanut butter banana overnight oats?
Store your peanut butter banana overnight oats in the refrigerator for up to 3 days in an airtight container. This helps maintain freshness and keeps the oats from drying out. Remember, the banana will darken slightly, but the flavors will still be delicious!

Can I freeze peanut butter banana overnight oats?
Certainly! If you have leftovers, you can freeze them in individual portions for up to 1 month. To freeze, simply portion them into freezer-safe containers and label them. Thaw overnight in the fridge, and when ready to eat, just stir and enjoy!

What should I do if my overnight oats turn out too thick?
No worries! If your peanut butter banana oats are thicker than you like, add a splash of milk or water to loosen the consistency. Stir until it’s creamy again. You can also adjust the liquid ratio next time, trying a bit more milk while mixing.

Can my pets have any of these ingredients?
Great question! While oats are generally safe for pets, avoid giving them peanut butter that contains xylitol, a sweetener that’s toxic to dogs. If considering sharing, check the ingredients to ensure safety, and keep servings small for pets!

What’s the best way to add variety to my peanut butter banana overnight oats?
Very! You can customize your oats by adding chia seeds or flaxseeds for extra nutrition, and sprinkle a bit of cinnamon or nutmeg for a warm flavor twist. Mix in nuts or dried fruits right before serving for a delightful crunch and additional textures!

Peanut Butter Banana Overnight Oats for a Yummy Breakfast!

Savor Peanut Butter Banana Overnight Oats, a quick and nutritious breakfast option that combines creamy peanut butter with ripe bananas and hearty oats.

  • Jar or bowl

For the Oats

  • 1/2 cup rolled oats (Can substitute with quick oats.)
  • 1 cup milk (Or dairy-free alternative like almond or coconut milk.)

For the Flavor

  • 1 tablespoon peanut butter (May substitute with almond or cashew butter.)
  • 1 medium banana (Use ripe bananas for best sweetness.)
  • 1 tablespoon honey or maple syrup (Optional; agave syrup is a vegan alternative.)
  • 1/2 teaspoon vanilla extract (Pure vanilla extract is preferred.)

Step-by-Step Instructions

  1. In a medium-sized jar or bowl, add 1/2 cup of rolled oats and 1 cup of milk. Stir together until combined, ensuring the oats are fully submerged.
  2. Introduce 1 tablespoon of creamy peanut butter, 1 tablespoon of honey or maple syrup, and 1/2 teaspoon of vanilla extract to the oat mixture. Blend thoroughly.
  3. Gently fold in one sliced banana to the oat mix, being cautious to keep the slices intact while mixing.
  4. Cover securely with a lid or plastic wrap and refrigerate for at least 4 hours or overnight.
  5. When ready to eat, stir the oats well and add a splash of milk if needed for consistency.

Use ripe bananas for maximum sweetness. Adjust sweetness according to preference and always stir before serving.

Breakfast
Healthy Breakfast, meal prep, nutritious, Overnight Oats, Peanut Butter Banana

Filed Under: Breakfast

Sausage and Sweet Potatoes in Honey Garlic Bliss

September 15, 2025 by grace bellamy Leave a Comment

Just the other day, I found myself craving the nostalgic comfort of a hearty meal, yet wanted something that didn’t take hours to prepare. Enter this delightful recipe for Sausage and Sweet Potatoes with Honey Garlic Sauce! What’s even better is that it beautifully marries savory and sweet, all while being on the table in just 30 minutes—perfect for those busy weeknights. Imagine the satisfying aroma filling your kitchen as the sausage browns and those sweet potatoes caramelize! This dish is not only a crowd-pleaser but also offers a nutritious punch with protein, fiber, and a touch of natural sweetness. Ready to whip up a meal that will have your friends and family coming back for seconds? Let’s dive in!

Sausage and Sweet Potatoes

Why is this recipe a must-try?

Simplicity at Its Best: Whip up this dish in just 30 minutes, making it perfect for busy weeknights.

Savory-Sweet Balance: The combination of honey and garlic creates a heavenly glaze that perfectly complements the sausage and sweet potatoes.

Versatile Protein Options: Use your favorite type of sausage—pork, chicken, turkey, or plant-based—to suit your taste and dietary needs.

Hearty & Nourishing: Packed with protein and fiber, this recipe offers a satisfying meal that’s both comforting and nutritious.

Crowd-Pleasing Delight: It’s not just a meal; it’s an experience that will have everyone coming back for seconds, especially when paired with a fresh salad or roasted veggies. Check out the perfect sides to complete your meal with our helpful guide on serving suggestions for balanced meals.

Sausage and Sweet Potatoes Ingredients

Get ready to savor the flavors of this delightful dish!

For the Main Dish
• Olive oil – 1 tablespoon, for sautéing the sausage and adding a rich flavor.
• Sausage – 1 pound, choose from pork, chicken, turkey, or plant-based for versatility.
• Sweet potatoes – 2 cups, cubed to bring a natural sweetness and wholesome texture to the dish.

For the Honey Garlic Sauce
• Honey – 4 tablespoons, to add a sweet, sticky glaze that beautifully balances the savory sausage.
• Garlic – 4 cloves, minced for an aromatic kick that enhances the overall flavor profile.
• Soy sauce – 2 tablespoons, providing a salty depth that pairs wonderfully with the sweetness.
• Paprika – 1 teaspoon, to introduce a subtle smoky flavor and vibrant color.
• Salt – to taste, elevating all the flavors in the dish.
• Pepper – to taste, for a bit of spice that rounds out the flavors nicely.

For Garnish
• Fresh parsley – for garnish, a sprinkle of greenery makes the dish pop and adds freshness.

Embrace the culinary adventure of making Sausage and Sweet Potatoes, filled with comforting warmth and delightful flavors!

Step‑by‑Step Instructions for Sausage and Sweet Potatoes

Step 1: Brown the Sausage
Begin by heating a large skillet over medium heat and adding 1 tablespoon of olive oil. Once the oil is shimmering, add 1 pound of sliced sausage to the pan. Cook for 5 to 7 minutes, stirring occasionally, until the sausage is browned and has developed a beautiful, golden color, releasing its savory aroma.

Step 2: Add Sweet Potatoes
Next, stir in 2 cups of cubed sweet potatoes, tossing gently to combine with the sausage. Sauté the mixture for another 5 minutes, allowing the sweet potatoes to soften slightly. You’ll know they’re ready when they start to take on a tender texture while still maintaining some structure.

Step 3: Prepare the Honey Garlic Sauce
In a small bowl, whisk together 4 tablespoons of honey, 4 minced cloves of garlic, 2 tablespoons of soy sauce, 1 teaspoon of paprika, and a sprinkle of salt and pepper. This sweet and savory concoction will elevate your dish. Once blended, pour the sauce evenly over the sausage and sweet potatoes, stirring to ensure everything is well coated.

Step 4: Simmer to Perfection
Cover the skillet with a lid and reduce the heat to low. Let the dish simmer for approximately 10 minutes, allowing the flavors to meld together. Keep an eye on the sweet potatoes; they should be fork-tender and glistening with the honey garlic sauce when done, creating an inviting sight.

Step 5: Garnish and Serve
Once the sweet potatoes are perfectly tender, remove the skillet from heat. Sprinkle fresh chopped parsley over the top for a vibrant finish. Serve the Sausage and Sweet Potatoes hot, allowing the delectable combination of savory and sweet to shine on your table. Enjoy this delightful dish with your favorite sides!

Sausage and Sweet Potatoes

Tips for the Best Sausage and Sweet Potatoes

Choose Your Sausage Wisely: Opt for high-quality sausage with your preferred flavor—pork, chicken, turkey, or plant-based—to enhance the taste profile.

Perfect Cooking Temperature: Cook the sausage over medium heat to prevent burning while allowing it to brown evenly and develop rich flavors.

Cut Uniformly: Ensure your sweet potato cubes are of similar size for even cooking. This way, they’ll all become tender at the same time, avoiding any mushy bits.

Balance Sweetness: Adjust the honey according to your taste; if you love less sweetness, reduce it slightly, or try adding a splash of vinegar for complexity.

Don’t Skip the Simmer: Allowing the dish to simmer for 10 minutes is crucial for blending all the flavors of the sausage and sweet potatoes, thus enhancing the overall taste.

Fresh Garnish Matters: A sprinkle of fresh parsley not only adds color but also brightens the dish, making your Sausage and Sweet Potatoes shine.

How to Store and Freeze Sausage and Sweet Potatoes

Fridge: Store any leftovers in an airtight container and refrigerate for up to 3 days. Reheat gently in the microwave or on the stovetop.

Freezer: For longer storage, freeze portions of the Sausage and Sweet Potatoes in freezer-safe containers for up to 3 months. Thaw in the fridge overnight before reheating.

Reheating: When ready to enjoy again, reheat on the stovetop over low heat, adding a splash of water to steam if needed. This method keeps the sweet potatoes tender and flavorful.

Tips for Best Quality: Always allow the dish to cool completely before sealing it in containers to avoid condensation and maintain taste.

What to Serve with Sausage and Sweet Potatoes?

Consider crafting a comforting meal that dances between savory and sweet, transporting you to culinary bliss.

  • Crisp Green Salad: A refreshing salad of mixed greens with a tangy vinaigrette will balance the richness of the dish, adding bright flavors.
  • Steamed Broccoli: Tender, vibrant broccoli adds a pop of color and a delightful crunch, creating a pleasing contrast alongside the sweet potatoes.
  • Quinoa Pilaf: Nutty quinoa elevates the meal with its unique texture. Light, fluffy, and full of protein, it pairs well with the honey garlic sauce.
  • Roasted Brussels Sprouts: The caramelized edges of Brussels sprouts provide a lovely earthy companion, enhancing the overall umami experience of the dish.
  • Garlic Bread: A warm loaf of garlic bread offers a comforting carb option, perfect for soaking up any leftover honey garlic sauce on your plate.
  • Apple Cider: A glass of chilled apple cider introduces a sweet and tangy note that harmonizes with the dish while refreshing your palate.
  • Vanilla Ice Cream: For dessert, a scoop of vanilla ice cream brings a creamy sweetness that beautifully contrasts the hearty flavors of sausage and sweet potatoes.

Make Ahead Options

These Sausage and Sweet Potatoes with Honey Garlic Sauce are perfect for meal prep enthusiasts! You can cube the sweet potatoes and slice the sausage up to 24 hours in advance, storing them separately in airtight containers in the refrigerator to maintain freshness. For an even faster finish, mix the honey garlic sauce in advance and refrigerate it as well. When you’re ready to cook, simply sauté the sausage, add the prepped sweet potatoes, and pour the sauce over them. Allow the dish to simmer, and you’ll have a delicious, home-cooked meal that saves you time without compromising on flavor!

Sausage and Sweet Potatoes Variations

Feel free to get creative and make this dish your own with these delightful variations!

  • Spicy Kick: Add red pepper flakes or a splash of hot sauce to the honey garlic sauce for a fiery twist. If you love heat, elevate every bite with a little extra spice!

  • Veggie Boost: Toss in bell peppers, onions, or even kale along with the sweet potatoes for added nutrition and flavor. It’s a great way to sneak in more veggies and enhance the dish’s vibrant colors.

  • Herb Infusion: Experiment with fresh herbs like thyme or rosemary integrated into the cooking process for a fragrant herbaceous note. These timeless additions bring a warmth that truly elevates the dish.

  • Citrus Zest: Brighten up the flavors by adding the juice and zest of an orange or lemon to the honey garlic sauce. This zesty twist balances the richness of the sausage and sweet potatoes beautifully.

  • Maple Wonderland: Swap honey for maple syrup for a uniquely sweet twist. The maple flavor plays lovely with the savory elements, creating a cozy, comforting sensation.

  • Nut Butter Delight: Stir in a spoonful of almond or peanut butter into the sauce for a creamy, nutty flavor that enhances both sweetness and richness. It’s a surprise that will delight your taste buds!

  • Roasted Sweet Potatoes: Instead of sautéing, roast the sweet potatoes separately until caramelized, then combine them with the sausage. This method adds a deliciously crispy texture, resulting in a dish that bursts with flavor.

  • Quinoa Base: For a heartier meal, serve the sausage and sweet potatoes over a bed of quinoa or couscous. This not only ups the fiber content but creates a fulfilling and well-rounded meal.

These variations ensure that your Sausage and Sweet Potatoes will never be boring, inviting you to explore different flavors while enjoying the comforts of home-cooked goodness! Looking for the perfect pairings to complement your dish? Check out our guide on serving suggestions for balanced meals.

Sausage and Sweet Potatoes

Sausage and Sweet Potatoes with Honey Garlic Sauce Recipe FAQs

What type of sausage works best for this recipe?
Absolutely! You can choose from pork, chicken, turkey, or even plant-based sausage. Each brings its unique flavor, so I often recommend trying a few to find your favorite.

How should I store leftovers?
For optimal freshness, refrigerate any leftovers in an airtight container for up to 3 days. When reheating, I find it best to use the stovetop on low heat to maintain the sweet potatoes’ tenderness—adding a splash of water can help steam them back to perfection!

Can I freeze the Sausage and Sweet Potatoes?
Very! To freeze, portion out the dish into freezer-safe containers after it has cooled completely. It can be kept for up to 3 months. When you’re ready to enjoy it again, simply thaw it overnight in the fridge before reheating on the stovetop over low heat.

What should I do if my sweet potatoes are too hard after cooking?
If you find your sweet potatoes aren’t tender enough after simmering, don’t worry! Simply add a splash of water to the skillet and cover it again, letting them simmer for an additional 5 minutes. This will create steam and help soften them quicker while enhancing the flavors.

Can I substitute honey for a different sweetener?
Absolutely! If you’re looking for alternatives, maple syrup or agave nectar can be used instead of honey. Keep in mind that each sweetener brings its flavor, so adjust to your preference!

Are there any allergies I should consider?
Yes, please be mindful if you or your guests have allergies. This dish contains soy sauce, which has gluten unless you opt for a gluten-free brand. If anyone has a garlic sensitivity, you can omit it, though it does provide a delightful flavor.

Sausage and Sweet Potatoes in Honey Garlic Bliss

Enjoy a comforting Sausage and Sweet Potatoes dish with a delicious honey garlic sauce—perfect for quick weeknight meals.

  • large skillet

For the Main Dish

  • 1 tablespoon Olive oil (for sautéing the sausage and adding a rich flavor.)
  • 1 pound Sausage (choose from pork, chicken, turkey, or plant-based for versatility.)
  • 2 cups Sweet potatoes (cubed to bring a natural sweetness and wholesome texture to the dish.)

For the Honey Garlic Sauce

  • 4 tablespoons Honey (to add a sweet, sticky glaze that beautifully balances the savory sausage.)
  • 4 cloves Garlic (minced for an aromatic kick that enhances the overall flavor profile.)
  • 2 tablespoons Soy sauce (providing a salty depth that pairs wonderfully with the sweetness.)
  • 1 teaspoon Paprika (to introduce a subtle smoky flavor and vibrant color.)
  • Salt (to taste, elevating all the flavors in the dish.)
  • Pepper (to taste, for a bit of spice that rounds out the flavors nicely.)

For Garnish

  • Fresh parsley (for garnish, a sprinkle of greenery makes the dish pop and adds freshness.)

Step-by-Step Instructions

  1. Begin by heating a large skillet over medium heat and adding 1 tablespoon of olive oil. Once the oil is shimmering, add 1 pound of sliced sausage to the pan. Cook for 5 to 7 minutes, stirring occasionally, until the sausage is browned.
  2. Next, stir in 2 cups of cubed sweet potatoes, tossing gently to combine with the sausage. Sauté the mixture for another 5 minutes.
  3. In a small bowl, whisk together 4 tablespoons of honey, 4 minced cloves of garlic, 2 tablespoons of soy sauce, 1 teaspoon of paprika, and a sprinkle of salt and pepper. Pour the sauce over the sausage and sweet potatoes.
  4. Cover the skillet with a lid and reduce the heat to low. Let the dish simmer for approximately 10 minutes.
  5. Once the sweet potatoes are perfectly tender, remove the skillet from heat. Sprinkle fresh chopped parsley over the top for a vibrant finish. Serve hot.

Allowing the dish to simmer for 10 minutes is crucial for blending all the flavors of the sausage and sweet potatoes, thus enhancing the overall taste.

Main Dishes
American
comfort food, Easy Recipe, honey garlic, quick meal, Sausage, Sweet Potatoes

Filed Under: Main Dishes

Zesty Shrimp & Avocado Bowls that Brighten Your Dinner Routine

September 15, 2025 by grace bellamy Leave a Comment

“Have you ever felt like your taste buds were stuck in a rut?” If so, it’s time to shake things up with my Zesty Shrimp & Avocado Bowls with Mango Salsa. These bowls are not just a meal; they’re an experience of vibrant flavors and refreshing ingredients that transport you straight to a sun-soaked beach. The combination of plump, perfectly seasoned shrimp and creamy avocado, topped with a zesty mango salsa, offers an irresistible perk of quick prep and a crowd-pleasing quality that’ll impress anyone at your table. With just 25 minutes from start to finish, you can say goodbye to fast food and hello to a homemade delight that’s as nutritious as it is delicious. Ready to elevate your dinner game with this easy and satisfying recipe? Let’s dive in!

Zesty Shrimp & Avocado Bowls

Why are these bowls a must-try?

Bold flavors: The zesty mango salsa elevates every bite, creating a refreshing twist that is both delicious and nutritious.
Quick prep: With just 25 minutes required, these bowls fit perfectly into a busy schedule—an ideal choice for those looking to swap out fast food for homemade goodness.
Nutrient-packed: This dish combines lean protein with healthy fats from avocado, making it not just satisfying but also wholesome.
Crowd-pleaser: Perfect for gatherings or family dinners, these bowls will impress your guests and family alike; everyone will be asking for seconds!
Versatile serving options: Serve over rice or quinoa, or even enjoy them as a fresh salad for a satisfying lunch the next day. Don’t forget to check out our guide on meal prepping for more tips on making weeknight dinners a breeze!

Zesty Shrimp & Avocado Bowls Ingredients

For the Shrimp
• Shrimp – 1 lb of peeled and deveined shrimp adds a delightful protein boost to these zesty shrimp & avocado bowls.
• Chili powder – 1 teaspoon gives the shrimp a delicious kick; feel free to adjust according to your spice preference.
• Salt and pepper – To taste, enhancing the overall flavor of the dish.

For the Mango Salsa
• Mango – 1 cup of fresh diced mango brings vibrant sweetness and a tropical touch to the salsa.
• Red onion – 1 small, finely chopped, provides a lovely crunch and sharpness to balance the sweetness.
• Jalapeño – 1 seeded and minced, adds a mild heat; omit for a milder salsa if desired.
• Lime juice – Juice of 1 lime brightens the salsa and helps meld the flavors.
• Salt and pepper – A pinch to season, enhancing the freshness of the ingredients.

For Serving
• Avocado – 2 ripe avocados, sliced or cubed, bring creaminess and healthy fats to the bowls.
• Olive oil – 2 tablespoons are needed for sautéing the shrimp, adding richness and flavor.
• Cooked rice or quinoa – A base for the bowls that makes them hearty and satisfying.
• Fresh cilantro – Chopped for garnish, lending an aromatic touch that elevates the whole dish.

Step‑by‑Step Instructions for Zesty Shrimp & Avocado Bowls

Step 1: Prepare the Mango Salsa
Start by dicing 1 cup of fresh mango into small cubes, ensuring they’re bite-sized and sweet. Next, finely chop a small red onion and mince a jalapeño, adjusting the quantity based on your spice tolerance. In a mixing bowl, combine the mango, onion, jalapeño, and juice from 1 lime. Add a pinch of salt and pepper, gently tossing the mixture to blend the flavors, then set aside to let it marinate.

Step 2: Season the Shrimp
While the salsa rests, sprinkle 1 pound of peeled and deveined shrimp with 1 teaspoon of chili powder, salt, and pepper to taste. Make sure each shrimp is evenly coated for a burst of flavor. This step is crucial for enhancing your Zesty Shrimp & Avocado Bowls, ensuring that every bite delivers a spicy kick.

Step 3: Cook the Shrimp
Heat 2 tablespoons of olive oil in a skillet over medium-high heat until shimmering. Carefully add the seasoned shrimp and cook for about 2-3 minutes on each side. The shrimp should turn a vibrant pink and become opaque, indicating they are perfectly cooked. Remove from heat and set aside, allowing the aroma to fill your kitchen as you prepare the next components.

Step 4: Assemble the Bowls
To create the base of your Zesty Shrimp & Avocado Bowls, scoop a generous serving of cooked rice or quinoa into each bowl. This hearty foundation provides a satisfying texture and complements the shrimp beautifully. Make sure to create a nice nest for the toppings that will follow.

Step 5: Add the Avocado and Shrimp
Next, arrange slices or cubes of 2 ripe avocados over the rice, ensuring each bowl has a creamy goodness. Then, add the beautifully cooked shrimp on top, allowing their vibrant color to shine. The combination of shrimp and avocado adds richness, making the dish truly irresistible.

Step 6: Top with Mango Salsa and Garnish
Generously spoon the prepared mango salsa over each bowl, letting the colors and textures blend. Finally, garnish with chopped fresh cilantro for an aromatic lift. The addition of cilantro enhances the overall freshness, making your Zesty Shrimp & Avocado Bowls not only divine in flavor but also visually stunning.

Step 7: Serve Immediately
Serve your Zesty Shrimp & Avocado Bowls right away for the best taste and freshness. The vibrant flavors and textures will impress anyone at your table, making this meal a guaranteed favorite. Enjoy the combination of warmth from the shrimp and the coolness of the avocado and salsa!

Zesty Shrimp & Avocado Bowls

How to Store and Freeze Zesty Shrimp & Avocado Bowls

Fridge: Store leftovers in an airtight container for up to 2 days. Keep the shrimp, avocado, and salsa separate to maintain freshness.

Freezer: For best quality, freeze cooked shrimp separately for up to 3 months. Avoid freezing avocado, as it can turn mushy.

Reheating: To reheat shrimp, gently sauté in a skillet over low heat until warmed through. Serve with freshly made salsa for a deliciously vibrant meal.

Assembly Tip: When ready to enjoy leftovers, assemble bowls fresh with rice or quinoa, avocado, and mango salsa right before serving for optimal flavor and texture.

Expert Tips for Zesty Shrimp & Avocado Bowls

Fresh Ingredients: Use ripe avocados and fresh mango for the best flavor; this will make your zesty shrimp & avocado bowls truly shine.

Don’t Overcook Shrimp: Cook shrimp just until pink and opaque (2-3 minutes per side); overcooked shrimp can become tough and rubbery.

Chill the Salsa: Allow the mango salsa to sit at room temperature for 10-15 minutes. This melds the flavors beautifully and enhances the dish.

Customize the Spice: Adjust the jalapeño and chili powder to suit your heat preference. A little taste test can guide your spice level without unnecessary risks.

Serving Suggestions: Consider serving these bowls with a squeeze of fresh lime on top for an extra zesty kick, enhancing flavor contrast.

Storage Tips: If you have leftovers, store the components separately to maintain freshness; combine before serving for the best experience!

What to Serve with Zesty Shrimp & Avocado Bowls

Create the perfect meal to accompany your delightful bowls of flavor, balancing textures and tastes that complement each bite.

  • Crispy Tortilla Chips: These provide a satisfying crunch, perfect for scooping up that zesty mango salsa.
  • Grilled Vegetables: A medley of zucchini, bell peppers, and asparagus adds smokiness and a colorful presentation, enhancing the freshness of the bowls.
  • Refreshing Cucumber Salad: Tossed with a light vinaigrette, this salad introduces a refreshing contrast that brightens your dining experience.
  • Garlic-Lime Rice: Fluffy rice infused with garlic and lime complements the shrimp beautifully and ties the flavors together in harmony.
  • Watermelon Feta Salad: The sweet and salty combination offers a perfect palate cleanser, enhancing the vibrant flavors of the dishes.
  • Mango Smoothie: A chilly, fruity drink brings a refreshing twist and echoes the mango salsa used in the bowls.
  • Pineapple Coconut Rice: With a hint of tropical sweetness, this rice dish elevates the overall experience, matching the theme of your zesty shrimp & avocado bowls.
  • Crispy Sweet Potato Fries: Their sweetness and crunch create a delightful contrast to the creamy avocado and spicy shrimp.
  • Sparkling Water with Lime: This light, bubbly drink refreshes the palate and makes for a delightful pairing, enhancing the tropical vibes of the meal.

Zesty Shrimp & Avocado Bowls Variations

Feel free to customize your Zesty Shrimp & Avocado Bowls to match your taste buds and dietary needs!

  • Dairy-Free: Skip any cheese toppings and use coconut yogurt for a creamy texture without dairy.
  • Spicy Twist: Add extra minced jalapeño or red pepper flakes to the shrimp for an added kick that warms the soul.
  • Citrus Kick: Swap lime juice for fresh orange juice in the salsa for a sweeter, more juicy flavor profile.
  • Herb Infusion: Incorporate chopped mint or basil into the mango salsa for a refreshing herbal twist that brightens the dish.
  • Veggie Booster: Toss in diced bell peppers or shredded carrots to the mango salsa for extra crunch and vibrant color.
  • Quinoa Boost: Use quinoa cooked in vegetable broth instead of water to enhance the flavor and add a nutty touch to your bowl.
  • Shrimp Alternatives: Substitute shrimp with grilled chicken or tofu for a different protein choice that keeps it satisfying and delicious.
  • Nutty Finesse: Sprinkle sesame seeds or chopped nuts (like cashews or pistachios) on top for a delightful crunch and added healthy fats.

These variations make it easy to keep exciting flavors flowing while enjoying your homemade goodness! If you’re looking for more ideas, why not explore our easy recipes for meal prepping? It’s a fantastic way to make weekly meals a breeze!

Make Ahead Options

These Zesty Shrimp & Avocado Bowls are perfect for meal prep enthusiasts! You can prepare the mango salsa up to 3 days in advance, storing it in an airtight container in the refrigerator to keep it fresh and vibrant. Additionally, you can season and cook the shrimp ahead of time, refrigerating them for up to 24 hours before serving. To maintain the quality of your avocados and prevent browning, slice them just before assembly. When ready to enjoy your delicious bowls, simply reheat the shrimp in a skillet or microwave, assemble the rice or quinoa base, layer on the shrimp, and top with the prepared salsa and avocado for a meal that’s just as delightful and fresh as when you made it!

Zesty Shrimp & Avocado Bowls

Zesty Shrimp & Avocado Bowls Recipe FAQs

How do I choose the best avocados for this recipe?
Absolutely! Look for avocados that are slightly soft to the touch but not mushy. A ripe avocado will yield gently when pressed, indicating it’s creamy and perfect for your Zesty Shrimp & Avocado Bowls. If you find avocados that are still firm, you can let them sit at room temperature for a day or two until they ripen.

How should I store leftovers of this dish?
For sure! Store any leftovers in an airtight container in the fridge for up to 2 days. It’s best to keep the shrimp, avocado, and salsa separate to prevent the avocado from browning and the shrimp from getting soggy. When you’re ready to enjoy them again, simply combine everything for a delicious meal!

Can I freeze any components of the Zesty Shrimp & Avocado Bowls?
Yes! You can freeze the cooked shrimp separately for up to 3 months for optimal quality. Just make sure to place them in a freezer-safe bag and remove as much air as possible. However, avoid freezing the avocado or the salsa, as this can lead to undesirable textures once thawed.

What if my shrimp turns out a bit rubbery?
No worries! Overcooked shrimp can happen, but there are ways to avoid it. Always make sure to cook your shrimp just until they turn pink and opaque, which usually takes 2-3 minutes per side. If you find they’re rubbery, it means they were cooked too long. Next time, consider using a timer to monitor the cooking process closely.

Are there any dietary considerations I should be aware of?
Certainly! If you’re serving these Zesty Shrimp & Avocado Bowls to guests, be mindful of seafood allergies, as shrimp is a common allergen. Additionally, you can make the dish vegetarian by substituting the shrimp with grilled veggies or tofu, ensuring it remains just as flavorful and satisfying for all dietary preferences!

How can I make this dish more spicy?
Very easily! If you love heat, consider adding more jalapeño to the mango salsa or increasing the amount of chili powder on your shrimp. You could also drizzle a bit of hot sauce over the assembled bowls for that extra kick. The more the merrier when it comes to flavor!

Zesty Shrimp & Avocado Bowls that Brighten Your Dinner Routine

Zesty Shrimp & Avocado Bowls offer a delightful mix of flavors in just 25 minutes, making them a perfect homemade alternative to fast food.

  • skillet
  • Mixing Bowl
  • cutting board
  • Knife

For the Shrimp

  • 1 lb peeled and deveined shrimp (adds a delightful protein boost)
  • 1 teaspoon chili powder (gives the shrimp a delicious kick)
  • to taste salt
  • to taste pepper

For the Mango Salsa

  • 1 cup fresh diced mango (brings vibrant sweetness)
  • 1 small red onion (finely chopped)
  • 1 jalapeño (seeded and minced)
  • 1 lime juice (brightens the salsa)
  • a pinch salt
  • a pinch pepper

For Serving

  • 2 ripe avocados (sliced or cubed)
  • 2 tablespoons olive oil (for sautéing the shrimp)
  • cooked rice or quinoa (as a base for the bowls)
  • fresh cilantro (chopped for garnish)

Step‑by‑Step Instructions

  1. Start by dicing 1 cup of fresh mango into small cubes, then finely chop a small red onion and mince a jalapeño. In a mixing bowl, combine the mango, onion, jalapeño, and juice from 1 lime. Add a pinch of salt and pepper, gently tossing the mixture to blend the flavors, then set aside to let it marinate.
  2. While the salsa rests, sprinkle 1 pound of peeled and deveined shrimp with 1 teaspoon of chili powder, salt, and pepper to taste. Make sure each shrimp is evenly coated.
  3. Heat 2 tablespoons of olive oil in a skillet over medium-high heat until shimmering. Carefully add the seasoned shrimp and cook for about 2-3 minutes on each side until they turn pink and opaque. Remove from heat and set aside.
  4. Scoop a generous serving of cooked rice or quinoa into each bowl to create a base.
  5. Arrange slices or cubes of 2 ripe avocados over the rice in each bowl, then add the cooked shrimp on top.
  6. Spoon the prepared mango salsa over each bowl and garnish with chopped fresh cilantro.
  7. Serve your Zesty Shrimp & Avocado Bowls immediately for the best taste and freshness.

Use ripe ingredients for maximum flavor, adjust spice levels to personal preference, and serve immediately for best texture.

Main Dishes
Mexican
avocado bowls, crowd-pleaser, healthy dinner, mango salsa, quick recipe, zesty shrimp

Filed Under: Main Dishes

Crunchy Onion and Spinach Pakoras with Mint Raita Delight

September 14, 2025 by grace bellamy Leave a Comment

As I stood in my kitchen, the tantalizing aroma of spices danced through the air, sweeping me away to bustling street corners where pakoras are sold hot and fresh. Today, I’m sharing my recipe for Onion and Spinach Pakoras with Mint Raita—an irresistible snack that marries crispy textures with vibrant flavors. These pakoras are not just a delightful way to indulge; they’re quick to whip up, making them perfect for any day or gathering. Plus, with the refreshing mint raita on the side, you’ll elevate your eating experience to new heights! Are you ready to transform your snack game? Let’s dive into the recipe!

Onion and Spinach Pakoras with Mint Raita

Why are these pakoras a must-try?

Crispy texture: Each bite offers a satisfying crunch that’ll make your taste buds sing.

Flavor-packed: The combination of onions, spinach, and spices creates a savory explosion that transcends ordinary snacks.

Quick and easy: With just one hour from start to finish, you can have these delicious Onion and Spinach Pakoras with Mint Raita ready to impress friends or family.

Versatile pairing: Enjoy them as an appetizer, a snack with chai, or even as a side dish to your favorite curry.

Healthier alternative: Made with chickpea flour, these pakoras are a guilt-free indulgence that feels good to share.

Perfect for gatherings: They’re a crowd favorite that disappears fast—prepare a double batch and watch them vanish!

Onion and Spinach Pakoras Ingredients

• Discover the fresh flavors of Onion and Spinach Pakoras with Mint Raita!

For the Pakoras
• Fresh spinach – finely chopped for vibrant color and nutrition.
• Small onion – thinly sliced to add sweetness and crunch.
• Chickpea flour (besan) – provides a gluten-free base for the batter.
• Rice flour – enhances crispiness for that perfect crunch.
• Green chilies – finely chopped; adjust according to your heat preference!
• Cumin seeds – impart warm, earthy flavors that elevate the dish.
• Red chili powder – adds a touch of heat and color.
• Turmeric powder – gives a beautiful golden hue and health benefits.
• Garam masala – a fragrant spice blend that adds depth to the flavors.
• Salt – to enhance all the delicious tastes.
• Water – as needed to create the ideal batter consistency.
• Oil – for deep frying, ensuring a golden, crispy finish.

For the Mint Raita
• Plain yogurt – acts as a cooling base to balance the spice of the pakoras.
• Fresh mint leaves – finely chopped to give a refreshing flavor burst.
• Lemon juice – adds a zesty kick that brightens the raita.

Step‑by‑Step Instructions for Onion and Spinach Pakoras with Mint Raita

Step 1: Prepare the Vegetables
Rinse the fresh spinach leaves thoroughly under cold water, then finely chop them. Slice the small onion thinly to create delicate rings. Set the prepared vegetables aside as you mix the dry ingredients, ensuring each element is ready for a tasty batch of Onion and Spinach Pakoras.

Step 2: Mix the Dry Ingredients
In a large mixing bowl, combine the chickpea flour, rice flour, cumin seeds, red chili powder, turmeric powder, garam masala, and a good pinch of salt. Whisk everything together until it’s well blended; this will form a flavorful base for our pakoras. Take a moment to enjoy the inviting aroma of the spices!

Step 3: Combine with Vegetables
Add the chopped spinach, sliced onion, and finely chopped green chilies into the flour mixture. Stir everything together gently until the vegetables are evenly coated with the spice blend. This combination is essential for achieving the desired taste in your Onion and Spinach Pakoras, bringing all the flavors together beautifully.

Step 4: Create the Batter
Gradually pour in water to the mixture, stirring continuously until you achieve a thick batter that clings to the vegetables. The batter should not be too runny; it needs to coat the vegetables without dripping off. This step is crucial for that perfect crunchy texture that everyone loves in pakoras!

Step 5: Heat the Oil
In a deep frying pan, pour enough oil to submerge the pakoras halfway—aim for about 2-3 inches deep. Heat the oil over medium heat until it reaches approximately 350°F (175°C). To test if the oil is ready, drop a small spoonful of batter; if it sizzles and rises to the surface, you’re set to fry!

Step 6: Fry the Pakoras
Once the oil is hot, carefully drop small amounts of the batter mixture into the pan, ensuring not to overcrowd. Fry the pakoras in batches, cooking each batch for about 3-4 minutes or until they are golden brown and crispy. Keep an eye on them, gently flipping for even cooking and color.

Step 7: Drain Excess Oil
Using a slotted spoon, carefully remove the pakoras from the oil and place them on paper towels to drain any excess oil. This step is essential to maintain their crunchiness and prevent them from becoming soggy. Let the pakoras cool slightly while you prepare the mint raita for a delightful pairing!

Step 8: Prepare the Mint Raita
In a mixing bowl, combine the plain yogurt, finely chopped mint leaves, lemon juice, and a pinch of salt. Stir until the ingredients are well blended, creating a cooling sauce that complements the spicy pakoras beautifully. Taste and adjust the salt if necessary, ensuring every dip is bursting with flavor.

Step 9: Serve Hot
Present your delicious Onion and Spinach Pakoras with a generous side of refreshing mint raita. These crispy delights are best enjoyed hot, so gather your friends and family around to savor every crunchy bite together. Let the flavors transport you to a street food paradise!

Onion and Spinach Pakoras with Mint Raita

How to Store and Freeze Onion and Spinach Pakoras

Fridge: Store leftover Onion and Spinach Pakoras in an airtight container for up to 3 days to maintain their freshness and crispness.

Freezer: Freeze uncooked pakoras for up to 2 months. Arrange them on a baking sheet to freeze individually before transferring to a freezer-safe bag.

Reheating: For best results, reheat leftovers in an oven at 375°F (190°C) for 10-15 minutes, ensuring they regain their delightful crunch.

Serve Immediately: Freshly cooked pakoras are at their best! If you can, enjoy them right after frying for that ultimate crispy experience.

Make Ahead Options

These Onion and Spinach Pakoras with Mint Raita are perfect for meal prep enthusiasts! You can prepare the batter up to 24 hours in advance and keep it refrigerated to save time on busy weeknights. Just mix the dry ingredients and vegetables, then add water just before frying to maintain that crispy texture. Additionally, you can make the refreshing mint raita up to 3 days ahead—store it in an airtight container in the fridge to keep the flavors fresh. When you’re ready to enjoy, simply heat the oil and fry the pakoras until golden brown, then serve them hot with the chilled raita for restaurant-quality results with minimal effort!

Expert Tips for Onion and Spinach Pakoras

  • Perfect Batter Consistency: Aim for a thick batter that clings to the vegetables; too runny will yield soggy pakoras. Adjust water as needed.

  • Oil Temperature Check: Ensure the oil is hot enough before frying (about 350°F). A small test drop should sizzle and rise to the surface instantly.

  • Avoid Overcrowding: Fry in small batches to maintain oil temperature and ensure even cooking. Overcrowding leads to greasy, unevenly cooked pakoras.

  • Fresh Ingredients: Use fresh spinach and herbs for maximum flavor. Wilting can dull the taste and texture of your Onion and Spinach Pakoras with Mint Raita.

  • Flavor Boost: Don’t hesitate to customize spices! Add or omit flavors based on personal preference, but keep the balance for that perfect taste!

  • Serving Tip: Always serve pakoras hot for the best crispy experience! Accompany with mint raita for a delightful cooling effect.

What to Serve with Onion and Spinach Pakoras with Mint Raita

Get ready to create a delightful feast that combines warmth and comfort, perfect for sharing with loved ones.

  • Crispy Samosas: These traditional pastries filled with spiced potatoes complement the pakoras perfectly, creating a wonderful array of textures. Together, they form an irresistible snack platter that invites everyone to dig in.

  • Spiced Masala Chai: A cup of warm, aromatic masala chai pairs beautifully, balancing the crunchiness of the pakoras with its soothing spices. It’s the ideal drink to sip while enjoying your snack!

  • Vegetable Biryani: The rich flavors and fragrant spices of a vegetable biryani create an enchanting contrast to the crispy pakoras, making for a well-rounded meal that satisfies all tastes.

  • Raita Variations: While the mint raita brings a refreshing touch, adding a sweet mango raita alongside enhances flavor diversity, ushering in an elegant touch to the dish.

  • Fried Eggplant: Crispy fried eggplants add layers of savory goodness to the table, inviting your guests to taste and relish every bite. This side dish adds depth while still maintaining a light eating experience.

  • Tamarind Chutney: A tangy tamarind chutney complements the spice in the pakoras, providing a luscious sweetness that invites indulgence. This vibrant dip creates a festival of flavors at your gathering!

Onion and Spinach Pakoras with Mint Raita Twists

Take a leap into creativity! There are so many ways to personalize these delightful pakoras for a special touch.

  • Gluten-Free: Swap chickpea flour for a gluten-free flour blend for a universally enjoyable snack.
    Explore the world of gluten-free baking! Experimenting with different flours can yield tasty results without compromising flavor.

  • Extra Veggies: Add grated carrots or zucchini for extra nutrients and a pop of color.
    These additions bring even more freshness to the dish while enhancing its visual appeal!

  • Spicy Kick: Incorporate crushed red pepper flakes to increase the heat level.
    Perfect for those who love their snacks fiery! Just a pinch can elevate the dish from mild to vibrant.

  • Herb Infusion: Mix in chopped cilantro or parsley along with mint for added depth.
    Each herb adds its unique essence. The combination creates an aromatic delight that transports you to sunny gardens.

  • Baking Option: Opt for baked pakoras by forming the batter into small patties and brushing them with oil before baking at 400°F (200°C).
    A healthier alternative without sacrificing that satisfying crisp! Enjoy them guilt-free while still relishing their deliciousness.

  • Sweet Twist: Add a sprinkle of sugar to balance out the spices for a different flavor profile.
    This unexpected touch can surprise your taste buds, leading to a delightful dance of sweet and savory notes!

  • Nutty Flavor: Stir in a tablespoon of ground flaxseed or sesame seeds for a nutty texture.
    These simple additions enhance the crunch while infusing beneficial nutrients into each bite.

  • Mint Raita Variations: Experiment by adding diced cucumber or a dash of cumin to the raita for extra flavor contrast.
    The creamy yogurt paired with crisp cucumbers lightens up the dish further, creating a refreshing complement to the pakoras.

Feel free to get adventurous! Each variation opens a door to a new culinary experience that turns this beloved snack into something uniquely yours. Consider serving these alongside a warm cup of masala chai for a delightful pairing that invites cozy conversations. Enjoy your cooking journey!

Onion and Spinach Pakoras with Mint Raita

Onion and Spinach Pakoras with Mint Raita Recipe FAQs

How do I select ripe and fresh spinach?
Absolutely! When choosing spinach, look for vibrant, deep green leaves that are crisp and free from dark spots or wilting. Fresh spinach should feel firm to the touch, while any dark spots or yellowing indicate age. Always opt for organic if possible, as they tend to be fresher!

What’s the best way to store leftover pakoras?
Very! Store any leftover Onion and Spinach Pakoras in an airtight container in the refrigerator for up to 3 days. To keep them as crispy as possible, I recommend placing a paper towel at the bottom of the container to absorb excess moisture.

Can I freeze uncooked pakoras?
Absolutely! To freeze uncooked pakoras, first arrange them in a single layer on a baking sheet, ensuring they do not touch one another. Freeze them for about 1-2 hours until firm, then transfer to a freezer-safe bag. They’ll stay fresh for up to 2 months. When ready to enjoy, fry them straight from the freezer—no need to thaw!

What should I do if my pakoras turn out soggy?
If your pakoras end up soggy, it might be due to a too-thin batter or overcrowding the oil during frying. To fix this, ensure your batter is thick enough to coat the vegetables. Additionally, fry in smaller batches to maintain the oil temperature around 350°F (175°C). If they’re soggy, you can reheat them in an oven at 375°F (190°C) for 10-15 minutes to crisp them up again.

Are these pakoras safe for people with nut allergies?
Very! The Onion and Spinach Pakoras with Mint Raita are made with chickpea flour, which is gluten-free and nut-free. However, it’s always best to double-check for any cross-contamination, especially if you’re serving someone with severe allergies. Enjoy sharing these delightful snacks with everyone!

Crunchy Onion and Spinach Pakoras with Mint Raita Delight

Delight in these Onion and Spinach Pakoras with Mint Raita, featuring crispy textures and vibrant flavors.

  • Mixing Bowl
  • Deep frying pan
  • slotted spoon
  • paper towels

For the Pakoras

  • 2 cups Fresh spinach (finely chopped)
  • 1 small Small onion (thinly sliced)
  • 1 cup Chickpea flour (besan)
  • 1/4 cup Rice flour
  • 2 pcs Green chilies (finely chopped)
  • 1 teaspoon Cumin seeds
  • 1 teaspoon Red chili powder
  • 1/2 teaspoon Turmeric powder
  • 1 teaspoon Garam masala
  • 1 teaspoon Salt
  • as needed cups Water (to create batter)
  • 2 cups Oil (for deep frying)

For the Mint Raita

  • 1 cup Plain yogurt
  • 1/4 cup Fresh mint leaves (finely chopped)
  • 1 tablespoon Lemon juice

Preparation Instructions

  1. Rinse the fresh spinach leaves thoroughly under cold water, then finely chop them. Slice the small onion thinly to create delicate rings. Set aside.
  2. In a large bowl, combine the chickpea flour, rice flour, cumin seeds, red chili powder, turmeric powder, garam masala, and salt. Whisk together until well blended.
  3. Add the chopped spinach, sliced onion, and chopped green chilies into the flour mixture. Stir gently until the vegetables are coated.
  4. Gradually pour in water to the mixture, stirring continuously until you achieve a thick batter that clings to the vegetables.
  5. In a deep frying pan, pour enough oil to submerge the pakoras halfway. Heat oil until it reaches approximately 350°F (175°C).
  6. Carefully drop small amounts of the batter mixture into the pan, frying in batches for about 3-4 minutes or until golden brown and crispy.
  7. Remove the pakoras from the oil using a slotted spoon and place them on paper towels to drain excess oil.
  8. In a mixing bowl, combine the yogurt, chopped mint leaves, lemon juice, and a pinch of salt. Stir until well blended.
  9. Serve the Onion and Spinach Pakoras hot with the mint raita on the side.

Store leftover pakoras in an airtight container for up to 3 days. For best results, serve them hot and fresh for optimal crispiness.

Appetizer
Indian
Appetizer, crispy, Mint Raita, Onion and Spinach Pakoras, Pakoras, snacks

Filed Under: Appetizer

Fresh and Vibrant Garden Salad to Brighten Your Day

September 14, 2025 by grace bellamy Leave a Comment

As I flipped through my recipe journal, a colorful wave of memories washed over me, each salad inspiring with its vibrant crunch and freshness. Today, let me share my go-to Garden Salad, a delightful dish that brings together the crispness of romaine, spinach, and arugula, layered with cherry tomatoes, crunchy cucumbers, and creamy avocado. Not only can you whip this up in just 15 minutes, but it also holds the power to revive your weeknight meals, leaving fast food behind. This salad is a fantastic way to indulge in seasonal produce, making it a nourishing choice for both lunch and dinner. Want to take your salads from ordinary to extraordinary? Join me in discovering how this simple recipe can make your taste buds dance with the freshest flavors!

Garden Salad

Why Is This Garden Salad So Special?

Freshness jumps to the forefront: Bursting with seasonal vegetables, this salad is a celebration of color and nutrition. Quick to prepare: Whip it up in just 15 minutes—perfect for those busy nights! Versatile enough: Pair with grilled chicken or serve as a light lunch. Customizable: Add your favorite toppings or dressings to suit any palate. Crowd-pleasing appeal: From family dinners to potlucks, this Garden Salad is a hit every time! Plus, if you’re looking for more ways to elevate your meals, check out my guide on delicious salad dressings to complement this vibrant dish.

Garden Salad Ingredients

For the Salad
• Mixed salad greens – 4 cups of a vibrant mix (romaine, spinach, arugula) for a crunchy base.
• Cherry tomatoes – 1 cup, halved to add a burst of sweetness.
• Cucumber – 1, sliced for that refreshing crunch in every bite.
• Bell pepper – 1 (any color), diced to provide a colorful and crispy texture.
• Red onion – ¼, thinly sliced for a hint of zing.
• Shredded carrots – ¼ cup to introduce a lovely crunch and a touch of sweetness.
• Radishes – ½ cup, sliced for a peppery kick.
• Avocado – ½, sliced, adding that creamy richness that elevates the salad.
• Feta cheese – ¼ cup, crumbled (optional) for a salty flavor burst.

For the Dressing
• Olive oil – 3 tablespoons to create a silky richness.
• Balsamic vinegar – 1 tablespoon to provide a tangy depth of flavor.
• Salt and pepper – to taste for enhancing the overall flavor.

For Garnish
• Fresh herbs (basil, parsley, or cilantro) – to sprinkle on top for an aromatic finish.

This Garden Salad is not only nourishing but also a visual delight—perfect for any occasion!

Step‑by‑Step Instructions for Garden Salad

Step 1: Prepare the Greens
Rinse the mixed salad greens under cold running water, ensuring that they’re clean and fresh. Pat the greens dry with a clean kitchen towel or use a salad spinner to remove excess moisture. Once dried, place the vibrant greens in a large salad bowl, creating a cheerful and crisp base for your Garden Salad.

Step 2: Add Colorful Vegetables
Next, halve the cherry tomatoes, slice the cucumber into thin rounds, and dice the bell pepper into bite-sized pieces. Add these freshly prepared vegetables to the bowl with the salad greens. The mix of red, green, and orange will brighten your Garden Salad and provide a delightful crunch that invites everyone to dig in.

Step 3: Incorporate Additional Crunch
Thinly slice the red onion and sprinkle it into the bowl, bringing a subtle zing to the salad. Follow this with shredded carrots and sliced radishes for added texture and a peppery kick. Gently toss the ingredients together to create a colorful and inviting salad before adding the next elements to build your Garden Salad.

Step 4: Layer in the Creaminess
Slice the avocado in half, remove the pit, and carefully cut slices from the flesh. Gently add the avocado slices to the top of your salad, arranging them artfully for a touch of elegance. This creamy element not only enhances the richness of your Garden Salad but also adds a lovely contrast to the crunchy vegetables below.

Step 5: Add Feta for Flavor
If you’re using feta cheese, crumble it over the salad now. This salty and creamy cheese will beautifully balance the fresh flavors of your Garden Salad. Take a moment to visually admire the layered textures and colors as you prepare to dress the salad, making it as delicious to look at as it is to eat.

Step 6: Create the Dressing
In a small mixing bowl, whisk together the olive oil, balsamic vinegar, and a generous pinch of salt and pepper. Mix vigorously until the dressing is well combined and emulsified. The dressing should have a glossy appearance, ready to elevate the flavors of your Garden Salad with each drizzle.

Step 7: Dress and Toss the Salad
Drizzle the freshly made dressing over your salad, ensuring an even distribution for flavor enhancement. With clean hands or salad tongs, gently toss all the ingredients together to coat them without bruising the delicate greens. Your Garden Salad should appear vibrant, well-mixed, and ready for garnishing.

Step 8: Finish with Fresh Herbs
To add an aromatic finish, sprinkle your choice of fresh herbs—such as basil, parsley, or cilantro—over the top of the salad. This not only enhances the fragrance but also adds a splash of color, making your Garden Salad truly irresistible.

Step 9: Serve Immediately
For the best taste and freshness, serve your Garden Salad immediately. The crisp greens and colorful vegetables will be most appealing at this stage. Pair it with grilled chicken or hearty soups for a complete meal, or enjoy it as a light and refreshing dish on its own.

Garden Salad

Expert Tips for the Best Garden Salad

Fresh Greens: Use the freshest mixed greens you can find, preferably organic; wilted or browning greens can diminish the salad’s appeal.

Layering Texture: Add denser veggies like cucumbers and bell peppers at the bottom to create a sturdy base, ensuring an enjoyable crunch throughout.

Avoid Soggy Salad: Toss the dressing just before serving to keep the greens crisp; dressing them too early can lead to a soggy Garden Salad.

Customization: Don’t hesitate to add your favorite toppings, such as nuts or seeds, to give your salad a personal touch and prevent it from feeling boring.

Visual Appeal: Arrange sliced avocado and cherry tomatoes on top for a beautiful presentation; it not only looks good but also tempts everyone to try your Garden Salad!

Dressing Balance: Taste the dressing before adding it to ensure the seasoning is balanced; this will enhance the overall flavors and enjoyment of your dish.

Make Ahead Options

Preparing this Garden Salad in advance can save you precious time during busy weeknights! You can pre-chop the vegetables—like the cucumber, cherry tomatoes, bell pepper, red onion, carrots, and radishes—up to 3 days ahead. Just store them in airtight containers in the refrigerator to maintain their freshness. For best results, keep the avocado and feta cheese separate until serving to prevent browning and sogginess; these can be added right before you enjoy your salad. When you’re ready to serve, simply combine the prepped ingredients, drizzled with the dressing you can mix in advance and store for up to 1 week. This way, your Garden Salad will be just as delicious, with minimal effort!

Garden Salad Variations & Substitutions

Feel free to mix and match ingredients for a salad that delights your senses and fits your cravings!

  • Dairy-Free: Omit the feta cheese and substitute with nutritional yeast for a cheesy flavor without the dairy.
  • Protein-Packed: Add grilled chicken, chickpeas, or diced tofu for a heartier salad that keeps you satisfied.
  • Spice It Up: Toss in diced jalapeños or sprinkle with red pepper flakes to give your salad a spicy kick that warms your palate.
  • Crunchy Twist: Incorporate roasted nuts like almonds or walnuts for an added crunch that elevates the texture of the dish.
  • Fruity Addition: Add slices of fresh berries or diced apples for a sweet twist that complements the savory veggies beautifully.
  • Herb-Infused Dressing: Try mixing fresh herbs like dill or mint into your dressing for a vibrant twist that brings freshness to every bite.
  • Whole Grain Boost: Serve the salad with a side of quinoa or farro for extra fiber and protein, creating a more filling meal.

Remember, customizing your salad can turn a simple dish into a personalized delight. For more inspiring ideas, don’t forget to check out my guide on delicious salad dressings for fresh flavor enhancements that will make your Garden Salad sing!

How to Store and Freeze Garden Salad

Fridge: Keep your Garden Salad in an airtight container in the refrigerator for up to 1-2 days for optimal freshness. This helps maintain the crispness of the greens and vegetables.

Room Temperature: Do not leave the salad at room temperature for more than 2 hours to prevent spoilage and ensure food safety.

Freezer: Avoid freezing the salad, as fresh vegetables lose their texture and flavor once thawed. The vibrant crunch is what makes a Garden Salad special!

Reheating: This dish is best enjoyed cold and fresh, so skip the reheating step and serve it chilled for the most delightful experience.

What to Serve with Garden Salad?

Enjoying a bright and fresh garden salad is delightful, but pairing it with complementary dishes can elevate your meal to new heights.

  • Grilled Chicken: Juicy, seasoned grilled chicken adds protein and a savory element, making your meal satisfying and wholesome.
    Adding this dish creates a lovely contrast between the vibrant salad and the smoky flavors of the chicken, keeping every bite interesting.

  • Roasted Vegetables: A mix of seasonal roasted vegetables brings out the natural sweetness, enhancing the garden salad’s fresh taste.
    The warm, caramelized veggies offer a delightful textural contrast, making both the salad and the veggies shine together.

  • Crusty Artisan Bread: A piece of fresh, crusty bread is perfect for mopping up leftover salad dressing.
    The crunchy exterior paired with a soft center provides a delicious experience as you savor each bite.

  • Creamy Potato Salad: The richness of creamy potato salad complements the freshness of the garden salad beautifully.
    This hearty side brings a comforting flavor that keeps the meal well-rounded and satisfying.

  • Crispy Quinoa Cakes: These savory cakes are packed with flavor and add protein, making them a perfect partner for your light salad.
    Their crunchy texture and nutty taste balance the crisp, refreshing ingredients of the garden salad effortlessly.

  • Chilled White Wine: A glass of chilled Sauvignon Blanc or Pinot Grigio offers a refreshing sip that pairs wonderfully with the garden salad.
    The crisp acidity of the wine enhances the salad’s fresh flavors, turning your casual meal into a dining experience.

  • Fruit Sorbet: For dessert, a light and refreshing fruit sorbet makes a perfect ending to the meal.
    Its sweetness and icy texture cleanse the palate, leaving you delightfully refreshed after a satisfying dinner.

Garden Salad

Garden Salad Recipe FAQs

How do I select the best ingredients for my Garden Salad?
Absolutely! When choosing your salad greens, look for vibrant colors and freshness—avoid any that have dark spots or wilting. For cherry tomatoes, opt for firm ones that feel heavy for their size. When picking cucumbers and bell peppers, ensure they are firm and without blemishes, which indicates freshness.

How should I store leftover Garden Salad?
To store, keep your Garden Salad in an airtight container in the refrigerator. It’s best consumed fresh within 1-2 days, as the greens lose their crispness quickly. Avoid adding dressing if you plan to store it; instead, dress individual servings just before enjoying for optimal freshness.

Can I freeze Garden Salad?
Unfortunately, it’s not recommended to freeze Garden Salad. Freezing changes the texture of fresh vegetables, making them mushy and unappetizing upon thawing. Enjoy your salad fresh or consider making a hearty grain salad if you want to prepare ahead for freezing.

What if my salad has become soggy?
Very! If your Garden Salad ends up soggy, you can try layering and tossing the drier ingredients on top, such as cucumbers or radishes. Additionally, you can gently pat the greens with a paper towel to absorb excess moisture. In the future, dress the salad just before serving to maintain the crispness.

Is this Garden Salad suitable for my dietary restrictions?
Definitely! This Garden Salad can be customized to suit various dietary needs. For gluten-free diets, ensure that the dressing is gluten-free. Those sensitive to dairy can simply omit feta cheese. Plus, if you’re concerned about allergies, always adjust ingredients according to what works best for you or your guests.

Fresh and Vibrant Garden Salad to Brighten Your Day

This Garden Salad is fresh, colorful, and nourishing, perfect for invigorating your meals.

  • salad bowl
  • Mixing Bowl
  • Knife
  • cutting board

For the Salad

  • 4 cups mixed salad greens (a vibrant mix (romaine, spinach, arugula))
  • 1 cup cherry tomatoes (halved)
  • 1 cucumber (sliced)
  • 1 bell pepper (diced)
  • 1/4 red onion (thinly sliced)
  • 1/4 cup shredded carrots
  • 1/2 cup radishes (sliced)
  • 1/2 avocado (sliced)
  • 1/4 cup feta cheese (crumbled (optional))

For the Dressing

  • 3 tablespoons olive oil
  • 1 tablespoon balsamic vinegar
  • salt and pepper (to taste)

For Garnish

  • fresh herbs ((basil, parsley, or cilantro))

Step-by-Step Instructions for Garden Salad

  1. Rinse the mixed salad greens under cold running water, ensuring that they’re clean and fresh. Pat the greens dry with a clean kitchen towel or use a salad spinner to remove excess moisture. Once dried, place the vibrant greens in a large salad bowl.
  2. Halve the cherry tomatoes, slice the cucumber into thin rounds, and dice the bell pepper. Add these freshly prepared vegetables to the bowl with the salad greens.
  3. Thinly slice the red onion and sprinkle it into the bowl. Follow this with shredded carrots and sliced radishes for added texture. Gently toss to combine.
  4. Slice the avocado in half, remove the pit, and add slices on top of the salad.
  5. Crumble feta cheese over the salad for extra flavor, if using.
  6. In a small bowl, whisk together olive oil, balsamic vinegar, and salt and pepper. Mix until emulsified.
  7. Drizzle the dressing over the salad and gently toss to coat the ingredients.
  8. Sprinkle fresh herbs over the top and serve immediately for the best flavor.

This salad is best enjoyed fresh and can be customized with various toppings.

Salad
American
fresh salad, Garden Salad, Healthy Recipe, quick meal, seasonal produce, vegetable salad

Filed Under: salad

Bright and Crunchy Carrot Sesame Salad to Freshen Your Day

September 14, 2025 by grace bellamy Leave a Comment

Walking through the market, I couldn’t resist the vibrant orange hue of freshly harvested carrots, their crispness promising a delightful crunch. It’s funny how something so simple can transform our meals so significantly. Today, I’m excited to share my recipe for Carrot Sesame Salad, a refreshing dish that’s not just quick to prepare but also a perfect crowd-pleaser. With the bold flavors of sesame oil and a zesty lemon dressing, this salad elevates the humble carrot into a light yet satisfying side. Plus, it’s a nourishing option that helps me beat those fast-food cravings in just 10 minutes! Curious about how to make this dish shine on your table? Let’s dive into the recipe and uncover its delicious secrets!

Carrot Sesame Salad

Why is Carrot Sesame Salad a Must-Try?

Simplicity at Its Best: This recipe is a breeze to whip up, taking just 10 minutes to prepare!

Vibrant Flavors: The sesame oil and lemon juice blend perfectly, giving you a fresh and zesty taste that wakes up your palate.

Nourishing and Light: Packed with nutrients, this salad is an easy way to enjoy a healthy meal without sacrificing flavor.

Versatile Pairing: Whether as a side dish to accompany grilled chicken or a standalone lunch, this salad fits seamlessly into any meal.

Crowd-Pleaser: Its colorful presentation and delightful crunch make it a favorite among family and friends, perfect for gatherings or meal prep!

Try this Carrot Sesame Salad today, and say goodbye to greasy fast food!

Carrot Sesame Salad Ingredients

• To create a vibrant and crunchy dish, gather these essentials:

For the Salad

  • Carrots – 4 large, peeled and grated; fresh carrots provide that delightful crunch.
  • Sesame Oil – 2 tablespoons; this adds a deep, nutty flavor that enhances every bite.
  • Soy Sauce – 1 tablespoon; it brings a savory element to balance the sweetness of the carrots.
  • Lemon Juice – 1 tablespoon; freshly squeezed lemon juice brightens the overall taste.
  • Sesame Seeds – 2 tablespoons, toasted; these add a beautiful texture and enhance the sesame flavor.
  • Honey or Maple Syrup – 1 tablespoon, optional; this can add a hint of sweetness, depending on your taste.
  • Salt and Pepper – to taste; season to bring out all the flavors in the salad.

For Garnish

  • Fresh Herbs – like cilantro or parsley; these not only add color but also a fresh herbal note that complements the salad.

Combine these ingredients for a refreshing Carrot Sesame Salad that’s sure to please!

Step‑by‑Step Instructions for Carrot Sesame Salad

Step 1: Grate the Carrots
Begin by peeling and grating the 4 large carrots using a box grater or food processor. Aim for fine shreds to ensure a delightful crunch in your Carrot Sesame Salad. This step should take about 5 minutes, leaving you with vibrant orange strands ready to shine in the salad.

Step 2: Prepare the Dressing
In a small bowl, combine 2 tablespoons of sesame oil, 1 tablespoon of soy sauce, and 1 tablespoon of freshly squeezed lemon juice. If you prefer a touch of sweetness, add 1 tablespoon of honey or maple syrup. Whisk together until smooth, creating a luscious dressing that will envelop the carrots with tasty flavor in just 2 minutes.

Step 3: Toss the Carrots with Dressing
In a large mixing bowl, add the grated carrots and pour in the prepared dressing. Using tongs or a large spoon, gently toss the mixture for about 1-2 minutes until the carrots are evenly coated. The vibrant colors will pop, and the aroma will begin to awaken your senses as the flavors meld beautifully.

Step 4: Add Toasted Sesame Seeds
Sprinkle 2 tablespoons of toasted sesame seeds into the salad, mixing gently to combine. The seeds not only enhance the flavor but also add a lovely crunch. Take a moment to admire the beautiful contrasts of color as the seeds blend seamlessly into your Carrot Sesame Salad.

Step 5: Season to Taste
Now, season your salad with salt and pepper to taste. Start with a pinch of each, then toss the salad again to distribute the seasoning. Take a quick taste test to ensure the flavors are spot-on. Adjust the seasoning as desired so every bite is perfectly seasoned.

Step 6: Garnish with Fresh Herbs
Before serving, elevate your Carrot Sesame Salad by garnishing it with fresh herbs like cilantro or parsley. Roughly chop a handful and scatter it over the top for a burst of color and freshness. This step adds an inviting aroma and makes your salad look even more appealing.

Step 7: Let It Rest
For best results, allow the salad to sit for about 10 minutes. This resting time lets the flavors meld together, ensuring a deliciously cohesive dish. While you wait, enjoy the enticing scent of sesame and citrus wafting through your kitchen, promising a delightful experience ahead.

Carrot Sesame Salad

Carrot Sesame Salad Variations

Feel free to get creative with your Carrot Sesame Salad; the possibilities are endless!

  • Gluten-Free: Substitute soy sauce with tamari for a gluten-free option that keeps all the flavor intact.
    Experimenting with gluten-free alternatives brings a world of flavor without the gluten. Enjoy the same delightful crunch!

  • Add Protein: Toss in some grilled chicken or chickpeas for a heartier meal.
    Adding protein elevates this salad from a side to a satisfying main dish while keeping it vibrant and healthy.

  • Spicy Kick: Mix in a dash of sriracha or red pepper flakes for a spicy twist.
    Heat lovers will appreciate this fiery boost that blends beautifully with the salad’s fresh ingredients.

  • Nutty Upgrade: Incorporate chopped nuts like almonds or walnuts for an extra crunch.
    Nuts add texture and a nutty flavor that pairs wonderfully with the sweetness of the carrots.

  • Citrus Burst: Try adding orange juice or zest for an even brighter flavor.
    This citrusy twist enhances the freshness and makes your salad an even more inviting dish.

  • Herb Variations: Experiment with fresh herbs like mint or basil instead of cilantro or parsley.
    Each herb introduces its own unique flair, transforming this salad into something special every time.

  • Creamy Option: Mix in a dollop of Greek yogurt for creaminess while keeping it healthy.
    A creamy addition can balance the crispness of the carrots and make for a wonderful taste contrast.

  • Sweet Twist: Add diced apples or raisins for a touch of natural sweetness and extra texture.
    These fruity elements complement the carrots perfectly, making every bite a delightful surprise.

How to Store and Freeze Carrot Sesame Salad

Fridge: Store your Carrot Sesame Salad in an airtight container for up to 3 days to maintain its freshness and crunch.

Freezer: This salad is best enjoyed fresh, but if you must freeze, store it in a freezer-safe container for up to 1 month. Note that texture may change upon thawing.

Reheating: Since this salad is typically served cold, simply remove it from the fridge and let it sit at room temperature for about 10 minutes before enjoying.

Preparation Time: If you need to make it ahead, consider preparing only the dressing and grating the carrots. Combine them just before serving for optimal flavor and texture.

Make Ahead Options

These Carrot Sesame Salad components are perfect for meal prep, saving time during your busy week! You can prepare the grated carrots up to 3 days in advance; simply store them in an airtight container in the refrigerator to maintain their crispness. Additionally, you can make the dressing ahead of time and refrigerate it for up to 24 hours. When ready to serve, just toss the carrots with the dressing and sprinkle in the toasted sesame seeds. For the best flavor, let the combined salad sit for about 10 minutes before enjoying, allowing the ingredients to meld beautifully. Prepping ahead means you’ll have a vibrant, crunchy Carrot Sesame Salad ready with minimal effort!

What to Serve with Carrot Sesame Salad?

Elevate your meal with delightful side dishes that enhance the fresh flavors of this vibrant salad.

  • Grilled Chicken Skewers: Tender, smoky chicken pairs beautifully with the salad’s crunch, creating a satisfying and protein-rich dinner.

  • Quinoa Pilaf: Nutty and fluffy, quinoa adds heartiness and extra fiber, making your meal both nutritious and fulfilling.

  • Crispy Roasted Potatoes: The crispy texture contrasts delightfully with the salad while providing a comforting, warm element to your plate.

  • Steamed Broccoli: Bright green broccoli offers a fresh pop of color, and its earthy taste complements the salad’s zesty notes perfectly.

  • Toasted Pita Chips: Crunchy and light, these chips are perfect for scooping up the Carrot Sesame Salad, adding more texture and flavor.

  • Miso Soup: A warm, umami-rich miso soup balances the crisp freshness of the salad, creating a harmonious blend of hot and cold.

  • Chilled White Wine: A glass of crisp Chardonnay enhances the salad’s flavors, offering a lovely contrast to the sweetness of the carrots.

  • Fruit Sorbet: Finish your meal on a sweet note with a refreshing scoop of fruit sorbet, cleansing your palate and adding a burst of flavor.

Expert Tips for Carrot Sesame Salad

  • Prep Perfectly: Make sure to peel and grate the carrots finely for optimal texture; larger chunks can result in a less enjoyable crunch.

  • Balancing Flavors: Adjust the honey or maple syrup according to your taste; too much can overpower the natural flavors of the Carrot Sesame Salad.

  • Season with Care: Always start with a small pinch of salt and pepper; it’s easy to add more, but hard to take flavor out!

  • Embrace Freshness: Use freshly squeezed lemon juice instead of bottled for the best vibrant taste; it really brightens the salad.

  • Let It Rest: Allow the Carrot Sesame Salad to sit for 10 minutes before serving—this helps all the flavors meld together beautifully!

Carrot Sesame Salad

Carrot Sesame Salad Recipe FAQs

What type of carrots should I use for the Carrot Sesame Salad?
Absolutely! Fresh, bright orange carrots are best for this salad. Look for ones that are firm and without any dark spots or blemishes. If you can find organic carrots, even better—they’ll be tastier and more nutritious.

How should I store leftovers of the Carrot Sesame Salad?
Store any leftover salad in an airtight container in the fridge for up to 3 days. The carrots will keep their crunchiness, but be mindful not to let it sit too long, as the dressing may make them soggy over time.

Can I freeze the Carrot Sesame Salad?
Very! Freezing is possible, but keep in mind that the texture may change once thawed. If you choose to freeze, place the salad in a freezer-safe container and use it within 1 month. To serve, let it thaw in the refrigerator overnight or at room temperature for about 1 hour before you eat.

What can I do if my Carrot Sesame Salad is too salty?
If you find your salad is a bit salty, consider adding a little more grated carrot to balance things out. Alternatively, a sprinkle of fresh herbs can also brighten the flavors to help counteract the saltiness. Just mix gently and adjust to your taste.

Is this salad suitable for everyone, including those with allergies?
While the Carrot Sesame Salad is generally healthy, it does contain soy sauce, which has gluten. If you’re gluten-sensitive or have other allergies, opt for a gluten-free soy sauce or a suitable alternative. Fresh herbs and flavors can usually be adjusted to suit personal preferences as well!

How can I prepare the salad ahead of time?
Great question! To save time, you can prepare the dressing and grate the carrots in advance. Store them separately and combine just before serving. This helps maintain the freshness and crunch of the salad while allowing you to enjoy it anytime!

Bright and Crunchy Carrot Sesame Salad to Freshen Your Day

A refreshing Carrot Sesame Salad, featuring crunchy carrots and bold flavors of sesame oil and lemon dressing.

  • box grater
  • Mixing Bowl
  • Whisk
  • Measuring Spoons

For the Salad

  • 4 large Carrots (peeled and grated)
  • 2 tablespoons Sesame Oil
  • 1 tablespoon Soy Sauce
  • 1 tablespoon Lemon Juice (freshly squeezed)
  • 2 tablespoons Sesame Seeds (toasted)
  • 1 tablespoon Honey or Maple Syrup (optional)
  • Salt and Pepper (to taste)

For Garnish

  • Fresh Herbs (like cilantro or parsley)

Step-by-Step Instructions

  1. Begin by peeling and grating the 4 large carrots using a box grater or food processor. Aim for fine shreds for a delightful crunch.
  2. In a small bowl, combine 2 tablespoons of sesame oil, 1 tablespoon of soy sauce, and 1 tablespoon of freshly squeezed lemon juice. Optionally, add 1 tablespoon of honey or maple syrup. Whisk together until smooth.
  3. In a large mixing bowl, add the grated carrots and pour in the prepared dressing. Toss the mixture for about 1-2 minutes until the carrots are evenly coated.
  4. Sprinkle 2 tablespoons of toasted sesame seeds into the salad, mixing gently to combine.
  5. Season your salad with salt and pepper to taste, tossing the salad again to distribute the seasoning.
  6. Garnish the salad with fresh herbs like cilantro or parsley. Roughly chop and scatter it over the top.
  7. For best results, allow the salad to sit for about 10 minutes before serving.

Store the salad in an airtight container for up to 3 days. Best enjoyed fresh, but can be frozen for up to 1 month.

Salad
Asian
Carrot Sesame Salad, Easy Recipe, healthy salad, quick salad, refreshing salad, Vegetarian

Filed Under: salad

Crispy Roast Potatoes: Irresistibly Golden & Flavor-Packed

September 14, 2025 by grace bellamy Leave a Comment

The aroma of roasting potatoes wafts through the kitchen, instantly transporting me to cherished family gatherings where everyone gathered around the table, eagerly waiting for that first bite. My recipe for Crispy Roast Potatoes is a crowd-pleasing companion to any meal, and it comes together with just a handful of simple ingredients. Not only do these spuds deliver a satisfyingly crunchy exterior, but they’re also incredibly easy to prepare—perfect for busy weeknights or leisurely weekend feasts. They’re delightfully versatile, pairing wonderfully with everything from succulent roasted chicken to vibrant veggie dishes. Ready to elevate your side dish game? Let’s dive into the irresistible world of crispy, golden-roasted potatoes that are bound to become a staple in your home!

Crispy Roast Potatoes

Why Are Crispy Roast Potatoes a Must-try?

Crispy Perfection: The golden, crunchy exterior of these potatoes makes them irresistible, satisfying your cravings for something hearty and delicious.

Flavor Explosion: Infused with aromatic garlic, rosemary, and thyme, every bite sings with flavor that’s simply unmatched.

Versatile Delight: Perfect as a side for any main dish, from roasted chicken to vibrant veggie platters, they fit seamlessly into any meal.

Effortless Cooking: With just 15 minutes of prep, you’ll have perfectly roasted potatoes in just over an hour—ideal for busy weeknights!

Crowd Favorite: Whether it’s a family dinner or a gathering with friends, these crispy roast potatoes will have everyone coming back for seconds!

Crispy Roast Potatoes Ingredients

For the Potatoes
• 2 pounds potatoes – Yukon Gold or Russet are perfect for that fluffy interior and crispy skin.
• 1/4 cup olive oil – Helps achieve that golden hue and delightful crunch.
• 1 tablespoon sea salt – Enhances the natural flavors of the potatoes.
• 1 teaspoon black pepper – Adds a subtle kick that balances the dish.

For the Seasoning
• 1 teaspoon garlic powder – Infuses a savory depth to your crispy roast potatoes.
• 1 teaspoon dried rosemary – Opt for fresh if you have it, as it boosts the aroma and authenticity.
• 1 teaspoon dried thyme – Offers a fragrant touch that complements the rosemary beautifully.

Step‑by‑Step Instructions for Crispy Roast Potatoes

Step 1: Preheat the Oven
Begin by preheating your oven to 425°F (220°C). This high temperature is key for achieving the crispy exterior of your roast potatoes. A properly heated oven ensures that when you add your potatoes later, they will sizzle and begin browning immediately.

Step 2: Prepare the Potatoes
Wash and peel the 2 pounds of potatoes, then cut them into even-sized chunks, about 1 to 2 inches thick. This uniformity is important for even cooking. Place the potato chunks in a large pot and fill it with salted water, covering the potatoes adequately for boiling.

Step 3: Boil the Potatoes
Bring the pot of salted water to a vigorous boil over medium-high heat. Once boiling, reduce to a simmer and cook the potatoes for approximately 10 minutes, just until they begin to soften but aren’t falling apart. You want them slightly tender to guarantee the best texture once roasted.

Step 4: Drain and Steam the Potatoes
After boiling, drain the potatoes in a colander and let them sit for a few minutes. This helps steam escape, allowing the potatoes to dry out and ensuring a crispier finish during roasting. You want to start with as little moisture as possible.

Step 5: Heat the Baking Sheet
While the potatoes dry, drizzle 1/4 cup of olive oil onto a large baking sheet or roasting pan. Place the pan in the hot oven for about 5 minutes until the oil is shimmering and hot. This step is crucial for achieving that perfect crispiness on your crispy roast potatoes.

Step 6: Season the Potatoes
Return the boiled potatoes to the pot and add 1 tablespoon of sea salt, 1 teaspoon each of black pepper, garlic powder, dried rosemary, and dried thyme. Cover the pot with a lid and shake gently to coat the potatoes evenly with the seasonings, enhancing their flavors and ensuring each bite is packed with taste.

Step 7: Add Potatoes to the Oven
Carefully remove the hot baking sheet from the oven. Add the seasoned potatoes in a single layer, ensuring they are spaced apart for optimal roasting. Crowding the pan can lead to steaming rather than roasting, which is not what you want for your crispy roast potatoes.

Step 8: Roast the Potatoes
Place the baking sheet back into the oven and roast the potatoes for 25 to 30 minutes. Be sure to flip them halfway through cooking to allow all sides to get that beautiful golden brown color. Keep an eye on them as they roast to ensure they don’t over-brown.

Step 9: Check for Doneness
After about 45 to 50 minutes total roasting time, your crispy roast potatoes should be golden brown and deliciously crispy on the outside. A fork should easily pierce the potatoes, indicating they are tender on the inside.

Step 10: Cool and Serve
Once done, remove the crispy roast potatoes from the oven and let them cool for a couple of minutes before serving. This short resting time allows them to firm up slightly, making them even easier to handle. Enjoy them warm alongside your favorite dishes!

Crispy Roast Potatoes

Expert Tips for Crispy Roast Potatoes

Perfect Potato Choice: Use Yukon Gold or Russet potatoes for the best texture and flavor, ensuring that your crispy roast potatoes are fluffy inside and crunchy outside.

Don’t Overcrowd: Spread the potatoes in a single layer on the baking sheet. Overcrowding can lead to steaming instead of roasting, preventing that desired crispiness.

Steam Off Moisture: After boiling, let the potatoes sit in the colander for a few minutes. Removing excess moisture is key to achieving a perfectly crispy finish.

Hot Oil Magic: Always heat your olive oil in the baking sheet before adding the potatoes. This helps in forming a delicious crunch right from the start.

Flip for Golden Brown: Remember to flip the potatoes halfway through cooking. This ensures that every side gets that lovely golden-brown color we all crave in crispy roast potatoes.

Storage Tips for Crispy Roast Potatoes

Fridge: Allow your crispy roast potatoes to cool completely before storing. Keep them in an airtight container in the refrigerator for up to 3 days to maintain their flavor and texture.

Freezer: For longer storage, spread the potatoes on a baking sheet to freeze individually. Once frozen, transfer them to a freezer-safe container; they can last up to 3 months in the freezer without losing much crispiness.

Reheating: To reheat, place the frozen or refrigerated crispy roast potatoes on a baking sheet and warm them in a preheated oven at 400°F (200°C) until heated through, about 10-15 minutes. This method helps restore their delightful crunch!

Make Ahead Options

These Crispy Roast Potatoes are a fantastic meal prep option for busy weeknights! You can boil and season the potatoes up to 24 hours in advance, allowing them to sit in the refrigerator to develop their flavors. Simply follow the initial steps of boiling and seasoning, then store the coated chunks in an airtight container. Just before serving, preheat your oven and heat the olive oil on the baking sheet. Transfer the prepped potatoes directly to the hot oil, followed by roasting them for about 25-30 minutes until they reach that glorious golden crispiness. This way, you’ll save precious time while ensuring your delicious potatoes are just as irresistible!

What to Serve with Crispy Roast Potatoes

Create a memorable meal that tantalizes the taste buds and warms the heart by pairing these crispy treats with delightful companions.

  • Roasted Chicken: Juicy and tender, roasted chicken enhances the cozy vibe of your meal with its savory richness, perfectly complementing the crispy texture of the potatoes.

  • Grilled Vegetables: Colorful seasonal veggies, lightly charred and drizzled with olive oil, add a fresh, vibrant touch that balances the crispy roast potatoes beautifully.

  • Creamy Coleslaw: The cool, crunchy elements of a creamy coleslaw refresh your palate, making it a delightful companion to the crispy, richly seasoned spuds.

  • Garlic Aioli: This creamy, garlicky dip invites you to dunk each crispy potato piece, adding depth with its luscious flavor and enhancing the overall dining experience.

  • Balsamic Glazed Brussels Sprouts: The slightly tangy and sweet notes from the balsamic glaze play wonderfully off the crispy potatoes, creating a delicious interplay of flavors.

  • Chardonnay or Light Beer: A chilled glass of Chardonnay or a light beer will cool down the palate, harmonizing perfectly with the warmth and crunch of your crispy roasted potatoes.

  • Chocolate Mousse: For a sweet finish, serve a rich chocolate mousse. Its silky texture and deep flavor create a satisfying end to a meal centered around crispy, savory delights.

Crispy Roast Potatoes Variations & Substitutions

Customize your crispy roast potatoes to match your tastebuds and dietary needs, enhancing each bite with delightful twists!

  • Dairy-Free: Swap olive oil for avocado oil or melted coconut oil for a rich flavor without the dairy.
  • Herb Infusion: Experiment with fresh herbs like thyme or sage instead of dried for a fresher taste that elevates every bite.
  • Spicy Kick: Add a sprinkle of cayenne pepper or chili flakes to the seasoning for those who enjoy a bit of heat in every crunchy bite.
  • Garlic Lovers: Incorporate fresh minced garlic instead of garlic powder for a robust garlic flavor that fills your kitchen with an irresistible aroma.
  • Lemon Zest Twist: Grate some lemon zest over the roasted potatoes just before serving for a refreshing citrus note that brightens the dish.
  • Crispy Skins: Leave the skins on for an extra crunch factor! This adds texture and nutrients for a heartier dish.
  • Flavored Oils: Try using flavored oils, like rosemary-infused olive oil, before roasting to add an extra layer of deliciousness.
  • Whole30 Approved: Substitute potatoes for sweet potatoes or cauliflower for a nutritious, lower-carb option that’s still satisfying and crispy when roasted!

Feel free to explore these variations based on what you love to create a dish that’s uniquely yours. Pair these potatoes with a classic roasted chicken or sprinkle some fresh herbs for a gorgeous finish before serving!

Crispy Roast Potatoes

Crispy Roast Potatoes Recipe FAQs

How do I choose the right potatoes for crispy roast potatoes?
Absolutely! For the best results, I recommend using Yukon Gold or Russet potatoes. These varieties give you a fluffy interior while ensuring the skin crisps up beautifully. Look for potatoes that are firm and free from blemishes or dark spots—the fresher, the better!

What’s the best way to store crispy roast potatoes?
After allowing your crispy roast potatoes to cool completely, store them in an airtight container in the refrigerator for up to 3 days. For optimal texture, ensure they are completely cooled first—this prevents moisture buildup, which can lead to sogginess.

Can I freeze crispy roast potatoes?
Very! To freeze your leftover crispy roast potatoes, spread them evenly on a baking sheet in a single layer. Freeze them until solid, which usually takes a few hours, and then transfer them to a freezer-safe container. They can last up to 3 months in the freezer. Just remember to reheat them in a hot oven to get that crunch back!

Why are my roast potatoes not crispy?
If your crispy roast potatoes aren’t turning out crispy, there could be a couple of reasons. Firstly, make sure you’re not overcrowding the pan during roasting as this can lead to steaming rather than roasting. Also, ensure that you’re letting the boiled potatoes steam dry before adding them to the hot oil; this step helps achieve that desirable crunch.

Are there any dietary considerations for crispy roast potatoes?
Absolutely! This recipe is quite versatile and can easily accommodate various dietary needs. If you’re mindful of allergens, the ingredients are generally safe for most diets, but always check individual sensitivities. You can replace olive oil with a different oil if preferred, such as avocado oil, for those needing alternatives. Always serve with caution if sharing with pets, as potatoes should not be seasoned or given with heavy spices!

How can I enhance the flavor of my crispy roast potatoes?
For an even more flavor-packed experience, I often recommend adding fresh herbs to the mix! Fresh thyme and rosemary are fantastic additions—just roughly chop them and add them to the seasoning. You could also try sprinkling some grated Parmesan cheese just a few minutes before they finish roasting for a cheesy twist!

Crispy Roast Potatoes: Irresistibly Golden & Flavor-Packed

Crispy Roast Potatoes are a crowd-pleasing side dish, featuring a satisfyingly crunchy exterior and infused with aromatic flavors.

  • Large Pot
  • Colander
  • Baking Sheet or Roasting Pan
  • Oven

For the Potatoes

  • 2 pounds Yukon Gold or Russet potatoes (Perfect for that fluffy interior and crispy skin.)
  • 1/4 cup olive oil (Helps achieve that golden hue and delightful crunch.)
  • 1 tablespoon sea salt (Enhances the natural flavors of the potatoes.)
  • 1 teaspoon black pepper (Adds a subtle kick that balances the dish.)

For the Seasoning

  • 1 teaspoon garlic powder (Infuses a savory depth to your crispy roast potatoes.)
  • 1 teaspoon dried rosemary (Boosts the aroma and authenticity.)
  • 1 teaspoon dried thyme (Offers a fragrant touch.)

Step-by-Step Instructions

  1. Preheat your oven to 425°F (220°C).
  2. Wash and peel the potatoes, then cut them into even-sized chunks, about 1 to 2 inches thick.
  3. Bring a pot of salted water to a boil and cook the potatoes for approximately 10 minutes.
  4. Drain the potatoes in a colander and let them sit for a few minutes.
  5. Drizzle olive oil onto a baking sheet and heat it in the oven for about 5 minutes.
  6. Return the boiled potatoes to the pot and add sea salt, black pepper, garlic powder, dried rosemary, and dried thyme. Shake gently to coat.
  7. Add the seasoned potatoes to the hot baking sheet in a single layer.
  8. Roast the potatoes for 25 to 30 minutes, flipping halfway through cooking.
  9. Check for doneness after about 45 to 50 minutes; they should be golden brown and crispy.
  10. Remove from the oven and let cool for a couple of minutes before serving.

Use Yukon Gold or Russet potatoes for the best texture and flavor. Don’t overcrowd the baking sheet for optimal crispiness.

Side Dishes
American
Crispy Roast Potatoes, easy recipes, family gatherings, Roasted potatoes, side dish, vegetable dishes

Filed Under: Side Dishes

Irresistibly Juicy Lemongrass Chicken Vietnamese Style Recipe

September 14, 2025 by grace bellamy Leave a Comment

The savory aroma wafting through my kitchen transports me straight to the bustling streets of Hanoi. This Juicy Lemongrass Chicken Vietnamese Style is a delightful escape from the mundane, bringing a refreshing twist to your dinner table. The beauty of this recipe lies not only in its quick prep time but also in its vibrant flavors that effortlessly blend the aromatic essence of lemongrass and garlic. Perfect for a weeknight family meal or a special gathering, this dish makes an enticing statement while remaining simple enough for any home chef to master. Imagine grilling chicken that’s both succulent and packed with a burst of Vietnamese flair! Are you ready to bring a taste of Vietnam home? Keep scrolling for a step-by-step guide that will elevate your cooking game.

Juicy Lemongrass Chicken Vietnamese Style

Why Will You Love This Chicken?

Exquisite Flavor: The brilliant combination of fresh lemongrass and garlic infuses the chicken with a burst of aromatic flavors that will transport your taste buds to Vietnam.

Quick and Easy: With minimal prep time and simple steps, this recipe is perfect for busy nights when you crave delicious, home-cooked food without the fuss.

Versatile Pairings: Enjoy this dish over jasmine rice, rice noodles, or alongside a light salad, allowing you to tailor each serving to your liking.

Crowd-Pleasing Appeal: Impress guests at your next gathering with this show-stopping entrée that simplifies hosting while delivering gourmet taste.

Leftover Friendly: Enjoy the leftovers in wraps or salads, making meals effortless throughout the week! Don’t forget to check out other delightful dishes like my Vietnamese Spring Rolls for a complete Vietnamese meal at home.

Juicy Lemongrass Chicken Ingredients

• The vibrant flavors of the Juicy Lemongrass Chicken Vietnamese Style will surely impress your family and friends!

For the Marinade

  • Chicken thighs or breasts – 1.5 pounds, boneless and skinless; thigh meat offers more moisture for that juicy mouthfeel.
  • Fresh lemongrass – 3 stalks, finely chopped; this fragrant herb adds a unique citrusy taste, bringing the essence of Vietnam to your dish.
  • Garlic – 4 cloves, minced; garlic adds a rich depth of flavor and aroma that you can’t resist.
  • Red chilies – 1-2, finely chopped; adjust to your spice preference, they provide a lovely kick to your chicken!
  • Fish sauce – 2 tablespoons; this staple adds umami and saltiness, crucial for authentic Vietnamese flavor.
  • Soy sauce – 1 tablespoon; balances the fish sauce and enhances overall taste.
  • Sugar – 1 tablespoon; a touch of sweetness helps to caramelize the chicken beautifully.
  • Vegetable oil – 1 tablespoon; aids in cooking the chicken evenly on high heat.
  • Black pepper – 1 teaspoon; a simple seasoning that complements the marinade perfectly.

For Garnishing

  • Fresh cilantro – for garnish; adds a touch of color and a fresh finish to your dish.
  • Lime wedges – for serving; a squeeze of lime brightens up the flavors and elevates the dish even more!

Step‑by‑Step Instructions for Juicy Lemongrass Chicken Vietnamese Style

Step 1: Prepare the Marinade
In a medium-sized bowl, combine the finely chopped lemongrass, minced garlic, and chopped red chilies with the fish sauce, soy sauce, sugar, vegetable oil, and black pepper. Stir well for about 2 minutes until the sugar dissolves and all the ingredients are mixed into a fragrant marinade. This blend will create the flavorful base for your Juicy Lemongrass Chicken Vietnamese Style.

Step 2: Marinate the Chicken
Add the boneless and skinless chicken thighs or breasts to the bowl with the marinade. Use your hands to thoroughly coat each piece, ensuring every surface is drenched with the aromatic mixture. Cover the bowl with plastic wrap and refrigerate for at least 30 minutes; for best results, marinate for up to 2 hours to deepen the flavors of the chicken.

Step 3: Preheat the Grill or Pan
While the chicken marinates, preheat your grill or non-stick skillet over medium-high heat for about 5 minutes. You want the cooking surface hot enough that a drop of water sizzles on contact. This temperature is essential for achieving that golden-brown crust on your Juicy Lemongrass Chicken Vietnamese Style while keeping the inside tender and juicy.

Step 4: Cook the Chicken
Once hot, remove the chicken from the marinade, letting any excess drip off. Place the chicken in the grill or skillet, cooking for about 6-7 minutes on one side, until it turns a beautiful golden brown. Flip the chicken and repeat on the other side, cooking until the internal temperature reaches 165°F (75°C). The chicken should look caramelized and slightly charred.

Step 5: Let It Rest
After cooking, remove the chicken from the heat and transfer it to a plate. Allow the chicken to rest for about 5 minutes; this step is crucial as it helps the juices redistribute, keeping the chicken moist and flavorful.

Step 6: Slice and Serve
Slice the rested chicken into strips, showcasing the juicy, tender meat. Arrange the slices on a serving platter for a beautiful presentation, ready to delight your guests. The vibrant colors and aroma will draw everyone in for a taste of your Juicy Lemongrass Chicken Vietnamese Style.

Step 7: Garnish
To complete the dish, sprinkle freshly chopped cilantro over the sliced chicken for a burst of color and flavor. Serve with lime wedges on the side; the acidity of lime enhances the dish, making each bite a refreshing experience. This garnish elevates your Juicy Lemongrass Chicken Vietnamese Style, making it visually stunning and delicious!

Juicy Lemongrass Chicken Vietnamese Style

Make Ahead Options

These Juicy Lemongrass Chicken Vietnamese Style wonders are perfect for busy home cooks looking to save time! You can marinate the chicken up to 24 hours in advance, allowing it to soak up those delicious flavors. Once marinated, store the chicken in an airtight container in the refrigerator until you’re ready to cook. For even smoother meal prep, you can slice the chicken into strips before storing—just keep in mind that it’s best to cook it within 2-3 days for optimum taste. When you’re ready to serve, simply cook the chicken as directed, and you’ll enjoy succulent, flavorful results without the last-minute rush!

Storage Tips for Juicy Lemongrass Chicken

Fridge: Store any leftover Juicy Lemongrass Chicken in an airtight container in the refrigerator for up to 3-4 days. Allow it to cool completely before sealing to maintain freshness.

Freezer: For longer storage, freeze the chicken in an airtight container or heavy-duty freezer bag for up to 3 months. Thaw overnight in the fridge before reheating.

Reheating: To reheat, warm the chicken gently in a skillet over medium heat until heated through, or microwave in short intervals, covered to retain moisture.

Avoiding Dryness: If you’re reheating from the fridge or freezer, adding a splash of chicken broth or water can help keep the meat moist and flavorful.

Expert Tips for Juicy Lemongrass Chicken

Marinade Magic: Use a non-reactive bowl for marinating, such as glass or ceramic, to prevent altering the flavor of your Juicy Lemongrass Chicken.

Timing Matters: For the best flavor infusion, allow the chicken to marinate for at least 1-2 hours; the longer, the better!

Heat Control: Ensure your grill or skillet is hot enough before cooking. This prevents sticking and promotes a crispy exterior while keeping the chicken tender inside.

Resting is Key: Don’t skip the resting step! Allowing the chicken to sit for 5 minutes helps retain its juices, preventing dryness.

Slicing Technique: Slice the chicken against the grain to maximize tenderness, making every bite deliciously juicy.

Flavor Enhancement: Drizzle a bit of extra lime juice just before serving for an added brightness that complements the dish beautifully.

Juicy Lemongrass Chicken Variations

Feel free to personalize your experience with these delightful twists on the recipe!

  • Gluten-Free: Substitute soy sauce with tamari for a gluten-free option that still packs the same umami punch.
  • Spicy Kick: Add more red chilies or a dash of Sriracha to the marinade for those who love an extra layer of heat!
  • Herb-Infused: Experiment with fresh herbs like mint or Thai basil for a refreshing depth that brightens the dish.
  • Coconut Flavor: Replace fish sauce with coconut aminos for a sweeter, slightly tropical twist that complements the lemongrass beautifully.
  • Crunchy Texture: Thinly slice some bell peppers and onions to toss on the grill alongside your chicken for added crunch and flavor.
  • Zesty Marinade: Blend in a tablespoon of lime zest with the marinade to enhance the citrus flavor and aroma of your chicken.
  • Vegetarian Option: Swap the chicken for tofu or tempeh, marinating and grilling as directed for a plant-based alternative that’s equally satisfying.
  • Sweet & Savory: Drizzle a bit of honey or maple syrup when serving to create a delicious sweet contrast to the savory profile of your dish.

These variations can turn your Juicy Lemongrass Chicken Vietnamese Style into a unique meal suited for any palate. For the full experience, why not pair it with some vibrant Vietnamese Spring Rolls? They make a wonderful light and fresh complement to your chicken. Happy cooking!

What to Serve with Juicy Lemongrass Chicken Vietnamese Style

Imagine hosting an unforgettable dinner that transports your guests right to the heart of Vietnam with every vibrant bite.

  • Jasmine Rice: A fragrant base that absorbs the delightful flavors of the chicken, creating a perfect harmony on your plate.

  • Fresh Vietnamese Salad: Crisp vegetables and herbs tossed in a light dressing provide a refreshing contrast to the rich, savory chicken. It’s a colorful, healthful addition that brightens up your meal.

  • Rice Noodles: Soft, chewy noodles served with a drizzle of lime and soy sauce offer a delightful texture to accompany the grilled chicken.

  • Coconut Sticky Rice: Sweet and creamy, this unique side brings an unexpected tropical twist that pairs beautifully with the aromatic spice of the chicken.

  • Grilled Asparagus: The slight char and tender bites of asparagus enhance the dish with an added crunch, creating an appealing textural contrast.

  • Iced Vietnamese Coffee: Smooth and strong, this beverage balances the meal with its sweetness and bold flavors, perfect for cooling down on a warm evening.

  • Peanut Sauce: A creamy, nutty sauce for dipping or drizzling over your chicken elevates the whole experience with a rich, luscious taste.

  • Mango Sticky Rice: A delightful dessert that combines sweet mango with sticky rice, an indulgent way to end your Vietnamese-inspired meal on a high note.

Juicy Lemongrass Chicken Vietnamese Style

Juicy Lemongrass Chicken Vietnamese Style Recipe FAQs

How do I choose the best lemongrass for this recipe?
Absolutely! When selecting lemongrass, look for stalks that are firm and vibrant green, with no dark spots or browning. The lower part should be plump and bulbous, as this portion has the most flavor. Make sure to use fresh lemongrass for the best aromatic qualities in your Juicy Lemongrass Chicken.

What’s the best way to store leftover Juicy Lemongrass Chicken?
After cooking, allow your Juicy Lemongrass Chicken to cool completely. Then, store it in an airtight container in the refrigerator for up to 3-4 days. To retain its moisture and flavor, I’d recommend placing a damp paper towel inside the container before sealing.

Can I freeze the leftovers, and if so, how?
Absolutely! To freeze your Juicy Lemongrass Chicken, follow these steps: First, allow any leftover chicken to cool completely. Next, slice the chicken and place it in a heavy-duty freezer bag or an airtight container. Label and date it before storing in the freezer for up to 3 months. When you’re ready to enjoy it again, simply thaw overnight in the refrigerator and reheat gently in a skillet or microwave.

Why is my chicken dry after cooking?
Very often, dry chicken results from overcooking. To ensure juicy and tender meat in your Juicy Lemongrass Chicken, use a meat thermometer to check for an internal temperature of 165°F (75°C). If you find the chicken dries out during reheating, add a splash of chicken broth or water to the pan, and cover it to retain moisture.

Are there any dietary considerations for this dish?
When preparing your Juicy Lemongrass Chicken Vietnamese Style, keep in mind that it contains fish sauce, which may not be suitable for vegetarians. If you’re cooking for someone with a fish allergy, you can substitute the fish sauce with soy sauce or a homemade umami blend of mushroom broth and spices. Additionally, check to ensure that the soy sauce is gluten-free if needed!

Irresistibly Juicy Lemongrass Chicken Vietnamese Style Recipe

This Juicy Lemongrass Chicken Vietnamese Style delivers aromatic flavors of lemongrass and garlic, transforming your dinner with a burst of Vietnamese flair.

  • grill
  • Non-stick skillet
  • Medium-Sized Bowl

Marinade

  • 1.5 pounds Chicken thighs or breasts (boneless and skinless)
  • 3 stalks Fresh lemongrass (finely chopped)
  • 4 cloves Garlic (minced)
  • 1-2 Red chilies (finely chopped; adjust to spice preference)
  • 2 tablespoons Fish sauce
  • 1 tablespoon Soy sauce
  • 1 tablespoon Sugar
  • 1 tablespoon Vegetable oil
  • 1 teaspoon Black pepper

Garnish

  • Fresh cilantro (for garnish)
  • Lime wedges (for serving)

Step-by-Step Instructions

  1. In a medium-sized bowl, combine the finely chopped lemongrass, minced garlic, and chopped red chilies with the fish sauce, soy sauce, sugar, vegetable oil, and black pepper. Stir well for about 2 minutes until the sugar dissolves and all the ingredients are mixed into a fragrant marinade.
  2. Add the boneless and skinless chicken thighs or breasts to the bowl with the marinade. Use your hands to thoroughly coat each piece, ensuring every surface is drenched with the aromatic mixture. Cover the bowl with plastic wrap and refrigerate for at least 30 minutes; for best results, marinate for up to 2 hours.
  3. While the chicken marinates, preheat your grill or non-stick skillet over medium-high heat for about 5 minutes.
  4. Once hot, remove the chicken from the marinade, letting any excess drip off. Place the chicken in the grill or skillet, cooking for about 6-7 minutes on one side, until it turns a beautiful golden brown. Flip the chicken and repeat on the other side, cooking until the internal temperature reaches 165°F (75°C).
  5. After cooking, remove the chicken from the heat and transfer it to a plate. Allow the chicken to rest for about 5 minutes.
  6. Slice the rested chicken into strips, showcasing the juicy, tender meat. Arrange the slices on a serving platter.
  7. To complete the dish, sprinkle freshly chopped cilantro over the sliced chicken and serve with lime wedges on the side.

Use a non-reactive bowl for marinating and allow the chicken to marinate for at least 1-2 hours for the best flavor infusion.

Main Dishes
Vietnamese
Chicken Recipe, easy dinner, grilled chicken, Juicy Lemongrass Chicken, Marinated Chicken, Vietnamese Chicken

Filed Under: Main Dishes

Mushroom Stuffed Potato Cakes: Crispy Bliss You’ll Crave

September 14, 2025 by grace bellamy Leave a Comment

As I stood in my kitchen, the aroma of sizzling mushrooms and garlic wafted through the air, igniting a delicious sense of anticipation. The result? A new favorite: Mushroom Stuffed Potato Cakes! This recipe not only transforms humble ingredients into a comforting dish but also makes for an effortless weeknight meal or a memorable side at gatherings. With just 50 minutes of your time, you’ll enjoy crispy, golden cakes packed with a savory mushroom filling that can easily win over even the pickiest eaters. Plus, they’re freezer-friendly, making them a perfect make-ahead option for busy days. Ready to elevate your dinner routine? Let’s dive into how to create these delightful cakes that everyone will adore!

Mushroom Stuffed Potato Cakes

Why are Mushroom Stuffed Potato Cakes irresistible?

Comforting, Crispy Goodness: Each bite offers a delightful crunch outside and a soft, savory filling inside, perfect for satisfying cravings.
Easy to Make: Even beginner cooks can whip these up in just 50 minutes, bringing homemade joy to your dinner table.
Versatile Ingredients: Use any variety of mushrooms or cheese you prefer, making it easy to customize your favorite flavors.
Crowd-Pleasing Dish: These potato cakes are a hit at family gatherings and casual get-togethers, ensuring everyone leaves with a full belly and a smile.
Make-Ahead Option: Prepare in advance and freeze for easy weeknight meals—just reheat and enjoy!
Elevate your cooking with these delicious potato cakes and explore more comfort food recipes that bring warmth to your kitchen!

Mushroom Stuffed Potato Cakes Ingredients

Discover what you need to create these delightful, savory treats!

For the Potato Base
• Large potatoes (Russet or Yukon Gold) – 3 are perfect for a creamy texture when mashed.
• Egg – 1 acts as a binder to hold your cakes together.
• Salt and pepper – to taste, ensuring your base is well-seasoned.

For the Mushroom Filling
• Mushrooms (any variety, chopped) – 2 cups add earthy flavor and moisture.
• Small onion (finely chopped) – 1 brings sweetness and depth to the filling.
• Garlic (minced) – 2 cloves infuse the mixture with aromatic goodness.
• Thyme (fresh or dried) – 1 teaspoon enhances the savory profile of your cakes.

For Coating and Frying
• Breadcrumbs – 1/2 cup provides a delightful crunch when fried.
• Olive oil – use enough for frying to achieve that crisp, golden-brown exterior.

For Garnish
• Fresh parsley – sprinkle on top for a pop of color and freshness!

With these Mushroom Stuffed Potato Cakes ingredients, you’re all set to create a dish that’s not only delicious but also a joy to prepare. Get cooking!

Step‑by‑Step Instructions for Mushroom Stuffed Potato Cakes

Step 1: Boil and Mash the Potatoes
Begin by peeling the 3 large potatoes and placing them in a pot of salted water. Bring the water to a boil and cook the potatoes for about 15 minutes, or until they are fork-tender. Once cooked, drain the potatoes and transfer them to a large bowl for mashing. Allow them to cool slightly before mashing until smooth and creamy.

Step 2: Sauté the Onions and Mushrooms
In a skillet, heat 1 tablespoon of olive oil over medium heat. Add the finely chopped onion and sauté for about 3-4 minutes, until they become translucent and fragrant. Next, stir in the chopped mushrooms and minced garlic, cooking for an additional 5-7 minutes. The mushrooms should be browned and tender, and you can season the mixture with 1 teaspoon of thyme, salt, and pepper to taste.

Step 3: Combine Ingredients
In the bowl with the mashed potatoes, add the sautéed mushroom mixture, 1/2 cup of grated cheese, and 1 egg to act as a binder. Mix everything together until well combined, ensuring that no lumps remain. The resulting filling for your Mushroom Stuffed Potato Cakes should be creamy and flavorful, ready for shaping.

Step 4: Shape the Potato Cakes
Take a portion of the potato mixture and shape it into patties about 3 inches in diameter. Ensure each patty is uniform in size for even cooking. Place the shaped potato cakes onto a plate, and continue until all the mixture is formed into patties. This step is crucial for achieving the perfect texture in your Mushroom Stuffed Potato Cakes.

Step 5: Coat with Breadcrumbs
On a separate plate, spread out your breadcrumbs. Carefully take each potato cake from the plate and coat it evenly with breadcrumbs on both sides. This coating will provide a delightful crunch when frying, so make sure the patties are fully covered. Set aside the coated cakes for the next step.

Step 6: Fry the Potato Cakes
In a large skillet, heat a generous amount of olive oil over medium-high heat. Once the oil is shimmering, carefully add the potato cakes to the skillet without overcrowding. Fry each cake for about 4-5 minutes on each side, or until they are golden brown and crispy. Keep an eye on them to ensure they don’t burn.

Step 7: Drain Excess Oil
Once cooked, use a slotted spatula to transfer the Mushroom Stuffed Potato Cakes to a plate lined with paper towels. This will help absorb any excess oil, keeping your cakes crispy. Allow them to rest for a few minutes before serving, which makes them easier to handle and enhances the flavor.

Step 8: Garnish and Serve
Finally, sprinkle fresh parsley over the crispy Mushroom Stuffed Potato Cakes for a burst of color and added freshness. Serve them warm as a delightful snack or side dish, perfect for any occasion. Your guests will be eager to dig into these delicious homemade treats!

Mushroom Stuffed Potato Cakes

Expert Tips for Mushroom Stuffed Potato Cakes

• Choose the Right Potatoes: Russet or Yukon Gold potatoes are best for mashing due to their creaminess; avoid waxy varieties for an ideal texture.

• Avoid Overcooking: Ensure the mushrooms are nicely browned but not overcooked, keeping their texture intact to prevent a soggy filling in your cakes.

• Perfect Binding: Make sure to add the egg and mix well with the filling; this is key to preventing your Mushroom Stuffed Potato Cakes from falling apart while cooking.

• Breadcrumb Coating: For extra crunch, you can mix some grated cheese into your breadcrumbs; this will enhance the flavor and texture.

• Fry Separately: Don’t overcrowd the skillet while frying; this can lead to steaming rather than frying, making the cakes less crispy.

Enjoy these tips to make your Mushroom Stuffed Potato Cakes a hit with family and friends!

Storage Tips for Mushroom Stuffed Potato Cakes

Room Temperature: Keep the Mushroom Stuffed Potato Cakes at room temperature for up to 2 hours; after that, they should be refrigerated to maintain freshness.

Fridge: Store any leftovers in an airtight container in the fridge for up to 3 days. Reheat in a skillet or oven to restore crispiness.

Freezer: Freeze the uncooked potato cakes in a single layer on a baking sheet. Once solid, transfer them to a freezer-safe bag for up to 2 months.

Reheating: When ready to enjoy, reheat directly from frozen in a skillet with a bit of olive oil over medium heat until golden and heated through, about 10-12 minutes.

What to Serve with Mushroom Stuffed Potato Cakes?

Creating a delightful meal around these crispy treats will ensure your dining experience is both comforting and flavorful.

  • Fresh Green Salad: A light, zesty salad of mixed greens and a citrus vinaigrette brightens up your plate and complements the rich flavors.
  • Creamy Garlic Mashed Potatoes: For a comforting twist, serve a scoop of creamy mashed potatoes on the side for extra indulgence.
  • Sweet Chili Sauce: Drizzle this on top for a spicy kick that enhances the savory mushroom goodness of each cake.
  • Roasted Vegetables: The caramelized sweetness and earthy flavors of roasted carrots, bell peppers, and zucchini provide a healthy balance.
  • Herb-Infused Quinoa: This grainy side adds a nutty flavor, making it a perfect companion, plus it brings in some wholesome grains.
  • Pimento Cheese Dip: Serve a small bowl for dipping to add creamy richness that perfectly blends with the crispy potato cakes.
  • Crisp Apple Cider: A refreshing drink to cleanse the palate and harmonize with the hearty flavors of your meal.
  • Chocolate Mousse: End your meal on a sweet note with a light, airy chocolate mousse that will leave everyone smiling.

Diving into these pairing ideas will enhance the experience of your Mushroom Stuffed Potato Cakes, making dinner a memorable occasion!

Make Ahead Options

These Mushroom Stuffed Potato Cakes are a fantastic choice for meal prep, allowing you to enjoy homemade goodness on busy weeknights! You can prepare the potato mixture (after mashing the potatoes and sautéing the mushrooms) up to 24 hours in advance; simply refrigerate it in an airtight container. The shaped, uncoated patties can also be frozen for up to 3 months—just layer them between parchment paper to prevent sticking. When you’re ready to cook, thaw your frozen patties overnight in the fridge and coat them with breadcrumbs before frying. This way, you’ll experience the same crispy, delicious results as when freshly made, all while saving precious time!

Mushroom Stuffed Potato Cakes Variations

Feel free to experiment and make these delightful potato cakes your own with these fun twists!

  • Vegan Option: Substitute the egg with flaxseed meal mixed with water and use a plant-based cheese for a delicious vegan friendly version.
    Elevate the taste by incorporating nutritional yeast for extra flavor!

  • Spicy Kick: Add diced jalapeños or red pepper flakes to the mushroom mixture before cooking to spice things up.
    This little heat twist will awaken your senses and add an exciting zing!

  • Herb Infusion: Try swapping thyme for fresh herbs like rosemary or basil to customize the flavor profile.
    Fresh herbs elevate these cakes, giving every bite a unique herbal aroma!

  • Cheesy Goodness: Replace the standard cheese with blue cheese or feta for a tangy twist that cheese lovers will adore.
    The bold flavors create an incredible contrast with the earthy mushrooms!

  • Extra Crunch: Mix in crushed potato chips or panko breadcrumbs with the regular breadcrumbs for a crispy surprise.
    This offers delightful texture contrasts that will keep everyone coming back for seconds!

  • Sweet Potato Variation: Substitute half of the potatoes with sweet potatoes for a sweeter, nutrient-packed alternative.
    This adds natural sweetness while also boosting the dish’s vibrant color!

  • Loaded Version: Stuff with additional fillings like cooked spinach, roasted red peppers, or even crispy bacon if you desire.
    This makes each cake a hearty, flavorful delight that’ll satisfy any appetite!

Discover more ways to enhance your dinner experience! You might enjoy other versatile recipes like spinach and cheese stuffed mushrooms or savory vegetable fritters that keep it interesting and mouthwatering.

Mushroom Stuffed Potato Cakes

Mushroom Stuffed Potato Cakes Recipe FAQs

How do I choose the right potatoes for Mushroom Stuffed Potato Cakes?
Absolutely! For the best texture, opt for Russet or Yukon Gold potatoes. These varieties offer a creamy mash that holds together beautifully. Avoid waxy potatoes, as they can become too sticky and might not mash as smoothly.

How should I store leftover Mushroom Stuffed Potato Cakes?
Very simply! Place any leftovers in an airtight container in your refrigerator, where they will stay fresh for up to 3 days. When reheating, I recommend using a skillet or oven to restore their signature crispiness. Just heat them at a medium temperature until they’re heated through!

Can I freeze my Mushroom Stuffed Potato Cakes?
Definitely! To freeze them, shape your potato cakes and place them in a single layer on a baking sheet. Freeze until solid, then transfer them to a freezer-safe bag. They can last up to 2 months this way. When you’re ready to enjoy, just reheat them directly from frozen.

What if my Mushroom Stuffed Potato Cakes fall apart while frying?
No worries! If your cakes are crumbling, it might be due to insufficient binding from the egg or too much moisture in the filling. To prevent this, ensure your mashed potato mixture is smooth and well-mixed with the egg. You can also add a bit more breadcrumbs as a binder if needed.

Are Mushroom Stuffed Potato Cakes suitable for a vegetarian diet?
Absolutely! This recipe is entirely vegetarian-friendly, packed with mushrooms, potatoes, and cheese for a hearty meal. Just double-check your breadcrumbs and cheese to ensure they don’t contain any animal products, and you’re good to go!

Can I use different types of mushrooms for this recipe?
Very much! You can customize the flavor by using any variety of mushrooms you prefer. I often mix button, shiitake, or even portobello mushrooms. Just make sure to finely chop them so they blend well into the filling, ensuring each bite is delicious!

Mushroom Stuffed Potato Cakes: Crispy Bliss You’ll Crave

Mushroom Stuffed Potato Cakes are crispy, savory treats perfect for weeknight meals or gatherings.

  • Pot
  • skillet
  • Mixing Bowl
  • spatula
  • Baking Sheet

For the Potato Base

  • 3 large potatoes (Russet or Yukon Gold)
  • 1 large egg (acts as a binder)
  • salt and pepper (to taste)

For the Mushroom Filling

  • 2 cups mushrooms (any variety, chopped) (adds earthy flavor)
  • 1 small onion (finely chopped) (brings sweetness)
  • 2 cloves garlic (minced) (infuses aromatic goodness)
  • 1 teaspoon thyme (fresh or dried) (enhances savory profile)

For Coating and Frying

  • 1/2 cup breadcrumbs (provides crunch)
  • olive oil (enough for frying)

For Garnish

  • fresh parsley (for garnish)

Step-by-Step Instructions

  1. Peel and boil the potatoes in salted water for about 15 minutes, then drain and mash until smooth.
  2. In a skillet, heat olive oil and sauté the onion until translucent, then add mushrooms and garlic, cooking until browned.
  3. Combine mushroom mixture with mashed potatoes, cheese, and egg, mixing until well combined.
  4. Shape the mixture into patties about 3 inches in diameter.
  5. Coat each patty with breadcrumbs on both sides.
  6. Fry the cakes in heated olive oil for 4-5 minutes on each side until golden brown.
  7. Transfer the cakes to paper towels to drain excess oil before serving.
  8. Sprinkle with fresh parsley before serving warm.

Mushroom Stuffed Potato Cakes are versatile and can be customized with different cheese or mushrooms.

Side Dishes
American
comfort food, Easy Recipe, Mushroom Stuffed Potato Cakes, potato cakes, stuffed cakes, Vegetarian

Filed Under: Side Dishes

Juicy Turkey Burger Recipe for a Flavorful Dinner Night

September 14, 2025 by grace bellamy Leave a Comment

I once stumbled upon a family barbecue where the scent of sizzling burgers danced in the air, instantly igniting my cravings. It was here that I first tried a turkey burger, and I was hooked! These turkey burgers are not just an easy dinner choice; they offer a healthier twist without sacrificing that juicy goodness we all love. With just a handful of ingredients and 30 minutes, you’ll have a satisfying meal that makes you feel good about your choices. Perfectly seasoned and grilled to perfection, this turkey burger recipe is bound to become a weeknight staple. Ready to elevate your burger game? Let’s dive into creating a deliciously wholesome feast!

Turkey Burger

Why is This Turkey Burger Unique?

Juicy, Flavorful Patties: The use of ground turkey elevates the classic burger experience, providing a lean yet delicious alternative.

Herb-Infused Goodness: Fresh parsley and garlic blend into the meat, infusing each bite with vibrant flavor that traditional burgers often lack.

Quick and Easy: Ready in just 30 minutes, this recipe is perfect for busy weeknights or last-minute gatherings with friends.

Crowd-Pleasing Appeal: Each turkey burger is customizable with your choice of toppings—lettuce, tomatoes, and condiments for an unforgettable bite.

Healthy Twist: With lower calories and fat than beef burgers, you can indulge without the guilt! Try pairing these with a side of sweet potato fries for a complete meal.

Turkey Burger Ingredients

• Get ready to create a delicious turkey burger that’s both satisfying and wholesome!

For the Patties

  • 1 pound ground turkey – A lean protein that forms the juicy base of our turkey burger.
  • 1/4 cup finely chopped onion – Adds sweetness and moisture to the patties.
  • 2 cloves garlic, minced – Infuses the mixture with aromatic flavor.
  • 1/4 cup fresh parsley, chopped – Brings a burst of freshness that brightens each bite.
  • 1 tablespoon Worcestershire sauce – Enhances the umami flavor, making your turkey burger irresistible.
  • 1 teaspoon Dijon mustard – Adds a touch of tang for extra depth of flavor.
  • 1/2 teaspoon salt – Essential for bringing out the natural flavors in the turkey.
  • 1/2 teaspoon black pepper – Adds a mild heat that compliments the ingredients.
  • 1/4 teaspoon smoked paprika (optional) – Introduces a hint of smokiness that elevates the flavor profile.

For Serving

  • 4 burger buns – The perfect vehicle for your delicious turkey burger.
  • Lettuce leaves – Adds freshness and a crunch that pairs well with the juicy patty.
  • Sliced tomatoes – A classic topping that provides juiciness and flavor.
  • Sliced cheese (optional) – Melting on top offers a creamy texture if desired.
  • Condiments of choice – Customize your turkey burger with ketchup, mayo, mustard, or whatever you prefer!

This Turkey Burger recipe is simple, and scrumptious, and is sure to delight your family and friends at dinner time!

Step‑by‑Step Instructions for Turkey Burger

Step 1: Prepare the Mixture
In a mixing bowl, combine 1 pound of ground turkey, 1/4 cup of finely chopped onion, 2 cloves of minced garlic, 1/4 cup of fresh chopped parsley, 1 tablespoon of Worcestershire sauce, 1 teaspoon of Dijon mustard, 1/2 teaspoon of salt, 1/2 teaspoon of black pepper, and 1/4 teaspoon of smoked paprika (if using). Mix gently with your hands until everything is just combined; avoid overworking the meat to keep your turkey burger juicy.

Step 2: Shape the Patties
Divide the turkey mixture into four equal portions and shape each into a patty about 1 inch thick. Make a slight indentation in the center of each patty to help them cook evenly and avoid puffing up. This step is crucial for ensuring a perfectly cooked turkey burger that retains its shape and moisture.

Step 3: Preheat the Grill or Skillet
Preheat your grill to medium-high heat or heat a skillet or grill pan over medium heat. Add a splash of oil to prevent sticking and enhance browning. Wait until the grill is hot, or the skillet shimmers, indicating it’s ready for cooking your flavorful turkey patties.

Step 4: Cook the Patties
Carefully place the patties on the grill or skillet. Cook for 5-7 minutes on one side until they turn golden brown and release easily from the cooking surface. Flip the patties and cook for another 5-7 minutes, ensuring the internal temperature reaches a safe 165°F (74°C) for a perfectly cooked turkey burger.

Step 5: Add Cheese (Optional)
If you want to melt cheese on your burgers, place a slice on top of each patty during the last minute of cooking. Close the grill lid or cover the skillet briefly to trap the heat and aid melting. This step adds a gooey, creamy texture that perfectly complements the savory turkey meat.

Step 6: Toast the Buns
If desired, lightly toast your burger buns on the grill or in a toaster for a golden, crispy exterior. Toasting enhances the flavor and texture, making your turkey burger even more enjoyable. Keep an eye on them to prevent burning; a few minutes is all you need for a delightful crunch.

Step 7: Assemble Your Burger
Begin assembling your turkey burger by placing each cooked patty onto a toasted bun. Layer with crisp lettuce, juicy sliced tomatoes, and any other condiments you love. Feel free to get creative with toppings to personalize your turkey burger and make it uniquely yours.

Step 8: Serve Immediately
Serve your homemade turkey burgers while they are still hot and juicy. The aroma will entice everyone to the table, and the delightful flavors will leave them coming back for more. These turkey burgers make for a perfect meal shared with family and friends!

Turkey Burger

Expert Tips for Turkey Burger

  • Don’t Overmix: Gently combine the ingredients to keep your turkey burger juicy. Overworking can lead to tough patties, so mix just until blended.

  • Indent the Patties: Creating a slight indentation in the center of each patty helps them cook evenly and prevents puffing during grilling.

  • Use a Meat Thermometer: Always check that your turkey burgers reach an internal temperature of 165°F (74°C) for safe eating. This guarantees they are cooked perfectly!

  • Experiment with Toppings: Elevate your turkey burger by trying unique toppings, such as avocado, sautéed mushrooms, or spicy aioli, to add flavor and excitement.

  • Toast the Buns: Lightly toasting your burger buns enhances texture and flavor, making each bite even more satisfying. A minute or two is all you need!

  • Season Generously: Feel free to adjust the seasoning to your taste. Adding more spices or herbs can make your turkey burger even more flavorful.

Make Ahead Options

These Turkey Burgers are perfect for meal prep, allowing you to enjoy delicious homemade food on busy weeknights! You can prep the turkey mixture and shape the patties up to 24 hours in advance—just cover the mixing bowl with plastic wrap and refrigerate. For even more convenience, cook the patties in advance and refrigerate them for up to 3 days. When it’s time to serve, simply reheat the turkey burgers in a skillet or on the grill until warmed through and juicy. By prepping ahead, you’ll save valuable time without compromising on flavor—your family will love these turkey burgers just as much, even on the busiest days!

Turkey Burger Variations & Substitutions

Feel free to unleash your creativity and adapt this recipe to match your taste buds!

  • Gluten-Free: Swap regular buns for gluten-free burger buns or lettuce wraps for a lighter option.
  • Spicy Kick: Add diced jalapeños or a dash of hot sauce to the turkey mixture for a flavorful heat that’ll ignite your palate.
  • Cheese Lovers: Experiment with different cheeses like pepper jack or feta for unique flavor profiles that elevate your burger experience.
  • Herb Twist: Replace parsley with fresh basil or cilantro to introduce a fresh new dimension to your turkey burgers. The fragrant herbs will surprise and delight your taste buds.
  • Veggie-Packed: Mix in finely grated zucchini or carrots into the patty mixture for added moisture and nutrition. These veggies blend seamlessly, keeping your burgers moist and wholesome.
  • BBQ Flavor: Substitute Worcestershire sauce with your favorite BBQ sauce for a smoky, sweet twist – perfect for summer barbecues!
  • Lentil Option: For a vegetarian version, combine cooked lentils with similar seasonings for satisfying patties that are full of flavor.
  • Bun Alternatives: Try using portobello mushrooms or slices of sweet potato in place of traditional buns for a fun, healthy variation.

Feeling adventurous? Don’t hesitate to explore options to enhance your cooking experience! For a complementary side, serve with sweet potato fries or try a colorful tossed salad for a balanced meal. Enjoy your journey into the world of turkey burgers!

How to Store and Freeze Turkey Burger

Fridge: Store leftover turkey burgers in an airtight container in the fridge for up to 3 days. Reheat in a skillet or microwave until heated through.

Freezer: Freeze cooked turkey burger patties in a single layer, then transfer to a freezer-safe bag for up to 3 months. Thaw in the fridge before reheating.

Reheating: For best results, reheat turkey burgers in a skillet over medium heat for about 5 minutes per side, or until warmed through to ensure juiciness.

Assembly: If you’ve already assembled your burgers, wrap them tightly in plastic wrap and store in the fridge for up to 2 days for quick meals.

What to Serve with Turkey Burger

A turkey burger is the perfect centerpiece for a delightful meal that will satisfy your cravings.

  • Creamy Coleslaw: Adds a crunchy, tangy contrast that complements the juicy turkey, making every bite more exciting.
  • Sweet Potato Fries: They bring a natural sweetness and crispy texture, perfectly balancing the savory flavors of your turkey burger.
  • Grilled Corn on the Cob: The smoky-sweet corn enhances the summertime vibes, pairing deliciously with the grilled turkey patties.
  • Spicy Pickles: A zesty crunch that brightens the meal, spicy pickles add an exciting kick to every turkey burger.
  • Garden Salad: Fresh greens and vibrant vegetables create a refreshing side that lightens the meal while adding nutrition and color.
  • Garlic Parmesan Roasted Potatoes: Creamy and crispy, these buttery potatoes bring a rich flavor profile that pairs beautifully with turkey.
  • Sparkling Lemonade: This refreshing drink pairs perfectly with the meal, cutting through the richness while adding a zesty twist.
  • Chocolate Chip Cookies: For dessert, these cookies provide a warm, indulgent finish to your family feast, inviting nostalgia with each bite.
  • Fruit Salad: A light, fresh dessert option that rounds out the meal, adding a burst of flavor with seasonal fruits.

Turkey Burger

Turkey Burger Recipe FAQs

How do I know if my turkey is ripe and ready for cooking?
When selecting ground turkey, look for a bright pink color with little or no dark spots. Fresh turkey should have a clean smell and be firm to touch. If you notice any dark spots or your turkey has an off-putting odor, it’s best to avoid it.

How should I store leftover turkey burgers?
Absolutely! Store leftover turkey burgers in an airtight container in the fridge. They’ll stay fresh for up to 3 days. If you plan to keep them longer, it’s better to freeze them to maintain quality.

Can I freeze turkey burger patties?
Yes! To freeze your turkey burger patties, lay them out in a single layer on a baking sheet and freeze until solid. Then, transfer them to a freezer-safe bag, separating each patty with parchment paper if desired. They’ll last for up to 3 months. When you’re ready to eat, simply thaw them in the fridge overnight before cooking!

What should I do if my turkey burger falls apart while cooking?
Very! If your turkey burger patties start to crumble, it could be due to overmixing or not enough binder. To fix this, gently combine your mixture next time and consider adding a beaten egg or breadcrumbs for extra binding power. If they do start falling apart, you can finish cooking them in a skillet, turning the burger into a delicious turkey burger bowl!

Are turkey burgers safe for pets?
While plain cooked turkey is generally safe for pets, avoid giving them any seasoned turkey burger due to added onions, garlic, or other spices, which can be harmful to them. Always check with your vet about including new foods in your pet’s diet.

Juicy Turkey Burger Recipe for a Flavorful Dinner Night

This Juicy Turkey Burger recipe offers a flavorful, healthier dinner option that will become a weeknight staple.

  • grill
  • Mixing Bowl
  • skillet
  • spatula

For the Patties

  • 1 pound ground turkey (A lean protein that forms the juicy base of our turkey burger.)
  • 1/4 cup finely chopped onion (Adds sweetness and moisture to the patties.)
  • 2 cloves garlic, minced (Infuses the mixture with aromatic flavor.)
  • 1/4 cup fresh parsley, chopped (Brings a burst of freshness that brightens each bite.)
  • 1 tablespoon Worcestershire sauce (Enhances the umami flavor, making your turkey burger irresistible.)
  • 1 teaspoon Dijon mustard (Adds a touch of tang for extra depth of flavor.)
  • 1/2 teaspoon salt (Essential for bringing out the natural flavors in the turkey.)
  • 1/2 teaspoon black pepper (Adds a mild heat that compliments the ingredients.)
  • 1/4 teaspoon smoked paprika (Introduces a hint of smokiness that elevates the flavor profile.)

For Serving

  • 4 pieces burger buns (The perfect vehicle for your delicious turkey burger.)
  • Lettuce leaves (Adds freshness and a crunch that pairs well with the juicy patty.)
  • Sliced tomatoes (A classic topping that provides juiciness and flavor.)
  • Sliced cheese (Melting on top offers a creamy texture if desired.)
  • Condiments of choice (Customize your turkey burger with ketchup, mayo, mustard, or whatever you prefer!)

Step-by-Step Instructions for Turkey Burger

  1. In a mixing bowl, combine ground turkey, finely chopped onion, minced garlic, fresh chopped parsley, Worcestershire sauce, Dijon mustard, salt, black pepper, and smoked paprika. Mix gently with your hands until just combined.
  2. Divide the mixture into four equal portions and shape each into a patty about 1 inch thick. Make a slight indentation in the center of each patty.
  3. Preheat your grill to medium-high heat or heat a skillet over medium heat. Add a splash of oil to prevent sticking.
  4. Place the patties on the grill or skillet. Cook for 5-7 minutes on one side until golden brown. Flip and cook for another 5-7 minutes, ensuring the internal temperature reaches 165°F (74°C).
  5. If desired, place a slice of cheese on top during the last minute of cooking to melt.
  6. Lightly toast your burger buns on the grill or in a toaster until golden and crispy.
  7. Assemble your turkey burger by placing each cooked patty onto a toasted bun and layering with lettuce, sliced tomatoes, and any other condiments.
  8. Serve your homemade turkey burgers immediately while still hot and juicy.

This turkey burger recipe is simple, scrumptious, and sure to delight your family and friends at dinner time.

Sandwiches
American
comfort food, easy dinner, Grilled Turkey Burger, Healthy Burger, Turkey Burger, weeknight meal

Filed Under: Sandwiches

Savory Shrimp Avocado Mango Bowls for Fresh Flavor Bliss

September 14, 2025 by grace bellamy Leave a Comment

As I stood in my kitchen, the vibrant colors of ripe avocados and juicy mangoes caught my attention, instantly evoking thoughts of summer vibes. That’s when I realized it was the perfect moment to whip up Shrimp Avocado Mango Bowls! This refreshing dish is not only a feast for the eyes but also brings together the delightful sweetness of mango, creamy avocado, and succulent shrimp in just about half an hour. With minimal prep and cooking time, it’s a surefire way to impress your family or enjoy a self-care dinner. The best part? These bowls are perfect for warm nights when you crave something light, delicious, and healthy. Ready to dive into a tropical escape? Let’s get cooking!

Shrimp Avocado Mango Bowls

Why are Shrimp Avocado Mango Bowls a Must-Try?

Colorful, Refreshing Ingredients: This dish combines vivid shrimp, ripe avocados, and sweet mangoes, creating a stunning presentation.
Quick to Prepare: With just 30 minutes from prep to table, it’s perfect for busy nights.
Nutrient-Packed Goodness: Enjoy a healthy meal loaded with protein, healthy fats, and vibrant vitamins.
Versatile Delight: Serve it as a light dinner, a filling lunch, or even as a refreshing summer appetizer.
Crowd-Pleasing Appeal: Impress friends and family alike—this recipe is bound to be a hit at any gathering!
You can also check out my other healthy summer recipes for more inspiration!

Shrimp Avocado Mango Bowls Ingredients

For the Shrimp
• 1 lb shrimp – peeled and deveined for the perfect tenderness and flavor.
• 2 tbsp olive oil – enhances the shrimp’s natural taste while keeping it moist.
• 1 lime – juiced to add a zesty kick that pairs wonderfully with shrimp.
• 1 tsp ground cumin – introduces a warm, earthy note that’s a must for this dish.
• Salt and pepper – to taste, elevating the overall flavor profile.

For the Bowl
• 2 ripe avocados – diced for a creamy texture that balances the shrimp’s flavor.
• 1 large mango – diced to bring a sweet, tropical flair to the bowl.
• 1 cup cherry tomatoes – halved for a burst of freshness and color.
• 1 small red onion – finely chopped to add a bit of crunch and sharpness.
• Fresh cilantro – for garnish, it adds a pop of color and a herbal note.

These vibrant Shrimp Avocado Mango Bowls are not just a treat for the taste buds but also a feast for the eyes, making them the perfect meal to brighten your day!

Step‑by‑Step Instructions for Shrimp Avocado Mango Bowls

Step 1: Marinate the Shrimp
In a medium bowl, combine the peeled and deveined shrimp with olive oil, lime juice, ground cumin, salt, and pepper. Use a spoon to toss everything together until the shrimp are evenly coated. Allow the shrimp to marinate for about 10 minutes while you prepare the other ingredients, letting those flavors meld beautifully.

Step 2: Cook the Shrimp
Heat a skillet over medium-high heat until it’s hot, then add the marinated shrimp in a single layer. Sear the shrimp for 2-3 minutes on each side, flipping when they turn pink and opaque. As they cook, the shrimp should sizzle pleasantly; keep an eye on them to prevent overcooking. Once done, remove them from the heat and set aside.

Step 3: Prepare the Bowl Ingredients
While the shrimp is cooking, take the time to prepare your colorful ingredients. Dice the ripe avocados and large mango, then halve the cherry tomatoes. In a large mixing bowl, gently combine these vibrant components along with the finely chopped red onion, creating a delightful visual medley that will enhance your Shrimp Avocado Mango Bowls.

Step 4: Combine All Ingredients
Add the cooked shrimp to the bowl with the diced avocados, mango, cherry tomatoes, and red onion. Using a large spoon, carefully toss all the ingredients together until they are well combined, ensuring that the creamy avocado and sweet mango coat the shrimp evenly. This mix should look inviting and taste truly refreshing.

Step 5: Serve and Garnish
Divide the shrimp avocado mixture into serving bowls. For an extra burst of flavor, drizzle with additional lime juice and sprinkle fresh cilantro on top as a garnish. This final touch not only adds a pop of color but also a fresh herbal note, making your Shrimp Avocado Mango Bowls a feast for both the eyes and the palate.

Shrimp Avocado Mango Bowls

Shrimp Avocado Mango Bowls Variations

Feel free to get creative and put your personal twist on these delightful bowls for a unique dining experience!

  • Spicy Kick: Add diced jalapeños for a flavorful heat that complements the sweetness of the mango.
  • Coconut Cream: Swap out olive oil for coconut cream for a tropical flair and rich, creamy texture in your shrimp sauce.
  • Grilled Shrimp: Instead of pan-searing, grill the shrimp for a smoky flavor that brings an exciting new dimension to the dish.
  • Vegan Option: Replace shrimp with chickpeas or grilled tofu for a hearty, plant-based alternative that’s still packed with protein.
  • Herb Swaps: Experiment with fresh herbs like dill or mint instead of cilantro to change up the flavor profile entirely.
  • Citrus Variations: Use orange or grapefruit juice instead of lime to bring a different zesty flavor, enhancing the sweetness of your mango.
  • Nutty Crunch: Top with toasted pine nuts or sliced almonds for a satisfying crunch and a boost in healthy fats.
  • Quinoa Base: Serve the mixture over a bed of fluffy quinoa for added texture and an extra protein kick in your bowl.

If you’re looking for something light yet satisfying, consider pairing these bowls with a side of refreshing cucumber salad or some homemade zucchini fritters for an unforgettable meal!

How to Store and Freeze Shrimp Avocado Mango Bowls

Fridge: Keep any leftovers in an airtight container for up to 2 days. The shrimp and veggies will still taste fresh, but the avocado may brown slightly.

Freezer: It’s best not to freeze assembled bowls; instead, freeze cooked shrimp in a separate container for up to 3 months. Thaw in the fridge before using.

Reheating: For the shrimp, gently reheat in a skillet over low heat until heated through. Avoid microwaving as it can make shrimp rubbery.

Room Temperature: These bowls are best enjoyed immediately but can sit out for about 1 hour during gatherings before they should be refrigerated.

What to Serve with Shrimp Avocado Mango Bowls

As you prepare to delight in the freshness of this vibrant dish, consider how to complement its bold flavors with delightful sides and sips.

  • Crispy Tortilla Chips: Perfect for crunch, these add a delightful texture contrast to the creamy avocado and sweet mango.

  • Zesty Lime Rice: A side of lime-infused rice enhances the citrus notes in your bowls while offering a satisfying base.

  • Grilled Corn Salad: Sweet, smoky grilled corn with lime dressing brings a burst of flavor that dances beautifully with the shrimp.

  • Cucumber and Mint Salad: This refreshing salad cuts through the richness of the avocado, providing a cooling contrast that elevates your meal.

  • Spicy Black Bean Tacos: For a heartier bite, these tacos introduce a savory spice that pairs beautifully with the sweetness of the shrimp and fruit.

  • Coconut Water: Chill with a glass of fresh coconut water for a tropical drink that harmonizes perfectly with the dish’s bright flavors.

  • Pineapple Sorbet: End on a sweet note! This light dessert cleanses the palate while continuing the tropical theme of your meal. Enjoy the burst of fruity flavor with each bite.

Expert Tips for Shrimp Avocado Mango Bowls

Perfect Shrimp Texture: Cook shrimp just until pink: Overcooking makes shrimp rubbery. Remove them from heat as soon as they’re opaque for tender bites in your Shrimp Avocado Mango Bowls.

Fresh Ingredients Matter: Use ripe avocados and mangoes: This ensures a creamy texture and sweet flavor that truly elevates your dish. Firm fruits won’t provide the expected taste.

Balanced Seasoning Tip: Adjust seasoning gradually: When adding salt and pepper, taste as you go. It’s easier to add more than to fix an overly salty dish!

Garnish with Flair: Use fresh herbs creatively: Besides cilantro, consider adding mint or basil for a fragrant twist. These do wonders for the overall flavor experience.

Vibrant Color Pop: Layer with variety: Present the bowls in layers instead of mixing entirely for a visually stunning presentation—an Instagram-worthy touch that will impress everyone!

Make Ahead Options

These Shrimp Avocado Mango Bowls are perfect for busy home cooks seeking to meal prep in advance! You can marinate the shrimp up to 24 hours ahead of time; simply toss them with olive oil, lime juice, ground cumin, salt, and pepper, then refrigerate to let the flavors develop. For the freshest results, prepare the diced avocados and mango just before serving to prevent browning; you can store them in an airtight container with a splash of lime juice for up to 3 days. When ready to enjoy, simply cook the marinated shrimp and combine all components as instructed—this way, you’ll have a delightful and vibrant meal ready with minimal effort, just as delicious as if you made it fresh!

Shrimp Avocado Mango Bowls

Shrimp Avocado Mango Bowls Recipe FAQs

How do I choose ripe avocados and mangoes for my Shrimp Avocado Mango Bowls?
Absolutely! For the best flavor and texture, choose avocados that yield slightly to gentle pressure; this indicates ripeness. Mangoes should also be slightly soft when gently squeezed but not overly mushy. Look for vibrant color and a sweet aroma from the stem end.

What is the best way to store leftover Shrimp Avocado Mango Bowls?
I recommend transferring any leftovers to an airtight container. They’ll stay fresh for up to 2 days in the fridge. Keep in mind that while the shrimp and veggies will taste great, the avocado may brown slightly. To slow down browning, squeeze a little lime juice over the surface before storing.

Can I freeze the assembled Shrimp Avocado Mango Bowls?
It’s best not to freeze the full bowls since avocado and shrimp don’t freeze well together. Instead, freeze the cooked shrimp separately in a sealed container for up to 3 months. When you’re ready to use it, thaw it overnight in the fridge before reheating gently on the stovetop.

What should I do if my shrimp ends up overcooked?
Oh no! If that happens, don’t worry—it happens to the best of us! To salvage the dish, try chopping the overcooked shrimp into smaller pieces to mix into the salad, which can help disguise the texture. Next time, aim for a cooking time of 2-3 minutes per side, and keep a close eye on their color as they cook.

Is this recipe suitable for people with seafood allergies?
No worries! If you have a seafood allergy, you can substitute the shrimp with grilled chicken, tofu, or even chickpeas for a hearty, protein-rich alternative. Adjust the seasoning accordingly to fit your taste, and you’ll still enjoy the fresh, vibrant flavors of the Shrimp Avocado Mango Bowls!

How long can the bowls sit out at room temperature during a gathering?
These tasty bowls are best when served immediately, but they can safely sit out for about 1 hour during gatherings. After that, make sure to refrigerate any leftovers to keep them fresh and safe to eat. Enjoy every refreshing bite!

Savory Shrimp Avocado Mango Bowls for Fresh Flavor Bliss

These Shrimp Avocado Mango Bowls are a vibrant, healthy dish combining sweet mango, creamy avocado, and succulent shrimp, perfect for summer nights.

  • Medium bowl
  • skillet
  • large mixing bowl

For the Shrimp

  • 1 lb shrimp (peeled and deveined)
  • 2 tbsp olive oil (for marinating)
  • 1 unit lime (juiced)
  • 1 tsp ground cumin
  • salt (to taste)
  • pepper (to taste)

For the Bowl

  • 2 unit ripe avocados (diced)
  • 1 large mango (diced)
  • 1 cup cherry tomatoes (halved)
  • 1 small red onion (finely chopped)
  • fresh cilantro (for garnish)

Step-by-Step Instructions

  1. In a medium bowl, combine the peeled and deveined shrimp with olive oil, lime juice, ground cumin, salt, and pepper. Toss until evenly coated. Allow to marinate for about 10 minutes.
  2. Heat a skillet over medium-high heat and add the marinated shrimp in a single layer. Sear for 2-3 minutes on each side until pink and opaque. Set aside.
  3. Prepare your ingredients by dicing the avocados and mango, and halving the cherry tomatoes. Combine these along with red onion in a large mixing bowl.
  4. Add the cooked shrimp to the bowl with avocados, mango, cherry tomatoes, and red onion. Toss gently until well combined.
  5. Divide the shrimp avocado mixture into serving bowls. Drizzle with lime juice and garnish with fresh cilantro.

Use ripe ingredients for the best flavor. Avoid overcooking shrimp as it can become rubbery.

Salad
Healthy, Mexican, Tropical
avocado, Easy Recipe, healthy meal, Light Dinner, mango, shrimp

Filed Under: salad

Sushi Cups: Crispy Fiesta of Flavorful Freshness

September 14, 2025 by grace bellamy Leave a Comment

The aroma of toasted wonton wrappers and savory sushi rice fills the air as I whip up these delightful Sushi Cups. This recipe is my secret weapon when I want to impress guests or simply enjoy a fancy dinner at home. The beauty of these Sushi Cups lies in their quick preparation and the ability to combine fresh, vibrant ingredients into a perfectly bite-sized dish. Featuring sushi-grade fish, creamy avocado, and crunchy cucumber, they are not only a crowd-pleaser but also a fantastic way to elevate your dinner routine without ordering takeout. Trust me, once you take your first bite, you’ll be hooked! Ready to dive into this fun and delicious adventure? Let’s get cooking!

Sushi Cups

Why Are Sushi Cups So Irresistible?

Easy to Make: You don’t need advanced culinary skills to whip up these Sushi Cups. With just a few simple steps, you’ll have a gourmet dish ready to impress.

Fresh Ingredients: Utilizing fresh sushi-grade fish, creamy avocado, and crunchy cucumber, each bite bursts with vibrant flavors.

Versatile Choices: Customize your fillings! Add your favorite vegetables or substitute with cooked shrimp for a different twist.

Perfect Presentation: These Sushi Cups are not only delicious but also visually stunning, making them ideal for parties or family gatherings.

Quick Preparation: Enjoy a satisfying meal in just under an hour – a fantastic alternative to takeout! For more quick meals, check out our guide on easy weekday dinners.

Sushi Cups Ingredients

Get ready to gather the essentials for your sensational Sushi Cups!

For the Sushi Rice

  • Sushi rice – This is the star ingredient that gives the cups their authentic flavor and texture.
  • Water – Necessary for cooking the rice to perfection; it helps ensure the grains are fluffy.
  • Rice vinegar – Adds that tangy depth that balances the dish beautifully.
  • Sugar – Enhances the rice’s flavor; feel free to adjust this for your taste preferences.
  • Salt – A hint of salt elevates the savory notes in the rice.

For the Wonton Cups

  • Wonton wrappers – These are the perfect vessel for your sushi goodness, adding a delightful crunch.
  • Cooking spray or oil – Essential for frying or baking the wonton wrappers to achieve that golden crispness.

For the Filling

  • Sushi-grade fish (tuna or salmon) – Opt for the freshest catch to ensure safety and flavor in your Sushi Cups.
  • Avocado – Provides a creamy texture that complements the fish perfectly.
  • Cucumber – Offers a refreshing crunch that balances the creaminess of the avocado.
  • Cream cheese – Adds a rich, velvety element that ties all the flavors together.

For Garnishing

  • Soy sauce – A drizzle over the top brings umami to each bite of your Sushi Cups.
  • Pickled ginger – Serves as a palate cleanser that pairs wonderfully with the fish.
  • Sesame seeds – Not only for garnish but also adds a nutty flavor and extra crunch.
  • Chopped green onions – A fresh herbaceous note that brightens your Sushi Cups.

Gather these ingredients and get ready for a culinary adventure with your homemade Sushi Cups!

Step‑by‑Step Instructions for Sushi Cups

Step 1: Rinse the Rice
Start by rinsing 1 cup of sushi rice under cold water until the water runs clear, which helps remove excess starch for better texture. Once rinsed, combine the rice with 1 1/4 cups of water in a rice cooker or saucepan. If using a saucepan, bring it to a boil, then reduce heat and let it simmer covered for 18-20 minutes.

Step 2: Season the Rice
After the rice is cooked, transfer it to a large bowl and allow it to cool slightly. In a small bowl, whisk together 2 tablespoons of rice vinegar, 1 tablespoon of sugar, and 1/2 teaspoon of salt until dissolved. Pour this mixture over the sushi rice, gently folding it in while fanning to help cool it further and enhance flavor.

Step 3: Prepare the Wonton Cups
Preheat your oven to 375°F (190°C) while the rice cools. Lightly spray a muffin tin with cooking spray. Carefully press 12 wonton wrappers into the muffin cups, shaping them into small cups. Bake in the preheated oven for 8-10 minutes, or until the wrappers are crisp and slightly golden, creating a perfect vessel for your Sushi Cups.

Step 4: Make the Filling
While the wonton cups are baking, prepare the filling. In a bowl, combine 1/2 pound of diced sushi-grade fish (like tuna or salmon), 1 diced avocado, 1/2 julienned cucumber, and 1/4 cup of softened cream cheese. Mix until evenly combined, and feel free to adjust seasoning with salt and pepper to your liking for that extra flavor kick in your Sushi Cups.

Step 5: Assemble the Sushi Cups
Once the wonton cups have cooled, it’s time to fill them. Start by adding a generous spoonful of the seasoned sushi rice into the bottom of each cup. Then, top the rice with a portion of the fish mixture you just prepared. Drizzle a little soy sauce over the top to enhance the umami flavor of your Sushi Cups.

Step 6: Garnish for the Finishing Touch
Complete each Sushi Cup with a touch of flair. Add pickled ginger for a zesty contrast, sprinkle sesame seeds for that nutty crunch, and finish off with chopped green onions for a fresh pop of color. These final garnishes not only make the Sushi Cups visually stunning but also enhance the overall flavor experience.

Step 7: Serve Immediately
Serve your vibrant Sushi Cups immediately to ensure they maintain their delightful crunch. Gather your loved ones or guests, and enjoy this fantastic alternative to takeout that’s packed with fresh, fabulous flavors. Each bite is sure to impress and satisfy!

Sushi Cups

Sushi Cups Variations & Substitutions

Feel free to get creative with these Sushi Cups, embracing flavors and ingredients that excite your palate!

  • Vegetarian: Replace sushi-grade fish with marinated tofu for a plant-based twist that’s equally satisfying.
  • Spicy Kick: Add sriracha or spicy mayo to the fish mixture for a delightful heat that brings each cup to life.
  • Tropical Fusion: Incorporate diced mango or pineapple with avocado for a fruity, sweet-savory balance.

For those who love a crunch, try adding thinly sliced radishes on top. They provide a refreshing contrast that’s beautifully vibrant.

  • Low-Carb Option: Swap out the wonton wrappers with zucchini or eggplant slices baked until crispy for a delightful, lighter alternative.
  • Seafood Medley: Combine diced shrimp and scallops with the sushi-grade fish for a rich and complex flavor profile.
  • Herbaceous Notes: Add fresh herbs like cilantro or basil to the filling for a fragrant and refreshing twist that’s sure to uplift the dish.

Lastly, if you love umami, marinate the cucumber in rice vinegar for a pickled touch that enhances the overall flavor. Each variation invites a new experience, making this dish endlessly enjoyable! For more customized recipes, don’t miss checking out our tips on creative cooking substitutions.

Expert Tips for Sushi Cups

• Perfect Rice: Ensure you rinse sushi rice thoroughly until the water runs clear; this removes excess starch and prevents stickiness.

• Crispy Wrappers: Don’t skip the baking step! Preheat the oven to 375°F (190°C) and bake wonton wrappers until crisp to avoid sogginess.

• Fresh Fish Only: Always use sushi-grade fish for sushi cups; it’s crucial for flavor and safety. Consult your fishmonger for the freshest options.

• Customization is Key: Feel free to personalize your fillings or garnishes! Experiment with vegetables or proteins to suit your taste preferences.

• Serve Fresh: These Sushi Cups are best enjoyed immediately after assembling. This ensures that the wonton wrappers remain wonderfully crunchy.

How to Store and Freeze Sushi Cups

Fridge: Store assembled Sushi Cups in an airtight container in the fridge for up to 2 days. However, for the best crunchiness, it’s best to consume them right after making.

Freezer: To freeze, store the unfilled wonton cups in a freezer-safe container for up to 1 month. Fill them with fresh ingredients when you’re ready to enjoy.

Reheating: If you have leftover filled cups, reheat them in an oven at 350°F (175°C) for about 10 minutes to restore the crispiness, but keep in mind that the fish might not be as fresh-tasting.

Wrap Well: If freezing unfilled wonton cups, ensure they’re wrapped well to avoid freezer burn, preserving the delightful crunch for later use.

Make Ahead Options

These Sushi Cups are perfect for busy weeknights or entertaining, allowing you to savor homemade goodness without the last-minute rush! To prep in advance, you can cook the sushi rice and store it in an airtight container in the refrigerator for up to 3 days. Meanwhile, the wonton cups can be baked and kept at room temperature for up to 24 hours to retain their crispiness. When you’re ready to serve, simply prepare the fish mixture and fill the cups shortly before placing them on the table. This way, you ensure each bite remains just as delicious and fresh, making your Sushi Cups the star of any gathering!

What to Serve with Sushi Cups

The crunchy wonton shells filled with fresh ingredients create a delightful canvas for a well-rounded meal.

  • Creamy Avocado Salad: A fresh, zesty avocado salad with citrus dressing complements the texture of the sushi cups perfectly. It’s a refreshing side that enhances the overall experience.
  • Crispy Tempura Vegetables: The light, crispy texture of tempura vegetables balances well with the savory sushi cups, adding an exciting crunch. Serve alongside a dipping sauce for extra flavor!
  • Miso Soup: A warm bowl of miso soup with tofu and seaweed offers comforting umami flavors that nicely contrast with the cold sushi cups. It’s a traditional pairing that warms the soul.
  • Edamame Beans: Lightly salted edamame provides a delightful pop of protein, making it a satisfying side. Plus, they add an extra layer of fun to your meal!
  • Pickled Vegetables: A small dish of pickled radishes or carrots adds a tangy bite, cleansing the palate between bites of the sushi cups.
  • Green Tea: A cup of freshly brewed green tea offers a soothing finish, with its earthy notes enhancing the meal without overpowering the flavors.

These pairing options create a vibrant spread, elevating your sushi cup experience to something truly special!

Sushi Cups

Sushi Cups Recipe FAQs

How do I select the best sushi-grade fish for my Sushi Cups?
Absolutely! When choosing sushi-grade fish, look for vibrant color and a fresh ocean scent. The flesh should be firm to the touch and have minimal dark spots. I recommend asking your local fishmonger for recommendations; they can guide you to the freshest options available, often labeled as ‘sushi-grade’ or ‘sashimi-grade.’

How should I store leftover Sushi Cups?
To maintain the crunchiness of your delicious Sushi Cups, store any leftovers in an airtight container in the fridge. They will stay fresh for up to 2 days, but I recommend enjoying them right after making for the best texture. If you want to keep the ingredients longer, consider storing the components separately rather than assembled.

Can I freeze unfilled wonton wrappers for my Sushi Cups?
Yes, you can! To freeze your wonton wrappers, place them in a freezer-safe container or a resealable bag, ensuring they’re well-wrapped to prevent freezer burn. They can be stored this way for up to 1 month. When you’re ready to use them, simply take the amount you need out, bake as directed, and fill with fresh ingredients.

What if my wonton wrappers get soggy after baking?
Very! If your wonton wrappers become soggy, it could be due to excess moisture or underbaking. Always ensure they are golden and crisp before removing from the oven. If that happens, you can always re-bake them at 375°F (190°C) for a few minutes to regain that delightful crunch!

Are there any dietary considerations for Sushi Cups, such as allergies?
Absolutely! If you’re making Sushi Cups for guests with dietary restrictions, be mindful of common allergens. If anyone is allergic to seafood, consider substituting the fish with cooked shrimp, tofu, or additional veggies. Additionally, ensure that your soy sauce is gluten-free if that’s a concern. Always double-check ingredient labels to keep everyone safe and happy!

How can I ensure my Sushi Cups maintain their crunch?
To keep your Sushi Cups crispy, assemble them just before serving! If preparing in advance, store the filling and wonton cups separately. When ready to serve, fill the cups with rice and toppings for the ultimate fresh experience. Enjoy this delightful alternative to takeout!

Sushi Cups: Crispy Fiesta of Flavorful Freshness

Sushi Cups are a delightful blend of savory sushi rice and fresh ingredients, perfect for impressing guests.

  • Rice cooker
  • Muffin tin
  • Mixing Bowl

For the Sushi Rice

  • 1 cup sushi rice (star ingredient for authentic flavor)
  • 1.25 cups water (for cooking the rice)
  • 2 tablespoons rice vinegar (adds tangy depth)
  • 1 tablespoon sugar (to enhance rice flavor)
  • 0.5 teaspoon salt (elevates savory notes)

For the Wonton Cups

  • 12 pieces wonton wrappers (vessel for sushi goodness)
  • 1 tablespoon cooking spray or oil (for frying or baking)

For the Filling

  • 0.5 pound sushi-grade fish (tuna or salmon) (fresh catch for flavor)
  • 1 piece avocado (creamy texture)
  • 0.5 piece cucumber (julienned for crunch)
  • 0.25 cup cream cheese (adds richness)

For Garnishing

  • 1 tablespoon soy sauce (for umami flavor)
  • 1 tablespoon pickled ginger (palate cleanser)
  • 1 tablespoon sesame seeds (for nutty flavor)
  • 2 tablespoons chopped green onions (fresh garnish)

Step-by-Step Instructions

  1. Rinse 1 cup of sushi rice under cold water until clear, combine with 1 1/4 cups of water in a rice cooker. Cook for 18-20 minutes.
  2. Transfer rice to a bowl, cool slightly. Whisk together 2 tablespoons rice vinegar, 1 tablespoon sugar, and 1/2 teaspoon salt. Mix with rice.
  3. Preheat oven to 375°F. Spray muffin tin, press 12 wonton wrappers into cups. Bake for 8-10 minutes until crisp.
  4. Prepare filling with 1/2 pound diced sushi-grade fish, 1 diced avocado, 1/2 julienned cucumber, and 1/4 cup softened cream cheese. Mix well.
  5. Fill wonton cups with sushi rice, top with fish mixture, drizzle with soy sauce.
  6. Garnish with pickled ginger, sesame seeds, and green onions. Serve immediately.

Best enjoyed immediately after assembling for optimal crunch.

Appetizer
Japanese
Appetizer, Crispy Wonton, fresh ingredients, quick meal, Sushi Cups

Filed Under: Appetizer

Sauteed Mushrooms with Spinach for a Fresh, Flavorful Meal

September 14, 2025 by grace bellamy Leave a Comment

As I stood in my kitchen, the warm aroma of sautéing garlic danced through the air, instantly transporting me to memories of cozy family dinners. This simple yet nourishing recipe for Sauteed Mushrooms with Spinach is a delightful dish that brings together earthy flavors and vibrant greens in just 15 minutes. Not only is it a quick-prep wonder for those busy weeknights, but it’s also a fantastic way to incorporate more nutritious veggies into your meals. Plus, with a touch of Parmesan cheese on top, it’s sure to impress even the pickiest eaters. Ready to elevate your next dinner? Let’s dive into this delicious recipe and discover just how satisfying homemade cooking can be!

Sauteed Mushrooms with Spinach

Why is this dish a must-try?

Quick Preparation: In just 15 minutes, this recipe takes minimal effort, making it perfect for busy weeknights.

Flavor Explosion: The rich, earthy taste of sautéed mushrooms paired with the freshness of spinach is simply irresistible.

Healthy Benefits: Packed with nutrients, this dish will help you load up on veggies without sacrificing flavor.

Versatile Pairing: Serve it alongside grilled chicken, steak, or even on toast for a delightful brunch option.

Crowd-Pleasing Appeal: Whether you’re entertaining guests or enjoying a cozy dinner, it’s a hit for everyone, including picky eaters!

For more delicious vegetable recipes, check out our easy vegetable dishes. Enjoy the goodness of home-cooked meals!

Sauteed Mushrooms with Spinach Ingredients

For the Sauté
• Fresh mushrooms – 8 oz, sliced; these add a rich, earthy flavor to the dish.
• Fresh spinach – 4 cups, washed and chopped; packed with nutrients, it wilts beautifully when cooked.
• Olive oil – 2 tablespoons; this helps to sauté the vegetables to perfection and adds a lovely richness.
• Garlic – 2 cloves, minced; use fresh garlic for maximum fragrance and taste.
• Salt – to taste; enhances the overall flavor of the sautéed mushrooms and spinach.
• Black pepper – to taste; adds a subtle heat and depth to the dish.

For Serving
• Lemon juice – 1 tablespoon, optional; a splash of acidity brightens the flavors wonderfully.
• Grated Parmesan cheese – for serving, optional; adds a creamy, savory note that elevates the dish.

This delightful recipe for Sauteed Mushrooms with Spinach is not just quick to make but also packed with flavors that make homemade cooking a joy!

Step‑by‑Step Instructions for Sauteed Mushrooms with Spinach

Step 1: Prepare Your Ingredients
Start by washing and slicing the fresh mushrooms into even pieces to ensure uniform cooking. Next, wash the spinach thoroughly and chop it into smaller pieces for easier incorporation later. Mince the garlic cloves finely, as this will infuse the sauté with wonderful aroma and flavor. Having all ingredients ready is crucial for a smooth cooking process.

Step 2: Heat the Olive Oil
In a large skillet, pour in 2 tablespoons of olive oil and heat it over medium heat. Allow the oil to warm for about 1-2 minutes until it shimmers lightly, signaling that it’s hot enough to start sautéing. This step sets the stage for the delicious flavors to unfold as the mushrooms begin to cook.

Step 3: Sauté the Mushrooms
Add the prepared sliced mushrooms to the skillet. Stir them gently for about 5-7 minutes, allowing them to cook until they turn golden brown and tender. Keep an eye on the mushrooms as they release moisture; they should become nicely caramelized and fragrant, enhancing the overall taste of the Sauteed Mushrooms with Spinach.

Step 4: Add Garlic for Flavor
Once the mushrooms are perfectly sautéed, stir in the minced garlic. Cook for an additional 1-2 minutes, stirring continuously until the garlic becomes fragrant and lightly golden. Be careful not to burn the garlic, as it can turn bitter and affect the dish’s flavor. Your kitchen will be filled with a delightful aroma at this stage!

Step 5: Incorporate the Spinach
Now it’s time to add the chopped spinach to the skillet. Toss the spinach with the sautéed mushrooms and garlic, and cook for about 2-3 minutes. As the spinach wilts down, it should become vibrant and tender, integrating beautifully with the other ingredients. This step brings a burst of freshness to your Sauteed Mushrooms with Spinach.

Step 6: Season to Taste
Once the spinach is wilted, season the mixture with salt and black pepper to taste. If you desire an extra zing, drizzle in 1 tablespoon of lemon juice at this stage. Stir the ingredients well for an even distribution of flavors. This final touch enhances the dish by balancing the rich earthiness of the mushrooms with vibrant acidity.

Step 7: Serve Your Dish
Remove the skillet from heat and prepare to serve your delicious Sauteed Mushrooms with Spinach immediately. If you like, sprinkle some grated Parmesan cheese on top for a creamy finish. Serve this flavorful dish warm, either as a standalone treat or paired with your favorite protein for a satisfying meal. Enjoy the delightful combination of flavors!

Sauteed Mushrooms with Spinach

Sauteed Mushrooms with Spinach Variations

Feel free to let your creativity shine by customizing this delightful dish to match your taste and dietary preferences!

  • Dairy-Free: Omit the Parmesan cheese and substitute with nutritional yeast for a cheesy flavor without the dairy.
  • Spicy Kick: Add a pinch of red pepper flakes or some chopped jalapeños to introduce a tantalizing heat. Your taste buds will dance with excitement!
  • Asian Flair: Incorporate soy sauce or sesame oil for an umami twist, and toss in some sliced green onions for that extra bite.
  • Nutty Crunch: Sprinkle toasted pine nuts or slivered almonds on top just before serving for a lovely crunchy texture that complements the soft sauté.
  • Herb Delight: Experiment with fresh herbs like thyme or basil, adding them at the end of cooking for an aromatic finish that elevates the entire dish.
  • Whole Grain Boost: Serve the sautéed mushrooms and spinach over a bed of quinoa or brown rice for added fiber and heartiness.
  • Lemon Zing: For bright and zesty flavor, incorporate more lemon juice or a splash of balsamic vinegar for a delicious tang. It makes every bite burst with freshness!
  • Protein Power: Add cooked chicken, shrimp, or tofu for an easy protein boost, turning this side dish into a hearty main course.

For more delightful vegetable recipes to explore, don’t miss out on our easy vegetable dishes! You’ll find endless inspiration for your home-cooked meals.

How to Store and Freeze Sauteed Mushrooms with Spinach

Fridge: Store leftovers in an airtight container in the refrigerator for up to 3 days. This keeps the flavors fresh and ready to enjoy again!

Freezer: For longer storage, freeze the sautéed mushrooms with spinach in freeze-safe containers for up to 2 months. Ensure they’re well-sealed to prevent freezer burn.

Reheating: When you’re ready to enjoy, reheat on low heat in a skillet until warmed through. Adding a splash of olive oil can help restore moisture and flavor.

Room Temperature: Avoid leaving the dish out at room temperature for more than 2 hours to maintain safety and quality.

Expert Tips for Sauteed Mushrooms with Spinach

• Mushroom Choice: Use a variety of mushrooms such as cremini, shiitake, or button for a range of flavors and textures in your Sauteed Mushrooms with Spinach.

• Freshness Counts: Always opt for fresh spinach and mushrooms; wilted greens and soggy mushrooms can result in a less appealing dish.

• Don’t Overcrowd: Sauté mushrooms in batches if your skillet is small. Overcrowding leads to steaming, which prevents that beautiful browning.

• Watch the Garlic: Garlic cooks quickly; add it after the mushrooms are browned to prevent it from burning, which can turn the dish bitter.

• Finish with Flavor: For added depth, garnish with a sprinkle of fresh herbs like thyme or parsley right before serving to brighten the dish.

• Serve Right Away: This dish tastes best fresh; serve immediately after cooking for the most vibrant flavor and texture in your Sauteed Mushrooms with Spinach.

What to Serve with Sauteed Mushrooms with Spinach

Elevate your mealtime with delectable pairings that round out the flavors of this savory dish.

  • Grilled Chicken: Juicy, tender grilled chicken adds protein, balancing the earthy mushrooms and vibrant spinach beautifully.
  • Creamy Mashed Potatoes: The smooth, buttery texture of creamy mashed potatoes serves as a comforting base that enhances every bite.
  • Toasted Bread: Serve on a slice of warm, crusty bread for a lovely appetizer that brings a rustic crunch to the meal.
  • Quinoa Salad: A light quinoa salad with lemon vinaigrette provides a fresh and nutty contrast, enhancing the dish’s flavors.
  • Scrambled Eggs: For brunch lovers, mix the sautéed mushrooms and spinach into scrambled eggs for a delightful morning wake-up.
  • Red Wine: A glass of light red wine, like Pinot Noir, complements the sautéed flavors and adds a touch of elegance to your meal.
  • Lemon Sorbet: A refreshing lemon sorbet makes for a perfect, light dessert that cleanses the palate after a hearty meal.

Make Ahead Options

Sauteed Mushrooms with Spinach are a fantastic option for meal prep, saving you precious time during busy weeknights. You can slice the mushrooms, chop the spinach, and mince the garlic up to 24 hours in advance. Store these ingredients in airtight containers in the refrigerator to maintain their freshness. When you’re ready to cook, heat the olive oil and sauté the mushrooms as usual; they will still be just as tender and flavorful! For the best results, incorporate the spinach in the same cooking session, as it wilts quickly and doesn’t hold up well to prolonged storage. Enjoy the ease of home-cooked goodness with minimal effort!

Sauteed Mushrooms with Spinach

Sauteed Mushrooms with Spinach Recipe FAQs

How do I choose the best mushrooms for this recipe?
Absolutely! When selecting mushrooms, look for fresh ones that are firm and free from dark spots or blemishes. If you’re going for texture and flavor variety, I recommend combining different types, like cremini and shiitake, which can elevate your Sauteed Mushrooms with Spinach with a range of earthy tones.

What’s the best way to store leftovers?
To keep your Sauteed Mushrooms with Spinach delicious, store any leftovers in an airtight container in the refrigerator. They’ll stay fresh for up to 3 days. Ensure the container is sealed well to prevent moisture loss and to keep flavors intact.

Can I freeze Sauteed Mushrooms with Spinach?
Absolutely! To freeze, let the dish cool completely before transferring it to freeze-safe containers. You can store it safely in the freezer for up to 2 months. When you’re ready to enjoy it again, thaw in the fridge overnight and reheat in a skillet over low heat for the best texture and flavor.

How do I know if my spinach or mushrooms have gone bad?
Very important! If your fresh spinach has turned dark and slimy or the mushrooms exhibit dark spots, wrinkles, or a mushy texture, they are past their prime. For the best taste and safety, always use fresh ingredients when making Sauteed Mushrooms with Spinach.

Can I make this dish vegan-friendly?
Sure! To make Sauteed Mushrooms with Spinach vegan, simply omit the Parmesan cheese or replace it with a nutritional yeast sprinkle for a cheesy flavor without dairy. You can also use a splash of balsamic vinegar instead of lemon juice for a different zing in taste.

Sauteed Mushrooms with Spinach for a Fresh, Flavorful Meal

This Sauteed Mushrooms with Spinach recipe combines earthy flavors and vibrant greens in just 15 minutes, perfect for healthy weeknight dinners.

  • skillet

For the Sauté

  • 8 oz Fresh mushrooms, sliced (these add a rich, earthy flavor to the dish.)
  • 4 cups Fresh spinach, washed and chopped (packed with nutrients, it wilts beautifully when cooked.)
  • 2 tablespoons Olive oil (this helps to sauté the vegetables to perfection and adds a lovely richness.)
  • 2 cloves Garlic, minced (use fresh garlic for maximum fragrance and taste.)
  • Salt (to taste; enhances the overall flavor.)
  • Black pepper (to taste; adds a subtle heat and depth.)

For Serving

  • 1 tablespoon Lemon juice (optional; a splash of acidity brightens the flavors.)
  • Grated Parmesan cheese (for serving, optional; adds a creamy, savory note.)

Step-by-Step Instructions

  1. Start by washing and slicing the fresh mushrooms into even pieces. Wash the spinach thoroughly and chop it into smaller pieces. Mince the garlic cloves finely.
  2. In a large skillet, pour in 2 tablespoons of olive oil and heat it over medium heat for 1-2 minutes until it shimmers lightly.
  3. Add the prepared sliced mushrooms to the skillet and stir gently for about 5-7 minutes until they turn golden brown and tender.
  4. Once the mushrooms are perfectly sautéed, stir in the minced garlic and cook for 1-2 minutes until fragrant.
  5. Add the chopped spinach to the skillet and toss with the sautéed mushrooms and garlic, cooking for about 2-3 minutes.
  6. Once the spinach is wilted, season with salt and black pepper to taste, and optionally add 1 tablespoon of lemon juice.
  7. Remove the skillet from heat and serve immediately, with grated Parmesan cheese if desired.

For best flavor, serve immediately after cooking. Fresh ingredients are key, and a variety of mushrooms adds depth to the dish.

Side Dishes
American
easy recipes, healthy recipes, quick meals, Sauteed Mushrooms, Spinach, Vegetarian Dishes

Filed Under: Side Dishes

Creamy Pumpkin Whipped Feta Dip for Cozy Gatherings

September 14, 2025 by grace bellamy Leave a Comment

When the leaves start to turn and the air grows crisp, my kitchen transforms into a cozy haven where comforting flavors shine. One of my favorite go-to recipes during this season is a luscious Pumpkin Whipped Feta Dip. This delightful blend combines creamy feta cheese and pumpkin puree, offering a unique twist that’s perfect for autumn gatherings or quiet nights in. Not only is this dip incredibly easy to prepare—taking just 15 minutes from start to finish—but it also promises to impress your guests, making it a true crowd-pleaser. Plus, it’s a healthier alternative to traditional dips, blending nutritious ingredients without sacrificing taste. Curious about how I elevate this dip to the next level? Let’s dive in!

Pumpkin Whipped Feta Dip

Why is Pumpkin Whipped Feta Dip a must-try?

Deliciously Unique: This dip combines creamy feta and rich pumpkin puree, creating a flavor experience that’s unlike anything else you’ve tried.

Quick and Easy: With just 15 minutes of prep time, you can whip up this sumptuous treat without fuss.

Perfect for Gatherings: Ideal for autumn get-togethers, serving this dip will make you the star of the evening!

Healthier Choice: Enjoy a nutritious alternative that’s low in calories but high in flavor, letting you indulge guilt-free.

Customizable Delight: Feel free to mix in your favorite toppings or pair it with an array of dippables like seasoned pita chips or grilled vegetables for extra flair!

Pumpkin Whipped Feta Dip Ingredients

Unlock the secrets to this creamy delight!

For the Dip

  • Feta cheese – 8 oz – crumbled for easy blending and that signature tang.
  • Greek yogurt – 1/2 cup – adds creaminess and a hint of tartness that elevates the dip.
  • Pumpkin puree – 1 cup – this is the star ingredient that gives the dip its fall flavor!
  • Honey – 1-2 tbsp – sweetness balances the saltiness of feta; adjust according to taste.
  • Fresh thyme – 1 tsp (plus more for garnish) – imparts an earthy aroma that’s simply irresistible.
  • Black pepper – to taste – adds a subtle kick that enhances all the flavors.
  • Chopped walnuts – 1/4 cup (optional) – adds crunch and a nutty bite if you’re feeling adventurous.

This Pumpkin Whipped Feta Dip is not just delicious; it’s a wonderful way to bring the cozy flavors of fall to your table. Enjoy!

Step‑by‑Step Instructions for Pumpkin Whipped Feta Dip

Step 1: Blend Feta and Yogurt
Start by adding the crumbled feta cheese and Greek yogurt into a food processor. Blend on high until the mixture becomes smooth and creamy, about 1-2 minutes. Stop occasionally to scrape down the sides with a spatula, ensuring there are no lumps left. This base will set the stage for a delightful Pumpkin Whipped Feta Dip.

Step 2: Mix in Pumpkin and Flavors
Once the feta and yogurt are well blended, incorporate the pumpkin puree, honey, fresh thyme, and several grinds of black pepper into the food processor. Blend again for another 1-2 minutes until everything is well combined and creamy. Taste and adjust the sweetness by adding more honey if desired, creating a harmonious balance in your dip.

Step 3: Chill the Mixture
Transfer the whipped feta mixture into a clean bowl or airtight container and cover it tightly. Place the dip in the refrigerator for at least 30 minutes to 1 hour. This chilling time allows the flavors to meld beautifully, enhancing the overall taste of your Pumpkin Whipped Feta Dip and giving it a cool, refreshing texture.

Step 4: Prepare for Serving
When you’re ready to serve, take the chilled dip out of the refrigerator and transfer it to a serving bowl. Here, you’re free to get creative! Sprinkle chopped walnuts (if using) over the top, add extra fresh thyme for a pop of color, drizzle with honey, and add a few more cracks of black pepper to enhance the flavor.

Step 5: Serve and Enjoy
Present your Pumpkin Whipped Feta Dip alongside an array of dippables like crusty bread, crackers, or fresh vegetables. This dish is perfect for sharing during cozy gatherings or as a delicious snack for yourself. Savour the unique and delightful flavors that make this dip a fall favorite!

Pumpkin Whipped Feta Dip

Make Ahead Options

These Pumpkin Whipped Feta Dip preparations are perfect for busy home cooks looking to save time during the week! You can prepare the dip base (feta, yogurt, pumpkin, honey, thyme, and pepper) up to 24 hours in advance by blending all ingredients and storing the mixture in an airtight container in the refrigerator. To maintain quality and flavor, cover it tightly, preventing air exposure that can impact freshness. When you’re ready to serve, stir in any additional honey or toppings like walnuts, and let it chill for a little while longer. This way, you’ll enjoy the same delicious, creamy results with minimal effort and maximize your time for cozy gatherings!

Tips for the Best Pumpkin Whipped Feta Dip

  • Quality Cheese Matters: Use a high-quality feta cheese for a richer flavor. It makes a noticeable difference in your Pumpkin Whipped Feta Dip!

  • Chill to Perfection: Allow the dip to chill for at least 30 minutes. This enhances the flavors, making the dip even more delicious.

  • Adjust Sweetness: Taste before serving and feel free to add more honey if desired. Balancing sweetness is key to a harmonious Pumpkin Whipped Feta Dip.

  • Experiment with Herbs: Fresh thyme is fantastic, but don’t hesitate to try other herbs like rosemary or sage for a unique twist!

  • Serving Success: Pair with a variety of dippers like crusty bread, veggies, or crackers to cater to everyone’s tastes at your gathering.

How to Store and Freeze Pumpkin Whipped Feta Dip

Fridge: Store your Pumpkin Whipped Feta Dip in an airtight container for up to 3-5 days. Always use a clean spoon to avoid contamination.

Freezer: If you want to keep it longer, freeze the dip in a freezer-safe container for up to 2 months. Thaw overnight in the fridge before enjoying.

Reheating: This dip is best served cold. However, if you prefer it warm, gently heat it in a microwave or over low heat on the stove, stirring frequently.

Serving Tip: Before serving, give your dip a good stir to restore its creamy texture after storage. Enjoy the delightful flavors all over again!

Pumpkin Whipped Feta Dip Variations

Feel free to explore these delightful twists that will make your Pumpkin Whipped Feta Dip even more extraordinary!

  • Spicy Kick: Add 1/2 tsp of cayenne pepper for a fiery boost that will awaken your taste buds. Let the heat mingle with the creamy feta for an unforgettable experience.

  • Herb Lovers: Swap fresh thyme for fresh rosemary or sage to give your dip a new aromatic profile. Each herb brings a unique flavor, making it a savory option for seasonal gatherings.

  • Nutty Crunch: Replace walnuts with toasted pecans or almonds for a different texture. These nuts add a sweet, earthy depth, elevating your dip to new heights.

  • Creamy Vegan: Substitute feta with tofu or cashew cheese for a delightful vegan option. Blend until smooth and creamy for a satisfying treat that’s plant-based without compromising on taste.

  • Sweet Twists: Drizzle in maple syrup instead of honey for a unique sweetness that pairs perfectly with pumpkin’s natural flavors. This simple swap adds a delightful autumn nuance to your dip.

  • Smoky Flavor: Mix in a teaspoon of smoked paprika for a touch of smokiness that complements the pumpkin beautifully. It’s a simple way to add an exciting depth to your dip.

  • Cheesy Depth: Incorporate a handful of grated Parmesan cheese along with the feta for a rich, savory flavor. The added cheesiness will leave everyone wanting more!

  • Mediterranean Flair: Mix in some sun-dried tomatoes or olives for an unexpected Mediterranean twist. This infusion brings a savory bite that harmonizes wonderfully with your dip.

No matter how you choose to customize, each variation will deepen your love for this delightful dip. Consider pairing your creation with some delicious dippers like seasoned pita chips or grilled vegetables to truly impress your friends and family!

What to Serve with Pumpkin Whipped Feta Dip

When you’re aiming to create a memorable meal, pairing the right accompaniments can elevate your Pumpkin Whipped Feta Dip to new heights.

  • Crusty Bread: Works beautifully with the dip’s creamy texture, providing a satisfying crunch that complements each bite.

  • Savory Crackers: Ideal for adding a bit of spice and crunch, enhancing the dip’s rich pumpkin flavor and tangy feta.

  • Seasoned Pita Chips: These delightful chips bring a warm, toasty flavor that pairs perfectly, offering a lovely contrast to the smooth dip.

  • Fresh Veggies: Carrot sticks, celery, and bell pepper strips add a refreshing crunch, balancing the dip’s richness with vibrant, fresh flavors.

  • Olive Tapenade: A salty, briny addition that adds depth and makes each dip feel gourmet, enhancing your tasting experience.

  • Marinated Olives: They add a burst of flavor that contrasts beautifully with the creaminess, making for an intriguing palate sensation.

Pairing your Pumpkin Whipped Feta Dip with these delicious options ensures a cozy, fulfilling experience that will have everyone coming back for more!

Pumpkin Whipped Feta Dip

Pumpkin Whipped Feta Dip Recipe FAQs

How do I choose the best pumpkin puree?
Absolutely! Look for pumpkin puree that is rich in color, ideally a deep orange, indicating ripeness. Make sure to check for any added sugar or preservatives; pure pumpkin should be the only ingredient listed. If you have access to fresh pumpkins, roasting and pureeing them makes for a fabulous flavor boost!

How should I store homemade Pumpkin Whipped Feta Dip?
Very simple! Store your dip in an airtight container in the refrigerator for up to 3-5 days. Remember to use a clean spoon each time you scoop to prevent any bacteria from spoiling your delicious creation!

Can I freeze Pumpkin Whipped Feta Dip?
Absolutely! If needed, you can freeze the dip in a freezer-safe container for up to 2 months. To freeze, pour the dip into the container, press a piece of plastic wrap against the surface to minimize air exposure, and seal it well. When you’re ready to enjoy, thaw it overnight in the fridge. Give it a good stir before serving to restore the creamy texture.

What if my Pumpkin Whipped Feta Dip is too thick?
No worries! If you find your dip is thicker than you’d like, you can add a tablespoon of Greek yogurt or a splash of milk to loosen it up. Blend again until you achieve your desired consistency. Don’t forget to taste and adjust the seasoning after adding more liquid!

Is this dip safe for people with nut allergies?
Great question! The Pumpkin Whipped Feta Dip itself is naturally nut-free, but if you decide to add walnuts for crunch, they can pose a risk to those with nut allergies. You can easily omit the walnuts and still enjoy a tasty dip, or substitute with pumpkin seeds for a similar texture without the nut concern.

How do I enhance the flavor of my dip?
I recommend experimenting with fresh herbs! While thyme is delightful, you might also try adding a pinch of nutmeg, or even a dash of cayenne pepper for some warm heat. Stir in your choices as you blend and taste along the way to find that perfect flavor balance!

Creamy Pumpkin Whipped Feta Dip for Cozy Gatherings

Enjoy a delightful Pumpkin Whipped Feta Dip that mixes creamy feta and pumpkin puree for a unique autumn appetizer.

  • Food Processor

For the Dip

  • 8 oz Feta cheese (crumbled for easy blending)
  • 0.5 cup Greek yogurt (adds creaminess and tartness)
  • 1 cup Pumpkin puree (the star ingredient for fall flavor)
  • 1-2 tbsp Honey (adjust according to taste)
  • 1 tsp Fresh thyme (plus more for garnish)
  • Black pepper (to taste)
  • 0.25 cup Chopped walnuts (optional for crunch)

Step-by-Step Instructions

  1. Blend Feta and Yogurt: Add the crumbled feta cheese and Greek yogurt into a food processor. Blend on high until smooth, about 1-2 minutes.
  2. Mix in Pumpkin and Flavors: Incorporate the pumpkin puree, honey, fresh thyme, and black pepper. Blend for another 1-2 minutes.
  3. Chill the Mixture: Transfer the mixture to a bowl and refrigerate for at least 30 minutes to 1 hour.
  4. Prepare for Serving: Take the dip out of the refrigerator and transfer to a serving bowl, adding walnuts and thyme.
  5. Serve and Enjoy: Present the dip with dippables like crusty bread or crackers.

Use high-quality feta for a richer flavor. Chill the dip to enhance flavors. Adjust honey for sweetness as needed.

Appetizer
American
Autumn Recipe, Creamy Dip, Fall Appetizer, Healthy Snack, Party Dip, Pumpkin Whipped Feta Dip

Filed Under: Appetizer

Beef Bacon & Cheddar Cheese Muffins: Savory Comfort in Bites

September 13, 2025 by grace bellamy Leave a Comment

As I opened my fridge tonight, a quiet excitement sparked within me—a culinary treasure trove filled with an array of ingredients just waiting for a delicious harmony. And that’s when it hit me: why not create something truly special? Enter my Beef Bacon & Cheddar Cheese Muffins, a cozy fusion of savory flavors that are perfect for any occasion. These muffins aren’t just easy to whip up in under 40 minutes; they’re also a delightful crowd-pleaser that families will love. Plus, they’re incredibly versatile—great as a hearty breakfast, midday snack, or even as a delightful companion to a warm soup. Are you ready to elevate your muffin game and discover the magic of these flavors? Let’s dive into this scrumptious adventure!

Beef Bacon & Cheddar Cheese Muffins

Why will you adore these muffins?

Irresistible Flavor: The blend of beef bacon and sharp cheddar creates a savory explosion that keeps everyone coming back for more.

Quick and Easy: With a prep time of just 15 minutes, you can satisfy your cravings without spending hours in the kitchen.

Perfect for Any Meal: These muffins make great breakfast options, delightful snacks, or even add some heartiness to a light lunch with a side of warm soup.

Impressive Crowd-Pleaser: Serve them at your next gathering and watch as guests rave about their delightful taste and warm comfort.

Store and Share: They can be stored effortlessly for days, making them an ideal make-ahead snack for busy weeks ahead!

Beef Bacon & Cheddar Cheese Muffins Ingredients

Here’s everything you need to create these tasty muffins filled with savory goodness!

For the Muffin Base

  • All-purpose flour – a key ingredient that provides structure to the muffins.
  • Baking powder – helps the muffins rise and stay fluffy.
  • Baking soda – offers an additional lift, ensuring the muffins are light and airy.
  • Salt – enhances the overall flavors of the muffins.
  • Large egg – binds the ingredients and adds moisture.
  • Buttermilk – creates a tender crumb with a subtle tang; can substitute with regular milk plus a dash of vinegar.
  • Vegetable oil – keeps the muffins moist; can swap with melted butter for a richer taste.

For the Savory Filling

  • Cooked beef bacon – adds a hearty, smoky flavor that elevates the muffins.
  • Shredded cheddar cheese – provides that irresistible cheesy goodness; feel free to mix in different cheese types for a unique twist.
  • Fresh chives (optional) – imparts a fresh herbal note that complements the beef bacon.

Enjoy creating your Beef Bacon & Cheddar Cheese Muffins and watch them quickly become a family favorite!

Step‑by‑Step Instructions for Beef Bacon & Cheddar Cheese Muffins

Step 1: Preheat the Oven
Begin by preheating your oven to 375°F (190°C). While that’s warming up, prepare a muffin tin by lining it with paper liners or giving it a light coat of cooking spray. This step ensures your Beef Bacon & Cheddar Cheese Muffins will easily release after baking, leaving you with perfectly shaped treats.

Step 2: Combine Dry Ingredients
In a large mixing bowl, sift together 1 cup of all-purpose flour, 1 teaspoon of baking powder, 1/2 teaspoon of baking soda, and 1/4 teaspoon of salt. Mixing these dry ingredients thoroughly will create a fluffy base for your muffins. You want a smooth blend to ensure every bite is packed with flavor!

Step 3: Whisk Wet Ingredients
In another bowl, crack 1 large egg and whisk it together with 1/2 cup of buttermilk and 1/4 cup of vegetable oil. Mix until everything is well combined and frothy. This is the heart of your Beef Bacon & Cheddar Cheese Muffins, bringing moisture and richness to your batter.

Step 4: Combine Wet and Dry Mixtures
Gently pour the wet mixture into the bowl of dry ingredients. Using a spatula or wooden spoon, stir the mixture just until combined—it’s perfectly normal if there are a few lumps. Overmixing can make your muffins tough, so be kind to the batter!

Step 5: Add Savory Fillings
Now, fold in 1 cup of chopped cooked beef bacon and 1 cup of shredded cheddar cheese. If desired, add 1 tablespoon of chopped fresh chives for an extra flavor boost. The savory aroma will start to fill your kitchen, and the delightful combination of beef and cheese in your muffins will soon come to life.

Step 6: Fill the Muffin Tin
Carefully spoon the batter into the prepared muffin tin, filling each cup about two-thirds full. This allows the muffins to rise beautifully without overflowing. As you do this, you might let your imagination run free about how delicious your Beef Bacon & Cheddar Cheese Muffins will be!

Step 7: Bake to Perfection
Place the muffin tin in the preheated oven and bake for 20-25 minutes. To test for doneness, insert a toothpick into the center of a muffin—if it comes out clean, your muffins are ready! Enjoy the warm, inviting aroma wafting through your kitchen as they bake.

Step 8: Cool and Serve
Once baked, remove the muffins from the oven and let them cool in the pan for 5-10 minutes. Then, gently transfer them to a wire rack to cool completely. Whether enjoyed warm or at room temperature, your Beef Bacon & Cheddar Cheese Muffins are sure to be a hit!

Beef Bacon & Cheddar Cheese Muffins

Beef Bacon & Cheddar Cheese Muffin Variations

Feel free to let your creativity shine and make these muffins your own with delicious adjustments!

  • Gluten-Free: Substitute all-purpose flour with a gluten-free blend to cater to dietary needs.
  • Spicy Kick: Add diced jalapeños or red pepper flakes for a delightful heat that ignites the taste buds.
  • Smoked Flavor: Swap cooked beef bacon for turkey bacon or smoked sausage for a different savory experience.
  • Cheese Lovers: Mix in a combination of cheeses, such as mozzarella or pepper jack, for extra gooeyness and flavor.
  • Herb Infusion: Enhance aroma by incorporating fresh herbs like thyme or rosemary, adding a delightful touch of nature’s essence.
  • Veggie Enrich: Fold in sautéed vegetables like spinach or mushrooms for added nutrition and colorful flair.
  • Enhanced Sweetness: Add a touch of honey or maple syrup for a balance of sweet and savory that will tantalize your palate.
  • Mini Muffins: Bake the mixture in a mini muffin tin for bite-sized treats that are perfect for gatherings or lunchboxes.

Whatever variations you choose, rest assured these muffins are a canvas for your culinary imagination, ready to delight the senses and please your family!

What to Serve with Beef Bacon & Cheddar Cheese Muffins

Elevate your savory muffin experience with delightful pairings that bring warmth and joy to every meal.

  • Creamy Tomato Soup: A classic companion, its tangy richness pairs brilliantly with the savory muffins, creating a cozy harmony.

  • Crunchy Garden Salad: Fresh greens and colorful veggies add a crisp, refreshing contrast to the hearty flavors of your muffins. Toss it with a zesty vinaigrette for an extra zing.

  • Savory Herb Butter: Spread warm, herby butter on the muffins for a lush, aromatic indulgence. This simple addition takes the flavor to another level.

  • Spicy Mustard Dip: The tanginess of spicy mustard complements the savory notes in the muffins while adding an exciting kick that tantalizes the taste buds.

  • Warm Spinach and Artichoke Dip: This creamy, cheesy dip provides a luxurious texture that pairs wonderfully, perfect for scooping up alongside each muffin.

  • Scrambled Eggs: For a hearty breakfast or brunch, a side of fluffy scrambled eggs adds protein and balances the savory muffins perfectly.

  • Icy Lemonade: A cool, refreshing glass of lemonade helps brighten the meal and cuts through the richness of the muffins with its tangy sweetness.

  • Chocolate Chip Cookies: Keep the sweet-savory balance by serving these indulgent cookies for dessert. Their sweetness perfectly contrasts the muffins’ savory flavors.

Make Ahead Options

These Beef Bacon & Cheddar Cheese Muffins are perfect for meal prep aficionados! You can mix the dry ingredients and store them in an airtight container up to 3 days in advance, ensuring flavor and freshness. Additionally, you can prepare the wet ingredients (egg, buttermilk, and oil) and refrigerate them for up to 24 hours; this method minimizes prep time when you’re ready to bake. When it’s time to enjoy your delicious muffins, simply combine the mixtures, fold in the savory fillings, and bake as directed. This way, you can savor homemade goodness with minimal effort, making your busy weeknights just a bit easier!

Expert Tips for Beef Bacon & Cheddar Cheese Muffins

Avoid Overmixing: Gently stir the batter until just combined; overmixing can lead to dense muffins instead of light, fluffy ones.

Bacon Selection: Opt for thick-cut beef bacon to enhance flavor and texture, but remember to chop it finely for even distribution in the muffins.

Cheese Variations: Feel free to experiment with different cheeses like pepper jack or gouda to add your own twist to these Beef Bacon & Cheddar Cheese Muffins.

Proper Cooling: Allow muffins to cool in the tin for a few minutes before transferring to a wire rack; this prevents sogginess and maintains the perfect texture.

Storage Solutions: Keep leftovers in an airtight container in the fridge for freshness or freeze individually for quick snacks later on.

How to Store and Freeze Beef Bacon & Cheddar Cheese Muffins

Fridge: Store leftover muffins in an airtight container in the refrigerator for up to 5 days. This will keep them fresh and flavorful for your snacking pleasure.

Freezer: For extended storage, freeze the muffins individually wrapped in plastic wrap or placed in a freezer-safe bag for up to 3 months. This method preserves their delightful taste and texture.

Thawing: When you’re ready to enjoy your Beef Bacon & Cheddar Cheese Muffins, simply thaw them in the fridge overnight. You can reheat them in the microwave for about 30 seconds or in a preheated oven at 350°F (175°C) for about 10 minutes.

Reheating: For best results, reheat gently to restore warmth and fluffiness. Enjoy them fresh and warm, as if they just came out of the oven!

Beef Bacon & Cheddar Cheese Muffins

Beef Bacon & Cheddar Cheese Muffins Recipe FAQs

What is the best way to select beef bacon for this recipe?
Absolutely! Opt for thick-cut beef bacon as it adds a deeper flavor and a chewy texture to the muffins. When selecting bacon, look for consistent coloring and avoid packages with dark spots all over, which can indicate spoilage. Fresh bacon should feel firm to the touch and have a pleasant smell.

How should I store leftover Beef Bacon & Cheddar Cheese Muffins?
Store any leftover muffins in an airtight container in the refrigerator for up to 5 days. This keeps them fresh and delicious, ready for a quick snack or breakfast option. If you’re dealing with a busy week ahead, you might appreciate this!

Can I freeze these muffins, and if so, how?
Very much! To freeze your Beef Bacon & Cheddar Cheese Muffins, let them cool completely after baking. Then, wrap each muffin tightly in plastic wrap or place them in a freezer-safe bag. They can be frozen for up to 3 months. When you’re ready to enjoy, simply thaw them in the refrigerator overnight or reheat straight from the freezer!

What should I do if my muffins come out dense?
If your muffins are dense, it often means they were overmixed or too much flour was added. Always mix until just combined and be cautious with your flour measurement—spoon it into the measuring cup and level it off with a knife rather than scooping directly from the bag. This keeps your muffins light and fluffy!

Are these muffins suitable for people with dietary restrictions?
If you’re considering dietary needs, these Beef Bacon & Cheddar Cheese Muffins can be modified! For gluten-free options, substitute all-purpose flour with a gluten-free blend. Make sure the beef bacon is nitrate-free or turkey bacon as an alternative for those avoiding red meat. Always double-check cheese for lactose intolerance or dairy allergies, opting for a lactose-free version if necessary.

Beef Bacon & Cheddar Cheese Muffins: Savory Comfort in Bites

Delicious Beef Bacon & Cheddar Cheese Muffins for a savory snack that’s hearty and easy to make.

  • Muffin tin
  • Mixing bowls
  • spatula

For the Muffin Base

  • 1 cup all-purpose flour
  • 1 teaspoon baking powder
  • 1/2 teaspoon baking soda
  • 1/4 teaspoon salt
  • 1 large egg
  • 1/2 cup buttermilk (can substitute with regular milk plus a dash of vinegar)
  • 1/4 cup vegetable oil (can swap with melted butter)

For the Savory Filling

  • 1 cup cooked beef bacon
  • 1 cup shredded cheddar cheese (or mix in different cheese types)
  • 1 tablespoon fresh chives (optional)

Step-by-Step Instructions

  1. Preheat the oven to 375°F (190°C) and prepare a muffin tin with liners or cooking spray.
  2. In a large bowl, sift together the flour, baking powder, baking soda, and salt.
  3. In another bowl, whisk together the egg, buttermilk, and vegetable oil until frothy.
  4. Pour the wet mixture into the dry ingredients and stir until just combined.
  5. Fold in the cooked beef bacon, shredded cheddar cheese, and fresh chives if using.
  6. Spoon the batter into the muffin tin, filling each cup about two-thirds full.
  7. Bake in the preheated oven for 20-25 minutes or until a toothpick inserted comes out clean.
  8. Cool the muffins in the pan for 5-10 minutes, then transfer to a wire rack to cool completely.

These muffins can be stored in an airtight container in the fridge for up to 5 days. They also freeze well for up to 3 months.

Breakfast
American
Beef Bacon, Cheddar Cheese, easy recipes, muffins, savory snacks

Filed Under: Breakfast

Irresistible Breakfast Grilled Cheese with Scrambled Eggs and Bacon

September 13, 2025 by grace bellamy Leave a Comment

Waking up to the smell of bacon sizzling in the skillet is simply one of life’s greatest joys, don’t you think? That delightful aroma is just the beginning of my Ultimate Breakfast Grilled Cheese with Scrambled Eggs and Bacon, a dish that wedding breakfast nostalgia with everyday comfort. In just half an hour, you can whip up this indulgent feast, sure to turn your mornings into a cheerful celebration, not just another mundane routine. With layers of creamy scrambled eggs, crispy bacon, and gooey melted cheddar, this recipe is a total crowd-pleaser, transforming your breakfast into a gourmet experience without the need for any fancy culinary skills. Ready to elevate your morning meal and impress your loved ones? Let’s dive in and make this breakfast masterpiece together!

Breakfast Grilled Cheese with Scrambled Eggs and Bacon

Why is this breakfast grilled cheese special?

Irresistible flavors come together in every bite, with crispy bacon and creamy scrambled eggs nestled between layers of melted cheddar. Quick and easy to make, you’ll have a gourmet breakfast ready in just 30 minutes! Perfect for any occasion, whether for a lazy weekend or a bustling weekday. Customizable to your taste, add herbs or spices for an extra kick, or swap elements based on what you have at home. This is not just another breakfast dish; it’s a shareable delight that will have everyone wanting seconds! For amazing side options, check out my home fries or smoothie recipe!

Breakfast Grilled Cheese Ingredients

• Get ready to make your mornings irresistible!

For the Sandwich

  • Thick-cut bacon – adds a delightful crunch and smoky flavor to your breakfast grilled cheese.
  • Large eggs – the star of the scramble, providing richness and protein.
  • Milk – ensures your scrambled eggs are extra fluffy and creamy.
  • Salt and pepper – essential for seasoning, elevating the overall taste.
  • Bread – choose sourdough or your favorite type for that perfect balance of crispy and soft.
  • Shredded cheddar cheese – melty and gooey, it’s what makes this breakfast grilled cheese truly indulgent.
  • Unsalted butter – spread on the outside for that golden, crispy finish.
  • Chopped fresh chives or green onions (optional) – a perfect garnish that adds a pop of color and fresh flavor.

Enjoy whipping up this delicious Breakfast Grilled Cheese with Scrambled Eggs and Bacon that will become your new morning favorite!

Step‑by‑Step Instructions for Breakfast Grilled Cheese with Scrambled Eggs and Bacon

Step 1: Cook the Bacon
Preheat a skillet over medium heat and add the thick-cut bacon. Cook the bacon until it reaches a crispy golden texture, about 6 to 8 minutes, turning occasionally to ensure even cooking. Once crispy, remove the bacon from the skillet and let it drain on paper towels, absorbing excess grease for a delightful crunch.

Step 2: Whisk the Eggs
In a medium bowl, crack four large eggs and pour in the milk, adding a pinch of salt and pepper. Whisk the mixture vigorously until fully combined and slightly frothy. This step ensures your scrambled eggs are fluffy and rich. Set the bowl aside while you prepare the skillet for cooking.

Step 3: Cook the Eggs
Carefully drain most of the bacon grease from the skillet, leaving about 1 tablespoon for flavor. Pour the egg mixture into the hot skillet and reduce the heat slightly to medium-low. Gently stir the eggs with a spatula, pushing them from the edges to the center, cooking for about 3 to 5 minutes until just set but still moist. Remove from heat.

Step 4: Assemble the Sandwich
Lay out two slices of your selected bread, preferably sourdough, on a clean work surface. Evenly distribute the shredded cheddar cheese over each slice, allowing the cheese to melt beautifully when grilled. Next, spoon the fluffy scrambled eggs evenly over the cheese, followed by two strips of crunchy bacon on each slice, creating layers of flavor.

Step 5: Add More Cheese
Sprinkle the remaining shredded cheddar cheese on top of the bacon, enhancing the gooeyness of your Breakfast Grilled Cheese with Scrambled Eggs and Bacon. Finally, place the other two slices of bread on top, sealing in all those fantastic ingredients and preparing them for the grill.

Step 6: Butter the Bread
Generously smear the outsides of each sandwich with the softened unsalted butter. This crucial step ensures that the bread turns a beautiful golden brown and achieves a crispy, satisfying crust. The butter acts as a protective layer, helping the sandwiches brown perfectly during grilling.

Step 7: Grill the Sandwiches
Heat a clean, large skillet or griddle over medium heat. Carefully place the sandwiches in the skillet, cooking for about 3 to 4 minutes on each side. As they grill, press down lightly with a spatula to achieve a perfect sear. The bread should develop a delicious golden hue and the cheese should melt into gooey perfection.

Step 8: Cool and Slice
Once your Breakfast Grilled Cheese with Scrambled Eggs and Bacon has that enticing golden crust, remove them from the skillet and let them cool slightly for about 1 minute. This resting period allows the cheese to set a bit, making it easier to slice.

Step 9: Garnish and Serve
For an extra burst of flavor and a pop of color, feel free to garnish the sandwiches with chopped fresh chives or green onions before serving. This optional step adds a fresh element and enhances the sensory experience of your hearty breakfast.

Breakfast Grilled Cheese with Scrambled Eggs and Bacon

What to Serve with Ultimate Breakfast Grilled Cheese with Scrambled Eggs and Bacon

Elevate your breakfast experience with delightful pairings that complement the rich, gooey goodness of your grilled cheese masterpiece.

  • Crispy Hash Browns: Perfectly golden and crunchy, these add a satisfying contrast to the soft, cheesy sandwich.
  • Fresh Avocado Slices: Creamy avocados provide a smooth texture and healthy fat, balancing the richness of the grilled cheese.
  • Sweet Tomato Jam: This tangy-sweet condiment brightens the dish, enhancing each bite with a deliciously unexpected twist.
  • Seasonal Fruit Salad: A refreshing medley of juicy fruits adds a burst of freshness, rounding out your meal beautifully.
  • Savory Sausages: Crispy sausage links provide a hearty protein kick, making this breakfast even more satisfying for hungry diners.
  • Iced Coffee: A lightly sweetened iced coffee keeps things cool and provides a refreshing contrast to the warmth of your grilled cheese.
  • Herb-Infused Olive Oil: Drizzle over roasted vegetables for a vibrant side dish that elevates your meal with Mediterranean flair.
  • Berries and Yogurt Parfait: The creaminess of yogurt paired with tart berries makes for a delightful contrast to your grilled cheese.
  • Mimosas: Start your morning right with the bright, bubbly refreshment of a mimosa – a cheerful companion to your breakfast indulgence!

Tips for the Best Breakfast Grilled Cheese

  • Cheese Selection: Use high-quality cheddar cheese for a rich, gooey melt. Mixing in some pepper jack can add a delightful spice kick.
  • Bread Choice: Opt for sourdough or artisanal bread for the best texture. Avoid thin bread which might get soggy.
  • Egg Cooking: Be patient while cooking the scrambled eggs; cook them gently to maintain a creamy texture. Overcooking can lead to dry eggs.
  • Bacon Crunch: Ensure the bacon is crispy before adding it to the sandwich. It adds not just flavor but also the perfect contrasting crunch to the creamy eggs.
  • Even Cooking: Press down lightly on the sandwiches with a spatula while grilling, ensuring even heat distribution for the perfect sear.
  • Serving Style: Cutting the sandwiches in half makes them easier to handle and adds a visual appeal. Garnish with fresh chives for that extra touch!

Enjoy crafting your own delicious Breakfast Grilled Cheese with Scrambled Eggs and Bacon that everyone will adore!

How to Store and Freeze Breakfast Grilled Cheese with Scrambled Eggs and Bacon

Fridge: Store leftover sandwiches in an airtight container for up to 3 days. Reheat in a skillet over medium heat for crispy results.

Freezer: Freeze individual sandwiches wrapped in plastic wrap and aluminum foil for up to 2 months. Thaw overnight in the fridge before reheating.

Reheating: To reheat, place in a skillet over medium heat for 5-7 minutes, flipping halfway through, until heated through and crispy. Enjoy your Breakfast Grilled Cheese with Scrambled Eggs and Bacon any day of the week!

Room Temperature: Avoid leaving the sandwiches out for more than 2 hours to ensure food safety and freshness.

Make Ahead Options

These Breakfast Grilled Cheese with Scrambled Eggs and Bacon are perfect for meal prep enthusiasts! You can cook the bacon and scramble the eggs up to 3 days in advance; simply store them in separate airtight containers in the refrigerator. When you’re ready to serve, layer the prepped ingredients with cheese and bread as directed, then butter the outsides of the sandwiches. Grill them fresh for about 3 to 4 minutes per side. This ensures the bread remains crispy and the cheese melts perfectly, delivering the same delicious flavor and texture as if you made it all at once. Enjoy gourmet breakfasts all week, making your mornings so much easier!

Breakfast Grilled Cheese Variations

Feel free to get creative with this recipe and let your taste buds lead the way!

  • Dairy-Free: Substitute cheese with a plant-based alternative and use almond milk for the eggs. The flavor remains delightful without the dairy!

  • Vegetarian: Replace bacon with sautéed spinach or mushrooms for a flavorful twist that keeps it hearty and satisfying. You might be surprised at how rich and delicious it can be!

  • Spicy Kick: Add sliced jalapeños or a drizzle of hot sauce to the eggs or cheese layer. The heat will elevate your breakfast into a whole new flavor dimension.

  • Herb-Infused: Stir fresh herbs like basil or parsley into the scrambled eggs for a vibrant and fragrant boost. Herbaceous notes will brighten up each bite!

  • Cheese Medley: Mix different types of cheese such as mozzarella and gouda for a decadent, melty experience that will have your guests begging for more.

  • Texture Tweak: Try switching sourdough for a bagel or panini bread to change things up. A different base can add a delightful chewiness that enhances the overall sandwich.

  • Breakfast Burrito: Turn everything into a breakfast burrito by wrapping scrambled eggs, cheese, and bacon in a tortilla instead of bread. It’s portable and just as delicious!

  • Extra Crunch: Add a layer of fried onion rings or crispy hash browns inside the sandwich for an unexpected crunch. It’ll give your breakfast grilled cheese a satisfying texture contrast.

With these variations, you’ll always have a new way to enjoy this ultimate breakfast delight! And don’t forget to pair it with a refreshing drink like my smoothie recipe or serve alongside those crispy home fries for breakfast bliss.

Breakfast Grilled Cheese with Scrambled Eggs and Bacon

Breakfast Grilled Cheese with Scrambled Eggs and Bacon Recipe FAQs

How do I choose the right bacon for my breakfast grilled cheese?
Absolutely! Look for thick-cut bacon, as it adds a delightful crunch and smoky flavor that perfectly complements the creamy scrambled eggs. If you prefer a leaner option, turkey bacon can also work beautifully, providing a lighter touch without sacrificing taste.

What’s the best way to store leftover breakfast grilled cheese?
To store your delicious Breakfast Grilled Cheese with Scrambled Eggs and Bacon, place the leftovers in an airtight container in the refrigerator. They should stay fresh for up to 3 days. When you’re ready to enjoy them again, simply reheat in a skillet over medium heat for about 5 minutes until crispy.

Can I freeze breakfast grilled cheese sandwiches?
Very! Freezing is a wonderful option for meal prep. Wrap each sandwich tightly in plastic wrap, followed by aluminum foil, and freeze for up to 2 months. To reheat, simply thaw overnight in the fridge, then warm them up in a skillet over medium heat for 5-7 minutes, flipping halfway to ensure even heating.

What if my scrambled eggs are dry? How can I avoid that?
Oh dear! If your scrambled eggs turn out dry, it might be because they were cooked at too high a temperature or for too long. To ensure fluffy and creamy eggs, be patient and cook them over medium-low heat, stirring gently from the edges toward the center. Remember, the eggs will continue cooking slightly even after removing them from heat, so take them off just before they’re fully set.

Are there any dietary considerations I should keep in mind with this recipe?
Certainly! When it comes to allergies, it’s best to check for common culprits like eggs, dairy, and gluten if you’re serving guests. For a dairy-free version, use non-dairy milk and cheese alternatives. Make sure to choose gluten-free bread if anyone has gluten sensitivities. If you’re cooking for pets, remember bacon is not healthy for them; it’s best kept off their plate!

How long does bacon last in the fridge after cooking?
Cooked bacon can be stored in the fridge for about 4 to 5 days. Always keep it in an airtight container. If you notice dark spots or an off smell, it’s best to discard it for safety. Enjoy your kitchen adventures with confidence!

Irresistible Breakfast Grilled Cheese with Scrambled Eggs and Bacon

This Breakfast Grilled Cheese with Scrambled Eggs and Bacon is a delicious way to start your day with crispy bacon, creamy eggs, and melted cheese.

  • skillet
  • spatula
  • Mixing Bowl

For the Sandwich

  • 4 slices thick-cut bacon
  • 4 large eggs
  • 1/4 cup milk
  • to taste salt
  • to taste pepper
  • 4 slices bread (sourdough or favorite type)
  • 1 cup shredded cheddar cheese
  • 2 tablespoons unsalted butter (softened)
  • to taste chopped fresh chives or green onions (optional)

Step-by-Step Instructions

  1. Preheat a skillet over medium heat and add the thick-cut bacon. Cook the bacon until crispy, about 6 to 8 minutes, then remove and let drain on paper towels.
  2. In a mixing bowl, crack the eggs, add the milk, salt, and pepper. Whisk until combined and slightly frothy.
  3. Drain most of the bacon grease from the skillet, leaving about 1 tablespoon. Pour the egg mixture into the skillet, cooking gently for about 3 to 5 minutes until just set.
  4. Lay out two slices of bread, distribute the shredded cheddar cheese over each slice, then spoon the scrambled eggs over the cheese, followed by two strips of bacon.
  5. Sprinkle remaining cheddar cheese on top of the bacon and place the other two slices of bread on top.
  6. Spread the outside of each sandwich with unsalted butter.
  7. Grill the sandwiches in a skillet over medium heat for about 3 to 4 minutes on each side, pressing down with a spatula.
  8. Once golden brown, remove from heat and let cool slightly before slicing.
  9. Garnish with fresh chives or green onions before serving.

Store leftovers in an airtight container for up to 3 days. Reheat in a skillet for crispy results.

Breakfast
American
Bacon, Breakfast Grilled Cheese, comfort food, easy recipes, Quick Breakfast, Scrambled Eggs

Filed Under: Breakfast

Delicious Apple Cider Whoopie Pie Cookies with Caramel Bliss

September 13, 2025 by grace bellamy Leave a Comment

As I stood in my kitchen, the crisp scent of apple cider wafted through the air, creating a cozy atmosphere perfect for baking. That’s when the idea of making Apple Cider Whoopie Pie Cookies with Caramel took over my imagination. These delightful treats not only embrace the essence of fall but also offer a fun twist on traditional whoopie pies. You’ll be thrilled to discover how quick and simple they are to whip up, making them perfect for both busy weeknights and festive gatherings. Plus, the creamy caramel filling adds a touch of indulgence that will keep everyone coming back for seconds. Ready to dive into this tasty adventure? Let’s get those ovens preheating!

Apple Cider Whoopie Pie Cookies with Caramel

Why are these cookies a must-try?

Irresistible Flavor: The sweet and tangy notes of apple cider blended with warm spices like cinnamon and nutmeg create a delicious taste that embodies autumn in every bite.

Quick and Easy: With just 30 minutes of prep time, you can have these delightful cookies ready in no time, making them perfect for last-minute gatherings or quick treats.

Showstopper Appeal: Stack these whoopie pies high, and watch as they steal the show at any event—you’ll be the star baker in your circle!

Versatile Treat: Enjoy them as a cozy dessert or serve them at your next fall gathering. Pair with a warm cup of cider for an unforgettable experience.

Endless Enjoyment: Kids and adults alike will adore the gooey caramel filling that makes each bite even more enjoyable—who can resist that?!

For more tasty inspiration, check out my recipe for Classic Whoopie Pies or learn the secrets behind the perfect Caramel Sauce.

Apple Cider Whoopie Pie Cookies Ingredients

For the Cookies

  • All-purpose flour – This forms the base of your cookies, giving them structure and softness.
  • Baking soda – It provides the lift, making your cookies fluffy.
  • Ground cinnamon – Adds warm, comforting spice that pairs beautifully with apple cider.
  • Ground nutmeg – Just a pinch elevates the flavor with a hint of nutty warmth.
  • Salt – Enhances the sweetness of the cookies for a well-rounded taste.
  • Unsalted butter – Use softened butter for a creamy texture that binds the cookie mix.
  • Brown sugar – Its rich molasses flavor creates a delightful depth in every bite.
  • Large eggs – Essential for moisture and binding the ingredients together.
  • Apple cider – The star ingredient, adding a sweet and tangy fall flavor.
  • Vanilla extract – A splash brings a lovely aromatic sweetness to the cookie dough.

For the Caramel Filling

  • Unsalted butter – Creates a rich base for the creamy caramel.
  • Brown sugar – This brings that desired caramel sweetness and richness.
  • Heavy cream – Adds a luxurious creaminess to the filling, making it irresistible.
  • Vanilla extract – Infuses the filling with delightful flavor that complements the cookies beautifully.

Step‑by‑Step Instructions for Apple Cider Whoopie Pie Cookies with Caramel

Step 1: Preheat the Oven
Begin by preheating your oven to 350°F (175°C). This ensures your Apple Cider Whoopie Pie Cookies bake evenly and achieve that perfect golden hue. While the oven warms up, gather all your ingredients and line a baking sheet with parchment paper for easy cleanup.

Step 2: Prepare Dry Ingredients
In a mixing bowl, whisk together the all-purpose flour, baking soda, ground cinnamon, ground nutmeg, and salt. This step not only combines the dry ingredients but also helps to aerate the mixture, making for fluffier cookies. Set this bowl aside, ready for the next stage of our cookie adventure.

Step 3: Cream Butter and Sugar
In a separate large bowl, use an electric mixer to beat the softened unsalted butter and brown sugar together until it becomes light and fluffy. This should take about 3-4 minutes. The combination will create a lovely caramel-like base for your Apple Cider Whoopie Pie Cookies, so make sure it’s well blended!

Step 4: Add Eggs and Cider
Next, incorporate the large eggs, apple cider, and vanilla extract into the butter-sugar mixture. Blend on medium speed until fully combined and smooth, about 2 minutes. The apple cider will infuse your cookies with that delightful fall flavor, making them irresistibly moist and tasty.

Step 5: Combine Mixtures
Gradually add the dry ingredients to the wet mixture, mixing on low speed until just combined. Be careful not to overmix; we want those little pockets of flavor to shine through in your Apple Cider Whoopie Pie Cookies. The dough should be thick and slightly sticky, signaling it’s ready for the next step.

Step 6: Scoop Dough
Using a cookie scoop or spoon, drop rounded balls of dough onto the lined baking sheet, spacing them about 2 inches apart. This will allow the cookies to spread slightly while baking. You should have about 12 to 15 cookie rounds, ensuring everyone gets a taste of these fall-inspired treats.

Step 7: Bake
Place the baking sheet in your preheated oven and bake for 12-15 minutes, or until the edges of the whoopie pie cookies are golden brown. Keep an eye on them; they’re done when they spring back slightly when touched. Allow the cookies to cool on the baking sheet for 5 minutes before transferring them to a wire rack.

Step 8: Make Caramel Filling
While the cookies cool, prepare the caramel filling. In a saucepan over medium heat, melt ½ cup of unsalted butter, then add 1 cup of brown sugar and ¼ cup of heavy cream. Bring the mixture to a boil while stirring constantly for about 3-5 minutes until thickened. Remove from heat and stir in 1 teaspoon of vanilla extract.

Step 9: Assemble
To assemble your Apple Cider Whoopie Pie Cookies, spread a generous amount of the warm caramel filling on the flat side of one cookie. Top it with another cookie, creating a delightful sandwich. Repeat this process until all cookies are filled, and enjoy the sweet, gooey goodness of your new favorite treat!

Apple Cider Whoopie Pie Cookies with Caramel

What to Serve with Apple Cider Whoopie Pie Cookies with Caramel

As you savor the gooeyness of these whoopie pies, consider completing your meal with delightful pairings that elevate the experience.

  • Creamy Mashed Potatoes: These smooth potatoes offer a comforting contrast to the sweet, spiced cookies, making them a cozy side for a fall meal.

  • Cinnamon-Spiced Apple Cider: Serve a warm cup of this drink to emphasize the apple flavor and bring a touch of nostalgia to your gathering.

  • Chilled Vanilla Ice Cream: The creamy, cold ice cream helps balance the sweetness of the cookies, creating a delightful dessert that’s hard to resist.

  • Roasted Brussels Sprouts: The caramelized, earthy tones of Brussels sprouts perfectly complement the sweetness of the whoopie pies, rounding out your meal beautifully.

  • Pumpkin Soup: This velvety soup with hints of spice matches the cookies’ flavors, creating a comforting, well-rounded dining experience.

  • Cheese Platter: Include sharp aged cheeses to contrast the sweetness of the cookies—this pairing adds a savory element that enhances the overall flavor journey.

  • Warm Caramel Sauce: Drizzle extra caramel over vanilla ice cream or apple slices for a mouthwatering dessert homage to your whoopie pies.

These pairings will help set the scene for a cozy gathering, ensuring that every bite is a moment to relish!

Make Ahead Options

These Apple Cider Whoopie Pie Cookies with Caramel are perfect for busy home cooks looking to save time! You can prepare the cookie dough up to 24 hours in advance; simply cover and refrigerate it until you’re ready to bake. Additionally, the caramel filling can be made up to 3 days ahead; just store it in an airtight container in the refrigerator. When you’re ready to assemble, let the filling come to room temperature before spreading it between the cookies. This way, you’ll have a delectable treat at hand, and your cookies will remain just as delicious and fresh! Enjoy the convenience and delight of these easy make-ahead whoopie pies!

Apple Cider Whoopie Pie Cookies Variations

Feel free to get creative with your Apple Cider Whoopie Pie Cookies and let your taste buds guide you!

  • Gluten-Free: Substitute all-purpose flour with a gluten-free blend for a delightful alternate version that everyone can enjoy. Just ensure you mix well to keep that fluffy texture intact!

  • Vegan: Use plant-based butter, flaxseed eggs, and almond milk cider for a delicious dairy-free and egg-free treat. Don’t worry; the flavor remains absolutely divine!

  • Spiced Up: Add a pinch of cayenne or a dash of ginger for an unexpected kick that contrasts beautifully with the sweet caramel. Your guests will be pleasantly surprised!

  • Pumpkin Twist: Incorporate a half cup of pumpkin puree into the cookie mixture for a seasonal flair that brings an extra depth of flavor. This makes for a wonderfully moist and fragrant treat!

  • Chocolate-Dipped: Dip one half of each whoopie pie in melted chocolate for a decadent finish. The smooth chocolate pairs perfectly with the caramel, adding richness to every bite!

  • Nutty Addition: Stir in chopped pecans or walnuts into the cookie dough to add a crunchy texture that contrasts beautifully with the soft cookie and gooey caramel filling. It’s a delightful surprise in every bite!

  • Caramel Swirl: For a more indulgent caramel filling, swirled additional caramel sauce into freshly whipped cream. The lightness of whipped cream combined with caramel is a match made in heaven!

For more fun baking ideas, don’t miss my recipe for Classic Whoopie Pies, which is a timeless favorite. And if you’re feeling adventurous, check out how to make the perfect Caramel Sauce that elevates any dessert!

Expert Tips for Apple Cider Whoopie Pie Cookies

  • Perfectly Fluffy Cookies: Ensure your butter is softened, not melted. The right consistency helps trap air, providing that light and fluffy texture you desire in your Apple Cider Whoopie Pie Cookies.

  • Don’t Overmix: Mix the wet and dry ingredients until just combined. Overmixing can lead to tough cookies, ruining the softness that makes these treats so delightful.

  • Caramel Consistency: Pay attention while making the caramel filling; it should be thick but spreadable. If too thick, add a splash more cream to achieve the right consistency for your whoopie pies.

  • Cooling Time: Allow the cookies to cool completely before assembling. This prevents the warm cookies from melting the caramel filling, keeping your whoopie pies intact and delicious.

  • Storage Tip: Store assembled cookies in an airtight container in the fridge to maintain that heavenly caramel gooeyness. Enjoy within a few days for the best experience!

How to Store and Freeze Apple Cider Whoopie Pie Cookies

Fridge: Store assembled Apple Cider Whoopie Pie Cookies in an airtight container in the fridge for up to 3 days. This keeps the caramel filling gooey and fresh.

Freezer: To freeze the cookies, individually wrap them in plastic wrap and place them in a freezer-safe bag for up to 2 months. Thaw at room temperature before enjoying!

Reheating: If you prefer warm cookies, reheat them in the microwave for about 10-15 seconds. This revives the irresistible caramel filling and soft texture.

Room Temperature: If you plan to eat the cookies within a day, keep them in an airtight container at room temperature. They will stay deliciously soft and flavorful!

Apple Cider Whoopie Pie Cookies with Caramel

Apple Cider Whoopie Pie Cookies with Caramel Recipe FAQs

How do I choose the right apple cider for baking?
Absolutely! Opt for pure apple cider without added sugars or preservatives for the best flavor. Fresh, unfiltered apple cider offers a richer taste that perfectly enhances your cookies, while store-bought pasteurized cider works well too.

What’s the best way to store leftover cookies?
For sure! Store your assembled Apple Cider Whoopie Pie Cookies in an airtight container in the fridge. They will stay fresh for up to 3 days, keeping the caramel filling gooey and flavorful. If they are at room temperature, aim to eat them within a day for optimal taste.

Can these cookies be frozen?
Absolutely! To freeze your Apple Cider Whoopie Pie Cookies, wrap each cookie individually in plastic wrap and place them in a freezer-safe bag. They can be stored for up to 2 months. When you’re ready to indulge, simply thaw them at room temperature for a delightful treat that tastes freshly baked.

How can I prevent my cookies from coming out dry?
Very good question! To ensure moist cookies, make sure your butter is softened but not melted and avoid overmixing your dough. When combining wet and dry ingredients, mix just until everything is incorporated—you want to preserve that light and fluffy texture that makes these whoopie pies so special!

Is there a way to make these cookies gluten-free?
Definitely! You can substitute all-purpose flour with a 1:1 gluten-free baking flour mix. Ensure your other ingredients, such as baking soda and vanilla extract, are also gluten-free. This adjustment will let everyone enjoy the cozy flavors of these Apple Cider Whoopie Pie Cookies!

Can I make the caramel filling ahead of time?
Yes, you can! The caramel filling can be prepared in advance. After making it, let it cool, then store it in an airtight container in the fridge for up to a week. Just remember to reheat it slightly before assembling with your cookies to get that melty goodness back!

Delicious Apple Cider Whoopie Pie Cookies with Caramel Bliss

Indulge in Apple Cider Whoopie Pie Cookies with Caramel, an irresistible fall treat that combines sweet apple cider with creamy caramel filling.

  • Oven
  • Mixing bowls
  • Electric mixer
  • Baking Sheet
  • parchment paper
  • Saucepan
  • Cookie scoop

For the Cookies

  • 2 cups all-purpose flour
  • 1 teaspoon baking soda
  • 1 teaspoon ground cinnamon
  • 1/2 teaspoon ground nutmeg
  • 1/4 teaspoon salt
  • 1/2 cup unsalted butter (softened)
  • 1 cup brown sugar
  • 2 large eggs
  • 1 cup apple cider
  • 1 teaspoon vanilla extract

For the Caramel Filling

  • 1/2 cup unsalted butter
  • 1 cup brown sugar
  • 1/4 cup heavy cream
  • 1 teaspoon vanilla extract

Step‑by‑Step Instructions

  1. Preheat your oven to 350°F (175°C). Line a baking sheet with parchment paper.
  2. In a mixing bowl, whisk together the all-purpose flour, baking soda, ground cinnamon, ground nutmeg, and salt.
  3. Beat the softened unsalted butter and brown sugar until light and fluffy.
  4. Incorporate the large eggs, apple cider, and vanilla extract into the butter-sugar mixture and blend until smooth.
  5. Gradually add the dry ingredients to the wet mixture, mixing until just combined.
  6. Drop rounded balls of dough onto the lined baking sheet, spacing them about 2 inches apart.
  7. Bake for 12-15 minutes until the edges are golden brown. Cool on the sheet for 5 minutes.
  8. Melt butter and mix with brown sugar and heavy cream over medium heat to make the caramel filling.
  9. Spread caramel filling on the flat side of one cookie and top with another cookie to assemble.

Store assembled cookies in an airtight container in the fridge for up to 3 days. For best results, enjoy within a few days.

Dessert
American
Apple Cider Whoopie Pie, baking, caramel, cookies, Fall dessert

Filed Under: Dessert

Deliciously Boozy Bourbon Peach Upside Down Cake to Impress

September 13, 2025 by grace bellamy Leave a Comment

On a warm summer evening, nothing beats the smell of a fresh cake baking in the kitchen, especially when it stars luscious, juicy peaches. My Bourbon Peach Upside Down Cake is not just a dessert; it’s an experience that transforms simple ingredients into a stunning centerpiece. With only a short prep time, this delightful treat is perfect for a quick pick-me-up during the week or a show-stopping dessert for gatherings with friends. The sweet, caramelized peaches bathed in bourbon and cinnamon create a harmonious balance that’s hard to resist. Plus, you won’t need any fancy equipment to pull off this crowd-pleaser! Could this be your new go-to dessert for impressing loved ones? Let’s find out!

Bourbon Peach Upside Down Cake

Why is this cake so special?

Irresistible Flavor: The richness of bourbon and the sweetness of fresh peaches create a dessert that sings with summer vibes.

Quick and Easy: With just one hour of total time, you can whip up a stunning cake that impresses guests without the usual fuss.

Visual Appeal: The gorgeous presentation of caramelized peaches on top makes it a striking centerpiece for any table.

Versatility: Serve it warm with a scoop of vanilla ice cream or enjoy it as a delightful brunch treat. This Bourbon Peach Upside Down Cake is perfect for any occasion!

For those who love more peachy recipes, don’t miss checking out my Peach Galette to satisfy your cravings!

Bourbon Peach Upside Down Cake Ingredients

For the Cake Base

  • Peaches – 4-5, cored and cut into wedges (leave the skin on for extra flavor and color).
  • Butter – 1 stick (8 tablespoons) – use unsalted for better control over sweetness.
  • Sugar – 1 ¼ cup – this will ensure a delicious caramelization with the peach juices.
  • Eggs – 3 – room temperature eggs help create a fluffier texture.
  • All-purpose Flour – 1 cup – provides the structure needed for this cake.
  • Almond Flour – ¼ cup – adds a lovely nutty flavor and tenderness to the cake.
  • Bourbon – 3 tbsp – brings depth and a hint of sophistication to the dessert.
  • Cinnamon – ½ tsp – enhances the warmth and aroma, making this cake irresistible.
  • Vanilla Extract – ½ tsp – adds a touch of sweetness and complexity to the flavor.
  • Baking Powder – 1 tsp – ensures that the cake rises beautifully.

For the Caramel Layer

  • Water – ¼ cup – helps create the right consistency for your caramel.
  • Sugar – ½ cup – this will be caramelized to create the gooey, sweet layer at the base.

This Bourbon Peach Upside Down Cake is not just a treat; it’s a feast for the senses, combining the warmth of spice, the sweetness of ripe peaches, and the unmistakable character of bourbon. Enjoy baking!

Step‑by‑Step Instructions for Bourbon Peach Upside Down Cake

Step 1: Preheat Your Oven
Begin by preheating your oven to 350°F (175°C). While it heats up, prepare a 9-inch cake pan by lining the base with parchment paper and generously buttering the paper. This ensures the Bourbon Peach Upside Down Cake releases easily after baking and allows for a beautiful presentation.

Step 2: Arrange the Peaches
Next, take your peach wedges and arrange them over the buttered parchment in a circular pattern, starting from the center. As you layer them, ensure they are snug and visually appealing. Sprinkle ¼ teaspoon of cinnamon over the peaches to enhance their natural sweetness and aroma.

Step 3: Make the Caramel
Combine ¼ cup of water with ½ cup of sugar in a medium saucepan, heating it over medium-high heat. Without stirring, allow the mixture to simmer for about 10-15 minutes until it turns a light amber color. Once it reaches this stage, carefully remove it from the heat, quickly add 1 tablespoon of bourbon, and pour the caramel evenly over the arranged peaches.

Step 4: Beat the Butter and Sugar
In a mixing bowl, cream together 1 stick of softened butter and ¾ cup of sugar using an electric mixer on medium speed. Continue to beat for about 3 minutes until the mixture is light and fluffy. Once fluffy, add the eggs one at a time, allowing each to blend in before adding the next. Then, mix in the vanilla extract and 2 tablespoons of bourbon.

Step 5: Combine the Dry Ingredients
In a separate bowl, whisk together the all-purpose flour, almond flour, baking powder, and the remaining ¼ teaspoon of cinnamon. This blend will give your Bourbon Peach Upside Down Cake both structure and a hint of nutty flavor. Gradually add this dry mixture to the wet ingredients, mixing until just combined to avoid overmixing.

Step 6: Pour the Batter
Once your batter is ready, gently pour it over the peach and caramel layer in the cake pan. Using a spatula, smooth the surface to ensure even baking. Be sure to avoid disturbing the peach arrangement below so that they remain beautifully displayed after baking.

Step 7: Bake the Cake
Place the cake in the preheated oven and bake for 30-35 minutes. You’ll know your Bourbon Peach Upside Down Cake is done when a toothpick inserted into the center comes out clean and the top is golden brown. Keep an eye on it towards the end of baking to avoid over-browning.

Step 8: Cool and Serve
After baking, remove the cake from the oven and let it cool for 15-30 minutes on a wire rack. This cooling time is crucial for the caramel to set. Once slightly cooled, carefully invert the cake onto a serving plate, allowing the gorgeous caramelized peaches to shine atop. Enjoy your stunning Bourbon Peach Upside Down Cake!

Bourbon Peach Upside Down Cake

Make Ahead Options

These Bourbon Peach Upside Down Cakes are ideal for busy home cooks looking to save time without compromising on flavor! You can prepare the peach and caramel layers up to 24 hours in advance. Simply arrange the peaches in the cake pan, sprinkle with cinnamon, and prepare the caramel, covering them with plastic wrap before refrigerating. The cake batter can also be made ahead and stored in the fridge for up to 3 days. When you’re ready to bake, just combine the prepared layers with the cold batter and proceed with baking. This way, you’ll have a stunning cake that’s just as delicious and fresh-tasting, ready for your table with minimal effort!

Expert Tips for Bourbon Peach Upside Down Cake

  • Peach Selection: Use ripe but firm peaches for the best flavor and texture. Overripe peaches may become mushy when baked.
  • Monitor Caramel: Watch the sugar closely while melting to avoid burning. It should be a light amber color for an ideal sweetness.
  • Bourbon Balance: Adjust the bourbon to your taste. Too much can overpower the peaches; 2-3 tablespoons offers a pleasant depth.
  • Avoid Overmixing: Mix the batter until just combined to keep your Bourbon Peach Upside Down Cake light and fluffy. Overmixing can lead to a dense texture.
  • Cool Properly: Allow the cake to cool sufficiently before inverting it. This helps the caramel set, ensuring it doesn’t run all over when served.

Bourbon Peach Upside Down Cake Variations

Feel free to put your own twist on this delightful dessert to suit your taste and dietary needs!

  • Gluten-Free: Substitute all-purpose flour with a 1:1 gluten-free flour blend for a fantastic gluten-free option.
  • Vegan: Replace eggs with flaxseed meal and use a plant-based butter alternative for an amazing vegan treat.
  • Peach Preserves: Swap fresh peaches with peach preserves for a shortcut that’s still bursting with flavor. Spread joy with each slice!
  • Nutty Crunch: Mix in chopped pecans or walnuts into the batter for a delightful crunch that complements the soft peaches beautifully.
  • Spicy Kick: Add a pinch of nutmeg or cayenne pepper for an unexpected warmth that elevates the cake’s flavor profile.
  • Bourbon Alternatives: Try using rum or brandy instead of bourbon for a slightly different aromatic twist. Each brings its own unique character!
  • Fruit Fusion: Blend in other fruits like raspberries or blueberries for a vibrant burst of color and flavor that’s absolutely irresistible.
  • Caramel Delight: Drizzle extra caramel sauce over the top before serving for an indulgent finish that will have everyone reaching for seconds.

For more fruity inspiration, check out my Peach Galette—it’s a lovely way to enjoy the taste of summer any time of year!

What to Serve with Bourbon Peach Upside Down Cake

Indulging in a slice of warm Bourbon Peach Upside Down Cake is like wrapping yourself in a cozy blanket of flavors; but what else can enhance this delightful experience?

  • Vanilla Ice Cream: The creamy richness and coolness of vanilla ice cream provide a beautiful contrast to the warm cake, making every bite a dreamy combination of temperatures.

  • Caramel Sauce: Drizzling extra caramel on top amplifies the sticky sweetness already present in the cake, creating a decadent dessert that every sweet tooth will crave.

  • Whipped Cream: Light and airy whipped cream adds a heavenly touch, balancing the richness of the cake and making each bite feel elegant and special.

  • Honeyed Greek Yogurt: A dollop of Greek yogurt sweetened with honey brings a tangy flair that cuts through the sweetness while adding a protein-packed twist.

  • Fresh Berries: Vibrant, tart berries like raspberries or blueberries provide a juicy contrast that brightens the palate, making for a delightful flavor experience alongside each piece of cake.

  • Mint Tea: A warm cup of mint tea refreshingly cleanses the palate between bites, enhancing the rich flavors of the bourbon and peaches without overpowering them.

  • Chardonnay: This crisp white wine complements the fruit and bourbon beautifully, making it a wonderful pairing for a summer gathering or a cozy night in.

  • Lemon Sorbet: Light, refreshing, and slightly tart, lemon sorbet cleanses the palate wonderfully, making each next bite of cake even more enjoyable.

How to Store and Freeze Bourbon Peach Upside Down Cake

Room Temperature: Store the Bourbon Peach Upside Down Cake at room temperature for up to 2 days, covered with a cake dome or plastic wrap to keep it moist.

Fridge: If you need it to last longer, refrigerate the cake for up to 5 days in an airtight container. Just remember to bring it back to room temperature before serving for the best flavor.

Freezer: Freeze individual slices of the Bourbon Peach Upside Down Cake wrapped tightly in plastic wrap and then in aluminum foil for up to 3 months. Thaw overnight in the fridge before enjoying!

Reheating: Gently reheat slices in the microwave for 15-20 seconds or in a preheated oven at 350°F for about 10 minutes to restore its delicious texture.

Bourbon Peach Upside Down Cake

Bourbon Peach Upside Down Cake Recipe FAQs

How do I choose the right peaches for this cake?
Absolutely! For the best Bourbon Peach Upside Down Cake, select ripe yet firm peaches. Look for peaches that yield slightly to pressure but aren’t overly soft or bruised. Dark spots all over or excessive softness might indicate overripeness, which could lead to a mushy cake. If you can, try to smell the peaches as well; a fragrant scent usually means they are juicy and flavorful!

What’s the best way to store leftovers?
Very good question! You can store your Bourbon Peach Upside Down Cake at room temperature for up to 2 days covered with a cake dome or plastic wrap to maintain moisture. If you’d like it to last longer, move it to the fridge in an airtight container where it will stay fresh for up to 5 days. Just make sure to let it come back to room temperature before enjoying it again for the best flavor experience.

Can I freeze this cake?
Yes, you can! To freeze your Bourbon Peach Upside Down Cake, wrap individual slices tightly in plastic wrap, then wrap them again in aluminum foil to prevent freezer burn. They will be good for up to 3 months. When you’re ready to enjoy, simply thaw the slices overnight in the fridge. For a little warmth, you can reheat them gently in the microwave for 15-20 seconds or in a preheated oven at 350°F for about 10 minutes.

What should I do if my cake is dry?
If your Bourbon Peach Upside Down Cake turns out dry, it could be due to overbaking or using too much flour. To prevent this in the future, always keep an eye on the baking time and check for doneness a few minutes early. Utilize the toothpick test—insert it into the center of the cake and if it comes out clean, it’s done! Additionally, ensure that when measuring flour, you spoon it into the measuring cup and level it off instead of scooping directly from the bag or container.

Is this recipe suitable for people with nut allergies?
Great question! Since almond flour is used in the recipe, it wouldn’t be suitable for individuals with nut allergies. You can easily substitute the almond flour with an equal amount of all-purpose flour or a nut-free flour blend. This keeps the cake delightful while making it accessible for everyone.

Deliciously Boozy Bourbon Peach Upside Down Cake to Impress

Experience the mouthwatering Bourbon Peach Upside Down Cake, combining juicy peaches and rich bourbon for an unforgettable dessert.

  • 9-inch cake pan
  • Mixing Bowl
  • Medium saucepan
  • Electric mixer

For the Cake Base

  • 4-5 pieces Peaches (cored and cut into wedges)
  • 8 tablespoons Butter (unsalted)
  • 1.25 cups Sugar
  • 3 pieces Eggs (room temperature)
  • 1 cup All-purpose Flour
  • 0.25 cup Almond Flour
  • 3 tablespoons Bourbon
  • 0.5 teaspoons Cinnamon
  • 0.5 teaspoons Vanilla Extract
  • 1 teaspoon Baking Powder

For the Caramel Layer

  • 0.25 cups Water
  • 0.5 cups Sugar

Step‑by‑Step Instructions

  1. Preheat your oven to 350°F (175°C) and prepare a 9-inch cake pan by lining the base with parchment paper and buttering it.
  2. Arrange peach wedges over the buttered parchment in a circular pattern and sprinkle ¼ teaspoon of cinnamon over the peaches.
  3. Combine water and sugar in a medium saucepan and heat without stirring until it turns light amber. Add 1 tablespoon of bourbon and pour over the peaches.
  4. Cream together softened butter and sugar until fluffy, then add eggs one at a time followed by vanilla extract and bourbon.
  5. Whisk together all-purpose flour, almond flour, baking powder, and remaining cinnamon. Gradually mix into wet ingredients until just combined.
  6. Pour batter over the peach and caramel layer, smoothing the surface carefully.
  7. Bake for 30-35 minutes until a toothpick comes out clean.
  8. Cool on a wire rack for 15-30 minutes before inverting onto a serving plate.

Select ripe but firm peaches for best results. Monitor the caramel closely to avoid burning.

Dessert
American
bourbon, Bourbon Peach Upside Down Cake, cake, dessert, peach, upside down cake

Filed Under: Dessert

Delicious Apple Fritter Waffle Donuts for Cozy Mornings

September 13, 2025 by grace bellamy Leave a Comment

As I flipped through my recipe book, I stumbled upon a delightful fusion that made me stop in my tracks: Apple Fritter Waffle Donuts. These gems are a warm embrace of cozy flavors, perfectly blending the sweetness of apples with the irresistible texture of waffles. What makes this recipe even more appealing is that it whips up in just 25 minutes, making it an ideal choice for both busy mornings and indulgent brunches. Plus, whether you’re hosting friends or simply treating yourself, they’re a guaranteed crowd-pleaser. Ready to tantalize your taste buds? Let’s dive into the delicious world of these Apple Fritter Waffle Donuts and discover how to make this sweet treat that’s perfect for any occasion!

Apple Fritter Waffle Donuts

Why are Apple Fritter Waffle Donuts irresistible?

Quick and Easy: In just 25 minutes, you can whip up these delightful treats, perfect for those busy mornings when you crave comfort without the wait.

Flavor Explosion: The sweet, spiced apples mixed with warm vanilla create a flavor profile that’s simply delectable, making every bite a memorable experience.

Golden Crispiness: Each waffle donut has a delightful crispy exterior while remaining fluffy and soft on the inside, ensuring a pleasing texture that everyone will love.

Versatile Delight: Perfect for breakfast or dessert, these donuts can be enjoyed at any time of the day, whether you’re relaxing at home or hosting a brunch party.

Gorgeous Presentation: Drizzled with a smooth glaze, they’ll not only taste amazing but will also look stunning on any table, impressing your guests and family alike.

For a quick fix of something special, consider making these alongside my Blueberry Breakfast Bars, which complement the morning vibe beautifully.

Apple Fritter Waffle Donuts Ingredients

For the Batter
• 1 cup all-purpose flour – A great base for a fluffy texture.
• 1/4 cup granulated sugar – Sweetens the batter, enhancing the apple flavor.
• 1 tsp baking powder – Ensures a light and airy donut that puffs up beautifully.
• 1/2 tsp cinnamon – Adds warmth and a hint of spice, reminiscent of cozy fall flavors.
• 1/2 tsp nutmeg – Complements the cinnamon for a delicious aromatic blend.
• 1/2 tsp salt – Balances the sweetness for a more rounded flavor.
• 1/2 cup milk – Keeps the batter moist; you can use almond milk for a dairy-free option.
• 1 large egg – Binds the ingredients together for a perfect consistency.
• 2 tbsp melted butter – Adds richness and helps achieve that golden color.
• 1 tsp vanilla extract – Infuses a delightful hint of sweetness and fragrance.
• 1 cup diced, peeled apples (e.g., Granny Smith or Honeycrisp) – Brings texture and a burst of juicy flavor to the batter.

For the Glaze
• 1 cup powdered sugar – Creates a sweet, smooth glaze that elevates the flavor.
• 2 tbsp milk – Helps thin the glaze to a perfect drizzling consistency.
• 1/2 tsp vanilla extract – Enhances the glaze’s flavor, making each bite irresistible.

These luscious Apple Fritter Waffle Donuts are not just a treat; they’re a convenient and delightful way to brighten your morning!

Step‑by‑Step Instructions for Apple Fritter Waffle Donuts

Step 1: Mix Dry Ingredients
In a mixing bowl, combine 1 cup all-purpose flour, 1/4 cup granulated sugar, 1 teaspoon baking powder, 1/2 teaspoon cinnamon, 1/2 teaspoon nutmeg, and 1/2 teaspoon salt. Whisk them together until well-blended, creating a dry mixture that will form the base of your Apple Fritter Waffle Donuts. This step ensures that all the flavors and leavening agents are evenly distributed.

Step 2: Whisk Wet Ingredients
In another bowl, whisk together 1/2 cup milk, 1 large egg, 2 tablespoons melted butter, and 1 teaspoon vanilla extract. Mix these ingredients until smooth and evenly combined, creating a creamy texture. This step adds richness to your batter, which will complement the diced apples beautifully in the final recipe.

Step 3: Combine Mixtures
Pour the wet ingredients into the bowl of dry ingredients, mixing gently with a spatula until just combined. Avoid overmixing; the batter should be slightly lumpy. This will ensure that your Apple Fritter Waffle Donuts are tender and fluffy, ready to embrace the delicious apple pieces to come.

Step 4: Fold in Apples
Gently fold in 1 cup of diced, peeled apples, ensuring that they are evenly distributed throughout the batter. The apples add sweetness and texture, making these waffle donuts truly divine. Take care not to break the apple pieces as you mix, maintaining their integrity for delightful bites.

Step 5: Preheat Waffle Iron
Preheat your waffle iron according to the manufacturer’s instructions and generously grease the plates to prevent sticking. A medium-high heat setting works best to achieve a golden and crispy exterior. This preparation step is essential as it ensures that your Apple Fritter Waffle Donuts cook evenly and have the perfect crispness.

Step 6: Cook Waffle Donuts
Spoon the batter into the preheated waffle iron, using enough to fully cover the bottom without overflowing. Close the lid and cook for about 3-4 minutes, or until the donuts are golden brown and crisp. You’ll know they’re ready when a delightful aroma fills the air, making it hard to resist.

Step 7: Prepare the Glaze
While the waffle donuts are cooking, prepare the glaze. In a separate bowl, whisk together 1 cup powdered sugar, 2 tablespoons milk, and 1/2 teaspoon vanilla extract until smooth and creamy. This simple glaze adds a sweet finish, perfectly complementing the warm flavors of your Apple Fritter Waffle Donuts.

Step 8: Glaze and Serve
Once the waffle donuts are cooked, remove them from the waffle iron and drizzle the glaze generously over them. Allow the glaze to set for a moment, creating a beautiful finish before serving. These Apple Fritter Waffle Donuts are now ready to provide a warm and comforting treat for any time of the day!

Apple Fritter Waffle Donuts

What to Serve with Apple Fritter Waffle Donuts

Indulge in the warmth of these delightful waffle donuts and create a balanced meal to remember.

  • Fresh Fruit Salad: A bowl of mixed seasonal fruits adds brightness and a refreshing contrast to the rich sweetness of the donuts.

  • Spiced Coffee: Rich, aromatic coffee with a hint of cinnamon pairs perfectly, enhancing the spiced flavors in the donuts.

  • Greek Yogurt Parfait: Layered with granola and berries, this adds creaminess and crunch, making breakfast feel indulgent yet wholesome.

  • Maple Syrup Drizzle: For added sweetness, a light drizzle of pure maple syrup takes the flavor to another level, echoing the warm spices.

  • Herbal Tea: A soothing cup of chamomile or mint tea offers a gentle, fragrant backdrop to your waffle donuts, making it a cozy afternoon treat.

  • Ice Cream Scoops: Transform your breakfast into dessert by serving a scoop of vanilla or cinnamon ice cream alongside for a delightful contrast in temperatures.

  • Nutty Granola: A sprinkle of crunchy, nutty granola brings texture and complements the soft, fluffy donut, creating an enjoyable bite.

Pairing these delightful accompaniments with your Apple Fritter Waffle Donuts will elevate your dining experience, inviting warmth in every bite.

Apple Fritter Waffle Donuts Variations

Feel free to put your own spin on these delightful treats with these fun and flavorful suggestions!

  • Gluten-Free: Substitute all-purpose flour with a 1:1 gluten-free flour blend for a delicious alternative that everyone can enjoy.
  • Dairy-Free: Use almond milk or oat milk in place of regular milk, and swap butter for coconut oil for a lighter twist that’s still rich and satisfying.
  • Sweetener Swap: Replace granulated sugar with maple syrup or honey for a natural sweetness and a hint of extra flavor that will surprise your taste buds.
  • Extra Spice: Add 1/4 teaspoon allspice or cardamom to the batter for an aromatic, warm flavor that takes these waffle donuts to the next level.
  • Fruit Variations: Incorporate other fruits like diced pears or berries for a delightful burst of flavor. Each fruit brings its unique sweet note, making this recipe your canvas!
  • Choco-Kissed: Fold in some mini chocolate chips with the apples for a sweet, chocolaty surprise in every bite—perfect for satisfying those sweet cravings.
  • Salted Caramel Drizzle: Instead of the glaze, top with drizzled salted caramel for a decadent treat that pairs perfectly with the warm, spiced apple flavors.
  • Serving Suggestion: Pair these delightful waffle donuts with a side of my Vanilla Greek Yogurt for a balanced breakfast, creating a perfect harmony of flavors that will keep your mornings exciting.

Let your creativity shine as you customize these Apple Fritter Waffle Donuts to cater to your family’s tastes, ensuring a special treat every time!

How to Store and Freeze Apple Fritter Waffle Donuts

Room Temperature: Store leftover waffle donuts in an airtight container for up to 2 days. Keep them in a cool, dry place to maintain their freshness.

Fridge: For extended freshness, refrigerate your Apple Fritter Waffle Donuts in a sealed container for about 4 days. Reheat in the microwave for 10-15 seconds before serving.

Freezer: Freeze the waffle donuts in a single layer on a baking sheet for an hour, then transfer to a freezer-safe bag. They can be stored for up to 2 months.

Reheating: To reheat frozen donuts, pop them in a toaster or oven at 350°F for about 5-7 minutes or until warmed through, bringing back their delightful crispiness.

Expert Tips for Apple Fritter Waffle Donuts

Consistent Measurements: Use measuring cups and spoons to ensure accuracy, as uneven amounts can affect the texture of your waffle donuts.

Don’t Overmix: Mix the batter just until combined to keep your Apple Fritter Waffle Donuts fluffy and tender. Overmixing can lead to tough donuts.

Grease the Waffle Iron: Generously grease your waffle iron before cooking to prevent sticking; it makes all the difference when removing the donuts.

Check for Doneness: Keep an eye on the cooking time; every waffle iron varies. Open it slightly to peek for a golden-brown color before serving.

Experiment with Glaze: Feel free to customize the glaze with spices or citrus zest for a unique flavor twist that will make your Apple Fritter Waffle Donuts stand out.

Make Ahead Options

These Apple Fritter Waffle Donuts are a fantastic choice for meal prep, allowing you to enjoy them with less morning chaos! You can prepare the batter up to 24 hours in advance by mixing the dry ingredients and storing them in an airtight container. The wet ingredients can also be whisked together and kept in the fridge until ready to use, just be sure to fold in the diced apples just before cooking to prevent them from browning. When you’re ready to serve, simply follow the cooking steps, and within minutes, you’ll have warm, crispy donuts that taste just as delicious as if they were made fresh! Enjoy the time-saving benefits of having this delightful dish ready to go!

Apple Fritter Waffle Donuts

Apple Fritter Waffle Donuts Recipe FAQs

What apples should I use for the Apple Fritter Waffle Donuts?
Absolutely! I recommend using firm, tart apples like Granny Smith or Honeycrisp. Their sweetness combined with a slight tartness provides the perfect balance in the donut, bringing out that delicious apple flavor in every bite.

How long can I store Apple Fritter Waffle Donuts?
You can store leftover waffle donuts in an airtight container at room temperature for up to 2 days. If you want to keep them fresh longer, refrigerate them; they’ll last about 4 days in a sealed container. Simply reheat in the microwave for 10-15 seconds before enjoying again.

Can I freeze leftover Apple Fritter Waffle Donuts?
Certainly! To freeze your delicious treats, first place them in a single layer on a baking sheet for about an hour to firm up. Then transfer the waffle donuts to a freezer-safe bag, making sure to remove as much air as possible. They’re good for about 2 months in the freezer.

What’s the best way to reheat frozen Apple Fritter Waffle Donuts?
When it’s time to indulge again, you can reheat them by popping them into a toaster or an oven preheated to 350°F. Heat for about 5-7 minutes or until they’re warmed through and regain that delightful crispiness on the outside.

Can I make these Apple Fritter Waffle Donuts healthier?
Very! You can substitute half of the all-purpose flour for whole wheat flour to add a nutritious boost. Additionally, consider cutting down on the sugar in the batter or glaze, or using a sugar alternative. If you’re avoiding dairy, almond or oat milk works beautifully in place of regular milk.

Are Apple Fritter Waffle Donuts safe for pets?
No, it’s best to keep these delicious treats away from pets. The ingredients like sugar and potentially harmful spices are not suitable for them and can lead to digestive issues or other health concerns. Always stick to pet-safe foods for your furry friends!

Delicious Apple Fritter Waffle Donuts for Cozy Mornings

Enjoy these Apple Fritter Waffle Donuts, a delightful fusion of sweet apples and waffles, perfect for cozy mornings.

  • waffle iron
  • Mixing bowls
  • Whisk
  • spatula

For the Batter

  • 1 cup all-purpose flour (A great base for a fluffy texture.)
  • 1/4 cup granulated sugar (Sweetens the batter, enhancing the apple flavor.)
  • 1 tsp baking powder (Ensures a light and airy donut that puffs up beautifully.)
  • 1/2 tsp cinnamon (Adds warmth and a hint of spice.)
  • 1/2 tsp nutmeg (Complements the cinnamon for a delicious aromatic blend.)
  • 1/2 tsp salt (Balances the sweetness for a more rounded flavor.)
  • 1/2 cup milk (Keeps the batter moist; can use almond milk.)
  • 1 large egg (Binds the ingredients together.)
  • 2 tbsp melted butter (Adds richness and helps achieve that golden color.)
  • 1 tsp vanilla extract (Infuses a delightful hint of sweetness.)
  • 1 cup diced, peeled apples (Brings texture and juicy flavor to the batter.)

For the Glaze

  • 1 cup powdered sugar (Creates a sweet, smooth glaze.)
  • 2 tbsp milk (Helps thin the glaze to a perfect consistency.)
  • 1/2 tsp vanilla extract (Enhances the glaze’s flavor.)

Step‑by‑Step Instructions

  1. Mix Dry Ingredients: Combine flour, sugar, baking powder, cinnamon, nutmeg, and salt in a mixing bowl until well-blended.
  2. Whisk Wet Ingredients: In another bowl, whisk together milk, egg, melted butter, and vanilla extract until smooth.
  3. Combine Mixtures: Pour wet ingredients into dry ingredients, mixing gently until just combined.
  4. Fold in Apples: Gently fold in diced apples, ensuring even distribution in the batter.
  5. Preheat Waffle Iron: Preheat waffle iron and grease the plates to prevent sticking.
  6. Cook Waffle Donuts: Spoon batter into waffle iron, cover, and cook for 3-4 minutes until golden brown.
  7. Prepare the Glaze: In a bowl, whisk together powdered sugar, milk, and vanilla extract until smooth.
  8. Glaze and Serve: Drizzle glaze over cooked waffle donuts and allow to set before serving.

These Apple Fritter Waffle Donuts are perfect for breakfast or dessert, providing a warm and comforting treat for any occasion.

Dessert
American
Apple Fritter Waffle Donuts, Breakfast, Cozy Mornings, dessert, easy recipes, waffle donuts

Filed Under: Dessert

Mouthwatering Korean Corn Cheese That Everyone Will Love

September 13, 2025 by grace bellamy Leave a Comment

There’s a delightful warmth that fills the kitchen when I whip up a dish of Korean Corn Cheese, and let me tell you, it’s a game changer! This irresistibly creamy and cheesy side dish is a nostalgic nod to Korean street food, but with the added benefit of being incredibly quick to prepare. With just a few simple ingredients like sweet corn, mozzarella, and cream cheese, you can create a mouthwatering experience that’s perfect for gatherings or a cozy night in. Imagine a bubbling, cheesy top layer that beckons you to dig in, while the underlying sweetness of corn adds the most comforting touch. Ready to impress your friends and family with this easy yet crowd-pleasing recipe? Let’s dive into the world of Korean Corn Cheese together! What toppings will you choose to bring your dish to life?

Korean Corn Cheese

Why is Korean Corn Cheese so irresistible?

Cheesy, creamy goodness: Each bite is a delightful burst of flavor with the rich mozzarella and cream cheese melting beautifully together.

Quick and simple: In just 30 minutes, you can whip up this dish, making it perfect for busy weeknights or spontaneous gatherings.

Flavorful base: The combination of sweet corn and savory garlic provides the kind of comfort that warms the heart.

Customizable toppings: Feel free to experiment with jalapeños or extra cheese to suit your taste, creating a unique dish every time.

Crowd-pleaser: Whether it’s a game day, potluck, or family dinner, this Korean Corn Cheese is guaranteed to gather compliments!

Pair it with other dishes like kimchi or barbecue for a complete meal, and don’t forget to check out my tips on storing leftovers for maximum enjoyment.

Korean Corn Cheese Ingredients

Unlock the secret to this creamy delight with these essential ingredients!

For the Corn Mixture

  • Sweet corn – 2 cups, canned or frozen; the star of the dish, bringing natural sweetness and texture.
  • Shredded mozzarella cheese – 1 cup; this gooey cheese melts to create that irresistible, stretchy goodness.
  • Mayonnaise – 1/2 cup; adds a creamy richness that perfectly complements the cheese.
  • Cream cheese – 1/4 cup, softened; contributes a luscious, velvety texture that binds everything together.
  • Sugar – 1 tablespoon; enhances the sweetness of the corn, elevating the flavor profile beautifully.
  • Minced garlic – 1 tablespoon; infuses the dish with an aromatic base that deepens the overall taste.
  • Green onions – 2, chopped; introduces a fresh, grassy note that brightens each delectable bite.
  • Salt – 1/4 teaspoon; balances the flavors and amplifies the overall taste sensation.
  • Black pepper – 1/4 teaspoon; adds a gentle hint of spice, enhancing the other flavors beautifully.

Optional Toppings

  • Sliced jalapeños – for those who enjoy a little kick and an added layer of flavor.
  • Additional cheese for topping – because who can resist even more melty cheese?
  • Parmesan cheese – sprinkle some on top for a sophisticated, savory finish.

Dive into the deliciousness of Korean Corn Cheese and tailor it with your favorite toppings for an unforgettable experience!

Step‑by‑Step Instructions for Korean Corn Cheese

Step 1: Preheat the Oven
Begin by preheating your oven to 375°F (190°C). This ensures a perfectly baked Korean Corn Cheese with a bubbly, golden top. Prepare a medium-sized baking dish by lightly greasing it with a bit of oil or cooking spray. While the oven warms up, gather and prep the rest of your ingredients to save time.

Step 2: Prepare the Corn
If you’re using canned corn, take a moment to drain and rinse it under cold water. For frozen corn, simply thaw it in the microwave or by leaving it out for a bit. This step is crucial to ensure your Korean Corn Cheese has the right consistency, avoiding excess moisture that can affect the baking process.

Step 3: Mix the Ingredients
In a large mixing bowl, combine the corn, shredded mozzarella cheese, mayonnaise, cream cheese, sugar, minced garlic, chopped green onions, salt, and black pepper. Stir vigorously until all the ingredients are evenly blended, creating a thick, creamy mixture that highlights the sweet corn’s flavor, taking about 2-3 minutes.

Step 4: Transfer to Baking Dish
Pour the corn mixture into the prepared baking dish and spread it evenly with a spatula. Smooth the top to create an even layer, ensuring that every bite of this Korean Corn Cheese will be equally delicious. This step helps in achieving a beautifully consistent bake, leading to a wonderful texture.

Step 5: Add Extra Cheese
For an even more delectable experience, sprinkle additional mozzarella or parmesan cheese on top of the corn mixture. This layer will melt into a delightful crust, providing that sought-after gooeyness. If you enjoy a little spice, consider adding sliced jalapeños before moving on to the next step.

Step 6: Bake to Perfection
Place the baking dish in the preheated oven and bake for 15-20 minutes. Keep an eye on the dish, looking for a bubbly surface and golden edges, which indicate your Korean Corn Cheese is ready. The delightful aroma will fill your kitchen, luring everyone to the dining area.

Step 7: Cool and Serve
Once baked, carefully remove the dish from the oven and let it cool for a few minutes. This resting period allows the flavors to settle and makes serving easier. As it cools, the cheesy topping will set slightly, making each scoop perfectly satisfying when served warm.

Step 8: Garnish for Extra Flavor
Feel free to elevate your Korean Corn Cheese by garnishing with additional chopped green onions or jalapeños just before serving. These toppings add a fresh burst of color and flavor, inviting everyone to dig in and enjoy this mouthwatering dish together.

Korean Corn Cheese

Variations & Substitutions for Korean Corn Cheese

Feel free to get creative and make this dish your own with these exciting twists and substitutions!

  • Vegan Option: Swap out the cheeses and mayonnaise for plant-based alternatives, using cashew cream for a rich texture.
  • Spicy Kick: Add chopped green chilies or sriracha to the mixture for an extra zing that will awaken your taste buds.
  • Herb Infusion: Mix in fresh herbs like cilantro or parsley to enhance the flavor profile and add a touch of freshness.
  • Smoky Flavor: Incorporate smoked paprika or chipotle powder into the mixture for a savory smokiness that complements the corn wonderfully.
  • Crunchy Texture: Top with crushed tortilla chips or breadcrumbs before baking for a delightful crispy layer that adds texture to each bite.
  • Cheesy Delight: Try mixing in different cheeses like cheddar or pepper jack for a unique depth of flavor that everyone will love.
  • Gluten-Free: Ensure all your ingredients are gluten-free if necessary, or serve with gluten-free tortilla chips for dipping!
  • Flavor Bomb: Whisk in some diced roasted red peppers or sun-dried tomatoes for a burst of Mediterranean flavor that takes this dish to the next level.

Explore these variations, and remember, it’s all about making it work for your taste and inviting everyone to enjoy this comforting Korean Corn Cheese together! For a complete meal, pair it with some homemade kimchi or delicious barbecue meats for a satisfying and harmonious feast.

Storage Tips for Korean Corn Cheese

  • Fridge: Store leftovers in an airtight container for up to 3 days. This keeps the flavors fresh while preventing the dish from drying out.

  • Freezer: For longer storage, freeze Korean Corn Cheese in a sealed container for up to 2 months. Allow it to cool completely before freezing to maintain texture.

  • Reheating: To reheat, thaw overnight in the fridge if frozen, then bake at 350°F (175°C) until heated through, about 15-20 minutes. Add a sprinkle of cheese for extra creaminess!

  • Serving Warm: Enjoy it warm to experience that delightful, gooey texture and enhance the comforting flavor of your delicious Korean Corn Cheese.

Make Ahead Options

Korean Corn Cheese is a fantastic recipe for meal prep that saves you precious time! You can prepare the entire corn mixture up to 24 hours in advance by combining sweet corn, mozzarella cheese, mayonnaise, cream cheese, sugar, minced garlic, green onions, salt, and black pepper in a bowl. Be sure to store it in an airtight container in the refrigerator to keep the flavors fresh and to prevent the mixture from drying out. When you’re ready to enjoy this delicious dish, simply pour the mixture into the baking dish, top with additional cheese if desired, and bake it as instructed, allowing for a delightful cheesy experience with minimal effort.

What to Serve with Korean Corn Cheese

Imagine gathering around a warm table, the aroma of freshly baked goodness wafting through the air, inviting everyone to dig in.

  • Sweet and Sour Slaw: A tangy coleslaw adds crunch and contrasts beautifully to the creamy richness of the Korean Corn Cheese.
  • Grilled Korean BBQ Meats: Juicy marinated meats like bulgogi or galbi provide a savory balance, creating a delightful fusion of flavors.
  • Savory Kimchi: The heat and acidity of this traditional side dish perfectly complement the creaminess of Corn Cheese, enhancing your meal experience.
  • Steamed Jasmine Rice: Fluffy rice absorbs all the flavors, making it a comforting addition to your meal as a perfect base.
  • Crispy Fried Chicken: The crispy exterior and tender interior of fried chicken pair exquisitely with the cheesy dish, creating a satisfying contrast.
  • Pita Bread or Tortilla Chips: These provide a fun, dippable option for enjoying the Korean Corn Cheese, extra crunchy and delightful.
  • Chilled Beer: A crisp, cold beer works wonders to cut through the richness of the cheese, making your meal even more enjoyable.
  • Lemonade or Iced Tea: Refreshing, citrusy drinks provide a bright, uplifting contrast to the deeply cheesy flavors, enhancing the overall dining experience.

Expert Tips for Korean Corn Cheese

  • Corn Choice: Use sweet corn for optimal flavor; avoid overcooked corn to maintain texture in your Korean Corn Cheese.

  • Cheese Melt: Shredded mozzarella melts beautifully, but mixing with cream cheese ensures creaminess; don’t skip this combination!

  • Mixing Thoroughly: Stir the corn mixture well to distribute ingredients evenly; uneven mixing can lead to inconsistent flavors and texture.

  • Baking Timing: Keep an eye on the oven; every oven is different! Start checking around 15 minutes to avoid burning the cheesy topping.

  • Serving Warm: Serve immediately after cooling; the dish tastes best when the cheese is still warm and gooey, increasing the comfort factor!

  • Storage Tips: If you have leftovers, store them in an airtight container; Korean Corn Cheese stays delicious for up to 3 days and can be reheated with cheese for extra creaminess.

Korean Corn Cheese

Korean Corn Cheese Recipe FAQs

What type of corn should I use for Korean Corn Cheese?
Absolutely! For the best flavor and texture, use sweet corn, either canned or frozen. If using canned, remember to drain and rinse it. Frozen corn should be thawed but not overcooked, as you want it to maintain its delightful bite.

How should I store leftovers of my Korean Corn Cheese?
Very easy! Store any leftovers in an airtight container in the refrigerator for up to 3 days. This helps retain its rich flavor while keeping it from drying out. If you need to keep it longer, freeze Korean Corn Cheese for up to 2 months, ensuring it cools completely before sealing it in a container.

Can I freeze Korean Corn Cheese?
Absolutely! To freeze, let your Korean Corn Cheese cool completely, then transfer it to a freezer-safe container or zip-top bag. Press out any excess air, seal it tightly, and label it with the date. When ready to enjoy, thaw it overnight in the fridge and reheat in the oven at 350°F (175°C) for about 15-20 minutes. Consider adding a sprinkle of cheese on top for that irresistibly creamy finish!

What should I do if my cheese doesn’t melt properly?
No worries! If your cheese doesn’t melt as you hoped, it could be due to one of two things: either the oven temperature was too low, or the cheese wasn’t shredded finely enough. Make sure to shred your mozzarella cheese finely for the best melt and preheat the oven to the correct temperature. If you see the top color but the cheese isn’t melting, you can cover it lightly with foil and bake a bit longer for a gooey consistency.

Are there any dietary considerations for Korean Corn Cheese?
Absolutely! If you have dietary restrictions, feel free to modify this dish. For a vegan version, substitute the mayonnaise and cream cheese with dairy-free alternatives, and use vegan cheese. If making for guests with allergies, check the ingredient labels, particularly on the cheeses and mayonnaise, which can contain hidden allergens. Always inform your guests about the ingredients used to keep everyone safe and happy!

Can I add extra toppings or ingredients to my Korean Corn Cheese?
The more the merrier! You can definitely get creative by adding toppings like sliced jalapeños, bacon bits, or even diced bell peppers for extra flavor. Other cheeses, such as cheddar or gouda, can also be used for a unique twist. Just remember to adjust the baking time slightly if you add heavier ingredients to ensure they cook through equally!

Mouthwatering Korean Corn Cheese That Everyone Will Love

Enjoy this creamy Korean Corn Cheese, a quick and delicious side dish perfect for gatherings.

  • Oven
  • Baking Dish
  • Mixing Bowl
  • spatula

For the Corn Mixture

  • 2 cups Sweet corn (canned or frozen)
  • 1 cup Shredded mozzarella cheese
  • 1/2 cup Mayonnaise
  • 1/4 cup Cream cheese (softened)
  • 1 tablespoon Sugar
  • 1 tablespoon Minced garlic
  • 2 Green onions (chopped)
  • 1/4 teaspoon Salt
  • 1/4 teaspoon Black pepper

Optional Toppings

  • Sliced jalapeños
  • Additional cheese for topping
  • Parmesan cheese (for sprinkling)

Preparation

  1. Preheat your oven to 375°F (190°C) and lightly grease a baking dish.
  2. If using canned corn, drain and rinse it. For frozen corn, thaw it in the microwave or at room temperature.
  3. In a large mixing bowl, combine corn, mozzarella, mayonnaise, cream cheese, sugar, garlic, green onions, salt, and black pepper until well mixed.
  4. Pour the mixture into the greased baking dish and spread evenly.
  5. Sprinkle additional cheese or jalapeños on top if desired.
  6. Bake for 15-20 minutes until bubbly and golden.
  7. Let cool for a few minutes before serving. Garnish with extra green onions or jalapeños if desired.

Serve warm for best taste. Optional toppings add variety to the dish.

Side Dishes
Korean
cheesy side dish, comfort food, corn cheese, Easy Recipe, Korean street food, quick dishes

Filed Under: Side Dishes

Hearty Italian Meatball Soup for Cozy Family Dinners

September 13, 2025 by grace bellamy Leave a Comment

There’s something about the comforting aroma of simmering soup that feels like a warm hug on a chilly evening. This Creamy Italian Meatball Soup is my go-to when I want to bring a little piece of Italy to my kitchen, effortlessly marrying rich flavors and heartwarming nostalgia. With family-friendly ingredients and the versatility to customize with your favorite meatballs or veggies, this soup is perfect for any occasion. Plus, it’s a quick one-pot wonder that not only brings everyone to the table but also fills your home with inviting scents. So grab your apron, and let’s dive into this delightful recipe that’s sure to become a staple in your home. Ready for a taste of comfort?

Italian Meatball Soup

Why is this soup a must-try?

Hearty, this Italian Meatball Soup is a comforting meal that turns any ordinary day into a special occasion. Customizable, you can easily adapt it with Italian sausage meatballs or even a vegetarian version, making it suitable for all dietary preferences. Quick and easy, you’ll have a delicious, nutritious dinner on the table in just 50 minutes! Family-friendly, this soup not only pleases picky eaters but also satisfies those with a hearty appetite. The warm, inviting aroma will make everyone feel at home, ensuring this recipe quickly becomes a favorite in your collection. Whether it’s a chilly evening or a special gathering, this soup is your ticket to cozy culinary bliss. For more family-friendly recipes, be sure to check out our Italian Sausage Meatballs recipe!

Italian Meatball Soup Ingredients

For the Meatballs
• Ground beef or turkey – Use ground turkey for a lighter option without sacrificing flavor.
• Breadcrumbs – They help bind the meatballs for a nice texture; consider using gluten-free breadcrumbs if necessary.
• Grated Parmesan cheese – Adds a savory richness; you can substitute with Pecorino Romano for a sharper taste.
• Large egg – Acts as a binder, making the meatballs moist and flavorful.
• Garlic, minced – Fresh garlic brings a wonderful aroma; you can use garlic powder in a pinch.
• Dried Italian herbs – A blend of herbs like oregano and basil adds authentic Italian flavor; feel free to adjust based on your preferences.
• Salt – Enhances all flavors, but start with less if you’re watching sodium intake.
• Black pepper – Freshly cracked pepper adds a nice kick; adjust to your liking.

For the Soup Base
• Chicken or vegetable broth – Provides a flavorful base; homemade broth can elevate the taste.
• Heavy cream – Creates the creamy texture that makes this soup irresistible; substitute with coconut milk for a dairy-free option.
• Diced carrots – Add sweetness and nutrition; you can use other vegetables like zucchini or bell peppers for variety.
• Diced celery – Brings along a crisp texture; can be replaced with additional root vegetables if desired.
• Diced potatoes – They contribute heartiness; sweet potatoes can be a nutritious alternative.
• Frozen green peas – Add color and sweetness; fresh peas work, too, if in season.

For Garnish
• Fresh parsley, chopped – A sprinkle adds freshness and a touch of color, making your Italian Meatball Soup visually appealing!

Step‑by‑Step Instructions for Creamy Italian Meatball Soup

Step 1: Prepare the Meatball Mixture
In a large mixing bowl, combine 1 pound of ground beef or turkey with 1/2 cup of breadcrumbs, 1/4 cup of grated Parmesan cheese, 1 large egg, 2 cloves of minced garlic, 1 teaspoon of dried Italian herbs, 1/2 teaspoon of salt, and 1/4 teaspoon of black pepper. Use your hands to mix everything thoroughly until well combined, ensuring all ingredients are evenly distributed.

Step 2: Form the Meatballs
Once the mixture is ready, roll it into small meatballs, approximately 1 inch in diameter. Place the formed meatballs on a plate, making sure they don’t touch each other to prevent sticking. This step should take about 5-10 minutes, and setting them aside helps ensure a smooth transition to the cooking process.

Step 3: Brown the Meatballs
In a large pot or Dutch oven, heat a drizzle of olive oil over medium-high heat for about 1-2 minutes. Carefully add the meatballs in batches to avoid overcrowding the pot. Brown the meatballs on all sides for about 6-8 minutes until they’re golden and cooked through. Remove them from the pot and set aside on a plate so the soup can develop its rich flavor.

Step 4: Sauté the Vegetables
In the same pot, add a little more olive oil if needed, and toss in 1 cup each of diced carrots, diced celery, and diced potatoes. Sauté the vegetables for about 5 minutes, stirring occasionally, until they begin to soften and fragrant aromas fill the air. This step adds depth to your Italian Meatball Soup, making it heartier and more delicious.

Step 5: Add the Broth
Pour in 4 cups of chicken or vegetable broth, and increase the heat to bring the mixture to a boil. Once boiling, reduce the heat to a simmer and let it cook for about 10 minutes until the vegetables are tender. This simmering process allows the rich flavors to meld together beautifully, creating a comforting base for your soup.

Step 6: Combine Meatballs and Cream
Return the browned meatballs to the pot, gently stirring to integrate them into the soup. Next, pour in 1 cup of heavy cream and add 1 cup of frozen green peas. Allow the soup to simmer for an additional 10-15 minutes until the meatballs are fully cooked through. The cream will turn the broth into a luscious, creamy texture that elevates the dish.

Step 7: Final Seasoning
Taste your creamy Italian Meatball Soup and adjust the flavor with additional salt and black pepper if needed. Allow the flavors to develop for a couple of minutes after seasoning, ensuring a well-balanced taste throughout this comforting dish. This thoughtful adjustment will guarantee that your family enjoys every comforting spoonful.

Step 8: Serve and Garnish
Ladle the hearty soup into bowls, taking care to include plenty of meatballs and vegetables in each serving. To finish, sprinkle freshly chopped parsley on top for a burst of color and freshness. This final touch not only enhances the appearance but also adds an inviting aroma to your delicious Italian Meatball Soup.

Italian Meatball Soup

How to Store and Freeze Italian Meatball Soup

Fridge: Store your Italian Meatball Soup in an airtight container for up to 3 days. Allow it to cool before sealing to maintain freshness.

Freezer: Freeze the soup in an airtight container or freezer bag for up to 3 months. When ready to enjoy, thaw in the fridge overnight before reheating.

Reheating: Reheat on the stove over medium heat, stirring often, until heated through (about 10-15 minutes). You may need to add a splash of broth for the desired consistency.

Portioning: For convenient meals, consider dividing the soup into individual portions before freezing. This way, you can enjoy a comforting bowl anytime!

What to Serve with Creamy Italian Meatball Soup

Cozy up your dinner with delightful sides that complement the rich flavors of this hearty soup.

  • Crusty Bread: Perfect for soaking up those creamy flavors, a warm loaf of bread elevates the meal experience.

  • Caesar Salad: Fresh romaine, crunchy croutons, and a tangy dressing create a vibrant contrast against the meatball soup.

  • Garlic Breadsticks: Buttery, fluffy, and infused with garlic, they are the ideal companions for sopping up every last drop of soup.

  • Parmesan Risotto: Creamy and decadent, this side offers a comforting texture that pairs beautifully with the flavors of the soup.

  • Roasted Vegetables: Seasoned with Italian herbs, vibrant roasted veggies add a delightful sweetness and earthy crunch alongside the soup.

  • Red Wine: A medium-bodied Chianti or Sangiovese balances the richness of the cream, enhancing every aspect of the meal.

  • Tiramisu: Finish off the evening with this luscious dessert that celebrates Italian flavors and leaves everyone smiling.

Each of these pairings brings its own unique touch, making your Italian Meatball Soup experience truly memorable!

Italian Meatball Soup Variations

Feel free to play around and make this soup your own with exciting twists and substitutions!

  • Italian Sausage Meatballs: Switch out ground beef or turkey for Italian sausage for a spicier, flavorful kick. The rich flavors of the sausage meld perfectly with the creamy broth.
  • Vegetarian Version: Swap the meatballs for lentil or chickpea patties to create a plant-based delight. This variation retains the heartiness while adding a nourishing touch.
  • Dairy-Free Option: Replace heavy cream with coconut milk for a creamy texture that’s also dairy-free. The subtle coconut flavor complements the Italian herbs beautifully!
  • Extra Veggies: Add seasonal Veggies like zucchini or bell peppers to increase nutrition and color. More veggies bring different textures and sweetness to the soup.
  • Spicy Kick: Sprinkle red pepper flakes or a dash of hot sauce for a warming heat that tantalizes the taste buds. This can elevate each spoonful to new flavorful heights!
  • Herb Swaps: Experiment with fresh herbs like basil or thyme instead of Italian seasoning for a unique flavor profile. The fresh kick will freshen things up and take the soup to the next level.
  • Frozen Veggie Mix: Use frozen mixed vegetables instead of fresh for convenience and quick prep. This can save time while still maintaining the nutritious element of the soup.
  • Crispy Toppings: Add crispy bacon bites or croutons on top for an exciting crunch. This addition brings delightful texture and garnishes your soup with extra flair.

Feel free to dive into these delicious options, and let your creativity lead the way! Each variation can create a unique experience—a testament to the joy of cooking for your family. For even more delightful inspiration, check out our Italian Sausage Meatballs recipe or try some homemade Garlic Bread alongside this comforting soup!

Make Ahead Options

These Creamy Italian Meatball Soup preparations are perfect for busy weeknights! You can make the meatballs up to 24 hours in advance; simply roll them and store them in an airtight container in the refrigerator. Additionally, you can chop the vegetables (carrots, celery, and potatoes) and keep them in the fridge for up to 3 days. To maintain the soup’s rich flavor, store the broth and cream separately until you’re ready to cook. When it’s time to serve, sauté the vegetables, add the broth and cream, then return the prepped meatballs to heat through for a comforting, quick meal that’s just as delicious!

Helpful Tricks for Italian Meatball Soup

  • Doneness Check: Ensure meatballs are fully cooked by checking their internal temperature; it should reach 165°F for safety and great texture.
  • Flavor Boost: For deeper flavor, consider browning the meatballs in batches and deglazing the pot with broth to capture those delicious bits.
  • Vegetable Variations: Feel free to swap in seasonal vegetables like zucchini or spinach; they add color, nutrition, and can refresh your Italian Meatball Soup!
  • Cream Alternatives: If you’re looking for a lighter version, use half-and-half or evaporated milk instead of heavy cream while maintaining creaminess.
  • Make-Ahead Tip: Prepare the meatballs ahead of time and freeze them. Just add frozen meatballs straight to the soup; it saves time on busy weeknights!

Italian Meatball Soup

Creamy Italian Meatball Soup Recipe FAQs

How do I choose the best meat for my meatballs?
Absolutely! For the best flavor and texture, opt for ground beef or turkey with some fat content (at least 15%). This helps keep the meatballs moist and flavorful. If you’re looking for variety, Italian sausage can also add a wonderful spice and depth to your soup!

What’s the best way to store leftover soup?
Very simple! Store your Italian Meatball Soup in an airtight container in the fridge for up to 3 days. Make sure it’s cooled completely before sealing it up, which helps preserve the flavors and textures of the ingredients.

Can I freeze Creamy Italian Meatball Soup?
Of course! Freeze the soup in an airtight container or freezer bag for up to 3 months. To thaw and enjoy, simply move it to the fridge a night before serving. When ready, reheat it on the stove over medium heat—this usually takes about 10-15 minutes. Adding a splash of broth helps maintain the perfect consistency!

What should I do if my meatballs are falling apart?
If your meatballs are crumbling, it might be due to too much moisture or not enough binding. Try adding an extra egg or some more breadcrumbs to the mixture next time to help them hold together better. Ensuring you mix them well without overworking the meat is also key to keeping that perfect texture.

Can I make this soup vegetarian-friendly?
Absolutely! For a hearty vegetarian option, replace the meatballs with plant-based meat or a mixture of beans and lentils. Use vegetable broth instead of chicken broth and load up on your favorite veggies like zucchini and bell peppers. The possibilities are endless!

Is this soup safe for pets?
While some ingredients are safe for pets, such as carrots and peas, it’s best to avoid giving your dog or cat soup that contains garlic, onion, or high levels of salt. Always check with your vet before sharing any human food with your fur babies!

Hearty Italian Meatball Soup for Cozy Family Dinners

This Italian Meatball Soup is a comforting meal filled with rich flavors, perfect for family dinners on chilly evenings.

  • large pot or Dutch oven
  • Mixing Bowl
  • Measuring Cups
  • Measuring Spoons

For the Meatballs

  • 1 lb ground beef or turkey (Use ground turkey for a lighter option.)
  • 1/2 cup breadcrumbs (Consider using gluten-free breadcrumbs if necessary.)
  • 1/4 cup grated Parmesan cheese (Substitute with Pecorino Romano for a sharper taste.)
  • 1 large egg (Acts as a binder for the meatballs.)
  • 2 cloves garlic, minced (Fresh garlic is preferred.)
  • 1 teaspoon dried Italian herbs (A blend of herbs like oregano and basil.)
  • 1/2 teaspoon salt (Adjust based on sodium intake.)
  • 1/4 teaspoon black pepper (Adjust to your liking.)

For the Soup Base

  • 4 cups chicken or vegetable broth (Homemade broth can elevate the taste.)
  • 1 cup heavy cream (Substitute with coconut milk for a dairy-free option.)
  • 1 cup diced carrots (You can use other vegetables for variety.)
  • 1 cup diced celery (Can be replaced with additional root vegetables.)
  • 1 cup diced potatoes (Sweet potatoes can be used as an alternative.)
  • 1 cup frozen green peas (Fresh peas can also be used if in season.)

For Garnish

  • 1/4 cup fresh parsley, chopped (Adds freshness and color.)

Step‑by‑Step Instructions

  1. In a large mixing bowl, combine ground beef or turkey, breadcrumbs, grated Parmesan cheese, egg, minced garlic, dried Italian herbs, salt, and black pepper. Mix well until combined.
  2. Roll the mixture into small meatballs approximately 1 inch in diameter and place on a plate.
  3. Heat olive oil in a large pot or Dutch oven over medium-high heat. Brown meatballs in batches for 6-8 minutes until golden and cooked through. Remove and set aside.
  4. Add more olive oil if needed and sauté diced carrots, celery, and potatoes for about 5 minutes until softened.
  5. Pour in broth and bring to a boil. Then reduce heat and simmer for about 10 minutes until vegetables are tender.
  6. Return meatballs to the pot, add heavy cream and frozen peas, and simmer for an additional 10-15 minutes.
  7. Taste and adjust seasoning with salt and black pepper if needed. Let flavors develop for a few minutes.
  8. Ladle soup into bowls, garnish with chopped parsley, and serve.

Refrigerate for up to 3 days or freeze for up to 3 months. Reheat on the stove, adding broth if needed.

Main Dishes
Italian
comfort food, family-friendly, hearty, Italian Meatball Soup, one pot meal, Soup

Filed Under: Main Dishes

Irresistible Texas Roadhouse Butter Chicken You’ll Crave

September 13, 2025 by grace bellamy Leave a Comment

There’s something magical about the aroma of chicken roasting in the oven, mingling with warm spices and a hint of sweetness. That’s precisely what I felt when I discovered the delight of Texas Roadhouse Butter Chicken, a dish that transforms your dinner table into a cozy, inviting haven. This recipe is not only a breeze to make, with just 15 minutes of prep time, but it also promises to impress even the pickiest of eaters. The luxurious blend of butter, honey, and spices ensures that each bite is both comforting and unique, offering a delightful twist on your usual chicken dinner. Perfect for those busy weeknights or a lovely weekend gathering, this dish is bound to become a go-to favorite in your kitchen. Ready to savor a taste of Texas without leaving home? Let’s dive into the rich, buttery magic of this chicken masterpiece!

Texas Roadhouse Butter Chicken

Why is Texas Roadhouse Butter Chicken Special?

Simplicity at Its Best: With just 15 minutes of prep, this recipe is perfect for busy weeknights when you need something quick yet satisfying.

Irresistible Flavor Combination: The blend of butter, honey, cinnamon, and nutmeg brings an unforgettable taste that’ll leave you and your guests craving more!

Crowd-Pleasing Dish: This chicken is sure to impress anyone at your dinner table, making it a great choice for family gatherings or casual get-togethers.

Versatile Serving Options: Pair it with rice, roasted veggies, or salads for a complete meal that suits any occasion. For more great chicken ideas, check out our delicious chicken recipes.

Time-Saving Delight: Cook and serve in under an hour, perfect for those who want a homemade feast without the fuss.

Texas Roadhouse Butter Chicken Ingredients

Prepare to savor all the delightful flavors this dish has to offer!

For the Chicken
• Boneless, skinless chicken breasts – 4 pieces will cook evenly and absorb the buttery goodness.
• Salt – 1/2 teaspoon enhances the chicken’s flavor beautifully.
• Black pepper – 1/2 teaspoon adds that subtle kick you crave.

For the Flavorful Sauce
• Olive oil – 1 tablespoon helps achieve a perfect sear on the chicken.
• Unsalted butter – 1/4 cup, softened, is the creamy heart of the sauce.
• Honey – 2 tablespoons provide a touch of sweetness that complements the spices.
• Ground cinnamon – 1/2 teaspoon adds a warm, inviting aroma that’s hard to resist.
• Ground nutmeg – 1/4 teaspoon gives that cozy, nutty hint everyone loves.
• Vanilla extract – 1 teaspoon rounds out the flavors with a sweet, rich essence.

For Garnishing
• Fresh cilantro – 2 tablespoons, chopped, offer a refreshing touch if desired.

Make the most of these ingredients and enjoy an unforgettable taste of Texas Roadhouse Butter Chicken!

Step‑by‑Step Instructions for Texas Roadhouse Butter Chicken

Step 1: Preheat the Oven
Begin by preheating your oven to 375°F (190°C). This will ensure the Texas Roadhouse Butter Chicken cooks evenly and thoroughly. While the oven heats up, gather your ingredients and equipment, including a large oven-safe skillet, to streamline your cooking process.

Step 2: Season the Chicken
Take the four boneless, skinless chicken breasts and season them generously with 1/2 teaspoon of salt and 1/2 teaspoon of black pepper on both sides. This simple seasoning enhances the chicken’s natural flavor, preparing it for the rich butter sauce that will follow.

Step 3: Brown the Chicken
In your preheated skillet, heat 1 tablespoon of olive oil over medium-high heat. Once the oil is shimmering, carefully add the seasoned chicken breasts, browning each side for about 3-4 minutes. You’ll know they’re ready to flip when they develop a beautiful golden crust. Remove the chicken and set it aside.

Step 4: Melt the Butter
Lower the heat to medium and add 1/4 cup of softened unsalted butter to the same skillet. Allow the butter to melt completely, swirling it around to infuse the skillet with that luscious buttery essence. This delightful base is crucial for your Texas Roadhouse Butter Chicken.

Step 5: Prepare the Flavor Mixture
Once the butter has melted, stir in 2 tablespoons of honey, 1/2 teaspoon of ground cinnamon, 1/4 teaspoon of ground nutmeg, and 1 teaspoon of vanilla extract. Mix everything together until well combined and allow it to bubble slightly for about 1-2 minutes, creating a fragrant sauce that caramelizes beautifully.

Step 6: Coat the Chicken
Return the browned chicken breasts to the skillet, ensuring each piece is coated evenly in the rich butter mixture. This step helps to infuse the chicken with an amazing flavor and prepares it for roasting, which will bring out all those sweet and spicy notes.

Step 7: Roast in the Oven
Carefully transfer the skillet with the chicken to your preheated oven. Roast for 20-25 minutes, or until the chicken is fully cooked and reaches an internal temperature of 165°F (74°C). You’ll know it’s perfect when the juices run clear, and the chicken is tender.

Step 8: Baste for Extra Flavor
About halfway through the roasting time, open the oven and baste the chicken with the bubbling butter mixture. This adds moisture and flavor, ensuring the Texas Roadhouse Butter Chicken remains juicy and delicious throughout the cooking process.

Step 9: Rest Before Serving
Once your chicken is cooked to perfection, remove the skillet from the oven and let the chicken rest for a few minutes. This helps the juices redistribute, keeping your chicken juicy and tender when you slice into it.

Step 10: Garnish and Serve
For an extra touch of freshness, garnish your Texas Roadhouse Butter Chicken with chopped cilantro if desired. Serve hot, alongside your favorite sides, and watch as this comforting dish becomes a new family favorite at the dinner table.

Texas Roadhouse Butter Chicken

Texas Roadhouse Butter Chicken Variations

Feel free to make this Texas Roadhouse Butter Chicken your own with these delightful suggestions!

  • Gluten-Free: Swap traditional sauces and spices for certified gluten-free versions to enjoy this dish worry-free.
  • Spicy Twist: Add a pinch of cayenne pepper or some sliced jalapeños to the butter mixture for a fiery kick!
  • Herb-Infused: Incorporate fresh thyme or rosemary into the butter sauce for an aromatic and earthy flavor boost.
  • Honey-Sweetened: Replace honey with maple syrup for a unique sweetness that plays beautifully with the spices.
  • Creamy Addition: Stir in some heavy cream or coconut milk to the sauce after melting the butter for a rich, creamy version.

For a delightful touch, consider serving it with roasted vegetables to add color and nutrition to your meal. Embrace your creativity and let the flavors shine!

Make Ahead Options

These Texas Roadhouse Butter Chicken is a fantastic option for meal prep, saving you time on busy weeknights! You can season the chicken breasts with salt and black pepper and refrigerate them for up to 24 hours in advance. Additionally, you can prepare the buttery sauce (butter, honey, cinnamon, nutmeg, and vanilla) ahead of time and store it in an airtight container in the refrigerator for up to 3 days. When ready to serve, simply reheat the sauce, brown the chicken, coat it with the sauce, and roast it in the oven as directed. This way, you’ll still enjoy the same mouthwatering flavor and tender texture without the last-minute rush!

Expert Tips for Texas Roadhouse Butter Chicken

  • Choose Quality Chicken: Opt for fresh, high-quality chicken breasts for the best flavor and texture in your Texas Roadhouse Butter Chicken.

  • Don’t Rush Browning: Take your time browning the chicken for a golden crust; this enhances the flavor and adds wonderful depth.

  • Baste for Juiciness: Remember to baste with the bubbling butter mixture halfway through roasting; this keeps the chicken moist and flavorful.

  • Check Internal Temperature: Use a meat thermometer to ensure the chicken reaches 165°F (74°C); undercooked chicken can be dry and unappetizing.

  • Experiment with Spices: Feel free to adjust the spices; adding a pinch of cayenne or using different herbs can give your Texas Roadhouse Butter Chicken a unique twist!

What to Serve with Texas Roadhouse Butter Chicken

There’s something magical about creating the perfect meal to accompany a dish that’s rich, buttery, and delightfully aromatic.

  • Fluffy Rice: A bed of fluffy white or jasmine rice complements the chicken, soaking up the delicious butter sauce beautifully.
  • Garlic Mashed Potatoes: Creamy mashed potatoes bring a comforting texture to your table, making every bite a taste of home.
  • Roasted Vegetables: A medley of seasonal roasted vegetables offers a colorful and nutritious contrast to the sweet flavors of the chicken.
  • Crisp Garden Salad: A refreshing garden salad with a zesty vinaigrette adds crunch and brightness, balancing the dish’s richness effortlessly.
  • Honey-Glazed Carrots: The honey in these glazed carrots ties into the chicken’s flavor while providing a sweet, tender experience.
  • Cornbread Muffins: Soft cornbread muffins are the perfect vehicle to capture any leftover butter sauce, enhancing the savory experience.
  • Chilled White Wine: Pairing the meal with a chilled glass of Chardonnay elevates the dining experience, enhancing the savory and sweet notes.
  • Lemonade Iced Tea: A refreshing glass of iced tea with a hint of lemon offers a delightful contrast to the warmth of the chicken.
  • Chocolate Cake: Finish on a sweet note! A slice of rich chocolate cake pairs surprisingly well after the buttery chicken for a comforting end to the meal.

How to Store and Freeze Texas Roadhouse Butter Chicken

Fridge: Store leftover Texas Roadhouse Butter Chicken in an airtight container for up to 3 days. This will help maintain its delicious flavor and moisture.

Freezer: Freeze portions in airtight containers or heavy-duty freezer bags for up to 3 months. Thaw overnight in the fridge for best results before reheating.

Reheating: To reheat, place the chicken in the microwave or oven until heated through, ensuring it reaches an internal temperature of 165°F (74°C) to enjoy it at its best.

Texas Roadhouse Butter Chicken

Texas Roadhouse Butter Chicken Recipe FAQs

How do I choose ripe ingredients for this recipe?
Absolutely! For this Texas Roadhouse Butter Chicken, select fresh, firm chicken breasts without any dark spots or signs of freezer burn. Availability of high-quality chicken is essential, as it will absorb all the luscious flavors beautifully.

How should I store leftover Texas Roadhouse Butter Chicken?
To ensure you enjoy every last bite, store leftovers in an airtight container in the fridge for up to 3 days. This keeps the chicken moist and full of flavor. When ready to enjoy again, simply reheat gently to avoid drying it out.

Can I freeze Texas Roadhouse Butter Chicken?
Very! You can freeze portions of Texas Roadhouse Butter Chicken for up to 3 months. To do so, place the cooled chicken in airtight containers or heavy-duty freezer bags. Ensure you remove as much air as possible, then label with the date. To thaw, transfer the chicken to the fridge overnight before reheating.

What should I do if my chicken turns out dry?
If your chicken ends up dry, it may have been overcooked. Next time, use a meat thermometer to check for an internal temperature of 165°F (74°C) to prevent this. Additionally, basting with the sauce halfway through cooking can help keep moisture locked in, leading to juicier results.

Is this recipe suitable for people with allergies?
While this Texas Roadhouse Butter Chicken recipe contains common allergens such as dairy (butter) and sugars (honey), alternatives can be used! Try substituting coconut oil for butter or agave syrup for honey for a dairy-free or vegan twist. Always check labels if you’re serving anyone with allergies to ensure their safety.

How can I enhance the flavor even more?
Feel free to experiment with spices! Adding a pinch of cayenne for a spicy kick or incorporating herbs like thyme or rosemary can elevate this dish further. Adjusting the seasoning to your preference is part of the joy of cooking!

Irresistible Texas Roadhouse Butter Chicken You’ll Crave

This Texas Roadhouse Butter Chicken is a cozy, buttery dish perfect for any occasion that will leave you craving more.

  • large oven-safe skillet

For the Chicken

  • 4 pieces boneless, skinless chicken breasts
  • 1/2 teaspoon salt
  • 1/2 teaspoon black pepper

For the Flavorful Sauce

  • 1 tablespoon olive oil
  • 1/4 cup unsalted butter (softened)
  • 2 tablespoons honey
  • 1/2 teaspoon ground cinnamon
  • 1/4 teaspoon ground nutmeg
  • 1 teaspoon vanilla extract

For Garnishing

  • 2 tablespoons fresh cilantro (chopped)

Step‑By‑Step Instructions

  1. Preheat your oven to 375°F (190°C).
  2. Season the chicken breasts generously with salt and black pepper on both sides.
  3. In the skillet, heat olive oil over medium-high heat and brown each side of the chicken for about 3-4 minutes.
  4. Add the softened butter to the skillet and allow it to melt completely.
  5. Stir in honey, ground cinnamon, ground nutmeg, and vanilla extract until well combined.
  6. Return the chicken to the skillet, ensuring each piece is coated in the butter mixture.
  7. Transfer the skillet to the oven and roast for 20-25 minutes until the chicken is fully cooked.
  8. Baste the chicken with the bubbling butter mixture halfway through the roasting time.
  9. Let the chicken rest for a few minutes before serving.
  10. Garnish with chopped cilantro if desired and serve hot.

Use fresh, high-quality chicken breasts for the best flavor and texture. Baste with the butter mixture halfway through roasting to maintain moisture and flavor.

Main Dishes
American
buttery chicken, comfort food, dinner recipe, easy chicken recipe, quick meal, Texas Roadhouse Butter Chicken

Filed Under: Main Dishes

Soft Chewy Pumpkin Oatmeal Cookies with Maple Frosting Bliss

September 11, 2025 by grace bellamy Leave a Comment

The first small bite sent me back to autumn afternoons spent at my grandmother’s kitchen, where the scent of warm spices danced in the air. These Soft Chewy Pumpkin Oatmeal Cookies with Maple Frosting not only evoke those cherished memories but also deliver a delightful balance of tender pumpkin, hearty oats, and a velvety frosting that’s just too irresistible to resist. With a prep time of only 20 minutes, they’re perfect for those who crave homemade goodness without the fuss. Plus, they make an excellent treat for gatherings—once you set these cookies on the table, you’ll be the star of the party! So, are you ready to embark on a cozy baking adventure?

Soft Chewy Pumpkin Oatmeal Cookies Maple Frosting

Why Are These Cookies So Irresistible?

Unforgettable Flavor: The subtle sweetness of pumpkin is perfectly complemented by a medley of warm spices, making each bite a comforting experience.

Easy and Quick: With only 20 minutes of prep time, you can have a batch of these delightful cookies ready to share in no time!

Frosting Magic: A creamy maple frosting elevates these cookies, adding a luscious finish that makes them absolutely crave-worthy.

Crowd-Pleasing Treat: Perfect for holiday gatherings, bake sales, or cozy afternoons, these cookies will appeal to everyone—from kids to adults.

Versatile Enjoyment: Enjoy them warm from the oven or transform them into a delightful dessert with a scoop of ice cream on the side!

Soft Chewy Pumpkin Oatmeal Cookies Ingredients

• Get ready to indulge in a delightful baking experience!

For the Cookies
• Butter – 1 cup softened; it adds richness and contributes to that chewy texture.
• Light Brown Sugar – 1 cup packed; enhances sweetness and gives a lovely caramel flavor.
• Granulated Sugar – 1/2 cup; balances the depth of brown sugar with a hint of crispiness.
• Eggs – 2 large; they provide structure and help bind the ingredients together seamlessly.
• Vanilla Extract – 1 teaspoon; adds warmth and enhances the overall flavor profile.
• Pumpkin Puree – 1 cup; the star of the show, ensuring these cookies are soft and packed with seasonal flavor.
• All-Purpose Flour – 2 1/2 cups; provides the base for the cookies, creating that perfect balance of texture.
• Baking Soda – 1 teaspoon; acts as a leavening agent, helping the cookies to rise slightly.
• Cinnamon – 1 teaspoon; brings a warm, inviting spice that pairs beautifully with pumpkin.
• Nutmeg – 1/2 teaspoon; adds a hint of earthiness and depth to the flavor.
• Cloves – 1/4 teaspoon; a pinch of cloves gives a subtle spiciness that elevates the cookie experience.
• Salt – 1/2 teaspoon; balances sweetness and enhances all the flavors in the cookie.
• Old-Fashioned Rolled Oats – 3 cups; gives a hearty texture and chewiness that makes these cookies truly special.

For Maple Frosting
• Cream Cheese – 4 ounces, softened; provides creaminess and a slight tang to the frosting.
• Butter – 1/4 cup, softened; adds richness and helps the frosting spread smoothly.
• Powdered Sugar – 2 cups; sweetens the frosting, giving it that melt-in-your-mouth quality.
• Maple Syrup – 2 tablespoons; brings a warm, distinctive flavor that harmonizes beautifully with the pumpkin.
• Vanilla Extract – 1 teaspoon; a staple in frosting that adds depth to the sweetness.

These Soft Chewy Pumpkin Oatmeal Cookies with Maple Frosting are not just a treat; they’re a cozy hug in cookie form ready to be shared!

Step‑by‑Step Instructions for Soft Chewy Pumpkin Oatmeal Cookies Maple Frosting

Step 1: Preheat and Prepare
Begin by preheating your oven to 350°F (175°C). While it heats, line your baking sheets with parchment paper; this will prevent the cookies from sticking and ensure even baking. Setting up your workspace like this allows for a smooth process as you create your Soft Chewy Pumpkin Oatmeal Cookies with Maple Frosting.

Step 2: Cream the Butters and Sugars
In a large mixing bowl, combine the softened butter, packed light brown sugar, and granulated sugar. Using an electric mixer, cream the mixture on medium speed until it becomes light and fluffy, which should take about 3-4 minutes. This step is crucial, as it creates a beautiful base for your cookie dough.

Step 3: Mix in the Eggs and Pumpkin
Next, add the two large eggs one at a time, mixing well after each addition to ensure they’re thoroughly incorporated. Stir in the vanilla extract and pumpkin puree until everything is well blended. The mixture should look smooth and slightly thick, rich with the warm color of pumpkin, setting the stage for your cookie batter.

Step 4: Combine Dry Ingredients
In a separate medium bowl, whisk together the all-purpose flour, baking soda, cinnamon, nutmeg, cloves, and salt. This will evenly distribute the leavening agent and spices throughout the flour. Once whisked, gradually add this dry mixture to the wet ingredients, mixing gently just until the dough comes together without overmixing.

Step 5: Fold in the Oats
Now it’s time to incorporate the old-fashioned rolled oats into your cookie dough. Using a spatula, gently fold the oats into the mixture until they are evenly distributed. You’ll see the texture shifting as the oats add substance to your Soft Chewy Pumpkin Oatmeal Cookies, making them hearty and chewy.

Step 6: Shape the Cookie Dough
Using a tablespoon, drop rounded mounds of dough onto the prepared baking sheets, leaving about 2 inches between each cookie to allow for spreading. As you work, the dough should hold its shape but be slightly sticky—a good sign that these cookies will turn out tender and delicious once baked.

Step 7: Bake the Cookies
Place the baking sheets in your preheated oven and bake for 12 to 15 minutes. Keep an eye out for the edges, which should be set while the centers remain a touch soft. The cookies will continue to firm up as they cool, so don’t worry if they look slightly underbaked!

Step 8: Cool the Cookies
After baking, allow the cookies to cool on the baking sheets for about 5 minutes. This helps them firm up a bit. Then, transfer each cookie to a wire rack to cool completely. The aroma of the freshly baked cookies will waft through your kitchen, enhancing the anticipation for the final touch.

Step 9: Prepare the Maple Frosting
While the cookies cool, make the luscious maple frosting. In a mixing bowl, beat together the softened cream cheese and butter until smooth and creamy. This creates a decadent base for your frosting, ensuring it will spread easily on your Soft Chewy Pumpkin Oatmeal Cookies.

Step 10: Finish the Frosting
Gradually add the powdered sugar to the cream cheese mixture, beating on low speed until well combined. Then, stir in the maple syrup and vanilla extract, beating until the frosting is velvety and perfectly spreadable. The hint of maple adds a delightful twist that complements the spices in the cookies.

Step 11: Frost the Cookies
Once the cookies have completely cooled, it’s time to frost them! Use a knife or a piping bag to spread a generous layer of maple frosting over each cookie. This sweet, creamy topping will enhance the flavors and make your Soft Chewy Pumpkin Oatmeal Cookies irresistible and ready to share.

Soft Chewy Pumpkin Oatmeal Cookies Maple Frosting

Soft Chewy Pumpkin Oatmeal Cookies Variations

Feel free to make these delightful cookies your own with some exciting twists and substitutions!

  • Gluten-Free: Replace all-purpose flour with a gluten-free flour blend, ensuring everyone can enjoy these cookies without worry.
  • Sugar-Free: Use a sugar substitute like erythritol or stevia to lower the sugar content while keeping the cookies sweet and satisfying.
  • Nutty Delight: Add 1 cup of chopped nuts, such as walnuts or pecans, for a delightful crunch that contrasts with the chewy oats.
  • Extra Spice: Boost the warmth by adding 1/4 teaspoon of ground ginger, infusing your cookies with even more autumn flavor that warms the soul.
  • Chocolatey Indulgence: Mix in 1 cup of chocolate chips or cacao nibs for a rich, sweet addition that pairs beautifully with pumpkin and spices.
  • Coconut Flakes: Fold in 1 cup of sweetened or unsweetened shredded coconut to add chewiness and a tropical flair to your autumn treat.
  • Dairy-Free: Substitute butter with coconut oil or vegan butter. Use dairy-free cream cheese and powdered sugar for a deliciously creamy frosting alternative!
  • Maple Infusion: For a stronger maple flavor, drizzle a touch of maple extract into both the cookie dough and frosting for a delightful twist.

With these variations, you’ll keep the deliciousness alive while making sure everyone at your table can savor these treats! If you’re in the mood for more cozy baking inspirations, check out my recipe for Chewy Chocolate Chip Cookies or my delightful Pumpkin Spice Muffins. Happy baking!

How to Store and Freeze Soft Chewy Pumpkin Oatmeal Cookies

Airtight Container: Store your cookies in an airtight container at room temperature for up to 3 days to maintain their soft, chewy texture.

Fridge: If you prefer a longer shelf life, refrigerate the cookies in an airtight container for up to a week. This helps retain freshness while keeping the flavors intact.

Freezer: For longer storage, freeze the cookies in a single layer on a baking sheet, then transfer to a freezer-safe bag or container. They can be frozen for up to 3 months.

Reheating: To enjoy your Soft Chewy Pumpkin Oatmeal Cookies warm, simply microwave them for 10-15 seconds or pop them in a preheated oven at 350°F (175°C) for a few minutes.

Expert Tips for Soft Chewy Pumpkin Oatmeal Cookies

Mixing Wisely: Avoid overmixing the dough when combining wet and dry ingredients, as this can lead to tough cookies instead of the desired soft chewy texture.

Perfect Pumpkin: Use canned pumpkin puree for consistency and convenience, but ensure it’s pure pumpkin and not pumpkin pie filling, which contains added spices and sugars.

Cooling Time: Don’t skip the cooling period before frosting! Allowing the cookies to cool completely prevents the frosting from melting and makes for a prettier presentation of your Soft Chewy Pumpkin Oatmeal Cookies.

Storage Tips: Store the cookies in an airtight container with a piece of bread to keep them soft and fresh for several days.

Oats Matter: Choose old-fashioned rolled oats for the best texture; quick oats will yield a different consistency, making your cookies less chewy.

What to Serve with Soft Chewy Pumpkin Oatmeal Cookies with Maple Frosting

Imagine a cozy kitchen filled with the warm scent of freshly baked cookies, inviting you to create the perfect meal to accompany your sweet treat.

  • Creamy Mashed Potatoes: These buttery, smooth potatoes provide a comforting contrast to the sweet cookies, enhancing the overall dining experience.

  • Savory Apple Salad: Crisp apples and mixed greens tossed with a tangy vinaigrette beautifully balance the sweetness of the cookies. The freshness will awaken your taste buds!

  • Warm Spiced Cider: A cozy mug of spiced apple cider serves as a perfect warm drink, complementing the fall flavors of pumpkin and spices.

  • Roasted Brussels Sprouts: Their caramelized edges and slightly bitter taste create a delightful contrast to the sweetness of your Soft Chewy Pumpkin Oatmeal Cookies with Maple Frosting.

  • Chocolate Chip Ice Cream: This creamy dessert melts beautifully on warm cookies, creating a heavenly combination you won’t want to miss.

  • Pumpkin Soup: A comforting bowl of creamy pumpkin soup enhances the pumpkin flavor and adds a savory element to your spread.

  • Caramel Pecan Tart: The rich sweetness of a pecan tart pairs well, bringing a nutty crunch that complements the soft, chewy cookies.

  • Spiced Chai Latte: A warm cup of chai, with hints of cinnamon and clove, harmonizes beautifully with the spices in your cookies, making it an ideal beverage pairing.

Make Ahead Options

These Soft Chewy Pumpkin Oatmeal Cookies with Maple Frosting are perfect for meal prep, making your busy weeknights a breeze! You can prepare the cookie dough up to 24 hours in advance; simply cover it tightly and refrigerate. When you’re ready to bake, scoop the dough onto baking sheets and let it sit at room temperature for about 10 minutes before baking to ensure even cooking. Additionally, the maple frosting can be made up to 3 days ahead—store it in an airtight container in the refrigerator. Just remember to bring the frosting to room temperature and give it a quick stir before spreading it on your cookies for that freshly made taste!

Soft Chewy Pumpkin Oatmeal Cookies Maple Frosting

Soft Chewy Pumpkin Oatmeal Cookies with Maple Frosting Recipe FAQs

What type of pumpkin puree should I use?
I recommend using canned pumpkin puree for consistency, ensuring you select pure pumpkin and not pumpkin pie filling. The latter contains additional sugars and spices that can alter the flavor of your cookies.

How should I store Soft Chewy Pumpkin Oatmeal Cookies?
To keep your cookies fresh, store them in an airtight container at room temperature for up to 3 days. For longer storage, refrigerate them for up to a week, which will help retain their delightful softness.

Can these cookies be frozen? If so, how?
Absolutely! To freeze your Soft Chewy Pumpkin Oatmeal Cookies, start by placing them in a single layer on a baking sheet and freeze them until solid. Once frozen, transfer them to a freezer-safe bag or container. They can be kept frozen for up to 3 months. When you’re ready to enjoy, simply thaw at room temperature or warm them in the microwave.

What should I do if my cookies turn out too dry?
If your cookies come out dry, it may be due to overbaking or mismeasuring the flour. To fix it in the future, ensure you’re measuring your flour correctly (spooning it into the measuring cup without packing) and keep an eye on the baking time—take them out when the edges are set but the centers still look slightly soft.

Can I make these cookies gluten-free?
Yes! You can easily adapt this recipe to be gluten-free by using a gluten-free all-purpose flour blend. Be sure to check the blend you choose includes xanthan gum for the right texture, and your cookies will be just as delicious!

Soft Chewy Pumpkin Oatmeal Cookies with Maple Frosting Bliss

Delightful Soft Chewy Pumpkin Oatmeal Cookies with Maple Frosting, perfect for autumn gatherings.

  • Electric mixer
  • Mixing bowls
  • Baking sheets
  • parchment paper
  • spatula

For the Cookies

  • 1 cup Butter (softened)
  • 1 cup Light Brown Sugar (packed)
  • 1/2 cup Granulated Sugar
  • 2 Eggs (large)
  • 1 teaspoon Vanilla Extract
  • 1 cup Pumpkin Puree
  • 2 1/2 cups All-Purpose Flour
  • 1 teaspoon Baking Soda
  • 1 teaspoon Cinnamon
  • 1/2 teaspoon Nutmeg
  • 1/4 teaspoon Cloves
  • 1/2 teaspoon Salt
  • 3 cups Old-Fashioned Rolled Oats

For Maple Frosting

  • 4 ounces Cream Cheese (softened)
  • 1/4 cup Butter (softened)
  • 2 cups Powdered Sugar
  • 2 tablespoons Maple Syrup
  • 1 teaspoon Vanilla Extract

Step-by-Step Instructions

  1. Preheat your oven to 350°F (175°C) and line baking sheets with parchment paper.
  2. In a large mixing bowl, cream together softened butter, light brown sugar, and granulated sugar until light and fluffy.
  3. Add eggs one at a time, mixing well after each addition, then stir in vanilla extract and pumpkin puree.
  4. In a separate bowl, whisk together flour, baking soda, cinnamon, nutmeg, cloves, and salt, then gradually add to wet ingredients.
  5. Fold in old-fashioned rolled oats until evenly distributed.
  6. Drop rounded mounds of dough onto prepared baking sheets, leaving 2 inches between cookies.
  7. Bake for 12 to 15 minutes until edges are set and centers are soft.
  8. Cool cookies on baking sheets for about 5 minutes before transferring to a wire rack.
  9. Beat together cream cheese and butter in a mixing bowl for the frosting until smooth.
  10. Gradually add powdered sugar, then stir in maple syrup and vanilla extract until velvety.
  11. Once cooled, frost each cookie generously with the maple frosting.

Store cookies in an airtight container to maintain freshness. For best results, avoid overmixing the dough.

Dessert
American
autumn treats, Baked Goods, Fall Desserts, Homemade Cookies, Maple Frosting, Soft Chewy Pumpkin Oatmeal Cookies

Filed Under: Dessert

Cozy Up with Delicious White Chicken Chili Tonight

September 11, 2025 by grace bellamy Leave a Comment

The first chill of autumn hits, and suddenly, all I crave are cozy bowls of comfort. That’s when I turn to my favorite White Chicken Chili—a one-pot meal that warms you from the inside out. This gluten-free recipe comes together in just 40 minutes, perfect for busy evenings yet satisfying enough to impress dinner guests. With tender shredded chicken, hearty white beans, and a spicy kick from green chiles, you’ll find it quickly becomes a family favorite. And the best part? It’s so simple that even novice cooks can feel like culinary champions. Are you ready to take your taste buds on a delightful adventure? Let’s dive into this bowl of deliciousness!

White Chicken Chili

Why is White Chicken Chili a must-try?

Flavorful, Hearty Comfort: This White Chicken Chili combines tender chicken with creamy white beans and sweet corn for a truly satisfying meal.

One-Pot Wonder: Forget the mess; this recipe is made in just one pot, making cleanup a breeze.

Gluten-Free Goodness: Perfect for those with dietary restrictions, it’s a delicious and safe option that everyone can enjoy.

Quick and Easy: With only 40 minutes from start to finish, it’s ideal for busy weeknights yet impressive enough for entertaining.

Customize It: Top with your favorites like fresh cilantro, lime, or shredded cheese—your chili, your way!

Whether you’re looking for a comforting weeknight dinner or a heartwarming dish to share with friends, this White Chicken Chili is sure to delight your taste buds and warm your soul!

Ingredients

White Chicken Chili Ingredients

For the Chili

  • Olive oil – A great base for sautéing all the flavors together.
  • Medium onion – Adds sweetness and depth; yellow or white works perfectly.
  • Garlic – Fresh minced garlic brings an aromatic touch to the dish.
  • Green chiles – Choose poblano or jalapeño for a spicy kick, or skip for less heat.
  • Ground cumin – This warm spice enhances the overall flavor profile.
  • Dried oregano or Italian seasoning – Offers a lovely herbaceous note; opt for whichever you have on hand.
  • Boneless, skinless chicken breasts – The star protein of this dish, adding heartiness.
  • Chicken broth – Use homemade or store-bought for convenience; it enhances the chili’s richness.
  • Salt – Essential for rounding out the flavors; adjust to taste.
  • Ground black pepper – A touch brings out all the other flavors beautifully.
  • White beans – Creamy and filling; they also help thicken the chili.
  • Frozen corn – Sweet corn adds a refreshing contrast and texture.
  • Heavy cream or sour cream – Choose to make it creamy; either will work wonders here!

For the Toppings

  • Fresh cilantro – Brings freshness and brightness to your finished dish.
  • Lime – A wedge of lime is perfect for squeezing on top; it adds zestiness.
  • Cheddar cheese – Shredded cheese melts beautifully and adds richness.
  • Tortilla chips or strips – Crunchy garnishes that give texture and fun to each bite.

Dive into making this delightful White Chicken Chili—it’s a warm hug in a bowl that your family will love!

Step‑by‑Step Instructions for White Chicken Chili

Step 1: Heat the Oil
In a large stockpot, heat 1 tablespoon of olive oil over medium-high heat until it shimmers. This should take about 1-2 minutes. Once the oil is hot, you’ll notice a subtle aroma rising—it’s time to move on to the next step of creating your flavorful White Chicken Chili.

Step 2: Sauté Aromatics
Add 1 finely chopped medium onion, 1 tablespoon of minced garlic, and 1-2 sliced green chiles to the pot. Sauté the mixture for about 2-3 minutes, stirring occasionally, until the onions are translucent and the garlic is fragrant. This step is crucial for building the flavor base of your chili.

Step 3: Add Spices
Sprinkle in 1 teaspoon of ground cumin and 1 teaspoon of dried oregano (or Italian seasoning) into the pot. Stir everything together until the spices are well combined with the onion and garlic, cooking for about 1 minute. You should smell the warm spices beginning to bloom in your kitchen.

Step 4: Cook the Chicken
Introduce 1 pound of boneless, skinless chicken breasts into the pot, along with 3 and ½ cups of chicken broth. Season with 1 teaspoon of salt and ½ teaspoon of ground black pepper. Bring the mixture to a simmer over medium heat, cover the pot, and let it cook undisturbed for 12-15 minutes, or until the chicken is cooked through and no longer pink.

Step 5: Shred the Chicken
Carefully remove the chicken breasts from the pot and place them on a cutting board. Using two forks, shred the chicken into small pieces. Return the shredded chicken to the pot, stirring it into the broth mixture to create a deliciously hearty White Chicken Chili.

Step 6: Incorporate the Beans
Add the two cans (15 ounces each) of drained and rinsed white beans to the pot, stirring gently to combine. Continue cooking the chili for about 5-7 minutes, allowing the beans to warm through. For a thicker texture, feel free to mash about one-third of the beans with a potato masher during this step.

Step 7: Mix in Corn and Cream
Stir in 1 and ½ cups of frozen corn and ½ cup of heavy cream (or sour cream) until everything is evenly mixed. Let the chili simmer for an additional 2-3 minutes, stirring occasionally until the mixture is smooth and creamy. The chili should have a comforting, thick consistency by this point.

Step 8: Serve and Garnish
Optionally, drizzle the finished chili with fresh lime juice for an added zing. Ladle the White Chicken Chili into bowls and top with freshly chopped cilantro, a sprinkle of shredded cheddar cheese, and a handful of tortilla chips or strips for a delightful crunch. Enjoy your wholesome creation!

White Chicken Chili

What to Serve with White Chicken Chili

Pairing your White Chicken Chili with the right sides can elevate your dining experience to cozy perfection.

  • Savory Cornbread: This sweet and buttery bread provides a delightful contrast to the spiciness of the chili. It’s perfect for dipping and soaking up every delicious bite.

  • Crispy Baked Tortilla Chips: Crunchy chips add a satisfying texture that complements the creamy chili, making every spoonful enjoyable with a satisfying crunch.

  • Zesty Lime Rice: Fluffy rice seasoned with lime and cilantro offers a fresh twist, balancing the richness of the chili while enhancing its flavors.

  • Classic Ceasar Salad: The crisp romaine lettuce and creamy dressing will provide a refreshing contrast, cleansing your palate between bites of hearty chili.

  • Roasted Vegetables: A medley of colorful veggies, lightly seasoned and roasted, brings both flavor and nutrients, making your meal comforting yet wholesome.

  • Ice-cold Beer: A light, crisp lager or a hoppy IPA can cut through the rich flavors of the chili, making it an ideal pairing for a cozy night in.

  • Fruity Sangria: Offering a refreshing, fruity contrast to the spicy chili, this drink is perfect for enhancing your dining experience and creating a festive atmosphere.

  • Creamy Coleslaw: The crunch and acidity from coleslaw can brighten up the dish while adding a nice texture, perfectly complementing your chili experience.

Embrace these sides with your White Chicken Chili for a delightful meal that’s heartwarming and satisfying!

Make Ahead Options

White Chicken Chili is an excellent choice for meal prep enthusiasts looking to save time on busy weeknights! You can make the chili base—sans cream and toppings—up to 3 days ahead. Prepare everything from sautéing the aromatics to incorporating the shredded chicken and beans, then allow it to cool completely before transferring it to an airtight container for refrigeration. To keep the flavors vibrant and delicious, avoid adding cream until you’re ready to reheat and serve. When it’s time to enjoy, simply reheat your chili on the stovetop over medium heat, stir in the heavy cream, and simmer until warmed through—resulting in cozy bowls of flavorful goodness without the last-minute rush.

Expert Tips for White Chicken Chili

  • Perfecting Texture: Use a mix of whole and mashed white beans for a creamy yet hearty consistency; this avoids a soupy texture.

  • Temperature Control: Ensure to simmer the chicken gently, avoiding boiling to keep it tender and juicy, enhancing the flavor of your White Chicken Chili.

  • Spice Levels: Adjust the amount of green chiles to your heat preference; start small and increase gradually to suit your family’s taste.

  • Garnishing Confidently: Don’t skip the toppings! Fresh cilantro, lime, and tortilla chips elevate the chili’s flavor and provide a delightful contrast in texture.

  • Make-Ahead Magic: This chili tastes even better the next day! Make it in advance and refrigerate; flavors meld beautifully, making for an effortless meal.

White Chicken Chili Variations

Feel free to make this White Chicken Chili your own! Let your creativity shine in the kitchen.

  • Dairy-Free: Replace heavy cream with coconut milk or a dairy-free sour cream alternative for a creamy texture without dairy. You’ll still get that rich flavor without any guilt!

  • Spicy Kick: For those who love heat, add more sliced jalapeños or even a dash of cayenne pepper to spice things up. This variation will surely invigorate your taste buds!

  • Vegetable-Packed: Toss in additional veggies like bell peppers, carrots, or zucchini for a hearty dose of nutrients. The added crunch will elevate this dish to a new level of enjoyment.

  • Smoky Flavor: Try adding a teaspoon of smoked paprika or even some chipotle peppers for that lovely smoky note. This twist will create a depth of flavor that’s simply divine!

  • Herbaceous Touch: Add fresh herbs like parsley or cilantro when serving for a burst of freshness. The herbaceous notes beautifully brighten the entire dish.

  • White Bean Swap: Feel free to swap some white beans with chickpeas for a delightful twist on texture and taste. The chickpeas add protein while varying the flavor experience!

  • Slow Cooker Adaptation: Prepare this chili in a slow cooker for hands-off cooking. Simply combine all ingredients and let it simmer until everything is perfectly melded. For similar cozy feeling but with changes in texture, this method allows for an easy pathway to deliciousness!

  • Serve with Style: Switch out tortilla chips for crunchy, diced avocado or crispy bacon bits as toppings for a fun, gourmet touch. Who wouldn’t want to dive into that creamy bowl of chili topped with this deliciousness?

Embrace these variations to make this dish suit your family’s taste perfectly! For more comforting recipes, check out this chili recipe or explore some delightful one-pot meals that will feed your soul and keep your kitchen clean!

How to Store and Freeze White Chicken Chili

Fridge: Store any leftovers in an airtight container for up to 3 days. Reheat gently on the stovetop or microwave, adding a splash of broth if necessary.

Freezer: Freeze portions of the White Chicken Chili in freezer-safe bags or containers for up to 3 months. Allow to cool completely before freezing to maintain texture and taste.

Thawing: To thaw, place the container in the fridge overnight or use the microwave’s defrost setting. Reheat thoroughly on the stovetop, stirring frequently.

Reheating: For optimal creaminess, reheat on low heat and add a bit more chicken broth if needed to achieve your desired consistency. Enjoy the comforting flavors all over again!

White Chicken Chili

White Chicken Chili Recipe FAQs

How do I choose ripe ingredients for my White Chicken Chili?
Absolutely! For the best flavors, select ripe green chiles that are smooth and firm. They should have vibrant skin without any dark spots or blemishes. As for the onion, look for one that feels heavy for its size and has a dry, papery skin.

How should I store leftover White Chicken Chili?
Very good question! Store any leftovers in an airtight container in the fridge for up to 3 days. When reheating, gently warm it on the stovetop over low heat, adding a splash of broth if necessary to maintain its creamy texture.

Can I freeze White Chicken Chili?
Absolutely! This chili freezes wonderfully. After cooking, let it cool completely, then portion it into freezer-safe bags or containers. It can be frozen for up to 3 months. When you’re ready to enjoy it again, simply thaw it in the fridge overnight or use the microwave to defrost.

What if my chili is too thick or too spicy?
No worries! If you find your chili too thick, simply stir in more chicken broth until you reach your desired consistency. If you need to tone down the spice, consider adding a dollop of sour cream or heavy cream to soften the heat, or stir in more white beans for balance.

Is White Chicken Chili safe for my gluten-sensitive family members?
Yes, indeed! This recipe is gluten-free since it uses ingredients without gluten. However, always check the labels on your chicken broth and canned beans to ensure they are certified gluten-free.

How do I ensure my White Chicken Chili turns out perfectly every time?
To achieve the perfect texture and flavor, simmer the chicken gently without boiling to keep it tender and juicy. Consider using a mix of whole and mashed white beans for a creamy consistency. And don’t skip the toppings—fresh cilantro, lime, and tortilla chips truly elevate the dish!

Cozy Up with Delicious White Chicken Chili Tonight

This White Chicken Chili is a gluten-free, one-pot meal perfect for busy evenings and satisfying enough to impress dinner guests.

  • large stockpot

For the Chili

  • 1 tablespoon olive oil (A great base for sautéing all the flavors together.)
  • 1 medium onion (Adds sweetness and depth; yellow or white works perfectly.)
  • 1 tablespoon garlic (Fresh minced garlic brings an aromatic touch to the dish.)
  • 1-2 green chiles (Choose poblano or jalapeño for a spicy kick, or skip for less heat.)
  • 1 teaspoon ground cumin (This warm spice enhances the overall flavor profile.)
  • 1 teaspoon dried oregano (Offers a lovely herbaceous note; opt for Italian seasoning if preferred.)
  • 1 pound boneless, skinless chicken breasts (The star protein of this dish, adding heartiness.)
  • 3.5 cups chicken broth (Use homemade or store-bought for convenience.)
  • 1 teaspoon salt (Essential for rounding out the flavors.)
  • 0.5 teaspoon ground black pepper (A touch brings out all the other flavors beautifully.)
  • 2 cans (15 ounces each) white beans (Creamy and filling; they also help thicken the chili.)
  • 1.5 cups frozen corn (Sweet corn adds a refreshing contrast and texture.)
  • 0.5 cups heavy cream (Choose to make it creamy; sour cream works here as well.)

For the Toppings

  • 1 fresh cilantro (Brings freshness and brightness.)
  • 1 lime (A wedge for squeezing on top; it adds zestiness.)
  • 1 cup cheddar cheese (Shredded cheese melts beautifully.)
  • 1 tortilla chips or strips (Crunchy garnishes that give texture to each bite.)

Step‑by‑Step Instructions

  1. Heat the oil in a large stockpot over medium-high heat until shimmering, about 1-2 minutes.
  2. Add the finely chopped onion, minced garlic, and sliced green chiles, and sauté for 2-3 minutes until translucent.
  3. Sprinkle in ground cumin and dried oregano, stirring for about 1 minute until well combined.
  4. Introduce the chicken breasts and chicken broth, seasoning with salt and pepper. Simmer for 12-15 minutes until the chicken is cooked through.
  5. Remove the chicken, shred it using two forks, and return it to the pot.
  6. Add the drained and rinsed white beans, cooking for 5-7 minutes.
  7. Mix in frozen corn and heavy cream, letting the chili simmer for an additional 2-3 minutes.
  8. Optionally, drizzle with lime juice, serve in bowls topped with cilantro, cheddar cheese, and tortilla chips.

This chili tastes even better the next day; make it in advance and refrigerate to allow flavors to meld beautifully.

Main Dishes
American
chili, comfort food, easy recipes, gluten-free, one-pot meals, White Chicken Chili

Filed Under: Main Dishes

Savory Phyllo Meat Pie: A Crispy, Comforting Delight

September 11, 2025 by grace bellamy Leave a Comment

As I was sifting through my collection of treasured recipes, I stumbled upon a delightful gem—Phyllo Meat Pie, or as it’s lovingly known, Egyptian Goulash. This savory dish is not just about satisfying hunger; it wraps a world of flavors in flakey, buttery layers that are a treat to the senses. With quick prep time and the ability to feed a crowd, this dish is perfect for gatherings or cozy family nights at home. Each bite offers a comforting blend of seasoned beef and aromatic spices, making it a delightful alternative to your usual fast food routine. Are you ready to uncover the secrets of this scrumptious dish that will transport you straight to the heart of Egypt?

Phyllo Meat Pie

What Makes Phyllo Meat Pie Irresistible?

Flavor Explosion: This pie boasts an incredible blend of spices and savory beef that will have everyone asking for seconds.

Crispy Layers: Each bite features the flaky goodness of phyllo pastry, making it a satisfying treat that breaks the monotony of everyday meals.

Quick Prep Time: With just 10 minutes of prep, you can create a dish that looks and tastes gourmet—perfect for home chefs of all skill levels.

Crowd-Pleaser: It’s a wonderful dish for gatherings, offering a hearty portion that will delight guests, transforming any occasion into a memorable feast.

Versatile Base: Feel free to experiment with different fillings—spinach, cheese, or lamb—all pair beautifully with the phyllo, allowing you to put your personal spin on this classic.

Satisfy your craving for homemade goodness and transport your taste buds with this delicious recipe that stands out among family favorites!

Phyllo Meat Pie Ingredients

• Dive into the flavorful world of Phyllo Meat Pie with these essential ingredients!

For the Filling

  • Vegetable oil – helps brown the beef and enhances flavor.
  • Ground beef – the heart of the pie, providing a savory base.
  • Garlic, minced – adds aromatic depth to the filling.
  • Salt – essential for amplifying all the delicious flavors.
  • Ground black pepper – adds a subtle kick to the beef.
  • Ground cumin – brings warm, earthy notes that complement the meat.
  • Tomato paste – adds richness and a touch of sweetness to balance the spices.

For the Pastry

  • Butter, melted – gives the phyllo its rich flavor and crispy texture.
  • Olive oil – adds a fruity note, enhancing the pastry’s depth.
  • Phyllo pastry sheets – the star ingredient that creates those flaky, delicate layers.
  • Milk – provides moisture and aids in achieving a golden color.
  • Egg – gives the pastry a nice shine and helps bind the ingredients together.
  • Salt – a small amount ensures the pastry is seasoned just right.
  • Ground black pepper – complements the filling and enriches the overall taste.

Step‑by‑Step Instructions for Phyllo Meat Pie

Step 1: Prepare the Beef Filling
In a large skillet, heat 1 tablespoon of vegetable oil over medium-high heat. Add 1 pound of ground beef, cooking until browned, about 6-8 minutes. Stir in 1 tablespoon of minced garlic, 1 teaspoon of salt, ½ teaspoon of ground black pepper, ½ teaspoon of ground cumin, and 2 tablespoons of tomato paste. Cook for an additional 2-3 minutes to blend flavors before removing from heat.

Step 2: Mix the Pastry Mixture
In a medium bowl, whisk together ½ cup of melted butter, ½ cup of olive oil, 1 cup of milk, 1 egg, ¼ teaspoon of salt, and ¼ teaspoon of ground black pepper. This luscious mixture will brush onto the phyllo sheets, helping create that irresistible, crispy texture in your Phyllo Meat Pie. Ensure it’s fully combined for even distribution.

Step 3: Layer the Phyllo Pastry
Preheat your oven to 350°F (175°C). Start layering your phyllo pastry sheets in a 9×13 casserole pan. Place 5-6 sheets in the pan, brushing each with the pastry mixture to coat. Repeat this process, ensuring the sheets are well brushed for that golden, flaky finish. Create at least 6 layers for the base, then prepare to add the filling.

Step 4: Spread the Beef Filling
Once your phyllo base is ready, evenly spread the cooked beef filling over the layers. Use a spatula to ensure it’s spread out uniformly across the phyllo, reaching the edges of the pan. This beef mixture is the heart of your Phyllo Meat Pie, so make sure it’s well-distributed for every bite to be rich and flavorful.

Step 5: Top with Remaining Phyllo
Add 5-6 more phyllo sheets on top of the beef filling, brushing each layer with the pastry mixture just as you did before. This helps lock in moisture and create a beautifully crispy top. Tuck in any excess phyllo sheets around the edges for a clean presentation that will impress your family and friends.

Step 6: Bake to Perfection
Carefully place your assembled Phyllo Meat Pie in the preheated oven, baking for about 50 minutes. Keep an eye on it as it bakes; you want the top to turn a glorious golden brown and become beautifully crispy. The sound of sizzling and the aroma wafting from the oven will surely make your mouth water!

Step 7: Cool and Serve
Once baked to a perfect golden brown, remove the Phyllo Meat Pie from the oven. Allow it to cool slightly for about 10-15 minutes before slicing. This resting time helps set the layers, making it easier to serve. Enjoy the hearty, comforting flavors of this delightful dish with family or friends!

Phyllo Meat Pie

What to Serve with Phyllo Meat Pie

Transform your hearty Phyllo Meat Pie into a complete meal by adding these delightful sides and beverages that will elevate your dining experience.

  • Bright Garden Salad: Fresh greens with a zesty lemon vinaigrette provide a refreshing contrast to the rich pie. Crisp cucumber and juicy tomatoes bring a delightful crunch.

  • Garlic Roasted Potatoes: These crispy, golden potatoes with a hint of garlic create a wonderful textural contrast and soak up all the delicious flavors from your pie.

  • Yogurt Sauce: A cool, creamy yogurt sauce with herbs is perfect for drizzling over each slice, adding a tangy note that perfectly balances the savory meat filling.

  • Sautéed Spinach: Tender spinach, lightly sautéed with olive oil and garlic, adds a hint of earthiness and vibrant color to your plate while offering a nutritious boost.

  • Minted Couscous: Fluffy couscous mixed with fresh mint offers a delightful and fragrant side that compliments the spices in the phyllo meat pie, adding a lightness to the meal.

  • Mint Tea: To drink, serve a refreshing mint tea that cools the palate and enhances the exotic flavors, creating a cozy atmosphere for your gathering.

With these savory pairings, your Phyllo Meat Pie will shine even brighter at the dining table, inviting everyone to savor each moment!

Make Ahead Options

These Phyllo Meat Pies are a fantastic choice for meal prep! You can prepare the beef filling and assemble the pie up to 24 hours in advance. To do this, cook the filling as instructed and let it cool completely. Once cooled, store the filling in an airtight container in the refrigerator. Similarly, you can layer the phyllo and filling in your baking dish, but wrap the assembled dish tightly with plastic wrap to keep it fresh. When you’re ready to bake, simply take it out of the fridge, brush with the pastry mixture, and bake directly from cold, adding an extra 10-15 minutes to the baking time for even doneness. This approach ensures that your Phyllo Meat Pie remains just as delicious and perfectly crispy, making weeknight dinners a breeze!

Phyllo Meat Pie Variations

Feel free to explore these exciting twists and substitutions for your Phyllo Meat Pie and delight your taste buds!

  • Dairy-Free: Substitute milk with almond or coconut milk and use dairy-free margarine instead of butter for a deliciously rich and creamy filling without the dairy.

  • Heat It Up: Add chopped jalapeños or crushed red pepper to the beef filling for a spicy kick. The heat balances beautifully with the flaky pastry for those who love a little extra zest.

  • Vegetarian Delight: Swap ground beef for lentils or mushrooms for a hearty vegetarian alternative. The earthiness of lentils or the meatiness of mushrooms works wonderfully with the spices.

  • Herb Infusion: Mix in fresh herbs like parsley or dill into the beef filling for an aromatic flavor boost. A sprinkle of chopped fresh mint on top before serving can also elevate the dish.

  • Nutty Crunch: Toasted pine nuts or walnuts added to the beef mixture brings an unexpected crunch and depth of flavor. The nutty texture complements the flakiness of the pastry beautifully.

  • Global Influence: Use Moroccan spices like cinnamon and nutmeg in the beef filling for an exotic twist. Pairing these spices with raisins can add an interesting sweet contrast.

  • Extra Layer: For added texture, layer sautéed spinach or kale in between the phyllo sheets. This not only enhances the nutrition but also adds a delightful green vibrancy to your dish.

  • Mini Pies: Create small hand-held versions of the Phyllo Meat Pie by using muffin tins or smaller baking dishes. It’s a fun way to serve them at parties or gatherings!

Embrace your creativity and make this dish truly your own! If you’re looking for more inspiration on flavorful ingredients, check out how to perfect phyllo pastry or explore ideas for filling variations that can turn this classic into something extraordinary.

Expert Tips for Phyllo Meat Pie

  • Layering Technique: Ensure each pastry layer is brushed well with the mixture to prevent dryness; it contributes to that flaky, irresistible finish in your Phyllo Meat Pie.

  • Beef Browning: Don’t rush the browning of the beef; it adds depth of flavor. Cook until well browned for a rich, savory filling.

  • Cool Before Cutting: Allow the pie to cool for about 10-15 minutes after baking. This helps set the layers for a cleaner slice and better presentation.

  • Don’t Rush the Bake: Keep an eye on the baking time; if it’s not golden brown yet, give it a few more minutes to achieve that perfect crispy texture.

  • Explore Fillings: Feel free to mix in or swap the beef for ground chicken, turkey, or veggies. Each variation can create a unique yet comforting Phyllo Meat Pie tailored to your taste.

How to Store and Freeze Phyllo Meat Pie

Room Temperature: Store the Phyllo Meat Pie at room temperature for up to 2 hours if it’s just been made, but avoid leaving it out for longer to prevent spoilage.

Fridge: Keep any leftover pie in an airtight container in the fridge for up to 3 days. Reheat in the oven to restore crispiness.

Freezer: For longer storage, wrap individual slices of Phyllo Meat Pie tightly in plastic wrap and then in aluminum foil. They can be frozen for up to 3 months.

Reheating: To reheat, bake frozen slices at 350°F (175°C) for about 20-25 minutes, or until heated through and crispy. Enjoy every bite of your flavorful Phyllo Meat Pie!

Phyllo Meat Pie

Phyllo Meat Pie Recipe FAQs

How do I choose the right phyllo pastry?
Absolutely! When selecting phyllo pastry, look for packages that are well-dated and free of tears. You want the sheets to feel slightly moist but not sticky. If you’re able to touch it, a slight bend is a good sign of freshness. Always thaw your phyllo overnight in the refrigerator for the best texture.

How should I store leftover Phyllo Meat Pie?
After enjoying your delicious pie, store any leftovers in an airtight container in the fridge. It will stay fresh for up to 3 days. To maintain that crispy texture, you can reheat it in the oven at 350°F (175°C) for about 15-20 minutes.

Can I freeze Phyllo Meat Pie?
Very much! Freezing your pie is a great way to preserve its flavors. Just wrap individual slices tightly in plastic wrap, then in aluminum foil. This will protect against freezer burn. You can enjoy those slices later, as they are good for up to 3 months! When ready, bake from frozen at 350°F (175°C) for about 20-25 minutes, or until heated through.

What if my phyllo sheets keep breaking?
If your phyllo is tearing, don’t worry—this happens to the best of us! A key tip is to work quickly and keep your sheets covered with a damp cloth while you layer them to prevent drying. Additionally, brush the edges with the pastry mixture to help mend any tears. Remember, a rustic look adds charm!

Is this dish suitable for those with dietary restrictions?
Absolutely! If you’re catering to specific dietary needs, such as gluten intolerance, you can find gluten-free phyllo pastry options. For lactose concerns, try substituting the butter with a dairy-free alternative and using a plant-based milk. Just make sure to check that your spices and fillings are also gluten and dairy-free to keep it safe for everyone.

Can I use different meats or veggies in the filling?
The more the merrier! Phyllo Meat Pie is incredibly versatile. You can replace beef with ground turkey or chicken. If you prefer a vegetarian option, consider using sautéed spinach, mushrooms, or a mix of your favorite vegetables. Just ensure they are cooked and cooled before layering to avoid a soggy pie!

Savory Phyllo Meat Pie: A Crispy, Comforting Delight

This Phyllo Meat Pie combines seasoned beef and aromatic spices within flaky layers, perfect for gatherings.

  • skillet
  • Medium bowl
  • 9×13 casserole pan

For the Filling

  • 1 tablespoon Vegetable oil (helps brown the beef and enhances flavor)
  • 1 pound Ground beef (the heart of the pie)
  • 1 tablespoon Garlic, minced (adds aromatic depth)
  • 1 teaspoon Salt (essential for flavor)
  • ½ teaspoon Ground black pepper (adds a subtle kick)
  • ½ teaspoon Ground cumin (brings warm, earthy notes)
  • 2 tablespoons Tomato paste (adds richness and sweetness)

For the Pastry

  • ½ cup Butter, melted (gives rich flavor)
  • ½ cup Olive oil (adds a fruity note)
  • 1 cup Milk (provides moisture)
  • 1 each Egg (helps bind the ingredients)
  • ¼ teaspoon Salt (for seasoning)
  • ¼ teaspoon Ground black pepper (complements the filling)
  • 1 pack Phyllo pastry sheets (the star ingredient for flaky layers)

Step-by-Step Instructions

  1. In a large skillet, heat 1 tablespoon of vegetable oil over medium-high heat. Add 1 pound of ground beef, cooking until browned, about 6-8 minutes. Stir in 1 tablespoon of minced garlic, 1 teaspoon of salt, ½ teaspoon of ground black pepper, ½ teaspoon of ground cumin, and 2 tablespoons of tomato paste. Cook for an additional 2-3 minutes to blend flavors before removing from heat.
  2. In a medium bowl, whisk together ½ cup of melted butter, ½ cup of olive oil, 1 cup of milk, 1 egg, ¼ teaspoon of salt, and ¼ teaspoon of ground black pepper until fully combined.
  3. Preheat your oven to 350°F (175°C). Start layering your phyllo pastry sheets in a 9×13 casserole pan, placing 5-6 sheets, brushing each with the pastry mixture. Create at least 6 layers for the base.
  4. Evenly spread the cooked beef filling over the phyllo layers, using a spatula to ensure it’s well-distributed.
  5. Add 5-6 more phyllo sheets on top of the beef filling, brushing each with the pastry mixture. Tuck in any excess phyllo sheets around the edges for a clean presentation.
  6. Carefully place the assembled Phyllo Meat Pie in the preheated oven, baking for about 50 minutes until the top is golden brown.
  7. Allow the Phyllo Meat Pie to cool for about 10-15 minutes before slicing. Serve and enjoy!

Allow the pie to cool before cutting to help set the layers and achieve a clean slice.

Main Dishes
Egyptian
comfort food, crowd-pleaser, Egyptian Goulash, Phyllo Meat Pie, quick recipe, savory pie

Filed Under: Main Dishes

Irresistible Swedish Apple Cake for Cozy Moments

September 11, 2025 by grace bellamy Leave a Comment

In a quaint cafe nestled among the cobblestone streets of Sweden, the aroma of freshly baked goods wafts through the air, beckoning passersby to indulge in comfort. That’s exactly how I felt when I first tasted a slice of Swedish Apple Cake. This delightful treat has found its way into my heart and my kitchen, and I’m excited to share it with you! The beauty of this Swedish Apple Cake lies not only in its simplicity but also in its versatility—perfect for a busy weeknight dessert or a leisurely weekend brunch. With just 15 minutes of prep, you can whip up a delectable masterpiece that makes your home smell like an apple orchard in full bloom. Plus, it’s a great way to sneak in those wholesome apples you have lying around. Are you ready to embark on this baking adventure? Let’s dive into this recipe together!

Swedish Apple Cake

Why is Swedish Apple Cake so special?

Simplicity at its finest: With just 15 minutes of prep, this recipe is perfect for both novice and experienced bakers.

Irresistibly Flavorful: The warm combination of cinnamon, cardamom, and fresh apples creates a cozy, inviting taste that’s hard to resist.

Versatile Treat: Enjoy it warm with a scoop of ice cream, or at room temperature with a dollop of whipped cream for an extra touch.

Crowd-Pleaser: This cake is perfect for gatherings, ensuring every slice brings smiles; it’s been a hit at my own dinner parties!

Nostalgic Aroma: Baking this cake fills your kitchen with the sweet scent of a Swedish bakery—truly magical! For more easy and delightful recipes, check out this scrumptious yogurt cake to keep the deliciousness going!

Swedish Apple Cake Ingredients

• Perfect for your next baking adventure!

For the Cake
• Medium apples – Granny Smith, Honeycrisp, or Braeburn add a great tartness that complements the sweetness of the cake.
• All-purpose flour – This is your base for structure; feel free to substitute with whole wheat for a healthier twist.
• Baking powder – Essential for that light, fluffy texture.
• Baking soda – Aids in leavening; don’t skip it!
• Salt – Just a pinch enhances all the flavors, bringing the cake to life.
• Ground cinnamon – A must for warmth and comforting flavor; it pairs beautifully with the apples.
• Ground cardamom (optional) – Just a dash can elevate the flavor profile; give it a try if you’re feeling adventurous!
• Unsalted butter – Adds richness; make sure it’s melted and cooled for the perfect texture.
• Granulated sugar – Sweetness is key, balancing the tartness of the apples.
• Large eggs – Bind everything together, creating that desirable structure.
• Vanilla extract – Just a touch makes the cake smell heavenly.
• Plain yogurt or sour cream – Adds moisture and a subtle tanginess to the cake.

For the Topping
• Granulated sugar – Sprinkles on top give the cake a delightful sweet crunch.
• Ground cinnamon – Infuses the topping with that warm spice we all love.

Get your spatulas ready, because this Swedish Apple Cake is just a mix away from becoming your new favorite dessert!

Step‑by‑Step Instructions for Swedish Apple Cake

Step 1: Preheat and Prepare
Preheat your oven to 350°F (175°C), ensuring it’s ready for your delicious Swedish Apple Cake. Grease a 9-inch round or square baking pan with butter or non-stick spray, then line the bottom with parchment paper for easy removal. This initial preparation sets the foundation for a perfect bake!

Step 2: Slice the Apples
Begin by peeling, coring, and thinly slicing the three apples. Set the apple slices aside in a bowl; they will be the star of your Swedish Apple Cake. Aim for uniform slices to ensure even cooking and a beautiful presentation once the cake is baked.

Step 3: Mix the Dry Ingredients
In a medium mixing bowl, whisk together the all-purpose flour, baking powder, baking soda, salt, ground cinnamon, and optional ground cardamom. This mixture will add structure and flavor to your cake. Ensure it’s well combined and set it aside as you prepare the wet ingredients.

Step 4: Combine the Wet Ingredients
In a separate bowl, whisk the melted and cooled unsalted butter with the granulated sugar until smooth. Then, add in the lightly beaten eggs, vanilla extract, and yogurt or sour cream. Mix well until everything is fully incorporated, creating a luscious wet mixture that will bring your Swedish Apple Cake to life.

Step 5: Create the Batter
Gradually add the dry ingredient mixture to the wet ingredients. Using a spatula, gently stir until just combined; be careful not to overmix. Your batter will be thick yet spreadable, ready to cradle those juicy apple slices you’ve prepared. This is the heart of your Swedish Apple Cake!

Step 6: Layer the Batter and Apples
Spoon half of the batter into the prepared baking pan and spread it evenly to cover the bottom. Layer half of the sliced apples on top in a single, even layer. This adds a delightful texture and flavor to every bite of your cake, enhancing its charm.

Step 7: Add More Batter and Apples
Dollop the remaining batter over the apple layer. With a gentle touch, spread it to cover the apples, ensuring they are mostly hidden beneath. Finally, arrange the remaining apple slices artfully on top of the batter; this will create a gorgeous surface that’s vulnerable to the oven’s heat.

Step 8: Prepare the Topping
In a small bowl, mix together the additional granulated sugar and ground cinnamon. Once blended, sprinkle this mixture evenly over the apple slices. This topping will caramelize as it bakes, adding a delightful crunch to your Swedish Apple Cake.

Step 9: Bake the Cake
Place the cake in the preheated oven and bake for 40–45 minutes. You’ll know it’s done when the top turns golden brown, the apples become tender, and a toothpick inserted into the center comes out clean. The enticing aroma will surely fill your kitchen!

Step 10: Cool and Serve
Remove the Swedish Apple Cake from the oven and let it cool in the pan for about 10–15 minutes. Once slightly cooled, slice it into generous pieces. Enjoy it warm or at room temperature, savoring the cozy flavors that make this cake irresistibly delightful!

Swedish Apple Cake

How to Store and Freeze Swedish Apple Cake

Room Temperature: Store your cake at room temperature in an airtight container for up to 3 days. This keeps it moist and flavorful, perfect for snacking!

Fridge: For longer storage, refrigerate the Swedish Apple Cake in an airtight container. It will stay fresh for up to a week, and the chill enhances its complex flavors.

Freezer: To freeze, wrap individual slices tightly in plastic wrap, then place them in a freezer-safe bag. They can be stored for up to 3 months without losing flavor or texture.

Reheating: When ready to enjoy, thaw slices in the fridge overnight and reheat gently in the microwave or oven. A quick warm-up will revive its delightful aroma and taste!

What to Serve with Swedish Apple Cake

The warmth and sweetness of this cake create the perfect opportunity to craft a delightful meal experience.

  • Cinnamon Ice Cream: The creamy, vanilla-tinged swirl of cinnamon ice cream complements the cake’s spiced notes, making each bite a heavenly indulgence.
  • Whipped Cream: A dollop of freshly whipped cream adds a light, airy texture that balances the cake’s density and enhances its sweetness.
  • Fresh Berry Salad: A mix of tart berries like raspberries and strawberries brings a bright, refreshing contrast, cleansing the palate between bites of the rich cake.
  • Caramel Sauce: Drizzling caramel sauce over each slice not only adds a touch of decadence but also enhances the apple flavor, creating a delightful synergy.
  • Spiced Chai Tea: The fragrant spices in chai tea harmonize beautifully with the cake’s warmth, providing a comforting beverage option.
  • Cheese Platter: Pairing the cake with a selection of mild cheeses can create a delightful savory-sweet contrast, elevating your dessert experience.
  • Almond Biscotti: A crunchy almond biscotti alongside adds a textural contrast. Dip it in your coffee for an extra cozy moment.
  • Sautéed Cinnamon Apples: For an added touch, sautéing some apple slices in butter and cinnamon and serving warm over the cake brings an irresistible, homey vibe.

Expert Tips for Swedish Apple Cake

  • Choose the Right Apples: Opt for firm, tart apples like Granny Smith or Honeycrisp; they hold their shape well and provide a lovely contrast to the sweetness of the cake.

  • Don’t Overmix: When combining the wet and dry ingredients, stir until just combined to avoid a dense cake. A lumpy batter is perfectly fine!

  • Layer Flavors: For an extra flavor kick, add a sprinkle of lemon juice on the apples after slicing. This brightens the taste and balances the sweetness.

  • Check for Doneness: Keep an eye on the baking time; your oven’s temperature may vary. Test with a toothpick in the center—it should come out clean for the perfect Swedish Apple Cake!

  • Cool Before Serving: Allow the cake to cool in the pan for 10–15 minutes before slicing. This helps maintain its structure and makes for easier serving.

  • Storage Tips: Store any leftovers in an airtight container at room temperature for up to three days, or refrigerate for longer freshness. Enjoy this delightful Swedish Apple Cake later!

Swedish Apple Cake Variations

Feel free to get creative and customize your Swedish Apple Cake according to your taste or dietary needs!

  • Gluten-Free: Substitute all-purpose flour with a gluten-free blend for a flourless alternative that everyone can enjoy.
    A delightful way to cater to gluten sensitivities, it keeps the same flavor profiles intact!

  • Dairy-Free: Use coconut oil instead of butter and almond milk yogurt in place of regular yogurt.
    This variation brings new flavor and keeps the cake moist without dairy—perfect for those looking for non-dairy options.

  • Spiced Up: Add a pinch of nutmeg or a dash of ginger for an extra warming spice kick.
    These spices harmonize well with the apples and create an even cozier aroma while baking.

  • Brown Sugar: Swap granulated sugar for brown sugar for a deeper, more caramel-like sweetness.
    This small change can elevate the richness of the cake, making each bite more indulgent.

  • Fruit Medley: Mix in other fruits like pears or cranberries for a delightful twist.
    This unexpected combination adds texture, and color, and enhances the flavor profile, making it even more exciting!

  • Apple-Pecan: Toss in some chopped pecans or walnuts for added crunch and nuttiness.
    The contrasting texture makes every slice an adventure while enhancing the overall flavor.

  • Caramel Drizzle: Drizzle warm caramel sauce over slices before serving for a decadent finish.
    This sweet addition transforms the cake into a showstopper, perfect for gatherings or special occasions.

  • Credit Cozy Toppings: Serve with a scoop of vanilla ice cream or a dollop of whipped cream for extra indulgence.
    Adding these creamy elements takes the comfort of the Swedish Apple Cake to a new level of deliciousness!

For more fun and exciting baking ideas, try my charming yogurt cake or explore other sweet creations that can spark new culinary delights!

Make Ahead Options

These Swedish Apple Cake preparations are perfect for busy home cooks looking to streamline their meal planning! You can slice and prepare the apples up to 24 hours in advance; just place them in a bowl with a splash of lemon juice to prevent browning. Additionally, the dry ingredients can be whisked together and stored in an airtight container for up to 3 days. When you’re ready to bake, simply mix the wet ingredients with the prepped dry mix and follow the remaining steps. This way, you save precious time while still achieving a delightful cake that tastes just as delicious—they’ll never guess you prepped ahead!

Swedish Apple Cake

Swedish Apple Cake Recipe FAQs

How do I select the best apples for this cake?
Absolutely! For the best Swedish Apple Cake, choose firm and tart apples like Granny Smith, Honeycrisp, or Braeburn. These varieties not only retain their shape during baking but also provide a delicious balance of tartness against the sweet cake. Look for apples that are smooth and free from dark spots to ensure freshness!

How should I store leftover Swedish Apple Cake?
Very simple! Store your cake in an airtight container at room temperature for up to 3 days to keep it moist and tasty. If you want it to last longer, refrigerate it in a sealed container for up to a week. This helps maintain its flavors and makes it easy to enjoy a slice whenever you crave something sweet.

Can I freeze Swedish Apple Cake?
Absolutely! To freeze this delightful cake, wrap individual slices tightly in plastic wrap, then place them in a freezer-safe bag. You can store them for up to 3 months without losing flavor or texture. When you’re ready to enjoy a slice, simply thaw it in the fridge overnight and reheat gently in the microwave or oven for a warm treat!

What should I do if my cake is too dense?
If you find your Swedish Apple Cake is too dense, it could be due to overmixing the batter or too much flour. Remember to mix just until ingredients are combined, as a few lumps are perfectly okay! Also, make sure you’re using the right measurements and spooning flour instead of packing it—this can make a big difference in texture.

Are there any dietary considerations for this recipe?
Indeed! This Swedish Apple Cake can be made with alternatives to accommodate dietary needs. For a gluten-free version, substitute the all-purpose flour with a gluten-free blend. If you’re looking for a healthier option, you can use unsweetened applesauce instead of butter or yogurt. Keep in mind that this cake contains eggs and dairy, so adjust accordingly if you have allergies!

Can I use different flavors or spices?
The more the merrier! While cinnamon and cardamom are traditional in this recipe, feel free to tailor it to your taste. A splash of lemon juice can brighten flavors, and you can add nutmeg for a warm twist. Just remember to adjust quantities to keep the balance in your Swedish Apple Cake delightful!

Irresistible Swedish Apple Cake for Cozy Moments

A delightful Swedish Apple Cake rich in flavor, perfect for cozy moments, featuring apples, warm spices, and a simple preparation.

  • 9-inch round or square baking pan

For the Cake

  • 3 medium apples (Granny Smith, Honeycrisp, or Braeburn) (peeled, cored, and thinly sliced)
  • 1 cup all-purpose flour (or whole wheat for a healthier twist)
  • 1 teaspoon baking powder
  • 1 teaspoon baking soda
  • 0.5 teaspoon salt
  • 1 teaspoon ground cinnamon
  • 0.25 teaspoon ground cardamom (optional)
  • 0.5 cup unsalted butter (melted and cooled)
  • 1 cup granulated sugar
  • 2 large eggs (lightly beaten)
  • 1 teaspoon vanilla extract
  • 0.5 cup plain yogurt or sour cream

For the Topping

  • 2 tablespoons granulated sugar (for sprinkling)
  • 1 teaspoon ground cinnamon

Step-by-Step Instructions for Swedish Apple Cake

  1. Preheat your oven to 350°F (175°C) and grease a 9-inch baking pan.
  2. Peel, core, and thinly slice the apples, then set them aside.
  3. In a medium bowl, whisk together flour, baking powder, baking soda, salt, cinnamon, and cardamom.
  4. In another bowl, mix melted butter and sugar until smooth, then add eggs, vanilla, and yogurt.
  5. Gradually combine the dry mixture with the wet mixture until just combined.
  6. Spoon half of the batter into the baking pan and layer with half of the apple slices.
  7. Spread the remaining batter over the apples and top with the rest of the apple slices.
  8. Mix sugar and cinnamon for topping and sprinkle over apple slices.
  9. Bake for 40–45 minutes until the top is golden and a toothpick comes out clean.
  10. Cool the cake in the pan for 10–15 minutes before slicing and serving.

For an extra flavor kick, consider adding a sprinkle of lemon juice on the apples after slicing.

Dessert
Swedish
apple dessert, cozy dessert, dessert recipe, easy baking, homemade cake, Swedish Apple Cake

Filed Under: Dessert

Delicious Sweet Potato Gnocchi to Elevate Your Dinner Game

September 11, 2025 by grace bellamy Leave a Comment

As I peeled back the layers of those vibrant sweet potatoes, a wave of nostalgia washed over me—reminding me of cozy family gatherings filled with laughter and the irresistible smell of homemade pasta cooking away in the kitchen. One bite of these comforting Sweet Potato Gnocchi will transport you to those happy moments; they’re not just easy to make but also a delightful twist on traditional gnocchi that everyone will rave about. With just a handful of ingredients and a preparation time of just over an hour, you can create a dish that is both a fun cooking adventure and a scrumptious meal—all while bringing a touch of warmth to your table. What’s your favorite topping for gnocchi? Let’s dive in and explore the deliciousness together!

Sweet Potato Gnocchi

Why is Sweet Potato Gnocchi a Must-Try?

Flavorful Comfort: Sweet potato brings a hint of natural sweetness, transforming traditional gnocchi into a cozy yet gourmet dish.

Easy to Make: With just a few simple ingredients, you can whip up a satisfying meal that impresses family and friends alike.

Versatile Topping Options: You can pair it with a multitude of sauces or toppings, from creamy Alfredo to a drizzle of olive oil and fresh herbs, allowing for endless creativity!

Quick Preparation: In just over an hour, you can enjoy homemade goodness without the stress.

Crowd-Pleasing Dish: Whether it’s a family dinner or a cozy gathering, everyone will love this unique and delicious twist on classic gnocchi.

Don’t forget to check out our guide on how to make delicious homemade sauces to elevate your gnocchi experience!

Sweet Potato Gnocchi Ingredients

For the Gnocchi
• Sweet potatoes – 2 medium (230g); their natural sweetness gives the gnocchi a delightful flavor.
• Large egg – 1; this binds the ingredients and adds richness to the dough.
• Parmesan cheese – 1/2 cup (50g), freshly grated; adds a savory depth that complements the sweet potato beautifully.
• King Arthur Unbleached All-Purpose Flour – 3/4 cup (90g), plus more for rolling; helps form the dough and keep it from sticking.

For Frying
• Butter – 2 tablespoons (28g); for frying, it adds a golden crispiness and a rich flavor that enhances your Sweet Potato Gnocchi.

Prepare these ingredients, and let your kitchen fill with heartwarming aromas as you create this beloved family dish!

Step‑by‑Step Instructions for Sweet Potato Gnocchi

Step 1: Prepare Sweet Potatoes
Scrub and dry the sweet potatoes, then pierce them in several places with a fork. Microwave on full power for 8 to 9 minutes until tender or bake in a preheated 425°F oven for about 45 to 60 minutes. Let them cool slightly until you can handle them, making sure your kitchen fills with the comforting aroma of sweet potatoes.

Step 2: Scoop Out the Flesh
Once the sweet potatoes are cool enough to touch, carefully slice them lengthwise and scoop out the flesh using a spoon. Avoid any large pieces of skin to ensure a smooth texture. You should have about 1 1/4 cups of the soft sweet potato ready, which is the foundation of your delightful Sweet Potato Gnocchi.

Step 3: Mash the Sweet Potatoes
Using a potato ricer or a fork, press or mash the sweet potato flesh until it is light and fluffy, free of lumps. Allow it to cool until lukewarm while you gather the remaining ingredients. This step is vital to create a silky dough that will yield tender and flavorful gnocchi.

Step 4: Combine Ingredients
In a mixing bowl, blend the cooled sweet potato flesh with one large egg, ensuring it is well combined. The egg adds richness and binds the sweet potato, making it creamy and cohesive. This mixture will serve as the base of your Sweet Potato Gnocchi dough, bursting with flavor and warmth.

Step 5: Mix in Cheese and Flour
In a separate small bowl, whisk together the freshly grated Parmesan and the all-purpose flour. Gently mix this flour mixture into the sweet potato and egg blend until a soft dough forms. It’s perfectly fine if some flour remains in the bowl; just don’t over-knead it. Your dough is coming together wonderfully!

Step 6: Rest the Dough
Once your dough is formed, cover it with plastic wrap and let it rest for about 10 minutes. Meanwhile, bring 2 quarts of water to a rolling boil in a large pot. Additionally, melt the 2 tablespoons of butter in a large skillet over medium heat. This step prepares the stage for cooking your Sweet Potato Gnocchi beautifully.

Step 7: Shape the Gnocchi
Divide the rested dough into three equal pieces, then roll each piece into smaller sections about 1/2″ wide and 1″ long. Ensure you work on a floured surface to prevent sticking, and maintain the comforting, tender nature of the dough. Your crafted pieces are the stars of this delicious dish.

Step 8: Create Grooves
Roll each gnocchi piece in a bit of flour to keep them from sticking together and use a gnocchi board or fork to create little grooves on each piece. These grooves will help the sauce cling beautifully to your Sweet Potato Gnocchi, enhancing every bite with flavor.

Step 9: Cook the Gnocchi
Gently drop the shaped gnocchi into the boiling water and stir lightly to prevent them from sticking. The gnocchi will sink to the bottom initially, but after a few minutes, they will float to the surface. Once floating, cook for an additional 1 to 2 minutes to achieve that perfect tender texture.

Step 10: Fry the Gnocchi
Using a slotted spoon, carefully transfer the cooked gnocchi to the hot butter in your skillet. Fry them for about 2 to 3 minutes, until they turn golden brown on one side, then flip and cook for another minute or so. Once crispy and beautifully colored, your Sweet Potato Gnocchi is ready to be served warm with more Parmesan or your favorite sauce!

Sweet Potato Gnocchi

Make Ahead Options

These Sweet Potato Gnocchi are perfect for meal prep enthusiasts! You can prepare the dough up to 24 hours in advance, just be sure to refrigerate it tightly wrapped in plastic wrap to maintain its moisture and prevent drying out. Additionally, shaped, uncooked gnocchi can be frozen for up to 3 months: simply place them in a single layer on a baking sheet until frozen, then transfer to a freezer bag. When ready to serve, cook directly from frozen in boiling water for an extra minute. This way, your homemade Sweet Potato Gnocchi will be just as delicious, saving you time on busy weeknights!

What to Serve with Sweet Potato Gnocchi?

There’s nothing quite like the delightful textures and flavors of homemade meals, and Sweet Potato Gnocchi is no exception!

  • Creamy Sage Butter: The warm, herbal notes of sage combined with rich butter finish the gnocchi beautifully, elevating each fluffy bite.

  • Roasted Brussels Sprouts: Adding a crispy texture, these savory, caramelized sprouts provide a perfect contrast, enhancing the sweet potato’s natural sweetness.

  • Garlic Bread: A crunchy, buttery side that encourages you to savor every spoonful, it’s the ideal vehicle for pairing with sauces and soaking up deliciousness.

  • Fresh Arugula Salad: The peppery greens tossed with a zesty vinaigrette offer a refreshing contrast, balancing the richness of the gnocchi wonderfully.

  • Parmesan Crisps: These make for a delightful crunchy topping, adding both flavor and textural contrast that will have everyone reaching for more.

  • Red Wine: A light Pinot Noir or a Chianti enhances the flavor profile, making for a heartwarming pairing that connects well with the sweet undertones of the gnocchi.

  • Chocolate Mousse: Finish your meal with a light and airy chocolate mousse, offering a sweet finale that complements the gnocchi’s warmth and comfort.

Enjoy the blissful experience of creating an unforgettable meal around your Sweet Potato Gnocchi!

How to Store and Freeze Sweet Potato Gnocchi

Fridge: Store cooked Sweet Potato Gnocchi in an airtight container for up to 3 days. Reheat them in a skillet with a little butter over medium heat until warmed through.

Freezer: Freeze uncooked gnocchi on a baking sheet until solid, then transfer to a freezer-safe bag. They can be stored for up to 2 months. Cook from frozen, adding a couple of extra minutes to the boiling time.

Reheating: To reheat frozen cooked gnocchi, simmer in water for about 3–5 minutes until they float. Alternatively, sauté them directly in a skillet for a crispy exterior.

Freshness Tip: Always let cooked gnocchi cool completely before storing, which helps maintain texture and flavor.

Expert Tips for Sweet Potato Gnocchi

  • Select the Right Sweet Potatoes: Choose firm and unblemished sweet potatoes for the best texture and flavor. Avoid any that have soft spots or sprouting, as they can affect your gnocchi.

  • Avoid Over-Kneading: When mixing the flour and potato, gently combine until just incorporated. Over-kneading can lead to dense gnocchi instead of light and fluffy ones.

  • Proper Cooking Time: When your gnocchi floats, remember to cook it for 1-2 additional minutes to ensure thorough cooking and the right texture without becoming mushy.

  • Use Enough Flour for Rolling: Don’t skimp on the flour when shaping the gnocchi. This prevents sticking and maintains the shape. Just sprinkle as needed to keep your workspace dry.

  • Experiment with Sauces: This Sweet Potato Gnocchi pairs wonderfully with both savory and sweet sauces. Try brown butter with sage for a classic touch or a creamy garlic sauce for a rich option.

Sweet Potato Gnocchi Variations

Feel free to experiment and elevate your Sweet Potato Gnocchi with these delightful twists!

  • Gluten-Free: Substitute all-purpose flour with a gluten-free blend or almond flour for a lighter option. Your gnocchi will have its own unique texture while remaining scrumptious!

  • Dairy-Free: Replace Parmesan with nutritional yeast or a dairy-free cheese alternative to keep the dish creamy without the dairy. This allows everyone to enjoy a plant-based version bursting with flavor.

  • Herb-Infused: Add fresh herbs like sage, thyme, or rosemary to your dough for an aromatic punch. This adds a lovely depth of flavor that complements sweetness beautifully.

  • Veggie Boost: Mix in finely grated carrots or zucchini to the dough for added nutrition and texture. Not only does it make the gnocchi vibrant, but it also contributes to a flavorful twist that’s hard to resist.

  • Spicy Kick: Incorporate a pinch of red pepper flakes or a dash of cayenne pepper into the dough for an unexpected heat that balances the sweetness. It’s a fantastic way to surprise those taste buds!

  • Sweet Variation: For a dessert twist, replace the savory ingredients with cinnamon and nutmeg, sleek them with a drizzle of maple syrup after frying. This transforms your gnocchi into a delightful evening treat that’s sure to impress!

  • Nutty Crunch: Add toasted pine nuts or walnuts to your sauce for a textural contrast against the soft dumplings. This brings a satisfying crunch that alongside the fluffy gnocchi creates a symphony of textures for every bite.

  • Sauce Match: Explore different sauces, like a butter sage sauce or a spicy marinara. Experimenting with your sauce can completely change the flavor profile and keep this dish exciting for repeated meals!

With these variations, your Sweet Potato Gnocchi won’t just be a meal; it’ll be a thrilling culinary adventure! Don’t forget to try some of these tasty ideas as you load your plate high with comforting deliciousness.

Sweet Potato Gnocchi

Sweet Potato Gnocchi Recipe FAQs

How do I choose ripe sweet potatoes for my gnocchi?
Absolutely! When selecting sweet potatoes, look for ones that are firm and free from blemishes or soft spots. A little bit of dryness on the skin is fine, but avoid any that have sprouted or show signs of decay, as they can affect the texture and sweetness of your Sweet Potato Gnocchi.

How should I store leftover Sweet Potato Gnocchi?
You can store your cooked Sweet Potato Gnocchi in an airtight container in the fridge for up to 3 days. When you’re ready to enjoy them again, reheat gently in a skillet with a bit of butter over medium heat, which revitalizes the flavor while keeping them pillowy and delicious.

Can I freeze Sweet Potato Gnocchi, and how?
Very! To freeze uncooked gnocchi, lay them out on a baking sheet lined with parchment paper and place them in the freezer until solid, about 1 to 2 hours. Once frozen, transfer them to a freezer-safe bag and store for up to 2 months. When you’re ready to cook, drop the frozen gnocchi directly into boiling water and add a couple of extra minutes to the cooking time for perfectly fluffy results.

What should I do if my gnocchi is too sticky or mushy?
If your Sweet Potato Gnocchi dough ends up too sticky, it could be because there’s too much moisture in the sweet potatoes or not enough flour. I recommend sprinkling in more flour gradually until the dough is manageable but still soft. On the other hand, if they become mushy while cooking, ensure they float to the surface and cook for just an additional 1-2 minutes to avoid overcooking.

Are there any dietary considerations for this recipe?
Certainly! If you have dietary restrictions, you can make the Sweet Potato Gnocchi gluten-free by substituting the all-purpose flour with a gluten-free blend. Also, the recipe contains eggs and dairy (Parmesan cheese), so be mindful of allergies. For a vegan version, you might try substituting the egg with a flaxseed mixture (1 tablespoon of ground flaxseed mixed with 2.5 tablespoons of water) and using nutritional yeast instead of Parmesan.

How do I reheat frozen cooked gnocchi effectively?
To reheat frozen cooked gnocchi, simmer them in boiling water for about 3 to 5 minutes until they float to the surface, indicating they are warmed through. For a deliciously crispy twist, you can also sauté them in a skillet with a touch of olive oil or butter for a few minutes, achieving that golden exterior while keeping the insides tender.

Delicious Sweet Potato Gnocchi to Elevate Your Dinner Game

Experience the comforting flavors of Sweet Potato Gnocchi, a delightful twist on a classic dish that will impress your family and friends.

  • Microwave
  • fork
  • Mixing Bowl
  • Potato Ricer
  • skillet
  • Floured Surface
  • Gnocchi Board or Fork
  • Large Pot
  • slotted spoon

For the Gnocchi

  • 2 medium sweet potatoes (p peeled and scrubbed)
  • 1 large egg (binds ingredients)
  • 1/2 cup Parmesan cheese (freshly grated)
  • 3/4 cup King Arthur Unbleached All-Purpose Flour (plus more for rolling)

For Frying

  • 2 tablespoons butter (for frying)

Preparation Steps

  1. Scrub and dry the sweet potatoes, then pierce them in several places with a fork. Microwave on full power for 8 to 9 minutes until tender or bake in a preheated 425°F oven for about 45 to 60 minutes.
  2. Once the sweet potatoes are cool enough to touch, carefully slice them lengthwise and scoop out the flesh using a spoon.
  3. Using a potato ricer or a fork, press or mash the sweet potato flesh until it is light and fluffy, free of lumps.
  4. In a mixing bowl, blend the cooled sweet potato flesh with one large egg, ensuring it is well combined.
  5. In a separate small bowl, whisk together the freshly grated Parmesan and the all-purpose flour. Gently mix this flour mixture into the sweet potato and egg blend until a soft dough forms.
  6. Once your dough is formed, cover it with plastic wrap and let it rest for about 10 minutes.
  7. Divide the rested dough into three equal pieces, then roll each piece into smaller sections about 1/2″ wide and 1″ long.
  8. Roll each gnocchi piece in a bit of flour and use a gnocchi board or fork to create grooves on each piece.
  9. Gently drop the shaped gnocchi into boiling water and stir lightly to prevent them from sticking. Once floating, cook for an additional 1 to 2 minutes.
  10. Using a slotted spoon, carefully transfer the cooked gnocchi to hot butter in your skillet and fry until golden brown.

Serve warm with additional Parmesan or your favorite sauce.

Main Dishes
Italian
comfort food, easy dinner, Family Recipes, homemade gnocchi, Pasta, Sweet Potato Gnocchi

Filed Under: Main Dishes

Irresistible Pumpkin Spice Latte Bars for Cozy Snacking

September 11, 2025 by grace bellamy Leave a Comment

As the crisp autumn air settles in, the allure of warm, spiced treats becomes irresistible. Recently, I decided to channel my love for seasonal flavors into a delightful batch of Pumpkin Spice Latte Bars. These bars capture the essence of cozy coffee shop vibes right from your own kitchen, making them the perfect sweet fix for fall gatherings or a quiet afternoon at home. Not only are they a breeze to whip up—taking just about an hour from start to finish—but they also offer an impressive creamy espresso glaze that elevates this treat from ordinary to extraordinary. Picture yourself indulging in these scrumptious bars with a cup of your favorite brew. Are you ready to dive into this deliciously simple recipe?

Pumpkin Spice Latte Bars

Why are these bars so irresistible?

Simplicity at its finest: With just a few pantry staples, you’ll have these delightful Pumpkin Spice Latte Bars ready in no time. Heartwarming flavors: The harmonious blend of pumpkin purée and warm spices evokes the cozy feel of autumn, making them a seasonal favorite. Versatile treat: Perfect for gatherings or a break with your morning coffee, these bars are sure to impress. Time-saving: Prepping and baking takes just an hour, allowing you to enjoy them sooner! If you’re craving more fall-inspired creations, why not explore our Bourbon Pumpkin Pie or Apple Cinnamon Muffins for some delicious variety?

Pumpkin Spice Latte Bars Ingredients

For the Batter

  • Granulated sugar – adds sweetness and moisture to these Pumpkin Spice Latte Bars.
  • Pumpkin purée – brings a rich, creamy texture and the quintessential fall flavor to your bars.
  • Vegetable oil – ensures your bars stay moist and tender throughout.
  • Unsalted butter – enhances the flavor and adds a bit of richness to the batter.
  • Pumpkin pie spice – a warm mix of spices that evokes the essence of the season.
  • Salt – balances the sweetness and elevates all the flavors in the bars.
  • Large egg – acts as a binder, helping the bars achieve the perfect structure.
  • All-purpose flour – provides stability and helps give the bars their delightful texture.
  • Baking powder – gives the bars a lovely lift, making them fluffy and airy.

For the Glaze

  • Milk – adds creaminess to the glaze and helps dissolve the espresso powder.
  • Espresso powder – infuses a rich coffee flavor that complements the pumpkin perfectly.
  • Salt (for the glaze) – a pinch helps to bring out the flavors and enhance the overall taste.
  • Confectioners’ sugar – sweetens the glaze and adds a smooth texture, making it irresistible.

Feel free to gather these ingredients and get ready for a cozy baking experience that captures the warmth of autumn in every bite!

Step‑by‑Step Instructions for Pumpkin Spice Latte Bars

Step 1: Prepare the Pan
Preheat your oven to 350°F (175°C). While it warms, grease an 8-inch square pan or line it with parchment paper, ensuring to grease the parchment as well. This will prevent the delicious Pumpkin Spice Latte Bars from sticking, making for easy removal once they’re baked!

Step 2: Mix the Base
In a medium saucepan, mix together the granulated sugar, pumpkin purée, vegetable oil, butter, pumpkin pie spice, and salt. Place the saucepan over medium heat, stirring constantly until the butter melts and the mixture is smooth and well combined—this should take about 3 to 5 minutes.

Step 3: Cool the Mixture
Remove the saucepan from heat and allow the mixture to cool for 10 to 15 minutes. Stir occasionally to help it cool evenly, ensuring that it feels warm but not hot to the touch before moving on to the next step. This cooling period is crucial for the egg to be added safely without cooking it.

Step 4: Add the Egg
Once the mixture has cooled, crack in a large egg and stir to fully combine. It’s important to mix this well to ensure a uniform texture throughout your Pumpkin Spice Latte Bars. The egg will act as a binding agent, giving the bars their perfect structure.

Step 5: Incorporate the Dry Ingredients
Now, add in the all-purpose flour and baking powder, stirring until the batter is completely smooth and no streaks of flour remain. This mixture will become thick and rich, embodying the comforting flavors of fall.

Step 6: Transfer to the Pan
Pour the batter into your prepared pan, and use a spatula to smooth it into an even layer. Make sure to spread it evenly across the corners so every bite of your Pumpkin Spice Latte Bars is delightful.

Step 7: Bake the Bars
Place the pan into the preheated oven and bake for 32 to 36 minutes. You’ll know they’re done when the bars look set and a toothpick inserted in the center comes out clean. The enticing aroma of pumpkin and spices will fill your kitchen!

Step 8: Cool the Bars
After baking, let the bars cool in the pan for about 15 minutes. Once they’re cool enough to handle, gently loosen the edges and transfer the bars to a wire rack. Allow them to cool completely, which will help them firm up for cutting.

Step 9: Prepare the Glaze
In a medium microwave-safe bowl, whisk together the milk, espresso powder, and a pinch of salt. Microwave in 10-second intervals, stirring in between, until the espresso powder dissolves completely. This will create a luscious base for the glaze.

Step 10: Finish the Glaze
Add the confectioners’ sugar to the espresso mixture and stir well until it becomes a smooth glaze. Pour this heavenly glaze over the cooled Pumpkin Spice Latte Bars, spreading it to the edges for that beautiful finish. Allow the glaze to set before cutting the bars to enjoy them!

Pumpkin Spice Latte Bars

Pumpkin Spice Latte Bars Variations

Feel free to get creative and personalize your Pumpkin Spice Latte Bars to fit your unique tastes and dietary needs!

  • Gluten-Free: Substitute all-purpose flour with your favorite gluten-free blend for a celiac-friendly option that doesn’t skimp on flavor.

  • Dairy-Free: Use coconut oil instead of butter and almond or oat milk for the glaze to keep it dairy-free while enjoying all the cozy flavors.

  • Maple Sweetener: Swap out granulated sugar for pure maple syrup for a natural sweetness that adds a delightful depth to each bite.

Dive into flavor! The maple will infuse a gentle earthiness that complements the pumpkin beautifully.

  • Nutty Texture: Add 1/2 cup of chopped nuts, such as walnuts or pecans, to the batter for a crunchy surprise that elevates the bars with added flavor and nutrients.

  • Spicy Kick: Mix in a pinch of cayenne pepper or red pepper flakes to the batter for a subtle heat that contrasts wonderfully with the sweetness of the bars.

  • Chocolate Drizzle: Top the cooled bars with a drizzle of melted dark chocolate for a decadent twist that pairs harmoniously with the pumpkin and spices.

  • Pumpkin Seed Topping: Sprinkle toasted pumpkin seeds on top of the glaze for a festive, crunchy finish that adds both flavor and seasonal charm.

For more fall-inspired ideas, try pairing these bars with our Apple Cinnamon Muffins or indulge in a warm slice of Bourbon Pumpkin Pie for a cozy autumn treat!

Make Ahead Options

These Pumpkin Spice Latte Bars are perfect for meal prep! You can prepare the batter up to 24 hours in advance by mixing all the ingredients up to Step 5. Transfer it to an airtight container and refrigerate it until you’re ready to bake. This not only saves you time before those busy weeknights but ensures that your bars will be just as flavorful when baked. For the glaze, you can mix the milk, espresso powder, and salt and store it separately in the fridge for up to 3 days. When ready to enjoy, simply bake the bars and finish with the prepared glaze after cooling, resulting in a delicious treat that will lighten your cooking load while still tasting homemade!

How to Store and Freeze Pumpkin Spice Latte Bars

  • Room Temperature: Store the bars in an airtight container for up to 3 days. This keeps them soft and fresh, perfect for a sweet snack anytime you crave them.
  • Fridge: If you prefer a longer shelf life, these Pumpkin Spice Latte Bars can be stored in the fridge for up to a week. Be sure to wrap them tightly to prevent drying out.
  • Freezer: For extended storage, freeze the bars wrapped in plastic wrap and foil for up to 3 months. Thaw them overnight in the fridge before enjoying!
  • Reheating: When you’re ready to indulge, gently warm them in the microwave for about 10-15 seconds to bring back that freshly baked goodness.

What to Serve with Pumpkin Spice Latte Bars

These delectable treats are perfect for cozy gatherings, enhancing the warmth of fall flavors in every bite.

  • Warm Apple Cider: A hug in a mug, this seasonal favorite brings a comforting sweetness that pairs beautifully with the pumpkin and spice.

  • Vanilla Ice Cream: Smooth and creamy, a scoop of vanilla ice cream complements the spiced bars, creating a delightful contrast in temperature.

  • Toasted Pecans: The crunch of toasted pecans adds a wonderful texture, wonderfully enhancing the soft bars while bringing a nutty richness.

  • Coffee: A classic pairing, a fresh cup of brewed coffee or espresso amplifies the flavors of the bars, making each bite even more indulgent.

  • Whipped Cream: Fluffy and light, a dollop of freshly whipped cream can add a touch of indulgence, elevating the dessert to café-style treat status.

  • Cranberry Sauce: A tangy fruit sauce can add a burst of brightness and acidity, balancing the sweetness of the bars with a refreshing zing.

  • Chai Tea: With its blend of warm spices, chai tea harmonizes beautifully with the pumpkin, enhancing that cozy, autumn experience.

  • Pumpkin Spice Latte: Dive even deeper into the fall spirit by serving these bars with their namesake drink for a delightful combo that celebrates the season!

Expert Tips for Pumpkin Spice Latte Bars

  • Use Fresh Pumpkin Purée: Don’t settle for canned if you can help it! Fresh purée adds a richer flavor and creaminess to your Pumpkin Spice Latte Bars.

  • Mind the Temperature: Let the melted mixture cool sufficiently before adding the egg. If it’s too hot, you risk scrambling the egg and ruining your texture.

  • Avoid Overmixing: Once you add the flour, mix just until incorporated. Overmixing can lead to tough bars rather than the tender, soft treat you want!

  • Let Them Cool Completely: Patience is key! Allow the bars to cool completely before glazing and cutting; this helps them set properly and makes them easier to slice.

  • Check for Doneness: Use the toothpick test! Insert it into the center of the bars; it should come out clean or with a few crumbs—indicating perfectly baked Pumpkin Spice Latte Bars.

Pumpkin Spice Latte Bars

Pumpkin Spice Latte Bars Recipe FAQs

How do I choose the best pumpkin purée for my bars?
Absolutely! For the best results, look for pumpkin purée that is deep orange in color and free from any dark spots. Fresh purée offers a richer flavor than canned, but if you’re using canned, make sure it’s 100% pure pumpkin with no added sugars or spices.

What’s the best way to store leftover Pumpkin Spice Latte Bars?
Very! Store your bars in an airtight container at room temperature for up to 3 days. If you’d like them to last longer, pop them in the fridge, where they can stay fresh for up to a week. Just make sure to wrap them tightly to prevent them from drying out.

Can I freeze these Pumpkin Spice Latte Bars? How?
Absolutely! To freeze, first cool the bars completely. Then, wrap them tightly in plastic wrap and then in foil to prevent freezer burn. They will keep well for up to 3 months. When you’re ready to enjoy, simply thaw them in the fridge overnight, or for a quicker option, let them sit at room temperature for a couple of hours.

What should I do if my bars come out too dry?
Very common! If your Pumpkin Spice Latte Bars come out dry, it may be due to overbaking. Next time, be sure to check them a few minutes before the end of the baking time; the toothpick should come out with a few moist crumbs. Additionally, always measure flour accurately; too much can lead to a dense texture.

Are these bars safe for pets or people with allergies?
It’s important to be cautious. The ingredients in Pumpkin Spice Latte Bars, like pumpkin and sugar, may not harm pets in small quantities but are not recommended. For those with allergies, be aware that the recipe contains eggs, dairy, and gluten. Always check with your guests to ensure they can enjoy these delectable treats without concerns!

Irresistible Pumpkin Spice Latte Bars for Cozy Snacking

These Pumpkin Spice Latte Bars are a delightful blend of fall flavors, perfect for cozy snacking with a warm beverage.

  • 8-inch square pan
  • Medium saucepan
  • Whisk
  • spatula
  • Microwave-safe bowl

For the Batter

  • 1 cup granulated sugar
  • 1 cup pumpkin purée
  • 1/2 cup vegetable oil
  • 1/4 cup unsalted butter (melted)
  • 1 teaspoon pumpkin pie spice
  • 1/2 teaspoon salt
  • 1 large egg
  • 1 cup all-purpose flour
  • 1 teaspoon baking powder

For the Glaze

  • 2 tablespoons milk
  • 1 tablespoon espresso powder
  • 1/4 teaspoon salt (for the glaze)
  • 1 cup confectioners’ sugar

Step-by-Step Instructions

  1. Preheat your oven to 350°F (175°C). Grease an 8-inch square pan or line it with parchment paper, greasing the parchment as well.
  2. In a medium saucepan, mix together granulated sugar, pumpkin purée, vegetable oil, melted butter, pumpkin pie spice, and salt. Heat over medium, stirring until combined, about 3 to 5 minutes.
  3. Remove from heat and let cool for 10 to 15 minutes, stirring occasionally until warm but not hot.
  4. Crack in a large egg and stir to combine well.
  5. Add the all-purpose flour and baking powder, stirring until completely smooth without streaks of flour.
  6. Pour the batter into the prepared pan and smooth it into an even layer.
  7. Bake in the preheated oven for 32 to 36 minutes, until set, and a toothpick comes out clean.
  8. Let the bars cool in the pan for about 15 minutes, then transfer them to a wire rack to cool completely.
  9. In a microwave-safe bowl, whisk together milk, espresso powder, and a pinch of salt. Microwave in 10-second intervals, stirring until espresso powder dissolves.
  10. Stir in confectioners’ sugar to form a smooth glaze and pour over cooled bars.

For best results, use fresh pumpkin purée, and ensure the melted mixture cools before adding the egg to prevent scrambling.

Dessert
American
baking, coffee treats, cozy snacks, Fall Desserts, Pumpkin Recipes, Pumpkin Spice Latte Bars

Filed Under: Dessert

Chili Crisp Cottage Cheese Flatbreads: Flavor-Packed Delight

September 11, 2025 by grace bellamy Leave a Comment

Every now and then, I stumble upon a recipe that feels like a cozy embrace on a busy day. Enter my Chili Crisp Cottage Cheese Flatbreads—an easy and delightful creation that will transform your weeknight dinners into something special. Packed with the goodness of cottage cheese and the zesty kick of chili crisp, these flatbreads are both a quick prep option and a crowd-pleaser, ensuring your loved ones are satisfied without the hustle of takeout. Whether you’re using them as a base for your favorite toppings or enjoying them warm straight off the skillet, they promise to bring a little joy to your table. Curious about how this simple dish can elevate your culinary game? Let’s dive in!

Chili Crisp Cottage Cheese Flatbreads

Why are Flatbreads So Irresistible?

Flavor-Packed: These flatbreads deliver a delightful combination of creamy cottage cheese and spicy chili crisp, creating an explosion of flavor in every bite.

Easy to Make: With straightforward steps and just a food processor, you’ll have homemade flatbreads ready in no time, perfect for any weeknight.

Versatile Base: Use them as a canvas for your favorite toppings—think roasted veggies, grilled meats, or even a drizzle of hummus for a fresh twist!

Healthy Twist: Packed with protein from cottage cheese, these flatbreads provide a nutritious alternative to quick takeout options.

Crowd-Pleaser: Whether served at a casual gathering or a cozy family dinner, these flatbreads are sure to impress and satisfy everyone at your table.

Ready to elevate your recipe repertoire? Check out how to make homemade bread for even more delicious creations!

Chili Crisp Cottage Cheese Flatbreads Ingredients

For the Dough

  • Cottage cheese – 3/4 cup (170g), whole milk preferred for creaminess.
  • Warm water – 1/2 cup (114g), helps activate the yeast for a fluffy texture.
  • Instant yeast – 2 1/2 teaspoons, the key ingredient for that delightful rise.
  • Granulated sugar – 1 1/2 teaspoons, balances the flavors and supports yeast growth.
  • Table salt – 1 1/4 teaspoons, enhances the overall flavor of the flatbreads.
  • Cilantro – 1 cup (14g), leaves and tender stems add freshness and fragrance; dill or parsley can substitute.
  • King Arthur Unbleached Bread Flour – 2 1/4 cups (270g), provides the perfect structure for your flatbreads.

For the Flavor

  • Chili crisp – 1 tablespoon (22g), plus more for brushing—this is what gives our flatbreads their spicy kick!

For Cooking

  • Vegetable oil – for brushing or greasing, ensures the flatbreads cook perfectly without sticking.

Step‑by‑Step Instructions for Chili Crisp Cottage Cheese Flatbreads

Step 1: Prepare the Dough
In a food processor, combine 3/4 cup cottage cheese, 1/2 cup warm water, 2 1/2 teaspoons instant yeast, 1 1/2 teaspoons granulated sugar, and 1 1/4 teaspoons table salt. Process for about 20 to 30 seconds until the mixture is smooth and creamy, ensuring all ingredients are well incorporated before moving on to the next step.

Step 2: Add Flour and Herbs
Next, add 1 cup of cilantro, 2 1/4 cups of bread flour, and 1 tablespoon of chili crisp to the food processor. Pulse the ingredients in 8 to 10 second bursts until the dough starts to come together and pulls away from the sides of the bowl, forming a slightly sticky ball. This should take around 30 seconds; if the mixture seems too wet, add a little more flour.

Step 3: Let the Dough Rise
Scrape the dough into a lightly greased bowl, covering it with a clean kitchen towel or plastic wrap. Allow the dough to rise in a warm, draft-free area until it has increased in volume by about 1 1/2 times, which should take approximately 30 to 45 minutes. You’ll know it’s ready when the dough is puffy and has a slightly airy texture.

Step 4: Knead the Dough
Once risen, transfer the dough to a lightly floured work surface. Gently knead the dough for about 30 to 60 seconds, adding flour as necessary to prevent stickiness. The goal is to create a smooth and springy texture that springs back when pressed. This step is crucial for developing the gluten structure for our chili crisp cottage cheese flatbreads.

Step 5: Shape the Dough Balls
Divide the kneaded dough into 4 equal pieces, roughly 150g each, and shape each piece into a tight ball. Cover the balls with plastic wrap or an overturned bowl to keep them moist as they rest for approximately 15 to 30 minutes. The dough should become puffier and relax, making it easier to roll out later.

Step 6: Cook the Flatbreads on the Stovetop
Heat a large cast iron skillet over medium-high heat. Take one dough ball and stretch or roll it into a 7″ to 8″ round. Brush the top surface with vegetable oil, then place it oil-side down in the skillet. Cook for about 1 to 2 minutes until the bottom is golden brown and bubbles form on top. Flip carefully and cook the second side for another 1 to 2 minutes until brown.

Step 7: Broil the Flatbreads
For a different cooking method, preheat your broiler and grease a baking sheet with 1 1/2 teaspoons of vegetable oil. Place 2 balls of dough onto the sheet, coat with oil, and stretch into 7″ to 8″ rounds. Broil until golden brown on top for about 1 to 3 minutes, then flip and broil until the other side is evenly golden, about 1 to 2 minutes. Wrap the cooked flatbreads in a kitchen towel to keep warm.

Step 8: Finish with Chili Crisp
As a final touch, brush the warm chili crisp cottage cheese flatbreads with a little extra chili crisp before serving. This will add a delightful spicy kick that enhances both the flavor and appeal of your delicious creations, making them irresistible straight from the skillet or oven!

Chili Crisp Cottage Cheese Flatbreads

Make Ahead Options

These Chili Crisp Cottage Cheese Flatbreads are perfect for busy weeknights and can easily be prepped in advance! You can prepare the dough up to 24 hours ahead by following steps 1 through 4, then refrigerate it after kneading for optimal flavor development. Just be sure to cover the bowl tightly to prevent drying out. When you’re ready to enjoy, let the dough sit at room temperature for about 30 minutes before dividing and cooking as directed in the remaining steps. This way, you’ll have warm, flavorful flatbreads on hand with minimal effort, keeping your weeknight meals quick and satisfying!

Chili Crisp Cottage Cheese Flatbreads Variations

Feel free to make these flatbreads your own by playing with flavor and texture!

  • Herb Infusion: Swap cilantro for fresh dill or parsley for an entirely new taste. The aromatic herbs will bring a refreshing note to your flatbreads.
  • Whole Wheat: Use whole wheat flour instead of bread flour for a nuttier flavor and added fiber. It will give your flatbreads a heartier texture that complements any topping beautifully.
  • Spicy Heat: Add extra chili crisp directly into the dough for an even spicier kick. This bold move guarantees a zesty explosion in every bite, perfect for spice enthusiasts!
  • Cheesy Delight: Mix in shredded cheese, like mozzarella or feta, into the dough. The melted pockets provide an addictive gooeyness that elevates the overall experience.
  • Vegetable Boost: Fold in finely chopped spinach or roasted red peppers for a nutritious touch. These vibrant veggies will not only enhance the visual appeal but also add a think outside the box flavor twist!
  • Garnished with Seeds: Sprinkle sesame or poppy seeds on top before cooking for added crunch and nutty flavor. They provide that delightful crispy bite that complements the soft texture inside.
  • Sweet Spin: Drizzle honey or spread a layer of cream cheese on top after cooking for a sweet alternative. Pairing this with spicy toppings creates a unique sweet-savory balance.
  • Gluten-Free Option: Substitute bread flour with a gluten-free all-purpose blend to make this recipe accessible for everyone. Now, no one misses out on this delightful experience!

Dive into more delightful options, and don’t forget to explore my tempting guide on how to make homemade bread for that effortless touch in your kitchen!

What to Serve with Chili Crisp Cottage Cheese Flatbreads

Imagine a cozy meal where each bite is bursting with flavor, offering warmth and comfort to your dinner table.

  • Roasted Vegetables: Caramelized carrots and zucchini bring sweetness and a splash of color, balancing the spice of the flatbreads beautifully.
  • Cucumber Salad: Crisp, refreshing cucumbers with a light vinaigrette add a delightful crunch, ensuring a vibrant contrast with the warm flatbreads.
  • Spicy Hummus: A chunky, garlicky hummus offers a rich dip that harmonizes with the chili crisp, making each mouthful even more enjoyable.
  • Greek Yogurt Sauce: The cool, creamy texture of a yogurt sauce drizzled with lemon and herbs elevates the overall dish, providing a refreshing finish.
  • Avocado Slices: Slices of creamy avocado sprinkled with lime juice enhance the richness and add a luxurious touch to your meal.
  • Sweet Mango Chutney: The sweetness of mango chutney balances the spicy flatbreads, creating a symphony of flavors that tantalizes the palate.
  • Craft Beer: A light, crisp pale ale offers a refreshing contrast to the rich flavors of the flatbreads, making it the perfect pairing for this meal.
  • Chili Crisp Drizzle: For those who crave an extra kick, a simple drizzle of additional chili crisp over the flatbreads enhances the bold flavors.

How to Store and Freeze Chili Crisp Cottage Cheese Flatbreads

Room Temperature: Store any leftover flatbreads in an airtight container at room temperature for up to 2 days. They’re best enjoyed fresh but can last a little longer.

Fridge: For extended freshness, place the flatbreads in the fridge for up to 5 days. Wrap them in plastic wrap or store in an airtight container to prevent drying out.

Freezer: Freeze the flatbreads for up to 3 months. Individually wrap each flatbread in plastic wrap and then place them in a resealable freezer bag. This keeps them fresh!

Reheating: To reheat, warm the flatbreads in a skillet over medium heat for 1-2 minutes on each side or in a toaster oven until they are hot and slightly crispy, bringing back their delightful texture.

Expert Tips for Chili Crisp Cottage Cheese Flatbreads

Watch the Dough Rise: Ensure your dough rises in a warm, draft-free area to achieve that perfect puffiness; it’s essential for fluffy flatbreads.

Don’t Over-process: When mixing in the flour, use short pulses to avoid overworking the dough, which can result in tough flatbreads.

Perfect Cooking Temp: Keep your skillet at medium-high heat—you want a good sear without burning; adjust as necessary to achieve that golden brown color.

Resting is Key: Allow the shaped dough balls to relax; this makes rolling them out much easier and contributes to a better texture in your chili crisp cottage cheese flatbreads.

Experiment with Toppings: Feel free to get creative with your toppings or dips; roasted vegetables or a drizzle of yogurt can elevate these flatbreads even further.

Chili Crisp Cottage Cheese Flatbreads

Chili Crisp Cottage Cheese Flatbreads Recipe FAQs

What type of cottage cheese should I use?
Absolutely! For the best flavor and texture, I recommend using whole milk cottage cheese. It gives your flatbreads a creaminess that’s hard to beat. If you only have low-fat or non-fat, you can still use those, but they might be less rich.

How should I store leftover flatbreads?
To retain their freshness, store any leftover flatbreads in an airtight container at room temperature for up to 2 days. If you want to keep them longer, it’s best to refrigerate them, where they’ll last up to 5 days. Just wrap them well in plastic wrap or place them in an airtight container to prevent them from drying out.

Can these flatbreads be frozen?
Yes! You can freeze the chili crisp cottage cheese flatbreads for up to 3 months. Here’s how: First, let them cool completely. Then, wrap each flatbread individually in plastic wrap to prevent freezer burn, and place them into a resealable freezer bag. When you’re ready to enjoy, just thaw them in the fridge overnight or reheating directly from frozen in a skillet for that freshly-cooked taste!

What should I do if my dough isn’t rising?
Very! If your dough isn’t rising, it could be due to a few issues. First, make sure your yeast is fresh—expired yeast won’t bubble up. You can test it by combining it with warm water and sugar; if it doesn’t froth within 5-10 minutes, it’s time to buy a new packet. Ensure the area where you’re letting the dough rise is warm, as cooler temperatures can slow the process. If it’s still not rising, try moving it to a warmer spot, like the oven (turned off) or near a sunny window.

Are these flatbreads suitable for different dietary needs?
Absolutely! These flatbreads can cater to various dietary preferences. They’re vegetarian-friendly, and if you’re looking for gluten-free options, you can experiment with gluten-free flour blends. Just ensure any toppings you choose are also aligned with your dietary restrictions. However, do note they’re not suitable for anyone with a dairy allergy due to the cottage cheese.

Chili Crisp Cottage Cheese Flatbreads: Flavor-Packed Delight

These Chili Crisp Cottage Cheese Flatbreads combine creamy cottage cheese with zesty chili crisp, perfect for quick dinners and satisfying gatherings.

  • Food Processor
  • Cast-iron skillet

For the Dough

  • 3/4 cup cottage cheese (whole milk preferred for creaminess)
  • 1/2 cup warm water (helps activate the yeast for a fluffy texture)
  • 2 1/2 teaspoons instant yeast (the key ingredient for that delightful rise)
  • 1 1/2 teaspoons granulated sugar (balances the flavors and supports yeast growth)
  • 1 1/4 teaspoons table salt (enhances the overall flavor of the flatbreads)
  • 1 cup cilantro (leaves and tender stems add freshness; dill or parsley can substitute)
  • 2 1/4 cups King Arthur Unbleached Bread Flour (provides the perfect structure for your flatbreads)

For the Flavor

  • 1 tablespoon chili crisp (plus more for brushing)

For Cooking

  • vegetable oil (for brushing or greasing)

Step-by-Step Instructions

  1. In a food processor, combine cottage cheese, warm water, instant yeast, granulated sugar, and table salt. Process for about 20 to 30 seconds until smooth.
  2. Next, add cilantro, bread flour, and chili crisp to the processor. Pulse until the dough starts to come together and pulls away from the sides.
  3. Scrape the dough into a greased bowl, cover it, and let it rise in a warm area for about 30 to 45 minutes until puffy.
  4. Transfer the risen dough to a floured surface and knead for 30 to 60 seconds until smooth and springy.
  5. Divide the dough into 4 equal pieces, shape into balls, and cover to rest for about 15 to 30 minutes.
  6. Heat a cast iron skillet over medium-high heat. Roll one dough ball into a round, brush with oil, and cook for 1 to 2 minutes per side until golden brown.
  7. For broiling, preheat the broiler, grease a baking sheet, place dough balls, stretch them, and broil until golden brown on both sides.
  8. Brush warm flatbreads with extra chili crisp before serving to enhance the flavor.

Keep the dough in a warm place to ensure optimal rising. Experiment with different toppings for more flavors.

Main Dishes
American
Chili Crisp, Cottage Cheese, crowd-pleaser, Flatbreads, quick recipes, Weeknight Dinner

Filed Under: Main Dishes

  • « Previous Page
  • 1
  • …
  • 8
  • 9
  • 10
  • 11
  • 12
  • …
  • 22
  • Next Page »
RecipeCrown

Hello, beautiful people! I’m Grace Bellamy, a foodie, traveler, and writer with wanderlust in my soul. Whether crafting recipes in my kitchen or exploring flavors around the globe, my greatest joy is helping you create healthier, happier lives, one delicious bite at a time.