RecipeCrown

Easy & Delicious Recipes

  • Home
  • Breakfast
  • Main Dishes
  • Dessert
  • About
  • Contact
You are here: Home / Archives for grace bellamy

Cinnamon Apple Cake that Whispers Comfort in Every Slice

September 7, 2025 by grace bellamy Leave a Comment

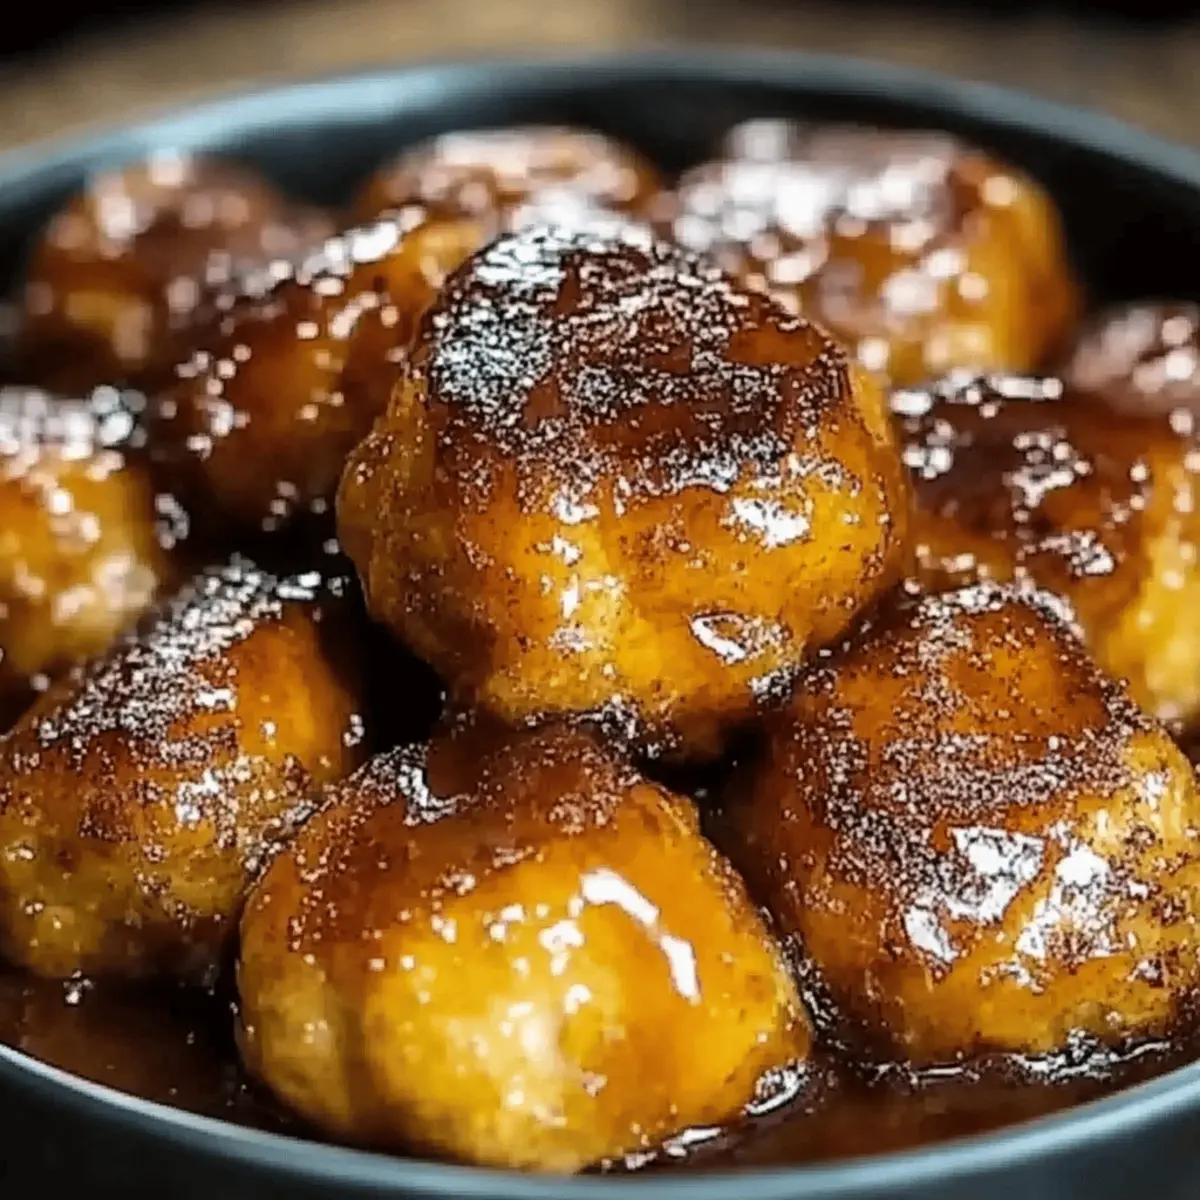
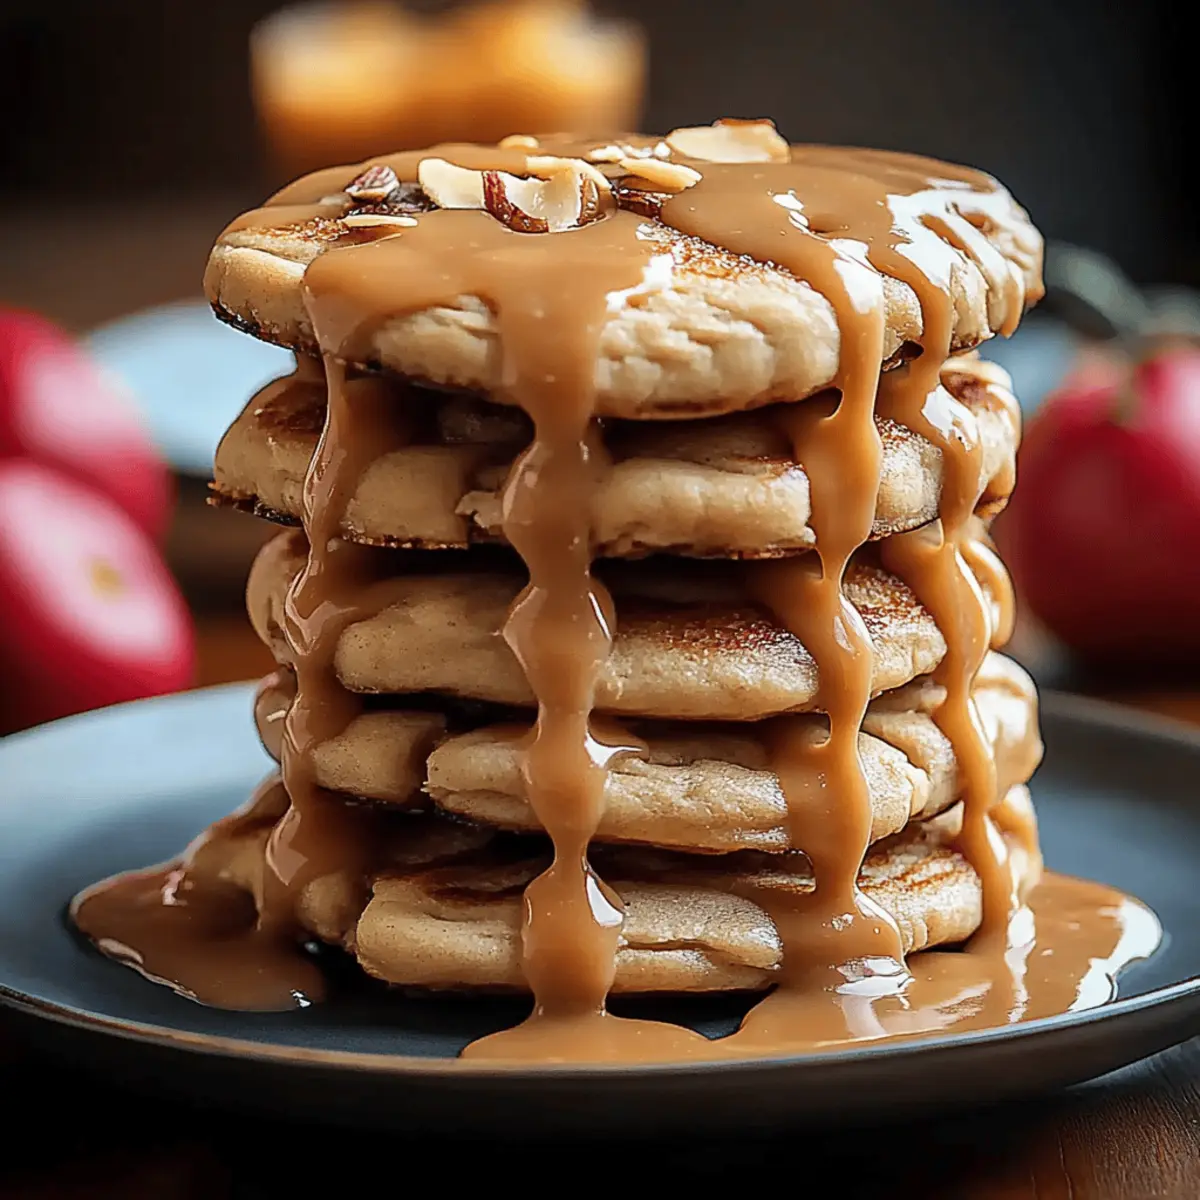
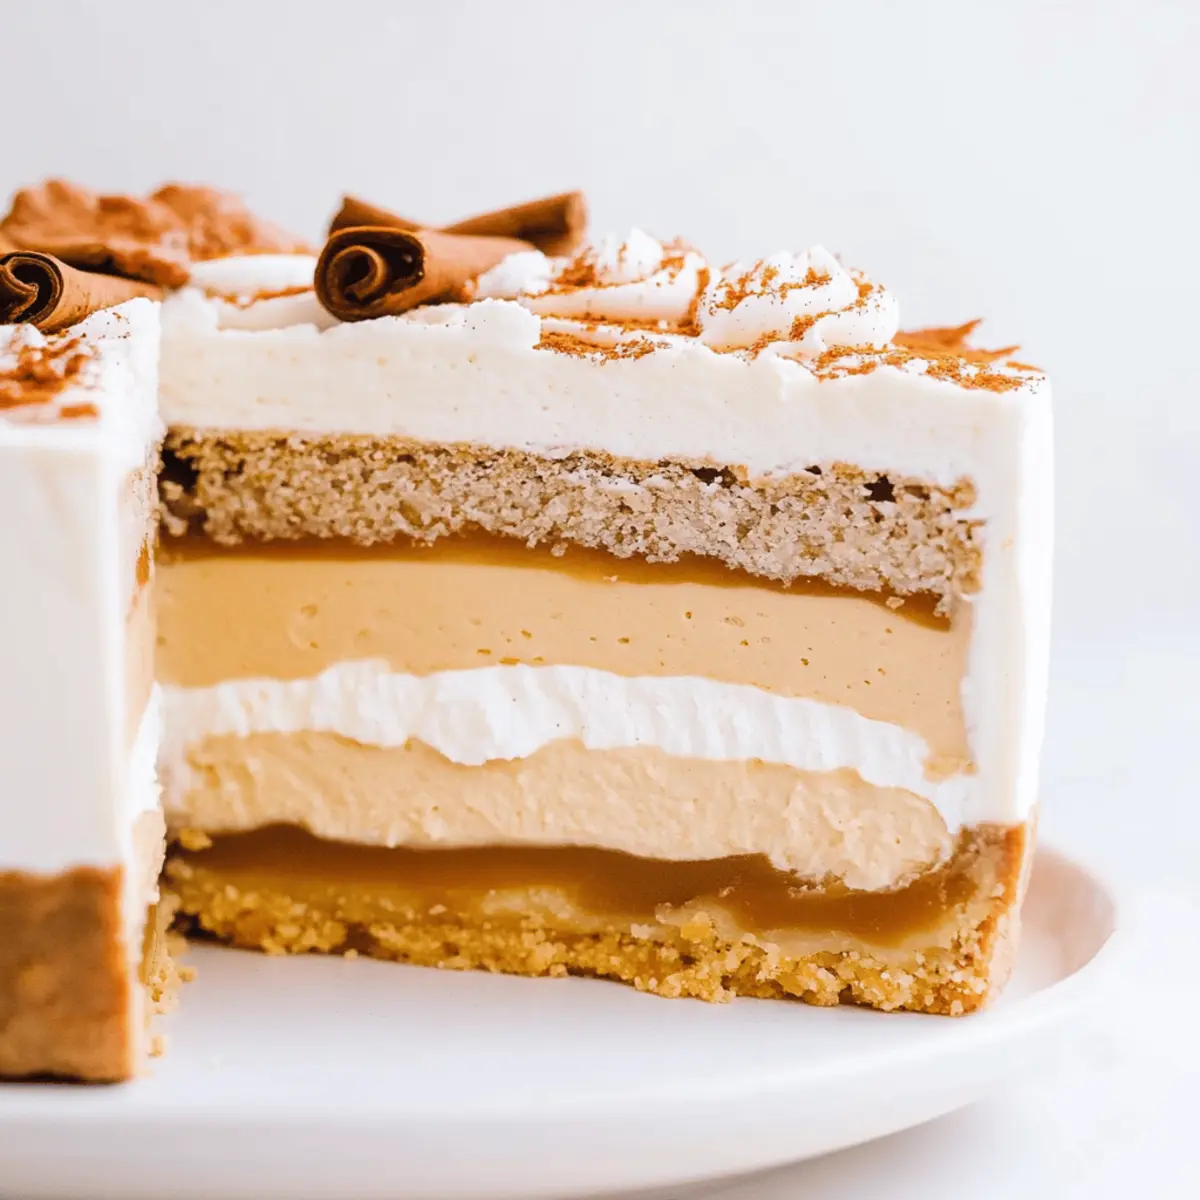
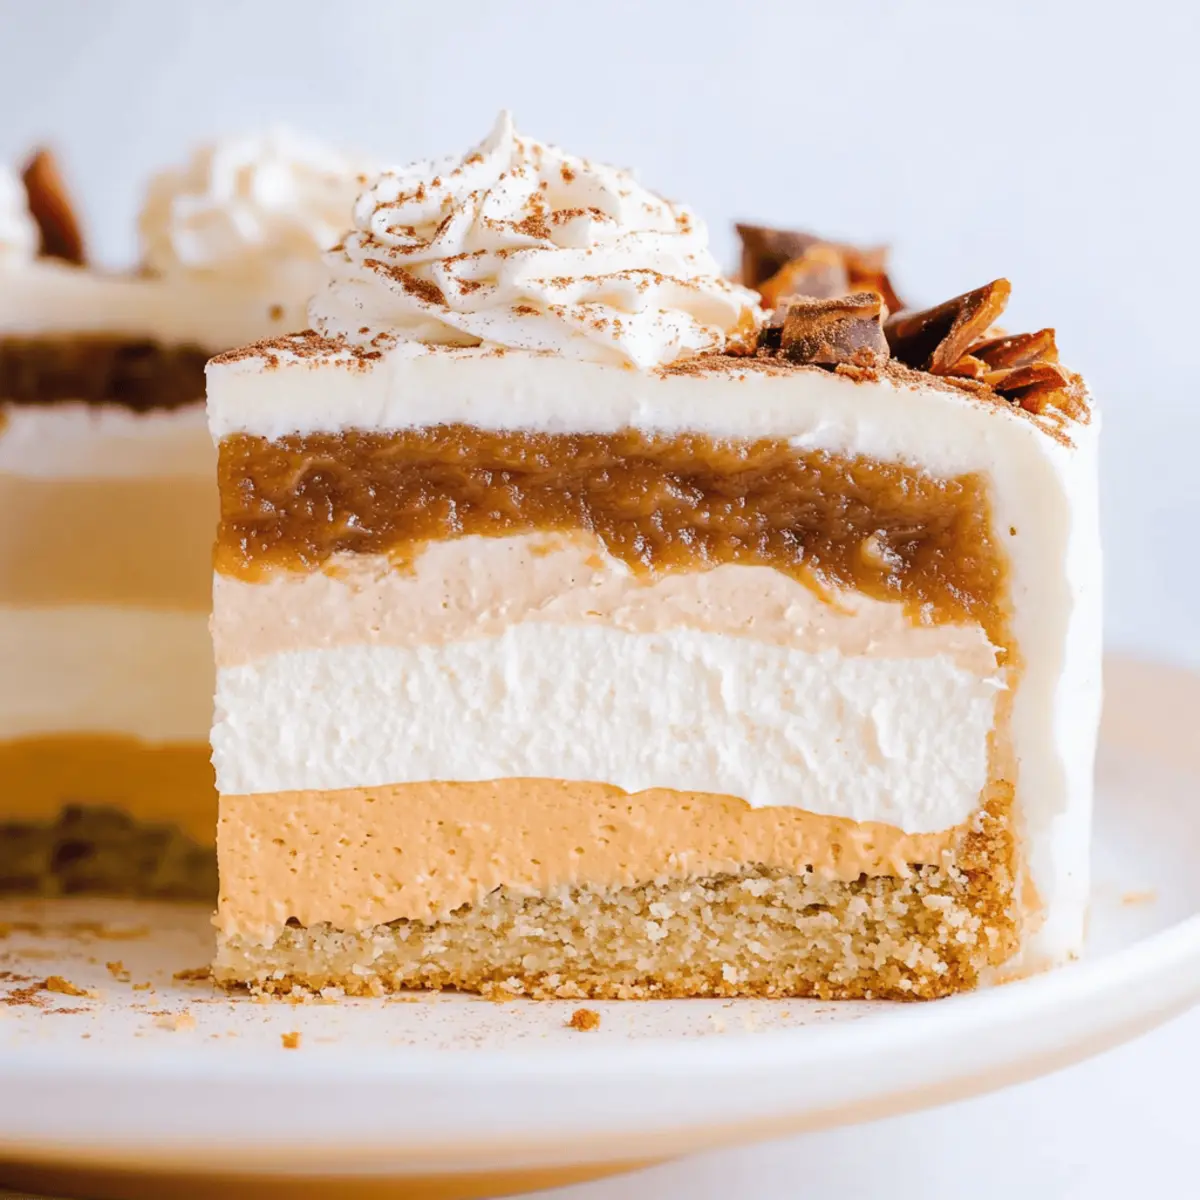
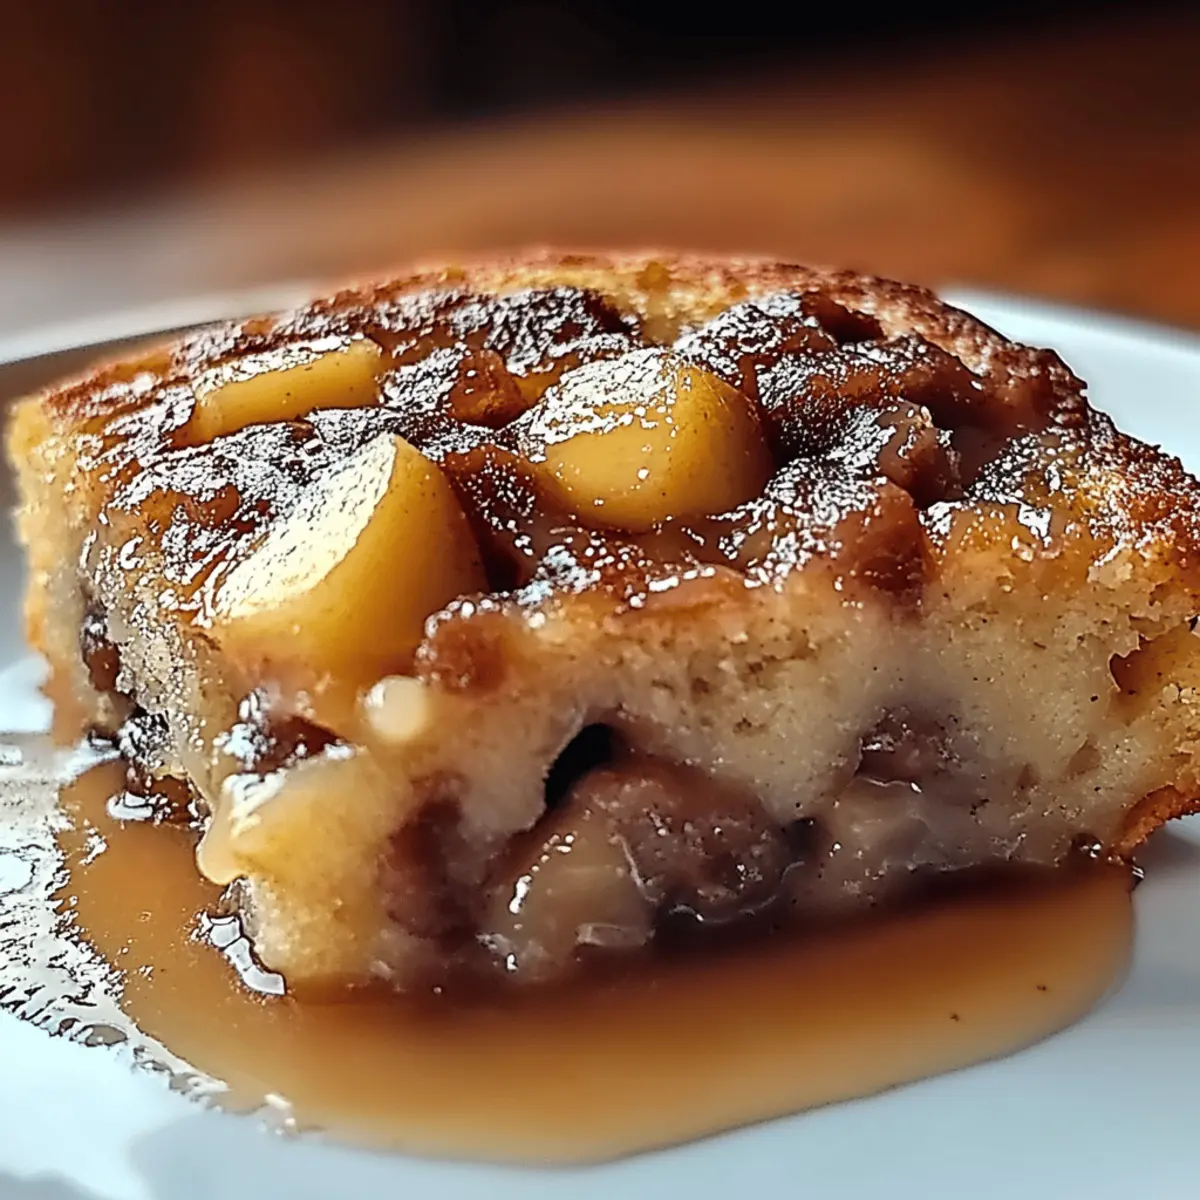
As the scent of fresh apples mingles with a hint of cinnamon wafts through the air, I find myself transported to cozy autumn afternoons spent in the kitchen. Today, I’m excited to share my beloved Cinnamon Apple Cake recipe, a delightful twist on classic comfort food that always receives rave reviews from friends and family. Not only is this cake incredibly easy to whip up, with just 15 minutes of prep time, but it also allows the natural sweetness of apples to take center stage, making it a wholesome treat perfect for any occasion. Whether you’re looking to impress during a family gathering or simply craving something warm and comforting, this cake is bound to satisfy. Ready to dive into the magic of baking? Let’s get started!

Cinnamon Apple Cake

Why is Cinnamon Apple Cake a Must-Try?

Irresistible aroma: The moment you bake this cake, the comforting scents of cinnamon and apples will fill your home, creating a cozy atmosphere.

Quick and easy: With only 15 minutes of prep time, this recipe is perfect for both novice and seasoned bakers alike.

Wholesome ingredients: Packed with fresh apples, this cake not only delights the palate but also offers a touch of nutrition—a sweet treat you can feel good about!

Versatile serving options: Whether it’s a dessert for a dinner party or a delightful afternoon snack, this cake is always a crowd-pleaser. Serve it warm or enjoy it with a scoop of ice cream for an extra special touch!

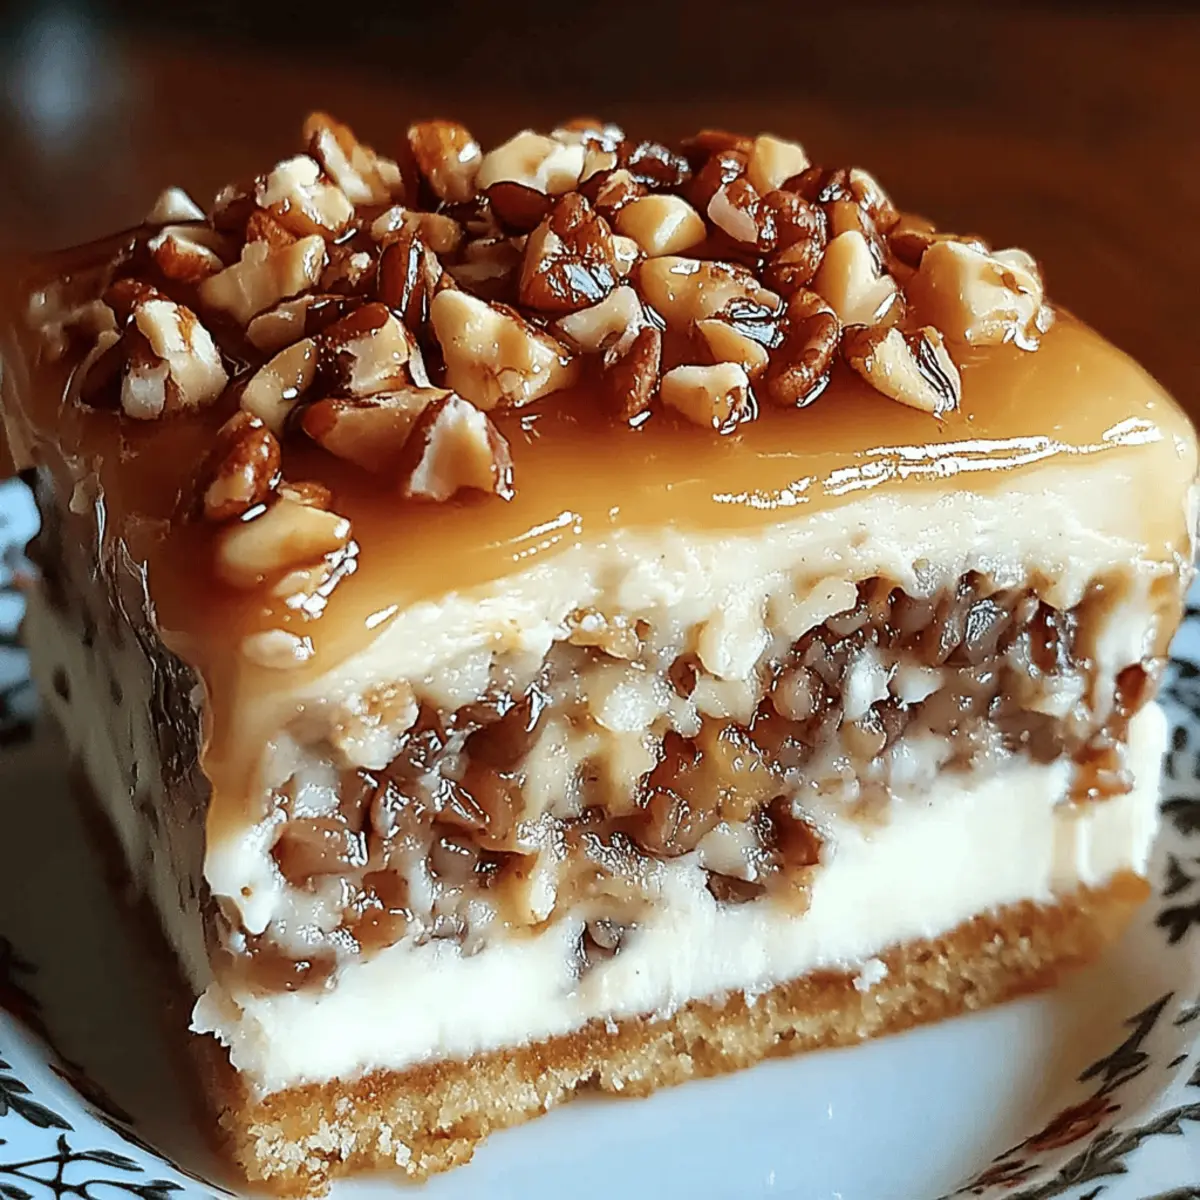
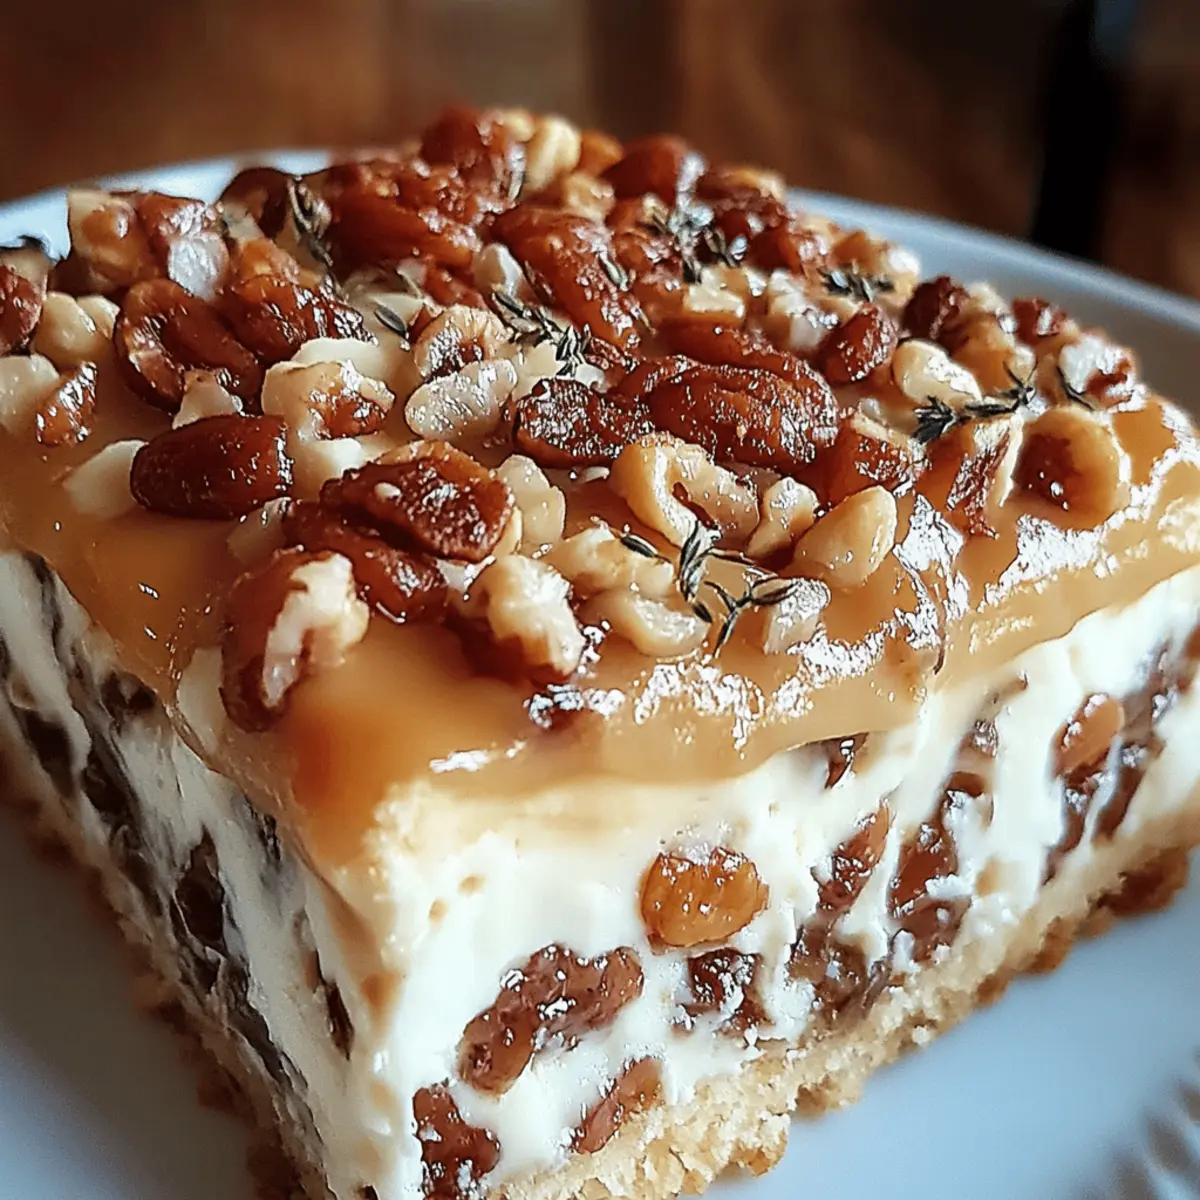
Make it your own: Feel free to add nuts or a drizzle of caramel for that personalized twist! You could also explore our other delicious dessert ideas in the Fall Dessert Collection for more inspiration.

Cinnamon Apple Cake Ingredients

• Ready to create your own slice of comfort? Here’s what you need:

For the Cake

  • All-purpose flour – a fundamental base for texture; make sure to sift for lightness.
  • Granulated sugar – balances the flavors perfectly; brown sugar can add depth if you prefer!
  • Baking powder – ensures your cake rises beautifully and stays fluffy.
  • Salt – enhances the sweetness of the cake; don’t skip it!
  • Ground cinnamon – the star spice that brings warmth and aroma to every bite.
  • Large eggs – bind the ingredients and provide moisture; room temperature eggs work best.
  • Vegetable oil – keeps the cake moist; you can substitute with melted butter for more flavor.
  • Vanilla extract – adds a lovely depth; pure vanilla extract is always a win!
  • Chopped apples – fresh, tart varieties are perfect for this cake; Granny Smith works wonders!

Optional Toppings

  • Powdered sugar – a light dusting on top adds a charming finish.
  • Whipped cream or ice cream – serves as a delicious companion for your decadent cake experience.

Embrace the comforting flavors of this Cinnamon Apple Cake and let it whisper delight in every slice!

Step‑by‑Step Instructions for Cinnamon Apple Cake

Step 1: Prepare Your Oven and Pan
Preheat your oven to 350°F (175°C) to ensure even baking. While the oven warms up, grease and flour a 9-inch round cake pan for easy release once the cake is baked. Make sure the flour coats the greased surface well to prevent sticking, setting you up for a smooth baking process.

Step 2: Mix Dry Ingredients
In a large mixing bowl, whisk together 2 cups of all-purpose flour, 1 cup of granulated sugar, 2 teaspoons of baking powder, 1 teaspoon of salt, and 1/2 teaspoon of ground cinnamon. The combination of these dry ingredients will create the perfect base for your Cinnamon Apple Cake, ensuring even distribution of flavor and leavening agents for a delightful rise.

Step 3: Combine Wet Ingredients
In a separate bowl, crack two large eggs and beat them until frothy. Now, add 1/2 cup of vegetable oil and 1 teaspoon of vanilla extract, whisking until the mixture is smooth and well combined. This rich, wet mixture acts as the perfect binder for your cake, enriching every slice with flavor.

Step 4: Fold in Apples
Gently fold 2 cups of chopped apples into the wet mixture, ensuring each piece is well-coated. These apples will add natural sweetness and moisture to your Cinnamon Apple Cake, creating that irresistible texture you love. Be careful not to overmix—just a few gentle folds will do the trick.

Step 5: Combine Wet and Dry Mixtures
Gradually pour the wet apple mixture into the dry ingredients, stirring gently until just blended. You want to mix until there are no dry pockets but be cautious not to overmix, as this could affect your cake’s tenderness. Visualize a thick, luscious batter that is studded with pieces of apple, ready for the oven.

Step 6: Pour and Smooth
Transfer the batter into your prepared cake pan, using a spatula to smooth the top. This will help bake evenly and create a lovely presentation when turned out. Ensure that the batter spreads evenly in the pan to prevent any uneven rises while baking, giving it that perfect golden-brown hue.

Step 7: Bake the Cake
Place the cake pan in the preheated oven and bake for 30 to 35 minutes. You’ll know it’s ready when the top is golden brown, and a toothpick inserted into the center comes out clean. Keep an eye on the cake during the last few minutes, as oven times can vary slightly.

Step 8: Cool and Serve
Once baked, remove your Cinnamon Apple Cake from the oven and let it cool in the pan for about 10 minutes. After that, gently transfer it to a wire rack to cool completely. This cooling step is crucial for the best texture, allowing the flavors to settle before slicing and serving your warm, comforting creation.

Cinnamon Apple Cake

Make Ahead Options

These Cinnamon Apple Cakes are perfect for busy home cooks looking to save time without sacrificing flavor! You can prepare the batter up to 24 hours in advance; simply combine all the ingredients and store it in the refrigerator in an airtight container. To maintain the cake’s delightful moisture and texture, avoid mixing the apples in until just before baking. When you’re ready to enjoy it, preheat your oven and pour the batter into the prepared pan, adding the chopped apples just before baking. By prepping ahead, you’ll be able to serve a freshly baked cake with minimal effort, making any weeknight feel special!

Cinnamon Apple Cake Variations

Make your Cinnamon Apple Cake truly one-of-a-kind by exploring these delightful twists that add personal flair and flavor!

  • Gluten-Free: Substitute all-purpose flour with a gluten-free blend for a cake everyone can enjoy. Many blends do a great job mimicking the texture of regular flour.

  • Nutty Addition: Stir in 1/2 cup of chopped walnuts or pecans into the batter for added crunch and a boost of flavor. The nuts will create a lovely contrast against the soft cake.

  • Maple Sweetness: Replace granulated sugar with maple syrup, using 3/4 cup for a wonderfully rich, caramel-like flavor. The combination of cinnamon and maple will have everyone reminiscing about cozy mornings.

  • Spicy Kick: Incorporate a pinch of nutmeg or ginger along with the cinnamon for an aromatic warmness that dances on your tongue. These spices are perfect for adding depth to the cake.

  • Fruit Fusion: Mix in diced pears, peaches, or cranberries for a refreshing twist on the classic apple flavor. This creates a medley of tastes that will surely impress your guests.

  • Vegan Version: Swap eggs with 1/4 cup of unsweetened applesauce and substitute vegetable oil with coconut oil. This vegan version retains moisture while being kinder to the planet.

  • Lemon Zest: Brighten up the cake by adding a teaspoon of lemon zest into the batter. The citrus adds a refreshing balance to the sweetness and cuts through the richness.

Embrace the creativity of baking and don’t hesitate to mix and match these variations! For more yummy ideas, check out our delightful suggestions in the Fall Dessert Collection. Your kitchen deserves some fun experiments!

Expert Tips for Cinnamon Apple Cake

Use Room Temperature Ingredients: Make sure your eggs and any other refrigerated items are at room temperature for the best texture and flavor.

Don’t Overmix: When combining wet and dry ingredients, mix gently until just combined. Overmixing can lead to a dense cake instead of a fluffy Cinnamon Apple Cake.

Choose the Right Apples: Use tart apples like Granny Smith for a balanced flavor. Sweet varieties can lead to an overly sugary cake.

Test for Doneness: Stick a toothpick in the center around the 30-minute mark. If it comes out clean, your cake is perfectly baked; don’t wait until it’s overly browned.

Cool Properly: Allow the cake to cool in the pan for 10 minutes before transferring it to a wire rack. This prevents it from breaking apart and enhances its texture.

How to Store and Freeze Cinnamon Apple Cake

Room Temperature: Store leftover Cinnamon Apple Cake in an airtight container at room temperature for up to 3 days to retain its delightful moisture and flavor.

Fridge: For longer freshness, keep it in the fridge, where it can last up to a week. Make sure it’s wrapped tightly to prevent it from absorbing any odors.

Freezer: To freeze, wrap slices of the cake in plastic wrap and then aluminum foil to prevent freezer burn. It can be stored for up to 3 months—just thaw overnight in the fridge before enjoying!

Reheating: When you’re ready to indulge again, microwave a slice for about 15 seconds to restore that fresh-baked taste. A warm slice of your Cinnamon Apple Cake is pure comfort!

What to Serve with Cinnamon Apple Cake Delight?

The perfect meal is just a slice away—let’s explore delightful pairings that will elevate your culinary experience!

  • Creamy Vanilla Ice Cream: A scoop of vanilla ice cream brings delightful creaminess that contrasts beautifully with the warm, spiced cake.
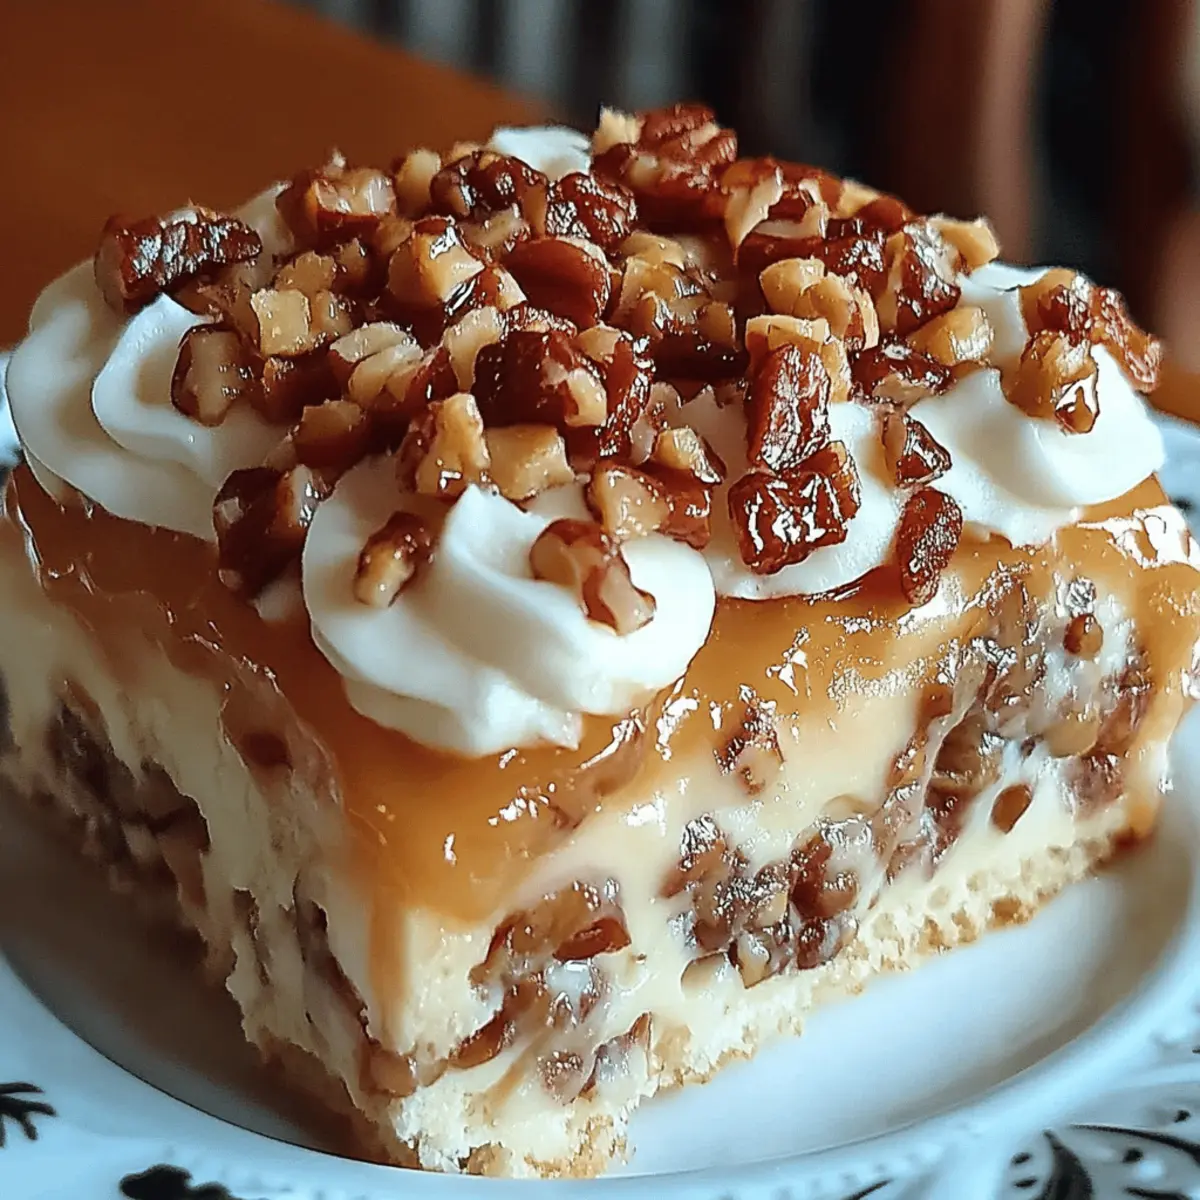
  • Whipped Cream: Light and airy, a dollop of whipped cream enhances the cake’s sweetness while adding a fluffy texture.
  • Caramel Sauce: Drizzle warm caramel on top for a decadent touch that perfectly complements the cinnamon and apples.
  • Fresh Fruit Salad: A refreshing mix of seasonal fruits adds a vibrant, juicy element that balances the cake’s richness.
  • Nutty Granola: Sprinkle some crunchy granola on the plate for an exciting texture contrast, making each bite more satisfying.
  • Herbal Tea: A warm cup of chamomile or mint tea soothes and pairs well with the spicy flavors of the cake.
  • Spiced Apple Cider: Enhance the apple flavor by serving with warm spiced apple cider—a classic fall combo that’s cozy and inviting!
  • Sharp Cheddar Cheese: This unexpected pairing balances sweetness with a slight tang, offering an intriguing flavor combination to explore.
  • Chocolate Drizzle: For the chocoholics, a light drizzle of dark chocolate adds depth and richness that will indulge your sweet tooth.

Cinnamon Apple Cake

Cinnamon Apple Cake Delight Recipe FAQs

How do I choose ripe apples for my cinnamon apple cake?
Absolutely! For an optimal flavor, opt for apples that are firm and tart, like Granny Smith or Honeycrisp. Look for those with smooth skin and no dark spots. Ideally, they should be free from bruises and have a fresh, crisp appearance to ensure they hold up well during baking.

What is the best way to store leftover cinnamon apple cake?
Leftover cake can be stored in an airtight container at room temperature for up to 3 days. If you need to keep it longer, refrigerate it tightly wrapped—this will extend its freshness for about a week! Just remember that refrigeration may slightly alter the texture, but it’ll still be delicious.

Can I freeze cinnamon apple cake, and how?
Yes, you can freeze your cake! Here’s how: First, allow the cake to cool completely. Then, wrap individual slices tightly in plastic wrap and place them in a freezer-safe bag or container to avoid freezer burn. Your cake can stay fresh for up to 3 months. When you’re ready to enjoy it again, simply thaw overnight in the fridge and pop it in the microwave for about 15 seconds to restore its warmth and flavor!

What should I do if my cake doesn’t rise properly?
Very! If you find your cake hasn’t risen, it could be due to expired baking powder or overmixing the batter. Always check that your baking powder is fresh—if it doesn’t bubble when mixed with water, it’s time to replace it! Remember also to mix gently when combining wet and dry ingredients to maintain that fluffy texture.

Is this recipe suitable for those with egg allergies?
While my cinnamon apple cake relies on eggs for moisture and structure, you can substitute eggs to make it suitable for many dietary needs! For each egg, try using 1/4 cup of unsweetened applesauce or a flax egg (1 tablespoon of ground flaxseed mixed with 2.5 tablespoons of water—let it rest for 5 minutes). This should help maintain the moistness without compromising flavor!

Cinnamon Apple Cake that Whispers Comfort in Every Slice

This Cinnamon Apple Cake is a delightful twist on classic comfort food, perfect for any occasion.

  • Mixing Bowl
  • Whisk
  • Cake Pan
  • spatula
  • Oven

For the Cake

  • 2 cups all-purpose flour (sifted)
  • 1 cup granulated sugar (or brown sugar)
  • 2 teaspoons baking powder
  • 1 teaspoon salt
  • 1/2 teaspoon ground cinnamon
  • 2 large eggs (room temperature)
  • 1/2 cup vegetable oil (or melted butter)
  • 1 teaspoon vanilla extract (pure)
  • 2 cups chopped apples (preferably Granny Smith)

Optional Toppings

  • as desired powdered sugar (for dusting)
  • as desired whipped cream or ice cream (for serving)

Preparation

  1. Preheat your oven to 350°F (175°C) and prepare a 9-inch round cake pan by greasing and flouring it.
  2. In a large mixing bowl, whisk together the flour, sugar, baking powder, salt, and ground cinnamon.
  3. In a separate bowl, beat the eggs until frothy, then add the vegetable oil and vanilla, mixing until smooth.
  4. Gently fold the chopped apples into the wet mixture.
  5. Pour the wet mixture into the dry ingredients and stir until just blended.
  6. Transfer the batter into the prepared cake pan, smoothing the top.
  7. Bake in the preheated oven for 30 to 35 minutes or until golden brown.
  8. Allow the cake to cool in the pan for about 10 minutes before transferring it to a wire rack to cool completely.

For best results, use room temperature ingredients and avoid overmixing to keep the cake fluffy.

Dessert
American
apple dessert, Autumn Dessert, baking, Cinnamon Apple Cake, comfort food, Easy Recipe

Filed Under: Dessert

Decadent Chocolate Cherry Upside Down Cake for Sweet Moments

September 7, 2025 by grace bellamy Leave a Comment

As I rummaged through my pantry last week, a can of pitted tart cherries caught my eye, whispering promises of sweet indulgence. That’s when inspiration struck: an irresistible Chocolate Cherry Upside Down Cake! This dessert isn’t just stunning with its glossy, cherry top; it also surprises you with its rich chocolate flavor and tender crumb. What I adore most about this recipe is its quick prep time—perfect for those weeknight cravings—and the fact that it’s a guaranteed crowd-pleaser at gatherings. Whether you’re honing your baking skills or simply looking for a delightful way to elevate your weekend, this cake will definitely steal the show. Curious to learn how to create this scrumptious masterpiece? Let’s dive in!

Chocolate Cherry Upside Down Cake

Why is this cake a must-try?

Decadent flavors: The delightful mix of tart cherries and rich chocolate creates an unforgettable taste experience.
Easy preparation: With just 15 minutes of prep time, you can whip up a show-stopping dessert even on a busy weeknight.
Impressive presentation: Inverting this cake reveals a stunning, glossy cherry topping that will wow your guests!
Versatile indulgence: Perfect for any occasion, from family gatherings to weekend celebrations, this cake will appeal to everyone.
Moist and tender: Thanks to the buttermilk and boiling water, each bite is incredibly rich and melts in your mouth.
Eager to explore more delectable desserts? Check out my favorite easy cake recipes for inspiration!

Chocolate Cherry Upside Down Cake Ingredients

Explore the delightful components of this show-stopping dessert!

For the Cherry Topping
• Unsalted butter – ensures a rich, smooth flavor base for the cherries.
• Granulated sugar – helps create a beautiful caramelized layer on top.
• Pitted tart cherries – the star ingredient that adds a tangy sweetness to balance the chocolate.

For the Cake Batter
• All-purpose flour – provides the structure necessary for a fluffy cake.
• Granulated sugar – balances the cocoa powder and enhances sweetness.
• Unsweetened cocoa powder – delivers that rich chocolaty depth, essential for the cake.
• Baking powder – helps the cake rise beautifully, ensuring a light texture.
• Baking soda – adds leavening, enhancing the cake’s fluffiness.
• Salt – elevates the flavor and balances sweetness.
• Large eggs – bind the ingredients and contribute to a moist crumb.
• Buttermilk – adds moisture and a slight tang, making for an incredibly tender cake.
• Vegetable oil – ensures a moist texture while keeping the cake light.
• Vanilla extract – infuses warmth and depth into the batter.
• Boiling water – activates the cocoa and ensures a rich, smooth batter, making your cake deliciously moist.

Get ready to enjoy the magic of this Chocolate Cherry Upside Down Cake—an unforgettable treat that will impress everyone!

Step‑by‑Step Instructions for Chocolate Cherry Upside Down Cake

Step 1: Preheat and Prepare the Pan
Preheat your oven to 350°F (175°C). While the oven is heating, take a 9-inch round cake pan and grease it with a bit of unsalted butter. For easy removal, line the bottom with parchment paper. Set the pan aside as you prepare the delicious cherry topping for the Chocolate Cherry Upside Down Cake.

Step 2: Create the Cherry Topping
In a medium saucepan, melt 2 tablespoons of unsalted butter over medium heat. Once melted, stir in 1/2 cup of granulated sugar and allow it to bubble for about 2-3 minutes. This creates a lovely caramel base. Add the canned pitted tart cherries and cook for another 2-3 minutes until they’re warmed through, filling your kitchen with a delightful aroma.

Step 3: Combine Flavors
Remove the saucepan from the heat and stir in 1 teaspoon of vanilla extract. The combination of the cherries and the rich butter-sugar mixture will elevate the flavors in your cake. Pour this cherry mixture into the prepared cake pan, spreading it evenly across the bottom to create a luscious and glossy topping.

Step 4: Mix the Dry Ingredients
In a large mixing bowl, sift together 1 1/2 cups of all-purpose flour, 1 cup of granulated sugar, 1/2 cup of unsweetened cocoa powder, 1 1/2 teaspoons of baking powder, 1/2 teaspoon of baking soda, and 1/4 teaspoon of salt. Mix thoroughly until all dry ingredients are well combined. This forms the base of your Chocolate Cherry Upside Down Cake.

Step 5: Prepare the Wet Ingredients
In a separate bowl, whisk together 2 large eggs, 1 cup of buttermilk, 1/2 cup of vegetable oil, and another 1 teaspoon of vanilla extract. Ensure the mixture is smooth and well blended. Gradually add this wet mixture to the bowl of dry ingredients, mixing gently until just combined to keep your cake tender.

Step 6: Add Boiling Water
Next, carefully stir in 1/2 cup of boiling water into the cake batter. The heat activates the cocoa, creating a smooth and rich consistency. Be cautious as you mix; the batter will be thin but don’t worry—that’s exactly what you want for the Chocolate Cherry Upside Down Cake!

Step 7: Combine Batter and Cherry Topping
Pour the chocolate cake batter evenly over the cherry topping in the pan. Make sure to spread the batter gently so that it sits evenly on top of the cherries. This step is crucial for creating the beautiful layer that will be revealed when you invert the cake.

Step 8: Bake the Cake
Place the cake pan in your preheated oven and bake for 35-40 minutes. To test for doneness, insert a toothpick into the center of the cake; if it comes out clean, it’s ready! Keep an eye on the cake as it bakes to ensure it rises beautifully and achieves that perfect crust.

Step 9: Cool and Invert the Cake
Once baked, remove the cake from the oven and let it cool in the pan for about 10 minutes. This cooling time allows the cake to set perfectly. After that, carefully invert it onto a plate, allowing the glossy cherry topping to shine through. Your Chocolate Cherry Upside Down Cake is now ready to impress!

Chocolate Cherry Upside Down Cake

What to Serve with Chocolate Cherry Upside Down Cake

To create a truly memorable meal, consider these delightful pairings that will enhance the experience of your indulgent dessert.

  • Vanilla Ice Cream: The creamy, cold texture contrasts beautifully with the warm cake, making each bite a soothing treat.
  • Whipped Cream: Light and airy, this topping adds a delightful sweetness that complements the rich chocolate and tart cherries.
  • Coffee: A steaming cup of coffee balances the sweetness of the cake, providing a warm and comforting end to your meal.
  • Chocolate Sauce: Drizzle over each slice for an extra layer of decadence that deepens the chocolate experience.
  • Fresh Mint Leaves: A sprig of mint not only adds a pop of color but also a refreshing note that brightens up each bite.
  • Berry Compote: The tangy flavor of a mixed berry compote heightens the fruitiness of the cherries while adding a lovely acidity to the cake.
  • Sparkling Water: A fizzy drink is a light, refreshing option to cleanse the palate and balance the rich flavors of the dessert.
  • Hazelnut Coffee: The nutty flavors in this brew enhance the cake’s chocolate and cherry components, creating a harmonious dessert experience.
  • Chocolate-Covered Almonds: Serve alongside for a crunchy texture and rich flavor that perfectly complements the cake’s softness.
  • Dark Chocolate Shavings: As a final touch, sprinkle some shavings on top to intensify the chocolatey goodness while adding elegance.

Make Ahead Options

Busy home cooks will find this Chocolate Cherry Upside Down Cake is a dream when it comes to meal prep! You can prepare the cherry topping up to 24 hours in advance; simply cook the cherries and let them cool before transferring them to an airtight container and refrigerating. Additionally, you can mix the dry cake ingredients and store them in a separate container for up to 3 days. When you’re ready to bake, just whisk together the wet ingredients and combine them with the dry ingredients, then pour over the prepared cherry topping. This way, each bite will still taste fresh and delicious, providing you with an impressive dessert with minimal effort when the sweet cravings strike!

Chocolate Cherry Upside Down Cake Variations

Feel free to play around with this delectable dessert to suit your taste buds!

  • Gluten-Free: Swap out all-purpose flour for a gluten-free blend to enjoy this cake without the gluten.
  • Dairy-Free: Use almond or coconut milk along with a dairy-free buttery spread to keep the rich flavors intact.
  • Nutty Twist: Add chopped walnuts or pecans to the cherry mixture for a delightful crunch. The nuttiness complements the cherries beautifully!
  • Fruity Flair: Mix in other fruits like diced pineapples or sliced strawberries with the cherries for a colorful and fruity topping.
  • Spicy Kick: Add a pinch of cayenne pepper or cinnamon into the batter for a surprising flavor boost that adds warmth.
  • Decadent Swirl: Fold in chocolate chips or a swirl of cream cheese before baking for a creamy, chocolatey surprise in every slice.
  • Syrupy Drizzle: After baking, drizzle with a cherry or chocolate syrup to elevate the presentation and sweetness.

Happy baking and enjoy your personal twist on the Chocolate Cherry Upside Down Cake! Don’t forget to check out my favorite easy cake recipes for more scrumptious delights!

How to Store and Freeze Chocolate Cherry Upside Down Cake

Room Temperature: Store the Chocolate Cherry Upside Down Cake at room temperature in an airtight container for up to 2 days to maintain moisture and flavor.

Fridge: If you want to keep it longer, refrigerate the cake for up to 1 week. Make sure it’s covered to prevent it from drying out.

Freezer: For longer storage, wrap slices tightly in plastic wrap and freeze for up to 2 months. Thaw in the fridge before serving.

Reheating: To enjoy leftover cake warm, gently reheat individual slices in the microwave for about 15-20 seconds.

Expert Tips for Chocolate Cherry Upside Down Cake

  • Room Temperature Eggs: Use eggs at room temperature to help create a smooth batter, ensuring your Chocolate Cherry Upside Down Cake has a tender crumb.
  • Don’t Overmix: After adding the wet ingredients, mix until just combined. Overmixing can lead to a dense cake, so be gentle!
  • Monitor Baking Time: Ovens vary in temperature, so start checking the cake at the 35-minute mark. A toothpick should come out clean when it’s done baking.
  • Use Quality Cherries: Opt for high-quality tart cherries for a vibrant flavor. Avoid overly sweet varieties as they will affect the balance in your cake.
  • Cool Before Inverting: Allowing the cake to cool for 10 minutes helps it to set and makes inverting easier without losing the cherry topping.

Chocolate Cherry Upside Down Cake

Chocolate Cherry Upside Down Cake Recipe FAQs

How do I select the best cherries for this recipe?
Absolutely! When choosing tart cherries for your Chocolate Cherry Upside Down Cake, look for those that are plump and firm. Avoid any with dark spots or blemishes. If you’re using canned cherries, opt for those packed in juice rather than syrup for a more authentic flavor.

How should I store the leftover cake?
Very simply! Store your Chocolate Cherry Upside Down Cake at room temperature in an airtight container for up to 2 days. If you want it to last longer, you can refrigerate it for up to 1 week—just make sure it’s properly covered to prevent it from drying out.

Can I freeze the Chocolate Cherry Upside Down Cake?
Yes, you can! To freeze, wrap slices tightly in plastic wrap or aluminum foil, then place them in a freezer-safe bag to prevent freezer burn. This way, it will keep for up to 2 months. When you’re ready to enjoy it, simply thaw the slices in the fridge overnight before serving.

What can I do if my cake sinks in the middle?
If your Chocolate Cherry Upside Down Cake sinks in the middle, it could be due to a couple of reasons. First, make sure your oven is properly preheated and that you’re not opening the oven door too frequently while baking. Additionally, check that you’ve used the right measurements, especially for leavening agents like baking powder or baking soda, as they’re crucial for the right rise. If you notice it happens often, consider checking your oven temperature with an oven thermometer for accuracy.

Are there any dietary considerations with this cake?
Yes! This cake contains eggs and dairy, which may not be suitable for those with allergies or dietary restrictions. If you’re looking to make a vegan-friendly version, you can substitute the eggs with flaxmeal (1 tablespoon mixed with 2.5 tablespoons of water per egg) and opt for a non-dairy substitute for the buttermilk, like almond or soy milk with a squeeze of lemon juice added for acidity.

How long does the cake stay fresh?
Your Chocolate Cherry Upside Down Cake will stay fresh for about 2 days at room temperature, or up to 1 week if refrigerated. Just be mindful to keep it covered to maintain its moisture and flavor. Enjoy every bite, as it’s best savored within this timeframe!

Decadent Chocolate Cherry Upside Down Cake for Sweet Moments

This Chocolate Cherry Upside Down Cake blends tart cherries with rich chocolate for an irresistible dessert.

  • 9-inch Round Cake Pan
  • Medium saucepan
  • large mixing bowl
  • Whisk
  • sifter

Cherry Topping

  • 2 tablespoons unsalted butter (for the cherry topping)
  • 1/2 cup granulated sugar (for the cherry topping)
  • 1 can pitted tart cherries (the star ingredient)

Cake Batter

  • 1 1/2 cups all-purpose flour (for structure)
  • 1 cup granulated sugar (for sweetness)
  • 1/2 cup unsweetened cocoa powder (for chocolate flavor)
  • 1 1/2 teaspoons baking powder (for leavening)
  • 1/2 teaspoon baking soda (for leavening)
  • 1/4 teaspoon salt (to balance sweetness)
  • 2 large eggs (for binding)
  • 1 cup buttermilk (for moisture)
  • 1/2 cup vegetable oil (to keep the cake moist)
  • 1 teaspoon vanilla extract (for flavor depth)
  • 1/2 cup boiling water (to activate cocoa)

Step-by-Step Instructions

  1. Preheat your oven to 350°F (175°C) and grease a 9-inch round cake pan with unsalted butter, lining the bottom with parchment paper.
  2. In a medium saucepan, melt 2 tablespoons of unsalted butter over medium heat, stir in 1/2 cup of granulated sugar, and cook for 2-3 minutes to create a caramel base. Add the pitted tart cherries and cook for another 2-3 minutes.
  3. Remove from heat and stir in 1 teaspoon of vanilla extract. Pour the cherry mixture into the prepared cake pan, spreading it evenly.
  4. In a large bowl, sift together 1 1/2 cups of all-purpose flour, 1 cup of granulated sugar, 1/2 cup of cocoa powder, 1 1/2 teaspoons of baking powder, 1/2 teaspoon of baking soda, and 1/4 teaspoon of salt.
  5. In a separate bowl, whisk together 2 large eggs, 1 cup of buttermilk, 1/2 cup of vegetable oil, and 1 teaspoon of vanilla extract. Gradually add to the dry ingredients, mixing gently.
  6. Stir in 1/2 cup of boiling water carefully into the batter until smooth.
  7. Pour the batter evenly over the cherry topping in the pan, spreading gently.
  8. Bake for 35-40 minutes, checking for doneness with a toothpick.
  9. Let the cake cool in the pan for 10 minutes before inverting onto a plate.

Allow the cake to cool completely before storing. Use room temperature eggs for a smoother batter.

Dessert
American
cake, cherry, chocolate, dessert, sweet, upside down cake

Filed Under: Dessert

Irresistibly Moist Butterbeer Cupcakes for a Sweet Treat

September 7, 2025 by grace bellamy Leave a Comment

As the scent of freshly baked goods dances through my kitchen, I can’t help but feel a little nostalgic. These Butterbeer Cupcakes whisk me away to a world of magic and warmth, reminiscent of cozy evenings spent with friends. Perfect for any gathering, these cupcakes bring a fun twist to dessert with their rich butterscotch flavor, all while being incredibly simple to make. You’ll love how quickly they come together, transforming your kitchen into a delightful bakery in no time. With an irresistible buttercream frosting and a drizzle of luscious ganache, these treats are bound to be the highlight of your next celebration. Curious about how to whip up a batch that will enchant your friends and family? Let’s dive into this scrumptious recipe together!

Butterbeer Cupcakes

Why Are Butterbeer Cupcakes So Irresistible?

Decadent Flavor: Each bite delivers a rich burst of butterscotch that will have your taste buds dancing with joy.

Easy to Make: The simple process means even kitchen novices can achieve bakery-level results without stress.

Perfect for Celebrations: Whether it’s a birthday, holiday, or casual get-together, these cupcakes are sure to steal the show.

Kid-Friendly Fun: With a whimsical nod to the beloved drink, they’re a great treat for parties with children or nostalgic adults alike.

Customizable Delight: Mix up your frosting or add festive sprinkles to match any occasion, making these cupcakes incredibly versatile.

Whip up a batch today and experience the joy of homemade sweets! Don’t forget to check out our guide on decorating cupcakes for some creative inspiration.

Ingredients

For the Cupcakes

  • Butterscotch beer – 3 cups (710 ml) adds a unique flavor, but cream soda will work as a substitute!
  • Unsalted butter – 1/2 cup (112 g), softened for a rich moistness in each bite.
  • Light brown sugar – 1/2 cup (110 g), packed to infuse deep caramel notes.
  • Granulated white sugar – 1/4 cup (50 g) for balanced sweetness.
  • Eggs – 2, at room temperature to ensure a well-emulsified batter.
  • Vanilla bean paste or extract – 2 tsp for a warm aromatic note.
  • Butter extract – 1 tsp enhances the buttery flavor beautifully.
  • Butterscotch chips – 1/3 cup (56 g), melted and slightly cooled to boost the butterscotch flavor.
  • Buttermilk – 1/2 cup (120 ml), at room temperature helps to create tender cupcakes.
  • All-purpose flour – 1 3/4 cups (219 g), spooned and leveled then sifted for lightness.
  • Baking powder – 1 1/2 tsp ensures a nice rise for fluffy cupcakes.
  • Baking soda – 1/4 tsp balances the acidity in the buttermilk.
  • Salt – 1/2 tsp to enhance all the flavors.

For the Frosting

  • Unsalted butter – 1 1/2 cups (336 g), softened to create a creamy texture.
  • Butterscotch chips – 1 cup (170 g), melted and slightly cooled to deepen the frosting’s flavor.
  • Powdered sugar – 2 1/4 cups (290 g), measured then sifted to achieve a smooth frosting.
  • Butter extract – 3/4 tsp for an extra layer of buttery goodness.
  • Vanilla – 1/2 tsp adds warmth and complexity.

For the Ganache

  • Butterscotch chips – 1/4 cup (42 g) for a silky drizzle over the cupcakes.
  • Heavy cream – 1 tbsp will help achieve a luscious texture.
  • Honey – 1/2 tbsp adds a delightful hint of sweetness to the ganache.

Experience the magic of Butterbeer Cupcakes and let each bite take you on a nostalgic journey!

Step‑by‑Step Instructions for Butterbeer Cupcakes

Step 1: Reduce the Butterscotch Beer
Start by pouring 3 cups of butterscotch beer into a large pot. Set the pot over medium heat and simmer for 20–30 minutes, allowing the mixture to reduce to about 1/2 cup. Stir occasionally to prevent sticking. Once reduced, take the pot off the heat and let it cool until it’s slightly warm to the touch.

Step 2: Preheat the Oven and Prepare Pans
While the butterscotch beer is cooling, preheat your oven to 350°F (175°C). Grab two standard cupcake pans and line them with vibrant cupcake liners. These will not only make your Butterbeer Cupcakes look delightful but also help with easy removal once baked.

Step 3: Whisk the Dry Ingredients
In a medium bowl, combine 1 3/4 cups of all-purpose flour, 1 1/2 teaspoons of baking powder, 1/4 teaspoon of baking soda, and 1/2 teaspoon of salt. Use a whisk to ensure there are no lumps and that the mixture is well combined. Setting this mixture aside prepares you for a well-balanced batter.

Step 4: Cream the Sugars and Butter
In a large bowl, take 1/2 cup of softened unsalted butter and add 1/2 cup of light brown sugar along with 1/4 cup of granulated sugar. Using an electric mixer, cream the mixture on medium speed for about 1-2 minutes until it becomes fluffy and light in color, creating the perfect base for your Butterbeer Cupcakes.

Step 5: Incorporate Eggs and Extracts
Next, add 2 room-temperature eggs along with 2 teaspoons of vanilla bean paste and 1 teaspoon of butter extract to the butter-sugar mixture. Mix on medium speed until everything is thoroughly incorporated and the color lightens, around 1-2 minutes, ensuring a rich flavor.

Step 6: Mix in the Butterscotch Beer and Chips
To deepen the flavor of your Butterbeer Cupcakes, carefully mix in the cooled butterscotch beer reduction and 1/3 cup of melted butterscotch chips until fully combined. The mixture should look silky, and the aroma will be absolutely enchanting.

Step 7: Combine Dry Ingredients with Buttermilk
Gradually add the dry ingredients you whisked together earlier and 1/2 cup of room-temperature buttermilk. Mix on low speed until just combined, being careful not to overmix. You’ll want a smooth and slightly thick batter that pours effortlessly into your cupcake liners.

Step 8: Fill the Cupcake Liners
With your batter ready, use a scoop or spoon to divide the mixture evenly among your paper liners, filling each about 2/3 full. This allows for the lovely rise that will create perfect cupcakes, so you’re set for a delightful treat with buttery goodness.

Step 9: Bake the Cupcakes
Carefully place the pans in your preheated oven and bake for 14–18 minutes. Keep an eye on them! The cupcakes are done when a toothpick inserted into the center comes out clean. The tops should be gently golden and spring back when touched.

Step 10: Cool the Cupcakes
Once baked, remove the cupcakes from the oven and allow them to cool in the pan for 5 minutes. This helps set their shape. After this, transfer them gently to a cooling rack where they can cool completely before you frost them.

Step 11: Make the Butterscotch Buttercream
While the cupcakes are cooling, it’s time to make the frosting! In a large bowl, whip 1 1/2 cups of softened unsalted butter on high speed for 5-10 minutes until it turns pale and fluffy. This will provide a luxurious base for your butterscotch frosting.

Step 12: Add the Butterscotch Chips to the Frosting
Now, mix in 1 cup of melted butterscotch chips into the whipped butter until well combined. The mixture should be smooth and velvety, inviting you to dive into a delightful frosting experience for your Butterbeer Cupcakes.

Step 13: Incorporate the Powdered Sugar and Extracts
Gradually add 2 1/4 cups of sifted powdered sugar into the butter mixture, mixing until fully incorporated. Then, blend in 3/4 teaspoon of butter extract and 1/2 teaspoon of vanilla until light and fluffy. This frosting will enhance the overall butterscotch experience!

Step 14: Prepare the Butterscotch Ganache
For the ganache, combine 1/4 cup of butterscotch chips and 1 tablespoon of heavy cream in a microwave-safe bowl. Microwave on high for 30–45 seconds, then stir until smooth, mixing in 1/2 tablespoon of honey to create a luscious drizzle that will elevate your cupcakes.

Step 15: Frost and Drizzle Your Cupcakes
Now that your Butterbeer Cupcakes are completely cooled, use a piping bag to generously frost each cupcake with the butterscotch buttercream. Finally, drizzle them with the warm butterscotch ganache, adding a decadent finishing touch that’s simply irresistible!

Butterbeer Cupcakes

Butterbeer Cupcake Variations & Substitutions

Feel free to get creative with these Butterbeer Cupcakes! Each twist offers a unique flavor sensation that’s sure to delight your taste buds.

  • Gluten-Free: Substitute all-purpose flour with a 1:1 gluten-free baking blend for a lovely, tender cupcake. You’ll never miss the gluten!

  • Dairy-Free: Use coconut oil or vegan butter in place of unsalted butter and a dairy-free milk alternative for buttermilk. The flavor remains indulgent!

  • Extra Butterscotch: Add an extra 1/3 cup of butterscotch chips into the batter for a delightful gooey surprise in every bite. More is definitely better with these cupcakes!

  • Spiced Delight: Blend in 1 teaspoon of cinnamon or a pinch of nutmeg for a cozy flavor twist that complements the butterscotch beautifully. Perfect for the fall season!

  • Frosting Fun: Experiment with a cream cheese frosting instead of butterscotch buttercream for a tangy contrast that’ll elevate the sweetness of your cupcakes. It’s a delightful balance!

  • Add Some Heat: For those who love a kick, incorporate a dash of cayenne pepper or chili powder into the batter for a sweet-and-spicy surprise that will have everyone talking!

  • Different Drizzle: Swap the butterscotch ganache for a chocolate ganache for a rich and decadent contrast. Chocolate lovers will adore this variation!

  • Seasonal Sprinkles: Top with festive, seasonal sprinkles to match any occasion, adding a splash of color and fun to every cupcake. These little details make all the difference!

Feel inspired? Whip up a batch of these delightful variations and let your Butterbeer Cupcakes steal the spotlight at your next gathering! Don’t forget to check out our guide on how to frost cupcakes for some creative frosting techniques that will wow your guests!

Make Ahead Options

These Butterbeer Cupcakes are perfect for busy home cooks looking to simplify their meal prep! You can make the cupcake batter up to 24 hours in advance; just store it tightly covered in the refrigerator to maintain its freshness and prevent the butterscotch chips from hardening. The baked cupcakes themselves can be made up to 3 days ahead and stored in an airtight container at room temperature. For the frosting, prepare it in advance and refrigerate it, but be sure to let it come to room temperature and re-whip it slightly before piping. When you’re ready to serve, simply frost the cooled cupcakes and drizzle with ganache for that oh-so-delicious finishing touch!

How to Store and Freeze Butterbeer Cupcakes

Room Temperature: Store leftover Butterbeer Cupcakes in an airtight container at room temperature for up to 2 days, ensuring they stay moist and delicious.

Fridge: If you prefer to keep them fresher longer, refrigerate the cupcakes in a sealed container for up to 5 days, but let them come to room temperature before serving for the best flavor.

Freezer: You can freeze unfrosted cupcakes for up to 3 months. Wrap each cupcake in plastic wrap and place them in a freezer-safe bag. Thaw overnight in the fridge before frosting.

Reheating: To enjoy a warm cupcake, heat it in the microwave for about 10-15 seconds. This will give you that freshly baked feel, reminding you of that magical Butterbeer flavor!

Expert Tips for Perfect Butterbeer Cupcakes

  • Use Room Temperature Ingredients: Ensure your eggs and buttermilk are at room temperature for a well-emulsified batter, preventing a dense texture in the Butterbeer Cupcakes.

  • Don’t Overmix: Mix until just combined, especially when adding dry ingredients. Overmixing can lead to tough cupcakes, so keep it gentle!

  • Cool Completely: Let your cupcakes cool completely before frosting to avoid melting the butterscotch buttercream. This ensures a perfect presentation.

  • Pipe Frosting Creatively: Use a piping bag with a decorative tip for a beautiful frosting swirl that not only looks great but adds extra buttercream goodness.

  • Drizzle with Ganache: Make sure your butterscotch ganache is slightly warm, not hot. This creates a smooth drizzle without melting the frosting.

  • Experiment with Flavors: Feel free to swap out extracts or add a sprinkle of sea salt on top to enhance the butterscotch flavors and make your Butterbeer Cupcakes uniquely yours!

What to Serve with Butterbeer Cupcakes?

When craving something sweet, whisk your loved ones away to a delightful culinary adventure with these whimsical treats.

  • Spiced Apple Cider: Perfect for autumn, this warm drink adds a comforting note that complements the butterscotch flavor beautifully.
  • Caramel Apple Slices: The crunch of fresh apples drizzled with caramel echoes the rich butterscotch, making for a fun, shared dessert experience.
  • Chocolate Milkshake: The creamy, chocolaty goodness pairs well with the cupcakes for a nostalgic treat, bringing back childhood memories.

For a lovely brunch gathering, consider serving these cupcakes alongside a warm glass of mulled wine. The spices in the wine will harmonize with the flavors of the Butterbeer Cupcakes, creating an inviting atmosphere.

  • Vanilla Ice Cream: A scoop on the side provides a creamy contrast to the texture of the cupcakes and enhances their sweetness.
  • Pumpkin Spice Muffins: Elevate your dessert table with a seasonal favorite; their spice will beautifully balance the sweetness of the cupcakes.
  • Coffee or Espresso: A strong brew serves nicely as a pick-me-up against the sweet decadence of butterscotch to finish your meal perfectly.
  • Whipped Cream Topping: Light and airy, a dollop of whipped cream on top of each cupcake elevates the overall presentation and adds a touch of elegance.

Whether for a festive celebration or a cozy gathering, pair these Butterbeer Cupcakes with delightful accompaniments for a magical spread!

Butterbeer Cupcakes

Butterbeer Cupcakes Recipe FAQs

What kind of butterscotch beer should I use?
Absolutely! You can use either butterscotch beer or cream soda for your Butterbeer Cupcakes. Both options add that wonderful, nostalgic flavor—so pick whichever you have on hand!

How should I store leftover cupcakes?
For optimal freshness, store leftover Butterbeer Cupcakes in an airtight container at room temperature for up to 2 days. If you’d like to extend their shelf life, refrigerate them for up to 5 days, but make sure to bring them back to room temperature before serving to enhance the flavors.

Can I freeze my Butterbeer Cupcakes?
Yes! You can freeze unfrosted Butterbeer Cupcakes for up to 3 months. Just wrap each cupcake tightly in plastic wrap and place them in a freezer-safe bag. When you’re ready to enjoy them, thaw overnight in the fridge, and then frost as desired!

What do I do if my cupcakes are dry?
If you find your Butterbeer Cupcakes turning out dry, it might be due to overmixing the batter or not measuring ingredients accurately. Ensure you’re measuring flour properly, using the spoon-and-level method, and mix until just combined to avoid overworking the batter. Also, check your oven temperature with an oven thermometer to ensure it’s accurate.

Are these cupcakes suitable for a gluten-free diet?
Great question! You can easily make these Butterbeer Cupcakes gluten-free by substituting the all-purpose flour with a 1:1 gluten-free flour blend. Just ensure it’s one meant for baking, as those will provide the right texture and flavor.

Can pets have any of the ingredients in the cupcake?
It’s very important to keep in mind that some ingredients in Butterbeer Cupcakes, such as chocolate and certain sweeteners, can be harmful to pets. Always keep these delights out of reach from furry friends. If your pet ever consumes something they shouldn’t, consult your veterinarian.

Irresistibly Moist Butterbeer Cupcakes for a Sweet Treat

Delight in delightful Butterbeer Cupcakes, rich in butterscotch flavor and topped with creamy frosting.

  • Large Pot
  • cupcake pans
  • Whisk
  • Electric mixer
  • piping bag
  • Microwave-safe bowl

For the Cupcakes

  • 3 cups butterscotch beer (Cream soda can be substituted.)
  • 1/2 cup unsalted butter (Softened)
  • 1/2 cup light brown sugar (Packed)
  • 1/4 cup granulated white sugar (For balanced sweetness)
  • 2 whole eggs (At room temperature)
  • 2 tsp vanilla bean paste or extract (For aromatic flavor)
  • 1 tsp butter extract (Enhances buttery flavor)
  • 1/3 cup butterscotch chips (Melted and slightly cooled)
  • 1/2 cup buttermilk (At room temperature)
  • 1 3/4 cups all-purpose flour (Spoon and leveled then sifted)
  • 1 1/2 tsp baking powder (For cupcake rise)
  • 1/4 tsp baking soda (Balances acidity)
  • 1/2 tsp salt (Enhances flavor)

For the Frosting

  • 1 1/2 cups unsalted butter (Softened)
  • 1 cup butterscotch chips (Melted and slightly cooled)
  • 2 1/4 cups powdered sugar (Sifted)
  • 3/4 tsp butter extract
  • 1/2 tsp vanilla

For the Ganache

  • 1/4 cup butterscotch chips
  • 1 tbsp heavy cream
  • 1/2 tbsp honey

Cupcake Preparation

  1. Start by pouring butterscotch beer into a large pot, set over medium heat and simmer for 20–30 minutes.
  2. Preheat your oven to 350°F (175°C) and line cupcake pans with vibrant liners.
  3. In a medium bowl, combine flour, baking powder, baking soda, and salt.
  4. Cream together butter, light brown sugar, and granulated sugar for 1-2 minutes until fluffy.
  5. Add eggs, vanilla, and butter extract, mixing until thoroughly combined.
  6. Mix in the cooled butterscotch beer reduction and melted butterscotch chips.
  7. Gradually add dry ingredients and buttermilk, mixing until just combined.
  8. Divide batter evenly among cupcake liners until 2/3 full.
  9. Bake for 14–18 minutes or until a toothpick inserted comes out clean.
  10. Cool cupcakes in the pan for 5 minutes, then transfer to a cooling rack.

Frosting and Ganache

  1. Whip softened butter on high speed for 5-10 minutes until pale and fluffy.
  2. Mix in melted butterscotch chips until well combined.
  3. Gradually add sifted powdered sugar, butter extract, and vanilla, mixing until light and fluffy.
  4. Combine butterscotch chips and heavy cream in a bowl, microwaving until smooth, then mix in honey.
  5. Frost cooled cupcakes with the buttercream and drizzle with the ganache.

Ensure all ingredients are at room temperature for the best results.

Dessert
American
Butterbeer Cupcakes, butterscotch, celebration, cupcakes, dessert, sweet treat

Filed Under: Dessert

Indulge in Decadence with Caramel Brownie Cheesecake

September 7, 2025 by grace bellamy Leave a Comment

The unexpected combination of rich brownie, creamy cheesecake, and luscious caramel can elevate any dessert spread from ordinary to extraordinary. That’s why I’m thrilled to share my Caramel Brownie Cheesecake recipe, a showstopper that’s sure to leave your guests in awe. With quick prep and a crowd-pleasing flavor profile, this delightful treat allows you to savor every moment spent in the kitchen without enduring hours of labor. Each bite offers a symphony of textures—with the fudgy brownie base juxtaposing smoothly with the velvety cheesecake layer, all tied together beautifully by a drizzle of homemade caramel. Whether it’s for a special occasion or just to satisfy a sweet craving, this recipe effortlessly delivers comfort and joy. Are you ready to create something unforgettable? Let’s dive in!

Caramel Brownie Cheesecake

Why is This Cheesecake So Irresistible?

Heavenly Fusion: This Caramel Brownie Cheesecake is a glorious blend of fudgy brownie and luscious cheesecake, crowned with warm caramel.

Quick and Simple: With just 30 minutes of prep time, you can indulge in rich flavors without spending all day in the kitchen.

Elevated Experience: Impress your family and friends with a dessert that looks and tastes gourmet, making it perfect for gatherings or cozy nights in.

Versatile Delight: Whether served at holiday parties or as a simple weeknight treat, this cheesecake is sure to be a crowd-pleaser.

Drizzle of Love: The homemade caramel sauce adds a luxurious finish, elevating your dessert game. For more delicious combinations, check out my Classic Cheesecake Recipe or explore various Brownie Variations.

Caramel Brownie Cheesecake Ingredients

• Create your own dessert masterpiece with these delicious components!

For the Brownie Base

  • Unsalted butter – helps achieve that rich, moist brownie texture.
  • Granulated sugar – adds sweetness and enhances the flavor profile.
  • Large eggs – bind the ingredients together, creating a fudgy consistency.
  • Vanilla extract – infuses the brownies with warm aromatic notes.
  • All-purpose flour – gives structure to the brownie while keeping it tender.
  • Cocoa powder – imparts deep chocolate richness, essential for a brownie.
  • Salt – balances sweetness and enhances overall flavor.

For the Cheesecake Layer

  • Cream cheese – the creamy base for a smooth, luscious filling.
  • Granulated sugar (for cheesecake) – sweetens the filling beautifully.
  • Large eggs (for cheesecake) – provides stability and a delightful texture.
  • Vanilla extract (for cheesecake) – enriches the cheesecake with warmth.
  • Sour cream – adds a tangy flavor that contrasts pleasantly with sweetness.

For the Caramel Sauce

  • Granulated sugar (for caramel sauce) – the star ingredient that transforms into liquid gold.
  • Unsalted butter (for caramel sauce) – adds creaminess and richness to the caramel.
  • Heavy cream (for caramel sauce) – ensures the sauce is smooth and decadent.
  • Sea salt (for caramel sauce) – enhances the flavors and creates that sweet-salty delight.

This Caramel Brownie Cheesecake will not only satisfy your sweet tooth but also impress anyone lucky enough to taste it!

Step‑by‑Step Instructions for Caramel Brownie Cheesecake

Step 1: Preheat and Prepare
Begin by preheating your oven to 350°F (175°C). In a medium saucepan over low heat, melt 1 cup of unsalted butter and 2 cups of granulated sugar together, stirring until well incorporated. Once melted, remove from heat and allow to cool slightly, then whisk in 4 large eggs and 1 teaspoon of vanilla extract until smooth and glossy.

Step 2: Combine Dry Ingredients
In a separate bowl, sift together 1 cup of all-purpose flour, 1 cup of cocoa powder, and 1/2 teaspoon of salt. Gradually fold the dry ingredients into the wet mixture from Step 1, using a spatula to combine until just incorporated. This rich brownie batter will become the delicious base for your Caramel Brownie Cheesecake.

Step 3: Bake the Brownie Base
Grease a 9-inch springform pan with butter or non-stick spray, then carefully pour the brownie batter into the pan, smoothing it out evenly. Bake in your preheated oven for 25-30 minutes, or until a toothpick inserted into the center comes out slightly moist but not wet. Allow the brownie base to cool completely before adding the cheesecake layer.

Step 4: Prepare the Cheesecake Filling
While the brownie base cools, make the cheesecake filling. In a large mixing bowl, beat 16 oz of softened cream cheese until creamy, then add 1 cup of granulated sugar, 3 large eggs, 1 teaspoon of vanilla extract, and 1/2 cup of sour cream. Mix until the mixture is velvety smooth and well combined, creating the perfect topping for your Caramel Brownie Cheesecake.

Step 5: Bake the Cheesecake Layer
Pour the cheesecake mixture over the cooled brownie layer, spreading it evenly with a spatula. Return the pan to the oven and bake for another 30-35 minutes, or until the cheesecake is set but still slightly jiggly in the center. Allow to cool at room temperature for about 1 hour before chilling.

Step 6: Make the Caramel Sauce
For the luscious caramel, heat 1 cup of granulated sugar in a medium saucepan over medium heat, stirring constantly until it melts and turns a golden-brown color. Once melted, carefully stir in 6 tablespoons of unsalted butter and 1/2 cup of heavy cream until smooth. Lastly, add 1 teaspoon of sea salt for that perfect sweet-salty finish.

Step 7: Assemble and Chill
Drizzle the caramel sauce generously over the cooled cheesecake, allowing it to cascade down the sides. Place your Caramel Brownie Cheesecake in the refrigerator for at least 2 hours, or until it’s thoroughly chilled. This chilling time allows the flavors to meld beautifully, making each bite heavenly!

Caramel Brownie Cheesecake

How to Store and Freeze Caramel Brownie Cheesecake

Fridge: Store leftover Caramel Brownie Cheesecake in an airtight container in the fridge for up to 5 days to maintain its freshness and flavor.

Freezer: If you want to enjoy it later, freeze individual slices wrapped tightly in plastic wrap, then place in a freezer-safe bag for up to 2 months.

Thawing: To enjoy your cheesecake, simply transfer the frozen slice to the fridge a few hours before serving or overnight until thawed completely.

Reheating: For a warm treat, gently reheat individual slices in the microwave for 10-15 seconds, but avoid overheating to preserve texture and taste.

Caramel Brownie Cheesecake Variations

Feel free to personalize this recipe and make it your own with these delightful twists that can enhance your experience!

  • Gluten-Free: Substitute all-purpose flour with a 1:1 gluten-free flour blend for a delicious gluten-free option.
  • Nutty Addition: Mix in 1 cup of chopped walnuts or pecans to the brownie batter for added crunch and flavor.
  • Cheesecake Swirl: Before baking, dollop spoonfuls of cheesecake filling over the brownie base and swirl with a knife for a beautiful marbled effect.
  • Chocolate Chunk: Fold in 1 cup of dark chocolate chips into the brownie batter for an extra chocolatey experience. Each bite will be a delightful surprise!
  • Fruit Fusion: Add a layer of fresh raspberries or strawberries on top of the cheesecake before the caramel drizzle for a touch of fruitiness and color.
  • Lower Sugar: Use a sugar substitute like erythritol in both the brownie and cheesecake layers for a lighter version without sacrificing taste.
  • Spiced Flavor: Incorporate a teaspoon of cinnamon or instant espresso powder into the brownie batter to add warm, comforting undertones.
  • Spicy Kick: If you enjoy heat, sprinkle in a dash of cayenne pepper into the caramel sauce for a surprising and delightful kick.

No matter which variation you choose, these adjustments can turn your Caramel Brownie Cheesecake into an entirely new treat! And if you’re interested in even more creative ideas, take a look at my Classic Cheesecake Recipe or explore different Brownie Variations. Enjoy your baking adventure!

What to Serve with Caramel Brownie Cheesecake?

Creating a delightful meal to accompany this creamy dessert can elevate your dining experience to new heights.

  • Creamy Mashed Potatoes: Their buttery, smooth texture rounds out the meal, making it comforting and satisfying. Pairing savory, rich potatoes with the sweet cheesecake offers a delightful contrast.

  • Grilled Asparagus: The slight bitterness of the asparagus complements the sweet flavors of the cheesecake while adding a fresh, vibrant crunch to your plate. This balance makes each bite exciting and refreshing.

  • Roasted Chicken: Marinated in herbs and spices, roasted chicken adds a savory touch that plays beautifully with the cake’s sweetness, creating a delightful play of flavors.

  • Mixed Green Salad: Tossed with a light vinaigrette, this salad brings brightness to the table, allowing your taste buds to reset between bites of the rich cheesecake.

  • Coffee or Espresso: The deep flavors of finely brewed coffee or a shot of espresso create an exquisite pairing, intensifying the dessert’s chocolatey notes while providing a comforting warmth.

  • Vanilla Ice Cream: A classic choice, the creamy ice cream serves as a perfect foil to the dense cheesecake, heightening the indulgent experience with its delightful cold and sweetness.

  • Chocolate Sauce Drizzle: For those who crave even more decadence, a drizzle of warm chocolate sauce enhances the flavors, adding rich layers to each bite of cheesecake.

This combination of textures and flavors makes for an unforgettable meal, especially when concluding with the heavenly Caramel Brownie Cheesecake.

Make Ahead Options

These Caramel Brownie Cheesecake delights are perfect for busy home cooks looking to save time! You can prepare the brownie base up to 24 hours in advance; simply bake, cool, and store it tightly wrapped in plastic wrap to maintain its moist texture. The cheesecake filling can also be made up to 3 days ahead—mix and refrigerate in an airtight container until ready to use. When you’re ready to assemble, pour the cheesecake mixture over the brownie layer and bake as directed. Drizzle with caramel sauce just before serving for that fresh finish, ensuring your dessert tastes just as delicious as if made the same day!

Expert Tips for Caramel Brownie Cheesecake

Ingredient Quality: Use high-quality cocoa powder and cream cheese for the best flavor. Fresh ingredients elevate this sumptuous Caramel Brownie Cheesecake to gourmet status.

Avoid Overbaking: When baking, check the cheesecake for doneness by gently shaking the pan; it should be slightly jiggly in the center. Overbaking can lead to cracks and a dry texture.

Chill Sufficiently: Allow the cheesecake to chill for at least 2 hours after baking. This step is crucial for the flavors to develop and the texture to set perfectly.

Caramel Consistency: If your caramel sauce seems too thin, allow it to boil a bit longer to thicken up. But watch it carefully to prevent burning.

Layering Technique: Always pour the cheesecake filling over a completely cooled brownie base to avoid mixing layers, ensuring a beautiful presentation.

Caramel Brownie Cheesecake

Caramel Brownie Cheesecake Recipe FAQs

What type of chocolate is best for brownies?
Absolutely! For the richest flavor, use high-quality unsweetened cocoa powder or dark chocolate. The cocoa adds deep chocolate richness, making your brownies more decadent.

How long can I store leftover cheesecake in the fridge?
You can store leftover Caramel Brownie Cheesecake in an airtight container in the fridge for up to 5 days. Just make sure it’s fully covered to prevent it from absorbing other odors.

Can I freeze caramel brownie cheesecake? If so, how?
Yes, you can freeze it! First, let the cheesecake cool completely. Then, slice it into individual portions and wrap each piece tightly in plastic wrap. Place them in a freezer-safe bag or container, where they can stay frozen for up to 2 months. To enjoy, simply thaw in the fridge for a few hours or overnight until ready to serve.

What if my cheesecake cracks while baking?
Very! Cracks can often occur due to overbaking or too much mixing. To avoid this, check your cheesecake while it’s baking; it should be set but still slightly jiggly in the center. If cracks do appear, don’t worry too much! A drizzle of caramel over the top can hide them beautifully.

Can I use a gluten-free flour substitute for the brownie base?
Definitely! If you’re looking for a gluten-free option, substitute with a 1:1 gluten-free all-purpose flour blend. It works surprisingly well, maintaining the fudgy texture while accommodating dietary needs. Just make sure your other ingredients, like the chocolate, are also gluten-free!

Is this dessert safe for pets?
No, it’s not safe! Ingredients like chocolate, sugar, and cream can be harmful to pets. Be sure to keep your Caramel Brownie Cheesecake out of reach and enjoy it as a special treat for yourself and your loved ones instead!

Indulge in Decadence with Caramel Brownie Cheesecake

This Caramel Brownie Cheesecake mixes rich brownie, creamy cheesecake, and luscious caramel for a delightful dessert.

  • 9-inch springform pan
  • Mixing bowls
  • Medium saucepan
  • Whisk
  • spatula
  • sifter

Brownie Base

  • 1 cup unsalted butter (melted)
  • 2 cups granulated sugar
  • 4 large eggs
  • 1 teaspoon vanilla extract
  • 1 cup all-purpose flour
  • 1 cup cocoa powder
  • 1/2 teaspoon salt

Cheesecake Layer

  • 16 oz cream cheese (softened)
  • 1 cup granulated sugar (for cheesecake)
  • 3 large eggs (for cheesecake)
  • 1 teaspoon vanilla extract (for cheesecake)
  • 1/2 cup sour cream

Caramel Sauce

  • 1 cup granulated sugar (for caramel sauce)
  • 6 tablespoons unsalted butter (for caramel sauce)
  • 1/2 cup heavy cream (for caramel sauce)
  • 1 teaspoon sea salt (for caramel sauce)

Preparation

  1. Preheat your oven to 350°F (175°C). In a medium saucepan over low heat, melt the butter and sugar together, stirring until incorporated. Remove from heat, allow to cool slightly, then whisk in eggs and vanilla until smooth.
  2. In a separate bowl, sift together flour, cocoa powder, and salt. Gradually fold the dry ingredients into the wet mixture until just incorporated. Pour into greased springform pan.
  3. Bake for 25-30 minutes, or until a toothpick comes out slightly moist. Allow to cool completely.
  4. In a large bowl, beat cream cheese until creamy, then add sugar, eggs, vanilla, and sour cream. Mix until smooth.
  5. Pour the cheesecake mixture over the cooled brownie layer and bake for an additional 30-35 minutes, until set but still jiggly in the center. Cool at room temperature for 1 hour, then chill.
  6. To make the caramel, heat sugar in a saucepan, stirring constantly until it melts and turns golden-brown. Stir in butter, cream, and sea salt until smooth.
  7. Drizzle caramel sauce over the cheesecake. Refrigerate for at least 2 hours before serving.

Use high-quality ingredients for the best flavor. Chill sufficiently to enhance flavors.

Dessert
American
brownies, caramel, Caramel Brownie Cheesecake, cheesecake, chocolate, dessert

Filed Under: Dessert

Irresistibly Moist Cream Cheese Pound Cake Recipe to Delight

September 7, 2025 by grace bellamy Leave a Comment

It’s amazing how a simple blend of butter, cream cheese, and sugar can transform into a deliciously moist and dense Cream Cheese Pound Cake that feels like a warm hug on a plate. As I whisk together the ingredients, the anticipation builds for the sweet, comforting aroma that will soon fill my kitchen. This recipe stands out not just for its delightful taste, but also for its effortless preparation—perfect for anyone who craves homemade goodness without spending all day in the kitchen. You’ll find that it’s a guaranteed crowd-pleaser, whether served at a casual gathering or a special celebration. Paired with a sprinkle of powdered sugar or a dollop of whipped cream, this cake is sure to impress. Are you ready to create a timeless classic that’s perfect for any occasion?

Cream Cheese Pound Cake

Why is this Cream Cheese Pound Cake special?

Irresistible warmth: The comforting aroma that fills your kitchen while baking is just the beginning!

Moist and Dense: This cake strikes the perfect balance, giving you a rich texture that’s hard to resist.

Easy Preparation: With just a handful of ingredients and straightforward steps, it’s a breeze to whip up any day of the week.

Versatile Delight: Enjoy it plain, or dress it up with toppings like fresh fruit or whipped cream for a stunning presentation.

Guaranteed Crowd-Pleaser: Whether it’s a family dinner or a festive gathering, this Cream Cheese Pound Cake is sure to be a hit.

Cream Cheese Pound Cake Ingredients

• Discover the essential ingredients for a perfect Cream Cheese Pound Cake.

For the Batter

  • Unsalted butter – ensures a rich and creamy base, enhancing the cake’s flavor.
  • Cream cheese – adds tanginess and moisture, making the cake beautifully dense.
  • Granulated sugar – sweetens the batter and aids in creating a tender crumb.
  • Large eggs – provide structure and stability, helping the cake rise beautifully.
  • All-purpose flour – forms the backbone of the cake; for a lighter texture, consider cake flour as a substitute.
  • Baking powder – gives the cake a little lift, contributing to its moistness.
  • Salt – enhances all the flavors, making the sweetness pop.
  • Vanilla extract – infuses a warm, inviting aroma that perfectly complements the other flavors.

Step‑by‑Step Instructions for Cream Cheese Pound Cake

Step 1: Preheat and Prepare
Begin by preheating your oven to 325°F (165°C). While the oven warms up, take a 10-inch bundt pan and generously grease and flour it, making sure to coat every crevice. This crucial step ensures that your Cream Cheese Pound Cake will easily release from the pan once baked and keep its beautiful shape.

Step 2: Cream the Butter and Cream Cheese
In a large mixing bowl, combine the softened unsalted butter and cream cheese. Using a hand mixer or a stand mixer fitted with the paddle attachment, beat the mixture on medium speed until it’s light, fluffy, and well combined, about 3-5 minutes. This step creates a rich base for your cake, setting the stage for a moist and flavorful cream cheese pound cake.

Step 3: Add Sugar Gradually
Next, gradually add the granulated sugar to the creamed mixture while continuing to mix on medium speed. Keep beating until the sugar is fully incorporated and the mixture appears smooth and pale, about 2-3 minutes. This step is vital for achieving the perfect sweetness and texture in your cream cheese pound cake.

Step 4: Incorporate the Eggs
Now it’s time to add the large eggs, one at a time. Beat well after each addition to ensure they are thoroughly mixed into the batter before adding the next. This process should take about 5 minutes total and will help provide the rich structure needed for your cake, enhancing its moistness.

Step 5: Mix Dry Ingredients
In a separate bowl, sift together the all-purpose flour, baking powder, and salt. Gradually introduce this dry mixture into the wet ingredients while mixing at low speed. This should be done until everything is just combined; avoid overmixing to keep your Cream Cheese Pound Cake tender and fluffy.

Step 6: Add Vanilla Extract
Stir in the tablespoon of vanilla extract, ensuring it’s evenly distributed throughout the batter. The vanilla will enhance the flavor profile of your cream cheese pound cake, resulting in a deliciously aromatic treat that will fill your kitchen with warmth and comfort.

Step 7: Pour and Smooth the Batter
Carefully pour the batter into your prepared bundt pan, smoothing the top with a spatula to create an even surface. This helps ensure your cake gets a lovely rise and bakes uniformly. It’s a simple step, but it can make all the difference in the presentation of your final bake.

Step 8: Bake to Perfection
Place the bundt pan in the preheated oven and bake for 1 hour 15 minutes to 1 hour 30 minutes. You’ll know the cake is done when a toothpick inserted into the center comes out clean and the top has turned a beautiful golden brown. Be patient—the aroma will be worth the wait!

Step 9: Cool the Cake
Once your cake has finished baking, remove it from the oven and allow it to cool in the pan on a wire rack for about 10-15 minutes. This cooling time is crucial as it helps stabilize the cake so it won’t collapse when you flip it out of the pan.

Step 10: Remove and Serve
After cooling, carefully invert the bundt pan to release your Cream Cheese Pound Cake onto the wire rack. Allow it to cool completely before slicing. Enjoy it plain or add toppings like powdered sugar or whipped cream to elevate this already delightful treat!

Cream Cheese Pound Cake

Expert Tips for Cream Cheese Pound Cake

  • Room Temperature Ingredients: Ensure your butter and cream cheese are at room temperature. This helps create a smooth batter and all-around better texture in your Cream Cheese Pound Cake.

  • Avoid Overmixing: Mix the flour just until combined; overmixing can lead to a tough cake. The key is to keep it nice and tender.

  • Check for Doneness: Invest in a toothpick test! Insert it into the center; it should come out clean when the cake is done. This helps avoid under or overbaking.

  • Cooling Time: Don’t rush the cooling process. Allowing the cake to cool for 10-15 minutes in the pan helps maintain its shape for perfect slices.

  • Experiment with Flavors: Add citrus zest or almond extract for a twist! Enhancing your Cream Cheese Pound Cake with different flavors can yield exciting results.

  • Storage Savvy: To keep your cake moist, wrap it tightly with plastic wrap once cooled. It lasts for several days while staying deliciously fresh!

What to Serve with Cream Cheese Pound Cake?

Enhance your delightful Cream Cheese Pound Cake experience by pairing it with these fabulous side dishes and treats.

  • Fresh Berries:
    Juicy berries like strawberries or blueberries add a pop of color and a refreshing tartness that perfectly balances the cake’s richness.

  • Whipped Cream:
    A dollop of homemade whipped cream creates a light, airy contrast, making each bite feel luxurious and indulgent.

  • Chocolate Ganache:
    Pouring a glossy chocolate ganache on top offers a decadent touch, creating a delightful combination of rich flavors that chocolate lovers adore.

  • Lemon Glaze:
    A tangy lemon glaze provides brightness and zing, cutting through the sweetness and making the cake even more irresistible.

  • Vanilla Ice Cream:
    The creamy texture of vanilla ice cream served alongside your pound cake adds a delightful coolness, creating a heavenly dessert duo.

  • Coffee or Tea:
    A warm cup of coffee or soothing herbal tea enriches the experience, enhancing the flavors of the cake while providing a comforting finish to the meal.

Cream Cheese Pound Cake Variations

Feel free to personalize this scrumptious cake with some delightful twists that will excite your palate!

  • Gluten-Free: Substitute all-purpose flour with a gluten-free blend. Adjust baking time slightly to ensure it bakes through.

  • Citrus Zest: Add a tablespoon of lemon or orange zest to the batter for a bright, refreshing flavor that complements the creaminess.

  • Chocolate Swirl: Fold in one cup of melted dark chocolate or chocolate chips for a decadent twist that’ll delight any chocoholic.

  • Nutty Addition: Mix in a half cup of chopped nuts, like walnuts or pecans, for a crunchy texture that pairs beautifully with the soft cake.

  • Maple Flavor: Swap the vanilla extract with maple syrup for a warm, earthy aroma that elevates the cake to cozy heights.

  • Berry Burst: Fold in a cup of fresh or frozen berries like blueberries or raspberries for a sweet and tangy layer of flavor. This addition adds color and a lovely fruity note.

  • Spiced Up: Incorporate a teaspoon of cinnamon or nutmeg into the dry ingredients for a gentle warmth that makes every slice feel like a hug.

  • Dairy-Free: Replace cream cheese with a dairy-free cream cheese alternative and use coconut oil instead of butter for a tropical flair. This creates a whole new world of deliciousness!

How to Store and Freeze Cream Cheese Pound Cake

Room Temperature: Keep your Cream Cheese Pound Cake tightly wrapped in plastic wrap or stored in an airtight container for up to 3 days. This helps maintain its moistness.

Fridge: For longer freshness, refrigerate the wrapped cake for up to a week. Just be sure to bring it back to room temperature before serving for the best flavor and texture.

Freezer: To preserve the cake for an extended period, wrap individual slices in plastic wrap followed by foil, and freeze for up to 3 months. Thaw in the fridge or at room temperature when ready to enjoy.

Reheating: If desired, reheat slices in the microwave for about 10-15 seconds or in a warm oven for a few minutes, ensuring the cake remains moist and delightful.

Make Ahead Options

These Cream Cheese Pound Cakes are perfect for busy home cooks who want to save time during the week! You can prepare the batter up to 24 hours in advance by mixing all the ingredients and storing the batter in an airtight container in the refrigerator. To maintain the cake’s quality and prevent any loss of flavor, ensure it’s tightly sealed. When you’re ready to bake, simply pour the chilled batter into the prepared bundt pan and let it sit at room temperature for about 30 minutes before baking to ensure even cooking. This way, you’ll have a freshly baked, moist Cream Cheese Pound Cake with minimal effort—ideal for those busy moments when time is of the essence!

Cream Cheese Pound Cake

Cream Cheese Pound Cake Recipe FAQs

What is the best way to select ripe ingredients for this Cream Cheese Pound Cake?
Absolutely! For the best results, ensure your butter and cream cheese are at room temperature before you begin baking—this helps create a smooth and airy batter. When selecting eggs, choosing large eggs is essential for achieving the right structure in your cake.

How should I store my Cream Cheese Pound Cake, and how long will it last?
To keep your Cream Cheese Pound Cake at its best, tightly wrap it in plastic wrap or store it in an airtight container. At room temperature, it will last for up to 3 days. If you want it to stay fresh longer, refrigerate it for up to a week. Just let it come back to room temperature before serving for the best taste.

Can I freeze Cream Cheese Pound Cake, and if so, how?
Yes, you can! To freeze your Cream Cheese Pound Cake, slice it into individual portions. Wrap each slice tightly in plastic wrap, then cover with foil. This prevents freezer burn and helps maintain moisture. It can be stored in the freezer for up to 3 months. When you’re ready to enjoy, simply thaw it in the refrigerator overnight or at room temperature for a few hours.

What troubleshooting tips can you share if my Cake doesn’t come out perfect?
If your Cream Cheese Pound Cake turns out denser than expected, it might be due to overmixing the batter once the flour was added. Try mixing until just combined next time. If the cake sinks in the middle, ensure you’re using the right egg size and that the cake isn’t underbaked. Always test for doneness with a toothpick!

Are there any dietary considerations I should be aware of with this recipe?
While this Cream Cheese Pound Cake is a delightful treat for most, it contains dairy and gluten. If you’re cooking for someone with lactose intolerance, consider using lactose-free cream cheese and butter. For a gluten-free version, you can substitute all-purpose flour with a gluten-free baking blend, ensuring the baking powder is also gluten-free. Enjoy experimenting!

Irresistibly Moist Cream Cheese Pound Cake Recipe to Delight

This Cream Cheese Pound Cake is a moist, dense dessert that is easy to prepare and perfect for any occasion.

  • 10-inch Bundt pan
  • Mixing Bowl
  • hand mixer or stand mixer
  • spatula

For the Batter

  • 1 cup unsalted butter (softened)
  • 8 oz cream cheese (softened)
  • 2 cups granulated sugar
  • 4 large eggs
  • 2 cups all-purpose flour
  • 1 tbsp baking powder
  • 1 tsp salt
  • 1 tbsp vanilla extract

Preparation

  1. Preheat oven to 325°F (165°C) and grease and flour a 10-inch bundt pan.
  2. Cream unsalted butter and cream cheese together in a large mixing bowl until light and fluffy, about 3-5 minutes.
  3. Gradually add granulated sugar and mix until smooth and pale, about 2-3 minutes.
  4. Add eggs one at a time, beating well after each addition.
  5. In a separate bowl, sift flour, baking powder, and salt together, then gradually mix into wet ingredients until just combined.
  6. Stir in vanilla extract until evenly distributed.
  7. Pour the batter into the prepared bundt pan and smooth the top with a spatula.
  8. Bake for 1 hour 15 minutes to 1 hour 30 minutes until a toothpick comes out clean.
  9. Cool in the pan for 10-15 minutes, then invert onto a wire rack to cool completely.
  10. Slice and serve as desired.

Enjoy plain or with toppings like powdered sugar or whipped cream. Store tightly wrapped or in an airtight container.

Dessert
American
classic dessert, Cream Cheese Pound Cake, dessert recipe, easy baking, homemade cake, moist cake

Filed Under: Dessert

Savory Roasted French Dip Sandwich for Cozy Nights In

September 7, 2025 by grace bellamy Leave a Comment

As I stood in the kitchen, the rich aroma of slow-roasted beef mingled with the warmth of fresh bread, creating a cozy embrace that felt like home. Today, I’m excited to share my recipe for a Savory Roasted French Dip Sandwich that transforms simple ingredients into a delightful, hearty meal. This dish is not only perfect for impressing guests but also incredibly easy to whip up with just a bit of patience. With minimal active prep time and the magic of a long, slow roast, you can enjoy tender, flavorful beef paired with melty provolone and crusty baguette. Plus, it’s an irresistible comfort food that rivals any takeout! Are you ready to elevate your sandwich game and bring some joy into your kitchen?

Savory Roasted French Dip Sandwich

Why is this sandwich a must-try?

Unparalleled Flavor: The Savory Roasted French Dip Sandwich boasts an incredible depth of flavor from slow-roasting the beef with fresh herbs and spices, ensuring every bite is a taste sensation.

Easy Preparation: With just 15 minutes of prep, you can let the oven do the work, making it perfect for cooks of all skill levels.

Versatile Serving Options: Serve it as a main dish or cut into smaller portions for a delightful appetizer at your next gathering.

Crowd-Pleasing Appeal: This dish will wow both family and friends, making it a go-to for cozy nights in or casual gatherings.

Dipping Delight: The savory cooking liquid doubles as a rich dipping sauce, elevating your sandwich experience to new heights. Enjoy it alongside horseradish sauce for an extra kick!

Savory Roasted French Dip Sandwich Ingredients

For the Beef Roast
• Beef chuck roast – A great choice for braising, this cut ensures succulent meat perfect for shredding.
• Olive oil – Used for searing; it helps develop a beautiful crust.
• Kosher salt – Enhances the beef’s natural flavors; feel free to adjust to taste.
• Black pepper – Adds a touch of heat and depth to the seasoning blend.
• Garlic powder – A must for that savory boost in flavor.
• Onion powder – Complements the garlic while enhancing overall taste.
• Dried thyme – Provides herbal notes that pair beautifully with beef.
• Dried rosemary – Offers a distinct fragrance and flavor profile.

For the Onions and Broth
• Large onion, sliced – Sweetens the dish as it caramelizes during cooking.
• Beef broth – Forms the savory base for simmering; opt for low-sodium if preferred.
• Soy sauce – Adds umami depth and a touch of saltiness to the broth.

For the Sandwich Assembly
• Baguette – The perfect vessel for your sandwich, crusty on the outside and soft inside.
• Provolone cheese – Melts beautifully, adding creamy richness to each bite.
• Optional: Horseradish sauce – A zesty dip that complements the savory flavors of the sandwich.

Each ingredient contributes to the delicious experience of a Savory Roasted French Dip Sandwich, ensuring you savor every bite!

Step‑by‑Step Instructions for Savory Roasted French Dip Sandwich

Step 1: Preheat the Oven
Begin by preheating your oven to 325°F (163°C) to prepare for a slow roast that will transform your beef into a tender masterpiece. While the oven warms up, gather your ingredients and ensure your cooking space is tidy, ready for a delightful cooking experience.

Step 2: Heat the Skillet
In a large, oven-safe skillet, drizzle 1 tablespoon of olive oil and heat it over medium-high until shimmering. You’ll know the oil is ready when it lightly bubbles. This step is crucial for developing a rich, flavorful crust on your beef chuck roast as it sears.

Step 3: Season the Beef
Generously season the 2 lbs beef chuck roast with kosher salt, black pepper, garlic powder, onion powder, dried thyme, and dried rosemary. Make sure to rub the seasonings all over the roast for even flavor. The savory blend will enhance the deliciousness of your Savory Roasted French Dip Sandwich!

Step 4: Sear the Roast
Once the oil is hot, carefully place the seasoned roast into the skillet. Sear for about 8-10 minutes, turning occasionally to get a deep golden-brown color on all sides. This step locks in the juices, setting up a mouthwatering base for the sandwich.

Step 5: Sauté the Onions
Remove the beef from the skillet and set it aside temporarily. In the same skillet, add sliced onions and sauté for about 5 minutes until they soften and become slightly caramelized. The sweetness of the onions will balance the savory beef beautifully, enhancing your sandwich experience.

Step 6: Combine the Ingredients
Return the beef to the skillet with the sautéed onions, and pour in 4 cups of beef broth and 1/4 cup of soy sauce. The broth will add rich depth and moisture, making every bite of your Savory Roasted French Dip Sandwich truly enjoyable.

Step 7: Roast the Beef
Cover the skillet with a lid or aluminum foil and place it in the preheated oven. Roast for approximately 3-4 hours, or until the beef is fork-tender and shreds easily. Keep an eye on the aroma; it will be heavenly as it fills your kitchen!

Step 8: Shred the Beef
Once the beef is done roasting, carefully remove it from the oven and let it rest for a few minutes. Then, using two forks, shred the beef into bite-sized pieces. This tender beef is what makes your Savory Roasted French Dip Sandwich incredibly satisfying.

Step 9: Preheat the Broiler
While the beef rests, preheat your broiler to high. This step is essential for getting that melty, bubbly cheese which elevates the sandwich to a whole new level of deliciousness.

Step 10: Prepare the Baguette
Cut the baguette pieces in half lengthwise and arrange them on a baking sheet, cut side up. Place slices of provolone cheese on one side of each baguette half, ensuring generous coverage as this will create a delightfully cheesy layer in your sandwich.

Step 11: Broil for Melty Goodness
Broil the baguette halves for about 2-3 minutes, or until the cheese is melted and bubbling. Keep a close watch to avoid burning; you want a lovely golden color that adds to the overall appeal of your Savory Roasted French Dip Sandwich.

Step 12: Assemble the Sandwiches
To assemble, pile the shredded beef onto the cheese-topped baguette halves. The combination of savory beef and gooey cheese nestled in the crusty baguette is irresistible. Don’t forget to spoon some of the cooking liquid from the skillet on top for added moisture!

Step 13: Serve with Dipping Sauce
Utilize the remaining cooking liquid as a rich dipping sauce for your sandwiches. This savory addition makes each bite even more enjoyable. Optionally, serve with horseradish sauce on the side for an extra kick that enhances the flavors of your Savory Roasted French Dip Sandwich.

Savory Roasted French Dip Sandwich

Make Ahead Options

These Savory Roasted French Dip Sandwiches are perfect for meal prep, making weeknight dinners a breeze! You can season and sear the beef chuck roast up to 24 hours in advance—just refrigerate it covered. The sautéed onions can also be prepared ahead and stored in an airtight container in the fridge for up to 3 days. When you’re ready to enjoy, simply add the previously prepped ingredients to the pot with beef broth and soy sauce, then roast as directed. This method not only saves time but also ensures the flavors meld beautifully, leaving you with a deliciously tender beef that tastes just as amazing as if you had made it in one go!

Expert Tips for Savory Roasted French Dip Sandwich

  • Choose the Right Roast: Use a beef chuck roast for its marbling and tenderness. Avoid lean cuts as they may dry out during the long roast.

  • Searing Essentials: Don’t skip the searing step! It locks in juices and creates a rich crust that deepens the flavor of your Savory Roasted French Dip Sandwich.

  • Season Generously: Be bold with your seasoning! Proper seasoning elevates the dish, ensuring every bite bursts with flavor.

  • Monitor Oven Time: Each oven is different. Check your beef around the 3-hour mark; you want it fork-tender but not overcooked.

  • Creative Dipping Options: Use the cooking liquid wisely as a dipping sauce. Experiment with additional spices like cayenne or smoked paprika for a unique flavor twist.

  • Storage Guidance: If you have leftovers, store the shredded beef and broth separately. This way, you can reheat without soggy bread for a quick meal the next day.

What to Serve with Savory Roasted French Dip Sandwich

Bring your dining experience to life with delicious companions that harmonize perfectly with each bite of your savory creation!

  • Creamy Mashed Potatoes: Silky smooth and buttery, they absorb the rich dipping sauce, creating a perfect match for comfort food lovers.

  • Garlic Parmesan Fries: Crispy on the outside and fluffy on the inside, these fries add a delightful crunch to balance the soft sandwich textures. Pair them with a sprinkle of fresh parsley for a pop of color!

  • Coleslaw: A refreshing crunch provides a pleasant contrast to the hearty beef, and its tangy dressing brightens every bite, making it a superb sidekick.

  • Roasted Vegetables: Roast a medley of seasonal veggies like carrots, bell peppers, and zucchini for a healthy touch. The natural sweetness complements the savory flavors beautifully.

  • French Onion Soup: Embrace the French theme with this rich, brothy delight. The cheesy crouton topping mirrors your sandwich’s melted provolone, creating a warm, comforting duo.

  • Crisp Green Salad: A simple arugula or mixed greens salad dressed lightly with vinegar can cleanse the palate and brighten the meal, making it feel lighter and refreshing.

  • Sparkling Water or Lemonade: Quench your thirst with a fizzy beverage that uplifts the rich flavors without overpowering them. A splash of citrus adds a refreshing zing!

  • Chocolate Chip Cookies: End your meal on a sweet note with warm cookies, which provide a nostalgic comfort that pairs nicely with that post-sandwich satisfaction!

Savory Roasted French Dip Sandwich Variations

Feel free to explore these delicious twists that bring new flavors and textures to your Savory Roasted French Dip Sandwich!

  • Gluten-Free: Use gluten-free rolls or lettuce wraps instead of baguettes for a suitable option.

  • Spicy Kick: Add sliced jalapeños or a sprinkle of red pepper flakes for heat that will thrill your taste buds. Even a small amount works wonders to awaken the flavors!

  • Herb Infusion: Swap the dried thyme and rosemary for fresh herbs like parsley or basil to amplify the freshness of the dish. Fresh herbs bring a vibrant idiom to your savory flavors!

  • Cheese Varieties: Experiment with different cheeses, like mozzarella or sharp cheddar, to add a unique flair to your sandwich. Each cheese will melt differently, creating diverse flavor experiences.

  • Vegetable Medley: Throw in some sautéed bell peppers or mushrooms with the onions for a hearty veggie twist. These add a delightful texture to every mouthful while ramping up the flavor profile!

  • Sweet BBQ: Drizzle a bit of your favorite barbecue sauce over the beef before serving for a sweet and smoky experience that’s sure to impress. It’s an unexpected flavor explosion that will surprise and delight!

  • Stuffed Baguette: Before broiling, add a layer of spinach or arugula to your assembled sandwiches for added freshness and a pop of color. This not only boosts nutrition but also gives visual appeal.

  • Baked Potatoes: Serve your French Dip with a side of loaded baked potatoes for a comforting meal. It’s a match made in cozy cuisine heaven that will leave you satisfied!

Feel free to mix and match these ideas; the journey in your kitchen is all about flavor exploration and personal touch. Happy cooking!

Storage Tips for Savory Roasted French Dip Sandwich

Fridge: Store any leftover shredded beef and broth in an airtight container in the fridge for up to 3 days. This keeps it fresh and ready to reheat!

Freezer: To enjoy your Savory Roasted French Dip Sandwich later, freeze the shredded beef and broth in separate airtight containers for up to 3 months. This helps maintain flavor and texture.

Reheating: When ready to eat, thaw in the fridge overnight, then reheat on the stove over low heat, adding a splash of broth to moisten the beef if needed.

Sandwich Assembly: For the best sandwich experience, assemble and broil fresh baguette halves with cheese just before serving, as this keeps the bread crispy and the cheese gooey!

Savory Roasted French Dip Sandwich

Savory Roasted French Dip Sandwich Recipe FAQs

What type of beef is best for the Savory Roasted French Dip Sandwich?
Choosing a beef chuck roast is key! It has the ideal marbling, which keeps the meat tender and juicy during the long roasting process. Avoid lean cuts like sirloin, as they can dry out and won’t shred as nicely.

How should I store leftovers from the Savory Roasted French Dip Sandwich?
Store any leftover shredded beef and broth in airtight containers in the fridge for up to 3 days. This keeps them fresh. If you want to save them longer, freeze the beef and broth in separate airtight containers for up to 3 months to maintain flavor and texture.

Can I freeze the Savory Roasted French Dip Sandwich?
Absolutely! To freeze, store the shredded beef and broth separately in airtight containers. When you’re ready to enjoy them again, thaw overnight in the fridge and reheat on the stove over low heat, adding a splash of broth for moisture.

What should I do if my beef isn’t shredding easily?
If your beef isn’t shredding well, it may need more time in the oven. Roast it for an additional 30 minutes to 1 hour, checking periodically. You’ll know it’s ready when it’s fork-tender and falls apart effortlessly for that mouthwatering Savory Roasted French Dip Sandwich.

Is there a way to make this recipe gluten-free?
Yes, you can easily make a gluten-free version of the Savory Roasted French Dip Sandwich. Just use gluten-free soy sauce or coconut aminos instead of regular soy sauce and make sure the baguette is gluten-free as well. There are some great gluten-free bread options available in stores nowadays!

Savory Roasted French Dip Sandwich for Cozy Nights In

This Savory Roasted French Dip Sandwich is a delightful, hearty meal perfect for cozy nights in, featuring slow-roasted beef with melty provolone.

  • Oven-safe skillet

For the Beef Roast

  • 2 lbs beef chuck roast (A great choice for braising.)
  • 1 tablespoon olive oil (Used for searing.)
  • 2 teaspoons kosher salt (Adjust to taste.)
  • 1 teaspoon black pepper
  • 1 teaspoon garlic powder
  • 1 teaspoon onion powder
  • 1 teaspoon dried thyme
  • 1 teaspoon dried rosemary

For the Onions and Broth

  • 1 large onion, sliced (Sweetens as it caramelizes.)
  • 4 cups beef broth (Opt for low-sodium if preferred.)
  • 1/4 cup soy sauce (Adds umami depth.)

For the Sandwich Assembly

  • 8 oz provolone cheese (Melts beautifully.)
  • to taste horseradish sauce (Optional.)

Step-by-Step Instructions

  1. Preheat your oven to 325°F (163°C) to prepare for a slow roast.
  2. In a large, oven-safe skillet, drizzle olive oil and heat over medium-high until shimmering.
  3. Generously season the beef chuck roast with kosher salt, black pepper, garlic powder, onion powder, dried thyme, and dried rosemary.
  4. Carefully place the seasoned roast into the skillet and sear for about 8-10 minutes, turning occasionally.
  5. Remove the beef from the skillet and set it aside. In the same skillet, add sliced onions and sauté for about 5 minutes.
  6. Return the beef to the skillet with the sautéed onions, then pour in beef broth and soy sauce.
  7. Cover the skillet and place it in the preheated oven. Roast for approximately 3-4 hours, or until fork-tender.
  8. Once done, remove the beef and let it rest for a few minutes before shredding it into bite-sized pieces.
  9. Preheat your broiler to high while the beef rests.
  10. Cut the baguette pieces in half lengthwise, arrange on a baking sheet, and place provolone cheese on each half.
  11. Broil the baguette halves for about 2-3 minutes, until the cheese is melted and bubbling.
  12. Assemble by piling the shredded beef onto the cheese-topped baguette halves and spoon some cooking liquid on top.
  13. Serve with the remaining cooking liquid as a dipping sauce and optional horseradish sauce on the side.

For the best sandwich experience, assemble and broil fresh baguette halves with cheese just before serving.

Sandwiches
American
beef sandwich, comfort food, Cozy Meal, Easy Recipe, Savory Roasted French Dip Sandwich, slow-roasted beef

Filed Under: Sandwiches

Zesty Pineapple Chicken Tacos for a Flavorful Twist

September 5, 2025 by grace bellamy Leave a Comment

The unexpected harmony of sweet and savory has always captivated my taste buds, and that’s precisely what drew me to these Pineapple Chicken Tacos. This dish combines the juiciness of marinated chicken thighs with tangy pineapple, creating a flavor explosion that dances on the palate. Not only are these tacos a fun twist on traditional flavors, but they also offer a quick prep time of just 15 minutes, making them perfect for any weeknight dinner. Plus, they’re easily customizable—add jalapeños for a kick or creamy avocado for a rich texture. Whether you’re cooking for yourself or hosting friends, these delightful tacos are sure to impress. What will you add to your stack of Pineapple Chicken Tacos?

Pineapple Chicken Tacos

Why are Pineapple Chicken Tacos a must-try?

Bursting with Flavor: The vibrant combination of marinated chicken and succulent pineapple creates a delightful taste.

Customization Galore: Personalize each taco with optional jalapeños for heat or creamy avocado for richness.

Quick and Easy: With a total time of just 25 minutes, these tacos are perfect for busy weeknights.

Crowd-Pleaser: Impress guests with a unique twist on classic tacos—they’re guaranteed to be a hit.

Healthy Indulgence: Packed with protein and lower in calories, feel good about serving this dish.

Enjoy these delicious Pineapple Chicken Tacos tonight, and consider adding a side dish like a fresh pineapple salsa for an extra zing!

Pineapple Chicken Tacos Ingredients

Unleash the flavor with these essential ingredients!

For the Chicken Marinade

  • 1 lb chicken thighs – The juicy, tender meat holds up beautifully to marinating and grilling.
  • 1 tbsp chili powder – Adds a delightful kick and depth to the chicken’s flavor.
  • 1 tsp cumin – Provides a warm, earthy note that complements the pineapple.
  • 1 tsp paprika – Brings a subtle sweetness and vibrant color to your dish.
  • 1 tbsp lime juice – Brightens the marinade, enhancing all the flavors.

For the Tacos

  • 8 tortillas – Choose corn or flour for your preferred texture; they’re the perfect vessel for filling!
  • 1 cup cubed pineapple – This adds a juicy sweetness that pairs wonderfully with the savory chicken.
  • ¼ cup diced red onion – Offers a crunchy bite and sharpness to balance the sweetness.
  • ¼ cup sliced jalapeño (optional) – Add this for a spicy kick if you love heat!
  • Avocado slices (optional) – Creamy avocado lends a rich texture and cooling contrast.
  • Chopped cilantro (for garnish) – Brightens the dish visually and adds a fresh herbaceous note.
  • Lime wedges (for serving) – Squeeze over the tacos just before eating for an extra zesty punch!

Embrace this delightful recipe for Pineapple Chicken Tacos tonight!

Step‑by‑Step Instructions for Pineapple Chicken Tacos

Step 1: Marinate the Chicken
In a mixing bowl, combine 1 lb chicken thighs with 1 tbsp chili powder, 1 tsp cumin, 1 tsp paprika, and 1 tbsp lime juice. Mix thoroughly to ensure every piece is well coated. Cover the bowl and let the chicken marinate in the refrigerator for at least 15 minutes, or up to 2 hours for maximum flavor.

Step 2: Cook the Chicken
Heat a grill or a skillet over medium-high heat until it’s hot. Add the marinated chicken thighs and cook for about 5-7 minutes on each side. The chicken should be fully cooked when the juices run clear, and an internal temperature of 165°F is reached. Once done, remove the chicken from the heat and let it rest for a few minutes before slicing or shredding it.

Step 3: Prepare the Tortillas
While the chicken rests, warm 8 tortillas in a dry skillet or microwave until they’re pliable. This should take about 1-2 minutes in the skillet or 20-30 seconds in the microwave. Warming the tortillas enhances their flavor and texture, making them the perfect base for your Pineapple Chicken Tacos.

Step 4: Assemble the Tacos
On each warm tortilla, layer slices or shreds of the cooked chicken, followed by 1 cup of cubed pineapple, and ¼ cup diced red onion. If desired, add ¼ cup sliced jalapeño for heat and avocado slices for creaminess. Each bite will burst with the delightful flavors of your Pineapple Chicken Tacos.

Step 5: Serve and Garnish
Serve the assembled tacos immediately with lime wedges on the side. Squeeze fresh lime juice over the tacos just before taking a bite for that extra zesty punch. Garnish with chopped cilantro to brighten the dish visually and enhance the flavors. Enjoy the vibrant tastes of your homemade Pineapple Chicken Tacos!

Pineapple Chicken Tacos

How to Store and Freeze Pineapple Chicken Tacos

Fridge: Store any leftovers in an airtight container in the refrigerator for up to 3 days to maintain freshness and flavor.

Freezer: If you want to enjoy your Pineapple Chicken Tacos later, freeze the marinated chicken before cooking. It keeps well for up to 3 months; just thaw overnight in the fridge before cooking.

Reheating: To reheat, warm the cooked chicken in a skillet over medium heat until heated through. Quickly warm the tortillas to prevent them from getting soggy before serving.

Ingredient Storage: Keep unused pineapple and toppings like avocado separately in the refrigerator. Use within 1-2 days for optimal freshness.

Pineapple Chicken Tacos Variations

Feel free to unleash your creativity and customize these tacos to delight your taste buds!

  • Spicy Twist: Add more jalapeños or even a dash of hot sauce to the marinade for an added kick.

  • Sweetened BBQ: Brush a bit of your favorite BBQ sauce on the chicken while grilling for a smoky-sweet flavor.

  • Vegetarian Delight: Replace chicken with black beans or grilled portobello mushrooms for a wholesome meatless version.

  • Tropical Upgrade: Incorporate diced mango or papaya along with the pineapple for a tropical fruit medley that brightens every bite.

  • Extra Crunch: Top with crunchy cabbage slaw or sliced radishes to add a refreshing texture contrast that elevates your tacos.

  • Herbaceous Boost: Mix fresh mint or basil with your cilantro garnish for a fresh taste explosion that beautifully complements the sweetness of the pineapple.

  • Delightfully Cheesy: Sprinkle crumbled feta or cotija cheese inside the tacos for a creamy, tangy addition that balances the dish beautifully.

  • Zesty Dressing: Drizzle a quick lime crema (sour cream mixed with lime juice and zest) over the assembled tacos for an added tangy finish.

These variations allow you to explore a world of flavors. Serve with a refreshing side salad or a bowl of tropical fruit salsa to make your meal truly unforgettable!

Expert Tips for Pineapple Chicken Tacos

  • Marinate Wisely: Allow the chicken to marinate for at least 30 minutes for better flavor absorption. The longer, the tastier!

  • Cook to Perfection: Use a meat thermometer to check that chicken reaches 165°F—this ensures it’s fully cooked without overcooking.

  • Tortilla Technique: Warm tortillas before assembly to prevent tearing. A dry skillet works wonders for a soft, pliable texture!

  • Layer Strategically: Start with chicken and then add pineapple and toppings to prevent sogginess. This keeps your Pineapple Chicken Tacos delightful until the last bite.

  • Customize: Don’t be afraid to mix up the ingredients! Add beans or corn for extra fiber, or switch to lean turkey for a lighter option.

Make Ahead Options

These Pineapple Chicken Tacos are perfect for meal prep enthusiasts looking to save time on busy weeknights! You can marinate the chicken thighs up to 24 hours in advance, allowing the flavors to deepen. Simply combine the chicken with the chili powder, cumin, paprika, and lime juice, cover, and refrigerate. Additionally, you can cut the pineapple and dice the red onion up to 3 days ahead, storing them in airtight containers in the refrigerator to maintain freshness. When you’re ready to serve, cook the marinated chicken, warm the tortillas, and assemble your tacos for a delightful meal that’s just as delicious as if you made everything fresh that day!

What to Serve with Pineapple Chicken Tacos

Elevate your taco night by pairing these vibrant Pineapple Chicken Tacos with delightful sides that enhance their flavor.

  • Crispy Plantains: Sweet and crunchy plantains bring a tropical flair that complements the juicy tacos beautifully. Their richness balances the fresh, zesty toppings perfectly.
  • Chilled Black Bean Salad: This refreshing salad adds protein and a mix of textures, while a lime dressing ties the flavors together, making a satisfying accompaniment.
  • Zesty Cilantro Rice: Fluffy rice infused with cilantro and lime brightens up the meal, providing a subtle, herbaceous undertone that pairs wonderfully with the tacos.
  • Grilled Corn on the Cob: Charred corn sprinkled with lime and chili powder offers a smoky-sweet crunch, creating a delightful contrast to the tender chicken and pineapple.
  • Mango Avocado Salad: A refreshingly fruity and creamy salad that combines sweet mango and creamy avocado to enhance the overall tropical theme of your meal.
  • Spicy Mexican Slaw: Crunchy cabbage and carrots with a spicy kick add a fresh bite that plays off the sweetness of the pineapple. This slaw is visually appealing and invigorating!
  • Coconut Agua Fresca: This light and refreshing drink balances the meal with its creamy texture and sweet flavor, perfect for washing down the zesty tacos.
  • Lime Sorbet: Finish off your meal with a chilled lime sorbet that echoes the lime in your tacos, providing a light and refreshing dessert to cleanse your palate.
  • Grilled Pineapple Skewers: Serve these sweet and caramelized skewers on the side for a fun and flavorful addition that repeats the pineapple theme while adding another layer of sweetness.

Pineapple Chicken Tacos

Pineapple Chicken Tacos Recipe FAQs

How do I choose the right pineapple for my Pineapple Chicken Tacos?
Absolutely! Look for pineapples that are firm yet slightly soft when pressed. The exterior should be golden-yellow or brown, and a sweet aroma should be present at the base. Avoid pineapples with dark spots all over, as they may be overripe or spoiled.

What’s the best way to store leftover Pineapple Chicken Tacos?
Very! Place any uneaten tacos in an airtight container in the fridge for up to 3 days. When ready to enjoy again, you can reheat the chicken and warm the tortillas for a fresh taste. If you have extra ingredients like pineapple or avocado, store them separately to maintain their freshness!

Can I freeze my Pineapple Chicken Tacos for later use?
Absolutely! To freeze, marinate your chicken thighs and place them in a freezer-safe bag, removing as much air as possible. The marinated chicken can be stored for up to 3 months. When you’re ready to cook, thaw the chicken in the fridge overnight, then follow the cooking steps provided in the recipe.

What can I do if my chicken turns out dry while cooking?
Ah, a common concern! If your chicken turns out dry, make sure to use a meat thermometer to check for doneness after cooking. The ideal internal temperature is 165°F. If you notice dryness, consider reducing cook time and ensuring proper marinating for moisture retention, which will provide a juicier result next time.

Are Pineapple Chicken Tacos safe for my pet?
It’s best not to share these tacos with pets. While chicken is usually safe for dogs, the spices and lime juice in the marinade can upset their stomachs. Likewise, pineapple is generally safe, but introduce new foods slowly to ensure there are no allergies.

Can I replace the chicken with a different protein in this recipe?
Very! Feel free to adapt the recipe to suit your preferences. You can substitute chicken thighs with ground turkey, beef, or even a plant-based protein like jackfruit or tofu. Just adjust the cooking times accordingly—ground meat usually cooks faster than chicken thighs!

Zesty Pineapple Chicken Tacos for a Flavorful Twist

These Pineapple Chicken Tacos combine marinated chicken thighs and tangy pineapple for a sweet and savory delight, perfect for any weeknight dinner.

  • Grill or skillet
  • Mixing Bowl
  • tongs

For the Chicken Marinade

  • 1 lb chicken thighs (The juicy, tender meat holds up beautifully to marinating and grilling.)
  • 1 tbsp chili powder (Adds a delightful kick and depth to the chicken’s flavor.)
  • 1 tsp cumin (Provides a warm, earthy note that complements the pineapple.)
  • 1 tsp paprika (Brings a subtle sweetness and vibrant color to your dish.)
  • 1 tbsp lime juice (Brightens the marinade, enhancing all the flavors.)

For the Tacos

  • 8 tortillas tortillas (Choose corn or flour for your preferred texture.)
  • 1 cup cubed pineapple (Adds a juicy sweetness that pairs wonderfully with the savory chicken.)
  • ¼ cup diced red onion (Offers a crunchy bite and sharpness to balance the sweetness.)
  • ¼ cup sliced jalapeño (Add this for a spicy kick if you love heat!)
  • Avocado slices (Creamy avocado lends a rich texture and cooling contrast.)
  • Chopped cilantro (Brightens the dish visually and adds a fresh herbaceous note.)
  • Lime wedges (Squeeze over the tacos just before eating for an extra zesty punch!)

Step‑by‑Step Instructions

  1. In a mixing bowl, combine chicken thighs with chili powder, cumin, paprika, and lime juice. Mix thoroughly and let marinate for at least 15 minutes.
  2. Heat a grill or skillet over medium-high heat and cook the marinated chicken for about 5-7 minutes on each side. Remove and let rest.
  3. Warm the tortillas in a dry skillet or microwave until pliable, about 1-2 minutes in a skillet or 20-30 seconds in a microwave.
  4. On each tortilla, layer cooked chicken, cubed pineapple, and diced onion. Add jalapeños and avocado slices if desired.
  5. Serve immediately with lime wedges on the side and garnish with chopped cilantro.

Consider adding a side of fresh pineapple salsa for an extra zing!

Main Dishes
Mexican
Chicken Tacos, easy dinner, Flavorful Tacos, Pineapple Chicken Tacos, Pineapple Tacos, Quick Tacos

Filed Under: Main Dishes

Delicious Strawberry Avocado Spinach Salad for a Fresh Boost

September 5, 2025 by grace bellamy Leave a Comment

As I sat in my sunlit kitchen, the sweet aroma of ripe strawberries permeated the room, instantly lifting my spirits. Today, I’m excited to share my Strawberry Avocado Spinach Salad with Poppyseed Dressing, a vibrant dish that’s both fresh and nutritious. Not only is this delightful salad gluten-free, but it also comes together in under 20 minutes—perfect for those busy weeknights when you crave something wholesome yet effortless. The combination of tender spinach, creamy avocado, and juicy strawberries, all drizzled in a luscious poppyseed dressing, is a guaranteed crowd-pleaser. Are you ready to elevate your salad game and surprise your taste buds? Let’s dive into this gem of a recipe!

Strawberry Avocado Spinach Salad

Why is this Salad a Game Changer?

Fresh and Nutritious: This Strawberry Avocado Spinach Salad is a vibrant burst of health, loaded with antioxidants and nutrients that nourish your body without compromising on taste.

Quick and Easy: With just 10 minutes of prep time, you can whip up this delicious salad, making it an ideal option for busy weeknights or spontaneous gatherings.

Crowd-Pleasing Flavors: The sweet strawberries, creamy avocado, and tangy poppyseed dressing offer a delightful dance of flavors that will impress family and friends alike, perfect for serving alongside a hearty Chicken Caesar Salad or a bright Pomegranate Rocket Salad.

Versatile: Feel free to customize this salad by adding nuts or crumbled feta cheese to boost its richness.

Gluten-Free Delight: Enjoy this salad guilt-free, as it’s entirely gluten-free and fits seamlessly into various dietary lifestyles.

Strawberry Avocado Spinach Salad Ingredients

• Here’s what you need to create this refreshing Salmon dish!

For the Salad

  • Fresh spinach – 4 cups – The base of this vibrant salad, packed with vitamins and minerals.
  • Strawberries – 1 cup, sliced – Adds a sweet and tangy burst that perfectly complements the flavors.
  • Avocado – 1, diced – Creamy richness that enhances the salad’s texture and nutritional value.
  • Red onion – ¼ cup, thinly sliced – Introduces a zesty kick and beautiful color.
  • Feta cheese (optional) – ½ cup, crumbled – A delightful addition for a savory touch if you’re in the mood for extra flavor.
  • Pecans or walnuts (optional) – ¼ cup, chopped – Provides a satisfying crunch and healthy fats.
  • Poppyseed dressing – ¼ cup – The perfect finishing touch, adding a hint of sweetness to the salad.

Feel free to mix and match these ingredients to suit your taste, making this Strawberry Avocado Spinach Salad your own signature dish!

Step‑by‑Step Instructions for Strawberry Avocado Spinach Salad

Step 1: Prepare the Spinach
In a large mixing bowl, add the 4 cups of fresh spinach. Using your hands, gently toss the spinach until it’s well mixed. Aim for a fluffy volume that feels light and vibrant, which will be the base for your Strawberry Avocado Spinach Salad. This should take about 1-2 minutes.

Step 2: Add the Strawberries
Next, take 1 cup of sliced strawberries and evenly scatter them over the tossed spinach. Their bright red color will create a beautiful contrast, enhancing the presentation. Enjoy the visually appealing layers as you prepare to add more fresh ingredients. This step should take around 1 minute.

Step 3: Incorporate the Avocado
Carefully dice 1 avocado, being cautious not to bruise the flesh. Scatter the diced avocado onto the salad, allowing its creamy texture to balance the crisp spinach and juicy strawberries. The vibrant green from the avocado will add richness to your Strawberry Avocado Spinach Salad. This will take about 2 minutes.

Step 4: Slice the Red Onion
Thinly slice ¼ cup of red onion, aiming for very fine pieces to avoid overpowering the salad. Add the sliced onion on top of the salad, contributing a zesty punch that complements the sweetness of the strawberries. This step should only take about 2 minutes, but the flavor it adds is priceless.

Step 5: Optional Toppings
If desired, sprinkle ½ cup of crumbled feta cheese and ¼ cup of chopped pecans or walnuts over the salad. These optional ingredients introduce savory and crunchy elements, enhancing your Strawberry Avocado Spinach Salad’s texture and flavor profile. This step will take about 1-2 minutes, depending on your preference.

Step 6: Dress the Salad
Drizzle ¼ cup of poppyseed dressing evenly over the top of the salad. Make sure to cover all areas to ensure that every bite is flavorful. The dressing adds a sweet and tangy layer, which melds beautifully with the fresh ingredients. This should take about 1 minute to pour and distribute.

Step 7: Toss Gently
Using tongs, gently toss the salad to combine all the ingredients without crushing the delicate avocado or wilting the spinach. Aim for a light mix that allows each element to shine while being coated in the poppyseed dressing. This tossing process should take about 1-2 minutes.

Step 8: Serve Immediately
Once tossed, serve your Strawberry Avocado Spinach Salad immediately for optimal freshness and flavor. The colors and textures will be at their best, providing a delightful eating experience. You can use an attractive serving bowl to display your creation beautifully!

Strawberry Avocado Spinach Salad

Strawberry Avocado Spinach Salad Variations

Feel free to give your Strawberry Avocado Spinach Salad a personalized twist that excites your taste buds and elevates this delightful dish!

  • Nut-Free: Omit nuts and replace with sunflower seeds for a tasty crunch without allergens. You’ll enjoy the delightful texture while keeping it light and allergy-friendly.

  • Vegan: Swap feta cheese for dairy-free cheese or simply leave it out to enjoy this salad fully plant-based. The creamy avocado still provides richness, making each bite satisfying.

  • Spicy Kick: Add thinly sliced jalapeños or a sprinkle of red pepper flakes for an exciting heat that contrasts beautifully with the sweetness of the strawberries. A little spice goes a long way in creating a balanced flavor profile.

  • Citrusy Twist: Drizzle fresh lime juice over the salad for a zesty brightness that beautifully complements the poppyseed dressing. Citrus adds an extra layer of freshness that’ll awaken your taste buds.

  • Grilled Addition: Toss in grilled chicken or shrimp for added protein, transforming this salad into a heartier meal. The smoky flavor from the grill adds a delightful depth, elevating your salad experience.

  • Herbal Upgrade: Enhance earthiness by adding fresh herbs like basil or mint, introducing awakenings of flavor that complement the other ingredients deliciously. Fresh herbs can completely transform the overall taste with their aromatic quality.

  • Fruity Mix: Substitute strawberries with other seasonal fruits like peaches or blueberries for a refreshing change that provides delightful bursts of sweetness. Fruit diversity keeps your salads exciting, offering a different flavor each time.

  • Crouton Crunch: Top with homemade croutons for a satisfying crunch. Toss stale bread with olive oil and herbs, bake until golden, and sprinkle atop the salad for an addictive texture contrast.

Each of these variations can make your Strawberry Avocado Spinach Salad an exciting and personalized dish that feels fresh every time. Need inspiration for more lovely salads? Don’t miss out on the vibrant flavors of a classic Chicken Salad or a beloved Pasta Salad to complement your meals!

Tips for the Best Strawberry Avocado Spinach Salad

  • Choose Fresh Ingredients: A crisp texture and vibrant colors come from using the freshest spinach, strawberries, and avocado. Wilted or overripe items can dull the salad’s overall appeal.

  • Cut Carefully: When dicing the avocado, use a gentle hand to avoid mashing it. This ensures beautiful, intact pieces that enhance the Strawberry Avocado Spinach Salad’s presentation.

  • Avoid Over-Dressing: Drizzle the poppyseed dressing moderately. Too much dressing can overwhelm the delicate flavors and textures of the salad, so adjust to your taste preference.

  • Assemble Just Before Serving: To keep the salad fresh and prevent sogginess, toss the ingredients and add the dressing just before serving. This ensures each bite is perfectly crisp.

  • Experiment with Toppings: While feta and nuts are fantastic additions, feel free to explore other toppings like sunflower seeds or goat cheese for varied flavors and textures in your Strawberry Avocado Spinach Salad.

What to Serve with Strawberry Avocado Spinach Salad

Imagine sitting at your table, savoring every vibrant bite of a strawberry avocado spinach salad while contemplating the perfect companions to elevate your meal.

  • Herb-Crusted Chicken: Juicy, baked chicken seasoned with fresh herbs adds a savory contrast to the freshness of the salad.
  • Creamy Tomato Basil Soup: A warm, comforting bowl of soup complements the salad perfectly, making it a wholesome option for any occasion.

This duo can be particularly fulfilling on a chilly day, creating a beautiful balance of warmth and freshness.

  • Quinoa Pilaf: Light, fluffy quinoa infused with herbs and vegetables enhances the nutritious element of your meal, making it even more satisfying.
  • Garlic Bread: Crispy, buttery garlic bread delivers a delightful crunch, making it a fantastic side to soak up any leftover dressing from the salad.

A plate of garlic bread brings extra warmth and heartiness that pairs wonderfully with the luscious flavors of the salad.

  • Lemonade or Iced Tea: A refreshing glass of lemonade or iced tea offers a burst of citrus, enhancing the bright flavors of the salad while keeping you cool.
  • Fruit Sorbet: Light and fruity sorbet serves as a refreshing dessert option, cleansing the palate after the savory courses.

This combination provides a refreshing end to your meal, leaving everyone delighted and satisfied.

How to Store and Freeze Strawberry Avocado Spinach Salad

Fridge: Store any leftover salad in an airtight container in the fridge for up to 2 days. Keep the poppyseed dressing separate until ready to serve to maintain freshness.

Freezer: It’s not recommended to freeze the assembled salad, as the textures of fresh ingredients like avocado and spinach can become mushy once thawed.

Prepped Ingredients: If you’d like to prepare components ahead of time, you can store individual ingredients like spinach, strawberries, and diced avocado separately in the fridge for up to 3 days. Assemble just before serving for the best taste.

Reheating: This salad is best served fresh and cold, so reheating isn’t applicable. Just toss well again before serving to refresh the flavors!

Make Ahead Options

Preparing your Strawberry Avocado Spinach Salad ahead of time is a fantastic way to save time during busy weeknights! You can wash and dry the spinach, slice the strawberries, and dice the avocado up to 24 hours in advance. To maintain freshness, store the spinach in an airtight container and keep the strawberries and avocado separate, as avocado can brown quickly; consider adding lemon juice to the diced avocado to prevent this. Additionally, you can prepare the dressing and refrigerate it for up to 3 days. When you’re ready to serve, simply combine the components in a bowl, toss gently with the dressing, and enjoy a fresh and vibrant salad that’s just as delicious as if it were made fresh!

Strawberry Avocado Spinach Salad

Strawberry Avocado Spinach Salad Recipe FAQs

What should I look for in fresh strawberries?
When selecting strawberries, look for vibrant red color and a glossy finish. They should be plump without dark spots or soft areas. Fresh strawberries typically have a sweet, fragrant aroma. Avoid any with dark spots or mold.

How should I store leftover Strawberry Avocado Spinach Salad?
Store any leftover salad in an airtight container in the fridge for up to 2 days. However, keep the poppyseed dressing separate until you’re ready to serve to help maintain the freshness and crunch of your ingredients.

Can I freeze prepared Strawberry Avocado Spinach Salad?
Freezing the assembled salad is not recommended, as fresh ingredients like avocado and spinach may turn mushy upon thawing. If you want to prepare in advance, store the individual components separately in the fridge for up to 3 days, and assemble just before serving.

What if my avocado is underripe?
If you’ve got an underripe avocado, place it in a paper bag at room temperature for 1-2 days, checking daily. To speed up the ripening process, add an apple or banana in the bag. Once ripe, it should yield slightly when gently pressed.

Are there any dietary considerations for this salad?
Absolutely! This salad is gluten-free as it contains no gluten-laden ingredients. If you’re serving it to guests, you may want to check for nut allergies if you’re adding pecans or walnuts. Also, if someone is avoiding dairy, simply leave out the feta cheese.

How can I enhance the flavor if my strawberries are not sweet enough?
If your strawberries lack sweetness, consider macerating them! Simply slice the strawberries and toss them with a teaspoon of sugar or honey. Let them sit for 10-15 minutes at room temperature, allowing the juices to mingle and create a sweet syrup. Add these to your salad for that extra burst of flavor!

Delicious Strawberry Avocado Spinach Salad for a Fresh Boost

Enjoy a vibrant and nutritious Strawberry Avocado Spinach Salad, loaded with fresh ingredients and a delicious poppyseed dressing.

  • Mixing Bowl
  • tongs

For the Salad

  • 4 cups fresh spinach (The base of this vibrant salad, packed with vitamins and minerals.)
  • 1 cup strawberries (Adds a sweet and tangy burst that perfectly complements the flavors.)
  • 1 avocado (Creamy richness that enhances the salad’s texture and nutritional value.)
  • 1/4 cup red onion (Introduces a zesty kick and beautiful color.)
  • 1/2 cup feta cheese (Optional, for a delightful addition for a savory touch.)
  • 1/4 cup pecans or walnuts (Optional, provides a satisfying crunch and healthy fats.)
  • 1/4 cup poppyseed dressing (The perfect finishing touch, adding a hint of sweetness.)

Step-by-Step Instructions

  1. In a large mixing bowl, add the 4 cups of fresh spinach and toss gently until well mixed.
  2. Scatter 1 cup of sliced strawberries evenly over the tossed spinach.
  3. Carefully dice 1 avocado and scatter the cubes onto the salad.
  4. Slice 1/4 cup of red onion thinly and add on top of the salad.
  5. Optional: Sprinkle 1/2 cup of crumbled feta cheese and 1/4 cup of chopped nuts over the salad.
  6. Drizzle 1/4 cup of poppyseed dressing evenly over the salad.
  7. Using tongs, gently toss the salad to combine all the ingredients.
  8. Serve immediately for optimal freshness and flavor.

Assemble just before serving to keep the salad fresh. Feel free to customize with other toppings.

Salad
American
fresh salad, gluten-free salad, healthy salad, quick salad, Strawberry Avocado Spinach Salad, vegetarian salad

Filed Under: salad

Irresistibly Tangy Sweet and Sour Chicken Your Family Will Love

September 5, 2025 by grace bellamy Leave a Comment

As I opened the fridge, a wave of inspiration washed over me, fueled by the vibrant colors of fresh produce waiting to be transformed. That’s when I knew it was the perfect night for my family-favorite Sweet and Sour Chicken. This dish takes mere moments to prepare and cook, making it an ideal option for busy weeknights, yet it’s packed with flavors that will impress even the most discerning palates. The combination of tender chicken, crisp bell peppers, and sweet pineapple creates a beautiful harmony, while the tangy sauce beautifully balances everything out. Whether served over fluffy rice or noodles, this dish is a stellar way to bring everyone together around the table. Curious how easy it is to whip up this delightful meal?

Sweet and Sour Chicken

How can you make Sweet and Sour Chicken?

Simplicity at its best: This recipe is quick and straightforward, making it a hassle-free choice for busy evenings. Flavorful fusion: The delightful combination of tangy sauce, chicken, and fresh veggies is sure to tantalize your taste buds. Crowd-pleaser: Perfect for family dinners, this dish appeals to both adults and kids alike. Versatile serving options: Serve it over rice or noodles to satisfy everyone’s cravings. Meal prep friendly: You can easily double the recipe for quick leftovers throughout the week! Don’t forget to check out my tips on mealtime hacks for busy days!

Sweet and Sour Chicken Ingredients

For the Chicken
• 1 lb boneless, skinless chicken breasts – cut into pieces for quick cooking and tender bites.
• 1/4 cup cornstarch – helps create a crispy coating that locks in moisture.

For the Sauce
• 1/2 cup vinegar – use white or apple cider vinegar for that tangy kick.
• 1/4 cup ketchup – adds a sweet depth to the classic sweet and sour flavor profile.
• 2 tablespoons soy sauce – provides an umami boost that enhances the dish.
• 3/4 cup sugar – balances the acidity with just the right amount of sweetness.
• 2 teaspoons minced garlic – infuses the dish with aromatic richness.
• 1 tablespoon grated ginger – brings a fresh, zesty note to the sauce.

For the Vegetables
• 2 tablespoons vegetable oil – ensures optimal cooking without frying hard.
• 1 red bell pepper – adds vibrant color and a sweet crunch.
• 1 green bell pepper – contributes to the dish’s freshness and adds another layer of flavor.
• 1 medium onion – caramelizes beautifully, adding sweetness to the entire dish.
• 1 cup pineapple chunks – enhances the sweet and sour taste, adding juiciness.

For Seasoning
• Salt and pepper to taste – essential for enhancing all the flavors in your Sweet and Sour Chicken.
• 2 tablespoons water (optional) – for thinning the sauce if needed.
• 1 tablespoon cornstarch (optional, for thickening) – perfect for getting the sauce to your desired consistency.

Step‑by‑Step Instructions for Sweet and Sour Chicken

Step 1: Coat the Chicken
Begin by placing your cut chicken pieces into a large bowl and sprinkle with cornstarch. Toss the chicken until each piece is well-coated, creating a barrier that will help lock in moisture. This step is crucial for achieving tender and juicy Sweet and Sour Chicken once cooked.

Step 2: Brown the Chicken
Heat 1 tablespoon of vegetable oil in a large skillet over medium-high heat. Once the oil shines, carefully add the coated chicken pieces to the skillet. Allow the chicken to cook, stirring occasionally for about 5–7 minutes, or until they turn golden brown and are cooked through. Remove the cooked chicken and set aside on a plate.

Step 3: Stir-Fry the Vegetables
In the same skillet, add the remaining tablespoon of vegetable oil and immediately toss in the chopped red and green bell peppers and onion. Stir-fry the vegetables on medium-high heat for about 3–4 minutes until they are just tender and vibrant in color. This will add a wonderful crunch to your Sweet and Sour Chicken.

Step 4: Mix the Sauce
In a medium bowl, combine the vinegar, ketchup, soy sauce, sugar, minced garlic, and grated ginger. Whisk the mixture until the sugar is dissolved, creating a smooth and aromatic sauce. This mixture will provide the sweet tang that makes your Sweet and Sour Chicken so irresistible.

Step 5: Combine Chicken and Sauce
Return the browned chicken to the skillet with the stir-fried vegetables. Pour the prepared sauce over the chicken and vegetables, stirring well to thoroughly coat everything in this luscious mixture. Allow it to cook together for about 2–3 minutes, letting the flavors infuse.

Step 6: Add Pineapple Chunks
Now, stir in the pineapple chunks, and give everything a good mix. Let the Sweet and Sour Chicken simmer gently for about 5 minutes, allowing the dish to come together beautifully and the sauce to meld with the sweetness of the pineapple.

Step 7: Thicken the Sauce
If you prefer a thicker sauce, combine the additional 1 tablespoon of cornstarch with 2 tablespoons of water in a small bowl. Pour this mixture into the skillet while stirring constantly. Cook for another 2–3 minutes until the sauce reaches your desired thickness.

Step 8: Season and Serve
Taste your Sweet and Sour Chicken and adjust the seasoning with salt and pepper, if necessary. Once you’re satisfied with the flavor, serve the dish over fluffy rice or noodles. Garnish with chopped green onions for added freshness and enjoy a delightful meal with your loved ones!

Sweet and Sour Chicken

What to Serve with Sweet and Sour Chicken

Transform your meal into a delightful feast with these perfect pairings that enhance every bite of sweet and tangy goodness.

  • Fluffy Jasmine Rice: Serves as a fragrant base that soaks up the vibrant sauce, providing a comforting texture that complements the dish beautifully.
  • Crispy Egg Rolls: These appetizers add a delightful crunch and are filled with flavor, making an enticing contrast to the soft chicken and sweet sauce.
  • Stir-Fried Broccoli: Tender-crisp broccoli brings a vibrant green color and natural sweetness, buffering the tanginess of the chicken and boosting nutritional value.
  • Coconut Sticky Rice: Infused with a hint of coconut, this dish offers a delicate sweetness that pairs wonderfully with the bold flavors of sweet and sour chicken.
  • Fresh Cucumber Salad: A cool, refreshing side that brings a crisp texture and lightness, balancing the richness of the main dish while adding a burst of freshness.
  • Mango Smoothie: This fruity drink completes the meal, echoing the sweetness of the pineapple and providing a delightful contrast to the tangy notes of the chicken.
  • Chocolate Spring Rolls: To satisfy the sweet tooth, these intriguing desserts add a playful twist to the end of your meal, echoing the playful flavors of the dish.

Tips for the Best Sweet and Sour Chicken

Perfect Coating: Ensure each chicken piece is thoroughly coated with cornstarch to achieve that delicious crispy texture.

Avoid Overcrowding: When browning the chicken, work in batches if necessary to maintain a high cooking temperature, resulting in better browning.

Taste Test: Always taste the sauce before serving; adjust the sweetness or acidity with extra sugar or vinegar to suit your palate.

Pineapple Placement: Add pineapple chunks towards the end to keep them juicy and avoid overcooking, preserving their sweetness in the Sweet and Sour Chicken.

Thickening Trick: If you desire a thicker sauce, remember to mix cornstarch with cold water before adding it to the skillet for smoother results.

Make Ahead Options

These Sweet and Sour Chicken is perfect for meal prep lovers! You can easily coat the chicken pieces with cornstarch and chop the vegetables up to 24 hours in advance, storing them separately in the refrigerator to maintain their freshness and crispness. You can also mix the sauce ingredients ahead of time and refrigerate it for up to 3 days. When you’re ready to serve, simply brown the chicken, stir-fry the vegetables, and combine everything with the prepared sauce and pineapple chunks. This approach will have you enjoying this delightful dish without the last-minute rush, saving you precious time on busy weeknights!

How to Store and Freeze Sweet and Sour Chicken

Fridge: Store leftover Sweet and Sour Chicken in an airtight container in the fridge for up to 3 days. Reheat gently on the stove or in the microwave until hot throughout.

Freezer: For longer storage, freeze the dish in an airtight container or freezer bag for up to 2 months. When ready to enjoy, thaw overnight in the fridge before reheating.

Reheating: When reheating, add a splash of water to the skillet to help revive the sauce and prevent drying. Heat over medium until warmed through.

Serving: For best results, avoid freezing any rice or noodles you plan to serve with your Sweet and Sour Chicken, as they can become mushy once frozen and reheated.

Sweet and Sour Chicken Variations

Feel free to get creative with this delightful recipe and cater it to your taste buds!

  • Gluten-Free: Substitute cornstarch and soy sauce with gluten-free options for a safe, flavorful dish.
  • Pineapple-Free: Swap pineapple chunks with diced peaches or mango for a sweet twist. This will still give you that delicious fruitiness without traditional pineapple.
  • Vegetable Boost: Add broccoli, snap peas, or carrots for extra crunch and nutrition. The more colorful your dish, the more appealing it becomes!
  • Spicy Kick: Introduce sliced jalapeños or red pepper flakes for a zing that sets your taste buds dancing. Just a little can elevate the sweet and sour balance beautifully.
  • Crispy Texture: Toss in some cashews or peanuts at the end for a nutty crunch that adds depth. The mix of flavors and textures will surely impress your family and friends!
  • Baked Version: For a healthier alternative, bake the chicken instead of frying it—just coat your chicken pieces in cornstarch and place them on a baking sheet. Serve it with the sweet and sour sauce drizzled on top for that classic flavor with less oil.
  • Coconut Twist: Incorporate coconut milk into the sauce for a tropical flair. The creamy sweetness will transport your meal to a sunny beach!
  • Meal Prep Friendly: Double the recipe and divide it into portions for quick meals throughout the week. This way, you have a vibrant dish ready when the busy night calls, and you can enjoy delightful leftovers!

Don’t forget to savor the cooking process, and consider pairing this Sweet and Sour Chicken with a refreshing side like a homemade Asian slaw or crispy spring rolls for a complete meal sensation!

Sweet and Sour Chicken

Sweet and Sour Chicken Recipe FAQs

How do I know if my chicken is fresh?
Look for chicken that is pink and moist, without any grey discoloration or foul odor. The skin should be smooth and not slimy. If you notice any dark spots or unusual textures, it’s best to avoid it.

What’s the best way to store leftover Sweet and Sour Chicken?
Store leftover Sweet and Sour Chicken in an airtight container in the fridge for up to 3 days. If you plan to enjoy it later, reheat gently on the stove or in the microwave until heated through. Always ensure it reaches an internal temperature of 165°F for safe consumption.

Can I freeze Sweet and Sour Chicken?
Absolutely! You can freeze Sweet and Sour Chicken in an airtight container or freezer bag for up to 2 months. To thaw, place it in the fridge overnight before reheating. When ready to enjoy, add a splash of water to help revive the sauce and heat over medium until warmed.

What if my sauce is too thin?
If your sauce turns out too thin, don’t worry! You can thicken it by mixing 1 tablespoon of cornstarch with 2 tablespoons of cold water until smooth. Gradually stir this into the skillet and let it simmer for a few minutes until it thickens nicely. This technique works wonders!

Is Sweet and Sour Chicken safe for pets?
Generally, Sweet and Sour Chicken shouldn’t be fed to pets, particularly because of the sugars, vinegar, and soy sauce content, which can be harmful to them. If you’d like to give your furry friend a treat, consider plain cooked chicken without added sauces.

Can I make Sweet and Sour Chicken gluten-free?
Yes, you can easily adapt this recipe! Swap out the soy sauce for a gluten-free variety, and use a cornstarch or any gluten-free thickener. This way, everyone can enjoy a delicious meal without worrying about gluten sensitivities!

Irresistibly Tangy Sweet and Sour Chicken Your Family Will Love

This Sweet and Sour Chicken is a delightful dish combining tangy sauce, chicken, and fresh vegetables, perfect for family dinners.

  • skillet
  • Mixing Bowl

For the Chicken

  • 1 lb boneless, skinless chicken breasts (cut into pieces for quick cooking)
  • 1/4 cup cornstarch (helps create a crispy coating)

For the Sauce

  • 1/2 cup vinegar (white or apple cider vinegar for tanginess)
  • 1/4 cup ketchup (adds sweetness)
  • 2 tablespoons soy sauce (provides umami boost)
  • 3/4 cup sugar (balances acidity)
  • 2 teaspoons minced garlic (adds aromatic richness)
  • 1 tablespoon grated ginger (adds fresh flavor)

For the Vegetables

  • 2 tablespoons vegetable oil (for cooking)
  • 1 unit red bell pepper (adds color and crunch)
  • 1 unit green bell pepper (adds freshness)
  • 1 medium onion (adds sweetness)
  • 1 cup pineapple chunks (enhances sweet and sour taste)

For Seasoning

  • Salt (to taste)
  • Pepper (to taste)
  • 2 tablespoons water (optional for thinning the sauce)
  • 1 tablespoon cornstarch (optional for thickening)

Step-by-Step Instructions

  1. Coat the chicken pieces with cornstarch in a large bowl.
  2. Heat 1 tablespoon of vegetable oil in a skillet over medium-high heat and brown the chicken for 5–7 minutes.
  3. Stir-fry red and green bell peppers and onion in the skillet for 3–4 minutes until tender.
  4. Mix vinegar, ketchup, soy sauce, sugar, garlic, and ginger in a bowl to create the sauce.
  5. Combine the browned chicken and vegetables with the sauce in the skillet and cook for 2–3 minutes.
  6. Add pineapple chunks to the skillet and simmer for 5 minutes.
  7. For a thicker sauce, mix cornstarch with water and stir into the skillet, cooking for another 2–3 minutes.
  8. Adjust seasoning with salt and pepper and serve over rice or noodles.

Store leftovers in an airtight container in the fridge for up to 3 days. Reheat gently. For freezing, use an airtight container for up to 2 months. Avoid freezing rice or noodles to maintain quality.

Main Dishes
Asian
Chicken Stir Fry, Easy Chicken Recipes, family meals, quick dinners, Sweet and Sour Chicken, weeknight dinners

Filed Under: Main Dishes

Iced Lemon Lavender Shortbread Cookies for Sweet Serenity

September 5, 2025 by grace bellamy Leave a Comment

The refreshing scent of lemon and fragrant lavender wafting from the oven is enough to transport me to a sun-drenched garden in full bloom. That’s exactly what I crave when I bake these Iced Lemon Lavender Shortbread Cookies. This delightful recipe not only satisfies your sweet tooth but also offers a wonderful escape from the ordinary cookie experience. With just a quick 10 minutes of prep time, you can produce a batch of cookies that are elegant, yet approachable—perfect for impressing guests at a tea party or enjoying with your afternoon cup of coffee. Plus, they’re easy to freeze, so you can always have a few on hand for unexpected cravings. Are you ready to add a touch of sunshine to your baking?

Iced Lemon Lavender Shortbread Cookies

Why Will You Love These Cookies?

Simplicity: The ingredient list is short, making this recipe easy to follow for home bakers of all skill levels.

Zesty Refreshment: The bright notes of lemon combined with floral lavender elevate traditional shortbread into an elegant treat.

Versatile Appeal: Whether for a brunch, dessert table, or a quiet evening at home, these cookies cater to every occasion.

Freezer-Friendly: Whip up a batch and store them for later enjoyment, ensuring you always have a sweet surprise ready.

Culinary Adventure: Infusing culinary lavender opens up a whole new world of flavors in your baking repertoire.

With these Iced Lemon Lavender Shortbread Cookies, every bite is a delightful experience! Don’t forget to try more delightful options like our Homemade Biscotti for a crunchy accompaniment to your tea.

Iced Lemon Lavender Shortbread Cookies Ingredients

For the Dough
• Unsalted butter – 1 cup, softened; essential for rich flavor and a tender texture.
• Powdered sugar – 1/2 cup; gives the cookies a melt-in-your-mouth consistency.
• Granulated sugar – 1/4 cup; balances sweetness and helps achieve perfect browning.
• All-purpose flour – 2 cups; the backbone of the cookie, providing structure and stability.
• Salt – 1/4 tsp; enhances the flavors and balances sweetness.
• Fresh lemon juice – 2 tbsp; adds a zesty kick that brightens the overall taste.
• Lemon zest – 2 tsp; intensifies the lemon flavor and aroma in every bite.
• Dried culinary lavender – 1 tbsp; infuses a delicate floral note to your Iced Lemon Lavender Shortbread Cookies.

For the Icing
• Powdered sugar – 1 cup; creates a smooth glaze perfect for drizzling.
• Fresh lemon juice – 2-3 tbsp; ensures the icing has the right consistency and a zesty flavor.

Get ready to indulge in these delightful cookies, bringing a touch of sunshine to your baking adventures!

Step‑by‑Step Instructions for Iced Lemon Lavender Shortbread Cookies

Step 1: Preheat Your Oven
Begin by preheating your oven to 325°F (163°C). This ensures a consistent temperature for baking your Iced Lemon Lavender Shortbread Cookies. While the oven warms, gather your mixing bowl and other baking equipment, like a whisk and baking sheet lined with parchment paper, to streamline your process.

Step 2: Cream the Butter and Sugars
In a mixing bowl, cream together 1 cup of softened unsalted butter, 1/2 cup of powdered sugar, and 1/4 cup of granulated sugar until the mixture is smooth and fluffy, about 3-4 minutes. You’ll want the sugars nicely incorporated for that delightful melt-in-your-mouth texture.

Step 3: Combine Dry Ingredients
Gradually add 2 cups of all-purpose flour and 1/4 teaspoon of salt to the butter mixture, mixing on low speed until just combined. The dough will begin to come together, and you want to avoid overmixing, which could toughen your cookies.

Step 4: Add Lemon and Lavender
Stir in 2 tablespoons of fresh lemon juice, 2 teaspoons of lemon zest, and 1 tablespoon of dried culinary lavender, ensuring each ingredient is evenly distributed throughout the dough. The floral scent mingling with the citrus will elevate your shortbread cookies to a fragrant delight.

Step 5: Chill the Dough
Shape the dough into a log and wrap it tightly in plastic wrap. Refrigerate for about 30 minutes to firm up, making it easier to slice. While the dough chills, clean your workspace and prepare your baking sheet for the next steps.

Step 6: Slice and Arrange Cookies
Once chilled, remove the dough from the refrigerator and slice it into 1/4-inch thick rounds. Place them on the prepared baking sheet, leaving some space in between to allow for spreading while baking. Your dough should look beautifully round and firm at this stage.

Step 7: Bake the Cookies
Bake in your preheated oven for 12-15 minutes, or until the edges are slightly golden. Keep an eye on them, as you want the cookies to retain their pale color while allowing that perfect golden edge to form, signaling they’re done.

Step 8: Cool the Cookies
After baking, let the cookies cool completely on a wire rack. This cooling process is vital to ensure the structure fully sets before you add the icing. The aroma of your Iced Lemon Lavender Shortbread Cookies will fill your kitchen beautifully during this time.

Step 9: Prepare the Icing
While your cookies cool, whisk together 1 cup of powdered sugar and 2-3 tablespoons of fresh lemon juice in a bowl. Aim for a smooth consistency that’s thick but pourable. This lemon icing will add an extra zesty sheen to your cookies, making them even more irresistible.

Step 10: Drizzle the Icing
Once the cookies are completely cool, drizzle the prepared icing over the top of each cookie. Feel free to sprinkle a bit of additional lavender if desired for a beautiful finish. This step adds elegance and a touch of sweetness to your Iced Lemon Lavender Shortbread Cookies.

Iced Lemon Lavender Shortbread Cookies

Make Ahead Options

These Iced Lemon Lavender Shortbread Cookies are a perfect treat to prepare in advance, saving you precious time on busy days! You can make the cookie dough up to 24 hours ahead of time by shaping it into a log, wrapping it tightly in plastic wrap, and refrigerating. The flavors will meld beautifully, ensuring they are just as delightful when baked. Additionally, once baked and cooled, these cookies can be stored in an airtight container for up to 3 days at room temperature or frozen for up to 3 months. When you’re ready to serve, simply drizzle the icing over the cookies and enjoy a moment of sweet serenity without the last-minute scramble!

Iced Lemon Lavender Shortbread Cookies Variations

Feel free to sprinkle some creativity into your baking with these delightful twists on the classic recipe!

  • Gluten-Free: Substitute all-purpose flour with a gluten-free flour blend for a celiac-friendly option. The cookies will still offer a delightful crunch and buttery flavor.

  • Herb Infusion: Try adding fresh rosemary or thyme instead of lavender for an aromatic spin that pairs beautifully with the lemon. The savory notes will elevate the cookie and pique your interest.

  • Nutty Crunch: Incorporate 1/2 cup of finely chopped nuts, such as almonds or pistachios, into the dough for an unexpected texture. This adds a lovely crunch and complements the sweet and floral notes.

  • Decadent Chocolate: Swirl some melted chocolate into your icing or add chocolate chunks to the cookie dough for a rich contrast against the lemon. Who doesn’t love the harmony of lemon and dark chocolate?

  • Citrus Twist: Mix in a touch of orange or lime zest along with the lemon zest for a vibrant citrus bouquet. It provides a refreshing zing that dances on your palate and brightens the cookie’s character.

  • Spiced Up: Incorporate a pinch of cardamom or ginger powder into the dough for a warm, spicy undertone that beautifully complements the citrus and lavender. It’s a fun twist that makes your cookies truly unique.

  • Dairy-Free: Use coconut oil in place of butter and a dairy-free powdered sugar for a vegan version. You won’t lose the rich flavor, and the coconut adds a delightful twist.

  • Addition of Cream Cheese: Fold in 1/4 cup of softened cream cheese into the dough for a richer texture. It will make your cookies even more melt-in-your-mouth delicious!

Now, as you explore these variations, consider pairing your cookies with a warm cup of tea or our cozy Homemade Biscotti to complete your sweet treat experience!

How to Store and Freeze Iced Lemon Lavender Shortbread Cookies

Room Temperature: Store the cookies in an airtight container at room temperature for up to 5 days. This keeps them fresh and maintains their delightful texture.

Fridge: If you prefer a longer shelf life, keep the cookies in the fridge for up to 2 weeks. Just ensure they’re well-wrapped to avoid moisture.

Freezer: For extended storage, freeze the cookies in a single layer on a baking sheet until solid, then transfer to a freezer-safe container. They can be frozen for up to 3 months.

Reheating: To enjoy the cookies warm, pop them in a preheated oven at 350°F (175°C) for about 5-7 minutes. This will refresh the Iced Lemon Lavender Shortbread Cookies and give them a freshly baked feel.

What to Serve with Iced Lemon Lavender Shortbread Cookies

The fragrant allure of lemon and lavender creates a sweet charm at your table, making every bite a sunny escape.

  • Herbal Tea: A warm cup of chamomile or mint tea beautifully complements the floral notes of the cookies while adding a soothing touch.
  • Fresh Berries: A mixed berry medley provides a juicy contrast to the buttery texture, enhancing the freshness in every bite.
  • Creamy Whipped Cream: A dollop of lightly sweetened whipped cream adds richness, creating a delightful contrast with the cookies’ lightness.
  • Fruit Salad: A refreshing fruit salad with citrus segments harmonizes perfectly, complementing the cookies’ floral flavors for a light dessert.
  • Sparkling Lemonade: The fizzy, zesty notes of sparkling lemonade mirror the flavors in the cookies, making a joyful pairing for sunny afternoons.
  • Lavender-Infused Lemonade: Elevate your drink game with lavender lemonade that echoes the cookie’s floral essence, enhancing the whole experience beautifully.
  • Vanilla Ice Cream: A scoop of vanilla ice cream drizzled with lemon syrup can be a delightful treat, offering a creamy taste to balance the zesty cookie.
  • Almond Biscotti: For a crunchy complement, serve some almond biscotti alongside; their nutty flavor pairs well with the sweet lemony cookies.

Indulging in these pairings will create a delightful spread, making any occasion feel particularly special!

Expert Tips for Iced Lemon Lavender Shortbread Cookies

Chill the Dough: Properly chilling the dough for at least 30 minutes helps maintain shape and enhances the texture. Don’t skip this step!

Don’t Overmix: When incorporating flour, mix just until combined. Overmixing can lead to tough cookies instead of the tender bite you desire in your Iced Lemon Lavender Shortbread Cookies.

Watch the Baking Time: Each oven is different! Check your cookies at the 12-minute mark to prevent over-baking. They should have slightly golden edges and a pale center.

Cool Completely: Allow the cookies to cool completely on a wire rack before icing. This prevents the frosting from melting into the cookies and losing its beautiful drizzle effect.

Opt for Quality Ingredients: Use fresh lemons and high-quality culinary lavender for the best flavor. This makes a noticeable difference in your finished cookies.

With these tips in mind, you’re well on your way to creating the most delightful Iced Lemon Lavender Shortbread Cookies you can share (or keep all to yourself!).

Iced Lemon Lavender Shortbread Cookies

Iced Lemon Lavender Shortbread Cookies Recipe FAQs

How can I ensure my lavender is safe to use in cooking?
Absolutely! When choosing lavender for your Iced Lemon Lavender Shortbread Cookies, make sure it’s labeled as culinary lavender. This means it’s specifically grown for consumption and free from pesticides. Dried culinary lavender, like English or French varieties, can often be found in specialty herb shops or online.

How should I store my cookies to keep them fresh?
For optimal freshness, store your cookies in an airtight container at room temperature for up to 5 days. This method helps maintain their delicate texture and flavor. If they last longer than that (though I doubt they will!), consider placing them in the fridge, where they can stay fresh for another week or two if properly wrapped.

Can I freeze the cookies, and if so, how?
Yes, you can definitely freeze these delightful cookies! First, lay them in a single layer on a baking sheet and pop them in the freezer until they’re solid, which usually takes about 1-2 hours. Once they’re firm, transfer them to a freezer-safe container and store for up to 3 months. When you’re ready to enjoy them, just thaw them at room temperature or reheat in a preheated oven at 350°F (175°C) for about 5-7 minutes.

What if my dough seems too sticky?
A slightly sticky dough can happen, especially if the butter was too warm. If your dough is unmanageable, sprinkle a bit more flour while kneading until it holds together better. Just be careful not to add too much, as it could affect the final texture. Shape the dough into a log, wrap it, and chill for about 30 minutes to help it firm up.

Are there any dietary considerations I need to be aware of?
Absolutely! If you’re baking for someone with dietary restrictions, be sure to check if they have allergies to any of the ingredients. The cookies contain butter and wheat, which can be problematic for those with dairy or gluten allergies. You might consider using a gluten-free all-purpose flour blend and dairy-free butter substitutes for those with dairy or gluten sensitivities.

Can I use other flavors or extracts instead of lemon?
Very! While lemon and lavender make a lovely combination, feel free to experiment with other flavors. Orange zest could add a vibrant citrus alternative, while a dash of vanilla extract can create a warmer taste profile. Just be sure to balance the sweetness of the icing to match any flavor changes you make.

Iced Lemon Lavender Shortbread Cookies for Sweet Serenity

Iced Lemon Lavender Shortbread Cookies offer a delightful escape with zesty lemon and floral lavender, perfect for any occasion.

  • Mixing Bowl
  • Whisk
  • Baking Sheet
  • parchment paper
  • Plastic wrap

For the Dough

  • 1 cup unsalted butter (softened)
  • 1/2 cup powdered sugar (for melt-in-your-mouth consistency)
  • 1/4 cup granulated sugar (balances sweetness)
  • 2 cups all-purpose flour (provides structure)
  • 1/4 tsp salt (enhances flavors)
  • 2 tbsp fresh lemon juice (adds a zesty kick)
  • 2 tsp lemon zest (intensifies flavor)
  • 1 tbsp dried culinary lavender (infuses floral notes)

For the Icing

  • 1 cup powdered sugar (for a smooth glaze)
  • 2-3 tbsp fresh lemon juice (for consistency and flavor)

Step-by-Step Instructions

  1. Preheat your oven to 325°F (163°C). Prepare a mixing bowl and baking sheet lined with parchment paper.
  2. Cream together the unsalted butter, powdered sugar, and granulated sugar until smooth and fluffy, about 3-4 minutes.
  3. Gradually add all-purpose flour and salt to the butter mixture, mixing on low speed until just combined.
  4. Stir in fresh lemon juice, lemon zest, and dried culinary lavender until evenly distributed.
  5. Shape the dough into a log, wrap it in plastic wrap, and refrigerate for about 30 minutes.
  6. Once chilled, slice the dough into 1/4-inch thick rounds and place on the baking sheet.
  7. Bake for 12-15 minutes, or until the edges are slightly golden.
  8. Let cool completely on a wire rack.
  9. Whisk together powdered sugar and fresh lemon juice to make the icing.
  10. Drizzle the icing over cooled cookies and sprinkle with additional lavender if desired.

Properly chill the dough for at least 30 minutes. Avoid overmixing to ensure tender cookies. Store cookies in an airtight container.

Dessert
Baked Goods
baking, cookies, Iced Lemon Lavender Shortbread Cookies, lavender, Lemon, shortbread

Filed Under: Dessert

Sweet and Crispy Air Fried Bananas in Just 30 Minutes

September 5, 2025 by grace bellamy Leave a Comment

What happens when you pair two ripe bananas with a dash of creativity? You get these delightful Air Fried Bananas, a simple yet satisfying solution to satisfy your sweet cravings without the guilt. In just thirty minutes, you can transform ordinary bananas into caramelized bites of joy that are not only quick to make but also a healthier alternative to traditional frying. Imagine serving them warm over pancakes or ice cream on a cozy weekend morning, making them a perfect crowd-pleaser for friends and family. Ready to discover how easy it is to elevate your snacking game? Let’s dive into this deliciously easy recipe!

Air Fried Bananas

Why Are Air Fried Bananas a Must-Try?

Unbeatable simplicity: With just two ripe bananas and minimal prep, this recipe is perfect for those busy days when you crave something sweet.

Guilt-free indulgence: Enjoy the natural sweetness of bananas with less oil than traditional frying methods, making it a healthier option.

Versatile delight: Serve them warm over pancakes, mix into smoothies, or even enjoy them as a cozy dessert with vanilla ice cream; the possibilities are endless!

Crowd-pleasing treat: These fragrant, caramelized bites are sure to impress friends and family alike—perfect for gatherings or a fun family brunch.

Time-saving magic: Whip up these tasty delights in just 30 minutes, allowing you to satisfy your cravings without the long wait or complicated steps.

Air Fried Bananas Ingredients

For the Bananas
• Ripe bananas – The riper, the sweeter; choose bananas with lots of freckles for the best flavor.
• Olive oil (optional) – A light drizzle adds richness, but you can skip it for an even healthier treat.
• Cinnamon (optional) – Sprinkle on some warmth; cinnamon enhances the natural sweetness of the bananas.
• Brown sugar or honey (optional) – A touch of sweetness elevates the dish, perfect for those with a sweet tooth!
• Cooking spray – Use it to prevent sticking in the air fryer, ensuring perfectly cooked bananas.

These Air Fried Bananas are not only scrumptious but also quick to whip up, making them a delightful treat for any occasion!

Step‑by‑Step Instructions for Air Fried Bananas

Step 1: Prepare the Bananas
Start by peeling the ripe bananas and cutting them in half lengthwise. Then, slice each half into quarters, ensuring the pieces are even for uniform cooking. This will help create those delicious caramelized edges once they are air-fried. Place the banana pieces in a mixing bowl, ready for flavor.

Step 2: Add Flavorings
In the mixing bowl with your banana pieces, drizzle in the optional olive oil and sprinkle the cinnamon and brown sugar or honey if desired. Gently toss the pieces to ensure they are evenly coated, enhancing their natural sweetness. You want to see a lovely glaze forming on the banana surfaces.

Step 3: Preheat the Air Fryer
Now, preheat your air fryer to 350°F (175°C). Allow it to warm up for about 5 minutes while you finish prepping the bananas. This step is crucial for achieving that perfect golden-brown exterior, so don’t skip it. The hot air will work its magic on the bananas once you add them.

Step 4: Arrange the Banana Pieces
Lightly spray the air fryer basket with cooking spray to prevent sticking. Carefully arrange the banana pieces in a single layer within the basket, ensuring they don’t overlap. Keeping them separate allows for better air circulation, which results in beautifully cooked Air Fried Bananas that are tender and caramelized.

Step 5: Cook the Bananas
Cook the bananas in the air fryer for about 10-12 minutes, turning them halfway through to achieve even browning. Keep an eye on them as they cook; the bananas should turn golden-brown and become tender. The sweet aroma will fill your kitchen, hinting at the delightful treat just minutes away.

Step 6: Check for Doneness
After the cooking time is up, check the doneness of the bananas. They should be caramelized and soft to the touch but not mushy. If needed, you can give them an additional minute or two; just be careful not to overcook them. Once they look perfect, it’s time to take them out!

Step 7: Cool and Serve
Carefully remove the bananas from the air fryer and let them cool for a couple of minutes before serving. This small wait ensures they reach the perfect temperature for enjoying. Serve your Air Fried Bananas warm, perhaps with a scoop of ice cream, over pancakes, or mixed into your favorite dessert—enjoy the lovely treat!

Air Fried Bananas

What to Serve with Air Fried Bananas

Indulging in these warm, caramelized bites opens the door to endless possibilities for delightful pairings that elevate a simple treat into a memorable meal.

  • Vanilla Ice Cream: A scoop adds creaminess and a chill contrast to the warm bananas, creating a classic dessert duo.
  • Pancakes: Top your favorite stack with these sweet bananas for a touch of natural sweetness, transforming breakfast into a treat.
  • Waffles: Their crispy texture against the soft bananas makes for a delightful combination, perfect for weekend brunches with loved ones.
  • Greek Yogurt: A dollop offers a tangy balance to the sweetness, making it a wholesome choice for breakfast or a light dessert.
  • Chocolate Drizzle: Rich chocolate adds a luxurious layer to the bananas, ideal for those who love an extra indulgence in their treats.
  • Nuts or Seeds: Chopped walnuts or sunflower seeds give a wonderful crunch and a different texture contrast, enhancing each bite’s experience.
  • Smoothies: Blend the air-fried bananas into a smoothie for added creaminess and natural sweetness, making it a nutritious snack option.
  • Beverage Pairing: A warm cup of chai tea harmonizes with the bananas’ sweetness, while a cold glass of almond milk refreshes the palate.
  • Coconut Whipped Cream: This light and fluffy topping adds a tropical twist to the dish, making it feel even more indulgent and festive.
  • Maple Syrup: A drizzle over your banana dish brings out even more sweetness and creates a beautiful glaze, perfect for special occasions.

How to Store and Freeze Air Fried Bananas

Fridge: Store any leftovers in an airtight container in the refrigerator for up to 2 days, ensuring the bananas maintain their best texture and flavor.

Freezer: For longer storage, freeze the air fried bananas in a single layer on a baking sheet until solid. Transfer them to a freezer bag for up to one month, allowing for a tasty snack anytime!

Reheating: To reheat frozen bananas, place them in the air fryer for a few minutes at 350°F (175°C) until warmed through and slightly crispy again. Enjoy this delicious treat fresh!

Expert Tips for Air Fried Bananas

Choose Ripe Bananas: Ensure your bananas are ripe for the best flavor; look for plenty of brown spots for maximum sweetness.

Don’t Overcrowd: Space out the banana pieces in the air fryer basket to allow for even cooking and delicious caramelization.

Check for Doneness: Keep an eye on the bananas as they cook; they should be golden-brown and tender, but avoid overcooking to maintain a nice texture.

Adjust the Sweetness: Feel free to experiment with the amount of brown sugar or honey; start with less and add more to taste for your ideal sweetness level.

Cool Slightly Before Serving: Letting the bananas cool for a couple of minutes allows the flavors to settle and makes them easier to handle when serving.

Air Fried Bananas Variations

Feel free to get creative with these delightful Air Fried Bananas—the possibilities are as tempting as the caramelized sweetness itself!

  • Dairy-Free: Skip the ice cream and opt for coconut whipped cream for a vegan and refreshing topping.
    Add a tropical twist that complements the bananas perfectly.

  • Nutty Crunch: Top with your favorite chopped nuts, like walnuts or almonds, for added texture and flavor.
    The crunchiness will create a delightful contrast with the soft bananas.

  • Spiced Upgrade: Enhance the flavor by adding a pinch of nutmeg or cardamom along with the cinnamon.
    These spices will bring a warmth and depth that makes each bite unforgettable.

  • Chocolatey Delight: Drizzle melted dark chocolate over the bananas right before serving for a decadent twist.
    Each bite will feel like a moment of pure indulgence, perfect for chocolate lovers!

  • Maple Bliss: Substitute honey with pure maple syrup for a hint of caramel richness that’s simply divine.
    It adds a lovely twist that complements the sweet bananas wonderfully.

  • Fruity Fusion: Toss in some diced apples or peaches along with the banana for a delightful fruit medley.
    This mix brings varied flavors and textures, making the dish a feast for your taste buds.

  • Add Heat: For a spicier kick, sprinkle some cayenne pepper or red pepper flakes before air frying.
    This unexpected heat will perfectly balance the sweetness of the bananas.

  • Coconut Flakes: Toss in unsweetened shredded coconut for a tropical touch that enhances both flavor and texture.
    It adds a delicious chewiness that complements the soft, caramelized bananas beautifully.

Let your taste buds take the lead and enjoy creating your own versions of these scrumptious air-fried bites! For other ideas, consider checking out how to enjoy these bananas with a scoop of the best homemade vanilla ice cream or atop some fluffy pancakes.

Make Ahead Options

These Air Fried Bananas are perfect for meal prep enthusiasts looking to save time during busy weeknights! You can slice and season the bananas (with olive oil, cinnamon, and brown sugar or honey) up to 24 hours in advance; simply refrigerate them in an airtight container to maintain their quality. When you’re ready to enjoy, just preheat your air fryer and cook the bananas as instructed, flipping halfway through for that golden-brown perfection. This makes it easy to whip up a delicious dessert or breakfast topping without the hassle, ensuring you and your family get to enjoy this delightful treat with minimal effort!

Air Fried Bananas

Air Fried Bananas Recipe FAQs

What should I look for when selecting ripe bananas?
Absolutely! Choose bananas that are nice and ripe for the best flavor. Look for bananas with plenty of brown spots on the skin, as this indicates maximum sweetness. The more freckled, the better!

How should I store leftover air fried bananas?
You can store any leftover Air Fried Bananas in an airtight container in the refrigerator for up to 2 days. Make sure they cool slightly before sealing to prevent moisture from building up inside the container.

Can I freeze air fried bananas?
Very! For longer storage, freeze your bananas by placing them in a single layer on a baking sheet until they are solid. Once frozen, transfer them to a freezer bag for up to one month. This way, you’ll have a quick snack ready whenever the craving hits!

What if my bananas are overripe?
If your bananas are too overripe, and you notice dark spots all over or an overly mushy texture, I’d recommend using them for baking instead, like in banana bread or muffins. Air frying may result in a less desirable texture, as they might overcook easily.

Are air fried bananas safe for pets?
While bananas are generally safe for dogs in moderation, it’s important to avoid adding any sugar or spices if sharing. Always consult your veterinarian before introducing new foods to your pet’s diet, as individual reactions can vary.

Can I adjust the sweetness of the air fried bananas?
Absolutely! You can modify the amount of brown sugar or honey according to your taste preferences. Start with a small amount and taste the bananas after tossing; feel free to add more if needed to achieve your perfect level of sweetness!

Sweet and Crispy Air Fried Bananas in Just 30 Minutes

Enjoy Air Fried Bananas, a guilt-free dessert that transforms ripe bananas into caramelized bites of joy.

  • Air Fryer

For the Bananas

  • 2 ripe bananas (Choose bananas with lots of freckles for the best flavor.)
  • 1 tablespoon olive oil (Optional, for richness.)
  • 1 teaspoon cinnamon (Optional, enhances sweetness.)
  • 1 tablespoon brown sugar or honey (Optional, for extra sweetness.)
  • 1 spray cooking spray (To prevent sticking in air fryer.)

Step-by-Step Instructions for Air Fried Bananas

  1. Prepare the Bananas: Peel the ripe bananas and cut them in half lengthwise. Slice each half into quarters.
  2. Add Flavorings: Drizzle in olive oil and sprinkle cinnamon and brown sugar or honey if desired. Toss to coat.
  3. Preheat the Air Fryer: Set the air fryer to 350°F (175°C) and warm up for about 5 minutes.
  4. Arrange the Banana Pieces: Lightly spray the air fryer basket and arrange banana pieces in a single layer.
  5. Cook the Bananas: Air fry for about 10-12 minutes, turning halfway, until golden-brown.
  6. Check for Doneness: Bananas should be caramelized and soft; check and cook an additional minute if needed.
  7. Cool and Serve: Remove from air fryer and let cool for a couple of minutes before serving.

For best flavor, ensure bananas are ripe with brown spots. Don’t overcrowd the air fryer for even cooking.

Dessert
French
Air Fried Bananas, Banana Dessert, Caramelized Bananas, Easy Recipe, Healthy Snack, quick dessert

Filed Under: Dessert

Flavorful Asparagus with Zucchini and Squash for Vibrant Meals

September 5, 2025 by grace bellamy Leave a Comment

As I stood in my kitchen, the vibrant greens and yellows of fresh veggies caught my eye, whispering the promise of a nutritious meal. That’s when I decided to whip up some Flavorful Asparagus with Zucchini and Squash. Not only is this dish a breeze to prepare in just 25 minutes, but it’s also a colorful celebration of healthy eating, making it perfect for those who are eager to step away from fast food. The marriage of tender asparagus, succulent zucchini, and sweet yellow squash creates an irresistible medley that can easily be customized with your favorite spices or additional veggies. Whether you’re hosting a gathering or simply need a satisfying weeknight side dish, this recipe delivers wholesome goodness in every bite. Are you ready to bring a burst of color and health to your dinner table? Let’s get started!

Flavorful Asparagus with Zucchini and Squash

Why is this dish a must-try?

Vibrant flavors: The combination of asparagus, zucchini, and yellow squash creates a colorful medley bursting with fresh taste.

Quick and easy: Ready in just 25 minutes, this recipe is perfect for busy weeknights when you’re craving something healthy yet delicious.

Customizable: Feel free to add your favorite spices or additional veggies, tailoring each dish to your taste.

Guilt-free indulgence: This dish is not just delicious but also vegan and gluten-free, making it a perfect option for various dietary preferences.

Crowd-pleaser: Whether you’re serving it at a family gathering or enjoying a cozy dinner, it’s sure to impress anyone at the table.

So, if you’re looking to elevate your cooking game, check out my tips on creating the perfect side dish! Enjoy!

Flavorful Asparagus with Zucchini and Squash Ingredients

• Here’s what you’ll need for this healthy delight!

For the Veggies

  • Fresh asparagus – This key ingredient adds a delightful crunch and vibrant color.
  • Zucchini – Slice into half-moons to cook evenly and enhance those nutritious benefits.
  • Yellow squash – Offers a touch of sweetness, complementing the earthiness of the asparagus.

For Cooking

  • Olive oil – A heart-healthy choice that helps to sauté the veggies perfectly and adds richness.
  • Salt and pepper – Essential for enhancing the flavors; season to your taste for the best experience!

Feel free to personalize with extra spices or your favorite veggies to make this Flavorful Asparagus with Zucchini and Squash truly your own!

Step‑by‑Step Instructions for Flavorful Asparagus with Zucchini and Squash

Step 1: Prepare the vegetables
Start by washing the fresh asparagus, zucchini, and yellow squash thoroughly under cool water. Trim the tough ends of the asparagus and cut it into 2-inch pieces. Next, slice both the zucchinis and squashes into half-moons for even cooking. With everything prepped and visually vibrant, you’re ready to move on to creating the delicious medley of Flavorful Asparagus with Zucchini and Squash.

Step 2: Heat the oil
Place a large skillet on the stove over medium heat and add 2 tablespoons of olive oil. Allow the oil to heat for about 1-2 minutes until it shimmers slightly but does not smoke. This step is crucial for bringing out the flavors in your vegetables. Gaze at that glistening oil; it’s the perfect foundation for your flavorful sauté.

Step 3: Sauté asparagus
Once the olive oil is hot, add the prepared asparagus pieces to the skillet. Sauté for about 2-3 minutes, stirring occasionally until they begin to soften and turn a bright green. The asparagus should remain vibrant yet slightly tender, indicating it’s time to welcome the other veggies to the pan, building the heart of the Flavorful Asparagus with Zucchini and Squash.

Step 4: Add zucchini and squash
Now it’s time to toss in the sliced zucchini and yellow squash. Stir these into the skillet, mixing them with the asparagus. Cook everything together for an additional 5-7 minutes, stirring occasionally. The vegetables should become tender yet maintain a slight crunch. Admire the colorful medley as it cooks, inviting all those bright flavors.

Step 5: Season
Sprinkle salt and pepper over the sautéed vegetables according to your taste preference. Stir well to ensure the seasoning evenly coats each piece, enhancing the overall flavor of your dish. Let the vibrant aromas rise up, as your Flavorful Asparagus with Zucchini and Squash comes to life and is ready to be served.

Step 6: Serve
Remove the skillet from the heat and transfer the colorful vegetables to a beautiful serving dish. Serve immediately while they’re still warm and at their peak of freshness. Presentation matters, so consider garnishing with fresh herbs or grated cheese to elevate this dish even further. Your Flavorful Asparagus with Zucchini and Squash is now ready to impress!

Flavorful Asparagus with Zucchini and Squash

Flavorful Asparagus with Zucchini and Squash Variations

Feel free to unleash your creativity and customize this dish to delight your palate!

  • Herb-Infused: Add fresh herbs such as thyme or rosemary for an aromatic lift that complements the veggies beautifully.

  • Nutty Crunch: Sprinkle toasted pine nuts or chopped walnuts on top before serving to introduce a satisfying crunch and nutty flavor.

  • Spicy Kick: Want some heat? Toss in a pinch of red pepper flakes or drizzle with sriracha for an exciting twist that wakes up your taste buds.

  • Creamy Addition: Stir in a dollop of vegan cream cheese or dairy-free yogurt at the end for a rich and creamy sauce that enhances every bite.

  • Citrus Zing: A squeeze of lemon juice just before serving brightens the dish and adds a refreshing tang that balances the sweetness of the squash.

  • Savory Twist: For a heartier meal, incorporate cooked quinoa or lentils into the sauté for added protein and texture. They soak up flavors well too!

  • Cheesy Delight: Top with grated vegan cheese or nutritional yeast for a cheesy flavor that is completely dairy-free yet oh-so-delicious.

  • Roasted Variation: Instead of sautéing, toss the veggies with olive oil and roast them in the oven for a caramelized, deep flavor and roasted crunch.

Explore these variations to discover new ways to enjoy your Flavorful Asparagus with Zucchini and Squash! If you’re looking for additional flavor inspirations, check out my tips on creating the perfect side dish, or learn how to incorporate these vibrant veggies into a grain bowl for a fulfilling meal!

Make Ahead Options

These Flavorful Asparagus with Zucchini and Squash are perfect for meal prep enthusiasts! You can wash and cut the asparagus, zucchini, and squash up to 24 hours in advance, storing them in an airtight container in the refrigerator to maintain their freshness. Additionally, you can measure out the olive oil and seasonings to streamline the cooking process. When you’re ready to serve, simply heat the oil in a skillet, sauté the asparagus first for 2-3 minutes, then add the zucchini and squash, cooking for another 5-7 minutes. This way, you’ll enjoy a delightful and delicious dish with minimal effort on busy weeknights, just as satisfying as if you made it fresh!

Expert Tips for Flavorful Asparagus with Zucchini and Squash

  • Veggie Variety: Add more colorful vegetables like bell peppers or carrots to enhance both flavor and nutrition in your dish.

  • Oil Temperature: Ensure your olive oil is hot enough before adding the vegetables; this prevents the veggies from steaming instead of sautéing, maintaining that delightful crunch.

  • Seasoning Balance: Start with a small amount of salt and pepper, tasting as you go. It’s easier to add seasoning than to fix an oversalted dish.

  • Final Garnish: Fresh herbs like basil or parsley not only brighten the presentation but also elevate the overall taste of your Flavorful Asparagus with Zucchini and Squash.

  • Stirring Technique: Stir gently and occasionally. This allows all vegetables to cook evenly without breaking apart, keeping your dish visually appealing.

  • Leftover Magic: Use any leftovers in a grain bowl or as a topping for quinoa; the flavors blend beautifully, making for a quick, healthy meal the next day.

What to Serve with Flavorful Asparagus with Zucchini and Squash

To create a memorable meal, it’s essential to balance the vibrant freshness of your sautéed veggies with complementary sides and drinks.

  • Quinoa Salad: This nutty grain dish adds protein and a complementary texture, enhancing the freshness of your veggies. Toss in some lemon and herbs for brightness!

  • Grilled Chicken: Juicy and tender, this protein adds a satisfying heartiness to your plate. The smoky flavor pairs beautifully with the lightness of the asparagus medley.

  • Garlic Bread: Crispy and warm, this classic carb option is perfect for soaking up any delicious juices from the sauté. It adds a comforting crunch alongside your vibrant salad.

  • Fresh Lemonade: A refreshing drink with citrusy zing creates a delightful contrast to your earthy dish, brightening every bite. It’s like summer in a glass!

  • Savory Oatmeal: A unique but wholesome side, adding oats enhances your meal’s fiber content. Top with a sunny-side-up egg and herbs for a twist.

  • Roasted Chickpeas: Crunchy and seasoned to perfection, these little bites offer a satisfying crunch that complements the tender veggies and adds extra protein to your meal.

  • Herbed Couscous: Fluffy and fragrant, couscous absorbs flavors marvelously, making it a fantastic pairing. Toss with fresh herbs and lemon for an extra kick!

  • Berry Tart: A slice of this sweet treat adds a nice finish to your light and pleasing meal. The fruity flavor perfectly balances the savory sauté, making for a satisfying end to dinner!

Storage Tips for Flavorful Asparagus with Zucchini and Squash

Fridge: Store leftovers in an airtight container in the refrigerator for up to 3 days. This keeps the veggies fresh and ready for your next meal.

Freezer: To freeze, allow the dish to cool completely before placing it in a freezer-safe container. It can last for up to 2 months, perfect for meal prep!

Reheating: When ready to enjoy again, gently reheat in the microwave or on the stovetop over low heat. Add a splash of water to help steam and refresh the flavors of your Flavorful Asparagus with Zucchini and Squash.

Flavorful Asparagus with Zucchini and Squash

Flavorful Asparagus with Zucchini and Squash Recipe FAQs

How do I select ripe asparagus and other veggies?
Absolutely! When choosing asparagus, look for firm, straight stalks with tightly closed tips. The color should be vibrant green; avoid any that show brown or woody ends. For zucchini and yellow squash, pick ones that are smooth and firm with no dark spots. A general rule of thumb is to select vegetables that feel heavy for their size and have no wrinkling.

What’s the best way to store leftovers?
Very! To store your leftover Flavorful Asparagus with Zucchini and Squash, place any uneaten portion in an airtight container and refrigerate it within two hours of cooking. This method keeps the veggies fresh for up to 3 days. If you foresee leftovers becoming excess, you might want to freeze them instead!

Can I freeze the cooked vegetables?
Yes, you can! To freeze, allow your Flavorful Asparagus with Zucchini and Squash to cool completely. Next, transfer everything into a freezer-safe container—be sure to leave a little space for expansion—and seal it tightly. Your dish can be frozen for up to 2 months. When you’re ready to enjoy it again, let it thaw in the fridge overnight before gently reheating in the microwave or on the stovetop.

What if my vegetables turn mushy while cooking?
Don’t worry, it happens to the best of us! To avoid mushy veggies in your Flavorful Asparagus with Zucchini and Squash, make sure to sauté over medium heat and keep an eye on the cook time. Always add the asparagus first, as it takes longer than the zucchini and squash. Aim for tenderness but not overcooked; the goal is to maintain a slight crunch for texture!

Is this dish suitable for my gluten-free diet?
Absolutely, yes! This Flavorful Asparagus with Zucchini and Squash is not only vegan but naturally gluten-free. Just verify that any additional toppings or spices you choose don’t contain gluten. It’s a colorful, safe option for anyone avoiding gluten in their diet, ensuring delightful flavors without compromise.

Can I give this dish to my pet?
While it’s perfectly healthy for humans, it’s best to keep this dish for yourself and not share it with pets. Vegetables like asparagus should be given to pets in moderation and prepared without added oils or seasonings. If you’re looking for something delicious to share, consider plain cooked carrots or green beans instead!

Flavorful Asparagus with Zucchini and Squash for Vibrant Meals

This Flavorful Asparagus with Zucchini and Squash dish is a colorful celebration of healthy eating, perfect for various dietary preferences.

  • large skillet

For the Veggies

  • 1 bunch Fresh asparagus (Trimmed and cut into 2-inch pieces.)
  • 2 medium Zucchini (Sliced into half-moons.)
  • 2 medium Yellow squash (Sliced into half-moons.)

For Cooking

  • 2 tablespoons Olive oil (Heart-healthy oil.)
  • to taste Salt
  • to taste Pepper

Step-by-Step Instructions

  1. Wash the fresh asparagus, zucchini, and yellow squash under cool water. Trim the tough ends of the asparagus and cut it into 2-inch pieces. Slice both the zucchinis and squashes into half-moons.
  2. Heat a large skillet over medium heat and add 2 tablespoons of olive oil. Allow the oil to heat until it shimmers slightly.
  3. Add the prepared asparagus pieces to the skillet and sauté for about 2-3 minutes until they begin to soften and turn a bright green.
  4. Toss in the sliced zucchini and yellow squash. Cook them together for an additional 5-7 minutes until tender yet slightly crunchy.
  5. Sprinkle salt and pepper over the sautéed vegetables according to your taste preference and stir well.
  6. Remove from heat and transfer the colorful vegetables to a serving dish. Serve warm and garnish as desired.

Feel free to personalize with extra spices or your favorite veggies.

Side Dishes
Vegan
Flavorful Asparagus with Zucchini and Squash, gluten-free, Healthy, Quick, Vibrant

Filed Under: Side Dishes

Creamy Italian Sausage Rigatoni for Comfort Food Lovers

September 5, 2025 by grace bellamy Leave a Comment

As I stood by the stove, the rich aroma of sizzling Italian sausage mixed with the scent of garlic wafted through my kitchen, instantly transporting me to a cozy trattoria in Rome. That’s the kind of magic I experience whenever I whip up this Creamy Italian Sausage Rigatoni. Not only is it a comforting meal that fills bellies and warms hearts, but it also comes together in just about 50 minutes. Perfect for a weeknight dinner yet impressive enough for guests, this dish combines tender rigatoni with a creamy, flavorful sauce that you’ll want to savor. The best part? It’s indulgent without being fussy, allowing you to enjoy the process and the wonderful flavors it brings to your table. Curious about how to make this luscious pasta dish that celebrates both simplicity and richness? Let’s dive in!

Creamy Italian Sausage Rigatoni

Why is Creamy Italian Sausage Rigatoni a Must-Try?

Comforting, Italian Flavors: Indulge in the rich, savory taste of Italian sausage and creamy sauce that brings warmth to every bite.
Quick Prep Time: Ready in just 50 minutes, making it an ideal choice for busy weeknights or last-minute gatherings.
Crowd-Pleasing Appeal: Perfect for family dinners or entertaining friends, this dish is always a hit at the table.
Versatile Pairing: Serve with a side salad or bread, or try alongside other favorites like Garlic Butter Pasta for an exquisite meal experience.
Gourmet Made Easy: Enjoy a restaurant-quality dish at home without complex techniques—simply sauté, simmer, and serve!
Fresh Garnish: Top with basil for a burst of freshness that elevates this creamy delight.

This Creamy Italian Sausage Rigatoni recipe is a delicious adventure that’s easy to master, perfect for any culinary enthusiast!

Creamy Italian Sausage Rigatoni Ingredients

For the Pasta
• Rigatoni pasta – a hearty choice that holds onto the creamy sauce beautifully.

For the Sauce
• Italian sausage – brings a savory, robust flavor that defines this dish.
• Olive oil – for sautéing the sausage and enhancing its flavor.
• Onion – adds sweetness and depth to the sauce when sautéed.
• Garlic – infuses aromatic goodness with every stir.
• Crushed tomatoes – the base that gives the sauce its rich color and taste.
• Heavy cream – creates the luscious, creamy texture that makes this a comforting meal.
• Chicken broth – provides a subtle layer of flavor and thins out the sauce.
• Italian seasoning – a blend of herbs that enhances the dish’s authentic Italian vibe.
• Red pepper flakes (optional) – add a kick of heat if you like a bit of spice!
• Salt and pepper – essential for balancing the flavors and enhancing taste.
• Grated Parmesan cheese – enriches the creaminess and adds a delicious, nutty note.

For Garnish
• Fresh basil leaves – delivers a burst of freshness that complements the creamy sauce perfectly.

Gather all these essential ingredients, and you’ll be ready to whip up a magnificent dish of Creamy Italian Sausage Rigatoni that your loved ones will adore!

Step‑by‑Step Instructions for Creamy Italian Sausage Rigatoni

Step 1: Cook the Rigatoni
Bring a large pot of salted water to a rolling boil over high heat. Add the rigatoni pasta and cook according to package instructions until al dente, usually around 10-12 minutes. Once cooked, drain the pasta in a colander and set it aside, allowing any excess water to drip off.

Step 2: Brown the Sausage
In a large skillet, heat 1 tablespoon of olive oil over medium heat. Once the oil shimmers, add the Italian sausage, breaking it apart with a spatula as it cooks. Sauté for about 6-8 minutes, or until the sausage is nicely browned and cooked through, stirring occasionally for even browning.

Step 3: Sauté Onion and Garlic
Add the diced onion and minced garlic to the skillet with the sausage. Sauté for about 3-4 minutes, stirring frequently, until the onion is translucent and the garlic is fragrant. This aromatic mixture will form a flavorful base for your Creamy Italian Sausage Rigatoni sauce.

Step 4: Add Tomatoes and Cream
Pour in the crushed tomatoes, heavy cream, and chicken broth, stirring to combine all the ingredients. Add the Italian seasoning and optional red pepper flakes, then season with salt and pepper to taste. Allow the sauce to simmer on low heat for about 10 minutes, letting the flavors meld beautifully.

Step 5: Combine Pasta and Sauce
Carefully add the cooked rigatoni to the skillet with the creamy sauce. Gently stir to coat the pasta thoroughly, ensuring every piece is enveloped in the rich mixture. This step is crucial for achieving that comforting texture in your Creamy Italian Sausage Rigatoni.

Step 6: Melt the Parmesan
Sprinkle the grated Parmesan cheese over the pasta and stir gently until the cheese melts and incorporates into the sauce. This will create a smooth, creamy consistency that brings the whole dish together. The rich flavor of the cheese elevates your Creamy Italian Sausage Rigatoni wonderfully.

Step 7: Serve and Garnish
Ladle the creamy rigatoni into bowls and garnish generously with fresh basil leaves. Serve hot, delighting in the comforting aroma and vibrant colors of this delicious dish. Your Creamy Italian Sausage Rigatoni is now ready to be enjoyed with family and friends!

Creamy Italian Sausage Rigatoni

Expert Tips for Creamy Italian Sausage Rigatoni

  • Choose Quality Sausage: Select high-quality Italian sausage for richer flavor. Avoid overly processed options, as they can affect the overall taste of your Creamy Italian Sausage Rigatoni.

  • Don’t Overcook Pasta: Cook the rigatoni until just al dente; it will continue to cook in the sauce. This helps maintain the perfect pasta texture.

  • Sautéing Technique: Ensure your onion and garlic are sautéed just until translucent; overcooking can lead to bitterness. This step builds the flavor foundation for your dish.

  • Simmer Time: Allow the sauce to simmer long enough to meld flavors, but keep an eye on it. Over-reduced sauce can lose its creamy goodness, so stir occasionally.

  • Creamy Consistency: Gradually stir in the heavy cream and cheese to achieve the desired creaminess, ensuring each bite of your Creamy Italian Sausage Rigatoni is velvety smooth.

  • Fresh Garnish: Fresh basil isn’t just for looks; it adds a burst of flavor that brightens the richness of the dish. Don’t skip this essential topping!

What to Serve with Creamy Italian Sausage Rigatoni

Elevate your dining experience by complementing this indulgent pasta dish with flavorful sides that balance its richness.

  • Garlic Bread: The crunchy, buttery goodness of garlic bread perfectly soaks up the creamy sauce, adding a delightful crunch to each bite.

  • Caesar Salad: Crisp romaine and tangy dressing bring a refreshing contrast to the creamy Italian sausage rigatoni, making the meal light and satisfying.

  • Roasted Vegetables: The caramelized sweetness of seasonal veggies provides a lovely balance to the savory flavors, enhancing the overall dining experience.

  • Caprese Skewers: Juicy cherry tomatoes, mozzarella, and basil on a skewer are vibrant and full of flavor, offering a beautiful freshness to round out your plate.

  • Zinfandel Wine: A glass of bold Zinfandel offers fruity notes and spice that harmonize with the savory richness of the dish, elevating your meal to new heights.

  • Tiramisu: Finish with this classic Italian dessert, whose coffee-soaked layers and creamy mascarpone create a luxurious end to a delightful evening.

How to Store and Freeze Creamy Italian Sausage Rigatoni

Room Temperature: Store any leftovers at room temperature for no more than 2 hours to avoid spoilage.

Fridge: Keep your Creamy Italian Sausage Rigatoni in an airtight container in the fridge for up to 3 days. Reheat in the microwave or on the stovetop for best results.

Freezer: For longer storage, freeze the rigatoni in a freezer-safe container for up to 3 months. Thaw overnight in the fridge before reheating.

Reheating: When reheating, add a splash of milk or cream to restore the creaminess and prevent drying out, gently warming it in a saucepan.

Make Ahead Options

These Creamy Italian Sausage Rigatoni are perfect for busy home cooks looking to save time during the week! You can prepare the sauce (without the pasta) up to 3 days in advance. Simply cook the Italian sausage, then add the onion, garlic, tomatoes, cream, and spices. Let it cool, then refrigerate in an airtight container. The rigatoni can be cooked up to 24 hours beforehand; just toss it with a bit of olive oil to prevent sticking. When you’re ready to serve, reheat the sauce on the stove, add the rigatoni, and stir in the Parmesan cheese until melted. This way, you’ll enjoy delicious, comforting pasta in no time, with minimal effort!

Creamy Italian Sausage Rigatoni Variations

Embrace the joy of personalizing your meal as you explore these delightful twists on the classic Creamy Italian Sausage Rigatoni!

  • Gluten-Free: Substitute rigatoni with gluten-free pasta for a tummy-friendly option that doesn’t compromise flavor. Your family will love this alternative just as much!

  • Spicy Kick: Add more red pepper flakes or toss in a diced jalapeño to spice things up. This extra heat creates a lively burst of flavor in every bite.

  • Vegetarian Delight: Swap the Italian sausage for a mix of sautéed mushrooms and bell peppers, keeping the rich creamy sauce for a satisfying plant-based meal. You won’t miss the meat at all!

  • Extra Greens: Stir in fresh spinach or kale during the simmering phase of the sauce for added nutrients and a pop of color. It not only looks good but tastes great, too!

  • Creamy Veggie Medley: Blend in chopped zucchini and sun-dried tomatoes while the sauce simmers for a hearty veggie addition. These tender bites add both texture and flavor to your pasta.

  • Cheesy Indulgence: Experiment with different cheeses like mozzarella or fontina for a creamier sauce. This twist will take your Creamy Italian Sausage Rigatoni to a whole new level of decadence.

  • Italian Herb Infusion: Enhance the flavor by incorporating fresh herbs like thyme or oregano when you add the crushed tomatoes. This will elevate the dish to gourmet status and delight your taste buds.

  • Lemon Zest Brightness: Add a splash of fresh lemon juice and the zest at the end for a zingy brightness that perfectly balances the creaminess. This refreshing touch will make your dish unforgettable!

Discover how these variations allow you to create a personalized masterpiece while staying true to the comforting essence of your favorite Creamy Italian Sausage Rigatoni!

Creamy Italian Sausage Rigatoni

Creamy Italian Sausage Rigatoni Recipe FAQs

What type of Italian sausage should I use?
Absolutely! For the best flavor, choose high-quality Italian sausage with a good balance of meat and spices. You can go for sweet, mild, or hot varieties depending on your spice preference. Fresh sausage usually provides a richer, more authentic taste compared to pre-packaged options.

How should I store leftover Creamy Italian Sausage Rigatoni?
Very! After cooking, let your rigatoni cool to room temperature, then transfer it to an airtight container. Store in the fridge for up to 3 days. When ready to enjoy it again, simply reheat in the microwave or on the stovetop. If you find it too thick, add a splash of milk or cream to restore the creamy texture.

Can I freeze Creamy Italian Sausage Rigatoni?
Absolutely! To freeze, place the cooled rigatoni in a freezer-safe container and seal it tightly. This dish can be frozen for up to 3 months. When you’re ready to enjoy it, thaw the container overnight in the fridge. To reheat, gently warm it in a saucepan, adding a bit of milk or cream to bring back its luscious creaminess.

How do I prevent my pasta from becoming mushy?
Great question! To keep your rigatoni perfectly al dente, cook it for just a minute less than the package instructions suggest. Remember, the pasta will continue to cook slightly when mixed with the hot sauce. Stirring gently also helps maintain its integrity while making sure each piece is coated in the delicious sauce.

Can I make this dish gluten-free?
Certainly! If you’re looking for a gluten-free version of Creamy Italian Sausage Rigatoni, you can substitute the rigatoni pasta with a gluten-free pasta alternative. Many brands offer delightful options that work just as well. Just keep an eye on the cooking time, as it may vary from traditional pasta.

Is this recipe suitable for kids with allergies?
Very! If you have young ones with dietary restrictions, you can adapt the ingredients to suit their needs. Choose a mild sausage that is gluten-free and check for any dairy alternatives if lactose is a concern. The sauce can be adjusted by using coconut milk or a non-dairy cream substitute to still achieve that creamy goodness without compromising flavor.

Creamy Italian Sausage Rigatoni for Comfort Food Lovers

Savor the rich flavors of Creamy Italian Sausage Rigatoni, a comforting dish that combines savory sausage and creamy sauce, perfect for family dining.

  • Large Pot
  • Colander
  • large skillet
  • spatula

For the Pasta

  • 1 lb Rigatoni pasta (Hearty choice that holds onto the creamy sauce beautifully)

For the Sauce

  • 1 lb Italian sausage (Brings a savory, robust flavor)
  • 1 tbsp Olive oil (For sautéing the sausage)
  • 1 medium Onion
  • 4 cloves Garlic
  • 28 oz Crushed tomatoes (The base for the sauce)
  • 1 cup Heavy cream (Creates the luscious texture)
  • 1 cup Chicken broth
  • 1 tbsp Italian seasoning
  • 1/2 tsp Red pepper flakes (Optional, for heat)
  • to taste Salt
  • to taste Pepper
  • 1 cup Grated Parmesan cheese (Enriches the creaminess)

For Garnish

  • 1/4 cup Fresh basil leaves (Delivers a burst of freshness)

Cooking Steps

  1. Bring a large pot of salted water to a boil and cook the rigatoni according to package instructions until al dente, about 10-12 minutes. Drain and set aside.
  2. Heat 1 tablespoon of olive oil in a large skillet over medium heat. Add the Italian sausage and brown for 6-8 minutes, breaking it up as it cooks.
  3. Add diced onion and minced garlic to the skillet. Sauté for 3-4 minutes until the onion is translucent and the garlic is fragrant.
  4. Pour in crushed tomatoes, heavy cream, and chicken broth. Stir in Italian seasoning and red pepper flakes, then season with salt and pepper. Simmer on low for 10 minutes.
  5. Add the cooked rigatoni to the skillet and gently stir to coat the pasta in the sauce.
  6. Sprinkle grated Parmesan cheese over the pasta and stir gently until melted and incorporated into the sauce.
  7. Ladle into bowls and garnish with fresh basil leaves. Serve hot.

Select high-quality Italian sausage for the best flavor. Don’t overcook the pasta to maintain its texture. Fresh basil is essential for brightness in the dish.

Main Dishes
Italian
comfort food, Creamy Italian Sausage Rigatoni, Easy Recipe, family dinner, Pasta, Savory Sauce

Filed Under: Main Dishes

Spooktacular Cheesy Halloween Breadstick Bones for Fun Dipping

September 5, 2025 by grace bellamy Leave a Comment

As I stood in the kitchen, the scent of melted cheese and freshly baked bread took me back to cozy autumn nights filled with laughter and spooky tales. This season, I couldn’t resist whipping up my Cheesy Halloween Breadstick Bones, a recipe that marries fun with flavor. These delightful breadsticks are not only a perfect addition to your Halloween festivities but also a crowd-pleaser that everyone will love. With just 35 minutes from start to finish, they’re quick enough for a last-minute snack while being a playful alternative to traditional appetizers. Serve them warm with marinara sauce for dipping, and watch as they vanish before your eyes! Want to add a spooky twist to your next gathering? Let’s dive into this fun and cheesy recipe!

Cheesy Halloween Breadstick Bones

Why are these breadsticks a Halloween must-try?

Fun and Festive: These Cheesy Halloween Breadstick Bones are not just snacks; they’re a playful addition to any spooky gathering that gets everyone into the Halloween spirit.

Quick to Prepare: With only 35 minutes from start to finish, these delightful treats save you time, making them perfect for any last-minute gatherings or cozy nights in.

Cheesy Goodness: The combination of melted mozzarella and grated Parmesan provides a rich, savory flavor that will keep your taste buds dancing with joy.

Easy to Customize: Feel free to experiment with your favorite flavors or serve with a variety of dipping sauces. They are versatile enough to be enjoyed all year round!

Crowd-Pleaser: With each bite, you’ll have your guests asking for more. They’re perfect for parties, movie nights, or as a fun and interactive snack for kids.

Try them alongside some of your favorite festive treats, and watch as they steal the show!

Cheesy Halloween Breadstick Bones Ingredients

Ready to whip up these spooky delights? Here’s what you need!

For the Breadsticks
• Pizza dough – 1 pound ensures a soft, chewy texture perfect for forming bone shapes.
• Unsalted butter – 2 tablespoons (melted) adds a rich flavor and helps the cheese stick.
• Grated Parmesan cheese – ½ cup for that nutty, sharp taste that enhances every bite.
• Shredded mozzarella cheese – 1 cup creates the melty, gooey effect everyone loves in these Cheesy Halloween Breadstick Bones.
• All-purpose flour – for dusting your surface to prevent sticky situations.

For Dipping
• Marinara sauce – pair with warm breadsticks for a classic and delicious dip that complements the cheese!

Step‑by‑Step Instructions for Cheesy Halloween Breadstick Bones

Step 1: Preheat the Oven
Begin by preheating your oven to 375°F (190°C). This ensures the perfect baking environment for your Cheesy Halloween Breadstick Bones. While the oven warms up, line two baking sheets with parchment paper to prevent sticking and make cleanup a breeze.

Step 2: Prepare the Dough
Allow your pizza dough to sit at room temperature for about 10 minutes. This will make it easier to work with. Once ready, dust your working surface with all-purpose flour to prevent the dough from sticking. Divide the dough into 10 equal pieces, ensuring they all bake evenly.

Step 3: Shape the Bones
Take each piece of dough and roll it out into an 8-inch long rope, making the ends slightly thicker to resemble bones. This playful shape adds to the Halloween theme! Once shaped, snip the ends about 1 inch deep, then gently pull apart to create the bone look that your guests will love.

Step 4: Arrange on Baking Sheets
Place the shaped breadsticks on the lined baking sheets, leaving enough space between them to allow for rising. This spacing is crucial for achieving that delightful puffiness. You’ll want to see a bit of space around each stick, ensuring they bake evenly and don’t stick together.

Step 5: Add the Flavor
Brush the tops of each breadstick generously with melted butter, coating them for a rich flavor. Next, sprinkle an even layer of grated Parmesan cheese over the butter-brushed breadsticks. This adds a nutty and savory kick, enhancing the cheesy goodness you expect from Cheesy Halloween Breadstick Bones.

Step 6: Bake to Perfection
Slide the baking sheets into the preheated oven and bake for about 15 minutes. Keep an eye on them; they should puff slightly and turn a light golden brown, signaling they’re on their way to deliciousness. The aroma will fill your kitchen with a mouthwatering scent!

Step 7: Cheese It Up
Once they have that lovely golden color, take the breadsticks out of the oven and sprinkle shredded mozzarella cheese on top of each one. This step creates the melty, gooey cheese effect that makes your Cheesy Halloween Breadstick Bones irresistible. Return them to the oven.

Step 8: Final Bake
Bake again for an additional 5-7 minutes until the mozzarella is melted and bubbly. The breadsticks should be beautifully golden and have an inviting appearance. Keep an eye on them to ensure they don’t over-bake; you want that glorious gooeyness!

Step 9: Cool and Serve
After removing your Cheesy Halloween Breadstick Bones from the oven, let them cool slightly on the baking sheet for about 5 minutes. This cooling time helps maintain their shape. Serve them warm alongside marinara sauce for dipping, and watch them disappear at your Halloween gathering!

Cheesy Halloween Breadstick Bones

Cheesy Halloween Breadstick Bones Variations

Get ready to transform your Cheesy Halloween Breadstick Bones into something even more exciting and delicious!

  • Spicy Twist: Add a pinch of red pepper flakes to the butter for a zesty kick. Your guests will love the unexpected heat!

  • Herb-Infused: Mix garlic powder and Italian herbs into the melted butter for an aromatic flavor boost. The added herbs will make your kitchen smell divine!

  • Gluten-Free: Substitute traditional pizza dough with gluten-free dough to make these breadsticks accessible for everyone. It’s a fantastic way to share the joy of baking!

  • Cheddar Delight: Combine mozzarella with shredded cheddar cheese for an extra cheesy depth of flavor. This variation offers a delightful twist that’s sure to please cheese lovers!

  • Veggie Packed: Add finely chopped spinach or kale into the dough before shaping to incorporate some greens into your spooky treats. It not only enhances the nutrition but adds a lovely color too!

  • Sweet Surprise: Drizzle with honey or maple syrup after baking for a sweet finish that pairs beautifully with the savory flavors. It’s a playful contrast that will intrigue the taste buds!

  • Make ‘Em Mini: Shape smaller breadsticks for bite-sized treats perfect for dipping! They’re ideal for kids and fun bites at your Halloween party.

  • Bacon & Cheese: Sprinkle cooked, crumbled bacon atop the mozzarella for a rich, savory addition. This variation is sure to be a hit at any gathering!

With these variations, the possibilities are endless! Explore these ideas to find your favorite spin on these delightful breadsticks. For a festive atmosphere, arrange your spooky breadsticks alongside some [Cheesy Pumpkin Puffs](internalLink) or [Witch’s Brew Soup](internalLink), creating a spread that will enchant all your guests!

Storage Tips for Cheesy Halloween Breadstick Bones

Room Temperature: Allow leftovers to cool completely and store in a breathable container at room temperature for up to 1 day; enjoy them while they’re still soft!

Fridge: For longer storage, place breadsticks in an airtight container and refrigerate for up to 3 days. Reheat in a preheated oven at 350°F for best results.

Freezer: To freeze, cool the Cheesy Halloween Breadstick Bones completely, wrap individually in foil, and store in a freezer-safe bag. They can be reheated directly from frozen in the oven.

Reheating: For all storage methods, a quick reheat will restore their cheesy goodness, so don’t skip this step!

What to Serve with Cheesy Halloween Breadstick Bones

As the aroma of warm, cheesy breadsticks wafts through your kitchen, let’s elevate your festive gathering with these delicious pairings.

  • Marinara Sauce: This classic dipping sauce complements the cheesy flavors perfectly and adds a tangy twist. Each dip brings an extra layer of yum!
  • Spooky Veggie Platter: Fresh-cut veggies add crunch and a pop of color, creating a playful contrast to the warm breadsticks. Think carrots, bell peppers, and cucumbers arranged like a Halloween masterpiece!
  • Pumpkin Soup: A creamy, whimsical soup pairs wonderfully with the cheesy breadsticks, offering warmth and comfort for any autumn gathering.
  • Garlic Butter Dip: Elevate the breadsticks further by serving with a garlicky dip. The buttery garlic flavor makes each bite even more irresistible.
  • Caesar Salad: The crisp romaine and tangy dressing provide a refreshing balance to the richness of the breadsticks, making for a well-rounded meal.
  • Hot Apple Cider: For a delicious drink option, warm up some apple cider with spices for an enchanting fall beverage that will please your guests.
  • Witch’s Brew Cocktail: A fun, themed cocktail—mixing pomegranate juice with sparkling water—adds a festive touch to your meal.
  • Chocolate Dipped Pretzels: For a sweet ending, these salty-sweet delights will be a delightful contrast. They’re perfect for nibbling while sharing spooky stories!
  • Ghoulish Cheese Board: Pair with a variety of cheeses and crackers to keep your guests snacking all night long. It’s a fun way to incorporate flavors that go beyond the breadsticks!
  • Caramel Apple Slices: Sliced apples drizzled with caramel sauce provide a sweet treat that mirrors the fun and whimsy of your Cheesy Halloween Breadstick Bones.

Tips for the Best Cheesy Halloween Breadstick Bones

Use Fresh Dough: Ensure your pizza dough is fresh for the best texture. Old dough can be tough and won’t rise properly, affecting your Cheesy Halloween Breadstick Bones’ fluffiness.

Space Them Out: Leave enough space between the breadsticks on the baking sheet to allow them to expand without sticking together. This helps them bake evenly and puff up nicely.

Watch the Oven Time: Keep an eye on the baking time during both stages to avoid over-baking. The goal is a light golden exterior with a gooey cheese top.

Cool Before Serving: Allow the breadsticks to cool slightly before serving them. This prevents the cheese from being too hot and makes for an easier dipping experience.

Experiment with Toppings: Feel free to spice things up! Try adding garlic powder or Italian herbs to the melted butter for an extra flavor kick that your guests will adore.

Make Ahead Options

These Cheesy Halloween Breadstick Bones are ideal for meal prep, saving you precious time on busy days! You can shape the breadsticks up to 24 hours in advance; simply follow the first four steps and cover them loosely with plastic wrap before refrigerating. To maintain their quality, it’s best to bake them the same day if possible. When you’re ready to enjoy these tasty treats, preheat your oven to 375°F (190°C) and place the shaped dough directly onto the baking sheets. Brush the melted butter and sprinkle the cheeses, then bake according to the recipe instructions for deliciously fresh results that will impress your guests—even if you prepared them a day ahead!

Cheesy Halloween Breadstick Bones

Cheesy Halloween Breadstick Bones Recipe FAQs

What is the best way to select pizza dough?
Absolutely! When choosing pizza dough, go for fresh options if possible. Look for dough that feels slightly elastic and is free of any dark spots or overly dry patches. If using store-bought, check the expiration date to ensure freshness for your Cheesy Halloween Breadstick Bones.

How should I store leftover breadsticks?
Leftovers can be stored in an airtight container in the refrigerator for up to 3 days. Make sure they cool completely before storage to keep them fresh. A simple way to reheat them is to place them in a preheated oven at 350°F for about 5-10 minutes to regain their delightful texture.

Can I freeze the Cheesy Halloween Breadstick Bones?
Yes! To freeze, cool the Cheesy Halloween Breadstick Bones completely after baking. Wrap each breadstick individually in foil to prevent freezer burn, and then store them in a freezer-safe bag. They can be reheated directly from frozen, baking at 375°F for about 15-20 minutes until warmed through.

What should I do if my breadsticks aren’t puffing up?
If your breadsticks aren’t puffing up, it’s likely due to the dough being too cold. Make sure you let the pizza dough come to room temperature before rolling, as this helps activate the gluten and yeast for a better rise. Also, ensure your oven is fully preheated to the right temperature to create that perfect environment for bubbling!

Are there any dietary considerations for these breadsticks?
Definitely! Since these Cheesy Halloween Breadstick Bones contain dairy, they’re not suitable for those with lactose intolerance. For a dairy-free option, consider using non-dairy cheese melts and buttery spreads available in most grocery stores, which will keep the fun alive without compromising on taste!

How do I ensure my breadsticks are perfectly cheesy?
For that melty, gooey cheese topping, add the mozzarella cheese during the last few minutes of baking. This way, it has time to melt perfectly without burning. If you’d like to add extra flavor, mix in some Italian herbs with your shredded cheese for a tasty twist!

Spooktacular Cheesy Halloween Breadstick Bones for Fun Dipping

Try these Cheesy Halloween Breadstick Bones for a fun and flavorful take on a classic snack perfect for Halloween gatherings.

  • Oven
  • Baking sheets
  • parchment paper
  • Mixing surface
  • Knife

For the Breadsticks

  • 1 pound Pizza dough (ensures a soft, chewy texture perfect for forming bone shapes.)
  • 2 tablespoons Unsalted butter ((melted) adds a rich flavor and helps the cheese stick.)
  • 0.5 cups Grated Parmesan cheese (for that nutty, sharp taste that enhances every bite.)
  • 1 cup Shredded mozzarella cheese (creates the melty, gooey effect everyone loves.)
  • All-purpose flour (for dusting your surface to prevent sticky situations.)

For Dipping

  • 1 cup Marinara sauce (pair with warm breadsticks for a classic and delicious dip.)

Step‑by‑Step Instructions

  1. Preheat your oven to 375°F (190°C) and line two baking sheets with parchment paper.
  2. Allow your pizza dough to sit at room temperature for about 10 minutes and dust your working surface with all-purpose flour. Divide the dough into 10 equal pieces.
  3. Roll each piece of dough into an 8-inch long rope, making the ends thicker to resemble bones. Snip the ends about 1 inch deep and pull apart to create the bone look.
  4. Place the shaped breadsticks on the baking sheets with space between them for rising.
  5. Brush the tops of each breadstick with melted butter and sprinkle grated Parmesan cheese over them.
  6. Bake in the preheated oven for about 15 minutes until puffed and lightly golden.
  7. Once golden, sprinkle shredded mozzarella cheese on top of each breadstick and return to the oven.
  8. Bake for an additional 5-7 minutes until the mozzarella is melted and bubbly.
  9. Let the breadsticks cool slightly for about 5 minutes on the baking sheet, then serve warm with marinara sauce for dipping.

These cheesy breadstick bones are a fun addition to any Halloween gathering and can be customized with your favorite flavors or additional toppings.

Side Dishes
American
breadsticks, Cheese Dip, Cheesy Halloween Breadstick Bones, easy recipes, Halloween snacks, party food

Filed Under: Sandwiches

Deliciously Fluffy Pumpkin Cream Cheese Muffins for Fall

September 5, 2025 by grace bellamy Leave a Comment

The scent of warm spices and sweet pumpkin wafting through the kitchen is nothing short of enchanting. As a cozy fall morning unfolds, there’s a real need for something special—how about Bakery-Style Pumpkin Cream Cheese Muffins? These muffins don’t just fill your home with an inviting aroma; they’re a delightful treat that combines the comforting essence of pumpkin with the velvety richness of cream cheese. Whether you’re preparing for a family gathering or simply indulging in some self-care, these muffins are a breeze to whip up and are perfect for freezing, allowing you to savor a home-baked delight any time. They’re sure to impress, whether enjoyed for breakfast or as an afternoon snack. Are you ready to embrace the cozy vibes and create your new favorite recipe?

Pumpkin Cream Cheese Muffins

Why Are These Muffins Unforgettable?

Irresistible Flavors: Imagine sinking your teeth into a muffin bursting with spices and creamy goodness; that’s what these Pumpkin Cream Cheese Muffins offer!

Baking Made Easy: With just 20 minutes of prep, you can whip up this delightful treat, making it perfect for busy mornings or last-minute gatherings.

Freezer-Friendly: Bake a batch ahead of time, and enjoy them fresh from the oven whenever you crave a taste of fall!

Perfectly Moist: Thanks to the pumpkin puree and cream cheese filling, each muffin is soft, fluffy, and utterly satisfying—no dry bites here!

Crowd-Pleaser: They’re not just delicious; these muffins are sure to be a hit with family and friends, whether served at brunch or as a sweet afternoon snack.

Pumpkin Cream Cheese Muffin Ingredients

For the Muffin Batter

  • All-purpose flour – Adds structure to the muffins, ensuring they rise beautifully.
  • Baking soda – Gives the muffins a wonderful lift.
  • Baking powder – Enhances the fluffiness of each bite.
  • Ground cinnamon – Infuses warm, cozy flavors that scream fall.
  • Ground ginger – Adds a zesty kick, perfectly complementing the pumpkin.
  • Ground nutmeg – Gives a nutty depth that enriches the overall flavor profile.
  • Ground cloves – Offers a hint of warmth, rounding out the spice mix.
  • Salt – Balances the sweetness, enhancing all the flavors.
  • Granulated sugar – Sweetens the muffins; adjust for your taste!
  • Brown sugar – Brings a lovely caramelly note to the mix.
  • Large eggs – Acts as a binding agent while contributing to the moisture.
  • Pure pumpkin puree – Essential for that distinct, rich pumpkin flavor in these Pumpkin Cream Cheese Muffins.
  • Vegetable oil – Ensures a moist texture, keeping the muffins soft.
  • Milk – Adds richness and slightly contributes to the overall moistness.
  • Vanilla extract – Elevates the flavor with a touch of sweetness.

For the Cream Cheese Filling

  • Cream cheese – The star of the filling, adding creaminess and tang.
  • Powdered sugar – Sweetens the filling, balancing the cream cheese tartness.
  • Egg yolk – Provides richness and helps to bind the filling ingredients.
  • Vanilla extract – Enhances the sweetness and flavor of the cream cheese filling.

With these ingredients on hand, you’re well on your way to creating warm and inviting Pumpkin Cream Cheese Muffins that will fill your home with delightful fall aromas!

Step‑by‑Step Instructions for Pumpkin Cream Cheese Muffins

Step 1: Preheat the Oven
Begin by preheating your oven to 400°F (200°C). While it warms up, line a 12-cup muffin pan with paper liners. This step ensures that your Pumpkin Cream Cheese Muffins bake evenly and are easy to remove after they’re baked. As the oven heats, gather your ingredients to streamline the process.

Step 2: Whisk the Dry Ingredients
In a large mixing bowl, combine the all-purpose flour, baking soda, baking powder, ground cinnamon, ground ginger, nutmeg, cloves, and salt. Use a whisk to mix them thoroughly, ensuring there are no lumps. This mixture of spices and flour will be the foundation for your muffins, giving them that fall-inspired aroma and flavor.

Step 3: Mix the Wet Ingredients
In a separate bowl, whisk together the granulated sugar, brown sugar, eggs, pumpkin puree, vegetable oil, milk, and vanilla extract until smooth and well-blended. You should see a lovely orange hue from the pumpkin. This blend of wet ingredients is essential for creating the moist texture of your Pumpkin Cream Cheese Muffins, so mix until combined.

Step 4: Combine Wet and Dry Mixtures
Gently pour the wet mixture into the bowl of dry ingredients. Using a spatula, fold the two mixtures together until just combined—lumps are perfectly okay, so be careful not to overmix. This careful folding technique helps retain the muffins’ light and fluffy texture, a hallmark of delicious Pumpkin Cream Cheese Muffins.

Step 5: Prepare the Cream Cheese Filling
In a medium bowl, beat the softened cream cheese until smooth. Then add in the powdered sugar, egg yolk, and vanilla extract, mixing well until everything is fully combined and creamy. This filling will add a delightful surprise of creamy goodness in the center of your muffins, enhancing the flavor profile with rich creaminess.

Step 6: Fill the Muffin Cups
Spoon the pumpkin batter into each muffin cup until they are about two-thirds full. Then, using a small spoon, add approximately 1 tablespoon of the cream cheese filling into the center of each muffin. Ensure the filling is nestled within the batter to create that perfect blend of flavors in each bite of your Pumpkin Cream Cheese Muffins.

Step 7: Bake the Muffins
Place the muffin pan in the preheated oven and bake at 400°F for 5 minutes. After this initial burst of heat, reduce the oven temperature to 350°F (175°C) and continue baking for an additional 15-18 minutes. Keep an eye on them; they are done when a toothpick inserted into the pumpkin part comes out clean, signaling your muffins are light and fluffy.

Step 8: Cool the Muffins
Once baked, remove the muffin pan from the oven and allow the muffins to cool in the pan for about 5 minutes. This cooling step is crucial for easy removal. Afterward, carefully transfer the Pumpkin Cream Cheese Muffins to a wire rack to cool completely, where they will continue to set and develop their delightful flavors.

Pumpkin Cream Cheese Muffins

How to Store and Freeze Pumpkin Cream Cheese Muffins

Room Temperature: Store cooled muffins in an airtight container for up to 3 days. This keeps them fresh and soft, ready for snacking anytime.

Fridge: For longer freshness, keep the muffins in the refrigerator for up to 1 week. Just be sure to wrap them well to prevent them from drying out.

Freezer: These delightful pumpkin cream cheese muffins freeze beautifully! Place them in a sealed freezer bag or container for up to 3 months.

Reheating: To enjoy muffins from the freezer, simply thaw them overnight in the fridge and warm them in the microwave for about 15-20 seconds for a fresh-baked taste.

Make Ahead Options

These Pumpkin Cream Cheese Muffins are perfect for meal prep enthusiasts! You can prepare the muffin batter up to 24 hours in advance by mixing it and storing it in the refrigerator in an airtight container. Additionally, you can scoop the cream cheese filling into small pre-portioned dollops and refrigerate them as well. When you’re ready to bake, simply fill the muffin cups with the chilled batter and add the cream cheese filling before baking. For best results, ensure the batter is brought back to room temperature before baking to maintain its fluffy texture. Enjoy fresh, warm muffins that are just as delicious and comforting on busy mornings!

What to Serve with Bakery-Style Pumpkin Cream Cheese Muffins

Nothing pairs better with cozy moments than delightful bites that complement your muffins perfectly!

  • Creamy Mashed Potatoes: Their buttery texture is a comforting contrast to the fluffy muffins, perfect for a fall feast.

  • Warm Apple Cider: The sweet, spiced flavors of apple cider elevate your muffin experience, making each sip like a hug in a mug.

  • Maple Pecan Salad: The crunch of pecans and the sweetness of maple dressing play beautifully off the creamy richness of the muffins.

  • Spiced Chai Latte: A warm cup of spiced chai adds a lovely aromatic touch, harmonizing with the muffins’ cozy flavors.

  • Caramel Drizzle: A light drizzle of caramel sauce over the muffins introduces an indulgent sweetness that can elevate your coffee break.

  • Dark Chocolate Brownies: These fudgy treats create a delightful contrast, ensuring a rich, satisfying dessert spread after enjoying your Pumpkin Cream Cheese Muffins.

Indulge in these combinations and turn your baking into a full fall-inspired feast!

Expert Tips for Pumpkin Cream Cheese Muffins

• Don’t Overmix: Gently combine wet and dry ingredients. Overmixing can lead to dense muffins instead of the light, fluffy Pumpkin Cream Cheese Muffins.

• Room Temperature Ingredients: Ensure your cream cheese and eggs are at room temperature for a smoother filling and better incorporation with the batter.

• Proper Baking Times: Start baking at 400°F for that initial rise, then lower to 350°F for even baking. This step is vital for perfectly fluffy muffins.

• Test for Doneness: Use a toothpick inserted into the pumpkin part. It should come out clean; if batter sticks, bake a few more minutes for the best texture.

• Customize the Spices: Feel free to adjust spices based on your taste preferences! A little extra cinnamon or nutmeg can elevate the pumpkin flavor in these muffins.

Pumpkin Cream Cheese Muffins Variations

Feel free to explore these delightful twists that make your Pumpkin Cream Cheese Muffins even more special—each variation is a chance to elevate your baking game!

  • Gluten-Free: Substitute all-purpose flour with your favorite gluten-free blend for a deliciously inclusive muffin experience. Enjoy the softness that pumpkin provides to keep them moist!

  • Dairy-Free: Replace cream cheese with silken tofu blended with a bit of nutritional yeast and lemon juice. This swap yields a creamy filling while maintaining that rich flavor without dairy!

  • Nutty Texture: Add ½ cup of chopped nuts, such as walnuts or pecans, to the batter for an extra crunch. They provide a delightful contrast to the soft texture of the muffins, making each bite a bit more interesting.

  • Pumpkin Spice Boost: Enhance the spices by increasing the cinnamon or adding 1 teaspoon of pumpkin spice mix for a warm, enveloping aroma. It brings a seasonal touch to the muffins, perfect for chilly days!

  • Chocolate Lovers: Mix in ½ cup of chocolate chips, either dark or white, for a luscious surprise inside. Each bite combines the rich flavors of pumpkin and chocolate, making a decadent treat!

  • Extra Creamy Center: Fold in a few tablespoons of sour cream or Greek yogurt into the cream cheese filling. This will make it extra moist and tangy, perfect for a delightful offset to the sweetness.

  • Cranberry Surprise: Add a ½ cup of dried cranberries to the muffin batter for a burst of tartness. The contrast between the sweet pumpkin and tangy cranberries creates a flavor explosion that’s truly unique.

  • Spicy Kick: For those who love heat, incorporate ½ teaspoon of cayenne pepper or a sprinkle of crushed red pepper flakes into the batter. This unexpected twist will create a tantalizing balance with the sweet pumpkin flavor.

These variations not only keep your Pumpkin Cream Cheese Muffins fresh and exciting but maximize the possibilities for every taste preference and occasion. Dive into the wonderful world of flavors that baking has to offer!

Pumpkin Cream Cheese Muffins

Pumpkin Cream Cheese Muffins Recipe FAQs

What should I look for when selecting pumpkin puree?
Absolutely! When choosing pumpkin puree, look for a brand that is pure 100% pumpkin with no added sugars or spices. You can also make your own by roasting and blending fresh pumpkin. For optimal flavor and texture, select pumpkins that are heavy for their size and have a deep orange color. Avoid any with dark spots or soft spots.

How should I store my Pumpkin Cream Cheese Muffins?
To keep your muffins fresh, store them in an airtight container at room temperature for up to 3 days. If you’d like to extend their life, refrigerate them, where they can last for up to 1 week when properly wrapped. Always ensure they are completely cooled before storing to prevent moisture buildup!

Can I freeze these muffins? If so, how?
Certainly! To freeze your Pumpkin Cream Cheese Muffins, allow them to cool completely first. Then, wrap each muffin individually in plastic wrap or foil, and place them in a labeled freezer bag. They can be stored in the freezer for up to 3 months. When you’re ready to enjoy one, thaw it overnight in the fridge and reheat in the microwave for about 15-20 seconds for that just-baked taste.

What can I do if my muffins come out dry?
If you find your muffins are dry, it’s often due to overmixing the batter or baking them too long. Always mix until just combined to keep them fluffy and light. As a troubleshooting tip, make sure to check them as they approach the end of the baking time. A toothpick should come out clean but not dry when inserted into the pumpkin part.

Are there any dietary considerations I should be aware of?
When making these muffins, consider potential allergies to gluten, eggs, or dairy due to the ingredients like flour and cream cheese. For gluten-free options, substitute with a gluten-free flour blend. You can also make a vegan version by replacing eggs with flaxseed meal mixed with water and using dairy-free cream cheese alternatives.

How long do the flavors develop after making them?
Great question! While these muffins are delicious right after baking, they actually taste even better the next day as the spices and flavors have time to meld. If you can resist the temptation, let them sit overnight to enhance the rich flavor profile of your Pumpkin Cream Cheese Muffins.

Deliciously Fluffy Pumpkin Cream Cheese Muffins for Fall

Delight in these Pumpkin Cream Cheese Muffins, a cozy treat filled with warm spices and rich cream cheese.

  • muffin pan
  • Mixing bowls
  • Whisk
  • spatula
  • Measuring cups and spoons

For the Muffin Batter

  • 2 cups All-purpose flour
  • 1 teaspoon Baking soda
  • 1 teaspoon Baking powder
  • 2 teaspoons Ground cinnamon
  • 1 teaspoon Ground ginger
  • 1 teaspoon Ground nutmeg
  • 1 teaspoon Ground cloves
  • 1/2 teaspoon Salt
  • 1 cup Granulated sugar
  • 1/2 cup Brown sugar
  • 2 large Eggs
  • 1 cup Pure pumpkin puree
  • 1/2 cup Vegetable oil
  • 1/2 cup Milk
  • 1 teaspoon Vanilla extract

For the Cream Cheese Filling

  • 8 ounces Cream cheese (softened)
  • 1/2 cup Powdered sugar
  • 1 large Egg yolk
  • 1 teaspoon Vanilla extract

Step‑by‑Step Instructions

  1. Preheat your oven to 400°F (200°C) and line a 12-cup muffin pan with paper liners.
  2. In a large mixing bowl, whisk together the dry ingredients: flour, baking soda, baking powder, spices, and salt.
  3. In a separate bowl, whisk together the wet ingredients: sugars, eggs, pumpkin puree, vegetable oil, milk, and vanilla extract until smooth.
  4. Gently fold the wet mixture into the dry ingredients until just combined.
  5. In another bowl, beat the cream cheese until smooth, then mix in powdered sugar, egg yolk, and vanilla until creamy.
  6. Fill each muffin cup with pumpkin batter, then add 1 tablespoon of cream cheese filling in the center.
  7. Bake for 5 minutes at 400°F, then reduce to 350°F (175°C) and bake for an additional 15-18 minutes until a toothpick comes out clean.
  8. Allow muffins to cool in the pan for 5 minutes before transferring them to a wire rack.

Don’t overmix the batter for fluffy muffins and use room temperature ingredients for best results.

Breakfast
American
Baked Goods, cozy treats, Fall Muffins, Homemade Muffins, Pumpkin Cream Cheese Muffins

Filed Under: Breakfast

Thanksgiving Piecaken: The Ultimate Festive Dessert Mashup

September 5, 2025 by grace bellamy Leave a Comment

As I took my first bite of the Thanksgiving Piecaken, a delightful wave of nostalgia washed over me. It’s like unwrapping memories of family gatherings and festive cheer all packed into one extraordinary dessert. This recipe combines the best of both worlds—rich cheesecake and spiced cake layered around a classic pumpkin pie—creating a stunning centerpiece that will impress your loved ones and embarrass those fast-food takeout boxes. With minimal fuss and a wonderful mix of textures and flavors, the Thanksgiving Piecaken elevates holiday gatherings to a new level. Plus, it’s freezer-friendly, making it perfect for prep-ahead hosting. Curious about the magic of this mouthwatering creation? Let’s dive into the sweet details!

Thanksgiving Piecaken

Why is Thanksgiving Piecaken a must-try?

Two Desserts in One: The Thanksgiving Piecaken unites a luscious cheesecake and delightful spice cake, all while embracing the iconic pumpkin pie—perfect for family feasts.

Flavor Explosion: Each layer brings its own unique taste, with warm spices and creamy textures that will have everyone reaching for seconds.

Impressive Centerpiece: This dessert is not only delicious but also a stunning visual treat, sure to be the talk of the table.

Make Ahead Magic: With its chill time, this scrumptious treat fits into your holiday prep beautifully. Just whip it up, refrigerate, and you’re ready to impress!

Versatile Serving: Whether it’s a festive gathering or a cozy family night, the Thanksgiving Piecaken adapts perfectly, bringing joy to any occasion.

Don’t forget to check out my tips on making homemade pumpkin pie to complete your festive menu!

Thanksgiving Piecaken Ingredients

For the Cheesecake Layer
• Cream cheese – 3 (8 ounce) packages, softened for a creamy base.
• Granulated sugar – 1/2 cup to sweeten without overpowering.
• All-purpose flour – 3 tablespoons helps to stabilize the filling.
• Vanilla extract – 1 teaspoon adds depth to the flavor.
• Ground cinnamon – 2 teaspoons for warm spice notes.
• Heavy whipping cream – 1/2 cup adds richness and creaminess.
• Large eggs – 2, essential for binding the filling.

For the Spice Cake Layer
• All-purpose flour – 2/3 cup gives structure to the cake.
• Baking powder – 1/2 teaspoon ensures the cake rises beautifully.
• Ground cinnamon – 3/4 teaspoon enhances the spiced flavor.
• Ground ginger – 1/2 teaspoon adds warmth and a zest.
• Nutmeg – 1/2 teaspoon for that classic holiday essence.
• Ground cloves – 1/4 teaspoon contributes to the spiced aroma.
• Allspice – 1/4 teaspoon for a unique flavor twist.
• Butter – 1/4 cup, softened, creates a moist cake.
• Brown sugar – 1/3 cup, packed for a deep, molasses flavor.
• Vegetable oil – 1 tablespoon adds moisture.
• Pure vanilla extract – 1/2 teaspoon for extra flavor depth.
• Large egg – 1 binds the batter together.
• Milk – 1/3 cup + 1 tablespoon keeps the batter smooth and pourable.

For the Assembly
• Store-bought pumpkin pie – 1 (9-inch), saves time and adds tradition.

For the Frosting
• Unsalted butter – 12 ounces (3 sticks), softened for a creamy texture.
• Powdered sugar – 5 cups, essential for sweetness and stability.
• Vanilla extract – 2 teaspoons to elevate the frosting’s flavor.
• Ground cinnamon – 1/2 teaspoon, optional, adds a hint of spice.
• Heavy whipping cream – 3-4 tablespoons, cold to achieve fluffiness.

With these Thanksgiving Piecaken ingredients, you’re well on your way to creating a layered masterpiece that will leave everyone in awe!

Step‑by‑Step Instructions for Thanksgiving Piecaken

Step 1: Preheat and Prepare
Preheat your oven to 350°F (175°C) and prepare a 9-inch springform pan. Lightly coat the bottom and sides with non-stick spray and place a round of parchment paper at the bottom. This ensures your Thanksgiving Piecaken releases beautifully after baking.

Step 2: Cream the Cheese
In a stand mixer fitted with the paddle attachment, beat the softened cream cheese on medium speed for 5-6 minutes until smooth and creamy. Gradually add the granulated sugar and 3 tablespoons of all-purpose flour, mixing until fully incorporated and fluffy. The mixture should be light and airy.

Step 3: Mix in the Flavors
Add the vanilla extract, ground cinnamon, and heavy whipping cream to the cream cheese mixture. Begin mixing on low speed to combine the ingredients, then increase to high and whip for 1 minute. Scrape down the bowl and mix again for another minute until totally smooth and glossy.

Step 4: Incorporate the Eggs
Add the eggs to the mixture one at a time, ensuring each egg is fully mixed in before adding the next. Pour the cheesecake batter into the prepared springform pan, tapping it gently on the counter to release any trapped air bubbles. This step is crucial for an even texture in your Thanksgiving Piecaken.

Step 5: Bake the Cheesecake
Bake the cheesecake layer in your preheated oven at 350°F (175°C) for 10 minutes. After this, reduce the oven temperature to 200°F (93°C) and continue baking for another 30-35 minutes. The center should jiggle slightly when done. Allow it to cool in the oven with the door ajar for 15 minutes before transferring to room temperature, then refrigerate overnight.

Step 6: Prepare the Spice Cake Layer
For the spice cake layer, preheat your oven to 350°F (175°C) again. Grease a 9-inch round cake pan with vegetable shortening and dust it lightly with flour to ensure easy removal. This step will get your cake layer ready for baking once prepared.

Step 7: Whisk the Dry Ingredients
In a medium bowl, whisk together 2/3 cup of all-purpose flour, 1/2 teaspoon baking powder, and the array of spices: cinnamon, ginger, nutmeg, cloves, and allspice. Mix thoroughly so that the spices are evenly distributed in the flour, creating a fragrant base for your Thanksgiving Piecaken.

Step 8: Cream the Butter and Sugars
In your stand mixer, beat together 1/4 cup of softened butter and 1/3 cup of brown sugar until fluffy and light in color. Add the tablespoon of vegetable oil, the egg, and 1/2 teaspoon of pure vanilla extract, mixing until the batter is cohesive and well combined.

Step 9: Combine Wet and Dry Ingredients
Gradually add half of the flour mixture to the creamed butter mixture, stirring until smooth. Follow this by adding 1/3 cup plus 1 tablespoon of milk and mixing until well combined. Finally, incorporate the remaining flour mixture, ensuring no lumps remain in your spiced batter.

Step 10: Bake the Spice Cake
Pour the spiced cake batter into the prepared cake pan and bake for 15-17 minutes, or until a toothpick inserted in the center comes out clean. Once baked, allow it to cool completely before placing it in the refrigerator overnight to enhance the flavors for your Thanksgiving Piecaken.

Step 11: Make the Frosting
For the frosting, beat 12 ounces of softened unsalted butter in the stand mixer until smooth and creamy. Gradually add the powdered sugar, mixing thoroughly after each addition. If desired, mix in cinnamon, 2 teaspoons of vanilla extract, and 3-4 tablespoons of cold heavy whipping cream until the frosting reaches a fluffy, spreadable consistency.

Step 12: Assemble the Layers
Trim each layer of cheesecake and spice cake to ensure they are uniform in size. Begin by placing the cheesecake upside down on a cake stand, then spread 3/4 cup of frosting evenly on top. Carefully layer the spiced cake over the frosting, creating a delightful foundation for your Thanksgiving Piecaken.

Step 13: Incorporate the Pumpkin Pie
Gently remove the crust from your store-bought pumpkin pie, cutting it to fit atop the spice cake layer. Position the pumpkin pie delicately, then spread half of the remaining frosting over the entire assembled cake, covering each layer beautifully.

Step 14: Final Touch and Chill
Refrigerate the beautifully assembled Thanksgiving Piecaken for 20-30 minutes to allow the frosting to set slightly. Once set, smooth the remaining frosting over the cake for a polished look. If desired, pipe a decorative edge around the top and sprinkle with a dash of cinnamon before serving.

Thanksgiving Piecaken

Tips for the Best Thanksgiving Piecaken

Perfect Layering: Ensure each layer is even by trimming any excess cake or cheesecake. This not only improves aesthetics but also makes slicing much easier.

Chill Time Matters: Don’t skip the chilling steps! Refrigerating overnight allows flavors to meld and improves the texture of your Thanksgiving Piecaken.

Avoid Overmixing: When mixing batters, do so just until combined. Overmixing can lead to a dense texture instead of the desired fluffy layers.

Watch Your Bake Times: Ovens vary; check your cheesecakes and spiced cake layers a few minutes before the suggested time to avoid overbaking.

Frosting Consistency: If your frosting is too stiff, add more cold heavy whipping cream, a tablespoon at a time, until you achieve a fluffy spreadable consistency.

Presentation Perfect: Use a warm knife to slice your Thanksgiving Piecaken for clean edges, making your dessert as beautiful as it is delicious!

How to Store and Freeze Thanksgiving Piecaken

Room Temperature: Keep your Thanksgiving Piecaken at room temperature for up to 2 hours if serving immediately; this helps the layers maintain their texture.

Fridge: Store any leftovers in an airtight container in the fridge for up to 4 days. Be sure to cover the piecaken well to prevent it from drying out.

Freezer: For longer storage, freeze the Thanksgiving Piecaken by wrapping it tightly in plastic wrap and aluminum foil. It can last up to 2 months in the freezer.

Reheating: To enjoy frozen slices, thaw them overnight in the refrigerator. Warm in the microwave for about 15-20 seconds to restore the creamy layers before serving.

Thanksgiving Piecaken Variations

Feel free to put your own spin on the Thanksgiving Piecaken; it’s all about the joy of creating something deliciously unique!

  • Gluten-Free: Substitute all-purpose flour with a gluten-free blend for those needing to avoid gluten. It will still hold up nicely in all layers!

  • Vegan: Use dairy-free cream cheese and replace eggs with flaxseed meal or aquafaba. This variation allows everyone to enjoy the Piecaken without sacrificing flavor.

  • Extra Spice: Amp up the flavor by adding an additional teaspoon of your favorite spices, such as cardamom or freshly grated ginger, to the spice cake layer. It creates a fresh twist that will tantalize your taste buds.

  • Chocolate Delight: Mix in some chocolate chips into the cheesecake layer for a decadent twist. Chocolate and pumpkin are a match made in heaven!

  • Coconut Cream Frosting: Swap out regular frosting for a whipped coconut cream topping for a light and tropical flair. It adds an airy texture that brightens the holiday flavors.

  • Nutty Crunch: Fold in chopped nuts, like walnuts or pecans, into the spice cake batter for a lovely crunch. This texture upgrade gives the Piecaken an added layer of satisfaction.

  • Maple Touch: Replace granulated sugar in the frost with maple syrup for a hint of autumnal sweetness, enhancing the overall flavors of your Thanksgiving Piecaken.

  • Caramel Swirl: Drizzle some homemade or store-bought caramel sauce on top of the frosting before serving for a touch of decadence everyone will love!

And don’t forget, while you’re at it, why not whip up some homemade pumpkin pie to serve alongside for a traditional treat everyone adores?

What to Serve with Thanksgiving Piecaken

Creating a delightful spread alongside the Thanksgiving Piecaken elevates your festive gathering and completes the holiday meal experience.

  • Creamy Mashed Potatoes: Silky and buttery, they provide a perfect contrast to the rich sweetness of the piecaken.

  • Green Bean Almondine: This fresh and crunchy side adds a splash of color and lightness, balancing the dessert’s density beautifully.

  • Savory Stuffing: The aromatic herbs in stuffing complement the warm spices of the piecaken, making every bite feel festive.

  • Roasted Brussels Sprouts: With their crispy edges and nutty flavor, they add wonderful texture and a slight bitterness to offset the sweetness.

  • Cranberry Sauce: A tart, tangy counterpoint to the dessert that brings out the flavors of both the pumpkin and spice cake layers.

  • Pumpkin Spice Latte: This cozy drink mirrors the flavors of the piecaken, creating a warm hug in a cup to sip alongside dessert.

  • Apple Pie: If you’re feeling extra indulgent, a slice of classic apple pie adds more seasonal goodness to the table, charming everyone.

With these thoughtful pairings, your Thanksgiving celebration will be as memorable as the piecaken itself, bringing warmth and joy to your gathering.

Make Ahead Options

These Thanksgiving Piecaken layers are ideal for meal prep, saving you time during the busy holiday season! You can prepare the cheesecake and spice cake layers up to 24 hours in advance; simply bake them, allow them to cool completely, and then refrigerate overnight. For optimal flavor, make the frosting ahead as well; it can be stored in an airtight container in the fridge for up to 3 days. To maintain the delicious quality of your Thanksgiving Piecaken, be sure to wrap each layer separately to prevent drying out. When you’re ready to assemble, just bring everything to room temperature, layer, frost, and chill briefly. With these steps, you’ll achieve stunning, fresh results with minimal hassle!

Thanksgiving Piecaken

Thanksgiving Piecaken Recipe FAQs

What kind of cream cheese should I use?
Absolutely! I recommend using full-fat cream cheese as it creates a rich and creamy cheesecake layer essential for your Thanksgiving Piecaken. Low-fat or non-fat options may result in a denser texture.

How should I store leftover Piecaken?
For sure! Any leftovers should be stored in an airtight container in the fridge for up to 4 days. Be sure to wrap it well to keep it moist and fresh, preventing it from drying out.

Can I freeze Thanksgiving Piecaken?
Yes, you can! To freeze your Thanksgiving Piecaken, wrap it tightly in plastic wrap and then in aluminum foil. It’ll remain delicious for up to 2 months in the freezer. When you’re ready to indulge, thaw it overnight in the fridge and warm it in the microwave for about 15-20 seconds to restore its creamy layers.

What if my cheesecake layer cracks while baking?
No worries! If your cheesecake layer cracks, it often means it baked too quickly or at too high a temperature. To avoid this, bake at a lower temperature and keep the oven door slightly ajar while cooling. If it cracks anyway, just cover it with frosting—it’s part of the charm!

Can I substitute any ingredients for dietary restrictions?
Definitely! If you have allergies, consider using dairy-free cream cheese and almond or coconut milk in place of regular milk. For a gluten-free version, swap out the all-purpose flour with a gluten-free flour blend. Just be sure to adjust baking times if needed.

How far in advance can I make the Thanksgiving Piecaken?
Very well! You can prepare the Thanksgiving Piecaken up to 2 days in advance. Just make sure to keep it chilled in the fridge after assembling to let the flavors meld beautifully. This makes your holiday prep a breeze!

Thanksgiving Piecaken: The Ultimate Festive Dessert Mashup

Thanksgiving Piecaken combines cheesecake, spiced cake, and pumpkin pie in one delightful dessert.

  • Oven
  • stand mixer
  • 9-inch springform pan
  • 9-inch Round Cake Pan

For the Cheesecake Layer

  • 3 packages Cream cheese (8 ounces each, softened)
  • 0.5 cup Granulated sugar (to sweeten without overpowering)
  • 3 tablespoons All-purpose flour (helps to stabilize the filling)
  • 1 teaspoon Vanilla extract (adds depth to the flavor)
  • 2 teaspoons Ground cinnamon (for warm spice notes)
  • 0.5 cup Heavy whipping cream (adds richness and creaminess)
  • 2 large Eggs (essential for binding the filling)

For the Spice Cake Layer

  • 2/3 cup All-purpose flour (gives structure to the cake)
  • 0.5 teaspoon Baking powder (ensures the cake rises beautifully)
  • 0.75 teaspoon Ground cinnamon (enhances the spiced flavor)
  • 0.5 teaspoon Ground ginger (adds warmth and a zest)
  • 0.5 teaspoon Nutmeg (for that classic holiday essence)
  • 0.25 teaspoon Ground cloves (contributes to the spiced aroma)
  • 0.25 teaspoon Allspice (for a unique flavor twist)
  • 0.25 cup Butter (softened, creates a moist cake)
  • 1/3 cup Brown sugar (packed for a deep, molasses flavor)
  • 1 tablespoon Vegetable oil (adds moisture)
  • 0.5 teaspoon Pure vanilla extract (for extra flavor depth)
  • 1 large Egg (binds the batter together)
  • 1/3 cup Milk (keeps the batter smooth and pourable)
  • 1 tablespoon Milk (additional for pourability)

For the Assembly

  • 1 9-inch Store-bought pumpkin pie (saves time and adds tradition)

For the Frosting

  • 12 ounces Unsalted butter (softened for a creamy texture)
  • 5 cups Powdered sugar (essential for sweetness and stability)
  • 2 teaspoons Vanilla extract (to elevate the frosting’s flavor)
  • 0.5 teaspoon Ground cinnamon (optional, adds a hint of spice)
  • 3-4 tablespoons Heavy whipping cream (cold to achieve fluffiness)

Step-by-Step Instructions

  1. Preheat your oven to 350°F (175°C) and prepare a 9-inch springform pan.
  2. In a stand mixer, beat the softened cream cheese until smooth and creamy. Gradually add sugar and flour, mixing until fluffy.
  3. Add vanilla extract, ground cinnamon, and heavy whipping cream to the mixture, then mix until totally smooth.
  4. Add eggs one at a time, ensuring each is fully mixed in. Pour batter into the prepared pan.
  5. Bake the cheesecake layer at 350°F for 10 minutes, then reduce temperature to 200°F for 30-35 minutes.
  6. For the spice cake layer, preheat your oven to 350°F again and prepare a 9-inch cake pan.
  7. Whisk together dry ingredients including flour and spices in a bowl.
  8. Beat together butter and brown sugar until fluffy, then add remaining wet ingredients.
  9. Combine wet and dry ingredients gradually until smooth, ensuring no lumps remain.
  10. Bake the spiced cake for 15-17 minutes until a toothpick comes out clean.
  11. For the frosting, beat butter until creamy, then gradually add powdered sugar and other ingredients until fluffy.
  12. Assemble the layers starting with the cheesecake, then frosting, followed by spice cake, and pumpkin pie on top.
  13. Chill the assembled Piecaken for 20-30 minutes before adding a final layer of frosting.

Perfect layering is key. Refrigerate overnight for improved flavor and texture. Use a warm knife for clean slices.

Dessert
American
cheesecake, dessert, holiday dessert, pumpkin pie, spice cake, Thanksgiving Piecaken

Filed Under: Dessert

Cheesy Halloween Breadstick Bones: Spooky & Scrumptious Treats

September 5, 2025 by grace bellamy Leave a Comment

As the leaves begin to crunch beneath my feet and the smell of cinnamon fills the air, it feels like the perfect time to whip up something fun and spooky—like these Cheesy Halloween Breadstick Bones! This recipe is not only a fantastic way to get into the Halloween spirit but also a quick and crowd-pleasing snack that everyone will love. With just 35 minutes of your time, you can create a platter of gooey, cheesy goodness that pairs perfectly with marinara sauce for dipping. Whether you’re hosting a Halloween party or just looking for a fun way to treat the family, these cheese-laden delights are sure to become a favorite. So, are you ready to roll up your sleeves and create a spine-chilling snack that’s deliciously delectable? Let’s get started!

Cheesy Halloween Breadstick Bones

Why Are These Breadstick Bones So Fun?

Playful Presentation: Shaped like bones, these breadsticks are a delightful addition to any Halloween spread.
Quick and Easy: With just 15 minutes of prep, they’re perfect for last-minute gatherings.
Cheesy Goodness: The combo of melted mozzarella and Parmesan brings a rich, savory flavor that everyone craves.
Dipping Delight: Pair them with marinara sauce for a spooky yet tasty experience that enhances the fun!
Versatile Appeal: These treats are ideal for parties, cozy family nights, or simply indulging your inner chef with homemade snacks.
Crowd Favorite: Guaranteed to be a hit with both kids and adults, you’ll have everyone coming back for more! Check out our tips on how to store leftovers or more spooky recipes to keep the Halloween spirit alive.

Cheesy Halloween Breadstick Bones Ingredients

Dive into crafting these spooky delights with the perfect ingredients for a treat that everyone will love!

For the Dough
• Pizza dough – This is the canvas for your breadstick bones; feel free to use store-bought for a quicker option.

For the Topping
• Unsalted butter (melted) – Brush this over the breadsticks for a golden-brown finish and rich taste.
• Grated Parmesan cheese – Adds a savory kick that perfectly complements the mozzarella.
• Shredded mozzarella cheese – The gooey goodness that makes these Cheesy Halloween Breadstick Bones a must-have!

For Assembly
• All-purpose flour – Dust your surface to prevent sticking while shaping those fun bone forms.
• Marinara sauce (for dipping) – A delicious dip that not only enhances the flavor but also adds to the spooky presentation!

Step‑by‑Step Instructions for Cheesy Halloween Breadstick Bones

Step 1: Preheat the Oven
Begin by preheating your oven to 375°F (190°C). While the oven warms up, line two baking sheets with parchment paper, creating a non-stick surface for your Cheesy Halloween Breadstick Bones. This will ensure easy handling and cleanup once they are baked to golden perfection.

Step 2: Prepare the Dough
Once your pizza dough has come to room temperature, dust your work surface generously with all-purpose flour. Divide the dough into 10 equal pieces—this will help in shaping the bones uniformly. Use your hands to roll each piece into a rope about 8 inches long, ensuring the ends are a bit thicker to create that bone-like appearance.

Step 3: Shape the Bones
For the fun spooky touch, snip each end of the rolled dough about 1 inch deep with kitchen scissors, then gently pull the ends apart to resemble bones. It’s all about the presentation! Arrange the shaped breadsticks on the lined baking sheets, making sure to leave enough space between each piece for them to puff up while baking.

Step 4: Add the Toppings
With your breadsticks in place, brush a generous amount of melted unsalted butter over the top of each one. This will give them a delicious golden-brown finish. Next, sprinkle the breadsticks liberally with the grated Parmesan cheese, ensuring each piece is covered in that savory goodness, setting the stage for the cheesy flavor to come.

Step 5: Bake the Breadsticks
Slide your baking sheets into the preheated oven and bake the Cheesy Halloween Breadstick Bones for 15 minutes. Keep an eye on them as they puff up and turn a light golden color, a sure sign they’re on their way to being deliciously crusty and golden.

Step 6: Add Mozzarella and Finish Baking
After 15 minutes, take the baking sheets out of the oven and sprinkle shredded mozzarella cheese generously over the tops of each breadstick. Return them to the oven and bake for an additional 5-7 minutes, until the cheese melts and begins to bubble, creating that irresistible gooey texture.

Step 7: Cool and Serve
Once the cheese is melted and bubbly, remove the Cheesy Halloween Breadstick Bones from the oven and let them cool slightly on a wire rack. Serve them warm alongside a side of marinara sauce for dipping, adding an extra layer of fun to this spooky and scrumptious treat!

Cheesy Halloween Breadstick Bones

Cheesy Halloween Breadstick Bones Variations

Get creative and make these delightful treats your own with just a few simple twists that add new flavors and dietary options!

  • Gluten-Free: Substitute the pizza dough with a gluten-free version for all your celiac friends, ensuring no one misses out on the fun!

  • Vegan: Use vegan mozzarella and plant-based butter to create a dairy-free delight that’s just as cheesy and satisfying.

  • Herb-Infused: Incorporate minced garlic and fresh herbs like rosemary or thyme into the dough for an aromatic touch that elevates the flavor.

  • Spicy Kick: Add a pinch of red pepper flakes or sprinkle some jalapeño slices on top of your mozzarella for a thrilling heat that adds excitement to each bite.

  • Cheesy Blend: Swap the mozzarella for a mixture of two or more cheeses, such as cheddar or gouda, to introduce a creamy and complex flavor profile.

  • Veggie Delight: Top your breadsticks with sautéed bell peppers and onions before baking to give them a nutritious boost and a vibrant appearance.

  • Full-Moon Sweet: Make them sweet by drizzling melted chocolate or caramel sauce over the warm breadsticks instead of cheese for a Halloween treat that satisfies your sweet tooth.

  • Limited Edition Shape: Use cookie cutters to create festive shapes like pumpkins or ghosts instead of bones, adding a whimsical touch to your Halloween snack table.

Whether you’re preparing for a party or just snuggling up for a cozy movie night, these variations will keep your Cheesy Halloween Breadstick Bones fresh and exciting. If you’re looking for more creative twists, don’t forget to explore our awesome ideas on how to store leftovers and discover more spooky recipes for your Halloween feast!

Expert Tips for Cheesy Halloween Breadstick Bones

• Dough Temperature: Make sure the pizza dough is at room temperature before shaping; this makes it easier to roll and shape into bone forms.

• Cheese Choices: Feel free to experiment with different cheeses like cheddar or pepper jack for added flavor; just remember to keep the balance so it complements the Cheesy Halloween Breadstick Bones.

• Space It Out: Don’t overcrowd the baking sheet! Leave enough space between each breadstick to allow for puffing up and even baking.

• Watch the Time: Every oven bakes differently; keep an eye on the breadsticks during the last few minutes to prevent over-baking.

• Dipping Splendor: Marinara sauce adds a delightful contrast to the cheesy breadsticks—consider warming it slightly before serving for an extra touch of deliciousness.

Make Ahead Options

These Cheesy Halloween Breadstick Bones are perfect for meal prep, making your spooky celebrations a breeze! You can shape the breadsticks up to 24 hours in advance; simply follow the instructions up to placing them on the baking sheets, then cover them with plastic wrap and refrigerate. To maintain their quality, let them sit at room temperature for about 30 minutes before baking. When ready to enjoy, just brush with melted butter and add the Parmesan cheese, then bake as instructed—no one will know they were prepped ahead! This way, you’ll have deliciously cheesy breadsticks with minimal effort, right when you need them!

How to Store and Freeze Cheesy Halloween Breadstick Bones

Room Temperature: Store any leftovers in an airtight container at room temperature for up to 1 day to maintain their softness.

Fridge: For a longer shelf life, keep breadsticks in the fridge for up to 3 days in a sealed container. Reheat in a preheated oven at 350°F for about 5–7 minutes to restore their cheesy goodness.

Freezer: To freeze, individually wrap each Cheesy Halloween Breadstick Bone in foil and store them in a freezer-safe bag. They can be baked directly from frozen until warm—perfect for last-minute spooky snacks!

Reheating: When reheating, consider using the oven for the best texture. Bake at 350°F for 10-15 minutes, or until heated through and the cheese is bubbling.

What to Serve with Cheesy Halloween Breadstick Bones?

As the spooky season approaches, it’s time to craft the ultimate spread, aligning perfectly with the delicious, cheesy allure of these breadstick bones.

  • Pumpkin Soup: A warm, velvety pumpkin soup complements the cheesy breadstick bones and adds a festive fall vibe to your meal.

  • Leafy Green Salad: A light, crisp salad with a tangy vinaigrette balances the richness of the cheesy treats, bringing freshness to your plate.

  • Stuffed Peppers: Colorful stuffed peppers filled with rice and veggies create a nourishing side that pairs beautifully with the savory flavors of the breadsticks.

  • Garlic Herb Butter Shrimp: Juicy grilled shrimp with garlic and herbs introduce an aromatic touch, enhancing the overall sensory experience of your meal.

  • Crispy Potato Wedges: Seasoned, crunchy potato wedges provide a satisfying contrast in texture, making them another irresistible dipper alongside the marinara sauce.

  • Autumn Spice Apple Cider: Warm apple cider infused with cinnamon and cloves offers a flavorful beverage that brings comforting warmth and fits the Halloween theme perfectly.

  • Chocolate Skeleton Cupcakes: End the meal with mini chocolate cupcakes adorned with skeleton frosting that mirrors the festive spirit, making them perfect for both kids and adults!

Create a delightful array of flavors and textures to accompany your Cheesy Halloween Breadstick Bones, and watch as your gathering transforms into a fun and memorable evening!

Cheesy Halloween Breadstick Bones

Cheesy Halloween Breadstick Bones Recipe FAQs

How do I choose the best pizza dough for my breadsticks?
Absolutely! For the best results, opt for high-quality pizza dough that’s fresh or frozen. If using frozen, allow it to fully thaw in the refrigerator overnight. Check for any signs of damage or excessive air bubbles in the dough; smooth, pliable dough yields the best-shaped breadstick bones!

What’s the best way to store leftover Cheesy Halloween Breadstick Bones?
Very! If you have leftovers, keep them in an airtight container at room temperature for up to 1 day. For longer storage, place them in the fridge for up to 3 days. When ready to enjoy, just reheat them in a preheated oven at 350°F (175°C) for about 5-7 minutes for optimal texture.

Can I freeze the Cheesy Halloween Breadstick Bones?
Absolutely! To freeze, wrap each breadstick bone individually in foil and place them into a freezer-safe bag. They’ll keep well for up to 3 months. When you’re ready to indulge, bake straight from the freezer at 375°F (190°C) for 15-20 minutes or until warm.

What if my dough is tough to shape?
So common! If your pizza dough feels too tough or isn’t rolling out easily, it might be too cold. Let it sit at room temperature for a bit longer, about 10 more minutes. Alternatively, lightly dust your hands and work surface with flour to help manipulate the dough while keeping it from sticking.

Are there any dietary considerations for these Cheesy Halloween Breadstick Bones?
Very! If you’re accommodating allergies, be mindful of gluten in the pizza dough and lactose in the cheeses. For gluten-free options, look for specialty gluten-free pizza dough. Also, note that while cheese is great for humans, it’s not recommended for pets, so ensure they don’t sneak any cheese-covered leftovers!

How can I enhance the flavor of my Cheesy Halloween Breadstick Bones?
I often make variations! You can mix in garlic powder or Italian herbs into the melted butter before brushing them on the breadsticks. For an extra kick, consider adding a sprinkle of red pepper flakes on top or using different cheeses like cheddar or gouda to change up the flavor profile.

Cheesy Halloween Breadstick Bones: Spooky & Scrumptious Treats

Cheesy Halloween Breadstick Bones are a fun and quick snack perfect for Halloween gatherings.

  • Oven
  • Baking sheets
  • parchment paper
  • Kitchen scissors
  • wire rack

For the Dough

  • 1 package Pizza dough (Use store-bought for a quicker option.)

For the Topping

  • 2 tablespoons Unsalted butter (Melted)
  • 1/4 cup Grated Parmesan cheese
  • 1 cup Shredded mozzarella cheese

For Assembly

  • 1 cup All-purpose flour (For dusting)
  • 1 cup Marinara sauce (For dipping)

Step-by-Step Instructions

  1. Preheat your oven to 375°F (190°C) and line two baking sheets with parchment paper.
  2. Dust your work surface with all-purpose flour, divide the pizza dough into 10 equal pieces, and roll each into an 8-inch rope.
  3. Snip each end of the rolled dough about 1 inch deep and pull the ends apart to resemble bones, then arrange them on the baking sheets.
  4. Brush melted unsalted butter over each breadstick and sprinkle with grated Parmesan cheese.
  5. Bake for 15 minutes until lightly golden, then add shredded mozzarella on top and bake for an additional 5-7 minutes.
  6. Remove from oven, let cool slightly, and serve warm with marinara sauce for dipping.

Make sure the pizza dough is at room temperature for easier shaping. Experiment with different cheeses for added flavor.

Appetizer
American
cheesy breadsticks, Cheesy Halloween Breadstick Bones, easy appetizers, Halloween snacks, party food, spooky treats

Filed Under: Appetizer

Delicious Keto Philly Cheesesteak Roll Ups to Savor Tonight

September 5, 2025 by grace bellamy Leave a Comment

As I stood in my kitchen, the enticing aroma of sautéed onions and bell peppers filled the air, whisking me away to the bustling streets of Philadelphia. That’s when it hit me—why not enjoy the essence of a classic cheesesteak in a way that fits my keto lifestyle? Enter my Keto Philly Cheesesteak Roll Ups, a delightful twist that combines all the savory goodness of the traditional sandwich but wrapped up in gooey provolone cheese. These roll-ups are not only quick to whip up but also a crowd-pleaser that’s bound to impress your friends and family. Whether you’re following a keto diet or simply seeking a healthier option, these cheesy gems deliver comfort without the carbs. Ready to roll into flavor town?

Keto Philly Cheesesteak Roll Ups

Why Try Keto Philly Cheesesteak Roll Ups?

Simplicity makes these roll-ups a breeze to prepare, requiring minimal ingredients and just 15 minutes of cook time. Flavor-packed with tender roast beef, sautéed veggies, and gooey provolone, every bite is an explosion of savory delight. Versatile enough for dinner or a party appetizer, they’re perfect for any occasion. Plus, they’re a guilt-free indulgence, fitting seamlessly into your keto lifestyle. If you’re craving more low-carb goodness, check out my Keto Veggie Stir-Fry for a fantastic way to keep your meals exciting!

Keto Philly Cheesesteak Roll Ups Ingredients

For the Roll Ups

  • Olive oil – adds richness and helps in sautéing the vegetables to perfection.
  • Thinly sliced roast beef – provides a savory base and is essential for that classic cheesesteak flavor.
  • Green bell pepper – imparts a fresh crunch; feel free to substitute with a red or yellow pepper for a sweeter taste.
  • Onion – adds sweetness and depth; sautéing it brings out its natural sugars.
  • Sliced mushrooms – contribute an earthy flavor and chewy texture that complements the meat.
  • Garlic powder – enhances the overall taste with its aromatic kick; freshly minced garlic can be used for a bolder flavor.
  • Salt and pepper – essential for seasoning your filling to perfection.
  • Provolone cheese – melts beautifully to hold everything together in this keto delight.

Note: These Keto Philly Cheesesteak Roll Ups are not just a healthier alternative, but a delicious, low-carb meal everyone will love!

Step‑by‑Step Instructions for Keto Philly Cheesesteak Roll Ups

Step 1: Preheat the Oven
Begin by preheating your oven to 350°F (175°C). This allows the cheese to melt perfectly and gives the roll-ups a delicious golden finish. While the oven heats, gather your ingredients and equipment, including a large skillet and a baking dish to prepare for the upcoming steps.

Step 2: Sauté the Vegetables
In your preheated skillet over medium heat, add 1 tablespoon of olive oil. Once the oil is shimmering, toss in the sliced green bell pepper, onion, and mushrooms. Sauté the mix for about 5 minutes, stirring occasionally, until the vegetables start to soften and become fragrant, which enhances their natural sweetness.

Step 3: Combine with Roast Beef
Now, add the 1 pound of thinly sliced roast beef to the skillet with the sautéed vegetables. Sprinkle in a teaspoon of garlic powder, along with salt and pepper to taste. Stir well and cook for an additional 3-5 minutes until the beef is heated through and each vegetable is tender yet still vibrant, creating a perfectly savory filling for your roll-ups.

Step 4: Prepare Provolone Cheese
Lay out your 8 slices of provolone cheese flat on a clean surface. Ensure that each slice remains intact and ready for filling. This step is crucial for assembling your Keto Philly Cheesesteak Roll Ups, as the cheese will hold the delicious filling together after rolling.

Step 5: Assemble the Roll Ups
Carefully place a scoop of the beef and vegetable mixture on top of each provolone slice. Be generous but ensure you leave enough space around the edges for seamless rolling. The combination of flavors in each roll will bring the essence of the classic cheesesteak to your table while keeping it keto-friendly.

Step 6: Roll Tightly
Start rolling each provolone slice tightly around the filling, ensuring the cheese layer fully encases the savory mixture. Once rolled, place each roll-up seam-side down in your baking dish. This helps keep them from unrolling during baking and maintains that cheesy goodness inside.

Step 7: Bake to Perfection
With all roll-ups assembled in the baking dish, pop it in your preheated oven. Bake for 10 minutes, keeping an eye out for that beautiful melt on the provolone cheese, as it should become melty and bubbly by the end of the cooking time—a true indicator of deliciousness!

Step 8: Cool Before Serving
Once the keto roll-ups are done baking, remove them from the oven and let them sit for a few minutes. This resting time allows the cheese to slightly firm up, making it easier to handle and enjoy. Serve warm as a delightful meal or appetizer that’s packed with flavor and comfort.

Keto Philly Cheesesteak Roll Ups

Expert Tips for Keto Philly Cheesesteak Roll Ups

Choose Quality Meat: Use fresh, high-quality roast beef for the best flavor. Pre-packaged options can be bland and lacking in texture.

Sauté Wisely: Don’t overcrowd the skillet when sautéing the vegetables; this ensures they cook evenly and caramelize nicely, enhancing their natural sweetness.

Perfect Cheese Rolls: Make sure to roll the provolone cheese tightly around the filling to prevent them from unrolling during baking. This keeps all the savory goodness inside!

Watch Baking Time: Keep an eye on your roll-ups as they bake. If the cheese is bubbling and golden, they’re ready; overbaking can make them chewy rather than melt-in-your-mouth.

Fresh Seasoning: Use fresh black pepper and adjust the salt based on your taste preference. Seasoning is key in these Keto Philly Cheesesteak Roll Ups, enhancing all the flavors beautifully.

Enjoy your cooking adventure, and savor the joy that comes from making this delightful low-carb dish!

How to Store and Freeze Keto Philly Cheesesteak Roll Ups

Fridge: Store leftover roll-ups in an airtight container for up to 3 days. Allow them to cool completely before sealing to maintain their texture.

Freezer: For longer storage, wrap each roll-up in plastic wrap and place them in a freezer-safe bag. They can be frozen for up to 2 months without losing flavor.

Reheating: To reheat from frozen, bake directly from the freezer at 350°F (175°C) for about 15-20 minutes, or until heated through. Regular fridge-stored roll-ups can be microwaved for a quick snack!

Enjoyability: These Keto Philly Cheesesteak Roll Ups maintain their scrumptiousness well, even after being stored, making them perfect for meal prepping!

Keto Philly Cheesesteak Roll Ups Variations

Feel free to explore these delightful twists on the classic recipe and personalize your roll-ups to suit your taste!

  • Veggie-Packed: Add spinach or kale for an extra dose of nutrition and a burst of color. These greens blend nicely with the other veggies for a vibrant filling.

  • Spicy Kick: Incorporate jalapeños or diced green chilies to raise the heat level. Just a few slices can elevate the entire dish, perfect for spice lovers!

  • Cheese Swap: Try provolone or mozzarella for a different cheese flavor. Each variation offers a unique melt and richness that delights in every bite.

  • Herb Infusion: Sprinkle in fresh herbs like basil or oregano for a flavorful twist. These herbs add a refreshing depth, enhancing the overall aroma of your roll-ups.

  • Beef Alternative: Substitute with turkey or chicken for a lighter option without sacrificing flavor. Shredded chicken works wonderfully for that tender, tasty contrast.

  • Non-Dairy: Use cashew cheese or vegan cheese slices to make this dish dairy-free. This swap allows everyone to enjoy these delicious roll-ups, worry-free!

  • Crunch Factor: Add sautéed zucchini or grated carrots for extra texture and a hint of sweetness. These add-ins complement the savory filling beautifully.

  • Bold Flavors: Drizzle some steak sauce or balsamic glaze on before rolling for an additional punch of taste. This subtle enhancement can truly elevate your roll-ups!

Every variation offers a chance to create a personalized dish that your family will love. For more easy meal options, take a peek at my Keto Veggie Stir-Fry or whip up my mouthwatering Keto Chicken Enchiladas for even more delicious inspiration!

Make Ahead Options

These Keto Philly Cheesesteak Roll Ups are perfect for busy home cooks who want to save time during the week! You can prepare the savory beef and vegetable filling up to 3 days in advance and store it in an airtight container in the refrigerator. Simply sauté the veggies and roast beef as instructed, then let the mixture cool completely before transferring it to the container. When you’re ready to enjoy, just assemble the roll-ups with the provolone cheese, bake for 10 minutes until the cheese is melty, and you’ll have a delicious meal ready with minimal effort. This prep method ensures the flavors remain just as vibrant and satisfying!

What to Serve with Keto Philly Cheesesteak Roll Ups

Elevate your dining experience with delightful side dishes that perfectly complement the rich, cheesy flavors of your roll-ups.

  • Zesty Caesar Salad: A fresh, crunchy salad with romaine, parmesan, and creamy dressing cuts through the richness of the roll-ups.

  • Garlic Butter Green Beans: Tender green beans sautéed in garlic and butter offer a lovely crunch and bright flavor, enhancing your meal’s variety.

  • Cauliflower Mash: This creamy alternative to mashed potatoes provides a buttery, smooth texture that pairs beautifully with the savory roll-ups.

  • Roasted Brussels Sprouts: The caramelized edges of roasted Brussels sprouts add depth and slight sweetness, perfect for balancing the dish’s richness.

  • Herb-Infused Quinoa: Light and fluffy, this nutritious grain provides a subtle nuttiness and pairs well with the meaty flavors, creating a hearty plate.

  • Sparkling Lemonade: Refreshing and citrusy, this drink cuts through the savory richness of the roll-ups, providing a delightful contrast with every sip.

Keto Philly Cheesesteak Roll Ups

Keto Philly Cheesesteak Roll Ups Recipe FAQs

What is the best way to select ripe vegetables for this recipe?
Absolutely! When choosing vegetables, look for bell peppers that are firm and shiny, with no dark spots all over or soft spots, indicating freshness. For the mushrooms, select ones that are dry and firm, avoiding any that appear slimy or discolored. When choosing an onion, pick one that feels heavy for its size and has dry, papery skin.

How long can I store leftover Keto Philly Cheesesteak Roll Ups?
You can store leftover roll-ups in an airtight container in the refrigerator for up to 3 days. It’s best to allow them to cool completely before sealing to maintain the cheesy texture. Always check for any off smells or changes in color before enjoying stored food.

Can I freeze these Keto Philly Cheesesteak Roll Ups?
Yes, you can freeze these roll-ups for up to 2 months! First, wrap each rolled-up portion tightly in plastic wrap. Then, place them in a freezer-safe bag to prevent freezer burn. You can also label the bag with the date for your convenience. When you’re ready to enjoy, bake directly from frozen at 350°F (175°C) for approximately 15-20 minutes until heated through.

What should I do if my roll-ups are unrolling during baking?
If you find that your Keto Philly Cheesesteak Roll Ups are unrolling, it’s likely that they weren’t rolled tightly enough. A little tip is to keep the filling generous but not overflowing, ensuring you can secure the cheese around it. Also, consider using toothpicks to hold them together during the baking process if they tend to pop open.

Are there any dietary considerations for this recipe?
Indeed! These roll-ups are gluten-free, making them suitable for those with gluten sensitivities. However, if you have a dairy allergy, substituting provolone with a dairy-free cheese alternative can work, although you may find the melting consistency varies. Always check ingredient labels to ensure that they meet your dietary needs.

Can I add other fillings to my Keto Philly Cheesesteak Roll Ups?
Very! The more the merrier! You can easily customize your filling with other ingredients like jalapeños for a spicy kick, spinach for added greens, or even different cheeses such as mozzarella or Swiss for variety. Just remember to keep it keto-friendly and ensure your ingredients complement the flavors of the traditional cheesesteak.

Delicious Keto Philly Cheesesteak Roll Ups to Savor Tonight

Savor the taste of Keto Philly Cheesesteak Roll Ups, a low-carb delight wrapped in gooey cheese.

  • skillet
  • Baking Dish

For the Roll Ups

  • 1 tablespoon Olive oil (adds richness and helps in sautéing the vegetables)
  • 1 pound Thinly sliced roast beef (provides classic cheesesteak flavor)
  • 1 piece Green bell pepper (can substitute with red or yellow pepper)
  • 1 piece Onion (adds sweetness and depth)
  • 1 cup Sliced mushrooms (contributes earthy flavor)
  • 1 teaspoon Garlic powder (enhances overall taste)
  • to taste Salt
  • to taste Pepper
  • 8 slices Provolone cheese (melts beautifully)

Step-by-Step Instructions for Keto Philly Cheesesteak Roll Ups

  1. Preheat your oven to 350°F (175°C). Gather your ingredients and equipment.
  2. In a preheated skillet over medium heat, add the olive oil and sauté the sliced green bell pepper, onion, and mushrooms for about 5 minutes until they soften.
  3. Add the roast beef to the skillet with the vegetables. Add garlic powder, salt, and pepper, stirring well and cooking for an additional 3-5 minutes.
  4. Lay out the provolone cheese slices flat on a clean surface.
  5. Place a scoop of the beef and vegetable mixture on each provolone slice, leaving space around the edges.
  6. Roll each provolone slice tightly around the filling and place seam-side down in a baking dish.
  7. Bake the roll-ups in the oven for 10 minutes until the cheese is melty and bubbly.
  8. Remove from the oven and let the roll-ups cool for a few minutes before serving warm.

These Keto Philly Cheesesteak Roll Ups are a delicious low-carb meal that retains flavor after being stored.

Main Dishes
American
cheesesteak, easy recipes, healthy dinner, Keto Philly Cheesesteak Roll Ups, keto recipes, low-carb meals

Filed Under: Main Dishes

Crispy Salt & Pepper Mini Hasselback Potatoes with Zesty Dip

September 5, 2025 by grace bellamy Leave a Comment

As I pulled a tray of golden-brown potatoes from the oven, I couldn’t help but admire their crispy edges, cradling a tender heart. These Salt & Pepper Mini Hasselback Potatoes are the ultimate game-changer for anyone seeking a delightful twist on a traditional side dish. Not only are they a visual masterpiece that impresses at dinner parties, but they also come together in just about an hour, making them perfect for a busy weeknight. With a zesty Cajun dip to elevate each bite, these little gems combine comfort food with a dash of fun. Ready to serve up something special? Let’s dive into this flavorful adventure!

Salt & Pepper Mini Hasselback Potatoes

Why are Mini Hasselback Potatoes a Must-Try?

Crispy Edges: Each bite reveals a perfectly crisp exterior, thanks to the Hasselback technique that enhances texture like no other.
Flavorful Seasoning: The harmonious blend of sea salt, black pepper, and garlic powder ensures a savory punch, making these potatoes irresistible.
Quick to Prepare: With just 20 minutes of prep, this dish fits seamlessly into any busy schedule.
Versatile Pairing: Serve them as a delightful side or a standalone snack! Pair them with your favorite proteins or toss in fresh herbs for a seasonal twist. If you’re looking for other easy yet impressive sides, check out my guide on quick and delicious side dishes.
Crowd-Pleaser: Perfect for gatherings, these little wonders will leave your guests raving and asking for the recipe!

Salt & Pepper Mini Hasselback Potatoes Ingredients

For the Potatoes

  • Mini potatoes – 12-15 potatoes provide a perfect bite-sized treat that’s fun to eat.
  • Olive oil – 3 tablespoons add richness and help achieve that golden-crisp exterior.
  • Sea salt – 1 tablespoon enhances the potatoes’ natural flavor; feel free to adjust to taste.
  • Ground black pepper – 1 tablespoon adds a warm kick that beautifully complements the salt.
  • Garlic powder – 1 teaspoon infuses a delightful aroma and depth of flavor into the potatoes.
  • Onion powder – 1 teaspoon contributes a subtle sweetness that balances the seasoning.
  • Fresh parsley, chopped – 1 tablespoon to garnish and brighten up the dish with color.

For the Cajun Dip

  • Sour cream – ½ cup creates a creamy base that pairs beautifully with the vibrant Cajun flavors.
  • Mayonnaise – ¼ cup adds richness and a silky texture to the dip.
  • Cajun seasoning – 1 tablespoon for that exciting flavor explosion that takes the dip to the next level.
  • Lemon juice – 1 teaspoon brightens and balances the richness of the dip.
  • Salt and pepper – to taste, ensuring your Cajun dip is seasoned just right! Use these to enhance the flavors of the Salt & Pepper Mini Hasselback Potatoes.

Step‑by‑Step Instructions for Salt & Pepper Mini Hasselback Potatoes

Step 1: Preheat the Oven
Preheat your oven to 425°F (220°C) to prepare for baking. This high temperature will ensure that your Salt & Pepper Mini Hasselback Potatoes achieve that perfectly crispy exterior. While the oven heats, gather your ingredients and equipment, including a baking sheet and parchment paper for easy cleanup.

Step 2: Prepare the Potatoes
Wash and dry 12-15 mini potatoes thoroughly to remove any dirt. Using a sharp knife, carefully slice each potato thinly, leaving about ¼ inch at the bottom. This will create the unique Hasselback effect, allowing seasonings and heat to penetrate, giving the potatoes that delightful crispness.

Step 3: Coat the Potatoes
Place the sliced mini potatoes in a mixing bowl. Drizzle 3 tablespoons of olive oil over them, ensuring even coverage, and toss gently with your hands to coat all the slices. The olive oil is key to achieving the golden-brown hue that makes these mini Hasselback potatoes so inviting.

Step 4: Season the Potatoes
Sprinkle 1 tablespoon of sea salt, 1 tablespoon of ground black pepper, 1 teaspoon of garlic powder, and 1 teaspoon of onion powder evenly over the potatoes. Toss again to ensure even distribution of the flavorful seasoning, enhancing every tasty bite of your Salt & Pepper Mini Hasselback Potatoes.

Step 5: Arrange on Baking Sheet
Line your baking sheet with parchment paper for easy cleanup. Carefully arrange the seasoned potatoes on the sheet, making sure to space them evenly apart. This will allow the hot air to circulate around each potato, helping them bake uniformly for that crispy finish everyone loves.

Step 6: Bake the Potatoes
Place the baking sheet in the preheated oven and bake the potatoes for 30-35 minutes. Keep an eye on them; you’re looking for crispy edges and tender interiors. When done, they should be golden brown and fragrant, a true testament to their well-seasoned glory.

Step 7: Make the Cajun Dip
While the potatoes bake, prepare your Cajun dip. In a bowl, mix together ½ cup of sour cream, ¼ cup of mayonnaise, 1 tablespoon of Cajun seasoning, and 1 teaspoon of lemon juice. Stir well until everything is combined and creamy, adjusting salt and pepper to taste for an added kick alongside your potatoes.

Step 8: Garnish and Serve
Once the potatoes are finished baking, remove them from the oven and let them cool slightly. Drizzle any remaining olive oil over the top and sprinkle with 1 tablespoon of chopped fresh parsley for a pop of color. Serve your warm Salt & Pepper Mini Hasselback Potatoes alongside the zesty Cajun dip for dipping and delight!

Salt & Pepper Mini Hasselback Potatoes

Helpful Tricks for Salt & Pepper Mini Hasselback Potatoes

Slice with Care: Make sure to cut the potatoes thinly but not all the way through; leaving about ¼ inch at the bottom keeps them intact and fluffy inside.

Even Seasoning: To ensure every bite is bursting with flavor, remember to toss the potatoes well after adding the seasoning—this is key for your Salt & Pepper Mini Hasselback Potatoes!

Baking Sheet Space: Don’t overcrowd the baking sheet; spacing the potatoes allows hot air to circulate, resulting in crispier edges.

Watch the Bake Time: Keep an eye on the baking process as different ovens may vary. Look for that perfect golden-brown color and fragrant aroma to know they’re ready!

Dip to Impress: Adjust the Cajun dip ingredients to your liking. If you prefer more heat, add extra Cajun seasoning; if you like it milder, reduce it for a fantastic flavor tailored to your palate.

Salt & Pepper Mini Hasselback Potatoes Variations

Feel free to get creative and customize your Salt & Pepper Mini Hasselback Potatoes to suit your taste buds or dietary needs!

  • Dairy-Free: Substitute sour cream and mayonnaise with your favorite dairy-free yogurt or tahini for a creamy texture.
  • Spicy Cajun: Boost the heat by adding more Cajun seasoning or a dash of hot sauce to the dip for a fiery kick that elevates your pairing.
  • Herb-Infused: Mix in fresh herbs like rosemary or thyme with the olive oil before coating your potatoes for a fragrant twist. Each herb adds its own unique character, enhancing that comforting aroma.
  • Parmesan Crust: Add grated Parmesan cheese on top of the potatoes during the last 10 minutes of baking for a rich and cheesy addition that will have everyone asking for seconds.
  • Sweet Potato Varieties: Swap mini potatoes for sweet potatoes to introduce a subtle sweetness that pairs delightfully with the salty and spicy elements of the dish.
  • Garlic Lovers: Increase the garlic powder or add roasted garlic cloves for a deeper flavor that complements the spice nicely. Your kitchen will fill with an irresistible aroma as they bake!
  • Zesty Yogurt Dip: Replace the Cajun seasoning in the dip with dill and lemon zest for a refreshing counterpart that brightens the dish—perfect for warm-weather gatherings!
  • Smoked Paprika: Incorporate smoked paprika into the seasoning mix for a hint of smokiness, adding depth and complexity to every bite that will delight fans of bold flavors.

Experiment with these variations, and let your culinary creativity shine! If you’re looking for additional inspirations to enhance your meal, check out my article on unique side dishes that can perfectly complement this recipe!

How to Store and Freeze Salt & Pepper Mini Hasselback Potatoes

Fridge: Store leftover Salt & Pepper Mini Hasselback Potatoes in an airtight container in the refrigerator for up to 3 days to maintain their flavor and texture.

Freezer: To freeze, flash freeze the baked potatoes on a baking sheet before transferring them to a freezer bag. They can be stored for up to 2 months.

Reheating: To reheat, place the refrigerated or frozen potatoes on a baking sheet and warm in the oven at 375°F (190°C) for 10-15 minutes, ensuring they regain their crispy texture.

Garnish: Fresh parsley can lose its vibrancy when stored; add it right before serving to keep the dish looking fresh and inviting.

Make Ahead Options

These Salt & Pepper Mini Hasselback Potatoes are perfect for meal prep enthusiasts looking to save time during the week! You can slice and season the mini potatoes up to 24 hours in advance. Simply wash, dry, and slice them, then toss with olive oil and seasonings before refrigerating them in an airtight container. To maintain their quality, it’s best to prep the Cajun dip on the same day you plan to bake the potatoes, as it can be made and stored in the refrigerator for up to 3 days. When you’re ready to serve, bake the potatoes straight from the fridge, adding a few extra minutes to the cooking time for that crispy perfection with minimal effort. Enjoy the convenience of having this delightful dish ready to go!

What to Serve with Salt & Pepper Mini Hasselback Potatoes

Elevate your dining experience with delicious accompaniments that will create a delightful meal around these crispy bites.

  • Grilled Chicken: Juicy, herb-marinated chicken pairs beautifully, adding a touch of protein that complements the potatoes’ crispiness.
  • Vegetable Medley: A colorful sauté of seasonal vegetables such as bell peppers, zucchini, and asparagus brings freshness and balances the richness of the dip.
  • Caesar Salad: Crisp romaine, creamy dressing, and crunchy croutons offer a tangy contrast that refreshes the palate alongside the savory potatoes.
  • Garlic Breadsticks: Warm, buttery breadsticks with a hint of garlic create a heartwarming comfort food combo that’s hard to resist.
  • Coleslaw: A tangy coleslaw made with cabbage and a light dressing adds crunch and brightness, enhancing each bite of the mini Hasselback potatoes.

Pairing these elements not only enriches the sensory experience but also invites a variety of flavors, making each meal memorable! Enjoy with a chilled glass of white wine for a perfect finishing touch, or indulge with a rich chocolate mousse for dessert to end on a sweet note.

Salt & Pepper Mini Hasselback Potatoes

Salt & Pepper Mini Hasselback Potatoes Recipe FAQs

How do I select the right mini potatoes?
Absolutely! When choosing mini potatoes, look for ones that are firm, smooth, and blemish-free. Avoid any that have dark spots all over or feel soft to the touch. The smaller, the better for that perfect bite-sized experience. I often prefer a mix of red and yellow baby potatoes for a colorful presentation.

What is the best way to store leftover mini Hasselback potatoes?
You can store your leftover Salt & Pepper Mini Hasselback Potatoes in an airtight container in the fridge for up to 3 days. If you want to maintain their crispiness, I recommend reheating them in the oven rather than the microwave, as this will help revive that wonderful texture.

Can I freeze Hasselback potatoes?
Yes, you can freeze them! To freeze your baked potatoes, first, flash freeze them by placing them in a single layer on a baking sheet until they’re firm, about 1-2 hours. Once they’re solid, transfer them to a resealable freezer bag. They can be stored for up to 2 months. When you’re ready to enjoy, simply reheat in the oven at 375°F (190°C) until heated through and crisp!

How do I troubleshoot undercooked potatoes?
If your Salt & Pepper Mini Hasselback Potatoes are undercooked, don’t worry! Simply return them to the oven and bake for an additional 5-10 minutes, checking every few minutes to ensure they achieve that crispy exterior and tender interior. You can also adjust the oven temperature to a higher setting if you’re looking for additional crisping.

Are there any dietary considerations with the Cajun dip?
Good question! The Cajun dip contains dairy products, so it’s not suitable for those with lactose intolerance or dairy allergies. However, you can easily substitute the sour cream and mayonnaise with dairy-free alternatives like cashew cream or coconut yogurt to make it vegan-friendly. Always check the Cajun seasoning for gluten if you’re avoiding it, as some brands may contain hidden allergens.

Can I make this recipe ahead of time?
Absolutely! You can wash, slice, and season the mini potatoes a few hours in advance and store them in a bowl covered with damp paper towels in the refrigerator. Just bake them when you’re ready to serve. For the Cajun dip, you can also make it a day ahead and store it in the fridge; just give it a good stir before serving to refresh the flavors.

Crispy Salt & Pepper Mini Hasselback Potatoes with Zesty Dip

Delightful Salt & Pepper Mini Hasselback Potatoes with a zesty dip, perfect for any occasion.

  • Oven
  • Baking Sheet
  • Mixing Bowl
  • parchment paper
  • sharp knife

For the Potatoes

  • 12-15 pieces Mini potatoes (provides a perfect bite-sized treat)
  • 3 tablespoons Olive oil (adds richness and ensures crispy exterior)
  • 1 tablespoon Sea salt (enhances potatoes’ natural flavor)
  • 1 tablespoon Ground black pepper (adds a warm kick)
  • 1 teaspoon Garlic powder (infuses delightful aroma)
  • 1 teaspoon Onion powder (contributes subtle sweetness)
  • 1 tablespoon Fresh parsley, chopped (to garnish)

For the Cajun Dip

  • ½ cup Sour cream (creates a creamy base)
  • ¼ cup Mayonnaise (adds richness and texture)
  • 1 tablespoon Cajun seasoning (provides exciting flavor)
  • 1 teaspoon Lemon juice (brightens and balances richness)
  • Salt and pepper (to taste)

Cooking Instructions

  1. Preheat your oven to 425°F (220°C).
  2. Wash and dry 12-15 mini potatoes thoroughly.
  3. Using a sharp knife, carefully slice each potato thinly, leaving about ¼ inch at the bottom.
  4. Drizzle 3 tablespoons of olive oil over the sliced potatoes and toss gently to coat.
  5. Sprinkle 1 tablespoon of sea salt, 1 tablespoon of ground black pepper, 1 teaspoon of garlic powder, and 1 teaspoon of onion powder evenly over the potatoes and toss again.
  6. Line your baking sheet with parchment paper. Arrange the seasoned potatoes on the sheet, leaving space between them.
  7. Bake the potatoes for 30-35 minutes until crispy and golden brown.
  8. In a bowl, mix together ½ cup of sour cream, ¼ cup of mayonnaise, 1 tablespoon of Cajun seasoning, and 1 teaspoon of lemon juice. Stir well.
  9. Once baked, garnish the potatoes with chopped parsley and serve alongside the Cajun dip.

Slice potatoes carefully to not cut all the way through. Space them on the baking sheet for optimal crispiness.

Side Dishes
American
Cajun Dip, comfort food, Crispy Potatoes, party food, Salt & Pepper Mini Hasselback Potatoes, side dish

Filed Under: Side Dishes

Creamy American Macaroni Salad That Everyone Will Love

September 5, 2025 by grace bellamy Leave a Comment

As the sun shines brightly on a glorious summer day, I find myself longing for the nostalgic taste of family picnics and backyard barbecues. Enter my Classic Creamy American Macaroni Salad—a dish that’s not only a crowd-pleaser but also so easy to whip up. With just 15 minutes of prep time, you can create a refreshing side that captures the spirit of those cherished moments. This macaroni salad is freezer-friendly, making it perfect for meal prep, and it pairs beautifully with everything from grilled meats to sandwiches. The blend of crunchy vegetables and creamy dressing will have your taste buds dancing with delight. So, are you ready to dive into this comforting summer classic? Let’s get cooking!

Creamy American Macaroni Salad

Why is this macaroni salad a must-try?

Simplicity shines through with just a few basic ingredients, making it easy for anyone to prepare.
Flavor-packed and wonderfully creamy, each bite bursts with a delightful mix of tastes from the fresh veggies and dressing.
Versatile as a side for barbecues, picnics, or quick lunches, it suits any occasion perfectly.
Chill-Friendly, it can be made ahead of time, saving you precious moments on busy days.
Plus, crowd appeal is guaranteed—this Classic Creamy American Macaroni Salad will leave friends and family coming back for seconds! If you’re interested in other tasty sides, check out my Delicious Potato Salad or Refreshing Cucumber Salad.

Creamy American Macaroni Salad Ingredients

To create this irresistible Creamy American Macaroni Salad, gather these essential ingredients:

For the Salad
• 2 cups elbow macaroni – this classic pasta shape holds the creamy dressing beautifully.
• 1 cup mayonnaise – provides the rich and creamy base for the salad.
• 2 tablespoons apple cider vinegar – adds a tangy kick that balances the flavors.
• 1 tablespoon Dijon mustard – infuses a subtle depth of flavor into the creamy dressing.
• 1 teaspoon sugar – a hint of sweetness to contrast with the tanginess.
• 1/4 teaspoon salt – enhances all the flavors in the salad.
• 1/4 teaspoon freshly ground black pepper – adds a touch of warmth and spice.

For the Vegetables
• 1/2 cup diced celery – gives a satisfying crunch and freshness.
• 1/2 cup chopped red bell pepper – brings sweetness and vibrant color to the dish.
• 1/4 cup chopped red onion – adds a hint of sharpness and crisp texture.
• 1/4 cup chopped dill pickle – provides that iconic tangy punch that enhances the overall taste.

For the Garnish
• 2 hard-boiled eggs, chopped – creamy, rich bites that elevate the salad’s heartiness.
• 2 tablespoons chopped fresh parsley – a sprinkle of color and fresh flavor right before serving.

Prepare these ingredients, and you’ll be well on your way to delighting your family with a Classic Creamy American Macaroni Salad they’ll remember for years to come!

Step‑by‑Step Instructions for Creamy American Macaroni Salad

Step 1: Cook the Macaroni
In a large pot, bring a generous amount of salted water to a rolling boil over high heat. Once boiling, add 2 cups of elbow macaroni and cook for 8-10 minutes until al dente, stirring occasionally. The pasta should be tender but still have a slight bite. Drain the macaroni in a colander and rinse under cold water to halt the cooking process, allowing it to cool completely.

Step 2: Prepare the Dressing
While the macaroni cools, grab a large mixing bowl and add 1 cup of mayonnaise. Whisk in 2 tablespoons of apple cider vinegar, 1 tablespoon of Dijon mustard, 1 teaspoon of sugar, 1/4 teaspoon of salt, and 1/4 teaspoon of freshly ground black pepper. Mix until the dressing is smooth and well-combined, creating a rich and creamy base for your Creamy American Macaroni Salad.

Step 3: Combine the Macaroni and Dressing
Once the macaroni has cooled, gently fold it into the prepared dressing. Use a spatula to stir, ensuring that all the pasta is evenly coated with the creamy mixture. This step is crucial for achieving that delicious flavor throughout the salad. Aim to thoroughly combine without breaking the macaroni, giving it a beautiful sheen.

Step 4: Add Fresh Vegetables
Next, incorporate 1/2 cup of diced celery, 1/2 cup of chopped red bell pepper, 1/4 cup of chopped red onion, and 1/4 cup of chopped dill pickle into the macaroni mixture. Carefully mix them in using a folding motion to maintain the texture. The vibrant colors and crunch of the vegetables will enhance the Creamy American Macaroni Salad, making it visually appealing and flavorful.

Step 5: Include Hard-Boiled Eggs
To the salad, delicately add 2 chopped hard-boiled eggs, folding them in gently to avoid mashing. The eggs will add creaminess and richness, balancing the salad’s flavors. Ensure all ingredients are distributed evenly, creating the perfect blend of textures and tastes in your creamy macaroni salad masterpiece.

Step 6: Chill for Flavor
Cover the mixing bowl with plastic wrap or a lid and refrigerate the macaroni salad for at least 1 hour. This chilling time allows the flavors to meld together beautifully, resulting in a more harmonious taste. The salad is best enjoyed cold, so patience will pay off as you await the delightful dish!

Step 7: Garnish and Serve
Before serving, take the Creamy American Macaroni Salad out of the refrigerator and give it a gentle stir. Sprinkle 2 tablespoons of chopped fresh parsley over the top for a pop of color and fresh flavor. This final touch will make your dish not only delicious but also visually appealing, perfect for sharing with family and friends.

Creamy American Macaroni Salad

Creamy American Macaroni Salad Variations

Feel free to let your creativity shine and customize this classic dish to suit your taste buds!

  • Gluten-Free: Substitute elbow macaroni with gluten-free pasta made from rice or quinoa for the same delicious salad without the gluten.

  • Vegan: Replace mayonnaise with a plant-based alternative and skip the hard-boiled eggs for a creamy yet fresh salad that everyone can enjoy. This way, you’ll still achieve a rich texture just without the eggs.

  • Spicy Kick: Add a tablespoon of sriracha or chopped jalapeños for a zesty punch that brings excitement to every bite. Just be careful to balance the heat to suit your crowd!

  • Herb Infusion: Swap parsley for fresh dill, basil, or chives to elevate the flavor profile, lending an aromatic quality to the creamy base. Fresh herbs can transform your macaroni salad into a whole new experience.

  • Crunchy Additions: Toss in roasted sunflower seeds or chopped walnuts for an added layer of texture and health benefits that will satisfy your crunch craving. The toasty nuts pair beautifully with the creaminess and add sophistication.

  • Tropical Twist: Mix in diced pineapple or mango for a sweet contrast, making each mouthful delightfully refreshing. This variation will take you back to sunny days with a taste of the tropics.

  • More Veggies: Incorporate pea pods, diced cucumbers, or shredded carrots to increase the veggie content and vibrant colors, making the dish even healthier and more colorful. The freshness will shine through the creamy dressing.

  • Pasta Salad Medley: Combine macaroni with other pasta shapes like rotini or farfalle for a fun twist on texture and a summery feel that’s sure to please everyone at your gathering.

These variations ensure that your Creamy American Macaroni Salad always stays exciting and relevant, whether you’re serving it at a summer barbecue or as part of a cozy family meal. Explore and enjoy your way with this timeless dish! If you’re in the mood for more exciting sides, take a look at my Delicious Potato Salad or Refreshing Cucumber Salad for a perfect pairing.

Expert Tips for Creamy American Macaroni Salad

Perfect Pasta: Always cook the elbow macaroni al dente; overcooking can lead to mushy salad. Rinse under cold water to stop the cooking.

Chill Time: Don’t skip the chilling step. Refrigerating the salad for at least an hour allows flavors to meld beautifully in your creamy American macaroni salad.

Veggie Variation: Feel free to swap in your favorite vegetables; cucumbers or peas are delicious additions that will keep it fresh and exciting.

Mix with Care: Gently fold your ingredients to maintain the integrity of the pasta and veggies. You want perfect texture, not a mushy mix!

Taste and Adjust: Always taste before serving. If the salad needs more tang, a splash more apple cider vinegar can brighten it right up.

Make Ahead Options

These Creamy American Macaroni Salad tips are ideal for busy home cooks looking to save time! You can prepare the macaroni and dressing up to 24 hours in advance—just cook and cool the pasta, and mix the dressing ingredients together. Store these components separately in airtight containers to maintain freshness. The chopped vegetables and hard-boiled eggs can be added right before serving, which you can do up to 3 days ahead for the best crunch. When ready to enjoy, simply combine all components, stir gently, and chill for an hour to meld those delightful flavors. With these make-ahead options, you’ll have a delicious side dish with minimal last-minute effort!

What to Serve with Classic Creamy American Macaroni Salad

As you savor the creamy, tangy goodness of this delightful salad, let’s explore some perfect pairings that will elevate your meal to a whole new level.

  • Grilled Chicken: Juicy, char-grilled chicken adds a savory contrast to the pasta salad’s creaminess and flavor balance.
  • BBQ Ribs: Tender, smoky ribs create a delicious, hearty combination that makes outdoor gatherings unforgettable.
  • Corn on the Cob: Sweet, buttery corn brings a burst of freshness and a satisfying crunch that echoes the salad’s texture.
  • Tomato and Cucumber Salad: A light, refreshing salad offers vibrant flavors and nutrients, perfectly complementing the macaroni’s richness.
  • Fruit Salad: A mix of juicy seasonal fruits adds a sweet note that lightens the meal and enhances the summer vibe.
  • Iced Tea: Refreshing and lightly sweetened iced tea is a classic drink pairing, keeping things cool and casual.
  • Chocolate Chip Cookies: For dessert, warm cookies with gooey chocolate inside provide a comforting end to any meal.
  • Lemonade: Tart and sweet lemonade will beautifully cleanse the palate, making each bite of macaroni salad as enjoyable as the first.
  • Stuffed Peppers: Savory stuffed peppers filled with rice and spices add a heartiness that pairs well with the creamy pasta.
  • Caesar Salad: The crisp, garlic notes of Caesar salad bring crunch and depth, providing a satisfying contrast to the macaroni dish.

How to Store and Freeze Creamy American Macaroni Salad

Fridge: Store your Creamy American Macaroni Salad in an airtight container in the refrigerator for up to 3 days. This keeps the flavors fresh and vibrant!

Freezer: Freeze for up to 2 months in a tightly sealed container. Note that the texture may change slightly upon thawing, so enjoy it fresh when possible.

Thawing: To thaw, place the container in the refrigerator overnight. Give it a good stir before serving to revive the creaminess.

Reheating: This dish is best served cold; if you prefer it warm, gently heat in the microwave in short intervals, stirring frequently to avoid curdling the dressing.

Creamy American Macaroni Salad

Creamy American Macaroni Salad Recipe FAQs

What type of elbow macaroni should I use?
Absolutely! Opt for standard elbow macaroni as it holds the dressing beautifully. If you prefer a whole grain or gluten-free option, those can work too—just adjust cooking times as needed.

How long can I store leftover macaroni salad in the fridge?
You can store your Creamy American Macaroni Salad in an airtight container for up to 3 days. Be sure to keep it well-sealed to maintain its freshness and flavor!

Can I freeze Creamy American Macaroni Salad?
Yes, you can freeze it! Just transfer the salad to a tightly sealed container and freeze for up to 2 months. Keep in mind, though, that the texture may change slightly upon thawing, so it’s best enjoyed fresh when possible.

What’s the best way to thaw frozen macaroni salad?
To thaw your frozen Creamy American Macaroni Salad, simply place it in the refrigerator overnight before serving. Once thawed, give it a gentle stir to revive its creamy consistency, and it’s ready to enjoy!

Can I make creamy macaroni salad without eggs?
Certainly! If you’re avoiding eggs, you can either leave them out entirely or substitute them with chickpeas for added creaminess and protein. This keeps the salad delicious while accommodating dietary preferences.

How can I tell if my vegetables are ripe and ready to use?
Very! For optimal flavor, choose vegetables that are colorful and crisp. For instance, celery should be firm and bright green, while bell peppers should have a smooth, shiny skin. Avoid any with dark spots or wilting, as these can affect the overall taste and texture of your Creamy American Macaroni Salad.

Creamy American Macaroni Salad That Everyone Will Love

A refreshing and creamy American macaroni salad that is perfect for summer picnics and barbecues.

  • Large Pot
  • Colander
  • Mixing Bowl
  • Whisk
  • spatula

For the Salad

  • 2 cups elbow macaroni (this classic pasta shape holds the creamy dressing beautifully)
  • 1 cup mayonnaise (provides the rich and creamy base for the salad)
  • 2 tablespoons apple cider vinegar (adds a tangy kick that balances the flavors)
  • 1 tablespoon Dijon mustard (infuses a subtle depth of flavor into the creamy dressing)
  • 1 teaspoon sugar (a hint of sweetness to contrast with the tanginess)
  • 1/4 teaspoon salt (enhances all the flavors in the salad)
  • 1/4 teaspoon freshly ground black pepper (adds a touch of warmth and spice)

For the Vegetables

  • 1/2 cup diced celery (gives a satisfying crunch and freshness)
  • 1/2 cup chopped red bell pepper (brings sweetness and vibrant color to the dish)
  • 1/4 cup chopped red onion (adds a hint of sharpness and crisp texture)
  • 1/4 cup chopped dill pickle (provides that iconic tangy punch that enhances the overall taste)

For the Garnish

  • 2 tablespoons chopped fresh parsley (a sprinkle of color and fresh flavor right before serving)

Step-by-Step Instructions

  1. In a large pot, bring a generous amount of salted water to a rolling boil over high heat. Once boiling, add 2 cups of elbow macaroni and cook for 8-10 minutes until al dente, stirring occasionally. Drain the macaroni in a colander and rinse under cold water to halt the cooking process, allowing it to cool completely.
  2. While the macaroni cools, grab a large mixing bowl and add 1 cup of mayonnaise. Whisk in 2 tablespoons of apple cider vinegar, 1 tablespoon of Dijon mustard, 1 teaspoon of sugar, 1/4 teaspoon of salt, and 1/4 teaspoon of freshly ground black pepper. Mix until the dressing is smooth and well-combined.
  3. Once the macaroni has cooled, gently fold it into the prepared dressing, ensuring that all the pasta is evenly coated.
  4. Incorporate 1/2 cup of diced celery, 1/2 cup of chopped red bell pepper, 1/4 cup of chopped red onion, and 1/4 cup of chopped dill pickle into the macaroni mixture, mixing carefully.
  5. Delicately add 2 chopped hard-boiled eggs, folding them in gently to avoid mashing.
  6. Cover the mixing bowl with plastic wrap or a lid and refrigerate the macaroni salad for at least 1 hour.
  7. Before serving, stir the macaroni salad and sprinkle 2 tablespoons of chopped fresh parsley over the top.

This salad is best enjoyed cold and can be stored in the fridge for up to 3 days or frozen for up to 2 months.

Salad
American
barbecue side, cold pasta salad, creamy macaroni salad, easy picnic salad, Summer Salad, veggie salad

Filed Under: salad

Sheetpan Salmon and Potatoes With Veggies for Easy Dinners

September 5, 2025 by grace bellamy Leave a Comment

As I pulled the freshly roasted salmon from the oven, the vibrant colors of golden potatoes and crisp seasonal vegetables caught my eye, instantly filling my kitchen with a warm, inviting aroma. There’s something truly magical about a Sheetpan Salmon and Potatoes With Veggies meal: it’s not only simple to prepare but also a beautiful, nourishing feast that’s perfect for busy weeknights or a cozy weekend gathering. One of the best perks? You only need one pan, making cleanup a breeze after a delightful shared dinner. Plus, the combination of tender salmon, hearty potatoes, and colorful veggies offers a nutritious boost that makes everyone feel good. Ready to savor this scrumptious dish that’s sure to impress? Let’s dive into the recipe and transform your evening meal into an unforgettable experience!

Sheetpan Salmon and Potatoes With Veggies

Why is this salmon dish a must-try?

Simplicity reigns supreme with this one-pan wonder, perfect for both novice and seasoned home cooks. Flavor-packed with garlic and paprika, every bite of salmon, potato, and veggie is a celebration of taste. Time-saving prep means you can spend more moments with family and less over the sink. Versatile ingredients allow for seasonal swaps, making it adaptable to any palate. Crowd-pleasing appeal ensures that even picky eaters will be coming back for seconds! If you’re curious to explore more delightful one-pan recipes, check out my tips on quick weeknight dinners that keep your evenings stress-free!

Sheetpan Salmon and Potatoes With Veggies Ingredients

Discover the essentials for creating this delectable and easy meal!

For the Salmon

  • Salmon fillets – Rich in omega-3 fatty acids, this healthy protein is the star of your dish.

For the Potatoes

  • Baby potatoes – Their creamy texture and mild flavor make them perfect for roasting alongside the salmon.

For the Veggies

  • Seasonal vegetables (e.g., broccoli, bell peppers, or zucchini) – Fresh veggies add vibrant color and nutrients to your meal.

For the Seasoning

  • Olive oil – A drizzle enhances flavor and promotes beautifully roasted ingredients.
  • Garlic powder – This adds a savory depth to your dish without the fuss of fresh garlic.
  • Paprika – A sprinkle of this spice gives a lovely warmth and subtle smokiness.
  • Salt and pepper – Essential for enhancing and balancing all the flavors.

For Garnish

  • Fresh lemon – A squeeze adds a refreshing brightness that elevates your salmon.
  • Chopped parsley – This herb not only brightens the dish visually but also contributes fresh flavor.

Enjoy crafting your Sheetpan Salmon and Potatoes With Veggies meal that’s as delightful on the plate as it is to your palate!

Step‑by‑Step Instructions for Sheetpan Salmon and Potatoes With Veggies

Step 1: Preheat the Oven
Begin by preheating your oven to 400°F (200°C). This temperature is essential for achieving perfectly roasted salmon and tender potatoes. While the oven heats up, gather your ingredients and prepare your baking sheet—either line it with parchment paper or lightly grease it to prevent sticking.

Step 2: Prepare the Potatoes
In a mixing bowl, toss the halved baby potatoes with 2 tablespoons of olive oil, garlic powder, paprika, salt, and pepper. Make sure each potato is well-coated with the seasoning. This step infuses the potatoes with flavor, setting the stage for a delicious Sheetpan Salmon and Potatoes With Veggies experience.

Step 3: Arrange the Potatoes
Spread the seasoned baby potatoes in a single layer on one side of the prepared baking sheet. This ensures even roasting, allowing the edges to crisp up while keeping the insides tender. Place them in the preheated oven and roast for 15 minutes, watching for a golden-brown hue to form as they cook.

Step 4: Prep the Vegetables
While the potatoes roast, take a moment to trim and chop your chosen seasonal vegetables—whether it’s vibrant bell peppers, nutritious broccoli, or tender zucchini. Toss these colorful veggies in the remaining tablespoon of olive oil, seasoning them generously with salt and pepper to enhance their natural flavors.

Step 5: Combine Ingredients on the Sheetpan
After 15 minutes of roasting, carefully remove the baking sheet from the oven. With a spatula, push the potatoes to one side and add the salmon fillets and seasoned vegetables to the empty space, ensuring everything has room to cook evenly. This one-pan approach makes cleanup minimal and flavors meld beautifully.

Step 6: Season the Salmon
Sprinkle a pinch of salt and pepper over the salmon fillets to amplify their taste. The seasoning not only heightens the flavor but also complements the roasted textures of the potatoes and veggies. Return the baking sheet to the oven to allow the salmon to cook alongside the other ingredients.

Step 7: Final Roasting
Bake in the oven for an additional 15-20 minutes. Keep an eye on the salmon, checking for doneness when it flakes easily with a fork. The vibrant colors and enticing aromas will let you know your Sheetpan Salmon and Potatoes With Veggies is nearly ready to delight your senses.

Step 8: Garnish and Serve
Once cooked, remove the baking sheet from the oven and take a moment to admire your creation. Garnish the dish with fresh lemon slices and a sprinkle of chopped parsley to bring brightness and color. This final touch elevates the meal, making it visually stunning and bursting with fresh flavor before serving.

Sheetpan Salmon and Potatoes With Veggies

How to Store and Freeze Sheetpan Salmon and Potatoes With Veggies

Fridge: Store any leftovers in an airtight container in the fridge for up to 3 days. To maintain freshness, reheat just the portion you plan to eat.

Freezer: For longer storage, freeze the fully cooked dish in a freezer-safe container for up to 2 months. To avoid freezer burn, wrap tightly with plastic wrap before sealing.

Reheating: When ready to enjoy, thaw the frozen meal overnight in the fridge. Reheat in the oven at 350°F (175°C) for about 15-20 minutes until heated through, keeping the meal’s flavors intact.

Assembly: If preparing ahead, store each component separately in the fridge. This way, you can quickly assemble and roast your Sheetpan Salmon and Potatoes With Veggies when mealtime arrives!

Make Ahead Options

These Sheetpan Salmon and Potatoes With Veggies are perfect for meal prep enthusiasts! You can toss the halved baby potatoes with oil and seasonings up to 24 hours in advance, keeping them fresh in the refrigerator. Meanwhile, you can also chop and season your vegetables ahead of time; store them in an airtight container for up to 3 days. To maintain quality, keep the salmon fillets separate and add them only when you’re ready to roast. When it’s time to cook, simply place everything on the sheetpan and follow the finishing steps of roasting together for 15-20 minutes. This allows for a stress-free dinner with delicious results!

What to Serve with Sheetpan Salmon and Potatoes With Veggies

Get ready to create a delightful meal experience that complements the savory flavors of your salmon and veggies!

  • Creamy Garlic Pasta: The rich, creamy texture of garlic pasta pairs beautifully with salmon, adding an indulgent touch to your dinner.

  • Simple Arugula Salad: A fresh arugula salad with lemon vinaigrette brightens the plate and balances the richness of the roasted ingredients.

  • Herbed Quinoa: Nutty quinoa tossed with fresh herbs brings a delightful chewiness that’s both wholesome and substantial alongside your main dish.

Indulge in the lightness of a salad with your salmon meal for a refreshing contrast. The crisp greens will enhance every bite, layering textures and tastes that sing together beautifully.

  • Roasted Asparagus: Tender, caramelized asparagus spears add a succulent crunch, making each bite of salmon a flavor fiesta.

  • Chardonnay or Sauvignon Blanc: A chilled glass of these wines elevates the entire meal, complementing the salmon’s flavor while adding a touch of sophistication.

  • Chocolate Mousse: For dessert, a light and airy chocolate mousse delivers the perfect sweet finish that leaves everyone craving another bite.

By exploring these pairings, you can transform your Sheetpan Salmon and Potatoes With Veggies into an unforgettable dining experience!

Sheetpan Salmon and Potatoes With Veggies Variations

Feel free to let your imagination run wild as you customize this delightful recipe!

  • Dairy-Free: Substitute olive oil with coconut oil for a subtly sweet flavor that enhances the dish.

  • Extra Zest: Add lemon zest to the salmon before roasting for a bright, citrusy punch that elevates every bite.

  • Spicy Kick: Toss in red pepper flakes or sliced jalapeños with your vegetables for a touch of heat that makes your taste buds sing.

  • Herbaceous Twist: Replace garlic powder with fresh herbs like dill or rosemary, infusing your dish with fragrant notes that will transport you to a garden in full bloom.

  • Root Vegetable Delight: Swap baby potatoes with sweet potatoes or carrots for a healthier option packed with vibrant color and sweetness.

  • Mediterranean Flavor: Season with Italian herbs like oregano and thyme, and add kalamata olives or feta cheese for an exciting Mediterranean twist.

  • Protein Options: Try chicken breasts or tofu instead of salmon, adjusting the cooking time to ensure everything remains tender and juicy.

  • Quick Pickle: Add pickled red onions or cucumber slices as a refreshing side, giving your meal a crunch that contrasts beautifully with the soft salmon.

As you explore these variations, remember that this recipe is meant to be enjoyed and shared. Pair it with a side salad or some warm crusty bread, and savor the joyous experience of home-cooked goodness!

Expert Tips for Sheetpan Salmon and Potatoes With Veggies

  • Even Cooking: Ensure even cooking by placing salmon and vegetables in a single layer with space between them. This prevents steaming and helps everything roast beautifully.

  • Potato Prep: Cut baby potatoes into halves or quarters so they roast more quickly and evenly. Larger pieces will need extra cooking time, risking overcooked salmon.

  • Flavor Boost: For extra flavor, marinate the salmon fillets in olive oil, garlic, and lemon juice for 30 minutes before roasting. This transforms your Sheetpan Salmon and Potatoes With Veggies into a delectable meal!

  • Veggie Variety: Don’t limit yourself! Mix in different seasonal vegetables like asparagus, carrots, or cherry tomatoes to keep this dish fresh and exciting each time you make it.

  • Check Doneness: Salmon continues to cook slightly after being removed from the oven. Keep an eye on the clock and on the fish—it should flake easily with a fork when done!

Sheetpan Salmon and Potatoes With Veggies

Sheetpan Salmon and Potatoes With Veggies Recipe FAQs

What type of salmon is best for this recipe?
Absolutely! You can use fresh or frozen salmon fillets for your Sheetpan Salmon and Potatoes With Veggies. When selecting fresh salmon, look for fillets that are bright in color, with moist flesh and no dark spots. If using frozen salmon, ensure it’s well-thawed before cooking for even better results.

How do I store leftovers?
Very simply! Store any leftovers in an airtight container in the fridge for up to 3 days. To maintain the best quality, reheat just the portion you plan to enjoy by using an oven or microwave until warmed through. This way, you’ll keep the flavors delightful and avoid any sogginess.

Can I freeze Sheetpan Salmon and Potatoes With Veggies?
Definitely! For longer storage, freeze the fully cooked dish in a freezer-safe container for up to 2 months. To avoid freezer burn, wrap tightly with plastic wrap before sealing. When you’re ready to enjoy, just thaw the meal overnight in the fridge and reheat in the oven at 350°F (175°C) for about 15-20 minutes until heated through.

What should I do if my potatoes aren’t cooking evenly?
If your baby potatoes aren’t cooking evenly, make sure they are cut into similar sizes—halves or quarters ensure they cook at the same rate. If needed, you can give them a quick head-start by parboiling them for 5-8 minutes before tossing them with the seasoning. This extra step ensures both the salmon and potatoes reach perfect doneness simultaneously.

Are there any dietary considerations to keep in mind?
Of course! When preparing your Sheetpan Salmon and Potatoes With Veggies, if you’re serving someone with seafood allergies, consider substituting the salmon with a heartier vegetable or protein like chickpeas or tofu, which will also roast beautifully. For gluten-free needs, this recipe is naturally gluten-free, making it a safe choice for those with sensitivities.

How can I add more flavor to the salmon?
For an extra flavor boost, you can marinate your salmon fillets in olive oil, garlic, and lemon juice for about 30 minutes before roasting. This simple marinade infuses the salmon with a delightful zing, elevating the taste of your Sheetpan Salmon and Potatoes With Veggies to the next level!

Sheetpan Salmon and Potatoes With Veggies for Easy Dinners

This Sheetpan Salmon and Potatoes With Veggies is a simple, nutritious meal perfect for busy weeknights.

  • Oven
  • Baking Sheet
  • Mixing Bowl

For the Salmon

  • 4 fillets Salmon (Rich in omega-3 fatty acids)

For the Potatoes

  • 1.5 pounds Baby potatoes (Halved or quartered for even roasting)

For the Veggies

  • 2 cups Seasonal vegetables (e.g., broccoli, bell peppers, or zucchini)

For the Seasoning

  • 3 tablespoons Olive oil (Divided)
  • 1 teaspoon Garlic powder
  • 1 teaspoon Paprika
  • to taste Salt
  • to taste Pepper

For Garnish

  • 1 medium Fresh lemon (Sliced)
  • 1/4 cup Chopped parsley

Step-by-Step Instructions

  1. Preheat your oven to 400°F (200°C). Prepare your baking sheet by lining it with parchment paper or lightly greasing it.
  2. In a mixing bowl, toss the halved baby potatoes with 2 tablespoons of olive oil, garlic powder, paprika, salt, and pepper until well-coated.
  3. Spread the seasoned baby potatoes in a single layer on one side of the baking sheet and roast for 15 minutes.
  4. While the potatoes roast, trim and chop your seasonal vegetables and toss them in the remaining olive oil with salt and pepper.
  5. After 15 minutes, push the potatoes to one side and add the salmon fillets and seasoned vegetables to the empty space.
  6. Sprinkle salt and pepper over the salmon fillets and return the baking sheet to the oven to cook.
  7. Bake for an additional 15-20 minutes, checking for salmon doneness when it flakes easily with a fork.
  8. Remove from the oven and garnish with lemon slices and chopped parsley before serving.

Store leftovers in an airtight container in the fridge for up to 3 days or freeze for up to 2 months.

Main Dishes
American
easy dinner, Healthy Recipe, One-pan meal, Potatoes, Sheetpan Salmon, veggies

Filed Under: Main Dishes

Indulge in Decadence with Crème Brûlée Cheesecake Bliss

September 5, 2025 by grace bellamy Leave a Comment

As I sifted through the chaos of everyday life, I stumbled upon a luscious Crème Brûlée Cheesecake recipe that promised to elevate my dessert game to new heights. This indulgent blend of creamy cheesecake topped with a caramelized sugar crust is not just a showstopper; it adds a delightful twist to a classic favorite. What I love the most is how simple it is to whip up this crowd-pleaser, perfect for gatherings or a quiet night in. With a prep time of just 30 minutes and the added benefit of making it ahead of time, you can savor each slice, guilt-free. Are you ready to impress your family and friends with this beautiful creation, or maybe treat yourself to a little slice of heaven? Let’s dive in!

Crème Brûlée Cheesecake

Why is Crème Brûlée Cheesecake irresistible?

Decadent Fusion: This dessert brilliantly combines the rich allure of crème brûlée with the creamy texture of cheesecake, all wrapped in a delightful crust.

Effortless Indulgence: With just 30 minutes of prep, you can create an impressive dish that’s perfect for any occasion—no culinary degree required!

Versatile Treat: Serve it at a dinner party, a cozy gathering, or even enjoy a slice solo while binge-watching your favorite show. It’s that adaptable!

Showstopper Appeal: The striking contrast of the caramelized sugar topping and the creamy cheesecake will wow your guests and have them asking for seconds.

Make-Ahead Magic: This cheesecake is perfect for planning ahead. Chill it overnight and it’s ready to impress when you are. Who doesn’t love a stress-free dessert?

Elevate your dessert game and explore other delightful options like our classic cheesecake recipes!

Crème Brûlée Cheesecake Ingredients

• Get ready to create a creamy delight!

For the Crust

  • Butter – 1 cup, melted to bind the biscuit crumbs for a rich base.
  • Biscuit Crumbs – 1 cup, use digestive biscuits for a deliciously crunchy crust.

For the Cheesecake Filling

  • Cream Cheese – 1 cup, ensure it’s at room temperature for a smooth texture.
  • Sugar – 2 cups, divide into 1 cup for the filling and reserve 1 cup for the caramelized topping.
  • Large Eggs – 4, they help create a rich and fluffy filling.
  • Heavy Cream – 1 cup, adds to the luxurious creaminess of the cheesecake.
  • Vanilla Extract – 1 tablespoon, elevates the flavor to heavenly heights.

For the Topping

  • Sugar – 1 cup, this will create the signature caramelized crust that defines the Crème Brûlée Cheesecake.

With these simple ingredients, you’re on your way to baking a dessert that’s bound to become a cherished favorite in your home!

Step‑by‑Step Instructions for Crème Brûlée Cheesecake

Step 1: Preheat and Prepare the Crust
Preheat your oven to 350°F (175°C). In a medium bowl, combine 1 cup of melted butter with 1 cup of biscuit crumbs, mixing until fully incorporated. Press this mixture firmly into the bottom of a springform pan to form a solid crust. This will be the delicious base for your Crème Brûlée Cheesecake.

Step 2: Mix the Cheesecake Filling
In a large mixing bowl, blend 1 cup of room temperature cream cheese using an electric mixer until smooth and creamy. Gradually add in 1 cup of sugar, continuing to mix until thoroughly combined. Carefully beat in 4 large eggs one at a time, ensuring that each egg is fully incorporated before adding the next.

Step 3: Add Cream and Vanilla
Once your mixture is fluffy, pour in 1 cup of heavy cream and 1 tablespoon of vanilla extract. Mix on low speed until the filling is smooth and well-blended. This indulgent filling for your Crème Brûlée Cheesecake should now have a rich, velvety texture ready to pour over the crust.

Step 4: Bake the Cheesecake
Pour the cheesecake filling evenly over the prepared crust in the springform pan. Place it in the preheated oven and bake for approximately 1 hour. Look for the edges to puff up slightly while the center remains a bit jiggly—this indicates it’s perfectly baked but still has that creamy texture.

Step 5: Cool the Cheesecake
Once baked, turn off the oven and crack the door open to let the cheesecake cool gradually. This gentle cooling process helps to prevent cracks from forming on the surface. After about 30 minutes, transfer it to the refrigerator and chill for at least 4 hours, or overnight if you want the best results.

Step 6: Caramelize the Sugar Topping
Before serving, sprinkle 1 cup of sugar evenly over the chilled cheesecake. If you have a blowtorch, carefully caramelize the sugar until it turns golden and crisp. Alternatively, place the cheesecake under a hot grill (broiler) for 2-3 minutes, watching closely to avoid burning—this crispy topping is the perfect finish to your Crème Brûlée Cheesecake.

Step 7: Slice and Serve
Allow the caramelized sugar topping to harden for a few minutes before slicing. Use a sharp knife to cut through, revealing the creamy layers within your Crème Brûlée Cheesecake. Serve immediately, and enjoy the delightful blend of flavors and textures with each slice!

Crème Brûlée Cheesecake

What to Serve with Crème Brûlée Cheesecake

Elevate your dessert experience by complementing this creamy delight with flavors and textures that dance together beautifully.

  • Fresh Berries: A medley of raspberries, strawberries, and blueberries adds a refreshing burst of juicy sweetness that balances the richness.
  • Whipped Cream: Light and airy, a dollop of freshly whipped cream enhances the creamy texture while providing a touch of elegance to each slice.
  • Chocolate Drizzle: A warm chocolate ganache drizzle introduces a luxurious indulgence, adding depth and richness that pairs perfectly with the creamy cheesecake.
  • Espresso or Coffee: The boldness of a shot of espresso or a steaming cup of coffee sings alongside the dessert, creating a delightful balance of flavors.
  • Lemon Sorbet: A scoop of zesty lemon sorbet brings a refreshing contrast, cleansing the palate while offering a light finish after a rich dessert.
  • Almond Biscotti: Crunchy almond biscotti not only adds texture but also a nutty flavor that contrasts beautifully with the smooth cheesecake.
  • Fruit Compote: A warm fruit compote, perhaps peach or cherry, adds a beautiful sweetness and a hint of tartness that complements the creamy layers.
  • Sweet Wine: A glass of sweet dessert wine, like Sauternes or late harvest Riesling, enhances the overall experience with its aromatic notes and sweetness.

Crème Brûlée Cheesecake Variations

Feel free to let your creativity flow and adjust this recipe to suit your taste buds!

  • Gluten-Free: Substitute biscuit crumbs with gluten-free cookie crumbs for a delightful crust that everyone can enjoy.

  • Fruit-Infused: Add a swirl of raspberry or mango puree into the cheesecake filling before baking for a fruity twist that elevates each bite.

  • Chocolate Lover’s Delight: Mix in melted chocolate (dark or white) into the cheesecake batter for a rich chocolate version of this classic dessert. A decadent treat!

  • Lemon Zest: Stir in the zest of one lemon for a bright, citrusy flavor that balances the richness of the cheesecake beautifully. It offers a fresh surprise to each mouthful.

  • Spices: Incorporate a dash of cinnamon or nutmeg into the filling to warm up the flavor profile, creating a cozy, inviting cheesecake perfect for winter gatherings.

  • Dairy-Free: Substitute cream cheese and heavy cream with non-dairy alternatives like coconut cream and cashew cheese for a deliciously creamy vegan version.

  • Heat Factor: Add a pinch of cayenne pepper to the sugar mix before caramelizing for an unexpected kick that plays wonderfully with the sweetness.

For even more delightful options, don’t forget to explore our scrumptious classic cheesecake recipes or discover how easy it is to whip up a no-bake cheesecake for a lighter alternative.

How to Store and Freeze Crème Brûlée Cheesecake

Fridge: Store your uneaten Crème Brûlée Cheesecake in an airtight container in the refrigerator for up to 5 days. This helps maintain its delicious creamy texture!

Freezer: If you want to enjoy it later, you can freeze slices wrapped in plastic wrap and then in aluminum foil for up to 3 months. Thaw in the fridge overnight before enjoying.

Reheating: For the best flavor, don’t try to reheat the cheesecake. Simply bring it to room temperature before serving to revive its creamy consistency.

Caramelized Topping: If the sugar topping has softened in the fridge, simply use a kitchen torch or broiler for a few seconds to re-carve it before slicing and serving. Enjoy every delicious bite!

Expert Tips for Crème Brûlée Cheesecake

Smoothest Texture: Ensure your cream cheese is at room temperature before mixing; this prevents clumps and creates a silky filling.

Watch the Bake: Keep an eye on your cheesecake toward the end of the baking time to avoid overcooking. The center should jiggle gently.

Chill Wisely: Cooling your cheesecake gradually in the oven helps prevent cracks. Don’t skip the refrigeration time for best results!

Perfect Caramelization: When caramelizing sugar, don’t walk away! Monitor closely, especially under the broiler, to achieve that perfect golden crust.

Slicing Tip: Use a warm, sharp knife to slice through the hard sugar topping—this will make for cleaner cuts and a stunning presentation.

With these expert tips, you’re all set to make a show-stopping Crème Brûlée Cheesecake that’ll leave everyone wanting more!

Make Ahead Options

These Crème Brûlée Cheesecakes are a fantastic option for busy cooks looking to save time! You can prepare the crust and filling up to 24 hours in advance. Simply make the crust and the cheesecake filling, pour the filling over the crust, and refrigerate it right away. To maintain the creamy texture, ensure that the cheesecake is tightly wrapped (using plastic wrap) to prevent any odors from the refrigerator affecting its flavor. When you’re ready to serve, just caramelize the sugar topping and allow it to harden before slicing. This way, you’ll have a stunning dessert ready to impress with minimal effort!

Crème Brûlée Cheesecake

Crème Brûlée Cheesecake Recipe FAQs

How do I select the best cream cheese for my Crème Brûlée Cheesecake?
Absolutely! The key is to choose a high-quality cream cheese that’s full-fat and at room temperature. This ensures a smooth, creamy texture in your filling. Look for brands without additives, as they tend to give better results in cheesecake recipes.

How should I store Crème Brûlée Cheesecake after baking?
Very! After baking and cooling, cover your cheesecake with plastic wrap or transfer it to an airtight container. It will keep in the refrigerator for up to 5 days. This helps maintain its delicious creamy texture, so you can enjoy each slice without compromising flavor!

Can I freeze my Crème Brûlée Cheesecake, and if so, how?
Of course! To freeze, slice your cheesecake and wrap each piece tightly in plastic wrap, then place them in a freezer bag or airtight container. It can last in the freezer for up to 3 months. When you’re ready to enjoy, simply thaw it overnight in the fridge for the best taste.

What if my cheesecake cracks while baking?
No worries, it happens sometimes! The most important thing is to check your baking time and not overbake it; the center should still jiggle slightly when you take it out. If cracks do appear, cover them with the caramelized sugar topping—nobody will notice once it’s sliced!

Is this recipe suitable for individuals with dietary restrictions?
Great question! This Crème Brûlée Cheesecake contains dairy and gluten, so it may not be suitable for those with lactose intolerance or gluten sensitivities. You could experiment with dairy-free cream cheese alternatives and gluten-free biscuit crumbs, but keep in mind the texture and flavor may vary.

Can I use a different type of sugar for the caramelized topping?
Definitely! While granulated sugar is the classic choice for that perfect caramelized top, you can experiment with brown sugar for a richer flavor. Just be cautious during the caramelization process, as brown sugar can burn more quickly than white sugar, so monitor it closely!

Indulge in Decadence with Crème Brûlée Cheesecake Bliss

Savor the indulgence of Crème Brûlée Cheesecake, a delightful twist on a classic favorite that features a creamy filling and a caramelized topping.

  • Oven
  • Mixing Bowl
  • Electric mixer
  • Springform pan
  • Blowtorch

For the Crust

  • 1 cup Butter (melted)
  • 1 cup Biscuit Crumbs (use digestive biscuits)

For the Cheesecake Filling

  • 1 cup Cream Cheese (room temperature)
  • 2 cups Sugar (divide into 1 cup for filling and 1 cup for topping)
  • 4 large Eggs
  • 1 cup Heavy Cream
  • 1 tablespoon Vanilla Extract

For the Topping

  • 1 cup Sugar (for caramelizing)

Step-by-Step Instructions

  1. Preheat your oven to 350°F (175°C). Combine melted butter with biscuit crumbs and press into the bottom of a springform pan.
  2. In a large bowl, blend cream cheese until smooth. Gradually add in sugar, then beat in eggs one at a time.
  3. Pour in heavy cream and vanilla extract, mixing until smooth. Pour the filling over the crust.
  4. Bake for approximately 1 hour until edges puff and center jiggles slightly.
  5. Let the cheesecake cool gradually in the oven with the door cracked. Refrigerate for at least 4 hours or overnight.
  6. Before serving, sprinkle sugar on top and caramelize using a blowtorch or broiler.
  7. Allow topping to harden, slice, and serve. Enjoy!

For best results, ensure cream cheese is at room temperature and chill the cheesecake overnight for optimal texture.

Dessert
French
cheesecake, creamy dessert, Crème Brûlée, decadent dessert, make-ahead

Filed Under: Dessert

Baja Shrimp Tacos: Fresh, Zesty, and Ready in 25 Minutes

September 5, 2025 by grace bellamy Leave a Comment

Every time I bite into a perfectly crafted taco, I’m transported to my favorite seaside eatery, where the ocean breeze and laughter flow as freely as the salsa. Today, I’m excited to share my Baja Shrimp Tacos recipe, a quick yet delightful dish that brings the vibrant flavors of the coast right to your kitchen. With just 25 minutes to prep and cook, you can escape from the mundane and impress your family or friends with a meal that feels indulgent without the fuss. Not only are these tacos loaded with succulent shrimp and fresh toppings, but they’re also customizable—perfect for those who love a touch of creativity in their cooking. So, are you ready to dive into this delicious culinary adventure? Let’s get started!

Baja Shrimp Tacos

Why Try Baja Shrimp Tacos?

Quick and Easy: These tacos come together in just 25 minutes, making them perfect for busy weeknights or spontaneous gatherings.

Fresh Ingredients: Packed with vibrant toppings like avocado, cilantro, and lime juice that create a luscious, refreshing experience.

Flavor Explosion: The combination of spices and marinated shrimp provides a zesty kick that will awaken your taste buds.

Customizable: Adjust the toppings based on your preferences—whether you want to add some spicy hot sauce or keep it creamy with sour cream, the options are endless.

Crowd-Pleaser: These Baja Shrimp Tacos are sure to impress friends and family, turning a simple meal into a festive occasion! Plus, if you’re looking for other ways to elevate your taco game, check out my guide on Taco Variations.

Baja Shrimp Taco Ingredients

• Perfect for your next taco night!

For the Shrimp
• 1 lb shrimp – peeled and deveined for a tender bite.
• 2 tbsp olive oil – enhances flavor and prevents sticking.
• 1 tsp chili powder – adds warmth and depth to the shrimp.
• 1 tsp cumin – brings a slightly nutty, earthy flavor.
• 1 tsp paprika – adds a sweet smokiness.
• 1/2 tsp garlic powder – enriches the taste with a subtle garlic note.
• 1/2 tsp salt – essential for balancing flavors.
• 1/4 tsp black pepper – a touch of heat that elevates the dish.

For the Tacos
• 8 corn tortillas – warm them for a delightfully pliable texture.
• 1 cup shredded cabbage – adds crunch and vibrant color.
• 1/2 cup diced tomatoes – freshness that complements the shrimp beautifully.
• 1/4 cup chopped cilantro – a burst of herbal flavor to brighten each bite.
• 1 avocado – sliced for creamy richness that enhances the taco.

For Serving (Optional)
• 1/2 cup sour cream or Greek yogurt – for a creamy addition, if desired.
• Hot sauce – drizzle for an extra kick, making your Baja Shrimp Tacos even more exciting!
• Juice of 1 lime – fresh acidity that ties all the flavors together.

Step‑by‑Step Instructions for Baja Shrimp Tacos

Step 1: Marinate the Shrimp
In a mixing bowl, combine 2 tablespoons of olive oil, 1 teaspoon of chili powder, 1 teaspoon of cumin, 1 teaspoon of paprika, 1/2 teaspoon of garlic powder, 1/2 teaspoon of salt, and 1/4 teaspoon of black pepper. Add 1 pound of peeled and deveined shrimp, tossing to ensure they are evenly coated. Allow the shrimp to marinate for 10-15 minutes to absorb the flavorful spices.

Step 2: Cook the Shrimp
Preheat a skillet over medium-high heat until it is hot and shimmering, which should take about 2 minutes. Once ready, add the marinated shrimp to the pan in a single layer. Sauté for 2-3 minutes on each side, cooking until the shrimp turn pink and opaque. Remove from heat, ensuring they don’t overcook to keep them tender.

Step 3: Warm the Tortillas
In a separate non-stick pan, set the heat to low and warm 8 corn tortillas for about 30 seconds on each side until they are pliable and slightly toasted. This step enhances the texture and flavor of the tortillas, making them perfect for wrapping around your delicious shrimp.

Step 4: Assemble the Tacos
Lay the warmed tortillas on a plate and evenly distribute the cooked shrimp among them, ensuring each tortilla gets a generous portion. The vibrant color of shrimp against the warm tortillas sets the stage for a mouthwatering meal that embodies the essence of Baja Shrimp Tacos.

Step 5: Add the Toppings
Top each taco generously with 1 cup of shredded cabbage, 1/2 cup of diced tomatoes, 1/4 cup of chopped cilantro, and slices from 1 avocado. This colorful array not only enhances the tacos visually but also introduces fresh, crunchy textures that balance the shrimp perfectly.

Step 6: Finish with Condiments
If desired, add a dollop of 1/2 cup of sour cream or Greek yogurt to each taco for a creamy finish. Drizzle hot sauce over the top for an extra kick if you enjoy some heat. These finishing touches make your Baja Shrimp Tacos even more exciting and flavorful.

Step 7: Serve with Lime
Squeeze fresh lime juice over each assembled taco to brighten the flavors and add a zesty twist. Serve immediately, allowing everyone to enjoy these Baja Shrimp Tacos while they are fresh and warm, perfect for a delightful and vibrant meal!

Baja Shrimp Tacos

How to Store and Freeze Baja Shrimp Tacos

Fridge: Store any leftover Baja Shrimp Tacos in an airtight container in the fridge for up to 2 days. Keep the components separate for optimal freshness.

Freezer: While it’s best to freeze the shrimp alone, you can freeze the marinated shrimp in an airtight bag for up to 3 months. Thaw in the fridge overnight before cooking.

Reheating: To reheat cooked shrimp, gently sauté them in a skillet over medium heat until warmed through, about 2-3 minutes. Avoid overcooking to keep them tender.

Tortilla Storage: If you have leftover tortillas, store them in a sealed container at room temperature for up to 3 days. You can also freeze them for longer storage—just layer with parchment paper.

What to Serve with Baja Shrimp Tacos?

To create a truly memorable meal around your Baja Shrimp Tacos, consider these delightful accompaniments that elevate both the flavor and experience.

  • Spicy Black Beans: Creamy, seasoned black beans add a savory richness that complements the shrimp’s zestiness beautifully.

  • Zesty Rice: Lemon or lime-infused rice provides a refreshing flavor and fluffy texture, enhancing each bite of your tacos.

  • Fresh Guacamole: Creamy and smooth, this classic dip offers a perfect contrast to the spicy shrimp, adding a layer of richness.

  • Grilled Corn on the Cob: Sweet, charred corn adds crunch and a burst of sweetness, making your meal feel like a vibrant summer celebration.

  • Mango Salsa: The tropical sweetness of ripe mango mingles with spice, bringing forth a refreshing zing that pairs effortlessly with your tacos.

  • Crispy Tortilla Chips: Serve these for extra crunch alongside your tacos, paired with a zesty salsa or creamy dip to satisfy every craving.

  • Cabbage Slaw: A light, crunchy slaw with a tart vinaigrette will bring a delightful texture and cut through the richness of the shrimp.

  • Watermelon Salad: Sweet, juicy watermelon bites offer a cooling contrast to the spices, making every bite feel like a refreshing treat.

  • Tequila Sunrise: This fruity cocktail brings a light and refreshing sip that’s perfect for a taco night fiesta, enhancing your dining experience.

Expert Tips for Baja Shrimp Tacos

Perfectly Cooked Shrimp: Ensure your shrimp are cooked just until pink and opaque—overcooking can lead to rubbery meat.

Tortilla Technique: Warm your corn tortillas in a dry pan; this enhances their flavor and makes them more pliable, reducing the risk of tearing.

Flavor Balance: Squeeze fresh lime juice over the tacos just before serving; it brightens the dish and elevates the flavors of your Baja Shrimp Tacos.

Topping Variety: Feel free to customize toppings—fresh mango salsa or a tangy cabbage slaw can add a fun twist and complement the shrimp beautifully.

Meal Prep Tip: Marinate the shrimp ahead of time for intense flavor; letting them sit longer allows the spices to penetrate deeper for a tastier result.

Baja Shrimp Tacos Variations & Substitutions

Feel free to get creative with your Baja Shrimp Tacos and make them truly your own!

  • Gluten-Free: Use gluten-free corn tortillas instead of traditional ones for a safe and delicious option. They will still hold all the flavorful fillings beautifully.

  • Spicy Twist: Add diced jalapeños or a drizzle of spicy chipotle sauce to the shrimp for those who love an extra kick. This little touch can take the tacos to a whole new level!

  • Vegetarian Option: Replace shrimp with marinated grilled zucchini or bell peppers for a fantastic vegetarian taco that keeps the vibrant flavors intact. The textures will surprise you!

  • Extra Crunch: Include some crispy fried onions or crushed tortilla chips as a topping for a delightful crunch that elevates your taco experience. A fun addition everyone will love!

  • Herbal Boost: Toss in some fresh diced mango or pineapple along with the cilantro for a sweet-savory flavor combination that’s refreshingly tropical. Your taste buds will be thrilled!

  • Creamy Vegan: Swap sour cream with a coconut yogurt or make a blended avocado sauce for a creamy vegan alternative that complements your taco’s zesty flavors perfectly.

  • Taco Salad: Transform these ingredients into a colorful taco salad by layering the shrimp, toppings, and dressing over a bed of mixed greens instead of using tortillas. It’s a hearty and healthy twist!

  • Coconut Shrimp: For a tropical twist, breadcrumb your shrimp with shredded coconut before cooking. It adds a splendid crunch and a subtle sweetness that’s utterly delicious!

Each of these variations ensures that your Baja Shrimp Tacos stay exciting and can cater to everyone’s palate. For additional inspiration on transforming your meals, don’t miss my guide on Taco Variations and check out how to pair these tacos with side dishes that can elevate your dining experience even more!

Make Ahead Options

These Baja Shrimp Tacos are a fantastic choice for meal prep! You can marinate the shrimp up to 24 hours in advance, allowing the flavors to infuse deeply. Simply combine the olive oil, spices, and shrimp in a bowl, cover, and refrigerate. Additionally, you can chop all your toppings, like cabbage, tomatoes, cilantro, and avocado, and store them in airtight containers for up to 3 days. To maintain quality, keep the avocado separate until just before serving to prevent browning. When you’re ready to enjoy your tacos, simply cook the marinated shrimp and warm the tortillas, and you’ll have a delicious meal ready in minutes!

Baja Shrimp Tacos

Baja Shrimp Tacos Recipe FAQs

How should I select ripe ingredients for my Baja Shrimp Tacos?
Absolutely! When choosing ingredients like avocados, look for those that yield gently to pressure; this indicates they’re ripe and creamy. For tomatoes, select ones that are vibrant in color and firm with a slight give, avoiding any with dark spots or blemishes. Fresh cilantro should have a bright green color and no wilting – the fresher, the better!

How can I store leftover Baja Shrimp Tacos?
Leftover Baja Shrimp Tacos can be kept in an airtight container in the refrigerator for up to 2 days. To maintain freshness, I suggest storing the components separately—keep the shrimp, tortillas, and toppings like cabbage and avocado in different containers. This will ensure everything stays delicious!

Can I freeze the shrimp for my Baja Shrimp Tacos?
Yes! You can freeze the marinated shrimp for up to 3 months. Simply place the shrimp in a zip-top bag and remove as much air as possible before sealing. Thaw the shrimp overnight in the refrigerator before cooking. Avoid freezing cooked shrimp as it may affect the texture. Remember, fresh shrimp offers the best flavor!

What should I do if my shrimp turn out rubbery?
Very! If your shrimp turn out rubbery, this is usually due to overcooking. To avoid this, always cook shrimp just until they turn pink and opaque, typically about 2-3 minutes per side on medium-high heat. Keep a close eye on them—once they curl up tightly, they’re done! If in doubt, remove them from the heat sooner rather than later.

Are Baja Shrimp Tacos suitable for people with allergies?
Definitely! However, be cautious if you or your guests have shellfish allergies, as shrimp is a common allergen. You can easily substitute the shrimp with grilled chicken or roasted vegetables for a delightful alternative. If lactose is a concern, opt for a dairy-free yogurt instead of sour cream, or leave out the dairy altogether—these tacos are still flavorful without it!

Can I prepare the shrimp ahead of time for a quicker meal?
Of course! For meal prep, marinate your shrimp the night before and store them in the fridge. This not only saves time when you’re ready to cook but also allows the flavors to deepen overnight. Just sauté when you’re ready—within 15 minutes, you’ll have delicious Baja Shrimp Tacos ready to enjoy!

Baja Shrimp Tacos: Fresh, Zesty, and Ready in 25 Minutes

Indulge in flavorful Baja Shrimp Tacos, quick and customizable, perfect for any gathering.

  • Mixing Bowl
  • skillet
  • non-stick pan

For the Shrimp

  • 1 lb shrimp (peeled and deveined)
  • 2 tbsp olive oil (enhances flavor and prevents sticking)
  • 1 tsp chili powder (adds warmth and depth)
  • 1 tsp cumin (slightly nutty, earthy flavor)
  • 1 tsp paprika (adds sweetness and smokiness)
  • 1/2 tsp garlic powder (adds subtle garlic note)
  • 1/2 tsp salt (balancing flavor)
  • 1/4 tsp black pepper (adds a touch of heat)

For the Tacos

  • 8 pieces corn tortillas (warm them for pliability)
  • 1 cup shredded cabbage (adds crunch and color)
  • 1/2 cup diced tomatoes (complements shrimp beautifully)
  • 1/4 cup chopped cilantro (adds herbal flavor)
  • 1 piece avocado (sliced for creaminess)

For Serving (Optional)

  • 1/2 cup sour cream or Greek yogurt (for creaminess, if desired)
  • hot sauce (drizzle for an extra kick)
  • 1 piece lime (juice for acidity)

Step-by-Step Instructions

  1. In a mixing bowl, combine olive oil, chili powder, cumin, paprika, garlic powder, salt, and black pepper. Add shrimp, tossing to coat. Marinate for 10-15 minutes.
  2. Preheat a skillet over medium-high heat. Add marinated shrimp in a single layer. Sauté for 2-3 minutes on each side until pink and opaque. Remove from heat.
  3. In a non-stick pan, warm corn tortillas on low for about 30 seconds on each side until pliable and slightly toasted.
  4. Lay warmed tortillas on a plate and evenly distribute cooked shrimp among them.
  5. Top with shredded cabbage, diced tomatoes, chopped cilantro, and avocado slices.
  6. Add a dollop of sour cream or Greek yogurt and drizzle with hot sauce if desired. Squeeze lime juice over the tacos.
  7. Serve immediately while fresh and warm.

For best results, do not overcook shrimp to avoid rubbery texture. Feel free to customize toppings to your preference.

Main Dishes
Mexican
Baja Shrimp Tacos, easy dinner, quick meals, seafood, shrimp, Tacos

Filed Under: Main Dishes

Tender Texas-Style Brisket in the Oven for Flavor Bliss

September 5, 2025 by grace bellamy Leave a Comment

The moment I took my first forkful of Texas-Style Brisket, I was transported to a sun-soaked backyard barbecue, where laughter mingled with the smoky aroma wafting from the grill. This mouthwatering dish brings the flavors of Texas right into your kitchen, making it a standout meal for family gatherings or when you simply want to treat yourself to something special. What I love most about making this Texas-Style Brisket in the Oven is how utterly satisfying it is—nothing beats that tender, juicy bite after hours of slow cooking, and the recipe is surprisingly easy to master! Plus, it’s a fantastic way to infuse rich flavors without the need for a grill. Are you ready to impress your friends and family with this delicious, home-cooked classic? Let’s dive into the smoky magic of this brisket recipe!

Texas-Style Brisket in the Oven

Why is Texas-Style Brisket a Must-Try?

Tender, Juicy Perfection: Achieving that melt-in-your-mouth texture is easy with the low and slow cooking method.

Bold Flavor Explosion: The Texas-Style Brisket Rub infuses each slice with a savory, aromatic kick that elevates your meal.

Kitchen-Friendly: No fancy equipment needed! This recipe brings the barbecue experience right into your oven, making it perfect for home cooks.

Family Favorites: Impress your loved ones at your next gathering—this dish is sure to be a crowd-pleaser.

Easy Cleanup: With simple prep and minimal dishes, you can focus more on enjoying the meal and less on the mess.

Now that you’re ready to bring a taste of Texas to your table, don’t forget to check out the tips for perfect brisket and learn how to slice it just right for an unbeatable meal!

Texas-Style Brisket Ingredients

For the Brisket
• Brisket – Choose a USDA Choice or Prime cut for the best flavor and tenderness.

For the Rub
• Texas-Style Brisket Rub – This blend of spices will give your brisket that authentic Texas flavor kick!

With these key ingredients in hand, you’re one step closer to creating mouthwatering Texas-Style Brisket in the Oven that will leave everyone asking for seconds!

Step‑by‑Step Instructions for Texas-Style Brisket in the Oven

Step 1: Choose the Right Brisket
Select a brisket cut that boasts good marbling—this is key for moisture and flavor. Aim for a USDA Choice or Prime cut, which will yield the best results. Remove any excess fat, but leave a thin layer to help baste the meat as it cooks. This simple preparation step sets the stage for an incredible Texas-Style Brisket in the Oven.

Step 2: Season Generously
Rub the brisket evenly with the Texas-Style Brisket Rub, making sure to cover all sides generously. Allow the spices to penetrate the meat by letting it sit for at least 30 minutes at room temperature. This will enhance the flavor profile, making each bite a savory delight. Your brisket should begin to shimmer as the rub adheres perfectly.

Step 3: Preheat the Oven
Preheat your oven to a low temperature of 250°F (121°C). This low and slow method is essential for achieving the tender, juicy texture that Texas-Style Brisket is known for. While the oven is warming, prepare a roasting pan lined with aluminum foil for easy cleanup and set a wire rack on top to hold the brisket.

Step 4: Insert the Brisket
Place the seasoned brisket on the wire rack in the roasting pan, fat side up. This position allows the fat to render down, basting the meat as it cooks. Insert a meat thermometer into the thickest part of the brisket, ensuring it doesn’t touch any bone. Now, gently slide the pan into your preheated oven.

Step 5: Cook Low and Slow
Let the brisket cook in the oven for approximately 1 hour per pound. Keep an eye on the thermometer as it approaches 165°F (74°C), a critical threshold for wrapping. The brisket will become darker and develop a gorgeous crust as it cooks, filling your kitchen with mouthwatering aromas.

Step 6: Wrap for Moisture
Once the internal temperature hits 165°F, carefully remove the brisket from the oven. Wrap it tightly in aluminum foil or butcher paper to preserve moisture during the final cooking phase. This step is crucial for achieving the melt-in-your-mouth texture that defines a great Texas-Style Brisket in the Oven.

Step 7: Finish Cooking
Return the wrapped brisket to the oven and continue cooking until it reaches an internal temperature of around 200°F (93°C). This will typically take an additional 1 to 2 hours, depending on the size. When done, the brisket should feel tender when probed with a fork, signifying it’s ready to come out.

Step 8: Resting Period
Remove the brisket from the oven, carefully unwrap it, and let it rest on a cutting board for at least 30 to 45 minutes. This resting period allows the juices to redistribute throughout the meat, enhancing flavor and tenderness. Cover it loosely with foil to keep it warm while resting.

Step 9: Slice and Serve
Using a sharp knife, slice the brisket against the grain to ensure each piece remains tender. Aim for about ¼-inch thick slices for a perfect bite. Serve your Texas-Style Brisket in the Oven with your favorite sides, and watch as family and friends rave about your incredible culinary achievement!

Texas-Style Brisket in the Oven

Texas-Style Brisket Variations

Feel free to get creative as you prepare your Texas-Style Brisket, making it your own with flavorful twists and substitutions!

  • Spicy Kick: Add crushed red pepper flakes or cayenne to the rub for a zesty heat. Your taste buds will thank you for a thrilling burst of spice with each bite!

  • Herb Infusion: Mix in fresh herbs like rosemary or thyme into the rub to elevate the flavor profile. Just a sprinkle will introduce a delightful aromatic touch to your brisket.

  • Smoky Flavor: If you miss the grill, add a few drops of liquid smoke to the rub for that classic barbecue taste. It captures the essence of outdoor cooking right in your oven!

  • Sweet Twist: Incorporate brown sugar into the rub to enhance caramelization during cooking. This addition not only balances the spice but gives a lovely sweetness, creating a dynamic flavor contrast.

  • Garlic Goodness: Mince fresh garlic or include garlic powder in your rub for an irresistible savory depth. It’s amazing how this simple addition can transform the flavor landscape of your brisket!

  • Vegetarian Option: Substitute a hearty vegetable like portobello mushroom in place of brisket. Follow the same rub and cooking method for a delightful plant-based treat that captures the essence of the original dish!

  • Beer Braised: Replace some of the moisture with beer in the cooking process for rich, malty undertones. This creates a beautifully tender brisket with an added layer of complexity, sure to impress your guests!

  • BBQ Sauce Slather: Serve with your favorite homemade or store-bought barbecue sauce brushed on before baking for extra flavor. This tangy addition makes each slice even more delectable!

As you embark on your brisket journey, remember to explore different flavors and adapt the recipe to your taste. For tips on perfecting your cut, check out our guide on how to slice it just right for an unbeatable dining experience!

Expert Tips for Texas-Style Brisket

Select Wisely: Choose a brisket with good marbling to ensure juicy and flavorful meat. Avoid lean cuts, as they can dry out during cooking.

Rub It Right: Don’t skimp on the Texas-Style Brisket Rub; generous seasoning is key for a robust flavor. Let it rest before cooking for best results.

Temperature Check: Use a reliable meat thermometer to monitor the internal temperature. Wrapping the brisket too early can lead to undercooked meat.

Resting is Essential: Allow the brisket to rest after cooking to lock in juices. This step transforms good brisket into unbelievably tender Texas-Style Brisket in the Oven.

Slice Against the Grain: Always slice your brisket against the grain to ensure tender, melt-in-your-mouth pieces. Tricky, but practice makes perfect!

Make Ahead Options

These Texas-Style Brisket in the Oven are perfect for busy home cooks looking to save time while still enjoying a delicious meal! You can prepare the brisket by applying the Texas-Style Brisket Rub up to 24 hours in advance; simply wrap the seasoned meat in plastic wrap and refrigerate to allow the flavors to meld beautifully. Additionally, the brisket itself can be cooked ahead and stored in the fridge for up to 3 days. Just wrap it tightly in foil after cooking to maintain moisture. When you’re ready to serve, simply reheat in a low oven or on the grill for that fresh-out-of-the-oven taste, ensuring every bite is just as tender and juicy as if it were made that day!

What to Serve with Texas-Style Brisket in the Oven

A hearty meal deserves equally delightful accompaniments that will enhance each bite and complete your dining experience.

  • Creamy Coleslaw: This cool, crunchy side adds a light contrast to the rich, smoky brisket, brightening each mouthful.

  • Buttery Cornbread: Soft and sweet, cornbread perfectly soaks up brisket juices while offering a comforting, Southern charm to your meal. Pairing this bread with the savory meat brings a delightful balance of flavors.

  • Garlic Mashed Potatoes: Creamy and garlicky, these mashed potatoes serve as an ideal base for drizzling that delicious brisket sauce. The creamy texture envelops the flavors beautifully.

  • Pickled Jalapeños: For those who crave a little heat, adding pickled jalapeños gives a zesty kick that elevates the brisket. Their acidity provides a fresh counterpoint to the richness of the meat.

  • Grilled Vegetables: A colorful array of grilled vegetables offers a smoky char that complements the brisket while introducing a subtle sweetness. This vibrant side not only looks appealing but brings added nutrition to your plate.

  • Sweet Tea: A classic pairing, the sweet and refreshing taste of sweet tea balances the savory elements of the Texas-Style Brisket, making each bite even more enjoyable.

  • Chocolate Pecan Pie: End your meal on a sweet note with this decadent dessert. Its rich chocolate and nutty flavors create a delightful closure to the feast, leaving everyone satisfied and happy.

How to Store and Freeze Texas-Style Brisket

Fridge: Store leftover Texas-Style Brisket in an airtight container for up to 3 days. Allow it to cool completely before refrigerating to preserve moisture and flavor.

Freezer: Wrap brisket tightly in plastic wrap followed by aluminum foil or place in a freezer-safe bag for up to 3 months. This prevents freezer burn and keeps it delicious for later use.

Reheating: To reheat, thaw brisket overnight in the fridge. Warm slices gently in the oven at 300°F (150°C) covered with foil for about 15-20 minutes, or until heated through. Enjoy the same tender goodness!

Texas-Style Brisket in the Oven

Texas-Style Oven Brisket Recipe FAQs

What type of brisket should I choose for the best flavor?
Absolutely! For the best flavor and tenderness, look for a USDA Choice or Prime brisket cut that has good marbling. This fat will melt during cooking, ensuring a juicy and flavorful result. Steer clear of lean cuts, as they can dry out and won’t deliver that melt-in-your-mouth experience you’re aiming for.

How should I store leftover Texas-Style Brisket?
Very simple! Store your leftovers in an airtight container in the fridge for up to 3 days. Make sure to let the brisket cool completely before refrigerating; this helps maintain its moisture and flavor. If you want to enjoy it beyond the three-day mark, consider freezing it!

Can I freeze Texas-Style Brisket, and how do I do it?
Yes, you can absolutely freeze it! To do so, wrap the brisket tightly in plastic wrap, ensuring all surfaces are covered. Next, wrap it in aluminum foil or place it in a freezer-safe bag to prevent freezer burn. When stored this way, it can last up to 3 months. When you’re ready to enjoy it again, just thaw it overnight in the fridge and reheat gently.

What are some common issues when cooking brisket?
One issue might be undercooking it; always use a reliable meat thermometer to ensure it reaches around 200°F for that tender texture. If you find your brisket is tough, it might not have been cooked long enough. Cooking low and slow is key, so don’t rush this process! If it’s too dry, you may have wrapped it too early—waiting until it hits 165°F before wrapping helps lock in moisture.

Are there any dietary considerations I should keep in mind for my Texas-Style Brisket?
Absolutely! If you’re serving guests, take note of potential allergies; brisket is naturally gluten-free, but pre-packaged rubs can sometimes contain gluten or other allergens. As always, check labels or consider making your own rub to ensure it meets dietary needs. And if you’re cooking for pets, keep in mind that some ingredients may not be safe for them, so it’s best to avoid sharing brisket with furry friends!

How long should I let the brisket rest after cooking?
Resting is essential! Aim to let your cooked brisket rest for at least 30 to 45 minutes after it comes out of the oven. This resting period allows the juices to redistribute throughout the meat, enhancing its flavor and making it even more tender. During this time, loosely cover it with foil to keep it warm and create even juicier slices when serving.

Tender Texas-Style Brisket in the Oven for Flavor Bliss

This Texas-Style Brisket in the Oven delivers tender, juicy perfection with bold flavors and easy kitchen prep, perfect for any gathering.

  • Oven
  • roasting pan
  • wire rack
  • Meat Thermometer
  • Aluminum Foil

For the Brisket

  • 1 piece USDA Choice or Prime Brisket (Choose a cut with good marbling)

For the Rub

  • 1 cup Texas-Style Brisket Rub (Blend of spices for authentic flavor)

Step-by-Step Instructions

  1. Choose a brisket cut that boasts good marbling—aim for a USDA Choice or Prime cut. Remove excess fat, leaving a thin layer.
  2. Rub the brisket evenly with the Texas-Style Brisket Rub, covering all sides generously. Let it rest for at least 30 minutes.
  3. Preheat your oven to 250°F (121°C) and prepare a roasting pan lined with aluminum foil and set a wire rack on top.
  4. Place the seasoned brisket on the wire rack, fat side up. Insert a meat thermometer into the thickest part.
  5. Cook the brisket for approximately 1 hour per pound, monitoring the thermometer as it approaches 165°F (74°C).
  6. Once at 165°F, remove the brisket and wrap it tightly in aluminum foil or butcher paper.
  7. Return the wrapped brisket to the oven until it reaches around 200°F (93°C), which takes an additional 1 to 2 hours.
  8. Remove the brisket, unwrap, and let it rest on a cutting board for 30 to 45 minutes.
  9. Slice the brisket against the grain into about ¼-inch thick pieces and serve with your favorite sides.

This dish is perfect for family gatherings and provides rich flavors without needing a grill.

Main Dishes
Texan
barbecue, Beef, brisket, oven, slow cooking, Texas-Style

Filed Under: Main Dishes

Zesty Lime Sugar Cookies That Will Brighten Your Day

September 5, 2025 by grace bellamy Leave a Comment

The zesty scent of fresh limes can instantly transport me to sunlit afternoons by the beach, where slow-sipping on refreshing drinks meets the art of baking. Today, I’m thrilled to share my delightful Lime Sugar Cookies recipe with you, a perfect blend of sweet and tangy that’s sure to become your new favorite treat. With just 10 minutes of prep time, these cookies are not only a quick solution for satisfying your sweet tooth, but they also deliver a refreshing twist that elevates any gathering. Whether you choose to drizzle a simple lime glaze over the top or enjoy them as they are, these cookies promise to impress family and friends alike. Curious to bake a batch that will brighten your day? Let’s dive into this easy recipe together!

Lime Sugar Cookies

Why Love Lime Sugar Cookies?

Zesty flavor: The fresh lime zest adds a burst of citrus, making each bite a refreshing treat.
Quick prep: With only 10 minutes of prep time, these cookies are perfect for last-minute cravings or gatherings.
Crowd-pleaser: Their unique taste is sure to impress friends and family, giving them something special to talk about.
Versatile treat: Enjoy them plain, or elevate with a lime glaze for an extra touch of sweetness.
Simple process: Easy-to-follow steps make this recipe ideal for bakers of all skill levels. Whether you’re a seasoned chef or new to baking, you’ll love making these Lime Sugar Cookies for any occasion!

Lime Sugar Cookies Ingredients

• Get ready to bake these delightful treats!

For the Dough

  • Unsalted butter – 1 cup, softened; this creates a rich base for your Lime Sugar Cookies.
  • Granulated sugar – 1 cup; adds sweetness that balances the tangy lime flavor.
  • Fresh lime zest – 2 tablespoons; enhances the citrusy aroma and flavor profile of the cookies.
  • Fresh lime juice – 2 tablespoons; provides that essential zing that makes these cookies unique.
  • All-purpose flour – 2 ½ cups; flour gives the cookies structure and chewiness.
  • Baking powder – 1 teaspoon; helps the cookies rise and attain the perfect softness.
  • Salt – ¼ teaspoon; a pinch enhances all the flavors beautifully.

For the Optional Lime Glaze

  • Powdered sugar – 1 cup; creates a sweet and smooth glaze for drizzling.
  • Fresh lime juice – 2 tablespoons; adds a refreshing layer of tanginess to the glaze.

Dive into making these zesty Lime Sugar Cookies, and let the delightful flavors sweep you away!

Step‑by‑Step Instructions for Lime Sugar Cookies

Step 1: Cream the Butter and Sugar
In a large mixing bowl, add 1 cup of softened unsalted butter and 1 cup of granulated sugar. Using a hand mixer or stand mixer, beat on medium speed until the mixture is creamy and light in color, about 2 to 3 minutes. You’ll know it’s ready when it looks fluffy and well-combined, setting a rich base for your Lime Sugar Cookies.

Step 2: Add Lime Zest and Juice
Next, incorporate 2 tablespoons of fresh lime zest and 2 tablespoons of fresh lime juice into the butter mixture. Blend on low speed until everything is well mixed, about 30 seconds. The vibrant green zest will brighten the mixture, and the fresh lime juice will create a wonderfully zesty aroma that signals you’re on the right track to making these delightful Lime Sugar Cookies.

Step 3: Mix in the Flour
Gradually add in 2 ½ cups of all-purpose flour, 1 teaspoon of baking powder, and ¼ teaspoon of salt. Mix on low until the dough starts to come together, about 1 to 2 minutes. Aim for a smooth and cohesive dough; it should be slightly sticky but manageable. This step is crucial for achieving that perfect texture in your Lime Sugar Cookies.

Step 4: Chill the Dough
Once the dough is formed, wrap it in plastic wrap and refrigerate for at least 30 minutes. Chilling helps the dough firm up, ensuring that your cookies maintain their shape while baking. You’ll know the dough is ready when it’s noticeably firmer and easier to handle, making the next steps seamless as you prepare to bake these delicious treats.

Step 5: Preheat the Oven and Prepare Baking Sheets
Preheat your oven to 350°F (175°C). While the oven heats, line two baking sheets with parchment paper to prevent sticking. This step ensures even baking for your cookies and adds a lovely golden color as they rise in the oven, promising delightful Lime Sugar Cookies that will lightly brown around the edges.

Step 6: Bake the Cookies
Using a cookie scoop or tablespoon, portion out the chilled dough and place it on the prepared baking sheets, leaving space between each scoop. Bake in the preheated oven for about 10-12 minutes or until the edges are lightly golden. Keep an eye on them; the centers should look set but still soft, which is perfect for that chewy texture.

Step 7: Cool and Glaze (Optional)
Once baked, remove the cookies from the oven and allow them to cool on the baking sheets for about 5 minutes before transferring them to a wire rack. If desired, prepare a simple lime glaze by mixing 1 cup of powdered sugar with 2 tablespoons of fresh lime juice. Drizzle the glaze over the cooled cookies for an extra burst of flavor and shine, elevating your Lime Sugar Cookies to a delightful finish!

Lime Sugar Cookies

How to Store and Freeze Lime Sugar Cookies

Room Temperature: Store cookies in an airtight container at room temperature for up to 3 days to keep them fresh and chewy.

Fridge: If you want to extend their shelf life, place the cookies in the fridge for up to a week in a sealed container. This will slightly alter their texture but keeps them delicious.

Freezer: For longer storage, freeze the cookies in an airtight container or freezer bag for up to 3 months. Make sure they are completely cooled before freezing to prevent moisture buildup.

Reheating: To enjoy the cookies again, simply thaw them at room temperature or heat them in the microwave for about 10-15 seconds. These Lime Sugar Cookies are sure to brighten your day even after a freeze!

Make Ahead Options

These Lime Sugar Cookies are perfect for meal prep enthusiasts looking to save time during busy weeks! You can prepare the dough up to 3 days in advance by wrapping it tightly in plastic wrap and storing it in the refrigerator. When you’re ready to bake, simply scoop the chilled dough onto a prepared baking sheet and let it come to room temperature for about 10 minutes before baking (this helps with even cooking). If you want to make life even easier, you can bake and cool the cookies, then store them in an airtight container at room temperature for up to 5 days. Rest assured, your Lime Sugar Cookies will be just as delicious and zesty when you’re ready to enjoy them!

Expert Tips for Lime Sugar Cookies

Chill the Dough: Make sure to chill the dough for at least 30 minutes; this helps your Lime Sugar Cookies hold their shape and achieve a chewy texture.

Measure Accurately: Use the spoon-and-level method for measuring flour, as too much can lead to dry cookies. A precise 2 ½ cups is crucial for the perfect dough!

Watch the Baking Time: Keep a close eye on your cookies while baking; they should be lightly golden at the edges but soft in the center to ensure a delightful chewiness.

Zest Wisely: When zesting your limes, avoid the white pith beneath the skin, as it can introduce a bitter flavor. Use only the bright green outer layer for that vibrant zing!

Glaze It Right: If making the lime glaze, drizzle it over cooled cookies for the best finish; glazing warm cookies can cause the glaze to melt away, losing that lovely shine.

Lime Sugar Cookies Variations & Substitutions

Feel free to get creative and tailor these cookies to your taste—let’s make them your own!

  • Gluten-Free: Substitute 2 ½ cups of all-purpose flour with a gluten-free flour blend to enjoy this treat without the gluten.

  • Dairy-Free: Use coconut oil or a dairy-free butter alternative for the butter; this keeps the flavors splendid while accommodating dietary needs.

  • Sweetener Swap: Replace granulated sugar with coconut sugar for a deeper flavor and a hint of caramel; it’s a delightful twist you’ll love!

  • Zesty Additions: Include 1 teaspoon of lemon or orange zest in addition to lime zest to create a vibrant citrus medley that brightens each bite.

  • Choco-Lime Delight: Mix in ½ cup of dairy-free chocolate chips into the dough for a sweet and tangy treat everyone will adore; chocolate and citrus are a match made in heaven!

  • Nutty Crunch: Fold in ½ cup of chopped walnuts or pecans to add a delightful crunch; it’s a fantastic textural twist that adds sophistication to these cookies.

  • Spicy Kick: Add a pinch of cayenne or chili powder into the dough for a subtle heat—this unexpected twist pairs beautifully with the lime’s brightness.

  • Lime Cream Filling: Make sandwich cookies by adding a lime-flavored cream filling made from powdered sugar, vegan cream cheese, and extra lime juice for an indulgent treat that feels festive!

Whether you try one of these ideas or combine a few, these variations will allow you to make these Lime Sugar Cookies even more special and to your liking. Happy baking!

What to Serve with Lime Sugar Cookies

Create a delightful spread that brings out the cheerful, zesty essence of these sweet treats!

  • Creamy Vanilla Ice Cream: The velvety texture of ice cream complements the tangy cookies, creating a blissful contrast that’s utterly refreshing.
  • Coconut Whipped Cream: Light and airy, this tropical topping adds another layer of flavor, making each bite feel like a mini-vacation.
  • Lemonade Spritzer: A fizzy, citrusy drink that echoes the lime flavor, perfect for summer gatherings or afternoon picnics.
  • Fresh Fruit Salad: The juicy medley of berries and melons provides a juicy balance, enhancing the brightness of the lime cookies beautifully.
  • Dark Chocolate Dipping Sauce: Rich, bittersweet chocolate adds indulgence, making for a delicious dip that elevates the whole cookie experience.
  • Sparkling Water with Mint: A light and refreshing beverage to cleanse the palate and contrast the sweetness of the cookies.
  • Coconut Macaroons: They’re a chewy and coconutty delight, perfectly harmonizing with the lime’s zesty kick for a tropical treat.
  • Shortbread Cookies: The buttery crunch of shortbread pairs nicely with the lime cookies’ chewiness, offering a variety of textures to enjoy.

Lime Sugar Cookies

Lime Sugar Cookies Recipe FAQs

How do I select the right limes for this recipe?
Absolutely! When choosing limes, look for ones that are firm and feel heavy for their size, as they tend to be juicier. The skin should be smooth, bright green, and free from dark spots. Avoid limes that are overly soft, as they may be past their prime.

How should I store leftover Lime Sugar Cookies?
To keep your Lime Sugar Cookies fresh and chewy, store them in an airtight container at room temperature for up to 3 days. If you want to extend their freshness even further, they can last up to a week in the fridge, although they might firm up a bit.

Can I freeze Lime Sugar Cookies, and if so, how?
Yes, you can freeze these cookies! First, ensure they are completely cooled. Then, place them in an airtight container or freezer bag with layers separated by parchment paper to prevent sticking. They’ll be perfect for up to 3 months. When you’re ready to enjoy them, simply thaw them at room temperature or warm them in the microwave for about 10-15 seconds.

What should I do if my cookie dough is too sticky?
If your dough is sticky after mixing, don’t worry! This is often normal. I recommend chilling the dough for at least 30 minutes to help it firm up. If it’s still too sticky after chilling, you can gradually incorporate a bit more flour—just a tablespoon at a time—until it reaches the right consistency without overdoing it, as excess flour can lead to dry cookies.

Are there any dietary considerations I should be aware of with Lime Sugar Cookies?
Yes! If you have allergies or dietary restrictions, it’s good to note that this recipe includes dairy (butter) and gluten (all-purpose flour). For a dairy-free option, you could substitute the butter with a non-dairy alternative like coconut oil. If you’re looking for a gluten-free version, try using a 1-to-1 gluten-free flour blend, which should work nicely while retaining the flavor and texture. Always check labels for any hidden allergens!

Zesty Lime Sugar Cookies That Will Brighten Your Day

Enjoy these Lime Sugar Cookies, a delightful blend of sweet and tangy flavors perfect for any occasion.

  • Mixing Bowl
  • hand mixer
  • Cookie scoop
  • Baking sheets
  • parchment paper

For the Dough

  • 1 cup unsalted butter (softened)
  • 1 cup granulated sugar
  • 2 tablespoons fresh lime zest
  • 2 tablespoons fresh lime juice
  • 2.5 cups all-purpose flour
  • 1 teaspoon baking powder
  • 0.25 teaspoon salt (enhances flavors)

For the Optional Lime Glaze

  • 1 cup powdered sugar (for drizzling)
  • 2 tablespoons fresh lime juice (for glaze)

Step-by-Step Instructions

  1. In a large mixing bowl, add 1 cup of softened unsalted butter and 1 cup of granulated sugar. Beat on medium speed until creamy and light in color, about 2 to 3 minutes.
  2. Incorporate 2 tablespoons of fresh lime zest and 2 tablespoons of fresh lime juice into the butter mixture. Blend on low speed until well mixed, about 30 seconds.
  3. Gradually add in 2 ½ cups of all-purpose flour, 1 teaspoon of baking powder, and ¼ teaspoon of salt. Mix on low until the dough starts to come together, about 1 to 2 minutes.
  4. Wrap the dough in plastic wrap and refrigerate for at least 30 minutes to help firm it up.
  5. Preheat your oven to 350°F (175°C) and line two baking sheets with parchment paper.
  6. Use a cookie scoop or tablespoon to portion out the chilled dough on the prepared baking sheets and bake for about 10-12 minutes or until the edges are lightly golden.
  7. Allow the cookies to cool on the baking sheets for about 5 minutes before transferring them to a wire rack. If making the lime glaze, mix 1 cup of powdered sugar with 2 tablespoons of fresh lime juice and drizzle over the cooled cookies.

These Lime Sugar Cookies are perfect for any gathering or as a refreshing treat on a sunny day.

Dessert
American
baking, cookies, dessert, Lime Sugar Cookies, sweet treat, zesty

Filed Under: Dessert

Crispy Fried Sliced Mushrooms for Perfect Crunchy Munching

September 5, 2025 by grace bellamy Leave a Comment

As I stood in my kitchen, the enticing aroma of fried goodness wafted through the air, igniting nostalgia for simpler times. This recipe for Fried Sliced Mushrooms with Ranch has become one of my go-to favorites, capturing the essence of homemade comfort food in a fun, crispy package. What I love most is that it comes together in just 30 minutes, making it perfect for a quick weeknight treat or an impressive appetizer for guests. Plus, these crunchy bites are a great way to sneak in some veggies and are sure to win over even the pickiest eaters. Whether you serve them at a family gathering or indulge in a cozy solo snack, you’ll find yourself coming back to this recipe time and time again. Ready to take your culinary skills up a notch? Let’s dive into the deliciousness!

Fried Sliced Mushrooms

Why are Fried Sliced Mushrooms Irresistible?

Crispy, Crunchy Perfection: Every bite is a delightful crunch that keeps you reaching for more.
Flavor Punch: The seasoning blend of garlic, onion, and paprika creates a perfect savory taste that elevates the mushrooms.
Quick to Make: With just 30 minutes from prep to plate, it’s a speedy solution for your snack cravings!
Kid-Friendly: These fried delights are a sneaky way to get those veggies into even the pickiest eaters.
Perfect Pairing: Serve with ranch dressing for a creamy, zesty dip that complements the mushrooms beautifully.
Versatile Option: Whether as a party appetizer or a simple side dish, these mushrooms fit any occasion!

Fried Sliced Mushrooms Ingredients

For the Mushrooms
• 1 pound fresh mushrooms – Button or cremini mushrooms work best for a hearty bite.
• Salt and pepper – Adjust to taste for enhancing the flavor of your crispy fried sliced mushrooms.

For the Breading
• 1 cup all-purpose flour – Use this as a base for a crispy coating that clings perfectly.
• 2 large eggs – Beaten, they create a rich binding that keeps the breadcrumbs in place.
• 1 cup breadcrumbs – Preferably panko, for that extra crunch that everyone loves!
• 1 teaspoon garlic powder – Adds a savory depth that pairs beautifully with mushrooms.
• 1 teaspoon onion powder – A subtle sweetness that balances the savory elements.
• 1 teaspoon paprika – For a warm, slightly smoky flavor that elevates the dish.

For Frying
• Oil for frying – Vegetable or canola oil is ideal for achieving the perfect crispy exterior.

For Serving
• Ranch dressing – A must-have dip that perfectly complements these deliciously fried bites!

Step‑by‑Step Instructions for Fried Sliced Mushrooms

Step 1: Clean and Slice the Mushrooms
Start by gently cleaning 1 pound of fresh mushrooms with a damp cloth to remove any dirt. Slice them evenly, about 1/4 inch thick, to ensure they cook uniformly. You’ll want them to be bright and fresh, ready to take on those delicious flavors in the next steps.

Step 2: Set Up Your Dredging Station
Prepare a dredging station by grabbing three bowls. In the first bowl, place 1 cup of all-purpose flour. In the second, beat 2 large eggs until the mixture is smooth. In the third bowl, combine 1 cup of breadcrumbs, 1 teaspoon garlic powder, 1 teaspoon onion powder, 1 teaspoon paprika, and a sprinkle of salt and pepper. This process will make coating your fried sliced mushrooms a breeze!

Step 3: Dredge the Mushroom Slices
Take each mushroom slice and dip it into the flour, tapping to shake off any excess. Next, immerse the floured slice into the beaten eggs, letting any surplus drip back into the bowl to achieve a nice coating. This is an essential step to help the breadcrumbs stick for that perfect crunch!

Step 4: Coat with Breadcrumbs
After the egg dip, press the mushroom slice into the seasoned breadcrumb mixture firmly, ensuring an even coating all around. It’s vital to cover all surfaces for that irresistible crunch in your fried sliced mushrooms. Set the coated slices aside on a plate while you heat the oil.

Step 5: Heat the Oil
In a large frying pan or deep fryer, pour in enough oil for frying (vegetable or canola works great). Heat the oil to approximately 350°F (175°C). You can test the temperature by gently dropping in a breadcrumb; it should sizzle immediately. This hot oil will give your mushrooms the crispy exterior you’re looking for!

Step 6: Fry the Mushroom Slices
Carefully place the coated mushroom slices into the hot oil, ensuring not to overcrowd the pan. Fry in batches for about 3-4 minutes or until they turn a beautiful golden brown and crispy. Use a slotted spoon to gently move them around to ensure even cooking and avoid burning.

Step 7: Drain Excess Oil
Once the mushroom slices are golden and crunchy, use a slotted spoon to transfer them onto a plate lined with paper towels. This will help absorb any excess oil, leaving you with perfectly crispy fried sliced mushrooms. Allow them to drain for a couple of minutes before serving.

Step 8: Repeat the Frying Process
Continue the frying process with the remaining coated mushroom slices until all are cooked and coated in that savory crunch. Each batch should be cooked until golden and crispy, making your kitchen an aromatic delight!

Step 9: Serve and Enjoy
Serve your delectable fried sliced mushrooms hot, accompanied by a side of ranch dressing for dipping. Their crispy texture paired with the creamy dip will not only satisfy your snack cravings but also impress everyone at the table. Enjoy this delightful treat!

Fried Sliced Mushrooms

What to Serve with Fried Sliced Mushrooms

Elevate your dining experience with delicious pairings that complement the crispy goodness of these fried bites.

  • Creamy Mashed Potatoes: Their buttery smoothness contrasts beautifully with the crunchy mushrooms, creating a comforting meal.
  • Garlic Bread: The fragrant, toasty flavors enhance your overall taste and provide a satisfying heartiness to the spread.
  • Caesar Salad: Crisp romaine and tangy dressing bring a refreshing balance that cuts through the richness of the fried mushrooms.
  • Coleslaw: The crunchy, tangy cabbage salad adds an extra layer of texture while keeping everything light and zesty.
  • Roasted Vegetables: A colorful medley of seasonal veggies brings nutrition and vibrancy to your plate, making every meal feel wholesome.
  • Wine Pairing: A chilled Sauvignon Blanc enhances the meal’s flavors with bright acidity, perfectly complementing the savory mushrooms.
  • Chocolate Cake: For dessert, indulge in a rich chocolate cake for a delightful sweet contrast to your savory appetizer.
  • Spicy Dill Pickles: These add a crunchy, tart kick, enhancing the savory attributes of the mushrooms while balancing flavors.
  • Craft Beer: An amber ale or wheat beer pairs nicely, refreshing your palate and complementing the dish with a cozy, rustic vibe.
  • Fresh Parsley Garnish: Sprinkling freshly chopped parsley over your mushrooms adds visual appeal and a touch of vibrant flavor.

Fried Sliced Mushrooms: Fun Variations

Feel free to get creative with these variations to make this dish truly your own!

  • Gluten-Free: Use a gluten-free flour blend and gluten-free breadcrumbs for a crispy coating without the gluten.
  • Spicy Kick: Add cayenne pepper or chili powder to the breadcrumb mixture for a touch of heat that will elevate the flavor. Spice lovers will adore this twist!
  • Cheesy Delight: Mix grated Parmesan cheese into the breadcrumb mixture for a savory cheesy crust that takes these mushrooms to the next level.
  • Herb Infusion: Incorporate dried or fresh herbs like thyme or oregano into the breadcrumb coating for an aromatic flavor boost. This adds a lovely aroma that fills your kitchen!
  • Zesty Twist: Substitute ranch dressing with a garlic aioli or blue cheese dressing for a unique dip experience that will tantalize your taste buds.
  • Air-Fried Option: For a healthier version, try air frying the coated mushrooms at 400°F (200°C) for 10-12 minutes until golden and crispy. It’s a guilt-free indulgence!
  • Vegan-Friendly: Use a plant-based egg substitute, like flaxseed meal mixed with water, and opt for vegan breadcrumbs for a delicious vegan treat. Everyone deserves a crispy snack!
  • Stuffed Mushrooms: Try stuffing the mushroom caps with cheese or a mixture of spinach and breadcrumbs before frying them for an indulgent twist that’s sure to impress!

These variations ensure you can enjoy fried sliced mushrooms in a way that fits your taste and dietary needs. For more savory options, check out my recipe for Baked Mushroom Parmesan, or if you’re craving an appetizer, don’t miss my guide on Quick Marinara Dipping Sauce! Enjoy experimenting!

Expert Tips for Fried Sliced Mushrooms

Even Coating: Ensure each mushroom slice is evenly coated in the flour, egg, and breadcrumbs to achieve the perfect crunchy exterior.

Don’t Overcrowd: Fry in small batches to avoid overcrowding, which can lower the oil temperature and lead to soggy fried sliced mushrooms.

Temperature Check: Use a kitchen thermometer to maintain oil at 350°F (175°C); this ensures quick cooking and prevents greasy results.

Drain Excess Oil: Transfer fried mushrooms to a paper towel-lined plate immediately after frying to absorb excess oil for better texture.

Customize Seasoning: Feel free to add your favorite herbs or spices to the breadcrumb mixture, elevating the flavor of your fried sliced mushrooms even more!

How to Store and Freeze Fried Sliced Mushrooms

Fridge: Store leftovers in an airtight container for up to 3 days. This keeps them fresh while maintaining some of their crunch.

Freezer: For long-term storage, freeze the fried sliced mushrooms in a single layer on a baking sheet until firm. Then, transfer to a freezer-safe bag for up to 3 months.

Reheating: To bring back the crispiness, reheat the mushrooms in an oven at 375°F (190°C) for 8-10 minutes, or until heated through. Enjoy the delightful crunch once again!

Make Ahead Options

These Fried Sliced Mushrooms are perfect for meal prep, allowing you to enjoy a delicious snack without the last-minute hustle! You can clean and slice the mushrooms up to 24 hours in advance, storing them in an airtight container in the refrigerator to keep them fresh. Additionally, you can set up your dredging station (flour, egg, and breadcrumb mixtures) ahead of time; just cover each bowl until you’re ready to fry. When you’re set to serve, simply dredge the mushrooms and fry them until golden brown. This way, you’ll have crispy, flavorful fried sliced mushrooms on the table with minimal effort, making it a boon for busy weeknights!

Fried Sliced Mushrooms

Fried Sliced Mushrooms Recipe FAQs

How do I choose the right mushrooms for frying?
Absolutely! For the best results, pick fresh button or cremini mushrooms. Look for firm, plump ones without any dark spots or blemishes, which indicate ripeness. They should be dry and clean, as moisture can affect their frying ability.

What’s the best way to store leftover fried sliced mushrooms?
To keep your fried sliced mushrooms fresh, store them in an airtight container in the refrigerator for up to 3 days. This method will help maintain some of their crunch, but be aware that they may lose a bit of crispiness over time.

Can I freeze my fried sliced mushrooms for later use?
Yes, you can! To freeze, lay the fried sliced mushrooms in a single layer on a baking sheet and place them in the freezer until firm. Once frozen, transfer them to a freezer-safe bag for up to 3 months. This method ensures they don’t stick together, making it easier to grab what you need.

What should I do if my fried mushrooms turn out soggy?
Very common! If your fried sliced mushrooms aren’t crispy, check a couple of things: make sure the oil is hot enough (about 350°F or 175°C) before adding them, and don’t overcrowd the pan, as this lowers the temperature. If you want to revive soggy mushrooms, try reheating them in the oven at 375°F (190°C) for about 8-10 minutes to crisp them back up!

Are fried sliced mushrooms suitable for dietary restrictions?
Yes, they can be! This recipe can be adapted for various dietary needs. For gluten-free options, use almond flour instead of all-purpose flour and gluten-free breadcrumbs. Always check for any allergy concerns when serving, especially to those with mushroom allergies or other sensitivities.

How can I enhance the flavors in my fried sliced mushrooms?
Very easy! Consider adding grated Parmesan cheese to the breadcrumb mixture or incorporating fresh herbs like parsley or thyme. You could even try substituting spices such as cayenne or Italian seasoning for an extra kick! Enjoy experimenting to find your perfect balance!

Crispy Fried Sliced Mushrooms for Perfect Crunchy Munching

Savor the essence of comfort food with these Fried Sliced Mushrooms, delivering crispy perfection in every bite.

  • Frying Pan
  • Bowls
  • slotted spoon

For the Mushrooms

  • 1 pound fresh mushrooms (Button or cremini mushrooms work best for a hearty bite.)
  • Salt and pepper (Adjust to taste for enhancing flavor.)

For the Breading

  • 1 cup all-purpose flour (Base for a crispy coating.)
  • 2 large eggs (Beaten to create a binding.)
  • 1 cup breadcrumbs (Preferably panko for extra crunch.)
  • 1 teaspoon garlic powder (Adds savory depth.)
  • 1 teaspoon onion powder (Balances savory elements.)
  • 1 teaspoon paprika (Adds warm, slightly smoky flavor.)

For Frying

  • Oil for frying (Vegetable or canola oil is ideal.)

For Serving

  • Ranch dressing (Must-have dip to complement the mushrooms.)

Step-by-Step Instructions for Fried Sliced Mushrooms

  1. Clean 1 pound of fresh mushrooms with a damp cloth and slice them evenly, about 1/4 inch thick.
  2. Set up a dredging station with three bowls: flour in the first, beaten eggs in the second, and breadcrumbs mixed with seasoning in the third.
  3. Dredge each mushroom slice in flour, then dip into beaten eggs, and coat with breadcrumb mixture.
  4. Press the mushroom slices into the breadcrumb mixture firmly to ensure even coating.
  5. Heat oil in a large frying pan to approximately 350°F (175°C). Test with a breadcrumb for sizzling.
  6. Fry the coated mushroom slices in batches for about 3-4 minutes until golden brown.
  7. Transfer fried mushrooms to a paper towel-lined plate to drain excess oil.
  8. Repeat the frying process for remaining coated mushroom slices.
  9. Serve hot with ranch dressing for dipping.

Ensure even coating for crispy mushrooms and don’t overcrowd the frying pan.

Appetizer
American
Crispy Mushrooms, Easy Recipe, Fried Sliced Mushrooms, snack recipe, Vegetable Appetizer

Filed Under: Appetizer

Caramel-Drizzled Apple Cinnamon Cookies for Cozy Moments

September 5, 2025 by grace bellamy Leave a Comment

As I stood in my kitchen, the warm aroma of cinnamon and sweet apples danced through the air, instantly transporting me back to autumn days spent baking with family. That comforting sensation is exactly what you’ll find in these Caramel-Drizzled Apple Cinnamon Cookies. With just a quick 15 minutes of prep, these delightful treats are not only easy to whip up but also a surefire crowd-pleaser that will impress your friends and family. The combination of soft, spiced cookie dough filled with tender apple chunks, topped off with a rich salted caramel drizzle, is simply irresistible. Whether you’re looking to escape the fast-food routine or just want to indulge in some homemade goodness, you won’t be able to resist going back for seconds. Curious about how to bring this heavenly treat to life? Let’s get started!

Caramel-Drizzled Apple Cinnamon Cookies

Why are these cookies so special?

Irresistible flavors: The combination of fresh apples and warm cinnamon evokes cozy memories while making each bite a nostalgic journey.
Easy to make! With just 15 minutes of prep time, you can create a batch that’ll impress even the pickiest of eaters.
Crowd-pleaser: These cookies are perfect for sharing at gatherings or just enjoying with your family at home, making them the ideal solution when you want to bring people together.
Decadent drizzle: The rich salted caramel adds a layer of indulgence, transforming a simple cookie into a gourmet treat.
Now that you know why they shine, don’t forget to check out other delightful recipes like our Spiced Pumpkin Cookies and Classic Chocolate Chip Cookies for more sweet inspirations!

Caramel-Drizzled Apple Cinnamon Cookies Ingredients

• Get ready to create the magic!

For the Cookie Dough
• 2 cups diced apples – Fresh apples are key for that juicy, tender texture in every bite.
• ½ cup brown sugar – This adds rich, caramel-like sweetness which complements the apples beautifully.
• 1 teaspoon cinnamon – A must-have for that warm, comforting flavor we all love.
• ½ cup softened butter – Provides a rich, creamy base for your cookie dough.
• 1 cup dark brown sugar – Enhances the depth of flavor and moisture in your cookies.
• 1 cup granulated sugar – A perfect balance to help the cookies spread slightly as they bake.
• 1 teaspoon vanilla extract – Elevates the sweetness and adds lovely warmth.
• 1 large egg – Binds all the ingredients together for a perfect texture.
• 1⅓ cups all-purpose flour – Essential for structure; too much can make your cookies dense, so measure carefully!
• ½ teaspoon baking soda – Helps the cookies rise slightly for that soft, chewy bite.
• ½ teaspoon salt – Balances the sweetness, enhancing all the flavors perfectly.

For the Topping
• Salted caramel sauce – Use it generously for drizzling; it’s the crown jewel that makes these Caramel-Drizzled Apple Cinnamon Cookies truly shine!

Step‑by‑Step Instructions for Caramel-Drizzled Apple Cinnamon Cookies

Step 1: Prepare the Apple Mixture
In a medium saucepan, combine 2 cups of diced apples, ½ cup of brown sugar, and 1 teaspoon of cinnamon over medium heat. Stirring frequently, cook for about 5 minutes until the apples are tender and coated in a sweet syrup. Once softened, remove the pan from heat and allow this fragrant mixture to cool completely while you prepare the cookie dough.

Step 2: Cream the Butter and Sugars
In a large mixing bowl, beat together ½ cup of softened butter, 1 cup of dark brown sugar, and 1 cup of granulated sugar using an electric mixer on medium speed. Continue mixing until the mixture is light and fluffy, which should take about 3-4 minutes. Next, add in 1 teaspoon of vanilla extract and 1 large egg, mixing well until fully incorporated for a beautifully smooth batter.

Step 3: Mix the Dry Ingredients
In a separate bowl, whisk together 1⅓ cups of all-purpose flour, ½ teaspoon of baking soda, and ½ teaspoon of salt until combined. Gradually fold this dry mixture into your wet mixture, using a spatula to blend until just incorporated to ensure your Caramel-Drizzled Apple Cinnamon Cookies have the perfect texture. Avoid overmixing to keep the cookies tender and soft.

Step 4: Incorporate the Apple Mixture
Once your dough is ready, gently fold in the cooled apple mixture in two stages to prevent excess moisture from overwhelming the dough. Mix until the apples are evenly distributed throughout the cookie dough. If the dough feels overly soft, briefly refrigerate it for about 10-15 minutes to make it easier to scoop later on.

Step 5: Preheat and Prepare Baking Sheets
Preheat your oven to 350 °F (175 °C) and line your baking sheets with parchment paper to prevent sticking. This step ensures that your cookies bake evenly and come out perfectly golden. The aroma of cinnamon will begin to fill your kitchen as you get ready to bake your scrumptious Caramel-Drizzled Apple Cinnamon Cookies.

Step 6: Scoop and Bake the Cookies
Using a cookie scoop or a spoon, scoop portions of dough onto the prepared baking sheets, spacing them about 2 inches apart. This allows the cookies to spread without touching. Bake in the preheated oven for approximately 10-12 minutes or until the edges are golden brown and the centers look set. Remove them from the oven and let them cool slightly before transferring to a wire rack.

Step 7: Cool the Cookies
Allow your baked Caramel-Drizzled Apple Cinnamon Cookies to cool on the wire rack for about 5 minutes. This cooling time helps them firm up a bit while still being warm and delightful. Try to resist the temptation to eat them right away as the best is yet to come!

Step 8: Drizzle with Caramel
Once your cookies have cooled slightly, generously drizzle salted caramel sauce over each cookie. Let the decadent caramel cascade down the sides, adding not only sweetness but also a rich, beautiful finish to your cookies. Now they’re ready to be enjoyed or shared!

Caramel-Drizzled Apple Cinnamon Cookies

What to Serve with Caramel-Drizzled Apple Cinnamon Cookies

Imagine the bliss of a cozy evening spent with friends and family, each bite of these sweet treats sparking joy and laughter.

  • Hot Chocolate: The creamy richness of hot chocolate complements the warm spices in the cookies, creating a perfect cozy pairing.

  • Vanilla Ice Cream: A scoop of smooth vanilla ice cream contrasts the warm cookies beautifully, as it melts into that salted caramel drizzle.

  • Whipped Cream: Light and airy, a dollop of whipped cream adds elegance and enhances the indulgence of the caramel flavors.

  • Apple Cider: A warm cup of spiced apple cider echoes the apple and cinnamon in the cookies, wrapping you in autumnal delight.

  • Fresh Fruit Salad: Bright and refreshing, a fruit salad featuring juicy oranges and berries adds a refreshing crunch and balance to the richness.

  • Nutty Granola: The crunchy texture of nutty granola provides a unique contrast, making for a delightful dish alongside cookies for a fun breakfast.

  • Chai Tea: The aromatic spices in chai tea enhance the warm flavors of the cookies, bringing a comforting harmony to your dessert experience.

  • Maple Drizzle: Drizzling some maple syrup over the cookies introduces another layer of sweetness that beautifully complements the caramel.

How to Store and Freeze Caramel-Drizzled Apple Cinnamon Cookies

Room Temperature: Keep your cookies in an airtight container at room temperature for up to 3 days to maintain their soft texture and delicious flavor.

Fridge: If you want to extend their freshness, store the cookies in the fridge for up to a week. Just ensure they are in a tight container to prevent them from drying out.

Freezer: For longer storage, freeze cookies in a single layer and then transfer to a freezer-safe bag. They can last for up to 3 months. Thaw at room temperature or microwave for a few seconds before enjoying.

Reheating: To enjoy warm cookies again, microwave them for about 10-15 seconds. This will soften them and make the caramel drizzle deliciously gooey again!

Make Ahead Options

These Caramel-Drizzled Apple Cinnamon Cookies are perfect for busy weeknights or when you’re planning ahead! You can prepare the apple mixture (diced apples, brown sugar, and cinnamon) and refrigerate it for up to 3 days in advance, allowing the flavors to meld beautifully. Additionally, you can make the cookie dough ahead of time and store it in the fridge for up to 24 hours. Just remember to cover it tightly to maintain its moisture. When you’re ready to bake, simply scoop the chilled dough onto baking sheets and follow the baking instructions. Finish with a drizzle of salted caramel when they’re still warm for that irresistible touch!

Expert Tips for Caramel-Drizzled Apple Cinnamon Cookies

  • Use Fresh Apples: Choose crisp, fresh apples like Granny Smith or Honeycrisp for perfect texture and flavor. Avoid overripe apples to prevent excess moisture in the cookie dough.
  • Don’t Overmix: When combining wet and dry ingredients, mix until just combined to keep these Caramel-Drizzled Apple Cinnamon Cookies soft and chewy. Overmixing can lead to tough cookies.
  • Chill the Dough: If your dough feels too soft or sticky, refrigerate it for 10-15 minutes. This will make it easier to scoop and help the cookies maintain their shape while baking.
  • Monitor Baking Time: Remember, ovens vary, so check your cookies around the 10-minute mark. They should be golden around the edges but soft in the center for that perfect bite.
  • Caramel Drizzle Magic: For a stunning finish, heat your salted caramel sauce slightly before drizzling. It will flow beautifully over your cookies and add that extra touch of indulgence!

Caramel-Drizzled Apple Cinnamon Cookies Variations

Feel free to get creative and tailor these cookies to your taste; the possibilities are delightful!

  • Gluten-Free: Substitute all-purpose flour with a gluten-free blend for everyone to enjoy these treats. Just ensure your blend contains a binding agent for best results.

  • Vegan: Use flax eggs (1 tablespoon ground flaxseed + 2.5 tablespoons water) instead of the egg and swap butter for coconut oil or a vegan butter alternative.

  • Nutty Bliss: Add ½ cup of chopped walnuts or pecans to the dough for a delightful crunch and nutty flavor. The nuttiness complements the sweetness beautifully.

  • Spicy Kick: Mix in 1/4 teaspoon of cayenne pepper or a pinch of nutmeg for a surprising hint of warmth that pairs wonderfully with the apples.

  • Dried Fruit: Toss in 1/2 cup of dried cranberries or raisins for added sweetness and chewy texture. This little twist adds layers of flavor that your family will savor.

  • Maple Drizzle: Swap salted caramel with a warm maple syrup drizzle for a uniquely sweet experience. The maple flavor brings a cozy warmth to each bite.

  • Chocolate Lovers: Add 1/2 cup of chocolate chips to the dough for a decadent touch; the rich chocolate pairs beautifully with the cinnamon-spiced apples.

Enhance your cookie journey even further with other delightful recipes like our Classic Pumpkin Spice Cookies and Chewy Oatmeal Raisin Cookies!

Caramel-Drizzled Apple Cinnamon Cookies

Caramel-Drizzled Apple Cinnamon Cookies Recipe FAQs

What type of apples should I use for these cookies?
Absolutely! For the best results, I recommend using crisp and juicy apples like Granny Smith or Honeycrisp. These varieties provide a great texture and add the perfect balance of sweetness and tartness. Avoid using overripe apples, as they can introduce excess moisture, which may negatively affect the cookie dough.

How should I store my cookies, and how long will they last?
You can store your Caramel-Drizzled Apple Cinnamon Cookies in an airtight container at room temperature for up to 3 days. If you’d like to keep them fresh longer, place them in the fridge where they’ll stay good for up to a week. Just make sure they are tightly sealed to prevent drying out!

Can I freeze the cookies, and if so, how?
Yes, absolutely! To freeze your cookies, first place them in a single layer on a baking sheet and freeze until solid. Once frozen, transfer the cookies to a freezer-safe bag or container. They can be stored for up to 3 months. When you’re ready to enjoy them, let them thaw at room temperature or microwave them for about 10-15 seconds for that warm, gooey goodness.

What if my cookie dough feels too soft?
Very! If you find your dough is too soft or sticky to scoop, simply refrigerate it for about 10-15 minutes. This chilling time will help firm it up, making it easier to manage and ensuring nicely shaped cookies when baked. It’s a simple trick that can make a big difference!

Are these cookies suitable for people with allergies?
When it comes to dietary considerations, these cookies contain common allergens such as gluten (from flour) and dairy (from butter). If you’re making them for someone with specific allergies, I recommend substituting the all-purpose flour with a gluten-free blend and using plant-based butter or a similar dairy-free alternative. Always double-check individual ingredients for their allergen status to keep everyone safe.

Caramel-Drizzled Apple Cinnamon Cookies for Cozy Moments

Enjoy these Caramel-Drizzled Apple Cinnamon Cookies, a delightful treat filled with fresh apples and topped with salted caramel.

  • Medium saucepan
  • large mixing bowl
  • Electric mixer
  • Cookie scoop
  • parchment paper

For the Cookie Dough

  • 2 cups diced apples (Fresh apples are key for that juicy, tender texture in every bite.)
  • 1/2 cup brown sugar (Adds rich, caramel-like sweetness.)
  • 1 teaspoon cinnamon (Essential for warm flavor.)
  • 1/2 cup softened butter (Provides a rich, creamy base.)
  • 1 cup dark brown sugar (Enhances flavor depth and moisture.)
  • 1 cup granulated sugar (Helps cookies spread slightly.)
  • 1 teaspoon vanilla extract (Adds warmth and sweetness.)
  • 1 large egg (Binds ingredients for perfect texture.)
  • 1 1/3 cups all-purpose flour (Essential for structure.)
  • 1/2 teaspoon baking soda (Helps cookies rise slightly.)
  • 1/2 teaspoon salt (Balances sweetness.)

For the Topping

  • Salted caramel sauce (Generously drizzle over cookies.)

Instructions

  1. In a medium saucepan, combine 2 cups of diced apples, ½ cup of brown sugar, and 1 teaspoon of cinnamon over medium heat. Cook for about 5 minutes until apples are tender and coated in syrup.
  2. In a large mixing bowl, beat together ½ cup of softened butter, 1 cup of dark brown sugar, and 1 cup of granulated sugar until light and fluffy, about 3-4 minutes. Add 1 teaspoon of vanilla extract and 1 large egg, mixing well until fully incorporated.
  3. In a separate bowl, whisk together 1⅓ cups of all-purpose flour, ½ teaspoon of baking soda, and ½ teaspoon of salt. Gradually fold this into the wet mixture until just incorporated.
  4. Gently fold in the cooled apple mixture, mixing until evenly distributed. If dough is too soft, refrigerate for 10-15 minutes.
  5. Preheat the oven to 350 °F (175 °C) and line baking sheets with parchment paper.
  6. Scoop dough portions onto baking sheets, spacing 2 inches apart. Bake for approximately 10-12 minutes until edges are golden.
  7. Let cookies cool on a wire rack for about 5 minutes.
  8. Generously drizzle salted caramel sauce over each cookie.

For best results, use fresh Granny Smith or Honeycrisp apples and monitor baking time closely.

Dessert
American
apple, caramel, Cinnamon, cookies, dessert, homemade

Filed Under: Dessert

Irresistibly Soft Coffee Cake Muffins for Your Morning Bliss

September 4, 2025 by grace bellamy Leave a Comment

As the warm aroma of cinnamon and sugar fills my kitchen, I can’t help but feel a wave of nostalgia wash over me. There’s something truly special about Coffee Cake Muffins that brings to mind cozy mornings spent with loved ones. These delightful muffins are not only simple to whip up in just under an hour, but they also strike the perfect balance between indulgence and comfort. With their tender crumb and sweet streusel topping, they make for a wonderful breakfast or afternoon treat, leaving the ho-hum of fast food far behind. Plus, they freeze beautifully, allowing you to savor the deliciousness anytime you crave a homemade bite. Ready to make your taste buds dance with joy? Let’s dive into this scrumptious recipe!

Coffee Cake Muffins

Why are these Coffee Cake Muffins a must-try?

Simplicity at Its Best: The recipe involves straightforward steps, making baking a breeze for cooks of any level.

Warm, Comforting Flavors: The delightful combination of cinnamon and buttery sweetness brings joy with each bite.

Perfect for Any Time: Whether you enjoy them for breakfast or as a snack, these muffins cater to all cravings.

Easy to Make Ahead: You can batch-bake and freeze them, ensuring you have homemade goodness ready whenever the mood strikes.

Plus, if you’re interested in charming alternatives, check out my Apple Pecan Cake or the classic Carrot Cake for more scrumptious options!

Coffee Cake Muffin Ingredients

For the Muffin Base

  • All-purpose flour – 2 cups create the perfect tender crumb for your muffins.
  • Granulated sugar – 1 cup adds the right amount of sweetness to balance the flavors.
  • Unsalted butter – 1/2 cup, melted brings richness and moisture to the muffins.
  • Baking powder – 1 tablespoon ensures your muffins rise beautifully while baking.
  • Salt – 1/2 teaspoon enhances the flavors and balances the sweetness.
  • Ground cinnamon – 1 teaspoon infuses warmth and that cozy coffee cake flavor.
  • Whole milk – 1/2 cup contributes to a moist texture that you’ll love.
  • Large eggs – 2 provide structure and help bind all the ingredients together.
  • Vanilla extract – 1/2 teaspoon adds a hint of warmth and depth to your muffins.

For the Streusel Topping

  • All-purpose flour – 1/2 cup helps create a crumbly and delectable topping.
  • Brown sugar – 1/2 cup, packed provides a rich, caramel-like sweetness.
  • Unsalted butter – 1/4 cup, cold and cut into small pieces ensures a crumbly texture.
  • Ground cinnamon – 1 teaspoon for that extra dash of flavor and aroma.

These Coffee Cake Muffin ingredients are all you need to create a warm, comforting treat that’s perfect for any time of day!

Step‑by‑Step Instructions for Coffee Cake Muffins

Step 1: Preheat the Oven
Start by preheating your oven to 375°F (190°C). While it warms up, line a muffin tin with paper liners or lightly grease each cup to ensure your Coffee Cake Muffins release easily after baking. This initial step sets the stage for perfectly baked muffins with a golden-brown finish.

Step 2: Mix Dry Ingredients
In a large mixing bowl, combine 2 cups of all-purpose flour, 1 cup of granulated sugar, 1 tablespoon of baking powder, 1/2 teaspoon of salt, and 1 teaspoon of ground cinnamon. Whisk these ingredients together until well blended, ensuring that the baking powder is evenly distributed—this is key for fluffy muffins that rise beautifully as they bake.

Step 3: Combine Wet Ingredients
In a separate bowl, melt 1/2 cup of unsalted butter and whisk it together with 1/2 cup of whole milk, 2 large eggs, and 1/2 teaspoon of vanilla extract. Whisk vigorously until everything is well mixed and frothy. This will create a rich, smooth base for your Coffee Cake Muffins, layering in warmth and flavor with each ingredient.

Step 4: Mix Wet and Dry Ingredients
Pour the wet mixture into the bowl with dry ingredients. Gently stir them together until just combined—don’t worry if a few small lumps remain. Overmixing can lead to dense muffins, so embrace a gentle hand here. The batter will be a bit thick, but that’s just right for dreamy, tender muffins.

Step 5: Prepare Streusel Topping
In a small bowl, prepare the streusel topping by mixing together 1/2 cup of all-purpose flour, 1/2 cup of packed brown sugar, and 1 teaspoon of ground cinnamon. Add 1/4 cup of cold, chopped unsalted butter and use your fingers or a pastry cutter to blend it until you have coarse crumbs. This topping will add a delightful crunch and sweet aroma to your Coffee Cake Muffins.

Step 6: Fill Muffin Tin
Spoon the muffin batter into the prepared muffin tin, filling each cup about 2/3 full. This will allow space for the muffins to rise without overflowing. As you fill each cup, you’ll see the combination of wet and dry ingredients come together into a harmonious batter, ready for the sweet streusel topping.

Step 7: Add Streusel Topping
Evenly sprinkle the prepared streusel mixture over the tops of the filled muffin cups. Use your fingers to gently press the streusel down onto the batter—this will help it adhere and create that delicious, crunchy topping that pairs so well with the tender muffins.

Step 8: Bake the Muffins
Place the muffin tin in the preheated oven and bake for 18-22 minutes. Keep an eye on them as they bake; they’re ready when the tops are golden and a toothpick inserted into the center comes out clean. The aroma of your Coffee Cake Muffins will fill your kitchen, making it hard to resist!

Step 9: Cool and Enjoy
Once baked, allow the muffins to cool in the pan for about 5 minutes. This helps them set and makes it easier to remove them without breaking. After a brief cooling period, transfer the muffins to a wire rack to cool completely. These will be warm, comforting treats perfect for any time of day!

Coffee Cake Muffins

What to Serve with Coffee Cake Muffins

These delightful muffins are perfect as a sweet treat alongside other comforting options, making every bite a celebration of cozy flavors.

  • Fresh Fruit Salad: A vibrant medley of seasonal fruits adds a refreshing contrast to the rich sweetness of the muffins, brightening your breakfast table.

  • Greek Yogurt Parfait: Creamy Greek yogurt layered with honey and berries complements the muffins while adding a protein boost, perfect for a satisfying morning.

  • Hot Coffee or Tea: A steaming cup of coffee or fragrant tea brings warmth and enhances the cozy vibe of your muffin experience, creating the perfect pairing.

  • Scrambled Eggs with Herbs: Light, fluffy scrambled eggs seasoned with fresh herbs provide a savory balance to the sweet muffins, rounding out a hearty breakfast.

  • Maple Bacon: The crispy, salty crunch of bacon drizzled with maple syrup playfully contrasts the muffins’ sweetness, offering a delicious sweet-and-salty combination.

  • Milk Alternative Smoothie: Blend your favorite nut milk with bananas and spinach for a nutrient-packed smoothie that hydrates and complements the muffin’s flavors wonderfully.

These delightful pairings transform a simple muffin into a wholesome and satisfying meal experience that you’ll cherish morning after morning!

How to Store and Freeze Coffee Cake Muffins

Room Temperature: Store your cooled muffins in an airtight container at room temperature for up to 2 days for the best flavor and texture.

Fridge: If you prefer to keep them longer, refrigerate the muffins in an airtight container for up to 5 days. Just be aware that they may lose some moisture.

Freezer: To freeze, wrap each muffin individually in plastic wrap and place them in a freezer-safe bag. They can last for up to 3 months without losing their delightful taste.

Reheating: When you’re ready to enjoy a muffin, simply thaw it at room temperature or pop it into the microwave for 15-20 seconds for a warm, cozy treat!

Coffee Cake Muffins Customizations

Feel free to unleash your creativity and make these muffins uniquely yours with these delightful variations!

  • Gluten-Free: Swap all-purpose flour for a 1:1 gluten-free flour blend to suit your needs without sacrificing taste. Your muffins will still be tender and delightful!

  • Nutty Goodness: Add 1/2 cup of finely chopped walnuts or pecans to the batter for a crunchy texture and a wonderful nutty flavor. The added richness will elevate every bite!

  • Fruity Twist: Mix in 1 cup of fresh blueberries or diced apples for a fruity surprise that complements the cinnamon beautifully. Each muffin will burst with juicy flavor and freshness!

  • Dairy-Free: Use almond or coconut milk in place of whole milk and coconut oil instead of unsalted butter for a completely dairy-free treat. These muffins will still be moist and scrumptious!

  • Spiced Up: Enhance the flavor by adding 1/4 teaspoon of nutmeg or a hint of cardamom to the dry ingredients. This warm spice blend will create aromatic muffins that are hard to resist!

  • Chocolate Lover’s: Fold in 1/2 cup of mini chocolate chips into the muffin batter for a sweet, indulgent twist. The melted chocolate adds a rich layer of bliss with each bite!

  • Extra Crunch: Sprinkle chopped streusel topping with oats for added texture and heartiness. The combination of the chewy oats with the sweet topping hits just the right note!

Looking for more delightful ideas? You might love trying the moist flavors of my Cheese Blueberry Cake or the classic richness of Carrot Cake—perfect for adding to your baking repertoire!

Expert Tips for Coffee Cake Muffins

Mix Wisely: Avoid overmixing the batter. Stir just until combined; a few lumps are okay for light and fluffy Coffee Cake Muffins.

Chill Butter for Topping: Make sure the butter for the streusel topping is cold. This will help create that delightful crumbly texture.

Check Baking Time: Ovens can vary, so start checking your muffins around 18 minutes. They’re done when a toothpick comes out clean!

Cool Gradually: Allow the muffins to cool in the pan for 5 minutes first. This helps them set and prevents them from breaking apart.

Storage Savvy: For long-lasting freshness, store cooled muffins in an airtight container. They also freeze well for up to 3 months!

Make Ahead Options

These Coffee Cake Muffins are perfect for meal prep lovers! You can prepare the muffin batter and store it in the refrigerator for up to 24 hours before baking. Simply whisk together the wet and dry ingredients as instructed, then combine them, and cover the bowl tightly. When you’re ready to bake, let the batter sit at room temperature for about 15 minutes, then spoon it into your muffin tin and add the streusel topping. Alternatively, you can also make the streusel mixture in advance and refrigerate it in an airtight container for up to 3 days. This way, you’ll enjoy warm, homemade muffins with minimal effort—just as delicious and fresh-baked as they should be!

Coffee Cake Muffins

Coffee Cake Muffins Recipe FAQs

What should I look for when selecting ingredients?
Absolutely! When choosing your ingredients, opt for all-purpose flour that’s fresh and free of lumps. For the butter, make sure it’s unsalted to control the salt content in your muffins. Your eggs should be large and at room temperature for optimal mixing. When it comes to spices, fresh ground cinnamon is ideal for that warm, comforting flavor.

How should I store my Coffee Cake Muffins?
For the best flavor, store your cooled Coffee Cake Muffins in an airtight container at room temperature for up to 2 days. If you want to keep them longer, you can refrigerate them for up to 5 days, though they might be a little less moist. Always allow them to cool completely before storage to preserve their texture.

Can I freeze these muffins? If so, how?
Absolutely! To freeze your Coffee Cake Muffins, first ensure they are completely cool. Then, wrap each muffin individually in plastic wrap or aluminum foil. Place them in a freezer-safe bag or container, sealing tightly. They’ll stay delicious for up to 3 months. When you’re ready to enjoy, simply thaw them at room temperature or pop them in the microwave for a quick warm-up!

What if my muffins come out dense?
Very good question! If your muffins turned out dense, it could be due to overmixing the batter. Remember, it’s best to mix just until the dry ingredients are moistened; a few lumps are perfectly fine! Additionally, make sure your baking powder is fresh, as stale leavening can hinder the rise of your muffins. Lastly, check your oven temperature for accuracy—an oven thermometer can be a great help!

Are these Coffee Cake Muffins suitable for kids or those with allergies?
Definitely! These muffins are a delightful treat for all ages. However, if you’re concerned about allergies, consider substituting with gluten-free flour if someone has a gluten sensitivity. You can also use dairy-free milk and butter alternatives to make them suitable for those with dairy allergies. Be cautious while preparing if anyone has an egg allergy, as traditional muffins do contain eggs.

Irresistibly Soft Coffee Cake Muffins for Your Morning Bliss

Delight in these Coffee Cake Muffins that bring warmth and comfort to any morning.

  • Muffin tin
  • Mixing bowls
  • Whisk
  • Measuring Cups
  • Measuring Spoons

Muffin Base

  • 2 cups all-purpose flour (Creates the perfect tender crumb.)
  • 1 cup granulated sugar (Balances the flavors.)
  • 1/2 cup unsalted butter (Melted for richness.)
  • 1 tablespoon baking powder (Ensures proper rising.)
  • 1/2 teaspoon salt (Enhances flavor.)
  • 1 teaspoon ground cinnamon (Infuses warm flavor.)
  • 1/2 cup whole milk (Contributes to moist texture.)
  • 2 large eggs (Provides structure.)
  • 1/2 teaspoon vanilla extract (Adds warmth.)

Streusel Topping

  • 1/2 cup all-purpose flour (Creates a crumbly topping.)
  • 1/2 cup brown sugar (Packed for sweetness.)
  • 1/4 cup unsalted butter (Cold and chopped.)
  • 1 teaspoon ground cinnamon (Adds extra flavor.)

Baking Instructions

  1. Preheat your oven to 375°F (190°C) and prepare a muffin tin.
  2. In a large bowl, mix flour, sugar, baking powder, salt, and cinnamon.
  3. In another bowl, melt butter and mix with milk, eggs, and vanilla until frothy.
  4. Combine wet and dry ingredients, stirring gently until just mixed.
  5. In a small bowl, mix flour, brown sugar, cinnamon, and cold butter for topping.
  6. Fill muffin cups with batter about 2/3 full.
  7. Sprinkle the streusel topping on each muffin.
  8. Bake for 18-22 minutes until golden brown and a toothpick comes out clean.
  9. Cool in the pan for 5 minutes before transferring to a wire rack.

Avoid overmixing for light and fluffy muffins. Store in an airtight container.

Breakfast
American
baking, Breakfast, coffee cake muffins, cozy, homemade, muffins

Filed Under: Breakfast

Irresistible Butter Pecan Praline Poke Cake You’ll Adore

September 4, 2025 by grace bellamy Leave a Comment

As the delightful scent of pecans caramelizing fills my kitchen, I can’t help but feel a rush of nostalgia; this is the essence of my childhood. Today, I’m excited to share my take on a beloved classic: Butter Pecan Praline Poke Cake. This comforting dessert combines the rich, nutty flavors of butter pecan with a luscious praline sauce that seeps deep into every slice. Not only is this cake surprisingly simple to whip up, but it’s also a guaranteed crowd-pleaser—perfect for gatherings or simply treating yourself on a quiet afternoon. With just 15 minutes of active prep time and the option to make it ahead of time, it’s both a breeze to create and an absolute showstopper. Curious about how to bring this sweet nostalgia to your table? Let’s dive into the details!

Butter Pecan Praline Poke Cake

Why is Butter Pecan Poke Cake irresistible?

Irresistible, with every slice revealing the warm, gooey praline sauce and crunchy pecans that make this cake a true delight. Quick to prepare, it takes just 15 minutes of your time, making it perfect for busy days. Nostalgic flavor combines the buttery richness of pecans with sweet caramel notes, creating a dessert everyone will adore. Versatile enough for any occasion, whether it’s a casual family gathering or a festive celebration. And with the bonus of homemade whipped cream, you can elevate your dessert game effortlessly. Want more decadent ideas? Check out my whipped cream variations for fresh twists!

Butter Pecan Praline Poke Cake Ingredients

• Let’s gather what you need!

For the Cake

  • Butter Pecan cake mix – this is the star of the show, creating a rich base flavor.
  • Water – necessary for mixing the cake batter to the right consistency.
  • Vegetable oil – adds moisture and tenderness to your cake.
  • Large eggs – these will help bind the ingredients and create a fluffy texture.

For the Praline Sauce

  • Brown sugar – provides that rich, caramel-like sweetness that’s essential to the praline sauce.
  • Heavy cream – creates a velvety consistency that perfectly complements the cake’s flavor.

For the Topping

  • Powdered sugar – adds a touch of sweetness when mixed into the whipped cream.
  • Vanilla extract – for an aromatic lift in your creamy topping.
  • Homemade whipped cream – elevates your Butter Pecan Praline Poke Cake with a light and airy finish.
  • Chopped pecans – these add a delightful crunch and accentuate the buttery pecan flavor in every bite.

Now that you have all your ingredients, let’s bring that deliciousness to life!

Step‑by‑Step Instructions for Butter Pecan Praline Poke Cake

Step 1: Preheat the Oven
Preheat your oven to 350°F (175°C) following the instructions on the Butter Pecan cake mix box. This initial step ensures a perfectly baked cake that rises beautifully. Prepare a 9×13-inch baking pan by greasing it lightly with cooking spray or butter to prevent sticking later on.

Step 2: Mix the Cake Batter
In a large mixing bowl, combine the Butter Pecan cake mix, 1 cup of water, 1/2 cup of vegetable oil, and 3 large eggs. Using a hand mixer or a whisk, mix the ingredients on medium speed until well-blended, about 2 minutes. The batter should be smooth and slightly thick, showcasing its delightful buttery texture.

Step 3: Bake the Cake
Pour the cake batter into your prepared baking pan, evenly spreading it with a spatula. Place the pan in the preheated oven and bake according to the package directions, usually around 30 minutes. The cake is ready when it’s golden brown and a toothpick inserted into the center comes out clean, filling your home with enchanting aromas.

Step 4: Prepare the Praline Sauce
While the cake is baking, prepare the luscious praline sauce. In a medium saucepan over medium heat, combine 1 cup of brown sugar and 1/2 cup of heavy cream. Stir continuously until the sugar is fully dissolved and the mixture begins to simmer, about 5 minutes. Remove the saucepan from heat and set it aside to cool slightly.

Step 5: Poke the Cool Cake
Once the cake has baked to perfection, remove it from the oven and let it cool for about 10 minutes. Using a fork, carefully poke holes all over the surface of the cake, about 1 inch apart. This step is crucial for allowing the warm praline sauce to seep into the Butter Pecan Praline Poke Cake, creating a moist and delicious result.

Step 6: Add the Praline Sauce
Pour the warm praline sauce generously over the poke cake, ensuring it seeps into the holes and saturates the cake. Use a spatula to spread the sauce evenly across the surface. The warm sauce will give your cake a rich, decadent flavor, enhancing every bite with that delightful pecan essence.

Step 7: Chill the Cake
Allow the cake to cool completely at room temperature for about 30 minutes, then transfer it to the refrigerator. Chill the Butter Pecan Praline Poke Cake for at least 2 hours, allowing the flavors to meld and the sauce to set, ensuring you get the ultimate creamy texture when served.

Step 8: Top with Whipped Cream
Once chilled, it’s time to elevate your cake! In a mixing bowl, whip 2 cups of homemade whipped cream with 1 cup of powdered sugar and 1 teaspoon of vanilla extract until soft peaks form. Spread the fluffy whipped cream over the chilled cake, and sprinkle the chopped pecans generously on top to add that extra crunch and flavor.

Butter Pecan Praline Poke Cake

Butter Pecan Praline Poke Cake Variations

Feel free to explore these delightful twists to make the Butter Pecan Praline Poke Cake truly your own!

  • Gluten-Free: Swap the cake mix for a gluten-free version, ensuring everyone can enjoy this cake without worry.

  • Nut-Free: Replace pecans with sunflower seeds or oats to retain texture while maintaining a nut-free treat.

  • Brown Sugar Substitute: Use coconut sugar instead of brown sugar for a lighter flavor with a hint of caramel.

  • Add Spices: Infuse warmth with cinnamon or nutmeg in the cake batter for an aromatic flavor profile that brightens every bite.

  • Fruit Twist: Fold in diced apples or crushed pineapple for a fruity layer that adds natural sweetness and moistness.

  • Chocolate Drizzle: Drizzle melted chocolate over the whipped cream topping for a luxurious finish that’s sure to impress.

  • Coffee Kick: Mix in a tablespoon of instant coffee granules with the cake batter for a delightful mocha flavor that complements the pecans beautifully.

  • Over-the-Top Topping: Instead of just whipped cream, layer on caramel sauce on top for a decadent treat that oozes indulgence.

With these variations, you’ll forever have reasons to whip up this beloved cake time and again! And remember, if you’re interested in exploring more possibilities, check out my whipped cream variations and discover how easy it is to take your toppings to the next level.

Make Ahead Options

These Butter Pecan Praline Poke Cake options are perfect for busy home cooks looking to save time! You can prepare the cake itself up to 3 days in advance; simply bake, cool, and poke holes as directed. Keep the cake tightly wrapped in plastic wrap or stored in an airtight container in the refrigerator to maintain its moisture. The praline sauce can also be made ahead and stored in the fridge for up to 5 days, ensuring your cake is decadent and flavorful. When you’re ready to serve, pour the warm sauce over the chilled cake, top it with homemade whipped cream, and sprinkle chopped pecans for that delightful finishing touch. You’ll have a show-stopping dessert that’s just as delicious, ready to impress in no time!

What to Serve with Butter Pecan Praline Poke Cake?

Elevate your dessert experience with delightful side dishes that beautifully complement the sweet, nutty flavors of this poke cake.

  • Creamy Mashed Potatoes: Their buttery richness pairs beautifully with the cake’s nutty flavor for a comforting dinner duo.
  • Maple-Glazed Carrots: These sweet and tender veggies bring a splash of color and a hint of maple that echoes the cake’s sweetness.
  • Crisp Green Salad: A light salad with mixed greens and a tangy vinaigrette offers a refreshing contrast to the cake’s richness, balancing the meal.
  • Roasted Brussels Sprouts: Their crispy exterior and slightly bitter notes create a delicious juxtaposition to the sweet, caramel-like sauce of the poke cake.
  • Vanilla Ice Cream: A scoop of creamy vanilla adds a cool, refreshing element, enhancing the caramel flavors and rounding out the dessert.
  • Spiced Apple Cider: This warm drink, with its aromatic spices, mirrors the cozy flavors of the cake, making it a perfect pairing for cool evenings.
  • Chocolate Chip Cookies: For a fun twist, serve these classic bites alongside the cake—who can resist more sweet treats?
  • Pecan Pie: A slice of pecan pie deepens the nutty experience, bringing an extra layer of indulgence that pecan lovers will adore.
  • Coffee or Espresso: An aromatic cup of coffee helps cut the sweetness of the cake and enhances those warm, nutty flavors beautifully.

How to Store and Freeze Butter Pecan Praline Poke Cake

Fridge: Store any leftover Butter Pecan Praline Poke Cake in an airtight container for up to 3 days. This keeps it fresh and delicious for your next slice!

Freezer: For longer storage, wrap the chilled cake tightly in plastic wrap and then in foil. It can be frozen for up to 3 months without losing its delightful taste.

Thawing: To enjoy, thaw the cake overnight in the fridge. Allow it to sit at room temperature for about 30 minutes before serving for the best texture.

Reheating: If you’d like a warmer slice, microwave a piece for about 10-15 seconds on low power, followed by a dollop of freshly whipped cream for an extra treat!

Expert Tips for Butter Pecan Praline Poke Cake

  • Room Temperature Eggs: Ensure your eggs are at room temperature for better mixing and a fluffier cake texture. Cold eggs can lead to a denser cake.

  • Don’t Rush the Cooling: Allow the cake to cool for at least 10 minutes before poking holes. This prevents the cake from falling apart and helps it absorb the praline sauce.

  • Warm Sauce: Pour the praline sauce while it’s still warm to guarantee it seeps deeply into the butter pecan poke cake. Cold sauce won’t soak in as effectively.

  • Chill Time Matters: Refrigerate the cake for at least 2 hours to let the flavors meld, giving you that delicious, moist texture everyone will love.

  • Homemade Whipped Cream: For the best topping, use freshly whipped cream instead of store-bought. It’s light, airy, and makes your Butter Pecan Praline Poke Cake feel extra special!

Butter Pecan Praline Poke Cake

Butter Pecan Praline Poke Cake Recipe FAQs

How can I choose ripe pecans?
Absolutely! When selecting pecans for your Butter Pecan Praline Poke Cake, look for nuts that are plump, firm, and have a rich, buttery smell. Avoid any pecans with dark spots or that feel shriveled, as these can affect the taste and texture of your cake.

What’s the best way to store leftover poke cake?
Very! Store any leftover Butter Pecan Praline Poke Cake in an airtight container in the refrigerator. It will keep fresh for up to 3 days, allowing you to savor a slice of this delectable treat whenever you crave something sweet!

Can I freeze the Butter Pecan Praline Poke Cake?
Absolutely! To freeze your Butter Pecan Praline Poke Cake, first, wrap it tightly in plastic wrap to prevent freezer burn and then encase it in foil. This will keep it safe for up to 3 months. When you’re ready to enjoy, simply thaw it overnight in the fridge and let it sit at room temperature for about 30 minutes before serving.

What should I do if my cake doesn’t rise properly?
Oh no! If your cake doesn’t rise, it could be due to expired ingredients. Make sure your baking powder or cake mix is fresh. Also, ensure that the oven is preheated correctly and not opened too often during baking. Quick tip: When you poke holes for the praline sauce, avoid pushing down too deeply, as this can compress the cake.

Is Butter Pecan Praline Poke Cake suitable for people with nut allergies?
The more the merrier! Unfortunately, this recipe contains pecans, which are a common allergen. If you or your guests have nut allergies, consider using a nut-free cake mix and omitting the pecans entirely, and still drizzle the cake with the delicious praline sauce for that sweet, indulgent experience.

Irresistible Butter Pecan Praline Poke Cake

Delightful Butter Pecan Praline Poke Cake combines rich, nutty flavors with a luscious praline sauce for a crowd-pleasing dessert.

  • 9×13-inch baking pan
  • Mixing Bowl
  • hand mixer or whisk
  • Medium saucepan
  • spatula

For the Cake

  • 1 box Butter Pecan cake mix
  • 1 cup water
  • 1/2 cup vegetable oil
  • 3 large eggs

For the Praline Sauce

  • 1 cup brown sugar
  • 1/2 cup heavy cream

For the Topping

  • 1 cup powdered sugar
  • 1 teaspoon vanilla extract
  • 2 cups homemade whipped cream
  • 1/2 cup chopped pecans

Step-by-Step Instructions

  1. Preheat your oven to 350°F (175°C) and prepare a 9×13-inch baking pan.
  2. In a large mixing bowl, combine the cake mix, water, vegetable oil, and eggs. Mix until well-blended.
  3. Pour the batter into the prepared pan and bake according to the package directions, usually about 30 minutes.
  4. In a medium saucepan, combine brown sugar and heavy cream over medium heat, stirring until dissolved and simmering.
  5. After baking, let the cake cool for about 10 minutes, then poke holes all over the surface with a fork.
  6. Pour the warm praline sauce over the cake, ensuring it seeps into the holes.
  7. Chill the cake in the refrigerator for at least 2 hours.
  8. Whip the cream with powdered sugar and vanilla until soft peaks form. Spread over the chilled cake and sprinkle with chopped pecans.

Store leftovers in an airtight container for up to 3 days or freeze for up to 3 months.

Dessert
American
Butter Pecan, dessert, Nostalgic, Poke Cake, Praline

Filed Under: Dessert

Indulge in Butter Pecan Praline Poke Cake Bliss

September 4, 2025 by grace bellamy Leave a Comment

A heavenly aroma of toasted pecans wafting through the kitchen—it’s moments like these that inspire me to whip up my favorite Butter Pecan Praline Poke Cake. This delightful dessert not only satisfies my sweet tooth but also captivates everyone at the table, making it the perfect crowd-pleaser for any gathering. With just a handful of simple ingredients, including a trusty cake mix and a luscious homemade praline sauce, this recipe is a breeze to prepare, giving you more time to enjoy precious moments with friends and family. Plus, this poke cake offers a delightful twist, with every bite oozing flavor from those glorious holes filled with decadent praline goodness. Curious about how to make this scrumptious treat? Let’s dive in!

Butter Pecan Praline Poke Cake

Why is this poke cake a must-try?

Decadent Flavor: Each slice is loaded with rich butter pecan flavor and a warm praline sauce that seeps into every delectable bite.

Easy to Make: This recipe requires only minimal effort with pre-packaged cake mix, making it perfect for even the busiest home cooks.

Perfect for Gatherings: Impress your guests with a dessert that captures everyone’s hearts—it’s sure to be a hit at parties or family gatherings.

Versatile Options: Serve it warm, chilled, or with a scoop of ice cream for a unique twist. Don’t forget to check out my tips on creating homemade whipped cream that will elevate this dish to the next level!

Time-Saving: With a total time of just under three hours, you can whip this treat up without spending all day in the kitchen.

Butter Pecan Praline Poke Cake Ingredients

For the Cake
• Butter Pecan cake mix – a flavorful base that carries the essence of butter and pecans; saves you time!
• Water – helps to create a moist cake; you can use milk for a richer flavor.
• Vegetable oil – keeps the cake tender and adds moisture; can be substituted with melted butter for an extra rich taste.
• Large eggs – provide structure and richness; ensure they’re at room temperature for best results.

For the Praline Sauce
• Brown sugar – adds depth and warmth to the sauce; light or dark brown sugar works wonderfully.
• Heavy cream – creates a luscious and creamy texture; half-and-half can be used for a lighter option.

For the Topping
• Powdered sugar – sweetens your whipped cream effortlessly; sifting helps create a smoother topping.
• Vanilla extract – enhances the flavors in both the cake and topping; pure vanilla extract is preferred for a more robust taste.
• Homemade whipped cream – brings a light and airy finish; it pairs perfectly with the rich cake.
• Chopped pecans – provide a delightful crunch and extra butter pecan flavor; toast them lightly for even more depth!

This delectable Butter Pecan Praline Poke Cake is sure to be a crowd-pleaser!

Step‑by‑Step Instructions for Butter Pecan Praline Poke Cake

Step 1: Preheat the Oven
Begin by preheating your oven according to the instructions on the Butter Pecan cake mix box. This ensures the cake bakes evenly. As the oven heats up, gather your ingredients and equipment, including a large mixing bowl and a greased baking pan to prepare for the cake batter.

Step 2: Mix the Cake Batter
In the large mixing bowl, combine the Butter Pecan cake mix, 1 cup of water, 1/2 cup of vegetable oil, and 3 large eggs. Use a whisk or electric mixer to mix until the ingredients are fully blended and smooth, about 2-3 minutes. Look for a batter that is thick and creamy, ready to rise to deliciousness in the oven.

Step 3: Bake the Cake
Pour the prepared batter into your greased baking pan, spreading it evenly. Place the pan in the preheated oven and bake according to the package directions, typically around 30 minutes. You’ll know it’s done when a toothpick inserted in the center comes out clean, and the cake is lightly golden on top.

Step 4: Prepare the Praline Sauce
While the cake bakes, prepare the luscious praline sauce. In a medium saucepan over medium heat, combine 1 cup of brown sugar and 1/2 cup of heavy cream. Stir continuously until the sugar dissolves and the mixture becomes smooth, about 5-7 minutes. Remove it from heat once it’s well combined, allowing the flavors to meld beautifully.

Step 5: Poke the Cake
Once the cake has finished baking, remove it from the oven and let it cool for 5-10 minutes. Use a fork to poke holes in the surface of the warm cake, approximately every 2 inches. These holes will allow the warm praline sauce to soak in and infuse the Butter Pecan Praline Poke Cake with flavor.

Step 6: Pour the Praline Sauce
Next, pour the warm praline sauce evenly over the surface of the poked cake. Make sure to drizzle it into the holes so that each bit of cake absorbs the sweet richness. Allow the cake to sit for a few more minutes to fully absorb the sauce, enriching every bite with unforgettable flavor.

Step 7: Cool the Cake
Let the cake cool completely at room temperature before transferring it to the refrigerator. Chill the cake for at least 2 hours. This cooling time helps the flavors meld and ensures a delightful texture when you’re ready to serve the Butter Pecan Praline Poke Cake.

Step 8: Top and Serve
When you’re ready to serve, generously top the chilled cake with 2 cups of homemade whipped cream. Sprinkle the chopped pecans over the whipped cream for a delightful crunch. This finishing touch not only adds texture but also enhances the overall butter pecan experience of this indulgent poke cake.

Butter Pecan Praline Poke Cake

What to Serve with Butter Pecan Praline Poke Cake

As you prepare to indulge in a slice of this decadent cake, let’s discover some delightful pairings that will elevate your dessert experience.

  • Warm Apple Crisp: This comforting dessert adds a delightful contrast with its spiced apple filling and crunchy topping, perfectly balancing the richness of the poke cake.

  • Vanilla Ice Cream: The creamy, cool scoop of vanilla ice cream complements the warm praline flavors, creating a deliciously indulgent combo that everyone will adore.

  • Pecan Pie Bites: Small, bite-sized pecan pies enhance the nutty flavor profile and bring an appealing crunch—the perfect treat for a sweet-loving crowd.

  • Whipped Cream Topped Coffee: A hot cup of coffee crowned with whipped cream makes for a cozy pairing, bringing out the buttery notes in both the cake and drink.

  • Chocolate Drizzle Brownies: The richness of fudgy brownies pairs beautifully with the praline cake, providing a double chocolate experience that’s utterly irresistible.

  • Fresh Fruit Salad: A refreshing medley of citrus and berries adds a lightness that offsets the sweetness, balancing the richness of the Butter Pecan Praline Poke Cake.

  • Minty Iced Tea: This cool and refreshing beverage offers a crisp contrast, cleansing the palate while complementing the sweet and nutty flavors of the cake.

These pairings not only enhance the overall experience but also create a beautiful, complete table for your friends and family to enjoy!

Expert Tips for Butter Pecan Praline Poke Cake

  • Use Room Temperature Eggs: Make sure your eggs are at room temperature before mixing to help the batter fully incorporate, resulting in a fluffier cake.

  • Avoid Overmixing: Mix your batter just until combined; overmixing can lead to a dense texture. Aim for a smooth, creamy consistency without lumps.

  • Perfect Poking Technique: Poke holes evenly across the cake for optimal sauce absorption. Space them about 2 inches apart to allow the praline sauce to seep in properly.

  • Chill for Best Flavor: Don’t skip the chilling step! Refrigerating the cake for at least 2 hours enhances the flavors, ensuring every bite of your Butter Pecan Praline Poke Cake is a rich, delightful experience.

  • Homemade Whipped Cream Boost: For extra stability in your whipped cream, add a tablespoon of powdered sugar as you whip, helping it hold up beautifully for topping.

Butter Pecan Praline Poke Cake Variations

Customize this delicious treat to suit your tastes and preferences, and let your creativity shine!

  • Gluten-Free: Substitute the Butter Pecan cake mix with a gluten-free alternative for a delightful twist that everyone can enjoy.
  • Nut-Free: Omit the chopped pecans in the cake and topping, or replace them with sunflower seeds for a crunch without the nuts.
  • Extra Sweetness: Drizzle a bit of maple syrup or caramel sauce over the whipped cream to add an extra layer of sweetness that’s simply irresistible.
  • Spiced Up: Add a teaspoon of cinnamon or nutmeg to the cake mix for a warm, inviting spiced flavor that’s perfect for cozy gatherings.
  • Chocolate Lovers: Fold in mini chocolate chips into the batter before baking for a rich surprise that complements the praline sauce beautifully.
  • Fruit Enhancements: Top the cake with fresh fruit, like sliced bananas or strawberries, to add a refreshing, fruity twist to the indulgent dessert.
  • Coconut Bliss: Mix in shredded coconut into the batter for a tropical flair; the chewy texture adds depth to each slice.
  • Dairy-Free: Substitute heavy cream with coconut cream and use a dairy-free whipped topping to create a luscious, dairy-free version!

With these variations, your Butter Pecan Praline Poke Cake can be a personal masterpiece, ensuring everyone loves a slice! Don’t forget to explore my tips on creating homemade whipped cream for the perfect fluffy topping. Enjoy the delightful experience of making it your own!

Make Ahead Options

These Butter Pecan Praline Poke Cakes are perfect for meal prep enthusiasts looking to save time during busy weeknights! You can bake the cake and prepare the praline sauce up to 24 hours in advance; simply store the cooled cake in the refrigerator while keeping the sauce in an airtight container at room temperature to maintain its rich flavor. When you’re ready to serve, poke the holes in the cake and pour the warm praline sauce over it. Chill the cake for at least 2 hours (or overnight for even better flavor) before topping it with homemade whipped cream and chopped pecans. With this prep ahead method, you’ll enjoy a delightful dessert with just a few final steps!

How to Store and Freeze Butter Pecan Praline Poke Cake

Fridge: Store any leftover Butter Pecan Praline Poke Cake in an airtight container in the refrigerator for up to 3 days to retain its moisture and flavor.

Freezer: Wrap individual slices of cake tightly in plastic wrap, then place them in a freezer-safe bag for up to 2 months. This way, you can enjoy your treat whenever the craving strikes.

Thawing: To defrost, simply transfer the frozen cake to the fridge the night before you plan to serve it. This ensures the cake thaws slowly and evenly.

Reheating: If you prefer it warm, pop a slice in the microwave for 10-15 seconds, then enjoy the gooey, delicious flavor of the praline sauce!

Butter Pecan Praline Poke Cake

Butter Pecan Praline Poke Cake Recipe FAQs

How do I choose ripe ingredients for this recipe?
When selecting pecans, look for fresh, whole nuts that are free from dark spots, which can indicate rancidity. For the best flavor, opt for raw pecans and toast them lightly before using. As for the eggs, choose large, fresh eggs that do not have any cracks and are within their expiration date for optimal results.

How do I store leftover Butter Pecan Praline Poke Cake?
To keep your delicious cake fresh, store any leftovers in an airtight container in the refrigerator. This will help retain moisture and flavor for up to 3 days. If you want to keep it longer, consider freezing it, which can be a wonderful way to save those sweet bites for later!

Can I freeze Butter Pecan Praline Poke Cake?
Absolutely! To freeze, wrap individual slices tightly in plastic wrap, making sure there’s no air. Then place the wrapped slices in a freezer-safe bag or container. They can be stored in the freezer for up to 2 months. When you’re ready to enjoy, just transfer a slice to the fridge the night before to thaw.

What should I do if my cake comes out too dense?
If you find your Butter Pecan Praline Poke Cake is denser than expected, it might be due to overmixing the batter. To prevent this in future batches, mix the ingredients just until combined and avoid beating the batter beyond that. Additionally, make sure your eggs are at room temperature; this helps create a lighter texture.

Is this recipe safe for people with nut allergies?
This Butter Pecan Praline Poke Cake contains pecans, which can pose a risk for those with nut allergies. For a nut-free version, you can simply omit the pecans from the cake and topping. If you want to maintain richness without nuts, consider folding in chocolate chips or using a different flavored cake mix. Always check ingredient labels for any hidden allergens.

Indulge in Butter Pecan Praline Poke Cake Bliss

This Butter Pecan Praline Poke Cake is a delightful dessert that captivates everyone with its rich flavor and easy preparation.

  • large mixing bowl
  • greased baking pan
  • Medium saucepan
  • whisk or electric mixer

For the Cake

  • 1 box Butter Pecan cake mix (saves you time)
  • 1 cup Water (can use milk for richer flavor)
  • 1/2 cup Vegetable oil (can substitute with melted butter)
  • 3 large Eggs (at room temperature)

For the Praline Sauce

  • 1 cup Brown sugar (light or dark works)
  • 1/2 cup Heavy cream (half-and-half can be lighter option)

For the Topping

  • 2 cups Homemade whipped cream (pairs perfectly with the cake)
  • 1 cup Chopped pecans (toast them lightly for more flavor)
  • 1 cup Powdered sugar (sifting helps create a smoother topping)
  • 1 tsp Vanilla extract (pure extract is preferred)

Step-by-Step Instructions

  1. Preheat your oven according to the cake mix box instructions.
  2. Mix the cake mix, water, vegetable oil, and eggs until smooth, about 2-3 minutes.
  3. Pour batter into greased pan and bake according to package directions (about 30 minutes).
  4. In a saucepan, combine brown sugar and heavy cream; stir until smooth, about 5-7 minutes.
  5. Poke holes in the cooled cake every 2 inches to allow sauce absorption.
  6. Pour praline sauce over the poked cake and let it absorb.
  7. Cool cake completely and refrigerate for at least 2 hours.
  8. Top with whipped cream and chopped pecans before serving.

Use room temperature eggs, avoid overmixing, poke holes evenly, and chill for best flavor.

Dessert
American
Butter Pecan Praline Poke Cake, cake, dessert, Pecans, Poke Cake, Praline

Filed Under: Dessert

Spook Up Snack Time with Cheesy Halloween Breadstick Bones

September 4, 2025 by grace bellamy Leave a Comment

As I grabbed the pizza dough from my fridge, a delightful idea took shape in my mind—transforming simple ingredients into something a little spooky and extra fun. Enter Cheesy Halloween Breadstick Bones! This recipe not only brings a festive flair to your table, but it’s also incredibly easy to whip up, making it perfect for a busy weeknight or a Halloween gathering. Imagine the smiles on your family and friends’ faces when they dip these cheesy delights into marinara sauce, all while being playfully presented as “bones.” The best part? These breadsticks come together in just 35 minutes, so you can serve up a delicious distraction from fast food in no time. So, are you ready to summon your inner chef and create some delightful Halloween magic in your kitchen?

Cheesy Halloween Breadstick Bones

Why Are These Bones So Irresistible?

Deliciously cheesy: Combining gooey mozzarella and savory Parmesan, these breadsticks are the ultimate comfort food that both kids and adults will adore.

Quick and easy: With just 35 minutes from start to finish, they’re perfect for those busy weeknights or spontaneous Halloween festivities.

Creative presentation: Shaped like bones, these breadsticks add a fun, spooky touch to your meal, making dinner entertaining and memorable.

Dip-worthy: Paired with marinara sauce, they make an irresistible snack that encourages sharing and laughter around the table.

Kid-friendly fun: Kids will love helping shape the dough into “bones,” turning cooking into a delightful family activity. For even more spooky ideas, check out our guide on fun Halloween snacks!

Cheesy Halloween Breadstick Bones Ingredients

Ready to make some spook-tacular snacks? Here’s what you’ll need to create your Cheesy Halloween Breadstick Bones!

For the Dough
• 1 pound pizza dough – You can use store-bought or homemade; either works perfectly!
• All-purpose flour – Dust your surface to prevent sticking and help shape those bone-like figures!

For the Topping
• 2 tablespoons unsalted butter – Melted butter adds a rich flavor and helps the cheese adhere beautifully.
• ½ cup grated Parmesan cheese – This cheese adds a delightful nuttiness and enhances the overall flavor profile.
• 1 cup shredded mozzarella cheese – Gooey and melty, mozzarella creates that irresistible layer on top!

For Dipping
• Marinara sauce – Perfect for dipping these cheesy delights; consider adding a sprinkle of crushed red pepper for extra zing!

Now, gather your ingredients and get ready to enjoy a spook-tacular baking adventure while crafting your Cheesy Halloween Breadstick Bones!

Step‑by‑Step Instructions for Cheesy Halloween Breadstick Bones

Step 1: Preheat the Oven
Begin by preheating your oven to 375°F (190°C). While the oven heats up, line two baking sheets with parchment paper to ensure your Cheesy Halloween Breadstick Bones don’t stick and bake evenly. This preparation step will help streamline the process and ensure a smooth baking experience.

Step 2: Prepare the Dough
Let your pizza dough sit at room temperature for about 10 minutes. Meanwhile, dust your clean surface with all-purpose flour to prevent sticking. Once ready, divide the dough into 10 equal pieces, which will form the base for your spooky breadstick bones. This step sets the stage for easy shaping later on.

Step 3: Shape the Bones
Now, roll each piece of dough into an 8-inch long rope. To give your Cheesy Halloween Breadstick Bones a more bone-like appearance, make the ends slightly thicker. Then, snip each end about 1 inch deep and gently pull apart to create a bony texture. This fun, hands-on shaping is part of what makes this recipe enjoyable!

Step 4: Arrange on Baking Sheets
Carefully place the shaped breadsticks on your prepared baking sheets, ensuring that they have space between them for expansion while baking. This will allow for even cooking and help maintain their unique bone shape. Visualize how adorable these cheesy creations will look once baked to a golden hue!

Step 5: Add Toppings
Brush the tops of each breadstick generously with melted butter, which adds flavor and helps the cheese adhere nicely. Then, sprinkle the grated Parmesan cheese evenly across each breadstick, ensuring they’re well-covered for a delightful cheesy experience. This step adds that extra layer of flavor that makes your Cheesy Halloween Breadstick Bones so irresistible.

Step 6: Bake the Breadsticks
Place the baking sheets in the preheated oven and bake for about 15 minutes, or until the breadsticks start to puff up and turn light golden. Keep an eye on them, as the aroma will beckon you! This is where the magic of transformation happens, turning simple dough into spooky treats.

Step 7: Add Mozzarella Cheese
Once the initial baking is complete, remove the breadsticks from the oven. Now, sprinkle a generous amount of shredded mozzarella cheese on top of each one. Return them to the oven for another 5-7 minutes, until the cheese is melted and bubbly, creating that gooey, cheesy goodness we all love in our Cheesy Halloween Breadstick Bones.

Step 8: Cool and Serve
Finally, let your spooky breadsticks cool slightly on the baking sheets before serving. This brief pause ensures they won’t be too hot to handle. Pair them with warm marinara sauce for dipping, and prepare to enjoy the fun and flavor of your homemade Cheesy Halloween Breadstick Bones!

Cheesy Halloween Breadstick Bones

Make Ahead Options

These Cheesy Halloween Breadstick Bones are perfect for meal prep! You can shape the breadsticks up to 24 hours in advance, then cover them with plastic wrap and refrigerate. This keeps them fresh and ready to bake when you’re short on time. When you’re ready to serve, simply brush with melted butter and sprinkle with Parmesan cheese, then bake as directed. If you’d like to prep even further, consider making the dough a full 3 days ahead of time and freezing it. Just thaw in the fridge overnight before shaping and baking, ensuring your spooky treats are just as delicious and gooey when served!

Expert Tips for Cheesy Halloween Breadstick Bones

  • Dough Temperature: Let your pizza dough sit at room temperature. This makes it easier to shape into bones and creates a fluffier texture when baked.

  • Perfectly Shaped Bones: When shaping the dough, ensure the ends are thicker to mimic real bones. This enhances the spooky look while allowing them to bake evenly.

  • Butter Brush: Don’t skimp on brushing melted butter before baking! It not only adds great flavor but also helps the cheeses melt beautifully without burning.

  • Cheese Layering: Add your mozzarella cheese in the last few minutes of baking. This ensures it melts perfectly and gets that golden, bubbly finish on your Cheesy Halloween Breadstick Bones.

  • Serving Suggestions: Consider serving with marinara and a sprinkle of crushed red pepper for an extra kick. This adds a fun twist to the traditional dip and will surprise your guests!

What to Serve with Cheesy Halloween Breadstick Bones

Imagine a fun Halloween gathering where each bite is as delightful as it is spooky, ensuring laughter and satisfaction all around.

  • Pumpkin Soup: This creamy, spiced soup is a warm counterpart, perfect for dipping and enhancing the Halloween ambiance.
  • Caesar Salad: The crisp romaine and crunchy croutons offer a refreshing contrast to the cheesy warmth of the breadsticks.
  • Spooky Stuffed Peppers: Stuff bell peppers with rice and vegetables to resemble little monsters; they add a colorful, healthy side.

For something sweet:

  • Cinnamon Sugar Cookies: These soft, buttery cookies make a wonderful dessert with a hint of spookiness to match your theme.
  • Apple Cider: A warm glass of spiced apple cider elevates the meal with a cozy, autumnal touch that ties the flavors together beautifully.

Storage Tips for Cheesy Halloween Breadstick Bones

Room Temperature: Allow the breadsticks to cool completely and store them in an airtight container at room temperature for up to 1 day for the best taste.

Fridge: If you want to keep them longer, place the cooled breadsticks in the fridge. They will last for up to 3 days; just reheat them in a preheated oven at 350°F for 5-7 minutes.

Freezer: For extended storage, wrap each breadstick individually in foil and place them in a freezer-safe bag. They can be frozen for up to 3 months. Bake directly from frozen at 375°F until hot.

Reheating: For the best results, always reheat leftover Cheesy Halloween Breadstick Bones in the oven to maintain their crispy texture instead of using the microwave.

Cheesy Halloween Breadstick Bones Variations

Feel free to get creative and make these breadsticks your own with these fun twists and substitutions!

  • Gluten-Free: Use gluten-free pizza dough for a deliciously alternative treat that everyone can enjoy. It will still be chewy and satisfying!

  • Herbed Delight: Mix dried oregano, basil, or garlic powder into the melted butter before brushing for an aromatic herb-infused breadstick. This will elevate the flavor profile—a rewarding aromatic experience!

  • Cheddar Explosion: Swap out mozzarella for sharp cheddar cheese. Its robust flavor will add an extra layer of richness that cheese lovers will adore.

  • Spicy Kick: Sprinkle red pepper flakes or drizzle some hot sauce before serving for a fiery burst of flavor that enhances the cheesy goodness. This spicy surprise will make taste buds dance!

  • Veggie Boost: Toss in chopped spinach or shredded zucchini into the dough for a nutritious twist. It’s a sneaky way to add greens into your snacks without losing the fun!

  • Sweet Treat: Try using cinnamon sugar on top instead of cheese for a unique dessert idea. Combine it with a side of warm apple sauce for a delightful dipping experience.

  • Smoky Flavor: Add smoked paprika or a touch of liquid smoke to the butter for a savory, smoky flavor that will transport your taste buds.

  • Seasoned Flour: Mix Italian seasoning or garlic powder into the all-purpose flour for dusting before shaping. This small change adds a delightful scent and extra flavor with each bite.

With these variations, you can turn your cheesy Halloween breadstick bones into a snack that fits every family member’s taste!

Cheesy Halloween Breadstick Bones

Cheesy Halloween Breadstick Bones Recipe FAQs

How do I select the best pizza dough?
Absolutely! When choosing pizza dough, look for one that feels smooth and elastic. If homemade, ensure it has been allowed to rise properly. If you’re buying pre-made, opt for fresh dough from your local bakery or grocery store for the best flavor.

What’s the best way to store leftover breadsticks?
To keep your Cheesy Halloween Breadstick Bones fresh, allow them to cool completely, then place them in an airtight container. They will last for up to 1 day at room temperature or up to 3 days in the fridge. Just pop them in a preheated oven at 350°F for about 5-7 minutes to revive their crispy texture!

Can I freeze Cheesy Halloween Breadstick Bones?
Very! To freeze, let your breadsticks cool completely. Individually wrap each one in aluminum foil, then store them in a freezer-safe bag. They’ll keep for up to 3 months. When you’re ready, bake directly from frozen at 375°F until heated through, usually 15-20 minutes.

What if my breadsticks are too soft or dense?
If your breadsticks come out too soft, it could be due to under-baking or not allowing the dough to rise properly. Be sure the dough is at room temperature before shaping and follow the baking times closely. If they seem dense, ensure you’re using enough flour while shaping to prevent excess moisture.

Are these breadsticks safe for kids and pets?
Definitely! The ingredients in Cheesy Halloween Breadstick Bones are kid-friendly and safe for pets if they don’t have lactose intolerance. However, keep marinara sauce away from pets, especially cats and dogs, as it may contain ingredients that aren’t good for them.

What should I do if I run out of mozzarella cheese?
No worries! You can substitute with other cheeses like cheddar or fontina for a unique twist. If using a cheese blend, aim for those that melt well to achieve that delicious gooey texture. Enjoy getting creative!

Spook Up Snack Time with Cheesy Halloween Breadstick Bones

Cheesy Halloween Breadstick Bones are a delightful snack, perfect for Halloween gatherings and busy weeknights, combining flavors of mozzarella and Parmesan for a spooky twist.

  • Oven
  • Baking sheets
  • parchment paper
  • Rolling Pin

For the Dough

  • 1 pound pizza dough (store-bought or homemade)
  • cups all-purpose flour (for dusting)

For the Topping

  • 2 tablespoons unsalted butter (melted)
  • ½ cup grated Parmesan cheese
  • 1 cup shredded mozzarella cheese

For Dipping

  • cups marinara sauce (for serving)

Step-by-Step Instructions

  1. Preheat your oven to 375°F (190°C) and line two baking sheets with parchment paper.
  2. Let your pizza dough sit at room temperature for about 10 minutes and dust a clean surface with all-purpose flour.
  3. Divide the dough into 10 equal pieces and roll each into an 8-inch long rope, making the ends thicker.
  4. Arrange the shaped breadsticks on the prepared baking sheets, leaving space for expansion.
  5. Brush the tops with melted butter and sprinkle with grated Parmesan cheese.
  6. Bake for about 15 minutes or until puffed and light golden.
  7. Remove from the oven, sprinkle with shredded mozzarella cheese, and return for an additional 5-7 minutes until melted.
  8. Cool slightly on baking sheets before serving with marinara sauce.

Allow breadsticks to cool completely and store in an airtight container at room temperature for up to a day. For longer storage, refrigerate for up to 3 days and freeze for up to 3 months.

Side Dishes
American
Cheesy Halloween Breadstick Bones, comfort food, easy recipes, family fun, Halloween snacks, party appetizers

Filed Under: Sandwiches

Deliciously Fun Ghostbusters Stay Puft Marshmallows to Make

September 4, 2025 by grace bellamy Leave a Comment

As I stood in my kitchen, I couldn’t help but think back to the thrill of watching Ghostbusters as a kid—those whimsical marshmallow monsters captivating my imagination. Inspired by that nostalgic charm, I set out to create my very own Ghostbusters Stay Puft Marshmallows, and let me tell you, they are as fun to make as they are to devour! This easy recipe not only serves as a delightful treat for Halloween parties and movie nights but also brings a smile to the faces of guests young and old. With just fifteen minutes of prep time, you can whip up a spooky-inspired dessert that’s sure to outshine any store-bought option. Plus, they make fantastic gifts for fellow fans! Are you ready to dive into this deliciously marshmallowy adventure and learn how to recreate this iconic confection?

Ghostbusters Stay Puft Marshmallows

Why are these marshmallows irresistible?

Nostalgic Charm: These Ghostbusters Stay Puft Marshmallows bring a playful nostalgia to your kitchen, reminiscent of childhood movie magic.

Easy and Quick: With just 15 minutes of prep time, you can create these delightful treats that require minimal baking skills.

Visual Appeal: Their charming design, complete with candy eyes and adorable smiles, makes them a hit at any gathering. Serve these at your next Halloween party or cozy movie night for instant smiles!

Versatile Treats: Whether you enjoy them yourself, or gift them to a fellow fan, these marshmallows are perfect for sharing and spreading joy.

Customizable Fun: Feel free to play around with decorations – add your personal twist to make them even more unique!

Ghostbusters Stay Puft Marshmallows Ingredients

Get ready to bring the fun of Ghostbusters into your kitchen with these easy-to-find ingredients!

For the Marshmallow Body
• Large marshmallows – use 12 large ones for a towering Stay Puft figure that will steal the show.

For the Coating
• White chocolate – 1 cup; it adds a deliciously sweet layer to your marshmallows.
• Vegetable shortening – 1 tablespoon; this ensures a smooth melt and glossy finish for your chocolate coating.

For the Finishing Touches
• Powdered sugar – dust lightly to give your marshmallows a soft, sweet touch.
• Black edible marker – perfect for drawing on cheerful smiles and adding that final touch of character.
• Candy eyes – these whimsical little decorations will bring your Stay Puft Marshmallows to life!

Now that you have all the ingredients ready, let’s create some marshmallow magic!

Step‑by‑Step Instructions for Ghostbusters Stay Puft Marshmallows

Step 1: Melt the Chocolate
Begin by placing 1 cup of white chocolate and 1 tablespoon of vegetable shortening in a microwave-safe bowl. Heat in the microwave for 30 seconds at a time, stirring after each interval until the mixture is smooth and glossy. This should take about 1 to 2 minutes total, creating the perfect coating for your delightful Ghostbusters Stay Puft Marshmallows.

Step 2: Assemble the Marshmallow Base
Take a large marshmallow and dip its bottom into the melted white chocolate, allowing the excess to drip off. Firmly press this marshmallow onto a parchment-lined baking sheet. Use the melted chocolate as “glue” to stack two more marshmallows on top, forming the iconic body shape of your Stay Puft creation. Ensure the structure is sturdy for the next steps.

Step 3: Allow to Set
Let the base structure set slightly at room temperature for about 5-10 minutes. For a quicker setting, pop the baking sheet into the refrigerator for a few minutes. This will help the marshmallow stack bond well, creating a solid foundation for your Ghostbusters Stay Puft Marshmallows.

Step 4: Coat the Figure
Once the marshmallow base is stable, take a spatula and coat the entire figure with the remaining melted white chocolate. Spread it evenly for a smooth finish, ensuring all visible surfaces are covered. While the chocolate is still wet, gently press candy eyes onto the marshmallow figure to give your Stay Puft character its delightful expression.

Step 5: Let the Coating Harden
Allow the white chocolate coating to harden fully. This usually takes about 15 to 20 minutes at room temperature. If you’re short on time, you can refrigerate the marshmallow figure for a quicker hardening process, ensuring that it remains a showstopper at your next gathering.

Step 6: Add the Finishing Touches
Once the chocolate is completely set, gently dust your Ghostbusters Stay Puft Marshmallows with powdered sugar for a soft finish. Use a black edible marker to draw on playful smiles, bringing your marshmallow figures to life with personality. This final touch will make them irresistibly charming at any celebration or to hand out as gifts.

Ghostbusters Stay Puft Marshmallows

Expert Tips for Ghostbusters Stay Puft Marshmallows

• Melt Carefully: Make sure to heat the chocolate and shortening in 30-second intervals; overheating can cause it to seize.

• Building Blocks: Stack the marshmallows securely using the melted chocolate as glue; ensure each layer is stable before proceeding.

• Setting Time: Allow the base to set slightly before full coating; don’t rush this step for a better structure and stability.

• Smooth Coating: Use a spatula for an even white chocolate coat, ensuring all areas are covered for a polished look.

• Decorate Creatively: Get playful with your candy eyes and smiles; making each Ghostbusters Stay Puft Marshmallow unique adds to their charm!

• Avoid Refrigeration: After coating, keep the marshmallows at room temperature to prevent the chocolate from blooming and ensure they stay perfectly delicious.

How to Store and Freeze Ghostbusters Stay Puft Marshmallows

Room Temperature: Store your marshmallows in an airtight container at room temperature for optimal flavor and texture; they will stay fresh for up to 3 days.

Avoid Refrigeration: Refrigerating the marshmallows can cause the chocolate to bloom, affecting their appearance and taste. Best enjoyed at room temperature!

Freezer: If you need to store them longer, place the marshmallows in a freezer-safe bag or container. They can be frozen for up to 2 months, but let them thaw completely before enjoying.

Reheating: There’s no need to reheat these marshmallows; simply take them out of their storage and enjoy their delightful charm at your next event!

What to Serve with Ghostbusters Stay Puft Marshmallows

Imagine a festive gathering where laughter fills the room and sweet aromas waft through the air, creating an irresistible atmosphere of joy and celebration.

  • Hot Cocoa Bar: A rich, warm cup of hot cocoa provides the perfect cozy base to pair with your whimsical marshmallows, offering a delightful dip experience.
  • Spooky Cupcakes: Create a spooky dessert table by serving eerie-looking cupcakes, which add a fun element to your Ghostbusters-themed festivities.
  • Gingerbread Cookies: The spiced warmth of gingerbread cookies adds a delightful contrast to the sweet marshmallows, making each bite an adventure in flavor.
  • Fall Fruit Platter: Serve an assortment of seasonal fruits like crisp apples and juicy pears to balance the sweetness while adding freshness to your dessert spread.
  • Candy Corn: For a Halloween twist, add colorful candy corn to your table. Their playful crunch pairs beautifully with the soft, chewy marshmallow texture.
  • Milk: A classic glass of cold milk is a simple yet refreshing drink choice, enhancing the sweet flavors of your Stay Puft Marshmallows and making them feel indulgent.

Ghostbusters Stay Puft Marshmallows Variations

Feel free to embark on your culinary adventure and add your unique twist to these delightful marshmallow creations!

  • Dairy-Free: Substitute the white chocolate with dairy-free chocolate chips for a vegan-friendly version.
  • Colorful Coating: Add food coloring to the melted chocolate to create vibrant, spectacular designs that delight the eyes.
  • Crunchy Topping: Mix crushed graham crackers with powdered sugar for a s’mores-inspired texture coating.
  • Stuffed Marshmallows: Insert pieces of your favorite chocolate or caramel inside each marshmallow for an indulgent surprise.
  • Spicy Kick: Add a pinch of cayenne pepper to the white chocolate for a daring, unexpected heat in each bite.
  • Flavor Infusion: Drizzle your marshmallows with different flavored syrups like caramel or strawberry before coating them.
  • Cookie Crumble: Roll the coated marshmallows in crushed cookies (think Oreos!) for an irresistible crunch and added flavor.
  • Personalized Decorations: Use different colored edible markers to create unique characters or messages, perfect for special events or parties.

So, let your imagination run wild! Customize these marshmallows to match your taste or festivities, and make them truly your own. For more fun decorations, check out our guide on making Halloween cupcakes and enhance your spooky celebrations.

Make Ahead Options

These Ghostbusters Stay Puft Marshmallows are perfect for meal prep enthusiasts! You can assemble the marshmallow stacks and coat them with chocolate up to 24 hours in advance, allowing you to enjoy a fun cooking session ahead of your gathering. Just ensure that, after coating, you let them harden completely before storing. It’s best to keep them in an airtight container at room temperature to prevent stickiness and preserve their delightful texture. When ready to serve, simply dust with powdered sugar and add the black edible marker smiles right before presentation. This way, your marshmallows will look fresh and just as delicious as if made the day of your event!

Ghostbusters Stay Puft Marshmallows

Ghostbusters Stay Puft Marshmallows Recipe FAQs

How can I select the best marshmallows for this recipe?
Absolutely! For the fluffiest and most appealing results, choose large marshmallows that are fresh and free from dark spots or hardening. The fresher, the better!

What’s the best way to store leftover marshmallows?
To keep your Ghostbusters Stay Puft Marshmallows fresh, store them in an airtight container at room temperature for up to 3 days. This will help prevent them from becoming sticky or losing their texture.

Can I freeze Ghostbusters Stay Puft Marshmallows?
Yes, you can freeze them! To do this, place your marshmallows in a freezer-safe bag or airtight container. Make sure to separate layers with parchment paper if stacking to prevent them from sticking together. They can be stored for up to 2 months; just remember to thaw them completely at room temperature before indulging!

Why did my white chocolate coating not come out shiny?
Very often, this happens if the chocolate was overheated or if it didn’t have enough shortening. For a smooth and glossy finish, melted chocolate should be heated slowly in 30-second intervals, stirring regularly. It’s essential to watch the temperature and keep it smooth when adding the shortening, which gives that beautiful sheen!

Are these marshmallows suitable for folks with allergies?
Great question! These marshmallows are not gluten-free as marshmallows can contain trace elements, and the white chocolate may also have cross-contamination risks. Always check labels for allergen information, especially if you are serving to guests with dietary restrictions.

Deliciously Fun Ghostbusters Stay Puft Marshmallows to Make

Create delightful Ghostbusters Stay Puft Marshmallows—fun to make and irresistible to eat. Perfect for parties and gifts!

  • Microwave-safe bowl
  • spatula
  • Baking Sheet
  • parchment paper

For the Marshmallow Body

  • 12 large marshmallows

For the Coating

  • 1 cup white chocolate (for coating)
  • 1 tablespoon vegetable shortening (for smooth melting)

For the Finishing Touches

  • 1 tablespoon powdered sugar (for dusting)
  • 1 piece black edible marker (for drawing smiles)
  • 1 pack candy eyes (for decoration)

Step-by-Step Instructions

  1. Melt the chocolate by placing 1 cup of white chocolate and 1 tablespoon of vegetable shortening in a microwave-safe bowl. Heat in the microwave for 30 seconds at a time, stirring until smooth and glossy.
  2. Assemble the marshmallow base by dipping the bottom of a large marshmallow into melted chocolate and pressing it onto a parchment-lined baking sheet. Stack two more marshmallows on top using the chocolate as glue.
  3. Allow the base structure to set slightly at room temperature for about 5-10 minutes, or refrigerate for a quicker setting.
  4. Coat the figure with remaining melted white chocolate using a spatula for an even coat. Press candy eyes onto the marshmallow figure before the coating sets.
  5. Let the coating harden fully at room temperature for 15-20 minutes, or refrigerate for a quicker process.
  6. Add the finishing touches by dusting with powdered sugar and using the black edible marker to draw playful smiles.

Store marshmallows in an airtight container at room temperature for up to 3 days. Avoid refrigeration to maintain texture.

Dessert
American
easy marshmallow recipe, fun desserts, Ghostbusters Stay Puft Marshmallows, gift ideas, Halloween Treats, party snacks

Filed Under: Dessert

Delicious Ghostbusters Stay Puft Marshmallows You’ll Adore

September 4, 2025 by grace bellamy Leave a Comment

As I stood in my kitchen, the sweet aroma of melting white chocolate wafted through the air, instantly transporting me back to childhood. With each sticky marshmallow stacked higher, I couldn’t help but smile as I created my very own Ghostbusters Stay Puft Marshmallows! Not only are these adorable treats quick to whip up in just 20 minutes, but they also pack a whimsical punch that will charm everyone from kids to adults. Perfect for Halloween parties or a cozy movie night, these marshmallows are a fun and playful way to get your loved ones involved in the kitchen. So grab your apron, and let’s make some delicious memories together! Who else is ready to let their inner ghostbuster shine?

Ghostbusters Stay Puft Marshmallows

Why will you love Stay Puft Marshmallows?

Quick and Easy: With just 20 minutes of your day, you can create delightful treats that are sure to bring joy to any gathering.

Fun Decor: Let your creativity flow as you use candy eyes and edible markers to bring these marshmallows to life, making them a hit at parties!

Nostalgic Appeal: Perfect for fans of the Ghostbusters franchise, these marshmallows evoke cherished childhood memories while satisfying sweet cravings.

Versatile Treats: Ideal for Halloween, movie nights, or even as a unique gift. Who wouldn’t love a homemade surprise?

Crowd-Pleaser: They’re a delightful way to impress kids and adults alike, making them a surefire hit at any event. Grab some tips on how to create fun edible decorations to pair with your marshmallows!

Ghostbusters Stay Puft Marshmallows Ingredients

For the Marshmallow Base
• 12 large marshmallows – these fluffy delights provide the perfect foundation for your adorable creations.

For the Coating
• 1 cup white chocolate – melted, it adds a sweet and creamy layer to your marshmallow masterpiece.
• 1 tablespoon vegetable shortening – this helps create a smoother, glossy finish on your white chocolate.

For Decoration
• Powdered sugar – dust it generously to give your Stay Puft Marshmallows a snowy, ghostly appearance.
• Black edible marker – use this to draw playful faces on your marshmallows for a personal touch.
• Candy eyes – these little embellishments add character and charm, making your creations irresistibly cute!

Dive in and enjoy the delightful process of making Ghostbusters Stay Puft Marshmallows—it’s a sweet adventure you won’t forget!

Step‑by‑Step Instructions for Ghostbusters Stay Puft Marshmallows

Step 1: Melt the Chocolate
Start by placing 1 cup of white chocolate and 1 tablespoon of vegetable shortening in a microwave-safe bowl. Heat the mixture in 30-second intervals, stirring thoroughly after each round. Continue until the chocolate is completely melted and smooth, about 1.5 to 2 minutes total. This creamy blend will become the magical “glue” for your Ghostbusters Stay Puft Marshmallows.

Step 2: Assemble the Base
Dip the bottom of a large marshmallow into the melted white chocolate, then press it onto a parchment-lined baking sheet. Stack two additional marshmallows on top, applying more melted chocolate between each one to secure them in place. This will create a stable body for your marshmallow ghost. Allow the base to set slightly—consider refrigerating for about 5 minutes to speed up the process.

Step 3: Coat the Marshmallow Figure
Once the marshmallow structure is sturdy, use a spatula to coat the entire figure with the remaining melted white chocolate. Ensure an even layer covers all sides, creating a glossy finish. While the chocolate is still wet, gently press candy eyes onto the front of your Ghostbusters Stay Puft Marshmallow to bring it to life.

Step 4: Let it Harden
Allow your marshmallow figures to harden completely at room temperature. If you prefer quicker results, place the baking sheet in the refrigerator for about 10-15 minutes. Check for the chocolate to become firm and set before proceeding. This will ensure your creations are ready for the final touch.

Step 5: Add the Finishing Touches
Once the chocolate has set, generously dust the marshmallow figures with powdered sugar for a delightful, snowy appearance. Then, take a black edible marker and carefully draw fun smiles and faces on your Ghostbusters Stay Puft Marshmallows. This personalized touch adds a whimsical charm that everyone will adore.

Step 6: Serve and Enjoy
Your Ghostbusters Stay Puft Marshmallows are now complete! Arrange them on a serving platter for your next gathering or storage. Keep them in an airtight container at room temperature for the best texture and taste. These sweet, nostalgic treats are sure to impress and bring smiles to faces of all ages.

Ghostbusters Stay Puft Marshmallows

What to Serve with Ghostbusters Stay Puft Marshmallows?

As you gather around the table to enjoy your delicious sweet creations, consider adding delightful companions that enhance your festive experience.

  • Hot Chocolate Bar: Create a cozy station with various toppings like whipped cream and peppermint sticks, perfect for dunking those marshmallows!
  • Spooky Fruit Skewers: Thread bananas, strawberries, and grapes on sticks. They add freshness and balance the sweetness of the marshmallows.
  • Halloween Cupcakes: Chocolate or vanilla cupcakes topped with orange icing will match the theme beautifully while satisfying any sweet tooth.
  • Popcorn Treats: Serve freshly popped popcorn drizzled with caramel or chocolate. The crunchy texture contrasts charmingly with the soft marshmallows.
  • Candy Corn Jars: Display colorful candy corn for a festive touch! The vibrant colors create an inviting atmosphere that captures the essence of Halloween.
  • Spiced Apple Cider: A warm drink offering hints of cinnamon and cloves complements your marshmallow treats perfectly—ideal for a chilly evening!
  • Ghostly Cheese Platter: Include a selection of cheeses and crackers, bringing savory elements to balance the sweetness of the marshmallows.
  • Mini Pumpkin Pies: These delightful bites echo the fall spirit and are a fun, thematic dessert option alongside your Ghostbusters Stay Puft Marshmallows.

Tips for the Best Ghostbusters Stay Puft Marshmallows

Melt Carefully: Ensure your white chocolate is melted slowly, stirring frequently to prevent burning. This will give your marshmallows a silky coating.

Cool Before Stacking: Allow the base structure to set slightly before stacking. If it’s too warm, the marshmallows may slip and lose their shape.

Be Generous with Sugar: Dust liberally with powdered sugar to keep the marshmallows from sticking together. It also enhances their ghostly appearance!

Use Fresh Decor: Check the freshness of your candy eyes and edible markers. Using fresh supplies ensures your Ghostbusters Stay Puft Marshmallows look their best.

Avoid Refrigeration: Do not refrigerate finished marshmallows as it can cause chocolate blooming, ruining the visual appeal. Store at room temperature instead for optimal taste.

How to Store and Freeze Ghostbusters Stay Puft Marshmallows

Room Temperature: Keep your marshmallows in an airtight container at room temperature for up to 3 days to maintain their delightful texture.

Fridge: Avoid refrigeration, as it can cause chocolate blooming, leading to a less appealing appearance.

Freezer: If you need to store them for longer, place the marshmallows in a freezer-safe container with parchment paper between layers. They can be frozen for up to 2 months.

Reheating: To enjoy frozen marshmallows, let them thaw in the fridge overnight, then bring them to room temperature before serving for the best flavor and texture.

Ghostbusters Stay Puft Marshmallows Variations

Feel free to unleash your creativity and personalize your Ghostbusters Stay Puft Marshmallows with these delightful variations!

  • Dairy-Free: Use dairy-free chocolate instead of white chocolate for a suitable alternative. It still creates a creamy coating, perfect for everyone!

  • Colorful Coating: Swap white chocolate for colored candy melts to make vibrant, eye-catching marshmallows. This twist is sure to brighten up any party!

  • Crunchy Texture: Roll your marshmallows in crushed graham crackers or nuts after coating for added crunch. This combination makes for a delightful textural surprise!

  • Flavor Infusion: Add a drop of peppermint or almond extract to the melted white chocolate for a flavor twist. It’s a fun way to make each batch uniquely delicious!

  • Spooky Faces: Instead of just smiles, use the edible marker to create ghostly expressions or Halloween-themed designs. Your marshmallows will surely become the talk of the party!

  • Boozy Marshmallows: For adult gatherings, drizzle the finished marshmallows with a splash of flavored liqueur (like chocolate or coffee). It adds an exciting kick!

  • Fruity Fun: Dip the marshmallows in fruit-flavored candy melts or drizzle them with fruit-flavored glaze for a fruity taste explosion that pairs perfectly with the sweetness.

  • Mini Marshmallows: Use mini marshmallows instead for bite-sized treats. These smaller versions are great for topping desserts or for little hands to enjoy.

Embrace these ideas and transform your marshmallow creations into something even more special. For additional inspiration, learn how to make fun edible decorations that can elevate your presentations!

Make Ahead Options

These Ghostbusters Stay Puft Marshmallows are a fantastic option for meal prep, making it easy to whip up a batch in advance! You can prepare the marshmallow base and coat them in white chocolate up to 24 hours ahead of your gathering. Just assemble and refrigerate the stacked marshmallows to maintain their shape, then coat with chocolate before serving. To ensure they stay fresh, store them in an airtight container at room temperature, avoiding refrigeration to prevent the chocolate from blooming. When you’re ready to enjoy, simply dust them with powdered sugar and add the finishing touches with your black edible marker. With this prep, you’ll save time and impress your guests!

Ghostbusters Stay Puft Marshmallows

Ghostbusters Stay Puft Marshmallows Recipe FAQs

How do I choose the right marshmallows?
When selecting marshmallows, opt for large, fluffy ones that aren’t stale or overly hard. Look for fresh marshmallows with a soft, puffy texture and no dark spots—all about that fluffy perfection for your Ghostbusters Stay Puft Marshmallows!

How should I store my Ghostbusters Stay Puft Marshmallows?
Store your marshmallows in an airtight container at room temperature for up to 3 days. This keeps them soft and prevents stickiness. Make sure not to refrigerate them as it may cause the chocolate to bloom, ruining their delightful look.

Can I freeze my Ghostbusters Stay Puft Marshmallows?
Absolutely! To freeze, layer your marshmallows in a freezer-safe container with parchment paper between layers. They will keep well for up to 2 months. When you’re ready to enjoy, thaw them in the fridge overnight and let them come to room temperature before serving to retain that magical texture.

Why is my white chocolate not coating smoothly?
If the white chocolate isn’t coating smoothly, it may be too hot or too thick. Ensure you heat it in 30-second intervals, stirring often. If it’s still too thick, you can add a little more shortening (1 teaspoon at a time). This will create a smoother, more manageable consistency for coating your marshmallows beautifully.

Are Ghostbusters Stay Puft Marshmallows suitable for my dog’s diet?
It’s best to keep these treats away from your furry friends. Marshmallows contain sugar and may not be healthy for dogs. If you want a dog-friendly treat, consider making plain marshmallows without the coating or sugar!

What if I can’t find edible markers for decoration?
If you don’t have black edible markers on hand, you can use melted chocolate or dark chocolate chips to create faces instead! Just melt some chocolate, let it cool slightly, and use a toothpick to draw on those playful smiles. This adds a personal touch while keeping it delicious!

Delicious Ghostbusters Stay Puft Marshmallows You’ll Adore

Sweet and whimsical Ghostbusters Stay Puft Marshmallows are quick to whip up, perfect for parties, and a nostalgic treat for all ages.

  • Microwave-safe bowl
  • spatula
  • Baking Sheet
  • parchment paper

For the Marshmallow Base

  • 12 large marshmallows (these fluffy delights provide the perfect foundation for your adorable creations.)

For the Coating

  • 1 cup white chocolate (melted, it adds a sweet and creamy layer to your marshmallow masterpiece.)
  • 1 tablespoon vegetable shortening (this helps create a smoother, glossy finish on your white chocolate.)

For Decoration

  • powdered sugar (dust it generously to give your Stay Puft Marshmallows a snowy, ghostly appearance.)
  • black edible marker (use this to draw playful faces on your marshmallows for a personal touch.)
  • candy eyes (these little embellishments add character and charm, making your creations irresistibly cute!)

Step‑by‑Step Instructions for Ghostbusters Stay Puft Marshmallows

  1. Step 1: Melt the Chocolate. Start by placing 1 cup of white chocolate and 1 tablespoon of vegetable shortening in a microwave-safe bowl. Heat the mixture in 30-second intervals, stirring thoroughly after each round until smooth, about 1.5 to 2 minutes total.
  2. Step 2: Assemble the Base. Dip the bottom of a large marshmallow into the melted white chocolate, then press it onto a parchment-lined baking sheet. Stack two additional marshmallows on top, applying more melted chocolate between each one to secure them.
  3. Step 3: Coat the Marshmallow Figure. Use a spatula to coat the entire marshmallow structure with the remaining melted white chocolate for an even layer.
  4. Step 4: Let it Harden. Allow to harden completely at room temperature, or refrigerate for about 10-15 minutes for quicker results.
  5. Step 5: Add the Finishing Touches. Dust with powdered sugar and draw smiles and faces using the black edible marker.
  6. Step 6: Serve and Enjoy. Arrange on a serving platter and store in an airtight container at room temperature.

Be generous with powdered sugar to prevent sticking and enhance appearance. Avoid refrigeration after coating to prevent chocolate blooming.

Dessert
American
candy, desserts, Ghostbusters Stay Puft Marshmallows, Halloween Treats, marshmallows

Filed Under: Dessert

Thanksgiving Piecaken: A Festive Slice of Joy and Flavor

September 4, 2025 by grace bellamy Leave a Comment

As I stood in my kitchen, the sweet aroma of autumn spices danced through the air, transporting me to cherished Thanksgivings past. That’s when I decided it’s time to break the mold with a Thanksgiving Piecaken that marries the very essence of the season into one stunning dessert. This incredible creation not only impresses your guests but also combines three favorite desserts: cheesecake, spice cake, and a classic pumpkin pie. With its quick prep and cheerful visual impact, you’ll find it’s the perfect way to celebrate family gatherings without the hassle of juggling multiple desserts. So, get ready to blend your baking skills and create a comfort-food masterpiece that’s bound to become a cherished tradition. Are you ready to embark on this deliciously layered journey?

Thanksgiving Piecaken

Why is Thanksgiving Piecaken irresistible?

Decadent layers: Combining creamy cheesecake, spiced cake, and rich pumpkin pie into one slice elevates your dessert game for the holiday season.

Easy to make: With straightforward steps, this dessert is approachable, even if baking isn’t your strongest suit.

Visual wow-factor: This stunning dessert will steal the show on your holiday table, making it a centerpiece worth celebrating.

Crowd-pleaser: Your family and friends won’t just want one slice—they’ll be coming back for seconds!

Make-ahead friendly: Prep the layers the day before for stress-free serving when guests arrive, allowing you to relax and enjoy the festivities.

Discover more ways to impress your guests with fall-inspired recipes that blend classic flavors!

Thanksgiving Piecaken Ingredients

• Dive into the deliciousness of this one-of-a-kind dessert!

For the Cheesecake Layer
• Cream cheese – provides the creamy base for the cheesecake.
• Granulated sugar – sweetens the cheesecake to perfection.
• All-purpose flour (3 tablespoons) – helps create the right texture.
• Vanilla extract – adds a warm, inviting flavor.
• Ground cinnamon (2 teaspoons) – infuses that comforting, autumn spice.
• Heavy whipping cream – creates a rich and fluffy texture.
• Large eggs (2) – bind the mixture for a luscious cheesecake.

For the Spice Cake Layer
• All-purpose flour (2/3 cup) – forms the foundation of the cake.
• Baking powder (1/2 teaspoon) – ensures the cake rises beautifully.
• Ground cinnamon (3/4 teaspoon) – deepens the spice flavor profile.
• Ground ginger (1/2 teaspoon) – adds a zesty kick.
• Nutmeg (1/2 teaspoon) – enhances the festive taste.
• Ground cloves (1/4 teaspoon) – contributes warm, aromatic notes.
• Allspice (1/4 teaspoon) – rounds out the spice mix for complexity.
• Butter (1/4 cup, softened) – brings richness and moisture.
• Brown sugar (1/3 cup, packed) – adds depth of flavor and moisture.
• Vegetable oil (1 tablespoon) – keeps the cake tender.
• Pure vanilla extract – brightens the flavors of the cake.
• Large egg – provides structure to the spice cake.
• Milk (1/3 cup + 1 tablespoon) – helps create a smooth batter.

For the Frosting
• Unsalted butter (12 ounces, softened) – forms the creamy base of the frosting.
• Powdered sugar (5 cups) – sweetens and thickens the frosting.
• Vanilla extract (2 teaspoons) – enhances the overall flavor.
• Cinnamon (1/2 teaspoon, optional) – adds an extra touch of warmth.
• Heavy whipping cream (3-4 tablespoons, cold) – provides a fluffy consistency.

For the Assembly
• Store-bought pumpkin pie (1, 9-inch) – saves time and adds authenticity to your piecaken.

Let the delicious layers of this Thanksgiving Piecaken delight your taste buds!

Step‑by‑Step Instructions for Thanksgiving Piecaken

Step 1: Preheat and Prepare
Begin by preheating your oven to 350 degrees F. While it heats up, grab a 9-inch springform pan and apply non-stick spray, lining the bottom with parchment paper for easy release later. This preparation sets the stage for your glorious Thanksgiving Piecaken.

Step 2: Cream the Cheesecake Mixture
In a stand mixer, combine the softened cream cheese, granulated sugar, and 3 tablespoons of flour. Mix on medium speed until smooth and creamy, about 2-3 minutes. Introduce the vanilla extract and ground cinnamon, mixing until fully incorporated. This rich blend forms the luscious cheesecake layer of your Piecaken.

Step 3: Add the Heavy Cream and Eggs
Slowly pour in the heavy whipping cream while your mixer is on low speed, then crank it up to high for about 1 minute. Add the eggs one at a time, allowing each to blend in completely before the next addition. Once well mixed, pour this beautiful cheesecake filling into your prepared springform pan, and gently tap it to eliminate any air bubbles.

Step 4: Bake the Cheesecake Layer
Place the springform pan in the preheated oven at 350 degrees F and bake for 10 minutes. After this initial time, reduce the temperature to 200 degrees F and continue baking for an additional 30-35 minutes. The center should jiggle slightly when done. Once baked, let it cool at room temperature, then refrigerate it overnight for the best texture.

Step 5: Prepare the Spice Cake Layer
While the cheesecake cools, prepare a 9-inch cake pan by greasing it with vegetable shortening and dusting it with flour. In a separate bowl, whisk together the 2/3 cup of flour, baking powder, and spices: cinnamon, ginger, nutmeg, cloves, and allspice. This spiced flour mix will give your Piecaken its delightful warmth.

Step 6: Mix the Spice Cake Batter
In your stand mixer, cream together the softened butter and brown sugar until fluffy, about 3-4 minutes. Add in the vegetable oil, egg, and vanilla extract, mixing until fully combined. Gradually incorporate the first half of your flour mixture, followed by the milk, then the rest of the flour mixture until just combined—this creates the moist batter for the spice cake layer.

Step 7: Bake the Spice Cake
Pour the spice cake batter into your prepared cake pan and bake in the oven for 15-17 minutes. Check for doneness by inserting a toothpick; it should come out clean or with a few moist crumbs. Let the cake cool to room temperature before refrigerating overnight, ensuring optimal flavor for your Thanksgiving Piecaken.

Step 8: Create the Frosting
For the frosting, start by creaming the softened unsalted butter in your stand mixer until smooth and creamy. Gradually add the powdered sugar, mixing until fully blended. Finally, stir in the vanilla extract, optional cinnamon, and cold heavy whipping cream until you achieve a light and fluffy whipped frosting consistency perfect for your Piecaken.

Step 9: Trim and Assemble Layers
Once cooled, gently trim each layer (cheesecake and spice cake) for even sizing. Begin assembling your Thanksgiving Piecaken by placing the cheesecake layer upside down on a cake stand, spreading 3/4 cup of frosting over the top, ensuring even coverage for a beautiful base.

Step 10: Stack and Frost
Next, place the spice cake layer on top of the frosted cheesecake and spread another 3/4 cup of frosting over it. Prepare your store-bought pumpkin pie by trimming it to fit, and place it on the spice cake layer. Now, cover the entire Piecaken with half of the remaining frosting, filling any cracks and smoothing the sides for an even finish.

Step 11: Chill to Set
Refrigerate the assembled Thanksgiving Piecaken for 20-30 minutes until the frosting firms up slightly. This step ensures that once you add the final layer of frosting, it will hold its shape beautifully for serving.

Step 12: Final Decor and Serve
Apply the remaining buttercream frosting and pipe a decorative border if desired, adding a festive touch. Slice into this stunning creation and watch your family and friends delight in every bite of your Thanksgiving Piecaken!

Thanksgiving Piecaken

How to Store and Freeze Thanksgiving Piecaken

  • Room Temperature: If serving the cake on the same day, keep it at room temperature for up to 4 hours to maintain its texture and flavor before serving.

  • Fridge: Store leftover Thanksgiving Piecaken in an airtight container in the refrigerator for up to 3 days. This keeps it fresh and ready for a sweet treat later!

  • Freezer: Wrap individual slices tightly in plastic wrap, then foil. Store in the freezer for up to 3 months—perfect for enjoying this delicious dessert anytime!

  • Reheating: Thaw overnight in the refrigerator, then gently warm in the microwave for about 10-15 seconds if you prefer a slightly warmed slice. Enjoy every delightful bite!

Expert Tips for Thanksgiving Piecaken

  • Room Temperature Ingredients: Make sure your cream cheese and eggs are at room temperature for a smooth cheesecake batter. This prevents lumps and ensures even mixing.

  • Avoid Overmixing: When incorporating eggs, mix just until combined to avoid a dense texture in your cheesecake layer. A light touch goes a long way!

  • Check Cake Doneness: Use a toothpick to check for doneness in both layers. It should come out clean or with a few moist crumbs, signaling they’re ready.

  • Chill Layers Overnight: Refrigerating the cheesecake and spice cake layers overnight enhances their flavors and makes assembly easier. It’s worth the wait!

  • Frosting Consistency: Ensure your frosting is light and airy for perfect coverage. If it’s too thick, add a splash more heavy whipping cream until the desired consistency is reached.

  • Customize Your Piecaken: Don’t hesitate to add your favorite spices or toppings! Be creative, adding a sprinkle of nuts or a drizzle of caramel can elevate your Thanksgiving Piecaken even further.

Thanksgiving Piecaken Variations & Substitutions

Feel the freedom to personalize this incredible Thanksgiving Piecaken with delightful twists that suit your taste buds!

  • Gluten-Free: Substitute all-purpose flour with a 1:1 gluten-free baking blend for a friendly alternative without sacrificing texture.
  • Dairy-Free: Use vegan cream cheese and coconut cream in place of heavy whipping cream to create a luscious vegan twist.
  • Spice It Up: Add a pinch of cayenne pepper or chili powder to the spice cake layer for a surprising kick that meshes beautifully with fall flavors.
  • Nutty Crunch: Fold in 1/2 cup of finely chopped walnuts or pecans into the spice cake batter for delightful texture and warmth.
  • Chocolate Lovers: Swirl in melted chocolate or cocoa powder into the cheesecake layer for an indulgent touch that combines sweetness with richness.
  • Fruit Infusion: Layer slices of roasted or caramelized apples between the cheesecake and spice cake for a delicious fruity surprise.
  • Pumpkin Spice Frosting: Add a teaspoon of pumpkin pie spice to the frosting mix to bring even more autumn flavor into each slice!
  • Dessert Jars: For a fun variation, create individual dessert jars using layers of cheesecake, spice cake, and pie—perfect for festive gatherings or gifting!

As you explore these variations, why not check out other creative ideas like our fall-inspired recipes that combine seasonal delights? Your Thanksgiving gatherings will be extra special with these treats!

What to Serve with Thanksgiving Piecaken

Indulging in a slice of this unique dessert is just the beginning; let’s create a warm and inviting feast for your loved ones.

  • Spiced Apple Cider: Warm and aromatic, this drink brings out the cozy flavors of fall, enhancing the sweetness of the Piecaken.
  • Creamy Mashed Potatoes: The rich, buttery texture provides a comforting balance against the sweet layers of the Piecaken, perfect for satiating the palate.
  • Green Bean Almondine: Fresh, crisp green beans topped with toasty almonds add a delightful crunch, creating a lovely contrast to the dessert’s creamy texture.
  • Roasted Brussels Sprouts: These lightly caramelized sprouts lend a savory depth that beautifully complements the sweetness of the Thanksgiving Piecaken.
  • Pumpkin Spice Latte: This seasonal favorite offers a delightful hint of pumpkin that pairs excellently with the flavors in the Piecaken.
  • Gingerbread Cookies: The warm spices in these chewy treats echo the flavors in the Piecaken, making for a festive treat alongside the dessert.
  • Cranberry Sauce: The tangy brightness of cranberry sauce cuts through the richness of the Piecaken, providing a refreshing bite with each taste.

With these delicious pairings, your Thanksgiving celebration is sure to create memories that will last long after the last slice is gone!

Make Ahead Options

These Thanksgiving Piecaken layers are perfect for meal prep, allowing you to enjoy stress-free holiday baking! You can prepare the cheesecake layer and spice cake layer up to 24 hours in advance. Simply bake both layers and allow them to cool completely before refrigerating them separately overnight to maintain their rich flavors and textures. While the cakes chill, whip up the frosting, which can also be made a day ahead and stored in the fridge. When you’re ready to assemble, just trim the layers for even sizing, stack them with frosting in between, and refrigerate for 20-30 minutes to set. This thoughtful prep means your Thanksgiving Piecaken will be just as delicious on serving day, leaving you free to enjoy the festivities!

Thanksgiving Piecaken

Thanksgiving Piecaken Recipe FAQs

What type of cream cheese should I use for the cheesecake layer?
I recommend using full-fat cream cheese for the richest and creamiest texture. Avoid low-fat or non-fat options, as they can lead to a less appealing consistency in your cheesecake layer!

How can I tell if my spices are fresh enough for the spice cake layer?
Spices typically lose flavor over time, so if yours are over a year old, it’s best to replace them. A quick test is to rub a small amount between your fingers; if you don’t get a strong aroma, they may be expired. Fresh spices greatly enhance your Thanksgiving Piecaken’s flavor!

What’s the best way to store leftover Thanksgiving Piecaken?
After you’ve enjoyed your delicious creation, make sure to store the remaining Piecaken in an airtight container in the fridge for up to 3 days. If you have extra slices, wrap them tightly in plastic wrap and then foil before placing them in the freezer, where they can last for up to 3 months!

How do I freeze individual slices of Thanksgiving Piecaken?
To freeze, slice the Piecaken after it has been fully assembled and chilled. Wrap each slice tightly in plastic wrap, ensuring no air can enter. Then, wrap them again in foil for added protection from freezer burn. Label the bags with the date, and enjoy plucking them from the freezer whenever you crave a sweet treat!

Can I modify the recipe to be gluten-free?
Absolutely! You can substitute the all-purpose flour with a gluten-free flour blend. Ensure that the baking powder you use is also gluten-free. Your Thanksgiving Piecaken will still deliver on flavor and texture, making it an inclusive dessert for everyone to enjoy.

How can I make my frosting lighter for the Thanksgiving Piecaken?
If your frosting is too thick, simply add a tablespoon of cold heavy whipping cream at a time while mixing until you reach your desired consistency. It should be fluffy and easy to spread, giving your Piecaken a beautiful finish that everyone will admire!

Thanksgiving Piecaken: A Festive Slice of Joy and Flavor

Thanksgiving Piecaken combines cheesecake, spice cake, and pumpkin pie into one amazing dessert, perfect for holiday gatherings.

  • stand mixer
  • 9-inch springform pan
  • 9-inch cake pan

For the Cheesecake Layer

  • 8 ounces cream cheese (softened)
  • 3/4 cup granulated sugar
  • 3 tablespoons all-purpose flour
  • 1 teaspoon vanilla extract
  • 2 teaspoons ground cinnamon
  • 1 cup heavy whipping cream (cold)
  • 2 large eggs

For the Spice Cake Layer

  • 2/3 cup all-purpose flour
  • 1/2 teaspoon baking powder
  • 3/4 teaspoon ground cinnamon
  • 1/2 teaspoon ground ginger
  • 1/2 teaspoon nutmeg
  • 1/4 teaspoon ground cloves
  • 1/4 teaspoon allspice
  • 1/4 cup butter (softened)
  • 1/3 cup brown sugar (packed)
  • 1 tablespoon vegetable oil
  • 1 teaspoon pure vanilla extract
  • 1 large egg
  • 1/3 cup milk
  • 1 tablespoon milk

For the Frosting

  • 12 ounces unsalted butter (softened)
  • 5 cups powdered sugar
  • 2 teaspoons vanilla extract
  • 1/2 teaspoon cinnamon (optional)
  • 3-4 tablespoons heavy whipping cream (cold)

For the Assembly

  • 1 9-inch store-bought pumpkin pie

Preparation

  1. Preheat your oven to 350 degrees F. Prepare a 9-inch springform pan with non-stick spray and line with parchment paper.
  2. In a stand mixer, combine cream cheese, granulated sugar, and flour until smooth. Mix in vanilla and cinnamon.
  3. Slowly add heavy whipping cream on low speed, then switch to high. Add eggs one at a time, blending well after each.
  4. Pour the cheesecake mixture into the springform pan. Tap gently to remove air bubbles.
  5. Bake for 10 minutes, then reduce heat to 200 degrees F and bake for an additional 30-35 minutes.
  6. Let cool at room temperature, then refrigerate overnight.

Spice Cake Layer

  1. Prepare a 9-inch cake pan by greasing and dusting with flour.
  2. In a bowl, whisk flour, baking powder, and spices together.
  3. Cream together butter and brown sugar until fluffy. Mix in oil, egg, and vanilla.
  4. Gradually mix in half of the flour mixture, then milk, followed by the remaining flour until just combined.
  5. Pour the spice cake batter into the prepared pan and bake for 15-17 minutes.
  6. Cool at room temperature and refrigerate overnight.

Frosting and Assembly

  1. Cream the softened unsalted butter until smooth. Gradually add powdered sugar and mix well.
  2. Stir in vanilla, optional cinnamon, and cold heavy cream until fluffy.
  3. Trim cheesecake and spice cake layers for even sizing. Assemble by placing cheesecake layer upside down on a cake stand.
  4. Spread 3/4 cup frosting over the cheesecake, then place spice cake layer on top and frost again.
  5. Trim the store-bought pumpkin pie to fit and place on top. Cover the entire Piecaken with half of the remaining frosting.
  6. Refrigerate for 20-30 minutes until frosting firms, then apply the remaining frosting and decorate as desired.

Ensure all ingredients are at room temperature for best results.

Dessert
American
cheesecake, holiday dessert, layered dessert, Piecaken, Thanksgiving dessert, Thanksgiving Piecaken

Filed Under: Dessert

Sardinia Herb Soup: A Flavorful Escape into Freshness

September 4, 2025 by grace bellamy Leave a Comment

As the seasons shift, there’s nothing quite like the warm embrace of a bowl of Sardinia Herb Soup. This vibrant dish is a delightful escape to the Mediterranean, filled with a tapestry of fresh vegetables and aromatic herbs that will transport you straight to sun-drenched coasts. What I love most about this recipe is how quickly it comes together, making it a perfect weeknight meal for anyone seeking comfort without the fuss. Plus, it’s a wonderful way to sneak in nutrients without compromising on taste. With just 45 minutes from prep to plate, you’ll have a hearty, satisfying dish ready to enjoy. Curious about how this simple blend can create such a rich flavor? Let’s dive into the steps that will bring your kitchen to life!

Sardinia Herb Soup

What makes Sardinia Herb Soup special?

Vibrant, Fresh Ingredients: This soup bursts with flavor from all-natural ingredients like zucchini, bell pepper, and chickpeas, creating a refreshing blend that’s nourishing and satisfying.
Easy to Prepare: With a total cook time of just 45 minutes, it’s a quick weeknight meal that doesn’t skimp on heartiness.
Herbal Harmony: The mix of parsley, basil, and mint adds a fragrant twist, evoking the essence of Mediterranean gardens.
Nutritionally Rich: Packed with veggies and protein, this dish is perfect for anyone looking to boost their diet without intensity.
Customizable Delight: Feel free to adapt the recipe by adding your choice of veggies or swapping in different herbs to tailor it to your tastes. Whether enjoyed alone or with a sprinkle of grated Parmesan, this soup promises to be a crowd-pleaser!

Sardinia Herb Soup Ingredients

For the Soup

  • Olive oil – used for sautéing the vegetables, adding richness to the base of the soup.
  • Onion – provides sweetness and depth, making the foundation of this flavorful dish.
  • Garlic – enhances flavor with its aromatic punch, perfect for brightening the soup.
  • Carrots – adds natural sweetness and color, making the soup even more inviting.
  • Celery – introduces crunch and a mild flavor that complements the other ingredients.
  • Zucchini – brings freshness and subtle flavor, balancing the heartiness of the soup.
  • Bell pepper – provides a pop of color and a slight sweetness that elevates the dish.
  • Chickpeas – packed with protein, they offer a substantial texture that makes the soup more filling.
  • Vegetable broth – the liquid base that infuses all the ingredients with savory depth.
  • Diced tomatoes – contributes acidity and richness, enhancing the overall flavor profile.

For the Herbs

  • Fresh parsley – adds brightness and a hint of earthiness to round out the flavors.
  • Fresh basil – delivers a sweet, aromatic touch that evokes the essence of Mediterranean cuisine.
  • Fresh mint – introduces a refreshing note, making each spoonful a delightful surprise.
  • Dried oregano – brings a warm, herby depth, tying all the flavors together beautifully.

For Seasoning

  • Salt – essential for seasoning the soup, enhancing all the natural flavors.
  • Black pepper – provides a hint of heat and complexity to the dish.
  • Lemon juice – a splash at the end brightens the flavors and adds a delightful zing.

Optional Toppings

  • Grated Parmesan cheese – adds a rich, savory finish that complements the herbal notes of the soup.

Step‑by‑Step Instructions for Sardinia Herb Soup

Step 1: Sauté the Aromatics
In a large pot, set over medium heat, warm 2 tablespoons of olive oil. Once the oil shimmers, add 1 large chopped onion, 3 minced garlic cloves, 2 diced carrots, and 2 diced celery stalks. Sauté these vegetables for about 5-7 minutes, stirring frequently, until the onions are translucent and fragrant.

Step 2: Add the Vegetables
After the aromatics soften, stir in 1 diced zucchini and 1 chopped bell pepper. Continue cooking for an additional 5 minutes, allowing the mixture to soften further. You’ll notice the vibrant colors come to life, creating a delicious foundation for your Sardinia Herb Soup.

Step 3: Incorporate Chickpeas
Next, add 1 can of drained and rinsed chickpeas to the pot, stirring to combine all the ingredients thoroughly. This step not only adds protein but also contributes a hearty texture to the soup. Cook for 2 minutes to warm the chickpeas through.

Step 4: Build the Soup Base
Slowly pour in 6 cups of vegetable broth along with 1 cup of diced tomatoes, stirring to blend everything together. Make sure to scrape down the sides of the pot to incorporate any flavorful bits sticking to it. The mixture will start to bubble as it heats up, signaling the next phase.

Step 5: Season the Soup
Sprinkle in 1 teaspoon of dried oregano, 1 teaspoon of salt, and ½ teaspoon of black pepper, stirring well. Allow the soup to come to a gentle simmer, which should take about 5-7 minutes. You’ll notice the comforting aromas blooming as the spices mingle with the vegetables.

Step 6: Simmer for Flavor
Once simmering, reduce the heat to low and let the soup cook gently for 20 minutes. This slow cooking allows the flavors in your Sardinia Herb Soup to meld beautifully together, creating a rich and inviting dish.

Step 7: Add Fresh Herbs
After 20 minutes, stir in 1 cup of chopped fresh parsley, ½ cup of fresh basil, and ¼ cup of fresh mint. Cook for another 5 minutes, allowing the herbs to wilt and infuse their aromatic qualities into the soup. The vibrant green colors will make your dish visually enticing.

Step 8: Finish With Lemon Juice
Remove the pot from heat and stir in the juice of 1 lemon. This brightens the flavors and adds a refreshing zing to the soup. Take a moment to enjoy the aroma wafting through your kitchen, a testament to the delicious meal you’ve just prepared.

Step 9: Serve and Enjoy
Ladle the warm Sardinia Herb Soup into bowls, and if desired, garnish with freshly grated Parmesan cheese for an added layer of flavor. The combination of fresh herbs and cheese creates a satisfying finish that complements the hearty soup perfectly.

Sardinia Herb Soup

Sardinia Herb Soup Variations

Feel free to play around with this Sardinia Herb Soup recipe—there’s room to explore delightful twists on flavors and textures!

  • Dairy-Free: Omit Parmesan cheese and use nutritional yeast for a cheesy flavor without dairy.
  • Spicy Kick: Add a pinch of red pepper flakes or diced jalapeños for a warming heat that awakens the taste buds.
  • Heartier Veggies: Include sweet potatoes or butternut squash for a sweeter, denser addition that complements the soup perfectly.
  • Coconut Cream: Stir in a bit of coconut cream at the end for a creamy texture and a tropical twist on the flavor.
  • Protein Boost: Swap chickpeas for white beans or lentils to mix up the protein source and texture of your soup.
  • Flavor Variants: Try adding a splash of balsamic vinegar or apple cider vinegar for a tangy twist that brightens every bite.
  • Herb Rotation: Replace mint with dill or cilantro to create a fresh flavor profile that offers a whole new experience.
  • Grain Infusion: Toss in cooked quinoa or farro for a heartier soup that’s even more satisfying on those chilly evenings.

The beauty of this recipe lies in its adaptability, encouraging you to be creative while enjoying the delightful, nourishing qualities of a homemade soup! For more flavor-packed options, check out my Vegetable Enchiladas or try this Savory Lentil Salad for a nutritious side dish.

How to Store and Freeze Sardinia Herb Soup

Fridge: Keep your Sardinia Herb Soup in an airtight container in the fridge for up to 3 days. This way, you can enjoy it for lunch or dinner without losing flavor.

Freezer: Freeze leftover soup in portions in freezer-safe containers for up to 3 months. Be sure to leave some space for expansion as it freezes.

Reheating: When ready to enjoy, thaw in the fridge overnight and reheat on the stovetop over medium heat. Stir in a splash of vegetable broth for moisture, as the soup may thicken upon freezing.

Avoid Freezing Cream: If adding Parmesan cheese, consider garnishing fresh before serving instead of incorporating it directly into the soup; it may not freeze well.

Make Ahead Options

Sardinia Herb Soup is a fantastic recipe for meal prep, ensuring you save time on busy weeknights! You can chop the vegetables, prepare the herbs, and even sauté the aromatics up to 24 hours in advance. Simply refrigerate the prepped ingredients in airtight containers to maintain their freshness and prevent browning. When you’re ready to serve, just combine everything in a pot with the vegetable broth and simmer as directed. You can also store the finished soup in the fridge for up to 3 days; just reheat gently on the stove and stir in the lemon juice just before serving to keep that vibrant flavor intact. Enjoy a comforting bowl with minimal effort!

What to Serve with Sardinia Herb Soup

Warm, inviting, and bursting with flavors, this soup offers a perfect base to create a comforting and delicious meal experience.

  • Crusty Bread: A slice of freshly baked, crusty bread is perfect for soaking up every flavorful drop of the soup, enhancing your dining experience.

  • Mixed Green Salad: A light, crisp salad with a citrus vinaigrette balances the hearty soup, adding a refreshing contrast to the meal.

  • Garlic Breadsticks: These golden, buttery breadsticks bring a delightful crunch, making them a fun and tasty sidekick for your soup.

  • Grilled Vegetables: Smoky, charred vegetables provide a lovely flavor contrast and extra layers of health, aligning beautifully with the soup’s fresh essence.

  • Cheese Platter: A selection of cheeses, like sharp cheddar or creamy goat cheese, adds richness and a sophisticated touch that complements the herbaceous notes of the dish.

  • Lemon Sorbet: A scoop of lemon sorbet offers a refreshing palate cleanser, preparing your senses for a satisfying finish to the meal.

  • Crisp White Wine: A chilled glass of Sauvignon Blanc or Pinot Grigio enhances the herbal flavors and bright notes of the soup while making each spoonful more delightful.

Each of these pairings enhances the culinary experience, allowing the vibrant Sardinia Herb Soup to shine at the heart of your meal.

Expert Tips for Sardinia Herb Soup

  • Fresh Herbs Matter: Use fresh herbs like parsley, basil, and mint for the best flavor. Dried herbs won’t replicate the vibrant taste of Sardinia Herb Soup.

  • Chop Evenly: Ensure you dice vegetables uniformly so they cook evenly, giving your soup the perfect texture and a beautiful presentation.

  • Adjust the Broth: If you prefer a heartier soup, reduce the broth by a cup or add more chickpeas. This helps enhance the richness of the Sardinia Herb Soup.

  • Taste as You Go: Always taste your soup while cooking and adjust the seasoning gradually. This way, you avoid overpowering flavors and maintain balance.

  • Cooling & Freezing: Leftover soup can be cooled and frozen for up to three months. When reheating, add a splash of vegetable broth for extra moisture.

  • Garnish with Style: A sprinkle of grated Parmesan on top adds a savory finish to each bowl. It’s an easy way to elevate your Sardinia Herb Soup!

Sardinia Herb Soup

Sardinia Herb Soup Recipe FAQs

What type of vegetables should I use for Sardinia Herb Soup?
Absolutely! Choosing the freshest vegetables is key to enhancing the soup’s flavor. Look for vibrant zucchini without dark spots, fresh bell peppers that are firm, and carrots that are crisp. If you have leftover veggies, feel free to mix and match! Just keep in mind that root vegetables like potatoes may change the texture.

How should I store leftover Sardinia Herb Soup?
To keep your delicious Sardinia Herb Soup fresh, transfer it to an airtight container and store it in the fridge for up to 3 days. If you’re planning to enjoy it later in the week, simply reheat it on the stovetop over medium heat, stirring occasionally to ensure even warming.

Can I freeze Sardinia Herb Soup?
Absolutely! You can freeze your Sardinia Herb Soup for up to 3 months. To do this, allow the soup to cool completely, then pour it into freezer-safe containers. Remember to leave about an inch of space at the top for expansion. When you’re ready to enjoy it, thaw it in the fridge overnight and reheat it on the stovetop, adding a splash of vegetable broth to restore moisture.

What if my soup turns out too thick?
If you find that your Sardinia Herb Soup has thickened more than you prefer, don’t worry! Just add a bit of vegetable broth or water, stirring it in gradually until you reach your desired consistency. This will not only adjust the texture but will allow those fresh flavors to shine through once more.

Is Sardinia Herb Soup suitable for vegans?
Yes, it is! Sardinia Herb Soup is a vegan-friendly dish as it uses vegetable broth and plant-based ingredients. For those who are sensitive to gluten, just ensure that the vegetable broth is gluten-free. And if you want to serve it with a protein boost, consider adding more chickpeas or even some quinoa!

What’s the best way to reheat frozen soup?
To reheat your frozen Sardinia Herb Soup, gently thaw it overnight in the fridge for the best results. When ready to eat, pour it into a pot over medium heat, stirring occasionally, and add a splash of vegetable broth if needed to improve consistency. This method helps preserve the soup’s flavor and texture beautifully!

Sardinia Herb Soup: A Flavorful Escape into Freshness

Experience the vibrant flavors of seafood with Sardinia Herb Soup, a nourishing blend of fresh vegetables and aromatic herbs.

  • Large Pot

For the Soup

  • 2 tablespoons olive oil (used for sautéing)
  • 1 large onion (chopped)
  • 3 cloves garlic (minced)
  • 2 carrots (diced)
  • 2 celery stalks (diced)
  • 1 zucchini (diced)
  • 1 bell pepper (chopped)
  • 1 can chickpeas (drained and rinsed)
  • 6 cups vegetable broth (liquid base)
  • 1 cup diced tomatoes

For the Herbs

  • 1 cup fresh parsley (chopped)
  • ½ cup fresh basil
  • ¼ cup fresh mint
  • 1 teaspoon dried oregano

For Seasoning

  • 1 teaspoon salt
  • ½ teaspoon black pepper
  • 1 tablespoon lemon juice (freshly squeezed)

Optional Toppings

  • to taste grated Parmesan cheese

Step-by-Step Instructions

  1. In a large pot over medium heat, warm 2 tablespoons of olive oil. Add 1 chopped onion, 3 minced garlic cloves, 2 diced carrots, and 2 diced celery stalks. Sauté for about 5-7 minutes until translucent.
  2. Stir in 1 diced zucchini and 1 chopped bell pepper and cook for an additional 5 minutes.
  3. Add 1 can of drained chickpeas, stirring to combine all ingredients, and cook for 2 minutes to warm through.
  4. Pour in 6 cups of vegetable broth and 1 cup of diced tomatoes, stir well and scrape the sides of the pot.
  5. Sprinkle in 1 teaspoon of dried oregano, 1 teaspoon of salt, and ½ teaspoon of black pepper, then bring to a gentle simmer for 5-7 minutes.
  6. Reduce heat to low and let soup cook gently for 20 minutes.
  7. After 20 minutes, stir in 1 cup of chopped fresh parsley, ½ cup of fresh basil, and ¼ cup of fresh mint and cook for another 5 minutes.
  8. Remove pot from heat and stir in the juice of 1 lemon.
  9. Ladle soup into bowls and garnish with grated Parmesan cheese if desired.

For best flavors, use fresh herbs and adjust seasoning while cooking. Leftovers can be refrigerated or frozen for later enjoyment.

Main Dishes
Mediterranean
aromatic herbs, comfort food, fresh vegetables, nutritional soup, quick meal, Sardinia Herb Soup

Filed Under: Main Dishes

Delicious Crispy Fish Taco Bowls for Your Family Feast

September 4, 2025 by grace bellamy Leave a Comment

As the savory scent of crispy fish wafted through my kitchen, I couldn’t help but think of sun-soaked beach days and laughter shared over good food. These Crispy Fish Taco Bowls are not only a feast for the senses but also a delightful twist on traditional tacos. A fabulous perk? They come together in just 40 minutes, making them perfect for a busy weeknight meal. Each bowl is topped with a vibrant slaw and zesty chipotle sauce, ensuring that this dish is not just a dinner but an experience! Whether you’re a seasoned home chef or simply someone tired of fast food, this recipe offers a tasty upgrade to your dinner routine. So, are you ready to dive into a bowl that promises crispy goodness in every bite?

Crispy Fish Taco Bowls

Why are Crispy Fish Taco Bowls a must-try?

Quick and Easy: This dish comes together in just 40 minutes, perfect for busy cooks looking for a delicious meal without the fuss.

Flavor Explosion: Each bite features crispy fish, complemented by a zesty slaw and a smoky chipotle sauce. The combination of flavors is sure to thrill your taste buds!

Versatile Options: Customize these bowls with your favorite toppings like avocado or pickled onions to create a personal masterpiece that suits your mood.

Crowd-Pleaser: Whether you’re serving up a family feast or entertaining friends, these taco bowls are always a hit, bringing smiles around the table.

Healthy Twist: Packed with protein and fresh veggies, they provide a wholesome option compared to traditional fast food. If you’re looking for more exciting weeknight meals, check out my one-pan recipes for effortless cooking!

Crispy Fish Taco Bowls Ingredients

These ingredients will transport your taste buds to a coastal paradise!

For the Fish
• 4 fish fillets – Choose your favorite type, like cod or tilapia, for the best texture and flavor.
• Salt – Use to taste; a sprinkle enhances all the other flavors.
• Pepper – Freshly ground pepper adds a wonderful aroma.
• 1 cup all-purpose flour – This helps create that irresistible crispy coating.
• 2 eggs – Beaten eggs act as the perfect glue for the breadcrumbs.
• 1 cup panko breadcrumbs – These give your fish an extra crunch; feel free to try whole-grain crumbs for a healthier option.

For the Seasoning
• 1 tsp smoked paprika – Adds depth and a subtle smokiness to the fish.
• 1 tsp garlic powder – A dash of flavor that pairs perfectly with the fish.
• 1 tsp cumin powder – Provides a warm and earthy taste.
• 1 tsp chili powder – For a hint of heat that you can adjust based on preference.
• Cooking oil for frying – Choose a high smoke point oil like canola or vegetable oil to achieve that crispy finish.

For the Slaw
• 2 cups shredded cabbage mix – A blend of green and purple cabbage adds crunch and color.
• 1 cup shredded carrots – For an additional crunchy sweetness.
• 1/2 cup chopped cilantro – This herb brings freshness and vibrancy to the dish.

For the Dressing
• 1/4 cup mayonnaise – This creates a creamy base for your slaw.
• 2 tbsp lime juice – Fresh lime juice adds zesty brightness.
• 1 tbsp apple cider vinegar – Balances the richness with acidity; you can substitute with white vinegar if needed.
• 1 tbsp honey (optional) – A touch of sweetness to balance flavors; adjust based on your taste.
• Additional salt and pepper to taste – Always a good idea to season to your liking.

For Serving
• 2 cups cooked rice or quinoa – This serves as a hearty base for your bowl.
• Chipotle sauce – A delectable mix of sour cream, mayonnaise, minced chipotle peppers, lime juice, garlic, cumin, and salt to bring everything together.

Optional Toppings
• Sliced avocado – Creamy and rich, a perfect complement to the crispy fish.
• Diced tomatoes – Freshness adds a pop of color and flavor.
• Pickled red onions – These offer a tangy crunch that elevates your dish.
• Lime wedges – A squeeze of lime brightens up each bite!

Let’s bring these Crispy Fish Taco Bowls to life in your kitchen!

Step‑by‑Step Instructions for Crispy Fish Taco Bowls

Step 1: Prepare the Fish
Start by patting the fish fillets dry with paper towels, then season them generously with salt and pepper. This step ensures that the fish absorbs the flavors beautifully. Prepping the fish properly sets the stage for perfectly crispy fish taco bowls that everyone will love!

Step 2: Set Up Breading Station
In three shallow dishes, place the all-purpose flour in the first, the beaten eggs in the second, and in the last, combine panko breadcrumbs with smoked paprika, garlic powder, cumin powder, and chili powder. This organized setup makes it easy to coat the fish evenly, ensuring a crispy texture when cooked.

Step 3: Coat the Fish
Take each fish fillet and dip it first into the flour, making sure it’s fully coated. Next, immerse the fillet into the beaten eggs to adhere, and finally, press it into the panko mixture until it’s well-coated. This triple-layer approach creates an irresistible crunch, essential for your crispy fish taco bowls.

Step 4: Fry the Fish
Heat a generous amount of cooking oil in a large skillet over medium-high heat until it shimmers, indicating it’s hot enough for frying. Gently add the coated fish in batches, allowing each side to fry for about 3–4 minutes or until golden brown and crispy. Drain the perfectly fried fish on paper towels to absorb excess oil before assembling the bowls.

Step 5: Make the Slaw
In a large mixing bowl, combine the shredded cabbage mix, shredded carrots, and chopped cilantro. This fresh mixture is vibrant and crunchy, providing a refreshing contrast to the rich, crispy fish in your taco bowls. Toss gently to mix the ingredients evenly and brighten up your meal.

Step 6: Prepare the Dressing
In a small bowl, whisk together the mayonnaise, lime juice, apple cider vinegar, and optional honey, and season with additional salt and pepper. This creamy dressing adds a zesty kick to the slaw. Once fully mixed, pour it over the slaw mixture and toss until everything is evenly coated, enhancing your crispy fish taco bowls with flavor.

Step 7: Assemble the Bowls
Begin assembling your crispy fish taco bowls by adding a hearty base of cooked rice or quinoa to each serving bowl. Layer the crispy fish pieces on top, followed by a generous scoop of the fresh slaw. This vibrant arrangement not only makes for an appealing presentation but also ensures every bite is packed with flavor.

Step 8: Drizzle the Chipotle Sauce
Generously drizzle the prepared chipotle sauce over the crispy fish and slaw in each bowl. This sauce ties the entire dish together with its smoky and creamy character. Feel free to adjust the amount based on your taste for a flavor-packed experience in every crunchy bite.

Step 9: Add Optional Toppings
Finish off your crispy fish taco bowls with toppings of your choice, such as sliced avocado, diced tomatoes, or pickled red onions for extra flavor and texture. Adding lime wedges allows everyone to squeeze a bit of freshness over their meal. Each bowl bursts with colors and flavors, making for a delightful dining experience.

Crispy Fish Taco Bowls

Crispy Fish Taco Bowls Variations & Substitutions

Feel free to explore these delicious twists and swaps to make the Crispy Fish Taco Bowls your own!

  • Gluten-Free: Swap all-purpose flour and panko breadcrumbs for gluten-free alternatives like almond flour and crushed gluten-free crackers for a crispy coating.
  • Dairy-Free: Use vegan mayonnaise and replace the chipotle sauce with a dairy-free version made from cashews blended with lime juice and spices.
  • Baked Fish: Skip the frying and coat the fish, then bake at 425°F (220°C) on a parchment-lined baking sheet for about 15–20 minutes for a healthier option.
  • Extra Spice: Add diced jalapeños or a pinch of cayenne to the slaw for a flavor punch that brings a delightful heat to each bite.
  • Veggie Swap: Try using cauliflower or eggplant for a plant-based alternative, also bringing unique textures and flavors to your bowls.
  • Crispy Topping: Top with crushed tortilla chips instead of panko for added crunch and a fun twist that makes delightful textures.
  • Rice Alternatives: Instead of rice or quinoa, use cilantro-lime cauliflower rice for a low-carb base that still packs incredible flavor.
  • Salsa Variation: Mix in a fruity salsa, like mango or pineapple, into your slaw for a refreshing sweetness that elevates your dish.

Exploring these variations can help you discover new and exciting tastes in your Crispy Fish Taco Bowls while keeping them fresh and vibrant! If you love vibrant and aromatic flavors, you might enjoy checking out my recipes for luscious one-pan meals that also celebrate colorful ingredients!

What to Serve with Crispy Fish Taco Bowls

Elevate your meal experience with tempting sides and drinks that beautifully complement these delicious bowls.

  • Creamy Guacamole: The rich and creamy texture of guacamole adds a luxurious touch that pairs wonderfully with the crispy fish.

  • Mexican Street Corn Salad: This dish brings sweet and smoky flavors, along with a delightful crunch that complements the fish tacos perfectly.

  • Cilantro Lime Rice: Light and zesty, this rice provides a vibrant flavor contrast that enhances the overall dish while keeping it fresh and enjoyable.

  • Chilled Mango Salsa: Sweet and tangy, mango salsa adds a fruitiness that balances the heat and richness in your taco bowls.

  • Spicy Black Beans: Earthy and soft, these beans contribute protein and fiber while their spices echo the flavors in the fish.

  • Refreshing Margarita: A zesty, ice-cold margarita brings a festive flair to your meal, perfectly pairing with the crispy fish and slaw.

  • Lime-Pineapple Sorbet: As a light dessert, this sorbet cleanses the palate and offers a delightful hint of sweetness that echoes the zesty lime in your bowls.

How to Store and Freeze Crispy Fish Taco Bowls

Fridge: Store assembled Crispy Fish Taco Bowls in airtight containers for up to 2 days. Keep the fish, slaw, and toppings separate to maintain texture and freshness.

Freezer: To freeze, portion out the cooked fish and slaw mix into freezer-safe bags. These can last up to 2 months. Reheat when you’re ready for a quick meal!

Reheating: For best results, reheat the fish in an oven at 375°F (190°C) until crispy, about 10–15 minutes. This method revives the crunchiness beautifully!

Leftovers: If you have leftover slaw and rice or quinoa, enjoy them fresh in salads or bowls, ensuring nothing goes to waste!

Make Ahead Options

These Crispy Fish Taco Bowls are a fantastic option for meal prep, saving you precious time during busy weeknights! You can prepare the slaw and chipotle sauce up to 3 days in advance; simply mix the shredded cabbage, carrots, and cilantro, then toss it with the dressing just before serving to keep the vegetables crisp. Additionally, the fish can be breaded and refrigerated for up to 24 hours; this helps the coating adhere better when fried. When you’re ready to enjoy, just fry the fish until golden brown, and assemble the bowls with your prepped components for an effortlessly delicious meal that’s just as flavorful as fresh!

Expert Tips for Crispy Fish Taco Bowls

Pat the Fish Dry: To achieve that perfect crispy texture, make sure the fish fillets are dry before seasoning; excess moisture can lead to sogginess.

Breading Technique: When coating the fish, press firmly into the panko mixture to ensure it adheres well. This will prevent any breading from falling off during frying.

Monitor Oil Temperature: Use a thermometer to check the oil’s temperature or test it with a small piece of fish; if it bubbles, it’s hot enough. Too low oil will make your fish greasy rather than crispy.

Customize Seasonings: Don’t hesitate to tweak the spices to suit your palette. Adding more chili powder will give your crispy fish taco bowls an extra kick if you enjoy heat!

Fresh Slaw: Mix the slaw dressing just before serving to keep it crisp. If it sits too long, the veggies will wilt, making your bowls less vibrant.

Tip for Leftovers: If you plan to have leftovers, store the components separately to maintain freshness. Reheat fish in an oven for crispiness rather than a microwave.

Crispy Fish Taco Bowls

Crispy Fish Taco Bowls Recipe FAQs

What type of fish is best for these bowls?
Absolutely! I recommend using white fish like cod, tilapia, or mahi-mahi for their mild flavor and flaky texture. Just ensure the fillets are fresh and firm to guarantee they hold up during frying.

How should I store leftover Crispy Fish Taco Bowls?
Store assembled bowls in airtight containers in the fridge for up to 2 days. To preserve the texture, keep the fish, slaw, and toppings separate. This will help maintain that delightful crispiness!

Can I freeze cooked fish from these bowls?
Yes! To freeze, portion out the cooked fish into freezer-safe bags. Just be sure to label them and use them within up to 2 months. When ready to enjoy, reheat in the oven at 375°F (190°C) for about 10-15 minutes to bring back that crispy texture.

My fish batter isn’t sticking. What can I do?
If the batter isn’t adhering well, first, ensure the fish is patted dry before seasoning. A light dredge in flour allows the egg to cling better. For an even crunchier finish, try pressing the coated fish firmly into the panko mixture. This should help keep the coating intact while frying!

Are there any dietary considerations for this recipe?
For gluten-free options, substitute all-purpose flour and panko breading with gluten-free alternatives like almond flour or crushed cornflakes. Additionally, check that your mayonnaise is egg-free if allergies are a concern. Always adjust toppings and dressings according to personal dietary needs.

Can I use a different type of slaw mix?
Very! Feel free to customize the slaw with your preferred veggies, like sliced bell peppers or radishes. Just ensure they’re crunchy and fresh to complement the crispy fish. Adding avocado or even mango can give you a delightful twist too!

Crispy Fish Taco Bowls Recipe FAQs

Delicious Crispy Fish Taco Bowls for Your Family Feast

Experience the joy of Crispy Fish Taco Bowls with a zesty slaw and chipotle sauce, perfect for a family feast.

  • large skillet
  • Mixing bowls
  • Shallow Dishes

For the Fish

  • 4 fillets fish (cod or tilapia recommended)
  • Salt (to taste)
  • Pepper (freshly ground)
  • 1 cup all-purpose flour
  • 2 eggs beaten eggs
  • 1 cup panko breadcrumbs (can substitute with whole-grain)

For the Seasoning

  • 1 tsp smoked paprika
  • 1 tsp garlic powder
  • 1 tsp cumin powder
  • 1 tsp chili powder
  • Cooking oil for frying (canola or vegetable oil)

For the Slaw

  • 2 cups shredded cabbage mix
  • 1 cup shredded carrots
  • 1/2 cup chopped cilantro

For the Dressing

  • 1/4 cup mayonnaise
  • 2 tbsp lime juice
  • 1 tbsp apple cider vinegar (or white vinegar)
  • 1 tbsp honey (optional)
  • Additional salt and pepper (to taste)

For Serving

  • 2 cups cooked rice or quinoa
  • Chipotle sauce (for drizzling)

Optional Toppings

  • Sliced avocado
  • Diced tomatoes
  • Pickled red onions
  • Lime wedges

Step-by-Step Instructions

  1. Prepare the Fish: Pat fish fillets dry and season generously with salt and pepper.
  2. Set Up Breading Station: In three dishes, place flour, beaten eggs, and panko mixed with seasoning.
  3. Coat the Fish: Dip fish fillets in flour, then eggs, then panko mixture ensuring it’s fully coated.
  4. Fry the Fish: Heat oil and fry fish until golden and crispy, about 3–4 minutes per side.
  5. Make the Slaw: Mix cabbage, carrots, and cilantro in a bowl.
  6. Prepare the Dressing: Whisk mayonnaise, lime juice, vinegar, and honey; season to taste.
  7. Assemble the Bowls: Add rice or quinoa, then crispy fish and fresh slaw to each bowl.
  8. Drizzle the Chipotle Sauce: Generously pour chipotle sauce over the bowls.
  9. Add Optional Toppings: Finish with avocado, tomatoes, pickled onions, and lime wedges.

For the best crispy texture, ensure fish is dry before seasoning.

Main Dishes
Mexican
Crispy Fish Taco Bowls, Easy Recipe, Family Meal, Fish, healthy dinner, Tacos

Filed Under: Main Dishes

Savor the Flavor: Mexican Tostadas de Carne Asada Recipe

September 4, 2025 by grace bellamy Leave a Comment

The sizzling sound of steak hitting the grill is enough to transport me south of the border, where the sun shines bright and flavor reigns supreme. Today, I’m excited to share my twist on a classic—Mexican Tostadas de Carne Asada. This dish not only brings a delightful crunch but also promises quick prep time, making it a perfect option for busy evenings or casual gatherings with friends. Imagine a vibrant plate topped with beautifully marinated flank steak, fresh veggies, and creamy avocado for a meal that looks as good as it tastes. If you’re ready to elevate your homemade cooking game and impress your loved ones, then dive into this recipe that guarantees satisfaction at every bite. Curious how to create this fiesta on a plate? Let’s get started!

Mexican Tostadas de Carne Asada

Why Are These Tostadas So Irresistible?

Incredible Flavor: The marinade infuses the flank steak with a combination of zesty lime and aromatic garlic, delivering a flavor explosion in every bite.

Quick Prep: With just 10 minutes of prep and a total time of only 30 minutes, you can whip up a delightful meal without stressing over the clock.

Crowd-Pleaser: Perfect for family dinners or gatherings, these tostadas are a hit with everyone, making them a fantastic choice for entertaining.

Fresh and Colorful: Each tostada is topped with a rainbow of fresh veggies, ensuring a visually stunning and nutritious dish that excites the palate.

Versatile Pairing: Not only do these tostadas shine on their own, but they also pair beautifully with sides like guacamole or a refreshing Mexican corn salad, enhancing your dining experience.

Whether you’re a seasoned chef or simply someone who loves homemade food, you’ll find this recipe enhances your culinary repertoire. Ready to delight your taste buds? Dive into this irresistible meal!

Mexican Tostadas de Carne Asada Ingredients

• Gather these fresh ingredients to create a flavor-packed experience!

For the Steak Marinade

  • Flank steak – a tender cut that’s perfect for grilling and packs in great flavor.
  • Olive oil – helps in marinating and adds richness to the meat.
  • Lime juice – provides a zesty kick and tenderizes the steak beautifully.
  • Minced garlic – lends an irresistible aroma that complements the beef.
  • Cumin – adds a warm, earthy undertone that enhances the overall flavor.
  • Chili powder – brings a hint of spice, balancing the dish perfectly.
  • Salt – essential for seasoning and enhancing the other flavors.
  • Pepper – provides a subtle heat that works wonderfully in the marinade.

For the Tostadas

  • Tostada shells – the crunchy base that holds all the toppings together.

For the Fresh Toppings

  • Diced tomatoes – juicy and vibrant, they add freshness and color.
  • Diced red onion – contributes a sharp flavor that contrasts beautifully with the richness of the steak.
  • Diced jalapeño – adds a spicy kick for those who crave a little heat.
  • Sliced avocado – creamy texture that complements and balances the flavors beautifully.
  • Shredded lettuce – provides a crisp, refreshing crunch.
  • Fresh cilantro – a sprinkle brightens the dish and adds a burst of color.

For Serving

  • Lime wedges – a refreshing touch for squeezing over your tostadas, enhancing the flavors even more.

Ready to whip up these delicious Mexican Tostadas de Carne Asada? Let’s get cooking!

Step‑by‑Step Instructions for Mexican Tostadas de Carne Asada

Step 1: Prepare the Marinade
In a medium bowl, whisk together 3 tablespoons of olive oil, 2 tablespoons of lime juice, 3 minced garlic cloves, 1 teaspoon of cumin, 1 teaspoon of chili powder, 1 teaspoon of salt, and 1/2 teaspoon of pepper. This vibrant marinade is vital for the Mexican Tostadas de Carne Asada. Once combined, add 1 pound of flank steak, ensuring it is evenly coated. Let the steak marinate for at least 30 minutes, or refrigerate for up to 2 hours for deeper flavor infusion.

Step 2: Grill the Steak
Preheat your grill or skillet over medium-high heat, about 375°F. When the grill is hot, remove the flank steak from the marinade, letting excess marinade drip off. Cook the steak for 4 to 6 minutes on each side, until it reaches your desired doneness (look for a nice sear and a slightly firm texture). Once cooked, transfer the steak to a cutting board and allow it to rest for 5 minutes before slicing it thinly against the grain.

Step 3: Prepare the Topping Mix
While the steak is resting, take another bowl and combine 1 cup of diced tomatoes, 1/2 cup of diced red onion, and 1 diced jalapeño. Add a squeeze of lime juice and a sprinkle of salt, mixing everything well to meld the vibrant flavors. This fresh topping mix will add color and zest to your Mexican Tostadas de Carne Asada, enhancing every bite.

Step 4: Assemble the Tostadas
Position 4 tostada shells on a serving platter, allowing each to shine. Layer the thinly sliced carne asada evenly across each tostada, ensuring a generous portion on each one. Top them with the fresh veggie mixture, making each tostada visually inviting. Then, add slices of creamy avocado and a handful of shredded lettuce for a delightful crunch to complete your assembly.

Step 5: Garnish and Serve
Finish each tostada with a sprinkle of fresh cilantro for a burst of flavor and color. Serve your delicious Mexican Tostadas de Carne Asada with lime wedges on the side—perfect for squeezing over the tostadas! Gather your friends and family, and dive into this colorful and luscious dish that promises to delight everyone at your table.

Mexican Tostadas de Carne Asada

Expert Tips for Mexican Tostadas de Carne Asada

  • Marinate Longer: For even more flavor, marinate the steak for up to 2 hours in the refrigerator to let the spices really penetrate the meat.

  • Don’t Overcook: Keep an eye on your steak while grilling; overcooking can make it tough. Cook until just medium for juicy results in your Mexican Tostadas de Carne Asada.

  • Thin Slices: Always slice the steak against the grain to retain tenderness—perfect for topping your crispy tostadas!

  • Fresh Ingredients: Use fresh produce for toppings. It not only enhances flavor but also adds delightful crunch and color to your dish.

  • Customize Your Heat: Adjust the diced jalapeño to your spice preference. Remove seeds for milder flavor or add more for a fiery kick in each tostada.

What to Serve with Mexican Tostadas de Carne Asada

Elevate your dining experience with these vibrant and satisfying accompaniments that perfectly complement your tostadas.

  • Refried Beans: Creamy and savory, they provide a rich texture that balances the crunchy tostadas beautifully.

  • Mexican Street Corn: With its sweet, smoky, and tangy flavors, this dish adds a lively side that’s a hit at gatherings.

  • Guacamole: Smooth, creamy avocado dip with a hint of lime enhances the freshness of the carne asada and adds a luscious touch.

  • Pico de Gallo: The bright, zesty salsa bursts with freshness, harmonizing perfectly with the flavors of your tostadas.

  • Mexican Rice: Fluffy and aromatic, seasoned rice serves as a filling side that complements the vibrant toppings wonderfully.

  • Chips and Salsa: Crunchy tortilla chips paired with a zesty tomato salsa offer a fun appetizer to get your meal started.

  • Lime Margarita: Refreshing and tangy, this classic cocktail is the ideal drink to wash down the savory goodness of carne asada.

Enjoy mixing and matching these delightful side dishes to create a feast that your family and friends will rave about!

Make Ahead Options

These Mexican Tostadas de Carne Asada are ideal for meal prep, allowing you to spend less time in the kitchen on busy weeknights! You can marinate the flank steak up to 24 hours in advance, enhancing the flavor while keeping it tender. Simply mix the marinade, add the steak, and refrigerate until you’re ready to grill. The topping mix (diced tomatoes, red onion, and jalapeño) can be prepared a day ahead and stored in an airtight container in the fridge to maintain freshness. When you’re ready to serve, grill the marinated steak, slice it, and assemble the tostadas with the prepped toppings, ensuring a delicious meal that’s just as vibrant and flavorful!

Mexican Tostadas de Carne Asada Variations

Feel free to get creative with your tostadas! Each twist adds a unique touch that makes this dish even more exciting.

  • Veggie-Loaded: Add a mix of bell peppers or zucchini for extra crunch and vibrant color.

  • Spicy Kick: Incorporate chipotle peppers in adobo sauce into the topping mix for a smoky heat.

  • Different Proteins: Swap steak for grilled chicken or shrimp for a delicious twist on flavors.

  • Creamy Dream: Try adding a drizzle of chipotle crema or sour cream to enhance creaminess!

  • Whole Wheat Tortilla: Use whole wheat tostada shells for a healthier, nutrient-rich base.

  • Herbed Toppings: Enhance freshness by mixing in chopped mint or parsley with the cilantro.

  • Cheesy Delight: Add crumbled queso fresco or shredded cheese on top for a cheesy burst!

  • Sweet & Spicy: Include diced mango or pineapple in the veggie mix for a sweet surprise flavor.

With each variation, you can discover new flavors that suit your family’s taste. Enjoy experimenting! For more tips on how to elevate your favorites, check out this irresistible meal!

How to Store and Freeze Mexican Tostadas de Carne Asada

Fridge: Store leftover Mexican Tostadas de Carne Asada in an airtight container for up to 3 days to keep the toppings fresh and flavorful.

Freezer: Assemble the tostadas without toppings before freezing. Wrap each tostada tightly in plastic wrap and place them in a freezer-safe bag. They can be stored for up to 2 months.

Reheating: To reheat, bake the tostada shells at 350°F for about 10 minutes until crispy. Top with your desired fresh ingredients after reheating for optimal taste.

Freezing Steaks: If you have leftover marinated steak, wrap it well and freeze for up to 3 months. Thaw in the fridge before grilling or cooking as desired.

Mexican Tostadas de Carne Asada

Mexican Tostadas de Carne Asada Recipe FAQs

How do I choose the right flank steak?
Absolutely! Look for flank steak that’s bright red with minimal dark spots or discoloration. The fat should be well-marbled but not overwhelming. A fresh cut should feel firm to the touch and have a nice, smooth texture.

How should I store leftover tostadas?
Very simply! Store leftover Mexican Tostadas de Carne Asada in an airtight container in the fridge for up to 3 days. Note that it’s best to keep the tostada shells separate from the toppings to preserve their crunch.

Can I freeze the tostadas and toppings?
Yes, indeed! To freeze, assemble the tostadas without any of the fresh toppings. Wrap each tostada tightly in plastic wrap and place them in a freezer-safe bag. They can last for up to 2 months. When ready to eat, simply reheat the shells at 350°F for about 10 minutes until crispy, and top them with fresh ingredients afterwards.

What should I do if the steak is tough after grilling?
If your steak turns out tough, it may be due to overcooking or slicing against the grain. To remedy this, let the steak rest for a few minutes before slicing thinly against the grain. This technique will help retain the steak’s tenderness. Also, if you’re using flank steak, aim for medium-rare to medium doneness for the best texture.

Are there any dietary considerations for the toppings?
For sure! If you have any allergies, be cautious with ingredients like jalapeño and avocado, which some may be sensitive to. Additionally, you can swap out any topping for alternatives, like using lettuce wraps instead of tostada shells for a low-carb option. Always feel free to customize based on dietary needs!

Can pets eat any leftovers?
While it’s best to avoid sharing seasoned steak with pets, plain cooked flank steak can be a treat for dogs. Just make sure to remove any marinade and seasonings first, as they can be harmful to pets. Always consult your veterinarian with any dietary questions or before introducing new foods to your pet’s diet.

Savor the Flavor: Mexican Tostadas de Carne Asada Recipe

Delight in the crispy crunch of Mexican Tostadas de Carne Asada topped with marinated steak and fresh veggies.

  • grill
  • Medium bowl
  • Serving platter

For the Steak Marinade

  • 1 lb Flank steak (a tender cut that’s perfect for grilling)
  • 3 tbsp Olive oil (adds richness to the meat)
  • 2 tbsp Lime juice (provides a zesty kick)
  • 3 cloves Minced garlic (lends an irresistible aroma)
  • 1 tsp Cumin (adds a warm, earthy undertone)
  • 1 tsp Chili powder (brings a hint of spice)
  • 1 tsp Salt (essential for seasoning)
  • 1/2 tsp Pepper (provides subtle heat)

For the Tostadas

  • 4 Tostada shells (the crunchy base)

For the Fresh Toppings

  • 1 cup Diced tomatoes (adds freshness and color)
  • 1/2 cup Diced red onion (contributes sharp flavor)
  • 1 Diced jalapeño (adds spicy kick)
  • 1 Sliced avocado (creamy texture)
  • 1 cup Shredded lettuce (provides a refreshing crunch)
  • 1/4 cup Fresh cilantro (adds a burst of color)

For Serving

  • 2 Lime wedges (for squeezing over tostadas)

Step-by-Step Instructions

  1. In a medium bowl, whisk together olive oil, lime juice, garlic, cumin, chili powder, salt, and pepper. Add flank steak, ensuring it is evenly coated. Marinate for at least 30 minutes.
  2. Preheat your grill or skillet over medium-high heat. Remove steak from marinade and cook for 4 to 6 minutes on each side until desired doneness. Let rest for 5 minutes before slicing.
  3. In another bowl, combine diced tomatoes, red onion, jalapeño, lime juice, and salt. Mix well to meld the flavors.
  4. Position tostada shells on a serving platter. Layer sliced carne asada, veggie mixture, avocado, and shredded lettuce on top.
  5. Finish with fresh cilantro and serve with lime wedges for squeezing. Enjoy!

For extra flavor, marinate steak for up to 2 hours. Slice against the grain for tenderness. Adjust jalapeño for spice preference.

Main Dishes
Mexican
Carne Asada, Grilled Steak, Mexican Tostadas, quick meal, Steak Tostadas, Tostadas

Filed Under: Main Dishes

Melt-In-Your-Mouth Apple Cinnamon Rolls That Wow!

September 4, 2025 by grace bellamy Leave a Comment

There’s something irresistibly cozy about the aroma of fresh-baked Apple Cinnamon Rolls wafting through the house, isn’t there? As I experimented in my kitchen recently, I realized these delightful rolls aren’t just a treat; they’re a memory-maker. With the perfect blend of tender dough, tart Granny Smith apples, and warm cinnamon spice, this Apple Cinnamon Rolls recipe is a fantastic crowd-pleaser that’s sure to brighten your mornings or elevate your brunch game. Plus, the best part? It comes together in just 40 minutes, making it a quick yet impressive addition to any gathering. Slather on some creamy maple-infused frosting, and you’ll have everyone asking for seconds. Curious about how to make these mouthwatering rolls? Let’s dive in!

Apple Cinnamon Rolls

Why are these rolls a must-try?

Irresistible Aroma: The moment you pull these rolls from the oven, your kitchen will be filled with an inviting scent that feels like a warm hug.
Quick Prep Time: In just 40 minutes, you can bake a dozen rolls that look as good as they taste! Perfect for a last-minute brunch or a spontaneous treat.
Unique Flavor Combo: The tartness of Granny Smith apples paired with warm cinnamon offers a delightful contrast that will keep your taste buds dancing.
Creamy Frosting Finish: Top with a luscious cream cheese and maple syrup frosting for a sweet, rich contrast that takes these rolls to the next level.
Crowd-Pleasing Delight: These Apple Cinnamon Rolls are a hit at any gathering, whether it’s a family brunch or a cozy get-together with friends. They pair beautifully with a cup of coffee!
Consider making them ahead and experimenting with other additions like nuts or raisins for a personal twist!

Apple Cinnamon Rolls Ingredients

For the Dough
• All-purpose flour – gives the rolls their perfect structure and texture.
• Instant yeast – ensures a quick rise so you can enjoy your Apple Cinnamon Rolls sooner!
• Salt – enhances the flavors in the dough, balancing the sweetness.
• Coconut sugar – adds a rich, caramel-like sweetness that complements the cinnamon beautifully.
• Unsweetened almond milk – keeps the dough dairy-free while adding moisture.
• Coconut oil – lends a subtle tropical flavor and contributes to a tender crumb.
• Water – helps to activate the yeast and bind the ingredients together.

For the Filling
• Chopped Granny Smith apples – the star ingredient, providing a tartness that contrasts wonderfully with the sweetness.
• Ground cinnamon – infuses the rolls with warmth and comfort, essential for this classic flavor profile.

For the Frosting
• Cream cheese – adds richness and a tangy flavor that perfectly balances the sweetness of the rolls.
• Maple syrup – brings a natural sweetness to the frosting, enhancing the overall flavor while tying back to the apple theme.

Enjoy crafting these delicious Apple Cinnamon Rolls that are bound to bring smiles and warmth to your kitchen!

Step‑by‑Step Instructions for Apple Cinnamon Rolls

Step 1: Combine the Dry Ingredients
In a large mixing bowl, whisk together 4 1/4 cups of all-purpose flour, 2 1/4 teaspoons of instant yeast, 1 teaspoon of salt, and 3/4 cup of coconut sugar until well blended. This combination sets the foundation for your Apple Cinnamon Rolls, giving them the perfect texture.

Step 2: Mix the Wet Ingredients
In a small saucepan, gently heat 1/2 cup of unsweetened almond milk, 1/3 cup of coconut oil, and 1/4 cup of water over low heat until warm but not boiling—about 2-3 minutes. Pour this mixture into the flour blend and stir until a dough begins to form, ensuring all dry ingredients are incorporated.

Step 3: Knead the Dough
Transfer the dough onto a floured surface and knead for about 5 minutes, until it becomes smooth and elastic. As you work, feel how the dough transforms; it should no longer stick to your fingers. This step is essential for achieving light and fluffy Apple Cinnamon Rolls.

Step 4: Roll Out the Dough
Using a rolling pin, roll the dough into a large rectangular shape, approximately 1/4 inch thick. This is where your anticipation builds; the wider rectangle allows for generous filling. Keep your workspace lightly floured to prevent sticking while you shape the dough.

Step 5: Add the Filling
Evenly spread 1/2 cup of chopped Granny Smith apples over the rolled dough, ensuring they cover the surface well. Next, sprinkle 1 tablespoon of ground cinnamon throughout. The aromatic mix will elevate your Apple Cinnamon Rolls and make your kitchen smell amazing.

Step 6: Shape the Rolls
Starting from one edge, tightly roll the dough into a log. Once rolled, carefully cut the log into 12 equal-sized rolls using a sharp knife or a dough scraper. Each cut should reveal that enticing apple and cinnamon swirl, a delicious preview of what’s to come!

Step 7: Let the Rolls Rise
Place the sliced rolls into a greased baking pan. Cover them with a clean kitchen towel and let them rise for 20-30 minutes in a warm place. If using instant yeast, watch for the rolls to puff up until doubled in size, preparing them for the oven.

Step 8: Bake the Rolls
Preheat your oven to 350°F (175°C). Once your rolls have risen, bake them for 20-25 minutes, or until they are golden brown on top. Keep an eye on them as they bake, enjoying the delightful aroma of Apple Cinnamon Rolls filling your kitchen.

Step 9: Prepare the Frosting
While the rolls are baking, beat together 4 oz of cream cheese and 1/3 cup of maple syrup in a bowl until smooth. This luscious frosting will add the perfect sweetness to balance the spiced rolls, creating a perfect finish to your Apple Cinnamon Rolls.

Step 10: Frost and Serve
Once the rolls are out of the oven and slightly cooled, generously spread the cream cheese frosting over the warm rolls. The warmth from the rolls will help the frosting melt slightly, making each bite truly irresistible. Share and enjoy your homemade Apple Cinnamon Rolls!

Apple Cinnamon Rolls

How to Store and Freeze Apple Cinnamon Rolls

Room Temperature: Allow the rolls to cool completely, then store in an airtight container for up to 3 days to maintain freshness, enjoying that lovely flavor.

Fridge: For longer storage, place the rolls in the fridge in a sealed container. They’ll stay good for about a week; just reheat gently.

Freezer: Freeze the unfrosted rolls in a single layer on a baking sheet, then transfer to a zip-top bag for up to 3 months. Thaw in the fridge overnight before baking or reheating.

Reheating: To reheat, place them in a preheated oven at 350°F (175°C) for about 10-15 minutes until warmed through. Add frosting after warming for a sweet finish!

What to Serve with Apple Cinnamon Rolls

The soft, warm embrace of freshly-baked rolls leaves you dreaming of delightful companions that elevate your meal to new heights.

  • Fresh Fruit Salad: A medley of diced apples, berries, and citrus brings a refreshing brightness that harmonizes beautifully with the sweetness of the rolls.
  • Savory Breakfast Sausages: The rich, savory flavor of sausage creates a pleasing contrast, adding depth to your brunch spread that balances the sweetness of the rolls.
  • Vanilla Yogurt Parfait: Layer creamy vanilla yogurt with granola and fruit for a light yet satisfying addition, enhancing the rolling experience with delightful textures.
  • Spiced Chai Latte: This warm, spiced drink beautifully complements the apple and cinnamon flavors, creating a cozy drink pairing that’s sheer bliss.
  • Maple Pecan Granola: A crunchy topping like this provides contrasting textures, adding a nutty sweetness that ties together the apple and cinnamon goodness of the rolls.
  • Egg and Cheese Breakfast Casserole: A cheesy, fluffy bake works wonders as a hearty side, making for a balanced meal that keeps everyone satisfied and smiling.
  • Hot Chocolate: A rich, chocolaty drink complements the sweetness of the rolls while creating a nostalgic, cozy experience that invites you to linger around the table.
  • Cinnamon Sugar Cookies: For a sweet treat that keeps the theme consistent, these cookies provide a delightful balance of crisp and chewiness alongside your rolls.
  • Homemade Apple Cider: This warm, spiced beverage echoes the apple goodness of the rolls while bringing a perfect autumnal feel to your gathering.

Apple Cinnamon Rolls Variations

Feel free to make these delightful Apple Cinnamon Rolls your own with a few tasty twists!

  • Gluten-Free: Substitute all-purpose flour with a gluten-free blend to accommodate dietary restrictions, keeping the joy of homemade rolls alive.
  • Vegan Delight: Replace cream cheese with cashew cream and use a plant-based frosting to ensure everyone can indulge without compromise.
  • Extra Crunch: Add 1/2 cup of chopped walnuts or pecans to the filling for a delightful crunch that complements the soft dough beautifully.
  • Spicy Kick: Mix in 1/4 teaspoon of cayenne pepper or ginger to the cinnamon for a subtle heat that elevates the classic flavor profile.
  • Fruit Fusion: Swap out Granny Smith apples for pears or mixed berries; their different textures will offer a refreshing twist to each bite.
  • Maple Pecan Topping: Before baking, sprinkle 1/2 cup chopped pecans on top of the frosting for a nutty crunch and added flavor that’s simply irresistible.
  • Cinnamon Swirl: For an extra layer of flavor, sprinkle additional cinnamon sugar onto the dough before rolling it up, creating a double-cinnamon experience.
  • Chocolate Chip Twist: Add 1/2 cup of mini chocolate chips to the filling for a sweet indulgence that pairs perfectly with the apples and cinnamon, creating a dessert-like treat.

These variations not only cater to different tastes and dietary needs but will also keep your family excited about each new batch of Apple Cinnamon Rolls. Enjoy the magic of baking while making these rolls truly yours!

Make Ahead Options

These Apple Cinnamon Rolls are ideal for busy home cooks looking to save time! You can prepare the dough and fill it with chopped apples and cinnamon up to 24 hours in advance; simply cover and refrigerate it. When you’re ready to bake, let the rolls rise for about 30 minutes at room temperature before baking. To maintain quality, ensure they are tightly covered to prevent drying out. If you’d like to make them even earlier, you can freeze the unbaked rolls for up to 3 months. Just thaw them in the refrigerator overnight and follow the rising and baking instructions. With these make-ahead tips, your homemade Apple Cinnamon Rolls will be just as delicious with minimal effort on busy mornings!

Tips for the Best Apple Cinnamon Rolls

Perfect Dough Texture: Knead for 5 minutes: Kneading well ensures elasticity and a light texture. If the dough is too sticky, add a little extra flour while kneading.

Avoid Tough Rolls: Don’t overmix after adding wet ingredients: Mixing too much can make the dough tough. Stir just until combined for tender rolls.

Rising Time Matters: Allow rolls to fully rise: If using instant yeast, let them rise until doubled for fluffy Apple Cinnamon Rolls. Cover them warmly for the best results.

Watch the Bake: Keep an eye on them: Baking time may vary slightly by oven. Remove when rolls are golden brown, not dark, for optimum flavor.

Frosting Tip: Frost while warm: Spreading the cream cheese frosting on warm rolls lets it melt into every sweet crevice, elevating the flavor experience!

Apple Cinnamon Rolls

Apple Cinnamon Rolls Recipe FAQs

How do I choose the right apples for this recipe?
Absolutely! For these Apple Cinnamon Rolls, I recommend using Granny Smith apples due to their tart flavor, which beautifully balances the sweetness of the coconut sugar. Look for apples that are firm, shiny, and free of dark spots or bruising to ensure they hold their texture when baked.

What’s the best way to store leftover rolls?
To keep your Apple Cinnamon Rolls fresh, store them in an airtight container at room temperature for up to 3 days. If you want to keep them longer, place them in the refrigerator for up to a week; just make sure to reheat them gently before serving to enjoy that fresh-baked taste!

Can I freeze the rolls?
Yes, freezing is a great option! To freeze, place the unfrosted rolls in a single layer on a baking sheet and freeze until solid. Then, transfer them to a zip-top bag and store for up to 3 months. When you’re ready to enjoy, thaw them in the fridge overnight before baking or reheating (at 350°F for 10-15 minutes).

What should I do if my dough doesn’t rise?
If your dough doesn’t rise, it could be due to inactive yeast. Always check the expiration date on your instant yeast before using it. If it doesn’t bubble when mixed with warm water, it’s best to start again with fresh yeast. Ensure your environment is warm, as yeast thrives best in temperatures around 75°F to 80°F. If it’s too cold, consider preheating your oven and placing the dough inside (turned off) to help it rise.

Are these rolls safe for pets or allergies?
While the Apple Cinnamon Rolls are delicious for humans, avoid sharing with pets since ingredients like cream cheese and added sugars can upset their stomachs. For allergies, be cautious with ingredients like coconut oil, almond milk, and cream cheese; you can substitute almond milk with oat milk and use a dairy-free cream cheese if needed.

Can I make these rolls vegan?
Absolutely! To make vegan Apple Cinnamon Rolls, simply substitute the cream cheese with a dairy-free alternative and replace the egg (if using) with a flaxseed egg or applesauce. Additionally, coconut sugar is a great choice for a vegan-friendly sweetener, ensuring that everyone can enjoy these delightful rolls!

Melt-In-Your-Mouth Apple Cinnamon Rolls That Wow!

These Apple Cinnamon Rolls are a warm, cozy treat that combines tender dough with tart Granny Smith apples and cinnamon, perfect for any gathering.

  • Mixing Bowl
  • Rolling Pin
  • baking pan
  • Whisk
  • Saucepan
  • Knife

For the Dough

  • 4 1/4 cups all-purpose flour (gives the rolls their perfect structure and texture.)
  • 2 1/4 teaspoons instant yeast (ensures a quick rise.)
  • 1 teaspoon salt (enhances the flavors.)
  • 3/4 cup coconut sugar (adds caramel-like sweetness.)
  • 1/2 cup unsweetened almond milk (keeps the dough dairy-free.)
  • 1/3 cup coconut oil (contributes to a tender crumb.)
  • 1/4 cup water (helps activate the yeast.)

For the Filling

  • 1/2 cup chopped Granny Smith apples (provides tartness.)
  • 1 tablespoon ground cinnamon (infuses warmth.)

For the Frosting

  • 4 oz cream cheese (adds richness and tang.)
  • 1/3 cup maple syrup (brings natural sweetness.)

Step-by-Step Instructions

  1. In a large mixing bowl, whisk together 4 1/4 cups of all-purpose flour, 2 1/4 teaspoons of instant yeast, 1 teaspoon of salt, and 3/4 cup of coconut sugar until well blended.
  2. In a small saucepan, gently heat 1/2 cup of unsweetened almond milk, 1/3 cup of coconut oil, and 1/4 cup of water over low heat until warm but not boiling.
  3. Transfer the dough onto a floured surface and knead for about 5 minutes, until it becomes smooth and elastic.
  4. Using a rolling pin, roll the dough into a large rectangular shape, approximately 1/4 inch thick.
  5. Evenly spread 1/2 cup of chopped Granny Smith apples over the rolled dough, then sprinkle 1 tablespoon of ground cinnamon throughout.
  6. Starting from one edge, tightly roll the dough into a log. Cut the log into 12 equal-sized rolls.
  7. Place the sliced rolls into a greased baking pan, cover with a kitchen towel, and let them rise for 20-30 minutes.
  8. Preheat your oven to 350°F (175°C). Bake the rolls for 20-25 minutes, or until golden brown.
  9. While the rolls are baking, beat together 4 oz of cream cheese and 1/3 cup of maple syrup until smooth.
  10. Once the rolls are out of the oven, spread the cream cheese frosting over the warm rolls.

Consider making them ahead and experimenting with other additions like nuts or raisins for a personal twist!

Dessert
American
Apple Cinnamon Rolls, Baked Goods, brunch, comfort food, dessert, sweet treat

Filed Under: Dessert

Delicious Apple Cinnamon Rolls for a Cozy Morning Treat

September 4, 2025 by grace bellamy Leave a Comment

As I peeled back the layers of dough, the sweet scent of cinnamon and freshly chopped Granny Smith apples filled the air, instantly transporting me to my grandmother’s cozy kitchen every autumn. These Apple Cinnamon Rolls are a delightful twist on a classic favorite, perfect for those weekend brunches when you want to impress without spending all day in the kitchen. Not only are they incredibly simple to whip up, but they also bring an irresistible warmth and comfort to your table. Plus, this recipe is easily customizable—whether you want to add raisins or swap in different apples, the possibilities are endless! Are you ready to dive into an experience that will fill your home with delicious memories? Let’s get baking!

Apple Cinnamon Rolls

Why are these rolls a must-try?

Irresistible aroma: The moment they start baking, your kitchen will be filled with a warm, nostalgic scent that invites everyone to come for a taste.
Time-saving: In just 40 minutes, you can create delicious rolls that are perfect for any occasion, making them a fantastic choice for busy mornings or surprise guests.
Customizable delight: Feel free to experiment by adding ingredients like nuts or swapping apples for your favorite fruit, ensuring every batch feels unique.
Perfect for sharing: With 12 generous servings, they are ideal for brunches or potlucks, making every gathering a little sweeter.
Frosted perfection: The cream cheese maple frosting adds an exquisite touch, balancing the apple and cinnamon flavors for an unforgettable taste experience.

Apple Cinnamon Rolls Ingredients

For the Dough

  • All-purpose flour – the base of your rolls, giving them a lovely texture.
  • Instant yeast – ensures quick rising, so you can enjoy these treats sooner!
  • Salt – enhances flavor; never skip this step!
  • Coconut sugar – adds a subtle caramel flavor, making the rolls even more delicious.
  • Unsweetened almond milk – keeps the dough moist; feel free to substitute with any milk you prefer.
  • Coconut oil – gives richness and a hint of tropical flavor; you can replace it with butter if desired.
  • Water – helps create the right dough consistency, keep it warm!

For the Filling

  • Chopped Granny Smith apples – provide a tart burst of flavor that complements the cinnamon beautifully.
  • Ground cinnamon – the star spice that makes these Apple Cinnamon Rolls so aromatic and comforting!

For the Frosting

  • Cream cheese – adds a creamy tanginess that perfectly balances the sweetness.
  • Maple syrup – sweetens up the frosting naturally; you can switch it with honey or agave syrup for a different twist.

Step‑by‑Step Instructions for Apple Cinnamon Rolls

Step 1: Combine Dry Ingredients
In a large mixing bowl, whisk together 4 1/4 cups all-purpose flour, 2 1/4 teaspoons instant yeast, 1 teaspoon salt, and 3/4 cup coconut sugar until evenly blended. This is the foundation of your Apple Cinnamon Rolls, helping to create a deliciously fluffy texture.

Step 2: Heat Wet Ingredients
In a small saucepan, gently heat 1/2 cup unsweetened almond milk, 1/3 cup coconut oil, and 1/4 cup water over low heat until warm but not boiling, about 3-5 minutes. Once heated, pour this mixture into the flour blend and stir until a soft dough begins to form.

Step 3: Knead the Dough
Transfer the dough onto a floured surface and knead for about 5 minutes until smooth and elastic. This process will help develop the gluten, giving your Apple Cinnamon Rolls the ideal texture. Aim for a dough that’s slightly tacky but not sticky.

Step 4: Roll Out the Dough
Using a rolling pin, roll the dough into a rectangular shape, approximately 12×18 inches in size. The dough should be about 1/4 inch thick. This creates a perfect canvas for the filling, ensuring every bite is bursting with flavor.

Step 5: Add Filling
Spread 1/2 cup of chopped Granny Smith apples evenly over the rolled-out dough, ensuring every bite has a taste of fruit. Then, sprinkle 1 tablespoon of ground cinnamon over the apples, adding that warm, inviting aroma that signifies delicious Apple Cinnamon Rolls await.

Step 6: Roll the Dough
Starting from one edge, tightly roll the dough into a log shape. Make sure the filling stays intact as you roll. Once rolled, trim the ends if necessary, and cut the log into 12 equal-sized rolls using a sharp knife or dental floss for clean slices.

Step 7: Let the Rolls Rise
Place the cut rolls in a greased baking pan, ensuring they have enough space to expand. Cover the pan with a clean kitchen towel and let the rolls rise for about 20-30 minutes, until they are puffed and have doubled in size. This step is crucial for achieving fluffy rolls.

Step 8: Preheat and Bake
While the rolls are rising, preheat your oven to 350°F (175°C). Once preheated, bake the rolls for 20-25 minutes or until they are golden brown on top. You’ll know they’re finished when you gently tap the top, and they sound hollow.

Step 9: Make the Frosting
As the rolls bake, prepare the creamy frosting by beating together 4 oz of cream cheese and 1/3 cup of maple syrup until smooth and fluffy. This frosting will beautifully complement the flavors of your Apple Cinnamon Rolls, adding an indulgent touch.

Step 10: Frost and Serve
Once the rolls are out of the oven, allow them to cool for a few minutes, then generously spread the cream cheese frosting over the warm rolls. The heat will melt the frosting slightly, creating a luscious glaze that enhances the irresistible combination of apple and cinnamon.

Apple Cinnamon Rolls

Expert Tips for Apple Cinnamon Rolls

  • Dough Consistency: Make sure your dough is slightly tacky but not too sticky. This ensures fluffy rolls without being hard to handle.
  • Warm Ingredients: Use warm (not hot) liquids when mixing your dough; this activates the instant yeast much faster for better rise.
  • Correct Cutting: When slicing your rolls, use a sharp knife or dental floss for clean cuts. This helps keep your rolls intact and fluffy.
  • Rising Time: Don’t rush the rising process; allow the rolls to double in size for the best texture in your Apple Cinnamon Rolls.
  • Frosting Warm Rolls: Frost your rolls while they are still warm to allow the cream cheese and maple syrup frosting to melt slightly, creating a delicious glaze.

What to Serve with Apple Cinnamon Rolls?

Warm, gooey rolls bursting with apple and cinnamon bring comfort to any breakfast table, inviting delightful pairings to complete your meal.

  • Fresh Fruit Salad: A colorful mix of seasonal fruits enhances the sweetness of the rolls, creating a refreshing contrast.
  • Crispy Bacon: The savory, salty crunch of bacon balances the sweetness of the rolls, making each bite deliciously satisfying.
  • Scrambled Eggs: Soft, fluffy scrambled eggs add a protein-rich element that complements the indulgent rolls perfectly for a well-rounded breakfast.
  • Maple Syrup Drizzle: Elevate your rolls even more by drizzling additional maple syrup on top, enhancing their sweet, gooey goodness.
  • Spiced Coffee: Enjoy a cup of warm spiced coffee to echo the cinnamon flavors, creating a cozy morning experience.
  • Vanilla Ice Cream: For a delightful dessert twist, serve warm rolls with a scoop of vanilla ice cream, blending flavors and temperatures in blissful harmony.
  • Chai Tea: The warm spices in chai tea enhance the comforting flavors of the rolls, creating a warm and inviting atmosphere for your brunch.
  • Yogurt Parfait: Layer creamy yogurt with granola and fresh berries for a light side that contrasts beautifully with the sweetness of the rolls.
  • Nutty Granola: A sprinkle of crunchy granola on the side adds texture and richness, making the breakfast experience even more satisfying.

How to Store and Freeze Apple Cinnamon Rolls

Room Temperature: Keep any leftover rolls in an airtight container for up to 2 days. Enjoy them fresh for breakfast or a sweet snack!

Fridge: If you prefer them chilled, store the rolls in the refrigerator for up to 5 days. Reheat in the microwave for about 10-15 seconds before indulging.

Freezer: Freeze unfrosted rolls in an airtight container or freezer bag for up to 3 months. Thaw overnight in the fridge before baking at 350°F (175°C) for about 15 minutes.

Reheating: For previously baked, frosted rolls, warm them in the microwave for about 20 seconds or in the oven at 350°F (175°C) for 5-10 minutes for a delightful, gooey experience!

Make Ahead Options

These Apple Cinnamon Rolls are perfect for meal prep enthusiasts! You can prepare the dough up to 24 hours in advance by following steps 1-6, then cover the rolls tightly with plastic wrap and refrigerate them. This helps develop flavors while maintaining that fluffy texture. When ready to bake, simply let them sit at room temperature for 30 minutes before proceeding with the rising step (step 7). You can also make the frosting ahead and refrigerate it for up to 3 days; just give it a quick whisk before spreading it over the warm rolls. With these make-ahead tips, you’ll enjoy delightful, bakery-quality rolls with minimal effort!

Apple Cinnamon Rolls Variations

Feel free to let your creativity shine with these mouthwatering twists that elevate your Apple Cinnamon Rolls to new heights!

  • Gluten-Free: Substitute all-purpose flour with a gluten-free blend for a safe and scrumptious treat everyone can enjoy. The texture may vary, but don’t worry; they’ll still be delightfully fluffy!

  • Nutty Addition: Add 1/2 cup of chopped walnuts or pecans to the filling for a delightful crunch that complements the soft rolls beautifully. The nutty flavor enhances the warming spices, creating an irresistible bite!

  • Spiced-Up: Boost the flavor by adding a pinch of nutmeg or allspice to the cinnamon filling. These spices add a cozy, seasonal layer of warmth, making your rolls even more comforting.

  • Berry Burst: Swap out the Granny Smith apples with fresh blueberries or raspberries for a fruity twist. The tartness from the berries brings a refreshing zing while keeping the rolls moist and delicious.

  • Cinnamon Swirl: For extra cinnamon goodness, mix additional cinnamon with coconut sugar and spread it over the dough first before layering the apples. This creates an extra sweet and gooey cinnamon swirl throughout each roll!

  • Creamy Caramel: Drizzle homemade or store-bought caramel sauce over the frosted rolls for an indulgent treat. The combination of caramel, cream cheese, and cinnamon is simply divine, creating a luxurious experience.

  • Dairy-Free Frosting: Swap cream cheese for a vegan cream cheese alternative, and use maple syrup or agave as a sweetener for the frosting. This keeps your rolls deliciously creamy while catering to dairy-free diets.

  • Maple Pecan Variation: Replace the frosting with a simple glaze made from powdered sugar and maple syrup, topped with toasted pecans for a delightful crunch and sweetness that’s pure bliss!

Apple Cinnamon Rolls

Apple Cinnamon Rolls Recipe FAQs

How do I choose the best apples for the filling?
Absolutely! For the filling, I recommend using tart apples like Granny Smith, as their flavor balances beautifully with the sweetness of the rolls. Look for apples that are firm with no dark spots or blemishes to ensure maximum flavor and texture.

What is the best way to store leftover Apple Cinnamon Rolls?
You can store any leftover rolls in an airtight container at room temperature for up to 2 days. For longer storage, place them in the fridge for up to 5 days. Just remember to reheat them in the microwave for about 10-15 seconds before diving back in!

Can I freeze Apple Cinnamon Rolls?
Yes, you can! To freeze the rolls, I recommend freezing them unfrosted. Just place the rolls in an airtight container or a freezer bag for up to 3 months. Thaw them overnight in the fridge, and then bake at 350°F (175°C) for about 15 minutes until warmed through. This way, you’ll have freshly baked rolls anytime you crave them!

What if my dough doesn’t rise properly?
Very often, if the dough doesn’t rise well, the yeast might not be active. Double-check that your yeast is fresh and that your liquids were warm—not hot—when mixed. If you’re using regular yeast instead of instant yeast, make sure to allow for a longer rising time, about 1-2 hours, until the dough doubles in size.

Can I make this recipe dairy-free?
Certainly! This recipe is already dairy-free, but if you’re looking to adjust it further, you can use a plant-based cream cheese alternative for the frosting. Additionally, substituting almond milk with any dairy-free milk will keep the rolls just as moist and delicious!

How should I serve Apple Cinnamon Rolls?
I often suggest serving these rolls warm with a drizzle of the cream cheese frosting. Pair them with a cup of coffee or tea for a cozy morning treat! They’re perfect for brunch gatherings or simply as a lovely indulgence for yourself.

Delicious Apple Cinnamon Rolls for a Cozy Morning Treat

These delightful Apple Cinnamon Rolls are easy to make, perfect for brunch, and fill your home with warm, nostalgic aromas.

  • Mixing Bowl
  • Saucepan
  • Rolling Pin
  • baking pan
  • sharp knife

For the Dough

  • 4 1/4 cups all-purpose flour (the base of your rolls, giving them a lovely texture.)
  • 2 1/4 teaspoons instant yeast (ensures quick rising)
  • 1 teaspoon salt (enhances flavor)
  • 3/4 cup coconut sugar (adds a subtle caramel flavor)
  • 1/2 cup unsweetened almond milk (keeps the dough moist)
  • 1/3 cup coconut oil (gives richness and a hint of flavor)
  • 1/4 cup water (helps create the right dough consistency)

For the Filling

  • 1/2 cup chopped Granny Smith apples (provides tart flavor)
  • 1 tablespoon ground cinnamon (star spice)

For the Frosting

  • 4 oz cream cheese (adds a creamy tanginess)
  • 1/3 cup maple syrup (sweetens the frosting naturally)

Step-by-Step Instructions for Apple Cinnamon Rolls

  1. In a large mixing bowl, whisk together 4 1/4 cups all-purpose flour, 2 1/4 teaspoons instant yeast, 1 teaspoon salt, and 3/4 cup coconut sugar until evenly blended.
  2. In a small saucepan, gently heat 1/2 cup unsweetened almond milk, 1/3 cup coconut oil, and 1/4 cup water over low heat until warm but not boiling.
  3. Transfer the dough onto a floured surface and knead for about 5 minutes until smooth and elastic.
  4. Using a rolling pin, roll the dough into a rectangular shape, approximately 12×18 inches in size.
  5. Spread 1/2 cup of chopped Granny Smith apples evenly over the rolled-out dough.
  6. Starting from one edge, tightly roll the dough into a log shape.
  7. Place the cut rolls in a greased baking pan and let them rise for about 20-30 minutes.
  8. Preheat your oven to 350°F (175°C). Once preheated, bake the rolls for 20-25 minutes.
  9. Prepare the creamy frosting by beating together 4 oz of cream cheese and 1/3 cup of maple syrup until smooth.
  10. Once the rolls are out of the oven, allow them to cool for a few minutes, then generously spread the cream cheese frosting over the warm rolls.

Ensure the dough is slightly tacky for the best texture. Frost while warm for a delicious glaze.

Dessert
American
Apple Cinnamon Rolls, baking, brunch, comfort food, cozy, dessert

Filed Under: Dessert

Deliciously Simple Spanish Beans & Eggs for a Cozy Meal

September 4, 2025 by grace bellamy Leave a Comment

In the hustle and bustle of everyday life, a simple meal can feel like a breath of fresh air. Today, I’m excited to share my go-to recipe for Spanish Beans & Eggs, a nourishing dish that easily brings warmth and comfort to the table. Not only is this recipe quick to prepare—whipping it up takes just 30 minutes—but it also offers a delightful twist that satisfies both your taste buds and your love for homemade goodness. With protein-packed eggs nestled in seasoned black beans, this dish is as hearty as it is flavorful. Plus, it’s a fabulous way to sneak in some extra nutrition without skimping on taste! Are you ready to dive into this deliciously vibrant meal? Let’s get cooking!

Spanish Beans & Eggs

Why is this dish a must-try?

Simplicity is key! You only need basic ingredients that you likely have on hand.
Rich, Spicy Flavor comes from the combination of smoked paprika and cumin, elevating the dish to something extraordinary.
Nourishing and Healthy with black beans and eggs, it’s a wholesome meal to fuel your day.
Versatile serving options mean you can enjoy it for breakfast, lunch, or dinner, adapting to your cravings.
Crowd-Pleasing Appeal makes it a hit with family and friends—perfect for gatherings! You can even try serving it with warm tortillas for an extra touch—deliciously simple for a cozy meal you won’t forget.

Spanish Beans & Eggs Ingredients

• Get ready to create this delightful dish with ease!

For the Beans

  • Black beans – 1 can (15 oz), drained and rinsed; they’re packed with protein and perfect for this comforting recipe.
  • Olive oil – 1 tablespoon; this gives a rich flavor while sautéing your vegetables.

For the Eggs

  • Large eggs – 4, crack them gently into your bean mixture for that cozy feel.

For the Aromatics

  • Onion – 1 small, chopped; it adds natural sweetness to the base of your dish.
  • Garlic – 2 cloves, minced; the aromatic essence that elevates the flavor profile!

For the Seasoning

  • Smoked paprika – 1 teaspoon; introduces a warm, smoky depth that defines this Spanish classic.
  • Ground cumin – ½ teaspoon; this spice enhances the savory notes and pairs beautifully with beans.

To Taste

  • Salt and pepper – add to your preference for perfect seasoning.

For Garnish

  • Fresh cilantro or parsley – chopped; adds a pop of color and freshness to each serving.
  • Avocado slices (optional) – creamy and delicious, they take your dish to the next level.
  • Crumbled feta or queso fresco (optional) – for a tangy, savory touch that complements the eggs and beans.

Immerse yourself in this vibrant dish that combines convenience with rich flavors in every bite!

Step‑by‑Step Instructions for Spanish Beans & Eggs

Step 1: Heat the Oil
In a medium-sized skillet, heat 1 tablespoon of olive oil over medium heat. Allow the oil to warm up for about 1-2 minutes until it shimmers, ensuring a non-stick surface for sautéing your vegetables. This will create the perfect base for the flavorful Spanish Beans & Eggs that are to come.

Step 2: Sauté Aromatics
Add the chopped onion to the skillet and sauté for 3-4 minutes until it becomes translucent and slightly softened. Next, add the minced garlic and continue to cook for another minute, stirring continuously to prevent burning. The fragrant mixture will set the stage for the delicious beans to be added.

Step 3: Incorporate Black Beans
Stir in the rinsed black beans along with 1 teaspoon of smoked paprika, ½ teaspoon of ground cumin, and a sprinkle of salt and pepper to taste. Cook this mixture for about 5 minutes, stirring occasionally, until the beans are heated through and coated in the aromatic spices, filling your kitchen with mouthwatering scents.

Step 4: Create Wells for Eggs
Using a spoon, make small wells in the warm bean mixture, creating spaces for the eggs. Carefully crack one egg into each well, ensuring that the yolk remains intact. The warm beans will cradle the eggs, preparing them for the next cooking step in your Spanish Beans & Eggs.

Step 5: Cover and Cook
Cover the skillet with a lid and let the eggs cook for 5-7 minutes over medium-low heat. This steaming method will help set the whites while keeping the yolks runny, or you can leave them longer if you prefer a firmer yolk. Watch for the whites to become opaque and firm, signaling that your dish is almost ready.

Step 6: Garnish and Serve
Remove the skillet from the heat, and take a moment to sprinkle freshly chopped cilantro or parsley on top for a burst of color and freshness. The Spanish Beans & Eggs are now ready to be served! For added indulgence, plate your dish with optional slices of avocado and crumbled feta or queso fresco to enhance flavors and textures.

Spanish Beans & Eggs

Make Ahead Options

These Spanish Beans & Eggs are perfect for meal prep enthusiasts! You can sauté the onion and garlic, then stir in the black beans with spices up to 24 hours in advance. Store this mixture in an airtight container in the refrigerator. When you’re ready to cook, simply create wells, crack in the eggs, cover, and cook as directed. This method ensures the flavors meld beautifully while maintaining the quality of the dish, resulting in a comforting meal. Additionally, feel free to prepare your garnishes, like chopped cilantro or sliced avocado, a day ahead to save time before serving! Just remember, they should be added fresh for the best taste.

What to Serve with Spanish Beans & Eggs

Imagine a cozy gathering where the comforting aroma fills the air as you savor every bite of a hearty meal.

  • Warm Tortillas: Soft, flour tortillas are perfect for scooping up the beans and eggs, adding a delightful, chewy texture to each bite.
    Enjoy tearing them apart together; it’s a delicious interactive experience that brings everyone to the table.

  • Avocado Salad: Fresh, sliced avocado drizzled with lime juice enhances the creaminess of the dish while adding a refreshing bite.
    This accompaniment balances the warmth of the beans and eggs beautifully, elevating your meal.

  • Crispy Roasted Potatoes: Seasoned with herbs and spices, these crispy potatoes provide a crunchy texture that contrasts heavenly with the soft eggs.
    They also soak up any remaining flavors on your plate—nothing goes to waste here!

  • Sautéed Greens: Lightly sautéed spinach or kale with garlic adds a nutritional boost and a lovely pop of color to your meal.
    These greens complement the dish’s earthiness while keeping it fresh and vibrant.

  • Spicy Salsa: A side of tangy salsa with chopped tomatoes, onion, and cilantro introduces a zesty kick, enhancing the flavor profile.
    Each spoonful adds brightness and a little heat, perfect for those who enjoy a bit of spice.

  • Zesty Lime Wedges: A squeeze of fresh lime juice brightens the flavors, bringing everything together in a refreshing burst.
    Add this simple touch to enhance your dining experience and make every bite a little more exciting!

Expert Tips for Spanish Beans & Eggs

  • Perfect Egg Texture: Make sure to keep an eye on the eggs as they cook; adjusting the lid can help control the steam, achieving your desired doneness.

  • Spice Balance: If you’re unsure about the heat, start with half the smoked paprika and cumin, then add more according to your taste preference.

  • Avoid Overcooking: When covering the skillet, check the eggs around the 5-minute mark. Overcooking can lead to rubbery eggs; aim for a slightly runny yolk for the best richness.

  • Fresh Garnish: Add fresh herbs right before serving to maintain their vibrant color and flavor. Cilantro or parsley adds a lovely fresh touch to your Spanish Beans & Eggs.

  • Storage Savvy: If storing leftovers, keep the eggs separate from the bean mixture to prevent them from becoming overcooked during reheating.

  • Serving Variations: Try topping with sliced jalapeños or hot sauce for an extra kick, making it customizable for everyone at the table!

Spanish Beans & Eggs Variations

Feel free to mix things up and make this dish your own with these fun suggestions!

  • Vegetarian Delight: Swap the eggs for a vegan alternative like tofu scramble for a plant-based option that’s still hearty.

  • Mexican Twist: Add diced tomatoes and sliced jalapeños while cooking for a burst of fresh flavor and just the right amount of heat.

  • Cheesy Goodness: Incorporate shredded cheese like Monterey Jack or pepper jack during the last couple of minutes of cooking for a melty, indulgent touch.

  • Herb-Infused: Experiment with fresh herbs like oregano or thyme instead of cilantro for a different yet delightful aromatic flavor profile.

  • Smoky Heat: Add chipotle powder in place of some smoked paprika for a spicy kick that will awaken your taste buds.

  • Veggie Boost: Toss in bell peppers or spinach with the beans to sneak in extra nutrition and color; they will wilt nicely and elevate the dish.

  • Satisfying Grain: Serve over a bed of quinoa or brown rice to transform this dish into a filling, one-bowl meal that’s comforting and wholesome.

  • Mediterranean Flair: Top with olives and a drizzle of olive oil for a Mediterranean-style spin—pair it with crusty bread for a delightful crunch!

With these variations, you can explore a world of flavors and textures while enjoying your Spanish Beans & Eggs! Why not start experimenting today? Serve it with warm tortillas for a complete, cozy meal that your loved ones will savor!

How to Store and Freeze Spanish Beans & Eggs

Fridge: Store leftovers in an airtight container for up to 3-4 days. Keeping it sealed will maintain freshness and flavor.

Freezer: For longer storage, freeze the dish for up to 2 months. Ensure the container is freezer-safe and label it with the date.

Reheating: When ready to enjoy, reheat gently on the stove over low heat or in the microwave to avoid overcooking the eggs. Enjoy your Spanish Beans & Eggs warm!

Separation Tip: If storing, consider keeping the eggs separate from the beans to maintain their texture during reheating. Aim for a delicious, cozy meal that feels fresh each time you serve it!

Spanish Beans & Eggs

Spanish Beans & Eggs Recipe FAQs

How do I select ripe avocados for serving?
Absolutely! When choosing avocados, look for ones that yield slightly to gentle pressure. They should be dark green and smooth-skinned without dark spots. If they feel rock hard, they’re not ripe yet; if they feel mushy, they’re overripe. For the best flavor, use them within a day or two after purchase.

How should I store leftovers of Spanish Beans & Eggs?
Store your Spanish Beans & Eggs in an airtight container in the refrigerator for up to 3-4 days. This method locks in the flavors and keeps everything fresh. If you’re concerned about the eggs, I often recommend keeping them separate from the beans before storing to prevent overcooking when reheating.

Can I freeze Spanish Beans & Eggs?
Yes, you can freeze this dish! Portion the beans into freezer-safe containers or bags and freeze for up to 2 months. When ready to enjoy, simply thaw overnight in the fridge before reheating. For the best texture, consider freezing the bean mixture separately from the eggs.

What should I do if the eggs are overcooked?
If your eggs happen to become overcooked, don’t fret! For the next time, try lowering the heat a little and check the eggs around the 5-minute mark. If they start to look firm, just take them off the heat—remember, the residual heat will continue to cook them slightly!

Are there any dietary considerations I should be aware of?
Yes! If you’re preparing this dish for someone with allergies, be mindful of the eggs and possible dairy if you’re using feta or queso fresco. To make it vegan, simply omit the eggs and cheese or substitute with a plant-based alternative. Always double-check labels if using canned ingredients to ensure they meet dietary needs.

Deliciously Simple Spanish Beans & Eggs for a Cozy Meal

A comforting dish featuring protein-packed eggs nestled in seasoned black beans, offering a delightful spin on Spanish flavors.

  • medium-sized skillet

For the Beans

  • 1 can (15 oz) black beans (drained and rinsed)
  • 1 tablespoon olive oil (for sautéing)

For the Eggs

  • 4 large eggs (crack them into the bean mixture)

For the Aromatics

  • 1 small onion (chopped)
  • 2 cloves garlic (minced)

For the Seasoning

  • 1 teaspoon smoked paprika (adds a warm, smoky depth)
  • 0.5 teaspoon ground cumin (enhances the savory notes)
  • salt (to taste)
  • pepper (to taste)

For Garnish

  • fresh cilantro or parsley (chopped)
  • avocado slices (optional)
  • crumbled feta or queso fresco (optional)

Step-by-Step Instructions

  1. Heat the olive oil over medium heat for 1-2 minutes until shimmering.
  2. Sauté the chopped onion for 3-4 minutes until translucent, then add the minced garlic and cook for another minute.
  3. Stir in the black beans, smoked paprika, cumin, and season with salt and pepper. Cook for 5 minutes until heated through.
  4. Make small wells in the bean mixture and crack an egg into each well.
  5. Cover the skillet and cook the eggs for 5-7 minutes until whites are firm and yolks are runny or cooked to preference.
  6. Garnish with cilantro or parsley and serve with avocado and feta if desired.

Adjust spices to taste, and consider keeping eggs separate when storing leftovers for better texture.

Breakfast
Spanish
comfort food, Easy Recipe, Healthy Breakfast, quick meal, Spanish Beans & Eggs

Filed Under: Breakfast

Savory Broiled Miso Salmon that Melts in Your Mouth

September 4, 2025 by grace bellamy Leave a Comment

As I unwrapped the salmon fillets, the vibrant pink color beckoned excitement for the culinary adventure ahead. With just a handful of ingredients, I was about to transform this simple fish into a mouthwatering dish: Broiled Miso Salmon. This recipe is perfect for busy weeknights, allowing you to whip up a healthy meal in just 40 minutes. The magic lies in the umami-rich miso marinade, which creates a delightful caramelized crust and keeps the salmon succulent. Not only is it a showstopper at the dinner table, but it’s also freezer-friendly—ideal for those moments when a craving for homemade goodness strikes. Ready to elevate your cooking game with this deliciously easy dish? Let’s dive in!

Broiled Miso Salmon

What Makes This Salmon Recipe Special?

Simplicity at Its Best: With just eight ingredients, this recipe is incredibly easy to prepare, perfect for home cooks of all skill levels.

Umami Explosion: The savory miso marinade infuses the salmon with rich flavors, creating a delightful taste experience that rivals your favorite restaurant dishes.

Quick Cooking Time: In just 40 minutes, you can enjoy a healthy homemade meal that is both satisfying and nutritious, ideal for those busy evenings.

Suited for All Occasions: Whether it’s a weeknight dinner or a fancy gathering, this dish is sure to impress. Serve it alongside rice or veggies for a complete meal!

Freezer Friendly: Prepare a batch and freeze for later; just marinate the salmon beforehand, and you can have an easy dinner ready whenever you need it!

This Broiled Miso Salmon is about to become your new go-to recipe that’s simple yet exquisite, so why not give it a try today?

Broiled Miso Salmon Ingredients

• Discover the delightful ingredients that bring this dish to life!

For the Salmon

  • Salmon fillets – about 6 ounces each; choose skin-on for extra flavor and moisture.
  • White miso paste – this adds a rich umami flavor, creating the perfect marinade.

For the Marinade

  • Mirin – a sweet rice wine that balances the flavors beautifully.
  • Sake – enhances the taste and tenderizes the salmon for a delectable texture.
  • Soy sauce – adds depth and umami to the marinade.
  • Sugar – helps to caramelize the top and balance the savory notes.
  • Sesame oil – offers a fragrant finish that enhances the overall flavor profile.
  • Fresh ginger – finely grated, it gives a zesty kick that complements the fish.

For Garnish

  • Green onions – thinly sliced for a pop of freshness and color.
  • Toasted sesame seeds – a delightful crunch; optional but highly recommended!
  • Lemon wedges – serve on the side for a bright, zesty touch that complements the Broiled Miso Salmon.

Step‑by‑Step Instructions for Broiled Miso Salmon

Step 1: Prepare the Marinade
In a small bowl, whisk together the white miso paste, mirin, sake, soy sauce, sugar, sesame oil, and finely grated ginger until the mixture is smooth and well combined. This fragrant miso marinade is the key to your delicious Broiled Miso Salmon, so take a moment to ensure it’s evenly mixed and ready to infuse your salmon with rich umami flavors.

Step 2: Marinate the Salmon
Place the salmon fillets in a shallow dish or a resealable plastic bag, ensuring they’re in a single layer. Pour the prepared miso marinade over the salmon, making sure each fillet is thoroughly coated. Cover the dish or seal the bag, then refrigerate for at least 30 minutes, allowing the flavors to meld, or for several hours if you prefer a more intense taste.

Step 3: Preheat the Broiler
While the salmon marinates, preheat your oven’s broiler to high and position the oven rack about 6 inches from the heat source. The intense heat from the broiler will caramelize the marinade and give your Broiled Miso Salmon that beautiful golden crust. Make sure to keep an eye on the salmon during cooking to prevent burning.

Step 4: Prepare the Baking Sheet
Line a baking sheet with aluminum foil or use a broiler pan for easy cleanup, then lightly coat it with cooking spray or a drizzle of oil to prevent sticking. This step is essential to ensure your lovely broiled salmon releases easily from the pan and retains its beautiful presentation when ready to serve.

Step 5: Arrange the Salmon on the Baking Sheet
Remove the marinated salmon fillets from the refrigerator and discard any leftover marinade. Place the fillets skin-side down on the prepared baking sheet, ensuring they have enough space between them for even cooking. The vibrant colors of the salmon will shine as it prepares for a delightful transformation in the oven.

Step 6: Broil the Salmon
Slide the baking sheet into the preheated oven and broil the salmon for 8-10 minutes. Keep a close eye on the fillets—look for the fish to become opaque and the top to develop a beautifully caramelized, golden brown crust. Cooking time may vary based on the thickness of your fillets and the intensity of your broiler, so adjust accordingly.

Step 7: Garnish the Salmon
Once the salmon is cooked through, carefully remove it from the oven. Sprinkle the fillets with thinly sliced green onions and toasted sesame seeds for added crunch and aroma. This finishing touch elevates your Broiled Miso Salmon, enhancing both its flavor and presentation for an impressive meal.

Step 8: Serve and Enjoy
Serve your Broiled Miso Salmon hot from the oven with fresh lemon wedges on the side. The bright zest of lemon adds a refreshing contrast to the savory-rich flavors of the dish. Gather your loved ones around the table and savor this melt-in-your-mouth culinary delight—an easy yet elegant dinner option that’s sure to impress!

Broiled Miso Salmon

Expert Tips for Broiled Miso Salmon

Marination Time: Ensure you marinate the salmon for at least 30 minutes, but 2-4 hours is ideal for enhanced flavor.

Monitor Cooking: Keep an eye on your broiling salmon—cooking time varies, so watch for that perfect caramelized crust without burning.

Use Skin-On Fillets: Choosing skin-on salmon enhances flavor and moisture, helping prevent over-drying while broiling your delicious Broiled Miso Salmon.

Avoid Overcrowding: Space your fillets evenly on the baking sheet for uniform cooking and to achieve that beautiful golden finish everyone will love.

Serve with Accompaniments: Don’t overlook side dishes; steamed rice or veggies complement the salmon perfectly, making for a well-rounded meal!

What to Serve with Broiled Miso Salmon

Pairing the right sides with your salmon can elevate your meal into an unforgettable experience of flavors and textures.

  • Steamed Jasmine Rice: The light, fluffy texture of jasmine rice perfectly absorbs the savory miso glaze, adding a comforting element to your plate. It’s the ideal canvas for savoring every drop of sauce.

  • Roasted Asparagus: Crispy-tender and slightly charred asparagus complements the salmon beautifully. The earthy notes of the vegetables enhance the fish’s rich flavor while adding a burst of color to your meal.

  • Cucumber Salad: A refreshing cucumber salad adds a crunchy contrast to the rich salmon. Toss in a light vinaigrette to balance out the savory notes, and its crispness will awaken your palate with each bite.

  • Sesame Noodle Salad: Flavorful sesame noodles tossed with colorful veggies offer both texture and a touch of nuttiness. This salad echoes the sesame flavors in the salmon, creating a harmonious meal experience.

  • Miso Soup: For those craving a warm starter, a comforting bowl of miso soup provides a delightful umami flavor that ties nicely with your Broiled Miso Salmon. Add tofu and seaweed for added substance and nutrition.

  • Sautéed Baby Bok Choy: This tender, slightly bitter green works wonders alongside the rich fish. Quick sautéing brings out its sweetness while providing a lovely bite-sized component that complements your dinner nicely.

  • Chardonnay: A chilled glass of chardonnay offers bright acidity that cuts through the richness of the salmon and balances the flavors beautifully, making every mouthful a pleasure.

  • Green Tea Ice Cream: For dessert, indulge in creamy green tea ice cream. The subtle bitterness pairs wonderfully with the salmon’s umami flavors, providing a refreshing finish to your meal.

Broiled Miso Salmon Variations

Feel free to get creative with this dish and make it your own!

  • Dairy-Free: Substituting sugar with maple syrup keeps the glaze sweet while maintaining that rich umami profile.
  • Spicy Twist: Add a teaspoon of sriracha to the marinade for a spicy kick that brings a whole new dimension to the flavors. Sriracha not only elevates the heat but also adds a hint of tang, creating an exciting contrast that’s sure to please your palate.
  • Herb-Infused: Incorporate fresh herbs like cilantro or basil into the marinade for a fragrant twist. This vibrant addition complements the richness of the salmon beautifully while adding an aromatic freshness.
  • Citrus Variation: Swap the lemon for orange or lime to introduce a different citrus flavor that brightens up the dish. The zesty notes will tangibly enhance the overall flavor experience, making each bite feel like a mini-vacation!
  • Vegetarian Option: Try this marinade with firm tofu! A couple of extra hours in the marinade will yield delicious, rich flavors. Tofu absorbs the savory miso beautifully, transforming it into a delectable protein alternative that pleases vegetarians.
  • Sweet and Savory: Experiment with the honey instead of sugar for a floral sweetness that plays well with miso’s umami goodness. This substitution will give your dish a beautifully balanced flavor profile that’s both comforting and sophisticated.
  • Nutty Crunch: Top the broiled salmon with crushed macadamia nuts or almonds for extra texture and richness. The nutty flavors will complement the savory salmon while adding a delightful crunch, creating a feast for both the eyes and the taste buds!
  • Rice Bowl: Transform your salmon into a rice bowl—serve over sushi rice with sliced avocado and pickled veggies for a delicious, deconstructed sushi experience! The combination of flavors and textures creates an inviting dish that’s not only filling but also visually appealing.

Explore these variations and let your culinary creativity shine! If you’re looking for more ideas, don’t forget to check out my guide on Serving Suggestions for Broiled Miso Salmon.

Make Ahead Options

These Broiled Miso Salmon fillets are perfect for meal prep enthusiasts looking to save time during busy weeknights! You can marinate the salmon in the flavorful miso mixture up to 24 hours ahead of time, allowing the fish to absorb all that delicious umami goodness. Simply transfer the coated fillets to a resealable plastic bag or a shallow dish, cover tightly, and refrigerate. If you’re not cooking them right away, they can even be frozen for up to 3 months; just thaw them overnight in the fridge before broiling. When you’re ready to enjoy, simply broil the salmon straight from the refrigerator for a quick and delightful meal that’s just as delicious as when made fresh!

Storage Tips for Broiled Miso Salmon

Fridge: Store leftover Broiled Miso Salmon in an airtight container in the refrigerator for up to 3 days to maintain freshness and flavor.

Freezer: Wrap the salmon tightly in plastic wrap or aluminum foil and place it in an airtight container for freezing; it can last up to 3 months.

Reheating: To reheat, thaw in the fridge overnight, then warm in a moderate oven (350°F) for about 10 minutes until heated through.

Serving Suggestions: Pair reheated salmon with fresh garnishes like green onions or lemon wedges for a delightful meal ready in no time!

Broiled Miso Salmon

Broiled Miso Salmon Recipe FAQs

What type of salmon should I use for the best Broiled Miso Salmon?
I recommend using skin-on salmon fillets, which weigh about 6 ounces each. The skin helps retain moisture during cooking and enhances the overall flavor of your dish.

How long can I store leftover Broiled Miso Salmon?
You can store leftover Broiled Miso Salmon in an airtight container in the refrigerator for up to 3 days. Just be sure to let it cool down to room temperature before sealing it up to keep freshness intact!

Can I freeze Broiled Miso Salmon?
Absolutely! To freeze, wrap the salmon tightly in plastic wrap or aluminum foil, then place it in an airtight container or freezer bag. It can last up to 3 months in the freezer. When you’re ready to enjoy it, thaw it overnight in the fridge before reheating.

What should I do if my salmon is overcooked?
If your salmon ends up overcooked and dry, don’t fret! You can create a delicious sauce to pair with it. Mix together a little bit of soy sauce, honey, and lemon juice, brushing it over the salmon to add moisture back in while serving.

Is Broiled Miso Salmon safe for my dog to eat?
While salmon is generally safe for dogs in small amounts, make sure it is cooked thoroughly and free from any seasoning, particularly soy sauce or miso, which can be high in sodium. Always consult your vet if you’re unsure whether it’s safe for your furry companion.

What are some ways to enhance the flavor of the marinade for Broiled Miso Salmon?
If you’re looking to amp up the flavor, consider adding crushed garlic or a splash of rice vinegar to the marinade. You can also play around with different types of miso paste, like red or yellow, for a change in taste. Just remember to adjust the sweetness accordingly!

Savory Broiled Miso Salmon that Melts in Your Mouth

Enjoy delicious Broiled Miso Salmon with a rich umami flavor and a delightful caramelized crust.

  • Oven
  • Baking Sheet
  • small bowl
  • Whisk
  • Plastic wrap

For the Salmon

  • 2 pieces Salmon fillets (about 6 ounces each, skin-on recommended)
  • 3 tablespoons White miso paste (for marinade)

For the Marinade

  • 2 tablespoons Mirin
  • 2 tablespoons Sake
  • 2 tablespoons Soy sauce
  • 1 tablespoon Sugar
  • 1 tablespoon Sesame oil
  • 1 tablespoon Fresh ginger (finely grated)

For Garnish

  • 2 tablespoons Green onions (thinly sliced)
  • Toasted sesame seeds (optional)
  • 2 wedge Lemon wedges

Step-by-Step Instructions

  1. Prepare the marinade by whisking together the white miso paste, mirin, sake, soy sauce, sugar, sesame oil, and ginger until smooth.
  2. Marinate the salmon fillets in the mixture in a shallow dish or resealable bag for at least 30 minutes.
  3. Preheat the broiler in your oven to high and position the rack 6 inches from the heat source.
  4. Line a baking sheet with aluminum foil and lightly coat with cooking spray.
  5. Arrange the marinated salmon skin-side down on the baking sheet.
  6. Broil the salmon for 8-10 minutes, monitoring for a caramelized crust.
  7. Garnish the cooked salmon with green onions and sesame seeds.
  8. Serve immediately with lemon wedges on the side.

For enhanced flavor, allow the salmon to marinate longer. Adjust broiling time based on fillet thickness.

Main Dishes
Japanese
Broiled Miso Salmon, Easy Recipe, Freezer-friendly, healthy dinner, miso marinade, Salmon recipe

Filed Under: Main Dishes

Hearty Spanish Beans & Eggs for a Cozy Home Breakfast

September 4, 2025 by grace bellamy Leave a Comment

In a bustling cafe in Madrid, I stumbled upon a dish that transformed my breakfast routine forever: Spanish Beans & Eggs. This vibrant meal combines the earthy richness of black beans with perfectly cooked eggs, creating a delightful fusion that’s both satisfying and wholesome. Not only is this recipe a breeze to whip up in just about 30 minutes, but it also brings a touch of Mediterranean magic to your table, making it a crowd-pleaser for brunch gatherings. Plus, with its nourishing ingredients and flexibility for customization—think creamy avocado or crumbled queso—it’s an easy way to elevate your mornings. Are you ready to savor this flavor-packed journey? Let’s dive into this comforting recipe!

Spanish Beans & Eggs

Why will you love Spanish Beans & Eggs?

Simplicity at Its Best: This recipe comes together in just 30 minutes, making it perfect for busy mornings.

Flavor Explosion: The combination of smoked paprika and cumin brings a warm, smoky depth that makes every bite special.

Customizable Delight: Feel free to top with avocado, feta, or even a drizzle of hot sauce for added flair!

Nutritious and Filling: Packed with protein and fiber, this dish will keep you satisfied throughout the day.

Perfect for Gatherings: Impress your family or guests with this eye-catching brunch dish that caters to everyone’s taste buds.

Whether you’re serving up a hearty breakfast or a cozy brunch gathering, Spanish Beans & Eggs can be paired beautifully with warm tortillas or crusty bread for a complete meal. Enjoy the adventure of flavors and remember, you can even store leftovers in an airtight container for up to 3-4 days in the fridge!

Spanish Beans & Eggs Ingredients

Here’s everything you need to create this scrumptious breakfast dish!

For the Beans
• 1 can (15 oz) black beans – drained and rinsed for a hearty base full of nutrients.
• 1 tablespoon olive oil – used for sautéing, adding a rich flavor to your dish.
• 1 small onion – chopped to enhance the aroma and depth of flavor.
• 2 cloves garlic – minced, for that essential savory kick.
• 1 teaspoon smoked paprika – introduces a warm, smoky essence to the beans.
• ½ teaspoon ground cumin – a spice that pairs perfectly with the beans for added warmth.
• Salt and pepper, to taste – balance the flavors to your preference.

For the Eggs
• 4 large eggs – the star ingredient that brings richness and protein to the dish.

For Garnishing
• Fresh cilantro or parsley – chopped, to sprinkle on top for a fresh finish.
• Avocado slices (optional) – for creaminess that complements the savory flavors.
• Crumbled feta or queso fresco (optional) – adds a salty richness to elevate the dish beautifully.

Set your taste buds ready and enjoy whipping up these Spanish Beans & Eggs!

Step‑by‑Step Instructions for Spanish Beans & Eggs

Step 1: Heat the Oil
In a medium-sized skillet, heat 1 tablespoon of olive oil over medium heat. Allow it to warm for about 1-2 minutes until you notice a shimmer on the surface. This preheating will ensure that your ingredients sauté beautifully, setting the stage for the rich flavor of the Spanish Beans & Eggs.

Step 2: Sauté the Onions and Garlic
Add the chopped onion to the skillet and sauté for about 3-4 minutes, or until the onions turn translucent and fragrant. Next, mix in the minced garlic and continue cooking for another minute, stirring until it releases its delightful aroma. This step builds a flavorful base for your beans.

Step 3: Combine the Beans and Spices
Stir in the drained and rinsed black beans along with 1 teaspoon of smoked paprika, ½ teaspoon of ground cumin, and salt and pepper to taste. Cook for about 5 minutes, giving it a gentle stir occasionally. You’ll know it’s ready when the beans are heated through and the spices create a savory aroma, making your Spanish Beans & Eggs truly inviting.

Step 4: Add the Eggs
Using a spoon, create small wells in the bean mixture and carefully crack one egg into each well. Make sure the eggs are evenly spaced to cook consistently. This is where the magic happens, as the eggs will cook directly in the flavorful bean mixture, enriching the dish.

Step 5: Cover and Cook
Cover the skillet with a lid and let it cook for about 5-7 minutes. Keep an eye on the eggs; you want them to be set to your desired doneness. The whites should be firm while the yolks remain slightly runny if that’s your preference. This is the moment to create a cozy aroma throughout your kitchen with these Spanish Beans & Eggs!

Step 6: Garnish and Serve
Once cooked, remove the skillet from heat and garnish your dish with freshly chopped cilantro or parsley. For an extra touch, serve alongside avocado slices and crumbled feta or queso fresco if desired. These beautiful garnishes not only add color but also enhance the overall flavor profile, making your Spanish Beans & Eggs presentation irresistible.

Spanish Beans & Eggs

What to Serve with Spanish Beans & Eggs?

Elevate your breakfast experience with delightful pairings that complement the hearty flavors and textures of this dish.

  • Warm Tortillas: Soft, warm tortillas provide the perfect vessel for scooping up beans and eggs, adding an authentic touch to every bite.
  • Avocado Toast: The creamy, rich texture of avocado toast pairs beautifully, adding freshness to the hearty beans and eggs.
  • Sautéed Spinach: A side of sautéed spinach adds a vibrant color and a nutritional punch, making your plate pop with health and flavor.
  • Fresh Salsa: A zesty salsa brings a bright, tangy kick that balances nicely against the smoky beans, enhancing every mouthful.
  • Crusty Bread: A slice of crusty bread is ideal for mopping up the delicious bean mixture, offering a heartwarming crunch.
  • Bloody Mary: For a brunch twist, a spicy Bloody Mary complements the flavors beautifully, creating a relaxing atmosphere for your meal.
  • Yogurt Parfait: For something sweet, serve a yogurt parfait on the side; its creaminess and sweetness provide the perfect contrast.
  • Fruit Salad: A refreshing fruit salad can cleanse the palate between bites, adding a sweet and juicy element to your meal.

Make Ahead Options

Spanish Beans & Eggs are perfect for meal prep enthusiasts! You can prepare the onion, garlic, and spice mixture up to 24 hours in advance; store it in an airtight container in the refrigerator to keep flavors fresh. Additionally, you can cook the black beans (if using dried) and refrigerate them for up to 3 days ahead. When you’re ready to serve, simply reheat the bean mixture in a skillet, create wells for the eggs, and crack them in. Cover and cook for about 5-7 minutes until the eggs reach your desired doneness. This way, you’ll enjoy a hearty breakfast without the rush, just as delicious as when made fresh!

Storage Tips for Spanish Beans & Eggs

Fridge: Store leftovers in an airtight container for up to 3-4 days to maintain freshness and flavor.

Freezer: These Spanish Beans & Eggs can be frozen for up to 2 months. Just make sure to cool completely before transferring to a freezer-safe container.

Thawing: To enjoy later, thaw in the refrigerator overnight. This helps retain texture and taste.

Reheating: Reheat on the stovetop or in the microwave until warmed through, ensuring eggs are cooked to your liking without overcooking.

Spanish Beans & Eggs Variations

Feel free to personalize this recipe to suit your taste and dietary needs!

  • Vegetarian Option: Skip the eggs and use firm tofu instead, crumbling it into the mix for a protein boost.

  • Spicy Kick: Add sliced jalapeños to the bean mixture while cooking for an extra layer of heat and flavor.

  • Cheesy Delight: Stir in a handful of shredded cheese, such as cheddar or Monterey Jack, when the beans are nearly done for a melty twist.

  • Herbal Infusion: Mix in fresh herbs like basil or oregano along with the beans for a fragrant flavor enhancement.

  • Protein-Packed: Incorporate diced chorizo or cooked sausage for a heartier breakfast option, adding depth and savoriness to the dish.

For those who love experimenting, why not try serving with a side of homemade Corn Tortillas? They’re a delightful complement to the rich flavors in your Spanish Beans & Eggs!

  • Nut-Free Version: Replace olive oil with avocado oil for a buttery flavor without nuts, perfect for a nut-sensitive diet.

  • Breakfast Bowls: Transform this dish into a breakfast bowl by serving the beans and eggs over quinoa or brown rice for added texture and fiber.

With these variations, you can easily mix and match to find your perfect version of Spanish Beans & Eggs!

Expert Tips for Spanish Beans & Eggs

Use Fresh Ingredients: Always use fresh eggs and veggies; they enhance the flavors in your Spanish Beans & Eggs significantly.

Watch Egg Doneness: Keep an eye on the eggs as they cook; for perfectly runny yolks, 5-6 minutes is ideal.

Avoid Overcrowding: If using a larger skillet, don’t overcrowd the beans and eggs—give them room to breathe for even cooking.

Taste as You Go: Season gradually; a little salt and pepper can take this dish to the next level, so adjust based on your preference.

Experiment with Spices: Feel free to experiment with different spices or herbs—fresh thyme or oregano can bring a delightful twist to your Spanish Beans & Eggs.

Spanish Beans & Eggs

Spanish Beans & Eggs Recipe FAQs

What type of black beans should I use?
Absolutely! For this recipe, you can use canned black beans, as they’re convenient and save you time. Ensure they are drained and rinsed to remove excess sodium. If you prefer, you can also utilize dried black beans that you’ve cooked at home. Simply soak them overnight and cook until tender before adding to the dish.

How should I store leftovers?
Very simple! Allow your Spanish Beans & Eggs to cool completely before transferring them to an airtight container. They can be kept in the refrigerator for up to 3-4 days. Make sure to reheat them evenly before serving to enjoy the flavors just as fresh as they were when first made.

Can Spanish Beans & Eggs be frozen?
Absolutely! This dish can be frozen for up to 2 months. To do this, allow the dish to cool entirely, then portion it into freezer-safe containers or bags. When you’re ready to enjoy, simply thaw them overnight in the refrigerator before reheating on the stovetop or in the microwave.

How do I know when the eggs are perfectly cooked?
For optimal results, cover the skillet and cook the eggs for about 5-7 minutes. If you like runny yolks, aim for 5-6 minutes. When the whites are set and look firm, while the yolks still jiggle slightly, your eggs are just right! Remember, you can always peek under the lid to check on them.

Are there any dietary considerations for this recipe?
Absolutely! This Spanish Beans & Eggs recipe is naturally gluten-free and vegetarian-friendly. If you have allergies, watch out for the eggs and cheese toppings, which can be omitted or replaced with dairy-free alternatives. If you’re cooking for pets, avoid serving them the eggs, as they may cause digestive issues. Always consult with your vet if unsure.

Can I customize the spices or ingredients?
Very much so! Don’t hesitate to tweak the spices to your liking. You can add more cumin for an earthy flavor or a pinch of chili powder for a kick. Fresh herbs can also be introduced—think fresh thyme or oregano. The more the merrier when it comes to personalizing your Spanish Beans & Eggs!

Hearty Spanish Beans & Eggs for a Cozy Home Breakfast

Spanish Beans & Eggs is a vibrant, satisfying breakfast dish featuring black beans and perfectly cooked eggs.

  • medium-sized skillet

For the Beans

  • 1 can (15 oz) black beans (drained and rinsed)
  • 1 tablespoon olive oil (for sautéing)
  • 1 small onion (chopped)
  • 2 cloves garlic (minced)
  • 1 teaspoon smoked paprika
  • ½ teaspoon ground cumin
  • Salt (to taste)
  • Pepper (to taste)

For the Eggs

  • 4 large eggs

For Garnishing

  • fresh cilantro or parsley (chopped)
  • avocado slices (optional)
  • crumbled feta or queso fresco (optional)

Step-by-Step Instructions

  1. Heat the olive oil in a medium-sized skillet over medium heat for about 1-2 minutes until shimmering.
  2. Add chopped onion and sauté for 3-4 minutes until translucent. Then mix in minced garlic and sauté for another minute.
  3. Stir in the drained black beans, smoked paprika, ground cumin, salt, and pepper. Cook for about 5 minutes until heated through.
  4. Create small wells in the bean mixture and crack one egg into each well.
  5. Cover the skillet and cook for 5-7 minutes until the eggs are set to your desired doneness.
  6. Remove from heat, garnish with cilantro or parsley, and serve with optional avocado and feta.

Store leftovers in an airtight container for up to 3-4 days in the fridge.

Breakfast
Spanish
Breakfast, brunch, Easy, Healthy, Spanish Beans & Eggs, Vegetarian

Filed Under: Breakfast

  • « Previous Page
  • 1
  • …
  • 10
  • 11
  • 12
  • 13
  • 14
  • …
  • 22
  • Next Page »
RecipeCrown

Hello, beautiful people! I’m Grace Bellamy, a foodie, traveler, and writer with wanderlust in my soul. Whether crafting recipes in my kitchen or exploring flavors around the globe, my greatest joy is helping you create healthier, happier lives, one delicious bite at a time.