RecipeCrown

Easy & Delicious Recipes

  • Home
  • Breakfast
  • Main Dishes
  • Dessert
  • About
  • Contact
You are here: Home / Archives for grace bellamy

Creamy Dijon Chicken That Elevates Weeknight Dinners

August 12, 2025 by grace bellamy Leave a Comment

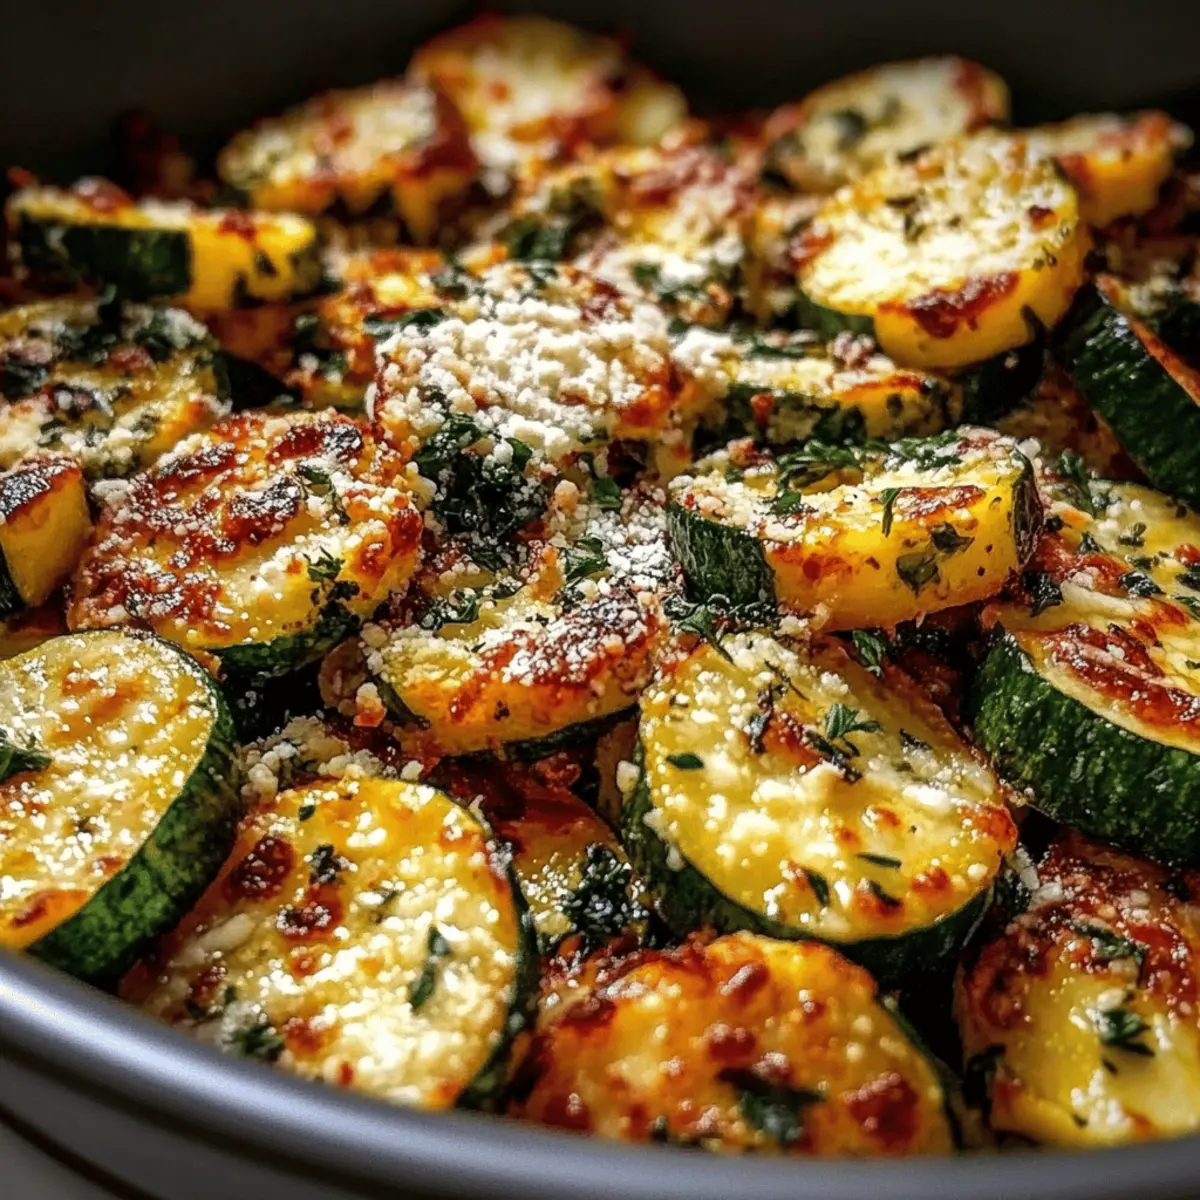
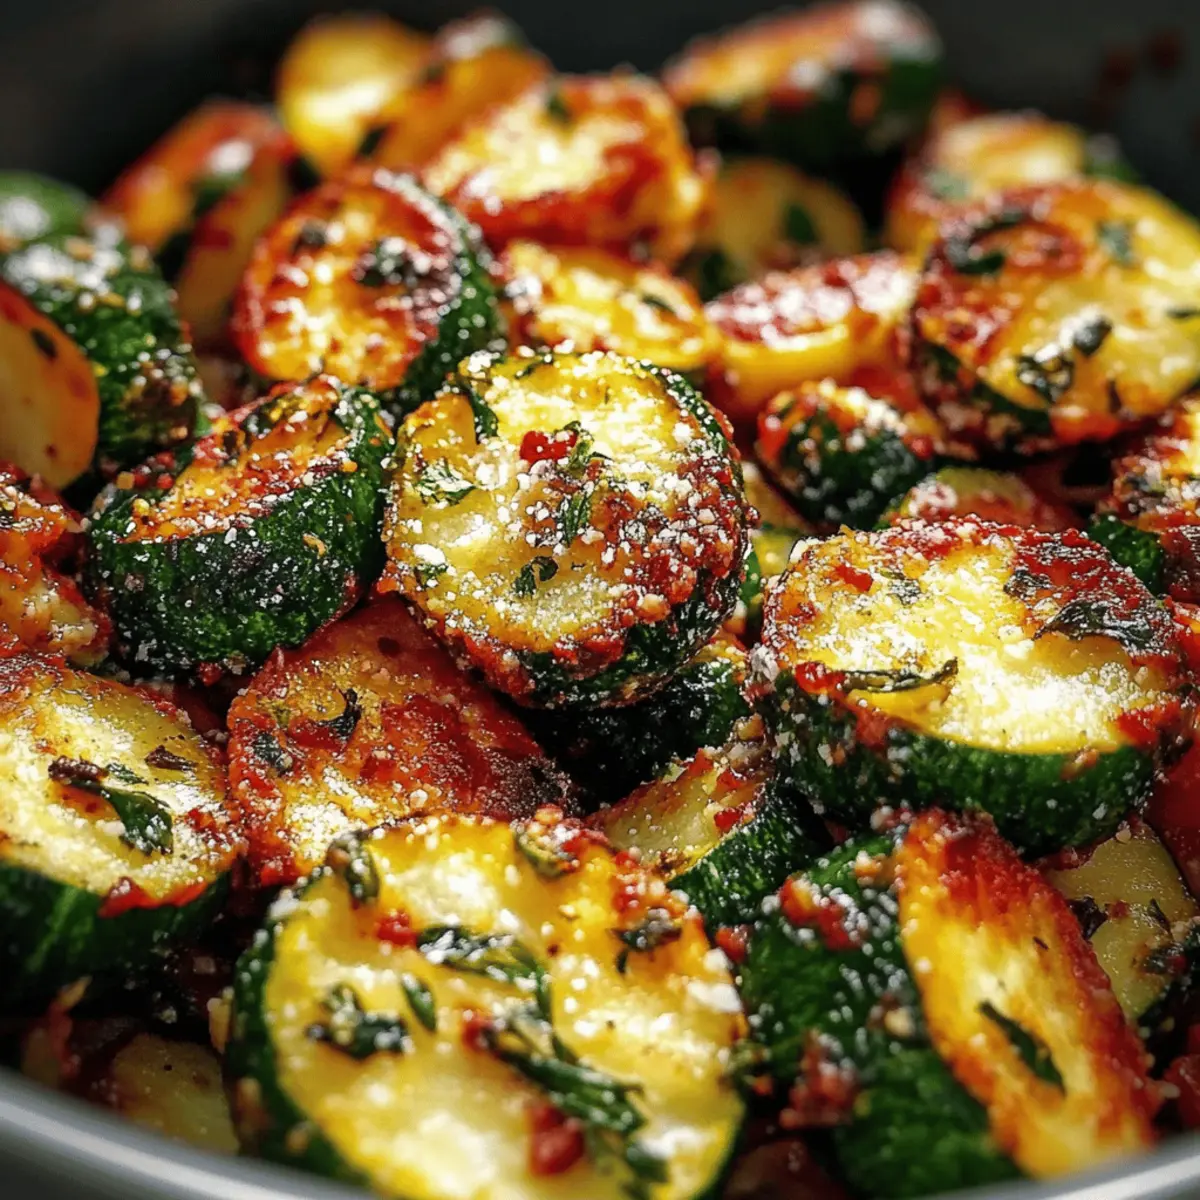
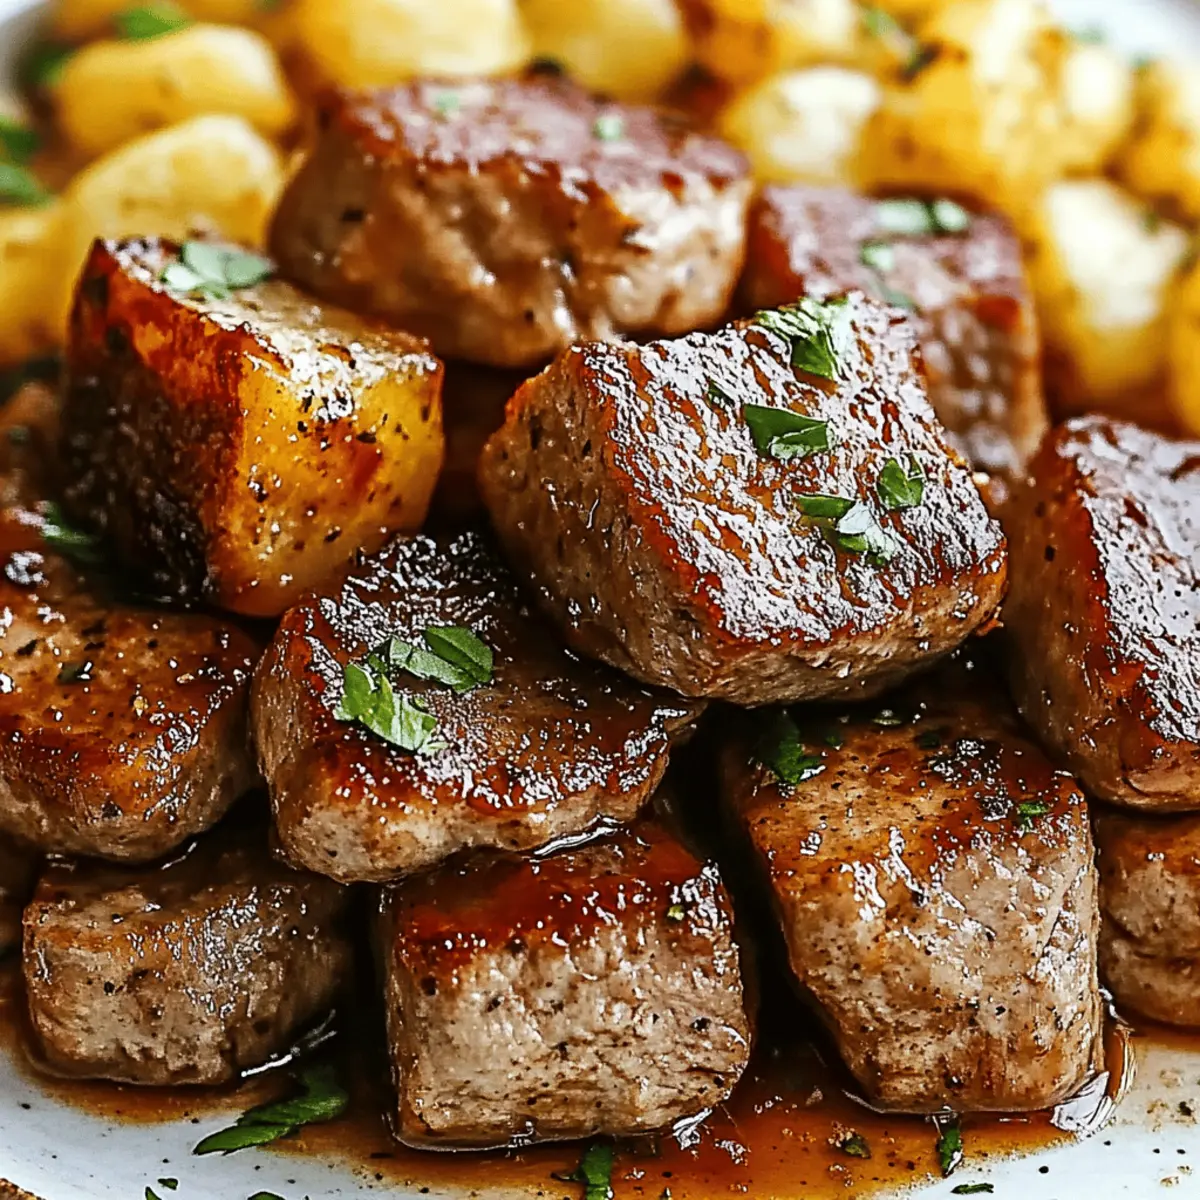
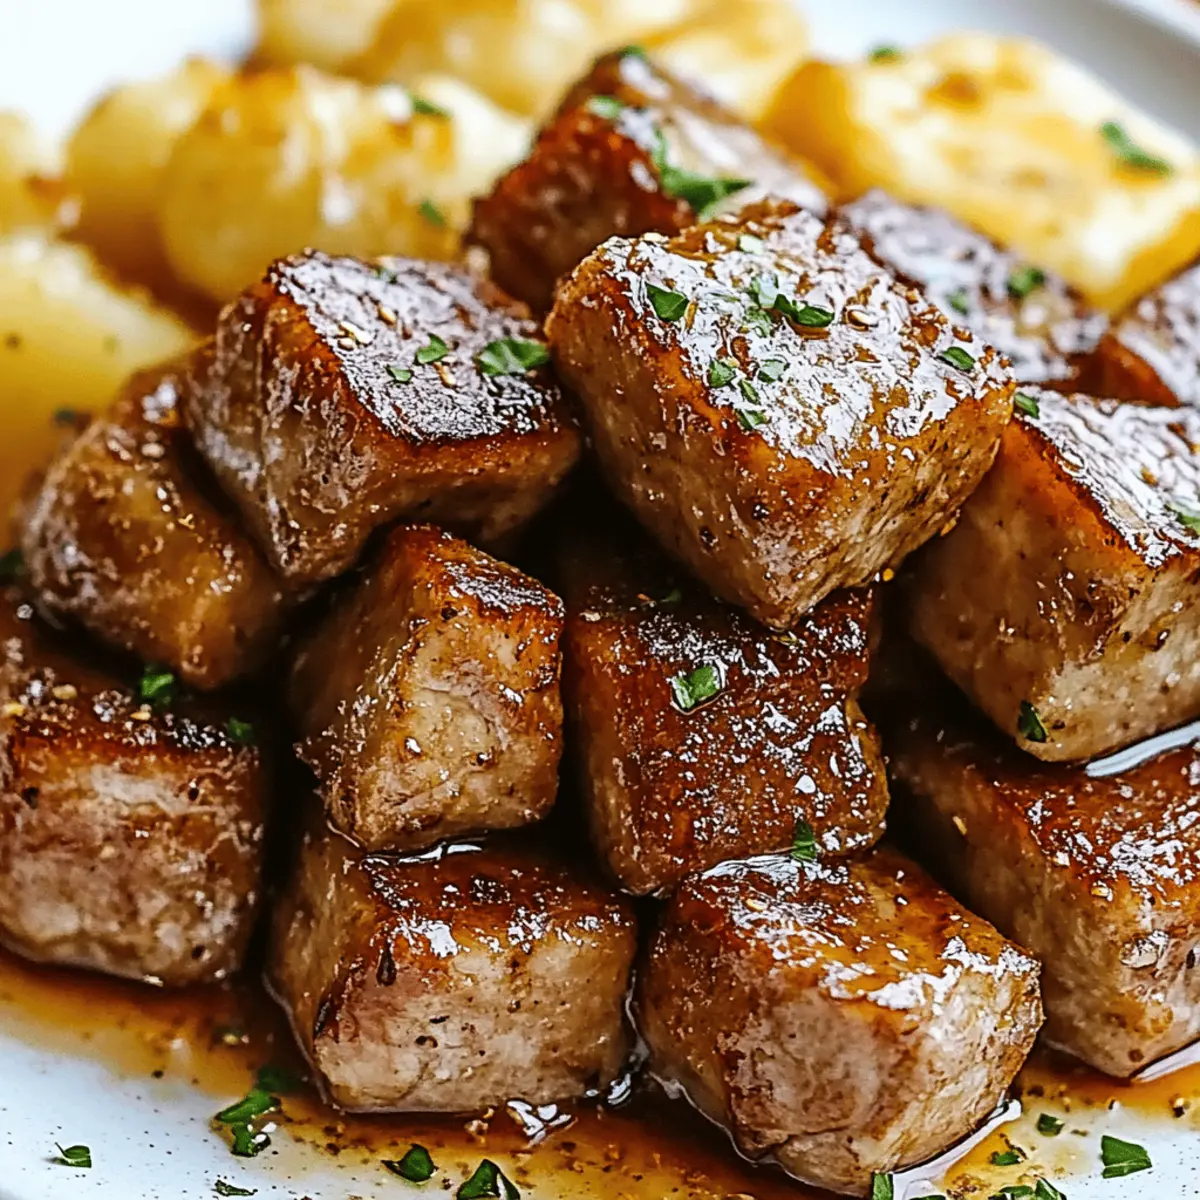
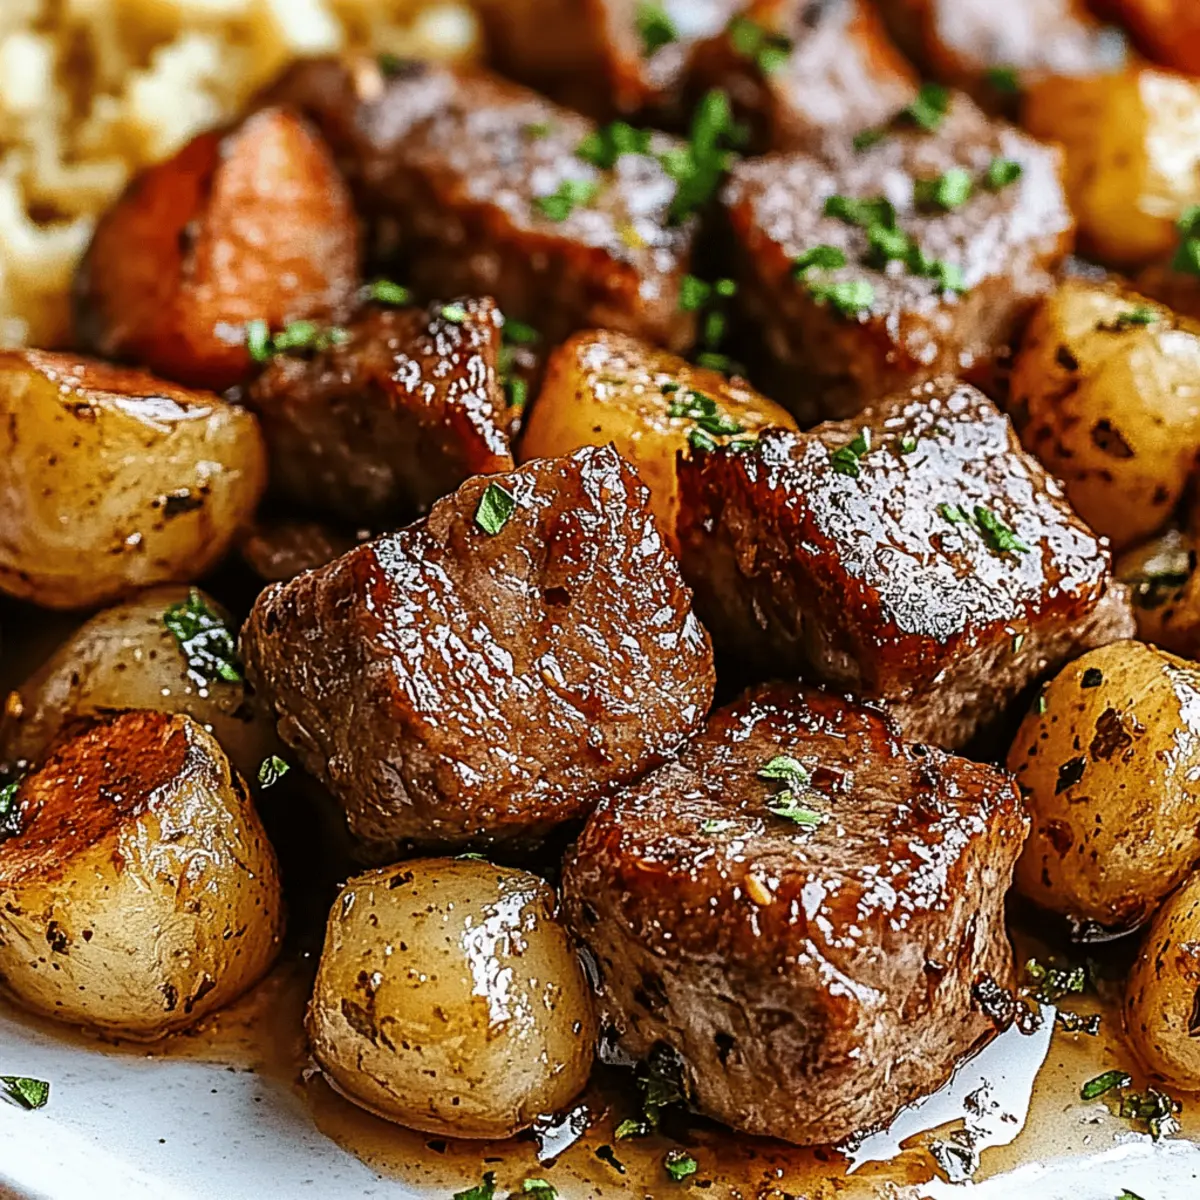
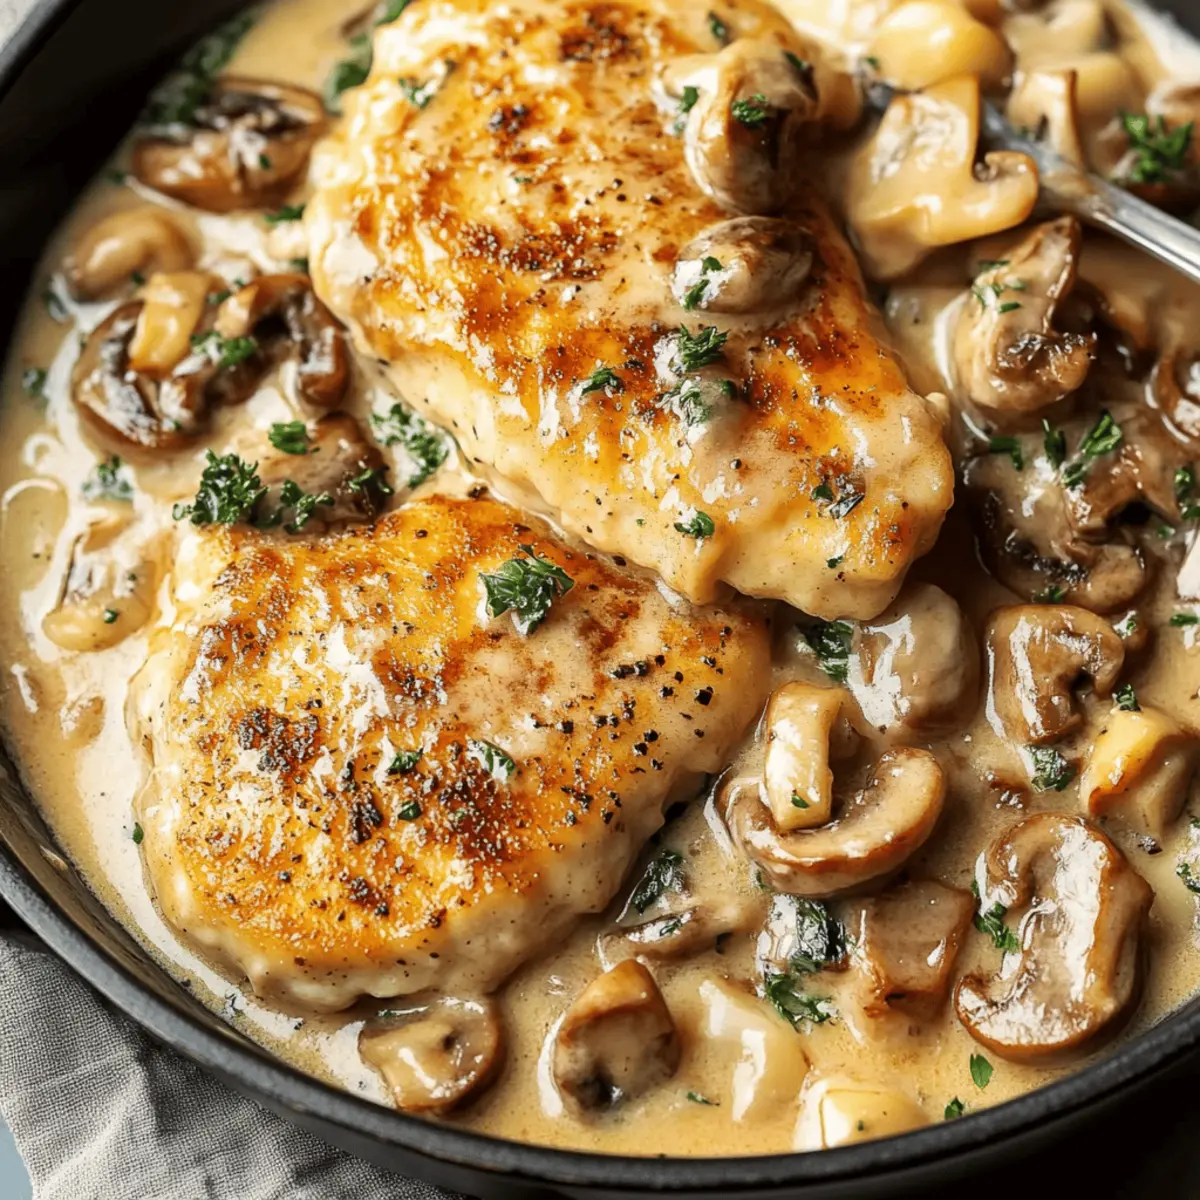
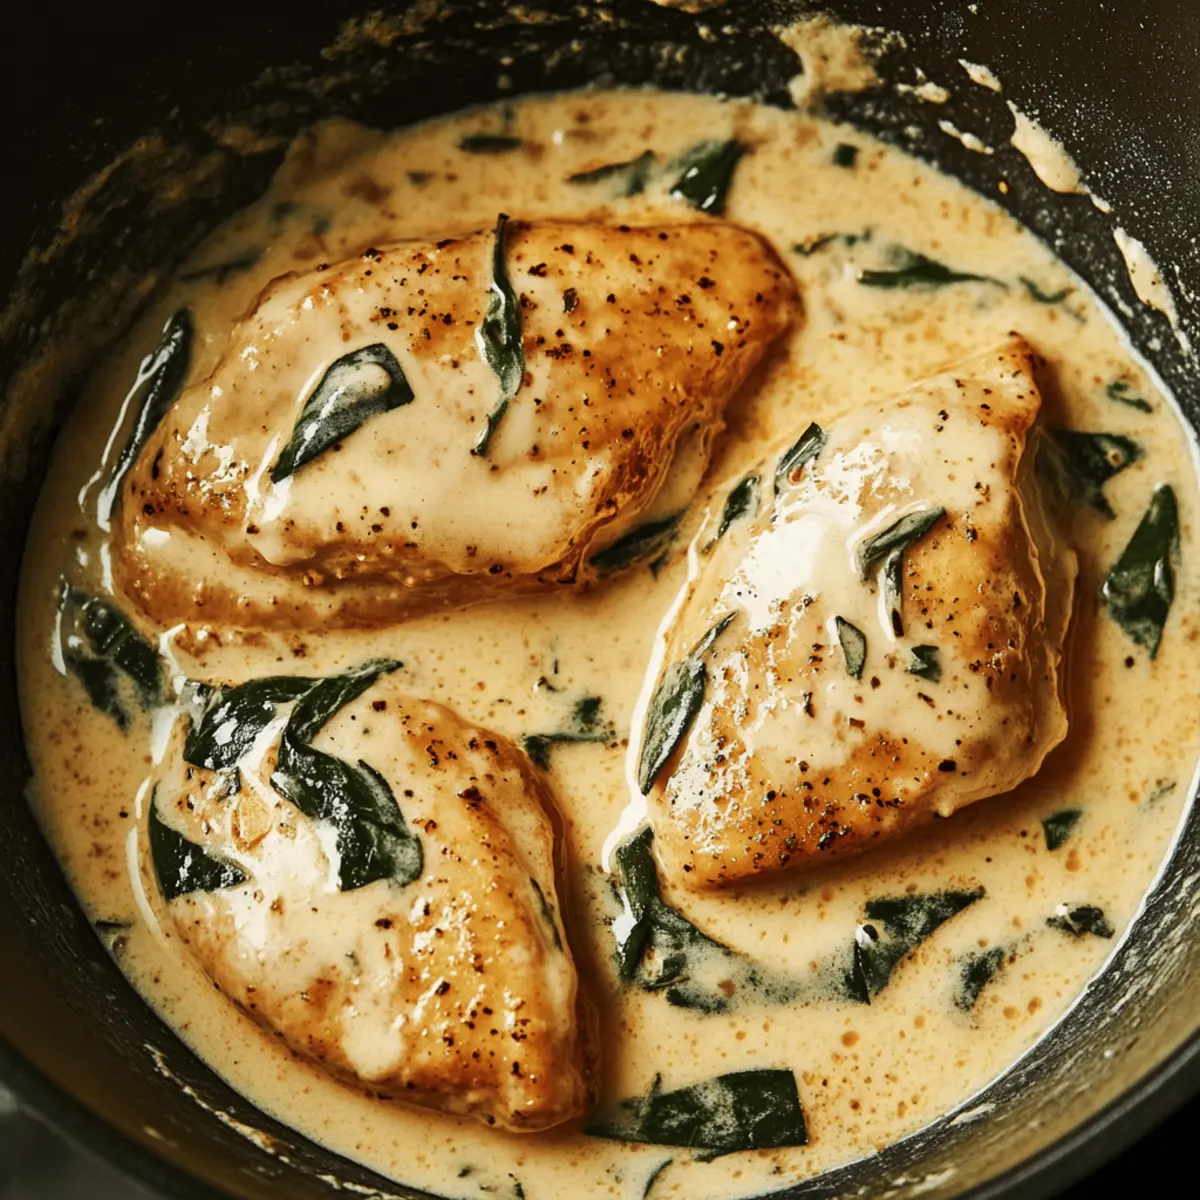
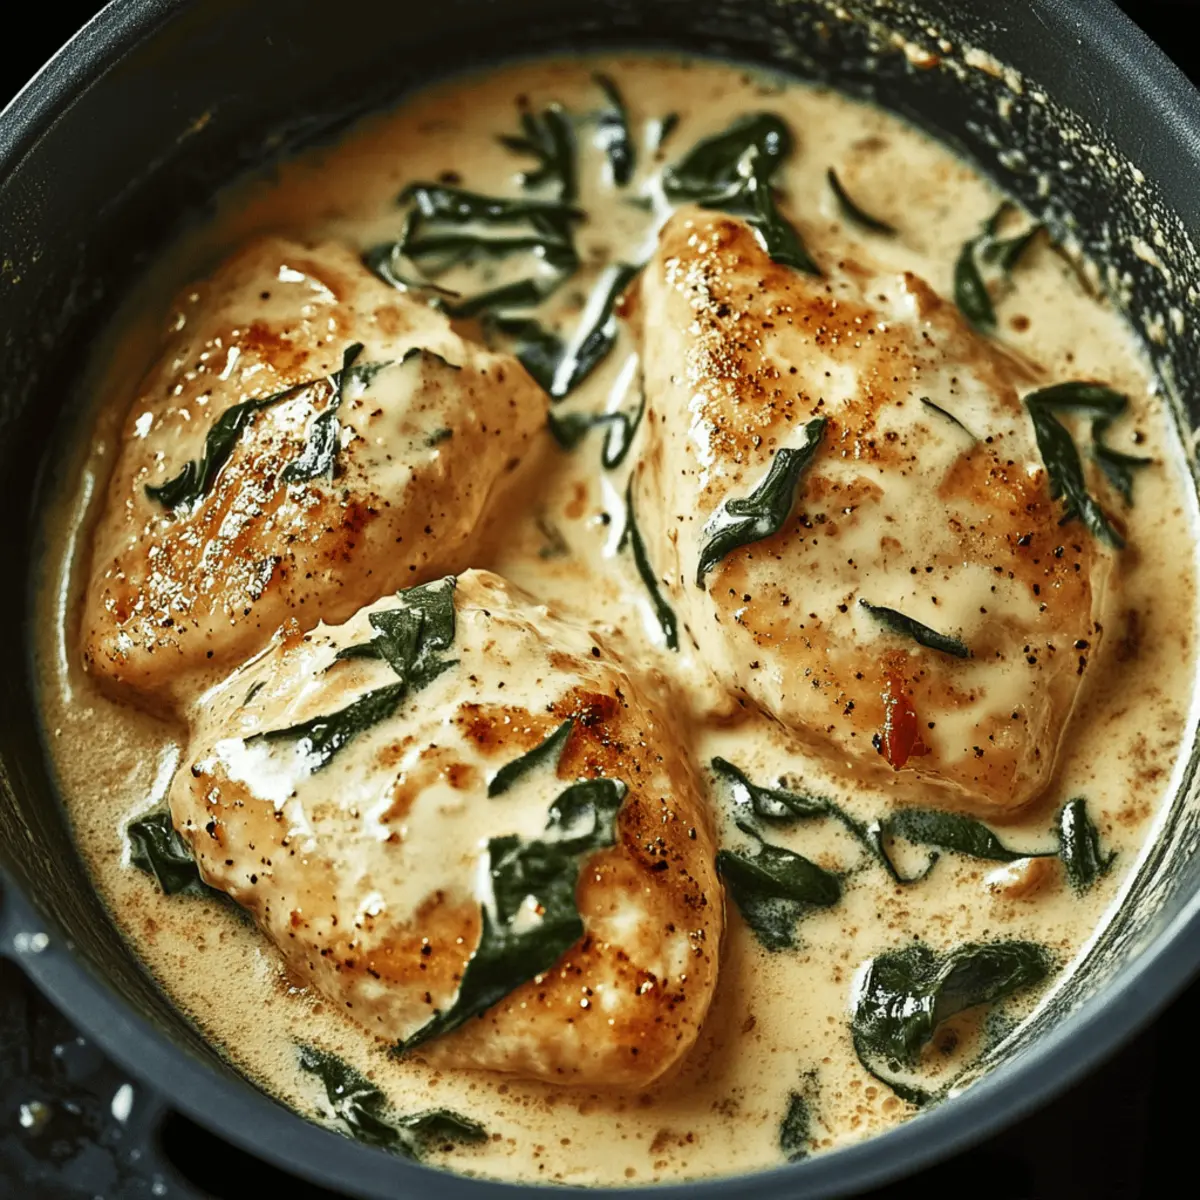
As I stood in my kitchen, the comforting aroma of sizzling chicken wafted through the air, instantly lifting my spirits. That’s how I knew I was onto something special with this Creamy Dijon Chicken recipe. It’s a delightful blend of rich flavors that comes together in just 30 minutes—perfect for those busy weeknights when you want to treat yourself to a home-cooked meal without the fuss. Not only is this dish a total crowd-pleaser, but it’s also a fantastic way to elevate a simple chicken breast into something truly memorable. Trust me, once you spoon that luscious, tangy sauce over each piece, you’ll be hooked! Are you ready to make some kitchen magic happen?

Why Is Creamy Dijon Chicken a Must-Try?

Effortless Cooking: With just 30 minutes from prep to plate, it’s perfect for busy weeknights.

Tangy Delight: The Dijon mustard adds a zesty kick that transforms ordinary chicken into an extraordinary dish.

Creamy Indulgence: Rich heavy cream brings an irresistible smoothness, making every bite a delight.

Impressive Presentation: Garnished with fresh parsley, it’s not just delicious but beautiful to serve.

Experience this dish alongside a simple side salad or over rice for a complete meal that impresses!

Creamy Dijon Chicken Ingredients

For the Chicken

  • 4 boneless, skinless chicken breasts – Choose fresh, high-quality chicken for the best texture and flavor.
  • Salt and pepper – Essential for enhancing the natural taste of the chicken.

For the Sauce

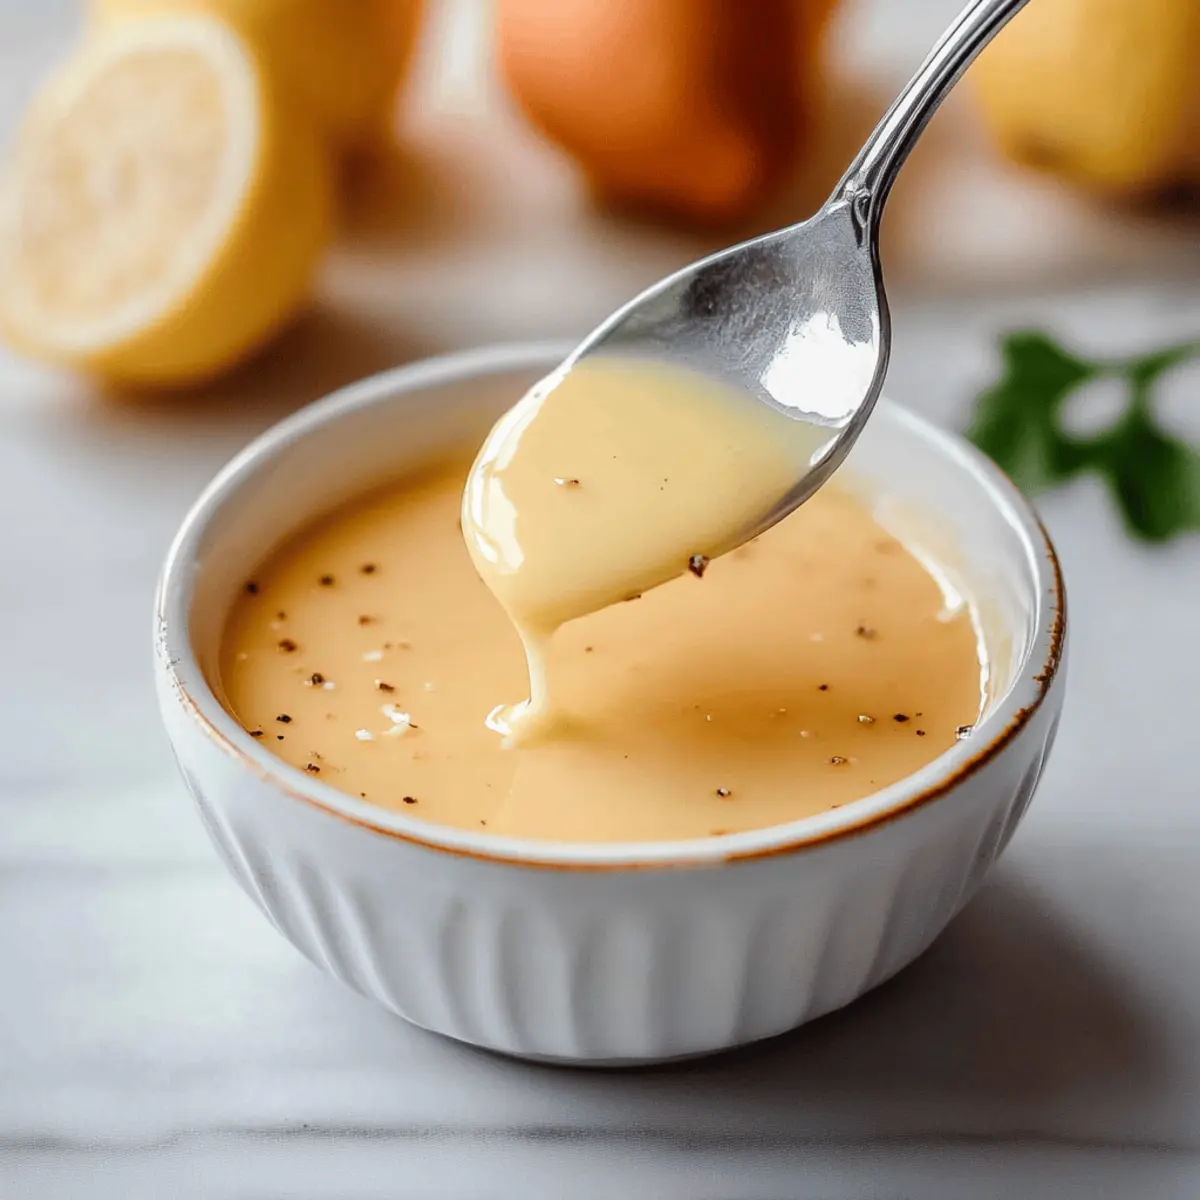
  • 2 tablespoons Dijon mustard – This ingredient is key for that signature tangy flavor in the creamy Dijon chicken.
  • 1 cup heavy cream – Adds a rich and velvety texture to the sauce.
  • 2 cloves garlic, minced – Garlic brings depth and aroma to the sauce.
  • 1 tablespoon olive oil – Used for searing the chicken and infusing it with flavor.
  • 1 teaspoon fresh thyme or 1/2 teaspoon dried thyme – A delightful herb that complements the creaminess and adds a refreshing note.

For Garnishing

  • Optional: Fresh parsley for garnish – A sprinkle of parsley not only brightens the dish but adds a pop of color, making it visually appealing.

With these Creamy Dijon Chicken ingredients, you’re all set to create a dish that’s sure to impress your family and friends alike!

Step‑by‑Step Instructions for Creamy Dijon Chicken

Step 1: Prepare the Chicken
Begin by patting the 4 boneless, skinless chicken breasts dry with paper towels. Season both sides generously with salt and pepper until well-coated. This essential step enhances the chicken’s flavor and ensures it browns nicely during cooking.

Step 2: Sear the Chicken
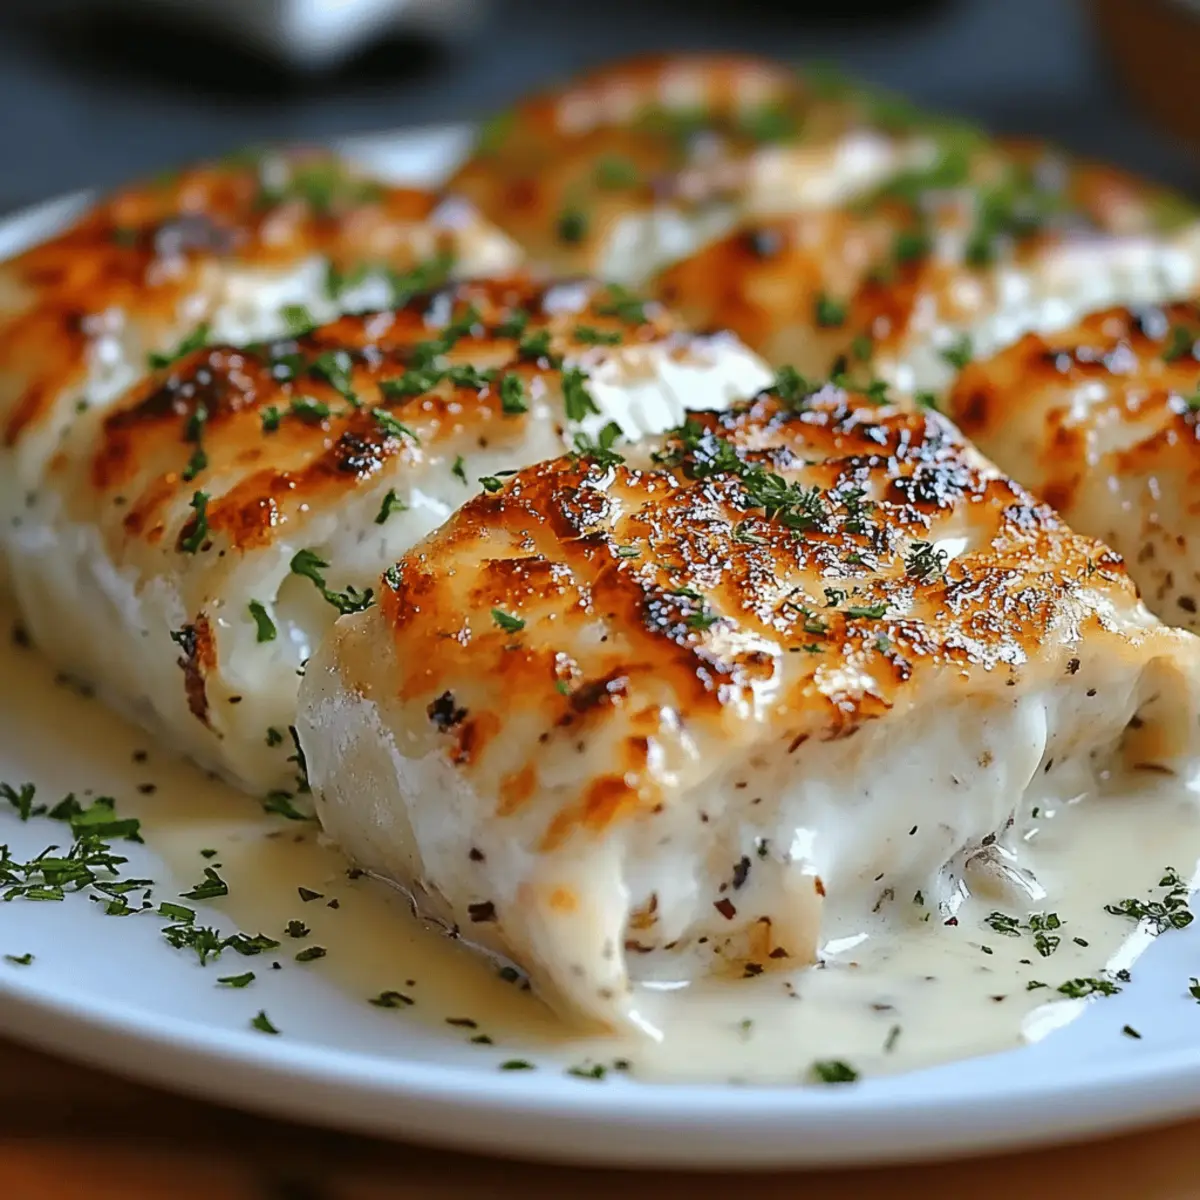
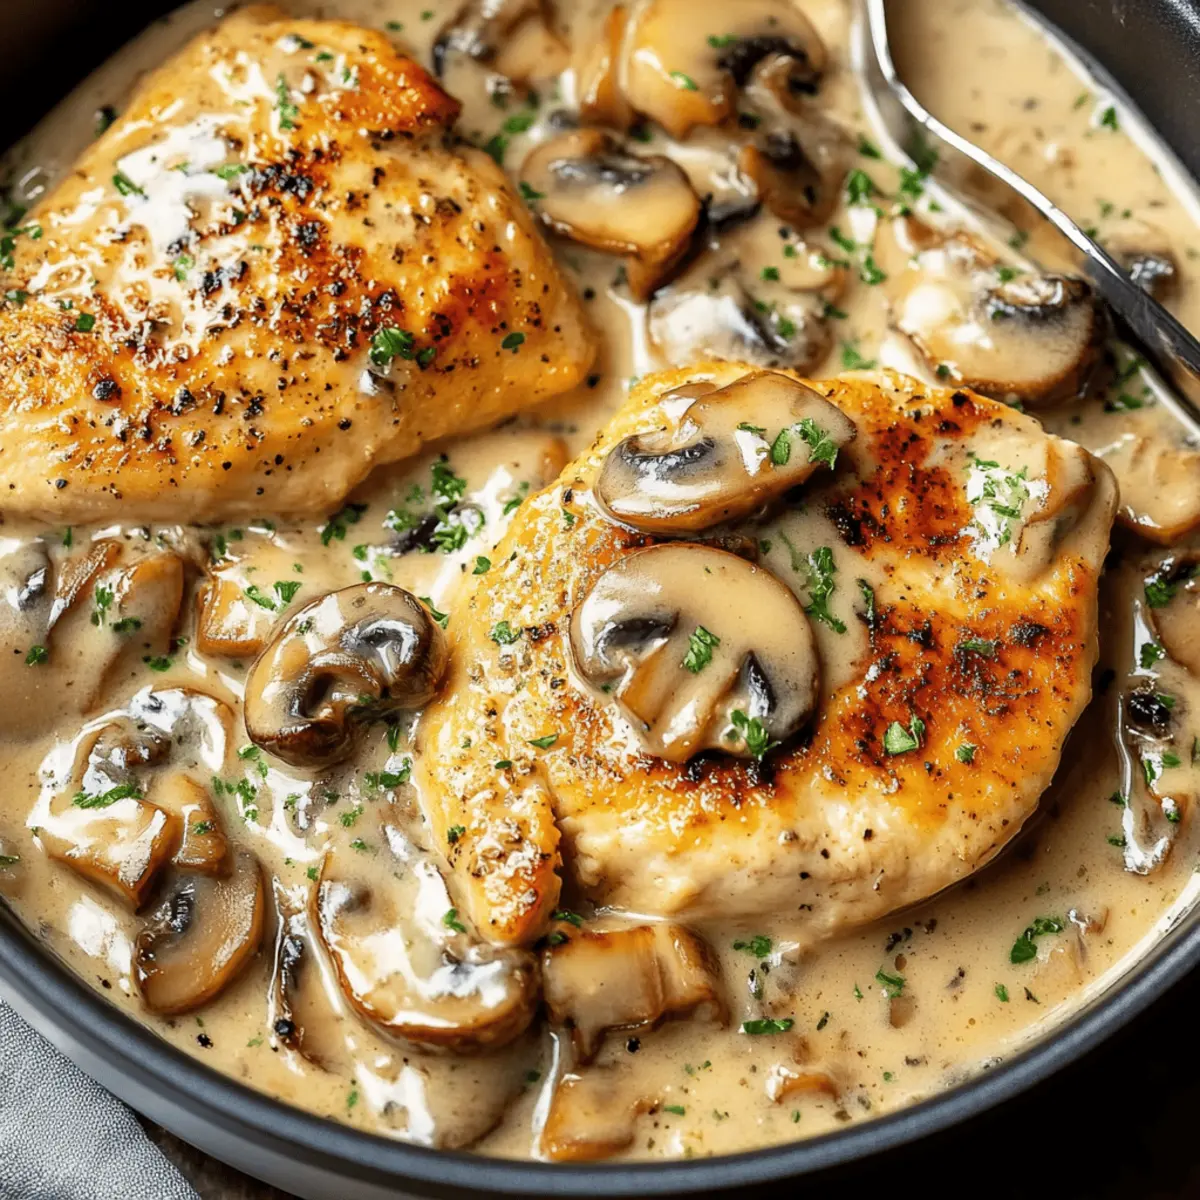
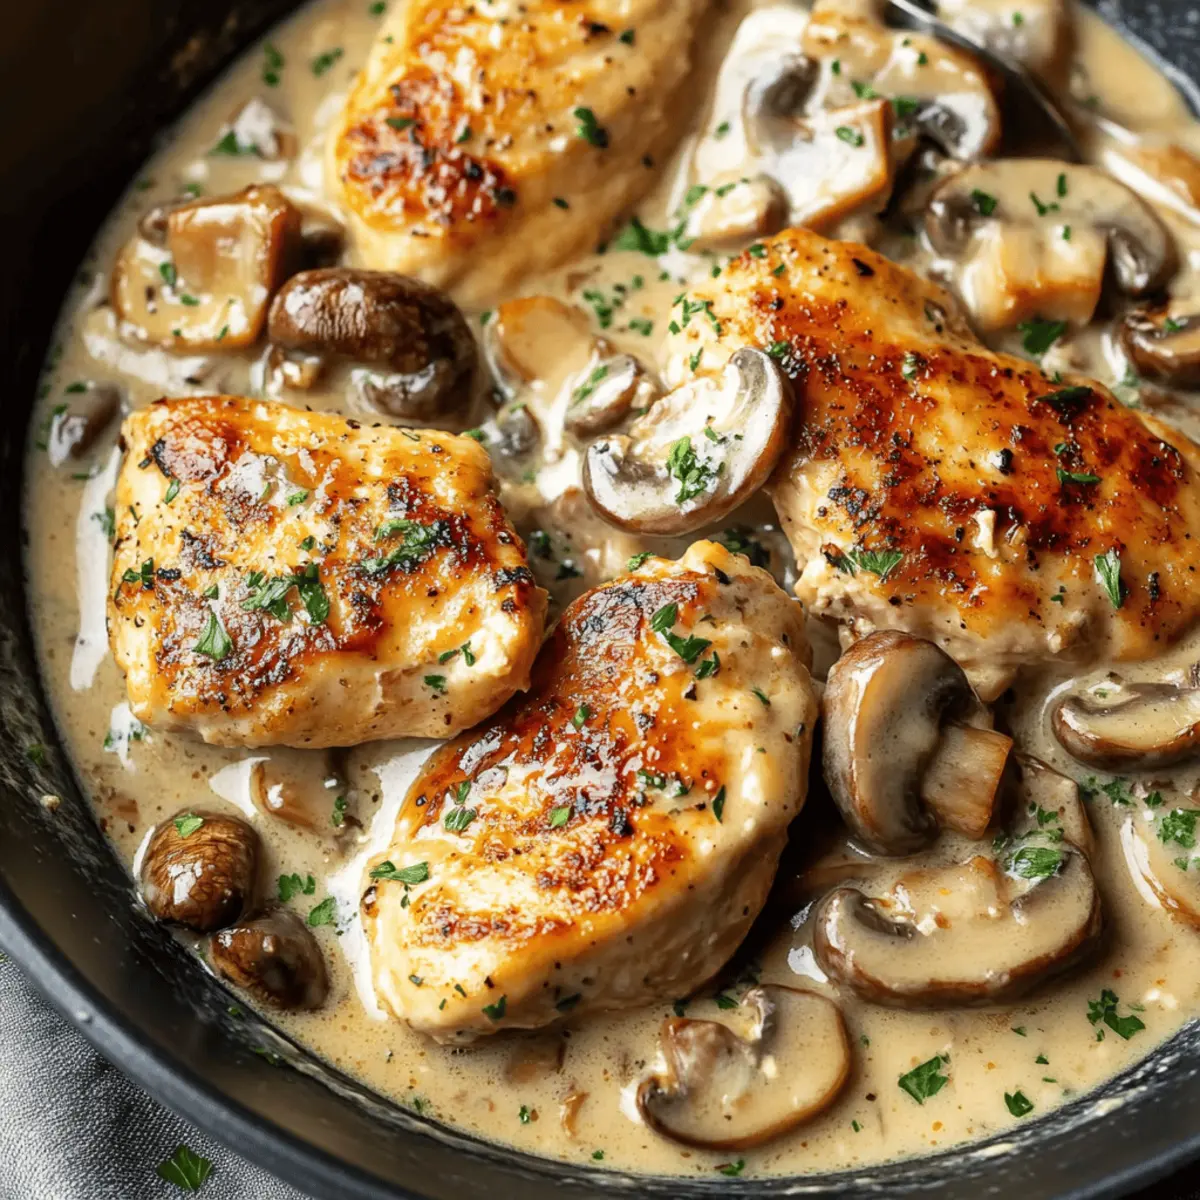
In a large skillet, heat 1 tablespoon of olive oil over medium-high heat. Once the oil shimmers, add the seasoned chicken breasts to the skillet, making sure not to overcrowd them. Sear each side for 6-7 minutes until they are golden brown and cooked through, reaching an internal temperature of 165°F.

Step 3: Sauté the Garlic
After the chicken is beautifully browned, remove it from the skillet and set aside on a plate. In the same skillet, add the 2 cloves of minced garlic and sauté for about 1 minute until fragrant, stirring constantly to prevent burning. This will infuse the oil with delightful garlic flavor, perfect for the sauce.

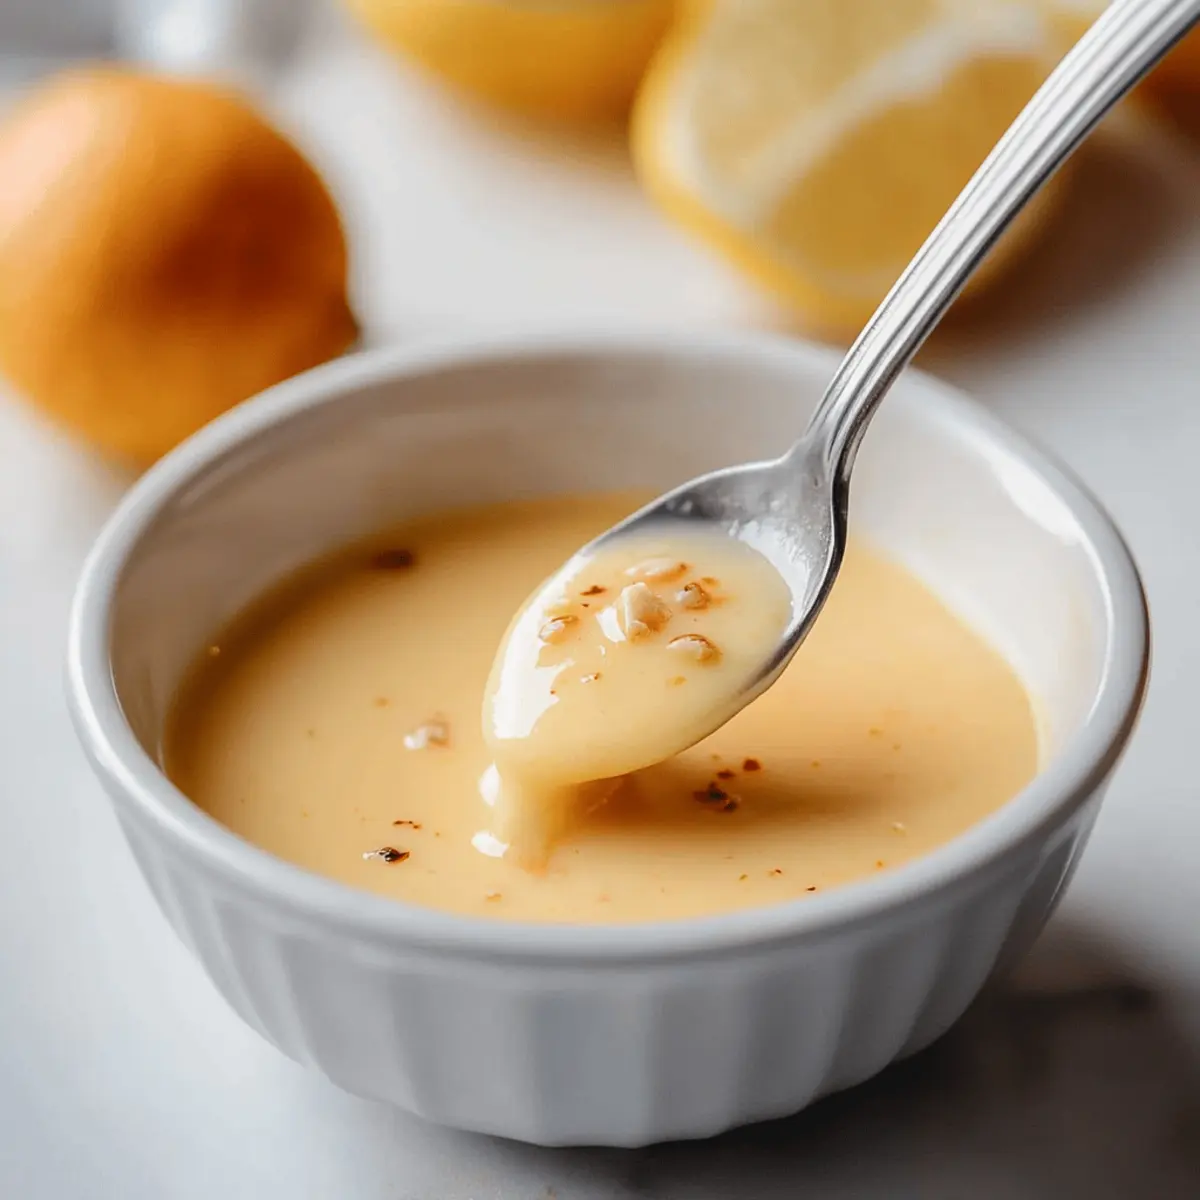
Step 4: Make the Sauce
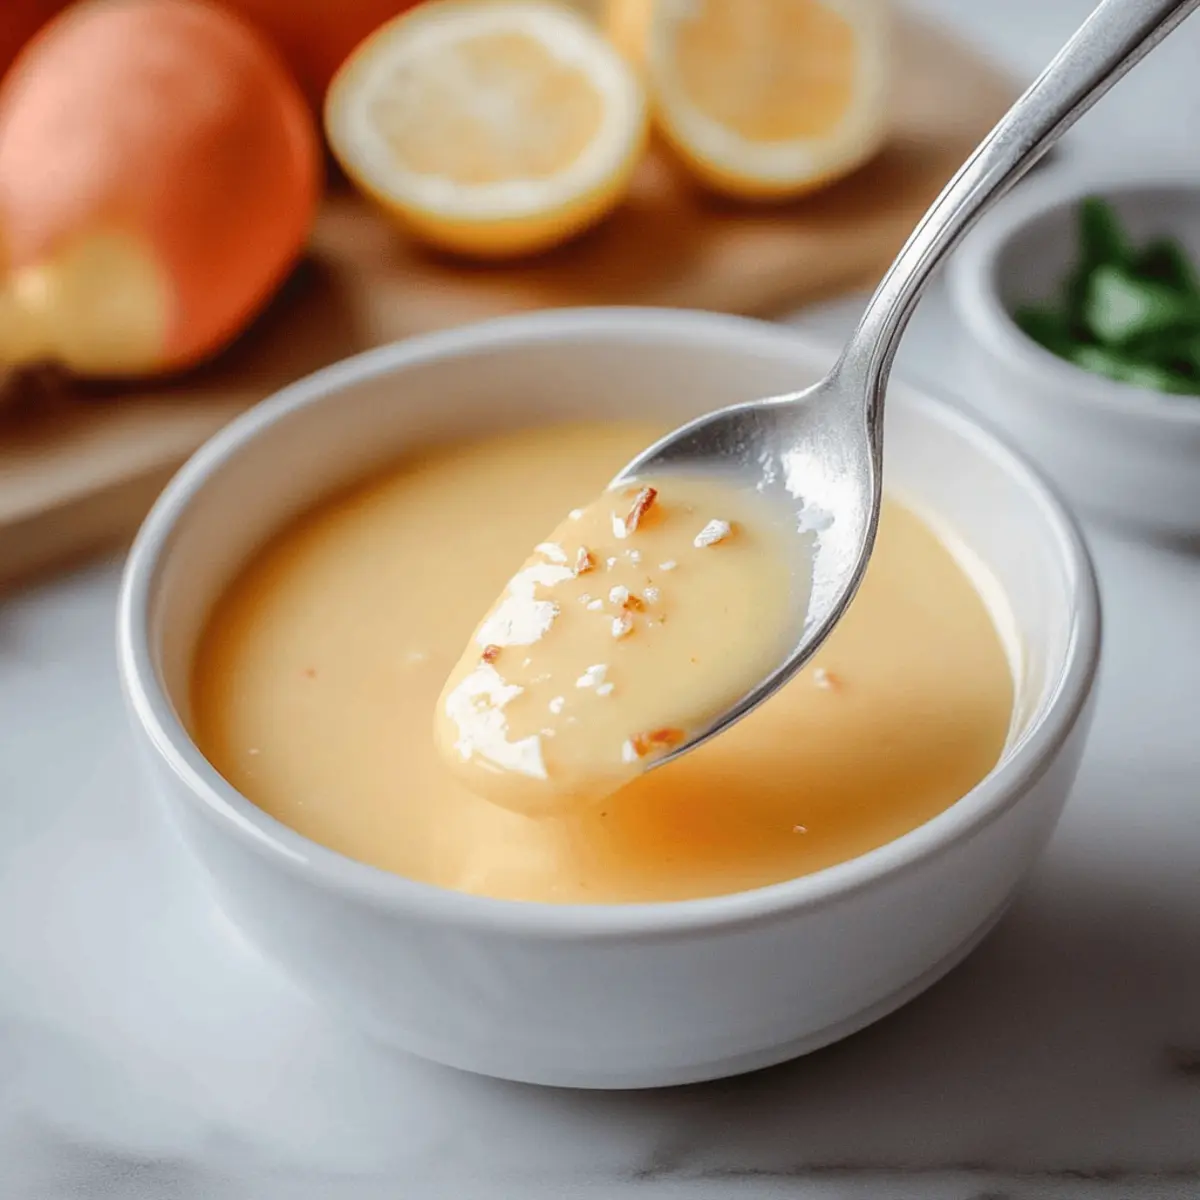
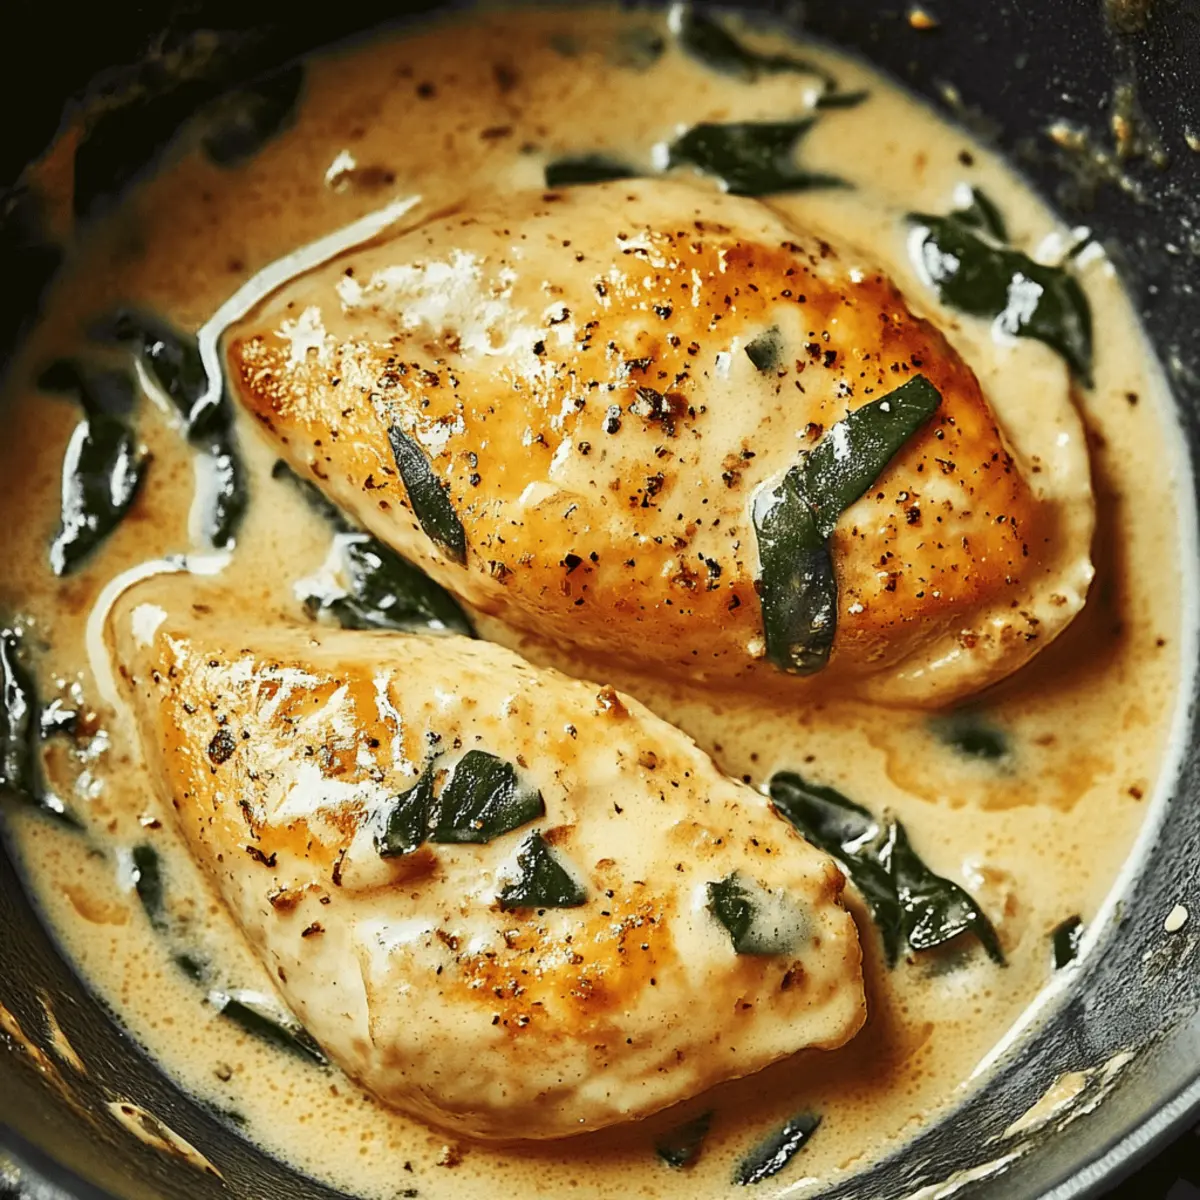
Next, add 2 tablespoons of Dijon mustard and 1 cup of heavy cream to the skillet, stirring constantly to combine the ingredients. Bring the mixture to a gentle simmer over medium heat and cook for 2-3 minutes. Watch for the sauce to thicken slightly and embrace a luscious creamy texture, complementing the Dijon mustard’s tang.

Step 5: Combine Chicken and Sauce
Return the seared chicken breasts to the skillet, allowing them to soak up the creamy Dijon sauce. Spoon the sauce over the chicken and sprinkle with either 1 teaspoon of fresh thyme or 1/2 teaspoon of dried thyme. Simmer everything together for about 5 minutes, giving the flavors time to meld beautifully.

Step 6: Garnish and Serve
Once everything is heated through and the chicken is coated in the creamy sauce, garnish with fresh parsley for a pop of color and freshness. Serve this Creamy Dijon Chicken hot, perhaps over rice or with a side salad, to elevate your weeknight dinner into a memorable meal.

Make Ahead Options

These Creamy Dijon Chicken preparations are perfect for meal prep enthusiasts! You can season the chicken breasts and refrigerate them up to 24 hours in advance, allowing the flavors to meld beautifully. The sauce can also be made ahead; simply sauté the garlic, mix in the Dijon mustard and heavy cream, and store it in an airtight container for up to 3 days in the fridge. To that end, minimizing air exposure prevents the sauce from dulling in flavor. When you’re ready to serve, simply sear the chicken, reheat the sauce, and combine them for a quick, delicious dinner. This prep-ahead strategy ensures that each bite of Creamy Dijon Chicken is just as delightful as when freshly made!

Expert Tips for Creamy Dijon Chicken

Perfect Searing: Ensure the skillet is hot enough before adding the chicken; this creates a wonderful sear that locks in moisture.

Don’t Overcrowd: Cook chicken in batches if your skillet isn’t large enough. Overcrowding can lead to steaming instead of searing.

Taste as You Go: Always taste the sauce and adjust seasoning if needed. A pinch more salt or pepper can elevate your creamy Dijon chicken flavor!

Simmer Gently: When combining chicken and sauce, keep the heat medium-low to let the flavors meld without boiling away the creaminess.

Fresh Ingredients: Use fresh thyme for a more vibrant flavor, but if using dried thyme, reduce the amount to avoid overpowering the dish.

Creamy Dijon Chicken Variations

Dive into a world of flavor by customizing your Creamy Dijon Chicken to suit your taste and dietary needs! Each variation adds a delightful twist to an already fabulous dish.

  • Herb-Infused: Add chopped fresh herbs like rosemary or basil for a fragrant flavor boost. This brings a whole new aromatic experience to every bite!

  • Spicy Kick: Stir in a teaspoon of red pepper flakes or a dash of hot sauce for a fiery twist. Feel free to adjust the heat level to suit your palate!

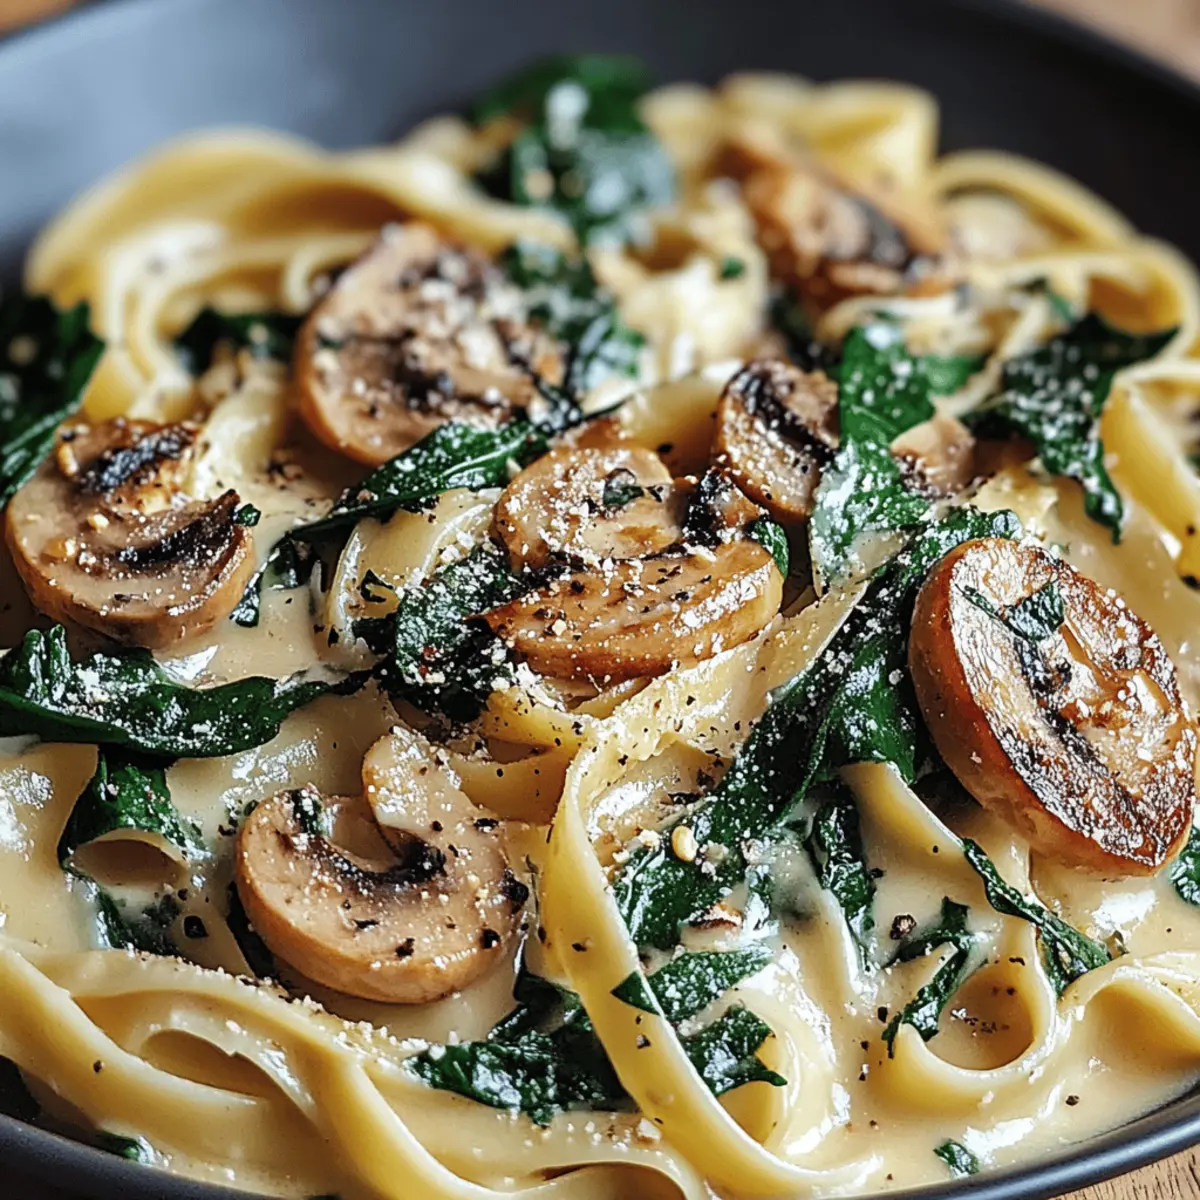
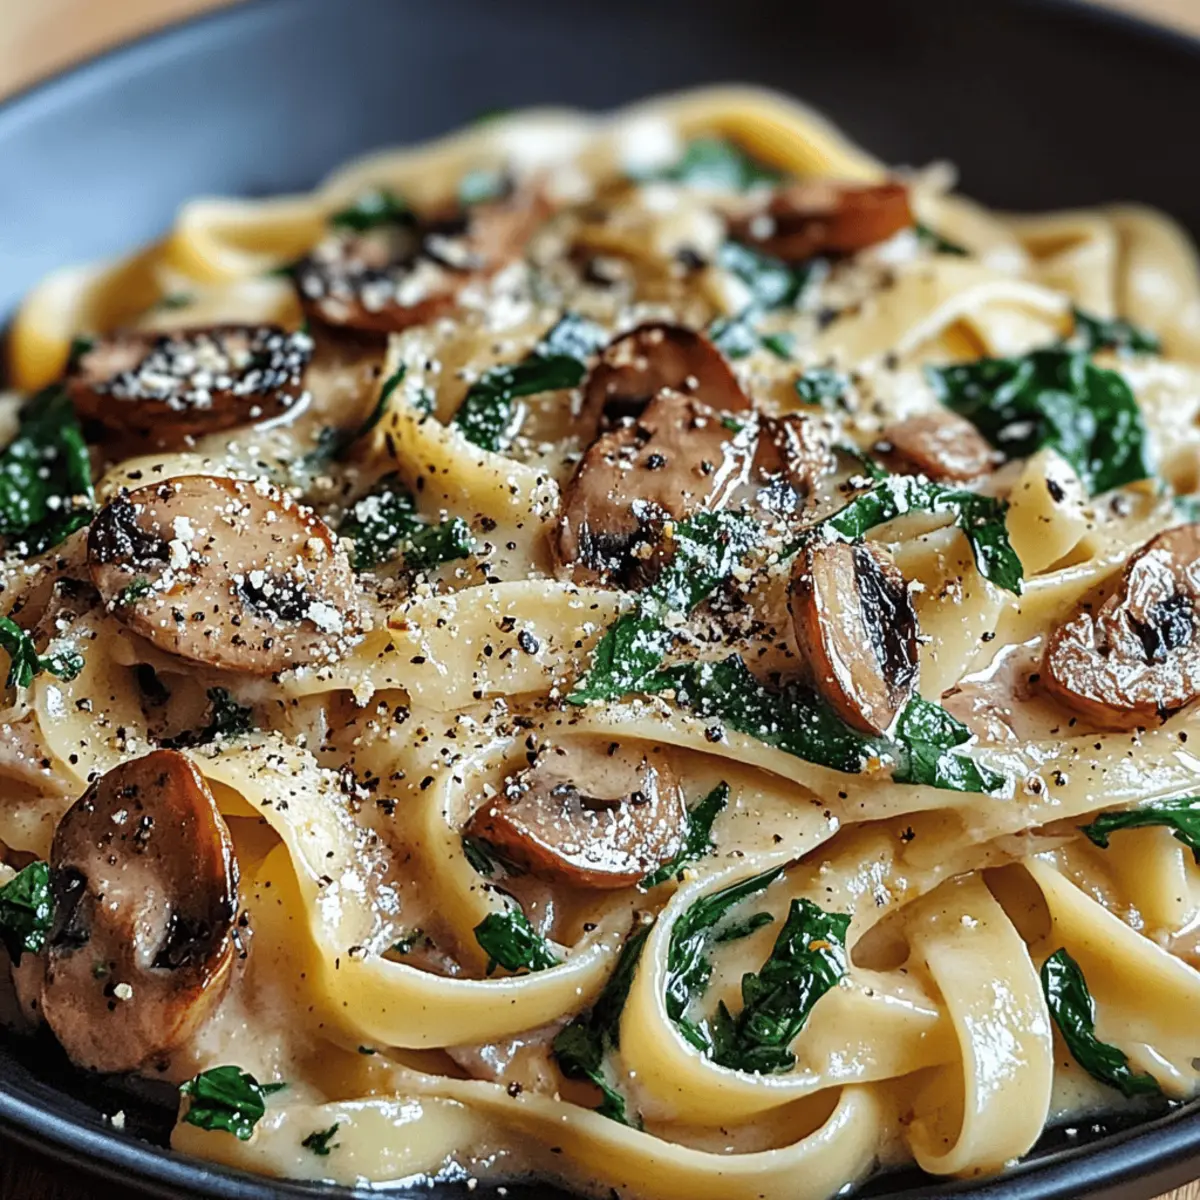
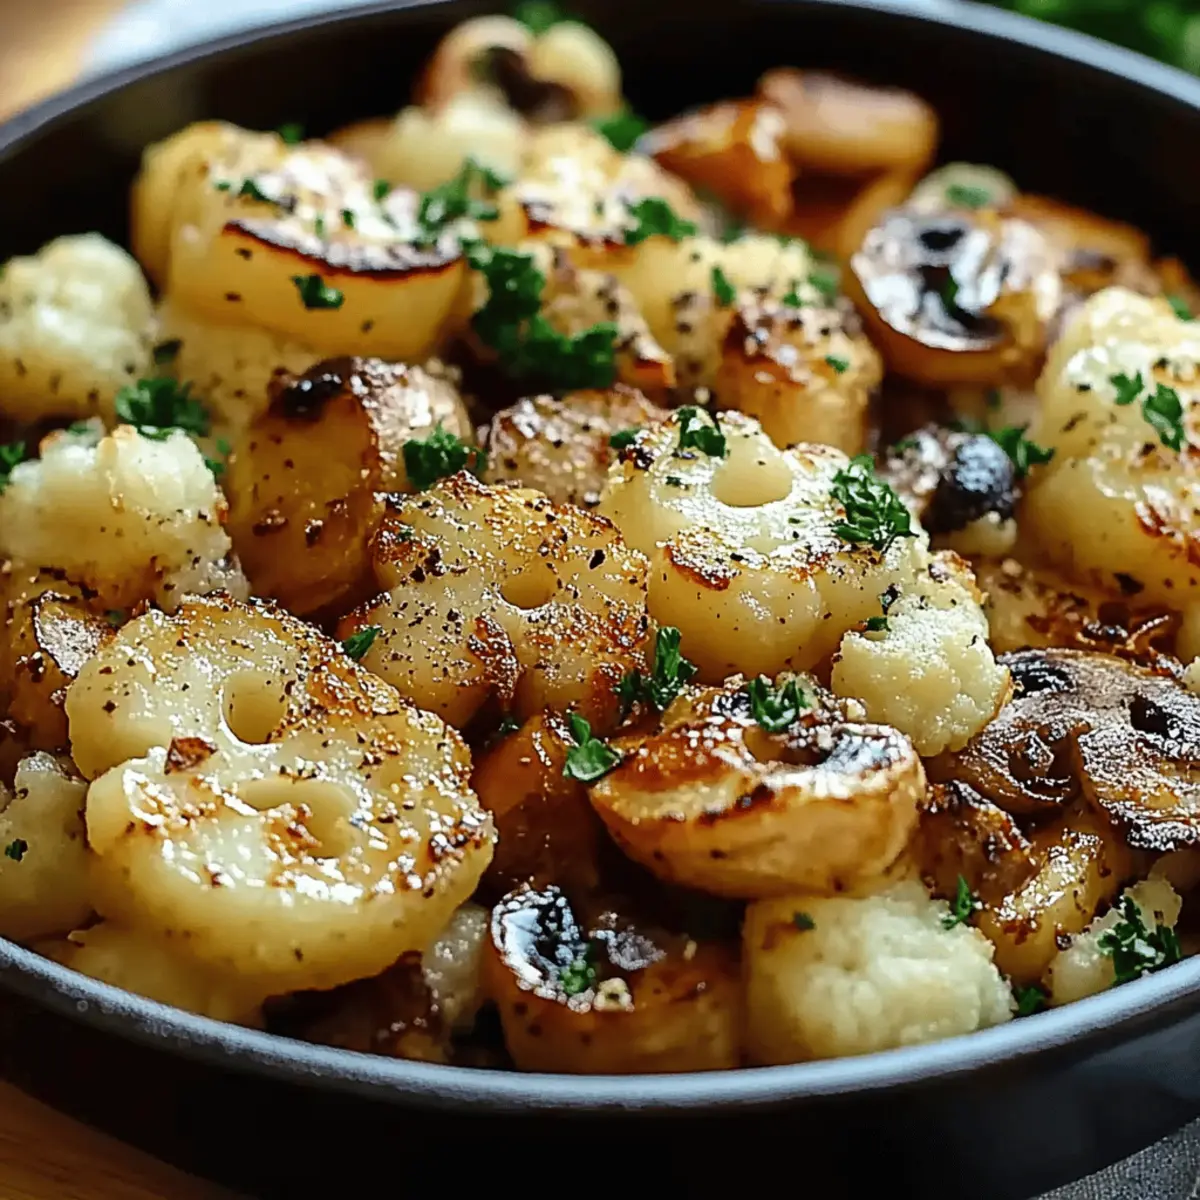
  • Mushroom Medley: Incorporate sliced mushrooms into the sauté phase for an earthy addition that pairs beautifully with the creamy sauce. It adds a hearty texture that elevates the dish!

  • Citrus Zing: Add the zest of one lemon or orange to the sauce for a fresh, tangy burst that balances the creaminess. A little citrus can brighten every mouthful!

  • Vegetable Lover’s Delight: Toss in some spinach or kale during the simmer phase for an extra dose of greens. This not only enhances nutrition but also adds vibrant color!

  • Nutty Twist: Add a sprinkle of toasted walnuts or pecans for a delightful crunch. It’s the perfect contrast to the creamy sauce, creating a harmonious texture.

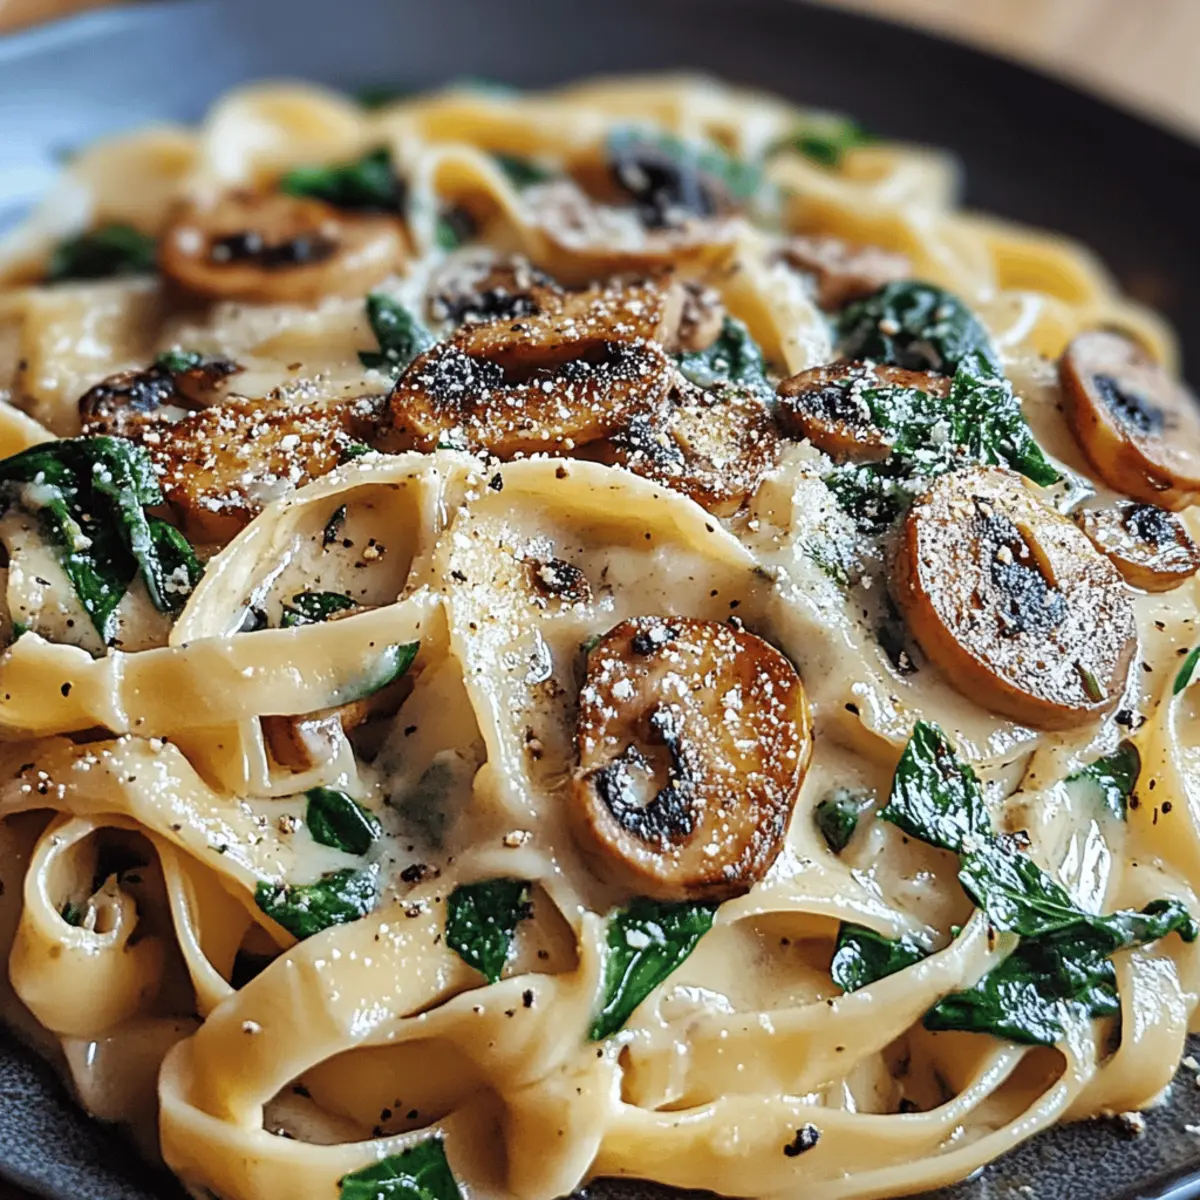
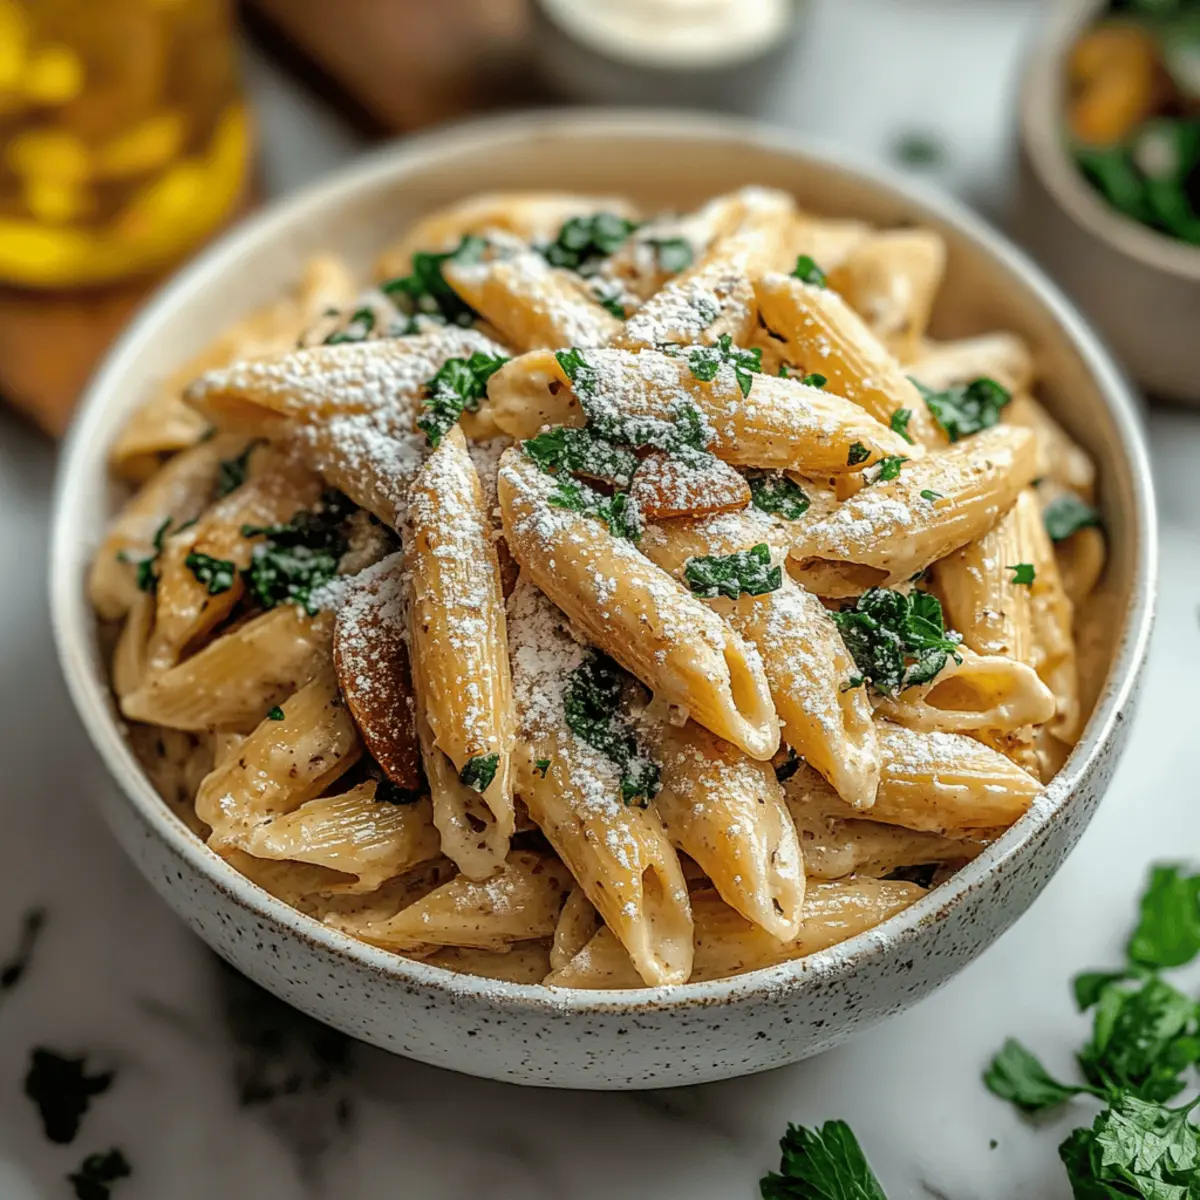
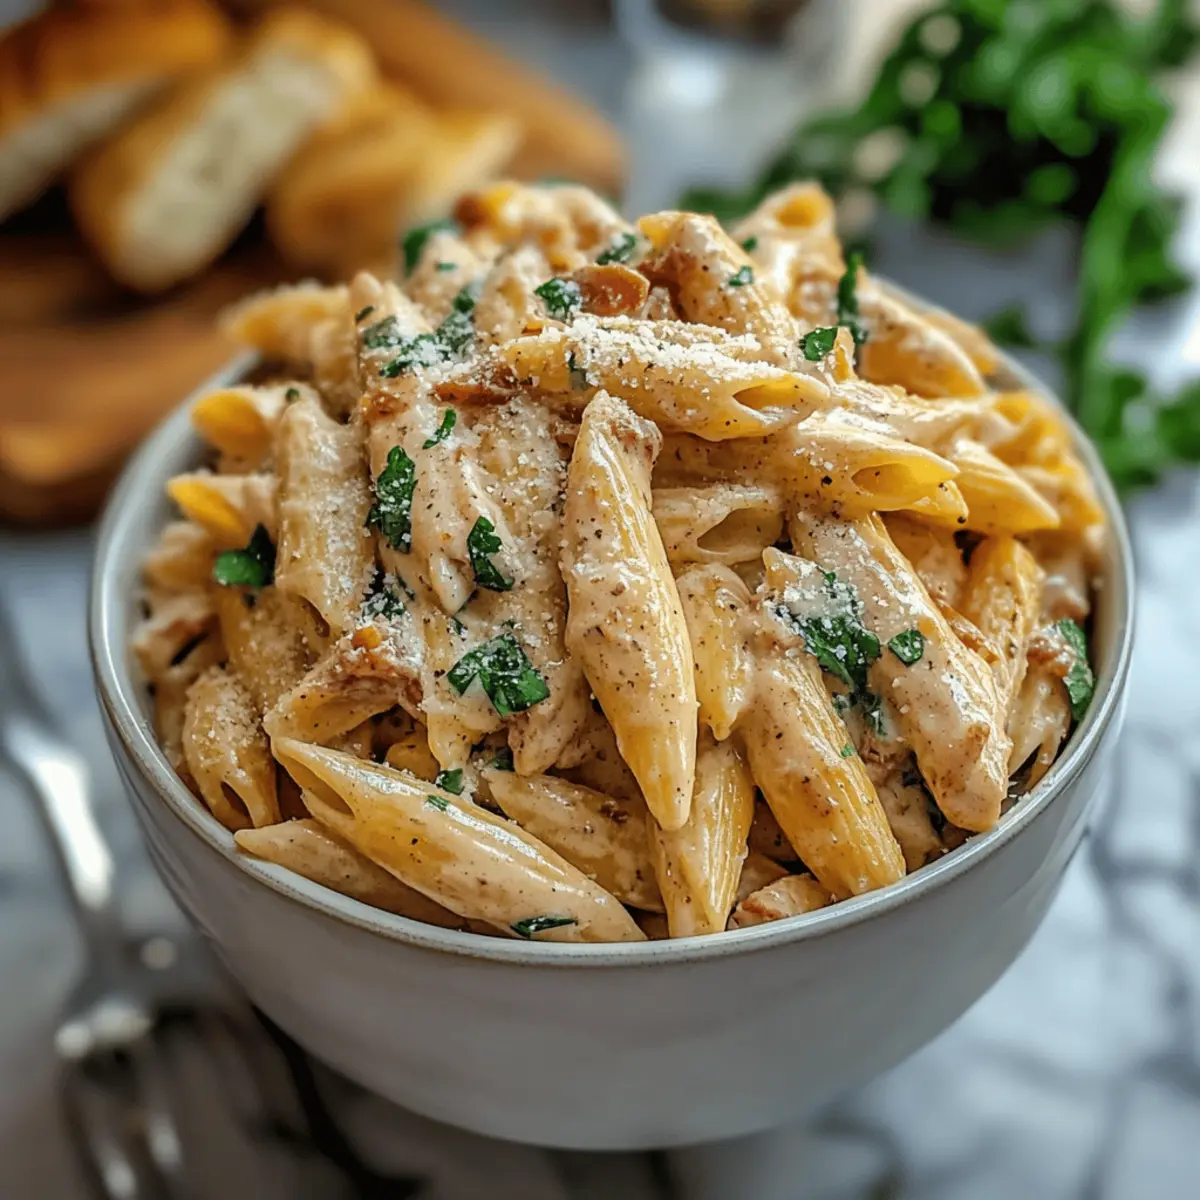
  • Pasta Partner: Serve over cooked pasta for a comforting, Italian-inspired twist. You can easily transform this recipe into a luxurious pasta dish everyone will love.

  • Plant-Based Alternative: Substitute chicken with firm tofu or jackfruit for a delicious vegetarian version. Creamy Dijon sauce complements plant-based proteins beautifully!

These variations provide endless possibilities. Whether exploring new flavors or accommodating dietary restrictions, you’ll never get bored with your Creamy Dijon Chicken! Serve it over warm rice, and don’t forget to pair it with a refreshing side salad for a well-rounded dinner experience.

What to Serve with Creamy Dijon Chicken

Picture this: a table set for family, laughter filling the air, and the delightful aroma of Creamy Dijon Chicken enticing everyone to sit down and savor the moment.

  • Fluffy Rice: A bed of fluffy rice absorbs the creamy sauce beautifully, ensuring you get every flavorful drop in each bite.
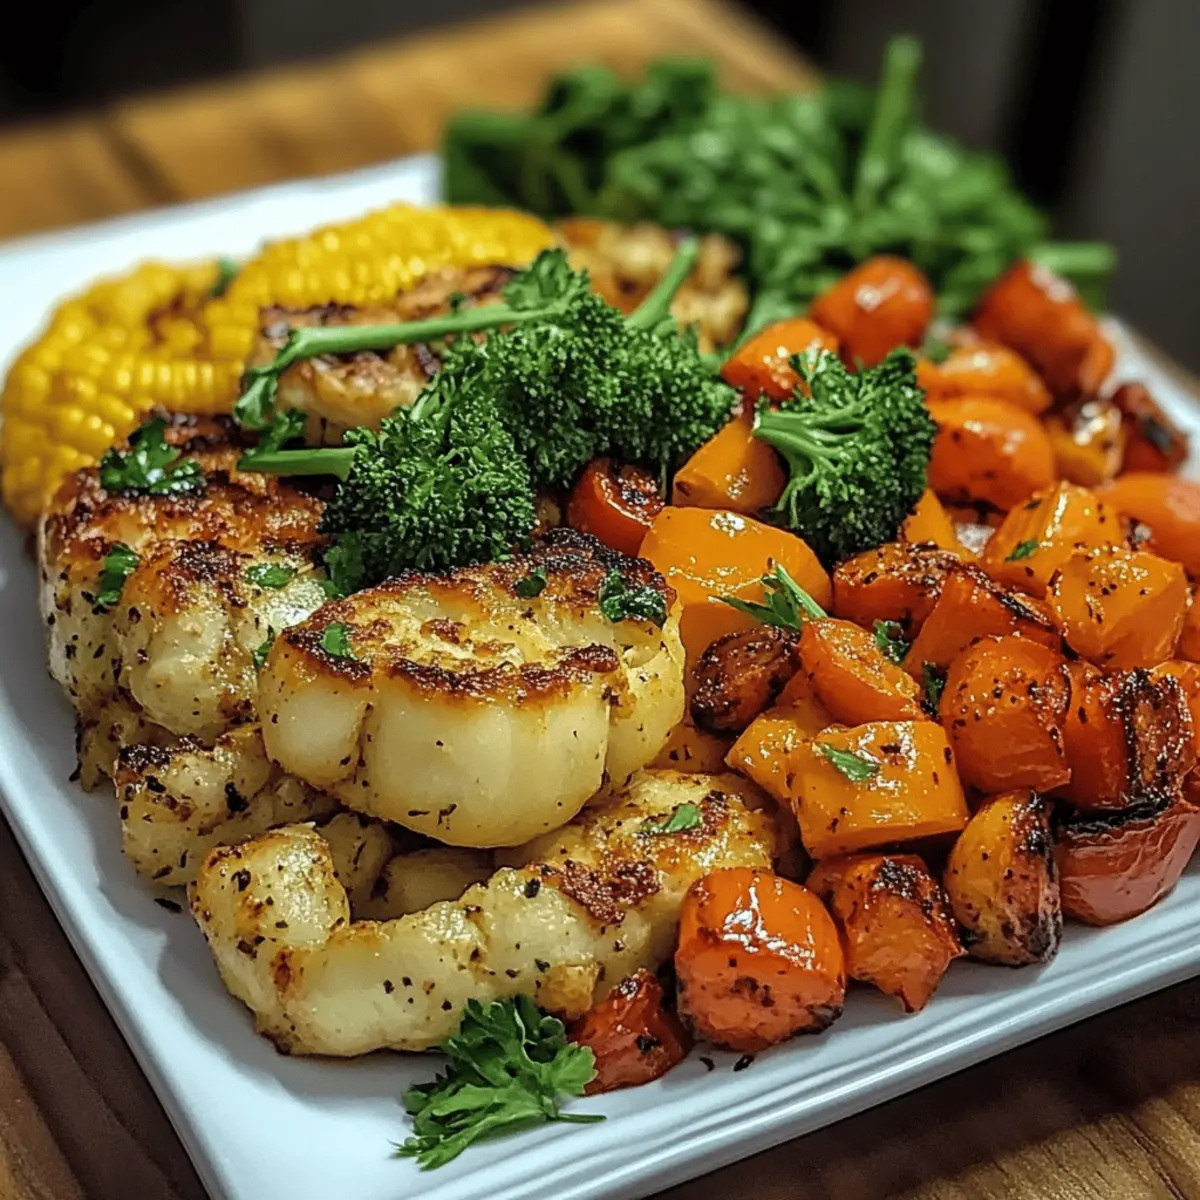
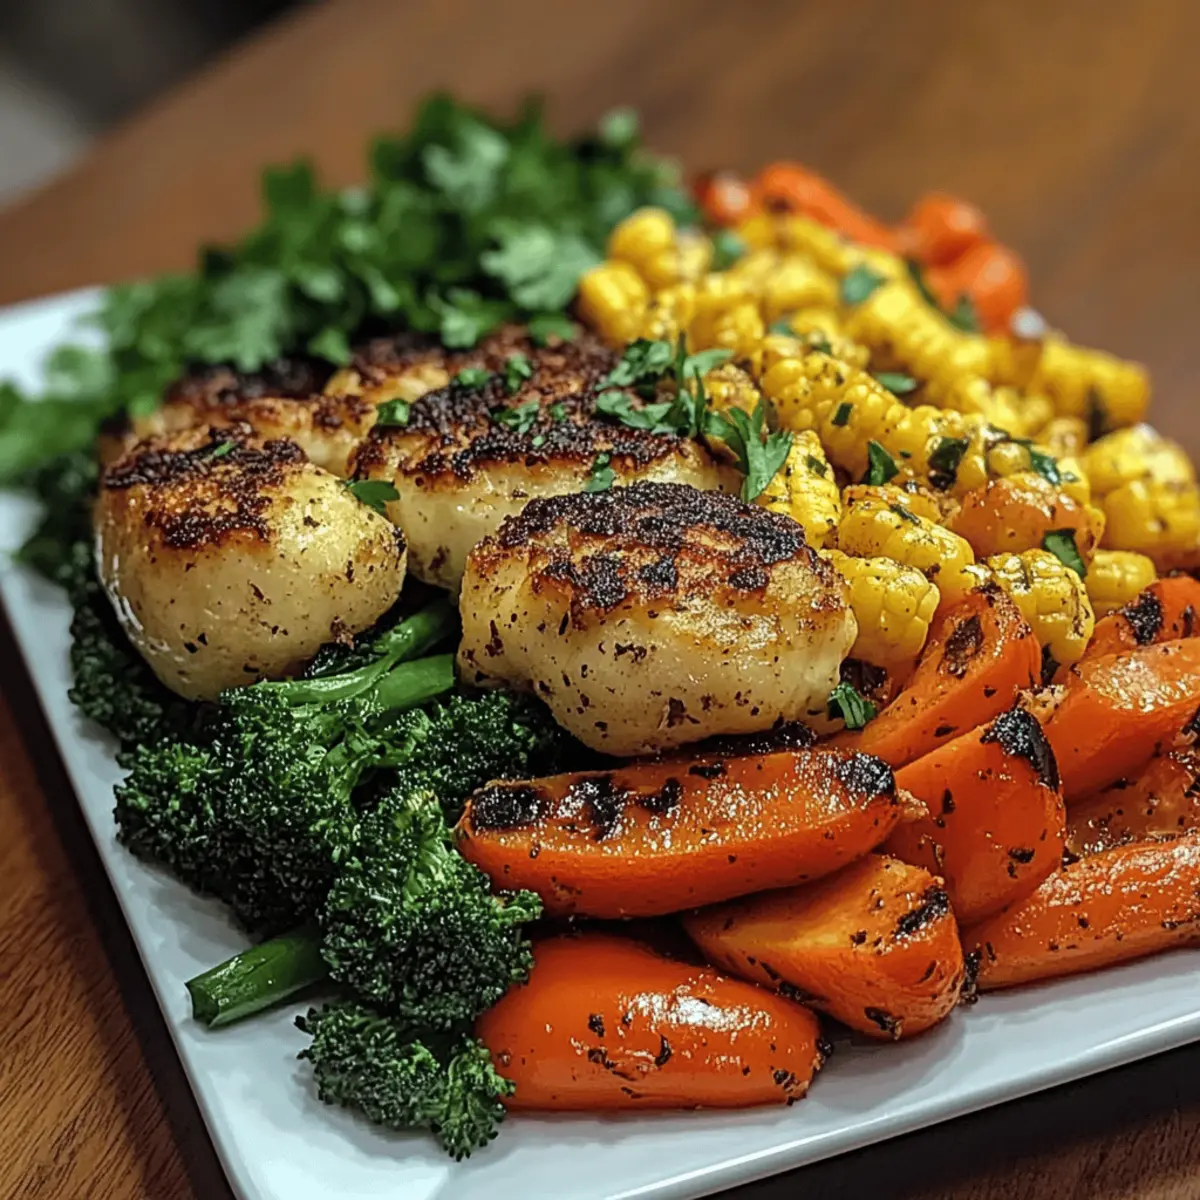
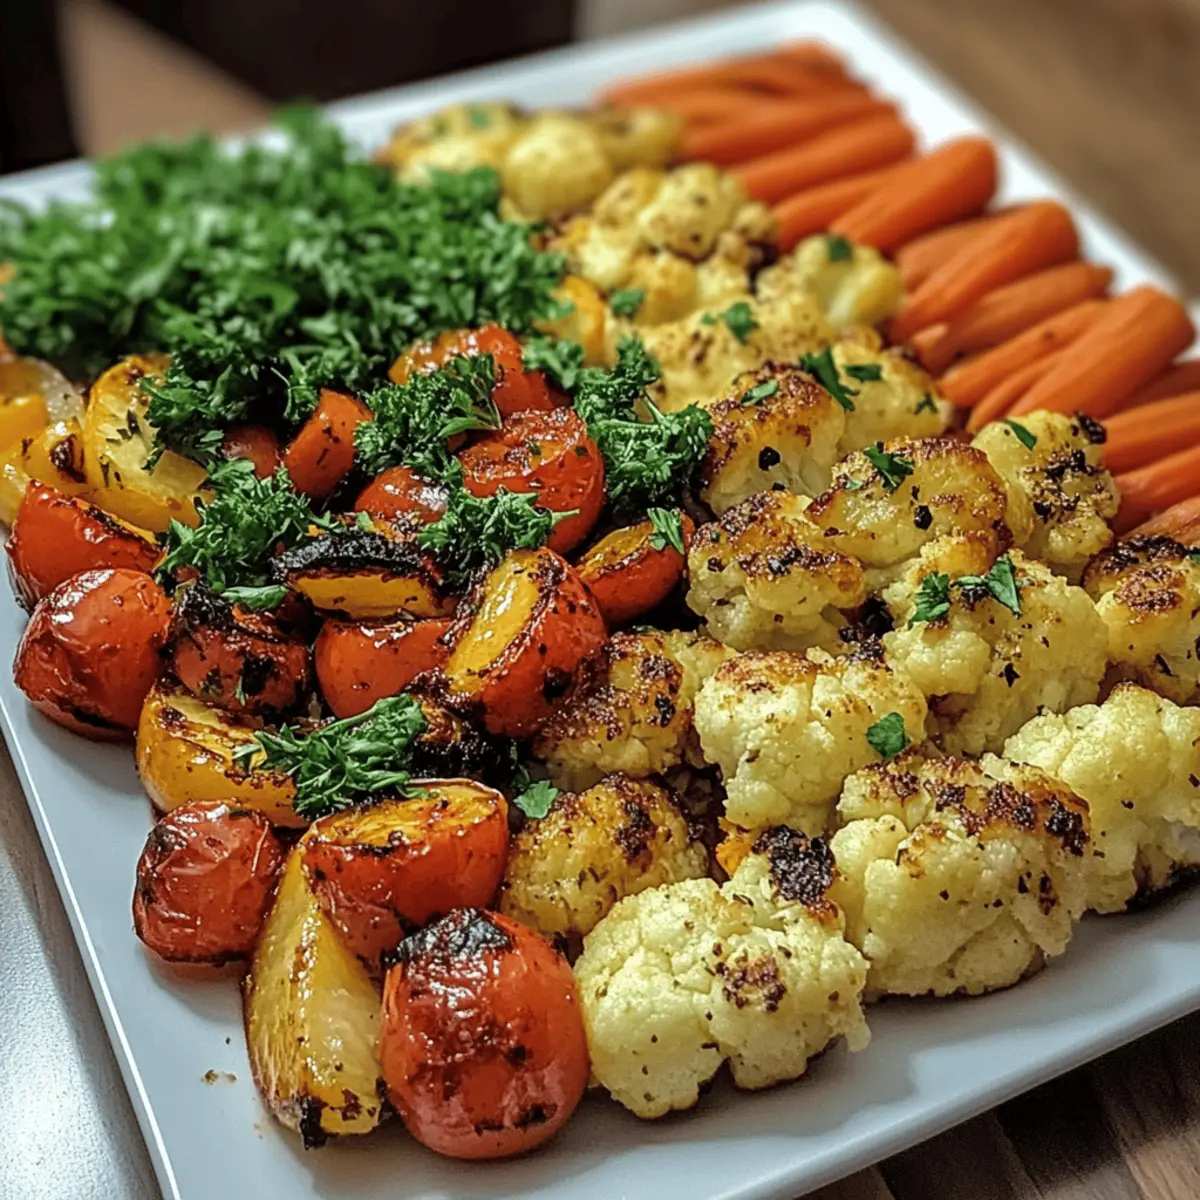
  • Roasted Vegetables: Colorful roasted vegetables add a delightful crunch and healthy balance, complementing the richness of the chicken.
  • Garlic Bread: Warm, crusty garlic bread is perfect for mopping up excess sauce, making each meal feel like a special occasion.
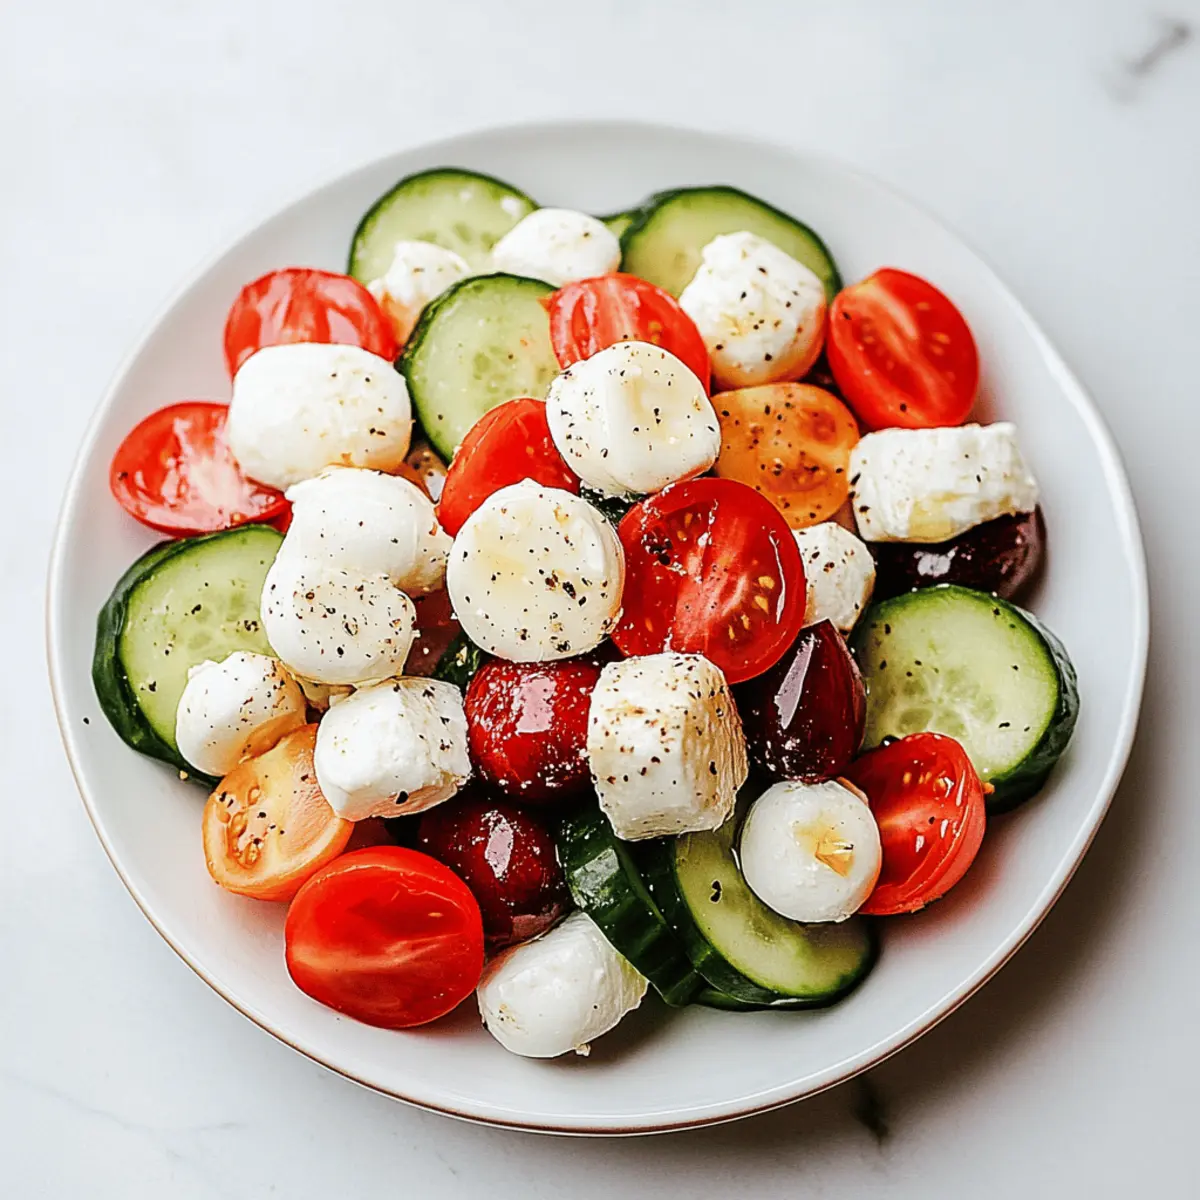
  • Simple Green Salad: A fresh salad with crisp greens and a tangy vinaigrette cuts through the rich creaminess, creating a perfect palate balance.
  • Butter Noodles: Thin, buttery noodles serve as a subtle, comforting side that pairs perfectly with the sauce while enhancing the overall dish.
  • Steamed Asparagus: Tender asparagus brings a pop of color and a fresh flavor, elevating the meal with minimal effort.
  • Chardonnay or Pinot Grigio: A chilled glass of Chardonnay or Pinot Grigio enhances the dining experience, echoing the tangy notes of the dish.
  • Lemon Sorbet: For dessert, a light, refreshing lemon sorbet cleanses the palate, offering a zesty finish after the rich chicken.

These pairings will transform your Creamy Dijon Chicken into a complete, satisfying feast that delights everyone at the table.

How to Store and Freeze Creamy Dijon Chicken

Fridge: Store leftover Creamy Dijon Chicken in an airtight container in the refrigerator for up to 3 days. Reheat gently on the stove or in the microwave to maintain creaminess.

Freezer: For longer storage, freeze the chicken in a freezer-safe container for up to 3 months. To prevent freezer burn, wrap it tightly in plastic wrap before placing it in the container.

Thawing: Thaw frozen Creamy Dijon Chicken overnight in the refrigerator before reheating. This keeps the flavors intact and helps maintain the sauce’s creamy texture.

Reheating: When reheating, add a splash of cream or broth to the skillet and warm over low heat until heated through, stirring occasionally for a smooth consistency.

Creamy Dijon Chicken Recipe FAQs

How do I select the best chicken breasts for this recipe?
Absolutely! Look for boneless, skinless chicken breasts that are firm and have a pinkish hue. Avoid those with dark spots or any discoloration, as this can indicate they are past their prime. Fresh chicken should feel slightly moist but not slimy.

How do I store leftovers of Creamy Dijon Chicken?
Store your leftover Creamy Dijon Chicken in an airtight container in the refrigerator for up to 3 days. To reheat, do it gently on the stove or microwave to maintain that delicious creamy texture. Adding a splash of cream can help revive the sauce!

Can I freeze Creamy Dijon Chicken?
Very! To freeze, place the cooled chicken and sauce in a freezer-safe container or wrap tightly in plastic wrap followed by aluminum foil. It can last up to 3 months in the freezer. Thaw in the refrigerator overnight before reheating to keep those flavors intact.

What should I do if my sauce is too thick?
If you find your sauce has thickened more than you’d like, don’t worry—it’s a common issue! Simply add a small amount of chicken broth or cream, stirring continuously over low heat until it reaches your desired consistency. This will keep the creamy and tangy flavor balanced.

Is Creamy Dijon Chicken safe for my pets?
It’s best to keep this dish away from pets, especially dogs, as ingredients like garlic can be harmful to them. Always ensure any leftovers are stored securely and consider simple, pet-friendly alternatives for your furry friends instead!

Creamy Dijon Chicken That Elevates Weeknight Dinners

Creamy Dijon Chicken is a delightful blend of rich flavors, perfect for busy weeknights.

  • large skillet

For the Chicken

  • 4 pieces boneless, skinless chicken breasts (Choose fresh, high-quality chicken for the best texture and flavor.)
  • to taste salt
  • to taste pepper

For the Sauce

  • 2 tablespoons Dijon mustard (Key ingredient for the signature tangy flavor.)
  • 1 cup heavy cream (Adds a rich and velvety texture.)
  • 2 cloves garlic, minced (Brings depth and aroma.)
  • 1 tablespoon olive oil (Used for searing the chicken.)
  • 1 teaspoon fresh thyme or 1/2 teaspoon dried thyme (Delightful herb that complements the creaminess.)

For Garnishing

  • to taste fresh parsley (Sprinkle for garnish.)

Step-by-Step Instructions

  1. Pat the chicken breasts dry and season with salt and pepper.
  2. Heat olive oil in a skillet over medium-high heat and sear the chicken for 6-7 minutes on each side.
  3. Remove chicken, sauté minced garlic in the same skillet for 1 minute.
  4. Add Dijon mustard and heavy cream, stirring to combine, and simmer for 2-3 minutes.
  5. Return chicken to skillet, spooning sauce over it and sprinkle with thyme. Simmer for 5 minutes.
  6. Garnish with fresh parsley before serving hot over rice or with a side salad.

Perfect for weeknight dinners; enjoy alongside a salad or rice.

Main Dishes
American
Chicken Recipe, Creamy Dijon Chicken, Creamy Sauce, dijon mustard, easy meals, weeknight dinners

Filed Under: Main Dishes

Delicious Blueberry Buttermilk Pancake Casserole Bliss

August 12, 2025 by grace bellamy Leave a Comment

On a lazy Sunday morning, the smell of warm, buttery pancakes wafts through the kitchen, instantly lifting my spirits. This Blueberry Buttermilk Pancake Casserole is my go-to recipe for turning an ordinary breakfast into a delightful feast that the whole family raves about. Not only is this casserole a simple way to impress your loved ones, but it also offers a fantastic twist on the classic pancake experience—perfectly fluffy and bursting with juicy blueberries. Plus, with minimal prep time and the ability to bake a whole pan at once, you’ll free up valuable moments for cozy chats over coffee. Intrigued? Let’s dive into how to make this delicious shareable breakfast treat!

Why is this casserole a game-changer?

Simplicity: This Blueberry Buttermilk Pancake Casserole requires just a handful of ingredients and minimal effort, making it a foolproof choice for busy mornings or leisurely brunches.

Flavor Explosion: The combination of tangy buttermilk and sweet blueberries creates a delightful contrast that dances on your taste buds, elevating your breakfast experience.

Batch Cooking: Why flip pancakes one by one when you can bake a whole casserole? It serves 9-12, perfect for families or gatherings, and means more time enjoying the meal!

Dressed to Impress: With a drizzle of glaze and a sprinkle of fresh mint leaves, you can elevate your breakfast spread to a beautiful centerpiece that looks as good as it tastes.

Adaptable: Feel free to mix in other fruits or ingredients like nuts or chocolate chips to customize this recipe and suit different palates. Why not check out how to make varying flavors in pancake casseroles?

Crowd-Pleaser: This delightful dish is always a hit, turning anyone who tries it into a fan, ensuring it becomes a cherished addition to your breakfast repertoire.

Blueberry Buttermilk Pancake Casserole Ingredients

Get ready to bake a breakfast delight!

For the Casserole
• 2 cups all-purpose flour – The base of your fluffy pancakes, providing structure and a light texture.
• 4 teaspoons baking powder – This leavening agent ensures a light, airy casserole that rises beautifully.
• 1 teaspoon baking soda – A must for balancing acidity from the buttermilk and enhancing fluffiness.
• 1/2 teaspoon salt – Enhances overall flavor, balancing sweetness wonderfully.
• 2 tablespoons granulated sugar – Adds just the right touch of sweetness to the batter.
• 2 large eggs, lightly beaten – They act as a binding agent, helping the casserole hold together.
• 2 cups buttermilk – The star of the show! It adds tanginess and moisture, lending to that dreamy texture.
• 4 tablespoons unsalted butter, melted – This brings richness and flavor; don’t forget to save some for greasing!
• 1 teaspoon vanilla extract – Elevates the sweetness and depth of flavor, making every slice unforgettable.

For the Blueberry Filling
• 4 cups fresh blueberries, divided – The star ingredient here, providing bursts of sweetness and color.
• 1/4 cup granulated sugar – Helps to sweeten the blueberries, creating a luscious filling.
• 2 tablespoons lemon juice – Adds brightness and enhances the flavor of the blueberries.
• 1 tablespoon cornstarch – Thickens the filling, ensuring it holds together beautifully in the casserole.

For the Glaze (Optional)
• 1 cup powdered sugar – Sweetens and gives the glaze its lovely texture.
• 2-3 tablespoons buttermilk – Adjust until you reach your desired consistency for drizzling.
• 1/2 teaspoon vanilla extract – Infuses the glaze with a lovely flavor that complements the casserole.

To Serve
• Maple syrup – A classic pairing, perfect for drizzling over warm slices.
• Whipped cream – Adds a light, creamy texture that contrasts beautifully with the casserole.
• Fresh mint leaves – For a pop of color and a refreshing touch!

Enjoy preparing your Blueberry Buttermilk Pancake Casserole using these delightful ingredients!

Step‑by‑Step Instructions for Blueberry Buttermilk Pancake Casserole

Step 1: Prepare the Blueberry Filling
In a medium saucepan, combine 3 cups of fresh blueberries, 1/4 cup of granulated sugar, and 2 tablespoons of lemon juice. Cook over medium heat, stirring occasionally until the mixture begins to simmer and the sugar dissolves completely, about 5 minutes. The blueberries will soften, releasing their juices; be careful not to smash them too much while stirring.

Step 2: Thicken the Filling
In a small bowl, whisk 1 tablespoon of cornstarch with 1 tablespoon of cold water until smooth. Gradually pour this mixture into the simmering blueberry filling, stirring constantly. Continue cooking for an additional 1-2 minutes, allowing the mixture to thicken significantly. Once thickened, remove it from the heat and gently fold in the remaining 1 cup of fresh blueberries. Set the filling aside to cool slightly.

Step 3: Make the Pancake Batter
In a large mixing bowl, whisk together 2 cups of all-purpose flour, 4 teaspoons of baking powder, 1 teaspoon of baking soda, 1/2 teaspoon of salt, and 2 tablespoons of granulated sugar. In a separate bowl, whisk 2 large eggs, 2 cups of buttermilk, 4 tablespoons of melted unsalted butter, and 1 teaspoon of vanilla extract until combined. Pour the wet ingredients into the dry ingredients, gently folding until just combined. Avoid overmixing to keep the batter fluffy.

Step 4: Assemble the Casserole
Preheat your oven to 375°F (190°C) and grease a 9×13-inch baking dish thoroughly with more melted butter. Pour half of the pancake batter into the bottom of the dish, using a spatula to spread it evenly across the surface. Next, spoon the cooled blueberry filling over the batter, distributing it evenly to ensure each slice is packed with flavor.

Step 5: Top with Batter
Carefully pour the remaining pancake batter over the blueberry filling, spreading it as uniformly as possible. This layer will form the golden-brown top of your Blueberry Buttermilk Pancake Casserole, locking in the delicious blueberry goodness beneath. Smooth over the surface gently for an even bake.

Step 6: Bake
Place the assembled casserole into the preheated oven and bake for 30-35 minutes. Keep an eye on the casserole as it cooks; it should turn golden brown and a toothpick inserted into the center will come out clean when it’s perfectly done. The aroma will fill your kitchen, hinting at the delightful breakfast ahead.

Step 7: Prepare the Glaze (Optional)
While your casserole is baking, whisk together 1 cup of powdered sugar, 2-3 tablespoons of buttermilk, and 1/2 teaspoon of vanilla extract in a small bowl until smooth. Adjust the consistency by adding more buttermilk, 1 tablespoon at a time, until it reaches your desired drizzling consistency. This glaze will wonderfully complement your Blueberry Buttermilk Pancake Casserole.

Step 8: Serve
Once baked, remove the casserole from the oven and let it cool for a few minutes before slicing. Drizzle with your optional glaze, if using, then serve warm with a side of maple syrup and a dollop of whipped cream. Garnish each plate with fresh mint leaves for an extra burst of color and flavor.

What to Serve with Blueberry Buttermilk Pancake Casserole

On those cozy mornings, enhancing your breakfast experience is a must, and pairing this delightful dish can take it to the next level!

  • Crispy Bacon: The smoky, salty notes of crispy bacon provide a savory contrast to the sweet and fruity casserole.

  • Fresh Fruit Salad: A refreshing mix of seasonal fruits adds brightness and a touch of acidity, balancing the rich embrace of pancakes.

  • Yogurt Parfait: Layer Greek yogurt with honey and fresh fruits for a creamy, tangy side that complements the fluffy casserole beautifully.

  • Maple Butter: Whip softened butter with maple syrup for a luxurious spread that doubles the maple goodness on your breakfast plate.

Indulging in these pairings not only elevates your breakfast feast but also invites delightful conversations around the table. Consider making a warm spiced apple cider to match the cozy vibes of the meal—perfect for chilly mornings!

  • Coffee or Tea: A rich cup of coffee or a soothing herbal tea will warm your spirits, nicely balancing the sweetness of your casserole.

Make Ahead Options

These Blueberry Buttermilk Pancake Casserole are perfect for those busy mornings! You can prepare the blueberry filling and pancake batter up to 24 hours in advance. Simply cook the filling and let it cool completely, while the batter can be mixed and stored in the refrigerator, ensuring it remains fresh and fluffy. When you’re ready to bake, grease the casserole dish and layer the half-baked batter, followed by the filling and remaining batter. Just pop it in the oven for about 30-35 minutes for a delicious breakfast that tastes just as good as if it were made fresh that day. Enjoy the ease of meal prep without sacrificing flavor!

Expert Tips for Blueberry Buttermilk Pancake Casserole

  • Fresh Blueberries: Use ripe, seasonal blueberries for the best flavor. Frozen can work in a pinch but may make the filling watery.

  • Don’t Overmix: When combining the wet and dry ingredients, mix only until there are no dry spots. Overmixing can lead to dense pancakes rather than a fluffy casserole.

  • Check Doneness: To ensure your casserole is perfectly baked, use a toothpick. It should come out clean from the center, indicating it’s ready to slice and serve.

  • Customize Fillings: Feel free to swap blueberries with other berries or even diced fruits like bananas or strawberries for a delightful twist on this Blueberry Buttermilk Pancake Casserole.

  • Serving Tip: Let the casserole cool for a few minutes before slicing. This helps it hold its shape and makes for easier serving, especially when drizzling with glaze.

Blueberry Buttermilk Pancake Casserole Variations

Feel free to explore these delightful twists and personalize your casserole!

  • Gluten-Free: Substitute all-purpose flour with a gluten-free baking blend for a deliciously safe option for gluten-sensitive friends.

  • Dairy-Free: Use plant-based milk and yogurt alternatives in place of buttermilk and butter, so everyone can enjoy this treat!

  • Nutty Crunch: Add 1/2 cup of chopped nuts like walnuts or pecans to the batter, bringing a delightful crunch that complements the soft pancakes.

  • Choco-Berry Delight: Mix in 1/2 cup of chocolate chips along with the blueberries for a decadent twist that will make any chocolate lover swoon.

  • Spice It Up: Add 1 teaspoon of cinnamon or nutmeg to the batter for a warm, cozy flavor that takes this casserole to the next level.

  • Fruit Medley: Mix in strawberries or raspberries with the blueberries for a fruity explosion that brightens every bite—just irresistible!

  • Breakfast-for-Dessert: Swap maple syrup for a drizzle of caramel sauce and serve with vanilla ice cream for a sweet twist that transforms breakfast into dessert!

  • Heat it Up: Add a dash of cayenne pepper to your blueberry filling for those adventurous souls who enjoy a little sweet heat.

Don’t hesitate to customize this dish as you explore variations based on your taste preferences; the possibilities are endless! For more creative twists, be sure to check out my easy pancake ideas or consider mixing in some of your favorite fruits for a delightful breakfast surprise!

How to Store and Freeze Blueberry Buttermilk Pancake Casserole

Fridge: Store leftover casserole in an airtight container in the fridge for up to 3 days. Reheat individual portions in the microwave for a quick breakfast.

Freezer: If you have more leftovers, freeze the casserole by wrapping slices tightly in plastic wrap and then placing them in a freezer-safe bag for up to 3 months.

Reheating: When ready to enjoy, thaw overnight in the fridge. Reheat in the oven at 350°F (175°C) for 15-20 minutes or in the microwave until heated through.

Partial Prep: You can also prepare the blueberry filling and pancake batter in advance, keeping them stored separately in the fridge for up to 2 days before baking the casserole fresh.

Blueberry Buttermilk Pancake Casserole Recipe FAQs

What should I look for when selecting blueberries?
Absolutely! Choose ripe, plump blueberries that are free of dark spots or mushiness. The best ones will have a deep blue color and a slight bloom on their skin, indicating freshness. Avoid those with dark spots all over, as they might be overripe or starting to spoil.

How should I store leftover Blueberry Buttermilk Pancake Casserole?
Very easy! Store any leftovers in an airtight container in the fridge for up to 3 days. Simply reheat individual portions in the microwave. It’s a perfect quick breakfast that tastes just as delightful!

Can I freeze this casserole for later?
Yes, indeed! If you have extra, wrap the slices tightly in plastic wrap and then place them in a freezer-safe bag. This Blueberry Buttermilk Pancake Casserole can be frozen for up to 3 months. Just thaw it overnight in the fridge and reheat it in the oven at 350°F (175°C) for 15-20 minutes until warmed through.

What should I do if my pancake casserole doesn’t rise?
Ah, no worries! If your casserole doesn’t rise as expected, it could be due to expired leavening agents like baking powder or baking soda. Always check the date on your ingredients before baking! Additionally, make sure to mix your batter gently to avoid overworking the gluten, which can lead to dense results.

Are there any dietary restrictions I should consider with this recipe?
Absolutely! If you’re looking to accommodate dietary restrictions, consider substituting the all-purpose flour with a gluten-free blend. You can also swap out buttermilk with a dairy alternative, such as almond or oat milk mixed with a bit of lemon juice for acidity. Just ensure to adjust the sugar content according to your chosen fruit and preferences. Always check for allergies, especially with fresh blueberries or any nuts you might choose to add!

Can I prepare the blueberry filling ahead of time?
Certainly! You can make the blueberry filling in advance. Just store it in an airtight container in the fridge for up to 2 days. This not only saves you time on a busy morning but ensures you have one less step to complete before diving into this delicious Blueberry Buttermilk Pancake Casserole Recipe!

Delicious Blueberry Buttermilk Pancake Casserole Bliss

A delightful Blueberry Buttermilk Pancake Casserole recipe perfect for breakfast gatherings, bursting with flavor and easy to make.

  • Medium saucepan
  • large mixing bowl
  • small bowl
  • 9×13-inch baking dish

For the Casserole

  • 2 cups all-purpose flour (The base of your fluffy pancakes.)
  • 4 teaspoons baking powder (Leavening agent for light texture.)
  • 1 teaspoon baking soda (Balances acidity and enhances fluffiness.)
  • 1/2 teaspoon salt (Enhances overall flavor.)
  • 2 tablespoons granulated sugar (Adds sweetness to the batter.)
  • 2 large eggs, lightly beaten (Binding agent for the casserole.)
  • 2 cups buttermilk (Adds tanginess and moisture.)
  • 4 tablespoons unsalted butter, melted (Brings richness and flavor.)
  • 1 teaspoon vanilla extract (Elevates sweetness and flavor.)

For the Blueberry Filling

  • 4 cups fresh blueberries, divided (Provides sweetness and color.)
  • 1/4 cup granulated sugar (Sweetens the blueberries.)
  • 2 tablespoons lemon juice (Adds brightness to the flavor.)
  • 1 tablespoon cornstarch (Thickens the filling.)

For the Glaze (Optional)

  • 1 cup powdered sugar (Provides sweetness and texture.)
  • 2-3 tablespoons buttermilk (Adjust for drizzling consistency.)
  • 1/2 teaspoon vanilla extract (Infuses glaze with flavor.)

To Serve

  • Maple syrup (Classic pairing for drizzling.)
  • Whipped cream (Adds a light texture.)
  • Fresh mint leaves (For color and freshness.)

Step-by-Step Instructions

  1. In a medium saucepan, combine 3 cups of fresh blueberries, 1/4 cup of granulated sugar, and 2 tablespoons of lemon juice. Cook over medium heat, stirring occasionally until the mixture begins to simmer and the sugar dissolves completely, about 5 minutes.
  2. In a small bowl, whisk 1 tablespoon of cornstarch with 1 tablespoon of cold water until smooth. Gradually pour this mixture into the simmering blueberry filling, stirring constantly. Continue cooking for an additional 1-2 minutes, allowing the mixture to thicken significantly.
  3. In a large mixing bowl, whisk together 2 cups of all-purpose flour, 4 teaspoons of baking powder, 1 teaspoon of baking soda, 1/2 teaspoon of salt, and 2 tablespoons of granulated sugar. In a separate bowl, whisk 2 large eggs, 2 cups of buttermilk, 4 tablespoons of melted unsalted butter, and 1 teaspoon of vanilla extract until combined. Pour the wet ingredients into the dry ingredients, gently folding until just combined.
  4. Preheat your oven to 375°F (190°C) and grease a 9×13-inch baking dish thoroughly with melted butter. Pour half of the pancake batter into the bottom of the dish, using a spatula to spread it evenly across the surface.
  5. Spoon the cooled blueberry filling over the batter, distributing it evenly. Careful with the remaining pancake batter, pour and spread it uniformly over the blueberry filling.
  6. Place the assembled casserole into the preheated oven and bake for 30-35 minutes. A toothpick inserted into the center should come out clean when it’s perfectly done.
  7. While your casserole is baking, whisk together 1 cup of powdered sugar, 2-3 tablespoons of buttermilk, and 1/2 teaspoon of vanilla extract in a small bowl until smooth. Adjust the consistency as desired.
  8. Once baked, remove the casserole and let it cool for a few minutes before slicing. Drizzle with your optional glaze, if using, and serve warm with maple syrup and whipped cream.

Use fresh blueberries for the best flavor and let the casserole cool slightly before slicing for easier serving.

Breakfast
American
baked pancakes, Blueberry Buttermilk Pancake Casserole, blueberry dessert, breakfast casserole, easy brunch, pancake recipe

Filed Under: Breakfast

Cheesy Pepperoni Pizza Roll Ups You’ll Crave Every Time

August 11, 2025 by grace bellamy Leave a Comment

As I rummaged through my fridge last week, a little culinary spark ignited—what if I could transform my usual snack into something fun and indulgent? Enter my Cheesy Pepperoni Pizza Roll Ups, the perfect solution for busy weeknights or a cozy movie marathon! In just 17 minutes, you’ll have these crowd-pleasers on the table, offering a satisfying crunch and that delightful melted cheese we all crave. Plus, they’re low-carb, making them a fantastic guilt-free treat for everyone. Whether you’re entertaining friends or just treating yourself, these roll-ups are bound to become a new favorite. Are you ready to tackle this quick and delicious recipe together?

Why Are These Roll Ups So Irresistible?

Quick preparation means you’ll be enjoying these Cheesy Pepperoni Pizza Roll Ups in just 17 minutes! Flavor-packed with melty cheese and pepperoni wrapped in a crispy tortilla, they’re a family favorite for a reason. Versatile enough to customize with your favorite toppings, you can easily swap in veggies or different cheeses. Perfect for movie night or game day, they’ll satisfy cravings without the guilt of fast food. Plus, pair them with a refreshing side, like a California Roll Cucumber Salad, for a complete meal!

Cheesy Pepperoni Pizza Roll Ups Ingredients

For the Filling
• Mozzarella cheese – A must-have for that gooey, melty goodness.
• Marinara sauce – Use your favorite brand for a burst of Italian flavor.
• Pepperoni slices – Feel free to adjust the quantity for your ideal meaty bite.

For the Wrap
• Low-carb tortillas – A healthy alternative that keeps your roll-ups light and crispy.
• Olive oil – Brushing this on adds a delightful golden finish while baking.

Enjoy crafting your Cheesy Pepperoni Pizza Roll Ups!

Step‑by‑Step Instructions for Cheesy Pepperoni Pizza Roll Ups

Step 1: Preheat the Oven
Start by preheating your oven to 375°F (190°C). This temperature is perfect for achieving that crispy outer layer while keeping the cheese inside melty and delicious. While the oven heats up, gather all your ingredients and equipment like a baking sheet and a brush for the olive oil, preparing for a smooth cooking experience.

Step 2: Prepare the Tortillas
Lay your low-carb tortillas flat on a clean surface. Make sure they are fully open and ready to be filled. This step is key to ensuring your Cheesy Pepperoni Pizza Roll Ups roll up neatly, so arrange them side by side with a little space in between, giving you room to work without any mess.

Step 3: Spread the Marinara Sauce
Using about 2 tablespoons of marinara sauce, spread it evenly over each tortilla, leaving about a half-inch border around the edges. The sauce not only adds flavor but also helps to bind the ingredients together. Be generous yet mindful, making sure the sauce doesn’t reach the edges, helping your roll-ups stay intact during baking.

Step 4: Add the Cheese
Now, sprinkle shredded mozzarella cheese evenly over the marinara sauce on each tortilla. The cheese is the star of your Cheesy Pepperoni Pizza Roll Ups, so ensure an even coating to create that irresistible gooeyness. Don’t skimp on this step, as a good layer of cheese is what brings these tasty bites alive!

Step 5: Layer the Pepperoni
Take your pepperoni slices and arrange them on top of the cheese. Feel free to be creative with the amount; a layer of pepperoni adds a wonderful contrast and a savory flavor that complements the cheese beautifully. Make sure each roll-up contains a hearty amount of this delicious topping to guarantee tasty bites.

Step 6: Roll Them Up
Starting from one end, carefully roll each tortilla tightly without tearing. This step is crucial to keep all the delightful fillings secure inside. As you roll, pinch the sides slightly to tuck in the ingredients, ensuring a neat and flavorful roll-up that will hold its shape during baking.

Step 7: Brush with Olive Oil
Once rolled, brush the outside of each roll-up generously with olive oil. This will help achieve a lovely golden color and crispiness as they bake. The oil also adds a bit of flavor, making your Cheesy Pepperoni Pizza Roll Ups even more irresistible. Use a pastry brush for the best results.

Step 8: Bake for Perfection
Place the roll-ups seam-side down on a baking sheet lined with parchment paper. Bake them in your preheated oven for about 10-12 minutes, or until the outside is golden brown and you can see the cheese bubbling out. This visual cue indicates that your Cheesy Pepperoni Pizza Roll Ups are almost ready to be devoured!

Step 9: Cool Slightly Before Serving
After baking, remove the roll-ups from the oven and let them cool for a few minutes. This resting period allows the cheese to set a bit, making them easier to slice. The golden outside will be hot, and letting them cool will ensure a perfect bite whenever you serve these tasty treats!

Cheesy Pepperoni Pizza Roll Ups Variations

Feel free to personalize your Cheesy Pepperoni Pizza Roll Ups to match your taste buds and dietary preferences.

  • Veggie-Packed: Add finely chopped bell peppers, mushrooms, or spinach to amp up the flavor and nutrition. These colorful additions introduce both freshness and crunch to each bite.

  • Spicy Kick: Sprinkle in red pepper flakes or sliced jalapeños for a fiery version. The heat will tantalize your taste buds, making each roll-up feel like an adventure!

  • Cheddar Twist: Swap mozzarella for sharp cheddar cheese for a bolder flavor. The unique taste of cheddar adds a new dimension to this classic roll-up, sure to impress any cheese lover.

  • Gluten-Free: Use gluten-free tortillas to accommodate those with dietary restrictions. Many brands ensure that you won’t miss out on the classic taste and texture!

  • Herb Infusion: Mix dried Italian herbs like oregano and basil into the cheese for a fragrant aroma. This small twist makes a big difference, transporting you straight to an Italian pizzeria.

  • Crunchy Topping: Add a sprinkle of crushed tortilla chips on top for extra crunch before baking. This twist elevates the texture and gives a delightful contrast to the gooey cheese inside.

  • Sweet Surprise: Drizzle your roll-ups with a balsamic glaze post-bake for a sweet and tangy finish. This unexpected addition enhances the flavor profile and makes a remarkable starter or snack.

For a well-rounded meal, consider pairing these delicious roll-ups with a side of Cheesy Scalloped Potatoes or enjoy a refreshing dish like California Roll Cucumber Salad. Enjoy the creativity in your kitchen!

How to Store and Freeze Cheesy Pepperoni Pizza Roll Ups

Room Temperature: Store cooled Cheesy Pepperoni Pizza Roll Ups in an airtight container at room temperature for up to 2 hours. This keeps them tasty for a quick snack!

Fridge: Keep any leftovers in the fridge for up to 3 days, wrapped tightly in plastic wrap or placed in an airtight container. Reheat in the oven for a crispy finish!

Freezer: For longer storage, freeze the roll-ups tightly wrapped in foil or placed in a freezer-safe bag for up to 2 months. Thaw in the fridge overnight before reheating.

Reheating: To reheat, bake in a preheated oven at 375°F (190°C) for 10 minutes or until heated through. This ensures they stay crispy and delicious!

What to Serve with Cheesy Pepperoni Pizza Roll Ups?

These scrumptious roll-ups are perfect for creating a complete meal that satisfies every craving and warms the heart.

  • Crunchy Caesar Salad: Crisp romaine and tangy dressing provide a refreshing contrast to the cheesy goodness of the roll-ups.

  • Garlic Bread Sticks: Soft, buttery breadsticks with a touch of garlic are perfect for dipping into extra marinara sauce.

  • Roasted Vegetable Medley: A colorful mix of seasonal veggies adds a healthy, flavorful element and pairs wonderfully with the flavors of pizza.

  • Zesty Coleslaw: The crunch and tanginess of coleslaw balance the richness of the roll-ups, making every bite exciting.

  • Fresh Fruit Salad: Juicy fruits like watermelon and berries bring a sweet, refreshing palate cleanser between cheesy bites.

  • Pale Ale or Craft Beer: A cold beer enhances the meal, cutting through the richness and perfectly complementing the savory flavors.

These accompanying dishes and drinks will lift your Cheesy Pepperoni Pizza Roll Ups experience to new heights!

Make Ahead Options

These Cheesy Pepperoni Pizza Roll Ups are perfect for meal prep enthusiasts looking to save time during busy weeknights! You can prepare the roll-ups up to 24 hours in advance by assembling them through Step 6 and then refrigerating them in an airtight container. When it’s time to serve, brush the outside with olive oil and bake directly from the fridge for an additional 2-3 minutes to ensure they heat through without losing that delightful crisp. This method allows you to enjoy fresh, gooey goodness with minimal effort, ensuring your roll-ups taste just as delicious as when freshly made!

Expert Tips for Cheesy Pepperoni Pizza Roll Ups

  • Perfect Rolling: Ensure a snug roll without tearing the tortillas. If they crack, warm them briefly in the microwave to soften before filling.

  • Cheese Quality: Use high-quality mozzarella cheese for maximum meltiness. Fresh cheese yields a creamier texture compared to pre-shredded varieties.

  • Avoid Overfilling: Don’t overload with toppings, as this might cause spills during baking. Aim for a balanced layer of cheese and pepperoni for the ideal Cheesy Pepperoni Pizza Roll Ups.

  • Baking Time: Keep an eye on the roll-ups towards the end of the baking time. Ovens may vary, and you want to catch them at that perfect golden-brown moment.

  • Serve Fresh: Enjoy your roll-ups right after cooling slightly for optimal flavor and texture. They’re best fresh out of the oven!

Cheesy Pepperoni Pizza Roll Ups Recipe FAQs

What is the best way to choose ripe ingredients for my Cheesy Pepperoni Pizza Roll Ups?
Absolutely! When selecting ingredients, opt for fresh mozzarella that is soft and creamy for the best melting quality. Check the expiration date and ensure the cheese has no dark spots or unusual odors. For marinara sauce, look for a brand that uses natural ingredients and has a vibrant color; avoid anything overly watery.

How should I store leftovers of my Cheesy Pepperoni Pizza Roll Ups?
The more the merrier with storing! After they’ve cooled, wrap your leftovers tightly in plastic wrap or place them in an airtight container. They will stay fresh in the refrigerator for up to 3 days. To enjoy them again, I recommend reheating them in the oven for a crispy texture!

Can I freeze Cheesy Pepperoni Pizza Roll Ups?
Certainly! To freeze your Cheesy Pepperoni Pizza Roll Ups, first let them cool completely. Next, wrap each roll tightly in aluminum foil, then place them in a freezer-safe bag. They can be stored in the freezer for up to 3 months. When ready to eat, thaw them overnight in the fridge and reheat as noted above for that fresh-baked taste!

What can I do if my roll-ups come apart while baking?
No worries at all! If your roll-ups come apart, it could be due to overstuffing or rolling too loosely. To repair, simply use toothpicks to hold them together during baking. In the future, ensure an even distribution of fillings and roll tightly to maintain their shape. If your tortillas crack, warm them briefly in the microwave to make them easier to handle.

Are there any dietary considerations for the Cheesy Pepperoni Pizza Roll Ups?
Very much so! These roll-ups are low-carb but always check the specific brands of tortillas and marinara sauce for potential allergens. Those with sensitivities to gluten should choose gluten-free tortillas. Additionally, feel free to substitute turkey or veggie pepperoni for a healthier or vegetarian option. Enjoy customizing for everyone at your table!

Cheesy Pepperoni Pizza Roll Ups You’ll Crave Every Time

Enjoy these Cheesy Pepperoni Pizza Roll Ups for a quick, indulgent snack with a low-carb twist.

  • Oven
  • Baking Sheet
  • Pastry Brush

For the Filling

  • 1 cup Mozzarella cheese (Shredded, for gooey texture.)
  • 2 tablespoons Marinara sauce (Use your favorite brand.)
  • 10-15 slices Pepperoni (Adjust quantity to taste.)

For the Wrap

  • 4 pieces Low-carb tortillas (Keeps roll-ups light and crispy.)
  • 2 tablespoons Olive oil (For brushing on the outside.)

Preparation Steps

  1. Preheat your oven to 375°F (190°C). Gather ingredients and a baking sheet.
  2. Lay tortillas flat on a clean surface, side by side.
  3. Spread about 2 tablespoons of marinara sauce evenly over each tortilla.
  4. Sprinkle shredded mozzarella cheese evenly over the marinara on each tortilla.
  5. Arrange pepperoni slices on top of the cheese.
  6. Carefully roll each tortilla tightly without tearing.
  7. Brush the outside of each roll-up generously with olive oil.
  8. Place roll-ups seam-side down on a lined baking sheet and bake for 10-12 minutes.
  9. Remove from oven and let cool for a few minutes before serving.

These roll-ups can be customized with your favorite toppings to suit your taste. Serve fresh for the best flavor and texture.

Appetizer
Italian
Cheesy Pepperoni Pizza Roll Ups, comfort food, Low-Carb, party food, pizza rolls, snack

Filed Under: Appetizer

Delicious Fresh Cucumber Caprese Salad for Your Summer Feasts

August 11, 2025 by grace bellamy Leave a Comment

As summer’s warmth lingers in the air, I’m reminded of the vibrant flavors that bring our meals to life. This Fresh Cucumber Caprese Salad is the perfect way to savor those sunny days, combining crisp cucumbers, sweet cherry tomatoes, and luxurious mozzarella in a delightful harmony. The best part? It comes together in just 10 minutes, making this dish a lifesaver when you’re craving something light yet satisfying. Whether you’re serving it as a colorful side at a barbecue or enjoying it solo for a refreshing lunch, this salad is not only a treat for the palate but also a feast for the eyes. Ready to elevate your summer gatherings? Grab your freshest ingredients and let’s dive into a bowl of this exquisite salad!

What makes this salad a must-try?

Ease: This Fresh Cucumber Caprese Salad is a breeze to whip up, taking only 10 minutes to prep. Perfect for those hectic summer days when you want something quick and delicious!

Vibrant Flavors: The zesty balsamic vinegar and fresh herbs elevate the crisp cucumber and juicy tomatoes, creating a burst of flavor that sings of summer.

Versatile: Whether served alongside grilled meats or enjoyed on its own, this salad fits perfectly into any meal setting. It’s also a fantastic option for potlucks or barbecues!

Crowd-Pleaser: With its bright colors and fresh ingredients, this salad looks as good as it tastes, impressing your guests without any extra effort.

Storage Friendly: Keep leftovers in your fridge for up to two days, making it a great make-ahead option for busy weeks. Enjoy it fresh or as a topping for your favorite dishes!

Fresh Cucumber Caprese Salad Ingredients

• Have everything you need to create this vibrant dish!

For the Marinade

  • Olive oil – adds richness and helps meld the flavors together beautifully.
  • Balsamic vinegar – provides a tangy sweetness that enhances the overall taste.
  • Dried oregano – lends a robust, aromatic touch that complements the fresh ingredients.
  • Dried basil – offers a hint of classic Italian flavor to your salad.
  • Salt – enhances the natural flavors of all ingredients.
  • Pepper – adds a little heat to balance the flavors.

For the Salad

  • Cucumber – crisp and refreshing, perfect for keeping your salad cool and light.
  • Cherry tomatoes – their juicy sweetness brings a delightful contrast to the cucumbers.
  • Fresh mozzarella – creamy and soft, it adds luxurious flavor and texture to each bite.
  • Red onion – adds a zesty crunch; feel free to omit if you prefer a milder taste.
  • Fresh basil leaves (optional) – for an aromatic garnish that brightens the dish even more!

Prepare these ingredients to dive into your delicious Fresh Cucumber Caprese Salad!

Step‑by‑Step Instructions for Fresh Cucumber Caprese Salad

Step 1: Make the Marinade
In a small bowl, combine 2 tablespoons of olive oil, 1 tablespoon of balsamic vinegar, 1 tablespoon each of dried oregano and dried basil, along with a pinch of salt and pepper. Stir the mixture gently until everything is well combined and the oil and vinegar blend harmoniously. Set the marinade aside, allowing the flavors to mingle as you prepare the salad.

Step 2: Prepare the Cucumber
Begin by peeling a washed cucumber, ensuring it’s clean and fresh. Use a fork to create texture by scraping along the skin in a vertical motion. Then, slice the cucumber thinly and dice it into small, even pieces, making them perfect for your Fresh Cucumber Caprese Salad. This process takes just a few minutes and enhances the visual appeal of your dish.

Step 3: Combine the Base Ingredients
Place the diced cucumber into a medium-sized bowl, creating a refreshing base. Next, quarter 1½ cups of washed cherry tomatoes and add them to the bowl with the cucumbers. The vibrant colors of the tomatoes will bring a delightful contrast to the salad’s fresh textures. Use a spoon to gently mix the vegetables, ensuring even distribution.

Step 4: Add the Red Onion
For an optional zesty crunch, thinly slice and dice half of a large red onion, then add it to your bowl of cucumbers and tomatoes. If the onion’s strong flavor isn’t your preference, feel free to skip this step. Mixing them in brings another layer of flavor to your Fresh Cucumber Caprese Salad.

Step 5: Incorporate the Mozzarella
Slice 8 ounces of fresh mozzarella into bite-sized pieces or use pearl-sized mozzarella balls for an easy addition to the salad. Gently fold the mozzarella into the bowl with the other ingredients. The creamy texture of the cheese will marry beautifully with the crisp vegetables, elevating the taste and appearance of your salad.

Step 6: Drizzle the Marinade
Pour the prepared marinade over the bowl of vegetables and cheese, then use a spatula or wooden spoon to mix everything carefully. Make sure each ingredient is evenly coated with the marinade for maximum flavor. The olive oil and vinegar will enhance the fresh ingredients and create a sumptuous dressing in your Fresh Cucumber Caprese Salad.

Step 7: Let It Rest
Allow the salad to sit for 10 minutes before serving. This resting time is crucial, as it enables the flavors to meld together beautifully. During this time, the ingredients will soak up the marinade, transforming the taste and ensuring every bite is bursting with deliciousness.

How to Store and Freeze Fresh Cucumber Caprese Salad

Fridge: Store any leftovers in an airtight container in the fridge for up to 2 days to keep them fresh.

Prep Ahead: For convenience, you can prepare the ingredients separately, like chopping cucumbers, tomatoes, and onions, and then combine before serving for maximum freshness.

Avoid Freezing: It’s best not to freeze the Fresh Cucumber Caprese Salad as the texture of the vegetables and cheese will suffer, losing their delightful crunch.

Reheating: If you prefer, you can enjoy the salad cold right from the fridge; no need for reheating, as it’s refreshing served chilled!

What to Serve with Fresh Cucumber Caprese Salad

Transform your meal into a delightful feast by pairing this vibrant salad with complementary dishes that enhance its fresh flavors.

  • Grilled Chicken: Juicy, smoky chicken provides a savory contrast to the bright flavors of the salad, creating a satisfying meal.
  • Garlic Bread: Warm, buttery garlic bread adds a comforting crunch, perfect for soaking up the remaining marinade.

For a balanced plate, consider serving roasted vegetables on the side. Their caramelized edges will add a savory depth that pairs beautifully with the salad’s crispness.

  • Pasta Primavera: Lightly sautéed veggies tossed with pasta mirror the freshness of your salad, offering a harmonious blend of flavors and textures.
  • Italian Chianti: A glass of this red wine revitalizes every bite, enhancing the tomatoes and cheese while adding a touch of elegance.
  • Lemon Sorbet: End your meal with a refreshing scoop of lemon sorbet, cleansing your palate and rounding out the flavors of your feast.

Make Ahead Options

These Fresh Cucumber Caprese Salad ingredients are perfect for meal prep enthusiasts! You can slice and dice the cucumbers, tomatoes, and red onion up to 24 hours in advance, storing them in an airtight container in the refrigerator to keep them crisp and fresh. The marinade can also be prepared ahead of time; simply refrigerate it separately to maintain the quality of the fresh ingredients. When you’re ready to serve, combine the prepped vegetables with the mozzarella and drizzle the marinade over the top. Allow the salad to rest for 10 minutes before enjoying this vibrant dish, just as delicious and fresh as if you made it last minute!

Fresh Cucumber Caprese Salad Variations

Feel free to add your personal touch and make this salad truly your own with these tasty variations!

  • Dairy-Free: Substitute fresh mozzarella with avocado or a dairy-free cheese alternative for a lighter option.

  • Add Protein: Toss in grilled chicken or chickpeas to turn this salad into a filling meal. This will not only add heartiness but also complement the fresh flavors beautifully.

  • Spicy Kick: Add a sprinkle of red pepper flakes or some diced jalapeño to introduce a bit of heat, creating a vibrant contrast to the cooling cucumbers.

  • Herb Swap: Experiment with herbs such as fresh dill or cilantro for a different aromatic experience. Each herb brings a unique flavor that can transform your salad.

  • Nutty Twist: Incorporate a handful of toasted pine nuts or walnuts to add a delightful crunch and rich texture.

  • Sweetness: For a pop of sweetness, try adding in diced mango or peach, which pairs remarkably well with the tomatoes and mozzarella.

  • Alternative Dressing: Swap the balsamic vinegar for a lemon vinaigrette for a brighter, tangy flavor. This twist adds a refreshing zing that amplifies the salad’s summer vibes.

  • Extra Veggies: Mix in additional veggies like bell peppers or zucchini for more colors and crunch, making the salad even more enticing!

Feel free to get creative with these ideas, and enjoy your delicious, customized Fresh Cucumber Caprese Salad! If you’re looking for other fresh flavors, consider pairing it with grilled chicken or tomato basil bruschetta for a delightful summer feast.

Tips for the Best Fresh Cucumber Caprese Salad

Fresh Ingredients Matter: Use the freshest cucumbers, tomatoes, and mozzarella for vibrant flavor and texture, making a noticeable difference in your Fresh Cucumber Caprese Salad.

Don’t Rush the Marinade: Allow your salad to sit for at least 10 minutes before serving; this resting time lets the flavors meld beautifully for a more delightful taste.

Avoid Watery Cucumber: Fork scoring the cucumber is essential; it creates texture and helps it absorb the marinade without becoming too watery.

Slice with Care: Aim for uniform slices of cucumbers and tomatoes; consistent sizes not only look appealing but also ensure even flavor distribution.

Customize as Desired: Feel free to mix in other ingredients like bell peppers or avocados for a unique twist, but always remember the essence of the Fresh Cucumber Caprese Salad!

Fresh Cucumber Caprese Salad Recipe FAQs

How do I select the best cucumbers for this salad?
Absolutely! Look for firm cucumbers that are free of dark spots, blemishes, or shriveling. Smaller cucumbers, like English cucumbers, are often sweeter and have fewer seeds, making them a great choice for your Fresh Cucumber Caprese Salad!

What’s the best way to store leftovers?
To keep your Fresh Cucumber Caprese Salad fresh, store any leftovers in an airtight container in the fridge for up to 2 days. This helps maintain the vibrant flavors and crisp texture. Just remember, it’s best enjoyed when freshly made!

Can I freeze this salad for later use?
I recommend avoiding freezing your Fresh Cucumber Caprese Salad, as the texture of the vegetables will change once thawed, leading to a soggy salad. If you want to prep in advance, consider storing the ingredients separately, mixing them just before serving.

What can I do if my salad seems too watery?
That’s a great observation! If your salad becomes watery, it may be due to the cucumbers releasing moisture. To prevent this, fork score the cucumber before slicing; this technique not only looks appealing but also helps it absorb the marinade without releasing too much water.

Are there any dietary considerations for this salad?
Very! This Fresh Cucumber Caprese Salad is naturally vegetarian and can easily be made gluten-free. If you’re concerned about dairy, try replacing the mozzarella with a vegan alternative or omitting it altogether, and enjoy the fresh flavors of the cucumber and tomatoes on their own!

Delicious Fresh Cucumber Caprese Salad for Your Summer Feasts

This Fresh Cucumber Caprese Salad is a vibrant summer dish combining crisp cucumbers, sweet cherry tomatoes, and creamy mozzarella.

  • small bowl
  • Medium-Sized Bowl
  • spatula
  • Knife
  • cutting board

For the Marinade

  • 2 tablespoons olive oil
  • 1 tablespoon balsamic vinegar
  • 1 tablespoon dried oregano
  • 1 tablespoon dried basil
  • 1 pinch salt
  • 1 pinch pepper

For the Salad

  • 1 large cucumber (peeled and diced)
  • 1.5 cups cherry tomatoes (quartered)
  • 8 ounces fresh mozzarella (sliced or ball form)
  • 0.5 large red onion (optional)
  • fresh basil leaves (optional garnish)

Preparation Steps

  1. In a small bowl, combine the olive oil, balsamic vinegar, dried oregano, dried basil, salt, and pepper. Stir gently and set aside.
  2. Peel the cucumber, then slice and dice it evenly to enhance texture.
  3. Add the diced cucumber and quartered cherry tomatoes to a medium bowl, gently mixing them together.
  4. If using, add the diced red onion to the bowl and mix well.
  5. Fold in the mozzarella, ensuring an even distribution.
  6. Drizzle the marinade over the salad and mix carefully to coat all ingredients.
  7. Allow the salad to rest for 10 minutes before serving for the flavors to meld.

Use the freshest ingredients for the best flavor and texture. Avoid freezing the salad to maintain its crispness.

Salad
Italian
barbecue side, Easy Recipe, Fresh Cucumber Caprese Salad, healthy salad, light lunch, Summer Salad

Filed Under: salad

Irresistible Strawberry Shortcake Sushi for Sweet Celebrations

August 11, 2025 by grace bellamy Leave a Comment

You wouldn’t expect to find sushi in the realm of dessert, but here we are, shaking things up with a delightful twist that’s both unexpected and utterly delicious! Introducing my Strawberry Shortcake Sushi—a playful spin on a beloved classic that comes together in just under an hour. This dessert isn’t just fun to make; it’s a total crowd-pleaser that adds a splash of whimsy to any gathering. With layers of soft pound cake, luscious whipped cream, and fresh strawberries, you’re in for a treat that’s as beautiful as it is scrumptious. Plus, it can be prepped ahead—perfect for those busy weekends! Curious how to create this culinary marvel? Let’s roll up our sleeves and get started!

Who Can Resist Strawberry Shortcake Sushi?

Unique Twist: This dessert deliciously combines sushi presentation with classic strawberry shortcake ingredients.
Easy to Make: You don’t need any sushi-making experience—just simple layering and rolling techniques!
Fresh & Fruity: Juicy strawberries offer a delightful burst of flavor, perfectly complemented by whipped cream and cake.
Perfect for Gatherings: Everyone will love this whimsical treat at parties, making it a great conversation starter.
Versatile Delight: Feel free to customize with your favorite toppings, like chocolate sauce or graham cracker crumbs!
Time-Saving: With a total time of just 45 minutes, it’s a quick dessert option that won’t keep you in the kitchen all day.

For more fun dessert ideas, check out my delicious post on Layered Berry Parfaits that will impress your guests!

Strawberry Shortcake Sushi Ingredients

For the Base

  • Pound Cake – Either store-bought or homemade, this soft cake serves as the perfect foundation for your sushi.
  • Whipped Cream – Light and fluffy, this adds a creamy layer; try Cool Whip as a time-saving alternative.

For the Filling

  • Fresh Strawberries – Finely diced for a burst of fruity sweetness, these can be replaced with other berries if desired.
  • Strawberry Jam or Puree – Optional for spreading; it adds extra strawberry flavor to your sushi rolls.

For Toppings

  • Graham Cracker Crumbs – These add a delightful crunch and a hint of toasted flavor.
  • Sprinkles – Perfect for making your dessert visually appealing, especially for kids.
  • Shredded Coconut – A tropical twist that complements the strawberries beautifully!

This Strawberry Shortcake Sushi is perfect for sharing and bursting with flavor!

Step‑by‑Step Instructions for Strawberry Shortcake Sushi

Step 1: Prepare the Sushi Rice
Start by rinsing 1 cup of high-quality short-grain rice under cold water until the water runs clear, removing excess starch. Cook the rice according to package instructions, typically around 15-20 minutes. Once cooked, let the rice cool until it’s warm, as this will make it easier to mix with the sweetening ingredients.

Step 2: Flavor the Rice
In a mixing bowl, combine the cooled rice with 2 tablespoons of rice vinegar, 2 tablespoons of sugar, and a pinch of salt. Gently fold the rice with a spatula for about 2-3 minutes until the mixture is evenly distributed, and the grains start to feel sticky. This sweetened rice base adds a delightful flavor to your Strawberry Shortcake Sushi.

Step 3: Set Up Your Rolling Station
Lay a sheet of plastic wrap over a bamboo sushi mat or a clean cutting board for easy rolling. Ensure the plastic wrap is large enough to cover the mat completely, creating a non-stick surface. This helps maintain the shape of your rolls as you layer the ingredients.

Step 4: Layer the Pound Cake
Place a thin layer of your pound cake directly on the plastic wrap, aiming for an even coverage about 1/4 inch thick. Make sure the edges are straight to create a neat roll later on. This layer serves as the foundation for your Strawberry Shortcake Sushi, so press down slightly to secure it in place.

Step 5: Spread the Whipped Cream
Gently spread a thin layer of whipped cream or Cool Whip over the layer of pound cake. Use a spatula to create an even distribution, leaving a small border around the edges. The cream will act as the glue to hold everything together and add a luscious texture to your sushi.

Step 6: Add the Fresh Strawberries
Evenly distribute the finely diced fresh strawberries across the whipped cream layer. Allow the vibrant colors and juicy texture of the strawberries to shine, ensuring they are spread out to create an even bite with each slice. This delightful fruit layer complements the whipped cream and cake beautifully.

Step 7: Roll the Sushi
Carefully lift the edge of the bamboo mat and start rolling the sushi away from you, using your fingers to keep the filling tightly packed. Press gently as you roll, creating a firm, cohesive shape. Continue rolling until the sushi is tightly wrapped, then peel away the plastic wrap from the end.

Step 8: Slice the Sushi Roll
Once your roll is complete, use a sharp knife to slice the sushi into bite-sized pieces, about 1-2 inches thick. Wipe the knife with a damp cloth between cuts to ensure clean edges. Arrange the pieces on a serving platter, showcasing the delightful layers of your Strawberry Shortcake Sushi.

Step 9: Garnish and Serve
Optional: Drizzle a bit of strawberry sauce or melted chocolate over the top for added flavor and visual appeal. You can also sprinkle some graham cracker crumbs, sprinkles, or shredded coconut on top for a fun finishing touch. Enjoy your beautiful and whimsical Strawberry Shortcake Sushi with friends and family!

How to Store and Freeze Strawberry Shortcake Sushi

Fridge: Store leftovers in an airtight container for up to 2 days to maintain freshness. This ensures the texture and flavor of your Strawberry Shortcake Sushi stay delightful.

Freezer: For longer storage, freeze individual pieces wrapped in plastic wrap or foil for up to 1 month. Ensure they’re airtight to prevent freezer burn.

Reheating: Thaw in the refrigerator overnight before enjoying. Avoid microwave reheating as it can alter the texture of the cake and cream.

Preparation Tips: If planning ahead, keep the rice, cream, and cake separate until just before serving to ensure the best taste and texture.

What to Serve with Strawberry Shortcake Sushi?

Elevate your dessert experience with these delightful pairings that complement the playful essence of your sushi creation.

  • Fresh Fruit Salad: A crispy mix of seasonal fruits provides a refreshing contrast that brightens each bite of your sushi.
  • Minted Lemonade: This zesty drink adds a refreshing kick that cuts through the sweetness, making every mouthful feel vibrant and invigorating.
  • Chocolate Drizzle: Tantalizing melted chocolate adds richness, making the sushi even more indulgent. A divine pairing that satisfies the sweetest cravings.
  • Green Tea Ice Cream: The subtle bitterness of green tea ice cream balances the sweetness, creating a harmonious dessert combination that will impress your guests.
  • Graham Cracker Crust Cups: Serve these crunchy mini cups for added texture and sweetness. They are the perfect vessel for showcasing extra whipped cream or fresh berries.
  • Coconut Whipped Cream: Enhance the creamy layer with a coconut twist, adding tropical flair and elevating the flavor profile of your sushi.
  • Berry Compote: A warm berry compote drizzled over the sushi will enhance its sweetness, making this dessert even more decadent.
  • Champagne: A light, bubbly champagne pairs exceptionally with the strawberries, making this treat perfect for celebrations. Each sip enhances the delightful experience of your sweet sushi!

Tips for the Best Strawberry Shortcake Sushi

  • Rice Selection: Use short-grain rice for the ideal sticky texture that holds your sushi together. Avoid long-grain rice, as it won’t have the same consistency.
  • Chill Ingredients: Keep your whipped cream and strawberries chilled before assembly for a refreshing taste and better texture. Warm ingredients can make your sushi soggy.
  • Consistent Slices: Use a sharp, damp knife when slicing to ensure clean cuts. This keeps the layers intact while presenting an elegant appearance.
  • Variations Galore: Experiment with different fruits or toppings, like blueberries or coconut, to customize your Strawberry Shortcake Sushi according to your taste!
  • Freshness Matters: Enjoy your sushi within 24 hours for the best flavor and texture. Store leftovers in an airtight container in the fridge to maintain freshness.
  • Layering Technique: Spread the whipped cream and strawberries evenly without overloading to prevent the filling from spilling out when rolling.

Strawberry Shortcake Sushi Variations

Feel free to elevate your Strawberry Shortcake Sushi by mixing in your favorite flavors and textures!

  • Gluten-Free: Substitute traditional pound cake with gluten-free cake or a blend of almond flour to make this dessert suitable for gluten-sensitive folks.
  • Fruit Mix-Up: Experiment with various berries like blueberries or raspberries for a colorful twist packed with refreshing flavors. Each berry brings its unique sweetness and acidity that can brighten up your rolls!
  • Dairy-Free: Use coconut cream instead of whipped cream, making this dish accessible for dairy-free eaters while adding a subtle tropical flavor. The creamy coconut pairs perfectly with the strawberries!
  • Nutty Crunch: Toss in some slivered almonds or chopped walnuts for an extra crunch in your bites. This adds delicious texture while enhancing the flavor profile of your sushi.
  • Chocolate Lovers: Drizzle melted chocolate on top or mix mini chocolate chips into your whipped cream for an indulgent treat that satisfies cravings. Chocolate and strawberries are classic partners in crime!
  • Spicy Kick: Add a pinch of cayenne pepper to the whipped cream to introduce an unexpected heat that beautifully contrasts the sweetness of the strawberries. It’s a daring but delectable twist!
  • Herbaceous Touch: Fold in some finely chopped mint or basil into the whipped cream for a refreshing herbal note that elevates each bite. Fresh herbs can really transform the flavor!
  • Layered Delight: Instead of rolling it up, create a layered parfait style with cake, cream, strawberries, and toppings in a glass for a fun presentation. It’s a visually stunning option for serving at gatherings.

Don’t forget to check my Strawberry Shortcake Puff Pastry recipe for another sweet treat that’s perfect for sharing, or explore my delightful Chocolate Strawberry Tart for a more decadent dessert!

Make Ahead Options

These Strawberry Shortcake Sushi rolls are perfect for meal prep enthusiasts! You can prepare the sushi rice and mix it with rice vinegar, sugar, and salt up to 24 hours in advance; just refrigerate it in an airtight container to maintain its quality. Additionally, you can layer the pound cake with whipped cream and diced strawberries and store it separately in the fridge for up to 3 days. When ready to serve, simply assemble the rolls, slice them into bite-sized pieces, and add any desired toppings like graham cracker crumbs or chocolate drizzle. This way, your dessert will be just as delicious and visually appealing, saving you precious time during busy occasions!

Strawberry Shortcake Sushi Recipe FAQs

How do I choose ripe strawberries?
Absolutely! Look for strawberries that are bright red, firm, and fragrant. Avoid those with dark spots all over or signs of mold. Ideally, run your fingers lightly over the strawberries; they should feel slightly soft, indicating they’re sweet and juicy.

How should I store Strawberry Shortcake Sushi?
Very simply! Store your sushi in an airtight container in the fridge, where it will last for up to 2 days. Make sure that the container is well-sealed to preserve the delightful textures of the cake and cream.

Can I freeze Strawberry Shortcake Sushi?
Yes, you can! For freezing, wrap each piece of sushi tightly in plastic wrap and then store it in a freezer-safe bag or container. This way, they can be frozen for up to 1 month. When you’re ready to enjoy, just thaw them in the fridge overnight—it’s that easy!

What should I do if my sushi rolls are falling apart?
If your rolls are falling apart, it may be due to overstuffing or using too much whipped cream. For a tighter roll, be sure to use less filling and pay attention to your rolling technique—press gently with the mat while rolling to hold everything together.

Are there any dietary considerations for this dessert?
Absolutely! If you’re making this for someone with allergies, ensure the pound cake and whipped cream are free from dairy and gluten if needed. Additionally, strawberries are safe for most people, but always check for allergies. For pets, avoid giving them any whipped cream as it can upset their stomach.

What can I use instead of pound cake?
If you’re looking for alternatives, you could use sponge cake or even a gluten-free cake if necessary. The key is to have a soft, spongy base that will roll well when layered with the filling. Experimenting with different cakes can lead to delightful new flavors in your Strawberry Shortcake Sushi!

Irresistible Strawberry Shortcake Sushi for Sweet Celebrations

Discover a playful twist on a classic dessert with Strawberry Shortcake Sushi, combining soft cake, whipped cream, and fresh strawberries.

  • Bamboo Sushi Mat
  • Plastic wrap
  • spatula
  • sharp knife

For the Base

  • 1 pound Pound Cake (Either store-bought or homemade)
  • 1 cup Whipped Cream (Try Cool Whip as a time-saving alternative)

For the Filling

  • 2 cups Fresh Strawberries (Finely diced)
  • 1 table spoon Strawberry Jam or Puree (Optional for spreading)

For Toppings

  • 1/2 cup Graham Cracker Crumbs (For a delightful crunch)
  • 1/4 cup Sprinkles (For visual appeal)
  • 1/4 cup Shredded Coconut (For a tropical twist)

Preparation Steps

  1. Rinse 1 cup of short-grain rice under cold water until the water runs clear. Cook the rice according to package instructions for about 15-20 minutes. Allow to cool until warm.
  2. In a bowl, mix the cooled rice with 2 tablespoons of rice vinegar, 2 tablespoons of sugar, and a pinch of salt. Fold gently for 2-3 minutes until sticky.
  3. Cover a bamboo sushi mat with plastic wrap. Make sure it’s large enough for easy rolling.
  4. Layer the pound cake on the plastic wrap, about 1/4 inch thick, and press down slightly.
  5. Spread a thin layer of whipped cream over the pound cake, leaving a small border.
  6. Distribute the diced strawberries evenly over the whipped cream layer.
  7. Start rolling the sushi carefully, using the bamboo mat. Keep filling tightly packed.
  8. Slice the roll into bite-sized pieces using a sharp knife, wiping the blade between cuts.
  9. Optional: Drizzle with strawberry sauce or melted chocolate, and sprinkle toppings before serving.

Prepare within 24 hours for the best flavor and texture. Store leftovers in an airtight container in the fridge.

Dessert
Fusion
Creative Sweets, Dessert Sushi, Party Desserts, Strawberry Dessert, Strawberry Shortcake Sushi, Whimsical Desserts

Filed Under: Dessert

Delicious Herb-Infused Crustless Zucchini Quiche Recipe

August 11, 2025 by grace bellamy Leave a Comment

Stepping into the kitchen, I often find myself in a delightful impromptu battle between the convenience of takeout and the magic of home-cooked meals. When I discovered the Herb-Infused Crustless Zucchini Quiche, I felt like I’d found the perfect ally against fast food temptation. This dish not only comes together in just over 50 minutes but is also a delightful way to showcase seasonal produce! With the zesty freshness of basil and a medley of vibrant veggies, it pleases both the palate and the eye. Plus, it’s a fantastic option for an easy brunch or light dinner that’s packed with flavor and nutrition. Are you ready to discover how simple and satisfying homemade food can be? Let’s dive into crafting this luscious quiche together!

Why is this quiche a must-try?

Flavorful, herb-infused goodness: The combination of fresh basil and seasonal veggies packs a punch of flavor that’s truly irresistible.
Easy to make: In just over 50 minutes, you can whip up this delicious quiche even on the busiest of days.
Versatile dish: Perfect for brunch, a light dinner, or even meal prep for the week ahead—this quiche fits every occasion!
Crowd-pleaser: Your family and guests will be impressed (and asking for seconds) with this colorful and wholesome dish.
Health-conscious: Packed with veggies and made with plant-based milk, it’s a nutritious option that satisfies. Plus, if you love easy recipes, check out my other quick treats like Avocado Toast.

Herb-Infused Crustless Zucchini Quiche Ingredients

Here’s everything you need to create this flavorful dish!

For the Veggies

  • Ghee or avocado oil – Adds a rich, buttery flavor and helps prevent sticking.
  • Zucchinis – Fresh and crisp, they provide a lovely texture and moisture in the quiche.
  • Onion – Sweetens as it cooks, adding depth to your herb-infused crustless zucchini quiche.
  • Garlic – A touch of aromatic goodness that elevates the overall flavor profile.
  • Baby spinach – Vibrant and nutritious, it wilts down beautifully and complements the other veggies.
  • Tomatoes – Juicy slices offer a burst of freshness and brighten up your quiche.
  • Fresh basil – The star of the show, introducing a fragrant herbaceous note that truly enhances the dish.

For the Egg Mixture

  • Large eggs – The foundation for binding all the ingredients together and providing protein.
  • Plant-based milk – Ensures creaminess while keeping this dish dairy-free; feel free to use your favorite.
  • Salt – Essential for bringing out the flavors of all the ingredients.
  • Freshly ground black pepper – Adds a warm, spicy kick that complements the zucchini perfectly.

Gather these ingredients, and let’s transform your kitchen into a haven of homemade delights with this herb-infused crustless zucchini quiche!

Step‑by‑Step Instructions for Herb-Infused Crustless Zucchini Quiche

Step 1: Preheat and Prepare
Begin by preheating your oven to 350°F (175°C). While the oven heats up, take your pie dish or quiche pan and coat it liberally with ghee or avocado oil. This important step will ensure that your Herb-Infused Crustless Zucchini Quiche won’t stick and will have a lovely golden hue once baked.

Step 2: Sauté the Zucchini
In a skillet over medium-high heat, add 1 tablespoon of ghee or avocado oil. Once hot, arrange the zucchini rounds in a single layer and cook them until they are golden brown, about 2-3 minutes per side. You’ll know they’re ready when they become slightly tender. After browning, remove them from the heat and set aside.

Step 3: Cook the Onion and Garlic
Lower the skillet’s heat to medium and pour in the remaining 1 tablespoon of ghee or avocado oil. Add the diced onion and sauté for 3-4 minutes until they turn translucent and fragrant. Next, add the minced garlic and stir for about one minute until the garlic becomes aromatic. Be careful not to burn it, as burnt garlic can taste bitter.

Step 4: Add the Spinach
Toss in the baby spinach and stir until it wilts down, which should take just about a minute. Once it has reduced in volume, immediately remove the skillet from the heat. This will give your Herb-Infused Crustless Zucchini Quiche a delightful burst of color and flavor.

Step 5: Layer the Veggies
Spread the cooked onion, garlic, and spinach mixture evenly in the bottom of the greased quiche pan. Follow this by layering the majority of the browned zucchini and tomato slices over the mixture, saving a handful of each for topping later. This adds both texture and a beautiful presentation to your quiche.

Step 6: Add Fresh Basil
Sprinkle the chopped fresh basil generously over the layered vegetables in the quiche pan. The basil will impart a fragrant, herbaceous aroma that elevates the flavors of your Herb-Infused Crustless Zucchini Quiche, making it even more inviting and delicious.

Step 7: Prepare the Egg Mixture
In a mixing bowl, whisk together the eggs, plant-based milk, salt, and freshly ground black pepper until everything is smooth and well combined. This creamy mixture will bind all the lovely veggies together and give your quiche its rich texture.

Step 8: Pour and Settle
Carefully pour the egg mixture over the layered vegetables in the quiche pan. Let the liquid settle gently among the fillings without disturbing the arrangement. You’ll see the beautiful colors of the veggies blending closely with the creaminess of the egg mixture for the Herb-Infused Crustless Zucchini Quiche.

Step 9: Garnish before Baking
Top your quiche with the reserved zucchini rounds and tomato slices for an eye-catching finish. This step not only enhances the quiche’s appearance but also ensures a delightful bite in every slice once cooked.

Step 10: Bake to Perfection
Place the quiche in the preheated oven and bake for 35-40 minutes. You’ll know it’s ready when the center is set, and a toothpick inserted in the middle comes out clean. The edges will be slightly puffed and golden, making it a perfect Herb-Infused Crustless Zucchini Quiche for any occasion.

Step 11: Cool and Serve
Once baked, remove the quiche from the oven and allow it to cool slightly. This resting period will help the quiche set properly and make slicing easier. After about 10-15 minutes, cut it into wedges and garnish with extra fresh basil before serving, presenting a beautiful homemade delight to your family or guests.

Herb-Infused Crustless Zucchini Quiche Variations

Feel free to unleash your creativity with this recipe and make it truly your own!

  • Dairy-Free: Substitute the plant-based milk with almond or oat milk for a nutty twist that’s still creamy and satisfying.

  • Cheesy Delight: Add 1/2 cup of your favorite shredded cheese (like mozzarella or feta) to the egg mixture for an extra layer of richness.

  • Protein Boost: Toss in cooked and crumbled sausage or diced ham for a heartier dish that the whole family will adore.

  • Spicy Kick: Mix in some chopped jalapeños or sprinkle red pepper flakes into the egg mixture to add a delightful heat.

  • Herb Variations: Experiment with different herbs like thyme or oregano instead of basil for a unique flavor profile that matches your taste.

  • Vegetable Medley: Swap out the zucchini and tomatoes for seasonal veggies like asparagus or bell peppers to create a colorful and diverse quiche.

  • Breakfast Version: Transform it into a breakfast quiche by mixing in cooked bacon and adding a sprinkle of smoked paprika for that familiar brunch feel.

  • Crust Option: If you’re feeling indulgent, use a ready-made pastry crust as a base for a traditional quiche that adds a buttery crunch to each bite!

Each of these variations allows you to personalize your Herb-Infused Crustless Zucchini Quiche while keeping the spirit of home-cooked goodness alive. Whether you’re hosting a brunch or just treating yourself to a cozy night in, there’s a version here that’s sure to please! If you need more ideas, why not check out my delightful Avocado Toast for an easy side option?

Make Ahead Options

These Herb-Infused Crustless Zucchini Quiches are perfect for meal prep enthusiasts! You can sauté the zucchini, onion, garlic, and spinach up to 24 hours in advance; just refrigerate them in an airtight container to maintain freshness. Additionally, you can whisk the egg and plant-based milk mixture ahead of time and store it in the fridge, ensuring it’s ready when you are. When you’re ready to bake, simply layer the prepped veggies in the quiche pan, pour the egg mixture over, and bake as instructed. This approach saves you precious time during the week, allowing you to enjoy a nutritious, homemade meal with minimal effort, just as delicious as if you made it fresh!

How to Store and Freeze Herb-Infused Crustless Zucchini Quiche

Fridge: Store leftover slices in an airtight container for up to 3 days. Reheat in the microwave for a quick meal or snack.

Freezer: If you want to save some for later, wrap individual slices tightly in plastic wrap and then foil. Frozen, it can last up to 3 months!

Reheating: To enjoy a delicious slice from the freezer, thaw in the fridge overnight, then reheat in the oven at 350°F (175°C) for about 15-20 minutes.

Avoid Excess Moisture: For the best texture, ensure the quiche is completely cooled before storing. This prevents condensation and helps maintain the integrity of your Herb-Infused Crustless Zucchini Quiche.

What to Serve with Herb-Infused Crustless Zucchini Quiche

Elevate your meal with delightful pairings that accentuate the fresh flavors of this quiche masterpiece.

  • Crunchy Garden Salad: A light salad filled with mixed greens and a tangy vinaigrette complements the creamy texture of the quiche perfectly. The crispness adds a refreshing contrast.

  • Roasted Sweet Potatoes: The natural sweetness of roasted sweet potatoes pairs beautifully with the herb-infused quiche, creating a satisfying balance of flavors and textures.

  • Savory Garlic Bread: Warm, crusty garlic bread provides a delightful crunch and rich aroma that echoes the quiche’s herbs, perfect for sopping up any extra egg goodness.

  • Fruit Medley: A vibrant mix of seasonal fruits adds a refreshing and sweet note to your meal, cleansing the palate and enhancing the flavors of the quiche.

  • Herbal Tea or Lemonade: A soothing cup of herbal tea or a citrusy lemonade can brighten up your meal, offering a delightful contrast to the savory quiche while keeping things light.

  • Chilled White Wine: A glass of chilled Sauvignon Blanc enhances the herbaceous notes of the quiche, making your brunch feel elegant and festive.

  • Dessert Bars: For a sweet ending, pair with lemon or berry dessert bars that resonate with the fresh ingredients, adding a tangy finish that’ll leave everyone craving more.

Expert Tips for Herb-Infused Crustless Zucchini Quiche

  • Fresh Ingredients: Use the freshest zucchini and tomatoes possible for maximum flavor. Seasonal veggies significantly enhance the taste of your Herb-Infused Crustless Zucchini Quiche.

  • Avoid Soggy Bottom: Make sure to sauté the zucchini and spinach properly. Removing excess moisture is key to preventing a soggy quiche.

  • Customize Your Veggies: Feel free to mix in other vegetables like bell peppers or mushrooms. This allows you to tailor the Herb-Infused Crustless Zucchini Quiche to your personal taste!

  • Perfect Baking Time: Keep an eye on your quiche towards the end of the baking time. Oven temperatures can vary, so check for doneness using the toothpick test.

  • Rest Before Serving: Allow the quiche to rest for at least 10-15 minutes after baking. This helps it set up nicely for beautiful slices!

Herb-Infused Crustless Zucchini Quiche Recipe FAQs

What type of zucchini is best for this quiche?
Absolutely, I recommend using medium-sized zucchinis that are firm and shiny. Look for ones without dark spots all over, as these may indicate overripeness. Fresh zucchini provides the best texture, ensuring your Herb-Infused Crustless Zucchini Quiche is tender and flavorful.

How should I store leftover quiche?
Leftover slices should be stored in an airtight container in the fridge, where they’ll stay fresh for up to 3 days. If you’re pressed for time, you can reheat them in the microwave for a quick meal or enjoy cold as a refreshing snack.

Can I freeze my Herb-Infused Crustless Zucchini Quiche?
Certainly! To freeze, wrap individual slices tightly in plastic wrap, then cover them with foil for extra protection. This method allows your quiche to stay delicious for up to 3 months. When you’re ready to enjoy it, simply thaw the slices in the fridge overnight and reheat them in the oven at 350°F (175°C) for about 15-20 minutes.

What should I do if my quiche comes out soggy?
Very importantly, ensure that you sauté the zucchini and spinach thoroughly to remove excess moisture before layering them in the quiche. Also, let the quiche cool completely before storing it. If it’s still soggy after baking, try using a slotted spoon to spread the filling, allowing any extra liquid to drain off.

Is this quiche suitable for those with dietary restrictions?
Definitely! The Herb-Infused Crustless Zucchini Quiche can be made dairy-free by using plant-based milk, as noted in the ingredients. It’s also gluten-free, but be sure to check specific ingredient labels if you have allergies. If you want to share with your pets, keep in mind that onions and garlic aren’t safe for them, so omit those for their portion of the meal!

Can I add other vegetables to this quiche?
The more the merrier! Feel free to customize your quiche by adding other vegetables like bell peppers, mushrooms, or even kale. Just sauté them as you would the zucchini and spinach, and enjoy the flavors of your own creation!

Delicious Herb-Infused Crustless Zucchini Quiche Recipe

Discover the delightful Herb-Infused Crustless Zucchini Quiche, a flavorful and nutritious option for breakfast.

  • Oven
  • skillet
  • Mixing Bowl
  • Quiche Pan

For the Veggies

  • 2 tablespoons ghee or avocado oil (Adds a rich, buttery flavor and helps prevent sticking.)
  • 2 medium zucchinis (Fresh and crisp, they provide a lovely texture and moisture.)
  • 1 medium onion (Adds depth to the flavor as it cooks.)
  • 2 cloves garlic (A touch of aromatic goodness.)
  • 4 cups baby spinach (Vibrant and nutritious.)
  • 2 medium tomatoes (Offers a burst of freshness.)
  • 1 cup fresh basil (Introducing a fragrant herbaceous note.)

For the Egg Mixture

  • 6 large eggs (Foundation for binding the ingredients.)
  • 1 cup plant-based milk (Ensures creaminess and keeps the dish dairy-free.)
  • 1 teaspoon salt (Essential for flavor.)
  • 1 teaspoon freshly ground black pepper (Adds a warm, spicy kick.)

Preparation Steps

  1. Preheat your oven to 350°F (175°C). Coat your pie dish or quiche pan with ghee or avocado oil.
  2. In a skillet over medium-high heat, add 1 tablespoon of ghee or avocado oil. Arrange the zucchini rounds in a single layer and cook until golden brown, about 2-3 minutes per side.
  3. Lower the heat, add the remaining tablespoon of ghee or avocado oil, and sauté the diced onion for 3-4 minutes until translucent. Add the minced garlic and stir for about a minute.
  4. Add baby spinach to the skillet and stir until wilted, about 1 minute. Remove from heat.
  5. Spread the cooked onion, garlic, and spinach mixture in the bottom of the greased quiche pan. Layer the majority of the browned zucchini and tomato slices over the mixture.
  6. Sprinkle chopped fresh basil generously over the layered vegetables.
  7. In a mixing bowl, whisk together the eggs, plant-based milk, salt, and black pepper until smooth.
  8. Pour the egg mixture over the layered vegetables in the quiche pan.
  9. Top your quiche with the reserved zucchini rounds and tomato slices.
  10. Bake in the preheated oven for 35-40 minutes, until the center is set. A toothpick inserted in the middle should come out clean.
  11. Allow the quiche to cool for 10-15 minutes before slicing and serving garnished with extra fresh basil.

Use fresh ingredients for maximum flavor. Customize your veggie selection as desired. Allow the quiche to rest for easier slicing.

Breakfast
American
easy brunch, healthy quiche, Herb-Infused Crustless Zucchini Quiche, plant-based recipe, quiche recipe, vegetable quiche

Filed Under: Breakfast

Irresistible Air Fryer Donut Bites for Sweet Moments

August 11, 2025 by grace bellamy Leave a Comment

The first bite of these Air Fryer Donut Bites feels like a warm hug on a Sunday morning; I can almost hear the laughter of friends gathered around the kitchen, eagerly waiting for something sweet and comforting. What makes these mini donuts truly special is their simplicity— whipped together using just four ingredients and in under 15 minutes, they’re perfect for a quick breakfast or a delightful snack. Plus, with the air fryer blessing us with a healthier twist on the traditional donut, you can treat yourself without the guilt! Are you ready to heat up that air fryer and indulge in a sweet adventure? Let’s dive in!

Why Are Air Fryer Donut Bites Amazing?

Quick and Easy: Prepared in just 15 minutes, these Air Fryer Donut Bites come together effortlessly, perfect for busy mornings!

Healthier Twist: Using the air fryer gives you a delicious taste without the excess oil.

Irresistible Flavor: The cinnamon-sugar coating adds a warm and cozy touch that everyone will love.

Versatile Snack: Enjoy them as a breakfast treat, an afternoon pick-me-up, or even for a fun party dessert!

Ready to create more joy in your kitchen? For another quick and delicious option, check out this Cinnamon Roll Recipe.

Air Fryer Donut Ingredients

With just a few simple ingredients, you can whip up these delightful Air Fryer Donut Bites that will surely become a favorite!

For the Dough

  • Self-raising flour – gives the donut bites their light and fluffy texture.
  • Sweetened Greek yogurt – adds moisture and a hint of sweet tanginess.
  • Granulated sugar – enhances the sweetness for that perfect treat.
  • Ground cinnamon – provides a warm, comforting flavor that pairs beautifully with the sweetness.

For the Drizzle (Optional)

  • Melted chocolate – adds a luscious touch; don’t skip this if you’re a chocolate lover!

Step‑by‑Step Instructions for Air Fryer Donut Bites

Step 1: Make the Dough
In a large mixing bowl, combine 140 g of self-raising flour and 140 g of sweetened Greek yogurt. Stir until a soft dough forms, ensuring all ingredients are blended well, with no dry patches remaining. This should take about 2-3 minutes. The dough will be slightly sticky but manageable, setting you up for delicious Air Fryer Donut Bites!

Step 2: Knead the Dough
Transfer the dough to a lightly floured surface and knead gently for about 2 minutes until it is smooth and elastic. If the dough feels too sticky, rub a little oil on your hands to help prevent sticking while you work. You’re looking for a soft and pliable texture, which is essential for those delightful donut bites.

Step 3: Shape the Donuts
Divide the dough into two equal portions, rolling each into a log approximately 1 inch thick. Cut each log into small pieces weighing 8-12g and roll them into smooth donut balls. Ensure they are uniform in size for even cooking in the air fryer, as this will lead to perfectly puffed Air Fryer Donut Bites.

Step 4: Preheat the Air Fryer
Preheat your air fryer to 180°C (350°F) for about 5 minutes. While it’s heating, lightly brush the air fryer basket with oil to prevent sticking. This step is crucial for achieving that golden-brown exterior on your Air Fryer Donut Bites.

Step 5: Air Fry the Donuts
Toss the shaped donut balls in melted butter, then place them carefully in the preheated air fryer basket, ensuring there’s space between each piece for even airflow. Air fry for 5 minutes, or until they puff up and turn a beautiful golden brown, making your kitchen smell irresistible.

Step 6: Coat the Donuts
As soon as the Air Fryer Donut Bites are done, remove them and coat them while warm in melted butter. Roll each donut in a cinnamon-sugar mixture to ensure an even coating. The warmth will help the sugar adhere and create a deliciously sweet crust that brings out the magic of these delightful bites!

How to Store and Freeze Air Fryer Donut Bites

Room Temperature: Enjoy your Air Fryer Donut Bites fresh, but if you have leftovers, store them in an airtight container at room temperature for up to 2 days.

Fridge: For longer freshness, keep them in the refrigerator for up to 5 days in a sealed container to maintain their soft texture.

Freezer: Freeze the donut bites in a single layer on a tray, then transfer to a freezer bag for up to 3 months. Reheat in the air fryer to restore warmth and texture.

Reheating: To enjoy your Air Fryer Donut Bites again, reheat them in the air fryer at 160°C (320°F) for about 3-5 minutes until warmed through.

Air Fryer Donut Variations

Feel free to let your creativity shine in the kitchen by customizing these delightful Air Fryer Donut Bites to your liking!

  • Gluten-Free: Substitute self-raising flour with a gluten-free blend for a lighter option that everyone can enjoy.
  • Vegan: Swap Greek yogurt for a plant-based yogurt and use maple syrup in place of granulated sugar for an egg-free treat.
  • Flavor Infusion: Add a splash of vanilla extract to the dough to elevate the flavor profile with a sweet, aromatic touch.
  • Fruity Twist: Incorporate mashed bananas or applesauce into the dough for a subtle fruity flavor—perfect for a morning boost!
  • Spice It Up: Experiment with different spices like nutmeg or pumpkin spice to give your donut bites a unique and seasonal twist.

For an extra indulgent treat, consider dusting the finished donut bites with powdered sugar or cacao powder, adding a lovely visual contrast and delightfully sweet flavor. The endless possibilities mean you’ll never get bored with these Air Fryer Donut Bites! If you’re looking for more sweet adventures, don’t forget to check out my Cinnamon Roll Recipe to keep the cozy vibes going.

Expert Tips for Air Fryer Donut Bites

Perfectly Measure: Ensure you measure the flour and yogurt accurately; too much flour can lead to dense bites, while too little may affect the dough’s consistency.

Knead Gently: Kneading should be light and quick; don’t over-knead, as this can toughen the dough and alter the texture of your Air Fryer Donut Bites.

Space Them Out: Leave enough space between each donut in the air fryer basket; overcrowding will prevent them from rising properly and achieving that delightful fluffiness.

Monitor Cooking Time: Every air fryer varies slightly, so keep an eye on the donuts towards the end of the cooking time to avoid overcooking. They should be puffed and golden!

Cinnamon-Sugar Coating: For a balanced sweetness, coat the warm Air Fryer Donut Bites generously but avoid excess dripping butter to prevent a soggy layer.

What to Serve with Air Fryer Donut Bites

Delight in more than just sweetness by creating a beautifully balanced meal around these comforting little treats!

  • Fresh Fruit Salad: A medley of vibrant, juicy fruits adds a refreshing contrast and brightens up your plate beautifully.
  • Coffee or Tea: Pairing your donut bites with a warm cup of coffee or herbal tea enhances the cozy experience of enjoying a sweet moment.
  • Savory Omelet: A fluffy omelet filled with cheese and vegetables provides a hearty balance to the sweetness of your donut bites.
  • Yogurt Parfait: Layer creamy yogurt with granola and berries for a delightful balance of texture and flavors; it’s filling yet light!
  • Chocolate Dipping Sauce: For a decadent touch, serve melted chocolate alongside to dip your donut bites; a chocolate lover’s dream!
  • Vanilla Ice Cream: The creamy, cold nature of ice cream perfectly complements the warm, fluffy donut bites for a delightful contrast.
  • Cinnamon Latte: Enjoy a cozy experience by pairing your bites with a creamy cinnamon latte, adding warmth and sweetness to your snack time.
  • Nut Butter: Offering almond or peanut butter as a dip brings a rich, nutty flavor and a satisfying creaminess that pairs well with the donuts.
  • Milkshake: A thick chocolate or vanilla milkshake transforms your meal into a fun, indulgent treat, perfect for cozy gatherings!

Make Ahead Options

These Air Fryer Donut Bites are perfect for meal prep enthusiasts! You can prepare the dough up to 24 hours in advance; simply combine the self-raising flour and Greek yogurt as directed in the instructions, knead it, and wrap it tightly in plastic wrap before refrigerating. You can also shape the donut balls ahead of time and store them in an airtight container in the fridge for up to 3 days. When you’re ready to enjoy your sweet treats, just air fry them directly from the fridge—no need to thaw! This way, you’ll enjoy fresh, fluffy donut bites that are just as delicious with minimal effort, saving you precious time during busy mornings.

Air Fryer Donut Bites Recipe FAQs

How do I know if my ingredients are fresh enough to use?
Absolutely! When selecting your self-raising flour, check for any clumps or weird odors—if the flour feels gritty or smells musty, it’s best to toss it. For the sweetened Greek yogurt, look for glossy packaging, and be wary of any bulging lids or dark spots; these can indicate spoilage. Yogurt should have a smooth texture and fresh, creamy scent for perfect Air Fryer Donut Bites!

What’s the best way to store leftovers?
Very simple! For airtight storage, pop your Air Fryer Donut Bites in an airtight container, where they’ll stay fresh at room temperature for up to 2 days. If you want them to last longer, you can store them in the fridge for about 5 days. Just make sure the container is sealed to keep those bite-sized delights soft and fluffy!

Can I freeze my Air Fryer Donut Bites?
Absolutely! To freeze these delicious treats, first lay them out in a single layer on a baking tray. Pop them in the freezer for about 1-2 hours, or until they’re firm. Then, transfer the frozen donut bites to a freezer bag, squeezing out as much air as possible. They can be frozen for up to 3 months! When you’re ready to enjoy, just reheat in the air fryer at 160°C (320°F) for 3-5 minutes for that just-made taste.

What should I do if my donut dough feels too sticky?
No worries, my friend! If your dough is too sticky to manage, I’d suggest rubbing a little olive oil on your hands before handling it. You can also sprinkle a bit more self-raising flour on your work surface during shaping to make it easier to roll into those perfect little balls. Just remember, a gentle touch is key to preventing them from being dense or tough!

Are these donut bites suitable for people with dietary restrictions?
Very much so! These Air Fryer Donut Bites are made with simple ingredients, but make sure to check if anyone has allergies to gluten (as they contain flour) or dairy (from the yogurt). For a gluten-free version, you might experiment with a gluten-free flour blend. If you’re looking for alternatives to Greek yogurt, try a dairy-free option like coconut yogurt, which would add a unique flavor twist!

Can I add different flavors or toppings?
Absolutely! The more the merrier! Feel free to enhance your Air Fryer Donut Bites by adding vanilla extract or even a pinch of nutmeg for a different twist. For toppings, you could change up the cinnamon-sugar by rolling them in a mixture of cocoa powder and sugar for a chocolatey delight, or drizzle with caramel for added sweetness. Don’t hesitate to get creative!

Irresistible Air Fryer Donut Bites for Sweet Moments

These Air Fryer Donut Bites are quick, easy, and delicious, perfect for sweet moments.

  • Air Fryer

For the Dough

  • 140 g self-raising flour
  • 140 g sweetened Greek yogurt
  • 2 tbsp granulated sugar
  • 1 tsp ground cinnamon

For the Drizzle (Optional)

  • 50 g melted chocolate (adds a luscious touch)

Step-by-Step Instructions

  1. In a large mixing bowl, combine 140 g of self-raising flour and 140 g of sweetened Greek yogurt. Stir until a soft dough forms.
  2. Transfer the dough to a lightly floured surface and knead gently for about 2 minutes until smooth and elastic.
  3. Divide the dough into two equal portions, rolling each into a log approximately 1 inch thick and cut into small pieces weighing 8-12g.
  4. Preheat your air fryer to 180°C (350°F) for about 5 minutes and brush the basket with oil.
  5. Toss the shaped balls in melted butter and place them in the air fryer basket, air frying for 5 minutes.
  6. Remove the Air Fryer Donut Bites when done and coat them in melted butter and cinnamon-sugar mixture.

Store any leftovers in an airtight container at room temperature for up to 2 days or in the fridge for longer freshness.

Dessert
American
Air Fryer Donut, Donut Bites, easy dessert, Healthy Treat, Quick Snack, sweet

Filed Under: Dessert

Savor the Crunch: Smashburger Quesadillas You’ll Love

August 11, 2025 by grace bellamy Leave a Comment

Late-night cravings? We’ve all been there, and that’s how my Smashburger Quesadillas came to life! Imagine the delight of a juicy burger nestled inside a crispy tortilla, combining two of our favorite comfort foods into one drool-worthy treat. This recipe not only promises a quick prep time of just 10 minutes but also makes for a perfect crowd-pleaser at your next gathering. Whipping up these Smashburger Quesadillas means you can say goodbye to greasy takeout and hello to delicious homemade goodness—without the fuss. Who knew burger night could be this easy and fun? Are you ready to transform your dinner routine?

Why Are Smashburger Quesadillas Amazing?

Savory Delight: The succulent ground beef paired with melty cheese creates an indulgent flavor explosion.
Quick and Easy: Perfect for when you’re short on time, this meal comes together in just 20 minutes!
Versatile Toppings: Customize your quesadillas by adding your favorite burger toppings, from pickles to onions.
Crowd-Pleaser: Ideal for game day or family dinners, everyone will love this fusion of flavors.
Comfort Food Reinvented: Say goodbye to boring takeout—these quesadillas deliver mouthwatering satisfaction with every bite. For more fun recipes, check out my guide on homemade quesadillas.

Smashburger Quesadillas Ingredients

Get ready to dive into this mouthwatering creation!

For the Quesadillas
• 1 lb ground beef – The star of the show, providing juicy flavor that embodies a classic burger.
• Salt, pepper, garlic powder – Essential seasonings that enhance the taste of the beef for a satisfying bite.
• 4 large flour tortillas – The perfect vessel for wrapping up all that deliciousness, ensuring a crispy finish.
• 1 cup shredded cheddar or American cheese – Melts beautifully, adding creaminess that complements the savory beef.

For Serving (Optional)
• Pickles – Adds a tangy crunch that brightens up each bite, making your quesadillas even more delightful.
• Diced onions – A fresh touch that elevates the flavor, bringing a classic burger essence to the dish.
• Burger sauce – Drizzle or dip for extra zing, enhancing the overall experience of these incredible Smashburger Quesadillas!

Step‑by‑Step Instructions for Smashburger Quesadillas

Step 1: Preheat Your Cooking Surface
Begin by heating a large skillet or griddle over medium-high heat, allowing it to reach a hot temperature that will sear the ground beef perfectly. This should take about 3-5 minutes. You want to hear a sizzle when you place the beef down. This initial heat is crucial to ensure your Smashburger Quesadillas have that deliciously crispy exterior.

Step 2: Prepare the Beef on Tortillas
While your skillet is heating, take a small handful of ground beef and press it directly onto one half of each tortilla. Be sure to season generously with salt, pepper, and garlic powder to enhance the flavor. This should only take a minute or two. Lay the beefy side down onto the hot skillet, ensuring each tortilla is ready to transform into a scrumptious quesadilla.

Step 3: Cook the Beef Side Down
Cook the tortillas with the beef side down for 2–3 minutes, until the beef is browned and you can see the juices starting to bubble. Peek beneath to check for a rich, golden-brown color—this indicates perfect doneness and flavor development. The aroma should be mouthwatering, signaling that your Smashburger Quesadillas are on their way to becoming something special.

Step 4: Flip and Add Cheese
Once the meat is beautifully browned, carefully flip each tortilla over to cook the cheese side. Immediately sprinkle a generous handful of shredded cheddar or American cheese over the cooked beef. Fold the tortilla in half, covering the cheese and meat, and press down gently with a spatula. This should only take about a minute as you wait for the cheese to melt and the tortilla to become golden and crispy.

Step 5: Grill Until Crispy
Continue grilling both sides of the folded quesadilla for an additional 2-3 minutes until they develop a crispy exterior and the cheese is gooey and melted. Keep an eye on the color—you’re aiming for a delightful golden-brown that signals perfection. The tempting smell of the Smashburger Quesadillas will surely have everyone hungry and waiting.

Step 6: Slice and Serve
Once nicely crispy, carefully remove the quesadillas from the skillet and let them rest for a minute. Using a sharp knife or pizza cutter, slice each quesadilla into wedges for easy serving. You can serve these irresistible Smashburger Quesadillas with your favorite burger toppings like pickles, diced onions, or a drizzle of burger sauce for an extra burst of flavor. Enjoy!

What to Serve with Smashburger Quesadillas

Elevate your meal by pairing these delightful quesadillas with tasty sides and drinks that enhance their flavors.

  • Crispy French Fries: Perfect for soaking up any extra juices, these golden fries add a satisfying crunch to your plate.
  • Guacamole: This creamy dip balances the savory notes of the quesadillas with a rich, fresh taste that’s simply irresistible.
  • Chili Con Queso: A cheesy, spicy dip that invites a flavor explosion, pairing perfectly with the quesadillas for a comforting bite.
  • Coleslaw: A crunchy, tangy salad provides a refreshing contrast, cutting through the richness while adding a delightful crunch.
  • Tomato Salsa: Fresh and zesty, this vibrant salsa complements the quesadillas beautifully, adding a pop of color and brightness.
  • Iced Tea: A refreshing drink choice that quenches your thirst and complements the bold flavors of the quesadillas without overpowering them.
  • Brownies: End on a sweet note with fudgy brownies, offering a deliciously rich dessert that everyone will adore after the savory feast.

Expert Tips for Smashburger Quesadillas

• Perfectly Browned Beef: Ensure the ground beef is well-browned before flipping. This step is crucial for achieving the rich flavor that makes Smashburger Quesadillas irresistible.

• Crispy Tortillas: Use medium-high heat to get that golden, crispy exterior. If the skillet isn’t hot enough, the quesadillas may turn out soggy.

• Cheese Variety: Feel free to mix cheeses for added flavor! Cheddar and American combo melts perfectly, but pepper jack adds a spicy twist.

• Avoid Overfilling: Don’t overstuff your quesadillas. A small handful of beef and cheese works best for easy flipping and to prevent tearing.

• Resting Time: Allow the quesadillas to cool for a minute after grilling. This helps the cheese set slightly, making them easier to slice and enjoy!

How to Store and Freeze Smashburger Quesadillas

Fridge: Store leftover quesadillas in an airtight container in the fridge for up to 3 days. Reheat in a skillet over medium heat for a few minutes to restore their crispiness.

Freezer: For longer storage, wrap individual quesadillas tightly in plastic wrap and then in aluminum foil. They can be frozen for up to 2 months.

Reheating: To reheat frozen Smashburger Quesadillas, let them thaw in the fridge overnight, then warm them in a skillet until heated through and crispy.

Serving Fresh: Enjoy quesadillas straight from the skillet for the best texture and flavor. They’re best consumed fresh but can still be delightful when reheated!

Smashburger Quesadillas Variations

Feel free to mix and match these ideas to create the ultimate quesadilla just for you!

  • Dairy-Free: Substitute dairy cheese with a plant-based cheese alternative for a creamy yet guilt-free delight.
    This swap ensures that everyone can enjoy these Smashburger Quesadillas without compromising on flavor.

  • Spicy Kick: Add jalapeño slices or a dash of hot sauce while grilling for an added kick.
    If you love heat, this tweak will keep your taste buds dancing and elevate your meal to the next level.

  • Veggie-Loaded: Incorporate sautéed bell peppers and onions for a colorful, hearty twist.
    Not only does this add nutritional value, but it also brings in a beautiful sweetness that balances the savory beef.

  • Ground Turkey: Swap ground beef with ground turkey for a leaner option that’s just as satisfying.
    This variation still delivers juicy goodness, making it a healthier alternative perfect for any day.

  • Crunchy Texture: Add crushed tortilla chips inside the quesadilla for an extra crunch.
    This delightful twist gives your Smashburger Quesadillas an unexpected texture, creating a delightful experience with every bite!

  • BBQ Flavor: Mix in BBQ sauce with the ground beef during cooking for a smoky, tangy flavor.
    Embracing this twist not only amps up the taste but also transports your quesadilla to the backyard grill vibes.

  • Sweet & Savory: Toss in some caramelized onions or a hint of brown sugar to play with flavors.
    This adds a sweet note that beautifully contrasts the savory elements, making your quesadilla truly gourmet.

  • Loaded Toppings: Go wild with toppings! Think diced tomatoes, avocado, and a dollop of sour cream for a fresh touch.
    Adding these crowd-pleasers turns your quesadillas into a feast that’s filled with textures and flavors everyone will love.

Don’t forget, for more delicious ideas, check out my tips on easy quesadilla variations and how to make delicious burger sauces. Enjoy customizing your Smashburger Quesadillas!

Make Ahead Options

These Smashburger Quesadillas are perfect for busy weeknights when you need to save time while enjoying delicious homemade food. You can prep the ground beef mixture and season it up to 24 hours in advance. Simply store it in an airtight container in the refrigerator to keep it fresh. Additionally, consider assembling the quesadillas (without cooking) and wrapping them tightly in plastic wrap; they can be refrigerated for up to 3 days. When you’re ready to serve, just heat a skillet over medium-high and cook each quesadilla for about 5-7 minutes until crispy and melty. This way, you’ll have restaurant-quality Smashburger Quesadillas on the table with minimal effort!

Smashburger Quesadillas Recipe FAQs

How do I select the best ground beef for Smashburger Quesadillas?
Absolutely! I recommend choosing ground beef with an 80/20 fat ratio. This ensures a juicy, flavorful filling without being overly greasy. Look for a bright red color without any dark spots, which indicates freshness. Purchasing from a trusted butcher can also make a significant difference in quality.

What’s the best way to store leftover Smashburger Quesadillas?
Store leftover quesadillas in an airtight container in the fridge for up to 3 days. To maintain their delicious crispiness, reheat them in a skillet over medium heat for a few minutes—this will keep the exterior golden and crispy while warming the filling perfectly.

Can I freeze Smashburger Quesadillas, and if so, how?
Yes, you can! For the best results, wrap each quesadilla tightly in plastic wrap and then in aluminum foil to protect them from freezer burn. They can be stored in the freezer for up to 2 months. When you’re ready to enjoy them, thaw in the fridge overnight, and then reheat them in a skillet until they’re hot and crispy.

What should I do if my quesadillas are soggy after cooking?
If your quesadillas turn out soggy, it might be due to the skillet not being hot enough when you started cooking, or using too much filling. For your next batch, ensure your skillet is properly preheated, and avoid overstuffing them. Cooking over medium-high heat helps achieve that crispy texture that makes Smashburger Quesadillas so enjoyable!

Are Smashburger Quesadillas suitable for my gluten-free diet?
Certainly! Just swap out the flour tortillas for gluten-free tortillas made from corn or alternative flours. Additionally, ensure that your seasonings and any condiments are gluten-free. This way, you can still enjoy the delicious flavors without compromising your dietary needs.

Savor the Crunch: Smashburger Quesadillas You’ll Love

Smashburger Quesadillas combine juicy burgers and crispy tortillas for a delicious crunchy treat.

  • large skillet
  • spatula
  • sharp knife
  • Pizza Cutter

For the Quesadillas

  • 1 lb ground beef (The star of the show, providing juicy flavor.)
  • to taste salt (Essential seasoning.)
  • to taste pepper (Essential seasoning.)
  • to taste garlic powder (Essential seasoning.)
  • 4 large flour tortillas (Perfect for wrapping.)
  • 1 cup shredded cheddar or American cheese (Melts beautifully for creaminess.)

For Serving (Optional)

  • pickles (Adds a tangy crunch.)
  • diced onions (Elevates flavor.)
  • burger sauce (Drizzle or dip for extra flavor.)

Cooking Instructions

  1. Preheat your skillet over medium-high heat for 3-5 minutes.
  2. Press ground beef onto half of each tortilla and season. Place beef side down on the skillet.
  3. Cook tortillas for 2–3 minutes until beef is browned.
  4. Flip tortillas, sprinkle cheese over beef, fold and press with spatula. Cook until cheese melts.
  5. Grill both sides for an additional 2-3 minutes until crispy.
  6. Slice into wedges and serve with toppings.

For best texture and flavor, enjoy quesadillas straight from the skillet.

Main Dishes
American
burger, comfort food, easy dinner, game day, quesadillas, Smashburger Quesadillas

Filed Under: Main Dishes

Savor Garlic Parmesan Zucchini & Squash in Just 30 Minutes

August 11, 2025 by grace bellamy Leave a Comment

As the sizzling sound of garlic fills my kitchen, I can’t help but feel a rush of excitement—it’s time for my Garlic Parmesan Zucchini & Squash Medley! This dish is not just a delicious way to showcase fresh summer veggies; it’s also an absolute lifesaver for busy nights when you crave something healthy yet satisfying. In just 30 minutes, you’ll create a colorful bowl of zucchini and squash, perfectly tender and awash with the nutty richness of parmesan. Whether you’re feeding the family or just treating yourself, this medley pairs well with any meal, proving that healthy eating can be both simple and delightful. Curious about how to whip this up with minimal fuss? Let’s dive into the recipe!

Why is Garlic Parmesan Zucchini & Squash a Must-Try?

Flavorful Delight: This Garlic Parmesan Zucchini & Squash Medley bursts with the rich aroma of garlic and the savory punch of parmesan, elevating your vegetable side to gourmet status in a snap.

Quick Preparation: In just 30 minutes, you can have a nutritious dish ready to enjoy, making it perfect for busy weeknights.

Healthy Choices: Packed with vitamins and low in calories, it’s a guilt-free comfort that won’t derail your healthy eating goals.

Versatile Side Dish: Ideal alongside grilled chicken or fish, this medley complements any main dish, making meal planning a breeze.

Crowd-Pleasing Option: Perfect for family dinners or casual gatherings, everyone—from kids to adults—will be reaching for seconds!

Don’t forget to explore other healthy vegetable options like our Roasted Vegetable Medley or try serving it alongside a refreshing Quinoa Salad for a complete meal experience.

Garlic Parmesan Zucchini & Squash Ingredients

For the Medley

  • Zucchini – 2 medium zucchinis, sliced into half-moons for a tender crunch.
  • Yellow Squash – 2 medium yellow squash, sliced into half-moons, adding vibrant color to your dish.
  • Olive Oil – 3 tablespoons to ensure the veggies are sautéed to perfection without sticking.
  • Garlic – 3 cloves minced for a savory base that enhances the flavor of the dish.
  • Salt – 1/2 teaspoon to elevate the natural flavors of the zucchini and squash.
  • Black Pepper – 1/4 teaspoon for a subtle hint of heat and added depth of flavor.
  • Parmesan Cheese – 1/2 cup grated to provide a creamy, cheesy coating that makes this medley irresistible.
  • Fresh Parsley – 2 tablespoons chopped for a fresh, herbal note that brightens the dish.

Let the delightful aromas of Garlic Parmesan Zucchini & Squash fill your kitchen as you prepare this easy, satisfying dish!

Step‑by‑Step Instructions for Garlic Parmesan Zucchini & Squash

Step 1: Prepare the Vegetables
Start by washing the two medium zucchinis and two medium yellow squash under cool running water. Slice them into 1/4-inch thick half-moons using a sharp knife and a cutting board. Ensure even thickness for uniform cooking; set the sliced vegetables aside, ready to shine in your Garlic Parmesan Zucchini & Squash Medley.

Step 2: Sauté the Garlic
Heat 3 tablespoons of olive oil in a large skillet over medium heat. Once shimmering, add 3 minced garlic cloves and sauté for about 1 minute until fragrant, stirring constantly. Watch for the garlic to turn a light golden color—it should not brown. This fragrant base will elevate the flavor of your Garlic Parmesan Zucchini & Squash.

Step 3: Add the Zucchini and Squash
Carefully add the sliced zucchini and yellow squash to the skillet, stirring to coat them in the garlicky oil. Season with 1/2 teaspoon salt and 1/4 teaspoon black pepper. Cook for 8-10 minutes while occasionally stirring, until the vegetables are tender but still vibrant and crisp. Look for slight browning on the edges for that perfect caramelization.

Step 4: Incorporate the Parmesan Cheese
Remove the skillet from heat and sprinkle 1/2 cup of grated parmesan cheese over the warm sautéed vegetables. Gently toss everything together to coat the zucchini and squash in the melted cheese. The residual heat will help the cheese melt beautifully, infusing the Garlic Parmesan Zucchini & Squash with creamy goodness.

Step 5: Garnish and Serve
Transfer the colorful medley to a serving dish, ensuring the cheese is evenly distributed. Finish with a sprinkle of freshly chopped parsley for a pop of color and freshness. Serve your Garlic Parmesan Zucchini & Squash warm, and watch it become a favorite at your family table!

Garlic Parmesan Zucchini & Squash Variations

Customize your Garlic Parmesan Zucchini & Squash Medley to suit your taste buds and dietary preferences!

  • Dairy-Free: Substitute nutritional yeast for parmesan to keep the cheesy flavor while making it dairy-free. It adds a nutty, savory twist!
  • Spicy Kick: Add red pepper flakes to the garlic while sautéing for a touch of heat that brings the dish to life. Your dinner guests will be thrilled with the added warmth!
  • Herb-Infused: Toss in fresh herbs like thyme or basil during the last minute of cooking for an aromatic twist. Fresh herbs not only enhance the flavor but also add lovely colors.
  • Roasted Option: Roast the zucchini and squash in the oven at 425°F for 20 minutes before adding cheese for a caramelized flavor profile. This method brings out the natural sweetness of the vegetables!
  • Lemon Zest: Finish with a sprinkle of lemon zest before serving for a bright, fresh note that complements the richness of the parmesan beautifully. The burst of citrus will elevate your dish!
  • Adding Protein: Stir in some cooked chicken or chickpeas for a heartier meal that’s satisfying and protein-packed. This makes it a complete dish that’s great for lunch or dinner!
  • Nutty Flavors: Top with crushed walnuts or almonds for added crunch and healthy fats. The nutty texture contrasts beautifully with the tender veggies.

Explore these variations to make the Garlic Parmesan Zucchini & Squash Medley your own! Don’t forget to pair it with a tasty main like our Roasted Vegetable Medley or a light Quinoa Salad for a delicious and fulfilling meal.

Expert Tips for Garlic Parmesan Zucchini & Squash

  • Choose Fresh Veggies: Select firm zucchinis and squash with shiny skin. Avoid overripe ones, as they can be watery and less flavorful.

  • Perfect Cooking Time: Ensure you cook the zucchini and squash just until tender—about 8-10 minutes. Overcooking can result in mushy vegetables.

  • Experiment with Cheese: For extra flavor, consider mixing different cheeses like mozzarella or feta with the parmesan in your Garlic Parmesan Zucchini & Squash medley.

  • Adjust Seasoning: Taste as you go! Feel free to adjust the salt and pepper to suit your family’s preferences or to accommodate any dietary needs.

  • Add Extra Color: Boost the visual appeal by including colorful bell peppers or cherry tomatoes, tossed in while sautéing the zucchini and squash.

What to Serve with Garlic Parmesan Zucchini & Squash Medley

Elevate your meal with delightful pairings that complement the vibrant flavors and textures of this vegetable medley.

  • Creamy Mashed Potatoes: The buttery richness of mashed potatoes contrasts beautifully with the light crunch of zucchini and squash. A warm, comforting addition to any plate.

  • Grilled Chicken: Juicy grilled chicken adds a hearty protein element, creating a satisfying balance alongside the fresh, garlicky veggies. Season it with herbs to enhance the overall flavor profile.

  • Quinoa Salad: A light quinoa salad tossed with fresh veggies and lemon dressing offers a refreshing and healthful companion. It adds a chewy texture that harmonizes nicely with the tender medley.

  • Garlic Bread: Crispy garlic bread brings a delightful crunch and aromatic flavor, perfect for scooping up the cheesy zucchini and squash. Your guests will enjoy mopping up every last bit.

  • Roasted Salmon: The rich, flaky texture of roasted salmon provides a luxurious complement to the simplicity of the Garlic Parmesan Zucchini & Squash, making for an elegant dining experience.

  • Simple Green Salad: A bright, crisp salad with mixed greens, cucumbers, and a light vinaigrette can cleanse the palate, balancing the richness of the parmesan. It’s a refreshing contrast.

  • Lemonade or Iced Tea: Refreshing drinks like lemonade or iced tea serve to brighten your meal and quench your thirst, enhancing the flavors of the vegetables. They’re great for summer dining.

  • Chocolate Mousse: For dessert, a silky chocolate mousse offers a decadent finish to your meal. Its richness contrasts perfectly with the light vegetable medley.

Make Ahead Options

These Garlic Parmesan Zucchini & Squash Medley ingredients are perfect for meal prep enthusiasts! You can slice the zucchinis and yellow squash up to 24 hours in advance. Simply store them in an airtight container in the refrigerator to keep them crisp and fresh. Additionally, you can mince the garlic and store it in a small container, preventing browning and maintaining its fragrant aroma. When you’re ready to serve, sauté the garlic in olive oil as per the recipe and add the prepped squash. This way, you’ll enjoy the same delicious dish with minimal effort, making dinner time a breeze on busy nights!

Storage Tips for Garlic Parmesan Zucchini & Squash

  • Room Temperature: Serve your Garlic Parmesan Zucchini & Squash warm and enjoy within 2 hours. Otherwise, it’s best to refrigerate leftovers promptly.

  • Fridge: Store any uneaten medley in an airtight container in the fridge for up to 3 days. This keeps the flavors intact while minimizing moisture loss.

  • Freezer: For longer storage, you can freeze the Garlic Parmesan Zucchini & Squash medley for up to 2 months. Cool completely, then place in a freezer-safe bag or container before sealing.

  • Reheating: Reheat in a skillet over medium heat, adding a splash of olive oil to revive that delicious flavor. Heat until warmed through, about 5-7 minutes.

Garlic Parmesan Zucchini & Squash Recipe FAQs

How do I choose ripe zucchini and yellow squash?
Absolutely! When selecting zucchini and yellow squash, look for firm, shiny skins without any dark spots or blemishes. The vegetables should feel heavy for their size; avoid those that are soft or have blemishing, as these could be overripe.

How should I store leftover Garlic Parmesan Zucchini & Squash?
To store your Garlic Parmesan Zucchini & Squash, simply place any leftovers in an airtight container and refrigerate. It will keep well for up to 3 days. Make sure it cools to room temperature before sealing to prevent moisture buildup inside the container.

Can I freeze Garlic Parmesan Zucchini & Squash?
Yes, you can freeze this medley for up to 2 months! Allow the dish to cool completely after cooking. Once cooled, transfer it to a freezer-safe bag or container, ensuring to remove as much air as possible before sealing. When you’re ready to enjoy, thaw overnight in the fridge, then reheat in a skillet.

What should I do if my squash becomes mushy when cooking?
If your zucchini or squash turns mushy, it’s likely been overcooked. Make sure to follow the recommended cooking time of 8-10 minutes, stirring occasionally, until just tender. If it happens again, try cooking at a slightly lower heat or reduce the time to prevent mushiness.

Are there any allergy considerations for Garlic Parmesan Zucchini & Squash?
Great question! This recipe contains dairy (parmesan cheese), so it isn’t suitable for those with lactose intolerance or a dairy allergy. You can substitute with a dairy-free cheese alternative if desired. Always check other ingredients for allergen risks, especially if serving to guests with dietary restrictions.

Can I add other vegetables to the Garlic Parmesan Zucchini & Squash?
Very much! You can enhance your Garlic Parmesan Zucchini & Squash by adding other veggies like bell peppers, cherry tomatoes, or even asparagus. Just ensure that any added vegetables have similar cooking times to keep everything perfectly tender. Enjoy experimenting!

Savor Garlic Parmesan Zucchini & Squash in Just 30 Minutes

Enjoy a delicious Garlic Parmesan Zucchini & Squash medley packed with flavor and ready in just 30 minutes!

  • large skillet
  • cutting board
  • sharp knife

Medley

  • 2 medium zucchinis (sliced into half-moons)
  • 2 medium yellow squash (sliced into half-moons)
  • 3 tablespoons olive oil
  • 3 cloves garlic (minced)
  • 1/2 teaspoon salt
  • 1/4 teaspoon black pepper
  • 1/2 cup parmesan cheese (grated)
  • 2 tablespoons fresh parsley (chopped)

Preparation Steps

  1. Wash the zucchinis and yellow squash under cool running water. Slice into 1/4-inch thick half-moons using a sharp knife and a cutting board.
  2. Heat olive oil in a large skillet over medium heat. Once shimmering, add minced garlic and sauté for about 1 minute until fragrant.
  3. Add the sliced zucchini and yellow squash to the skillet, stir to coat in the garlicky oil, and season with salt and black pepper. Cook for 8-10 minutes until tender.
  4. Remove from heat and sprinkle grated parmesan cheese over the sautéed vegetables. Toss gently to coat.
  5. Transfer to a serving dish and garnish with fresh parsley.

Enjoy your Garlic Parmesan Zucchini & Squash warm. Store leftovers in an airtight container in the fridge for up to 3 days.

Side Dishes
American
garlic, Healthy, Parmesan, Quick, Squash, Zucchini

Filed Under: Side Dishes

Delicious Gyeran Mari: A Flavorful Korean Egg Roll Treat

August 11, 2025 by grace bellamy Leave a Comment

As I whisked the eggs, a comforting aroma wafted through my kitchen, transporting me back to sunny mornings spent enjoying homemade Gyeran Mari. This delightful Korean rolled omelette isn’t just a treat for the senses; it’s a quick and satisfying dish that redefines breakfast or brunch. Packed with protein and vibrant veggies, it’s perfect for those of us who crave a wholesome meal without the fuss. With just a few ingredients and a mere 10 minutes of your time, you can whip up this crowd-pleaser that’s sure to impress family or guests alike. Are you ready to roll up your sleeves and dive into this deliciously simple recipe?

Why is Gyeran Mari a Must-Try?

Simplicity at Its Best: With only 5 basic ingredients, this recipe is a breeze to make, perfect for both beginners and seasoned cooks alike.

Quick Prep and Cook Time: In just 10 minutes, you can have a delicious, protein-packed meal on your table. It’s ideal for busy mornings or spontaneous dinner plans.

Versatility Galore: Feel free to mix in your favorite veggies or proteins, such as bell peppers or cheese, making it a versatile dish for any palate.

Crowd-Pleasing Appeal: This delightful rolled omelette looks as good as it tastes and is sure to impress guests at brunch or family dinners.

Healthful Ingredients: Packed with nutrients from eggs and fresh veggies, Gyeran Mari offers a healthy alternative to takeout or processed meals. For more quick and tasty recipes, check out our quick breakfast ideas.

Gyeran Mari Ingredients

• Get ready to create this flavorful Korean egg roll!

For the Omelette

  • 5 medium eggs – The star of the dish, full of protein and flavor.
  • 1 green onion, chopped – Adds a fresh and slightly sweet onion flavor.
  • 2 tbsp carrot, chopped or grated – Brings a pop of color and sweetness to balance the dish.
  • 1/4 tsp salt – Enhances the natural flavors of all the ingredients.
  • 1/8 tsp black or white pepper – A dash of spice to elevate the taste.
  • 1 tsp neutral oil – Prevents sticking and helps achieve that perfect, golden color.

Enjoy the delightful fusion of flavors as you prepare this delicious Gyeran Mari!

Step‑by‑Step Instructions for Gyeran Mari

Step 1: Whisk the Eggs
Begin by cracking 5 medium eggs into a mixing bowl. Add 1/4 teaspoon of salt and 1/8 teaspoon of black or white pepper. Use a whisk to blend the mixture until it’s fully combined and frothy, taking about 1–2 minutes. Then, fold in the chopped green onions and grated or chopped carrots, ensuring they’re evenly distributed throughout the egg mixture.

Step 2: Heat the Pan
Place a 10-inch non-stick pan over low heat, adding 1 teaspoon of neutral oil. Allow the oil to warm for about 1 minute, ensuring it fully coats the bottom of the pan and warms without smoking. The oil should shimmer slightly, indicating it’s ready. This step is vital for achieving that perfect, golden exterior on your Gyeran Mari.

Step 3: Cook the First Layer
Pour 1/3 of the egg mixture into the heated pan, spreading it evenly across the surface. Cook for approximately 2–3 minutes, or until the edges begin to set while the top remains slightly runny. Keep an eye on the color, aiming for a bright yellow hue that signifies readiness for rolling.

Step 4: Roll the Omelette
Using a rice paddle or spatula, gently lift the edges of the omelette. As the top firms up, start rolling it towards one side of the pan, taking care not to disturb the cooked edges. Aim to create a tight roll, which will give your Gyeran Mari its signature shape. This should take another minute until the majority of the egg is cooked.

Step 5: Add More Egg Mixture
Once the first roll is complete, gently push the rolled omelette to the far side of the pan. Pour in the next 1/3 of the egg mixture, tilting the pan slightly to fill any empty spaces. Cook for another 2–3 minutes, allowing the edges to set and the bottom to turn golden. The aroma of the cooking Gyeran Mari will fill your kitchen beautifully.

Step 6: Repeat the Rolling
After the second layer firms up, roll the omelette again towards the untouched side of the pan, ensuring you keep the roll tight. This should only take about a minute as the mixture continues to cook through. Securely pulling the omelette back will create an impressive layered effect, characteristic of delightful Gyeran Mari.

Step 7: Final Layer and Rest
For the last time, pour in the remaining 1/3 of the egg mixture, tilting the pan where necessary. Allow it to cook until just set, approximately 2 minutes. Once fully cooked, gently pull the omelette again to create a cohesive roll. Transfer the completed Gyeran Mari to a cool surface and let it rest for a couple of minutes to firm up.

Step 8: Slice and Serve
Once rested, take a sharp knife and cut the rolled omelette into 6 to 8 pieces, revealing the beautiful layers within. You can serve your Gyeran Mari warm or allow it to cool completely before storing it in an airtight container. These delightful slices make for a perfect snack or meal addition!

Make Ahead Options

These Gyeran Mari are perfect for meal prep enthusiasts! You can whisk together the eggs, salt, pepper, and veggies up to 24 hours in advance, storing the mixture in the refrigerator until you’re ready to cook. This way, all the chopping and mixing is done, saving you valuable time on busy mornings. When you’re ready to enjoy your Gyeran Mari, simply heat the pan with oil and cook the egg mixture as outlined in the recipe. This approach not only keeps the flavors fresh but ensures a delightful cooking experience—your result will be just as delicious! By preparing ahead, you’ll have a protein-packed meal ready with minimal effort.

Expert Tips for Gyeran Mari

Perfect Your Rolling Technique: Practice makes perfect! Roll the omelette tightly but gently, so it maintains its shape while cooking all layers evenly.

Watch the Heat: Keep the pan on low heat; cooking too fast can lead to burnt edges while leaving the inside undercooked. Patience is key for Gyeran Mari.

Avoid Overcrowding: Only add a third of the egg mixture at a time. This ensures each layer cooks consistently and forms beautiful layers within the roll.

Choose the Right Pan: A non-stick pan is essential for easy release. If you don’t have one, make sure to grease the pan well to prevent sticking.

Customize Your Fillings: Feel free to add other vegetables or cooked proteins to the egg mixture. Just remember to chop them finely for even cooking!

What to Serve with Gyeran Mari

Imagine a delightful spread that complements the gentle flavors of this Korean egg roll—this meal will surely awaken your senses!

  • Steamed Rice: The soft, fluffy texture of rice balances the savory richness of Gyeran Mari, creating a comforting and wholesome meal.
  • Kimchi: This zesty side adds a layer of spice, enhancing the flavor profile while providing a refreshing crunch that contrasts beautifully with the omelette.
  • Sautéed Spinach: A touch of garlic and a drizzle of soy sauce can elevate sautéed spinach, offering a nutritious, green counterpart to the egg-filled delight. The earthy taste ties the meal together.
  • Miso Soup: A warm bowl of miso soup complements Gyeran Mari perfectly; the umami flavors meld seamlessly, offering a nurturing touch to your dining experience.
  • Fresh Salad: A light, crisp salad with a tangy dressing refreshes the palate and balances the hearty omelette, adding brightness to your meal.
  • Soy Sauce: Drizzle a bit of soy sauce over your Gyeran Mari for an extra dash of flavor; the saltiness and richness bring out the best in the dish.
  • Chilled Green Tea: Sipping on this refreshing beverage enhances the overall dining experience, offering a soothing contrast that’s perfect for this light meal.
  • Fruit Platter: Serve a colorful assortment of fresh fruits like melon, strawberries, or orange slices for a sweet finish that cleanses the palate after the savoriness of Gyeran Mari.

Gyeran Mari Variations & Substitutions

Feel free to get creative with this delightful dish, as customizing Gyeran Mari will make every bite a unique experience!

  • Dairy-Free: Substitute with almond or soy milk to keep the eggs fluffy without dairy.
  • Spicy Kick: Add diced jalapeños or a dash of sriracha for a fiery flavor boost.
  • Cheesy Delight: Stir in your favorite cheese, like cheddar or feta, for a creamy and hearty twist.
  • Veggie Power: Incorporate sautéed mushrooms or spinach for an extra layer of nutrition and flavor.
  • Protein Boost: Add cooked shrimp or shredded chicken to amp up the protein content and make it even more satisfying.
  • Herb Infusion: Mix in some fresh herbs like cilantro or basil to enhance the dish with a fragrant touch.
  • Sweet Touch: Include a tablespoon of finely chopped bell peppers or peas for a hint of sweetness and vibrant color.
  • Texture Twist: Swap out the carrots for zucchini or sweet potatoes for a different texture and taste.

With these variations, you can tailor Gyeran Mari to suit your cravings or dietary needs, transforming this simple dish into something truly special! For more inspiration, check out our quick recipes or vegetarian options!

How to Store and Freeze Gyeran Mari

Fridge: Store any leftover Gyeran Mari in an airtight container in the fridge for up to 3 days to maintain its freshness and flavor.

Freezer: For longer storage, wrap the cooled Gyeran Mari tightly in plastic wrap and place it in a freezer-safe bag or container. It can be frozen for up to 1 month.

Reheating: To reheat, simply microwave slices for 30-60 seconds until warmed through. Avoid overheating to keep the texture moist and enjoyable.

Serving Tips: For the best taste, let Gyeran Mari sit at room temperature for a few minutes after reheating before serving, ensuring it regains some of its original fluffiness.

Gyeran Mari Recipe FAQs

What type of eggs should I use for Gyeran Mari?
Absolutely! Using medium-sized eggs is perfect since they provide the right balance of protein and moisture. Fresh eggs with bright, uncracked shells will yield the best results. If you’re in doubt, check for freshness by placing an egg in a bowl of water; if it sinks, it’s fresh!

How should I store leftover Gyeran Mari?
Very! To keep your Gyeran Mari fresh, store any leftovers in an airtight container in the fridge for up to 3 days. This helps maintain its taste and texture. When you’re ready to enjoy it again, just give it a quick reheat!

Can I freeze Gyeran Mari?
Definitely! For freezing, let the Gyeran Mari cool completely after cooking. Then, wrap it tightly in plastic wrap and place it inside a freezer-safe bag or container. It can be frozen for up to 1 month. When you’re ready to use it, thaw it in the refrigerator overnight and reheat in the microwave.

What should I do if my Gyeran Mari is sticking to the pan?
Oh no! If you find it sticking, it may be that the oil wasn’t hot enough before adding the egg mixture, or perhaps the pan wasn’t truly non-stick. Make sure to preheat your pan and oil well before pouring in the eggs. If you’re using a non-stick pan, double-check that it’s not scratched or damaged.

Is Gyeran Mari safe for my gluten-sensitive family members?
Absolutely! The primary ingredients—eggs, vegetables, and seasonings—are naturally gluten-free. Just be mindful of any additional sauces or condiments you serve alongside it. Always double-check labels if you’re using pre-packaged items to ensure they meet gluten-free requirements.

How can I prevent my Gyeran Mari from becoming rubbery?
Very important question! To avoid a rubbery texture, cook your Gyeran Mari on low heat and take your time with each layer. Rushing the cooking process can lead to chewy eggs. Aim for the eggs to be slightly undercooked when you roll them, as they continue to set from residual heat. Enjoy that light, fluffy texture!

Delicious Gyeran Mari: A Flavorful Korean Egg Roll Treat

This Gyeran Mari is a delightful Korean rolled omelette packed with protein and veggies, perfect for breakfast or brunch.

  • 10-inch non-stick pan
  • Mixing Bowl
  • Whisk
  • spatula or rice paddle

For the Omelette

  • 5 medium eggs (The star of the dish, full of protein and flavor.)
  • 1 green onion, chopped (Adds a fresh and slightly sweet onion flavor.)
  • 2 tbsp carrot, chopped or grated (Brings a pop of color and sweetness to balance the dish.)
  • 1/4 tsp salt (Enhances the natural flavors of all the ingredients.)
  • 1/8 tsp black or white pepper (A dash of spice to elevate the taste.)
  • 1 tsp neutral oil (Prevents sticking and helps achieve that perfect, golden color.)

Step-by-Step Instructions for Gyeran Mari

  1. Whisk together the eggs, salt, and pepper until frothy, then fold in the green onions and carrots.
  2. Heat the non-stick pan over low heat and add the neutral oil, allowing it to warm.
  3. Pour in 1/3 of the egg mixture and cook until the edges begin to set, about 2–3 minutes.
  4. Gently roll the omelette towards one side of the pan, creating a tight roll.
  5. Add the next 1/3 of the egg mixture and cook until golden, about 2–3 minutes.
  6. After rolling the second layer, cook the final 1/3 of the mixture until just set, about 2 minutes.
  7. Transfer the rolled Gyeran Mari to a cool surface and let it rest for a couple of minutes.
  8. Slice the omelette into 6 to 8 pieces and serve warm or at room temperature.

Store leftovers in an airtight container in the fridge for up to 3 days. For longer storage, freeze wrapped Gyeran Mari for up to 1 month.

Breakfast
Korean
Breakfast, brunch, Gyeran Mari, Korean egg roll, omelette, quick recipe

Filed Under: Breakfast

Creamy Roasted Garlic Hollandaise to Elevate Your Brunch

August 10, 2025 by grace bellamy Leave a Comment

Walking into my kitchen, the alluring aroma of roasted garlic fills the air, instantly lifting my spirits. Today, I’m excited to share a delightful twist on a classic—Roasted Garlic Hollandaise Sauce. This simple yet sophisticated sauce can elevate any dish, making it a must-have for your culinary repertoire. With just a few ingredients and only five minutes of your time, you can create a creamy masterpiece that’s perfect for brunch or a weeknight dinner. One of the best perks? It pairs beautifully with everything from Eggs Benedict to seasonal vegetables, adding a gourmet touch that will impress guests and family alike. Are you ready to transform your meals with this easy recipe? Let’s dive into the rich, buttery world of Roasted Garlic Hollandaise!

Why is Roasted Garlic Hollandaise a Favorite?

Elevate your dishes effortlessly with this quick and easy recipe! In just 5 minutes, you can whip up a luxurious sauce that adds a depth of flavor to any meal. Roasted garlic lends a mellow, comforting taste that transforms simple brunch staples like Eggs Benedict into gourmet fare. With its creamy texture and versatile nature, it pairs wonderfully with vegetables, fish, and more. Plus, impress your guests without the fuss of complicated techniques! Want to explore more delightful twists? Consider trying it over asparagus or drizzle it on your favorite fish dish for an unforgettable experience.

Roasted Garlic Hollandaise Ingredients

Get ready to create a culinary masterpiece with these ingredients!

For the Sauce

  • Unsalted butter – This is the base that brings richness; make sure it’s very hot for the perfect emulsion.
  • Egg yolks – They provide a creamy texture; using fresh eggs makes all the difference in flavor.
  • Roasted garlic – It adds a sweet, mellow flavor that elevates the classic hollandaise to a new level.
  • Lemon juice – Freshly squeezed is best; it brings brightness and balances the richness of the butter.
  • Salt – Enhances all flavors; adjust to your taste for that perfect seasoning in your Roasted Garlic Hollandaise.

Step‑by‑Step Instructions for Roasted Garlic Hollandaise

Step 1: Melt the Butter
Begin by melting 1/2 cup of unsalted butter in the microwave or on the stovetop. If using a microwave, heat it in 20-second increments until hot and foamy, taking care not to brown it. On the stovetop, use medium heat in a small saucepan. Once melted, keep an eye on it, as this will be the rich foundation of your Roasted Garlic Hollandaise.

Step 2: Blend the Ingredients
While the butter melts, gather your blender and add 4 egg yolks, 4 cloves of roasted garlic, 1 tablespoon of fresh lemon juice, and 1/4 teaspoon of salt to the blender jar. Secure the lid tightly and blend on high until the mixture is smooth and well combined, which should take about 20-30 seconds.

Step 3: Combine and Emulsify
With the blender running, carefully drizzle the hot melted butter through the flap on the lid. This process should take about 60-90 seconds, allowing the sauce to thicken and become creamy. Be sure to watch the mixture closely, as it will turn into a luscious Roasted Garlic Hollandaise that perfectly emulsifies.

Step 4: Serve the Sauce
Once the sauce has reached a thick, creamy consistency, turn off the blender and transfer your Roasted Garlic Hollandaise to a serving bowl. This sauce is best enjoyed fresh, so be ready to serve it warm over your favorite dishes like Eggs Benedict or steamed vegetables.

What to Serve with Roasted Garlic Hollandaise

Imagine sitting down to a table adorned with vibrant colors and rich aromas, where each dish harmonizes beautifully with every bite.

  • Creamy Mashed Potatoes: These buttery potatoes provide a comforting base that balances the zesty richness of hollandaise, making it a delightful pairing.

  • Poached Eggs: A classic choice! The silky texture of poached eggs combined with the sauce creates a heavenly burst of flavor and creaminess.

  • Steamed Asparagus: Lightly seasoned asparagus topped with Roasted Garlic Hollandaise adds elegance and a fresh crunch that brightens your plate.

  • Grilled Salmon: The mild flavors of salmon enhance the sweet notes of roasted garlic, creating a sun-kissed seafood dish full of depth.

  • Crusty French Bread: Serve a warm loaf on the side to soak up any extra hollandaise, turning each bite into a comforting, indulgent treat.

  • Mixed Green Salad: A fresh, crisp salad with a light vinaigrette creates a refreshing contrast, perfectly balancing the indulgence of hollandaise sauce.

  • Sparkling Wine: Kick your brunch up a notch with a glass of sparkling wine! Its effervescence complements and elevates the culinary experience.

  • Chocolate Mousse: End on a sweet note with a rich chocolate mousse. This dessert provides a decadent finish that rounds out a delightful meal.

Expert Tips for Roasted Garlic Hollandaise

  • Butter Temperature: Ensure the butter is very hot and foamy for a proper emulsion; too cool, and the sauce might not thicken properly.

  • Fresh Ingredients: Use fresh egg yolks and roasted garlic for the best flavor; stale ingredients can lead to bland results.

  • Slow Drizzle: When adding butter, drizzle it slowly into the blender. If added too quickly, the sauce may break and separate.

  • Avoid Over-blending: Blend until just combined and thickened; over-blending can change the texture of your Roasted Garlic Hollandaise.

  • Fixing Breakage: If your sauce breaks, whisk in boiling water, one drop at a time, to bring it back together smoothly.

How to Store and Freeze Roasted Garlic Hollandaise

Refrigerator: Store your Roasted Garlic Hollandaise sauce in an airtight container for up to 3 days. It’s best enjoyed fresh, but can be kept cool for later use.

Freezer: If you’d like to make it ahead, freeze the sauce in portions using ice cube trays. This way, you can thaw just what you need, enjoying the savory flavor later.

Reheating: Gently reheat the sauce on low heat, stirring frequently to avoid separating. If it thickens too much, whisk in a small amount of hot water to restore its creamy consistency.

Serving Suggestions: When ready to serve, use it as a delightful drizzle over your favorite dishes like Eggs Benedict, roasted veggies, or seafood for a culinary touch!

Roasted Garlic Hollandaise Variations

Feel free to make this Roasted Garlic Hollandaise your own with these tasty twists and substitutions!

  • Dairy-Free: Use vegan butter instead of unsalted butter for a delightful dairy-free option that still tastes rich and creamy.

  • Spicy Kick: Add a pinch of cayenne pepper or a dash of hot sauce for a gentle heat that enhances the flavors without overpowering them.

  • Herb-Infused: Blend in fresh herbs like dill or chives to bring a fresh touch and vivid color to your sauce, complementing fish and vegetables beautifully.

  • Citrus Zing: Swap out the lemon juice for lime juice or add a zesty splash of orange juice for a unique citrus profile that brightens your sauce.

  • Savoriness Boost: Incorporate a teaspoon of Dijon mustard in the blending step. This adds depth and tanginess, giving a gourmet flair ideal for Eggs Benedict.

  • Nutty Flavor: For an intriguing twist, drizzle in a bit of toasted sesame oil once the sauce is blended. It adds warmth and complexity perfect for Asian-inspired dishes.

  • Smoky Flavor: Use smoked salt instead of regular salt to infuse a rich, smoky flavor that pairs wonderfully with roasted vegetables and grilled meats.

  • Veggie-Packed: Blend in a handful of cooked spinach or kale for a nutrient boost. This not only adds flavor but also colors your sauce beautifully, making it a hit for health-conscious diners.

For additional delightful options, you might enjoy exploring ways to enhance classic dishes like Eggs Benedict or playing with seasonal flavors in your favorite vegetable recipes. Each suggestion opens new doors to elevate your dining experience!

Make Ahead Options

Preparing your Roasted Garlic Hollandaise in advance can be a game-changer for busy home cooks! You can make the sauce up to 24 hours ahead of time by following the same blending steps, then allow it to cool and transfer it to a tightly sealed container. To maintain quality, refrigerate the sauce during this time. When you’re ready to serve, gently reheat the sauce over low heat, stirring continuously. If the sauce has thinned, whisk in a splash of warm water to bring it back to its luscious consistency. This way, you’ll have a creamy, flavorful hollandaise ready to elevate your brunch or dinner with minimal effort!

Roasted Garlic Hollandaise Sauce Recipe FAQs

Which garlic should I use for this recipe?
Absolutely! Using roasted garlic is essential for this recipe, as it adds a sweet, mellow flavor to your Roasted Garlic Hollandaise. Look for garlic that is fully roasted until it’s soft and golden, which brings out the best taste. You can easily roast garlic at home by wrapping a whole bulb in foil and baking it at 400°F (200°C) for 30-35 minutes.

How long can I store Roasted Garlic Hollandaise in the refrigerator?
You can keep your Roasted Garlic Hollandaise sauce in an airtight container in the refrigerator for up to 3 days. Just be sure to store it tightly covered to maintain its freshness. If you find that it thickens while chilled, simply whisk in a few teaspoons of warm water when ready to enjoy!

Can I freeze Roasted Garlic Hollandaise sauce?
Absolutely! To freeze your Roasted Garlic Hollandaise, pour it into an ice cube tray or silicone molds. Once frozen, transfer the cubes to a zip-top freezer bag. They can be stored for up to 3 months. When you’re ready to use them, thaw the desired number of cubes in the fridge overnight and gently reheat with a splash of warm water until creamy.

What should I do if the sauce breaks?
No worries! If your sauce separates or “breaks,” you can bring it back together by whisking in boiling water one teaspoon at a time. Start with just a few drops; this will help emulsify the sauce again. If it seems too thick, continue adding small amounts of hot water until your desired consistency is reached.

Can I use this sauce for dietary restrictions, like allergies?
If you have dietary restrictions or allergies to eggs or dairy, I’m afraid this Roasted Garlic Hollandaise sauce may not be suitable, as it contains both. For a vegan alternative, consider using an avocado-based sauce for creaminess, or explore recipes using nutritional yeast to simulate the richness of hollandaise.

What should I serve with Roasted Garlic Hollandaise?
Very! This sauce pairs beautifully with a variety of dishes. You can drizzle it over classic Eggs Benedict, steamed asparagus, roasted broccoli, or even grilled fish. The creamy sauce elevates these meals, turning them into gourmet experiences!

Creamy Roasted Garlic Hollandaise to Elevate Your Brunch

This Roasted Garlic Hollandaise is a quick and easy sauce that elevates any dish, perfect for brunch or dinner.

  • Blender
  • Microwave or Stovetop
  • small saucepan

For the Sauce

  • 1/2 cup Unsalted butter (Very hot for perfect emulsion)
  • 4 large Egg yolks (Fresh for better flavor)
  • 4 cloves Roasted garlic (Adds sweet, mellow flavor)
  • 1 tablespoon Fresh lemon juice (Best when freshly squeezed)
  • 1/4 teaspoon Salt (Adjust to taste)

Preparation

  1. Melt the butter in the microwave or on the stovetop.
  2. In a blender, combine egg yolks, roasted garlic, lemon juice, and salt.
  3. With the blender running, drizzle in the hot melted butter.
  4. Turn off the blender and transfer the sauce to a serving bowl.

Best served fresh; store in an airtight container for up to 3 days and freeze for longer storage.

Sauce
American
brunch, easy recipes, Gourmet, homemade, Roasted Garlic Hollandaise, sauce

Filed Under: Souce

Savory Baked Cauliflower: Crispy Perfection Every Time

August 10, 2025 by grace bellamy Leave a Comment

As I stood in my kitchen, a head of cauliflower caught my eye, begging to be transformed into something crispy and delightful. That’s how this Baked Cauliflower recipe came to life—a simple yet satisfying way to enjoy veggies any time of day. With a quick prep time of just 10 minutes, this dish is perfect for those busy nights when you crave a home-cooked meal but don’t want to fuss with complicated recipes. Plus, roasting brings out the natural sweetness of the cauliflower, making it a hit with everyone at the table. Whether enjoyed on its own or tossed in alongside grains and proteins, this dish promises to become a go-to side. Curious about how to elevate your weeknight dinners with a healthy twist? Let’s dive into this deliciously crispy adventure!

Why Try Baked Cauliflower Tonight?

Crispy, golden perfection: When you roast cauliflower, it transforms into a crunchy delight that’s irresistibly tasty.

Quick prep time: You can whip this up in just 10 minutes, making it ideal for a busy weeknight meal.

Versatile side dish: Pair it with your favorite grains, proteins, or dips like ranch or garlic aioli for a delightful addition to any meal.

Healthy indulgence: This dish is low in calories but high in flavor, allowing you to savor every bite guilt-free.

Family-friendly appeal: Even those who typically shy away from veggies will love this crispy cauliflower—it’s sure to be a crowd-pleaser!

Explore more about how to enjoy this as a main or side dish with our tips on serving suggestions.

Baked Cauliflower Ingredients

Elevate your meals with these flavorful components!

For the Cauliflower

  • Cauliflower – Cut into florets to create crispy bites that will please any palate.
  • Olive oil – Essential for roasting; helps achieve that golden, crispy texture.
  • Salt – Enhances flavor; be generous for the best results!
  • Black pepper – Adds a subtle kick; freshly ground will give the best flavor.
  • Garlic powder – Brings depth to the dish; you can use fresh garlic for an extra punch.
  • Paprika – A dash provides a hint of smokiness and vibrant color.

For the Optional Topping

  • Grated Parmesan cheese – Sprinkling this on during the last few minutes of baking adds a rich, savory layer and enhances your baked cauliflower experience.

Step‑by‑Step Instructions for Baked Cauliflower

Step 1: Preheat the Oven
Begin by preheating your oven to 425°F (220°C). This high temperature is crucial for achieving that crispy roasted texture in your baked cauliflower. While the oven heats up, arrange your cooking space and gather the necessary ingredients, ensuring everything is ready for a smooth cooking experience.

Step 2: Prepare the Cauliflower
In a large mixing bowl, place the chopped cauliflower florets and drizzle them generously with olive oil. Sprinkle in salt, black pepper, garlic powder, and paprika. Use your hands or a large spoon to toss everything together until each floret is well-coated with this flavorful mixture, enticing your golden roasted cauliflower to come to life.

Step 3: Arrange on a Baking Sheet
Line a rimmed baking sheet with parchment paper to prevent sticking and make cleanup a breeze. Spread the seasoned cauliflower florets in a single layer on the prepared baking sheet, making sure not to overcrowd them. This step is essential as it allows each piece to roast evenly, maximizing that delightful crispiness.

Step 4: Roast the Cauliflower
Place the baking sheet in the preheated oven and roast the cauliflower for 25–30 minutes. Halfway through the roasting time, take a moment to flip the florets with a spatula. You’ll know it’s ready when the cauliflower is crisp on the outside and turns a beautiful golden brown, showcasing its perfectly caramelized edges.

Step 5: Add Parmesan (Optional)
If you’re using grated Parmesan cheese, sprinkle it on the cauliflower during the last 5 minutes of baking. This optional step will introduce a rich, savory flavor that melds beautifully with the roasted cauliflower. Keep an eye on it as it bakes; you want the cheese to melt and turn slightly golden without burning.

Step 6: Serve Your Baked Cauliflower
Once done, carefully remove the baking sheet from the oven and let the baked cauliflower cool slightly. Serve it hot, either as a stand-alone snack or paired with dips like ranch or garlic aioli. This versatile dish can accompany your favorite proteins or grains, making it a delightful addition to any meal.

Expert Tips for Baked Cauliflower

  • Choose Fresh Cauliflower: Look for firm, tightly closed florets. Fresh cauliflower yields the best texture and flavor in your baked cauliflower.

  • Don’t Overcrowd: Spread the cauliflower in a single layer on the baking sheet. Overlapping pieces can steam instead of roast, leading to soggy bites.

  • Tweak Seasonings: Feel free to adjust the spices based on your taste—add cayenne for heat or thyme for earthiness, enhancing your baked cauliflower experience.

  • Watch the Clock: Keep a close eye during the last few minutes of roasting, especially if you’ve added cheese. Burnt cheese can ruin that perfect crispy addition.

  • Reheat for Crispiness: When storing leftovers, reheat in the oven or air fryer for a crispy texture. Microwaving will make your baked cauliflower mushy.

What to Serve with Crispy Roasted Cauliflower

Elevate your dining experience with a delightful assortment of side dishes and pairings that complement each bite of crispy goodness.

  • Quinoa Salad: Packed with protein and fiber, this nutty salad with fresh herbs and lemon complements the roasted flavors while adding a refreshing crunch.

  • Garlic Mashed Potatoes: Creamy and rich, these mashed potatoes create a comforting balance against the crispy texture of the cauliflower, making every bite delightful.

  • Lemon Herb Grilled Chicken: The zesty brightness of grilled chicken harmonizes wonderfully with the savory notes of roasted cauliflower, creating a well-rounded meal.

  • Chickpea Hummus: This smooth, creamy dip adds a burst of flavor and works beautifully as a side option, bringing a different texture and taste to your plate.

  • Roasted Brussels Sprouts: Their slight bitterness and crispy edges pair perfectly with the cauliflower, offering an earthy balance that enchants your taste buds.

  • Garlic Aioli: A luscious dip that pairs exceptionally well with roasted cauliflower, this creamy addition brings an extra layer of flavor and keeps your palate excited.

  • Sweet Potato Fries: Soft and slightly sweet, these fries create a playful contrast with the savory cauliflower, making every meal feel like a special occasion.

  • Red Wine: A fruity red wine merges beautifully with the earthy flavors, making it a perfect complement to bring out the dish’s savory notes.

  • Dark Chocolate Mousse: Need a sweet finish? The richness of dark chocolate mousse adds an elegant touch, rounding out your meal with a satisfying dessert.

How to Store and Freeze Baked Cauliflower

Fridge: Let your baked cauliflower cool completely before transferring to an airtight container. It will stay fresh in the refrigerator for up to 4 days.

Freezer: For longer storage, place cooled baked cauliflower in a freezer-safe container or bag. Enjoy its flavor and texture for up to 1 month.

Reheating: To bring back that crispy perfection, reheat in the oven or air fryer until warmed through, rather than using a microwave, which can make it soggy.

Serving Suggestion: Pair your reheated baked cauliflower with fresh dips or alongside your favorite mains for an easy, tasty meal.

Baked Cauliflower Variations & Substitutions

Feel free to switch things up and create your own delicious spin on this baked cauliflower recipe!

  • Dairy-Free: Substitute the Parmesan cheese with nutritional yeast for a cheesy flavor that keeps your dish vegan-friendly.
  • Extra Crunch: Toss in some breadcrumbs before roasting to add an irresistible texture contrast that family and friends will love.
  • Spicy Kick: Add a pinch or two of cayenne pepper or red pepper flakes to boost the heat for those who enjoy a fiery flavor.
  • Herb Infusion: Experiment with fresh or dried herbs like thyme or rosemary; they will infuse the cauliflower with amazing fragrance and taste.
  • Citrus Zing: Squeeze fresh lemon juice over the roasted cauliflower after baking for a bright, zesty finish that livens up every bite.
  • Hummus Twist: Serve your baked cauliflower with a creamy hummus dip instead of ranch for a Mediterranean-inspired flavor combination.
  • Nutty Delight: Sprinkle chopped almonds or walnuts on top before serving to add a crunchy, nutty profile that complements the cauliflower beautifully.
  • Asian Flair: Drizzle with soy sauce and sprinkle sesame seeds over the hot cauliflower for an Asian-inspired treat that’s both savory and satisfying.

With these variations, you’re sure to keep your baked cauliflower fresh and exciting! For more ways to enhance your meals, check out our serving suggestions and find delicious ideas to pair with your crispy dish.

Make Ahead Options

These Baked Cauliflower florets are a fantastic option for meal prep! You can chop the cauliflower and toss it with olive oil and seasonings up to 24 hours in advance, then refrigerate in an airtight container to prevent moisture buildup. On the day you wish to serve, simply spread it out on a baking sheet and roast at 425°F (220°C) for 25-30 minutes, flipping halfway through for even cooking. If you’re using Parmesan, sprinkle it on during the last 5 minutes for that mouthwatering finish. This approach not only saves time but also ensures that your baked cauliflower retains its delightful crispiness and flavor—just as delicious as if made fresh!

Crispy Roasted Cauliflower Recipe FAQs

How do I choose a ripe cauliflower?
Absolutely! When selecting cauliflower, look for heads that are firm and heavy with tightly bound florets. Avoid any that show dark spots or soft patches, as they may be past their prime. The leaves should be green and fresh, so ensure the whole head looks vibrant and healthy.

How should I store leftover baked cauliflower?
Let your baked cauliflower cool completely before storing it in an airtight container in the refrigerator. It will stay fresh for up to 4 days. If you want to enjoy it later, you can pack it in a freezer-safe container, where it will last for up to 1 month.

Can I freeze baked cauliflower?
Yes, you can freeze baked cauliflower! To do this, allow it to cool completely, then place it in a single layer on a baking sheet and freeze for a couple of hours. Once frozen, transfer the cauliflower into a freezer-safe bag or container, ensuring you remove as much air as possible. When ready to eat, reheat in the oven or air fryer for the best texture.

Why is my roasted cauliflower mushy instead of crispy?
Very good question! If your baked cauliflower turns out mushy, it could be due to overcrowding the baking sheet or not roasting at a high enough temperature. Make sure to spread the florets in a single layer to allow for proper air circulation. Check that your oven is preheated to 425°F (220°C) before placing the tray inside for optimal crispiness.

Can I make this recipe gluten-free?
Absolutely! This roasted cauliflower recipe is naturally gluten-free, as all the ingredients are safe to enjoy for gluten-sensitive individuals. If you prefer mixing in breadcrumbs for extra crunch, just ensure they are gluten-free, and you’re all set to enjoy this dish without worry.

Is it safe for pets?
While roasted cauliflower is generally safe for dogs in moderation, avoid adding any extra seasonings like salt or garlic, as these can be harmful to pets. Always check with your vet if you have concerns about specific ingredients before sharing your baked cauliflower with furry friends.

Savory Baked Cauliflower: Crispy Perfection Every Time

Baked Cauliflower is a quick and healthy side dish that’s irresistibly crispy and full of flavor.

  • Oven
  • Baking Sheet
  • Mixing Bowl
  • parchment paper

For the Cauliflower

  • 1 head Cauliflower (Cut into florets)
  • 3 tablespoons Olive oil (Essential for roasting)
  • 1 teaspoon Salt (Be generous for best results)
  • 1/2 teaspoon Black pepper (Freshly ground preferred)
  • 1 teaspoon Garlic powder (Can use fresh garlic)
  • 1 teaspoon Paprika (Adds smokiness and color)

For the Optional Topping

  • 1/4 cup Grated Parmesan cheese (Adds rich flavor)

Step-by-Step Instructions for Baked Cauliflower

  1. Preheat your oven to 425°F (220°C).
  2. In a large mixing bowl, place the chopped cauliflower florets and drizzle them with olive oil. Sprinkle in salt, black pepper, garlic powder, and paprika. Toss well to coat.
  3. Line a baking sheet with parchment paper and spread the cauliflower in a single layer.
  4. Roast the cauliflower for 25–30 minutes, flipping halfway through, until crisp and golden.
  5. If using, add grated Parmesan cheese during the last 5 minutes of baking.
  6. Remove from the oven and let cool slightly before serving.

Serve hot as a snack or alongside dips. Can be paired with grains or proteins for a complete meal.

Side Dishes
American
Baked Cauliflower, Crispy Cauliflower, healthy side dish, quick recipe, roasted vegetables, Vegetarian Recipe

Filed Under: Side Dishes

Crispy Air Fryer Apple Fries – A Sweet, Guilt-Free Delight

August 10, 2025 by grace bellamy Leave a Comment

There’s something truly magical about the crispiness of a freshly cooked snack—especially when that snack is the delightful Crispy Air Fryer Apple Fries. With just a handful of ingredients, you can whip up this satisfying treat that’s not only quick to prepare but also a great way to enjoy the naturally sweet flavors of apples. I love how these fries offer a healthier twist on traditional desserts, making them a perfect option for both kids and adults looking to swap out fast food for something deliciously homemade. They’re golden, crunchy, and oh-so-dippable, whether you choose caramel sauce for that indulgent flair or vanilla yogurt for a lighter bite. Ready to bite into the joy of making your own crispy apple fries? Let’s get started!

Why are Crispy Apple Fries a Must-Try?

Crispy, Golden perfection awaits you with each bite of these air-fried apple fries, turning simple apples into an exciting snack. Healthier alternative: Satisfy your sweet tooth without the guilt! With a minimal prep time of just 15 minutes, it’s perfect for those busy days or spontaneous cravings. Customizable toppings: Enjoy them with rich caramel or a light vanilla yogurt dip for a refreshing twist. Family-friendly fun: Kids will love this interactive snack, making it a wonderful addition to your next family gathering. Discover more tasty ways to satisfy your cravings by checking out our easy air fryer recipes that everyone will adore!

Crispy Air Fryer Apple Fries Ingredients

• Get ready to create the most delightful snack!

For the Apple Fries

  • 2 large apples – Choose Granny Smith or Honeycrisp for a perfect balance of tartness and sweetness.
  • 1/2 cup all-purpose flour – Helps create a crispy coating that adheres well to the apples.
  • 2 large eggs – Beaten to give a rich and smooth coating to the apple slices.
  • 1 cup panko breadcrumbs – Offers extra crunch; feel free to use regular breadcrumbs if desired.

For the Cinnamon-Sugar Mixture

  • 2 teaspoons cinnamon – Adds warmth and sweetness, making these crispy air fryer apple fries even more irresistible!
  • 2 tablespoons granulated sugar – Balances the cinnamon for a delightful sweet finish.

For Cooking and Serving

  • Cooking spray – Ensures your apple fries get that perfect golden crisp without excessive oil.
  • 1/2 cup caramel sauce (optional) – Perfect for those who want to indulge in a sweet, sticky dip!
  • 1/2 cup vanilla yogurt (optional for a lighter option) – A refreshing choice that pairs beautifully with the spices!

Step‑by‑Step Instructions for Crispy Air Fryer Apple Fries

Step 1: Prepare the Apples
Start by washing and peeling the apples if you prefer them without skin. Slice each apple into wedges, about 1/2 inch thick, removing the core and seeds as you go. This will ensure your crispy air fryer apple fries cook evenly and have a lovely shape to hold all that flavor!

Step 2: Mix the Cinnamon-Sugar
In a small bowl, combine the cinnamon and sugar. Set this sweet mixture aside, as it will add a delightful touch to your crispy air fryer apple fries once they are fully cooked. The aroma of cinnamon will fill your kitchen, increasing the anticipation for your tasty treat!

Step 3: Set Up Your Breading Station
Prepare three bowls for an efficient breading process: one with flour, another with beaten eggs, and the last filled with panko breadcrumbs. Add half of the cinnamon-sugar mixture to the breadcrumbs, stirring well to incorporate. This will give your apple fries an irresistible crispy coating bursting with flavor.

Step 4: Coat the Apple Wedges
Take each apple slice and dredge it in the flour, shaking off any excess. Next, dip the slice into the beaten eggs, ensuring it’s fully coated before pressing it into the breadcrumb mixture. Make sure each slice is evenly coated with breadcrumbs for the perfect crunch. Repeat this step for all apple wedges.

Step 5: Preheat the Air Fryer
Set your air fryer to preheat at 375°F (190°C) for about 3 minutes. This ensures an immediate crispy texture on your apple fries as soon as they enter. The goal is to create that perfectly golden-brown exterior while keeping the apples tender and sweet on the inside!

Step 6: Arrange the Apple Fries
Once preheated, carefully arrange the breaded apple slices in a single layer within the air fryer basket. Be sure to leave a bit of space between each slice to guarantee even cooking and crispiness. Lightly spray the tops of the apple fries with cooking spray to help achieve that perfect crunch!

Step 7: Air Fry the Apple Fries
Cook the apple slices at 375°F for approximately 8 to 10 minutes. Flip them halfway through to ensure even frying. Keep an eye on them; you’re looking for a delicious golden-brown color that signals they are perfectly crispy and ready to snack on.

Step 8: Add Finishing Touches
Once cooked, immediately sprinkle the remaining cinnamon-sugar mixture over the hot crispy air fryer apple fries. This extra layer of flavor will enhance their sweetness. Serve them right away with caramel sauce or a side of vanilla yogurt for dipping, making your snack even more enjoyable!

How to Store and Freeze Crispy Air Fryer Apple Fries

Room Temperature: Enjoy these apple fries immediately for the best taste and texture. If needed, they can sit out for up to 1 hour before becoming less crispy.

Fridge: Store any leftover crispy apple fries in an airtight container in the fridge for up to 3 days. Reheat in the air fryer briefly to regain some crunch.

Freezer: Freeze the breaded but uncooked apple slices in a single layer on a baking sheet, then transfer to a zip-top bag for up to 3 months. Cook directly from frozen, adding a few extra minutes to the air frying time.

Reheating: For best results, reheat leftover crispy air fryer apple fries in the air fryer at 375°F for about 3-5 minutes. Enjoy the crunch as if they were just made!

What to Serve with Crispy Air Fryer Apple Fries

Elevate your homemade treat with delightful accompaniments that will enhance every crunchy bite of your apple fries.

  • Creamy Vanilla Yogurt: A refreshing complement that balances the sweetness of the apple fries, offering a tangy contrast with each dip.
  • Indulgent Caramel Sauce: Drizzle this sticky sweetness over the fries for a treat that feels decadent and indulgent, making each bite heavenly.
  • Crispy Bacon-Wrapped Brussels Sprouts: For a savory touch, these savory bites add a crunchy texture and a tantalizing flavor contrast to the sweetness of the apple fries.
  • Spiced Hazelnut Cookies: Pair these warm, nutty cookies with your fries for a deliciously cozy dessert that’s sure to please everyone in the family.
  • Minty Fruit Salad: Light and refreshing, a mix of fresh fruits with a mint twist enhances the flavors and balances out the richness of the fries.
  • Sparkling Cider or Lemonade: Quench your thirst with these fruity beverages, which bring a bubbly brightness to the table, perfectly accompanying your crispy snack.
  • Decadent Chocolate Fondue: Transform your apple fries into a dessert experience by dipping them in warm, melted chocolate for a luxurious treat.

Let these pairings inspire your next family gathering or snack time, making your crispy air fryer apple fries the star of the meal!

Crispy Air Fryer Apple Fries Variations

Feel free to make these Crispy Air Fryer Apple Fries your own with these delightful twists that will tickle your taste buds!

  • Gluten-Free: Substitute all-purpose flour with a gluten-free blend and use gluten-free breadcrumbs for a similar crunch.

  • Spicy Kick: Add a pinch of cayenne pepper to the cinnamon-sugar mixture for a surprising and exciting heat that balances the sweetness.

  • Nutty Flavor: Mix crushed almonds or walnuts into the panko breadcrumbs for a satisfying crunch and added nutrition. The nutty flavor pairs beautifully with the sweet apples!

  • Dairy-Free: Swap the eggs with a flaxseed meal mixture (1 tablespoon flaxseed + 2.5 tablespoons water, let sit for 5 minutes) for a plant-based option that still coats the apples wonderfully.

  • Fruit Variations: Experiment with other fruits like pears or peaches for a refreshing change of pace. Each fruit brings its own unique flavor and sweetness.

  • Caramelized Toppings: Instead of just sprinkling more cinnamon-sugar afterward, lightly drizzle with warm caramel or a sprinkle of toasty coconut for a tropical twist.

  • Herbal Infusion: Add a dash of freshly grated ginger or a bit of fresh mint to the cinnamon-sugar blend for an aromatic note that’s undeniably captivating.

With just a few simple swaps, you can whip up an entirely new version of this recipe. For more inspirations, check out our delicious easy air fryer recipes for your next homemade treat!

Make Ahead Options

These Crispy Air Fryer Apple Fries are perfect for meal prep enthusiasts! You can prepare the apple slices and coat them in flour, eggs, and breadcrumbs up to 24 hours in advance. Just store the coated slices in an airtight container in the refrigerator to maintain their freshness and prevent browning. When you’re ready to enjoy this delicious treat, simply preheat your air fryer and air fry the apple slices at 375°F for about 8 to 10 minutes until they’re golden and crisp. This way, you save precious time on busy weeknights and still serve up a snack that’s just as delightful as when made fresh!

Tips for the Best Crispy Air Fryer Apple Fries

  • Apple Choice Matters: Use a mix of Granny Smith and Honeycrisp apples for the ideal balance of tartness and sweetness. Avoid overly soft apples as they won’t hold up during frying.
  • Thick Cuts: Slice apples into 1/2 inch wedges. Too thin and they can become mushy, too thick and they may not cook through evenly.
  • Even Coating: Ensure each apple slice is thoroughly coated in flour, egg, and breadcrumbs. This will prevent the coating from falling off during cooking and give you that perfect crispy texture.
  • Do Not Overcrowd: Place apple fries in a single layer in the air fryer basket. Overcrowding leads to uneven cooking and less crispiness, so fry in batches if necessary!
  • Check for Doneness: Keep an eye on the apple fries towards the end of the cooking time. They should be golden and crispy; a quick flip halfway ensures optimum texture.
  • Serve Immediately: These crispy air fryer apple fries are best enjoyed fresh out of the fryer. Pair them with caramel sauce or vanilla yogurt to elevate your snacking experience!

Crispy Air Fryer Apple Fries Recipe FAQs

What type of apples should I use for crispy apple fries?
Absolutely! For the best flavor and texture, I recommend using Granny Smith or Honeycrisp apples. Granny Smith will give a delicious tartness that beautifully contrasts with the sweet cinnamon-sugar coating, while Honeycrisp apples provide a lovely sweetness and crispiness. Avoid overly soft apples, as they can become mushy during cooking.

How should I store leftover crispy apple fries?
Leftover crispy apple fries should be stored in an airtight container in the fridge, where they will stay fresh for up to 3 days. When ready to enjoy again, simply pop them back into the air fryer at 375°F for about 3-5 minutes. This will help restore their crunchiness—trust me, it’s almost like they were just made!

Can I freeze the uncooked apple fries?
Indeed! To freeze your breaded but uncooked crispy apple fries, arrange them in a single layer on a baking sheet and freeze until solid. After that, transfer them to a zip-top bag or airtight container. They can be kept in the freezer for up to 3 months. When you’re ready to cook them, there’s no need to thaw; just add an extra couple of minutes to the cooking time in the air fryer.

What if my apple fries turn out soggy?
If your crispy air fryer apple fries are soggy, it may be due to overcrowding in the air fryer basket. Always arrange the apple slices in a single layer and leave some space between them for optimal air circulation. Additionally, ensure each slice is coated evenly. If they become soggy after storage, reheat them in the air fryer at 375°F for a few minutes to restore their delightful crunch.

Are crispy apple fries safe for kids with food allergies?
Yes! However, it’s essential to check for specific allergies. The main ingredients—apples, eggs, flour, and breadcrumbs—are common allergens. If your child has egg or gluten allergies, consider using egg substitutes (like a flaxseed mixture) and gluten-free breadcrumbs. Always consult your healthcare provider for tailored dietary advice.

How long can I keep my crispy apple fries at room temperature?
These delicious treats are best enjoyed fresh, but they can sit out at room temperature for up to 1 hour. After that, they may start to lose their crispy texture. So, make sure to serve them warm and don’t let them linger too long on the table, especially at gatherings!

Crispy Air Fryer Apple Fries – A Sweet, Guilt-Free Delight

Discover the joy of Crispy Air Fryer Apple Fries, a quick and healthy snack that satisfies sweet cravings.

  • Air Fryer

For the Apple Fries

  • 2 large apples (Choose Granny Smith or Honeycrisp for a perfect balance of tartness and sweetness.)
  • 1/2 cup all-purpose flour (Helps create a crispy coating.)
  • 2 large eggs (Beaten to give a rich coating.)
  • 1 cup panko breadcrumbs (Offers extra crunch.)

For the Cinnamon-Sugar Mixture

  • 2 teaspoons cinnamon (Adds warmth and sweetness.)
  • 2 tablespoons granulated sugar (Balances the cinnamon.)

For Cooking and Serving

  • cooking spray (Ensures crispiness.)
  • 1/2 cup caramel sauce (Optional for dipping.)
  • 1/2 cup vanilla yogurt (Optional for a lighter option.)

Step-by-Step Instructions

  1. Start by washing and peeling the apples if you prefer them without skin. Slice each apple into wedges, about 1/2 inch thick, removing the core and seeds.
  2. In a small bowl, combine the cinnamon and sugar. Set aside.
  3. Prepare three bowls for an efficient breading process: one with flour, one with beaten eggs, and one with panko breadcrumbs mixed with half of the cinnamon-sugar mixture.
  4. Dredge each apple slice in flour, dip in beaten eggs, and press into the breadcrumb mixture, ensuring each slice is evenly coated.
  5. Preheat your air fryer to 375°F (190°C) for about 3 minutes.
  6. Carefully arrange the breaded apple slices in a single layer in the air fryer basket, lightly spraying the tops with cooking spray.
  7. Cook the apple slices at 375°F for approximately 8 to 10 minutes, flipping halfway through until golden-brown.
  8. Once cooked, sprinkle the remaining cinnamon-sugar mixture over the apple fries and serve immediately with caramel sauce or vanilla yogurt.

Enjoy immediately for the best taste and texture. Store leftovers in an airtight container in the fridge for up to 3 days.

Dessert
American
air fryer, apple fries, crispy snack, healthy dessert, quick recipe

Filed Under: Dessert

Savory Chicken Alfredo Lasagna Rolls for Cozy Dinners

August 10, 2025 by grace bellamy Leave a Comment

As I shuffled through my pantry last week, a sudden spark of creativity hit me like the smell of garlic sizzling in olive oil. That’s when I decided to whip up some Chicken Alfredo Lasagna Rolls—a delightful twist on classic comfort food that’s sure to bring everyone to the dinner table. This recipe not only promises a warm hug of creamy textures but also makes for an impressive dish that can dazzle guests or simply make family nights memorable. With quick prep and the ability to easily be made ahead of time, this dish highlights why homemade meals can be a joyful alternative to fast food. Ready to roll your way into a delicious evening? Let’s dive into this heavenly, cheesy creation!

Why are Chicken Alfredo Lasagna Rolls a must-try?

Comforting and satisfying: These rolls combine the beloved flavors of chicken Alfredo with the heartwarming nature of lasagna, providing a comforting meal perfect for any occasion.

Easy to Make: Even if you’re not an expert chef, the step-by-step preparation is simple, allowing anyone to create a homemade masterpiece.

Make-Ahead Friendly: Prep them in advance for stress-free hosting or quick weeknight dinners. Simply bake when you’re ready to serve!

Crowd-Pleaser: They are guaranteed to impress family and friends, making them perfect for gatherings or cozy dinners alike.

Versatile: Feel free to customize with your favorite veggies or proteins for a personal touch or check out how they’re featured in other recipes like Lasagna Soup.

You’ll discover that this dish is not just food; it’s a delightful experience waiting to happen!

Chicken Alfredo Lasagna Rolls Ingredients

Get ready to create a culinary masterpiece with these rich and creamy Chicken Alfredo Lasagna Rolls!

For the Noodles

  • Lasagna noodles – These are the perfect vessels for holding all that cheesy goodness!

For the Filling

  • Cooked chicken, shredded – Leftover rotisserie chicken works exceptionally well for a quick option.
  • Ricotta cheese – This brings a luscious creaminess that complements the other ingredients beautifully.
  • Grated Parmesan cheese – It adds a nutty flavor that elevates the dish!
  • Shredded mozzarella cheese – This melts wonderfully, creating that gooey texture we all love.
  • Garlic powder – Adds depth and flavor without the chopping hassle!
  • Italian seasoning – A delightful blend of herbs that ties everything together.
  • Salt and pepper to taste – Essential for seasoning and enhancing the dish’s overall flavor.

For the Sauce

  • Alfredo sauce – Choose store-bought for convenience or whip up your own for a delicious homemade touch!

For Garnish

  • Fresh parsley – This brightens up the dish and adds a pop of color before serving.

With these ingredients ready, you’ll be all set for a delightful evening filled with the comforting aroma of Chicken Alfredo Lasagna Rolls wafting through your home!

Step‑by‑Step Instructions for Chicken Alfredo Lasagna Rolls

Step 1: Cook the Lasagna Noodles
Bring a large pot of salted water to a boil and add the lasagna noodles. Cook them until al dente, about 8–10 minutes, stirring occasionally. Once done, drain the noodles in a colander and lay them flat on a clean towel to prevent sticking while you prepare the filling.

Step 2: Prepare the Chicken Filling
In a large mixing bowl, combine the shredded chicken, ricotta cheese, 1 cup of shredded mozzarella, grated Parmesan, garlic powder, Italian seasoning, and a pinch of salt and pepper. Mix the ingredients thoroughly until you achieve a creamy and well-blended filling that will make your Chicken Alfredo Lasagna Rolls irresistible.

Step 3: Start Layering the Dish
Spread a thin layer of Alfredo sauce on the bottom of a 9×13-inch baking dish, ensuring you cover the surface evenly. This will prevent the rolls from sticking to the pan and add flavor right from the start.

Step 4: Roll the Lasagna Noodles
Take one cooked lasagna noodle and position it on a flat surface. Spoon about 1/4 cup of the chicken mixture onto one end of the noodle and gently roll it up tightly. Place the rolled noodle seam-side down in the baking dish. Continue this process with the remaining noodles and filling until the dish is full of delightful Chicken Alfredo Lasagna Rolls.

Step 5: Add Sauce to the Rolls
Once all rolls are nestled in the baking dish, pour the remaining Alfredo sauce evenly over the top, ensuring every noodle is generously covered. Finish by sprinkling the remaining shredded mozzarella cheese over the sauce, creating a cheesy layer that will melt beautifully during baking.

Step 6: Bake the Dish
Preheat your oven to 375°F (190°C). Cover the baking dish with aluminum foil to keep the moisture in and prevent over-browning. Bake the lasagna rolls for 25 minutes, then carefully remove the foil. Continue baking for an additional 15–20 minutes, until the cheese is bubbly and golden brown, indicating that your Chicken Alfredo Lasagna Rolls are perfectly cooked.

Step 7: Garnish and Serve
Once baked, take the Chicken Alfredo Lasagna Rolls out of the oven and let them cool for about 5–10 minutes. This resting period helps the rolls set slightly. Before serving, sprinkle fresh parsley over the top for a burst of color and flavor, and enjoy this comforting meal with family and friends!

What to Serve with Chicken Alfredo Lasagna Rolls

Create the perfect dinner ambiance with delicious pairings that complete the warmth of your homemade rolls.

  • Garlic Bread: This crispy delight complements the creamy lasagna, allowing you to soak up every last bit of Alfredo sauce.
  • Caesar Salad: Crisp romaine with a tangy dressing provides a fresh contrast to the richness of the lasagna, enhancing each bite.
  • Sautéed Spinach: Lightly sautéed greens with garlic offer a vibrant pop of color and a healthful balance to your meal.
  • Roasted Vegetables: Sweet, caramelized veggies like carrots and bell peppers add texture and depth, making every plate feel gourmet.
  • Fresh Caprese Salad: The bright flavors of tomatoes, basil, and mozzarella create a refreshing side that cuts through the creamy richness.
  • Wine Pairing: A chilled Chardonnay brings a buttery flavor that echoes the sauce, enhancing the entire dining experience.
  • Dessert Option: End on a sweet note with Tiramisu, providing a lovely contrast to the savory flavors that came before.

With these options, your dinner table will be a delightful feast filled with flavors and textures that harmonize beautifully!

Chicken Alfredo Lasagna Rolls Variations

Feel free to explore these flavorful twists to make the Chicken Alfredo Lasagna Rolls your own!

  • Vegetable-Packed: Add spinach or sautéed mushrooms to the filling for a nutritious boost. This addition enhances flavor while keeping the rolls hearty and satisfying.

  • Spicy Kick: Mix in some crushed red pepper flakes or diced jalapeños for an exciting heat that elevates the flavors. Just a pinch can take your dish from cozy to exhilarating!

  • Italian Sausage: Swap out the chicken for cooked Italian sausage for a savory and robust flavor. This shift adds a delightful twist that any meat lover will appreciate.

  • Gluten-Free: Use gluten-free lasagna noodles to make this dish suitable for those with dietary restrictions. You can enjoy all the comforting goodness without missing out!

  • Creamy Spin: Consider blending some cream cheese into the filling for an extra velvety texture. The result? An even richer experience that will leave everyone wanting more!

  • Herb-Infused: Try adding fresh basil or thyme into your filling for aromatic notes that brighten each bite. Fresh herbs can truly transform a dish!

  • Nut-Free: Skip the dairy by using cashew cream or a vegan cream alternative. This ensures that everyone can enjoy a delicious, comforting meal!

  • Cheesy Delight: Experiment with different cheeses like gouda or fontina for a unique flavor profile that adds depth to the standard mozzarella. The melty surprise awaits in each bite!

These variations not only personalize your Chicken Alfredo Lasagna Rolls, but they also create a fun and interactive cooking experience! If you’re looking for a comforting side dish to accompany your rolls, take a look at my Herb-Infused Garlic Bread or Classic Caesar Salad for a delightful meal pairing!

How to Store and Freeze Chicken Alfredo Lasagna Rolls

Fridge: Store in an airtight container in the refrigerator for up to 3 days. Make sure the rolls are completely cooled before sealing to maintain their texture.

Freezer: For longer storage, freeze the assembled, uncooked rolls wrapped tightly in plastic wrap and aluminum foil for up to 3 months. Thaw in the fridge before baking.

Reheating: To reheat leftovers, place in the microwave or oven. For the oven, cover with foil and heat at 350°F (175°C) for about 20-25 minutes, ensuring they’re heated through.

With these simple storage tips, you can enjoy Chicken Alfredo Lasagna Rolls whenever the craving strikes!

Expert Tips for Chicken Alfredo Lasagna Rolls

Tackle Sticking Noodles: Use plenty of water when boiling the lasagna noodles. Adding a little oil to the water can help prevent sticking!

Don’t Overstuff: Aim for about 1/4 cup of filling per noodle to avoid bursting during baking. Keep the filling comfortable and ensure good rolls.

Quality Sauce Matters: A great Alfredo sauce can elevate your Chicken Alfredo Lasagna Rolls. Try making your own for a richer flavor!

Cover While Baking: Always cover the baking dish with foil in the first phase of baking to keep the rolls moist. Remove it later for a perfect golden finish!

Let It Rest: Allow the dish to cool for a few minutes after baking. This will help set the rolls, making them easier to serve without falling apart.

With these tips in hand, your Chicken Alfredo Lasagna Rolls are bound to be an unforgettable hit!

Make Ahead Options

These Chicken Alfredo Lasagna Rolls are perfect for meal prep, making your busy weeknights a breeze! You can prepare the entire dish up to 24 hours in advance by assembling the rolls and covering them tightly with plastic wrap or aluminum foil to prevent drying out. Simply prepare the filling and roll the noodles the night before; refrigerate them until you’re ready to bake. When it’s time to serve, just pop them into a preheated oven and bake them as directed—no one will know they were made ahead of time! They’ll turn out just as delicious and comforting, ensuring you save precious time on a hectic day.

Chicken Alfredo Lasagna Rolls Recipe FAQs

What kind of chicken should I use for the filling?
Absolutely! You can use any cooked chicken for these rolls, but I often recommend shredded rotisserie chicken because it’s flavorful and saves time. If you prefer, grilled or baked chicken breast also works beautifully. Just ensure it’s cooked and shredded for easy mixing with the other filling ingredients.

How should I store leftover Chicken Alfredo Lasagna Rolls?
Very! Store any leftovers in an airtight container in the refrigerator for up to 3 days. Make sure they cool completely before sealing to preserve the creamy texture. When ready to enjoy, simply reheat them in the microwave or oven for a quick meal!

Can I freeze Chicken Alfredo Lasagna Rolls?
Absolutely! For optimal freshness, freeze the assembled, uncooked rolls by wrapping them tightly in plastic wrap, followed by aluminum foil. This way, they can last up to 3 months in the freezer. When you’re ready for a delicious dinner, simply thaw them in the refrigerator overnight before baking.

What’s the best way to reheat Chicken Alfredo Lasagna Rolls?
The more the merrier! For gentle reheating, place the rolls in a baking dish, cover with foil, and heat in the oven at 350°F (175°C) for about 20-25 minutes. This helps maintain their moisture and ensures they’re heated through. Alternatively, you can use a microwave for a quicker option, but be careful not to overheat!

Any dietary considerations for Chicken Alfredo Lasagna Rolls?
Definitely! If you’re cooking for someone with dietary restrictions, you can substitute ricotta with a dairy-free cheese and use gluten-free lasagna noodles to accommodate those with gluten sensitivities. Always double-check labels for allergens if you’re cooking for friends or family with specific dietary needs.

What can I do if my Chicken Alfredo Lasagna Rolls end up dry?
The best fix for dry rolls is to ensure your layers of Alfredo sauce are generous! If they do come out dry, you can add a little more sauce while reheating to bring back their creamy goodness. Adding a layer of sauce in the baking dish beneath the rolls also helps to keep them moist during baking.

Savory Chicken Alfredo Lasagna Rolls for Cozy Dinners

Delight in these Chicken Alfredo Lasagna Rolls, a cozy, comforting twist on classic lasagna perfect for any dinner occasion.

  • 9×13-inch baking dish
  • Large Pot
  • Mixing Bowl
  • Colander

For the Noodles

  • 12 noodles Lasagna noodles

For the Filling

  • 3 cups Cooked chicken, shredded (Leftover rotisserie chicken works well.)
  • 15 oz Ricotta cheese
  • 1 cup Grated Parmesan cheese
  • 2 cups Shredded mozzarella cheese
  • 1 teaspoon Garlic powder
  • 1 teaspoon Italian seasoning
  • to taste Salt and pepper (Essential for seasoning.)

For the Sauce

  • 2 cups Alfredo sauce (Store-bought or homemade.)

For Garnish

  • 2 tablespoons Fresh parsley (Chopped, for garnishing.)

Step-by-Step Instructions

  1. Cook the lasagna noodles in a large pot of salted boiling water until al dente, about 8–10 minutes. Drain and lay flat.
  2. In a mixing bowl, combine shredded chicken, ricotta cheese, 1 cup shredded mozzarella, Parmesan, garlic powder, Italian seasoning, and salt and pepper.
  3. Spread a thin layer of Alfredo sauce on the bottom of a baking dish.
  4. Take one noodle, spoon about 1/4 cup of filling onto one end, and roll it up tightly; place seam-side down in the dish.
  5. Once all rolls are in the dish, pour remaining Alfredo sauce over them and sprinkle with the remaining mozzarella.
  6. Preheat the oven to 375°F (190°C). Cover with foil and bake for 25 minutes, then uncover and bake for another 15–20 minutes until bubbly.
  7. Let rolls cool for 5–10 minutes, then garnish with parsley before serving.

Use ample water when boiling noodles and consider a quality Alfredo sauce for best results.

Main Dishes
Italian
Chicken Alfredo Lasagna Rolls, comfort food, cozy dinners, crowd-pleaser, easy recipes, make-ahead

Filed Under: Main Dishes

Crispy Zucchini Tots That Will Wow Your Taste Buds

August 9, 2025 by grace bellamy Leave a Comment

As I sifted through my fridge a few days ago, searching for inspiration, a vibrant head of broccoli caught my eye—surely, a star could emerge from this humble veggie! That’s when I decided to whip up some Low Carb Crispy Broccoli Cheese Rounds. These crispy delights are perfect for anyone craving a satisfying snack without the carbs or guilt. With just a handful of ingredients, including cheddar cheese and almond flour, they come together so quickly that they’ll become your new go-to recipe. Not only are they a clever way to sneak in some greens, but these rounds are also utterly versatile—ideal as an appetizer or paired with your favorite dipping sauce. Curious to discover how these little wonders come together? Let’s dive in!

Why You’ll Love These Broccoli Rounds?

Quick and Easy: In just 30 minutes, you’re serving up a healthy treat! Perfect for busy weeknights or unexpected guests.

Flavor-Packed: The blend of cheddar cheese and garlic powder creates a deliciously savory bite that everyone will love.

Low Carb and Guilt-Free: These rounds make enjoying a satisfying snack worry-free, perfect for those on a low-carb lifestyle.

Versatile Serving Options: Serve them as an appetizer, party snack, or alongside your favorite meal, just like my Crispy Zucchini Tots for even more variety!

Healthy Sneak-In: It’s a clever way to include more greens in your diet without sacrificing flavor!

Zucchini Tots Ingredients

• Get ready to make delicious bites!

For the Tots

  • 2 cups grated zucchini – ensure to squeeze out excess moisture for extra crispiness.
  • 1 cup shredded cheese – I love using cheddar for that gooey texture.
  • 1/2 cup almond flour – a great low-carb alternative to regular flour.
  • 2 large eggs – they’ll help bind everything together beautifully.
  • 1/2 tsp garlic powder – enhances the flavor profile in these savory bites.
  • 1/4 tsp salt – adds just the right amount of seasoning.
  • 1/4 tsp black pepper – gives a subtle kick.
  • Cooking spray or olive oil – for greasing the pan and achieving that golden brown finish.

These scrumptious Zucchini Tots are ideal for anyone looking to indulge without the guilt!

Step‑by‑Step Instructions for Zucchini Tots

Step 1: Preheat the Oven
Begin by preheating your oven to 400°F (200°C). This temperature will ensure your Zucchini Tots become perfectly crispy. While the oven heats up, line a baking sheet with parchment paper for easy removal and to keep the tots from sticking.

Step 2: Prepare the Mixture
In a large mixing bowl, combine the grated zucchini, shredded cheese, almond flour, eggs, garlic powder, salt, and black pepper. Use a spatula or wooden spoon to mix until the ingredients are thoroughly combined. The mixture should be moist but hold together when pressed, making it ideal for shaping into tots.

Step 3: Form the Tots
Using a tablespoon, scoop portions of the mixture and shape them into small rounds approximately the size of a golf ball. Place each round on the prepared baking sheet, leaving about an inch of space between them. This ensures they bake evenly and achieve a delightful crispiness.

Step 4: Add the Finishing Touches
For an extra golden brown finish, lightly spray the tops of the formed Zucchini Tots with cooking spray or drizzle them with olive oil. This step is key for achieving that crispy exterior we all love while baking in the oven.

Step 5: Bake the Tots
Place the baking sheet in the preheated oven and bake the Zucchini Tots for 15-20 minutes. About halfway through, carefully flip them to ensure they are evenly baked on both sides, resulting in a beautifully crispy texture that you can’t resist.

Step 6: Cool and Serve
Once golden brown and crispy, remove the Zucchini Tots from the oven and allow them to cool on the baking sheet for a few minutes. This cooling time enhances their firmness, making them easier to handle. Serve warm for a delightful snack or appetizer!

Variations & Substitutions for Zucchini Tots

Feel free to get creative and customize your Zucchini Tots to fit your taste and dietary needs!

  • Dairy-Free: Swap out the cheese for a plant-based alternative. Nutritional yeast can also give a cheesy flavor without the dairy!

  • Gluten-Free: Use a gluten-free flour blend instead of almond flour. This keeps the texture perfect while catering to your dietary preferences.

  • Spicy Kick: Add a pinch of red pepper flakes or cayenne pepper to the mix for a delightful heat that will wake up your taste buds—just be careful not to overdo it!

  • Herb Infusion: Fresh herbs like parsley or basil can infuse your Zucchini Tots with bright flavors. Toss in a handful to take them to the next level!

  • Baked vs. Fried: For an extra crisp, consider lightly frying your tots in a pan with olive oil instead of baking. This brings out their flavor in a whole new way.

  • Quinoa Booster: Mix in some cooked quinoa to introduce a chewy texture and a boost of protein—perfect if you’re looking for a satisfying snack!

  • Sweet Potato Twist: For a sweeter take, substitute some of the zucchini with grated sweet potato. It brings a lovely color and sweetness that pairs perfectly with savory seasonings.

  • Mostly Green: Replace some of the zucchini with grated carrots or spinach. This not only changes the color but adds a nutritious element with a subtle flavor!

Explore these options to make the Zucchini Tots uniquely yours, and don’t forget to check out my Crispy Zucchini Tots for inspiration!

How to Store and Freeze Broccoli Cheese Rounds

Fridge: Store leftover Broccoli Cheese Rounds in an airtight container for up to 3 days. They maintain their flavor and moisture if you cover them properly.

Freezer: For longer storage, freeze these rounds on a baking sheet for 1-2 hours until solid, then transfer to a freezer-safe bag. They’ll last up to 2 months!

Reheating: Reheat in the oven at 350°F (175°C) for about 10-15 minutes until heated through and crispy again. Enjoy them warm for the best taste!

Room Temperature: If serving fresh, allow the rounds to sit at room temperature for no more than 2 hours to ensure food safety.

What to Serve with Low Carb Crispy Broccoli Cheese Rounds?

Elevate your dining experience with delightful additions that will perfectly complement these savory bites.

  • Creamy Avocado Dip: This smooth and rich dip adds a luscious texture and vibrant flavors that enhance the earthy broccoli taste.

  • Fresh Garden Salad: A mix of crunchy greens, cherry tomatoes, and a tangy vinaigrette will brighten up your plate and provide a refreshing contrast.

  • Zesty Marinara Sauce: Its bold flavors and acidity will balance the richness of the cheese, making every bite feel like a gourmet experience.

  • Garlic Butter Shrimp: Pair these rounds with succulent shrimp sautéed in garlic butter for a delicious surf-and-turf you’ve never expected.

  • Stuffed Bell Peppers: Colorful and hearty, these peppers filled with quinoa and vegetables make an excellent side, adding both color and nutrition to your meal.

  • Chilled White Wine: A crisp, chilled glass of Sauvignon Blanc will beautifully balance the savory notes, making your dining experience delightful.

  • Homemade Tzatziki Sauce: The refreshing cucumber and yogurt dip not only provide a cool element but also a burst of flavor that pairs wonderfully with the cheese rounds.

  • Mini Quiches: Bite-sized quiches with fresh vegetables offer a delightful texture and a touch of whimsy, complementing the crunch of broccoli cheese rounds.

  • Sliced Baguette: Serve these crispy rounds with toasted slices for a rustic touch; the crunch of bread adds an extra layer of texture.

Helpful Tricks for Zucchini Tots

• Moisture Management: Squeeze excess moisture from the grated zucchini before mixing. This helps achieve that perfect crispiness and prevents soggy tots!

• Egg Binding: Ensure the eggs are well-beaten and evenly incorporated into the mixture. This will help bind the tots together, ensuring they hold their shape when cooked.

• A Perfect Scoop: Use a tablespoon or cookie scoop for uniform portions. This not only makes shaping easier but also ensures even cooking throughout.

• Flip with Care: Gently flip the tots halfway through baking to achieve a consistent golden brown color on both sides. This is essential for that irresistible crispy texture!

• Experiment with Cheese: While cheddar is fantastic, feel free to try different varieties like mozzarella or parmesan for a unique twist on your Zucchini Tots.

Make Ahead Options

These Low Carb Crispy Broccoli Cheese Rounds are perfect for meal prep enthusiasts! You can prepare the mixture up to 24 hours in advance. Simply mix your finely chopped broccoli, shredded cheddar cheese, almond flour, eggs, garlic powder, salt, and black pepper as instructed, then cover it tightly and refrigerate. For the best results, form the rounds just before baking, ensuring they remain fresh and crispy. When you’re ready to enjoy, simply preheat your oven, place the formed rounds on a baking sheet, spray with cooking oil, and bake for 15-20 minutes. This way, you’ll savor the same delicious, crunchy goodness with minimal effort on busy weeknights!

Low Carb Crispy Broccoli Cheese Rounds Recipe FAQs

How do I choose the right broccoli?
Absolutely! When selecting broccoli, look for florets that are vibrant green and firm, with no yellowing or dark spots. If it has dark spots all over, it’s best to skip it. Fresh broccoli will give you the best flavor and texture for your rounds!

How should I store leftover Broccoli Cheese Rounds?
I recommend storing any leftovers in an airtight container in the fridge for up to 3 days. Make sure they’re completely cooled before placing them in the container to keep them fresh and avoid moisture buildup that can make them soggy.

Can I freeze Broccoli Cheese Rounds?
Yes, they freeze beautifully! To do this, lay the rounds on a baking sheet in a single layer and freeze for 1-2 hours until solid. Then, transfer them to a freezer-safe bag or container. They’ll stay fresh for up to 2 months. When you’re ready to enjoy, just reheat them in the oven at 350°F (175°C) for about 10-15 minutes until crispy again.

What can I do if my rounds are soggy after baking?
Very! If your rounds turn out soggy, it could be due to excess moisture in the broccoli. Make sure to chop it finely and squeeze out as much water as you can before mixing it. Also, be sure to bake them long enough at a high temperature to achieve that desired crispiness!

Are there any dietary considerations with these Broccoli Cheese Rounds?
Absolutely, while these rounds are low-carb, they do contain cheese and eggs. So, if you’re serving them to someone with dairy allergies or following a vegan diet, consider replacing the cheese with a dairy-free alternative and using flax eggs as a binder (1 tablespoon of ground flaxseed mixed with 2.5 tablespoons of water per egg).

How can I make the rounds even more flavorful?
For an extra pop of flavor, you can mix in herbs like dried oregano, or even a pinch of red pepper flakes for some heat. Adjust these extras to your taste; after all, the more, the merrier in cooking!

Crispy Zucchini Tots That Will Wow Your Taste Buds

Crispy Zucchini Tots are a delicious low-carb snack that satisfy your cravings without guilt. Perfect for any occasion!

  • Oven
  • Mixing Bowl
  • Baking Sheet
  • parchment paper
  • spatula

For the Tots

  • 2 cups grated zucchini (ensure to squeeze out excess moisture for extra crispiness)
  • 1 cup shredded cheese (preferably cheddar for gooey texture)
  • 1/2 cup almond flour (a great low-carb alternative)
  • 2 large eggs (they’ll help bind everything together beautifully)
  • 1/2 tsp garlic powder (enhances flavor profile)
  • 1/4 tsp salt (adds seasoning)
  • 1/4 tsp black pepper (adds a subtle kick)
  • Cooking spray or olive oil (for greasing the pan)

Step-by-Step Instructions

  1. Preheat your oven to 400°F (200°C) and line a baking sheet with parchment paper.
  2. In a large mixing bowl, combine the grated zucchini, cheese, almond flour, eggs, garlic powder, salt, and black pepper. Mix until thoroughly combined.
  3. Using a tablespoon, scoop portions of the mixture and shape them into small rounds. Place on the baking sheet, leaving about an inch of space between each.
  4. Lightly spray the tops of the tots with cooking spray or drizzle with olive oil for a golden brown finish.
  5. Bake in the preheated oven for 15-20 minutes, flipping halfway through.
  6. Once golden brown, remove from the oven and allow to cool slightly before serving.

For best results, squeeze excess moisture from zucchini and ensure uniform scooping for even cooking.

Appetizer
American
Appetizer, Crispy Snacks, Low-Carb, Vegetable Snacks, Zucchini Tots

Filed Under: Appetizer

Deliciously Crispy Zucchini Tots You’ll Love to Make

August 9, 2025 by grace bellamy Leave a Comment

It’s funny how the simplest ingredients can transform into something that feels like a hidden gem in the world of low-carb cooking. Today, I’m excited to share my recipe for Low Carb Crispy Broccoli Cheese Rounds, an absolute game-changer for anyone looking to swap fast food for a healthier, homemade option. These delightful rounds are not only a breeze to prepare, taking just 30 minutes from start to finish, but they also make for an irresistible snack or side dish that the whole family will love. With every bite, you’ll experience the satisfying crunch combined with the creamy goodness of cheese and the goodness of broccoli. Ready to trade in takeout for something truly delicious? Let’s dive into this tasty adventure!

Why Are These Broccoli Cheese Rounds Irresistible?

Bite-Sized Perfection: Each round is perfectly crafted for easy snacking or serving as a side dish.
Low-Carb Delight: With wholesome ingredients like broccoli and almond flour, these are guilt-free treats everyone can enjoy.
Quick and Easy: Ready in just 30 minutes, they fit seamlessly into any busy schedule.
Crowd-Pleaser: Kids and adults alike will love the cheesy, crispy exterior and the flavorful veggie center—no one will miss the fast food!
Versatile Flavor: Feel free to switch up the cheese or add spices like paprika for extra zing. Cooking at home has never tasted this good! If you love easy recipes, check out my Zucchini Tots for more delicious fun.

Zucchini Tots Ingredients

For the Rounds
• Broccoli – 2 cups grated; fresh broccoli provides a vibrant taste and a nutritious boost.
• Cheese – 1 cup shredded (cheddar or mozzarella); choose your favorite for a melty and rich flavor.
• Eggs – 2 large; they act as the binding agent, ensuring the rounds hold together beautifully.
• Almond Flour – 1/2 cup; a low-carb alternative that helps achieve a crisp texture while keeping it healthy.
• Garlic Powder – 1/2 teaspoon; enhances flavor with a warm and aromatic touch.
• Onion Powder – 1/2 teaspoon; adds a subtle sweetness that complements the other ingredients.
• Salt and Pepper – to taste; adjust according to your preference to bring all flavors together.

These Broccoli Cheese Rounds are a delightful way to enjoy wholesome ingredients and satisfy cravings without the fast food guilt!

Step‑by‑Step Instructions for Low Carb Crispy Broccoli Cheese Rounds

Step 1: Preheat the Oven
Start by preheating your oven to 400°F (200°C). This ensures the perfect cooking environment for your Low Carb Crispy Broccoli Cheese Rounds. While the oven is heating, line a baking sheet with parchment paper to prevent sticking and to help achieve that desired crispy texture.

Step 2: Combine Ingredients
In a large mixing bowl, combine 2 cups of grated broccoli, 1 cup of your favorite shredded cheese, 2 large eggs, 1/2 cup of almond flour, 1/2 teaspoon of garlic powder, 1/2 teaspoon of onion powder, and salt and pepper to taste. Mix thoroughly until everything is well incorporated, and you see a cohesive mixture ready to form into rounds.

Step 3: Shape the Rounds
Using a tablespoon, scoop out portions of the mixture and mold them into rounds. Place each rounded ball onto the prepared baking sheet, making sure to leave space between them for even cooking. As you shape the Low Carb Crispy Broccoli Cheese Rounds, press them gently to flatten slightly for a better texture during baking.

Step 4: Bake to Perfection
Slide your baking sheet into the oven and bake the rounds for 18-20 minutes. Keep an eye on them; they should become golden brown and crispy at the edges. This is the moment to savor the mouthwatering aroma wafting through your kitchen!

Step 5: Cool and Serve
Once baked to perfection, remove the Low Carb Crispy Broccoli Cheese Rounds from the oven and allow them to cool slightly on the baking sheet. This cooling period helps them firm up even more, making them easier to handle. Once cooled, they’re ready to serve as a delightful snack or side dish!

Helpful Tricks for Broccoli Cheese Rounds

  • Chop Finely: Ensure the broccoli is grated finely so that each round holds together well without crumbling during baking.

  • Cheese Choice: Opt for a cheese with good melting properties, like mozzarella, for a wonderfully gooey texture.

  • Don’t Overtighten: When shaping the rounds, avoid packing the mixture too tightly; this will hinder the crispiness you’re aiming for.

  • Baking Space: Leave enough space between each round on the baking sheet to promote even cooking and prevent them from sticking together.

  • Check Often: Keep an eye on the oven towards the end of baking to ensure they don’t overcook; you want them golden, not burnt.

Experimenting with these tips will help you master these delicious broccoli cheese rounds while keeping them low-carb and nutritious!

Make Ahead Options

These Low Carb Crispy Broccoli Cheese Rounds are perfect for meal prep enthusiasts looking to save time during busy weeknights! You can mix the ingredients and form the rounds up to 24 hours in advance. Simply prepare the mixture as instructed and shape it into rounds, then store them in an airtight container in the refrigerator. To maintain their quality and crispness, avoid stacking them on top of each other. When you’re ready to enjoy, just bake them straight from the fridge for about 20-25 minutes, ensuring those delicious rounds come out hot and crispy, delivering the same satisfying taste as if they were made fresh. Enjoy the convenience of homemade goodness without the fuss!

How to Store and Freeze Broccoli Cheese Rounds

Fridge: Store the cooked Low Carb Crispy Broccoli Cheese Rounds in an airtight container for up to 3 days to maintain their freshness and flavor.

Freezer: For longer storage, freeze the rounds in a single layer on a baking sheet, then transfer to a freezer-safe container for up to 3 months.

Reheating: When ready to enjoy, reheat directly from frozen in the oven at 350°F (175°C) for about 15-20 minutes until warmed through and crispy again.

Room Temperature: Allow the rounds to cool completely before storing; never leave them at room temperature for more than 2 hours to avoid spoilage.

What to Serve with Low Carb Crispy Broccoli Cheese Rounds

Elevate your dining experience by pairing these crispy rounds with vibrant sides and refreshing drinks that complement each flavorful bite.

  • Creamy Mashed Cauliflower: This smooth alternative to mashed potatoes offers a light, fluffy texture that beautifully balances the crispiness of the rounds.

  • Fresh Garden Salad: A mix of greens, cherry tomatoes, and cucumbers provides a refreshing crunch and a burst of color that brightens your plate.

  • Roasted Garlic Asparagus: The nutty flavor of roasted asparagus adds an elegant touch, perfect for widening the flavor palette of your meal.

  • Zesty Dipping Sauce: Create a tangy yogurt or avocado dip to enhance the taste of your broccoli cheese rounds, adding a creamy texture that pairs perfectly.

  • Quinoa Pilaf: This protein-packed side with herbs and spices complements the rounds, providing a wholesome texture and flavorful depth to your meal.

  • Sparkling Lemonade: A bright and bubbly drink that lifts the flavors of the dish, making each bite feel like a refreshing escape.

  • Mini Fruit Tart: End your meal with a light dessert; the fruity sweetness contrasts wonderfully with the savory rounds, creating a delightful conclusion.

Variations & Substitutions for Zucchini Tots

Feel free to mix and match these ideas to make this recipe uniquely yours!

  • Cheese Swap: Replace cheddar with feta or goat cheese for a tangy twist that adds a creamy, rich flavor. These swaps can elevate the dish, lending a Mediterranean flair.

  • Herb-Infused: Add fresh herbs like parsley or basil to the mixture for an aromatic kick. The brightness of the herbs beautifully complements the earthy broccoli and adds freshness.

  • Grain-Free Crunch: Use coconut flour instead of almond flour for a different low-carb option while giving the rounds a slight sweetness. Coconut flour perches uniquely on your palate, delighting taste buds with each bite.

  • Extra Veggies: Incorporate finely grated zucchini or carrots into the mix to boost moisture and nutrition. The extra veggies not only amp up the health factor but also create an attractive color contrast.

  • Spice It Up: Sprinkle in some red pepper flakes or cayenne pepper for a spicy version that adds heat. A hint of heat can transform your rounds into a bold appetizer that surprises the taste buds!

  • Dairy-Free: Opt for a non-dairy cheese substitute if you’re going vegan. Nut-based cheeses melt well and can still deliver that cheesy satisfaction without the dairy.

  • Nut-Free Option: Swap almond flour for oat flour or ground sunflower seeds to make these rounds nut-free while keeping them delicious and crumbly. Ground sunflower seeds lend a nut-like flavor without the allergens!

  • Sweet Potato Addition: Mix in some mashed sweet potato for a subtle sweetness and added nutrition. This twist adds both creaminess and a touch of color that makes the rounds even more inviting.

Combining any of these variations allows you to craft a delightful dish perfectly suited to your taste. For another fun and healthy option, give my Baked Cauliflower Bites a try for a different veggie treat everyone will adore!

Low Carb Crispy Broccoli Cheese Rounds Recipe FAQs

How do I select ripe broccoli for this recipe?
Absolutely! When choosing broccoli, look for vibrant green heads with tight florets and firm stems. Avoid any that have dark spots or yellowing, as these are indications of age. A fresh, healthy piece of broccoli will give your rounds a delicious flavor and texture.

What is the best way to store leftover broccoli cheese rounds?
Very simple! Store your cooked Low Carb Crispy Broccoli Cheese Rounds in an airtight container in the fridge. They will stay fresh for about 3 days. If you notice they’re getting soft or losing their crunch, just reheat them in the oven to bring back that crispy goodness!

Can I freeze the broccoli cheese rounds? How do I do it?
Yes, definitely! To freeze your rounds, start by letting them cool completely. Then, place them in a single layer on a baking sheet and pop that into the freezer for about 1 to 2 hours until they’re firm. Once they’re frozen, transfer them to a freezer-safe container or zip-top bag. They can stay frozen for up to 3 months. When you’re ready to enjoy, just reheat directly from frozen at 350°F (175°C) for about 15-20 minutes!

What if my rounds don’t hold together while baking?
Don’t worry; it happens! If your rounds are crumbling, be sure that your grated broccoli is finely chopped and that you’ve mixed all the ingredients thoroughly. You might consider adding a bit more almond flour or another egg to help bind the mixture together. Also, avoid packing them too tightly when forming the rounds to maintain their crispy texture.

Are there any dietary considerations for these broccoli cheese rounds?
Yes! These Low Carb Crispy Broccoli Cheese Rounds are gluten-free due to the almond flour, making them suitable for those with gluten intolerances. However, they do contain eggs and cheese, which may be unsuitable for some dietary restrictions. If you’re concerned about allergies, you can experiment with vegan cheese alternatives and flaxseed meal in place of eggs for a great substitute.

Can I customize the cheese used in the recipe?
Absolutely! While cheddar and mozzarella are fantastic choices, feel free to experiment with different types of cheese that melt well, like Monterey Jack or Gouda, for unique flavor profiles. The more the merrier in terms of flavor combinations, so have fun with it!

Deliciously Crispy Zucchini Tots You’ll Love to Make

These Zucchini Tots are a delicious and healthy low-carb snack or side dish, perfect for the whole family.

  • Oven
  • Baking Sheet
  • parchment paper
  • Mixing Bowl
  • Measuring Cups
  • Measuring Spoons

For the Rounds

  • 2 cups Broccoli, grated (Fresh broccoli provides a vibrant taste and a nutritious boost.)
  • 1 cup Cheese, shredded (Choose your favorite (cheddar or mozzarella) for a melty, rich flavor.)
  • 2 large Eggs (They act as the binding agent.)
  • 1/2 cup Almond Flour (A low-carb alternative that helps achieve a crisp texture.)
  • 1/2 teaspoon Garlic Powder (Enhances flavor with a warm touch.)
  • 1/2 teaspoon Onion Powder (Adds subtle sweetness.)
  • Salt and Pepper (To taste.)

Step-by-Step Instructions

  1. Preheat your oven to 400°F (200°C) and line a baking sheet with parchment paper.
  2. In a large mixing bowl, combine grated broccoli, shredded cheese, eggs, almond flour, garlic powder, onion powder, and salt and pepper to taste. Mix until well incorporated.
  3. Scoop portions of the mixture and mold them into rounds. Place each round on the prepared baking sheet, ensuring space between them.
  4. Bake for 18-20 minutes until they’re golden brown and crispy at the edges.
  5. Allow them to cool slightly before serving.

For best results, ensure broccoli is grated finely and cheese has good melting properties.

Side Dishes
American
Cheese, crispy, healthy snacks, Low-Carb, Vegetarian, Zucchini Tots

Filed Under: Side Dishes

Crispy Orange Chicken: The Ultimate Flavor Explosion at Home

August 9, 2025 by grace bellamy Leave a Comment

The sizzling sound of crispy tortillas in the air fryer is an invitation that’s hard to resist. When I need a quick snack or a side dish to elevate any meal, I reach for this Air Fryer Tortilla Garlic Bread recipe. With just a handful of ingredients, it’s not only a breeze to prepare but also a crowd-pleaser that brings a delightful crunch to your table. Imagine slathering buttery, garlicky goodness onto tortillas and watching them transform into a golden masterpiece in under ten minutes! Perfect for those evenings when you’re craving comfort without the fuss, this recipe is a game changer. Whether you choose to enjoy it on its own or pair it with your favorite dip, get ready to impress yourself and anyone lucky enough to share it with you. What’s your favorite way to enjoy garlic bread?

Why Is This Garlic Bread So Irresistible?

Speedy Preparation: This recipe takes just 10 minutes, making it perfect for those busy evenings when you crave something delicious without the wait.

Flavor Burst: Each bite is a blend of garlic and butter that dances on your palate, while the fresh parsley adds a pop of color and taste.

Versatile Delight: Enjoy it as a snack, side dish, or even party appetizer paired with salsa or marinara sauce—you’ll love the crowd-pleasing factor!

Healthy Twist: Using tortillas instead of traditional bread keeps it lighter while still delivering that satisfying crunch everyone craves.

Air Fryer Magic: Cooking with an air fryer ensures perfectly crispy results without excess oil, making this dish both tasty and guilt-free.

Crispy Orange Chicken Ingredients

• Discover the magic of flavor!

For the Chicken

  • Chicken breast – This lean protein is the perfect base for an irresistible crispy orange chicken.
  • Cornstarch – Coating the chicken with cornstarch creates that signature crunchy exterior.
  • Egg – A light egg wash helps the cornstarch adhere, ensuring every piece is beautifully crispy.

For the Orange Sauce

  • Fresh orange juice – Adds a vibrant, zesty flavor that is essential for the best orange chicken.
  • Soy sauce – Provides a savory depth that balances the sweetness of the orange juice.
  • Honey – Enhances the sweetness and gives the sauce a beautiful glaze.
  • Garlic – Minced garlic infuses the sauce with aromatic goodness, elevating the flavor profile.
  • Ginger – Fresh ginger brings a warm, spicy note to the sauce, enhancing the overall taste.

For Garnish

  • Green onions – Chopped green onions not only add color but also a fresh crunch on top of the dish.
  • Sesame seeds – Toasted sesame seeds bring a nutty flavor and appealing texture to the finish.

Embrace the delightful crunch and vibrant tang of crispy orange chicken that everyone in your home will adore!

Step‑by‑Step Instructions for Air Fryer Tortilla Garlic Bread

Step 1: Preheat the Air Fryer
Start by preheating your air fryer to 375°F (190°C). This step is crucial for achieving that signature crispy texture you want in your Air Fryer Tortilla Garlic Bread. Allow it to heat for about 3-5 minutes; you’ll know it’s ready when you hear a gentle whir of the fan.

Step 2: Prepare the Garlic Butter Mixture
In a small bowl, mix together 2 tablespoons of softened butter, 2 minced garlic cloves, chopped parsley, salt, and pepper. Stir until well combined, ensuring that the garlic is evenly distributed. This garlicky goodness will be the star of your crispy tortilla bread, infusing it with flavor and aroma.

Step 3: Spread the Mixture on the Tortillas
Take your two flour tortillas and use a butter knife to spread the garlic butter mixture generously on one side of each tortilla. Make sure to cover the surface evenly for the best flavor. You’ll start to see the butter melt slightly, indicating that your tortillas are ready for the air fryer.

Step 4: Place Tortillas in the Air Fryer
Carefully place the tortillas into the air fryer basket, buttered side facing up. It’s important not to overlap them to ensure they cook evenly. Arrange them in a single layer, giving them enough space to achieve that golden-brown color you aim for in classic garlic bread.

Step 5: Air Fry the Tortillas
Set your air fryer to cook the tortillas for 5 minutes. Keep an eye on them as they cook; the tortillas should turn a lovely golden brown, crisping up nicely. You’ll notice a savory aroma filling your kitchen — that’s the garlic butter doing its magic!

Step 6: Slice and Serve
Once your Air Fryer Tortilla Garlic Bread is perfectly crispy, carefully remove the tortillas from the air fryer. Allow them to cool for a moment before slicing them into wedges. Serve them warm with your choice of dipping sauce, and enjoy the delightful crunch that will surely please everyone!

Helpful Tricks for Air Fryer Tortilla Garlic Bread

Even Spread: Ensure the garlic butter is spread evenly on each tortilla for consistent flavor in every bite.

Watch the Time: Keep an eye on the air fryer; cooking times can vary slightly. Aim for that golden brown color to achieve crispy perfection.

Non-Stick Spray: Lightly spray the air fryer basket with non-stick spray to prevent any sticking. This helps maintain the crispiness of your tortillas.

Experiment with Herbs: Feel free to add other herbs like oregano or thyme to the garlic butter mixture for a unique twist on flavors.

Dipping Sauces: Pair your garlic bread with marinara sauce, garlic aioli, or even a spicy salsa for an extra layer of flavor that complements the crispy texture.

How to Store and Freeze Air Fryer Tortilla Garlic Bread

Fridge: Store leftovers in an airtight container for up to 2 days. This will help keep your Air Fryer Tortilla Garlic Bread fresh and flavorful.

Freezer: If you’d like to freeze it, wrap the garlic bread in plastic wrap and then in foil. It can be frozen for up to 1 month without losing its crispy appeal.

Reheating: For best results, reheat the tortilla garlic bread in the air fryer at 350°F (175°C) for about 3-5 minutes. This will help restore its crunchiness.

Thawing: If frozen, let it thaw in the fridge for several hours or overnight before reheating for optimal taste and texture.

Crispy Orange Chicken Variations

Feel free to let your creativity shine by customizing this recipe to match your taste buds!

  • Gluten-Free: Substitute regular flour tortillas with corn tortillas or gluten-free wraps for a delicious alternative. You’ll still enjoy that satisfying crunch.

  • Vegan: Replace butter with vegan margarine or olive oil and skip the garlic for a plant-based twist that doesn’t skimp on flavor. This keeps it light while maintaining the indulgence.

  • Herbed Delight: Add dried Italian herbs such as oregano or basil into the garlic butter mixture for a fragrant burst that elevates the taste. The aroma alone will have everyone in the kitchen!

  • Spicy Kick: Add a pinch of red pepper flakes to the garlic butter blend for an extra zest that adds excitement to every bite. It’ll bring a delightful heat to your garlic bread.

  • Parmesan Boost: Sprinkle freshly grated Parmesan cheese on top of the garlic spread before air frying. This creates a rich, cheesy crust that perfectly complements the garlic flavor.

  • Cheesy Garlic Bread: Layer slices of mozzarella cheese on top of the tortillas along with the garlic mixture. The cheese will melt and add a wonderful gooey texture that’s irresistible!

  • Double the Garlic: If you’re a true garlic lover, feel free to double the amount of minced garlic in the spread. This ensures a robust flavor that packs a punch and keeps the taste lingering.

  • Crispy Pizza Style: Top with your favorite pizza toppings, such as pepperoni, olives, or bell peppers, before air frying. This transforms your garlic bread into a fun, savory treat perfect for sharing!

Like dipping sauces? Pair your Air Fryer Tortilla Garlic Bread with salsa or garlic aioli for an extra burst of flavor and fun. Enjoy mixing and matching flavors!

Make Ahead Options

These Air Fryer Tortilla Garlic Breads are perfect for meal prep enthusiasts looking to save time! You can prepare the garlic butter mixture and spread it over the tortillas up to 24 hours in advance; simply keep them tightly wrapped in plastic wrap to maintain freshness. When you’re ready to enjoy, just pop the prepped tortillas in the air fryer and cook for 5 minutes until they are golden brown and crispy. This way, you’ll have a delectable snack or side dish with minimal effort, perfect for those busy weeknights. Enjoy the deliciousness just as if they were freshly made!

What to Serve with Air Fryer Tortilla Garlic Bread

Imagine a cozy gathering where delicious aroma fills the air and every bite of garlic bread is savored alongside delightful companion dishes.

  • Creamy Marinara Sauce: A classic pairing, the rich tomato sauce will balance the savory flavors of the garlic bread.
  • Zesty Salsa: Fresh and tangy, salsa adds a vibrant kick that complements the crispy texture perfectly.
  • Garlic Aioli: This creamy dip enhances the garlic flavor while providing a smooth contrast to the crunch of each wedge.
  • Cheese Platter: Pair with assorted cheeses like brie or cheddar for a charming assortment that guests will love.
  • Roasted Vegetables: Enjoy a medley of roasted seasonal veggies as a colorful side that brings freshness to your meal.
  • Classic Caesar Salad: Crisp romaine lettuce with creamy dressing and croutons makes for a hearty, refreshing complement.
  • Chilled White Wine: A glass of chilled Sauvignon Blanc enhances the meal and elevates the dining experience.
  • Chocolate Chip Cookies: End your meal on a sweet note with warm cookies, providing a delightful contrast to the savory garlic bread.
  • Fruit Skewers: Refreshing and sweet, skewers of seasonal fruits add a lovely touch to your table.

Air Fryer Tortilla Garlic Bread Recipe FAQs

How do I choose the best tortillas for this recipe?
Absolutely! For the best results, I recommend using flour tortillas that are fresh and pliable. Look for tortillas without dark spots or tears; they should be soft to the touch. If you prefer a whole wheat option, that can add extra flavor and fiber while still delivering the delightful crunch!

How should I store leftover Air Fryer Tortilla Garlic Bread?
To keep your leftovers fresh, store them in an airtight container in the fridge for up to 2 days. This method helps retain moisture while preventing them from becoming stale. It’s an easy solution to enjoy this delicious garlic bread for a second helping!

Can I freeze the Air Fryer Tortilla Garlic Bread?
Yes, you can! Wrap the garlic bread tightly in plastic wrap and then in aluminum foil. It can be frozen for up to 1 month. When you’re ready to enjoy it again, simply thaw it in the fridge for several hours, then reheat in the air fryer at 350°F (175°C) for 3-5 minutes to restore its crispy texture.

What should I do if my tortillas aren’t crispy enough after air frying?
Very! If you find your tortillas aren’t as crispy as you’d like, here are a few steps to troubleshoot:

  1. Ensure your air fryer is fully preheated before cooking.
  2. Avoid overcrowding the basket; give the tortillas enough space to crisp up.
  3. If necessary, add an extra minute or two to the cook time, but keep a close eye to prevent burning!

Can pets safely consume garlic bread?
No, it’s best to avoid sharing this treat with your furry friends. Garlic can be toxic to dogs and cats in large quantities. If you’re looking for a safe treat to share, consider plain cooked tortillas without any butter or seasoning as a special snack for them!

What dipping sauces pair well with this garlic bread?
Delicious question! I often like to dip my crispy tortilla garlic bread in marinara or homemade garlic aioli for a lush experience. If you’re feeling adventurous, consider pairing it with spicy salsa or even a creamy ranch dressing for a fun twist!

Crispy Orange Chicken: The Ultimate Flavor Explosion at Home

Crispy Orange Chicken is the ultimate flavor explosion, combining crunchy chicken with a tangy orange sauce for a delightful meal.

  • Air Fryer

For the Chicken

  • 1 lb Chicken breast (Lean protein base)
  • 1/2 cup Cornstarch (For coating)
  • 1 large Egg (Light egg wash)

For the Orange Sauce

  • 1/2 cup Fresh orange juice (Essential for flavor)
  • 1/4 cup Soy sauce (For savory depth)
  • 2 tbsp Honey (Enhances sweetness)
  • 2 cloves Garlic (Minced)
  • 1 tbsp Ginger (Fresh, grated)

For Garnish

  • 2 tbsp Green onions (Chopped)
  • 1 tbsp Sesame seeds (Toasted)

Preparation

  1. Preheat the air fryer to 375°F (190°C) for 3-5 minutes.
  2. In a bowl, mix the egg and cornstarch, then coat the chicken pieces.
  3. In a separate pan, combine the orange juice, soy sauce, honey, minced garlic, and ginger to create the orange sauce.
  4. Cook the chicken in the air fryer for about 15 minutes, flipping halfway through until crispy.
  5. Once cooked, toss the chicken in the orange sauce and garnish with green onions and sesame seeds.

Serve warm with your choice of dipping sauce for an extra layer of flavor.

Main Dishes
Asian
Air Fryer Chicken, Chicken Recipes, Crispy Chicken, Crispy Orange Chicken, Flavor Explosion, Orange Sauce

Filed Under: Main Dishes

Chickpea Feta Avocado Salad: A Fresh and Zesty Delight

August 9, 2025 by grace bellamy Leave a Comment

As I crunched down on that first blissful bite of my Chickpea Feta Avocado Salad, a melody of textures and flavors danced on my palate, instantly brightening my day. This quick, vibrant dish is perfect for anyone seeking a nutritious yet satisfying alternative to boring fast food. Packed with protein-rich chickpeas, creamy avocado, and tangy feta, this salad not only delights your taste buds but also keeps your energy levels soaring. Whether you’re prepping for a sunny picnic or looking for a refreshing weeknight dinner, this recipe promises to be a lively, crowd-pleasing addition to your culinary repertoire. Curious how simple ingredients can create such flavorful magic? Let’s dive into making this extraordinary salad!

Why is this salad a must-try?

Vibrant flavors come together in a delightful balance, making every bite a celebration of freshness and zest. Quick prep means you can whip this up in just 15 minutes, perfect for busy weeknights or spontaneous gatherings. Nutritious ingredients like chickpeas, avocado, and feta provide a protein boost that keeps you feeling satisfied without the heavy guilt of fast food. Versatile dish can be served as a main course or as a side, adapting seamlessly to any meal. Elevate your salad game by pairing it with your favorite grilled chicken or enjoy it solo—either way, this Chickpea Feta Avocado Salad will impress your family and friends!

Chickpea Feta Avocado Salad Ingredients

For the Salad

  • Chickpeas – The star of our Chickpea Feta Avocado Salad, these provide a hearty, protein-rich base.
  • Avocado – Adds creaminess and healthy fats, making this salad both satisfying and nutritious.
  • Feta Cheese – This crumbly cheese contributes a tangy flavor that beautifully contrasts with the creamy avocado.
  • Red Onion – A bit of sharpness from red onion adds depth and color to the salad.
  • Fresh Parsley – Brightens the dish with its fresh flavor and adds a pop of green.
  • Fresh Mint – Elevates the taste profile with a refreshing twist, perfect for summer vibes.

For the Dressing

  • Olive Oil – A good-quality olive oil is key for richness and helps bring all the flavors together.
  • Lemon Juice – Freshly squeezed lemon juice adds a zesty brightness that enhances the overall flavor.
  • Garlic – Minced for a subtle yet impactful taste that rounds out the dressing beautifully.
  • Dried Oregano – This herb lends an earthy note that complements the salad’s fresh ingredients.
  • Salt and Pepper – Essential for seasoning; adjust to your personal taste preference.

Step‑by‑Step Instructions for Chickpea Feta Avocado Salad

Step 1: Prepare the Ingredients
Begin by gathering all your ingredients for the Chickpea Feta Avocado Salad. Drain and rinse the chickpeas under cold water to remove excess sodium, letting them dry while you chop the avocado. Dice the avocado into bite-sized pieces, slice the red onion thinly, and finely chop the fresh parsley and mint, creating a colorful prep station.

Step 2: Combine the Salad Components
In a large mixing bowl, gently combine the drained chickpeas, diced avocado, crumbled feta cheese, sliced red onion, chopped parsley, and mint. Toss these ingredients carefully, ensuring the avocado remains intact for that creamy texture. The vibrant colors and textures of this Chickpea Feta Avocado Salad will begin to take shape as you mix.

Step 3: Make the Flavorful Dressing
In a small bowl or jar, whisk together the olive oil, freshly squeezed lemon juice, minced garlic, and dried oregano. Season this dressing with a bit of salt and pepper to taste, and blend until smooth. This zesty combination will enhance the delicious flavors of your Chickpea Feta Avocado Salad, bringing everything together beautifully.

Step 4: Dress and Toss the Salad
Pour the dressing over your salad mixture in the large bowl. Gently toss the ingredients together, ensuring every piece is coated with the dressing while being careful not to over-mix to preserve the avocado’s shape. Take a moment to appreciate the fresh aromas as the flavors meld, ready to be enjoyed.

Step 5: Serve or Chill
For optimal freshness, serve the Chickpea Feta Avocado Salad immediately after dressing. If you prefer a chilled version, cover the salad and refrigerate it for about 30 minutes to let the flavors develop further. This salad is perfect for a quick lunch or as a delightful side dish at your next gathering!

What to Serve with Chickpea Feta Avocado Salad

Elevate your culinary experience by complementing this vibrant salad with delightful sides and beverages that enhance every bite.

  • Grilled Chicken: Juicy, seasoned chicken adds a satisfying protein element that pairs beautifully with the fresh flavors of the salad.
  • Quinoa Pilaf: Nutty and savory quinoa provides a hearty grain base that balances the creaminess of the avocado.
  • Tzatziki Dip: This cooling yogurt dip made with cucumber and herbs enriches your meal with a refreshing contrast.
  • Pita Bread: Soft, warm pita serves as a lovely vessel to scoop up salad, enhancing the fun of each mouthful.
  • Rosemary Focaccia: With its herby scent and tender crumb, focaccia slices provide a lovely texture that complements the dish’s flavors.
  • Sparkling Lemonade: A zesty, effervescent drink mirrors the salad’s bright notes, making it an enjoyable thirst quencher.
  • Watermelon Feta Skewers: Sweet and salty, these skewers create a playful appetizer that mirrors the main dish’s key ingredients.

Add a sweet touch with lemon sorbet for dessert. Its tartness cleanses the palate and rounds out the meal beautifully.

Make Ahead Options

These Chickpea Feta Avocado Salads are perfect for meal prep enthusiasts! You can chop and combine all the salad ingredients—chickpeas, feta, red onion, parsley, and mint—up to 3 days in advance. Just make sure to leave the diced avocado out until you’re ready to serve to prevent browning. Additionally, you can prepare the dressing ahead of time and store it in the refrigerator for up to 5 days. When you’re ready to enjoy, simply fold in the sliced avocado and dress the salad right before serving, ensuring that everything is fresh and vibrant, just as delicious as when made on the spot!

Tips for the Best Chickpea Feta Avocado Salad

  • Fresh Ingredients: Use the freshest produce you can find; ripe avocados and vibrant herbs elevate the flavor and appearance of your Chickpea Feta Avocado Salad.

  • Don’t Over-Mix: Gently toss the salad to avoid mashing the avocado. You want creamy chunks, not a mushy blend, for the best texture.

  • Chill for Flavor: If time allows, let the salad chill in the fridge for at least 30 minutes. This helps the flavors meld beautifully together before serving.

  • Adjust to Taste: Always taste your salad before serving. Feel free to add more salt, pepper, or even a dash of hot sauce if you prefer a kick to your Chickpea Feta Avocado Salad!

  • Experiment with Add-Ins: Feel free to customize your salad by adding ingredients like cherry tomatoes, cucumber, or even grilled chicken for extra protein and variety.

Variations & Substitutions for Chickpea Feta Avocado Salad

Feeling inspired to make this Chickpea Feta Avocado Salad your own? Let your creativity shine with these exciting variations!

  • Dairy-Free: Swap feta with a vegan cheese alternative or omit completely for a lighter option. You’ll still enjoy a fresh and satisfying salad without the dairy!

  • Extra Crunch: Add chopped cucumbers or bell peppers for a delightful crunch. These vegetables not only enhance the texture but also add vibrant color to your salad.

  • Spicy Kick: Toss in a diced jalapeño or a sprinkle of red pepper flakes if you’re in the mood for some heat. Just a little spice can transform this refreshing salad into a zesty adventure!

  • Herb Boost: Experiment with different herbs like basil or cilantro for a unique twist. Each herb offers a different flavor profile, adding a personal touch to your Chickpea Feta Avocado Salad.

  • Grains Galore: Mix in some cooked quinoa or farro for added fiber and richness. These grains make the salad more filling and turn it into a complete meal—a perfect pick for lunch or dinner!

  • Avocado Swap: If avocados aren’t available, try using ripe mango for a sweet, tropical twist. This unexpected change introduces a delightful layer of flavor that will wow your taste buds!

  • Mediterranean Vibes: Incorporate sun-dried tomatoes or olives for a taste of the Mediterranean. These ingredients complement the feta beautifully and elevate the overall flavor of the salad.

  • Chickpea Alternatives: For a twist, substitute the chickpeas with black beans or white beans. Both options will add a different flavor and texture while maintaining the salad’s heartiness.

With these variations, you’ll find endless ways to enjoy your Chickpea Feta Avocado Salad, making every meal a fun and flavorful experience! If you’re looking for more delicious salad ideas, consider trying a refreshing Mediterranean Quinoa Salad or a hearty Spinach Strawberry Salad next!

How to Store and Freeze Chickpea Feta Avocado Salad

Fridge: Keep any leftover Chickpea Feta Avocado Salad in an airtight container in the fridge for up to 3 days. This will maintain freshness and flavor while keeping the ingredients crisp.

Freezer: It’s best not to freeze this salad, as the texture, especially of the avocado, will become mushy when thawed. Instead, enjoy fresh portions!

Reheating: While this salad is best served cold, you can gently reheat any leftover chickpeas if you prefer a warm dish. Just warm them in a skillet over low heat without compromising the overall taste.

Serving Reminder: For maximum freshness, consider preparing the dressing separately and only mix just before serving if you plan on enjoying leftovers.

Chickpea Feta Avocado Salad Recipe FAQs

How do I choose ripe avocados for the salad?
Absolutely! When selecting avocados, look for ones that yield slightly to gentle pressure. They should be firm but not hard, and without dark spots all over the skin. If they’re hard, leave them at room temperature for a few days to ripen. You can also check the stem; if it pops off easily and is green underneath, the avocado is ripe!

What is the best way to store leftover Chickpea Feta Avocado Salad?
For up to 3 days, store any leftover salad in an airtight container in the fridge. This helps keep the ingredients fresh while preserving their flavors.

Can I freeze Chickpea Feta Avocado Salad?
Very! It’s best not to freeze this salad. The texture of the avocado will get mushy when thawed, which may not be enjoyable. I recommend enjoying it fresh!

What if my salad turns mushy when mixing?
If that happens, don’t worry! To prevent mushiness, be careful when tossing the salad. Use a gentle folding motion instead of stirring vigorously, which will help keep the avocado in chunks. If it does become mushy, consider adding more chickpeas or feta to the mix for balance.

Are there any dietary considerations for this salad?
Definitely! This salad is vegetarian and can easily be made gluten-free. If you have allergies, take note that the feta cheese contains dairy. For a dairy-free option, try substituting with crumbled tofu or a dairy-free feta alternative.

Can I add other ingredients to this salad?
The more the merrier! You can customize your Chickpea Feta Avocado Salad by adding ingredients like cherry tomatoes, cucumber, or even grilled chicken for an extra protein boost. Feel free to experiment and make it your own!

Chickpea Feta Avocado Salad: A Fresh and Zesty Delight

Chickpea Feta Avocado Salad is a nutritious and satisfying dish, bursting with flavors and textures, perfect for any meal.

  • Mixing Bowl
  • small bowl

For the Salad

  • 1 can Chickpeas (drained and rinsed)
  • 1 medium Avocado (diced)
  • 100 grams Feta Cheese (crumbled)
  • 1/4 medium Red Onion (sliced)
  • 1/4 cup Fresh Parsley (chopped)
  • 1/4 cup Fresh Mint (chopped)

For the Dressing

  • 3 tablespoons Olive Oil (good-quality)
  • 2 tablespoons Lemon Juice (freshly squeezed)
  • 1 clove Garlic (minced)
  • 1 teaspoon Dried Oregano
  • to taste Salt
  • to taste Pepper

Preparation

  1. Gather all ingredients for the Chickpea Feta Avocado Salad. Drain and rinse the chickpeas. Dice the avocado, slice the red onion, and chop the parsley and mint.
  2. In a large mixing bowl, combine the chickpeas, avocado, feta cheese, red onion, parsley, and mint. Toss gently.
  3. In a small bowl, whisk together the olive oil, lemon juice, garlic, and oregano. Add salt and pepper to taste.
  4. Pour the dressing over the salad and toss gently to coat.
  5. Serve immediately or chill in the fridge for about 30 minutes before serving.

For the best flavor, use fresh ingredients. Consider chilling the salad for enhanced taste.

Salad
Mediterranean
avocado, chickpea, feta, fresh, Healthy, Salad

Filed Under: salad

Irresistible Ham and Cheese Croissant Breakfast Casserole

August 9, 2025 by grace bellamy Leave a Comment

The morning sun peeked through the window while I fiddled with a recipe that’s become my secret weapon for brunch gatherings—my beloved Ham and Cheese Croissant Breakfast Casserole. This dish is a delightful twist on traditional breakfast fare, combining fluffy buttery croissants, savory ham, and oozing Swiss cheese into a satisfying casserole that will impress your family and friends. With quick prep and effortless assembly, it brings a gourmet touch to the table without demanding a chef’s skills. Whether it’s a lazy weekend or a special occasion, this easy-to-make breakfast will win hearts—and no one will complain about leftovers! Ready to discover how to whip up this cozy dish that turns any morning into a feast?

Why is this breakfast casserole a must-try?

Simplicity at its Finest: This Ham and Cheese Croissant Breakfast Casserole requires minimal effort, making it perfect for brunch enthusiasts or busy mornings.

Decadent Layers: With buttery croissants, savory ham, and gooey Swiss cheese, your taste buds will celebrate each bite!

Crowd-Pleasing: Serving 6-8, it’s ideal for gatherings, ensuring everyone leaves satisfied and happy.

Versatile Base: Feel free to customize with your favorite meats or veggies for a personal touch—this dish adapts to your tastes!

Leftover Love: Easy to reheat, it transforms into a delightful second-day breakfast that you’ll look forward to.

Elevate your brunch game with this delightful casserole and explore more delicious breakfast ideas in our brunch recipes section.

Ham and Cheese Croissant Breakfast Casserole Ingredients

For the Base
• Large buttery croissants – 6, cut into quarters for that flaky, tender base everyone loves.
• Diced ham – 1 cup, adds a savory depth and protein to make it hearty.
• Shredded Swiss cheese – 1 cup, melts beautifully to create rich cheesy goodness.

For the Egg Mixture
• Large eggs – 6, the essential binding agent that holds this casserole together.
• Milk – 2 cups, adds creaminess and ensures a moist texture throughout.
• Dried thyme – 1 teaspoon, infuses a subtle herbaceous note that elevates the dish.
• Garlic powder – 1 teaspoon, for a warm, comforting flavor that rounds out the ingredients.
• Salt and pepper – to taste, enhancing all the flavors for a perfectly balanced dish.

For the Topping
• Grated Parmesan cheese – ½ cup, adds a delightful crispy layer on top when baked.
• Fresh chives – chopped, for garnish that brings a fresh burst of color and flavor!

Whip up this Ham and Cheese Croissant Breakfast Casserole that will make your mornings feel extraordinary!

Step‑by‑Step Instructions for Ham and Cheese Croissant Breakfast Casserole

Step 1: Preheat and Prepare the Dish
Begin by preheating your oven to 350°F (175°C). While it warms up, take a 9×13 inch baking dish and grease it generously with butter or cooking spray, ensuring every corner is coated to prevent sticking. This preparation is vital for achieving that perfect, golden finish on your Ham and Cheese Croissant Breakfast Casserole.

Step 2: Layer the Croissants
Once your dish is ready, spread the quartered croissants evenly across the bottom. Arrange them close together to create a fluffy base that will soak up the egg mixture beautifully. The sight of those buttery croissant layers laying out just right is already a win for your breakfast casserole!

Step 3: Add Ham and Cheese
Next, sprinkle the diced ham generously over the croissants, followed by an even layer of shredded Swiss cheese on top. This combination brings together both savory and creamy flavors, making the casserole irresistible. The croissants will create pockets of deliciousness as they bake, so make sure to cover all the croissant pieces.

Step 4: Whisk the Egg Mixture
In a medium bowl, whisk together the 6 large eggs, 2 cups of milk, dried thyme, garlic powder, and a pinch of salt and pepper until the mixture is smooth and well combined. This velvety blend will bind everything together, enhancing the flavors throughout your Ham and Cheese Croissant Breakfast Casserole.

Step 5: Pour and Press
Now, pour the egg mixture evenly over the croissant, ham, and cheese layers. Use a spatula to gently press down the croissants, ensuring they absorb the creamy egg mixture fully. It’s important to coat every piece for that delightful texture once baked; a well-soaked casserole is a happy casserole!

Step 6: Add the Parmesan
Sprinkle the grated Parmesan cheese over the top of the casserole, creating a deliciously cheesy crust that will bake to a perfect golden brown. This final touch not only adds flavor but also a beautiful finishing layer that everyone will want to dig into!

Step 7: Bake with Foil
Cover the casserole loosely with aluminum foil and place it in the preheated oven. Bake it for 30 minutes; the foil will help keep the casserole moist during this initial baking stage. The anticipation of that heavenly aroma filling your kitchen will be hard to resist!

Step 8: Final Bake Without Foil
After the first 30 minutes, remove the foil and continue baking for an additional 15-20 minutes, or until the top is golden brown and the casserole is set in the center. Keep an eye on it as it transforms; you’ll know it’s ready when it’s puffed up and lightly browned!

Step 9: Rest and Garnish
Once baked, let your casserole cool for about 5 minutes to set before slicing. This brief moment is crucial as it allows the layers to come together. Just before serving, garnish with freshly chopped chives for a pop of color and flavor, making your Ham and Cheese Croissant Breakfast Casserole as delightful to the eyes as it is to the palate!

How to Store and Freeze Ham and Cheese Croissant Breakfast Casserole

Fridge: Store any leftovers in an airtight container for up to 3 days. Reheat in the microwave or oven until warm throughout for the best flavor.

Freezer: For long-term storage, wrap portions tightly in plastic wrap and then foil, freezing for up to 2 months. Thaw in the fridge overnight before reheating.

Reheating: To reheat, cover with foil and warm in a 350°F (175°C) oven for about 20 minutes. Skip the foil for the last 5 minutes to crisp the top back up!

Room Temperature: If serving at a gathering, it can be left out for up to 2 hours before needing to refrigerate leftovers.

Ham and Cheese Croissant Breakfast Casserole Tweaks

Feel free to explore the endless possibilities with this delicious casserole and make it your very own!

  • Vegetarian: Replace ham with sautéed spinach or mushrooms for a hearty, meatless dish that still delights.

  • Gluten-Free: Use gluten-free croissants or even a base of shredded potatoes for a tasty alternative for those avoiding gluten.

  • Herb-Infused: Add fresh herbs like dill or rosemary to the egg mixture for an aromatic twist that elevates the overall flavor.

  • Spicy Kick: Toss in sliced jalapeños or red pepper flakes for those who love a hint of heat, adding an exciting dimension to each bite.

  • Cheese Variety: Experiment with a mix of cheeses like sharp cheddar or creamy mozzarella to create a new flavor profile that keeps it interesting.

  • Breakfast Meat Mix: Swap out the ham for crumbled breakfast sausage or crispy bacon for a meaty explosion of flavor that enthusiasts will adore.

  • Creamy Addition: Stir in cream cheese or Greek yogurt into the egg mixture for added richness, taking your casserole to a whole new level of indulgence.

  • Sweet Touch: Drizzle a little maple syrup over the top before baking for a surprising sweet-salty combination that makes breakfast feel extra special!

Embrace these variations and serve them alongside a fresh fruit salad or a cup of coffee from our brunch recipes section, perfecting your morning feast!

Make Ahead Options

These Ham and Cheese Croissant Breakfast Casserole are perfect for busy mornings! You can prepare the entire casserole up to 24 hours in advance by following the first five steps and then covering the dish tightly with foil before refrigerating. To maintain that fresh taste, make sure the casserole is well-sealed to prevent it from drying out. When you’re ready to bake, simply take it out of the fridge, let it sit for about 30 minutes at room temperature (this helps it cook evenly), and then bake as instructed in the recipe. With this make-ahead option, you can savor a delightful breakfast with minimal effort—just pop it in the oven and enjoy!

Expert Tips for Ham and Cheese Croissant Breakfast Casserole

Soak Time Matters: Allow the croissants to soak in the egg mixture for at least 20 minutes before baking to achieve that delightful texture.

Don’t Rush the Bake: Keep the casserole covered for the first half to prevent drying out—uncover for the last stage to create a golden crust.

Cheese Variety: Mix in different cheeses like gouda or cheddar for a unique spin on your Ham and Cheese Croissant Breakfast Casserole, enhancing flavor.

Fresh Ingredients: Use fresh herbs if possible; they elevate the dish, adding brightness and complex flavors that dried herbs may not provide.

Cooling Time: Letting it rest for a few minutes after baking centers the casserole and makes slicing easier, preventing a messy presentation.

What to Serve with Ham and Cheese Croissant Breakfast Casserole

Nothing completes a cozy breakfast like delightful pairings that enhance the delicious flavors of this crowd-pleasing dish.

  • Fresh Fruit Salad: A mix of vibrant seasonal fruits adds a refreshing contrast, balancing the richness of the casserole beautifully.
  • Crispy Bacon: The salty crunch of bacon brings an irresistible texture that pairs perfectly with the creamy layers of the casserole.
  • Roasted Asparagus: The earthy taste of tender asparagas complements the savory ham and enhances the overall flavor profile. For tried-and-true textural contrast, a quick roast caramelizes the edges while keeping it vibrant.
  • Savory Scones: Cheddar or herb scones provide a delightful bread option that pairs wonderfully with the dish’s decadence, creating a satisfying brunch spread.
  • Yogurt Parfaits: Creamy yogurt layered with granola and berries creates a light, sweet element, adding diversity to your breakfast offerings.
  • Herbal Tea: A warm cup of herbal tea or chai invigorates the morning, introducing soothing flavors that harmonize with cheesy richness.
  • Cinnamon Rolls: For those with a sweet tooth, decadent cinnamon rolls drizzled with icing offer a heavenly contrast to the savory casserole.
  • Mimosa: A refreshing mimosa adds a festive touch to your breakfast or brunch, bringing sparkling brightness that pairs delightfully with the dish.
  • Maple Syrup: A drizzle of maple syrup over servings of casserole gives a sweet touch, enhancing the dish’s profile while inviting inner indulgence.
  • Chocolate Coffee Cake: Rich with cocoa, this dessert adds just the right sweet ending to your breakfast spread, making it feel celebratory!

Ham and Cheese Croissant Breakfast Casserole Recipe FAQs

What type of croissants works best for this casserole?
Absolutely, using large buttery croissants is key to achieving a fluffy and flavorful base! They should be fresh or a day or two old, as this ensures they can absorb the egg mixture without becoming too soggy. If you have day-old croissants, even better—they’ll soak up flavors wonderfully!

How should I store leftovers of the casserole?
For maximizing freshness, store any leftovers in an airtight container in the fridge for up to 3 days. When reheating, I recommend popping it in the microwave or oven until completely warm to maintain that delightful texture.

Can I freeze the Ham and Cheese Croissant Breakfast Casserole?
Definitely! To freeze, wrap individual portions tightly in plastic wrap, followed by a layer of aluminum foil. This will protect it from freezer burn. You can keep it in the freezer for up to 2 months. When you’re ready to enjoy it, just thaw it overnight in the refrigerator before reheating!

What should I do if the casserole is too soggy?
If your casserole turns out soggy, it may be due to the croissants being too fresh or not soaking properly. To prevent this next time, ensure your croissants are slightly stale or allow the casserole to soak for at least 20 minutes before baking. Baking it uncovered for the last part of cooking also helps to firm up the texture.

Are there any dietary considerations for this recipe?
Yes! If you’re catering to dietary needs, you can substitute the ham with turkey or a meat substitute for a healthier option. For cheese allergies, you can use dairy-free cheese alternatives. Additionally, double-check that the croissants are free from dairy or gluten if you need a gluten-free version for any guests; I often recommend checking local bakeries for suitable options.

Can I add vegetables to the casserole?
Very much so! Feel free to add your favorite veggies—like spinach, bell peppers, or mushrooms—into the layers for added nutrition and flavor. Just be sure to sauté them first if they have a high water content to prevent sogginess in your delightful Ham and Cheese Croissant Breakfast Casserole.

Irresistible Ham and Cheese Croissant Breakfast Casserole

This Ham and Cheese Croissant Breakfast Casserole is a perfect brunch dish combining croissants, ham, and Swiss cheese for a delightful meal.

  • 9×13-inch baking dish
  • Mixing Bowl
  • Whisk
  • spatula

For the Base

  • 6 large buttery croissants (cut into quarters)
  • 1 cup diced ham (adds savory depth)
  • 1 cup shredded Swiss cheese (melts beautifully)

For the Egg Mixture

  • 6 large eggs (essential binding agent)
  • 2 cups milk (adds creaminess)
  • 1 teaspoon dried thyme (infuses subtle flavor)
  • 1 teaspoon garlic powder (adds warm flavor)
  • salt and pepper (to taste)

For the Topping

  • ½ cup grated Parmesan cheese (adds crispy layer)
  • fresh chives (chopped, for garnish)

Step-by-Step Instructions

  1. Preheat your oven to 350°F (175°C) and grease a 9×13 inch baking dish with butter or cooking spray.
  2. Layer the quartered croissants evenly across the bottom of the baking dish.
  3. Sprinkle the diced ham over the croissants, followed by the shredded Swiss cheese.
  4. In a medium bowl, whisk together the eggs, milk, dried thyme, garlic powder, and a pinch of salt and pepper until smooth.
  5. Pour the egg mixture evenly over the layered croissants, ham, and cheese. Press down gently with a spatula.
  6. Sprinkle the grated Parmesan cheese on top.
  7. Cover loosely with aluminum foil and bake for 30 minutes.
  8. Remove the foil and bake for an additional 15-20 minutes until the top is golden brown.
  9. Let cool for 5 minutes before slicing and garnish with freshly chopped chives.

Soak the croissants in the egg mixture for at least 20 minutes for best texture. Letting it rest after baking helps with slicing.

Breakfast
American
breakfast casserole, brunch, casserole, Easy Recipe, Ham and Cheese Croissant Breakfast Casserole, Leftovers

Filed Under: Breakfast

Ultimate Hashbrown Breakfast Casserole for Cozy Mornings

August 9, 2025 by grace bellamy Leave a Comment

There’s something magical about waking up to the aroma of a warm, hearty breakfast wafting through the house. It’s a culinary embrace that promises comfort and satisfaction, making mornings feel just a bit brighter. Today, I’m excited to share my favorite recipe for Hashbrown Breakfast Casserole, a dish that is not only a crowd-pleaser but also incredibly easy to throw together. With minimal prep time and maximum flavor, it combines crispy hashbrowns, savory breakfast sausage, and a cheesy blend that will make your family jump out of bed in anticipation. This casserole is perfect for brunch gatherings or a delightful family breakfast, and it can even be made ahead for those busy weekdays. Are you ready to elevate your breakfast game? Let’s dive in!

Why is this casserole a breakfast hero?

Easy to Prepare: With just 15 minutes of prep, this dish is perfect for busy mornings or brunch gatherings.

Hearty and Hearty: Packed with savory breakfast sausage and two types of cheese, it’s a satisfying meal that everyone will love.

Versatile Ingredients: Feel free to customize with your favorite veggies, like bell peppers or onions, for an extra boost of flavor and color.

Feeds a Crowd: This recipe serves 8 people, making it an ideal choice for family get-togethers or when you want leftovers for a quick meal.

Effortless Cleanup: One baking dish means less time scrubbing and more time enjoying your delicious Hashbrown Breakfast Casserole with loved ones.

Whether you are looking for a cozy family breakfast or want to impress friends at your next brunch, this casserole hits all the right notes!

Hashbrown Breakfast Casserole Ingredients

Get ready to whip up this delightful dish!

For the Casserole

  • 1 package (30 oz) frozen hashbrowns – thawed for easier layering in the casserole.
  • 1 pound breakfast sausage – cooked and crumbled for that savory flavor every bite craves.
  • 1 cup shredded cheddar cheese – adds a rich, tangy taste that balances the dish perfectly.
  • 1 cup shredded mozzarella cheese – gives a gooey, stretchy texture when melted.
  • 6 large eggs – the binding agent that makes this Hashbrown Breakfast Casserole fluffy and hearty.
  • 1 cup milk – ensures the casserole is creamy and keeps everything moist during baking.
  • 1 teaspoon salt – enhances all the flavors beautifully, so don’t skip it!
  • ½ teaspoon black pepper – adds a subtle kick to elevate your casserole.
  • ½ teaspoon garlic powder – infuses a warm, welcoming aroma into every bite.

Optional Veggies

  • 1 cup diced bell peppers – sweet and colorful additions that brighten the dish.
  • 1 cup diced onions – provide a zesty crunch that complements the creamy texture.

For Garnishing

  • Fresh parsley, chopped – adds a fresh pop of color and flavor for that perfect finishing touch.

Step‑by‑Step Instructions for Hashbrown Breakfast Casserole

Step 1: Preheat the Oven
Begin by preheating your oven to 350°F (175°C). This ensures it reaches the perfect temperature while you prepare the casserole, allowing for even baking. You can use an oven thermometer for an accurate read, preventing any surprises when it’s time to cook your Hashbrown Breakfast Casserole.

Step 2: Prepare the Baking Dish
Lightly grease a 9×13-inch baking dish with cooking spray or a bit of butter. This step is essential to prevent the casserole from sticking to the sides, making cleanup easier. If you have parchment paper, consider lining the bottom for added protection and easy serving.

Step 3: Layer the Hashbrowns
Spread the thawed hashbrowns evenly across the bottom of the greased baking dish. Use a spatula to press them down slightly, creating a solid base. The hashbrowns should be golden and slightly crispy, providing a delightful texture when baked.

Step 4: Add the Breakfast Sausage
Evenly sprinkle the cooked and crumbled breakfast sausage over the hashbrown layer. Make sure to cover the hashbrowns completely; this savory layer brings both flavor and substance to your Hashbrown Breakfast Casserole.

Step 5: Cheese It Up
In a bowl, combine the shredded cheddar and mozzarella cheeses. Set aside half of this cheesy mixture and sprinkle the rest over the layer of sausage. The cheese will melt beautifully, adding richness and gooeyness that balances the casserole perfectly.

Step 6: Whisk the Egg Mixture
In a separate bowl, whisk together the eggs, milk, salt, pepper, and garlic powder until everything is well combined and frothy. This mixture will bind all the ingredients in your Hashbrown Breakfast Casserole and create that fluffy texture everyone loves.

Step 7: Pour the Egg Mixture
Slowly pour the egg mixture evenly over the layered ingredients in the baking dish, ensuring that it soaks into the layers. Make sure to cover it evenly, so every delicious bite has that creamy, savory flavor.

Step 8: Top with Remaining Cheese
Sprinkle the reserved cheese mixture over the egg layer, creating a golden, melty crust on top. This extra layer of cheese will give your Hashbrown Breakfast Casserole a delightful finish, enhancing both flavor and presentation.

Step 9: Add Optional Veggies
If desired, top the cheese layer with diced bell peppers and onions for added flavor and color. These veggies bring a fresh crunch and can elevate the flavors in your casserole, making it not just delicious but visually appealing as well.

Step 10: Bake the Casserole
Place the baking dish in the preheated oven and bake for 45-50 minutes. You’ll know it’s ready when the casserole is set, bubbly, and has a golden top. Keep an eye on it in the last few minutes to ensure it doesn’t overcook.

Step 11: Cool and Serve
Once baked, allow the casserole to cool for a few minutes before slicing into servings. This cooling period will help it hold together better when serving your delightful Hashbrown Breakfast Casserole, making it easier for everyone to enjoy.

Make Ahead Options

These Hashbrown Breakfast Casseroles are perfect for meal prep enthusiasts! You can combine the dry ingredients, such as the thawed hashbrowns, cooked breakfast sausage, and cheese, up to 24 hours in advance. Simply layer them in the baking dish, cover tightly with plastic wrap, and refrigerate. For the egg mixture, whisk the eggs, milk, and spices, then store it in the fridge until you’re ready to bake. This ensures the ingredients maintain their quality and freshness. When you’re ready to enjoy your delicious casserole, pour the egg mixture over the layers, bake at 350°F (175°C) for 45-50 minutes, and savor the flavors that are just as delightful as if made fresh!

Expert Tips for Hashbrown Breakfast Casserole

Perfect Hashbrowns: Ensure your hashbrowns are fully thawed and pressed to remove excess moisture—this keeps your casserole from becoming soggy.

Sausage Choice: Use spicy or Italian sausage for an extra flavor kick. Just remember to drain excess grease to avoid a greasy casserole.

Cheese Variations: Feel free to mix cheeses! A combination of Monterey Jack or pepper jack can add a delightful twist to your Hashbrown Breakfast Casserole.

Even Baking: Cover the casserole with foil for the first 30 minutes to prevent over-browning, then uncover it for the last 15-20 minutes for a golden top.

Make-Ahead Magic: Prepare the casserole the night before and refrigerate. Just pop it in the oven in the morning for a quick and easy breakfast!

Easy Serving: Use a sharp knife to slice into portions after cooling slightly; this will help keep the layers intact and make serving a breeze.

Hashbrown Breakfast Casserole Variations

Feel free to let your creativity shine with these delightful twists to your Hashbrown Breakfast Casserole!

  • Vegetarian: Substitute the breakfast sausage with black beans or cooked lentils for a protein-packed, plant-based option. This alternative creates a hearty yet light meal that everyone can enjoy.

  • Spicy: Add diced jalapeños or a sprinkle of red pepper flakes to the egg mixture for an extra kick. The heat beautifully complements the creamy, cheesy layers and adds an exciting depth of flavor.

  • Mediterranean: Incorporate feta cheese and sun-dried tomatoes instead of mozzarella and cheddar. This twist brings a vibrant Mediterranean flair, making for a refreshing change.

  • Dairy-Free: Use oat or almond milk and swap the cheese for dairy-free alternatives. This deliciously creamy variation ensures everyone can savor your casserole without missing out.

  • Herb-Infused: Add fresh herbs like thyme or rosemary to the egg mixture for an aromatic uplift. The herbs bring a new dimension of flavor that brightens each bite of your casserole.

  • Savory Sweet: Include a sprinkle of cinnamon and nutmeg in the egg mixture and serve with maple syrup. This unexpected pairing creates a delightful sweet and savory experience that might surprise your guests.

  • Loaded: Top the casserole with crispy bacon or diced ham before baking. This indulgent version will please meat lovers and add a crunchy texture that contrasts beautifully with the creamy filling.

  • Breakfast Burrito Style: Mix in seasoned potatoes and green chilies, and serve with salsa on the side. This casual rendition transforms your casserole into a festive, flavor-packed breakfast that’s perfect for gatherings.

Explore these ideas and make this recipe your own depending on what you have on hand or your family’s preferences. Happy cooking!

What to Serve with Hashbrown Breakfast Casserole

There’s nothing quite like a cozy breakfast spread that tantalizes your taste buds and warms the soul.

  • Crispy Bacon: The smoky crunch of bacon adds a savory contrast, making each bite of the casserole even more satisfying. Pairing crispy bacon with the creamy casserole creates a delightful textural experience.

  • Fresh Fruit Salad: Bright, juicy fruits like strawberries, blueberries, and oranges bring a refreshing sweetness that balances the hearty flavors. The vibrant colors also brighten up your breakfast table.

  • Buttery Croissants: Flaky, warm croissants are a delightful addition that provides a soft, buttery touch, perfect for scooping up the casserole. Their delicate layers nicely complement the dish’s heartiness.

  • Sautéed Spinach: Lightly sautéed spinach offers a nutritious side that adds a pop of color and earthy flavor, enhancing both taste and presentation. Plus, it gives a fresh touch to the overall meal.

  • Spiced Chai Tea: The rich and aromatic spices of a warm chai tea serve as a comfort drink that pairs wonderfully with the casserole. Its warmth adds an inviting ambiance to your breakfast experience.

  • Maple Syrup Drizzle: For those who enjoy sweet touches, a light drizzle of maple syrup over a slice of the casserole transforms it into a delightful sweet and savory combo.

  • Homemade Cinnamon Rolls: Soft, gooey cinnamon rolls with their sweet aroma create a scrumptious sweet contrast, adding an indulgent touch to a cozy breakfast gathering.

  • Chocolate Milk: A fun and creamy drink makes breakfast feel like a treat! The chocolaty flavor can be a delightful companion to the savory casserole.

Choose a pairing or two to elevate your Hashbrown Breakfast Casserole into a full meal experience that your family will love!

How to Store and Freeze Hashbrown Breakfast Casserole

Fridge: Store any leftovers in an airtight container for up to 3 days. Make sure to let the casserole cool completely before sealing to maintain freshness.

Freezer: If you’d like to freeze your Hashbrown Breakfast Casserole, wrap tightly in plastic wrap and then in aluminum foil. It can be stored for up to 2 months.

Reheating: To reheat, thaw overnight in the fridge and bake at 350°F (175°C) for 20-25 minutes until warmed through. You can cover it with foil to prevent browning.

Portioning: For convenience, consider cutting the casserole into individual servings before freezing. This allows for quick reheating on busy mornings!

Hashbrown Breakfast Casserole Recipe FAQs

How do I select the best hashbrowns for this recipe?
Absolutely! When choosing hashbrowns, look for a package labeled “easy-to-cook” or “fully thawed” to ensure they have the right texture. Frozen hashbrowns should be free of ice crystals and not have dark spots all over, which can indicate freezer burn.

What is the best way to store leftover Hashbrown Breakfast Casserole?
Store your leftovers in an airtight container in the refrigerator for up to 3 days. Make sure the casserole has cooled completely before sealing it, as this helps maintain moisture and flavor.

Can I freeze the Hashbrown Breakfast Casserole?
Very! To freeze, wrap the casserole tightly in plastic wrap and then in aluminum foil. It can be frozen for up to 2 months. When you’re ready to enjoy it, thaw it overnight in the fridge and bake at 350°F (175°C) for 20-25 minutes until warmed through. Cover with foil to prevent browning.

What should I do if my casserole is too soggy?
If your casserole turns out soggy, ensure the hashbrowns are fully thawed and drained of excess moisture before baking. Also, you can try cooking it a bit longer to evaporate any excess liquid. Cover the dish with foil for the first half of baking, then uncover it for the last part to allow for a golden finish.

Are there any dietary considerations for pets or allergies?
Great question! This casserole contains common allergens such as eggs, dairy, and gluten found in hashbrowns. If you have pets, avoid letting them eat this dish, as ingredients like onions can be toxic to dogs. For gluten-free needs, ensure you’re using gluten-free hashbrowns and check your sausage for gluten-containing ingredients.

Can I make any substitutions for the sausage in this recipe?
Of course! You can substitute breakfast sausage with turkey sausage or even a plant-based sausage for a lighter or vegetarian option. Just make sure it’s cooked and crumbled before adding to the casserole. Adjust the seasonings to complement the flavors of your chosen sausage to keep every bite just as delightful!

Ultimate Hashbrown Breakfast Casserole for Cozy Mornings

This Hashbrown Breakfast Casserole combines crispy hashbrowns, savory breakfast sausage, and a cheesy blend for a delightful breakfast.

  • 9×13-inch baking dish

For the Casserole

  • 1 package frozen hashbrowns (30 oz, thawed)
  • 1 pound breakfast sausage (cooked and crumbled)
  • 1 cup shredded cheddar cheese
  • 1 cup shredded mozzarella cheese
  • 6 large eggs
  • 1 cup milk
  • 1 teaspoon salt
  • ½ teaspoon black pepper
  • ½ teaspoon garlic powder

Optional Veggies

  • 1 cup diced bell peppers
  • 1 cup diced onions

For Garnishing

  • 1 tablespoon fresh parsley (chopped)

Step-by-Step Instructions

  1. Preheat your oven to 350°F (175°C).
  2. Lightly grease a 9×13-inch baking dish with cooking spray or a bit of butter.
  3. Spread the thawed hashbrowns evenly across the bottom of the greased baking dish.
  4. Evenly sprinkle the cooked and crumbled breakfast sausage over the hashbrown layer.
  5. In a bowl, combine the shredded cheddar and mozzarella cheeses. Set aside half and sprinkle the rest over the layer of sausage.
  6. In a separate bowl, whisk together the eggs, milk, salt, pepper, and garlic powder until well combined and frothy.
  7. Slowly pour the egg mixture evenly over the layered ingredients in the baking dish.
  8. Sprinkle the reserved cheese mixture over the egg layer.
  9. If desired, top the cheese layer with diced bell peppers and onions.
  10. Place the baking dish in the preheated oven and bake for 45-50 minutes.
  11. Allow the casserole to cool for a few minutes before slicing into servings.

Make ahead for busy weekdays. Store leftovers in an airtight container for up to 3 days.

Breakfast
American
breakfast casserole, cheesy casserole, easy breakfast, family breakfast, Hashbrown Breakfast Casserole, make ahead breakfast

Filed Under: Breakfast

Crispy Air Fryer Tortilla Garlic Bread in Just 10 Minutes

August 9, 2025 by grace bellamy Leave a Comment

As I rummaged through my kitchen one evening, my eyes landed on two lonely flour tortillas. Inspiration struck—how about whipping up a quick and delicious snack? Enter the Air Fryer Tortilla Garlic Bread! This recipe not only transforms simple ingredients into a crispy, golden delight, but it also takes just 10 minutes from start to finish. It’s the perfect antidote to fast food cravings and makes an easy, crowd-pleasing side for just about any meal. Plus, you can customize it with melted cheese or a sprinkle of red pepper flakes for an extra kick. Curious about how such a humble dish can turn your dinner into something memorable? Let’s dive in!

Why is this Garlic Bread so Special?

Simplicity Made Delicious: This Air Fryer Tortilla Garlic Bread requires minimal ingredients and just 10 minutes of your time. Perfect for busy weeknights!

Flavor Explosion: With the fragrant garlic butter and optional toppings like cheese or red pepper flakes, each bite is bursting with savory goodness.

Endless Versatility: Use this garlic bread as a base for toppings, or serve it alongside your favorite dishes. It complements pasta, soups, and salads perfectly!

Healthy Alternative: Say goodbye to greasy takeout! This recipe is not only quick but also a healthier choice for satisfying your snack cravings.

Crowd-Pleasing Appeal: Friends and family will love this quick snack—it’s a hit at get-togethers or casual dinners. Looking for more quick recipes? Check out our easy air fryer recipes.

Air Fryer Tortilla Garlic Bread Ingredients

Here’s what you’ll need to whip up your delicious Air Fryer Tortilla Garlic Bread:

For the Garlic Butter
• Butter – Adds richness and helps the garlic flavor shine through.
• Minced Garlic – Fresh is best for a potent, aromatic kick.

For the Tortilla Base
• Flour Tortillas – Choose large, soft tortillas for that perfect crispy edge.
• Salt (optional) – Enhances the overall flavor; use sea salt for a gourmet touch.
• Italian Seasoning (optional) – Gives a flavorful herb boost; feel free to experiment with dried herbs.

For Optional Toppings
• Grated Cheese (optional) – Melts beautifully for an indulgent, cheesy finish.
• Red Pepper Flakes (optional) – Adds the perfect amount of heat for spice lovers.

Step‑by‑Step Instructions for Air Fryer Tortilla Garlic Bread

Step 1: Prepare the Garlic Butter
Begin by mixing 2 tablespoons of softened butter with 2 minced garlic cloves in a small bowl until thoroughly combined. This fragrant garlic butter will be the star of your Air Fryer Tortilla Garlic Bread. Make sure the butter is smooth and creamy for easy spreading later on.

Step 2: Spread the Mixture
Take your prepared garlic butter and evenly spread it over one side of each flour tortilla. Use a butter knife to ensure a generous layer, as this will help create that delicious crispy surface. Visualize the butter glistening across the tortillas, ready to elevate the flavor.

Step 3: Add Seasonings
Sprinkle salt and Italian seasoning over the garlic buttered tortillas if you’re using them. This step is optional, but it enhances the overall flavor profile of your Air Fryer Tortilla Garlic Bread. The herbs will infuse the garlic goodness with an aromatic kick that’s simply irresistible.

Step 4: Air Fry the Tortillas
Place the tortillas in your air fryer basket with the garlic butter side facing up. Ensure they fit comfortably without overlapping, allowing even cooking. Set the air fryer to 400°F (200°C) and cook for 5 minutes, keeping an eye on them as they turn crispy and golden.

Step 5: Add Toppings (Optional)
Once the tortillas are golden and crispy, carefully remove them from the air fryer. If desired, sprinkle grated cheese or a dash of red pepper flakes on top while they’re still warm. This adds an extra layer of flavor and indulgence to your Air Fryer Tortilla Garlic Bread.

Step 6: Serve Warm
Slice the crispy tortilla garlic bread into triangles or wedges for easy serving. Enjoy it warm alongside your favorite dishes or as a delicious snack on its own. The aroma will be inviting, and each bite will leave you craving more of this quick and satisfying treat!

Air Fryer Tortilla Garlic Bread Variations

Feel free to get creative with this recipe and make it truly your own—your taste buds will thank you!

  • Dairy-Free: Substitute vegan butter for a delightful dairy-free twist, ensuring everyone can enjoy this garlicky goodness.

  • Cheesy Delight: Add a mix of mozzarella and parmesan before air frying for a melty, cheesy bread that will impress your guests. The blend of cheeses creates a rich flavor that pairs perfectly with garlic.

  • Spicy Kick: Mix in some diced jalapeños or sprinkle cayenne pepper on top before air frying for an extra spicy kick. This adds a whole new level of warmth and excitement to each bite!

  • Herb Infusion: Swap Italian seasoning with fresh herbs like basil or parsley for a vibrant, fresh taste. Adding herbs not only boosts flavor but also brings a pop of color to your garlic bread.

  • Whole Wheat Option: Use whole wheat tortillas for added fiber, making this tasty treat a bit healthier without sacrificing flavor. You’ll still get that crispy, satisfying crunch!

  • Garlic Lovers’ Dream: Increase the garlic to 4 cloves for a more robust garlic flavor. If you love garlic, this variation gives you that extra punch you crave!

  • Mediterranean Flare: Top your garlic bread with Kalamata olives and feta cheese before air frying for a Mediterranean-inspired appetizer. These toppings introduce a delightful brininess that complements the garlic beautifully.

  • Avocado Addition: Once out of the air fryer, mash some avocado on top for a creamy, nutritious topping that brings a fresh dimension to your garlic bread. This twist adds great texture and keeps the dish vibrant!

Each variation transforms your Air Fryer Tortilla Garlic Bread into a unique creation that’s perfect for any occasion. Pair it with your favorite sides, and don’t forget to check out our easy air fryer recipes for more delicious ideas!

Make Ahead Options

Looking to streamline your cooking and save time? You can easily prep the components for your Air Fryer Tortilla Garlic Bread up to 24 hours in advance. Begin by mixing the garlic butter and storing it in an airtight container in the refrigerator. You can also spread the garlic butter mixture onto the tortillas, then stack them with parchment paper between each one to prevent sticking. When you’re ready to serve, simply air fry the prepped tortillas at 400°F (200°C) for about 5 minutes until they’re golden and crispy. This way, you’ll have a delicious, quick snack ready without any hassle, making your busy weeknights so much easier!

How to Store and Freeze Air Fryer Tortilla Garlic Bread

Room Temperature: Store leftover Air Fryer Tortilla Garlic Bread in a cool, dry place for up to 2 hours to maintain its crispiness; cover it lightly with a paper towel to protect it.

Fridge: To keep it fresh for longer, place the garlic bread in an airtight container in the fridge for up to 3 days. Reheat in the air fryer for a few minutes to revive the crunch.

Freezer: You can freeze leftovers by wrapping each piece tightly in plastic wrap, followed by aluminum foil. Store in the freezer for up to 2 months. Just air fry straight from frozen, adding a couple of extra minutes to the cooking time.

Reheating: For best results, reheat in the air fryer at 350°F (175°C) for 3-5 minutes. Avoid the microwave, as it can make the bread chewy instead of crispy.

Expert Tips for Air Fryer Tortilla Garlic Bread

  • Garlic Freshness: Use fresh garlic for the best flavor. Dried garlic simply won’t have the same aromatic kick, undermining the essence of your Air Fryer Tortilla Garlic Bread.

  • Butter Softness: Ensure your butter is softened but not melted. This allows for easier spreading without tearing the tortillas.

  • Tortilla Size: Opt for large, medium-thickness tortillas. Thin ones may burn quickly, while too-thick ones won’t get crispy.

  • Even Cooking: Keep space between tortillas in the air fryer. Overlapping can result in uneven cooking and soggy spots.

  • Personalize It: Feel free to experiment with spices like paprika or oregano, tailoring your Air Fryer Tortilla Garlic Bread to your taste, and make it uniquely yours!

What to Serve with Air Fryer Tortilla Garlic Bread

Transform your delightful garlic bread into a full meal experience with these perfect pairings!

  • Creamy Tomato Soup: This classic combo enhances the garlic flavors and offers a comforting warmth on chilly nights.

  • Crispy Salad: A fresh, crunchy salad balances the richness of the garlic bread, creating a delightful contrast of textures.

  • Spaghetti Aglio e Olio: The simple yet flavorful pasta dish complements the garlic while embracing Italian traditions; a match made in heaven!

  • Homemade Guacamole: The creamy, zesty guacamole pairs beautifully and adds a refreshing element, perfect for dipping.

  • Savory Chili: A hearty chili served alongside creates a cozy feel, with spoonfuls of richness that make each bite of garlic bread even more enjoyable.

  • Herb-Infused Olive Oil: For a refined touch, serve a small dish of herb oil for dipping. The herbal notes will enhance the garlic butter perfectly.

  • Chilled White Wine: A crisp Sauvignon Blanc is the ideal beverage that cuts through the richness, refreshing your palate with each sip.

Each of these pairings will help elevate your dining experience, making your Air Fryer Tortilla Garlic Bread the star of the meal!

Air Fryer Tortilla Garlic Bread Recipe FAQs

How do I choose the best tortillas for this recipe?
For the best results, opt for large, soft flour tortillas. A medium thickness allows them to become crispy without burning. Avoid thin tortillas, as they might become too fragile to handle.

How should I store leftover Air Fryer Tortilla Garlic Bread?
You can store leftovers at room temperature for up to 2 hours, covered with a paper towel. For longer storage, place them in an airtight container in the fridge, where they’ll stay fresh for about 3 days.

Can I freeze Air Fryer Tortilla Garlic Bread?
Absolutely! To freeze, wrap each piece tightly in plastic wrap, then in aluminum foil. Store them in the freezer for up to 2 months. When you’re ready to enjoy, throw them straight into the air fryer for a few extra minutes at the same cooking temperature.

What if my tortilla garlic bread isn’t crispy enough?
If your garlic bread comes out less crispy than you’d like, there are a couple of things you can try. First, make sure you’re not overcrowding the air fryer basket; each tortilla needs space to circulate air properly. If the bread is still soft, add an extra minute to the cooking time for a more golden finish.

Is this recipe suitable for those with allergies?
Check all your ingredients: for example, wheat-based tortillas contain gluten, so use gluten-free varieties if you have a gluten allergy. The garlic butter can easily be substituted with a dairy-free alternative if you’re lactose intolerant!

Can I customize this recipe?
Very! Feel free to experiment with different herbs or cheeses to match your preferences. You can also add toppings like sliced tomatoes or olives before air frying for a Mediterranean twist!

Crispy Air Fryer Tortilla Garlic Bread in Just 10 Minutes

Quick and delicious Air Fryer Tortilla Garlic Bread that’s crispy and flavorful. Perfect for a snack or side dish.

  • Air Fryer

Garlic Butter

  • 2 tablespoons Butter (softened)
  • 2 cloves Minced Garlic (fresh)

Tortilla Base

  • 2 large Flour Tortillas (soft)
  • Salt (optional)
  • Italian Seasoning (optional)

Optional Toppings

  • Grated Cheese (optional)
  • Red Pepper Flakes (optional)

Steps

  1. Mix 2 tablespoons of softened butter with 2 minced garlic cloves in a small bowl until well combined.
  2. Spread the garlic butter evenly over one side of each flour tortilla.
  3. Sprinkle salt and Italian seasoning over the buttered tortillas if using.
  4. Place the tortillas butter side up in the air fryer and cook at 400°F (200°C) for 5 minutes.
  5. Remove the tortillas and, if desired, add grated cheese or red pepper flakes on top.
  6. Slice the crispy tortilla garlic bread into triangles and serve warm.

Store leftovers in an airtight container; can be reheated in the air fryer to maintain crispiness.

Side Dishes
American
Air Fryer Tortilla Garlic Bread, easy snacks, fried bread, garlic bread, quick recipes, tortilla recipes

Filed Under: Side Dishes

Creamy Spinach Mushroom Pasta for Cozy Nights In

August 9, 2025 by grace bellamy Leave a Comment

The aroma of sautéed mushrooms and garlic wafted through my kitchen, instantly lifting my spirits. It was the perfect moment for a Spinach Mushroom Pasta, a dish that’s not only quick and simple but also packed with a delightful blend of flavors. With fresh spinach folding into creamy goodness, this recipe proves that delectable home-cooked meals don’t have to take hours or involve complicated techniques. Cooking enthusiasts, rejoice! Each bite is a celebration of wholesome ingredients, making it a fantastic option for busy weeknights or cozy gatherings with friends. Plus, it’s a wonderful way to incorporate more greens into your diet without sacrificing taste. Are you ready to indulge in a comforting bowl of this vibrant pasta? Let’s dive in!

Why is Spinach Mushroom Pasta so beloved?

Simplicity: This recipe is incredibly easy to whip up, making it a perfect choice for busy weeknights or last-minute gatherings.

Flavor Explosion: The savory combination of garlic and mushrooms pairs beautifully with fresh spinach, ensuring a rich taste in every bite.

Creamy Delight: With a luscious cream sauce that binds the dish together, you’ll savor that comforting texture without feeling heavy.

Health Boost: Packed with greens, this dish lets you indulge while sneaking in nutrients—making it great for anyone looking to up their veggie intake.

Crowd-Pleaser: Whether you’re cooking for family or entertaining guests, this Spinach Mushroom Pasta is sure to impress, leaving them asking for seconds!

Pairing Options: Serve it with some garlic bread or a light salad for a complete meal that everyone will love! If you’re interested in more delicious ideas, don’t miss my suggestions for perfect side dishes.

Spinach Mushroom Pasta Ingredients

For the Pasta
• 8 oz pasta – Use penne, fettuccine, or your favorite for the best texture.

For the Sauce
• 1 tablespoon olive oil or butter – This adds richness and flavor to your sauce.
• 8 oz mushrooms, sliced – Baby bella or white mushrooms bring umami depth to the dish.
• 3–4 cups fresh spinach – Fresh greens that will wilt perfectly into the creamy sauce.
• 3 cloves garlic, minced – Adds a fragrant punch to enhance the overall flavor profile.
• ½ teaspoon salt – Essential for balancing the dish’s flavors.
• ¼ teaspoon black pepper – A touch of spice that complements the creaminess.
• ½ cup heavy cream or half-and-half – For a luscious creaminess, creating that comforting texture.
• ¼ cup grated Parmesan cheese – Use fresh for the best melting quality; it enriches the sauce wonderfully.
• ½ cup reserved pasta water – Add this as needed to adjust sauce consistency.

Each ingredient plays a vital role in crafting a delightful Spinach Mushroom Pasta that is both easy to make and wonderfully satisfying! Enjoy every bite and savor the comforting flavors!

Step‑by‑Step Instructions for Spinach Mushroom Pasta

Step 1: Cook the Pasta
Begin by boiling a large pot of salted water over high heat. Once the water reaches a rolling boil, add 8 oz of your favorite pasta—penne or fettuccine work beautifully. Cook until the pasta is al dente, about 8–10 minutes, keeping an eye on it to ensure it’s perfectly tender. Reserve ½ cup of pasta water before draining and set the pasta aside.

Step 2: Sauté the Mushrooms
In a large skillet, heat 1 tablespoon of olive oil or butter over medium heat. Once melted, add 8 oz of sliced mushrooms and sauté for 6–7 minutes, stirring occasionally, until they become golden brown and tender. The mushrooms should release their juices and develop a nice color, enticing your senses with their aroma as part of your Spinach Mushroom Pasta journey.

Step 3: Add Flavorful Ingredients
Next, stir in 3 cloves of minced garlic, along with ½ teaspoon of salt and ¼ teaspoon of black pepper. Cook for about 1 minute until the garlic becomes fragrant. Then, add in 3–4 cups of fresh spinach, stirring continuously for 2–3 minutes until the spinach wilts beautifully. The vibrant greens will complement the earthy mushrooms, elevating the dish.

Step 4: Create the Creamy Sauce
Pour in ½ cup of heavy cream or half-and-half, followed by ¼ cup of grated Parmesan cheese. Stir to combine everything well, allowing the mixture to simmer for 2–3 minutes. This gentle simmering will help the sauce thicken slightly, creating that rich, creamy texture that is a hallmark of the Spinach Mushroom Pasta.

Step 5: Combine Pasta and Sauce
Carefully add your drained pasta to the skillet, tossing gently to coat it in the creamy sauce. Gradually mix in the reserved pasta water—about a tablespoon at a time—until your desired sauce consistency is reached. The pasta should be beautifully coated, and the sauce luscious and inviting, pulling all the flavors together for an unforgettable meal.

Step 6: Serve and Garnish
Remove the skillet from the heat and transfer your Spinach Mushroom Pasta to serving bowls. Sprinkle with additional grated Parmesan cheese for an extra touch of flavor and a lovely finish. Serve warm, allowing everyone to enjoy this comforting dish that marries the richness of creamy sauce with the freshness of spinach and mushrooms.

What to Serve with Spinach Mushroom Pasta

The delightful aroma of this creamy dish fills your home, making it a perfect centerpiece for a cozy meal with loved ones.

  • Garlic Bread: The crunchy, buttery flavor of garlic bread is a classic pairing, adding a satisfying crunch against the creaminess of the pasta.

  • Caesar Salad: Crisp romaine topped with creamy dressing provides a refreshing balance to the rich flavors of spinach mushroom pasta.

  • Roasted Broccoli: Tender, caramelized broccoli adds a beautiful earthy taste and a pop of color, enhancing the overall presentation.

  • White Wine: A chilled glass of Sauvignon Blanc or Pinot Grigio complements the dish beautifully, cutting through the creaminess and elevating the experience.

  • Simple Arugula Salad: With a peppery kick, this salad’s freshness will brighten the palate between bites of rich pasta, adding a zesty contrast.

  • Lemon Sorbet: For dessert, a light and refreshing lemon sorbet cleanses the palate and leaves a sweet note after the savory meal.

Each of these pairings enhances your Spinach Mushroom Pasta experience, turning a simple dinner into a delightful culinary adventure!

Expert Tips for Spinach Mushroom Pasta

• Pasta Perfection: Always cook pasta until al dente to avoid mushiness. It will continue to cook slightly when added to the sauce, ensuring the perfect texture.

• Mushroom Magic: Use fresh mushrooms instead of canned for the best flavor. Sauté them until they release their moisture and become golden brown for richer taste.

• Creamy Consistency: Don’t forget to reserve that pasta water! It helps adjust the sauce if it becomes too thick, allowing your Spinach Mushroom Pasta to maintain a perfect creamy texture.

• Season Smart: Taste the dish as you go, especially after adding salt and pepper. Everyone’s seasoning preference is different, so adjust according to your taste.

• Fresh Grated Cheese: Always opt for freshly grated Parmesan cheese over pre-packaged. It melts better and enhances the creaminess of your sauce for that authentic flavor.

Make Ahead Options

Preparing your Spinach Mushroom Pasta in advance is a fantastic way to save time on busy weeknights! You can cook the pasta and store it in the refrigerator for up to 3 days. You can also sauté the mushrooms, garlic, and spinach mixture, then let it cool before refrigerating it for the same duration. When you’re ready to serve, simply reheat the mushroom and spinach mix in a skillet, add the cream and Parmesan, and toss in the cold pasta. If the sauce thickens too much, add reserved pasta water to achieve that perfect creamy consistency. By prepping in advance, you can enjoy a delicious homemade meal with minimal effort!

How to Store and Freeze Spinach Mushroom Pasta

Fridge: Store leftovers in an airtight container for up to 3–4 days. This keeps the pasta fresh while retaining its creamy texture, making reheating a breeze.

Freezer: For longer storage, freeze portions in airtight containers or freezer bags for up to 2 months. Thaw in the fridge overnight before reheating for the best results.

Reheating: To enjoy your Spinach Mushroom Pasta again, gently reheat in a skillet over low heat, adding a splash of cream or milk to bring back that creamy consistency. Stir occasionally until warmed through.

Best Eaten Fresh: While this dish is delicious as leftovers, it’s best enjoyed fresh right after cooking for the ultimate creamy experience!

Spinach Mushroom Pasta Variations

Feel free to put your own spin on this delicious dish with these fun variations that will tantalize your taste buds!

  • Gluten-Free: Substitute regular pasta with gluten-free penne or fettuccine for a delightful alternative.
  • Dairy-Free: Swap heavy cream and Parmesan with coconut cream and nutritional yeast for a vegan twist.
  • Extra Veggies: Add diced bell peppers or zucchini for added color and nutrients. These veggies will blend beautifully with the mushrooms and spinach.
  • Spicy Kick: Stir in red pepper flakes to the sauté for a lovely heat that elevates the comforting flavors of the sauce.
  • Nutty Flavor: Toss in some toasted pine nuts or walnuts just before serving for a crunchy texture and a nutty aroma.
  • Protein Boost: Add grilled chicken or sautéed shrimp to make the dish heartier, perfect for a satisfying family meal.
  • Herbed Twist: Enhance the flavors by adding fresh herbs like basil or parsley right before serving; it brings a fresh pop that complements the creamy sauce.
  • One-Pot Wonder: Skip the extra pot! Sauté the spinach and mushrooms directly in the same pot you cooked the pasta for easy cleanup.

No matter how you customize it, each variation brings its own unique charm to this comforting dish. Enjoy exploring these delicious twists! If you’re looking for a refreshing salad to serve alongside, check out my light and bright arugula salad for a delightful pairing.

Spinach Mushroom Pasta Recipe FAQs

How do I choose the right mushrooms for my Spinach Mushroom Pasta?
Absolutely! For your Spinach Mushroom Pasta, baby bella or white mushrooms are excellent choices. Look for mushrooms that are firm and without dark spots or wrinkles. Fresh mushrooms should have a pleasant earthy aroma. If you can find them, try to select smaller to medium-sized mushrooms, as they tend to have a sweeter flavor and better texture once cooked.

What is the best way to store leftover Spinach Mushroom Pasta?
Very! Store leftovers in an airtight container in the refrigerator for up to 3–4 days. When you’re ready to enjoy again, just reheat gently on low heat in a skillet. You can add a splash of cream or milk to return its creamy goodness—we want every bite to feel like it just came off the stove!

Can I freeze Spinach Mushroom Pasta?
Of course! To freeze, portion your Spinach Mushroom Pasta into airtight containers or freezer bags. This keeps it fresh for about 2 months. I recommend letting it cool completely before freezing. When you’re ready to enjoy it, simply thaw it in the fridge overnight or use the microwave’s defrost setting for a quicker option. Reheat gently and you might find it’s just as delicious as when you first made it!

What should I do if my sauce is too thick?
No worries! If your sauce ends up too thick, simply add a tablespoon of the reserved pasta water as you reheat to thin it out. Stir continuously until you reach your desired consistency. Remember, it’s always easier to add liquid bit by bit!

Can I make this recipe dairy-free?
Absolutely! To make a dairy-free version of Spinach Mushroom Pasta, you can substitute heavy cream with a full-fat coconut milk or a dairy-free cream alternative. For the cheese, try a cashew-based or nutritional yeast option to still get that cheesy flavor without the dairy.

Is this recipe safe for pets?
Very! While the ingredients used in Spinach Mushroom Pasta are generally safe for most pets, it’s best to keep foods with cream, butter, or garlic away from your furry friends. Garlic can be toxic to dogs and cats in large quantities, so it’s best to avoid giving them human food with garlic in it. Always consult your vet for specific dietary recommendations tailored to your pet’s needs.

Enjoy making your Spinach Mushroom Pasta, and feel free to reach out if you have more questions!

Creamy Spinach Mushroom Pasta for Cozy Nights In

This Creamy Spinach Mushroom Pasta is a quick, flavorful, and healthy dish perfect for weeknights or gatherings.

  • Large Pot
  • large skillet
  • Measuring Cups
  • Measuring Spoons
  • Knife
  • cutting board

For the Pasta

  • 8 oz pasta (penne, fettuccine, or your favorite)

For the Sauce

  • 1 tablespoon olive oil or butter (adds richness and flavor)
  • 8 oz mushrooms, sliced (baby bella or white mushrooms)
  • 3–4 cups fresh spinach (will wilt into the sauce)
  • 3 cloves garlic, minced (adds pungent flavor)
  • ½ teaspoon salt (balances flavors)
  • ¼ teaspoon black pepper (adds slight spice)
  • ½ cup heavy cream or half-and-half (for creaminess)
  • ¼ cup grated Parmesan cheese (use fresh for better melting)
  • ½ cup reserved pasta water (to adjust sauce consistency)

Cooking Steps

  1. Boil a large pot of salted water. Add 8 oz of pasta once boiling and cook 8–10 minutes until al dente. Reserve ½ cup pasta water and drain.
  2. In a large skillet, heat 1 tablespoon of olive oil or butter over medium heat. Sauté 8 oz of sliced mushrooms for 6–7 minutes until golden brown and tender.
  3. Stir in 3 cloves minced garlic, ½ teaspoon salt, and ¼ teaspoon black pepper. Cook for 1 minute until the garlic becomes fragrant. Add 3–4 cups fresh spinach and stir until wilted, about 2–3 minutes.
  4. Pour in ½ cup heavy cream and ¼ cup grated Parmesan cheese, stirring to combine. Allow to simmer for 2–3 minutes to thicken.
  5. Add the drained pasta to the skillet, tossing gently to coat. Mix in reserved pasta water gradually until desired consistency is reached.
  6. Remove from heat and serve in bowls. Garnish with additional grated Parmesan cheese.

Best enjoyed fresh but can be stored in the fridge for 3-4 days or frozen for up to 2 months.

Main Dishes
Italian
comfort food, creamy pasta, Healthy Recipe, quick dinner, Spinach Mushroom Pasta, Vegetarian

Filed Under: Main Dishes

Delicious Tteokbokki: Your New Favorite Comfort Food!

August 9, 2025 by grace bellamy Leave a Comment

As I watched the vibrant colors of the melting cheese and glistening sauce mingle in the pan, I couldn’t help but feel a wave of happiness wash over me. Tteokbokki is the ultimate Korean comfort food that’s bound to transport you straight to the bustling streets of Seoul. This dish, boasting chewy rice cakes coated in a sweet and spicy sauce, is a delightful way to bring a little flair to your weeknight dinners. What I love most about Tteokbokki is not only its quick prep time—ready to serve in just 20 minutes—but also its crowd-pleasing appeal. It’s perfect for gatherings, or simply enjoying as a cozy solo meal. Ready to embark on a culinary adventure that warms your heart as much as your stomach? Let’s jump into the flavors of Tteokbokki together!

Why is Tteokbokki a Must-Try?

Quick and Easy: With just 20 minutes from start to finish, Tteokbokki is a time-saver for busy weeknights without skimping on flavor.

Flavor Explosion: The sweet-spicy sauce, rich in Gochujang, delivers a delicious kick, making every bite a culinary adventure.

Versatile Dish: Serve it as a snack, a side, or a main meal—this dish easily adapts to any occasion.

Comfort Food Charm: The chewy texture of rice cakes paired with the savory fish cakes provides an unparalleled comfort that’s hard to resist.

True Crowd-Pleaser: Friends and family alike will be asking for seconds—perfect for gatherings or cozy dinners. Try making some homemade kimchi on the side for that extra punch!

Tteokbokki Ingredients

For the Stock
• Anchovy stock, dashi, unsalted chicken stock, or water – Use any of these as a base for a rich flavor that beautifully complements the Tteokbokki.

For the Rice Cakes
• Korean rice cakes – Opt for fresh or frozen ones; if frozen, soak them in warm water for 10 minutes before cooking to achieve that delightful chewiness.

For the Fish Cakes
• Korean fish cakes – These add a wonderful texture; don’t hesitate to cut them into bite-sized pieces for easier eating.

For the Sauce
• Soy sauce – This provides a savory depth to your sauce.
• Sugar – Adds sweetness; you can use less for a more balanced flavor.
• Gochugaru (Korean chili powder) – Adjust to your spice preference; it’s the main source of heat in Tteokbokki.
• Garlic – Freshly minced garlic elevates the sauce’s aromatic quality.
• Honey, rice syrup, or oligo syrup – Choose your favorite sweetener to enhance the sauce’s richness.
• Gochujang (Korean red chili paste) – This is essential for that distinctive Tteokbokki flavor, delivering both heat and umami.

For Garnish
• Green onion – Slice it thinly for a fresh, crisp finish that complements the rich flavors of the dish.

Step‑by‑Step Instructions for Tteokbokki

Step 1: Prepare the Sauce
In a small bowl, combine the soy sauce, sugar, Gochugaru, minced garlic, honey, and Gochujang. Stir well until all ingredients are fully blended and the sugar dissolves. This sauce will provide the sweet-spicy flavor that makes Tteokbokki so irresistible. If your Korean rice cakes are frozen, place them in a bowl of warm water to defrost for about 10 minutes while making the sauce.

Step 2: Heat the Stock
In a large pan, pour in 3 cups of your chosen stock (anchovy, dashi, unsalted chicken stock, or water) and set it over medium heat. Bring the stock to a gentle boil, ensuring it’s bubbling steadily but not too vigorously. This should take around 5 minutes, depending on your stovetop. The hot stock will create a flavorful base for your Tteokbokki.

Step 3: Combine Rice Cakes and Sauce
Once the stock is boiling, add the defrosted Korean rice cakes and the sauce mixture into the pan. Stir gently to ensure the rice cakes are evenly coated in the sauce. Let everything simmer together, allowing the flavors to meld beautifully, for about 10 minutes. Keep an eye on the sauce as it reduces, becoming thicker and glossier.

Step 4: Add the Fish Cakes
After the sauce has reduced and thickened, gently add the bite-sized pieces of Korean fish cakes to the pan. Cook for an additional 2 minutes, stirring occasionally to mix the fish cakes with the rice cakes and sauce. Watch for the fish cakes to warm through, soaking in the delightful flavors of the Tteokbokki sauce.

Step 5: Garnish and Serve
Once your Tteokbokki is finished cooking and everything is heated through, remove the pan from heat. Optionally, slice green onions into thin rings for garnish. Spoon the Tteokbokki onto serving plates, finishing with a sprinkle of green onion for a fresh pop of color. Dive into this comforting dish while it’s still warm!

Expert Tips for Tteokbokki

  • Choose the Right Stock: Use anchovy stock or dashi for maximum flavor, but unseasoned chicken broth or water also works well if you’re in a pinch.

  • Perfect Rice Cakes: If using frozen rice cakes, remember to soak them in warm water for 10 minutes before cooking. This will ensure they achieve that perfect chewy texture.

  • Adjust the Heat: Customize the spice level by adjusting the amount of Gochugaru and Gochujang in the sauce. Start with less if you prefer a milder flavor.

  • Sauce Consistency: Keep an eye on the sauce while it simmers; a gentle boil helps it reduce smoothly. If it gets too thick, a splash of extra stock will help loosen it.

  • Extra Toppings: Don’t hold back on garnishes! Add sesame seeds, chopped chili peppers, or even a drizzle of sesame oil for added flavor and texture to your Tteokbokki.

Make Ahead Options

These Tteokbokki are perfect for meal prep enthusiasts! You can prepare the sauce and store it in an airtight container in the refrigerator for up to 3 days. Additionally, the Korean rice cakes can be soaked in warm water a day in advance, allowing them to soften and be ready to go when you’re ready to cook. When you’re ready to enjoy, simply heat your stock in a large pan, add the soaked rice cakes and prepared sauce, and cook as instructed. For best quality, store the components separately to prevent the rice cakes from becoming too soft. You’ll have authentic Tteokbokki with minimal effort on busy weeknights!

Tteokbokki Variations & Substitutions

Feel free to play around with Tteokbokki and make it uniquely yours—your taste buds will thank you!

  • Vegan: Replace fish cakes with sautéed mushrooms or tofu for a satisfying plant-based option. Enhancing flavor with soy sauce or tamari will give it that umami kick.

  • Gluten-Free: Use gluten-free soy sauce or tamari instead and check the rice cakes for any gluten-containing ingredients. Your Tteokbokki will still pack all the delicious flavor without the gluten!

  • Cheesy Delight: Stir in shredded mozzarella or cheddar cheese towards the end of cooking for a creamy twist. Cheese and Tteokbokki might just become your new favorite combination!

  • Spicy Kick: For those who crave heat, toss in sliced jalapeños or extra Gochugaru to amp up the spice level. A little heat can turn this dish into a real firecracker for your taste buds!

  • Protein Boost: Add cooked shrimp, chicken, or beef for a heartier dish. Simply sauté the protein of your choice in the pan first, then proceed with the original recipe for an enjoyable, protein-packed meal.

  • Sweet and Sour: Drizzle a touch of rice vinegar or add some chopped pineapple to the sauce for a sweet and tangy twist that beautifully complements the spiciness.

  • Texture Twist: Use crispy fried tofu or tempura vegetables instead of fish cakes to introduce an exciting crunch. The contrast in textures makes each bite a culinary adventure.

  • Savory Broth: Swap the water or stock with a flavorful veggie broth for an additional layer of depth—perfect for those cozy nights when you need that extra comforting touch.

Explore these variations, and you’ll not only savor Tteokbokki in its classic form but also discover new dimensions of flavor and texture that make it truly your own!

What to Serve with Tteokbokki?

Create a delightful spread that complements the vibrant, spicy flavors of your Tteokbokki, enhancing your meal experience.

  • Crispy Korean Fried Chicken: The crunch of fried chicken paired with sweet and spicy sauces adds an irresistible texture and flavor contrast. It’s a classic pairing that elevates any meal, honoring Korean culinary traditions.

  • Refreshing Cucumber Salad: Cool and crisp, this salad balances the heat of the Tteokbokki, providing a refreshing side that lightens the flavors on your palate. Toss in sesame seeds for a nutty finish!

  • Savory Kimchi Pancakes: These fluffy pancakes offer a nice crunch with a spicy kick, harmonizing beautifully with the soft, chewy rice cakes of your Tteokbokki. They make for a delightful appetizer!

  • Steamed Dumplings: Juicy dumplings filled with savory ingredients create a wonderful bite-size treat that complements the dish’s texture while adding a savory note to your meal.

  • Miso Soup: A warm, umami-rich miso soup can serve as a comforting starter, balancing the spices of Tteokbokki while helping to cleanse the palate.

  • Fruity Soju Cocktails: Pair your Tteokbokki with a light, fruity cocktail made with Korean soju. This refreshing drink can soften the dish’s heat, making for a delightful combination!

  • Mochi Ice Cream: For dessert, indulge in sweet and chewy mochi ice cream, offering a light finish with various flavors to pick from, creating a delightful sweet contrast to the spiciness.

  • Sweet Potato Fries: Crispy sweet potato fries bring a natural sweetness that complements the bold, spicy sauce, adding a satisfying crunch to the meal.

Bring these elements together for an unforgettable dining experience that delights the senses and warms the heart!

How to Store and Freeze Tteokbokki

Fridge: Store leftover Tteokbokki in an airtight container in the refrigerator for up to 3 days. Reheat in a pan with a splash of water to revive its texture.

Freezer: Tteokbokki can be frozen for up to 1 month. Allow it to cool completely before placing it in a freezer-safe container. To reheat, thaw overnight in the fridge and warm on the stove.

Reheating: For best results, reheat Tteokbokki on low heat in a pan, adding a little broth or water to maintain moisture and prevent sticking. Stir regularly until heated through.

Texture Note: Be aware that the texture of rice cakes can change after freezing, so for optimal chewiness, it’s best to enjoy Tteokbokki fresh.

Tteokbokki Recipe FAQs

How do I choose the right rice cakes for Tteokbokki?
Absolutely! When selecting Korean rice cakes, fresh is always preferable, but frozen works just as well. If you opt for frozen, soak them in warm water for about 10 minutes before cooking. Look for smooth, plump cakes without any dark spots for the best flavor and texture.

What is the best way to store leftover Tteokbokki?
Very simply! To store your Tteokbokki, place it in an airtight container and refrigerate for up to 3 days. When you’re ready to enjoy it again, just reheat in a pan with a bit of water to restore its delightful texture and prevent it from drying out.

Can I freeze Tteokbokki for later?
Absolutely! You can freeze Tteokbokki for up to 1 month. Allow it to cool completely before transferring it to a freezer-safe container. When you’re ready to reheat, simply thaw it overnight in the refrigerator and warm it on the stovetop, adding a splash of broth or water to help with moisture.

What if my Tteokbokki sauce is too thick?
If your sauce gets too thick while simmering, don’t worry! Just add a little stock or water to loosen it up. Stir it well and let it simmer for a few more minutes; this will help reach that perfect sweet-spicy consistency.

Are there any dietary considerations I should be aware of with Tteokbokki?
Definitely! For those with food allergies, be cautious with Gochujang, as it often contains wheat. If you’re cooking for pets, avoid using ingredients like garlic and certain sauces, which can be harmful. Always double-check ingredient labels to ensure they meet your dietary needs.

How can I adjust the spiciness level in my Tteokbokki?
To customize the heat in your Tteokbokki, you can simply adjust the amount of Gochugaru and Gochujang. Start with 1 teaspoon of Gochugaru for a milder dish, and taste as you go. If you crave more spice, feel free to add more until it suits your palate!

Delicious Tteokbokki: Your New Favorite Comfort Food!

Tteokbokki is a delicious Korean comfort food made with chewy rice cakes and a sweet-spicy sauce.

  • large pan
  • small bowl

For the Stock

  • 3 cups stock (anchovy, dashi, unsalted chicken stock, or water) (Any of these can be used as a base.)

For the Rice Cakes

  • 1 pound Korean rice cakes (Use fresh or soak frozen in warm water for 10 minutes.)

For the Fish Cakes

  • 1 cup Korean fish cakes (Cut into bite-sized pieces.)

For the Sauce

  • 3 tablespoons soy sauce
  • 1 tablespoon sugar (Use less for a more balanced flavor.)
  • 1 tablespoon Gochugaru (Korean chili powder) (Adjust to your spice preference.)
  • 2 cloves garlic (Freshly minced.)
  • 1 tablespoon honey or rice syrup or oligo syrup (Choose your favorite sweetener.)
  • 3 tablespoons Gochujang (Korean red chili paste) (Essential for Tteokbokki flavor.)

For Garnish

  • 2 stalks green onion (Slice thinly for garnish.)

Step‑by‑Step Instructions for Tteokbokki

  1. In a small bowl, combine soy sauce, sugar, Gochugaru, minced garlic, honey, and Gochujang. Stir well until blended. Soak frozen rice cakes in warm water for 10 minutes if needed.
  2. In a large pan, pour in the stock and heat over medium. Bring to a gentle boil, about 5 minutes.
  3. Once boiling, add defrosted rice cakes and sauce mixture. Stir gently and simmer for about 10 minutes to meld flavors.
  4. Add bite-sized fish cakes and cook for an additional 2 minutes, stirring occasionally.
  5. Remove from heat, garnish with sliced green onions, and serve warm.

Tteokbokki can be stored in the fridge for up to 3 days, or frozen for up to 1 month. Reheat on low heat with a splash of broth or water.

Main Dishes
Korean
comfort food, Easy Recipe, quick meal, rice cakes, spicy, Tteokbokki

Filed Under: Main Dishes

Crispy Broccoli Cheese Rounds for Guilt-Free Snacking Delight

August 9, 2025 by grace bellamy Leave a Comment

As I rummaged through my fridge, a vibrant bunch of broccoli caught my eye—perfect for a quick, guilt-free snack. That’s when I decided to whip up some Crispy Broccoli Cheese Rounds, a delightful treat that feels indulgent but is actually low in carbs. Not only are these little bites incredibly easy to prepare in just 10 minutes, but they also satisfy that cheesy craving without the heaviness. I mean, who doesn’t love a crispy, munchable snack that packs a nutritious punch? If you’re ready to elevate your snacking game while steering clear of fast food, let’s dive into this simple recipe together. What do you think—are you ready to give these rounds a try?

Why are Crispy Broccoli Cheese Rounds irresistible?

Simplicity in preparation makes these snacks a breeze to whip up in just 10 minutes. Cheesy goodness shines through in every bite thanks to a delicious blend of cheddar and Parmesan. Versatility is key—enjoy them as a savory appetizer, game day snack, or a healthy side for any meal. Great for everyone, these guilt-free bites cater to low-carb diets without sacrificing taste. If you’re looking for more quick snacks, check out my favorite healthy appetizer ideas.

Crispy Broccoli Cheese Rounds Ingredients

For the Mixture
• Broccoli florets – finely chopping enhances the texture and helps them bind with cheese.
• Shredded cheddar cheese – brings a creamy, melty goodness that complements the broccoli.
• Grated Parmesan cheese – adds a sharp, savory flavor that elevates the entire dish.
• Large egg – acts as a binding agent, helping the rounds hold their shape.
• Garlic powder – infuses a delightful aroma and flavor, making each bite irresistible.
• Onion powder – enhances the savory profile, pairing wonderfully with the cheese.
• Black pepper – adds a mild kick, balancing the richness of the cheeses.
• Salt – enhances overall flavor; taste and adjust to your preference.

Feel free to explore different cheese blends for your Crispy Broccoli Cheese Rounds, as this recipe thrives on creativity!

Step‑by‑Step Instructions for Crispy Broccoli Cheese Rounds

Step 1: Preheat the Oven
Begin by preheating your oven to 400°F (200°C). This temperature is ideal for achieving the perfect crispiness for your Crispy Broccoli Cheese Rounds. While the oven heats, line a baking sheet with parchment paper to prevent sticking and ensure easy cleanup.

Step 2: Mix the Ingredients
In a large mixing bowl, combine 2 cups of finely chopped broccoli florets, 1 cup of shredded cheddar cheese, and 1/2 cup of grated Parmesan cheese. Crack in 1 large egg, then sprinkle in 1/2 teaspoon of garlic powder, 1/2 teaspoon of onion powder, 1/4 teaspoon of black pepper, and 1/4 teaspoon of salt. Mix everything together until the ingredients are well incorporated, creating a cohesive mixture.

Step 3: Shape the Rounds
Using a tablespoon, scoop out portions of the broccoli cheese mixture and form them into small rounds. Place these rounds on the prepared baking sheet, making sure to leave enough space between them to allow for even baking. Focus on forming them tightly so they hold their shape during baking, which is crucial for your Crispy Broccoli Cheese Rounds.

Step 4: Bake to Perfection
Transfer the baking sheet into the preheated oven and bake the rounds for 20-25 minutes. Keep an eye on them as they bake; they should become golden brown and crispy around the edges. The delicious aroma wafting through your kitchen will be your cue that they’re getting close!

Step 5: Cool and Serve
Once baked to a beautiful golden brown, carefully remove the baking sheet from the oven. Allow your Crispy Broccoli Cheese Rounds to cool slightly before serving. This brief cooling period helps them firm up, enhancing the crunch. Enjoy them warm as a delicious snack or appetizer!

What to Serve with Low Carb Crispy Broccoli Cheese Rounds

Elevate your snacking experience with delightful pairings that enhance each bite of cheesy goodness.

  • Creamy Garlic Dip: This rich dip complements the crispy texture and adds a delightful garlicky flavor for dipping.

  • Side Salad: A fresh, crisp garden salad with a tangy vinaigrette provides a light contrast and refreshing crunch.

  • Zesty Quinoa: Fluffy quinoa tossed with lemon and herbs brings added nutrients and a delightful chewiness to your meal.

  • Ranch Dressing: Classic ranch is always a crowd-pleaser, making a perfect dip for these savory rounds to satisfy your cravings.

  • Curried Hummus: This unique take on hummus introduces warm spices, enhancing the flavors of the broccoli while adding a creamy texture.

  • Mango Chutney: The sweet and spicy notes of mango chutney create an intriguing flavor balance, complementing the cheese beautifully.

  • Sparkling Lemonade: A refreshing, fizzy drink like sparkling lemonade provides a bright and zesty contrast to richer flavors.

  • Chocolate Avocado Mousse: End your meal on a sweet note with a velvety dessert that’s healthy yet satisfying, pairing perfectly with these savory snacks.

Crispy Broccoli Cheese Rounds Variations

Feel free to get creative while preparing your Crispy Broccoli Cheese Rounds; the possibilities are endless!

  • Spicy Kick: Add 1/2 teaspoon of red pepper flakes for a delightful heat! Perfect for those who enjoy an extra zing in their snacks.

  • Herb Infusion: Mix in 1 tablespoon of fresh chopped herbs like parsley or basil. This will add a fresh, vibrant flavor that complements the cheese beautifully.

  • Cheddar Alternatives: Swap cheddar for gouda or Monterey jack for a creamier, more distinctive twist. Each cheese brings its own delicious personality to the mix!

  • Nut-Free Option: Replace the egg with a flaxseed mixture (1 tablespoon flaxseed meal + 2.5 tablespoons water) for a vegan or nut-free version while maintaining the binding properties.

  • Crunchy Texture: Fold in 1/4 cup of crushed almond flour or breadcrumbs for some extra crunch on the outside. It adds an enjoyable texture and a satisfying bite.

  • Sweet Potato Boost: For a slightly sweeter round, incorporate 1/2 cup of mashed sweet potato into the mixture. This gives a delicious depth of flavor that everyone will love!

  • Mini Appetizers: Use a mini muffin tin to create bite-sized rounds that are perfect for entertaining! These little nuggets are easy to eat and fun to share.

  • Garlic Lover’s Delight: Increase the garlic powder to 1 teaspoon for a more robust garlic flavor. It’s a savory treat that will have you dreaming of garlic bread!

With these fun variations in mind, the sky’s the limit! If you’re also looking for more quick and easy snacks, check out my favorite healthy appetizer ideas or explore some delightful pairing options with these rounds. You’ll be snacking better in no time!

How to Store and Freeze Crispy Broccoli Cheese Rounds

Room Temperature: Cool completely before storing; keep out for no more than 2 hours to avoid spoilage.

Fridge: Store in an airtight container for up to 3 days. Reheat in the oven to retain crispiness, ideally at 350°F (175°C) for about 10 minutes.

Freezer: For longer storage, freeze the rounds after baking. Place a single layer in a freezer-safe bag, separating layers with parchment paper. They can last up to 2 months.

Reheating: Thaw in the fridge overnight, then reheat in the oven or air fryer until heated through and crispy. Enjoy those delicious Crispy Broccoli Cheese Rounds!

Expert Tips for Crispy Broccoli Cheese Rounds

  • Finely Chopped Broccoli: Make sure to chop your broccoli florets very finely for better texture and binding. Larger pieces can lead to less crispy rounds.
  • Egg Choice Matters: Use a large egg to ensure the mixture binds well. A smaller egg may not provide enough moisture and binding for your Crispy Broccoli Cheese Rounds.
  • Watch the Bake Time: Keep an eye on your rounds during baking. Overbaking can lead to dryness, while underbaking means they won’t be crispy enough.
  • Customize Your Cheeses: Feel free to experiment with different cheese combinations. Just remember, the creaminess and flavor balance the broccoli in your Crispy Broccoli Cheese Rounds.
  • Proper Spacing: Space the rounds out evenly on the baking sheet. This allows for good airflow, ensuring every bite turns out crisp and golden.

Make Ahead Options

These Crispy Broccoli Cheese Rounds are fantastic for busy cooks looking to save time during the week! You can prepare the mixture up to 24 hours in advance; just combine the finely chopped broccoli, cheeses, egg, and seasonings in a bowl, cover it tightly with plastic wrap, and refrigerate. To maintain the crispy texture, avoid shaping the rounds until you’re ready to bake them. When you’re set to serve, simply scoop, shape, and bake as directed for 20-25 minutes until golden brown. With this prep method, you’ll have delicious, guilt-free snacks ready in no time—just as delightful as if you made them fresh!

Crispy Broccoli Cheese Rounds Recipe FAQs

How do I select the best broccoli for this recipe?
Absolutely! Look for broccoli florets that are vibrant green and firm. Avoid any with dark spots or yellowing, as they may be past their prime. Fresh broccoli should smell slightly earthy and not have a strong odor.

How should I store leftover Crispy Broccoli Cheese Rounds?
Very good question! Allow the rounds to cool completely before placing them in an airtight container. In the fridge, they will stay fresh for up to 3 days. To retain their delightful crispiness, reheat them in the oven at 350°F (175°C) for about 10 minutes before enjoying again.

Can I freeze Crispy Broccoli Cheese Rounds?
Yes, you can! After baking and cooling, arrange the rounds in a single layer on a baking sheet. Once frozen solid, transfer them to a freezer-safe bag, making sure to separate layers with parchment paper. They can be stored in the freezer for up to 2 months. When ready to eat, simply thaw overnight in the fridge and reheat until crispy.

What should I do if my rounds fall apart during baking?
Sometimes it happens, and that’s okay! Make sure to finely chop your broccoli and mix the ingredients well, focusing on binding them together. Next time, consider adding an extra egg or reducing the size of your rounds for better cohesion during baking.

Can I make these Crispy Broccoli Cheese Rounds gluten-free?
Absolutely! This recipe is naturally gluten-free since it doesn’t contain any flour or breadcrumbs. Always double-check your cheese labels for any hidden gluten, but rest assured, you can enjoy these without worry if you’re following a gluten-free diet!

Are these suitable for pets or those with allergies?
It’s important to keep pets away from these snacks due to the cheese and seasoning. If you’re serving them to guests with allergies, be mindful of any cheese sensitivities, particularly lactose intolerance, as well as egg allergies. You can experiment with dairy-free cheese options, which could be a nice alternative for those following specific dietary needs.

Crispy Broccoli Cheese Rounds for Guilt-Free Snacking Delight

These Crispy Broccoli Cheese Rounds are a quick, guilt-free snack packed with cheesy goodness, perfect for satisfying cravings without the carbs.

  • Baking Sheet
  • parchment paper
  • Mixing Bowl
  • tablespoon

For the Mixture

  • 2 cups finely chopped broccoli florets (finely chopping enhances the texture and helps them bind with cheese)
  • 1 cup shredded cheddar cheese (brings a creamy, melty goodness that complements the broccoli)
  • 1/2 cup grated Parmesan cheese (adds a sharp, savory flavor that elevates the entire dish)
  • 1 large egg (acts as a binding agent, helping the rounds hold their shape)
  • 1/2 teaspoon garlic powder (infuses a delightful aroma and flavor)
  • 1/2 teaspoon onion powder (enhances the savory profile, pairing wonderfully with cheese)
  • 1/4 teaspoon black pepper (adds a mild kick, balancing the richness of the cheeses)
  • 1/4 teaspoon salt (enhances overall flavor; taste and adjust to your preference)

Step-by-Step Instructions

  1. Preheat your oven to 400°F (200°C) and line a baking sheet with parchment paper.
  2. In a large mixing bowl, combine 2 cups of finely chopped broccoli florets, 1 cup of shredded cheddar cheese, and 1/2 cup of grated Parmesan cheese. Add 1 large egg, 1/2 teaspoon of garlic powder, 1/2 teaspoon of onion powder, 1/4 teaspoon of black pepper, and 1/4 teaspoon of salt. Mix until well incorporated.
  3. Scoop out portions of the mixture and form into small rounds, placing them on the prepared baking sheet.
  4. Bake for 20-25 minutes until golden brown and crispy.
  5. Remove from oven and allow to cool slightly before serving.

Ensure the broccoli is finely chopped for better binding and texture. Customize cheese blends to your liking for a different flavor profile.

Appetizer
American
cheesy appetizers, Crispy Broccoli Cheese Rounds, easy recipes, guilt-free snacks, healthy snacks, Low-Carb Snacks

Filed Under: Appetizer

Crispy Baked Parmesan Zucchini That You’ll Crave Again!

August 9, 2025 by grace bellamy Leave a Comment

As I rummaged through my pantry one evening, a hidden treasure caught my eye: a pack of Korean rice cakes. It took me back to a bustling street in Seoul where the tantalizing scent of Tteokbokki filled the air, igniting my passion for this beloved dish. This easy Tteokbokki recipe brings that vibrant, comforting street food right to your kitchen in just 20 minutes. Not only is it a quick and satisfying meal, but it’s also an exciting way to dip into the world of Korean cuisine. The rich, spicy sauce envelops the chewy rice cakes and tender fish cakes, creating a dish that’s sure to leave you craving more. Are you ready to spice up your dinner routine and impress your loved ones? Let’s dive into the deliciousness!

Why is Tteokbokki a Must-Try?

Easy to Make: Within just 20 minutes, you can whip up this flavorful delight, making it a perfect weeknight dinner.

Chewy, Satisfying Textures: The combination of soft and chewy rice cakes mixed with tender fish cakes provides a delightful mouthfeel you’ll adore.

Authentic Korean Flavor: With a rich blend of Gochujang and spices, this dish transports you straight to the streets of Seoul, vibrant and indulgent.

Versatile Customize: Feel free to adjust the chili level or add your favorite vegetables to make it your own!

Crowd-Pleasing Appeal: Tteokbokki is sure to impress family and friends; serve it at gatherings or cozy dinners, and watch it disappear!

Ready to explore other delicious recipes? Try adding some Crispy Baked Parmesan Zucchini on the side for a delightful combo!

Tteokbokki Ingredients

• Here’s everything you need to make this iconic dish!

For the Sauce

  • Soy sauce – enriches the umami flavor in Tteokbokki.
  • Sugar – balances the spice; you can reduce for lighter sweetness.
  • Gochugaru – adjust the heat to your preference with this Korean chili powder.
  • Garlic – adds depth and aromatic goodness to the sauce.
  • Honey – provides natural sweetness; feel free to substitute with rice syrup or oligo syrup.
  • Gochujang – the star of your Tteokbokki; it brings that authentic Korean kick!

For the Dish

  • Anchovy stock, dashi, or unsalted chicken stock – gives a rich, savory base for the Tteokbokki.
  • Korean rice cakes – the chewy texture you’ll fall in love with; don’t skip this!
  • Korean fish cakes – adds protein and another layer of flavor; cut into bite-sized pieces for easy eating.
  • Green onion – optional for a pop of freshness on top.

With these ingredients in hand, you’re just steps away from creating a Tteokbokki everyone will crave!

Step‑by‑Step Instructions for Tteokbokki

Step 1: Prepare the Sauce
In a small bowl, combine the soy sauce, sugar, Gochugaru, minced garlic, honey, and Gochujang to create your Tteokbokki sauce. Mix until smooth and fully blended, ensuring the ingredients are well combined. Set it aside for now; this rich and spicy sauce will transform your dish into a flavor bomb later!

Step 2: Defrost the Rice Cakes
If your Korean rice cakes are frozen, place them in a bowl and soak them in warm water for about 10 minutes. You want them to become soft and pliable for cooking. This step is essential for achieving that delightful chewy texture once they’re added to the sauce.

Step 3: Heat the Stock
In a large pan, pour in 3 cups of your choice of anchovy stock, dashi, or unsalted chicken stock. Set the heat to medium and bring the liquid to a gentle boil. You should start to see steam rising and small bubbles forming; this indicates that your base is ready for the rice cakes!

Step 4: Combine Rice Cakes and Sauce
Once the stock is boiling, drain the soaked rice cakes and add them to the pan. Immediately pour in the prepared Tteokbokki sauce, stirring gently to coat the rice cakes evenly. Keep the heat at medium and allow everything to simmer together for about 10 minutes, stirring occasionally until the sauce thickens and glistens.

Step 5: Cook the Fish Cakes
Add the defrosted fish cakes to the pan and continue to cook for an additional 2 minutes. Stir the mixture lightly; you’ll notice the fish cakes heating through and the flavors melding beautifully with the sauce. Keep an eye on the consistency, looking for a nice, thick coating on all the ingredients.

Step 6: Serve and Garnish
Once everything is well combined and cooked, remove the Tteokbokki from the heat. If desired, slice some green onions for garnish and sprinkle them over the dish for a fresh touch. Serve immediately in bowls to enjoy this amazing, street-style Tteokbokki!

What to Serve with Tteokbokki?

Pairing delicious sides with your Tteokbokki creates a memorable feast that tantalizes the senses.

  • Crispy Baked Parmesan Zucchini: The crunch and cheesy flavor harmonize beautifully with the chewy texture of the rice cakes and spicy sauce. This side adds a refreshing veggie component to your meal.

  • Korean Fried Chicken: Juicy and perfectly crispy, this savory delight balances the heat of Tteokbokki while satisfying your craving for comfort food. The combination guarantees a banquet of flavor in each bite.

  • Pickled Radish: This tangy and crispy side cut through the richness of the Tteokbokki, refreshing your palate and enhancing your dining experience. It’s a vibrant addition that brightens up the plate!

  • Seaweed Salad: Light and refreshing, this salad introduces a unique umami flavor that complements the spiciness of Tteokbokki. The textures contrast elegantly, making every bite delightful.

  • Kimchi: The fermented heat and tanginess of kimchi pair perfectly with Tteokbokki, adding depth and tradition to your meal. It’s a classic Korean side that never disappoints!

  • Rice: Steamed short-grain rice serves as a blank canvas to absorb the savory sauce, providing balance and heartiness to your dinner.

  • Soda or Sweet Tea: Sipping on a cold soda or sweet tea helps to cool down the palate, contrasting the spicy deliciousness of your Tteokbokki. Refreshing and delightful, it captures the essence of a fulfilling meal.

  • Mochi Dessert: End your meal on a sweet note with chewy mochi that’s both fun to eat and deliciously sweet. Perfect for indulging after your savory feast!

Make Ahead Options

These Tteokbokki are perfect for busy home cooks looking to save time during the week! You can prepare the Tteokbokki sauce and soak the rice cakes up to 24 hours in advance; simply store them separately in the refrigerator. The sauce keeps its rich flavor, while soaking the rice cakes makes them ready to cook. To finish, just heat the stock, add the soaked rice cakes along with the sauce, and cook for about 10 minutes before adding the fish cakes for another 2 minutes. This way, you can enjoy a delicious, homemade meal without the last-minute rush, making dinner a breeze!

How to Store and Freeze Tteokbokki

Fridge: Store leftover Tteokbokki in an airtight container in the refrigerator for up to 3 days. Be sure to cover it well to retain moisture and flavor.

Freezer: If you want to freeze Tteokbokki, place it in a freezer-safe container after it has cooled completely. It can last for up to 2 months in the freezer.

Reheating: To reheat, thaw in the refrigerator overnight if frozen. Heat on the stovetop over low-medium heat, adding a splash of water or stock to restore the sauce’s consistency.

Texture Note: Keep in mind that once frozen, the texture of rice cakes may become slightly softer, but the delicious Tteokbokki flavors will still shine through!

Baked Parmesan Zucchini Variations

Feel free to play around with these delightful twists that will make your dish uniquely yours!

  • Cheesy Twist: Add shredded mozzarella for a gooey, melty layer, enhancing the cheesy goodness of your zucchini bake. Pair it with a rich marinara sauce for dipping.

  • Herb-Infused: Include fresh herbs like basil or thyme into the breadcrumb mixture for an aromatic experience; these herbs bring a garden-fresh taste that pairs beautifully with the cheesy texture.

  • Spicy Kick: Sprinkle in some red pepper flakes or a dash of cayenne pepper before baking to turn up the heat, creating a zesty contrast that will surprise your taste buds beautifully.

  • Veggie Boost: Mix in diced bell peppers or spinach to the zucchini before baking for added nutrition and vibrant color. These vegetables not only amp up the flavor, but they also make the dish more wholesome.

  • Gluten-Free Option: Substitute regular breadcrumbs with almond flour or gluten-free breadcrumbs for a lighter, gluten-free version that still delivers on crunch and flavor.

  • Mediterranean Flair: Incorporate feta or olives for a Mediterranean touch that elevates the dish to new flavors and sensations. Their briny richness works perfectly alongside the cheesy zucchini!

  • Creamy Addition: Drizzle with a little heavy cream or sour cream before baking for a luscious, creamy texture that makes every bite feel indulgent and satisfying.

  • Zucchini Noodle Surprise: Use spiralized zucchini instead of rounds for a fun twist that adds an extra layer of texture. It’s a great way to make it lighter while still being incredibly delicious!

Enjoy experimenting with these variations, and don’t forget to pair your Baked Parmesan Zucchini with Tteokbokki for a flavorful meal packed with delights!

Expert Tips for Tteokbokki

• Perfect Texture: Soak rice cakes: Ensuring your Korean rice cakes are well-soaked in warm water is key to achieving that chewy texture without them becoming mushy.

• Customize Heat: Adjust spice level: Start with less Gochugaru and Gochujang if you’re unsure about spice; you can always add more to suit your taste buds!

• Avoid Clumping: Stir consistently: To prevent the rice cakes from sticking together, keep stirring gently during cooking, especially as the sauce thickens.

• Extra Flavor: Enhance with veggies: Feel free to add vegetables like cabbage or carrots during the last few minutes of cooking to elevate the dish’s flavor and nutrition.

• Serving Suggestion: Pair with side dishes: Tteokbokki is delicious on its own, but it shines even more when paired with other Korean specialties—consider serving alongside crispy Baked Parmesan Zucchini!

Tteokbokki Recipe FAQs

How do I select the right Korean rice cakes?
Absolutely! When choosing Korean rice cakes, look for ones that are firm and pliable. They should be free from dark spots or odd discolorations. If you can find fresh rice cakes, those are usually the best option. Frozen rice cakes are also wonderful, just make sure to soak them well before cooking for that perfect chewy texture.

How should I store leftover Tteokbokki?
Very! To store leftover Tteokbokki, place it in an airtight container, ensuring it’s well sealed. It will stay fresh in your fridge for up to 3 days. To keep it tasty, be cautious not to leave it uncovered, as that can dry it out or alter its flavors.

Can Tteokbokki be frozen?
Absolutely! To freeze Tteokbokki, allow it to cool completely first. Then, transfer it into a freezer-safe container. It can be stored for up to 2 months in the freezer. For reheating, simply thaw it overnight in the fridge and heat it gently on the stovetop, adding a splash of water or stock to help revive the sauce’s consistency.

What if my Tteokbokki sauce is too spicy?
If your sauce turns out to be a bit too fiery, don’t fret! You can balance it out by adding a bit more sugar or honey into the sauce while it’s cooking. Additionally, a splash of coconut milk or some diced vegetables might help to mellow the flavors without losing that delicious Tteokbokki essence.

Are there any dietary considerations for Tteokbokki?
Indeed! If you’re serving Tteokbokki to someone with food allergies, be sure to check the labels on your condiments. Both Gochujang and soy sauce can contain gluten and other allergens. For gluten-free options, look for tamari or gluten-free soy sauce and ensure your rice cakes are gluten-free as well. Additionally, if you’re cooking for vegetarian or vegan friends, you can substitute fish cakes with tofu or more vegetables for a delightful twist!

How long does it take to cook Tteokbokki?
Cooking Tteokbokki is quite quick! The total time is about 20 minutes, with 5 minutes for prep and 15 minutes of cooking. This makes it an excellent choice for a speedy weeknight meal. Just remember to keep an eye on it as you cook, stirring occasionally to ensure even cooking and sauce distribution.

Enjoy your culinary journey with Tteokbokki, and happy cooking!

Crispy Baked Parmesan Zucchini That You’ll Crave Again!

Discover the crispy goodness of Baked Parmesan Zucchini, a delightful side dish perfect for any meal.

  • Baking Sheet
  • Mixing Bowl
  • Oven

For the Zucchini

  • 2 cups Zucchini (sliced into sticks)
  • 1 cup Parmesan Cheese (grated)
  • 1 cup Breadcrumbs
  • 1 teaspoon Garlic Powder
  • 1 teaspoon Olive Oil
  • 1 teaspoon Salt
  • 1 teaspoon Pepper

Preparation

  1. Preheat the oven to 425°F (220°C).
  2. In a mixing bowl, combine Parmesan cheese, breadcrumbs, garlic powder, salt, and pepper.
  3. Dip each zucchini stick into olive oil, then coat with the breadcrumb mixture.
  4. Arrange the coated zucchini sticks on a baking sheet in a single layer.
  5. Bake in the preheated oven for 25 minutes or until golden brown.
  6. Serve hot and enjoy your crispy Baked Parmesan Zucchini!

Feel free to add your favorite herbs or spices to the breadcrumb mixture for extra flavor.

Side Dishes
Korean
Baked Parmesan Zucchini, crispy, Healthy Snack, side dish, Vegetable, Zucchini

Filed Under: Side Dishes

Savor Butter Steak Bites and Potatoes for a Comfort Feast

August 8, 2025 by grace bellamy Leave a Comment

As I watched the sun dip below the horizon, the aroma of sizzling steak and roasted garlic filled my kitchen, a warm invitation to indulge in a delightful dinner. That’s when I decided to recreate a comforting classic: Garlic Butter Steak Bites and Potatoes. This dish isn’t just a treat for the palate; it’s a thrilling culinary adventure that can be completed in about 30 minutes. Perfect for those busy weeknights, these tender steak bites, paired with crispy smashed potatoes, will not only satisfy your hunger but also impress family and friends. Plus, it’s the ideal way to engage with homemade flavors instead of reaching for takeout. Are you ready to elevate your dinner game? Let’s dive into this scrumptious recipe together!

Why Are Garlic Butter Steak Bites Irresistible?

Deliciously Tender: Each bite of the steak melts in your mouth, thanks to the rich garlic butter that enhances its natural flavor.
Crispy Perfection: The smashed potatoes add a delightful crunch, making every forkful a delightful experience.
Quick and Easy: In just 30 minutes, you can whip up this impressive meal, perfect for a busy weeknight.
Versatile Delight: Serve these steak bites with your favorite vegetable sides or on a bed of greens for a fresh twist.
Crowd-Pleasing: Whether it’s a family dinner or a gathering with friends, this dish is sure to be a hit that turns heads.

Butter Steak Bites and Potatoes Ingredients

For the Steak Bites
• Sirloin steak – tender and full of flavor, cut into bite-sized pieces for quick cooking.
• Salt and pepper – season generously for a beautiful crust and enhanced taste.

For the Potatoes
• Baby potatoes – choose small, firm potatoes for the best texture and easy smashing.
• Olive oil – helps achieve a crispy golden exterior when frying the potatoes.

For the Flavor Boost
• Butter – essential for rich, creamy garlic sauce that coats both steak and potatoes.
• Garlic – minced for that intoxicating aroma, elevating the dish to gourmet levels.
• Dried thyme – adds an earthy note that complements the steak perfectly.
• Dried rosemary – brings a hint of piney fragrance, enhancing the overall flavor profile.

For the Finishing Touch
• Fresh parsley – chopped, it brightens the dish and adds a pop of color when garnished.

This delicious Garlic Butter Steak Bites and Potatoes recipe is sure to become a family favorite!

Step‑by‑Step Instructions for Butter Steak Bites and Potatoes

Step 1: Prepare the Potatoes
Place quartered baby potatoes in a large pot and cover them with salted water. Bring the pot to a rolling boil, then cook the potatoes for 12–15 minutes until they are fork-tender but still hold their shape. Drain the potatoes thoroughly, allowing them to cool for 5 minutes. Gently smash each potato using a fork to create rough edges that will crisp up beautifully later.

Step 2: Season the Steak
While the potatoes are cooling, pat the sirloin steak bites dry with paper towels to ensure a good sear. Generously season the steak with salt and pepper on all sides. This step is crucial for developing a mouthwatering crust while cooking the Butter Steak Bites later. Let the seasoned steak rest for a moment as you heat the skillet.

Step 3: Sear the Steak Bites
In a large cast-iron skillet, heat 2 tablespoons of olive oil over high heat until it shimmers. Carefully add the steak bites in a single layer, ensuring they do not touch to promote even cooking. Let the steak cook undisturbed for 2–3 minutes, allowing a golden crust to form before flipping them to the other side.

Step 4: Finishing the Steak
Flip the steak bites and cook for an additional 1–2 minutes, aiming for medium-rare doneness. Once cooked to your desired level, transfer them to a plate and cover loosely with foil to keep warm. This resting period allows the juices to redistribute, ensuring tender Butter Steak Bites when ready to serve.

Step 5: Cook the Smashed Potatoes
In the same skillet, add the remaining olive oil and place the smashed potatoes cut-side down. Cook undisturbed for 4–5 minutes until the potatoes are golden and crispy. Carefully turn the potatoes over and crisp the other side for another 3–4 minutes, adding a delightful crunch to your dish.

Step 6: Flavor the Potatoes
Reduce the heat to medium-low and add the 3 tablespoons of butter and minced garlic to the skillet with the crispy potatoes. Cook for 1 minute until the garlic becomes fragrant and golden. Then, sprinkle in the dried thyme and stir to infuse the flavors throughout the potatoes, complementing the Butter Steak Bites.

Step 7: Combine Everything
Return the cooked steak bites back into the skillet with the potatoes. Gently toss everything together for 1–2 minutes until heated through and the flavors meld beautifully. Taste and adjust the seasoning with additional salt and pepper, creating a satisfying finish to your Butter Steak Bites and Potatoes dish.

What to Serve with Garlic Butter Steak Bites and Potatoes

Savoring the delightful aroma wafting from your kitchen, you’ll want to complement your meal with sides that add variety and enhance every bite.

  • Creamy Garlic Mashed Potatoes: Perfectly fluffy, these mashed potatoes bring a velvety texture that pairs well with the steak, soaking up all the rich garlic butter essence.

  • Roasted Asparagus: The fresh crunch of roasted asparagus adds a bright green contrast, making every slice of steak pop with flavor.

  • Crispy Brussels Sprouts: Their caramelized edges and hints of sweetness perfectly balance the savory steak bites while adding diverse textures to your plate.

  • Simple Green Salad: A refreshing salad with mixed greens, cherry tomatoes, and a light vinaigrette creates a light, crisp element that refreshes the palate between bites.

  • Garlic Bread: Toasted, buttery garlic bread is a great accompaniment that complements the dish, ensuring you capture every drop of that luscious sauce.

  • Red Wine: A glass of full-bodied red wine like Cabernet Sauvignon or Malbec elevates your dining experience, enhancing the rich flavors of the steak.

  • Chocolate Lava Cake: For dessert, indulge in a molten chocolate lava cake; its rich gooey center is a decadent way to end a comforting meal, leaving everyone satisfied.

Tips for the Best Butter Steak Bites and Potatoes

Moisture Matters: Pat the steak bites completely dry before seasoning. This helps achieve a flavorful crust while avoiding steaming during cooking.

Monitor Your Heat: Keep the skillet on high heat when searing the steak bites. This is crucial for developing that perfect, golden crust without overcooking the meat.

Quality Ingredients: Use fresh herbs and quality butter for the best flavor. Fresh ingredients elevate your Butter Steak Bites and Potatoes to a whole new level.

Potato Preparation: Don’t skip the smashing step! It creates more surface area for the crispy texture you’re aiming for, enhancing the overall enjoyment of the dish.

Rest the Meat: Allow the steak to rest after cooking. This vital step redistributes juices, ensuring that each bite is tender and juicy.

Butter Steak Bites and Potatoes Variations

Feel free to dress up your Garlic Butter Steak Bites and Potatoes to suit your taste and dietary needs, creating a meal that’s uniquely yours!

  • Spicy Kick: Add a pinch of red pepper flakes to the garlic butter for a delightful heat that enhances every bite.

  • Herb Swap: Instead of thyme and rosemary, try fresh basil or dill for a fragrant twist, transforming the flavor profile completely.

  • Balsamic Glaze: Drizzle a balsamic reduction over the finished dish for a tangy sweetness that contrasts beautifully with the savory steak.

  • Vegetarian Delight: Substitute steak with hearty mushrooms like portobello or king oyster, providing a meaty texture and delicious umami flavor.

  • Sweet Potatoes: Replace baby potatoes with sweet potatoes for a deliciously sweet and nutritious alternative that pairs wonderfully with garlic.

  • Mustard Twist: Mix a teaspoon of Dijon mustard into the garlic butter for a zesty flavor boost that adds complexity to your dish.

  • Cheesy Goodness: Sprinkle freshly grated Parmesan cheese over the cooked steak and potatoes just before serving for a rich, savory finish.

  • Zesty Citrus: Add the zest of one lemon to the garlic butter for a bright, refreshing flavor that complements the richness of the steak perfectly.

Experimenting with these variations can turn your Garlic Butter Steak Bites and Potatoes into a personalized dish that keeps the family guessing what’s next at the dinner table! If you’re also interested in easy-to-make sides, check out my post on easy vegetable sides. And for a special occasion, consider adding those flavorful Herb Butter Shrimp as a delightful pairing!

How to Store and Freeze Butter Steak Bites and Potatoes

Fridge: Store any leftover Butter Steak Bites and potatoes in an airtight container for up to 3 days to maintain freshness and flavor.

Freezer: For longer storage, freeze the dish in a freezer-safe container for up to 2 months. Portion it out for easy meal prep!

Reheating: To reheat, thaw overnight in the fridge, then warm in a skillet over medium heat, adding a little butter or oil to prevent drying out.

Wrap Well: If freezing, make sure to wrap the steak bites and potatoes well to avoid freezer burn, preserving the delicious taste of your homemade meal.

Make Ahead Options

These Garlic Butter Steak Bites and Potatoes are perfect for meal prep enthusiasts looking to save time during busy weeknights! You can prep the potatoes by cooking them and smashing them up to 24 hours in advance; just refrigerate them in an airtight container. The steak can also be seasoned ahead of time, allowing the flavors to meld beautifully if you refrigerate it covered for up to 3 days. When you’re ready to serve, simply heat the skillet, add the potatoes to crisp them up, then sear the steak bites and combine everything before serving. This way, you’ll enjoy a delicious homemade meal with minimal last-minute effort!

Garlic Butter Steak Bites and Potatoes Recipe FAQs

How do I choose the best steak for this recipe?
Absolutely! When selecting a steak, look for sirloin that is bright red with a good amount of marbling—this fat adds flavor and tenderness. Avoid any cuts that have dark spots or are overly lean, as they may lack moisture and taste.

What is the best way to store leftovers?
You can store any leftover Butter Steak Bites and Potatoes in an airtight container in the refrigerator for up to 3 days. Make sure to let them cool completely before sealing the container, which helps maintain their texture and flavor.

Can I freeze Butter Steak Bites and Potatoes?
Yes! To freeze, allow the dish to cool completely, then place it in a freezer-safe container. For optimal freshness, consume within 2 months. When you’re ready to enjoy, thaw it overnight in the refrigerator, then reheat gently in a skillet to revive that delightful crispy texture.

What if my potatoes don’t get crispy?
If your potatoes aren’t crispy, be sure to smash them enough to create lots of surface area, and make sure the oil is hot before adding them to the skillet. Also, don’t overcrowd the pan—cooking them in batches can help achieve that beautiful golden exterior.

Are there any dietary considerations I should be aware of?
It’s always a good idea to check for allergies! This recipe contains butter and garlic, so if anyone has dairy or garlic sensitivities, consider using a dairy-free alternative such as olive oil for cooking and avoiding garlic in your seasoning. You can still enjoy the delicious flavors with other herbs!

Savor Butter Steak Bites and Potatoes for a Comfort Feast

Delve into this delightful Butter Steak Bites and Potatoes recipe, perfect for a comfort feast in just 30 minutes.

  • Large Pot
  • Cast-iron skillet
  • fork
  • paper towels

For the Steak Bites

  • 1 pound Sirloin steak (cut into bite-sized pieces)
  • to taste Salt
  • to taste Pepper

For the Potatoes

  • 1 pound Baby potatoes (small, firm potatoes)
  • 2 tablespoons Olive oil

For the Flavor Boost

  • 3 tablespoons Butter (for rich garlic sauce)
  • 3 cloves Garlic (minced)
  • 1 teaspoon Dried thyme
  • 1 teaspoon Dried rosemary

For the Finishing Touch

  • 2 tablespoons Fresh parsley (chopped)

Step-by-Step Instructions

  1. Place quartered baby potatoes in a large pot and cover them with salted water. Bring the pot to a boil, then cook for 12–15 minutes until fork-tender. Drain and cool for 5 minutes. Smash each potato gently.
  2. Pat the sirloin steak bites dry with paper towels and season generously with salt and pepper. Let rest while heating the skillet.
  3. Heat 2 tablespoons of olive oil in a cast-iron skillet over high heat. Add steak bites in a single layer and cook undisturbed for 2–3 minutes.
  4. Flip the steak bites and cook for 1–2 more minutes until medium-rare. Transfer to a plate and cover loosely with foil.
  5. Add remaining olive oil to the skillet and cook smashed potatoes cut-side down for 4–5 minutes until golden. Turn and crisp the other side for another 3–4 minutes.
  6. Reduce heat to medium-low, add butter and minced garlic to the skillet. Cook for 1 minute until fragrant, then stir in thyme.
  7. Return steak bites to the skillet and toss with potatoes for 1–2 minutes until heated through. Adjust seasoning with salt and pepper.

Ensure steak is pat dry for better sear; keep skillet heat high for the perfect crust. Fresh ingredients enhance flavor significantly.

Main Dishes
American
Butter Steak Bites, comfort food, Easy Recipe, Garlic Butter, Potatoes, quick dinner

Filed Under: Main Dishes

Delicious Cauliflower Mushroom Skillet You’ll Crave Every Night

August 8, 2025 by grace bellamy Leave a Comment

As I stood in my kitchen, the enticing aroma of garlic sizzling in butter enveloped me like a warm hug. That’s when I knew it was time to whip up my favorite Garlic Cauliflower Mushroom Skillet—a dish that never fails to impress with its vibrant flavors. This skillet meal not only comes together in just 25 minutes, making it perfect for busy weeknights, but it also serves as a deliciously hearty alternative to takeout. With the earthy richness of mushrooms and the subtle crunch of cauliflower, it’s a veggie lover’s dream! Plus, you can easily customize it with your favorite herbs or add a sprinkle of cheese for an extra touch of indulgence. So, are you ready to transform your weeknight dinners into something truly delightful?

Why is this skillet recipe a must-try?

Quick and Easy: This Garlic Cauliflower Mushroom Skillet comes together in just 25 minutes, making it a fantastic choice for busy weeknights.

Bursting with Flavor: The rich garlic and buttery taste meld beautifully with the earthy mushrooms, creating a dish that’s nothing short of delicious.

Healthy and Nutritious: With only 180 calories per serving, you can enjoy this satisfying meal without compromising your health goals.

Customizable Goodness: Feel free to add your favorite ingredients or switch up the spices for a personal twist! Plus, a sprinkle of Parmesan cheese elevates the flavor even further.

Crowd-Pleaser: Whether you’re dining alone or entertaining friends, this skillet dish caters to all, guaranteed to leave everyone craving more!

Cauliflower Mushroom Skillet Ingredients

Discover the delightful components of this easy-to-make dish!

For the Skillet

  • Olive oil – A healthy fat that helps sauté and infuse flavors into the dish.
  • Butter – Adds a rich creaminess and depth to the overall flavor.
  • Cauliflower – Offers a wonderful crunch and is the star of this Cauliflower Mushroom Skillet.
  • Mushrooms – Their earthy flavor complements the other ingredients beautifully.
  • Garlic – Infuses the dish with an irresistible aroma and taste.

For the Seasoning

  • Paprika – Adds warmth and a touch of smoky flavor.
  • Italian seasoning – A blend of herbs that brings a vibrant taste to the skillet.
  • Salt – Enhances the overall flavor profile, making each bite delicious.
  • Pepper – Provides a subtle kick and balances the richness of the butter.

For Garnishing

  • Lemon juice – Brightens the flavors and adds a zesty freshness.
  • Fresh parsley – Offers a pop of color and a hint of freshness on top.
  • Parmesan cheese (optional) – Melts beautifully, adding a savory depth when desired.

Now you’re equipped with everything you need to create this scrumptious Cauliflower Mushroom Skillet. Enjoy every moment in your kitchen!

Step‑by‑Step Instructions for Cauliflower Mushroom Skillet

Step 1: Heat the Skillet
Begin by placing a large skillet over medium heat. Add 2 tablespoons of olive oil and 2 tablespoons of butter to the pan. Allow the butter to melt and sizzle, creating a fragrant foundation for your Garlic Cauliflower Mushroom Skillet. This should take about 1-2 minutes, ensuring the mixture is hot and ready for the veggies.

Step 2: Sauté the Cauliflower
Once the butter is melted, add the cauliflower florets to the skillet. Sauté them for 5-6 minutes, stirring occasionally, until they start to turn a light golden brown. This caramelization adds a wonderful richness to your Cauliflower Mushroom Skillet, enhancing both flavor and texture. Look for the florets to soften slightly while retaining some crunch.

Step 3: Add the Mushrooms
Next, introduce the sliced mushrooms to the skillet, stirring to combine them with the cauliflower. Cook for an additional 4-5 minutes, allowing the mushrooms to soften and release their moisture. As they cook, you’ll notice the earthy aroma intensifying, melding beautifully with the cauliflower. Keep an eye out for the mushrooms turning tender and slightly darker in color.

Step 4: Mix in the Garlic and Spices
Add the minced garlic, paprika, Italian seasoning, salt, and pepper to the skillet. Stir everything together and cook for another 2 minutes, allowing the garlic to become fragrant and golden. You want the spices to coat the vegetables, infusing your Cauliflower Mushroom Skillet with a burst of flavor that will tantalize your taste buds.

Step 5: Finish and Garnish
Finally, drizzle fresh lemon juice over the skillet, adding brightness to balance the richness. If desired, sprinkle with grated Parmesan cheese for an extra touch of indulgence. Garnish with fresh parsley to bring a pop of color. Serve the Garlic Cauliflower Mushroom Skillet hot, and enjoy the delightful medley of flavors right away!

What to Serve with Garlic Cauliflower Mushroom Skillet

Elevate your dining experience by pairing this delightful skillet dish with complementary sides and beverages.

  • Creamy Polenta: Soft and buttery polenta offers a rich counterpoint to the sautéed veggies, making each bite comforting and velvety.
  • Quinoa Salad: A light, refreshing salad with herbs provides a great textural contrast and enhances the overall nutritional vibe of your meal.
  • Garlic Bread: Crispy, toasty bread on the side is perfect for soaking up garlic-infused juices, bringing extra layers of flavor to your plate.
  • Roasted Brussels Sprouts: Their caramelized crunch complements the softness of the cauliflower while adding a flavorful, nutty twist to the meal.
  • Herbed Rice: Fluffy rice sprinkled with fresh herbs brings an inviting aroma and serves as a wonderful vehicle for the dish’s vibrant flavors.
  • Chilled White Wine: A crisp Sauvignon Blanc is refreshing and complements the earthy notes of the mushrooms, making for a sophisticated pairing.
  • Lemon Sorbet: Finish your meal with a light, refreshing sorbet to cleanse your palate and end on a slightly sweet note.
  • Cucumber Mint Water: A cool, invigorating drink enhances the fresh essence of your meal and is a delightful accompaniment for summer evenings.

How to Store and Freeze Cauliflower Mushroom Skillet

Fridge: Store any leftovers in an airtight container in the refrigerator for up to 3 days. Reheat in a skillet over medium heat with a splash of olive oil.

Freezer: For longer storage, freeze the Cauliflower Mushroom Skillet in a freezer-safe container for up to 2 months. Thaw overnight in the fridge before reheating.

Reheating: When ready to enjoy, reheat on the stove until warmed through, adding lemon juice or fresh parsley for added brightness.

Wrap It Up: If you plan to keep portions handy, consider wrapping servings tightly in cling wrap before placing them in your freezer-safe container to prevent freezer burn.

Make Ahead Options

These Garlic Cauliflower Mushroom Skillet components are fantastic for meal prep! You can chop the cauliflower and slice the mushrooms up to 3 days in advance, storing them in airtight containers in the refrigerator to maintain their freshness. Additionally, you can pre-mince the garlic and mix the dry spices (paprika, Italian seasoning, salt, and pepper) ahead of time. When you’re ready to enjoy your skillet, simply heat olive oil and butter, toss in the prepped veggies, and follow the cooking instructions to finish. This way, you’ll save precious time during busy weeknights while still serving a delicious, vibrant meal that’s just as delightful as when made fresh!

Cauliflower Mushroom Skillet Variations

Feel free to mix things up with these enticing variations to make this dish uniquely yours!

  • Dairy-Free: Swap butter for coconut oil and omit Parmesan for a creamy, plant-based delight that still satisfies.

  • Spicy Kick: Add chili flakes or a diced jalapeño during cooking to bring a fiery touch to your Cauliflower Mushroom Skillet.

  • Nutty Twist: Sprinkle in some toasted pine nuts or sliced almonds for a delightful crunch and nutty flavor contrast.

  • Herb-Infused: Swap out Italian seasoning for fresh herbs like basil or rosemary to introduce a fragrant garden flavor to the dish.

  • Protein Boost: Stir in some cooked quinoa or shredded chicken for a heartier meal that turns your skillet into a complete dinner.

  • Extra Veggies: Toss in other vegetables such as bell peppers or spinach for added nutrition and vibrancy—get creative with what you have on hand!

  • Citrusy Flavor: Add a splash of orange juice or zest along with the lemon to brighten things up with an unexpected fruity twist.

  • Mushroom Medley: Mix different types of mushrooms, such as shiitake or portobello, to deepen the earthy flavor and elevate your dish to a gourmet level.

With these variations, you can create a new experience every time you whip up this fantastic skillet meal!

Tips for the Best Cauliflower Mushroom Skillet

Perfect Heat: Maintain medium heat: Too high can burn the garlic and butter, while too low won’t achieve that delightful golden color on your veggies.

Don’t Overcrowd: Sauté in batches: If your skillet is too crowded, the cauliflower and mushrooms will steam instead of browning, losing that delicious texture.

Fresh Garlic: Use fresh garlic only: Pre-minced garlic can lack flavor. Fresh garlic elevates your Cauliflower Mushroom Skillet with its vibrant aroma.

Taste as You Go: Adjust seasoning: Before finishing, taste your dish and tweak the seasoning as needed. Each ingredient shines through, making a difference!

Garnish for Zing: Don’t skip the lemon: A drizzle of lemon juice brightens flavors and balances richness—it’s an essential step that enhances your dish!

Cauliflower Mushroom Skillet Recipe FAQs

How do I select the best cauliflower for this recipe?
Absolutely! Look for a cauliflower head that is firm and heavy with tightly packed florets. Avoid any heads with dark spots or browning, which may indicate spoilage. Fresh cauliflower will have bright, white florets and fresh green leaves.

What is the best way to store leftover Cauliflower Mushroom Skillet?
Very! To store leftovers, place them in an airtight container in the refrigerator, where they will stay fresh for about 3 days. When you’re ready to enjoy them again, simply reheat in a skillet over medium heat with a splash of olive oil to revive their flavors.

Can I freeze this Cauliflower Mushroom Skillet?
Absolutely! To freeze, let the skillet cool completely, then transfer it into a freezer-safe container. It can last for up to 2 months in the freezer. When you’re ready to eat, thaw it overnight in the refrigerator, then reheat on the stove over medium heat until fully warmed through.

What can I do if my cauliflower is getting mushy?
Very! If your cauliflower appears mushy, it’s likely overcooked or too old. To avoid this, make sure to sauté it just until tender-crisp and golden. If you find your cooked dish is too soft, try adding a few fresh florets into the mix, cooking them separately for a couple of minutes, then folding them back in for added texture.

Is this recipe suitable for people with dietary restrictions?
Exactly! The Cauliflower Mushroom Skillet is vegetarian and gluten-free. If you’re looking for a dairy-free option, simply skip the Parmesan cheese or use a dairy-free alternative. Always check that your spices and seasonings are also free from allergens if serving others.

Can I add other vegetables to this skillet?
Absolutely! Feel free to mix in your favorite veggies, such as bell peppers or zucchini. Just cut them to similar sizes for even cooking. You might need to adjust the cooking times slightly depending on the vegetables used, so keep an eye on them to prevent overcooking.

Delicious Cauliflower Mushroom Skillet You’ll Crave Every Night

A Garlic Cauliflower Mushroom Skillet that impresses with flavors, perfect for busy weeknights.

  • large skillet

For the Skillet

  • 2 tablespoons Olive oil (A healthy fat that helps sauté and infuse flavors into the dish.)
  • 2 tablespoons Butter (Adds a rich creaminess and depth to the overall flavor.)
  • 1 head Cauliflower (Offers a wonderful crunch and is the star of this dish.)
  • 8 ounces Mushrooms (Their earthy flavor complements the other ingredients beautifully.)
  • 3 cloves Garlic (Infuses the dish with an irresistible aroma and taste.)

For the Seasoning

  • 1 teaspoon Paprika (Adds warmth and a touch of smoky flavor.)
  • 1 teaspoon Italian seasoning (A blend of herbs that brings a vibrant taste.)
  • 1 teaspoon Salt (Enhances the overall flavor profile.)
  • 1/2 teaspoon Pepper (Provides a subtle kick and balances the richness.)

For Garnishing

  • 2 tablespoons Lemon juice (Brightens the flavors and adds a zesty freshness.)
  • 1/4 cup Fresh parsley (Offers a pop of color and a hint of freshness.)
  • 1/4 cup Parmesan cheese (Optional; melts beautifully for added depth.)

Step-by-Step Instructions

  1. Begin by placing a large skillet over medium heat. Add olive oil and butter to the pan. Allow the butter to melt and sizzle for 1-2 minutes.
  2. Add the cauliflower florets to the skillet. Sauté for 5-6 minutes, until they start to turn golden brown.
  3. Introduce the sliced mushrooms to the skillet, stirring to combine with the cauliflower. Cook for another 4-5 minutes.
  4. Add minced garlic, paprika, Italian seasoning, salt, and pepper. Stir and cook for 2 minutes until fragrant.
  5. Drizzle lemon juice over the skillet and sprinkle with Parmesan cheese. Garnish with parsley and serve hot.

Maintain medium heat for cooking. Taste and adjust seasoning as necessary. Store leftovers properly.

Side Dishes
American
Cauliflower Mushroom Skillet, easy dinner, garlic, Healthy Recipe, quick meal, Vegetarian

Filed Under: Side Dishes

Chickpea Feta Avocado Salad: Fresh Flavor in Every Bite

August 8, 2025 by grace bellamy Leave a Comment

As I sifted through my fridge searching for inspiration, the vibrant colors of ripe avocado and crumbled feta practically shouted, “Throw us together!” That’s how my Chickpea Feta Avocado Salad came to life. This delightful dish not only takes a mere 15 minutes to prepare but also brings a refreshing twist to your table, making it a go-to choice for quick meals. Bursting with protein-packed chickpeas and healthy fats, it offers a satisfying balance that leaves me feeling nourished and energized. Whether you’re looking for a healthy lunch option or a crowd-pleasing side for dinner, this salad is sure to impress. So, what do you say—are you ready to whip up something delicious?

Why is this salad a must-try?

Freshness leaps off your plate with every bite of this Chickpea Feta Avocado Salad. Simple preparation means you only need 15 minutes to create a satisfying dish. Nutritious ingredients like protein-packed chickpeas and creamy avocado make it both delicious and filling. Plus, versatility shines as it pairs perfectly with grilled meats or stand-alone as a light lunch. Whether you’re hosting a gathering or enjoying a quiet night in, this salad will not only delight your taste buds but also spark joy in your kitchen. For more quick meal inspirations, check out my quick and easy salad recipes.

Chickpea Feta Avocado Salad Ingredients

• Get ready to discover the delightful components of this fresh salad!

For the Salad

  • Chickpeas – A fiber-rich base that adds protein and texture to your Chickpea Feta Avocado Salad.
  • Avocado – Creamy and nutrient-dense, it lends healthy fats that keep you satiated.
  • Feta Cheese – Adds a tangy punch, making each bite a savory delight.
  • Red Onion – Provides a crisp crunch and a hint of zing that brightens the salad.
  • Fresh Parsley – Offers a refreshing flavor and vibrant color to the mix.
  • Fresh Mint – Adds a fragrant touch, elevating the dish with aromatic notes.

For the Dressing

  • Olive Oil – A heart-healthy fat that brings all the flavors together beautifully.
  • Lemon Juice – Freshly squeezed wakes up your salad with a zesty brightness.
  • Garlic – A subtle addition that enhances the overall flavor profile of the salad.
  • Dried Oregano – Offers earthiness and complements the Mediterranean flavors.
  • Salt and Pepper – Essential seasonings to taste, ensuring your salad is perfectly balanced.

With these simple and fresh ingredients, you’re just moments away from enjoying a bowl of vibrant Chickpea Feta Avocado Salad that sings with flavor in every bite!

Step‑by‑Step Instructions for Chickpea Feta Avocado Salad

Step 1: Combine the Salad Ingredients
In a large mixing bowl, add the drained and rinsed chickpeas, diced avocado, crumbled feta cheese, thinly sliced red onion, chopped parsley, and chopped mint. Gently mix these vibrant ingredients together, ensuring the avocado remains intact for texture. This colorful blend sets the base for your Chickpea Feta Avocado Salad, inviting fresh flavors in every bite.

Step 2: Prepare the Dressing
In a small bowl or jar, whisk together the olive oil, freshly squeezed lemon juice, minced garlic, and dried oregano. Mix vigorously for about 30 seconds until the dressing is emulsified and slightly thickened. Adjust seasoning with salt and pepper to taste—this zesty dressing will beautifully enhance the fresh flavors of your salad.

Step 3: Dress the Salad
Pour the prepared dressing over the salad ingredients, taking care to drizzle it evenly across the mixture. Gently toss everything together with a large spoon or spatula, ensuring each ingredient is well-coated without smashing the avocado. This step brings all the elements of your Chickpea Feta Avocado Salad harmoniously together, creating a deliciously satisfying dish.

Step 4: Serve or Chill
Serve the Chickpea Feta Avocado Salad immediately for the freshest experience, or cover the bowl and chill it in the fridge for up to 30 minutes to let the flavors meld together. This salad is perfect as a light lunch or as a refreshing side dish with dinner—a delightful twist that’s ready in no time!

How to Store and Freeze Chickpea Feta Avocado Salad

Fridge: Store any leftovers in an airtight container in the fridge for up to 3 days. This will keep the flavors fresh while preventing sogginess.

Freezer: It’s best not to freeze this salad as the avocado and feta can change texture when thawed, making them less appetizing.

Reheating: If preferred, you can slightly warm the salad in the microwave for a minute, but serve it cool for optimal taste and texture.

Chickpea Feta Avocado Salad Variations

Feel free to explore these delicious twists and turns to make your Chickpea Feta Avocado Salad uniquely yours!

  • Mediterranean Twist: Add kalamata olives for a briny contrast that enhances the Mediterranean flavors beautifully. These little bursts of flavor take the salad to a whole new level!

  • Spicy Kick: Incorporate diced jalapeños or a sprinkle of red pepper flakes for that fiery touch. The heat complements the creaminess of the avocado perfectly!

  • Protein Boost: Toss in grilled chicken or shrimp for a satisfying protein upgrade. It makes this salad not just a side but a hearty meal all on its own.

  • Nuts for Crunch: Add a handful of toasted pine nuts or sliced almonds for an extra crunch. The nutty flavor enriches the texture and creates a delightful contrast!

  • Zesty Citrus: Replace lemon juice with lime juice for a tangy twist that brightens the whole salad. Lime adds a refreshing vibe that’s perfect for warm weather!

  • Herb Variation: Experiment with fresh basil or cilantro in place of parsley and mint for a different herby flavor profile. Each herb will bring its own unique fragrance!

  • Vegan Option: Substitute the feta with crumbled tofu or a dairy-free cheese alternative to keep it plant-based. You still get that creamy richness without the dairy!

  • Seasonal Ingredients: Customize with seasonal veggies like diced cucumbers or bell peppers. They add another layer of freshness and color to the mix!

With these variations, you can enjoy a different flavor profile and surprise your taste buds each time you make this delightful salad. For more exciting salad ideas, check out my refreshing salad recipes!

Expert Tips for Chickpea Feta Avocado Salad

  • Perfect Avocado: Choose avocados that are slightly soft to the touch, indicating ripeness. Avoid overripe avocados to maintain the salad’s fresh texture.

  • Chickpea Prep: Rinsing canned chickpeas properly helps remove excess sodium. This simple step elevates the overall flavor of your Chickpea Feta Avocado Salad.

  • Herb Freshness: Use fresh parsley and mint rather than dried for vibrant flavor and aroma. They make a world of difference in this salad!

  • Mix Gently: When combining the ingredients, use a light hand to avoid mashing the avocado. Preserving its chunkiness adds delightful creaminess to the salad.

  • Serve Chilled: For the best flavor experience, consider chilling the salad for about 30 minutes before serving. This allows all the ingredients to meld beautifully!

What to Serve with Chickpea Feta Avocado Salad?

Bring your table to life with vibrant pairings that enhance every delightful bite of this refreshing salad.

  • Garlic Bread: Crisp and buttery, it adds a satisfying crunch that complements the creamy textures of the salad.
  • Grilled Chicken: Marinated in herbs, tender grilled chicken provides a beautiful protein balance, making your meal heartier.
  • Quinoa Bowl: Nutty and fluffy quinoa serves as a fantastic base, turning your meal into a wholesome grain bowl.
  • Roasted Vegetables: Drizzled with olive oil and seasonings, they offer a caramelized sweetness that beautifully contrasts the salad’s freshness.
  • Pita Chips: Crunchy and lightly salted, these are perfect for scooping up the Chickpea Feta Avocado Salad, creating a fun, interactive dish.
  • Lemonade: A refreshing, tangy lemonade can amplify the zesty flavors of the salad, creating a bright, summery experience.
  • Fruit Salad: A medley of fresh fruits adds a sweet contrast and bursts of color, invigorating your dining experience.
  • Sparkling Water: Lightly flavored sparkling water refreshes your palate without overpowering the vibrant taste of the salad.
  • Chocolate Mousse: For dessert, a silky chocolate mousse offers decadent richness that rounds out the meal perfectly.

Make Ahead Options

These Chickpea Feta Avocado Salads are a fantastic option for meal prep lovers! You can pre-chop all the vegetables, including the red onion, parsley, mint, and even the chickpeas, and store them in an airtight container in the fridge for up to 3 days. Just remember to toss in the diced avocado right before serving to keep it from browning. Additionally, you can prepare the dressing (olive oil, lemon juice, garlic, and oregano) a day ahead and refrigerate it in a jar. When you’re ready to enjoy your salad, simply combine the ingredients, pour the dressing over, and gently toss for fresh, vibrant flavors with minimal effort!

Chickpea Feta Avocado Salad Recipe FAQs

How do I choose ripe avocados?
Absolutely! When selecting avocados for your Chickpea Feta Avocado Salad, look for ones that yield slightly to gentle pressure—this indicates ripeness. Avoid any with dark spots all over or those that feel overly mushy. A perfectly ripe avocado will lend that creamy texture you crave.

How should I store leftovers?
To keep your Chickpea Feta Avocado Salad fresh, store leftovers in an airtight container in the fridge. This method preserves flavors and prevents sogginess. It remains good for up to 3 days, but for the best taste, enjoy it within the first couple of days!

Can I freeze this salad?
Very! While it’s not recommended to freeze the salad itself, you can freeze the chickpeas in advance to pop into later meals. If you decide to freeze it despite the texture changes, do so in an airtight container, and consume within 1-2 months. Just remember that thawed avocado and feta might lose their creamy appeal.

What if my salad turns mushy?
If your Chickpea Feta Avocado Salad does end up mushy, it might be due to overripe avocados or too much mixing. If this happens, you can try adding more chickpeas or even some additional fresh herbs to bulk it up again. For future preparations, remember to mix gently and use fresh, firm avocados.

Is this salad safe for my pets?
Absolutely! This Chickpea Feta Avocado Salad contains ingredients that may not be suitable for pets, especially avocado (which can be toxic to dogs in larger amounts). So, keep this delicious treat just for you and opt for pet-friendly snacks to share with your furry friends.

Chickpea Feta Avocado Salad: Fresh Flavor in Every Bite

Chickpea Feta Avocado Salad is a refreshing and nutritious dish that takes only 15 minutes to prepare.

  • large mixing bowl
  • small bowl or jar
  • Whisk

For the Salad

  • 1 can Chickpeas (drained and rinsed)
  • 2 medium Avocados (diced)
  • 1 cup Feta Cheese (crumbled)
  • 1/2 medium Red Onion (thinly sliced)
  • 1/4 cup Fresh Parsley (chopped)
  • 1/4 cup Fresh Mint (chopped)

For the Dressing

  • 1/4 cup Olive Oil
  • 2 tablespoons Lemon Juice (freshly squeezed)
  • 1 clove Garlic (minced)
  • 1 teaspoon Dried Oregano
  • to taste Salt
  • to taste Pepper

Preparation Steps

  1. In a large mixing bowl, add the drained and rinsed chickpeas, diced avocado, crumbled feta cheese, thinly sliced red onion, chopped parsley, and chopped mint. Gently mix these vibrant ingredients together.
  2. In a small bowl or jar, whisk together the olive oil, freshly squeezed lemon juice, minced garlic, and dried oregano. Mix vigorously for about 30 seconds until the dressing is emulsified and slightly thickened.
  3. Pour the prepared dressing over the salad ingredients, gently toss everything together ensuring each ingredient is well-coated.
  4. Serve the salad immediately or cover the bowl and chill it in the fridge for up to 30 minutes.

For best flavor, chill the salad for about 30 minutes before serving to let the ingredients meld together.

Salad
Mediterranean
Chickpea Feta Avocado Salad, fresh ingredients, healthy salad, light lunch, quick meal, side dish

Filed Under: salad

Irresistible Hawaiian Roll French Toast You’ll Crave Daily

August 8, 2025 by grace bellamy Leave a Comment

As the sun peeked through the kitchen window, the sweet aroma of cinnamon and vanilla danced in the air, drawing me in like a comforting embrace. This Hawaiian Roll French Toast is my go-to weekend indulgence, transforming simple ingredients into a delightful morning feast. With just 25 minutes of prep and cook time, it’s an irresistible treat that keeps my family and friends coming back for more. Not only is it a quick and easy way to elevate breakfast, but it also offers a delightful twist by using soft, pillowy Hawaiian rolls that are perfect for soaking up the creamy custard. Want to take your brunch game to the next level? Let’s dive into this scrumptious recipe!

Why is Hawaiian Roll French Toast amazing?

Incredibly Easy: Preparation takes just 10 minutes, making it a perfect choice for busy mornings or lazy weekends.
Sweet Symbiosis: The pillowy Hawaiian rolls effortlessly soak up the rich custard, resulting in a breakfast classic that feels decadent yet approachable.
Crowd-Pleasing Delight: Whether you’re serving family or hosting brunch, this French toast is sure to impress everyone at the table.
Versatile Toppings: Customize your dish with powdered sugar, fresh fruit, or a drizzle of maple syrup to suit any taste.
Comfort Food Upgrade: It’s a deliciously satisfying way to elevate the usual breakfast routine, ensuring you’ll crave this delightful dish daily!

Hawaiian Roll French Toast Ingredients

For the Custard
• 4 large eggs – Eggs provide the necessary richness and moisture to the custard mixture.
• 1/2 cup milk – Whole milk adds creaminess; you can substitute with almond or oat milk for a dairy-free option.
• 1/4 cup heavy cream – This enhances the richness; feel free to use half-and-half if you’re looking for a lighter alternative.
• 1 teaspoon vanilla extract – A splash of vanilla imparts a warm, sweet flavor that complements the rolls perfectly.
• 1/2 teaspoon cinnamon – Cinnamon adds a touch of warmth; it can be adjusted according to your taste preferences.
• 2 tablespoons sugar – This sweetens the custard without overpowering the dish’s flavor.

For the French Toast
• 12 Hawaiian rolls – Their soft, sweet texture makes these rolls ideal for soaking up the custard, delivering a deliciously unique French toast experience.
• Butter (for cooking) – Use real butter for a rich, golden brown finish; you can also use coconut oil for a tropical twist.

Optional Toppings
• Powdered sugar – A sprinkling of powdered sugar adds elegance to your presentation.
• Maple syrup – Drizzle on top for an extra layer of sweetness, enhancing the overall flavor of your Hawaiian Roll French Toast.

This list of ingredients promises to create a breakfast masterpiece that’s as delightful as it is easy. Enjoy your morning indulgence with this fabulous Hawaiian Roll French Toast!

Step‑by‑Step Instructions for Hawaiian Roll French Toast

Step 1: Prepare the Custard
In a mixing bowl, whisk together 4 large eggs, 1/2 cup milk, 1/4 cup heavy cream, 1 teaspoon vanilla extract, 1/2 teaspoon cinnamon, and 2 tablespoons sugar until smooth and well combined. Ensure there are no visible lumps and the mixture appears creamy. This flavorful custard will coat the Hawaiian rolls, giving them a delightful richness.

Step 2: Slice the Rolls
Carefully slice the 12 Hawaiian rolls in half horizontally, creating equal top and bottom halves. Place the cut rolls on a large plate or cutting board, ready for dipping. This step is essential as it maximizes the surface area for soaking in the custard, ensuring each piece turns out soft and moist.

Step 3: Heat the Skillet
Preheat a large skillet or griddle over medium heat, allowing it to warm up for about 2-3 minutes. Once heated, add a generous pat of butter to coat the surface evenly. The butter should sizzle slightly upon contact, indicating that the skillet is at the right temperature for cooking your Hawaiian Roll French Toast.

Step 4: Dip the Roll Halves
Take each roll half and dip it into the custard mixture, ensuring both sides are well-coated. Be careful not to soak them too long; a quick dip of about 2-3 seconds per side should suffice. This prevents the rolls from becoming overly soggy while still allowing them to absorb that delicious custard flavor.

Step 5: Cook the French Toast
Place the dipped rolls onto the heated skillet, ensuring not to overcrowd them. Cook for 2-3 minutes on one side until golden brown, then flip them carefully using a spatula. After another 2-3 minutes, both sides should be nicely browned and slightly crispy, creating a perfect contrast to the soft interior of your Hawaiian Roll French Toast.

Step 6: Serve and Enjoy
Once cooked, arrange the golden French toast on a serving platter. If desired, dust them with powdered sugar for a beautiful presentation. Drizzle with warm maple syrup to enhance their sweetness. This finishing touch is a delightful way to elevate your Hawaiian Roll French Toast, making it a perfect treat for any breakfast or brunch occasion!

What to Serve with Hawaiian Roll French Toast?

As you savor every bite of this sweet delight, why not pair it with complementary dishes that round out your breakfast experience?

  • Crispy Bacon: The salty crunch of bacon contrasts beautifully with the sweet French toast, creating a delightful balance on your plate.
  • Fresh Fruit Salad: A mix of seasonal berries and tropical fruits adds a refreshing, juicy element that brightens up your feast.
  • Scrambled Eggs: Fluffy, buttery scrambled eggs provide a savory counterpoint to the sweetness of the French toast, ensuring each bite is satisfying.
  • Maple Glazed Sausages: These sweet-and-savory sausages mirror the flavors in your French toast while adding heartiness to your meal.
  • Yogurt Parfait: Layered with granola and fruits, this cool, creamy parfait complements the warm French toast perfectly, offering added texture.
  • Coconut Milk Latte: Enjoy a warm coconut latte alongside your meal for a tropical twist that echoes the flavors of Hawaiian rolls in your breakfast.
  • Cinnamon Roll Muffins: For the ultimate indulgence, pair these fluffy muffins for an extra layer of cinnamon goodness and a feast for the senses.
  • Homemade Whipped Cream: A dollop of freshly whipped cream can take your Hawaiian Roll French Toast to the next level, adding a rich creaminess that’s hard to resist.
  • Chai Tea: Pair this spiced tea with your meal for a warm, aromatic experience that enhances the comforting qualities of your breakfast.

Make Ahead Options

These delightful Hawaiian Roll French Toast pieces are perfect for meal prep, allowing you to enjoy a sumptuous breakfast with minimal effort on busy mornings! You can prepare the custard mixture and store it in the refrigerator for up to 24 hours. Additionally, slice the Hawaiian rolls a day in advance and keep them in an airtight container to maintain freshness. When you’re ready to cook, simply dip the rolls in the custard and proceed with the cooking instructions, ensuring they remain golden brown and delicious. By prepping ahead, you save precious time while still delivering restaurant-quality results that your family will adore!

Expert Tips for Hawaiian Roll French Toast

• Custard Consistency: Ensure your custard is smooth and free of lumps for even coating, enhancing the overall flavor of your Hawaiian Roll French Toast.

• Even Heating: Maintain a medium heat on your skillet to achieve that golden-brown crust without burning the rolls; avoid high heat to ensure they cook through.

• Quick Dipping: Dip the rolls in the custard mixture for just a couple of seconds. Too long can lead to soggy French toast that won’t hold its shape.

• Don’t Overcrowd: Cook in batches if necessary to allow space around each piece. This helps achieve the perfect crispness without steaming the French toast.

• Topping Variations: Experiment with toppings like fresh berries, whipped cream, or even a dollop of yogurt for added texture and flavor.

How to Store and Freeze Hawaiian Roll French Toast

Fridge: Store any leftover Hawaiian Roll French Toast in an airtight container in the refrigerator for up to 3 days. Reheat in a skillet over medium heat for the best texture.

Freezer: For longer storage, freeze individual slices on a baking sheet, then transfer them to a freezer bag once solid. They can be frozen for up to 2 months.

Reheating: When ready to enjoy, reheat the frozen slices in a toaster oven or microwave. Add a little butter to the skillet for a crispy crust as you warm them through.

Serving Tip: Drizzle with fresh maple syrup or powdered sugar after reheating for that fresh-made taste!

Hawaiian Roll French Toast Variations

Feel free to get creative and customize your Hawaiian Roll French Toast to suit your palate or dietary needs!

  • Dairy-Free: Replace milk and cream with almond or oat milk for a deliciously creamy dairy-free option. These substitutions will keep your custard flavorful while accommodating those with lactose intolerance.

  • Gluten-Free: Use gluten-free bread rolls instead of Hawaiian rolls. This swap allows everyone to enjoy this delightful breakfast without sacrificing taste or texture.

  • Enhanced Flavor: Add a pinch of nutmeg or a splash of orange zest to the custard mixture. These simple additions will give your French toast an aromatic and flavorful twist that’s sure to impress.

  • Fruity Twist: Top your French toast with sautéed apples or bananas to add sweetness and a fresh burst of flavor. This variation not only looks beautiful but also brings a delightful seasonal element to your meal.

  • Savory Option: Transform this dish into a savory delight by adding crumbled bacon or sautéed spinach to the custard before dipping the rolls. This unexpected twist will surprise your guests with every delicious bite.

  • Extra Crunch: For a textured finish, sprinkle crushed nuts like pecans or walnuts on top before serving. This not only adds crunch but also enhances the nutty flavor of the dish.

  • Spicy Kick: Incorporate a dash of cayenne pepper or chili powder into the custard for a surprising heat. This addition offers a unique flavor profile for those adventurous eaters.

  • Seasonal Spices: Try replacing cinnamon with pumpkin pie spice or apple pie spice during the fall. The warm flavors of these spices will really elevate your breakfast experience!

No matter which variation you choose, let your taste buds guide you! And if you’re feeling adventurous, try pairing your yummy French toast with some delicious fresh fruit for a refreshing twist or enjoy a side of crispy bacon to balance the sweetness.

Hawaiian Roll French Toast Recipe FAQs

What is the best way to select ripe Hawaiian rolls?
When choosing Hawaiian rolls, look for those that are soft and springy to the touch, without any dark spots or signs of drying out. Fresh rolls should feel light and fluffy, which is essential for soaking up the custard and creating that irresistible texture.

How should I store leftover Hawaiian Roll French Toast?
Store any leftovers in an airtight container in the refrigerator for up to 3 days. When you’re ready to enjoy, reheat them in a skillet over medium heat for the most enjoyable texture. This method maintains that delightful crispiness on the outside while warming the inside perfectly.

Can I freeze Hawaiian Roll French Toast?
Absolutely! To freeze, slice your French toast into individual pieces and place them on a baking sheet in a single layer. Freeze for about 1-2 hours until solid, then transfer the slices to a freezer bag, sealing it tightly. You can keep them in the freezer for up to 2 months.

What’s the best way to reheat frozen Hawaiian Roll French Toast?
To reheat, simply take the slices out of the freezer and place them directly into a preheated toaster oven or microwave. If using a skillet, add a little butter to ensure a crispy exterior. Heat until warmed through, which usually takes about 3-5 minutes in a skillet or 1-2 minutes in the microwave.

Are there any dietary considerations for Hawaiian Roll French Toast?
If you are concerned about allergies, ensure your ingredients are free from common allergens. Substitute dairy with almond milk or oat milk for a lactose-free option. If making for pets, it’s best to avoid serving any French toast as it’s high in sugar and not suitable for them.

What should I do if my French toast turns out soggy?
If the French toast is too soggy, it’s likely due to soaking the rolls for too long in the custard mixture. Aim for a quick dip of around 2-3 seconds on each side before cooking. Also, make sure to cook at the right temperature; medium heat is key to getting that nice crispy exterior without burning.

Irresistible Hawaiian Roll French Toast You’ll Crave Daily

This Hawaiian Roll French Toast transforms simple ingredients into a delightful breakfast experience that your family will crave daily.

  • Mixing Bowl
  • skillet or griddle

For the Custard

  • 4 large eggs (Provide richness and moisture to the custard.)
  • 1/2 cup milk (Whole milk adds creaminess; can substitute with almond or oat milk.)
  • 1/4 cup heavy cream (Enhances richness; half-and-half can be used for a lighter alternative.)
  • 1 teaspoon vanilla extract (Imparts a warm, sweet flavor.)
  • 1/2 teaspoon cinnamon (Adds warmth; can be adjusted to taste.)
  • 2 tablespoons sugar (Sweetens the custard.)

For the French Toast

  • 12 pieces Hawaiian rolls (Ideal for soaking up the custard.)
  • Butter (For cooking; can use coconut oil for a tropical twist.)

Optional Toppings

  • Powdered sugar (Adds elegance.)
  • Maple syrup (Enhances sweetness.)

Step-by-Step Instructions

  1. In a mixing bowl, whisk together eggs, milk, heavy cream, vanilla extract, cinnamon, and sugar until smooth.
  2. Carefully slice the Hawaiian rolls in half horizontally.
  3. Preheat a large skillet or griddle over medium heat and add a pat of butter.
  4. Dip each roll half into the custard mixture, coating both sides.
  5. Cook the dipped rolls in the skillet for 2-3 minutes on each side until golden brown.
  6. Arrange cooked French toast on a platter, dust with powdered sugar, and drizzle with maple syrup.

Ensure custard is smooth for even coating and maintain medium heat for cooking.

Breakfast
Hawaiian
Breakfast, brunch, Custard, Easy Recipe, Hawaiian Roll French Toast, sweet

Filed Under: Breakfast

Easy One-Pot Cheeseburger Macaroni for Cozy Nights In

August 8, 2025 by grace bellamy Leave a Comment

As I stood in my kitchen, the unmistakable aroma of sizzling beef and sautéed onions filled the air, transporting me back to carefree childhood days. Today, I’m sharing a comforting favorite—One-Pot Cheeseburger Macaroni. This delightful dish brings together rich flavors in just a single pot, making cleanup a breeze. With quick prep and the ability to satisfy even the hungriest of appetites, it’s perfect for busy weeknights or casual gatherings with friends. Imagine diving into a creamy, cheesy bowl of nostalgia where every bite hugs your heart! Are you ready to resurrect the classics and whip up something truly satisfying? Let’s get cooking!

Why is One-Pot Cheeseburger Macaroni a must-try?

Simplicity reigns supreme with this recipe, requiring just one pot and minimal cleanup. Hearty flavors shine through, as seasoned beef and creamy cheddar combine for an unforgettable taste. Quick and Easy to whip up, you can have dinner ready in just 30 minutes, perfect for those busy evenings. Crowd-Pleasing Appeal makes it ideal for family meals and casual get-togethers. Plus, feel free to personalize your dish with garnishes like crispy bacon bits or fresh parsley—check out my tips on garnishing dishes for ideas!

One-Pot Cheeseburger Macaroni Ingredients

• Here’s what you need for a delicious meal.

For the Base

  • Ground beef – a hearty protein that gives this dish its classic cheeseburger flavor.
  • Diced onion – adds a sweet and savory note as it sizzles with the beef.
  • Macaroni – the perfect pasta to easily absorb the rich flavors of the sauce.

For the Flavor

  • Beef broth – provides moisture and depth, making each bite taste comforting and savory.
  • Worcestershire sauce – a splash of this sauce enhances that authentic cheeseburger effect.
  • Garlic powder – a must for an aromatic boost that elevates all the flavors.
  • Salt – balances the flavors, just be careful not to overdo it!
  • Pepper – adds a hint of spice that elevates the entire dish’s profile.

For the Creamy Finish

  • Shredded cheddar cheese – the star ingredient that brings the rich, cheesy goodness to your macaroni.

For Garnishing (Optional)

  • Fresh parsley – a pop of color and freshness that brightens up each bowl.
  • Green onions – provide a crunchy texture and zesty flavor contrast.
  • Crispy bacon bits – for those extra crunchy bites that take your dish to a new level.

Now you’re ready to gather your ingredients and dive into making this delightful One-Pot Cheeseburger Macaroni!

Step‑by‑Step Instructions for One-Pot Cheeseburger Macaroni

Step 1: Brown the Beef
In a large pot over medium heat, add 1 pound of ground beef and cook until it’s fully browned, which should take about 5-7 minutes. Use a wooden spoon to break apart the meat as it cooks, ensuring it turns a uniform brown and is no longer pink. Once cooked through, carefully drain any excess fat from the pot.

Step 2: Sauté the Onion
Add 1 diced onion to the pot with the browned beef and sauté for about 2-3 minutes until the onion becomes translucent and fragrant. This step is crucial for building flavor in your One-Pot Cheeseburger Macaroni, so keep an eye on it and stir occasionally to prevent any sticking.

Step 3: Combine the Ingredients
Next, stir in 2 cups of macaroni, 3 cups of beef broth, 2 tablespoons of Worcestershire sauce, 1 teaspoon of garlic powder, 1 teaspoon of salt, and 1 teaspoon of pepper. Increase the heat and bring the mixture to a boil. Once boiling, reduce the heat to a simmer, allowing all the flavors to meld together beautifully as it cooks.

Step 4: Cook the Macaroni
Cover the pot and let the macaroni cook for approximately 8-10 minutes, stirring occasionally, until it reaches al dente and most of the liquid has been absorbed. This is where the magic happens in your One-Pot Cheeseburger Macaroni, as the pasta soaks up all those delicious flavors.

Step 5: Add the Cheese
Once the macaroni is cooked, remove the pot from heat and stir in 1 cup of shredded cheddar cheese. Keep stirring until the cheese melts completely and creates a rich, creamy consistency. This step adds that comforting cheeseburger essence that makes this dish so delightful.

Step 6: Serve and Garnish
Scoop the creamy One-Pot Cheeseburger Macaroni into bowls, serving warm. For a finishing touch, garnish with freshly chopped parsley, sliced green onions, or crispy bacon bits if desired. This adds a wonderful contrast in texture and flavor, making each bite even more enjoyable.

Expert Tips for One-Pot Cheeseburger Macaroni

  • Brown the Beef Properly: Ensure the ground beef is well-browned before adding other ingredients. This depth of flavor is key to a delicious One-Pot Cheeseburger Macaroni.

  • Watch the Liquid Level: Keep an eye on the pot while cooking. If the mixture looks too dry before the macaroni is done, add a splash of beef broth to maintain the creamy texture.

  • Cheese Addition: Stir in the cheddar cheese off the heat. This prevents the cheese from becoming rubbery and ensures that it melts perfectly for that creamy finish.

  • Personalize the Dish: Feel free to add your favorite seasonings or vegetables like bell peppers or peas to elevate the flavor of your One-Pot Cheeseburger Macaroni.

  • Check Doneness: For perfect macaroni, keep track of the cooking time and taste a piece to confirm it’s al dente before removing it from heat.

Make Ahead Options

These One-Pot Cheeseburger Macaroni are perfect for meal prep enthusiasts looking for quick and satisfying meals on busy nights! You can prepare the ground beef and sautéed onion up to 3 days in advance; just refrigerate them in an airtight container. Additionally, you can measure out all the dry ingredients (macaroni, garlic powder, salt, and pepper) and store them together for easy access. When you’re ready to enjoy your dish, simply reheat the beef mixture, add the beef broth and dry ingredients, then follow the cooking steps as usual. Stir in the cheese just before serving—this method ensures your One-Pot Cheeseburger Macaroni remains just as delicious and comforting, saving you time without sacrificing flavor!

One-Pot Cheeseburger Macaroni Variations

Feel free to get creative and make this comforting dish uniquely yours with these delicious twists!

  • Dairy-Free: Substitute the cheddar cheese with a dairy-free cheese blend, ensuring everyone can enjoy this creamy delight.
  • Vegetarian: Swap the ground beef for crumbled tempeh or lentils, making an equally satisfying meal that’s packed with plant-based goodness.
  • Spicy Kick: Add diced jalapeños or a teaspoon of cayenne pepper to give your One-Pot Cheeseburger Macaroni a fiery makeover.
  • Creamy Version: Stir in a dollop of sour cream or cream cheese after the cheese has melted for an extra creamy texture that indulgently coats each bite.
  • Veggie Boost: Toss in some frozen peas, chopped bell peppers, or spinach during cooking for a fresh flavor and a nutritional upgrade.
  • Gourmet Touch: Add a splash of balsamic vinegar and a sprinkle of Italian herbs for a sophisticated flavor that takes this comfort food to the next level.
  • Pasta Alternatives: Experiment with different pasta shapes like rotini or penne for an exciting twist in texture and appearance.
  • One-Pot Wonder: Consider tossing in some cooked bacon or sausage for an added layer of hearty flavor that complements the cheeseburger theme beautifully.

What to Serve with One-Pot Cheeseburger Macaroni

Elevate your One-Pot Cheeseburger Macaroni experience with these delightful pairings that will make your meal feel complete.

  • Garlicky Breadsticks: These warm, soft breadsticks are the perfect complement to soak up extra sauce, adding a satisfying chewiness to each bite.

  • Mixed Green Salad: A light salad with fresh vegetables offers a refreshing crunch and balances the richness of your mac and cheese.

  • Steamed Broccoli: Bright green steamed broccoli adds a nutritious element and a vibrant color to your plate, enhancing both flavor and texture.

  • Creamy Coleslaw: A tangy coleslaw adds a creamy, tangy contrast that perfectly cuts through the heartiness of the dish, creating a delightful balance.

  • Crispy Potato Wedges: Thick-cut potato wedges drizzled with herbs and spices bring a satisfying crunch that harmonizes beautifully with the creamy pasta.

  • Apple Pie: For dessert, a slice of warm apple pie drizzled with caramel makes a classic finishing touch, rounding out your cozy meal with a sweet note.

  • Iced Tea: A refreshing glass of iced tea, sweetened or unsweetened, is the perfect beverage to complement the savory flavors of your hearty dish.

Each of these pairings adds a unique flavor or texture, creating a deliciously satisfying feast for you and your loved ones!

How to Store and Freeze One-Pot Cheeseburger Macaroni

Room Temperature: Enjoy your One-Pot Cheeseburger Macaroni fresh for up to 2 hours after cooking. After that, it should be refrigerated to prevent bacteria growth.

Fridge: Store leftovers in an airtight container in the refrigerator for up to 3 days. When reheating, sprinkle a little beef broth to restore creaminess before warming.

Freezer: For longer storage, freeze in an airtight container for up to 2 months. Thaw in the fridge overnight before reheating.

Reheating: Reheat on the stovetop over low heat, adding a splash of broth or water for moisture, or microwave until heated through, stirring midway.

One-Pot Cheeseburger Macaroni Recipe FAQs

How do I know if my ground beef is fresh?
Absolutely! Look for ground beef that is bright red in color and firm to the touch. Avoid any packages with dark spots or off odors, which can indicate spoilage. Always check the use-by date, too—it’s essential for safety and optimal freshness.

How should I store leftovers of One-Pot Cheeseburger Macaroni?
For storage, allow the dish to cool at room temperature for no more than 2 hours. Then, transfer it to an airtight container and refrigerate. It will stay fresh in the fridge for up to 3 days. Don’t forget to stir in a splash of beef broth during reheating to revive its creamy texture!

Can I freeze One-Pot Cheeseburger Macaroni?
Certainly! To freeze, first allow the macaroni to cool completely. Then, place it in a freezer-safe airtight container, ensuring to leave some space for expansion. You can freeze it for up to 2 months. When you’re ready to enjoy, just thaw it in the fridge overnight before reheating, and add a little broth to bring back its creaminess.

What should I do if my macaroni is too sticky or mushy?
Very! If your macaroni ends up sticky, it could mean it was overcooked or needed more liquid during cooking. If you notice this happening, next time, reduce the cooking time or keep an eye on the liquid level while it simmers. Adding just a bit more broth can help your dish keep that creamy, luscious texture without becoming mushy.

Are there any dietary considerations with this recipe?
Of course! If you have dietary restrictions, consider using lean ground turkey as an alternative to beef or swapping out regular cheese for a dairy-free option. This recipe can also easily be made gluten-free by choosing gluten-free macaroni. Always check labels, especially if allergies are a concern. For vegetarian versions, you can replace the beef with a suitable meat alternative like lentils or mushrooms!

Easy One-Pot Cheeseburger Macaroni for Cozy Nights In

This One-Pot Cheeseburger Macaroni is a comforting dish that combines hearty flavors in just one pot, perfect for busy weeknights.

  • Large Pot

For the Base

  • 1 pound ground beef
  • 1 medium diced onion
  • 2 cups macaroni

For the Flavor

  • 3 cups beef broth
  • 2 tablespoons Worcestershire sauce
  • 1 teaspoon garlic powder
  • 1 teaspoon salt
  • 1 teaspoon pepper

For the Creamy Finish

  • 1 cup shredded cheddar cheese

For Garnishing (Optional)

  • fresh parsley (for garnish)
  • green onions (for garnish)
  • crispy bacon bits (for garnish)

Step-by-Step Instructions

  1. Brown the beef in a large pot over medium heat for 5-7 minutes until fully browned. Drain excess fat.
  2. Add the diced onion and sauté for 2-3 minutes until translucent.
  3. Stir in the macaroni, beef broth, Worcestershire sauce, garlic powder, salt, and pepper. Bring to a boil.
  4. Cover and simmer for 8-10 minutes until macaroni is al dente and most liquid is absorbed.
  5. Remove from heat and stir in the shredded cheddar cheese until melted and creamy.
  6. Serve warm and garnish with parsley, green onions, and bacon bits if desired.

This dish is great for busy weeknights and can be customized with additional toppings and seasonings.

Main Dishes
American
Cheeseburger, comfort food, Easy Recipe, Macaroni, One-Pot, quick dinner

Filed Under: Main Dishes

Creamy Garlic Parmesan Chicken Pasta for Cozy Nights

August 8, 2025 by grace bellamy Leave a Comment

As I stood in my kitchen, the familiar aroma of sizzling garlic enveloped me, instantly transporting me to a cozy Italian trattoria. This Healthy Garlic Parmesan Chicken Pasta is my secret weapon for turning any weeknight into an unforgettable dining experience. Not only is it quick to whip up—ready in just 30 minutes—but it also delivers a guilt-free indulgence that the whole family will love. Packed with protein from tender chicken and luscious Greek yogurt, this dish redefines comfort food while keeping your wellness goals in mind. With a hint of savory Parmesan and the fresh vibrancy of spinach, it’s hard to believe something this satisfying is also wholesome. Are you ready to elevate your pasta game? Let’s dive into this delightful recipe together!

Why is this pasta recipe a must-try?

Simplicity: This Garlic Parmesan Chicken Pasta is a breeze to make, requiring just 30 minutes from start to finish—perfect for busy weeknights!

Creamy Texture: The combination of Greek yogurt and Parmesan creates a rich, indulgent sauce that feels luxurious without weighing you down.

Nutrient-Packed: With whole wheat pasta and fresh spinach, you get fiber and nutrients that elevate this dish beyond your average pasta meal.

Family-Friendly: Kids and adults alike will adore the savory flavors, making this your new go-to recipe for family dinners.

Meal Prep Dream: Leftovers are easy to store and reheat, ensuring you can enjoy this deliciousness throughout the week—just add a splash of broth or milk for the perfect consistency!

Ready to take the plunge into pasta perfection? Try making this healthy garlic Parmesan chicken pasta that will make your taste buds sing!

Garlic Parmesan Chicken Pasta Ingredients

• Prepare for a delightful cooking experience!

For the Pasta
• 8 oz whole wheat pasta – A healthier alternative that adds fiber and texture.

For the Chicken
• 1 lb chicken breast, cubed – Provides lean protein that keeps you full.
• 2 tbsp olive oil – Adds healthy fats and helps in browning the chicken.
• 1 tsp salt – Enhances the flavors of the dish.
• 1/2 tsp pepper – A subtle kick to elevate your chicken.
• 1/2 tsp paprika – Adds a touch of smokiness to the dish.
• 1 tsp Italian seasoning – A blend that brings Italian flair to your pasta.

For the Sauce
• 3 cloves garlic, minced – Infuses the sauce with aromatic goodness.
• 2 tbsp whole wheat flour – Helps thicken the sauce for a creamy texture.
• 1 cup chicken broth – Adds depth and richness to your sauce.
• 1/2 cup low-fat milk – Keeps it creamy while reducing calories.
• 1 cup Greek yogurt – A healthier alternative that adds creaminess and tang.
• 1/2 cup grated Parmesan cheese – The star ingredient that gives this dish its name and flavor.

For the Extras
• 2 cups fresh spinach (optional) – Boosts nutrients and adds a pop of color.
• Chopped parsley (for garnish, optional) – Spruces up the dish and adds freshness.

Now that you have these essential ingredients ready, it’s time to whip up a comforting and healthy Garlic Parmesan Chicken Pasta that your loved ones will savor!

Step‑by‑Step Instructions for Garlic Parmesan Chicken Pasta

Step 1: Cook the Pasta
Begin by bringing a large pot of salted water to a vigorous boil. Once boiling, add 8 oz of whole wheat pasta and cook according to package instructions until it reaches an al dente texture, typically about 8-10 minutes. Be sure to save about 1/4 cup of the starchy pasta water before draining. Drain the pasta and set it aside, giving it a gentle shake to remove any excess water.

Step 2: Sauté the Chicken
In a large nonstick skillet, heat 1 tablespoon of olive oil over medium heat. Once the oil shimmers, add 1 lb of cubed chicken breast seasoned with 1 tsp salt, 1/2 tsp pepper, 1/2 tsp paprika, and 1 tsp Italian seasoning. Cook the chicken for approximately 5-6 minutes, turning occasionally until it is golden brown and cooked through. Transfer the cooked chicken to a plate and keep it warm.

Step 3: Sauté the Garlic
In the same skillet, add the remaining tablespoon of olive oil, allowing it to heat up for about 30 seconds. Stir in 3 cloves of minced garlic and sauté for 30-60 seconds, stirring constantly until fragrant but not browned; this will keep the garlic sweet. The aroma will fill your kitchen, signaling it’s time for the next step!

Step 4: Make the Roux
Sprinkle in 2 tablespoons of whole wheat flour over the garlic oil, stirring continuously to combine and form a light roux. Allow it to cook for about 30 seconds to eliminate any raw flour flavor. You’ll notice a slight thickening; this is crucial for the creamy sauce in your Garlic Parmesan Chicken Pasta!

Step 5: Prepare the Sauce
Gradually pour in 1 cup of chicken broth while whisking gently to avoid any lumps. After mixing well, add in 1/2 cup of low-fat milk and keep whisking for an additional 2-3 minutes, or until the sauce thickens. The sauce should lightly coat the back of a spoon, indicating it’s ready for the next delicious addition.

Step 6: Incorporate the Creaminess
Reduce the heat to low and stir in 1 cup of Greek yogurt until fully incorporated, creating a creamy base for your Garlic Parmesan Chicken Pasta. Add in 1/2 cup of grated Parmesan cheese, stirring until melted and the sauce becomes velvety. If the sauce is too thick, adjust the consistency with the reserved pasta water you saved earlier.

Step 7: Combine Ingredients
Return the cooked chicken along with any accumulated juices to the skillet. Toss in the cooked whole wheat pasta and, if desired, 2 cups of fresh spinach, stirring everything together until the pasta and chicken are evenly coated in the creamy sauce. The vibrant colors will make this dish even more appetizing!

Step 8: Serve and Garnish
Divide the Garlic Parmesan Chicken Pasta among plates, artfully garnishing with chopped parsley and a sprinkle of extra Parmesan if desired. Serve immediately while still warm, allowing everyone to enjoy the comforting aromas and flavors of this delightful dish!

Garlic Parmesan Chicken Pasta Variations

Feel free to get creative and personalize your Garlic Parmesan Chicken Pasta to suit your tastes and dietary needs!

  • Gluten-Free: Use gluten-free pasta or spiralized veggies like zucchini for a lighter, low-carb option.
  • Vegetarian: Swap chicken for hearty chickpeas or sautéed mushrooms to maintain that satisfying texture.
  • Spice Up: Add a pinch of red pepper flakes or diced jalapeños for a delightful heat that warms your soul.
  • Herbaceous Twist: Mix in fresh basil or oregano instead of Italian seasoning for a fresh garden flavor that brightens the dish.
  • Extra Creamy: Substitute the Greek yogurt with a combo of cream cheese and sour cream for a richer sauce that’s hard to resist.

For those looking to elevate this dish even more, consider adding some sun-dried tomatoes or artichoke hearts. This not only enhances the flavors, but also introduces lovely textures. Trust me, your family will ask for seconds!

Expert Tips for Garlic Parmesan Chicken Pasta

Cook Al Dente: Ensure your whole wheat pasta is cooked al dente. This will prevent it from becoming mushy when mixed with the sauce.

Avoid Garlic Burn: When sautéing garlic, monitor it closely to avoid browning. This keeps the flavor sweet rather than bitter, enhancing your Garlic Parmesan Chicken Pasta.

Thickening Trick: If your sauce is too thick, adjust it with reserved pasta water gradually until you achieve your desired consistency.

Flavor Infusion: For added flavor, consider marinating the chicken in the olive oil and spices for 30 minutes before cooking. This step makes the chicken more flavorful.

Fresh Ingredients: Use fresh spinach if possible; it adds vibrant color and a nutritional boost. You can substitute with other veggies like kale or broccoli if desired!

What to Serve with Healthy Garlic Parmesan Chicken Pasta

Imagine a cozy dinner where every bite takes you to delightful flavors, creating a truly memorable meal experience.

  • Garlic Bread: A crispy, buttery delight that complements the creamy sauce beautifully while adding a satisfying crunch.
  • Mixed Green Salad: Fresh greens tossed with a light vinaigrette create a refreshing contrast to the richness of the pasta.
  • Roasted Vegetables: Seasonal veggies, caramelized to perfection, bring earthy flavors that enhance the overall meal without overpowering it.
  • Grilled Asparagus: Tender yet slightly charred asparagus adds an elegant touch and a burst of green freshness to your plate.
  • Creamy Coleslaw: The cool, creamy slaw provides crunch and a tangy contrast that balances the savory notes of the dish.
  • Chardonnay: A chilled glass of this white wine is perfect for pairing, offering a smooth balance that complements the dish’s flavors.
  • Lemon Sorbet: End the evening on a refreshing note with bright, zesty sorbet, cleansing the palate beautifully after the hearty pasta.
  • Stuffed Mushrooms: Savory filled mushrooms make for an enticing appetizer, enticing your guests while enhancing the ambiance with their earthy taste.

Make Ahead Options

These Garlic Parmesan Chicken Pasta are a fantastic option for busy weeknights! You can prepare the chicken, sauce, and pasta up to 24 hours in advance, refrigerating them separately in airtight containers to maintain their freshness. Cook the chicken and toss it with the spices before storing, while allowing the sauce to cool before sealing. When you’re ready to serve, simply reheat the chicken and sauce on the stovetop, then mix in the cooked pasta. For the best results, add a splash of broth or milk to the sauce during reheating to keep it creamy and delicious. This way, you’ll have a homemade meal ready to enjoy with minimal effort!

How to Store and Freeze Garlic Parmesan Chicken Pasta

Fridge: Store leftover Garlic Parmesan Chicken Pasta in an airtight container for up to 4 days. Allow it to cool completely before sealing to maintain freshness.

Freezer: If you’d like to store it for longer, freeze the pasta in airtight containers or freezer bags for up to 3 months. For best results, separate portions to make reheating easier.

Reheating: When it’s time to enjoy your leftovers, reheat in a skillet with a splash of chicken broth or milk to restore the creamy texture. Heat gently until warmed through, about 5-7 minutes.

Enjoy Later: Freezing this dish is a great way to have a comforting meal on hand. Just remember to label your containers with the date for easy reference!

Garlic Parmesan Chicken Pasta Recipe FAQs

What type of pasta should I use for this recipe?
Absolutely! Whole wheat pasta is the star here, providing a wholesome health boost compared to traditional pasta. It adds fiber and a nutty flavor that complements the dish beautifully. You can also switch it up with gluten-free pasta if needed—just ensure to adjust the cooking time as per the package instructions.

How should I store leftover Garlic Parmesan Chicken Pasta?
This pasta can be stored in airtight containers in the fridge for up to 4 days. Allow it to cool completely before storing to prevent moisture buildup. When you’re ready to enjoy it again, just reheat it with a splash of broth or milk to maintain that creamy texture.

Can I freeze Garlic Parmesan Chicken Pasta?
Absolutely! To freeze, portion the pasta into airtight containers or freezer bags, ensuring you remove as much air as possible. It can be stored in the freezer for up to 3 months. During freezing, I recommend labeling your containers with the date so you can keep track of freshness.

What if my sauce seems too thick after cooking?
No worries! If your Garlic Parmesan Chicken Pasta sauce is thicker than you’d like, add the reserved pasta water gradually until you reach your desired consistency. This not only thins the sauce but also keeps it velvety. Just be patient and stir it in slowly for the best results!

Are there any dietary considerations to keep in mind?
Certainly! If you’re cooking for someone with dietary restrictions, this dish can easily be modified. It can be made gluten-free by using a suitable pasta alternative and lower in fat by using less Greek yogurt and cheese. Also, some may want to keep an eye out for lactose intolerance—try substituting the milk and yogurt with plant-based alternatives!

How can I make this dish more nutritious?
For an extra nutritious punch, toss in more vegetables like steamed broccoli or bell peppers alongside the spinach. These colorful additions not only boost nutrition but also enhance the visual appeal of your Garlic Parmesan Chicken Pasta, making it a feast for both the eyes and the palate!

Creamy Garlic Parmesan Chicken Pasta for Cozy Nights

This Garlic Parmesan Chicken Pasta is a quick, healthy indulgence that’s perfect for family weeknight dinners.

  • Large Pot
  • nonstick skillet
  • Whisk

For the Pasta

  • 8 oz whole wheat pasta (A healthier alternative that adds fiber and texture.)

For the Chicken

  • 1 lb chicken breast, cubed (Provides lean protein that keeps you full.)
  • 2 tbsp olive oil (Adds healthy fats and helps in browning the chicken.)
  • 1 tsp salt (Enhances the flavors of the dish.)
  • 1/2 tsp pepper (A subtle kick to elevate your chicken.)
  • 1/2 tsp paprika (Adds a touch of smokiness to the dish.)
  • 1 tsp Italian seasoning (A blend that brings Italian flair to your pasta.)

For the Sauce

  • 3 cloves garlic, minced (Infuses the sauce with aromatic goodness.)
  • 2 tbsp whole wheat flour (Helps thicken the sauce for a creamy texture.)
  • 1 cup chicken broth (Adds depth and richness to your sauce.)
  • 1/2 cup low-fat milk (Keeps it creamy while reducing calories.)
  • 1 cup Greek yogurt (A healthier alternative that adds creaminess and tang.)
  • 1/2 cup grated Parmesan cheese (The star ingredient that gives this dish its name and flavor.)

For the Extras

  • 2 cups fresh spinach (Boosts nutrients and adds a pop of color.)
  • Chopped parsley (for garnish, optional.)

Step-by-Step Instructions

  1. Begin by bringing a large pot of salted water to a vigorous boil. Add 8 oz of whole wheat pasta and cook according to package instructions until al dente, about 8-10 minutes. Save 1/4 cup of starchy pasta water, drain, and set aside.
  2. In a large nonstick skillet, heat 1 tbsp of olive oil over medium heat. Add 1 lb of cubed chicken seasoned with 1 tsp salt, 1/2 tsp pepper, 1/2 tsp paprika, and 1 tsp Italian seasoning. Cook for about 5-6 minutes until golden brown and cooked through. Transfer chicken to a plate and keep warm.
  3. In the same skillet, add the remaining tablespoon of olive oil. Stir in 3 cloves of minced garlic and sauté for 30-60 seconds until fragrant but not browned.
  4. Sprinkle in 2 tbsp of whole wheat flour over garlic oil, stirring to combine and form a light roux. Cook for about 30 seconds.
  5. Gradually pour in 1 cup of chicken broth while whisking gently. Add 1/2 cup of low-fat milk and keep whisking for 2-3 minutes until the sauce thickens.
  6. Reduce the heat to low and stir in 1 cup of Greek yogurt until incorporated. Add 1/2 cup of grated Parmesan cheese and stir until melted. Adjust consistency with reserved pasta water if needed.
  7. Return cooked chicken along with juices to the skillet. Toss in cooked whole wheat pasta and, if desired, 2 cups of fresh spinach, stirring until evenly coated in the sauce.
  8. Divide the pasta among plates, garnishing with chopped parsley and extra Parmesan if desired. Serve immediately.

Controlling the heat when sautéing garlic is crucial to prevent bitterness, and variations in vegetables can be made based on preference.

Main Dishes
Italian
comfort food, Family Meal, Garlic Parmesan Chicken Pasta, Healthy Pasta, Pasta Recipe, quick dinner

Filed Under: Main Dishes

Decadent Oreo Balls You Can’t Resist Making at Home

August 8, 2025 by grace bellamy Leave a Comment

As I grabbed the last of the Oreo cookies from the pantry, a lightbulb moment struck—why not transform these crunchy delights into something even more irresistible? That’s when I decided to whip up a batch of Oreo Balls, the perfect simple dessert for any occasion. Not only do they come together in just 30 minutes, but they’re also a show-stopping crowd-pleaser that’s sure to impress. With a luscious chocolate coating wrapping around a creamy, dreamy Oreo center, these bite-sized treats make for a fun, no-bake solution to satisfy any sweet tooth. Who could resist the charm of homemade delights like these? Ready to roll up your sleeves and indulge? Let’s dive into this delectable adventure!

Why Make Oreo Balls Today?

Simplicity reigns supreme with this recipe, taking just 30 minutes from start to finish. Decadent flavor combines the rich taste of chocolate with the delightful crunch of Oreos, creating a dessert that’s utterly irresistible. Versatile treat – perfect for parties, holidays, or just a sweet craving! These delicious bites are also kid-friendly, making them a fun activity for family time. If you love quick and easy desserts, check out other sweet favorites like Sweet Chili Meatballs for a perfect balance of savory and sweet. Don’t miss out on the joy of homemade sweets!

Oreo Balls Ingredients

Get ready to create your very own indulgent treats!

For the Oreo Mixture
• Oreo cookies – 8 ounces (225g) crushed, the star ingredient for that classic flavor.
• Melted butter – 3 tablespoons (45g) to bind everything together and enhance the richness.
• Milk – 1 teaspoon to ensure the mixture is perfectly moist when rolling into balls.

For the Chocolate Coating
• Chocolate – 8 ounces, choose your favorite type; dark chocolate brings a rich contrast to the sweet Oreo balls and makes them hard to resist!

Crafting these Oreo Balls isn’t just about the ingredients; it’s about creating delightful memories in the kitchen. Enjoy every bite!

Step‑by‑Step Instructions for Oreo Balls

Step 1: Crush the Oreos
Begin by placing 8 ounces of Oreo cookies in a food processor, pulsing until they turn into fine crumbs. Alternatively, you can use a rolling pin to smash the cookies within a sealed plastic bag. This process should take about 2-3 minutes, and you’ll know it’s ready when there are no large pieces remaining.

Step 2: Mix the Ingredients
In a large mixing bowl, combine the crushed Oreo cookies with 3 tablespoons of melted butter and 1 teaspoon of milk. Stir the mixture until it’s well combined and forms a thick, cohesive dough. This should take around 2-3 minutes of mixing. The consistency will be slightly sticky but will hold together when you roll it into balls.

Step 3: Form the Balls
Using your hands, scoop out approximately one tablespoon of the Oreo mixture and roll it into small balls, about 1 inch in diameter. Place each ball on a baking sheet lined with parchment paper. Aim to create about 16 balls, and set the baking sheet in the refrigerator to firm up while you prepare the chocolate coating, which will take about 10 minutes.

Step 4: Melt the Chocolate
In a microwave-safe bowl, add 8 ounces of your favorite chocolate for coating. Melt the chocolate in the microwave in 30-second intervals, stirring between each until it’s smooth and fully melted, totaling about 1-2 minutes. Ensure the chocolate is warm but not too hot, as this will help achieve a perfect coating for your Oreo Balls.

Step 5: Dip the Oreo Balls
Remove the Oreo balls from the refrigerator. Using a fork, dip each ball into the melted chocolate, ensuring it’s fully coated. Lift it out and gently shake off any excess chocolate before placing it back onto the lined baking sheet. Repeat this process until all balls are dipped, making sure to keep the coating even and smooth.

Step 6: Let the Chocolate Set
Allow the coated Oreo Balls to set at room temperature for about 15 minutes or until the chocolate hardens slightly. For a quicker option, pop them into the refrigerator for about 10 minutes. Once the chocolate has set completely, your delicious Oreo Balls are ready to be enjoyed, whether at a gathering or just for a sweet treat!

Make Ahead Options

These Oreo Balls are perfect for meal prep enthusiasts! You can prepare the Oreo mixture and form the balls up to 24 hours in advance, storing them in an airtight container in the refrigerator to maintain freshness. This not only saves you time on busy days, but also allows the flavors to meld beautifully. To finish, simply melt the chocolate and dip the chilled balls just before you’re ready to serve. If you want to make them even earlier, the rolled balls can be frozen for up to 3 months—just thaw in the refrigerator overnight before coating. With this make-ahead strategy, you’ll have delightful treats ready anytime, just as delicious as if made fresh!

Expert Tips for Oreo Balls

  • Crushing Oreos: Make sure to crush the Oreos into fine crumbs; large pieces can make it harder to roll nice, round balls.

  • Right Consistency: The mixture should be slightly sticky yet hold its shape. If too dry, add a touch more milk or butter until perfect.

  • Chocolate Options: Feel free to use milk, dark, or white chocolate for coating. Just remember that each type of chocolate will offer a different flavor profile for your Oreo Balls.

  • Avoid Overheating: When melting chocolate, do it gradually to prevent burning. Overheated chocolate can seize up, making it unusable for coating.

  • Chill Time: Refrigerating the balls after rolling makes them firmer and easier to coat. Don’t skip this step for perfectly coated treats!

Oreo Balls Variations & Substitutions

Feel free to play around and make these Oreo Balls your own! The possibilities are endless with this delicious base recipe.

  • Nut-Free: Replace Oreos with gluten-free chocolate cookies for a safe, nut-free option without sacrificing flavor.
    You can enjoy the same satisfying crunch and sweetness by making this simple swap, bringing joy to a wider audience.

  • Vegan: Use dairy-free chocolate and coconut cream instead of butter for an entirely plant-based version.
    Vegan treats can be just as delightful, ensuring everyone can savor the goodness of Oreo Balls without missing out on flavor.

  • Flavor Infusion: Add a teaspoon of vanilla extract to the mixture for a hint of warmth and depth.
    This small touch creates a beautifully aromatic treat that elevates the classic taste of Oreos, delighting anyone who takes a bite.

  • Coconut Coating: Garnish the chocolate-coated Oreo Balls with shredded coconut for a tropical twist.
    Not only does this add texture, but it lends an exotic flair that will have your guests swooning with every mouthful.

  • Spicy Kick: Stir in a pinch of cayenne pepper to the chocolate for a surprising hint of heat.
    The unexpected warmth instantly elevates the dessert, creating a captivating flavor profile that excites the palate.

  • Peanut Butter Delight: Fold in a couple of tablespoons of peanut butter into the Oreo mix for a nutty richness.
    The creamy goodness perfectly balances the sweetness, making it an irresistible treat for peanut butter aficionados.

  • Minty Fresh: Incorporate peppermint extract into the chocolate for a refreshing mint chocolate flavor.
    This version is perfect for those cozy winter holidays—just imagine how delightful these minty bites will be at your gatherings!

  • Caramel Drizzle: Drizzle warm caramel sauce over the finished Oreo Balls for a sweet indulgence.
    The gooey goodness enhances the chocolate and Oreo combination, turning them into a truly decadent dessert experience!

Explore these variations to make this beloved dessert truly your own, and consider pairing them with other delicious recipes like Sweet Chili Meatballs for a perfect balance of flavors. Happy cooking!

How to Store and Freeze Oreo Balls

Room Temperature: Store your Oreo Balls in an airtight container for up to 2 days at room temperature, enjoying their sweet crunch without any fuss.

Fridge: To keep them fresh longer, place the Oreo Balls in an airtight container in the refrigerator for up to 1 week. This helps retain their creamy texture and delicious chocolate coating.

Freezer: For extended storage, freeze the Oreo Balls in a single layer on a baking sheet for 1-2 hours, then transfer to a freezer-safe container. They can be frozen for up to 3 months.

Reheating: No reheating is necessary! Enjoy the Oreo Balls straight from the fridge or freezer for a delightful treat anytime you crave something sweet.

What to Serve with Oreo Balls?

These delightful treats beckon to be paired with just the right companions to elevate your dessert experience.

  • Vanilla Ice Cream: Creamy vanilla ice cream complements the richness of Oreo Balls, bringing a refreshing balance that’s hard to resist. Scoop it on the side for a delightful contrast!

  • Fresh Berries: Juicy strawberries or raspberries add a burst of tangy freshness that cuts through the sweetness, making each bite of the Oreo Balls even more enjoyable.

  • Chocolate Sauce Drizzle: Enhance the decadence with a drizzle of warm chocolate sauce, allowing the melt-in-your-mouth experience to reach new heights of indulgence and richness.

  • Crushed Nuts: Topping with chopped almonds or hazelnuts introduces a satisfying crunch and nutty flavor that pairs beautifully with the softness of the Oreo Balls.

  • Coffee or Espresso: A comforting cup of coffee or a shot of espresso serves as the perfect bitter counterpoint to the sweet Oreo Balls, creating a balanced dessert experience.

  • Milkshake: A chocolate or Oreo milkshake brings a fun, nostalgic touch, making this pairing an exciting treat for both adults and kids alike.

  • Mint Chocolate Tea: The refreshing notes of mint tea with chocolate undertones offer a soothing contrast that heightens the indulgent elements of Oreo Balls.

  • S’mores Dip: This warm, gooey s’mores dip can create a fun dessert spread, inviting everyone to dip their Oreo Balls while mingling flavors for an unforgettable experience.

Oreo Balls Recipe FAQs

What type of Oreos should I use for Oreo Balls?
Absolutely, you can use any variety of Oreo cookies for this recipe—classic, double-stuff, or even seasonal flavors like pumpkin spice! Each will give your Oreo Balls a unique twist, so feel free to experiment and find your favorite combination.

How long can I store Oreo Balls and what’s the best method?
Oreo Balls can be stored at room temperature in an airtight container for up to 2 days. To best preserve their flavors and texture, keep them in the fridge for up to 1 week. Make sure they’re sealed tightly to prevent them from drying out or absorbing other odors in the fridge.

Can I freeze Oreo Balls for later?
Yes, you certainly can! To freeze your Oreo Balls, first, place them in a single layer on a baking sheet and freeze for about 1-2 hours until solid. Then, transfer them into a freezer-safe container or a zip-top bag. They can be frozen for up to 3 months. To enjoy, simply take them out and let them thaw in the fridge for a couple of hours before savoring that deliciousness!

What do I do if the chocolate coating is too thick or seizes up?
If you find your melted chocolate too thick, it might be due to overheating. If this happens, you can add a teaspoon of vegetable oil or shortening while mixing it to smooth out the texture. If the chocolate seizes, it’s best to start over with a fresh batch. Alternatively, gently reheating the chocolate in short intervals while stirring continuously may soften it again.

Are Oreo Balls safe for kids or individuals with allergies?
Great question! While Oreo Balls are fun for kids, they do contain common allergens like dairy and gluten from the Oreos and chocolate. Always check the labels to ensure they fit within any dietary restrictions, especially for nut allergies. If needed, you can substitute with gluten-free Oreos and dairy-free chocolate to make them a safe delicious treat for everyone!

How can I garnish my Oreo Balls for extra flair?
For a lovely presentation, you can drizzle melted white chocolate over the cooled Oreo Balls or sprinkle some crushed nuts or colorful sprinkles on top before the chocolate sets. This adds a personal touch and makes them even more tempting for parties or celebrations!

Decadent Oreo Balls You Can’t Resist Making at Home

Oreo Balls are a simple dessert that transform Oreos into irresistible treats in just 30 minutes.

  • Food Processor
  • Mixing Bowl
  • Baking Sheet
  • parchment paper
  • Microwave

For the Oreo Mixture

  • 8 ounces Oreo cookies (crushed)
  • 3 tablespoons melted butter
  • 1 teaspoon milk

For the Chocolate Coating

  • 8 ounces chocolate (your favorite type)

Making the Oreo Balls

  1. Crush the Oreos in a food processor until fine crumbs remain.
  2. Mix the crushed Oreos with melted butter and milk until a thick dough forms.
  3. Roll one tablespoon of the mixture into a ball and place onto a baking sheet.
  4. Melt chocolate in the microwave in 30-second intervals until smooth.
  5. Dip each ball into the melted chocolate, ensuring even coating.
  6. Let the balls set at room temperature for 15 minutes or refrigerate for faster hardening.

Ensure Oreos are crushed finely, and that the mixture is slightly sticky for perfect shaping. Refrigerating helps the balls hold their shape better during coating.

Dessert
American
chocolate treats, easy recipes, homemade sweets, No-Bake Dessert, Oreo Balls

Filed Under: Dessert

Deliciously Creamy Mushroom Chicken in Just 30 Minutes

August 8, 2025 by grace bellamy Leave a Comment

I found myself in a delightful dilemma: a kitchen filled with the rich aroma of sautéed mushrooms mingling with the satisfying sizzle of chicken. This Creamy Mushroom Chicken has quickly become a weeknight favorite, perfect for those hectic evenings when you crave homemade goodness without sacrificing time. With a prep time of just 10 minutes and a total cook time of 20, this dish packs impressive flavor while keeping your schedule intact. The heavenly combination of tender chicken and a luscious creamy sauce will win over even the pickiest of eaters, making it a true crowd-pleaser. Plus, it’s a wonderful way to sneak in a few servings of mushrooms without anyone noticing! Curious to find out how to bring this comforting meal to your table? Let’s dive into the recipe!

Why is this Creamy Mushroom Chicken a must-try?

Quick and Easy: With a total cooking time of just 30 minutes, you can whip this meal together even on the busiest nights.

Savory Richness: The delightful combination of mushrooms and cream creates a luxurious sauce that elevates plain chicken to restaurant-level gourmet right in your kitchen.

Family-Friendly: Kids and adults alike will relish the creamy goodness, making it the ultimate family meal sure to charm even the pickiest eaters!

Versatile Delights: Serve it over pasta, rice, or even alongside roasted veggies, and explore delicious variations like Garlic Butter Chicken for a different twist.

Nutrient Boost: Packed with protein and delicious flavors, this dish not only satisfies but offers a nutritious balance, making it a perfect choice for health-conscious cooks.

This recipe is perfect if you’re searching for something comforting yet exciting to add to your repertoire!

Creamy Mushroom Chicken Ingredients

Here’s everything you’ll need to create this comforting dish!

For the Chicken

  • Chicken breasts – Choose two large breasts for tender, juicy cutlets.
  • Salt & pepper – Season to taste for enhanced flavor.
  • Flour – For dredging, adds a beautiful crust when seared.

For the Sauce

  • Olive oil – A must for sautéing; it helps achieve that lovely golden brown color.
  • Butter – Adds richness and depth to the creamy sauce.
  • Mushrooms (cremini or white) – The star of your Creamy Mushroom Chicken, providing a delicious umami flavor.
  • Italian seasoning – A sprinkle brings a burst of aromatic herbs.
  • Garlic – Freshly minced garlic adds a fragrant punch to the sauce.
  • Chicken broth – Use low-sodium for better control over seasoning.
  • Lemon juice – Adds brightness and balances the creaminess.
  • Dijon mustard – Introduces a subtle tang that elevates the overall flavor.
  • Heavy/whipping cream – The key ingredient for that rich, velvety sauce!

This lineup will have your kitchen smelling heavenly while creating a meal that’s sure to be loved by all!

Step‑by‑Step Instructions for Creamy Mushroom Chicken

Step 1: Prepare the Chicken
Begin by cutting the two large chicken breasts in half lengthwise to create four thin cutlets. Season both sides generously with salt and pepper, then dredge each cutlet in flour, making sure to coat evenly. This will create a lovely crust when cooked. Set the coated chicken aside while you heat the skillet.

Step 2: Sear the Chicken
Heat a large skillet over medium-high heat and add 2 tablespoons of olive oil. Once the pan is hot and shimmering, carefully add the chicken cutlets. Sear them for about 4-5 minutes on each side until they turn a beautiful golden brown. Once cooked through, remove the chicken from the skillet and set aside on a plate, covering it to keep warm.

Step 3: Sauté the Mushrooms
In the same skillet, reduce the heat to medium and add 2 tablespoons of butter. Allow the butter to melt before adding the sliced mushrooms and 1/4 teaspoon of Italian seasoning. Cook, stirring occasionally, for about 5-7 minutes until the mushrooms release their liquid and are nicely browned. Once cooked, remove the mushrooms from the skillet and set aside.

Step 4: Create the Sauce
Lower the heat to medium and add 3 minced garlic cloves to the skillet, stirring quickly to avoid burning. After about 30 seconds, pour in 1/2 cup of chicken broth, along with 1/2 teaspoon of lemon juice and 1/2 teaspoon of Dijon mustard. Stir until the mustard dissolves, then let the mixture simmer and reduce by half for approximately 3-4 minutes, developing rich flavors.

Step 5: Combine Everything
Once the sauce has reduced, pour in 1 cup of heavy cream and stir well. Return the chicken cutlets and sautéed mushrooms to the skillet, ensuring they are well-coated in the creamy sauce. Allow everything to simmer together for an additional 5 minutes, or until the chicken is fully cooked through and the sauce thickens to your desired consistency. Add extra salt and pepper to taste, if needed.

What to Serve with Creamy Mushroom Chicken

Imagine a table filled with delicious comforts that enhance your Creamy Mushroom Chicken, creating a satisfying meal that delights the senses.

  • Garlic Mashed Potatoes: The buttery richness of these creamy potatoes pairs beautifully with the sauce, soaking up every last drop.
  • Steamed Asparagus: This crisp vegetable adds a fresh crunch, balancing the creamy texture of the chicken for a delightful contrast.
  • Herbed Rice Pilaf: Fluffy rice with aromatic herbs complements the dish perfectly, offering a light, savory base for the rich sauce.
  • Roasted Brussels Sprouts: Their crispy exterior and tender inside provide a delightful flavor contrast, elevating your chicken dish to new heights.
  • Crusty Bread: A warm, crusty loaf is perfect for mopping up that luxurious sauce, making each bite even more enjoyable.
  • Mixed Green Salad: A light salad with vinaigrette adds refreshing zest, cutting through the creaminess and adding vibrant color to your plate.
  • Chardonnay: A glass of chilled Chardonnay enhances the dish’s flavor; its acidity balances the richness of the cream and mushrooms.
  • Chocolate Mousse: For dessert, a light and airy chocolate mousse is the perfect sweet ending, leaving a memorable taste on your palate.

Creamy Mushroom Chicken Variations

Invite your culinary creativity to flourish as you customize this dish to suit your taste buds!

  • Gluten-Free: Use cornstarch instead of flour for dredging to ensure a crispy coating without the gluten.

  • Mushroom Medley: Try a mix of shiitake, portobello, and oyster mushrooms for a delightful and complex flavor profile.

  • Spinach addition: Toss in a handful of fresh spinach towards the end for a vibrant color and a healthy nutrient boost—watch it wilt perfectly into the sauce!

  • Spicy Kick: Add red pepper flakes or a dash of sriracha for a warming heat that elevates the creamy sauce to new levels!

  • Herbed Flavor: Fresh herbs like thyme or rosemary make a fragrant addition—simply stir them in when adding the cream for a fresh flavor explosion!

  • Lemon-Herb Sauce: Instead of the Dijon mustard, incorporate more lemon juice and some capers for a zesty, Mediterranean twist that brightens up the dish.

  • Pasta Delight: Toss this creamy sauce with your favorite pasta to transform it into a delicious pasta dish, reminiscent of a cozy Italian night at home.

  • Mexican Fusion: A sprinkle of taco seasoning and some diced tomatoes mixed in brings a unique Mexican flair—serve with tortillas for a fun twist!

With all these possibilities, your Creamy Mushroom Chicken can be a new experience every time you cook it! For even more inspiration, consider trying out recipes like Street Corn Chicken or Cowboy Butter Chicken for a delightful change of pace.

Make Ahead Options

These Creamy Mushroom Chicken preparations are perfect for busy weeknights or meal prep enthusiasts! You can marinate the chicken cutlets and dredge them in flour up to 24 hours in advance, storing them in an airtight container in the refrigerator. The sautéed mushrooms can also be prepared ahead of time and refrigerated for up to 3 days to maintain their flavor. When you’re ready to serve, simply reheat the mushrooms while you cook the chicken and follow the sauce recipe as normal. This method ensures that you enjoy a delicious, homemade meal with minimal effort, allowing you to savor the rich, creamy goodness without the morning rush!

How to Store and Freeze Creamy Mushroom Chicken

Fridge: Store leftover Creamy Mushroom Chicken in an airtight container for up to 3 days. Reheat gently on the stove or microwave to avoid separating the cream.

Freezer: You can freeze the dish for up to 2 months. Make sure it’s completely cooled, then transfer to freezer-safe containers or bags, sealing tightly.

Thawing: To enjoy your frozen portion, thaw it overnight in the fridge before reheating. This helps maintain the texture and flavor of the creamy sauce.

Reheating: For best results, reheat in a skillet over low to medium heat, adding a splash of chicken broth or cream if the sauce thickens too much.

Helpful Tricks for Creamy Mushroom Chicken

  • Perfectly Cooked Chicken: Ensure the skillet is hot before adding chicken; this helps achieve that beautiful golden crust without drying it out.

  • Mushroom Magic: Avoid overcrowding the pan when sautéing mushrooms. Give them space to brown evenly, enhancing their flavor and texture.

  • Sauce Consistency: If your creamy sauce is too thin, let it simmer a bit longer without the chicken, allowing it to reduce.

  • Seasoning Balance: Taste and adjust seasoning at the end, keeping in mind the cream’s richness. A dash more salt or a squeeze of lemon juice can elevate the overall flavor.

  • Serving Suggestions: Pair your Creamy Mushroom Chicken with fresh herbs like parsley or thyme for a pop of color and additional flavor—just before serving!

Creamy Mushroom Chicken Recipe FAQs

What type of mushrooms should I use for this recipe?
I’m a big fan of cremini mushrooms for their robust flavor, but white button mushrooms work beautifully too! They both bring a wonderful umami quality to your Creamy Mushroom Chicken. Just be sure they’re fresh, with a firm texture and no dark spots or sliminess.

How should I store leftovers?
Absolutely! Store your leftover Creamy Mushroom Chicken in an airtight container in the refrigerator for up to 3 days. When reheating, do it gently on the stove or in the microwave to prevent the cream sauce from separating.

Can I freeze Creamy Mushroom Chicken?
Yes, you can freeze this dish for up to 2 months! Once it’s completely cooled, transfer it to freezer-safe containers or heavy-duty bags. Just remember to label them with the date.

How do I reheat frozen Creamy Mushroom Chicken?
To reheat, first thaw the frozen dish in the refrigerator overnight. Then, warm it in a skillet over low to medium heat, adding a splash of chicken broth or cream if the sauce thickens too much. This will help regain its luscious texture.

What if I don’t have heavy cream?
If you’re out of heavy cream, you can substitute it with half-and-half, or even a mix of milk and butter for a lighter version. Just be aware that the sauce may not be quite as thick or luxurious, but still delicious!

Can I make this dish dairy-free?
Absolutely! For a dairy-free version, use coconut cream or nut-based creams like cashew cream. Just keep the amounts similar to the recipe’s requirements, and you’ll get a creamy texture that still complements the flavors wonderfully.

These FAQs should help you enjoy this delightful Creamy Mushroom Chicken even more!

Deliciously Creamy Mushroom Chicken in Just 30 Minutes

Creamy Mushroom Chicken is a quick and satisfying weeknight dinner perfect for busy evenings.

  • large skillet

For the Chicken

  • 2 pieces chicken breasts (large)
  • to taste salt
  • to taste pepper
  • 1/2 cup flour (for dredging)

For the Sauce

  • 2 tablespoons olive oil
  • 2 tablespoons butter
  • 8 ounces mushrooms (cremini or white, sliced)
  • 1/4 teaspoon Italian seasoning
  • 3 cloves garlic (freshly minced)
  • 1/2 cup chicken broth (low-sodium)
  • 1/2 teaspoon lemon juice
  • 1/2 teaspoon Dijon mustard
  • 1 cup heavy cream (or whipping cream)

Step-by-Step Instructions

  1. Begin by cutting the two large chicken breasts in half lengthwise to create four thin cutlets. Season both sides generously with salt and pepper, then dredge each cutlet in flour, setting them aside.
  2. Heat a large skillet over medium-high heat and add the olive oil. Sear the chicken cutlets for about 4-5 minutes on each side until golden brown. Remove from skillet and cover to keep warm.
  3. In the same skillet, add the butter. Once melted, add the sliced mushrooms and Italian seasoning. Cook for 5-7 minutes until browned. Remove and set aside.
  4. Lower heat to medium and add the minced garlic. Stir for about 30 seconds, then add chicken broth, lemon juice, and Dijon mustard, simmering for 3-4 minutes.
  5. Pour in the heavy cream and stir well. Return chicken and mushrooms to the skillet, simmer for an additional 5 minutes until fully cooked and sauce thickens.

For best results, taste and adjust seasoning at the end. Pair with fresh herbs for added flavor.

Main Dishes
American
chicken, Creamy Mushroom Chicken, easy recipes, family meals, mushrooms, quick dinner

Filed Under: Main Dishes

Spicy Tteokbokki: Comforting Korean Rice Cakes in 20 Minutes

August 8, 2025 by grace bellamy Leave a Comment

The aroma of simmering spices wafted through my kitchen, instantly transporting me to a bustling street market in Seoul. That’s the magic of Tteokbokki, a beloved Korean dish that perfectly melds the chewy goodness of rice cakes with a sweet and spicy sauce that beckons for seconds. Ready in just 20 minutes, this recipe is not only a quick kitchen win but also a crowd-pleaser that will have your loved ones asking for your secret. Imagine impressing your friends with a delightful homemade treat that’s both comforting and incredibly satisfying. Are you ready to bring a taste of Korea into your home? Let’s dive into this simple yet delicious recipe!

Why is Tteokbokki so irresistible?

Simple and quick: This recipe takes just 20 minutes and only requires basic ingredients!
Heavenly flavors: The spicy and sweet sauce envelops the rice cakes in a delightful symphony of taste that’s sure to excite your palate.
Versatile: Customize the heat level to suit your preferences, making it perfect for everyone!
Crowd-pleaser: Ideal for gatherings, this dish draws people in, making it great for sharing with friends and family.
Homemade delight: Say goodbye to boring fast food and say hello to a dish that’s fun to make and even more enjoyable to eat! If you’re interested in more quick meal ideas, check out my post on delicious 30-minute dinners.

Tteokbokki Ingredients

For the Broth
• Anchovy stock – the base for authentic flavor, but dashi or unsalted chicken stock works well too.
• Water – can be used as a lighter alternative if you don’t have stock on hand.

For the Main Ingredients
• Korean rice cakes – these chewy delights are essential for that traditional Tteokbokki experience.
• Korean fish cakes – add a delightful texture and flavor, easily found in Asian markets.

For the Sauce
• Soy sauce – this adds a savory depth to the dish, so don’t skip it!
• Sugar – balances the heat; reduce it to 1 tbsp if you prefer less sweetness.
• Gochugaru – adjust this Korean chili powder to control the spice levels.
• Garlic – freshly minced for an aromatic hit that enhances the sauce.
• Honey (or syrup) – adds a touch of sweetness; you can substitute it with any preferred liquid sweetener.
• Gochujang – this spicy red chili paste seals the deal, infusing Tteokbokki with its iconic flavor.

For Garnish
• Green onion – a fresh touch to sprinkle on top, enhancing both flavor and presentation.

Now that you have the ingredients ready, get excited to whip up your very own Tteokbokki!

Step‑by‑Step Instructions for Tteokbokki

Step 1: Prepare the Sauce
In a small bowl, combine 2 tablespoons of soy sauce, 2 tablespoons of sugar, 1 tablespoon of Gochugaru, 2 minced cloves of garlic, 2 tablespoons of honey, and 3 tablespoons of Gochujang. Mix thoroughly until you achieve a smooth and cohesive sauce. This flavorful mixture will be the heart of your Tteokbokki, so take a moment to enjoy the enticing aroma.

Step 2: Soak the Rice Cakes
If using frozen Korean rice cakes, submerge them in warm water for about 10 minutes to defrost. You’ll know they are ready when they soften slightly and become pliable. This step is crucial for achieving that perfect chewy texture in your Tteokbokki, so don’t rush it!

Step 3: Heat the Stock
In a large pan or skillet, add 3 cups of anchovy stock over medium heat. Bring the stock to a gentle boil, watching for tiny bubbles forming on the surface, which should take about 5 minutes. This aromatic broth will serve as the flavorful base for your rice cakes and sauce.

Step 4: Add the Rice Cakes and Sauce
Once the stock reaches a boil, add the soaked rice cakes and the sauce you prepared earlier. Stir well to ensure that the rice cakes are fully coated in the sauce. You’ll notice the colors deepening as it heats, creating an irresistible visual appeal. Cook for around 10 minutes, stirring occasionally until the sauce thickens.

Step 5: Incorporate the Fish Cakes
After the sauce has reduced and clings beautifully to the rice cakes, add the cut pieces of Korean fish cakes. Allow them to simmer together for another 2 minutes until they are heated through and infuse the dish with additional flavor. The Tteokbokki should now be glossy and vibrant, signaling that it’s almost ready!

Step 6: Garnish and Serve
Remove the Tteokbokki from heat once everything is well combined. If desired, sprinkle finely chopped green onions on top for a fresh and colorful garnish. Serve hot in bowls, and relish this homemade comfort dish that’s bursting with flavor. Your delightful Tteokbokki is now ready to be shared!

Tips for the Best Tteokbokki

  • Use Fresh Ingredients: Fresh garlic and high-quality Gochujang truly elevate the flavor of your Tteokbokki, ensuring each bite is bursting with authenticity.
  • Don’t Rush the Soaking: Allowing the rice cakes to soak for the full 10 minutes ensures the perfect chewy texture; rushing this step may lead to a rubbery result.
  • Adjust the Spice: If you’re unsure about the heat level, start with less Gochugaru and add more as needed; your Tteokbokki should be flavorful, not overwhelmingly spicy.
  • Stir Frequently: This helps avoid sticking and ensures the sauce evenly coats the rice cakes while thickening beautifully.
  • Experiment with Toppings: Feel free to add other toppings like boiled eggs or shredded cabbage to customize your Tteokbokki and make it uniquely yours!

What to Serve with Tteokbokki

Enhance your Tteokbokki experience by adding some complementary dishes that create a delightful full meal.

  • Crispy Korean Fried Chicken: The juicy, crispy texture provides a perfect contrast to Tteokbokki’s chewiness, making each bite fulfilling.
  • Korean Cucumber Salad: This fresh, tangy salad adds brightness and crunch, balancing the rich flavors of the Tteokbokki beautifully.
  • Steamed Dumplings: Soft and savory, dumplings wrap up the meal with their hearty filling, providing a satisfying finish to your dinner.
  • Spicy Kimchi: A love letter to Korean cuisine, kimchi adds a zesty kick and probiotics to keep your gut happy while complementing the dish.
  • Savory Egg Soup: This warm, comforting soup adds a soothing element, balancing the spice and lending warmth to your dining experience.
  • Jasmine Rice: Steamed rice is perfect for soaking up the sauce from your Tteokbokki, making every bite a delightful adventure.
  • Korean BBQ Platter: A selection of grilled meats and vegetables brings a festive feel, making your meal even more inviting and mouthwatering.
  • Sooji Mool-Naengmyun (Cold Noodles): These refreshing cold noodles are great for offsetting the heat of the dish – a cool twirl of flavor on your plate!
  • Boba Milk Tea: A sweet, creamy drink to wash it all down, boba adds a deliciously chewy element that keeps the fun going!

Make Ahead Options

Tteokbokki is a fantastic dish for meal prep, allowing you to enjoy comforting flavors even on the busiest nights! You can prepare the sauce up to 3 days in advance; simply combine the soy sauce, sugar, Gochugaru, minced garlic, honey, and Gochujang in a sealed container and refrigerate until ready to use. Additionally, if using frozen rice cakes, you can soak them in warm water up to 24 hours ahead and keep them in the fridge to maintain their chewy texture. When you’re ready to serve, just boil your stock, add the rice cakes and sauce, and cook for about 10 minutes until bubbling and thickening – you’ll have delicious Tteokbokki with minimal fuss!

How to Store and Freeze Tteokbokki

Fridge: Store any leftover Tteokbokki in an airtight container for up to 3 days. The flavors will continue to meld, making it even tastier the next day!

Freezer: For longer storage, freeze portions in airtight containers or freezer bags for up to 2 months. Be sure to label them with the date for easy tracking.

Reheating: To enjoy frozen Tteokbokki, thaw it in the fridge overnight and reheat in a pan over low heat, adding a splash of water to loosen the sauce. Stir often to avoid sticking.

Room Temperature: Avoid leaving Tteokbokki out at room temperature for more than 2 hours to ensure food safety. Enjoy your homemade delight fresh whenever possible!

Tteokbokki Variations & Substitutions

Feel free to explore these exciting options to customize your Tteokbokki and make it your own!

  • Vegan: Substitute the fish cakes with marinated tofu or mushrooms for a plant-based delight. Paired with the savory sauce, this twist remains rich and satisfying!

  • Spicy: Increase the Gochugaru and add sliced fresh chilies to kick the heat up a notch! This variation is for those who thrive on a fiery flavor adventure!

  • Onion Free: If you prefer a milder taste, leave out the garlic and substitute onion with sautéed leeks for a gentle sweetness that still enhances your dish.

  • Add Vegetables: Incorporate a mix of vegetables like carrots, bell peppers, or zucchini for a nutritious boost. They’ll add both texture and a colorful presentation, making your Tteokbokki even more vibrant!

  • Sweet and Sour: For a tangy twist, add a splash of rice vinegar to the sauce, creating a delightful balance of sweet and sour flavors. This variation awakens your taste buds with a fresh change!

  • Cheesy: Sprinkle shredded cheese on top just before serving, allowing it to melt into the warm dish. This gooey addition adds a deliciously creamy texture that will delight cheese lovers!

  • Seafood: Add shrimp or squid for a delicious seafood twist. The fresh ocean flavors harmonize beautifully with the sweet and spicy sauce, creating a new exciting dimension for your Tteokbokki.

  • Cool Garnish: Top with a drizzle of sesame oil and toasted sesame seeds for a nutty finish that enhances the flavors and adds a delightful crunch. This simple addition takes your Tteokbokki to the next level!

These variations will invite endless creativity in your kitchen! For more quick meal adventures, don’t miss my post on quick weeknight dinners or explore some fun Asian recipes that will keep your meals exciting!

Tteokbokki Recipe FAQs

How do I choose the best Korean rice cakes?
When selecting Korean rice cakes, look for ones that are fresh and have a smooth, glossy surface. If you’re buying them frozen, check that they’re not covered in frost, indicating they’ve been thawed and refrozen. Fresh rice cakes should have a soft texture, and avoid any with dark spots, which could indicate they’re past their prime.

How should I store leftover Tteokbokki?
Store any leftover Tteokbokki in an airtight container in the fridge for up to 3 days. The flavors will meld and it may become even tastier the next day! For the best experience, reheat it slowly on the stovetop. Just add a splash of water to loosen the sauce and stir regularly to keep it from sticking.

Can I freeze Tteokbokki?
Absolutely! For longer storage, you can freeze Tteokbokki by placing portions in airtight containers or freezer bags, making sure to remove as much air as possible. It will keep well for up to 2 months. When you’re ready to enjoy it again, simply thaw it in the fridge overnight and reheat it in a pan on low heat.

What should I do if my sauce is too thick?
If your sauce turns out too thick while cooking, don’t worry! Simply add a splash of warm water or stock to loosen it up. Stir it in gradually while cooking on low heat until you achieve your desired consistency. This way, the sauce can coat the rice cakes beautifully without being overly sticky.

Is Tteokbokki safe for people with dietary restrictions?
Tteokbokki can be customized for various dietary needs! If you have allergies, be cautious with ingredients like soy sauce and Gochujang, which may contain wheat. For gluten-free options, look for gluten-free soy sauce and check the labels on any processed ingredients. Always remember to ask about specific food allergies if serving to others.

How long can I keep Tteokbokki at room temperature?
It’s important to avoid leaving Tteokbokki at room temperature for more than 2 hours to ensure food safety. If it’s a warm day or if the dish is left out at a gathering, try to consume it within one hour to prevent any foodborne illnesses. Enjoying this homemade delight fresh is always the best!

Spicy Tteokbokki: Comforting Korean Rice Cakes in 20 Minutes

Tteokbokki is a beloved Korean dish featuring chewy rice cakes in a sweet and spicy sauce, ready in just 20 minutes.

  • large pan or skillet
  • small bowl

For the Broth

  • 3 cups anchovy stock (or dashi/unsalted chicken stock)
  • 2 cups water (as a lighter alternative)

For the Main Ingredients

  • 1 lb Korean rice cakes (essential for traditional Tteokbokki)
  • 8 oz Korean fish cakes (found in Asian markets)

For the Sauce

  • 2 tablespoons soy sauce (adds savory depth)
  • 2 tablespoons sugar (reduce to 1 tbsp for less sweetness)
  • 1 tablespoon Gochugaru (adjust for spice levels)
  • 2 cloves garlic (freshly minced)
  • 2 tablespoons honey (or any preferred liquid sweetener)
  • 3 tablespoons Gochujang (spicy red chili paste)

For Garnish

  • 2 tablespoons green onion (finely chopped)

Step‑by‑Step Instructions

  1. In a small bowl, combine 2 tablespoons of soy sauce, 2 tablespoons of sugar, 1 tablespoon of Gochugaru, 2 minced cloves of garlic, 2 tablespoons of honey, and 3 tablespoons of Gochujang. Mix thoroughly until smooth.
  2. If using frozen Korean rice cakes, submerge them in warm water for about 10 minutes to defrost until slightly softened.
  3. In a large pan or skillet, heat 3 cups of anchovy stock over medium heat until it reaches a gentle boil, about 5 minutes.
  4. Once the stock boils, add the soaked rice cakes and the prepared sauce, stirring well to fully coat the rice cakes. Cook for around 10 minutes, stirring occasionally, until the sauce thickens.
  5. After the sauce has reduced, add the cut pieces of Korean fish cakes and allow them to simmer for an additional 2 minutes.
  6. Remove from heat and sprinkle with finely chopped green onions for garnish before serving hot.

Use fresh ingredients for the best flavor and adjust the spice level according to your preference. Store leftovers in an airtight container for up to 3 days.

Main Dishes
Korean
comfort food, Korean cuisine, quick recipe, rice cakes, spicy, Tteokbokki

Filed Under: Main Dishes

Indulge in Red Velvet Strawberry Cheesecake Delight

August 7, 2025 by grace bellamy Leave a Comment

There’s something magical about the combination of vibrant red velvet and luscious strawberries that instantly brightens any occasion. If you’re searching for that show-stopping dessert, look no further than this Red Velvet Strawberry Cheesecake. Not only does it impress with its stunning layers, but it also offers an incredible balance of flavors that will leave your guests in awe. Plus, the recipe is surprisingly easy to whip up, making it a go-to choice for both seasoned bakers and those just starting out in the kitchen. By utilizing fresh strawberries in the cheesecake filling, you’ll bring a fresh twist to this classic treat. Are you ready to create the ultimate dessert sensation that will have everyone asking for seconds? Let’s get baking!

What Makes This Cheesecake Irresistible?

Decadent Layers: The bright red velvet cake pairs beautifully with the creamy strawberry cheesecake, creating a dessert that’s as gorgeous as it is delicious.

Fresh Strawberries: Using pureed strawberries not only enhances the flavor but also adds a delightful freshness, making every bite a taste of summer.

Easy to Make: With simple steps and common ingredients, even novice bakers will find joy in crafting this stunning dessert.

Crowd-Pleasing Delight: Perfect for gatherings, this cheesecake is sure to impress family and friends alike, bringing smiles all around.

Versatile Base: Love cheesecakes? Check out our Carrot Cake Cheesecake or Rhubarb Cheesecake Fancy for more sensational variations.

Your baking journey to dessert nirvana starts here!

Red Velvet Strawberry Cheesecake Ingredients

Here’s what you’ll need to create this stunning dessert!

For the Cake
• 1 ½ cups all-purpose flour – This forms the base of our luscious red velvet cake.
• 1 cup granulated sugar – For that perfect sweetness that balances the flavors.
• 1 teaspoon baking powder – Helps the cake rise and achieve that light texture.
• 1 teaspoon baking soda – Reacts with the vinegar to create a fluffy interior.
• ½ teaspoon salt – Enhances all the flavors in the cake.
• 1 tablespoon cocoa powder – Adds a subtle depth and richness.
• 1 cup vegetable oil – Keeps the cake moist and tender.
• 1 cup buttermilk, room temperature – Ensures a deliciously moist crumb.
• 2 large eggs, room temperature – Binds the ingredients and helps in leavening.
• 2 tablespoons red food coloring – Gives our cake its signature vibrant color.
• 1 teaspoon vanilla extract – Adds warmth and sweetness to the batter.
• 1 teaspoon white vinegar – A key ingredient that reacts with the baking soda for fluffiness.

For the Cheesecake Filling
• 16 oz cream cheese, softened – The star of our strawberry cheesecake filling; it must be at room temperature for smooth mixing.
• 1 cup powdered sugar – Sweetens the cream cheese without the graininess of granulated sugar.
• 1 teaspoon vanilla extract – Enhances the rich flavor of the cheesecake.
• 1 cup fresh strawberries, pureed – This is where the flavor pops; fresh strawberries bring life to the cheesecake.

For the Topping
• 1 cup heavy whipping cream – Whipped to perfection for a fluffy texture in our filling.
• Fresh strawberries, halved – For a beautiful garnish that adds a fresh touch.
• Whipped cream (optional) – A delightful finishing touch for extra indulgence.

Now you’re set to create an unforgettable Red Velvet Strawberry Cheesecake that will delight everyone at the table! Happy baking!

Step‑by‑Step Instructions for Red Velvet Strawberry Cheesecake

Step 1: Preheat and Prepare
Preheat your oven to 350°F (175°C) while you grease and line a 9-inch springform pan with parchment paper. This ensures that your cake releases easily after baking, setting the stage for your beautiful Red Velvet Strawberry Cheesecake. Have your mixing bowls and a whisk handy for the next steps.

Step 2: Combine Dry Ingredients
In a large mixing bowl, sift together the all-purpose flour, granulated sugar, baking powder, baking soda, salt, and cocoa powder. This step not only combines the dry ingredients but also aerates the flour, giving your red velvet cake the perfect light texture. Set aside once mixed thoroughly.

Step 3: Mix Wet Ingredients
In another bowl, whisk together the vegetable oil, buttermilk, eggs, red food coloring, vanilla extract, and white vinegar until you achieve a smooth, vibrant mixture. The color from your food coloring should really stand out at this point, providing the signature hue of your Red Velvet Strawberry Cheesecake.

Step 4: Combine Mixtures
Gradually add the dry ingredients into the wet mixture, stirring gently with a spatula until just combined. Be careful not to overmix, as this can make your cake dense. The batter should be smooth and slightly thick; this is the foundation for your luscious cheesecake dessert.

Step 5: Pour and Smooth Batter
Pour the red velvet batter into your prepared springform pan, using a spatula to smooth the top evenly. This will help create a flat surface for your cheesecake filling later. Place the pan on the center rack of the preheated oven and prepare for the delicious aroma to fill your kitchen.

Step 6: Bake and Cool
Bake for 25-30 minutes, or until a toothpick inserted in the center comes out clean. Keep an eye on the cake as it bakes; it should be firm yet springy to the touch. Once baked, allow the cake to cool completely in the pan, providing a stable base for your cheesecake filling.

Step 7: Beat the Cream Cheese
In a large mixing bowl, beat the softened cream cheese until it’s smooth and creamy. Gradually add the powdered sugar and vanilla extract, mixing until fully incorporated and luscious. This will form the delightful base of your strawberry cheesecake filling, ensuring a rich, creamy texture.

Step 8: Incorporate Strawberries
Stir in the pureed strawberries into the cream cheese mixture until thoroughly combined. The fresh strawberry flavor should be prominent here, infusing your cheesecake filling with a bright, fruity essence that perfectly complements the richness of the cream cheese.

Step 9: Whip the Cream
In a separate bowl, whip the heavy cream until stiff peaks form. This step is crucial; the whipped cream should hold its shape, providing lightness to your filling. Gently fold the whipped cream into the strawberry cheesecake mixture until you achieve a light and fluffy consistency.

Step 10: Assemble the Cake
Once the red velvet cake has cooled, carefully remove it from the springform pan and place it on a serving dish. This is your opportunity to show off the vibrant red hue; it will make a stunning canvas for your cheesecake topping.

Step 11: Fill and Level
Spread the strawberry cheesecake filling evenly over the top of the red velvet cake. Use a spatula to smooth out the top, ensuring a beautifully finished layer. The vibrant layers of your Red Velvet Strawberry Cheesecake should start to come together beautifully.

Step 12: Chill to Set
Place the assembled cheesecake in the refrigerator to chill for at least 4 hours or until the filling is set. Chilling allows the flavors to meld beautifully, creating a dessert that’s truly irresistible, and ensuring that each slice holds its shape when served.

Step 13: Garnish and Serve
Before serving, garnish the top of your cheesecake with fresh strawberry halves for a delightful presentation. If desired, add a dollop of whipped cream to each slice for added decadence. Your stunning Red Velvet Strawberry Cheesecake is now ready to impress family and friends!

How to Store and Freeze Red Velvet Strawberry Cheesecake

Fridge: Store your Red Velvet Strawberry Cheesecake in the refrigerator, covered with plastic wrap or in an airtight container, for up to 3 days to maintain its creamy texture.

Freezer: If you want to freeze it, wrap individual slices in plastic wrap and then place them in an airtight container. It can be frozen for up to 1 month.

Thawing: To thaw, move the cheesecake from the freezer to the refrigerator overnight. This gentle defrosting will help preserve the taste and texture.

Reheating: Cheesecake is best enjoyed cold, but you can sit it out for about 15 minutes before serving for ideal taste and consistency.

What to Serve with Red Velvet Strawberry Cheesecake

Creating a feast that’s visually stunning and deliciously complementary ensures your dessert becomes the star of your dining table.

  • Fresh Fruit Salad: A vibrant mix of seasonal fruits adds a refreshing contrast that balances the richness of the cheesecake. The sweetness of ripe melons and berries will delight your palate after the dense dessert.

  • Chocolate Covered Strawberries: Elevate your dessert experience with these indulgent treats. The rich chocolate pairs beautifully with the fresh strawberries, creating a decadent yet refreshing mouthful.

  • Creamy Vanilla Ice Cream: A scoop of ice cream offers a delightful creaminess that beautifully contrasts the cheesecake’s texture while enhancing the flavors with a classic touch.

  • Coffee or Espresso: A warm cup of coffee brings out the cake’s rich flavors and provides a pleasant bitterness that balances the sweetness of the cheesecake perfectly. It’s the ideal endnote to an exquisite meal.

  • Sparkling Cider: For a light and festive drink pairing, consider serving chilled sparkling cider. Its bubbles cleanse the palate and add a celebratory twist to your gathering.

  • Mini Cheesecake Cups: If you’re entertaining a crowd, serve mini cheesecake cups alongside your Red Velvet Strawberry Cheesecake for a fun and interactive dessert experience. They echo the main dessert and allow guests to enjoy multiple flavors!

  • Cheesecake Brownies: For those who can’t resist a chocolaty treat, cheesecake brownies served alongside add a rich, fudgy element that complements the light fruity notes of the strawberry filling.

  • Chocolate Ganache: Drizzle warm chocolate ganache over each slice for a luxurious touch. The smooth chocolate elevates each bite of the creaminess while connecting back to the cake’s decadent nature.

No matter what you choose, each pairing will enhance your Red Velvet Strawberry Cheesecake experience!

Expert Tips for Red Velvet Strawberry Cheesecake

• Room Temperature Ingredients: Ensure your eggs and cream cheese are at room temperature for a smoother batter and creamy filling.

• Don’t Overmix: When combining wet and dry ingredients, stir just until incorporated to keep the cake light and fluffy. Overmixing can lead to a dense texture.

• Chill Thoroughly: Patience is key! Allow the cheesecake to chill for at least 4 hours, letting it set perfectly for clean slices of your Red Velvet Strawberry Cheesecake.

• Use Fresh Strawberries: For the best flavor, opt for fresh strawberries instead of frozen. Pureed strawberries add a vibrant taste and color to the cheesecake filling.

• Test the Cake: Use a toothpick inserted into the center to check for doneness. If it comes out clean, your cake is ready; if not, give it a few more minutes.

• Creative Toppings: Feel free to add your favorite toppings, like chocolate shavings or nuts, to customize your Red Velvet Strawberry Cheesecake further!

Make Ahead Options

These Red Velvet Strawberry Cheesecakes are a fantastic choice for meal prep enthusiasts! You can bake the red velvet cake up to 3 days in advance and store it, tightly wrapped, at room temperature to maintain its moistness. The cheesecake filling can be prepared up to 24 hours ahead; just keep it refrigerated in an airtight container. When you’re ready to serve, simply assemble the cheesecake by spreading the filling over the cooled cake, allowing it to set in the fridge for at least 4 hours before garnishing with fresh strawberries. This method not only saves you time but ensures your dessert remains just as delicious, ready to wow your guests!

Red Velvet Strawberry Cheesecake Variations

Feel free to add your personal touch to this delightful dessert with these creative twists!

  • Gluten-Free: Substitute with a gluten-free flour blend for a deliciously accommodating dessert.
  • Berry Bliss: Mix in other fruits like raspberries or blueberries to the cheesecake filling for an extra fruity burst.
  • Chocolate Drizzle: Drizzle melted chocolate over the top before serving for a decadent chocolaty touch.
  • Spice It Up: Add a pinch of cinnamon or nutmeg to the cake batter for a warm spice note that complements the strawberries beautifully.
  • Frozen Treat: Freeze individual slices and serve them like ice cream for a refreshing summer treat.
  • Less Sugar: Swap some of the granulated and powdered sugar with your favorite sugar substitute to enjoy a lighter version.
  • Savory Layer: Integrate a layer of fresh mint leaves between the cake and the cheesecake for a refreshing twist.

Whether you choose to experiment with flavors or adapt ingredients, this Red Velvet Strawberry Cheesecake is sure to delight everyone’s palate. And if you’re looking for more ways to impress your guests, don’t miss out on trying our delicious Carrot Cake Cheesecake or the elegant Rhubarb Cheesecake Fancy. Happy baking!

Red Velvet Strawberry Cheesecake Recipe FAQs

How do I choose ripe strawberries for the cheesecake?
Absolutely! When selecting strawberries, look for berries that are vibrant red, firm, and plump. Avoid any with dark spots or bruises, as this can indicate overripeness. The aroma of ripe strawberries should be sweet and fragrant, which is a good indication of flavor.

How should I store leftover cheesecake?
Very good question! To store your Red Velvet Strawberry Cheesecake, cover it with plastic wrap or place it in an airtight container. It will stay fresh in the refrigerator for up to 3 days. Just remember to let it come to room temperature for about 15 minutes before serving for the best taste!

Can I freeze my cheesecake?
Absolutely! To freeze your Red Velvet Strawberry Cheesecake, wrap individual slices tightly in plastic wrap, and then place them in an airtight container. This method prevents freezer burn and keeps the flavors intact. It can be stored in the freezer for up to 3 months.

What if my cheesecake filling doesn’t set?
If you find that your cheesecake filling hasn’t set after the recommended chilling time, it may need a little more time in the fridge. Make sure it’s wrapped well to prevent odors from other foods penetrating it. Let it chill for an additional hour or two. If the texture still seems off, it could be due to under-whipping the cream or not allowing the cream cheese to soften to room temperature before mixing.

Is this cheesecake suitable for people with allergies?
Great question! This recipe contains dairy (cream cheese, heavy cream, buttermilk) and gluten (all-purpose flour). If you have a gluten allergy, consider using a gluten-free flour blend as a substitute. Additionally, if you have lactose intolerance, you can try using lactose-free cream cheese and heavy cream alternatives.

What’s the best way to add a personal touch to my cheesecake?
I recommend it! Get creative with toppings! A drizzle of chocolate ganache or a sprinkle of crushed nuts can add delightful textures. You could also substitute the strawberries with other fruits like raspberries or blueberries for a different flavor profile. Enjoy experimenting!

Indulge in Red Velvet Strawberry Cheesecake Delight

Experience the delightful combination of Red Velvet Strawberry Cheesecake, a visually stunning dessert that is easy to make and perfect for any occasion.

  • 9-inch springform pan
  • Mixing bowls
  • Whisk
  • spatula

For the Cake

  • 1.5 cups all-purpose flour
  • 1 cups granulated sugar
  • 1 teaspoon baking powder
  • 1 teaspoon baking soda
  • 0.5 teaspoon salt
  • 1 tablespoon cocoa powder
  • 1 cups vegetable oil
  • 1 cups buttermilk, room temperature
  • 2 large eggs, room temperature
  • 2 tablespoons red food coloring
  • 1 teaspoon vanilla extract
  • 1 teaspoon white vinegar

For the Cheesecake Filling

  • 16 oz cream cheese, softened (must be at room temperature)
  • 1 cups powdered sugar
  • 1 teaspoon vanilla extract
  • 1 cups fresh strawberries, pureed

For the Topping

  • 1 cups heavy whipping cream
  • Fresh strawberries, halved (for garnish)
  • Whipped cream (optional) (for serving)

Step-by-Step Instructions

  1. Preheat your oven to 350°F (175°C) while greasing and lining a 9-inch springform pan with parchment paper.
  2. Sift together all-purpose flour, granulated sugar, baking powder, baking soda, salt, and cocoa powder in a bowl.
  3. Whisk together vegetable oil, buttermilk, eggs, red food coloring, vanilla extract, and white vinegar in another bowl.
  4. Gradually add the dry ingredients into the wet mixture, stirring gently until just combined.
  5. Pour the red velvet batter into the prepared springform pan and smooth the top evenly.
  6. Bake for 25-30 minutes, or until a toothpick inserted in the center comes out clean. Allow to cool completely.
  7. Beat the softened cream cheese until smooth, then gradually add powdered sugar and vanilla extract until fully incorporated.
  8. Stir in the pureed strawberries into the cream cheese mixture until thoroughly combined.
  9. Whip the heavy cream until stiff peaks form, then gently fold into the strawberry cheesecake mixture.
  10. Once cooled, remove the cake from the springform pan and place it on a serving dish.
  11. Spread the strawberry cheesecake filling evenly over the top of the red velvet cake.
  12. Chill the assembled cheesecake in the refrigerator for at least 4 hours or until set.
  13. Garnish the cheesecake with fresh strawberry halves and optional whipped cream before serving.

Ensure all ingredients are at room temperature for the best results.

Dessert
American
baking, cheesecake, dessert, red velvet, Red Velvet Strawberry Cheesecake, Strawberries

Filed Under: Dessert

Delicious Tteokbokki: Easy Spicy Korean Comfort Food

August 7, 2025 by grace bellamy Leave a Comment

A delightful aroma wafts through the kitchen as I combine the sauce for Tteokbokki, and in an instant, I’m transported to the bustling streets of Seoul. This iconic Korean dish, with its chewy rice cakes bathed in a spicy-sweet sauce, is not just a meal—it’s an experience! What I love most about Tteokbokki is how you can whip it up in only 20 minutes, making it the perfect weeknight dinner or a fun snack while catching up with friends. Plus, it’s completely customizable; whether you prefer it extra spicy or a touch milder, this recipe allows you to cater to your cravings effortlessly. Are you ready to discover how easy it is to create this street food classic right in your own home?

Why is Tteokbokki so loved?

Quick and Easy: Tteokbokki comes together in just 20 minutes, making it ideal for busy weeknights or spontaneous get-togethers.

Irresistible Flavor: With a harmonious blend of spicy and sweet from the Gochujang and honey, every bite is a flavor-packed adventure.

Customizable: Whether you like it spicy or mild, you can adjust the heat level to suit your taste, making it perfect for everyone.

Comforting Dish: This Korean staple warms the soul with its chewy rice cakes and satisfying sauce, offering a delightful twist on traditional comfort food.

Crowd-Pleaser: Serve it as an appetizer or a main dish; it’s guaranteed to impress family and friends alike! If you’re looking for more quick recipes, check out this easy weeknight dinner.

Tteokbokki Ingredients

Get ready to create a mouthwatering dish that will transport you to the vibrant streets of Korea!

For the Base

  • Anchovy stock – Adds a savory depth; you can also use dashi or unsalted chicken stock.
  • Korean rice cakes – These chewy delights are the heart of Tteokbokki; ensure they’re fresh or properly defrosted if frozen.
  • Korean fish cakes – Cut into bite-sized pieces; they enhance the dish with a lovely texture.
  • Green onion (optional) – A fresh garnish that adds a pop of color and flavor.

For the Tteokbokki Sauce

  • Soy sauce – Provides a salty umami flavor; feel free to adjust based on your taste.
  • Sugar – Balances the spice; reduce to 1 tbsp for a less sweet sauce.
  • Gochugaru – This Korean chili powder lets you control the heat; start with 1 tbsp if you’re sensitive to spice.
  • Garlic – Freshly minced garlic gives incredible depth; no substitutions needed for this essential flavor.
  • Honey – Use rice syrup or oligo syrup as alternatives to add sweetness effortlessly.
  • Gochujang – The key to authentic Tteokbokki, this Korean red chili paste creates that unique spicy kick!

Now you have everything you need to start making your very own delicious Tteokbokki!

Step‑by‑Step Instructions for Tteokbokki

Step 1: Prepare the Sauce
In a small bowl, whisk together the soy sauce, sugar, Gochugaru, minced garlic, honey, and Gochujang. Ensure all ingredients are well combined to create a smooth sauce. This zesty mixture will be the star of your Tteokbokki, bringing that distinctive spicy-sweet flavor that makes this dish so delightful.

Step 2: Defrost the Rice Cakes
If using frozen Korean rice cakes, place them in warm water for about 10 minutes until they soften. Once defrosted, drain them and set them aside. This step is crucial to ensure that your rice cakes have the perfect chewy texture once they’re cooked in your Tteokbokki sauce.

Step 3: Heat the Stock
In a large pan over medium heat, pour in the anchovy stock (or your chosen liquid) and bring it to a gentle boil. Keep an eye on the pot, as this should take approximately 3-5 minutes. The flavorful aroma of the stock will enhance your Tteokbokki, creating a savory base for the rice cakes and sauce.

Step 4: Combine Rice Cakes and Sauce
Once the stock reaches a boil, add the defrosted rice cakes along with the prepared sauce. Stir everything gently to ensure each rice cake is well-coated in the vibrant sauce. Continue cooking for about 10 minutes, stirring occasionally, until the sauce thickens and clings to the rice cakes, creating that luscious texture.

Step 5: Add the Fish Cakes
After the rice cakes have cooked in the sauce, add the bite-sized pieces of Korean fish cakes to the pan. Stir gently and let them cook for another 2 minutes. The fish cakes will warm through and infuse their delicious flavor into the dish, enhancing your Tteokbokki even further.

Step 6: Garnish and Serve
Once the Tteokbokki is ready, remove the pan from heat and transfer the dish to a serving plate. Garnish with freshly chopped green onions for a touch of color and flavor. Your homemade Tteokbokki is now ready to be enjoyed—dive into this comforting Korean classic and savor every delightful bite!

Tteokbokki Variations & Substitutions

Feel free to get creative and make this Tteokbokki truly your own with these delightful twists and substitutions!

  • Vegan Version: Swap the fish cakes for sliced tofu or extra veggies like bell peppers for a fulfilling plant-based meal. The chewy rice cakes combined with your favorite vegetables create a satisfying texture and flavor profile!

  • Noodle Twist: Replace half of the rice cakes with rice noodles for a different take on Tteokbokki. This hearty variation brings a comforting twist to the classic dish and is perfect for noodle lovers.

  • Spicy Garlic Kick: Add extra minced garlic and a dash more Gochugaru for an intense garlic flavor alongside the spice. It’s the perfect way to elevate your Tteokbokki into a burst of aromatic goodness!

  • Sweet & Savory: Incorporate pineapple chunks or mango pieces for a sweet contrast to the spicy sauce. This fruity twist infuses zest and a pop of freshness that takes your dish to a new level of delectable.

  • Better Stock: Use homemade vegetable stock instead of water or anchovy stock to deepen the flavor. This enhances the overall deliciousness and brings a unique richness to your Tteokbokki.

  • Crunchy Toppings: Top your Tteokbokki with crushed peanuts or sesame seeds for a delightful crunch. This added texture not only enhances the dish visually but also adds a nutty flavor that complements the sauce beautifully.

  • Extra Veggies: Mix in any leftover veggies like bok choy, zucchini, or mushrooms for added nutrition and color. A splash of freshness brightens the dish while keeping it satisfying and wholesome.

  • Baked Delight: Turn up the heat by baking your Tteokbokki! Spread it in a baking dish, sprinkle with cheese, and bake until golden for an indulgent twist. It’s a comforting way to enjoy this beloved dish, reminiscent of a cheesy, spicy casserole.

Explore these variations for a stunning Tteokbokki experience, just like the bustling food stalls in Seoul!

How to Store and Freeze Tteokbokki

Fridge: Keep leftover Tteokbokki in an airtight container and store it in the fridge for up to 3 days. The flavors will continue to develop, making it even more delicious!

Freezer: To freeze Tteokbokki, let it cool completely, then transfer it to a freezer-safe container. It can be stored for up to 2 months without losing its chewy texture.

Reheating: For best results, reheat Tteokbokki on the stove over low heat, adding a splash of stock or water to prevent drying out. Stir occasionally until heated through.

Avoid Separation: If stored or frozen, the sauce may separate; simply stir well when reheating to bring it back to its luscious consistency.

What to Serve with Tteokbokki

As you savor your homemade Tteokbokki, imagine the delightful array of flavors and textures that could complement this iconic dish.

  • Kimchi: The tangy, fermented crunch of kimchi adds a vibrant contrast, enhancing each bite with its distinct flavor. Pairing Tteokbokki with a side of kimchi not only elevates the meal but also compliments the dish’s warmth with a refreshing kick.

  • Crispy Fried Chicken: The savory, crispy bites of fried chicken bring a satisfying crunch that beautifully balances the chewy rice cakes in Tteokbokki. Serve with a sweet chili sauce for dipping to echo the dish’s spicy notes while adding a delightful texture.

  • Spring Rolls: Light and crunchy, these filled rolls offer a fresh contrast to the rich sauce of Tteokbokki. Each bite bursts with flavor, making them a perfect finger food while enjoying the heartiness of the meal.

  • Cold Noodle Salad: A cool, tangy noodle salad adds a refreshing twist, cleansing the palate between bites of warm Tteokbokki. The contrasting temperatures create an enjoyable dining experience, ensuring that every mouthful remains exciting.

  • Steamed Broccoli: The subtle bitterness of steamed broccoli provides not only color but also a nutritious element, balancing the richness of Tteokbokki. Drizzle with a bit of sesame oil to tie it all together perfectly.

  • Sparkling Water with Lime: Quench your thirst with bubbly sparkling water dressed with a hint of lime, which refreshes your palate and complements the spice in Tteokbokki beautifully.

  • Vanilla Ice Cream: To round off your meal, the creamy sweetness of vanilla ice cream contrasts delightfully with the heat of Tteokbokki, providing a satisfying end to your culinary journey.

  • Sooja Tea: A warm cup of this traditional tea can soothe your palate after indulging in spicy goodness, making it an excellent option to enhance your dining experience with Tteokbokki.

Make Ahead Options

These Tteokbokki are fantastic for busy cooks looking to save time on weeknights! You can prepare the sauce up to 3 days in advance; simply combine the soy sauce, sugar, Gochugaru, minced garlic, honey, and Gochujang in a bowl and refrigerate it. Additionally, if your rice cakes are frozen, you can defrost them overnight in the refrigerator to have them ready to go. On the day you plan to enjoy your Tteokbokki, just heat the stock, add the prepared sauce and rice cakes, and cook according to the original recipe for about 10-12 minutes. With these make-ahead tips, your Tteokbokki will be just as delicious, saving you valuable time in the kitchen!

Expert Tips for Tteokbokki

  • Perfect Texture: Soak frozen rice cakes in warm water for 10 minutes to ensure they are pliable and chewy when cooked.

  • Customize Spice: Adjust Gochugaru according to your heat preference; start with 1 tbsp if you’re unsure, and add more as needed.

  • Sauce Consistency: If your sauce is too thin after cooking, let it simmer a bit longer to thicken before serving.

  • Fresh Ingredients: Use fresh garlic and high-quality Gochujang for the best flavor; they make a noticeable difference in your Tteokbokki.

  • Mix It Up: Feel free to add vegetables like cabbage or carrots for an extra crunch and nutrition boost!

  • Avoid Overcooking: Be careful not to overcook the rice cakes; they should be tender but still have a delightful chew when you bite into them.

Tteokbokki Recipe FAQs

What kind of rice cakes should I use for Tteokbokki?
Absolutely! You should look for Korean rice cakes, which come in cylindrical shapes and are also known as “tteok.” Fresh rice cakes are ideal, but if they’re frozen, simply soak them in warm water for about 10 minutes to soften them before cooking. This ensures the best chewy texture in your dish.

How should I store leftover Tteokbokki?
To keep your leftover Tteokbokki fresh, place it in an airtight container and store it in the refrigerator for up to 3 days. Allow the flavors to meld together; you might find it’s even tastier the next day!

Can I freeze Tteokbokki?
Absolutely! Let your Tteokbokki cool completely, then transfer it to a freezer-safe container. It can be frozen for up to 2 months. When you’re ready to enjoy it again, simply let it thaw in the fridge overnight before reheating.

What can I do if the Tteokbokki sauce is too thin?
No worries at all! If you find that your sauce is too thin after cooking, just let it simmer for a few more minutes over low heat until it thickens. Stir gently during this process to ensure the rice cakes don’t stick to the bottom of the pan. This will help you achieve that luscious, rich sauce you crave!

Are there any dietary considerations for Tteokbokki?
Very much! If you have any food allergies, check labels on your ingredients. Wheat in soy sauce or Gochujang could be an issue for those with gluten sensitivities. For a vegetarian option, use vegetable stock in place of anchovy stock and ensure your Gochujang is vegan-friendly. Always keep an eye on your ingredient sources to cater to dietary needs!

How can I elevate my Tteokbokki further?
I often make my Tteokbokki more exciting by adding extras! Feel free to toss in chopped veggies like carrots or cabbage for crunch, or even throw in some boiled eggs or tofu for added protein. It’s a great way to customize your dish while keeping it delicious.

Delicious Tteokbokki: Easy Spicy Korean Comfort Food

Tteokbokki is a spicy-sweet Korean dish made with chewy rice cakes, perfect for a quick and customizable meal.

  • large pan
  • small bowl

For the Base

  • 2 cups anchovy stock (or dashi or unsalted chicken stock)
  • 1 pound Korean rice cakes (fresh or properly defrosted)
  • 8 ounces Korean fish cakes (cut into bite-sized pieces)
  • 2 tablespoons green onion (optional, for garnish)

For the Tteokbokki Sauce

  • 3 tablespoons soy sauce (adjust based on taste)
  • 2 tablespoons sugar (reduce to 1 tbsp for less sweetness)
  • 1 tablespoon Gochugaru (adjust based on spice tolerance)
  • 3 cloves garlic (freshly minced)
  • 2 tablespoons honey (or rice syrup/oligo syrup)
  • 3 tablespoons Gochujang (essential for authentic flavor)

Step-by-Step Instructions

  1. In a small bowl, whisk together the soy sauce, sugar, Gochugaru, minced garlic, honey, and Gochujang. Ensure all ingredients are well combined.
  2. If using frozen Korean rice cakes, place them in warm water for about 10 minutes until they soften. Drain and set aside.
  3. In a large pan over medium heat, pour in the anchovy stock and bring it to a gentle boil for approximately 3-5 minutes.
  4. Once the stock reaches a boil, add the defrosted rice cakes along with the prepared sauce. Stir gently and cook for about 10 minutes.
  5. After the rice cakes have cooked in the sauce, add the bite-sized pieces of Korean fish cakes to the pan. Stir and let them cook for another 2 minutes.
  6. Remove the pan from heat and transfer the dish to a serving plate. Garnish with chopped green onions.

For best texture, soak frozen rice cakes in warm water for 10 minutes before using. Adjust spice levels as needed.

Main Dishes
Korean
comfort food, Easy Recipe, quick meal, spicy, street food, Tteokbokki

Filed Under: Main Dishes

Savor Every Bite of Garlic Butter Steak Bites and Potatoes

August 7, 2025 by grace bellamy Leave a Comment

As I watched my skillet come to life with sizzling sounds and rich aromas, a wave of comfort washed over me. There’s something undeniably heartwarming about whipping up Garlic Butter Steak Bites and Potatoes, especially on a busy weeknight. This dish marries the tender, juicy bites of sirloin steak with crispy, buttery potatoes, creating a satisfying meal that caters to both the palate and the soul. Not only is it a quick-to-make crowd-pleaser, but it also elevates humble ingredients into a delightful feast. Perfect for when you want something special without spending hours in the kitchen! Are you ready to transform your dinner routine? Let’s dive into the recipe!

Why Will You Adore This Dish?

Simplicity is key: This recipe comes together in just 30 minutes, making it perfect for busy weeknights or quick gatherings.

Indulgent flavors shine through with a rich garlic butter sauce, elevating basic ingredients into something truly special.

Versatile companion: Pair these savory steak bites and potatoes with a fresh salad or crusty bread for a complete meal that satisfies everyone’s cravings.

Crowd-pleaser status guaranteed—the irresistible aroma and taste will impress your family and friends, ensuring it becomes a go-to dish!

If you’re looking for more delightful savory recipes, check out these Garlic Butter Chicken or Cowboy Butter Chicken that are sure to please any palate!

Garlic Butter Steak Bites and Potatoes Ingredients

• Discover the perfect blend of flavors in this dish!

For the Steak Bites

  • Sirloin steak – a tender cut that caramelizes beautifully when seared.
  • Salt and pepper – essential for enhancing the natural flavors of the steak.

For the Potatoes

  • Baby potatoes – their creamy texture complements the savory steak bites.
  • Butter – use good quality for a rich, decadent flavor.
  • Olive oil – helps achieve a nice golden crust on the potatoes.
  • Garlic – minced for intense flavor that infuses the dish.
  • Dried thyme and rosemary – herbal notes that elevate the taste profile.

For Garnish

  • Fresh parsley – adds a pop of color and brightness to the dish.

With these glorious ingredients, your Garlic Butter Steak Bites and Potatoes are just a few steps away from making dinner a delightful experience!

Step‑by‑Step Instructions for Garlic Butter Steak Bites and Potatoes

Step 1: Boil the Potatoes
Begin by placing the halved or quartered baby potatoes in a pot of salted water. Bring it to a boil over medium-high heat and let them cook for 12-15 minutes until they’re fork-tender but still hold their shape. Once cooked, drain the potatoes and allow them to cool for about 5 minutes before moving to the next step.

Step 2: Smash the Potatoes
After the potatoes have cooled, take a fork and gently smash each piece to create craggy surfaces. This step is essential for maximizing crispiness in your Garlic Butter Steak Bites and Potatoes. Set the smashed potatoes aside while you prepare the steak bites, allowing the cragginess to expand their surface area for even better flavor absorption.

Step 3: Prepare the Steak Bites
While the potatoes cool, pat the sirloin steak bites completely dry with paper towels. This step ensures a perfect sear. Generously season the steak with salt and pepper, ensuring every bite is full of flavor. The seasoning will create a tasty crust when you sear them in the skillet, enhancing your Garlic Butter Steak Bites and Potatoes.

Step 4: Sear the Steak Bites
Heat a large cast-iron skillet over high heat, then add 2 tablespoons of olive oil. Allow the oil to shimmer for about 1 minute before adding the beef in a single layer, making sure they don’t touch. Sear the steak bites for 2-3 minutes without stirring. You’ll know they’re ready to flip when they develop a golden, crispy crust.

Step 5: Cook the Steak to Perfection
After the initial sear, use tongs to flip the steak bites and cook for an additional 1-2 minutes for medium-rare. Once cooked to your desired doneness, carefully transfer the steak bites to a plate and tent them with foil to keep warm, allowing the flavors to meld while you move on to the potatoes.

Step 6: Crisp the Potatoes
In the same skillet, add the remaining olive oil, then carefully place the smashed potatoes cut-side down. Allow them to cook undisturbed for about 4-5 minutes until they turn golden and crispy. After that, flip the potatoes and crisp the other side for an additional 3-4 minutes, enhancing the satisfying crunch of your Garlic Butter Steak Bites and Potatoes.

Step 7: Infuse with Garlic and Herbs
Once both sides of the potatoes are crispy, reduce the heat to medium-low. Add 1 tablespoon of butter and the minced garlic to the skillet, cooking for about 1 minute until fragrant. Stir in the fresh thyme, allowing the herbs to infuse their delightful flavors into the potatoes.

Step 8: Combine Everything Together
Return the warm steak bites to the skillet, tossing them with the crispy potatoes and garlicky herb mixture. Cook everything together for 1-2 minutes until heated through. Taste and adjust seasoning with salt and pepper, ensuring your Garlic Butter Steak Bites and Potatoes are perfectly balanced and flavorful.

Step 9: Serve and Garnish
Once everything is combined, serve the Garlic Butter Steak Bites and Potatoes warm, garnished with freshly chopped parsley. This final touch will add a vibrant pop of color and freshness, making this delicious dish visually appealing as well as mouthwatering!

What to Serve with Garlic Butter Steak Bites and Potatoes

Create the ultimate comfort meal by combining vibrant sides and refreshing drinks that enhance your dining experience!

  • Creamy Coleslaw: The crunch and tanginess of coleslaw balance the rich butteriness, adding a refreshing contrast to your steak.
  • Garlic Bread: Perfectly toasted garlic bread acts as a fantastic vehicle for sopping up the luscious garlic butter sauce.
  • Roasted Asparagus: Tender asparagus drizzled with olive oil offers a delightful, earthy flavor that complements the richness of the dish.
  • Caesar Salad: A classic Caesar salad, with its crisp romaine and creamy dressing, cuts through the heaviness and adds brightness to the meal.
  • Red Wine: A bold red wine like Cabernet Sauvignon enhances the savory depth of the steak while elevating the entire dining experience.
  • Apple Crisp: Serve warm apple crisp for dessert—its warm, spiced flavors create a cozy finish to your hearty meal.
  • Herb-Infused Rice: Fluffy rice infused with herbs serves as a wonderful canvas for the steak bites, soaking up all delicious garlic butter flavors.
  • Steamed Broccoli: The slight bitterness of steamed broccoli adds a great contrast, giving your meal a healthful, green touch that balances the richness beautifully.
  • Sparkling Water: Crisp, bubbly sparkling water refreshes the palate between bites, making every mouthful of Garlic Butter Steak Bites and Potatoes even more enjoyable.

Expert Tips for Garlic Butter Steak Bites and Potatoes

Pat the Steak Dry: Ensure the steak bites are completely dry before seasoning. This helps achieve a beautiful crust during cooking.

Don’t Overcrowd the Pan: Cook steak bites in a single layer to avoid steaming. Give them space to develop that irresistible sear for your Garlic Butter Steak Bites and Potatoes.

Smash for Crispiness: Gently smash the boiled potatoes; this creates more surface area for that golden-brown crust. The more craggy, the better!

Keep an Eye on the Heat: Watch your skillet temperature closely. Too high, and you risk burning the garlic; too low, and your steak won’t sear properly.

Rest the Steak: After cooking, tent the steak bites with foil to maintain warmth and allow the juices to redistribute, ensuring tenderness in every morsel.

Season to Taste: Always taste and adjust the seasoning before serving. A little more salt or pepper can make a world of difference in your Garlic Butter Steak Bites and Potatoes!

Garlic Butter Steak Bites and Potatoes Variations

Feel free to embrace your culinary creativity and tailor this dish to fit your taste buds!

  • Herb-Infused: Swap dried thyme and rosemary for fresh versions for a brighter flavor. Fresh herbs truly elevate each bite.
  • Spicy Kick: Add a pinch of red pepper flakes or cayenne pepper to the garlic butter for a tantalizing heat that’ll delight spice lovers! Just be careful, a little goes a long way!
  • Vegetarian Option: Substitute the steak with hearty mushrooms or eggplant. They’ll soak up the garlic butter beautifully, offering a rich, savory experience for all.
  • Creamy Twist: Stir in a splash of heavy cream at the end for a luxuriously creamy sauce. It adds a different dimension to the dish that feels indulgent and delicious!
  • Air Fryer Potatoes: For a healthier take, cook the smashed potatoes in an air fryer. They will come out crispy without needing too much oil, perfect for guilt-free indulgence!
  • Play with Cheese: Top with grated Parmesan or crumbled feta while still warm for a delightful cheesy flavor. Cheese adds an extra layer of richness that can’t be overlooked!
  • Add Veggies: Toss in some bell peppers or asparagus while cooking the steak. They’ll add color and nutrients while still absorbing all those delicious garlic flavors.
  • Zesty Lemon: A squeeze of lemon juice over the finished dish brightens the flavors and adds a refreshing zing. It’s a delightful contrast that balances the richness beautifully!

Looking for more inspiration? Try pairing these steak bites with a side of Cheesy Scalloped Potatoes or a warm loaf of Cheese Garlic Crack for a complete meal experience!

Make Ahead Options

These Garlic Butter Steak Bites and Potatoes are perfect for meal prep enthusiasts! You can prep the steak bites and potatoes up to 24 hours in advance, saving precious time during busy weeknights. Simply boil the potatoes, cool them, and gently smash them as instructed. Season the steak bites with salt and pepper, then refrigerate them separately. When you’re ready to serve, cook the potatoes and steak bites as directed. For optimal quality, be sure to keep the components stored in airtight containers to prevent moisture loss. Just combine everything in the skillet when it’s time to eat, and you’ll enjoy the same delightful flavors with minimal effort!

How to Store and Freeze Garlic Butter Steak Bites and Potatoes

Fridge: Store leftover Garlic Butter Steak Bites and Potatoes in an airtight container for up to 3 days. This way, you can enjoy the delicious flavors even after your initial meal!

Freezer: For longer storage, freeze the steak bites and potatoes in a single layer on a baking sheet. Once frozen, transfer them to a zip-top freezer bag, and they’ll last up to 3 months.

Reheating: To reheat, place in a skillet over medium heat until warmed through, adding a splash of water or broth to retain moisture. Enjoy them like they were freshly made!

Thawing: When ready to enjoy frozen leftovers, thaw in the refrigerator overnight for best results. This helps maintain the texture of the Garlic Butter Steak Bites and Potatoes.

Garlic Butter Steak Bites and Potatoes Recipe FAQs

How do I choose the right steak for this recipe?
Absolutely! For the best results, I recommend using sirloin steak as it’s tender and has great flavor that caramelizes beautifully when seared. Look for meat that is bright red with a nice marbling of fat; this fat will help keep the steak juicy during cooking.

What is the best way to store leftovers?
To store leftover Garlic Butter Steak Bites and Potatoes, place them in an airtight container and keep them in the refrigerator for up to 3 days. Make sure to allow them to cool to room temperature before sealing to prevent condensation, which can make them soggy.

Can I freeze Garlic Butter Steak Bites and Potatoes?
Yes! For freezing, first arrange the steak bites and potatoes in a single layer on a baking sheet and freeze until solid, usually about 1-2 hours. Once fully frozen, transfer them to a zip-top freezer bag and label with the date. They can be stored like this for up to 3 months. When you’re ready to enjoy, thaw in the fridge overnight before reheating.

What should I do if my potatoes aren’t crispy enough after cooking?
If your potatoes aren’t as crispy as you’d like, don’t worry! You can return them to the skillet and cook them for a few more minutes over medium heat. Additionally, ensure that there’s enough space in the pan so they can fry properly. A little trick is to pat them dry again before cooking, as moisture can prevent crispiness.

Are there any dietary considerations I should know about?
Definitely! If you or someone you’re serving has dietary restrictions, I suggest selecting a leaner cut of beef or even replacing it with chicken if someone prefers not to eat red meat. Additionally, feel free to adjust the seasoning to accommodate any allergies or preferences. Just ensure to check the labels on your butter and any other condiments you use to avoid hidden allergens.

What’s the best way to reheat the leftovers?
To reheat, I suggest using a skillet over medium heat, adding a splash of water or broth to maintain moisture. Stir occasionally until warmed through, typically about 5-7 minutes. This will help preserve the delicious flavors and textures of your Garlic Butter Steak Bites and Potatoes!

Savor Every Bite of Garlic Butter Steak Bites and Potatoes

A quick, indulgent recipe for Garlic Butter Steak Bites and Potatoes perfect for busy weeknights.

  • Cast-iron skillet
  • Pot
  • fork

For the Steak Bites

  • 1 pound Sirloin steak (cut into bite-sized pieces)
  • to taste Salt
  • to taste Pepper

For the Potatoes

  • 1 pound Baby potatoes (halved or quartered)
  • 3 tablespoons Butter (good quality)
  • 2 tablespoons Olive oil (divided)
  • 3 cloves Garlic (minced)
  • 1 teaspoon Dried thyme
  • 1 teaspoon Dried rosemary

For Garnish

  • 2 tablespoons Fresh parsley (chopped)

Step-by-Step Instructions

  1. Place the halved or quartered baby potatoes in a pot of salted water and boil for 12-15 minutes until fork-tender. Drain and cool for 5 minutes.
  2. Gently smash each potato with a fork to create craggy surfaces and set aside.
  3. Pat the sirloin steak bites dry with paper towels, then season generously with salt and pepper.
  4. Heat a large skillet over high heat and add 2 tablespoons of olive oil. Sear the steak bites for 2-3 minutes without stirring.
  5. Flip the steak bites and cook for another 1-2 minutes until medium-rare, then transfer to a plate and tent with foil.
  6. In the same skillet, add the remaining olive oil and place the smashed potatoes cut-side down. Cook undisturbed for 4-5 minutes until golden and crispy; flip and cook another 3-4 minutes.
  7. Reduce heat to medium-low, add 1 tablespoon of butter and minced garlic, cooking for about 1 minute. Stir in the thyme and rosemary.
  8. Return the steak bites to the skillet, tossing with potatoes and herb mixture for 1-2 minutes until heated through. Adjust seasoning if necessary.
  9. Serve warm, garnished with freshly chopped parsley.

For optimal flavor, ensure steak is dry before seasoning and do not overcrowd the pan during cooking.

Main Dishes
American
comfort food, easy dinner, Garlic Butter Steak Bites, Hearty Meal, Potatoes, quick recipes

Filed Under: Main Dishes

Deliciously Fun Birthday Cake Pops to Celebrate Any Occasion

August 7, 2025 by grace bellamy Leave a Comment

As I stood in my kitchen, the tantalizing aroma of vanilla cake was taking me back to those childhood birthday parties filled with laughter and sweet treats. Today, I’m thrilled to share my homemade spin on Starbucks Copycat Birthday Cake Pops that will turn any ordinary day into a mini celebration! These adorable, bite-sized delights not only allow you to indulge your sweet tooth but are also a breeze to whip up with just a box of cake mix and a handful of pantry staples. Whether you’re hosting a get-together or simply craving something sweet, these Birthday Cake Pops are the perfect treat—quick to prepare and sure to impress everyone with their charming presentation. Who wouldn’t want a pop of happiness on a stick? Ready to channel your inner cake pop artist and create something delightful today?

Why Are Birthday Cake Pops So Fun?

Delightful and cute, these cake pops are the life of any party! Easy to make, you only need a box of cake mix and minimal effort to create these festive treats. Versatile in flavor, you can customize them to suit any celebration or taste preference. Perfect for sharing, they cut down on cake mess while delivering all the joy. If you love other sweet treats, consider trying my Apple Pecan Cake or Carrot Cake as more delightful alternatives! Embrace your creativity with these Birthday Cake Pops and turn any day into a celebration!

Birthday Cake Pops Ingredients

Get ready to create some sweet magic with these delightful Birthday Cake Pops!

For the Cake

  • vanilla cake mix – this is the base of your pops, delivering that classic birthday flavor.
  • neutral oil – helps keep the cake moist; sub with applesauce for a healthier twist!
  • milk or water – use milk for a richer taste, but water works if you’re in a pinch.
  • large eggs – binds the ingredients together; opt for flax eggs for a vegan version!
  • unsalted butter – adds creaminess; always good to keep it softened for easy mixing.

For the Buttercream

  • powdered sugar – sweetens your buttercream; sift it for a smoother texture.
  • vanilla extract – enhances the flavor; make sure to use pure vanilla for the best results.
  • pinch salt – brings out the sweetness; don’t skip it!
  • milk – use this to achieve your desired buttercream consistency; add little by little as needed.

For Decorating

  • candy melts – this colorful layer coats your cake pops, making them irresistible.
  • white nonpareils or sprinkles – finish off your pops with a festive crunch and color!

These Birthday Cake Pops are not just delicious but also a fun way to celebrate any occasion with your loved ones!

Step‑by‑Step Instructions for Birthday Cake Pops

Step 1: Preheat the Oven
Begin by preheating your oven to between 325℉ and 350℉ (162-175℃); check the cake mix box for specific guidance based on your pan size. Ensure your oven is ready before mixing the batter, as this will help your Birthday Cake Pops bake evenly and rise beautifully.

Step 2: Prepare the Cake Batter
In a large mixing bowl, combine the vanilla cake mix, neutral oil, milk (or water), eggs, and softened unsalted butter. Use an electric mixer or whisk to blend until the mixture is smooth and well combined, resembling a thick batter. Once mixed thoroughly, pour this delightful batter into a greased or lined cake pan of your choice.

Step 3: Bake the Cake
Bake the cake in the preheated oven for approximately 25-30 minutes or until a toothpick inserted into the center comes out clean. Start checking for doneness about 2-4 minutes before the suggested bake time. A perfectly baked cake will be golden brown and spring back when gently pressed.

Step 4: Crumble the Cake
Once fully baked, remove the cake from the oven and transfer it into a large mixing bowl while it’s still warm. Use your mixer or your hands to crumble the cake into fine pieces, ensuring no large chunks remain. This crumbled texture will be the base for your glorious Birthday Cake Pops.

Step 5: Prepare the Buttercream
In a separate small mixing bowl, whisk together the powdered sugar, vanilla extract, a pinch of salt, and just enough milk to create a smooth, spreadable buttercream. This creamy mixture adds sweetness and binds the cake crumbs together, so ensure it’s fluffy and well mixed before proceeding.

Step 6: Combine Cake and Buttercream
Add the smooth buttercream mixture to the crumbled cake and mix well until everything is fully incorporated. Use your hands or a spatula to ensure an even blend, creating a sticky dough-like consistency that will hold its shape when formed into balls for your Birthday Cake Pops.

Step 7: Shape Cake Balls
With your hands, roll the cake mixture into balls roughly 1¼ inches (3 cm) in diameter, weighing about 30g each. This is a fun step where you can make them uniform in size for an appealing presentation. Place each rolled cake ball onto a parchment-lined baking sheet.

Step 8: Chill the Cake Balls
Place the baking sheet with the cake balls in the freezer for about 15 minutes. This chilling time is crucial as it helps the cake balls firm up, making them easier to work with when inserting the lollipop sticks later for your delightful Birthday Cake Pops.

Step 9: Prepare the Candy Coating
While the cake balls chill, melt a small amount of candy melts in a microwave-safe bowl according to the package instructions. Heat gently in short bursts, stirring frequently until smooth and fully melted. This candy coating will give your pops their vibrant colors and delicious sweetness.

Step 10: Insert Lollipop Sticks
Once the cake balls are chilled, dip the tip of each lollipop stick into the melted candy melts and carefully insert it halfway into each cake ball. This helps the stick adhere nicely when you coat the entire cake ball, ensuring no pops fall apart during dipping.

Step 11: Chill Again
Return the cake pops to the freezer for another 15 minutes. This extra chilling lets the candy melts set quickly, making the coating process easier and preventing the cake balls from sliding down the sticks when you dip them later.

Step 12: Bring to Room Temperature
After chilling, take the cake pops out of the freezer and allow them to sit at room temperature for about 10 minutes. This step allows the cake balls to warm slightly, making them less likely to break apart during the next dipping phase of your Birthday Cake Pops.

Step 13: Melt Remaining Candy Melts
Melt the remaining candy melts in a bowl until you achieve a smooth, thin consistency, perfect for dipping. If it appears too thick, you can stir in a teaspoon of vegetable oil to get that ideal silky texture that will coat your pops beautifully.

Step 14: Dip the Cake Pops
Gently dip each cake pop into the melted candy, swirling it to ensure it gets fully coated. Make sure to submerge the pop completely, covering the entire cake ball. This is where the magic happens, as each pop transforms into a colorful treat ready for decoration.

Step 15: Remove Excess Coating
After dipping, carefully tap the stick on the edge of the bowl to let any excess candy melt drip off. This will prevent a thick coating from forming and give your Birthday Cake Pops a smooth, even finish. Set each coated pop upright for decorating.

Step 16: Decorate Quickly
Before the candy coating dries, quickly sprinkle your colorful nonpareils or sprinkles over the pops as a charming finishing touch. This is a whimsical step that allows you to add a personal flair to your Birthday Cake Pops—so feel free to get creative!

Step 17: Let Them Dry
Lastly, place the finished cake pops into a styrofoam block or Holder to keep them upright while they dry completely. Allow them to set for at least 30 minutes, ensuring the candy coating hardens beautifully and supports all your hard work for a delightful treat ready to share!

Make Ahead Options

These Birthday Cake Pops are perfect for meal prep enthusiasts! You can prepare the cake batter and bake it up to 24 hours in advance; simply store it in an airtight container in the fridge to keep it moist. Additionally, the crumbled cake can be mixed with buttercream and rolled into balls up to 3 days ahead—just keep them refrigerated. When you’re ready to finish, take them out, chill briefly, dip in candy melts, and decorate. This advance prep allows you to enjoy these delightful treats with minimal effort on busy days, ensuring your Birthday Cake Pops are just as delicious and festive as if made fresh!

What to Serve with Birthday Cake Pops

Dreaming of a delightful dessert table that pairs perfectly with your charming Birthday Cake Pops?

  • Light Fruit Salad: A refreshing mix of seasonal fruits adds a touch of brightness, balancing the sweetness of the cake pops perfectly.
  • Sparkling Lemonade: The bubbly, zesty flavors of sparkling lemonade will elevate your sweet treats, offering a fun party vibe.
  • Mini Cheesecakes: These creamy bites provide a contrasting texture; pair with fruit compote for a sophisticated twist.
  • Chocolate Dipped Pretzels: The salty crunch of these pretzels mingles beautifully with the sweetness of the cake pops, creating a delightful contrast.
  • Frozen Yogurt Parfaits: Layered with berries and granola, these light and creamy desserts complement the fun essence of birthday cake pops.
  • Coffee or Espresso: Enhance your treat experience by serving a cup of rich coffee, providing a delightful contrast to the sweet flavors.
  • Caramel Sauce: Drizzling some decadent caramel sauce over your pops takes indulgence to a new level, offering an elegant touch.
  • Birthday Ice Cream Cake: If you’re celebrating a special day, why not add a classic birthday cake for the ultimate sweet setup?
  • Chocolate Milk: This nostalgic drink brings back memories, pairing wonderfully with sweet treats for a whimsical finish!

How to Store and Freeze Birthday Cake Pops

Fridge: Store your Birthday Cake Pops in an airtight container in the fridge for up to 1 week. This keeps them fresh and prevents them from drying out.

Freezer: For longer preservation, freeze the pops by placing them in a single layer on a baking sheet before transferring to a freezer-safe bag or container. They can be stored for up to 2 months.

Thawing: To enjoy frozen Birthday Cake Pops, remove them from the freezer and let them sit at room temperature for about 20-30 minutes. This helps maintain their delightful texture and flavor.

Reheating: If you’d like to enjoy the candy coating’s shine, briefly reheat them in the microwave for a few seconds. Avoid overheating to maintain their delightful shape!

Expert Tips for Birthday Cake Pops

  • Use Room Temperature Ingredients: Ensure that your eggs and butter are at room temperature for a smoother batter and better incorporation with the cake mix in your Birthday Cake Pops.

  • Don’t Overbake: Keep an eye on the cake while baking; if baked too long, it can become dry. Check for doneness a few minutes before the timer goes off.

  • Keep Cake Balls Firm: Chill the cake balls thoroughly before dipping to prevent them from breaking apart. This is crucial for making sturdy and delightful Birthday Cake Pops.

  • Heat Candy Melts Gradually: Melt your candy melts in short intervals, stirring often, to avoid scorching. A smooth consistency ensures an even coating on your pops.

  • Be Quick with Decorating: Work swiftly when adding sprinkles; the candy coating dries fast. Getting creative during this step is a great way to personalize each pop!

Birthday Cake Pops Variations

Feel free to let your creativity shine as you transform these Birthday Cake Pops into something uniquely yours!

  • Gluten-Free: Use a gluten-free cake mix to make this delightful treat suitable for those with gluten sensitivities. It’s just as tasty!

  • Dairy-Free: Substitute the butter and milk with plant-based alternatives like coconut oil and almond milk for a dairy-free option.

  • Flavor Twist: Add your favorite extract, like almond or lemon, to the cake mixture for a refreshing flavor twist that surprises and delights.

  • Add-Ins: Incorporating mini chocolate chips or colorful sprinkles into the cake mixture not only adds great texture but also bursts of flavor in every bite.

  • Chocolate Coating: Swap the candy melts for dark or milk chocolate for an indulgent twist. This rich coating adds depth and goes wonderfully with the vanilla cake inside.

  • Mini Pops: Instead of traditional-sized pops, make mini cake pops by rolling smaller balls for bite-sized treats perfect for parties!

  • Express Yourself: Decorate with themed sprinkles or edible glitter to match holiday or special occasion colors, making your cake pops as festive as the event.

  • Spicy Kick: For a surprise flavor, add a dash of cayenne or chili powder to the cake mix, giving your pops a fun and unexpected heat that tantalizes the taste buds.

Whichever variation you choose, these Birthday Cake Pops will always be a cheerful addition to your celebrations! If you’re looking for more delightful dessert ideas, try my Pineapple Cake or indulge in my delicious Carrot Cake Cheesecake for an unbeatable treat!

Birthday Cake Pops Recipe FAQs

What is the best way to select ripe ingredients for Birthday Cake Pops?
Absolutely! For the best Birthday Cake Pops, ensure all ingredients, especially the eggs and butter, are at room temperature. This will help achieve a smoother batter. When using milk, go for whole milk or milk alternatives for added richness, while your vanilla extract should ideally be pure, as it provides superior flavor.

How should I store my Birthday Cake Pops?
You can store your Birthday Cake Pops in an airtight container in the fridge for up to 1 week. This keeps them fresh and prevents them from drying out. If you’d like to keep them longer, place them in the freezer once fully set. They will stay fresh for up to 2 months when wrapped in plastic wrap and stored in a freezer-safe container.

Can I freeze Birthday Cake Pops? If yes, how?
Yes! To freeze your Birthday Cake Pops, place them in a single layer on a baking sheet. Allow them to freeze until firm (about 1 hour), then transfer the pops to a freezer-safe bag or container. Seal tightly, making sure to remove as much air as possible to prevent freezer burn. When ready to enjoy, let them thaw at room temperature for about 20-30 minutes.

What should I do if my cake pops crumble or fall apart?
If your Birthday Cake Pops are crumbling, it might be due to insufficient moisture in the cake mixture. To troubleshoot, mix in a little more buttercream until the mixture holds together easily. Ensure you chill the cake balls sufficiently before dipping, as this helps them maintain their shape during the coating process. Additionally, make sure to insert the lollipop sticks gently to avoid breaking the pops.

Are Birthday Cake Pops safe for children with allergies?
Very! While Birthday Cake Pops are fun, be mindful of allergies. The cake mix and candy melts often contain gluten and dairy. To make allergy-friendly pops, consider using gluten-free cake mix and dairy-free candy melts. Always read labels thoroughly to ensure all ingredients match dietary needs, especially if sharing with children.

Deliciously Fun Birthday Cake Pops to Celebrate Any Occasion

These Birthday Cake Pops are delightful bite-sized treats perfect for any celebration, easy to make, and incredibly fun to eat!

  • Mixing Bowl
  • Electric mixer
  • Cake Pan
  • parchment paper
  • Microwave-safe bowl
  • Baking Sheet
  • Styrofoam Block

For the Cake

  • 1 box vanilla cake mix (the base of your pops, delivering classic birthday flavor)
  • 1/2 cup neutral oil (helps keep the cake moist; sub with applesauce for a healthier twist)
  • 1 cup milk (use for a richer taste, but water works if you’re in a pinch)
  • 3 large eggs (binds the ingredients together; opt for flax eggs for a vegan version)
  • 1/2 cup unsalted butter (adds creaminess; always good to keep it softened for easy mixing)

For the Buttercream

  • 2 cups powdered sugar (sweetens your buttercream; sift it for a smoother texture)
  • 1 teaspoon vanilla extract (enhances the flavor; make sure to use pure vanilla for the best results)
  • 1 pinch salt (brings out the sweetness; don’t skip it!)
  • 2 tablespoons milk (use to achieve desired buttercream consistency; add little by little as needed)

For Decorating

  • 2 cups candy melts (this colorful layer coats your cake pops, making them irresistible)
  • 1 cup white nonpareils or sprinkles (finish off your pops with a festive crunch and color)

Cake Preparation

  1. Preheat your oven to between 325℉ and 350℉ (162-175℃); check the cake mix box for specific guidance based on your pan size.
  2. In a large mixing bowl, combine the vanilla cake mix, neutral oil, milk, eggs, and softened unsalted butter; blend until smooth.
  3. Pour the batter into a greased or lined cake pan.
  4. Bake for approximately 25-30 minutes or until a toothpick comes out clean; start checking for doneness a few minutes before the timer goes off.
  5. Once baked, crumble the cake into a bowl while still warm, ensuring no large chunks remain.
  6. In a separate bowl, whisk together powdered sugar, vanilla extract, salt, and milk to create a smooth buttercream.
  7. Combine the buttercream with the crumbled cake until fully incorporated, creating a sticky dough-like consistency.
  8. Roll the mixture into balls about 1¼ inches in diameter and place them on a parchment-lined baking sheet.
  9. Chill the cake balls in the freezer for about 15 minutes.
  10. Melt a small amount of candy melts according to package instructions until smooth.
  11. Dip the tip of each lollipop stick into the melted candy and insert halfway into each cake ball.
  12. Chill again for another 15 minutes before bringing them to room temperature for about 10 minutes.
  13. Melt the remaining candy melts until smooth, adding oil if necessary for consistency.
  14. Dip each cake pop into the melted candy, ensuring it gets fully coated.
  15. Tap the stick on the edge of the bowl to remove excess coating.
  16. Quickly sprinkle colorful nonpareils or sprinkles over the pops before the coating dries.
  17. Place the finished cake pops in a styrofoam block or holder to dry completely for at least 30 minutes.

Use room temperature ingredients for smoother batter, and keep cake balls firm by chilling them before dipping.

Dessert
American
Birthday Cake Pops, Birthday Treats, Cake Pops, dessert recipes, easy recipes, party snacks

Filed Under: Dessert

Decadent Oreo Balls That Will Sweeten Your Day

August 7, 2025 by grace bellamy Leave a Comment

You wouldn’t believe how simple joy can fit into your hands! These Oreo Balls are the perfect sweet remedy for those days when fast food just doesn’t cut it. With just a handful of ingredients, you can whip up a delightful treat that’ll impress friends and family alike. Not only are these bites of chocolatey goodness utterly satisfying, but they come together in a mere 30 minutes, making them a fantastic quick-fix dessert. Plus, they’re a great way to satisfy your sweet tooth without the fuss of baking. So, are you ready to roll up your sleeves and make some delicious Oreo Balls that will leave everyone asking for seconds?

Why Are Oreo Balls So Irresistible?

Simplicity is the name of the game; with just four ingredients, you’ll have these decadent treats ready in about 30 minutes! Decadent chocolate coating envelops a deliciously easy Oreo filling, ensuring each bite is a heavenly experience. Versatile in presentation, you can drizzle them with white chocolate or sprinkle crushed Oreos for an extra touch. Crowd-pleaser status is guaranteed—whether you serve them at parties or surprise your family, everyone will be coming back for more! Plus, if you want to explore more delightful treats, don’t miss our perfect easy no-bake desserts for more inspiration!

Oreo Balls Ingredients

For the Oreo Mixture
• 16 Oreos – The classic chocolate cookies create the tasty base for these delightful Oreo Balls.
• 3 tablespoons melted butter – This adds richness and helps bind the mixture together.
• 1 teaspoon milk – A little moisture to bring everything together beautifully.

For the Chocolate Coating
• 8 ounces chocolate – Use semisweet or dark chocolate for the best flavor when coating your Oreo Balls.

With these simple ingredients, you’ll be on your way to creating irresistible Oreo Balls that will delight your family and friends!

Step‑by‑Step Instructions for Oreo Balls

Step 1: Crush the Oreos
Begin by crushing the 16 Oreos into fine crumbs. Use a food processor for a quick and efficient process, or place the Oreos in a plastic bag and smash them with a rolling pin. Aim for a texture similar to sand; this should take about 2-3 minutes. Set the crumbs aside in a large mixing bowl.

Step 2: Combine Ingredients
In the bowl with your crushed Oreos, add 3 tablespoons of melted butter and 1 teaspoon of milk. Mix everything together thoroughly until the mixture is well combined and holds together when pressed. This will take about 2 minutes of mixing. You want a sticky consistency that allows you to form balls easily.

Step 3: Roll into Balls
With your Oreo mixture ready, use your hands to roll it into small balls, approximately 1 inch in diameter. Place each ball on a parchment-lined tray, ensuring they have enough space between them. This step should take around 5-10 minutes. Once all the mixture is shaped, you’ll have a delightful tray of future Oreo Balls waiting to be coated.

Step 4: Melt the Chocolate
Next, melt your 8 ounces of chocolate using either a microwave or a double boiler. If using the microwave, heat in 30-second intervals, stirring in between until the chocolate is completely melted and smooth—this usually takes about 1-2 minutes. The chocolate needs to be fluid for easy dipping, so ensure it’s warm but not boiling.

Step 5: Coat the Oreo Balls
Carefully dip each chilled Oreo ball into the melted chocolate, ensuring it’s completely covered. You may use a fork or a toothpick for better control. Let any excess chocolate drip off and then return the coated balls back to the parchment-lined tray. This step will take about 10-15 minutes, so be patient as you create your delicious Oreo Balls.

Step 6: Add Finishing Touches
If desired, melt some white chocolate to drizzle over the cooled Oreo Balls for a decorative touch. You can also sprinkle crushed Oreos or sea salt on top while the chocolate is still wet. This extra flair adds to the visual appeal of your Oreo Balls and can be done in just a few minutes.

Step 7: Chill to Set
Finally, place the tray of chocolate-coated Oreo Balls in the refrigerator for about 15-20 minutes, or until the chocolate hardens completely. This will give your treats a firm texture, making them perfect for serving. Once set, your Oreo Balls are ready to enjoy or share with family and friends!

Make Ahead Options

These Oreo Balls are perfect for busy cooks looking to save time and still enjoy a delightful treat! You can prepare the Oreo mixture up to 24 hours in advance: simply crush the Oreos and mix them with melted butter and milk, then store the mixture in the refrigerator. When you’re ready to serve, roll the mixture into balls and dip them in melted chocolate—this final step only takes about 15 minutes. For best quality, keep the Oreo Balls in an airtight container in the fridge and enjoy them within 3 days for that fresh taste. Rest easy knowing that you’ll have scrumptious Oreo Balls waiting to impress your friends and family with minimal last-minute fuss!

How to Store and Freeze Oreo Balls

Fridge: Keep your Oreo Balls in an airtight container in the fridge for up to 1 week. This will maintain their freshness and delightful texture.

Freezer: For longer storage, freeze the Oreo Balls in a single layer on a baking sheet. Once frozen, transfer them to a freezer-safe bag or container. They can last up to 3 months.

Thawing: To enjoy, simply take the frozen Oreo Balls out and let them thaw in the fridge for about 30 minutes before serving, ensuring they stay delicious.

Reheating: There’s no need to reheat these treats! They are best enjoyed chilled, straight from the fridge or thawed from the freezer.

What to Serve with Oreo Balls

Creating a full dining experience around these sweet treats can transform your gathering into a delightful affair.

  • Coffee or Espresso: The rich, bold flavors complement the sweetness of Oreo Balls, making for a cozy, indulgent pairing. Perfect for an after-dinner treat!

  • Vanilla Ice Cream: A scoop of creamy vanilla ice cream adds a delightful contrast to the crunchy, chocolatey bites, enhancing the overall dessert experience.

  • Fresh Berries: Strawberries, raspberries, or blueberries offer a refreshing burst of flavor and acidity, cutting through the sweetness and balancing the palate beautifully.

  • Chocolate Sauce Drizzle: Serve with a side of warm chocolate sauce for dipping, creating an extra layer of decadence that chocolate lovers will adore!

A great addition would be a fruity or chocolatey dessert wine. Its sweetness pairs wonderfully with the Oreo Balls, creating a luscious dessert cocktail to savor.

  • Milkshake: A classic chocolate or vanilla milkshake turns your dessert into a fun, retro experience that everyone will enjoy! Every bite and sip brings back cherished memories.

  • Nutty Flourless Brownies: Their fudgy texture complements the Oreo Balls without overpowering them, ensuring a delightful balance of flavors and textures on your dessert table.

Oreo Balls Variations & Substitutions

Customize your Oreo Balls experience with these delightful twists that will elevate their charm and flavor!

  • Peanut Butter: Add 1/4 cup of creamy peanut butter to the Oreo mixture for a rich, nutty flavor that pairs beautifully with chocolate. With this twist, you create a sweet and salty dance in every bite.

  • Minty Fresh: Incorporate 1/2 teaspoon of peppermint extract into the chocolate coating for a refreshing minty flavor. This variation is like a chocolate peppermint patty, just more scrumptious and decadent!

  • Gluten-Free: Substitute traditional Oreos with gluten-free sandwich cookies to cater to gluten-sensitive friends and family. Everyone will enjoy the rich taste without missing a beat!

  • Spicy Kick: Add a dash of cayenne pepper or chili powder to the chocolate coating for a surprising burst of heat. This unexpected twist gives your Oreo Balls a thrilling kick, perfect for adventurous palates.

  • Nutty Crunch: Fold in 1/4 cup of crushed nuts like almonds or walnuts into the Oreo mixture for added texture. The nutty crunch enhances the experience and brings a delightful bite into each treat.

  • Flavorful Coatings: Experiment with different chocolate coatings, such as white, milk, or dark chocolate. Each type brings its unique flavor profile to the table, showcasing your creative flair.

  • Caramel Drizzle: Drizzle some warm caramel over your finished Oreo Balls for an indulgent finish. This sweet addition will make your Oreo Balls an unforgettable treat that everybody craves.

  • Festive Touch: Roll your finished Oreo Balls in crushed candy canes during the holidays or colorful sprinkles for birthdays. It’s a fun way to make them extra festive and appealing for any occasion!

Feel free to explore these options and create a truly personalized treat that resonates with your taste buds. And if you’re looking for more fun ideas, don’t miss our guide on easy no-bake treats that will surely spark your creativity!

Expert Tips for Oreo Balls

• Crushing Oreos: Ensure the Oreos are finely crushed to help the mixture hold together better. Avoid large chunks that can make rolling difficult.

• Mix Consistency: The mixture should be sticky; if it’s too dry, add a drop more milk. If it’s too wet, incorporate additional crushed Oreos.

• Chocolate Quality: Use good quality chocolate for coating to enhance flavor. Chocolate chips will work, but melting bar chocolate tends to provide a smoother finish.

• Coating Technique: Use a fork for dipping, allowing excess chocolate to drip off easily. This prevents clumps and gives a clean look to your Oreo Balls.

• Chilling Time: Don’t skip refrigeration! Allowing the Oreos to chill helps set the chocolate coating, resulting in a delightful bite.

By following these tips, you’ll ensure your Oreo Balls are a crowd-pleasing success!

Oreo Balls Recipe FAQs

What is the best way to select ripe Oreos?
Absolutely! Choose Oreos that are intact and free from visible damage. Since they’re a packaged product, it’s more about ensuring the packaging is sealed and fresh. If you’re using older Oreos from the pantry, check for any signs of staleness or dark spots all over, which indicate they’re past their prime.

How should I store Oreo Balls?
To keep your Oreo Balls fresh, store them in an airtight container in the fridge. They will last for up to 1 week. Always make sure they’re completely cooled and set after coating before storing to maintain their texture.

Can I freeze Oreo Balls? How do I do it?
Definitely! To freeze your Oreo Balls, place them in a single layer on a baking sheet and flash freeze them until solid, about 1-2 hours. After they are frozen, transfer them to a freezer-safe bag or container. They can be stored in the freezer for up to 3 months. Remember to allow them to thaw in the fridge for about 30 minutes before serving for the best texture.

What should I do if my Oreo mixture is too dry or too wet?
If your Oreo mixture feels too dry and crumbles apart, simply add another teaspoon of milk at a time until it reaches the right consistency—sticky but manageable. On the contrary, if it’s too wet, incorporate additional crushed Oreos, a tablespoon at a time, until it holds together well. This troubleshooting will help ensure your Oreo Balls are a success!

Are Oreo Balls suitable for people with allergies?
Take care! Oreo Balls primarily contain Oreos, which may have allergenic ingredients like wheat and dairy. For those with dairy allergies, consider using dairy-free chocolate and vegan Oreos. Always check the ingredient labels for allergens and make substitutions as needed.

How can I embellish my Oreo Balls for special occasions?
Very! Besides drizzling with white chocolate or adding crushed Oreos as a topping, consider using colorful sprinkles, edible glitter, or even crushed nuts for a festive touch. Personalizing your Oreo Balls can make them even more delightful and perfect for parties!

Decadent Oreo Balls That Will Sweeten Your Day

Delight in these Oreo Balls, a simple yet irresistible treat sure to impress anyone.

  • Food Processor
  • Mixing Bowl
  • parchment paper
  • Microwave

Oreo Mixture

  • 16 cookies Oreos (The classic chocolate cookies create the tasty base.)
  • 3 tablespoons melted butter (Adds richness and helps bind the mixture together.)
  • 1 teaspoon milk (A little moisture to bring everything together.)

Chocolate Coating

  • 8 ounces chocolate (Use semisweet or dark chocolate for coating.)

Step-by-Step Instructions

  1. Crush the 16 Oreos into fine crumbs, using a food processor or a plastic bag and rolling pin. Aim for a sandy texture.
  2. In a bowl, add 3 tablespoons of melted butter and 1 teaspoon of milk to the crushed Oreos, mixing until well combined.
  3. Roll the mixture into 1-inch balls and place them on a parchment-lined tray.
  4. Melt 8 ounces of chocolate in the microwave or double boiler until smooth.
  5. Dip each ball into the melted chocolate, ensuring it is fully covered, then return to the tray.
  6. Optionally drizzle with white chocolate or sprinkle crushed Oreos on top.
  7. Chill the tray in the refrigerator for 15-20 minutes until the chocolate sets.

Store in an airtight container in the fridge for up to 1 week. For longer storage, freeze in a single layer for up to 3 months and thaw as needed.

Dessert
American
chocolate treat, easy dessert, No-Bake Dessert, Oreo Balls, party treat, sweet snack

Filed Under: Dessert

Creamy Mushroom Chicken to Satisfy Your Comfort Food Cravings

August 7, 2025 by grace bellamy Leave a Comment

There’s nothing quite as satisfying as a homemade meal that transforms a simple evening into something special. Enter my Creamy Mushroom Chicken—a dish that’s sure to become a staple in your kitchen. With just 30 minutes of your time, you can create a meal that is both nourishing and indulgent, fusing tender chicken with rich, savory mushrooms in a delightful creamy sauce. This recipe is not only a crowd-pleaser but also a perfect solution for those weekday nights when you want something quick yet impressive. Whether you’re hosting friends or cooking for family, this dish will leave everyone asking for seconds. Are you ready to indulge in a delectable dinner that’s as easy to prepare as it is to enjoy?

What Makes This Chicken Dish Irresistible?

Elevated Comfort Food: This Creamy Mushroom Chicken takes classic flavors and elevates them, making every bite a comforting delight.
Quick and Easy: With just 30 minutes of prep and cook time, it’s a perfect choice for busy weeknights.
Savory Mushroom Bliss: The earthy mushrooms combined with garlic create an aroma that will make your mouth water as it cooks.
Versatile Serving Options: Pair it with rice, pasta, or a fresh salad for a complete meal that’s sure to impress! If you’re looking for other quick dinner ideas, check out our list of easy weeknight meals.
Crowd-Pleasing: This dish is great for family or entertaining friends, ensuring everyone leaves the table happy and satisfied!

Creamy Mushroom Chicken Ingredients

Imagine indulging in the rich flavors of Creamy Mushroom Chicken right in your own home. Here’s everything you’ll need to make this delightful dish!

For the Chicken
• 2 large chicken breasts – ensure they’re skinless for a lighter meal.
• Salt & pepper – to taste, elevating the dish by balancing flavors.
• Flour – for dredging, creating a beautiful golden crust.

For the Cooking
• 2 tablespoons olive oil – adds a lovely depth of flavor as it cooks the chicken.
• 2 tablespoons butter – brings richness to the sauce, enhancing the creaminess.

For the Mushroom Sauce
• 12 ounces mushrooms (cremini or white), sliced – these earthy delights are key for that savory flavor.
• 1/4 teaspoon Italian seasoning – a hint of this blend will brighten up the dish.
• 3 cloves garlic, minced – fresh garlic infuses the sauce with irresistible aroma.

For the Creamy Sauce
• 1/2 cup chicken broth – adds moisture and a layer of flavor to the dish.
• 1/2 teaspoon lemon juice – a splash brightens the sauce, balancing the creaminess.
• 1/2 teaspoon Dijon mustard – enhances the depth of flavor in your creamy sauce.
• 1 cup heavy/whipping cream – this ingredient is what truly makes it creamy and luscious.

Step‑by‑Step Instructions for Creamy Mushroom Chicken

Step 1: Prepare the Chicken
Begin by cutting the chicken breasts in half lengthwise to create four thinner cutlets. Season both sides generously with salt and pepper, then dredge each cutlet in flour, making sure they are evenly coated. This will help achieve a lovely golden crust during cooking.

Step 2: Cook the Chicken
In a large skillet, heat 2 tablespoons of olive oil over medium-high heat until shimmering. Add the floured chicken cutlets to the pan in a single layer, ensuring they have room to brown. Cook for 4-5 minutes on each side until they are golden brown and cooked through, then transfer them to a plate and set aside.

Step 3: Sauté the Mushrooms
In the same skillet, reduce the heat to medium and add 2 tablespoons of butter. Once the butter has melted and begins to foam, add 12 ounces of sliced mushrooms along with 1/4 teaspoon of Italian seasoning. Cook the mushrooms for about 5-7 minutes until they release their moisture and develop a nice brown sear, then remove them from the pan and set aside.

Step 4: Create the Sauce Base
With the skillet still heated, add 3 minced garlic cloves and 1/2 cup of chicken broth. Squeeze in 1/2 teaspoon of lemon juice and stir in 1/2 teaspoon of Dijon mustard, mixing well. Allow the mixture to simmer for about 3-4 minutes, stirring occasionally until it reduces by about half, giving you a flavorful base for your creamy sauce.

Step 5: Finish the Dish
Now, add 1 cup of heavy cream to the pan along with the cooked chicken and previously sautéed mushrooms. Stir gently to combine everything and let it simmer for an additional 5 minutes. During this time, the sauce should thicken, and the chicken will absorb the delightful flavors, bringing your Creamy Mushroom Chicken to life. Adjust seasoning with salt and pepper to taste.

Make Ahead Options

Preparing your Creamy Mushroom Chicken in advance is a brilliant way to save time on busy weeknights! You can season and dredge the chicken cutlets, then refrigerate them for up to 24 hours before cooking. Similarly, sauté the mushrooms and store them in an airtight container for up to 3 days in the fridge. When you’re ready to enjoy this sumptuous dish, simply reheat the mushrooms in your skillet, add the broth, lemon juice, and mustard, then finish by adding the cream and cooked chicken. This approach ensures all the flavors meld beautifully, delivering a meal that’s just as delicious as if made fresh. By preparing components ahead, you can cut down your cooking time significantly while maintaining that homemade goodness!

Expert Tips for Creamy Mushroom Chicken

• Perfectly Cooked Chicken: Ensure your chicken cutlets are evenly sliced to promote even cooking and avoid any dry spots.

• Mushroom Selection: Choose fresh cremini or white mushrooms for the best flavor and texture—avoid canned mushrooms for a more satisfying dish.

• Thickening the Sauce: If your sauce isn’t thickening as desired, let it simmer a bit longer before adding the heavy cream; it helps concentrate those savory flavors.

• Balancing Flavors: Don’t forget the lemon juice and Dijon mustard—these ingredients brighten the Creamy Mushroom Chicken and elevate its overall taste.

• Serving Suggestions: Serve your dish over rice or pasta to soak up that creamy sauce, making it a hearty meal everyone will love!

Creamy Mushroom Chicken Variations

Feel free to play around with flavors and ingredients to make this Creamy Mushroom Chicken truly your own!

  • Dairy-Free: Substitute heavy cream with coconut cream or a cashew cream for a delightful dairy-free alternative.

  • Gluten-Free: Use cornstarch or gluten-free flour to dredge the chicken, ensuring everyone can enjoy this dish!

  • Mushroom Medley: Mix different types of mushrooms like shiitake or portobello for a more complex flavor profile that’ll surprise your taste buds.

  • Add Veggies: Toss in some spinach or kale during the last few minutes of cooking for an added nutrient boost and vibrant color.

  • Spicy Kick: Add a pinch of red pepper flakes or diced jalapeños to the sauce to elevate the heat for those who love a spicy twist.

  • Herb Infusion: Fresh thyme or rosemary can bring a wonderful aromatic quality to the dish—just toss in chopped herbs while making the sauce.

  • Lemon Zest: For a zesty brightness, incorporate the zest of one lemon along with the juice—this adds a lovely brightness to the creamy sauce.

  • Nutty Touch: Stir in some toasted pine nuts or slivered almonds at the end for added texture and a nutty flavor that complements the mushrooms beautifully.

Feel inspired to mix and match these ideas or share your own variations! Cooking should be an adventure, and with each tweak, it becomes more personal and fulfilling. If you’re interested in pairing this meal with a delightful side, consider checking out our suggestions for easy vegetable sides or explore quick dessert options to satisfy your sweet tooth.

How to Store and Freeze Creamy Mushroom Chicken

Fridge: Store leftover Creamy Mushroom Chicken in an airtight container for up to 3 days. Reheat gently on the stove with a splash of chicken broth to maintain creaminess.

Freezer: You can freeze the dish for up to 2 months. Make sure to cool completely, then place it in a freezer-safe container, removing as much air as possible to prevent freezer burn.

Thawing: To enjoy frozen Creamy Mushroom Chicken, thaw it overnight in the refrigerator before reheating. This method helps retain flavor and texture, making it almost as good as fresh.

What to Serve with Creamy Mushroom Chicken

Transform your delightful dish into a banquet of flavors with these perfect pairings that elevate every bite.

  • Creamy Mashed Potatoes: The velvety texture complements the rich sauce, soaking up every drop and adding a comforting element to your meal.

  • Garlic Bread: Crisp, buttery bread slathered in garlic is the ultimate sidekick, perfect for mopping up that luxurious creamy sauce.

  • Steamed Asparagus: This vibrant veggie adds a fresh crunch, balancing the richness of the chicken with a hint of earthiness.

  • Mixed Green Salad: A light salad with a zesty vinaigrette brings a refreshing contrast, brightening your palate between each flavorful mouthful.

  • Pasta: Choose al dente fettuccine or penne to complement the creamy mushroom sauce—it’s like a warm hug from your plate!

  • Roasted Vegetables: Caramelized carrots and broccoli with a gentle sprinkle of herbs create a delicious, hearty side that’s easy to prepare.

  • Chardonnay or White Wine: A chilled glass of white wine harmonizes beautifully, enhancing the dish’s creaminess while offering a touch of elegance.

  • Lemon Sorbet: Finish your meal with a light, refreshing dessert—its citrusy notes cleanse the palate and leave a delightful aftertaste.

Creamy Mushroom Chicken Recipe FAQs

How do I choose the right mushrooms for this recipe?
Absolutely! For the best flavor, go for fresh cremini or white mushrooms. Look for mushrooms that are firm and unblemished, avoiding any with dark spots all over or that feel spongy. These fresh varieties will provide the earthy, savory goodness that elevates your Creamy Mushroom Chicken!

How should I store leftover Creamy Mushroom Chicken?
You can keep your leftovers in an airtight container in the fridge for up to 3 days. When reheating, add a splash of chicken broth to help restore the creaminess of the sauce and avoid drying out the chicken. Heat gently over medium-low, stirring occasionally until warmed through.

Can I freeze Creamy Mushroom Chicken?
Very easily! If you want to freeze it, let the dish cool completely first. Then, transfer it to a freezer-safe container, making sure to remove as much air as possible to prevent freezer burn. It will keep well for up to 2 months.

How do I thaw and reheat frozen Creamy Mushroom Chicken?
To thaw, simply place your frozen dish in the fridge overnight. This slow thawing will help maintain the flavor and texture of your meal. Once thawed, reheat it gently on the stove. Add a little chicken broth to help revive the creamy sauce and stir until warmed through.

What dietary considerations should I keep in mind for this recipe?
If you have pets, please avoid giving them any leftovers that contain onions or garlic, as these can be harmful to them. Additionally, for those with allergies, always check the labels on your chicken broth and Dijon mustard to ensure they meet your dietary needs. If you’re looking for a lighter option, consider substituting heavy cream with a low-fat alternative, but be prepared for a slightly different texture and flavor!

What if my sauce isn’t thickening as I hoped?
Very! If the sauce seems too thin, let it simmer for a few extra minutes before adding the heavy cream; this will concentrate those flavors nicely. You can also mix a teaspoon of cornstarch with a tablespoon of water to create a slurry and stir that into your sauce to thicken it more rapidly. Just let it simmer for a couple more minutes to achieve the desired consistency!

Enjoy your cooking, and happy eating!

Creamy Mushroom Chicken to Satisfy Your Comfort Food Cravings

Creamy Mushroom Chicken is a comforting dish that combines tender chicken and savory mushrooms in a rich, creamy sauce.

  • large skillet

For the Chicken

  • 2 large chicken breasts (ensure they’re skinless for a lighter meal)
  • salt (to taste)
  • pepper (to taste)
  • cup flour (for dredging)

For the Cooking

  • 2 tablespoons olive oil (adds depth of flavor)
  • 2 tablespoons butter (brings richness to the sauce)

For the Mushroom Sauce

  • 12 ounces mushrooms (cremini or white), sliced (for savory flavor)
  • 1/4 teaspoon Italian seasoning (to brighten the dish)
  • 3 cloves garlic, minced (infuses the sauce with aroma)

For the Creamy Sauce

  • 1/2 cup chicken broth (adds moisture and flavor)
  • 1/2 teaspoon lemon juice (to balance the creaminess)
  • 1/2 teaspoon Dijon mustard (enhances flavor)
  • 1 cup heavy/whipping cream (makes it creamy and luscious)

Step‑by‑Step Instructions

  1. Begin by cutting the chicken breasts in half lengthwise to create four thinner cutlets. Season both sides with salt and pepper, then dredge each cutlet in flour.
  2. In a large skillet, heat olive oil over medium-high heat. Add the floured chicken cutlets, cooking for 4-5 minutes on each side until golden brown.
  3. In the same skillet, reduce heat to medium and add butter. Once melted, add sliced mushrooms and Italian seasoning. Cook for 5-7 minutes until browned.
  4. Add minced garlic, chicken broth, lemon juice, and Dijon mustard. Simmer for 3-4 minutes until reduced by half.
  5. Add heavy cream, cooked chicken, and mushrooms. Stir and simmer for 5 minutes until the sauce thickens.

Serve over rice or pasta for a complete meal.

Main Dishes
American
Chicken Recipe, comfort food, Creamy Mushroom Chicken, easy dinner, mushroom sauce, quick meals

Filed Under: Main Dishes

Crispy Air Fryer Broccoli: A Flavorful Twist on Greens

August 7, 2025 by grace bellamy Leave a Comment

As I rummaged through my fridge, a vibrant bunch of broccoli caught my eye, sparking a quick triumph for dinner preparations. These green florets are usually overlooked, but when cooked to perfection in an air fryer, they transform into an irresistible side dish that’s both crispy and delicious. My Air Fryer Broccoli recipe is not only a breeze to throw together—taking just 15 minutes from prep to plate—but it’s also a fantastic way to indulge in healthy eating without sacrificing flavor. Plus, the punchy notes of garlic and a squeeze of fresh lemon elevate this dish beautifully, making it a crowd-pleaser at any table. Are you ready to unleash the power of your air fryer and enjoy a veggie that doesn’t skimp on satisfaction?

Why is Air Fryer Broccoli a Must-Try?

Simplicity makes this recipe a winner! With just five ingredients and minimal prep time, you’ll have a delicious side dish ready in just 15 minutes. Flavor-packed garlic and a zesty squeeze of lemon elevate the taste, creating a satisfying crunch that even the pickiest eaters will love. Versatile, it pairs perfectly with a variety of meals from grilled chicken to quinoa bowls. Plus, healthy eating doesn’t get easier than this: enjoy nutritious broccoli that’s crispy, not soggy! So, why not add this Air Fryer Broccoli to your weeknight rotation? It’s a fast way to impress at your next dinner!

Air Fryer Broccoli Ingredients

Here’s everything you need to make this crispy delight!

For the Broccoli
• Broccoli florets – 4 cups, fresh and vibrant; the star of this dish that gets beautifully crispy.
• Extra virgin olive oil – 2 tablespoons; a heart-healthy oil that enhances flavor and promotes crispiness.

For Seasoning
• Garlic powder – 1 teaspoon; adds a punch of savory goodness that pairs perfectly with the broccoli.
• Salt – 1/2 teaspoon; balances the flavors, drawing out the natural sweetness of the broccoli.
• Black pepper – 1/2 teaspoon; contributes a mild heat that complements the other seasonings.

For Finishing Touch
• Lemon juice – 1 tablespoon; a bright, zesty finish that elevates the flavor of your Air Fryer Broccoli.

Step‑by‑Step Instructions for Air Fryer Broccoli

Step 1: Rinse and Dry
Begin by rinsing 4 cups of vibrant broccoli florets under cold water to remove any impurities. Once rinsed, pat them dry thoroughly with a clean kitchen towel to ensure they crisp up nicely in the air fryer. Proper drying is crucial to achieve that delightful crunch you’ll love in your Air Fryer Broccoli.

Step 2: Season the Broccoli
In a large mixing bowl, toss the dried broccoli florets with 2 tablespoons of extra virgin olive oil. Add 1 teaspoon of garlic powder, 1/2 teaspoon of salt, and 1/2 teaspoon of black pepper into the bowl. Mix everything well until each floret is evenly coated with the flavorful seasoning, ensuring that your Air Fryer Broccoli is packed with taste.

Step 3: Preheat the Air Fryer
Preheat your air fryer to 200°C (400°F) for about 5 minutes. This step helps to create a crispy exterior on your broccoli florets as they cook. Once heated, the air fryer’s powerful convection will get your broccoli perfectly cooked through while giving it that irresistible golden-brown color.

Step 4: Arrange the Broccoli
Carefully place the seasoned broccoli florets into the air fryer basket in a single layer. Be sure to avoid overcrowding the basket, as this allows hot air to circulate evenly and helps achieve that fantastic crispiness. If necessary, cook in batches to ensure each floret bakes to perfection in your Air Fryer Broccoli.

Step 5: Cook and Shake
Set the timer for 8-10 minutes, allowing the broccoli to cook until tender and just beginning to brown. Halfway through, gently shake the basket to promote even cooking and browning. This simple action will enhance the texture and flavor, ensuring every piece of your Air Fryer Broccoli is deliciously crisp.

Step 6: Check for Doneness
Around the 8-minute mark, check the broccoli florets for tenderness and a golden-brown char. If they need more time, add an additional minute or two to reach your desired level of crispiness. The visual cues of a nice char will indicate when your Air Fryer Broccoli is ready to be enjoyed.

Step 7: Serve with Lemon Juice
Once cooked to perfection, carefully remove the air fryer basket and transfer the broccoli to a serving dish. For a zesty finish, drizzle 1 tablespoon of fresh lemon juice over the top. This final touch not only brightens the flavor but also elevates your stunning Air Fryer Broccoli to the next level of deliciousness.

Make Ahead Options

These Air Fryer Broccoli florets are an excellent choice for meal prep, allowing busy cooks to enjoy a healthy side without extra hassle! You can wash and dry the broccoli florets, then toss them with olive oil and seasonings up to 24 hours in advance. Just store the seasoned florets in an airtight container in the refrigerator to maintain their freshness. When it’s time to cook, simply transfer them to the air fryer basket and cook for 8-10 minutes or until they reach your desired crispiness. This way, you’ll have delicious, nutrient-packed broccoli ready to serve with minimal effort on a busy weeknight!

How to Store and Freeze Air Fryer Broccoli

Fridge: Store any leftovers in an airtight container in the refrigerator for up to 3-4 days to maintain freshness and flavor.

Freezer: For longer storage, freeze the air fryer broccoli in a single layer on a baking sheet for an hour, then transfer to a freezer-safe bag or container for up to 3 months.

Reheating: To restore the crispiness, reheat the broccoli in the air fryer for 3-5 minutes at 200°C (400°F). Avoid microwaving, as it may result in a soggy texture.

Thawing: If frozen, it’s best to thaw in the fridge overnight before reheating for best results, although cooking from frozen is also possible!

Air Fryer Broccoli Variations & Substitutions

Feel free to play with this recipe—there are so many delightful ways to make it even more exciting!

  • Vegan Cheese: Sprinkle nutritional yeast over the broccoli before air frying for a cheesy flavor without the dairy. It’s packed with vitamins and adds a nutty kick!
  • Spicy Kick: Toss in a teaspoon of chili flakes or cayenne pepper for a fiery twist. Your Air Fryer Broccoli will be a flavor explosion that’s sure to warm you up.
  • Herb Blend: Experiment with dried herbs like oregano or basil to bring herbal notes to your dish. Mixing in fresh herbs like thyme post-cooking keeps it vibrant and aromatic.
  • Balsamic Glaze: Drizzle with balsamic glaze instead of lemon juice for a tangy, sweet flavor that pairs wonderfully with the crispy broccoli. It creates a mouthwatering contrast that elevates your dish.
  • Ginger Zest: Add grated fresh ginger during the seasoning phase to introduce a zesty, warm flavor profile. The ginger will transform your side into a vibrant, aromatic delight.
  • Nutty Crunch: After cooking, sprinkle toasted almonds or walnuts on top for a satisfying crunch and a boost of healthy fats. They add delightful texture and flavor to every bite!
  • Cheesy Delight: Grate some Parmesan cheese over the hot broccoli right after cooking—the heat will melt it slightly, creating a rich flavor. It’s a little indulgence that elevates the dish beautifully.

As you can see, there are endless possibilities to make this recipe your own. For an even heartier meal, try serving your crispy broccoli alongside fragrant quinoa or a flavorful chicken dish to create a brightly colored and nutritious plate!

What to Serve with Air Fryer Broccoli

Elevate your dinner with delightful pairings that enhance the crunchy, garlicky goodness of this veggie star.

  • Grilled Chicken: Juicy and flavorful, grilled chicken brings a savory contrast that beautifully complements the crispiness of the broccoli.
  • Quinoa Salad: This nutty, protein-packed grain adds heartiness and a refreshing texture, making for a well-rounded meal.
  • Pasta Primavera: Light and vibrant pasta filled with seasonal veggies harmonizes with the bright notes of lemon from the broccoli.
  • Homemade Pizza: Top your favorite pizza with Air Fryer Broccoli for a delicious and nutritious twist that invites everyone to the table.
  • Crispy Garlic Potatoes: The comforting crunch of roasted potatoes alongside your broccoli creates a satisfying mix of textures.
  • Drink Pairing – White Wine: A chilled Sauvignon Blanc pairs nicely, enhancing the fresh flavors of broccoli with its crisp acidity.
  • Chocolate Mousse: Cap off the meal with a rich, creamy dessert that provides a delightful contrast to the lightness of the broccoli.
  • Lemon Sorbet: Light and refreshing, this zesty sorbet cleanses the palate, accentuating the bright lemon notes in your Air Fryer Broccoli.

Expert Tips for Air Fryer Broccoli

• Prepping Right: Ensure broccoli florets are dried thoroughly after rinsing; moisture can prevent crispiness.

• Single Layer Cooking: Avoid overcrowding the air fryer basket; cook in batches if necessary for perfectly crispy Air Fryer Broccoli.

• Monitor Closely: Keep an eye on the cooking time, especially around the 8-minute mark, to achieve optimal tenderness and golden-brown char.

• Adjust Seasoning: Feel free to customize the seasoning; adding a pinch of red pepper flakes can give your Air Fryer Broccoli an extra kick!

• Serve Hot: For the best flavor and texture, enjoy your broccoli right after cooking; it’s delicious when warm and crispy!

Air Fryer Broccoli Recipe FAQs

How do I choose the best broccoli for this recipe?
Absolutely! When selecting broccoli, look for vibrant green florets with tightly closed buds. Avoid any that show yellowing or dark spots, as this can indicate spoilage. Fresh broccoli should be firm to the touch and have a crisp texture. If you can, buy organic for the cleanest and most flavorful option!

How should I store leftover Air Fryer Broccoli?
To keep your Air Fryer Broccoli fresh, store leftovers in an airtight container in the refrigerator for up to 3-4 days. This helps to retain its flavor and texture. When you’re ready to enjoy the leftovers, simply reheat them in the air fryer for 3-5 minutes at 200°C (400°F) to bring back that wonderful crispiness.

Can I freeze Air Fryer Broccoli? How?
Yes, you can freeze your Air Fryer Broccoli! Start by spreading the cooked florets in a single layer on a baking sheet, then place them in the freezer for about one hour. Once they’re frozen solid, transfer them to a freezer-safe bag or container and store for up to 3 months. When you’re ready to use them, you can cook them directly from frozen in the air fryer, though it’s best to thaw in the fridge overnight for best results.

What if my Air Fryer Broccoli isn’t crispy?
Very! If you find your Air Fryer Broccoli isn’t as crispy as you’d like, a few tweaks can help. First, ensure the florets are completely dry before seasoning, as excess moisture can lead to sogginess. Secondly, avoid overcrowding the air fryer basket; cooking in batches allows hot air to circulate properly. Lastly, if they aren’t crispy after the initial cooking time, simply add an extra minute or two until you achieve that delightful crunch!

Are there any dietary considerations for Air Fryer Broccoli?
Absolutely! Air Fryer Broccoli is a wholesome side dish suitable for various dietary needs. It’s naturally gluten-free and vegan, making it great for most diets. However, make sure to check seasoning ingredients, as certain brands of garlic powder may contain additives. This recipe is also safe for most pets if you keep seasonings minimal—just be sure to offer plain broccoli without oil!

Crispy Air Fryer Broccoli: A Flavorful Twist on Greens

Discover the irresistible crunch of Air Fryer Broccoli, a deliciously crispy side dish that brings flavor and nutrition to your table in just 15 minutes.

  • Air Fryer

For the Broccoli

  • 4 cups Broccoli florets (fresh and vibrant; the star of this dish that gets beautifully crispy.)
  • 2 tablespoons Extra virgin olive oil (a heart-healthy oil that enhances flavor and promotes crispiness.)

For Seasoning

  • 1 teaspoon Garlic powder (adds a punch of savory goodness that pairs perfectly with the broccoli.)
  • 0.5 teaspoon Salt (balances the flavors, drawing out the natural sweetness of the broccoli.)
  • 0.5 teaspoon Black pepper (contributes a mild heat that complements the other seasonings.)

For Finishing Touch

  • 1 tablespoon Lemon juice (a bright, zesty finish that elevates the flavor of your Air Fryer Broccoli.)

Step-by-Step Instructions for Air Fryer Broccoli

  1. Begin by rinsing 4 cups of vibrant broccoli florets under cold water to remove any impurities. Once rinsed, pat them dry thoroughly with a clean kitchen towel to ensure they crisp up nicely in the air fryer.
  2. In a large mixing bowl, toss the dried broccoli florets with 2 tablespoons of extra virgin olive oil. Add 1 teaspoon of garlic powder, 1/2 teaspoon of salt, and 1/2 teaspoon of black pepper into the bowl. Mix everything well until each floret is evenly coated with the flavorful seasoning.
  3. Preheat your air fryer to 200°C (400°F) for about 5 minutes. This step helps to create a crispy exterior on your broccoli florets as they cook.
  4. Carefully place the seasoned broccoli florets into the air fryer basket in a single layer. Be sure to avoid overcrowding the basket, as this allows hot air to circulate evenly and helps achieve that fantastic crispiness.
  5. Set the timer for 8-10 minutes, allowing the broccoli to cook until tender and just beginning to brown. Halfway through, gently shake the basket to promote even cooking and browning.
  6. Around the 8-minute mark, check the broccoli florets for tenderness and a golden-brown char. If they need more time, add an additional minute or two to reach your desired level of crispiness.
  7. Once cooked to perfection, carefully remove the air fryer basket and transfer the broccoli to a serving dish. For a zesty finish, drizzle 1 tablespoon of fresh lemon juice over the top.

Ensure broccoli florets are dried thoroughly after rinsing; moisture can prevent crispiness. Monitor closely around the 8-minute mark to achieve optimal tenderness and golden-brown char. Serve hot for the best flavor and texture.

Side Dishes
American
Air Fryer Broccoli, air fryer recipes, crispy broccoli, healthy side dish, Vegetable Recipe

Filed Under: Side Dishes

Irresistible Garlic Roasted Vegetables to Brighten Your Dinner

August 7, 2025 by grace bellamy Leave a Comment

As I opened my oven, the aromatic essence of garlic wafted through my kitchen, instantly lifting my spirits. That’s the magic of Garlic Roasted Vegetables—transforming simple ingredients into a symphony of flavors that’s both healthful and satisfying. With just a handful of brightly colored veggies, like broccoli and sweet bell peppers, this recipe offers the ultimate combination of vibrant nutrition and comforting taste. Not only is it a breeze to whip up, with minimal prep required, but it also makes for a spectacular side dish that can complement almost any main course. The balance of roasted warmth and aromatic herbs will surely have your loved ones asking for seconds! So, are you ready to turn your kitchen into a delicious haven with this crowd-pleasing dish?

Why are Garlic Roasted Vegetables a must-try?

Simplicity at its finest: With just 15 minutes of prep time, you’ll have a colorful medley of fresh vegetables ready to roast.

Delicious aroma: The combination of garlic, oregano, and thyme creates an irresistible scent that’ll make your mouth water before they even come out of the oven.

Nutrient-rich: Packed with vitamins from broccoli, carrots, and bell peppers, this dish is not only tasty but also beneficial for your health.

Versatile pairing: These roasted veggies complement everything from grilled chicken to pasta dishes, making them a go-to side for any meal.

Crowd-pleaser: Serve it at gatherings, and watch as family and friends devour these flavorful veggies! For more easy side ideas, check out my healthy vegetable recipes.

Garlic Roasted Vegetables Ingredients

Get ready to delight your senses!

For the Vegetables
• Broccoli florets – adds a satisfying crunch and a vibrant green color.
• Cauliflower florets – a mild companion to soak up the garlic goodness.
• Carrots – sweet and earthy, they bring a lovely pop of orange.
• Red bell pepper – this addition offers sweetness and a beautiful hue.
• Yellow bell pepper – perfectly complements the red for a colorful medley.

For the Seasoning
• Olive oil – essential for roasting; it adds healthy fats and depth of flavor.
• Garlic – minced to unleash its aroma and provide a rich, savory punch.
• Salt – enhances flavors; adjust to taste for a perfect balance.
• Pepper – freshly cracked for a hint of warmth and spice.
• Dried oregano – lends a Mediterranean flair that pairs wonderfully with roasted veggies.
• Dried thyme – adds a fragrant earthiness that’s simply irresistible.

For Garnish
• Fresh parsley – a sprinkle of this vibrant herb elevates both flavor and presentation.

Let this Garlic Roasted Vegetables dish shine on your dining table, as it’s not just a side; it’s a colorful celebration of ease and taste!

Step‑by‑Step Instructions for Garlic Roasted Vegetables

Step 1: Preheat the Oven
Begin by preheating your oven to 425°F (220°C). This will ensure it’s hot enough to roast the vegetables perfectly, resulting in a delightful caramelization. While waiting for the oven to heat, gather your ingredients and prepare your baking sheet, lining it with parchment paper for easy cleanup.

Step 2: Wash the Vegetables
Thoroughly wash all your vegetables under cold water to remove any dirt or impurities. As you rinse, admire the vibrant colors of the broccoli, cauliflower, carrots, and bell peppers. Once cleaned, gently pat them dry with a clean kitchen towel to remove excess moisture, which helps achieve that desirable roasted texture later on.

Step 3: Chop the Vegetables
Carefully chop the broccoli and cauliflower into bite-sized florets. Slice the carrots into rounds and chop the red and yellow bell peppers into appealing pieces. Aim for uniform sizes so they cook evenly when you make this Garlic Roasted Vegetables dish. Place all the prepared vegetables into a large mixing bowl to keep them together.

Step 4: Season the Vegetables
Drizzle the olive oil over the assorted vegetables in the mixing bowl and add the minced garlic, salt, pepper, oregano, and thyme. Toss everything together until each piece is generously coated with the seasoning mixture. You’ll know it’s ready when the vegetables glisten and have a tantalizing aroma that fills your kitchen.

Step 5: Arrange on Baking Sheet
Spread the seasoned vegetables evenly on a large baking sheet in a single layer, making sure not to overcrowd them. This is crucial for proper roasting, allowing the heat to circulate around each piece. If necessary, use two baking sheets to ensure optimal space for your Garlic Roasted Vegetables.

Step 6: Roast in the Oven
Place the baking sheet in the preheated oven and roast the vegetables for 25-30 minutes. Halfway through, take a moment to stir them gently, ensuring an even browning. Keep an eye on them, and look for golden edges and a tender, fork-ready texture as signals that they are done.

Step 7: Final Touches
Once roasted, carefully remove the baking sheet from the oven and transfer the vegetables to a serving dish. To elevate your Garlic Roasted Vegetables, garnish with freshly chopped parsley for a burst of freshness and a splash of color just before serving. This will enhance both flavor and presentation, making your dish truly inviting.

Step 8: Enjoy
Now that your Garlic Roasted Vegetables are beautifully plated, they’re ready to be enjoyed! Pair them alongside your favorite main dish or simply savor the deliciousness on their own. Enjoy the warmth, flavors, and joy that come from this wonderful, home-cooked dish!

Make Ahead Options

These Garlic Roasted Vegetables are perfect for meal prep enthusiasts! You can chop the broccoli, cauliflower, carrots, and bell peppers up to 24 hours in advance. Store the prepped vegetables in an airtight container in the refrigerator to keep them fresh and crisp. Additionally, you can mix the olive oil, garlic, and spices ahead of time, so they’re ready to go when you are. When you’re ready to roast, simply toss the vegetables with the seasoning blend, spread them on a baking sheet, and roast as directed. This way, you’ll enjoy the delightful flavors of Garlic Roasted Vegetables with minimal effort on busy weeknights!

How to Store and Freeze Garlic Roasted Vegetables

Fridge: Store leftover Garlic Roasted Vegetables in an airtight container; they’ll stay fresh for up to 3-4 days. Keep them refrigerated to maintain flavor and texture.

Freezer: For longer storage, freeze the cooled vegetables in a freezer-safe bag or container for up to 3 months. This is great for meal prep!

Reheating: When ready to enjoy, reheat your Garlic Roasted Vegetables in the oven at 350°F (175°C) for 10-15 minutes to restore their original crispiness.

Thawing: If frozen, thaw overnight in the fridge before reheating. This way, they’ll heat evenly and taste just as delicious.

Garlic Roasted Vegetables Variations

Feel free to get creative and adapt this delightful dish to suit your taste buds!

  • Vegan Twist: Substitute olive oil with avocado oil for a richer flavor packed with healthy fats.
  • Spicy Kick: Add crushed red pepper flakes to the seasoning mix for an exciting heat that balances perfectly with the sweetness of the vegetables.
  • Herb Boost: Mix in a tablespoon of fresh rosemary or basil to enhance the aromatic profile, adding an irresistible fragrance that invites everyone to the table.
  • Creamy Texture: Toss in a couple of dollops of cream cheese or a sprinkle of nutritional yeast before roasting for a creamy flavor enhancement that transforms the dish.
  • Additional Veggies: Experiment by adding zucchini or asparagus for a different texture and flavor. These additions will create a vibrant and colorful medley on your plate.
  • Citrus Zing: Drizzle fresh lemon juice over the vegetables before serving for a bright, tangy finish that brings together the roasted flavors wonderfully.
  • Sweet Touch: Toss in a handful of cherry tomatoes, which will caramelize beautifully and add a delightful sweetness amidst the savory roasted veggies.

Feel free to mix and match these variations based on your preferences. And if you’re in the mood for something new, try combining these roasted veggies with some of my easy chicken recipes or wholesome grain salads for a complete and satisfying meal. Enjoy creating a dish that truly reflects your culinary style!

What to Serve with Garlic Roasted Vegetables

Garlic roasted vegetables bring a burst of color and flavor to your table, enhancing any meal with their vibrant presence.

  • Grilled Chicken: The smoky flavors of grilled chicken pair beautifully with the savory garlic notes, creating a satisfying plate.
  • Quinoa Salad: A light and nutritious quinoa salad with fresh herbs adds a wholesome crunch, balancing the roasted warmth perfectly.
  • Pasta Primavera: This dish of pasta adorned with fresh veggies harmonizes wonderfully, enhancing both taste and texture on your plate.
  • Lemon Herb Rice: A zesty lemon-infused rice brings a fresh, citrusy contrast, lifting the earthy flavors of the roasted veggies.
  • Seared Salmon: The flaky richness of seared salmon complements the garlic’s boldness, creating an elegant and delicious combination.
  • Hummus and Pita: A creamy hummus served with warm pita is perfect for dipping those fresh roasted bits, adding both texture and flavor.
  • Fresh Garden Salad: Crisp greens tossed in a light vinaigrette provide a refreshing crunch that brightens your meal.
  • Red Wine: A glass of smooth red wine harmonizes with the garlic-roasted goodness, enhancing the overall dining experience.
  • Chocolate Mousse: For dessert, a rich chocolate mousse offers a luxurious ending, balancing the savory tastes with a touch of sweetness.

Expert Tips for Garlic Roasted Vegetables

  • Choose Fresh Veggies: Select vibrant, fresh vegetables for the best flavor. Stale or wrinkled produce can lead to disappointing results in your Garlic Roasted Vegetables.

  • Uniform Cuts: Cut vegetables into uniform sizes to ensure even cooking. If not, some pieces may be overcooked while others remain crunchy.

  • Don’t Overcrowd: Arrange the veggies in a single layer on the baking sheet. Overcrowding can trap steam, preventing that delightful caramelization.

  • Adjust Seasoning: Taste and adjust seasoning as needed after tossing with oil. Salt enhances flavors, so be mindful not to underseason your Garlic Roasted Vegetables!

  • Use Parchment Paper: Line your baking sheet with parchment paper for easy cleanup. It also helps prevent sticking, making it easy to serve.

  • Perfect Leftovers: Store any leftovers in an airtight container in the fridge, but enjoy them within 3-4 days to maintain freshness and flavor of your Garlic Roasted Vegetables.

Garlic Roasted Vegetables Recipe FAQs

How do I choose the right vegetables for roasting?
Absolutely! When selecting vegetables, look for fresh, vibrant options without any dark spots or blemishes. The more colorful your selection, the better! Broccoli should be bright green, cauliflower should be creamy white without brown spots, and bell peppers should feel firm and smooth. This ensures that your Garlic Roasted Vegetables are not just eye-catching but also bursting with flavor.

What’s the best way to store leftovers?
Store any leftover Garlic Roasted Vegetables in an airtight container in the refrigerator. They’re best enjoyed within 3-4 days to maintain their taste and texture. Just remember to let them cool down before sealing to avoid condensation, which can make them soggy.

Can I freeze Garlic Roasted Vegetables? If so, how?
Absolutely! To freeze your Garlic Roasted Vegetables, allow them to cool completely, then transfer them into a freezer-safe bag or container. Make sure to remove as much air as possible to avoid freezer burn. They can be stored for up to 3 months. When you’re ready to enjoy them, thaw overnight in the fridge, then reheat in the oven at 350°F (175°C) for about 10-15 minutes to regain their crispy texture.

What should I do if my vegetables are soggy after roasting?
Very! If your Garlic Roasted Vegetables turn out soggy, it may be due to overcrowding on the baking sheet. Always ensure they are in a single layer to promote even roasting and caramelization. If they’re already cooked, you can try broiling them for a few minutes post-roasting to crisp them up a bit—just keep a close eye to avoid burning!

Are there any dietary considerations for Garlic Roasted Vegetables?
Absolutely! This dish is naturally vegan and gluten-free, making it suitable for various dietary preferences. However, if you or a loved one has allergies, ensure all spices and oils used are safe. For those on a low-sodium diet, consider reducing the added salt or using a salt substitute while still enjoying the flavorful herbs.

How can I make Garlic Roasted Vegetables spicier?
Very! If you love a bit of heat, try adding red pepper flakes or a dash of cayenne pepper to your seasoning mix before roasting. You can also experiment with spicy mustard on the veggies prior to roasting for a zesty twist that pairs well with the garlic flavor. Enjoy the flavorful journey!

Irresistible Garlic Roasted Vegetables to Brighten Your Dinner

Delight in the vibrant and healthful flavors of Garlic Roasted Vegetables, a perfect side dish to enhance any meal.

  • Oven
  • Baking Sheet
  • Mixing Bowl

For the Vegetables

  • 2 cups broccoli florets (adds a satisfying crunch and vibrant green color)
  • 2 cups cauliflower florets (a mild companion to soak up the garlic goodness)
  • 2 cups carrots (sweet and earthy, with a lovely pop of orange)
  • 1 cup red bell pepper (offers sweetness and beautiful hue)
  • 1 cup yellow bell pepper (complements the red for a colorful medley)

For the Seasoning

  • 4 tablespoons olive oil (essential for roasting; adds healthy fats and depth of flavor)
  • 4 cloves garlic (minced to unleash its aroma and provide rich flavor)
  • 1 teaspoon salt (enhances flavors; adjust to taste)
  • 1 teaspoon pepper (freshly cracked for warmth and spice)
  • 1 teaspoon dried oregano (lends Mediterranean flair)
  • 1 teaspoon dried thyme (adds fragrant earthiness)

For Garnish

  • 2 tablespoons fresh parsley (elevates both flavor and presentation)

Preparation

  1. Preheat your oven to 425°F (220°C) and prepare your baking sheet with parchment paper.
  2. Wash all vegetables under cold water and pat them dry.
  3. Chop the broccoli, cauliflower, carrots, and bell peppers into uniform sizes and place in a mixing bowl.
  4. Drizzle olive oil over the vegetables and add garlic, salt, pepper, oregano, and thyme. Toss to coat.
  5. Spread vegetables evenly on the baking sheet in a single layer.
  6. Roast in the oven for 25-30 minutes, stirring halfway through.
  7. Garnish with freshly chopped parsley before serving.
  8. Enjoy your Garlic Roasted Vegetables!

For best results, use fresh vegetables and avoid overcrowding the baking sheet.

Side Dishes
American
Garlic Roasted Vegetables, healthy side dish, oven roasted, roasted vegetables, vegetable medley

Filed Under: Side Dishes

  • « Previous Page
  • 1
  • …
  • 16
  • 17
  • 18
  • 19
  • 20
  • …
  • 22
  • Next Page »
RecipeCrown

Hello, beautiful people! I’m Grace Bellamy, a foodie, traveler, and writer with wanderlust in my soul. Whether crafting recipes in my kitchen or exploring flavors around the globe, my greatest joy is helping you create healthier, happier lives, one delicious bite at a time.