RecipeCrown

Easy & Delicious Recipes

  • Home
  • Breakfast
  • Main Dishes
  • Dessert
  • About
  • Contact
You are here: Home / Archives for grace bellamy

Delicious Baked Beans & Ground Beef Casserole for Comfort Cravings

October 27, 2025 by grace bellamy Leave a Comment

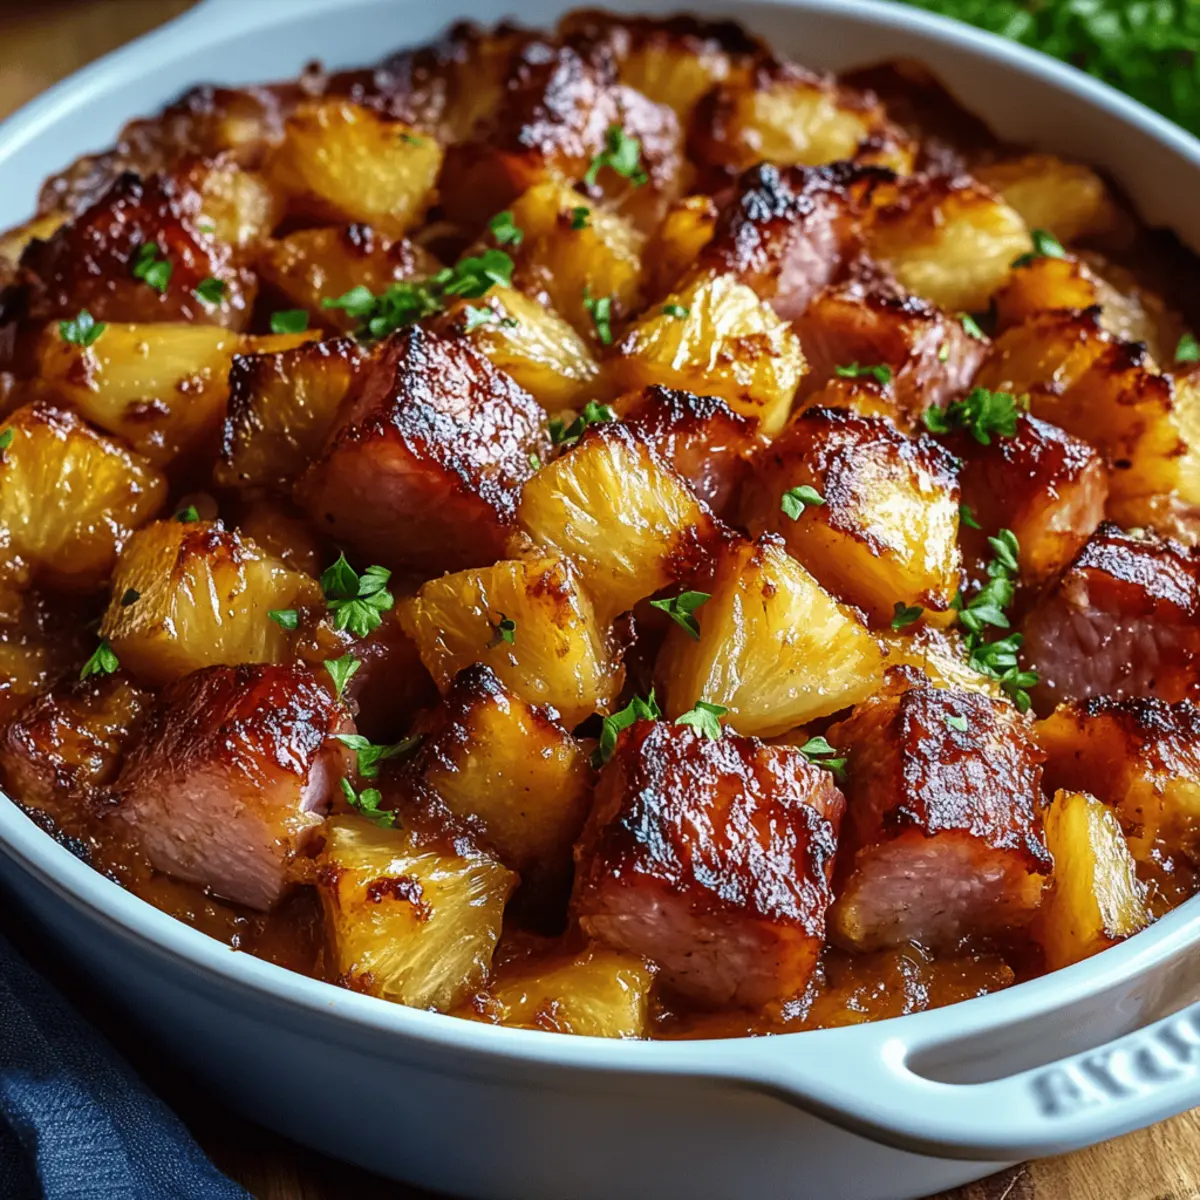
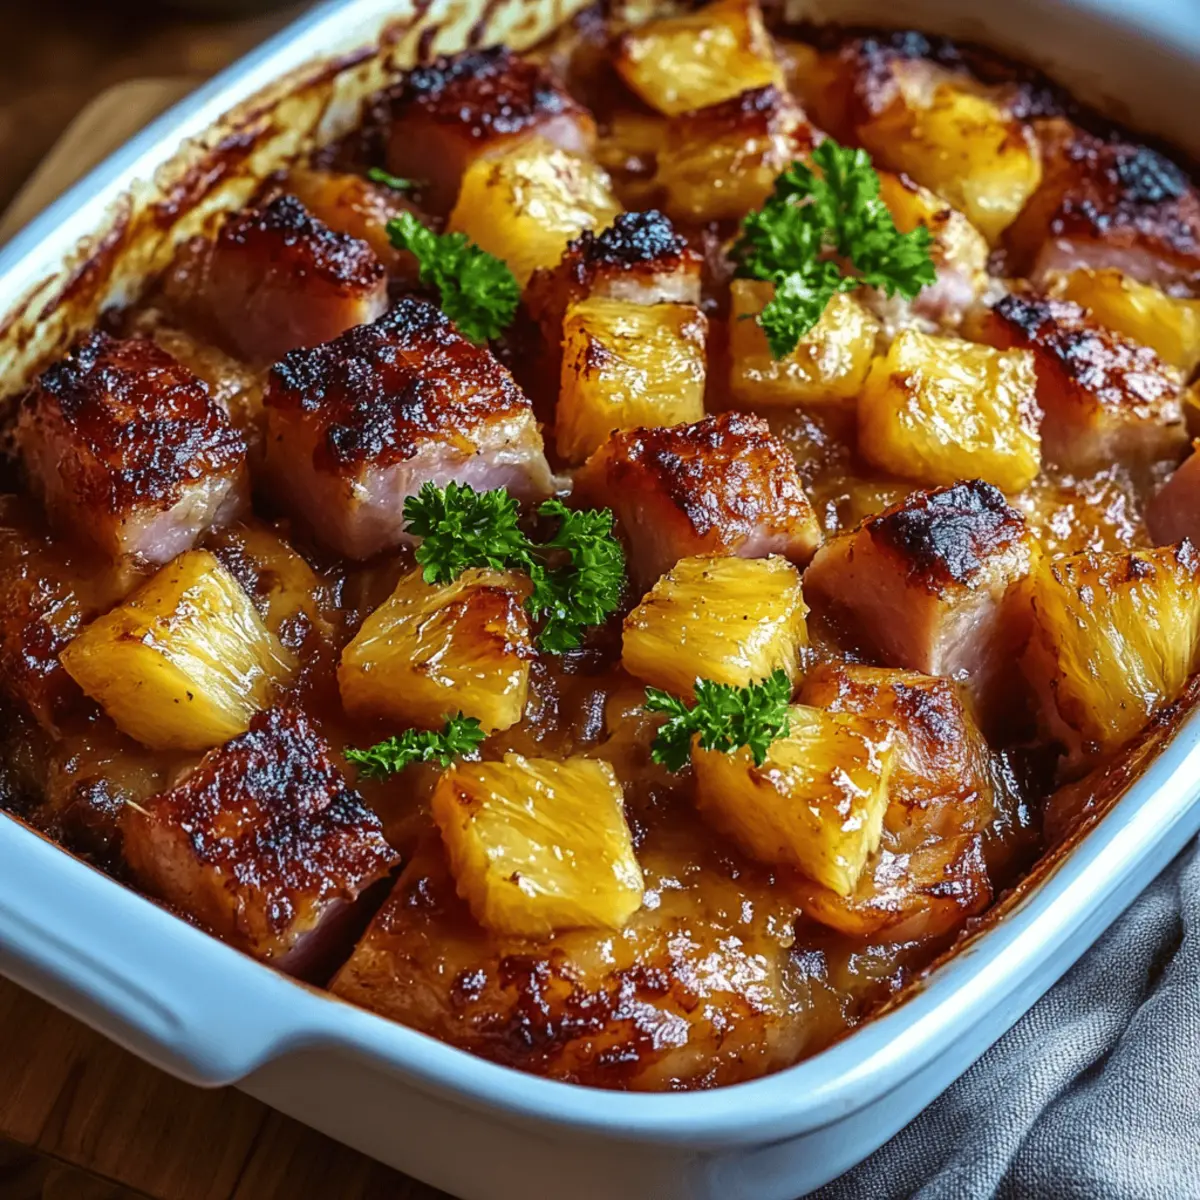
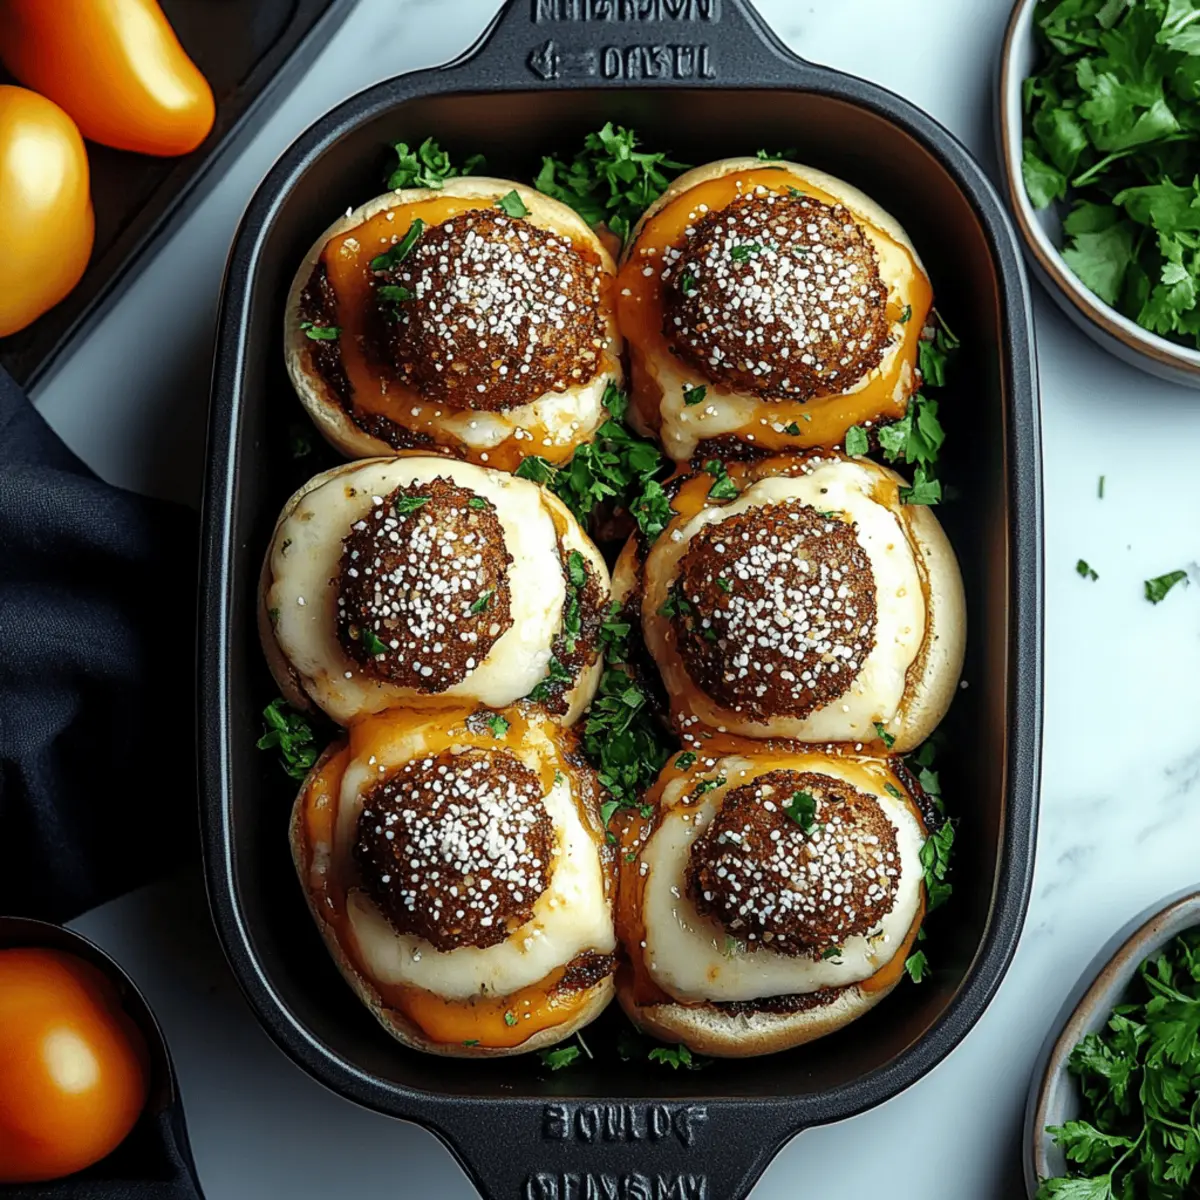
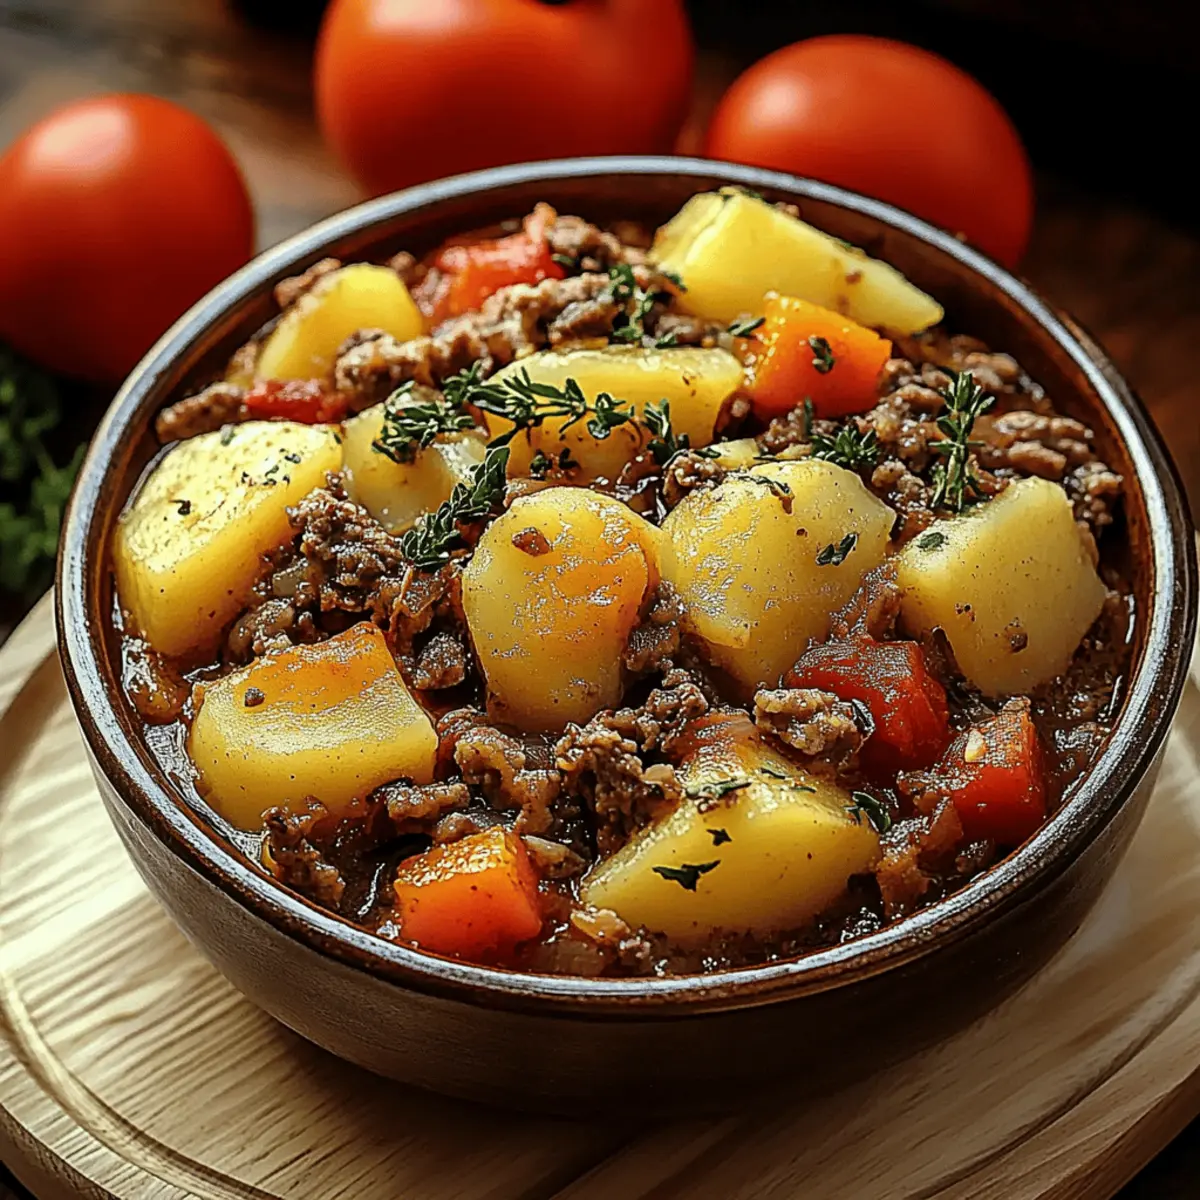
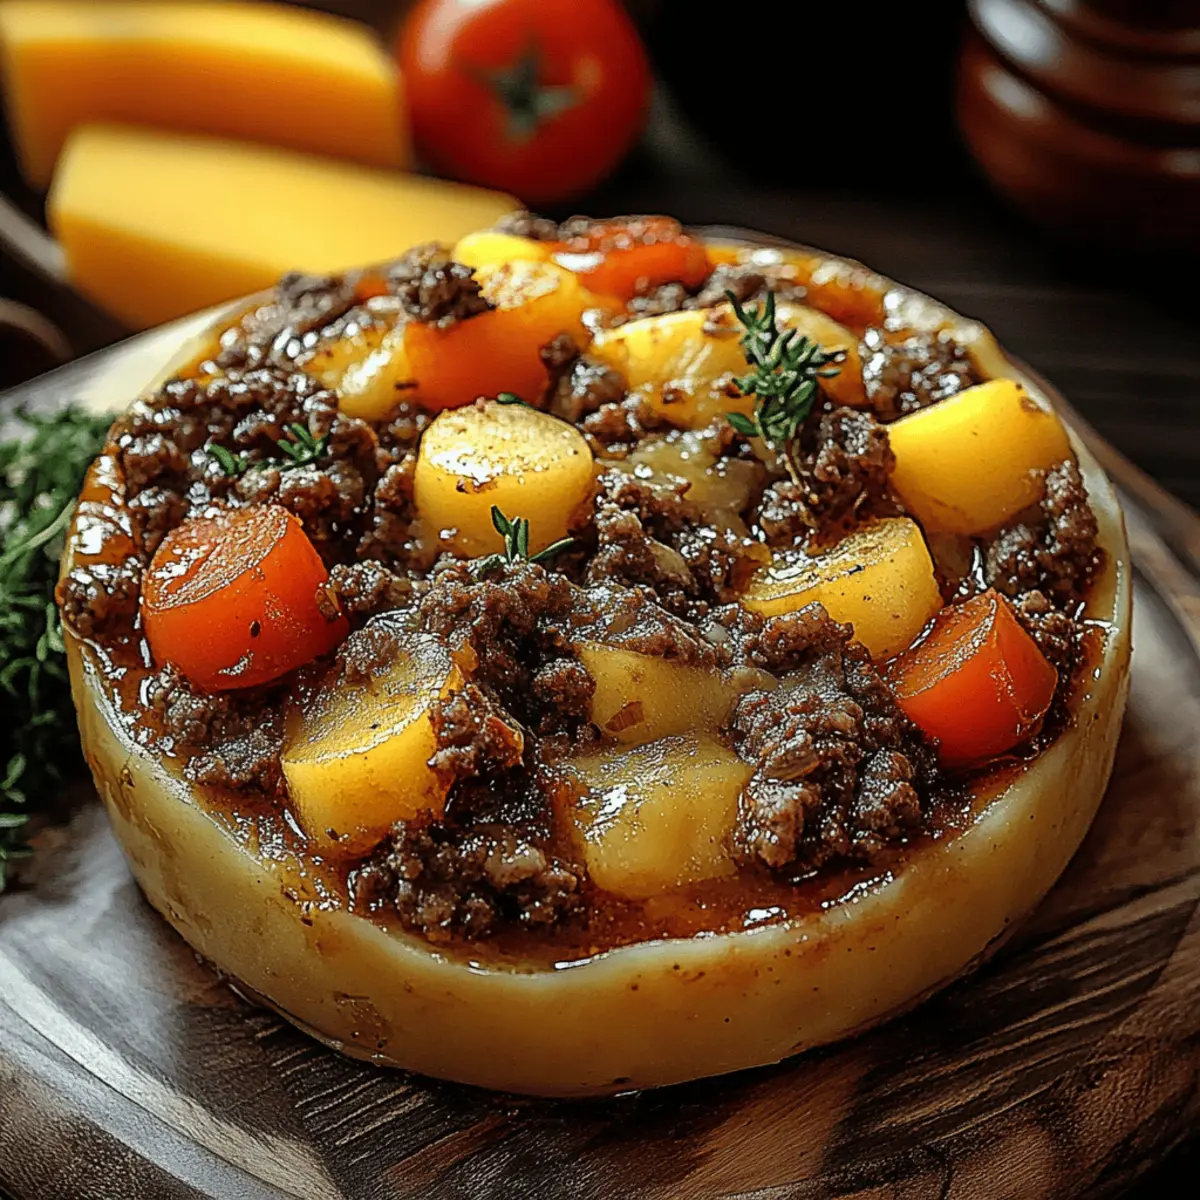
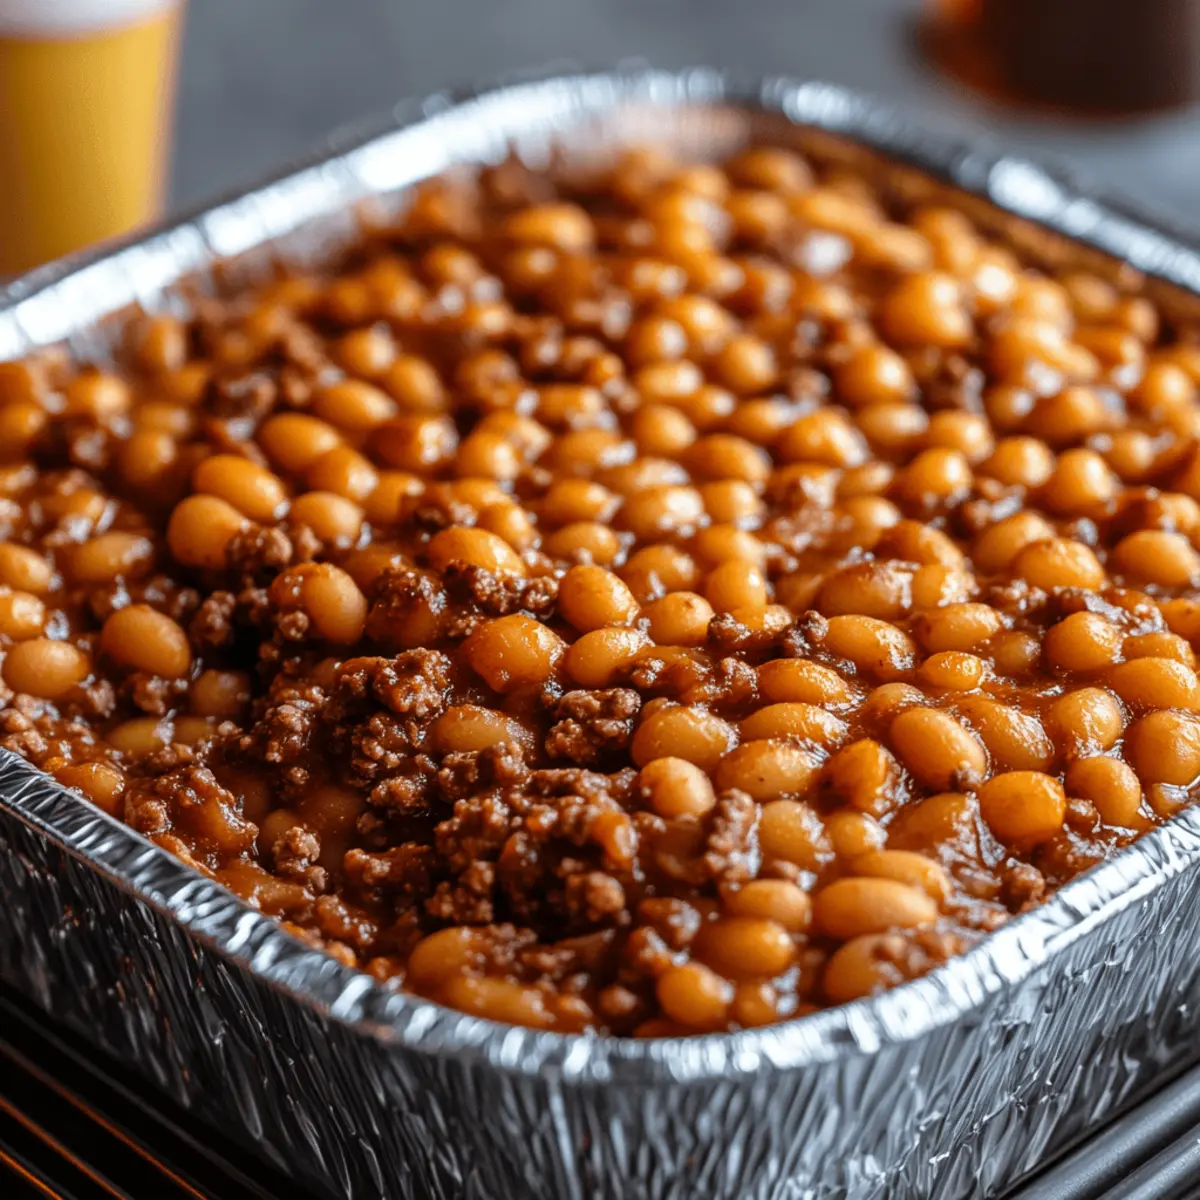
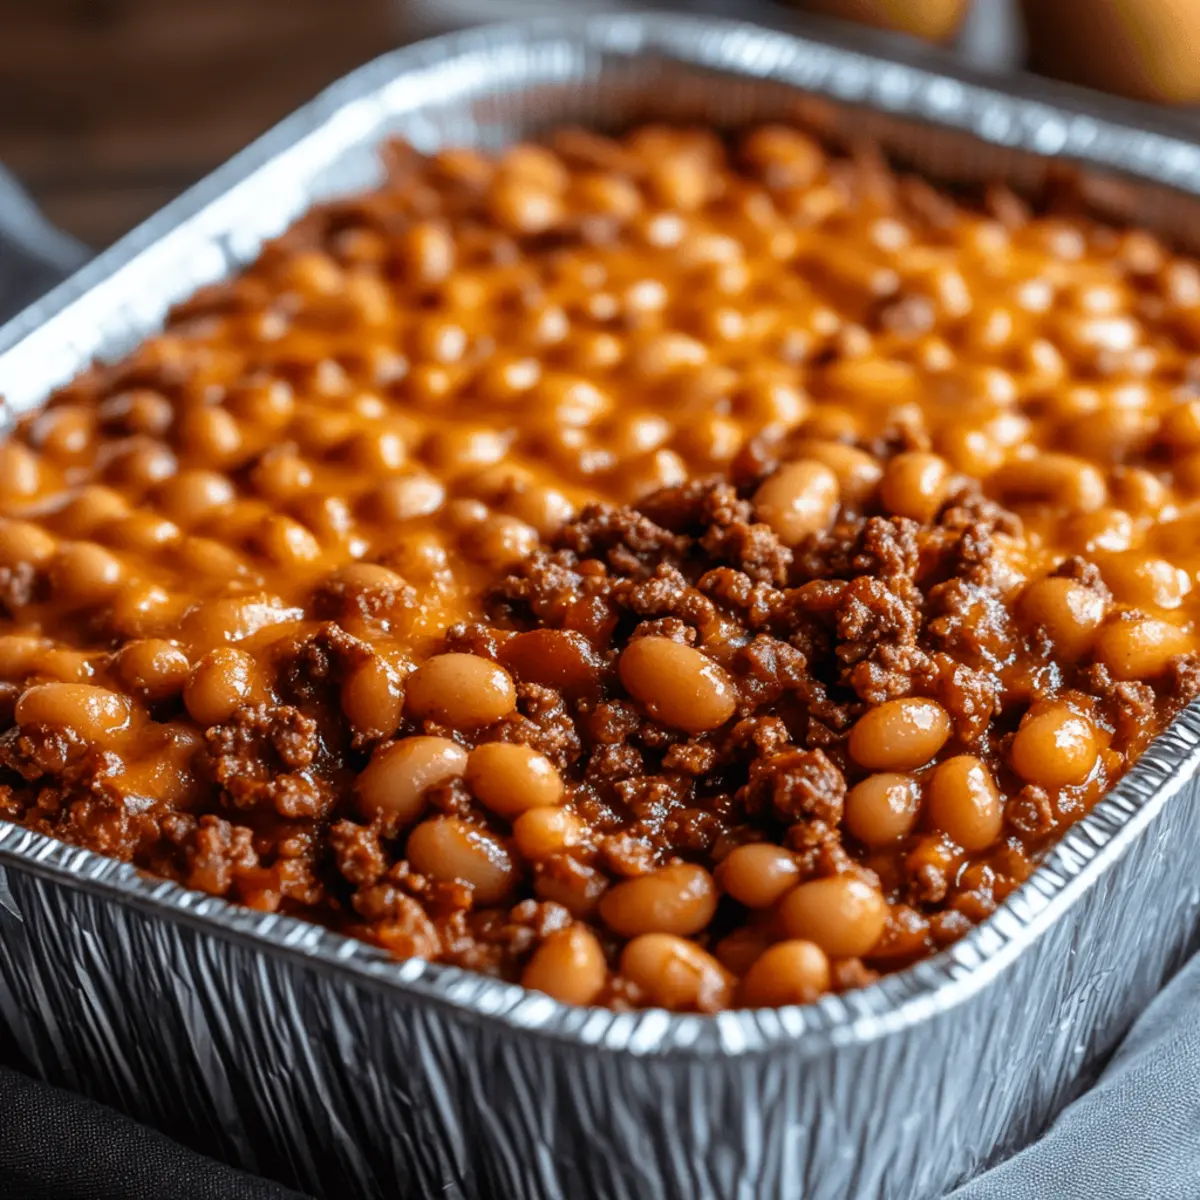
The moment the oven timer dings, a wave of nostalgia washes over me as the rich aroma of Baked Beans and Ground Beef Casserole fills the kitchen. This dish isn’t just a recipe; it’s a comforting embrace on a busy weeknight or a festive gathering. With easy preparation and a satisfying, hearty blend, it seamlessly transforms from a casual dinner to a show-stopping centerpiece. This casserole boasts the magical ability to please even the pickiest eaters while offering a delightful twist on traditional meals. You’ll love how the combination of savory ground beef and sweet beans creates a harmony that’s hard to resist. Plus, it’s freezer-friendly, making it perfect for meal prep! Are you ready to dive into this delicious world of home-cooked goodness?

Baked Beans & Ground Beef Casserole

Why is this casserole a must-try?

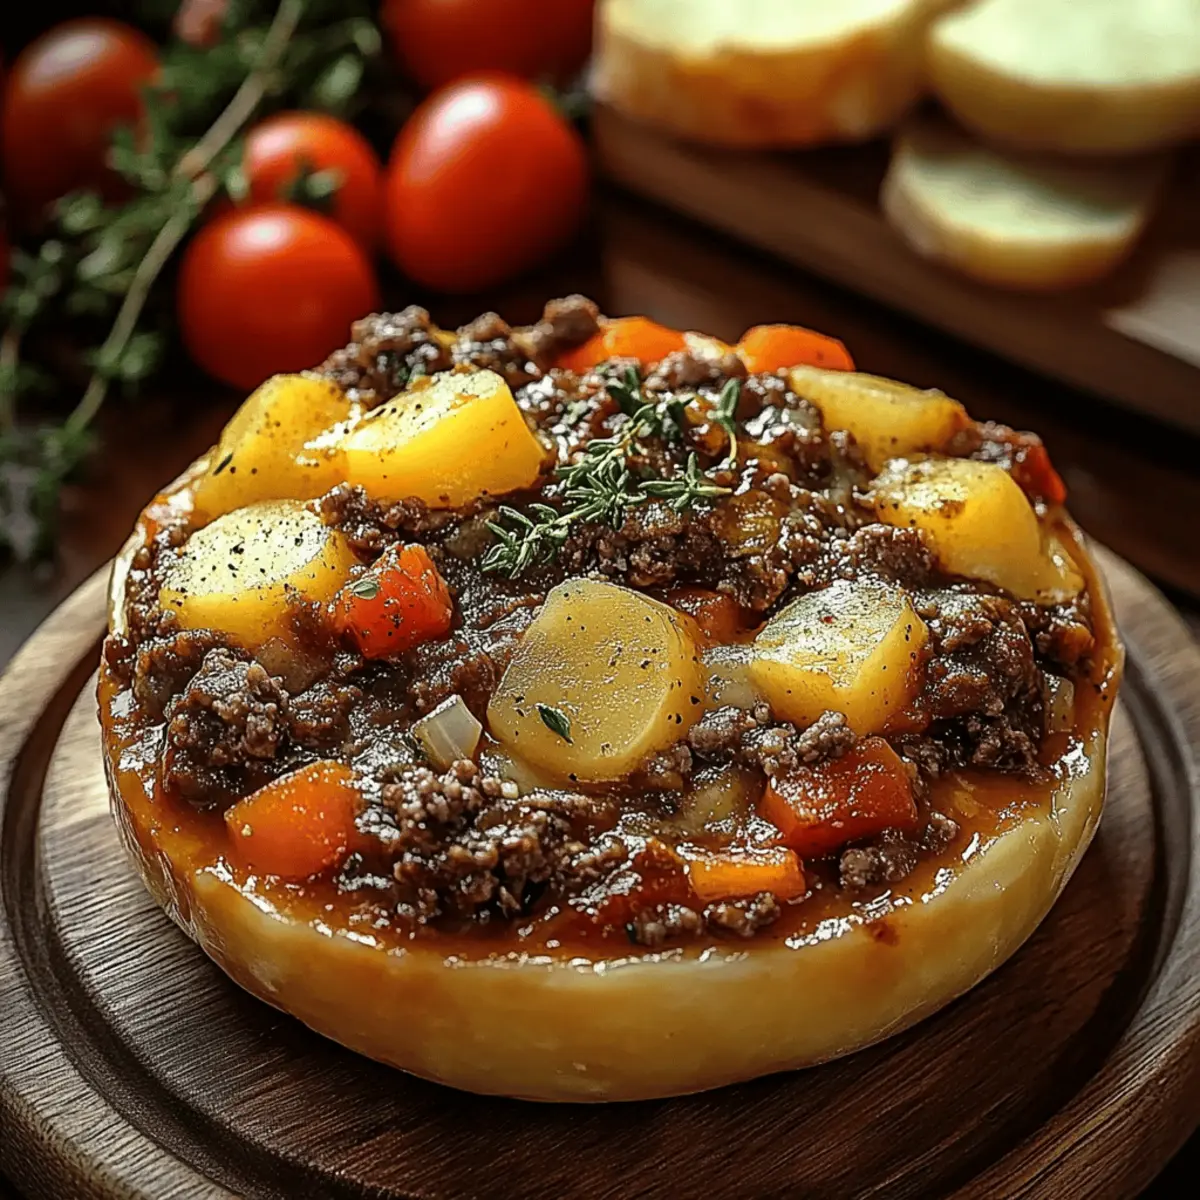
Comforting and satisfying, this Baked Beans & Ground Beef Casserole warms your heart with every bite. Quick preparation makes it an ideal choice for busy weeknights, taking only 55 minutes from start to finish. Flavorful combination of savory beef with sweet beans creates a balanced dish everyone will crave. Plus, it’s crowd-pleasing – perfect for family gatherings or potlucks, just like my Overnight Breakfast Casserole. Freezer-friendly, you can whip up a batch to enjoy later, saving you time without sacrificing flavor!

Baked Beans & Ground Beef Casserole Ingredients

Get ready to create a comforting classic!

For the Casserole
• 500 g ground beef – this rich meat forms the hearty base of your casserole.
• 1 medium onion, diced – it adds a sweet and aromatic flavor when sautéed.
• 1 green bell pepper, diced – brings a pop of color and crunch to the dish.
• 1 cup ketchup – provides a tangy sweetness that binds all the flavors together.
• 2 tablespoons mustard – adds a hint of sharpness for depth in every bite.
• 2 tablespoons Worcestershire sauce – delivers umami richness that elevates the taste.
• 100 g brown sugar – balances the savory elements with a touch of sweetness.
• 1 can (415 g) pork and beans, undrained – these beans add creamy texture and are key to the baked beans flavor.
• Salt and black pepper to taste – essential for enhancing all the delightful flavors.
• Butter for greasing the baking dish – ensures a non-stick surface for your easy serve.

This hearty Baked Beans & Ground Beef Casserole is ready to bring warmth and joy to your dinner table!

Step‑by‑Step Instructions for Baked Beans & Ground Beef Casserole

Step 1: Preheat and Prepare
Begin by preheating your oven to 175°C (350°F). While the oven warms up, grab a 23 x 33 cm (9×13 inch) baking dish and generously grease it with butter. This ensures your delicious Baked Beans & Ground Beef Casserole won’t stick during baking, allowing for easy, beautiful servings!

Step 2: Cook the Ground Beef
In a deep skillet, heat over medium heat and add the 500 g of ground beef. Use a spoon to break it apart as it cooks, stirring until it’s completely browned and no longer pink, which should take about 5-7 minutes. Drain off any excess grease, ensuring a leaner casserole that still packs a meaty punch.

Step 3: Sauté the Vegetables
Add the diced onion and green bell pepper to the skillet with the cooked beef. Continue cooking for 5 to 8 minutes, stirring occasionally, until the onion turns translucent and the bell pepper softens slightly. This step not only enhances flavors but also brings vibrant colors to your Baked Beans & Ground Beef Casserole.

Step 4: Mix in the Flavorings
Once the vegetables are tender, stir in 1 cup of ketchup, 2 tablespoons of mustard, 2 tablespoons of Worcestershire sauce, and 100 g of brown sugar. Mix everything thoroughly until the beef and veggies are coated evenly. Season generously with salt and black pepper to bring out the rich flavors in your casserole.

Step 5: Fold in the Beans
Turn off the heat and gently fold in the undrained can of pork and beans into the mixture. This will add creaminess and depth to your Baked Beans & Ground Beef Casserole, enriching the dish with hearty beans that blend beautifully with the other ingredients.

Step 6: Assemble the Casserole
Carefully pour the flavorful mixture into the prepared baking dish. Using a spatula, spread it evenly across the dish, ensuring every corner is filled with that savory goodness. Cover the dish tightly with aluminum foil to trap in moisture while baking, allowing the flavors to meld together seamlessly.

Step 7: Bake to Perfection
Place the covered baking dish in your preheated oven. Bake for 45 minutes, or until the casserole is bubbling and heated through. You’ll know it’s ready when the edges are nicely browned and the aroma fills your kitchen, enticing everyone to gather around the dinner table.

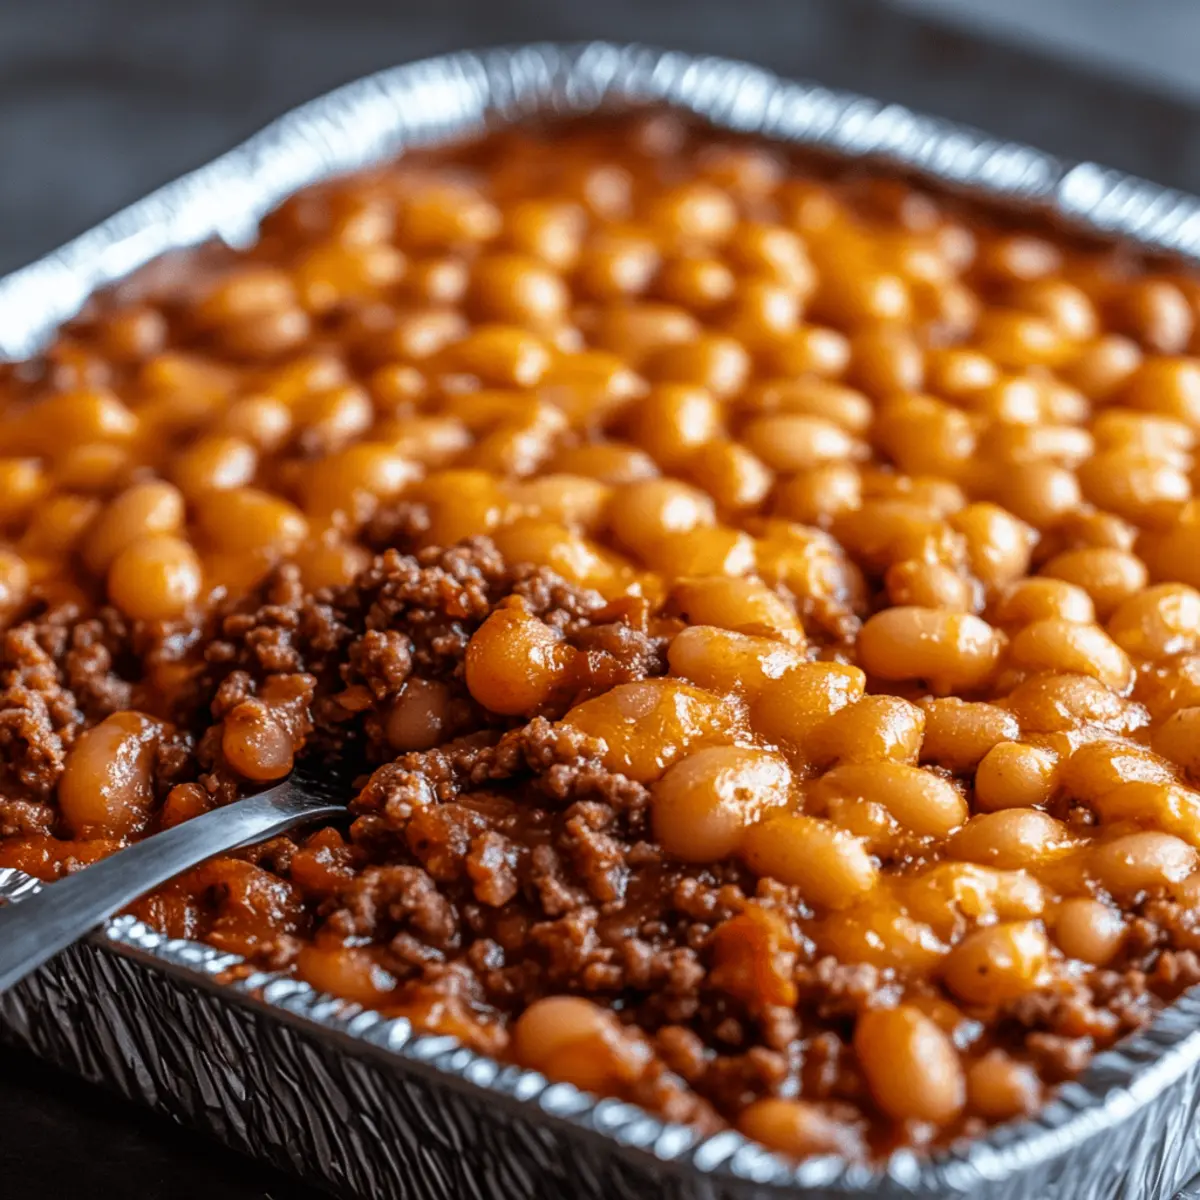
Step 8: Rest Before Serving
After baking, remove the dish from the oven and let it rest for about 10 minutes before serving. This allows the flavors to settle and makes it easier to serve. Slice into your warm and hearty Baked Beans & Ground Beef Casserole and enjoy the comforting, home-cooked meal!

Baked Beans & Ground Beef Casserole

Make Ahead Options

These Baked Beans & Ground Beef Casserole are perfect for meal prep enthusiasts! You can easily prepare the entire casserole up to 24 hours in advance. Simply follow the recipe through step 6, then cover the baking dish tightly with aluminum foil and refrigerate. This method helps the flavors meld beautifully while keeping the casserole fresh. When you’re ready to enjoy it, preheat your oven as instructed and bake for an additional 10 minutes, or until heated through. Allowing it to rest for 10 minutes before serving ensures a well-set dish, giving you delicious, hassle-free results on busy weeknights!

Baked Beans & Ground Beef Casserole Variations

Get ready to explore delicious twists that will make this comforting casserole your own!

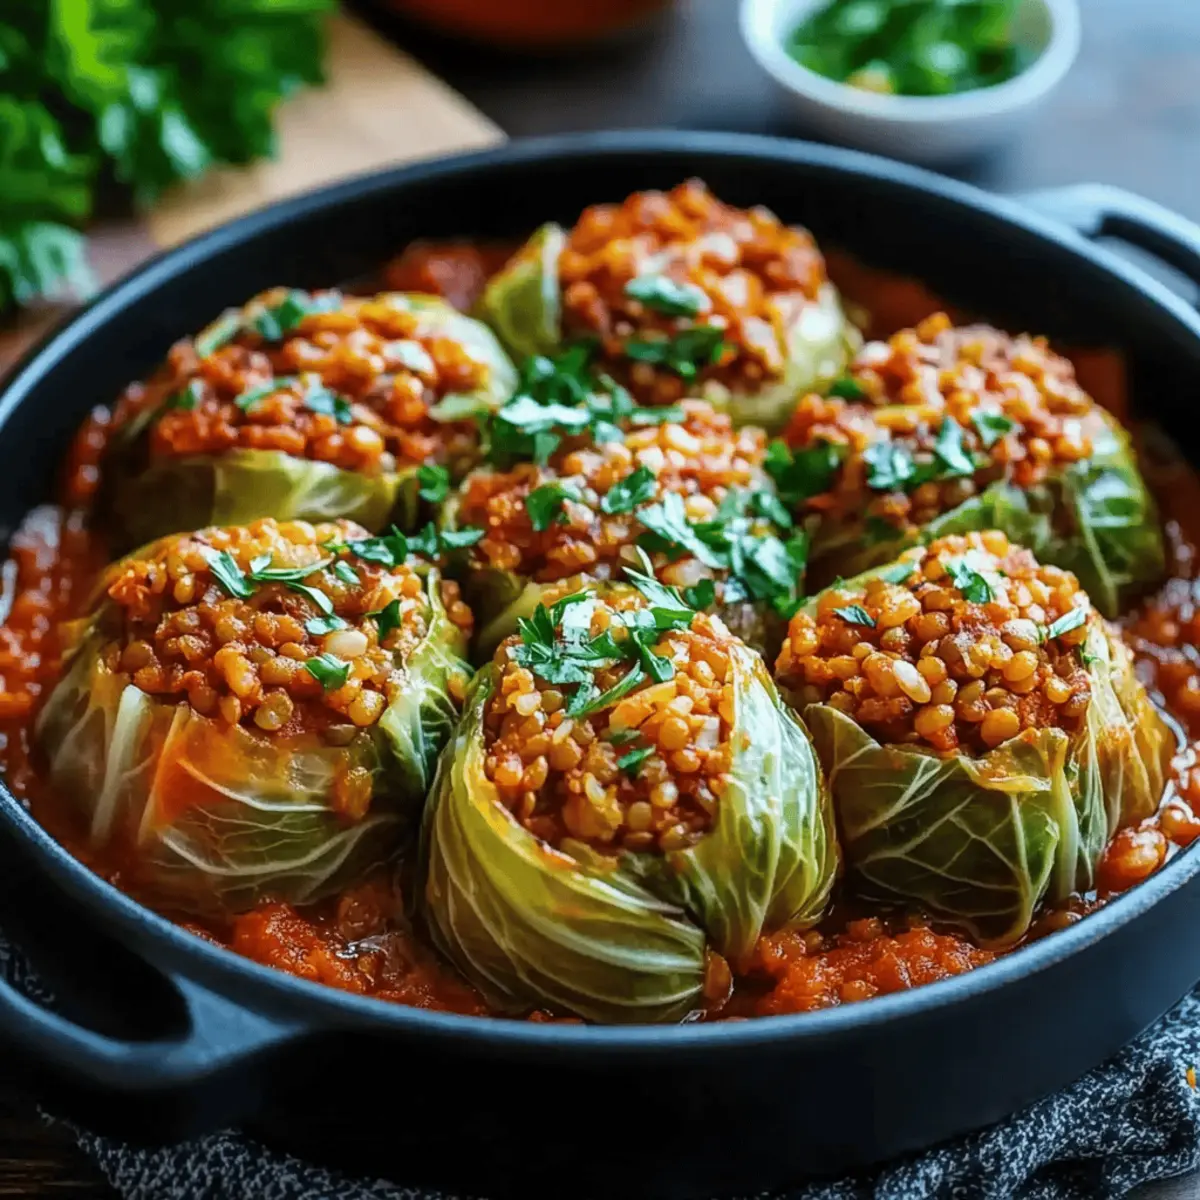
  • Vegetarian: Substitute ground beef with lentils or chickpeas, adding a hearty texture while keeping it plant-based. This delightful swap ensures everyone at the table can indulge.

  • Spicy Kick: Add diced jalapeños or a teaspoon of red pepper flakes for a fiery touch. The heat works wonderfully with the sweetness of the beans, creating a flavor explosion.

  • Cheesy Delight: Top your casserole with shredded cheese during the last 10 minutes of baking for a gooey, melty finish. Cheese brings a savory richness that elevates the entire dish.

  • Herbs & Spices: Incorporate fresh herbs like parsley or spices such as smoked paprika for depth. A sprinkle of fresh herbs before serving not only adds flavor but also a burst of color.

  • Bean Variety: Swap the pork and beans with black beans or kidney beans for a different texture and taste. This change gives you a chance to experiment with flavors while maintaining the casserole’s heartiness.

  • BBQ Flavor: Mix in your favorite BBQ sauce instead of ketchup for a smoky, tangy twist. This variation brings summer vibes to your dinner table, making it perfect for any occasion.

  • Quinoa Boost: Stir in cooked quinoa for extra protein and a nutty flavor. This twist adds a wholesome element, making the dish even more nutritious and satisfying.

  • Sweet Potato Layers: Add sliced sweet potatoes on top of the beef mixture before baking for a deliciously sweet contrast. The layers create a beautiful presentation while adding nutrition and flavor.

The sky’s the limit when it comes to customizing your Baked Beans & Ground Beef Casserole! These variations let you showcase your creativity in the kitchen, just like with my Hamburger Rice Casserole or Hawaiian Roll Casserole. Enjoy experimenting and let your taste buds lead the way!

What to Serve with Baked Beans & Ground Beef Casserole

When delighting in this hearty dish, consider pairing it with sides and drinks that elevate the meal experience.

  • Buttered Corn: A sweet addition that contrasts the savory casserole, adding a burst of fresh flavor to each bite.

  • Garlic Bread: The crispy, buttery crunch complements the richness of the casserole, perfect for soaking up those delicious juices.

  • Coleslaw: A fresh and tangy side that offers a crunchy texture, balancing the warm and hearty elements of the dish.

  • Mixed Greens Salad: Light and refreshing, tossed with a zesty vinaigrette to enhance the overall meal without overwhelming flavors.

  • Creamy Mashed Potatoes: Their smooth and buttery consistency provides comfort next to the texture of the casserole, creating a delightful combination.

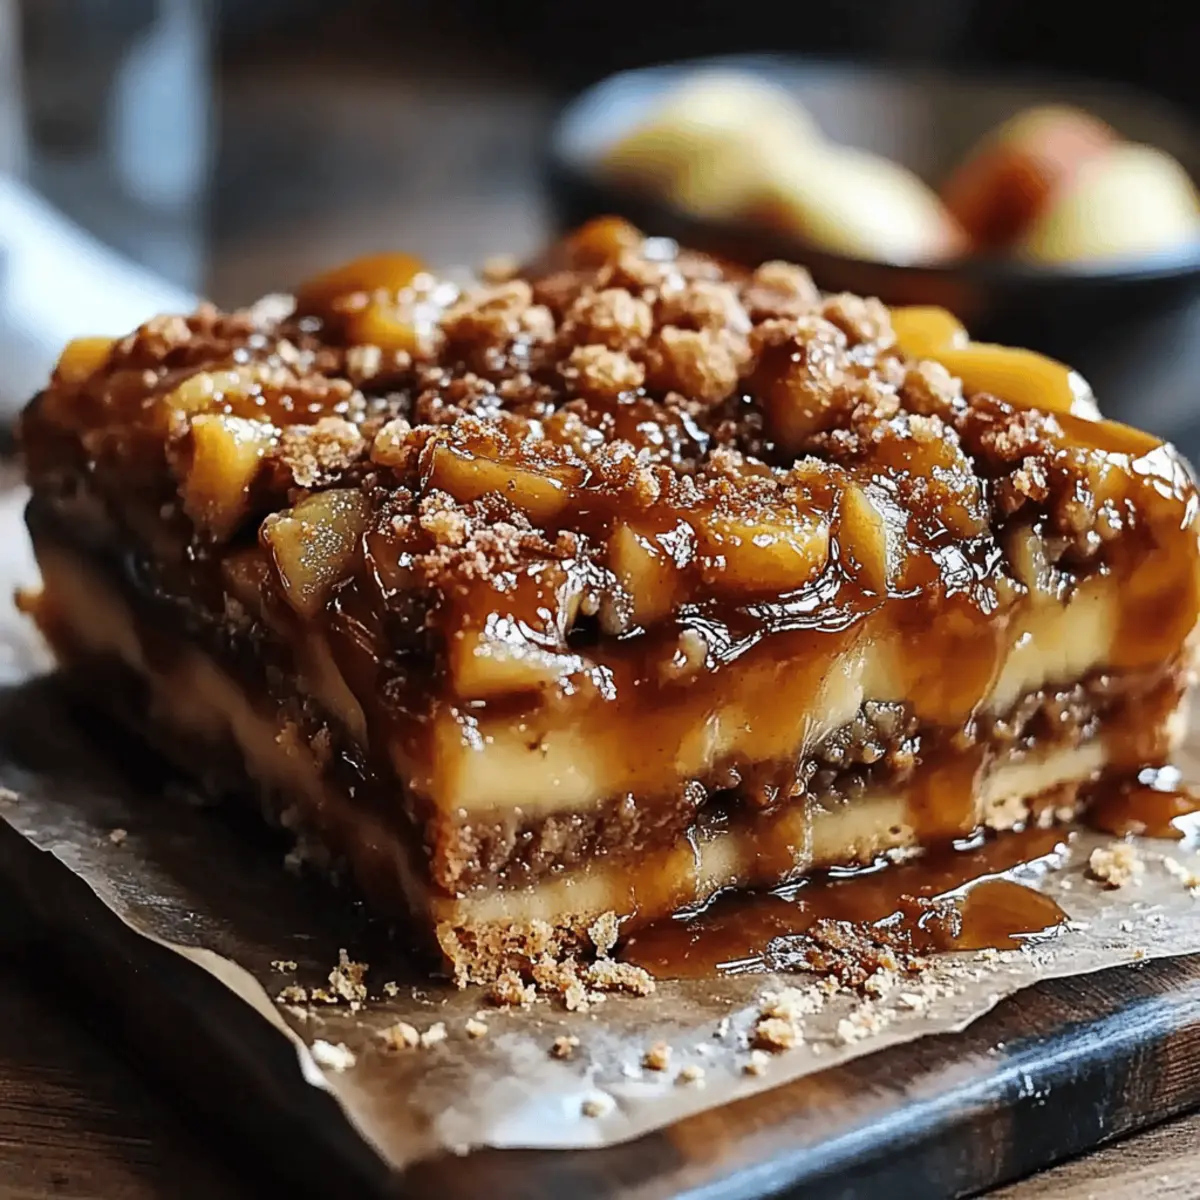
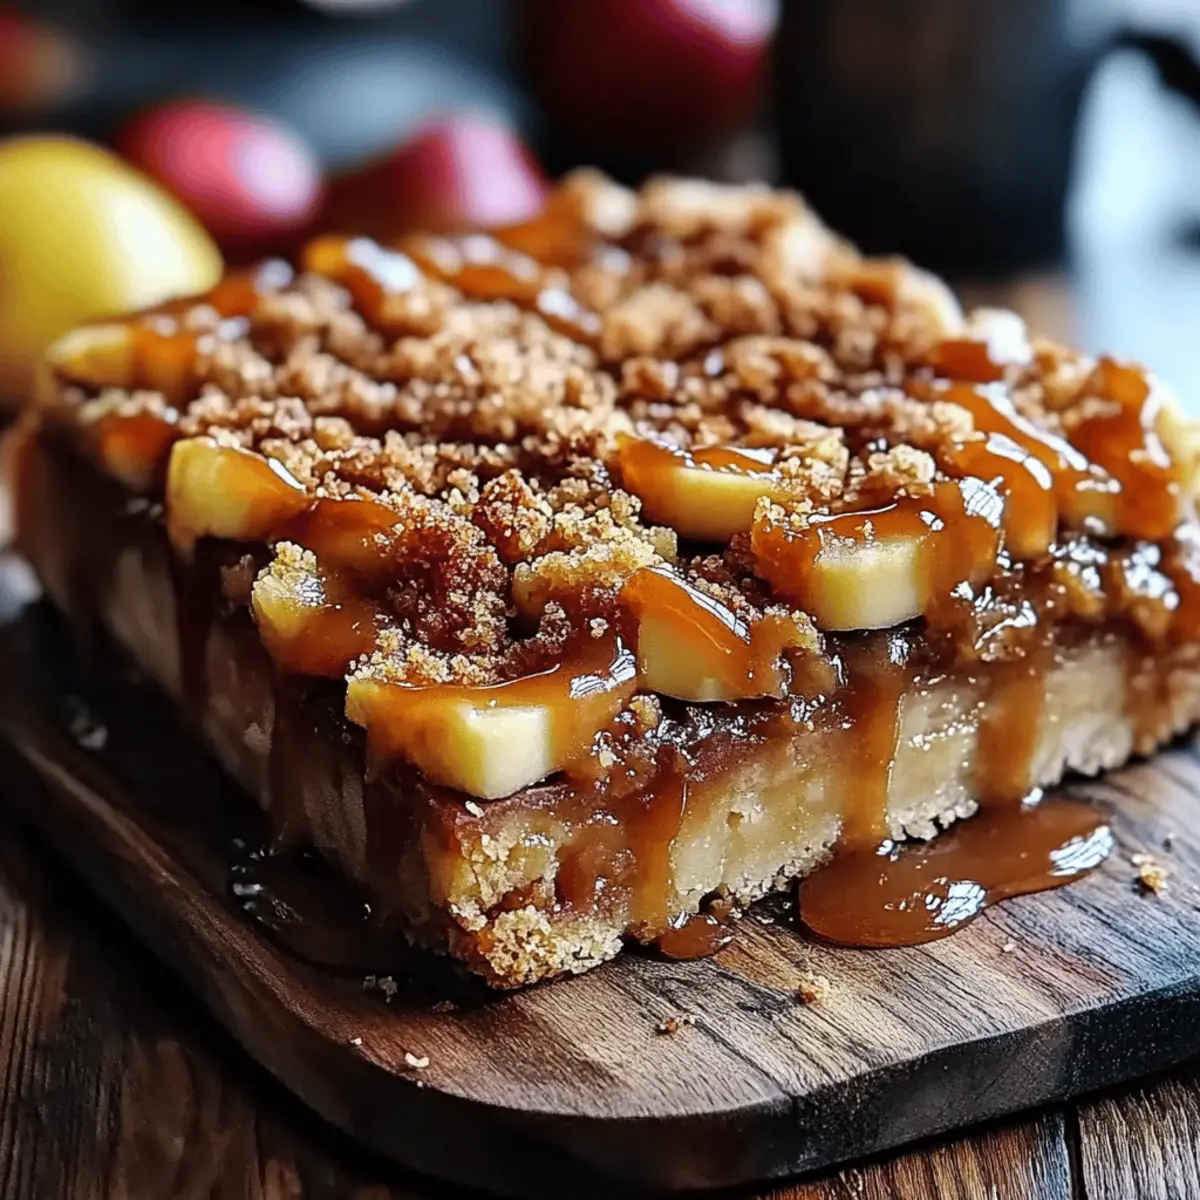
  • Apple Crisp: A warm dessert that introduces a touch of sweetness and fruity warmth, a perfect ending to a satisfying meal.

Enjoy a glass of cold lemonade or a lightly sweetened iced tea to refresh your palate and embrace the comforting goodness of this home-cooked feast!

How to Store and Freeze Baked Beans & Ground Beef Casserole

  • Room Temperature: Allow the casserole to cool completely before storing it at room temperature for up to 2 hours. For any longer, refrigerate it to ensure freshness.
  • Fridge: Store leftovers in an airtight container in the fridge for up to 3 days. Reheat portions in the microwave or oven until warmed through.
  • Freezer: For longer storage, freeze the casserole in a well-sealed freezer-safe container for up to 3 months. Label it for easy identification!
  • Reheating: Thaw overnight in the refrigerator before reheating. Reheat in the oven at 175°C (350°F) for about 20-30 minutes or until heated through, ensuring your Baked Beans & Ground Beef Casserole is just as delicious as the first time!

Expert Tips for Baked Beans & Ground Beef Casserole

  • Browning Beef: Ensure you thoroughly brown the ground beef for deeper flavor. Undercooked beef will impact the overall richness of your Baked Beans & Ground Beef Casserole.

  • Vegetable Variety: Feel free to add other vegetables like corn or diced tomatoes for added flavor and nutrition. Just be cautious not to overstuff the casserole.

  • Adjust Sweetness: If you prefer a less sweet dish, reduce the brown sugar. Taste the mixture before baking—it should be balanced, neither too sweet nor too savory.

  • Covering the Dish: Always cover with aluminum foil during baking to keep the casserole moist. Removing it early may dry out the dish.

  • Make-Ahead Tip: Assemble the casserole ahead of time and refrigerate until you’re ready to bake. Just add an extra 10-15 minutes to the baking time. Enjoy a stress-free meal!

Baked Beans & Ground Beef Casserole

Baked Beans & Ground Beef Casserole Recipe FAQs

What type of ground beef should I use for this casserole?
Absolutely! You can use any ground beef variety, but I recommend lean ground beef (at least 80/20) to avoid excess grease without compromising the flavor. You can also try ground turkey or chicken as a healthier alternative.

How should I store leftovers of the casserole?
Very simply! Allow the casserole to cool completely, then store leftovers in an airtight container in the fridge for up to 3 days. Reheat individual portions in the microwave or toss the entire dish back in the oven at 175°C (350°F) for about 20 minutes.

Can I freeze the Baked Beans & Ground Beef Casserole?
Of course! Freeze it in a well-sealed container for up to 3 months. When you’re ready to enjoy it, thaw the casserole in the refrigerator overnight. Then, reheat in the oven at 175°C (350°F) for 20-30 minutes, making sure it’s heated thoroughly.

What if my casserole is too dry after baking?
Don’t worry! If your Baked Beans & Ground Beef Casserole turns out a little dry, you can add a splash of beef broth or even more ketchup while reheating. Cover it tightly with foil to help trap steam and moisture when you reheat.

How do I know if my vegetables are ripe enough?
A great question! Look for firm green bell peppers without dark spots; they should be shiny and vibrant. For onions, choose those that feel heavy for their size, and avoid any that are sprouting or have soft spots.

Is this casserole suitable for pets or those with allergies?
It’s important to be cautious! This casserole contains ingredients like beef and beans that may not be suitable for dogs or cats. Additionally, for people with allergies, always double-check the labels of processed items like ketchup and Worcestershire sauce, as they can contain allergens.

Delicious Baked Beans & Ground Beef Casserole for Comfort Cravings

Enjoy a comforting Baked Beans & Ground Beef Casserole that warms the heart and pleases the palate.

  • Oven
  • skillet
  • Baking Dish
  • spatula

For the Casserole

  • 500 g ground beef (this rich meat forms the hearty base of your casserole)
  • 1 medium onion, diced (adds a sweet and aromatic flavor when sautéed)
  • 1 piece green bell pepper, diced (brings a pop of color and crunch to the dish)
  • 1 cup ketchup (provides a tangy sweetness that binds all the flavors together)
  • 2 tablespoons mustard (adds a hint of sharpness for depth in every bite)
  • 2 tablespoons Worcestershire sauce (delivers umami richness that elevates the taste)
  • 100 g brown sugar (balances the savory elements with a touch of sweetness)
  • 1 can (415 g) pork and beans, undrained (these beans add creamy texture and are key to the baked beans flavor)
  • salt and black pepper to taste (essential for enhancing all the delightful flavors)
  • Butter for greasing the baking dish (ensures a non-stick surface for your easy serve)

Step-by-Step Instructions

  1. Preheat your oven to 175°C (350°F) and grease a 23 x 33 cm (9×13 inch) baking dish with butter.
  2. In a deep skillet, cook 500 g of ground beef over medium heat until browned, about 5-7 minutes. Drain excess grease.
  3. Add diced onion and green bell pepper to the skillet and cook for 5-8 minutes until the onion is translucent.
  4. Stir in ketchup, mustard, Worcestershire sauce, and brown sugar until well mixed. Season with salt and black pepper.
  5. Fold in the undrained can of pork and beans into the mixture.
  6. Pour the mixture into the prepared baking dish and cover with aluminum foil.
  7. Bake covered for 45 minutes until hot and bubbling.
  8. Let it rest for about 10 minutes before serving to allow flavors to settle.

Browning the beef thoroughly enhances flavor. Consider adding other vegetables for nutrition, and adjust sweetness to taste.

Main Dishes
American
Baked Beans & Ground Beef Casserole, casserole, comfort food, Freezer-friendly, meal prep

Filed Under: Main Dishes

Irresistibly Soft Apple Cider Cinnamon Bread to Delight You

October 27, 2025 by grace bellamy Leave a Comment

As I stood in my kitchen, the aroma of simmering apple cider filled the air, instantly whisking me away to fall picnics and cozy evenings. This is how my journey to creating the perfect Apple Cider Cinnamon Bread began—a delightful fusion of sweet and spicy that captures the essence of autumn in every bite. This recipe not only brings comfort and warmth to your home but also boasts a quick prep time, making it an easy choice for a sweet treat on busy days. Share this crowd-pleasing loaf with family and friends, and watch it vanish faster than you can say “seconds, please!” Ready to fill your kitchen with delicious memories? Let’s dive into this recipe!

Apple Cider Cinnamon Bread

Why is this bread a must-bake?

Irresistible flavors: The warm notes of apple cider combined with cinnamon and nutmeg create an inviting aroma that beckons everyone to the kitchen.
Quick and easy: With just 15 minutes of prep time, this Apple Cider Cinnamon Bread fits perfectly into your busy schedule.
Crowd favorite: It’s not just a loaf; it’s a conversation starter at gatherings, perfect for holiday brunches or cozy evenings with loved ones.
Perfect for any occasion: Enjoy it fresh out of the oven, or toast slices for a delightful breakfast with butter or jam!
Once you’ve savor this comforting treat, you may also want to try the delicious Mini Pineapple Upside Down Cakes or pair it with a slice of Garlic Crack Bread for a savory option.

Apple Cider Cinnamon Bread Ingredients

Here’s what you need to create this delightful loaf.

For the Bread
• 1 cup apple cider – This is the star of your Apple Cider Cinnamon Bread, enhancing the flavor and aroma.
• 1/2 cup unsalted butter, melted – Provides richness and moisture to the bread.
• 1/2 cup granulated sugar – Adds sweetness and balances the spices.
• 1/2 cup brown sugar – Brings a deeper, caramel-like sweetness to the mix.
• 2 large eggs – Acts as a binder and adds structure to the bread.
• 1/2 cup sour cream – Contributes tenderness and a slight tang to the flavor profile.
• 1 teaspoon vanilla extract – Enhances sweetness and complements the spices.

For the Dry Mix
• 2 cups all-purpose flour – Forms the base of your bread, creating that perfect texture.
• 1 tablespoon baking powder – Helps the bread rise, making it light and fluffy.
• 1 teaspoon baking soda – Also aids in leavening for a great rise.
• 1 tablespoon ground cinnamon – Infuses your bread with warm, comforting flavor.
• 1 teaspoon ground nutmeg – Adds depth and a touch of warmth to every slice.
• 1/2 teaspoon salt – Balances the sweetness and enhances overall flavor.

For the Topping
• 2 tablespoons melted butter (for brushing) – Gives a beautiful shine and extra flavor on top of the bread.
• 1/4 cup granulated sugar (for topping) – Creates a sweet crust that invites you in.
• 1 tablespoon ground cinnamon (for topping) – Sprinkles cinnamon goodness to finish off your loaf.

Step‑by‑Step Instructions for Apple Cider Cinnamon Bread

Step 1: Simmer the Cider
In a small saucepan, bring 1 cup of apple cider to a gentle simmer over medium heat. Allow it to reduce until you have about ½ cup of concentrated cider, which will take approximately 15–20 minutes. Keep an eye on it, stirring occasionally, until it’s thickened slightly. Once reduced, remove it from the heat and let it cool slightly.

Step 2: Combine the Wet Ingredients
In a large mixing bowl, whisk together the melted butter, ½ cup granulated sugar, ½ cup brown sugar, 2 large eggs, ½ cup sour cream, 1 teaspoon vanilla extract, and the cooled reduced cider. Mix until the ingredients are well combined and form a smooth batter. This mixture will create the moist base for your Apple Cider Cinnamon Bread.

Step 3: Whisk the Dry Ingredients
In a separate bowl, whisk together 2 cups of all-purpose flour, 1 tablespoon baking powder, 1 teaspoon baking soda, 1 tablespoon ground cinnamon, 1 teaspoon ground nutmeg, and ½ teaspoon salt. Make sure to mix thoroughly to evenly distribute the baking powder and spices, which will enhance the flavor and ensure a perfect rise in your bread.

Step 4: Combine Wet and Dry Mixtures
Gently fold the dry ingredients into the wet mixture, stirring just until combined. Be careful not to overmix, as this could lead to a dense loaf. You want to maintain the tenderness of your Apple Cider Cinnamon Bread, so a few lumps are perfectly acceptable as you create a beautiful batter.

Step 5: Prepare for Baking
Pour the completed batter into a greased 9×5-inch loaf pan, ensuring an even distribution. Tap the pan gently on the counter to remove any air bubbles and spread the batter evenly. This will help ensure that your bread rises beautifully and bakes evenly, resulting in a perfectly moist loaf.

Step 6: Bake the Bread
Preheat your oven to 350°F (175°C) and place the loaf pan inside once warmed. Bake for 45–50 minutes, or until a toothpick inserted in the center comes out clean. You’ll know it’s done when the top is golden brown and slightly domed, filling your kitchen with the irresistible aroma of apple and cinnamon.

Step 7: Cool the Bread
After baking, let the Apple Cider Cinnamon Bread cool in the pan for about 10 minutes. This resting time allows the bread to set, making it easier to remove. Once it’s slightly cooled, carefully transfer the loaf onto a wire rack to cool completely, letting the steam escape to prevent sogginess.

Step 8: Add the Finishing Touches
While the bread is still warm, brush the top and sides with 2 tablespoons of melted butter for a delightful shine. In a small bowl, mix together ¼ cup granulated sugar and 1 tablespoon ground cinnamon. Generously sprinkle this over the warm bread, pressing lightly to help it adhere, creating a sweet, crunchy topping that enhances every bite.

Apple Cider Cinnamon Bread

Make Ahead Options

These Apple Cider Cinnamon Bread preparations are perfect for busy home cooks looking to save time! You can mix the wet ingredients (butter, sugars, eggs, sour cream, vanilla, and reduced cider) and refrigerate them in an airtight container for up to 24 hours. Additionally, the dry ingredients can be combined and stored separately for up to 3 days. When you’re ready to bake, simply combine the wet and dry ingredients as directed. To maintain that glorious quality, avoid overmixing the batter. After baking, cool the bread, and store it at room temperature. This way, you’ll have delightful, homemade bread ready to enjoy with minimal effort!

Apple Cider Cinnamon Bread Variations

Feel free to personalize your loaf with these delicious twists and substitutions that will make your kitchen sing!

  • Gluten-Free: Substitute all-purpose flour with a 1:1 gluten-free baking mix for a gluten-free version that maintains great flavor and texture.
  • Vegan: Replace eggs with flax eggs (1 tablespoon flaxseed meal + 2.5 tablespoons water) and use vegan butter to create a plant-based delight.
  • Spice It Up: Add 1/4 teaspoon ground cloves or allspice for extra complexity. This spice trio will elevate the flavors and provide an inviting aroma.
  • Nutty Crunch: Fold in 1/2 cup of chopped walnuts or pecans for added crunch and a nutty flavor twist. These additions create a heartier loaf that’s perfect for satisfying cravings.
  • Fruit Fusion: Incorporate 1 cup of diced apples or pears into the batter for bursts of juicy sweetness. Their moisture will enhance the texture and provide delightful bites throughout the loaf.
  • Sweet Topping: Swap the sugar topping for a drizzle of caramel sauce after baking. This luscious topping takes the indulgence to another level and transforms every slice into a sweet treat.
  • Spicy Kick: For a hint of heat, add 1/2 teaspoon cayenne pepper or red pepper flakes to the dry mix. This unexpected twist balances the sweetness with a delightful kick that will surprise and delight.
  • Savory Twist: Include 1 teaspoon of rosemary or thyme in the batter for a savory version. This herbaceous touch makes it perfect for pairing with cheeses or savory spreads, taking traditional sweetness into new savory territory.

Each variation brings its unique touch, allowing you to explore flavors while keeping the heart of the Apple Cider Cinnamon Bread intact. Don’t forget to savor each bite with a cozy cup of tea or coffee, and perhaps enjoy it alongside a slice of Apple Goats Cheese for a delightful brunch!

What to Serve with Apple Cider Cinnamon Bread?

As you savor the warmth of this delicious loaf, consider complementing it with delightful sides that enhance the experience.

  • Creamy Mashed Potatoes:
    Silky and buttery, they offer a comforting contrast to the sweet spices of the bread. Perfect for a cozy dinner!

  • Warm Spiced Cider:
    Enhance the autumn vibes with a steaming mug of spiced cider. The flavors echo the bread, creating a harmonious pairing.

  • Honey Butter:
    A dollop of honey butter adds sweetness and richness, making every slice feel like a warm hug. It’s the perfect topping!

  • Roasted Root Vegetables:
    Their earthy sweetness balances the cinnamon notes, adding a delightful crunch to your meal. A wholesome side dish that’s hard to resist!

  • Cheese Platter:
    Pair slices with sharp cheddar or creamy brie for a contrast of flavors. The tanginess of cheese adds depth to this sweet bread.

  • Vanilla Ice Cream:
    Melted over warm slices, it turns this comforting loaf into a dessert experience! Drizzle with caramel for extra indulgence.

These pairings not only elevate your dining experience but create memorable moments to share with loved ones. Enjoy!

How to Store and Freeze Apple Cider Cinnamon Bread

Room Temperature: Store leftover Apple Cider Cinnamon Bread in an airtight container at room temperature for up to 3 days to keep it fresh and flavorful.

Fridge: If you want to extend its shelf life, you can refrigerate the bread for up to a week. Just ensure it’s wrapped tightly to prevent drying out.

Freezer: For longer storage, freeze slices of the Apple Cider Cinnamon Bread by wrapping them in plastic wrap and placing them in a freezer-safe bag. It will keep well for up to 3 months.

Reheating: To enjoy frozen bread, simply thaw it in the fridge overnight, then warm slices in the toaster or oven for a delightful treat that tastes just baked!

Expert Tips for Apple Cider Cinnamon Bread

Perfectly Reduced Cider: Ensure you simmer the apple cider long enough to concentrate the flavor; this will elevate the taste of your Apple Cider Cinnamon Bread.

Don’t Overmix: Gently fold the dry ingredients into the wet mixture. Overmixing can lead to a dense loaf, so stop once everything is just combined.

Right Oven Temperature: Always preheat your oven to 350°F (175°C) before baking. An unheated oven can result in uneven baking and affect the rise.

Cooling Matters: Allow the bread to cool in the pan for 10 minutes after baking; this helps set the loaf and makes it easier to remove without falling apart.

Sugar-Cinnamon Mix Touch: Press the sugar and cinnamon topping lightly onto the warm bread to ensure it adheres well, giving you a delightful sweet crust.

Storage Tip: For the best flavor, store leftover bread in an airtight container at room temperature. Reheat slices for a warm treat!

Apple Cider Cinnamon Bread

Apple Cider Cinnamon Bread Recipe FAQs

What type of apple cider should I use?
Absolutely! Use fresh, unfiltered apple cider for the best flavor in your Apple Cider Cinnamon Bread. It provides a rich and robust taste that truly enhances the loaf. If you can find it at your local orchard or farmer’s market, that’s even better!

How should I store the bread after baking?
For the best results, keep your Apple Cider Cinnamon Bread in an airtight container at room temperature for up to 3 days. If you’re in a humid climate, consider refrigerating it tightly wrapped to prevent mold. This method will help retain its lovely moisture and flavor.

Can I freeze the Apple Cider Cinnamon Bread?
The more the merrier! Yes, you can freeze your Apple Cider Cinnamon Bread. Wrap the cooled bread tightly in plastic wrap, then place it in a freezer-safe bag or container. It will keep well for up to 3 months. When you’re ready to enjoy it, thaw it overnight in the fridge and warm slices in the toaster or oven to bring back that fresh-baked goodness.

What should I do if my bread is too dense?
Very! If your bread turned out dense, it might have been overmixed. Be gentle when combining your wet and dry ingredients—just stir until combined. Another reason could be the flour measurement; too much flour can lead to a heavy loaf. Always spoon and level your flour for accuracy.

Is this recipe safe for dogs or other pets?
While the ingredients in Apple Cider Cinnamon Bread are generally safe for most pets, it’s best to keep it away from them due to the sugar and butter content. If you’d love to share a treat with your furry friend, consider making a pet-friendly version with whole wheat flour, applesauce, and bananas instead!

Can I use gluten-free flour in this recipe?
Absolutely! To make this Apple Cider Cinnamon Bread gluten-free, use a 1:1 gluten-free flour blend that includes xanthan gum. This will help achieve a similar texture. Just be mindful that baking times may vary, so check with a toothpick for doneness!

Irresistibly Soft Apple Cider Cinnamon Bread to Delight You

This Apple Cider Cinnamon Bread is a delightful fusion of sweet and spicy flavors that captures autumn in every bite.

  • loaf pan
  • Mixing bowls
  • Saucepan

For the Bread

  • 1 cup apple cider (This is the star of your Apple Cider Cinnamon Bread, enhancing the flavor and aroma.)
  • 1/2 cup unsalted butter, melted (Provides richness and moisture to the bread.)
  • 1/2 cup granulated sugar (Adds sweetness and balances the spices.)
  • 1/2 cup brown sugar (Brings a deeper, caramel-like sweetness to the mix.)
  • 2 large eggs (Acts as a binder and adds structure to the bread.)
  • 1/2 cup sour cream (Contributes tenderness and a slight tang to the flavor profile.)
  • 1 teaspoon vanilla extract (Enhances sweetness and complements the spices.)

For the Dry Mix

  • 2 cups all-purpose flour (Forms the base of your bread, creating that perfect texture.)
  • 1 tablespoon baking powder (Helps the bread rise, making it light and fluffy.)
  • 1 teaspoon baking soda (Also aids in leavening for a great rise.)
  • 1 tablespoon ground cinnamon (Infuses your bread with warm, comforting flavor.)
  • 1 teaspoon ground nutmeg (Adds depth and a touch of warmth to every slice.)
  • 1/2 teaspoon salt (Balances the sweetness and enhances overall flavor.)

For the Topping

  • 2 tablespoons melted butter (for brushing) (Gives a beautiful shine and extra flavor on top of the bread.)
  • 1/4 cup granulated sugar (for topping) (Creates a sweet crust that invites you in.)
  • 1 tablespoon ground cinnamon (for topping) (Sprinkles cinnamon goodness to finish off your loaf.)

Step-by-Step Instructions for Apple Cider Cinnamon Bread

  1. In a small saucepan, bring 1 cup of apple cider to a gentle simmer over medium heat. Allow it to reduce until you have about ½ cup of concentrated cider, which will take approximately 15–20 minutes.
  2. In a large mixing bowl, whisk together the melted butter, ½ cup granulated sugar, ½ cup brown sugar, 2 large eggs, ½ cup sour cream, 1 teaspoon vanilla extract, and the cooled reduced cider. Mix until the ingredients are well combined and form a smooth batter.
  3. In a separate bowl, whisk together 2 cups of all-purpose flour, 1 tablespoon baking powder, 1 teaspoon baking soda, 1 tablespoon ground cinnamon, 1 teaspoon ground nutmeg, and ½ teaspoon salt.
  4. Gently fold the dry ingredients into the wet mixture, stirring just until combined.
  5. Pour the completed batter into a greased 9×5-inch loaf pan, ensuring an even distribution. Tap the pan gently on the counter to remove any air bubbles.
  6. Preheat your oven to 350°F (175°C) and bake for 45–50 minutes, or until a toothpick inserted in the center comes out clean.
  7. Let the Apple Cider Cinnamon Bread cool in the pan for about 10 minutes, then transfer to a wire rack to cool completely.
  8. While the bread is still warm, brush the top and sides with 2 tablespoons of melted butter. In a small bowl, mix together ¼ cup granulated sugar and 1 tablespoon ground cinnamon and sprinkle over the warm bread.

For the best flavor, store leftover bread in an airtight container at room temperature. Reheat slices for a warm treat.

Breakfast
American
Apple Cider Cinnamon Bread, Autumn Bread, Cinnamon Bread, Fall Recipes, quick bread

Filed Under: Breakfast

Skillet Zucchini and Mushrooms for a Flavorful Dinner Delight

October 27, 2025 by grace bellamy Leave a Comment

Sizzling in the pan, the vibrant green zucchini and earthy mushrooms create a symphony of sights and sounds that fill my kitchen with a warm embrace. As I throw together this Skillet Zucchini and Mushrooms recipe, I’m reminded of how simple ingredients can be transformed into something truly special. With just a few minutes of prep time, this dish not only provides a quick weeknight meal but also delivers a delightful medley of flavors that are sure to impress any dinner guest. Plus, it’s a wonderful way to pack your plate with veggies without sacrificing taste. Have you ever wondered how something so effortless can bring such joy to your table? Let’s dive in!

Skillet Zucchini and Mushrooms

Why is Skillet Zucchini and Mushrooms a must-try?

Simplicity makes this dish a weekday staple, featuring ingredients you likely have on hand. Flavorful seasonings elevate the natural taste of fresh zucchini and mushrooms, creating a dish that’s both satisfying and gourmet. Versatile and perfect as a side or main course, this recipe pairs beautifully with options like Crock Pot Chicken or a light Pomegranate Rocket Salad. Quick cooking time means you can whip it up in just 15 minutes, making it ideal for busy evenings. Embrace the joy of preparing wholesome home-cooked meals without the hassle of fast food!

Skillet Zucchini and Mushrooms Ingredients

For the Skillet Dish
• 2 medium zucchini – slice them evenly to ensure they cook perfectly.
• 2 tablespoons olive oil – this adds a lovely richness and depth of flavor.
• 1 tablespoon butter – for an irresistible buttery finish.
• 1 small onion – diced to bring sweetness and aroma to the dish.
• 8 ounces mushrooms – sliced for that earthy flavor and chewy texture.
• 2 cloves garlic – minced for a fragrant hint that ties everything together.
• 1/4 cup vegetable broth – adds moisture and enhances overall taste.

For Garnishing
• Fresh parsley – chopped for a pop of color and freshness on top.
• Grated Parmesan cheese – adds a creamy, salty touch that’s hard to resist.

For Seasoning
• Salt – to taste, bringing out the natural flavors of the veggies.
• Pepper – freshly cracked for a slight kick.
• Mixed herbs – customize with your favorites for a personal touch.

Dive into this delightful Skillet Zucchini and Mushrooms recipe and experience how effortless it is to enjoy wholesome, homemade meals!

Step‑by‑Step Instructions for Skillet Zucchini and Mushrooms

Step 1: Heat the Skillet
Begin by placing a large skillet over medium-high heat and adding 2 tablespoons of olive oil along with ½ tablespoon of butter. Allow the butter to melt and start sizzling, which creates a flavorful base for your Skillet Zucchini and Mushrooms. This should take about 1-2 minutes, setting the stage for the vibrant ingredients to shine.

Step 2: Sauté the Zucchini
Next, add the sliced zucchini to the hot skillet, seasoning them lightly with salt and pepper. Cook for 3-4 minutes, stirring occasionally, until the zucchini is just tender and shows a beautiful golden color on the edges. Once done, remove the zucchini from the skillet and set it aside, leaving the flavorful oil behind.

Step 3: Cook the Onion
Wipe out any excess liquid from the skillet if needed, then add the remaining ½ tablespoon of butter. Once melted, toss in the diced onion and sauté for about 2 minutes. You want the onion to become softened and aromatic, creating a tasty foundation for the rest of your Skillet Zucchini and Mushrooms.

Step 4: Brown the Mushrooms
Add the sliced mushrooms to the skillet and cook them for 5-7 minutes, stirring occasionally. Watch for them to brown and release most of their moisture, which enriches the overall flavor profile of the dish. This step brings out the earthy notes of the mushrooms, enhancing the delicious medley of ingredients.

Step 5: Incorporate Garlic and Herbs
Once the mushrooms are beautifully browned, stir in the minced garlic and your choice of mixed herbs. Cook for about 20 seconds, just until the garlic becomes fragrant—be careful not to let it burn, as that can turn the flavor bitter. This short step adds another layer of depth to your Skillet Zucchini and Mushrooms.

Step 6: Combine and Simmer
Return the sautéed zucchini to the skillet and pour in ¼ cup of vegetable broth. Toss everything together gently, making sure the zucchini and mushrooms are well coated in the delicious broth. Allow the mixture to simmer for 2 minutes, enabling the flavors to meld beautifully, while the broth adds moisture to the dish.

Step 7: Final Seasoning and Serve
Taste your Skillet Zucchini and Mushrooms, adjusting seasoning with additional salt and pepper as needed. Once satisfied with the flavor, remove the skillet from heat and sprinkle fresh parsley and grated Parmesan cheese on top for an inviting finish. Serve this colorful dish warm and enjoy a delightful, wholesome meal.

Skillet Zucchini and Mushrooms

What to Serve with Skillet Zucchini and Mushrooms

With every bite, the rich flavors of this dish whisk you away to the heart of a cozy kitchen, ready to be paired with delightful accompaniments.

  • Creamy Mashed Potatoes: The silky texture and buttery flavor provide a comforting contrast to the earthy veggies. This combination creates a balanced plate that feels indulgent and satisfying.

  • Quinoa Salad with Lemon Vinaigrette: The fresh zing of lemon brightens the dish while the nuttiness of quinoa complements the savory zucchini and mushrooms. This pairing adds a lively freshness to your meal.

  • Garlic Noodles: With their addictive richness, these noodles offer a delightful alternative to the earthiness of your skillet dish. They soak up the vibrant flavors beautifully, creating a harmonious union on your plate.

  • Herb-Roasted Chicken: Tender chicken infused with herbs creates a delicious protein option that matches the flavor profile of the vegetables. The juicy chicken balances the sautéed veggies while elevating the entire meal experience.

  • Crispy Garlic Bread: The crunchy texture and garlic flavor offer a delicious contrast to the tender zucchini and mushrooms. Dip it into the dish’s sauce, and you’ll find a scrumptious blend of flavors that ties everything together.

  • Chilled White Wine: A glass of crisp Sauvignon Blanc will enhance the herbs in your dish while refreshing your palate. It’s a perfect partner to celebrate this vibrant meal with family and friends.

Craft your perfect dining experience with these pairings, showcasing Skillet Zucchini and Mushrooms as the star on your table!

Expert Tips for Skillet Zucchini and Mushrooms

  • Prep Veggies First: Slice all vegetables before cooking. This keeps the process smooth and helps avoid overcooking any of your zucchini or mushrooms.

  • Don’t Rush the Sauté: Allow zucchini to brown lightly for depth of flavor. Rushing this step can lead to soggy veggies instead of those beautifully roasted bites.

  • Control Garlic’s Flavor: Add garlic last to prevent burning. Burning garlic makes it bitter, which can overshadow the richness of your Skillet Zucchini and Mushrooms.

  • Adjust Seasoning Wisely: Taste as you go! A little salt enhances flavors, but it’s easy to oversalt. Start small, and build your seasoning gradually.

  • Customize Herbs: Feel free to experiment with herbs! Fresh basil or oregano can add unique flavors. Just ensure to avoid overpowering the beloved taste of zucchini and mushrooms.

Make Ahead Options

These Skillet Zucchini and Mushrooms are a fantastic option for busy home cooks looking to save time during the week! You can slice the zucchini and mushrooms up to 24 hours in advance, storing them in airtight containers in the refrigerator to keep them fresh. Additionally, dice the onion and mince the garlic ahead of time, placing them together in a small container to prevent the garlic from browning. When you’re ready to cook, simply heat your skillet and follow the usual steps, adding the prepped ingredients. You’ll find that this preparation method allows you to whip up this flavorful dish with minimal effort, making weeknight dinners a breeze!

How to Store and Freeze Skillet Zucchini and Mushrooms

Fridge: Store your Skillet Zucchini and Mushrooms in an airtight container for up to 3 days. This keeps the flavors fresh while allowing for easy reheating.

Freezer: If you want to freeze the dish, portion it out in freezer-safe containers and use within 2 months for the best flavor. Thaw in the fridge overnight before reheating.

Reheating: Gently reheat on the stovetop over medium heat, adding a splash of vegetable broth to retain moisture and flavor. Aim for even heating, around 5-7 minutes until warmed through.

Serving Suggestions: For a delightful twist, serve it over cooked rice or pasta upon reheating. Enjoy this vibrant dish while keeping your meal prep hassle-free!

Skillet Zucchini and Mushrooms Variations

Feel free to switch things up and make this recipe your own; your taste buds will thank you!

  • Dairy-Free: Substitute nutritional yeast for Parmesan to keep the dish creamy without the cheese. It adds a nutty, cheesy flavor that’s simply delightful.

  • Spicy Kick: Incorporate red pepper flakes or sliced jalapeños for a fun heat adjustment. Just a pinch or two can elevate the dish from mild to mouthwatering!

  • Texture Boost: Toss in some toasted pine nuts or walnuts for a crunchy surprise. Each bite will have a delightful contrast between the tender veggies and crunchy nuts.

  • Herb Infusion: Experiment with fresh herbs like thyme or dill for a fresh twist. Their aromatic profiles will add another layer of flavor to this already vibrant dish.

  • Protein Packed: Add cooked chicken, shrimp, or chickpeas for a satisfying main course. This not only enhances the flavor but transforms your Skillet Zucchini and Mushrooms into a hearty meal.

  • Asian Influence: Drizzle a bit of soy sauce or sesame oil during the cooking process for a delightful umami flavor. Pair it with rice for a cozy, Asian-inspired dish.

  • Add More Veggies: Include bell peppers, spinach, or even diced tomatoes to bulk it up. This way, you’re not only boosting flavor but also packing in more nutrients.

No matter how you choose to adapt this Skillet Zucchini and Mushrooms, every variation is sure to bring a smile to your face, just like a family-loved recipe should!

Skillet Zucchini and Mushrooms

Skillet Zucchini and Mushrooms Recipe FAQs

How do I choose ripe zucchini for this recipe?
Absolutely! When selecting zucchini, look for firm vegetables with smooth, shiny skin and no dark spots or soft spots. Smaller zucchinis tend to be more flavorful and tender, so aim for those that are about 6-7 inches long.

How should I store leftovers of Skillet Zucchini and Mushrooms?
You can store your Skillet Zucchini and Mushrooms in an airtight container in the fridge for up to 3 days. Before consuming, just give it a good stir and a quick reheat on the stovetop to bring back its delicious flavors!

Can I freeze Skillet Zucchini and Mushrooms?
Absolutely! To freeze, let the dish cool completely, then divide it into freezer-safe containers. It’s best used within 2 months for optimal taste. When you’re ready to enjoy it again, thaw it in the fridge overnight and reheat over medium heat, adding a splash of vegetable broth to keep it moist.

What if my zucchini turns out soggy?
If you find your zucchini mushy, it’s likely they were cooked too long or at too high of a temperature. Next time, sauté the zucchini for just 3-4 minutes until they are just tender. Remember, they can continue to cook even after you remove them from heat, so it’s best to undercook slightly!

Are there any dietary considerations for Skillet Zucchini and Mushrooms?
Sure! This dish is vegetarian, and you can easily adjust it to be vegan by omitting the butter and using a dairy-free cheese alternative if desired. Always taste carefully if you have allergies, especially to ingredients like Parmesan or mixed herbs, and swap them out as needed.

How do I keep my leftovers tasting fresh when reheating?
When reheating, add a few drops of vegetable broth or a splash of water to keep your Skillet Zucchini and Mushrooms from drying out. Gently heat over medium-low until warmed through, about 5-7 minutes, stirring occasionally, ensuring the flavors return beautifully!

Skillet Zucchini and Mushrooms for a Flavorful Dinner Delight

Skillet Zucchini and Mushrooms is a quick, flavorful dish perfect for any meal.

  • large skillet

For the Skillet Dish

  • 2 medium zucchini (slice them evenly)
  • 2 tablespoons olive oil (adds richness)
  • 1 tablespoon butter (for buttery finish)
  • 1 small onion (diced)
  • 8 ounces mushrooms (sliced)
  • 2 cloves garlic (minced)
  • 1/4 cup vegetable broth (adds moisture)

For Garnishing

  • fresh parsley (chopped)
  • grated Parmesan cheese (for topping)

For Seasoning

  • salt (to taste)
  • pepper (freshly cracked)
  • mixed herbs (customize with favorites)

Step-by-Step Instructions

  1. Heat a large skillet over medium-high heat and add olive oil and butter. Allow butter to melt.
  2. Add sliced zucchini, season with salt and pepper, and cook for 3-4 minutes until tender. Remove and set aside.
  3. Wipe skillet if needed, add remaining butter, and sauté diced onion for about 2 minutes until softened.
  4. Add sliced mushrooms and cook for 5-7 minutes, stirring occasionally, until browned and moisture released.
  5. Stir in minced garlic and mixed herbs, cooking for about 20 seconds until fragrant.
  6. Return sautéed zucchini to the skillet, add vegetable broth, toss gently, and simmer for 2 minutes.
  7. Adjust seasoning to taste, then sprinkle fresh parsley and grated Parmesan on top before serving.

Prep all veggies first to avoid overcooking. Adjust seasoning as needed to personalize flavors.

Side Dishes
American
healthy recipes, mushrooms, quick meal, skillet zucchini, vegetable dish, weeknight dinners

Filed Under: Side Dishes

Savory Brown Sugar Pineapple Ham Bake for a Cozy Dinner

October 27, 2025 by grace bellamy Leave a Comment

As I prepared for a cozy family dinner one chilly evening, I stumbled upon a delightful combination that transformed our meal into something magical: the Brown Sugar Pineapple Ham Bake. This dish not only boasts a mouthwatering glaze that caramelizes beautifully in the oven but also combines the heartiness of ham with the tropical sweetness of pineapple. The best part? It takes just 10 minutes to prep and is an absolute crowd-pleaser, perfect for evenings when you want to impress without spending hours in the kitchen. Whether you serve it over fluffy rice, creamy mashed potatoes, or your favorite roasted veggies, this easy recipe is sure to make your taste buds dance. Curious about how to bring this scrumptious dish to life in your own kitchen? Let’s dive in!

Brown Sugar Pineapple Ham Bake

Why is Brown Sugar Pineapple Ham Bake a Treat?

Savory Sweetness: This dish brings together the rich flavors of ham and the sweetness of pineapple, creating a delightful harmony that tantalizes your taste buds.

Quick Prep: In just 10 minutes, you can whip up this easy recipe, making it a perfect choice for busy weeknights or impromptu gatherings.

Crowd-Pleasing: Whether you’re cooking for family or hosting friends, this dish is guaranteed to delight everyone at the table. Serve it with steamed rice or mashed potatoes for a complete meal that feels special.

Glazed Goodness: The caramelized glaze is a showstopper, elevating the dish and leaving everyone wanting more. For more sweet and savory delights, check out these delicious Pineapple Bliss Bars that are equally irresistible!

Versatile Option: Dress up leftovers in sandwiches or on salads for a delicious twist the next day; it’s a recipe that keeps on giving!

Brown Sugar Pineapple Ham Bake Ingredients

• Get ready to create magic in your kitchen!

For the Base

  • Diced ham – This hearty ingredient is the star of your dish, providing that savory punch.
  • Pineapple chunks – Adds a burst of sweetness that balances perfectly with the ham.

For the Glaze

  • Brown sugar – This key ingredient produces a rich, caramelized flavor that’s simply irresistible.
  • Dijon mustard – Adds a hint of tanginess, enhancing the overall complexity of the glaze.
  • Soy sauce – Deepens the flavor profile with its umami richness.
  • Pineapple juice – Brings extra sweetness and complements the pineapple chunks.
  • Ground cloves – Just a pinch adds warmth and an aromatic touch to your dish.

Now you’ve got all the essentials for your Brown Sugar Pineapple Ham Bake, ready to impress!

Step‑by‑Step Instructions for Brown Sugar Pineapple Ham Bake

Step 1: Preheat the Oven
Begin by preheating your oven to 190°C (375°F). While the oven warms up, grab a 33×23 cm (9×13-inch) baking dish and lightly grease it with butter or nonstick spray. This ensures your Brown Sugar Pineapple Ham Bake doesn’t stick, allowing for easy serving and cleanup.

Step 2: Prepare the Glaze
In a medium bowl, whisk together the brown sugar, Dijon mustard, soy sauce, pineapple juice, and ground cloves until the mixture is smooth and glossy. The sweet aroma will fill your kitchen, and the consistency should be perfect for coating. Set this glaze aside as it will add a delightful touch to your ham and pineapple.

Step 3: Layer the Ingredients
Now, evenly spread the diced ham and pineapple chunks in your prepared baking dish. Arrange them so that each piece is visible, creating an inviting, colorful base for your dish. This step sets the stage for the flavors to meld beautifully during baking in the Brown Sugar Pineapple Ham Bake.

Step 4: Add the Glaze
Pour the prepared glaze over the ham and pineapple mixture, ensuring each piece is coated in that tantalizing sauce. Gently toss the ingredients together to ensure an even distribution of flavors. The glaze should glisten as it embraces the ham and pineapple, promising a scrumptious result.

Step 5: Bake the Dish
Place your baking dish in the preheated oven and bake uncovered for 30–35 minutes. Keep an eye on it as the ham heats through, and the glaze becomes caramelized and bubbly, achieving a beautiful golden color. The delightful scents will fill your home, making it hard to wait for that first bite!

Step 6: Serve and Enjoy
Once done, remove the Brown Sugar Pineapple Ham Bake from the oven and let it cool slightly. Serve warm over steamed rice, mashed potatoes, or roasted vegetables, spooning extra glaze over each portion for added flavor. This dish is sure to be a hit at your dinner table!

Brown Sugar Pineapple Ham Bake

Brown Sugar Pineapple Ham Bake Variations

Feel free to let your creativity shine with these delicious twists that can elevate your Brown Sugar Pineapple Ham Bake!

  • Spicy Kick: Add a sprinkle of red pepper flakes or diced jalapeños for a fiery burst of heat that perfectly complements the sweetness.

  • Herb Infusion: Toss in fresh herbs like rosemary or thyme before baking for an aromatic twist that adds depth and freshness to each bite.

  • Fruit Medley: Mix in diced apples or pears for added sweetness and texture; they pair beautifully with the pineapple and ham. Imagine the delightful crunch!

  • Maple Syrup: Substitute brown sugar with maple syrup to create an irresistible glaze that infuses a woodsy sweetness into the dish.

  • Vegan Swap: Replace ham with smokey tempeh or diced jackfruit and use agave syrup instead of brown sugar for a plant-based version that delivers on flavor.

  • Nutty Crunch: Sprinkle toasted pecans or walnuts on top before serving to add a delightful crunch and nutty flavor that enhances the dish.

  • Tropical Boost: Incorporate coconut flakes or a splash of coconut milk for an extra layer of tropical goodness that complements the pineapple beautifully.

  • Savory Cheese: Top with shredded cheddar or crumbled feta before baking for a savory twist that balances the dish’s sweetness.

With these variations, your Brown Sugar Pineapple Ham Bake can become a versatile family favorite, each bite bringing something new to the table. For more delightful sweet treats, don’t forget to check out these Pineapple Bars Tropical that will brighten your dessert lineup!

How to Store and Freeze Brown Sugar Pineapple Ham Bake

Room Temperature: Leftover Brown Sugar Pineapple Ham Bake should not be left out for more than 2 hours to ensure food safety.

Fridge: Store any leftovers in an airtight container in the fridge for up to 3 days, keeping them fresh and flavorful for your next meal.

Freezer: To freeze, place the cooled ham bake in a freezer-safe container for up to 3 months. Thaw in the fridge overnight before reheating.

Reheating: Reheat in the oven at 175°C (350°F) for about 15–20 minutes, or until heated through, to maintain the dish’s delicious texture and flavors.

Make Ahead Options

These Brown Sugar Pineapple Ham Bake components are perfect for meal prep! You can dice the ham and mix the glaze up to 24 hours in advance, keeping them refrigerated in separate airtight containers. This not only saves you valuable time but also allows the flavors of the glaze to meld beautifully, enhancing the dish’s overall taste. When you’re ready to cook, simply layer the ham and pineapple in your greased baking dish, pour the prepared glaze over the top, and bake as instructed. This way, you’ll achieve just as delicious results with minimal effort, allowing you to focus on enjoying your meal with family!

Tips for the Best Brown Sugar Pineapple Ham Bake

Perfect Pineapple: Choose ripe, juicy pineapple chunks to enhance the dish’s sweetness and flavor profile, avoiding canned versions that can be overly soft.

Glaze Thickness: Ensure the glaze is smooth and glossy but not too runny; a thicker consistency will cling better to the ham while baking.

Baking Time: Keep an eye on your dish as it bakes; each oven is different, and you want the glaze to be caramelized without burning.

Serving Suggestions: Pair with fluffy rice or creamy mashed potatoes, but don’t forget to drizzle extra glaze over your servings for that burst of flavor!

Leftover Magic: Transform leftovers into delicious sandwiches or salad toppings the next day; the Brown Sugar Pineapple Ham Bake is just as delightful the second time around!

What to Serve with Brown Sugar Pineapple Ham Bake

Elevate your dining experience with delightful sides that complement this sweet and savory ham dish.

  • Fluffy Rice: A classic pairing that soaks up the delicious glaze, adding a comforting base to your meal.

  • Creamy Mashed Potatoes: The buttery texture of mashed potatoes pairs beautifully with the caramelized ham, creating a rich and satisfying duo. Rustically prepared with garlic or herbs can enhance the flavor further!

  • Roasted Vegetables: Bright seasonal veggies like carrots and Brussels sprouts offer a colorful contrast and crunchy texture. Their natural sweetness complements the ham, making for an appealing plate.

  • Fresh Salad: A crisp green salad with a zesty vinaigrette refreshes the palate and adds a crisp element to your meal. Consider adding juicy tomatoes or sliced avocados for an extra touch!

  • Sweet Potato Wedges: These healthy and naturally sweet fries provide a unique flavor twist and a delightful crunch when roasted. Their sweetness harmonizes splendidly with the ham’s glaze.

  • Chilled White Wine: A glass of chilled Sauvignon Blanc or Riesling balances the dish’s sweetness, enhancing your dining experience and making it feel special.

  • Pineapple Upside-Down Cake: For dessert, serve this classic cake that echoes the flavors of your ham bake, completing the tropical theme and leaving everyone wanting more!

Brown Sugar Pineapple Ham Bake

Brown Sugar Pineapple Ham Bake Recipe FAQs

How do I choose ripe pineapple chunks for my Brown Sugar Pineapple Ham Bake?
Absolutely! When selecting pineapple, look for ones that are fragrant, with a golden hue and slight give when pressed. Avoid any that have dark spots all over, which can indicate overripeness. If using canned pineapple, prefer the variety packed in juice instead of syrup for a fresher taste!

How should I store leftover Brown Sugar Pineapple Ham Bake?
To enjoy your leftovers, keep any uneaten Brown Sugar Pineapple Ham Bake in an airtight container in the fridge. It will stay fresh and tasty for up to 3 days. Be sure not to leave it out at room temperature for more than 2 hours for food safety!

Can I freeze Brown Sugar Pineapple Ham Bake?
Yes, you can freeze this dish! After it’s cooled down completely, place it in a freezer-safe container. It’s best consumed within 3 months for optimal flavor. When you’re ready to eat it, simply thaw it overnight in the fridge before reheating!

What’s the best method for reheating Brown Sugar Pineapple Ham Bake?
For the best results, reheat your Brown Sugar Pineapple Ham Bake in the oven at 175°C (350°F) for about 15–20 minutes, or until it’s heated through. This method helps to maintain the dish’s lovely texture without turning rubbery, which can happen in the microwave.

What can I serve alongside Brown Sugar Pineapple Ham Bake?
Very! This dish pairs wonderfully with steamed rice, creamy mashed potatoes, or roasted vegetables. For a delightful twist, feel free to drizzle some extra glaze over your sides to enhance the meal even further!

Savory Brown Sugar Pineapple Ham Bake for a Cozy Dinner

Enjoy a magical meal with this Brown Sugar Pineapple Ham Bake that perfectly balances savory ham with sweet pineapple.

  • Baking Dish
  • Mixing Bowl
  • Whisk

For the Base

  • 4 cups diced ham (source of savory flavor)
  • 1 can pineapple chunks (for sweetness)

For the Glaze

  • 1 cup brown sugar (key ingredient for caramelization)
  • 2 tablespoons Dijon mustard (adds tanginess)
  • 1 tablespoon soy sauce (deepens flavor)
  • 1/2 cup pineapple juice (for extra sweetness)
  • 1/4 teaspoon ground cloves (adds aromatic warmth)

Step-by-Step Instructions

  1. Preheat your oven to 190°C (375°F) and grease a 33×23 cm (9×13-inch) baking dish.
  2. In a medium bowl, whisk together brown sugar, Dijon mustard, soy sauce, pineapple juice, and ground cloves until smooth.
  3. Spread the diced ham and pineapple chunks evenly in the prepared baking dish.
  4. Pour the glaze over the ham and pineapple, gently toss to coat.
  5. Bake uncovered for 30–35 minutes until the glaze is caramelized and bubbly.
  6. Allow to cool slightly before serving warm over rice, mashed potatoes, or roasted vegetables.

Avoid using overly soft canned pineapple. Ensure the glaze has a thick, glossy consistency for best results.

Main Dishes
American
baked ham, Brown Sugar Pineapple Ham Bake, Cozy Meal, easy ham recipe, family dinner, ham and pineapple

Filed Under: Main Dishes

Creamy Pumpkin Gnocchi: A Cozy Fall Favorite You’ll Love

October 27, 2025 by grace bellamy Leave a Comment

The cozy aroma of fall wafts through the kitchen as I prepare a dish that’s as comforting as a warm embrace—Creamy Pumpkin Gnocchi with Spinach and Italian Sausage. This recipe seamlessly blends the earthiness of pumpkin with the savory notes of Italian sausage, creating a heartwarming meal that feels like a hug on a plate. Not only does it come together in just 30 minutes, making it perfect for busy weeknights, but it also strikes the ideal balance between rich and wholesome. The addition of fresh spinach not only elevates the color but adds a burst of nutrients to this creamy dish. Curious about how to bring a little autumn magic to your dinner table? Let’s dive into the details!

Creamy Pumpkin Gnocchi

Why is Creamy Pumpkin Gnocchi a Must-Try?

Cozy Comfort: This dish wraps you in the warm flavors of fall, making it the perfect meal to enjoy on chilly evenings.

Quick to Make: With just 30 minutes from prep to table, it’s an ideal choice for busy weeknights without sacrificing flavor.

Creamy Delight: The luscious combination of pumpkin puree and heavy cream results in a velvety sauce that you won’t be able to resist.

Savory Satisfaction: Packed with Italian sausage, this recipe brings a mouthwatering savory component that perfectly balances the sweetness of pumpkin.

Nutritious Spinach: Adding fresh spinach not only contributes vibrant color but also boosts the nutritional value, making this dish guilt-free indulgence.

If you’re craving more delicious comfort food, check out our Garlic Butter Chicken or our heartwarming Potato Soup Deliciously. Enjoy exploring these flavors!

Creamy Pumpkin Gnocchi Ingredients

For the Gnocchi
• Potato gnocchi – This is the heart of the dish, lending a soft and pillowy texture.
• Olive oil – Used for sautéing, it adds a lovely flavor while keeping everything moist.

For the Sauce
• Italian sausage – The savory goodness in this dish; you can swap for turkey sausage for a lighter option.
• Pumpkin puree – This gives the sauce a rich, creamy base and embodies the essence of autumn.
• Heavy cream – Creates a luscious, velvety sauce that brings the whole dish together.
• Grated Parmesan cheese – Adds a salty, nutty flavor that enhances the creamy texture.
• Garlic – Infuses the dish with aromatic goodness; fresh is best for maximum flavor.
• Nutmeg – Just a pinch elevates the taste with warm, cozy notes complementary to pumpkin.
• Salt and pepper – Essential seasonings to balance and enhance all the flavors.

For the Vegetables
• Fresh spinach leaves – Add at the end to wilt nicely; this contributes both color and nutrients.
• Fresh parsley or basil (optional) – Brilliant garnishes that can brighten up the dish’s presentation.

This Creamy Pumpkin Gnocchi is your new go-to comfort food that embraces the warmth of fall flavors while keeping it wholesome and satisfying!

Step‑by‑Step Instructions for Creamy Pumpkin Gnocchi

Step 1: Cook the Gnocchi
Begin by bringing a large pot of salted water to a rolling boil. Carefully add the potato gnocchi and cook according to the package instructions, usually about 2–4 minutes or until they float to the surface. Once cooked, drain the gnocchi in a colander and set aside, allowing any excess water to escape while you prepare the sauce.

Step 2: Sauté the Sausage
In a large skillet, heat 2 tablespoons of olive oil over medium-high heat. Add the Italian sausage, breaking it apart with a wooden spoon. Sauté for about 5-7 minutes, or until it’s browned and cooked through, with a golden color. Once done, remove the sausage from the skillet and set it aside, leaving the flavorful drippings in the pan.

Step 3: Sauté the Garlic
In the same skillet, add the minced garlic and sauté for about 1 minute, or until fragrant and golden, stirring occasionally to prevent burning. This step will infuse the oil with a delightful garlic aroma, enhancing the flavor of your Creamy Pumpkin Gnocchi.

Step 4: Create the Creamy Sauce
Reduce the skillet heat to medium-low and add the pumpkin puree, heavy cream, grated Parmesan cheese, nutmeg, salt, and pepper into the skillet. Stir continuously for about 3 minutes, until the sauce becomes creamy, well-combined, and slightly thickened. The beautiful orange hue of the pumpkin will shine through, making it irresistible.

Step 5: Combine the Gnocchi and Spinach
Now, gently add the cooked gnocchi and fresh spinach leaves into the skillet. Use a spatula to fold the gnocchi into the sauce for about 2-3 minutes, allowing the spinach to wilt and the gnocchi to be well-coated in that rich creamy sauce. The vibrant colors will brighten your dish!

Step 6: Add the Sausage and Serve
Return the cooked sausage to the skillet, tossing everything together until heated through, about 2 minutes. Make sure everything is evenly distributed in the Creamy Pumpkin Gnocchi. Serve immediately while hot, optionally garnished with fresh parsley or basil for that delightful finishing touch!

Creamy Pumpkin Gnocchi

Tips for the Best Creamy Pumpkin Gnocchi

Perfect Gnocchi Texture: Ensure you don’t overcook the gnocchi; just a few minutes in boiling water is enough to achieve that pillowy softness.

Sausage Options: Feel free to substitute Italian sausage with turkey sausage or even a vegetarian version for a lighter or meat-free option without losing flavor.

Creamy Sauce Secrets: To prevent the sauce from curdling, keep the heat low once you add the heavy cream and blend continuously until preferred consistency is achieved.

Seasoning Balance: Taste and adjust the salt and pepper in your Creamy Pumpkin Gnocchi as you go; the sausage and Parmesan already add saltiness, so be mindful.

Fresh Spinach Addition: Add spinach at the very end; it wilts quickly but retains nutrients and vibrant color, enhancing both taste and presentation.

What to Serve with Creamy Pumpkin Gnocchi

As you savor the comforting flavors of this delightful dish, consider these perfect pairings to create a wholesome meal experience.

  • Garlic Bread: A crunchy, buttery side that perfectly complements the creaminess, making each bite a delightful experience.

  • Roasted Brussels Sprouts: These slightly crispy and caramelized bites add a nutty earthiness, balancing the meal with a robust texture.

  • Caprese Salad: Bright and fresh with ripe tomatoes, creamy mozzarella, and fragrant basil—lightly dressed to contrast the rich gnocchi.

  • Crisp White Wine: A chilled Sauvignon Blanc or Pinot Grigio enhances the meal with its acidity, cleansing the palate between bites.

There’s something magical about a warm drink in chilly weather.

  • Pumpkin Spice Latte: Elevate the autumn experience with this cozy beverage that complements the pumpkin flavors beautifully.

  • Chocolate Mousse: For an indulgent dessert, this rich and airy treat offers a delightful sweet finish to your comforting meal.

Creamy Pumpkin Gnocchi Variations

Feel free to customize your Creamy Pumpkin Gnocchi to make it uniquely yours—the possibilities are as delightful as the dish itself!

  • Meat-Free: Substitute Italian sausage with veggie crumbles or mushrooms for a hearty plant-based option. This twist offers a wonderful earthiness that complements the sauce beautifully.

  • Spicy Kick: Add red pepper flakes or diced jalapeños to the sausage for an extra layer of heat. Just a pinch can elevate the entire dish, making it an exciting meal for spice lovers.

  • Nutty Flavor: Swap heavy cream with coconut cream for a luscious, nutty taste. The creaminess will remain intact, providing a slight sweetness that pairs intriguingly with the pumpkin.

  • Cheesy Goodness: Experiment by adding different cheeses like goat cheese or feta for a tangy twist. Their unique flavors will elevate this comforting dish to new heights.

  • Roasted Veggies: Toss in roasted butternut squash or sweet potatoes for added texture and depth. This addition not only enhances flavor but makes the meal even cozier.

  • Herb Infusion: Try mixing in fresh sage or thyme for an aromatic touch. These fragrant herbs will fill your kitchen with an inviting aroma and add freshness to the creaminess.

  • Extra Creamy: If you’re craving a richer sauce, consider adding cream cheese for an ultra-luxurious finish. This will create a heavenly, creamy texture that you won’t forget!

As you make this recipe your own, you might also enjoy exploring other comforting dishes like our heartwarming Potato Soup Deliciously or the delightful Garlic Butter Chicken. Start experimenting with flavors and enjoy the magic of homemade cooking!

How to Store and Freeze Creamy Pumpkin Gnocchi

Fridge: Store any leftovers in an airtight container for up to 3 days. Before enjoying again, gently reheat on the stovetop over low heat, adding a splash of cream if the sauce thickens.

Freezer: This creamy dish can be frozen for up to 2 months. Portion it out in freezer-safe containers, ensuring it’s tightly sealed to prevent freezer burn.

Thawing: For best results, thaw in the refrigerator overnight. Reheat on low heat, adding a bit of water or cream to restore creaminess.

Reheating: Warm gently on the stovetop, stirring occasionally to keep the Creamy Pumpkin Gnocchi from sticking. Enjoy the cozy flavors all over again!

Make Ahead Options

These Creamy Pumpkin Gnocchi are perfect for meal prep, allowing you to savor this delicious dish even on the busiest weeknights! You can cook the gnocchi and prepare the sauce, including the Italian sausage and spinach, up to 24 hours in advance. Simply store the gnocchi and sauce separately in airtight containers in the refrigerator. When you’re ready to serve, heat the sauce gently over medium heat, then add the gnocchi and spinach until warmed through. This method ensures your dish maintains its creamy texture and vibrant flavor, making it just as delightful as the day you made it!

Creamy Pumpkin Gnocchi

Creamy Pumpkin Gnocchi with Spinach and Italian Sausage Recipe FAQs

How do I choose the right pumpkin puree?
Absolutely! When selecting pumpkin puree, look for a rich, vibrant color without any dark spots or separation. Canned puree is convenient and consistent, but if you prefer fresh, choose a sugar pumpkin, roast, and blend it until smooth!

How should I store leftover Creamy Pumpkin Gnocchi?
Store any leftovers in an airtight container for up to 3 days. Before enjoying again, gently reheat on the stovetop over low heat to prevent the sauce from becoming too thick; you can add a splash of cream or water for creaminess.

Can I freeze Creamy Pumpkin Gnocchi?
Definitely! To freeze, portion the dish into freezer-safe containers and seal tightly. It can be frozen for up to 2 months. For best results, thaw in the refrigerator overnight before reheating gently on low heat.

My sauce turned out too thick; how do I fix it?
No worries! Simply add a splash of milk or cream to the sauce while reheating and stir until it reaches your desired consistency. You can also incorporate a bit of pasta cooking water for the same effect.

Are there any dietary considerations for Creamy Pumpkin Gnocchi?
Yes! If you’re catering to dietary restrictions, you can swap the Italian sausage for turkey sausage or a plant-based alternative for a lighter or vegetarian option. For allergies, ensure your pumpkin puree and cream are free from additives if necessary!

How do I avoid the gnocchi getting mushy?
To achieve that perfect pillowy texture, be sure not to overcook the gnocchi. They typically take about 2-4 minutes to cook in boiling water, so keep a close eye on them; they’re ready when they float to the surface!

Creamy Pumpkin Gnocchi: A Cozy Fall Favorite You’ll Love

Discover the comforting flavors of Creamy Pumpkin Gnocchi, a heartwarming dish perfect for busy fall nights.

  • Large Pot
  • Colander
  • large skillet
  • Wooden Spoon
  • spatula

For the Gnocchi

  • 1 package Potato gnocchi (This is the heart of the dish, lending a soft and pillowy texture.)
  • 2 tablespoons Olive oil (Used for sautéing, it adds a lovely flavor while keeping everything moist.)

For the Sauce

  • 1 pound Italian sausage (The savory goodness in this dish; you can swap for turkey sausage for a lighter option.)
  • 1 cup Pumpkin puree (This gives the sauce a rich, creamy base and embodies the essence of autumn.)
  • 1 cup Heavy cream (Creates a luscious, velvety sauce that brings the whole dish together.)
  • 1/2 cup Grated Parmesan cheese (Adds a salty, nutty flavor that enhances the creamy texture.)
  • 2 cloves Garlic (Infuses the dish with aromatic goodness; fresh is best for maximum flavor.)
  • 1/4 teaspoon Nutmeg (Just a pinch elevates the taste with warm, cozy notes complementary to pumpkin.)
  • to taste Salt (Essential seasonings to balance and enhance all the flavors.)
  • to taste Pepper (Essential seasonings to balance and enhance all the flavors.)

For the Vegetables

  • 2 cups Fresh spinach leaves (Add at the end to wilt nicely; this contributes both color and nutrients.)
  • optional Fresh parsley or basil (Brilliant garnishes that can brighten up the dish’s presentation.)

Step‑by‑Step Instructions

  1. Begin by bringing a large pot of salted water to a rolling boil. Carefully add the potato gnocchi and cook according to the package instructions, usually about 2–4 minutes or until they float to the surface. Once cooked, drain the gnocchi in a colander and set aside.
  2. In a large skillet, heat 2 tablespoons of olive oil over medium-high heat. Add the Italian sausage, breaking it apart with a wooden spoon. Sauté for about 5-7 minutes, or until it’s browned and cooked through. Once done, remove the sausage from the skillet and set it aside.
  3. In the same skillet, add the minced garlic and sauté for about 1 minute, or until fragrant and golden, stirring occasionally to prevent burning.
  4. Reduce the skillet heat to medium-low and add the pumpkin puree, heavy cream, grated Parmesan cheese, nutmeg, salt, and pepper into the skillet. Stir continuously for about 3 minutes, until the sauce becomes creamy and slightly thickened.
  5. Gently add the cooked gnocchi and fresh spinach leaves into the skillet. Use a spatula to fold the gnocchi into the sauce for about 2-3 minutes, allowing the spinach to wilt.
  6. Return the cooked sausage to the skillet, tossing everything together until heated through, about 2 minutes. Serve immediately while hot, optionally garnished with fresh parsley or basil.

Ensure you don’t overcook the gnocchi; just a few minutes in boiling water is enough for a pillowy softness. Adjust the seasoning as needed, considering the salt from sausage and cheese.

Main Dishes
Italian
comfort food, Creamy Pumpkin Gnocchi, Fall Recipes, gnocchi, Italian Sausage, pumpkin

Filed Under: Main Dishes

Savor the Comfort of Hearty Chicken and Vegetable Stew

October 27, 2025 by grace bellamy Leave a Comment

As the aroma of sizzling onions and garlic wafted through my kitchen, I could feel the cozy vibes of my childhood wrapping around me like a warm blanket. This Hearty Chicken and Vegetable Stew is more than just a meal; it’s a ticket to comfort that warms both body and soul. Packed with tender chicken, vibrant veggies, and infused with flavorful herbs, this stew promises to bring smiles around the dinner table. Not only is it a breeze to make—with just 15 minutes of prep time—but it also doubles as the perfect crowd-pleaser for family gatherings or simply a soothing weeknight dinner. Imagine your loved ones diving into each spoonful, appreciating the heartiness that makes this dish a true favorite. Ready to discover the secret to a deliciously fulfilling meal? Let’s dive in!

Hearty Chicken and Vegetable Stew

Why is this stew a must-try?

Comforting Warmth: A bowl of this Hearty Chicken and Vegetable Stew is like a hug in a dish, perfect for chilly evenings.

Flavorful Punch: The combination of juicy chicken and hearty vegetables, all simmered in aromatic herbs, creates a dish bursting with flavor.

Time-Saving Delight: With just 15 minutes of prep, you’ll be enjoying this wholesome meal in under an hour.

Versatile Enjoyment: Pair it with crusty bread or a side salad for a complete dinner that suits any occasion.

Family Favorite: This stew is sure to impress everyone at the table, making it a go-to for gatherings, just like our Crock Pot Chicken or Blackened Chicken Sweet.

Savor each comforting spoonful—you might just find it becomes a beloved staple in your home!

Hearty Chicken and Vegetable Stew Ingredients

For the Stew
• Chicken breast or thighs – 1.5 lbs of boneless, skinless cuts make for a tender and juicy base.
• Olive oil – 2 tablespoons add a touch of richness and help to sauté the vegetables.
• Onion – 1 large, diced onion brings a sweet depth of flavor when sautéed.
• Garlic – 3 cloves of minced garlic infuse delightful aroma and taste.
• Carrots – 2 peeled and sliced carrots introduce natural sweetness and color.
• Celery – 2 stalks, sliced for a refreshing crunch and additional flavor.
• Potatoes – 3 peeled and cubed potatoes add heartiness that makes this stew filling.
• Chicken broth – 2 cups provide a savory foundation for your stew.
• Water – 1 cup helps to balance the flavors and achieve the right consistency.
• Diced tomatoes – 1 can (14 oz) adds a touch of acidity and richness to the mix.
• Dried thyme – 1 teaspoon enhances the comforting flavor profile of the stew.
• Dried oregano – 1 teaspoon brings a fragrant herbaceous note that complements the chicken.
• Bay leaf – 1 leaf infuses a subtle depth, perfect for long, slow cooking.
• Salt and pepper – To taste; seasoning is pivotal for elevating the overall flavor.
• Frozen peas – 1 cup added towards the end for a pop of color and sweetness.
• Fresh parsley – 2 tablespoons chopped for a fresh finish that livens up the stew.

Let the ingredients come together and turn this Hearty Chicken and Vegetable Stew into an unforgettable meal!

Step‑by‑Step Instructions for Hearty Chicken and Vegetable Stew

Step 1: Sauté the Aromatics
In a large pot or Dutch oven, heat 2 tablespoons of olive oil over medium heat. Once shimmering, add 1 large diced onion and sauté until it’s translucent, about 5 minutes. Follow with 3 cloves of minced garlic, stirring for another minute until fragrant, creating a welcoming aroma that fills your kitchen.

Step 2: Brown the Chicken
Add 1.5 lbs of bite-sized chicken pieces to the pot, ensuring not to overcrowd the pan. Cook the chicken for around 5-7 minutes, turning occasionally until lightly browned on all sides. The chicken will acquire a lovely golden color, which not only enhances flavor but also adds visual warmth to your Hearty Chicken and Vegetable Stew.

Step 3: Incorporate the Vegetables
Once the chicken is browned, stir in the sliced carrots, celery, and cubed potatoes. Allow these vibrant vegetables to cook for about 3-4 minutes, stirring occasionally. This step helps to soften the vegetables slightly and allows them to soak up the delicious flavors from the chicken and the aromatics already in the pot.

Step 4: Combine the Liquids
Pour in 2 cups of chicken broth and 1 cup of water into the pot, followed by a can of diced tomatoes with their juices. This mixture will create a flavorful base for your stew. Use a wooden spoon to scrape any browned bits from the bottom of the pot, ensuring that every ounce of flavor is captured in the stew.

Step 5: Add the Seasonings
Sprinkle in 1 teaspoon of dried thyme, 1 teaspoon of dried oregano, salt, and pepper to taste. Don’t forget to add 1 bay leaf to the mix. Stir well to combine all the flavors, creating a beautifully aromatic stew that promises comfort in every spoonful.

Step 6: Simmer for Flavor
Bring the stew to a gentle boil over medium-high heat, then reduce the heat to low. Cover the pot and let it simmer for about 30 minutes. This slow cooking time allows the vegetables to become tender and for the chicken to cook through, melding all the delicious flavors of your Hearty Chicken and Vegetable Stew perfectly.

Step 7: Finish with Peas and Parsley
In the last 5 minutes of cooking, add 1 cup of frozen peas and stir them into the pot. They will brighten the stew and add a touch of sweetness. After the peas are heated through, discard the bay leaf and mix in 2 tablespoons of chopped fresh parsley, adding a lovely fresh note just before serving.

Step 8: Serve with Love
Ladle your Hearty Chicken and Vegetable Stew into warm bowls, letting the colorful medley of ingredients shine through. Pair it with crusty bread for dipping or a simple side salad to round out the meal. Each comforting bowl is sure to bring smiles and warmth to your dinner table.

Hearty Chicken and Vegetable Stew

Helpful Tricks for Hearty Chicken and Vegetable Stew

Perfect Browning: Always ensure the chicken pieces have enough space in the pot. Overcrowding can lead to steaming rather than browning, impacting the stew’s flavor.

Herb Adjustment: Consider adding fresh herbs if available. They can enhance the flavors of your Hearty Chicken and Vegetable Stew, but add them towards the end for freshness.

Texture Control: For optimal texture, cut your vegetables into uniform sizes. This helps them cook evenly and retain their individual flavors, preventing mushiness.

Broth Quality: Use a high-quality chicken broth for a richer taste. Homemade stock can elevate your stew, bringing a depth of flavor that store-bought just can’t match.

Season to Taste: Don’t hesitate to taste test! Adjust the salt and pepper at various stages of cooking to ensure every bite is perfectly seasoned.

Hearty Chicken and Vegetable Stew Variations

Feel free to get creative with this Hearty Chicken and Vegetable Stew! Here are some delightful twists to suit your taste buds.

  • Vegetable-Loaded: Add more vegetables like zucchini or green beans for a colorful and nutritious boost. Each addition will enhance the stew’s texture and flavor!

  • Spicy Kick: Incorporate a teaspoon of red pepper flakes or a chopped jalapeño for that extra heat. Just be prepared for your taste buds to dance!

  • Creamy Comfort: Stir in 1/2 cup of heavy cream or coconut milk at the end for a richer, creamier stew that melts in your mouth. It takes the comfort factor to another level!

  • Herbed Delight: Swap out dried thyme and oregano for fresh herbs like rosemary or basil to elevate the flavor profile beautifully. Fresh herbs offer a burst of freshness in every spoonful.

  • Grain Fusion: Serve over a bed of quinoa or brown rice instead of the traditional crusty bread for a wholesome, nutty twist. It adds both heartiness and a gratifying texture!

  • Protein-Packed: Substitute chicken with diced beef or turkey, allowing you to explore different meat flavors. Each option brings its unique aroma and taste to the stew.

  • Savory Depth: Use homemade bone broth instead of chicken broth for an umami explosion. This enhances flavor and adds many nutrients to your hearty meal.

  • Vegetarian Option: Replace the chicken with chickpeas or lentils for a delicious vegetarian version that’s just as filling and satisfying. This makes it perfect for those meatless nights!

With these variations, you can enjoy an exciting new take on the classic while keeping it as comforting as ever!

What to Serve with Hearty Chicken and Vegetable Stew

A comforting stew deserves delightful companions to enhance your mealtime experience.

  • Crusty Bread: The perfect vessel for soaking up every drop of savory stew, adding a satisfying crunch to each bite.

  • Simple Green Salad: A mix of fresh greens with a light vinaigrette provides a refreshing contrast, balancing the richness of the stew beautifully.

  • Garlic Bread: Crisp on the outside and soft within, garlic bread adds a punch of flavor and an aromatic touch that pairs wonderfully with the stew. Dip it in for an extra treat!

  • Roasted Vegetables: Caramelized and perfectly seasoned, a side of roasted carrots and Brussels sprouts creates depth while keeping the whole meal vibrant.

  • Creamy Mashed Potatoes: Velvety potatoes add a pleasing creaminess that complements the hearty chunks of chicken and vegetables beautifully.

  • Herb-Infused Rice: A subtly flavored rice dish can serve as a delicious base for the stew, soaking up its rich flavors while adding additional texture.

  • Savory Biscuits: Fluffy, buttery biscuits provide a delightful, flaky texture—ideal for mopping up the stew’s broth and enhancing comfort food vibes.

  • Chardonnay or Light Red Wine: A glass of chilled Chardonnay or a light-bodied red enhances the meal’s elegant warmth and highlights its flavors.

  • Apple Crisp: For dessert, nothing beats a warm apple crisp that offers a sweet finish, rounding off a wholesome dining experience with a touch of nostalgia.

Make Ahead Options

These Hearty Chicken and Vegetable Stew ingredients are perfect for meal prep enthusiasts! You can chop the vegetables (onions, carrots, celery, and potatoes) and store them in an airtight container in the refrigerator for up to 3 days. For even more convenience, you can pre-cook the chicken, letting it cool before refrigerating it separately for up to 24 hours. When you’re ready to serve, simply combine all the prepped ingredients in the pot, add the liquids and seasonings, and let it simmer as directed. This way, you’ll enjoy a comforting, delicious stew with minimal effort, perfect for busy weeknights!

How to Store and Freeze Hearty Chicken and Vegetable Stew

Fridge: Store any leftover Hearty Chicken and Vegetable Stew in an airtight container for up to 3 days. This will keep your stew fresh and ready for quick meals.

Freezer: If you want to save it for later, freeze the stew in freezer-safe bags or containers for up to 3 months. Make sure to leave some space at the top for expansion as it freezes.

Reheating: When you’re ready to enjoy your frozen stew, thaw it overnight in the fridge. Reheat on the stovetop over medium heat until hot, or microwave in a covered bowl until steaming. Enjoy!

Portioning: Consider dividing the stew into single-serving portions before freezing. This makes it easier to grab a comforting bowl whenever you need it!

Hearty Chicken and Vegetable Stew

Hearty Chicken and Vegetable Stew Recipe FAQs

How do I choose the best chicken for this stew?
Absolutely! For the best texture and flavor, I recommend using boneless, skinless chicken thighs. They’re juicier and more forgiving during cooking compared to chicken breasts. However, if you prefer leaner meat, chicken breasts work well too—just be cautious not to overcook them, as they can dry out.

How should I store leftover Hearty Chicken and Vegetable Stew?
For any leftovers, simply store the Hearty Chicken and Vegetable Stew in an airtight container in the fridge, where it will stay fresh for about 3 days. When reheating, just give it a gentle stir to bring back the wonderful flavors, and it’s ready to enjoy again!

Can I freeze Hearty Chicken and Vegetable Stew?
Yes, you can freeze it! Let the stew cool completely before transferring it to freezer-safe bags or containers, leaving some space at the top for expansion. It freezes beautifully for up to 3 months. When you’re ready to eat, thaw it overnight in the fridge, and reheat on the stovetop or in the microwave until hot.

What should I do if my stew is too thick?
No worries! If your Hearty Chicken and Vegetable Stew turns out thicker than you like, simply add a splash of chicken broth or water while reheating. Stir it in gradually until you reach your desired consistency. Taste and adjust the seasoning if needed!

Is this stew pet-friendly?
Not entirely. While the chicken and vegetables are generally safe for pets, keep in mind that onions and garlic are toxic to dogs. If you’d like to make a pet-safe version, simply omit the onions and garlic and set aside some plain chicken and vegetables before seasoning the stew.

How can I enhance the flavor of my stew?
For a richer, heartier flavor, consider adding a tablespoon of tomato paste along with the diced tomatoes. You might also experiment with a splash of balsamic vinegar just before serving for a delightful tang. Fresh herbs, added at the end of cooking, can also brighten up the dish!

Savor the Comfort of Hearty Chicken and Vegetable Stew

This Hearty Chicken and Vegetable Stew is a comforting meal that warms both body and soul.

  • large pot or Dutch oven

For the Stew

  • 1.5 lbs boneless, skinless chicken breast or thighs (tender and juicy base)
  • 2 tablespoons olive oil (for sautéing)
  • 1 large onion (diced)
  • 3 cloves garlic (minced)
  • 2 carrots (peeled and sliced)
  • 2 stalks celery (sliced)
  • 3 potatoes (peeled and cubed)
  • 2 cups chicken broth (for savory foundation)
  • 1 cup water (to balance flavors)
  • 1 can diced tomatoes (14 oz can)
  • 1 teaspoon dried thyme
  • 1 teaspoon dried oregano
  • 1 leaf bay leaf
  • salt and pepper (to taste)
  • 1 cup frozen peas (added towards the end)
  • 2 tablespoons fresh parsley (chopped)

Step-by-Step Instructions

  1. In a large pot or Dutch oven, heat 2 tablespoons of olive oil over medium heat. Once shimmering, add 1 large diced onion and sauté until it’s translucent, about 5 minutes. Follow with 3 cloves of minced garlic, stirring for another minute until fragrant.
  2. Add 1.5 lbs of bite-sized chicken pieces to the pot, ensuring not to overcrowd the pan. Cook the chicken for around 5-7 minutes, turning occasionally until lightly browned on all sides.
  3. Once the chicken is browned, stir in the sliced carrots, celery, and cubed potatoes. Allow these vibrant vegetables to cook for about 3-4 minutes, stirring occasionally.
  4. Pour in 2 cups of chicken broth and 1 cup of water into the pot, followed by a can of diced tomatoes with their juices. Use a wooden spoon to scrape any browned bits from the bottom of the pot.
  5. Sprinkle in 1 teaspoon of dried thyme, 1 teaspoon of dried oregano, salt, and pepper to taste, and add 1 bay leaf. Stir well to combine all the flavors.
  6. Bring the stew to a gentle boil over medium-high heat, then reduce the heat to low. Cover the pot and let it simmer for about 30 minutes.
  7. In the last 5 minutes of cooking, add 1 cup of frozen peas and stir them into the pot. After the peas are heated through, discard the bay leaf and mix in 2 tablespoons of chopped fresh parsley.
  8. Ladle your Hearty Chicken and Vegetable Stew into warm bowls. Pair it with crusty bread or a simple side salad.

Taste test and adjust seasoning as necessary during cooking. Consider pairing with crusty bread for a complete meal.

Main Dishes
American
chicken stew, comfort food, family recipe, Hearty Chicken and Vegetable Stew, Soup, vegetable stew

Filed Under: Main Dishes

Irresistible No Bake Pumpkin Spice Delight in Just 20 Minutes

October 27, 2025 by grace bellamy Leave a Comment

As I stood in my kitchen, the air filled with cozy autumn scents, I couldn’t help but crave something sweet yet effortless. Enter the No Bake Pumpkin Spice Delight, a delightful treat that brings all the warm, spiced notes of fall without the fuss of baking. This recipe is perfect for anyone looking to indulge their dessert-loving spirit quickly – all it takes is 20 minutes of prep and a bit of chilling time! With a creamy pumpkin filling and a crunchy graham cracker crust, it’s not just a crowd-pleaser; it’s also a fabulous addition to your holiday table that anyone can whip up. Whether you’re entertaining guests or simply treating yourself, this luscious dessert is the ideal antidote to busy weekdays. Are you ready to dive into this blissful no-bake experience?

No Bake Pumpkin Spice Delight

Why is this dessert a must-try?

Irresistible flavors blend seamlessly in this No Bake Pumpkin Spice Delight, offering a warm embrace of fall in every bite. Quick prep of just 20 minutes means you can whip it up effortlessly, even on hectic days. No oven required makes it perfect for those warm-weather gatherings or small kitchens. Crowd-pleaser guaranteed; everyone will be asking for the recipe! Plus, it can be customized with your favorite toppings or served as an impressive centerpiece at your next gathering. Try pairing it with a warm cup of spiced chai for a delightful finish!

No Bake Pumpkin Spice Delight Ingredients

• Get ready to gather these essential ingredients for your sweet creation!

For the Crust

  • Graham cracker crumbs – a perfect base that adds crunch and sweetness.
  • Unsalted butter – binds the crumbs together for a rich flavor.

For the Filling

  • Powdered sugar – sweetens the filling without grittiness.
  • Cream cheese – adds a creamy texture that balances the pumpkin.
  • Pumpkin puree – gives the No Bake Pumpkin Spice Delight its signature flavor.
  • Vanilla extract – enhances the sweetness with a warm, aromatic layer.
  • Pumpkin pie spice – infuses the dish with classic fall spices for perfect flavor harmony.
  • Whipped topping – ensures the filling is light and airy, making it a treat for your taste buds.

For the Garnish

  • Additional whipped topping – for a fluffy final touch that looks as good as it tastes.
  • Ground cinnamon – adds a sprinkle of warmth that’s visually appealing and flavorful.
  • Crushed graham crackers – provides an extra crunch on top, elevating the presentation.

Step‑by‑Step Instructions for No Bake Pumpkin Spice Delight

Step 1: Prepare the Crust
In a medium bowl, combine 2 cups of graham cracker crumbs with 1/2 cup of melted unsalted butter. Mix well until the crumbs are evenly moistened and the mixture holds together when pressed. Firmly press this mixture into the bottom of a 9×9 inch dish, creating an even crust that should feel slightly compact.

Step 2: Mix the Filling
In a large mixing bowl, beat together 1 cup of powdered sugar and 1 package (8 oz) of softened cream cheese using an electric mixer at medium speed. Continue mixing for about 3-4 minutes, or until you achieve a smooth and creamy consistency. This will be the luscious base for your No Bake Pumpkin Spice Delight.

Step 3: Add the Pumpkin and Spices
Gently fold in 1 cup of pumpkin puree, 1 teaspoon of vanilla extract, and 1 teaspoon of pumpkin pie spice into the cream cheese mixture. Use a spatula to mix thoroughly until all ingredients are fully combined. The mixture should have a lovely caramel color and a fragrant aroma, embodying the essence of fall.

Step 4: Incorporate the Whipped Topping
Carefully fold in 1 container (8 oz) of thawed whipped topping into the pumpkin mixture, combining the ingredients until light and fluffy. This will help to create a creamy texture while adding an airy feel to your filling. Take your time to ensure it’s well mixed, as this is critical for the final texture of your No Bake Pumpkin Spice Delight.

Step 5: Assemble the Dessert
Using a spatula, spread the fluffy pumpkin filling evenly over the prepared graham cracker crust. Make sure to reach the edges and smooth the top, creating a beautiful, even layer. This step is crucial, as it will help set the dessert for that delightful presentation when serving.

Step 6: Chill Until Set
Place the assembled No Bake Pumpkin Spice Delight into the refrigerator and chill for at least 2 hours. This allows the filling to firm up and blend the flavors beautifully. Once firm, you’ll know it’s ready when it holds its shape and the topping looks freshly set.

Step 7: Garnish and Serve
Before serving, remove the dessert from the refrigerator. Top it with additional whipped topping, a light sprinkle of ground cinnamon, and crushed graham crackers for garnish. This finishing touch not only adds flavor but also creates an appetizing appearance, making your No Bake Pumpkin Spice Delight irresistible!

No Bake Pumpkin Spice Delight

No Bake Pumpkin Spice Delight Variations

Feel free to mix things up with these fun variations and substitutions that will make your dessert experience even more delightful!

  • Dairy-Free: Swap cream cheese for a vegan alternative and use coconut whipped topping for a creamy, rich flavor without dairy.

  • Gluten-Free: Use gluten-free graham cracker crumbs to create a tasty crust that everyone can enjoy without compromising on texture. It’s little changes like this that make a big difference!

  • Maple Twist: Replace powdered sugar with maple syrup for a natural sweetness that enhances the seasonal flavors in an exciting way. The rich maple notes will take your dessert on a sweet adventure!

  • Spicy Kick: Add a pinch of cayenne pepper or some finely chopped ginger for a surprising heat that complements the pumpkin spice beautifully. This is perfect for those who enjoy a touch of warmth in every bite!

  • Nutty Crunch: Fold in some crushed walnuts or pecans into the filling for added texture and a deliciously nutty flavor. This gives the dessert a delightful crunch that balances well with the creamy filling.

  • Caramel Drizzle: Drizzle homemade or store-bought caramel sauce over the top before serving for an extra layer of sweetness and a beautiful presentation. People won’t be able to resist reaching for another slice!

  • Chocolate Layer: Layer some chocolate pudding or chocolate ganache beneath the pumpkin filling for a rich, decadent twist that chocolate lovers will adore. It’s an irresistible combination of flavors that creates pure bliss!

  • Fruit Topping: Top your No Bake Pumpkin Spice Delight with fresh sliced apples or pears for a refreshing contrast to the creamy filling, adding both beauty and flavor to your presentation. It’s a lovely touch that brings a burst of freshness.

Each of these variations adds a personal touch, making this recipe your own and ensuring it’s a stunning hit at any gathering. Enjoy exploring these exciting alternatives, and remember, cooking is all about creativity and joy! For additional ideas on delightful treats, check out my other favorite recipes like Chocolate Chip Cookie Bars or Classic Apple Crisp. Happy cooking!

Helpful Tricks for No Bake Pumpkin Spice Delight

  • Crust Consistency: Ensure the graham cracker mixture feels slightly moist but not soggy; this will give you a solid base that holds together.

  • Cream Cheese Softening: Always let the cream cheese soften at room temperature for at least 30 minutes. Cold cream cheese can create lumps in your filling.

  • Whipped Topping Technique: When folding in the whipped topping, use a gentle hand to avoid deflating the mixture. This keeps the No Bake Pumpkin Spice Delight light and airy.

  • Chilling Time: Don’t rush the chilling process. Allow at least 2 hours in the fridge for the dessert to set properly, ensuring clean slices when serving.

  • Decorative Garnish: Get creative with your toppings! In addition to cinnamon and graham cracker crumbles, consider adding chopped nuts or caramel drizzle for a delicious twist.

Make Ahead Options

These No Bake Pumpkin Spice Delight treats are perfect for meal prep, allowing you to savor the flavors of fall during your busiest weeks! You can prepare the graham cracker crust and the pumpkin filling separately up to 24 hours in advance. Just keep the crust covered at room temperature and the filling refrigerated to maintain its light, creamy texture. When you’re ready to serve, simply spread the chilled pumpkin mixture over the prepared crust and refrigerate for another 2 hours to set. Finishing touches like whipped topping and garnishes can be added just before serving, ensuring your dessert remains fresh and inviting while saving you precious time!

How to Store and Freeze No Bake Pumpkin Spice Delight

Fridge: Store your No Bake Pumpkin Spice Delight covered in the refrigerator for up to 3 days. This keeps it fresh and maintains the creamy texture.

Freezer: For longer storage, freeze individual slices wrapped in plastic wrap and then in foil for up to 2 months. Thaw overnight in the refrigerator before serving.

Serving: When ready to enjoy, let it sit at room temperature for about 10-15 minutes after taking it out of the fridge to soften slightly.

Reheating: No reheating is necessary, as this dessert is best enjoyed chilled. Just garnish with fresh toppings before serving to enhance its appeal!

What to Serve with No Bake Pumpkin Spice Delight

Whether you’re hosting a cozy gathering or just enjoying a quiet evening at home, adding complementary dishes to your No Bake Pumpkin Spice Delight can elevate your dessert experience.

  • Creamy Mashed Potatoes: These buttery potatoes provide a comforting, velvety texture that contrasts beautifully with the dessert’s smoothness.
  • Spiced Apple Cider: Serve warm or chilled, this drink’s apple and spice notes harmonize with the pumpkin flavors, creating a cozy vibe.
  • Candied Pecans: Their sweet crunch adds a delightful textural contrast, while the nuttiness pairs well with the spiced filling.
  • Roasted Brussels Sprouts: These caramelized sprouts introduce a savory element, balancing the sweetness of the dessert perfectly for a satisfying meal.
  • Vanilla Bean Ice Cream: A scoop of this creamy treat brings a classic flavor that complements the pumpkin without overshadowing its spices.
  • Chai Tea: The warm spices in chai resonate with the pumpkin pie spices, enhancing the whole dining experience with comforting warmth.

Adding these tasty pairings not only highlights the No Bake Pumpkin Spice Delight but also creates a festive and memorable meal for you and your loved ones!

No Bake Pumpkin Spice Delight

No Bake Pumpkin Spice Delight Recipe FAQs

What kind of pumpkin puree should I use?
I recommend using 100% pure pumpkin puree for this No Bake Pumpkin Spice Delight. Avoid pumpkin pie filling, as it contains added sugars and spices that can alter the flavor and texture of your dessert.

How should I store leftovers?
Absolutely! You can store your No Bake Pumpkin Spice Delight covered in the refrigerator for up to 3 days. Make sure it’s sealed tightly to prevent it from absorbing any odors from the fridge.

Can I freeze No Bake Pumpkin Spice Delight?
Yes, you can freeze this delightful dessert! To do so, wrap individual slices in plastic wrap and then in foil to prevent freezer burn. It can be stored for up to 2 months. To enjoy, simply thaw in the refrigerator overnight and let it sit at room temperature for about 10-15 minutes before serving.

What if my filling turns out lumpy?
If your filling is lumpy, it may be due to the cream cheese not being softened enough. Always let the cream cheese sit at room temperature for at least 30 minutes before mixing. If lumps persist, you can pass the filling through a sieve or mix it for an additional minute or two until smooth.

Are there any allergens in this recipe?
This No Bake Pumpkin Spice Delight contains dairy (cream cheese and whipped topping) and gluten (graham crackers). If you’re serving guests with dietary restrictions, consider using gluten-free graham crackers and dairy-free cream cheese alternatives for a delicious and inclusive treat!

Irresistible No Bake Pumpkin Spice Delight in Just 20 Minutes

Indulge in a creamy No Bake Pumpkin Spice Delight that brings cozy autumn flavors without baking.

  • Mixing Bowl
  • Electric mixer
  • spatula
  • 9×9-inch dish

For the Crust

  • 2 cups graham cracker crumbs
  • 1/2 cup unsalted butter (melted)

For the Filling

  • 1 cup powdered sugar
  • 8 oz cream cheese (softened)
  • 1 cup pumpkin puree
  • 1 teaspoon vanilla extract
  • 1 teaspoon pumpkin pie spice
  • 8 oz whipped topping (thawed)

For the Garnish

  • 1 cup additional whipped topping
  • 1 teaspoon ground cinnamon
  • 1/4 cup crushed graham crackers

Crust Preparation

  1. Combine graham cracker crumbs with melted butter. Mix until evenly moistened and press into the bottom of a 9×9 inch dish.

Filling Preparation

  1. Beat powdered sugar and softened cream cheese together until smooth and creamy.
  2. Fold in pumpkin puree, vanilla extract, and pumpkin pie spice until fully combined.
  3. Carefully fold in thawed whipped topping until light and fluffy.

Assemble and Chill

  1. Spread the pumpkin filling evenly over the crust and smooth the top. Chill in the refrigerator for at least 2 hours.
  2. Before serving, garnish with additional whipped topping, ground cinnamon, and crushed graham crackers.

Ensure cream cheese is softened for smoother mixing. Chill time is crucial for setting the dessert properly.

Dessert
American
fall recipe, Holiday Treat, No Bake Pumpkin Spice Delight, No-Bake Dessert, Pumpkin Dessert, quick dessert

Filed Under: Dessert

Lentil and Rice Stuffed Cabbage Rolls: Comfort in Every Bite

October 26, 2025 by grace bellamy Leave a Comment

The aroma of roasted cabbage fills the kitchen as I roll up my sleeves for a cozy dinner. This isn’t just any meal; it’s an adventure that combines comfort with nutrition in my Lentil and Rice Stuffed Cabbage Rolls. With just a handful of wholesome ingredients, these delightful rolls are a crowd-pleaser that offer a perfect blend of flavors, a healthy twist on a traditional dish, and a fabulous way to repurpose leftover produce. They’re also freezer-friendly, making them an easy option for busy weeknights or meal prep. As I layer each cabbage leaf with a savory mix of lentils, rice, and spices, I can’t help but wonder: what comforting dish will you create next in your kitchen?

Lentil and Rice Stuffed Cabbage Rolls

Why Are These Cabbage Rolls So Special?

Explosive flavor: With a delightful mix of lentils, rice, and spices, each bite brings a rich and wholesome taste. Easy to prepare: Cooking and assembling these cabbage rolls is straightforward, perfect for both beginners and seasoned chefs. Healthy twist: This nutritious dish is a fantastic way to enjoy vegetables, and you can easily add ingredients like spinach or grated carrots for extra goodness. Meal prep friendly: You can prepare a large batch and freeze them for busy days, just like my Crock Pot Chicken and Rice for easy dinners. Crowd-pleaser: Friends and family will love these vibrant rolls at your dinner table, making it a hit similar to my delicious Crab Stuffed Mushrooms.

Lentil and Rice Stuffed Cabbage Rolls Ingredients

For the Cabbage

  • 1 medium head green or Savoy cabbage – choose Savoy for a sweeter, more tender option that rolls easily.

For the Filling

  • 1 cup lentils – packed with protein, these legumes are perfect for the filling and add hearty texture.
  • 1 cup rice – use long-grain rice for a fluffy consistency that complements the lentils.

For the Seasoning

  • 1 teaspoon smoked paprika – this adds a delightful smokiness that enhances the overall flavor.
  • 1 teaspoon cumin – a warm spice that brings depth and complexity to your cabbage rolls.
  • Salt to taste – adjust based on your personal preference or dietary needs.
  • Pepper to taste – freshly ground black pepper will elevate the flavors beautifully.

For the Sauce

  • 2 cups homemade tomato sauce – homemade sauce provides a fresh and vibrant flavor that pairs perfectly with the rolls.

Optional Add-ins

  • Spinach – a great way to sneak in some extra greens for added nutrition.
  • Grated carrots – for sweetness and color, adding a delightful crunch.
  • Chopped nuts – for a satisfying texture and an extra boost of flavor.

These Lentil and Rice Stuffed Cabbage Rolls can be a delightful addition to your meal rotation!

Step‑by‑Step Instructions for Lentil and Rice Stuffed Cabbage Rolls

Step 1: Preheat the Oven
Begin by preheating your oven to 375°F (190°C) to ensure it’s hot and ready for your Lentil and Rice Stuffed Cabbage Rolls. This temperature is perfect for baking the rolls to tender perfection while allowing the flavors to meld beautifully. Set a timer for 30 to 40 minutes once the rolls are in the oven for baking.

Step 2: Prepare the Cabbage
Carefully remove the leaves from the head of cabbage, selecting the larger outer leaves to use for your rolls. Bring a large pot of water to a boil and blanch the leaves for about 2-3 minutes, or steam them until they are soft and pliable. This step ensures that the cabbage wraps easily around the filling without tearing.

Step 3: Cook the Filling
In a medium saucepan, combine 1 cup of lentils and 1 cup of rice, then follow the package instructions for cooking each. Typically, you’ll simmer them in water for about 20-30 minutes until both are tender yet slightly firm. This hearty filling, packed with protein and flavor, will be the star of your stuffed cabbage rolls.

Step 4: Season the Mixture
Once the lentils and rice are cooked, drain any excess water and transfer them to a large mixing bowl. Stir in 1 teaspoon of smoked paprika, 1 teaspoon of cumin, and add salt and pepper to taste. Mix thoroughly until all ingredients are well combined, ensuring your Lentil and Rice Stuffed Cabbage Rolls are bursting with flavor.

Step 5: Assemble the Rolls
Take a softened cabbage leaf and place a generous portion of the lentil and rice mixture at the base. Roll the leaf tightly, folding in the sides to secure the filling, and then place the roll seam-side down in a baking dish. Repeat this process until all leaves are filled, creating a delightful array of cabbage rolls.

Step 6: Add the Sauce
Pour 2 cups of homemade tomato sauce over the assembled cabbage rolls in the baking dish, ensuring they’re well covered. This sauce not only keeps the rolls moist while baking but also enhances their flavor significantly. If desired, sprinkle extra spices or garnishes on top for added flair.

Step 7: Bake to Perfection
Place the baking dish in the preheated oven and bake the rolls for 30-40 minutes. Look for the cabbage to become tender and the sauce to bubble slightly around the edges. Your Lentil and Rice Stuffed Cabbage Rolls will be ready when heated through, with a warm and inviting aroma filling your kitchen.

Lentil and Rice Stuffed Cabbage Rolls

Lentil and Rice Stuffed Cabbage Rolls Variations

Feel free to transform these cabbage rolls into your own signature dish with various delightful twists and substitutions.

  • Quinoa Boost: Swap rice for quinoa for a nutty flavor and added protein. It’s a wholesome replacement that enhances the nutritional profile of your dish.

  • Vegetarian Delight: Add mushrooms to the lentil and rice mixture for a savory, umami-packed flavor. The mushrooms create a hearty texture, making each bite even more satisfying.

  • Spicy Kick: Incorporate diced jalapeños or red pepper flakes into the filling to spice things up! For those who love a little heat, it’ll elevate the overall taste of your rolls.

  • Herb-Infused: Toss fresh herbs like basil or parsley in with the filling for a vibrant flavor explosion. These aromatic additions create a refreshing contrast that’s simply irresistible.

  • Creamy Texture: Mix in cream cheese or sour cream into the filling for a rich, creamy twist. This variation adds a luxurious mouthfeel, making each roll even more decadent.

  • Nuts About It: Add chopped walnuts or almonds for a crunchy surprise. The texture contrast between the soft cabbage and crunchy nuts creates an exciting eating experience.

  • Sautéed Spinach: Blend sautéed spinach into the filling for extra nutrients and color. It not only enhances the dish’s appeal but also brings a delightful freshness.

These versatile changes will allow you to customize the Lentil and Rice Stuffed Cabbage Rolls while ensuring that every bite is as comforting as it is satisfying. If you’re in search of more inspiration, you might enjoy exploring my Unstuffed Cabbage Rolls or Hamburger Rice Casserole for variations that spark creativity!

Expert Tips for Lentil and Rice Stuffed Cabbage Rolls

  • Choose the Right Cabbage: Opt for green or Savoy cabbage; Savoy is more tender and easier to roll, ensuring your stuffed cabbage rolls hold together perfectly.

  • Avoid Overcooking the Leaves: Steam or blanch the cabbage leaves just until soft; overcooking will make them mushy and prone to tearing when you assemble the rolls.

  • Flavor the Filling: Feel free to play with spices; try adding herbs like oregano or thyme to your lentil and rice mixture for even more depth in your Lentil and Rice Stuffed Cabbage Rolls.

  • Sauce Matters: Use a rich homemade tomato sauce; it adds freshness and complements the filling. Store-bought sauce can be fine but lacks that homemade flavor.

  • Time-Saving Tip: Prepare the lentils and rice ahead of time and store them in the fridge to save on assembly time during busy weeknights.

How to Store and Freeze Lentil and Rice Stuffed Cabbage Rolls

Fridge: Store the assembled cabbage rolls in an airtight container in the refrigerator for up to 3 days. Make sure to cover them with additional tomato sauce to keep them moist.

Freezer: For longer storage, freeze the assembled rolls before baking. Wrap them tightly in plastic wrap and place them in a freezer-safe container for up to 3 months.

Reheating: When you’re ready to enjoy, thaw the frozen rolls overnight in the fridge. Bake from cold, adding a bit more sauce on top, for about 40-50 minutes at 375°F (190°C) until heated through.

Leftovers: Any leftover cooked rolls can be stored in the fridge for 2-3 days; simply reheat in the oven or microwave, adding extra sauce to maintain moisture for the best experience with your Lentil and Rice Stuffed Cabbage Rolls.

What to Serve with Lentil and Rice Stuffed Cabbage Rolls

Elevate your dining experience with delicious sides that create a harmonious meal.

  • Creamy Mashed Potatoes: Their velvety texture pairs beautifully with the tender cabbage and savory filling.
  • Garlic Roasted Vegetables: The caramelized sweetness adds a delightful contrast, brightening your plate with color and flavor.
  • Zesty Coleslaw: A crunchy, tangy side that brings freshness and complements the hearty cabbage rolls perfectly.
  • Herbed Quinoa Salad: Light and nutritious, this salad’s fresh herbs offer a fragrant contrast to the rich sweetness of the rolls.
  • Homemade Breadsticks: Soft, warm, and inviting, they are perfect for soaking up any extra sauce on your plate.
  • Crisp Garden Salad: Mix greens with a simple vinaigrette; the freshness cuts through the richness, balancing the meal beautifully.
  • Chilled Cucumber Soup: Refreshing and smooth, this cool soup can be a delightful opener to your hot, comforting rolls.

Make Ahead Options

These Lentil and Rice Stuffed Cabbage Rolls are perfect for busy home cooks looking to save time during the week! You can prepare the filling (lentils and rice mixed with spices) up to 3 days in advance, storing it in the refrigerator in an airtight container. Additionally, the cabbage leaves can be blanched and stored for 24 hours before assembling to ensure they remain pliable. When you’re ready to enjoy your meal, simply assemble the rolls and pour tomato sauce over them before baking. This way, your rolls are just as delicious and maintain their quality, making mealtime a breeze!

Lentil and Rice Stuffed Cabbage Rolls

Lentil and Rice Stuffed Cabbage Rolls Recipe FAQs

What type of cabbage is best for stuffing?
Absolutely, I recommend using either green or Savoy cabbage. Savoy cabbage is particularly tender and has a slightly sweeter flavor, which makes it easier to roll without tearing. It gives every bite a lovely texture in your Lentil and Rice Stuffed Cabbage Rolls.

How do I store leftover cabbage rolls?
Store any leftover cabbage rolls in an airtight container in the fridge for up to 3 days. To maintain their moisture, ensure they are covered with additional tomato sauce. This way, they’ll stay delightful and flavorful for your next meal!

Can I freeze Lentil and Rice Stuffed Cabbage Rolls?
Yes! For longer storage, freeze the assembled cabbage rolls before baking. Wrap them tightly in plastic wrap and place them in a freezer-safe container. They can be stored for up to 3 months. To reheat, thaw them overnight in the fridge, and then bake at 375°F (190°C) for about 40-50 minutes, adding a little extra sauce on top for moisture.

What should I do if my cabbage leaves tear?
No worries if your leaves tear—this can happen! I suggest using smaller pieces of leaf to create patchwork rolls. Alternatively, if a leaf is too shredded, you can finely chop it and mix it into the filling for added flavor and texture, which will still work beautifully in your rolls.

Are these cabbage rolls suitable for people with dietary restrictions?
Absolutely! These lentil and rice stuffed cabbage rolls are vegetarian and can easily be made vegan by ensuring the tomato sauce is plant-based. Additionally, you can tailor the spices and vegetables in the filling to accommodate allergies; just keep an eye out for nuts if you’re using them as optional add-ins.

How do I know if my lentils and rice are cooked perfectly?
To ensure they’re just right, cook the lentils and rice according to package instructions, typically simmering for about 20-30 minutes. The lentils should be tender but not mushy, while the rice should be fluffy and slightly firm. Tasting a few grains before mixing them into your filling is a good idea to achieve that perfect texture in your Lentil and Rice Stuffed Cabbage Rolls!

Lentil and Rice Stuffed Cabbage Rolls: Comfort in Every Bite

Lentil and Rice Stuffed Cabbage Rolls offer a hearty, nutritious blend of flavors, making them a perfect comfort dish for any occasion.

  • Oven
  • Large Pot
  • Medium saucepan
  • Baking Dish
  • Mixing Bowl
  • Cooking Spoon

For the Cabbage

  • 1 medium head green or Savoy cabbage (Choose Savoy for sweeter, more tender option.)

For the Filling

  • 1 cup lentils (Packed with protein for hearty texture.)
  • 1 cup rice (Use long-grain for fluffy consistency.)

For the Seasoning

  • 1 teaspoon smoked paprika (Adds delightful smokiness.)
  • 1 teaspoon cumin (Brings depth and complexity.)
  • to taste salt (Adjust based on preference.)
  • to taste pepper (Freshly ground for elevated flavor.)

For the Sauce

  • 2 cups homemade tomato sauce (Provides fresh and vibrant flavor.)

Optional Add-ins

  • spinach (Sneak in extra greens.)
  • grated carrots (Adds sweetness and color.)
  • chopped nuts (Adds texture and flavor.)

Step‑by‑Step Instructions

  1. Preheat your oven to 375°F (190°C).
  2. Remove leaves from cabbage, blanch in boiling water for 2-3 minutes or steam until soft.
  3. In a medium saucepan, cook 1 cup of lentils and 1 cup of rice according to package instructions, about 20-30 minutes.
  4. Once cooked, drain and mix in a large bowl with smoked paprika, cumin, salt, and pepper.
  5. Take a cabbage leaf, fill with the lentil mixture, roll tightly, and place seam-side down in a baking dish.
  6. Pour tomato sauce over the rolls in the baking dish.
  7. Bake for 30-40 minutes, until cabbage is tender and sauce is bubbling.

These rolls can be prepared in advance and stored in the fridge or freezer, making them a convenient meal option.

Main Dishes
Comfort Food
Cabbage Rolls, Freezer-friendly, healthy dinner, Lentil and Rice Stuffed Cabbage Rolls, meal prep, Vegetarian

Filed Under: Main Dishes

Zesty Italian Lemon Garlic Pasta Ready in 30 Minutes

October 26, 2025 by grace bellamy Leave a Comment

The moment the aromatic scent of garlic begins to fill the kitchen, I know I’m in for a treat. There’s a certain magic in preparing Italian Lemon Garlic Pasta that instantly takes me back to sun-drenched cafes in Italy, where every bite is a celebration of simplicity and flavor. This dish is not only quick to prepare—ready in just 30 minutes—but it also brings a burst of brightness with zesty lemon and the warmth of toasted garlic. Perfect for busy weeknights or an intimate gathering, it caters to all pasta lovers craving something fresh yet comforting. Trust me, the delightful combination of butter, lemon, and parsley will have your family begging for seconds. Ready to make your own culinary escape to Italy?

Italian Lemon Garlic Pasta

Why is this pasta recipe amazing?

Simplicity: With just a few ingredients and straightforward steps, this dish can be whipped up in just 30 minutes, making it a go-to for busy weeknights.

Bright flavor: The zesty lemon and fragrant garlic work together to create a lively dish that awakens the senses.

Versatile: Pair this pasta with grilled chicken or roasted vegetables for a complete meal, or enjoy it on its own topped with freshly grated Parmesan.

Crowd-pleaser: It’s perfect for dinner parties or cozy family meals, guaranteed to impress everyone at your table.

Comfort food: This Italian Lemon Garlic Pasta wraps you in warmth and satisfaction, making you feel right at home.

For a creamy twist, try it alongside Garlic Butter Pasta, or serve it with a refreshing Pasta Salad for a complete feast!

Italian Lemon Garlic Pasta Ingredients

• Dive into a delightful dish!

For the Pasta

  • 8 oz spaghetti – Feel free to swap it for linguine, fettuccine, or bucatini based on your preference.
  • ½ cup reserved pasta water – This helps create a luscious sauce that clings to every strand of pasta.

For the Sauce

  • 4 tbsp unsalted butter – This adds richness to the dish without overpowering the lemon zest.
  • 4 tbsp olive oil – Use extra for tossing the pasta later for added flavor.
  • 6–8 garlic cloves, minced (~2 tbsp) – The heart of this recipe; freshly minced garlic delivers the best aroma.
  • 1 tsp Italian seasoning – Adds depth and a touch of the Italian countryside to every bite.
  • Zest of 2 lemons (~2 tbsp) – The zest brightens the dish; make sure to avoid the white pith.
  • Juice of 1 lemon (~2 tbsp) – A splash of acidity that brings everything together.

For Finishing Touches

  • ⅓ cup fresh parsley, chopped – A fresh herb that adds both color and flavor to your pasta.
  • Kosher salt, to taste – Essential for enhancing all other flavors present in the dish.
  • Freshly cracked black pepper, to taste – Adds a mild kick without overwhelming the palate.
  • Grated Parmesan cheese – A creamy topping that enhances the umami profile of your Italian Lemon Garlic Pasta.
  • Crushed red pepper flakes (optional) – For those who crave a bit of heat in their pasta.

Step‑by‑Step Instructions for Italian Lemon Garlic Pasta

Step 1: Boil the Pasta
Fill a large pot with water and add a generous amount of salt, bringing it to a rolling boil over high heat. Once boiling, add 8 oz of spaghetti and cook until al dente, about 8–10 minutes. Remember to taste the pasta a minute or two before the time is up. When ready, reserve ½ cup of the starchy pasta water, then drain the pasta and toss it lightly with a drizzle of olive oil, setting it aside.

Step 2: Sauté the Garlic
In a large skillet, combine 4 tbsp of unsalted butter and 4 tbsp of olive oil over medium-low heat. Allow the butter to melt and gently bubble, then add 6–8 minced garlic cloves. Sauté for 1–2 minutes, stirring constantly, until the garlic is fragrant and turns a light golden color but be careful not to let it brown, which could cause bitterness.

Step 3: Add Seasonings
Sprinkle 1 tsp of Italian seasoning and the zest of 2 lemons into the skillet. Toast the mixture for about 30 seconds, stirring frequently to release the aromatic oils and enhance the flavors. The delightful scent of this Italian Lemon Garlic Pasta will begin to fill your kitchen, hinting at the deliciousness to come.

Step 4: Stir in Lemon Juice
Pour in the juice of 1 lemon and stir the mixture well, letting it simmer gently for 1–2 minutes. This step allows the bright citrus flavors to meld with the butter and oil, creating the base of your luscious sauce. Keep an eye on it; you want a vibrant mix that’s warm but not boiling vigorously.

Step 5: Combine Pasta and Sauce
Add the cooked spaghetti to the skillet, using tongs to gently toss and coat the pasta evenly with the sauce. Gradually add the reserved pasta water, about 2–3 tbsp at a time, stirring constantly. Keep mixing until the sauce emulsifies and develops a glossy coating over the pasta, ensuring every strand gets that delicious Italian Lemon Garlic flavor.

Step 6: Finish the Dish
Remove the skillet from heat and fold in ⅓ cup of chopped fresh parsley, seasoning everything with kosher salt and freshly cracked black pepper to taste. This final mix not only brightens the dish visually but also adds a pop of flavor, enhancing the overall experience of your Italian Lemon Garlic Pasta. Adjust the lemon flavor if necessary by adding a bit more juice or zest.

Step 7: Plate and Serve
Using tongs, plate your Italian Lemon Garlic Pasta and finish with a generous sprinkle of grated Parmesan cheese. If you enjoy a bit of heat, add a pinch of crushed red pepper flakes on top. Serve immediately while hot to enjoy the full brilliance of the zesty flavors combined with the warmth of the garlic—your loved ones will be asking for seconds!

Italian Lemon Garlic Pasta

Tips for the Best Italian Lemon Garlic Pasta

  • Perfect Pasta Cook: Ensure your spaghetti is al dente by tasting a minute early. Overcooked pasta can lead to a mushy texture that’s less enjoyable.

  • Mind the Garlic: Sauté minced garlic until golden, but avoid browning it; burnt garlic can make your sauce bitter instead of deliciously fragrant.

  • Emulsify Wisely: Gradually add reserved pasta water to the sauce while tossing; this creates a glossy coating that allows the flavors to stick perfectly to your Italian Lemon Garlic Pasta.

  • Adjust the Lemon: Don’t hesitate to tweak the lemon flavor by adding extra zest or juice according to your taste; balancing acidity can elevate the dish’s freshness.

  • Fresh vs. Dried Herbs: If using dried parsley instead of fresh, reduce the quantity as dried herbs are more concentrated in flavor. Fresh parsley provides a lovely color and bright taste.

  • Garnish Generously: Top off your pasta with abundant grated Parmesan and optional crushed red pepper flakes—it transforms your dish into a restaurant-quality meal!

How to Store and Freeze Italian Lemon Garlic Pasta

  • Room Temperature: To enjoy your Italian Lemon Garlic Pasta at its best, serve it fresh. If you must leave it out, do so for no more than 2 hours.

  • Fridge: Store leftovers in an airtight container in the refrigerator for up to 3 days. Be sure to reheat gently to preserve the sauce’s creaminess.

  • Freezer: Although it’s best enjoyed fresh, you can freeze this pasta for up to 2 months. Place it in a freezer-safe container and let it cool before sealing.

  • Reheating: When ready to enjoy, thaw in the fridge overnight and reheat on a stovetop over low heat, adding a splash of reserved pasta water if needed to restore creaminess.

What to Serve with Italian Lemon Garlic Pasta

Creating a delightful meal is as simple as blending flavors, textures, and vibrant pairings that will enhance your dining experience.

  • Garlic Bread: A classic side that complements the garlic-forward pasta perfectly, adding a crunchy texture and buttery richness.

  • Roasted Asparagus: The earthy crunch of roasted asparagus brings a fresh contrast to the creamy sauce and elevates your plate with vibrant greens.

  • Caprese Salad: Juicy tomatoes, creamy mozzarella, and fresh basil add a refreshing bite. This salad offers contrasting textures and a burst of color.

Indulge in this refreshing drink pairing:

  • Pinot Grigio: A light white wine with citrus notes enhances the lemon and garlic while offering a crisp finish that uplifts the entire meal.

Round off your dinner with dessert:

  • Lemon Sorbet: A light and zesty sorbet mirrors the flavors of the pasta. Its cool sweetness cleanses the palate beautifully after the savory dish.

Serve any combination of these delightful pairings to create an unforgettable dining experience that captures the essence of Italian cuisine!

Italian Lemon Garlic Pasta Variations

Feel free to let your creativity shine and customize this delightful Italian Lemon Garlic Pasta with these tasty twists!

  • Dairy-Free: Swap out the butter and cheese with olive oil and nutritional yeast for a plant-based delight. It may surprise you how rich and flavorful it can still be!

  • Gluten-Free: Use gluten-free pasta made from chickpeas or brown rice to accommodate gluten sensitivities without skimping on taste.

  • Protein-Packed: Add grilled chicken or shrimp for a heartier meal. The flavors meld perfectly with the zesty sauce, making every bite satisfying and nourishing.

  • Veggie Boost: Toss in sautéed spinach, cherry tomatoes, or asparagus to elevate your dish with fresh veggies. It not only enhances the flavor but also adds a pop of color to your plate!

  • Herb Infusion: Experiment with fresh basil or mint instead of parsley for a fragrant twist. These herbs will bring a different aroma and freshness that dancing flavors will surely thank.

  • Spicy Kick: Incorporate sliced jalapeños or a few dashes of hot sauce into the mix for those who love a bit of heat. The added kick will balance beautifully with the bright lemon flavor.

  • Nutty Flavor: Try adding toasted pine nuts or walnuts for a crunchy finish. They’ll provide texture and a delightful, nutty taste that contrasts wonderfully with the creamy sauce.

Indulging in the versatility of this Italian Lemon Garlic Pasta opens up endless possibilities. For a creamy side, think about pairing it with a dish like Creamy Tomato Rigatoni Pasta, or make it a feast with classic Cheese and Garlic Crack for a memorable meal!

Make Ahead Options

These Italian Lemon Garlic Pasta preparations are perfect for busy weeknights! You can cook the spaghetti and sauté the garlic mixture up to 24 hours in advance. Simply store the pasta in an airtight container in the refrigerator, drizzling it lightly with olive oil to prevent sticking. The garlic mixture can also be refrigerated, keeping its fragrant charm intact. When ready to serve, reheat the garlic mixture gently over low heat, add the cooked pasta, and toss in the reserved pasta water gradually to revive its glossy texture. A quick finish with fresh parsley and Parmesan will ensure your Italian Lemon Garlic Pasta tastes just as delicious as when freshly made!

Italian Lemon Garlic Pasta

Italian Lemon Garlic Pasta Recipe FAQs

What type of pasta should I use for this recipe?
You can use 8 oz of spaghetti, but feel free to swap it for other types like linguine, fettuccine, or bucatini based on your preference. Each will carry the sauce beautifully, offering a delightful twist on the same fantastic flavor profile of Italian Lemon Garlic Pasta.

How should I store leftovers of this pasta?
To keep your Italian Lemon Garlic Pasta fresh, store leftovers in an airtight container in the refrigerator for up to 3 days. When reheating, do so gently over low heat to preserve the sauce’s creaminess. You may want to add a splash of reserved pasta water to restore that perfect consistency.

Can I freeze Italian Lemon Garlic Pasta?
Absolutely! While fresh is always best, you can freeze this pasta for up to 2 months. To do this, let the pasta cool completely, place it in a freezer-safe container, and seal tightly. When you’re ready to enjoy it again, thaw in the fridge overnight and reheat on a stovetop over low heat, adding a splash of reserved pasta water if needed.

What should I do if the garlic burns while cooking?
If your garlic happens to burn, tackle the issue by promptly removing it from heat to prevent bitterness from spreading to the dish. You can salvage the sauce by starting again, using fresh garlic, and being mindful of your sautéing time. Keep the heat low—around medium-low—to achieve that lovely, golden color without burning.

Are there any dietary considerations I should keep in mind?
Definitely! If you have a garlic allergy or are cooking for someone who does, you can omit the garlic altogether and replace it with a pinch of asafetida for a similar aroma. Additionally, if you’re making this dish for a vegetarian or lactose-intolerant friend, you can skip the Parmesan cheese or use a dairy-free alternative to keep everyone happy and healthy!

How can I enhance the flavors in this dish?
Great question! Besides adding more lemon zest or juice to adjust the acidity, consider incorporating freshly cracked pepper and even some crushed red pepper flakes for heat. An olive oil drizzle before serving lifts the fresh flavors, while extra parsley not only adds color but also brightens the experience. The more, the merrier!

Zesty Italian Lemon Garlic Pasta Ready in 30 Minutes

Experience the vibrant flavors of Italian Lemon Garlic Pasta, a quick and delightful dish that transports you straight to Italy.

  • Large Pot
  • large skillet
  • tongs

For the Pasta

  • 8 oz spaghetti (Feel free to swap for linguine, fettuccine, or bucatini based on preference.)
  • ½ cup reserved pasta water (Helps create a luscious sauce.)

For the Sauce

  • 4 tbsp unsalted butter (Adds richness without overpowering the lemon zest.)
  • 4 tbsp olive oil (Use extra for tossing later for added flavor.)
  • 6–8 cloves garlic, minced (Freshly minced garlic delivers the best aroma.)
  • 1 tsp Italian seasoning (Adds depth to every bite.)
  • 2 tbsp zest of 2 lemons (Brightens the dish; avoid the white pith.)
  • 2 tbsp juice of 1 lemon (Brings a splash of acidity.)

For Finishing Touches

  • ⅓ cup fresh parsley, chopped (Adds color and flavor.)
  • Kosher salt (To taste.)
  • Freshly cracked black pepper (To taste.)
  • Grated Parmesan cheese (A creamy topping.)
  • Crushed red pepper flakes (Optional for those who crave heat.)

Step-by-Step Instructions

  1. Fill a large pot with water and salt. Bring to a boil and cook 8 oz of spaghetti until al dente, about 8–10 minutes. Reserve ½ cup of pasta water, drain, and toss with olive oil.
  2. In a large skillet, melt 4 tbsp of unsalted butter and 4 tbsp of olive oil over medium-low heat. Add 6–8 minced garlic cloves and sauté for 1–2 minutes until fragrant and lightly golden.
  3. Add 1 tsp of Italian seasoning and the zest of 2 lemons to the skillet. Stir for about 30 seconds to release the aromatic oils.
  4. Pour in the juice of 1 lemon and simmer for 1–2 minutes to meld the flavors.
  5. Add the cooked spaghetti to the skillet, tossing with the sauce. Gradually add reserved pasta water until emulsified and glossy.
  6. Fold in ⅓ cup of chopped fresh parsley and season with kosher salt and freshly cracked black pepper to taste.
  7. Plate the pasta, topping with grated Parmesan cheese and optional crushed red pepper flakes. Serve immediately.

For the best flavor, taste the pasta for doneness a minute early and adjust lemon levels to preference.

Main Dishes
Italian
comfort food, Easy Dinner Recipe, Italian Cuisine, Lemon Garlic Pasta, Quick Pasta Recipe, Zesty Pasta

Filed Under: Main Dishes

Delicious Marinated Grilled Mushroom Skewers for Flavor Lovers

October 26, 2025 by grace bellamy Leave a Comment

As I stood by the grill, the sizzle of mushrooms hitting the heat sent my taste buds into overdrive. There’s something magical about Marinated Grilled Mushroom Skewers that brings people together, making them the perfect dish for summer gatherings or cozy nights in. Not only are they a delightful vegetarian option, but they’re also packed with flavor thanks to a zesty marinade of garlic, soy sauce, and a hint of sweetness. Plus, they come together in just a few simple steps, making this recipe a top choice for anyone looking to ditch fast food for something homemade and delicious. The addition of colorful veggies, like bell peppers and cherry tomatoes, can create a vibrant feast on a stick. Ready to wow your family and friends at your next cookout? Grab your skewers, and let’s dive into this tasty adventure!

Marinated Grilled Mushroom Skewers

Why are these skewers a must-try?

Bursting with flavor: The marinade combines garlic, soy sauce, and balsamic vinegar for a tangy, irresistible taste.
Quick & Easy: With minimal prep and cook time, you can serve up gourmet flavors in just 40 minutes.
Customizable: Feel free to add vibrant veggies like bell peppers and cherry tomatoes for extra nutrition and color.
Perfect for Gatherings: These Marinated Grilled Mushroom Skewers are sure to impress guests at any summer barbecue or cozy family dinner.
Looking for more grilling inspiration? Try these Crab Stuffed Mushrooms for appetizers or enjoy a comforting Chicken Mushroom dish later!

Marinated Grilled Mushroom Skewers Ingredients

• Get ready to savor the goodness!

For the Marinade

  • Olive oil – adds richness and helps the flavors cling to the mushrooms.
  • Soy sauce – brings umami and a salty depth to the dish.
  • Balsamic vinegar – infuses a tangy sweetness that complements the mushrooms beautifully.
  • Worcestershire sauce – enhances the savory notes with a unique blend of flavors.
  • Garlic – minced for maximum flavor; it elevates the entire dish.
  • Dijon mustard – adds a subtle kick and enhances the marinade’s complexity.
  • Honey (or maple syrup) – provides a touch of sweetness to balance the savory elements.
  • Dried thyme – offers an aromatic, earthy layer to the marinade.
  • Dried rosemary – contributes a pine-like fragrance, enhancing the flavor profile.
  • Smoked paprika – gives a hint of smokiness that’s perfect for grilling.
  • Salt – to taste; enhances all the flavors in the marinade.
  • Pepper – freshly cracked for a slight heat that rounds out the dish.

For the Skewers

  • Mushrooms (whole) – the star of dish; choose firm varieties like cremini or button for best results.
  • Optional veggies – bell peppers, cherry tomatoes, zucchini – feel free to mix and match for vibrant, tasty skewers!

These Marinated Grilled Mushroom Skewers are not only delicious but also a fun and healthy way to enjoy the grilling season. Happy cooking!

Step‑by‑Step Instructions for Marinated Grilled Mushroom Skewers

Step 1: Prepare the Marinade
In a medium bowl, whisk together 1/4 cup of olive oil, 1/4 cup of soy sauce, 2 tablespoons of balsamic vinegar, 1 tablespoon of Worcestershire sauce, and 4 minced garlic cloves. Then, add in 1 tablespoon of Dijon mustard, 1 tablespoon of honey, 1 teaspoon each of dried thyme and rosemary, plus 1 teaspoon of smoked paprika. Season with salt and pepper, mixing until smooth and fragrant.

Step 2: Marinate the Mushrooms
Place your 1 pound of whole mushrooms into a resealable bag or a shallow dish. Pour the prepared marinade over the mushrooms, ensuring they are completely coated. Seal the bag or cover the dish tightly, then refrigerate for at least 30 minutes, letting those flavors meld. For the best results, marinate for 2–3 hours.

Step 3: Prepare the Skewers
If you’re using wooden skewers, soak them in water for 30 minutes to prevent burning on the grill. Metal skewers can be used directly. Gather your skewers and prepare any optional vegetables, such as bell peppers, cherry tomatoes, or zucchini, for a colorful addition to your Marinated Grilled Mushroom Skewers.

Step 4: Preheat the Grill
While the mushrooms marinate, preheat your grill to medium-high heat. For charcoal grills, wait until the coals are covered in white ash. If using a gas grill, close the lid for about 10 minutes to achieve the right temperature. A properly heated grill will give your skewers that lovely char and smoky flavor.

Step 5: Oil the Grill Grates
Before grilling, lightly oil the grill grates using a paper towel dipped in oil or spray it with non-stick cooking spray. This step is crucial to prevent the Marinated Grilled Mushroom Skewers from sticking, ensuring an even, enjoyable grill experience.

Step 6: Assemble the Skewers
Remove the mushrooms from the marinade and thread them onto the soaked skewers, leaving a little space between each piece for even cooking. Optionally, alternate the mushrooms with your chosen vegetables for added flavor and vibrant color. Each skewer should showcase a variety of textures and tastes.

Step 7: Grill the Skewers
Place the assembled skewers on the preheated grill and cook for 10–12 minutes. Turn them occasionally, allowing the mushrooms to become tender and achieve a golden-brown color, slightly charred on the edges. For an extra flavor boost, brush with reserved marinade during grilling.

Step 8: Serve and Garnish
Once the skewers are perfectly grilled, transfer them to a serving platter. Garnish with freshly chopped parsley or chives for a pop of color and freshness. Serve warm and watch as your family and friends dig into these delicious Marinated Grilled Mushroom Skewers!

Marinated Grilled Mushroom Skewers

How to Store and Freeze Marinated Grilled Mushroom Skewers

Fridge: Store leftover skewers in an airtight container for up to 3 days. Reheat them gently in the microwave or on a skillet to keep them tender.

Freezer: If you want to enjoy these skewers later, freeze them before grilling. Place the marinated mushrooms (and veggies if used) in a freezer-safe bag for up to 2 months.

Thawing: To thaw the frozen skewers, transfer them to the fridge overnight before grilling. Ensure they are completely thawed for even cooking.

Reheating: When ready to serve, reheat the thawed skewers on the grill over medium heat for about 5–7 minutes until warmed through and slightly crisp.

What to Serve with Marinated Grilled Mushroom Skewers

Nothing elevates your dinner like pairing these flavorful skewers with delightful sides that complement their zesty taste.

  • Creamy Mashed Potatoes: The silky texture of mashed potatoes creates a perfect contrast to the grilled skewers, soaking up any extra marinade.

  • Fresh Garden Salad: A crisp salad with mixed greens and a tangy vinaigrette adds brightness and freshness, balancing the hearty flavors of the skewers. Toss in some cherry tomatoes to mirror the ones on the skewers!

  • Quinoa Pilaf: Fluffy quinoa seasoned with herbs introduces a nutty flavor that harmonizes beautifully with the marinated mushrooms while adding fiber to your meal. The texture of the pilaf is a lovely accompaniment, making for a satisfying bite.

  • Grilled Vegetable Medley: Add another layer of smokiness with grilled zucchini, bell peppers, and asparagus. Their charred flavors complement the skewers while adding colorful appeal to your plate.

  • Garlic Bread: Crispy, buttery garlic bread is a comforting side that guests love. The aromas of garlic and herbs provide a delightful scent that brings everyone to the table and pairs well with the skewers.

  • Chilled White Wine: A glass of chilled Sauvignon Blanc or Pinot Grigio enhances the overall dining experience. Their crisp acidity will cleanse your palate between bites, making each one feel as good as the last.

  • Chocolate Mousse: Finish your meal on a sweet note with a light chocolate mousse, offering a luscious texture that contrasts perfectly with the savory skewers, creating a truly memorable dining experience.

Expert Tips for Marinated Grilled Mushroom Skewers

  • Marinade Time: Let the mushrooms soak in the marinade for at least 30 minutes, but ideally 2–3 hours to enhance flavor absorption.
  • Skewer Spacing: Space the mushrooms slightly apart on the skewers; this allows for even cooking and prevents steaming.
  • Choose Fresh Mushrooms: Opt for firm, fresh mushrooms like cremini or button for the best results. Avoid limp or bruised ones.
  • Add Veggies: Feel free to mix mushrooms with bell peppers or zucchini for extra color and nutrition, adding their unique flavors.
  • Watch the Grill: Keep an eye on the skewers while grilling; turning them frequently ensures they cook evenly without burning.

Marinated Grilled Mushroom Skewers Variations

Feel free to let your creativity shine with these delightful twists on the recipe!

  • Dairy-Free: Swap in coconut aminos for a soy-free marinade that’s just as tasty.
    This works well for those avoiding soy but still craving that umami punch!

  • Spicy Kick: Add red pepper flakes or a dash of sriracha to the marinade for an extra kick.
    This will elevate the flavor profile and keep your taste buds dancing!

  • Herb-Infused: Use fresh herbs instead of dried for a vibrant flavor boost.
    Fresh basil or cilantro can completely transform the dish with their aromatic qualities.

  • Balsamic Glaze Drizzle: After grilling, drizzle a balsamic glaze over the skewers for added sweetness and depth.
    It creates a beautiful finish that enhances both flavor and presentation.

  • Citrus Burst: Incorporate lemon or lime juice into the marinade for a tangy twist.
    Adding citrus not only brightens the flavors but adds a refreshing zing to each bite!

  • Veggie Lovers: Combine with other veggies like asparagus or eggplant for a colorful medley.
    Each veggie brings its unique taste, making each skewer even more exciting!

  • Smoky Flavor: Use smoked sea salt or liquid smoke in the marinade for additional depth.
    This infusion of smokiness will transport you to that perfect summer cookout vibe!

  • Asian-Inspired: Add sesame oil and green onions for an Asian flair that complements the mushrooms beautifully.
    This variation pairs perfectly with rice or noodles for a complete meal experience.

Enjoy experimenting with these variations, and don’t forget to share your favorite combinations! If you’re looking for more dinner ideas, consider our Crab Stuffed Mushrooms and bring versatility to your table!

Make Ahead Options

These Marinated Grilled Mushroom Skewers are perfect for meal prep enthusiasts looking to save time on busy weeknights! You can easily marinate the mushrooms up to 24 hours in advance, enhancing their flavor while allowing your busy schedule to breathe. Just place the whole mushrooms in a resealable bag with the marinade, ensuring they’re well-coated, and refrigerate them. For a quick assembly, you can also pre-soak wooden skewers up to 3 days beforehand. When you’re ready to grill, simply remove the mushrooms from the fridge, thread them onto the soaked skewers (optionally adding prepped veggies), and grill for 10–12 minutes. With these prep tips, you’ll enjoy restaurant-quality results with minimal effort, leaving you more time to relax and enjoy your meal!

Marinated Grilled Mushroom Skewers

Marinated Grilled Mushroom Skewers Recipe FAQs

What type of mushrooms are best for this recipe?
Absolutely! For the best flavor and texture, I recommend using firm varieties like cremini or button mushrooms. Look for mushrooms that are plump and free of dark spots. Avoid those that are limp or bruised, as they can affect the overall taste and cooking experience.

How should I store leftover skewers?
You can store leftover Marinated Grilled Mushroom Skewers in an airtight container in the refrigerator for up to 3 days. For those times when you’re craving them again, simply reheat gently in the microwave or on a skillet, and enjoy that delightful flavor all over again!

Can I freeze the marinated mushrooms and use them later?
Yes, you can! If you want to prepare in advance, freeze the marinated mushrooms (and veggies if used) in a freezer-safe bag or container. They’ll stay good for up to 2 months. Just remember to label your bags with the date!

How do I properly thaw and reheat frozen skewers?
To thaw your frozen skewers, simply transfer them to the refrigerator overnight. Once they’re completely thawed, you can grill them over medium heat for about 5–7 minutes until they are warmed through and slightly crisp. Make sure to monitor them so they don’t overcook!

What should I do if the mushrooms aren’t grilling well?
Very good question! If your mushrooms aren’t grilling well, it could be due to temperature. Ensure your grill is preheated to medium-high before adding the skewers. Also, leave some space between each mushroom on the skewers to allow even cooking and prevent steaming. If needed, you can brush them with a bit of the reserved marinade for added moisture and flavor.

Are these skewers safe for people with dietary restrictions?
Yes! These Marinated Grilled Mushroom Skewers are vegetarian-friendly and can easily be made vegan by using maple syrup instead of honey. However, be mindful of soy allergies, as soy sauce is a key ingredient. Consider using gluten-free soy sauce if necessary. Always check the labels of your ingredients to ensure they meet your dietary needs.

Delicious Marinated Grilled Mushroom Skewers for Flavor Lovers

These Marinated Grilled Mushroom Skewers are packed with flavor and make the perfect dish for summer gatherings.

  • grill
  • Skewers
  • Mixing Bowl
  • Measuring Cups
  • Measuring Spoons
  • Airtight Container

Marinade

  • 1/4 cup olive oil (adds richness)
  • 1/4 cup soy sauce (brings umami)
  • 2 tablespoons balsamic vinegar (infuses tangy sweetness)
  • 1 tablespoon Worcestershire sauce (enhances savory notes)
  • 4 cloves garlic (minced)
  • 1 tablespoon Dijon mustard (adds a subtle kick)
  • 1 tablespoon honey (or maple syrup for sweetness)
  • 1 teaspoon dried thyme (offers aromatic flavor)
  • 1 teaspoon dried rosemary (contributes fragrance)
  • 1 teaspoon smoked paprika (adds smokiness)
  • salt (to taste)
  • pepper (freshly cracked)

For the Skewers

  • 1 pound whole mushrooms (choose firm varieties like cremini or button)
  • optional veggies (bell peppers, cherry tomatoes, zucchini, as desired)

Preparation

  1. In a medium bowl, whisk together olive oil, soy sauce, balsamic vinegar, Worcestershire sauce, and minced garlic.
  2. Add Dijon mustard, honey, dried thyme, dried rosemary, and smoked paprika.
  3. Season with salt and pepper, mixing until smooth and fragrant.
  4. Place whole mushrooms in a resealable bag or shallow dish and pour the marinade over them.
  5. Ensure mushrooms are completely coated, then refrigerate for at least 30 minutes.
  6. For best results, marinate for 2 to 3 hours.
  7. Soak wooden skewers in water for 30 minutes.
  8. Preheat grill to medium-high heat.
  9. Lightly oil the grill grates.
  10. Remove mushrooms from marinade and thread onto skewers.
  11. Optionally alternate with vegetables.
  12. Grill the skewers for 10 to 12 minutes, turning occasionally.
  13. Brush with reserved marinade during grilling.
  14. Transfer to serving platter, garnish with chopped parsley or chives, and serve warm.

Let mushrooms marinate for 2-3 hours for better flavor absorption. Choose fresh mushrooms and alternate with veggies for color and nutrition.

Appetizer
Grilling
Barbecue Skewers, Grilled Mushrooms, Marinated Grilled Mushroom Skewers, summer recipes, Vegetarian Skewers, Zesty Marinade

Filed Under: Appetizer

Savory Vegetarian Eggplant Lasagna to Delight Your Taste Buds

October 26, 2025 by grace bellamy Leave a Comment

Just the other day, I found myself reminiscing about my first attempt at making lasagna—how messy and chaotic it was, yet somehow so satisfying. Fast forward to now, and I’ve perfected a version that combines comfort with a healthy twist: Vegetarian Eggplant Lasagna with Mushrooms. This dish not only leaves your taste buds dancing but also brings a myriad of benefits to your dinner table. It’s a fabulous crowd-pleaser, perfect for impressing guests or enjoying cozy family nights. Plus, it’s easy to prepare and makes for fantastic leftovers! Trust me, once you try this recipe, you’ll be actively seeking excuses to whip it up again. Who knew that healthy could taste so indulgent? Ready to dig in and transform your weeknight meals? Let’s get cooking!

Vegetarian Eggplant Lasagna

Why is this eggplant lasagna special?

Vegetarian Flavor Explosion: This dish is packed with rich and savory flavors, thanks to the aromatic herbs and sautéed mushrooms.

Easy Preparation: With straightforward steps and quick prep, you’ll have this lasagna ready to bake in no time!

Healthy Twist: Ditch the noodles and enjoy a healthier version that satisfies your cravings without the guilt.

Crowd-Pleaser: Perfect for family dinners or gatherings, it impresses even the most discerning palates.

Delicious Leftovers: Enjoy it the next day! This lasagna tastes even better when the flavors have melded overnight, making it a perfect make-ahead option.

Give this delightful Vegetarian Eggplant Lasagna a try, and you’ll be hooked!

Vegetarian Eggplant Lasagna Ingredients

Get ready to gather these fresh ingredients for a hearty vegetarian feast!

For the Eggplant
• Eggplants – 3 medium eggplants are the star, providing a satisfying texture that’s reminiscent of traditional lasagna noodles.
• Olive oil – 1 tablespoon for roasting eggplant ensures a nice golden finish.
• Salt – Use to taste; drawing moisture from the eggplant helps enhance its flavor.
• Pepper – to taste; a little seasoning goes a long way in this dish.

For the Filling
• Olive oil – 1 tablespoon for cooking filling adds richness to the sautéed vegetables.
• Onion – 1 diced onion brings sweetness and depth to the filling.
• Garlic – 2 cloves minced; fresh garlic gives a delightful aromatic boost.
• Mushrooms – 8 ounces sliced; they provide earthiness and texture, making the lasagna hearty.
• Dried oregano – 1 teaspoon enhances the flavors with a classic Italian touch.
• Dried basil – 1 teaspoon offers a fragrant and herbal dimension that’s quintessential to lasagna.

For the Cheese Mixture
• Ricotta cheese – 1 cup adds creaminess and binds the layers together.
• Egg – 1 egg helps to set the cheese mixture, giving it a lovely structure.
• Parmesan cheese – ½ cup grated (optional); this adds nuttiness and a touch of decadence.
• Fresh parsley – ¼ cup chopped brings a burst of color and freshness to the dish.

For Layering
• Marinara sauce – 3 cups create a luscious, flavorful base and prevent the lasagna from being dry.
• Mozzarella cheese – 1 cup shredded; it melts beautifully, creating that irresistible, gooey topping.

Now that you have your ingredients ready, enjoy creating this delightful Vegetarian Eggplant Lasagna!

Step‑by‑Step Instructions for Vegetarian Eggplant Lasagna

Step 1: Preheat the Oven
Begin by preheating your oven to 400°F (200°C). While the oven heats up, line your baking sheets with parchment paper or give them a light coating of olive oil. This will help the eggplant slices roast perfectly and prevent sticking, creating a golden and delicious base for your Vegetarian Eggplant Lasagna.

Step 2: Prepare the Eggplant
Wash and slice the eggplants into medium-thick rounds. Sprinkle them generously with salt and place them on paper towels to allow the moisture to draw out for about 15 minutes. Afterward, blot the eggplant slices dry with another paper towel, ensuring they are ready for roasting and won’t release excess water in the lasagna.

Step 3: Roast the Eggplant
Arrange the salted eggplant slices in a single layer on your prepared baking sheets. Drizzle or lightly spray them with olive oil, then season with salt and pepper. Roast these beauties in the oven for 20–25 minutes, flipping them halfway through until they become tender and golden brown, adding a wonderful depth of flavor to your lasagna.

Step 4: Sauté the Filling
While the eggplant is roasting, heat one tablespoon of olive oil in a skillet over medium heat. Add the diced onion, stirring until it becomes translucent, about 5 minutes. Then, stir in the minced garlic for an additional minute before adding the sliced mushrooms. Sauté the mushrooms for about 8–10 minutes until they are browned and tender, seasoned with oregano, basil, salt, and pepper.

Step 5: Mix the Cheese Filling
In a separate bowl, combine the ricotta cheese, egg, and optional Parmesan along with the chopped parsley. Mix these ingredients together until you achieve a smooth and creamy texture. This luscious cheese mixture will add a rich and enticing layer to your Vegetarian Eggplant Lasagna, tying all the flavors together beautifully.

Step 6: Lower the Oven Temperature
When the eggplants are roasted, reduce the oven temperature to 375°F (190°C). This new temperature will ensure that your lasagna bakes evenly without overcooking. Get ready to build those layers of flavor that make this dish so special!

Step 7: Layer the Ingredients
Start by spreading a thin layer of marinara sauce on the bottom of a 9×13-inch baking dish, keeping the lasagna moist. Next, layer the roasted eggplant slices evenly over the sauce. This will form a great foundation for the filling and enhance the overall taste of your Vegetarian Eggplant Lasagna.

Step 8: Build the Filling Layers
On top of the eggplant, spread half of your ricotta cheese mixture, followed by half of the mushroom filling. Spoon a generous amount of marinara sauce over these layers and sprinkle with shredded mozzarella cheese for that irresistible gooey goodness that everyone loves about lasagna.

Step 9: Repeat the Layers
Repeat the layering process with the remaining ingredients: eggplant, ricotta mixture, mushroom filling, marinara sauce, and finish off with more mozzarella cheese on top. This multi-layered approach introduces a variety of flavors and textures in every bite of your Vegetarian Eggplant Lasagna.

Step 10: Bake the Lasagna
Cover the baking dish tightly with foil and place it in the preheated oven. Bake the lasagna for 30 minutes, allowing the flavors to meld beautifully. Afterward, remove the foil and bake for an additional 10–15 minutes until the cheese is melted, bubbly, and golden brown on top—an inviting sight that promises deliciousness.

Step 11: Rest Before Serving
Once your Vegetarian Eggplant Lasagna is out of the oven, let it rest for 10 minutes before slicing. This resting period will help the layers set perfectly, making it easier to serve and ensuring every slice holds together beautifully. Garnish with fresh basil for an extra touch of flavor and color, then enjoy your warm, hearty creation!

Vegetarian Eggplant Lasagna

Vegetarian Eggplant Lasagna Variations

Feel free to let your creativity shine as you transform this recipe into your own personal masterpiece!

  • Gluten-Free: Substitute eggplant with zucchini or use gluten-free lasagna sheets for a delightful twist.

  • Spicy Kick: Add red pepper flakes to the mushroom filling for an exciting heat that warms the soul. A little spice can elevate the flavor balance beautifully.

  • Add Spinach: Incorporate fresh or frozen spinach into the ricotta mixture for an extra boost of color and nutrition. It adds a vibrant touch while being packed with vitamins!

  • Nutty Flavor: Swap ricotta for cottage cheese or add ground nuts like almonds or walnuts to the filling for a satisfying crunch and a rich flavor profile.

  • Sweet Layering: Instead of traditional marinara sauce, try using homemade pumpkin or butternut squash puree. It gives a deliciously sweet and earthy taste that surprises and delights!

  • Herb Infusion: Replace dried herbs with fresh basil and thyme, which will elevate the taste and aroma of your lasagna significantly. Fresh herbs can make all the difference!

  • Cheesy Indulgence: Go wild with different cheeses like gorgonzola or feta for a more robust, tangy flavor twist that will leave everyone craving more.

  • Protein-Packed: Add layers of cooked lentils or beans in between for an extra hearty and satisfying vegetarian option. It transforms the lasagna into a complete meal packed with protein!

If you’re ready to combine flavors in a fun way, don’t forget to check out my delicious Taco Lasagna New while you’re at it. There’s so much to explore in the world of comforting dishes!

Make Ahead Options

These Vegetarian Eggplant Lasagna layers are perfect for meal prep enthusiasts! You can roast the eggplant slices and prepare the filling up to 24 hours in advance; simply store them separately in the refrigerator to maintain their freshness and prevent sogginess. When ready to assemble, layer the roasted eggplant and fillings with marinara sauce and cheese in your baking dish. Then, cover and refrigerate the assembled lasagna for up to 3 days before baking. To finish, just adjust the baking time by adding an extra 10 minutes if it’s coming straight from the fridge. This way, you’ll enjoy a delicious homemade meal with minimal effort on your busy weeknight!

Expert Tips for Vegetarian Eggplant Lasagna

Don’t Skip Salting: This crucial step draws out moisture, preventing your lasagna from becoming soggy. Always remember to blot the eggplant dry.

Layer Wisely: For the best flavor distribution, alternate layers of eggplant, cheese, and sauce. This ensures every bite is packed with the delightful taste of the Vegetarian Eggplant Lasagna.

Use Fresh Herbs: Fresh parsley and basil can elevate the flavor. While dried herbs work in a pinch, fresh truly makes a difference!

Cover for Even Baking: Always cover your lasagna with foil for the first half of baking. This helps the dish cook through without burning the cheese.

Let It Rest: Allow your lasagna to sit for 10 minutes after baking. This helps the layers set and makes for cleaner slices when serving.

Experiment with Cheeses: Feel free to mix different cheeses like gouda or fontina for unique flavors. It’s a great way to personalize your Vegetarian Eggplant Lasagna!

What to Serve with Vegetarian Eggplant Lasagna

Elevate your dining experience by pairing this delightful dish with complementary flavors and textures that create a wholesome meal.

  • Garlic Bread: This classic side brings a crispy, buttery crunch that balances well with the creamy lasagna layers. It’s perfect for soaking up any leftover marinara sauce!

  • Mixed Green Salad: Light and refreshing, a salad with vinaigrette balances the richness of the lasagna. Add some cherry tomatoes and cucumbers for a bright contrast.

  • Roasted Vegetables: Roasting seasonal vegetables like zucchini, bell peppers, and carrots adds depth and color to your table. Their caramelized sweetness perfectly complements the savory eggplant.

  • Steamed Broccoli: Nutrient-packed and vibrant, steamed broccoli provides a delightful crunch and its slight bitterness pairs beautifully with cheesy dishes. A squeeze of lemon can enhance its freshness.

  • Red Wine: A medium-bodied red wine, like Chianti or Merlot, makes the perfect pairing. The wine’s rich notes marry harmoniously with the lasagna’s flavors.

  • Dessert: Consider serving a light dessert, such as panna cotta or fruit sorbet. Their refreshing taste contrasts the hearty meal, leaving your guests satisfied yet eager for a sweet finish.

How to Store and Freeze Vegetarian Eggplant Lasagna

Fridge: Store leftovers in an airtight container for up to 3 days. Reheat in the oven at 350°F (175°C) until warmed through, about 20 minutes.

Freezer: This Vegetarian Eggplant Lasagna can be frozen for up to 3 months. Wrap it tightly in plastic wrap and then foil to prevent freezer burn.

Thawing: When ready to enjoy, thaw overnight in the refrigerator. For best results, reheat directly from frozen in the oven for a crispy top.

Reheating: Reheat slices in the microwave for a quick meal. Just pop it on a microwave-safe plate and heat for 2-3 minutes or until warmed to your liking.

Vegetarian Eggplant Lasagna

Vegetarian Eggplant Lasagna Recipe FAQs

How do I choose the right eggplants for this recipe?
Absolutely! Look for medium-sized eggplants that feel firm to the touch. They should have smooth, shiny skin without any dark spots or blemishes, which can indicate over-ripeness. A small, slightly green stem is also a good sign of freshness.

How should I store leftover Vegetarian Eggplant Lasagna?
For sure! Store any leftovers in an airtight container in the refrigerator for up to 3 days. Make sure to let it cool completely before sealing to prevent moisture buildup, which can make it soggy. Reheat it in the oven at 350°F (175°C) for about 20 minutes until warmed through.

Can I freeze Vegetarian Eggplant Lasagna?
Yes, indeed! You can freeze the lasagna for up to 3 months. Make sure to cool it completely, then wrap it tightly in plastic wrap followed by aluminum foil to avoid freezer burn. This layer is super essential for preserving flavor and texture.

What’s the best way to reheat frozen Vegetarian Eggplant Lasagna?
Great question! For best results, thaw your lasagna in the refrigerator overnight. Once thawed, preheat your oven to 375°F (190°C) and reheat it for about 30–40 minutes until it’s hot and the cheese is bubbly. If you’re in a hurry, you can reheat slices in the microwave for 2–3 minutes or until warmed to your liking.

Can I make this dish gluten-free or vegan?
Certainly! To make a gluten-free version, simply replace the marinara sauce with gluten-free sauce options. For a vegan option, use dairy-free cheese alternatives and omit the egg from the ricotta mixture, which can be substituted with silken tofu blended with nutritional yeast for creaminess.

How can I prevent the lasagna from being soggy?
Absolutely! Salting the eggplants and letting them rest is key. After slicing, sprinkle them with salt and let them sit on paper towels for about 15 minutes to draw out moisture. Be sure to blot them dry before roasting to ensure a deliciously layered lasagna that’s not soggy!

Savory Vegetarian Eggplant Lasagna to Delight Your Taste Buds

This Vegetarian Eggplant Lasagna is a delightful, healthy twist on a classic dish, packed with rich flavors and perfect for any crowd.

  • Oven
  • Baking Dish
  • skillet
  • parchment paper
  • paper towels
  • Mixing Bowl

For the Eggplant

  • 3 medium eggplants
  • 1 tablespoon olive oil (for roasting eggplant)
  • salt (to taste)
  • pepper (to taste)

For the Filling

  • 1 tablespoon olive oil (for cooking filling)
  • 1 medium onion (diced)
  • 2 cloves garlic (minced)
  • 8 ounces mushrooms (sliced)
  • 1 teaspoon dried oregano
  • 1 teaspoon dried basil

For the Cheese Mixture

  • 1 cup ricotta cheese
  • 1 large egg
  • 0.5 cup Parmesan cheese (grated (optional))
  • 0.25 cup fresh parsley (chopped)

For Layering

  • 3 cups marinara sauce
  • 1 cup mozzarella cheese (shredded)

Step-by-Step Instructions

  1. Preheat the oven to 400°F (200°C) and prepare baking sheets lined with parchment paper or coated with olive oil.
  2. Wash and slice the eggplants into medium-thick rounds, sprinkle with salt, and let them sit on paper towels for 15 minutes.
  3. Roast the salted eggplant slices in the oven for 20-25 minutes until tender and golden brown.
  4. Heat olive oil in a skillet over medium heat, add diced onions, and sauté until translucent. Stir in minced garlic and sliced mushrooms, and cook until browned.
  5. In a separate bowl, combine ricotta cheese, egg, optional Parmesan, and parsley, mixing until smooth.
  6. Reduce oven temperature to 375°F (190°C).
  7. Spread a thin layer of marinara sauce in a baking dish, layer with roasted eggplant slices, followed by the cheese and mushroom filling.
  8. Repeat the layering with remaining ingredients: eggplant, cheese mixture, mushroom filling, marinara sauce, and mozzarella cheese.
  9. Cover with foil and bake for 30 minutes, then remove foil and bake an additional 10-15 minutes until cheese is bubbly and golden.
  10. Let the lasagna rest for 10 minutes before slicing and serving. Garnish with fresh basil.

Perfect for meal prep and makes delicious leftovers! Store in the fridge for up to 3 days or freeze for up to 3 months.

Main Dishes
Italian
comfort food, Easy Lasagna, Healthy Lasagna, Vegetarian Eggplant Lasagna, Vegetarian Recipes

Filed Under: Main Dishes

Mouthwatering Stuffing Recipe Perfect for Family Gatherings

October 26, 2025 by grace bellamy Leave a Comment

As I stood in my kitchen, the warm, savory aroma of sautéing onions and celery wrapped around me like a cozy blanket, I couldn’t help but smile. This Homemade Stuffing recipe has become my secret weapon during the holidays, transforming any meal into a feast of comfort and joy. With its perfect blend of herbs and those crunchy edges that beg for a hearty scoop, this stuffing is not only a crowd-pleaser but also a fantastic way to use up stale bread. Plus, it’s straightforward to whip up, making it an ideal last-minute addition to your dinner table. It doesn’t just fill bellies; it brings people together, igniting laughter and stories amongst family and friends. Are you ready to create a beloved tradition with your own homemade stuffing?

Stuffing

Why is this stuffing recipe a must-try?

Comforting Flavors: This stuffing bursts with savory herbs like sage and marjoram, enveloping your taste buds in warmth and nostalgia.

Easy to Make: With just a few steps, you can create homemade magic in your kitchen that rivals any restaurant.

Crowd-Pleasing Delight: Perfect for family gatherings or holiday feasts, this recipe will have your guests coming back for seconds!

Versatile Use: Not just for holidays, you can easily pair this stuffing with a weeknight roast or even serve it as a side for a cozy dinner.

Budget-Friendly: Utilize stale bread you already have, reducing waste and saving money while enjoying a comforting homemade dish.

Let this stuffing, filled with warmth and love, elevate your meals by checking out other recipes like my delicious herb-roasted chicken or a classic green bean casserole.

Stuffing Ingredients

For the Veggie Base

  • ¾ cup butter – adds richness and depth to the flavor profile.
  • 1 cup onions, diced – sautéing them brings out their natural sweetness.
  • 1 cup celery, diced – provides a wonderful crunch and aromatic flavor.

For Seasoning

  • 1 teaspoon salt – enhances all the other flavors in the stuffing.
  • ½ teaspoon pepper – adds a subtle kick to the mixture.
  • 1 teaspoon poultry seasoning – infuses the stuffing with classic holiday flavors.
  • 1 teaspoon marjoram – offers a hint of earthiness that complements the herbs.
  • 1 teaspoon sage – gives that quintessential Thanksgiving taste that everyone loves.
  • 1 teaspoon parsley – lends a fresh finish and vibrant color to the dish.

For Binding

  • 2 large eggs – helps hold everything together for a perfect texture.
  • 2 cups chicken broth – moistens the stuffing and gives it a savory base.

For the Bread

  • 8 cups stale bread cubes – vital for achieving that delightful, crunchy texture in the stuffing!

For Topping

  • 2 tablespoons butter (for dotting the top) – ensures a golden, crispy top that is utterly irresistible.

This delicious stuffing, filled with layers of flavor, is a definite star at any table. Can’t wait for you to give it a try!

Step‑by‑Step Instructions for Stuffing

Step 1: Preheat the Oven
Begin by preheating your oven to 350°F (175°C). While the oven warms up, generously butter a 9×9-inch baking dish to ensure your homemade stuffing doesn’t stick. This step is essential for achieving that perfectly crispy crust, so don’t rush it!

Step 2: Sauté Vegetables
In a large skillet over medium heat, melt ¾ cup of butter. Once the butter is bubbling, add in 1 cup of diced onions and 1 cup of diced celery. Cook the mixture for 20–30 minutes, stirring occasionally, until the onions are soft and translucent—this indicates that they’ve developed a sweet flavor base for your stuffing.

Step 3: Season the Mixture
Remove the skillet from heat and stir in 1 teaspoon of salt, ½ teaspoon of pepper, 1 teaspoon of poultry seasoning, 1 teaspoon of marjoram, 1 teaspoon of sage, and 1 teaspoon of parsley. Mixing these seasonings into your sautéed veggies will fill your kitchen with a comforting aroma, enhancing the flavor profile of your stuffing.

Step 4: Whisk Eggs and Broth
In a small bowl, whisk together 2 large eggs and 2 cups of chicken broth until well combined. This egg-broth mixture will help bind your homemade stuffing, so it’s important to incorporate them thoroughly. Set this mixture aside momentarily while you prepare the bread.

Step 5: Combine Ingredients
In a large mixing bowl, add 8 cups of stale bread cubes. Pour the buttery vegetable mixture over the bread, stirring gently to combine. Next, pour in the egg and chicken broth mix, tossing everything together until the bread is evenly coated. This ensures every bite of your stuffing is packed with flavor.

Step 6: Transfer to Baking Dish
Pour the stuffing mixture into the buttered baking dish, spreading it evenly across the pan. For an extra touch of richness, dot the top with 2 tablespoons of butter. This will help create that irresistible, golden, and crispy topping everyone loves in homemade stuffing.

Step 7: Bake the Stuffing
Cover the baking dish with foil and place it in the preheated oven. Bake for 30 minutes, allowing the stuffing to set. After this initial baking time, remove the foil and continue baking for an additional 15 minutes until the top is golden brown and crisp. For an even crispier finish, broil for 1–2 minutes at the end.

Stuffing

Tips for the Best Stuffing

  • Use Stale Bread: Make sure your bread is stale for the best texture; fresh bread can lead to a mushy stuffing.

  • Don’t Rush the Sauté: Cook onions and celery until soft and translucent; this enhances the flavor of your stuffing and prevents bitterness.

  • Mix Gently: When combining the bread and the vegetable mixture, toss gently to avoid breaking the bread cubes and maintain that perfect texture.

  • Customize Your Herbs: Feel free to mix and match herbs based on your taste preferences; adding thyme or rosemary can give your stuffing a unique twist!

  • Watch the Bake Time: Keep an eye on the stuffing towards the end of the baking; broiling for 1–2 minutes can achieve that ideal crispy topping without overcooking.

  • Use Quality Broth: Opt for a rich, flavorful chicken broth to elevate the overall taste of your stuffing—it’s worth it!

What to Serve with Homemade Stuffing?

As the savory aroma wafts from your oven, imagine the delicious possibilities to complete your meal.

  • Roast Turkey: The classic pairing, tender turkey complements the herbs in the stuffing, creating a harmonious Thanksgiving feast.

  • Creamy Mashed Potatoes: Their buttery texture and rich flavor contrast beautifully with the crunchy stuffing, making every bite a delight.

  • Cranberry Sauce: The tartness of cranberry sauce cuts through the savory stuffing, adding a refreshing pop of flavor to your plate.

  • Honey Glazed Carrots: Sweet, tender carrots provide a wonderful textural contrast and add a vibrant color to your meal.

  • Green Bean Almondine: Crisp green beans topped with toasted almonds introduce a satisfying crunch and a hint of nuttiness that enhances the stuffing.

  • Garlic Parmesan Roasted Brussels Sprouts: These vegetables offer a crispy texture and elevate your meal with their rich flavors, perfectly complementing your stuffing.

  • Savory Gravy: Drizzle of rich, homemade gravy infuses your stuffing with even more flavor while keeping the dish deliciously moist.

  • Apple Pie: Finish your meal on a sweet note with warm apple pie, its cinnamon-spiced filling mirroring the aromatic herbs in your stuffing for a perfect ending.

Stuffing Variations & Substitutions

Feel free to get creative and customize your stuffing to match your tastes and dietary needs!

  • Gluten-Free: Substitute the stale bread with your favorite gluten-free bread option, ensuring a perfect texture without gluten.
  • Vegan: Replace butter with olive oil or vegan butter, and use flax eggs or aquafaba to bind the stuffing. Enjoy a guilt-free twist!
  • Add Protein: Toss in cooked sausage or diced turkey for a heartier dish that will fuel your guests for a long evening of fun.
  • Herb Explosion: Increase the herbs by adding thyme and rosemary for a flavor kick that lifts every bite and enhances the holiday spirit.
  • Fruit & Nut Surprise: Mix in some dried cranberries or chopped walnuts for added texture and a sweet yet savory pop in your stuffing.
  • Spicy Kick: Add diced jalapeños or a sprinkle of red pepper flakes to introduce a fun level of heat to warm up any chilly gathering.
  • Apple Twist: Fold in diced apples or pears to add natural sweetness and a fruity flare—perfect for a Thanksgiving twist!
  • Cheesy Goodness: Include shredded cheddar or crumbled feta cheese for a gooey, rich twist that elevates the traditional flavor, making it extra decadent.

Explore these exciting variations to create your unique stuffing recipe, and consider pairing it with my delicious herb-roasted chicken or a classic green bean casserole to make the perfect family feast!

Make Ahead Options

These Homemade Stuffing preparations are perfect for meal prep enthusiasts! You can chop the vegetables and sauté them up to 24 hours in advance, allowing the flavors to deepen. Simply refrigerate the cooled mixture in an airtight container. You can also combine the bread cubes with the seasonings and keep them separate for up to 3 days. When you’re ready to serve, just whisk together the eggs and broth, mix in the refrigerated veggie blend, and stir everything into the bread cubes. Dot with butter and bake as directed for a dish that’s just as delicious as if made fresh, saving you time on busy weeknights!

How to Store and Freeze Stuffing

Fridge: Store any leftover stuffing in an airtight container for up to 3 days. This keeps it fresh and ready for quick reheating!

Freezer: For longer storage, freeze stuffing in a freezer-safe bag or container for up to 3 months. Layer it flat to save space and ensure even thawing.

Reheating: Thaw frozen stuffing overnight in the fridge, then reheat in the oven at 350°F for 20-25 minutes, or until heated through. Add a splash of broth to maintain moisture.

Additional Tip: Always let your stuffing cool completely before storing, as this helps prevent condensation and keeps the flavors intact!

Stuffing

Homemade Stuffing Recipe FAQs

How do I select the right bread for stuffing?
Absolutely! For the best texture, choose stale bread that has lost some moisture. A mix of white, whole wheat, or even cornbread can give your stuffing delightful layers of flavor. If your bread is fresh, you can cube it and toast it lightly in the oven for about 10-15 minutes until it’s dry before using it in the recipe.

How should I store leftover stuffing?
Very important! Store any leftover stuffing in an airtight container in the fridge for up to 3 days. Make sure it’s completely cooled before sealing it to prevent moisture buildup, which can lead to sogginess.

Can I freeze homemade stuffing?
You can definitely freeze it! Pack the stuffing in a freezer-safe bag or container, squeezing out any excess air. This will allow it to last for up to 3 months. For the best results, layer it flat in the freezer, as it will thaw more evenly that way.

What’s the best way to reheat frozen stuffing?
Reheating is a breeze! Thaw your frozen stuffing overnight in the fridge. When you’re ready to enjoy it, preheat your oven to 350°F. Transfer the stuffing to a baking dish, sprinkle a little chicken broth over it to reintroduce moisture, then cover with foil and bake for 20-25 minutes until heated through.

Can I make adjustments for dietary restrictions, such as allergies?
Absolutely! If you’re catering to allergies, consider using gluten-free bread for those with gluten sensitivities. You can also substitute chicken broth with vegetable broth for a vegetarian option, and use a plant-based butter if you’re avoiding dairy. Always make sure to check the labels for any hidden allergens.

What should I do if my stuffing turns out too dry?
If you find your stuffing is dry after baking, don’t worry! You can sprinkle a little extra chicken broth or melted butter over the top before reheating, then cover with foil while baking to help retain moisture. For future batches, consider increasing the amount of broth used in the recipe to ensure a fluffier texture.

Mouthwatering Stuffing Recipe Perfect for Family Gatherings

This savory stuffing is the perfect side dish for family gatherings, filled with warm flavors and delightful textures.

  • large skillet
  • Mixing Bowl
  • Baking Dish
  • Whisk

For the Veggie Base

  • ¾ cup butter (adds richness and depth to the flavor profile)
  • 1 cup onions, diced (sautéing them brings out their natural sweetness)
  • 1 cup celery, diced (provides a wonderful crunch and aromatic flavor)

For Seasoning

  • 1 teaspoon salt (enhances all the other flavors in the stuffing)
  • ½ teaspoon pepper (adds a subtle kick to the mixture)
  • 1 teaspoon poultry seasoning (infuses the stuffing with classic holiday flavors)
  • 1 teaspoon marjoram (offers a hint of earthiness that complements the herbs)
  • 1 teaspoon sage (gives that quintessential Thanksgiving taste that everyone loves)
  • 1 teaspoon parsley (lends a fresh finish and vibrant color to the dish)

For Binding

  • 2 large eggs (helps hold everything together for a perfect texture)
  • 2 cups chicken broth (moistens the stuffing and gives it a savory base)

For the Bread

  • 8 cups stale bread cubes (vital for achieving that delightful, crunchy texture in the stuffing!)

For Topping

  • 2 tablespoons butter (for dotting the top to ensure a golden, crispy top)

Step-by-Step Instructions for Stuffing

  1. Preheat your oven to 350°F (175°C) and generously butter a 9×9-inch baking dish.
  2. In a large skillet over medium heat, melt ¾ cup of butter. Add in 1 cup of diced onions and 1 cup of diced celery. Cook for 20–30 minutes until soft and translucent.
  3. Remove from heat and stir in salt, pepper, poultry seasoning, marjoram, sage, and parsley.
  4. In a small bowl, whisk together 2 large eggs and 2 cups of chicken broth until well combined. Set aside.
  5. In a large mixing bowl, add 8 cups of stale bread cubes. Pour the buttery vegetable mixture over the bread. Pour in the egg and chicken broth mix, tossing everything together.
  6. Pour the stuffing mixture into the buttered baking dish and dot the top with 2 tablespoons of butter.
  7. Cover with foil and bake for 30 minutes. Remove foil and bake an additional 15 minutes until golden brown. Broil for 1–2 minutes if desired.

Use stale bread for best texture; fresh bread can lead to mushy stuffing. Customize herbs to your preference for a unique taste.

Side Dishes
American
bread stuffing, comfort food, Holiday Side Dish, homemade stuffing, Stuffing, vegetable stuffing

Filed Under: Side Dishes

Lemon and Dill Butter Garlic Bliss for Chicken Lovers

October 26, 2025 by grace bellamy Leave a Comment

As the fragrant aroma of garlic mingles with the zesty brightness of lemon, I’m instantly transported to my favorite bistro where every plate feels like a celebration. This Lemon and Dill Butter Garlic Chicken with Asparagus brings that vibrant dining experience right into my home kitchen. Not only is this dish simple to whip up in just 30 minutes, but it also combines healthy ingredients with rich flavors that satisfy both the palate and the conscience. The tender chicken, perfectly cooked asparagus, and fresh dill come together in a buttery, garlicky sauce that will have everyone asking for seconds. Whether you’re catering to a special dinner or just treating yourself on a weeknight, this delightful recipe is sure to become a staple in your culinary repertoire. So, are you ready to discover how to elevate your next meal with this mouthwatering combination? Let’s dive into the recipe!

Lemon and Dill Butter Garlic

Why is this dish a must-try?

Simplicity in preparation means you can whip this up in just 30 minutes, making it perfect for busy weeknights. Flavor explosion combines zesty lemon, savory garlic, and fresh dill for a dish that feels gourmet. Versatile pairing options allow you to serve it with rice, pasta, or crusty bread, ensuring it’s a hit with everyone. Healthy indulgence means you’re not sacrificing nutrition for taste, with lean chicken and vibrant veggies. Most importantly, crowd-pleasing appeal guarantees that this dish will impress family and friends alike! Get ready to savor the goodness of Lemon and Dill Butter Garlic Chicken!

Lemon and Dill Butter Garlic Ingredients

• Discover the flavors that make this dish shine!

For the Chicken

  • 1 lb chicken breast – boneless and skinless offers a lean protein base that’s perfect for absorbing all the rich flavors.

For the Vegetables

  • 1 bunch asparagus – trimmed for crisp-tender bites that add a vibrant green touch to your plate.

For the Sauce

  • 1 tbsp olive oil – provides the ideal cooking base for a beautiful sauté.
  • 1 tbsp butter – adds richness and depth to the sauce, making every bite buttery smooth.
  • 3 cloves garlic – chopped for that irresistible aromatic kick!
  • 1/4 tsp red pepper flakes – infuses a touch of heat that contrasts perfectly with the zesty lemon.
  • 1/2 cup chicken broth – forms the flavorful liquid base that ties the dish together.
  • 1 lemon – for juice and zest, delivering bright acidity that enhances the overall flavor profile.
  • 1/4 cup fresh dill – chopped, this herb adds a fresh, grassy note that lifts the dish.
  • Salt – to taste, elevating the flavors without overpowering them.
  • Pepper – to taste, for an added layer of warmth and complexity.

This Lemon and Dill Butter Garlic Chicken is a wonderful dish that balances taste and nutrition perfectly!

Step‑by‑Step Instructions for Lemon and Dill Butter Garlic

Step 1: Sauté the Asparagus
Begin by heating 1 tablespoon of olive oil in a large skillet over medium-high heat. Once the oil is shimmering, add the trimmed asparagus and sauté until it’s crisp-tender, about 3–5 minutes. You’ll know it’s ready when the asparagus is bright green and slightly tender, then transfer it to a plate and set aside to keep warm.

Step 2: Cook the Chicken
In the same skillet, lower the heat slightly and add 1 tablespoon of butter. Allow it to melt completely before adding the boneless, skinless chicken breast. Season with salt and pepper, cooking each side for about 3–5 minutes until golden brown. The chicken should have a nice sear, indicating it’s developing rich flavors as it cooks through.

Step 3: Infuse Garlic and Spice
Once the chicken is beautifully browned, stir in 3 chopped cloves of garlic and 1/4 teaspoon of red pepper flakes. Continue cooking for about 1 minute, stirring frequently until the garlic is fragrant and golden, ensuring it doesn’t burn. This step is vital to layering the comforting flavors in your Lemon and Dill Butter Garlic dish.

Step 4: Create the Flavorful Base
Next, pour in 1/2 cup of chicken broth, scraping the bottom of the skillet with a wooden spoon to lift any browned bits — these add wonderful depth to the sauce. Bring the mixture to a gentle boil, then reduce the heat and let it simmer for about 5 minutes. The broth will reduce slightly, intensifying the flavors as the chicken cooks through.

Step 5: Add Lemon and Dill
After simmering, stir in the juice and zest of 1 lemon along with 1/4 cup of chopped fresh dill. This is where the Lemon and Dill Butter Garlic magic happens! Return the sautéed asparagus to the skillet, tossing everything together for a few moments to let all the ingredients mingle beautifully in the sauce.

Step 6: Serve and Savor
Finally, serve your Lemon and Dill Butter Garlic Chicken with Asparagus immediately. Pair it with a bed of rice, al dente pasta, or crusty bread to soak up the delightful buttery sauce. Feel free to add a sprinkle of fresh dill on top for a pop of color and freshness, making every bite a delightful experience.

Lemon and Dill Butter Garlic

Lemon and Dill Butter Garlic Variations

Feel free to get creative with this recipe and make it your own!

  • Dairy-Free: Substitute olive oil for butter and use a plant-based butter alternative for a rich flavor without dairy.

  • Herb Explosion: Experiment with fresh herbs like parsley or tarragon instead of dill for a new twist on flavor. These herbs bring a unique freshness!

  • Vegetable Medley: Add bell peppers or zucchini for extra color and nutrition, creating a vibrant medley that everyone will love!

  • Grilled Version: Grill the chicken for a smoky flavor. Just marinate the chicken in the lemon and dill mixture before grilling to enhance the taste.

  • Spicy Kick: Increase the red pepper flakes or add a dash of hot sauce for those who enjoy their meals with a bit more heat.

  • Nutty Finish: Top each serving with toasted pine nuts or slivered almonds to add a delightful crunch that contrasts beautifully with the tender chicken.

  • Lemon Substitute: Swap lemon with lime for a more tropical flair. The zesty lime brings a bright, tangy twist to the dish that’s absolutely refreshing.

  • Family-Friendly Additions: Sneak in some cherry tomatoes or baby spinach at the end for a pop of color and added texture, making this dish even more family-friendly.

Don’t forget, each variation opens up a new dimension of flavor that can turn this beloved dish into an array of culinary delights! If you’re looking to explore more delightful chicken recipes, consider checking out our crowd-pleasing favorites to impress your family and friends!

What to Serve with Lemon and Dill Butter Garlic Chicken with Asparagus

Savoring this vibrant dish opens up a world of delicious pairing possibilities that will elevate your dining experience.

  • Creamy Mashed Potatoes: These buttery delights provide a smooth texture that complements the tender chicken beautifully, perfect for soaking up that herby sauce.

  • Quinoa Salad: A light, refreshing quinoa salad with cucumbers and cherry tomatoes adds a crunchy contrast to the rich, buttery flavors of the chicken.

  • Garlic Bread: Warm, crusty garlic bread is an irresistible choice, ideal for mopping up every last bit of that zesty lemon and dill sauce.

  • Herbed Rice: Fluffy rice infused with fresh herbs enhances the dish’s overall freshness while serving as a hearty base for the chicken and asparagus.

  • Caesar Salad: Crisp romaine lettuce, creamy dressing, and crunchy croutons provide a contrasting texture and a tangy kick that pairs wonderfully with the garlicky chicken.

  • Sautéed Spinach: Lightly sautéed spinach with a hint of lemon makes for a nutritious side that adds vibrant green color and enhances the dish’s Mediterranean flair.

  • Chardonnay: A chilled glass of Chardonnay complements the citrus notes beautifully, creating a refined pairing that encourages lingering at the table.

  • Lemon Tart: To finish off your meal with a sweet touch, a zesty lemon tart offers a delightful aftertaste that echoes the dish’s bright flavors.

How to Store and Freeze Lemon and Dill Butter Garlic

Fridge: Store leftovers in an airtight container for up to 3 days. Ensure the chicken and asparagus are fully cooled before sealing to maintain freshness.

Freezer: For longer storage, freeze in a freezer-safe container for up to 3 months. Make sure to portion out the chicken and asparagus in meal-sized servings for easy reheating.

Reheating: Thaw in the fridge overnight and reheat gently in a skillet over medium heat, adding a splash of chicken broth to revive the buttery, garlicky sauce.

Room Temperature: Avoid leaving out for more than 2 hours to prevent spoilage. If serving at a gathering, keep it warm in a chafing dish for safer enjoyment.

Make Ahead Options

These Lemon and Dill Butter Garlic Chicken with Asparagus are absolutely perfect for meal prep enthusiasts! You can marinate the chicken breasts in olive oil, garlic, lemon juice, and chopped dill up to 24 hours in advance, allowing those flavors to really penetrate. In addition, you can prep the asparagus and store it in an airtight container in the refrigerator for up to 3 days. When it’s time to cook, simply sauté the chicken (discarding any leftover marinade) and follow the final steps of the recipe. This prep not only saves time during busy weeknights but ensures your dish will be just as delicious, with vibrant flavors and textures intact.

Expert Tips for Lemon and Dill Butter Garlic

  • Perfect Searing: Ensure the skillet is hot before adding the chicken to achieve a golden-brown crust. This enhances the flavor in your Lemon and Dill Butter Garlic Chicken.

  • Don’t Overcook Asparagus: Cook just until crisp-tender; you want the asparagus to retain its bright color and crunch. Overcooking can make it mushy and lose its fresh flavor.

  • Mind the Garlic: Stir the garlic constantly as it cooks to prevent burning. Burnt garlic can taste bitter, negatively impacting your delightful dish.

  • Homemade Chicken Broth: Using homemade chicken broth elevates the dish. It adds more depth than store-bought varieties.

  • Zest Carefully: When zesting the lemon, take care to avoid the bitter white pith under the skin. This brightens the flavors of your Lemon and Dill Butter Garlic chicken.

  • Customize Your Heat: Adjust the red pepper flakes to suit your taste. Less heat accommodates sensitive palates while still adding a nice flavor depth to the dish.

Lemon and Dill Butter Garlic

Lemon and Dill Butter Garlic Chicken with Asparagus Recipe FAQs

How do I select the perfect asparagus?
Absolutely! When choosing asparagus, look for firm, vibrant green stalks with closed, compact tips. Avoid any that have dark spots or are too woody. A good bunch should feel slightly springy when you bend the stalk gently.

How should I store the leftovers?
Very! You can store any leftovers of your Lemon and Dill Butter Garlic Chicken in an airtight container in the fridge for up to 3 days. It’s best to allow the chicken and asparagus to cool down completely before sealing them, which helps maintain their freshness and flavor.

Can I freeze this dish? If so, how?
Definitely! To freeze your Lemon and Dill Butter Garlic Chicken, portion it out in freezer-safe containers. This way, you can grab just what you need later. Make sure to cool the dish completely first. It can be stored in the freezer for up to 3 months. To reheat, thaw the container in the fridge overnight and warm it gently in a skillet, adding a splash of chicken broth to restore the delicious buttery sauce.

What can I do if my chicken is overcooked?
Oh no! If your chicken ends up overcooked, don’t fret. Slice the chicken thinly and toss it back into the buttery, lemony sauce for a few minutes to soak up moisture. This can help revive some tenderness, and don’t forget to serve with a side of your favorite pasta or rice to balance the dish!

Are there any dietary considerations for this recipe?
Certainly! This Lemon and Dill Butter Garlic Chicken is naturally gluten-free, making it a great option for people with gluten sensitivities. However, if you’re cooking for someone with allergies, be sure to verify that the chicken broth and any added ingredients don’t contain allergens. Always adjust the red pepper flakes if cooking for sensitive palates or omit them altogether for a milder flavor.

Lemon and Dill Butter Garlic Bliss for Chicken Lovers

This Lemon and Dill Butter Garlic dish combines tender chicken with vibrant asparagus in a rich, buttery sauce, perfect for quick weeknight dinners.

  • large skillet

For the Chicken

  • 1 lb chicken breast (boneless and skinless)

For the Vegetables

  • 1 bunch asparagus (trimmed)

For the Sauce

  • 1 tbsp olive oil (cooking base)
  • 1 tbsp butter (adds richness)
  • 3 cloves garlic (chopped)
  • 1/4 tsp red pepper flakes (for heat)
  • 1/2 cup chicken broth (liquid base)
  • 1 lemon (for juice and zest)
  • 1/4 cup fresh dill (chopped)
  • salt (to taste)
  • pepper (to taste)

Step‑by‑Step Instructions for Lemon and Dill Butter Garlic

  1. Heat 1 tablespoon of olive oil in a large skillet over medium-high heat. Add the trimmed asparagus and sauté until crisp-tender, about 3–5 minutes. Transfer to a plate and set aside.
  2. In the same skillet, lower the heat slightly and add 1 tablespoon of butter. Allow it to melt and add the boneless chicken breast; season with salt and pepper. Cook each side for about 3-5 minutes until golden brown.
  3. Stir in 3 chopped cloves of garlic and 1/4 teaspoon of red pepper flakes, cooking for about 1 minute until fragrant. Avoid burning the garlic.
  4. Pour in 1/2 cup of chicken broth, scraping the bottom of the skillet. Bring to a gentle boil, then reduce the heat and simmer for 5 minutes.
  5. Stir in juice and zest of 1 lemon and 1/4 cup of chopped dill. Add back the sautéed asparagus and toss to combine.
  6. Serve immediately with rice, pasta, or bread, and sprinkle fresh dill on top for garnish.

Ensure to properly sauté ingredients for optimal flavor and texture.

Main Dishes
American
Chicken Recipe, Garlic Butter Chicken, Healthy Chicken, Lemon and Dill Butter Garlic, quick dinner

Filed Under: Main Dishes

Indulge in Creamy Cheesy Potato Gratin Perfection Tonight

October 26, 2025 by grace bellamy Leave a Comment

As I stood in my kitchen, the scent of caramelizing onions and melting cheese enveloped me like a warm hug—a moment that could only be captured in a dish of Creamy Cheesy Potato Gratin. This comforting classic not only celebrates the humble potato but transforms it into a crowd-pleaser that’s perfect for any occasion. With just 20 minutes of prep and a simple layering technique, you can create a creamy, indulgent side dish that pairs beautifully with roasted meats or simply stands alone as the star. The winning combination of Gruyère cheese and a hint of nutmeg elevates this dish to a new level of comfort, making it the ultimate antidote to fast food cravings. Curious about how to turn basic ingredients into something magical? Let’s get cooking!

Creamy Cheesy Potato Gratin

Why is this Potato Gratin Irresistible?

Unforgettable Flavor: The creamy cheese sauce infused with onions, garlic, and thyme creates an explosion of taste that will wow your guests.

Easy to Make: With just 20 minutes of prep, this dish is accessible for both seasoned chefs and kitchen novices alike.

Versatile Side Dish: Perfect for pairing with roasts or as a standalone indulgence, it fits seamlessly into any meal plan.

Crowd-Pleasing Comfort: Its bubbly, golden top and harmonious textures ensure it disappears at family gatherings or dinner parties.

Time-Saving Delight: Bake ahead of time and reheat when ready to serve, making it the perfect addition to your meal prep routine.

So, get ready to turn a few simple ingredients into an unforgettable experience with this Creamy Cheesy Potato Gratin, and say goodbye to fast food fatigue!

Creamy Cheesy Potato Gratin Ingredients

For the Gratin
• 2 pounds potatoes – use starchy varieties like Russets for a perfect creamy texture.
• 2 cups heavy cream or béchamel sauce – heavy cream adds richness, while béchamel gives a silky smoothness.
• 1 medium onion, finely chopped – enhances the flavor with a touch of sweetness.
• 2 cloves garlic, minced – adds a fragrant kick to the dish.
• 1 teaspoon fresh thyme – imparts a lovely herbal note that complements the potatoes beautifully.
• 1 pinch nutmeg – a subtle hint that elevates the creamy cheese flavor.
• 1 cup Gruyère cheese – or any good melting cheese, for that addictive gooeyness.
• Additional cheese for topping – for the ultimate golden and crispy finish on your gratin.

Get ready to dive into the delightful layers of this Creamy Cheesy Potato Gratin, where every bite is an embrace of warmth and flavor!

Step‑by‑Step Instructions for Creamy Cheesy Potato Gratin

Step 1: Preheat the Oven
Begin by preheating your oven to 375°F (190°C). This ensures that the Creamy Cheesy Potato Gratin will bake evenly, resulting in a perfectly golden top. A well-preheated oven is essential for achieving that bubbling, crispy layer we all love.

Step 2: Slice the Potatoes
Using a mandoline slicer, carefully slice your 2 pounds of potatoes into thin rounds, about 1/8-inch thick. The uniform thickness allows for even cooking and a creamy texture in every bite. Place the sliced potatoes in a bowl of cold water to prevent browning while you prepare the sauce.

Step 3: Prepare the Cheese Sauce
In a saucepan over medium heat, combine 2 cups of heavy cream (or béchamel sauce) with the finely chopped onion, minced garlic, 1 teaspoon of fresh thyme, and a pinch of nutmeg. Stir gently for about 5–7 minutes until the mixture is warm and fragrant, allowing the flavors to meld beautifully.

Step 4: Melt the Gruyère Cheese
Add 1 cup of Gruyère cheese to the warm cream mixture. Stir continuously for about 2–3 minutes until the cheese is melted and fully incorporated. The sauce should become creamy and smooth, full of cheesy goodness—this will coat your potatoes perfectly in the Creamy Cheesy Potato Gratin.

Step 5: Assemble the Gratin
In a greased baking dish, layer the sliced potatoes, slightly overlapping them for even coverage. Once you’ve created the layers, pour the creamy cheese sauce evenly over the potatoes, ensuring they are all well-coated. Visually, it should look luxurious and inviting.

Step 6: Add Extra Cheese Topping
Sprinkle additional cheese on top of your assembled gratin. This extra layer will brown beautifully during baking, creating a deliciously crispy finish. Use any good melting cheese to complement the Gruyère, enhancing the indulgence of your Creamy Cheesy Potato Gratin.

Step 7: Bake to Perfection
Place your baking dish in the preheated oven and bake for 1 hour and 10 minutes. As it bakes, watch for the top to turn golden and bubbly. The aroma wafting through your kitchen will be irresistible and signal that your comforting dish is nearly ready.

Step 8: Cool and Serve
Once baked, remove the Creamy Cheesy Potato Gratin from the oven and allow it to cool for about 10–15 minutes. This helps set the layers, making it easier to serve. The wait will be worth it, as each creamy, cheesy bite will warm your heart and nourish your soul.

Creamy Cheesy Potato Gratin

Expert Tips for Creamy Cheesy Potato Gratin

Uniform Slices: Ensure potatoes are sliced uniformly for even cooking; a mandoline works wonders for this.

Layering Magic: Alternate layers of potatoes and cheese sauce for enhanced flavor and texture. Don’t skip this step!

Watch the Bake: Keep an eye on the oven in the last 10 minutes to prevent burning the crispy cheese topping.

Rest Before Serving: Let the gratin cool for 10–15 minutes after baking for cleaner slices and intensified flavors.

Use Fresh Herbs: Fresh thyme is key; dried herbs may lack the vibrant flavor that makes the creamy cheesy potato gratin truly shine.

Make Ahead Options

These Creamy Cheesy Potato Gratin are perfect for busy home cooks! You can slice and soak the potatoes up to 24 hours in advance; just store them in a bowl of cold water in the refrigerator to prevent browning. Additionally, the cheese sauce can be prepared and refrigerated for up to 3 days. When you’re ready to assemble, layer the potatoes in your baking dish, pour the chilled sauce over them, and sprinkle some extra cheese on top. Then, bake as directed, adding a few extra minutes to the cooking time if the dish is cold from the fridge. This way, you’ll enjoy a delicious, comforting meal with minimal effort on busy evenings!

How to Store and Freeze Creamy Cheesy Potato Gratin

Fridge: Store leftover Creamy Cheesy Potato Gratin in an airtight container for up to 3 days for the best flavor and creaminess.

Freezer: For longer storage, freeze your gratin in an airtight container for up to 2 months. Allow it to cool completely before freezing to maintain texture.

Reheating: When ready to enjoy, thaw overnight in the fridge, then reheat in a 350°F (175°C) oven for about 30 minutes, covered with foil to keep it moist.

Cooling: Let the gratin cool to room temperature before storing to prevent condensation, which can make the dish soggy.

What to Serve with Creamy Cheesy Potato Gratin

As you savor this indulgent dish, consider complementing it with flavors that will elevate your dining experience even more.

  • Roasted Chicken: The tender meat contrasts beautifully with the creamy texture, while flavorful herbs can enhance the whole meal.
  • Grilled Asparagus: Lightly charred asparagus adds a fresh crunch that balances the richness of the gratin. It’s a perfect springtime pairing.
  • Seared Salmon: The richness of the fish pairs harmoniously with the creamy cheesy potato gratin, bringing a taste of elegance to your plate.
  • Side Salad: A crisp salad with a tangy vinaigrette can cleanse the palate and provide a refreshing contrast to the warm, cheesy layers.
  • Garlic Bread: The buttery, crusty bread is perfect for scooping up every last bite of the gratin. Plus, who doesn’t love garlic bread?
  • Red Wine: A glass of earthy Pinot Noir beautifully complements the creaminess of the dish while enhancing the overall dining experience.
  • Chocolate Lava Cake: End your meal on a high note with a rich dessert; the warm chocolate contrasts with the cheesy potatoes creating a delightful finish.

Consider these pairings to create a complete, comforting meal that everyone will love!

Creamy Cheesy Potato Gratin Variations

Feel free to mix things up and customize your Creamy Cheesy Potato Gratin with these delightful ideas!

  • Dairy-Free: Use coconut cream and a dairy-free cheese alternative for a lactose-free twist without losing creaminess.

  • Herb-Infused: Add fresh herbs like rosemary or parsley into the cheese sauce for a fragrant boost that pairs wonderfully with potatoes.

  • Add-Ins: Toss in sautéed mushrooms or spinach before layering the potatoes for a flavorful veggie infusion.

  • Spicy Kick: Incorporate diced jalapeños or a dash of cayenne pepper to uplift the flavor and heat level for those who love a bit of spice.

  • Smoky Flavor: Sprinkle smoked paprika over the layers for a unique depth that elevates the classic flavors of this gratin.

  • Layered Cheeses: Experiment with a blend of cheeses like cheddar, fontina, or even blue cheese for a rich, multi-dimensional cheesy experience.

  • Nutty Crunch: Top your gratin with crushed nuts or breadcrumbs mixed with olive oil before baking for a crunchy contrast to the creamy interior.

  • Seasoned Potato Substitutes: Try sweet potatoes or parsnips as a base for a whole new flavor profile, adding natural sweetness and richness.

These variations not only keep your meals exciting but also invite you to play with ingredients you love! For an extensive selection of flavorful side dishes, don’t miss exploring our Baked Garlic Parmesan Brussels Sprouts or try a delightful Roasted Root Vegetable Medley to accompany your gratin!

Creamy Cheesy Potato Gratin

Creamy Cheesy Potato Gratin Recipe FAQs

How do I select the best potatoes for my gratin?
Absolutely! For an indulgent Creamy Cheesy Potato Gratin, opt for starchy varieties like Russets. They give that perfect creamy texture. Look for potatoes that are firm and free of dark spots or blemishes. Storing them in a cool, dark place will help maintain their freshness.

How should I store leftover Creamy Cheesy Potato Gratin?
To keep your leftover gratin tasting fresh, place it in an airtight container and refrigerate for up to 3 days. Allow it to cool completely before storing to prevent excess moisture, which could make it soggy. If you anticipate not finishing it within a few days, freezing is a viable option!

Can I freeze Creamy Cheesy Potato Gratin? How?
Yes, you can freeze your Creamy Cheesy Potato Gratin! Just make sure it’s completely cooled before freezing to preserve its texture. Transfer it into an airtight container or wrap it tightly with plastic wrap and foil. It can last up to 2 months. When you’re ready to enjoy it again, thaw it in the fridge overnight and reheat in a preheated oven at 350°F (175°C) for about 30 minutes, covered with foil to retain moisture.

What should I do if my gratin isn’t bubbling or browning properly?
Very! If your gratin isn’t bubbling or browning as expected, it could be due to not enough cheese on top or your oven temperature being inconsistent. Be sure to preheat the oven fully, and keep an eye on it during the last 10 minutes of baking. If it needs more color, you can broil it for a few minutes at the end, but watch it closely to avoid burning!

Are there any dietary considerations with this recipe?
Certainly! This Creamy Cheesy Potato Gratin is rich in dairy, making it unsuitable for those with lactose intolerance or dairy allergies. For a dairy-free version, consider using almond milk with a plant-based cheese alternative and substituting the heavy cream with a coconut cream or a homemade dairy-free béchamel. Always check ingredient labels to accommodate specific dietary needs.

Can I add other ingredients to my gratin?
Absolutely! The more the merrier! Feel free to customize your Creamy Cheesy Potato Gratin by adding cooked bacon, sautéed mushrooms, or even spinach for added flavor and nutrition. Just remember to keep the balance of your cheese sauce to ensure your gratin remains creamy and delicious!

Indulge in Creamy Cheesy Potato Gratin Perfection Tonight

Experience the deliciousness of Creamy Cheesy Potato Gratin, a comforting and crowd-pleasing dish perfect for any occasion.

  • mandoline slicer
  • Saucepan
  • Baking Dish

For the Gratin

  • 2 pounds potatoes (use starchy varieties like Russets for a perfect creamy texture)
  • 2 cups heavy cream or béchamel sauce (heavy cream adds richness, while béchamel gives a silky smoothness)
  • 1 medium onion, finely chopped (enhances the flavor with a touch of sweetness)
  • 2 cloves garlic, minced (adds a fragrant kick to the dish)
  • 1 teaspoon fresh thyme (imparts a lovely herbal note that complements the potatoes beautifully)
  • 1 pinch nutmeg (a subtle hint that elevates the creamy cheese flavor)
  • 1 cup Gruyère cheese (or any good melting cheese, for that addictive gooeyness)
  • Additional cheese for topping (for the ultimate golden and crispy finish on your gratin)

Step-by-Step Instructions

  1. Preheat your oven to 375°F (190°C).
  2. Using a mandoline slicer, slice your 2 pounds of potatoes into thin rounds, about 1/8-inch thick. Place them in a bowl of cold water to prevent browning.
  3. Combine 2 cups of heavy cream (or béchamel sauce) with the finely chopped onion, minced garlic, 1 teaspoon of fresh thyme, and a pinch of nutmeg in a saucepan over medium heat. Stir gently for 5-7 minutes until warm and fragrant.
  4. Add 1 cup of Gruyère cheese to the warm cream mixture. Stir until melted and creamy.
  5. In a greased baking dish, layer the sliced potatoes, slightly overlapping them. Pour the cheese sauce evenly over the potatoes.
  6. Sprinkle additional cheese on top for a crispy finish.
  7. Bake in the preheated oven for 1 hour and 10 minutes until golden and bubbly.
  8. Allow to cool for 10-15 minutes before serving to set the layers.

Ensure potatoes are sliced uniformly for even cooking. Letting the gratin cool before serving helps with cleaner slices.

Side Dishes
baked dishes, comfort food, Creamy Cheesy Potato Gratin, easy recipes, potato gratin, side dish

Filed Under: Side Dishes

Creamy Baked Feta with Olives: The Ultimate Cozy Delight

October 26, 2025 by grace bellamy Leave a Comment

As I gathered ingredients for a cozy get-together, the sight of creamy feta cheese beckoned me like an old friend. With just a handful of pantry staples, I crafted what would soon become the star of the evening: Creamy Baked Feta. This crowd-pleaser is not only quick to prepare but also transforms simple ingredients into a luxurious dish that everyone will rave about. Each bite offers a delightful medley of rich cheese, tangy olives, and the earthy warmth of garlic, making it the perfect accompaniment for toasted crostini or pita chips. Best of all, you can assemble it ahead of time and let the oven work its magic while you mingle. Isn’t it exciting how one dish can elevate your meal? Ready to dive into the creamy goodness?

Creamy Baked Feta

Why is Creamy Baked Feta a Must-Try?

Simplicity: With just a few ingredients, famous for their pantry-friendly nature, this recipe is perfect for any home cook eager to impress without the fuss.

Rich, Tangy Flavor: The creamy feta mingles beautifully with olives and sun-dried tomatoes, creating a mouthwatering flavor explosion that’s hard to resist.

Versatile Serving Options: Serve this dish as a dip with your favorite toasted bread or pita chips, or pair it with fresh veggies for a delightful appetizer.

Quick & Easy: Ready in just 25 minutes, it’s ideal for last-minute gatherings or when you need a comforting dish without spending all day in the kitchen.

Make-Ahead Convenience: You can prepare it up to 2 hours in advance, so you can enjoy your time with guests instead of feeling rushed.

Crowd-Pleasing Delight: Perfect for any occasion, from casual dinners to elegant parties. Once you try it, your guests will be asking for the recipe – just like they do with my Creamy Potato Soup!

Creamy Baked Feta Ingredients

For the Baked Feta
• 8 ounces feta cheese – a rich and creamy base for this dish that melts beautifully.
• 1 cup olives – choose your favorites for a tangy burst of flavor.
• 1/2 cup sun-dried tomatoes – they add a sweet and slightly tangy depth to the creamy baked feta.
• 4 cloves garlic, minced – infuses the dish with aromatic warmth and depth of flavor.
• 1/4 cup olive oil – drizzled for richness, it helps create that luxurious creamy texture.
• 1 teaspoon dried herbs – enhances the flavor profile; feel free to mix in Italian seasoning for a twist.

Optional Serving Suggestions
• Toasted crostini – serve for a delightful crunch alongside the creamy goodness.
• Pita chips – perfect for dipping, balancing the textures beautifully.
• Fresh veggies – a lighter option that complements the richness of the baked feta.

This creamy baked feta dish is a simple, elegant option that will surely impress your family and friends!

Step‑by‑Step Instructions for Creamy Baked Feta

Step 1: Preheat the Oven
Begin by preheating your oven to 350°F (175°C). This step is crucial to ensure that when you bake your creamy baked feta, it melts evenly and to perfection. Let the oven warm up while you prepare the other ingredients, so you won’t have to wait later.

Step 2: Combine Ingredients
In a medium-sized baking dish, combine the 8 ounces of feta cheese, 1 cup of olives, 1/2 cup of sun-dried tomatoes, and 4 cloves of minced garlic. Drizzle 1/4 cup of olive oil over the mixture, then sprinkle 1 teaspoon of dried herbs on top. Mix gently, ensuring all ingredients are evenly coated and nestled together for an inviting presentation.

Step 3: Bake the Feta
Place the baking dish in the preheated oven and let it bake for 20 minutes. Keep an eye out for the creamy feta to become warm and soften beautifully. The edges may slightly bubble, indicating that it’s ready to deliver its rich and tangy flavors.

Step 4: Serve Immediately
Once baked, carefully remove the dish from the oven. Allow it to cool for a minute, then serve your creamy baked feta warm, alongside toasted crostini or pita chips. The delightful combination of textures and flavors is sure to impress your guests as you gather around the table.

Creamy Baked Feta

How to Store and Freeze Creamy Baked Feta

Fridge: Store leftover creamy baked feta in an airtight container for up to 5 days. Ensure it’s well-sealed to maintain its creamy texture and flavor.

Freezer: While not recommended for long-term storage, you can freeze baked feta for up to 2 months. Wrap tightly in plastic wrap and then place it in a freezer-safe container.

Reheating: To enjoy leftovers, reheat in the oven at 350°F for about 20 minutes until warmed through; this restores its delightful creaminess.

Make-Ahead Tip: You can easily prepare this dish up to 2 hours in advance. Just assemble, refrigerate, and allow it to come to room temperature before baking!

What to Serve with Creamy Baked Feta

When hosting the perfect get-together, pairing the rich, warm flavors of baked feta with complementary dishes can elevate your meal to a memorable feast.

  • Toasted Crostini: Perfectly crisp and lightly toasted, these bite-sized delights are ideal for scooping up the creamy feta, adding a satisfying crunch.

  • Pita Chips: Their light, airy texture pairs wonderfully with the creamy goodness, making them great for dipping in the delicious feta melange.

  • Fresh Veggies: Carrot sticks, cucumber slices, and bell pepper strips offer a refreshing and crunchy contrast, balancing the richness of the baked feta.

  • Bruschetta: Topped with diced tomatoes, basil, and a drizzle of balsamic glaze, bruschetta adds a fresh, zesty tang that complements the creamy feta perfectly.

  • Roasted Nuts: A small bowl of your favorite roasted nuts adds a savory, crunchy element. Their flavors enhance the richness while providing a satisfying mouthfeel.

  • White Wine: A chilled Sauvignon Blanc or Pinot Grigio elevates the experience with fruity acidity that cuts through the creaminess of the dish.

  • Sliced Baguette: Warm, crusty slices of baguette are a classic pairing, allowing you to enjoy every bit of that luxurious feta sauce as you indulge.

  • Hummus: A side of herbed hummus introduces another layer of flavor that harmonizes beautifully while keeping the meal light and fresh.

Make Ahead Options

These Creamy Baked Feta bites are perfect for meal prep enthusiasts! You can assemble the dish up to 2 hours in advance by combining the feta, olives, sun-dried tomatoes, garlic, olive oil, and dried herbs in your baking dish. Cover it tightly with plastic wrap and refrigerate it during this time to maintain freshness. When you’re ready to impress your guests, simply remove it from the fridge, allow it to come to room temperature for about 30 minutes, and then bake as directed for 20 minutes. This way, you can enjoy a delicious appetizer without the last-minute rush, all while savoring that creamy, mouthwatering flavor just as if it were freshly made!

Expert Tips for Creamy Baked Feta

  • Cheese Choice: Use high-quality feta cheese for the best creamy texture and flavor. Avoid over-processed varieties, as they may not melt as well.

  • Olive Selection: Experiment with different types of olives, such as Kalamata or Castelvetrano, to find the perfect balance of tanginess in your creamy baked feta.

  • Herbs Galore: Customize your dried herbs! Italian seasoning, oregano, or thyme can elevate the flavor. Just remember, too many spices can overshadow the feta’s richness.

  • Avoid Overbaking: Keep an eye on your creamy baked feta to ensure it remains creamy and doesn’t dry out. Baked for 20 minutes is ideal; check for bubbling edges as a sign it’s ready.

  • Garnish Wisely: Consider garnishing with fresh herbs like parsley or basil before serving to add a pop of color and an aromatic touch to your creamy baked feta.

Creamy Baked Feta Variations & Substitutions

Feel free to get creative and customize this dish to suit your palate and dietary needs!

  • Herb-Infused: Swap out dried herbs for fresh ones like basil or parsley for a vibrant flavor lift. Fresh herbs bring a burst of fragrance and color that elevates the dish beautifully.

  • Spicy Kick: Add crushed red pepper flakes to introduce a delightful heat that balances the creaminess of the feta. Start with a pinch and adjust to your preferred spice level—it’s an easy way to step up the flavor!

  • Mediterranean Twist: Toss in artichoke hearts or marinated peppers for a taste of the Mediterranean. These additions will enhance the dish’s texture and create a more complex flavor profile.

  • Olive Oil Variation: Try using flavored olive oil, such as garlic-infused or lemon-infused, to add another dimension of flavor. Just a drizzle can transform the dish, making it even more aromatic and delicious.

  • Nutty Texture: Sprinkle in some toasted pine nuts or walnuts for added crunch and richness. The nutty flavor complements the creamy feta perfectly, making every bite a delightful experience.

  • Dairy-Free Feta: For a dairy-free option, substitute with a vegan feta cheese alternative. It may yield a slightly different texture, but the flavors will still harmonize beautifully with your other ingredients.

  • Sweet & Savory: Add a handful of honey or balsamic glaze just before serving for a sweet contrast to the salty feta. This creates a touch of sweetness that balances the dish beautifully.

  • Veggie Additions: Mix in some finely chopped spinach or kale for an extra boost of nutrients and vibrant color. These greens will add a fresh touch without overpowering the other flavors.

These variations not only provide exciting twists but also ensure your creamy baked feta experience is uniquely yours. It’s all about making the dish reflect your tastes and preferences! Enjoy exploring these options, and for another delicious recipe idea, check out my Chicken Feta Pasta.

Creamy Baked Feta

Creamy Baked Feta Recipe FAQs

What kind of feta cheese should I use?
Absolutely! For the best creamy texture and flavor, opt for high-quality feta cheese. I recommend using a block of feta rather than crumbled; it melts beautifully and holds its shape during baking.

How do I know when the olives are ripe?
Very good question! Look for olives that are plump and shiny, without any dark spots or blemishes. They should feel firm but not hard when you squeeze them gently. Ripe olives should also have a pleasing aroma; avoid those that smell off or rancid.

How do I store the leftover creamy baked feta?
No worries! Store any leftovers in an airtight container in the fridge for up to 5 days. Make sure the container is sealed well to preserve its delightful creaminess.

Can I freeze my creamy baked feta?
Yes, if you need to! Wrap it tightly in plastic wrap, place it in a freezer-safe container, and it will last for up to 2 months. When ready to enjoy, thaw in the fridge overnight and reheat in the oven at 350°F for about 20 minutes until warmed through.

What if my baked feta doesn’t melt properly?
If your creamy baked feta isn’t melting as expected, it could be because the oven temperature was too low or the feta wasn’t high-quality. Ensure your oven is preheated properly and try using a fresh block of feta that’s full-fat for that perfect creamy texture next time.

Is creamy baked feta suitable for those with dietary restrictions?
Great consideration! This dish contains dairy and gluten, so it may not be suitable for those who are lactose intolerant or following a gluten-free diet. You can experiment with dairy-free cheese alternatives or serve it with gluten-free chips or veggies to accommodate different dietary needs.

Creamy Baked Feta with Olives: The Ultimate Cozy Delight

Creamy Baked Feta is a quick, delicious appetizer that combines rich feta cheese, olives, and garlic for a crowd-pleasing dish.

  • Baking Dish

For the Baked Feta

  • 8 ounces feta cheese (a rich and creamy base for this dish that melts beautifully.)
  • 1 cup olives (choose your favorites for a tangy burst of flavor.)
  • 1/2 cup sun-dried tomatoes (they add a sweet and slightly tangy depth to the creamy baked feta.)
  • 4 cloves garlic, minced (infuses the dish with aromatic warmth and depth of flavor.)
  • 1/4 cup olive oil (drizzled for richness, it helps create that luxurious creamy texture.)
  • 1 teaspoon dried herbs (enhances the flavor profile; feel free to mix in Italian seasoning for a twist.)

Optional Serving Suggestions

  • toasted crostini (serve for a delightful crunch alongside the creamy goodness.)
  • pita chips (perfect for dipping, balancing the textures beautifully.)
  • fresh veggies (a lighter option that complements the richness of the baked feta.)

Step-by-Step Instructions for Creamy Baked Feta

  1. Preheat your oven to 350°F (175°C).
  2. In a medium-sized baking dish, combine the feta cheese, olives, sun-dried tomatoes, and minced garlic. Drizzle olive oil over the mixture and sprinkle dried herbs on top. Mix gently.
  3. Place the baking dish in the preheated oven and bake for 20 minutes until warm and softened.
  4. Remove from oven, let cool for a minute, and serve warm with toasted crostini or pita chips.

This creamy baked feta dish is a simple, elegant option that will surely impress your family and friends.

Appetizer
Mediterranean
Appetizer, Baked Feta, Cozy Dish, Creamy Baked Feta, feta cheese, Feta Recipe

Filed Under: Appetizer

Decadent Caramel Ritz Cracker Christmas Cookies Delight

October 25, 2025 by grace bellamy Leave a Comment

As I pulled open the oven door, the warm scent of melting chocolate blended with the buttery aroma of Ritz crackers filled my kitchen, instantly igniting a sense of nostalgia. There’s something truly magical about the holidays, and these Caramel Ritz Cracker Christmas Cookies encapsulate that joy in every delightful bite. With a mere 25 minutes of your time, you can whip up these sweet and salty treats that are sure to become a cherished addition to your holiday traditions. Not only are they a quick and simple recipe, but they also bring an irresistible twist to classic cookie exchanges. Who doesn’t love a slightly gooey center wrapped in rich chocolate? Get ready to impress your family and friends—will you be the one to share the secret behind these scrumptious, unforgettable cookies?

Caramel Ritz Cracker Christmas Cookies

Why Are These Cookies So Irresistible?

Quick to Make: In just 25 minutes, you can create a batch of delightful treats, making them perfect for last-minute holiday preparations.

Decadent Flavor: The combination of buttery crackers, creamy dulce de leche, and rich chocolate creates an explosion of taste that will have everyone asking for seconds!

Perfect for Sharing: Whether it’s for potlucks, cookie exchanges, or family gatherings, these cookies are sure to be a hit and elevate any dessert table.

Customizable Fun: Feel free to experiment! Add different toppings or flavors to personalize these cookies to your taste. For a festive twist, consider drizzling with caramel or even a sprinkle of peppermint.

Once you try these delectable Caramel Ritz Cracker Christmas Cookies, you might find yourself making them year-round! If you’re in the mood for more easy holiday treats, check out my Chocolate Pretzel Caramel Bites for another crowd-pleaser!

Caramel Ritz Cracker Christmas Cookies Ingredients

• Get ready to create holiday magic!

For the Cookies

  • Ritz crackers – 60 round buttery crackers provide the perfect crispy base for that delightful gooey filling.
  • Dulce de leche – 1 cup of this creamy caramel adds a luscious sweetness to the center of each cookie.
  • Dark chocolate chips – 1 1/2 cups contribute a rich chocolatey flavor, balancing out the sweetness perfectly.
  • Dark chocolate melting wafers – 1 1/2 cups make dipping easy and create a lovely glossy finish.
  • Sea salt (optional) – A sprinkle on top enhances flavors and adds a touch of sophistication to the cookies.

Now that you’ve gathered all the essential ingredients for your Caramel Ritz Cracker Christmas Cookies, let’s jump into the delicious directions!

Step‑by‑Step Instructions for Caramel Ritz Cracker Christmas Cookies

Step 1: Preheat and Prepare
Begin by preheating your oven to 350°F (175°C). While the oven warms up, line a baking sheet with parchment paper to prevent sticking. This step is crucial for easy cleanup and to help your Caramel Ritz Cracker Christmas Cookies bake evenly.

Step 2: Arrange the Crackers
Place 30 Ritz crackers in a single layer on your prepared baking sheet. Ensure they sit flat, as this will be the base for your delicious cookie sandwiches. Keep your workspace organized to make adding the dulce de leche easier in the next step.

Step 3: Add the Dulce de Leche
Spoon a small dollop of dulce de leche onto the center of each cracker on the baking sheet. Aim for just enough to cover without overflowing, as this will create a lovely gooey filling once baked. This rich caramel center will be the star of your Caramel Ritz Cracker Christmas Cookies!

Step 4: Create the Sandwiches
Take the remaining 30 Ritz crackers and gently press them on top of each dulce de leche-laden cracker to form sandwiches. Make sure they align well to keep the filling contained while baking, creating the perfect bite of sweet and salty goodness.

Step 5: Bake the Cookies
Place the baking sheet in the preheated oven and bake for 5-7 minutes, until the crackers are golden and the filling is warmed through. Keep an eye on them for that perfect slight softness—this will ensure your cookies have the desired texture when they cool.

Step 6: Cool and Set Aside
Once baked, remove the cookies from the oven and allow them to cool slightly on the baking sheet. This cooling period gives them a chance to firm up just a bit, ensuring the dulce de leche stays in the center of your scrumptious Caramel Ritz Cracker Christmas Cookies.

Step 7: Melt the Chocolate
While the cookies cool, melt the dark chocolate chips and dark chocolate melting wafers together. You can use a microwave in short bursts of 20 seconds, stirring in between, or a double boiler for a gentle heat. The resulting smooth chocolate will allow for a perfect dip for your sandwiches.

Step 8: Dip the Cookies
Once the chocolate is melted and glossy, take each cookie sandwich and dip it into the rich chocolate, ensuring each side is fully coated. Allow any excess chocolate to drip off before placing them back on the parchment paper. This will create a beautiful chocolate shell around each Caramel Ritz Cracker Christmas Cookie.

Step 9: Add Sea Salt (Optional)
If desired, sprinkle a touch of sea salt over the top of the dipped cookies while the chocolate is still wet. This optional step adds a delightful contrast to the sweetness and enhances the flavors of your cookies, giving them a gourmet touch.

Step 10: Let the Chocolate Set
Finally, allow the chocolate to set completely at room temperature. This may take about 30 minutes. You can place the cookies in the refrigerator for quicker setting if you’re eager to enjoy your Caramel Ritz Cracker Christmas Cookies sooner. Once set, they are ready to be devoured!

Caramel Ritz Cracker Christmas Cookies

Tips for the Best Caramel Ritz Cracker Christmas Cookies

  • Perfect Cooling: Let the cookies cool slightly after baking to achieve the right texture. If they’re too hot when dipped, the chocolate won’t set properly.

  • Dulce de Leche Distribution: Use a teaspoon to ensure each cracker gets just the right amount of dulce de leche. Too much can overflow when baking!

  • Chocolate Melting Method: Opt for a double boiler for a smooth melt. If using a microwave, heat slowly to avoid burning the chocolate, which can ruin your Caramel Ritz Cracker Christmas Cookies!

  • Sea Salt Sprinkle: Don’t skip the sea salt! A sprinkle right after dipping enhances the sweetness and adds a gourmet flair to your cookies.

  • Storage Tips: Store your cookies in an airtight container at room temperature or in the fridge for longer freshness. They’ll stay delicious for days, if they last that long!

Caramel Ritz Cracker Christmas Cookies Variations

Feel free to let your creativity shine by customizing these delightful cookies with your favorite flavors and substitutions.

  • Nut-Free: Replace the chocolate with carob chips for a nut-free option that still delivers a sweet treat.
  • Dairy-Free: Use dairy-free chocolate chips and coconut cream to create a delicious vegan version suitable for all dietary needs.
  • Spicy Kick: Add a dash of cayenne pepper to the melted chocolate for a surprising sweet and spicy combination that will tantalize curious taste buds.
  • Peanut Butter Twist: Spread a layer of peanut butter on the crackers before adding the dulce de leche for a decadent and nutty richness that balances the sweetness beautifully.
  • S’mores Style: Mix crushed graham crackers into the dulce de leche for a delightful campfire-inspired treat that brings nostalgia in every bite.
  • Festive Sprinkles: Top the chocolate-coated cookies with colorful holiday sprinkles for a fun, festive twist that’s perfect for cookie exchanges or family gatherings.
  • Minty Fresh: Infuse the melted chocolate with peppermint extract for a cool, minty flavor that pairs perfectly with the sweet caramel.
  • Crunchy Toppings: Add crushed pretzels or toffee bits on top of the chocolate for an enjoyable crunch and textural contrast in every mouthful.

Experimenting with these variations could lead you to your new favorite cookie recipe. If you’d like to explore more festive ideas, try my Chocolate Pretzel Caramel Bites for another delicious treat!

How to Store and Freeze Caramel Ritz Cracker Christmas Cookies

Room Temperature: Store cookies in an airtight container for up to 3 days to keep them fresh. Layer parchment paper between each layer to prevent sticking.

Fridge: For longer storage, place the container in the fridge. They will stay delicious for up to a week, maintaining their delightful texture.

Freezer: Freeze cookies in a single layer on a baking sheet until solid, then transfer to an airtight container. They can be stored for up to 3 months—perfect for future holiday cravings!

Reheating: Enjoy at room temperature or warm in the microwave for about 10 seconds to soften the chocolate before serving.

What to Serve with Caramel Ritz Cracker Christmas Cookies

Indulging in these festive treats is just the beginning—pair them with delightful sides and beverages for a truly magical holiday gathering.

  • Hot Cocoa: The warmth and richness of hot cocoa perfectly complement the sweet and salty flavors of the cookies.

  • Gingerbread Cookies: Add a classic holiday touch with spicy gingerbread that contrasts beautifully with the creamy dulce de leche.

  • Fruit Platter: Fresh fruits like strawberries and mandarin segments provide a refreshing contrast to the sweetness of the cookies.

  • Cheesecake Bites: Mini cheesecake bites match the richness and elevate your dessert table with a creamy indulgence.

  • Nutty Trail Mix: A crunchy trail mix with nuts and dried fruits adds texture and balance to the dessert spread.

  • Peppermint Milkshake: This festive drink offers a cool, minty flavor that pairs wonderfully with the warm chocolate cookies.

These pairing ideas will enhance your holiday experience and create a delightful feast that everyone will cherish!

Make Ahead Options

These Caramel Ritz Cracker Christmas Cookies are perfect for busy cooks looking to save time during the holiday rush! You can prepare the cookie sandwiches (Ritz crackers with dulce de leche) up to 24 hours in advance. Simply assemble them and store in an airtight container in the refrigerator to maintain freshness. When you’re ready to finish the cookies, just melt the dark chocolate chips and melting wafers, dip the chilled sandwiches, and let the chocolate set. This way, you can enjoy the rich flavors just as delicious as if they were fresh out of the oven!

Caramel Ritz Cracker Christmas Cookies

Caramel Ritz Cracker Christmas Cookies Recipe FAQs

What type of Ritz crackers should I use?
I recommend using regular buttery Ritz crackers for the best flavor and texture. If you want to switch it up, you can try flavored crackers for a fun twist—garlic or herb varieties could add an unexpected and delightful flavor profile!

How long can I store my Caramel Ritz Cracker Christmas Cookies?
To keep your cookies fresh, store them in an airtight container at room temperature for up to 3 days. If you place them in the fridge, they’ll stay delicious for about a week. Just remember to layer parchment paper between each layer to prevent sticking!

Can I freeze the cookies? How do I do it?
Absolutely! To freeze, place the cookies in a single layer on a baking sheet and put them in the freezer until solid. Once they’re frozen, transfer them into an airtight container or freezer bag, separating layers with parchment paper. They can last up to 3 months in the freezer. When you’re ready to enjoy them, just let them thaw at room temperature!

What should I do if the chocolate doesn’t set properly?
If your chocolate hasn’t set, it could be due to warming during a dip. Make sure your cookies are completely cooled before dipping. If they’re warm, the chocolate might not adhere well. If you find that your chocolate is still too soft, pop your cookies in the refrigerator for about 20-30 minutes to help it set properly!

Are these cookies safe for pets or people with allergies?
These Caramel Ritz Cracker Christmas Cookies contain chocolate and dulce de leche, which are not safe for dogs. Additionally, check ingredients for common allergens like gluten in the crackers and dairy in the chocolate. If you have guests with allergies, consider a nut-free chocolate option or a gluten-free cracker to ensure everyone can enjoy these treats!

Decadent Caramel Ritz Cracker Christmas Cookies Delight

These Caramel Ritz Cracker Christmas Cookies are quick, delightful, and perfect for holiday exchanges.

  • Oven
  • Baking Sheet
  • parchment paper
  • Microwave
  • Double boiler

For the Cookies

  • 60 pieces Ritz crackers (round buttery crackers)
  • 1 cup dulce de leche (creamy caramel)
  • 1.5 cups dark chocolate chips (rich chocolatey flavor)
  • 1.5 cups dark chocolate melting wafers (for dipping)
  • to taste sea salt (optional, for garnish)

Step-by-Step Instructions

  1. Preheat your oven to 350°F (175°C) and line a baking sheet with parchment paper.
  2. Place 30 Ritz crackers in a single layer on the prepared baking sheet.
  3. Spoon a dollop of dulce de leche onto the center of each cracker.
  4. Press remaining Ritz crackers on top of the dulce de leche to form sandwiches.
  5. Bake for 5-7 minutes until golden and warm.
  6. Allow cookies to cool slightly on the baking sheet.
  7. Melt dark chocolate chips and melting wafers together.
  8. Dip each sandwich in the melted chocolate and let excess drip off.
  9. Sprinkle sea salt over dipped cookies while chocolate is wet, if desired.
  10. Allow the chocolate to set completely at room temperature.

Store cookies in an airtight container for up to 3 days at room temperature, or refrigerate for up to a week. Freeze for up to 3 months.

Dessert
American
Caramel Ritz Cracker Christmas Cookies, chocolate, cookies, dessert, holiday treats, quick recipes

Filed Under: Dessert

Pecan Pie Crescent Rolls for Effortless Holiday Indulgence

October 25, 2025 by grace bellamy Leave a Comment

As I stood in my kitchen, the delightful aroma of baking pastries reminded me of cozy family gatherings where dessert was the highlight. That’s when I decided to whip up these irresistible Pecan Pie Crescent Rolls. With just a few simple ingredients, these delightful rolls are a perfect fusion of flaky crescent dough and sweet, nutty pecan filling. Not only are they super quick to prepare—taking just 23 minutes from start to finish—but they are also a crowd-pleaser that will bring smiles to the faces of both family and friends. Imagine serving these warm, drizzled with a little caramel or alongside a scoop of vanilla ice cream! So, are you ready to indulge in a comforting dessert that feels as special as it tastes? Let’s get rolling!

Pecan Pie Crescent Rolls

Why are Pecan Pie Crescent Rolls a must-try?

Irresistible, warm bites: These Pecan Pie Crescent Rolls bring the delightful flavors of traditional pecan pie into a fun, flaky pastry form that everyone loves.

Effortless preparation: With only 23 minutes from prep to plate, you’ll spend more time enjoying delicious bites than in the kitchen.

Crowd-pleaser: Perfect for gatherings, these rolls will impress family and friends alike. Pair them lovingly with a scoop of vanilla ice cream for an unforgettable dessert!

Versatile indulgence: Enjoy them for breakfast, brunch, or dessert—no matter the occasion, these rolls fit perfectly! For additional delightful recipes, check out our classic pecan pie recipe.

Pecan Pie Crescent Rolls Ingredients

• Get ready to create a flavor sensation!

For the Filling

  • Chopped pecans – add a crunchy texture and nutty flavor that embodies classic pecan pie.
  • Granulated sugar – sweetens the filling to create that delicious dessert base.
  • Light corn syrup – ensures a glossy finish and sweetness, mimicking traditional pecan pie filling.
  • Unsalted butter – enriches the filling and adds decadence with its creamy taste.
  • Pure vanilla extract – infuses warmth and depth, elevating the overall flavor.
  • Large egg – binds the filling together and gives it a rich texture.

For the Dough

  • Pillsbury Crescent Rolls – these flaky rolls provide a tender and easy pastry base, perfect for wrapping around the filling.

Now that you have everything you need, let’s dive into making these delightful Pecan Pie Crescent Rolls that will have your loved ones returning for seconds!

Step‑by‑Step Instructions for Pecan Pie Crescent Rolls

Step 1: Preheat and Prepare
Begin by preheating your oven to 350°F (175°C). While it warms up, line a rimmed baking sheet with parchment paper to prevent sticking and make cleanup a breeze. This is the perfect time to gather all your ingredients, creating a cozy atmosphere in your kitchen as you prepare to whip up these delicious Pecan Pie Crescent Rolls.

Step 2: Make the Filling
In a large mixing bowl, combine the granulated sugar, light corn syrup, melted unsalted butter, pure vanilla extract, and the large egg. Whisk this mixture until it’s smooth and well combined. Keep the magic going by reserving 2 tablespoons of this sweet filling for later. It will ensure your rolls are extra special when they come out of the oven.

Step 3: Add the Pecans
Now, it’s time to bring in the hero of our filling! Stir in the chopped pecans until they’re evenly coated with the sweet mixture. This step is crucial for achieving that delightful crunch and nutty flavor in each bite of your Pecan Pie Crescent Rolls. The filling should be thick and luxurious, perfect for spooning onto the dough.

Step 4: Prepare the Crescent Dough
Gently unroll the Pillsbury Crescent Rolls and separate the dough into individual triangles on your prepared baking sheet. The dough should retain its flaky texture, ready for the delicious filling. With the wide end facing you, it’s important to ensure there’s enough space to add your pecan filling without it spilling over.

Step 5: Fill and Roll
Spoon 2 to 3 tablespoons of the pecan filling onto the widest end of each crescent triangle. Carefully roll the dough towards the narrow end, sealing in that rich filling. As you go, ensure the rolls are snug but not overly tight; they need space to puff up beautifully in the oven while baking.

Step 6: First Bake
Place your filled crescent rolls in the preheated oven and bake for about 8 minutes. You’ll know they’re ready to come out when they begin to set but are not yet fully golden. This stage allows them to develop structure while preserving their flaky goodness, which is essential for the next steps.

Step 7: Glaze and Final Bake
Remove the rolls from the oven and brush each one with the reserved 2 tablespoons of the sugar mixture. This sweet glaze will give your Pecan Pie Crescent Rolls a shiny, delectable finish. Return them to the oven and bake for an additional 5 minutes, or until they’re lightly golden brown and your kitchen is filled with an irresistible aroma.

Step 8: Garnish and Serve
Once baked, remove the rolls from the oven and let them cool slightly. If you desire, sprinkle additional chopped pecans on top for added texture and visual appeal. Serve these delightful Pecan Pie Crescent Rolls warm as a perfect treat for gatherings or cozy family moments, and relish every bite of this comforting indulgence.

Pecan Pie Crescent Rolls

Pecan Pie Crescent Rolls Variations & Substitutions

Feel free to get creative with this recipe and tailor it to your taste buds!

  • Nut-Free: Replace pecans with pumpkin seeds for a sweet and crunchy alternative. This gives a different yet delightful texture and flavor.

  • Chocolate Lovers: Add mini chocolate chips to the filling for a rich twist. The combination of chocolate and pecans creates a heavenly indulgence that’s hard to resist.

  • Spiced Up: Sprinkle in a teaspoon of cinnamon or nutmeg into the filling to add warm undertones. This little touch will elevate your rolls, making them perfect for cozy gatherings.

  • Maple Sweetened: Swap light corn syrup with maple syrup for a deeper, earthy sweetness. It creates a delightful twist that pairs beautifully with pecans.

  • Cream Cheese Filling: Blend softened cream cheese with powdered sugar and a touch of vanilla. Spread this on the crescent dough before adding the pecan filling for extra creaminess.

  • Savory Option: Turn these rolls into appetizers by using cooked bacon bits and cheddar cheese in place of the pecans. This savory surprise will wow guests during your next gathering!

  • Gluten-Free: Use gluten-free crescent roll dough to make this treat accessible for all. With the right mix of flavors, your friends won’t even notice the difference!

  • Add a Crunch: Top the rolls with a little sugar and more chopped nuts before baking to create a delightful crust. It adds texture and will make each bite even more satisfying.

The choices are endless, and every twist results in scrumptious variations that can make your gathering even more memorable! Want to explore more classic flavors? Give our pecan pie recipe a try!

How to Store and Freeze Pecan Pie Crescent Rolls

Room Temperature: Keep leftover Pecan Pie Crescent Rolls in an airtight container at room temperature for up to 2 days for the best flavor and texture.

Fridge: If you need to store them longer, they can be kept in the refrigerator for up to 4 days, but be aware they might lose some flakiness.

Freezer: For longer storage, freeze the rolls tightly wrapped in plastic wrap and foil for up to 2 months. This keeps them moist and prevents freezer burn.

Reheating: To revive the delightful taste and texture, preheat the oven to 350°F and reheat frozen rolls for 10-15 minutes, or until warmed through.

Expert Tips for Pecan Pie Crescent Rolls

  • Crescent Roll Care: Handle the Pillsbury Crescent Rolls gently to keep their flaky texture. Avoid stretching or pressing them too hard when shaping or rolling.

  • Filling Consistency: Ensure your pecan filling is thick enough to stay inside the rolls while baking. If it’s too runny, it could leak out during baking.

  • Golden Finish: Brush your rolls with the reserved sugar mixture before the final bake. This step enhances the shine and flavors, making your Pecan Pie Crescent Rolls irresistibly golden.

  • Baking Time Monitor: Keep a close eye on your rolls during the last few minutes in the oven. Every oven varies, and watching them ensures they don’t over-bake and become dry.

  • Storage Solution: To keep leftovers fresh, store them in an airtight container. If freezing, wrap them tightly to preserve their flaky goodness and reheat gently before serving.

What to Serve with Pecan Pie Crescent Rolls

Warm, flaky delights like these create an inviting atmosphere, perfect for cozy gatherings and sweet celebrations.

  • Vanilla Ice Cream: A scoop drizzled with caramel elevates the dessert, creating a decadent contrast to the nutty rolls.
  • Hot Coffee: The rich aroma of freshly brewed coffee perfectly complements the sweetness, making for a delightful morning treat.
  • Spiced Tea: A warm cup of spiced tea warms the soul and adds a comforting touch, enhancing the nutty flavors of the rolls.
  • Fresh Fruit Salad: A bright fruit medley balances the sweetness with refreshing bursts of flavor, bringing a vibrant touch to the table.
  • Chocolate Sauce: Drizzling chocolate sauce atop these rolls creates an indulgent experience that chocolate lovers will adore.
  • Whipped Cream: Light and fluffy, a dollop of whipped cream complements the rolls’ sweetness while adding a creamy texture.
  • Maple Syrup: A drizzle of maple syrup adds an extra layer of sweetness, drawing out the rich pecan flavor beautifully.
  • Roasted Coffee & Hazelnut Liqueur: For special gatherings, serve these rolls alongside this warming beverage for a lovely after-dinner treat.
  • Caramel Sauce: This adds a luscious richness that echoes the pie flavors, offering a delightful experience in every bite.

Make Ahead Options

These Pecan Pie Crescent Rolls are perfect for busy home cooks looking to save time during the week! You can prepare the pecan filling and store it in an airtight container in the refrigerator for up to 3 days. Additionally, you can unroll the crescent dough and cut it into triangles, laying them flat on the baking sheet, then cover and refrigerate for up to 24 hours. When you’re ready to bake, simply fill the dough with your prepped pecan mixture, proceed to bake as directed, and enjoy warm, delicious rolls just as if they were fresh from the oven! This makes it easy to enjoy these treats without all the last-minute fuss!

Pecan Pie Crescent Rolls

Pecan Pie Crescent Rolls Recipe FAQs

How do I select the best pecans for my filling?
Absolutely! Look for fresh pecans that are plump and have a light brown color. Avoid any nuts that show signs of spoilage, like a rancid smell or dark spots all over the shell. If possible, try to buy them from a source where you can smell the nuts first—they should have a rich, nutty aroma!

What’s the best way to store leftover Pecan Pie Crescent Rolls?
Very! To keep your rolls fresh, store them in an airtight container at room temperature for up to 2 days. If you need to store them longer, you can refrigerate them for up to 4 days. However, keep in mind they may lose some of their delightful flakiness in the fridge.

Can I freeze Pecan Pie Crescent Rolls?
Absolutely! For longer storage, wrap the cooled rolls tightly in plastic wrap and then in foil to keep them fresh. They can be frozen for up to 2 months. When you’re ready to enjoy them, preheat your oven to 350°F and reheat the frozen rolls for about 10-15 minutes, or until warmed through for that fresh-baked taste.

What should I do if my filling is too runny?
If you find your pecan filling is too runny, don’t fret! You can thicken it by adding more chopped pecans or a bit of cornstarch. Simply mix in a tablespoon at a time until you achieve the desired consistency. This will help it stay inside the rolls during baking, ensuring each bite is deliciously packed with flavor.

Are Pecan Pie Crescent Rolls safe for people with nut allergies?
While these rolls are packed with pecans, they may not be suitable for those with nut allergies. Always check for allergies to any ingredients used in the filling, and be cautious when serving to those with dietary restrictions. If desired, you can experiment with other fillers like chocolate chips for a nut-free option!

Can my pets have any of the leftover Pecan Pie Crescent Rolls?
It’s best to keep these rolls away from your pets, especially since they contain sugar and nuts that are not suitable for them. Instead, consider making some pet-friendly treats that they can enjoy while you snack on your delicious Pecan Pie Crescent Rolls!

Pecan Pie Crescent Rolls for Effortless Holiday Indulgence

Delight in these Pecan Pie Crescent Rolls, a quick and irresistible dessert that combines flaky pastry with a sweet pecan filling.

  • Oven
  • Mixing Bowl
  • Baking Sheet
  • parchment paper
  • Whisk

Filling

  • 1 cup Chopped pecans
  • 1/2 cup Granulated sugar
  • 1/2 cup Light corn syrup
  • 2 tablespoons Unsalted butter, melted
  • 1 teaspoon Pure vanilla extract
  • 1 large Egg

Dough

  • 1 package Pillsbury Crescent Rolls (Flaky pastry base)

Preparation Steps

  1. Preheat your oven to 350°F (175°C) and prepare a baking sheet with parchment paper.
  2. In a mixing bowl, combine the granulated sugar, light corn syrup, melted unsalted butter, vanilla extract, and egg. Whisk until smooth and well combined.
  3. Stir in the chopped pecans until evenly coated.
  4. Unroll the Crescent Rolls and separate them into individual triangles on the baking sheet.
  5. Spoon 2-3 tablespoons of the pecan filling onto the wide end of each triangle and roll it up carefully.
  6. Bake the rolls for about 8 minutes, until they begin to set but are not yet golden.
  7. Brush each roll with the reserved filling and return to the oven for an additional 5 minutes.
  8. Let the rolls cool slightly before serving, optionally garnished with additional pecans.

Serve warm with a drizzle of caramel or alongside vanilla ice cream for an extra special treat.

Dessert
American
Crescent Rolls, Easy Recipe, holiday dessert, Irresistible Treat, pecan pie, quick dessert

Filed Under: Dessert

Ultimate Comfort: Crockpot Lasagna Soup You’ll Love

October 24, 2025 by grace bellamy Leave a Comment

As the aroma of simmering garlic and Italian herbs wafts through my kitchen, I know something special is on the horizon. Today, I’m excited to share my beloved Crockpot Lasagna Soup, a cozy dish that turns the classic layered lasagna into a heartwarming bowl of goodness. This recipe is a game-changer—it’s not only a quick prep at just 15 minutes, but it also deepens in flavor as it cooks, making it a perfect choice for those busy weeknights when you crave comfort food without the fuss. And did I mention it easily feeds a crowd or makes for delightful leftovers? So grab your favorite bowl and a cozy blanket, and let’s dive into this deliciously hearty meal that will warm both your heart and your home. What’s your favorite topping to add to a soup?

Crockpot Lasagna Soup

What Makes This Soup So Special?

Comforting, Homemade Goodness: This Crockpot Lasagna Soup captures the heart of classic lasagna in a warm, inviting bowl, perfect for any occasion.

Minimal Effort, Max Flavor: With just 15 minutes of prep, you can set it and forget it while the flavors meld beautifully over hours.

Crowd-Pleasing Delight: Easily serves a family or group, ensuring everyone leaves the table satisfied, just like my Chicken Noodle Soup does!

Versatile Additions: Feel free to adapt the recipe with your favorite veggies or proteins, making it uniquely yours every time.

Hearty & Nourishing: Each serving packs a wholesome punch with rich ingredients, making it a blissful and nutritious meal, great for meal prep like my delicious Potato Soup.

Get cozy, grab a spoon, and enjoy this delightful culinary adventure!

Crockpot Lasagna Soup Ingredients

For the Soup Base
• Ground beef – a flavorful protein that gives the soup its heartiness.
• Medium onion, diced – adds sweetness and depth to the broth.
• Red bell pepper, diced – brings a pop of color and sweetness to the mix.
• Crushed tomatoes – forms the foundation of the rich, saucy base.
• Diced tomatoes – adds texture and a burst of tomato flavor.
• Beef broth – provides the savory liquid that brings it all together.
• Garlic, minced – infuses the soup with a wonderful aromatic quality.
• Italian seasoning – enhances the flavor profile with a perfect blend of herbs.

For the Noodles and Cheese
• Lasagna noodles, broken into pieces – gives that authentic lasagna experience in every bite.
• Ricotta cheese – adds creaminess and a delightful richness to each serving.
• Shredded mozzarella cheese – melts beautifully, offering that classic stretchy cheese goodness.
• Grated parmesan cheese – adds a nutty, salty finish to the soup.

This Crockpot Lasagna Soup is a cozy dish that’s sure to become a family favorite!

Step‑by‑Step Instructions for Crockpot Lasagna Soup

Step 1: Brown the Beef
Begin by heating a large skillet over medium-high heat. Add 1 lb of ground beef and cook it until browned and fully cooked, about 7-10 minutes. Make sure to break up the meat as it cooks for even browning. Once done, drain any excess grease, and transfer the beef into a 6-quart crockpot.

Step 2: Add the Vegetables
Next, add 1 diced medium onion and 1 diced red bell pepper to the crockpot with the ground beef. Stir the mixture well to combine the ingredients, allowing the vegetables to soften slightly as they cook. This step adds a wonderful layer of flavor to your Crockpot Lasagna Soup.

Step 3: Incorporate the Tomatoes
Pour in 14.5 oz of crushed tomatoes and 28 oz of diced tomatoes into the crockpot. Stir everything together to ensure the tomatoes are evenly distributed throughout the soup base. The vibrant colors and rich aromas will start to fill your kitchen as the ingredients meld together.

Step 4: Season the Soup
Add 3 cloves of minced garlic and 1 tablespoon of Italian seasoning to the crockpot. Mix thoroughly, allowing the garlic and herbs to infuse their flavors into the soup. This step enhances the delicious aroma, ensuring every bowl of your Crockpot Lasagna Soup is packed with taste.

Step 5: Create the Soup Base
Pour in 4 cups of beef broth to your seasoned mixture, creating a hearty soup base. Stir well to combine all the ingredients, ensuring the broth absorbs the flavors from the meat and vegetables. This rich base is what makes the soup comforting and fulfilling.

Step 6: Set the Cooking Time
Cover the crockpot and set it to cook on low for 6-8 hours or on high for 3-4 hours. This slow cooking process allows all the flavors to deepen and blend beautifully. You’ll know it’s ready when the vegetables are tender and the soup is bubbling.

Step 7: Add the Noodles
Once cooking time is complete, carefully remove the lid and break 8 oz of lasagna noodles into bite-sized pieces. Sprinkle these over the soup and gently stir to incorporate them into the mixture. This will transform your soup into a delightful lasagna-inspired dish.

Step 8: Final Cooking Stage
Cover the crockpot again and cook on high for an additional 30-45 minutes, or until the lasagna noodles are cooked through and tender. This final step ensures the noodles absorb the rich flavors of your Crockpot Lasagna Soup, resulting in a deliciously cohesive meal.

Step 9: Serve and Enjoy
When the noodles are ready, ladle the soup into bowls. Top each serving with a tablespoon of ricotta cheese, followed by a sprinkle of shredded mozzarella and grated parmesan cheese. The combination of cheeses creates an irresistible finishing touch to your hearty soup.

Crockpot Lasagna Soup

Expert Tips for Crockpot Lasagna Soup

Prep Ahead: Prepare and chop all your vegetables a day in advance. This step saves you precious time on busy weeknights!

Brown the Beef: Ensure you fully brown the ground beef to enhance the depth of flavor. Undercooking can leave a raw taste in your soup.

Layer Wisely: When adding the lasagna noodles, break them into smaller pieces for even cooking. Larger pieces may remain hard even after cooking.

Stir Carefully: Stir gently when incorporating the noodles into the soup to avoid breaking them apart too much, ensuring a hearty texture in your Crockpot Lasagna Soup.

Adjust for Thickness: If the soup feels too thick at the end, simply stir in a bit more beef broth until you reach your desired consistency.

Topping Options: Don’t limit yourself to cheese! Experiment with fresh basil or a dash of red pepper flakes for added flavor and freshness.

How to Store and Freeze Crockpot Lasagna Soup

Fridge: Store your leftover Crockpot Lasagna Soup in an airtight container for up to 3 days. Reheat gently on the stovetop or in the microwave until heated through, enjoying that warm, comforting flavor again.

Freezer: For longer storage, freeze the soup in portions using freezer-safe containers for up to 3 months. To reheat, thaw overnight in the fridge and warm on the stove, adding a splash of beef broth if needed.

Reheating: When reheating, stir occasionally to ensure even heating and to keep those hearty noodles intact, allowing the flavors to meld beautifully once again.

Serving Size: Consider freezing in individual-serving sizes to make weeknight meals a breeze! Enjoy your homemade comfort food at a moment’s notice.

Crockpot Lasagna Soup Variations

Feel free to make this Crockpot Lasagna Soup your own masterpiece, adding your favorite ingredients for a truly personal touch!

  • Gluten-Free: Substitute lasagna noodles with gluten-free pasta or use zucchini noodles for a lighter twist. Both options maintain flavor while catering to dietary needs.

  • Spicy Kick: Add a pinch of red pepper flakes or a diced jalapeño to give your soup an exciting heat that warms you from the inside out. It’s a simple way to elevate your culinary experience.

  • Vegetable-Packed: Toss in chopped spinach, kale, or mushrooms for added nutrition and a delightful texture. These veggies not only boost health but offer a pop of color and flavor.

  • Dairy-Free: Replace the ricotta, mozzarella, and parmesan with cashew cheese or vegan cheese alternatives. Enjoy creamy goodness without the dairy!

  • Beef Substitute: Go with ground turkey or lentils instead of beef for a lighter protein choice. Both options provide satisfying flavors and help diversify your protein intake.

  • Herb-Infusion: Experiment with fresh herbs like basil or oregano to intensify the Mediterranean flavors. Fresh herbs can take your soup to another level of freshness and aromatic delight.

  • Umami Booster: Incorporate a splash of Worcestershire sauce or soy sauce for an incredible umami kick that deepens the flavor profile. You’ll be surprised by how much richness this brings.

As you explore these variations, consider pairing your soup with a slice of delicious homemade garlic bread or a fresh salad. Your mealtime will become a heartwarming, enjoyable experience, just like my delightful Chili Meatballs Crockpot and Taco Lasagna recipes do!

What to Serve with Crockpot Lasagna Soup

As you savor each warm spoonful, it’s tempting to create a full meal that complements the cozy richness of this delicious soup.

  • Garlic Breadsticks: The perfect side to dip into your soup, these soft, buttery delights add a satisfying crunch alongside the creamy soup.
  • Caesar Salad: Crisp romaine, creamy dressing, and crunchy croutons create a refreshing contrast to the hearty lasagna soup. It’s light yet fulfilling!
  • Oven-Roasted Vegetables: A medley of seasonal veggies adds vibrant colors and natural sweetness, elevating the flavors of your meal delightfully.
  • Parmesan Crusted Zucchini: These baked zucchini slices, with their cheesy, crisp topping, are a fun, healthy twist on traditional garlic bread!
  • Homemade Italian Sangria: A fruity, refreshing beverage that adds a burst of flavor, this drink complements the herbaceous notes of the soup beautifully.
  • Chocolate Chip Cookies: Indulge in a sweet ending after your comforting dinner. The melty chocolate pairs perfectly with the warmth of your soup, inviting smiles all around.
  • Pesto Bruschetta: Crispy bread topped with basil pesto and diced tomatoes brings a touch of Italian flair that enhances the dish’s comforting vibes.
  • Balsamic Glazed Asparagus: Tender asparagus with a tangy-sweet glaze adds a sophisticated touch, balancing the heartiness of the Crockpot Lasagna Soup.
  • Classic Tiramisu: For dessert, this light, coffee-flavored delight perfectly contrasts the savory richness of the soup, making it a memorable meal.

Make Ahead Options

These Crockpot Lasagna Soup ingredients are perfect for meal prep enthusiasts! You can brown the ground beef and chop the onions and bell pepper up to 24 hours in advance. Store the meat and vegetables in an airtight container in the refrigerator to maintain their freshness. On the day you’re ready to cook, simply combine all ingredients in the crockpot and let it simmer. The lasagna noodles should be added at the end, about 30-45 minutes before serving, ensuring they’re cooked perfectly without becoming mushy. By prepping these components ahead, you’ll save precious time on busy weeknights while still enjoying a delicious, homemade meal!

Crockpot Lasagna Soup

Crockpot Lasagna Soup Recipe FAQs

What type of ground beef should I use for this soup?
Absolutely! I recommend using lean ground beef (like 80/20) for a good balance of flavor and fat. If you prefer a healthier option, ground turkey or chicken work well too, though they may alter the flavor a bit.

How should I store leftovers?
To keep your Crockpot Lasagna Soup fresh, store any leftovers in an airtight container in the refrigerator for up to 3 days. Make sure to let it cool to room temperature before sealing it up. When reheating, a gentle stovetop method is perfect to maintain its hearty flavor!

Can I freeze this soup?
Very much! You can freeze Crockpot Lasagna Soup for up to 3 months. I suggest pouring it into freezer-safe containers, making sure to leave some room for expansion as it freezes. When you’re ready to enjoy, simply thaw it overnight in the fridge and reheat on the stove, adding a bit of beef broth if it’s thicker than you’d like.

Why are the lasagna noodles hard after cooking?
If your noodles remain hard, they might have been broken too large. I recommend breaking them into smaller, bite-sized pieces before adding them to the soup. Also, make sure to stir gently when mixing them in; this helps with even cooking without breaking the noodles apart too much.

Is this soup pet-friendly?
While the ingredients are wholesome, they’re not suitable for pets, especially with the added seasoning. Always avoid feeding pets any foods containing garlic or excessive salt. It’s best to save the deliciousness of your Crockpot Lasagna Soup exclusively for human enjoyment!

Can I make this soup vegetarian?
Absolutely! You can swap out the ground beef for mushrooms or lentils for a hearty base. Replace the beef broth with vegetable broth for a fresh taste. This way, you maintain a comforting feel without the meat!

Ultimate Comfort: Crockpot Lasagna Soup You’ll Love

Savor the heartwarming Crockpot Lasagna Soup, a cozy twist on classic lasagna that’s perfect for comfort food lovers.

  • Crockpot
  • skillet

For the Soup Base

  • 1 lb Ground beef (a flavorful protein that gives the soup its heartiness.)
  • 1 medium Onion, diced (adds sweetness and depth to the broth.)
  • 1 medium Red bell pepper, diced (brings a pop of color and sweetness to the mix.)
  • 14.5 oz Crushed tomatoes (forms the foundation of the rich, saucy base.)
  • 28 oz Diced tomatoes (adds texture and a burst of tomato flavor.)
  • 4 cups Beef broth (provides the savory liquid that brings it all together.)
  • 3 cloves Garlic, minced (infuses the soup with a wonderful aromatic quality.)
  • 1 tbsp Italian seasoning (enhances the flavor profile with a perfect blend of herbs.)

For the Noodles and Cheese

  • 8 oz Lasagna noodles, broken into pieces (gives that authentic lasagna experience in every bite.)
  • 1 cup Ricotta cheese (adds creaminess and a delightful richness to each serving.)
  • 1 cup Shredded mozzarella cheese (melts beautifully, offering that classic stretchy cheese goodness.)
  • 0.5 cup Grated parmesan cheese (adds a nutty, salty finish to the soup.)

Step-by-Step Instructions

  1. Begin by heating a large skillet over medium-high heat. Add ground beef and cook until browned and fully cooked, about 7-10 minutes.
  2. Add diced onion and diced red bell pepper to the crockpot with the ground beef. Stir well to combine.
  3. Pour in crushed tomatoes and diced tomatoes into the crockpot. Stir to ensure even distribution.
  4. Add minced garlic and Italian seasoning to the crockpot. Mix thoroughly.
  5. Pour in beef broth and stir well to combine all the ingredients.
  6. Cover the crockpot and set it to cook on low for 6-8 hours or on high for 3-4 hours.
  7. Once cooking time is complete, remove the lid and break lasagna noodles into bite-sized pieces. Stir into the soup.
  8. Cover the crockpot again and cook on high for an additional 30-45 minutes.
  9. Ladle the soup into bowls. Top each serving with ricotta cheese, shredded mozzarella, and grated parmesan.

Feel free to adapt the recipe with your favorite veggies or proteins, making it uniquely yours every time.

Main Dishes
Italian
comfort food, Crockpot Lasagna Soup, Easy Recipe, Family Meal, Hearty Meal, Soup

Filed Under: Main Dishes

Savory Slow Cooker Beef Ramen Noodles to Savor All Day

October 24, 2025 by grace bellamy Leave a Comment

Walking into my kitchen, the savory aroma of beef and spices instantly wraps around me like a warm hug. Today, I’m thrilled to share my Slow Cooker Beef Ramen Noodles, a recipe that unites the comforting essence of homemade broth with tender beef in a way that transforms dinner into an experience. One of the best parts? It all simmers away in your slow cooker, leaving you with more time to savor the moments that matter. Plus, this dish is not only a crowd-pleaser but also super quick to prep—just 15 minutes, and you’re set! Whether you’re looking for a cozy meal after a long day or a satisfying dish to impress friends, these Beef Ramen Noodles are just what you need. Are you ready to dive into a bowl of pure comfort?

Beef Ramen Noodles

Why Are Slow Cooker Beef Ramen Noodles So Irresistible?

Comfort and Convenience: Imagine returning home to a fragrant kitchen after a long day, ready to indulge in a hearty meal. Easy Prep: With only 15 minutes of prep time, you can set your slow cooker and forget about it! Flavorful Delight: Each bite delivers rich flavors from tender beef, soy sauce, and ginger. Versatile Serving Options: Customize your bowl with toppings like soft-boiled eggs or Sriracha for an extra kick. Crowd-Pleasing Meal: Perfect for family dinners or gatherings, these Beef Ramen Noodles are bound to impress! An ultimate comfort food experience, and it’s a great reason to explore more slow cooker recipes for effortless cooking!

Beef Ramen Noodles Ingredients

• Get ready to savor every bite!

For the Beef
• Beef chuck – cuts into chunks that become wonderfully tender after slow cooking.
• Salt – enhances the natural flavors of the beef and the broth.
• Pepper – adds a touch of warmth that makes the dish truly comforting.

For the Aromatics
• Onion – sliced to release sweet, savory notes as it simmers.
• Garlic – minced to infuse rich depth into the broth.
• Ginger – grated for a zesty kick that brightens the flavors.

For the Broth
• Beef broth – the heart of your Beef Ramen Noodles, creating a robust base.
• Water – dilutes the broth slightly, balancing the flavors perfectly.
• Soy sauce – deepens the umami flavor, making every spoonful irresistible.
• Sesame oil – adds a nutty aroma and richness to the broth.
• Brown sugar – a hint of sweetness that perfectly complements the salty elements.

For the Noodles and Greens
• Ramen noodles – cook quickly and soak up all the delightful broth flavor!
• Baby spinach – adds a fresh touch and a pop of color to your dish.

For the Garnish
• Green onions – sliced to sprinkle on top for a refreshing crunch.
• Optional: Soft-boiled eggs – add creaminess and protein, making your meal even more satisfying.
• Optional: Sriracha or chili oil – perfect for those who love a spicy kick in their Beef Ramen Noodles!

Step‑by‑Step Instructions for Beef Ramen Noodles

Step 1: Prepare the Beef
Begin by seasoning 1.5 pounds of beef chuck chunks with 1 tablespoon of salt and 1/2 teaspoon of pepper. This step ensures the beef will be flavorful. Place the seasoned meat directly into the bowl of your slow cooker, ensuring that the pieces are evenly distributed for optimal cooking.

Step 2: Add Aromatics
Next, sprinkle sliced onions, minced garlic, and grated ginger over the beef in the slow cooker. These aromatics will infuse the dish with a delightful flavor as it cooks. Gently stir everything together with a spoon to mix the ingredients, ensuring that the beef is surrounded by these savory additions.

Step 3: Combine the Broth
Pour 4 cups of beef broth and 1 cup of water into the slow cooker, followed by 1/4 cup of soy sauce, 2 tablespoons of sesame oil, and 2 tablespoons of brown sugar. Stir the mixture gently to combine all these delicious flavors. This broth will be the heart of your Beef Ramen Noodles, so make sure everything is well incorporated.

Step 4: Slow Cook the Mixture
Cover the slow cooker with its lid and set it to low for 8 hours or high for 4 hours. This slow cooking will allow the beef to become tender and soak in all the savory goodness. As it cooks, enjoy the enticing aroma of your Beef Ramen Noodles wafting through your kitchen!

Step 5: Cook the Ramen Noodles
About 10 minutes before you’re ready to serve, bring a separate pot of water to a boil and cook 8 ounces of ramen noodles according to the package instructions. Once they are tender, drain the noodles and set them aside. This step is essential for ensuring your noodles are perfectly cooked and ready to soak up the flavorful broth.

Step 6: Add the Spinach
Just before serving, stir in 2 cups of baby spinach into the slow cooker. This will wilt the spinach slightly, adding a vibrant pop of color and freshness to your Beef Ramen Noodles. Allow it to cook for another 2-3 minutes, just until the spinach is wilted.

Step 7: Assemble the Bowls
Now it’s time to serve! Ladle generous portions of the beef and broth over the bowls filled with the cooked ramen noodles. Make sure each bowl gets a hearty serving of that rich broth and tender chunks of beef to enjoy.

Step 8: Garnish and Serve
Finally, sprinkle each bowl with sliced green onions for a fresh crunch. If desired, add soft-boiled eggs for extra creaminess and drizzle with Sriracha or chili oil for a spicy kick! Your Beef Ramen Noodles are now ready to be savored—enjoy every delightful bite!

Beef Ramen Noodles

Beef Ramen Noodles Variations & Substitutions

Feel free to put your own spin on this recipe with these fun and tasty ideas!

  • Dairy-Free: Replace any optional toppings with dairy-free alternatives, like avocado, for a creamy texture without dairy.

  • Gluten-Free: Swap regular ramen noodles for gluten-free alternatives, ensuring everyone at your table can enjoy this dish.

  • Spicy Kick: Add sliced jalapeños or a dash of chili flakes to the cooking broth for those who crave a bit of heat.

  • Veggie Boost: Toss in additional vegetables such as bell peppers, carrots, or mushrooms to create a more vibrant and nutritious dish.

  • Coconut Twist: Stir in a splash of coconut milk just before serving for a creamy, tropical flair that enhances the broth.

  • Asian Flair: Add a touch of miso paste or a splash of rice vinegar for a tangy kick and to elevate the umami flavors in the broth.

  • Earthy Delight: Substitute beef with shiitake mushrooms or tempeh for a hearty vegetarian option, bringing a unique flavor profile to the dish.

  • Instant Option: For a speedier meal, use instant ramen instead of traditional noodles – just make sure to adjust the cooking time accordingly!

These variations not only cater to diverse tastes and dietary preferences but also allow for endless culinary creativity. Your slow cooker can be the stage for a delicious performance each time you make Beef Ramen Noodles!

Expert Tips for Beef Ramen Noodles

• Choose the Right Beef: Use well-marbled beef chuck for maximum tenderness and flavor. Leaner cuts can result in a less succulent dish.

• Adjust Broth Flavor: Taste the broth before serving and tweak it with more soy sauce or sugar if desired. This ensures your Beef Ramen Noodles have just the right balance.

• Noodle Timing: Don’t add ramen noodles too early! They’ll become mushy; only cook them just before serving for the best texture.

• Spinach Tips: Stir in baby spinach just before serving to maintain its vibrant color and fresh taste. Overcooking will wilt it too much.

• Customize Your Bowl: Encourage creativity! Provide various toppings like soft-boiled eggs and Sriracha, allowing everyone to tailor their Beef Ramen Noodles to their taste.

How to Store and Freeze Beef Ramen Noodles

Fridge: Store leftover Beef Ramen Noodles in an airtight container for up to 3 days. Be sure to separate the noodles and broth if possible to maintain texture.

Freezer: If you have extra Beef Ramen Noodles, freeze the broth and beef in one container and the noodles in another. This way, they can be stored for up to 2 months.

Reheating: Thaw overnight in the fridge when ready to eat. Reheat the broth on the stove or in the microwave until it’s steaming, then add freshly cooked noodles to serve.

Avoid Watery Noodles: Reheat noodles separately to avoid them becoming mushy, and only mix them with the broth right before serving.

Make Ahead Options

These Slow Cooker Beef Ramen Noodles are perfect for meal prep! You can season and prepare the beef, garlic, onion, and ginger mixture up to 24 hours in advance. Simply place the seasoned beef and aromatics in the slow cooker, cover, and refrigerate until you’re ready to cook. When you’re ready to enjoy your meal, just add the beef broth, water, soy sauce, sesame oil, and brown sugar, and set your slow cooker. The noodles can be cooked just before serving to ensure they maintain their perfect texture. This approach not only saves time for busy weeknights but also ensures that your beef remains incredibly tender and flavorful, making your Beef Ramen Noodles just as delicious as freshly made.

What to Serve with Slow Cooker Beef Ramen Noodles

When you indulge in a comforting bowl of homemade beef ramen, it’s natural to crave complementary flavors and textures that elevate your meal experience.

  • Crispy Egg Rolls: These crunchy delights add a satisfying crunch, bursting with savory fillings that pair beautifully with the rich broth.
  • Steamed Bok Choy: Fresh and vibrant, this green veggie lightens the meal while soaking up the delicious broth, offering a lovely contrast in texture.
  • Refreshing Cucumber Salad: A cool, tangy salad with cucumbers and sesame dressing balances out the hearty beef ramen, making for a refreshing palate cleanse.
  • Garlic Bread: Soft and buttery, a slice of garlic bread is perfect for dipping into the flavorful broth—you won’t want to miss a drop!
  • Green Tea: Serve a warm cup of green tea with your ramen to cleanse the palate, enhance flavors, and promote relaxation after your meal.
  • Mochi Ice Cream: For dessert, consider a sweet treat like mochi ice cream, offering a delightful chewy texture and a variety of flavors to satisfy your sweet tooth.
  • Pickled Vegetables: The tangy crunch of pickled radishes or carrots introduces a burst of flavor that complements the savory profile of beef ramen wonderfully.
  • Soft-Boiled Eggs: A culinary classic that adds richness and a sense of indulgence; simply drizzle with soy sauce for the perfect finishing touch!
  • Spicy Kimchi: For those who love a kick, a side of spicy kimchi brings depth and heat, enhancing the overall flavor experience of your beef ramen noodles.

Beef Ramen Noodles

Slow Cooker Beef Ramen Noodles Recipe FAQs

What type of beef should I use for slow cooker beef ramen noodles?
Absolutely! Using beef chuck is ideal because its marbling ensures the meat becomes wonderfully tender during the slow cooking process. Avoid lean cuts, as they may end up dry or tough.

How do I store leftover beef ramen noodles?
I recommend keeping your leftover Beef Ramen Noodles in an airtight container in the refrigerator for up to 3 days. To maintain the texture, it’s best to separate the noodles from the broth when storing.

Can I freeze beef ramen noodles?
Very! You can freeze your Beef Ramen Noodles for up to 2 months. Store the broth and beef in one container and the noodles in another to prevent them from becoming mushy. Thaw in the fridge overnight before reheating.

What should I do if my broth is too salty?
If you find your broth is too salty, try adding a splash of water or low-sodium beef broth to dilute it. Alternatively, you can add a small amount of sugar. Just remember to taste as you go to achieve your desired flavor balance!

Are there any dietary considerations for this recipe?
Yes! If you’re serving this dish to anyone with food allergies or dietary restrictions, consider using gluten-free ramen noodles or tamari instead of soy sauce. For those watching sodium intake, opt for low-sodium broth and soy sauce.

How do I reheat frozen beef ramen noodles properly?
For perfect results, thaw the broth overnight in the refrigerator. When ready to eat, reheat the broth on the stove or in the microwave until steaming hot. Cook your noodles separately to prevent them from becoming soggy, and mix everything together right before serving for maximum flavor!

Savory Slow Cooker Beef Ramen Noodles to Savor All Day

Savory Slow Cooker Beef Ramen Noodles are a comforting dish that combines tender beef with rich broth and noodles.

  • Slow Cooker

For the Beef

  • 1.5 pounds beef chuck (cut into chunks)
  • 1 tablespoon salt
  • 0.5 teaspoon pepper

For the Aromatics

  • 1 medium onion (sliced)
  • 3 cloves garlic (minced)
  • 1 tablespoon ginger (grated)

For the Broth

  • 4 cups beef broth
  • 1 cup water
  • 0.25 cup soy sauce
  • 2 tablespoons sesame oil
  • 2 tablespoons brown sugar

For the Noodles and Greens

  • 8 ounces ramen noodles
  • 2 cups baby spinach

For the Garnish

  • 2 tablespoons green onions (sliced)
  • soft-boiled eggs (optional)
  • Sriracha or chili oil (optional)

Step-by-Step Instructions for Beef Ramen Noodles

  1. Season beef chuck chunks with salt and pepper, then place in slow cooker.
  2. Sprinkle sliced onions, minced garlic, and grated ginger over the beef and gently stir.
  3. Pour in beef broth, water, soy sauce, sesame oil, and brown sugar, then stir to combine.
  4. Cover and slow cook on low for 8 hours or high for 4 hours.
  5. Cook ramen noodles in separate pot according to package instructions, then drain.
  6. Stir in baby spinach into the slow cooker for the last few minutes.
  7. Ladle beef and broth over cooked ramen noodles in bowls.
  8. Garnish with green onions and optional toppings like soft-boiled eggs and Sriracha.

Choose well-marbled beef chuck for maximum tenderness and flavor. Adjust the broth to taste before serving.

Main Dishes
Asian
Beef Ramen Noodles, comfort food, easy recipes, Hearty Meal, Savory Dishes, slow cooker

Filed Under: Main Dishes

Savory Lamb Shank with Rosemary: Comfort Food Bliss

October 24, 2025 by grace bellamy Leave a Comment

The aroma wafting through the kitchen is irresistible—a heady blend of succulent lamb and fresh rosemary. While some days, a quick meal feels like the only option, there are times when a special dish like Lamb Shank with Rosemary Jus calls for our attention. This recipe brings a touch of sophistication to your dinner table without demanding a culinary degree. It’s not only a crowd-pleaser that delights family and friends alike, but it’s also a wonderful way to spend a leisurely evening stirring, simmering, and savoring each moment. Perfectly tender and paired with a luscious jus, this comforting dish makes any day feel more special. Ready to transform your cooking into an unforgettable experience? Let’s dive into this culinary adventure!

Lamb Shank

Why is Lamb Shank a Must-Try?

Tenderness that melts in your mouth – each bite of succulent lamb is an experience not to be missed. Aromatically captivating, the rosemary jus elevates the dish with a burst of flavor that will have your taste buds dancing. Impressive yet straightforward, this recipe is perfect for both novice cooks and seasoned chefs looking to impress guests with elegant comfort food. Hearty and satisfying, it’s a delightful way to gather loved ones around the table, making moments feel special. If you’re craving a cozy meal that feels like a warm hug, this Lamb Shank is your answer!

Lamb Shank Ingredients

For the Lamb Shank
• 4 lamb shanks – Choose meaty shanks for the best flavor and tenderness.
• Salt and pepper – Essential for seasoning the lamb before searing.

For the Vegetables
• 1 large onion, chopped – Adds a savory base to the dish.
• 2 large carrots, chopped – Sweetness balances the richness of the lamb.
• 2 stalks celery, chopped – Contributes crunch and aromatic depth.
• 4 cloves garlic, minced – Infuses the dish with a robust flavor.

For the Sauce
• 2 tablespoons olive oil – Ideal for searing the lamb and enhancing flavor.
• 2 cups red wine – Select a robust wine for rich sauce complexity.
• 2 cups beef stock – Adds depth and richness to the jus.
• 2 tablespoons fresh rosemary, chopped – Use fresh for the best aromatic qualities.
• 1 tablespoon fresh thyme, chopped – Complements the rosemary beautifully.
• 1 tablespoon Dijon mustard – Adds a tangy richness to the sauce.
• 2 tablespoons cornstarch (optional) – Use for thickening the jus if desired.

For Garnish
• Fresh rosemary sprigs – Perfect for decorative flair and flavor enhancement.

Indulge in the savory delight of this Lamb Shank, and let every bite transport you to a cozy gathering filled with warmth and happiness!

Step‑by‑Step Instructions for Lamb Shank with Rosemary Jus

Step 1: Preheat the Oven
Begin by preheating your oven to 325°F (160°C). This temperature is ideal for slowly braising the lamb shank, resulting in tender meat that falls off the bone. While the oven warms up, gather your ingredients to keep your workspace organized for the next steps.

Step 2: Sear the Lamb Shanks
In a large oven-safe pot or Dutch oven, heat 2 tablespoons of olive oil over medium-high heat. Season the lamb shanks generously with salt and pepper, and then sear each one for about 4-5 minutes, turning until browned on all sides. Once done, remove the shanks from the pot and set them aside on a plate.

Step 3: Sauté the Vegetables
Using the same pot, add the chopped onion, carrots, and celery. Sauté these aromatic vegetables for about 5-7 minutes, stirring occasionally, until they start to soften and become fragrant. Add the minced garlic and sauté for an additional minute, allowing the garlic to infuse the mix with its rich flavor.

Step 4: Add the Red Wine
Next, pour in 2 cups of robust red wine, scraping the bottom of the pot to loosen any browned bits; this step adds incredible depth to your lamb shank sauce. Allow the mixture to come to a simmer, letting it reduce by half for about 10-15 minutes. You’ll notice the liquid thickening slightly as the flavors concentrate.

Step 5: Combine Ingredients for Braising
Return the seared lamb shanks to the pot, ensuring they are nestled among the vegetables. Pour in 2 cups of beef stock, followed by chopped rosemary, thyme, and a tablespoon of Dijon mustard. Ensure the lamb shanks are mostly submerged in this aromatic liquid to absorb all the wonderful flavors as they cook.

Step 6: Bake the Lamb Shank
Cover the pot with a lid and carefully transfer it to your preheated oven. Let the lamb shank bake for 2 to 2.5 hours, allowing the low and slow cooking to work its magic. Check in occasionally; the meat should be wonderfully tender and easily pull away from the bone when it’s ready.

Step 7: Finish the Sauce
Once the lamb is cooked to perfection, carefully remove the shanks from the pot and keep them warm on a serving plate. If desired, strain the cooking liquid back into a saucepan, letting it simmer on low heat. To thicken the rosemary jus, whisk in cornstarch, adjusting the seasoning to taste with salt and pepper as needed.

Step 8: Plate and Serve
To serve, place the tender lamb shanks on your plates, and generously drizzle the luscious rosemary jus over the top. For a finishing touch, add fresh rosemary sprigs as a garnish, enhancing both the presentation and aroma of your delectable lamb shank dish.

Lamb Shank

Lamb Shank Variations & Substitutions

Feel free to explore these delightful twists and tweaks that can enhance your lamb shank experience!

  • Herb Variations: Experiment with thyme, oregano, or even sage instead of rosemary for a different flavor profile. The beauty of herbs is how they can completely transform a dish!

  • Red Wine Substitute: Use white wine or a splash of balsamic vinegar for a tangy taste if you prefer. This alternative can add an unexpected brightness to the sauce while still maintaining depth.

  • Vegetable Medley: Swap in or add other vegetables such as parsnips or mushrooms for extra texture and flavor. Mixing different veggies can bring a new dimension to your dish.

  • Low-Sodium Options: Opt for low-sodium beef stock to reduce the overall salt in your meal without sacrificing flavor. This can be especially helpful if you’re watching your sodium intake.

  • Spicy Kick: Add crushed red pepper flakes or a splash of your favorite hot sauce if you crave heat. Just a little can lift the whole dish, making it exciting for those who enjoy a little spice!

  • Dijon Mustard Alternative: If you don’t have Dijon on hand, try whole grain mustard for a grainy texture and a unique flavor twist. It can introduce a delightful crunch that enhances the overall taste experience.

  • Thickening Variations: Instead of cornstarch, consider using arrowroot powder or a roux for thickening your jus. Each thickening agent has its unique characteristics that can subtly alter the final texture.

  • Vegan Version: Substitute lamb with hearty mushrooms and use vegetable stock instead of beef for a delicious plant-based alternative. You’d be surprised how mushrooms can deliver a satisfying, umami-packed result!

By incorporating these variations or substitutions, you can make this lamb shank recipe your own and add even more joy to your culinary adventures. And if you want more flavor combinations, don’t forget to explore pairing your dish with side options like creamy mashed potatoes in our expert tips. Enjoy every moment of your cooking journey!

How to Store and Freeze Lamb Shank

  • Room Temperature: Allow the lamb shank to cool completely before storing, but it should not be left out for more than 2 hours to prevent bacterial growth.

  • Fridge: Store leftover lamb shank in an airtight container for up to 3 days. Make sure the rosemary jus is included to keep the meat moist and flavorful.

  • Freezer: For longer storage, freeze the lamb shank in a tightly sealed freezer bag or container for up to 3 months. Thaw in the fridge overnight before reheating.

  • Reheating: Gently reheat in the oven at 300°F (150°C) until warmed through, or simmer on the stovetop with some broth or jus in a covered pan to retain moisture. Enjoy your delicious lamb shank again!

Expert Tips for Lamb Shank

  • Choose Quality Meat: Select meaty lamb shanks from a reputable source for maximum flavor. This cut benefits from long cooking times and the right quality will elevate the dish.

  • Sear for Depth: Don’t skip the searing step! Browning the lamb enhances the flavors and creates a rich base for the rosemary jus. It’s a common mistake to rush this stage—allow it to develop.

  • Adjust Seasoning: Always taste the jus before serving. Add salt and pepper gradually, as flavors concentrate during cooking. This can avoid over-seasoning your delicious lamb shank.

  • Thickening the Jus: If you prefer a thicker sauce, whisk in cornstarch only after straining the cooking liquid. Make sure to mix it with a bit of cold water first to prevent clumping.

  • Slow Cook for Tenderness: Low and slow is key! Ensure you’re baking for the full 2 to 2.5 hours to achieve that glorious melt-in-your-mouth tenderness. Rushing this process can result in tougher meat.

  • Use Fresh Herbs: Fresh rosemary and thyme provide an aromatic flavor that’s simply unmatched. While dried herbs are convenient, they won’t give the same depth of flavor to your lamb shank.

Make Ahead Options

These Lamb Shanks with Rosemary Jus are perfect for busy home cooks looking to save time! You can prepare the braising liquid (including the sautéed vegetables and wine mixture) up to 24 hours in advance. Simply follow steps 2 through 4, let the mixture cool, and refrigerate. The lamb shanks can also be seasoned and seared in advance; just cool and store them in an airtight container for up to 3 days. When you’re ready to enjoy, return the shanks and the prepared mixture to a pot, add the beef stock and herbs, and bake as directed. This way, you’ll have a comforting, restaurant-quality meal with minimal effort!

What to Serve with Lamb Shank with Rosemary Jus

The tender, juicy lamb shank tantalizingly drizzled with rosemary jus deserves a perfectly curated companion to elevate your dining experience.

  • Creamy Mashed Potatoes: This classic pairing offers a luscious texture that absorbs the flavorful jus, making each bite heavenly.
  • Roasted Root Vegetables: Carrots, parsnips, and sweet potatoes caramelize beautifully, adding sweetness and earthiness to balance out the rich lamb.
  • Garlic Bread: The crunchiness and buttery goodness of garlic bread serve as the perfect vessel for savoring every drop of the rosemary jus. Dip it in, and thank me later!
  • Sautéed Green Beans: Bright and crisp, sautéed green beans provide a refreshing crunch to complement the richness of the lamb shank. Toss in almonds for added texture!
  • Wild Rice Pilaf: Offering a nutty flavor and chewy texture, wild rice pilaf brings an earthy note that harmonizes well with the savory lamb shank.
  • Side Salad with Balsamic Vinaigrette: A fresh salad topped with a tangy vinaigrette brightens the plate, enhancing all the flavors while introducing a delightful crispness.
  • Red Wine: A glass of the same robust red wine used in your cooking will beautifully echo the dish’s flavors, turning each sip into a delicious extension of the meal.

Lamb Shank

Lamb Shank with Rosemary Jus Recipe FAQs

How do I choose the best lamb shanks?
Absolutely! For the best flavor and tenderness, look for lamb shanks that are meaty with a nice layer of fat. This will enhance the richness of your dish. Also, make sure the meat is a vibrant pinkish-red color without any dark spots or signs of spoilage.

How should I store leftover lamb shank?
You can store leftover lamb shank in an airtight container in the fridge for up to 3 days. Make sure to include the rosemary jus to keep the meat moist and flavorful. If you want to prepare it for longer storage, you can freeze it!

What is the best way to freeze lamb shank?
To freeze lamb shank, first allow it to cool completely. Then, place it in a tightly sealed freezer bag or container, making sure to include the jus. This helps preserve moisture and flavor. Label it with the date, and you can store it for up to 3 months. When you’re ready to enjoy it again, thaw it in the fridge overnight before reheating.

How can I reheat lamb shank without drying it out?
The best way to reheat lamb shank is to gently warm it in the oven at 300°F (150°C) until heated through. Alternatively, you can simmer on the stovetop with some broth or jus in a covered pan to retain moisture. This ensures your lamb stays juicy and tender, just like when you first cooked it!

Can I make lamb shank ahead of time?
Certainly! You can prepare your lamb shank a day in advance and store it in the fridge. This actually allows the flavors to deepen even more. Just reheat gently to ensure it’s warmed through before serving. It’s a perfect way to impress guests with minimal stress!

Is there any dietary consideration for this dish?
Lamb shank is a delectable option for many, but it’s important to note that this recipe is not gluten-free due to the Dijon mustard and potential cross-contamination from other kitchen items. If allergies or dietary restrictions are a concern, you might opt for a gluten-free mustard substitute, ensuring everyone can enjoy this savory dish!

Savory Lamb Shank with Rosemary: Comfort Food Bliss

This savory Lamb Shank with rosemary is a delightful comfort food, perfect for any special occasion.

  • Dutch oven

For the Lamb Shank

  • 4 shanks lamb (Choose meaty shanks for the best flavor and tenderness.)
  • to taste salt (Essential for seasoning the lamb before searing.)
  • to taste pepper (Essential for seasoning the lamb before searing.)

For the Vegetables

  • 1 large onion (chopped, adds a savory base to the dish.)
  • 2 large carrots (chopped, sweetness balances the richness.)
  • 2 stalks celery (chopped, contributes crunch and aromatic depth.)
  • 4 cloves garlic (minced, infuses the dish with robust flavor.)

For the Sauce

  • 2 tablespoons olive oil (Ideal for searing the lamb and enhancing flavor.)
  • 2 cups red wine (Select a robust wine for rich sauce complexity.)
  • 2 cups beef stock (Adds depth and richness to the jus.)
  • 2 tablespoons fresh rosemary (chopped, use fresh for best aromatic qualities.)
  • 1 tablespoon fresh thyme (chopped, complements the rosemary beautifully.)
  • 1 tablespoon Dijon mustard (Adds a tangy richness to the sauce.)
  • 2 tablespoons cornstarch (optional, use for thickening the jus if desired.)

For Garnish

  • to taste fresh rosemary sprigs (Perfect for decorative flair and flavor enhancement.)

Step-by-Step Instructions

  1. Preheat your oven to 325°F (160°C). Gather your ingredients.
  2. In a large pot, heat olive oil over medium-high heat. Season lamb shanks with salt and pepper, sear for 4-5 minutes until browned.
  3. Add chopped onion, carrots, and celery, sauté for 5-7 minutes until softened. Add minced garlic, sauté for another minute.
  4. Pour in red wine, scraping the pot to loosen browned bits, let simmer for 10-15 minutes until reduced by half.
  5. Return lamb shanks to pot, add beef stock, rosemary, thyme, and Dijon mustard, ensuring shanks are mostly submerged.
  6. Cover pot and place in preheated oven, bake for 2 to 2.5 hours until tender.
  7. Remove lamb shanks, strain cooking liquid to thicken with cornstarch if desired, adjust seasoning with salt and pepper.
  8. Plate lamb shanks, drizzle with rosemary jus, and garnish with fresh rosemary sprigs.

For the best results, follow the tips provided for selecting quality meat and seasoning appropriately.

Main Dishes
American
Braised Lamb, comfort food, Herb Recipes, Lamb Shank, slow cooking

Filed Under: Main Dishes

Zesty Lemon Herb Chicken and Rice for Cozy Family Dinners

October 24, 2025 by grace bellamy Leave a Comment

As the sun dipped below the horizon, the comforting aroma of lemon and herbs filled my kitchen, a sweet reminder of family meals around the table. This Slow Cooker Lemon Herb Chicken and Rice is the ultimate antidote to those chaotic evenings when time simply slips away. With just 10 minutes of prep, you’ll have a deliciously satisfying meal ready to greet you after a long day—no more fast food! The combination of tender chicken, fragrant broth, and fluffy rice offers a delightful comfort that’s not just easy on the palate, but also a feast for the senses. Plus, it’s freezer-friendly, making it a perfect make-ahead option for busy weeks. Curious how a few simple ingredients can transform your dinner routine? Let’s dive into this delightful recipe!

Lemon Herb Chicken and Rice

Why is Lemon Herb Chicken and Rice special?

Simplicity, prepared in just 10 minutes, makes this dish perfect for busy weeknights. Tender chicken bathes in a zesty, herb-infused broth that will have your taste buds dancing. Versatile enough for any occasion, it pairs beautifully with a fresh salad or crusty bread. Family-friendly, this recipe will please even the pickiest eaters, granting you peace of mind. Plus, it’s freezer-friendly; simply store leftovers for those extra busy days. Take your taste journey further with my tips for nail-biting sides in my Ultimate Guide to Quick Sides.

Lemon Herb Chicken and Rice Ingredients

For the Chicken
• 4 chicken breasts – Choose skinless for a lighter, healthier meal.
• 1 cup chicken broth – Homemade gives the best flavor, but store-bought works well too.
• 1/4 cup lemon juice – Fresh-squeezed lemons will brighten the flavors beautifully.
• 1 tablespoon lemon zest – Adds a punch of citrusy aroma that elevates the dish.
• 2 cloves garlic, minced – Fresh garlic imparts a rich, aromatic depth to the recipe.

For Seasoning
• 1 teaspoon oregano – This herb complements the lemon for a classic taste.
• 1 teaspoon thyme – Enhances the earthy flavors and pairs nicely with chicken.
• 1 teaspoon salt – Adjust to taste—it helps bring out the other flavors.
• 1 teaspoon pepper – Freshly cracked is ideal for optimal taste.

For the Base
• 1 cup rice – Long-grain works wonderfully to soak up the luscious broth.
• 1 cup frozen peas – Adds vibrant color and a sweet pop to every bite.

For Garnish
• Parsley, for garnish – Freshly chopped adds a refreshing touch and a dash of color.
• Lemon slices, for garnish – They’re perfect for serving and add an appealing visual element.

This Lemon Herb Chicken and Rice is not just a dish; it’s a memory in the making, perfect for cozy family dinners!

Step‑by‑Step Instructions for Lemon Herb Chicken and Rice

Step 1: Prepare the Chicken
Begin by placing the four chicken breasts at the bottom of your slow cooker, laying them flat to ensure they cook evenly. This will serve as the flavorful base for your Lemon Herb Chicken and Rice.

Step 2: Mix the Broth
In a medium bowl, combine 1 cup of chicken broth, 1/4 cup of fresh lemon juice, 1 tablespoon of lemon zest, and 2 minced cloves of garlic. Sprinkle in 1 teaspoon each of oregano, thyme, salt, and pepper. Whisk these ingredients together until well combined, creating a zesty mix to pour over the chicken.

Step 3: Combine Chicken and Broth
Pour the flavorful broth mixture evenly over the chicken breasts, ensuring every piece is well coated to absorb the delicious lemon herb flavors. This step is crucial for achieving that mouthwatering taste throughout your Lemon Herb Chicken and Rice.

Step 4: Add the Rice
Gently sprinkle 1 cup of rinsed rice around the chicken in an even layer. This will allow the rice to absorb the aromatic broth during cooking, adding a delightful fluffiness to your dish. Make sure it’s well distributed but avoid stirring just yet.

Step 5: Set the Slow Cooker
Cover your slow cooker tightly, and set it to cook on low heat for 4-5 hours. This slow cooking process will allow the chicken to become tender and juicy, while the rice cooks perfectly with the delightful flavors.

Step 6: Check for Doneness
After about 4 hours, check the chicken to ensure it is cooked through and reaches an internal temperature of 165°F. If it hasn’t reached this temperature yet, continue cooking for an additional hour, checking periodically for doneness.

Step 7: Add Peas
In the last 30 minutes of cooking, sprinkle 1 cup of frozen peas on top of the chicken and rice. This will add a pop of color and freshness to your Lemon Herb Chicken and Rice, enhancing both the flavor and presentation.

Step 8: Stir and Serve
Once cooking is complete, gently stir all the ingredients together in the slow cooker to combine the flavors harmoniously. This final step will ensure each bite of the Lemon Herb Chicken and Rice is packed with flavor.

Step 9: Garnish Your Dish
Before serving, garnish your dish with freshly chopped parsley and a few lemon slices for a pop of color and a hint of citrus. Your Lemon Herb Chicken and Rice is now ready to be enjoyed, bringing a cozy feel to your dinner table.

Lemon Herb Chicken and Rice

Expert Tips for Lemon Herb Chicken and Rice

• Use Fresh Ingredients: Fresh lemon juice and herbs elevate your dish’s flavor significantly. Always choose fresh over bottled for the best results.

• Don’t Skip Rinsing the Rice: Rinsing removes excess starch, ensuring fluffy rice instead of a sticky mess. Just a simple rinse can make a big difference!

• Check Doneness Carefully: Ensure your chicken reaches an internal temperature of 165°F. Under-cooked chicken can lead to food safety issues, so use a meat thermometer.

• Customize Your Vegetables: Feel free to add or substitute vegetables like carrots or bell peppers for variety. Just add them in the last hour of cooking.

• Freezer-Friendly: This Lemon Herb Chicken and Rice can be made in bulk and frozen for busy nights. Portion it out in airtight containers for quick meals.

• Season to Taste: Adjust the salt and pepper according to your family’s preference, allowing you to cater to everyone’s taste and avoid blandness.

Lemon Herb Chicken and Rice Variations

Feel free to make this comforting dish your own with these fun and flavorful twists!

  • Dairy-Free: Substitute chicken broth with vegetable broth for a lighter option that keeps the taste intact.
  • Whole Grain: Use brown rice instead of white for added fiber and a nuttier flavor; just increase the cooking time slightly.
  • Veggie-Packed: Toss in chopped bell peppers or carrots along with the peas for a colorful, nutrient-rich addition.
  • Spicy Kick: Add red pepper flakes or sliced jalapeños for those who enjoy a touch of heat in their meals.
  • Herb-Infused: Experiment with herbs like rosemary or basil to give your dish a unique aroma and flavor profile.

Feel inspired by how versatile this Lemon Herb Chicken and Rice can be. Maybe even pair it with a fresh salad or my Mediterranean Quinoa Salad for a delightful meal ahead!

  • Citrus Burst: Incorporate orange juice and zest alongside the lemon for a refreshing flavor blend that’s simply divine.
  • Lemon Herb Fiesta: Add a tablespoon of taco seasoning for a zesty southwest twist that makes dinner more exciting.
  • Sundried Tomatoes: Mix in chopped sundried tomatoes for a burst of umami and a Mediterranean flair that’s irresistible.

Each variation customizes the dish, turning it into a family favorite in myriad delightful ways!

Make Ahead Options

These Slow Cooker Lemon Herb Chicken and Rice are perfect for meal prep enthusiasts! You can marinate the chicken in the broth mixture (1 cup chicken broth, 1/4 cup lemon juice, and spices) up to 24 hours in advance, allowing the flavors to meld beautifully. Store this in an airtight container in the refrigerator. Additionally, you can rinse and prepare the rice, keeping it ready to sprinkle over the chicken when cooking begins. When you’re ready to cook, simply layer the marinated chicken in the slow cooker, add the prepared rice around it, and proceed with cooking as instructed. This prep ensures that dinner comes together effortlessly while maintaining the quality of your Lemon Herb Chicken and Rice.

How to Store and Freeze Lemon Herb Chicken and Rice

Fridge: Store any leftovers in an airtight container for up to 3 days. This will keep your delicious Lemon Herb Chicken and Rice fresh and ready for quick meals.

Freezer: You can freeze the dish for up to 3 months. Allow it to cool completely, then transfer to freezer-safe containers, removing as much air as possible to prevent freezer burn.

Reheating: Thaw in the refrigerator overnight before reheating in the microwave or on the stovetop. Add a splash of chicken broth to restore moisture during reheating, ensuring your meal remains flavorful.

Portioning: Consider dividing into single-serving sizes before freezing. This makes it easy to enjoy a quick, homemade meal without the need to defrost the entire batch.

What to Serve with Slow Cooker Lemon Herb Chicken and Rice

As you savor each bite of this dish, create a meal that tantalizes your taste buds with delightful textures and flavors.

  • Garlic Bread: Perfectly toasted, this crunchy side soaks up the lemony broth, creating a harmonious balance with the chicken and rice.

  • Greek Salad: Crisp cucumbers, juicy tomatoes, and feta cheese add freshness and a pop of color, balancing the richness of the chicken.

  • Roasted Vegetables: Caramelized carrots, bell peppers, and zucchini provide earthy flavors that complement the zesty notes of the lemon herb chicken beautifully.

  • Coleslaw: The crunchiness of cabbage combined with a creamy dressing delivers a delightful contrast, uplifting the entire meal.

  • Lemon Butter Asparagus: Tender-crisp asparagus tossed in lemon butter ties in the citrus theme, brightening each flavor in your dining experience.

  • White Wine: A chilled glass of Pinot Grigio or Sauvignon Blanc not only refreshes but also enhances the lemony notes, completing your meal elegantly.

  • Fruit Tart: For dessert, a light fruit tart with seasonal fruits brings a sweet finish while echoing the refreshing lemon essence in your chicken dish.

Lemon Herb Chicken and Rice

Lemon Herb Chicken and Rice Recipe FAQs

How do I choose the right chicken for my Lemon Herb Chicken and Rice?
Absolutely! Opt for skinless chicken breasts for a lighter, healthier dish. Look for chicken that is pink with no dark spots or a strong odor, which indicates freshness. If available, free-range or organic chicken can add extra flavor and quality to your meal.

How should I store leftover Lemon Herb Chicken and Rice?
For sure! Store any leftovers in an airtight container in the fridge for up to 3 days. This keeps it delicious and ready for quick reheating. Just make sure to let it cool completely before sealing it up—this prevents steaming and sogginess!

Can I freeze my Lemon Herb Chicken and Rice?
Yes! This dish is freezer-friendly and can be safely frozen for up to 3 months. Allow it to cool down, then transfer it into freezer-safe containers or heavy-duty freezer bags. Remove as much air as possible to avoid freezer burn. When you’re ready to enjoy it, thaw overnight in the fridge for the best texture.

What can I do if my chicken isn’t fully cooked after 4 hours?
Very! If your chicken appears undercooked after 4 hours, simply close the lid and continue cooking on low. Every slow cooker varies, so checking the internal temperature with a meat thermometer is key—ensure it reaches 165°F for safe consumption. It’s handy to have that thermometer on hand for future meals!

Are there any dietary considerations I need to keep in mind?
Definitely! If you have allergies, double-check your ingredients, especially for the chicken broth, as some brands may contain allergens. This recipe is naturally gluten-free if using gluten-free rice and broth. As a general tip, avoid feeding leftover lemon chicken to pets, as certain spices and citrus can upset their stomachs.

How can I customize the vegetables in my Lemon Herb Chicken and Rice?
Of course! You could easily switch up the vegetables by adding items like diced carrots or bell peppers. If you’re adding firm veggies, toss them in during the last hour of cooking for just the right texture. For softer ones, add them in the last 30 minutes. This keeps it versatile and allows you to cater to your family’s preferences!

Zesty Lemon Herb Chicken and Rice for Cozy Family Dinners

This Lemon Herb Chicken and Rice is a simple, comforting weeknight meal that’s both family-friendly and freezer-friendly.

  • Slow Cooker

For the Chicken

  • 4 breasts chicken (skinless)
  • 1 cup chicken broth (homemade or store-bought)
  • 1/4 cup lemon juice (fresh-squeezed)
  • 1 tablespoon lemon zest
  • 2 cloves garlic (minced)

For Seasoning

  • 1 teaspoon oregano
  • 1 teaspoon thyme
  • 1 teaspoon salt
  • 1 teaspoon pepper

For the Base

  • 1 cup rice (long-grain)
  • 1 cup frozen peas

For Garnish

  • parsley (freshly chopped)
  • lemon slices

Step-by-Step Instructions

  1. Begin by placing the four chicken breasts at the bottom of your slow cooker, laying them flat.
  2. In a medium bowl, combine chicken broth, lemon juice, lemon zest, and minced garlic. Add oregano, thyme, salt, and pepper, whisking until well combined.
  3. Pour the broth mixture evenly over the chicken breasts.
  4. Gently sprinkle rinsed rice around the chicken in an even layer.
  5. Cover the slow cooker tightly, and set it to cook on low heat for 4-5 hours.
  6. Check the chicken after about 4 hours to ensure it reaches an internal temperature of 165°F.
  7. In the last 30 minutes, sprinkle frozen peas on top of the chicken and rice.
  8. Once cooking is complete, gently stir all the ingredients together in the slow cooker.
  9. Before serving, garnish with freshly chopped parsley and lemon slices.

This dish is freezer-friendly and can be made in bulk for busy nights.

Main Dishes
American
Easy Recipe, family dinner, Freezer-friendly, Lemon Herb Chicken and Rice, slow cooker

Filed Under: Main Dishes

Cheesy Ranch Potatoes and Smoked Beef Sausage Delight

October 24, 2025 by grace bellamy Leave a Comment

As the aromatic scent of roasted baby potatoes fills my kitchen, it brings me back to countless family gatherings where laughter and good food intertwined. Today, I’m excited to share my recipe for Cheesy Ranch Potatoes and Smoked Beef Sausage, a dish that is not only a crowd-pleaser but also surprisingly simple to whip up in under an hour. With minimal prep time and hearty ingredients, this meal becomes a staple for those evenings when you want comfort without the fuss. The creaminess of ranch and the savory notes of smoked sausage create a delightful medley that will surely be gone in a flash. Are you ready to dive into this deliciousness? Let’s get cooking!

Cheesy Ranch Potatoes and Smoked Beef Sausage

What Makes This Dish Irresistible?

Flavor explosion: The combination of smoked beef sausage and cheddar cheese delivers a taste sensation that is both hearty and comforting.

Easy preparation: With just 15 minutes of prep time, this dish is simple enough for any home cook to master without fuss.

Perfect for gatherings: Whether you’re hosting a family dinner or a casual get-together, these Cheesy Ranch Potatoes and Smoked Beef Sausage are sure to impress your guests.

Versatile recipe: You can easily customize it with veggies or swap out the protein for a different twist, making it a great go-to for any meal.

Time-efficient: In under 45 minutes, you can serve a delicious homemade meal that puts fast food to shame and pleases the whole family.

Cheesy Ranch Potatoes Ingredients

Get ready to whip up something delicious!

For the Potatoes
• 2 pounds baby potatoes – Perfectly tender and crisp up beautifully in the oven.
• 2 tablespoons olive oil – Helps to achieve that golden, crispy exterior you’ll love.
• ½ teaspoon black pepper – Adds a hint of spice to balance the creaminess.
• ½ teaspoon salt – Enhances all the flavors in this comforting dish.

For the Sausage
• 1 pound smoked beef sausage – Provides a smoky, savory flavor that complements the potatoes perfectly.

For the Cheese
• 1 cup cheddar cheese, shredded – Melts beautifully, adding rich creaminess to the dish.

For the Dressing
• 1 cup ranch dressing – Brings a tangy, creamy element that ties all the flavors together.
• 1 tablespoon ranch seasoning mix – Boosts the ranch flavor and adds depth.

For Garnish
• Fresh parsley, chopped (for garnish, optional) – A pop of color and freshness on top!

By gathering these simple ingredients, you’re well on your way to preparing the ultimate Cheesy Ranch Potatoes and Smoked Beef Sausage delight. Let’s get started!

Step‑by‑Step Instructions for Cheesy Ranch Potatoes and Smoked Beef Sausage

Step 1: Preheat the Oven
Begin by preheating your oven to 400°F (200°C), allowing it to reach the perfect temperature for roasting. This step is crucial as it ensures that your Cheesy Ranch Potatoes and Smoked Beef Sausage cook evenly and develop a lovely golden color.

Step 2: Prepare the Potatoes
Wash and cut the baby potatoes in half, or quarters if they’re larger, and transfer them into a large mixing bowl. Look for any blemished spots and remove those to ensure every bite is perfect. You want vibrant, fresh potatoes for the best flavor!

Step 3: Season the Potatoes
To the bowl of potatoes, drizzle in the olive oil, and add ranch seasoning mix, garlic powder, salt, and black pepper. Toss everything together vigorously until the potatoes are well coated in the seasoning blend, creating a flavorful base for your dish.

Step 4: Incorporate the Sausage
Add the sliced smoked beef sausage into the bowl with the seasoned potatoes. Mix gently but thoroughly to ensure the sausage is evenly distributed among the potatoes, as its smoky flavor will enhance the overall taste of the Cheesy Ranch Potatoes and Smoked Beef Sausage.

Step 5: Transfer to Baking Dish
Pour the potato and sausage mixture into a large baking dish, spreading it out into an even layer with a spatula. This allows for optimal roasting and ensures that every piece gets that crispy texture and delicious flavors during baking.

Step 6: Bake the Mixture
Place the baking dish in your preheated oven and bake for 20-25 minutes, or until the potatoes are tender when pierced with a fork. Keep an eye on them; they should turn a beautiful golden hue, indicating they’re almost ready!

Step 7: Add Ranch Dressing and Cheese
Once the potatoes are tender, remove the dish from the oven and drizzle the ranch dressing evenly over the potato and sausage mixture. Top it generously with shredded cheddar cheese, which will melt to perfection during the next baking phase, adding creaminess to the dish.

Step 8: Final Bake for Melting Cheese
Return the dish to the oven and bake for an additional 5-10 minutes, watching closely until the cheese is melted and bubbly. You’ll know it’s ready when the cheese is golden and slightly crisped around the edges, creating an irresistible topping.

Step 9: Garnish and Serve
Remove the dish from the oven and, if desired, sprinkle chopped fresh parsley over the top for a pop of color and freshness. Let the dish cool slightly before serving, which allows the flavors to meld together beautifully.

Step 10: Enjoy
Savor your warm, delicious Cheesy Ranch Potatoes and Smoked Beef Sausage while it’s hot. The combination of flavors and textures is bound to be a favorite at your dinner table, making it a delightful comfort food choice.

Cheesy Ranch Potatoes and Smoked Beef Sausage

Cheesy Ranch Potatoes and Smoked Beef Sausage Variations

Feel free to get creative with this dish and make it your own!

  • Dairy-Free: Substitute the cheddar cheese with a plant-based cheese alternative to keep it creamy without dairy.
    Mixing in a sprinkle of nutritional yeast can give it a similar cheesy flavor.

  • Spicy Kick: Add sliced jalapeños or a sprinkle of red pepper flakes for a fiery touch.
    This variation will bring a vibrant, spicy warmth to each bite, balancing out the creamy ranch.

  • Veggie-Loaded: Toss in colorful veggies like bell peppers, corn, or zucchini before baking for added nutrition and flavor.
    The veggies will enhance the dish’s texture and offer a delightful crunch against the potatoes.

  • Herb Infusion: Experiment with fresh herbs such as rosemary, thyme, or dill to elevate the flavor profile.
    Chopping them finely and mixing them into the ranch dressing can create a fragrant and tasty experience.

  • Smoky Flavor Boost: Use chipotle sausage or smoked paprika for an extra depth of flavor.
    This twist will infuse the dish with a robust smokiness that pairs beautifully with the other ingredients.

  • Rustic Texture: Swap baby potatoes for sweet potatoes or Yukon Gold for a different texture and sweetness.
    This not only adds variety but also serves as a nutrient-dense alternative the whole family will enjoy.

  • Quick Meal Option: Use pre-cooked smoked sausage to cut down on cooking time and enjoy a quicker meal.
    Just toss everything together and bake; your meal will be ready in no time, perfect for busy weeknights!

  • Classic Comfort: Serve this dish with a side of warm, crusty bread or buttery biscuits for a comforting, hearty meal.
    The bread will soak up the flavors from the dish, making every bite even more satisfying!

Feel free to mix and match these suggestions, crafting a perfect plate that brings joy to your family just like my beloved Cheesy Ranch Potatoes and Smoked Beef Sausage!

How to Store and Freeze Cheesy Ranch Potatoes

Room Temperature: Store any leftovers in an airtight container at room temperature for up to 2 hours before refrigerating to prevent spoilage.

Fridge: Keep Cheesy Ranch Potatoes and Smoked Beef Sausage in the fridge for up to 3 days in a tightly sealed container to maintain freshness.

Freezer: For longer storage, freeze in an airtight container or heavy-duty freezer bag for up to 3 months; separate portions for easy meal prep.

Reheating: When ready to enjoy leftovers, reheat in the oven at 350°F (175°C) for about 15-20 minutes, or until warmed through, for the best texture.

Expert Tips for Cheesy Ranch Potatoes

Perfect Potato Prep: Ensure even cooking by cutting the baby potatoes into similar sizes, allowing them to roast uniformly for the best flavor and texture.

Watch the Sausage: Consider using a high-quality smoked beef sausage, as the flavor varies greatly. Avoid overly fatty options to keep the dish balanced.

Melty Cheese Magic: To achieve a beautifully melted cheese layer, opt for freshly shredded cheddar instead of pre-packaged, which can have anti-caking agents that affect melting.

Ranch Distribution: When adding the ranch dressing, drizzle it evenly across the surface to ensure every bite of the Cheesy Ranch Potatoes and Smoked Beef Sausage is flavorful and creamy.

Avoid Soggy Potatoes: If you prefer really crispy potatoes, give them a minute to rest after baking before serving. This allows steam to escape, preventing sogginess.

What to Serve with Cheesy Ranch Potatoes and Smoked Beef Sausage

Transform your meal into a comforting feast with these delightful pairings that will warm your heart and tantalize your taste buds.

  • Garlic Bread: The crispy, buttery goodness of garlic bread complements the creamy and savory flavors of the potatoes perfectly. It’s a cozy side that brings people together, making each bite feel even more satisfying.

  • Steamed Broccoli: Bright green broccoli brings a crisp texture and a fresh taste that balances the richness of your dish. Drizzle a hint of lemon over it for a zesty touch, creating a vibrant contrast that your family will love.

  • Coleslaw: A tangy coleslaw adds a refreshing crunch that pairs beautifully with the warm, cheesy potatoes. Its cool texture offers a delightful contrast that enhances every tasty bite of the Cheesy Ranch Potatoes and Smoked Beef Sausage.

  • Corn on the Cob: Sweet, juicy corn, especially when slathered in butter, brings a pop of sweetness that complements the smoky sausage. The fun of eating it off the cob adds a touch of nostalgia to your family meal.

  • Apple Pie: For a comforting dessert, nothing beats a classic apple pie. The warm spices and sweet fruit make for a delightful finish after the savory richness of your main dish. Serve it warm with a scoop of vanilla ice cream for extra indulgence.

  • Sparkling Lemonade: Refreshing and bubbly, sparkling lemonade pairs wonderfully, cutting through the richness of the potatoes and sausage. This lively drink adds a festive feel, making any dinner feel like a celebration.

Each of these pairings adds a layer of comfort and joy, turning your meal into a cherished experience that evokes warmth and togetherness. Enjoy!

Make Ahead Options

These Cheesy Ranch Potatoes and Smoked Beef Sausage are perfect for meal prep enthusiasts! You can wash and cut the baby potatoes up to 24 hours in advance, storing them in water in the refrigerator to prevent browning. Additionally, you can slice the smoked beef sausage and mix it with the seasoning in advance, keeping it tightly covered for up to 3 days. When you’re ready to bake, simply combine the prepped components in a baking dish, drizzle with ranch dressing and cheese, and bake in a preheated oven as usual. This method not only saves you precious time on busy weeknights but ensures your dish is just as delicious when it’s time to serve!

Cheesy Ranch Potatoes and Smoked Beef Sausage

Cheesy Ranch Potatoes and Smoked Beef Sausage Recipe FAQs

How do I know when the baby potatoes are ripe for this recipe?
Look for firm potatoes without any blemishes or dark spots all over. When selecting baby potatoes, choose ones that are smooth and consistent in color. They should feel heavy for their size and not have any soft spots, ensuring they’re fresh and ready for roasting.

What is the best way to store leftovers of Cheesy Ranch Potatoes and Smoked Beef Sausage?
Absolutely! Allow the dish to cool down slightly after serving, then transfer the leftovers into an airtight container. You can store them in the refrigerator for up to 3 days. Just remember to let them cool to room temperature for about 2 hours before sealing to prevent moisture buildup and maintain that delicious texture.

Can I freeze Cheesy Ranch Potatoes and Smoked Beef Sausage? How do I do it?
Yes, you can! To freeze, let the dish cool completely after baking. Then, portion the leftovers into airtight containers or heavy-duty freezer bags, removing as much air as possible. Label the bags with the date, and they can last for up to 3 months in the freezer. When you’re ready to enjoy, simply thaw in the fridge overnight and reheat in the oven at 350°F (175°C) for about 15-20 minutes, until heated through.

What should I do if my potatoes aren’t cooking evenly?
If you find that your potatoes are not cooking evenly, it may be due to their size. Ensure you cut them into similar sizes so they roast uniformly. Also, give them a little stir halfway through your initial baking time to help promote even cooking. Remember to check for doneness using a fork; they should be tender but not mushy.

Are there any dietary considerations I should keep in mind for this recipe?
If you’re serving this to guests or family members with dietary restrictions, you could substitute the smoked beef sausage with a plant-based sausage for a vegetarian option. As for allergies, since ranch dressing often contains dairy, make sure to have a dairy-free alternative available if needed. Additionally, check the ingredients in your ranch seasoning to avoid any common allergens.

Can I add more vegetables to this dish?
Very! Feel free to customize the Cheesy Ranch Potatoes and Smoked Beef Sausage by adding vegetables like bell peppers, onions, or broccoli. Just ensure the vegetables are chopped into similar sizes and add them to the mix at the same time as the sausages to ensure they cook evenly and absorb all that delicious flavor.

Cheesy Ranch Potatoes and Smoked Beef Sausage Delight

A delightful dish featuring Cheesy Ranch Potatoes and Smoked Beef Sausage, perfect for gatherings and comfort food evenings.

  • Baking Dish
  • Mixing Bowl
  • spatula
  • Oven

For the Potatoes

  • 2 pounds baby potatoes (Perfectly tender and crisp up beautifully in the oven.)
  • 2 tablespoons olive oil (Helps to achieve a golden, crispy exterior.)
  • ½ teaspoon black pepper (Adds a hint of spice.)
  • ½ teaspoon salt (Enhances all the flavors.)

For the Sausage

  • 1 pound smoked beef sausage (Provides a smoky, savory flavor.)

For the Cheese

  • 1 cup cheddar cheese, shredded (Melts beautifully, adding rich creaminess.)

For the Dressing

  • 1 cup ranch dressing (Brings a tangy, creamy element.)
  • 1 tablespoon ranch seasoning mix (Boosts the ranch flavor.)

For Garnish

  • fresh parsley, chopped (For garnish, optional.)

Step-by-Step Instructions

  1. Preheat your oven to 400°F (200°C).
  2. Wash and cut the baby potatoes in half or quarters and transfer to a large mixing bowl.
  3. Drizzle olive oil, ranch seasoning mix, salt, and black pepper over the potatoes and toss to coat.
  4. Add the sliced smoked beef sausage and mix gently to combine.
  5. Pour the mixture into a large baking dish, spreading it evenly.
  6. Bake for 20-25 minutes until the potatoes are tender and golden.
  7. Drizzle ranch dressing over the mixture and top with shredded cheddar cheese.
  8. Return to oven and bake for an additional 5-10 minutes until cheese is melted.
  9. Garnish with chopped fresh parsley if desired and let cool slightly before serving.
  10. Serve warm and enjoy!

For best results, ensure even potato sizes and use freshly shredded cheese for melting. Use high-quality smoked sausage for enhanced flavor.

Main Dishes
American
Cheesy Ranch Potatoes, comfort food, Easy Recipe, family dinner, potato dish, Smoked Beef Sausage

Filed Under: Main Dishes

Garlic Butter Beef Bites That Melt in Your Mouth

October 24, 2025 by grace bellamy Leave a Comment

As the aroma of baking cookies wafts through the house, it hits you— Christmas is just around the corner. This is the perfect time to indulge in baking traditions that bring joy to friends and family. Today, I’m excited to share my beloved recipe for Soft Christmas Cookies, a delightful treat that is as comforting as a warm hug. Not only are these cookies incredibly easy to prepare, but they also make for a wonderful way to spread some holiday cheer. With a soft, melt-in-your-mouth texture and a hint of almond and vanilla, they’re sure to become a staple in your festive baking routine. Whether you’re crafting them for a holiday party or a cozy night at home, these cookies are a little sprinkle of magic on any dessert table. Curious how to create these sweet beauties? Let’s get started!

Garlic Butter Beef Bites

Why These Cookies Will Delight You

Joyful baking experience: The moment you start mixing your ingredients, the holiday spirit begins to fill your kitchen. Melt-in-your-mouth texture: Each cookie is soft and buttery, providing a scrumptious bite that’s hard to resist. Delicate flavors: The combination of vanilla and almond extracts creates an unforgettable taste that pairs beautifully with your favorite holiday beverages. Quick and simple: With just 25 minutes from prep to finish, these cookies fit perfectly into your busy holiday schedule. Perfect gift option: Pack them in festive boxes for friends or family, making it easy to share the love this season!

Garlic Butter Beef Bites Ingredients

For the Beef Bites
• 1 pound beef tenderloin – choose a good-quality cut for tenderness and flavor.
• 2 tablespoons olive oil – this helps to sear the beef perfectly.
• 4 cloves garlic, minced – garlic adds an irresistible aroma and flavor.
• 1 teaspoon salt – enhances the overall taste of the dish.
• ½ teaspoon black pepper – adds a hint of warmth and spice.

For the Garlic Butter Sauce
• ½ cup unsalted butter – makes the sauce rich and decadent.
• 1 teaspoon fresh parsley, chopped – adds freshness and a pop of color.
• 1 tablespoon lemon juice – brightens up the flavors in the garlic butter sauce.

These Garlic Butter Beef Bites are not just an appetizer; they’re an experience that will linger in your taste buds and make everyone swoon at your gatherings. Happy cooking!

Step‑by‑Step Instructions for Soft Christmas Cookies

Step 1: Preheat the Oven
Start by preheating your oven to 375°F (190°C). This is an essential first step that allows your cookies to bake evenly and develop a lovely golden color. While the oven warms up, gather your baking sheets and line them with parchment paper or have them ungreased and ready.

Step 2: Mix Dry Ingredients
In a medium bowl, sift together 2 ¾ cups of all-purpose flour, 1 teaspoon of baking soda, 1 teaspoon of baking powder, and ½ teaspoon of salt. This step is crucial to ensure that your dry ingredients are well combined, which helps the cookies rise beautifully. Set this bowl aside as you prepare to mix the wet ingredients.

Step 3: Cream Butter and Sugar
In a large mixing bowl, cream together 1 cup of softened unsalted butter and 1 ½ cups of white sugar using an electric mixer on medium speed. Beat until the mixture is light and fluffy, which will take about 2-3 minutes. You’ll know it’s ready when it looks pale and creamy, setting the stage for your soft Christmas cookies.

Step 4: Incorporate Egg and Extracts
Add 1 egg, 1 teaspoon of vanilla extract, and 1 teaspoon of almond extract to the butter-sugar mixture. Beat the mixture on medium speed until all ingredients are well combined, approximately 1-2 minutes. The goal is to achieve a smooth, cohesive mixture with a delightful aroma that will remind you of the holidays.

Step 5: Combine Dry and Wet Ingredients
Gradually blend the dry ingredients into the wet mixture, stirring until just combined. This method will help prevent overmixing, keeping your cookies soft and tender. It’s essential to scrape down the sides of the bowl with a spatula to ensure everything is evenly incorporated.

Step 6: Adjust Dough Consistency
If your cookie dough seems too stiff, mix in 3-4 tablespoons of milk, one tablespoon at a time, until you achieve a slightly sticky but workable consistency. This will help create that melt-in-your-mouth texture characteristic of your soft Christmas cookies, making them even more enjoyable.

Step 7: Shape the Cookies
Roll the dough into small balls, about 1 inch in diameter, using your hands. Place these dough balls on the ungreased cookie sheets, spacing them about 2 inches apart to allow for spreading. This will give each cookie room to bake without merging into each other.

Step 8: Bake the Cookies
Place the cookie sheets in the preheated oven and bake for 8 to 10 minutes. Keep an eye on them, as you want the edges to turn lightly golden while the centers remain soft. When the cookies look just set and slightly puffed, it’s time to take them out.

Step 9: Cool and Decorate
Once baked, remove your soft Christmas cookies from the oven and let them cool on the sheet for about 5 minutes. Afterward, transfer them to a wire rack to cool completely. Once cool, dust generously with powdered sugar for a festive touch before serving or sharing your delightful treats!

Garlic Butter Beef Bites

Make Ahead Options

These Soft Christmas Cookies are a fantastic choice for meal prep, allowing you to enjoy holiday baking with ease! You can prepare the cookie dough up to 24 hours in advance—just roll the dough into balls, place them on a baking sheet, and cover tightly with plastic wrap before refrigerating. When you’re ready to bake, simply preheat your oven, place the dough on an ungreased cookie sheet, and pop them in the oven as directed. For those who want to bake further in advance, you can freeze the cookie dough balls for up to 3 months. Just ensure they’re well-wrapped to maintain their freshness. When it’s time to indulge, bake directly from frozen (adding a couple of extra minutes to the bake time) for cookies that are just as delicious as fresh!

Garlic Butter Beef Bites Variations

Feel free to get creative and customize these delectable bites to fit your taste buds and dietary needs!

  • Spicy Kick: Add chopped jalapeños or red pepper flakes for a spicy twist that’ll awaken your palate. A little heat can elevate the garlic’s richness beautifully.

  • Herb Infusion: Experiment with fresh herbs such as thyme or rosemary to infuse the beef with an aromatic depth. These herbs pair beautifully with the garlic, adding layers of flavor that sing.

  • Balsamic Glaze: Drizzle with a balsamic reduction after baking for a sweet-tangy contrast that complements the savory beef. This little touch can elevate your dish to gourmet status!

  • Mushroom Medley: Sauté diced mushrooms along with the garlic for an earthy flavor boost. The mushrooms will absorb the garlic butter sauce and create delightful bites full of umami.

  • Lemon Zest: Brighten the dish by adding a sprinkle of lemon zest to the garlic butter sauce. This refreshing twist cuts through the richness and adds a lovely zing.

  • Vegetarian Option: Substitute beef with hearty veggies like portobello mushrooms or eggplant. Marinate them in the garlic butter sauce for a delicious alternative that doesn’t skimp on flavor.

  • Cheesy Goodness: Top the beef bites with a sprinkle of your favorite cheese during the last minute of baking. The melty cheese adds a wonderful creamy texture that’s hard to resist!

  • Mini Skewers: For a fun presentation, thread the beef bites onto skewers and grill them for a smoky flavor. This makes them perfect for summer cookouts or casual gatherings.

Don’t hesitate to mix and match these variations to find your perfect combination. If you’re looking for more ideas, try serving these Garlic Butter Beef Bites alongside a fresh garden salad or some warm, crusty bread. Happy cooking!

What to Serve with Soft Christmas Cookies

As you dive into the holiday spirit with these delightful treats, think about pairing them with complementary flavors that enhance your festive experience.

  • Gingerbread Hot Cocoa: This rich chocolate drink, infused with warming spices, beautifully balances the sweetness of the cookies. Cozy up with a mug to bring extra cheer!
  • Spiced Apple Cider: The warming spices in this classic drink elevate the flavors of the cookies, making for an inviting sip that echoes holiday nostalgia.
  • Creamy Eggnog: A traditional holiday favorite, eggnog’s creamy texture and hint of nutmeg create a delightful contrast to the soft cookies, perfect for a festive gathering.
  • Fruit Salad with Citrus Dressing: A light and fresh fruit salad adds a refreshing touch to the dessert table, contrasting the cookies’ sweetness and keeping the meal balanced.
  • Chocolate-Dipped Pretzels: The salty crunch of pretzels dipped in chocolate provides a fun, textural contrast, complementing the soft, sweet cookies with delightful crunch.
  • Holiday Cheese Board: Gather an assortment of cheeses, nuts, and dried fruits; this savory mix pairs beautifully with the sweetness of the cookies, creating a harmonious balance.
  • Nutty Biscotti: A deliciously crunchy treat, biscotti offers a delightful dip into coffee or tea, providing a lovely contrast to the soft Christmas cookies.
  • Caramel Sauce Drizzle: Drizzling warm caramel sauce over the cookies adds a touch of indulgence; it’s a delightful way to elevate the dessert experience with extra sweetness!

Tips for the Best Soft Christmas Cookies

Chill the Dough: If time allows, chill the cookie dough for 30 minutes. This will help the cookies keep their shape and prevent excessive spreading.

Watch the Baking Time: Underbake slightly to achieve that perfect soft texture. Aim for just a light golden edge; they will continue to cook on the sheet.

Use Fresh Extracts: For the best flavor, ensure your vanilla and almond extracts are fresh. Old extracts can diminish the cookie’s delightful taste.

Don’t Overmix: When combining wet and dry ingredients, mix until just combined. Overmixing can lead to tough cookies instead of the desired soft, tender bites.

Add Your Twist: Feel free to personalize your cookies! Add chocolate chips, nuts, or even festive sprinkles to make your soft Christmas cookies uniquely yours.

How to Store and Freeze Soft Christmas Cookies

Room Temperature: Store your cookies in an airtight container at room temperature for up to 3 days. This keeps them soft and delicious.

Fridge: For longer freshness, you can refrigerate the cookies in an airtight container for up to 1 week. Bring them to room temperature before serving for the best taste.

Freezer: To freeze, place the cookies in a single layer on a baking sheet until firm, then transfer them to a freezer-safe bag. They’ll keep well for up to 3 months.

Reheating: When ready to enjoy your frozen soft Christmas cookies, simply let them thaw at room temperature or warm them in the oven at 350°F (175°C) for about 5–7 minutes.

Garlic Butter Beef Bites

Soft Christmas Cookies Recipe FAQs

What type of flour should I use for Soft Christmas Cookies?
Absolutely! I recommend using all-purpose flour, as it provides the perfect balance of structure and softness in your cookies. Ensure it’s fresh and stored in a cool, dry place for the best results.

How should I store Soft Christmas Cookies?
For the best freshness, store your cookies in an airtight container at room temperature for up to 3 days. If you want to keep them longer, placing them in the refrigerator in an airtight container will extend their life to about a week. Just allow them to come to room temperature before enjoying!

Can I freeze Soft Christmas Cookies?
Yes, indeed! To freeze your cookies, start by placing them in a single layer on a baking sheet and freeze until firm, which usually takes about 1-2 hours. After that, transfer them to a freezer-safe bag, ensuring you expel as much air as possible. They will keep well for up to 3 months. When you’re ready to enjoy them, let them thaw at room temperature or warm them briefly in an oven preheated to 350°F (175°C) for about 5-7 minutes.

What if my cookie dough is too sticky?
No worries! If your dough feels overly sticky or difficult to handle, simply mix in an extra tablespoon of flour at a time until you reach a workable consistency. Keep in mind that a touch of added milk may sometimes help achieve that delicious melt-in-your-mouth texture.

Are Soft Christmas Cookies safe for kids and pets?
While these cookies are a delightful treat for the family, they contain sugar and butter that are not advisable for pets. As for kids, they make a lovely holiday snack! Just be mindful of any allergies to nuts or gluten, depending on your ingredient choices. If needed, you can substitute with allergy-friendly alternatives.

Can I add other flavors to the cookie recipe?
Very! Feel free to personalize your Soft Christmas Cookies by adding chocolate chips, festive sprinkles, or even nuts. They all bring a delightful twist to the classic flavor, making your holiday baking even more enjoyable!

Garlic Butter Beef Bites That Melt in Your Mouth

Delicious Garlic Butter Beef Bites are tender and flavorful, perfect for gatherings and a true delight for any meat lover.

  • skillet
  • cutting board
  • Knife

For the Beef Bites

  • 1 pound beef tenderloin (choose a good-quality cut for tenderness and flavor)
  • 2 tablespoons olive oil (this helps to sear the beef perfectly)
  • 4 cloves garlic, minced (adds an irresistible aroma and flavor)
  • 1 teaspoon salt (enhances overall taste)
  • ½ teaspoon black pepper (adds warmth and spice)

For the Garlic Butter Sauce

  • ½ cup unsalted butter (makes the sauce rich and decadent)
  • 1 teaspoon fresh parsley, chopped (adds freshness and color)
  • 1 tablespoon lemon juice (brightens up flavors)

Cooking Instructions

  1. Preheat a skillet over medium-high heat with the olive oil.
  2. Season the beef tenderloin with salt and black pepper.
  3. Sear the beef in the hot skillet for about 3-4 minutes on each side until browned.
  4. Add minced garlic to the skillet and cook for an additional minute.
  5. In a separate small saucepan, melt the butter over low heat, then add parsley and lemon juice.
  6. Pour the garlic butter sauce over the cooked beef bites and serve immediately.

These Garlic Butter Beef Bites are a delightful appetizer or main dish perfect for any gathering. Enjoy them while hot!

Main Dishes
American
Appetizer, Beef, butter, garlic, Garlic Butter Beef Bites, Holiday

Filed Under: Main Dishes

Delicious Spinach Lasagna Roll-ups for Cozy Family Dinners

October 24, 2025 by grace bellamy Leave a Comment

As I stirred the bubbling marinara sauce, the scent of garlic and herbs wafted through my kitchen, instantly transporting me to a cozy Italian trattoria. That’s when I decided it was time for a comforting dish that still felt light and fresh—enter my Spinach Lasagna Roll-ups! This recipe is not only a feast for the eyes, with each roll filled to the brim with ricotta and vibrant spinach, but it’s also a breeze to make, perfect for a weeknight dinner that’ll impress your loved ones. In just under an hour, you can whip up these cheesy delights, making them a fantastic go-to for your meal rotation. Are you ready to roll into a delicious adventure with me?

Spinach Lasagna Roll-ups

Why are Spinach Lasagna Roll-ups a must-try?

Comforting, Yet Light: These Spinach Lasagna Roll-ups combine the heartiness of traditional lasagna with the freshness of spinach, making them perfect for hearty meals that won’t weigh you down.

Family-Friendly Appeal: With gooey cheese and a delicious marinara topping, these roll-ups are a hit with both kids and adults alike, satisfying even the pickiest eaters.

Easy to Prepare: This dish could be part of your dinner lineup in just about 50 minutes—no complicated steps here! If you’re interested in more quick dinners, be sure to check out my fabulous meal prep ideas.

Endless Variations: Feel free to personalize your roll-ups by adding different veggies or proteins to the filling, ensuring you never get bored of the same recipe.

Impressive Presentation: Serving these delightful rolls not only looks stunning but makes you feel like a culinary rockstar, elevating your home dining experience!

Spinach Lasagna Roll-ups Ingredients

For the Roll-ups

  • Lasagna noodles – 8 sheets are perfect for rolling and holding your delicious filling.
  • Ricotta cheese – 2 cups add creaminess and richness to every bite.
  • Shredded mozzarella cheese – 1 cup brings that gooey, melty goodness everyone loves in spinach lasagna roll-ups.
  • Grated Parmesan cheese – 1/2 cup adds a sharp, savory flavor that complements the cheeses perfectly.
  • Fresh spinach – 2 cups, chopped, provides vibrant color and a nutritious boost.
  • Egg – 1 egg helps bind the mixture together, ensuring that filling stays in place during baking.
  • Salt and pepper – Add to taste for a complimentary seasoning that elevates all the flavors.

For the Sauce

  • Marinara sauce – 2 cups creates a flavorful base and top layer for the roll-ups.

Extras

  • Garlic powder – 1 teaspoon infuses the dish with aromatic flavor without the hassle of fresh garlic.
  • Onion powder – 1 teaspoon enhances the overall taste, making your roll-ups irresistible.
  • Fresh basil (optional) – Use for garnish to add a pop of color and fresh aroma before serving!

Step‑by‑Step Instructions for Spinach Lasagna Roll-ups

Step 1: Preheat and Cook Noodles
To start your Spinach Lasagna Roll-ups, preheat your oven to 375°F (190°C). In a large pot, bring water to a boil and cook the lasagna noodles according to package instructions, typically around 8–10 minutes, until they’re al dente. Once cooked, drain the noodles and lay them flat on a clean kitchen towel to prevent sticking while you prepare the filling.

Step 2: Make the Filling
In a mixing bowl, combine 2 cups of ricotta cheese, 1 cup of shredded mozzarella, 1/2 cup of grated Parmesan, 2 cups of chopped spinach, 1 egg, 1 teaspoon of garlic powder, 1 teaspoon of onion powder, and salt and pepper to taste. Stir the mixture until all the ingredients are thoroughly blended and creamy, creating a vibrant filling for your roll-ups.

Step 3: Prepare the Baking Dish
Spread a thin layer of marinara sauce evenly across the bottom of a 9×13-inch baking dish. This will help keep the Spinach Lasagna Roll-ups moist and prevent them from sticking. Ensure the sauce covers the entire bottom of the dish so each roll-up has a flavorful base to soak into during baking.

Step 4: Assemble the Roll-ups
Take one cooked lasagna noodle and place it on a flat surface. Spread a generous amount of the cheese-spinach mixture along the length of the noodle. Carefully roll it up tightly, ensuring the filling is secure within. Repeat this process for each noodle, placing them seam-side down in the prepared baking dish without crowding.

Step 5: Add the Sauce and Cheese
Once all the lasagna roll-ups are in the dish, pour the remaining marinara sauce over the top, ensuring to cover each roll-up generously. Then, sprinkle the last bit of shredded mozzarella cheese all over, making sure every inch is covered for that irresistible melty top.

Step 6: Bake to Perfection
Cover the dish with aluminum foil and place it in the preheated oven. Bake for 20 minutes to infuse the flavors and heat through. After 20 minutes, carefully remove the foil, allowing the cheese on top to become bubbly and golden. Bake for an additional 10-15 minutes until you see that lovely, melted cheese.

Step 7: Cool and Serve
Once out of the oven, allow your Spinach Lasagna Roll-ups to cool for a few minutes. This brief cooling time helps set the filling and makes serving easier. Garnish with fresh basil if desired, then slice and serve warm, enjoying the delightful combination of flavors in this comforting dish.

Spinach Lasagna Roll-ups

Make Ahead Options

These Spinach Lasagna Roll-ups are a fantastic option for busy home cooks looking to save time! You can prepare the filling and assemble the roll-ups up to 24 hours in advance. Simply follow the first five steps of the recipe, then cover the dish tightly with plastic wrap and refrigerate. To maintain quality, ensure the filling is tightly packed to prevent drying. When you’re ready to enjoy your meal, take them out of the fridge, pour the marinara sauce over the top, and sprinkle with mozzarella cheese before baking as directed. You’ll have a delicious, homemade dinner that feels just as fresh, but with much less effort!

How to Store and Freeze Spinach Lasagna Roll-ups

Fridge: Store remaining Spinach Lasagna Roll-ups in an airtight container for up to 3 days. Reheat in the microwave or oven until heated through.

Freezer: For longer storage, freeze cooked roll-ups for up to 3 months. Wrap them tightly in plastic wrap and aluminum foil to prevent freezer burn.

Reheating: Thaw frozen roll-ups overnight in the fridge. Reheat in a preheated oven at 375°F (190°C) for about 25-30 minutes, covered with foil to retain moisture.

Serving Fresh: For the best flavor experience, aim to enjoy the roll-ups fresh, but the ability to store them means you can enjoy this delicious dish anytime!

Tips for the Best Spinach Lasagna Roll-ups

Cook Noodles Al Dente: To prevent soggy roll-ups, cook the lasagna noodles just until al dente. They’ll soften more while baking.

Avoid Overfilling: Don’t overstuff the noodles. A generous amount of filling is great, but overfilling can cause them to burst during baking.

Fresh Ingredients: Use fresh spinach instead of frozen for vibrant flavor and texture. Frozen can make the filling watery, impacting your delicious roll-ups.

Perfect Marinara: Choose a high-quality marinara sauce; it makes all the difference in flavor. You can even add Italian herbs for an extra boost!

Let Them Cool: Allow the roll-ups to cool slightly before serving to help the filling set and make slicing easier. Enjoy your homemade spinach lasagna roll-ups!

What to Serve with Spinach Lasagna Roll-ups

Creating a delightful dinner around your Spinach Lasagna Roll-ups can turn an ordinary meal into a memorable feast.

  • Garlic Bread: A crispy, buttery delight perfect for soaking up marinara sauce and adding that lovely garlic aroma. It’s a classic pairing that everyone loves.

  • Caesar Salad: Crisp romaine, tangy dressing, and crunchy croutons offer a refreshing contrast to the hearty roll-ups. The creamy dressing and crunch play beautifully against the softness of the lasagna.

  • Steamed Green Beans: Bright green beans, lightly steamed and tossed with olive oil and lemon, provide a fresh, vibrant side. Their snap adds a wonderful texture to balance the creamy rolls.

  • Roasted Vegetables: A colorful mix of seasonal veggies adds earthy flavors that complement the richness of the cheese. Plus, the caramelization enhances their natural sweetness, making them a delightful addition to your plate.

  • Wine Pairing: A light-bodied red, like Pinot Noir, complements the flavors wonderfully with its fruity notes, enhancing the overall dining experience. Sip slowly, and let the flavors mingle!

  • Lemon Sorbet: Serve this refreshing dessert after your meal to cleanse your palate. Its bright, zesty flavor is the perfect ending after the rich lasagna.

Spinach Lasagna Roll-ups Variations & Substitutions

Feel free to make this recipe your own by experimenting with these delicious ideas!

  • Gluten-Free: Swap traditional lasagna noodles for gluten-free options; just check the cooking times as they may differ.
  • Creamy Twist: Replace ricotta with cottage cheese for a lighter, yet still creamy filling that packs a protein punch.
  • Vegan: Use tofu or a store-bought vegan ricotta along with nutritional yeast to maintain that cheesy flavor without dairy.
  • Added Protein: Incorporate cooked ground turkey or sausage into the filling for an extra protein boost; just be sure to season accordingly!
  • Veggie Boost: Add diced bell peppers, mushrooms, or zucchini to the spinach mixture to enhance the veggie goodness and add more texture.
  • Spicy Kick: Mix in some red pepper flakes or diced jalapeños to the filling for a lovely, zesty twist that’ll keep taste buds dancing.
  • Herb-Infused: Toss in fresh herbs like oregano, thyme, or parsley into the cheese mixture for a burst of fragrant flavor that elevates your roll-ups.
  • Cheese Lovers: Don’t hold back! Add a layer of crumbled feta cheese or goat cheese sprinkled between the roll-ups and the marinara for a delightful tang.

These personalized options are guaranteed to keep your family excited and engaged come dinner time, ensuring they keep asking for more delicious roll-ups!

Spinach Lasagna Roll-ups

Spinach Lasagna Roll-ups Recipe FAQs

How do I choose fresh spinach for my Spinach Lasagna Roll-ups?
Absolutely! When selecting spinach, look for vibrant green leaves without any dark spots or signs of wilting. Fresh spinach should feel crisp to the touch. If you can, opt for organic spinach for even fresher flavor, as it’s generally grown without harmful pesticides.

What is the best way to store leftover Spinach Lasagna Roll-ups?
You can store any leftover Spinach Lasagna Roll-ups in an airtight container in the refrigerator for up to 3 days. Just make sure to let them cool to room temperature before sealing. When you’re ready to enjoy them again, simply reheat in the microwave or oven until they’re heated through.

Can I freeze Spinach Lasagna Roll-ups? How?
Certainly! To freeze your Spinach Lasagna Roll-ups, wrap each roll tightly in plastic wrap and then in aluminum foil to protect them from freezer burn. They can be stored in the freezer for up to 3 months. When you’re ready to eat, thaw them in the refrigerator overnight. Then, reheat them in a preheated oven at 375°F (190°C) for about 25-30 minutes, covered with foil to ensure they retain moisture.

What should I do if my Spinach Lasagna Roll-ups are too watery?
If you find your roll-ups are watery, it might be because cooked spinach releases moisture. To prevent this, be sure to squeeze out excess water from the chopped spinach after washing it. Alternatively, you can sauté the spinach before adding it to your filling to help reduce moisture. Adjusting the amount of marinara sauce used can also help balance textures.

Are Spinach Lasagna Roll-ups suitable for vegetarians?
Yes! Spinach Lasagna Roll-ups are a fantastic vegetarian dish since they are packed with fresh spinach, cheeses, and eggs. However, if you’re catering to specific dietary restrictions, ensure you check the marinara sauce for any hidden animal products. Enjoy these delicious roll-ups guilt-free!

Can pets eat any of the ingredients in Spinach Lasagna Roll-ups?
While spinach is safe for dogs in moderation, other ingredients like garlic and onion can be harmful to pets. It’s best to keep these delightful Spinach Lasagna Roll-ups strictly for human enjoyment!

Delicious Spinach Lasagna Roll-ups for Cozy Family Dinners

Enjoy these comforting yet light Spinach Lasagna Roll-ups, perfect for family dinners with gooey cheese and marinara.

  • Large Pot
  • Mixing Bowl
  • 9×13-inch baking dish
  • Aluminum Foil

For the Roll-ups

  • 8 sheets Lasagna noodles (perfect for rolling)
  • 2 cups Ricotta cheese (adds creaminess)
  • 1 cup Shredded mozzarella cheese (for gooey goodness)
  • 1/2 cup Grated Parmesan cheese (sharp flavor)
  • 2 cups Fresh spinach (chopped for filling)
  • 1 large Egg (binds the mixture)
  • Salt and pepper (to taste)

For the Sauce

  • 2 cups Marinara sauce (for layering)

Extras

  • 1 teaspoon Garlic powder (for flavor)
  • 1 teaspoon Onion powder (enhances taste)
  • Fresh basil (for garnish (optional))

Preparation Steps

  1. Preheat your oven to 375°F (190°C) and cook lasagna noodles in boiling water until al dente.
  2. In a mixing bowl, combine ricotta, mozzarella, Parmesan, spinach, egg, garlic powder, onion powder, and season with salt and pepper.
  3. Spread marinara sauce evenly in a 9×13-inch baking dish.
  4. Take a lasagna noodle, spread filling along the length, and roll it up tightly. Place seam-side down in the baking dish.
  5. Pour remaining marinara sauce over the roll-ups and sprinkle shredded mozzarella on top.
  6. Cover with foil and bake for 20 minutes, then uncover and bake for another 10-15 minutes until cheese is bubbly.
  7. Allow to cool for a few minutes, garnish with fresh basil, then slice and serve.

For the best flavor experience, enjoy fresh roll-ups but they can be stored for later.

Main Dishes
Italian
comfort food, Easy Recipe, family dinner, homemade, Spinach Lasagna Roll-ups, Vegetarian Dish

Filed Under: Main Dishes

Savory Slow Cooker Chicken Burrito Bowls for Easy Meals

October 24, 2025 by grace bellamy Leave a Comment

In the midst of a busy weekday afternoon, the aroma of savory spices fills the kitchen, teasing my senses and reminding me of the simple pleasures of home-cooked meals. That’s when I reach for my slow cooker and whip up these irresistible Slow Cooker Chicken Burrito Bowls. This delightful dish not only makes my life easier with its quick prep time but also brings everyone together around the table, allowing for a customized dining experience that caters to all tastes. Packed with nutritious ingredients and bursting with flavor, these burrito bowls are not just satisfying; they’re the perfect remedy for anyone seeking comfort instead of fast food. Are you ready to elevate your weeknight dinners with this delicious twist on classic burrito flavors? Let’s dive into the recipe!

Slow Cooker Chicken Burrito Bowls

Why are these burrito bowls a must-try?

Simplicity at its finest: With just a 10-minute prep time, this recipe fits seamlessly into any busy schedule.

Flavor-packed ingredients: The combination of spices, zesty salsa, and tender chicken creates an explosion of savory goodness in every bite.

Versatile dining: Each person can personalize their bowl with their favorite toppings, making it perfect for family meals or gatherings.

Nutritious and hearty: With protein-rich chicken and fiber-filled beans, these bowls are a wholesome alternative to takeout.

Crowd-pleaser: Serve with a side of chips or fresh guacamole for an unforgettable meal everyone will rave about! Want more quick, healthy options? Check out our delicious slow cooker recipes.

Slow Cooker Chicken Burrito Bowls Ingredients

For the Base
• 2 cups diced onion – Enhances the flavor and adds sweetness to balance the spice.
• 1 lb chicken breasts – The star of the dish; tender and juicy when cooked slowly.
• 8 oz salsa – Brings a zesty kick; use your favorite brand for a familiar taste.
• 1 can black beans – Packed with protein and fiber, giving the dish added heartiness.
• 1 can diced tomatoes – Adds moisture and richness to the overall flavor profile.
• 1 can diced green chiles – Introduces a mild heat and a touch of freshness.
• 2 cups chicken broth – Keeps everything juicy and flavorful; low-sodium is a great option.

For Seasoning
• 1 tsp chipotle chile powder – Adds a smoky heat, perfect for those who love a little spice.
• 1 tsp paprika – Provides warmth and enhances the color of your dish.
• 1 tsp oregano – Brings a hint of earthiness that complements the other spices.
• 1 tsp salt – Essential to elevate all the flavors and balance the dish.
• 1 tsp black pepper – Adds a subtle kick without overpowering the other spices.

For the Finish
• 2 cups instant rice – Quick-cooking and helps to absorb all those delightful flavors.
• 2 cups shredded Colby-Jack cheese – Melts beautifully on top, adding creaminess to each bite.

These savory Slow Cooker Chicken Burrito Bowls are sure to become a beloved family favorite!

Step‑by‑Step Instructions for Slow Cooker Chicken Burrito Bowls

Step 1: Prepare the Chicken
Begin by placing the chicken breasts at the bottom of your slow cooker, creating a solid foundation for delicious Slow Cooker Chicken Burrito Bowls. These will simmer and become tender as the flavors meld. Aim for a uniform layer to ensure even cooking.

Step 2: Add the Base Ingredients
Next, sprinkle the diced onion over the chicken, followed by the salsa, black beans, diced tomatoes, diced green chiles, and chicken broth. Stir gently to distribute the ingredients without disturbing the chicken layer too much. This delightful mix will set the stage for a flavor explosion.

Step 3: Season Generously
Sprinkle in the chipotle chile powder, paprika, oregano, salt, and black pepper. These spices are the heartbeat of your Slow Cooker Chicken Burrito Bowls, adding depth and warmth. Mix all the ingredients carefully, ensuring each flavor is evenly incorporated before covering the cooker.

Step 4: Slow Cook the Mixture
Cover the slow cooker and set it to cook on low for 4 hours. The slow cooking process allows the chicken to soak up the savory juices and tenderize beautifully. A tempting aroma will fill your kitchen, signaling that a delicious meal is on its way.

Step 5: Shred the Chicken
After 4 hours, carefully remove the chicken breasts from the slow cooker. Using two forks, shred the chicken in a large bowl, allowing it to soak up some of the juices. This step transforms your chicken into the perfect taco filling for your bowls.

Step 6: Combine and Cook the Rice
Return the shredded chicken to the slow cooker and add the instant rice. Stir everything together, ensuring the rice is well-distributed among the mixture. Cover the slow cooker again and cook for an additional 45 minutes, or until the rice becomes tender and fluffy.

Step 7: Add the Cheese
When the rice is ready, sprinkle the shredded Colby-Jack cheese over the top of your mixture. Cover once more and let it sit for an additional 3-5 minutes, allowing the cheese to melt beautifully into the medley, making your Slow Cooker Chicken Burrito Bowls even more indulgent.

Step 8: Serve and Enjoy
Scoop your savory creation into bowls, and don’t forget to add your favorite toppings like sour cream or avocado for an extra delight! Each hearty serving of these Slow Cooker Chicken Burrito Bowls is sure to bring comfort and satisfaction to your gathering or weeknight dinner.

Slow Cooker Chicken Burrito Bowls

What to Serve With Slow Cooker Chicken Burrito Bowls

There’s something truly magical about creating a meal that not only feeds the soul but also brings loved ones together around the table.

  • Savory Cornbread: A warm slice of cornbread adds a touch of sweetness that complements the flavors of the burrito bowls beautifully. It’s perfect for scooping up every last bite.

  • Fresh Guacamole: This creamy, zesty dip elevates your meal, providing a cool contrast to the spices in the bowls. Its fresh ingredients will make each bite unforgettable.

  • Crispy Tortilla Chips: Crunchy and salty tortilla chips serve as an excellent side for dipping into the burrito bowls. Their texture adds a pleasing contrast to the creamy ingredients.

  • Cucumber Avocado Salad: The cooling freshness of cucumbers and avocados balances the richness of the chicken burrito bowls, refreshing your palate with every forkful.

  • Black Bean Salsa: Packed with flavor, this vibrant salsa enhances the dish with an extra layer of texture and taste, making it a delightful addition to your table.

  • Margaritas: A classic drink pairing, margaritas bring a festive spirit to your meal. The citrusy kick complements the spices wonderfully while giving your dining experience a celebratory flair.

  • Churros with Chocolate Sauce: End your meal on a sweet note with warm churros. Their crunchy exterior and soft interior, dipped in chocolate, create a delightful contrast to the savory burrito bowls.

How to Store and Freeze Slow Cooker Chicken Burrito Bowls

Fridge: Store leftovers in an airtight container for up to 3 days. Make sure to cool the burrito bowls to room temperature before refrigerating to preserve texture.

Freezer: For longer storage, freeze in airtight containers for up to 2 months. Divide into single servings for quick thawing and reheating.

Reheating: Thaw overnight in the fridge before reheating. Warm in the microwave or on the stovetop until heated through, then add fresh toppings to refresh the flavor.

Airtight Cleaning: Always ensure your storage containers are clean and seal tightly to maintain the delicious taste of your Slow Cooker Chicken Burrito Bowls.

Slow Cooker Chicken Burrito Bowls Variations

Feel free to get creative with these burrito bowls; your taste buds will thank you for the adventure!

  • Dairy-Free: Substitute the Colby-Jack cheese with dairy-free cheese for a flavorful option that everyone can enjoy.
    If you’re catering to a dairy sensitivity, there are delicious alternatives available that melt beautifully!

  • Vegetarian: Swap out chicken for extra firm tofu or tempeh, and add more beans and vegetables.
    This variation not only makes it meatless, but it also packs in more fiber and flavor!

  • Spicy: Increase the chipotle chile powder or add diced jalapeños to amp up the heat.
    For those who crave heat, this will take your burrito bowls to a whole new level of excitement!

  • Loaded Toppings: Go beyond sour cream by adding guacamole, fresh salsa, or chopped green onions.
    These toppings will enhance the texture and flavor, making each bite a wonderful surprise!

  • Quinoa Substitute: Use quinoa instead of instant rice for a nutty flavor and added protein boost.
    This option is not only health-conscious but also adds an interesting texture to your bowls.

  • Southwestern Twist: Incorporate corn and diced bell peppers into the base mixture for a colorful flair.
    This twist adds sweetness and crunch, perfect for those looking to elevate their burrito experience.

  • Cilantro Lime Rice: Instead of plain rice, cook the rice in lime juice and stir in fresh cilantro at the end.
    This zesty alternative adds a refreshing brightness that complements the savory chicken beautifully.

Want more delicious recipe suggestions? Check out our scrumptious slow cooker recipes or explore delightful one-pot meals that make weeknight cooking a breeze!

Expert Tips for Slow Cooker Chicken Burrito Bowls

• Chicken Quality: Opt for fresh, high-quality chicken breasts to ensure tenderness and flavor. Avoid frozen chicken, as it may not cook evenly.

• Spice Balance: Adjust the chipotle chile powder to your preferred heat level. Start with less if you’re unsure, as you can always add more later.

• Avoid Overcooking: Keep an eye on the rice; overcooking can lead to mushy texture. Check at the 45-minute mark to see if it’s tender.

• Layer Wisely: Place the chicken at the bottom of the slow cooker to allow it to baste in the flavorful juices; avoid crowding the ingredients.

• Topping Variety: Get creative with toppings like cilantro, jalapeños, or lime wedges. They add freshness and elevate your Slow Cooker Chicken Burrito Bowls experience.

Make Ahead Options

These Slow Cooker Chicken Burrito Bowls are perfect for meal prep enthusiasts! You can chop the onions and combine the canned ingredients (salsa, black beans, diced tomatoes, and green chiles) up to 24 hours in advance; refrigerate them in an airtight container. For even more convenience, season the chicken breasts and place them in the slow cooker along with the broth the night before; just keep everything covered until you’re ready to start cooking. When you’re ready to serve, simply add the shredded chicken back to the cooker with the rest of the ingredients and follow the remaining cooking steps. This way, you’ll have a delicious, hearty meal ready with minimal effort, ideal for busy weeknights!

Slow Cooker Chicken Burrito Bowls

Slow Cooker Chicken Burrito Bowls Recipe FAQs

How do I choose the best chicken for my burrito bowls?
Absolutely! For the best results, opt for fresh, high-quality chicken breasts. Look for chicken that’s pink without dark spots or a strong odor. If you must use frozen chicken, make sure it’s completely thawed and dry to ensure even cooking and maximum tenderness.

How long can I store leftovers in the fridge?
Very! Leftovers of your Slow Cooker Chicken Burrito Bowls can be stored in an airtight container for up to 3 days. Make sure to let the bowls cool to room temperature before sealing them to maintain the best texture and flavor.

Can I freeze my Slow Cooker Chicken Burrito Bowls?
Yes, you can! Freeze your burrito bowls in airtight containers for up to 2 months. For convenience, divide them into single-serving portions. This way, you can easily thaw and reheat only what you need.

What is the best way to reheat my burrito bowls?
I often suggest thawing the frozen portions overnight in the fridge. Then, reheat in the microwave on medium power until heated through, or on the stovetop over low heat, stirring occasionally. Adding fresh toppings like avocado or sour cream after reheating can reinvigorate the dish!

What should I do if my rice turns out mushy?
If you find your rice has become mushy, don’t worry! Try removing it from the slow cooker as soon as you notice. Spread it out on a baking sheet while cooling; this can help it retain some texture. For future attempts, check the rice at the 45-minute mark to ensure it’s not overcooked.

Can I modify this recipe for dietary restrictions?
Absolutely! If you have allergies, consider using gluten-free tortillas or substituting poultry with beans or tofu for a vegetarian option. You can also adjust the spice levels based on your family’s preferences. Just remember to always check ingredient labels for allergens!

Savory Slow Cooker Chicken Burrito Bowls for Easy Meals

Enjoy these Slow Cooker Chicken Burrito Bowls, a flavorful and nutritious meal perfect for busy weeknights.

  • Slow Cooker

For the Base

  • 2 cups diced onion (Enhances flavor and adds sweetness.)
  • 1 lb chicken breasts (Tender and juicy when cooked slowly.)
  • 8 oz salsa (Brings a zesty kick.)
  • 1 can black beans (Packed with protein and fiber.)
  • 1 can diced tomatoes (Adds moisture to the flavor.)
  • 1 can diced green chiles (Introduces mild heat.)
  • 2 cups chicken broth (Keeps everything juicy.)

For Seasoning

  • 1 tsp chipotle chile powder (Adds smoky heat.)
  • 1 tsp paprika (Provides warmth and color.)
  • 1 tsp oregano (Brings earthiness.)
  • 1 tsp salt (Elevates flavors.)
  • 1 tsp black pepper (Adds a subtle kick.)

For the Finish

  • 2 cups instant rice (Helps absorb flavors.)
  • 2 cups shredded Colby-Jack cheese (Adds creaminess when melted.)

Step-by-Step Instructions

  1. Prepare the Chicken: Place chicken breasts at the bottom of the slow cooker.
  2. Add the Base Ingredients: Sprinkle diced onion over chicken, followed by salsa, black beans, diced tomatoes, diced green chiles, and chicken broth.
  3. Season Generously: Sprinkle in chipotle chile powder, paprika, oregano, salt, and black pepper.
  4. Slow Cook the Mixture: Cover and cook on low for 4 hours.
  5. Shred the Chicken: Remove chicken from the slow cooker and shred it.
  6. Combine and Cook the Rice: Return shredded chicken to slow cooker, add instant rice, and mix well.
  7. Add the Cheese: Sprinkle shredded Colby-Jack cheese over the mixture and let it sit to melt.
  8. Serve and Enjoy: Scoop into bowls and add favorite toppings.

Opt for fresh chicken, adjust spices to taste, and store leftovers properly for best flavor.

Main Dishes
Mexican
burrito bowls, chicken, easy meals, family-friendly, Healthy, slow cooker

Filed Under: Main Dishes

Crispy Baked Chicken Tenders That Melt in Your Mouth

October 22, 2025 by grace bellamy Leave a Comment

As I watched my niece’s eyes widen in excitement over a plate of golden-brown crispy baked chicken tenders, I realized how these delightful bites could turn any ordinary day into a family feast. Nothing compares to the satisfaction of creating homemade meals that not only please the palate but also foster togetherness. This easy-to-follow crispy baked chicken tenders recipe is both a crowd-pleaser and a healthier alternative to store-bought options, making it a win for everyone. With minimal prep time and a few simple ingredients, you’ll whip up these tender delights that are packed with flavor and irresistible crunch. Want to discover how to make chicken tenders that rival your favorite diner’s? Let’s dive in!

Crispy Baked Chicken Tenders

Why Are These Chicken Tenders So Irresistible?

Crispy texture: Baked to perfection, each tender boasts a crunchy coating that makes you feel like you’re biting into a deep-fried treat without the guilt.

Flavor explosion: Juicy chicken, seasoned just right, delivers a savory punch that will have everyone reaching for seconds.

Family-friendly: These tenders are loved by kids and adults alike, making them a perfect addition to any dinner table or game night.

Quick and easy: With just 15 minutes of prep and 25 minutes in the oven, your craving for delicious homemade chicken tenders will be satisfied in no time.

For more crispy chicken inspiration, check out our Crock Pot Chicken or try making Crockpot Chicken Breast for a simple meal!

Crispy Baked Chicken Tenders Ingredients

• Get ready to create the most delectable and crunchy chicken tenders your family will adore!

For the Chicken

  • Chicken breast – tender, boneless cuts are best for a juicy bite.
  • Salt and pepper – essential seasonings that enhance the chicken’s natural flavors.

For the Coating

  • All-purpose flour – this creates a base that helps adhere the seasonings and breadcrumbs.
  • Eggs – beaten for binding, ensuring the coating sticks perfectly!
  • Panko breadcrumbs – these provide that extra crunch that makes these tenders irresistible.

For the Seasoning

  • Garlic powder – adds aromatic warmth that elevates the flavor profile.
  • Paprika – gives a smoky depth and a beautiful color to your tenders.
  • Italian seasoning – a perfect blend that brings a medley of herbs into each bite.

With these Crispy Baked Chicken Tenders Ingredients, you’re on your way to a scrumptious meal that banishes fast food cravings!

Step‑by‑Step Instructions for Crispy Baked Chicken Tenders

Step 1: Preheat the Oven
Begin by preheating your oven to 400°F (200°C). This step is crucial as it ensures that the chicken tenders will cook evenly and achieve that delightful crispiness. While the oven warms up, gather your baking sheets and line them with parchment paper to prevent sticking and ease cleanup.

Step 2: Prepare the Chicken
Take your tender boneless chicken breasts and season them generously with salt and pepper, which enhances their natural flavors. Slice them into evenly sized strips, about 1 inch wide. This uniformity ensures each piece cooks at the same rate, giving you perfectly juicy and crispy baked chicken tenders.

Step 3: Set Up the Breading Station
In three separate shallow dishes, create your breading station. In the first dish, add all-purpose flour; in the second, beat a couple of eggs until smooth; and in the third, mix panko breadcrumbs with garlic powder, paprika, and Italian seasoning. This organized setup will streamline the coating process and make it easier to achieve that irresistible crunch.

Step 4: Coat the Chicken
One by one, take each chicken strip and first dip it into the flour, shaking off any excess. Next, dip it into the beaten eggs, ensuring it’s fully coated, followed by the panko breadcrumb mixture. Press the breadcrumbs firmly onto the chicken to create a thick, crunchy layer. Repeat this process until all strips are coated.

Step 5: Bake the Chicken Tenders
Arrange the breaded chicken strips on the prepared baking sheets in a single layer, ensuring they have enough space to breathe. Place them in the preheated oven and bake for about 15–20 minutes, flipping halfway through. You’ll know they’re ready when they’re golden brown and the internal temperature reaches 165°F (74°C).

Step 6: Cool and Serve
Once baked to perfection, remove the crispy baked chicken tenders from the oven and let them cool on the baking sheets for about 5 minutes. This resting time allows the juices to redistribute, keeping them tender and moist. Serve these delightful tenders warm with your favorite dipping sauces for a fun and satisfying meal.

Crispy Baked Chicken Tenders

What to Serve with Chocolate Chip Cookies

There’s something magical about adding delightful accompaniments to warm, gooey chocolate chip cookies, turning them into the perfect treat.

  • Cold Milk: A classic pairing, the creaminess of cold milk balances the sweetness of the cookies while complementing their chocolatey richness.

  • Vanilla Ice Cream: Dreamily smooth and creamy, this addition creates a delightful contrast, transforming the cookies into an indulgent sundae delight.

  • Fresh Berries: Juicy strawberries or raspberries add a burst of freshness, cutting through the sweetness and bringing a vibrant touch to your dessert.

  • Coffee or Espresso: The robust flavors of coffee enhance the rich chocolate notes, creating a delightful harmony between the type of cookie and the beverage.

  • Caramel Sauce: Drizzling warm caramel on top adds a sweet and buttery flavor, elevating the cookie experience to gourmet dessert levels.

  • Nutty Trail Mix: Adding a crunchy, savory element like nutty trail mix creates a balanced contrast, making each bite exciting and full of texture.

  • Chocolate Milkshake: A rich chocolate milkshake will take your dessert to the next level, providing a luscious, creamy experience that’s irresistible.

  • Sweet Whipped Cream: Light and fluffy, sweet whipped cream can be dolloped on top or served as a dip for your cookies, adding an elegant touch to the experience.

Expert Tips for Crispy Baked Chicken Tenders

  • Coating Mastery: Ensure every piece is thoroughly coated in flour, egg, and then panko. This method creates a perfect crunchy crust that will leave you satisfied.

  • Uniform Strips: Cut chicken into equal sizes for consistent cooking. Uneven pieces can lead to some being undercooked while others are overdone.

  • Don’t Crowd the Pan: Give the tenders space on the baking sheet. Crowding can trap steam and prevent a crisp texture, so bake in batches if necessary.

  • Watch the Bake Time: Keep an eye on your tenders around the 15-minute mark. Overbaking can result in dry chicken, so ensure they reach an internal temperature of 165°F (74°C) for the juiciest results.

  • Flavor Variations: Feel free to get creative with spices! Swap in your favorite seasonings for a personalized touch while maintaining the crispy baked chicken tenders you love.

Make Ahead Options

These Crispy Baked Chicken Tenders are perfect for meal prep enthusiasts! You can bread the chicken strips and refrigerate them up to 24 hours in advance, which keeps the coating fresh and crunchy. For best results, arrange the prepared tenders on a baking sheet lined with parchment paper, cover tightly with plastic wrap, and store in the fridge. This allows you to save precious time on busy weeknights. When ready to bake, simply preheat your oven and pop them in for 15-20 minutes until golden brown. You’ll have delicious, homemade chicken tenders ready to impress with minimal effort, making family dinners both easy and enjoyable!

How to Store and Freeze Crispy Baked Chicken Tenders

Fridge: Store leftover chicken tenders in an airtight container for up to 3 days. Ensure they are fully cooled before sealing to maintain their crispy texture.

Freezer: To freeze, wrap each cooled chicken tender individually in plastic wrap, then place them in a freezer-safe bag. They will last for up to 2 months, making it easy to enjoy homemade chicken tenders anytime.

Reheating: For best results, reheat in the oven at 375°F (190°C) until heated through (about 15 minutes). This method restores their crispy goodness, unlike microwaving.

Serving: Pair your reheated chicken tenders with your favorite dipping sauces for a tasty snack or meal that evokes family gatherings.

Crispy Baked Chicken Tenders Variations

Feel free to get creative and customize your crispy baked chicken tenders with these fun and tasty twists!

  • Gluten-Free: Substitute all-purpose flour with almond flour and use gluten-free panko breadcrumbs for a delicious alternative.

  • Cheesy Goodness: Add 1/2 cup of grated Parmesan cheese to your panko mixture for a rich, cheesy flavor enhancement.

  • Spicy Kick: Mix cayenne pepper or chili powder into your seasoning blend for a zesty heat that everyone will love.

  • Herb Infusion: Swap Italian seasoning for fresh herbs like thyme or rosemary to lend a delightful earthy aroma to your tenders.

  • Sweet and Savory: Brush the tenders with honey mustard before coating for a perfect balance of sweetness and savory crunch.

  • Crispy Baked Chicken Tenders Salad: Chop cooked tenders into bite-sized pieces and toss with mixed greens, cherry tomatoes, and ranch dressing for a hearty salad.

  • Air Fryer Option: Cook the breaded tenders in an air fryer at 400°F (200°C) for 10-12 minutes for an extra crispy and healthier version.

  • Asian-Inspired Twist: Incorporate sesame seeds into the panko mix and serve with a soy dipping sauce for an exotic flavor profile.

With so many delicious options, there’s no end to the possibilities! If you’re searching for more chicken ideas, check out our delectable Hawaiian Chicken Sheet recipe or try out our unique One Pot Chicken Stroganoff for a delightful twist!

Crispy Baked Chicken Tenders

Crispy Baked Chicken Tenders Recipe FAQs

How do I choose the best chicken for my tenders?
Absolutely! When selecting chicken breasts, look for boneless cuts that are firm and pink, with no dark spots or unpleasant odors. Fresh chicken will have a slightly moist surface and should be free of any excessive liquid. Using high-quality chicken makes all the difference in taste and texture!

What’s the best way to store leftover chicken tenders?
Leftover crispy baked chicken tenders should be stored in an airtight container in the fridge. Ensure they are completely cooled before sealing to maintain their crunch. They will stay fresh for up to 3 days. Just remember to place a paper towel at the bottom of the container to absorb any excess moisture.

Can I freeze my chicken tenders?
Yes, very much! To freeze your chicken tenders, wrap each cooled tender individually in plastic wrap and then put them in a freezer-safe bag. This prevents freezer burn and allows you to enjoy them later. They can be stored in the freezer for up to 2 months. When you’re ready to eat, just follow the reheating instructions below!

What’s the best way to reheat frozen chicken tenders?
For optimal results, reheat frozen chicken tenders in the oven. Preheat your oven to 375°F (190°C) and place your tenders on a baking sheet. Bake them for about 15-20 minutes, or until heated through and crispy again. Avoid microwaving, as this can make them soggy.

Are there any dietary considerations I should keep in mind?
Definitely! If you’re preparing these tenders for someone with allergies, always check the labels on your ingredients, especially the breadcrumbs, as they may contain gluten or other allergens. For a healthier alternative, feel free to use whole wheat or gluten-free breadcrumbs. Also, keep in mind that while these chicken tenders are perfect for family gatherings, they may not be suitable for pets due to seasoning or additives.

Crispy Baked Chicken Tenders That Melt in Your Mouth

Crispy Baked Chicken Tenders are the perfect family-friendly meal that satisfies cravings for a healthier, homemade alternative.

  • Oven
  • Baking sheets
  • parchment paper
  • Shallow Dishes

For the Chicken

  • 1 pound Chicken breast (tender, boneless cuts are best for a juicy bite)
  • to taste Salt (essential seasoning)
  • to taste Pepper (essential seasoning)

For the Coating

  • 1 cup All-purpose flour (creates a base that helps adhere the seasonings and breadcrumbs)
  • 2 large Eggs (beaten for binding)
  • 1 cup Panko breadcrumbs (provides extra crunch)

For the Seasoning

  • 1 teaspoon Garlic powder (adds aromatic warmth)
  • 1 teaspoon Paprika (gives smoky depth)
  • 1 teaspoon Italian seasoning (blend of herbs)

Crispy Baked Chicken Tenders Instructions

  1. Preheat your oven to 400°F (200°C) and line baking sheets with parchment paper.
  2. Season chicken breasts with salt and pepper and slice into 1-inch wide strips.
  3. Create a breading station with flour, beaten eggs, and a mixture of panko breadcrumbs, garlic powder, paprika, and Italian seasoning.
  4. Coat each chicken strip in flour, then dip in eggs, and finally coat with the breadcrumb mixture.
  5. Arrange the coated strips on the baking sheets and bake for 15-20 minutes, flipping halfway through, until golden brown and internal temperature reaches 165°F (74°C).
  6. Let the tenders cool for about 5 minutes before serving with your favorite dipping sauces.

Ensure coating mastery for a perfect crunchy crust and avoid overcrowding the pan to keep tenders crispy.

Main Dishes
American
baked, chicken, Crispy Baked Chicken Tenders, family-friendly, Healthy, tenders

Filed Under: Main Dishes

Crispy Honey Garlic Glazed Salmon That’s Simply Irresistible

October 22, 2025 by grace bellamy Leave a Comment

As I stood over the stove, inhaling the warm, inviting aroma of melting honey and sizzling garlic, a delightful wave of nostalgia washed over me. That’s when I knew I was on the path to making my favorite weeknight dinner: Crispy Honey Garlic Glazed Salmon. This dish is the perfect blend of sweet and savory, and it comes together in just 25 minutes, making it a go-to for busy evenings. Not only is it a crowd-pleaser that you and your loved ones will crave, but it’s also a healthy alternative to fast food without sacrificing flavor. Serve it with a side of fluffy jasmine rice or colorful roasted veggies, and you’ve got a meal that’s both satisfying and nourishing. Ready to give your dinner routine a delicious upgrade? Let’s dive into this easy recipe!

Crispy Honey Garlic Glazed Salmon

Why is this salmon recipe irresistible?

Quick and Easy: In just 25 minutes, you can create a delicious meal that rivals any restaurant delicacy. No more waiting for takeout!

Flavor Explosion: The sweet and savory glaze combines honey, soy sauce, and garlic for an irresistible taste that will leave everyone asking for seconds.

Healthy Delight: Packed with protein, this Salmon dish is not only delectable but also a nutritious option for families looking to avoid fast food.

Versatile Pairings: Serve with jasmine rice, quinoa, or your favorite veggies to create a well-rounded meal that suits everyone’s palate.

Crowd-Pleasing Favorite: Impress your guests with a dish that’s catered to all tastes, making it perfect for casual dinners or special occasions.

Crispy Honey Garlic Glazed Salmon Ingredients

For the Glaze

  • Honey – Enhances the sweetness and helps create a sticky, flavorful glaze.
  • Low-sodium soy sauce – Adds a depth of umami, perfectly balancing the sweetness of the honey.
  • Garlic – Freshly minced garlic elevates the flavor profile with a savory punch.

For the Salmon

  • Salmon fillets – Opt for skin-on fillets for added flavor and texture; approximately 6 ounces per person ensures a hearty portion.
  • Olive oil – Prevents sticking and contributes a light, fruity flavor when searing the salmon.
  • Salt – A pinch enhances the salmon’s natural flavors; adjust to your taste.
  • Pepper – Freshly cracked pepper adds a subtle spiciness that complements the glaze.

For Garnish

  • Chopped green onions – Fresh green onions provide a pop of color and a mild onion flavor that brightens the dish.

Serve your Crispy Honey Garlic Glazed Salmon with a side of steamed veggies or rice for a complete and satisfying meal!

Step‑by‑Step Instructions for Crispy Honey Garlic Glazed Salmon

Step 1: Prepare the Salmon
Rinse the salmon fillets under cold water, then pat them dry with paper towels. This crucial step ensures a crispy texture. Lightly season both sides with salt and freshly cracked pepper to enhance the natural flavors of the salmon, making it ready for the delicious glaze you’ll create.

Step 2: Make the Honey Garlic Glaze
In a mixing bowl, combine 1/4 cup of honey, 2 tablespoons of low-sodium soy sauce, and 3 cloves of minced garlic. Stir until well blended, creating a fragrant glaze that’s both sweet and savory. Pour this mixture into a small saucepan and heat over medium heat, allowing it to simmer for about five minutes. Stir occasionally to thicken the glaze.

Step 3: Heat the Skillet
While the glaze is thickening, heat a skillet over medium-high heat and add 2 tablespoons of olive oil. Wait until the oil shimmers, indicating it’s hot and ready. This is the perfect temperature for achieving that golden-brown crust on your Crispy Honey Garlic Glazed Salmon, so don’t rush this step.

Step 4: Cook the Salmon
Carefully place each salmon fillet skin-side down in the hot skillet, making sure not to overcrowd the pan. Cook undisturbed for about four minutes, allowing a beautiful golden crust to form. This step is crucial for developing flavor and texture, so resist the urge to move the fillets around during cooking.

Step 5: Add the Glaze and Flip
Gently flip the salmon fillets over using a spatula. Brush half of the honey garlic glaze on the tops of the fillets, letting it seep into the salmon for added flavor. Cook for an additional three to four minutes, or until the internal temperature reaches 145°F, ensuring your salmon is perfectly cooked and flaky.

Step 6: Drizzle the Remaining Glaze
Once the salmon is cooked through and caramelized, drizzle the remaining honey garlic glaze over the cooked fillets. This adds an extra layer of gooey sweetness and enhances the visual appeal of your Crispy Honey Garlic Glazed Salmon. Make sure to coat each piece well for maximum flavor.

Step 7: Serve and Garnish
Serve the salmon immediately while it’s still warm. Garnish with chopped green onions for a pop of color and a hint of freshness. Pair your Crispy Honey Garlic Glazed Salmon with sides like steamed vegetables or fluffy jasmine rice for a complete and satisfying meal that everyone will love.

Crispy Honey Garlic Glazed Salmon

Make Ahead Options

These Crispy Honey Garlic Glazed Salmon fillets are perfect for meal prep! You can prepare the honey garlic glaze up to 3 days in advance and store it in an airtight container in the refrigerator. Simply mix together the honey, soy sauce, and minced garlic, then refrigerate to allow the flavors to meld beautifully. For the salmon, you can season the fillets and store them in the fridge for up to 24 hours before cooking. When you’re ready to enjoy your meal, just heat the skillet and follow the cooking instructions, brushing on the pre-prepared glaze as you cook, ensuring a delectable dish that’s just as delicious as if made fresh. This way, busy weeknights become a breeze!

How to Store and Freeze Crispy Honey Garlic Glazed Salmon

Fridge: Allow any uneaten portions to cool completely before transferring them to an airtight container. Store in the fridge for up to 3 days to maintain freshness.

Freezer: For longer storage, wrap the salmon tightly in plastic wrap and then in aluminum foil before placing in the freezer. It can be frozen for up to 3 months without losing flavor or texture.

Reheating: To reheat, gently thaw the salmon in the fridge overnight, then warm it in a skillet over low heat until heated through. This method helps keep the salmon juicy and flavorful.

Do Not Refreeze: Avoid refreezing any previously frozen and thawed salmon to maintain the best quality and taste. Enjoy your leftover crispy honey garlic glazed salmon!

Crispy Honey Garlic Glazed Salmon Variations

Feel free to add your own twist or swap ingredients to make this dish your own burst of flavor!

  • Dairy-Free: Substitute olive oil with coconut oil for a tropical touch that pairs wonderfully with salmon.

  • Spicy Kick: Add 1-2 teaspoons of sriracha or your favorite hot sauce to the glaze for a delightful heat that complements the sweetness.

  • Herb-Infused: Incorporate fresh herbs like thyme or rosemary into your glaze for an aromatic twist, enhancing the dish with earthy notes.

  • Citrus Zing: Squeeze in some fresh lemon or orange juice for a zesty brightness that cuts through the glaze’s sweetness beautifully.

  • Maple Sweetness: Swap honey for pure maple syrup to create an equally delicious and unique flavor that brings warmth to the dish.

  • Nutty Crunch: Top the finished salmon with toasted sesame seeds or crushed nuts for added texture and nutty flavor, delighting both the senses and palate.

  • Baked Variation: For a healthier twist, bake the salmon at 375°F for 15-20 minutes, slathered in the glaze, for a fuss-free, oven-cooked version.

  • Sweet Potato Pairing: Serve alongside roasted sweet potatoes for a deliciously nutritious and vibrant side that complements the salmon perfectly.

What to Serve with Crispy Honey Garlic Glazed Salmon

Elevate your mealtime with these delightful pairings that beautifully complement the sweet and savory notes of the salmon.

  • Fluffy Jasmine Rice: This aromatic grain soaks up the glaze perfectly, providing a comforting base for your meal. The warmth and texture balance the salmon’s lusciousness beautifully.

  • Roasted Asparagus: The slight crunch of asparagus sprinkled with olive oil and sea salt adds a refreshing contrast to the dish. The earthiness of the veggies enhances the flavors of the salmon, creating a well-rounded plate.

  • Quinoa Salad with Veggies: A light and nutty quinoa salad tossed with colorful veggies introduces a fresh, vibrant element. This pairing not only adds texture but also elevates the dish with added nutrients.

  • Garlic Mashed Potatoes: Creamy mashed potatoes infused with garlic create a rich and comforting side. Their buttery texture pairs wonderfully with the sticky glaze of the salmon, making every bite indulgent.

  • Cucumber Salad: A crisp cucumber salad drizzled with rice vinegar brings a cooling contrast. The mild flavor refreshes your palate, perfectly balancing the richness of the salmon.

  • Chardonnay: A chilled glass of Chardonnay complements the salmon’s sweetness without overwhelming it. Its crisp acidity balances the richness, making it an ideal sipping partner.

  • Chocolate Mousse: For dessert, a light chocolate mousse provides a luscious end to the meal. Its silky texture and subtle sweetness create a delightful finish after the savory main course.

  • Sautéed Spinach: Lightly sautéed fresh spinach with a squeeze of lemon offers a nutritious addition. This bright side enhances the overall depth of flavors alongside the honey garlic glaze.

Expert Tips for Crispy Honey Garlic Glazed Salmon

Prepare Ahead: Use the optional marinating time of 30 minutes to let the salmon soak in the glaze for deeper flavor.

Perfect Heat: Make sure the skillet is hot enough before adding the salmon; this ensures a nicely crispy skin.

Avoid Overcrowding: Cook the salmon in batches if necessary; overcrowding the pan leads to steaming instead of searing.

Check Temperature: Always use a meat thermometer to check that the internal temperature reaches 145°F for safe consumption.

Garnish Wisely: Don’t skip the chopped green onions; they introduce a fresh burst of flavor that complements the glaze beautifully.

Crispy Honey Garlic Glazed Salmon

Crispy Honey Garlic Glazed Salmon Recipe FAQs

How do I choose the best salmon for this recipe?
Absolutely! For the Crispy Honey Garlic Glazed Salmon, look for fresh, vibrant fillets with a bright, pinkish hue. Opt for wild-caught salmon if available, as it tends to have better flavor. Additionally, avoid any fillets that have dark spots or an overly fishy smell—those are signs that the salmon may not be fresh.

How should I store leftovers?
After making your delicious salmon, allow any uneaten portions to cool completely and then transfer them to an airtight container. You can keep it stored in the fridge for up to 3 days. When reheating, it’s best to gently warm it in a skillet over low heat to maintain its juicy texture.

Can I freeze the Crispy Honey Garlic Glazed Salmon?
Very! To freeze, first wrap the cooled salmon tightly in plastic wrap, then wrap it again in aluminum foil to prevent freezer burn. You can freeze it for up to 3 months. When you’re ready to enjoy it again, remember to thaw it in the refrigerator overnight, then reheat gently in a skillet.

What if my glaze doesn’t thicken?
If you find that your glaze isn’t thickening as expected, try simmering it for a few additional minutes while stirring regularly. If it’s still thin, adding a small cornstarch slurry (1 teaspoon cornstarch mixed with 2 teaspoons of water) can help achieve that perfect sticky consistency. Just remember to simmer for another minute after adding the slurry!

Is this recipe suitable for special dietary needs?
The Crispy Honey Garlic Glazed Salmon recipe is naturally gluten-free if you use gluten-free soy sauce. However, if anyone has a honey allergy, you might substitute the honey with maple syrup for a similar sweetness. Always check with your guests regarding allergies to ensure everyone can enjoy this delightful dish!

How long should the salmon ideally marinate?
I recommend allowing the salmon to marinate in the glaze for at least 30 minutes. This step infuses the fish with deeper flavors, creating an even more delicious finish. Just remember to store it in the fridge during the marinating process to keep things safe!

Crispy Honey Garlic Glazed Salmon That’s Simply Irresistible

Crispy Honey Garlic Glazed Salmon is a sweet and savory dish that can be made in just 25 minutes.

  • skillet
  • Mixing Bowl
  • small saucepan
  • spatula

For the Glaze

  • 1/4 cup honey (Enhances sweetness and creates a sticky glaze.)
  • 2 tablespoons low-sodium soy sauce (Adds depth of umami.)
  • 3 cloves garlic (Freshly minced for added flavor.)

For the Salmon

  • 4 6-ounce salmon fillets (Opt for skin-on for added flavor.)
  • 2 tablespoons olive oil (Prevents sticking during cooking.)
  • 1 pinch salt (Enhances natural flavors.)
  • 1 pinch pepper (Freshly cracked for subtle spiciness.)

For Garnish

  • 2 tablespoons chopped green onions (For a pop of color and mild flavor.)

Preparation

  1. Rinse the salmon fillets under cold water, then pat them dry with paper towels. Season both sides with salt and pepper.
  2. In a mixing bowl, combine honey, soy sauce, and minced garlic. Stir until well blended, then heat in a saucepan for about five minutes.
  3. Heat a skillet over medium-high heat and add olive oil, waiting until it shimmers.
  4. Place salmon fillets skin-side down in the skillet and cook undisturbed for about four minutes.
  5. Gently flip the salmon and brush half of the glaze on top. Cook for another three to four minutes until salmon reaches 145°F.
  6. Drizzle the remaining glaze over the salmon after cooking.
  7. Serve immediately garnished with chopped green onions.

Serve with steamed vegetables or fluffy jasmine rice for a complete meal.

Main Dishes
American
Crispy Honey Garlic Glazed Salmon, easy salmon recipe, healthy dinner, quick recipe, salmon with glaze, weeknight meal

Filed Under: Main Dishes

Sweet & Salty Salted Honey Pie for Cozy Gatherings

October 22, 2025 by grace bellamy Leave a Comment

The smooth golden hue of honey, paired with a hint of sea salt, invites you to experience a slice of heaven with my Salted Honey Pie. As a passionate home-chef, I often seek desserts that strike the perfect balance between sweet and savory, and this pie does just that! With its quick prep and simple ingredients, it’s a delightful crowd-pleaser that comes together in just over an hour. Imagine your friends gathering around, their eyes lighting up as you serve this luscious dessert, topped with a sprinkle of flaky sea salt. It’s a fun twist on traditional pies, elevating your homemade food game while ensuring you say goodbye to fast food. Are you ready to discover how to make this irresistible treat?

Salted Honey Pie

Why is Salted Honey Pie a must-try?

Irresistible flavor: The combination of sweet honey and flaky sea salt creates a unique taste that dances on your palate.
Quick prep time: With just 15 minutes of preparation, you can breeze through making this delightful dessert and impress your guests.
Simple ingredients: Made from pantry staples like butter, sugar, and eggs, this recipe is both accessible and satisfying.
Crowd favorite: It’s the perfect dessert for gatherings—they’ll be begging for seconds after one taste.
Versatile option: Serve it warm for a cozy dessert or chilled for a refreshing treat, making it ideal for any occasion. For another comforting dessert, check out our delicious Chicken Pot Pie.

Salted Honey Pie Ingredients

• To craft your perfect Salted Honey Pie, gather these essentials!

For the Crust

  • 9-inch pie crust – You can either make your own or use store-bought; blind baking ensures a perfectly crisp base.

For the Filling

  • Unsalted butter – Melted and cooled for a rich flavor that binds the filling beautifully.
  • Granulated sugar – Sweetness to balance the saltiness; feel free to try coconut sugar for a deeper flavor.
  • Cornmeal – Adds a delightful texture; opt for fine grind to keep the filling smooth.
  • Salt – Just a touch enhances all the flavors; don’t skip this step!
  • White vinegar or lemon juice – Brightens the pie’s flavors; use whichever you have on hand.
  • Vanilla extract – A must for warmth and depth—makes everything better!
  • Honey – Try wildflower or clover for a natural sweetness and a unique flavor.
  • Large eggs – These help set the filling; ensure they’re at room temperature for best results.
  • Heavy cream – Guarantees a silky finish—using full-fat is essential for that luscious texture.

To Finish

  • Flaky sea salt – A light sprinkle brings everything together, adding that perfect salty crunch just before serving.

Step‑by‑Step Instructions for Salted Honey Pie

Step 1: Prepare the Pie Crust
Begin by blind baking your pie crust to achieve a perfectly crisp base. Preheat your oven to 375°F (190°C). Chill the crust in the pan, then line it with parchment paper or foil, and fill with pie weights. Bake for 12–15 minutes, until the edges are lightly golden. Remove the weights and lining, then return to the oven for another 5 minutes until the bottom is a light golden color. Let cool slightly before filling.

Step 2: Mix the Filling
In a large mixing bowl, whisk together the melted and slightly cooled unsalted butter with granulated sugar, cornmeal, salt, white vinegar or lemon juice, vanilla extract, and honey. Mix until everything is well combined and smooth, which should take about 2 minutes of vigorous whisking. The fragrant blend will have a glossy finish, signaling it’s ready for the next step in creating your Salted Honey Pie.

Step 3: Incorporate the Eggs and Cream
Add the three large eggs to the mixture, one at a time, whisking thoroughly after each addition. This ensures a luscious filling texture in your Salted Honey Pie. Once all the eggs are incorporated, gently stir in the heavy cream until completely smooth, making sure there are no lumps. This creamy addition will enhance the richness of your filling.

Step 4: Fill the Crust
Carefully pour the prepared filling into the pre-baked pie crust. Use a spatula to spread it evenly, ensuring every corner is filled. To avoid any spills, place the pie on a baking sheet before moving it to the oven. This will catch any drips while baking, keeping your oven neat and tidy during the process.

Step 5: Bake the Pie
Slide the pie into the oven and bake at 350°F (175°C) for 40–50 minutes. Watch for the filling to be just set and slightly jiggly in the center—a perfect indication that your Salted Honey Pie is on its way to perfection. If the crust begins to brown too quickly, tent it with aluminum foil to keep it from burning while the filling finishes baking.

Step 6: Cool the Pie
Once it’s beautifully baked, take the pie out of the oven and let it cool completely on a wire rack for at least 2 hours. This cooling period allows the filling to firm up, producing that delightful slice when you serve it. Patience pays off here, as the flavors will continue to meld while the pie cools.

Step 7: Finish with Flaky Sea Salt
Before serving your Salted Honey Pie, sprinkle a generous but delicate layer of flaky sea salt on top. This last touch elevates the flavor, creating a perfect balance between sweet and salty. Slice into pieces and serve to your eager guests, who are sure to delight in this scrumptious homemade dessert!

Salted Honey Pie

Expert Tips for Perfect Salted Honey Pie

  • Butter Temperature: Use melted, slightly cooled butter to prevent the sugar from clumping. This ensures a smooth filling in your Salted Honey Pie.
  • Egg Incorporation: Add eggs one at a time, whisking well after each addition. This step is crucial for the right texture; don’t rush it!
  • Cornmeal Choice: Opt for fine-grind cornmeal to maintain the silky filling. Coarse cornmeal can create an undesired grainy texture in the pie.
  • Monitor Baking: Keep an eye on the pie while baking. If the crust browns too quickly, cover it with foil to avoid burning.
  • Cooling Time: Allow the pie to cool completely on a wire rack for at least 2 hours. This helps the filling set, making for cleaner slices when serving.

Salted Honey Pie Variations

Feel free to let your creativity shine with these delightful twists for your Salted Honey Pie!

  • Gluten-Free: Substitute the pie crust with a gluten-free option, like almond flour or a pre-made gluten-free crust, for a delicious alternative.
  • Nutty Crunch: Add ½ cup of chopped nuts, like pecans or hazelnuts, to the filling for an added crunch and a warm, earthy flavor. The nuts will roast slightly during baking, enhancing their natural oils and taste.
  • Spiced Delight: Incorporate a teaspoon of cinnamon or nutmeg into the filling to add warm, cozy notes that complement the honey beautifully. Spice brings a whole new depth to this already lovely dessert!
  • Fruity Twist: Fold in a cup of diced seasonal fruits, such as peaches or apples; they will add juicy bursts of flavor amidst the creamy filling. The added moisture from the fruit gives the pie a refreshing, bright taste!
  • Minty Freshness: Sprinkle fresh chopped mint over the pie just before serving for a refreshing contrast against the sweet honey and salty finish. The burst of mint will lighten the overall richness of your pie.
  • Dairy-Free: Replace heavy cream with a creamy coconut milk or cashew cream to make a luscious filling that’s dairy-free yet oh-so-satisfying. This option will bring a light, tropical vibe to your pie!
  • Chocolate Lovers: Drizzle melted dark chocolate over the top just before serving or melt into the filling for an indulgent chocolate-honey combination that dessert lovers won’t forget. A chocolate touch becomes a rich addition to this classic.
  • Citrus Zest: Grate some lemon or orange zest into the filling for a bright flavor uplift that contrasts beautifully with the sweet honey and sea salt. A citrusy zing can elevate the experience of your pie wonderfully!

These variations not only personalize your Salted Honey Pie but also add exciting new dimensions that everyone will love. For another family-favorite, check out our comforting Chicken Pot Pie. Enjoy making it your own!

Make Ahead Options

These Salted Honey Pie preparations are perfect for busy home cooks looking to save time! You can prepare the filling up to 24 hours in advance; simply mix together the melted butter, sugar, cornmeal, salt, vinegar, vanilla, honey, eggs, and cream as instructed. Transfer it to an airtight container and refrigerate to keep the flavors fresh. Additionally, you can blind bake the pie crust up to 3 days in advance. Store it covered at room temperature to maintain its crispiness. When ready to bake, just pour in the prepared filling and bake according to the recipe instructions. Just like that, you’ll have a delicious Salted Honey Pie ready to impress your guests with minimal effort!

What to Serve with Salted Honey Pie

Indulging in a slice of pie is a delightful experience, but pairing it with the right sides can elevate your dessert game even further.

  • Fresh Berries: A mix of strawberries, blueberries, and raspberries adds a juicy pop and bright acidity that balances the sweetness of the pie. The vibrant colors will make your dessert table truly eye-catching.

  • Vanilla Ice Cream: The creaminess of vanilla ice cream complements the rich filling perfectly, creating a luscious contrast. It also adds a pleasing temperature difference, making each bite a delightful surprise.

  • Whipped Cream: A dollop of lightly sweetened whipped cream brings a light texture and extra sweetness that enhances the overall flavor. Consider adding a hint of cinnamon for a warm, cozy touch.

  • Charcuterie Board: Include a variety of cheeses, cured meats, and nuts for a savory contrast. The salty notes of the cheeses and meats will harmonize beautifully with the sweet pie, creating a delightful snack for your guests.

  • Sweet Tea: A chilled glass of sweet tea provides a refreshing beverage choice that complements the pie’s sweetness. It’s a classic pairing that adds a homestyle feel to your gathering.

  • Coffee or Espresso: Enjoying a slice of pie with a warm cup of coffee or espresso creates a wonderful balance of flavors. The bitterness of the coffee highlights the sweetness of the pie, making it an excellent after-dinner treat.

  • Chocolate Sauce: Drizzling a bit of warm chocolate sauce over your slice adds a rich, decadent experience that chocolate lovers will appreciate. The combination of chocolate and honey is a match made in dessert heaven.

  • Nutty Granola: A sprinkle of toasted granola can add a crunchy texture that contrasts beautifully with the smooth filling. It can also introduce a nutty flavor that complements the pie’s sweetness.

How to Store and Freeze Salted Honey Pie

Fridge: Store the Salted Honey Pie covered in plastic wrap or in an airtight container for up to 3 days to maintain its freshness and flavor.

Freezer: If you want to preserve the pie longer, freeze it (sliced or whole) for up to 2 months. Wrap tightly in plastic wrap, followed by foil, to prevent freezer burn.

Thawing: To enjoy, thaw the pie in the fridge overnight before serving. Reheat in a 350°F (175°C) oven for 10-15 minutes to restore its lovely texture.

Serving Tips: Top with flaky sea salt just before serving for a delightful finishing touch, ensuring you recreate the perfect sweet and salty balance.

Salted Honey Pie

Salted Honey Pie Recipe FAQs

What type of honey is best for the Salted Honey Pie?
Absolutely! I recommend using wildflower or clover honey for a more complex flavor. Each type of honey carries its unique taste, which can enhance the pie in different ways, making it even more delicious.

How long can I store the Salted Honey Pie?
You can keep the Salted Honey Pie in the refrigerator for up to 3 days. Make sure to cover it with plastic wrap or store it in an airtight container to preserve its freshness and delightful flavor.

Can I freeze Salted Honey Pie?
Very much so! You can freeze your Salted Honey Pie for up to 2 months. It’s best to wrap it tightly in plastic wrap and then in foil to avoid any freezer burn. If you’re freezing individual slices, the same method applies—just be sure they’re well-covered!

What should I do if my pie crust browns too quickly while baking?
If you notice that the pie crust is browning faster than the filling is setting, don’t worry! Simply tent the crust with aluminum foil to shield it from the heat and allow the filling to cook through without burning the crust. This simple trick works wonders!

Are there any dietary considerations for this recipe?
Certainly! If anyone in your gathering has allergies or dietary restrictions, consider using a gluten-free pie crust. Also, for a dairy-free option, substitute the heavy cream with coconut cream and use dairy-free butter. This way, everyone can enjoy a slice of this delectable Salted Honey Pie!

Sweet & Salty Salted Honey Pie for Cozy Gatherings

Experience the delightful balance of sweet and salty with this Salted Honey Pie. A perfect dessert for gatherings.

  • Oven
  • Pie dish
  • Mixing Bowl
  • Whisk
  • spatula
  • parchment paper
  • Pie weights

For the Crust

  • 1 9-inch pie crust (can be homemade or store-bought)

For the Filling

  • 1/2 cup unsalted butter (melted and cooled)
  • 3/4 cup granulated sugar (or coconut sugar)
  • 1/4 cup cornmeal (fine grind)
  • 1/4 teaspoon salt (to enhance flavors)
  • 1 tablespoon white vinegar or lemon juice (whichever you have)
  • 1 teaspoon vanilla extract
  • 1/2 cup honey (wildflower or clover preferred)
  • 3 large eggs (room temperature)
  • 1 cup heavy cream (full-fat for best texture)

To Finish

  • to taste flaky sea salt (for serving)

Step-by-Step Instructions

  1. Preheat your oven to 375°F (190°C). Blind bake the pie crust for 12–15 minutes until lightly golden. Cool slightly.
  2. In a mixing bowl, whisk together melted butter, sugar, cornmeal, salt, vinegar or juice, vanilla, and honey until smooth.
  3. Incorporate the eggs one at a time, whisking thoroughly after each addition. Stir in the heavy cream until smooth.
  4. Pour the filling into the pre-baked crust, spreading it evenly. Place the pie on a baking sheet to catch drips.
  5. Bake at 350°F (175°C) for 40–50 minutes until slightly jiggly in the center. Tent with foil if browning too quickly.
  6. Cool the pie on a wire rack for at least 2 hours before slicing to allow it to set.
  7. Before serving, sprinkle with flaky sea salt for the perfect finishing touch.

Allow the pie to cool completely for best texture. Use fine-grind cornmeal for a silky filling.

Dessert
American
dessert, easy pie, Gatherings, homemade, Salted Honey Pie, sweet and salty

Filed Under: Dessert

Irresistible Cheesy Cajun Garlic Chicken Rotini Skillet

October 22, 2025 by grace bellamy Leave a Comment

Stepping into my kitchen the other day, I came across a half-empty bag of rotini pasta and a longing for something comforting and delicious. That’s when I decided to whip up my Cheesy Cajun Garlic Chicken Rotini Skillet, a dish that brilliantly combines creamy goodness with just the right amount of spice. What I love most about this recipe is how quickly it comes together—perfect for busy weeknights—while still being a crowd-pleaser that transforms simple ingredients into a feast. The rich, cheesy sauce envelops tender chicken and perfectly cooked pasta, making it a satisfying choice for both family dinners and casual gatherings. So are you ready to dive into a bowl of comfort? Let’s bring a taste of Louisiana right to your dinner table!

Cheesy Cajun Garlic Chicken Rotini Skillet

Why is this recipe a must-try?

Simplicity at Its Best: With just 30 minutes from prep to plate, this dish is perfect for busy weeknights.
Rich, Cheesy Flavor: The combination of mozzarella, Parmesan, and cheddar creates a creamy sauce that envelops every bite.
Spice It Up: The Cajun seasoning adds a delightful kick, making it a fun twist on traditional comfort food.
Versatile Dish: Perfect for family dinners or casual gatherings—a dish that’s sure to please everyone! For another crowd favorite, check out my Garlic Butter Chicken too.
One-Skillet Wonder: Easy cleanup means more time to enjoy your meal without hassle!

Cheesy Cajun Garlic Chicken Rotini Ingredients

• Get ready to create a comforting and delicious Cheesy Cajun Garlic Chicken Rotini Skillet that will delight your taste buds!

For the Chicken

  • 2 boneless, skinless chicken breasts – cut into bite-sized chunks for quick cooking and maximum flavor absorption.
  • 2 tablespoons Cajun seasoning – adds a spicy kick that beautifully complements the creamy sauce.

For the Pasta

  • 12 oz rotini pasta – its ridges hold onto the sauce perfectly, ensuring every bite is packed with flavor.

For the Sauce

  • 2 tablespoons olive oil – provides the perfect base for sautéing the chicken and infused with rich flavor.
  • 1 teaspoon garlic powder – adds depth and enhances the garlic flavor throughout the dish.
  • ½ teaspoon onion powder – brings a subtle sweetness that balances the spices.
  • 4 cloves garlic, minced – the star of the show, delivering a fragrant aroma and robust flavor to the sauce.
  • 1 tablespoon butter – contributes to the creaminess and richness of the sauce.
  • 1 cup heavy cream – creates a luscious, velvety texture that coats the chicken and pasta beautifully.
  • ½ cup chicken broth – adds depth and enhances the overall flavor of the dish.

For the Cheesy Goodness

  • 1 cup shredded mozzarella cheese – melts beautifully, adding gooeyness to every scoop.
  • ½ cup grated Parmesan cheese – lends a sharp, nutty flavor that elevates the entire dish.
  • ½ cup shredded cheddar cheese – introduces a rich, savory note that complements the Cajun seasoning.

For Garnish

  • Fresh parsley, chopped – brightens up the dish and adds a pop of fresh flavor for the perfect finishing touch.

Step‑by‑Step Instructions for Cheesy Cajun Garlic Chicken Rotini Skillet

Step 1: Cook the Rotini
Start by bringing a large pot of salted water to a rolling boil over high heat. Once boiling, add the rotini pasta and cook according to the package instructions, usually around 8-10 minutes, until al dente. Drain the pasta and set it aside, allowing it to rest while you prepare the rest of the Cheesy Cajun Garlic Chicken Rotini Skillet.

Step 2: Sauté the Chicken
In a large skillet, heat 2 tablespoons of olive oil over medium-high heat. Place the bite-sized chicken chunks in a mixing bowl, season them with the Cajun seasoning, garlic powder, onion powder, salt, and pepper. Once the oil is shimmering, add the seasoned chicken to the skillet and cook for about 6-7 minutes, stirring occasionally until the chicken is browned and fully cooked through. Remove from the skillet and set aside.

Step 3: Prepare the Garlic Sauce
In the same skillet, reduce the heat to medium and add 1 tablespoon of butter. Once melted, add the 4 cloves of minced garlic and sauté for about 1 minute or until fragrant, stirring constantly. Pour in ½ cup of chicken broth and 1 cup of heavy cream, bringing the mixture to a gentle simmer. Allow it to bubble lightly as you stir for 1-2 minutes to combine the flavors.

Step 4: Melt the Cheeses
Gradually add in 1 cup of shredded mozzarella cheese, ½ cup of grated Parmesan cheese, and ½ cup of shredded cheddar cheese into the simmering garlic sauce. Stir continuously until the cheeses melt completely and the sauce becomes smooth and creamy. Pay attention to avoid scorching; you want a rich, velvety texture to coat your chicken and pasta in the Cheesy Cajun Garlic Chicken Rotini Skillet.

Step 5: Combine Everything
Return the cooked rotini and browned chicken to the skillet with the cheesy sauce. Gently toss everything together until the pasta and chicken are evenly coated with the luscious sauce. Let the mixture simmer for an additional 2-3 minutes, allowing all the flavors to meld beautifully. Keep an eye on it to prevent sticking.

Step 6: Garnish and Serve
Once everything is well mixed and heated through, remove the skillet from the heat. Garnish your Cheesy Cajun Garlic Chicken Rotini Skillet with fresh chopped parsley and, if desired, an extra sprinkle of cheese for added flavor. Serve hot and watch as everyone enjoys this delightful, creamy dish!

Cheesy Cajun Garlic Chicken Rotini Skillet

Expert Tips for Cheesy Cajun Garlic Chicken Rotini Skillet

  • Perfect Chicken Cooking: Ensure chicken is cut into uniform pieces: This promotes even cooking and prevents any chunks from being undercooked.
  • Creamy Sauce Secrets: Stir continuously when adding cheese: This prevents the cheese from clumping and ensures a smooth, creamy sauce for your dish.
  • Don’t Overcook Pasta: Aim for al dente: Overcooked rotini will turn mushy in the skillet, so keep them firm for the best texture.
  • Flavor Adjustments: Taste as you go: If it needs more spice, feel free to add a pinch of Cajun seasoning for that extra kick in your Cheesy Cajun Garlic Chicken Rotini Skillet.
  • Garnish Wisely: Use fresh herbs: A sprinkle of fresh parsley not only brightens the dish but adds a burst of flavor.

Cheesy Cajun Garlic Chicken Rotini Substitutions

Feel free to explore these delicious variations and make this recipe uniquely yours!

  • Gluten-Free: Substitute rotini with gluten-free pasta or zoodles for a lighter option.
  • Protein Swap: Use shrimp or turkey instead of chicken for a different flavor profile. Both proteins complement the Cajun spices wonderfully.
  • Dairy-Free: Swap heavy cream with coconut milk and use dairy-free cheese alternatives for a creamy sauce without the dairy. This twist adds a subtle tropical flavor.
  • Vegetarian: Replace chicken with roasted chickpeas or sautéed mushrooms for an equally satisfying dish. A hearty choice that doesn’t skimp on flavor!
  • Extra Veggies: Stir in spinach or bell peppers before adding the cheese to boost the nutrition and color of your dish. The added veggies create a vibrant, healthful feast!
  • Spicy Kick: Add diced jalapeños or a splash of hot sauce for an extra layer of heat. This can truly elevate the complexity of flavors.
  • Cheese Variation: Experiment with gouda or pepper jack cheese for a smokier or spicier flavor profile. Each cheese adds its unique character, taking the dish up a notch.
  • Herb Infusion: Try adding fresh basil or thyme to the sauce for a delightful herbal twist that enhances the overall taste experience. The freshness brings a garden-like essence to your plate.

Each variation offers a chance to explore and savor this delightful dish in a whole new light! For more flavorsome options, check out my scrumptious Blackened Chicken Sweet or indulge in my creamy Crock Pot Chicken.

What to Serve with Cajun Garlic Chicken Rotini Skillet

Prepare to elevate your dinner with the ideal accompaniments to this creamy, spicy dish that will delight your taste buds!

  • Garlic Bread: Perfectly toasted, buttery garlic bread adds a delicious crunch that complements the creamy texture of the pasta. It’s an irresistible combination for sopping up any leftover sauce.

  • Simple Caesar Salad: Crisp romaine, Parmesan, and a zesty dressing provide a refreshing contrast to the rich flavors. The salad’s crunchiness balances the creaminess of the rotini beautifully.

  • Steamed Broccoli: Bright green broccolini dressed with a squeeze of lemon cuts through the richness of the cheese, offering a pop of color and nutrition on your plate. Its tender texture pairs well with the skillet dish.

  • Spicy Corn on the Cob: Grilled corn brushed with Cajun butter can enhance the overall spice theme of the meal. The sweetness of the corn complements the savory richness of the dish, creating an exciting flavor profile.

  • Iced Tea: A tall glass of freshly brewed iced tea, sweetened lightly, refreshes the palate and balances the heat from the Cajun seasoning. It keeps the meal light and energizing.

  • Chocolate Lava Cake: For dessert, end on a sweet note. The warm, gooey chocolate center contrasts nicely with the savory skillet, making for a decadent finish to your Mexican-inspired feast.

Each pairing offers a unique touch, ensuring a delightful dining experience with the Cheesy Cajun Garlic Chicken Rotini Skillet!

Make Ahead Options

Preparing your Cheesy Cajun Garlic Chicken Rotini Skillet in advance is a game-changer for busy weeknights! You can chop the chicken and season it up to 24 hours before cooking, allowing the flavors to really sink in. Additionally, cook the rotini pasta ahead of time, then toss it with a little olive oil to prevent sticking. When you’re ready to enjoy, simply follow steps 3-6: sauté the garlic, add the broth and cream, melt in the cheeses, and combine everything. This way, you’ll serve a fresh, delicious meal with minimal effort, just as tasty as if you made it all in one go!

How to Store and Freeze Cheesy Cajun Garlic Chicken Rotini Skillet

Fridge: Store leftovers in an airtight container for up to 3 days. To maintain the creamy texture, it’s best to refrigerate without adding extra cheese.

Freezer: Freeze for up to 2 months in a freezer-safe container. For best results, separate the chicken from the pasta and sauce to avoid mushiness during reheating.

Reheating: Reheat in the microwave or on the stovetop over low heat. Add a splash of chicken broth or cream to revive the creamy sauce in your Cheesy Cajun Garlic Chicken Rotini Skillet.

Room Temperature: Avoid keeping at room temperature for more than 2 hours to ensure food safety and maintain flavor integrity.

Cheesy Cajun Garlic Chicken Rotini Skillet

Cajun Garlic Chicken Rotini Skillet Recipe FAQs

What type of chicken is best for this recipe?
Absolutely, I recommend using boneless, skinless chicken breasts for this dish. They cook quickly and absorb the Cajun seasoning flavors well. If you prefer, chicken thighs can also work beautifully, providing a slightly richer taste due to their higher fat content.

How can I tell if my rotini pasta is cooked perfectly?
Very! You want your rotini to be al dente, meaning firm to the bite. To achieve this, it’s best to check a minute or two before the package time, typically around 8-10 minutes. Drain the pasta, and it will continue to cook slightly in the sauce.

How should I store leftovers of Cheesy Cajun Garlic Chicken Rotini Skillet?
For sure! Store any leftovers in an airtight container in the fridge for up to 3 days. To keep that creamy texture intact, avoid adding extra cheese to the storage container.

Can I freeze the Cheesy Cajun Garlic Chicken Rotini Skillet?
Yes! Freeze in a freezer-safe container for up to 2 months. For optimal results, I suggest separating the chicken from the pasta and sauce before freezing to prevent any mushiness when reheating.

What’s the best way to reheat this dish?
I often reheat my Cheesy Cajun Garlic Chicken Rotini Skillet in the microwave or on the stovetop over low heat. To reclaim that creamy goodness, add a splash of chicken broth or cream while reheating; it works wonders for reviving that rich texture!

Are there any dietary considerations I should keep in mind?
Definitely! If you’re cooking for someone with lactose intolerance, consider using a lactose-free cream and cheese substitute. And if you’re serving it to pets, be cautious with the seasoning levels; the Cajun spices can be too intense for them. Always consult with your vet for safety!

Irresistible Cheesy Cajun Garlic Chicken Rotini Skillet

Enjoy the creamy, spicy delight of Cheesy Cajun Garlic Chicken Rotini Skillet, perfect for busy weeknights.

  • Large Pot
  • large skillet
  • Mixing Bowl

For the Chicken

  • 2 pieces boneless, skinless chicken breasts (cut into bite-sized chunks)
  • 2 tablespoons Cajun seasoning (adds a spicy kick)

For the Pasta

  • 12 oz rotini pasta (holds onto the sauce perfectly)

For the Sauce

  • 2 tablespoons olive oil (for sautéing the chicken)
  • 1 teaspoon garlic powder (enhances garlic flavor)
  • ½ teaspoon onion powder (adds subtle sweetness)
  • 4 cloves garlic (minced for flavor)
  • 1 tablespoon butter (for creaminess)
  • 1 cup heavy cream (creates a luscious sauce)
  • ½ cup chicken broth (adds depth of flavor)

For the Cheesy Goodness

  • 1 cup shredded mozzarella cheese (melts beautifully)
  • ½ cup grated Parmesan cheese (elevates the dish)
  • ½ cup shredded cheddar cheese (adds a rich, savory note)

For Garnish

  • fresh parsley (chopped, for garnish)

Cooking Directions

  1. Bring a large pot of salted water to a boil, add the rotini pasta and cook for 8-10 minutes until al dente. Drain and set aside.
  2. In a large skillet, heat olive oil over medium-high heat. Season chicken with Cajun seasoning, garlic powder, onion powder, salt, and pepper. Cook chicken for 6-7 minutes until browned and cooked through. Remove and set aside.
  3. In the same skillet, add butter and minced garlic, sauté for 1 minute until fragrant. Stir in chicken broth and heavy cream, simmer gently for 1-2 minutes.
  4. Gradually add mozzarella, Parmesan, and cheddar cheese, stirring continuously until melted and smooth.
  5. Return cooked rotini and chicken to the skillet, toss to coat with the cheese sauce, and simmer for an additional 2-3 minutes.
  6. Garnish with fresh parsley and serve hot.

Store leftovers in an airtight container for up to 3 days. Reheat with a splash of chicken broth to revive the creamy sauce.

Main Dishes
Cajun
Cheesy Cajun Garlic Chicken Rotini Skillet, comfort food, Creamy Sauce, easy dinner, one-skillet meal, quick recipe

Filed Under: Main Dishes

Delicious Chicken Bowl with Black Beans, Corn, & Creamy Sauce

October 22, 2025 by grace bellamy Leave a Comment

A sizzle echoed through my kitchen as juicy chicken marinated in vibrant spices filled the air, transforming an ordinary evening into something special. This Chipotle Chicken Bowl with Black Beans, Corn, & Creamy Sauce has become my go-to comfort meal, perfect for any weeknight craving. With just 45 minutes from prep to plate, it’s an inviting blend of flavors that’s not only quick to whip up but also a surefire crowd-pleaser. The smoky notes of the chipotle powder paired with creamy sauce create a delightful experience that keeps you wanting more. Plus, it’s packed with protein and fiber, making it a satisfying option for nutritious eating. Ready to turn your dinner into a fiesta?

Chicken Bowl with Black Beans, Corn, & Creamy Sauce

Why is this Chicken Bowl a must-try?

Flavor explosion: This dish is a vibrant medley of spices that dance on your palate, with smoky chipotle and zesty lime bringing it all to life.

Easy preparation: Whip up this hearty meal in just 45 minutes—perfect for busy weeknights when you crave something special without the fuss.

Healthy indulgence: Packed with protein from chicken and fiber from black beans and corn, this bowl ensures you feel full and satisfied!

Versatile toppings: Customize it with your favorite ingredients or leftovers, making it an adaptable choice for everyone.

Crowd-pleaser: Impress family and friends alike with this colorful, delicious bowl that’s sure to please even picky eaters!

Chicken Bowl with Black Beans Ingredients

This delicious Chicken Bowl with Black Beans, Corn, & Creamy Sauce is a fiesta for your taste buds!

For the Chicken
• Boneless skinless chicken breasts or thighs – Opt for thighs for extra juiciness; both are perfect for grilling.
• Olive oil – Helps the spices adhere and adds richness to the dish.
• Lime juice – Brightens the flavor and tenderizes the chicken.
• Garlic – Fresh cloves add aromatic depth to the marinade.
• Chipotle chili powder – Brings a smoky heat; feel free to adjust to your spice preference.
• Smoked paprika – Enhances the smoky flavor profile even further.
• Cumin – Adds warmth and earthiness to balance out the spices.
• Salt – Essential for flavor enhancement; don’t skip it!
• Black pepper – Freshly cracked offers more intense flavor.

For the Bowl
• Cooked black beans – A hearty protein source that pairs beautifully with the chicken.
• Corn – Choose grilled, roasted, or canned; each adds a different flavor and texture.
• Avocado – Sliced for creaminess that cools off the spicy elements.
• Fresh cilantro – Adds a pop of brightness and freshness to the bowl.

For the Creamy Sauce
• Sour cream or Greek yogurt – Provides a luscious base for the sauce; Greek yogurt is a healthier alternative.
• Chipotle peppers in adobo – Minced for an extra kick and depth in the sauce.
• Garlic powder – Convenient for a touch of flavor without the fuss of fresh garlic.
• Honey – A hint of sweetness balances the spice perfectly.
• Lime juice (for sauce) – Brightens the creamy sauce and ties all the flavors together.

Now you’re all set to create a vibrant Chicken Bowl with Black Beans, Corn, & Creamy Sauce that will delight your loved ones!

Step‑by‑Step Instructions for Chicken Bowl with Black Beans, Corn, & Creamy Sauce

Step 1: Marinate the Chicken
In a mixing bowl, combine 2 tablespoons of olive oil, 2 tablespoons of lime juice, minced garlic, chipotle chili powder, smoked paprika, cumin, salt, and black pepper. Add the chicken breasts or thighs to the marinade, ensuring they are well-coated. Cover the bowl and let the chicken marinate for at least 30 minutes in the refrigerator for optimal flavor—longer if possible!

Step 2: Cook the Chicken
Heat a grill or skillet over medium-high heat. Once hot, add the marinated chicken and cook for 6–7 minutes on each side until the chicken is fully cooked and has a beautiful char. You can check for doneness by ensuring the internal temperature reaches 165°F (75°C). Once done, transfer the chicken to a plate and let it rest for a few minutes before slicing it into strips.

Step 3: Warm the Black Beans
While the chicken is resting, warm 1 cup of cooked black beans in a small saucepan over medium heat. Stir occasionally and season them with a pinch of cumin and salt for extra flavor. Allow the beans to heat through for about 5 minutes, ensuring they are hot but not boiling, then set aside for assembly.

Step 4: Prepare the Corn
If you are using fresh corn, grill or roast it until lightly charred, which should take about 3–5 minutes. For canned corn, simply drain and rinse before warming it in a pan or microwave for 2 minutes. Either option will be a delicious addition to your Chicken Bowl with Black Beans, Corn, & Creamy Sauce.

Step 5: Make the Creamy Sauce
In a bowl, whisk together ½ cup of sour cream or Greek yogurt with 2 tablespoons of lime juice, minced chipotle peppers in adobo, garlic powder, and a teaspoon of honey until smooth. Adjust seasoning to taste. This sauce adds a rich, zesty kick, enhancing the overall flavor of your chicken bowl.

Step 6: Assemble the Bowl
In a large serving bowl, begin layering your ingredients: start with a generous portion of black beans, followed by corn, and top with sliced avocado and the sliced grilled chicken. Drizzle the creamy chipotle sauce over the top and finish with a sprinkle of fresh cilantro. Optionally, serve with lime wedges on the side for an extra burst of flavor.

Chicken Bowl with Black Beans, Corn, & Creamy Sauce

Chicken Bowl with Black Beans Variations

Feel free to put your spin on this flavorful Chicken Bowl, adding your favorite elements and surprises!

  • Dairy-Free: Substitute Greek yogurt with coconut yogurt for a delicious, creamy sauce without the dairy.
    Try a plant-based alternative; the subtle coconut flavor pairs beautifully with the spicy chicken.

  • Grain Base: Swap black beans and corn for quinoa or farro to build a hearty grain bowl.
    These grains add a delightful chewy texture, making every bite satisfying and nutritious!

  • Add More Veggies: Toss in sautéed bell peppers, zucchini, or spinach for extra nutrition and color.
    This boosts not only the health factor but also provides that satisfying crunch you crave!

  • Pico de Gallo Boost: Top with fresh pico de gallo for a fresh kick of flavor and texture.
    The bright, tangy notes from the tomatoes and onions take this bowl to the next level!

  • Spicy Kick: Add diced jalapeños to either the creamy sauce or as a topping to crank up the heat.
    This fiery addition will awaken your taste buds and turn up the heat on your dinner!

  • Protein Variations: Try grilled shrimp or beef strips in place of chicken for a lovely surf-and-turf twist.
    These proteins will soak up the marinade just as deliciously and offer their unique flavors.

  • Avocado Alternative: Use mango or peach slices instead of avocado for a sweet, juicy contrast to the savory bowl.
    Their natural sweetness creates a beautiful balance with the zingy chipotle flavors!

  • Smoky Sauce: Mix in a tablespoon of smoked paprika to the creamy sauce for an extra smoky taste.
    Layering flavors takes this dish to new heights while remaining simple and delightful!

Whatever variation you choose, you’ll create a personalized Chicken Bowl that’s sure to impress!

What to Serve with Chipotle Chicken Bowl with Black Beans, Corn, & Creamy Sauce

Savoring this delightful bowl makes it easy to envision a complete meal full of zing and freshness.

  • Cilantro Lime Rice: This fragrant, zesty rice is the perfect base, balancing the bold spices of the chicken bowl beautifully. Its bright flavor complements the dish while absorbing any extra sauce.

  • Grilled Vegetables: A colorful mix of seasonal vegetables adds a smoky depth and crunch, enhancing the experience with every bite. Bell peppers, zucchini, and red onions get caramelized and tender—a perfect match!

  • Fresh Pico de Gallo: This vibrant and refreshing salsa provides a burst of flavor with juicy tomatoes, onions, and a sprinkle of lime juice. The freshness brightens every spoonful of the bowl, elevating the taste even further.

  • Tortilla Chips: Crunchy, salty tortilla chips offer a satisfying texture contrast to the creamy elements of the bowl. Dip them into the extra sauce, and you’ll have an addictive snack!

  • Margaritas or Iced Tea: A chilled margarita with a hint of lime or a refreshing iced tea makes the meal feel like a fiesta. It’s the perfect way to wash down all those delicious flavors.

  • Chocolate Avocado Mousse: For dessert, this rich, creamy mousse is a delightful surprise! It’s a fantastic way to end the meal on a sweet yet healthy note.

Make Ahead Options

These Chicken Bowls with Black Beans, Corn, & Creamy Sauce are perfect for meal prep enthusiasts looking to save time during busy weeknights! You can marinate the chicken up to 24 hours in advance; simply combine all marinade ingredients and place the chicken in the mixture, then refrigerate. The black beans can be cooked and stored in the refrigerator for up to 3 days, ensuring they maintain their delicious flavor. For the creamy sauce, prepare it a day ahead and store it in an airtight container to keep it fresh. When ready to serve, simply cook the marinated chicken, warm the beans, and assemble your bowl with the corn, avocado, and sauce for a quick, flavorful meal that’s just as delicious as when freshly made!

Tips for the Best Chicken Bowl

Marination Time: Allow the chicken to marinate for at least 30 minutes; overnight is even better for deeper flavor infusion.

Check for Doneness: Use a meat thermometer to ensure the chicken reaches an internal temperature of 165°F (75°C) to avoid undercooking.

Corn Cooking Options: If using fresh corn, grilling brings an attractive char; however, canned corn is a quick alternative for time-saving.

Creamy Sauce Adjustments: Taste the sauce before serving; feel free to add more chipotle or honey to adjust heat and sweetness to your preference.

Layering Technique: Layer ingredients in the bowl starting with black beans, then corn, chicken, and avocado for a visually pleasing presentation.

Healthy Swap: Consider substituting sour cream for Greek yogurt for a lighter, protein-packed version of the creamy sauce.

How to Store and Freeze Chicken Bowl with Black Beans, Corn, & Creamy Sauce

Fridge: Store any leftovers in an airtight container for up to 3 days. Reheat portion sizes in the microwave or on the stovetop until warmed through.

Freezer: For longer storage, freeze the chicken bowl components (excluding avocado and creamy sauce) in airtight containers for up to 3 months. Thaw in the refrigerator before reheating.

Reheating: When ready to enjoy, reheat the chicken and beans in a skillet or microwave, adding a splash of water to prevent dryness. Pair with fresh avocado and sauce for best results.

Ingredient Separation: Keep the creamy sauce and avocado separate when storing to maintain freshness and prevent browning. Add them just before serving for optimal taste and texture.

Chicken Bowl with Black Beans, Corn, & Creamy Sauce

Chicken Bowl with Black Beans, Corn, & Creamy Sauce Recipe FAQs

What type of chicken is best for this recipe?
Absolutely! I recommend using boneless skinless chicken breasts for a classic approach or thighs for a juicier experience. Both cook beautifully and absorb the flavorful marinade well.

How should I store leftovers?
Store any leftovers in an airtight container in the refrigerator for up to 3 days. When reheating, consider separating the components like beans and chicken, then warming them up on the stovetop or in the microwave until heated through—typically about 2–3 minutes should do the trick.

Can I freeze the Chicken Bowl with Black Beans, Corn, & Creamy Sauce?
Yes, you can! For freezing, pack the chicken, black beans, and corn into airtight containers for up to 3 months. Here’s how:

  1. Cool the cooked chicken and beans completely.
  2. Portion into containers, leaving some space for expansion.
  3. Label with date and contents, then pop them in the freezer.
    When you’re ready to enjoy, thaw overnight in the refrigerator before reheating.

What if I have dietary restrictions or allergies?
Very! If you’re accommodating allergies, consider using a non-dairy yogurt for the creamy sauce or omit it altogether. This Chicken Bowl is versatile—feel free to substitute the chicken with grilled tofu or tempeh for a vegetarian option!

How do I know if my avocado is ripe?
When selecting an avocado, look for ones that yield slightly to gentle pressure. If it’s too soft or has dark spots all over, it might be overripe. If it’s too firm, allow it to ripen at room temperature for a day or two before using.

What’s the best way to add spice to the creamy sauce?
If you like heat, you can increase the amount of chipotle peppers in adobo for a spicier kick. Alternatively, a dash of hot sauce can also elevate the flavor to your liking!

Delicious Chicken Bowl with Black Beans, Corn, & Creamy Sauce

Enjoy a flavorful Chicken Bowl with Black Beans, Corn, & Creamy Sauce, perfect for weeknight cravings.

  • Mixing Bowl
  • Grill or skillet
  • small saucepan

For the Chicken

  • 2 breasts or thighs boneless skinless chicken (Opt for thighs for extra juiciness.)
  • 2 tablespoons olive oil
  • 2 tablespoons lime juice (Brightens the flavor.)
  • 2 cloves garlic (Minced.)
  • 1 tablespoon chipotle chili powder (Adjust to spice preference.)
  • 1 tablespoon smoked paprika
  • 1 teaspoon cumin
  • 1 teaspoon salt
  • 1 teaspoon black pepper (Freshly cracked.)

For the Bowl

  • 1 cup cooked black beans (Hearty protein source.)
  • 1 cup corn (Grilled, roasted, or canned.)
  • 1 medium avocado (Sliced.)
  • ½ cup fresh cilantro (Chopped.)

For the Creamy Sauce

  • ½ cup sour cream or Greek yogurt (Greek yogurt is healthier.)
  • 2 tablespoons chipotle peppers in adobo (Minced.)
  • 1 teaspoon garlic powder
  • 1 tablespoon honey (Adjust for sweetness.)
  • 2 tablespoons lime juice (For the sauce.)

Marinating and Cooking

  1. In a mixing bowl, combine olive oil, lime juice, minced garlic, chipotle chili powder, smoked paprika, cumin, salt, and black pepper. Add chicken and marinate for at least 30 minutes.
  2. Heat a grill or skillet over medium-high heat. Cook marinated chicken for 6-7 minutes per side until fully cooked. Let it rest before slicing.
  3. Warm black beans in a small saucepan over medium heat, adding cumin and salt. Heat for about 5 minutes.
  4. Grill or roast corn until lightly charred or drain and rinse if using canned corn. Warm up for 2 minutes if canned.

Make Sauce and Assemble

  1. Whisk together sour cream or Greek yogurt, lime juice, chipotle peppers, garlic powder, and honey until smooth. Adjust seasoning to taste.
  2. In a serving bowl, layer black beans, corn, sliced avocado, and chicken. Drizzle with creamy sauce and top with cilantro.

Allow chicken to marinate overnight for deeper flavor. Store leftovers in an airtight container for up to 3 days.

Main Dishes
Mexican
Black Beans, Chicken Bowl, Corn, Creamy Sauce, healthy meal, quick dinner

Filed Under: Main Dishes

Bakery-Style Pumpkin Muffins That Melt in Your Mouth

October 22, 2025 by grace bellamy Leave a Comment

As the crisp autumn air whispers through the trees, there’s nothing quite like the warm embrace of freshly baked goods first thing in the morning. These Bakery-Style Pumpkin Muffins are my go-to for cozy mornings and cheerful brunches, combining the festive flavors of pumpkin and spice with a satisfying crumb. With a simple 35-minute prep and that inviting aroma wafting through your home, you’ll not only fill bellies but create moments that linger. Each muffin is bursting with the essence of fall and topped with a delightful crumble—making them perfect for sharing or savoring all by yourself. Curious to delve into this heavenly recipe and make your kitchen smell like a bakery? Let’s get started!

Bakery-Style Pumpkin Muffins

Why Will You Love These Muffins?

Irresistible flavor: Each bite of these Bakery-Style Pumpkin Muffins delivers the warm, spiced goodness of fall that’s simply unforgettable. Quick and easy: With just 35 minutes from start to finish, you can enjoy homemade perfection, making it an ideal choice for busy mornings. Versatile treat: Perfect for brunch, snacks, or even dessert, these muffins cater to any occasion. Crumble topping: That sweet, buttery crumble adds an extra layer of texture and indulgence, elevating your baking game. For more inspiration, check out our guide on easy baking tips to take your skills to the next level!

Bakery-Style Pumpkin Muffin Ingredients

For the Muffin Batter
• All-purpose flour – This forms the base of your muffins, giving them structure and a delightful crumb.
• Baking soda – A crucial leavening agent that helps your muffins rise beautifully.
• Baking powder – Works in conjunction with baking soda to ensure fluffy muffins.
• Ground cinnamon – Adds a warm, cozy spice that evokes the essence of fall.
• Ground ginger – Infuses a zesty kick, perfectly complementing the pumpkin flavor.
• Ground nutmeg – Just a pinch heightens the sweet and savory profile of the muffins.
• Ground cloves – Brings an earthy tone that harmonizes with the other spices.
• Salt – A crucial ingredient that enhances all the flavors in your muffin.
• Pumpkin puree – The star of the show, delivering moisture and that beloved pumpkin flavor in your Bakery-Style Pumpkin Muffins.
• Granulated sugar – Sweetens the muffins while creating a delightful texture.
• Brown sugar – Adds richness and moisture with its deep caramel notes.
• Vegetable oil – Ensures your muffins are tender and moist.
• Large eggs – Binding agents that help with structure and moisture.
• Vanilla extract – Enhances the overall sweetness and flavor profile.

For the Crumble Topping
• All-purpose flour – Provides the needed base for a crumbly texture that’s simply irresistible.
• Brown sugar – Adds depth of flavor and keeps the topping moist and chewy.
• Cold butter – The secret to achieving that perfect crumble when mixed with flour and sugar.

Whether shared among family or savored alone, these Bakery-Style Pumpkin Muffins are sure to warm your heart. Enjoy every bite!

Step‑by‑Step Instructions for Bakery-Style Pumpkin Muffins

Step 1: Preheat Your Oven
Begin by preheating your oven to 375°F (190°C) while you gather your ingredients. Line a muffin tin with paper liners to make for easy removal later. As the oven warms up, you’ll create the perfect cozy atmosphere for baking those irresistible Bakery-Style Pumpkin Muffins.

Step 2: Mix Dry Ingredients
In a large mixing bowl, whisk together 1 ¾ cups of all-purpose flour, 1 teaspoon of baking soda, ½ teaspoon of baking powder, 1 teaspoon of ground cinnamon, ½ teaspoon of ground ginger, ¼ teaspoon of ground nutmeg, ¼ teaspoon of ground cloves, and ¼ teaspoon of salt. This blend of dry ingredients awakens the delightful autumn spices that will enhance your pumpkin muffins.

Step 3: Combine Wet Ingredients
In another mixing bowl, combine 1 cup of pumpkin puree, ½ cup of granulated sugar, ½ cup of brown sugar, ⅓ cup of vegetable oil, 2 large eggs, and 1 teaspoon of vanilla extract. Mix these wet ingredients until they are well combined and smooth, creating a rich base that will bring your Bakery-Style Pumpkin Muffins to life.

Step 4: Combine Wet and Dry Mixtures
Slowly pour the wet mixture into the bowl with the dry ingredients. Gently fold the ingredients together until just combined, being careful not to overmix. You’ll know it’s perfect when the batter is slightly lumpy but cohesive, ensuring tender, moist muffins that are flavorful and light.

Step 5: Prepare the Crumble Topping
In a separate small bowl, prepare the crumble topping by mixing ¼ cup of all-purpose flour and ¼ cup of brown sugar. Add in 2 tablespoons of cold butter and use your fingers to rub the mixture until it resembles coarse crumbs. This crumble will add a delightful crunch to your Bakery-Style Pumpkin Muffins.

Step 6: Fill Muffin Cups
Carefully fill each muffin liner about ¾ full with the pumpkin muffin batter, ensuring even distribution for uniform baking. Then, sprinkle the crumble topping generously over each muffin. The combination of the moist muffin and the crispy topping creates a wonderful textural contrast that makes these muffins extra special.

Step 7: Bake the Muffins
Place the muffin tin in your preheated oven and bake for 18-20 minutes. Keep an eye on the muffins; they should rise beautifully and become golden-brown. To check for doneness, insert a toothpick in the center of one muffin—if it comes out clean or with a few moist crumbs, they’re ready to come out.

Step 8: Cool and Enjoy
Once baked, allow the muffins to cool in the tin for about 5 minutes. This resting time helps them set perfectly. After that, transfer them to a wire rack to cool completely. Breathe in that delicious aroma and slice into the warm, spiced goodness of your Bakery-Style Pumpkin Muffins!

Bakery-Style Pumpkin Muffins

What to Serve with Bakery-Style Pumpkin Muffins

Imagine a cozy afternoon, the aroma of pumpkin and spice filling the air, as you savor these delightful muffins alongside thoughtfully chosen pairings.

  • Creamy Butter: A generous pat enhances the muffins’ texture and complements the warm spices beautifully.
  • Cinnamon Sugar Dusting: Sprinkle a mixture of cinnamon and sugar on top for an extra sweet touch that dances with every bite.
  • Fresh Fruit Salad: A bright medley of seasonal fruits like pears, apples, and cranberries adds freshness and balances the rich flavors.
  • Maple Syrup Drizzle: Drizzle warm maple syrup over each muffin for a decadent touch that elevates your cozy treat.
  • Coffee or Tea: Pair these muffins with your favorite brew to elevate morning or afternoon moments. The warmth from a steaming cup mingles perfectly with their spiced flavor.
  • Whipped Cream: A dollop of homemade whipped cream adds an unexpected twist, turning the muffins into a delightful dessert.
  • Nutty Granola: A handful of crunchy granola on the side brings texture and a nutty flavor, making it a wholesome addition to breakfast.
  • Hot Chocolate: For a sweet treat experience, serve these muffins with a steaming mug of hot chocolate, wrapping you in warmth and indulgence.
  • Chocolate Chips: Toss in a few chocolate chips into the batter or as a topping for added richness and delightful gooeyness.
  • Yogurt Parfait: Stack these muffins with layers of yogurt and granola for a heartier breakfast that’s both nutritious and delicious.

How to Store and Freeze Bakery-Style Pumpkin Muffins

Room Temperature: Store your Bakery-Style Pumpkin Muffins in an airtight container at room temperature for up to 2 days to maintain freshness.

Fridge: For longer storage, refrigerate them in an airtight container for up to a week; just be aware they may dry out a little.

Freezer: To freeze, wrap each muffin tightly in plastic wrap and place them in a freezer-safe bag. They can last up to 3 months, ready for a cozy treat anytime!

Reheating: To enjoy muffins warm, simply microwave them for 15-20 seconds or place them in a preheated oven at 350°F (175°C) for 5-10 minutes.

Make Ahead Options

These Bakery-Style Pumpkin Muffins are perfect for meal prep enthusiasts and can save you precious time on busy mornings! You can prepare the muffin batter and store it in the refrigerator for up to 24 hours—just be sure to cover it tightly to prevent drying out. If you want to get even more ahead, you can assemble the muffins in the tin, cover with plastic wrap, and refrigerate for up to 3 days before baking. When you’re ready to enjoy, simply preheat your oven and bake straight from the fridge; just add a couple of extra minutes to the cooking time for best quality. With this prep strategy, you’ll have warm, homemade muffins ready to brighten your day!

Bakery-Style Pumpkin Muffins Variations

Feel free to get creative with these muffins, enhancing flavors and textures to match your taste or dietary needs!

  • Gluten-Free: Substitute all-purpose flour with a gluten-free blend for a deliciously inclusive version. Many blends work beautifully without altering the final result.
  • Dairy-Free: Use plant-based milk and coconut oil instead of traditional butter. You’ll enjoy moist muffins with a hint of coconut flavor.
  • Nutty Addition: Stir in ½ cup of chopped walnuts or pecans for a delightful crunch and added richness. The nuts harmonize perfectly with the spices.
  • Spicy Kick: Incorporate 1 teaspoon of cayenne pepper for a warm, spicy twist that contrasts beautifully with the sweetness. It’s a fun, unexpected flavor burst!
  • Chocolate Heaven: Add ½ cup of chocolate chips to the batter for a sweet treat that transforms these muffins into dessert. Chocolate and pumpkin are simply meant to be!
  • Fruit Fusion: Toss in half a cup of blueberries or cranberries for a fruity surprise. Their tangy notes complement the pumpkin’s earthiness beautifully.
  • Maple Drizzle: Drizzle warm muffins with maple syrup or a maple glaze for an extra touch of sweetness and flavor. It feels like autumn in every bite!
  • Cinnamon Sugar Topping: Before baking, sprinkle a mix of cinnamon and granulated sugar atop the crumble for a sweet, crunchy finish that elevates your muffins.

Let your imagination run wild with these variations, and don’t hesitate to explore other flavors! For more ideas on how to customize your baking, you might enjoy our guide on easy baking tips. Whether you stick to the classic or go adventurous, each bite is sure to warm your heart!

Expert Tips for Bakery-Style Pumpkin Muffins

  • Measure Accurately: Use a kitchen scale or proper measuring cups to ensure your flour and sugars are measured accurately, preventing dense muffins.
  • Avoid Overmixing: When combining wet and dry ingredients, mix until just combined. Overmixing can lead to tough muffins instead of the light texture you desire.
  • Use Fresh Spices: Fresh ground spices amplify flavor; ensure your cinnamon, ginger, nutmeg, and cloves are recent for the best flavor in your Bakery-Style Pumpkin Muffins.
  • Check for Doneness: Rely on a toothpick for testing doneness; a few moist crumbs are ideal. If it’s wet, bake a minute or two longer to avoid undercooked centers.
  • Customize Toppings: Feel free to add nuts or chocolate chips to the crumble topping for a delicious twist on flavor and texture, making your muffins uniquely yours!

Bakery-Style Pumpkin Muffins

Bakery-Style Pumpkin Muffins Recipe FAQs

How do I select the best pumpkin puree?
Absolutely! When choosing pumpkin puree, look for those that are deep orange in color and have a thick, smooth texture. Canned pumpkin is often the best choice for consistency, but if you prefer fresh, make sure to choose small sugar pumpkins, as they tend to have the sweetest, richest flavor.

How should I store leftover muffins?
Very! To store your Bakery-Style Pumpkin Muffins, place them in an airtight container at room temperature for up to 2 days. For longer storage, pop them in the fridge where they’ll last for up to a week. Just keep in mind that the fridge can dry them out a bit.

Can I freeze Bakery-Style Pumpkin Muffins?
Absolutely! To freeze your muffins, cool them completely and then wrap each muffin individually in plastic wrap. Place the wrapped muffins in a freezer-safe bag and enjoy them for up to 3 months. When you’re ready to savor one, just thaw it at room temperature or heat it in the microwave for a quick treat.

What if my muffins sink in the center?
Oh no! If your Bakery-Style Pumpkin Muffins sink, it could be due to overmixing the batter or too much moisture. Make sure to fold the ingredients gently and check your ingredient measurements. If they still sink, try baking a little longer until they’re puffed and set.

Are these muffins safe for people with nut allergies?
Yes! This recipe for Bakery-Style Pumpkin Muffins does not include any nuts, so they are safe for those with nut allergies. However, always ensure the environment and ingredients you use are free of cross-contamination, especially if you’re serving guests with allergies.

How can I make these muffins healthier?
Definitely! To make your Bakery-Style Pumpkin Muffins healthier, consider substituting half of the all-purpose flour with whole wheat flour for added fiber. You might also reduce sugar slightly or use alternatives like applesauce or mashed bananas for natural sweetness. Additionally, adding in some oats can enhance their nutritional value and heartiness!

Bakery-Style Pumpkin Muffins That Melt in Your Mouth

These Bakery-Style Pumpkin Muffins are a cozy treat that combines pumpkin and spice for a delightful breakfast or brunch option.

  • Muffin tin
  • Mixing bowls
  • Whisk
  • Measuring Cups
  • Measuring Spoons
  • wire rack

For the Muffin Batter

  • 1 ¾ cups all-purpose flour (This forms the base of your muffins, giving them structure and a delightful crumb.)
  • 1 teaspoon baking soda (A crucial leavening agent that helps your muffins rise beautifully.)
  • ½ teaspoon baking powder (Works in conjunction with baking soda to ensure fluffy muffins.)
  • 1 teaspoon ground cinnamon (Adds a warm, cozy spice that evokes the essence of fall.)
  • ½ teaspoon ground ginger (Infuses a zesty kick, perfectly complementing the pumpkin flavor.)
  • ¼ teaspoon ground nutmeg (Just a pinch heightens the sweet and savory profile of the muffins.)
  • ¼ teaspoon ground cloves (Brings an earthy tone that harmonizes with the other spices.)
  • ¼ teaspoon salt (A crucial ingredient that enhances all the flavors in your muffin.)
  • 1 cup pumpkin puree (The star of the show, delivering moisture and that beloved pumpkin flavor in your Bakery-Style Pumpkin Muffins.)
  • ½ cup granulated sugar (Sweetens the muffins while creating a delightful texture.)
  • ½ cup brown sugar (Adds richness and moisture with its deep caramel notes.)
  • ⅓ cup vegetable oil (Ensures your muffins are tender and moist.)
  • 2 large eggs (Binding agents that help with structure and moisture.)
  • 1 teaspoon vanilla extract (Enhances the overall sweetness and flavor profile.)

For the Crumble Topping

  • ¼ cup all-purpose flour (Provides the needed base for a crumbly texture that’s simply irresistible.)
  • ¼ cup brown sugar (Adds depth of flavor and keeps the topping moist and chewy.)
  • 2 tablespoons cold butter (The secret to achieving that perfect crumble when mixed with flour and sugar.)

Step-by-Step Instructions for Bakery-Style Pumpkin Muffins

  1. Preheat your oven to 375°F (190°C) while you gather your ingredients. Line a muffin tin with paper liners to make for easy removal later.
  2. In a large mixing bowl, whisk together the dry ingredients: flour, baking soda, baking powder, cinnamon, ginger, nutmeg, cloves, and salt.
  3. In another bowl, mix together the wet ingredients: pumpkin puree, granulated sugar, brown sugar, vegetable oil, eggs, and vanilla extract until smooth.
  4. Pour the wet mixture into the dry ingredients and gently fold together until just combined, being careful not to overmix.
  5. In a separate bowl, mix the crumble topping ingredients together: flour, brown sugar, and cold butter until resembling coarse crumbs.
  6. Fill each muffin liner about ¾ full with batter and sprinkle the crumble topping on each.
  7. Bake in the preheated oven for 18-20 minutes until muffins are golden-brown, checking doneness with a toothpick.
  8. Allow muffins to cool in the tin for about 5 minutes before transferring them to a wire rack to cool completely.

For best results, measure ingredients accurately and avoid overmixing. Feel free to customize your topping with nuts or chocolate chips!

Breakfast
American
Bakery-Style Pumpkin Muffins, brunch, cozy treats, fall baking, muffins, pumpkin

Filed Under: Breakfast

Elevate Your Feast with Garlic Thanksgiving Turkey Magic

October 22, 2025 by grace bellamy Leave a Comment

As a whirlwind of aromas fills your kitchen, it’s hard not to feel a surge of warmth and nostalgia. This is the magic of the Garlic Thanksgiving Turkey, a centerpiece that transforms any gathering into a cherished feast. With flavors that dance thanks to roasted garlic, fresh herbs, and zesty lemon, you’ll discover that this dish is an easy way to impress your family and friends. Not only does it offer a scrumptious upgrade to your traditional menu, but it’s also a crowd-pleaser that can make your Thanksgiving unforgettable. Plus, this recipe is perfect for those who want to escape from fast food monotony without spending all day in the kitchen. So, are you ready to wrap your holiday in the irresistible embrace of garlic and herbs? Let’s dive into the details!

Garlic Thanksgiving Turkey

Why is Garlic Thanksgiving Turkey a Must-Try?

Irresistible Aroma: The moment you roast this turkey, your kitchen will be filled with an enticing blend of garlic and herbs that sets the mood for celebration.
Flavor Explosion: With zesty lemon and fresh rosemary, thyme, and sage, each bite is a holiday flavor explosion that will delight your taste buds.
Impressive Presentation: This turkey has a golden, crispy skin that makes for a stunning centerpiece at any gathering.
Time-Efficient Cooking: You achieve a gourmet meal without spending the entire day cooking, allowing you more time with your loved ones.
Versatile Dish: This recipe isn’t just for Thanksgiving—enjoy it any time you want a comforting feast that breaks the fast-food cycle. Ready to elevate your feast? Try creating delicious sauces with the leftover pan juices, and check out our tips on making gravy that wows.

Garlic Thanksgiving Turkey Ingredients

For the Turkey
• Turkey – A fully thawed 12 to 18 lb turkey will ensure even cooking and juicy results.
• Onion – Quartered onions infuse delightful flavors into the turkey and keep it moist.
• Lemon – Adding lemon quarters brightens the flavor profile and provides a zesty aroma.
• Fresh Rosemary – Rosemary adds a fragrant and savory touch that enhances the turkey’s natural taste.
• Fresh Thyme – With earthy notes, thyme complements the garlic and other herbs beautifully.
• Fresh Sage – This herb offers a warm, slightly peppery flavor, perfect for a comforting Thanksgiving feast.
• Kosher Salt – Essential for seasoning, kosher salt helps bring out all the flavors in your turkey.
• Fresh Ground Black Pepper – A dash of black pepper adds a little kick and balances the richness of the meat.

For the Herb Butter
• Unsalted Butter – Softened butter forms the base for an herbaceous mixture that keeps the turkey moist.
• Garlic – Minced garlic delivers the magical burst of flavor that makes this recipe truly special.
• Kosher Salt – Incorporating salt into the herb butter ensures even seasoning throughout the turkey.
• Black Pepper – Adds a warm, subtle spiciness to the rich, creamy butter.
• Chopped Fresh Rosemary – Reinforces the rosemary’s flavor and aroma, making each bite divine.
• Chopped Fresh Thyme – Fresh thyme in the butter infuses the meat with its aromatic goodness.

For the Vegetable Base
• Onion – Another onion helps create a fragrant bed for the turkey while roasting.
• Celery – Chopped celery adds structure to the vegetable base and enhances the overall flavor.
• Carrots – Carrots provide a hint of sweetness and color to the pan, making it visually appealing.

This Garlic Thanksgiving Turkey recipe is bound to be the star of your holiday table!

Step‑by‑Step Instructions for Garlic Thanksgiving Turkey

Step 1: Prepare the Turkey
Remove the thawed turkey from the fridge and let it sit at room temperature for 1 hour. This helps it cook evenly. While waiting, remove the giblets from the cavity. Ensuring the cavity is empty will enhance airflow during roasting, leading to a perfectly cooked Garlic Thanksgiving Turkey.

Step 2: Preheat the Oven
Preheat your oven to 325°F (160°C). This temperature allows for gentle roasting, ensuring the turkey cooks evenly while achieving that desired crispy skin. Having your oven ready when the turkey is seasoned will streamline the cooking process and keep the momentum going in your kitchen.

Step 3: Season the Cavity
Pat the turkey dry with paper towels, making sure to remove excess moisture. Generously season the cavity with kosher salt and freshly ground black pepper, creating a foundation of flavor. This step is crucial for infusing your Garlic Thanksgiving Turkey with rich taste from the inside out.

Step 4: Stuff the Turkey
Stuff the turkey’s cavity with the quartered onion, lemon, and sprigs of fresh rosemary, thyme, and sage. Be careful not to overfill, as this can obstruct airflow and affect cooking. This blend of aromatics will infuse moisture and flavor beautifully throughout the roasting process.

Step 5: Make the Herb Butter
In a small mixing bowl, combine ¾ cup of softened unsalted butter with minced garlic, kosher salt, black pepper, chopped rosemary, and thyme. Mix thoroughly until all ingredients are well incorporated, creating a fragrant herb butter that adds rich flavor and moisture to your Garlic Thanksgiving Turkey.

Step 6: Apply Herb Butter Under the Skin
Gently loosen the skin of the turkey over the breasts, using your fingers or a spoon, taking care not to tear it. Rub about one-third of the herb butter underneath the skin, ensuring to cover both breasts. This step helps lock in moisture and enhances the turkey’s flavor.

Step 7: Rub the Outside
Rub the remaining herb butter all over the outside of the turkey, making sure to cover every nook and cranny. This layer will create a beautiful, golden finish as it roasts. The garlic and herb aroma will soon fill your kitchen, making it a warm and inviting space.

Step 8: Prepare the Roasting Pan
Place quartered onion, chopped celery, and chopped carrots in the bottom of a large roasting pan. These vegetables serve as a flavorful bed for the turkey, enhancing the drippings for gravy later. Position the turkey breast side up on top of the veggies and tuck the wing tips underneath to prevent burning.

Step 9: Roast the Turkey
Place your turkey in the preheated oven, roasting for about 15 minutes per pound. Use a meat thermometer to check that the internal temperature reaches 158°-160°F in the thickest part of the thigh or breast. If the skin browns too quickly, tent it with aluminum foil to prevent burning.

Step 10: Rest Before Carving
Once roasted, remove the turkey from the oven and let it rest for 30 minutes, covered with aluminum foil. This resting time is essential to allow the juices to redistribute throughout the meat, ensuring a juicy and flavorful Garlic Thanksgiving Turkey when you carve it.

Step 11: Carve and Serve
After resting, carve the turkey into serving pieces and transfer them to a platter, saving the pan juices for gravy preparation. The beautiful golden skin and tender meat make this Garlic Thanksgiving Turkey a stunning centerpiece for your holiday gathering, ready to be enjoyed with loved ones.

Garlic Thanksgiving Turkey

How to Store and Freeze Garlic Thanksgiving Turkey

Fridge: Store leftover Garlic Thanksgiving Turkey in an airtight container for up to 3 days. Properly sealed, it retains flavor and moisture, ready for quick meals.

Freezer: You can freeze leftover turkey for up to 2-3 months. Wrap it tightly in plastic wrap, then place it in a freezer-safe container to prevent freezer burn.

Reheating: Thaw frozen turkey in the fridge overnight before reheating. For best results, warm it in the oven at 325°F (160°C) until heated through, maintaining its juicy texture.

Slicing: Slice turkey before storing to make it easier to reheat portions as needed. This way, you can enjoy your delicious Garlic Thanksgiving Turkey in multiple meals!

Garlic Thanksgiving Turkey Variations

Customize this Garlic Thanksgiving Turkey to fit your family’s preferences and dietary needs while still enjoying a feast of flavors.

  • Herb-Infused: Swap out rosemary, thyme, and sage with fresh dill or tarragon for a unique twist that brightens each bite. These herbs bring a fresh and floral essence, creating a completely different flavor profile for the turkey.

  • Citrus Medley: In addition to lemon, add orange or lime wedges to the cavity for a sweet, zesty kick. This delightful combo enhances the natural juiciness of the turkey while offering an aromatic surprise.

  • Spicy Kick: For those who love a little heat, incorporate a few sliced jalapeños or a dash of cayenne pepper into the herb butter. Just a hint of spice elevates the flavor and adds a fun twist to your family favorite!

  • Garlic Lover’s Delight: Increase the number of garlic cloves to 10 or 12 for a more robust garlic flavor that truly shines. Roasting garlic mellows its intensity, providing a rich and decadent taste experience.

  • Gluten-Free: Replace any traditional gravies made with flour with a cornstarch or arrowroot slurry to make a delicious gluten-free gravy to serve with your turkey. This way, everyone can enjoy a smooth, flavorful sauce without worry.

  • Vegetable Base Twist: Add root vegetables like parsnips or sweet potatoes to the roasting pan for added flavor and sweetness. This can transform your turkey drippings into a more robust base for your gravy.

  • Stuffing Content: Use gluten-free bread or wild rice for a stuffing mix that accommodates dietary preferences while still providing a delicious flavor enhancement. Pair it with classic herbs for a comforting taste that pairs well with turkey.

  • Reimagined Side Dishes: Consider serving this turkey with a fresh cranberry salsa or a tangy chimichurri sauce instead of traditional gravy to bring brightness and excitement to your dish. Elevating the accompaniments can create a whole new dining experience!

Keep these variations in mind to create a personalized and memorable feast that your loved ones will cherish. And while you’re at it, don’t forget to explore our guide on making gravy that wows from those rich pan drippings to complete your meal!

Expert Tips for Garlic Thanksgiving Turkey

• Room Temperature Prep: Let the turkey sit for 1 hour before cooking. This helps it roast evenly and reduces the risk of drying out.

• Avoid Overstuffing: When filling the turkey cavity, be cautious not to overstuff. This can hinder air circulation, leading to uneven cooking and a less juicy Garlic Thanksgiving Turkey.

• Temperature Check: Use a meat thermometer to ensure your turkey reaches an internal temperature of 158°-160°F in the thickest parts. This guarantees perfect doneness without undercooking.

• Resting is Key: Allow the turkey to rest for 30 minutes post-roasting. This enhances juiciness, as the juices redistribute throughout the meat, making every slice flavorful.

• Save the Drippings: Don’t forget to keep those pan juices! They are perfect for making a rich gravy that will complement your Garlic Thanksgiving Turkey beautifully.

Make Ahead Options

Preparing your Garlic Thanksgiving Turkey ahead of time can save you precious hours on the big day! You can season the turkey and apply the herb butter up to 24 hours in advance. Simply follow the first six steps of the recipe and then cover the turkey tightly with plastic wrap or foil, refrigerating it until you’re ready to roast. This allows the flavors to meld beautifully. On the day of serving, just let the turkey come to room temperature for about an hour before roasting. This method ensures a tender, flavorful turkey that’s just as delectable as if made fresh that day, making your holiday feast stress-free!

What to Serve with Garlic Thanksgiving Turkey

As the savory aroma of roasted garlic and herbs wafts through your home, it’s time to think about the delightful accompaniments that will make your feast even more memorable.

  • Creamy Mashed Potatoes: These fluffy potatoes provide a rich and velvety complement to the turkey’s bold flavors, perfect for soaking up gravy.
  • Honey-Glazed Carrots: Sweet and tender, glazed carrots add a pop of color and a hint of sweetness that beautifully balances the savory turkey.
  • Stuffing: A warm, herby stuffing filled with sage, sautéed onions, and aromatic spices enhances the festive spirit and pairs wonderfully with turkey juices.
  • Cranberry Sauce: Its tartness cuts through the richness of the turkey, providing a refreshing contrast that elevates each bite into a harmonious experience.
  • Green Bean Almondine: Crunchy green beans tossed with toasted almonds offer a delightful texture and a burst of freshness to balance the meal.
  • Harvest Salad: A mix of greens, apples, and candied nuts dressed in a light vinaigrette adds a refreshing contrast and brightens the plate.
  • Pumpkin Pie: This classic dessert envelops the table with aromas of cinnamon and nutmeg, leaving your guests with a sweet ending to a perfect holiday meal.
  • Spiced Apple Cider: A warm drink infused with cinnamon and cloves is a delightful way to toast the gathering, complementing the richness of your turkey.

With these pairings, your Garlic Thanksgiving Turkey will shine even brighter at your table, creating a feast that fills not just the stomach but also the heart.

Garlic Thanksgiving Turkey

Garlic Thanksgiving Turkey Recipe FAQs

How do I select a turkey for roasting?
Absolutely! When choosing a turkey, look for one that is fully thawed and weighs between 12 to 18 pounds. A fresh turkey is excellent, but if you’re buying frozen, ensure it’s solid and properly sealed without any signs of freezer burn. Remember that a larger turkey often provides more leftovers, which are perfect for post-holiday meals!

How should I store leftover Garlic Thanksgiving Turkey?
Very! Store leftover turkey in an airtight container in the refrigerator for up to 3 days. Make sure to seal it well to keep its flavor and moisture intact. If you have a large quantity of leftovers, placing the turkey in a shallow dish can help it cool down faster and reduce bacteria growth—safety first!

Can I freeze leftover Garlic Thanksgiving Turkey?
Definitely! For the best flavor preservation, wrap the leftover turkey tightly in plastic wrap, then place it in a freezer-safe container or bag. It will stay fresh for up to 2-3 months. When you’re ready to enjoy it again, simply thaw it overnight in the fridge for the best results.

What’s the best way to reheat my frozen Garlic Thanksgiving Turkey?
To reheat your frozen turkey, start by thawing it in the fridge overnight. Once ready, preheat your oven to 325°F (160°C). Place the turkey in a roasting pan and cover it with foil to maintain moisture. Heat until warmed through, about 20-25 minutes per pound, ensuring it retains its juicy texture.

How can I tell if the turkey is cooked properly?
Use a meat thermometer to check for doneness! Insert it into the thickest part of the thigh or breast; it should read between 158°F and 160°F. If you notice any juices running clear, that’s another sign your Garlic Thanksgiving Turkey is ready to take out of the oven!

Can my pets eat leftover turkey?
While turkey can be a tasty treat for pets, make sure it’s boneless and free from seasoning, especially garlic and onions, as these can be harmful. Always consult with your vet before introducing new foods to your pet’s diet, and only give them small amounts to avoid any digestive issues.

Garlic Thanksgiving Turkey

This Garlic Thanksgiving Turkey is a flavorful centerpiece, combining roasted garlic, fresh herbs, and zesty lemon for an unforgettable feast.

  • roasting pan
  • Meat Thermometer
  • Mixing Bowl
  • paper towels

For the Turkey

  • 12 to 18 lb Turkey (Fully thawed for even cooking)
  • 1 Onion (Quartered)
  • 1 Lemon (Quartered)
  • 1 tbsp Fresh Rosemary (Chopped)
  • 1 tbsp Fresh Thyme (Chopped)
  • 1 tbsp Fresh Sage (Chopped)
  • 2 tbsp Kosher Salt
  • 1 tsp Fresh Ground Black Pepper

For the Herb Butter

  • 3/4 cup Unsalted Butter (Softened)
  • 4 cloves Garlic (Minced)
  • 1 tbsp Kosher Salt
  • 1 tsp Black Pepper
  • 1 tbsp Chopped Fresh Rosemary
  • 1 tbsp Chopped Fresh Thyme

For the Vegetable Base

  • 1 large Onion (Quartered)
  • 2 stalks Celery (Chopped)
  • 2 medium Carrots (Chopped)

Step‑by‑Step Instructions for Garlic Thanksgiving Turkey

  1. Remove the thawed turkey from the fridge and let it sit at room temperature for 1 hour.
  2. Preheat your oven to 325°F (160°C).
  3. Pat the turkey dry and season the cavity with kosher salt and black pepper.
  4. Stuff the turkey’s cavity with quartered onion, lemon, and sprigs of rosemary, thyme, and sage.
  5. In a mixing bowl, combine softened butter with minced garlic, kosher salt, black pepper, rosemary, and thyme.
  6. Loosen the skin of the turkey and rub a portion of the herb butter underneath.
  7. Rub the remaining herb butter all over the outside of the turkey.
  8. Place quartered onion, chopped celery, and chopped carrots in the bottom of a roasting pan.
  9. Place the turkey breast side up on top of the vegetables and tuck the wing tips underneath.
  10. Roast the turkey for about 15 minutes per pound, checking internal temperature.
  11. Let the turkey rest covered with aluminum foil for 30 minutes before carving.
  12. Carve the turkey and serve it with pan juices.

This Garlic Thanksgiving Turkey is perfect anytime you want a comforting feast beyond the traditional menu. Saving pan juices is recommended for making gravy.

Main Dishes
American
festive meals, Garlic Thanksgiving Turkey, garlic turkey, holiday roast, Thanksgiving, turkey recipe

Filed Under: Main Dishes

Melt-in-Your-Mouth Cheesy Chicken and Rice Casserole

October 22, 2025 by grace bellamy Leave a Comment

As I pulled the bubbling Cheesy Chicken and Rice Casserole from the oven, the rich, creamy aroma wrapped around me like a warm hug. There’s something so comforting about a dish that combines tender chicken, fluffy rice, and gooey cheese all in one hearty bake. This recipe not only delivers on flavor but also makes your weeknight dinners a breeze with its simple prep and minimal clean-up—perfect for those busy evenings when fast food doesn’t cut it anymore. If you’re looking for a delightful family favorite that’s sure to please, this Cheesy Chicken and Rice Casserole is your answer! Ready to dive into this cozy dish and elevate your home-cooked meals?

Cheesy Chicken and Rice Casserole

Why is This Casserole So Irresistible?

Comforting and hearty: This Cheesy Chicken and Rice Casserole is the ultimate feel-good meal, perfect for cozy family dinners.
Flavor-packed delight: With creamy mushroom soup and gooey cheddar cheese, each bite bursts with flavor that will keep everyone coming back for seconds.
Easy preparation: Simply mix and bake! No intricate techniques here—just straightforward steps that let you focus on enjoying your meal.
Versatile options: Customize with additional seasonings or vegetables for a unique twist, or swap out proteins to suit your tastes.
Crowd-pleaser: It’s a surefire hit at family gatherings or potlucks, ensuring everyone leaves satisfied. For more comforting recipes, check out our easy casserole ideas that will transform your weeknight dinners!

Cheesy Chicken and Rice Casserole Ingredients

For the Casserole
• Boneless, skinless chicken breasts – this protein stays tender and juicy, creating the perfect base for your casserole.
• Rice (uncooked) – provides a fluffy texture that absorbs all those delicious flavors as it cooks.
• Cream of mushroom soup – this creamy component brings richness and depth, making it a true comfort food.
• Milk – adds creaminess and helps blend all the flavors together flawlessly.
• Water – ensures the rice cooks perfectly, absorbing just the right amount of moisture.
• Onion soup mix – a handy seasoning to infuse a savory, oniony flavor without all the chopping.
• Paprika – gives a hint of smokiness and color to the dish.
• Salt – essential for enhancing the overall flavors of the casserole.
• Black pepper – adds a subtle warmth; adjust to your spice preference.
• Shredded cheddar cheese – the star of the show! Its melty goodness is what makes this Cheesy Chicken and Rice Casserole so irresistible.

Optional Add-Ins
• Garlic powder – for an aromatic kick that complements the other flavors beautifully.
• Parmesan cheese – adds a nutty richness that elevates the cheesy experience.
• Chopped parsley – sprinkle on top as a fresh garnish, brightening up the dish!

This Cheesy Chicken and Rice Casserole is sure to become a family favorite you’ll want to make time and time again!

Step‑by‑Step Instructions for Cheesy Chicken and Rice Casserole

Step 1: Preheat the Oven
Begin by preheating your oven to 350°F (175°C). While the oven is warming up, take a 9×13-inch casserole dish and lightly grease it with butter or non-stick cooking spray to prevent sticking. This small step ensures your Cheesy Chicken and Rice Casserole comes out clean and intact, making for a lovely presentation.

Step 2: Mix the Soup Mixture
In a large mixing bowl, whisk together 1 ½ cans of cream of mushroom soup, ¾ cup of milk, and 2 ½ cups of water. Add in the onion soup mix and stir until the mixture is smooth and well-combined. This creamy blend will create the flavorful base that complements the rice and chicken perfectly, enhancing the overall richness of your casserole.

Step 3: Prepare the Rice Base
Evenly spread the uncooked rice across the bottom of the greased casserole dish. It’s important to create a uniform layer so that the rice cooks evenly. This foundation is vital for ensuring each bite of your Cheesy Chicken and Rice Casserole is infused with flavor and moisture from the soup mixture.

Step 4: Add the Soup Mixture
Carefully pour the creamy soup mixture over the rice, ensuring that every grain is coated. The liquid will gradually permeate the rice as it bakes, allowing it to soak up all those delicious flavors. If needed, use a spatula to gently spread the mixture, making sure it covers the rice evenly.

Step 5: Settle the Mixture
Next, shake or lightly tap the casserole dish on the counter to settle the liquid evenly among the rice. This step helps prevent dry spots and ensures that the Cheesy Chicken and Rice Casserole cooks evenly throughout, leading to tender rice and juicy chicken.

Step 6: Place the Chicken
Now, take your boneless, skinless chicken breasts and lay them on top of the rice mixture. Press them down slightly to ensure they make good contact with the liquids below. This technique will keep the chicken juicy as it bakes, resulting in perfectly cooked tender chicken in your casserole.

Step 7: Season the Chicken
Sprinkle paprika, salt, and black pepper over the chicken breasts for a burst of flavor. If you’re feeling adventurous, add any optional seasonings like garlic powder or Parmesan cheese at this stage. These spices will enhance the taste of your Cheesy Chicken and Rice Casserole, adding depth to each delectable bite.

Step 8: Cover and Bake
Take a piece of aluminum foil and cover the casserole dish tightly. This covering traps the moisture, allowing the chicken and rice to cook thoroughly. Place it in the preheated oven and bake for 45 minutes. During this time, the flavors will meld beautifully, creating a comforting dish.

Step 9: Check Doneness
After 45 minutes, carefully remove the foil and check the casserole. The rice should be tender, and most of the liquid should have been absorbed. This is a crucial step to ensure your Cheesy Chicken and Rice Casserole is cooked perfectly before adding the cheesy topping.

Step 10: Add the Cheese
Sprinkle 2 cups of shredded cheddar cheese evenly over the top of the casserole. This melty layer will create a gooey, delicious topping for your dish. Return the casserole to the oven uncovered and bake for an additional 15 minutes, or until the cheese is melted and bubbly, creating that irresistible golden crust.

Step 11: Rest and Serve
Once baked to perfection, remove your Cheesy Chicken and Rice Casserole from the oven and let it rest for 5-10 minutes. This resting period allows the flavors to settle and makes serving easier. Consider garnishing with chopped parsley to add a fresh touch before diving in and enjoying your flavorful meal!

Cheesy Chicken and Rice Casserole

Expert Tips for Cheesy Chicken and Rice Casserole

Even Cooking: Ensure the rice is spread evenly in the dish, so it cooks uniformly and avoids dry spots.

Check Liquid Levels: Remove the foil after 45 minutes to confirm the rice is tender and there’s adequate liquid absorbed before adding cheese.

Resist Overcrowding: Don’t overcrowd with too many seasonings; start with the basics and adjust to your taste. This keeps the flavors balanced in your Cheesy Chicken and Rice Casserole.

Rest Before Serving: Allow the casserole to rest for 5-10 minutes after baking; this helps set the dish and makes serving easier.

Garnish for Freshness: Add chopped parsley before serving to brighten the flavors and presentation—it’s that little touch that makes a big difference!

Make Ahead Options

These Cheesy Chicken and Rice Casserole is perfect for meal prep enthusiasts! You can assemble the entire casserole up to 24 hours in advance, making it a fantastic option for busy weeknights. Simply prepare the dish up to the point of baking, covering it tightly with aluminum foil. When you’re ready to cook, just pop it in the oven straight from the fridge, allowing for an extra 10-15 minutes of bake time to ensure it’s heated thoroughly (check that both the rice is tender and the chicken is cooked through). This method allows all the flavors to meld beautifully, keeping your casserole just as delicious as if it were freshly made!

What to Serve with Cheesy Chicken and Rice Casserole

Indulge in a delightful dining experience by pairing your casserole with complementary sides that elevate its comforting charm.

  • Garlicky Green Beans: The vibrant crunch of green beans tossed in garlic butter brings brightness and a fresh contrast to the creamy casserole.
  • Zesty Coleslaw: This crunchy, tangy salad adds a refreshing bite that cuts through the richness of the Cheesy Chicken and Rice Casserole.
  • Warm Garlic Bread: Sopping up every delectable bite is easy with warm garlic bread; its buttery, toasty flavors are a comforting match.
  • Creamy Mashed Potatoes: Rich and creamy, mashed potatoes provide a smooth texture that harmonizes well with the casserole’s hearty elements. Their buttery richness makes every bite a cozy delight.
  • Mixed Green Salad: A simple salad with a zesty vinaigrette adds a refreshing contrast, balancing the dish’s warmth and heaviness. The crispness of fresh veggies brightens the plate.
  • Sweet Potato Chips: The sweet crunch of baked or fried sweet potato chips offers a unique contrast to the savory casserole while adding a delightful texture.
  • Sparkling Lemonade: A refreshing drink to cleanse your palate between bites, it’s the perfect accompaniment to the rich flavors of the casserole.
  • Chocolate Cake: For dessert, a slice of moist chocolate cake rounds out the meal, balancing the savory casserole with something sweet and decadent.
  • Apple Crisp: The warmth of spiced apples topped with crispy oats provides a cozy, comforting end to your meal, a perfect harmony of flavors.

How to Store and Freeze Cheesy Chicken and Rice Casserole

Room Temperature: Allow the casserole to cool completely before storing; it should not be left out for more than 2 hours to ensure food safety.

Fridge: Store leftovers in an airtight container in the refrigerator for up to 3 days. Make sure the casserole is cooled down to avoid condensation, which can make it soggy.

Freezer: For longer storage, freeze the Cheesy Chicken and Rice Casserole in an airtight container or tightly wrapped with foil for up to 3 months. Label it with the date for easy reference.

Reheating: When ready to enjoy, thaw overnight in the fridge if frozen. Reheat in the oven at 350°F (175°C) until heated through, about 25–30 minutes, adding a sprinkle of cheese on top for extra melty goodness!

Cheesy Chicken and Rice Casserole Variations

Feel free to put your own spin on this comforting casserole, making it uniquely yours!

  • Dairy-Free: Substitute the milk and cheddar cheese with almond milk and dairy-free cheese for a creamy yet guilt-free option.
  • Vegetable-Packed: Mix in your favorite veggies like broccoli, peas, or bell peppers before baking for a colorful, nutritious boost. This adds vibrant flavors and textures that elevate the dish!
  • Spicy Kick: Add diced jalapeños or a sprinkle of cayenne to the soup mixture for a zesty twist that will awaken your taste buds. Spice lovers will rejoice in this exciting variation!
  • Herb-Infused: Incorporate fresh herbs like thyme or rosemary into the soup mixture for an aromatic, flavorful enhancement that transports the dish to a gourmet level. A little herb goes a long way!
  • Quinoa Swap: Replace the rice with quinoa for a protein-packed alternative that cooks in the same way, offering a nutty flavor and excellent texture. This variation brings a nutritious twist that’s both tasty and filling.
  • Italian Flair: Use Italian seasoning in the chicken seasoning and add sundried tomatoes to the mixture for an Italian-inspired casserole that’s bursting with flavors. This will charm anyone who loves the taste of Italy!
  • Crispy Topping: Before the final bake, sprinkle some breadcrumbs mixed with olive oil and Parmesan cheese on top for a delightful crunch that contrasts beautifully with the creamy texture below. This adds a lovely crispy layer that makes each bite even more enjoyable!
  • Slow Cooker Method: Follow the same layering process in your slow cooker, allowing the casserole to cook on low for 4-6 hours. This hands-off method results in a delightful meal full of flavor and warmth with minimal effort.

When customizing your Cheesy Chicken and Rice Casserole, your options are as endless as your culinary imagination! For more delicious meal ideas to inspire your cooking journey, check out our easy casserole ideas that your family will adore!

Cheesy Chicken and Rice Casserole

Cheesy Chicken and Rice Casserole Recipe FAQs

What type of chicken works best for this recipe?
Absolutely! Boneless, skinless chicken breasts are ideal for this Cheesy Chicken and Rice Casserole as they cook evenly and remain tender. If you want to mix it up, you can use boneless thighs for a richer flavor or even shredded rotisserie chicken for a quicker prep.

How long can I store leftovers in the refrigerator?
Very! You can store any leftovers in an airtight container in the fridge for up to 3 days. Just make sure the casserole has cooled completely before sealing it up. This way, it stays fresh and ready for a quick reheat!

Can I freeze this casserole for later?
Absolutely! To freeze your Cheesy Chicken and Rice Casserole, let it cool completely and then transfer it to an airtight container or cover it tightly with foil. It can be frozen for up to 3 months. Don’t forget to label it with the date, so you know when to enjoy it again!

What if my rice isn’t fully cooked after baking?
No worries! If you find that the rice isn’t cooked through after the initial baking timeframe, simply add a splash of water (about ¼ cup) and cover the casserole tightly with foil again. Return it to the oven for an additional 10-15 minutes. This should help steam the rice further, ensuring it’s tender and fluffy.

Can I make this casserole ahead of time?
Very much so! You can prepare the Cheesy Chicken and Rice Casserole up to 24 hours in advance. Assemble it as outlined, but cover it tightly and store it in the refrigerator until you’re ready to bake. Just add an extra 10-15 minutes to the baking time if you’re baking it straight from the fridge.

Is this casserole suitable for people with food allergies?
Absolutely! If you have guests with specific dietary considerations, you can easily modify this recipe. For gluten-free needs, choose gluten-free cream of mushroom soup and onion soup mix. Be mindful of any cheese allergies—you can leave out the cheddar and enjoy it without for a still-decadent dish!

Melt-in-Your-Mouth Cheesy Chicken and Rice Casserole

This Cheesy Chicken and Rice Casserole delivers comfort with its tender chicken, fluffy rice, and gooey cheese, making it a delightful family favorite.

  • 9×13-inch casserole dish
  • large mixing bowl
  • Whisk

For the Casserole

  • 4 pieces Boneless, skinless chicken breasts
  • 2 cups Rice (uncooked)
  • 1.5 cans Cream of mushroom soup
  • 0.75 cups Milk
  • 2.5 cups Water
  • 1 package Onion soup mix
  • 1 teaspoon Paprika
  • 1 teaspoon Salt
  • 0.5 teaspoon Black pepper
  • 2 cups Shredded cheddar cheese

Optional Add-Ins

  • 1 teaspoon Garlic powder
  • 0.5 cups Parmesan cheese
  • 0.25 cups Chopped parsley (for garnish)

Step-by-Step Instructions

  1. Preheat your oven to 350°F (175°C) and grease a 9×13-inch casserole dish.
  2. In a large mixing bowl, whisk together the cream of mushroom soup, milk, and water. Stir in the onion soup mix until smooth.
  3. Spread the uncooked rice evenly in the bottom of the casserole dish.
  4. Pour the creamy soup mixture over the rice, ensuring all grains are coated.
  5. Shake or lightly tap the casserole dish to settle the liquid among the rice.
  6. Place the chicken breasts on top of the rice mixture, pressing them down slightly.
  7. Season the chicken with paprika, salt, and black pepper, adding any optional spices if desired.
  8. Cover the dish with aluminum foil and bake for 45 minutes.
  9. After baking, remove the foil and check the casserole for doneness.
  10. Add the shredded cheddar cheese on top and bake uncovered for an additional 15 minutes.
  11. Let the casserole rest for 5-10 minutes before serving. Garnish with chopped parsley if desired.

Allow the casserole to cool before storing. It can be refrigerated for up to 3 days or frozen for up to 3 months.

Main Dishes
American
casserole, Cheesy Chicken, comfort food, easy dinner, Family Meal

Filed Under: Main Dishes

Savory Garlic Parmesan Cheeseburger Bombs Your Family Will Love

October 22, 2025 by grace bellamy Leave a Comment

As I stood in my kitchen, the familiar sound of sizzling beef filled the air, instantly transporting me to a weekend barbecue with family and friends. There’s nothing quite like the joy of sinking your teeth into a warm, gooey Garlic Parmesan Cheeseburger Bomb, packed with cheesy goodness and tender meat. This recipe not only comes together in just about 40 minutes but also packs a delightful surprise with every bite—a perfect embrace of comfort food with a fun twist! Not only are these adorable bites crowd-pleasers for any gathering, but they also make fantastic leftovers that reheat beautifully. So, are you ready to dive into this delicious adventure and impress your loved ones with every flavorful morsel?

Garlic Parmesan Cheeseburger Bombs

Why Are These Bombs So Loved?

Comforting and delicious, these Garlic Parmesan Cheeseburger Bombs combine the heartiness of a classic burger with the fun of bite-sized treats. Quick to make, in just 40 minutes you’ll have a scrumptious dish ready for your family. Versatile for any occasion, they’re perfect for game day or a cozy family dinner. Cheesy goodness wrapped in warm biscuit dough makes for an irresistible flavor explosion. Plus, if you’re looking for more ideas for homemade treats, check out our recipe for Doughy Garlic Knots. Your loved ones will be coming back for more!

Garlic Parmesan Cheeseburger Bombs Ingredients

Discover the delightful components that come together to create these irresistible bites!

For the Filling
• Ground beef – gives these bombs a hearty, satisfying base.
• Salt – enhances the flavors of the beef and cheese.
• Black pepper – adds a nice kick to the filling.
• Garlic powder – infuses a rich garlic flavor throughout.
• Onion powder – complements the savory taste of the beef.
• Worcestershire sauce – brings depth and umami to the mix.
• Shredded cheddar cheese – melts wonderfully to provide a gooey filling.

For the Dough
• Refrigerated biscuit dough – makes preparation quick and easy while yielding a fluffy texture.

For the Topping
• Butter, melted – adds a rich, buttery flavor when brushed on top.
• Finely minced garlic – elevates the aromas and taste of the bombs.
• Grated Parmesan cheese – introduces a salty, nutty flavor that pairs perfectly with garlic.
• Chopped fresh parsley – brightens up the dish with a splash of color and freshness.

With these ingredients at hand, you’re well on your way to creating the ultimate Garlic Parmesan Cheeseburger Bombs that will delight your family and friends!

Step‑by‑Step Instructions for Garlic Parmesan Cheeseburger Bombs

Step 1: Preheat the Oven
Begin by preheating your oven to 375°F (190°C). While the oven warms up, line a baking sheet with parchment paper to prevent sticking. This simple step prepares the perfect environment for your Garlic Parmesan Cheeseburger Bombs to bake evenly and develop that delightful golden crust.

Step 2: Cook the Ground Beef
In a large skillet over medium heat, add the ground beef and cook it until fully browned, approximately 5-7 minutes. Use a spatula to break the meat into smaller pieces as it cooks. Once browned, drain any excess fat to ensure a leaner, healthier filling for your cheeseburger bombs.

Step 3: Season the Beef Mixture
Sprinkle in salt, black pepper, garlic powder, onion powder, and Worcestershire sauce, stirring well to combine for about 2-3 minutes. As the seasonings meld, add in the shredded cheddar cheese, allowing it to melt and create a gooey filling. This savory mixture forms the hearty base of your Garlic Parmesan Cheeseburger Bombs.

Step 4: Prepare the Biscuit Dough
Roll out each biscuit from the tube until it’s about 1/4 inch thick, ensuring they can comfortably hold the filling. This step makes them easier to wrap around the savory beef mixture. Lay each rolled biscuit on the countertop, ready to be generously filled with the cheesy beef goodness.

Step 5: Fill the Biscuit Dough
Take about 2 tablespoons of the cheesy beef mixture and place it in the center of each prepared biscuit. Be careful not to overfill them, as this can make sealing tricky. Remember, these Garlic Parmesan Cheeseburger Bombs will puff up while baking, so a little bit of filling goes a long way!

Step 6: Seal the Bombs
Carefully fold the edges of the dough around the filling, pinching them to seal securely and form a ball shape. Place each bomb seam-side down on the lined baking sheet. This will help prevent any filling from escaping, allowing for a delicious burst of flavor with every bite.

Step 7: Brush with Garlic Butter
In a small bowl, combine the melted butter and minced garlic, creating a fragrant mixture. Using a pastry brush, generously coat the tops of each cheeseburger bomb with the garlic butter. This step adds richness and enhances the overall aroma of your Garlic Parmesan Cheeseburger Bombs.

Step 8: Add the Parmesan Topping
Sprinkle grated Parmesan cheese evenly over the top of each bomb, allowing it to adhere to the garlic butter. This cheesy layer forms a savory crust that perfectly complements the flavors within. Your cheeseburger bombs are now ready to be baked to perfection!

Step 9: Bake to Golden Perfection
Place the baking sheet in the preheated oven and bake for 12-15 minutes. Keep an eye on them as they bake; you’re looking for a lovely golden brown color and a crisp texture. The aroma filling your kitchen will be irresistible as your Garlic Parmesan Cheeseburger Bombs come to life.

Step 10: Garnish and Serve
Once baked, remove the cheeseburger bombs from the oven and allow them to cool slightly for about 5 minutes. Garnish with chopped fresh parsley for a pop of color and freshness. These delightful bites are now ready to be served and enjoyed!

Garlic Parmesan Cheeseburger Bombs

Make Ahead Options

These Garlic Parmesan Cheeseburger Bombs are a fantastic option for meal prep enthusiasts! You can prepare the cheesy beef filling up to 3 days in advance, storing it in an airtight container in the refrigerator. Additionally, you can assemble the bombs and refrigerate them for up to 24 hours before baking, ensuring they remain fresh and flavorful. To maintain quality, refrigerate them without baking, and be sure to cover them with plastic wrap to prevent drying out. When you’re ready to serve, simply bake them directly from the fridge, adding a couple of extra minutes to the cook time for perfectly puffy and delicious results!

How to Store and Freeze Garlic Parmesan Cheeseburger Bombs

Fridge: Store leftovers in an airtight container for up to 3 days. This keeps the flavor intact while ensuring they stay moist and delicious.

Freezer: For longer storage, freeze unbaked bombs by placing them on a baking sheet until solid, then transfer them to a freezer bag. They can be stored for up to 3 months.

Reheating: To reheat, bake from frozen at 375°F (190°C) for 18-20 minutes until heated through. Enjoy the cheesy goodness as if they were freshly made!

Garlic Parmesan Cheeseburger Bombs Variations

Feel free to unleash your creativity and customize these delicious bombs to match your taste!

  • Turkey Option: Substitute ground beef with ground turkey for a leaner, lighter filling that’s equally satisfying. The spices will still shine through, making each bite delectable.

  • Veggie-Packed: Replace beef with sautéed mushrooms, spinach, or black beans for a vegetarian twist. Adding veggies not only enhances flavor but also boosts nutritional value!

  • Spicy Kick: Incorporate chopped jalapeños or a dash of cayenne pepper into the beef mixture for those who enjoy a little heat. Balance spicy notes with a cool dip for a delightful contrast.

  • Cheese Lovers: Swap cheddar for your favorite melty cheese like mozzarella or pepper jack. Each variation brings a unique richness that elevates the cheesy goodness to new heights!

  • Biscuit Alternatives: Use puff pastry or crescent roll dough instead of biscuit dough for a different texture. This change will provide a light, flaky bite that you’ll adore.

  • Sweet and Savory: Add a spoonful of barbecue sauce or a drizzle of honey inside the filling for a surprising burst of flavor. This sweet finish can elevate your bombs for a fun twist on the classic.

  • Herb Infusion: Mix fresh herbs like basil or cilantro into the beef mixture for added freshness. The aromatic notes will complement the garlic and parmesan beautifully.

  • Extra Crunch: Coat the tops of the bombs with breadcrumbs or crushed crackers before baking for added texture. This creates a delightful crunch that makes every bite exciting.

Now, with these variations, you can take your Garlic Parmesan Cheeseburger Bombs to new delicious destinations! If you’re intrigued by even more homemade goodness, try pairing these with our Doughy Garlic Knots for a delightful feast. Your family will be asking for seconds!

What to Serve with Garlic Parmesan Cheeseburger Bombs

Nothing completes a hearty meal like the perfect side dishes that complement the savory, cheesy goodness of your Garlic Parmesan Cheeseburger Bombs.

  • Crispy French Fries: The classic pairing adds a crunchy texture to your meal, making each bite even more satisfying.

  • Coleslaw: A refreshing, tangy slaw balances the richness of the bombs, providing a crisp contrast with every mouthful.

  • Garden Salad: With colorful fresh vegetables, this light salad brings a burst of flavor and enhances the overall meal experience.

  • Roasted Vegetables: Seasonal roasted veggies bring earthiness and a caramelized sweetness that beautifully complements the savory bombs.

  • Garlic Bread: A warm, buttery loaf of garlic bread further amplifies the flavor profile, making the garlic experience delightfully intense. It’s perfect for dipping!

  • Beer or Cider: A chilled beer or bubbly cider adds a refreshing element, cutting through the richness of the cheeseburger bombs for a cozy drink pairing.

Expert Tips for Garlic Parmesan Cheeseburger Bombs

  • Don’t Overfill: Avoid the temptation to cram too much filling into each biscuit. A heaping tablespoon is perfect for preventing leaks and ensuring a good seal.

  • Seal Well: Make sure to pinch the edges tightly after folding the dough around the filling. An improper seal can cause the filling to ooze out while baking, ruining your beautiful bombs.

  • Uniform Size: Roll out each biscuit to a consistent thickness of about 1/4 inch. This ensures they bake evenly and gives your Garlic Parmesan Cheeseburger Bombs that ideal fluffy texture.

  • Watch the Bake Time: Keep an eye on your bombs as they bake; every oven varies. If they aren’t golden brown after 15 minutes, give them a few extra minutes for that perfect finish.

  • Herb Enhancements: Experiment with fresh herbs like thyme or oregano mixed into the filling for an extra layer of flavor. Don’t be afraid to make this recipe your own!

Garlic Parmesan Cheeseburger Bombs

Garlic Parmesan Cheeseburger Bombs Recipe FAQs

How do I choose the right ground beef for my bombs?
Absolutely! Look for ground beef with an 80/20 lean-to-fat ratio for the perfect balance of flavor and juiciness. This gives your Garlic Parmesan Cheeseburger Bombs that rich taste without being too greasy.

How should I store leftover Garlic Parmesan Cheeseburger Bombs?
I recommend storing leftovers in an airtight container in the fridge for up to 3 days. To keep them moist and flavorful, consider reheating them gently in an oven at 350°F (175°C) for about 10 minutes before serving.

Can I freeze Garlic Parmesan Cheeseburger Bombs?
Yes, you can! For optimal results, freeze your unbaked bombs. First, place them on a baking sheet lined with parchment paper and freeze until solid, then transfer them into a freezer bag, ensuring to remove excess air. They can last in the freezer for up to 3 months. When you’re ready to bake, there’s no need to thaw; just pop them in the oven for 18-20 minutes!

What should I do if my bombs are leaking during baking?
Very good question! If you find that your bombs are leaking, it’s usually due to overfilling or not sealing the edges properly. Next time, be sure to limit your filling to about 2 tablespoons, and pinch the edges firmly to create an airtight seal before baking.

Can these bombs be made gluten-free?
Absolutely! You can substitute regular biscuit dough with gluten-free biscuit alternatives. Just ensure to check all other ingredients for gluten content, especially the Worcestershire sauce. Your loved ones won’t even notice the difference!

Are Garlic Parmesan Cheeseburger Bombs safe for pets?
While these bombs are delicious for humans, they are not ideal for pets. Ingredients like garlic, onions, and excessive fats can be harmful to dogs and cats. It’s best to stick to proper pet food treats when sharing with your furry friends!

Savory Garlic Parmesan Cheeseburger Bombs Your Family Will Love

Delight in warm, gooey Garlic Parmesan Cheeseburger Bombs, a comforting twist on classic burgers that everyone will savor.

  • large skillet
  • Baking Sheet
  • parchment paper
  • Pastry Brush
  • Mixing Bowl

For the Filling

  • 1 pound ground beef (for a hearty base)
  • 1 teaspoon salt (to enhance flavors)
  • 1 teaspoon black pepper (for a nice kick)
  • 1 teaspoon garlic powder (for rich flavor)
  • 1 teaspoon onion powder (to complement beef)
  • 1 tablespoon Worcestershire sauce (for depth and umami)
  • 1 cup shredded cheddar cheese (for gooey filling)

For the Dough

  • 1 can refrigerated biscuit dough (for ease of preparation)

For the Topping

  • 2 tablespoons butter, melted (for brushing)
  • 2 cloves finely minced garlic (for aroma)
  • 1/2 cup grated Parmesan cheese (for a cheesy crust)
  • 2 tablespoons chopped fresh parsley (for garnish)

Preparation Steps

  1. Preheat your oven to 375°F (190°C) and line a baking sheet with parchment paper.
  2. In a large skillet over medium heat, cook the ground beef until fully browned, about 5-7 minutes.
  3. Sprinkle in salt, black pepper, garlic powder, onion powder, and Worcestershire sauce, stirring to combine for 2-3 minutes. Stir in shredded cheddar cheese until melted.
  4. Roll out each biscuit until about 1/4 inch thick for easy wrapping.
  5. Place about 2 tablespoons of the cheesy beef mixture in the center of each biscuit.
  6. Carefully fold the edges of the dough around the filling and pinch to seal, placing seam-side down on the baking sheet.
  7. Combine melted butter and minced garlic in a small bowl, then brush over the tops of each cheeseburger bomb.
  8. Sprinkle grated Parmesan cheese on top of each bomb to adhere to the garlic butter.
  9. Bake for 12-15 minutes or until golden brown and crisp.
  10. Allow to cool slightly before garnishing with chopped fresh parsley and serve.

These Garlic Parmesan Cheeseburger Bombs can be made ahead and frozen for later enjoyment.

Main Dishes
American
Appetizer, Cheeseburger, comfort food, family dinner, game day, Garlic Parmesan Cheeseburger Bombs

Filed Under: Main Dishes

Savory General Tso’s Chicken Made Easy at Home

October 22, 2025 by grace bellamy Leave a Comment

As the door swung open, the unmistakable aroma of fried chicken wafted through my kitchen, instantly whisking me away to my favorite takeout spot. Today, I’m crafting a homemade version of General Tso’s Chicken that not only satisfies those cravings but also transforms the dinner table into a feast. With just 25 minutes from start to finish, you’ll delight in a dish that combines crispy chicken and a sweet, tangy sauce—all without the wait. This recipe is a game-changer for anyone looking to ditch takeout and embrace the joy of cooking at home. Plus, it serves a crowd, making it perfect for family gatherings or cozy dinners with friends. Are you ready to create a restaurant-quality meal that feels like a hug on a plate?

General Tso’s Chicken

Why is General Tso’s Chicken a Must-Try?

Flavor Explosion: This dish perfectly balances sweetness and tanginess, making each bite an adventure for your taste buds.

Quick Cooking: Ready in just 25 minutes, it’s perfect for busy weeknights or last-minute gatherings.

Crowd-Pleaser: A favorite among family and friends, this recipe will elevate your dinner gatherings and impress your guests.

Simple Ingredients: With just a few pantry staples like soy sauce and paprika, you can whip up a delicious meal easily.

Versatile Dish: Pair it with rice or vegetables to customize your plate. For more easy-to-make chicken recipes, check out Crock Pot Chicken or One Pot Chicken!

General Tso’s Chicken Ingredients

• Get ready to whip up a delicious homemade version of General Tso’s Chicken!

For the Chicken
• 4 chicken breasts, cubed – Chicken breast offers a lean option that stays juicy when fried.
• 1 cup all-purpose flour (or cornstarch) – Cornstarch gives extra crispness, perfect for that crunch!

For the Seasoning
• 1 tsp paprika – Adds a subtle smokiness that enhances the flavor profile.
• 2 tsp garlic salt – Provides a savory depth that elevates the chicken’s taste.

For the Sauce
• 1 1/4 cup sugar – This balances the tanginess of the sauce, a key component of General Tso’s Chicken.
• 1 cup water – Helps create the perfect sauce consistency.
• 1 cup white distilled vinegar – The tartness from vinegar brings a refreshing zing.
• 1 tsp salt – Enhances all the flavors in your sauce.
• 6 Tbsp soy sauce – A must-have for that umami-packed flavor!
• 1 tsp red chili pepper flakes (optional) – For those who enjoy a kick, this adds a spicy touch!

Now that you have all your ingredients prepped, you’re just moments away from a delicious dinner experience!

Step‑by‑Step Instructions for General Tso’s Chicken

Step 1: Prepare the Chicken
Begin by cubing the chicken breasts into bite-sized pieces. In a large bowl, coat the chicken evenly with flour or cornstarch, ensuring that each piece is well-covered. This will create a delightful crunch once cooked. Preheat your large skillet over medium-high heat and add 3/4 cup of oil. The oil should shimmer when it’s hot enough for frying.

Step 2: Fry the Chicken
Carefully add the floured chicken pieces to the hot oil in batches, avoiding overcrowding to maintain a consistent temperature. Fry them for about 5-7 minutes or until they turn golden brown and crispy, flipping halfway through for even cooking. Once done, use a slotted spoon to transfer the chicken to a paper towel-lined plate, allowing excess oil to drain off.

Step 3: Combine Sauce Ingredients
In a separate mixing bowl, whisk together 1 1/4 cups of sugar, 1 cup of water, 1 cup of white distilled vinegar, 1 tsp of salt, and 6 tablespoons of soy sauce to create your tangy sauce. If you enjoy a bit of heat, feel free to add 1 tsp of red chili pepper flakes. This will give your General Tso’s Chicken a spicy kick!

Step 4: Cook the Sauce
Pour the sauce mixture into the skillet used for frying over medium heat. Bring the sauce to a gentle boil, stirring occasionally for about 2-3 minutes. As it heats up, you’ll notice the aroma intensifying, which means you’re on the right track!

Step 5: Combine Chicken and Sauce
Once the sauce is boiling, reduce the heat to low, and carefully add the fried chicken pieces back to the skillet. Stir to coat the chicken thoroughly in the luscious sauce. Simmer uncovered for about 12 minutes, allowing the flavors to meld and the sauce to thicken. The chicken should glisten beautifully, and the aroma will have your mouth watering!

Step 6: Serve and Enjoy
After 12 minutes, remove the skillet from heat. Your homemade General Tso’s Chicken is now ready to serve! Spoon it over a bed of rice or alongside your favorite vegetables for a complete meal. Enjoy the warmth and comfort of this delicious dish shared with family and friends.

General Tso’s Chicken

Make Ahead Options

These General Tso’s Chicken make-ahead options are perfect for busy weeknights or meal prep enthusiasts! You can coat the chicken breasts in flour or cornstarch and refrigerate them for up to 24 hours before frying, which helps save time during your evening cooking. Additionally, you can prepare the sauce and store it in an airtight container in the fridge for up to 3 days. When you’re ready to serve, simply heat the sauce, fry the chicken, and toss them together as directed. This way, you’ll enjoy the same delicious taste while effectively managing your time! Just remember to fry the chicken fresh to maintain that irresistible crunch.

What to Serve with General Tso’s Chicken

As the delightful aroma fills your kitchen, think about what to complement your vibrant dish and create a well-rounded meal.

  • Steamed Jasmine Rice: This fragrant rice absorbs the sweet and tangy sauce, making each bite a true delight. It provides warmth and balances the dish beautifully.

  • Stir-Fried Vegetables: A colorful medley of bell peppers, broccoli, and carrots adds a crunchy, fresh element, elevating your meal with vibrant textures and flavors.

  • Egg Rolls: Crispy on the outside and filled with savory goodness, these little pockets are perfect for dipping and create a satisfying crunch alongside your chicken.

  • Asian Cucumber Salad: Fresh and tangy, the lightness of this salad cuts through the richness of General Tso’s Chicken, providing a refreshing contrast with every bite.

  • Hot and Sour Soup: Warm, flavorful, and slightly spicy, this soup adds an extra layer of taste to your meal, perfect for chilling evenings or cozy gatherings.

  • Chilled Sake or Green Tea: A delicate, slightly sweet sake enhances the flavors of your dish, while a cup of refreshing green tea cleanses the palate and complements the meal perfectly.

  • Chocolate Mousse: End your meal on a sweet note with a rich, creamy dessert. The chocolatey indulgence pairs surprisingly well with the bright flavors of General Tso’s Chicken, leaving everyone satisfied.

General Tso’s Chicken Variations

Ready to put your own spin on General Tso’s Chicken? Let’s explore some delightful variations that’ll excite your taste buds!

  • Gluten-Free: Substitute all-purpose flour with a gluten-free blend or cornstarch for crispy chicken without gluten. This way, everyone can enjoy the dish!

  • Healthier Option: Swap out sugar for honey or maple syrup to cut refined sugars while keeping a touch of sweetness. You might be surprised by the natural flavor boost!

  • Add Veggies: Toss in fresh broccoli or bell peppers with the chicken during the last few minutes of simmering. This adds color and crunch while making it a more balanced meal.

  • Spicy Kick: Increase the red chili pepper flakes to your desired heat level, or add in some sliced fresh jalapeños for a fiery twist. Your dish can become a spicy sensation that warms the soul!

  • Sweet and Sour: Mix in pineapple chunks along with the chicken for a tangy, tropical twist. This additional fruitiness complements the savory elements beautifully.

  • Citrus Zing: Add the juice of one orange or lemon into your sauce mixture for a refreshing citrusy flavor. This brings a bright note that enlivens every bite!

  • Soy Sauce Alternative: For a unique flavor, try using coconut aminos instead of soy sauce. This offers a slightly sweeter and less salty taste that’s sure to delight.

For more family-loved chicken recipes, check out this flavorful Hawaiian Chicken Sheet that brings tropical vibes to your dinner table! Each variation here allows you to create a dish that’s uniquely yours while keeping the spirit of General Tso’s Chicken alive. Enjoy the journey of customizing your meals and sharing them with loved ones.

Expert Tips for General Tso’s Chicken

Coating Crunch: Ensure chicken pieces are well-coated in flour or cornstarch for that signature crispy texture everyone loves in General Tso’s Chicken.

Avoid Overcrowding: Fry the chicken in batches to maintain oil temperature, which helps prevent soggy pieces and ensures even cooking.

Perfect Sauce Thickness: Simmer the sauce uncovered; this allows moisture to evaporate and thickens the sauce beautifully, enhancing its rich flavor.

Adjust Sweetness: Taste the sauce before adding more sugar—every palate is different! Customize it to your liking to make it a true family favorite.

Serve Fresh: General Tso’s Chicken is best served immediately; refrigerating can soften the crispiness, so enjoy it hot off the stove!

Storage Tips for General Tso’s Chicken

Fridge: Store leftover General Tso’s Chicken in an airtight container for up to 3 days to maintain freshness and flavor.

Freezer: For longer storage, place cooled chicken in a freezer-safe container for up to 3 months. Thaw in the fridge before reheating.

Reheating: Reheat in a skillet over medium heat, adding a splash of water to revive moisture, for about 5-7 minutes until heated through.

Room Temperature: Avoid leaving General Tso’s Chicken out for more than 2 hours to prevent spoilage. Always refrigerate leftovers promptly.

General Tso’s Chicken

General Tso’s Chicken Recipe FAQs

What should I look for when selecting chicken breasts?
Absolutely! When choosing chicken breasts, opt for ones that are firm to the touch and free of any dark spots or odors. Fresh chicken should have a pink color with minimal fat. I often recommend organic chicken for a cleaner taste and better quality!

How can I store leftover General Tso’s Chicken?
Very important! Place your leftovers in an airtight container in the refrigerator, where they’ll stay fresh for about 3 days. Make sure to let the chicken cool before sealing to avoid condensation inside the container.

Can I freeze General Tso’s Chicken?
Absolutely! To freeze, allow the chicken to cool completely, then place it in a freezer-safe container or zip-top bag. It can be frozen for up to 3 months. When you’re ready to enjoy it, simply thaw it in the refrigerator overnight and reheat gently in a skillet.

What if my sauce is too thick or too thin?
No worries! If your sauce turns out too thick, add a little water a tablespoon at a time until you reach your desired consistency. On the flip side, if it’s too thin, simmer it longer without a lid to allow excess moisture to evaporate and create a thicker sauce. Just keep an eye on it to avoid burning!

Is this dish pet-friendly?
Good question! While General Tso’s Chicken is delicious for us humans, it’s not suitable for pets due to the spices, particularly garlic and onion, which can be harmful to dogs and cats. Always ensure to keep tempting leftovers away from their reach!

Can I substitute ingredients for dietary restrictions?
Definitely! If you’re gluten-sensitive, replace regular flour with a gluten-free all-purpose blend or cornstarch. For a lower sugar option, consider using a sugar substitute like agave or stevia; however, remember that the flavor may vary slightly. Adjust the recipe as needed, and feel free to experiment!

Savory General Tso’s Chicken Made Easy at Home

Enjoy homemade General Tso’s Chicken, a crispy and sweet-tangy dish that’s ready in just 25 minutes.

  • large skillet

For the Chicken

  • 4 pieces chicken breasts, cubed (Chicken breast offers a lean option that stays juicy when fried.)
  • 1 cup all-purpose flour or cornstarch (Cornstarch gives extra crispness, perfect for that crunch!)

For the Seasoning

  • 1 tsp paprika (Adds a subtle smokiness that enhances the flavor profile.)
  • 2 tsp garlic salt (Provides a savory depth that elevates the chicken’s taste.)

For the Sauce

  • 1.25 cup sugar (This balances the tanginess of the sauce, a key component of General Tso’s Chicken.)
  • 1 cup water (Helps create the perfect sauce consistency.)
  • 1 cup white distilled vinegar (The tartness from vinegar brings a refreshing zing.)
  • 1 tsp salt (Enhances all the flavors in your sauce.)
  • 6 Tbsp soy sauce (A must-have for that umami-packed flavor!)
  • 1 tsp red chili pepper flakes (Optional, for those who enjoy a kick.)

Step-by-Step Instructions

  1. Begin by cubing the chicken breasts into bite-sized pieces. Coat the chicken evenly with flour or cornstarch.
  2. Preheat your large skillet over medium-high heat and add 3/4 cup of oil.
  3. Carefully add the floured chicken pieces to the hot oil in batches, frying them for about 5-7 minutes or until golden brown and crispy.
  4. In a separate mixing bowl, whisk together sugar, water, vinegar, salt, and soy sauce to create your tangy sauce.
  5. Pour the sauce mixture into the skillet over medium heat and bring to a gentle boil.
  6. Once the sauce is boiling, reduce heat to low and add the fried chicken pieces back to the skillet.
  7. Simmer uncovered for about 12 minutes, stirring occasionally to coat the chicken thoroughly.
  8. Remove from heat and serve over rice or vegetables.

General Tso’s Chicken is best served immediately to maintain its crispiness. Refrigerate leftovers promptly.

Main Dishes
Chinese
Crispy Chicken, easy chicken recipe, family recipe, General Tso’s Chicken, homemade Chinese food, quick dinner

Filed Under: Main Dishes

Delicious Honey Sesame Chicken Made Easy at Home

October 22, 2025 by grace bellamy Leave a Comment

Late one night, I found myself longing for the kind of comfort that only a good meal can provide. Enter my version of Panda Express Honey Sesame Chicken—a dish that captures that delightful sweet-and-spicy balance, hitting all the right notes to lift your spirits! What I love most about this recipe is how it serves up a crowd-pleasing feast while being surprisingly quick to prepare. With gluten-free options and fresh veggies, you can indulge guilt-free, avoiding the fast-food trap. This Honey Sesame Chicken is just the thing to bring the family together, offering a tasty alternative that’s perfect for busy weeknights or cozy weekends. Are you ready to whip up something delicious and satisfying? Let’s dive into the recipe!

Honey Sesame Chicken

Why is this Honey Sesame Chicken special?

Quick and Easy: The prep takes just 10 minutes, making it perfect for weeknights when time is tight.

Flavor Explosion: The sweet honey and spicy hot sauce create a taste sensation that will have everyone coming back for seconds!

Gluten-Free Friendly: With the use of gluten-free flour and corn starch, this dish caters to various dietary needs without sacrificing flavor.

Colorful Veggies: Adding vibrant bell peppers and green beans not only boosts nutrition but also makes the dish visually appealing.

Crowd-Pleasing Meal: This recipe is a hit with both families and guests, effortlessly transforming any dinner into a festive occasion.

For more easy and delicious meals, check out my guide on quick weeknight dinners. You won’t want to miss it!

Honey Sesame Chicken Ingredients

For the Batter

  • Egg – A binding agent that gives the chicken a crispy coating.
  • Salt – Enhances overall flavor in the batter.
  • Black Pepper – Adds a subtle kick to the batter mix.
  • Olive Oil – Provides moisture and richness in the batter.
  • Gluten-Free All-Purpose Flour – Ensures a crispy exterior without gluten.
  • Baking Soda – Helps the batter rise slightly for a lighter texture.
  • Cornstarch – Contributes to extra crunch on the chicken.

For the Chicken

  • Chicken Fillets – Tender protein that soaks up the delicious sauce perfectly.
  • Vegetable Oil – Necessary for frying to achieve that golden-brown color.

For the Veggies

  • Yellow Bell Pepper – Adds vibrant color and a sweet crunch.
  • Green Beans – Offers a fresh texture and a nutritional boost.

For the Sauce

  • Honey – The star ingredient that brings sweetness to the dish.
  • Hot Sauce – Provides a spicy kick, balancing the sweetness of the honey.
  • Apple Cider Vinegar – Adds acidity to brighten the flavors.
  • Lemon Juice – Enhances the sauce with a zesty note.
  • Filtered Water – Adjusts the sauce consistency for the perfect coating.
  • Cornstarch – Used again to thicken the sauce for a gooey texture.

For Garnish

  • Sesame Seeds – Adds crunch and a nutty flavor, elevating the finished dish.

If you’re excited about making this Honey Sesame Chicken at home, gather your ingredients and let the adventure begin!

Step‑by‑Step Instructions for Honey Sesame Chicken

Step 1: Prepare the Batter
In a medium bowl, beat the egg and mix in 1/2 teaspoon salt, 1/2 teaspoon black pepper, and 2 tablespoons of olive oil until well combined. This mixture acts as a tasty binder for the chicken strips, ensuring a crispy texture.

Step 2: Make the Coating
In a separate bowl, whisk together 2/3 cup gluten-free all-purpose flour, 1/2 teaspoon baking soda, and 1 tablespoon cornstarch. This dry mixture will create the perfect crispy coating for your Honey Sesame Chicken, adding crunch and flavor to every bite.

Step 3: Coat the Chicken
Dip your chicken fillets, cut into strips, into the egg mixture, making sure they are thoroughly coated. Then, roll each strip in the flour mix until fully covered. This double-coating is key to achieving that delightful crunch when frying your chicken.

Step 4: Heat the Oil
Heat 1 1/2 cups of vegetable oil in a large skillet or wok over medium-high heat, aiming for a temperature of 350°F. To test if the oil is ready, drop a small piece of the batter in—if it sizzles immediately, you are good to go!

Step 5: Fry the Chicken
Carefully add the coated chicken strips into the hot oil in batches, frying for about 6-7 minutes. Allow them to turn golden brown and crispy, flipping halfway through for even cooking. Once cooked, remove the chicken and place it on a plate lined with paper towels to drain excess oil.

Step 6: Sauté the Vegetables
In another pan, heat 1 tablespoon of olive oil over medium-high heat. Add 1 cup of sliced yellow bell pepper and 1 cup of trimmed green beans, stir-frying them for about 5 minutes until they are tender but still vibrant.

Step 7: Prepare the Sauce
Combine 1 cup of honey, 1/3 cup of hot sauce, 1 tablespoon of apple cider vinegar, 1 tablespoon of lemon juice, and 1/2 cup of filtered water in a medium saucepan over medium heat. Stir in 1 tablespoon of cornstarch and bring the mixture to a gentle boil, cooking until it thickens into a rich sauce.

Step 8: Combine Chicken and Sauce
Add the fried chicken strips and sautéed vegetables into the saucepan with the honey sauce. Carefully mix everything together, cooking for an additional 2-3 minutes until all ingredients are warmed through and well-coated with the sticky sauce.

Step 9: Serve the Dish
Once everything is combined and heated, transfer the Honey Sesame Chicken to a serving plate. To finish, sprinkle with sesame seeds for added crunch and garnish. Serve immediately to savor this delicious meal at its freshest!

Honey Sesame Chicken

Make Ahead Options

These Honey Sesame Chicken preparations are perfect for busy cooks looking to make mealtime easier! You can prep the chicken and batter mixture up to 24 hours in advance by coating the strips and storing them tightly covered in the refrigerator. This keeps the chicken flavorful and ready to fry. The sautéed bell peppers and green beans can be prepared and stored separately in an airtight container for up to 3 days. When you’re ready to serve, simply fry the chicken strips fresh in hot oil, then combine with prepped vegetables and sauce, cooking until heated through. This way, you’ll enjoy restaurant-quality Honey Sesame Chicken with minimal effort, saving you time without compromising taste!

Honey Sesame Chicken Variations

Feel free to get creative with this Honey Sesame Chicken recipe—there’s so much room for delicious customization!

  • Spicy Kick: Add more hot sauce or crushed red pepper flakes to the sauce for an extra layer of heat. The zesty burst will enliven your taste buds!

  • Honey Alternatives: Swap honey for maple syrup or agave nectar for a unique twist. Each alternative adds its own distinctive flavor while keeping the dish sweet.

  • Protein Swap: Use tofu or shrimp in place of chicken for a vegetarian or seafood option. Both swaps will soak up the delicious sauce beautifully!

  • Veggie Medley: Introduce broccoli, snap peas, or carrots to the sauté for variations in textures and nutritional benefits; it’s a delightful way to brighten up the dish!

  • Nuts About It: Sprinkle chopped cashews or almonds on top for an added crunch. This will not only elevate the texture but also provide a lovely nutty flavor.

  • Citrus Zest: Incorporate orange or lime zest into the sauce for a refreshing twist that will brighten up the entire dish.

  • Sesame Oil Infusion: Drizzle sesame oil over the finished chicken to enhance its nutty flavor. This subtle addition can take your dish to new aromatic heights!

For more delightful culinary adventures, explore my guide on healthy cooking hacks or learn how to create flavors in your own kitchen with my favorite tips on culinary techniques. Enjoy your cooking journey!

Expert Tips for Honey Sesame Chicken

  • Egg Coating: Ensure the chicken is well-coated with the egg mixture to achieve that crispy texture when frying. Skipping this step can lead to soggy chicken.

  • Temperature Check: Fry the chicken at 350°F; too low and it won’t crisp up properly, too high can burn it before cooking through. Use a thermometer for accuracy.

  • Oil Drain: Place fried chicken on paper towels immediately after cooking to absorb excess oil, keeping the chicken crispy and not greasy.

  • Stir-Fry Quick: When sautéing the vegetables, keep the heat high and stir constantly. This helps them stay vibrant and crunchy, enhancing your Honey Sesame Chicken.

  • Taste Balance: Adjust the honey and hot sauce ratio in the sauce to suit your taste. More honey lends sweetness, while extra hot sauce adds a spicier kick.

How to Store and Freeze Honey Sesame Chicken

Fridge: Store leftover Honey Sesame Chicken in an airtight container for up to 3 days. Reheat gently in a skillet to maintain its crispiness.

Freezer: Freeze the chicken before adding the sauce for up to 2 months. When ready to enjoy, thaw in the fridge overnight and reheat in the oven or air fryer for that crispy texture.

Reheating: For best results, reheat in a pan over medium heat with a splash of water or broth to prevent drying out. Stir occasionally until warmed through.

Serving Tip: Always garnish with fresh sesame seeds after reheating for that added crunch and flavor boost!

What to Serve with Honey Sesame Chicken

Delight your family with a well-rounded meal that beautifully complements this sweet and spicy dish!

  • Steamed Jasmine Rice: The fluffy texture and fragrant aroma of jasmine rice soak up the sauce, making each bite even more flavorful. This classic pairing ensures a satisfying foundation for the star dish.

  • Crispy Spring Rolls: These crunchy appetizers filled with fresh vegetables add a satisfying texture contrast, complementing the tender chicken. Serve with a tangy dipping sauce to heighten the flavor experience.

  • Garlic Broccoli: A quick sauté of broccoli with minced garlic adds nutrition and color to your meal. The slight bitterness of the broccoli balances the sweetness of the honey sauce, creating a delightful harmony.

  • Mango Salad: A fresh mango salad with cucumbers and a zesty lime dressing brightens the plate. The tropical sweetness of mango cuts through the richness, offering a refreshing contrast to the dish.

  • Miso Soup: This warm, comforting soup filled with umami flavors adds depth to your meal. Its lightness contrasts nicely with the heavier chicken, making each bite feel balanced.

  • Lychee Iced Tea: A fruity, refreshing drink option to cleanse the palate. The sweetness of lychee complements the Honey Sesame Chicken while keeping your experience light and refreshing.

  • Sesame Noodles: These chilled noodles tossed with a sesame dressing provide a delightful, savory side that echoes the flavors of the main dish. Their chewy texture pairs perfectly with the crisp chicken.

  • Chocolate Fortune Cookies: End your meal on a sweet note with these delightful treats. Crunchy cookies with a chocolate twist add a hint of indulgence, tying the theme together deliciously.

Honey Sesame Chicken

Panda Express Honey Sesame Chicken Recipe FAQs

How do I select the right honey for this recipe?
Absolutely! When choosing honey, look for one that is pure and raw if possible. Pure honey has the best flavor and is unprocessed, which preserves its natural sweetness and health benefits. Organic honey is also a fantastic choice, as it’s often free from additives or pesticides.

How should I store leftover Honey Sesame Chicken?
You’ll want to store leftovers in an airtight container in the fridge for up to 3 days. Make sure to reheat it gently in a skillet over medium heat—this keeps the crispiness intact. Adding a splash of water or broth while reheating helps prevent drying out, ensuring your dish remains delicious!

Can I freeze Honey Sesame Chicken?
Yes! To freeze, do it before adding the sauce. Place the prepared chicken strips in a freezer-safe bag or container for up to 2 months. When you’re ready to enjoy, thaw the chicken overnight in the fridge and reheat in an oven or air fryer for that fabulous crispy texture.

What should I do if my chicken isn’t crispy?
Very often, this happens when the oil temperature is too low. Make sure the oil is heated to 350°F before adding the chicken—test with a small batter piece; it should sizzle immediately! Also, ensure the chicken is well-coated in the egg and flour mixture for that coveted crunch.

Are there any dietary considerations I should be aware of?
Definitely! This recipe uses gluten-free flour, which is great for those with gluten allergies. However, the hot sauce may contain gluten, so check the label if you need it to be entirely gluten-free. Always consider individual dietary restrictions as well, especially if serving to guests or family members with allergies.

What modifications can I make for a healthier version?
You can absolutely lighten this dish up! Try using less honey or substituting it with a sugar-free alternative like agave syrup. You may also use a lighter oil for frying or bake the chicken instead. For a lower-calorie option, consider cooking the chicken in an air fryer—much less oil, same great flavor!

Delicious Honey Sesame Chicken Made Easy at Home

Enjoy a comforting Honey Sesame Chicken with a delightful sweet-and-spicy balance, perfect for any family meal.

  • Medium bowl
  • large skillet or wok
  • Medium saucepan

For the Batter

  • 1 Egg (A binding agent for crispy coating)
  • 1/2 teaspoon Salt (Enhances flavor)
  • 1/2 teaspoon Black Pepper (Adds a subtle kick)
  • 2 tablespoons Olive Oil (Provides moisture and richness)
  • 2/3 cup Gluten-Free All-Purpose Flour (Ensures a crispy exterior)
  • 1/2 teaspoon Baking Soda (Helps batter rise)
  • 1 tablespoon Cornstarch (Contributes to extra crunch)

For the Chicken

  • 1 pound Chicken Fillets (Tender protein)
  • 1 1/2 cups Vegetable Oil (For frying)

For the Veggies

  • 1 cup Yellow Bell Pepper (Adds color and crunch)
  • 1 cup Green Beans (Offers fresh texture)

For the Sauce

  • 1 cup Honey (Star ingredient)
  • 1/3 cup Hot Sauce (Provides spicy kick)
  • 1 tablespoon Apple Cider Vinegar (Adds acidity)
  • 1 tablespoon Lemon Juice (Enhances flavor)
  • 1/2 cup Filtered Water (Adjusts sauce consistency)
  • 1 tablespoon Cornstarch (Thickens the sauce)

For Garnish

  • 2 tablespoons Sesame Seeds (Adds crunch and flavor)

Step‑by‑Step Instructions

  1. Prepare the Batter: In a medium bowl, beat the egg, salt, black pepper, and olive oil. This mixture acts as a binder for the chicken.
  2. Make the Coating: In a separate bowl, whisk flour, baking soda, and cornstarch.
  3. Coat the Chicken: Dip chicken strips in the egg mixture, then roll in the flour mix.
  4. Heat the Oil: Heat vegetable oil in a large skillet over medium-high heat.
  5. Fry the Chicken: Add chicken strips in batches, frying for 6-7 minutes until golden brown.
  6. Sauté the Vegetables: Heat olive oil, add bell pepper and green beans and stir-fry for 5 minutes.
  7. Prepare the Sauce: Combine honey, hot sauce, vinegar, lemon juice, and water. Stir in cornstarch and bring to a boil.
  8. Combine Chicken and Sauce: Mix fried chicken and sautéed vegetables in the sauce.
  9. Serve the Dish: Transfer to a plate, sprinkle with sesame seeds, and serve immediately.

Adjust honey and hot sauce ratio to taste for sweetness or spiciness.

Main Dishes
Asian
chicken, dinner, Easy Recipe, family-friendly, gluten-free, Honey Sesame Chicken

Filed Under: Main Dishes

Irresistible Teriyaki Chicken Rice Bowl You Can Make Tonight

October 22, 2025 by grace bellamy Leave a Comment

As I stood in my kitchen, the aroma of sizzling chicken filled the air, instantly transporting me to those cozy evenings spent around the dinner table. This Teriyaki Chicken Rice Bowl has become a go-to for my busy weeknights, offering the perfect blend of flavors that brings everyone together. Preparing this dish is surprisingly quick, taking just 25 minutes from start to finish—ideal for anyone looking to swap out fast food for something homemade and delicious. Not only is it satisfying, but the combination of tender chicken in a rich, sweet sauce served over fluffy rice and fresh veggies makes every bite a delightful experience. Curious about how to create this delightful bowl of comfort? Let’s dive into the recipe!

Teriyaki Chicken Rice Bowl

Why is this Teriyaki Chicken Bowl a must-try?

Quick and Easy: This recipe is perfect for those busy evenings, taking just 25 minutes from prep to plate!

Flavor Explosion: The combination of savory soy sauce, sweet honey, and fragrant ginger brings each bite to life.

Customization: Feel free to add any of your favorite veggies to this dish, making it your own family favorite.

Crowd-Pleaser: Perfect for everyone at the table—kids and adults alike will love this delicious homemade twist on a classic.

Healthy Alternative: By making your own sauce with fresh ingredients, you can control the flavors and reduce sodium compared to takeout.

Imagine swapping fast food for this wholesome dish and enjoying quality time with loved ones. Check out more easy weeknight meals like this 30-Minute Stir-Fry for additional inspiration!

Teriyaki Chicken Rice Bowl Ingredients

• Discover the joy of homemade flavor!

For the Chicken

  • Boneless skinless chicken breasts – Cubed for even cooking and maximum tenderness.
  • Olive oil – This keeps the chicken from sticking to the skillet, ensuring a golden brown crust.

For the Teriyaki Sauce

  • Low sodium soy sauce – A healthier choice that keeps the flavor without excess salt.
  • Water – Helps to balance the sauce’s richness.
  • Light brown sugar – Adds a hint of sweetness, enhancing the teriyaki flavor profile.
  • Rice vinegar – This brings a tangy brightness to the sauce.
  • Sesame oil (optional) – Provides a delightful nutty aroma; use it if you want that extra depth!
  • Ground ginger – Brings warmth and spice to the sauce.
  • Minced garlic – Infuses the sauce with pungent flavor that melds beautifully with the other ingredients.
  • Honey – For added sweetness and a glossy finish.
  • Cornstarch – Acts as a thickening agent, giving the sauce that perfect, satiny texture.

For Garnish and Serving

  • Sesame seeds – Sprinkle on top for decoration and a lovely nuttiness.
  • Chopped green onions – Adds a fresh crunch to each bowl.
  • Rice – Serve as the base; white, brown, or jasmine work beautifully!
  • Steamed veggies – Customize your bowl with your choice of colorful, nutritious vegetables.

This Teriyaki Chicken Rice Bowl is sure to be a hit, showcasing homemade goodness in every bite!

Step‑by‑Step Instructions for Teriyaki Chicken Rice Bowl

Step 1: Heat the Oil
Start by drizzling 1 tablespoon of olive oil into a large skillet over medium-high heat. Allow the oil to shimmer for about 1 minute, indicating it’s hot enough. This initial step is crucial for achieving a beautifully browned crust on your chicken, which will enhance the flavor of the Teriyaki Chicken Rice Bowl.

Step 2: Brown the Chicken
Add the cubed boneless, skinless chicken breasts to the skillet in a single layer. Sauté the chicken for about 6-8 minutes, tossing occasionally, until it’s cooked through and no longer pink in the center. The pieces should have a golden-brown color on the outside; this assures a juicy texture and rich flavor in your dish.

Step 3: Prepare the Teriyaki Sauce
While the chicken is browning, grab a medium bowl and whisk together 1/2 cup of low sodium soy sauce, 1/2 cup of water, 2 tablespoons of honey, and 3 tablespoons of packed light brown sugar. Then add 2 tablespoons of rice vinegar, 1/2 teaspoon of sesame oil (if using), 1 teaspoon of ground ginger, 2 teaspoons of minced garlic, and 3 teaspoons of cornstarch. This will create a flavorful sauce that perfectly complements your chicken.

Step 4: Combine Chicken and Sauce
Once the chicken is fully cooked and browned, carefully pour the prepared teriyaki sauce over the chicken in the skillet. Stir the mixture well over medium heat and cook for an additional 3-5 minutes. The sauce should thicken and cling beautifully to the chicken, creating a glossy finish that makes your Teriyaki Chicken Rice Bowl irresistible.

Step 5: Serve Your Dish
Remove the skillet from the heat and prepare to serve your Teriyaki Chicken Rice Bowl. Scoop cooked rice onto your plates, then pile on the rich teriyaki chicken. Add your choice of steamed veggies alongside, allowing vibrant colors and textures to shine through. For an extra touch, garnish with sesame seeds and chopped green onions, enhancing both the presentation and flavor.

Teriyaki Chicken Rice Bowl

What to Serve with Teriyaki Chicken Rice Bowl

Enhance your dining experience with delightful side dishes that perfectly complement this comforting, homemade meal.

  • Steamed Broccoli: This bright green veggie adds a satisfying crunch and health benefits, balancing the sweet richness of the teriyaki sauce.

  • Crispy Spring Rolls: Light and delightful, spring rolls introduce a textural contrast that elevates your dining experience. They’re perfect for dipping in soy sauce!

  • Garlic Ginger Edamame: These flavorful pods enrich the meal with added protein and are a fun finger food to enjoy alongside. Their light seasoning harmonizes beautifully with your dish.

  • Miso Soup: Warm and soothing, miso soup provides umami depth, making every spoonful a comforting companion to the teriyaki chicken. It sets a calming tone for your meal.

  • Cucumber Salad: A refreshing cucumber salad with a hint of rice vinegar complements the meal, adding a burst of freshness that balances the richness of the chicken.

  • Jasmine Rice: Fragrant jasmine rice not only serves as a base but enhances the overall aroma of the dish. Its subtle floral notes create an elegant touch to each bite.

  • Chilled Sake or Green Tea: Pair your meal with a glass of chilled sake or freshly brewed green tea for a delightful way to cleanse your palate between bites.

  • Chocolate Mochi: For the perfect sweet ending, chocolate mochi offers a chewy, satisfying dessert that feels indulgent without being overly sweet. A delightful way to conclude the meal!

Teriyaki Chicken Rice Bowl Variations

Feel free to get creative with this Teriyaki Chicken Rice Bowl and customize it to suit your taste!

  • Dairy-Free: Simply omit any butter or dairy-based ingredients, ensuring a delightful, creamy texture without milk products.

  • Gluten-Free: Substitute tamari for soy sauce, which retains that authentic umami flavor while being gluten-free.

  • Sweet & Spicy: Add a teaspoon of sriracha or your favorite hot sauce for a fiery kick—this twist will elevate the flavor profile and excite your taste buds. The heat compliments the sweetness perfectly, transforming each bite into a new experience.

  • Vegetarian: Replace chicken with cubed tofu or tempeh to create a plant-based version. Marinating the tofu beforehand makes it flavorful and hearty, ensuring no one misses the meat.

  • Veggie-Packed: Toss in your choice of colorful vegetables like bell peppers, broccoli, or snap peas into the skillet while cooking for an extra dose of nutrients. This not only adds flavor but also great texture and vibrant color to the bowl.

  • Spicy Garlic: Mix in minced fresh chili or a dash of chili flakes with the garlic during cooking for a more flavorful kick. This adds a tantalizing bite that appeals to heat lovers!

  • Citrus Twist: Add a squeeze of fresh lime or orange juice just before serving to brighten and balance the flavors beautifully. It gives a refreshing zing that contrasts wonderfully with the savory teriyaki sauce.

Exploring these variations not only makes mealtime exciting but allows you to craft a dish consistent with your family’s tastes. For more culinary creativity, check out my Sweet & Spicy Chicken Stir-Fry or a comforting Vegetarian Fried Rice for an enjoyable dinner twist!

Make Ahead Options

These Teriyaki Chicken Rice Bowls are a fantastic choice for meal prep enthusiasts! You can marinate the cubed chicken in the teriyaki sauce for up to 24 hours in advance, which not only infuses rich flavor but also ensures juicy tenderness. Additionally, you can prepare the teriyaki sauce and store it in an airtight container in the refrigerator for up to 3 days. When you’re ready to enjoy your meal, simply brown the chicken, pour in the prepared sauce, and let it thicken—just as delicious as if you made it fresh! For the best results, store cooked rice and steamed veggies separately, then assemble right before serving for a vibrant and satisfying meal without the last-minute rush.

How to Store and Freeze Teriyaki Chicken Rice Bowl

Fridge: Store leftovers in an airtight container for up to 3 days to maintain freshness. Reheat in the microwave or on the stovetop until warmed through.

Freezer: For longer storage, freeze the teriyaki chicken separately from the rice and veggies in freezer-safe containers for up to 3 months.

Reheating: When ready to enjoy, thaw overnight in the fridge, then reheat in a skillet or microwave until hot, adding a splash of water if the sauce seems thick.

Wrapped Serving: If storing portions with rice and vegetables, ensure they are well-wrapped or contained to prevent freezer burn and maintain quality.

Expert Tips for Teriyaki Chicken Rice Bowl

  • Chicken Perfection: Ensure the chicken is cut evenly into cubes to promote uniform cooking. This prevents some pieces from being overcooked while others remain underdone.

  • Sauce Thickness: For a thicker sauce, let it simmer a little longer after adding cornstarch. Keep stirring until it reaches your desired consistency for the Teriyaki Chicken Rice Bowl.

  • Veggie Variety: Don’t hesitate to include a colorful mix of steamed vegetables. Broccoli, bell peppers, and snap peas add flavor and nutrition, but be cautious not to overcrowd the bowl.

  • Control Sweetness: Adjust the amount of brown sugar and honey to fit your taste preferences. Too much sweetness can overpower the savory elements, so taste as you go!

  • Serving Style: For a beautiful presentation, layer the rice first, then the chicken, and finally the veggies. This showcases the lovely colors and textures of your homemade meal.

Teriyaki Chicken Rice Bowl

Teriyaki Chicken Rice Bowl Recipe FAQs

What type of chicken is best for this recipe?
Absolutely! Boneless skinless chicken breasts are perfect for this Teriyaki Chicken Rice Bowl. They cook evenly and stay juicy, giving you tender bites that absorb the rich sauce beautifully. If you prefer, boneless chicken thighs can also be used for a richer flavor!

How should I store leftovers of the Teriyaki Chicken Rice Bowl?
Store any leftovers in an airtight container for up to 3 days in the refrigerator. When reheating, consider adding a splash of water to keep the sauce from thickening too much and to ensure everything warms evenly.

Can I freeze the Teriyaki Chicken Rice Bowl?
Yes, you can! To freeze, pack the teriyaki chicken, rice, and veggies in separate airtight, freezer-safe containers. This keeps everything fresh and prevents a soggy texture. The dish can be stored for up to 3 months. When you’re ready to enjoy, simply thaw overnight in the fridge and reheat on the stove or in the microwave.

What if my teriyaki sauce is too thin?
Very! If your sauce is thinner than you’d like, don’t worry. Continue cooking it over medium heat until it thickens to your desired consistency. Stir frequently and feel free to add an extra teaspoon of cornstarch mixed with water toward the end for a boost in thickness.

Are there any dietary considerations for this dish?
Definitely! This Teriyaki Chicken Rice Bowl can be made gluten-free by using tamari instead of soy sauce. Additionally, if you have allergies to sesame, feel free to omit the sesame oil and seeds. For a lower-carb option, serve the chicken over cauliflower rice instead of traditional rice.

How can I tell if my chicken is cooked through?
To ensure your chicken is perfectly cooked, use a meat thermometer. It should read 165°F (75°C) at the thickest part. Alternatively, cut into a piece; it should have no pink inside and the juices should run clear. Enjoy the peace of mind that comes with perfectly cooked chicken!

Irresistible Teriyaki Chicken Rice Bowl You Can Make Tonight

This Teriyaki Chicken Rice Bowl is a quick, delicious, and customizable meal perfect for busy weeknights.

  • large skillet
  • Medium bowl
  • Whisk

For the Chicken

  • 1 pound Boneless skinless chicken breasts (Cubed for even cooking)
  • 1 tablespoon Olive oil (For cooking chicken)

For the Teriyaki Sauce

  • 1/2 cup Low sodium soy sauce (Healthier choice)
  • 1/2 cup Water (To balance sauce)
  • 2 tablespoons Light brown sugar (Adds sweetness)
  • 2 tablespoons Rice vinegar (Brings tangy brightness)
  • 1/2 teaspoon Sesame oil (Optional for nutty aroma)
  • 1 teaspoon Ground ginger (Adds warmth)
  • 2 teaspoons Minced garlic (Infuses flavor)
  • 2 tablespoons Honey (For added sweetness)
  • 3 teaspoons Cornstarch (Thickening agent)

For Garnish and Serving

  • 2 tablespoons Sesame seeds (For decoration)
  • 2 tablespoons Chopped green onions (Adds fresh crunch)
  • 2 cups Cooked rice (Base for the bowl)
  • 2 cups Steamed veggies (Customize with your choice)

Step-by-Step Instructions

  1. Heat the Oil: Drizzle olive oil into a large skillet over medium-high heat and let it shimmer for about 1 minute.
  2. Brown the Chicken: Add cubed chicken in a single layer and sauté for 6-8 minutes until cooked through.
  3. Prepare the Teriyaki Sauce: Whisk together soy sauce, water, honey, brown sugar, rice vinegar, sesame oil, ginger, garlic, and cornstarch.
  4. Combine Chicken and Sauce: Pour sauce over chicken, stirring well and cooking for an additional 3-5 minutes until thickened.
  5. Serve Your Dish: Scoop rice onto plates, top with teriyaki chicken, add veggies, and garnish with sesame seeds and green onions.

For best results, cut chicken evenly to promote uniform cooking. Adjust sweetness by changing brown sugar and honey to fit your taste.

Main Dishes
Asian
easy dinner, healthy meal, quick recipe, Rice Bowl, Teriyaki Chicken, Weeknight Dinner

Filed Under: Main Dishes

Deliciously Soft Banana Muffins Your Family Will Love

October 21, 2025 by grace bellamy Leave a Comment

As I rummaged through my fruit bowl one Sunday morning, a few overripe bananas caught my eye, whispering sweet promises of deliciousness. That’s when I decided to whip up a batch of Soft and Fluffy Banana Muffins, a delightful treat that’s perfect for breakfast, snacks, or even a sweet dessert. Trust me, there’s nothing quite like the aroma of freshly baked muffins wafting through the kitchen—it’s simply irresistible! These banana muffins not only help you eliminate wasted fruit but are also incredibly freezer-friendly, making them a smart choice for a busy week. Plus, they’re kid-friendly, which means the whole family can enjoy this treat without any fuss. Ready to turn those ripe bananas into a wholesome batch of happiness? Let’s dive in!

Banana Muffins

Why are these banana muffins a must-try?

Deliciously Soft: Each muffin emerges from the oven fluffy and moist, with a texture that’ll have your taste buds dancing in delight.

Kid-Friendly: These banana muffins are perfect for little hands, packing in natural sweetness without added sugars!

Versatile Options: Feeling adventurous? Try variations like Nutty or Vegan to suit any diet.

Freezer-Friendly: Made too many? No worries! These muffins freeze beautifully, perfect for quick breakfasts.

Quick and Easy: With only 15 minutes of prep, you’ll have fresh muffins ready in no time—ideal for busy mornings.

Elevate your snack game by pairing these with coffee or tea. For more delightful recipes, check out our Kitchen Essentials for tips on baking perfect muffins every time!

Banana Muffin Ingredients

For the Muffins
• 3 ripe bananas, mashed – Overripe bananas are perfect for adding natural sweetness and flavor.
• 1/3 cup melted butter – This gives the muffins their rich, buttery flavor, ensuring a soft texture.
• 1 teaspoon baking soda – Acts as a leavening agent, helping the muffins rise beautifully.
• Pinch of salt – Balances the sweetness and enhances the overall flavor.
• 3/4 cup granulated sugar – Adds sweetness; you can reduce this for a healthier version.
• 1 large egg, beaten – Helps bind the ingredients together and adds richness.
• 1 teaspoon vanilla extract – Infuses a lovely aroma and enhances the sweet flavor.
• 1 teaspoon baking powder – Works alongside baking soda for extra fluffiness.
• 1 1/2 cups all-purpose flour – The main structure of the muffins; be careful not to overmix!

Feel free to customize these delicious banana muffins with chocolate chips, nuts, or berries for unique variations that everyone in the family will love!

Step‑by‑Step Instructions for Soft and Fluffy Banana Muffins

Step 1: Preheat the Oven
Begin by preheating your oven to 350°F (175°C). While the oven is heating up, grab your muffin tin and line it with paper liners or give it a light greasing with butter or cooking spray to ensure easy removal later on.

Step 2: Prepare the Bananas
In a large mixing bowl, take your ripe bananas and mash them with a fork until they reach a smooth consistency. You should have about 1 to 1.5 cups of mashed bananas, which will contribute to the delicious moisture of your banana muffins.

Step 3: Combine Adjustments
Next, drizzle the melted butter into the mashed bananas, stirring until fully combined. This step is crucial as it infuses the muffins with a rich, buttery flavor that complements the sweetness of the bananas beautifully.

Step 4: Add Baking Ingredients
Now, sprinkle the baking soda and a pinch of salt into your banana mixture, stirring well to ensure an even distribution. This combination will create the perfect rise for your muffins while balancing out their sweetness.

Step 5: Sweeten the Mix
Add the granulated sugar to the bowl, mixing it into the banana mixture until it is thoroughly incorporated. The sugar adds just the right amount of sweetness, making these banana muffins a delightful treat that your family will love.

Step 6: Mix in Egg and Vanilla
Incorporate the beaten egg and vanilla extract into the mixture, stirring until everything is combined. This step enriches the banana muffins, ensuring they stay moist and flavorful throughout.

Step 7: Incorporate Baking Powder
Next, sprinkle in the baking powder and give the mixture a good stir. This addition will enhance the fluffiness of your muffins, ensuring they rise perfectly as they bake in the oven.

Step 8: Fold in the Flour
Gradually fold in the all-purpose flour, mixing until just combined. Avoid overmixing to keep your banana muffins soft and fluffy, as too much mixing can lead to denser muffins that might not rise as nicely.

Step 9: Fill the Muffin Tin
Distribute the muffin batter evenly into each muffin cup of the prepared tin, filling them about two-thirds full. This allows room for the muffins to rise beautifully while baking, ensuring they don’t overflow.

Step 10: Bake the Muffins
Place the muffin tin in your preheated oven and bake for 20-25 minutes. Keep an eye on them; they’re ready when a toothpick inserted into the center comes out clean with just a few crumbs sticking to it.

Step 11: Cool and Enjoy
Once baked, remove the muffins from the oven and allow them to cool in the tin for about 10 minutes. After that, carefully transfer them to a wire rack to cool completely, enhancing their fluffy texture and making them irresistible.

Banana Muffins

Make Ahead Options

These Soft and Fluffy Banana Muffins are perfect for meal prep enthusiasts! You can mash your ripe bananas and combine them with the melted butter, sugar, and egg up to 24 hours in advance, storing the mixture in the refrigerator to maintain freshness. If you’d like to prep even further, you can also measure and sift the dry ingredients (flour, baking soda, baking powder, and salt) to have them ready to go. When it’s time to bake, simply blend the dry mix into your banana mixture, fold gently, and distribute into the muffin tin. You’ll have warm, delightful muffins ready to serve to your family with minimal effort and just as delicious as if freshly made!

Expert Tips for Banana Muffins

Mash Ripe Bananas: Use overripe bananas for maximum sweetness and moisture, creating the perfect soft texture in your banana muffins.

Don’t Overmix: Stir the flour until just combined to avoid dense muffins. Overmixing can lead to tough baked goods.

Proper Baking Time: Check for doneness at the lower end of the baking time. A toothpick should come out clean but moist for ideal fluffiness.

Customize Wisely: Feel free to add chocolate chips or nuts, but remember to adjust sugar levels accordingly for balance.

Storage Savvy: Keep muffins in an airtight container at room temperature for 3 days, or freeze them individually to enjoy later!

These tips will help you achieve perfect banana muffins every time!

Banana Muffins: Customization Ideas

Feel free to get creative with these delightful banana muffins by adding your own twist and tailoring them to your family’s taste buds!

  • Nutty: Add 1/2 cup chopped nuts like walnuts or pecans for a crunchy texture that complements the soft muffins. The crunch adds a beautiful contrast to the soft, fluffy interior!

  • Chocolate Chip: Stir in 1/2 cup of chocolate chips for a rich, sweet addition that kids will go wild for. The melty chocolate enhances the muffins, making them an irresistible treat!

  • Banana Oat: Substitute 1/2 cup of flour with rolled oats for a heartier muffin. The texture change adds a delightful chew and boosts the fiber content too!

  • Vegan: Replace the egg with 1/4 cup of applesauce and use a plant-based butter alternative. This keeps the muffins soft and moist, perfect for all diet preferences!

  • Berry Blast: Fold in 1 cup of fresh or frozen mixed berries for a fruity flavor explosion. The burst of berries brings a refreshing twist that pairs beautifully with banana.

  • Spiced Delight: Add 1 teaspoon of cinnamon or nutmeg to the batter for a warm, spicy aroma that will fill your kitchen with comfort. This spice blend elevates the classic banana flavor to new heights!

  • Coconut: Incorporate 1/2 cup of shredded coconut for a tropical vibe that complements the bananas’ natural sweetness. It adds texture and a bit of island charm!

  • Gluten-Free: Use a gluten-free all-purpose flour blend instead of regular flour for a gluten-free option. This variation allows everyone to enjoy these treats without compromising taste!

For even more delicious inspiration, don’t forget to explore our Kitchen Essentials for tips on how to bake perfect muffins every time!

Storage Tips for Banana Muffins

Room Temperature: Store your banana muffins in an airtight container at room temperature for up to 3 days. This keeps them fresh and ready to enjoy!

Freezer: For longer storage, wrap each muffin individually in plastic wrap and place them in a freezer bag. They’ll stay delicious for up to 3 months.

Reheating: To enjoy frozen banana muffins, simply remove them from the freezer and let them thaw at room temperature. For a warm treat, reheat in the microwave for about 15-20 seconds.

Flavor Preservation: Ensure muffins are completely cooled before storing to prevent moisture buildup, which can affect the taste and texture of your banana muffins.

What to Serve with Soft and Fluffy Banana Muffins

Indulge in the comforting aroma of freshly baked muffins as you create a delightful breakfast spread or snack time treat for your loved ones.

  • Creamy Yogurt Parfait: The tanginess of yogurt paired with fresh fruits complements the sweetness of the bananas beautifully.
  • Buttery Toast: Simple yet satisfying, a slice of toasted bread slathered with butter makes for a delightful contrast to the soft muffins.
  • Honey Drizzle: A drizzle of honey enhances the natural sweetness of the muffins, adding a sumptuous touch that everyone will adore.
  • Fresh Fruit Salad: Crisp and refreshing, a mix of seasonal fruits adds a lovely contrast to the rich and fluffy texture of the muffins.
  • Nutty Granola: Crunchy granola provides a satisfying texture that pairs wonderfully with the moist goodness of banana muffins, making for breakfast bliss.
  • Warm Milk or Tea: Cozy up with a cup of warm milk or herbal tea; their mild flavors won’t compete with the muffins, creating a comforting pairing.

Pair any of these delightful options with your banana muffins for a deliciously filled meal, making every bite a moment of happiness!

Banana Muffins

Soft and Fluffy Banana Muffins Recipe FAQs

How do I choose ripe bananas?
Absolutely! Look for bananas that are predominantly yellow with few brown spots; these are perfect for baking. If they’ve turned mostly brown or have dark spots all over, don’t worry! They are even sweeter and more flavorful for your muffins, allowing you to achieve that deliciously soft texture.

What’s the best way to store banana muffins?
Very! Keep your banana muffins in an airtight container at room temperature for up to 3 days to keep them fresh. If you want to extend their shelf life, wrap each muffin individually in plastic wrap and store them in a freezer bag. They can be frozen for up to 3 months and enjoyed later as a quick breakfast or snack!

Can I freeze banana muffins, and how?
Absolutely! To freeze your banana muffins, let them cool completely after baking. Then, wrap each muffin individually in plastic wrap to prevent freezer burn. Place these wrapped muffins into a freezer bag, ensuring you expel as much air as possible before sealing. They can be enjoyed for up to 3 months! When you’re ready, just thaw them at room temperature, or pop them in the microwave for about 15-20 seconds to warm them up.

What should I do if my muffins come out dense?
Oh no! If your muffins turn out dense, it’s often due to overmixing the batter. When you add the flour, mix until just combined. Overmixing can develop gluten, leading to tough muffins instead of the soft texture we strive for. Also, check your baking soda and powder for freshness; expired leavening agents may also affect the rise.

Are there any dietary considerations I should know about?
Very! These banana muffins are kid-friendly and can be customized for different dietary needs. If you’re looking to make them vegan, substitute the egg with a flax egg (1 tablespoon ground flaxseed mixed with 2.5 tablespoons water), and swap the butter with coconut oil or a plant-based butter alternative. Always check for allergies related to nuts, especially if you’re adding nuts or using any specific alternative ingredients.

How can I make these banana muffins healthier?
Great question! You can reduce the sugar content to half a cup or substitute it with honey or maple syrup. Additionally, you can incorporate whole wheat flour instead of all-purpose flour for added fiber and nutrients. Adding oats or nuts can also boost the muffin’s nutritional value, offering a delightful crunch and healthy fats!

Deliciously Soft Banana Muffins Your Family Will Love

These Banana Muffins are soft, fluffy, and kid-friendly, perfect for breakfast or snacks.

  • Muffin tin
  • Mixing Bowl
  • fork

For the Muffins

  • 3 whole ripe bananas, mashed (Overripe bananas are perfect for adding natural sweetness and flavor.)
  • 1/3 cup melted butter (This gives the muffins their rich, buttery flavor, ensuring a soft texture.)
  • 1 teaspoon baking soda (Acts as a leavening agent, helping the muffins rise beautifully.)
  • pinch salt (Balances the sweetness and enhances the overall flavor.)
  • 3/4 cup granulated sugar (Adds sweetness; you can reduce this for a healthier version.)
  • 1 large egg, beaten (Helps bind the ingredients together and adds richness.)
  • 1 teaspoon vanilla extract (Infuses a lovely aroma and enhances the sweet flavor.)
  • 1 teaspoon baking powder (Works alongside baking soda for extra fluffiness.)
  • 1 1/2 cups all-purpose flour (The main structure of the muffins; be careful not to overmix!)

Step‑by‑Step Instructions

  1. Preheat your oven to 350°F (175°C) and prepare your muffin tin.
  2. Mash the bananas in a bowl until smooth.
  3. Stir the melted butter into the mashed bananas until combined.
  4. Add baking soda and salt to the mixture, stirring well.
  5. Mix in the granulated sugar until thoroughly incorporated.
  6. Add the beaten egg and vanilla extract, stirring until combined.
  7. Sprinkle in the baking powder and stir to combine.
  8. Fold in the flour gradually, mixing until just combined.
  9. Distribute the batter evenly in the muffin tin, filling about two-thirds full.
  10. Bake for 20-25 minutes until a toothpick comes out clean.
  11. Cool in the tin for 10 minutes, then transfer to a wire rack.

Feel free to customize these muffins with chocolate chips, nuts, or berries for unique variations that everyone will enjoy!

Breakfast
American
baking, Banana Muffins, easy muffins, family recipe, snack, soft muffins

Filed Under: Breakfast

Irresistible Salted Caramel Apple Bars for Fall Cravings

October 21, 2025 by grace bellamy Leave a Comment

As I flipped through my collection of cherished family recipes, the scent of fresh apples and warm spices tugged at my heart, transporting me to cozy autumn afternoons. That’s how I stumbled upon my favorite comfort recipe: Salted Caramel Apple Bars. Packed with wholesome ingredients, this delightful dessert not only boasts a golden, crumbly crust but also offers a luscious layer of apples drenched in sweet, salted caramel. You’ll love how quick and easy it is to prepare, making it a perfect go-to for gatherings or a special treat for yourself. Plus, the combination of chewy oats and tender apples creates the ultimate crowd-pleaser that everyone will be raving about! What would you pair with these delightful bars for the perfect afternoon snack?

Salted Caramel Apple Bars

Why Will You Love These Bars?

Simplicity at its best: With just a handful of ingredients and straightforward steps, these Salted Caramel Apple Bars come together quickly, making them perfect for both novice and seasoned bakers alike.

Bursting with flavor: The aromatic blend of cinnamon, nutmeg, and fresh apples, drizzled with rich salted caramel, delivers a delightful taste that embodies the essence of fall.

Versatile treats: Enjoy them warm with a scoop of vanilla ice cream or at room temperature with a cup of tea. They’re perfect for gatherings, afternoon snacks, or even as a quick breakfast!

Crowd-pleaser appeal: Whether entertaining friends or craving a sweet treat yourself, these bars are sure to impress and satisfy any sweet tooth.

Time-saving recipe: Ready in just over an hour, these bars can easily fit into a busy schedule, leaving you with more time to enjoy the deliciousness. Don’t forget to check out my tips on how to make homemade salted caramel for an extra touch!

Salted Caramel Apple Bars Ingredients

For the Crust

  • All-purpose flour – gives the bars their sturdy base and crumbly texture.
  • Old-fashioned oats – adds a delightful chewiness that complements the crunch.
  • Brown sugar – provides a rich, molasses-like flavor that deepens the sweetness.
  • Granulated sugar – balances the brown sugar for a perfect sweetness blend.
  • Baking soda – helps the crust rise, creating that irresistible crumbliness.
  • Salt – enhances the flavors in the crust and balances the sweetness.
  • Unsalted butter – ensures the perfect amount of creaminess without added salt.
  • Vanilla extract – infuses warmth and depth to the overall flavor profile.

For the Apple Filling

  • Medium-sized apples – use tart varieties like Granny Smith for a delicious contrast.
  • Lemon juice – brightens the flavors and prevents the apples from browning.
  • Cinnamon – a warm spice that adds aromatic sweetness to the filling.
  • Nutmeg – elevates the flavor with its unique earthiness.

For the Topping

  • Salted caramel sauce – drizzled on top, this decadent addition makes the bars irresistible!
  • Sea salt – a sprinkle on top enhances the caramel’s sweetness and gives a delightful pop.

Step‑by‑Step Instructions for Salted Caramel Apple Bars

Step 1: Preheat and Prepare
Begin by preheating your oven to 350°F (175°C). Grease a 9×13 inch baking dish with butter or non-stick spray to prevent sticking. This step ensures the base of your Salted Caramel Apple Bars bakes evenly. Set your dish aside while you prepare the crust mixture.

Step 2: Make the Crust Mixture
In a large mixing bowl, combine 2 cups of all-purpose flour, 1 cup of old-fashioned oats, 3/4 cup of brown sugar, 1/2 cup of granulated sugar, 1/2 teaspoon of baking soda, and 1/4 teaspoon of salt. Pour in 1 cup of melted unsalted butter and 1 teaspoon of vanilla extract, mixing until the texture resembles coarse crumbs. This is the foundation for your scrumptious bars!

Step 3: Bake the Crust Base
Press about two-thirds of the crumb mixture firmly into the bottom of the prepared baking dish. Place the dish in the oven and bake for 10-12 minutes, or until the edges are lightly golden. Removing it at the right time will ensure a perfectly baked crust that complements the apples and caramel wonderfully.

Step 4: Prepare the Apple Filling
While the crust is baking, in another bowl, toss 4 medium-sized peeled, cored, and diced apples with 1 tablespoon of lemon juice, 1 tablespoon of ground cinnamon, and 1/4 teaspoon of nutmeg. The lemon juice will brighten the flavors, while the spices enhance the overall aroma—this is a delightful filling for your Salted Caramel Apple Bars.

Step 5: Layer the Filling
Once the crust is lightly golden, remove it from the oven and evenly layer the prepared apple mixture over the baked crust. Drizzle 1/2 cup of salted caramel sauce generously over the apples, allowing it to seep between the layers. This addition creates a luscious, gooey texture and enhances the flavor profile.

Step 6: Add the Crumble Topping
Sprinkle the remaining crumble mixture evenly over the apple and caramel layers. This tops off your Salted Caramel Apple Bars with a delightful crunch, ensuring each bite is a tasty combination of buttery crust, sweet apples, and rich caramel.

Step 7: Bake Until Golden
Return the baking dish to the oven and bake for an additional 30-35 minutes. Keep an eye on it, and look for a golden brown topping and tender apples. The warm aroma of cinnamon and caramel will fill your kitchen, making it hard to wait!

Step 8: Cool and Serve
Once finished baking, remove the dish from the oven and allow it to cool for 15-20 minutes before slicing into bars. Before serving, sprinkle the top with 1/2 teaspoon of sea salt to enhance the flavors. These Salted Caramel Apple Bars are now ready to enjoy!

Salted Caramel Apple Bars

What to Serve with Salted Caramel Apple Bars

Indulge your senses and create the perfect autumn ambiance with delightful pairings alongside these sweet, chewy bars.

  • Vanilla Ice Cream: The creamy texture of vanilla ice cream melts beautifully with the warm bars, creating a blissful union of flavors. It adds a refreshing contrast that enhances the caramel’s richness.

  • Chai Tea: Steamy chai with its aromatic spices pairs beautifully, complementing the cinnamon and nutmeg found in the bars, making your snack feel even more comforting.

  • Caramel Drizzle: A light drizzle of extra salted caramel not only elevates the bars but adds another layer of decadence; it’s perfect for those who believe more is more!

  • Cinnamon Sugar Pecan Topping: Toasted pecans tossed in cinnamon sugar introduce a delightful crunch and flavor that ties beautifully with the apples and caramel, creating an irresistible treat.

  • Hot Apple Cider: A warm cup of spiced apple cider perfectly captures the essence of fall, complementing the flavors in the bars. Sip and enjoy the comforting fall vibes.

  • Whipped Cream: A dollop of fresh whipped cream adds a light, airy touch to each bite. It balances out the richness of the caramel and enhances the apple flavor beautifully.

  • Hazelnut Coffee: Rich, nutty hazelnut coffee provides a robust contrast, making the sweetness of the bars truly shine. It’s the perfect companion for any afternoon snack.

  • Dark Chocolate Bark: For chocolate lovers, a side of dark chocolate bark delivers a sophisticated bitterness that cuts through the sweetness and makes for an elegant pairing.

  • Pumpkin Spice Latte: Embrace the fall flavors with a warm pumpkin spice latte. The spice notes in the latte complement the bars exceptionally well, creating a cozy experience.

Expert Tips for Salted Caramel Apple Bars

  • Choose the Right Apples: Opt for tart varieties like Granny Smith or Honeycrisp for a delicious contrast to the sweetness of the caramel.

  • Don’t Overmix: When combining your crust ingredients, mix just until crumbly. Overmixing can lead to a dense texture rather than the desired lightness in your Salted Caramel Apple Bars.

  • Layer Evenly: Ensure the apple layer is evenly spread before drizzling with caramel. This guarantees every bite is balanced in flavor and texture.

  • Watch the Bake Time: Keep a close eye during the second bake. The top should be golden brown, and the apples tender but not mushy.

  • Allow to Cool: Patience is key—cooling the bars for 15-20 minutes helps them set properly and makes slicing easier. Enjoy the warm aroma while you wait!

How to Store and Freeze Salted Caramel Apple Bars

Room Temperature: Store cooled bars in an airtight container at room temperature for up to 3 days for the best freshness and flavor.

Fridge: For longer storage, keep your Salted Caramel Apple Bars in the refrigerator for up to 1 week. Just make sure they’re in a sealed container to prevent drying out.

Freezer: Wrap individual bars tightly in plastic wrap and place them in a freezer-safe bag. They can be frozen for up to 3 months. Thaw in the fridge or at room temperature.

Reheating: To enjoy bars warm, reheat in the microwave for 10-15 seconds or place in a preheated oven at 350°F (175°C) for about 5-10 minutes.

Make Ahead Options

These Salted Caramel Apple Bars are perfect for meal prep enthusiasts! You can prepare the crust up to 24 hours in advance by mixing the dry ingredients and melting the butter, then store them in the refrigerator. Additionally, you can chop the apples and toss them with lemon juice, cinnamon, and nutmeg, keeping them fresh for up to 3 days in an airtight container to prevent browning. When you’re ready to bake, simply layer the prepared ingredients and follow the finishing steps as outlined in the recipe. This way, you’ll have a delightful dessert on hand without the last-minute rush, ensuring you can savor the flavors without the stress of preparation!

Salted Caramel Apple Bars Variations

Feel free to get creative with your Salted Caramel Apple Bars; there’s no wrong way to make them your own!

  • Dairy-Free: Use coconut oil in place of butter and almond milk for a deliciously creamy twist that’s friendly to dairy-free diets.

  • Gluten-Free: Substitute all-purpose flour with a gluten-free flour blend to keep the same great taste for those avoiding gluten.

  • Nutty Addition: Stir in 1/2 cup of chopped nuts, like walnuts or pecans, into the apple filling for an extra crunch and rich flavor.

  • Spice it Up: Add a pinch of cayenne pepper along with the cinnamon for a delightful kick that complements the sweetness beautifully.

  • Caramel Overload: Use a homemade salted caramel recipe for an elevated flavor experience. The freshness of homemade caramel really shines through!

  • Apple Variety: Experiment with different apple varieties, such as Fuji or Braeburn, for unique flavor profiles and sweetness levels—each will bring its own charm!

  • Oatless Alternative: For a more traditional crumb topping, swap oats for more flour, creating a finer, softer texture that contrasts the gooey apple filling.

  • Vegan-Friendly: To make these bars vegan, replace butter with dairy-free butter and use flax eggs instead of regular eggs in the crust—satisfyingly delicious!

No matter how you choose to customize, these bars will surely be a hit as you cater them to your tastes. Enjoy!

Salted Caramel Apple Bars

Salted Caramel Apple Bars Recipe FAQs

What kind of apples should I use for these bars?
Absolutely! For the best flavor contrast, I recommend using tart apple varieties like Granny Smith or Honeycrisp. They balance perfectly with the sweetness of the salted caramel and enhance the overall taste of the bars.

How should I store the Salted Caramel Apple Bars?
You can keep your cooled bars in an airtight container at room temperature for up to 3 days. If you want them to last longer, refrigerate them for up to a week. Just make sure they are well-sealed to retain their moisture and deliciousness!

Can I freeze Salted Caramel Apple Bars?
Yes, you can! I often make a batch and freeze individual bars for easy treats later. Wrap each bar tightly in plastic wrap and place them in a freezer-safe bag. They’ll stay fresh for up to 3 months. To enjoy, just thaw them in the fridge or at room temperature.

What do I do if my crust is too crumbly?
Very often, a crust can be crumbly if the butter is not fully incorporated or if it’s overmixed. Make sure to mix until just combined for a light texture. If it’s too dry, you can add a tablespoon of ice-cold water to help it come together.

Can I substitute any ingredients for dietary restrictions?
Definitely! If you’re looking for a gluten-free option, you can substitute all-purpose flour with a gluten-free flour blend. For a dairy-free version, try using coconut oil instead of unsalted butter and a plant-based caramel sauce. Always check for allergies with ingredient substitutions!

How do I know when the bars are done baking?
Look for a golden-brown top and tender apples to ensure they are perfectly baked. The bars should feel set at the center but not overly firm. A toothpick can also help; insert it in the center—if it comes out clean or with a few moist crumbs, they’re ready to be taken out!

Irresistible Salted Caramel Apple Bars for Fall Cravings

Delightful Salted Caramel Apple Bars, a perfect fall dessert packed with apples and salted caramel.

  • 9×13-inch baking dish
  • Mixing bowls
  • Whisk
  • spatula

For the Crust

  • 2 cups all-purpose flour
  • 1 cup old-fashioned oats
  • 3/4 cup brown sugar
  • 1/2 cup granulated sugar
  • 1/2 teaspoon baking soda
  • 1/4 teaspoon salt
  • 1 cup unsalted butter, melted
  • 1 teaspoon vanilla extract

For the Apple Filling

  • 4 medium-sized apples, peeled, cored, and diced (preferably tart varieties like Granny Smith)
  • 1 tablespoon lemon juice
  • 1 tablespoon cinnamon
  • 1/4 teaspoon nutmeg

For the Topping

  • 1/2 cup salted caramel sauce (for drizzling)
  • 1/2 teaspoon sea salt (for garnish)

Step-by-Step Instructions

  1. Preheat your oven to 350°F (175°C) and grease a 9×13 inch baking dish.
  2. In a large mixing bowl, combine the flour, oats, brown sugar, granulated sugar, baking soda, and salt. Stir in melted butter and vanilla until the texture resembles coarse crumbs.
  3. Press about two-thirds of the crumb mixture into the bottom of the prepared dish and bake for 10-12 minutes until lightly golden.
  4. In another bowl, toss diced apples with lemon juice, cinnamon, and nutmeg.
  5. Once the crust is golden, layer the apple mixture evenly over the baked crust. Drizzle salted caramel sauce over the apples.
  6. Sprinkle the remaining crumb mixture over the apple and caramel layers.
  7. Bake for an additional 30-35 minutes, until topping is golden brown and apples are tender.
  8. Cool for 15-20 minutes before slicing and sprinkle sea salt before serving.

Tips: Use tart apples, don’t overmix the crust, layer evenly, watch baking time, and allow to cool before slicing.

Dessert
American
apple bars, baking, caramel dessert, easy dessert, Fall dessert, Salted Caramel Apple Bars

Filed Under: Dessert

Delicious Caribbean Vegetable Curry for Cozy Nights

October 21, 2025 by grace bellamy Leave a Comment

As the vibrant colors of fresh vegetables sizzle in a pot, I can’t help but feel transported to a sun-soaked Caribbean island, where each bite of this Caribbean Vegetable Curry feels like a warm hug. This recipe is a perfect way to breathe new life into your dinner routine, showcasing a delightful mix of nutritious veggies like cauliflower, carrots, and green beans, all enveloped in a creamy coconut sauce. With a prep time of just 20 minutes, it’s not only a quick fix for busy weeknights—it’s also a nourishing option that even the pickiest eaters will adore. Plus, the enticing aroma of spices like curry powder and smoked paprika wafting through your kitchen is sure to whet everyone’s appetite. Are you ready to spice up your culinary journey and bring the taste of the tropics to your home?

Caribbean Vegetable Curry

What makes this curry extra delightful?

Wholesome, Nutrient-Rich: Packed with vibrant vegetables like cauliflower, carrots, and green beans, this curry is both nourishing and satisfying.
Creamy Coconut Sauce: The rich coconut milk adds an indulgent creaminess that perfectly balances the spices, creating a comforting dish.
Quick Preparation: With only 20 minutes of prep time, it’s an easy choice for busy weeknights when you crave something homemade.
Versatile Pairing Options: Serve it with coconut rice or warm flatbreads for a complete meal that your whole family will enjoy—creating a delightful dining experience.
Naturally Vegan and Gluten-Free: Perfect for various dietary needs, this dish doesn’t compromise on flavor, making it a hit for everyone at your table.
Aromatic Spices: The enticing aroma of curry powder and smoked paprika wafting through your kitchen guarantees to whet your appetite and leave you yearning for more.

Caribbean Vegetable Curry Ingredients

Elevate your cooking game with these vibrant flavors!

For the Base
• Coconut oil – A healthy fat that imparts a delicious tropical flavor to the curry.
• Onion – Adds sweetness and depth, creating an aromatic foundation for the dish.
• Garlic – Enhances flavor richness, bringing a touch of warmth to every bite.
• Ginger – A key ingredient that adds a zesty, peppery kick to the curry.

For the Vegetables
• Red bell pepper – Offers sweetness and a pop of color, making your dish visually appealing.
• Yellow bell pepper – Complements the red pepper with its mild sweetness.
• Cauliflower florets – Absorbs flavors beautifully while adding a satisfying texture.
• Chopped carrots – Infuses natural sweetness and vibrant color to the mix.
• Green beans – Provides a crisp contrast and fresh flavor that brightens the curry.

For the Creamy Sauce
• Coconut milk – Creates a rich, creamy sauce that’s quintessential to Caribbean Vegetable Curry.
• Curry powder – A blend of spices that imparts a warm, earthy flavor profile.
• Allspice – Adds a hint of sweetness and complexity to the overall taste.
• Smoked paprika – Introduces a subtle smokiness that enhances the curry’s character.
• Salt and black pepper – Essential for balancing flavors; adjust to your taste.
• Vegetable broth – Offers a savory base that brings all the flavors together.

For Garnish and Serving
• Fresh cilantro – A bright herb garnish that elevates the dish with a fresh finish.
• Lime wedges – A zesty accompaniment that adds a refreshing squeeze before enjoying your curry.

Bringing together these delightful ingredients, your Caribbean Vegetable Curry will be an inviting and flavorful dish that transcends everyday meals!

Step‑by‑Step Instructions for Caribbean Vegetable Curry

Step 1: Heat the Oil
In a large pot, heat 2 tablespoons of coconut oil over medium heat until it melts and shimmers, about 1–2 minutes. This step is essential as it helps infuse the base with a delightful tropical flavor. Make sure to swirl the oil around the pot to coat the bottom evenly.

Step 2: Sauté Aromatics
Add the diced onion, minced garlic, and grated ginger to the pot, sautéing for about 3–4 minutes. Stir often until the onion becomes translucent and fragrant. This aromatic mix forms a flavorful foundation for your Caribbean Vegetable Curry, filling your kitchen with enticing scents.

Step 3: Add Bell Peppers
Stir in the chopped red and yellow bell peppers. Cook for another 2–3 minutes, stirring frequently until the peppers soften slightly. This not only enhances the colors in your curry but also ensures that the peppers release their sweet flavors into the mix.

Step 4: Incorporate Hearty Vegetables
Mix in the chopped carrots and cauliflower florets. Stir well to ensure that all the vegetables are combined and coated with the oil and aromatics. Continue cooking for about 4–5 minutes until the cauliflower begins to soften and the colors pop, creating a joyful medley of veggies.

Step 5: Season with Spices
Sprinkle the curry powder, allspice, and smoked paprika over the vegetable mixture. Mix thoroughly until the vegetables are evenly coated, about 1–2 minutes. You’ll notice the spices becoming aromatic, indicating it’s time to take your Caribbean Vegetable Curry to the next level.

Step 6: Add Coconut Milk
Pour in the can of coconut milk, then stir to combine it with the spices and vegetables. Cook for an additional 2 minutes, allowing the creamy milk to meld beautifully with the spices, creating a luscious base for your curry.

Step 7: Pour in Broth
Add the vegetable broth to the pot, mixing everything together for a rich and flavorful sauce. Once well combined, let the curry come to a gentle simmer over medium heat. This will ensure that all the ingredients meld well, enhancing the overall taste.

Step 8: Simmer for Tenderness
Cover the pot and cook the mixture for about 15–20 minutes, allowing it to simmer until the vegetables are tender. During this time, keep an eye on the pot, stirring occasionally to prevent sticking and ensure even cooking.

Step 9: Add Crunchy Green Beans
In the last 5 minutes of cooking, add the trimmed green beans, folding them into the curry gently. This step preserves their bright color and crisp texture, ensuring a delightful contrast in your Caribbean Vegetable Curry.

Step 10: Final Seasoning Adjustments
After removing the pot from the heat, taste the curry and adjust the seasoning with salt and black pepper as needed. This final touch enhances the flavors, ensuring your Caribbean Vegetable Curry becomes a comforting dish bursting with taste.

Step 11: Garnish and Serve
Before serving, sprinkle fresh cilantro on top for a burst of flavor and a lovely pop of color. Serve your Caribbean Vegetable Curry hot, accompanied by lime wedges for a refreshing squeeze before enjoying a warm plate that brings the tropics to your table.

Caribbean Vegetable Curry

How to Store and Freeze Caribbean Vegetable Curry

Fridge: Store leftover Caribbean Vegetable Curry in an airtight container for up to 5 days, ensuring it stays fresh and flavorful.

Freezer: This curry freezes beautifully! Pour it into a freezer-safe container, leaving space for expansion, and enjoy it for up to 3 months.

Reheating: When you’re ready to enjoy, thaw overnight in the fridge or use the microwave. Reheat gently on the stove, adding a splash of vegetable broth to restore creaminess.

Serving Tip: Freshen up your reheated curry with a sprinkle of cilantro and a squeeze of lime for an added zing!

Expert Tips for Caribbean Vegetable Curry

Use Fresh Ingredients: Always opt for fresh vegetables to ensure vibrant flavors and textures in your Caribbean Vegetable Curry.

Adjust Spice Levels: Feel free to increase or decrease the curry powder according to your heat tolerance—start small if unsure!

Don’t Overcook Beans: Add green beans in the last 5 minutes of cooking to maintain their bright color and crispness, enhancing the overall dish.

Simmer Gently: Avoid boiling; a gentle simmer allows the vegetables to become tender while keeping their shape and preventing mushiness.

Garnish Wisely: Don’t skip the fresh cilantro and lime wedges—they add essential brightness and flavor that elevates your curry experience.

Store Right: Keep leftovers in an airtight container in the fridge for up to 5 days or freeze for up to 3 months to enjoy this delightful Caribbean Vegetable Curry later!

Make Ahead Options

These Caribbean Vegetable Curry preparations are perfect for busy home cooks looking to save time during the week! You can chop all the vegetables (onion, bell peppers, carrots, and cauliflower) up to 24 hours in advance and store them in an airtight container in the refrigerator. Additionally, you can mix your spices (curry powder, allspice, and smoked paprika) ahead to streamline the cooking process. When you’re ready to serve your curry, just heat the coconut oil, sauté the aromatics, add the prepped veggies and spices, then stir in the coconut milk and vegetable broth. With these make-ahead tips, you’ll enjoy your flavorful Caribbean Vegetable Curry with minimal effort on busy nights!

What to Serve with Caribbean Vegetable Curry

Elevate your dining experience with delicious sides that are vibrant and flavorful.

  • Coconut Rice: Sweet and fragrant, it enhances the tropical theme while soaking up the curry’s rich sauce.
  • Warm Flatbreads: Perfect for scooping up the curry, these fluffy morsels offer a delightful, chewy texture.
  • Steamed Broccoli: Bright green and crunchy, this side adds a fresh element that complements the velvety curry beautifully.
  • Mango Chutney: A sweet and tangy contrast that adds a burst of flavor and complements the spices in your dish.
  • Crispy Papadums: Light and crunchy, these are fantastic for adding a different texture while enjoying a taste of the tropics.
  • Pineapple Smoothie: Cool and refreshing, it balances the heat of the curry while echoing those tropical flavors.

Variations for Caribbean Vegetable Curry

Feel free to unleash your creativity and customize this curry to suit your taste!

  • Spicy Kick: Add sliced jalapeños or a dash of cayenne pepper during cooking for an extra layer of heat that will wake up your palate! Let the spices mingle with the veggies to create a flavor explosion.

  • Protein Boost: Include chickpeas or cooked lentils to make this curry heartier and more filling—perfect for a satisfying meal that keeps you fueled throughout the day.

  • Sweet Addition: Toss in diced sweet potatoes or butternut squash for a hint of natural sweetness that pairs beautifully with the spices. This delightful twist adds both flavor and a beautiful color contrast.

  • Creamy Cashew Twist: Blend 1/4 cup raw cashews with a bit of water until smooth and stir into the curry to enhance the creaminess, delivering an indulgent richness that’s absolutely irresistible.

  • Herb Infusion: Experiment by adding fresh basil or mint along with the cilantro for a refreshing herbal twist that transforms the dish into a vibrant taste sensation.

  • Earthy Flavor: Swap out the cauliflower for roasted or sautéed mushrooms; they bring a deliciously earthy flavor that complements the spices while adding a satisfying texture.

  • Coconut Variations: Try using coconut yogurt as a garnish or stirring in a spoonful for a tangy creaminess that rounds out the flavors beautifully.

  • Veggie Variety: Feel free to substitute any seasonal vegetables such as zucchini or asparagus. This flexibility not only keeps your curry exciting but also makes the most of what you have on hand.

Elevate your Caribbean Vegetable Curry experience by playing around with these variations and serving suggestions! To fully enjoy the burst of flavors, pair it with coconut rice or warm flatbreads, and don’t forget that refreshing lime wedge for the perfect finish.

Caribbean Vegetable Curry

Caribbean Vegetable Curry Recipe FAQs

How do I choose ripe vegetables for the curry?
Absolutely! When selecting vegetables for your Caribbean Vegetable Curry, look for fresh and vibrant options. For bell peppers, choose those with smooth, shiny skin—avoid any that have dark spots all over. Cauliflower should be white with tight, compact florets, while carrots should be firm and brightly colored. Fresh green beans should snap when bent, showing that they’re crisp and not limp.

What’s the best way to store leftovers of this curry?
Very good question! Store any leftover Caribbean Vegetable Curry in an airtight container in the refrigerator for up to 5 days. Make sure the curry cools down to room temperature before sealing it up. This will help maintain its freshness! For best results, reheat gently on the stove or microwave, adding a splash of vegetable broth if it thickens too much.

Can I freeze Caribbean Vegetable Curry?
Absolutely! To freeze your delicious curry, allow it to cool completely and pour it into a freezer-safe container or zip-top bag, leaving some space at the top for expansion as it freezes. It will keep well in the freezer for up to 3 months. When you’re ready to enjoy it, thaw it overnight in the fridge, then reheat on the stove. A splash of vegetable broth can help bring back the creamy consistency!

What should I do if my curry is too spicy?
If you find your Caribbean Vegetable Curry too spicy, don’t worry! You can balance the heat by adding more coconut milk or vegetable broth to dilute it. Another great option is to stir in additional chopped vegetables that can absorb some spice, such as more cauliflower or carrots. This way, you maintain the volume of your dish while softening the heat!

Is this curry suitable for people with allergies?
Great inquiry! This Caribbean Vegetable Curry is naturally vegan and gluten-free, making it a safe option for many dietary needs. However, always check for specific allergies, especially to coconut, which is present in the coconut milk. If you’re cooking for someone with allergies, it might be wise to substitute coconut milk with a different non-dairy milk, adjusting the flavors as needed.

Can I make this curry in advance?
Very much so! One of the great aspects of Caribbean Vegetable Curry is that it tastes even better the next day as the flavors meld together. You can prepare it a day in advance and store it in the fridge. Just reheat it on the stove before serving, and don’t forget to garnish with fresh cilantro and a squeeze of lime for a refreshing touch!

Delicious Caribbean Vegetable Curry for Cozy Nights

This Caribbean Vegetable Curry combines vibrant vegetables and creamy coconut sauce for a comforting and nourishing dish.

  • Large Pot

For the Base

  • 2 tablespoons Coconut oil (A healthy fat that imparts a delicious tropical flavor.)
  • 1 medium Onion (Adds sweetness and depth.)
  • 3 cloves Garlic (Enhances flavor richness.)
  • 1 tablespoon Ginger (Adds a zesty kick.)

For the Vegetables

  • 1 medium Red bell pepper (Offers sweetness and color.)
  • 1 medium Yellow bell pepper (Complements the red pepper.)
  • 2 cups Cauliflower florets (Absorbs flavors beautifully.)
  • 1 cup Chopped carrots (Infuses natural sweetness.)
  • 1 cup Green beans (Provides a crisp contrast.)

For the Creamy Sauce

  • 1 can Coconut milk (Creates a rich, creamy sauce.)
  • 2 tablespoons Curry powder (A blend of spices for flavor.)
  • 1 teaspoon Allspice (Adds sweetness and complexity.)
  • 1 teaspoon Smoked paprika (Introduces subtle smokiness.)
  • 1 teaspoon Salt (Adjust to taste.)
  • 1 teaspoon Black pepper (Adjust to taste.)
  • 1 cup Vegetable broth (Offers a savory base.)

For Garnish and Serving

  • 1 cup Fresh cilantro (A bright herb garnish.)
  • 2 pieces Lime wedges (Add a refreshing squeeze.)

Step‑by‑Step Instructions

  1. In a large pot, heat coconut oil over medium heat until it melts.
  2. Add diced onion, minced garlic, and grated ginger; sauté until onion is translucent.
  3. Stir in chopped red and yellow bell peppers; cook until softened.
  4. Mix in chopped carrots and cauliflower florets; stir to combine.
  5. Sprinkle curry powder, allspice, and smoked paprika; mix until vegetables are coated.
  6. Pour in coconut milk; stir to combine with spices.
  7. Add vegetable broth; mix everything together and let simmer.
  8. Cover and cook for 15–20 minutes until vegetables are tender.
  9. In the last 5 minutes, add trimmed green beans.
  10. Taste and adjust seasoning with salt and black pepper.
  11. Sprinkle fresh cilantro on top and serve with lime wedges.

Use fresh ingredients for best flavor and adjust spice levels to your taste. This curry is rich in nutrients and caters to various dietary needs.

Main Dishes
Caribbean
Coconut Curry, gluten-free, healthy dinner, quick recipe, Vegan, vegetable curry

Filed Under: Main Dishes

Comforting Hamburger Potato Casserole That Heals the Soul

October 21, 2025 by grace bellamy Leave a Comment

There’s nothing like the comforting scent of a casserole bubbling away in the oven, especially on a chilly evening. Our Hamburger Potato Casserole is a warm hug in a dish that’s perfect for both busy weeknights and leisurely weekends. This recipe features tender layers of sliced potatoes and seasoned ground beef, all enveloped in a creamy, savory sauce that practically invites you to dig in. With just 20 minutes of prep time, you’ll be rewarded with a hearty meal that can easily please a crowd or satisfy cravings long into the night. Plus, it’s freezer-friendly, making it a practical choice for those looking to save time for future feasts. Are you ready to warm your kitchen and your heart? Let’s get started!

Hamburger Potato Casserole

Why Is This Casserole a Must-Try?

Simplicity makes this Hamburger Potato Casserole a breeze to prepare, requiring just 20 minutes of hands-on time. Flavor-fusion at its finest, the hearty ground beef pairs beautifully with creamy soups, while layers of tender potatoes create a comforting base. Versatile enough for any occasion, this dish is perfect for casual family dinners or potlucks. Plus, it’s crowd-pleasing, ensuring everyone leaves the table satisfied. For added convenience, don’t forget it’s freezer-friendly, making meal prep a snap for busy nights. Try it alongside a fresh salad or some homemade bread for a complete meal!

Hamburger Potato Casserole Ingredients

• Here’s everything you need to create this comforting dish!

For the Casserole

  • 1 pound ground beef – the star protein that adds rich flavor and substance.
  • 1 medium onion, chopped – infuses a delicious sweetness and depth.
  • 4 cups thinly sliced potatoes – use a mandoline for perfectly even slices and tender texture.
  • 1 can (10.5 oz) cream of mushroom soup – adds creaminess and a savory touch; can substitute with cream of chicken if desired.
  • 1 can (10.5 oz) cream of celery soup – gives a unique flavor boost, complementing the beef perfectly.
  • 1 cup milk – thins out the soup mixture for the right consistency and creaminess.
  • 1 teaspoon salt – elevates all the flavors, balancing the richness.
  • 1/2 teaspoon black pepper – adds a subtle warmth without overpowering the dish.
  • 2 cups shredded cheddar cheese – melty goodness on top that adds a savory finish.
  • 2 tablespoons olive oil – helps in sautéing the onions and beef, contributing healthy fats to the dish.

This Hamburger Potato Casserole is sure to be a hit at your dinner table!

Step‑by‑Step Instructions for Hamburger Potato Casserole

Step 1: Preheat the Oven
Begin by preheating your oven to 350°F (175°C). This ensures that once your casserole is assembled, it can bake evenly and become beautifully golden. Set aside a spacious 9×13-inch baking dish, which will house your comforting Hamburger Potato Casserole.

Step 2: Sauté the Onions
In a large skillet, warm 2 tablespoons of olive oil over medium heat. Add the chopped onion and sauté for about 5 minutes, or until the onions become soft and translucent. This step infuses a delightful flavor into your ground beef that will enrich the overall taste of the casserole.

Step 3: Brown the Ground Beef
Next, add 1 pound of ground beef to the skillet with the softened onions. Cook them together, breaking the beef apart with a spoon, until it’s no longer pink, typically around 7-10 minutes. If there’s excess fat, be sure to drain it off so your Hamburger Potato Casserole won’t be greasy.

Step 4: Mix the Soup Base
In a large bowl, combine 10.5 oz each of cream of mushroom soup and cream of celery soup with 1 cup of milk, 1 teaspoon of salt, and ½ teaspoon of black pepper. Stir this mixture thoroughly until all ingredients are well blended, creating a creamy base that will envelop the layers of your casserole.

Step 5: Layer the Potatoes
Prepare your baking dish by spreading half of the 4 cups of thinly sliced potatoes evenly across the bottom. This initial layer will create a solid foundation for your Hamburger Potato Casserole, allowing all the flavors to meld beautifully as it bakes.

Step 6: Add the Ground Beef
Now, spoon half of the cooked ground beef mixture over the layer of sliced potatoes, spreading it out evenly. This will ensure each bite of the casserole is rich with flavor and features that hearty meat you desire.

Step 7: Pour the Soup Mixture
Next, carefully pour half of the creamy soup mixture over the beef layer, spreading it evenly with a spatula. This will not only add moisture but also enhance the flavors of your Hamburger Potato Casserole as it bakes and the layers melt together.

Step 8: Repeat the Layers
Layer the remaining potato slices over the top of the soup mixture. Follow this with the rest of the ground beef mixture, ensuring everything is evenly distributed. Finally, pour the remaining soup mixture over the entire dish, sealing in the deliciousness.

Step 9: Bake Covered
Cover the casserole dish tightly with aluminum foil, which helps to trap moisture and ensure even cooking. Place it in the preheated oven to bake for 1 hour, allowing the potatoes to become tender and the flavors to meld together.

Step 10: Add the Cheese
After an hour of baking, carefully remove the foil to expose the layer of casserole beneath. Sprinkle 2 cups of shredded cheddar cheese evenly over the top. Return the dish to the oven uncovered, and bake for an additional 15-20 minutes, until the cheese is melted and bubbly, adding a deliciously golden finish to your Hamburger Potato Casserole.

Step 11: Cool and Serve
Once you’ve achieved that irresistible cheesy goodness, remove the casserole from the oven. Allow it to cool for a few minutes before serving. This brief rest will help set the layers, making it easier to serve up generous portions for a warm and inviting family meal.

Hamburger Potato Casserole

Helpful Tricks for Hamburger Potato Casserole

  • Perfect Potato Slices: Use a mandoline to ensure your potatoes are evenly sliced. This helps them cook uniformly, avoiding any crunchy bits in your casserole.
  • Drain the Grease: Always drain excess fat from the ground beef after browning. This prevents your Hamburger Potato Casserole from becoming too greasy and keeps the flavors balanced.
  • Layering Tips: Make sure to layer ingredients evenly. This ensures every bite is flavorful and consistent, giving you that comfort food experience everyone loves.
  • Cheese Melting: For a super gooey cheese topping, broil the casserole for the last 2-3 minutes if you want an extra bubbly finish. Just keep a close eye to prevent burning!
  • Freezer-Friendly: Don’t forget, this casserole can be made ahead and frozen! Just assemble it, cover tightly, and freeze before baking for an easy future meal.
  • Season to Taste: Adjust the seasonings in the soup mixture according to your preference—feel free to add a pinch of garlic powder or herbs for extra flavor in your Hamburger Potato Casserole.

Make Ahead Options

These Hamburger Potato Casserole components are perfect for meal prep, making weeknight cooking a breeze! You can prepare the casserole completely and refrigerate it for up to 24 hours before baking. Simply follow the assembly steps and cover the dish tightly with aluminum foil to prevent drying out. If you want to prep even further ahead, you can also store the casserole in the freezer for up to 3 months—just be sure to thaw it overnight in the fridge before baking. When you’re ready to enjoy, bake it from the fridge at 350°F for about an hour. Your Hamburger Potato Casserole will be just as delicious and comforting, saving you precious time while still delivering a hearty family meal!

What to Serve with Hamburger Potato Casserole

Enhancing your meal with delightful sides will take your Hamburger Potato Casserole to the next level of comfort and satisfaction.

  • Garlic Bread: A classic pairing, its crispy, buttery finish complements the creamy richness of the casserole while soaking up all the savory goodness.

  • Green Salad: A refreshing mix of greens, tomatoes, and cucumbers adds crunch and brightness, perfectly balancing the hearty flavors and textures of the casserole.

  • Steamed Broccoli: Tender, vibrant green florets provide a nutritional boost and a pop of color to your plate, making each bite feel wholesome and nourishing.

  • Roasted Brussels Sprouts: Caramelized on the outside and tender within, they bring a nutty flavor that harmonizes beautifully with the casserole’s richness.

  • Apple Sauce: Sweet and tangy, it’s a nostalgic side that cuts through the savory layers of the casserole for a delightful contrast.

  • Homemade Coleslaw: Creamy with a bit of crunch, this dish enhances the meal’s texture while adding a refreshing element.

  • Sweet Tea: A classic beverage that perfectly complements comfort food, its sweetness balances the savory flavors of the casserole beautifully.

  • Chocolate Chip Cookies: For a sweet finish, these warm, gooey cookies provide a comforting end to your meal, leaving you completely satisfied.

How to Store and Freeze Hamburger Potato Casserole

Fridge: Store leftovers in an airtight container for up to 3 days. Make sure it’s completely cooled before sealing, to avoid condensation.

Freezer: To freeze, assemble the casserole but do not bake. Cover tightly with foil or plastic wrap and freeze for up to 3 months.

Reheating: When ready to eat, thaw overnight in the fridge, then bake at 350°F (175°C) for about 30-40 minutes or until heated through. For an extra cheesy top, add a bit more cheddar before reheating.

Extra Tips: If you have single servings left, portion them out in smaller containers for quick lunches. Enjoy your delicious Hamburger Potato Casserole anytime!

Hamburger Potato Casserole Variations

Feel free to explore these creative twists that can make your Hamburger Potato Casserole even more delicious!

  • Dairy-Free: Substitute the cream soups with a dairy-free alternative, using cashew cream for richness. This variation keeps the creamy texture while making it suitable for dairy-sensitive folks.
  • Vegetarian: Swap out the ground beef for a combination of sautéed mushrooms and lentils. You’ll enjoy a hearty and nutritious option that’s just as satisfying.
  • Spicy Kick: Add diced jalapeños or crushed red pepper flakes to the beef mixture for a delicious heat. It transforms your casserole into a zesty comfort food delight!
  • Herb Infusion: Stir in fresh herbs like thyme or rosemary into the soup mixture. The fragrant herbs will elevate the dish and surprise your guests with delightful flavors.
  • Cheesy Variants: Instead of cheddar, try other cheeses like pepper jack for a spicy twist or gouda for a nutty flavor that complements the beef beautifully.
  • Tex-Mex Style: Incorporate black beans and corn, and top with shredded Mexican cheese blend. This will give your casserole a fun, fiesta-style flair that everyone will love!
  • Loaded Baked Potato: Add crispy bacon bits and green onions on top just before serving, reminiscent of your favorite loaded baked potatoes in a casserole form.
  • Add a Crunch: Mix in breadcrumbs or crushed tortilla chips as a topping before the final few minutes of baking for an irresistible crunch that contrasts with the creamy layers.

Each variation opens up a world of flavor possibilities, ensuring your Hamburger Potato Casserole remains a family favorite with every bite!

Hamburger Potato Casserole

Hamburger Potato Casserole Recipe FAQs

How do I choose the right potatoes for my casserole?
Absolutely! For the best results, look for starchy potatoes like Russets or creamy ones like Yukon Gold. These varieties cook well and become wonderfully tender in the casserole. Avoid waxy potatoes, as they can remain firm and not absorb the flavors as effectively.

How can I store leftovers properly?
I recommend transferring your Hamburger Potato Casserole leftovers into an airtight container. They’ll stay fresh for up to 3 days if stored in the fridge. Be sure to let it cool completely before sealing it, preventing moisture buildup that can lead to sogginess.

Can I freeze my Hamburger Potato Casserole?
Very! To freeze, assemble the casserole without baking it. Cover it tightly with foil or plastic wrap and freeze for up to 3 months. When you’re ready to enjoy it, simply thaw in the fridge overnight before baking as directed. This convenience makes meal prep a breeze!

What should I do if my casserole seems too watery?
If your casserole turns out watery, it could be due to excess moisture from the potatoes. To avoid this next time, be sure to slice the potatoes evenly and drain any excess liquid from the beef and soup mixture before layering. Baking it uncovered for the last 15-20 minutes can also help evaporate extra moisture.

Is this recipe suitable for people with dairy allergies?
If you have dairy allergies, I recommend using dairy-free alternatives. Substitute the cream of mushroom and cream of celery soups with plant-based versions, and use non-dairy milk instead. You can also omit the cheese or use a dairy-free cheese alternative on top to keep the comforting aspect intact.

How long does the casserole need to bake?
After being covered, your Hamburger Potato Casserole needs to bake for an hour at 350°F (175°C). During the last 15-20 minutes, remove the foil to allow the cheese to melt beautifully and the top to turn golden brown. This helps create that delicious contrast between creamy layers and a crispy top!

Comforting Hamburger Potato Casserole That Heals the Soul

A hearty Hamburger Potato Casserole featuring layers of sliced potatoes and seasoned ground beef, enveloped in a creamy sauce, perfect for any occasion.

  • 9×13-inch baking dish
  • large skillet
  • large bowl

For the Casserole

  • 1 pound ground beef (the star protein that adds rich flavor and substance.)
  • 1 medium onion, chopped (infuses a delicious sweetness and depth.)
  • 4 cups thinly sliced potatoes (use a mandoline for perfectly even slices.)
  • 1 can cream of mushroom soup (adds creaminess and a savory touch.)
  • 1 can cream of celery soup (gives a unique flavor boost.)
  • 1 cup milk (thins out the soup mixture.)
  • 1 teaspoon salt (elevates all the flavors.)
  • 1/2 teaspoon black pepper (adds subtle warmth.)
  • 2 cups shredded cheddar cheese (melty goodness on top.)
  • 2 tablespoons olive oil (helps in sautéing the onions and beef.)

Directions

  1. Preheat your oven to 350°F (175°C). Prepare a spacious 9×13-inch baking dish.
  2. Warm 2 tablespoons of olive oil in a large skillet over medium heat. Add chopped onion and sauté for about 5 minutes until soft.
  3. Add 1 pound of ground beef to the skillet with the softened onions. Cook until no longer pink, around 7-10 minutes.
  4. In a large bowl, combine cream of mushroom soup, cream of celery soup, 1 cup of milk, 1 teaspoon of salt, and ½ teaspoon of black pepper. Stir thoroughly.
  5. Spread half of the 4 cups of thinly sliced potatoes evenly across the bottom of the baking dish.
  6. Spoon half of the cooked ground beef mixture over the layer of sliced potatoes.
  7. Pour half of the creamy soup mixture over the beef layer, spreading evenly with a spatula.
  8. Layer the remaining potato slices over the top of the soup mixture, followed by the rest of the ground beef mixture.
  9. Pour the remaining soup mixture over the entire dish, sealing in the deliciousness.
  10. Cover the casserole dish tightly with aluminum foil and place it in the preheated oven to bake for 1 hour.
  11. Remove the foil and sprinkle 2 cups of shredded cheddar cheese evenly on top. Bake uncovered for an additional 15-20 minutes.
  12. Allow the casserole to cool for a few minutes before serving.

This casserole is freezer-friendly. Assemble it, cover tightly, and freeze before baking for an easy future meal.

Main Dishes
American
casserole, comfort food, Easy Recipe, family dinner, Hamburger Potato Casserole, Hearty Meal

Filed Under: Main Dishes

Garlic Herb Roasted Potatoes, Carrots, and Zucchini Delight

October 21, 2025 by grace bellamy Leave a Comment

With the aroma of garlic and herbs wafting through the kitchen, there’s something deeply satisfying about roasting a medley of vegetables to perfection. My Garlic Herb Roasted Potatoes, Carrots, and Zucchini is a wholesome dish that effortlessly transforms humble ingredients into a vibrant feast. One of the best parts? It comes together in just under an hour and is packed with nutrients, making it an ideal choice for anyone looking to elevate their weeknight dinners. Plus, the leftovers can be stored or frozen, ensuring a delicious side dish is always within reach. Curious to discover how these simple veggies can become your new go-to comfort food? Let’s get roasting!

Garlic Herb Roasted Potatoes Carrots Zucchini

Why are roasted veggies so irresistible?

Simplicity shines through in this recipe, as it requires minimal prep and basic ingredients. Flavorful garlic and herbs infuse each bite, making these Garlic Herb Roasted Potatoes, Carrots, and Zucchini a taste sensation. Versatility means you can serve it alongside any main course or enjoy it as a healthy snack. Effortless cleanup and batch cooking allow you to pair leftovers with lunch or dinner throughout the week. Explore other delicious veggie dishes in this vibrant vegetable medley that’ll keep dinner exciting!

Garlic Herb Roasted Potatoes Carrots Zucchini Ingredients

Discover the delicious components of this vibrant dish!

For the Veggies

  • Baby potatoes – halved for optimal roasting, they become tender and golden.
  • Carrots – cut into sticks to caramelize beautifully and add sweetness.
  • Zucchini – sliced for a delightful texture that contrasts with the other veggies.

For the Dressing

  • Olive oil – the key to achieving that perfectly roasted exterior while keeping veggies moist.
  • Garlic – minced for a bold flavor that complements the herbs beautifully.
  • Dried oregano – this aromatic herb brings a touch of Mediterranean flair to the dish.
  • Dried thyme – adds earthiness that pairs excellently with the other ingredients.
  • Salt – enhances the overall flavor profile of the roasted veggies.
  • Black pepper – a dash to bring out the vibrant flavors of all the ingredients.

For Garnish

  • Fresh parsley – chopped and sprinkled on top for a burst of color and freshness just before serving.

Embrace the joy of cooking with these Garlic Herb Roasted Potatoes, Carrots, and Zucchini!

Step‑by‑Step Instructions for Garlic Herb Roasted Potatoes, Carrots, and Zucchini

Step 1: Preheat the Oven
Begin by preheating your oven to 400°F (200°C). This essential step ensures that your Garlic Herb Roasted Potatoes, Carrots, and Zucchini start cooking evenly right from the moment they go in. By the time you’re ready with the veggies, the oven will be hot and ready to work its magic.

Step 2: Prepare the Vegetables
Wash and chop the baby potatoes, carrots, and zucchinis according to the ingredient list. Halve the potatoes, cut the carrots into sticks, and slice the zucchinis. Aim for uniform sizes to ensure even roasting. The vibrant colors of these vegetables will create a beautiful base for your roasting dish.

Step 3: Mix the Dressing
In a large mixing bowl, combine the olive oil, minced garlic, dried oregano, dried thyme, salt, and black pepper. Whisk the ingredients together until thoroughly blended. This fragrant herb mixture will coat your vegetables and infuse them with delicious flavors as they roast.

Step 4: Coat the Vegetables
Add the halved baby potatoes, carrot sticks, and zucchini slices into the bowl with the dressing. Toss everything together until all the vegetables are evenly coated in the flavorful herb mixture. You should see a lovely sheen on the veggies, indicating they’re ready for roasting.

Step 5: Arrange on a Baking Sheet
Spread the coated vegetables in a single layer on a large baking sheet. This is key for achieving the perfect Garlic Herb Roasted Potatoes, Carrots, and Zucchini; spacing them out promotes even caramelization and browning. Ensure they aren’t crowded and can roast to golden perfection.

Step 6: Roast in the Oven
Place the baking sheet in your preheated oven and roast the vegetables for 30 to 35 minutes. Halfway through cooking, stir the veggies to ensure they brown evenly. You’ll know they’re done when the potatoes are fork-tender and the zucchinis have a slight crispness, showcasing their bright color.

Step 7: Check for Doneness
After roasting, check that all vegetables are cooked through. The ideal texture is tender with fork-tender potatoes and slightly crispy zucchini. If they need more time, feel free to return them to the oven for a few additional minutes, watching closely to prevent burning.

Step 8: Garnish and Serve
Once roasted to perfection, carefully remove the baking sheet from the oven. Sprinkle the vibrant Garlic Herb Roasted Potatoes, Carrots, and Zucchini with freshly chopped parsley before serving. This final touch adds a burst of freshness and elevates the dish both visually and in flavor.

Garlic Herb Roasted Potatoes Carrots Zucchini

Make Ahead Options

These Garlic Herb Roasted Potatoes, Carrots, and Zucchini are perfect for meal prep enthusiasts! You can chop and season the vegetables up to 24 hours in advance, placing them in an airtight container in the refrigerator. This not only saves you valuable time on busy weeknights but also allows the flavors to meld together beautifully. When you’re ready to serve, just spread the seasoned veggies on a baking sheet and roast them in the preheated oven for 30 to 35 minutes until golden and tender. Maintaining quality is key, so be sure to whisk the olive oil and herbs together fresh before coating the veggies for that just-made taste!

Storage Tips for Garlic Herb Roasted Potatoes Carrots Zucchini

Fridge: Store leftovers in an airtight container for up to 4 days; this keeps your Garlic Herb Roasted Potatoes, Carrots, and Zucchini fresh and ready for quick meals.

Freezer: Freeze in an airtight freezer bag for up to 3 months. Squeeze out excess air to prevent freezer burn and maintain flavor.

Reheating: Reheat in the oven at 350°F (175°C) for 10-15 minutes to restore crispiness or warm in the microwave for about 2-3 minutes.

Individual Portions: Consider freezing in single-serving portions to easily defrost and enjoy these veggies whenever a craving strikes!

Garlic Herb Roasted Potatoes Carrots Zucchini Variations

Feel free to let your creativity shine as you explore these delightful variations for your roasted veggies!

  • Sweet Potato: Swap baby potatoes for sweet potatoes for a hint of natural sweetness and vibrant color.
  • Colorful Bell Peppers: Add sliced bell peppers for an extra crunch and a pop of color. They bring a subtle sweetness that balances beautifully with the other veggies.
  • Spicy Kick: Include a pinch of red pepper flakes to elevate the heat level—perfect for those who love a little spice in their life!
  • Herb Explosion: Experiment with fresh herbs like rosemary or basil for a fragrant twist. Just chop them finely and mix them in before roasting to enhance the aroma.
  • Lemon Zest: Add zest from half a lemon to the dressing for a refreshing citrus touch that brightens the dish. Pair it with grilled fish or chicken for a complete and flavorful meal!
  • Root Vegetable Medley: Mix in parsnips or turnips for a hearty root vegetable medley that’s rich in flavor and texture, perfect for chilly evenings.
  • Garlic Lovers: For an extra punch, toss in a few whole garlic cloves with the veggies; they will roast and become deliciously sweet and spreadable!
  • Balsamic Glaze: Drizzle a balsamic glaze over the veggies before serving for a sweet and tangy finish that complements the roasted flavors wonderfully.

Explore these variations and elevate your platter; discover the magic of roasted veggies in endless ways! If you’re thirsting for more colors and flavors, try out my recipes for a vibrant vegetable medley or a zesty Mediterranean veggie mix!

What to Serve with Garlic Herb Roasted Potatoes, Carrots, and Zucchini

Elevate your meal with delightful sides that complement the flavors and textures of this vibrant roasted dish.

  • Creamy Mashed Potatoes: These velvety potatoes bring a rich creaminess that balances the savory roasted veggies perfectly.
  • Grilled Lemon Chicken: The bright citrus notes in this chicken dish enhance the earthy flavors of the Garlic Herb Roasted Potatoes, Carrots, and Zucchini.
  • Garden Salad: A fresh mix of greens and veggies creates a crunchy contrast, adding a refreshing element to your meal.
  • Quinoa Pilaf: This fluffy grain dish adds a nutty flavor and heartiness, making it a stellar base for the roasted medley.
  • Garlic Bread: With its buttery, garlicky goodness, this bread offers a delightful crunch and the perfect tool for savoring every bit of your dish.
  • Raspberry Vinaigrette Dressing: Drizzle over a simple salad to introduce a tangy sweetness, enhancing the overall palate of your meal.
  • Roasted Chickpeas: These crunchy bites pack a protein punch and provide a fantastic texture contrast to the soft roasted vegetables.
  • Herb-Infused Olive Oil: Serve this alongside warm bread or drizzled on salads for an aromatic enhancement that ties the whole meal together.
  • Red Wine: A glass of fruity red enhances the earthiness of the roasted veggies, creating a warm and inviting dinner experience.

Expert Tips for Garlic Herb Roasted Potatoes, Carrots, and Zucchini

Uniform Cuts: Ensure all vegetables are cut to similar sizes for even roasting, preventing some from being overcooked while others remain raw.

High Heat: Roasting at 400°F allows for optimal caramelization, creating that delicious golden brown crust that elevates the Garlic Herb Roasted Potatoes, Carrots, and Zucchini.

Quality Olive Oil: Use extra virgin olive oil for a richer flavor and better roasting results, as it enhances the dish’s overall taste while promoting healthier benefits.

Stir Halfway: Remember to stir the veggies halfway through the cooking time to achieve uniform browning and tenderness, making every bite delightful.

Experiment with Herbs: Feel free to mix in or substitute herbs like rosemary or basil to personalize the flavor profile of your Garlic Herb Roasted Potatoes, Carrots, and Zucchini!

Garlic Herb Roasted Potatoes Carrots Zucchini

Garlic Herb Roasted Potatoes, Carrots, and Zucchini Recipe FAQs

How should I select ripe vegetables?
Absolutely! When choosing baby potatoes, look for ones that are firm and have smooth skins without dark spots. For carrots, pick those that are bright orange and crisp, avoiding ones that are soft or brittle. Zucchini should feel firm and have a shiny skin; any dullness or blemishes may indicate overripeness. Freshness plays a key role in the flavor of your Garlic Herb Roasted Potatoes, Carrots, and Zucchini.

How do I store leftover roasted vegetables?
Very simple! Store any leftovers in an airtight container in the refrigerator for up to 4 days. This keeps your Garlic Herb Roasted Potatoes, Carrots, and Zucchini fresh and ready to complement other meals. Just give them a quick reheat, and they’ll be almost as good as when freshly roasted!

Can I freeze roasted vegetables?
Absolutely! To freeze your Garlic Herb Roasted Potatoes, Carrots, and Zucchini, first let them cool completely. Then, transfer them into an airtight freezer bag, making sure to squeeze out excess air to prevent freezer burn. They can be kept in the freezer for up to 3 months. When you’re ready to enjoy them, simply defrost in the refrigerator overnight and reheat in the oven or microwave.

What if my vegetables are soggy after roasting?
If you find your Garlic Herb Roasted Potatoes, Carrots, and Zucchini are soggy, there are a few troubleshooting tips. First, ensure that you’ve spaced them out properly on the baking sheet to allow for even air circulation—crowding can lead to steaming rather than roasting. Secondly, if they are not as crispy as you’d like, you can place them back in the oven for an additional 5-10 minutes, keeping an eye on them to prevent burning. You may also try increasing the oven temperature slightly for a shorter roasting time next time.

Are there any dietary considerations for this recipe?
Very important! This Garlic Herb Roasted Potatoes, Carrots, and Zucchini recipe is naturally vegetarian and vegan. If you have allergies, ensure that the olive oil you’re using is pure and check spice brands for any potential cross-contamination. While this dish is safe for most pets if eaten in moderation, avoid giving them any seasoned leftovers, as certain herbs can be harmful. Always consult your veterinarian if unsure.

Garlic Herb Roasted Potatoes, Carrots, and Zucchini Delight

Enjoy the vibrant Garlic Herb Roasted Potatoes, Carrots, and Zucchini, a wholesome dish packed with nutrients.

  • Oven
  • Baking Sheet
  • Mixing Bowl
  • Knife
  • cutting board

For the Veggies

  • 1 pound baby potatoes (halved for optimal roasting)
  • 2 medium carrots (cut into sticks)
  • 2 medium zucchini (sliced)

For the Dressing

  • 3 tablespoons olive oil
  • 3 cloves garlic (minced)
  • 1 teaspoon dried oregano
  • 1 teaspoon dried thyme
  • 1 teaspoon salt
  • 1/2 teaspoon black pepper

For Garnish

  • 1/4 cup fresh parsley (chopped)

Step-by-Step Instructions

  1. Preheat your oven to 400°F (200°C).
  2. Wash and chop the baby potatoes, carrots, and zucchinis as per the ingredient list.
  3. In a large mixing bowl, combine olive oil, minced garlic, dried oregano, dried thyme, salt, and black pepper. Whisk until blended.
  4. Add the halved potatoes, carrot sticks, and zucchini slices to the bowl and toss until coated.
  5. Spread the vegetables in a single layer on a baking sheet.
  6. Roast for 30 to 35 minutes, stirring halfway through for even browning.
  7. Check for doneness and roast longer if needed.
  8. Remove from the oven and sprinkle with chopped parsley before serving.

Ensure all vegetables are cut to similar sizes for even roasting. Use extra virgin olive oil for better flavor.

Side Dishes
Mediterranean
comfort food, Garlic Herb Roasted Potatoes Carrots Zucchini, healthy side dish, roasted vegetables, vegetable medley, Weeknight Dinner

Filed Under: Side Dishes

  • « Previous Page
  • 1
  • 2
  • 3
  • 4
  • 5
  • …
  • 22
  • Next Page »
RecipeCrown

Hello, beautiful people! I’m Grace Bellamy, a foodie, traveler, and writer with wanderlust in my soul. Whether crafting recipes in my kitchen or exploring flavors around the globe, my greatest joy is helping you create healthier, happier lives, one delicious bite at a time.