RecipeCrown

Easy & Delicious Recipes

  • Home
  • Breakfast
  • Main Dishes
  • Dessert
  • About
  • Contact
You are here: Home / Archives for grace bellamy

Savory Olive Garden Pasta That Beats Fast Food Any Day

October 21, 2025 by grace bellamy Leave a Comment

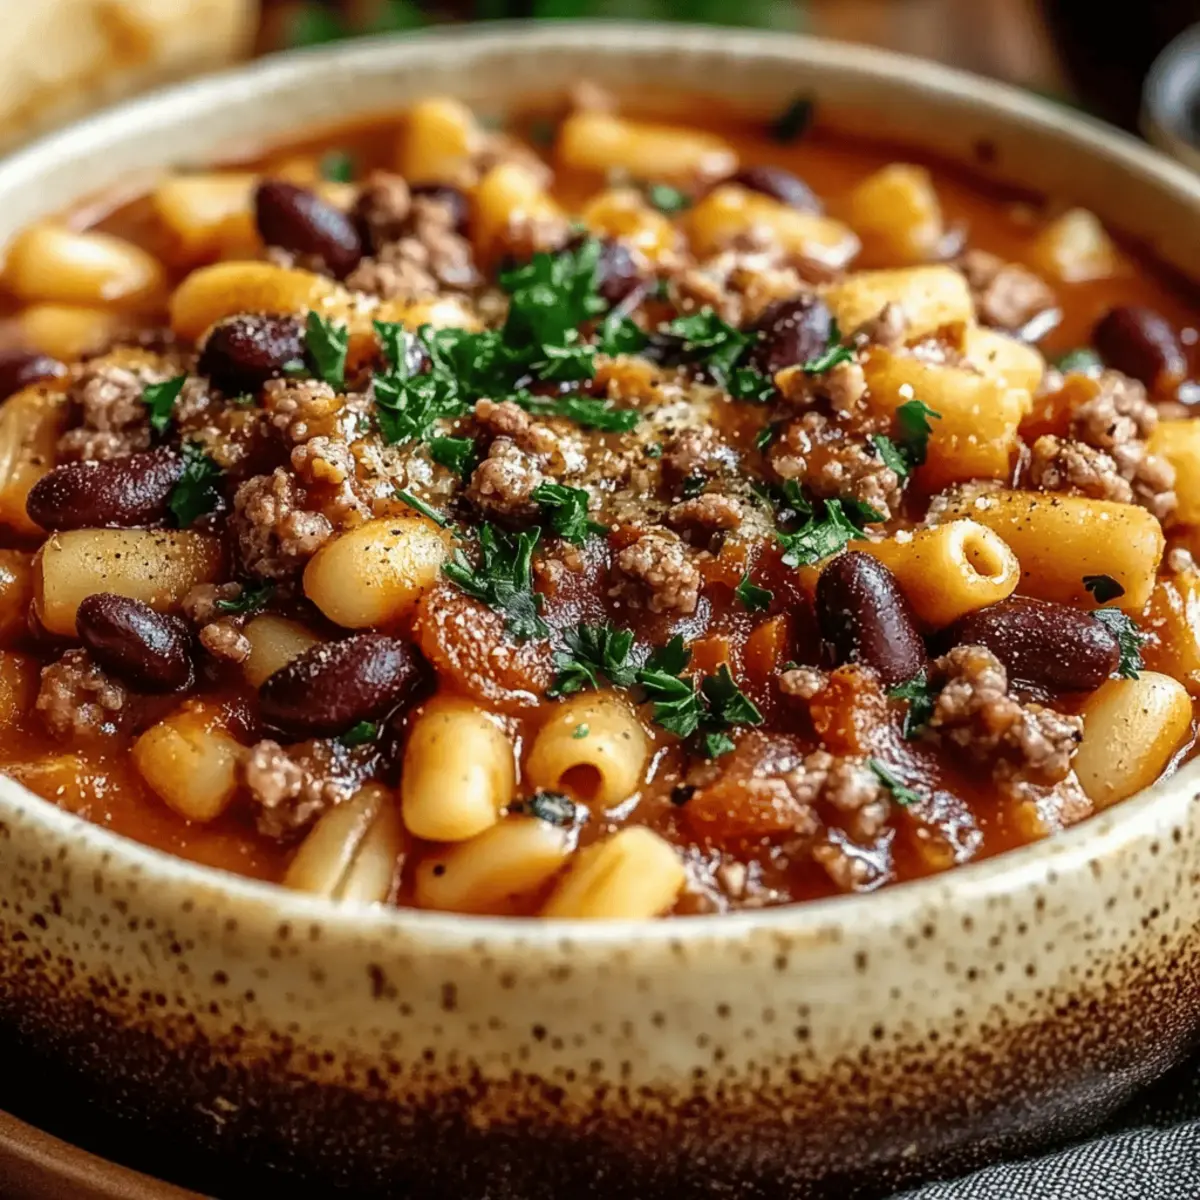
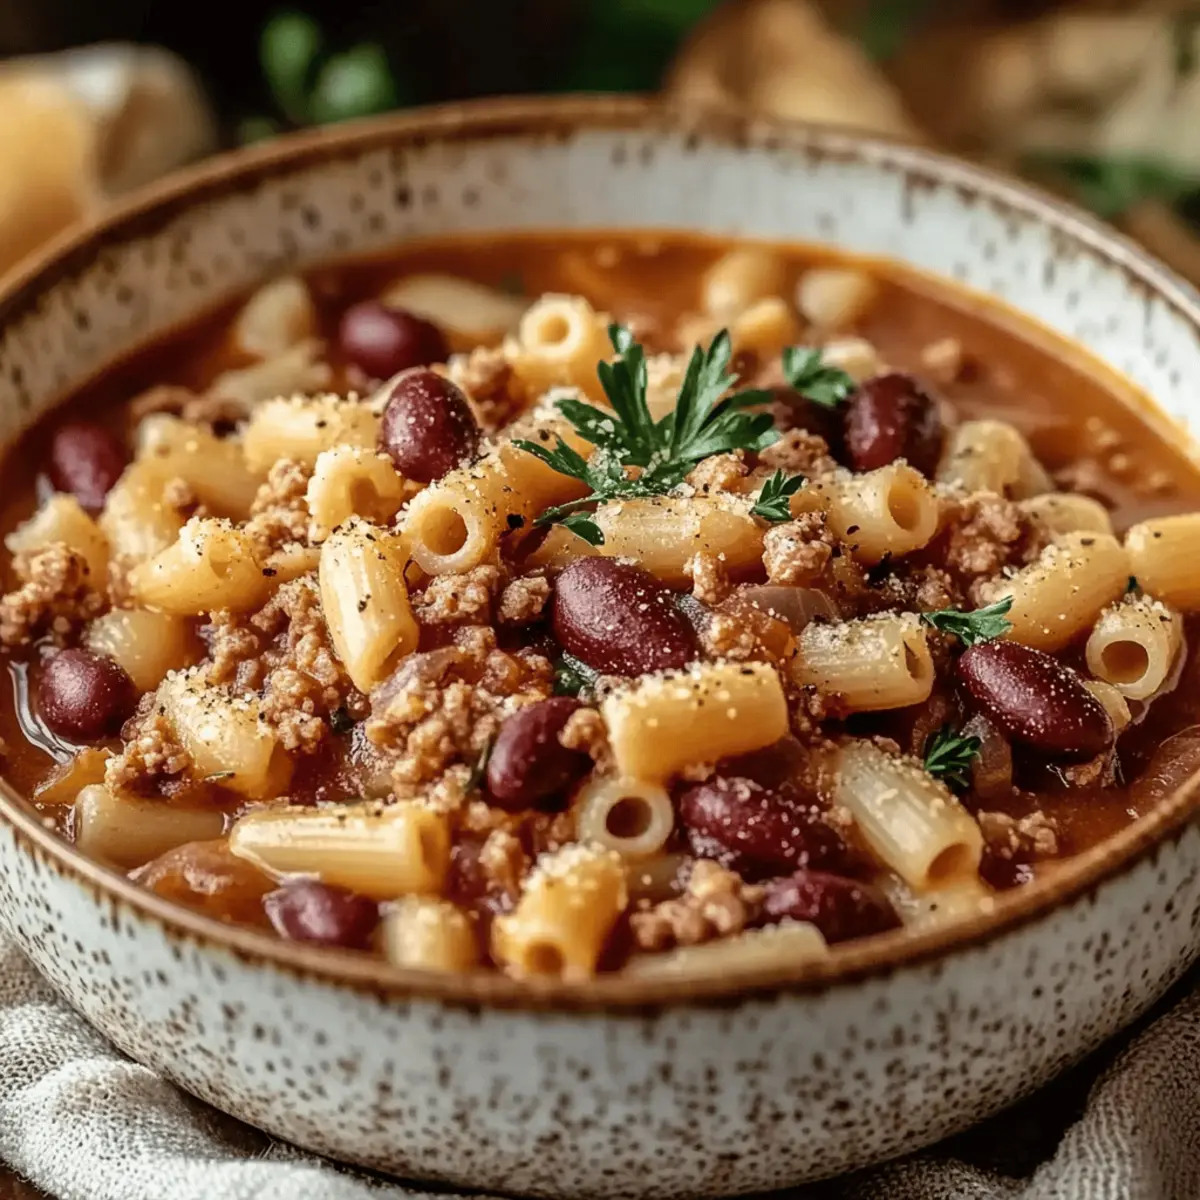
It’s a chilly evening, and I can’t help but be transported back to that cozy Italian restaurant I stumbled upon during my last trip. The rich aroma of simmering herbs and savory broth beckoned me, and I knew that I had to recreate that magic at home. That’s where my love for hearty Pasta e Fagioli began, a delightful dish that feels like a warm hug in a bowl. This comforting recipe not only lets you whip up a satisfying meal in just 45 minutes, but it’s also a fantastic way to sneak in some vegetables for the family. Packed with wholesome ingredients like cannellini beans, veggies, and tender pasta, each spoonful is both nourishing and delicious. Are you ready to learn how to bring a touch of Italy to your kitchen? Let’s dive into this easy-to-follow recipe that will become a go-to in your home!

Olive Garden Pasta

Why is Pasta e Fagioli So Loved?

Comforting, it brings warmth and satisfaction with every spoonful, ideal for chilly evenings. Nutritious ingredients like spinach and beans make it a wholesome family favorite. Quick to prepare, this recipe allows you to enjoy delicious homemade food in just 45 minutes. Impressive flavors from herbs and savory broth create an irresistible aroma. Need a crowd-pleaser? This Pasta e Fagioli is sure to win hearts at your next gathering! For more comforting options, check out my Italian-inspired meals!

Olive Garden Pasta Ingredients

For the Base

  • 1 lb ground beef (or Italian sausage) – Use ground turkey for a lighter option without sacrificing flavor.
  • 1 medium onion, chopped – Adds a sweet, aromatic base that enhances the overall dish.
  • 2 cloves garlic, minced – Fresh garlic provides a punch of flavor that’s hard to substitute.
  • 2 carrots, diced – A touch of sweetness and a great way to sneak in some veggies!
  • 2 celery stalks, diced – Contributes a nice crunch and depth to the flavor profile.

For the Soup

  • 1 can (15 oz) cannellini beans, drained and rinsed – These creamy beans are the star of any Pasta e Fagioli dish.
  • 1 can (14.5 oz) diced tomatoes, with juice – The tomatoes bring brightness and acidity that balances the beef.
  • 4 cups beef broth (or vegetable broth) – Use homemade broth for a more robust flavor, or go low-sodium if desired.
  • 1 cup small pasta (such as ditalini or small shells) – Choose your preferred pasta for perfectly balanced bites.

For Flavor & Garnish

  • 2 cups fresh spinach (optional) – This adds a vibrant color and a nutritional boost!
  • 1 teaspoon dried oregano – A must-have herb that gives that authentic Italian essence.
  • 1 teaspoon dried basil – Complementary to oregano, it enhances the dish’s flavor profile.
  • Salt and pepper, to taste – Essential for brightening and rounding out the flavors.
  • Olive oil, for sautéing – Extra virgin olive oil infuses a fruity aroma while cooking.
  • Grated Parmesan cheese, for serving – A generous sprinkle ties all the flavors together beautifully.

Embrace the joy of crafting this Olive Garden Pasta dish that will surely outshine any fast food option you’ve been tempted by. Enjoy every comforting bite!

Step‑by‑Step Instructions for Olive Garden Pasta

Step 1: Sauté the Aromatics
In a large pot, heat a tablespoon of olive oil over medium heat. Add the chopped onion, diced carrots, and celery. Sauté these vegetables for about 5 to 7 minutes, or until they become tender and translucent. Stir occasionally to ensure even cooking, and watch for a lovely aroma filling your kitchen as the veggies soften.

Step 2: Brown the Meat
Add the ground beef or Italian sausage to the pot, breaking it apart with a wooden spoon. Cook for approximately 5 minutes, stirring frequently, until the meat is browned and no longer pink. This step is crucial for developing flavor, so ensure the meat cooks evenly and gets a nice sear while absorbing the aromatic essence of the sautéed vegetables.

Step 3: Enhance the Flavor
Stir in the minced garlic, dried oregano, and basil. Cook for an additional minute, stirring continuously to prevent the garlic from burning. You’ll know it’s ready when the aroma of the herbs wafts through the air, creating an inviting scent that signals the next delicious step in your Olive Garden Pasta dish.

Step 4: Add the Tomatoes and Beans
Pour the can of diced tomatoes, along with their juices, and the drained cannellini beans into the pot. Stir everything together to combine the flavors. As the mixture thickens, you’ll observe the bright color of the tomatoes merging with the creamy beans—a beautiful sight that promises a flavorful base for your Pasta e Fagioli.

Step 5: Simmer the Broth
Next, pour in the beef or vegetable broth, bringing the mixture to a gentle boil. Once it starts bubbling, reduce the heat to low and allow it to simmer for about 15 minutes. As it simmers, you’ll see the flavors meld and deepen, creating a rich, comforting soup that evokes images of an Italian kitchen.

Step 6: Cook the Pasta
Add the small pasta, such as ditalini or small shells, to the pot. Cook according to the package instructions, generally around 8-10 minutes until the pasta reaches al dente. Stir occasionally to prevent sticking, and feel free to check for doneness—a perfect opportunity to sample a spoonful of this delightful Olive Garden Pasta.

Step 7: Incorporate the Spinach
If you opt for spinach, stir it into the soup during the last couple of minutes of cooking. Watch as the vibrant greens wilt into the soup, adding a pop of color and nutrition. This step not only enhances the flavor profile but also transforms your Pasta e Fagioli into an even healthier dish that your family will love.

Step 8: Season to Perfection
Taste the soup and adjust the seasoning with salt and pepper to enhance the flavors. This is your chance to create just the right balance, making every spoonful irresistibly delicious. A perfectly seasoned Olive Garden Pasta relies on these final adjustments, ensuring that every flavor shines through in the comforting broth.

Step 9: Serve and Garnish
Ladle the hearty Pasta e Fagioli into bowls, then top each serving with a generous sprinkle of freshly grated Parmesan cheese. As the cheese melts slightly into the warm soup, it adds a creamy richness that elevates the overall experience. Take a moment to savor the visual and aromatic appeal before diving in!

Olive Garden Pasta

Make Ahead Options

These comforting Pasta e Fagioli are perfect for meal prep enthusiasts looking to save time during busy weeknights! You can sauté the vegetables and brown the meat up to 24 hours in advance; simply refrigerate the mixture in an airtight container. Additionally, the soup itself can be stored in the refrigerator for up to 3 days or frozen for up to 3 months. To maintain optimal quality, store the cooked pasta separately to prevent it from becoming mushy. When you’re ready to serve, reheat the soup on the stove and add the pasta until warmed through, ensuring each spoonful remains just as delicious as when first made!

Olive Garden Pasta Variations

Feeling inspired? Let your creativity flow with these delightful twists to make the recipe uniquely yours!

  • Dairy-Free: Substitute grated Parmesan with nutritional yeast for a cheesy flavor that’s completely dairy-free.
  • Vegetarian: Replace ground beef with a mix of lentils and mushrooms for a delightful umami flavor.
  • Gluten-Free: Use gluten-free pasta such as brown rice or quinoa pasta, ensuring everyone can enjoy a comforting bowl.
  • Spicy Kick: Add red pepper flakes or diced jalapeños to the pot for a flavorful heat that tantalizes the taste buds.
  • Rich & Hearty: Toss in diced sweet potatoes or butternut squash for an added layer of sweetness and texture.
  • Italian Herb Boost: Fresh basil or thyme can replace dried herbs, giving your dish an enticing aroma and flavor depth.
  • Flavorful Swaps: Consider using Italian sausage for a bolder flavor profile that contrasts wonderfully with the beans.
  • Veggie Heaven: Enhance the nutritional profile by adding chopped kale, zucchini, or bell peppers during cooking.

Explore these variations to create a Pasta e Fagioli that warms both your heart and your taste buds. And if you’re looking for more inspiration, don’t miss my hearty soup recipes or check out these delicious casseroles that always hit the spot!

How to Store and Freeze Pasta e Fagioli

Fridge: Store leftover Olive Garden Pasta in an airtight container for up to 4-5 days. Ensure it’s cooled to room temperature before sealing.

Freezer: For longer storage, freeze the soup in suitable containers for up to 3 months. Leave some space at the top to allow for expansion as it freezes.

Reheating: When ready to enjoy, simply thaw in the refrigerator overnight and reheat on the stovetop over low heat. Add a splash of broth if needed to thin it out.

Airtight Storage: Make sure to use airtight containers to preserve the flavors and freshness of your Pasta e Fagioli while it’s stored.

Expert Tips for Olive Garden Pasta

• Choose Quality Meat: Selecting high-quality ground beef or Italian sausage will enhance the overall flavor of the soup and ensure it’s satisfying.

• Avoid Overcooking Pasta: To achieve that perfect al dente texture, check the pasta a minute before the package instructions to avoid mushy bites.

• Fresh Herbs Matter: Use fresh herbs when possible for a brighter flavor. Dried herbs can work, but the freshness of basil and oregano will elevate your Olive Garden Pasta.

• Customize Your Broth: Consider making your own broth for richer flavor. If using store-bought, opt for low-sodium versions to better control saltiness.

• Enhance with Add-Ins: For more nutrition, feel free to add other vegetables like bell peppers or zucchini, making sure to chop them evenly for consistent cooking.

• Store Properly: Leftover Olive Garden Pasta can be stored in the fridge for 4-5 days or frozen for up to 3 months, making meal prep a breeze!

What to Serve with Pasta e Fagioli

Looking to create the perfect spread to accompany this hearty Italian favorite?

  • Garlic Bread: The crunchy, buttery delight of garlic bread is perfect for dipping into the rich broth, providing a satisfying textural contrast.

  • Caesar Salad: Crisp romaine lettuce topped with creamy dressing and crunchy croutons adds a fresh, zesty bite that balances the hearty soup.

  • Grilled Vegetables: Charred bell peppers, zucchini, and eggplant bring a smoky flavor and vibrant color, enhancing the nutritional value of your meal.

  • Stuffed Peppers: Savory stuffed peppers filled with seasoned rice and cheese can stand as a wonderful side offering a delightful texture alongside the soup.

  • Herbed Rice: Fluffy rice infused with fresh herbs and a drizzle of olive oil complements the Pasta e Fagioli while soaking up its hearty flavors.

  • Wine Pairing: A light-bodied Chianti or a refreshing Sauvignon Blanc beautifully complements the rich flavors of the soup, creating an elevated dining experience.

  • Tiramisu: End your meal on a sweet note with this beloved Italian dessert. Its coffee and cocoa flavors create a delightful contrast to the savory soup.

Each of these accompaniments enhances the overall experience, turning mealtime into a cherished memory.

Olive Garden Pasta

Pasta e Fagioli Recipe FAQs

How do I select the best ingredients for Pasta e Fagioli?
Absolutely! For the ground meat, choose high-quality beef or Italian sausage, as this enhances the soup’s overall flavor. When it comes to vegetables, pick fresh carrots and celery without dark spots or blemishes. Diced tomatoes should have no swelling in the can, indicating they’re fresh. The cannellini beans should ideally be firm, without any mushy texture. Lastly, opt for fresh herbs whenever possible; they offer a brighter flavor than dried.

How should I store leftovers of my Pasta e Fagioli?
Curious about storing your leftovers? Place any remaining soup in an airtight container and refrigerate. It will stay fresh for about 4-5 days. Make sure the soup is cooled to room temperature before sealing to prevent condensation and spoilage. If you’re unsure, a test taste before storing will ensure it’s still delightful!

Can I freeze Pasta e Fagioli, and how do I do it?
Very! To freeze your Pasta e Fagioli, first let the soup cool completely. Then, pour it into suitable freezer-safe containers or zip-top bags, leaving about an inch of space at the top for expansion. Label with the date and freeze for up to 3 months. When you’re ready to enjoy it, thaw it in the refrigerator overnight, then reheat it on the stove over low heat, adding a splash of broth for moisture if needed.

What if my bean and tomato combination is too thick or bland?
If your Pasta e Fagioli is too thick, add a bit more broth or water to achieve your desired consistency. If you feel it’s lacking flavor, season with additional salt and pepper or a squeeze of fresh lemon juice for brightness. The addition of cheese or fresh herbs just before serving can also elevate the flavors immensely!

Are there any dietary considerations I should be aware of?
It’s great that you’re considering dietary needs! If you or anyone you’re serving has allergies, be cautious with the meat choice and double-check labels on canned goods for any potential allergens. For a gluten-free version, simply swap the small pasta with a gluten-free alternative. If you have pets at home, keep any leftovers out of their reach, as certain ingredients, like onions and garlic, can be harmful to dogs and cats.

What can I do if I don’t have cannellini beans?
No worries at all! If you don’t have cannellini beans, you can substitute them with kidney beans or navy beans, which also work well in this recipe. Just make sure to rinse and drain them if they are canned. Feel free to experiment with whatever legumes you have on hand; the soup will still turn out delicious!

Savory Olive Garden Pasta That Beats Fast Food Any Day

A comforting Olive Garden Pasta recipe that combines savory broth, hearty ingredients, and nourishing vegetables for a delightful family meal.

  • Large Pot

For the Base

  • 1 lb ground beef (or Italian sausage; use ground turkey for a lighter option)
  • 1 medium onion, chopped (adds a sweet, aromatic base)
  • 2 cloves garlic, minced (provides a punch of flavor)
  • 2 medium carrots, diced (adds a touch of sweetness)
  • 2 stalks celery, diced (contributes crunch and depth)

For the Soup

  • 1 can (15 oz) cannellini beans (drained and rinsed)
  • 1 can (14.5 oz) diced tomatoes (with juice)
  • 4 cups beef broth (or vegetable broth)
  • 1 cup small pasta (such as ditalini or small shells)

For Flavor & Garnish

  • 2 cups fresh spinach (optional)
  • 1 teaspoon dried oregano
  • 1 teaspoon dried basil
  • salt and pepper (to taste)
  • olive oil (for sautéing)
  • grated Parmesan cheese (for serving)

Step-by-Step Instructions for Olive Garden Pasta

  1. Heat a tablespoon of olive oil in a large pot over medium heat. Add the onion, carrots, and celery. Sauté for 5 to 7 minutes until tender.
  2. Add the ground beef or Italian sausage, breaking it apart, and cook for about 5 minutes until browned.
  3. Stir in the minced garlic, oregano, and basil. Cook for an additional minute, stirring continuously.
  4. Add the diced tomatoes and rinsed cannellini beans. Stir to combine and allow mixture to thicken.
  5. Pour in the beef or vegetable broth and bring to a gentle boil. Reduce heat and simmer for about 15 minutes.
  6. Add the small pasta to the pot and cook according to package instructions, around 8-10 minutes.
  7. If using spinach, stir it into the soup during the last few minutes of cooking.
  8. Taste and adjust seasoning with salt and pepper before serving.
  9. Ladle into bowls and top with freshly grated Parmesan cheese before serving.

Leftover Olive Garden Pasta can be stored in the fridge for 4-5 days or frozen for up to 3 months.

Main Dishes
Italian
comfort food, family dinner, Hearty Meal, Italian recipe, Olive Garden Pasta, Pasta e Fagioli

Filed Under: Main Dishes

Irresistible Spicy Cheesy Baked Football Dip for Game Day

October 21, 2025 by grace bellamy Leave a Comment

As the big game approaches, I can practically taste the excitement in the air. There’s nothing quite like gathering with friends and family, sharing laughs and great food while cheering for our favorite teams. This Spicy Cheesy Baked Football Dip is my go-to crowd-pleaser, blending luscious cream cheese, zesty jalapeños, and crispy bacon into a warm, cheesy masterpiece. What’s even better? It’s a breeze to whip up in just under an hour, making it an absolute must for your game day spread. Plus, it pairs perfectly with crunchy tortilla chips or fresh baguette slices for maximum dunking enjoyment! Ready to impress your guests and elevate your snack game? Let’s dive into the recipe and turn your kitchen into the ultimate party zone!

Spicy Cheesy Baked Football Dip

Why Is This Dip a Game Day Essential?

Crowd-Pleasing Flavor: The combination of creamy cheeses and zesty jalapeños makes this dip irresistible to everyone.

Quick Preparation: In just 55 minutes, you can have this deliciousness ready to serve!

Versatile Serving Options: Enjoy it with tortilla chips or fresh baguette slices, perfect for dipping!

Memorable Gatherings: This dip brings friends and family together for an unforgettable game day experience.

Easily Adjustable: You can tweak the spices to suit your personal taste, making it a unique dish each time.

Elevate your next gathering with this fantastic recipe and check out more mouthwatering ideas like our Cheesy Spinach Artichoke Dip for an extra crowd-pleaser!

Spicy Cheesy Baked Football Dip Ingredients

• Get ready to dive into flavor with these essential ingredients!

For the Dip

  • Cream cheese – A rich and creamy base that brings everything together perfectly.
  • Sour cream – Adds a tangy depth that balances the richness of the cheeses.
  • Mayonnaise – Keeps the dip smooth while enhancing its creaminess.
  • Taco seasoning – Infuses robust flavor, making this dip a fiesta in every bite!
  • Cayenne pepper – Adjust this to your heat preference for that extra kick.
  • Shredded cheddar cheese – Offers a sharp and mouthwatering taste, ideal for that cheesy goodness.
  • Shredded mozzarella cheese – Melts beautifully, making the dip ooey-gooey and delightful.

For the Mix-ins

  • Diced jalapeños – Adds a spicy zing—fresh or canned, they both work wonders!
  • Sliced black olives – Provides a savory, briny crunch that enhances the dip’s texture.
  • Diced tomatoes – Brings a fresh element that cuts through the richness.
  • Chopped green onions – Offers a lovely oniony brightness that elevates every bite.
  • Cooked and crumbled bacon – Adds a smoky, crispy touch that makes this dip truly irresistible.

For Serving

  • Tortilla chips or sliced baguette – Perfect vessels for scooping up this Spicy Cheesy Baked Football Dip!

Get ready to impress your guests with this delightful recipe that brings friends and family together in cheesiness!

Step‑by‑Step Instructions for Spicy Cheesy Baked Football Dip

Step 1: Preheat the Oven
Begin by preheating your oven to 350°F (175°C). This step is crucial as it ensures your Spicy Cheesy Baked Football Dip bakes evenly for a creamy and delicious texture. While the oven is warming up, gather your mixing bowl and other ingredients so you’re ready to move quickly through the next steps.

Step 2: Prepare the Creamy Base
In a large mixing bowl, combine the softened cream cheese, sour cream, and mayonnaise. Use a hand mixer or a sturdy spatula to mix them together until the mixture is smooth and creamy, with no lumps remaining. This should take about 2–3 minutes. A well-mixed base is the foundation for your flavorful dip.

Step 3: Add Spices
Sprinkle in the taco seasoning and cayenne pepper to the creamy base. Stir well, ensuring the spices are fully incorporated to bring out the rich flavors. Taste the mixture as you go, adjusting the cayenne pepper according to your personal spice preference. This step adds a wonderful excitement that makes the dip truly special.

Step 4: Incorporate Cheeses
Fold in the shredded cheddar and mozzarella cheeses gently into the seasoned cream cheese mixture. Use a spatula to combine them thoroughly, ensuring the cheeses are evenly distributed throughout the mix. You’ll know it’s ready when the mixture is cheesy and gooey, looking inviting and luscious.

Step 5: Mix in the Veggies
Now, gently fold in the diced jalapeños, sliced black olives, and diced tomatoes. This combination adds brightness and texture to your Spicy Cheesy Baked Football Dip. Make sure everything is well combined, giving each bite a burst of flavor and a little crunch from the olives—just beautiful!

Step 6: Transfer to Baking Dish
Carefully transfer the dip mixture into a large, oven-safe baking dish. Spread it out evenly with your spatula to create a nice, level surface. This ensures that every part of the dip bakes uniformly and achieves that perfect bubbly goodness.

Step 7: Add Final Touches
Top the dip mixture with the crumbled bacon and chopped green onions. The bacon will add a delightful crunch and smoky flavor while the green onions contribute a fresh brightness to the dish. This layered look not only tastes great but also makes for a beautiful presentation.

Step 8: Bake to Perfection
Place the baking dish in the preheated oven and bake for 25-30 minutes. Keep an eye on it and look for the dip to become bubbly and the top to turn a lovely golden brown. This visual cue indicates that the flavors have melded beautifully and the dip is ready to shine at your gathering.

Step 9: Cool and Serve
Once baked, remove the dip from the oven and let it cool for about 10 minutes. This cooling time helps the dip set slightly, making it perfect for dipping. You’ll want to serve it warm, with tortilla chips or sliced baguette nearby for maximum enjoyment and dipping fun!

Spicy Cheesy Baked Football Dip

What to Serve with Spicy Cheesy Baked Football Dip

Looking to create a memorable game day spread that perfectly complements your cheesy delight?

  • Crunchy Tortilla Chips: The perfect vehicle for scooping, adding a satisfying crunch that balances the creamy dip beautifully. Every dip is a match made in heaven!

  • Sliced Baguette: Soft, warm baguette slices are great for a more refined dipping experience, soaking up every luscious flavor while providing a wonderful texture.

  • Guacamole: A zesty addition that pairs wonderfully with the spicy kick of the dip, offering a creamy avocado goodness that cuts through the richness perfectly.

  • Chilled Veggie Platter: Crisp veggies like cucumbers, carrots, and bell peppers provide a refreshing bite that contrasts nicely with the rich dip, balancing flavors and textures.

  • Cilantro Lime Rice: This fragrant rice dish adds a subtle tang, enhancing the whole experience and bringing a lightness to your festive spread.

  • Craft Beer or Cider: A cold beverage with hoppy or fruity notes heightens the game day experience while cooling down the heat from the dip.

  • Chocolate Brownies: End your meal on a sweet note! These fudgy treats are a comforting contrast to the savory, spicy dip and will have everyone reaching for seconds.

  • Salsa Fresca: Fresh tomato salsa brightens your palate and adds a zingy freshness that pairs wonderfully with the creamy dip.

Elevate your gathering by exploring these delightful accompaniments, turning your Spicy Cheesy Baked Football Dip into the star of the show!

Make Ahead Options

These Spicy Cheesy Baked Football Dip is perfect for busy game days! You can prepare the entire dip up to 24 hours in advance by following the initial steps and then refrigerating it in an airtight container. To maintain quality, mix everything except the bacon and green onions, cover it tightly, and place it in the fridge. When you’re ready to bake, simply transfer the mixture to your baking dish, sprinkle with bacon and green onions, and bake in a preheated oven at 350°F (175°C) for 30-35 minutes until bubbly and golden. This preparation will save you precious time while ensuring your dip is just as delicious!

Expert Tips for Spicy Cheesy Baked Football Dip

  • Smooth Base: Ensure your cream cheese is fully softened before mixing to avoid lumps in the dip. A smooth base leads to a creamy texture!

  • Taste as You Go: Don’t hesitate to adjust the cayenne pepper and taco seasoning according to your heat preference. This dip is all about your flavor!

  • Cheese Conflict: When folding in the cheeses, do so gently to avoid overworking the mixture. This keeps your cheese texture perfectly melty!

  • Layer Wisely: Distribute your add-ins like bacon and green onions evenly across the top for a stunning presentation and balanced flavor with every scoop.

  • Watch Your Bake: Keep an eye on the dip while it bakes; if the top browns too quickly, cover it with foil to prevent burning. You want beautifully bubbly perfection!

Elevate your game day with this delightful Spicy Cheesy Baked Football Dip that everyone will rave about!

How to Store and Freeze Spicy Cheesy Baked Football Dip

  • Room Temperature: Best enjoyed warm; however, if left out, consume within 2 hours to ensure freshness and safety.

  • Fridge: Store leftovers in an airtight container for up to 3 days. When ready to enjoy again, you can reheat gently in the microwave or oven.

  • Freezer: You can freeze this dip for up to 2 months. Ensure it’s in a freezer-safe container; simply thaw in the fridge overnight before reheating.

  • Reheating: Reheat in the oven at 350°F (175°C) for 15-20 minutes until warmed through and bubbly. Enjoy your Spicy Cheesy Baked Football Dip like new!

Spicy Cheesy Baked Football Dip Variations

Feel free to make this recipe your own with these delightful twists and swaps that will surprise and delight your taste buds!

  • Vegetarian: Omit the bacon and replace it with extra diced vegetables like bell peppers or mushrooms for a colorful and satisfying twist.
  • Vegan: Substitute the cream cheese, sour cream, and mayonnaise with plant-based alternatives, and use nutritional yeast for a cheesy flavor boost.
  • Spicy Kick: Add more jalapeños or a splash of hot sauce to crank up the heat! You can even try including chopped serrano peppers for an extra fiery punch.
  • Cheesy Overload: Experiment with different cheese blends! Gouda or pepper jack cheese can enhance the flavor and provide a creamy texture.
  • Smoky Flavor: Incorporate smoked paprika or chipotle powder into the mix for a smoky twist that complements the rich cheeses wonderfully.
  • Crunchy Topping: For added texture, sprinkle crushed tortilla chips or panko breadcrumbs on top before baking—this will give your dip an extra crispy finish!
  • Sweet and Savory: Mix in some caramelized onions or a handful of diced sweet corn to create a contrast of flavors that is simply divine!
  • Herb Infusion: Add fresh herbs like cilantro or parsley for a burst of freshness that brightens up the whole dish. These herbs can create a vivid flavor profile that’s unexpected yet delightful!

Feeling inspired? For more incredible ideas, don’t miss our Cheesy Spinach Artichoke Dip or check out this delightful Buffalo Chicken Dip for another winning game day treat!

Spicy Cheesy Baked Football Dip

Spicy Cheesy Baked Football Dip Recipe FAQs

What type of cream cheese is best for this dip?
Using full-fat cream cheese gives the dip a rich and creamy texture that’s essential for its overall flavor. I recommend letting it soften at room temperature for about 30 minutes before mixing to ensure a smooth base!

How should I store leftover Spicy Cheesy Baked Football Dip?
Store any leftovers in an airtight container in the refrigerator for up to 3 days. When you’re ready to enjoy it again, simply reheat it either in the microwave or at 350°F (175°C) in the oven for 15-20 minutes until it’s warm and bubbly.

Can I freeze the dip? If so, how?
Absolutely! You can freeze this dip for up to 2 months. To do this, transfer the cooled dip into a freezer-safe container, ensuring it’s well-sealed. To thaw, move it to the fridge overnight. When you’re ready to serve, reheat it in the oven at 350°F (175°C) for 15-20 minutes until warm.

How can I adjust the spiciness if I don’t like it too hot?
If you’re sensitive to spice, you can omit the cayenne pepper entirely or reduce it to 1/4 teaspoon for a milder kick. Additionally, opting for fewer jalapeños or even using sweet peppers can keep the heat at bay while still delivering delicious flavor.

Are there any dietary considerations for this dip?
Yes, this dip contains common allergens like dairy and eggs from the mayonnaise. If you’re accommodating guests with dietary restrictions, consider using vegan cream cheese and a dairy-free mayo alternative. You can also skip the bacon or substitute it with a plant-based option to make it suitable for all diets.

What’s the best way to serve my dip?
Serve the Spicy Cheesy Baked Football Dip warm with tortilla chips or sliced baguette for dipping. You can also offer veggie sticks like carrots or celery for a healthier option that pairs nicely with the creamy dip!

Irresistible Spicy Cheesy Baked Football Dip for Game Day

This Spicy Cheesy Baked Football Dip is a game day essential that combines creamy cheeses, zesty jalapeños, and crispy bacon for a delicious crowd-pleaser.

  • Oven
  • Mixing Bowl
  • spatula
  • hand mixer
  • Oven-Safe Baking Dish

For the Dip

  • 8 oz Cream cheese (softened)
  • 1 cup Sour cream
  • 1/2 cup Mayonnaise
  • 1 packet Taco seasoning
  • 1/2 teaspoon Cayenne pepper (adjust for heat preference)
  • 1 cup Shredded cheddar cheese
  • 1 cup Shredded mozzarella cheese

For the Mix-ins

  • 1/2 cup Diced jalapeños (fresh or canned)
  • 1/2 cup Sliced black olives
  • 1 cup Diced tomatoes
  • 1/4 cup Chopped green onions
  • 1 cup Cooked and crumbled bacon

For Serving

  • 1 bag Tortilla chips
  • 1 loaf Sliced baguette

Preparation Steps

  1. Preheat your oven to 350°F (175°C).
  2. In a large mixing bowl, combine the softened cream cheese, sour cream, and mayonnaise until smooth.
  3. Sprinkle in the taco seasoning and cayenne pepper, adjusting to taste.
  4. Fold in shredded cheddar and mozzarella cheeses until evenly distributed.
  5. Gently fold in diced jalapeños, sliced black olives, and diced tomatoes.
  6. Transfer the mixture to a large, oven-safe baking dish and spread evenly.
  7. Top with the crumbled bacon and chopped green onions.
  8. Bake in the preheated oven for 25-30 minutes until bubbly and golden brown.
  9. Let cool for about 10 minutes before serving with tortilla chips or sliced baguette.

For best results, ensure cream cheese is softened before mixing and adjust spices to personal preference.

Appetizer
American
Appetizer Recipe, cheesy dip, Crowd-Pleasing Dip, Football Party Snack, game day dip, Spicy Cheesy Baked Football Dip

Filed Under: Appetizer

Spooktacular Jack-O-Lantern Halloween Pizza for Family Fun

October 19, 2025 by grace bellamy Leave a Comment

As I strolled through the pumpkin patch last autumn, an idea sparked: what if I could transform the beloved Halloween pumpkin into a mouthwatering pizza? Enter the Jack-O-Lantern Halloween Pizza—a charming and playful dish that’s just as fun to make as it is to eat. This recipe is a fantastic way to swap out the usual fast food for a homemade delight, and it only takes about 30 minutes from start to finish! Not only is it customizable for everyone’s taste buds, but it also adds a festive flair to your Halloween gatherings. Watching family and friends’ faces light up as they dig into this delicious creation is an added perk. Ready to bring some spooky joy to your kitchen? Let’s get baking!

Jack-O-Lantern Halloween Pizza

Why Is This Pizza a Halloween Must-Make?

Fun and Festive: This Jack-O-Lantern Halloween Pizza brings a playful spirit to any gathering, making dinner a creative adventure for kids and adults alike.

Quick to Prepare: With a total time of just 30 minutes, you can whip up this delightful dish faster than ordering takeout.

Customizable: Everyone can add their favorite toppings, making it a perfect crowd-pleaser for parties.

Family Bonding: Getting the kids involved in decorating the pizza fosters creativity, turning mealtime into a memorable family activity.

Flavorful Layers: The combination of gooey mozzarella, savory pepperoni, and fresh veggies creates a delicious blend that will make every bite enjoyable.

Hosted a Halloween party? Don’t forget to check out my tips on creating a festive atmosphere while serving this fantastic pizza!

Jack-O-Lantern Halloween Pizza Ingredients

Get ready to create a spooky masterpiece that’s both fun and delicious!

For the Crust

  • Pre-made pizza crust – a time-saving base that lets you focus on the fun toppings.

For the Sauce

  • Pizza sauce – adds that classic tangy flavor to complement the toppings perfectly.

For the Cheese

  • Shredded mozzarella cheese – melts beautifully to create a gooey, delightful layer on top.

For the Toppings

  • Sliced black olives – create spooky eyes and mouth shapes to give your Jack-O-Lantern its character.
  • Green bell pepper – adds a colorful, crunchy element to enhance the festive look.
  • Pepperoni slices – provides a savory kick that everyone loves, making this pizza irresistible.

For Seasoning

  • Italian seasoning – adds depth to the flavors, enhancing the overall taste of your Jack-O-Lantern Halloween Pizza.

For Finishing Touch

  • Olive oil – brushing the crust helps achieve a golden and crispy texture.

Step‑by‑Step Instructions for Jack-O-Lantern Halloween Pizza

Step 1: Preheat the Oven
Begin by preheating your oven to 450°F (232°C). This high temperature is crucial for achieving that crispy crust while the cheese melts to a bubbly perfection. Make sure to give it enough time to reach the desired heat, so you can slide your Jack-O-Lantern Halloween Pizza in right after assembling!

Step 2: Prepare the Pizza Crust
On a floured surface, roll out the pre-made pizza crust to fit your chosen pizza pan. Aim for a thickness of about 1/4 inch so that the crust bakes evenly without being too doughy. As you roll, keep an eye out for any cracks—gently patch them up to ensure a smooth surface for your toppings.

Step 3: Brush with Olive Oil
Carefully transfer the rolled crust onto your pizza pan and use a brush to apply olive oil generously over the surface. This adds flavor and helps to achieve a beautiful golden color as your Jack-O-Lantern Halloween Pizza bakes. You want to make sure every corner is covered for the best result!

Step 4: Spread the Pizza Sauce
Evenly spread the pizza sauce over the entire surface of the crust using the back of a spoon. Make sure to leave about 1/2 inch around the edges for a crust that’s both sturdy and delicious. The sauce will not only enhance flavor but also keep your toppings in place while baking.

Step 5: Add the Cheese
Sprinkle the shredded mozzarella cheese generously over the sauce, covering it completely. Allow the cheese to flow right to the edge of the crust, making it ooze and bubble when it bakes in the oven. This layer of cheese will serve as a warm foundation for the fun Jack-O-Lantern face!

Step 6: Create the Jack-O-Lantern Face
Using the sliced black olives, artfully arrange them to create eyes and a mouth on the pizza, giving it that signature Jack-O-Lantern look. Get creative with the placement—your pizza can have a silly or spooky expression. This step adds a playful touch that kids will love!

Step 7: Decorate with Peppers and Pepperoni
Scatter chopped green bell peppers and pepperoni slices around the eyes and mouth for some added flair and a burst of flavor. This colorful mix not only enhances the pizza’s appearance but also provides delightful bites of fresh veggies and savory pepperoni throughout your Jack-O-Lantern Halloween Pizza.

Step 8: Add Italian Seasoning
Sprinkle Italian seasoning over the top of your decorated pizza to introduce an aromatic blend of herbs that will elevate the flavor profile. The aroma will blend beautifully with the cheesy goodness while baking, enticing everyone as they await the treat that’s about to emerge from the oven.

Step 9: Bake the Pizza
Carefully place your assembled pizza into the preheated oven and bake it for 15-20 minutes. Keep an eye on it; you’re looking for the cheese to be completely melted and the crust edges to turn a lovely golden brown. Your Jack-O-Lantern Halloween Pizza should look festive and tantalizing!

Step 10: Slice and Serve
Once baked to perfection, remove your pizza from the oven and let it cool for a minute before slicing. Using a pizza cutter, slice it into wedges while the cheese is still warm and melty. Serve hot and watch as everyone digs into this spooky, delicious treat!

Jack-O-Lantern Halloween Pizza

What to Serve with Jack-O-Lantern Halloween Pizza?

As you prepare for a festive night, think about how to enhance your spooky feast with delightful pairings that bring warmth and flavor to the table.

  • Crispy Garlic Bread: The buttery, garlicky aroma complements the cheesy pizza, adding a satisfying crunch to every bite.
  • Autumn Salad: A mix of crisp greens, diced apples, and walnuts, dressed in a tangy vinaigrette, introduces a refreshing crunch that balances the pizza’s richness.
  • Pumpkin Soup: This velvety delight captures the essence of fall and will warm your guests as they enjoy their Halloween pizza.
  • Sweet Potato Fries: Crispy on the outside and fluffy inside, these fries provide a sweet contrast that pairs wonderfully with the savory flavors of the pizza.
  • Hot Apple Cider: Serve this spiced drink warm to bring a cozy flavor that echoes holiday traditions, enhancing the celebratory spirit of your meal.
  • Chocolate Mousse: End the evening with a rich and creamy dessert that keeps the festive theme, offering a delightful sweet note after the savory feast.
  • Spooky Fruit Platter: Create a fun assortment using ghost-shaped melons and pumpkin-themed fruits to keep the festive spirit alive.
  • Caramel Corn: The sweet and salty crunch of caramel corn adds a playful snack option that guests can munch on while enjoying their pizza.
  • Craft Beer: A light pumpkin ale or a crisp cider pairs well with the dish, bringing in a seasonal touch that complements the pizza’s festive charm.

How to Store and Freeze Jack-O-Lantern Halloween Pizza

Fridge: Keep leftover Jack-O-Lantern Halloween Pizza in an airtight container for up to 3 days. Reheat in the oven or microwave until warmed through for the best taste.

Freezer: To freeze, wrap pieces in plastic wrap, then place them in a resealable freezer bag. They’ll maintain quality for up to 2 months.

Reheating: For crispy results, reheat slices in the oven at 350°F (175°C) for about 10 minutes. Microwaving is quicker, but the crust may become soggy.

Room Temperature: If you’ve got leftovers after a party, they can sit out for up to 2 hours before needing refrigeration.

Expert Tips for Jack-O-Lantern Halloween Pizza

  • Roll Evenly: Ensure the pizza crust is rolled to about 1/4 inch thick for an evenly baked base that is neither doughy nor too crispy.

  • Creative Faces: Involve the kids in designing the Jack-O-Lantern face using olives and other toppings, making it a fun family activity while avoiding common mistakes with placement.

  • Extra Cheese: If you love cheese (who doesn’t?), don’t hesitate to add more mozzarella for an extra gooey layer; just be cautious not to overload it to keep the crust intact.

  • Oven Care: Monitor the pizza as it bakes. Baking times can vary based on oven efficiency—aim for melted cheese and golden edges without burning.

  • Cool Before Slicing: Let your Jack-O-Lantern Halloween Pizza cool for a minute after baking; this allows for easier slicing and avoids potential cheese pull disasters when serving.

Jack-O-Lantern Halloween Pizza Variations

Embrace your creativity and let your taste buds soar while customizing this delightful pizza recipe!

  • Veggie-Packed: Add more veggies like zucchini, mushrooms, or artichokes for a colorful, healthier twist. These vibrant toppings will not only enhance the flavor but also make your pizza even more festive!
  • Cheesy Delight: Mix in a blend of cheeses, such as cheddar or gouda, for an irresistible cheesy flavor. The extra gooeyness will make every bite even more satisfying and comforting.
  • Spicy Kick: Sprinkle red pepper flakes or jalapeño slices on top for an added kick. This fiery twist will make your Jack-O-Lantern Halloween Pizza stand out and awaken your taste buds!
  • Dairy-Free: Swap the cheese with a dairy-free alternative, and use vegan pizza sauce to create a delicious plant-based version. Your vegan friends will appreciate the thoughtful gesture during Halloween gatherings.
  • Gluten-Free: Use a gluten-free pizza crust or cauliflower crust to accommodate dietary restrictions. This option will let everyone join in on the Halloween fun without missing out!
  • Sweet Surprise: Add slices of cooked pumpkin or butternut squash for a sweet and savory combination. The added sweetness will complement the savory elements beautifully, offering a unique flavor profile.
  • Breakfast Pizza: Top with scrambled eggs, breakfast sausage, and cheese for a delightful morning twist. Imagine a festive breakfast that transforms your Halloween morning into something truly special!
  • BBQ Twist: Drizzle BBQ sauce instead of traditional pizza sauce and top with grilled chicken and red onions. This playful take transforms the pizza into a BBQ feast that’s perfect for a fall gathering.

Feel free to explore these variations and make your Jack-O-Lantern Halloween Pizza a true reflection of your family’s tastes and preferences!

Make Ahead Options

These Jack-O-Lantern Halloween Pizzas are perfect for busy home cooks looking to save time! You can prepare the pizza crust, sauce, and toppings up to 24 hours in advance by assembling the crust on your pizza pan, brushing it with olive oil, and storing it in the refrigerator. To keep the toppings fresh, store the cheese and vegetables in separate airtight containers. When you’re ready to bake, simply spread the sauce, sprinkle the cheese, and decorate with the toppings before baking it directly from the fridge for 15-20 minutes. This approach ensures that your Jack-O-Lantern Halloween Pizza is just as delicious and festive, allowing you to enjoy a fun meal with minimal effort!

Jack-O-Lantern Halloween Pizza

Jack-O-Lantern Halloween Pizza Recipe FAQs

What types of cheese can I use for the Jack-O-Lantern Halloween Pizza?
Absolutely! While shredded mozzarella is the classic choice for its meltiness, you can also experiment with provolone or cheddar for a different flavor twist. Mixing a bit of parmesan can add a delightful salty flavor. Don’t hesitate to combine different cheeses to match your family’s taste preferences!

How should I store leftover Jack-O-Lantern Halloween Pizza?
Store leftovers in an airtight container in the fridge for up to 3 days. If you’re looking to keep them longer, wrap individual slices in plastic wrap and freeze them in a resealable freezer bag for up to 2 months. They make for a quick and tasty snack on a later date!

Can I freeze the Jack-O-Lantern Halloween Pizza? If so, how?
Yes, you can easily freeze it! First, let the pizza cool completely. Next, wrap each slice tightly in plastic wrap, ensuring no air escapes, as this prevents freezer burn. Then, place the wrapped slices in a resealable freezer bag or a container. When you’re ready to enjoy, thaw in the fridge overnight and reheat in the oven at 350°F (175°C) for about 10 minutes until hot and crispy again!

What if my pizza dough tears while rolling out?
No worries! If your pizza dough tears, just press the edges together to seal them, or use a bit of extra flour to patch it up. Rolling it out slowly and gently can help maintain the dough’s integrity. If it keeps tearing, let it rest for 5-10 minutes, as this allows the gluten to relax, making it easier to work with.

Is the Jack-O-Lantern Halloween Pizza safe for pets?
In general, it’s best to keep this pizza for humans only! While most of the ingredients are safe, onions in some pizza sauces and spices can be harmful to pets. Always double-check specific ingredients before sharing, or simply enjoy this spooktacular treat yourself!

How do I make the Jack-O-Lantern face without using olives?
There are plenty of options! You can use sliced bell peppers to create eyes and a mouth or even employ cherry tomatoes for added sweetness. Additionally, cut-outs from zucchini or cucumber could lend a fun, healthy twist. Get creative and have a blast decorating your spooky pizza!

Spooktacular Jack-O-Lantern Halloween Pizza for Family Fun

Create a delightful Jack-O-Lantern Halloween Pizza that’s quick to make, customizable, and perfect for festive family gatherings.

  • Oven
  • Pizza Pan
  • Rolling Pin
  • Brush
  • spoon
  • Pizza Cutter

For the Crust

  • 1 pre-made pizza crust (a time-saving base)

For the Sauce

  • 1 cup pizza sauce (adds a classic tangy flavor)

For the Cheese

  • 2 cups shredded mozzarella cheese (melts beautifully)

For the Toppings

  • 1 cup sliced black olives (for spooky eyes and mouth)
  • 1 cup green bell pepper (adds color and crunch)
  • 1 cup pepperoni slices (provides a savory kick)

For Seasoning

  • 1 teaspoon Italian seasoning (adds depth to flavors)

For Finishing Touch

  • 2 tablespoons olive oil (for brushing the crust)

Step-by-Step Instructions

  1. Preheat your oven to 450°F (232°C).
  2. On a floured surface, roll out the pre-made pizza crust to fit your chosen pizza pan to about 1/4 inch thickness.
  3. Transfer the rolled crust onto your pizza pan and brush olive oil generously over the surface.
  4. Spread the pizza sauce evenly over the crust, leaving about 1/2 inch around the edges.
  5. Sprinkle the shredded mozzarella cheese generously over the sauce, covering it completely.
  6. Using the sliced black olives, arrange them to create eyes and a mouth on the pizza.
  7. Scatter chopped green bell peppers and pepperoni slices around the eyes and mouth.
  8. Sprinkle Italian seasoning over the top of your decorated pizza.
  9. Bake your assembled pizza in the preheated oven for 15-20 minutes, until the cheese is melted and edges are golden brown.
  10. Remove the pizza from the oven and let it cool for a minute before slicing into wedges.

Let your kids help design the Jack-O-Lantern face using olives and other toppings.

Main Dishes
American
Easy Pizza, family fun, Festive Recipes, Halloween Pizza, homemade pizza, Jack-O-Lantern

Filed Under: Main Dishes

Spooky Spider Cookies That Will Wow Your Halloween Guests

October 19, 2025 by grace bellamy Leave a Comment

As I stood in my kitchen the other day, I could almost hear the excited chatter of little ghouls and goblins anticipating a Halloween feast. What if this year, we stepped up our game with something delightfully eerie? Enter the Spooky Spider Cookies! These whimsical treats not only bring a fun, festive flair to any Halloween gathering but are also incredibly easy to whip up. Perfect for both seasoned bakers and those still finding their footing in the kitchen, they offer a great opportunity to engage kids in a fun activity. Plus, they’re guaranteed to impress guests, transforming your dessert table into a haunted masterpiece. Who can resist those adorable little spider shapes? Curious to find out how to make these charming cookies come to life in your own kitchen? Let’s dive into the recipe!

Spooky Spider Cookies

Why Are Spooky Spider Cookies a Must-Make?

Delightful and Fun: Spooky Spider Cookies bring a playful element to your Halloween festivities that kids and adults alike will adore.

Easy to Make: With simple ingredients and straightforward steps, even novice bakers can create confections that look stunning on any dessert table.

Engaging Activity: Get the little ones involved! Crafting these charming cookies is a wonderful way to spend quality time together in the kitchen.

Crowd-Pleasing Treat: These cookies are sure to bring smiles and laughter, making them a highlight of your Halloween bash.

Whether you’re themed for a spooky gathering or just looking for something festive, be sure to consider pairing these with our favorite Halloween Dessert Recipes for a complete holiday spread!

Spooky Spider Cookies Ingredients

For the Cookie Base

  • All-purpose flour – This provides the structure for your Spooky Spider Cookies.
  • Granulated sugar – Sweetens the cookies and helps create a delightful texture.
  • Brown sugar – Adds moisture and a hint of caramel flavor.
  • Unsalted butter – Provides richness and helps with the cookie’s spread during baking.
  • Eggs – Acts as a binder to hold all the ingredients together.
  • Vanilla extract – Enhances the flavor profile of the cookies.
  • Baking powder – Helps the cookies rise and become soft and chewy.
  • Salt – Balances the sweetness and enhances the overall flavor.

For the Spider Decorations

  • Chocolate chips – Perfect for the spider bodies; use semi-sweet for a balanced flavor.
  • Black licorice – Ideal for creating the spider legs; cut them to your desired length.
  • Candy eyes – These add an adorable and spooky touch to your spiders.

Pair these Spooky Spider Cookies with our other Halloween Dessert Recipes for an eerie yet tasty Halloween experience!

Step‑by‑Step Instructions for Spooky Spider Cookies

Step 1: Prepare the Cookie Dough
Start by preheating your oven to 350°F (175°C). In a large mixing bowl, combine 2 cups of all-purpose flour, 1 cup of granulated sugar, and 1/2 cup of brown sugar. Add 1 cup of softened unsalted butter, 1 egg, 1 teaspoon of vanilla extract, 1 teaspoon of baking powder, and a pinch of salt. Mix the ingredients until a soft dough forms and your kitchen fills with a sweet aroma.

Step 2: Shape the Cookies
Using your hands, roll the dough into small balls, about 1 inch in diameter. Place them 2 inches apart on a parchment-lined baking sheet, ensuring even spacing for uniform baking. As they bake, they will spread out, creating cute cookie shapes. Flatten the tops gently with your palm for a more even surface, preparing them for their fun spider decorations.

Step 3: Bake the Cookies
Slide the baking sheet into the preheated oven and bake for 10-12 minutes, or until the edges are just golden brown. Keep an eye on them; you want a soft center for that delicious chewy texture. Once baked, remove them from the oven, and let the Spooky Spider Cookies cool on the baking sheet for about 5 minutes before transferring them to a wire rack to finish cooling.

Step 4: Create the Spider Decorations
Once your cookies are cool, it’s time to make them spooky! Melt some chocolate chips in a microwave-safe bowl in 30-second intervals, stirring after each session until smooth. Using a toothpick or a piping bag, add a dollop of melted chocolate in the center of each cookie. This will hold your chocolate chip spider bodies in place.

Step 5: Assemble the Spiders
For each spooky spider, place a chocolate chip in the center of the melted chocolate on the cookie. Then, cut black licorice into 2-inch pieces for the legs, and stick four on each side of the chocolate chip, creating a delightful spider shape. Finish off your creations by adding candy eyes on top of the melted chocolate, making them all the more adorable.

Step 6: Let Them Set
Allow the chocolate to set for about 15-20 minutes at room temperature. This will ensure that the spiders stay intact and your Spooky Spider Cookies look perfect for serving. The anticipation of biting into these creepy yet cute cookies will surely delight your Halloween guests and bring a smile to everyone’s face!

Step 7: Serve and Enjoy
Once set, arrange your Spooky Spider Cookies on a festive platter to showcase their whimsical charm. Get ready to share these frightfully fun treats with family and friends, inviting them into your kitchen for a Halloween celebration filled with laughter, creativity, and deliciousness.

Spooky Spider Cookies

Storage Tips for Spooky Spider Cookies

Room Temperature: Store your Spooky Spider Cookies in an airtight container at room temperature for up to 4 days. This keeps them soft and chewy, ready to delight your guests.

Fridge: If you prefer, you can also refrigerate the cookies for a slightly firmer texture. Just place them in an airtight container and enjoy within a week.

Freezer: To preserve their spooky charm, freeze the cookies by placing them in a single layer on a baking sheet, then transfer to an airtight freezer bag. They can be stored for up to 3 months.

Reheating: When you’re ready to enjoy them again, simply thaw at room temperature or microwave for a few seconds. This will help restore their delightful softness!

Make Ahead Options

These Spooky Spider Cookies are perfect for meal prep, making your Halloween festivities a breeze! You can prepare the cookie dough up to 24 hours in advance—just mix all your ingredients and refrigerate the dough in an airtight container. This keeps the flavors fresh and makes rolling the cookies a snap on the day you plan to serve them. If you’d like, you can bake the cookies a few days ahead, storing them in an airtight container to maintain their chewy texture. When you’re ready to create the fun spider decorations, simply melt the chocolate and assemble with chocolate chips, licorice, and candy eyes. Your guests will be just as delighted as if they’d come straight from the oven!

What to Serve with Spooky Spider Cookies

As you prepare for a hauntingly delicious Halloween gathering, complement these whimsical cookies with treats that enchant both young and old.

  • Fang-tastic Milkshakes: Thick and creamy, these shakes are perfect for dunking those spooky cookies and add a delightful chill.
  • Pumpkin Spice Cupcakes: With warm spices and creamy frosting, they echo fall flavors while adding a festive flair to your spread.
  • Ghoulishly Green Fruit Salad: Fresh fruits tossed in a lime dressing bring a crisp, refreshing contrast to the sweetness of your cookies.
  • Witch’s Brew Hot Chocolate: Rich and velvety, this drink is perfect for cozying up with on a chilly Halloween night, balancing the cookies’ sweetness beautifully.
  • Creepy Jell-O Cups: These vibrant, wobbly treats can be made into ghoulish colors and topped with gummy worms, adding a playful twist to your dessert table.
  • Mummy Brownies: Fudgy and decadent, these brownies topped with “bandages” of white chocolate perfectly match the spooky theme, making them a hit.
  • Ghostly Marshmallow Pops: Easy to make and fun to eat, these pops add a playful touch and are a great way to use leftover marshmallows.
  • Caramel Apple Slices: Tart apple slices drizzled with rich caramel provide a crunchy bite that balances well with your soft, chewy cookies.
  • Sinister Sangria: For an adult twist, this fruity, spiced drink will both refresh and set a festive mood for your Halloween party.
  • Chocolate-Covered Pretzels: The sweet and salty combo of these quick treats creates a delightful contrast, making them an irresistible pairing with spider-themed sweets.

Expert Tips for Spooky Spider Cookies

Perfect Cookie Consistency: Keep an eye on baking time. Overbaking can lead to dry cookies; aim for a soft center that remains chewy as they cool.

Chill the Dough: If your dough is too sticky, refrigerate it for 30 minutes before shaping. This helps in rolling perfect balls for your Spooky Spider Cookies.

Decorating Strategies: Use melted white chocolate for added detail. Drizzle it on top of the spiders for a more lifelike appearance that will wow your guests!

Licorice Alternatives: If you don’t have black licorice, consider using chocolate strings or edible crafting lace as spider legs for a unique twist.

Storage Tips: Store uneaten cookies in an airtight container to keep them fresh and soft. They can last for several days, but trust me, they’ll disappear quickly!

Spooky Spider Cookies Variations & Substitutions

Feel free to get creative and personalize your Spooky Spider Cookies with these fun twists!

  • Gluten-Free: Substitute all-purpose flour with a gluten-free flour blend to keep these treats inclusive for everyone.

  • Nutty Delight: Add 1/2 cup of chopped nuts, like pecans or almonds, to the dough for a lovely crunch that pairs well with the softness of the cookies.

  • Chocolate Lovers: Use dark chocolate chips instead of semi-sweet to give a richer flavor that will please any chocolate aficionado.

  • Coconut Flakes: Mix in 1/2 cup of shredded coconut for a chewy texture and a taste of tropical sweetness—perfect for a Halloween surprise!

  • Minty Twist: Replace vanilla extract with peppermint extract for a refreshing spin, reminiscent of those festive mint cookies we love.

  • Spicy Kick: Add a dash of cinnamon or even a pinch of cayenne pepper to the dough for a warm, spicy surprise that will intrigue your taste buds.

  • Decorative Fun: Swap black licorice legs with colorful gummy worms for an extra fun and playful look that kids will adore.

  • Different Shapes: Instead of spider shapes, use cookie cutters to create other eerie designs, like bats or ghosts, for a varied Halloween-themed cookie platter.

These variations not only enhance the flavors and textures but also add fun and creativity to your baking experience. Pair these delightful cookies with other Halloween Dessert Recipes for an unforgettable Halloween spread!

Spooky Spider Cookies

Spooky Spider Cookies Recipe FAQs

What type of flour is best for Spooky Spider Cookies?
I recommend using all-purpose flour for the perfect texture and structure in your Spooky Spider Cookies. It creates that delightful softness and chewiness we all love. You could also try substituting half of it with whole wheat flour for a nuttier flavor, but it may change the texture slightly.

How should I store my Spooky Spider Cookies?
Store your Spooky Spider Cookies in an airtight container at room temperature for up to 4 days. This keeps them wonderfully soft and chewy. If you refrigerate them, they can last about a week, but they might become a bit firmer. Just remember, they’re best enjoyed fresh!

Can I freeze Spooky Spider Cookies?
Absolutely! To freeze your cookies, first arrange them in a single layer on a baking sheet. After they are frozen solid, transfer them into an airtight freezer bag. This way, you can enjoy them for up to 3 months. When you’re ready to eat, simply thaw them at room temperature or pop them in the microwave for a few seconds to regain that soft texture.

What should I do if my cookie dough is too sticky?
If your dough feels overly sticky, simply chill it in the refrigerator for about 30 minutes. This will firm it up and make rolling those cute little balls a breeze! Just make sure to avoid adding too much flour, as that might affect the final texture of your Spooky Spider Cookies.

Are there any dietary considerations for these cookies?
Definitely! If you have dietary restrictions, you can swap out regular ingredients for gluten-free flour or use dairy-free butter alternatives. Always check your chocolate chips and licorice for allergens, especially if you’re serving them to kids or guests with food sensitivities. It’s always better to be safe and ensure everyone can enjoy the spooky fun!

Spooky Spider Cookies That Will Wow Your Halloween Guests

Spooky Spider Cookies are delightful treats perfect for Halloween that will impress your guests.

  • Mixing Bowl
  • Baking Sheet
  • parchment paper
  • Microwave-safe bowl
  • Toothpick or piping bag

For the Cookie Base

  • 2 cups all-purpose flour
  • 1 cup granulated sugar
  • 1/2 cup brown sugar
  • 1 cup unsalted butter (softened)
  • 1 large egg
  • 1 teaspoon vanilla extract
  • 1 teaspoon baking powder
  • a pinch salt

For the Spider Decorations

  • 1 cup chocolate chips (semi-sweet)
  • 1 package black licorice (cut into pieces)
  • 1 package candy eyes

Step-by-Step Instructions

  1. Preheat your oven to 350°F (175°C).
  2. In a large mixing bowl, combine the all-purpose flour, granulated sugar, and brown sugar.
  3. Add softened unsalted butter, egg, vanilla extract, baking powder, and a pinch of salt. Mix until a soft dough forms.
  4. Roll the dough into small balls, about 1 inch in diameter, and place 2 inches apart on a parchment-lined baking sheet.
  5. Flatten the tops gently with your palm and bake for 10-12 minutes until the edges are golden brown.
  6. Remove from the oven and let cool on the baking sheet for 5 minutes before transferring to a wire rack.
  7. Melt chocolate chips in a microwave-safe bowl in 30-second intervals until smooth.
  8. Add a dollop of melted chocolate in the center of each cookie to hold chocolate chip spider bodies.
  9. For each spider, place a chocolate chip on top, stick black licorice legs, and add candy eyes.
  10. Allow the chocolate to set for 15-20 minutes at room temperature.
  11. Arrange on a festive platter and enjoy your Spooky Spider Cookies!

Store uneaten cookies in an airtight container to keep them fresh and soft. Can last for several days.

Dessert
American
baking, cookies, desserts, Halloween, spider cookies, spooky treats

Filed Under: Dessert

Irresistible Toffee Recipe That Will Wow Your Taste Buds

October 19, 2025 by grace bellamy Leave a Comment

“Who doesn’t love the sound of sweet satisfaction?” When friends and family gather around, there’s nothing like sharing a homemade treat that sparks joy, and this Better Than Anything Toffee is the hidden gem you need in your repertoire! This delightful recipe is not only simple to whip up but also incredibly satisfying, making it a must-try for those busy afternoons when you crave something special. The luscious combination of buttery toffee and melt-in-your-mouth chocolate, enhanced by your choice of crunchy nuts, creates an irresistible dessert that’s sure to leave taste buds dancing. Whether you’re hosting a gathering or just treating yourself, this toffee is perfect for adding that homemade touch we all savor. Curious to learn how to create this heavenly delight? Let’s dive into the steps!

Toffee

Why Is This Toffee So Irresistible?

Simplicity: This recipe comes together with just a few ingredients, making it accessible for even novice bakers.

Decadent Flavor: The rich blend of buttery toffee, smooth chocolate, and crunchy nuts creates a taste explosion that will have everyone reaching for seconds.

Versatile Options: Feel free to experiment with your favorite nuts or chocolate types to customize your toffee experience, which ensures you always have something new to wow your guests.

Quick Prep: With a total cook time of just 10-15 minutes, this toffee delivers big flavor without taking up your entire afternoon.

Crowd-Pleasing Delight: Whether served at parties or packed as gifts, it’s sure to be a hit among family and friends! Make sure to check out some delicious variations in our nutty dessert recipes for even more inspiration!

Toffee Ingredients

For the Toffee Base

  • Unsalted butter – ensures a rich, creamy texture for the toffee.
  • Granulated sugar – provides the sweetness and helps achieve that beautiful golden color.
  • Salt – balances the sweetness and enhances the overall flavor profile.
  • Vanilla extract – adds a warm, inviting aroma and depth to the toffee.
  • Water – helps dissolve the sugar and contributes to the cooking process.

For Topping

  • Semi-sweet or milk chocolate chips – perfect for that melt-in-your-mouth sensation; use dark chocolate for a more intense flavor.
  • Chopped nuts (pecans, walnuts, or almonds) – give a delightful crunch and nutty flavor; feel free to use your favorite variety to personalize your toffee experience.

Indulging in this toffee is more than just a treat—it’s about creating lasting memories with every delightful bite!

Step‑by‑Step Instructions for Toffee

Step 1: Prepare Your Baking Dish
Line a 9×13-inch baking dish or baking sheet with parchment paper or a silicone mat, ensuring it’s ready for your toffee. Gather all your ingredients and measure them out, making it easier to work swiftly as you cook. This preparation will save you time and ensure a smooth process.

Step 2: Melt the Ingredients
In a heavy-bottomed saucepan, combine the unsalted butter, granulated sugar, salt, and water over medium heat. Stir constantly to prevent burning, and cook until the mixture transforms into a deep golden brown color, which will take about 10-15 minutes. Keep an eye on the thermometer; you’re aiming for 300°F, the hard crack stage, before adding the vanilla extract.

Step 3: Pour Out the Toffee Mixture
Once the toffee has reached the desired color and temperature, carefully pour it onto the prepared baking sheet. Use a spatula to spread the mixture evenly, ensuring every corner is covered. Let the toffee sit for 1-2 minutes until it firms up slightly, maintaining that beautiful sheen you’ve created.

Step 4: Add the Chocolate Chips
While the toffee is still warm, generously sprinkle the chocolate chips over the top. Allow them to sit for about 2 minutes—this will soften the chips perfectly. After they’ve had time to melt, use a spatula to spread the warm chocolate evenly to cover the toffee layer below.

Step 5: Top with Nuts
Sprinkle your choice of chopped pecans, walnuts, or almonds over the melted chocolate. Gently press the nuts into the chocolate to ensure they adhere well; this adds a delicious crunch to your irresistible toffee. Take a moment to appreciate the beautiful layering of flavors and textures.

Step 6: Cool and Harden the Toffee
Allow the finished toffee to cool at room temperature for about 2 hours, or if you’re in a hurry, chill it in the fridge for 30 minutes. Once hardened, the toffee will be easy to break into bite-sized pieces, revealing the delicious layers of chocolate and nuts that make this toffee a true delight!

Toffee

What to Serve with Better Than Anything Toffee

Imagine serving up a stunning sweet treat that pairs perfectly with delightful side dishes and drinks, creating a memorable experience for everyone.

  • Creamy Vanilla Ice Cream: A scoop adds a luscious creaminess that perfectly balances the crunchy and sweet toffee, enhancing your dessert experience.

  • Fresh Berries Medley: The tartness of strawberries, raspberries, and blueberries contrasts beautifully with the rich toffee, bringing a refreshing burst of flavor to every bite.

  • Espresso or Coffee: The robust flavors of freshly brewed espresso or coffee complement the sweet notes of the toffee, making it a perfect ending to any meal shared over good conversation.

  • Chocolate Mousse: Layering chocolate mousse beneath or alongside toffee adds depth and luxurious texture, creating an indulgent dessert that chocolate lovers will adore.

  • Salted Caramel Sauce: Drizzling a rich salted caramel on top of your toffee takes it to another level, enhancing its decadent flavor profile and adding a delightful contrast.

  • Candied Nuts: Serve a small bowl of candied nuts alongside your toffee; their sweet crunch will echo the flavors in your dessert while adding extra crunch.

  • A Glass of Milk: There’s something nostalgic about dipping pieces of toffee into cold milk, making this pairing a comforting way to enjoy your treat.

Elevate your gathering and entice your guests’ taste buds with these delightful accompaniments!

Toffee Variations & Substitutions

Feel free to unleash your creativity with these fun twists on classic toffee!

  • Dairy-Free: Use vegan butter and dairy-free chocolate to make it a plant-based delight.
  • Nut-Free: Omit the nuts altogether for a smooth finish, or replace them with seeds like sunflower or pumpkin.
  • Spicy Kick: Add a pinch of cayenne or chili powder to the sugar mixture for a surprising heat that complements the sweetness.
  • Unique Flavors: Swap in flavored extracts such as almond or hazelnut for a fun twist on traditional vanilla essence.
  • Texture Boost: Incorporate crushed pretzels or popcorn for a delightful crunch and a savory element in every bite.
  • Chocolate Varieties: Experiment with dark, white, or even flavored chocolate chips to create a signature flavor that suits your palate.
  • Layered Treat: For a more complex toffee, try layering with different types of chocolate or adding a sprinkle of sea salt atop the melted layer for a contrasting taste sensation.
  • Fruit Infusion: Toss in some dried fruits like cranberries or raisins for a touch of tartness that beautifully balances the sweetness.

These variations elevate your toffee game to new heights, making each batch a unique experience for you and your loved ones!

Tips for the Best Toffee

Temperature Matters: Aim for 300°F: Cooking your toffee mixture to exactly 300°F ensures a perfect hard crack stage, giving you that satisfying crunch.

Stir Constantly: Prevent Burning: Stirring constantly helps prevent the sugar from burning, which can ruin the flavor and texture of your toffee.

Timing is Key: Don’t Rush Cooling: Allow the toffee to cool properly so it sets firmly, making it easier to break into those delightful bite-sized pieces.

Nut Varieties: Get Creative: Feel free to swap in your favorite nuts to personalize your toffee; just make sure to press them in while the chocolate is still warm!

Watch for Overcooking: Avoid Bitter Toffee: If your toffee turns too dark, it can develop a burnt, bitter taste. Aim for that beautiful amber color for the best flavor!

Make sure to keep these tips in mind to create truly irresistible toffee that’ll impress everyone!

How to Store and Freeze Toffee

Room Temperature: Keep your toffee in an airtight container at room temperature for up to 1 week to maintain its delightful texture and flavor.

Fridge: If you desire a firmer toffee, refrigerate it in an airtight container for up to 2 weeks. Just be sure to let it come back to room temperature before serving for the best experience!

Freezer: To preserve freshness for longer, freeze your toffee in a well-sealed container for up to 3 months. Thaw it overnight in the fridge before enjoying.

Reheating: For a warm treat, pop the toffee into the microwave for a few seconds or let it sit at room temperature for a comfortable, melt-in-your-mouth indulgence.

Make Ahead Options

These Better Than Anything Toffee pieces are truly a lifesaver for busy home cooks looking to save time! You can prepare the toffee base up to 3 days in advance—just store it tightly wrapped in an airtight container at room temperature to keep it fresh. If you wish, you can also melt the chocolate and chop the nuts ahead of time; refrigerate them separately for up to 24 hours. When you’re ready to serve, simply reheat the chocolate slightly if needed, spread it over the cooled toffee, add the nuts, and let it set. This way, you’ll enjoy all the deliciousness of homemade toffee with minimal effort!

Toffee

Better Than Anything Toffee Recipe FAQs

What kind of butter should I use for toffee?
Absolutely! It’s best to use unsalted butter for making toffee. This allows you to control the saltiness in your recipe and ensures a rich, creamy texture. I often reach for high-quality butter, as the flavor truly shines in this sweet treat.

How do I store leftover toffee?
To maintain its delightful texture and flavor, store your toffee in an airtight container at room temperature for up to 1 week. If you prefer your toffee to be firmer, refrigerate it in the same container for up to 2 weeks. Just let it sit at room temperature for a bit before enjoying!

Can I freeze my toffee?
Yes, you can! To freeze your toffee, place it in a well-sealed container or wrap it tightly in plastic wrap. It stays fresh for up to 3 months. When you’re ready to enjoy, simply thaw it overnight in the fridge to bring it back to its delicious state.

What if my toffee isn’t hardening?
If your toffee doesn’t seem to harden properly, it may not have reached the hard crack stage (300°F) during cooking. For next time, be sure to use a candy thermometer and keep stirring until you achieve that deep golden color. If it’s too soft, you can try re-cooking the mixture gently until it reaches the right temperature again.

Is this toffee safe for pets?
Definitely not! This toffee contains ingredients like sugar and chocolate that can be harmful to pets, especially dogs. Keep this sweet treat out of their reach and opt for pet-friendly snacks instead. Always consult your veterinarian if you’re unsure about the safety of any food for your furry friends.

Can I use different nuts for the topping?
Very much! Feel free to get creative with your choice of nuts. You can use pecans, walnuts, or almonds, depending on your taste preference. Just make sure to chop them roughly, and remember to press them into the chocolate while it’s still warm for the best adhesion. Enjoy experimenting!

Irresistible Toffee Recipe That Will Wow Your Taste Buds

This irresistible toffee recipe features buttery toffee, chocolate, and nuts, making it a delightful treat to satisfy your cravings.

  • Heavy-bottomed saucepan
  • Baking Dish
  • spatula

Toffee Base

  • 1 cup unsalted butter (ensures a rich, creamy texture)
  • 2 cups granulated sugar (provides sweetness and golden color)
  • 1 teaspoon salt (balances sweetness)
  • 1 teaspoon vanilla extract (adds warm aroma)
  • 1/4 cup water (helps dissolve sugar)

Topping

  • 1 cup semi-sweet or milk chocolate chips (use dark chocolate for intense flavor)
  • 1 cup chopped nuts (pecans, walnuts, or almonds) (use your favorite variety)

Step‑by‑Step Instructions for Toffee

  1. Line a 9×13-inch baking dish with parchment paper or a silicone mat. Gather and measure your ingredients.
  2. In a heavy-bottomed saucepan, combine unsalted butter, granulated sugar, salt, and water. Stir constantly over medium heat until it turns deep golden brown (about 10-15 minutes).
  3. Carefully pour the toffee onto the prepared baking sheet and spread evenly. Let it sit for 1-2 minutes until it firms up slightly.
  4. Sprinkle chocolate chips over the warm toffee, allow them to melt for about 2 minutes, then spread evenly.
  5. Sprinkle chopped nuts over the melted chocolate, pressing them in gently to adhere.
  6. Cool the toffee at room temperature for 2 hours or refrigerate for 30 minutes until hardened.

For best results, ensure to monitor the temperature and stir constantly while cooking.

Dessert
American
chocolate, dessert, nuts, sweet, toffee

Filed Under: Dessert

Monster Bagels: Fun and Spooky Breakfast for Halloween Mornings

October 19, 2025 by grace bellamy Leave a Comment

As autumn leaves swirl and the air turns crisp, it’s the perfect time to conjure up some fun in the kitchen. This Halloween, let’s transform breakfast into a feast of ghoulish delights with ideas that will thrill both kids and adults alike. One standout in my collection of Halloween breakfast ideas is the whimsical Monster Bagels, a creative twist on the classic breakfast staple that’s sure to delight even the pickiest eaters. With their playful presentation, these bagels not only double as a canvas for your culinary creativity but also sneak in some nutritious elements—thanks to the avocado and veggie toppings. Plus, they come together in no time, allowing you to spend more moments enjoying the festivities. Curious about how to make these monstrous morsels? Keep scrolling to unleash your inner chef and turn your breakfast into a spooky masterpiece!

Monster Bagels

Why Are Monster Bagels So Fun?

Whimsical creations: Monster Bagels transform an ordinary breakfast into a spooky dinner table centerpiece that both kids and adults will love.

Easy preparation: With just a few ingredients like avocado and colorful veggies, these bagels come together quickly, making breakfast fun without a huge time commitment.

Nutrient-packed: Sneak in healthy toppings alongside the fun designs—parents will appreciate the nutritious elements supporting their child’s energy for Halloween festivities!

Creative expression: Let your imagination run wild; create unique monsters with varied toppings for each family member, turning breakfast into a canvas for culinary art.

Crowd pleaser: These spooky bagels can be a hit at Halloween parties or themed brunches and are bound to make your gathering memorable.

Ready to dive into the spooky season? Check out more Halloween breakfast ideas to keep the festivities flowing!

Monster Bagels Ingredients

• Prepare to create your spookiest breakfast yet!

For the Bagels

  • Bagels – Choose whole grain or your favorite flavor for a nutritious base.
  • Avocado – A creamy layer that adds healthy fats, making these bagels deliciously satisfying.

For the Decorations

  • Cucumber slices – Use these for monster teeth and scales; they’re refreshing and crunchy.
  • Olives – Perfect for spooky eyes! Use black olives to give your monster extra character.
  • Cherry tomatoes – Slice them up as fun monster noses or add vibrant color to your creations.

For Optional Spreads

  • Cream cheese – A classic spread that adds creaminess; try flavored varieties for extra fun!
  • Guacamole – A perfect pairing with avocado, it gives a greenish hue to enhance the monster theme.

Let the monster-making begin and have fun transforming your breakfast with these Monster Bagels!

Step‑by‑Step Instructions for Monster Bagels

Step 1: Prepare the Bagels
Start by slicing your bagels in half. If you prefer toasted bagels, place the halves in a toaster or on a broiler setting for about 3-5 minutes until golden brown and crispy. Once toasted, set them aside to cool slightly; the trick is to let them maintain their shape for decorating.

Step 2: Spread the Base Layer
Generously spread a layer of creamy avocado or guacamole over each bagel half. Use a knife to spread it evenly, ensuring every bite has that delicious green goodness. The vibrant color not only enhances the monster theme but also adds a nutritious boost, setting the stage for the fun toppings to come.

Step 3: Create the Monster Features
Now for the fun part! Start decorating your Monster Bagels. Arrange cucumber slices around the edges to form teeth or scales and position cherry tomato halves as vibrant noses. Get creative; the more playful the arrangement, the more monster-like they’ll become!

Step 4: Add the Spooky Eyes
Place black olives on top of the guacamole to serve as the eyes of your creatures. You can cut the olives in half for a more dramatic effect or use whole olives for larger, more expressive eyes. This step adds personality, making your Monster Bagels come alive on the plate.

Step 5: Final Touches and Serve
Once your monsters are fully assembled, take a step back to admire your work! Feel free to add any other fun toppings or sprinkle a bit of extra seasoning for flavor. Serve your Monster Bagels immediately to friends and family, and enjoy the smiles as they take a bite into these spooky creations!

Monster Bagels

Storage Tips for Monster Bagels

  • Room Temperature: Serve Monster Bagels fresh for the best taste. If you’re preparing them ahead, keep them at room temperature for up to 2 hours before decorating to prevent sogginess.

  • Fridge: Store leftover Monster Bagels wrapped tightly in plastic wrap or an airtight container in the refrigerator for up to 1 day. However, note that the toppings may lose some crunch.

  • Freezer: For longer storage, freeze plain bagel halves for up to 2 months. When ready to enjoy, simply toast them from frozen and then add fresh toppings!

  • Reheating: If you have leftover decorated Monster Bagels, reheat them gently in a toaster oven to restore their crispness. Avoid microwaving, as it can make them chewy.

What to Serve with Monster Bagels

Embrace the spirit of Halloween and create a delightful breakfast spread that will enchant both young and old alike.

  • Pumpkin Spice Latte: A cozy drink that complements the savory and creamy flavors of the bagels, warming hearts on crisp autumn mornings.

  • Crispy Bacon Strips: The salty crunch of bacon adds a satisfying contrast, making each bite of your Monster Bagels even more enjoyable.

  • Fruit Skewers: Bright, colorful fruits like strawberries, grapes, and melon bring freshness and vibrancy, enhancing the spooky theme while keeping things light.

  • Spiced Apple Cider: A warm drink that fills the air with autumn aromas; its sweetness pairs perfectly with the savory toppings on your bagels.

  • Cheesy Scrambled Eggs: These fluffy eggs provide a comforting texture and flavor, balancing the creativity of your Monster Bagels with hearty satisfaction.

  • Halloween Smoothie Bowls: Serve these vibrant bowls topped with spooky fruits and seeds for a fun, visually appealing complement to your breakfast feast.

  • Witch’s Brew Shake: A playful, green smoothie made from spinach, banana, and almond milk that mirrors the monster theme while being nutritious.

Gather your friends and family, and make this Halloween breakfast a delicious and memorable occasion with these delightful pairings!

Tips for the Best Monster Bagels

  • Fresh Ingredients: Always use ripe avocados and fresh veggies, as they enhance the flavors and visual appeal of your Monster Bagels.

  • Creative Shapes: Experiment with different cuts and arrangements of vegetables to bring your monsters to life! Use fun, unexpected shapes for added excitement.

  • Flavor Combinations: Don’t hesitate to mix spreads! Try combining cream cheese with herbs or spices to give your bagels an extra kick of flavor and fun.

  • Get the Kids Involved: Let children help decorate their own Monster Bagels—this makes breakfast a fun activity and encourages them to eat healthy!

  • Avoid Sogginess: If you’re toasting bagels, let them cool a bit before adding toppings. This helps prevent the vegetables from wilting and keeps everything nice and crisp.

  • Switch It Up: Feel free to swap in other toppings, like bell peppers or radishes, to create unique monsters. The sky’s the limit when making your Monster Bagels!

Monster Bagels Variations & Substitutions

Get ready to let your creativity shine by mixing and matching toppings—these Monster Bagels are perfect for customization!

  • Gluten-Free: Use gluten-free bagels or make your own using almond or coconut flour for a safe alternative.
  • Vegan: Swap cream cheese for a plant-based version and use hummus to add creaminess without animal products.
  • Spicy Twist: Add sliced jalapeños or a drizzle of sriracha to give your Monster Bagels a kick that’s sure to excite.
  • Cheesy Delight: Sprinkle shredded cheese on top before baking for a melty, delicious twist that elevates the flavor profile.

For a mini-paragraph twist, consider adding roasted veggies like bell peppers or zucchini for a hearty bite. They lend a delicious flavor and an exciting texture that can satisfy even the most discerning palate.

  • Sweet Monsters: Top with peanut butter and banana slices for a nutty and sweet version that kids will find irresistible. Little hands can help slice the bananas and spread the peanut butter for all those tiny chefs in the family!

  • Colorful Creations: Go wild with a rainbow of toppings! Use shredded carrots, beets, and purple cabbage to create visually stunning monsters that are as appealing to the eyes as they are to the tummy.

  • Kid-Friendly: Offer a variety of toppings so children can build their own monsters—let them choose their eyes, mouths, and other features. This hands-on approach makes breakfast a delightful experience for everyone.

Ready for more Halloween fun in the kitchen? Explore exciting options like Creepy Crawly Cinnamon Rolls or discover new inspirations with these creative Halloween Breakfast Ideas that’ll have everyone gobbling up the ghoulish goodness!

Make Ahead Options

These delightful Monster Bagels are perfect for busy mornings and meal prep enthusiasts! You can slice and toast the bagels up to 24 hours in advance, then store them in an airtight container to keep them fresh. Additionally, you can prepare the avocado spread and store it separately in the refrigerator for the same period—just remember to add a splash of lemon juice to maintain its vibrant color and prevent browning. When you’re ready to serve, simply spread the avocado on the bagels and decorate with your desired toppings. With these make-ahead options, you’ll enjoy quick and spooky breakfasts that are just as delicious as when freshly made!

Monster Bagels

Monster Bagels Recipe FAQs

What kind of bagels should I use for Monster Bagels?
Absolutely! You can use any bagel variety that you enjoy, but I recommend whole grain for a nutritious base. They offer a heartier texture and pair wonderfully with toppings.

How should I store leftover Monster Bagels?
If you have any Monster Bagels left over, store them in the refrigerator wrapped tightly in plastic wrap or in an airtight container for up to 1 day. Keep in mind that while they will still be edible, the toppings may lose some of their crispness.

Can I freeze the bagels?
Yes, you can freeze plain bagel halves for up to 2 months! To do this, simply slice the bagels and wrap each half tightly in plastic wrap before placing them in a freezer-safe bag. When you’re ready to enjoy them, toast the frozen halves directly from the freezer, then add your fresh toppings!

What should I do if my avocado is not ripe enough?
If your avocado isn’t ripe, place it in a paper bag with a banana or apple for a day or two; the ethylene gas they emit will help speed up the ripening process. If you’re in a hurry, you can also use a bit of guacamole as an alternative spread until your avocado ripens.

Can I include other toppings on my Monster Bagels?
Very! Feel free to get creative with your toppings! Bell peppers, radishes, or even mini carrots can add extra flair. The more variety you include, the more fun and unique your Monster Bagels will be—let your imagination run wild!

How long can I keep Monster Bagels at room temperature before serving?
You can keep your Monster Bagels at room temperature for up to 2 hours before serving. Just be sure to wait until the last minute to add toppings, as this will help prevent any sogginess and keep your breakfast bright and delightful.

Monster Bagels: Fun and Spooky Breakfast for Halloween Mornings

Create whimsical Monster Bagels for Halloween breakfast fun using nutritious ingredients like avocado and veggies. Perfect for kids and adults alike!

  • toaster
  • Knife
  • cutting board

For the Bagels

  • 4 whole bagels (Choose whole grain or your favorite flavor for a nutritious base.)
  • 2 medium avocados (A creamy layer that adds healthy fats.)

For the Decorations

  • 1 cup cucumber slices (Use for monster teeth and scales.)
  • 1 cup black olives (Perfect for spooky eyes!)
  • 1 cup cherry tomatoes (Slice for fun monster noses.)

For Optional Spreads

  • 1 cup cream cheese (Try flavored varieties for extra fun!)
  • 1 cup guacamole (Perfect pairing with avocado.)

Preparation Instructions

  1. Slice bagels in half. Toast if desired for 3-5 minutes until golden brown. Allow to cool slightly.
  2. Spread avocado or guacamole over each bagel half evenly.
  3. Decorate with cucumber slices as teeth/scales and cherry tomato halves as noses.
  4. Place black olives on top for eyes, cut in half for effect if desired.
  5. Serve immediately and enjoy the playful Monster Bagels.

Use fresh ingredients for better flavor and visual appeal. Get kids involved in decorating for a fun activity!

Sandwiches
American
bagels, fun food, Halloween breakfast, healthy recipes, Monster Bagels, spooky meals

Filed Under: Sandwiches

Heavenly Pumpkin Custard Cake That Melts in Your Mouth

October 19, 2025 by grace bellamy Leave a Comment

The aroma of warm pumpkin spice brings back memories of cozy autumn afternoons spent in the kitchen, crafting seasonal delights. Today, I’m excited to share my beloved Pumpkin Custard Cake, a dish that effortlessly captures the essence of fall and feels like a warm hug in dessert form. This delightful treat not only requires just 10 minutes of prep time, making it perfect for those busy days, but it also delivers a show-stopping result that will impress family and friends alike. With its creamy, custardy texture contrasted by a subtle hint of spice, this cake is a fantastic way to elevate your dessert game. Whether you’re hosting a gathering or just treating yourself, don’t you think it’s time to experience a slice of this pumpkin magic?

Pumpkin Custard Cake

Why is Pumpkin Custard Cake a Must-Try?

Decadently Unique: This Pumpkin Custard Cake offers a delightful twist on traditional desserts, featuring a luxurious custard texture that simply melts in your mouth.

Ease of Preparation: With just 10 minutes of prep time, you’ll find it effortlessly fits into your busy schedule.

Crowd-Pleasing Flavors: Warm spices like cinnamon and pumpkin pie spice create a cozy aroma, making it a perfect dessert for gatherings.

Impressive Presentation: Serve it chilled after refrigerating for the most stunning and satisfying slices—guaranteed to impress!

This cake is perfect for anyone searching for an elevated dessert experience, making it a fall favorite you’ll want to enjoy over and over.

Pumpkin Custard Cake Ingredients

For the Batter

  • Butter – 1/2 cup, melted; this rich fat adds a delicious depth of flavor to the batter.
  • Whole Milk – 2 cups; warms it up for a smoother blend in your custard.
  • Eggs – 4, separated; using only yolks creates a rich custardy texture while the whites add fluffiness.
  • Cream of Tartar – Pinch; helps stabilize the egg whites, giving your cake that perfect airy lift.
  • Confectioner’s Sugar – 1 1/2 cups; finer sugar ensures a smooth sweetness that blends beautifully.
  • Vanilla Extract – 1 tsp; adds a warm flavor profile that complements the pumpkin.
  • Ground Cinnamon – 1 tsp; a classic spice that enhances the cozy autumnal flavor of your pumpkin cake.
  • Pumpkin Pie Spice – 1 tsp; elevates the pumpkin flavor, making it the star ingredient in this Pumpkin Custard Cake.
  • Pumpkin Puree – 1 cup; make sure it’s pure pumpkin puree to achieve the best flavor and texture.
  • All-Purpose Flour – 1 cup; it helps to create structure and balance in your cake.

Step‑by‑Step Instructions for Pumpkin Custard Cake

Step 1: Preheat and Prepare
Start by preheating your oven to 325°F (160°C). While it warms up, line your 8×8 or 9×9 inch square baking dish with parchment paper, allowing some overhang for easy removal later. This preparation step sets the stage for your magnificent Pumpkin Custard Cake, ensuring an easy transfer once it’s baked.

Step 2: Warm the Milk
Gently warm the 2 cups of whole milk until it is lukewarm but not hot, as this will help in blending the ingredients smoothly. Set the milk aside to cool slightly while you tackle the next steps, as this will create a creamy base for your custard cake mixture.

Step 3: Beat the Egg Whites
In a clean mixing bowl, beat the 4 egg whites along with a pinch of cream of tartar. Using an electric mixer, whip them until stiff peaks form, about 3-5 minutes. These aerated whites will add a light fluffiness to your cake, creating that delightful texture synonymous with a perfect Pumpkin Custard Cake.

Step 4: Melt Butter and Combine Yolk Mixture
Melt 1/2 cup of butter in a microwave-safe bowl and allow it to cool to room temperature. In another bowl, whisk together the egg yolks and 1 1/2 cups of confectioner’s sugar until the mixture is pale and frothy, about 2-3 minutes. Once the butter has cooled, stir it into this yolk mixture along with the vanilla extract, ground cinnamon, and pumpkin pie spice.

Step 5: Incorporate Flour and Pumpkin
Mix 1 cup of all-purpose flour into the yolk and butter combination until just combined. Then, gently fold in 1 cup of pumpkin puree along with 1/4 cup of your lukewarm milk. This ensures that the pumpkin flavor shines through in your Pumpkin Custard Cake while maintaining a smooth texture in the batter.

Step 6: Add Remaining Milk
With your mixer on low speed, slowly add the remaining lukewarm milk to the batter, mixing until everything is well combined. Be mindful not to overmix; you want the mixture to stay light and airy, essential for achieving a custardy consistency in the final bake of your Pumpkin Custard Cake.

Step 7: Fold in Egg Whites
Carefully fold the beaten egg whites into your batter using a spatula. Aim to retain some small lumps for texture, which will contribute to the cake’s airy quality. This gentle approach helps maintain the volume you created with the egg whites, resulting in a delightful, fluffy custard.

Step 8: Bake the Custard Cake
Pour the prepared batter into your lined baking dish, ensuring an even spread. Place it in the preheated oven and bake for 60-65 minutes. The cake is ready when it is set around the edges but still slightly jiggly in the center; this indicates the creamy custard layer beneath.

Step 9: Cool and Chill
Once baked, remove your Pumpkin Custard Cake from the oven and let it cool completely in the baking dish. For the best results, refrigerate the cake for a couple of hours before serving; this helps the texture solidify and ensures clean cutting.

Step 10: Serve and Enjoy
After cooling, carefully lift the Pumpkin Custard Cake out of the dish using the parchment paper overhang and cut it into squares. Serve it chilled, and savor the delicious custardy layers that melt in your mouth, making this dessert a true fall favorite!

Pumpkin Custard Cake

How to Store and Freeze Pumpkin Custard Cake

Room Temperature: Enjoy fresh slices at room temperature for up to 2 hours. Beyond that, refrigerate to preserve texture and taste.

Fridge: Store the Pumpkin Custard Cake in an airtight container in the fridge for up to 3 days. Chilling enhances its creamy custard layers, making each bite even more delightful.

Freezer: To freeze, wrap slices tightly in plastic wrap and aluminum foil before placing them in a freezer-safe container. They’ll keep well for up to 2 months!

Reheating: Thaw in the fridge overnight for the best results. Reheat gently in the microwave for 15-20 seconds or enjoy chilled for a refreshing treat!

Make Ahead Options

These Pumpkin Custard Cake squares are perfect for meal prep enthusiasts looking to save time during busy weeknights! You can prepare the batter up to 24 hours in advance by combining the wet ingredients (butter, egg yolks, and spices) and the dry ingredients separately, keeping them refrigerated. Simply whisk the two together and fold in the beaten egg whites just before baking for fresh, fluffy results. For best quality, avoid cutting the cake until you’re ready to serve it, as refrigerating it whole prevents it from drying out. When you’re ready to enjoy, bake as directed and savor that delightful taste of fall!

What to Serve with Pumpkin Magic Custard Cake

Indulging in a slice of creamy, custardy perfection is just the start—let’s elevate your dessert experience with delightful companions!

  • Whipped Cream: A dollop of freshly whipped cream adds a light, airy sweetness that pairs beautifully with the rich custard.
  • Cinnamon Ice Cream: This warm, spiced ice cream creates a delightful contrast, balancing the warm flavors of your cake. Try a scoop on top for a picturesque presentation.
  • Spiced Apples: Sautéed apples with cinnamon provide a fruity, warm addition that enhances the overall autumn vibe of your meal.
  • Caramel Sauce: Drizzling caramel over the cake introduces a sweet, gooey element that deepens the flavors and adds an extra touch of indulgence.
  • Roasted Nuts: Toasted pecans or walnuts add a satisfying crunch and nutty flavor that complements the softness of the custard cake perfectly.
  • Chai Tea: A warm cup of chai infuses your dessert time with spicy notes, enhancing the cake’s flavors while providing a cozy drink option.
  • Pumpkin Spice Latte: For a seasonal treat, pair your cake with a pumpkin spice latte for a delightful nod to fall. Enjoy these flavors as you savor every morsel!

Expert Tips for Pumpkin Custard Cake

Right Pumpkin Puree: Use pure pumpkin puree instead of pumpkin pie filling for the best flavor and texture in your Pumpkin Custard Cake.

Don’t Overmix: When combining the ingredients, mix just until incorporated. Overmixing can lead to a denser cake instead of the desired custardy texture.

Chill Before Serving: For clean slices and the best texture, refrigerate the cake before cutting. This rest period allows the custard to set nicely.

Monitor Baking Time: Keep an eye on your cake during the last minutes of baking. It should be set but still have a slight jiggle in the center.

Gently Fold in Egg Whites: When adding egg whites, fold them in gently to retain volume. This technique is key to achieving fluffiness in your Pumpkin Custard Cake.

Variations & Substitutions for Pumpkin Custard Cake

Feel free to add your own twist to this delicious Pumpkin Custard Cake for a memorable treat!

  • Dairy-Free: Substitute the whole milk with almond milk or coconut milk for a lactose-free version that still tastes indulgent. The subtle nutty flavor will add a new dimension to the cake.

  • Gluten-Free: Use a 1:1 gluten-free all-purpose flour blend to make this cake gluten-free without compromising texture. You’ll still enjoy that delightful custardy finish!

  • Spice Up the Flavor: Swap the pumpkin pie spice with your favorite blend of spices, like nutmeg or ginger, to create a unique flavor profile that speaks to your palate.

  • Lower Sugar Option: Reduce the confectioner’s sugar to 1 cup or use a sugar alternative to cut down on sweetness while still achieving the desired texture.

  • Add a Chocolate Twist: Incorporate mini chocolate chips into the batter for a luscious chocolate-pumpkin fusion. The combination is sure to enchant even the pickiest eaters!

  • Nutty Flavor: Fold in chopped walnuts or pecans for a delightful crunch and extra depth of flavor. This variation brings both texture and richness to the dessert.

  • Extra Creaminess: Replace a portion of the pumpkin puree with cream cheese for a richer flavor and even creamier texture. This gives the cake a cheesecake-like finesse that will delight your guests.

  • Vegan Friendly: Substitute eggs with a flaxseed meal mixture (1 tablespoon of flaxseed meal + 3 tablespoons water = 1 egg) and use dairy-free butter for a completely vegan version that’s just as satisfying.

Feel free to experiment! Each twist allows you to create a unique version of this classic Pumpkin Custard Cake that suits your taste and dietary preferences. If you’re looking for more fall-inspiring desserts, check out my Apple Crisp recipe or try some delightful Spiced Pear Muffins for a cozy baking day.

Pumpkin Custard Cake

Pumpkin Custard Cake Recipe FAQs

What type of pumpkin puree should I use?
Absolutely! For the best flavor and texture in your Pumpkin Custard Cake, be sure to use pure pumpkin puree. Avoid pumpkin pie filling, as it is sweetened and spiced differently, which can alter the cake’s outcome significantly.

How should I store leftovers?
After serving, any leftover Pumpkin Custard Cake should be stored in an airtight container in the refrigerator. This will keep it fresh for up to 3 days. Chilling enhances the creamy layers, turning each bite into a luxurious, custardy delight.

Can I freeze Pumpkin Custard Cake?
Definitely! To freeze your Pumpkin Custard Cake, wrap individual squares tightly in plastic wrap, followed by aluminum foil to prevent freezer burn. Place them in a freezer-safe container, and they will remain delicious for up to 2 months. When you’re ready to enjoy, simply thaw them overnight in the fridge.

What should I do if my cake didn’t set properly?
If your Pumpkin Custard Cake is too runny, there could be a few reasons. First, ensure the baking time was adequate; it should be set around the edges but still slightly jiggly in the center. If it’s underbaked, return it to the oven for an additional 5 to 10 minutes. Next time, try refrigerating it longer after baking to help the custard set properly.

Are there any dietary considerations I should be aware of?
Very! This recipe contains dairy and eggs, which can be a concern for those with lactose intolerance or egg allergies. For a dairy-free alternative, you can use almond milk or coconut milk instead of whole milk and a flax egg to replace the eggs. Just ensure the pumpkin puree is also dairy-free!

Heavenly Pumpkin Custard Cake That Melts in Your Mouth

This Pumpkin Custard Cake is a decadent dessert that captures the essence of fall with its creamy texture and warm spices.

  • Oven
  • Mixing Bowl
  • Electric mixer
  • spatula
  • Baking Dish
  • parchment paper

For the Batter

  • 1/2 cup Butter (melted)
  • 2 cups Whole Milk (warm for smoother blend)
  • 4 Eggs (separated)
  • Pinch Cream of Tartar (helps stabilize egg whites)
  • 1 1/2 cups Confectioner’s Sugar (for smooth sweetness)
  • 1 tsp Vanilla Extract (adds warm flavor)
  • 1 tsp Ground Cinnamon (enhances autumn flavor)
  • 1 tsp Pumpkin Pie Spice (elevates pumpkin flavor)
  • 1 cup Pumpkin Puree (use pure for best flavor)
  • 1 cup All-Purpose Flour (for structure and balance)

Step-by-Step Instructions

  1. Preheat your oven to 325°F (160°C) and line your baking dish with parchment paper.
  2. Gently warm the whole milk until lukewarm.
  3. Beat the egg whites with a pinch of cream of tartar until stiff peaks form.
  4. Melt butter and cool, then whisk with egg yolks and confectioner’s sugar.
  5. Mix in flour and pumpkin puree with a small amount of the lukewarm milk.
  6. Slowly add the remaining milk, mixing until well combined.
  7. Gently fold in the beaten egg whites to maintain volume.
  8. Pour the batter into the baking dish and bake for 60-65 minutes.
  9. Allow the cake to cool completely, then refrigerate for a couple of hours.
  10. Lift the cake out using parchment paper, cut into squares, and serve chilled.

Use pure pumpkin puree instead of pumpkin pie filling for the best flavor. Remember to chill the cake before serving for the best texture.

Dessert
American
Autumn Dessert, Easy Cake, fall treats, holiday sweets, Pumpkin Custard Cake, Pumpkin Recipes

Filed Under: Dessert

Spooky Spider Cookies That’ll Thrill Your Halloween Bash

October 19, 2025 by grace bellamy Leave a Comment

As I rummaged through my kitchen pantry, I was hit with a delightful wave of nostalgia that transported me back to my childhood. Cue the playful giggles and Halloween whispers as I fondly recall the excitement of creating a mini cookie monster masterpiece. This year, I’m adding a spooky twist to our annual Halloween festivities with my fun and easy recipe for Spooky Spider Cookies. Not only are these cookies a creative centerpiece for any Halloween gathering, but they also promise a tasty treat the whole family will love. With minimal effort and a dash of fun, they’re perfect for those of us who want to craft something memorable without spending hours in the kitchen. Are you ready to conjure up some deliciousness? Let’s dive into the whimsical world of Halloween baking!

Spooky Spider Cookies

Why Are Spooky Spider Cookies a Must?

Irresistible Appeal: These cookies are not just a treat; they’re a playful centerpiece that will captivate both kids and adults alike.

Simple to Make: With minimal ingredients and a straightforward process, even novice bakers can whip these up in no time.

Creative Customization: Get creative by adding different toppings or using various cookie shapes to make them uniquely yours.

Perfect for Parties: They are the ideal treat for Halloween bashes, adding a touch of fun and festivity to your dessert table.

Tasty and Fun: These cookies blend rich chocolate flavor with a delightful crunch that will have everyone reaching for seconds.

Try pairing them with other spooky treats like Bloody Red Velvet Cake Pops or Vampire Donuts for a complete Halloween spread!

Spooky Spider Cookies Ingredients

Unleash your creativity with these tasty treats!

For the Cookies

  • All-purpose flour – the base for your dough, giving it the perfect structure.
  • Unsweetened cocoa powder – adds a rich, chocolatey flavor that makes these spiders irresistible.
  • Baking soda – helps the cookies rise, ensuring a light and tender texture.
  • Butter – brings a creamy richness; you can substitute with margarine if needed.
  • Granulated sugar – sweetens the dough; brown sugar can add a hint of caramel flavor.
  • Egg – binds the ingredients together and adds moisture; a flax egg is a great vegan alternative.
  • Vanilla extract – enhances the flavor profile, making the cookies even more delicious.

For the Decoration

  • Peanut butter cups – create the spider’s body; opt for any chocolate candy if you’re allergic.
  • Pretzel sticks – perfect for those long, spider legs; use thick ones for a more robust look.
  • Candy eyes – these bring your spooky spiders to life; substitute with chocolate chips for a simple effect.

Get ready to create a delightful batch of Spooky Spider Cookies that will thrill your Halloween bash!

Step‑by‑Step Instructions for Spooky Spider Cookies

Step 1: Prepare the Cookie Dough
Start by preheating your oven to 350°F (175°C). In a large mixing bowl, cream together 1 cup of softened butter and 1 cup of granulated sugar until the mixture is light and fluffy. Add in 1 egg and 1 teaspoon of vanilla extract, mixing until well combined. Gradually incorporate 2 cups of all-purpose flour, ¾ cup of unsweetened cocoa powder, and 1 teaspoon of baking soda until a dough forms. Your Spooky Spider Cookies dough should be smooth and slightly sticky.

Step 2: Shape the Cookies
With clean hands, scoop out tablespoon-sized portions of the dough and roll them into balls. Place each ball on a greased or parchment-lined baking sheet, spacing them about 2 inches apart. Gently flatten each ball with the palm of your hand to form thick discs. Bake the cookies in the preheated oven for 10-12 minutes or until the edges are firm and the centers appear set. Let the cookies cool on the baking sheet for a few minutes before transferring them to a wire rack to cool completely.

Step 3: Decorate the Cookies
While the spooky spider cookies cool, unwrap your peanut butter cups and get ready to assemble your creepy crawlers. Once the cookies are completely cooled, melt some chocolate in a microwave-safe bowl in 30-second intervals, stirring each time until smooth. Dip the bottom of each peanut butter cup into the melted chocolate and place it in the center of a cookie to form the spider’s body.

Step 4: Add the Legs
Now, grab your pretzel sticks, and break them into smaller segments for the spider legs. Insert four pretzel pieces on each side of the peanut butter cup to create a spooky spider shape. Ensure they are firmly placed in the cookie, so they stay standing. At this stage, your Spooky Spider Cookies will start to take on a delightful Halloween appearance.

Step 5: Bring Your Spiders to Life
Finally, complete your Spooky Spider Cookies by adding candy eyes to the peanut butter cups using a dab of melted chocolate to secure them in place. Allow the chocolate to set, which will take about 15 minutes, creating an adorable and slightly eerie effect. Your charming Halloween treats are now ready to thrill at your next party!

Spooky Spider Cookies

How to Store and Freeze Spooky Spider Cookies

Room Temperature: Keep your Spooky Spider Cookies in an airtight container at room temperature for up to 5 days. This will maintain their freshness and delightful texture.

Fridge: For extended freshness, store the cookies in the refrigerator for up to 1 week. Just remember to seal them well to prevent them from absorbing other odors.

Freezer: To freeze, place the fully decorated cookies in a single layer on a baking sheet for about an hour. Once firm, transfer them to a freezer bag or container. They’ll stay delicious for up to 3 months.

Reheating: For best results, thaw your cookies in the fridge overnight before bringing them to room temperature. If you want a warm treat, microwave them lightly for 10-15 seconds.

Make Ahead Options

These Spooky Spider Cookies are a fantastic choice for meal prep, making your Halloween festivities less hectic! You can prepare the cookie dough up to 24 hours in advance; simply mix everything together, shape into balls, and refrigerate them in an airtight container. By chilling the dough, you’ll allow the flavors to deepen while keeping the cookies tender when baked. On the day of your celebration, just preheat the oven, bake the cookies, and let them cool before adding the peanut butter cups and pretzel legs. The cookies taste just as delicious, and this planning allows your spooky creations to take center stage without stress, making them perfect for your busy schedule!

What to Serve with Spooky Spider Cookies

There’s nothing like a festive Halloween spread to get everyone in the ghostly spirit of the season!

  • Bloody Red Velvet Cake Pops: These charming cake pops add a splash of color and frightful fun, making them perfect companions for your spooky treats.
  • Witch Hat Cupcakes: Combining chocolate cupcakes topped with sugar cones, these whimsical creations provide a delightful contrast to the richness of the cookies.
  • Frankenstein Rice Krispie Bars: With their fun green color and candy eyes, these treats add a playful flair while complementing the Halloween theme.
  • Pumpkin Spice Cookies: These spiced delights create a warm fall flavor that pairs beautifully with the chocolatey goodness of your Spooky Spider Cookies.
  • Vampire Donuts: These red-iced donuts with candy eyes offer a visual and textural delight that enhances the festive mood of your treat table.
  • Candy Corn Cheesecake Bars: A creamy and rich dessert, these bars present a pleasing contrast to the crunch of your spider cookies, creating a well-rounded dessert experience.

Serve these together for a frightfully delightful Halloween gathering that will enchant all ages!

Spooky Spider Cookies Variations

Get ready to unleash your creativity and make these delightful treats even more enchanting!

  • Gluten-Free: Substitute all-purpose flour with a 1:1 gluten-free baking blend for the same tasty goodness without the gluten.

  • Nut-Free: Use carob chips instead of peanut butter cups to create a spider’s body, perfect for those with nut allergies.

  • Vegan: Replace the egg with a flax egg and use dairy-free chocolate for a delicious vegan version that everyone can enjoy.

  • Flavor Twists: Add a pinch of cinnamon or a splash of almond extract to the dough for an exciting twist on the classic chocolate flavor.

  • Fruity Surprise: Incorporate mini marshmallows or fruit leather cut into strips for a fun and fruity addition, making your spider cookies even more whimsical!

  • Chocolate Lovers: Drizzle additional melted chocolate over the finished cookies for a decadent touch that will have chocolate lovers swooning.

  • Hot & Spicy: Mix in a dash of cayenne pepper or chili powder to the cookie dough for a surprising kick that will set your spooky batch apart.

  • Funky Decorations: Up your decoration game with colorful icing for the spider legs or use edible glitter to make your cookies shine like Halloween stars!

Why not pair your delightful Spooky Spider Cookies with some Pumpkin Spice Cookies or Mummy Brownies for a full-blown Halloween dessert table that will impress all your guests? They’ll love the variety and fun in every bite!

Expert Tips for Spooky Spider Cookies

• Chill the Dough: This helps the cookies hold their shape while baking and prevents spreading, ensuring those spooky spiders look perfect!

• Avoid Overbaking: Keep an eye on the cookies; they should be soft in the center upon removal. Overbaked cookies can become dry and crumbly.

• Customize the Legs: Try using colored candy sticks or licorice for a fun twist! Experimenting with toppings makes your Spooky Spider Cookies uniquely yours.

• Warm Chocolate for Decoration: Always melt the chocolate slowly to prevent burning. A smooth consistency makes it easier to attach pretzel legs and candy eyes.

• Mix Flour/ Cocoa Well: Ensure the all-purpose flour and cocoa powder are fully combined before adding them to the wet ingredients. This prevents clumping and gives an even bake.

Spooky Spider Cookies

Spooky Spider Cookies Recipe FAQs

What kind of cocoa powder should I use for Spooky Spider Cookies?
Absolutely! Unsweetened cocoa powder is best for achieving that rich chocolate flavor. If you can, opt for a high-quality cocoa for deeper taste. Avoid using Dutch-processed cocoa as it can alter the cookie’s texture.

How should I store Spooky Spider Cookies?
Store your Spooky Spider Cookies in an airtight container at room temperature for up to 5 days. This keeps them fresh and maintains their delightful, chewy texture. If you prefer them chilled, they can be kept in the refrigerator for up to a week, just be sure to have them sealed tightly to ward off any other food odors!

Can I freeze Spooky Spider Cookies, and how?
Yes, you can! To freeze your Spooky Spider Cookies, first place the fully decorated cookies in a single layer on a baking sheet and pop them in the freezer for about an hour until they’re firm. Then, transfer them to a freezer bag or an airtight container, where they can stay delicious for up to 3 months. When you’re ready to enjoy, thaw them in the refrigerator overnight and let them reach room temperature for the best taste.

What should I do if my cookie dough is too sticky?
If your dough feels overly sticky, don’t worry! Just sprinkle in a little extra flour, about a tablespoon at a time, until the dough reaches a workable consistency. This will help in rolling the dough into balls without it sticking to your hands. If you chill the dough for 30 minutes, it can also help firm it up for easier handling!

Are there allergy-friendly alternatives for the ingredients?
Very! For a more allergy-friendly version, use gluten-free flour instead of all-purpose flour, and swap the butter for a dairy-free alternative such as coconut oil or a vegan butter substitute. To replace the egg, simply make a flax egg by mixing one tablespoon of ground flaxseed with three tablespoons of water—let it sit for about 5 minutes until it thickens!

Spooky Spider Cookies That’ll Thrill Your Halloween Bash

Delightful Spooky Spider Cookies that bring fun and nostalgia to your Halloween bash.

  • Mixing Bowl
  • Baking Sheet
  • parchment paper
  • Microwave-safe bowl

For the Cookies

  • 2 cups All-purpose flour
  • ¾ cup Unsweetened cocoa powder
  • 1 teaspoon Baking soda
  • 1 cup Butter, softened (Substitute with margarine if needed.)
  • 1 cup Granulated sugar (Brown sugar can add a hint of caramel flavor.)
  • 1 large Egg (A flax egg is a great vegan alternative.)
  • 1 teaspoon Vanilla extract

For the Decoration

  • 12 pieces Peanut butter cups (Opt for any chocolate candy if allergic.)
  • 8 sticks Pretzel sticks (Use thick ones for a robust look.)
  • 1 pack Candy eyes (Substitute with chocolate chips for a simple effect.)

Step-by-Step Instructions for Spooky Spider Cookies

  1. Preheat your oven to 350°F (175°C). In a mixing bowl, cream together butter and sugar until light and fluffy. Add in egg and vanilla extract, mixing until well combined. Gradually incorporate flour, cocoa powder, and baking soda until a dough forms.
  2. Scoop out tablespoon-sized portions of dough, roll them into balls, and place them on a greased or parchment-lined baking sheet. Flatten each ball to form thick discs. Bake for 10-12 minutes until edges are firm and centers are set. Cool on baking sheet for a few minutes before transferring to a wire rack.
  3. While the cookies cool, unwrap peanut butter cups. Melt chocolate in a microwave-safe bowl in 30-second intervals until smooth. Dip the bottom of each peanut butter cup into melted chocolate and place in the center of a cookie.
  4. Break pretzel sticks into smaller segments for legs. Insert four pretzel pieces on each side of the peanut butter cup to create a spider shape.
  5. Add candy eyes to the peanut butter cups using melted chocolate to secure them in place. Allow chocolate to set for about 15 minutes before serving.

Chill the dough to help cookies hold their shape and prevent spreading. Avoid overbaking for soft centers. Customize legs with colored candy sticks for fun variations.

Dessert
American
dessert recipes, easy baking, Family-friendly Treats, festive treats, Halloween Cookies, Spooky Spider Cookies

Filed Under: Dessert

Witch Hat Cupcakes: Spooktacular Treats for Halloween Fun

October 19, 2025 by grace bellamy Leave a Comment

As Halloween approaches, the kitchen becomes a playground of creativity and delight. I love turning ordinary moments into playful culinary adventures, especially when it comes to spooky sweets. This year, let’s conjure up some magic with Witch Hat Cupcakes! These whimsical treats not only captivate the eyes but are also a breeze to make, ensuring you can whip them up without the stress of complicated baking. With chocolate cupcakes topped with sugar cones, they become the perfect blend of sweet and fun—ideal for parties or cozy family gatherings. Plus, they’re sure to be a hit with little goblins and grown-ups alike! Are you ready to dive into the enchanting world of holiday baking?

Witch Hat Cupcakes

Why Are Witch Hat Cupcakes So Fun?

Delightful Presentation: The sight of a whimsical witch hat on top of a cupcake instantly sparks joy and adds a festive touch to any Halloween gathering.

Easy to Make: You don’t need to be a baking expert! These simple chocolate cupcakes come together quickly, allowing you to focus on the fun details like decorating.

Crowd-Pleasing Flavor: Rich chocolate paired with a crisp sugar cone offers a balance of textures that appeals to both kids and adults.

Versatile Variations: Feel free to get creative—add colored frosting or sprinkles to match your party theme, just like with our fun Ghost Meringues or Pumpkin Spice Cookies.

Memorable Treats: These cupcakes aren’t just desserts; they’re conversation starters that will leave a lasting impression on your guests!

Witch Hat Cupcake Ingredients

Get ready to create a spooktacular treat!

For the Cupcakes
• All-purpose flour – The foundation of your cupcakes; can substitute with gluten-free flour for a different spin.
• Granulated sugar – Sweetens the deal; helps keep the cupcakes moist.
• Unsweetened cocoa powder – For that rich chocolate flavor that you’ll love!
• Baking powder – Ensures your cupcakes rise beautifully.
• Salt – Enhances the overall flavor, balancing the sweetness.
• Eggs – Binds the ingredients together; for a vegan option, use applesauce or flaxseed meal.
• Milk – Adds moisture; almond or oat milk works well for dairy-free versions.
• Vegetable oil – Keeps your cupcakes rich and moist, making them irresistible.
• Vanilla extract – A boost of flavor that pairs perfectly with chocolate.

For the Topping
• Sugar cones – These transform into witch hats, making decorating a fun activity for the kids!
• Chocolate frosting – Rich and creamy, it not only tastes amazing but secures the cone in place.
• Edible decorations (sprinkles, candy eyes) – Let your creativity shine and personalize each cupcake!

Remember, these Witch Hat Cupcakes are sure to be a favorite as you celebrate Halloween!

Step‑by‑Step Instructions for Witch Hat Cupcakes

Step 1: Preheat the Oven
Begin your spooky baking adventure by preheating your oven to 350°F (175°C). This temperature is perfect for baking your chocolate cupcakes. While the oven warms up, gather your ingredients and equipment—mixing bowls, a whisk, and a cupcake pan. Preparing everything ahead of time ensures a smooth baking process that will lead to impressive Witch Hat Cupcakes.

Step 2: Mix the Dry Ingredients
In a mixing bowl, combine all-purpose flour, granulated sugar, cocoa powder, baking powder, and salt. Use a whisk to mix these dry ingredients together until evenly blended. This step is crucial as it ensures that your chocolate cupcakes have a consistent flavor and texture. Visual cues to look for include a uniform darker color throughout the mixture, which should take about 1-2 minutes.

Step 3: Combine the Wet Ingredients
In another bowl, whisk together the eggs, milk, vegetable oil, and vanilla extract until well mixed. This creates a wet mixture that will add moisture and flavor to your Witch Hat Cupcakes. Aim for a smooth consistency without lumps, which should take approximately 2-3 minutes of whisking. Once combined, pour the wet mixture into your dry ingredients.

Step 4: Blend the Batter
Stir the combined mixtures with a spatula or whisk gently until just blended. Be careful not to overmix; a few lumps are okay. This step usually takes around 1-2 minutes. You’re looking for a thick batter that’s rich and chocolaty, perfect for your Witch Hat Cupcakes. Once mixed, it’s time to fill your cupcake pan!

Step 5: Fill the Cupcake Liners
Using a scoop or a spoon, fill each cupcake liner in the pan about two-thirds full with batter. This allows space for the cupcakes to rise without overflowing. A visual cue to look for is a smooth top on each filled liner. Bake them in the preheated oven for about 18-20 minutes, until a toothpick inserted into the center comes out clean.

Step 6: Cool the Cupcakes
Once baked, carefully remove the cupcake pan from the oven and let it cool for about 5-10 minutes. After this initial cooling, transfer the cupcakes to a wire rack to cool completely, which typically takes about 30 minutes. This cooling step is essential before adding your topping to the Witch Hat Cupcakes, as hot cupcakes can melt the frosting.

Step 7: Prepare the Witch Hats
While waiting for the cupcakes to cool, gather your sugar cones and chocolate frosting. Once the cupcakes are fully cool, use a spatula or knife to generously spread chocolate frosting on top of each cupcake. This not only adds flavor but also helps stick the sugar cones (witch hats) in place.

Step 8: Assemble the Witch Hats
Delicately press a sugar cone onto the center of the frosted cupcake to create the witch hat. The frosting should secure the cone firmly. If desired, this is the perfect time to let your creativity shine! Decorate the frosting with edible decorations like sprinkles or candy eyes to personalize your Witch Hat Cupcakes for a fun Halloween touch.

Step 9: Serve and Enjoy
Once assembled, your enchanting Witch Hat Cupcakes are ready to dazzle at your Halloween gatherings. Arrange them on a festive platter for a stunning presentation that invites compliments from little goblins and grown-ups alike. Now it’s time to enjoy the fruits of your labor—watch as everyone delights in these whimsical treats!

Witch Hat Cupcakes

Make Ahead Options

These Witch Hat Cupcakes are perfect for busy home cooks who want to save time without sacrificing flavor! You can prepare the chocolate cupcakes up to 2 days in advance. Simply bake them, cool completely, and store them in an airtight container at room temperature to maintain their delicious moistness. You can also make the chocolate frosting up to 3 days ahead; just refrigerate it in a sealed container. When you’re ready to serve, frost the cooled cupcakes and gently press a sugar cone on top for the witch hats. This easy prep allows you to sprinkle creativity when it’s time to celebrate Halloween, ensuring your treats are just as delightful as if freshly made!

Expert Tips for Witch Hat Cupcakes

• Cupcake Consistency: Ensure your batter is mixed just until combined. Overmixing can make the cupcakes dense instead of fluffy.

• Cool Completely: Let the cupcakes cool entirely before frosting. If they’re too warm, the frosting will melt, making it difficult to assemble your witch hats.

• Frosting Technique: Use a small offset spatula to spread an even layer of chocolate frosting. This ensures that the sugar cone sits securely and looks polished.

• Fun Decorations: Get creative with your edible decorations! Use colored sprinkles or themed candies to add a personalized touch to your Witch Hat Cupcakes.

• Storage Tips: If making ahead, store unfrosted cupcakes in an airtight container at room temperature. Frost them on the day of serving for best results.

Storage Tips for Witch Hat Cupcakes

Room Temperature: Keep unfrosted cupcakes in an airtight container at room temperature for up to 3 days. This helps maintain their moisture and fluffy texture.

Fridge: If you’ve frosted the cupcakes, store them in the refrigerator for 2–3 days. Make sure they’re in a covered container to prevent them from drying out.

Freezer: For long-term storage, these cupcakes can be frozen for up to 2 months. Wrap each unfrosted cupcake tightly in plastic wrap and then place in an airtight freezer bag.

Reheating: If you want to savor them warm, thaw in the refrigerator overnight and then let them sit at room temperature for 30 minutes before enjoying. Frost them right before serving for the ultimate Witch Hat Cupcakes experience!

Witch Hat Cupcakes Variations

Feel free to add your own twist to these enchanting treats, inviting creativity and fun into your Halloween celebrations.

  • Gluten-Free: Substitute all-purpose flour with a gluten-free blend for a deliciously inclusive dessert option.
  • Vegan: Replace eggs with flaxseed meal or applesauce and use plant-based milk for a vegan-friendly version.
  • Nutty Delight: Add chopped walnuts or pecans to the batter for a delightful crunch and rich flavor.
  • Fruity Surprise: Mix in some chopped strawberries or raspberries for a juicy burst of flavor amidst the chocolate.
  • Spicy Kick: Sprinkle cayenne pepper in the batter for a smoky surprise that elevates the chocolate’s richness.

Imagine the surprise on guests’ faces as they bite into a cupcake that combines the warmth of spices.

  • Frosting Flavors: Try cream cheese or peanut butter frosting for a different flavor profile that will thrill taste buds.
  • Chocolate Lovers’ Paradise: Fold in chocolate chips for rich, melty pockets of chocolate in every bite.
  • Colorful Theme: Use colored frosting to match your party theme and add festive sprinkles or edible glitter for extra flair.

Let your imagination run wild, just like how we celebrate with fun treats such as Candy Corn Cheesecake Bars and Mummy Brownies! Each variation adds a unique spin, ensuring your Witch Hat Cupcakes are as unforgettable as your Halloween festivities.

What to Serve with Witch Hat Cupcakes?

As Halloween approaches, elevate your festive spread with creative treats that offer a delightful surprise alongside your enchanting cupcakes.

  • Ghoulish Gummy Worms: Adding these creepy candies alongside your cupcakes creates a playful dessert display that excites the imagination.
  • Creepy Crudités: A colorful platter of vegetables, served with a spooky dip, balances the sweetness and adds a fresh crunch to the festivities.
  • Witch’s Brew Punch: Serve a fizzy green punch with floating fruit slices to keep everyone refreshed and in the Halloween spirit.
  • Candy Corn Trail Mix: Combine candy corn, nuts, and chocolate for a sweet and salty snack that complements the cupcakes’ flavor.
  • Skeleton Cheese Platter: Curate a cheese board with themed crackers, fruits, and edible decorations for a savory option that pairs beautifully.
  • Boozy Butterbeer: This fun drink, reminiscent of pumpkin spice flavors, will perfectly match your Witch Hat Cupcakes while adding a whimsical touch to the gathering.
  • Ghostly Chocolate Dipped Strawberries: These treats are not only delicious but add a touch of elegance, perfectly balancing the fun of your dessert table.
  • Mummy Hot Dogs: A savory, easy-to-eat treat that adds a fun theme to your spooky menu, perfect for little monsters on the go.
  • Caramel Apple Slices: Serve crisp apple slices drizzled with caramel for a fresh dessert option that complements the festive sweetness.
  • Cauldron Chocolate Fondue: Dip fruits, marshmallows, and pretzels in a bubbling chocolate cauldron to create a fun, interactive dessert experience.

Witch Hat Cupcakes

Witch Hat Cupcakes Recipe FAQs

What type of flour should I use for Witch Hat Cupcakes?
You can use all-purpose flour for your cupcakes, but if you’re looking for a gluten-free option, feel free to swap it with a gluten-free all-purpose flour blend. Just make sure it has a binding agent, like xanthan gum, to help with texture.

How should I store the Witch Hat Cupcakes?
For unfrosted cupcakes, store them in an airtight container at room temperature for up to 3 days. If they’re frosted, keep them in the refrigerator for 2-3 days, sealed tightly to avoid drying out.

Can I freeze Witch Hat Cupcakes?
Absolutely! You can freeze unfrosted cupcakes for up to 2 months. Wrap each cupcake tightly in plastic wrap and place them in an airtight freezer bag. When you’re ready to enjoy them, thaw in the refrigerator overnight, let sit at room temperature for about 30 minutes, and frost before serving.

What if my cupcake batter is too thick?
If your batter is thicker than expected, you may have overmixed it; however, you can add a splash of milk to loosen it up. Just stir gently until it’s combined, but remember that some lumps are perfectly fine for keeping them fluffy.

Can pets consume Witch Hat Cupcakes?
It’s important to note that cupcakes are not ideal for pets, especially with ingredients like chocolate and sugar, which can be harmful to dogs and other animals. Always keep your tasty treats out of reach!

How can I customize the decoration on my Witch Hat Cupcakes?
The fun part about these cupcakes is creativity! You can use different colors of frosting, various sprinkles, or themed candies like gummy worms or chocolate spiders. Just imagine what your little ones would love, and make it a unique treat!

Witch Hat Cupcakes: Spooktacular Treats for Halloween Fun

Create delightful Witch Hat Cupcakes that are perfect for Halloween parties and gatherings, combining rich chocolate flavor with whimsical presentation.

  • Mixing bowls
  • Whisk
  • Cupcake pan
  • spatula
  • Scoop

For the Cupcakes

  • 1 1/2 cups all-purpose flour (can substitute with gluten-free flour)
  • 1 cup granulated sugar (helps keep the cupcakes moist)
  • 3/4 cup unsweetened cocoa powder (for rich chocolate flavor)
  • 1 tbsp baking powder (ensures cupcakes rise)
  • 1/2 tsp salt (enhances overall flavor)
  • 2 large eggs (can use applesauce or flaxseed for vegan option)
  • 1 cup milk (almond or oat milk works for dairy-free)
  • 1/2 cup vegetable oil (keeps cupcakes moist)
  • 1 tsp vanilla extract (adds flavor)

For the Topping

  • 12 pieces sugar cones (for witch hats)
  • 2 cups chocolate frosting (to secure the cones)
  • edible decorations (such as sprinkles or candy eyes)

Step-by-Step Instructions

  1. Preheat the oven to 350°F (175°C). Gather your ingredients and equipment.
  2. Mix the dry ingredients: combine flour, sugar, cocoa powder, baking powder, and salt in a bowl.
  3. Combine the wet ingredients: whisk eggs, milk, oil, and vanilla in another bowl and pour into dry ingredients.
  4. Blend the batter gently until just combined. Do not overmix.
  5. Fill each cupcake liner about two-thirds full with batter and bake for 18-20 minutes.
  6. Cool the cupcakes for 5-10 minutes in the pan, then transfer to a wire rack for 30 minutes.
  7. Spread chocolate frosting on top of each cooled cupcake.
  8. Press a sugar cone on top of each frosted cupcake to create the witch hat.
  9. Decorate with edible decorations as desired and serve.

These cupcakes can be stored unfrosted at room temperature for 3 days, or frosted in the refrigerator for 2-3 days. For long-term storage, freeze unfrosted cupcakes for up to 2 months.

Dessert
American
chocolate cupcakes, Easy Cupcake Recipe, Halloween Treats, spooky desserts, Witch Hat Cupcakes

Filed Under: Dessert

Delicious Poison Apple Pie: A Spooky Twist on Tradition

October 19, 2025 by grace bellamy Leave a Comment

As the leaves change, and a crisp chill fills the air, it’s time to embrace the spirit of Halloween not just in decor, but in our kitchens too. There’s something magical about serving a slice of Poison Apple Pie—the perfect blend of tradition and whimsy that beckons you to gather round the table. This dessert is not only stunning to look at, but it also comes together quickly, making it an ideal choice for busy home chefs who still want to impress. Plus, it’s a delightful way to use fresh apples in a seasonal treat that leaves your guests enchanted. Are you ready to bring a little Halloween charm to your dessert table? Let’s dive into the delightful world of Halloween desserts, starting with this mesmerizing pie!

Poison Apple Pie

Why is Poison Apple Pie a must-try?

Mysterious Appearance: This pie’s deep, dark allure steals the show at any gathering, perfect for Halloween-themed parties.

Simple Ingredients: You’ll only need a handful of pantry staples, plus fresh apples, to make this captivating dessert come to life.

Deliciously Sweet: With a charm that combines the natural sweetness of apples and a hint of spice, it’s sure to delight everyone’s taste buds.

Family Fun: Baking together can be a memorable experience—let the kids help with decorating the pie for a fun, festive activity!

Impressive Presentation: It’s a beautiful centerpiece that will have your guests talking, much like my Apple Goats Cheese salad, blending flavors and excitement.

Quick and Easy: Don’t fret over long prep times; this pie can be whipped up in no time, leaving you more time to enjoy the festivities.

Poison Apple Pie Ingredients

• Here’s what you’ll need to create this delicious Poison Apple Pie.

  1. For the Pie Filling:
  • 5 cups sliced apples – Use a mix of tart and sweet apples for a well-rounded flavor.
  • 1/2 cup sugar – Adjust the sweetness based on your apple variety; less sugar for sweeter apples.
  • 1 tablespoon black sugar – This adds a spooky touch when sprinkled on top before baking.
  1. For the Pie Crust:
  • 1 pie crust – Store-bought saves time, but homemade adds love and flavor!
  1. Seasonings:
  • 1 teaspoon cinnamon – A classic spice that enhances the flavor profile of the apples.
  • 1/2 teaspoon nutmeg – Adds warmth and depth; perfect for fall desserts.
  1. Optional Toppings:
  • Vanilla ice cream – For serving, this contrast to the warm pie brings the flavors together beautifully.

Get ready to conjure up this whimsical dessert and treat your guests to an enchanting Halloween delight!

Step‑by‑Step Instructions for Poison Apple Pie

Step 1: Prepare the Crust
Preheat your oven to 425°F (220°C). If using a homemade pie crust, roll it out and place it into a 9-inch pie dish carefully, ensuring there are no air bubbles. Trim the edges and crimp them for a decorative finish. If using a store-bought crust, fit it into the dish and proceed to the filling.

Step 2: Slice the Apples
Next, wash and peel the apples before slicing them into thin wedges. Aim for about 1/4-inch thickness to ensure they bake evenly. Place the sliced apples in a large mixing bowl and sprinkle with 1/2 cup sugar, 1 teaspoon of cinnamon, and 1/2 teaspoon of nutmeg. Toss gently to coat the apples, enhancing their flavor for the Poison Apple Pie.

Step 3: Fill the Pie Crust
Transfer the sweetened apple mixture into the prepared pie crust, distributing it evenly. Create a mounded effect in the center for a lovely appearance. Once filled, sprinkle the top with 1 tablespoon of black sugar, which adds a spooky charm and a slight crunch. This will make your pie stand out at Halloween gatherings!

Step 4: Bake the Pie
Place the pie directly in the preheated oven and bake for 15 minutes at 425°F (220°C). Afterward, reduce the temperature to 350°F (175°C) and continue to bake for an additional 35–40 minutes. Keep an eye on the crust to ensure it doesn’t burn; it should turn a beautiful golden brown while the apples soften and bubble.

Step 5: Cool and Serve
Once baked, remove the Poison Apple Pie from the oven and let it cool on a wire rack for at least 30 minutes. This cooling time allows the filling to set, making it easier to slice. You can serve it warm as is or with a scoop of vanilla ice cream for a delightful contrast that will enchant your guests.

Poison Apple Pie

Expert Tips for Poison Apple Pie

• Don’t Rush the Cooling: Allow the pie to cool for at least 30 minutes after baking. This helps the filling set, making for cleaner slices.

• Apple Variety Matters: Use a mix of tart and sweet apples for a balanced flavor in your Poison Apple Pie. Granny Smith and Fuji work wonderfully together.

• Pre-Bake the Crust: For a flaky crust, consider pre-baking it for 10 minutes before adding the filling to prevent sogginess.

• Spooky Topping Options: Experiment with toppings—add crushed caramel or even chocolate drizzle for extra flavor and a whimsical presentation.

• Watch Your Bake: Keep an eye on the pie toward the end. If the crust edges brown too quickly, you can cover them with foil to prevent burning.

• Perfect Black Sugar: Use black sugar or raw sugar on top for a great texture and spooky appearance. This enhances the festive look of your Poison Apple Pie!

Make Ahead Options

Preparing your Poison Apple Pie ahead of time is a perfect way to save time on the big day! You can slice the apples and toss them with sugar and spices up to 24 hours in advance, storing the mixture in an airtight container in the refrigerator to maintain freshness. Additionally, you can prepare the pie crust (either homemade or store-bought) and chill it in the fridge for up to 3 days. When you’re ready to bake, simply fill the prepared crust with your apple mixture, top with black sugar, and bake as directed. This approach ensures that your pie remains just as delicious and visually stunning, allowing you to enjoy the festivities!

Variations of Poison Apple Pie

Inviting readers to explore delightful twists on this enchanting dessert enhances its charm and flavor.

  • Gluten-Free: Substitute all-purpose flour with a gluten-free blend for a pie that everyone can enjoy. The flavor stays rich while catering to dietary needs.

  • Caramel Drizzle: Add a gooey caramel sauce on top before serving for an irresistible indulgent layer. It elevates each bite, bringing a touch of sweetness that harmonizes beautifully with the apples.

  • Spiced Apple Upgrade: Incorporate additional spices like allspice or ginger for a more dynamic flavor profile. Your guests might just find their new favorite seasonal treat!

  • Nutty Crunch: Fold in chopped walnuts or pecans into the apple filling for a delightful crunch. This twist adds texture and complements the softness of the apples with a satisfying bite.

  • Savory Spin: Experiment by adding a pinch of cheddar cheese to the crust. The savory notes play nicely against the sweet apples, creating a surprising and delicious contrast.

  • Vegan Version: Replace the butter in your crust with coconut oil and use maple syrup instead of sugar for a lighter, plant-based pie. It’s just as charming and flavorful!

  • Layered Delight: Transform this pie into a layered dessert using graham cracker crusts in between layers of spiced apples, similar to a trifle. Deliciously simple and visually stunning, perfect for gatherings!

  • Seasonal Spice Mix: For a festive touch, experiment with pumpkin pie spice instead of the usual cinnamon and nutmeg. It amplifies the autumn flavors and brings a lovely warmth to your dessert table.

Whether serving it at a gathering or just for family, these variations will keep the magic of Poison Apple Pie alive and your guests wanting more. For more delicious ideas, check out my charming Candy Corn Cheesecake Bars or delightful Mini Pineapple Upside Down Cakes!

What to Serve with Poison Apple Pie

Warm, spiced aromas fill the air as you prepare to share slices of this enchanting dessert, enticing your friends and family alike.

  • Vanilla Ice Cream: A scoop of creamy vanilla adds a delightful contrast to the warm pie, elevating each bite. The cold creaminess pairs perfectly with the spiced apple filling, creating a comforting, indulgent experience.

  • Caramel Sauce: Drizzling rich caramel over each slice enhances the sweet and tart flavors while adding a silky texture. It’s like a warm hug on a chilly Halloween night.

  • Whipped Cream: Soft, fluffy whipped cream is an irresistible companion to any pie. It lightens the density of the dessert, bringing an airy element that complements the pie’s robust flavors beautifully.

  • Hot Apple Cider: Serve warm apple cider spiced with cinnamon for a cozy drink pairing, enhancing the fall essence of the pie. The sweet and spicy notes deepen the apple flavor and add warmth to the gathering.

  • Halloween-themed Cheesecake: A spooky cheesecake adds a fun twist alongside the pie, offering another sweet option that ties into the seasonal theme. The creamy texture balances the pie’s crumbliness and creates a delightful choice for guests.

  • Pumpkin Spice Latte: For a festive drink, a pumpkin spice latte brings comforting spices that mingle beautifully with the flavors of your Poison Apple Pie. It’s a match made for cozy autumn nights and Halloween celebrations alike.

  • Chocolate-covered Pretzels: These provide a crunchy contrast to the soft pie while introducing a sweet and salty combination that surprises the palate. They serve as fun finger food that your guests will enjoy between slices.

How to Store and Freeze Poison Apple Pie

Room Temperature: Store leftover Poison Apple Pie covered at room temperature for up to 2 days to maintain its delightful flavor and texture.

Fridge: For extended freshness, keep the pie in the refrigerator, wrapped in plastic wrap or foil, for up to 5 days. This helps preserve the delicious filling and crust.

Freezer: If you want to save it for later, freeze the pie unbaked or baked for up to 2 months. Wrap it tightly in plastic and aluminum foil. Remember to thaw in the fridge before baking or reheating!

Reheating: To reheat, simply place individual slices in the oven at 350°F (175°C) for about 10–15 minutes, or until warmed through. Enjoy the enchanting flavors of your Poison Apple Pie!

Poison Apple Pie

Poison Apple Pie Recipe FAQs

What type of apples should I use for my Poison Apple Pie?
I recommend using a blend of tart and sweet apples, such as Granny Smith and Fuji, to create a delightful balance in flavor. Tart apples bring a crisp acidity that complements the sweetness well, making every bite of your Poison Apple Pie enchanting!

How should I store leftover Poison Apple Pie?
To keep your leftover Poison Apple Pie fresh, store it covered at room temperature for up to 2 days. For a longer shelf life, wrap it in plastic wrap or foil and refrigerate; it will stay delicious for up to 5 days. Remember, keeping it well-wrapped helps preserve both the crust and filling!

Can I freeze Poison Apple Pie?
Absolutely! You can freeze your Poison Apple Pie either unbaked or baked for up to 2 months. If freezing baked, allow it to cool completely, then wrap it tightly in plastic wrap followed by aluminum foil. Thaw it in the fridge overnight before reheating or baking it again, ensuring it retains its magical flavors.

What if my pie crust gets too brown while baking?
If you notice the edges of your crust turning too brown during baking, you can easily cover them with foil to prevent burning. This will allow the pie to continue baking evenly while keeping the crust from getting overly dark.

Why does my pie filling not seem to set?
It’s important to let your Poison Apple Pie cool for at least 30 minutes after baking. This cooling time enables the filling to thicken and set as it cools. If you’re in a hurry, you can also sprinkle in a tablespoon of cornstarch with the apples to help absorb excess moisture.

What toppings work best with Poison Apple Pie?
To elevate your Poison Apple Pie, consider serving it with a scoop of vanilla ice cream for a delightful contrast! You can also experiment with toppings like caramel drizzle or even crushed nuts for extra flavor and fun textures.

Delicious Poison Apple Pie: A Spooky Twist on Tradition

Try this Poison Apple Pie, a spooky dessert blending tradition and whimsy, perfect for Halloween gatherings.

  • 9-inch pie dish

For the Pie Filling

  • 5 cups sliced apples (Use a mix of tart and sweet apples for a well-rounded flavor.)
  • 1/2 cup sugar (Adjust the sweetness based on your apple variety.)
  • 1 tablespoon black sugar (Adds a spooky touch when sprinkled on top before baking.)

For the Pie Crust

Seasonings

  • 1 teaspoon cinnamon (A classic spice that enhances the flavor profile of the apples.)
  • 1/2 teaspoon nutmeg (Adds warmth and depth; perfect for fall desserts.)

Optional Toppings

  • 1 scoop vanilla ice cream (For serving, this contrast to the warm pie brings the flavors together beautifully.)

Step-by-Step Instructions

  1. Preheat your oven to 425°F (220°C). If using a homemade pie crust, roll it out and place it into a 9-inch pie dish carefully. Trim the edges and crimp them for a decorative finish. If using a store-bought crust, fit it into the dish and proceed to the filling.
  2. Next, wash and peel the apples before slicing them into thin wedges. Aim for about 1/4-inch thickness. Place the sliced apples in a large mixing bowl and sprinkle with 1/2 cup sugar, 1 teaspoon of cinnamon, and 1/2 teaspoon of nutmeg. Toss gently to coat the apples.
  3. Transfer the sweetened apple mixture into the prepared pie crust, distributing it evenly. Create a mounded effect in the center. Once filled, sprinkle the top with 1 tablespoon of black sugar.
  4. Place the pie directly in the preheated oven and bake for 15 minutes at 425°F (220°C). Afterward, reduce the temperature to 350°F (175°C) and continue to bake for an additional 35–40 minutes.
  5. Once baked, remove the Poison Apple Pie from the oven and let it cool on a wire rack for at least 30 minutes.

For best results, allow the pie to cool for at least 30 minutes to set the filling. Use a mix of apple varieties for balanced flavor.

Dessert
Halloween
apple pie, Halloween dessert, homemade pie, Poison Apple Pie, Seasonal Treats, spooky desserts

Filed Under: Dessert

Candy Corn Cheesecake Bars That Will Thrill Your Taste Buds

October 19, 2025 by grace bellamy Leave a Comment

As the vibrant colors of fall begin to blanket the landscape, my mind wanders to the sweetest Halloween whims. Among the ghoulish treats vying for my attention, the Candy Corn Cheesecake Bars stand out not just for their delightful appearance, but for their ability to charm party guests of all ages. These bars combine a rich, creamy cheesecake with the nostalgic flavors of candy corn, making them a perfect centerpiece for any spooky celebration. The best part? They’re easy to whip up and can be prepped ahead of time, freeing you to enjoy your haunted gatherings without a hitch. So, are you ready to embrace the spirit of the season with a treat that’s as fun to make as it is to eat? Let’s dive into this colorful recipe that’s sure to add a festive twist to your Halloween dessert table!

Candy Corn Cheesecake Bars

Why Candy Corn Cheesecake Bars?

Irresistible colors: These stunning bars showcase the iconic hues of candy corn, making them an eye-catching addition to your Halloween spread.

Delightful flavor: The creamy cheesecake blends sweetness with a hint of vanilla, perfectly capturing the cherished taste of the season.

Easy preparation: Don’t worry if you’re not a baking expert; this straightforward recipe allows you to whip them up quickly.

Perfect for sharing: Ideal for parties or family gatherings, everyone will want to try a slice of this delightful treat!

Make ahead: Prep them in advance to free up your day for all those spooky festivities, just like the Rhubarb Cheesecake Fancy for effortless entertaining.

Versatile joy: Feel free to add your own twist—whether it’s sprinkles or an additional layer of sweetness, the options are endless!

Candy Corn Cheesecake Bars Ingredients

• Get ready to whip up a delightful treat!

For the Crust

  • Graham cracker crumbs – A sweet base that brings a crunchy texture to balance the creamy filling.
  • Granulated sugar – Adds a touch of sweetness to the crust for an extra flavor boost.
  • Unsalted butter – Helps to bind the crumbs together while adding richness.

For the Cheesecake Filling

  • Cream cheese – The star ingredient for creating a rich and velvety texture that everyone loves.
  • Granulated sugar – Sweetens the filling perfectly, enhancing the overall flavor of the bars.
  • Sour cream – Adds a subtle tang and creaminess that takes the cheesecake to another level.
  • Vanilla extract – Imparts a warm, aromatic note that complements the candy corn flavor beautifully.
  • Candy corn – The delightful treat that provides both flavor and a pop of color, making your cheesecake truly festive.

For the Topping

  • Whipped cream – Lightens up the bars with a fluffy and airy finish.
  • Candy corn pieces – Sprinkle on top for that unmistakable Halloween touch, ensuring your Candy Corn Cheesecake Bars are as cute as they are delicious!
  • Crushed graham crackers – A sprinkle adds a final crunchy layer, enhancing both texture and presentation.

Enjoy making these vibrant Candy Corn Cheesecake Bars that will thrill your taste buds!

Step‑by‑Step Instructions for Candy Corn Cheesecake Bars

Step 1: Prepare the Crust
Begin by preheating your oven to 350°F (175°C) and greasing a 9×9-inch baking pan. In a medium bowl, combine graham cracker crumbs, granulated sugar, and melted unsalted butter. Mix until the texture resembles wet sand. Press this mixture evenly into the bottom of the prepared pan to form a firm crust. Bake for 8 minutes, or until lightly golden and fragrant.

Step 2: Make the Cheesecake Filling
While the crust is baking, whip together softened cream cheese and granulated sugar in a large mixing bowl using an electric mixer until smooth and creamy, about 3-4 minutes. Add sour cream and vanilla extract, mixing until well combined. Finally, gently fold in the candy corn pieces for that delightful flavor burst.

Step 3: Layer the Fillings
Remove the crust from the oven and let it cool for a few minutes. Pour the cheesecake filling over the warm crust, spreading it evenly with a spatula. To create the fun candy corn effect, divide the filling into three bowls and tint each bowl with yellow, orange, or leave white. Layer the colors carefully in the pan to mimic the candy corn design.

Step 4: Bake the Cheesecake Bars
Reduce the oven temperature to 325°F (160°C) and bake the layered cheesecake for 25-30 minutes. You’ll know it’s done when the edges are set but the center still slightly jiggles. Turn off the oven and crack the door, allowing the bars to cool in the oven for about 1 hour, which helps prevent cracking.

Step 5: Chill and Serve
Once cooled, cover the pan with plastic wrap and chill in the refrigerator for at least 4 hours or overnight to set completely. When ready to serve, whip up some cream and spread it over the top of the chilled cheesecake bars. Finally, sprinkle crushed graham crackers and additional candy corn pieces for an eye-catching finish.

Step 6: Slice and Enjoy
When you’re ready to indulge, slice the Candy Corn Cheesecake Bars into squares with a sharp knife. Clean the knife between cuts for cleaner edges. These bars are perfect for Halloween gatherings or as a festive treat any time of year. Serve chilled and enjoy every colorful bite!

Candy Corn Cheesecake Bars

How to Store and Freeze Candy Corn Cheesecake Bars

Fridge: Enjoy your Candy Corn Cheesecake Bars fresh by storing them in an airtight container in the fridge for up to 5 days. This keeps them flavorful and creamy.

Freezer: For longer storage, freeze the bars in an airtight container for up to 2 months. Make sure to wrap them individually in plastic wrap for best results.

Thawing: To enjoy frozen bars, simply transfer them to the fridge and let them thaw overnight. Enjoy a taste of Halloween nostalgia even after the celebrations!

Serving Reminder: Always serve these bars chilled for that delightful creamy texture and to showcase the vibrant layers.

What to Serve with Candy Corn Cheesecake Bars?

As the festive spirit of Halloween envelops your home, each colorful treat deserves equally delightful companions to create a complete celebration experience.

  • Whipped Cream: A dollop of fluffy whipped cream adds a light texture, beautifully balancing the richness of the cheesecake bars.

  • Crisp Apple Slices: Fresh, crunchy apples provide a refreshing contrast to the sweet dessert, inviting a playful flavor harmony.

  • Pumpkin Spice Latte: Cozy up with a warm, spiced latte that echoes the flavors of fall, enhancing the seasonal celebration of your sweet treats.

  • Chocolate Ghost Meringues: Light and airy, these delicate meringues will enchant party guests with their whimsical appearance and complementary sweetness.

  • Spooky Rice Krispie Treats: These fun, chewy bites will capture the spirit of Halloween while providing a chewy texture to complement the creamy bars.

  • Caramel Drizzle: Drizzling warm caramel over the cheesecake bars adds a luscious touch that will send your taste buds dancing with delight!

  • Gummy Worms: For a playful twist, garnish your dessert plate with gummy worms that bring a fun, spooky vibe to your Halloween gathering.

  • Candy Corn Mix: Create a festive trail mix with candy corn, nuts, and chocolate pieces to echo the flavors of the bars in a fun, crunchy way.

Expert Tips for Candy Corn Cheesecake Bars

Baking Time: Always keep an eye on your cheesecake while it bakes; if the edges are set but the center is still jiggly, it’s perfectly done!

Cooling Method: Let the cheesecake cool in the oven with the door cracked open. This prevents cracking and helps achieve that smooth, creamy texture.

Layering Colors: When layering your candy corn cheesecake filling, pour slowly and evenly to maintain distinct color layers. It keeps the festive look vibrant!

Chilling Time: For the best flavor and texture, don’t skip the chilling step. Chilling for at least 4 hours ensures the bars set beautifully and are easy to slice.

Serving Tip: To create clean slices, dip your knife in hot water and wipe it dry between cuts. This gives each piece a perfect presentation!

Storage Advice: Keep any leftovers in an airtight container in the fridge. These Candy Corn Cheesecake Bars can be enjoyed for up to a week!

Make Ahead Options

These delicious Candy Corn Cheesecake Bars are perfect for meal prep! You can prepare the crust and cheesecake filling up to 3 days in advance. Simply bake the crust and let it cool completely before storing it in an airtight container at room temperature. For the filling, whip it up and layer it on top of the crust, then cover the entire pan with plastic wrap and refrigerate. To maintain their creamy texture, make sure they are well covered to prevent any drying out. When you’re ready to serve, add the whipped cream topping and garnishes just before your guests arrive for optimal freshness. Enjoy these vibrant treats without the last-minute stress!

Candy Corn Cheesecake Bars Variations

Feel free to get creative with your Candy Corn Cheesecake Bars—there’s always room for tasty twists!

  • Dairy-Free: Substitute cream cheese with dairy-free alternatives like cashew or almond cream cheese for a vegan-friendly option.
  • SUGAR-FREE: Use a granulated sugar substitute to reduce sugar while keeping the sweetness intact.
  • Pumpkin Spice: Add 1 teaspoon of pumpkin spice to the cheesecake filling for a seasonal flavor boost that evokes cozy autumn vibes.
  • Chocolate Layer: For a chocolate twist, layer in a rich chocolate cheesecake layer beneath the candy corn filling—it’s a match made in dessert heaven!
  • Nutty Crust: Swap traditional graham crackers for crushed pecans or almonds in the crust for a nutty flavor and added crunch.
  • Fruit Topping: Top the bars with fresh fruit like raspberries or blueberries for a tart contrast to the sweet cheesecake layers.
  • Savory Kick: Blend in a touch of sea salt into the filling—it helps amplify the sweet notes of the candy corn, creating a delightful savory-sweet balance.
  • Chocolate Drizzle: Enhance the presentation by drizzling melted chocolate over the cooled bars—this adds elegance and an extra layer of indulgence.

Let your imagination run wild with these variations, just like when you’re making a festive treat like Pineapple Bars Tropical or even sampling a delightful Rhubarb Cheesecake Fancy. Each twist adds a personal touch to your Halloween dessert table!

Candy Corn Cheesecake Bars

Candy Corn Cheesecake Bars Recipe FAQs

What type of graham crackers should I use for the crust?
I recommend using plain graham crackers for the best flavor. Whole-wheat versions can work, too, but avoid flavored ones that may clash with the cheesecake. If you prefer, you can also make a cookie crust using crushed Oreos for a fun twist!

How long can I store Candy Corn Cheesecake Bars in the fridge?
These delicious cheesecake bars can be stored in an airtight container in the fridge for up to 5 days. Make sure to cover them well to maintain their creamy texture and vibrant colors.

Can I freeze Candy Corn Cheesecake Bars?
Absolutely! You can freeze these bars for up to 2 months. Just wrap each piece tightly in plastic wrap and place them in an airtight container. This helps prevent freezer burn and keeps them fresh for when you’re ready to indulge!

How do I thaw frozen Candy Corn Cheesecake Bars?
To thaw your frozen cheesecake bars, simply move them from the freezer to the refrigerator and let them sit overnight. This gentle thawing method preserves the texture and flavor of the cheesecake. Just remember to serve them chilled for a delightful treat!

Can I omit any ingredients if I have allergies?
Yes, you can customize the recipe to suit dietary needs. If you have a dairy allergy, try using dairy-free cream cheese and whipped toppings. For gluten-free options, substitute the graham cracker crust with a gluten-free cookie crust. Always double-check ingredient labels to ensure they meet your needs!

How can I prevent the cheesecake from cracking while baking?
To avoid cracks, bake your bars at a lower temperature and let them cool gradually in the oven with the door ajar. This gentle cooling process prevents temperature shock, ensuring a smooth and creamy cheesecake that’s as beautiful as it is delicious!

Candy Corn Cheesecake Bars That Will Thrill Your Taste Buds

Candy Corn Cheesecake Bars combine creamy cheesecake with the nostalgic flavors of candy corn, perfect for Halloween celebrations.

  • 9×9-inch baking pan
  • Mixing bowls
  • Electric mixer

For the Crust

  • 1 cup Graham cracker crumbs
  • 1/4 cup Granulated sugar
  • 1/2 cup Unsalted butter, melted

For the Cheesecake Filling

  • 16 oz Cream cheese, softened
  • 1/2 cup Granulated sugar
  • 1/2 cup Sour cream
  • 2 teaspoons Vanilla extract
  • 1 cup Candy corn

For the Topping

  • 1 cup Whipped cream
  • 1/2 cup Candy corn pieces
  • 1/4 cup Crushed graham crackers

Step-by-Step Instructions

  1. Preheat your oven to 350°F (175°C) and grease a 9×9-inch baking pan.
  2. In a medium bowl, combine graham cracker crumbs, granulated sugar, and melted unsalted butter. Mix until the texture resembles wet sand. Press this mixture evenly into the bottom of the prepared pan to form a firm crust. Bake for 8 minutes, or until lightly golden and fragrant.
  3. While the crust is baking, whip together softened cream cheese and granulated sugar in a large mixing bowl using an electric mixer until smooth and creamy, about 3-4 minutes. Add sour cream and vanilla extract, mixing until well combined. Finally, gently fold in the candy corn pieces.
  4. Remove the crust from the oven and let it cool for a few minutes. Pour the cheesecake filling over the warm crust, spreading it evenly with a spatula. To create the fun candy corn effect, divide the filling into three bowls and tint each bowl with yellow, orange, or leave white. Layer the colors carefully in the pan to mimic the candy corn design.
  5. Reduce the oven temperature to 325°F (160°C) and bake the layered cheesecake for 25-30 minutes. You’ll know it’s done when the edges are set but the center still slightly jiggles. Turn off the oven and crack the door, allowing the bars to cool in the oven for about 1 hour.
  6. Once cooled, cover the pan with plastic wrap and chill in the refrigerator for at least 4 hours or overnight to set completely.
  7. When ready to serve, whip up some cream and spread it over the top of the chilled cheesecake bars. Finally, sprinkle crushed graham crackers and additional candy corn pieces for an eye-catching finish.
  8. Slice the Candy Corn Cheesecake Bars into squares with a sharp knife. Clean the knife between cuts for cleaner edges.

Keep any leftovers in an airtight container in the fridge for up to 5 days. These bars can be frozen for up to 2 months.

Dessert
American
candy corn, cheesecake bars, easy recipes, Fall Desserts, Halloween Treats, Party Desserts

Filed Under: Dessert

Witchy Green Smoothie That Magically Boosts Your Energy

October 15, 2025 by grace bellamy Leave a Comment

As I stood in the kitchen, surrounded by the sounds of bubbling cauldrons and whispering spices, I felt an irresistible spark of creativity. Halloween isn’t just about spooks and treats; it’s a golden opportunity to transform your breakfast into something delightfully magical. Enter the Witchy Green Smoothie—an enchanting blend that’s as vibrant as it is healthy! This quick recipe is perfect for busy mornings, and it’s a fantastic way to sneak in your daily dose of greens without anyone batting an eye. Plus, it’s not just nutritious; it’s an instant showstopper that brings a festive flair to your table. So, are you ready to brew up some Halloween magic in your kitchen? Let’s dive into these Halloween breakfast ideas that will thrill both kids and adults alike!

Witchy Green Smoothie

Why Is This Smoothie So Magical?

Deliciously nutritious: The Witchy Green Smoothie combines spinach, banana, and almond milk for a naturally sweet and creamy beverage that packs a healthy punch.

Time-saving: Whip this up in minutes, making it perfect for hectic mornings or last-minute Halloween get-togethers.

Creative presentation: Serve it in cauldron-like mugs to capture the festive spirit—great for kids and adults alike!

Versatile ingredients: Feel free to swap in your favorite fruits or greens depending on what you have on hand.

Insta-worthy: The vibrant green color is sure to impress your guests, making this smoothie an instant photo-worthy hit!

For more fun twists on classic recipes, check out my Halloween Breakfast Ideas.

Witchy Green Smoothie Ingredients

• Here’s what you’ll need to conjure up this refreshing treat!

For the Smoothie

  • Spinach – A powerhouse green that blends smoothly and adds vibrant color.
  • Banana – Naturally sweet, it helps create a creamy texture and balances the greens.
  • Almond Milk – Use this dairy-free option for a silky finish; it can be substituted with any milk of your choice.

For Decoration

  • Chia Seeds – Sprinkle on top for a fun texture and a boost of Omega-3s.
  • Fruits – Add sliced bananas or berries to customize your smoothie and make it even more visually appealing.

This Witchy Green Smoothie is just one of the spooktacular breakfast ideas to enchant your family this Halloween!

Step‑by‑Step Instructions for Witchy Green Smoothie

Step 1: Prepare the Ingredients
Start by gathering all your ingredients for the Witchy Green Smoothie. You’ll need fresh spinach, a ripe banana, and almond milk. Rinse the spinach thoroughly to remove any dirt or grit, and peel the banana, breaking it into chunks for easier blending. This prep step ensures a smooth and vibrant result.

Step 2: Blend the Smoothie
In a blender, combine the prepared spinach, banana, and about one cup of almond milk. Blend on high for 30–45 seconds until the mixture is perfectly smooth and creamy, with no visible chunks remaining. The vibrant green color should be rich and inviting, signaling that it’s ready for the next step.

Step 3: Taste and Adjust
After blending, taste your Witchy Green Smoothie for sweetness. If you prefer a sweeter smoothie, feel free to add a dash of honey or maple syrup. Blend again for 10–15 seconds to incorporate any added sweetness and give it one last whirl to ensure everything is nicely mixed together.

Step 4: Serve Creatively
Pour the smoothie into fun, cauldron-like mugs to capture the festive spirit of Halloween! This playful presentation adds a whimsical touch that both kids and adults will love. Aim for a vibrant swirl as you pour to enhance the visual appeal of your Witchy Green Smoothie.

Step 5: Add Decorations
Sprinkle chia seeds on top for added texture and a boost of Omega-3s. You can also add a few sliced banana pieces or berries for an extra pop of color and flavor. These eye-catching decorations make the smoothie not only delicious but also visually stunning, perfect for your festive breakfast table.

Step 6: Enjoy Immediately
For the best taste and texture, enjoy your Witchy Green Smoothie right after preparing it. This smoothie is a refreshing treat that’s perfect for any busy morning or Halloween gathering—let the enchanting flavors invigorate your day!

Witchy Green Smoothie

Make Ahead Options

The Witchy Green Smoothie is a fantastic option for meal prep, saving you precious time on busy mornings! You can prepare all the ingredients—spinach, banana, and almond milk—up to 24 hours in advance. Simply wash and chop the spinach, peel and slice the banana, and mix them in a container with the almond milk, ensuring an airtight seal to keep everything fresh. When you’re ready to enjoy your smoothie, just pour the prepped mixture into a blender, blend until smooth, and serve in your favorite cauldron-like mugs. This way, you’ll have a deliciously nutritious meal ready in minutes, perfect for those hectic school-day breakfasts!

How to Store and Freeze Witchy Green Smoothie

Fridge: Keep any leftover Witchy Green Smoothie in an airtight container for up to 2 days. Just give it a quick stir or re-blend before drinking to restore its smooth texture.

Freezer: Pour the smoothie into ice cube trays or freezer-safe bags to freeze for up to 3 months. Blend frozen cubes with a splash of almond milk for an instant refreshing drink!

Thawing: If frozen, transfer the desired amount to the fridge for several hours or overnight to thaw. For a quicker option, blend straight from the freezer with a bit more liquid.

Reheating: This smoothie is best enjoyed cold; avoid reheating as it may alter the taste and texture. Enjoy it fresh for maximum vibrant flavors!

What to Serve with Witchy Green Smoothie

The perfect companion to your morning magic, these delicious sides will make your Halloween breakfast a memorable feast.

  • Pumpkin Pancakes: Fluffy and spiced with the essence of fall, these pancakes topped with maple syrup are a sweet way to start your day.
  • Ghostly Yogurt Parfaits: Layered with vanilla yogurt, granola, and fresh berries, these parfaits not only look festive but offer a delightful crunch that pairs wonderfully with your smoothie.
  • Monster Avocado Toast: Creamy avocado spread on whole-grain toast, adorned with cucumbers and olives. It’s a savory complement that contrasts beautifully with the smoothie’s sweetness.
  • Chocolate Waffles: Shaped like witch hats, these indulgent waffles topped with whipped cream will satisfy any sweet tooth and are fun for the kids!
  • Spooky Smoothie Bowls: Blend your favorite fruits with a bit of spinach for a vibrant bowl. Serve with chia seeds and sliced fruits to enhance your breakfast spread.
  • Mummy Toasts: Whole-grain toast dressed in cream cheese and banana slices resembling mummies adds a whimsical touch to your table.
  • Dracula’s Blood Red Juice: A refreshing pomegranate or berry juice adds a bold splash of color and tangy flavor that beautifully complements the smoothies.

Let your kitchen be filled with delightful flavors while creating a Halloween breakfast that’s enchanting from the first sip to the last bite!

Expert Tips for Witchy Green Smoothie

Fresh Greens: Use fresh spinach instead of frozen to achieve the best vibrant color and smooth texture. Frozen may dilute the flavor.

Quality Blender: A high-speed blender will ensure all ingredients combine smoothly, giving you that delightful creaminess in your Witchy Green Smoothie.

Customize Sweetness: Adjust sweetness with honey or maple syrup according to your taste—just add a little at a time to avoid over-sweetening.

Presentation Matters: Use fun, whimsical cups or jars for serving to enhance the festive Halloween spirit; vibrant colors make the drink more inviting.

Drink Immediately: Enjoy your smoothie right after preparation to preserve freshness and nutrition; it’s at its best when served right away!

Witchy Green Smoothie Variations

Feel free to sprinkle your own magic into this Witchy Green Smoothie with these fun and creative twists!

  • Dairy-Free: Substitute almond milk with coconut milk for a tropical twist that adds a creamy richness.
  • Protein Boost: Mix in a scoop of your favorite protein powder to make this smoothie an energizing post-workout treat.
  • Nutty Flavor: Add a tablespoon of almond butter or peanut butter for a nutty touch and added creaminess—it’s a game-changer!
  • Extra Greens: Swap half of the spinach for kale or Swiss chard to elevate the nutritional profile and adjust the flavor.
  • Berry Blast: Toss in a handful of mixed berries like strawberries or blueberries for a delightful fruitiness and vibrant color.
  • Citrus Zing: A squeeze of lemon or lime juice will add a refreshing zing that brightens up your smoothie.
  • Choco-Mint: Blend in a teaspoon of cocoa powder and a drop of mint extract for a deliciously decadent and refreshing flavor combo.
  • Spicy Kick: If you enjoy a bit of heat, add a sprinkle of cayenne pepper or a dash of ginger to give your smoothie an exciting edge.

Embrace your creative side—these variations can make your Witchy Green Smoothie even more enchanting! For more thrilling breakfast ideas, don’t miss my Halloween Breakfast Ideas and discover how to make festive flavors come alive!

Witchy Green Smoothie

Witchy Green Smoothie Recipe FAQs

What kind of spinach should I use for the Witchy Green Smoothie?
Absolutely! Fresh baby spinach is your best bet. It’s tender, blends smoothly, and has a mild flavor that won’t overpower the sweetness of the banana. Avoid spinach with dark spots or wilted leaves, as these are signs of aging.

How long can I store leftover Witchy Green Smoothie?
You’re in luck! You can keep any leftover smoothie in an airtight container in the fridge for up to 2 days. Just remember to give it a quick stir or re-blend to regain that creamy texture before enjoying it again!

Can I freeze the Witchy Green Smoothie?
Certainly! Pour your smoothie into ice cube trays or freezer-safe bags. Freeze for up to 3 months. When you’re ready for a refreshing treat, blend the frozen cubes with a splash of almond milk. It’s a super quick way to enjoy your smoothie on busy mornings.

What should I do if my smoothie is too thick?
Very easily! If you find your smoothie too thick, simply add a little more almond milk or water while blending until you reach your desired consistency. You can always adjust it to your taste preferences—smoothies are wonderfully forgiving!

Are there any dietary considerations for the Witchy Green Smoothie?
Yes! This recipe is vegan and dairy-free due to the use of almond milk. However, if you have a nut allergy, feel free to substitute with oat milk or another non-dairy milk that works for you. It’s great to adjust recipes so everyone can enjoy them!

Can I use other fruits in the Witchy Green Smoothie?
Absolutely! You can easily swap out the banana for avocados or mango for a different flavor profile. Just keep in mind that the sweetness level may change, so you might want to adjust the sweetener accordingly. Have fun experimenting with different combinations!

Witchy Green Smoothie That Magically Boosts Your Energy

A vibrant Witchy Green Smoothie that magically boosts your energy with nutritious greens, perfect for Halloween mornings.

  • Blender

For the Smoothie

  • 2 cups Spinach (Fresh)
  • 1 medium Banana (Ripe)
  • 1 cup Almond Milk (Dairy-free option)

For Decoration

  • 1 tablespoon Chia Seeds (Optional)
  • Fruits (Sliced bananas or berries as desired)

Preparation

  1. Gather all your ingredients for the Witchy Green Smoothie.
  2. Rinse the spinach thoroughly to remove any dirt.
  3. Peel the banana and break it into chunks.

Blending

  1. Combine the spinach, banana, and almond milk in a blender.
  2. Blend on high for 30–45 seconds until smooth.

Adjusting Taste

  1. Taste the smoothie and adjust sweetness if desired.
  2. Blend again for 10–15 seconds to incorporate.

Serving

  1. Pour the smoothie into cauldron-like mugs for a festive touch.
  2. Aim for a vibrant swirl while pouring.

Decorating

  1. Sprinkle chia seeds on top.
  2. Add sliced bananas or berries for color.

Enjoying

  1. Serve immediately for the best taste and texture.

Use fresh spinach for the best vibrant color and texture. A high-speed blender will ensure smoothness.

Drink
Healthy
Energy Boost, Green Smoothie, Halloween, Healthy Breakfast, Nutritious Drink, Witchy Green Smoothie

Filed Under: Drink

Pumpkin Patch Deviled Eggs that Wow Your Guests

October 15, 2025 by grace bellamy Leave a Comment

As I was arranging my kitchen for a cozy autumn gathering, the vibrant orange hues of the season sparked an idea: what if I transformed basic deviled eggs into delightful little pumpkins? Thus, my Pumpkin Patch Deviled Eggs were born! This fun twist not only delivers a crowd-pleasing appetizer but is also a breeze to whip up, making it perfect for those of us who are tired of fast food routines. These charming bites bring seasonal cheer to any table, and I guarantee they will spark conversations at your next party. Ready to turn your eggs into festive treats? Let’s dive into this easy, creative recipe!

Pumpkin Patch Deviled Eggs

Why Are Pumpkin Patch Deviled Eggs Special?

Creativity at its finest: These deviled eggs are not just delicious; they’re an eye-catching centerpiece that brings out the playful side of home cooking.
Flavorful and creamy: The blend of mayo, mustard, and spices delivers that classic deviled egg taste with a festive twist.
Easy to make: Even if you’re a busy chef, whipping these up is straightforward and doesn’t require advanced skills.
Versatile for any occasion: Perfect for parties, holidays, or family gatherings, they’ll delight both kids and adults alike.
Conversation starters: Watch your guests’ eyes light up when they see these pumpkin-shaped bites—they’re guaranteed to spark smiles and stories!

Pumpkin Patch Deviled Eggs Ingredients

For the Egg Filling
• 6 large eggs – The star ingredient, ensuring a creamy texture.
• 1/4 cup mayonnaise – Adds richness; consider Greek yogurt as a lighter substitute.
• 1 teaspoon yellow mustard – Enhances flavor; Dijon can be used for a tangy twist.
• 1/4 teaspoon salt – Balances the flavors; adjust to taste.
• 1/8 teaspoon black pepper – Adds a hint of spice; fresh ground is ideal.
• 1/2 teaspoon paprika – Provides a smoky undertone; extra for dusting gives visual appeal.
• A tiny dash of orange food coloring (optional) – A fun addition to mimic pumpkins!
• 2 tablespoons fresh chives, finely chopped – Adds a touch of color and a mild onion flavor for “stems.”

These Pumpkin Patch Deviled Eggs are not just a delight for your taste buds but also a treat for the eyes, making them the perfect addition to your autumn table!

Step‑by‑Step Instructions for Pumpkin Patch Deviled Eggs

Step 1: Boil the Eggs
Place the eggs in a single layer in a medium-sized saucepan and add cold water, ensuring there’s at least an inch of water covering the eggs. Bring the water to a rapid boil over high heat until bubbling vigorously. This should take about 10-12 minutes, which will help cook the eggs perfectly for your Pumpkin Patch Deviled Eggs.

Step 2: Settle and Chill
Once the water reaches a boil, remove the saucepan from heat and cover it tightly with a lid. Let the eggs sit undisturbed for exactly 10 minutes to finish cooking thoroughly. Meanwhile, prepare a large bowl filled with ice and cold water. After the 10 minutes are up, transfer the hot eggs into the ice bath using a slotted spoon to cool them down for at least 5 minutes.

Step 3: Peel the Eggs
After chilling, gently tap each egg on a hard surface to crack the shell. Roll the egg between your hands to loosen the shell further. When ready, peel the egg under cool running water; this ensures easy removal of the shell and helps keep the egg whites intact, which is essential for your Pumpkin Patch Deviled Eggs.

Step 4: Prepare the Filling
Slice each peeled egg in half lengthwise and carefully scoop out the yolks into a small mixing bowl. Add the mayonnaise, yellow mustard, salt, black pepper, paprika, and optional orange food coloring to the yolks. Mash the mixture until it’s smooth and creamy, creating a flavorful filling that will make your Pumpkin Patch Deviled Eggs pop with taste.

Step 5: Pipe the Filling
Spoon the luscious yolk mixture into a piping bag fitted with a star tip, like the Wilton 1M. This enables you to pipe the filling beautifully into each egg white half. Create a rounded mound on top of each half, which will resemble the charming shape of pumpkins for your delightful appetizer, Pumpkin Patch Deviled Eggs.

Step 6: Add the Pumpkin Details
To give your piped yolk a pumpkin-like appearance, use the dull side of a knife or a toothpick to create slight indentations in the piped filling. This mimics the ridges of a pumpkin, adding an artistic flair to your Pumpkin Patch Deviled Eggs that’s sure to impress your guests.

Step 7: Top with Chives
Insert the finely chopped chives into the top center of each piped yolk mound to resemble pumpkin stems. This not only enhances the visual appeal of your Pumpkin Patch Deviled Eggs but adds a fresh, mild onion flavor that balances the richness of the filling.

Step 8: Final Dusting
For an extra touch of visual appeal and a hint of flavor, dust the piped yolks and egg whites lightly with additional paprika. This adds a beautiful reddish hue reminiscent of autumn, making your Pumpkin Patch Deviled Eggs festive and inviting, perfect for any gathering.

Step 9: Chill Before Serving
Finally, place the assembled Pumpkin Patch Deviled Eggs in the refrigerator and let them chill for at least 30 minutes before serving. This will help the flavors meld together and provide a refreshing, cool bite that your guests will love when they are ready to enjoy these charming treats!

Pumpkin Patch Deviled Eggs

How to Store and Freeze Pumpkin Patch Deviled Eggs

Fridge: Store leftover Pumpkin Patch Deviled Eggs in an airtight container in the refrigerator for up to 3 days. This keeps them fresh and maintains their creamy texture.

Freezer: While not ideal for freezing due to texture changes, you can freeze unused yolk filling (without egg whites) for up to 1 month. Thaw in the fridge before repiping.

Reheating: If serving chilled after refrigerating, you can serve directly as is. If you prefer them warm, gently reheat in the microwave for no more than 10 seconds to avoid cooking further.

What to Serve with Pumpkin Patch Deviled Eggs

Creating a stunning spread around these delightful bites will elevate your gathering to the next level.

  • Crispy Bacon-Wrapped Asparagus: This savory, crunchy side adds a delightful contrast to the creamy texture of the deviled eggs. The smoky flavor of bacon pairs beautifully with eggs.

  • Apple and Walnut Salad: A fresh, crisp salad featuring sweet apples and crunchy walnuts brings earthiness and brightness to the table. The bite of vinaigrette harmonizes wonderfully with the rich deviled eggs.

  • Mini Quiches: These are perfect for adding variety. With a flaky crust and customizable fillings, mini quiches complement the deliciously creamy Pumpkin Patch Deviled Eggs while maintaining that charm of home cooking.

  • Garlic Breadsticks: Soft, buttery sticks offer a delightful texture to complement the deviled eggs. Their mild flavor fills out the plate while allowing the pumpkin deviled eggs to shine.

  • Homemade Vegetable Platter: A colorful array of fresh veggies provides a refreshing crunch and balances the richness of the deviled eggs. Serve with a zesty dip for an additional taste sensation.

  • Chilled White Wine: A crisp, refreshing white wine like Sauvignon Blanc pairs beautifully, enhancing the overall dining experience—perfect for sipping while enjoying your delightful deviled eggs.

  • Pumpkin Spice Cupcakes: For a sweet ending, these moist cupcakes topped with cream cheese frosting echo the autumn theme. They tie in the pumpkin flavor while bringing the meal to a satisfying close.

With these pairings, your gathering will bask in autumn warmth, ensuring each bite is savored and celebrated!

Pumpkin Patch Deviled Eggs Variations

Feel free to customize these delightful bites with your own personal twists for even greater enjoyment!

  • Low-Carb: Substitute mayonnaise with avocado for a creamy, healthy fat option that also adds a hint of flavor.
  • Spicy: Mix in finely chopped jalapeños or a dash of hot sauce for an extra kick that will thrill heat lovers.
  • Herbed: Add fresh herbs like dill or tarragon to the yolk mixture for a fragrant, garden-fresh flavor boost. The aromatic notes will transform these deviled eggs into an uplifting treat!
  • Smoky: Incorporate smoked paprika instead of regular paprika for a deeper, more complex flavor that adds warmth and richness. This little change will truly elevate your dish.
  • Vegan: Replace eggs with silken tofu blended with vegan mayo and seasonings for a plant-based alternative that maintains creaminess. There’s a rich, satisfying experience waiting to be had!
  • Cheese Lover: Fold in crumbled feta or sharp cheddar into the yolk mixture for a savory, cheesy twist that’s irresistibly delicious. It’s a flavor combination that brings together classic comfort!
  • Sweet Touch: Try adding a hint of maple syrup to the filling for a unique sweetness that surprises your palate, pairing beautifully with the savory notes.
  • Nutty Crunch: Sprinkle some chopped nuts, like pistachios or almonds, on top for an added crunch that contrasts perfectly with the creamy filling and makes each bite a delightful experience.

For more fun ideas and variations, check out our other festive appetizers to keep your gatherings lively!

Make Ahead Options

These Pumpkin Patch Deviled Eggs are ideal for meal prep, allowing you to enjoy the flavor and fun of this festive appetizer with significantly less stress! You can boil and peel the eggs up to 3 days in advance, storing them in a covered container in the refrigerator to maintain freshness. Prepare the yolk filling and refrigerate it in an airtight container for up to 2 days. When you’re ready to serve, simply pipe the yolk mixture into the egg whites, add the chives for stems, and finish with a dusting of paprika. This way, you can effortlessly impress your guests with just as delicious Pumpkin Patch Deviled Eggs, without a last-minute scramble!

Expert Tips for Pumpkin Patch Deviled Eggs

  • Perfect Boiling: Ensure your eggs are at room temperature before boiling. This prevents cracking and allows for easier peeling later.

  • Chill Well: Don’t skip the ice bath! This crucial step not only stops the cooking process but also helps achieve smoother, intact egg whites for your Pumpkin Patch Deviled Eggs.

  • Smooth Filling: Use a fork or a hand mixer to mash the yolk mixture until completely smooth. Lumps can make piping difficult and spoil the fun look of your pumpkins.

  • Piping Technique: If you don’t have a piping bag, a sturdy zip-lock bag with the corner snipped off works perfectly. This way, even beginner chefs can create beautiful mounds!

  • Creative Presentation: Feel free to get artistic! Add more embellishments like a sprinkle of herbs or alternative “stems” using other fresh herbs, giving your Pumpkin Patch Deviled Eggs a unique flair.

Pumpkin Patch Deviled Eggs

Pumpkin Patch Deviled Eggs Recipe FAQs

How do I select the best eggs for my deviled eggs?
Absolutely! Look for large eggs with no cracks in the shell and a clean surface. Fresh eggs will have a firmer white and a more rounded yolk, which will enhance the quality of your Pumpkin Patch Deviled Eggs. If you can, choose organic or free-range eggs for the best flavor and texture.

How should I store leftover Pumpkin Patch Deviled Eggs?
To keep your delicious creations fresh, store leftover Pumpkin Patch Deviled Eggs in an airtight container in the refrigerator. They will maintain their quality for up to 3 days. Just be sure to keep them chilled until you’re ready to enjoy another bite!

Can I freeze Pumpkin Patch Deviled Eggs?
While it’s not recommended to freeze finished deviled eggs due to texture changes, you can freeze the yolk filling alone. Simply spoon the filling into an airtight container and it can last for up to 1 month in the freezer. To reuse, thaw the filling in the fridge, then repipe it into fresh egg whites to recreate that delightful look!

What should I do if my egg yolks are hard to mash?
Very! If you find that the yolks are difficult to mash and blend smoothly, try using a hand mixer or a food processor for a smoother consistency. This is especially helpful for achieving the creamy texture desired in your Pumpkin Patch Deviled Eggs. Give it a few pulses until you reach that smooth and fluffy filling!

Are these Pumpkin Patch Deviled Eggs safe for pets or those with allergies?
It’s essential to consider that deviled eggs contain ingredients like mayonnaise and mustard that are not ideal for pets. Additionally, be cautious of food allergies—if you’re serving guests, notify them of ingredients like eggs and dairy. Always adjust recipes for dietary needs, ensuring everyone can enjoy these festive treats safely!

Pumpkin Patch Deviled Eggs that Wow Your Guests

Transform basic deviled eggs into delightful little pumpkins with this fun and easy recipe. Perfect for autumn gatherings, they are sure to impress your guests.

  • medium-sized saucepan
  • Mixing Bowl
  • piping bag
  • slotted spoon
  • Knife
  • Toothpick

For the Egg Filling

  • 6 large eggs (The star ingredient, ensuring a creamy texture.)
  • 1/4 cup mayonnaise (Adds richness; consider Greek yogurt as a lighter substitute.)
  • 1 teaspoon yellow mustard (Enhances flavor; Dijon can be used for a tangy twist.)
  • 1/4 teaspoon salt (Balances the flavors; adjust to taste.)
  • 1/8 teaspoon black pepper (Adds a hint of spice; fresh ground is ideal.)
  • 1/2 teaspoon paprika (Provides a smoky undertone; extra for dusting gives visual appeal.)
  • 1 dash orange food coloring (A fun addition to mimic pumpkins!)
  • 2 tablespoons fresh chives (finely chopped; adds color and a mild onion flavor for “stems.”)

Step‑by‑Step Instructions for Pumpkin Patch Deviled Eggs

  1. Place the eggs in a single layer in a medium-sized saucepan and add cold water, ensuring there’s at least an inch of water covering the eggs. Bring the water to a rapid boil over high heat until bubbling vigorously. This should take about 10-12 minutes.
  2. Once the water reaches a boil, remove the saucepan from heat and cover it tightly with a lid. Let the eggs sit undisturbed for exactly 10 minutes to finish cooking thoroughly. Meanwhile, prepare a large bowl filled with ice and cold water. After the 10 minutes are up, transfer the hot eggs into the ice bath using a slotted spoon to cool them down for at least 5 minutes.
  3. After chilling, gently tap each egg on a hard surface to crack the shell. Roll the egg between your hands to loosen the shell further. When ready, peel the egg under cool running water; this ensures easy removal of the shell and helps keep the egg whites intact.
  4. Slice each peeled egg in half lengthwise and carefully scoop out the yolks into a small mixing bowl. Add the mayonnaise, yellow mustard, salt, black pepper, paprika, and optional orange food coloring to the yolks. Mash the mixture until it’s smooth and creamy.
  5. Spoon the yolk mixture into a piping bag fitted with a star tip and pipe the filling beautifully into each egg white half. Create a rounded mound on top of each half, resembling the shape of pumpkins.
  6. Use the dull side of a knife or a toothpick to create slight indentations in the piped filling to mimic the ridges of a pumpkin.
  7. Insert the finely chopped chives into the top center of each piped yolk mound to resemble pumpkin stems.
  8. Dust the piped yolks and egg whites lightly with additional paprika for an extra touch of visual appeal.
  9. Finally, place the assembled Pumpkin Patch Deviled Eggs in the refrigerator and let them chill for at least 30 minutes before serving.

These Pumpkin Patch Deviled Eggs are a creative way to enjoy a classic dish for any autumn gathering.

Appetizer
American
Appetizer, Autumn Recipe, deviled eggs, Easy Recipe, party food, Pumpkin Patch Deviled Eggs

Filed Under: Appetizer

Decadent Spiderweb Chocolate Cake for a Spooky Treat

October 15, 2025 by grace bellamy Leave a Comment

As I wandered through a charming pumpkin patch, I stumbled upon an idea that would thrill any Halloween lover: a Spiderweb Chocolate Cake. This indulgent dessert isn’t just a feast for the eyes; it’s also a fun way to gather friends and family for a spooky celebration. One of the best perks of this recipe is its easy preparation—perfect for those busy days leading up to Halloween! Plus, the delight of decorating it with a web design makes it a fantastic activity for kids and adults alike. Are you ready to impress your guests with this hauntingly delicious creation? Let’s dive into the world of Halloween treats!

Spiderweb Chocolate Cake

Why is Spiderweb Chocolate Cake a Must-Try?

Delightfully Fun: This dessert adds a whimsical touch to your Halloween festivities, making it a perfect centerpiece.

Easy Preparation: Designed for busy schedules, this cake comes together quickly so you can focus on enjoying the celebration.

Interactive Experience: Decorating the spiderweb is a fun activity for everyone; gather the kids and make it a family affair!

Rich and Decadent Flavor: The chocolate cake is not just visually captivating; its moist layers and chocolatey goodness will leave everyone craving more.

Versatile for Any Occasion: While perfect for Halloween, this cake can easily transition to other fall gatherings or spooky celebrations.

With all these terrific features, why not explore more ways to elevate your spooky treats? Check out our other Halloween dessert recipes for inspiration!

Spiderweb Chocolate Cake Ingredients

• A delightful mix for spooky celebrations!

For the Cake

  • All-Purpose Flour – provides structure, ensuring the cake has just the right crumb.
  • Granulated Sugar – sweetens the cake and balances the rich cocoa flavor.
  • Cocoa Powder – gives the cake its deep chocolate flavor; Dutch-processed works wonderfully here.
  • Baking Powder – helps the cake rise, ensuring each slice is light and fluffy.
  • Baking Soda – enhances the cake’s leavening while pairing perfectly with cocoa.
  • Salt – amplifies the sweetness and balances flavors, a must-have in any cake recipe.
  • Eggs – bind the ingredients together, adding moisture and richness.
  • Buttermilk – keeps the cake moist and tender, making each bite melt in your mouth.
  • Vanilla Extract – infuses a warm note to the chocolate, elevating the overall flavor.
  • Vegetable Oil – adds moisture, keeping the cake soft and delicious.

For the Spiderweb Decoration

  • Chocolate Ganache – this silky mixture of chocolate and cream creates a glossy finish; use dark chocolate for a richer taste.
  • White Chocolate – perfect for creating the iconic spiderweb; melt and pipe out the design for maximum effect.

With these colorful components, you’ll be well on your way to crafting a stunning Spiderweb Chocolate Cake that captivates both the eyes and the taste buds!

Step‑by‑Step Instructions for Spiderweb Chocolate Cake

Step 1: Preheat and Prepare
Begin by preheating your oven to 350°F (175°C). Grease and flour two 9-inch round cake pans, ensuring a smooth release when it’s time to serve your Spiderweb Chocolate Cake. Prepare your ingredients by measuring out the flour, sugar, cocoa powder, baking powder, baking soda, salt, eggs, buttermilk, vanilla extract, and vegetable oil.

Step 2: Mix Dry Ingredients
In a large mixing bowl, whisk together the all-purpose flour, granulated sugar, cocoa powder, baking powder, baking soda, and salt until well combined. This will create a rich base for your Spiderweb Chocolate Cake, blending the dry ingredients evenly. Keep an eye on the texture; it should appear light and fluffy, free of lumps before moving on to the next step.

Step 3: Combine Wet Ingredients
In a separate bowl, whisk together the eggs, buttermilk, vegetable oil, and vanilla extract until smooth and creamy. Slowly incorporate this wet mixture into your dry ingredients, mixing until just combined. The batter should be silky and slightly thick, with no visible dry spots. Be careful not to overmix; you want a tender cake texture when it bakes.

Step 4: Bake the Cakes
Divide the batter evenly between the prepared cake pans. Place them in the preheated oven and bake for 30–35 minutes, or until a toothpick inserted into the center comes out clean. As the cakes rise and bake, they will release a wonderful chocolate aroma. Once done, remove them from the oven and let them cool in the pans for 10 minutes before transferring them to a wire rack to cool completely.

Step 5: Prepare the Ganache
While the cakes cool, prepare the chocolate ganache for icing. Heat heavy cream in a small saucepan over medium heat until it just begins to simmer, then pour it over chopped dark chocolate in a heat-safe bowl. Let it sit for about 5 minutes before stirring until smooth and glossy. This luxurious ganache will add depth to your Spiderweb Chocolate Cake.

Step 6: Ice the Cake
Once the cakes are completely cooled, place one layer on a serving plate. Spread a generous layer of chocolate ganache on top, then carefully place the second layer on top. Coat the entire cake with a thin layer of ganache to create a smooth base. The cake should look decadent and inviting, with a glossy chocolate layer covering every bit.

Step 7: Create the Spiderweb Decoration
To create the iconic spiderweb, melt white chocolate in a heat-safe bowl until smooth. Transfer it to a piping bag or a zip-top bag with the corner snipped off. Drizzle the white chocolate in a spiral pattern on top of the ganache, then use a toothpick to drag lines from the center outward to form the web design. This finishing touch will elevate your Spiderweb Chocolate Cake, making it a spooky attraction at any Halloween gathering.

Step 8: Serve and Enjoy
Let the decorated cake sit for at least 30 minutes to set the ganache and chocolate. Slice, serve, and watch your family and friends delight at the sight of this show-stopping Spiderweb Chocolate Cake! Remember to store any leftovers in an airtight container to maintain freshness, and feel free to make it a day in advance to save time on Halloween.

Spiderweb Chocolate Cake

How to Store and Freeze Spiderweb Chocolate Cake

Room Temperature: Keep the decorated cake in an airtight container at room temperature for up to 3 days to maintain its softness and moisture.

Fridge: If you need to store leftovers longer, refrigerate the cake in an airtight container for up to a week. Just remember that chilling may slightly alter the texture.

Freezer: For longer storage, slice and wrap pieces of the Spiderweb Chocolate Cake tightly in plastic wrap, then place them in a freezer-safe bag. It can be frozen for up to 2 months.

Reheating: When ready to enjoy, let the cake thaw in the fridge overnight. For a warm treat, gently microwave individual slices for about 10-15 seconds, just until warmed through.

Helpful Tricks for Spiderweb Chocolate Cake

  • Measure Accurately: Using precise measurements for ingredients ensures a light and fluffy cake. Avoid overflowing scoops, especially for the flour.

  • Room Temperature Eggs: For the best texture, let eggs come to room temperature before mixing. This helps create a smoother batter for your Spiderweb Chocolate Cake.

  • Don’t Overmix: Once you combine wet and dry ingredients, mix just until combined. Overmixing can lead to a dense cake, losing that perfect softness.

  • Cool Completely: Allow the cake layers to cool completely before icing. A warm cake can cause the ganache to melt, losing the beautiful glossy finish.

  • Spooky Presentation: Enhance your spiderweb decoration by adding mini chocolate spiders or using colored sprinkles to elevate your Halloween aesthetic.

  • Storage Secrets: Keep the decorated cake in an airtight container at room temperature. This helps maintain its moistness, ensuring every slice is delightful!

What to Serve with Spiderweb Chocolate Cake?

Imagine the delight of presenting a beautifully decorated cake at your gathering, complemented by unforgettable sides that elevate your Halloween experience.

  • Spooky Sugar Cookies: These classic treats can be decorated with fun Halloween themes, adding whimsical flavors and textures that kids will love.

  • Pumpkin Spice Cupcakes: A seasonal favorite, these moist cupcakes bring warmth and spice, perfectly balancing the richness of the chocolate cake.

  • Chilling Ghostly Fruit Salad: A refreshing mix of seasonal fruits like pears and grapes, served in a ghostly fashion, lightens the table and excites the senses.

  • Caramel Apple Slices: Sweet and slightly tart, these easy-to-eat snacks are a nostalgic Halloween classic that makes everyone’s taste buds dance.

  • Creepy Candy Corn Parfaits: Layer whipped cream and candy corn for a vibrant dessert that adds color and crunch, enticing everyone to dig in.

  • Witch’s Brew Punch: This fun and fizzy drink adds a refreshing twist, making it a perfect pairing for the richness of your Spiderweb Chocolate Cake.

Elevate your festivities by including these delightful accompaniments that promise to delight both the eyes and the taste buds!

Make Ahead Options

These Spiderweb Chocolate Cakes are perfect for meal prep, saving you time during the bustling days leading up to Halloween! You can bake the cakes up to 24 hours in advance—just allow them to cool completely before wrapping them tightly in plastic wrap and refrigerating to maintain their moisture. Additionally, you can prepare the chocolate ganache ahead of time; simply store it in an airtight container in the fridge for up to 3 days. When you’re ready to serve, reheat the ganache slightly to achieve a smooth consistency, then ice your cake and create the spiderweb decoration. With these make-ahead tips, you’ll be able to enjoy a delightful Halloween celebration with your loved ones without the last-minute rush!

Spiderweb Chocolate Cake Variations

Feel free to get creative and adapt the Spiderweb Chocolate Cake to fit your taste and occasion!

  • Gluten-Free: Substitute all-purpose flour with a gluten-free flour blend for a delightful, inclusive treat. It’s just as moist and delicious!

  • Vegan: Replace eggs with flaxseed meal and use plant-based milk instead of buttermilk. This way, everyone can enjoy the spooky delight!

  • Chocolate Ganache Twist: Add a splash of bourbon or espresso to your ganache for a flavor boost that will intrigue your guests. The depth of flavor is truly captivating!

  • Nutty Garnish: Toss in some chopped walnuts or pecans on top of your spiderweb decoration. The crunch adds a lovely texture that contrasts beautifully with the soft cake.

  • Spicy Kick: Incorporate a teaspoon of chili powder into the batter for a subtle heat that complements the chocolate perfectly. Your guests will be pleasantly surprised!

  • Dairy-Free: Use coconut cream for the ganache and almond milk in place of buttermilk. This keeps the richness while accommodating lactose intolerance.

  • Layered Treat: Try making it a layered cake by adding layers of raspberry or caramel between the cake layers. The fruity or buttery notes elevate the dessert to gourmet status!

To make your Halloween gatherings even more exciting, don’t forget to explore other festive delights like our Pumpkin Patch Cupcakes and Ghoulish Ghost Truffles for a sweet spread everyone will rave about!

Spiderweb Chocolate Cake

Spiderweb Chocolate Cake Recipe FAQs

What type of cocoa powder should I use?
For the best flavor in your Spiderweb Chocolate Cake, I recommend using Dutch-processed cocoa powder. It gives a deeper and more balanced chocolate flavor, which is ideal for the richness of this cake.

How should I store leftovers?
Absolutely! To keep your Spiderweb Chocolate Cake fresh, store it in an airtight container at room temperature for up to 3 days. If you need to extend its shelf life, you can refrigerate it for up to a week, but do keep in mind that chilling may slightly change its texture.

Can I freeze the Spiderweb Chocolate Cake?
Yes! If you want to enjoy this spooky delight later, slice the cake and wrap individual pieces tightly in plastic wrap. Place them in a freezer-safe bag, and they will last for up to 2 months. When you’re ready to indulge, simply let the slices thaw in the fridge overnight. For a cozy treat, pop a slice in the microwave for 10-15 seconds.

What if my cake doesn’t rise properly?
If your Spiderweb Chocolate Cake doesn’t rise as expected, there could be a few reasons. First, ensure your baking powder and baking soda are fresh; both should be within their expiration dates. Next, avoid overmixing the batter after adding the wet ingredients; this can lead to a dense cake. Lastly, make sure your oven is properly preheated, as baking at incorrect temperatures can also affect the rise.

Can I make this cake gluten-free?
Absolutely! To make a gluten-free Spiderweb Chocolate Cake, substitute the all-purpose flour with a 1:1 gluten-free flour blend. Be sure to check that your other ingredients, like baking powder and cocoa powder, are also gluten-free. This way, everyone can enjoy a slice of the celebration!

Is this cake suitable for pets?
While the Spiderweb Chocolate Cake is a delightful treat for humans, it’s important to keep it away from furry friends. Chocolate is toxic to dogs and cats, so make sure to enjoy this treat yourself and not share with your pets for their safety.

Decadent Spiderweb Chocolate Cake for a Spooky Treat

This Spiderweb Chocolate Cake is a fun and delicious dessert perfect for Halloween celebrations.

  • 9-inch round cake pans
  • Mixing bowls
  • Whisk
  • piping bag
  • Saucepan
  • wire rack

For the Cake

  • 2 cups All-Purpose Flour
  • 2 cups Granulated Sugar
  • 3/4 cup Cocoa Powder (Dutch-processed works wonderfully)
  • 1.5 tsps Baking Powder
  • 1.5 tsps Baking Soda
  • 1 tsp Salt
  • 3 large Eggs (room temperature)
  • 1 cup Buttermilk (room temperature)
  • 1 tsp Vanilla Extract
  • 1/2 cup Vegetable Oil

For the Spiderweb Decoration

  • 1 cup Chocolate Ganache (use dark chocolate for richer taste)
  • 1/2 cup White Chocolate (for spiderweb design)

Preparation and Baking

  1. Preheat your oven to 350°F (175°C) and grease two 9-inch round cake pans.
  2. In a large mixing bowl, whisk together flour, sugar, cocoa powder, baking powder, baking soda, and salt.
  3. In another bowl, whisk eggs, buttermilk, oil, and vanilla until smooth. Combine wet and dry ingredients until just mixed.
  4. Divide the batter into the cake pans and bake for 30-35 minutes until a toothpick comes out clean.
  5. Remove from oven, let cool in pans for 10 minutes, then transfer to a wire rack to cool completely.

Decoration

  1. Prepare chocolate ganache by heating cream, pouring it over chopped dark chocolate, and stirring until smooth.
  2. Once cooled, place one cake layer on a plate, add ganache, then top with the second layer. Coat the entire cake with ganache.
  3. Melt white chocolate, pipe into a spiderweb design on top of the ganache using a toothpick to create the web effect.
  4. Let the decorated cake sit for at least 30 minutes before serving for the ganache to set.

For a spooky touch, add mini chocolate spiders or colored sprinkles to the decoration.

Dessert
American
chocolate cake, dessert, Halloween, party food, Spiderweb Cake, Spooky Treat

Filed Under: Dessert

Spooktacular Halloween Pancakes to Delight Your Morning!

October 15, 2025 by grace bellamy Leave a Comment

As the sun rises on Halloween morning, a sense of magic floats in the air, and I can’t help but think of transforming ordinary breakfasts into something enchanting. That’s where my Halloween Pancakes come into play—they’re not just a meal; they’re a playful celebration that the whole family can enjoy! These deliciously festive pancakes are quick to whip up, making them perfect for those busy mornings filled with Halloween excitement. Plus, they can double as a delightful canvas for all sorts of spooky toppings! Whether you’re hosting a fun brunch with friends or just wanting to add some seasonal cheer to your morning routine, these Halloween breakfast ideas will surely cast a spell on your taste buds. Are you ready to gather your spooky ingredients and create a breakfast that’s sure to bring smiles?

Halloween Pancakes

Why Make Halloween Pancakes?

Festive Fun: Start your Halloween celebration off right with these creative pancakes that add a touch of whimsy to your morning routine.

Customizable Toppings: Whether it’s bat-shaped sprinkles or ghostly whipped cream, each pancake becomes a unique masterpiece!

Quick and Easy: Perfect for busy mornings, these pancakes are a simple way to get into the Halloween spirit without the fuss.

Family Bonding: Gather the kids to help decorate; it’s a fantastic way to make lasting memories while enjoying a delicious breakfast together.

Healthy Twist: You can sneak in some pumpkin puree or oats for a nutritious upgrade that keeps the fun alive!

These delightful Halloween breakfast ideas will transform your ordinary morning into a spooktacular feast. Get ready to enjoy every bite!

Halloween Pancakes Ingredients

For the Pancake Batter
• All-purpose flour – a staple for light, fluffy pancakes.
• Milk – use buttermilk for extra tenderness and a slight tang!
• Eggs – helps bind the ingredients while adding richness.
• Sugar – sweetness is key—consider using brown sugar for a deeper flavor.
• Baking powder – gives your pancakes that lift we all love!
• Pumpkin puree – adds a delicious fall flavor and moisture.
• Pumpkin spice – this warm blend of spices is essential for a seasonal twist.
• Salt – just a pinch enhances all the flavors.

For the Toppings
• Whipped cream – a fluffy cloud that makes everything more fun!
• Candy corn – adds a festive touch and a sweet crunch.
• Chocolate chips – for a touch of decadence; they melt beautifully!
• Bat-shaped sprinkles – because every pancake deserves a sprinkle of whimsy!
• Maple syrup – classic and comforting, it’s the perfect drizzle.

With these ingredients, your Halloween Pancakes will not only be a feast for the eyes but also a celebration of flavors, making your morning enchanting!

Step‑by‑Step Instructions for Halloween Pancakes

Step 1: Mix the Dry Ingredients
In a large bowl, whisk together 1 cup of all-purpose flour, 2 tablespoons of sugar, 1 tablespoon of baking powder, and a pinch of salt until light and fluffy. This mixture will create the base of your Halloween Pancakes, ensuring they’re light and airy. Set this bowl aside, allowing the dry ingredients to rest briefly while you prepare the wet ingredients.

Step 2: Combine the Wet Ingredients
In another bowl, blend together 1 cup of milk (or buttermilk for added tenderness), 1 cup of pumpkin puree, and 2 eggs until fully combined and smooth. The vibrant orange of the pumpkin puree adds an inviting hue, perfect for your Halloween theme. Pour this mixture into the bowl with the dry ingredients, creating a festive pancake batter.

Step 3: Create the Pancake Batter
Gently fold the wet ingredients into the dry ingredients, mixing until just combined. Avoid over-mixing to keep your Halloween Pancakes fluffy; a few lumps are okay. If desired, add 1 teaspoon of pumpkin spice for that warm, autumnal flavor that perfectly enhances the seasonal spirit. Allow the batter to rest for a few minutes as you heat your skillet.

Step 4: Heat Your Skillet
Preheat a non-stick skillet or griddle over medium heat, about 350°F (175°C). Lightly grease the surface with butter or cooking spray, ensuring an even golden-brown color later. Once the skillet is hot, you should see a light shimmer of oil or melted butter—a sign it’s time to pour your first pancake!

Step 5: Cook the Pancakes
Pour 1/4 cup of batter onto the hot skillet for each pancake. Cook for 2-3 minutes until bubbles form on the surface and the edges appear set. Flip the pancake with a spatula, and cook for an additional 1-2 minutes until golden brown on the other side. Repeat this process for the remaining batter, keeping the cooked pancakes warm in a preheated oven.

Step 6: Assemble and Decorate
Once all your Halloween Pancakes are cooked, it’s time to unleash your creativity! Stack them high on a plate, and add a generous dollop of whipped cream on top. Sprinkle with candy corn, chocolate chips, and bat-shaped sprinkles for that extra spooky flair. Drizzle with maple syrup for a sweet finish, transforming your breakfast into a delightful Halloween treat.

Halloween Pancakes

How to Store and Freeze Halloween Pancakes

Room Temperature: Store leftover Halloween pancakes at room temperature for up to 2 hours if they are just cooked and served.

Fridge: Keep pancakes in an airtight container in the fridge for up to 3 days. Reheat in the microwave or on a skillet for a warm breakfast treat!

Freezer: For longer storage, freeze the pancakes in a single layer on a baking sheet, then transfer to a freezer bag; they can last up to 2 months.

Reheating: When ready to enjoy, reheat frozen pancakes directly in the toaster or microwave until hot. These simple tips ensure your Halloween pancakes are ready whenever you crave them!

What to Serve with Halloween Pancakes?

As you gather around the breakfast table, let the enchantment of Halloween fill the air with delightful pairings that complement your festive pancakes!

  • Spooky Smoothies: A fruity blend with bananas and spinach, these green monsters will add a healthy yet fun twist to your meal. They’ll give a refreshing contrast to the richness of the pancakes.

  • Creepy Cereal: Serve a bowl of Halloween-themed cereal with milk; it adds crunch and fun visuals, making breakfast even more whimsical. The crunch balance beautifully with the softness of the pancakes.

  • Ghostly Yogurt Parfaits: Layer yogurt with Halloween-colored toppings for an eye-catching display. They’re light and creamy, adding a cool touch to the hearty pancakes.

  • Pumpkin Spice Chai: This warm drink is a cozy companion, enhancing the pumpkin flavors in your pancakes while offering a comforting spiced aroma.

  • Monster Toast: Spread avocado on whole-grain bread, using olives for monster eyes. It’s nutritious and playful, providing a savory element to round out breakfast.

  • Batty Bacon: Crispy bacon can be a perfect savory contrast, pairing well with the sweetness of your Halloween pancakes while giving a satisfying crunch with every bite.

Not only do these pairings bring in fun elements of Halloween, but each adds unique textures and flavors, transforming your breakfast into a spooktacular feast!

Make Ahead Options

These Halloween Pancakes are perfect for meal prep enthusiasts who want to save time on busy mornings! You can prepare the pancake batter up to 24 hours in advance by mixing the dry ingredients and storing them in an airtight container, while the wet ingredients can be combined and refrigerated separately. Just before cooking, simply whisk the wet mixture into the dry until combined. This method keeps your pancakes just as fluffy and delicious as if you made them fresh! For best results, remember to let the batter sit at room temperature for about 10 minutes before pouring it onto the skillet. When you’re ready to serve, just cook them up and watch everyone delight in their festive breakfast!

Halloween Pancakes Variations & Substitutions

Feel free to get creative and personalize your Halloween pancakes with these fun variations that will delight your taste buds!

  • Gluten-Free: Substitute all-purpose flour with a 1:1 gluten-free flour blend for a delicious alternative that everyone can enjoy.

  • Dairy-Free: Use almond milk or coconut milk in place of regular milk, and replace butter with coconut oil for a creamy yet dairy-free option.

  • Spiced Up: Add a pinch of cayenne pepper or a dash of cinnamon for a surprising warmth that will elevate your pancake experience.

    For those who embrace the thrill of heat, this twist will keep your taste buds tingling while keeping everything festive.

  • Fruit-Infused: Toss in some diced apples or mashed bananas to the batter for an added layer of fruity sweetness. It not only enhances the flavor but also adds a lovely texture.

  • Choco-Lover: Stir in chocolate chips or cocoa powder into the batter for a decadent chocolate version of your Halloween pancakes!

  • Colorful Toppings: Use vibrant fruit like blueberries or strawberries alongside the whipped cream to create a visual feast that adds flavor and a healthy twist!

    Kids will love the burst of color adding joy to their Halloween morning.

  • Savory Spin: Make pancake “mummies” by adding cooked sausage or bacon to the batter. The savory taste coupled with your sweet toppings makes for a delicious hit!

Transform your Halloween breakfast into a delight by mixing these ideas together, and check out more creative Halloween breakfast ideas to build the ultimate brunch spread.

  • Pumpkin Spice Overload: If you adore pumpkin spice, don’t hesitate to add an extra teaspoon to the batter for an aromatic burst of flavor that screams autumn. This little enhancement creates an irresistible pancake that captures the spirit of the season!

Expert Tips for Halloween Pancakes

• Use Fresh Pumpkin: For the best flavor, opt for fresh pumpkin puree instead of canned. It enhances the taste and texture of your Halloween pancakes.

• Don’t Overmix: To keep your pancakes fluffy, mix the batter just until combined. Overmixing can lead to dense pancakes—nobody wants that on Halloween morning!

• Heat Testing: Always test your skillet temperature before cooking the first pancake. A splash of water should sizzle and evaporate quickly; this ensures an even cooking surface.

• Creative Toppings: Encourage creativity with toppings! Let your family add their own spooky decorations, making it a fun and interactive Halloween breakfast experience.

• Make Ahead Option: Prepare extra batter and store it in the fridge for later. Just give it a quick stir before using, and enjoy Halloween pancakes anytime!

Enjoy these Halloween pancakes as a delicious way to celebrate the holiday!

Halloween Pancakes

Halloween Pancakes Recipe FAQs

How do I choose the right pumpkin for my pancakes?
Absolutely! When selecting a pumpkin, look for a small, sugar or pie pumpkin as they’re sweeter and more flavorful than larger varieties. Check for firmness and avoid pumpkins with soft spots or blemishes—these can indicate overripeness.

What’s the best way to store leftover Halloween pancakes?
Very straightforward! Store leftover pancakes in an airtight container in the fridge for up to 3 days. To maintain their fluffiness, simply reheat them in the microwave or on a skillet until heated through.

Can I freeze my Halloween pancakes?
Definitely! Freezing is a great option for meal prep. After cooking, let the pancakes cool, then lay them flat in a single layer on a baking sheet for about 30 minutes to flash freeze them. Once frozen, transfer the pancakes to a freezer bag and seal tight. They can last up to 2 months in the freezer. When you’re ready to eat, just reheat them directly in the toaster or microwave until warm!

What should I do if my pancake batter is too thick?
If your batter seems too thick, don’t worry! Simply add a little more milk, about a tablespoon at a time, until you reach your desired consistency. The perfect batter should be pourable but still thick enough to hold its shape on the skillet.

Are there any dietary considerations for Halloween pancakes?
Absolutely! If you or anyone in your family has allergies, consider using gluten-free flour alternatives like almond or coconut flour for the pancakes. For a dairy-free option, use non-dairy milk such as almond or oat milk. Additionally, you can replace the eggs with flaxseed or applesauce for a vegan twist. Always check your toppings too, as candies can contain allergens!

How can I make my Halloween pancakes even more festive?
For a fun twist, you can create different colors of batter by adding food coloring! Divide your batter into bowls and mix a few drops of food coloring in before cooking. Using cookie cutters to shape the pancakes is another enjoyable way to add a spooky touch. Don’t forget to let your family or friends join in on the creative topping process for a truly memorable Halloween breakfast!

These Halloween Pancakes Recipe FAQs will help you create an enchanting breakfast that everyone will love!

Spooktacular Halloween Pancakes to Delight Your Morning!

Delight in these Halloween Pancakes, a fun and festive breakfast perfect for the spooky season.

  • Mixing Bowl
  • Whisk
  • skillet
  • spatula

For the Pancake Batter

  • 1 cup all-purpose flour
  • 1 cup milk (or buttermilk for extra tenderness)
  • 2 large eggs
  • 2 tablespoons sugar (preferably brown sugar)
  • 1 tablespoon baking powder
  • 1 cup pumpkin puree
  • 1 teaspoon pumpkin spice (optional, for seasonal flavor)
  • 1 pinch salt

For the Toppings

  • 1 cup whipped cream
  • 1 cup candy corn
  • 1 cup chocolate chips
  • 1 cup bat-shaped sprinkles
  • 1 cup maple syrup

Step-by-Step Instructions for Halloween Pancakes

  1. Mix the dry ingredients in a bowl: flour, sugar, baking powder, and salt.
  2. Combine wet ingredients: milk, pumpkin puree, and eggs until smooth.
  3. Fold wet ingredients into dry ingredients until just combined; allow to rest.
  4. Heat a skillet over medium heat and grease lightly.
  5. Pour 1/4 cup of batter onto the skillet, cooking until bubbles form.
  6. Flip and cook until golden brown; repeat with remaining batter.
  7. Stack pancakes, top with whipped cream, sprinkles, candy corn, and drizzle syrup.

Serve with creative toppings to enhance the Halloween experience. Use fresh pumpkin for better flavor.

Breakfast
family fun, festive breakfast, Halloween pancakes, Holiday Recipe, pancakes, pumpkin

Filed Under: Breakfast

Indulge in Irresistible Ghost S’mores Dip for Spooky Fun

October 15, 2025 by grace bellamy Leave a Comment

As I rummaged through my pantry last week, a pack of ghost marshmallows caught my eye, sparking a delightful idea. Enter the Ghost S’mores Dip, a spooky take on the classic treat that’s sure to thrill both kids and adults alike. With just 15 minutes of your time, you can create a warm, gooey dessert that transforms your evenings into a cozy gathering around the table, without the hassle of a complicated recipe. This dip is not only a crowd-pleaser but also the perfect way to elevate any autumn or Halloween celebration. Trust me, once you serve this enchanting concoction with crispy graham crackers, everyone will come back for seconds—or thirds! Are you ready to whip up some sweet, ghostly fun?

Ghost S'mores Dip

Why Is Ghost S’mores Dip So Special?

Simplicity at its finest: With only five ingredients and a mere 15 minutes of prep, this spooky dip is quick and easy to make. Gooey goodness: Melted chocolate combined with fluffy roasted marshmallows creates an irresistible, ooey-gooey dessert. Perfect for gatherings: Whether it’s Halloween or a cozy fall get-together, this dish is bound to impress family and friends. Versatile dippers: While graham crackers are traditional, feel free to mix it up with pretzels, apples, or potato chips for a delightful twist. Kid-friendly fun: Everyone will love the playful ghostly appearance and delicious taste, making it an exciting dish for kids and adults alike! Prepare to impress with this easy and festive treat that is sure to become a favorite in your dessert repertoire!

Ghost S’mores Dip Ingredients

• Here’s everything you need to create this delightful treat.

For the Dip

  • Ghost marshmallows – These add a fun spooky twist to your dip; you can substitute them with ghost Peeps if needed.
  • Semi-sweet chocolate chips – They melt beautifully and bring a rich, chocolaty flavor to your dip.
  • Heavy cream – Warmed cream helps create that luscious, gooey texture that’s essential for this Ghost S’mores Dip.

For Serving

  • Graham crackers – The classic dippers that pair perfectly with the sweet and gooey center; consider breaking them into smaller pieces for easy dipping.
  • Mini chocolate chips – These serve as adorable eyes for the marshmallows, bringing your ghostly dip to life!

Together, these ingredients promise a warm and inviting treat that’s sure to enchant your guests!

Step‑by‑Step Instructions for Ghost S’mores Dip

Step 1: Preheat the Oven
Begin by preheating your oven to 450°F (232°C). This temperature will ensure that your chocolate melts to perfection while giving the ghost marshmallows a beautiful golden-brown finish. Make sure to let the oven fully reach the desired temperature before placing your dish inside, enhancing the overall experience of making this Ghost S’mores Dip.

Step 2: Combine Chocolate and Cream
In a medium-sized skillet, combine 2 cups of semi-sweet chocolate chips with 1/4 cup of warmed heavy cream. Stir the mixture over medium heat until you see the chocolate melting and blending smoothly with the cream, creating a luscious, velvety chocolate base. This process should take about 3-5 minutes, and you’ll know it’s ready when it’s perfectly melted and glossy.

Step 3: Arrange the Marshmallows
Once the chocolate mixture is ready, remove it from the heat and carefully arrange the ghost marshmallows on top, pressing them gently into the melted chocolate. For an extra cute touch, place mini chocolate chips on the marshmallows to create eyes and mouths, bringing your Ghost S’mores Dip to life. The contrast of the fluffy marshmallows against the gooey chocolate will be absolutely delightful.

Step 4: Bake to Perfection
Place the skillet in the preheated oven and bake for about 5 to 10 minutes. Keep a close eye on your dip as it bakes; once you see the chocolate bubbling and the marshmallows turning golden-brown, it’s time to take it out. The sweet aroma and enticing sight will make your mouth water for the upcoming treat.

Step 5: Serve with Dippers
As soon as the Ghost S’mores Dip is out of the oven, serve it immediately for the best experience. Use graham crackers or your favorite dippers to enjoy this warm and gooey dessert. Encourage your friends and family to dig in and savor the spooky deliciousness of the dip, making every bite truly memorable.

Ghost S'mores Dip

Ghost S’mores Dip Variations

Feel free to get creative and customize your Ghost S’mores Dip for an even more delightful experience!

  • Nut-Free: Substitute heavy cream with nut-free alternatives like oat or soy cream, ensuring everyone can enjoy this treat.

  • Vegan Twist: Use vegan chocolate chips and coconut whipped cream for a cruelty-free version that’s just as delicious.

  • Spicy Kick: Add a dash of cayenne pepper to the chocolate mixture for an unexpected and delightful heat that raises the flavor profile.

  • Caramel Swirl: Drizzle caramel sauce over the top before baking for a sweet, gooey addition that will have everyone swooning.

  • Chunky Chocolate: Mix in chopped chocolate or even your favorite candy bar pieces to create a rich, textured dip that adds fun surprises in each bite.

  • Fruit Infusion: Fold in some chopped strawberries or raspberries into the chocolate base for a fruity burst that complements the sweetness.

  • S’mores Style: Incorporate crushed graham crackers into the chocolate mixture to create a crust-like base for a more authentic s’mores experience.

  • Seasonal Flavors: Consider adding pumpkin spice or cinnamon to the chocolate mixture during the fall for an enchanting seasonal twist.

Explore these variations and let your creativity shine! If you’re looking for a mix of flavors, pairing this dip with some flavorful sides, like sliced fruits or pretzels, adds a delightful contrast to each velvety bite.

What to Serve with Ghost S’mores Dip

Elevate your dessert experience with delightful pairings that complement the rich, gooey flavors of this enchanting treat.

  • Crispy Graham Crackers: Their crunchiness provides the perfect contrast to the melty chocolate, ensuring every dip is a balanced delight.
  • Sliced Apples: Fresh and tart, apples cut through the sweetness nicely, adding a refreshing bite to the indulgent dip.
  • Salty Pretzels: The saltiness of pretzels pairs exquisitely with the sweetness, creating a salty-sweet flavor combo that’s hard to resist.
  • Mini Marshmallow Bites: Enhance the ghostly theme with additional mini marshmallows for dipping—soft and chewy, they make the experience even more fun!
  • Chocolate-Covered Potato Chips: For a surprising twist, try these; the crunch and savory flavor compliment the dip, making for a delightful contrast.
  • Warm Cinnamon Sugar Pita Chips: Their sweetness and spiced flavor add depth and a little warmth, harmonizing beautifully with the chocolate.
  • Caramel Sauce Drizzle: A touch of warm caramel drizzled over your serving enhances the sweetness and adds a touch of elegance.
  • Pumpkin Spice Latte: This seasonal drink perfectly accompanies the cozy, sweet flavors of the dip, making it a festive choice for gatherings.
  • Vanilla Ice Cream: A scoop of velvety ice cream on the side provides a creamy contrast to the warm, gooey dip, creating a delightful dessert experience.

How to Store and Freeze Ghost S’mores Dip

Fridge: Store any leftover Ghost S’mores Dip in an airtight container in the fridge for up to 3 days. Reheat in the oven to restore its gooey goodness.

Freezer: Although not ideal, you can freeze the dip for up to 2 months. Thaw in the fridge overnight, then reheat in the oven at 450°F until warmed through.

Make-Ahead: Combine the chocolate and cream ahead of time, and keep it in the fridge. Bake with the marshmallows just before serving for a fresh experience.

Reheating: For the best results, reheat in a 450°F oven for about 3 to 5 minutes, ensuring that the marshmallows regain their delightful fluffiness and the chocolate is melty again.

Make Ahead Options

These Ghost S’mores Dip components are perfect for busy home cooks looking to save time! You can prepare the chocolate and cream mixture up to 24 hours in advance; just combine the 2 cups of semi-sweet chocolate chips with 1/4 cup of warmed heavy cream and refrigerate it in an airtight container. The ghost marshmallows can also be arranged on top of the chocolate mixture ahead of time and left in the fridge. When you’re ready to indulge, simply bake the dip in a preheated oven at 450°F for 5 to 10 minutes until bubbly and golden. This way, you’ll have a delightful dessert with minimal last-minute effort, allowing you to enjoy the spook-tacular fun!

Expert Tips for Ghost S’mores Dip

  • Use Quality Ingredients: Opt for high-quality semi-sweet chocolate chips to enhance the richness of your Ghost S’mores Dip. The better the chocolate, the more luxurious the dip will taste!

  • Watch the Oven: Keep an eye on your dip while it bakes. The marshmallows can burn quickly; you’re looking for a perfect golden-brown color without any charred edges.

  • Mix Up the Dippers: Don’t just stick to graham crackers! Consider sliced apples, pretzels, or even potato chips for a fun and unique dipping experience with your Ghost S’mores Dip.

  • Prepare in Advance: For less stress, combine the chocolate and cream ahead of time. You can reheat the mixture before adding the marshmallows and popping it back in the oven.

  • Leftover Enjoyment: If you have leftovers (which is rare!), store them in an airtight container and reheat in the oven at 450°F for a few minutes until melty.

Ghost S'mores Dip

Ghost S’mores Dip Recipe FAQs

How do I select the right ghost marshmallows?
Look for ghost marshmallows that are fresh and have a firm texture. Avoid any that have dark spots or are overly sticky, as these may indicate they are past their prime. The best ones are plump and vibrant, which will ensure they roast nicely in the oven.

What is the best way to store leftover Ghost S’mores Dip?
Store any leftover Ghost S’mores Dip in an airtight container in your refrigerator for up to 3 days. When you’re ready to enjoy it again, simply reheat in a 450°F oven for about 3 to 5 minutes. This will restore that gooey, melty goodness, making it just as delightful as when you first made it!

Can I freeze Ghost S’mores Dip?
You can freeze Ghost S’mores Dip for up to 2 months. To do this, allow it to cool completely, then transfer it to an airtight container or freezer-safe bag. When ready to enjoy, thaw it in the fridge overnight, and then reheat in a 450°F oven for about 5 to 7 minutes until warmed through and gooey again.

What should I do if the marshmallows burn while baking?
If you notice that the marshmallows are starting to burn while baking, quickly cover the dip with aluminum foil to protect them from direct heat. This will allow the chocolate to continue melting without charring your marshmallow ghosts. Keep a close eye on the oven to prevent this from happening!

Are there any dietary considerations for Ghost S’mores Dip?
Absolutely! If you’re concerned about allergies, be sure to check the labels on your chocolate and marshmallows. There are gluten-free graham crackers available for those with gluten sensitivities. Additionally, you can explore dairy-free chocolate chips and non-dairy cream alternatives if you have lactose intolerance or follow a vegan diet.

Can I prepare the Ghost S’mores Dip ahead of time?
Yes, you can prep ahead! Combine the chocolate chips and heavy cream beforehand and store it in the fridge. When it’s time to serve, simply heat it in the oven for about 10 minutes, add the marshmallows on top, and bake until golden brown. This makes for a stress-free, last-minute preparation!

Indulge in Irresistible Ghost S’mores Dip for Spooky Fun

Enjoy a spooky twist on a classic with this Ghost S’mores Dip, perfect for Halloween and gatherings.

  • skillet
  • Oven

For the Dip

  • 1 pack ghost marshmallows (can substitute with ghost Peeps)
  • 2 cups semi-sweet chocolate chips (melt beautifully for rich flavor)
  • 1/4 cup heavy cream (warmed for a gooey texture)

For Serving

  • 1 box graham crackers (break into smaller pieces for dipping)
  • 1/2 cup mini chocolate chips (for ghost eyes)

Step-by-Step Instructions for Ghost S’mores Dip

  1. Preheat your oven to 450°F (232°C).
  2. In a medium-sized skillet, combine chocolate chips with warmed heavy cream over medium heat, stirring until melted and smooth.
  3. Once melted, arrange ghost marshmallows on top, pressing them gently into the chocolate, and add mini chocolate chips for eyes.
  4. Bake in the preheated oven for about 5 to 10 minutes until the chocolate is bubbling and marshmallows are golden-brown.
  5. Serve immediately with graham crackers or other dippers.

Use quality ingredients for the best flavor. Monitor the baking time closely to prevent burning.

Dessert
American
dessert, dip, Ghost S’mores Dip, Halloween, sweet treat

Filed Under: Dessert

Irresistible Christmas Cranberry Meatballs in Just 25 Minutes

October 15, 2025 by grace bellamy Leave a Comment

As I prepped for this holiday season, I realized something: hurried meals often overshadow the joy of gathering around the table. That’s where my Quick Christmas Cranberry Meatballs come in—they bring a delightful blend of flavors to any festive spread. This easy recipe combines sweet and tangy cranberry sauce with the warmth of chili, offering a crowd-pleasing dish that’s not just a snap to whip up, but also perfect for both casual gatherings and elegant parties. With just 25 minutes of your time, these meatballs are a fabulous way to impress without the fuss. Ready to spice up your holiday menu? Let’s dig into how to make these merry meatballs that will have everyone coming back for seconds!

Christmas Cranberry Meatballs

Why Are Christmas Cranberry Meatballs So Loved?

Quick and Easy: This recipe takes just 25 minutes from start to finish—perfect for busy holidays!

Sweet and Spicy: The balance of jellied cranberry sauce and chili sauce creates an irresistible flavor combination that will have your guests raving.

Versatile Serving Option: Serve them as an appetizer, main dish, or party snack—you can even keep them warm in a slow cooker while mingling.

Crowd-Pleasing Appeal: With flavors that appeal to both traditionalists and adventurous eaters, these meatballs are bound to become a family favorite.

Minimal Ingredients: With only five main ingredients, you won’t break the bank or stress over the shopping list. If you love simple yet delicious options, check out our popular holiday appetizers.

Christmas Cranberry Meatballs Ingredients

For the Sauce

  • Jellied cranberry sauce – A key element that brings sweetness and festive flavor; feel free to use homemade if you have it!
  • Chili sauce – Adds a punch of heat and depth; a great pairing with the cranberry for that sweet and spicy harmony.
  • Brown sugar – Enhances the sweetness of the sauce; you can substitute with honey or maple syrup for a different twist.
  • Garlic powder – Brings in savory notes to balance the sweet flavors; fresh minced garlic works too, just adjust to taste.
  • Black pepper – A little kick to round out the flavors; freshly ground pepper will elevate the dish even more.

For the Meatballs

  • Frozen pre-cooked meatballs – Use beef or turkey for your preferred taste; this saves time and ensures a no-fuss meal!

With these delightful ingredients at hand, you’re set to create Christmas Cranberry Meatballs that will enchant your holiday gatherings!

Step‑by‑Step Instructions for Christmas Cranberry Meatballs

Step 1: Prepare the Sauce
In a large skillet or saucepan, combine the jellied cranberry sauce, chili sauce, brown sugar, garlic powder, and black pepper. Heat the mixture over medium heat, stirring constantly for about 5 minutes, or until the sauce is smooth and starts to bubble. You’ll know it’s ready when the ingredients are well blended and fragrant—this is the heart of your Christmas Cranberry Meatballs!

Step 2: Add the Meatballs
Once your sauce is bubbling, stir in the frozen pre-cooked meatballs, making sure they are evenly coated with the luscious sauce. Reduce the heat to medium-low and cover the skillet. Let the meatballs simmer for 15–20 minutes, stirring occasionally, until they are heated through and the sauce thickens. Look for the meatballs to be steaming hot and well-saturated in the sauce.

Step 3: Serve and Garnish
After the meatballs have reached the perfect internal temperature, transfer them to a serving bowl. For an extra touch of festive flair, you can keep them warm in a slow cooker set to low. If desired, garnish your Christmas Cranberry Meatballs with freshly chopped parsley or rosemary to add a pop of color and a hint of freshness—perfect for holiday gatherings!

Christmas Cranberry Meatballs

Expert Tips for Christmas Cranberry Meatballs

  • Perfect Sauce Consistency: Ensure your sauce is fully smooth before adding the meatballs; lumps can affect the meatball coating and overall flavor.

  • Meatball Variations: Feel free to mix and match meatball types! Chicken or plant-based options can add a fun twist to your Christmas Cranberry Meatballs.

  • Taste as You Go: Always taste your sauce after combining the ingredients to adjust sweetness or heat; a pinch more of garlic can elevate the overall profile.

  • Slow Cooker Bonus: If serving at a party, transfer your meatballs to a slow cooker on warm; it keeps them deliciously hot while you socialize and enjoy the festivities.

  • Avoid Overcooking: Keep an eye on the simmer time; overcooking can lead to dry meatballs, so stir occasionally to maintain moisture.

Christmas Cranberry Meatballs Variations

Feel free to mix it up and tailor these delightful meatballs to suit your taste and dietary needs!

  • Gluten-Free: Use gluten-free meatballs and double-check your chili sauce ingredients to make this dish safe for gluten-sensitive guests.

  • Spicy Twist: Incorporate diced jalapeños or a splash of hot sauce for a zesty kick that elevates the flavor profile. The added heat can create an exciting contrast to the sweetness.

  • Vegan: Substitute frozen tofu or veggie meatballs for a plant-based option, and ensure your sauces are vegan-friendly for a crowd-pleasing dish.

  • Herb-Infused: Toss in fresh herbs like thyme or rosemary in the sauce for an aromatic twist that intertwines beautifully with the sweet and spicy elements.

  • Maple Sweetness: Swap out the brown sugar for maple syrup for a deeper, natural sweetness that pairs delightfully with the cranberry flavor.

  • Savory Addition: Add sautéed onions or bell peppers to the sauce for an added depth. The subtle crunch brings a lovely texture to each bite!

  • Fruit Fusion: Mix in some chopped pineapple or orange zest for a bright, fruity flavor that complements the tartness of cranberry perfectly.

  • BBQ Option: For a different vibe, try replacing the chili sauce with your favorite BBQ sauce. It’s a delicious spin that brings a smoky flavor to the festive dish.

Feel free to explore these variations and find the perfect combination that makes your table shine during the holidays! If you’re looking for other festive recipes, be sure to check out our collection of easy holiday appetizers.

What to Serve with Quick Christmas Cranberry Meatballs

Imagine a festive dining table where delicious aromas intertwine, inviting everyone to gather and share delightful moments.

  • Creamy Mashed Potatoes: Their buttery texture perfectly complements the sweet and tangy notes of the meatballs, creating a comforting balance.
  • Garlic Bread: The crunchy exterior and warm garlic flavor contrast beautifully with the juicy meatballs, adding a delightful crunch.
  • Roasted Brussels Sprouts: These crispy greens lend a touch of earthiness, elevating your meal with an added layer of freshness and vibrancy.
  • Cranberry Sauce: Serve a side of homemade cranberry sauce to intensify the flavor, bringing out the festive spirit of the season.
  • Caesar Salad: Crisp romaine and tangy dressing provide a refreshing crunch that cuts through the richness of the meatballs, keeping the meal light.
  • Red Wine Spritzer: A chilly blend of red wine and soda is the perfect sip for balancing the meal’s savory notes, enhancing the overall experience.
  • Cheesy Garlic Knots: Soft and gooey on the inside, these knots can be dunked into the meatball sauce, making every bite a savory delight!
  • Fruit Salad: A mix of seasonal fruits adds a hint of sweetness and color, making your holiday table as festive as can be!
  • Chocolate Truffles: End the meal on a sweet note with rich chocolate truffles that are sure to leave your guests smiling and satisfied.

Make Ahead Options

These Christmas Cranberry Meatballs are perfect for meal prep enthusiasts who want to save time during the busy holiday season! You can prepare the sauce (jellied cranberry sauce, chili sauce, brown sugar, garlic powder, and black pepper) up to 24 hours in advance and refrigerate it in an airtight container. Simply heat the sauce on the stove when ready to cook the meatballs. The pre-cooked meatballs can also be thawed overnight in the refrigerator if frozen. When you’re ready to serve, heat the sauce and meatballs together for about 15-20 minutes, stirring occasionally, for a deliciously warm dish that is just as satisfying as freshly made!

How to Store and Freeze Christmas Cranberry Meatballs

Fridge: Store any leftover Christmas Cranberry Meatballs in an airtight container for up to 3 days. Ensure they are cooled before sealing to maintain optimal freshness.

Freezer: For longer storage, freeze the meatballs in a single layer on a baking sheet, then transfer to a freezer-safe bag. They’ll last up to 3 months!

Reheating: To reheat, thaw overnight in the fridge, then warm in a skillet over low heat or microwave until heated through. Add a splash of water or sauce to prevent drying.

Serving Tip: These meatballs are perfect for holiday gatherings; keep them warm in a slow cooker for easy serving!

Christmas Cranberry Meatballs

Christmas Cranberry Meatballs Recipe FAQs

What kind of meatballs should I use for Christmas Cranberry Meatballs?
Absolutely! I recommend using frozen pre-cooked meatballs for ease and convenience. Beef or turkey options work well, but feel free to use chicken or even plant-based meatballs if you prefer a different flavor profile. Just keep the cooking times in mind to ensure they’re heated through properly.

How do I store leftover Christmas Cranberry Meatballs?
Store any leftovers in an airtight container in the fridge for up to 3 days. Be sure they’ve cooled down completely before sealing to maintain their freshness. When you’re ready to enjoy them again, just reheat in a skillet or microwave until warm.

Can I freeze Christmas Cranberry Meatballs?
Certainly! To freeze, start by placing your meatballs in a single layer on a baking sheet and freeze them for about 1-2 hours. Once firm, transfer them to a freezer-safe bag. This way, they won’t stick together, and they’ll last up to 3 months. When you’re ready to enjoy, thaw overnight in the fridge before reheating.

What if I want to make the sauce ahead of time?
Very! You can prepare the sauce up to 3 days in advance. Simply combine the cranberry sauce, chili sauce, brown sugar, garlic powder, and black pepper as directed, let it cool, and store in an airtight container in the fridge. When ready, just warm it up and add the meatballs to finish off your Christmas Cranberry Meatballs.

Are Christmas Cranberry Meatballs pet-friendly?
Not directly! While the ingredients themselves aren’t toxic to pets, the sauce contains sugar and spices that can upset their stomachs. It’s best to keep the meatballs strictly for human consumption. If you want to treat your furry friend, you might consider cooking plain meatballs without added ingredients just for them.

What are some common issues when making Christmas Cranberry Meatballs?
One potential hurdle could be the sauce clumping. Ensure you stir the sauce thoroughly when combining the ingredients over medium heat until it’s completely smooth—about 5 minutes should do it. If you notice lumps, you can whisk it or blend for a quick fix. Another tip is to closely monitor the simmering time—overcooked meatballs could dry out, so aim for a light simmer for 15-20 minutes until they’re heated through.

Irresistible Christmas Cranberry Meatballs in Just 25 Minutes

Delightful Christmas Cranberry Meatballs bring sweet and tangy flavors to your festive gathering. Perfectly quick and easy to prepare!

  • skillet
  • serving bowl
  • Slow Cooker

For the Sauce

  • 1 can jellied cranberry sauce
  • 1 cup chili sauce (adds heat)
  • 1/4 cup brown sugar (can substitute with honey or maple syrup)
  • 1 teaspoon garlic powder (fresh minced garlic works)
  • 1/2 teaspoon black pepper (use freshly ground for better flavor)

For the Meatballs

  • 1 package frozen pre-cooked meatballs (beef or turkey)

Step-by-Step Instructions

  1. In a large skillet, combine the jellied cranberry sauce, chili sauce, brown sugar, garlic powder, and black pepper. Heat over medium, stirring for about 5 minutes until smooth.
  2. Stir in the frozen pre-cooked meatballs, coating them with the sauce. Reduce heat to medium-low and cover. Simmer for 15-20 minutes or until heated through and sauce thickens.
  3. Transfer meatballs to a serving bowl. Optionally, keep warm in a slow cooker and garnish with parsley or rosemary before serving.

For best results, ensure sauce is smooth before adding meatballs. Consider using different types of meatballs for variations.

Appetizer
American
Christmas Cranberry Meatballs, easy dish, festive flavors, holiday appetizer, meatballs, quick recipe

Filed Under: Appetizer

Monster Muffins: Fun, Festive Treats for Halloween Mornings

October 15, 2025 by grace bellamy Leave a Comment

As I flipped through a stack of old pictures from last Halloween, I stumbled upon a snapshot of my kids, faces smeared with frosting, eagerly munching on green Monster Muffins. These whimsical treats are not just festive—they’re a magical way to kickstart the spooky season with a family-friendly breakfast that keeps everyone smiling. Halloween is the perfect excuse to get creative in the kitchen, and these muffins are a delightful blend of whole wheat goodness and fun! They pack in some surprise nutrition, so you can feel good about what your little goblins are devouring. Plus, they’re easy to whip up ahead of time, making your morning routine a breeze. Ready to treat your family to a breakfast that is as frightful as it is delightful? Let’s dive into these Monster Muffins and awaken the inner ghouls in your kitchen!

Monster Muffins

Why Are Monster Muffins a Must-Try?

Whimsical Fun: These muffins add a playful twist to your Halloween morning, ensuring smiles all around!

Nutritious Boost: Crafted with whole wheat flour, they bring nutrition without sacrificing taste—perfect for active kids!

Simple to Prepare: Quick and easy to make, these muffins are a breeze to whip up when you’re short on time.

Delightfully Decorative: Customize with googly eyes to create a visually striking treat that kids will love to help out with!

Versatile Variations: Feel free to swap ingredients based on your family’s preferences, making these muffins a hit for everyone!

Get even more festive with other Halloween Breakfast Ideas that will surely enchant your family, making your celebrations memorable!

Monster Muffin Ingredients

For the Muffins

  • Whole Wheat Flour – provides a nutritious base that keeps these treats hearty and wholesome.
  • Baking Powder – ensures your muffins rise beautifully, creating that fluffy texture.
  • Baking Soda – works with the baking powder to give your muffins an extra lift.
  • Salt – enhances the flavors, balancing out the sweetness.
  • Honey or Maple Syrup – adds natural sweetness and contributes to moisture for a delectable bite.
  • Eggs – binds the ingredients together and provides protein for that energy boost!
  • Milk (or Plant-Based Alternative) – keeps the mixture juicy, and can be swapped for almond milk or oat milk for dietary needs.
  • Green Food Coloring – creates that fun monster appearance; feel free to adjust for your desired hue.
  • Chocolate Chips or Googly Eyes – adds a whimsical touch that makes each muffin a delightful surprise!

For the Toppings

  • Frosting (optional) – use your favorite icing to enhance the festive look—let the kids help with this part!
  • Sprinkles – brighten up the muffins with colorful sprinkles for a fun, festive flair.

Embrace the Halloween spirit with these Monster Muffins that are as nutritious as they are fun! Get ready to see the smiles on your family’s faces as they enjoy these delightful morning treats!

Step‑by‑Step Instructions for Monster Muffins

Step 1: Preheat the Oven
Begin by preheating your oven to 350°F (175°C). This ensures an ideal baking environment for creating those fluffy Monster Muffins. While the oven heats up, gather all your ingredients, including whole wheat flour, honey or maple syrup, and chocolate chips. This will help streamline the mixing process later on.

Step 2: Combine Dry Ingredients
In a large mixing bowl, whisk together 2 cups of whole wheat flour, 2 teaspoons of baking powder, 1 teaspoon of baking soda, and ½ teaspoon of salt. Mixing these dry ingredients thoroughly will prepare the foundation for your Monster Muffins, ensuring consistent texture and even rising. Set the bowl aside as you prepare the wet ingredients.

Step 3: Mix Wet Ingredients
In a separate bowl, beat 2 eggs and combine them with ¾ cup of milk and ½ cup of honey or maple syrup. If you’re feeling adventurous, add a few drops of green food coloring at this stage for that monster-like hue! Whisk until everything is well blended, producing a smooth, colorful mixture to complement your dry ingredients.

Step 4: Combine Mixtures
Pour the wet mixture into the bowl of dry ingredients, then gently fold them together with a spatula. Aim for a batter with a few lumps—overmixing will result in dense muffins! As you fold, you can also stir in ½ cup of chocolate chips or googly eyes to make your Monster Muffins even more festive and fun.

Step 5: Prepare the Muffin Tin
Line a standard muffin tin with paper liners or lightly grease it with cooking spray. This will prevent your Monster Muffins from sticking and make cleanup a breeze. Use an ice cream scoop or ladle to fill each muffin cup about two-thirds full with batter, ensuring they have enough room to rise beautifully.

Step 6: Bake the Muffins
Place the muffin tin in your preheated oven and bake for 18-20 minutes, or until the tops are golden brown and a toothpick inserted in the center comes out clean. Keep an eye on them towards the end to avoid over-baking. The delightful aroma of Monster Muffins should start wafting through your kitchen!

Step 7: Cool and Decorate
Once the muffins are baked, remove them from the oven and let them cool in the pan for 5 minutes. After that, transfer them to a wire rack to cool completely. This is the perfect moment to let your kids help decorate—add frosting and colorful sprinkles for an extra festive touch, making these Monster Muffins a visual treat!

Monster Muffins

How to Store and Freeze Monster Muffins

Room Temperature: Keep your Monster Muffins in an airtight container for up to 3 days to maintain their moisture and flavor while avoiding any staleness.

Fridge: For longer freshness, store the muffins in the refrigerator where they can last up to a week—just make sure they’re in a sealed container!

Freezer: To freeze, wrap each muffin individually in plastic wrap and then place them in a freezer-safe bag or container. They’ll stay delicious for up to 3 months.

Reheating: When ready to enjoy, thaw frozen muffins overnight in the fridge. For a warm treat, reheat in the microwave for about 20 seconds or in a toaster oven until warmed through.

What to Serve with Monster Muffins

These vibrant Monster Muffins are the perfect festive treat to start your Halloween morning with a smile and a bit of magic.

  • Spooky Spider Eggs: Hard-boiled eggs dressed up with olive “spiders” create a fun, protein-packed side that adds a savory note to the meal.
  • Ghostly Yogurt Parfaits: Layering vanilla yogurt with granola and berries mimics a ghostly apparition, making for a sweet and nutritious addition.
  • Witch Hat Waffles: Chocolate waffles shaped into hats topped with whipped cream bring an extra layer of whimsy that complements the muffins nicely.
  • Pumpkin Spice Overnight Oats: Creamy and sweet, these oats blend seamlessly with the monster theme while providing a wholesome option to fuel your day.
  • Bloody Berry Smoothies: This vibrant smoothie using mixed berries and beet juice adds a spooky touch—perfect for a Halloween brunch that kids will love!
  • Haunted Hash Browns: Shaped like ghosts, these crispy potatoes can serve as a crunchy, savory contrast to the sweet Monster Muffins.

Get creative with your Halloween breakfast and watch as your family revels in this delightful spread of ghoulish delights!

Tips for the Best Monster Muffins

Right Texture: Use whole wheat flour for a hearty muffin that’s both nutritious and fluffy. It’s essential for the perfect Monster Muffins.

Avoid Overmixing: When combining dry and wet ingredients, mix just until combined. Overmixing can lead to dense, heavy muffins instead of light and fluffy ones!

Perfect Baking Time: Keep an eye on the muffins as they bake. Start checking around 18 minutes to ensure they don’t dry out and stay moist and delicious.

Customize Toppings: Get creative with toppings! Let your kids sprinkle on the googly eyes and any decorations they fancy, making each muffin unique and special.

Store Properly: To maintain freshness, store leftover Monster Muffins in an airtight container. They can last for a few days and make for a quick breakfast treat!

Monster Muffins: Delightful Customizations

Feel free to explore a world of creativity while making your Monster Muffins, transforming them with fun and exciting twists!

  • Gluten-Free: Substitute whole wheat flour with a gluten-free blend for a safe and scrumptious option that everyone can enjoy.
  • Nut-Free: Use sunflower seed butter instead of nut-based spreads to eliminate allergens and ensure all little ghouls can dig in.
  • Add Fruit: Toss in some shredded zucchini or mashed banana to amplify moisture and introduce a touch of natural sweetness to your muffins.
  • Extra Spices: Enhance the flavor with spices like cinnamon or nutmeg, creating a warm and inviting aroma that fills your kitchen.
  • Protein Boost: Mix in a scoop of your favorite protein powder to sneak in some added nourishment for those energetic little monsters.
  • Choco Delight: Try dark chocolate chips or white chocolate pieces for a different flavor burst that will surprise and delight the taste buds.
  • Boo-tiful Icing: Top with lavender or purple frosting to add a touch of spooky elegance—perfect for impressing Halloween party guests!
  • Fun Shapes: Bake in whimsical muffin tins shaped like bats or pumpkins for an eye-catching presentation that doubles the fun!

Let your imagination roam wild and create your own version of these Monster Muffins. If you’re looking for even more fun ideas, be sure to check out other Halloween Breakfast Ideas—because every Halloween should start with a smile!

Make Ahead Options

These delightful Monster Muffins are perfect for meal prep enthusiasts looking to save time during the busy Halloween season! You can prepare the dry ingredients (2 cups of whole wheat flour, baking powder, baking soda, and salt) and store them in an airtight container up to 3 days in advance. Additionally, you can mix the wet ingredients (eggs, milk, honey or maple syrup, and green food coloring) and refrigerate them up to 24 hours before baking. When you’re ready to enjoy these spooky treats, simply combine the dry and wet mixtures, fold in the chocolate chips, bake them as directed, and you’ll have these tasty muffins just waiting to be gobbled up! This method keeps your muffins as fluffy and fun as freshly baked!

Monster Muffins

Monster Muffins Recipe FAQs

Can I use all-purpose flour instead of whole wheat flour?
Absolutely! While I recommend whole wheat flour for its nutritional benefits, you can substitute it with all-purpose flour. Just keep in mind that the texture may be slightly different, and you might want to adjust the amount of liquid as needed since all-purpose flour absorbs moisture differently.

How should I store leftover Monster Muffins?
To maintain their freshness, store your Monster Muffins in an airtight container at room temperature for up to 3 days. If you’d like them to last longer, the fridge is a good option where they can stay fresh for up to a week. Be sure they are sealed well to prevent them from drying out!

Can I freeze Monster Muffins? What’s the best way to do it?
Yes, you can absolutely freeze them! To freeze your Monster Muffins, wrap each muffin individually in plastic wrap, then place them in a freezer-safe zip-top bag. They’ll keep well for up to 3 months. When you’re ready to enjoy them, just thaw them overnight in the fridge. For a cozy treat, reheat in the microwave for about 20 seconds or in a toaster oven.

How can I make these muffins gluten-free?
To make gluten-free Monster Muffins, substitute the whole wheat flour with a 1:1 gluten-free baking flour blend. Make sure to check that the other ingredients, especially the baking powder and any additives, are gluten-free as well. This way, everyone can enjoy these festive treats!

What can I use instead of eggs?
If you’re looking to make your Monster Muffins egg-free, you can substitute each egg with a flaxseed meal replacement. Simply mix 1 tablespoon of flaxseed meal with 2.5 tablespoons of water, let it sit for about 5 minutes to thicken, then add it to your wet ingredients. This will help bind everything together while keeping those monster vibes alive!

Monster Muffins: Fun, Festive Treats for Halloween Mornings

Delight your family with Monster Muffins, a fun and nutritious breakfast perfect for Halloween mornings.

  • Mixing Bowl
  • Muffin tin
  • Whisk
  • spatula
  • ice cream scoop

For the Muffins

  • 2 cups whole wheat flour (provides a nutritious base)
  • 2 teaspoons baking powder (ensures muffins rise beautifully)
  • 1 teaspoon baking soda (works with baking powder)
  • 0.5 teaspoon salt (enhances flavors)
  • 0.5 cups honey or maple syrup (for sweetness and moisture)
  • 2 large eggs (binds ingredients together)
  • 0.75 cups milk (or plant-based alternative) (keeps mixture juicy)
  • a few drops green food coloring (for monster appearance)
  • 0.5 cups chocolate chips or googly eyes (adds a whimsical touch)

For the Toppings

  • frosting (optional) (for festive look)
  • sprinkles (for fun, colorful flair)

Step-by-Step Instructions for Monster Muffins

  1. Preheat your oven to 350°F (175°C) and gather all ingredients.
  2. In a large bowl, whisk together whole wheat flour, baking powder, baking soda, and salt.
  3. In a separate bowl, beat eggs and combine with milk and honey or maple syrup. Add green food coloring if desired.
  4. Pour the wet mixture into the dry ingredients and fold them together gently.
  5. Line a muffin tin with paper liners and fill each cup 2/3 full with batter.
  6. Bake for 18-20 minutes or until golden brown and a toothpick comes out clean.
  7. Cool in the pan for 5 minutes, then transfer to a wire rack and let kids help decorate with frosting and sprinkles.

These muffins are not only fun but also nutritious, packed with whole grains and the chance to get creative with toppings.

Breakfast
American
easy muffins, festive treats, Halloween breakfast, Kid-Friendly Recipes, Monster Muffins, Wholesome Baking

Filed Under: Breakfast

Delightful Candy Cane Cookies for a Festive Treat

October 15, 2025 by grace bellamy Leave a Comment

The sweet aroma of peppermint wafted through the air as I tackled a new holiday baking project—Candy Cane Cookies. These whimsical cookies not only bring festive cheer to any gathering but also offer a delightful break from mundane fast food. With just 30 minutes of your time, you’ll create a delightful batch that’s perfect for sharing or savoring solo. Plus, the colorful twist of red and white makes them visually stunning and ideal for any holiday treat table. It’s fun watching friends and family marvel at the creativity of these simple yet elegant confections. Are you ready to bring a touch of the magic of the season into your kitchen?

Candy Cane Cookies

Why Are Candy Cane Cookies So Special?

Festive Appeal: These Candy Cane Cookies are the quintessential holiday treat, bringing a cheerful vibe to every gathering.

Quick and Easy: In just 30 minutes, you can whip up a batch, making it perfect for busy holiday schedules.

Delightful Flavor: The peppermint and vanilla flavors blend seamlessly, offering a nostalgic taste that will transport you straight to winter wonderlands.

Visually Stunning: The vibrant red and white twists make them a showstopper on any dessert table, enticing everyone to grab one (or two!).

Perfect for Sharing: These cookies are an ideal treat for gifting and cookie exchanges, allowing you to spread joy without much fuss.

Get ready to impress your loved ones with flavors inspired by festive cheer and creativity—all while keeping it simple! Don’t forget to check out our other holiday favorites for more inspiration!

Candy Cane Cookies Ingredients

A festive treat that brightens your holiday!

For the Dough

  • Unsalted butter – this gives your cookies that rich, creamy flavor.
  • Powdered sugar – create a light and tender texture with this sweet touch.
  • Large egg – use a room temperature egg for a smoother batter.
  • Vanilla extract – a classic flavor that pairs perfectly with peppermint.
  • Peppermint extract – essential for that unmistakable Candy Cane Cookies taste.
  • All-purpose flour – the base of your dough, providing structure.
  • Salt – a pinch enhances the sweetness and balances flavors.

For Coloring

  • Red food coloring – gel is preferred for a vibrant, festive hue that doesn’t alter texture.

Get ready to create these charming cookies that will delight both your taste buds and your loved ones!

Step‑by‑Step Instructions for Candy Cane Cookies

Step 1: Preheat and Prepare
Begin by preheating your oven to 375°F (190°C). While the oven warms up, line two baking sheets with parchment paper to ensure a smooth release of your cookies later. This step creates a non-stick environment for the delightful Candy Cane Cookies as they bake to perfection.

Step 2: Cream the Butter and Sugar
In a large mixing bowl, combine 1 cup of softened unsalted butter and 1 cup of powdered sugar. Using an electric mixer, beat them together on medium speed for about 3–4 minutes until the mixture is fluffy and light in color. This aeration is crucial for achieving the tender texture that these cookies are known for.

Step 3: Add Wet Ingredients
Next, crack one large room temperature egg into the mixture along with 1 teaspoon of vanilla extract and ½ teaspoon of peppermint extract. Continue mixing until all ingredients are fully incorporated, and the batter is smooth. You’ll notice the delightful aroma of peppermint begins to fill your kitchen, signaling you’re on the right track to making delicious Candy Cane Cookies.

Step 4: Blend in Dry Ingredients
Gradually add 2½ cups of all-purpose flour and ½ teaspoon of salt to the wet mixture. Use a spatula or wooden spoon to combine the ingredients until a soft dough forms that’s not sticky. This will take just a couple of minutes, and the dough should hold together but remain soft and workable, ready to be shaped into festive forms.

Step 5: Divide and Color the Dough
Once your dough is ready, divide it in half. Take one half and add red food coloring, mixing until you achieve a vibrant red hue. Be sure to use gel coloring for the best results without altering the dough’s texture. Now you have the two colors needed to create your beautiful Candy Cane Cookies!

Step 6: Shape the Cookies
Roll 1 teaspoon of each color dough into 4-inch ropes with your hands. Gently twist one red and one white rope together, then shape them into the classic candy cane form. This step is where the creative fun happens, and you can play around with the shapes to your heart’s content!

Step 7: Bake the Cookies
Place the shaped Candy Cane Cookies onto the lined baking sheets, ensuring they are spaced apart to allow for spreading. Bake them in the preheated oven for 8–10 minutes, or until the bottoms are lightly golden. As they bake, you will admire their festive colors transforming in the oven.

Step 8: Cool and Serve
After baking, allow the cookies to cool on the baking sheet for about 5 minutes. This resting period helps them firm up, making them easier to transfer. Once cooled, enjoy your delightful Candy Cane Cookies—perfect for sharing with family and friends or perhaps savoring one (or a few) by yourself!

Candy Cane Cookies

Candy Cane Cookies Variations & Substitutions

Feel free to get creative with your Candy Cane Cookies and make them uniquely yours!

  • Gluten-Free: Substitute all-purpose flour with a gluten-free blend for a cookie that’ll please everyone.
  • Butter Substitution: Use coconut oil or vegan butter for a dairy-free version without sacrificing flavor.
  • Minty Boost: Add crushed peppermint candies or chocolate chips to the dough for extra crunch and sweetness.
  • Shape Variation: Roll the dough into balls and flatten them, creating fun, festive cookie shapes instead of the traditional candy canes.
  • Spiced Up: Incorporate a pinch of cinnamon or nutmeg to add a warm, cozy flavor that pairs perfectly with peppermint.
  • Colorful Twists: Use green or blue food coloring instead of red for vibrant, holiday-themed cookie variations.
  • Peppermint Swirl: Swirl the red and white dough together before shaping to create a beautiful marbled effect.
  • Adjust Sweetness: For a less sugary cookie, reduce the powdered sugar by 1/4 cup and use a touch of maple syrup instead.

Get inspired to explore different options and turn these festive treats into unique delights! If you’re looking for more holiday baking ideas, be sure to check out our scrumptious Holiday Sugar Cookies and add a touch of tradition to your festive gatherings!

Make Ahead Options

These Candy Cane Cookies are perfect for meal prep enthusiasts looking to save time during the busy holiday season! You can prepare the cookie dough up to 24 hours in advance. Simply complete steps 1 through 4, then wrap the dough tightly in plastic wrap and refrigerate. This keeps the dough fresh and prevents it from drying out. When it’s time to bake, take the dough out, let it sit at room temperature for about 10 minutes, then proceed with steps 5 through 8, shaping and baking them right before serving. You’ll have delicious, festive cookies just as delightful as if made on the spot, without the last-minute rush!

Helpful Tricks for Candy Cane Cookies

Perfect Dough Consistency: Ensure your dough is soft but not sticky; adding flour slowly helps achieve the right texture for your Candy Cane Cookies.

Room Temperature Ingredients: Using room temperature egg and butter aids in better mixing and a smoother dough, enhancing the overall flavor.

Watch the Baking Time: Keep an eye on the cookies as they bake! Overbaking can lead to dry cookies, so look for lightly golden bottoms.

Food Coloring Tips: Use gel food coloring for vibrant results without affecting the dough’s texture. Start with a small amount and adjust until desired shade is reached.

Cooling Time Matters: Allow the cookies to cool on the baking sheet for at least 5 minutes before transferring them to a wire rack; this ensures they set properly.

Share Your Creations: These Candy Cane Cookies make wonderful gifts! Consider decorating with festive sprinkles for an extra special touch when sharing.

What to Serve with Candy Cane Cookies

Baking these delightful cookies creates an aroma that fills your home with warmth and festive cheer, making every bite a joyful experience.

  • Rich Hot Chocolate: A cup of creamy hot chocolate perfectly complements the peppermint flavors, enhancing that cozy winter feeling. Imagine curling up with a warm drink and a few cookies—pure bliss!

  • Classic Eggnog: Indulge in this traditional holiday drink, which offers a creamy, spiced contrast to the sweet crispness of the cookies. The nutmeg and vanilla notes in eggnog make each bite of cookie even more delightful.

  • Peppermint Bark: This sweet treat echoes the peppermint in your Candy Cane Cookies, creating a harmonious flavor experience. Serve them together for a festive platter that’s sure to impress!

  • Vanilla Ice Cream: A scoop of vanilla ice cream adds a creamy texture that balances the cookies’ sweetness. The cold, velvety ice cream against the warm, soft cookies is a match made in dessert heaven!

  • Sparkling Cranberry Juice: This refreshing drink offers a tart counterpoint to the sweetness of the cookies while providing a festive sparkle to your meal. It’s a delightful non-alcoholic option for all ages.

  • Festive Fruit Salad: A bright mix of fresh fruits brings a vibrant, refreshing contrast against the rich flavors of the cookies. Choose seasonal fruits like oranges and pomegranates for a pop of color!

Layer your holiday gathering with these enticing pairings, and watch as everyone savors the magic of the season, one delicious bite at a time!

How to Store and Freeze Candy Cane Cookies

Room Temperature: Store your Candy Cane Cookies in an airtight container at room temperature for up to 3 days to maintain their freshness.

Fridge: If you prefer a longer shelf life, refrigerate the cookies in an airtight container for up to a week. This keeps them moist and adds a refreshing chill.

Freezer: These cookies freeze beautifully! Wrap each cookie in plastic wrap and place them in a freezer bag for up to 3 months. Thaw at room temperature before enjoying.

Reheating: For a warm treat, reheat the cookies in the oven at 350°F (175°C) for about 3-5 minutes, bringing back their delightful taste and aroma!

Candy Cane Cookies

Candy Cane Cookies Recipe FAQs

What should I look for when selecting ingredients for Candy Cane Cookies?
Absolutely! Choose unsalted butter that’s softened to room temperature for the best texture. When selecting peppermint extract, look for quality brands to avoid a bitter flavor. If using food coloring, gel is preferred as it delivers a vibrant hue without altering the dough’s consistency.

How should I store my Candy Cane Cookies once they’re baked?
Very simply! Store your cookies in an airtight container at room temperature for up to 3 days. If you’d like them to last longer, refrigerate them for up to a week in the same type of container to maintain moisture. Just remember to keep them sealed!

Can I freeze Candy Cane Cookies, and how do I do it?
Absolutely! These cookies freeze exceptionally well. Wrap each one individually in plastic wrap, then place them in a freezer-safe bag or container. They can last up to 3 months in the freezer. When you’re ready to enjoy them, simply let them thaw at room temperature for a quick and easy treat!

What should I do if my Candy Cane Cookies are too sticky to shape?
Don’t worry! If your dough feels sticky, sprinkle a little extra flour onto your work surface and knead it gently until the dough is manageable. Alternatively, refrigerate the dough for about 30 minutes to firm it up, making it easier to roll and shape into cute candy canes.

Are Candy Cane Cookies safe for pets?
No, it’s best to avoid sharing these cookies with pets. The ingredients like peppermint extract and sugar are not suitable for dogs or cats and can upset their stomachs. Stick to pet-friendly treats for your furry friends!

Can I modify the recipe for allergies?
Yes, you certainly can! For a gluten-free alternative, substitute all-purpose flour with a 1:1 gluten-free baking blend. You can also replace the egg with a flaxseed egg (1 tablespoon ground flaxseed + 2.5 tablespoons water, mixed and rested for 5 minutes) for a vegan option. Enjoy your baking adventures safely!

Delightful Candy Cane Cookies for a Festive Treat

Indulge in these delightful Candy Cane Cookies, perfect for adding a festive touch to any gathering and treat table.

  • Mixing Bowl
  • Electric mixer
  • Baking sheets
  • parchment paper
  • spatula

For the Dough

  • 1 cup unsalted butter (softened)
  • 1 cup powdered sugar
  • 1 large egg (room temperature)
  • 1 teaspoon vanilla extract
  • 0.5 teaspoon peppermint extract
  • 2.5 cups all-purpose flour
  • 0.5 teaspoon salt

For Coloring

  • 1 drop red food coloring (gel preferred)

Step-by-Step Instructions

  1. Preheat your oven to 375°F (190°C) and line two baking sheets with parchment paper.
  2. In a large mixing bowl, combine the softened unsalted butter and powdered sugar. Beat together using an electric mixer on medium speed for 3-4 minutes until fluffy.
  3. Add the egg, vanilla extract, and peppermint extract to the mixture and blend until smooth.
  4. Gradually mix in the all-purpose flour and salt until a soft, non-sticky dough forms.
  5. Divide the dough in half and add red food coloring to one half, mixing until vibrant.
  6. Roll 1 teaspoon of each color into 4-inch ropes and twist them together to shape them into candy cane forms.
  7. Place cookies on lined baking sheets and bake for 8-10 minutes until lightly golden.
  8. Let cookies cool on the sheet for about 5 minutes before transferring them to a wire rack.

Store in an airtight container at room temperature for up to 3 days, or refrigerate for a week. These cookies freeze well for up to 3 months.

Dessert
American
Baking recipes, Candy Cane Cookies, cookie exchange, festive desserts, holiday treats, peppermint cookies

Filed Under: Dessert

Ghostly Yogurt Parfaits to Haunt Your Breakfast Routine

October 15, 2025 by grace bellamy Leave a Comment

The aroma of cinnamon and pumpkin fills the air, instantly taking me back to cozy autumn mornings. As Halloween approaches, it’s the perfect time to whip up some delightful, spooky breakfasts that will enchant both kids and adults alike. Today, I’m excited to share my recipe for Ghostly Yogurt Parfaits—an irresistible combination of creamy vanilla yogurt, crunchy granola, and fresh berries topped with playful marshmallow ghosts. Not only are these parfaits a fun twist on your morning routine, but they’re also quick to prepare, making them ideal for busy mornings filled with excitement. Whether you’re hosting a Halloween brunch or simply want to delight your family with something special, these parfaits are sure to bring smiles all around. Ready to add a touch of whimsy to your breakfast table? Let’s dive into the magic of Halloween!

Ghostly Yogurt Parfaits

Why Love Ghostly Yogurt Parfaits?

Fun & Festive: These parfaits transform your breakfast into a spooky celebration, perfect for Halloween mornings.

Quick Prep: With minimal ingredients and steps, you’ll have an enchanting breakfast ready in no time, leaving you free to enjoy the festivities.

Nutritious & Wholesome: Combining creamy yogurt, crunchy granola, and fresh berries creates a balanced meal that pleases both kids and adults alike.

Customizable: Mix and match your toppings or layers for a unique twist every time. Try adding nuts, seeds, or your favorite seasonal fruits!

Family Bonding: Involve the kids in assembling their parfaits! It’s a delightful way to create family memories while diving into tasty treats—check out how to make it a fun family activity with our other Halloween recipes!

Ghostly Yogurt Parfait Ingredients

• Your spooky breakfast awaits with these simple ingredients.

For the Parfaits

  • Vanilla yogurt – A creamy base that balances the crunch of granola and the sweetness of berries.
  • Granola – Adds a delightful crunch, making every bite more enjoyable.
  • Fresh berries – Use your favorite seasonal berries for vibrant color and natural sweetness.
  • Mini marshmallows – Perfect for creating the ghostly figure on top of your parfaits.

Optional Toppings

  • Honey or maple syrup – Drizzle on top for an extra touch of sweetness.
  • Chopped nuts – Sprinkle some for added texture and healthy fats.
  • Pumpkin spice – A pinch of this festive spice can enhance the fall flavors of your yogurt parfaits.

Unleash your creativity with these Ghostly Yogurt Parfaits that are sure to haunt your breakfast routine!

Step‑by‑Step Instructions for Ghostly Yogurt Parfaits

Step 1: Prepare Your Ingredients
Begin by gathering all your ingredients for the Ghostly Yogurt Parfaits: creamy vanilla yogurt, crunchy granola, fresh berries, and mini marshmallows. Rinse your berries thoroughly under cool water and pat them dry with a paper towel. Use a medium bowl to keep your yogurt and granola ready for layering as you prepare to assemble your delightful parfaits.

Step 2: Layer the Yogurt
In a tall glass or a clear cup, spoon in about a third of your vanilla yogurt, filling it halfway. Use a spatula or the back of the spoon to smooth the top, creating a flat surface for your next layer. The yogurt should be creamy and luscious, ready to be topped with delectable granola. This creates the perfect base for your Ghostly Yogurt Parfaits.

Step 3: Add the Granola
Sprinkle a generous layer of granola over the smooth yogurt; this will add a delightful crunch to your parfait. Be sure to cover the yogurt entirely for a balanced texture. Here, you can use about a quarter of your granola, depending on your preference for crunchiness. The granola’s golden color will contrast beautifully with the white yogurt, enhancing the visual appeal.

Step 4: Layer the Berries
Now it’s time to amp up the flavor with fresh berries! Add a handful of vibrant berries on top of the granola, creating a colorful layer that is both tasty and nutritious. Use a mix of strawberries, blueberries, or raspberries to make your parfait pop with colors that are perfect for Halloween festivities. Aim for a nice even spread across the top.

Step 5: Create the Ghostly Toppers
To transform your parfaits into spooky treats, finish with a few mini marshmallows on top, arranging them to look like ghostly figures. Make sure to use at least two or three marshmallows per parfait for a fun effect. You can even use a chocolate chip to create eyes on each marshmallow for an extra playful touch that ties into the Halloween theme.

Step 6: Optional Sweetening
If you prefer a sweeter contrast, drizzle a little honey or maple syrup over the marshmallow ghosts. This step not only adds a touch of sweetness but also gives your Ghostly Yogurt Parfaits an extra layer of flavor that complements the fruit and yogurt beautifully. Take a moment to appreciate the enchanting look of your assembled parfaits before serving.

Step 7: Serve and Enjoy
Once you’ve created your spectacular Ghostly Yogurt Parfaits, serve them immediately as a whimsical breakfast treat! Display them on a festive Halloween table, where everyone can admire the beautiful layers and ghostly toppings. These parfaits can also be prepped in advance, just make sure to add the marshmallows right before serving for that fresh, fluffy look!

Ghostly Yogurt Parfaits

Variations & Substitutions for Ghostly Yogurt Parfaits

Feel free to unleash your creativity and make these parfaits truly yours with these fun modifications!

  • Dairy-Free: Substitute regular yogurt with almond or coconut yogurt for a deliciously creamy vegan option.
  • Nut-Free: If allergies are a concern, swap granola for puffed rice or seeds for a delightful crunch without nuts.
  • Extra Sweet: Add a layer of honey-sweetened fruit compote between the yogurt and granola for a burst of flavor.
  • Crunchy Toppings: Mix in some chopped nuts or seeds to the granola for added protein and a satisfying crunch. A blend of flavors adds a lovely surprise in each bite!
  • Spicy Twist: Sprinkle cinnamon or pumpkin spice into the yogurt for a warm touch that tantalizes your taste buds during the Halloween season. It’s an unexpected yet delightful twist!
  • Berry Blast: Use any seasonal fruits like sliced bananas or diced peaches alongside the berries to create a fruity medley. Enjoy the variety and let your palate dance with excitement!
  • Syrupy Goodness: Drizzle chocolate or caramel sauce over the top for an indulgent treat that’s hard to resist. This will enchant both little monsters and big kids alike!
  • Frozen Delight: Freeze the yogurt mixture into popsicle molds for a cool Halloween treat that’s perfect for warm autumn afternoons. The kids will love these ghostly snacks on a stick!

Explore these exciting options and create your own spooky masterpieces. Why not also try them alongside our other Halloween recipes for even more festive fun?

Tips for the Best Ghostly Yogurt Parfaits

  • Yogurt Texture: Use full-fat or Greek yogurt for a creamier consistency that perfectly contrasts the granola’s crunch in your Ghostly Yogurt Parfaits.

  • Berry Selection: Choose a mix of berries for color and flavor; freezing your berries slightly can help them hold their shape when layered.

  • Marshmallow Positioning: Space out the mini marshmallows to create a more dynamic ghostly effect. Don’t forget to add chocolate chips for the eyes!

  • Granola Crunch: Keep excess granola on the side if preparing in advance; add it just before serving to maintain its delightful crunch.

  • Sweetness Adjustment: Consider the sweetness of your chosen yogurt and berries. Adjust the honey or syrup accordingly to achieve your perfect flavor balance.

  • Kid-Friendly Fun: Let the kids personalize their parfaits by choosing their toppings and layering them. This makes breakfast interactive and exciting!

How to Store and Freeze Ghostly Yogurt Parfaits

Fridge: Keep your assembled Ghostly Yogurt Parfaits in the refrigerator for up to 2 days. Cover them with a lid or plastic wrap to maintain freshness and prevent the yogurt from absorbing other odors.

Prepping in Advance: You can prepare the yogurt and granola separately and store them in airtight containers. Layer them with fresh berries and marshmallows just before serving to achieve the best texture.

Freezer: For a fun twist, you can freeze the yogurt (without granola) in ice cube trays. Blend these frozen yogurt cubes into smoothies later! However, avoid freezing the whole parfait, as the texture may change.

Reheating: These parfaits are best enjoyed cold, so there’s no reheating necessary! Serve straight from the fridge for a refreshing breakfast treat.

What to Serve with Ghostly Yogurt Parfaits

Embrace the spirit of Halloween with a whimsical breakfast spread that brings flavor, fun, and festivity to your table.

  • Spooky Smoothies: Blend ripe bananas, cocoa, and almond milk for a creamy drink that brings a playful twist to your morning, especially with a Halloween-themed presentation!

  • Monster Toast: Spread creamy avocado on whole-grain toast, topped with cute veggies to create little monster faces. It’s nutritious, colorful, and adds a crunchy texture.

  • Pumpkin Spice Muffins: These moist muffins enhance the seasonal flavor of pumpkin while providing a soft, sweet addition to your breakfast that everyone will adore.

  • Creepy Crawly Cinnamon Rolls: Add a touch of fun with rolls decorated with icing and gummy worms, making the perfect treat alongside your parfaits for a sweet surprise!

  • Witch’s Brew Hot Chocolate: A rich and creamy hot chocolate presented in a whimsical cup can warm up the chilly autumn mornings and complement the yogurt’s freshness perfectly.

  • Festive Fresh Fruit Platter: A colorful array of seasonal fruits will not only brighten up your breakfast table but also provide a refreshing contrast to the sweet flavors of the parfaits.

  • Chilling Chai Latte: The spicy warmth of a chai latte will harmonize beautifully with the creamy and fruity flavors of your parfaits, offering a cozy drink to sip alongside.

Each of these delightful additions enhances the magic of your Ghostly Yogurt Parfaits, creating a memorable Halloween breakfast that the whole family will enjoy!

Make Ahead Options

Ghostly Yogurt Parfaits are a fantastic option for meal prep, saving time on busy mornings! You can prepare the yogurt and granola layers up to 3 days in advance. Simply store the yogurt in an airtight container in the refrigerator, and keep the granola in a separate container to maintain its crunch. Fresh berries can be washed and cut a day ahead; just refrigerate them in a sealed bag. When it’s time to serve, layer the yogurt and granola, and top with berries and marshmallow ghosts for a delightful presentation. This way, you’ll enjoy a quick, delicious breakfast that feels fresh and festive with minimal effort!

Ghostly Yogurt Parfaits

Ghostly Yogurt Parfaits Recipe FAQs

What type of yogurt should I use for Ghostly Yogurt Parfaits?
Absolutely! For the best texture and flavor, I highly recommend using full-fat or Greek yogurt, as they create a creamier consistency that contrasts beautifully with the crunch of granola.

How long can I store Ghostly Yogurt Parfaits in the fridge?
You can keep your assembled Ghostly Yogurt Parfaits in the refrigerator for up to 2 days. Just be sure to cover them with a lid or plastic wrap to maintain freshness and prevent any unwanted odors from the fridge.

Can I prepare the ingredients in advance?
Very! To save time in the morning, you can prepare the yogurt and granola separately. Store them in airtight containers, and layer them with fresh berries and marshmallows just before serving to keep everything fresh and delightful.

Is it possible to freeze Ghostly Yogurt Parfaits?
I recommend against freezing the entire parfait, as the texture may change. However, a fun twist is to freeze the yogurt (without granola) in ice cube trays. You can blend the frozen yogurt cubes later into smoothies for a deliciously creamy treat!

What are some popular alternatives for toppings?
Great question! You can mix and match your toppings to suit your taste. Consider adding chopped nuts for extra crunch, or try seasonal fruits like slices of banana or apple. You can even sprinkle pumpkin spice for a seasonal twist!

Can these parfaits be enjoyed by kids with allergies?
Absolutely! When making Ghostly Yogurt Parfaits, ensure that the yogurt and granola are allergy-friendly and free from nuts or other allergens as needed. There are many brands that offer nut-free and gluten-free options to cater to various dietary needs.

Ghostly Yogurt Parfaits to Haunt Your Breakfast Routine

These Ghostly Yogurt Parfaits are a spooky and delightful breakfast that blends creamy yogurt, crunchy granola, and fresh berries, perfect for Halloween.

  • tall glasses or clear cups

For the Parfaits

  • 4 cups vanilla yogurt (creamy base)
  • 2 cups granola (for crunch)
  • 2 cups fresh berries (seasonal varieties)
  • 1 cup mini marshmallows (for ghostly figures)

Optional Toppings

  • 1 tablespoon honey or maple syrup (for sweetness)
  • 0.5 cup chopped nuts (for added texture)
  • 1 teaspoon pumpkin spice (for fall flavor)

Preparation Steps

  1. Gather all ingredients: yogurt, granola, berries, and mini marshmallows. Rinse berries and pat dry.
  2. In a tall glass or clear cup, spoon in about one-third of your yogurt for the first layer.
  3. Sprinkle a generous layer of granola over the yogurt, covering it entirely.
  4. Add a handful of vibrant mixed berries on top of the granola.
  5. Finish with mini marshmallows arranged to look like ghostly figures.
  6. Optionally drizzle with honey or maple syrup for added sweetness before serving.
  7. Serve immediately for the best experience, displaying on a festive Halloween table.

To store, keep parfaits covered in the fridge for up to 2 days. Assemble with granola and marshmallows just before serving for best texture.

Dessert
American
easy recipes, fun breakfast, Ghostly Yogurt Parfaits, Halloween breakfast, Healthy Breakfast, spooky parfaits

Filed Under: Dessert

Delicious Strawberry and Chocolate Fudge Mice to Impress

October 15, 2025 by grace bellamy Leave a Comment

Stepping into my kitchen, I couldn’t help but notice an adorable sight that filled me with joy—these charming little Strawberry and Chocolate Fudge Mice! This unique dessert captures the whimsy of childhood while offering a deliciously sweet escape from the mundane. With just a few simple ingredients, you can whip up these delightful treats that are both a feast for the eyes and a crowd-pleaser at any gathering. The best part? They’re not just fun to make, but they’re also quick to prepare, with minimal fuss. And trust me, your loved ones will be enchanted by the delightful combination of strawberries and creamy fudge. How about surprising your friends with this playful treat? Let’s dive into the recipe!

Strawberry and Chocolate Fudge Mice

Why are these mice so delightful?

Whimsical designs: These adorable Strawberry and Chocolate Fudge Mice bring a fun twist to dessert-making, perfect for parties or family gatherings.
Quick prep: Ready in just over an hour, this recipe saves you time while delivering impressive results.
Crowd-pleaser appeal: Bright strawberries wrapped in rich fudge create a delightful contrast that everyone will love.
Versatile options: Feel free to customize with different toppings like nuts or sprinkles, making each mouse uniquely yours!
This is a sweet treat that truly stands out! If you’re looking for more fun dessert ideas, check out my collection of creative dessert recipes.

Strawberry and Chocolate Fudge Mice Ingredients

• Get ready to create these delightful treats!

For the Fudge

  • Sweetened condensed milk – the base for a creamy texture that binds everything together.
  • Cocoa powder – adds a rich, chocolatey flavor to the fudge.
  • Salted butter – enhances the taste and gives the fudge a smooth consistency.

For the Toppings

  • Grated chocolate or chocolate sprinkles – these add an extra layer of chocolatey goodness and visual appeal.
  • Strawberries – the star of the show! Choose fresh, ripe strawberries for the best flavor.
  • Roasted peanuts – serve as the perfect ears for your chocolate fudge mice; feel free to substitute with sliced almonds, sunflower kernels, or pine nuts for variation.
  • Colored shaped sprinkles – these bring a fun pop of color, making your mice even more whimsical!

With these simple ingredients, you’re just steps away from crafting your own Strawberry and Chocolate Fudge Mice that will surely impress your friends and family!

Step‑by‑Step Instructions for Strawberry and Chocolate Fudge Mice

Step 1: Prepare Your Workspace
Begin by greasing a large plate with butter or cooking spray, which will be the resting place for your Strawberry and Chocolate Fudge Mice. Set it aside while you gather your ingredients, allowing for a smooth workflow.

Step 2: Make the Fudge Mixture
In a medium heavy-bottomed pan, combine the sweetened condensed milk with sifted cocoa powder, mixing until smooth. Ensure the heat is off initially to combine these ingredients easily without cooking them.

Step 3: Cook the Fudge
Turn the heat to medium and add the salted butter to the mixture. Stir constantly for about 7 minutes—scraping the bottom and sides of the pan to prevent sticking—until the fudge begins to bubble gently around the edges.

Step 4: Thicken the Fudge
Once bubbling, reduce the heat and continue stirring until the mixture thickens, resembling a thick brownie batter. A visual cue is when the fudge pulls away from the sides and bottom of the pan, indicating it’s ready to be removed from the heat.

Step 5: Transfer and Cool
Immediately transfer the thickened fudge onto your greased plate. Spread it gently to help it cool off quickly. You can let it cool at room temperature or refrigerate it for about 15 minutes if you’re in a hurry to start shaping your Strawberry and Chocolate Fudge Mice.

Step 6: Prepare the Strawberries
Rinse and dry all strawberries thoroughly, removing the green leaves while keeping the cap intact. This step is crucial as the fresh strawberries are the star of your adorable treats!

Step 7: Shape the Mice
Wet your hands slightly to prevent sticking, then take a portion of the fudge and flatten it in your palm. Place a prepared strawberry in the center and close the fudge around it, rolling gently to create a smooth shape reminiscent of a mouse.

Step 8: Coat with Chocolate
Once shaped, roll your fudge-covered strawberry in either grated chocolate or chocolate sprinkles until it’s completely coated. This adds not just flavor but also a delightful visual appeal—making your Strawberry and Chocolate Fudge Mice even more irresistible.

Step 9: Add the Tail
Using a small amount of fudge, mold it into a cute tail shape and attach it to the back of your strawberry. This final touch brings your chocolate fudge mice to life, adding to their charming character.

Step 10: Create the Ears
Take a roasted peanut and carefully split it in half. Attach the halves to the sides of the fudge-covered strawberry, just where the “ears” should be, ensuring they hang off nicely for a whimsical effect.

Step 11: Finish with Features
Decorate your Strawberry and Chocolate Fudge Mice with circle-shaped sprinkles for the eyes and a small round sprinkle for the nose at the tip of the strawberry. These playful details will make your creations even cuter!

Step 12: Chill and Serve
Place the completed Strawberry and Chocolate Fudge Mice on a serving platter and refrigerate until you’re ready to serve. Keeping them chilled enhances the taste and presentation, making them a delightful treat for any gathering.

Strawberry and Chocolate Fudge Mice

Strawberry and Chocolate Fudge Mice Variations

Feel free to explore these delightful options that will add a personal touch to your adorable treats!

  • Nut-Free: Replace roasted peanuts with sliced almonds or sunflower kernels, making it safe for nut allergies.
  • Dairy-Free: For a vegan twist, use coconut condensed milk and dairy-free chocolate for the fudge.
  • Spicy Kick: Add a pinch of cayenne pepper to the fudge for a surprising heat that elevates the chocolate flavor.
  • Flavored Fudge: Incorporate a teaspoon of vanilla or almond extract into the fudge for an added layer of deliciousness.
  • Fruit Surprise: Swap out strawberries for fresh raspberries or blueberries. Each berry offers a unique taste and adds a pop of color!
  • Choco-Mint Mice: Mix in crushed peppermint candies into the fudge for a refreshing peppermint chocolate experience.
  • Fruity Topping: Top the fudge-coated mice with a touch of melted white chocolate and a sprinkle of toasted coconut for a tropical flair.
  • Mini Mice: Use smaller strawberries for bite-sized versions, perfect for parties or kids’ snacks that are just as fun!

These variations will keep your Strawberry and Chocolate Fudge Mice fresh and enjoyable, adding fun twists that your loved ones will adore! And if you feel adventurous, why not check out my scrumptious dessert recipes for even more inspiration?

Expert Tips for Strawberry and Chocolate Fudge Mice

• Use Fresh Strawberries: Make sure to select ripe, firm strawberries to ensure they hold up well when covered with fudge, enhancing your Strawberry and Chocolate Fudge Mice.

• Heat Control: When cooking the fudge, keep the heat at medium to avoid burning. Stir constantly to achieve a smooth, thick consistency without sticking to the pan.

• Cool Before Shaping: Allow the fudge to cool adequately before handling it. If it’s too warm, it may become sticky and difficult to shape around the strawberries.

• Customize Toppings: Get creative with toppings! Use different nuts or colored sprinkles to make each Strawberry and Chocolate Fudge Mice unique and visually appealing.

• Perfect Your Rolling Technique: Slightly wet your hands when rolling the fudge around the strawberries to prevent sticking, ensuring a neat finish for your adorable mice.

• Refrigerate for Best Results: Keep the assembled mice in the fridge until serving. This helps maintain their shape and makes them even more refreshing to eat!

How to Store and Freeze Strawberry and Chocolate Fudge Mice

Fridge: Store your Strawberry and Chocolate Fudge Mice in an airtight container in the fridge for up to 3 days to maintain their freshness and flavor.

Freezer: If you need to keep them longer, freeze the mice in a single layer on a baking sheet for 2 hours, then transfer them to a freezer-safe container. They will stay good for up to 2 months.

Thawing: To enjoy frozen fudge mice, simply transfer them to the fridge for several hours or overnight before serving, ensuring they maintain their delightful texture.

Reheating: These treats are best served chilled or at room temperature; avoid reheating them in the microwave, as it can cause the chocolate coating to melt.

Make Ahead Options

These delightful Strawberry and Chocolate Fudge Mice are perfect for meal prep enthusiasts looking to save time! You can prepare the fudge mixture and refrigerate it for up to 3 days; this not only allows the flavors to meld beautifully but also makes it easier to shape your mice when you’re ready to serve. Simply follow the cooking steps but allow the fudge to cool completely before storing it in an airtight container. When you’re ready, shape the fudge around the strawberries, add the finishing touches, and chill for about 15 minutes before serving to ensure they’re just as delicious as freshly made!

What to Serve with Strawberry and Chocolate Fudge Mice

Elevate the enjoyment of your delightful treats with these complimentary sides and snacks that bring together flavors and textures!

  • Vanilla Ice Cream: The creamy, cool contrast to the rich fudge is a match made in dessert heaven. A scoop of vanilla ice cream complements the sweetness of the mice and adds a refreshing element to every bite.

  • Fresh Berries Medley: A mix of blueberries, raspberries, and blackberries complements the strawberries with brightness and acidity. The tartness of the berries balances the sweetness, making each mouthful even more delightful.

  • Chocolate Drizzled Popcorn: Light and crunchy popcorn drizzled with chocolate offers a sweet and salty snack option. This unexpected pairing provides delightful texture contrast, making it fun for guests to munch alongside the fudge mice.

  • Whipped Cream: Light and airy whipped cream is perfect for dipping or dolloping alongside. It adds a fluffy texture, enhancing the overall dessert experience with each bite.

  • Fruit Skewers: Assemble colorful fruit skewers with melons, pineapple, and grapes for a refreshing palate-cleansing treat. The natural sweetness of the fresh fruit will beautifully balance the rich fudge flavor.

  • Mint Tea: A warm cup of mint tea offers a soothing beverage choice that refreshes the palate. The subtle herbal notes can enhance the overall experience, making it perfect for winding down after enjoying the sweet mice.

  • Chocolate Milk: Indulge in a classic favorite! Creamy chocolate milk delights kids and adults alike, making it a playful drink option that pairs splendidly with your Strawberry and Chocolate Fudge Mice.

These delectable additions create a fun and inviting atmosphere, ensuring your dessert spread is as delightful as it is delicious!

Strawberry and Chocolate Fudge Mice

Strawberry and Chocolate Fudge Mice Recipe FAQs

How do I choose ripe strawberries for this recipe?
Absolutely! When selecting strawberries, look for bright red, firm ones without dark spots or bruises. They should feel fresh and fragrant—the aroma is a great indicator of ripeness. If you can press gently and they yield slightly, they’re perfect for wrapping in fudge!

How should I store leftover fudge mice?
Very simple! Place your Strawberry and Chocolate Fudge Mice in an airtight container and store them in the fridge for up to 3 days. This method helps maintain their freshness and keeps them from drying out. Just be sure to layer them in a way that they don’t squish against each other.

Can these fudge mice be frozen?
Yes, indeed! To freeze your Strawberry and Chocolate Fudge Mice, first, lay them in a single layer on a baking sheet lined with parchment paper. Freeze for about 2 hours, then transfer them to a freezer-safe container or zip-top bag. They can be stored like this for up to 2 months. Just remember to label your container with the date!

What should I do if my fudge mixture is too thin?
Not to worry! If your fudge mixture seems too thin, continue cooking it over medium heat, stirring constantly, until it thickens. Look for it to pull away from the sides of the pan and mimic the thickness of brownie batter. If needed, you can also add a little extra cocoa powder to help thicken it; just keep stirring until combined well.

Are there any dietary considerations I should keep in mind?
Absolutely! Always check for allergies, especially with the toppings. For a nut-free version, you can replace peanuts with sunflower seeds or just use extra sprinkles. If you’re using chocolate, ensure it is dairy-free if you’re catering to someone with lactose intolerance. It’s always best to inform your guests what ingredients you used to keep everyone happy and safe!

Delicious Strawberry and Chocolate Fudge Mice to Impress

These charming Strawberry and Chocolate Fudge Mice are a delightful twist on dessert that will impress your guests and bring joy to any gathering.

  • medium heavy-bottomed pan
  • large plate

For the Fudge

  • 1 can sweetened condensed milk
  • 1/2 cup cocoa powder
  • 2 tablespoons salted butter

For the Toppings

  • 1/2 cup grated chocolate or chocolate sprinkles
  • 12 pieces strawberries (fresh and ripe)
  • 12 pieces roasted peanuts (split in half for ears)
  • 1/4 cup colored shaped sprinkles

Step‑by‑Step Instructions

  1. Prepare Your Workspace: Grease a large plate with butter or cooking spray.
  2. Make the Fudge Mixture: In a medium heavy-bottomed pan, combine sweetened condensed milk with sifted cocoa powder.
  3. Cook the Fudge: Turn on the heat and add salted butter; stir for about 7 minutes until bubbling.
  4. Thicken the Fudge: Reduce heat and stir until the mixture thickens like brownie batter.
  5. Transfer and Cool: Immediately transfer the fudge onto the greased plate and spread gently.
  6. Prepare the Strawberries: Rinse, dry, and remove green leaves from strawberries.
  7. Shape the Mice: Flatten fudge in palms around strawberries to form shapes.
  8. Coat with Chocolate: Roll fudge-covered strawberries in grated chocolate or sprinkles.
  9. Add the Tail: Mold fudge into a tail and attach it to the back of your strawberry.
  10. Create the Ears: Split peanuts and attach halves to the sides of the fudge-covered strawberry.
  11. Finish with Features: Add circle-shaped sprinkles for eyes and a small round sprinkle for the nose.
  12. Chill and Serve: Place on a platter and refrigerate until serving.

For best results, use fresh strawberries and refrigerate the completed mice before serving.

Dessert
American
chocolate, dessert, Fudge, mice, strawberry, treats

Filed Under: Dessert

Haunted Hash Browns: Spooky Crispy Delights for Halloween

October 15, 2025 by grace bellamy Leave a Comment

As I walked through the pumpkin patch last fall, a delightful idea struck me—why not bring that seasonal flair to breakfast? This Halloween, let’s put a spooky twist on our morning routine with Haunted Hash Browns! These crispy, golden delights offer a fun way to kickstart your day while channeling all the eerie excitement of Halloween. Not only are they a crowd-pleaser that both kids and adults will adore, but they’re also quick to whip up, making them the perfect solution for those busy holiday mornings. Trust me, when you see the smiles they bring to your breakfast table, you’ll want to make them a tradition. Are you ready to summon some festive culinary magic?

Haunted Hash Browns

Why are Haunted Hash Browns a must-try?

Crispy, Flavorful Base: These Haunted Hash Browns are crispy on the outside, tender on the inside, creating a perfect canvas for spooky toppings.

Eye-Catching Presentation: With a dash of creativity, you can transform ordinary hash browns into ghostly delights that will wow your guests!

Quick and Easy: In just a few simple steps, you can whip up these delicious treats, making mornings stress-free during the busy Halloween season.

Kid-Friendly Fun: Ideal for your little ghouls and goblins, these hash browns are not just food—they’re a reason to gather around the breakfast table.

Versatile Pairing: Serve them with your favorite toppings or alongside other Halloween breakfast ideas like Pumpkin Pancakes for a festive brunch experience that everyone will crave!

Tradition Awaits: Embrace the spirit of the season and start a new family tradition that will be cherished for years to come!

Haunted Hash Browns Ingredients

For the Hash Browns

  • Potatoes – Use starchy varieties like Russet for extra crispiness.
  • Onion – Adds a savory depth; consider using green onions for a pop of color.
  • Salt – Enhances the overall flavor; adjust according to taste.
  • Pepper – A touch of freshly cracked black pepper adds mild heat; feel free to omit if preferred.
  • Oil – Opt for vegetable or canola oil for frying; it ensures a perfect golden finish.

For the Spooky Garnishes

  • Cheese – Shredded mozzarella or cheddar can be melted on top for a haunted appearance.
  • Olives – Black olives sliced into spooky eyes for your hash browns; a fun touch kids will love!
  • Sour Cream – A dollop on top creates a ghostly effect; it pairs well with the savory flavors.

Embrace the Halloween spirit with these Haunted Hash Browns, and watch as your breakfast table transforms into a festive delight!

Step‑by‑Step Instructions for Haunted Hash Browns

Step 1: Prep the Potatoes
Begin by peeling and grating 2 large Russet potatoes into fine shreds, which will yield crispy Haunted Hash Browns. Place the grated potatoes in a bowl of cold water for about 10 minutes to remove excess starch, enhancing their crispiness. Drain the water, then pat the potatoes dry using a clean kitchen towel. This ensures that moisture doesn’t interfere with frying.

Step 2: Sauté the Onions
In a skillet, heat 2 tablespoons of vegetable oil over medium heat. Add half a chopped onion, sautéing for about 3-4 minutes until it becomes translucent and slightly browned. This step adds depth to the flavor of your Haunted Hash Browns. Once done, transfer the onions to a plate and set aside, allowing the skillet to retain the heat for frying.

Step 3: Fry the Hash Browns
Still on medium heat, return the skillet to the burner and add another tablespoon of oil. Once the oil shimmers, carefully add the grated potatoes in an even layer, pressing them down slightly. Cook for about 5-7 minutes until the bottom turns golden brown and crispy. Flip the potatoes using a spatula, adding another splash of oil if necessary to achieve that desirable crunch.

Step 4: Add Toppings
Once both sides of your Haunted Hash Browns are beautifully golden and crispy, sprinkle shredded cheese on top, allowing it to melt for about 2 minutes. The melted cheese not only enhances the flavor but also adds a spooky layer to your dish. You can also position sliced olives to create eerie eyes right away, transforming simple hash browns into festive creations.

Step 5: Plate and Serve
Carefully transfer the Haunted Hash Browns to a serving platter; you can use a spatula to maintain their crispy texture. Top with a dollop of sour cream for a ghostly effect, and sprinkle fresh herbs if desired. Present these delicious delights with a festive touch, ensuring your breakfast table is ready for the Halloween festivities.

Haunted Hash Browns

What to Serve with Haunted Hash Browns?

Elevate your Halloween breakfast experience with delightful pairings that celebrate the festive spirit and flavor!

  • Pumpkin Pancakes: These fluffy, spiced delights offer a warm, autumnal sweetness that beautifully contrasts the savory hash browns.
  • Ghostly Yogurt Parfaits: Layered with fruit and granola, these parfaits add a refreshing crunch and a splash of color, making your table extra festive.
  • Mummy Toast: Spooky and fun, this toast can be adorned with cheese and olives to complement the crispy texture of the hash browns, creating playful bites.
  • Crispy Bacon Strips: Their salty crunch pairs perfectly with the texture of the hash browns, adding a savory component that everyone loves.
  • Fruity Smoothies: Blend up some seasonal fruits for a refreshing drink that balances the hearty brunch, providing a deliciously light yet satisfying contrast.
  • Apple Cider Mimosa: Effervescent with a touch of fall flavor, this drink adds a sweet sparkle to your breakfast spread, celebrating the festive season.
  • Warm Cinnamon Apples: Served warm, these fragrant apples offer a sweet and spiced finish to your breakfast, livening up the savory hash browns.
  • Chocolate Ghost Cupcakes: End the meal on a sweet note with these adorable treats, as the chocolate pairs surprisingly well with the flavors of the hash browns.
  • Spooky Fruit Salad: A mix of seasonal fruits like pears and grapes adorned with ghostly marshmallows adds both color and a refreshing bite to the table.

Haunted Hash Browns: Creative Twists

Feel free to get playful and add your unique touch to these Haunted Hash Browns—let your creativity shine!

  • Sweet Potato: Swap regular potatoes for sweet potatoes for a hint of natural sweetness; their vibrant color adds a festive flair.

  • Herbed Variants: Toss in fresh herbs, like rosemary or thyme, to elevate the flavor and aroma, creating a fragrant morning delight.

  • Cheesy Surprise: Blend in different types of cheese like gouda or feta before frying; each offers a special flavor twist that will surprise your taste buds.

  • Spicy Kick: Add a pinch of cayenne pepper or chili flakes to the mixture; it brings a delightful heat that complements the crispy potatoes.

  • Vegan Delight: For a plant-based version, use olive oil and skip the cheese; top with avocado slices for a creamy, healthy finish.

  • Add Veggies: Dice bell peppers or spinach into your hash brown mix for a colorful and nutritious boost; it makes breakfast even more exciting.

  • Dusting Magic: Try a sprinkle of smoked paprika or garlic powder on top before serving; these flavors create a mouthwatering aroma that’s hard to resist.

  • Breakfast Bowl: Transform your hash browns into a hearty breakfast bowl by adding poached eggs, sautéed greens, and a drizzle of hot sauce for a fully loaded meal.

Each twist brings its own unique flavor and charm to the table, allowing these Haunted Hash Browns to be a canvas for your culinary creativity! To round out your spooky breakfast, consider pairing them with delicious favorites like Ghostly Yogurt Parfaits or a side of Mummy Toast to truly capture the spirit of Halloween!

Tips for the Best Haunted Hash Browns

Use Starchy Potatoes: Choosing starchy potatoes like Russet is crucial for that extra crispiness; avoid waxy potatoes which can become mushy.

Dry Thoroughly: After soaking the grated potatoes, ensure they’re completely dry before frying to prevent sogginess and achieve the perfect golden color.

Heat Control: Maintain a medium heat during frying; too high can burn the outside before cooking the inside, while too low will make your hash browns greasy.

Don’t Overcrowd: Fry in batches if making a large amount; overcrowding the skillet can lead to steaming instead of frying, compromising the desired crunchiness.

Creative Garnishes: Get creative with spooky garnishes—think outside the box! Use different toppings to enhance the festive look, making your Haunted Hash Browns eye-catching!

Make Ahead Options

These Haunted Hash Browns are a fantastic choice for meal prep, allowing you to enjoy a festive breakfast without the morning rush! You can grate the potatoes and store them in a bowl of water in the refrigerator for up to 24 hours to prevent browning. Additionally, sauté the onions and refrigerate them separately for the same timeframe, ensuring that they maintain their flavor and texture. When you’re ready to serve, simply drain the potatoes, pat them dry, and sauté with the pre-prepared onions before frying until golden brown. This way, you can deliver delicious Haunted Hash Browns with minimal effort and savor the smiles around your breakfast table while saving precious time during Halloween festivities!

How to Store and Freeze Haunted Hash Browns

Fridge: Store cooked Haunted Hash Browns in an airtight container for up to 3 days. Reheat in a skillet over medium heat to restore their crispiness.

Freezer: Freeze leftover Haunted Hash Browns in a single layer on a baking sheet before transferring to a freezer bag. They’ll stay fresh for up to 2 months!

Reheating: For best results, reheat frozen hash browns directly from the freezer in a hot skillet with a bit of oil. This keeps them crispy and delicious.

Make-ahead Tip: Prep and cook larger batches to save time on busy Halloween mornings, ensuring you have spooky treats ready to go!

Haunted Hash Browns

Haunted Hash Browns Recipe FAQs

How do I choose the right potatoes for Haunted Hash Browns?
Absolutely! For that perfect crispy texture, opt for starchy varieties like Russet potatoes. They provide the ideal base for your Haunted Hash Browns. Avoid waxy potatoes, such as red or new potatoes, as they can become mushy when cooked.

What is the best way to store leftover Haunted Hash Browns?
After enjoying your spooky breakfast, store any leftover Haunted Hash Browns in an airtight container in the fridge for up to 3 days. To reheat, simply place them in a skillet over medium heat, allowing them to regain their delicious crunch!

Can I freeze Haunted Hash Browns?
Yes, you can! To freeze your Haunted Hash Browns, first spread them in a single layer on a baking sheet. Freeze them until firm, then transfer to a freezer bag. They’ll keep well for up to 2 months. When you’re ready to enjoy them again, reheat straight from the freezer in a hot skillet with a little oil for that irresistible crispy texture.

What should I do if my hash browns turn out soggy?
If your Haunted Hash Browns are soggy, don’t worry! This can happen if they’re not dried properly after soaking. In the future, make sure to thoroughly dry the grated potatoes with a kitchen towel before frying. Also, ensure your skillet is hot before adding the potatoes, and don’t overcrowd the pan, which can cause steaming instead of frying.

Are Haunted Hash Browns pet-friendly?
While hash browns can be delicious, they’re not suitable for pets, particularly due to the salt and oil used in cooking. If your furry friend comes begging, it’s best to stick with pet-safe treats instead!

Can I customize the toppings for Haunted Hash Browns?
Very much so! Get creative with your toppings—try adding sliced peppers for spooky eyeballs, or even a drizzle of ranch dressing for a spooky effect. The more the merrier when it comes to adding personal touches, so make it festive and fun!

Haunted Hash Browns: Spooky Crispy Delights for Halloween

These Haunted Hash Browns are a crispy, festive breakfast that will delight kids and adults alike this Halloween.

  • skillet
  • grater
  • bowl
  • spatula
  • Airtight Container
  • Freezer bags

For the Hash Browns

  • 2 large Russet potatoes (Starchy varieties for extra crispiness)
  • 0.5 cup Onion (Chopped; consider using green onions for color)
  • 1 tsp Salt (Adjust according to taste)
  • 1 tsp Pepper (Freshly cracked; adjust to preference)
  • 3 tbsp Vegetable oil (For frying; use canola if preferred)

For the Spooky Garnishes

  • 1 cup Shredded cheese (Mozzarella or cheddar for melting)
  • 0.5 cup Black olives (Sliced into spooky eyes)
  • 0.5 cup Sour cream (For a ghostly effect)

Step-by-Step Instructions

  1. Peel and grate the potatoes into fine shreds, soaking in cold water for 10 minutes, then drain and dry.
  2. Heat oil in a skillet and sauté chopped onion until translucent and browned; set aside.
  3. Add more oil to the skillet, layer in grated potatoes, and cook until golden brown, flipping once.
  4. Top with shredded cheese and olives once golden and crispy, allowing cheese to melt.
  5. Transfer to a platter, dollop with sour cream, and serve warm.

These hash browns are perfect for Halloween and can be topped with various spooky garnishes to enhance presentation.

Breakfast
American
Breakfast, Festive, Halloween, hash browns, kids, Spooky

Filed Under: Breakfast

Spooky Spider Eggs That Will Thrill Your Halloween Breakfast

October 15, 2025 by grace bellamy Leave a Comment

As Halloween approaches, the thrill of creating delightful treats that make your morning spooky yet scrumptious fills the air! Among my favorite Halloween breakfast ideas are these adorable Spooky Spider Eggs. Not only are they a hit with both kids and adults, but they also provide a fun and healthy way to kick off the day. With just a handful of ingredients, including hard-boiled eggs and some clever décor, you can transform a simple breakfast into a festive feast, all while keeping the prep quick and easy. Whether you’re hosting a Halloween brunch or simply want to surprise your family, these spider-inspired delights will bring smiles and giggles to the breakfast table. Curious how to whip up these creepy culinary creations? Let’s dive into the deliciously fun recipe that will set the perfect spooky tone for your Halloween festivities!

Spooky Spider Eggs

Why Are Spooky Spider Eggs So Appealing?

Fun, creative presentation: Transforming hard-boiled eggs into spooky spiders makes breakfast a delightful experience.

Healthy treat: Packed with protein and essential nutrients, these eggs are a guilt-free addition to your Halloween feast.

Quick to prepare: With minimal effort needed, you can whip up this festive dish in no time!

Crowd favorite: Kids and adults alike will love the playful design, making it ideal for family gatherings or Halloween parties.

Versatile serving options: Pair these with some colorful side dishes or a spooky smoothie for a complete breakfast!

For more festive ideas, don’t miss out on the Pumpkin Pancakes or consider making Monster Bagels for a full Halloween breakfast experience!

Ingredients

  1. For the Spooky Spider Eggs
  • 4 hard-boiled eggs – A fantastic base packed with protein and essential nutrients!
  • 1/4 cup mayonnaise – Adds creaminess and flavor that holds the egg filling together.
  • Olive slices – Perfect for creating the spider’s eyes and legs, dialing up the spookiness.
  1. For Serving
  • Fresh veggies or salad leaves – Serve on a bed of greens for a vibrant and healthy addition.
  • Ketchup or salsa – Fun dips that add some festive flair to your breakfast table, if desired.

Get your kitchen ready to assemble these Spooky Spider Eggs, and let the fun begin!

Step‑by‑Step Instructions for Spooky Spider Eggs

Step 1: Prepare the Hard-Boiled Eggs
Start by placing 4 eggs in a pot and cover them with cold water. Bring the water to a rolling boil over medium-high heat. Once boiling, cover the pot, remove it from heat, and let the eggs sit for 9-12 minutes depending on how well-done you prefer. After the time is up, transfer the eggs to an ice bath to cool them quickly and make peeling easier.

Step 2: Make the Filling
Once the hard-boiled eggs are cool enough to handle, gently tap them on a hard surface to crack the shells, then peel them under running cold water for easier removal. Slice each egg in half lengthwise and carefully scoop the yolks into a mixing bowl. Add 1/4 cup of mayonnaise to the egg yolks, mixing until you achieve a smooth, creamy consistency that will be the filling for your Spooky Spider Eggs.

Step 3: Assemble the Spider Eggs
Using a spoon, fill each egg white half with the creamy egg yolk mixture. Ensure you heap the filling a little for a spooky look. Once filled, arrange the egg halves on a serving plate, creating a delightful display. This is where your Spooky Spider Eggs start to take shape, so have fun with it!

Step 4: Create the Spider Features
Now, take a handful of olive slices and strategically place them on each egg for the spider’s eyes and legs. Use two slices for the eyes and several for the legs along the sides of each egg. The playful design of your Spooky Spider Eggs will definitely impress both kids and adults!

Step 5: Serve with a Festive Touch
For a vibrant presentation, serve your Spooky Spider Eggs on a bed of fresh veggies or salad leaves. Feel free to add dips like ketchup or salsa on the side for a fun culinary touch. Now, step back and admire your festive creation that combines fun, creativity, and a healthy treat!

Spooky Spider Eggs

Spooky Spider Eggs Variations & Substitutions

Feel free to mix things up and create your own charming take on Spooky Spider Eggs for a fun breakfast surprise!

  • Dairy-Free: Substitute mayonnaise with avocado mash for a creamy and nutrient-rich filling that’s bursting with flavor.

  • Herb-Infused: Mix in fresh herbs like dill or chives to the yolk mixture for an aromatic twist that elevates the traditional filling.

  • Spicy Kick: Add a dash of hot sauce or Sriracha to the filling to awaken those taste buds with some heat, perfect for spice lovers.

  • Avocado Surprise: Instead of the mayonnaise, use 1/4 cup of mashed avocado for a creamy and vibrant green filling that kids will love.

  • Vegetable Twist: Toss in finely chopped cucumbers or bell peppers into the egg filling for a crunchy texture and a pop of color that makes each bite even more delightful.

  • Olive Alternatives: For a twist on presentation, use mini pretzel sticks for the “legs” or cherry tomatoes for the “eyes” to vary your spooky aesthetic!

  • Whole Grain Touch: For a nutritious side, serve the eggs on whole-grain toast or crackers to make it a filling breakfast with added fiber.

  • Nut-Free: If you’re avoiding nuts, you can make the inside filling simpler with just mayonnaise and egg yolks, keeping it safe for everyone!

These delicious variations will not only allow you to play with flavors but also cater to your friends and family’s dietary preferences, making breakfast an inclusive festive delight! And if you’re looking for more Halloween-inspired dishes, check out our Ghostly Yogurt Parfaits or consider trying Creepy Crawly Cinnamon Rolls for a treat that both kids and adults will enjoy.

Expert Tips for Spooky Spider Eggs

• Perfect Eggs: Make sure to use fresh eggs for the best results. Older eggs can be harder to peel and make your spooky presentation less appealing.

• Chill Well: After boiling, chill the eggs in an ice bath for a few minutes. This makes peeling easier and keeps the whites intact for filling them.

• Creative Filling: Feel free to add herbs or spices to the mayonnaise mixture for extra flavor. Just remember, the focus keyword, Spooky Spider Eggs, should shine through!

• Assembly Fun: Have fun with the olive slices! You can create unique spider designs—some can have long legs, while others can sport a silly look. Let your creativity run wild!

• Healthier Options: Substitute mayonnaise with Greek yogurt to keep it lighter. This still gives you a creamy filling while increasing the health factor.

How to Store and Freeze Spooky Spider Eggs

Fridge: Keep your Spooky Spider Eggs in an airtight container for up to 3 days. This preserves their freshness while making them easy to grab for breakfast or snacks.

Freezer: For best results, avoid freezing. However, if you must, freeze the egg filling separately in a sealed container for up to 1 month and assemble the eggs fresh when ready to serve.

Reheating: If you’ve stored the eggs, enjoy them cold or gently reheat in the microwave for about 10-15 seconds. Always take care not to overheat, as eggs can get rubbery.

Presentation: When ready to serve, add fresh olive slices for a fun, festive look right before enjoying!

What to Serve with Spooky Spider Eggs

As you set the stage for a delightful Halloween breakfast, consider these whimsical pairings that enhance the festive atmosphere.

  • Creepy Crawly Cinnamon Rolls: These sweet rolls topped with gummy worms tantalize the taste buds and add a playful touch to your spread.

  • Bloody Berry Smoothie: This vibrant drink blends mixed berries and beet juice for a deliciously spooky refreshment that brightens the morning.

  • Monster Bagels: Avocado bagels adorned with cucumber and olives make for a fun, healthy bite to complement the protein-packed eggs.

  • Witch Hat Waffles: Fluffy waffles decorated with whipped cream and chocolate syrup conjure up a festive, sweet delight that everyone will love.

  • Haunted Hash Browns: Crispy, golden-brown potatoes served with ketchup or salsa bring a savory element to your Halloween breakfast that balances the sweetness of other dishes.

  • Pumpkin Spice Overnight Oats: These healthy oats, infused with pumpkin and spices, provide a wholesome touch that pairs well with the Spooky Spider Eggs for a balanced meal.

Imagine the laughter and excitement as friends and family gather to enjoy this spooky feast, creating memories that will linger long after the last bite!

Make Ahead Options

These Spooky Spider Eggs are perfect for meal prep, making your Halloween morning just a bit easier! You can prepare the hard-boiled eggs up to 3 days in advance, ensuring they are perfectly cooked and ready to go. Just store them in their shells in the refrigerator to keep them fresh. Additionally, you can whip up the creamy filling and keep it covered in the fridge for up to 24 hours—this not only saves time but also helps the flavors meld together beautifully. When you’re ready to serve, simply assemble the eggs with the filling and add the spider features. This way, you’ll have a fun and festive breakfast that is just as delicious as if it were freshly made!

Spooky Spider Eggs

Spooky Spider Eggs Recipe FAQs

How do I select the best eggs for this recipe?
Absolutely! Choose the freshest eggs you can find. Fresh eggs will not only taste better but also peel more easily after boiling, giving your Spooky Spider Eggs a lovely presentation. Look for eggs that are free of cracks and have a smooth, clean shell.

How should I store leftover Spooky Spider Eggs?
Keep your Spooky Spider Eggs in an airtight container in the refrigerator for up to 3 days. This preserves their freshness, making them easy to grab for breakfast or snacks throughout the week. If you’re serving a crowd, they also make delightful on-the-go treats!

Can I freeze Spooky Spider Eggs?
For best results, avoid freezing assembled eggs; they tend to lose texture and flavor. However, you can freeze the egg filling separately in a sealed container for up to 1 month. When you’re ready to serve, simply thaw the filling in the fridge overnight and assemble fresh eggs for a wonderful breakfast surprise.

What if my eggs are difficult to peel?
If you encounter stubborn shells, try peeling your hard-boiled eggs under running cold water. This helps loosen the membrane from the egg white, ensuring they remain intact for your Spooky Spider Eggs. If you over-boil them, they might also be more challenging to peel, so be careful with the timer!

Are there any dietary considerations for Spooky Spider Eggs?
Certainly! You can substitute mayonnaise with Greek yogurt for a healthier, lighter filling option, perfect for those watching calorie intake. For dietary restrictions, ensure your olives and any additional ingredients are free from allergens like gluten or nuts if you’re serving guests with allergies.

What can I serve with Spooky Spider Eggs?
Pair these delightful spider eggs with a bed of fresh salad leaves or colorful veggies for a vibrant, nutritious breakfast experience! You could also complement your dish with some fun dips like ketchup or salsa, adding a touch of festivity to your Halloween breakfast table.

Spooky Spider Eggs That Will Thrill Your Halloween Breakfast

Delight in these Spooky Spider Eggs, a fun and healthy Halloween breakfast that combines creativity with taste.

  • Pot
  • Mixing Bowl
  • spoon

For the Spooky Spider Eggs

  • 4 pieces hard-boiled eggs (A fantastic base packed with protein and essential nutrients!)
  • 1/4 cup mayonnaise (Adds creaminess and flavor that holds the egg filling together.)
  • olive slices (Perfect for creating the spider’s eyes and legs.)

For Serving

  • fresh veggies or salad leaves (Serve on a bed of greens for a vibrant addition.)
  • ketchup or salsa (Fun dips that add festive flair.)

Step-by-Step Instructions for Spooky Spider Eggs

  1. Prepare the hard-boiled eggs by placing 4 eggs in a pot with cold water. Bring to a boil and then let sit covered for 9-12 minutes.
  2. Once the eggs are cool, peel them under running cold water and slice each in half.
  3. Mix the egg yolks with 1/4 cup of mayonnaise until creamy for the filling.
  4. Fill each egg white half with the yolk mixture and arrange on a plate.
  5. Decorate with olive slices for the spiders’ eyes and legs.
  6. Serve with fresh veggies or dips for a complete festive look.

Using fresh eggs helps with peeling. Chill boiled eggs in an ice bath for easier handling. Consider using Greek yogurt in place of mayonnaise for a lighter option.

Breakfast
Easy Recipe, family gatherings, fun food, Halloween breakfast, Healthy Treat, Spooky Spider Eggs

Filed Under: Breakfast

Heavenly Christmas Toffee: A Sweet Holiday Delight

October 15, 2025 by grace bellamy Leave a Comment

As the holidays approach, there’s a familiar, heartwarming chatter that fills the kitchen. It often revolves around the joyous task of crafting decadent treats for loved ones. This year, I’m excited to share my beloved recipe for Classic Christmas Toffee, a delightful confection that perfectly marries buttery goodness with a satisfying crunch from pecans or almonds. This recipe is a true crowd-pleaser—whether you’re treating your family or gifting friends, it brings smiles all around. Plus, it’s a breeze to whip up, making it perfect for those busy days when time is precious. With its melty chocolate topping and a hint of flaked sea salt, how can you resist? Ready to embark on a sweet adventure this holiday season? Let’s dive into the magic of making toffee!

Christmas Toffee

Why is this Christmas Toffee irresistible?

Heavenly flavor: The rich, buttery taste blends perfectly with crunchy pecans or almonds for an unforgettable treat.
Effortless preparation: With just a few simple steps, you can create this festive delight without breaking a sweat, making it perfect for busy holiday schedules.
Versatile treat: Serve it as a dessert, use it as a gift, or bring it to gatherings—it’s a hit no matter the occasion!
Gourmet finish: A sprinkle of flaked sea salt elevates each bite, providing a delightful contrast to the sweetness of the chocolate.
Crowd-pleasing satisfaction: Whether you’re treating family or friends, this Christmas Toffee is sure to spread joy and smiles during the holiday season!

Christmas Toffee Ingredients

• Get ready for a delightful treat!

For the Toffee
• Chopped pecans or almonds – adds a nutty crunch that complements the buttery toffee perfectly.
• Butter – the star ingredient that gives this Christmas Toffee its rich flavor and smooth texture.
• Granulated sugar – sweetens the toffee, creating the perfect balance with the nuts and chocolate.
• Water – helps dissolve the sugar and butter, creating a smooth toffee mixture.
• Salt – enhances the overall flavor, making the sweetness pop!
• Vanilla – infuses a warm, aromatic essence into the toffee, adding depth to the flavors.

For the Topping
• Chocolate chips – use your favorite variety; they melt beautifully to create a luscious layer.
• Flaked sea salt (optional) – adds a gourmet touch and a hint of savory flavor to each delicious piece.

Now that you have all the ingredients lined up, you’re just a few steps away from crafting this delightful Christmas Toffee that is sure to impress everyone!

Step‑by‑Step Instructions for Christmas Toffee

Step 1: Prepare Your Baking Dish
Start by lining a 9×9 inch baking dish with parchment paper, ensuring you have enough paper overhanging the edges for easy removal later. Prepping your dish ahead of time makes pouring the hot toffee simpler, allowing for an even spread over the pecans or almonds that you will add shortly.

Step 2: Scatter the Nuts
Spread 1 cup of chopped pecans or almonds evenly across the bottom of the prepared baking dish. This layer of nuts will provide a crunchy base for your Christmas Toffee, so take your time to distribute them evenly, ensuring each piece gets a taste of that delectable buttery goodness you’re about to create.

Step 3: Combine Ingredients in a Pot
In a medium-sized pot, combine the 1 cup of butter, 1 cup of granulated sugar, 1/4 cup of water, and 1/2 teaspoon of salt. Place the pot over medium heat and stir frequently to melt the butter gradually. As the mixture heats, keep an eye on it to prevent burning and ensure everything combines into a silky smooth sauce.

Step 4: Heat to Hard Crack Stage
Once the mixture is bubbling, attach a candy thermometer to the pot to monitor the temperature closely. You’re aiming for the hard crack stage at 300°F. Stir occasionally while watching the thermometer; the mixture will begin to darken and thicken in color, indicating that it’s nearing the desired temperature for your Christmas Toffee.

Step 5: Remove from Heat and Add Vanilla
As soon as the toffee reaches 300°F, swiftly remove the pot from the heat to prevent overcooking. Carefully stir in 1 teaspoon of vanilla; the aromatic scent of vanilla will enhance your Christmas Toffee’s flavor profile. Make sure to mix thoroughly to ensure the vanilla is well incorporated into the hot caramel.

Step 6: Pour Over Nuts
Pour the hot caramel mixture gently over the layer of pecans or almonds in the baking dish. Use a spatula to spread the toffee evenly across the nuts, ensuring every piece is coated in that delicious caramel. The toffee will look glossy and rich, hinting at the delectable treat it will soon become.

Step 7: Add Chocolate Chips
Allow the caramel to cool for just about 2 minutes, then sprinkle your chocolate chips generously over the warm caramel. The residual heat will help the chocolate melt slightly, creating a luscious layer that will add a sweet and creamy finish to your Christmas Toffee.

Step 8: Melt the Chocolate
Cover the dish with foil or a baking sheet to trap the heat and aid the melting of the chocolate chips. Let it sit for around 4 minutes; during this time, you’ll notice the chocolate will soften beautifully, making it easier to create that wonderful swirled effect.

Step 9: Swirl in the Chocolate
Uncover the dish after about 4 minutes, and gently use a spatula to swirl the melted chocolate across the surface of the caramel. This playful technique not only creates an appealing look but also evenly distributes the chocolate flavor throughout your Christmas Toffee.

Step 10: Add Finishing Touches
Finely chop a handful of pecans and sprinkle them over the melted chocolate. Optionally, add a pinch of flaked sea salt for a gourmet touch that enhances the sweet and savory balance of your Christmas Toffee, making each bite a delightful surprise.

Step 11: Cool Completely
Now it’s time to let your toffee cool completely. Allow it to sit at room temperature for about 4 hours or place it in the fridge to speed up the process. The toffee should be solid and ready to be cut or broken into pieces, giving it that satisfying crunch everyone loves.

Step 12: Cut and Serve
Once set, carefully lift the toffee out of the pan using the parchment paper. Use a sharp knife to cut it into pieces or simply break it apart using your hands. Your homemade Christmas Toffee, with its irresistible layers, is now ready to be enjoyed by family and friends during the holiday season!

Christmas Toffee

Christmas Toffee Variations & Substitutions

Feel free to let your creativity shine and customize this toffee recipe to your taste preferences!

  • Nut-Free: Swap the pecans or almonds for sunflower seeds or pumpkin seeds for a delightful crunch without the nuts.

  • Caramel Twist: Substitute a portion of the granulated sugar with brown sugar. This adds a rich caramel flavor that deepens the toffee experience.

  • Dark Chocolate: Use dark chocolate chips instead of milk chocolate for a richer, more sophisticated flavor profile. Dark chocolate pairs wonderfully with the buttery toffee and adds depth to each bite.

  • Spiced Bliss: Add a pinch of cinnamon or nutmeg to the butter mixture for a warm, aromatic twist that’s perfect for the holiday season. Spices elevate the flavor, bringing a cozy vibe to your toffee.

  • Coconut Crunch: Mix in some flaked unsweetened coconut with the nuts or sprinkle it on top before the chocolate sets. Coconut adds a lovely tropical twist that brightens the flavors beautifully.

  • Chili Kick: For those who enjoy a bit of heat, add a dash of cayenne pepper or chili powder to the caramel mixture. This spicy surprise balances the sweetness and creates a stunning flavor contrast.

  • Fruit Fusion: Fold in some dried fruit like cranberries or cherries before pouring the caramel over the nuts. This adds a fruity brightness that complements the rich toffee.

  • Layered Delight: Create layers by drizzling white chocolate over the dark chocolate topping. This not only enhances the visual appeal but adds a creamy sweetness that rounds out the flavors perfectly.

Make your Christmas Toffee your own and delight in every customized taste! If you’re looking for more sweet inspirations, don’t forget to check out my Heavenly Christmas Cookies for another festive treat or explore the joy of making homemade candies to sweeten your holiday festivities!

Expert Tips for Christmas Toffee

• Use a Candy Thermometer: This is crucial for achieving the right texture. Without it, your toffee might end up too soft or burnt.

• Watch the Temperature: Once you reach 300°F, act quickly! Leaving it on the heat too long can lead to a bitter taste.

• Melted Chocolate Trick: Cover the caramel with foil to help the chocolate chips melt evenly, creating a luscious topping without burning.

• Cooling Time: Be patient! Allowing the toffee to cool for about 4 hours ensures a perfect crunch. Rushing will lead to sticky toffee.

• Storage Solutions: Store the Christmas Toffee in an airtight container to maintain freshness, separating layers with parchment paper to prevent sticking.

How to Store and Freeze Christmas Toffee

Room Temperature: Keep your Christmas Toffee in an airtight container at room temperature for up to 2 weeks. This preserves its crunchiness and rich flavor.

Fridge: If you prefer, store the toffee in the fridge for up to 3 weeks. Make sure it’s in a sealed container to prevent it from absorbing moisture.

Freezer: For longer storage, wrap the toffee tightly in plastic wrap and place it in an airtight container. It will last in the freezer for up to 3 months while retaining its delightful taste.

Reheating: If stored in the fridge or freezer, let the toffee sit at room temperature for about 30 minutes before serving. This ensures it regains its delightful crunch, making each bite irresistible.

Make Ahead Options

These Christmas Toffee treats are perfect for busy home cooks looking to save time during the holiday rush! You can prepare the buttery caramel mixture (up to 24 hours in advance) and refrigerate it in an airtight container to maintain quality. Simply skip pouring the caramel over the nuts, keeping them separate until you’re ready to finish. When it’s time to serve, reheat the caramel gently on the stovetop until softened, then pour it over the arranged nuts and follow the remaining steps of adding chocolate chips and letting it cool. This way, your Christmas Toffee will be just as delicious and fresh, ready to dazzle your family and friends!

What to Serve with Classic Christmas Toffee

Indulging in festive flavors doesn’t stop at just making toffee; it’s about creating the perfect holiday spread!

  • Creamy Hot Chocolate: This rich drink pairs beautifully, providing a warm, cozy contrast to the crunchy toffee. Add a dash of peppermint for a festive twist!
  • Spiced Gingerbread Cookies: The soft, aromatic spices in gingerbread enhance the holiday spirit and balance the sweet creaminess of the toffee.
  • Crisp Apple Slices: The freshness and slight tartness of apples offer a refreshing bite, contrasting the richness of the toffee’s buttery flavor.
  • Nutty Cheese Platter: Include a selection of cheeses like brie or cheddar, alongside nuts; this savory spread complements the sweetness of the toffee beautifully.
  • Mulled Wine: Warm and spiced, mulled wine brings fragrant notes that enhance the toffee experience, making for a cozy evening.
  • Chocolate-Dipped Pretzels: The saltiness of pretzels paired with chocolate and caramel echoes the flavors of the toffee while adding crunch and delight.
  • Whipped Cream Topping: Add a dollop on the side for a luxurious touch, letting each bite of toffee feel indulgent and creamy.

Christmas Toffee

Classic Christmas Toffee Recipe FAQs

What type of nuts should I use for the toffee?
Absolutely! You can use either pecans or almonds, depending on your taste preference. If you want to go for a festive touch, use a mix of both! Just ensure they are chopped into smaller pieces so they spread nicely across the bottom of your baking dish.

How should I store leftover Christmas Toffee?
To keep your toffee fresh and maintain its crunchiness, store it in an airtight container at room temperature for up to 2 weeks. If you live in a warm climate, you can also place it in the fridge, where it will stay good for up to 3 weeks. Just make sure it’s sealed tightly to prevent any moisture from ruining the texture!

Can I freeze Christmas Toffee for later use?
Yes, you can definitely freeze your Christmas Toffee! Wrap each piece tightly in plastic wrap, then place them in an airtight container or a freezer bag. It will stay fresh for up to 3 months. When you’re ready to enjoy your toffee, let it sit at room temperature for about 30 minutes to regain its delightful crunch!

What should I do if my toffee hardens too much?
If your toffee becomes too hard, don’t worry! You can try lightly reheating it in a low-temperature oven (around 250°F) for just a few minutes. Keep a close eye on it, so it doesn’t become too soft. Alternatively, using a sharp knife, you can break it into smaller, manageable pieces instead of trying to cut through a solid block.

Are there any dietary restrictions I should be aware of?
Indeed! If you’re making this for others, be mindful of common allergies. Both pecans and almonds can trigger nut allergies, so it’s best to inquire about these dietary restrictions first. If you want a nut-free version, you can omit the nuts altogether and use a thicker layer of chocolate on the bottom for added richness. Just ensure that all other ingredients remain allergen-free as needed!

Heavenly Christmas Toffee: A Sweet Holiday Delight

This Christmas Toffee perfectly blends buttery goodness with crunchy pecans and chocolate for a delightful holiday treat.

  • 9×9 inch baking dish
  • Candy thermometer
  • medium-sized pot
  • spatula

For the Toffee

  • 1 cup chopped pecans or almonds (adds a nutty crunch)
  • 1 cup butter (the star ingredient)
  • 1 cup granulated sugar (sweetens the toffee)
  • 1/4 cup water (helps dissolve the sugar)
  • 1/2 teaspoon salt (enhances flavor)
  • 1 teaspoon vanilla (adds aromatic essence)

For the Topping

  • 1 cup chocolate chips (melts to create a luscious layer)
  • flaked sea salt (optional for gourmet touch)

Step-by-Step Instructions

  1. Prepare Your Baking Dish: Line a 9×9 inch baking dish with parchment paper.
  2. Scatter the Nuts: Spread chopped pecans or almonds evenly across the bottom of the prepared baking dish.
  3. Combine Ingredients in a Pot: In a medium-sized pot, combine butter, granulated sugar, water, and salt. Heat while stirring until smooth.
  4. Heat to Hard Crack Stage: Monitor the temperature with a candy thermometer aiming for 300°F.
  5. Remove from Heat and Add Vanilla: Stir in vanilla once the toffee reaches 300°F.
  6. Pour Over Nuts: Pour the hot caramel mixture over the layer of nuts.
  7. Add Chocolate Chips: Sprinkle chocolate chips over the warm caramel.
  8. Melt the Chocolate: Cover the dish to help the chocolate chips melt.
  9. Swirl in the Chocolate: Use a spatula to swirl the melted chocolate across the surface.
  10. Add Finishing Touches: Top with chopped pecans and optional flaked sea salt.
  11. Cool Completely: Let the toffee cool completely at room temperature.
  12. Cut and Serve: Lift out of the pan and cut into pieces.

Store Christmas Toffee in an airtight container at room temperature for up to 2 weeks.

Dessert
American
Christmas Toffee, classic recipes, desserts, holiday treats, sweet recipes, toffee

Filed Under: Dessert

Magical Halloween Overnight Oats to Brighten Your Morning

October 15, 2025 by grace bellamy Leave a Comment

Every Halloween season, our kitchen transforms into a delightful workshop filled with spooky creativity. This year, I’ve decided to kickstart the morning festivities with some wickedly fun Halloween Overnight Oats! This recipe not only whispers sweet nothings to your tastebuds with its rich pumpkin flavor and warm spices, but it’s also a total time-saver—perfect for busy mornings or prepping ahead for a haunted brunch. You’ll love how easily these oats can be customized, whether you want to add marshmallow “ghosts” or sprinkle on some crunchy granola. Plus, they’re packed with nutrients to keep the little ghouls (and big goblins too!) fueled for their Halloween adventures. Curious about how to conjure up this festive breakfast? Let’s dive in!

Halloween Overnight Oats

Why Are Halloween Overnight Oats a Must-Try?

Convenience: Prepare these oats the night before for a no-fuss breakfast, giving you extra time to enjoy Halloween festivities!

Flavor Explosion: Infused with pumpkin, cinnamon, and nutmeg, these oats deliver a warm, inviting flavor that makes mornings feel special.

Customizable: Whether you prefer marshmallow “ghosts” or crunchy granola, you can easily adapt this recipe to match your tastes.

Nutrient-Dense: Packed with fiber and vitamins, these overnight oats keep everyone energized for a day of spooky fun!

Crowd-Pleaser: It’s a fantastic dish that the whole family will love, making it a perfect addition to your Halloween brunch.

Bring a touch of the Halloween spirit to your mornings with this delightful recipe. If you’re looking for a more savory option, check out my Halloween Breakfast Ideas!

Halloween Overnight Oats Ingredients

• Get ready to create a spooky yet delicious breakfast with these enchanting ingredients!

For the Base

  • 1 cup rolled oats – A hearty foundation that provides fiber and keeps you full.
  • 1 cup milk (or almond milk) – Use your favorite type for creaminess; almond milk adds a lovely nutty flavor.
  • 1/2 cup pumpkin puree – Brings rich autumn flavor, making this a festive morning treat!
  • 1/2 teaspoon cinnamon – Adds warmth and spice that perfectly complements the pumpkin.
  • 1/4 teaspoon nutmeg – A hint of this spice elevates the fall essence of your oats.
  • 1 tablespoon maple syrup (or honey) – Sweetens your dish naturally; adjust to taste!

For the Toppings

  • Halloween sprinkles – Fun and festive, these are perfect for adding a delightful crunch!
  • 1/2 cup granola – Offers a satisfying crunch to contrast the creaminess of the oats.
  • 1/2 cup mixed berries – Fresh berries add a pop of color and a burst of flavor.
  • Marshmallows – Use them to create adorable “ghosts” that will delight kids and adults alike!
  • Candy eyes – Transform your oats into playful creatures with these fun decorations!

Prepare to indulge in a magical breakfast that will kick off your Halloween celebrations in the tastiest way possible!

Step‑by‑Step Instructions for Halloween Overnight Oats

Step 1: Combine Base Ingredients
In a mixing bowl, combine 1 cup of rolled oats, 1/2 cup of pumpkin puree, 1 cup of milk (or almond milk), 1/2 teaspoon of cinnamon, and 1/4 teaspoon of nutmeg. Stir vigorously until all ingredients are fully mixed and the mixture is creamy. This should take about 2-3 minutes, leaving you with a lovely pumpkin-spiced base for your Halloween Overnight Oats.

Step 2: Sweeten the Mixture
Add 1 tablespoon of maple syrup (or honey) to the oat mixture for a touch of sweetness. Gently fold it in, ensuring it’s evenly distributed. The syrup will enhance the flavor profile, making it extra delicious and inviting. This mixing should take another 1-2 minutes, and you’ll notice the oats absorbing a delightful aroma.

Step 3: Refrigerate Overnight
Transfer the oat mixture into a sealable jar or container. Cover tightly and place it in the fridge overnight, or let it chill for at least 4 hours. This process allows the oats to soften and soak in all the flavors. When ready, they should look thickened and wonderfully creamy, ready for toppings!

Step 4: Prepare Toppings
While your Halloween Overnight Oats are chilling, gather your toppings. Slice fresh mixed berries, crush some granola, and set aside Halloween sprinkles and marshmallows. Creating playful “ghosts” with the marshmallows adds an extra festive touch, making this dish visually appealing when you’re ready to serve.

Step 5: Assemble Your Delight
When you’re ready to enjoy your oats, remove them from the fridge and give them a good stir. Layer the oats in a bowl or jar, then generously sprinkle with 1/2 cup of granola, followed by 1/2 cup of mixed berries. Let the vibrant colors mix and match, bringing your Halloween Overnight Oats to life!

Step 6: Add the Fun Finishing Touches
Top your delightful creation with a handful of Halloween sprinkles for a pop of color and fun. Then, place a few marshmallow “ghosts” on top and finish with candy eyes for a spooky effect. This final presentation adds a festive flair, perfect for waking up to some Halloween spirit!

Step 7: Serve and Enjoy!
Grab a spoon and dig in! These Halloween Overnight Oats are not just nutritious but also a delight to the senses. With their rich pumpkin flavor and playful toppings, you’re all set to begin your Halloween festivities. Enjoy the magic of this simple, wholesome breakfast as it fuels your day!

Halloween Overnight Oats

How to Store and Freeze Halloween Overnight Oats

Fridge: Keep your Halloween Overnight Oats in an airtight jar in the refrigerator for up to 3 days for maximum freshness and flavor.

Freezer: You can freeze the oats for up to 2 months. Just be sure to leave space in the container for expansion and add toppings fresh when you defrost.

Reheating: To enjoy chilled oats, simply give them a good stir. If you prefer them warm, transfer to a microwave-safe bowl and heat for 1-2 minutes, stirring halfway through.

Toppings Storage: Store any leftover toppings like granola, sprinkles, and marshmallows separately in a cool, dry place to maintain their crunch and prevent sogginess until ready to use.

Halloween Overnight Oats Variations

Feel free to unleash your creativity and customize these delicious overnight oats to suit your unique tastes or dietary needs!

  • Dairy-Free: Substitute regular milk with almond or coconut milk for a creamy, plant-based option.
    Rich and satisfying, this swap still retains all the delightful flavors while catering to dietary preferences.

  • Nutty Bliss: Add a tablespoon of nut butter, like almond or peanut butter, for an extra layer of flavor and creaminess.
    This will not only enhance the taste but also pack a protein punch, making your breakfast more filling and delightful!

  • Spiced Up: Introduce a pinch of ginger or a dash of pumpkin pie spice to amplify those cozy autumn flavors.
    This boosts the festive feel of the dish, evoking the essence of fall with every spoonful!

  • Fruity Twist: Incorporate a variety of seasonal fruits like diced apples or pears to offer a delightful texture and sweetness.
    The added freshness complements the oats perfectly, making each bite a joy to experience!

  • Chocolate Lovers: Mix in cocoa powder or chocolate chips for a fun twist that pairs beautifully with pumpkin.
    It’s a sweet surprise that’s sure to delight anyone with a taste for a little bit of indulgence in their oatmeal!

  • Granola Swap: Experiment with flavored granolas such as maple pecan or cinnamon crunch to enhance your breakfast.
    Choosing unique flavors can transform the entire experience, making it even more exciting to dig in each morning!

  • Extra Fiber: Toss in a tablespoon of chia seeds or flaxseeds for added nutrition and a delightful crunch.
    These tiny seeds boost the fiber content, ensuring that your Halloween oats keep you satisfied longer!

  • Cinnamon Roll Style: Blend in a touch of cinnamon swirls atop the mixed oats for that cozy cinnamon roll flavor.
    This variation adds a fun layer of sweetness while still being wholesome and nutritious!

Let your imagination run wild with these variations! For more spooky breakfast delights, check out my Halloween Breakfast Ideas and get inspired for your festive brunch!

What to Serve with Halloween Overnight Oats?

Elevate your Halloween breakfast experience with delightful accompaniments that add even more magic to your morning table!

  • Crispy Hash Browns: Their comforting crunch pairs beautifully with the creamy oats, making each bite a delightful contrast. Dip them in ketchup or salsa for a zesty kick!
  • Spooky Smoothies: Blend up a green smoothie using spinach, banana, and almond milk for a vibrant, nutrient-packed drink that complements the pumpkin flavor.
  • Homemade Cinnamon Rolls: Sweet, fluffy cinnamon rolls topped with icing bring a festive touch and satisfy any sweet tooth that comes to visit!
  • Fruit Skewers: Assemble colorful fruit skewers with seasonal fruits like oranges, grapes, and bananas. They add freshness and a pop of color to your breakfast spread!
  • Nutty Granola Bars: Crunchy, homemade granola bars offer a perfect grab-and-go option and are a hearty addition that keeps you fueled for Halloween fun!
  • Creamy Yogurt Parfaits: Layer vanilla yogurt with Halloween-themed fruits and granola for an alternative way to enjoy breakfast and surprise your little ghouls!
  • Pumpkin Spice Latte: Pair your oats with a warm Pumpkin Spice Latte for a cozy beverage that captures the essence of the season.
  • Ghoulish Green Apple Slices: Slice crisp green apples and spread a little nut butter on top to create “ghoulish” snacks that are fun for Halloween!
  • Mini Pumpkin Muffins: Bake or buy mini pumpkin muffins to serve alongside. Their soft texture and spiced flavor harmonize well with the oats.
  • Festive Hot Chocolate: Conclude your meal with a cup of rich hot chocolate, topped with marshmallows or whipped cream for a sweet finish to this Halloween treat!

Make Ahead Options

Preparing Halloween Overnight Oats is a breeze, especially for those busy mornings! You can make the base of the oats up to 24 hours in advance—simply mix together the rolled oats, pumpkin puree, milk, cinnamon, nutmeg, and maple syrup and refrigerate them overnight. To maintain their creaminess, ensure your container is tightly sealed. Just before serving, give the oats a quick stir and layer them with your favorite toppings, like granola, mixed berries, and marshmallow “ghosts.” This way, you’ll have a delightful Halloween-themed breakfast ready to fuel your family’s spooky adventures without any last-minute fuss! Enjoy the magic of easy meal prep!

Expert Tips for Halloween Overnight Oats

• Prep Ahead: Make these Halloween Overnight Oats the night before to save time in the morning, allowing for a more relaxed Halloween celebration.

• Texture Matters: For creamy oats, ensure you stir the mixture well before refrigerating. If it feels too thick in the morning, add a splash of milk to reach your desired consistency.

• Swap Sweeteners: Feel free to adjust the sweetness by using more or less maple syrup or honey. This can customize the flavor profile to suit your family’s taste preferences.

• Make it Festive: Use assorted toppings like nut butter, or chopped nuts along with your sprinkles to avoid overwhelming sweetness while adding texture to your Halloween Overnight Oats.

• Watch Serving Sizes: Keep an eye on portion sizes, especially with calorie-dense toppings like granola and marshmallows, to balance enjoyment and nutrition.

• Adapt Leftovers: If you have leftover oats, mix them into smoothies or bake them into muffins for a nutritious and fun way to use what’s left!

Halloween Overnight Oats

Halloween Overnight Oats Recipe FAQs

What type of oats should I use for Halloween Overnight Oats?
I recommend using rolled oats because they absorb the liquid beautifully and create a creamy texture. Steel-cut oats are too hearty for this recipe since they won’t soften as well overnight.

How long can I store Halloween Overnight Oats in the refrigerator?
You can keep your Halloween Overnight Oats in an airtight jar in the refrigerator for up to 3 days. Just give them a stir before enjoying; they may thicken slightly as they sit.

Can I freeze Halloween Overnight Oats?
Absolutely! You can freeze your Halloween Overnight Oats for up to 2 months. To freeze, transfer your mixture to a freezer-safe container, leaving some space at the top for expansion. When you’re ready to eat, thaw them in the refrigerator overnight and add toppings before serving.

What should I do if my overnight oats are too thick?
If your oats are too thick in the morning, simply add a splash of milk or your preferred milk alternative and mix well until you reach your desired consistency. This will help bring back that creamy texture!

Are there any dietary considerations for Halloween Overnight Oats, such as allergies?
Yes, be mindful of allergies! For nut allergies, use dairy or oat milk instead of almond milk. If gluten is a concern, make sure to use certified gluten-free oats and ingredients. Additionally, you can substitute maple syrup with agave or a sugar alternative for those watching their sugar intake.

Can I customize the toppings for Halloween Overnight Oats?
The more the merrier! You can absolutely customize your toppings based on what you have on hand or your preferences. Try fresh fruits, nuts, seeds, or even a scoop of yogurt for added creaminess and flair.

Magical Halloween Overnight Oats to Brighten Your Morning

Kickstart your Halloween festivities with these Magical Halloween Overnight Oats, rich in pumpkin flavor and warm spices.

  • Mixing Bowl
  • Sealabale jar or container

Base Ingredients

  • 1 cup rolled oats (A hearty foundation that provides fiber and keeps you full.)
  • 1 cup milk (or almond milk) (Use your favorite type for creaminess; almond milk adds a lovely nutty flavor.)
  • 1/2 cup pumpkin puree (Brings rich autumn flavor, making this a festive morning treat!)
  • 1/2 teaspoon cinnamon (Adds warmth and spice that perfectly complements the pumpkin.)
  • 1/4 teaspoon nutmeg (A hint of this spice elevates the fall essence of your oats.)
  • 1 tablespoon maple syrup (or honey) (Sweetens your dish naturally; adjust to taste!)

Toppings

  • Halloween sprinkles (Fun and festive, perfect for adding a delightful crunch!)
  • 1/2 cup granola (Offers a satisfying crunch to contrast the creaminess of the oats.)
  • 1/2 cup mixed berries (Fresh berries add a pop of color and a burst of flavor.)
  • marshmallows (Use them to create adorable “ghosts” that will delight kids and adults alike!)
  • candy eyes (Transform your oats into playful creatures with these fun decorations!)

Step-by-Step Instructions

  1. In a mixing bowl, combine rolled oats, pumpkin puree, milk (or almond milk), cinnamon, and nutmeg. Stir vigorously until all ingredients are fully mixed and the mixture is creamy.
  2. Add maple syrup (or honey) to the oat mixture and gently fold it in, ensuring it’s evenly distributed.
  3. Transfer the oat mixture into a sealable jar or container. Cover tightly and place it in the fridge overnight, or let it chill for at least 4 hours.
  4. While the overnight oats are chilling, gather your toppings like mixed berries, granola, Halloween sprinkles, and marshmallows.
  5. When ready to enjoy, remove the oats from the fridge and give them a good stir. Layer in a bowl or jar, sprinkle with granola and mixed berries.
  6. Top with Halloween sprinkles and marshmallow “ghosts” finished with candy eyes for a fun look. Serve and enjoy!

These Halloween Overnight Oats can be prepared ahead of time and stored in the fridge for up to 3 days.

Breakfast
American
Fall Recipes, Halloween Overnight Oats, Healthy Breakfast, Overnight Oats, Pumpkin Oats

Filed Under: Breakfast

Irresistible Pecan Pie Balls That Will Delight Your Tastebuds

October 15, 2025 by grace bellamy Leave a Comment

The moment I first tasted Pecan Pie Balls, I knew I stumbled upon a delightful secret that would revolutionize my dessert table. These little bites not only capture the familiar flavors of classic pecan pie but also bring together a blissful mix of chocolate and crunchy pecans without the fuss of baking. Perfect for when you need a sweet treat in a pinch, these no-bake delights are a crowd-pleaser that everyone will adore. What’s more, they’re easy to prepare and can be made ahead of time, making them an ideal choice for busy days or last-minute gatherings. Who wouldn’t love having a stash of these rich, irresistible bites waiting in the fridge? Ready to create your own sweet indulgence? Let’s dive into this simple recipe together!

Pecan Pie Balls

Why Are Pecan Pie Balls So Irresistible?

Sweet indulgence awaits with every bite of these delightful Pecan Pie Balls. Easy to make, they require no baking, allowing you to whip up a delicious dessert in no time. Rich and chocolatey, each ball offers a luscious blend of cocoa and pecans that tantalizes the taste buds. Perfect for gatherings, they’re a hit at parties and family functions alike, pleasing both kids and adults. Plus, they can be made ahead and stored in the fridge, making them a convenient treat for busy days. Treat yourself to this fun and satisfying recipe; you’ll find it hard to resist going back for more!

Pecan Pie Balls Ingredients

For the Mixture

  • 1 cup pecans – finely chopped to ensure they blend seamlessly into the texture.
  • 1 cup graham cracker crumbs – adds a sweet crunch that mimics the classic pecan pie crust.
  • 1/2 cup powdered sugar – sweetens the mixture beautifully and helps bind it together.
  • 1/2 cup unsweetened cocoa powder – provides a rich chocolate flavor that pairs perfectly with the nuts.
  • 1/2 cup unsalted butter – softened to create a smooth, creamy base for your balls.
  • 1/4 cup maple syrup – lends a lovely sweetness and hints of caramel flavor, just like in traditional pecan pie.
  • 1 teaspoon vanilla extract – enhances the overall flavor, making these Pecan Pie Balls extra delightful.
  • 1/4 teaspoon salt – balances the sweetness and enriches the flavors in the mix.

For the Coating

  • 1 cup semi-sweet chocolate chips – melting these creates a decadent coating that complements the filling.
  • Extra chopped pecans – sprinkle on top for a decorative touch and added crunch.

Step‑by‑Step Instructions for Pecan Pie Balls

Step 1: Combine Dry Ingredients
In a large mixing bowl, add the finely chopped pecans, graham cracker crumbs, powdered sugar, cocoa powder, and salt. Mix all the dry ingredients well to ensure they are evenly distributed, creating a sweet and nutty foundation for your Pecan Pie Balls. This should take about 2-3 minutes using a sturdy spatula or wooden spoon.

Step 2: Cream Wet Ingredients
In a separate bowl, use an electric mixer to cream together the softened butter, maple syrup, and vanilla extract until the mixture is smooth and creamy, about 2-3 minutes. This step adds rich flavor and moisture, making your Pecan Pie Balls delightful. The mixture should be soft and slightly fluffy when done.

Step 3: Combine Mixtures
Pour the creamy butter mixture into the bowl containing the dry ingredients. Gently fold them together using a spatula until fully combined, ensuring no dry spots remain. The result should be a thick and slightly sticky mixture that holds together well, taking approximately 3-4 minutes of folding and mixing.

Step 4: Chill the Mixture
Cover the bowl tightly with plastic wrap, then refrigerate for about 30 minutes. Chilling is essential as it firms up the mixture, making it easier to scoop and roll into balls. You’ll know it’s ready when you can easily handle it without it sticking excessively to your hands.

Step 5: Form the Balls
After chilling, scoop about a tablespoon of the mixture and roll it into a ball using your hands. Place each ball on a parchment-lined baking sheet. Continue this process, rolling until all the mixture is used up; you should yield about 20-25 Pecan Pie Balls. This step should only take about 10-15 minutes.

Step 6: Chill Again
Refrigerate the rolled balls for another 30 minutes. This second chilling helps them firm up further, ensuring they maintain their shape when dipped in chocolate. The balls should feel solid and cool to the touch when ready for the next step.

Step 7: Melt Chocolate
Prepare a microwave-safe bowl with the semi-sweet chocolate chips. Heat in 30-second intervals, stirring between each session until completely melted and smooth; this usually takes about 1-2 minutes. The melted chocolate should have a glossy appearance, ready to coat your Pecan Pie Balls.

Step 8: Coat the Balls
Dip each chilled ball into the melted chocolate, making sure to cover them completely. Allow any excess chocolate to drip off before placing them back on the parchment-lined baking sheet. This step ensures a luscious chocolate exterior that pairs beautifully with the Pecan Pie Balls’ filling.

Step 9: Garnish
While the chocolate is still wet, sprinkle extra chopped pecans over the coated balls for added crunch and visual appeal. This step adds a finishing touch, enhancing the look and texture of your delicious Pecan Pie Balls.

Step 10: Final Chill
Refrigerate the chocolate-coated Pecan Pie Balls for about 30 minutes, allowing the chocolate to set completely. You’ll know they are ready when the chocolate feels firm and has a nice, hardened sheen. Enjoy your delightful creations once they are set!

Pecan Pie Balls

Pecan Pie Balls Variations & Substitutions

Feel free to unleash your creativity and make these Pecan Pie Balls uniquely yours with delightful tweaks!

  • Nut-Free: Substitute pecans with sunflower seeds for an allergy-friendly version that still packs a nutty crunch.
  • Spicy Twist: Add a pinch of cayenne or chili powder to the mixture for a surprising kick that complements the sweetness beautifully.
  • Vegan Version: Replace butter with coconut oil and use maple syrup for sweetness, creating a vegan-friendly treat that’s just as luscious.
  • Caramel Infusion: Stir in a tablespoon of caramel sauce into the filling for a rich, gooey surprise that takes these bites to a whole new level.

For an extra layer of flavor, consider serving these with a dollop of whipped cream or a drizzle of caramel on top. This will elevate the treat and bring a diner-style dessert vibe to your table.

  • Flavor Boost: Spice things up by including a tablespoon of instant espresso powder for a mocha flavor that deepens the chocolate notes.
  • Dipped in White Chocolate: Swap semi-sweet chocolate for white chocolate for a sweet, creamy coat that adds a unique twist. The contrast of flavors will delight your palate!
  • Crunchy Oat Blend: Mix in some rolled oats for added texture, making each bite a little heartier while still retaining that indulgent taste.

These variations not only customize your Pecan Pie Balls but also allow you to experiment with different profiles, ensuring every batch is a memorable treat! Don’t forget to pair them with a delightful beverage; perhaps a creamy coffee or a frothy hot cocoa would complement the indulgent flavors perfectly!

Make Ahead Options

These Pecan Pie Balls are perfect for meal prep enthusiasts! You can prepare the mixture up to 24 hours in advance by combining the dry ingredients and wet ingredients, then chilling it in the refrigerator. Just remember to cover the bowl tightly to maintain freshness. You can also roll the balls and refrigerate them for up to 3 days before coating them in chocolate. When you’re ready to serve, melt the chocolate and dip the chilled balls, then allow them to set in the fridge for about 30 minutes. This way, you’ll have an irresistible sweet treat ready whenever you need it, bringing the joys of homemade desserts to your busy schedule!

What to Serve with Pecan Pie Balls?

Create the perfect dessert spread that highlights every sweet note of these delightful bites.

  • Decadent Hot Cocoa: A rich, creamy hot cocoa enhances the chocolatey goodness, perfect for cozy gatherings or cold evenings.

  • Vanilla Ice Cream: Serve with a scoop of vanilla ice cream for a beautiful contrast; the cold creaminess complements the rich sweetness of the Pecan Pie Balls.

  • Fruit Salad Medley: A fresh fruit salad provides a bright, zesty balance, cutting through the richness and offering a refreshing crunch.

  • Chai Tea: This spiced tea adds a warming spice contrast, enhancing the flavors of the pecans and chocolate for a comforting experience.

  • Caramel Dipping Sauce: Drizzle warm caramel over the balls for an indulgent touch, elevating each bite with a buttery sweetness.

  • Coffee or Espresso: A bold cup of coffee or espresso pairs wonderfully with the dessert, balancing the sweetness and enhancing the rich flavors.

Indulge in these pairings for a well-rounded experience that elevates your Pecan Pie Balls to new heights!

Expert Tips for Pecan Pie Balls

  • Chop Finely: Ensure pecans are finely chopped for a smoother texture. Large pieces can disrupt the desired bite-sized consistency in your Pecan Pie Balls.

  • Cream Well: Take your time when creaming the butter, syrup, and vanilla. A smooth mixture makes for richer, better-integrated balls.

  • Chilling is Key: Don’t skip the chilling steps! Proper chilling helps the mixture firm up, making it easier to roll and ensuring they hold their shape when coated in chocolate.

  • Chocolate Temperature: Melt chocolate slowly and avoid overheating. If it becomes too hot, it may seize, making it difficult to coat your Pecan Pie Balls smoothly.

  • Garnish Smartly: Add chopped pecans immediately after coating to ensure they stick. This adds a delightful crunch and a beautiful presentation to your treats.

How to Store and Freeze Pecan Pie Balls

Fridge: Store Pecan Pie Balls in an airtight container in the refrigerator for up to 1 week. Keep layers separated with parchment paper to prevent sticking.

Freezer: For longer storage, freeze the balls in a single layer on a baking sheet, then transfer them to a freezer-safe container. They can last up to 3 months.

Thawing: To enjoy frozen Pecan Pie Balls, thaw in the fridge overnight or at room temperature for about 30 minutes before serving.

Reheating: There’s no need to heat these treats; they’re best enjoyed chilled. However, you can let them sit at room temperature for a few minutes for optimal flavor.

Pecan Pie Balls

Pecan Pie Balls Recipe FAQs

How do I select the right pecans for Pecan Pie Balls?
Absolutely! When choosing pecans, look for fresh, plump ones without any dark spots or off odors. The best pecans will be uniform in color, ideally a light brown, and should feel slightly oily to the touch. Avoid store-bought pecans that have visible blemishes or look shriveled, as these traits indicate that they may be past their prime.

How should I store Pecan Pie Balls, and how long will they last?
Pecan Pie Balls can be stored in an airtight container in your refrigerator for up to 1 week. To prevent them from sticking together, I recommend placing layers of parchment paper between them. This small step makes all the difference in maintaining their beautiful shape and texture!

Can I freeze Pecan Pie Balls, and what’s the best way to do it?
Very much so! To freeze Pecan Pie Balls, first, place them in a single layer on a baking sheet and freeze until solid, which usually takes about 1-2 hours. Once firm, transfer them to a freezer-safe container or a zip-top bag, separating layers with parchment paper, where they can last for up to 3 months. When you’re ready to enjoy them, simply thaw in the refrigerator overnight or at room temperature for about 30 minutes.

What should I do if my mixture is too sticky or crumbly?
If your mixture turns out too sticky, it’s likely due to warmer ingredients or not enough dry ingredients. Add extra graham cracker crumbs, a tablespoon at a time, until you reach a consistency that’s easier to handle. Conversely, if it’s too crumbly, try incorporating a splash more maple syrup or softened butter—a little goes a long way in binding it together.

Are Pecan Pie Balls safe for people with nut allergies?
Unfortunately, Pecan Pie Balls contain pecans, so they are not safe for those with nut allergies. However, if you’re looking for a nut-free alternative, consider using seeds like sunflower seeds or pumpkin seeds in the mixture. They provide a wonderful texture and balance of flavors without introducing allergy concerns—just keep in mind it will change the overall taste somewhat!

Irresistible Pecan Pie Balls That Will Delight Your Tastebuds

These Pecan Pie Balls capture the rich flavors of classic pecan pie in no-bake bites, perfect for any occasion.

  • Mixing bowls
  • spatula
  • Electric mixer
  • parchment paper
  • Microwave-safe bowl

For the Mixture

  • 1 cup Pecans (finely chopped)
  • 1 cup Graham cracker crumbs
  • 1/2 cup Powdered sugar
  • 1/2 cup Unsweetened cocoa powder
  • 1/2 cup Unsalted butter (softened)
  • 1/4 cup Maple syrup
  • 1 teaspoon Vanilla extract
  • 1/4 teaspoon Salt

For the Coating

  • 1 cup Semi-sweet chocolate chips
  • Extra Chopped pecans (for garnish)

Step-by-Step Instructions for Pecan Pie Balls

  1. In a large mixing bowl, add the finely chopped pecans, graham cracker crumbs, powdered sugar, cocoa powder, and salt. Mix well for 2-3 minutes.
  2. In a separate bowl, use an electric mixer to cream together the softened butter, maple syrup, and vanilla extract until smooth, about 2-3 minutes.
  3. Pour the creamy butter mixture into the bowl with the dry ingredients. Gently fold them together until fully combined, taking about 3-4 minutes.
  4. Cover the bowl tightly with plastic wrap and refrigerate for about 30 minutes.
  5. Scoop about a tablespoon of the mixture and roll it into a ball. Place each ball on a parchment-lined baking sheet.
  6. Refrigerate the rolled balls for another 30 minutes.
  7. In a microwave-safe bowl, heat the chocolate chips in 30-second intervals until melted and smooth, about 1-2 minutes.
  8. Dip each chilled ball into the melted chocolate, covering completely, then allow excess chocolate to drip off before placing back on the baking sheet.
  9. Sprinkle extra chopped pecans over the coated balls while the chocolate is still wet.
  10. Refrigerate the chocolate-coated Pecan Pie Balls for about 30 minutes until the chocolate is set.

Store Pecan Pie Balls in an airtight container in the refrigerator for up to 1 week, or freeze for up to 3 months.

Dessert
American
chocolate treat, easy dessert, No-Bake Dessert, party snack, Pecan Pie Balls

Filed Under: Dessert

Jack-O’-Lantern Smoothie Bowls to Enchant Your Halloween Breakfast

October 15, 2025 by grace bellamy Leave a Comment

As I stood amidst the swirling autumn leaves, I found myself daydreaming about the excitement of Halloween breakfast ideas, particularly the vibrant Jack-O’-Lantern Smoothie Bowls. These delightful concoctions not only bring a splash of fun to the breakfast table but are also packed with nourishing ingredients that make them a guilt-free treat for both kids and adults alike. In mere moments, you can whip up this colorful bowl that’s bursting with flavor and sure to impress any little goblin. Plus, the playful decorations are a fantastic way to spark creativity and involve your loved ones in the kitchen. Ready to make your mornings spooktacular? Let’s dive into this Halloween culinary adventure!

Jack-O’-Lantern Smoothie Bowls

Why Choose Jack-O’-Lantern Smoothie Bowls?

Whimsical Delight: These smoothie bowls are a fun and enchanting way to kick off your day, perfect for Halloween enthusiasts of all ages.
Nutrient-Packed: With a blend of fruity goodness like mango and banana, they’re not just eye-catching but also full of vitamins.
Creative Presentation: The playful design with chia seeds and fruit makes breakfast a delightful experience and encourages kids to get involved.
Quick and Easy: In just a few simple steps, you can prepare these bowls, making them a time-saving option for busy mornings.
Family-Friendly: Everyone can customize their bowl with toppings they love, ensuring no one feels left out on this spooky holiday!
Get ready to charm your family with this festive delight, and for more delicious ideas, check out our fun Halloween Breakfast Ideas.

Jack-O’-Lantern Smoothie Bowl Ingredients

• Discover the magic of Halloween in your breakfast with these wholesome ingredients!

For the Smoothie Base

  • Mango – this tropical fruit adds natural sweetness and vibrant color to your smoothie.
  • Carrot Juice – packed with beta-carotene, it gives your smoothie a rich orange hue while adding a nutritious punch.
  • Banana – use this creamy fruit for a smooth texture and extra sweetness to balance the flavors.
  • Yogurt – choose plain or flavored for added creaminess and probiotics, making breakfast delicious and healthy!

For the Toppings

  • Chia Seeds – these tiny seeds resemble pumpkin seeds, adding texture and a subtle crunch to your bowl.
  • Fresh Fruit – berries, kiwi, or orange slices make fantastic, colorful decorations that bring your Jack-O’-Lantern to life.
  • Granola – sprinkle some on top for a delightful crunch and an extra layer of taste.
  • Nut butter – drizzle almond or peanut butter for added richness and a touch of healthy fats.

Create a spooky yet delicious experience with Jack-O’-Lantern Smoothie Bowls that are sure to become a Halloween favorite. Enjoy your creative morning!

Step‑by‑Step Instructions for Jack-O’-Lantern Smoothie Bowls

Step 1: Prepare the Smoothie Base
In a blender, combine 1 ripe mango (peeled and diced), 1 banana (sliced), and 1 cup of carrot juice. Blend on high for about 30 seconds, or until the mixture is smooth and creamy. If you prefer a thicker consistency, add a dollop of yogurt during blending. You want the vibrant orange color to shine through—this is your Jack-O’-Lantern smoothie base!

Step 2: Adjust Consistency
Once blended, check the consistency of your Jack-O’-Lantern smoothie. If it seems too thick, add a splash of carrot juice or a little more yogurt and blend again for another 10-15 seconds. The final texture should be smoothie-like but still thick enough to hold toppings without sinking. This is the delightful base of your spooky breakfast bowls!

Step 3: Assemble the Bowls
Divide the smoothie mixture equally between two bowls, creating a festive base ready for decoration. Use a spatula to spread the smoothie evenly, making it look inviting. The bright orange hue should be the star of the show, setting the stage for your creative toppings. Get ready to transform these bowls into fun Jack-O’-Lantern faces!

Step 4: Add Toppings
Now comes the fun part! Top each Jack-O’-Lantern smoothie bowl with chia seeds, mimicking the look of pumpkin seeds. Arrange colorful fruits like sliced kiwi, berries, or orange slices artistically on top for a cheerful, festive look. Stay playful and use your imagination here; each bowl can be a canvas for creativity, enticing everyone at the breakfast table.

Step 5: Final Touches
For an extra treat, drizzle your favorite nut butter over the top, or sprinkle some granola for crunch. These final touches not only enhance the flavor but also add a delightful texture, making your Jack-O’-Lantern Smoothie Bowls an exciting Halloween breakfast. Admire your creation—each bowl’s unique design is sure to spark joy and make your breakfast memorable!

Jack-O’-Lantern Smoothie Bowls

Make Ahead Options

Prepare Jack-O’-Lantern Smoothie Bowls ahead of time to make your bustling mornings a breeze! You can blend the smoothie base (mango, banana, and carrot juice) and refrigerate it for up to 24 hours for optimal freshness. To maintain quality, store the mixture in an airtight container to prevent browning. As for the toppings, prep your chia seeds, fruits, and granola in separate containers up to 3 days in advance to ensure they stay crispy and vibrant. When you’re ready to serve, simply stir the smoothie base to restore its consistency, pour it into bowls, and have fun decorating with the toppings. This way, you’ll enjoy a delightful, festive breakfast without the morning rush!

Variations & Substitutions for Jack-O’-Lantern Smoothie Bowls

Feel free to get creative with your smoothie bowls—there’s no limit to how you can customize this festive breakfast!

  • Dairy-Free: Use coconut yogurt instead of regular yogurt to make the smoothie plant-based without compromising creaminess.

  • Nut-Free: Substitute sunflower seed butter for nut butter and feel free to skip the nuts in your toppings for allergic concerns. Enjoy the same texture with a hint of toasty flavor.

  • Green Twist: Add a handful of spinach or kale to enhance nutrients without altering the sweet taste—perfect for sneaking in some greens!

  • Spiced Up: Incorporate a sprinkle of pumpkin spice or cinnamon to the smoothie base for a seasonal flavor boost that feels like fall.

  • Berry Good: Swap out mango for frozen berries if you’re craving a tart twist. Blueberries or raspberries will create a playful color and delightful flavor.

  • Protein-Packed: Mix in a scoop of your favorite protein powder to amp up the nutritional value, making your breakfast both filling and energizing for a busy day ahead.

  • Chia Seed Swaps: Instead of chia seeds, try using crushed nuts or cacao nibs for exciting textures that still delight the eyes and palate.

  • Frozen Version: Blend frozen fruit into the smoothie base for a thicker, creamier treat that resembles a sorbet—an icy delight that pairs well with warm fall mornings.

With these simple swaps, your Jack-O’-Lantern Smoothie Bowls can be tailored to suit every taste and dietary preference! Looking for more inspiration in the kitchen? Check out our Halloween Breakfast Ideas or learn how to make other festive treats like Spooky Spider Eggs.

Tips for the Best Jack-O’-Lantern Smoothie Bowls

  • Flavor Balance: Combine ripe mango with banana for optimal sweetness. Overripe bananas may dominate the flavor, so choose them wisely for balanced taste.
  • Texture Matters: Adjust the thickness by modifying the yogurt amount. A smoothie too thin may lack substance; aim for a creamy consistency that holds toppings well.
  • Topping Creativity: Use a variety of fresh fruits to make unique Jack-O’-Lantern faces that entice kids. Avoid using overly juicy fruits that can make the smoothie runny.
  • Chill Ingredients: For a refreshing breakfast, chill your fruit and yogurt beforehand. Warm ingredients can alter the delightful cold experience of the Jack-O’-Lantern Smoothie Bowls.
  • Experiment with Spices: Adding a pinch of cinnamon or nutmeg can elevate flavors, but start small. Too much spice can overwhelm the fruity freshness of your bowls.

How to Store and Freeze Jack-O’-Lantern Smoothie Bowls

Fridge: Store any leftover smoothie mixture in an airtight container for up to 2 days. This keeps the flavor fresh, ready for a quick breakfast fix!

Freezer: You can freeze the smoothie base in ice cube trays for up to 3 months. Just blend the cubes with fresh banana or yogurt when you’re ready to enjoy!

Reheating: Smoothie bowls are best enjoyed cold, but if you need to thaw frozen portions, place them in the fridge overnight or blend with a little juice for a refreshing treat.

Toppings: For optimal freshness, keep toppings like chia seeds, fruits, and granola in separate containers in the fridge. Add them right before serving for the best texture and flavor!

What to Serve with Jack-O’-Lantern Smoothie Bowls?

Imagine an enchanting breakfast that captivates the whole family while brimming with spooky seasonal flavors.

  • Monster Bagels: These fun bagels topped with avocado and cucumbers resemble playful monster faces, enhancing the Halloween vibe and adding wholesome nutrients.
  • Creepy Crawly Cinnamon Rolls: Ooey-gooey rolls wrapped with icing and topped with gummy worms create a sweet contrast, fitting perfectly with the spooky theme!
  • Spooky Spider Eggs: Hard-boiled eggs masquerading as spiders, complete with olive slices, bring a protein punch while adding a touch of fright to your platter.
  • Witch Hat Waffles: Chocolate waffles shaped like witch hats are delightful treats, and their sweet and rich flavor pairs splendidly with the fruity smoothie bowl.
  • Haunted Hash Browns: Shaped into ghostly forms, these crispy potatoes add a delightful crunch to your breakfast, paired warmly with ketchup or salsa.
  • Monstrous Muffins: Whisked with whole wheat flour and decorated with googly eyes, these muffins are a whimsical touch that’s both tasty and festive.
  • Halloween Smoothie: For a refreshing drink, whip up a Bloody Berry Smoothie that captures the essence of Halloween with its rich, vibrant colors.
  • Pumpkin Spice Overnight Oats: Creamy and satisfying, these oats filled with pumpkin goodness complement the smoothie bowls beautifully, enhancing their seasonal flavors.
  • Spooky Spider Crepes: Drizzled in chocolate web patterns and served with fruity toppings, these crepes provide a fun and sweet addition to your haunted breakfast spread.

Jack-O’-Lantern Smoothie Bowls

Jack-O’-Lantern Smoothie Bowls Recipe FAQs

How do I select ripe mangoes for my smoothie?
For the best flavor in your Jack-O’-Lantern Smoothie Bowls, look for mangoes that yield slightly to pressure when gently squeezed. This indicates ripeness and sweetness. Avoid any that are overly soft, have dark spots, or show signs of wrinkling. If you’re in a hurry, you can also find pre-sliced mango in the produce section!

How long can I store leftover smoothie mixture?
You can store any leftover smoothie mixture in an airtight container in the fridge for up to 2 days. Make sure to give it a good stir before serving, as some separation may occur. Utilize these leftovers for a quick breakfast fix on busy mornings!

Can I freeze the smoothie base for later use?
Absolutely! Freezing is a great way to enjoy your Jack-O’-Lantern Smoothie bowls later. Simply pour your smoothie base into ice cube trays and freeze for up to 3 months. When you’re ready to indulge, just blend a few frozen cubes with a fresh banana or a dollop of yogurt until smooth. This method creates a refreshing treat without any hassle!

What if my smoothie mixture is too thin?
If you find that your Jack-O’-Lantern smoothie mixture is too thin, don’t worry! Simply add a bit more frozen fruit, like banana or mango, and blend again. Alternatively, you can mix in some yogurt to thicken it up. Remember, a creamy consistency allows you to load on the toppings without everything sinking!

Are there any dietary considerations for this recipe?
It’s always good to be aware of dietary needs! The Jack-O’-Lantern Smoothie Bowls can easily be made dairy-free by swapping yogurt with a plant-based option like almond or coconut yogurt. If you’re considering allergies, double-check the granola and nut butter you choose, as they can be common allergens. For a nut-free version, simply omit nut butter and substitute with seeds or additional fruits.

How should I store and serve toppings for optimal freshness?
For the best texture and flavor, keep your toppings like chia seeds, fresh fruits, and granola in separate containers in the fridge. This way, they stay fresh and crunchy until you’re ready to use them. It’s best to add them right before serving to maintain that delightful crunch!

Jack-O’-Lantern Smoothie Bowls to Enchant Your Halloween Breakfast

Vibrant Jack-O’-Lantern Smoothie Bowls packed with nourishing ingredients for a spooktacular breakfast.

  • Blender

For the Smoothie Base

  • 1 cup Carrot Juice (Packed with beta-carotene for color and nutrition.)
  • 1 ripe Mango (Peeled and diced for sweetness.)
  • 1 medium Banana (Sliced for creaminess.)
  • 1 cup Yogurt (Plain or flavored for creaminess.)

For the Toppings

  • 2 tablespoons Chia Seeds (Adds texture and mimics pumpkin seeds.)
  • 1 cup Fresh Fruit (Berries, kiwi, or orange slices for decoration.)
  • 1/4 cup Granola (For added crunch on top.)
  • 2 tablespoons Nut butter (Almond or peanut butter for richness.)

Step-by-Step Instructions

  1. In a blender, combine 1 ripe mango (peeled and diced), 1 banana (sliced), and 1 cup of carrot juice. Blend on high for about 30 seconds, until smooth.
  2. Check the consistency and adjust with more carrot juice or yogurt if necessary, blending again for 10-15 seconds.
  3. Divide the smoothie mixture into two bowls and spread evenly.
  4. Top with chia seeds and arrange colorful fruits like kiwi, berries, or orange slices artistically on top.
  5. Drizzle nut butter on top or sprinkle granola for texture.

Enjoy your creative morning by customizing each bowl with your favorite toppings and involve your loved ones in the decorating process.

Breakfast
American
Fall Recipes, family-friendly, Halloween breakfast, Healthy Breakfast, Jack-O’-Lantern Smoothie Bowls, smoothie bowl

Filed Under: Breakfast

Spiderweb Crepes That Will Enchant Your Halloween Breakfast

October 15, 2025 by grace bellamy Leave a Comment

The kitchen is alive with laughter and excitement as the Halloween season approaches, and what better way to kick off those festive mornings than with some Spiderweb Crepes? These delightful treats add a playful twist to breakfast, combining a bit of creativity and classic flavors that are bound to please both kids and adults alike. Not only are they a fun way to start your day, but they’re also surprisingly easy to whip up, making them perfect for busy mornings filled with ghoulish fun. With just a drizzle of chocolate sauce to create the spooky web, these crepes transform into a delicious art piece on your plate. Curious about how to make these hauntingly good Spiderweb Crepes? Let’s jump into the recipe that will have everyone clamoring for more!

Spiderweb Crepes

Why Will Spiderweb Crepes Be a Hit?

Creativity in the kitchen comes to life with these whimsical crepes that turn a traditional breakfast into a spooky masterpiece. Quick and Easy to prepare, you’ll have them on the table in a flash, making them perfect for busy Halloween mornings. Kid-Friendly Fun invites little hands to help create the spiderweb details, turning cooking into family bonding time. Flavorful Twist on classic crepes, they blend delicious fillings with a spooky design to enchant your taste buds. Plus, they pair perfectly with our Bloody Berry Smoothie for an unforgettable breakfast that will wow both kids and adults alike!

Spiderweb Crepes Ingredients

• Get ready to create magical Spiderweb Crepes that will enchant your Halloween breakfast!

For the Crepes

  • 1 cup crepe batter – Use a simple homemade or store-bought crepe batter for a delightful base.
  • 2 tablespoons chocolate sauce – A must for drizzling to achieve the iconic spiderweb design!

For Serving

  • Whipped cream – Adds a creamy texture that pairs beautifully with the crepes.
  • Fresh berries – Use your favorite fruits for a burst of flavor and color on the plate.

These delightful Spiderweb Crepes are not just fun to look at but also a tasty treat that will have everyone excited about breakfast!

Step‑by‑Step Instructions for Spiderweb Crepes

Step 1: Prepare the Crepe Batter
Begin by whisking together your crepe batter in a mixing bowl until it reaches a smooth consistency. If you’re using a homemade recipe, allow it to rest for about 30 minutes to ensure light and fluffy crepes. Meanwhile, preheat a non-stick skillet over medium heat, which should take about 2-3 minutes, ensuring it’s hot but not smoking.

Step 2: Cook the Crepes
Using a ladle, pour about ¼ cup of crepe batter into the preheated skillet, swirling it around to create a thin layer. Cook for approximately 1-2 minutes, or until the edges of the crepe begin to lift and the surface looks set. Gently flip the crepe and cook for an additional 30 seconds, allowing it to become lightly golden. Transfer the crepe to a plate and repeat with the remaining batter.

Step 3: Drizzle the Spiderweb Design
Once all the crepes are cooked, take your chocolate sauce and place it in a small piping bag or a plastic sandwich bag with a corner snipped off. Starting from the center of each crepe, drizzle the chocolate sauce in a circular motion, then draw lines outward to create the iconic spiderweb design. This adds a fun and spooky touch to your Spiderweb Crepes!

Step 4: Serve with Whipped Cream and Berries
To serve, dollop generous amounts of whipped cream onto the center of the crepes, allowing it to peek out from the spiderweb pattern. Add a colorful array of fresh berries around the crepes for a burst of flavor and a festive touch. The combination of the rich chocolate web with creamy whipped cream and fruity sweetness will make these Spiderweb Crepes a standout Halloween breakfast!

Spiderweb Crepes

Expert Tips for Spiderweb Crepes

• Perfecting the Batter: A well-mixed crepe batter is key to success. Avoid overmixing to prevent tough crepes; a few lumps are okay!

• Heat Control: Cooking your crepes at the right temperature is crucial. Too hot, and they’ll burn; not hot enough, and they’ll be soggy. Medium heat is ideal.

• Chocolate Drizzle Technique: Use a thin chocolate sauce for easier piping. Practice your spiderweb design on a plate first if needed; it can be a fun activity!

• Serving Suggestions: Add a sprinkle of powdered sugar on top for extra sweetness and a touch of elegance to your Spiderweb Crepes.

• Storage Tips: If you have leftovers, store the crepes in an airtight container with parchment paper in between to keep them from sticking. Reheat gently before serving!

What to Serve with Spiderweb Crepes

Elevate your Halloween breakfast experience with delightful pairings that will enchant your family and friends alike.

  • Bloody Berry Smoothie: This vibrant drink brings a spooky flair while offering a refreshing taste that contrasts beautifully with the crepes.
  • Whipped Cream Cloud: A simple dollop of whipped cream enhances the creamy texture and balances the sweetness in your crepes.
  • Crispy Bacon Strips: The savory crunch of bacon provides the perfect contrast to the sweetness of the crepes, creating a delicious balance.
  • Fresh Fruit Medley: A colorful mix of seasonal fruits like bananas, strawberries, and blueberries adds freshness and a burst of flavor to the plate.
  • Pumpkin-Spiced Hot Chocolate: Embrace the seasonal flavors with a warm drink that adds a cozy, festive touch to your morning.
  • Gummy Worm Decorations: For a playful touch, sprinkle gummy worms around your plate. They add a fun element that kids will love!
  • Churro Bites: Crispy, cinnamon-sugar-coated churro bites can be a fun side, adding an extra sweet and crunchy dimension to your breakfast.
  • Creepy Crawly Cinnamon Rolls: Serve these sticky treats alongside the crepes for a full-on Halloween breakfast spread that will delight any crowd.
  • Monster Muffins: A delicious combo of flavors, these muffins maintain the festive theme and offer a hearty option to round out the meal.

Storage Tips for Spiderweb Crepes

  • Room Temperature: Enjoy crepes immediately after cooking for the best texture and flavor. If left out, they can stay fresh for up to 1 hour.
  • Fridge: Store any leftover Spiderweb Crepes in an airtight container for up to 3 days. Place parchment paper between the layers to prevent sticking.
  • Freezer: You can freeze crepes for up to 2 months. Wrap them individually in plastic wrap and place in a freezer-safe bag to maintain quality.
  • Reheating: To reheat, warm the crepes in a skillet over low heat for a few minutes or microwave for 15-30 seconds until heated through.

Spiderweb Crepes Variations & Substitutions

Feel free to get creative with your Spiderweb Crepes to make them uniquely yours! Whether you want to cater to dietary needs or add a tasty twist, these suggestions will inspire your Halloween breakfast journey.

  • Gluten-Free: Use gluten-free flour in your crepe batter for a delicious alternative that doesn’t skimp on flavor. You won’t even notice the difference!

  • Dairy-Free: Swap out milk for almond milk or any plant-based milk and use coconut whipped cream for a creamy topping that everyone can enjoy.

  • Nut-Free: If allergies are a concern, stick with water for your batter and choose sunflower seed butter for topping instead of traditional nut butters.

  • Add Protein: For a protein boost, consider adding a scoop of protein powder to the crepe batter; you’ll hardly taste it, just a thicker, fluffier crepe!

  • Caramel Drizzle: Instead of chocolate sauce, try drizzling caramel sauce for a sweet twist. The combination of caramel with fresh berries is simply divine!

  • Savory Version: Change it up by making a savory crepe: add spinach or cheese to the batter, and top with a dollop of sour cream or guacamole for an unexpected treat.

  • Boozy Touch: For an adult twist, add a splash of your favorite liqueur (like vanilla vodka) into the batter, enhancing the flavors and making it a fun indulgence!

These variations not only offer unique flavors and experiences but also cater to different dietary preferences. Plus, they remind us that cooking, like creativity, knows no bounds! Pair these delightful alterations with our Ghostly Yogurt Parfaits or Pumpkin Spice Overnight Oats for an enchanting Halloween breakfast lineup!

Make Ahead Options

These Spiderweb Crepes are perfect for meal prep enthusiasts! You can prepare the crepe batter up to 24 hours in advance by whisking together the ingredients and storing it in an airtight container in the refrigerator. When the morning comes, simply give the batter a quick stir before cooking the crepes as directed. Additionally, the chocolate sauce can be prepped in advance and stored in a piping bag, ensuring you can easily create that spooky spiderweb design when it’s time to serve. If you want to enjoy these crepes over the weekend, consider making them in batches and freezing the cooked crepes for up to 3 months. Just reheat them on a skillet before drizzling with chocolate sauce and serving with whipped cream and fresh berries for a delightful Halloween breakfast that’s just as delicious and festive!

Spiderweb Crepes

Spiderweb Crepes Recipe FAQs

What type of batter should I use for Spiderweb Crepes?
Absolutely! You can use a simple homemade crepe batter or a store-bought option. Just make sure it’s smooth and well-combined. If you’re making homemade batter, let it rest for about 30 minutes, ensuring fluffy and delightful crepes!

How long do Spiderweb Crepes stay fresh in the fridge?
Very! Leftover Spiderweb Crepes can be stored in an airtight container in the refrigerator for up to 3 days. To keep them from sticking, place parchment paper between the layers.

Can I freeze Spiderweb Crepes? How?
The more the merrier! You can freeze crepes for up to 2 months. To do this, wrap each crepe individually in plastic wrap and then place them in a freezer-safe bag. When you want to enjoy them, just thaw in the refrigerator overnight and reheat gently.

What’s the best way to reheat Spiderweb Crepes?
You can reheat your crepes either in a skillet over low heat for a few minutes or in the microwave for 15-30 seconds. This way, they’ll be warm and ready to serve without losing their delightful texture.

Are Spiderweb Crepes suitable for kids?
Absolutely! These crepes are a hit with kids because they can help decorate the spiderwebs with chocolate sauce. Plus, they’re fun to eat, making breakfast a playful and engaging experience for your little ones.

Can I customize the toppings for my Spiderweb Crepes?
Very! Feel free to get creative with your toppings. You can use flavored whipped cream, add a sprinkle of powdered sugar, or even mix in other fruits your family loves. Don’t hesitate to make them your own!

Spiderweb Crepes That Will Enchant Your Halloween Breakfast

Delightful Spiderweb Crepes make for a fun, creative Halloween breakfast that pleases both kids and adults alike.

  • Mixing Bowl
  • Whisk
  • Non-stick skillet
  • ladle
  • Piping bag or plastic sandwich bag

Crepes

  • 1 cup crepe batter (Use a simple homemade or store-bought crepe batter.)
  • 2 tablespoons chocolate sauce (For drizzling to achieve the spiderweb design.)

For Serving

  • whipped cream (Adds a creamy texture.)
  • fresh berries (Use your favorite fruits.)

Step-by-Step Instructions

  1. Prepare the crepe batter by whisking together until smooth. Allow to rest for about 30 minutes if homemade, then preheat skillet over medium heat.
  2. Pour about ¼ cup of crepe batter into skillet, swirling to create a thin layer. Cook for 1-2 minutes until edges lift, then flip and cook for 30 seconds.
  3. Once all crepes are cooked, drizzle chocolate sauce in a spiderweb pattern starting from the center.
  4. Serve with dollops of whipped cream in the center and arrange fresh berries around.

For a touch of elegance, consider adding a sprinkle of powdered sugar on top.

Breakfast
American
crepes, Family Recipes, fun breakfast, Halloween breakfast, kid-friendly, Spiderweb Crepes

Filed Under: Breakfast

Mummy Toast: Spooky and Fun Halloween Breakfast Delight

October 15, 2025 by grace bellamy Leave a Comment

As I sipped my morning coffee, the anticipation of Halloween crept into my imagination—what better way to welcome the spooky season than with a fun breakfast? Enter Mummy Toast, a playful twist on a classic slice that will thrill both kids and adults alike. Perfect for those chilly fall mornings, this treat not only brings smiles but is also a breeze to whip up. Just spread your choice of cream cheese or peanut butter on whole-grain toast and let your creativity shine as you layer on banana slices and raisins to create “mummy” faces. It’s a delightful way to fuel up for all the day’s festivities! Curious about how else to turn your breakfasts into Halloween magic? Let’s dive into these ghoulishly good ideas that transform the ordinary into the extraordinary!

Mummy Toast

Why is Mummy Toast a Spooky Favorite?

Creativity shines through in this delicious breakfast! With just a few simple ingredients, you can transform ordinary toast into a frightfully fun creation that delights both kids and adults.

Healthy & Wholesome: Whole-grain toast provides a nutritious base, making it a great option to kick-start your day.

Quick & Easy: This recipe comes together in minutes, making Halloween morning stress-free. Pair it with our Jack-O’-Lantern Smoothie Bowls for an even more festive experience!

Interactive Fun: Let everyone get involved in creating their own “mummy” faces, encouraging creativity in the kitchen.

Crowd-Pleaser: With its playful presentation and delicious flavors, Mummy Toast becomes a sure hit at any Halloween breakfast gathering!

Mummy Toast Ingredients

• Get ready to create a spooky delight with these easy ingredients!

For the Toast

  • Whole-grain bread – a nutritious base that offers fiber to fuel your morning.
  • Cream cheese or peanut butter – choose your spread; both add delicious creaminess to your mummy!

For the Decorations

  • Banana slices – for creating the mummy’s face; they’re naturally sweet and healthy!
  • Raisins – use these for the eyes, providing a spooky contrast against the banana.

Let your creativity flow as you whip up this Halloween breakfast favorite, Mummy Toast!

Step‑by‑Step Instructions for Mummy Toast

Step 1: Toast the Bread
Begin by toasting two slices of whole-grain bread in a toaster or on a griddle until they are golden brown and crisp, about 3 to 5 minutes. This step not only adds flavor but also provides a sturdy base for your Mummy Toast. Once done, set the toasted bread aside on a plate, ready for the spooky toppings!

Step 2: Spread the Base
Generously spread a layer of cream cheese or peanut butter over the warm toast while it’s still on your plate. Aim for an even coverage that reaches the edges, ensuring a delightful creaminess with every bite. The spread serves as a flavorful adhesive for creating the mummy’s face, so don’t be shy!

Step 3: Add the Banana Slices
Now, take a banana and slice it into thin rounds. Gently arrange the banana slices on top of the spread, overlapping them slightly to create a messy, wrapped appearance resembling a mummy. This not only adds a bright, fun element but also contributes natural sweetness to your Mummy Toast.

Step 4: Create the Mummy Face
Using raisins, add two pieces as the eyes of your mummy. Press them gently into the banana layer, making sure they stand out against the yellow banana for an eye-catching effect. At this point, your Mummy Toast should start looking delightfully spooky, so take a moment to admire your handiwork!

Step 5: Final Touches
For an extra creative flair, consider adding more banana or even additional slices as bandages across the toast. Feel free to play around with the arrangement until you achieve your desired “mummy” look. Once satisfied, serve your Mummy Toast immediately, inviting everyone to enjoy this fun and festive Halloween breakfast!

Mummy Toast

Mummy Toast Variations & Substitutions

Feel free to get creative with your Mummy Toast and make it your own!

  • Nut-Free: Substitute cream cheese or peanut butter with sunflower seed butter for a tasty, safe alternative.
  • Fruity Twist: Swap out bananas for thin apple slices to give your mummy a crisp, tart flavor.
  • Spooky Chocolate: Drizzle melted dark chocolate over the banana for a rich and devilish touch on your mummy face!
  • Vegan Option: Use dairy-free cream cheese and a nut butter made without added sugars, ensuring it’s both creamy and delightful.
  • Savory Version: Spread avocado instead of cream cheese for a unique take, topping with cherry tomatoes for eyes!
  • Dried Fruit Variety: Try using dried cranberries or hazelnuts for the eyes to add an extra layer of texture and flavor.
  • Themed Toppings: Decorate with edible googly eyes or gummy worms for an even creepier effect your kids will adore.
  • Cinnamon Sugar: Sprinkle a bit of cinnamon sugar on your spread before adding fruit—sweet and spooky in every bite!

With these variations, your Mummy Toast can be a canvas for endless creativity. Don’t forget to pair it with our Pumpkin Spice Overnight Oats for a hearty Halloween brunch experience!

Make Ahead Options

Mummy Toast is a fantastic choice for busy mornings, and you can prep elements in advance to save time! You can slice your bananas and store them in an airtight container with a squeeze of lemon juice to prevent browning, keeping them fresh for up to 24 hours. Additionally, toast the bread ahead of time and keep it wrapped in foil to retain its crispiness. When it’s time to serve, simply spread cream cheese or peanut butter on the prepared toast, layer the banana slices, and add the raisins for the eyes. This way, your Mummy Toast will be just as delicious and ready in a flash, making your Halloween breakfast a breeze!

Tips for the Best Mummy Toast

Choose Your Spread: Opt for a creamy spread that sticks well to the toast. Cream cheese adds a tangy flavor, while peanut butter offers a nutty richness, but don’t overdo it!

Slice Strategically: Cut your bananas into uniform rounds for an even appearance. Too thick can overwhelm, while too thin may break; aim for about ¼ inch!

Raisin Placement: Place raisins firmly into the banana slices to ensure they hold. This small step prevents them from rolling away, ensuring your mummy eyes stay in place!

Creative Add-Ons: Feel free to add other elements like mini chocolate chips for eyes or even a drizzle of honey for extra sweetness, but keep the theme spooky!

Serve Fresh: Mummy Toast is best enjoyed right after preparation. The more time they sit, the less “mummy-like” they become—serve immediately for maximum delight!

This delicious Mummy Toast is a fantastic way to celebrate Halloween morning, combining fun with nutritious options!

What to Serve with Mummy Toast?

Transform your Halloween breakfast into a spectacular feast filled with playful flavors and whimsical treats!

  • Pumpkin Spice Overnight Oats: These creamy oats bring warm autumn spices together for a cozy complement to your spooky toast.
  • Jack-O’-Lantern Smoothie Bowls: Fun and vibrant, these smoothie bowls add a burst of nutrition and color, making breakfast festive and energizing.
  • Bloody Berry Smoothies: Sweet, tangy, and garnished with red sugar, these creepy drinks lend a theatrical touch while being refreshingly delicious.
  • Creepy Crawly Cinnamon Rolls: Decorated with icing and gummy worms, these treats offer a sweet surprise that pairs beautifully with the savory Mummy Toast.

Imagine adorning the breakfast table with these finger-licking delights, encouraging everyone to mix and match their favorites for a spooktacular morning gathering!

  • Witch Hat Waffles: Chocolate waffles shaped like hats bring a fun element to the table, paired effortlessly with Mummy Toast for an adventurous taste experience.
  • Spooky Spider Eggs: These delightfully seasoned eggs with olive slices create a protein-packed pairing, balancing the sweetness of your Halloween fare.
  • Monster Muffins: These colorful muffins, with their spinach or candy eyes, add a creative touch to breakfast that kids will love.
  • Haunted Hash Browns: Shaped like ghosts and served with zesty ketchup, these crispy snacks provide a savory crunch to the sweet breakfast lineup.

How to Store and Freeze Mummy Toast

Room Temperature: Enjoy your Mummy Toast fresh for the best taste and texture; consume within a couple of hours of preparation to maintain its delightful appearance and flavor.

Fridge: If you have leftovers, store Mummy Toast in an airtight container in the fridge for up to 1 day. However, note that the toast may lose some crispness.

Freezer: While it’s not recommended to freeze Mummy Toast due to the toppings, you can freeze plain toasted bread for up to 3 months. Simply re-toast and then add your toppings fresh.

Reheating: To reheat, place leftover Mummy Toast in the toaster or on a skillet for a couple of minutes. This brings back some of the original crunch, making it almost as good as fresh!

Mummy Toast

Mummy Toast Recipe FAQs

What type of bread is best for Mummy Toast?
Whole-grain bread is the best choice for Mummy Toast due to its nutritional benefits, including fiber. It provides a sturdy base that holds up well against the toppings. If you’re feeling adventurous, you can also use seeded or sourdough bread for additional flavor!

How long can I store leftover Mummy Toast?
To enjoy Mummy Toast at its best, it’s recommended to consume it within a couple of hours of preparation. If you have leftovers, store them in an airtight container in the fridge for up to 1 day, but keep in mind the toast may lose some of its crispness.

Can I freeze Mummy Toast?
Freezing Mummy Toast is not ideal due to the toppings, which don’t fare well once frozen. However, you can prepare plain toasted bread and freeze it for up to 3 months. To enjoy, simply re-toast the bread and then add your favorite cream cheese or peanut butter and toppings fresh!

What if I run out of raisins for the eyes?
Absolutely! If you run out of raisins, consider using mini chocolate chips or even pieces of blueberries as mummy eyes. It’s all about being creative, and your little monsters will love the surprise!

Can I make Mummy Toast vegan?
Very! For a vegan version, simply replace cream cheese with a plant-based alternative and use peanut butter. This delicious swap maintains the fun while accommodating dietary preferences, making it a spooky delight for everyone!

How can I make Mummy Toast extra spooky?
For additional spooky flair, consider drizzling some honey or chocolate syrup to create “bandages” on the toast or adding a sprinkle of cinnamon for a delightful taste twist. Get creative with your decorations to make each piece uniquely fun!

These Mummy Toast Recipe FAQs will help you craft the perfect Halloween breakfast delight!

Mummy Toast: Spooky and Fun Halloween Breakfast Delight

Mummy Toast is a playful twist on a classic slice that creates a spooky breakfast delight for Halloween, perfect for kids and adults alike.

  • toaster
  • Plate
  • Knife

For the Toast

  • 2 slices Whole-grain bread (A nutritious base that offers fiber.)
  • 2 tablespoons Cream cheese or peanut butter (Choose your spread for creaminess.)

For the Decorations

  • 1 banana Banana slices (For creating the mummy’s face.)
  • 6 pieces Raisins (Use for the eyes of the mummy.)

Step-by-Step Instructions

  1. Begin by toasting two slices of whole-grain bread until golden brown, about 3 to 5 minutes.
  2. Spread a layer of cream cheese or peanut butter over the warm toast evenly.
  3. Slice the banana into thin rounds and arrange the slices on top of the spread, overlapping slightly.
  4. Add two raisins as the eyes of the mummy, pressing them into the banana layer.
  5. Create extra touches with more banana or additional slices as bandages, then serve immediately.

Serve fresh for the best taste and texture; consume within a couple of hours of preparation for maximum delight.

Breakfast
American
fun recipes, Halloween breakfast, Healthy Toast, Mummy Toast, Quick Breakfast, Spooky Breakfast

Filed Under: Breakfast

Delicious Witch Hat Waffles That Spook Up Your Breakfast!

October 15, 2025 by grace bellamy Leave a Comment

The scent of autumn wafts through the kitchen, bringing with it a delightful sense of nostalgia as Halloween approaches. This year, why not transform your breakfast table into a whimsical feast with my Witch Hat Waffles? These adorable, chocolatey creations are not just a treat for the eyes; they also pack a punch in flavor and creativity. Picture your family’s delighted smiles as they dig into these spooky yet scrumptious waffles, topped with fluffy whipped cream and colorful sprinkles for that fun twist. Perfect for both kids and adults, this recipe is a quick and easy way to bring a festive spirit to your morning routine—who said breakfast can’t be magical? Ready to brew up some deliciousness? Let’s get flipping!

Witch Hat Waffles

Why You’ll Love Witch Hat Waffles

Irresistible Charm: These waffles are not only delicious but also visually stunning, making them the star of your Halloween breakfast table.

Quick and Easy: With minimal prep time, you can whip up a batch in no time, perfect for busy mornings.

Fun for Everyone: Kids and adults alike will adore decorating these chocolatey creations with whipped cream and sprinkles—an activity that’s as enjoyable as eating them!

Versatile Delight: Whether served at a Halloween party or a cozy family brunch, they cater to all occasions.

Flavorful Twist: The rich chocolate flavor paired with light, fluffy texture makes for a delightful bite that everyone will love.

Serve with a Scary Story: Pair these cute waffles with a spooky tale, and make breakfast a memorable occasion! For more breakfast inspiration, check out my Halloween Breakfast Ideas for a full festive spread.

Witch Hat Waffle Ingredients

For the Waffle Batter

  • 1 cup all-purpose flour – use whole wheat flour for a healthier twist.
  • 1/4 cup cocoa powder – brings rich chocolate flavor to your waffles.
  • 1 teaspoon baking powder – helps the waffles rise and become fluffy.
  • 1 teaspoon baking soda – enhances the texture for a perfect crunch.
  • 1/4 cup maple syrup – adds a natural sweetness, perfect for Halloween.
  • 1 cup milk – substitute with almond milk for a dairy-free option.
  • 2 large eggs – acts as a binder, creating a fluffy texture.

For the Topping

  • 1/2 cup whipped cream – for a cloud-like finish, it resembles the witch’s hat.
  • 1/4 cup colorful sprinkles – adds festive flair and fun to your presentation.
  • 1/4 cup chocolate syrup – drizzled on top to enhance the chocolatey theme.

For Decoration

  • Chocolate waffle cones – to create the point of the witch’s hat, offering a crunchy element.
  • Gummy worms – for a playful touch that pairs perfectly with the theme of spooky fun.

These Witch Hat Waffles are sure to enchant your breakfast!

Step‑by‑Step Instructions for Witch Hat Waffles

Step 1: Prepare the Waffle Batter
In a large mixing bowl, whisk together 1 cup of all-purpose flour, 1/4 cup of cocoa powder, 1 teaspoon of baking powder, and 1 teaspoon of baking soda until combined. In another bowl, mix 1/4 cup of maple syrup, 1 cup of milk, and 2 large eggs until smooth. Gradually combine the wet ingredients with the dry and stir until just mixed; be careful not to overmix.

Step 2: Preheat the Waffle Maker
Plug in your waffle maker and set it to medium-high heat for about 5 minutes or until it indicates it’s ready. Lightly grease the plates with non-stick cooking spray to ensure your witch hat waffles easily release once they’re cooked. This will help you achieve that beautifully fluffy texture that everyone loves while also preventing any sticking.

Step 3: Cook the Waffles
Pour an appropriate amount of batter (approximately 1/2 cup) onto the center of the preheated waffle maker, spreading it slightly for even cooking. Close the lid and cook for about 4-5 minutes until the waffles are crispy and dark brown. Open the lid carefully and check with a fork or tongs; cooked waffles should be firm and not soggy.

Step 4: Shape the Waffles into Hats
Once cooked, carefully remove the waffles from the iron. Using a sharp knife, trim each waffle into a triangular shape to create the iconic witches’ hat style. Place the triangular pieces on a serving plate, allowing the shape to mimic a witch’s hat for that festive flair.

Step 5: Add Toppings
Generously dollop 1/2 cup of whipped cream on top of each waffle triangle, allowing it to slightly cascade down the sides like a fluffy hat. Drizzle with chocolate syrup for a delightful chocolatey finish. Then, sprinkle about 1/4 cup of colorful sprinkles to add a festive touch that makes the witch hat waffles pop with excitement.

Step 6: Decorate with Cones and Worms
To complete the witch hat look, place a chocolate waffle cone upside down on the whipped cream atop each waffle triangle. This will represent the point of the hat beautifully. For a playful finish, sprinkle a few gummy worms around the plate to enhance the spooky fun of these witch hat waffles.

Step 7: Serve and Enjoy
Present your witch hat waffles with a flourish! Gather your family around as you serve these delightful creations. Pair them with a seasonal beverage or perhaps a spooky story for the perfect Halloween breakfast experience. Watch as smiles light up the room with every delicious bite!

Witch Hat Waffles

Make Ahead Options

These Witch Hat Waffles are perfect for busy mornings and can be prepped in advance to make your Halloween breakfast even easier! You can prepare the waffle batter up to 24 hours in advance by mixing all dry ingredients (flour, cocoa powder, baking powder, and baking soda) and storing them in an airtight container. Whisk the wet ingredients (maple syrup, milk, and eggs) just before cooking to preserve their freshness. Additionally, you can cook the waffles and freeze them for up to 3 days. To maintain their quality, make sure to separate each waffle with parchment paper before placing them in a freezer bag. When ready to serve, simply reheat the waffles in a toaster or oven, decorate with whipped cream, chocolate syrup, and the witch hat cones, and enjoy a delightful meal that’s just as magical!

How to Store and Freeze Witch Hat Waffles

Room Temperature: Store leftover waffles at room temperature for up to 2 hours, ensuring they’re covered to keep them soft and fresh.

Fridge: If you have any waffles left, place them in an airtight container and refrigerate for up to 3 days. Reheat them in a toaster or microwave for a quick breakfast.

Freezer: For longer storage, freeze the cooled waffles in a single layer on a baking sheet, then transfer to a freezer-safe bag. They can last up to 3 months.

Reheating: To enjoy frozen witch hat waffles, simply toast them or heat them in the microwave until warmed through. They’ll taste just as delightful as when freshly made!

Witch Hat Waffles Variations & Substitutions

Feel free to let your creativity shine as you put your spin on these enchanting waffles!

  • Gluten-Free: Swap the all-purpose flour with a gluten-free flour blend for a delightful, gluten-free version.

  • Dairy-Free: Use coconut milk instead of regular milk, and opt for a dairy-free whipped topping to keep it creamy and delicious.

  • Vegan: Replace the eggs with flaxseed meal mixed with water (1 tablespoon flaxseed mixed with 3 tablespoons water equals 1 egg) and use maple syrup in place of honey for sweetness.

  • Sugar-Free: Substitute maple syrup with a sugar-free sweetener, like monk fruit or erythritol, and enjoy a guilt-free breakfast treat!

  • Add Spices: To enhance the flavor, incorporate a pinch of cinnamon or nutmeg into the batter for a warm, aromatic twist that complements the chocolate.

  • Fruit Fillings: Fold in some mashed bananas or shredded zucchini directly into the batter for added moisture and natural sweetness—your waffles will thank you!

  • Nutty Crunch: Stir in chopped nuts or granola for a satisfying crunch, elevating both texture and flavor, making every bite an adventure.

  • Chocolate Chip: Want more chocolate? Toss in a handful of chocolate chips for a decadent little surprise within each waffle. Perfect for the chocoholic in your life!

Explore these variations to create a breakfast experience that’s truly your own! Pair your Witch Hat Waffles with my Halloween Breakfast Ideas for a feast that’ll capture everyone’s imagination and taste buds!

Tips for the Best Witch Hat Waffles

Perfectly Cooked Waffles: Ensure you preheat your waffle maker thoroughly for even cooking; undercooked waffles may fall apart instead of forming the classic hat shape.

Avoid Overmixing: Mix your batter gently; overmixing can lead to tough waffles. The batter should be slightly lumpy for the best texture in your Witch Hat Waffles.

Use Fresh Ingredients: Always opt for fresh eggs and milk for richer flavor and better fluffiness. Stale ingredients can affect the taste and texture.

Customize Toppings: Feel free to get creative with your toppings! Use fruits, nuts, or different sprinkles to cater to your family’s tastes while keeping the witchy theme alive.

Check for Doneness: The visual indicator on your waffle maker might not be foolproof. Open the lid carefully and check if they’re crispy—soft waffles won’t hold the hat shape.

Serve Warm: For optimal enjoyment, serve the witch hat waffles immediately after cooking. Cold or soggy waffles can dampen the magical breakfast experience.

What to Serve with Witch Hat Waffles

The magic of breakfast comes alive when you pair these whimsical waffles with delightful sides that enchant the senses.

  • Autumn Spiced Hot Cider: This warm drink captures the flavors of fall, making your breakfast feel cozy and festive.

  • Goblin Green Smoothie: Packed with spinach, banana, and almond milk, this healthy concoction offers a refreshing contrast to the sweet waffles.

  • Pumpkin Spice Yogurt Parfait: Layered with yogurt, granola, and seasonal berries, this dish adds crunch and sweet flavors that complement the chocolatey waffles beautifully.

  • Scrambled Monster Eggs: Fluffy scrambled eggs tinted with vibrant colors or spices bring a playful yet savory note to the table.

  • Freaky Fruit Salad: A mix of colorful seasonal fruits will enliven your breakfast spread while keeping the magic in each bite. Add a hint of lime to brighten it up!

  • Gourd-acious Orange Juice: Freshly squeezed orange juice offers a bright, citrusy zing that lifts the sweet flavors of the waffles.

Serve these alongside your Witch Hat Waffles to create a Halloween breakfast that’s both breathtaking and delicious!

Witch Hat Waffles

Witch Hat Waffles Recipe FAQs

How do I choose the best ingredients for Witch Hat Waffles?
Absolutely! When selecting your ingredients, look for high-quality cocoa powder and flour. Fresh eggs are vital for fluffy waffles, while good maple syrup adds sweetness. If you’re opting for almond milk, make sure it’s unsweetened for a healthier choice. Fresh produce like berries or sprinkles will enhance the overall presentation and taste.

How should I store leftover Witch Hat Waffles?
To keep your Witch Hat Waffles fresh, let any leftovers cool down before storing. Place them in an airtight container and refrigerate for up to 3 days. You can reheat them in a toaster or microwave when you’re ready to enjoy them again! Just remember, they taste best when they’re warm!

Can I freeze my Witch Hat Waffles?
Certainly! Freezing is a great option for these whimsical waffles. After they’ve cooled completely, lay them out in a single layer on a baking sheet and freeze until solid. Then, transfer them to a freezer-safe bag. They’ll keep well for up to 3 months. When you’re ready to eat, simply toast or microwave them until warmed through!

What if my waffle batter is too thick or too thin?
Very! If your batter seems too thick, add a splash of milk to reach your desired consistency. Conversely, if it’s too thin, sprinkle in a bit more flour until it thickens up. The right texture should be pourable but not runny, which will help create those perfect Witch Hat shapes.

Are Witch Hat Waffles suitable for different dietary restrictions?
Yes! You can easily adapt the Witch Hat Waffles for various dietary needs. For a gluten-free version, use a gluten-free all-purpose flour blend. Substitute eggs with flax eggs or applesauce for a vegan alternative. Just make sure to check your toppings (like whipped cream) for allergens, potentially using coconut whipped cream for a dairy-free option.

How can I ensure my waffles come out crispy?
To achieve the perfect crispy texture, make sure to preheat your waffle maker thoroughly! Avoid opening the lid too early; cook the waffles until they are a deep golden brown. Greasing the plates lightly can also help, ensuring the waffles don’t stick while achieving that delightful crunch on the outside.

Delicious Witch Hat Waffles That Spook Up Your Breakfast!

Whip up delightful Witch Hat Waffles this Halloween for a charming breakfast experience your family will love.

  • Waffle Maker

For the Waffle Batter

  • 1 cup all-purpose flour (use whole wheat flour for a healthier twist)
  • 1/4 cup cocoa powder (brings rich chocolate flavor to your waffles)
  • 1 teaspoon baking powder (helps the waffles rise and become fluffy)
  • 1 teaspoon baking soda (enhances the texture for a perfect crunch)
  • 1/4 cup maple syrup (adds a natural sweetness, perfect for Halloween)
  • 1 cup milk (substitute with almond milk for a dairy-free option)
  • 2 large eggs (acts as a binder, creating a fluffy texture)

For the Topping

  • 1/2 cup whipped cream (for a cloud-like finish, resembles the witch’s hat)
  • 1/4 cup colorful sprinkles (adds festive flair and fun to your presentation)
  • 1/4 cup chocolate syrup (drizzled on top to enhance the chocolatey theme)

For Decoration

  • chocolate waffle cones (to create the point of the witch’s hat, offering a crunchy element)
  • gummy worms (for a playful touch that pairs perfectly with the theme of spooky fun)

Step-by-Step Instructions for Witch Hat Waffles

  1. In a large mixing bowl, whisk together 1 cup of all-purpose flour, 1/4 cup of cocoa powder, 1 teaspoon of baking powder, and 1 teaspoon of baking soda until combined. In another bowl, mix 1/4 cup of maple syrup, 1 cup of milk, and 2 large eggs until smooth. Gradually combine the wet ingredients with the dry and stir until just mixed; be careful not to overmix.
  2. Plug in your waffle maker and set it to medium-high heat for about 5 minutes or until it indicates it’s ready. Lightly grease the plates with non-stick cooking spray to ensure your witch hat waffles easily release once they’re cooked.
  3. Pour an appropriate amount of batter (approximately 1/2 cup) onto the center of the preheated waffle maker, spreading it slightly for even cooking. Close the lid and cook for about 4-5 minutes until the waffles are crispy and dark brown.
  4. Carefully remove the waffles from the iron. Using a sharp knife, trim each waffle into a triangular shape to create the iconic witches’ hat style.
  5. Generously dollop 1/2 cup of whipped cream on top of each waffle triangle, allowing it to slightly cascade down the sides. Drizzle with chocolate syrup and sprinkle with colorful sprinkles.
  6. Place a chocolate waffle cone upside down on the whipped cream atop each waffle triangle. Sprinkle a few gummy worms around the plate to enhance the spooky fun.
  7. Serve your witch hat waffles with a flourish, pairing them with a seasonal beverage or a spooky story.

Serve warm for optimal enjoyment, as cold or soggy waffles can dampen the magical breakfast experience.

Breakfast
American
Chocolate Waffles, Easy Waffles, family breakfast, Festive Recipe, Halloween breakfast, Witch Hat Waffles

Filed Under: Breakfast

Delightful Festive Peppermint Float Recipe to Savor

October 15, 2025 by grace bellamy Leave a Comment

As I poured the shimmering mixture into the punch bowl, the festive spirit filled the air, making it impossible not to smile. If you’re looking for a delightful drink that brings joy to any holiday gathering, the Festive Peppermint Float is just what you need! This creation combines the refreshing taste of peppermint with the creaminess of ice cream, making it a perfect balance for all ages. Not only is it quick to prepare, freeing you from kitchen stress, but its whimsical presentation also transforms any gathering into a celebration. Ready to impress your family and friends with this showstopper? Let’s dive into the details of making a joyfully delicious Peppermint Christmas Float!

Festive Peppermint Float

Why is this Peppermint Float so special?

Festive Spirit: The vibrant colors and refreshing flavors instantly elevate your holiday gatherings.

Easy Preparation: Just mix and serve! You’ll have more time to enjoy the festivities with loved ones rather than in the kitchen.

Crowd-Pleaser: Perfect for all ages, this drink brings smiles to kids and adults alike, making it an instant hit at parties and family get-togethers.

Customizable: Feel free to experiment with different ice cream flavors or toppings for a unique twist each time.

Visual Delight: The whimsical presentation, topped with crushed peppermint, is sure to impress your guests, making it a true showstopper.

Try pairing it with my Holiday Cheese Platter for a complete festive experience!

Festive Peppermint Float Ingredients

• Effortlessly create your holiday drink sensation with these simple ingredients!

For the Drink Base

  • Sparkling Water – This adds a delightful fizz that complements the creamy ice cream.
  • Peppermint Syrup – A must-have for that iconic festive flavor; adjust the quantity for your preferred sweetness.
  • Milk – Using whole milk creates a richer taste, but you can swap for almond or oat milk for a lighter option.

For the Topping

  • Ice Cream – Vanilla or peppermint ice cream adds a creamy sweetness that balances the drink beautifully.
  • Crushed Peppermint Candy – Sprinkle on top for an extra festive crunch and an eye-catching finish.

Now that you have everything ready, let the magic of the Festive Peppermint Float begin!

Step‑by‑Step Instructions for Festive Peppermint Float

Step 1: Prepare the Bowl
Begin by selecting a big punch bowl or a large-serving beverage jar. Ensure it’s clean and dry, ready to hold your delightful mixture. Position it on a stable surface for easy serving. Visualize filling it with your vibrant ingredients, evoking the festive spirit as you prepare to craft the Festive Peppermint Float.

Step 2: Mix the Drink Base
Pour in the base ingredients for your Festive Peppermint Float: sparkling water, peppermint syrup, and milk. Stir the mixture gently with a large spoon for about 30 seconds, ensuring that all the flavors meld beautifully. You should see delightful bubbles forming as the ingredients come together; the sweet peppermint scent will fill the air, enhancing the festive ambiance.

Step 3: Serve the Drink
Using a ladle, carefully pour the mixed drink from the punch bowl into your chosen serving glasses. Aim for about three-quarters full, allowing room for the ice cream. You want your guests to see the effervescent and well-blended mixture, which sets the stage for the delicious toppings to come.

Step 4: Add Ice Cream and Peppermint
Now comes the fun part! Top each glass with a generous scoop of ice cream, allowing it to float gracefully atop the drink. This creamy addition should contrast beautifully with the vibrant colors below. Next, sprinkle crushed peppermint candy over the ice cream, catching the light with a festive sparkle. This visual delight will surely captivate your guests.

Step 5: Present and Enjoy
Serve each drink with a colorful straw and a small spoon to savor every sip and bite. As your friends and family gather around, they’ll be eager to taste the Festive Peppermint Float. The combination of refreshing flavors and holiday cheer will make this drink a hit at your celebration, encouraging laughter and conversation as everyone enjoys their festive creation.

Festive Peppermint Float

Make Ahead Options

The Festive Peppermint Float is a perfect candidate for meal prep, saving you precious time on busy holiday days! You can mix the drink base (sparkling water, peppermint syrup, and milk) up to 24 hours in advance; simply refrigerate it in an airtight container to keep the fizz intact. When it’s time to serve, pour the mixture into glasses, add a scoop of ice cream, and sprinkle with crushed peppermint candy. This way, you and your guests can enjoy a refreshing, festive drink that’s just as delightful, minus the last-minute rush! Enjoy the ease of having your holiday punch prepared ahead, allowing you to focus on what truly matters—spending time with loved ones.

Expert Tips for Festive Peppermint Float

  • Ingredient Quality: Use fresh sparkling water and high-quality peppermint syrup. This ensures vibrant flavors and a delightful fizz in your Festive Peppermint Float.

  • Temperature Matters: Chill your glasses beforehand! Cold glasses keep the drink frosty longer, enhancing the overall experience during your celebrations.

  • Perfect Mixing: Stir gently to combine the ingredients without losing too much fizz. Excessive stirring can deflate the bubbles, affecting the drink’s fun texture.

  • Customizable Toppings: Experiment with different ice cream flavors, like chocolate or coffee, for a unique twist. Just remember to maintain that festive peppermint essence!

  • Serving Size: Fill glasses three-quarters full to allow ample space for ice cream. This prevents overflow and maintains a lovely presentation for your guests.

  • Garnish with Flair: Take it up a notch by adding a sprig of mint or edible glitter for an extra festive touch. Visual appeal is crucial for impressing your holiday guests!

How to Store and Freeze Festive Peppermint Float

Leftover Peppermint Float: If you have any leftover drink, store it in an airtight container in the fridge for up to 2 days; however, for best flavor, consume it as soon as possible.

Ice Cream Separation: If stored, the ice cream will eventually melt into the drink. To maintain texture, consider adding the ice cream just before serving.

Freezing Leftovers: While not recommended, you can freeze the drink base without ice cream in a freezer-safe container for up to 1 month. Thaw it in the fridge and add fresh ice cream before serving.

Reheating Instructions: If the drink base separates after refrigeration, give it a gentle stir and enjoy chilled or over ice for a refreshing twist.

Festive Peppermint Float Variations

Feel free to put your own spin on this delightful drink and cater to your family’s tastes!

  • Dairy-Free: Substitute milk with almond, oat, or coconut milk for a creamy base that keeps everyone happy.

  • Sugar-Free: Use sugar-free peppermint syrup or a natural sweetener to enjoy the same great flavor without the extra calories. It’s a guilt-free treat!

  • Chocolate Twist: Add a splash of chocolate syrup for an indulgent chocolate-peppermint blend that adds depth and richness to each sip.

  • Minty Boost: Enhance the peppermint flavor by adding a few drops of peppermint extract, giving your float a more intense and refreshing taste.

  • Fruity Surprise: Blend in some fresh berries or a splash of cranberry juice for a tangy twist that complements the sweetness with a fruity punch.

  • Spicy Kick: Muddle in a pinch of cinnamon or nutmeg to warm up your float and add a festive spice that perfectly complements the holidays.

  • Layered Delight: To impress your guests, layer the ingredients in the glass before adding the ice cream.

  • Adult Version: Add a splash of peppermint schnapps for a spirited touch that makes this festive drink a delightful holiday cocktail.

For those looking to take their holiday gatherings to the next level, consider serving the Peppermint Float alongside some homemade snacks. Try pairing it with my Gourmet Charcuterie Board or delightful Holiday Appetizer Recipes for a spread that leaves a lasting impression!

What to Serve with Festive Peppermint Float

Imagine a cheerful gathering where laughter fills the air, and every sip of your Peppermint Float is accompanied by delightful treats that elevate the festive spirit.

  • Chocolate Chip Cookies: A classic pairing that complements the minty flavors with rich, sweet chocolate bits, inviting warm memories with each bite.

  • Gingerbread Men: Their spiced goodness brings warmth to your holiday table, creating a nostalgic match for the refreshing Peppermint Float.

  • Roasted Nuts: Crunchy and savory, they offer a satisfying contrast to the sweet, creamy drink, making snacking even more enjoyable.

  • Fruit Skewers: Fresh fruits like strawberries and pineapple add color and brightness to your spread, enhancing the float’s vibrant presentation. The juicy bites balance out the rich sweetness, refreshing your palate.

  • Spiced Apple Cider: This warm beverage infuses your gathering with cozy spices, providing a perfect cozy balance to the chilly Peppermint Float.

  • Marshmallow Treats: Their chewy texture pairs well with the float’s creamy base, adding a fun and festive touch that kids will love.

  • Festive Cheeseboard: Create a mix of cheeses, crackers, and seasonal fruits for a savory contrast that engages all taste buds at your celebration. The combination of flavors keeps guests intrigued and delighted.

  • Pecan Pie: This holiday classic delivers a nutty sweetness, providing a rich finish that beautifully contrasts the lightness of your Peppermint Float.

With all these delightful pairings, your festive gathering will be unforgettable, filled with warmth, laughter, and delicious flavors.

Festive Peppermint Float

Festive Peppermint Float Recipe FAQs

How do I choose the right peppermint syrup?
Look for high-quality peppermint syrup with natural ingredients for the best flavor. A clear syrup indicates purity, while a cloudy one may contain additives. Always check the label to find a syrup that suits your taste, and feel free to adjust the amount according to how sweet you like your float!

How long can I store leftover Peppermint Float?
You can keep any leftover Peppermint Float in an airtight container in the fridge for up to 2 days. However, I recommend consuming it soon after preparation for the best experience, as the ice cream can melt and alter the texture of the drink.

Can I freeze the Festive Peppermint Float?
While I wouldn’t recommend freezing the entire float with ice cream, you can freeze the drink base without it. Pour the mixture into a freezer-safe container and freeze for up to 1 month. When you’re ready to enjoy, simply thaw it in the fridge, then add fresh ice cream just before serving for a delightful treat!

What adjustments can I make for dietary restrictions?
Absolutely! You can use almond, oat, or coconut milk as a dairy-free alternative. If someone has a peppermint allergy, feel free to substitute vanilla syrup in place of the peppermint syrup for a deliciously different flavor. Always keep an eye out for any specific ice cream allergies too and adjust accordingly!

Why is my Peppermint Float flat?
If your float turns out flat, it could be due to stirring too vigorously, which can deflate the bubbles in the sparkling water. To avoid this, mix gently and don’t over-stir once you’ve combined the ingredients. Additionally, make sure your sparkling water is fresh and fizzy for that celebratory bubble effect!

Delightful Festive Peppermint Float Recipe to Savor

Enjoy a refreshing Festive Peppermint Float, blending peppermint and ice cream for holiday joy.

  • punch bowl
  • large spoon
  • ladle
  • Serving glasses

For the Drink Base

  • 4 cups Sparkling Water (Freshly opened for fizz)
  • 1/2 cup Peppermint Syrup (Adjust for sweetness)
  • 2 cups Milk (Whole or alternative milk)

For the Topping

  • 2 cups Ice Cream (Vanilla or peppermint)
  • 1/2 cup Crushed Peppermint Candy (For garnish)

Step‑by‑Step Instructions

  1. Begin by selecting a big punch bowl or a large-serving beverage jar. Ensure it’s clean and dry, ready to hold your delightful mixture.
  2. Pour in the base ingredients for your Festive Peppermint Float: sparkling water, peppermint syrup, and milk. Stir gently for about 30 seconds.
  3. Using a ladle, carefully pour the mixed drink from the punch bowl into your serving glasses, filling about three-quarters full.
  4. Top each glass with a generous scoop of ice cream and sprinkle crushed peppermint candy over the ice cream.
  5. Serve each drink with a colored straw and small spoon, encouraging everyone to enjoy the festive creation.

Chill your serving glasses in advance for best experience. Customize flavors and toppings as desired.

Drink
American
easy festive drink, Festive Peppermint Float, holiday drink, peppermint float, peppermint recipe

Filed Under: Drink

Delicious No-Bake Pecan Pie Balls for Sweet Craving Fix

October 14, 2025 by grace bellamy Leave a Comment

As I pulled the last tray out of the fridge, the tantalizing aroma of sweet pecans and warm cinnamon filled my kitchen, creating a cozy atmosphere perfect for gathering loved ones. These No-Bake Pecan Pie Balls are not just a delightful treat; they offer a quick and fuss-free solution for those moments when you crave something indulgent without turning on the oven. With just 15 minutes of prep time, you’ll whip up a crowd-pleaser that’s both simple and satisfying. Plus, the option to toss in chocolate chips adds that extra touch of decadence, making them even more irresistible! Ready to satisfy your sweet tooth with these delightful little bites? Let’s dive into this easy recipe!

No-Bake Pecan Pie Balls

Why are No-Bake Pecan Pie Balls irresistible?

Quick to make: In just 15 minutes, you can create these delicious treats without any baking fuss. Perfect for a last-minute dessert!

Flavor explosion: The combination of sweetened condensed milk, maple syrup, and cinnamon provides a rich, satisfying flavor that will have everyone reaching for seconds.

Customizable: Feel free to add or swap ingredients; try incorporating dried fruits or even a dash of your favorite nut butter for added creativity.

No mess: With no pans or baking sheets to clean, you can enjoy the sweet moments without the usual cleanup hassle.

Crowd-pleaser: These bite-sized delights are great for parties, potlucks, or family gatherings; they’re sure to impress and bring smiles all around.

No-Bake Pecan Pie Balls Ingredients

• The perfect mix for indulgence!

For the Balls

  • Ground pecans – a nutty base that gives these No-Bake Pecan Pie Balls their irresistible crunch.
  • Sweetened condensed milk – adds creaminess and binds everything together beautifully.
  • Graham cracker crumbs – provides a subtle sweetness and texture reminiscent of traditional pie crusts.
  • Pure maple syrup – enhances the flavor with natural sweetness, making each bite feel like a cozy hug.
  • Ground cinnamon – adds warmth and depth to the flavor profile.
  • Chocolate chips (optional) – for those who want an extra touch of decadence and chocolatey goodness.

Feel free to get creative with your mix-ins to make these little bites your own!

Step‑by‑Step Instructions for No-Bake Pecan Pie Balls

Step 1: Prepare Your Workspace
Begin by clearing your kitchen counter and gathering all your ingredients for the No-Bake Pecan Pie Balls. This includes ground pecans, sweetened condensed milk, graham cracker crumbs, pure maple syrup, ground cinnamon, and optional chocolate chips. Having everything ready will streamline your process and make your cooking experience more enjoyable.

Step 2: Mix Dry Ingredients
In a large mixing bowl, combine the ground pecans, graham cracker crumbs, ground cinnamon, and chocolate chips if you’re using them. Stir these dry ingredients together until they’re well blended, creating a visually appealing mixture with a delightful nutty aroma. This should take about 2–3 minutes of mixing to ensure even distribution.

Step 3: Combine Wet Ingredients
Pour the sweetened condensed milk and pure maple syrup into the bowl with your dry mixture. Using a spatula, fold the ingredients together gently until fully combined. The mixture should form a sticky, cohesive dough that holds together easily, and this step will take about 2–3 minutes.

Step 4: Shape the Balls
Take small portions of the mixture and roll them into bite-sized balls, approximately one inch in diameter. As you shape each No-Bake Pecan Pie Ball, you’ll notice the silky texture and nutty scent filling the air. Aim to make about 24 balls, and this shaping process should take around 10 minutes.

Step 5: Chill the Balls
Place the rolled No-Bake Pecan Pie Balls onto a parchment-lined baking sheet, ensuring they have a little space between each ball. Refrigerate them for at least 30 minutes, allowing the flavors to meld and the balls to firm up. You’ll know they’re ready when they’re firm to the touch, making them easy to pick up and serve.

Step 6: Serve and Enjoy
Once chilled, arrange your delightful No-Bake Pecan Pie Balls on a platter or place them in cute cupcake liners. They can be served immediately, or stored in the fridge for later enjoyment. These treats are perfect for sharing at gatherings, making the most of their irresistible taste and delightful presentation.

No-Bake Pecan Pie Balls

Make Ahead Options

These No-Bake Pecan Pie Balls are a fantastic option for meal prep enthusiasts! You can prepare the mixture and roll the balls up to 24 hours in advance; simply refrigerate them in an airtight container. For optimal freshness, keep them well-spaced on the baking sheet and cover tightly before refrigeration to prevent drying out. If you’d like to make even larger batches, these delightful treats can be frozen for up to 3 months. Just remember to thaw them in the fridge overnight before serving. When you’re ready to enjoy, simply pop them out of the fridge, plate them up, and watch your family and friends indulge in these no-fuss, yet absolutely delicious bites!

Tips for the Best No-Bake Pecan Pie Balls

  • Chill Well: Ensure you refrigerate the balls for at least 30 minutes. This helps them firm up and prevents them from falling apart.

  • Measure Precisely: Accurate measurements are key! Too much sweetened condensed milk could make the mixture overly sticky, while too few pecans could affect the texture.

  • Roll Uniformly: Aim for consistent sizes when rolling the balls. This ensures even chilling and makes for a beautiful presentation when served.

  • Add Variety: Don’t hesitate to experiment with mix-ins like dried fruits or different nuts! These personal touches can elevate your No-Bake Pecan Pie Balls to a whole new level.

  • Storage Tips: Store leftovers in an airtight container in the fridge for up to one week. They’ll maintain their delicious taste and texture for several days!

What to Serve with No-Bake Pecan Pie Balls?

These sweet bites are perfect for satisfying any dessert craving, and they pair beautifully with an array of delicious sides.

  • Fresh Berries: Juicy strawberries or raspberries add a burst of freshness that balances the rich, nutty flavors of the pecan balls. Their tartness makes each bite even more satisfying.

  • Vanilla Ice Cream: A smooth scoop of creamy vanilla ice cream melts perfectly with the No-Bake Pecan Pie Balls, creating a delightful contrast in temperature and texture.

  • Chocolate Dipping Sauce: Drizzle warm chocolate sauce over the pecan balls for an extra layer of indulgence that transforms these bites into a decadent treat.

  • Whipped Cream: A cloud of fluffy whipped cream serves as a light and airy companion, complementing the dense sweetness of the pecan balls with a velvety touch.

  • Coffee or Espresso: Pair this sweet treat with a steaming cup of coffee or espresso. The rich, bold flavors will harmonize beautifully, enhancing the dessert experience.

  • Nutty Granola: A sprinkle of crunchy granola over the No-Bake Pecan Pie Balls adds an enjoyable texture. Plus, it brings in extra nutty flavors to elevate the experience.

  • Creamy Fruit Salad: A chilled fruit salad brings refreshing juiciness and a medley of flavors that cuts through the richness of the pecan balls, making for a well-rounded dessert spread.

How to Store and Freeze No-Bake Pecan Pie Balls

Fridge: Store No-Bake Pecan Pie Balls in an airtight container in the refrigerator for up to 1 week. The cool environment keeps them firm and fresh, perfect for snacking anytime.

Freezer: For longer storage, place the balls in a single layer on a baking sheet to freeze them individually. Once frozen, transfer to an airtight container or resealable bag, where they can last up to 3 months.

Thawing: To enjoy frozen No-Bake Pecan Pie Balls, simply transfer them to the refrigerator for a few hours to thaw before serving. This preserves their delightful texture and flavor.

Reheating: These treats are meant to be enjoyed chilled, so no reheating is necessary—just pop them straight from the fridge or freezer and savor their deliciousness!

No-Bake Pecan Pie Balls Variations

Feel free to explore these creative twists and swaps that can elevate your No-Bake Pecan Pie Balls into something truly unique!

  • Nut-Free: Substitute ground pecans with sunflower seeds or a nut-free blend. You’ll still enjoy that delightful crunch minus the nuts.

  • Vegan Delight: Replace sweetened condensed milk with coconut cream and use maple syrup for a luscious, plant-based treat. This variation ensures everyone can indulge!

  • Fruit-Filled: Add 1/2 cup of finely chopped dried fruits, like cranberries or apricots, for a chewy texture. The fruity contrast adds a delightful surprise in every bite.

  • Spicy Kick: Incorporate a pinch of cayenne pepper for a subtle heat that enhances the sweetness. It’s a daring twist that makes these treats even more exciting!

  • Coconut Coating: Roll your Pecan Pie Balls in shredded coconut after chilling for an extra layer of flavor and a tropical touch. It provides a beautifully textured exterior.

  • Dark Chocolate Drizzle: Melt dark chocolate and drizzle over chilled balls for a decadent finish. This simple step creates a stunning presentation and deepens the flavor.

  • Maple Pecan Swirl: Use maple-flavored syrup instead of plain maple syrup for an indulgent twist. The added maple flavor will take each ball to a new level of sweetness.

  • Almond Joy: Add 1/2 cup of almond butter to the mix for a creamy richness that complements the pecans beautifully. The nutty flavor is simply irresistible!

Need more ways to customize your treats? You can always check out how to mix things up with your favorite ingredients or explore additional baking hacks that make home cooking a breeze! Happy cooking!

No-Bake Pecan Pie Balls

No-Bake Pecan Pie Balls Recipe FAQs

How do I choose ripe and fresh pecans for my No-Bake Pecan Pie Balls?
Absolutely! When selecting pecans, look for ones that are plump, smooth, and free from dark spots or shriveling. Fresh pecans should have a rich, nutty aroma. If you can, choose raw or lightly toasted pecans for the best flavor in your No-Bake Pecan Pie Balls.

What’s the best way to store No-Bake Pecan Pie Balls?
To keep your No-Bake Pecan Pie Balls fresh, store them in an airtight container in the refrigerator for up to 1 week. They’ll maintain their delightful texture and flavor, perfect for snacking anytime. Make sure to separate layers with parchment paper if you’re stacking them!

Can I freeze No-Bake Pecan Pie Balls for later?
Certainly! To freeze your No-Bake Pecan Pie Balls, first place them in a single layer on a baking sheet and freeze until they are firm (about 1-2 hours). Afterward, transfer them to an airtight container or a resealable bag for up to 3 months. For best results, label the container with the date, so you can enjoy them at their best.

What should I do if the mixture is too sticky to roll into balls?
Very common! If your mixture feels overly sticky, you can try chilling it in the fridge for a few minutes to help it firm up. Alternatively, lightly moisten your hands with water or coat them with a bit of graham cracker crumbs; this will help prevent sticking as you roll your No-Bake Pecan Pie Balls.

Are No-Bake Pecan Pie Balls suitable for people with nut allergies?
Not really! These No-Bake Pecan Pie Balls contain pecans, which can trigger allergies in those sensitive to tree nuts. If you’re looking to make a nut-free version, consider substituting the pecans with sunflower seeds or oats, adjusting the mixture accordingly to maintain the desired consistency.

How can I customize my No-Bake Pecan Pie Balls?
The more the merrier! You can easily customize your recipe by adding in ingredients like dried fruits for extra sweetness or different types of nuts for a varied texture. You might also consider swapping out the maple syrup for honey or agave nectar, or adding a splash of vanilla extract for an extra layer of flavor!

Delicious No-Bake Pecan Pie Balls for Sweet Craving Fix

These No-Bake Pecan Pie Balls are a quick and delightful dessert that satisfies sweet cravings without baking.

  • Mixing Bowl
  • spatula
  • Baking Sheet
  • parchment paper

For the Balls

  • 2 cups ground pecans (a nutty base that gives these No-Bake Pecan Pie Balls their irresistible crunch.)
  • 1 can sweetened condensed milk (adds creaminess and binds everything together beautifully.)
  • 1 cup graham cracker crumbs (provides a subtle sweetness and texture reminiscent of traditional pie crusts.)
  • 1/2 cup pure maple syrup (enhances the flavor with natural sweetness.)
  • 1 teaspoon ground cinnamon (adds warmth and depth to the flavor profile.)
  • 1/2 cup chocolate chips (optional, for an extra touch of decadence.)

Step-by-Step Instructions

  1. Begin by clearing your kitchen counter and gathering all your ingredients for the No-Bake Pecan Pie Balls.
  2. In a large mixing bowl, combine the ground pecans, graham cracker crumbs, ground cinnamon, and chocolate chips if you’re using them.
  3. Pour the sweetened condensed milk and pure maple syrup into the bowl with your dry mixture. Fold the ingredients together gently until fully combined.
  4. Take small portions of the mixture and roll them into bite-sized balls, approximately one inch in diameter.
  5. Place the rolled No-Bake Pecan Pie Balls onto a parchment-lined baking sheet and refrigerate them for at least 30 minutes.
  6. Once chilled, arrange your No-Bake Pecan Pie Balls on a platter or place them in cute cupcake liners.

Ensure you refrigerate the balls for at least 30 minutes for best results.

Dessert
American
easy dessert, No-Bake Pecan Pie Balls, no-bake recipes, pecan dessert, Sweet Treats, sweets

Filed Under: Dessert

Irresistible Toffee: Easy Homemade Candy Bliss

October 14, 2025 by grace bellamy Leave a Comment

The sweet, buttery aroma of toffee wafts through the air as I melt the rich ingredients together, transporting me back to my grandmother’s kitchen. Today, I’m excited to share my recipe for Better Than Anything Toffee, a delightful treat that is perfect for those looking to bring a little joy into their lives while steering clear of store-bought snacks. This easy-to-make recipe not only comes together in just about 15 minutes but also promises to be a crowd-pleaser whenever you share it. With a luscious layer of chocolate and a satisfying crunch from chopped nuts, you’ll find this homemade toffee is simply irresistible. Are you ready to impress your friends and family with a sweet surprise they’ll crave again and again? Let’s dive in!

Toffee

Why is this toffee so irresistible?

Decadent, mouthwatering flavor: The rich buttery base, combined with velvety chocolate, creates a taste that’s simply divine.

Quick and easy: You can whip up this delightful treat in just 15 minutes, making it perfect for those who crave homemade goodness but are short on time.

Crowd favorite: Whether for a party or a cozy night in, this toffee is sure to impress friends and family alike with its delectable layers.

Customization options: Feel free to switch up the nuts or chocolate types based on your preference or dietary needs! It’s versatile enough for everyone.

Nostalgic experience: Each bite brings back warm memories, blending tradition with deliciousness that makes it perfect for sharing.

If you’re eager to elevate your dessert game, explore more about making easy homemade candy.

Toffee Ingredients

• Gather your essentials for this delightful treat!

For the Toffee Base

  • Unsalted butter – rich and creamy, it’s the foundation of that buttery goodness.
  • Granulated sugar – brings sweetness and helps create that perfect hard-crack texture.
  • Salt – a pinch enhances all the flavors and balances the sweetness.
  • Vanilla extract – adds a warm, aromatic quality that elevates the toffee experience.
  • Water – assists in melting the sugar while ensuring an ideal consistency.

For the Topping

  • Semi-sweet or milk chocolate chips – spread them while warm for a luscious chocolate layer that melts in your mouth.
  • Chopped pecans, walnuts, or almonds – choose your favorite nuts to add a satisfying crunch; they also add a delightful nutty flavor to the toffee.

Feel free to adjust the ingredients to make this toffee your own, but don’t underestimate how toffee can create lasting memories!

Step‑by‑Step Instructions for Better Than Anything Toffee

Step 1: Prepare Your Workspace
Begin by lining a 9×13-inch baking dish or a baking sheet with parchment paper or a silicone mat for easy removal later. Gather all your ingredients and tools, including a heavy-bottomed saucepan and a spatula, ensuring that everything is measured and ready to create your homemade toffee.

Step 2: Melt the Ingredients
In your heavy-bottomed saucepan, combine the unsalted butter, granulated sugar, salt, and water. Over medium heat, stir constantly to melt the mixture, watching for the mixture to turn a deep golden brown. Cook until it reaches the hard crack stage at 300°F, which should take about 10-15 minutes—a perfect sign that your toffee is coming together beautifully.

Step 3: Add Vanilla and Pour
Once the toffee base reaches the desired temperature, promptly remove it from the heat. Stir in the vanilla extract, allowing the warm aroma to fill your kitchen. Immediately pour the toffee mixture onto your prepared dish, using a spatula to spread it evenly across the surface. Let it sit for 1-2 minutes until it begins to firm up slightly.

Step 4: Melt the Chocolate
While the toffee is still warm, sprinkle the chocolate chips evenly over the top. Wait about 2 minutes for the chips to soften and melt from the heat of the toffee. Then, take your spatula and gently spread the melted chocolate into an even layer, creating a luscious topping for your Better Than Anything Toffee.

Step 5: Add Nuts and Press
With the chocolate layer now melted, sprinkle your choice of chopped nuts over the top of the chocolate. Gently press the nuts into the chocolate to ensure they adhere perfectly. This step not only adds crunch but also enhances the flavor, making this toffee irresistible!

Step 6: Cool and Break
Allow the toffee to cool completely at room temperature for about 2 hours. If you’re in a hurry, you can speed up the process by placing it in the fridge for 30 minutes. Once fully hardened, break the toffee into bite-sized pieces, and prepare to share your delicious homemade treat with family and friends.

Toffee

Expert Tips for Perfect Toffee

  • Watch the Temperature: Use a candy thermometer to ensure the mixture reaches 300°F, which is crucial for achieving that perfect hard-crack texture. Undercooking can lead to a chewy consistency instead of a crisp toffee.

  • Stir Constantly: Stir the mixture continuously to prevent scorching. A heavy-bottomed saucepan distributes heat evenly, reducing the chance of burns, and ensuring a smooth toffee.

  • Timing Matters: Pour the toffee mixture onto your baking sheet quickly after reaching the right temperature. Delaying could cause it to harden too soon, making spreading difficult.

  • Layering Chocolate: Let the chocolate chips sit on the warm toffee for 2 minutes before spreading. This helps achieve a smooth, silky chocolate layer rather than clumps.

  • Nut Choices: Experiment with different nuts for varied flavors! Pecans provide a buttery taste, while almonds add extra crunch. Just make sure they’re evenly distributed for the best taste in every bite of your homemade toffee.

  • Storage Tips: Keep the toffee in an airtight container at room temperature for up to two weeks. This helps retain its delightful crunch and flavor when you want to indulge again!

Make Ahead Options

These Better Than Anything Toffee treats are perfect for meal prep enthusiasts! You can melt the toffee base up to 24 hours in advance, allowing it to cool and harden before storing it in an airtight container. The chocolate and nut topping can also be prepared the same day, and simply added just before serving for the freshest taste. To maintain quality, be sure to refrigerate any leftover toffee in a sealed container for up to 3 days. When you’re ready to enjoy, break the chilled toffee into pieces and let it come to room temperature for that perfect melt-in-your-mouth experience. With these prep-ahead options, you’ll save precious time while still serving up a delightful homemade treat!

What to Serve with Better Than Anything Toffee

Indulge in a delightful gathering filled with sweet companions to make your toffee experience truly unforgettable.

  • Vanilla Ice Cream: A scoop of creamy vanilla ice cream beautifully contrasts the crunchy toffee, enhancing the sweetness in every bite. Serve it nestled beside warm toffee for a cozy dessert scenario.

  • Fresh Berries: Juicy strawberries or blueberries add a burst of freshness, brightening the rich flavors of the toffee. Their tartness cuts through the sweetness, making each mouthful a vibrant delight.

  • Espresso or Coffee: The bold, deep flavors of a rich coffee or espresso create a perfect pairing. The warmth of the drink beautifully complements the buttery toffee, making it an ideal end to your day.

  • Caramel Sauce: Drizzling warm caramel over your toffee adds an extra layer of decadence, inviting a delightful gooey texture that makes the experience even more indulgent.

  • Chocolate-Dipped Fruit: Fresh fruit dipped in chocolate mirrors the chocolatey richness of the toffee while adding a fresh pop of flavor. Try bananas or apples for a heavenly pairing!

  • Nutty Cheesecake: A slice of nutty cheesecake offers creamy richness that balances out the crunchiness of the toffee. The textures together create a luxurious dessert experience.

  • Nutty Hot Chocolate: A warm cup of nutty hot chocolate brings comforting nostalgia as you savor each piece of toffee, while the warmth enhances flavors and textures beautifully.

  • Milk: For a classic pairing, a cold glass of milk harmonizes perfectly with the sweetness of the toffee, washing it down smoothly and providing a comforting vibe.

  • Pecan Pie: Highlighting the nutty elements of both desserts, a slice of pecan pie brings a delightful crunch and richness that pairs splendidly with the toffee.

Toffee Variations & Substitutions

Feel free to get creative with your toffee recipe and customize it to suit your taste and needs!

  • Nut-Free: Omit the nuts and use sunflower seeds or pumpkin seeds for crunch without allergens; it’s still delightful!

  • Dairy-Free: Swap the unsalted butter for coconut oil or a dairy-free butter alternative. Enjoy the same rich flavor but without the dairy!

  • Gluten-Free: Rest assured, this toffee is naturally gluten-free! Just ensure your chocolate chips are certified gluten-free to keep it safe for everyone.

  • Dark Chocolate Delight: Replace semi-sweet chocolate chips with dark chocolate for a richer, more sophisticated toffee. This adds a luscious depth that chocolate lovers will appreciate!

  • Spicy Kick: Add a pinch of cayenne pepper or a sprinkle of sea salt on the chocolate layer for a spicy-sweet experience. It’s a daring twist that can take the flavor to another level!

  • Flavor Infusion: Experiment by adding different extracts! Replace vanilla with almond extract for a lovely nutty aroma or orange extract for a fresh citrus touch.

  • Fruit Additions: Fold in dried fruits like cranberries or apricots with the nuts for a chewy surprise. The sweet-and-sour flavor is a fantastic counterpoint to the toffee.

  • Add a Crunch: Mix crushed pretzels or potato chips into the chocolate layer just before it sets for a sweet-and-salty, extra crunchy delight your friends won’t forget!

As you explore these variations, you can make each batch uniquely yours! And if you find yourself craving more delicious treats, check out my guide on easy homemade candy and discover even more delightful creations to share with loved ones.

Storage Tips for Toffee

  • Room Temperature: Keep the toffee in an airtight container at room temperature for up to 2 weeks to retain its delightful crunch and flavor.
  • Fridge: If you prefer a slightly firmer texture, you can store the toffee in the fridge. Just be sure to let it come to room temperature before serving for the best taste.
  • Freezer: For longer storage, wrap the toffee pieces in plastic wrap and place them in a freezer bag. It will stay fresh for up to 3 months—perfect for future cravings!
  • Reheating: If you want to refresh the chocolate topping, place the toffee in a warm oven (around 200°F) for a few minutes to melt the chocolate slightly before enjoying.

Toffee

Better Than Anything Toffee Recipe FAQs

How do I know if my ingredients are ripe or up to standard?
Absolutely! For the best results, use fresh unsalted butter and high-quality chocolate chips. The chocolate should be glossy and smooth; opt for semi-sweet or milk chocolate based on your taste. As for the nuts, choose those that are raw or lightly roasted, avoiding any that appear stale or have dark spots.

How should I store my toffee, and how long does it last?
Very! Keep your Better Than Anything Toffee in an airtight container at room temperature for up to 2 weeks. If you’d like to store it in the fridge for a firmer bite, just remember to bring it back to room temperature before serving to enjoy its full flavor.

Can I freeze my toffee?
Absolutely! To freeze your toffee, wrap each piece in plastic wrap and place them in a freezer bag or airtight container. It can stay fresh for up to 3 months. When you’re ready to enjoy it, simply remove it from the freezer and let it sit at room temperature until softened.

What should I do if my toffee turns out chewy instead of crunchy?
Oh no! If your toffee ends up chewy, it might not have reached the hard crack stage (300°F). Make sure to monitor the temperature closely with a candy thermometer next time. If you find yourself in a pinch, you can bake the chewy toffee in a low oven (around 200°F) for about 10 minutes to help it crisp up—just keep an eye on it!

Are there any dietary considerations I should be aware of?
Oh, absolutely! If you’re catering to allergies, ensure your nuts are safe for your guests. For a nut-free version, you can simply omit the nuts entirely. Also, if you’re cooking for anyone with dairy allergies, consider using a vegan butter substitute and dairy-free chocolate chips to make a delicious alternative.

My chocolate isn’t melting evenly on the toffee, what can I do?
Very! If your chocolate chips aren’t melting evenly, allow them a little more time on the warm toffee—2 minutes should suffice. If they still seem stubborn, you can gently heat them with a spatula until smooth. If you want even smoother coverage, you could also melt the chocolate separately in a microwave-safe bowl before spreading it over the toffee.

Irresistible Toffee: Easy Homemade Candy Bliss

This easy homemade toffee is rich, buttery, and perfect for satisfying your sweet tooth.

  • Heavy-bottomed saucepan
  • spatula
  • 9×13-inch baking dish

Toffee Base

  • 1 cup Unsalted butter (rich and creamy)
  • 1 cup Granulated sugar (brings sweetness)
  • 1 teaspoon Salt (enhances flavors)
  • 1 teaspoon Vanilla extract (adds warm aroma)
  • 2 tablespoons Water (ensures ideal consistency)

Topping

  • 2 cups Semi-sweet or milk chocolate chips (for luscious layer)
  • 1 cup Chopped nuts (pecans, walnuts, or almonds) (adds crunch and flavor)

Step-by-Step Instructions

  1. Prepare Your Workspace: Line a 9×13-inch baking dish with parchment paper. Gather all ingredients and tools.
  2. Melt the Ingredients: In a saucepan, combine butter, sugar, salt, and water over medium heat, stirring until golden brown.
  3. Add Vanilla and Pour: Stir in vanilla extract and pour the mixture into the prepared dish, spreading evenly.
  4. Melt the Chocolate: Sprinkle chocolate chips over the warm toffee and allow to soften, then spread into an even layer.
  5. Add Nuts and Press: Sprinkle your choice of nuts over the melted chocolate and gently press them in.
  6. Cool and Break: Let the toffee cool completely for about 2 hours before breaking into pieces.

Experiment with different nuts for varied flavors and keep in an airtight container at room temperature for up to 2 weeks.

Dessert
American
candy, chocolate, dessert, homemade, sweet, toffee

Filed Under: Dessert

Wisconsin Apple Kringle: A Cozy Bake to Brighten Your Day

October 14, 2025 by grace bellamy Leave a Comment

As I stood in the kitchen, the warm scent of apples and cinnamon began to dance through the air, instantly transporting me to the heart of Wisconsin. This Wisconsin Apple Kringle recipe is not just a nod to a cherished Midwestern tradition; it’s a delightful way to slow down and savor homemade goodness. With quick prep and a freezer-friendly advantage, this pastry is perfect for those of us who crave the comfort of home-baked treats without spending hours in the kitchen. The soft, flaky layers enveloping a sweet apple filling create a comforting experience, whether enjoyed for breakfast or as a delightful dessert. Curiosity piqued? Let’s bring the magic of Wisconsin to your table!

Wisconsin Apple Kringle

Why is this Kringle so special?

Homemade Delight: This Wisconsin Apple Kringle brings the warmth of home baking right to your kitchen, with ingredients you likely already have.

Flavorful Filling: The luscious apple pie filling, combined with a hint of cinnamon, creates a mouthwatering experience that rivals any bakery treat.

Easy to Make: With just a few simple steps, this recipe is perfect for both novice and experienced bakers looking for a satisfying project.

Versatile Enjoyment: Whether served warm with a cup of coffee or as a sweet late-night snack, it’s sure to become a family favorite. Don’t forget to check out our baking tips for perfect results every time!

Great for Freezing: Make a batch ahead of time and freeze it for an effortless dessert option whenever you crave something sweet. Your friends and family will be begging for more!

Wisconsin Apple Kringle Ingredients

Discover the perfect blend of flavors with these ingredients!

For the Dough

  • All-purpose flour – This forms the base of your soft and flaky crust.
  • Salt – Enhances the flavor, making every bite delightful.
  • Granulated sugar – Adds a touch of sweetness right where it belongs.
  • Cold unsalted butter – Ensure it’s cold for that signature flakiness.
  • Vanilla extract – A hint of vanilla complements the apple filling beautifully.
  • Cold water – Helps bind the dough together without warming it up.

For the Filling

  • Apple pie filling – The star of the show, offering a sweet, spiced goodness.
  • Ground cinnamon (optional) – A dash adds warmth and depth to the flavor experience.

For the Glaze

  • Powdered sugar – Creates a smooth, sweet topping that drizzles beautifully.
  • Milk – Adjusts the consistency for the perfect glaze.
  • Vanilla extract – A splash goes a long way in heightening flavor.

Extras

  • Egg – For the wash, giving your kringle its gorgeous golden crust.

Step‑by‑Step Instructions for Wisconsin Apple Kringle

Step 1: Make the Dough
In a large mixing bowl, combine 2 cups of all-purpose flour, 1 teaspoon of salt, and 3 tablespoons of granulated sugar. Cut in 1 cup of cold, cubed unsalted butter using a pastry cutter or fork until the mixture resembles coarse crumbs. This step ensures a flaky texture. Then, add 2 teaspoons of vanilla extract and 1/3 cup of cold water. Mix until the dough forms, then refrigerate for at least one hour to firm up.

Step 2: Roll Out the Dough
After chilling, flour your surface liberally and roll out the chilled dough into a rectangle about 1/8-inch thick. Aim for a smooth and even thickness to create a tender Wisconsin Apple Kringle. Keep a little extra flour on hand to prevent sticking. Once rolled, visualize the rectangle as a canvas to wrap around the delicious filling.

Step 3: Add the Filling
Place 1 cup of apple pie filling in a line down the center of your rolled dough. If you wish to enhance the flavor, sprinkle 1 teaspoon of ground cinnamon over the filling. This adds warmth and a hint of spice to the kringle. Make sure the filling is placed evenly so every bite is deliciously satisfying.

Step 4: Shape the Kringle
Begin folding the dough over the apple filling to form a loose oval or horseshoe shape, encasing the filling inside. Be careful not to overfill the dough to prevent leaks during baking. As you fold, lightly press the edges to secure the shape and keep the deliciousness contained as it bakes.

Step 5: Seal and Prepare for Baking
Pinch the edges firmly together to seal the dough, creating a cohesive shape. Use a knife to lightly score the top; this allows steam to escape while baking. Then, brush the top with an egg wash made from 1 oz of beaten egg. This wash will give your Wisconsin Apple Kringle a beautiful golden crust as it bakes.

Step 6: Bake the Kringle
Preheat your oven to 375°F (190°C). Place the shaped kringle on a baking sheet lined with parchment paper. Bake for 25 minutes or until the kringle is a deep golden brown, filling your kitchen with delightful aromas. Keep an eye on the color—golden brown means it’s ready to come out and cool.

Step 7: Prepare the Glaze
While the kringle cools, whisk together 1 cup of powdered sugar, 2 teaspoons of milk, and 1 teaspoon of vanilla extract to create a smooth glaze. The glaze should flow easily but hold its shape when drizzled. This sweet topping will enhance the delightful flavors of your Wisconsin Apple Kringle.

Step 8: Glaze and Serve
Once the kringle has cooled for about 10 minutes, drizzle the prepared glaze generously over the top. Allow it to set for a moment before slicing into the pastry. This stunning Wisconsin Apple Kringle is now ready to be shared at your cozy breakfast table or as a sweet dessert treat!

Wisconsin Apple Kringle

Tips for the Best Wisconsin Apple Kringle

Dough Temperature Matters: Keep your butter and water cold to ensure a flaky texture in your Wisconsin Apple Kringle. Warm ingredients can result in tough dough.

Don’t Overfill: When adding the apple pie filling, remember that a little goes a long way! Overfilling can cause leaks during baking, ruining the shape.

Seal It Well: Pinch the edges firmly to create a tight seal before baking. This prevents the filling from escaping and keeps the flavors intact.

Egg Wash Advantage: Brush the dough with egg wash for a beautifully golden crust. This simple step elevates your kringle’s visual appeal!

Watch for Doneness: Keep an eye on your kringle as it bakes; the goal is a rich golden brown. Timing can vary based on your oven, so trust your senses!

Wisconsin Apple Kringle Variations & Substitutions

Feel free to let your creativity shine and customize this delightful treat to suit your tastes!

  • Dairy-Free: Swap the butter for a plant-based alternative like coconut oil or vegan butter to suit dietary needs.
  • Nutty Flavor: Add chopped walnuts or pecans to the apple filling for an extra crunchy twist and a lovely earthiness. These nuts bring a satisfying texture that complements the soft apples beautifully.
  • Different Fruit Filling: Try replacing the apple pie filling with cherry, peach, or even a mixed berry blend for a refreshing change of flavor. Each fruit brings its unique sweetness and can elevate your kringle experience!
  • Gluten-Free: Use a 1:1 gluten-free flour blend instead of all-purpose flour for a gluten-free option that doesn’t compromise on taste. Just ensure your other ingredients are also gluten-free!
  • Spiced Up: Add a pinch of nutmeg or ginger to the apple filling for a warm spiciness that takes the traditional flavor to new heights. These warming spices can bring a beautiful depth to every bite.
  • Extra Sweet: Incorporate some brown sugar into your apple filling to enhance the caramelization and depth of flavors when baked. This simple twist elevates the sweet experience immensely!
  • Maple Glaze: For a unique touch, replace the milk in the glaze with pure maple syrup for a rich and earthy sweetness that pairs perfectly with the apple. That lovely maple undertone is sure to bring joy to your taste buds!
  • Cinnamon Roll Version: Twirl the filling with fresh cinnamon roll dough instead of the kringle dough for a fun twist! Roll it tightly and slice before baking for delightful spirals.

Happy baking, and may your kitchen be filled with enticing aromas and warm memories! For more baking inspiration, check out our baking tips to ensure your kringle is a success!

Make Ahead Options

These Wisconsin Apple Kringle are perfect for busy home cooks looking to save time during the week! You can prepare the dough and chill it up to 24 hours in advance, ensuring convenience when you’re ready to bake. Simply follow the first two steps of the recipe—mixing the dry ingredients and cutting in the butter—then wrap the formed dough tightly in plastic wrap and refrigerate. The apple filling can also be made up to 3 days ahead; just store it in an airtight container to maintain its freshness. When you’re ready to bake, roll out the dough, fill it, and proceed with shaping and baking as directed. Enjoy the deliciousness of homemade kringle anytime with minimal effort!

How to Store and Freeze Wisconsin Apple Kringle

Fridge: Store any leftover Wisconsin Apple Kringle in an airtight container for up to 3 days to keep it fresh and maintain its delightful flavors.

Freezer: For longer storage, wrap the kringle tightly in plastic wrap and then in aluminum foil. Freeze for up to 3 months, ensuring you have a sweet treat on hand whenever cravings hit.

Thawing: To enjoy frozen kringle, thaw it in the refrigerator overnight. For a warm treat, reheat slices in the oven at 350°F (175°C) for about 10 minutes.

Reheating: If you prefer a quick fix, you can reheat individual slices in the microwave for about 20-30 seconds, but be cautious not to dry it out!

What to Serve with Wisconsin Apple Kringle

Looking to create a cozy gathering or an inviting breakfast spread? Here are some delightful pairings that will complement your kringle beautifully.

  • Warm Spiced Cider: The aromatic flavors of cinnamon and cloves in warm spiced cider echo the comforting notes in the apple filling. It’s a perfect cozy drink to sip alongside the kringle.

  • Vanilla Ice Cream: A scoop of creamy vanilla ice cream adds a cold, velvety contrast to the warm kringle—a classic pairing that elevates the dessert experience.

  • Fresh Fruit Salad: A vibrant fruit salad brings a refreshing balance to the sweet richness of the kringle. Try crisp apples and juicy berries for a textural burst.

  • Coffee or Tea: Whether you prefer a bold coffee or soothing tea, these beverages enhance the flavors of the kringle while providing a warm touch as you enjoy each slice.

  • Honey Butter: Spread a bit of honey butter on your slice of kringle for an extra layer of sweetness and richness. The creamy texture pairs flawlessly with the flaky pastry.

  • Maple Syrup Drizzle: A light drizzle of maple syrup adds a touch of sweetness to the kringle, enhancing its flavor while introducing a delightful stickiness.

  • Whipped Cream: Light and airy whipped cream on the side gives a luxurious feel to your kringle. It’s great for those indulgent moments when you want just a bit more.

  • Nut Mix: A variety of nuts adds a satisfying crunch and nutty flavor, complementing the soft, flaky texture of the kringle. This pairing makes for a great snack alongside.

  • Cheese Platter: Include some creamy brie or sharp cheddar to balance the sweetness of the kringle with savory notes that play harmoniously together.

Each of these suggestions brings out the delightful flavors of the Wisconsin Apple Kringle while creating a memorable meal experience. Enjoy the comforts of home with these delicious accompaniments!

Wisconsin Apple Kringle

Wisconsin Apple Kringle Recipe FAQs

What kind of apples should I use for the filling?
Absolutely! For your Wisconsin Apple Kringle, you want to select apples that are sweet and slightly tart for the best flavor. Varieties like Granny Smith, Honeycrisp, or Fuji work wonderfully. For extra texture, you can mix two types!

How should I store any leftover kringle?
To enjoy your Wisconsin Apple Kringle at its best, store any leftovers in an airtight container in the refrigerator for up to 3 days. This way, it retains its delightful flavor and remains fresh for those cozy moments you crave.

Can I freeze the kringle?
Very! Freezing is a fantastic option for this recipe. Wrap your cooled Wisconsin Apple Kringle first in plastic wrap, then in aluminum foil. This keeps it fresh for up to 3 months. When you’re ready to enjoy it, simply thaw it overnight in the refrigerator, then reheat in the oven for that fresh-baked taste.

What should I do if my dough is too crumbly?
If your dough for the Wisconsin Apple Kringle is too crumbly and not forming properly, don’t worry! Gradually add a teaspoon of cold water, mixing gently until it comes together without being overly wet. You want a cohesive dough that’s still cool—this will ensure the perfect flaky texture!

Can I make this recipe dairy-free?
Absolutely! To make a dairy-free version of the Wisconsin Apple Kringle, substitute the unsalted butter with a plant-based butter alternative. Additionally, you can use almond milk or oat milk in the glaze instead of regular milk. This way, everyone can enjoy this delicious treat!

Is this recipe safe for pets?
While the Wisconsin Apple Kringle is a delightful treat for humans, it’s best to keep it away from pets. Ingredients like sugar and cinnamon can upset a pet’s stomach if consumed in large quantities. Always stick to pet-safe treats for your furry friends!

Wisconsin Apple Kringle: A Cozy Bake to Brighten Your Day

Wisconsin Apple Kringle is a delightful pastry filled with sweet apple goodness, perfect for any time of the day.

  • Mixing Bowl
  • Pastry cutter
  • Rolling Pin
  • Baking Sheet
  • parchment paper
  • Whisk

For the Dough

  • 2 cups all-purpose flour (This forms the base of your soft and flaky crust.)
  • 1 teaspoon salt (Enhances the flavor, making every bite delightful.)
  • 3 tablespoons granulated sugar (Adds a touch of sweetness right where it belongs.)
  • 1 cup cold unsalted butter (Ensure it’s cold for that signature flakiness.)
  • 2 teaspoons vanilla extract (A hint of vanilla complements the apple filling beautifully.)
  • 1/3 cup cold water (Helps bind the dough together without warming it up.)

For the Filling

  • 1 cup apple pie filling (The star of the show, offering a sweet, spiced goodness.)
  • 1 teaspoon ground cinnamon (A dash adds warmth and depth to the flavor experience.)

For the Glaze

  • 1 cup powdered sugar (Creates a smooth, sweet topping that drizzles beautifully.)
  • 2 teaspoons milk (Adjusts the consistency for the perfect glaze.)
  • 1 teaspoon vanilla extract (A splash goes a long way in heightening flavor.)

Extras

  • 1 oz egg (For the wash, giving your kringle its gorgeous golden crust.)

Step-by-Step Instructions for Wisconsin Apple Kringle

  1. In a large mixing bowl, combine 2 cups of all-purpose flour, 1 teaspoon of salt, and 3 tablespoons of granulated sugar. Cut in 1 cup of cold, cubed unsalted butter until the mixture resembles coarse crumbs. Add 2 teaspoons of vanilla extract and 1/3 cup of cold water. Mix until the dough forms, then refrigerate for at least 1 hour to firm up.
  2. Flour your surface liberally and roll out the chilled dough into a rectangle about 1/8-inch thick.
  3. Place 1 cup of apple pie filling in a line down the center of your rolled dough. Sprinkle 1 teaspoon of ground cinnamon over the filling.
  4. Begin folding the dough over the apple filling to form a loose oval or horseshoe shape.
  5. Pinch the edges firmly together to seal the dough and brush with an egg wash made from 1 oz of beaten egg.
  6. Preheat your oven to 375°F (190°C). Place the shaped kringle on a baking sheet lined with parchment paper. Bake for 25 minutes or until golden brown.
  7. While the kringle cools, whisk together 1 cup of powdered sugar, 2 teaspoons of milk, and 1 teaspoon of vanilla extract to create a smooth glaze.
  8. Once the kringle has cooled for about 10 minutes, drizzle the glaze generously over the top.

Keep your butter and water cold to ensure a flaky texture. Don’t overfill the dough to prevent leaks during baking. Brush with egg wash for a beautiful, golden crust.

Dessert
American
comfort food, dessert, Home-baked, Pastry, Wisconsin Apple Kringle

Filed Under: Dessert

Decadent Black Forest Trifle to Sweeten Your Day

October 14, 2025 by grace bellamy Leave a Comment

While wandering through a sun-drenched farmers’ market one Saturday, I stumbled upon an abundance of plump, glossy cherries that almost seemed to call my name. That moment sparked a delightful idea for a show-stopping dessert: a Black Forest Trifle! This irresistible treat layers rich chocolate cake with sweet cherry pie filling and fluffy whipped cream, making it the perfect centerpiece for any gathering. Not only does this recipe offer an impressive visual presentation, but it also allows you to create a homemade dessert that’s far tastier than anything you could grab on the go. Plus, it’s a fantastic way to showcase seasonal fruits! Ready to dive into the layers of bliss? Let’s whip up some indulgence together!

Black Forest Trifle

Why is this dessert a crowd-pleaser?

Decadent Black Forest Trifle is the epitome of indulgence, combining rich chocolate cake with sweet cherry filling and fluffy whipped cream. Effortless to assemble, this recipe only takes 20 minutes of active prep time, making it perfect for busy chefs. Versatile enough for any occasion, whether a holiday feast or a simple family dinner, it will impress your guests with its luscious layers. Make-ahead friendly, you can prepare it a day in advance, allowing flavors to meld beautifully. For the best experience, consider pairing it with fresh cherries in season, or even explore the delightful alternatives like this chocolate cake recipe for a twist!

Black Forest Trifle Ingredients

• Here’s what you need to create your own Black Forest Trifle masterpiece!

For the Cake Layer

  • Chocolate cake – Use your favorite homemade or store-bought chocolate cake for the richest flavor.

For the Cherry Layer

  • Cherry pie filling – This adds sweetness and a fruity punch; fresh cherries can be substituted for a more vibrant taste.
  • Fresh cherries – Pitted and halved; they provide a beautiful garnish and burst of freshness. (Optional for flavor enhancement: 1 tablespoon cherry juice or liqueur)

For the Cream

  • Whipped cream – Homemade is best for a light texture, but store-bought works in a pinch.

For the Topping

  • Chocolate shavings – They add a lovely crunch and decorative touch, enhancing the chocolate experience!

Each layer offers its unique taste and texture, making your Black Forest Trifle a delightful indulgence for any occasion. Enjoy crafting your creation!

Step‑by‑Step Instructions for Black Forest Trifle

Step 1: Prepare the Trifle Dish
Begin by selecting a clear trifle dish or a large glass bowl to showcase your layers beautifully. Ensure it’s clean and dry. This dish will not only hold the indulgent Black Forest Trifle but also present its stunning layers. Once ready, take a moment to gather your ingredients for easy access during assembly.

Step 2: Layer the Chocolate Cake
Take half of the crumbled chocolate cake and evenly spread it across the bottom of your trifle dish. Gently press it down with the back of a spoon to create a solid base. The rich chocolate color should be visible, setting the stage for the layers to come. This first layer will provide a deliciously moist foundation.

Step 3: Add the Cherry Pie Filling
Next, spoon half of the cherry pie filling over the chocolate cake layer. Use a spatula to spread it evenly, allowing the bright red cherries to peek through while ensuring every bite is infused with that luscious cherry flavor. Keep an eye on the edges, letting some filling drip down for visual appeal.

Step 4: Incorporate Whipped Cream
Now, take one cup of whipped cream and dollop it over the cherry layer. Puff it up with a spatula or the back of a spoon, forming a light and fluffy layer. This creamy texture contrasts delightfully with the cake and cherries. The whipped cream should cover the cherries completely, creating a soft, cloud-like barrier.

Step 5: Repeat the Layers
For the second round, repeat the process by layering the remaining crumbled chocolate cake on top of the whipped cream. Gently press it down again to stabilize the structure for your Black Forest Trifle. Once set, this layer will enhance the dessert’s delightful height and offer more of that rich chocolate flavor.

Step 6: Add More Cherry Filling
Spoon the rest of the cherry pie filling atop the second cake layer, spreading it evenly similar to the first layer. This final cherry installment will not only add sweetness but also a vibrant pop of color. Ensure to let some cherries peek out, enhancing the visual appeal of your dessert.

Step 7: Top with Whipped Cream
Dollop the remaining whipped cream over the cherry layer, creating a generous and fluffy topping. Use your spatula to spread it seamlessly across the top, making it smooth and inviting. Be sure to leave a bit of height to provide a nice presentation for the finishing touches.

Step 8: Garnish with Chocolate Shavings and Cherries
Finish your Black Forest Trifle by sprinkling chocolate shavings over the whipped cream. Then, artfully arrange the halved fresh cherries on top. This combination not only adds extra texture but also elevates the dessert’s visual charm, making it irresistible for your guests.

Step 9: Chill Before Serving
Cover the trifle dish with plastic wrap or a lid and refrigerate for at least 4 hours, allowing the layers to set and flavors to meld. This chilling time is crucial for creating a refreshing and cohesive dessert that will shine during your mealtime. Patience will reward you with a perfectly indulgent treat!

Step 10: Serve and Enjoy
When ready to serve, scoop into the trifle carefully, making sure to get all layers in each portion. The rich flavors of the Black Forest Trifle will sing as you enjoy each delectable bite. Present with a smile and relish the joy your homemade dessert brings to family and friends.

Black Forest Trifle

Make Ahead Options

These decadent Black Forest Trifle layers are perfect for home cooks looking to streamline their dessert preparation! You can prepare the chocolate cake and cherry filling up to 24 hours in advance. Simply crumbled the cake and mix the cherry filling ahead of time, storing both in airtight containers in the refrigerator. For best results, layer the chocolate cake and cherry filling the day of serving to maintain the cake’s moisture and the whipped cream’s cloud-like texture. When ready to enjoy, assemble your trifle by layering the prepared ingredients and topping with fresh whipped cream and garnishes just before serving. This way, you’ll have an impressive dessert that is just as delicious as if you made it on the spot, leaving more time for enjoying your gathering!

Black Forest Trifle Variations

Feel free to get creative and customize your Black Forest Trifle with these delicious variations!

  • Dairy-Free: Substitute the whipped cream with coconut whipped cream for a dairy-free delight. It adds a subtle coconut flavor that’s simply irresistible.

  • Gluten-Free: Use gluten-free chocolate cake to accommodate dietary needs without sacrificing taste or texture. This allows everyone to enjoy this indulgence!

  • Boozy Twist: Add a splash of cherry liqueur or amaretto to the cherry filling for an adult version that enhances flavor and adds a sophisticated edge. Just a little goes a long way!

  • Berry Medley: Swap out some of the cherries for raspberries or strawberries for a mixed-berry Black Forest Trifle. The combination of fruits introduces a refreshing burst of color and flavor.

  • Chocolate Ganache Layer: Consider replacing one layer of whipped cream with a silky smooth chocolate ganache for an indulgent twist. It will add richness and depth to every bite.

  • Nutty Crunch: Sprinkle chopped pecans or hazelnuts between the layers for a satisfying crunch. This texture contrast elevates the experience, adding a delightful surprise in each spoonful.

  • Spicy Kick: For those who enjoy a bit of heat, mix a pinch of cayenne pepper into the whipped cream. The warmth adds an unexpected zing that complements the sweetness beautifully.

  • Caramel Drizzle: Drizzle some homemade or store-bought caramel sauce over each layer before assembly for a luscious, sweet addition. The layers will become even more tempting, creating an irresistible dessert!

Let your imagination soar, and don’t hesitate to experiment with these variations to make the Black Forest Trifle uniquely yours. Enjoy the process and the delicious results!

Expert Tips for the Best Black Forest Trifle

  • Layer Wisely: Ensure each layer is spread evenly to create a beautiful presentation. Uneven layers can lead to a messy trifle that doesn’t showcase the deliciousness properly.

  • Chill Time Matters: Don’t skip the refrigeration! Allowing the Black Forest Trifle to set for at least 4 hours melds the flavors beautifully, achieving that perfect balance between creaminess and sweetness.

  • Use Fresh Ingredients: Opt for fresh cherries when in season to enhance flavor and visual appeal. Canned cherries can work, but may not have the same vibrant taste or presentation.

  • Alternate with Fillings: For a unique twist, consider alternating the cherry pie filling with some chocolate ganache or even a layer of custard. This adds complexity and richness to your trifle.

  • Be Mindful of Portions: Since it’s rich and indulgent, serve in smaller portions. This way, your guests can savor the layers without feeling overwhelmed by the decadence of the Black Forest Trifle!

What to Serve with Black Forest Trifle

Creating the perfect meal to accompany this delightful dessert can elevate your gathering to new heights of pleasure.

  • Rich Coffee: A robust coffee enhances the chocolate flavors in the trifle, balancing the sweetness beautifully. Serve it warm for a cozy touch.

  • Vanilla Ice Cream: A scoop of creamy vanilla ice cream adds a luscious contrast and a temperature play that perfectly complements the Black Forest Trifle.

  • Chocolate-Covered Strawberries: These sweet treats introduce additional textures and a touch of elegance. Their freshness contrasts nicely with the rich layers of the trifle.

  • Cheese Platter: A mix of creamy brie and tangy blue cheese can provide an interesting flavor balance, inviting guests to explore savory notes alongside the sweet trifle.

  • Sparkling Water with Lime: A refreshing beverage like sparkling water brightened with lime offers a cleanse to the palate, enhancing the indulgence of the dessert.

  • Dark Chocolate Shavings: Scatter these on the cheese platter or serve alongside the trifle to echo its flavors. They encourage guests to indulge further in rich cocoa goodness.

Crafting a meal with these delightful pairings will ensure a truly memorable dining experience that lingers long after the last bite!

How to Store and Freeze Black Forest Trifle

Fridge: Keep your Black Forest Trifle covered in the refrigerator for up to 3 days. This ensures the layers stay fresh while the flavors continue to meld deliciously.

Freezer: While it’s recommended to enjoy the trifle fresh, you can freeze individual portions for up to 1 month. Store them in airtight containers, but be aware that the texture of whipped cream may change upon thawing.

Reheating: If you have frozen portions, thaw in the fridge overnight. Serve chilled for a refreshing dessert experience. Avoid any reheating, as this can compromise the lovely textures of the trifle.

Make Ahead: You can prepare the Black Forest Trifle a day in advance, allowing for easy entertaining and a more complex flavor profile to develop over time.

Black Forest Trifle

Black Forest Trifle Recipe FAQs

What type of chocolate cake is best for the Black Forest Trifle?
Absolutely! For the best flavor, I recommend using a rich, moist chocolate cake, whether it’s homemade or a high-quality store-bought option. The more chocolate, the merrier! You can even use chocolate brownies for a fudgier base, which adds an exciting twist.

How should I store my Black Forest Trifle after making it?
Keep your Black Forest Trifle covered in the refrigerator for up to 3 days. This helps preserve the freshness of the layers and allows the flavors to meld beautifully. Just ensure it’s in an airtight container or wrapped well to prevent any fridge odors from seeping in.

Can I freeze Black Forest Trifle?
While it’s best enjoyed fresh, you can freeze individual portions of the Black Forest Trifle for up to 1 month. To do this, portion out the trifle into airtight containers, ensuring that they are well sealed. Keep in mind that the whipped cream texture may change slightly after thawing, so I suggest consuming them chilled after thawing them overnight in the fridge.

What if I can’t find fresh cherries?
No problem at all! If fresh cherries are out of season or unavailable, you can certainly use canned cherry pie filling, which makes a delightful alternative. Just be aware that canned cherries might be sweeter and have a different texture compared to fresh ones, but they’ll still taste scrumptious!

How can I ensure the layers stay intact while serving?
For the best presentation, I recommend using a clear trifle dish and scooping from the bottom up to ensure each portion includes all layers. Additionally, use a large spoon or spatula that allows you to cut through the layers cleanly, maintaining that beautiful look without collapsing the structure.

Can I make this dessert gluten-free?
Yes, you can easily adapt the Black Forest Trifle for gluten-free diets! Just opt for a gluten-free chocolate cake, which is widely available. There are many great recipes or store-bought options to choose from. Enjoy your delicious trifle without any worries!

Decadent Black Forest Trifle to Sweeten Your Day

Indulge in a delightful Black Forest Trifle layered with chocolate cake, cherry filling, and whipped cream, perfect for any gathering.

  • Trifle dish or large glass bowl

For the Cake Layer

  • 1 whole Chocolate cake (homemade or store-bought)

For the Cherry Layer

  • 1 can Cherry pie filling
  • 1 cup Fresh cherries (pitted and halved; optional: 1 tablespoon cherry juice or liqueur)

For the Cream

  • 2 cups Whipped cream (homemade or store-bought)

For the Topping

  • 1/2 cup Chocolate shavings

Step-by-Step Instructions for Black Forest Trifle

  1. Begin by selecting a clear trifle dish or a large glass bowl to showcase your layers beautifully. Ensure it’s clean and dry.
  2. Take half of the crumbled chocolate cake and evenly spread it across the bottom of your trifle dish. Gently press it down.
  3. Spoon half of the cherry pie filling over the chocolate cake layer. Use a spatula to spread it evenly.
  4. Dollop one cup of whipped cream over the cherry layer. Puff it up with a spatula, forming a light layer.
  5. Repeat the process by layering the remaining crumbled chocolate cake on top. Gently press it down.
  6. Spoon the rest of the cherry pie filling on top of the second cake layer, spreading it evenly.
  7. Dollop the remaining whipped cream over the cherry layer, spreading it smoothly across the top.
  8. Sprinkle chocolate shavings over the whipped cream and arrange halved fresh cherries on top.
  9. Cover the trifle dish with plastic wrap and refrigerate for at least 4 hours to allow the layers to set.
  10. When ready to serve, scoop into the trifle, making sure to get all layers in each portion.

For the best flavor, use fresh cherries when in season. You can prepare this dessert one day in advance for flavors to meld beautifully.

Dessert
German
Black Forest Trifle, cherry dessert, chocolate dessert, holiday dessert, layered dessert, trifle

Filed Under: Dessert

Savory Cranberry Turkey Stuffing Balls for Cozy Gatherings

October 13, 2025 by grace bellamy Leave a Comment

As I stood in my kitchen, the scent of savory herbs mingled with the tangy sweetness of cranberries, I couldn’t help but smile. There’s something magical about crafting handmade dishes like these Cranberry Turkey Stuffing Balls that transforms any dinner into a celebration. Not only are they easy to whip up in just 40 minutes, but they also serve as a delightful twist on traditional stuffing, making them a hit at any gathering. With ground turkey as a lighter alternative and chunks of tart cranberries adding a burst of flavor, these little bites are sure to impress. Think of them as the perfect blend of comfort and creativity—ideal for those who crave homemade meals without the fuss. I can’t wait for you to give them a try; how about we dive in and explore this delicious recipe together?

Cranberry Turkey Stuffing Balls

Why are Cranberry Turkey Stuffing Balls a must-try?

Irresistible Flavor: The sweetness of cranberries pairs beautifully with the savory turkey, offering a bite that’s full of flavor.

Quick and Easy: With just 15 minutes of prep and 25 minutes of bake time, you’ll have delicious treats ready in under an hour! Perfect for busy evenings or last-minute gatherings.

Healthy Alternative: Ground turkey is a fantastic substitute for higher-fat meats, making these stuffing balls a lighter option that doesn’t compromise on taste.

Versatile Dish: Serve them as appetizers, side dishes, or even a main meal! They’re perfect for Thanksgiving or any cozy dinner party.

Transform your meals with these delightful bites that your guests will rave about! For more comforting dishes, check out our easy turkey recipes to keep your kitchen bustling with creativity.

Cranberry Turkey Stuffing Balls Ingredients

Discover the perfect blend of flavors!

For the Stuffing Balls
• Ground turkey – a lean option that keeps these stuffing balls moist and savory.
• Tart cranberries, chopped – adds a sweet and tangy burst of flavor that elevates every bite.
• Breadcrumbs – acts as a binder, ensuring your stuffing balls hold their shape during baking.
• Onions, diced – brings a subtle sweetness and savory depth to the mixture.
• Celery, diced – provides a delightful crunch that enhances the overall texture.
• Dried sage – adds earthy notes that beautifully complement the turkey.
• Dried thyme – contributes a warm, aromatic quality to this delicious dish.
• Sweetener (to taste, if desired) – can balance the tartness of cranberries for a harmonious flavor.
• Large eggs – binds the ingredients together, helping to create a satisfying texture.
• Salt and pepper to taste – essential for boosting the overall flavor of the stuffing balls.

These Cranberry Turkey Stuffing Balls are sure to become a cherished addition to your culinary repertoire!

Step‑by‑Step Instructions for Cranberry Turkey Stuffing Balls

Step 1: Preheat the Oven
Begin by preheating your oven to 400°F (200°C). This ensures the perfect cooking environment for your Cranberry Turkey Stuffing Balls. While the oven heats up, gather all your ingredients, and prepare your baking sheet by lining it with parchment paper to prevent sticking and facilitate easy cleanup.

Step 2: Combine the Mixture
In a large mixing bowl, add the ground turkey, chopped cranberries, breadcrumbs, diced onions, and diced celery. Sprinkle in the dried sage, thyme, sweetener (if desired), and season with salt and pepper. Crack in the two large eggs and mix everything together thoroughly until all ingredients are well combined, forming a cohesive mixture that holds together.

Step 3: Form the Balls
With your hands, take portions of the mixture and roll them into small balls, approximately 1 to 1.5 inches in diameter. Aim for a consistent size to ensure even cooking. Place the formed balls directly onto your prepared baking sheet, leaving about an inch of space between each one to allow for proper baking.

Step 4: Bake to Perfection
Slide the baking sheet into your preheated oven and let the Cranberry Turkey Stuffing Balls bake for about 20–25 minutes. Keep an eye on them as they cook; you’ll know they’re ready when they turn golden brown and you can smell the delightful aroma of herbs and turkey filling your kitchen.

Step 5: Check Doneness
To ensure your stuffing balls are fully cooked, use a meat thermometer to check their internal temperature. They should reach 165°F (74°C). If they haven’t reached this temperature yet, return them to the oven for a few more minutes. Once cooked through, carefully remove them from the oven and let them cool slightly before serving.

Cranberry Turkey Stuffing Balls

What to Serve with Cranberry Turkey Stuffing Balls

Imagine a cozy gathering where delectable bites meet hearty sides, creating a symphony of flavors that fill your home with warmth.

  • Garlic Mashed Potatoes: Creamy and buttery, these mashed potatoes contrast beautifully with the tangy sweetness of the stuffing balls, enhancing every bite.

  • Roasted Brussels Sprouts: Their earthiness complements the savory turkey, while the caramelization adds a depth of flavor to your meal.

  • Fresh Green Salad: Crisp greens tossed with a light vinaigrette offer a refreshing balance, cleansing the palate between bites of those flavorful stuffing balls.

  • Cranberry Sauce: Besides being a magical pairing with turkey, it elevates the stuffing balls further, harmonizing all those rich flavors on your plate.

  • Savory Gravy: Drizzling warm gravy over the stuffing balls creates an indulgent experience, adding moisture and a burst of flavor that’s hard to resist.

  • Herb-Baked Cornbread: With a hint of sweetness and a crumbly texture, this cornbread is perfect for scooping up the stuffing balls, making it a delightful side.

  • Sparkling Cider: A bubbly drink like sparkling cider or some refreshing lemonade pairs wonderfully, cutting through richness and lifting the overall dining experience.

  • Pumpkin Pie: To finish off your meal, a slice of warm, spiced pumpkin pie brings a festive cheer, rounding out the flavors beautifully.

How to Store and Freeze Cranberry Turkey Stuffing Balls

Fridge: Store cooled stuffing balls in an airtight container for up to 3 days. Reheat in the microwave or oven until heated through for the best flavor.

Freezer: Place stuffing balls in a single layer on a baking sheet to freeze for about 1–2 hours. Once frozen, transfer them to a zip-top bag for up to 3 months, removing as much air as possible.

Reheating: To reheat from frozen, bake at 350°F (175°C) for 20–25 minutes until heated through. For optimal texture, thaw in the fridge overnight before reheating.

Room Temperature: Do not leave cooked stuffing balls out for more than 2 hours to ensure food safety.

Cranberry Turkey Stuffing Balls Alternatives

Embrace your creative side and make this recipe your own with these delightful twists!

  • Gluten-Free: Substitute breadcrumbs with gluten-free panko or crushed gluten-free crackers for a similar texture.
    Transform your dish while ensuring everyone at the table can enjoy these bites of joy!

  • Spicy Kick: Add diced jalapeños or crushed red pepper flakes for a touch of heat that ignites the palate.
    Elevate the flavor, making your stuffing balls a heated sensation that friends and family won’t forget.

  • Vegetarian: Use a plant-based ground meat alternative and replace the eggs with flaxseed meal mixed with water to bind.
    This option makes your stuffing balls not only suitable for vegetarians but also a new favorite!

  • Fruitier Flavor: Incorporate diced apples or pears along with the cranberries for a refreshing sweetness.
    It’s the warmth of autumn in every bite, perfect for cozy gatherings and lovely company.

  • Herb Boost: Fresh herbs like parsley or dill can be swapped in to amplify the herbal aroma of your stuffing balls.
    Each taste will take your guests on a flavor journey as the scents fill the room.

  • Cheesy Delight: Mix in grated cheese, such as cheddar or feta, for a creamy richness that enhances every mouthful.
    A little extra cheesy goodness never hurt anyone and adds layers of flavor to these scrumptious bites!

  • Nutty Texture: Toss in chopped walnuts or pecans for a satisfying crunch that contrasts beautifully with the tender stuffing balls.
    It’s an unexpected twist that makes your dish stand out on any festive table.

For even more culinary inspiration, explore our easy turkey recipes and add some homemade magic to your kitchen!

Make Ahead Options

These Cranberry Turkey Stuffing Balls are perfect for busy home cooks looking to save time! You can prepare the mixture and form the balls up to 24 hours in advance. Simply combine all the ingredients as directed, roll them into balls, and place them on a baking sheet. Cover with plastic wrap and refrigerate to maintain freshness. When you’re ready to bake, there’s no need to thaw; just pop them in the oven directly and add an extra few minutes to the cooking time if needed. This make-ahead strategy not only ensures less stress on busy weeknights but also keeps the stuffing balls just as delicious!

Expert Tips for Cranberry Turkey Stuffing Balls

  • Mix It Right: Ensure all ingredients are combined thoroughly, avoiding dry pockets that could lead to uneven flavor and texture in your stuffing balls.

  • Consistent Size: Shape your balls to be uniform (1 to 1.5 inches) for even cooking. This helps them bake at the same rate, ensuring no one bites into an undercooked ball.

  • Stay Fresh: Use fresh herbs if possible. They can elevate the flavor profile of your Cranberry Turkey Stuffing Balls, making them taste more vibrant and aromatic.

  • Watch Your Bake Time: Keep an eye on them while they bake; ovens can vary. Look for that golden brown color as a visual cue for doneness instead of relying solely on time.

  • Check Temperature: Don’t skip the meat thermometer! Ensure they reach 165°F (74°C) for safety. This guarantees your stuffing balls are well-cooked and safe to enjoy.

These tips will help you master the art of creating delightful Cranberry Turkey Stuffing Balls that shine at any gathering!

Cranberry Turkey Stuffing Balls

Cranberry Turkey Stuffing Balls Recipe FAQs

How do I select the right cranberries?
Absolutely! When choosing cranberries, look for firm, plump ones with a vibrant color. Avoid any that have dark spots or wrinkles, as these may indicate overripeness. Fresh cranberries are best for this recipe, but if you can only find dried ones, consider using them for a different texture—just be sure to adjust the sweetener accordingly since dried cranberries are often sweeter.

How long can I store cooked stuffing balls in the refrigerator?
You can keep your Cranberry Turkey Stuffing Balls in the fridge for up to 3 days. Just place them in an airtight container, and when you’re ready to enjoy them again, reheat in the microwave or oven until they’re warmed through. They will taste just as delightful as the first day!

Can I freeze Cranberry Turkey Stuffing Balls?
Absolutely! To freeze your stuffing balls, start by arranging them in a single layer on a baking sheet, and freeze for about 1 to 2 hours. Once they are firm, transfer them into a zip-top bag, ensuring to remove as much air as possible. They can be stored in the freezer for up to 3 months. When ready to enjoy, you can bake them from frozen at 350°F (175°C) for about 20-25 minutes or thaw them overnight in the fridge for best results.

What should I do if my stuffing balls fall apart while baking?
If your stuffing balls are falling apart, it may be due to not enough binding agents. Make sure you’ve used the right amount of egg—this ingredient is crucial for holding the mixture together. If they still crumble, try adding a bit more breadcrumbs to your mixture. If they do not hold shape, they can still be repurposed as a delicious turkey stuffing casserole!

Are these stuffing balls suitable for people with food allergies?
These Cranberry Turkey Stuffing Balls can be modified to accommodate various allergies. For gluten concerns, use gluten-free breadcrumbs. If someone is egg-sensitive, you can try substituting the eggs with flax eggs (1 tablespoon of ground flaxseed mixed with 2.5 tablespoons of water per egg, let sit for 5 minutes). Always check for individual ingredient allergies, especially with sweeteners, as some may be derived from common allergens.

Savory Cranberry Turkey Stuffing Balls for Cozy Gatherings

These Cranberry Turkey Stuffing Balls are a delicious twist on traditional stuffing, perfect for gatherings.

  • Oven
  • Mixing Bowl
  • Baking Sheet
  • parchment paper
  • Meat Thermometer

For the Stuffing Balls

  • 1 pound Ground turkey
  • 1 cup Tart cranberries, chopped
  • 1 cup Breadcrumbs
  • 1 medium Onion, diced
  • 1 cup Celery, diced
  • 1 teaspoon Dried sage
  • 1 teaspoon Dried thyme
  • 1 tablespoon Sweetener (to taste) (If desired)
  • 2 Large eggs
  • to taste Salt
  • to taste Pepper

Step-by-Step Instructions

  1. Preheat your oven to 400°F (200°C) and prepare your baking sheet with parchment paper.
  2. In a large mixing bowl, combine ground turkey, chopped cranberries, breadcrumbs, diced onions, and diced celery. Add dried sage, thyme, sweetener (if desired), salt and pepper, and mix in the two large eggs until well combined.
  3. Roll portions of the mixture into small balls (1 to 1.5 inches in diameter) and place them on the prepared baking sheet.
  4. Bake for about 20-25 minutes until golden brown and cooked through.
  5. Ensure internal temperature reaches 165°F (74°C) using a meat thermometer. Let them cool slightly before serving.

These stuffing balls are versatile and can be served as appetizers, side dishes, or a main meal.

Side Dishes
American
appetizers, Cranberries, Cranberry Turkey Stuffing Balls, healthy recipes, Stuffing, Turkey

Filed Under: Side Dishes

Heavenly Cod and Potatoes in Creamy Rosemary Sauce

October 13, 2025 by grace bellamy Leave a Comment

The aroma of garlic and rosemary dancing through my kitchen always takes me back to family dinners where cooking felt like a celebration. If you’re ready to elevate your weeknight meals, let me introduce you to my Cod and Potatoes in Rosemary Cream Sauce. This dish is not only a delightful combination of tender cod fillets and buttery baby potatoes drenched in a creamy sauce, but it also comes together in just 35 minutes—perfect for busy evenings. Plus, the comforting flavors make it an instant crowd-pleaser, whether for a cozy family gathering or an intimate dinner date. Are you ready to impress your loved ones with a dish that looks as good as it tastes? Let’s dive in!

Cod and Potatoes

Why is This Dish a Must-Try?

Heavenly flavors: The blend of cod and buttery potatoes enveloped in a rich rosemary cream sauce is simply irresistible.

Quick prep: With just 35 minutes required from start to finish, it’s the perfect solution for hectic weeknights.

Crowd-pleaser: This dish caters to everyone’s palate, making it ideal for family dinners or gatherings—you’ll have everyone asking for seconds!

Comfort food twist: Think of it as a gourmet take on a classic, satisfying your cravings without all the fuss.

Versatile side options: Serve it with your favorite vegetables or a light salad for a complete meal that’s easy to customize. Ready to impress? You can also check out more delicious options in our guide to easy weeknight meals!

Cod and Potatoes Ingredients

Elevate your dinner with these simple yet delectable ingredients!

For the Potatoes
• Baby potatoes – these tender gems provide a buttery texture that pairs perfectly with the creamy sauce.
• Salt – season to taste for that extra flavor burst!

For the Cod
• Cod fillets – choose fresh, high-quality fillets for the best result; each about 350g immerses beautifully in the sauce.
• Ground black pepper – adds a hint of spice that complements the richness of the dish.

For the Sauce
• Olive oil – the base for cooking the cod, adding healthy fats and flavor.
• Butter – creates a luscious mouthfeel while sautéing garlic.
• Minced garlic – infuses an aromatic depth that transforms the dish.
• Heavy cream – the star of the sauce, bringing creaminess that’s hard to resist.
• Chicken broth – adds savory notes to the sauce; homemade or store-bought works beautifully.
• Chopped rosemary – elevates the dish with its earthy fragrance; it’s the perfect match for cod and potatoes.
• Lemon juice – brightens the flavors with a zing that cuts through the richness.

For Garnish
• Fresh parsley – not only adds a dash of color but also brings a fresh, vibrant flavor to the plate.

With these essential Cod and Potatoes ingredients, you’re just a few steps away from an unforgettable meal.

Step‑by‑Step Instructions for Cod and Potatoes

Step 1: Boil the Potatoes
In a large pot, bring salted water to a vigorous boil over high heat. Add the halved baby potatoes and cook them for about 15 minutes or until they are fork-tender, which means they should easily break apart without much resistance. Once done, drain the potatoes and set them aside so they can cool slightly while you prepare the cod.

Step 2: Season the Cod
While the potatoes are cooking, take the four cod fillets and place them on a clean cutting board. Season both sides generously with salt and freshly ground black pepper to enhance the flavors of the fish. Make sure to coat evenly, as this will help create a delightful crust when you cook the cod later.

Step 3: Cook the Cod
In a large skillet, heat 2 tablespoons of olive oil over medium heat until shimmering. Carefully place the seasoned cod fillets in the skillet, cooking for about 3-4 minutes on each side. You’ll know the cod is ready to flip when it flakes easily with a fork and has a lovely golden-brown exterior. Once cooked, remove the fillets from the skillet and set them aside on a plate.

Step 4: Sauté the Garlic
In the same skillet, melt 2 tablespoons of butter over medium heat, allowing it to bubble gently. Add 2 teaspoons of minced garlic and sauté for about 30 seconds or until fragrant; make sure it doesn’t brown too much, as this will give a bitter taste to your Cod and Potatoes dish.

Step 5: Prepare the Cream Sauce
Pour in 1 cup of heavy cream and 1 cup of chicken broth into the skillet, stirring to combine with the sautéed garlic. Add 2 teaspoons of chopped rosemary and 2 tablespoons of lemon juice to the mixture. Bring the sauce to a gentle simmer and let it cook for 4-5 minutes, stirring occasionally, until it thickens slightly and coats the back of a spoon.

Step 6: Combine Cod and Potatoes
Once the sauce has thickened, gently fold the cooked baby potatoes into the creamy mixture, ensuring they are evenly coated. Nestle the cooked cod fillets back into the skillet, spooning some of the sauce over each fillet. Cook everything together for an additional 2 minutes, allowing the flavors to meld and the cod to warm through.

Step 7: Serve and Garnish
Carefully transfer the delightful cod and potatoes to a serving plate, making sure to showcase the beautiful fillets. Drizzle with any extra sauce left in the skillet and garnish with freshly chopped parsley for a pop of color. Serve immediately while everything is warm and aromatic, and delight your family with your delicious Cod and Potatoes in Rosemary Cream Sauce.

Cod and Potatoes

Expert Tips for Cod and Potatoes

  • Perfect Potato Texture: Ensure you don’t overcook the baby potatoes; they should be fork-tender but still hold their shape for the best Cod and Potatoes experience.

  • Temperature Control: Cook the cod on medium heat to achieve a golden crust without burning. Too high heat can cause the fish to dry out.

  • Flavor Boost: Don’t skip seasoning! Salt and pepper enhance the cod’s natural flavor, so be generous when seasoning both the fish and potatoes.

  • Creamy Consistency: Stir your sauce regularly while it simmers to prevent it from thickening too much or sticking to the bottom of the skillet.

  • Garnish for Freshness: A sprinkle of fresh parsley just before serving not only adds color but also brightens the flavors of the creamy sauce.

How to Store and Freeze Cod and Potatoes

Fridge: Store leftover cod and potatoes in an airtight container for up to 3 days. Reheat gently in the microwave or skillet to maintain flavor and texture.

Freezer: For longer storage, freeze the dish in a freezer-safe container for up to 2 months. Thaw overnight in the fridge before reheating.

Reheating: When reheating, ensure the cod reaches an internal temperature of 145°F (63°C) for safe consumption. Add a splash of chicken broth to help revive the creamy sauce.

Keep It Fresh: For the best texture, freeze the cod and sauce separately from the potatoes; this prevents them from becoming mushy during storage.

Make Ahead Options

These Cod and Potatoes in Rosemary Cream Sauce are perfect for meal prep enthusiasts! You can cook the baby potatoes up to 3 days in advance and store them in an airtight container in the refrigerator. The cod fillets can also be seasoned and kept in the fridge for up to 24 hours before cooking, which helps the flavors to develop. When you’re ready to serve, simply follow the steps to sauté the cod and prepare the cream sauce; everything will taste just as delicious. This way, you reduce the cooking time significantly, providing a comforting meal with minimal effort on busy weeknights!

Cod and Potatoes Variations

Feel free to get creative and put your own twist on this delightful dish!

  • Dairy-Free: Swap the heavy cream with coconut milk for a rich, creamy texture that brings a hint of tropical flavor.

  • Spicy Kick: Add a pinch of red pepper flakes or diced jalapeños to the sauce for a delightful heat that balances the creaminess.

  • Herb Infusion: Experiment with different herbs such as thyme or dill instead of rosemary for unique and aromatic flavors to enhance your meal.

  • Vegetable Boost: Toss in some sautéed spinach or roasted bell peppers for added color, nutrition, and an extra layer of flavor.

  • Lemon Zest: Introduce fresh lemon zest to the sauce for an invigorating brightness that complements the creamy depth beautifully.

  • Pesto Drizzle: Add a swirl of basil pesto before serving for an herby richness that takes this dish to a whole new level.

  • Crunchy Topping: Finish with toasted breadcrumbs or crushed nuts for a delightful crunch that contrasts the creamy potatoes and tender cod.

  • Smoky Flavor: Sprinkle in some smoked paprika when preparing the sauce for a warm, smoky undertone that enhances the overall dish.

As you explore these variations, you might also want to consider pairing this dish with your favorite salad to keep things light, or check out our guide to easy weeknight meals for more inspiration. Happy cooking!

What to Serve with Cod and Potatoes in Rosemary Cream Sauce

Imagine a comforting table spread that invites laughter, warmth, and delicious flavors to complement your evening feast.

  • Steamed Asparagus: The verdant crunch of steamed asparagus balances the creamy sauce beautifully, adding a pop of freshness to each bite.

  • Garlic Bread: This warm, crusty bread is perfect for soaking up the luscious rosemary cream sauce, turning every bite into a delight.

  • Simple Green Salad: A light salad of mixed greens drizzled with a lemon vinaigrette adds a refreshing contrast to the richness of the dish.

  • Roasted Brussels Sprouts: Their caramelized edges and nutty flavor provide the perfect earthy complement to the buttery potatoes and flaky cod.

  • Crispy Broccoli Rabe: Sautéed with garlic and chili flakes, this dish adds a delightful bitterness that enhances the savory notes of cod.

  • Chardonnay Wine: An oaky Chardonnay pairs splendidly with the creamy elements, enhancing the meal’s flavors and elevating your dining experience.

  • Lemon Sorbet: To cleanse the palate, serve a light and zesty lemon sorbet as a refreshing finale to your elegant meal.

Cod and Potatoes

Cod and Potatoes in Rosemary Cream Sauce Recipe FAQs

What type of potatoes should I use for this dish?
Absolutely! I recommend using baby potatoes as they provide a buttery texture that perfectly complements the creamy sauce. Look for ones that are firm and have smooth skins, avoiding those with dark spots or blemishes, which may indicate overripeness.

How can I store leftovers of cod and potatoes?
After enjoying your meal, you can store any leftovers in an airtight container in the fridge for up to 3 days. When reheating, gently warm them in the microwave or a skillet, making sure the cod reaches an internal temperature of 145°F (63°C) for safe consumption.

Can I freeze cod and potatoes?
Yes! For future convenience, you can freeze this dish in a freezer-safe container for up to 2 months. Just be sure to separate the cod and sauce from the potatoes before freezing. Potatoes can become mushy when thawed, so this trick keeps the dish delightful! Thaw overnight in the fridge before reheating, adding a splash of chicken broth to the sauce if it seems thick.

What if my cream sauce is too thick?
If you find your cream sauce is thicker than desired, don’t worry! Just add a little chicken broth—about a tablespoon at a time—while gently stirring until you reach your preferred consistency. This will help lighten the sauce while maintaining its rich, creamy flavor.

Are there any dietary considerations for this recipe?
Very! This recipe contains dairy, so if you have lactose intolerance or are following a dairy-free diet, you can substitute the heavy cream with coconut cream or a non-dairy milk alternative while ensuring you use a suitable thickener, like cornstarch or dairy-free cream. Always check cod’s freshness if you’re serving this dish to pets, as raw or overcooked fish can be harmful to them.

How do I pick the freshest cod fillets?
When selecting cod fillets, look for bright, translucent flesh, and pleasant ocean-like smell. Avoid any fillets that appear dull or have dark spots, and choose those with firm texture; this ensures you’re working with the best ingredients for your Cod and Potatoes dish!

Heavenly Cod and Potatoes in Creamy Rosemary Sauce

Experience the delightful combination of cod and buttery potatoes in a creamy rosemary sauce—perfect for weeknight meals with loved ones.

  • Large Pot
  • large skillet
  • cutting board

For the Potatoes

  • 500 g baby potatoes
  • to taste salt

For the Cod

  • 4 fillets cod fillets (each about 350g)
  • to taste ground black pepper

For the Sauce

  • 2 tbsp olive oil
  • 2 tbsp butter
  • 2 tsp minced garlic
  • 1 cup heavy cream
  • 1 cup chicken broth
  • 2 tsp chopped rosemary
  • 2 tbsp lemon juice

For Garnish

  • to taste fresh parsley

Cooking Steps

  1. Boil the Potatoes: In a large pot, bring salted water to a vigorous boil over high heat. Add halved baby potatoes and cook for about 15 minutes until fork-tender. Drain and set aside.
  2. Season the Cod: On a clean cutting board, season cod fillets generously with salt and freshly ground black pepper.
  3. Cook the Cod: In a large skillet, heat 2 tablespoons of olive oil over medium heat. Cook cod fillets for 3-4 minutes on each side until golden brown. Set aside.
  4. Sauté the Garlic: Melt 2 tablespoons of butter in the same skillet. Add 2 teaspoons of minced garlic and sauté for 30 seconds until fragrant.
  5. Prepare the Cream Sauce: Add 1 cup of heavy cream and 1 cup of chicken broth to the skillet. Stir in 2 teaspoons of chopped rosemary and 2 tablespoons of lemon juice. Simmer for 4-5 minutes until the sauce thickens.
  6. Combine Cod and Potatoes: Fold in the cooked baby potatoes and nestle the cod fillets back into the skillet. Cook for 2 more minutes.
  7. Serve and Garnish: Transfer to a serving plate, drizzle with extra sauce, and garnish with fresh parsley. Serve warm.

Ensure potatoes are fork-tender but hold their shape. Adjust seasoning and monitor heat for cod to avoid drying out. Stir the sauce regularly for best consistency.

Main Dishes
American
Cod and Potatoes, comfort food, Creamy Sauce, easy meals, family dinner, quick recipe

Filed Under: Main Dishes

Dreamy Lemon Cream Puffs: A Sweet Twist on Classic Delights

October 13, 2025 by grace bellamy Leave a Comment

Wandering into my kitchen, I caught a whiff of sunshine—it was the bright, zesty aroma of lemons calling my name. If you’re like me and crave a sweet treat that feels like a slice of summer, then these Lemon Cream Puffs are about to become your new favorite indulgence. With the perfect blend of creamy textures and tangy flavors, this delightful dessert is not just a feast for the taste buds but also a breeze to prepare. In just 30 minutes, you can whip up these freezer-friendly gems, ensuring they’re ready to impress anytime you have guests—or just need a little pick-me-up yourself. Trust me, each bite is like a mini vacation, and I can’t wait for you to experience it! What’s your favorite way to add a citrus twist to dessert?

Lemon Cream Puffs

Why are these Lemon Cream Puffs irresistible?

Vibrant flavors of lemon elevate any occasion, transforming these cream puffs into a must-try dessert. Effortless to prepare, they come together in just 30 minutes—perfect for anyone busy yet craving homemade treats. Impressive presentation in cute molds or cups makes them an eye-catching addition to your gatherings. Freezer-friendly, you can prepare them ahead of time and enjoy whenever a sweet tooth strikes. These puffs are a refreshing escape from typical desserts and a great way to incorporate zesty joy into your menu! For another delightful option, make sure to check out my Lemon Bars.

Lemon Cream Puffs Ingredients

For the Crust
• Graham cracker crumbs – the base that adds a perfect crunch and sweetness.
• Butter, melted – binds the crust together for a rich flavor.

For the Filling
• Lemon yogurt – adds a creamy texture and a tangy kick; opt for full-fat lemon Greek yogurt for the best flavor.
• Lemon mousse – brings lightness and a heavenly texture to the filling.
• Lemon curd – intensifies the lemon flavor, making every bite a tart delight.

For the Coating
• White chocolate, melted – creates a luscious outer layer for the cream puffs.
• Oil-based yellow food coloring (optional) – gives your puffs a vibrant hue for an extra pop of color.

Enjoy making these Lemon Cream Puffs—they’re a delightful treat that will whisk you away to a sun-kissed paradise!

Step‑by‑Step Instructions for Lemon Cream Puffs

Step 1: Preheat and Prepare
Begin by preheating your silicone mold if you’re using one, or gather mini dessert cups or ramekins. This step sets the stage for your Lemon Cream Puffs, ensuring they’re properly set for a delightful presentation. If you’re using a mold, lightly oil it to prevent sticking, and set it aside as you prepare the crust.

Step 2: Make the Crust
In a mixing bowl, combine the graham cracker crumbs and melted butter until the mixture resembles wet sand. This will create a rich and flavorful crust for your Lemon Cream Puffs. Spoon the mixture into the bottom of each mold or cup, pressing it firmly to form a solid base. Aim for an even layer for optimal texture.

Step 3: Blend the Lemon Filling
For the filling, mix the lemon yogurt and lemon curd in a separate bowl until smooth and well-combined. This creamy mixture will provide a tangy burst of flavor in your Lemon Cream Puffs. Once combined, taste for sweetness; it should be balanced but bright. Layer this mixture on top of the graham cracker crust in your molds.

Step 4: Add the Mousse Layer
Spoon the lemon mousse gently over the lemon filling, layering it carefully to create a beautiful contrast. The mousse will add a light, airy texture that complements the creamy filling perfectly. Make sure to fill each mold or cup evenly, leaving a little space at the top for the white chocolate coating.

Step 5: Coat with White Chocolate
Melt the white chocolate in a microwave-safe bowl, heating it in increments for about 30 seconds each time. Once smooth, use a brush to coat the outside of the silicone mold, ensuring an even layer. If you like, add a drop of oil-based yellow food coloring to the chocolate for a vibrant finish on your Lemon Cream Puffs.

Step 6: Freeze the Cream Puffs
Carefully place the assembled Lemon Cream Puffs in the freezer for at least 4 hours, or until set. Freezing helps to solidify the layers, making them easy to remove from the molds later. Use this time to clean up your workspace and get ready to impress with this delightful treat.

Step 7: Thaw to Serve
Once your Lemon Cream Puffs are fully frozen and set, remove them from the freezer. To serve, allow them to thaw in the fridge for about 30 minutes, or at room temperature for 10–15 minutes. This gentle thawing ensures that the creamy texture is preserved while making them easy to enjoy.

Step 8: Present and Enjoy
Once thawed, your Lemon Cream Puffs are ready to be served! For an inviting presentation, place them on a decorative plate and perhaps garnish with a sprinkle of lemon zest. These charming puffs are best enjoyed chilled, delivering a refreshing bite that’s perfect for any occasion.

Lemon Cream Puffs

Expert Tips for Lemon Cream Puffs

  • Choose Quality Yogurt: Use full-fat lemon Greek yogurt for the best flavor and creamy texture in your Lemon Cream Puffs. Avoid low-fat versions, which can result in a less satisfying taste.
  • Crust Consistency: Ensure your graham cracker mixture is combined well. If it’s too dry, the crust may crumble; if too wet, it may not hold its shape.
  • Smooth Filling: Blend lemon yogurt and curd until fully combined to avoid lumps, ensuring a smooth and delightful filling inside your cream puffs.
  • Freezing Time: Don’t rush the freezing process! Allow the cream puffs to freeze for at least 4 hours to ensure they set properly, making them easier to remove from molds.
  • Gentle Thawing: Thaw in the fridge for a gradual temperature change, preserving the delicate textures of the Lemon Cream Puffs without compromising on taste.

Lemon Cream Puffs Variations & Substitutions

Feel free to explore these creative twists that make the delightful Lemon Cream Puffs even more irresistible!

  • Gluten-Free: Substitute graham cracker crumbs with gluten-free cookies or almond flour for a gluten-free crust.
  • Dairy-Free: Use coconut yogurt and vegan white chocolate to create a creamy, plant-based version of your puffs.
  • Fruit Fusion: Add fresh fruits like blueberries or strawberries between the layers for an extra burst of flavor. They pair beautifully with lemon!
  • Zesty Boost: Infuse the filling with a dash of vanilla or a splash of limoncello to elevate the lemon flavor and intrigue the palate.
  • Chocolate Lovers: Drizzle dark chocolate over the puffs for a decadent contrast or use dark chocolate instead of white for a richer taste.
  • Meringue Topping: Top each puff with a dollop of whipped meringue for a fanciful finish—light and airy just like the mousse!
  • Spicy Kick: Stir in a pinch of cayenne pepper or finely grated ginger into the lemon filling for those who love a little heat with their sweetness.
  • No-Bake Variation: If you prefer, turn these into a no-bake dessert by layering in a trifle dish, skipping the molds altogether for effortless serving.

Make these Lemon Cream Puffs your own and feel the magic of creativity in your kitchen! If you’re interested in other citrus-inspired recipes, you might love my Lemon Bars or Lemon Meringue Pie.

Make Ahead Options

These Lemon Cream Puffs are perfect for meal prep enthusiasts! You can prepare the graham cracker crust up to 24 hours in advance. Just mix the crumbs and melted butter, press into molds, and refrigerate to maintain their shape. The lemon filling can also be made a day ahead; simply combine the lemon yogurt and lemon curd, then cover and refrigerate. When you’re ready to serve, spoon the lemon mousse over the filling and coat with white chocolate before freezing for at least 4 hours. Thaw for 30 minutes in the fridge or 10-15 minutes at room temperature right before serving to ensure they’re just as delicious as when freshly made!

How to Store and Freeze Lemon Cream Puffs

Fridge: Store leftover Lemon Cream Puffs in an airtight container in the refrigerator for up to 3 days. This keeps them fresh while the flavors meld beautifully.

Freezer: If you want to keep these delightful treats longer, you can freeze the assembled Lemon Cream Puffs for up to 2 months. Wrap each puff tightly in plastic wrap, then place them in a freezer bag or airtight container.

Reheating: When you’re ready to indulge, remove the puffs from the freezer and thaw them in the fridge for about 30 minutes or at room temperature for 10-15 minutes. This gentle thawing method maintains their creamy texture.

Serving Tip: For an extra touch, dust the puffs with powdered sugar or garnish with a twist of lemon zest just before serving for a bright, visually appealing treat!

What to Serve with Lemon Cream Puffs?

Elevate your dessert experience with delightful pairings that perfectly complement the luscious, tangy goodness of these treats.

  • Fresh Berries: A medley of strawberries, blueberries, and raspberries adds a burst of sweetness and vibrant color, balancing the tangy flavors beautifully.

  • Minty Whipped Cream: Light and airy, whipped cream infused with fresh mint enhances each bite, offering a refreshing contrast to the rich lemon taste.

  • Iced Tea: A cool glass of lightly sweetened iced tea—perhaps with a splash of lemon—provides a soothing balance to the zesty cream puffs and keeps the mood relaxed.

  • Lemon Sorbet: Intensify the citrus experience with a scoop of lemon sorbet. Its icy texture and bright flavor make for a delightful palate cleanser between bites.

  • Chocolate Drizzle: Add a touch of decadence with a warm chocolate drizzle—its rich, creamy element enhances the bright lemon flavors and creates a beautiful presentation.

  • Pistachio Crumble: Chopped pistachios sprinkled on top add a lovely crunch and earthy flavor, making each bite a dreamy contrast of textures that your guests will adore.

  • Sparkling Wine: For a classy touch, serve your cream puffs with a glass of chilled sparkling wine. The effervescence elevates these delightful bites to a whole new level of sophistication!

  • Coconut Macaroons: These chewy, sweet treats bring a tropical twist to your dessert spread, further enriching the sensory experience alongside your Lemon Cream Puffs.

Each of these pairings enhances the creamy, tangy bliss of your Lemon Cream Puffs, transforming them into a multi-sensory dessert experience that’s sure to impress.

Lemon Cream Puffs

Lemon Cream Puffs Recipe FAQs

How do I choose ripe lemons for this recipe?
Absolutely! Look for lemons that are firm yet slightly soft to the touch, with a vibrant yellow color. Avoid any with dark spots all over or a dull, shriveled appearance. Fresh, juicy lemons will enhance your lemon filling’s flavor and zest beautifully!

What is the best way to store leftover Lemon Cream Puffs?
Very! Store leftover Lemon Cream Puffs in an airtight container in the refrigerator for up to 3 days. This method keeps them fresh while allowing the flavors to meld beautifully. If you find they start to get too soft, press a piece of parchment paper between layers to minimize moisture transfer.

Can I freeze Lemon Cream Puffs, and if so, how?
Absolutely! To freeze, wrap each assembled Lemon Cream Puff tightly in plastic wrap to prevent freezer burn. Then, place them in a freezer bag or airtight container. They can be stored for up to 2 months. When ready to enjoy, thaw in the fridge for about 30 minutes or at room temperature for 10-15 minutes. This ensures the texture remains delightful!

What if my cream puffs don’t set after freezing?
If your Lemon Cream Puffs aren’t setting properly, it may be due to insufficient freezing time. Make sure to freeze them for at least 4 hours or longer if your freezer is not operating at a consistent temperature. Also, ensure the layers were not overfilled; they should fill just below the top of the molds to allow proper setting.

Are Lemon Cream Puffs safe for people with allergies?
Yes, but it’s essential to check! The main ingredients include dairy and gluten, thanks to the graham cracker crust. If you’re making them for someone with specific allergies, you might consider using gluten-free graham crackers and dairy alternatives. Feel free to get creative and adjust according to dietary needs while keeping the lemony goodness intact!

What’s the best way to prevent the crust from crumbling?
To achieve a sturdy crust, ensure your graham cracker crumbs are well combined with melted butter until you reach a sandy texture that holds together when pressed. It’s important not to skip the pressing step; pressing the mixture firmly into your molds or cups creates a solid base that won’t crumble when served. For added texture, consider adding a touch of sugar to the mixture for sweetness!

Dreamy Lemon Cream Puffs: A Sweet Twist on Classic Delights

These Lemon Cream Puffs are a delightful dessert that combines creamy textures and tangy lemon flavors, perfect for any occasion.

  • Silicone mold
  • Mixing Bowl
  • Microwave-safe bowl

For the Crust

  • 1 cup Graham cracker crumbs (the base that adds a perfect crunch and sweetness.)
  • 1/2 cup Butter, melted (binds the crust together for a rich flavor.)

For the Filling

  • 1 cup Lemon yogurt (opt for full-fat lemon Greek yogurt for the best flavor.)
  • 1 cup Lemon mousse (brings lightness and a heavenly texture to the filling.)
  • 1/2 cup Lemon curd (intensifies the lemon flavor.)

For the Coating

  • 1 cup White chocolate, melted (creates a luscious outer layer for the cream puffs.)
  • 1 drop Oil-based yellow food coloring (optional for vibrant hue.)

Step‑by‑Step Instructions for Lemon Cream Puffs

  1. Preheat your silicone mold or gather mini dessert cups. Lightly oil the mold to prevent sticking.
  2. In a mixing bowl, combine graham cracker crumbs and melted butter until resembling wet sand. Spoon mixture into the bottom of each mold or cup.
  3. Mix lemon yogurt and lemon curd in a separate bowl until smooth. Taste for sweetness and layer on top of graham cracker crust.
  4. Gently spoon lemon mousse over the lemon filling, layering to create contrast and texture.
  5. Melt white chocolate in a microwave-safe bowl. Use a brush to coat the mold with chocolate, and add food coloring if desired.
  6. Place assembled Lemon Cream Puffs in the freezer for at least 4 hours until set.
  7. Remove from freezer and thaw in the fridge for about 30 minutes or at room temperature for 10-15 minutes.
  8. Present on a decorative plate and optionally garnish with lemon zest.

Store leftovers in an airtight container in the fridge for up to 3 days or freeze for up to 2 months. Thaw before serving for best texture.

Dessert
American
dessert, Easy Recipe, Freezer-friendly, Lemon, Lemon Cream Puffs, sweet treat

Filed Under: Dessert

Delicious Mississippi Chicken: Slow Cooker Comfort Food Bliss

October 13, 2025 by grace bellamy Leave a Comment

The aroma of slow-cooked chicken wafting through the house is like a warm embrace on a chilly evening. With just five minutes of prep time, Mississippi Chicken transforms an ordinary day into something special, using simple ingredients like pepperoncini, ranch seasoning, and butter to create a melt-in-your-mouth meal that’s sure to please everyone. This dish isn’t just hassle-free; it’s also a crowd-pleaser, perfect for family gatherings or cozy nights in. The best part? As the chicken simmers away, it allows you the freedom to focus on other tasks or simply unwind with a good book. Curious how this easy recipe can uplift the flavor mood at your dinner table? Let’s dive into the delicious details!

Mississippi Chicken

What Makes Mississippi Chicken Irresistible?

Simplicity shines through as this recipe requires only five minutes of prep. Flavor explosion happens with the blend of pepperoncini, ranch seasoning, and butter, creating a savory dish that’s hard to resist. Versatile serving options let you pair it with rice, mashed potatoes, or a fresh salad, making it great for any meal. Crowd-pleaser potential is high, perfect for family gatherings or cozy nights. Enjoy a fuss-free dinner that looks like you spent all day in the kitchen!

Mississippi Chicken Ingredients

Discover the magic behind this delightful dish!

For the Chicken
• Chicken breasts – Choose boneless, skinless pieces for easy shredding after cooking.
• Pepperoncini juice – Adds a tangy flavor that beautifully enhances the dish.
• Pepperoncini peppers – These mild peppers bring a zesty kick and color to your Mississippi Chicken.

For Seasoning
• Ranch seasoning packet – This adds creaminess and depth; feel free to use a homemade blend if preferred.
• Au jus seasoning packet – Provides a savory base; it can also be substituted with beef broth for a different flavor profile.

For Texture
• Butter – Use unsalted butter for a rich, velvety finish that elevates the dish.

Step‑by‑Step Instructions for Mississippi Chicken

Step 1: Prepare the Slow Cooker
Begin by placing your slow cooker on a stable surface and plugging it in. Take the four chicken breasts and lay them flat at the bottom of the cooker; this creates a solid base for your Mississippi Chicken. Ensure they are evenly spaced for optimal cooking.

Step 2: Add the Juices and Peppers
Pour one cup of pepperoncini juice over the chicken breasts, letting it soak in for delightful flavor. Then, sprinkle the cup of pepperoncini peppers around the chicken. This combination of juice and peppers not only adds moisture but also brings a vibrant, zesty kick that enhances the overall taste.

Step 3: Season the Chicken
Next, open the ranch seasoning packet and the au jus seasoning packet, sprinkling them evenly across the chicken. This step ensures that every bite of your Mississippi Chicken is bursting with flavor. The spices will infuse into the chicken as it cooks, creating a deliciously rich taste.

Step 4: Add the Butter
Cut half a cup of butter into small pieces and place them atop the seasoned chicken. The melting butter will add richness and create a luscious sauce as the chicken cooks slowly. Make sure to distribute the butter evenly, enhancing the flavor profile of your dish.

Step 5: Cook the Chicken
Cover the slow cooker with its lid and set it to cook on high for 3-4 hours or low for 6-8 hours. As the chicken cooks, it will become incredibly tender and soak up all the lovely juices and spices. The aroma wafting through your kitchen will make your mouth water!

Step 6: Shred and Serve
Once the cooking time has elapsed and your chicken is tender, use two forks to shred the chicken right in the cooker. Mix the shreds in with the flavorful sauce created during cooking. This final step allows every piece of chicken to be enveloped in that melt-in-your-mouth goodness before serving.

Mississippi Chicken

Make Ahead Options

Mississippi Chicken is perfect for meal prep enthusiasts! You can prep the chicken, pepperoncini juice, and seasonings in advance, assembling everything in the slow cooker up to 24 hours before cooking. Just combine the chicken breasts, pepperoncini juice, peppers, ranch seasoning, and au jus seasoning in the slow cooker, cover, and refrigerate. This not only saves valuable time during busy weeknights but also enhances the flavor as the chicken marinates overnight. When ready to cook, simply add the butter and start the slow cooker as directed. You’ll enjoy delicious, hassle-free meals with just a little preparation!

Expert Tips for Mississippi Chicken

  • Quality Chicken: Choose fresh, boneless, skinless chicken breasts for the best texture and flavor. Frozen chicken will require longer cooking times, affecting tenderness.

  • Adjust Spice Levels: If you like it spicier, add extra pepperoncini peppers or some crushed red pepper flakes. This enhances the Mississippi Chicken flavor without overwhelming it.

  • Slow Cooker Types: Cooking times vary by slow cooker brand. Check the chicken’s tenderness at the end of the recommended cooking time to prevent overcooking.

  • Butter Variations: For a healthier option, use olive oil or a reduced-fat butter alternative. This will still keep the dish rich while reducing calories.

  • Serving Suggestions: Make it a meal by serving Mississippi Chicken over rice or mashed potatoes for a comforting dinner that’s equally pleasing to the eyes!

  • Leftover Storage: Store leftover Mississippi Chicken in an airtight container in the fridge for up to 3 days. Reheat slowly to maintain moisture and flavor.

How to Store and Freeze Mississippi Chicken

Fridge: Store leftover Mississippi Chicken in an airtight container for up to 3 days. This way, you can enjoy it again while maintaining its rich flavor.

Freezer: For longer storage, freeze Mississippi Chicken in a sealed freezer bag or container for up to 3 months. Be sure to label it with the date!

Reheating: When ready to enjoy, thaw overnight in the fridge, then reheat in the microwave or stovetop until heated through. This keeps the chicken tender and flavorful.

Notes: Before storing, let the chicken cool to room temperature to avoid condensation, which can spoil the taste.

Mississippi Chicken Variations & Substitutions

Feel free to make this comforting favorite even more tailored to your taste and dietary needs!

  • Gluten-Free: Use gluten-free ranch and au jus seasoning mix to keep it friendly for gluten-sensitive diners. You can easily find these alternatives in most grocery stores!

  • Spicy Kick: Add a few diced jalapeños or crushed red pepper flakes to the chicken before cooking for an extra layer of heat. With just a touch of spice, you elevate the classic flavor to a new exciting level that spice lovers will adore.

  • Paleo-Friendly: Substitute butter with ghee and omit the seasoning packets, replacing them with fresh herbs and spices like garlic powder, onion powder, and thyme for a clean, paleo recipe. This twist allows your Mississippi Chicken to shine while keeping it wholesome.

  • Creamy Addition: After shredding the chicken, mix in some cream cheese or sour cream to create a dreamy, creamy sauce. This adds a new layer of richness that turns the dish into a divine comfort food.

  • Vegetarian Variation: Swap chicken for hearty jackfruit or chickpeas, cooking them in the same sauce for a vegetarian-friendly option that still captures all the delicious flavor. This swap provides a satisfying and filling meal that veggie lovers will rave about!

  • Flavor Infusion: Experiment with different types of broth like chicken, vegetable, or beef for varied flavor profiles. Each broth offers a unique twist on the classic Mississippi Chicken taste, making every rendition delightful!

  • Herbed Twist: Add fresh herbs like rosemary or thyme while cooking for an aromatic twist to your dish. The fragrant herbs will enhance the overall depth of flavor, creating an uplifting aroma your whole family will enjoy.

  • Slow Cooker Alternatives: If you’re short on time, try making this dish in an Instant Pot for a quick cooking option. Cooking under pressure makes it speedy without sacrificing the tender chicken you crave!

By embracing these variations and substitutions, you can make Mississippi Chicken truly your own while catering to different dietary preferences and palates, ensuring everyone at your table leaves happy.

What to Serve with Mississippi Chicken

The delightful flavors of Mississippi Chicken open the door to a world of delicious pairings that will elevate your meal experience.

  • Creamy Mashed Potatoes: The buttery richness of mashed potatoes provides a comforting contrast to the zesty chicken. They can soak up all that flavorful sauce, creating a delicious balance on your plate.

  • Savory Rice Pilaf: Light and fluffy rice pilaf brings a gentle nutty flavor that perfectly complements the spicy notes of the chicken. It’s an ideal choice for soaking up all the scrumptious juices.

  • Simple Green Salad: A fresh salad with crisp greens and a tangy vinaigrette cuts through the richness of the chicken, adding brightness and a refreshing crunch that balances the meal beautifully.

  • Steamed Broccoli: The tender, slightly earthy taste of steamed broccoli contrasts nicely with the bold flavors of Mississippi Chicken. Plus, it’s packed with nutrients, ensuring your meal is wholesome.

  • Homemade Coleslaw: Creamy coleslaw offers a delightful crunch and a touch of sweetness, making it a wonderful side that enhances the overall meal experience. It’s a classic pairing for any hearty dish!

  • Buttery Corn on the Cob: Sweet, juicy corn on the cob brushed with butter brings a seasonal touch. The simplicity and sweetness of the corn beautifully round out the flavors and evoke comfort.

  • Chilled White Wine: A glass of chilled Chardonnay or Sauvignon Blanc provides a crisp, refreshing contrast to the savory flavors of the chicken. It helps cleanse the palate between bites.

  • Chocolate Chip Cookies: For dessert, gooey chocolate chip cookies bring a comforting sweetness, completing the meal on a high note. The warm cookies are like a big hug after the delightful savory feast.

Mississippi Chicken

Mississippi Chicken Recipe FAQs

How do I choose the right chicken breasts for this recipe?
Absolutely! Look for boneless, skinless chicken breasts that are fresh and plump. They should have a nice pink color and no dark spots or odors. This ensures they’ll be tender and flavorful after cooking.

How long can I store leftover Mississippi Chicken in the fridge?
You can keep leftover Mississippi Chicken in an airtight container for up to 3 days. Just make sure it’s completely cooled before storing to maintain its delicious flavor and prevent spoilage.

Can I freeze Mississippi Chicken, and if so, how?
Very! To freeze, let the chicken cool to room temperature. Then, transfer it to a sealed freezer bag or container, making sure to remove as much air as possible. It can be frozen for up to 3 months. Don’t forget to label it with the date for easy reference!

What should I do if my chicken isn’t shredding easily after cooking?
If your chicken is tough or hard to shred, it may need more cooking time. Just check if it’s fully cooked by ensuring it reaches an internal temperature of 165°F (74°C). If it’s not, continue cooking on low for an additional hour or until tender.

Is this recipe suitable for those with dietary restrictions?
Definitely! If you’re concerned about dietary restrictions, use gluten-free ranch and au jus seasoning packets. For dairy-free options, try a plant-based butter substitute. Additionally, if you have specific allergies, always check the ingredient labels thoroughly to ensure they meet your needs.

What are some alternative serving options for Mississippi Chicken?
You can get creative! While it’s fantastic with rice or mashed potatoes, consider serving it on a toasted bun for a flavorful sandwich, or over a bed of greens for a lighter salad option. The more the merrier!

Delicious Mississippi Chicken: Slow Cooker Comfort Food Bliss

Mississippi Chicken is a melt-in-your-mouth dish that showcases tender chicken, pepperoncini, and rich butter, making it a perfect family favorite.

  • Slow Cooker

For the Chicken

  • 4 pieces boneless skinless chicken breasts
  • 1 cup pepperoncini juice
  • 1 cup pepperoncini peppers

For Seasoning

  • 1 packet ranch seasoning (can use homemade blend)
  • 1 packet au jus seasoning (can substitute with beef broth)

For Texture

  • 0.5 cup unsalted butter (cut into small pieces)

Step-by-Step Instructions for Mississippi Chicken

  1. Prepare the Slow Cooker: Place your slow cooker on a stable surface and plug it in. Lay the chicken breasts flat at the bottom of the cooker.
  2. Add the Juices and Peppers: Pour the pepperoncini juice over the chicken and sprinkle the pepperoncini peppers around it.
  3. Season the Chicken: Sprinkle the ranch and au jus seasoning evenly across the chicken.
  4. Add the Butter: Distribute the pieces of butter atop the seasoned chicken.
  5. Cook the Chicken: Cover and cook on high for 3-4 hours or low for 6-8 hours.
  6. Shred and Serve: Once cooked, shred the chicken in the cooker and mix it with the sauce.

Store leftover Mississippi Chicken in an airtight container for up to 3 days. For longer storage, freeze in a sealed container for up to 3 months.

Main Dishes
American
Chicken Recipe, comfort food, easy dinner, family recipe, Mississippi Chicken, slow cooker

Filed Under: Main Dishes

Easy Crockpot BBQ Chicken for a Perfect Family Dinner

October 13, 2025 by grace bellamy Leave a Comment

As I stood in my kitchen, the enticing aroma of smoky barbecue filled the air, instantly whisking me away to summer picnics and backyard gatherings. That’s the magic of my Crockpot BBQ Chicken. This dish offers a delightful combination of convenience and deliciousness, making it a perfect addition to your weeknight menus. With just ten minutes of prep time and the ability to serve up to six people, this recipe is not only a crowd-pleaser but also an incredible way to embrace slow-cooking success at home. You can transform simple shredded chicken into a succulent meal with just a handful of ingredients, leaving more time for you to relax or enjoy quality moments with loved ones. Curious to know just how easy it is to infuse your week with flavor? Let’s dive into the details!

Crockpot BBQ Chicken

Why is Crockpot BBQ Chicken a must-try?

Simplicity is key: With just ten minutes of prep, you can set your crockpot and forget about it until dinnertime.
Flavor-packed: The smoky, sweet blend from the barbecue sauce, honey, and spices creates a mouthwatering taste that everyone will love.
Versatile serving options: Enjoy on buns, in tacos, or over rice—perfect for satisfying picky eaters!
Crowd-pleaser: This dish serves up to six, making it ideal for family dinners or gatherings.
Make-ahead magic: Prep in advance and store the chicken in the fridge, ready to cook when you need it. Embrace this easy solution in your routine, and check out more delightful slow-cooker recipes!

Crockpot BBQ Chicken Ingredients

• Dive into the deliciousness of Crockpot BBQ Chicken with these simple ingredients!

For the Chicken
• Shredded chicken – approximately 150g provides the protein base for your flavorful dish.

For the Sauce
• Barbecue sauce – 1 tablespoon adds that irresistible smoky sweetness that makes this dish a hit.
• Honey – 1 tablespoon balances the flavors with a touch of natural sweetness.
• Worcestershire sauce – 1 teaspoon enhances the overall flavor profile with a deep umami kick.
• Garlic powder – 1/2 teaspoon infuses the chicken with aromatic warmth.
• Onion powder – 1/2 teaspoon brings a subtle savoriness that complements the barbecue sauce.
• Paprika – 1/2 teaspoon adds a mild smokiness and vibrant color.
• Salt and pepper – to taste ensures the perfect seasoning for this delightful meal.

Step‑by‑Step Instructions for Crockpot BBQ Chicken

Step 1: Prepare the Chicken
Begin by placing your shredded chicken evenly in the bottom of your slow cooker. Make sure it’s well-spaced to allow for thorough cooking. This ensures that your Crockpot BBQ Chicken will cook evenly and absorb those delightful flavors.

Step 2: Mix the Sauce
In a medium mixing bowl, combine the barbecue sauce, honey, Worcestershire sauce, garlic powder, onion powder, paprika, and a pinch of salt and pepper. Stir the mixture until it reaches a smooth consistency, blending the ingredients well. This flavorful sauce will give your chicken a delicious, sticky glaze once cooked.

Step 3: Coat the Chicken
Pour the prepared sauce over the shredded chicken in the crockpot. Use a spatula or tongs to gently toss the chicken, ensuring each piece is thoroughly coated in that mouthwatering mixture. This step is crucial for imbuing your Crockpot BBQ Chicken with rich flavor as it cooks.

Step 4: Set the Cooker
Cover your slow cooker with its lid and set it to cook on high for 3 to 4 hours, or on low for 6 to 7 hours. For the best results, opt for the high setting at around 3.5 hours. The chicken is ready when it’s tender and easily pulled apart, indicating it has absorbed the sauce beautifully.

Step 5: Shred the Chicken
Once your Crockpot BBQ Chicken is finished cooking, use two forks to shred the chicken directly in the slow cooker. This allows the chicken to soak up more of the sauce while you shred it. Stir the chicken pieces into the sauce to ensure they are fully coated, and if needed, adjust the seasoning with additional salt and pepper before serving.

Crockpot BBQ Chicken

What to Serve with Crockpot BBQ Chicken

Transform your delicious Crockpot BBQ Chicken into a complete feast that will tantalize your taste buds and create memorable moments around the table.

  • Creamy Coleslaw: This tangy, creamy side adds a delightful crunch that balances the tenderness of the chicken and enhances its rich flavors. A cool slaw is the perfect companion for this hearty dish.

  • Corn on the Cob: Grilled or boiled, the sweetness of fresh corn perfectly complements the smokiness of the barbecue. Slather on some butter for an irresistible treat at your summer cookouts.

  • Garlic Bread: Crispy on the outside and soft on the inside, garlic bread is perfect for soaking up extra sauce. It provides a lovely contrast in texture to the tender chicken.

  • Potato Salad: This creamy, savory side dish brings a homey feel to the meal. Its rich flavors mesh beautifully with the BBQ chicken, creating a comforting dining experience.

  • Baked Beans: Smoky and sweet, baked beans are a classic pairing that enhances the homely vibe of your meal. They are hearty enough to stand up to the bold flavors of the chicken.

  • Fresh Fruit Salad: A light, refreshing fruit salad adds a sweet finish to the meal. The bright flavors will cleanse the palate and provide a burst of freshness amongst the richness.

  • Sweet Tea or Lemonade: Elevate your gathering with a glass of sweet tea or homemade lemonade to sip on. These refreshing drinks will cool you down and perfectly complement the flavors of the BBQ dish.

Each of these pairings provides a delicious contrast to the mouthwatering flavors of your Crockpot BBQ Chicken, ensuring a well-rounded and memorable dining experience.

Expert Tips for Crockpot BBQ Chicken

  • Ingredient Quality: Use fresh or high-quality shredded chicken for the best flavor. Avoid using dry or overcooked chicken, which can lead to a dull meal.

  • Sauce Balance: Adjust the honey and barbecue sauce to suit your taste. If your sauce is too sweet, a splash of vinegar can balance it out and enhance the overall flavor of the Crockpot BBQ Chicken.

  • Avoid Overcrowding: Ensure the shredded chicken is evenly spaced in the slow cooker. Crowding the pot can result in uneven cooking and less absorption of the delicious sauce.

  • Use Leftovers Wisely: If you have leftover Crockpot BBQ Chicken, try using it in salads, sandwiches, or casseroles to minimize waste and elevate other meals!

  • Cook Time: Pay attention to the recommended cook times—using a digital meat thermometer can help ensure your chicken reaches a safe cooking temperature without becoming dry.

Make Ahead Options

These Crockpot BBQ Chicken preparations are perfect for busy home cooks looking to streamline their meal planning! You can assemble the entire dish up to 24 hours in advance. Simply place the shredded chicken in the slow cooker and pour the prepared sauce over it, then cover and refrigerate. When you’re ready to cook, just pop it in the slow cooker directly from the fridge—there’s no need to wait! For best results, make sure to stir the mixture well before cooking to ensure even flavor distribution. This makes dinner a breeze, allowing you to serve a delicious meal with minimal effort, just as if you had made it fresh that day!

Storage Tips for Crockpot BBQ Chicken

Fridge: Store leftovers in an airtight container for up to 4 days. This keeps your Crockpot BBQ Chicken fresh and flavorful for those quick meals later in the week.

Freezer: You can freeze your Crockpot BBQ Chicken for up to 3 months. Make sure it’s in a freezer-safe container or bag, removing as much air as possible to prevent freezer burn.

Reheating: When ready to enjoy, thaw in the fridge overnight and reheat on the stovetop or in the microwave until piping hot. Stir occasionally to ensure even heating.

Make-Ahead: Prepare and assemble your Crockpot BBQ Chicken in advance, storing it in the refrigerator until you’re ready to cook. This adds convenience to your meal planning!

Crockpot BBQ Chicken Variations

Feel free to personalize your Crockpot BBQ Chicken with these exciting twists, making it just the way you love it!

  • Spicy Kick: Add 1-2 tablespoons of hot sauce for a zesty flavor explosion. The balance of sweetness and heat enhances every bite, perfect for spice lovers!

  • Honey Mustard: Swap barbecue sauce with honey mustard for a tangy, sweet alternative. This change adds a delightful twist you didn’t know you needed!

  • Smoky Chipotle: Use chipotle sauce instead of barbecue for a smoky, spicy vibe. It complements the chicken beautifully and brings a whole new dimension to your meal.

  • Citrus Zest: Incorporate the juice and zest of one lime or lemon for brightness and freshness. This lightens up the dish and adds a refreshing zing.

  • Veggie Boost: Toss in some chopped bell peppers and onions with the chicken for extra nutrition and flavor. Not only does this add color, but it also keeps the dish hearty and satisfying.

  • Herb Infusion: Sprinkle in fresh or dried herbs like rosemary or thyme for an aromatic touch. These fragrant herbs enhance the overall taste, creating a lovely contrast with the sauce.

  • Peanut Sauce: For a unique twist, use a creamy peanut sauce instead of barbecue. This option offers an exotic flair that’s creamy and subtly nutty, taking your chicken to new heights!

  • Sweet & Savory: Mix in diced pineapples for a southwest twist that combines sweetness and acidity. This caramelizes beautifully, adding a pleasing texture and an interesting flavor contrast.

Feel inspired to create your own version of this dish? You can also enjoy this goodness with a side of homemade coleslaw or consider other delightful slow-cooker recipes that pair beautifully with your Crockpot BBQ Chicken!

Crockpot BBQ Chicken

Crockpot BBQ Chicken Recipe FAQs

What type of chicken should I use for Crockpot BBQ Chicken?
Absolutely! I recommend using boneless chicken breasts or thighs for the best results. They stay moist during the slow cooking process. If you’re in a pinch, shredded rotisserie chicken can work beautifully as well—just add it for the final 30 minutes of cooking to heat through.

How should I store leftover Crockpot BBQ Chicken?
Leftovers can be stored in an airtight container in the refrigerator for up to 4 days. This storage method keeps your Crockpot BBQ Chicken fresh and flavorful for quick, delicious meals during the week. Just remember to reheat it thoroughly before serving!

Can I freeze Crockpot BBQ Chicken?
Very much! You can freeze your Crockpot BBQ Chicken for up to 3 months. To do this, allow it to cool completely before transferring it into a freezer-safe bag or container. Be sure to remove as much air as possible to prevent freezer burn. When you’re ready to enjoy it, thaw it in the refrigerator overnight and reheat on the stovetop or in the microwave until heat all the way through.

What if my chicken turns out dry after cooking?
If your chicken ends up dry, it may have been overcooked. Make sure to adjust your cooking time according to your slow cooker’s settings, as some cook hotter or cooler than others. If you’re using frozen chicken, it may also require an extended cooking time. Next time, try checking the chicken for doneness a bit earlier and use the two-fork shredding technique directly in the sauce to keep it moist.

Can I modify the recipe for dietary restrictions?
Absolutely! If anyone in your family has dietary restrictions, you can easily adjust this Crockpot BBQ Chicken recipe. For gluten-free needs, ensure that your barbecue sauce is gluten-free. You could also substitute with a sugar-free or low-sugar barbecue sauce if you’re watching your sugar intake. And if you’re concerned about sodium, look for low-sodium Worcestershire sauce as a flavorful alternative. Just keep the family’s preferences in mind, and don’t hesitate to experiment!

Easy Crockpot BBQ Chicken for a Perfect Family Dinner

This Crockpot BBQ Chicken is a simple and flavorful dish that serves up to six people, perfect for family dinners.

  • Crockpot

For the Chicken

  • 150 g shredded chicken (provides the protein base)

For the Sauce

  • 1 tablespoon barbecue sauce (adds irresistible smoky sweetness)
  • 1 tablespoon honey (balances the flavors)
  • 1 teaspoon Worcestershire sauce (enhances flavor with umami)
  • 0.5 teaspoon garlic powder (infuses aromatic warmth)
  • 0.5 teaspoon onion powder (adds subtle savoriness)
  • 0.5 teaspoon paprika (adds mild smokiness and color)
  • salt and pepper (to taste)

Step-By-Step Instructions

  1. Begin by placing your shredded chicken evenly in the bottom of your slow cooker.
  2. In a medium mixing bowl, combine the barbecue sauce, honey, Worcestershire sauce, garlic powder, onion powder, paprika, and a pinch of salt and pepper. Stir until smooth.
  3. Pour the prepared sauce over the shredded chicken in the crockpot. Toss gently to coat the chicken.
  4. Cover your slow cooker and set it to cook on high for 3 to 4 hours, or on low for 6 to 7 hours.
  5. Once cooked, shred the chicken with two forks directly in the slow cooker and stir in the sauce.

Use fresh or high-quality shredded chicken for the best flavor and adjust sauce ingredients to taste. Leftovers can be used in salads, sandwiches, or casseroles.

Main Dishes
American
barbecue chicken, Crockpot BBQ Chicken, Easy Chicken Recipes, family dinner, slow cooker recipes, Weeknight Meals

Filed Under: Main Dishes

Mouthwatering Crock-Pot Shredded Beef Tacos You’ll Love

October 13, 2025 by grace bellamy Leave a Comment

The first time I savored a rich, savory taco bursting with slow-cooked flavor, I felt as if I was transported straight to a bustling street market in Mexico. That vivid memory inspired my love for making homemade Crock-Pot Shredded Beef Tacos. Perfect for both busy weeknights and festive gatherings, this recipe is a true win for anyone who desires comforting, homemade meals without the fuss. Not only is it incredibly easy to whip up—taking just 15 minutes of prep time—but it also yields a crowd-pleasing feast, perfect for sharing with friends and family. As the afternoon drifts away, your home will be filled with the irresistible aroma of seasoned beef simmering to perfection. Ready to embark on a culinary adventure that will delight everyone at the table?

Crock-Pot Shredded Beef Tacos

Why are these tacos so irresistible?

Flavor Explosion: Your taste buds will rejoice as the slow-cooked beef develops an incredibly rich flavor, thanks to a unique blend of spices.

Time-Saving: With only 15 minutes of prep, you can set your Crock-Pot and forget about it while it does all the hard work for you.

Crowd Favorite: Whether it’s a family dinner or a party, these tacos are sure to impress guests of all ages with their delicious toppings and customizable options.

Versatile Serving: Enjoy these tacos with Mexican rice, fresh salad, or refried beans for a complete meal that suits any occasion.

Easy Storage: Leftovers can be stored for up to 4 days, making them perfect for meal prep or quick lunches throughout the week. Discover even more taco inspiration in our top taco recipes.

Crock-Pot Shredded Beef Tacos Ingredients

For the Beef
• Chuck roast – The star of the show; this cut becomes tender and flavorful after slow cooking.
• Oil – A little oil for searing beef helps lock in juices and flavor.
• Beef broth – Provides a savory base that enhances the richness of the shredded beef.

For the Spice Blend
• Chili powder – Adds a warm, smoky flavor that’s essential for authentic tacos.
• Oregano – Enhances the overall taste; feel free to use fresh for a brighter flavor.
• Smoked paprika – Introduces a depth of flavor with its hint of smokiness.
• Cumin – Earthy and slightly nutty, cumin is a key player in taco seasoning.
• Garlic powder – Convenient and aromatic; fresh garlic can be used if preferred.
• Onion powder – Adds a sweet and savory note without the hassle of chopping.
• Salt – Elevates the flavors; adjust to taste depending on your broth’s sodium level.
• Pepper – A dash of black pepper brings everything together with a subtle kick.

For Finishing Touches
• Juice from limes – Brightens the beef and adds a refreshing zing; start with one lime and adjust as you prefer.
• Broth from the Crock-Pot (optional) – This is great for moistening the beef when mixing in the spices for an even richer flavor.

For Serving
• Tortillas – Essential for holding all that delicious shredded beef and toppings!
• Favorite toppings – Dive into a customizable experience with diced onions, fresh cilantro, hot sauce, cheese, guacamole, lettuce, and salsa.

These Crock-Pot Shredded Beef Tacos are not just about delightful flavors, but also about making cherished memories around the dinner table!

Step‑by‑Step Instructions for Crock-Pot Shredded Beef Tacos

Step 1: Prepare the Beef
Start by trimming any excess fat from the chuck roast, cutting it into 3–4-inch chunks. This helps the meat cook evenly and enhances the flavor. Take a moment to appreciate each piece as you get ready to create your mouthwatering Crock-Pot Shredded Beef Tacos.

Step 2: Sear the Meat
In a large skillet, heat 1 tablespoon of oil over medium-high heat. Once the oil is shimmering, add the beef chunks in batches; sear each side for about 3–4 minutes until they’re richly browned. This step locks in flavor and texture, setting the stage for your savory taco filling.

Step 3: Move to the Crock-Pot
Once all the beef is nicely browned, transfer it to the crock pot. Pour in 1 cup of beef broth, which will keep your meat moist and enhance the savory profile of the shredded beef. This combination is essential for achieving those irresistible Crock-Pot Shredded Beef Tacos everyone will love.

Step 4: Mix Your Spices
In a small bowl, combine the chili powder, oregano, smoked paprika, cumin, garlic powder, onion powder, salt, and pepper. Reserve 2 tablespoons of this spice blend for later. This spice mixture is a key component that will take your shredded beef to the next level in flavor.

Step 5: Season the Beef
Sprinkle the remaining spice mix evenly over the beef in the crock pot, making sure each piece is well-coated. This step is vital for infusing those tantalizing flavors into your beef as it slow-cooks to perfection. Cover the crock pot with its lid and allow the magic to begin.

Step 6: Slow-Cook to Perfection
Set your crock pot to low and let it cook for 6–7 hours. During this time, check occasionally; the beef is ready when it easily shreds apart with a fork and is fork-tender. The aroma wafting through your home will be nothing short of enticing!

Step 7: Shred the Beef
Once cooked, transfer the beef to a large plate or bowl. Use two forks to shred the beef into bite-sized pieces. Mix in the reserved seasoning and freshly squeezed lime juice. If desired, add a splash of crock pot broth for additional moisture, creating that luscious filling ideal for your tacos.

Step 8: Warm Tortillas
As you finish shredding the beef, take the time to warm your tortillas. You can do this on a skillet over medium heat for about 30 seconds on each side, or in the microwave wrapped in a damp paper towel. Warm tortillas are essential for wrapping your delicious shredded beef and toppings.

Step 9: Assemble with Toppings
Now comes the fun part! Spoon the shredded beef generously onto warmed tortillas. Invite everyone to customize their tacos with an array of toppings: diced onions, fresh cilantro, hot sauce, cheese, guacamole, lettuce, and salsa. These tasty additions elevate your hearty Crock-Pot Shredded Beef Tacos into an unforgettable feast!

Crock-Pot Shredded Beef Tacos

Crock-Pot Shredded Beef Tacos Variations

Feel free to explore these exciting twists and swaps that will personalize your taco experience to tempt your taste buds!

  • Dairy-Free: Use avocado or a dairy-free sour cream instead of traditional cheese or cream. This way, your tacos remain creamy without milk!

  • Spicy Kick: Add diced jalapeños or a dash of cayenne pepper to the spice mix for an extra layer of heat. Spice lovers will appreciate the added warmth!

  • Vegetarian Option: Substitute the beef with jackfruit cooked in the same spice blend for a plant-based alternative that’s incredibly satisfying. You’ll be surprised how delicious this tropical fruit can mimic traditional tacos!

  • Taco Bowl: Serve the shredded beef over a bed of rice or greens instead of in tortillas for a hearty taco salad. This makes for a delightful, mess-free meal perfect for bowls!

  • Smoky Flavor: Incorporate a couple of teaspoons of chipotle in adobo sauce for a deeper, smokier flavor profile that complements the beef beautifully. It’s a game-changer for smoky taco lovers!

  • Citrusy Twist: Zest some limes before juicing them for an added zing in your beef blend. This little enhancement will amplify the freshness and make your tacos pop!

  • Crock-Pot Chicken Alternative: Swap out the beef for chicken thighs, using the same spices for a lighter, yet still flavorful, taco option. It’s a great way to change things up while keeping them delicious.

  • Crunchy Toppings: Try adding crushed tortilla chips or crunchy slaw as a topping for an exciting texture contrast. A little crunch is the perfect finish to these savory tacos!

Feel inspired? You can explore more delicious taco options and variations in our top taco recipes and discover unique toppings that elevate your culinary journey!

Expert Tips for Crock-Pot Shredded Beef Tacos

• Choose the Right Cut: Use chuck roast for the best results; it becomes incredibly tender during slow cooking compared to lean cuts.

• Don’t Rush the Sear: Searing the beef is essential for depth of flavor; give it enough time to caramelize both sides before transferring to the crock pot.

• Season Generously: Make sure to coat the beef with the spice mix thoroughly; this infuses every bite of your Crock-Pot Shredded Beef Tacos with irresistible flavor.

• Adjust Lime Juice: Start with one lime’s juice and taste; you can always add more for a zesty kick, enhancing the overall freshness.

• Keep it Moist: If your beef seems dry after cooking, mix in some reserved broth to keep it juicy and flavorful before serving.

• Personalize Toppings: Encourage creativity with toppings! Provide a variety beyond the basics to make each taco uniquely delicious for everyone.

Make Ahead Options

These Crock-Pot Shredded Beef Tacos are perfect for meal prep enthusiasts! You can prepare the beef in advance by searing and cooking it up to 24 hours ahead of time. Just let the shredded beef cool completely before storing it in an airtight container in the refrigerator. When you’re ready to enjoy, simply reheat the beef in a skillet with a splash of broth or water on low heat until warmed through and tender, which helps maintain its juicy texture. For optimal freshness, warm your tortillas and assemble with toppings just before serving, ensuring your tacos are just as delicious as if they were freshly made!

How to Store and Freeze Crock-Pot Shredded Beef Tacos

Fridge: Store leftover shredded beef in an airtight container for up to 3–4 days. Be sure to separate the beef from the tortillas and toppings to maintain freshness.

Freezer: For longer storage, freeze the shredded beef in a sealed freezer bag for up to 3 months. Thaw in the fridge overnight before reheating.

Reheating: Gently reheat the beef in a skillet over medium heat, adding a splash of broth if needed to maintain moisture. Serve with fresh tortillas for delightful tacos again!

Room Temperature: Avoid leaving cooked beef at room temperature for more than 2 hours to prevent bacterial growth, ensuring a safe and delicious meal.

What to Serve with Crock-Pot Shredded Beef Tacos?

Transform your meal into a fiesta with these delightful accompaniments that elevate your taco experience!

  • Mexican Rice: Fluffy and slightly seasoned, Mexican rice provides a comforting, flavorful base to balance the rich beef. It’s a classic pairing that feels like home.

  • Refried Beans: Creamy and hearty, refried beans add a satisfying texture and protein boost, making your meal hearty and fulfilling.

  • Fresh Salad: A crisp salad with lime vinaigrette offers a refreshing contrast to the savory beef. Consider incorporating avocado, corn, and black beans for added flavor.

  • Guacamole: This creamy, zesty dip made from ripe avocados helps cut the richness of the beef tacos, delivering a taste fiesta in every bite.

  • Hot Sauce: A splash of your favorite hot sauce adds an exciting kick, bringing the flavors to life and making every taco a mouthwatering adventure.

  • Chilled Beverages: Pair your tacos with a refreshing drink like Horchata or a chilled Mexican beer for a flavorful contrast that balances the spices beautifully.

These pairings create a vibrant, well-rounded meal that celebrates the joy of homemade cooking and brings everyone to the table!

Crock-Pot Shredded Beef Tacos

Crock-Pot Shredded Beef Tacos Recipe FAQs

How do I choose the best chuck roast for this recipe?
When selecting a chuck roast, look for a piece with a good amount of marbling—this intramuscular fat will render beautifully during cooking, keeping the beef juicy and tender. Aim for a roast that has a nice red color and no dark spots. If possible, ask your butcher for a cut that hasn’t been previously frozen for the freshest flavor.

How should I store leftover Crock-Pot Shredded Beef Tacos?
Absolutely! To store leftovers, place the shredded beef in an airtight container in the fridge. It can stay fresh for 3-4 days. Be sure to keep the tortillas and toppings separate to prevent them from becoming soggy. I always recommend reheating the beef gently on the stovetop with a splash of broth for moisture.

Can I freeze the shredded beef, and how should I do it?
Yes, you can freeze the shredded beef! To freeze, let it cool completely, then place it in a freezer-safe bag or airtight container. Press out as much air as possible and label it with the date. Your shredded beef can be stored in the freezer for up to 3 months. When ready to use, simply thaw it overnight in the fridge and reheat on the stove or in the microwave until warmed through.

What if my shredded beef is too dry when it’s cooked?
No worries! If you find your beef is a bit dry after cooking, I suggest mixing in a few tablespoons of the reserved broth from the crock pot. Start with a small amount, then gently fold it into the shredded beef until you reach your desired moisture level. This will help revive the flavors and ensure your tacos remain deliciously juicy!

Are these tacos safe for my pets or allergenic to anyone?
Crock-Pot Shredded Beef Tacos are great for humans but should be prepared with caution for any pets. Avoid adding any toppings such as onions or garlic, as they can be harmful to pets. For those with allergies, be mindful of any added toppings, like cheese or specific salsas. Always check labels to ensure they meet dietary needs, making adjustments as necessary.

How long does the beef need to cook to achieve the best results?
The beef should cook on low for 6–7 hours in the crock pot until it’s tender enough to shred with a fork. Every slow cooker is different, so I recommend checking it after 6 hours for doneness. If it isn’t fork-tender yet, let it cook a little longer. The goal is to achieve that melt-in-your-mouth texture that makes these tacos so irresistible!

Mouthwatering Crock-Pot Shredded Beef Tacos You’ll Love

Enjoy these Crock-Pot Shredded Beef Tacos bursting with flavor, perfect for any occasion.

  • Crock-Pot
  • skillet

For the Beef

  • 3 pounds chuck roast (trimmed and cut into 3-4 inch chunks)
  • 1 tablespoon oil (for searing beef)
  • 1 cup beef broth (adds richness)

For the Spice Blend

  • 2 tablespoons chili powder (essential for authentic tacos)
  • 1 teaspoon oregano (fresh is recommended)
  • 1 teaspoon smoked paprika
  • 1 teaspoon cumin
  • 1 teaspoon garlic powder (can substitute with fresh garlic)
  • 1 teaspoon onion powder
  • 1 teaspoon salt (adjust to taste)
  • 1 teaspoon black pepper (for seasoning)

For Finishing Touches

  • 1 lime juice (adjust to taste)
  • broth from the Crock-Pot (optional for mixing in spices)

For Serving

  • 8 pieces tortillas (for filling)
  • favorite toppings (such as diced onions, cilantro, hot sauce, cheese, guacamole, lettuce, and salsa)

Step-by-Step Instructions

  1. Trim excess fat from the chuck roast and cut into 3–4 inch chunks.
  2. Heat 1 tablespoon of oil in a large skillet over medium-high heat. Sear each side of the beef chunks for about 3–4 minutes until browned.
  3. Transfer the seared beef to the crock pot and add 1 cup of beef broth.
  4. Combine the spice blend ingredients in a small bowl; reserve 2 tablespoons.
  5. Sprinkle the remaining spice mix over the beef and cover the crock pot.
  6. Set the crock pot to low and cook for 6–7 hours until the beef is fork-tender.
  7. Shred the beef using two forks and mix in the reserved seasoning and lime juice.
  8. Warm tortillas on a skillet or in the microwave.
  9. Assemble tacos by spooning shredded beef onto warmed tortillas with desired toppings.

Leftovers can be stored in an airtight container for up to 3-4 days in the fridge.

Main Dishes
Mexican
comfort food, Crock-Pot, easy tacos, meal prep, Shredded Beef Tacos, slow-cooked

Filed Under: Main Dishes

Irresistible Jalapeño Popper Grilled Cheese You’ll Crave

October 13, 2025 by grace bellamy Leave a Comment

There’s something utterly delightful about combining bold flavors in a classic comfort food, and that’s exactly what this Jalapeño Popper Grilled Cheese offers. Imagine sinking your teeth into a warm, gooey grilled cheese stuffed with cheesy baked jalapeños and crispy bacon—it’s pure bliss! This recipe not only elevates your ordinary grilled cheese but does so quickly, making it a perfect weeknight winner. Plus, who can resist a meal that feels indulgent yet is easy enough for any home cook? Whether you want to impress guests or treat yourself to a cozy dinner, this dish will have you dreaming of more. Ready to discover the joy of this spicy twist on a classic? Let’s dive in!

Jalapeño Popper Grilled Cheese

Why is this grilled cheese irresistible?

Bold flavors: This Jalapeño Popper Grilled Cheese infuses spicy jalapeños with creamy cheese and smoky bacon for a taste explosion.
Quick & Easy: In about 30 minutes, you can whip up this gourmet comfort food, making it perfect for busy weeknights.
Crowd-Pleaser: Serve this at your next gathering, and watch it disappear! It’s a hit with friends and family alike.
Customizable: Feel free to add more toppings or adjust the spice level to suit your taste, ensuring each bite is just right.
Even if you’re looking to elevate a simple weeknight meal, this recipe is sure to make your taste buds sing!

Jalapeño Popper Grilled Cheese Ingredients

For the Jalapeños

  • Jalapeños – use 4 large ones for that perfect spicy kick!
  • Cream Cheese – 8 ounces will create a creamy filling that blends beautifully with the spices.

For the Sandwich

  • Thick White Bread – 8 slices provide a sturdy base for grilling.
  • Cheddar Cheese – use 4 slices for a sharp, rich flavor that complements the other ingredients.
  • Monterey Jack Cheese – 4 slices add creaminess and help bind everything together.
  • Bacon – 4 strips, crispy and crumbled, will give a smoky crunch to each bite.

For Grilling

  • Butter – generously spread on the outside for that golden, crispy finish.
  • Chopped Cilantro (optional) – this fresh touch adds a burst of color and flavor if you want to elevate your sandwich!

This Jalapeño Popper Grilled Cheese recipe delivers a mouthwatering experience that you won’t forget!

Step‑by‑Step Instructions for Jalapeño Popper Grilled Cheese

Step 1: Prepare the Jalapeños
Preheat your oven to 375°F (190°C). Wearing food-safe gloves, slice each jalapeño in half lengthwise and carefully remove the seeds and membranes. This not only reduces spiciness but also creates a space for the cream cheese. Fill each jalapeño half with about 1 ounce of cream cheese, then arrange them on a baking sheet. Bake for 25–30 minutes until the peppers are semi-soft, the cream cheese is bubbly, and the tops turn lightly golden.

Step 2: Assemble the Sandwiches
While the jalapeños bake, get your sandwich components ready. Take two slices of thick white bread and place one slice of cheddar cheese on each, while on two other slices, place one slice of Monterey Jack cheese. Once the jalapeños are baked, slice them into bite-sized pieces and distribute them evenly atop the cheddar slices. For added flavor, layer two strips of crispy bacon on top of each Monterey Jack slice before combining the halves to form two delicious sandwiches.

Step 3: Butter and Grill the Sandwiches
Now it’s time to create that golden, crispy exterior! Generously spread butter on the outer sides of each of your assembled Jalapeño Popper Grilled Cheese sandwiches. Heat a skillet over medium-low heat until warm. Once heated, place the sandwiches butter-side down in the skillet. Grill each side for about 3–4 minutes or until the bread is a gorgeous golden brown and crispy, flipping once to ensure the cheese melts beautifully into gooey perfection.

Jalapeño Popper Grilled Cheese

Make Ahead Options

These Jalapeño Popper Grilled Cheese sandwiches are ideal for busy weeknights where every minute counts! You can prepare the jalapeños stuffed with cream cheese up to 24 hours in advance. Simply bake them as directed, allow them to cool completely, and refrigerate in an airtight container. For the sandwiches, assemble them (including bacon and cheeses) without grilling, wrap tightly, and store in the fridge for up to 3 days. When you’re ready to serve, just heat a skillet over medium-low heat, butter the outsides, and grill until golden brown and toasty, resulting in a mouthwatering sandwich that’s just as delicious as fresh!

Jalapeño Popper Grilled Cheese Variations

Feel empowered to switch things up and personalize this Jalapeño Popper Grilled Cheese to match your taste buds!

  • Dairy-Free: Swap cream cheese with a dairy-free alternative and use vegan cheese for a deliciously creamy bite.
    For an indulgent spin on dairy-free, try using cashew cream for that rich texture without the cream.

  • Spicy Kick: Add diced serrano peppers alongside your jalapeños for an extra heat boost that spice lovers will adore!
    These small adjustments can set your taste buds on fire while elevating the overall flavor experience.

  • Vegetarian Delight: Omit the bacon and replace it with sautéed mushrooms for an earthy flavor and satisfying texture.
    Mushrooms work wonders in this sandwich, adding depth to the overall taste without sacrificing satisfaction.

  • Herb Infusion: Sprinkle your sandwich with fresh basil or dill instead of cilantro for a fragrant twist.
    Experimenting with herbs can enhance the overall flavor profile and bring a unique freshness to each bite.

  • Cheese Lovers: Blend in more layers of cheese like pepper jack or gouda for a melty extravaganza!
    This can turn your grilled cheese into a cheese-lover’s dream, creating that gooeyness we all yearn for.

  • Crunch Factor: Introduce bread crumbs mixed with Parmesan to the outer layer of the sandwich for added crunch.
    This simple addition transforms your grilled cheese into something crispy and satisfying while maintaining its core flavor.

  • Satisfying Sides: Serve alongside a refreshing tomato or avocado salad for a balanced meal.
    Pairing it with fresh veggies can enhance your dining experience, making this comforting meal feel lighter and more vibrant.

  • Sweet Surprise: Add a layer of sliced peaches or figs for a delightful sweetness that contrasts the spicy jalapeños.
    This unexpected change transforms your grilled cheese into something truly unique, balancing spice with sweet perfection.

Explore these variations, and let your culinary creativity shine while diving into this warm, cheesy goodness! For more fun with flavors and combinations, don’t forget to check out our ideas like spicy chipotle grilled cheese to keep those taste buds excited! Or try out our delicious classic grilled cheese for those classic moments when simplicity reigns. Enjoy every bite!

How to Store and Freeze Jalapeño Popper Grilled Cheese

Fridge: Store leftover Jalapeño Popper Grilled Cheese in an airtight container for up to 3 days. This helps keep the flavors fresh while preventing the bread from becoming soggy.

Freezer: For longer storage, wrap each sandwich tightly in plastic wrap and aluminum foil and freeze for up to 3 months. This prevents freezer burn and maintains flavor.

Reheating: To reheat, unwrap the sandwiches and place them in a skillet on medium heat, covered, for about 5-7 minutes until warmed through and the cheese is gooey again. You can also use an oven preheated to 350°F (175°C) for about 10-15 minutes.

Expert Tips for Jalapeño Popper Grilled Cheese

  • Choose the Right Peppers: Opt for large jalapeños for a good balance of heat and meatiness while still allowing a creamy filling.
  • Avoid Sogginess: Ensure the jalapeños are well-drained after baking to prevent excess moisture from making your grilled cheese soggy.
  • Customize Spice Level: If you prefer less heat, remove all seeds and membranes from the jalapeños, or substitute with milder peppers entirely.
  • Double the Cheese: For extra gooeyness, consider adding more cheese or different varieties, such as pepper jack, to enhance the flavor profile of your Jalapeño Popper Grilled Cheese.
  • Watch the Heat: Grill on medium-low heat to achieve a perfectly toasted exterior without burning the bread while waiting for the cheese to melt.

What to Serve with Jalapeño Popper Grilled Cheese

Nothing pairs better with a warm and cheesy sandwich than delightful side dishes and drinks to round out your meal.

  • Creamy Tomato Soup: A classic pairing that provides a soothing, velvety counterbalance to the spicy grilled cheese.
  • Crispy Sweet Potato Fries: Their sweetness contrasts beautifully with the jalapeño heat, adding a crunchy texture to your meal.
  • Garlic Herb Roasted Vegetables: These colorful veggies offer a hearty, earthy flavor that complements the richness of the cheese.
  • Mixed Green Salad: A refreshing salad with zesty dressing brings a lightness to the dish altogether, balancing out the indulgence of the sandwich.
  • Spicy Salsa: Serve with a side of salsa to enhance the flavor profile, giving you an extra kick that ignites the taste buds!
  • Margaritas: Sip on a refreshing margarita which echoes the festive spirit of the jalapeños, marrying rich flavors perfectly.
  • Churros for Dessert: For a sweet finale, these warm, cinnamon-sugar treats provide a delightful contrast to your savory meal.
  • Pickled Jalapeños: Add some extra zing with pickled jalapeños on the side; their acidity will elevate every bite of your sandwich!

Jalapeño Popper Grilled Cheese

Jalapeño Popper Grilled Cheese Recipe FAQs

What type of jalapeños should I use?
Absolutely, when choosing jalapeños for your Jalapeño Popper Grilled Cheese, opt for large, firm ones. They should be bright green and free of dark spots or blemishes. This ensures you get the perfect balance of heat and meatiness, and they’ll hold up nicely in your sandwiches!

How should I store leftover grilled cheese?
Very simply! Store any leftover Jalapeño Popper Grilled Cheese in an airtight container in the fridge for up to 3 days. This keeps your sandwiches fresh and flavorful while preventing the bread from becoming soggy. Just remember to let them cool completely before sealing!

Can I freeze Jalapeño Popper Grilled Cheese?
Definitely! For freezing, wrap each sandwich tightly in plastic wrap followed by aluminum foil to protect them from freezer burn. They can be stored in the freezer for up to 3 months. When you’re ready to enjoy, simply unwrap and reheat in a skillet or oven until warm and gooey.

What if my peppers seem too spicy?
Don’t worry! If you prefer a milder flavor for your Jalapeño Popper Grilled Cheese, it’s best to remove all seeds and membranes from the jalapeños, as that’s where most of the heat resides. You can also substitute with milder peppers like banana peppers or even bell peppers for a similar cheesy delight without the kick.

How do I revive my grilled cheese if it gets soggy?
If your sandwiches turn out soggy, it may be due to excess moisture from the jalapeños. To prevent this, ensure they are well-drained after baking. If you find your sandwiches are soggy after cooking, you can crisp them up by placing them in a skillet on medium heat for a few minutes or even in a toaster oven for a quick revamp. Just remember to flip them to get both sides crispy!

Is there a way to make this recipe vegetarian-friendly?
Absolutely, making this Jalapeño Popper Grilled Cheese vegetarian is easy! Simply omit the bacon and consider adding extra layers of veggies, such as roasted red peppers or spinach, to enhance flavors without compromising on taste. Enjoy experimenting with the ingredients to match your dietary needs!

Irresistible Jalapeño Popper Grilled Cheese You’ll Crave

This Jalapeño Popper Grilled Cheese combines bold flavors for a delightful comfort food experience.

  • Oven
  • skillet
  • Baking Sheet
  • Knife
  • cutting board

For the Jalapeños

  • 4 large Jalapeños (for that perfect spicy kick!)
  • 8 ounces Cream Cheese (creates a creamy filling that blends beautifully with the spices.)

For the Sandwich

  • 8 slices Thick White Bread (provides a sturdy base for grilling.)
  • 4 slices Cheddar Cheese (for a sharp, rich flavor.)
  • 4 slices Monterey Jack Cheese (adds creaminess.)
  • 4 strips Bacon (crispy and crumbled for smoky crunch.)

For Grilling

  • 1 tablespoon Butter (generously spread on the outside.)
  • Chopped Cilantro (optional for added flavor.)

Step-by-Step Instructions for Jalapeño Popper Grilled Cheese

  1. Preheat your oven to 375°F (190°C). Slice each jalapeño in half lengthwise and remove the seeds and membranes. Fill each jalapeño half with about 1 ounce of cream cheese, then arrange them on a baking sheet. Bake for 25–30 minutes until the peppers are semi-soft and the cream cheese is bubbly.
  2. While the jalapeños bake, take two slices of thick white bread and place one slice of cheddar cheese on each. Place one slice of Monterey Jack cheese on two other slices. Once the jalapeños are baked, slice them into bite-sized pieces and distribute them evenly atop the cheddar slices. Layer two strips of crispy bacon on top of each Monterey Jack slice before combining the halves to form two sandwiches.
  3. Spread butter on the outer sides of each sandwich. Heat a skillet over medium-low heat. Place the sandwiches butter-side down in the skillet. Grill each side for about 3–4 minutes until golden brown and crispy, flipping once.

Store leftovers in an airtight container for up to 3 days. For longer storage, wrap each sandwich and freeze for up to 3 months. Reheat in a skillet or oven until warmed through.

Sandwiches
American
Cheesy Sandwich, comfort food, grilled cheese, Jalapeño Popper Grilled Cheese, quick dinner, Spicy Sandwich

Filed Under: Sandwiches

  • « Previous Page
  • 1
  • 2
  • 3
  • 4
  • 5
  • 6
  • …
  • 22
  • Next Page »
RecipeCrown

Hello, beautiful people! I’m Grace Bellamy, a foodie, traveler, and writer with wanderlust in my soul. Whether crafting recipes in my kitchen or exploring flavors around the globe, my greatest joy is helping you create healthier, happier lives, one delicious bite at a time.