RecipeCrown

Easy & Delicious Recipes

  • Home
  • Breakfast
  • Main Dishes
  • Dessert
  • About
  • Contact
You are here: Home / Archives for grace bellamy

Grape Jelly Meatballs: Sweet, Savory Comfort in Minutes

October 13, 2025 by grace bellamy Leave a Comment

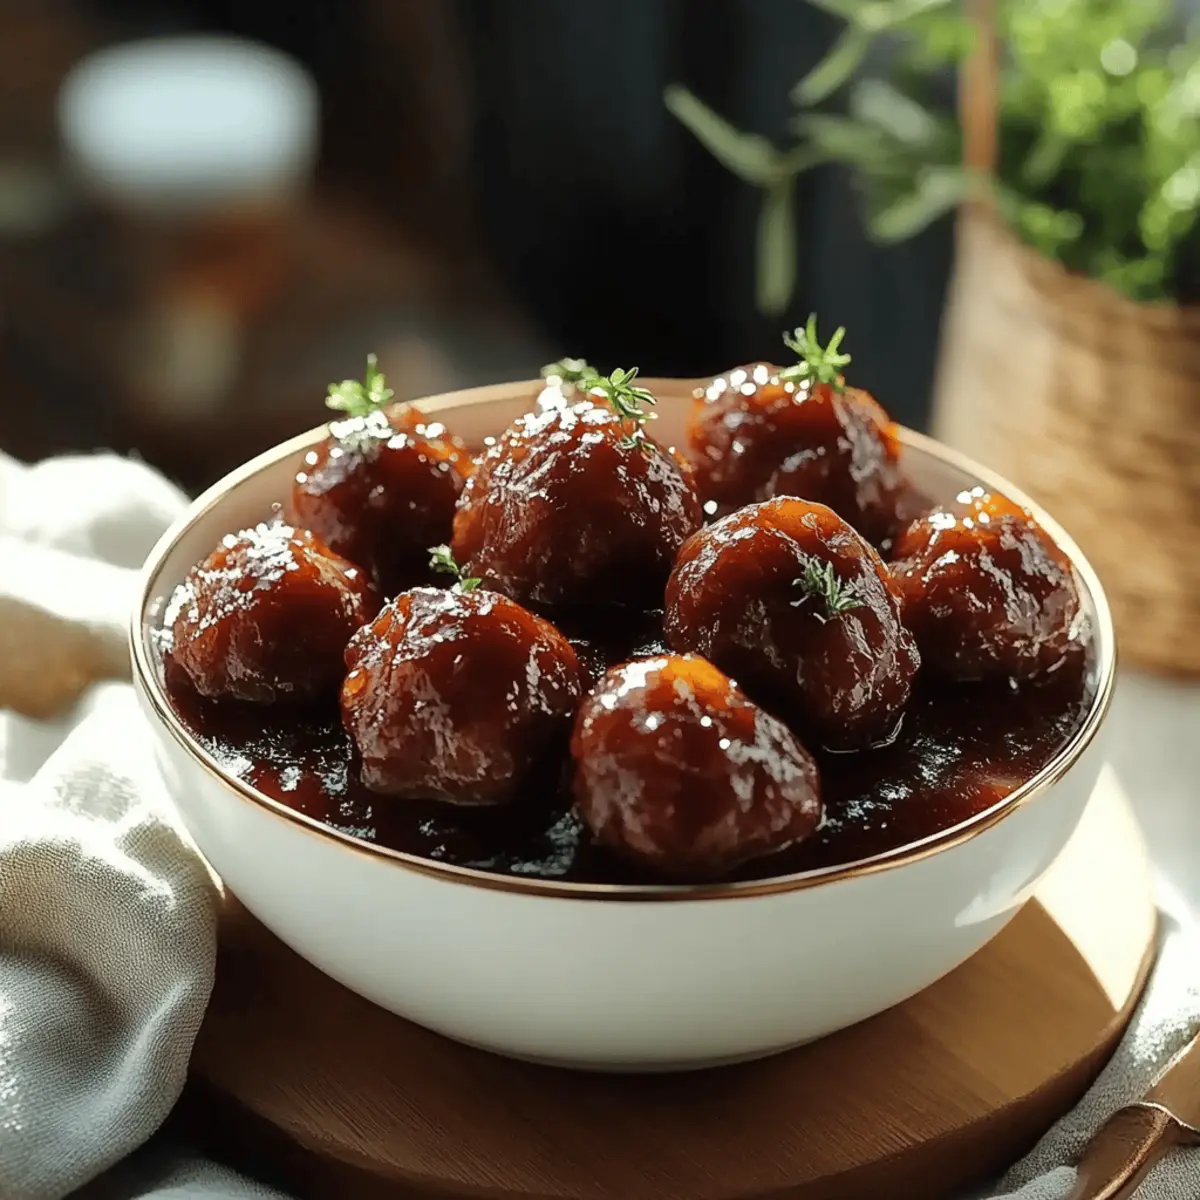
As I poured the bubbling sauce over the frozen meatballs, the kitchen filled with a nostalgic aroma that brought me straight back to family gatherings. If you’re after a quick and delicious recipe that wows both kids and adults alike, then you’re in for a treat with these Crockpot Grape Jelly Meatballs. This dish combines the sweetness of grape jelly with the smoky kick of BBQ sauce, creating a flavor explosion that’s unbelievably satisfying. One of the best perks? You can set it and forget it—the slow cooker does all the work, leaving you free to enjoy your day. Plus, these meatballs make for an impressive appetizer at parties or a hearty meal served over rice or noodles. Ready to discover how to bring this crowd-pleaser to your table? Let’s dive into the recipe!

Grape Jelly Meatballs

Why are Grape Jelly Meatballs so irresistible?

Simplicity makes this recipe a winner! With just three ingredients and minimal prep, you can whip up a delicious treat in no time. Flavor fusion of sweet grape jelly and smoky BBQ sauce creates a unique taste that delights everyone at the table. Versatile serving options mean you can easily enjoy these meatballs as appetizers, or serve them over rice or noodles for a satisfying meal. Plus, the slow cooker does all the hard work for you, making it perfect for busy days. Crowd-pleasing appeal means these meatballs are sure to be a hit at any gathering! Don’t forget to check out my tips for perfectly cooked meatballs to ensure your dish steals the show!

Grape Jelly Meatballs Ingredients

For the Meatballs
• Frozen meatballs – Use store-bought for convenience; this recipe is all about ease!

For the Sauce
• BBQ sauce – Choose your favorite brand for a personal touch; it pairs perfectly with the jelly.
• Grape jelly – The star of the dish; this adds a delightful sweetness that captivates all palates.

Step‑by‑Step Instructions for Grape Jelly Meatballs

Step 1: Prepare the Crockpot
Begin by spraying the inside of your Crockpot with cooking oil to prevent sticking and make cleanup easier. This simple step ensures your Grape Jelly Meatballs will slide out smoothly when it’s time to serve. Set the Crockpot aside as you prepare the meatballs and sauce.

Step 2: Add the Meatballs
Now, take the 24 ounces of frozen meatballs and spread them in an even layer at the bottom of the Crockpot. This ensures they cook evenly and soak up all the delicious flavors. Take a moment to admire your progress; the meatballs should be sitting comfortably, ready to absorb the delightful sauce.

Step 3: Whisk the Sauce
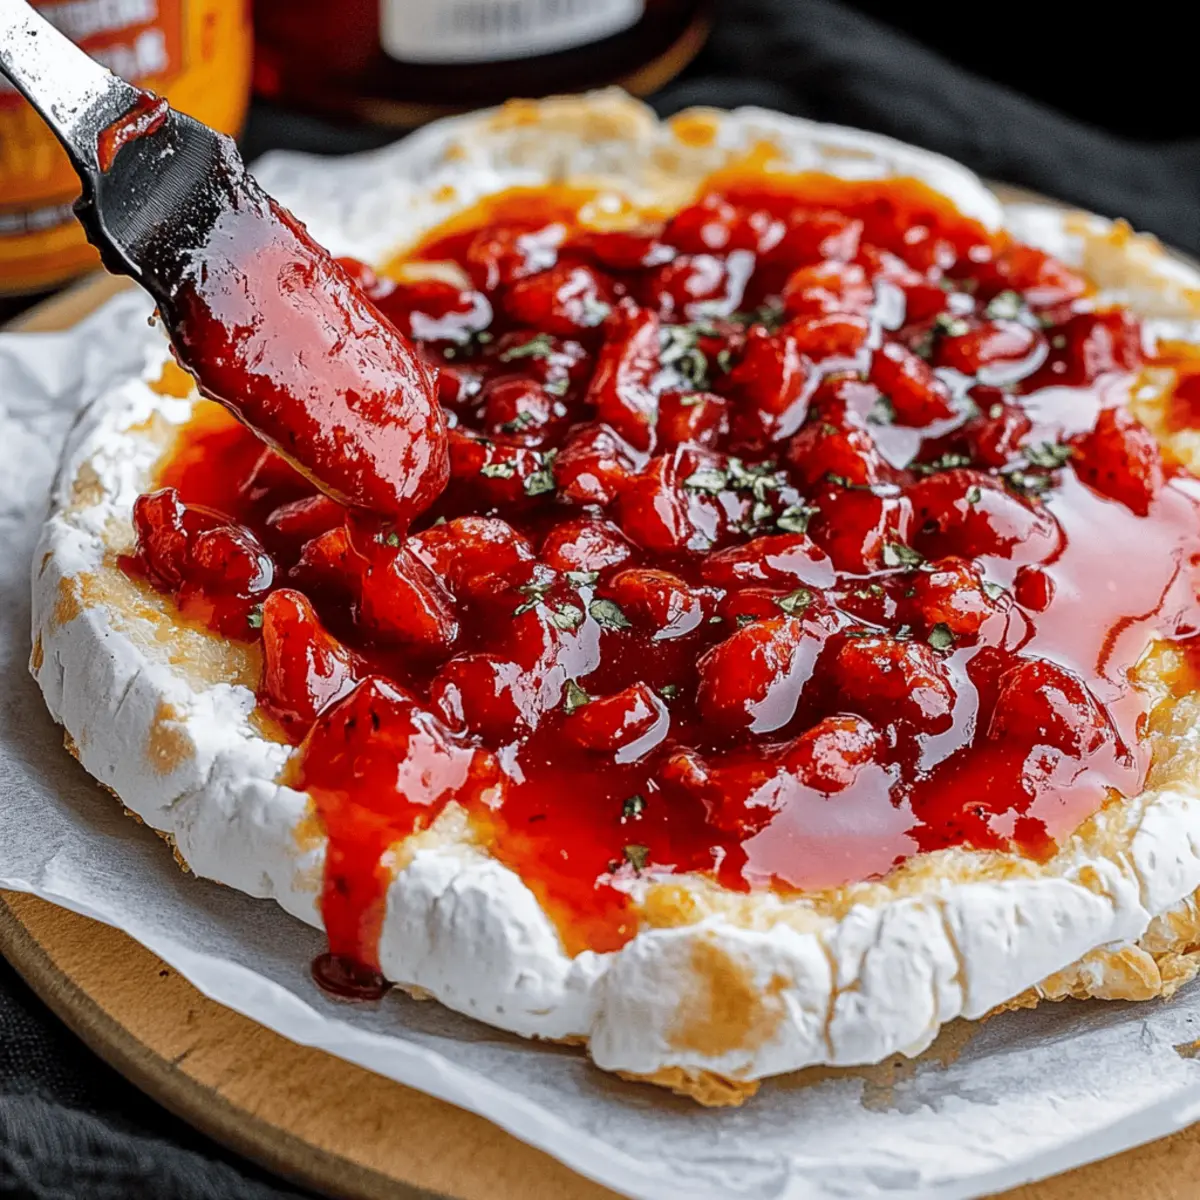
In a mixing bowl, combine 2 cups of BBQ sauce with 1 cup of grape jelly. Whisk them together until the mixture is smooth and fully blended, with no lumps. The color should be a vibrant blend of red and purple, indicating the perfect balance you’ll soon enjoy on your meatballs.

Step 4: Coat the Meatballs
Pour the prepared sauce mixture over the meatballs in the Crockpot, ensuring each one is coated in that sweet and savory blend. Gently turn the meatballs using a spatula or tongs, so they’re thoroughly enveloped in the sauce. This step is crucial for an even flavor throughout the dish.

Step 5: Set the Cooking Time
Cover the Crockpot with its lid and set it to cook on Low for 4–5 hours or on High for 2–3 hours. Resist the urge to lift the lid during cooking, as this will release steam and can affect the cooking time and tenderness of the Grape Jelly Meatballs.

Step 6: Thicken the Sauce if Needed
Towards the end of cooking, check the consistency of your sauce. If it appears too thin, simply remove the lid and increase the heat to High for an additional 20 minutes. This will allow the sauce to thicken nicely, giving your meatballs that perfect, sticky glaze that clings beautifully.

Step 7: Serve and Enjoy
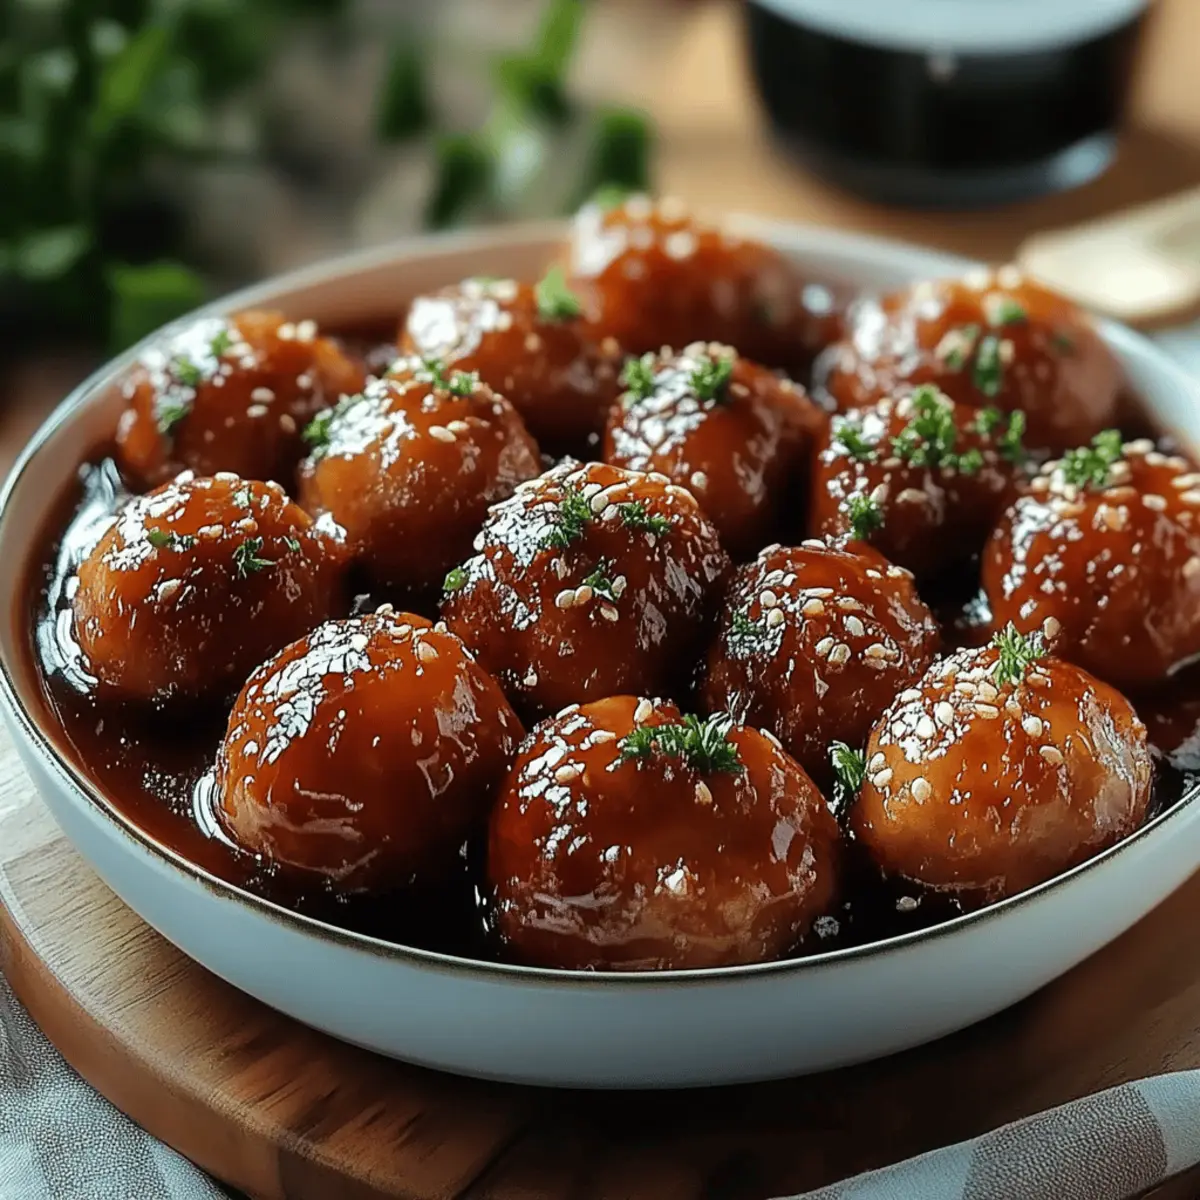
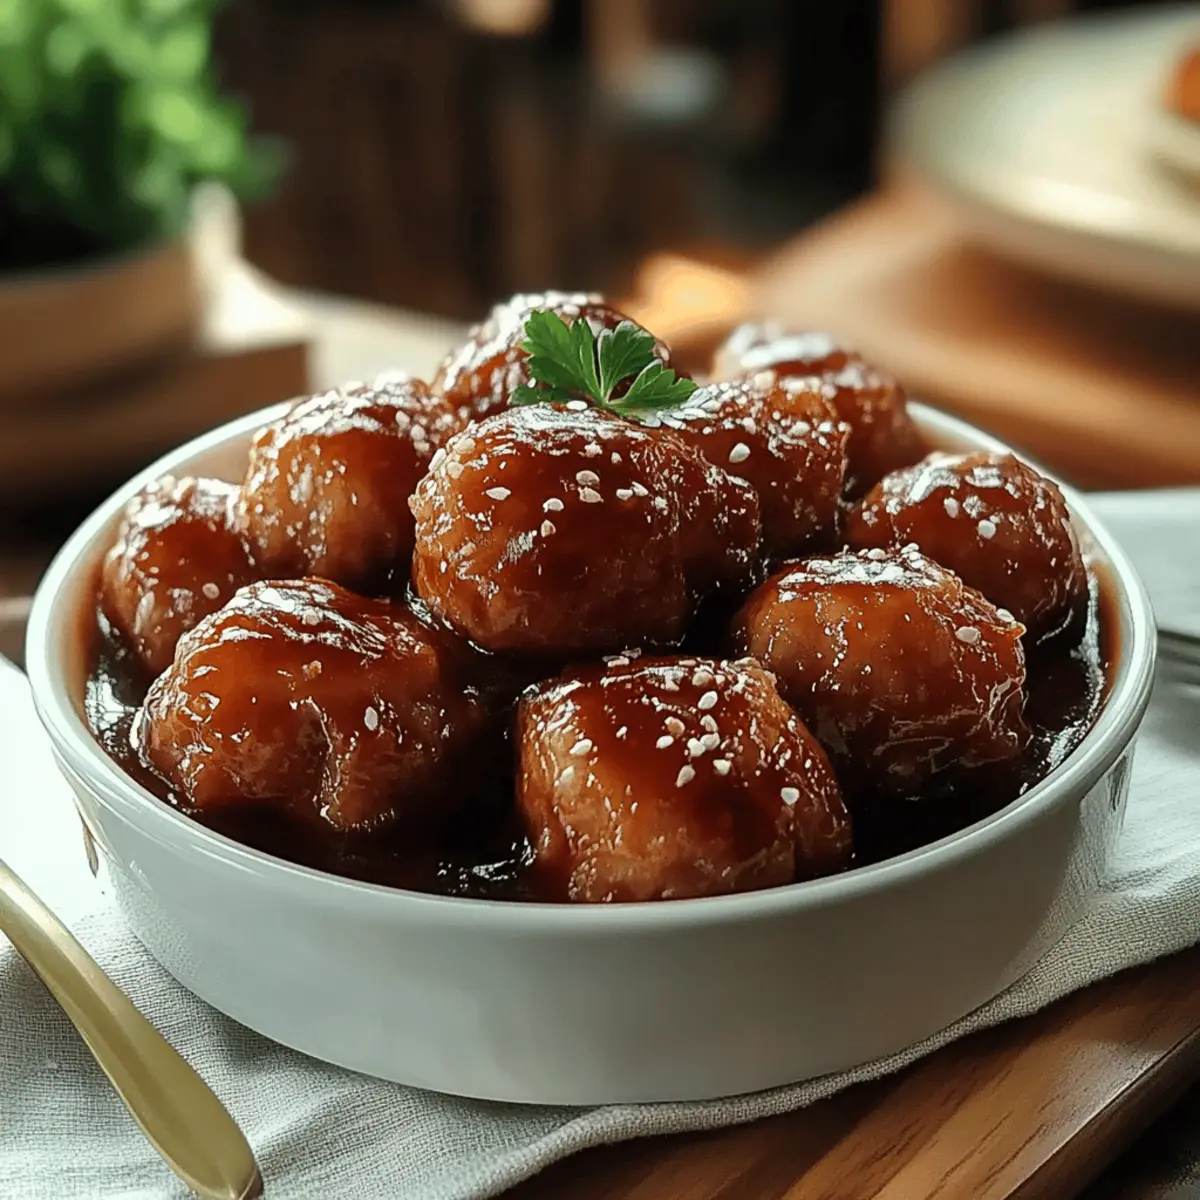
Once the cooking time is complete, carefully ladle the Grape Jelly Meatballs onto a serving platter. They can be enjoyed hot as a standalone dish or served over rice or noodles for a heartier meal. Consider garnishing with chopped herbs for a pop of color before serving!

Grape Jelly Meatballs

Grape Jelly Meatballs Variations

Feel free to get creative with these delicious meatballs, adjusting flavors and ingredients to suit your taste!

  • Gluten-Free: Substitute with gluten-free meatballs and BBQ sauce to make this dish suitable for those with gluten sensitivities.

  • Spicy Kick: Add 1-2 tablespoons of hot sauce or a pinch of cayenne pepper to the sauce mixture for an exciting spice that balances the sweetness beautifully.

  • Fruit Twist: Use different fruit preserves such as raspberry or apricot instead of grape jelly for a delightful change. Each brings a unique flavor while keeping that lovely sweetness.

  • Vegetarian Option: Swap the meatballs for plant-based meatballs, using a rich sauce made from vegan BBQ sauce to keep it completely meat-free but still satisfying.

  • Herb Infusion: Stir in fresh rosemary or thyme to the sauce for an aromatic lift that perfectly complements the flavors of the meatballs.

  • Pineapple Addition: Toss in some crushed pineapple along with the sauce for a tropical twist that adds juicy sweetness and tang to your dish.

  • Smoky Flavor: Add a teaspoon of smoked paprika to the sauce to bring a deeper, more complex flavor that pairs nicely with the BBQ sauce.

  • Asian Flair: Swap the BBQ sauce for teriyaki sauce and add a splash of soy sauce for a fusion twist that takes these meatballs in a whole new direction.

These ideas will help you create a version of Grape Jelly Meatballs that suits your cravings and occasions. Plus, don’t forget to enjoy them with toothpicks as appetizers or over rice for a hearty meal!

Make Ahead Options

These Grape Jelly Meatballs are a fantastic option for meal prep and busy weeknights! You can assemble the meatballs and sauce mixture up to 24 hours ahead of time. Simply follow the recipe steps up to coating the meatballs, then cover and refrigerate them in the Crockpot insert. When you’re ready to cook, just pop the insert back in the Crockpot and set it to your desired cooking time. This method not only saves you time but also allows the flavors to meld overnight, enhancing the overall deliciousness. For maintaining quality, avoid adding the sauce until you’re ready to cook, ensuring the meatballs stay juicy and tender. Enjoy these crowd-pleasers with ease, knowing you’ve prepped ahead for a delightful meal!

Expert Tips for Grape Jelly Meatballs

  • Ingredient Quality: Choose high-quality BBQ sauce and grape jelly for the best flavor. A premium sauce enhances the overall taste of your Grape Jelly Meatballs.

  • Cook Time Precision: Avoid opening the Crockpot lid too frequently. This releases steam and can affect cooking time, leading to unevenly cooked meatballs.

  • Thickness Adjustments: If the sauce is too thin at the end, remember to increase the heat to High for 20 minutes. This helps thicken the sauce and achieve that perfect sticky glaze.

  • Serving Options: Serve your meatballs with toothpicks as appetizers or over rice/noodles for a more filling meal. This versatility makes them great for any occasion.

  • Storage Tips: Leftovers can be stored in an airtight container in the fridge for up to three days. Reheat gently to preserve the sauce’s flavor and texture.

What to Serve with Crockpot Grape Jelly Meatballs

Create a memorable meal that balances sweet and savory flavors to delight everyone at the table.

  • Creamy Mashed Potatoes: Their buttery texture complements the meatballs’ sticky sauce and provides a comforting, classic touch to the meal.
    Add a sprinkle of chives for freshness and a pop of color.

  • Garlic Bread: Perfect for scooping up the savory sauce, this crispy delight adds an irresistible crunch to the feast.
    Serve warm, with the aroma of garlic wafting through the air, enhancing the overall experience.

  • Coleslaw Salad: Fresh, crunchy, and tangy, coleslaw adds a vibrant contrast to the rich flavors of the meatballs.
    The refreshing crunch balances the sweetness perfectly while adding a burst of color to your plate.

  • Steamed Green Beans: These bright green veggies add a delightful crispness to your meal and are a nutritious side.
    Drizzle with olive oil and a squeeze of lemon for an added zesty kick.

  • Roasted Brussels Sprouts: Their caramelized flavor and crispy edges provide a delightful texture that pairs wonderfully with the meatballs.
    A sprinkle of balsamic glaze elevates their taste even further, harmonizing the sweet and savory.

  • Fruit Skewers: For a juicy and refreshing side, fruit skewers loaded with strawberries, grapes, and melon complement your meal surprisingly well.
    Their sweetness will echo the flavors of the grape jelly without overpowering your main dish.

  • Sweet Tea or Lemonade: A glass of sweet tea or refreshing lemonade enhances the Southern touch of the meal when enjoyed together.
    These drinks bring a light and bright note to complement the rich taste of the meatballs beautifully.

  • Chocolate Chip Cookies: For dessert, finish your meal on a sweet note with warm, gooey chocolate chip cookies.
    Their comforting, nostalgic flavors round out the experience wonderfully, creating smiles all around.

Storage Tips for Grape Jelly Meatballs

Fridge: Store leftover Grape Jelly Meatballs in an airtight container in the fridge for up to 3 days. This keeps them fresh and flavorful for your next meal.

Freezer: For longer storage, freeze the meatballs in a freezer-safe container for up to 2 months. Make sure to separate layers with parchment paper to prevent sticking.

Reheating: Reheat the meatballs in a saucepan over low heat, stirring occasionally until warmed through. Alternatively, you can microwave them covered in a bowl with a splash of water to keep them moist.

Thawing: When you’re ready to enjoy frozen meatballs, thaw them overnight in the fridge before reheating for the best texture and flavor.

Grape Jelly Meatballs

Grape Jelly Meatballs Recipe FAQs

What kind of frozen meatballs should I use?
Absolutely! For this recipe, you can use any brand of frozen meatballs that you prefer. Look for meatballs made with quality ingredients for the best flavor. If you want a homemade touch, you can also make your own meatballs and freeze them ahead of time, which allows you to control the ingredients and flavors!

How should I store leftover Grape Jelly Meatballs?
To store your leftover Grape Jelly Meatballs, place them in an airtight container in the fridge. They will stay fresh for up to 3 days. Just make sure to let them cool completely before sealing to prevent condensation. When you’re ready to enjoy them again, simply reheat on low heat on the stovetop or in the microwave!

Can I freeze Grape Jelly Meatballs?
Yes, you can freeze Grape Jelly Meatballs! To do this, allow them to cool completely before placing them in a freezer-safe container. Separate layers with parchment paper to avoid sticking. They can be frozen for up to 2 months. When you’re ready to eat them, thaw the meatballs overnight in the fridge before reheating.

What can I do if the sauce is too thin?
If you find that the sauce is too thin towards the end of cooking, don’t worry! Just remove the lid of the Crockpot and switch the setting to High for an additional 20 minutes. This will help to thicken the sauce, giving your meatballs that delicious, sticky glaze. Stir occasionally to ensure even thickening.

Are Grape Jelly Meatballs pet-friendly?
While Grape Jelly Meatballs are a delightful treat for humans, it’s best to keep them away from pets. The grape jelly and high sodium content in BBQ sauce can be harmful to dogs and other pets. Always stick to pet-safe treats to keep your furry friends happy and healthy!

Can I substitute ingredients if I have allergies?
Of course! If you’re allergic to certain ingredients, you can substitute the BBQ sauce with a homemade version that avoids those allergens or use a sugar-free alternative if you’re watching your sugar intake. Just make sure the grape jelly is safe for your dietary needs as well. Explore alternatives that match your preferences and make this recipe your own!

Grape Jelly Meatballs: Sweet, Savory Comfort in Minutes

Delicious Grape Jelly Meatballs blend sweet and savory flavors, perfect for appetizers or meals that satisfy all ages.

  • Crockpot

For the Meatballs

  • 24 ounces Frozen meatballs (Use store-bought for convenience.)

For the Sauce

  • 2 cups BBQ sauce (Choose your favorite brand.)
  • 1 cup Grape jelly (The star of the dish.)

Step-by-Step Instructions for Grape Jelly Meatballs

  1. Spray the inside of your Crockpot with cooking oil to prevent sticking.
  2. Spread the frozen meatballs in an even layer at the bottom of the Crockpot.
  3. In a mixing bowl, combine BBQ sauce and grape jelly; whisk until smooth.
  4. Pour the sauce mixture over the meatballs and coat them thoroughly.
  5. Cover with the lid and set to cook on Low for 4–5 hours or High for 2–3 hours.
  6. If the sauce is too thin, increase the heat to High for 20 minutes to thicken.
  7. Ladle the meatballs onto a serving platter and enjoy with garnishes if desired.

Leftovers can be stored in an airtight container in the fridge for up to three days. Reheat gently to preserve sauce flavor and texture.

Appetizer
American
Crockpot Recipe, Easy Recipe, Family Favorites, Grape Jelly Meatballs, Party Appetizer, Slow Cooker Meatballs

Filed Under: Appetizer

Spooky Ghost Brown Butter Pumpkin Cookies for Fall Fun

October 9, 2025 by grace bellamy Leave a Comment

As the crisp air of fall settles in, I find myself turning my kitchen into a cozy hub filled with warmth and sweet aromas. These Spooky Ghost Brown Butter Pumpkin Cookies are the perfect way to celebrate the season, combining a soft, chewy texture with the rich, nutty flavor of brown butter. What makes them truly special is the fun twist of ghostly decorations, making them a hit for both kids and adults alike. Plus, they’re quick to whip up, allowing you more time to enjoy the festivities. Who wouldn’t want to share a batch of these playful treats at Halloween gatherings? Will your ghosts be smiling or scaring? Let’s dive into this delightful recipe together!

Spooky Ghost Brown Butter Pumpkin Cookies

Why are these cookies a must-try?

Fun and Festive: These Spooky Ghost Brown Butter Pumpkin Cookies bring a playful twist to your fall baking, making them perfect for Halloween parties!

Rich Flavor: The brown butter adds a rich, nutty depth that beautifully complements the sweetness of pumpkin.

Easy Decoration: With just a drizzle of white chocolate and a few black candy melts, you can create adorable ghost designs that everyone will love.

Quick Prep: You can whip up these cookies in no time, giving you more moments to enjoy the season.

Crowd-Pleaser: Friends and family will be enchanted by these delicious treats, ensuring you’ll be the star of your next gathering. Try pairing them with a warm cup of cider for the ultimate fall experience!

Spooky Ghost Brown Butter Pumpkin Cookies Ingredients

For the Cookie Base

  • Brown Butter and Maple Chewy Pumpkin Cookies – This cookie base is infused with rich flavors, setting the perfect stage for spooky fun!

For the Decoration

  • White chocolate – Melting this adds a creamy, sweet drizzle that forms the ghostly apparition.
  • Black candy melts – Use these to add whimsical eyes; the contrast makes your ghosts come to life!

These Spooky Ghost Brown Butter Pumpkin Cookies are sure to be a delightful addition to your fall festivities!

Step‑by‑Step Instructions for Spooky Ghost Brown Butter Pumpkin Cookies

Step 1: Preheat the Oven
Begin by preheating your oven to 350°F (175°C) to create the perfect baking environment for your Spooky Ghost Brown Butter Pumpkin Cookies. While the oven warms, line light-colored baking sheets with parchment paper to ensure that the cookies bake evenly and achieve a lovely golden hue.

Step 2: Prepare the Cookie Dough
Next, whip up a batch of Brown Butter and Maple Chewy Pumpkin Cookies according to your favorite recipe. Focus on achieving a smooth, well-combined dough. Once you’ve mixed all the ingredients, scoop the dough onto the prepared baking sheets, spacing them about two inches apart for even spreading as they bake.

Step 3: Bake the Cookies
With the oven preheated, place the baking sheets in the center. Bake your cookies for about 12-15 minutes or until they’re lightly golden around the edges and softly set in the centers. Keep an eye on them, as they’ll continue to firm up as they cool. Let them cool on the baking sheets for a few minutes before transferring to a wire rack.

Step 4: Melt the White Chocolate
Once your spooky cookies have cooled completely, it’s time to create their ghostly charm. In a microwave-safe bowl, melt white chocolate by heating it in 30-second intervals, stirring between each one until smooth and runny. This should take about 1-2 minutes.

Step 5: Drizzle the White Chocolate
Fill a piping bag or zip-top bag with the melted white chocolate, then snip a small corner to create a small opening. Drizzle the white chocolate over each cookie in a ghostly shape—think swirls and curves to bring your Spooky Ghost Brown Butter Pumpkin Cookies to life!

Step 6: Add the Candy Eyes
For the final touch, melt black candy melts in the microwave just like the white chocolate. Once melted, use either a piping bag or a small spoon to place tiny dots for eyes onto the ghostly shapes. Allow the chocolate to cool and set, and you’ll have delightful little ghosts ready to enchant your family and friends this Halloween!

Spooky Ghost Brown Butter Pumpkin Cookies

Make Ahead Options

These Spooky Ghost Brown Butter Pumpkin Cookies are perfect for meal prep enthusiasts looking to save time during the busy fall season! You can prepare the Brown Butter and Maple Chewy Pumpkin Cookie dough up to 24 hours in advance. Simply cover the bowl with plastic wrap and refrigerate to keep it fresh. When you’re ready to bake, scoop the chilled dough onto your baking sheets and proceed with the baking instructions. Additionally, you can melt the white chocolate and black candy melts up to 3 days ahead of time; just store them in airtight containers at room temperature. When it’s time to enjoy, finish by drizzling the melted chocolates on your cookies, and you’ll have festive treats that taste just as delicious as if they were just made!

What to Serve with Spooky Ghost Brown Butter Pumpkin Cookies

As the magic of Halloween approaches, envision a delightful spread that complements these whimsical treats and brings joy to your festivities.

  • Warm Apple Cider: This spiced drink brings cozy autumn flavors, creating a comforting pairing that enhances the warm pumpkin notes in the cookies.

  • Vanilla Ice Cream: A scoop of creamy vanilla ice cream offers a refreshing contrast to the rich flavors of the cookies, making each bite feel indulgent.

  • Candied Pecans: The crunch of these sweet, nutty morsels adds delightful texture and balances the soft cookie with a touch of sweetness.

  • Pumpkin Spice Latte: For a festive beverage, enjoy a pumpkin spice latte; its warm spices will resonate beautifully with the brown butter flavor.

  • Chocolate Milk: This classic drink is a hit for both kids and adults, providing a creamy sweetness that pairs wonderfully with the cookies’ charm.

  • Caramel Drizzle: A light drizzle over the cookies or served on the side, caramel adds extra sweet richness that elevates the ghostly fun.

Be creative with your pairings, and let your gathering shine with delicious flavors and cozy drinks!

Spooky Ghost Brown Butter Pumpkin Cookies Variations

Feel free to customize these cookies to suit your taste and dietary needs, blending flavors and fun along the way!

  • Gluten-Free: Substitute all-purpose flour with a gluten-free flour blend for a tasty cookie everyone can enjoy.
    This is a great option for those who need to avoid gluten but still want to indulge in festive treats during the season!

  • Vegan: Use plant-based butter and dairy-free chocolate to make these cookies suitable for a vegan lifestyle.
    With the rich flavor still intact, your ghosts will be delightful and compassionate!

  • Spicy: Add a pinch of cinnamon or nutmeg to the dough for a warming spiced twist.
    This extra flavor will dance on your taste buds, reminding you of cozy nights by the fire.

  • Chocolatey: Incorporate cocoa powder into the cookie dough for a chocolate version of these spooky treats.
    Chocolate and pumpkin is an incredible combination that will have family and friends asking for more!

  • Nuts or Seeds: Stir in some chopped walnuts or pumpkin seeds for added crunch and protein.
    This twist not only enhances the texture but also adds a wholesome touch to your cookies!

  • Pumpkin Spice Drizzle: Instead of plain white chocolate, mix powdered pumpkin spice into your melted chocolate for a seasonal flair.
    It’s all about amplifying those autumn flavors while keeping that festive spirit alive!

  • Coconut Flakes: Sprinkle toasted coconut flakes on top of the melted chocolate for a tropical, textured treat.
    This unexpected addition can evoke memories of warm beaches even on the chilly fall days!

  • Fruit Jam: Add a dollop of your favorite fruit jam before baking for a sweet surprise inside.
    With this sweet twist, each bite will be bursting with flavors you didn’t see coming!

By trying these variations, you’ll create a new spin on your Spooky Ghost Brown Butter Pumpkin Cookies, ensuring no two batches are the same! Pair them with a lovely cup of warm apple cider or stack them alongside a plate of festive pumpkin pie to make your festivities even sweeter!

How to Store and Freeze Spooky Ghost Brown Butter Pumpkin Cookies

Room Temperature: Keep your cookies in an airtight container at room temperature for up to 3 days to maintain their chewy texture and fresh taste.

Fridge: For extended freshness, store the cookies in the refrigerator in a sealed container for up to 1 week. Allow them to come to room temperature before enjoying.

Freezer: To freeze your Spooky Ghost Brown Butter Pumpkin Cookies, layer them in an airtight container with parchment paper between layers. They can be stored in the freezer for up to 3 months.

Reheating: When ready to enjoy, thaw the cookies overnight in the fridge, then warm them in the microwave for 10-15 seconds to revive their soft goodness.

Expert Tips for Spooky Ghost Brown Butter Pumpkin Cookies

  • Perfect Your Brown Butter: Watch the butter closely while browning; it can turn from perfect to burnt quickly. The nutty aroma is your sign to take it off the heat!

  • Cookie Spacing: Ensure your cookie dough scoops are spaced at least two inches apart. This prevents them from merging into one giant spooky cookie during baking!

  • Cool Completely: Allow the cookies to cool fully before drizzling with chocolate. This ensures the designs set well and don’t run off when the heat of the cookie melts them.

  • Use Quality Chocolate: The key to beautiful designs is high-quality white and black chocolate. This makes for a smoother melt and better shine on your ghostly decorations.

  • Get Creative: Don’t be afraid to personalize your ghost designs! Try different shapes or expressions to make each Spooky Ghost Brown Butter Pumpkin Cookie unique and fun!

Spooky Ghost Brown Butter Pumpkin Cookies

Spooky Ghost Brown Butter Pumpkin Cookies Recipe FAQs

How do I choose the best pumpkin for my cookies?
Absolutely! When selecting a pumpkin for your Spooky Ghost Brown Butter Pumpkin Cookies, look for a firm, heavy pumpkin with a smooth exterior. A sugar pumpkin or pie pumpkin has the best flavor for baking due to its sweetness. Avoid pumpkins with dark spots or soft areas, as these may indicate spoilage.

What’s the best way to store my cookies?
To store your Spooky Ghost Brown Butter Pumpkin Cookies, keep them in an airtight container at room temperature for up to 3 days. This helps maintain their soft, chewy texture. If you want them to last longer, you can refrigerate them for up to a week; just remember to let them come to room temperature before indulging!

Can I freeze these cookies for later?
Certainly! To freeze your Spooky Ghost Brown Butter Pumpkin Cookies, place them in an airtight container, ensuring to layer parchment paper between the cookies to prevent sticking. They can be stored in the freezer for up to 3 months. When you’re ready to enjoy, simply thaw overnight in the fridge and warm them in the microwave for about 10-15 seconds for that fresh-baked taste!

What should I do if my cookie dough is too sticky?
Very! If you find that your cookie dough is too sticky to work with, it may be due to excess moisture or humidity. I recommend chilling the dough in the fridge for about 30 minutes to firm it up. Alternatively, you can gently incorporate a bit more flour, adding it in a tablespoon at a time until the dough reaches the desired consistency.

Are these cookies safe for people with nut allergies?
It depends! The Spooky Ghost Brown Butter Pumpkin Cookies contain brown butter, which is made from regular butter, but if you have someone in your home with nut allergies, it’s a good idea to check your butter and any other ingredients for cross-contamination. If you’re uncertain, you might substitute the brown butter with a nut-free alternative like sunflower oil or a dairy-free butter blend.

How can I decorate the cookies if I don’t have black candy melts?
No problem! If you don’t have black candy melts on hand, you can use dark chocolate chips as a substitute. Simply melt them in the microwave, and then use a piping bag or a small spoon to create eyes on your ghost designs. This will still provide that fun contrast for your Spooky Ghost Brown Butter Pumpkin Cookies while adding a rich chocolatey flavor!

Spooky Ghost Brown Butter Pumpkin Cookies for Fall Fun

These Spooky Ghost Brown Butter Pumpkin Cookies are a delightful treat for Halloween, combining the rich flavor of brown butter with playful ghostly decorations.

  • Oven
  • Baking sheets
  • parchment paper
  • Microwave-safe bowl
  • piping bag

For the Cookie Base

  • 1 cup Brown Butter
  • 1 cup Pumpkin Puree
  • 1 cup Maple Syrup
  • 2 cups All-purpose Flour
  • 1 teaspoon Baking Soda
  • 1 teaspoon Salt

For the Decoration

  • 1 cup White Chocolate (Melted for drizzling)
  • 1 cup Black Candy Melts (For eyes)

Instructions

  1. Preheat your oven to 350°F (175°C) and line baking sheets with parchment paper.
  2. Prepare the cookie dough by mixing brown butter, pumpkin puree, and maple syrup. Blend in flour, baking soda, and salt.
  3. Scoop dough onto baking sheets, spacing them two inches apart. Bake for about 12-15 minutes.
  4. Let cookies cool on baking sheets for a few minutes before transferring to a wire rack.
  5. Melt white chocolate in a microwave-safe bowl and drizzle over cooled cookies.
  6. Melt black candy melts and dot them onto the cookies for eyes once the white chocolate has set.

Watch the brown butter closely to prevent burning. Ensure cookies are cooled before decorating for best results.

Dessert
American
Brown Butter Cookies, easy cookies, fall treats, Halloween Cookies, Pumpkin Dessert, Spooky Ghost Brown Butter Pumpkin Cookies

Filed Under: Dessert

No-Bake Moose Farts: Sweet Treats for Instant Joy

October 9, 2025 by grace bellamy Leave a Comment

It was a casual Saturday afternoon when I stumbled upon the funniest dessert name I’ve ever heard—No-Bake Moose Farts. As I stood in my kitchen, the scent of sweet cocoa wafting through the air, I couldn’t help but laugh at the delightful absurdity of it all. This recipe has an effortless charm that will win over friends and family alike. With a mere 15-minute prep time, it’s the perfect solution for anyone craving something sweet without the fuss of baking. Plus, these little bites pack a punch of creamy peanut butter and rich chocolate flavor that makes them irresistible. Trust me, you’re going to want to keep this recipe on repeat. Are you ready to dive into something deliciously fun?

No-Bake Moose Farts

Why will you love No-Bake Moose Farts?

Simplicity at Its Finest: This recipe is a breeze, requiring just 15 minutes of prep time and no baking!

Decadent Flavor: The creamy peanut butter and rich cocoa create a delightful and memorable taste that everyone will adore.

Versatile Treat: Perfect for parties, family gatherings, or a sweet pick-me-up at home, these treats are sure to impress.

Kid-Friendly Fun: Involving kids in rolling the balls can turn snack-making into a fun family activity.

Chill and Serve: With just an hour in the fridge, they’re a fantastic solution for last-minute cravings.

These No-Bake Moose Farts are a creative way to enjoy a dessert that’ll have everyone asking for seconds, and if you’re looking for more fun recipes to try, check out our guide to easy no-bake sweets that will satisfy your sweet tooth!

No-Bake Moose Farts Ingredients

Get ready to make these delightful treats in no time!

For the Base
• Graham cracker crumbs – A crumbly base that adds texture and a hint of sweetness.
• Unsweetened cocoa powder – Rich cocoa provides that chocolatey flavor without added sugars.
• Powdered sugar – For a smooth sweetness that blends beautifully into the mixture.

For the Creamy Mixture
• Creamy peanut butter – The star ingredient that gives a delectable nutty flavor and a creamy texture.
• Softened cream cheese – Ensures a rich and velvety mouthfeel that balances the sweetness.
• Vanilla extract – A splash of vanilla enhances the flavors and adds a warm aroma.

For the Fun
• Mini chocolate chips – These little bites add an extra layer of chocolatey goodness and texture.
• Whipped cream (optional) – A delightful topping that makes these treats even more indulgent!

These simple ingredients combine to create the delightful No-Bake Moose Farts that everyone will be raving about!

Step‑by‑Step Instructions for No-Bake Moose Farts

Step 1: Combine the Dry Ingredients
In a large mixing bowl, add 1 cup of graham cracker crumbs, 1/2 cup of unsweetened cocoa powder, and 1/2 cup of powdered sugar. Use a whisk to blend the ingredients until they form a uniform mixture, ensuring there are no lumps. This base will provide a rich flavor for your No-Bake Moose Farts.

Step 2: Mix in the Creamy Elements
Next, add 1/2 cup of creamy peanut butter, 1/2 cup of softened cream cheese, and 1 teaspoon of vanilla extract to the dry mixture. Using a spatula, combine them until the mixture is smooth and creamy, with no traces of cream cheese visible. This will create a luscious filling for your delightful treats.

Step 3: Fold in the Chocolate Chips
Once the creamy mixture is ready, gently fold in 1/4 cup of mini chocolate chips. Use a rubber spatula and be careful not to overmix; you want those chocolate chips to remain intact. This adds a fun texture and bursts of chocolate to your No-Bake Moose Farts.

Step 4: Shape the Treats
Scoop out portions of the mixture, about the size of a tablespoon, and shape them into small balls or logs using your hands. Place each shaped treat onto a lined baking sheet, leaving a little space between them. This way, the No-Bake Moose Farts will chill evenly without sticking together.

Step 5: Chill in the Refrigerator
Cover the baking sheet with plastic wrap and refrigerate for at least 1 hour. This chilling time is crucial as it helps the treats firm up and enhances their flavors. When you peek in after an hour, they should be set and ready to be enjoyed!

Step 6: Serve Your Treats
After chilling, your No-Bake Moose Farts are ready to serve! Optionally, top each treat with a dollop of whipped cream for added indulgence. Present them on a beautiful platter, and watch as everyone enjoys these delightful and whimsical treats.

No-Bake Moose Farts

Expert Tips for No-Bake Moose Farts

Chill Thoroughly: Make sure to refrigerate for at least an hour. This step is key for firming the texture and enhancing flavor.

Mix Well: Properly blend the cream cheese and peanut butter for a smooth filling. Lumps can disrupt the creamy consistency you want.

Shape Uniformly: Aim for equal-sized portions when shaping your treats. This ensures even chilling and makes for an appealing presentation.

Add More Fun: Get creative! Consider adding in crushed nuts or dried fruits for extra flavor and texture in your No-Bake Moose Farts.

Topping Ideas: If using whipped cream, serve it on the side for guests to customize their treats—choosing how indulgent they want to be!

How to Store and Freeze No-Bake Moose Farts

Fridge: Keep your No-Bake Moose Farts in an airtight container in the fridge for up to 5 days. This will keep them fresh and delicious for whenever your sweet tooth strikes.

Freezer: To freeze, place the treats in a single layer on a baking sheet until firm, then transfer them to a freezer-safe bag. They can be stored for up to 2 months.

Thawing: When ready to enjoy, simply remove them from the freezer and let them thaw in the fridge for a couple of hours. Enjoy chilled or at room temperature for the best flavor experience.

Reheating: There’s no need to reheat No-Bake Moose Farts, as they are best served cold. A dollop of whipped cream can freshen them up right before serving!

No-Bake Moose Farts Variations

Feel free to get creative and make this dessert your own with these fun variations!

  • Nut-Free: Replace peanut butter with sunflower seed butter for a nut-free alternative that still packs a punch of flavor.
    Sunflower seed butter offers a delightful, slightly sweet and nutty taste without worrying about allergies.

  • Vegan Delight: Use coconut cream and a substitute for peanut butter, like almond butter or a seed butter.
    This swap will provide a plant-based spin on your No-Bake Moose Farts that’s just as delicious!

  • Extra Crunch: Throw in some crushed nuts (like walnuts or almonds) for an exciting texture twist.
    These crunchy additions balance beautifully with the creamy filling, creating a delightful contrast.

  • Flavor Boost: Add a dash of espresso powder or instant coffee to enhance the chocolate flavor further.
    This little trick intensifies the richness and adds a delightful depth that coffee lovers will adore!

  • Heat It Up: Stir in a pinch of cayenne pepper or crushed red pepper flakes for a spicy kick.
    This surprising element can take your sweet treats to the next level, leaving everyone guessing at that extra zing!

  • Choco-Mint Fudge: Incorporate peppermint extract instead of vanilla to invite the refreshing essence of mint.
    It’s like a chocolate mint cookie rolled into one decadent ball that’s sure to cool you down on hot days!

  • Fruit Twist: Chop up some dried fruits like cranberries or apricots and fold them into the mixture.
    The addition of fruit adds a burst of sweetness and chewiness, elevating the experience to something extraordinary!

  • Cocoa Explosion: Use dark cocoa powder instead of unsweetened for an intensified chocolate experience.
    This will create a rich and deep flavor that chocolate lovers will truly relish and appreciate!

These No-Bake Moose Farts variations help you whip up a dessert tailored to your taste. Don’t forget to check out our guide for more exciting easy no-bake sweets to keep those sweet cravings in check!

Make Ahead Options

These No-Bake Moose Farts are fantastic for meal prep and can save you time on busy weeknights! You can prepare the mixture up to 24 hours in advance and store it in the refrigerator before shaping the treats. Simply follow the first three steps, then cover your mixing bowl tightly with plastic wrap to maintain freshness. When you’re ready to enjoy, scoop out the portions, shape them into balls or logs, and chill in the refrigerator for at least an hour before serving. This method ensures they remain just as delicious and flavorful, perfect for those spontaneous sweet cravings!

What to Serve with No-Bake Moose Farts

Creating the perfect dessert experience goes beyond just the treats themselves; let’s dive into harmonious pairings!

  • Creamy Vanilla Ice Cream: This classic addition offers a luscious, cold contrast that enhances the richness of the No-Bake Moose Farts. Scoop it up alongside for a delightful, creamy experience.

  • Fresh Berries: Strawberries, raspberries, or blueberries add a refreshing burst of tartness, balancing the sweetness beautifully. Plus, the bright colors bring a vibrant touch to the dessert spread.

  • Chocolate Drizzle: Drizzling warm chocolate sauce over the chilled treats adds an extra layer of indulgence and visual appeal. It’s an easy enhancement that will impress your guests.

  • Crispy Rice Treats: The crunchy texture of these treats introduces a fun element and balances the creaminess of the Moose Farts. Their mild sweetness complements the rich flavors without overwhelming the palate.

  • Minty Sparkling Water: For a refreshing drink pairing, opt for mint-infused sparkling water. The effervescence and mint enhance the sweet treats without adding extra sweetness.

  • Mini Fruit Tarts: These delightful little pastries provide a buttery crunch and fruity filling, creating a satisfying contrast to the soft, creamy No-Bake Moose Farts. A delightful mini-dessert combination!

  • Chocolate Coffee: Pair with a rich cup of mocha or dark chocolate coffee to elevate the dessert experience. The coffee’s bitterness contrasts beautifully with the sweetness of the treats.

  • Whipped Cream: While listed in the recipe, serving a side bowl of freshly whipped cream gives your guests the option to customize their treats as they please!

  • Homemade Hot Chocolate: If you want something cozy, serving warm hot chocolate alongside adds a comforting touch. Make it extra special with a sprinkle of cinnamon.

No-Bake Moose Farts

No-Bake Moose Farts Recipe FAQs

How do I choose ripe ingredients for No-Bake Moose Farts?
Absolutely! For the best results, make sure your cream cheese is fully softened to room temperature. This ensures a smooth blend with the peanut butter. While graham cracker crumbs can be store-bought, using fresh, high-quality cocoa powder will elevate the overall flavor. Always check that your peanut butter is creamy and stir-free; this will guarantee a delightful consistency in your mixture.

How should I store No-Bake Moose Farts?
Very! Keep your No-Bake Moose Farts in an airtight container in the refrigerator for up to 5 days. Just be sure to layer them with parchment paper if they’re stacked, preventing them from sticking together. This way, they remain fresh and ready to satisfy your cravings—perfect for an after-dinner treat or party snack!

Can I freeze No-Bake Moose Farts?
Absolutely! To freeze your treats, first place them in a single layer on a baking sheet and freeze until firm, about 1-2 hours. Then, transfer them to a freezer-safe bag or container. They can be frozen for up to 2 months. Just remember to label your bag with the date, so you know when to enjoy them!

What should I do if my No-Bake Moose Farts are too soft?
No worries at all! If you find that your mixture is a bit too soft to hold its shape, try chilling it a bit longer in the refrigerator—another 30 minutes should help. Additionally, you can incorporate a little more graham cracker crumbs to absorb excess moisture. Just be careful not to alter the flavor too much while finding the right consistency!

Are No-Bake Moose Farts safe for people with allergies?
Oh, absolutely! However, be cautious with potential allergens. Always check your peanut butter for allergens, especially if you’re serving guests. If needed, you can substitute almond or sunbutter for a nut-free version. For those avoiding dairy, using a dairy-free cream cheese alternative can work wonders, ensuring everyone can enjoy these delightful treats!

Can No-Bake Moose Farts be served to my pets?
No, it’s best to avoid giving your pets treats like No-Bake Moose Farts. The sugar and chocolate can be harmful to them. If you’re looking for a pet-friendly treat, consider simple frozen banana or apple slices as a delightful alternative!

No-Bake Moose Farts: Sweet Treats for Instant Joy

No-Bake Moose Farts are delightful treats blending peanut butter and chocolate for random joy.

  • large mixing bowl
  • Whisk
  • spatula
  • Rubber spatula
  • Baking Sheet
  • Plastic wrap

Base Ingredients

  • 1 cup graham cracker crumbs (A crumbly base that adds texture and a hint of sweetness.)
  • 1/2 cup unsweetened cocoa powder (Rich cocoa provides that chocolatey flavor without added sugars.)
  • 1/2 cup powdered sugar (For a smooth sweetness that blends beautifully into the mixture.)

Creamy Mixture

  • 1/2 cup creamy peanut butter (The star ingredient that gives a delectable nutty flavor and a creamy texture.)
  • 1/2 cup softened cream cheese (Ensures a rich and velvety mouthfeel that balances the sweetness.)
  • 1 teaspoon vanilla extract (A splash of vanilla enhances the flavors and adds a warm aroma.)

Fun Elements

  • 1/4 cup mini chocolate chips (These little bites add an extra layer of chocolatey goodness and texture.)
  • optional whipped cream (A delightful topping that makes these treats even more indulgent.)

Recipe Steps

  1. In a large mixing bowl, add 1 cup of graham cracker crumbs, 1/2 cup of unsweetened cocoa powder, and 1/2 cup of powdered sugar. Use a whisk to blend the ingredients until they form a uniform mixture, ensuring there are no lumps.
  2. Next, add 1/2 cup of creamy peanut butter, 1/2 cup of softened cream cheese, and 1 teaspoon of vanilla extract to the dry mixture. Using a spatula, combine them until the mixture is smooth and creamy.
  3. Once the creamy mixture is ready, gently fold in 1/4 cup of mini chocolate chips.
  4. Scoop out portions of the mixture, about the size of a tablespoon, and shape them into small balls or logs using your hands. Place each shaped treat onto a lined baking sheet.
  5. Cover the baking sheet with plastic wrap and refrigerate for at least 1 hour.
  6. After chilling, your No-Bake Moose Farts are ready to serve! Optionally, top each treat with a dollop of whipped cream.

Keep your No-Bake Moose Farts in an airtight container in the fridge for up to 5 days or freeze for up to 2 months.

Dessert
American
chocolate, dessert, easy recipes, No-Bake Moose Farts, Peanut Butter, Sweet Treats

Filed Under: Dessert

Halloween Mummy Meatballs That Will Wow Your Guests

October 9, 2025 by grace bellamy Leave a Comment

As the sun dips low and autumn leaves start swirling, the excitement of Halloween creeps into my kitchen. There’s something wonderfully whimsical about Halloween Mummy Meatballs that brings a smile to all ages. These spooky little bites are not only a fun way to get everyone involved in the cooking process, but they’re also super quick to whip up—perfect for those busy pre-trick-or-treating nights! With just a handful of ingredients, including crescent roll dough and your favorite meatballs, you can create a dish that truly impresses guests and family alike. Whether you serve them on a bed of pasta or with tasty dipping sauces, these mummies are bound to steal the show. Ready to turn your kitchen into a frightfully delightful food scene? Let’s dive in!

Halloween Mummy Meatballs

Why Everyone Loves Halloween Mummy Meatballs?

Quick and Easy: With just 30 minutes from start to finish, these delightful bites fit perfectly into your hectic Halloween schedule.

Creepy and Cute: The spooky appearance of these mummies is sure to captivate both kids and adults!

Customizable Flavor: Feel free to use your favorite meatballs or experiment with different sauces to create a dish that satisfies everyone’s tastes.

Hands-On Fun: This recipe is a fantastic way to get the whole family involved, making lasting memories in the kitchen.

Crowd-Pleasing Appeal: Perfect as an appetizer for parties, they’re destined to become a Halloween favorite that keeps your guests coming back for more!

Ready to impress? Serve these Halloween Mummy Meatballs on a spooky platter and watch as they disappear!

Halloween Mummy Meatballs Ingredients

Get ready to create some spooky deliciousness!

For the Mummies

  • Meatballs – Use about 16 meatballs, approximately 1.5 inches wide, for the perfect spooky base!
  • Crescent Roll Dough – 1/2 package (14 oz) provides the bandages that make these Halloween Mummy Meatballs fun and festive!

For the Eyes

  • Pepperoni – 3 slices work wonderfully, but feel free to get creative with other eye options like olives for a healthier twist!

For Serving

  • Dipping Sauce – Choose your desired sauce for serving; marinara or a tangy ranch dressing could complement the meatballs beautifully.

Have everything ready? Let’s wrap those meatballs in some dough and make Halloween a hit!

Step‑by‑Step Instructions for Halloween Mummy Meatballs

Step 1: Preheat the Oven
Begin by preheating your oven to 400°F (200°C). This step is crucial to ensure that your Halloween Mummy Meatballs bake evenly and achieve that delightful golden-brown color. While the oven heats up, you can prepare the crescent roll dough, making your workflow smoother and more efficient.

Step 2: Prepare the Dough
Unwrap the crescent dough and slice half of the package into thin strips, about 1/4 inch wide. These strips will create the bandages that give your meatballs their spooky mummy look. Lay the strips out on your work surface, making it easy to grab them as you wrap the meatballs.

Step 3: Wrap the Meatballs
Take one to two strips of dough and carefully wrap them around each meatball. Begin at the top, holding one end in place with your hand, and gently pull the dough to stretch it around in a haphazard pattern. Make sure to press the dough into itself to secure the strips, ensuring each mummy is tightly wrapped and ready for baking.

Step 4: Repeat the Process
Continue wrapping all the meatballs with the remaining dough strips, using additional leftovers to layer on more bandages if you desire a fuller mummy look. Be creative as you go—no two mummies need to look the same! Once wrapped, place them on a baking sheet lined with parchment paper for an easier cleanup.

Step 5: Bake the Mummies
Slide your baking sheet into the preheated oven and bake the Halloween Mummy Meatballs for about 12-15 minutes. Keep an eye on them, looking for that perfect golden brown color on the dough. You’ll know they’re ready when the meatballs are heated through and the dough is crispy.

Step 6: Prepare the Eyes
While the meatballs are baking, take the time to cut small circles from the pepperoni slices to use as eyes for your mummies. This is a great chance to enlist kids or family members to help out! The eye details will add a fun final touch to your spooky creations, so ensure you have enough for each meatball.

Step 7: Attach the Eyes
After the meatballs have cooled slightly, take a little bit of sauce or a drop of water and adhere two pepperoni eyes on each mummy. Use your fingers for precision, ensuring each mummy has its unique expression. This step is perfect for bringing your Halloween Mummy Meatballs to life!

Step 8: Serve and Enjoy
Now that your mummies look fabulous, serve them warm on a platter, optionally atop a bed of pasta or alongside your favorite dipping sauce. Whether it’s marinara or ranch dressing, these Halloween Mummy Meatballs are sure to impress all your guests and become a festive highlight of your Halloween festivities!

Halloween Mummy Meatballs

Halloween Mummy Meatballs Variations

Feel free to let your creative side shine as you personalize these spooky delights!

  • Gluten-Free: Substitute crescent roll dough with gluten-free dough options to cater to gluten sensitivities.

  • Spicy Twist: Add some crushed red pepper flakes to the sauce for a kick that will wake up your taste buds!

  • Cheesy Mummies: Sprinkle finely shredded cheese underneath the dough for extra gooeyness and a delicious flavor burst.

  • Veggie Option: Swap meatballs for roasted chickpeas or zucchini rounds for a fabulous vegetarian twist. They’ll still be creepy and utterly delicious!

  • Taco-Inspired: Use taco-seasoned meatballs and top them with jalapeño slices for an exciting and spicy adventure. Your guest’s taste buds will be in for a surprise!

  • Herb-Infused Dough: Incorporate dried herbs like oregano or basil into your dough for an aromatic flavor that adds depth to your mummies.

  • Nutty Crust: For texture, create a crust with crushed nuts mixed into the dough wrap; it’ll add a satisfying crunch.

  • Extra Eyes: If you’re feeling extra playful, use slices of olives or even mini cherry tomatoes as alternative eyeball options to make your mummies even more fun!

No matter how you choose to mix things up, these variations ensure everyone at your table delights in the spooky festivities. You can even pair them with a vibrant Halloween-themed salad or some deliciously creamy Pumpkin Pasta to complete your meal!

Make Ahead Options

These Halloween Mummy Meatballs are perfect for meal prep enthusiasts wanting to save time before the Halloween festivities! You can prepare the meatballs and wrap them in crescent dough up to 24 hours in advance; simply refrigerate them on a baking sheet, covered tightly with plastic wrap, to keep them fresh. When you’re ready to serve, preheat the oven and bake the mummies directly from the fridge for about 15-18 minutes until the dough is golden brown and the meatballs are heated through. Just remember to prepare the pepperoni eyes right before serving to ensure they stay vibrant and fun! You’ll have a delightful dish that’s just as delicious and ready to impress guests with minimal last-minute effort.

Expert Tips for Halloween Mummy Meatballs

  • Dough Consistency: Use fresh, refrigerated crescent roll dough for the best wrap consistency. Avoid overworking it to maintain its flakiness.

  • Even Baking: Make sure meatballs are spaced apart on the baking sheet to allow even heat distribution, ensuring a perfect golden brown on all sides.

  • Creative Eyes: If you want to switch things up, consider using sliced olives or even small pieces of mozzarella instead of pepperoni for your Halloween Mummy Meatballs’ eyes.

  • Keep It Light: For a lighter version, substitute turkey or chicken meatballs, reducing calories while still delivering delicious flavor.

  • Serving Options: Serve with a selection of sauces, like spicy marinara or creamy ranch, to cater to all tastes at your Halloween gathering.

  • Cooking Timing: Regularly check on the meatballs as they bake; overcooking can lead to dry meatballs, while the perfect bake will keep them juicy and flavorful!

What to Serve with Halloween Mummy Meatballs

Treat your guests to a fun and flavorful feast that complements these spooky bites, creating a memorable meal for all ages.

  • Pasta Skillet: Serve over a bed of buttery spaghetti for a comforting and filling side. The pasta absorbs the delicious meatball juices, tying the meal together beautifully.

  • Garlic Breadsticks: Warm, crispy breadsticks with a hint of garlic make the perfect vehicle for any leftover dipping sauce. Their crunchy texture contrasts nicely with the softness of the meatballs.

  • Crispy Salad: A fresh garden salad with crunchy vegetables like cucumbers and carrots adds a refreshing contrast. The brightness of the veggies balances the rich flavors of the mummies while keeping everything light.

  • Cheesy Cauliflower Bake: This creamy, cheesy dish can add a decadent touch to your Halloween spread. The subtle flavor of cauliflower pairs well with the savory meatballs, creating a balanced meal.

  • Roasted Brussels Sprouts: Caramelized Brussels sprouts provide a delightful earthy element that enhances your Halloween Mummy Meatballs. Their crispy edges and tender insides make them a delicious addition.

  • Spooky Punch: A fun Halloween-themed drink, like a fruity punch with floating eyeball-shaped ice cubes, is sure to wow your guests. The refreshing flavors will cleanse their palates and keep everyone hydrated during the festivities.

  • Chocolate Graveyard Cupcakes: For dessert, serve these playful cupcakes topped with crumbled cookies to resemble dirt and gummy worms. The rich chocolate flavor complements the savory meatballs, adding a sweet surprise to the spooky night.

Bring your Halloween celebration to life with these perfect pairings that will complement the delightful Halloween Mummy Meatballs!

How to Store and Freeze Halloween Mummy Meatballs

Fridge: Store leftover Halloween Mummy Meatballs in an airtight container in the fridge for up to 3 days. This helps maintain their fresh taste and prevents drying.

Freezer: If you want to enjoy them later, freeze the wrapped meatballs (uncooked or cooked) for up to 2 months. Use freezer-safe bags, removing as much air as possible for best results.

Reheating: To reheat, place thawed meatballs back in the oven at 350°F (175°C) for about 10–12 minutes, or until heated through, bringing back that delightful crispness.

Serving Tips: Consider serving with fresh dipping sauce after reheating to brighten flavors and enhance your Halloween Mummy Meatballs experience!

Halloween Mummy Meatballs

Halloween Mummy Meatballs Recipe FAQs

How do I select the best meatballs for this recipe?
Absolutely! For Halloween Mummy Meatballs, choose bite-sized meatballs, ideally around 1.5 inches in diameter. You can opt for beef, turkey, or chicken varieties, depending on your preference or dietary considerations. Look for meatballs that are well-seasoned and have a good structure to hold up during baking—homemade or store-bought will work beautifully!

How long can I store leftovers in the fridge?
Very! Leftover Halloween Mummy Meatballs can be stored in an airtight container in the fridge for up to 3 days. Just be sure to let them cool before sealing. To reheat, you can pop them back in the oven or microwave for a quick snack.

Can I freeze Halloween Mummy Meatballs?
Absolutely! You can freeze both uncooked and cooked Halloween Mummy Meatballs. To freeze uncooked, simply wrap them tightly in plastic wrap and place them in a freezer-safe bag, removing as much air as possible. They can be frozen for up to 2 months. When ready to cook, bake them directly from the freezer, adding an extra few minutes to the cooking time. If you’ve cooked them, cool them completely before placing them in the freezer.

What if my dough isn’t sticking well to the meatballs?
No worries! If you find the crescent dough isn’t adhering to your meatballs, try lightly moistening the meatball’s surface with a bit of water or sauce just before wrapping. Press the dough firmly and ensure the edges overlap slightly to help them stick together, creating that fun mummy effect. If it continues to be tricky, feel free to cut larger strips of dough for better coverage.

Can I make these Halloween Mummy Meatballs gluten-free?
The more the merrier! To accommodate gluten-free diets, you can substitute traditional crescent roll dough with gluten-free dough options. Look for gluten-free puff pastry or even gluten-free biscuit dough, which can create equally fun and delicious mummies while being suitable for those with gluten sensitivities.

Are these meatballs safe for my pet?
No! While the ingredients in Halloween Mummy Meatballs are delicious for humans, please avoid sharing them with your pets. Meatballs can contain seasonings and ingredients, like garlic or onion, that are harmful to dogs and cats. Stick to pet-safe treats for your furry friends, and enjoy these spooky bites yourself!

Halloween Mummy Meatballs That Will Wow Your Guests

Delight your guests with Halloween Mummy Meatballs, a fun and spooky appetizer perfect for Halloween celebrations.

  • Oven
  • Baking Sheet
  • parchment paper
  • Work surface

For the Mummies

  • 16 pieces Meatballs (approximately 1.5 inches wide)
  • 1/2 package (14 oz) Crescent Roll Dough (provides the bandages)

For the Eyes

  • 3 slices Pepperoni (for eyes, optional olives for healthier twist)

For Serving

  • Dipping Sauce (choose marinara or ranch dressing)

Preparation Steps

  1. Preheat your oven to 400°F (200°C).
  2. Unwrap the crescent dough and slice half of the package into thin strips, about 1/4 inch wide.
  3. Take one to two strips of dough and carefully wrap them around each meatball.
  4. Continue wrapping all the meatballs with the remaining dough strips.
  5. Place the wrapped meatballs on a baking sheet lined with parchment paper.
  6. Slide your baking sheet into the preheated oven and bake for about 12-15 minutes.
  7. While baking, cut small circles from the pepperoni slices to use as eyes.
  8. After cooling slightly, use sauce or water to attach two pepperoni eyes to each mummy.
  9. Serve the mummies warm on a platter with optional pasta or dipping sauce.

Use fresh crescent dough for best results. Ensure enough spacing on the baking sheet for even baking.

Appetizer
American
easy Halloween recipes, family fun cooking, Halloween food, Halloween Mummy Meatballs, meatball recipes, spooky appetizers

Filed Under: Appetizer

Spooktacular Halloween Taco Dip That Wow’s Every Party!

October 9, 2025 by grace bellamy Leave a Comment

As I was flipping through my favorite fall recipes, a little light bulb went off: why not add a festive twist to one of my go-to snacks? Enter the Halloween Taco Dip, where savory flavors take on a spooky theme, perfect for fall gatherings or chilling nights at home. This vibrant dip is not just a crowd-pleaser; it’s incredibly quick to whip up, allowing you to spend less time in the kitchen and more time enjoying good company. With layers of creamy guacamole, spiced beans, and a delightful spider web decoration, it’s sure to be a hit at your next party. Ready to impress your friends and family with a dish that’s as fun to make as it is to eat? Let’s dive into this deliciously haunted creation!

Halloween Taco Dip

Why is this Halloween Taco Dip a must-try?

Unique Presentation: This eye-catching dip, adorned with a spider web, is perfect for setting a festive Halloween mood.
Flavor Explosion: The blend of guacamole, spiced bean dip, and creamy sour cream creates an irresistible flavor combination.
Quick & Easy: With minimal prep time, you can whip this up in no time for unexpected guests or last-minute gatherings.
Crowd Favorite: Guaranteed to be the star of your next party, this dip caters to both kids and adults alike!
Versatile: Serve it with tortilla chips, veggies, or even spread it on sandwiches for a delightful twist. If you love easy appetizers, check out my popular dip recipes for more great options!

Halloween Taco Dip Ingredients

• Get ready to create a spooktacular party snack!

For the Dip

  • Frito Lay Bean Dip – a creamy base that brings rich flavor and texture.
  • Prepared Guacamole – adds a fresh and vibrant taste that’s irresistible.
  • Sour Cream – provides a smooth, tangy layer complementing the other ingredients.
  • Taco Seasoning – infuses the dip with a zesty kick that’s key to this Halloween Taco Dip.

For Decoration

  • Sour Cream (reserve 1/2 C) – perfect for creating a fun spider web topping.
  • Black Olives (8 to 10) – use whole olives for the spider, and slice two into legs for a creepy effect!
  • Cheddar Cheese – shredded on top adds color and a delightful cheesiness.
  • Tomato – diced for a juicy pop of freshness that brightens the dish.
  • Kale – finely shredded, it offers a lovely crunch and festive green color.

Step‑by‑Step Instructions for Halloween Taco Dip

Step 1: Spread the Base
Begin by spreading the can of Frito Lay Bean Dip evenly across the surface of an 8-inch serving plate. Use a spatula for a smooth layer, extending it all the way to the edges for a clean presentation. This creamy base sets the stage for your Halloween Taco Dip, making it both delicious and visually appealing.

Step 2: Create the Sour Cream Ring
In a mixing bowl, combine 1 cup of sour cream with the taco seasoning, stirring until well blended. Next, carefully spread this mixture in a 2-inch ring around the outer edge of the plate, leaving the center open for guacamole. This vibrant ring not only introduces flavor but also adds a fun, festive touch to your Halloween Taco Dip.

Step 3: Layer the Guacamole
Now it’s time to add the prepared guacamole! Spoon the guacamole into the center of the sour cream ring, using a large spoon to spread it evenly. Aim for a nice, thick layer that contrasts beautifully with the white of the sour cream. This layer completes the foundation of your dip, making it both colorful and appetizing.

Step 4: Draw the Spider Web
Take 1/2 cup of sour cream and place it into a ziploc bag. Cut a small opening at one corner of the bag, then pipe the sour cream over the guacamole in a swirling pattern to create a spider web design. This fun decoration will give your Halloween Taco Dip a spooky flair, perfect for impressing guests at your gathering.

Step 5: Sprinkle the Toppings
Generously sprinkle the shredded kale, cheddar cheese, diced tomatoes, and chopped black olives across the sour cream web. Make sure to distribute these toppings evenly, adding color and texture to the dish. The contrast of fresh veggies and creamy cheese will enhance both the flavor and visual appeal of your Halloween Taco Dip.

Step 6: Add the Spider
For the final spooky touch, place one whole black olive carefully in the center of the web for the spider’s body. Slice the remaining olive into eight thin strips to serve as the legs. Arrange these strips around the body, and your Halloween Taco Dip is not only delicious but also monsterously festive, ready to wow your party guests!

Halloween Taco Dip

Tips for the Best Halloween Taco Dip

• Layer Wisely: Make sure to evenly layer the bean dip and guacamole to avoid the flavors mixing too soon. A beautiful presentation is key!

• Decorate Creatively: Use different piping techniques for the sour cream web to make it unique. This Halloween Taco Dip is all about festive fun!

• Taste as You Go: Don’t forget to taste the sour cream and taco seasoning mixture. Adjust the seasoning to fit your preference for a perfect flavor!

• Prep Ahead: You can prepare the layers ahead of time and assemble just before serving. This saves time on busy days and keeps your dip fresh!

• Serving Suggestions: Serve with a variety of dippers like tortilla chips, sliced veggies, or pita—this enhances the experience and caters to all guests.

Make Ahead Options

These Halloween Taco Dip layers are perfect for busy home cooks looking to save time! You can prepare the base layers—bean dip, seasoned sour cream, and guacamole—up to 24 hours in advance. Simply spread the bean dip and seasoned sour cream on your serving plate, then cover tightly with plastic wrap and refrigerate. When you’re ready to serve, add the guacamole and pipe on the spider web decoration, followed by the toppings of kale, cheese, tomatoes, and olives. This way, you maintain the freshness and vibrant appearance of your Halloween Taco Dip while significantly cutting down on last-minute prep—perfect for those busy weeknights!

What to Serve with Halloween Taco Dip

Elevate your spooky snack with delightful pairings that will take your Halloween gatherings to the next level.

  • Crispy Tortilla Chips: Perfect for scooping, the crunch of these chips contrasts beautifully with the creamy layers of the dip.
  • Veggie Sticks: Fresh carrots, bell peppers, and cucumber add a healthy crunch that balances the rich flavors of the Taco Dip.
  • Spooky Edible Decorations: Consider sliced radishes shaped like ghosts or crescent moon cucumbers for a fun, festive touch alongside the dip.
  • Creamy Cilantro Lime Rice: The zesty flavor of this rice is a delightful contrast to the dip, adding freshness and a touch of brightness.
  • Classic Margaritas: The tangy and refreshing taste of a margarita pairs perfectly with the savory and spiced flavors of your Halloween Taco Dip.
  • Pumpkin Spice Cookies: For a sweet finish, these cozy cookies are a seasonal favorite—perfect to balance the savory dip with holiday warmth.
  • Apple Slices with Peanut Butter: The crisp sweetness of apples combined with creamy peanut butter provides a refreshing mix of flavors, enhancing the overall snacking experience.
  • Chilled Sparkling Water: Lightly flavored sparkling water offers a refreshing cleanse for the palate between bites, ensuring the enjoyment of every delicious layer.
  • Cheese Platter: A selection of cheeses can complement the richness of your dip, adding more variety to the snack experience while catering to different tastes.
  • Halloween Punch: Brew a festive punch, vibrant in color and flavors that will not only refresh but enhance the spirit of your spooky gathering.

Storage Tips for Halloween Taco Dip

Fridge: Store any leftover Halloween Taco Dip in an airtight container for up to 3 days. Keep it covered to maintain freshness and flavor.

Freezer: While it’s not recommended to freeze this dip due to its creamy ingredients, you could freeze the base layer (bean dip and guacamole) for up to a month, wrapping it tightly.

Reheating: If refrigerated, serve the dip cold or let it sit at room temperature for about 30 minutes before serving. Avoid reheating, as it can alter the texture.

Assembly: For best results, assemble the layers right before serving to keep everything fresh and visually appealing.

Halloween Taco Dip Variations

Customize your Halloween Taco Dip to match your taste buds and dietary preferences with these fun twists!

  • Vegan Option: Substitute sour cream with creamy cashew or coconut yogurt and skip the cheese for a plant-based delight. Enjoy the rich flavors without the dairy!

  • Spicy Kick: Add chopped jalapeños or a sprinkle of cayenne pepper to the bean dip for a zesty heat that will perk up your taste buds!

  • Salsa Surprise: Mix in a layer of your favorite salsa beneath the guacamole for an extra burst of flavor and a bit of color that screams festivity.

  • Protein Boost: Layer on some seasoned black beans or shredded chicken for a heartier dip that will satisfy even the hungriest party guests.

  • Gluten-Free Crunch: Swap tortilla chips for crisp cucumber slices or bell pepper strips, offering a refreshing alternative for gluten-sensitive guests. They add a fun crunch!

  • Cheese Lovers: Drizzle melted cheese over the top instead of shredded for a gooey texture that’s hard to resist. Just let it cool slightly before serving!

  • Herb Flavors: Fresh cilantro or green onions sprinkled on top elevate the flavor and add a pop of color. Their brightness complements the creamy layers beautifully.

  • Mediterranean Twist: Substitute the black olives with kalamata olives and add feta cheese for a Mediterranean flair, creating a dip that’s both festive and unique.

Experimenting with these variations can turn a simple Halloween Taco Dip into a personal masterpiece! If you’re looking for more inspiration, don’t forget to check out my easy appetizer ideas or explore my delicious dip recipes for new favorites!

Halloween Taco Dip

Halloween Taco Dip Recipe FAQs

How do I choose ripe avocados for the guacamole?
Absolutely! When selecting avocados, look for ones that yield slightly to gentle pressure but aren’t overly mushy. Dark green, slightly bumpy skin is usually a good indicator. Avoid any that have dark spots or feel too soft all over.

How should I store leftover Halloween Taco Dip?
After your gathering, store any leftover Halloween Taco Dip in an airtight container in the refrigerator. It should stay fresh for up to 3 days. Just make sure it’s covered well to prevent absorbing other odors in the fridge.

Can I freeze Halloween Taco Dip?
While I wouldn’t recommend freezing the final assembled dip due to the texture of the sour cream and guacamole, you can freeze the base layers! Simply mix the bean dip and guacamole, then transfer them to an airtight freezer bag. Make sure to remove as much air as possible and store it for up to 1 month. When you’re ready to use it, defrost in the fridge overnight and assemble with fresh toppings.

What if my sour cream mixture is too runny?
If your sour cream and taco seasoning mix is too runny for the spider web, you can thicken it by adding a bit more sour cream and mixing well. Alternatively, if it’s already mixed, you can refrigerate it for about 30 minutes; this often helps it firm up! It should still be pipeable, but thicker enough to hold its shape when piped.

Are there any dietary considerations for the Halloween Taco Dip?
Very! If you’re serving guests with dietary restrictions, consider using dairy-free sour cream and a bean dip that’s free from allergens. For the guacamole, using fresh avocado ensures no preservatives are involved. Just remember to inform your guests about any potential allergens in the dish!

How can I make the Halloween Taco Dip spicier?
Great question! If you like a little heat, try adding some diced jalapeños or a sprinkle of cayenne pepper to the taco seasoning mixture. You can also serve it with spicy tortilla chips for an extra kick! Just remember—the more the merrier!

Spooktacular Halloween Taco Dip That Wow’s Every Party!

This Halloween Taco Dip combines vibrant layers for a festive and quick appetizer that’s perfect for any gathering.

  • Mixing Bowl
  • spatula
  • 8-inch serving plate
  • ziploc bag

For the Dip

  • 1 can Frito Lay Bean Dip (creamy base)
  • 1 cup Prepared Guacamole (adds a fresh taste)
  • 1 cup Sour Cream (smooth and tangy layer)
  • 1 packet Taco Seasoning (infuses zesty flavor)

For Decoration

  • 1/2 cup Sour Cream (for spider web topping)
  • 8-10 whole Black Olives (for spider decoration)
  • 1 cup Cheddar Cheese (shredded, for topping)
  • 1 large Tomato (diced, for freshness)
  • 1 cup Kale (finely shredded, for crunch)

Step-by-Step Instructions for Halloween Taco Dip

  1. Spread the can of Frito Lay Bean Dip evenly across the surface of an 8-inch serving plate, extending it to the edges.
  2. In a mixing bowl, combine 1 cup of sour cream with the taco seasoning and spread in a ring around the plate, leaving the center open.
  3. Spoon the guacamole into the center of the sour cream ring, spreading it evenly to create a thick layer.
  4. Pipe 1/2 cup of sour cream over the guacamole in a swirling pattern to create a spider web design.
  5. Sprinkle shredded kale, cheddar cheese, diced tomatoes, and chopped black olives across the sour cream web.
  6. Place one whole black olive in the center for the spider’s body, and slice the remaining olive into legs around it.

Layer the ingredients to avoid mixing flavors and store leftovers in an airtight container. Serve with tortilla chips or veggies.

Appetizer
American
Appetizer, Easy Recipe, fall recipe, festive dip, Halloween Taco Dip, Party Dip

Filed Under: Appetizer

Whip Up Glinda’s Pink Potion for a Magical Refreshing Treat

October 9, 2025 by grace bellamy Leave a Comment

As I stirred the bright pink concoction, a burst of fruity aroma filled the kitchen, instantly whisking me away to a sunny island retreat. In a world where quick fixes and fast food reign supreme, discovering Glinda’s Pink Potion feels like a triumph—especially on those days when you want a taste of magic without the fuss. This delightful drink combines the sweetness of mango with the exotic notes of dragonfruit, creating a refreshing experience that’s perfect for any gathering or a little self-indulgence. In just five minutes, you can whip up this vibrant potion, making it a fantastic choice for both entertaining guests and enjoying a quick pick-me-up. What color will your next sip of wonder be?

Glinda's Pink Potion

Why Is Glinda’s Pink Potion So Irresistible?

Ease of Preparation: With a total time of just 5 minutes, this is the perfect recipe for busy days or spontaneous gatherings.

Vibrant Flavor Explosion: The combination of mango and dragonfruit creates a refreshing and tropical taste that dances on your palate.

Fun Presentation: Topped with strawberry cold foam and colorful sprinkles, this drink not only tantalizes taste buds but also pleases the eyes—perfect for impressing guests!

Versatile Enjoyment: Whether you’re sipping it on a sunny afternoon or serving at a brunch, Glinda’s Pink Potion fits any occasion.

Crowd-Pleasing Appeal: Kids and adults alike will love this enchanting drink, making it an instant favorite at any gathering. For more delightful drinks, you might also want to check out our post on refreshing summer beverages. Enjoy this magical treat!

Glinda’s Pink Potion Ingredients

For the Refresher Base

  • Water – 1 ½ cups to help dissolve the flavors and hydrate your potion.
  • Mango Nectar – ⅓ cup brings a sweet, tropical essence that complements the drink beautifully.
  • Granulated Sugar – ⅓ cup enhances the sweetness, making your potion delightfully refreshing.
  • Dragonfruit Powder – 1 tablespoon adds not only color but also a hint of exotic flavor.
  • Citric Acid – ½ teaspoon balances the sweetness with a little tang.

For the Cold Foam

  • Barista-Style Oat Milk (or Heavy Cream) – 2 tablespoons create a creamy texture, perfect for floating on top.
  • Strawberry Syrup – 1 ½ tablespoons infuses the foam with a lovely fruity flavor.
  • Soy Milk (preferably barista blend) – 1 tablespoon adds richness while keeping it plant-based.

To Assemble the Potion

  • Mango Dragonfruit Refresher Base – ½ cup provides the base, making this truly a Glinda’s Pink Potion!
  • Sweetened Coconut Milk – ½ cup enriches your drink with a creamy, tropical note.
  • Ice – as desired, to keep your potion cool and refreshing.
  • Freeze-Dried Dragonfruit Pieces – 1 tablespoon for an extra touch of texture.
  • Pink & Green Sprinkles – optional for topping, because every magical drink deserves a sprinkle of joy!

Step‑by‑Step Instructions for Glinda’s Pink Potion

Step 1: Make the Refresher Base
In a medium saucepan, combine 1 ½ cups of water, ⅓ cup of mango nectar, ⅓ cup of granulated sugar, 1 tablespoon of dragonfruit powder, and ½ teaspoon of citric acid. Heat over low temperature, whisking continuously for about 3 minutes until the mixture is fully dissolved and smooth. Once combined, remove the saucepan from the heat and let it cool slightly.

Step 2: Transfer the Mixture
When the refresher base has cooled, carefully pour it into a large jar with a tight-fitting lid. This will keep the mixture fresh and ready for use. Make sure to leave some space at the top to shake it later if you desire. Set the jar aside as you prepare the next components of Glinda’s Pink Potion.

Step 3: Prepare the Strawberry Cold Foam
In a small mason jar, add 2 tablespoons of barista-style oat milk (or heavy cream), 1 ½ tablespoons of strawberry syrup, and 1 tablespoon of soy milk. Using a milk frother, froth the mixture for about 20-30 seconds until it turns pale and thickened. The foam should have a light, airy texture that will sit beautifully atop your Glinda’s Pink Potion.

Step 4: Assemble the Potion Base
Grab a cocktail shaker and fill it with ice. Pour in ½ cup of your prepared mango dragonfruit refresher base, followed by ½ cup of sweetened coconut milk, and 1 tablespoon of freeze-dried dragonfruit pieces. Secure the lid firmly and shake vigorously for about 15-20 seconds until everything is well mixed and chilled.

Step 5: Strain and Serve
Strain the combined mixture into a tall glass filled with ice, allowing the vibrant colors of Glinda’s Pink Potion to sparkle through. If desired, stir in additional freeze-dried dragonfruit pieces for an extra burst of flavor. Top your potion with the strawberry cold foam and add a sprinkle of pink and green sprinkles for that magical finishing touch.

Glinda's Pink Potion

Expert Tips for Making Glinda’s Pink Potion

Fresh Ingredients: Use the freshest mango nectar and sweetened coconut milk for a vibrant flavor. Store them properly to maintain their taste.

Mind the Heat: When making the refresher base, heat gently to prevent the sugar from caramelizing, which could change the flavor of your Glinda’s Pink Potion.

Perfect Foam: Ensure the milk is cold when frothing the strawberry cold foam. This will help achieve the desired thick and airy consistency that tops your drink perfectly.

Customize It: Feel free to add more or less sugar based on your sweetness preference. Just remember, too much sugar can overpower the tropical essence!

Chill Your Glass: For an even cooler experience, chill your glass in the freezer before serving. This little trick keeps your potion cold longer!

What to Serve With Glinda’s Pink Potion

Dive into the joy of pairing delicious bites with this enchanting drink for a full magical experience.

  • Fresh Fruit Salad: A medley of diced seasonal fruits complements the tropical flavors of Glinda’s Pink Potion flawlessly, adding freshness to each sip.
  • Coconut Macaroons: The chewy sweetness and texture of coconut macaroons enhance the drink’s creamy coconut notes, creating a delightful balance.
  • Savory Spinach and Feta Tart: This flaky pastry offers a savory contrast, playing beautifully against the sweetness of the potion for a unique taste adventure.
  • Mini Vegetable Spring Rolls: Light and crispy, these spring rolls add a crunchy texture that invites a refreshing palette cleanser between sips of your drink.
  • Tropical Quinoa Salad: With hints of mango and lime, this salad mirrors the flavors of the potion while providing a wholesome and vibrant side.
  • Sparkling Water with Lime: For a bubbly refreshment that enhances the potion’s fruity essence without overpowering it, a zesty sparkling beverage is just the ticket.
  • Chocolate-Dipped Strawberries: The rich chocolate creates a luscious bite to contrast with the potion’s vibrant sweetness—a truly romantic pairing for any occasion.
  • Lemon Meringue Pie: The tartness from the pie perfectly cuts through the sweetness of Glinda’s Pink Potion, offering a delightful burst of flavor with every bite.

Make Ahead Options

These Glinda’s Pink Potion components are perfect for meal prep, saving you valuable time during busy weeknights! You can prepare the mango dragonfruit refresher base up to 3 days in advance. Simply make it according to the recipe, allow it to cool, and store it in a tightly sealed jar in the refrigerator to maintain freshness and flavor. The strawberry cold foam can also be made ahead of time, ideally up to 24 hours before serving, stored in an airtight container. When you’re ready to enjoy your potion, simply shake the refresher base with ice, add the coconut milk and freeze-dried dragonfruit pieces, then top it off with the cold foam for that delightful finishing touch. This way, you’ll have a magical drink ready to impress with minimal effort!

Variations & Substitutions for Glinda’s Pink Potion

Feel free to get creative and tailor Glinda’s Pink Potion to your taste and dietary needs!

  • Dairy-Free: Use coconut cream in place of oat milk for a richer, plant-based alternative that enhances the tropical flavor.
  • Lower Sugar: Swap granulated sugar with a natural sweetener like stevia or monk fruit for a guilt-free potion without sacrificing sweetness.
  • Citrus Twist: Add a splash of fresh lime or lemon juice for a zesty kick that brightens the drink and enhances the tropical essence.
  • Frozen Fruit: Blend in some fresh or frozen mango pieces for an icy, slushy texture that doubles down on the fruity goodness.
  • Berry Blast: Substitute strawberry syrup with raspberry or blueberry syrup for a different fruity note that brings a vibrant new flavor profile.
  • Spicy Heat: For those who love a challenge, add a dash of cayenne pepper or jalapeño slices to the shaker for a surprising heat that complements the sweetness.
  • Garnish Ideas: Top your potion with fresh mint leaves or edible flowers for a stunning presentation that also elevates the drink’s fragrance.
  • Fizzy Delight: Mix in some soda water or sparkling coconut water just before serving for a bubbly and refreshing twist.

Get ready to explore the delightful possibilities with Glinda’s Pink Potion! For a fun summer vibe, try pairing your potion with some summer snacks like tropical fruit skewers for a perfect warm-weather feast. Enjoy!

How to Store and Freeze Glinda’s Pink Potion

Fridge: Store any leftover Glinda’s Pink Potion in an airtight container in the fridge for up to 2 days. This keeps the tropical flavors fresh and vibrant.

Freezer: If you want to freeze your potion, pour it into an ice cube tray and freeze. These cubes can be blended later for a refreshing smoothie.

Reheating: As Glinda’s Pink Potion is best served chilled, avoid reheating it. Instead, shake well with ice for a delightful refreshment anytime!

Keep the Foam Fresh: Prepare the strawberry cold foam fresh before serving. It doesn’t store well but can be quickly whipped up in less than a minute!

Glinda's Pink Potion

Glinda’s Pink Potion Recipe FAQs

What kind of mango nectar should I use?
I recommend using 100% pure mango nectar with no added sugars or preservatives for the best flavor. This ensures that your Glinda’s Pink Potion is both delicious and healthy. Look for a brand that features real mango puree for that tropical taste!

How should I store leftover Glinda’s Pink Potion?
To keep your potion fresh, store any leftovers in an airtight container in the fridge for up to 2 days. Make sure to give it a good shake before enjoying, as ingredients may settle.

Can I freeze Glinda’s Pink Potion?
Absolutely! Pour your mixture into an ice cube tray and freeze it for up to 3 months. Later, blend the frozen cubes with a splash of coconut milk for a quick and refreshing smoothie! It’s a fun way to enjoy the flavors without wasting any potion!

What if my strawberry cold foam doesn’t thicken?
No worries! If your foam isn’t thickening, ensure your milk is really cold, and froth for a full 30 seconds. If possible, use a barista blend soy milk, as it has a higher fat content which helps achieve that lovely airy texture!

Is Glinda’s Pink Potion safe for my kids?
Yes, this delightful drink is safe for kids, providing a fun and colorful option without any harmful ingredients. Just be mindful of any allergies to dragonfruit or other components, and feel free to adjust sweetness for younger palates.

How can I make Glinda’s Pink Potion lower in sugar?
You can reduce the amount of sugar by using unsweetened coconut milk and less granulated sugar. Alternatively, try using a sugar substitute like monk fruit or agave syrup to lower the sugar content without sacrificing flavor!

Whip Up Glinda’s Pink Potion for a Magical Refreshing Treat

Glinda’s Pink Potion is a delightful drink combining tropical flavors and vibrant colors, perfect for any gathering.

  • Medium saucepan
  • large jar with tight-fitting lid
  • small mason jar
  • milk frother
  • Cocktail shaker
  • tall glass

For the Refresher Base

  • 1.5 cups Water (to help dissolve the flavors and hydrate your potion)
  • 0.33 cups Mango Nectar (brings a sweet, tropical essence)
  • 0.33 cups Granulated Sugar (enhances the sweetness)
  • 1 tablespoon Dragonfruit Powder (adds color and a hint of flavor)
  • 0.5 teaspoon Citric Acid (balances the sweetness with tang)

For the Cold Foam

  • 2 tablespoons Barista-Style Oat Milk (or Heavy Cream) (creates a creamy texture)
  • 1.5 tablespoons Strawberry Syrup (infuses the foam with fruity flavor)
  • 1 tablespoon Soy Milk (preferably barista blend) (adds richness)

To Assemble the Potion

  • 0.5 cups Mango Dragonfruit Refresher Base (provides the base for the potion)
  • 0.5 cups Sweetened Coconut Milk (enriches your drink)
  • as desired cups Ice (to keep your potion cool)
  • 1 tablespoon Freeze-Dried Dragonfruit Pieces (for an extra touch of texture)
  • Pink & Green Sprinkles (optional for topping)

Step-by-Step Instructions for Glinda’s Pink Potion

  1. In a medium saucepan, combine water, mango nectar, granulated sugar, dragonfruit powder, and citric acid. Heat over low, whisking for about 3 minutes until smooth.
  2. Carefully pour the mixture into a large jar with a tight-fitting lid and let it cool slightly.
  3. In a small mason jar, add oat milk, strawberry syrup, and soy milk. Froth the mixture for about 20-30 seconds until thickened.
  4. In a cocktail shaker with ice, combine refresher base, sweetened coconut milk, and freeze-dried dragonfruit. Shake for 15-20 seconds.
  5. Strain the mixture into a tall glass filled with ice. Top with cold foam and sprinkle with pink and green sprinkles.

Serve chilled and enjoy the magical flavors of Glinda’s Pink Potion. For best results, prepare the cold foam just before serving.

Drink
Tropical
Easy Recipe, Glinda’s Pink Potion, magical treat, refreshing drink, tropical beverage

Filed Under: Drink

Salami Mozzarella Eyeballs: A Fun Twist for Your Parties

October 9, 2025 by grace bellamy Leave a Comment

The anticipation began to build in the kitchen as I rummaged through the fridge, seeking inspiration for an upcoming gathering. That’s when I stumbled upon my secret weapon: fresh mozzarella. This not-so-ordinary Salami Mozzarella Eyeballs recipe instantly took shape in my mind, transforming simple ingredients into an eye-catching party delight. Not only are these savory skewers a total crowd-pleaser, but they also come together in just 20 minutes—perfect for busy home chefs like us. The combination of creamy mozzarella, zesty salami, and vibrant bell pepper offers a fun twist on classic appetizers that’ll have everyone talking (and munching!). So, are you ready to elevate your next snack time with a playful and irresistible dish?

Salami Mozzarella Eyeballs

Why are Salami Mozzarella Eyeballs a Must-Try?

Unique Presentation: These playful skewers will have your guests intrigued and smiling as they enjoy a delicious twist on traditional appetizers.
Quick & Easy: With just 20 minutes of prep, this recipe fits perfectly into your busy schedule, letting you whip up something impressive in no time.
Savory Flavor: The rich, creamy mozzarella paired with the spicy, zesty salami brings out a delightful medley of tastes that kids and adults alike will crave.
Versatile Serving: Perfect for parties, game nights, or casual gatherings, they are an exciting addition that stands out on any platter. Elevate your snacking with ease!
Crowd-Pleaser: Everyone loves a dish that’s fun and tasty—these eyeballs are sure to be a hit! Looking for more appetizers? Check out our entertaining ideas for more inspiration.

Salami Mozzarella Eyeballs Ingredients

• Get ready to create this fun dish!

For the Eyeballs

  • Fresh mozzarella balls – 12 pieces of firm variety preferred for the best eye shape and texture.
  • Kalamata olives – 2 tablespoons, chopped and pitted create the perfect realistic pupils.

For the Accents

  • Pepperoni stick – 4 ounces, avoid pre-sliced for controlling the size and shape.
  • Red bell pepper – 1 small, bright-colored and firm-fleshed to add a pop of color and freshness to your skewers.

Dive into crafting these Salami Mozzarella Eyeballs and watch your guests light up with excitement!

Step‑by‑Step Instructions for Salami Mozzarella Eyeballs

Step 1: Prepare the Mozzarella
Begin by examining each fresh mozzarella ball, ensuring they are firm and uniform in size. Using a sharp knife, carefully cut shallow indentations about 1/4 inch deep on one side of each cheese ball to create eye sockets. This step is crucial for achieving the perfect look for your Salami Mozzarella Eyeballs, so take your time and be gentle to avoid damaging the cheese.

Step 2: Add the Pupils
Next, finely chop the Kalamata olives into pieces roughly 1/8 inch in diameter, making sure they are evenly cut for a realistic look. Gently press these olive pieces into the indentations you created on the mozzarella balls, forming realistic-looking pupils. The dark olives against the creamy mozzarella provide a striking contrast, enhancing the eye-catching appeal of your tasty creations.

Step 3: Cut the Pepperoni
Now it’s time to add some zesty flavor! Take your pepperoni stick and slice it into varied sizes—create some 3/4 inch chunks and others thinly sliced. This variety not only adds visual interest but also textural contrast to your Salami Mozzarella Eyeballs. Set these pepperoni pieces aside as they will be layered in your skewers.

Step 4: Slice the Red Bell Pepper
For the final touch, slice your small red bell pepper into wedge-shaped pieces. These bright, crisp wedges will serve as a colorful blood accent on your skewers, providing a fun visual element. Aim for uniform pieces, as they will help maintain balance and presentation when you assemble your Salami Mozzarella Eyeballs on skewers.

Step 5: Assemble the Skewers
Grab your skewers and start assembling by threading a red bell pepper wedge onto the stick first. Follow this with a chunk of pepperoni, then carefully add a mozzarella ball with the pupil facing outward. For added texture and flavor, layer a thick slice of pepperoni, followed by a thin slice, and finish with another mozzarella ball at the end for stability. Ensure each skewer has a balanced and visually appealing arrangement.

Step 6: Chill and Serve
Once all the skewers are assembled, it’s best to serve your Salami Mozzarella Eyeballs slightly chilled for optimal texture and presentation. Ideally, assemble them no more than 2-4 hours before serving to maintain their freshness and visual appeal. Place them on a decorative platter, and get ready to wow your guests with this fun and tasty appetizer!

Salami Mozzarella Eyeballs

What to Serve with Salami Mozzarella Eyeballs?

Bring your gathering to life with perfect accompaniments for a playful appetizer that’s just bursting with flavor!

  • Crispy Garlic Bread: The warmth and crunch of garlic bread provide a delightful contrast to the creamy mozzarella, enhancing your appetizer experience. Each bite will be a comforting delight that balances the eye-catching skewers beautifully.

  • Mixed Green Salad: A bright salad with arugula, cherry tomatoes, and a light vinaigrette offers a fresh, crisp element that cuts through the richness of the Salami Mozzarella Eyeballs. The burst of color and flavor from the veggies adds a satisfying crunch to each meal.

  • Savory Hummus Dip: A flavorful hummus lends a creamy, savory option on the side, perfect for dipping the skewers. Whip up classic garlic or roasted red pepper hummus for a twist that complements the olives and salami perfectly.

  • Spicy Italian Pasta Salad: The zesty flavors of a tangy pasta salad with olives, pepperoncini, and cheese bring a touch of heartiness to your spread. This side is vibrant and can easily feed a larger crowd, making it a great sharing option.

  • Chilled White Wine: A crisp, chilled white wine, like Sauvignon Blanc, pairs beautifully, elevating the appetizer experience. The refreshing notes will cleanse the palate, enhancing each flavorful bite.

  • Sweet Fruit Platter: Finish off your gathering with a colorful platter of fresh fruits, like strawberries, grapes, and melon. The sweetness will contrast nicely with the salty savory skewers, creating a balanced tasting experience.

Expert Tips for Salami Mozzarella Eyeballs

  • Cut Carefully: A gentle touch is key when creating eye sockets in the mozzarella. Avoid deeper cuts to prevent the balls from disintegrating, preserving the dish’s fun appearance.

  • Balance Pepperoni Sizes: Mix chunk and thinly sliced pepperoni to create an appealing texture. This variety adds bite and visual interest to your Salami Mozzarella Eyeballs.

  • Uniform Pieces: When slicing red bell peppers, aim for even wedges. This consistency helps the skewers look tidy and ensures balanced flavor in every bite.

  • Timing Matters: For the best taste and texture, assemble the skewers just a few hours before serving. This keeps them looking fresh, so your guests can enjoy the delightful presentation.

  • Chill Before Serving: Serving the skewers slightly chilled enhances the creamy mozzarella’s texture and keeps everything in place, making each bite a joy!

How to Store and Freeze Salami Mozzarella Eyeballs

Fridge: Store leftover Salami Mozzarella Eyeballs in an airtight container for up to 3 days. This keeps them fresh while retaining their fun appearance and flavors.

Freezer: If you want to keep them longer, you can freeze the assembled skewers. Wrap them tightly in plastic wrap and place in a freezer-safe bag for up to 1 month.

Reheating: To enjoy them after freezing, thaw in the fridge overnight, then enjoy chilled or let sit at room temperature for about 30 minutes before serving to restore their texture.

Pre-assembly Tips: For best results, prepare and assemble the skewers no more than 2-4 hours before serving. This maintains the optimal quality of your delicious eye-catching creation!

Make Ahead Options

These Salami Mozzarella Eyeballs are a fantastic option for meal prep enthusiasts looking to save time on busy days! You can prepare the mozzarella balls with the olive pupils and store them in an airtight container in the refrigerator up to 24 hours before your gathering. Slice the pepperoni and bell pepper, keeping them separate in the fridge for optimal freshness. When you’re ready to impress your guests, simply assemble the skewers within a few hours of serving to maintain their appealing texture and presentation. This way, you’ll have an eye-catching appetizer that’s just as delicious and avoids any last-minute rush!

Salami Mozzarella Eyeballs Variations

Feel free to get creative and add your personal touch to these playful skewers!

  • Meat Lovers: Substitute in sliced dried sausage or salami for an extra kick of flavor and richness, perfect for hearty appetites.

  • Vegetarian Twist: Replace pepperoni with roasted bell peppers or marinated artichokes for a tasty, meatless version that everyone will enjoy.

  • Spicy Kick: Add jalapeño slices or sprinkle red pepper flakes into your mozzarella balls to give your appetizer a fun, spicy twist.

  • Herb Infusion: Mix in fresh basil or oregano into the mozzarella before assembling for a delightful burst of herbal aroma and flavor.

  • Cheese Change-Up: Swap mozzarella for creamy goat cheese or tangy feta for an entirely new flavor profile that adds sophistication to the dish.

  • Crunchy Innovation: Incorporate crunchy cucumber slices or radish wedges on the skewers for an unexpected twist in texture that balances the creaminess of the cheese.

  • Alternative Accents: Use cherry tomatoes for a burst of color and sweetness, enhancing both the flavor and appearance of your Salami Mozzarella Eyeballs.

These variations will keep your guests intrigued and craving more! If you’re interested in even more delicious options, consider checking out our quick appetizers or explore fun party ideas to keep the creativity flowing!

Salami Mozzarella Eyeballs

Salami Mozzarella Eyeballs Recipe FAQs

How do I choose fresh mozzarella for the recipe?
Absolutely! When selecting fresh mozzarella, look for firm balls that feel slightly springy when gently pressed. They should be free from excessive water and have a clean, milky smell. Avoid any dark spots or blemishes; a glossy surface is usually a good sign of freshness.

What is the best way to store leftovers?
You can store any leftover Salami Mozzarella Eyeballs in an airtight container in the refrigerator for up to 3 days. This method keeps the flavors fresh and helps maintain their playful appearance. Just make sure the container is fully sealed to prevent them from absorbing odors from other foods.

Can I freeze the assembled skewers?
Very much! To freeze Salami Mozzarella Eyeballs, tightly wrap each skewer in plastic wrap and then place them in a freezer-safe bag. They can stay in the freezer for up to 1 month. Remember, for best results, I recommend freezing them right after assembling to capture the initial freshness.

What should I do if the mozzarella is too soft?
If you find that your mozzarella is too soft to create eye sockets, there’s a simple fix! Place the mozzarella balls in the fridge for about an hour to firm them up. This chilling helps stabilize the cheese, making it easier to cut. If they are really soft, consider using a firmer variety known for its sliceability.

Are these skewers safe for pets or individuals with allergies?
Definitely! While the ingredients in Salami Mozzarella Eyeballs are generally safe, be cautious if serving them to pets, as cheese and certain processed meats like pepperoni can be unhealthy for them. Additionally, if anyone has allergies, check for specific sensitivities like dairy or gluten within the ingredients, especially with the salami.

How long before serving should I assemble the skewers?
I often recommend assembling your Salami Mozzarella Eyeballs no more than 2-4 hours before serving. This timing helps to maintain their freshness, ensures the ingredients stay vibrant, and keeps the mozzarella from becoming too soft, enhancing both texture and visual appeal.

Salami Mozzarella Eyeballs: A Fun Twist for Your Parties

Salami Mozzarella Eyeballs are a creative appetizer combining mozzarella, salami, and olives for a crowd-pleasing treat.

  • Skewers

For the Eyeballs

  • 12 fresh mozzarella balls (firm variety preferred for the best eye shape and texture)
  • 2 tablespoons Kalamata olives (chopped and pitted create the perfect realistic pupils)

For the Accents

  • 4 ounces pepperoni stick (avoid pre-sliced for controlling the size and shape)
  • 1 small red bell pepper (bright-colored and firm-fleshed to add a pop of color)

Step-by-Step Instructions

  1. Prepare the Mozzarella by cutting shallow indentations on one side of each mozzarella ball to create eye sockets.
  2. Add the Pupils by pressing finely chopped Kalamata olives into the indentations of the mozzarella balls.
  3. Cut the Pepperoni into varied sizes, making some chunks and others thinly sliced.
  4. Slice the Red Bell Pepper into wedge-shaped pieces for a colorful accent.
  5. Assemble the Skewers by threading a red bell pepper wedge, followed by a chunk of pepperoni and a mozzarella ball.
  6. Chill and Serve the skewers slightly chilled for optimal texture and presentation.

Cut carefully to avoid damaging the mozzarella. Serve slightly chilled for the best texture and presentation.

Appetizer
Italian
easy snacks, fun recipe, Gatherings, Party Appetizer, Salami Mozzarella Eyeballs, savory skewers

Filed Under: Appetizer

Delightful Buttery Spritz Cookies That Melt in Your Mouth

October 9, 2025 by grace bellamy Leave a Comment

Just imagine the warm aroma of freshly baked cookies wafting through your kitchen, turning any ordinary day into a delightful celebration. Today, I’m excited to share my recipe for Buttery Spritz Cookies, a classic treat that’s not only simple to whip up but also brings a charming sparkle to any occasion. These cookies come together quickly, making them an ideal choice for busy home chefs who want to create something special without a fuss. Plus, they can be decorated in countless ways, so you’ll never tire of their delightful presentation! Whether you’re preparing for a holiday gathering or simply indulging in a sweet treat, these cookies promise to be a cherished addition to your baking repertoire. Curious about how to make them shine with color and flavor? Let’s dive into the delicious world of spritz cookies!

Buttery Spritz Cookies

Why Are Buttery Spritz Cookies So Special?

Simplicity at Its Best: With just a handful of ingredients, you can whip up these delectable cookies in no time.

Customizable Delight: Choose to add vibrant colors and fun decorations, making every batch uniquely yours!

Crowd-Pleasing Treat: They’re light and buttery, appealing to both kids and adults alike—perfect for any gathering.

Make Ahead: You can easily prepare the dough in advance, saving precious time on busy baking days.

Endless Variations: Experiment with flavors like lemon or coconut, or enhance with different extracts—your creativity knows no bounds!

Buttery Spritz Cookies Ingredients

For the Cookie Dough

  • Unsalted butter – 1 cup (224g), at room temperature for easy creaming and a rich flavor.
  • Granulated sugar – 3/4 cup (155g), ensures sweetness and contributes to the cookie’s buttery texture.
  • Large egg – 1, binds the ingredients together, lending a tender crumb.
  • Vanilla extract – 1 tsp, adds a warm, comforting flavor to your buttery spritz cookies.
  • Almond extract – 1 tsp, brings a delightful nutty twist that elevates the cookie’s taste profile.
  • All-purpose flour – 2 1/4 cups (293g), provides the structure needed for the cookies to hold their shape.
  • Salt – 1/2 tsp, balances sweetness and enhances overall flavor.

Optional Color and Decoration

  • Red gel icing color – Use this for vibrant holiday-themed cookies or festive touches.
  • Green gel icing color – Perfect for adding a festive flair to your spritz cookies, especially during celebrations!
  • Sprinkles – Add these to bring a joyful crunch and color, making your cookies even more appealing.

Step‑by‑Step Instructions for Buttery Spritz Cookies

Step 1: Preheat the Oven
Begin by preheating your oven to 350°F (180°C). While the oven warms up, line your baking sheets with silicone baking mats to ensure easy cookie removal later. This simple preparation step will help your Buttery Spritz Cookies bake evenly, giving them a perfect golden finish.

Step 2: Cream Ingredients
In a large mixer bowl, add the room temperature unsalted butter and granulated sugar. Beat them together on medium speed for about 3-4 minutes, or until the mixture becomes light and fluffy, turning a pale yellow. This creates a delightful base for your Buttery Spritz Cookies, ensuring they are rich and tender.

Step 3: Add Egg and Extracts
Next, incorporate one large egg into the butter-sugar mixture. Blend until well combined, then add in the vanilla and almond extracts. Mix well until the mixture is smooth, infusing your dough with warm, inviting flavors that make these cookies simply irresistible.

Step 4: Combine Dry Ingredients
Slowly add 2 1/4 cups of all-purpose flour and 1/2 teaspoon of salt to the wet mixture. Mix until just combined — take care not to over-mix! You want a soft dough that holds together without being tough. If needed, finish combining with a rubber spatula, ensuring a silky consistency.

Step 5: Optional Coloring
If you’d like to add some color to your Buttery Spritz Cookies, divide the dough into parts. Gradually incorporate your choice of gel icing colors, starting with small amounts. Mix thoroughly until your desired shades are achieved, creating vibrant batches that are festive and fun.

Step 6: Fill the Cookie Press
Load the prepared dough into your cookie press, following the manufacturer’s directions for best results. Hold the press perpendicular to your lined baking sheets, and gently squeeze to release the cookies. Spacing them close together is fine, as these cookies won’t spread during baking.

Step 7: Decorate the Cookies
Before baking, take a moment to sprinkle your cookies with colorful sprinkles if desired. This adds a joyful touch that enhances the appearance of your Buttery Spritz Cookies and makes them even more appealing for any occasion.

Step 8: Bake to Perfection
Place your baking sheets in the preheated oven and bake the cookies for 5-8 minutes. For softer cookies, keep an eye on them and remove them at the 5-minute mark. They should be just set and lightly golden around the edges—this ensures a melt-in-your-mouth texture.

Step 9: Cool the Cookies
After baking, let the cookies cool on the sheets for about 4-5 minutes. They’ll be delicate when hot, so this gentle cooling step allows them to firm up before transferring to a wire rack for complete cooling. Enjoy the warmth lingering in your kitchen as your Buttery Spritz Cookies come to life!

Buttery Spritz Cookies

Expert Tips for Buttery Spritz Cookies

Perfect Dough Texture: Make sure your butter is at room temperature; melted or too cold butter can lead to dense cookies instead of the light texture you want.

Mixing Magic: Don’t over-mix your dough after adding flour. This can develop gluten and yield tougher cookies, rather than the tender melt-in-your-mouth Buttery Spritz Cookies you’re aiming for.

Cookie Press Technique: When using the cookie press, hold it perpendicular to the sheet for even shapes. A steady hand helps create uniform cookies that bake evenly.

Baking Timing: Keep a close watch on your cookies as they bake; ovens can vary. For softer cookies, pull them out at around 5 minutes, allowing them to remain buttery, not crunchy.

Storage Secrets: Store cooled cookies in an airtight container with wax paper between layers to protect their decorations. They’ll stay fresh for about a week, perfect for sharing with family or friends!

How to Store and Freeze Buttery Spritz Cookies

Room Temperature: Keep your cooled Buttery Spritz Cookies in an airtight container at room temperature for up to 1 week, ensuring they remain soft and delicious.

Fridge: If you prefer, you can store the cookies in the fridge to extend freshness slightly; however, make sure they are well wrapped to prevent them from absorbing other odors.

Freezer: For longer storage, freeze baked cookies in airtight containers for up to 3 months. Thaw them at room temperature before serving for the best texture.

Dough Storage: You can also refrigerate the cookie dough for up to 3 days. Bring it to room temperature before using your cookie press to ensure easy shaping!

Buttery Spritz Cookies Variations & Substitutions

Feel free to let your imagination run wild as you explore creative twists on these delightful cookies!

  • Gluten-Free: Swap all-purpose flour with a 1:1 gluten-free baking blend for a gluten-free treat everyone can enjoy. The cookies will still be just as light and buttery!
  • Vegan Delight: Replace butter with coconut oil and the egg with a flax egg for a vegan version that’s equally scrumptious. The coconut oil adds a subtle tropical flavor!
  • Flavor Boost: Try swapping vanilla extract for other flavors like orange or peppermint extract to give your spritz cookies a seasonal twist. A hint of peppermint in winter can really brighten the mood!
  • Nutty Crunch: Fold in chopped nuts like pecans or almonds to add a delightful crunch and extra flavor to your cookies. It’s like a cozy hug in cookie form!
  • Chocolate Lovers: Mix in mini chocolate chips or cocoa powder for chocolatey spritz cookies that will satisfy any chocoholic. The rich cocoa pairs beautifully with the buttery base!
  • Spicy Zing: Add a pinch of cinnamon or nutmeg for a warm, spicy note that adds depth to the overall flavor of your spritz cookies. These cozy spices are perfect for holiday baking!
  • Fruit Essence: Incorporate lemon or orange zest into the dough for a refreshing citrus burst that complements the buttery flavor beautifully. This twist will be a hit at any spring gathering!
  • Berry Blast: Top your cookies with a drizzle of berry-flavored icing made from powdered sugar and fruit puree for a sweet finish. The burst of color and flavor will elevate your cookie presentation!

By mixing and matching these delightful variations, you can create a cookie experience that’s truly unique. Don’t hesitate to explore and find what your taste buds fancy, making each batch of Buttery Spritz Cookies even more special than the last!

What to Serve with Buttery Spritz Cookies

Imagine a delightful gathering where sweet treats complement the laughter, filling the air with warmth and joy.

  • Rich Hot Cocoa: The creamy texture and chocolaty flavor of hot cocoa provide a cozy pairing that enhances the buttery sweetness of the cookies.
  • Fresh Berries: Tart strawberries or blueberries offer a burst of freshness, perfectly balancing the rich cookie experience with their juicy brightness.
  • Vanilla Ice Cream: A scoop of creamy vanilla ice cream on the side melts into deliciousness, transforming your spritz cookies into an indulgent dessert creation.
  • Nutty Coffee: A warm cup of nutty-flavored coffee enhances every bite while grounding the sweetness of the cookies with its rich aroma.
  • Lemonade: The tangy zest of lemonade adds a refreshing contrast, making for a delightful palate cleanser after indulging in your buttery treats.
  • Cheesecake Dip: Pairing these cookies with a creamy cheesecake dip provides a rich and decadent twist, inviting guests to savor each flavorful bite.
  • Chocolate Ganache: Drizzling silky chocolate ganache over your cookies elevates their elegance and invites chocolate lovers to enjoy a blissful experience.

Make Ahead Options

These Buttery Spritz Cookies are a perfect choice for busy home cooks looking to save time! You can prepare the dough up to 3 days ahead. Simply make the dough, then wrap it tightly in plastic wrap and refrigerate until you’re ready to bake; just bring it back to room temperature before pressing. Additionally, once baked, these cookies can be stored in an airtight container for up to 1 week—just remember to place wax paper between layers to protect their charming designs. When it’s time to serve, the cookies can be enjoyed as they are, or you can decorate them with sprinkles just before serving for that extra touch of delight!

Buttery Spritz Cookies

Buttery Spritz Cookies Recipe FAQs

How do I choose ripe ingredients for my Buttery Spritz Cookies?
Absolutely! For the best Buttery Spritz Cookies, use unsalted butter that is at room temperature but not overly soft or melted. Choose granulated sugar that is free of clumps. For the egg, a large, fresh egg works best—look for one with a clean shell.

What is the best way to store Buttery Spritz Cookies, and how long do they last?
You can keep your cooled cookies in an airtight container at room temperature for up to 1 week. To keep your decorations intact, place sheets of wax paper between layers. If you want to enjoy them for longer, they can be refrigerated, although this isn’t necessary unless you prefer chilled cookies.

Can I freeze Buttery Spritz Cookies, and how do I do it?
Certainly! To freeze your baked cookies, layer them in an airtight container with parchment paper between layers. They can be stored in the freezer for up to 3 months. When you’re ready to enjoy, simply thaw them at room temperature for a delightful treat!

What should I do if my dough is too sticky to work with?
If your dough is too sticky, I recommend chilling it in the refrigerator for about 30 minutes. This will make it easier to handle and press out cookies. If the issue persists, adding a tablespoon of flour at a time can help until you reach the desired consistency.

Are there any dietary considerations I should keep in mind when making Buttery Spritz Cookies?
Very much so! If you have dietary restrictions, consider using dairy-free butter to make the cookies lactose-free. Also, check your extracts as some may contain allergens. If making for kids or pets, remember that certain sprinkles may contain non-allergenic dyes or ingredients that aren’t pet-friendly.

Can I prepare the dough ahead of time?
Yes! You can absolutely prepare the dough ahead of time. Just refrigerate it for up to 3 days, wrapped tightly in plastic wrap. When ready to bake, allow the dough to reach room temperature before using your cookie press for that perfect shape!

Delightful Buttery Spritz Cookies That Melt in Your Mouth

Buttery Spritz Cookies are simple, delightful treats that add a charming sparkle to any occasion.

  • Mixing Bowl
  • Electric mixer
  • cookie press
  • Baking sheets
  • silicone baking mats

For the Cookie Dough

  • 1 cup unsalted butter (at room temperature)
  • 3/4 cup granulated sugar
  • 1 large egg
  • 1 tsp vanilla extract
  • 1 tsp almond extract
  • 2 1/4 cups all-purpose flour
  • 1/2 tsp salt

Optional Color and Decoration

  • red gel icing color
  • green gel icing color
  • sprinkles

Step-by-Step Instructions for Buttery Spritz Cookies

  1. Preheat your oven to 350°F (180°C) and line baking sheets with silicone baking mats.
  2. In a large mixer bowl, cream together the butter and sugar until light and fluffy.
  3. Add the egg, vanilla, and almond extracts, and mix until well combined.
  4. Gradually add flour and salt to the wet mixture, mix until just combined.
  5. If desired, divide the dough and mix in gel icing colors.
  6. Load the dough into the cookie press and release onto lined baking sheets.
  7. Sprinkle with sprinkles if desired before baking.
  8. Bake for 5-8 minutes, removing them at the first sign of golden edges.
  9. Let the cookies cool on sheets for 4-5 minutes before transferring to a wire rack.

Store cooled cookies in an airtight container. Can also be frozen for longer storage.

Dessert
American
baking, Buttery Spritz Cookies, cookies, dessert, easy recipes, holiday treats

Filed Under: Dessert

Irresistible Apple Snickerdoodle Bars for Cozy Moments

October 9, 2025 by grace bellamy Leave a Comment

The moment you sink your teeth into a warmly baked Apple Snickerdoodle Bar, you’ll find comfort wrapped in soft, spiced layers. These delightful bars are a chance to turn your kitchen into a cozy retreat, where homemade magic replaces the mundane routine of fast food. What makes these Apple Snickerdoodle Bars truly special? For one, they’re quick to whip up, allowing you to treat yourself and your loved ones to freshly baked goodness in just under 40 minutes. Plus, the combination of tart apples and warm spices creates a nostalgic flavor that’s hard to resist. So, are you ready to bring a delicious twist to your baking adventures? Let’s dive into this easy recipe and embrace the joy of homemade delights!

Apple Snickerdoodle Bars

Why are Apple Snickerdoodle Bars a Must-Try?

Cozy, Comforting Flavor: These bars are a delightful blend of warm spices and sweet apple, perfect for any season.

Quick and Simple: With just 15 minutes of prep time, you can easily whip up a batch for unexpected guests or cozy nights at home.

Versatile Treat: Enjoy them as a dessert, snack, or even breakfast—these bars fit any occasion!

Satisfying Texture: The soft, chewy bars offer a satisfying bite, complemented by a sprinkle of cinnamon sugar on top.

Family-Friendly Delight: Kids and adults alike will fall in love with this sweet treat, making it a perfect recipe for family baking sessions!

Transform your baking routine and discover more delicious options like Chewy Chocolate Chip Cookies or Classic Brownies!

Apple Snickerdoodle Bars Ingredients

Get ready to bake these delightful bars with this easy list of ingredients!

For the Batter

  • Unsalted butter – 1/2 cup (113g), softened for easier creaming.
  • Granulated sugar – 1 cup (200g), for sweetness and texture.
  • Brown sugar – 1/4 cup (50g), adds moisture and a hint of depth.
  • Large egg – 1, binds everything together beautifully.
  • Vanilla extract – 1 tsp, bringing a warm, aromatic flair.
  • All-purpose flour – 1 1/2 cups (180g), the base of these Apple Snickerdoodle Bars.
  • Baking powder – 1/2 tsp, ensures your bars rise to fluffy perfection.
  • Salt – 1/4 tsp, enhances the overall flavor.
  • Ground cinnamon – 1 tsp, for that classic snickerdoodle warmth.
  • Ground nutmeg – 1/2 tsp, adds a cozy holiday touch.
  • Medium apple – 1, peeled and finely diced for fruity sweetness.

For the Topping

  • Cinnamon sugar mixture – created with additional sugar and cinnamon, gives a delightful crunch on top.

Step‑by‑Step Instructions for Apple Snickerdoodle Bars

Step 1: Preheat the Oven
Preheat your oven to 350°F (175°C) to ensure it’s hot and ready for baking. While the oven warms, line an 8×8-inch baking pan with parchment paper, allowing some overhang on the sides. This will help you lift the Apple Snickerdoodle Bars out easily once they’re baked.

Step 2: Cream the Sugars and Butter
In a large mixing bowl, combine the softened unsalted butter, granulated sugar, and brown sugar. Using an electric mixer, cream these ingredients together on medium speed for about 2-3 minutes, or until the mixture turns light and fluffy. This step is crucial for creating a tender texture in your Apple Snickerdoodle Bars.

Step 3: Incorporate Egg and Vanilla
Next, beat in one large egg and one teaspoon of vanilla extract into the creamed mixture. Continue mixing until fully combined, about 1 minute. You want a smooth batter that’s well-blended. This adds richness and flavor, contributing to the delightful aroma of your Apple Snickerdoodle Bars.

Step 4: Mix Dry Ingredients
In a separate bowl, whisk together the all-purpose flour, baking powder, salt, ground cinnamon, and ground nutmeg. This ensures that the dry ingredients are evenly distributed, which is important for even rising and flavor in your Apple Snickerdoodle Bars. Take a moment to savor the fragrant spices!

Step 5: Combine Wet and Dry Ingredients
Gradually add the dry mixture to the wet ingredients, mixing gently with a spatula or wooden spoon until just combined. Avoid overmixing, as this can lead to denser bars. You should see a nice thick batter that’s ready for the star of the show—fresh apple chunks!

Step 6: Fold in the Apples
Carefully fold in the peeled and finely diced apple until evenly distributed throughout the batter. This step adds a delicious fruity element and moisture to your Apple Snickerdoodle Bars, elevating the overall flavor and texture.

Step 7: Spread the Batter
Pour the batter into your prepared baking pan, spreading it evenly with a spatula to ensure uniform baking. This helps achieve that beautiful, golden edge on your Apple Snickerdoodle Bars. Smooth down any uneven spots to make for an inviting presentation.

Step 8: Prepare the Topping
In a small bowl, mix together a bit of sugar with a teaspoon of cinnamon to create a sweet topping. Sprinkle this mixture evenly over the batter in the pan. This not only adds visual appeal but also creates a delightful sugary crust that’s characteristic of snickerdoodles.

Step 9: Bake the Bars
Place the pan in your preheated oven and bake for 25-30 minutes. Keep an eye on them; they’re done when the edges are golden and a toothpick inserted in the center comes out clean. Your kitchen will be filled with a warm, inviting aroma as the Apple Snickerdoodle Bars dreamily rise.

Step 10: Cool and Cut
Once baked, remove the pan from the oven and let it cool completely in the pan on a wire rack. This cooling process allows the bars to set properly. Once fully cooled, lift them out using the parchment overhang and cut into squares for serving, ready to be enjoyed fresh and warm!

Apple Snickerdoodle Bars

Expert Tips for Apple Snickerdoodle Bars

  • Butter Temperature: Always use softened butter for easy creaming; cold butter leads to dense bars instead of the desired softness.

  • Don’t Overmix: Mix just until combined! Overmixing the batter can create tough bars, ruining the wonderful texture of your Apple Snickerdoodle Bars.

  • Apple Selection: Choose firm apples like Granny Smith or Honeycrisp; they hold their shape and add delightful tartness, enhancing the sweetness of the bars.

  • Baking Time Check: Start checking at 25 minutes; every oven is different, and overbaking can lead to dry bars that lose that gooey charm.

  • Cool Completely: Allow the bars to cool fully in the pan; this ensures they set perfectly and are easier to cut without crumbling.

What to Serve with Apple Snickerdoodle Bars

Indulging in Apple Snickerdoodle Bars transforms any gathering into a heartwarming experience, especially when paired with delightful accompaniments.

  • Vanilla Ice Cream: A scoop of vanilla ice cream offers a creamy contrast to the warm bars, enhancing every bite with delicious richness.

  • Salted Caramel Sauce: Drizzling salted caramel adds a sweet and savory element that brings out the spices in the bars, creating a decadent treat.

  • Freshly Whipped Cream: Light and airy whipped cream complements the dense texture of the bars beautifully, adding a touch of elegance to your dessert table.

  • Warm Spiced Cider: Sipping on warm spiced cider creates a cozy atmosphere, perfectly mirroring the flavors of the bars while providing a comforting, nostalgic drink.

  • Cinnamon Tea: Pairing with a fragrant cinnamon tea enhances the snickerdoodle experience, inviting you to savor every delightful bite with a soothing sip.

  • Chai Latte: The warm, spiced notes of a chai latte echo the flavors of the Apple Snickerdoodle Bars, turning your snack time into an aromatic delight.

  • Fruity Salad: A fresh salad with crisp apples and tangy citrus counterbalances the sweetness of the bars, providing a refreshing and colorful addition to the meal.

  • Hot Chocolate: A rich cup of hot chocolate adds a touch of indulgence, making for a blissful pairing that warms both the heart and soul.

  • Nutty Granola: For a crunchy contrast, serve granola on the side. Its nuttiness will perfectly balance the soft texture of the bars.

Storage Tips for Apple Snickerdoodle Bars

Room Temperature: Store leftover Apple Snickerdoodle Bars in an airtight container at room temperature for up to 3 days to maintain their softness and flavor.

Fridge: For extended freshness, keep the bars in the refrigerator in an airtight container. They can last up to 1 week, though they may lose some moisture.

Freezer: Freeze the bars to keep them longer. Wrap them tightly in plastic wrap and place in a freezer bag for up to 3 months. Thaw before enjoying!

Reheating: If you prefer warm bars, reheat individual squares in the microwave for about 10-15 seconds for a cozy treat that tastes freshly baked.

Make Ahead Options

These Apple Snickerdoodle Bars are perfect for meal prep enthusiasts! You can prepare the batter up to 24 hours in advance; simply mix all the ingredients until combined, then cover the bowl tightly and refrigerate. This not only saves you time but also helps the flavors meld deliciously overnight. If you’d like, you can also dice the apples and store them in a sealed container with a splash of lemon juice to prevent browning. When ready to bake, just fold the apples into the chilled batter, spread it in the pan, and bake as directed. Enjoy the ease of having homemade treats ready in a snap for busy weeknights!

Apple Snickerdoodle Bars Customizations

Feel free to let your creativity soar as you personalize your Apple Snickerdoodle Bars with these delightful variations!

  • Gluten-Free: Substitute all-purpose flour with a gluten-free blend for a deliciously accommodating treat.
  • Nutty Twist: Add 1/2 cup of chopped walnuts or pecans to the batter for an irresistible crunch that complements the apple’s softness.
  • Spice It Up: Swap regular cinnamon for cinnamon sugar or a hint of apple pie spice for an extra flavor boost.
  • Fruit Variety: Experiment with pears or peaches instead of apples for a summertime version bursting with juicy flavor.
  • Oatmeal Add-in: Stir in 1/2 cup of rolled oats for a heartier texture that adds pleasant chewiness to your bars.
  • Chocolate Drizzle: Drizzle melted chocolate over the cooled bars for a touch of decadence that chocolate lovers will adore.
  • Vegan Option: Use flax eggs and coconut oil instead of egg and butter to create a plant-based version that’s just as delightful.
  • Cinnamon Swirl: Before baking, swirl in a mix of extra cinnamon and sugar into the batter for a fun surprise in every bite!

Not sure what to pair these treats with? Enjoy them alongside a comforting mug of hot cocoa or a scoop of vanilla ice cream for a cozy dessert experience. You can also discover more delightful recipes like Chewy Chocolate Chip Cookies or Classic Brownies to complement your baking journey!

Apple Snickerdoodle Bars

Apple Snickerdoodle Bars Recipe FAQs

What type of apple is best for baking in Apple Snickerdoodle Bars?
Absolutely! Choose firm apples like Granny Smith or Honeycrisp for your Apple Snickerdoodle Bars. These varieties hold their shape well during baking and provide a perfect balance of tartness that complements the sweetness of the bars.

How should I store leftover Apple Snickerdoodle Bars?
For the ultimate freshness, store your leftover Apple Snickerdoodle Bars in an airtight container at room temperature for up to 3 days. If you want them to last longer, placing them in the refrigerator will keep them fresh for up to 1 week, although they may become slightly drier. Always let them come to room temperature before serving!

Can I freeze Apple Snickerdoodle Bars, and if so, how?
Absolutely, my friend! To freeze your Apple Snickerdoodle Bars, first, allow them to cool completely in the pan. Then, wrap each bar tightly in plastic wrap and place them in a freezer bag. They can last up to 3 months in the freezer. When you’re ready to enjoy them, simply thaw them overnight in the fridge or on the counter for a couple of hours before serving.

Why did my Apple Snickerdoodle Bars come out dense?
Very good question! If your Apple Snickerdoodle Bars turned out dense, it’s likely due to overmixing the batter. Mix just until the ingredients are combined to avoid developing too much gluten, which can lead to a tough texture. Also, ensure you’re using softened butter to help create that light and fluffy outcome.

Are Apple Snickerdoodle Bars suitable for someone with egg allergies?
If you have an egg allergy, you can try substituting the large egg with a flaxseed meal alternative. Mix 1 tablespoon of flaxseed meal with 2.5 tablespoons of water and let it sit for about 5 minutes until it becomes gel-like. This should work well in your Apple Snickerdoodle Bars and still provide a delightful texture!

Irresistible Apple Snickerdoodle Bars for Cozy Moments

These Apple Snickerdoodle Bars are comforting, quick to make, and perfect for any occasion.

  • Mixing Bowl
  • Electric mixer
  • baking pan

For the Batter

  • 1/2 cup unsalted butter (softened)
  • 1 cup granulated sugar
  • 1/4 cup brown sugar
  • 1 large egg
  • 1 tsp vanilla extract
  • 1 1/2 cups all-purpose flour
  • 1/2 tsp baking powder
  • 1/4 tsp salt
  • 1 tsp ground cinnamon
  • 1/2 tsp ground nutmeg
  • 1 medium apple (peeled and finely diced)

For the Topping

  • cinnamon sugar mixture (for topping)

Step-by-Step Instructions

  1. Preheat your oven to 350°F (175°C) and line an 8×8-inch baking pan with parchment paper.
  2. In a large mixing bowl, cream together the softened unsalted butter, granulated sugar, and brown sugar.
  3. Beat in the egg and vanilla extract into the creamed mixture until fully combined.
  4. In a separate bowl, whisk together the all-purpose flour, baking powder, salt, ground cinnamon, and ground nutmeg.
  5. Gradually add the dry mixture to the wet ingredients, mixing gently until just combined.
  6. Fold in the peeled and finely diced apple.
  7. Pour the batter into the prepared baking pan and spread it evenly.
  8. Mix the sugar and cinnamon for the topping, and sprinkle it over the batter.
  9. Bake for 25-30 minutes until the edges are golden and a toothpick comes out clean.
  10. Allow to cool fully in the pan on a wire rack before lifting out and cutting into squares.

Use softened butter for easy creaming. Choose firm apples and avoid overmixing.

Dessert
American
apple dessert, Apple Snickerdoodle Bars, baking, cozy recipe, easy dessert, snickerdoodle

Filed Under: Dessert

Delicious Spider Web Black Bean Dip for Game Night Fun

October 9, 2025 by grace bellamy Leave a Comment

The aroma of toasty, seasoned black beans wafts through my kitchen, instantly transporting me to cozy gathering nights with friends. It’s these vibrant memories that inspire me to share my Spider Web Black Bean Dip. This delightful dish is not only a crowd-pleaser but also an easy way to elevate your snack game without spending hours in the kitchen. In just 30 minutes, you can whip up a cheesy, flavorful dip topped with a whimsical sour cream design. Perfect for parties or a cozy movie night in, this recipe will have everyone coming back for more. Ready to impress your guests with a delicious twist on traditional dip? Let’s dive into the magic of homemade goodness!

Spider Web Black Bean Dip

Why is this dip a game changer?

Simplicity at its finest: With just 5 easy ingredients, making this Spider Web Black Bean Dip is a breeze.

Flavor-packed perfection: The combination of creamy refried black beans, zesty salsa, and melty cheese creates a dip that bursts with flavor, ideal for gatherings.

Visually stunning presentation: The web design made from sour cream not only looks impressive but adds a delightful creaminess to each bite.

Versatile serving options: Pair it with tortilla chips, fresh veggies, or even as a topping for tacos. This dip will please all palates.

Time-saving delight: In just 30 minutes from start to finish, you can serve a delicious dip that rivals any restaurant’s offering. Ideal for those who prioritize flavor without the fuss.

Grab your mixing bowl and get ready to impress! If you need more quick appetizer ideas, don’t miss my Easy Homemade Guacamole for a flavorful addition to your spread.

Spider Web Black Bean Dip Ingredients

• Perfect for your next gathering!

For the Dip

  • Refried black beans – 16 ounces of creamy goodness that forms the base of our dip, full of rich flavor.
  • Shredded cheese – 1 cup of your favorite cheese blend adds melty texture and a deliciously gooey element.
  • Salsa – ½ cup of tangy salsa brings zest and freshness to the mix, enhancing the overall flavor profile.
  • Taco seasoning – 1 tablespoon adds a kick of spices that make every bite an adventure.

For the Topping

  • Sour cream – ¼ cup for a creamy finish, used to create the whimsical spider web design on top.

Now you have everything you need to create your delicious Spider Web Black Bean Dip!

Step‑by‑Step Instructions for Spider Web Black Bean Dip

Step 1: Preheat and Prepare
Preheat your oven to 375°F (190°C) and grab a 9-inch pie plate. Lightly spray the plate with cooking spray to prevent sticking, ensuring your Spider Web Black Bean Dip comes out easily once baked.

Step 2: Mix the Dip Ingredients
In a medium-sized mixing bowl, combine 16 ounces of refried black beans, ½ cup of salsa, 1 cup of shredded cheese, and 1 tablespoon of taco seasoning. Stir the mixture until well blended and smooth. This flavorful combo will form the delicious base of your dip.

Step 3: Spread the Mixture
Carefully pour the bean mixture into your prepared pie plate, using a spatula to spread it evenly across the bottom. Make sure the surface is flat for even baking, which will lead to a beautifully bubbly Spider Web Black Bean Dip when finished.

Step 4: Bake until Bubbly
Place the pie plate in the preheated oven and bake the dip uncovered for 20 to 25 minutes. Keep an eye on it; the edges should be slightly bubbly and the center heated through, creating a tempting aroma that fills your kitchen.

Step 5: Create the Spider Web Design
Once baked, remove the dish from the oven. In a pastry bag fitted with a round tip, add ¼ cup of sour cream. With the dip hot, gently pipe concentric circles on top, then draw intersecting lines from the center to the outer ring to form the spider web design.

Step 6: Serve with Dippables
Your Spider Web Black Bean Dip is now ready to serve! Offer it warm alongside your favorite dippables, like crispy tortilla chips or fresh veggie sticks, ensuring that everyone gets to enjoy this delectable creation right away.

Spider Web Black Bean Dip

What to Serve with Spider Web Black Bean Dip

Indulge your guests in a vibrant spread that complements the delightful, cheesy layers of this scrumptious dip.

  • Tortilla Chips: The classic choice, delivering crunchy texture that contrasts beautifully with the creamy dip, ensuring every bite is a delight.

  • Fresh Veggies: Bright and crispy bell peppers, carrots, and celery sticks add a refreshing crunch and healthy contrast, making everything feel lighter.

  • Guacamole: Creamy and rich, guacamole enhances the rich flavors of the black bean dip, adding a smooth finish to the snack experience.

  • Mexican Street Corn Salad: This sweet and savory salad brings an exciting mix of bright corn flavors, perfectly balancing the dip’s bold spices.

  • Mini Tacos: Small, soft tortillas filled with your favorite meat or veggies create a delicious handheld option for dipping into the black bean goodness.

  • Sangria: A fruity, refreshing beverage that cuts through the richness, making it a perfect drink to sip alongside your delicious dip and snacks.

  • Chocolate Chip Cookies: For a sweet finish, serve warm cookies that contrast with the savory depth of the dip, leaving guests with delightful memories.

Spider Web Black Bean Dip Variations

Feel free to get creative and adjust this recipe to match your tastes or dietary needs!

  • Dairy-Free: Swap out cheese and sour cream for vegan alternatives to make a plant-based version that’s just as tasty.

  • Spicy Kick: Add diced jalapeños or hot salsa for a fiery twist, perfect for those who crave a little heat in every bite.

  • Bean Blend: Use a combination of refried black beans and white beans for a unique flavor and delightful creaminess. This can also lighten the dish a bit.

  • Herby Twist: Add fresh herbs like cilantro or chives to the mix before baking for an aromatic enhancement that brightens each mouthful.

  • Crunch Factor: Top with crushed tortilla chips before baking for an added crunch that complements the smooth dip beautifully.

  • Creamy Avocado: Dollop fresh guacamole on top instead of sour cream for a luxurious avocado twist that adds richness and flavor.

  • Taco Night Upgrade: Use in tacos or burritos as a flavorful, creamy filling that takes your taco night to a whole new level.

For more ideas and inspiration, check out my Easy Homemade Guacamole for a fresh complement to your appetizers or consider making some zesty Baked Nachos to serve alongside this delightful dip. Enjoy customizing your creation!

How to Store and Freeze Spider Web Black Bean Dip

  • Fridge: Store leftover Spider Web Black Bean Dip in an airtight container for up to 3 days. Reheat gently in the oven or microwave before serving.
  • Freezer: For longer storage, freeze the dip in a freezer-safe container for up to 3 months. Thaw overnight in the fridge before reheating.
  • Reheating: To maintain the dip’s texture, reheat in a preheated oven at 350°F until warmed through, about 15-20 minutes. Avoid high heat to prevent drying out.
  • Serving Suggestions: This dip is best served warm, so time your reheating before guests arrive for the ultimate cheesy delight!

Expert Tips for Spider Web Black Bean Dip

  • Use Fresh Ingredients: Always opt for fresh salsa and quality cheese. They elevate the flavor of your Spider Web Black Bean Dip significantly.

  • Prevent Sticking: Make sure to spray your pie plate generously with cooking spray to ensure the dip releases easily after baking.

  • Check for Doneness: Oven temperatures can vary, so keep an eye on your dip. Look for bubbly edges and a warm center, which ensures it’s perfectly heated.

  • Piping Technique: If you don’t have a pastry bag, a plastic zip-top bag with the corner cut off works well for piped designs. Practice makes perfect!

  • Creative Toppings: Feel free to experiment with toppings like diced jalapeños or sliced olives in addition to sour cream for an extra burst of flavor.

  • Serve Warm: This dip tastes best warm, so time your serving to keep it gooey and delightful for guests.

Make Ahead Options

These Spider Web Black Bean Dip is perfect for meal prep enthusiasts! You can prepare the bean mixture (refried black beans, salsa, shredded cheese, and taco seasoning) up to 24 hours in advance. Simply mix the ingredients in a bowl, then cover and refrigerate. This will enhance the flavors while keeping the dip fresh. When you’re ready to serve, spread the chilled mixture into a prepared pie plate and bake as directed for 20 to 25 minutes. For the sour cream web topping, it’s best to pipe that on just before serving to maintain its creamy texture and presentation. With these make-ahead tips, you’ll enjoy a delicious, crowd-pleasing dip with minimal effort on game night!

Spider Web Black Bean Dip

Spider Web Black Bean Dip Recipe FAQs

How do I choose ripe ingredients for my Spider Web Black Bean Dip?
Absolutely! For this recipe, ensure your salsa is fresh, preferably homemade or from a deli for the best flavor. If using tomatoes in your salsa, look for firm tomatoes with vibrant color and no dark spots or mushy areas.

How should I store leftover Black Bean Dip?
You can easily store your leftover Spider Web Black Bean Dip in an airtight container for up to 3 days in the refrigerator. I recommend covering the dip with a layer of plastic wrap to keep it fresher for longer. When ready to enjoy, simply reheat it gently in the oven or microwave!

Can I freeze Spider Web Black Bean Dip?
Yes! Freezing your dip is a great option. Place the cooled dip into a freezer-safe container and it will stay good for up to 3 months. For thawing, simply move it to the refrigerator 24 hours before you plan to serve it, then reheat in a preheated oven at 350°F until warmed through (about 15-20 minutes).

What if my dip is too thick after baking?
Great question! If you find your dip is too thick after baking, simply mix in a splash of salsa or a bit of sour cream to loosen it up before serving. This will make it creamier and easier to dip into!

Is this dip suitable for people with dietary restrictions?
Very! This Spider Web Black Bean Dip is naturally vegetarian and can easily be made gluten-free by ensuring that your taco seasoning and any additional toppings are gluten-free. If you have dairy sensitivities, consider using dairy-free cheese and sour cream alternatives for the topping.

How can I make this dip more flavorful?
Definitely! To enhance the flavors, you can add diced jalapeños or chopped cilantro in the bean mixture before baking. Additionally, topping it with sliced olives or fresh diced tomatoes after baking can provide extra texture and flavor to your delicious Spider Web Black Bean Dip!

Delicious Spider Web Black Bean Dip for Game Night Fun

Elevate your snack game with this flavorful Spider Web Black Bean Dip, perfect for any gathering.

  • 9-inch pie plate
  • Mixing Bowl
  • spatula
  • pastry bag

For the Dip

  • 16 ounces refried black beans (creamy goodness that forms the base of the dip)
  • 1 cup shredded cheese (your favorite cheese blend)
  • 0.5 cup salsa (tangy salsa for zest)
  • 1 tablespoon taco seasoning (adds a kick of spices)

For the Topping

  • 0.25 cup sour cream (for the whimsical spider web design)

Step-by-Step Instructions

  1. Preheat your oven to 375°F (190°C) and spray a 9-inch pie plate with cooking spray.
  2. In a mixing bowl, combine refried black beans, salsa, shredded cheese, and taco seasoning; mix until smooth.
  3. Spread the mixture evenly into the prepared pie plate.
  4. Bake for 20-25 minutes until bubbly, ensuring the center is heated through.
  5. Remove from the oven and use sour cream to pipe concentric circles, then create a spider web design.
  6. Serve warm with tortilla chips or fresh veggie sticks.

For best results, use fresh ingredients and serve warm for the ultimate cheesy flavor.

Appetizer
Mexican
black bean dip, easy appetizer, game night dip, party snack, Spider Web Black Bean Dip

Filed Under: Appetizer

Delightful Raspberry Zinger Poke Cake for Sweet Moments

October 9, 2025 by grace bellamy Leave a Comment

As I stood in my kitchen, the sweet aroma of baking cake wafted through the air, instantly transporting me to sun-soaked summer picnics. That’s when my love for desserts took on a playful twist—enter the Raspberry Zinger Poke Cake. This delightful treat not only embraces nostalgia but also offers the perfect balance of freshness and indulgence. With just a handful of simple ingredients, you can whip up this vibrant cake in no time; it’s a crowd-pleaser that’s sure to impress friends and family. Best of all, it’s freezer-friendly and allows for delightful variations, making it a versatile addition to your dessert repertoire. Are you ready to dive into this tangy, creamy delight that’s perfect for a warm afternoon? Let’s get baking!

Raspberry Zinger Poke Cake

Why is Raspberry Zinger Poke Cake a Must-Try?

Irresistible flavor: The combination of tangy raspberry and sweet whipped topping creates a dreamy bite.

Effortless baking: Utilizing a cake mix means anyone can master this dessert, even novice bakers!

Perfect for gatherings: With 24 servings, it’s an incredible option for parties, picnics, or weekday treats.

Versatility: Feel free to swap in different fruits or toppings based on your cravings! Check out how to make a twist on this with your favorite fruit.

Refreshing delight: Chilling the cake enhances its flavors, making it the ideal summer dessert to cool down with.

Raspberry Zinger Poke Cake Ingredients

Discover the key ingredients for this delightful dessert.

For the Cake

  • Premium white cake mix – A quality mix ensures a light, fluffy texture for your Raspberry Zinger Poke Cake.
  • Ingredients listed on box – Follow the recipe instructions for perfect cake preparation.

For the Gelatin

  • Raspberry-flavored gelatin – Adds a vibrant raspberry flavor and moistness throughout the cake.
  • Hot purified water – Essential for dissolving the gelatin completely.

For the Topping

  • High-quality raspberry preserves – Spreading this on the top adds an extra layer of delicious fruitiness.
  • Whipped topping – Thawed for easy spreading, this adds creaminess and lightness.
  • Unsweetened shredded coconut – Provides delightful texture and a hint of tropical flavor.

Now that you have all the ingredients gathered, let’s dive into creating your own joyful experience with this Raspberry Zinger Poke Cake!

Step‑by‑Step Instructions for Raspberry Zinger Poke Cake

Step 1: Prepare the Cake
Begin by preheating your oven to the temperature specified on the cake mix box. In a mixing bowl, combine the premium white cake mix with the required ingredients—usually water, eggs, and oil—mixing until just combined. Pour the batter into a greased 9×13-inch baking pan and bake according to the box instructions, typically around 30 minutes, until a toothpick inserted in the center comes out clean.

Step 2: Cool the Cake
Once your cake is beautifully golden and baked, remove it from the oven and let it rest on a cooling rack for about 30 minutes. This step is crucial as it allows the cake to cool down completely before you start creating the delightful holes that will hold all that luscious raspberry flavor in your Raspberry Zinger Poke Cake.

Step 3: Make the Holes
After the cake has cooled, take the end of a wooden spoon and gently poke holes all over the surface of the cake. Aim for even spacing, making sure the holes reach about halfway into the cake. This is where the raspberry gelatin will seep in, ensuring each slice is packed with flavor—a hallmark of the ultimate Raspberry Zinger Poke Cake.

Step 4: Prepare and Pour the Gelatin
In a separate bowl, mix the raspberry-flavored gelatin with 2 cups of hot purified water. Stir until the gelatin is fully dissolved, which should take just a couple of minutes. Carefully pour the vibrant gelatin mixture evenly over the cake, allowing it to seep into the holes you created, enhancing the moistness and flavor throughout each slice.

Step 5: Add Raspberry Preserves
To give your cake an extra fruity kick, warm the raspberry preserves in the microwave for about 30 seconds. This step makes the preserves easier to spread. Once they’re smooth and slightly melted, spread the preserves evenly across the top of the cake, ensuring to cover it generously for that signature Raspberry Zinger experience.

Step 6: Apply Whipped Topping
Using a spatula, gently spread the thawed whipped topping over the raspberry preserves, creating a fluffy layer that balances the tartness of the fruit. Aim for an even application across the entire cake, making sure every bite of your Raspberry Zinger Poke Cake will be creamy and delightful.

Step 7: Sprinkle Coconut
Finally, take the unsweetened shredded coconut and sprinkle it evenly over the whipped topping, adding a delightful texture and a hint of tropical flavor. This final touch not only enhances the visual appeal of your Raspberry Zinger Poke Cake but also contributes a delightful crunch that contrasts with the creamy layers underneath.

Step 8: Chill the Cake
Cover the finished cake with plastic wrap and place it in the refrigerator. Let it chill for at least 4 hours, but overnight is even better! This chilling time allows the flavors to meld together beautifully, making your Raspberry Zinger Poke Cake not only a treat for the eyes but a refreshing delight for the taste buds when served.

Raspberry Zinger Poke Cake

How to Store and Freeze Raspberry Zinger Poke Cake

Fridge: Store your Raspberry Zinger Poke Cake in an airtight container in the refrigerator for up to 5 days. The chilling enhances the flavors while keeping the cake moist.

Freezer: For longer storage, wrap individual slices of the cake tightly in plastic wrap, then place them in a freezer-safe bag. This will keep them fresh for up to 3 months.

Thawing: To enjoy frozen slices, simply transfer them to the fridge to thaw overnight, or let them sit at room temperature for about 30 minutes before serving.

Reheating: If you prefer your cake slightly warmed, microwave a slice for 10-15 seconds. Enjoy the burst of raspberry flavor and creaminess in every delightful bite!

Make Ahead Options

These Raspberry Zinger Poke Cakes are a fantastic choice for meal prep, bringing both convenience and deliciousness to your busy weeknights! You can prepare the white cake and allow it to cool, then poke the holes up to 24 hours in advance. However, for the best flavor infusion, add the gelatin and raspberry preserves just before serving or chill the fully assembled cake up to 3 days ahead. To maintain quality, make sure to refrigerate it properly and cover it with plastic wrap to prevent drying. When you’re ready to serve, simply spread the whipped topping and sprinkle the coconut over it, and you’ll have a show-stopping dessert that’s just as delicious as when it was first made!

What to Serve with Raspberry Zinger Poke Cake

There’s something magical about creating a full meal to enjoy alongside this vibrant, fruity dessert.

  • Fresh Fruit Salad: A medley of juicy berries and zesty citrus cuts through the sweetness and enhances the refreshing flavors of the cake.
  • Grilled Chicken Skewers: Juicy, marinated chicken adds a savory contrast to the cake’s sweetness. The smoky flavor elevates the entire meal experience.
  • Coconut Rice: Light and fluffy coconut-infused rice provides a tropical touch that ties beautifully with the coconut topping of the cake. It’s a delight to savor!
  • Lemonade or Iced Tea: A crisp, cold drink offers a perfect refreshing companion, balancing the rich flavors of the Raspberry Zinger Poke Cake with every sip.
  • Chocolate Dipped Strawberries: The lush chocolate juxtaposes the tartness of the raspberry, creating a romantic dessert duo everyone will adore.
  • Vanilla Ice Cream: A scoop of creamy vanilla ice cream pairs perfectly; its rich flavor complements the cake while adding a cool element to each bite.
  • Nutty Granola Bars: Crunchy granola bars bring a satisfying texture that contrasts with the softness of the cake. They make a great snack alongside a slice!
  • Sparkling Water with Mint: This refreshing, effervescent beverage brightens the palate, making it a delightful way to cleanse your taste buds between bites.

Raspberry Zinger Poke Cake Variations

Customize your Raspberry Zinger Poke Cake and inspire others to enjoy a delightful twist with every bite!

  • Gluten-Free: Substitute the white cake mix for a gluten-free alternative, and enjoy the same delicious taste without the gluten.

  • Dairy-Free: Use dairy-free whipped topping and a plant-based milk to mix the cake; it’s just as creamy and delightful!

  • Extra Fruitiness: Layer in fresh raspberries or thinly sliced strawberries between the cake and whipped topping. This adds freshness and texture. Your family will love the juicy bites!

  • Chocolate Lovers: Swap the white cake mix for devil’s food cake mix for a scrumptious twist, combining chocolate and raspberry flavors that will take dessert to a new level.

  • Nutty Crunch: Sprinkle crushed almonds or pecans instead of coconut for an added crunch. This variation provides a delightful surprise in every forkful!

  • Zesty Citrus: Stir in some lemon or lime zest into the cake batter for an unexpected tang that pairs beautifully with raspberry. It’s refreshing and bright!

  • Spicy Kick: Add a pinch of cayenne pepper or chili powder to the cake batter for those who enjoy a little heat with their sweet. It creates a unique flavor profile that surprises the palate!

  • Mini Versions: Bake individual cakes in muffin tins for bite-sized delights. They’re perfect for grab-and-go moments or to share at gatherings.

As you get creative, don’t forget to explore other flavors! You can easily make variations using your favorite fruit for delightful surprises in every slice. Happy baking!

Expert Tips for Raspberry Zinger Poke Cake

  • Use Room Temperature Ingredients: Ensure your eggs and water are at room temperature before mixing to promote a fluffier cake texture in your Raspberry Zinger Poke Cake.

  • Cool Properly: Always let the cake cool completely before poking holes; otherwise, the gelatin may not soak in well, leading to dry parts.

  • Spread Evenly: When adding raspberry preserves and whipped topping, take your time to spread evenly for uniform flavor and texture in every slice.

  • Chill Longer for Best Flavor: While 4 hours is great, allowing your cake to chill overnight makes the flavors even more pronounced and enhances the overall experience.

  • Experiment with Toppings: Feel free to swap shredded coconut with crushed nuts or fresh berries to personalize your Raspberry Zinger Poke Cake experience!

Raspberry Zinger Poke Cake

Raspberry Zinger Poke Cake Recipe FAQs

How do I know when my cake is properly baked?
To ensure your Raspberry Zinger Poke Cake is perfectly baked, insert a toothpick into the center. If it comes out clean or with a few moist crumbs, your cake is ready!

What should I look for in ripe raspberries for this recipe?
Choose raspberries that are plump, firm, and brightly colored. Avoid those with dark spots or signs of mold, as they won’t deliver the same fresh flavor to your cake.

How should I store my Raspberry Zinger Poke Cake?
Store your cake in an airtight container in the refrigerator; it’ll remain fresh for up to 5 days. This allows the flavors to meld beautifully while keeping the cake moist and delicious.

Can I freeze Raspberry Zinger Poke Cake?
Absolutely! Wrap individual slices tightly in plastic wrap, then place them in a freezer-safe bag. Your cake can be kept in the freezer for up to 3 months. When you’re ready to enjoy, just thaw them in the fridge overnight or at room temperature for about 30 minutes.

What if my gelatin doesn’t dissolve properly?
If your gelatin isn’t dissolving well, ensure that your water is truly hot—near boiling works best. Stir continuously as it dissolves. If you’re still struggling, consider whisking it with a fork or switching to a whisk for better mixing.

Are there any allergens in this recipe?
The Raspberry Zinger Poke Cake contains common allergens like gluten from the cake mix, dairy in the whipped topping, and coconut. If you have allergies, consider using gluten-free cake mix or a dairy-free topping to customize the recipe to your needs.

Delightful Raspberry Zinger Poke Cake for Sweet Moments

This Raspberry Zinger Poke Cake is a perfect balance of tangy raspberry flavor and sweet whipped topping, ideal for summer gatherings.

  • Mixing Bowl
  • 9×13-inch baking pan
  • spatula

For the Cake

  • 1 box Premium white cake mix (A quality mix ensures a light, fluffy texture.)
  • Ingredients listed on box (Follow the recipe instructions for perfect cake preparation.)

For the Gelatin

  • 1 package Raspberry-flavored gelatin (Adds vibrant raspberry flavor.)
  • 2 cups Hot purified water (Essential for dissolving the gelatin completely.)

For the Topping

  • 1 cup High-quality raspberry preserves (Adds an extra layer of delicious fruitiness.)
  • 1 cup Whipped topping (Thawed for easy spreading.)
  • 1 cup Unsweetened shredded coconut (Provides delightful texture and a hint of tropical flavor.)

Step-by-Step Instructions

  1. Preheat your oven to the temperature specified on the cake mix box. In a mixing bowl, combine the premium white cake mix with the required ingredients and mix until just combined. Pour the batter into a greased 9×13-inch baking pan and bake according to the box instructions, typically around 30 minutes, until a toothpick inserted in the center comes out clean.
  2. Once your cake is beautifully golden and baked, remove it from the oven and let it rest on a cooling rack for about 30 minutes.
  3. After the cake has cooled, take the end of a wooden spoon and gently poke holes all over the surface of the cake.
  4. In a separate bowl, mix the raspberry-flavored gelatin with 2 cups of hot purified water. Stir until the gelatin is fully dissolved. Carefully pour the vibrant gelatin mixture evenly over the cake.
  5. Warm the raspberry preserves in the microwave for about 30 seconds and then spread them evenly across the top of the cake.
  6. Spread the thawed whipped topping over the raspberry preserves.
  7. Sprinkle the unsweetened shredded coconut evenly over the whipped topping.
  8. Cover the finished cake with plastic wrap and place it in the refrigerator. Let it chill for at least 4 hours, but overnight is even better!

Using room temperature ingredients helps in achieving a fluffier cake texture. Chill longer for better flavor.

Dessert
American
Cake Recipes, Easy Desserts, Poke Cake, Raspberry Dessert, Raspberry Zinger Poke Cake, summer dessert

Filed Under: Dessert

Witches’ Brew Halloween Cake Jars: A Spooky Sweet Delight

October 9, 2025 by grace bellamy Leave a Comment

As the sun sets and spooky season approaches, I find myself enchanted by the idea of creating something that captures the true spirit of Halloween. These Witches’ Brew Halloween Cake Jars are not only visually striking but also a delightful treat that combines the rich flavors of chocolate and vanilla in a fun and whimsical way. Perfect for gatherings or as a festive dessert, these jars are an easy crowd-pleaser that will leave everyone spellbound. With their playful layers and a dash of creativity, you can whip up these desserts in no time, making them a fantastic choice if you’re looking to escape the ordinary this Halloween. Are you ready to brew up some magic in your kitchen?

Witches' Brew Halloween Cake Jars

Why will you love these cake jars?

Easy and Fun: Making these Witches’ Brew Halloween Cake Jars is a delightful activity that the whole family can join in on. Layering the cake and buttercream in jars adds a playful twist to traditional baking!

Decadent Flavors: The combination of rich black cocoa and buttery vanilla creates a heavenly flavor profile that will satisfy any sweet tooth.

Eye-Catching Presentation: With vibrant colors and whimsical decorations, these jars are sure to be the star of your Halloween spread.

Customizable Treats: Whether you prefer more sprinkles, a different fondant design, or an extra layer of buttercream, these jars can easily be tailored to your style—making them perfect for any gathering!

Perfect for Parties: These cakes are portable and easy to serve, making them a hit at Halloween parties or festive gatherings. Just grab a jar and enjoy!

So get ready to impress your guests with these delightful treats. If you’re inspired to explore more spooky themes, don’t miss our Halloween-themed baking tips for added creativity!

Witches’ Brew Halloween Cake Jars Ingredients

• Get ready to awaken your inner baker with this magical treat!

For the Cake

  • 330 g self-raising flour – Essential for that perfect rise in your cake!
  • 360 g granulated sugar – Gives sweetness to balance the rich cocoa flavors.
  • 360 g butter – Use softened butter for a light and fluffy texture.
  • 6 eggs – Eggs help bind the mix and create a moist cake.
  • 30 g unsweetened black cocoa powder – Adds a deep chocolate flavor that’s perfect for Halloween!
  • 1½ teaspoon baking powder – Ensures your cake has the right lift.
  • ½ teaspoon salt – A must to enhance the sweetness.
  • 90 ml milk – Adds moisture; feel free to swap with almond milk for a different flavor.
  • 2 teaspoon vanilla extract – This adds a lovely aroma and taste to your cake.

For the Buttercream

  • 400 g salted butter – The salt balances the sweetness in your frosting.
  • 800 g powdered sugar – Creates a smooth, sweet frosting that’s easy to spread.
  • 1¼ teaspoon vanilla extract – Boosts the flavor in your buttercream beautifully.
  • 2 tablespoon milk or cream – Use this if your buttercream feels too stiff to work with.
  • Electric green food coloring – A few drops will cast a spooky glow in your frosting!

For the Decoration

  • 250 g orange fondant – Perfect for creating whimsical decorations that scream Halloween!
  • 200 g black fondant – Enhance the spooky theme with this dark and dramatic color.
  • 1 tablespoon CMC powder – Helps the fondant hold its shape for those fun witch legs.
  • Sprinkles – Use them to add extra fun and color to your cake jars.

Dive into this spellbinding recipe and let your creativity run wild with these Witches’ Brew Halloween Cake Jars!

Step‑by‑Step Instructions for Witches’ Brew Halloween Cake Jars

Step 1: Preheat and Prepare the Pan
Begin by preheating your oven to 170°C (340°F). While the oven warms up, grab a 9-inch square cake tin and grease it thoroughly with butter or cooking spray, then dust with flour. This will ensure your cake comes out easily after baking!

Step 2: Cream the Butter and Sugar
In a large mixing bowl, cream together 360 g of softened butter and 360 g of granulated sugar using an electric mixer. Beat the mixture on medium speed until it transforms into a light and fluffy consistency, which should take about 3 to 5 minutes. This step is crucial for a moist Witches’ Brew Halloween Cake!

Step 3: Incorporate the Eggs
Carefully add 6 eggs to your creamed mixture, two at a time. Make sure to beat the mixture well after each addition until fully combined. You want a smooth texture without any lumps, which will enhance the overall richness of your cake.

Step 4: Mix the Dry Ingredients
In a separate bowl, whisk together the self-raising flour, baking powder, black cocoa powder, and salt. Gradually sift this dry mixture into the wet creamed mixture in three parts, alternating with 90 ml of milk. Gently fold it all together while adding the 2 teaspoons of vanilla extract until fully combined, avoiding overmixing.

Step 5: Bake the Cake
Pour the cake batter into the prepared tin and smooth the top with a spatula. Place it in the oven and bake for 45 to 50 minutes, or until a skewer inserted into the center comes out clean. The cake should look risen and have a slight crack on top, indicating it’s perfectly baked.

Step 6: Cool the Cake
Once baked, carefully remove the cake from the oven and let it cool in the tin for about 2 to 3 minutes. After that, gently transfer the cake to a wire rack to cool completely. This cooling process is vital for achieving the perfect texture for your Witches’ Brew Halloween Cake Jars.

Step 7: Prepare the Buttercream
While the cake cools, start making your buttercream frosting. In a clean mixing bowl, cream 400 g of softened salted butter until it’s soft and fluffy. Gradually add the sifted powdered sugar, mixing on low speed to avoid a sugar cloud, then whip until it’s smooth and creamy.

Step 8: Color the Buttercream
Add 1¼ teaspoons of vanilla extract to the buttercream and mix until well combined. If the mixture feels too stiff, you can blend in 2 tablespoons of milk or cream for a smoother texture. To create a spooky look, drop in a few drops of electric green food coloring and blend until the color is uniform.

Step 9: Level and Cut the Cake
Once the cake has cooled completely, use a serrated knife to level its top. Then, cut the cake into two layers. Using a round cutter, carefully cut out 9 circles from each cake layer, which will form the delicious layers for your Witches’ Brew Halloween Cake Jars.

Step 10: Assemble the Cake Jars
To assemble your jars, optionally sprinkle some fun sprinkles at the bottom of each jar. Layer a cake circle into the jar, followed by a generous swirl of buttercream. Next, add even more sprinkles for an extra festive touch, then top it all off with another cake layer and a delightful buttercream swirl.

Step 11: Decorate with Fondant
Using a skewer, gently create small holes at the top of the jars where you can insert your whimsical fondant witch legs. Make sure they are secure and standing tall for that perfect Halloween effect. With each jar brimming with sweet layers, your Witches’ Brew Halloween Cake Jars are now ready to cast their spell at your next gathering!

Witches' Brew Halloween Cake Jars

Make Ahead Options

These Witches’ Brew Halloween Cake Jars are perfect for meal prep and can save you valuable time during the busy Halloween season! You can bake the cake up to 3 days in advance. Simply cool it completely, wrap it tightly in plastic wrap, and store it in the refrigerator to retain its moisture. The buttercream can also be made ahead of time; just refrigerate it in an airtight container for up to 3 days. When you’re ready to assemble, allow the cake and frosting to come to room temperature before cutting and layering. This way, your cake jars will be just as delicious and festive, ensuring a sweet surprise awaits your guests at your Halloween gathering!

What to Serve with Witches’ Brew Halloween Cake Jars

As you gather loved ones to enjoy these whimsical cake jars, consider how to create a complete and enchanting meal experience.

  • Spooky Punch: A fizzy, fruity drink with floating eyeball gummy candies creates a festive atmosphere, perfectly complementing the sweet flavors of the cake.

  • Ghostly Cheese Platter: A mix of soft and sharp cheeses with ghost-shaped crackers adds savory notes, balancing sweetness while keeping guests intrigued.

  • Witch’s Cauldron Stew: A warm, hearty soup full of seasonal vegetables and herbs can be a delightful contrast to the cake’s sweetness, enhancing the fall theme of your meal.

  • Chocolate-Covered Apples: Caramel or chocolate-dipped apples bring a satisfying crunch to your spread, echoing the celebratory spirit of Halloween.

  • Mummy Hot Dogs: Fun and easy to make, these dough-wrapped hot dogs are a hit with both kids and adults, adding a playful element to your gathering.

  • Autumn Salad: Tossed greens with roasted pumpkin, cranberries, and a maple vinaigrette introduce freshness, enriching the fall flavors and providing a perfect palate cleanser.

  • Pumpkin Spice Latte: A cozy warm drink, this classic fall favorite pairs deliciously with the rich flavors of chocolate in your cake jars, creating a warm and inviting dessert moment.

  • Spooky Cookies: Serve a platter of decorated cookies shaped like bats and pumpkins. Their festive designs will visually enhance your dessert spread.

Drawing on a mix of flavors, textures, and colors will ensure your Witches’ Brew Halloween Cake Jars shine even brighter in the company of delicious accompaniments!

Witches’ Brew Halloween Cake Jars Variations

Feel free to mix things up with these enchanting twists that will conjure up even more delight in your Witches’ Brew Halloween Cake Jars!

  • Vegan: Substitute eggs with flaxseed meal (1 tablespoon mixed with 3 tablespoons water) and use non-dairy butter and milk for a vegan-friendly version.

  • Gluten-Free: Use a 1:1 gluten-free flour blend instead of self-raising flour for a fluffy, gluten-free cake that everyone can enjoy. It’s a fantastic alternative that doesn’t skimp on flavor!

  • Spice It Up: Add a pinch of cinnamon or nutmeg to your batter for a warm and cozy spice that pairs beautifully with chocolate. These warming spices create a delightful aroma reminiscent of fall.

  • Nutty Twist: Incorporate chopped nuts like walnuts or pecans into your cake layers for an extra crunch that contrasts wonderfully with the creamy buttercream.

  • Zest of Citrus: A teaspoon of orange or lemon zest in your buttercream offers a refreshing tang that brightens the overall flavor profile, adding a delightful citrus note.

  • Colorful Cream: Experiment with different color food dyes in your buttercream beyond green, allowing for a rainbow of colors that can uplift the Halloween theme even further.

  • Extra Chocolate: For chocoholics, fold in mini chocolate chips into the batter before baking. The melted chocolate chunks create a luscious texture, making each bite decadently rich.

  • Fiery Kick: Add a touch of cayenne pepper or chili powder to your cake mix for those who enjoy a little heat. It’s a surprising twist that will surely awaken the taste buds!

With these variations, you can tailor your Witches’ Brew Halloween Cake Jars to suit every palate and make them truly your own. Don’t forget to check out our Halloween-themed baking tips for even more inspiration!

Expert Tips for Witches’ Brew Cake Jars

  • Check Your Eggs: Always use room temperature eggs for better incorporation into your batter, ensuring a fluffy texture in your Witches’ Brew Halloween Cake Jars.
  • Don’t Rush Cooling: Allow your cake to cool on a wire rack to prevent moisture buildup and sogginess in your jars. This step is essential for structure!
  • Sift Your Dry Ingredients: Sift flour, cocoa powder, and baking powder to eliminate lumps and achieve a light, airy cake that bakes evenly.
  • Customize Your Layers: Feel free to mix and match flavors! Adding spices or flavored extracts can take your Witches’ Brew Halloween Cake Jars to new heights.
  • Buttercream Consistency: If your buttercream is too stiff, gradually mix in milk or cream until it’s the perfect spreadable consistency for easy layering.
  • Get Creative with Decor: Let your imagination run wild with the fondant designs! Experiment with spooky shapes and colors to make your jars truly unique.

How to Store and Freeze Witches’ Brew Halloween Cake Jars

Room Temperature: For optimal freshness, store your assembled cake jars at room temperature for up to 2 days. Keep them covered with plastic wrap to maintain moisture.

Fridge: If you plan to keep them longer, refrigerate Witches’ Brew Halloween Cake Jars for up to 5 days. Just make sure they’re in an airtight container to avoid drying out.

Freezer: These cake jars can be frozen for up to 3 months. Before freezing, ensure they’re well covered with plastic wrap and then aluminum foil to prevent freezer burn.

Reheating: To enjoy a chilled jar, simply let it sit at room temperature for 30 minutes before serving. If you prefer it slightly warm, remove the lid and microwave for 10-15 seconds.

Witches' Brew Halloween Cake Jars

Witches’ Brew Halloween Cake Jars Recipe FAQs

How do I choose the right ingredients for my cake?
Absolutely! For the best results, use fresh ingredients. When choosing eggs, look for ones with uncracked shells and a clean, intact bloom. For butter, I recommend checking the expiration date and using high-quality brands for a rich flavor. The self-raising flour should be fresh to ensure proper leavening.

How should I store my Witches’ Brew Halloween Cake Jars?
For deliciously fresh cake jars, store them at room temperature for up to 2 days, covered in plastic wrap to lock in moisture. If you need to keep them longer, transfer to the fridge in an airtight container for up to 5 days to maintain their scrumptiousness—no one likes dry cake, right?

Can I freeze the Witches’ Brew Halloween Cake Jars? How?
Yes, indeed! You can freeze your cake jars for up to 3 months. To do this, make sure they are cooled completely, then cover each jar tightly with plastic wrap followed by aluminum foil to prevent freezer burn. When you’re ready to enjoy, simply let them thaw overnight in the fridge and bring them to room temperature before serving.

What if my buttercream is too stiff?
Very importantly, if your buttercream is a bit too stiff for spreading or piping, don’t worry! Just add one tablespoon of milk or cream at a time, mixing until you achieve a smoother consistency. This will help it spread beautifully on your cake layers without any hassle!

Are there any dietary considerations I should be aware of?
Absolutely! When preparing your Witches’ Brew Halloween Cake Jars, keep allergies in mind. Ensure all guests are aware of the ingredients, especially if they have sensitivities to gluten (consider gluten-free flour) or dairy (substitute with dairy-free butter). Additionally, these jars are fun but should be enjoyed responsibly—especially by pets, as chocolate can be harmful to them.

Can I customize the decorations on my cake jars?
The more, the merrier! You can definitely get creative with your decorations. Swap out the orange and black fondant for colors of your choice or add themed edible decorations like ghost or pumpkin sprinkles. You can also switch up the flavor of the buttercream or add different layers to suit your taste. Let your imagination run wild!

Witches’ Brew Halloween Cake Jars: A Spooky Sweet Delight

Witches’ Brew Halloween Cake Jars are a fun and whimsical dessert combining chocolate and vanilla flavors, perfect for Halloween gatherings.

  • 9-inch square cake tin
  • Electric mixer
  • Mixing bowls
  • Whisk
  • serrated knife
  • round cutter
  • spatula
  • Measuring cups and spoons

For the Cake

  • 330 g self-raising flour (Essential for that perfect rise in your cake!)
  • 360 g granulated sugar (Gives sweetness to balance the rich cocoa flavors.)
  • 360 g butter (Use softened butter for a light and fluffy texture.)
  • 6 pieces eggs (Help bind the mix and create a moist cake.)
  • 30 g unsweetened black cocoa powder (Adds a deep chocolate flavor that’s perfect for Halloween!)
  • 1.5 teaspoon baking powder (Ensures your cake has the right lift.)
  • 0.5 teaspoon salt (A must to enhance the sweetness.)
  • 90 ml milk (Adds moisture; feel free to swap with almond milk for a different flavor.)
  • 2 teaspoon vanilla extract (Adds a lovely aroma and taste to your cake.)

For the Buttercream

  • 400 g salted butter (The salt balances the sweetness in your frosting.)
  • 800 g powdered sugar (Creates a smooth, sweet frosting that’s easy to spread.)
  • 1.25 teaspoon vanilla extract (Boosts the flavor in your buttercream beautifully.)
  • 2 tablespoon milk or cream (Use this if your buttercream feels too stiff to work with.)
  • electric green food coloring (A few drops will cast a spooky glow in your frosting!)

For the Decoration

  • 250 g orange fondant (Perfect for creating whimsical decorations that scream Halloween!)
  • 200 g black fondant (Enhance the spooky theme with this dark and dramatic color.)
  • 1 tablespoon CMC powder (Helps the fondant hold its shape for those fun witch legs.)
  • sprinkles (Use them to add extra fun and color to your cake jars.)

Step-by-Step Instructions

  1. Preheat your oven to 170°C (340°F). Grease a 9-inch square cake tin with butter or cooking spray, then dust with flour.
  2. In a large mixing bowl, cream together 360 g of softened butter and 360 g of granulated sugar using an electric mixer on medium speed until light and fluffy, about 3 to 5 minutes.
  3. Add 6 eggs to the creamed mixture, two at a time, beating well after each addition until combined.
  4. In a separate bowl, whisk together flour, baking powder, black cocoa powder, and salt. Gradually sift this into the wet mixture in three parts, alternating with 90 ml of milk, folding gently until combined.
  5. Pour the batter into the prepared tin, smooth the top, and bake for 45 to 50 minutes, or until a skewer inserted comes out clean.
  6. Remove the cake from the oven, let it cool in the tin for 2 to 3 minutes, then transfer to a wire rack to cool completely.
  7. In a clean bowl, cream 400 g of softened butter for the frosting, gradually add sifted powdered sugar, mixing on low speed, then whip until smooth and creamy.
  8. Mix in 1¼ teaspoons of vanilla extract. If too stiff, add 2 tablespoons of milk or cream. Blend in electric green food coloring until uniform.
  9. Once cooled, level the cake’s top with a serrated knife and cut it into two layers. Use a round cutter to cut out 9 circles from each layer.
  10. Sprinkle some sprinkles at the bottom of each jar, layer a cake circle, add a swirl of buttercream, more sprinkles, then top with another cake layer and buttercream swirl.
  11. Create small holes in the top of the jars for whimsical fondant witch legs, securing them for the perfect Halloween effect.

Allow your cake to cool on a wire rack to prevent moisture buildup. Customize your jars with creative fondant decorations.

Dessert
American
cake jars, chocolate cake, Halloween desserts, spooky treats, vanilla buttercream, Witches’ Brew Halloween Cake Jars

Filed Under: Dessert

Delicious Homemade Christmas Toffee for Holiday Treats

October 8, 2025 by grace bellamy Leave a Comment

A festive aroma often paints the air during the holiday season, but nothing quite compares to the scent of homemade Christmas Toffee wafting from your kitchen. This delightful treat transforms a handful of simple ingredients into an irresistible sweet that’s perfect for sharing—or keeping all to yourself! With the crunch of pecans or almonds and a silky chocolate topping, you’ll soon discover just how satisfying it is to make this crowd-pleasing candy from scratch. What I love most about this recipe is its quick prep time, allowing for less fuss and more festive cheer. Plus, you can easily package these sweet morsels for gifting, making them a heartfelt present for friends and family. So, are you ready to create your own batch of Christmas magic?

Christmas Toffee

Why is Christmas Toffee a Must-Make?

Irresistible Flavor: The sweet, buttery toffee paired with rich chocolate and crunchy nuts creates a flavor explosion that’s hard to resist.

Simple Process: With easy-to-follow steps, you’ll whip up this festive treat even if you’re a kitchen novice.

Perfect for Gifting: Package your homemade Christmas Toffee in cute tins or jars, making thoughtful gifts for loved ones.

Customizable: Want a twist? Swap out the nuts or add toppings to suit your taste, allowing for endless variations!

Crowd-Pleasing Treat: This delightful candy is guaranteed to impress family and friends at holiday gatherings, making it a staple in your festive baking lineup.

Christmas Toffee Ingredients

For the Toffee
• Chopped pecans or almonds – a nutty crunch that enhances the toffee’s texture; choose your favorite or mix both for variety.
• Butter – adds richness and creaminess; use unsalted for better control over the flavor.
• Granulated sugar – the sweet base for your toffee; don’t substitute with brown sugar to maintain the proper texture.
• Water – helps dissolve the sugar for a smooth mixture; essential for achieving the right toffee consistency.
• Salt – balances the sweetness; a pinch enhances all the other flavors beautifully.
• Vanilla – infuses warmth and depth; opt for pure vanilla extract for the best flavor.

For the Topping
• Chocolate chips – provide a luscious layer on top; dark or milk chocolate works beautifully, depending on your preference.
• Flaked sea salt (optional) – a sprinkle on top adds a gourmet touch, heightening the toffee’s sweet notes while offering a savory contrast.

Make sure you have all your Christmas Toffee ingredients ready to create a festive treat that fills your home with sweet holiday cheer!

Step‑by‑Step Instructions for Christmas Toffee

Step 1: Gather Your Ingredients
Begin by assembling all your ingredients for the Christmas Toffee: chopped pecans or almonds, butter, granulated sugar, water, salt, vanilla, and chocolate chips. Ensure that you have a 9×9 inch baking dish as well, lined with parchment paper for easy removal later. This preparation will make your toffee-making process smooth and enjoyable.

Step 2: Prepare the Baking Dish
Line your 9×9 inch baking dish with parchment paper, allowing some extra hanging over the edges for easy lifting later. Next, evenly spread 1 cup of chopped pecans or almonds on the bottom of the dish, creating a nutty base for your Christmas Toffee. This will provide not only flavor but also a delightful crunch in every bite.

Step 3: Combine Ingredients in a Pot
In a medium-sized pot, combine the cut pieces of butter, granulated sugar, water, and salt. Set your stovetop to medium heat, stirring the mixture frequently until the butter has melted completely. As the ingredients blend, watch for the mixture to bubble gently, signaling that it’s reaching the next crucial stage in making your toffee.

Step 4: Heat the Mixture
Attach a candy thermometer to the side of the pot, ensuring it doesn’t touch the bottom. Allow the mixture to heat up, stirring occasionally to prevent burning. Keep an eye on the thermometer until it reaches the hard crack stage at 300°F (149°C). This is the perfect temperature where your toffee will set beautifully once cooled.

Step 5: Remove from Heat
Once the mixture hits 300°F, promptly remove the pot from the heat source to prevent overcooking. This is the moment that transforms the bubbling blend into the rich, sweet toffee you’re hoping to create. Be cautious, as the mixture will be extremely hot; it’s best to work quickly to maintain the right consistency for your Christmas Toffee.

Step 6: Add Vanilla
Carefully stir in the teaspoon of vanilla extract into the hot toffee mixture, ensuring it’s evenly mixed. The warmth will enhance the vanilla’s flavor, infusing the toffee with a delightful aroma. Make sure there are no lumps before proceeding; this step adds a lovely depth to your final treat.

Step 7: Pour Over the Nuts
Pour the hot toffee mixture over the layer of pecans or almonds in your prepared baking dish. Use a spatula to gently spread the toffee evenly, covering all the nuts for a cohesive treat. The warmth of the toffee will help it settle and stick to the nuts, creating the perfect base for the chocolate topping.

Step 8: Add Chocolate Chips
After allowing the toffee to cool for about 2 minutes, evenly sprinkle 1 cup of chocolate chips over the warm toffee. The heat from the toffee will work to melt the chocolate chips beautifully. This moment creates a luscious, smooth layer that will complement the crunchy layers beneath.

Step 9: Cover to Melt Chocolate
Cover the baking dish with foil or a baking sheet to trap the heat inside. Let it sit undisturbed for about 4 minutes, allowing the chocolate chips to melt thoroughly. This step is crucial as it makes spreading the chocolate easier, ensuring that every piece of your Christmas Toffee is generously coated.

Step 10: Swirl the Melted Chocolate
Once the chocolate has softened, uncover the mixture and gently swirl it using a knife or spatula, creating a marbled appearance. This not only looks beautiful but ensures the chocolate is evenly distributed across the surface of your Christmas Toffee for added flavor and texture.

Step 11: Add Final Touches
Finely chop a handful of pecans and sprinkle them on top of the melted chocolate, adding an extra crunch to each bite. If desired, complete your toffee with a sprinkle of flaked sea salt for a delightful contrast against the sweetness. This enhancement will elevate your Christmas Toffee to gourmet status.

Step 12: Cool the Toffee
Allow the Christmas Toffee to cool completely for about 4 hours at room temperature, or place it in the fridge to speed up the process if you can’t wait! Proper cooling ensures that the toffee sets firmly, enabling easy slicing or breaking apart into delightful pieces.

Step 13: Remove and Cut
Once the toffee has set and is fully cooled, lift it out of the pan using the edges of the parchment paper. Transfer to a cutting board, and, using a sharp knife, cut the toffee into squares or break into pieces with your hands. Make sure each piece highlights the delicious layers of crunch and chocolate!

Christmas Toffee

Expert Tips for Christmas Toffee

Choosing the Right Nuts: Use fresh nuts: stale nuts can ruin the flavor; toast them lightly for added crunch and richness.

Candy Thermometer: Keep it close: ensure your thermometer doesn’t touch the bottom of the pot for accurate readings and perfect toffee texture.

Cooling Time: Don’t rush it: letting the toffee cool completely before cutting ensures a clean, crisp texture in each piece.

Chocolate Melting: Cover it up: after sprinkling chocolate chips, covering the dish helps the chips melt evenly, making swirling easier.

Avoiding Sticky Toffee: Use unsalted butter: this prevents the toffee from becoming overly greasy or sticking more than necessary, enhancing your Christmas Toffee bliss!

What to Serve with Christmas Toffee

Indulging in homemade treats is always better when paired with the perfect accompaniments that enhance your festive experience.

  • Creamy Hot Chocolate: A warm mug of rich hot chocolate complements the sweet, crunchy toffee perfectly; add a marshmallow or two for extra fun!

  • Spiced Glühwein: This warm, spiced wine brings cozy holiday vibes while its aromatic spices enhance the buttery flavors of the toffee.

  • Gingerbread Cookies: The soft, spicy notes of gingerbread pair beautifully with the sweetness of Christmas Toffee, making each bite a festive delight.

  • Nutty Ice Cream: A smooth, nut-flavored ice cream provides a contrasting temperature and texture, creating a heavenly balance with your crunchy toffee.

  • Apple Cider: Warm apple cider, infused with cinnamon, brings comforting flavors that harmonize with the nutty toffee for a delightful duo.

  • Raspberry Tart: The tartness of a fresh raspberry tart cuts through the sweetness, offering a refreshing contrast that brightens the holiday table.

These pairing ideas transform your Christmas Toffee into a luxurious experience, making your seasonal celebrations even more magical. Enjoy!

Make Ahead Options

These Christmas Toffee bites are perfect for busy home cooks who want to save time during the holiday season! You can prepare the toffee base—combining butter, sugar, water, and salt—up to 24 hours in advance. Simply store it in an airtight container in the refrigerator after it has cooled. When you’re ready to finish, warm the mixture slightly and layer it over the nuts, then follow the steps to add the chocolate. To maintain the quality of your Christmas Toffee, keep it in a cool, dry place in an airtight container for up to 3 days before serving. This way, you can enjoy homemade sweets with minimal effort on the day of your gathering.

Christmas Toffee Variations & Substitutions

Feel free to explore these creative ideas to make your Christmas Toffee truly your own and delightful for any palate!

  • Nut-Free: Substitute the nuts with a layer of additional chocolate or crushed pretzels for a crunchy alternative.
  • Coconut Twist: Add shredded coconut on top before pouring chocolate for a tropical flair that pairs wonderfully with toffee!
  • Spicy Kick: Mix in a sprinkle of cayenne pepper or chili powder to elevate the flavor profile with a surprising heat.
  • Maple Flavor: Replace vanilla extract with maple extract for a cozy, warm flavor that perfectly complements the toffee’s sweetness.
  • Dairy-Free: Use coconut oil in place of butter, and opt for dairy-free chocolate chips to create a vegan-friendly treat that everyone can enjoy.
  • Caramel Infusion: Pour a thin layer of caramel sauce on top of the warm toffee before adding chocolate for an extra layer of indulgence.
  • Fruit Addition: Sprinkle some dried cranberries or cherries on top for a pop of color and a sweet-tart contrast to the rich toffee.
  • Herbal Notes: Infuse butter with a sprig of rosemary or thyme during melting for a surprising herby twist that’ll surprise your taste buds.

Experimenting with these variations will not only enhance your Christmas Toffee but might inspire new family favorites. Each twist is a chance to personalize this timeless treat, just like you would with a hearty homemade soup or comforting casserole. Plus, when you find the perfect combination, don’t forget to check out more ideas for holiday gifts like holiday cookie kits and chocolate bark!

How to Store and Freeze Christmas Toffee

Room Temperature: Store in an airtight container at room temperature for up to 2 weeks. Make sure it’s cool completely before sealing to prevent moisture buildup.

Fridge: If you prefer a firmer texture, store your Christmas Toffee in the fridge, where it can last for up to 4 weeks in an airtight container.

Freezer: To freeze, wrap individual pieces of Christmas Toffee in plastic wrap and then place them in a freezer-safe bag. They can be kept for up to 2 months.

Reheating: If chilled or frozen, allow the toffee to come to room temperature before serving. You can also briefly microwave it in 5-second increments to soften for a fresh taste!

Christmas Toffee

Christmas Toffee Recipe FAQs

How do I choose the right nuts for my Christmas Toffee?
Absolutely! Use fresh nuts for the best flavor; stale nuts can ruin the taste. If you want to elevate their crunchiness and richness, lightly toast them in a dry skillet over medium heat for about 5-7 minutes, stirring frequently, until they’re golden brown and fragrant.

How should I store my Christmas Toffee?
You can store your Christmas Toffee in an airtight container at room temperature for up to 2 weeks. Make sure it has cooled completely before sealing it to avoid moisture buildup, which can cause it to become sticky. If you prefer a firmer texture, refrigerate it for up to 4 weeks in the same manner.

Can I freeze Christmas Toffee?
Certainly! To freeze, wrap individual pieces of your Christmas Toffee in plastic wrap and then place them in a freezer-safe bag. They can be kept in the freezer for up to 2 months. When you’re ready to enjoy a piece, simply let the toffee come to room temperature before serving, or microwave it briefly in 5-second increments to soften.

What if my toffee doesn’t reach the correct temperature?
Very! If your toffee mixture hasn’t reached the hard crack stage (300°F or 149°C), it may not set properly. If you’re struggling, ensure the candy thermometer is correctly positioned, not touching the pot’s bottom. If it gets too cool, you can reheat it gently on the stove until it reaches the right temperature, stirring constantly.

Are there any dietary considerations for Christmas Toffee?
Yes! If you have allergies, be cautious, as this recipe includes butter, nuts, and chocolate, which are common allergens. For a dairy-free alternative, you can substitute the butter with a plant-based version. Also, ensure the chocolate chips are dairy-free if needed. Always check packaging for allergen information if sharing with friends or family!

Can I customize my Christmas Toffee toppings?
Very! One of the best parts of this recipe is its flexibility. Feel free to swap out the nuts for your favorites, like walnuts or pistachios. You can also experiment with different types of chocolate, such as dark or white chocolate, or even add sprinkles or crushed candies on top for a festive touch.

Delicious Homemade Christmas Toffee for Holiday Treats

This Christmas Toffee combines a sweet buttery base with rich chocolate and crunchy nuts for an irresistible holiday treat.

  • medium-sized pot
  • Candy thermometer
  • 9×9 inch baking dish

Toffee Ingredients

  • 1 cup chopped pecans or almonds (a nutty crunch that enhances the toffee’s texture; choose your favorite or mix both for variety)
  • 1 cup unsalted butter (adds richness and creaminess)
  • 1 cup granulated sugar (the sweet base for your toffee)
  • 2 tablespoons water (helps dissolve the sugar for a smooth mixture)
  • 1/2 teaspoon salt (balances the sweetness)
  • 1 teaspoon pure vanilla extract (infuses warmth and depth)

Topping Ingredients

  • 1 cup chocolate chips (dark or milk chocolate works beautifully)
  • to taste flaked sea salt (optional, for a gourmet touch)

Toffee Preparation

  1. Gather your ingredients: chopped pecans or almonds, butter, granulated sugar, water, salt, vanilla, and chocolate chips. Prepare a 9×9 inch baking dish lined with parchment paper.
  2. Line your baking dish with parchment paper and spread 1 cup of chopped pecans or almonds on the bottom.
  3. In a pot, combine butter, granulated sugar, water, and salt. Heat on medium, stirring frequently until the butter melts and the mixture bubbles gently.
  4. Attach a candy thermometer and allow the mixture to heat up, stirring occasionally, until it reaches 300°F (149°C).
  5. Remove the pot from heat once it reaches 300°F to prevent overcooking. Be cautious as the mixture is extremely hot.
  6. Stir in 1 teaspoon of vanilla extract into the hot toffee mixture until evenly mixed.
  7. Pour the hot toffee mixture over the layer of pecans or almonds in the dish and spread it evenly.
  8. After 2 minutes of cooling, sprinkle 1 cup of chocolate chips over the warm toffee.
  9. Cover the dish with foil or a baking sheet and let it sit for 4 minutes to melt the chocolate chips.
  10. Uncover and swirl the melted chocolate with a knife or spatula to create a marbled appearance.
  11. Sprinkle finely chopped pecans and optional flaked sea salt on top of the chocolate.
  12. Allow the toffee to cool completely for about 4 hours at room temperature.
  13. Once set, lift the toffee out of the pan using the parchment paper edges and cut into squares.

Store in an airtight container at room temperature for up to 2 weeks, or in the fridge for up to 4 weeks. For freezing, wrap individually and store in a freezer-safe bag for up to 2 months.

Dessert
American
Christmas Toffee, festive sweets, gift ideas, holiday treats, homemade candy, toffee recipe

Filed Under: Dessert

Irresistible Chocolate Rice Krispie Balls for Your Sweet Cravings

October 8, 2025 by grace bellamy Leave a Comment

As I stood in the kitchen, the sweet, nutty aroma of melting peanut butter filled the air, instantly transporting me back to my childhood. There’s something magical about the simplicity of no-bake desserts, and these Chocolate Rice Krispie Balls are no exception. Not only are they a breeze to whip up, but they also cater to your craving for both sweet and crunchy in every delightful bite. With a handful of ingredients, this versatile treat allows for endless possibilities; change up the nut butter, get creative with different toppings, or enjoy them straight up. These little gems are perfect for stashing away for a late-night snack or serving at your next gathering. Are you ready to dive into a delightful world of chocolatey goodness? Let’s roll up our sleeves!

Chocolate Rice Krispie Balls

Why are Chocolate Rice Krispie Balls a must-try?

Simplicity: With just a few staples, these no-bake treats come together in minutes, making them perfect for any skill level.
Decadent Flavors: The rich combination of peanut butter and chocolate creates a treat that both kids and adults will crave!
Versatile: Feel free to experiment with different nut butters or toppings, allowing for personalized creations every time!
Crowd-Pleaser: Great for gatherings, these bite-sized delights will disappear faster than you can say “delicious.”
Easy Storage: They keep wonderfully in the fridge, so you can enjoy them anytime the sweet tooth strikes! If you’re looking for more quick and delightful treats, check out our other snack ideas!

Chocolate Rice Krispie Balls Ingredients

Get ready to whip up these delightful treats!

For the Base

  • Creamy or crunchy peanut butter – A smooth consistency makes these chocolate rice Krispie balls easy to form and deliciously nutty.
  • Unsalted butter – It adds richness and keeps the mixture from being too dry.
  • Powdered sugar – This sweetens the base and gives it that melt-in-your-mouth texture.
  • Vanilla extract – A splash of this enhances the overall flavor of the chocolate rice Krispie balls beautifully.

For the Crunch

  • Crispy rice cereal – The star ingredient that provides that satisfying crunch and holds the candies together.

For the Coating

  • Semi-sweet or dark chocolate chips or melting wafers – Melting these will cover your balls in a rich chocolate layer; choose according to your sweetness preference.

Feeling inspired? Let’s create something magical in the kitchen together!

Step‑by‑Step Instructions for Chocolate Rice Krispie Balls

Step 1: Mix the Base
In a large bowl, combine 1 cup of creamy or crunchy peanut butter with 4 tablespoons of unsalted butter. Using a spatula, mix these two ingredients together until smooth and creamy, which should take about 2-3 minutes. This will create a rich base for your Chocolate Rice Krispie Balls, so make sure there are no lumps before moving on.

Step 2: Add Flavoring
Next, pour in 1 teaspoon of vanilla extract and mix it thoroughly into the peanut butter and butter mixture. Stir until the extract is fully blended, usually around 1-2 minutes. This step enhances the flavor beautifully, infusing your Chocolate Rice Krispie Balls with a delightful aroma that will tempt your taste buds.

Step 3: Sweeten the Mixture
Gradually add 2 cups of powdered sugar into the bowl, mixing continuously until you achieve a thick, creamy consistency. This should take about 3-4 minutes. The sugar will sweeten your mixture and help it hold together, making it essential for the perfect texture of your Chocolate Rice Krispie Balls.

Step 4: Fold in the Crunch
Gently fold in 1 ½ cups of crispy rice cereal, ensuring each piece is evenly coated in the peanut butter mixture. Take your time here, about 2-3 minutes, as this cereal provides the crunch that complements the rich flavors of Chocolate Rice Krispie Balls. You’ll want to see the cereal fully incorporated without it breaking apart.

Step 5: Shape the Balls
Using your hands, scoop out portions of the mixture and shape them into 1-inch balls. Place each ball onto a parchment-lined baking sheet as you go. This step should take approximately 5 minutes, and you’ll know it’s done when you have a beautiful array of Chocolate Rice Krispie Balls ready for chilling!

Step 6: Chill and Firm Up
Once shaped, place the baking sheet with the balls in the freezer and chill for at least 20 minutes. This will help firm them up, making them easier to coat in chocolate later. After 20 minutes, the balls should feel slightly firm to the touch, signaling they’re ready for the next step.

Step 7: Melt the Chocolate
While the balls chill, melt 8-10 ounces of semi-sweet or dark chocolate using a double boiler or microwave. Stir constantly until smooth, about 2-3 minutes in the microwave (checking every 30 seconds) or until fully melted using the double boiler. If the chocolate seems too thick, stir in 1-2 teaspoons of vegetable oil for a smoother consistency.

Step 8: Coat the Balls
Using a toothpick or dipping tool, dip each chilled ball into the melted chocolate, ensuring it’s evenly coated. Allow any excess chocolate to drip off, then carefully return the coated Chocolate Rice Krispie Balls back to the parchment-lined sheet. This should be done quickly for the chocolate to adhere well.

Step 9: Set and Enjoy
Finally, let the chocolate-coated balls set completely at room temperature or place them in the fridge for about 10-15 minutes. You’ll know they’re ready when the chocolate is firm to the touch. Once set, your delicious Chocolate Rice Krispie Balls are ready to be enjoyed as a sweet, crunchy snack!

Chocolate Rice Krispie Balls

What to Serve with Chocolate Rice Krispie Balls?

Indulging in these delightful treats opens the door to a world of delicious pairings that enhance the experience.

  • Refreshing Fruit Salad: A light and fruity accompaniment balances the rich chocolate and peanut butter flavors, providing a palate-cleansing contrast.

  • Vanilla Ice Cream: Serving a scoop of creamy vanilla ice cream brings a classic touch, perfectly complementing the crunchy texture of the chocolate rice Krispie balls.

  • Nutty Granola: Crunchy granola made with nuts and honey adds an earthy flavor dimension, creating a delightful texture harmony with each bite.

  • Caramel Dipping Sauce: For those who feel adventurous, a drizzle of warm caramel elevates the sweetness, turning an ordinary snack into a gourmet experience.

  • Hot Chocolate: Sip on a mug of rich hot chocolate for a cozy pairing. The warmth enhances the chocolate, making each sweet bite even more irresistible.

  • Coffee or Espresso: The bold bitterness of coffee contrasts beautifully with the sweet, crunchy treats, making for an energizing afternoon snack.

  • Chewy Cookies: Consider pairing with some homemade oatmeal or chocolate chip cookies for a deliciously indulgent dessert spread that will please all ages.

  • Chocolate-Covered Strawberries: For an elegant touch, these fruity bites add freshness while mirroring the chocolatey essence of your treats.

  • Chilled Milk: Can’t go wrong with a classic! The creaminess of milk is the perfect way to savor these bites, especially for the kids.

  • Sparkling Water with Lemon: To cleanse the palate, serve sparkling water with a hint of lemon for a refreshing finish after each sweet morsel.

Make Ahead Options

These Chocolate Rice Krispie Balls are perfect for meal prep enthusiasts! You can prepare the base mixture up to 24 hours in advance; just shape the balls and chill them in the freezer. Store the uncoated balls in an airtight container to maintain their freshness and texture. When you’re ready to finish them, simply melt the chocolate (this can be done in 3-5 minutes) and coat the chilled balls. Place the coated Chocolate Rice Krispie Balls back on the parchment-lined sheet and allow the chocolate to set completely before enjoying. This approach not only saves time but ensures you can whip up a delightful treat at a moment’s notice!

How to Store and Freeze Chocolate Rice Krispie Balls

Fridge: Store your Chocolate Rice Krispie Balls in an airtight container in the fridge for up to 1 week. They’ll stay fresh and ready to enjoy whenever the sweet tooth strikes!

Freezer: For longer storage, freeze the balls in a single layer on a baking sheet until solid, then transfer to a zip-top bag for up to 2 months. Simply thaw in the fridge before serving!

Reheating: There’s no need to reheat these no-bake treats, as they are best enjoyed chilled. You can grab them straight from the fridge or freezer for a refreshing snack!

Wrap It Up: Ensure each ball is individually wrapped in plastic wrap or parchment before freezing. This will keep them from sticking together and maintain their chocolatey goodness!

Expert Tips for Chocolate Rice Krispie Balls

Perfect Peanut Butter: Use room temperature peanut butter for easy mixing. If it’s refrigerated, it can be difficult to blend with the butter and sugar.

Chill Effectively: Don’t skip the chilling step! This firms up the mixture, making it easier to shape into balls that hold together beautifully.

Smooth Coating: If your chocolate isn’t melting smoothly, add a teaspoon of vegetable oil to achieve a nice, glossy finish. This makes your Chocolate Rice Krispie Balls look even more tempting!

Avoid Overmixing: Be gentle when folding in the crispy rice cereal. Overmixing can crush the cereal and diminish that delightful crunch we all love!

Customize Flavors: Feel free to experiment with different nut butters or toppings. The sky’s the limit, making these Chocolate Rice Krispie Balls a truly versatile treat!

Chocolate Rice Krispie Balls Variations

Feel free to get creative with these delightful treats, ensuring every batch has a unique twist that suits your taste buds!

  • Nut Butter Swap: Substitute peanut butter with almond, cashew, or sunflower seed butter for a different nutty flavor.

  • Coconut Delight: Fold in ½ cup of shredded coconut for a tropical twist that adds a chewy texture. You’ll love the way coconut complements the rich chocolate!

  • Crunchy Add-Ins: Incorporate chopped nuts, mini marshmallows, or crispy bacon pieces into the mixture for an unexpected crunch that will surprise your palate.

  • Spicy Kick: Add a pinch of cayenne pepper or a sprinkle of crushed red pepper flakes to the chocolate for a subtle heat that elevates the dessert experience.

  • Sweet Toppings: Drizzle melted white chocolate or caramel sauce on top for added sweetness and visual appeal. This adds a gorgeous finish and an irresistible flavor that everyone will love!

  • Flavor Infusion: Experiment with flavored extracts like almond or hazelnut instead of vanilla extract for an exciting new taste sensation. Each extract brings a distinct aroma, enhancing your Chocolate Rice Krispie Balls beautifully.

  • Fruit Essence: Mix in dried fruits like cranberries, raisins, or chopped dates for a burst of natural sweetness and chewiness. The contrast of flavors will leave you wanting more!

  • Decadent Dipping: Instead of just chocolate, try covering the balls in melted peanut butter or drizzling it over the top for a peanut buttery explosion of flavor. You can’t go wrong with a little extra peanut butter love!

If you’re looking for more ways to customize your treats, be sure to check out our easy storage tips to keep them fresher for longer or explore other snack ideas to spark your creativity!

Chocolate Rice Krispie Balls

Chocolate Rice Krispie Balls Recipe FAQs

How do I choose the right peanut butter?
Absolutely! For the best results, opt for creamy peanut butter as it blends smoothly with the other ingredients, giving your Chocolate Rice Krispie Balls a luscious texture. If you’re a fan of the crunch, go for crunchy peanut butter, but remember, it may alter the mixing dynamics a little, so be sure to blend thoroughly!

How should I store my Chocolate Rice Krispie Balls?
To keep your Chocolate Rice Krispie Balls fresh, store them in an airtight container in the refrigerator for up to 1 week. They’ll maintain their deliciousness, ready for any sweet craving that strikes! Just be sure to separate layers with parchment paper if you’re stacking them.

Can I freeze these balls?
Yes indeed! For longer storage, you can freeze your Chocolate Rice Krispie Balls. First, arrange them in a single layer on a baking sheet and freeze until solid—this usually takes about 1-2 hours. Once they are firm, transfer them to a zip-top bag, where they’ll stay good for up to 2 months. To enjoy, simply thaw in the refrigerator before serving!

What should I do if my chocolate coating is too thick?
Oh no, we want your balls to look fabulous! If your melted chocolate is too thick, simply add 1-2 teaspoons of vegetable oil and stir until it’s smooth and glossy. This little trick not only makes the coating easier but also results in a beautiful finish for your Chocolate Rice Krispie Balls!

Are there any allergy concerns with this recipe?
It’s very important to consider dietary preferences! If you’re making these for someone with peanut allergies, feel free to substitute the peanut butter with sun butter or almond butter. Just remember to check for allergies in other ingredients like chocolate or toppings! Always ensure that ingredients are suitable for all those who will be enjoying these delightful treats!

Irresistible Chocolate Rice Krispie Balls for Your Sweet Cravings

Delightful no-bake Chocolate Rice Krispie Balls with a perfect blend of peanut butter and chocolate.

  • large bowl
  • spatula
  • Baking Sheet
  • parchment paper
  • double boiler or microwave

For the Base

  • 1 cup creamy or crunchy peanut butter
  • 4 tablespoons unsalted butter
  • 2 cups powdered sugar
  • 1 teaspoon vanilla extract

For the Crunch

  • 1.5 cups crispy rice cereal

For the Coating

  • 8-10 ounces semi-sweet or dark chocolate chips or melting wafers

Preparation Steps

  1. In a large bowl, combine 1 cup of creamy or crunchy peanut butter with 4 tablespoons of unsalted butter. Mix until smooth and creamy.
  2. Pour in 1 teaspoon of vanilla extract and mix thoroughly into the peanut butter and butter mixture.
  3. Gradually add 2 cups of powdered sugar, mixing continuously until thick and creamy.
  4. Gently fold in 1 ½ cups of crispy rice cereal until evenly coated.
  5. Shape the mixture into 1-inch balls and place on a parchment-lined baking sheet.
  6. Chill the balls in the freezer for at least 20 minutes to firm up.
  7. Melt 8-10 ounces of chocolate, stirring until smooth.
  8. Dip each chilled ball into the melted chocolate until evenly coated, and return to the parchment-lined sheet.
  9. Let the chocolate-coated balls set completely at room temperature or in the fridge for about 10-15 minutes.

For best results, use room temperature peanut butter and avoid overmixing the cereal to keep the crunch intact.

Dessert
American
chocolate, Chocolate Rice Krispie Balls, easy treats, No-Bake Dessert, Peanut Butter, snacks

Filed Under: Dessert

Delightful Festive Peppermint Float to Brighten Your Holidays

October 8, 2025 by grace bellamy Leave a Comment

The delicate aroma of peppermint wafting through the air instantly transports me to cozy holiday gatherings, where laughter mingles with the clinking of glasses. This Festive Peppermint Float captures all those joyful moments in a delightful drink that’s perfect for any celebration. With just a few simple steps, you can whip up this festive beverage that not only dazzles the senses but also brings people together—imagine serving it at your next party and watching everyone’s faces light up! Plus, it’s a total crowd-pleaser, and the combination of fizzy goodness topped with creamy ice cream is sure to make hearts—and taste buds—happy. Curious about how to make this magical holiday treat? Let’s dive in!

Festive Peppermint Float

Why Is the Festive Peppermint Float Special?

Delightful flavors come together in this drink, combining the refreshing taste of peppermint with smooth ice cream for a truly festive experience. Quick and easy to prepare, you can have this holiday treat ready in a matter of minutes—perfect for last-minute gatherings. Endless versatility means you can customize it with different sodas or toppings to match your style. Family-friendly fun makes this a hit with both kids and adults alike. For tips on creating a perfect holiday drink spread, check out our holiday beverage guide!

Festive Peppermint Float Ingredients

• Let’s gather the ingredients to make this delightful drink!

For the Base

  • Peppermint soda – This adds that classic minty flavor that makes the Festive Peppermint Float so special.
  • Lemon-lime soda – A splash of this fizzy drink harmonizes the sweetness and enhances the refreshing quality.

For the Ice Cream

  • Vanilla ice cream – Creamy and smooth, it balances the fizzy soda perfectly for a rich texture.

For the Garnish

  • Crushed peppermint candy – Not only does this add a beautiful sprinkle of color, but it also provides that extra crunch and minty sweetness on top.
  • Whipped cream (optional) – A dollop of whipped cream adds a luxurious finish to your float.

Get ready to splash some cheer into your gatherings with this Festive Peppermint Float, and delight everyone at your holiday table!

Step‑by‑Step Instructions for Festive Peppermint Float

Step 1: Prepare Your Serving Vessel
Start by taking a large punch bowl or a beverage jar, ensuring it’s clean and ready for mixing. This is where the magic of your Festive Peppermint Float will happen! Choose a vessel that holds at least 2 quarts to accommodate all the bubbly goodness. Set it on a flat surface to make pouring and serving easier later on.

Step 2: Blend the Ingredients
Add your peppermint soda and lemon-lime soda into the punch bowl. Pour both sodas simultaneously to create a beautiful fizz that adds excitement to your float. Stir gently for about 30 seconds, ensuring all the flavors meld perfectly together and create a refreshing base. You’ll know it’s ready when the mixture appears bubbly yet well-combined.

Step 3: Pour into Glasses
Using a ladle or measuring cup, carefully pour the fizzy mixture into your serving glasses. Aim to fill each glass about three-quarters full, leaving some space for that delightful ice cream scoop. This stage should take around 5 minutes, allowing everyone to see the enticing bubbly liquid and anticipate the next delicious step.

Step 4: Top with Ice Cream
Now, for the star of the show! Add a generous scoop of vanilla ice cream to each glass, allowing it to gently float on top of the fizzy mixture. The ice cream should slowly start to melt, creating a luxurious swirl in your Festive Peppermint Float. Take your time with this step to ensure each glass is beautifully presented and ready for all to enjoy.

Step 5: Garnish with Peppermint Candy
Sprinkle a handful of crushed peppermint candy over the ice cream tops, ensuring each glass sparkles with festive cheer. This adds a colorful crunch and enhances the peppermint flavor, making your drink visually appealing. This step is quick, taking only about 2 minutes, but it makes a delightful difference in presentation.

Step 6: Serve with Love
Finally, present each glass with a spoon and a straw for easy sipping and enjoyment. Encourage your loved ones to dive in immediately, as the combination of flavors is best enjoyed fresh! Gather everyone around, and watch their faces light up as they take the first sip of this deliciously festive Peppermint Float.

Festive Peppermint Float

How to Store and Freeze Festive Peppermint Float

Fridge: Keep any leftover Peppermint Float in the fridge for up to 2 days, but be aware that the fizz will diminish over time.

Freezer: You can freeze the mixture (without ice cream) for up to 1 month. Just pour it into an airtight container, leaving some space for expansion.

Reheating: When ready to enjoy, simply defrost in the fridge overnight and add fresh ice cream to revive the festive flavors.

Ice Cream Storage: If you have leftover ice cream, store it in the freezer in its original container or an airtight one, where it can stay fresh for up to 2 weeks.

Helpful Tricks for Festive Peppermint Float

  • Choose the Right Soda: Opt for a high-quality peppermint soda for an authentic flavor. Generic sodas may lack the festive zing that elevates your Festive Peppermint Float.

  • Ice Cream Matters: Use good-quality vanilla ice cream with high butterfat content. This ensures a creamy texture that balances perfectly with the fizzy base.

  • Mind the Fizz: Pour the sodas slowly to maintain carbonation. Adding them too quickly can cause excessive fizz overflow and a less appealing presentation.

  • Garnish Generously: Don’t skimp on the crushed peppermint candy. A generous sprinkle not only adds flavor but makes your drinks visually stunning.

  • Serve Immediately: To enjoy the perfect combination of flavors and textures, serve your floats right after preparing. The longer they sit, the more the ice cream melts.

Festive Peppermint Float Variations

Feel free to get creative with your Festive Peppermint Float and explore these delicious twists!

  • Dairy-Free: Substitute the vanilla ice cream with coconut or almond milk ice cream for a creamy yet plant-based delight.
    The rich texture of dairy-free ice creams can elevate the float while keeping it festive and inclusive for everyone.

  • Chocolate Twist: Add chocolate syrup drizzled on top of the ice cream for a sweet complement to the minty flavors.
    This sweet addition introduces a decadent layer, making it a chocolate-lover’s paradise alongside the refreshing peppermint.

  • Fruit Infusion: Mix in some fresh raspberries or crushed strawberries to add a fruity flair to your float.
    The pop of color and flavor from the berries not only looks terrific but also adds a tangy sweetness that enhances the overall taste.

  • Spicy Kick: Sprinkle in a dash of cayenne pepper or cinnamon for a surprising burst of heat and warmth.
    This twist adds an exciting contrast, balancing the chill of the peppermint with a gentle warmth that’s perfect for cozy gatherings.

  • Mocktail Version: Replace the sodas with elderflower cordial mixed with sparkling water for a sophisticated twist on the classic float.
    This unique blend invites a floral sweetness that’s still festive but feels elegant enough for any gathering.

  • Gourmet Garnish: Top your float with a dollop of whipped cream and a drizzle of chocolate or caramel sauce for the ultimate treat.
    This indulgent finishing touch creates a luxurious wow factor that guests will rave about long after the last sip.

  • Citrus Burst: Instead of lemon-lime soda, try using a splash of orange soda for a zesty, refreshing taste.
    This simple swap packs a fruity punch, creating a delightful medley that will enchant everyone at your holiday table.

  • Alcoholic Version: Add a splash of peppermint schnapps for an adults-only version that’s as festive as it is fun.
    With just a touch of spirit, this variation gives the float a warm, inviting feel that’s perfect for holiday celebrations!

Don’t hesitate to explore these variations for a personal touch, and watch your guests fall in love all over again with this delightful drink!

Make Ahead Options

These Festive Peppermint Floats are perfect for meal prep during the bustling holiday season! You can mix the peppermint and lemon-lime sodas together up to 24 hours in advance and store the mixture in the refrigerator to keep it fizzy and fresh. Just remember to wait to add the ice cream and peppermint candy until you’re ready to serve, as this ensures each float maintains its delightful texture and presentation. When it’s time to celebrate, simply pour the prepped soda mixture into glasses, top each with a scoop of vanilla ice cream, garnish with crushed peppermint candy, and enjoy a festive drink that feels special and saves you time!

What to Serve with Festive Peppermint Float

As you gather around with loved ones, imagine a delightful spread that beautifully complements this joyful beverage!

  • Gingerbread Cookies: These classic treats bring warm spices that pair perfectly with the refreshing float, enhancing the holiday spirit.
  • Cheesy Pigs in a Blanket: The savory bites offer a fantastic contrast to the sweet float, making them perfect for mingling and sharing.
  • Winter Fruit Salad: A mix of seasonal fruits like oranges and pomegranates adds a vibrant, fresh pop, balancing the rich and sweet flavors.
  • Chocolate Fudge Brownies: These fudgy delights provide a rich, decadent treat that brings extra indulgence to your festivities.
  • Hot Cocoa Bar: Offer a cozy drink option alongside the float, allowing guests to choose their toppings, from marshmallows to candy canes, for a festive twist.
  • Honey Glazed Ham: For something savory, this dish makes an exquisite pairing, with its sweetness echoing the float while offering a hearty option.
  • Sparkling Cider: As a beverage complement, this bubbly option echoes the festive effervescence of the float while adding a touch of crispness.
  • Peppermint Bark: Create visual and flavor cohesion by pairing this sweet treat, as the minty flavors align beautifully with your Peppermint Float.
  • Sugar Cookies: These soft, buttery cookies provide a deliciously understated sweetness that pairs harmoniously without overpowering the main drink.

Festive Peppermint Float

Festive Peppermint Christmas Float Recipe FAQs

What kind of peppermint soda should I use?
Opt for a high-quality peppermint soda for the best flavor. It’s essential to choose a brand that has a strong, authentic minty taste, as this enhances the overall experience of your Festive Peppermint Float. Generic sodas may not deliver that delightful zing that makes this drink truly special.

How long can I store leftover Festive Peppermint Float?
You can keep any leftover Peppermint Float in the fridge for up to 2 days, but keep in mind that the fizz will fade over time. If you want to maintain some bubbles, consider only preparing what you think you’ll consume, and enjoy the leftovers as a refreshing treat the next day!

Can I freeze my Festive Peppermint Float?
Absolutely! You can freeze the soda mixture (without ice cream) for up to 1 month. Just pour it into an airtight container, leaving room for expansion as the liquid freezes. When you’re ready to enjoy it, let it defrost in the fridge overnight, then add fresh ice cream to revive the flavors.

What should I do if my float overflows while pouring the sodas?
If you find that your mixture is fizzing excessively and threatening to spill over, take a breather! Simply stop pouring, allow the fizz to settle for a moment, then continue pouring slowly. This approach helps maintain that delightful, effervescent presentation of your Festive Peppermint Float.

Are there any dietary considerations for this drink?
Yes! If you’re serving this at a gathering, be aware of any guests with dairy allergies or those avoiding certain sugars. Consider using dairy-free ice cream or a sugar-free soda option as alternatives. Always check ingredient labels to ensure they align with guests’ dietary needs and preferences.

Delightful Festive Peppermint Float to Brighten Your Holidays

This Festive Peppermint Float is a delightful drink that captures the joy of holiday gatherings.

  • Large punch bowl or beverage jar

For the Base

  • 2 cups peppermint soda (This adds that classic minty flavor that makes the Festive Peppermint Float so special.)
  • 2 cups lemon-lime soda (A splash of this fizzy drink harmonizes the sweetness and enhances the refreshing quality.)

For the Ice Cream

  • 4 scoops vanilla ice cream (Creamy and smooth, it balances the fizzy soda perfectly for a rich texture.)

For the Garnish

  • 1/2 cup crushed peppermint candy (Adds a beautiful sprinkle of color and provides extra crunch and minty sweetness.)
  • 1 cup whipped cream (A dollop of whipped cream adds a luxurious finish to your float.)

Step‑by‑Step Instructions

  1. Prepare Your Serving Vessel: Take a large punch bowl or beverage jar, ensuring it’s clean and ready for mixing.
  2. Blend the Ingredients: Add peppermint soda and lemon-lime soda into the punch bowl and stir gently for about 30 seconds.
  3. Pour into Glasses: Carefully pour the fizzy mixture into your serving glasses, filling each glass about three-quarters full.
  4. Top with Ice Cream: Add a generous scoop of vanilla ice cream to each glass, allowing it to gently float on top.
  5. Garnish with Peppermint Candy: Sprinkle a handful of crushed peppermint candy over the ice cream tops.
  6. Serve with Love: Present each glass with a spoon and a straw for easy sipping and enjoyment.

Keep any leftover Peppermint Float in the fridge for up to 2 days, and freeze the mixture (without ice cream) for up to 1 month.

Drink
festive beverage, Festive Peppermint Float, holiday drink, peppermint soda, vanilla ice cream

Filed Under: Drink

Cranberry Cream Cheese Crescent Bites for Sweet Cravings

October 8, 2025 by grace bellamy Leave a Comment

As I took that first bite of a warm Cranberry Cream Cheese Crescent Bite, I could almost hear the holiday chatter and laughter filling my kitchen. These delightful little treats not only capture the cozy essence of home but are also incredibly simple to whip up, making them the perfect crowd-pleaser for any gathering. With just 10 minutes of prep time and the divine combination of creamy filling and tangy cranberry sauce, you can impress your family and friends effortlessly. Plus, they’re a fantastic alternative to store-bought snacks, ensuring you bring homemade warmth to the table. Ready to elevate your next gathering with a burst of flavor and nostalgia? Let’s dive into this easy recipe!

Cranberry Cream Cheese Crescent Bites

Why are these bites a must-try?

Irresistible Flavor: The sweet and tangy combination of cranberry sauce with creamy filling creates a delicious burst in every bite.

Quick and Easy: With just 10 minutes of prep and 13 minutes of baking, you’ll have delicious treats ready in no time!

Perfect for Any Occasion: Whether it’s a casual get-together or a holiday feast, these Cranberry Cream Cheese Crescent Bites are sure to impress your guests.

Versatile Options: Feel free to customize them with nuts or orange zest for added texture and flair.

Crowd-Pleaser: These bites cater to both sweet and savory lovers, ensuring everyone leaves satisfied.

Make these bites and experience the joy of homemade snacks that outshine any store-bought option!

Cranberry Cream Cheese Crescent Bites Ingredients

• Get ready to create these delightful bites with the following ingredients:

For the Dough

  • Crescent roll dough – This versatile dough provides a flaky and buttery base that perfectly complements the creamy filling.

For the Cream Cheese Filling

  • Cream cheese – Using softened cream cheese ensures a smooth, luscious texture that melts in your mouth.
  • Powdered sugar – Adds just the right amount of sweetness to balance the tanginess of the cranberry sauce.
  • Vanilla extract – A splash of vanilla enhances the flavor profile, making the filling even more irresistible.

For the Topping

  • Whole berry cranberry sauce – This provides a tart and fruity burst that pairs beautifully with the creamy filling.
  • Optional: chopped pecans – Add these for a delightful crunch that contrasts with the soft bites.
  • Optional: orange zest – A sprinkle of zest brings a bright citrus note that elevates the flavor.

Enjoy making these Cranberry Cream Cheese Crescent Bites, perfect for any gathering or a lovely afternoon treat!

Step‑by‑Step Instructions for Cranberry Cream Cheese Crescent Bites

Step 1: Preheat and Prepare
Begin by preheating your oven to 375°F (190°C). While the oven warms up, take a moment to grease or line a mini muffin tin with paper liners. This will help ensure your Cranberry Cream Cheese Crescent Bites release easily once baked, allowing for a perfect presentation at your next gathering.

Step 2: Mix the Cream Cheese Filling
In a medium mixing bowl, combine 4 oz of softened cream cheese, ¼ cup of powdered sugar, and ½ tsp of vanilla extract. Using a hand mixer or spatula, blend these ingredients until the mixture is smooth and creamy, which should take about 1-2 minutes. The filling will have a luscious and inviting texture that complements the tart cranberry sauce beautifully.

Step 3: Prepare the Dough
Open the can of crescent roll dough and unroll it onto a clean surface. Cut each triangle in half so you have smaller triangles that fit perfectly into the mini muffin cups. Gently press each triangle into the muffin tin, making sure to cover the bottom and sides. This flaky dough will provide a lovely base for your delectable bites.

Step 4: Fill the Dough Cups
Now it’s time to build those delightful layers! Spoon 1 teaspoon of the cream cheese filling into each dough cup, followed by 1 teaspoon of whole berry cranberry sauce. Be creative with the layering, as the combination of tangy and creamy will burst with flavor. Make sure each cup is filled to about three-quarters full to allow for some rise during baking.

Step 5: Add Toppings
If you’re feeling adventurous, now’s the moment to sprinkle some optional toppings on your Cranberry Cream Cheese Crescent Bites. You can add a few chopped pecans for a delightful crunch or a touch of orange zest for a citrusy kick. These toppings will enhance both the flavor and presentation of your bites, making them even more inviting.

Step 6: Bake to Perfection
Place the muffin tin in your preheated oven and bake for 11–13 minutes, or until the dough turns a beautiful golden brown. Keep an eye on them, as the smell of baking will fill your kitchen! Once done, remove the tin from the oven and let the bites cool slightly before serving, ensuring a perfect warm treat for your guests.

Cranberry Cream Cheese Crescent Bites

Make Ahead Options

These Cranberry Cream Cheese Crescent Bites are a delightful choice for busy home cooks looking to save time! You can prepare the cream cheese filling and store it in the refrigerator for up to 3 days in an airtight container, ensuring it stays fresh and creamy. Additionally, you can assemble the bites in the muffin tin without baking them and keep the filled cups in the fridge for up to 24 hours. Just remember to cover the muffin tin tightly with plastic wrap to prevent the dough from drying out. When you’re ready to serve, simply pop them into the oven straight from the fridge and bake as directed. You’ll have warm, luscious Cranberry Cream Cheese Crescent Bites with minimal effort, perfect for any occasion!

Cranberry Cream Cheese Crescent Bites Variations

Feel free to explore these delightful twists and variations that will make your Cranberry Cream Cheese Crescent Bites uniquely yours!

  • Gluten-Free: Use gluten-free crescent roll dough for a version everyone can enjoy. It offers the same flaky texture and delicious taste!

  • Nut-Free: Skip the pecans and use sunflower seeds instead for a similar crunch without nuts, perfect for those with allergies.

  • Spicy Kick: Mix in a pinch of cayenne pepper or red pepper flakes to the cream cheese filling for a surprising and delightful heat.

  • Berry Bliss: Swap the whole berry cranberry sauce for raspberry or blueberry preserves to create a different fruity filling that’s equally delicious.

  • Herbed Flavor: Incorporate fresh herbs like thyme or rosemary into the cream cheese mixture for an intriguing sophisticated taste that will impress your guests.

  • Savory Sensation: Replace the cranberry sauce with a savory tomato-basil sauce for a Mediterranean twist that creates a delightful contrast to the cream cheese.

  • Dairy-Free: Use a plant-based cream cheese and alternative sweetener like agave to create a dairy-free version without sacrificing flavor.

  • Dessert Dream: Add chocolate chips to the cream cheese filling for an indulgent dessert bite that’s sure to satisfy any sweet tooth!

These variations allow for endless creativity, so don’t hesitate to experiment! For some inspiration, you might also enjoy my other bite-sized treats like Mini Chocolate Chip Cookies or perfecting the art of Savory Spinach Feta Puffs. Embrace the joy of making these delicious creations that cater to every taste!

What to Serve with Cranberry Cream Cheese Crescent Bites

Elevate your delightful bites into a full meal experience with these irresistible pairings that bring warmth and cheer to the table.

  • Warm Spinach Salad: A light, warm spinach salad with a tangy vinaigrette provides a refreshing contrast to the richness of the bites, creating harmony in every bite.

  • Savory Apple and Walnut Salad: Crisp apples and crunchy walnuts combine for a sweet and nutty flavor explosion, perfectly balancing the tanginess of the cranberry sauce.

  • Garlic Butter Roasted Vegetables: The earthy taste of roasted veggies pairs wonderfully with the creamy and sweet bites, adding a colorful and nutritious element to your spread.

  • Homemade Butternut Squash Soup: A bowl of creamy soup adds warmth and comfort, making your gathering feel even cozier and perfectly complementing the bites.

  • Cranberry Ginger Tea: A cup of this fragrant tea mirrors the flavors in the bites while providing a soothing and festive beverage option that guests will adore.

  • Chocolate Chip Cookies: For a sweet ending, serve warm chocolate chip cookies that offer a classic dessert contrast, satisfying both sweet cravings and leaving a lasting impression.

  • Spiced Apple Cider: Serve a warm glass of spiced apple cider to invigorate your guests. The warmth and spices enhance the autumnal essence of the bites.

Each pairing adds a unique touch to your gathering, transforming your Cranberry Cream Cheese Crescent Bites into the star of a memorable meal!

How to Store and Freeze Cranberry Cream Cheese Crescent Bites

Fridge: Store leftover bites in an airtight container for up to 3 days. They’ll be ready for an easy snack anytime!

Freezer: Place cooled bites in a freezer-safe container, separating layers with parchment paper to prevent sticking. They can be frozen for up to 2 months.

Reheating: To enjoy them warm, reheat frozen bites in the oven at 350°F (175°C) for about 10-12 minutes, or until heated through.

Serving Tip: These Cranberry Cream Cheese Crescent Bites are best served slightly warm to enhance the creamy texture and flavors.

Expert Tips for Cranberry Cream Cheese Crescent Bites

  • Softened Cheese: Make sure the cream cheese is at room temperature for a smooth filling. Cold cream cheese can result in lumps and uneven texture.

  • Prevent Sticky Dough: Lightly flour your hands and work surface while handling the crescent dough to prevent stickiness. This simple trick will help with easy assembly.

  • Watch the Bake Time: Keep an eye on your bites in the oven; every oven is different. Look for a golden color rather than relying solely on the timer for perfect results.

  • Fill with Care: Don’t overfill the cups; leaving some space allows the bites to rise without spilling over. Aim for about three-quarters full for best results.

  • Customize Your Toppings: Feel free to experiment with toppings! Besides chopped pecans and orange zest, consider using crushed walnuts or even chocolate chips for a different twist.

  • Store Properly: If there are any leftovers, store them in an airtight container in the fridge for up to 3 days. Reheat them briefly in the oven for a warm treat later!

Cranberry Cream Cheese Crescent Bites

Cranberry Cream Cheese Crescent Bites Recipe FAQs

What kind of cranberry sauce should I use?
Absolutely use whole berry cranberry sauce for a delightful burst of flavor! This type has a rich texture and a sweet-tart balance that perfectly complements the creamy filling. Avoid jellied sauces, as they won’t provide the same delightful texture or taste.

How should I store leftover Cranberry Cream Cheese Crescent Bites?
Store any leftovers in an airtight container in the refrigerator for up to 3 days. Make sure they’re fully cooled before sealing to prevent condensation, which can make them soggy. When you’re ready to enjoy them again, just pop them in the oven to warm them up!

Can I freeze these bites? If so, how?
Yes! These bites freeze beautifully. Once cooled, place them in a freezer-safe container, separating layers with parchment paper to avoid sticking. They can be frozen for up to 2 months. When you want to eat them, reheat them in the oven at 350°F (175°C) for about 10-12 minutes or until heated through.

What can I do if the dough is too sticky to work with?
If you find the crescent roll dough is sticky, lightly flour your hands and the work surface before handling it. This will help prevent the dough from sticking and make it easier to press into the muffin tin. If it continues to be a hassle, you can even chill the dough for a few minutes to make it more manageable!

Are there any allergy considerations for this recipe?
Yes! This recipe contains dairy due to the cream cheese. If you’re making these for someone with a dairy allergy, you could use a dairy-free cream cheese alternative. Always check labels to ensure the alternatives you choose are free from allergens. Additionally, if you’re adding toppings like chopped pecans, be sure no one has a nut allergy!

Cranberry Cream Cheese Crescent Bites for Sweet Cravings

Delightful Cranberry Cream Cheese Crescent Bites that are simple to make, perfect for gatherings.

  • mini muffin tin
  • Mixing Bowl
  • hand mixer

For the Dough

  • 1 can crescent roll dough (This versatile dough provides a flaky and buttery base.)

For the Cream Cheese Filling

  • 4 oz cream cheese (Softened for a smooth texture.)
  • 1/4 cup powdered sugar (Adds sweetness to balance the tartness.)
  • 1/2 tsp vanilla extract (Enhances flavor profile.)

For the Topping

  • 1 cup whole berry cranberry sauce (Provides a tart burst of flavor.)
  • 1/4 cup chopped pecans (Optional for added crunch.)
  • 1 tsp orange zest (Optional for a citrusy flair.)

Step‑by‑Step Instructions

  1. Preheat your oven to 375°F (190°C) and prepare a mini muffin tin.
  2. Mix 4 oz of softened cream cheese, 1/4 cup of powdered sugar, and 1/2 tsp of vanilla extract in a bowl until smooth.
  3. Open the can of crescent roll dough, cut triangles in half and press them into the muffin tin.
  4. Spoon 1 tsp of cream cheese filling into each cup, followed by 1 tsp of cranberry sauce.
  5. Sprinkle with optional chopped pecans or orange zest.
  6. Bake for 11–13 minutes or until golden brown. Let cool slightly before serving.

Best served slightly warm. Store leftovers in an airtight container for up to 3 days, or freeze for up to 2 months.

Appetizer
American
Cranberry Cream Cheese Crescent Bites, dessert bites, Easy Recipe, holiday snacks, homemade, party food

Filed Under: Appetizer

Craft the Ultimate Hocus Pocus Snack Board for Halloween Fun

October 8, 2025 by grace bellamy Leave a Comment

As the crisp air of fall settles in and Halloween approaches, I can’t help but feel that familiar excitement bubbling up—the thrill of crafting something deliciously whimsical. This year, I’ve whipped up a Hocus Pocus Snack Board that pays homage to those enchanting characters we all adore. Picture this: three brie wheels transformed into the iconic witches, garnished with playful accents like Twizzlers and olives, transforming ordinary ingredients into a spellbinding centerpiece. Not only is this charcuterie board a feast for the eyes, but it’s also customizable, making it an ideal choice for your Halloween gatherings. Plus, it takes just 30 minutes to prepare, giving you more time to enchant your guests with tasty tales while they nibble on delightful bites. Are you ready to conjure up some fun in your kitchen? Let’s dive into this magical recipe together!

Hocus Pocus Snack Board

Why This Hocus Pocus Snack Board Rocks?

Customization is key—tailor the ingredients to your taste or dietary needs, making it entirely your own! Easy to Assemble and fun to create, this board will have everyone pitching in to add their favorite fruits and snacks. Visually Stunning, it’s not just food; it’s a Halloween work of art that captivates every guest. Perfect for All Ages, both kids and adults will love the whimsical design. And it takes only 30 minutes to prepare, allowing you to spend more time enjoying the festivities and sharing stories around the table. For a deeper dive into fun Halloween recipes, check out our Halloween gathering ideas.

Ingredients

Hocus Pocus Snack Board Ingredients

For the Board
• 3 wheels brie cheese – a creamy base that adds richness and texture.
• Crackers or chips of choice – choose something crunchy to complement the soft cheese.

For the Accents
• Twizzlers pull and peel licorice – perfect for creating playful lips on your cheese characters.
• Black olives – slice them to form eyes that bring your witches to life.
• Pepperoni – roll and skewer them for adorable curly hair!

For the Fruits
• Blackberries – pile them high on the cheesewheel for a fun hairdo.
• Green grapes – they add a pop of color and are great for Winifred’s dress!
• Raspberries – use them for Sarah’s vibrant outfit.
• Small oranges – these add a citrusy sweetness and bright cheer to the board.

For Texture
• Popcorn – fluffy and fun, it makes the perfect hair for one of the witch cheesewheels.
• Sliced cheese of choice – create whimsical cheese shapes like bats with your cookie cutter!

Extra Tools
• Toothpicks – essential for assembling your charming cheese characters.
• Cookie cutter for cheese shapes (optional) – this lets you flex your creativity and fill empty spaces with themed fun!

Create an unforgettable Hocus Pocus Snack Board filled with magical ingredients that are both customizable and delightful!

Step‑by‑Step Instructions for Hocus Pocus Snack Board

Step 1: Set Up the Base
Begin by arranging the three wheels of brie cheese on a large wooden board, spacing them apart for visibility. This will create the charming foundation for your Hocus Pocus Snack Board. Use a rustic cutting board or platter to enhance the visual appeal. Keep the board ready as you gather your colorful ingredients to transform these cheese wheels into captivating witches.

Step 2: Create Playful Features
Cut Twizzlers pull and peel licorice into strips and pull them apart to form fun lips for each brie wheel. Gently press them onto the cheese’s surface, ensuring they stick well. Next, slice the black olives into rounds and place them above the Twizzlers to represent eyes, bringing your witch creations to life. This step adds a whimsical charm to your Hocus Pocus Snack Board.

Step 3: Style the Hair
For Sarah’s witch, grab popcorn and pile it on top of her brie wheel to form fluffy, fun hair. The light, airy texture of the popcorn will create an inviting look that captures the spirit of the character. Meanwhile, prepare pepperoni by rolling slices and securing them on toothpicks. Stick these into Winifred’s brie, crafting her iconic curly hairstyle and adding extra dimension to your snack board.

Step 4: Assemble the Remaining Characters
Top Mary’s cheese wheel with a generous mound of blackberries, creating a textured hairdo that boasts a playful flair. Arrange the berries in a balanced fashion to add richness and color. This unique hairstyle reflects Mary’s character and enhances the overall aesthetic of your Hocus Pocus Snack Board, ensuring every piece is visually captivating.

Step 5: Dress the Witches
Use raspberries to create the vibrant dress for Sarah’s witch, positioning them elegantly around her base. For Winifred, cluster green grapes around her cheese wheel, brightening up her outfit with lively hues. Lastly, arrange small orange slices around Mary’s brie to complete her look, ensuring that each character stands out on your enchanting snack board.

Step 6: Add Thematic Accents
Utilize a cookie cutter to create whimsical shapes, such as bats or broomsticks, from your sliced cheese. Place these throughout the board, filling empty spots while enhancing the Halloween theme. This playful addition not only adds texture but also embodies the Halloween spirit of your Hocus Pocus Snack Board, inviting guests to appreciate every detail.

Step 7: Fill in the Gaps
Now, take a moment to assess your board for any bare spaces. Fill these gaps with additional pieces of fruit, crackers, or chips, ensuring the layout looks abundant and enticing. Adjust the arrangement as needed to create a visually balanced presentation. This step ensures your Hocus Pocus Snack Board is a feast for the eyes as well as the tummy.

Step 8: Serve and Celebrate
Once you’re satisfied with the arrangement, serve the Hocus Pocus Snack Board immediately to showcase the lively colors and whimsical design. Encourage guests to dig in and enjoy the delightful assortment of flavors and textures. This festive board is not only a spectacular centerpiece but also a delightful snack that will enchant everyone at your Halloween gathering.

Hocus Pocus Snack Board

Make Ahead Options

These Hocus Pocus Snack Boards are perfect for busy cooks looking to save time! You can prepare the brie cheese wheels and arrange them on the board up to 24 hours in advance, simply cover with plastic wrap to maintain freshness. Additionally, you can slice the olives and Twizzlers, and prepare the popcorn for styling ahead of time to prevent any last-minute rush. Lastly, wash and cut the fruits (blackberries, raspberries, grapes, and oranges) and store them in airtight containers in the refrigerator for up to 3 days. When you’re ready to serve, just assemble the remaining elements and garnish your board, ensuring each component is just as delightful as if made fresh!

Expert Tips for Hocus Pocus Snack Board

Maximize Freshness: Use fresh ingredients for vibrant colors and flavors. Check that fruits are ripe and firm to enhance the visual appeal of your board.

Customize to Taste: Feel free to swap out ingredients! If brie isn’t your favorite, substitute it with cheddar or gouda. Make this Hocus Pocus Snack Board your own!

Avoid Soggy Crackers: To keep your crackers crunchy, avoid placing them directly on moist ingredients. Serve them on the side or in small bowls.

Engage Your Guests: Allow friends and family to help assemble the board. This not only makes it a fun activity but also creates a memorable experience together.

Plan Your Layout: Before you start, visualize your arrangement! Lay everything out before filling in gaps, ensuring a balanced and festive presentation.

Keep it Festive: Include seasonal decorations like mini pumpkins or ghost picks to elevate the Halloween vibe, making your Hocus Pocus Snack Board a real showstopper!

How to Store and Freeze Hocus Pocus Snack Board

Fridge: Keep any leftover components of your Hocus Pocus Snack Board in an airtight container for up to 3 days to maintain freshness.

Freezer: Assembled boards are not recommended for freezing, but individual ingredients like cut fruits or brie can be frozen for up to 2 months.

Reheating: For any cheese leftovers, allow them to come to room temperature before serving. Avoid microwaving as it may affect texture.

Room Temperature: If left out, enjoy your Hocus Pocus Snack Board within 2 hours to keep it safe and delicious.

Hocus Pocus Snack Board Variations

Let your imagination run wild as you personalize this enchanting board to fit your taste and dietary preferences!

  • Vegan Delight: Substitute brie with vegan cheese options and use plant-based snacks for a delightful alternative.
    Try using cashew-based cheeses, which provide creamy textures, ensuring no one misses out on the festive fun!

  • Gluten-Free Twist: Use gluten-free crackers or chips to cater to dietary needs without compromising flavor.
    This way, everyone can enjoy the magic, regardless of their dietary restrictions!

  • Spicy Kick: Add jalapeño slices or spicy salami for a heat boost that contrasts beautifully with the creamy cheese.
    For those who love a little fire, these flavors will make your board unforgettable!

  • Nutty Crunch: Toss in some mixed nuts for extra texture and flavor.
    These little crunchies add surprise and hearty satisfaction, elevating your snack experience even further!

  • Fruity Explosion: Swap in seasonal fruits like pomegranates or apples for a fresh and vibrant flavor profile.
    These earthy flavors will bring an exhilarating twist to your board and delight all fruit lovers!

  • Crispy Alternatives: Experiment with popcorn flavors; try cheese or caramel-coated popcorn for a unique touch.
    Both varieties will entice guests with their unexpected taste and delightful crunch!

  • Savory Cheese Swap: Replace brie with goat cheese or feta for a tangy flavor that complements the rest.
    This twist adds depth to your board while still keeping with the quirky charm of Hocus Pocus!

  • Dessert Finish: Top it off with chocolate-covered pretzels or candy corn for a sweet ending to your board.
    This classic combination brings a festive Halloween flair that guests will enjoy nibbling on!

Your Hocus Pocus Snack Board can be endlessly personalized to suit your gathering. Dive into the Halloween spirit and explore these delightful options! For more fun and spooky-themed ideas, check out our Halloween gathering ideas.

What to Serve with Hocus Pocus Charcuterie Board

As you conjure up your whimsical Hocus Pocus Snack Board, consider these delightful pairings to complete your Halloween feast.

  • Crispy Breadsticks: Their crunchy texture provides a perfect contrast to the creamy brie, inviting guests to savor every bite.
  • Spiced Apple Cider: Warm and aromatic, this comforting drink complements the sweetness of the fruits and spices of the season.

For a heartier touch, you might want to include:

  • Savory Cheese Straws: These crunchy treats add a touch of elegance and extra flavor that pairs beautifully with creamy cheeses.
  • Roasted Pumpkin Seeds: A delightful crunch with a hint of earthiness, these seeds bring seasonal flavors and make great finger snacks.

Don’t forget dessert!

  • Witch’s Brew Cupcakes: Chocolatey goodness topped with green frosting will enchant all your guests, echoing the fun theme of your board.

  • Chocolate-covered Pretzels: Their sweet and salty combination is irresistible, adding a playful pop of flavor that enhances the overall experience.

Incorporating these complements creates a memorable Halloween gathering, turning your charcuterie board into an enchanting focal point!

Hocus Pocus Snack Board

Hocus Pocus Charcuterie Board Recipe FAQs

How do I ensure my ingredients are fresh for the Hocus Pocus Snack Board?
Absolutely! When selecting fruits, look for berries that are plump and free of dark spots. For grapes and oranges, choose ones that feel firm to the touch and have vibrant colors. This not only enhances the visual appeal but also maximizes flavor.

What’s the best way to store leftovers from the Hocus Pocus Snack Board?
Very! Store any leftover components in an airtight container in the fridge for up to 3 days. Make sure to keep crackers separate to prevent them from getting soggy, and consume the fruit within a few days for the best taste and texture.

Can I freeze any ingredients for the Hocus Pocus Snack Board?
Sure! While I don’t recommend freezing the assembled board, individual ingredients like sliced cheese or cut fruits can be frozen. For best results, wrap them tightly in plastic wrap or place them in freezer-safe bags. They will stay fresh for up to 2 months. When ready to use, thaw them in the fridge overnight for the best texture.

How can I troubleshoot if my cheese isn’t melting properly?
If your cheese isn’t melting the way you’d like, it may be due to the temperature of the cheese. Always allow it to sit at room temperature for about 30 minutes before serving. This helps soften the cheese, making it easier to enjoy its rich, creamy texture.

Is there any dietary consideration for pets or allergies with the Hocus Pocus Snack Board?
It’s important to consider! Keep in mind that some ingredients, like grapes and certain types of cheese, can be harmful to pets. Double-check for any allergies among your guests, particularly with cheese and processed meats, and opt for alternative ingredients if needed, ensuring everyone has a tasty and safe experience.

What are some alternatives I can use for the ingredients in the Hocus Pocus Snack Board?
I often suggest swapping brie for a creamy goat cheese if you prefer a tangier bite, or using a vegan cheese if you need a dairy-free option. For a different crunch, you could replace popcorn with pretzels. The more fun flavors you incorporate, the merrier the board becomes!

Craft the Ultimate Hocus Pocus Snack Board for Halloween Fun

Create a magical Hocus Pocus Snack Board filled with whimsical ingredients perfect for Halloween gatherings.

  • Wooden board
  • Knife
  • Toothpicks
  • cookie cutter

For the Board

  • 3 wheels brie cheese (a creamy base that adds richness and texture)
  • 1 box crackers or chips (choose something crunchy to complement the soft cheese)

For the Accents

  • 1 package Twizzlers pull and peel licorice (perfect for creating playful lips on your cheese characters)
  • 1 cup black olives (slice them to form eyes)
  • 10 slices pepperoni (roll and skewer them for adorable curly hair)

For the Fruits

  • 1 cup blackberries (for a fun hairdo)
  • 1 cup green grapes (adds a pop of color)
  • 1 cup raspberries (for vibrant outfits)
  • 2 small oranges (adds sweetness and cheer)

For Texture

  • 2 cups popcorn (perfect hair for one of the witch cheesewheels)
  • 1 block sliced cheese (create whimsical shapes like bats)

Extra Tools

  • 1 pack toothpicks (essential for assembling cheese characters)
  • 1 cookie cutter for cheese shapes (optional for themed fun)

Step-by-Step Instructions

  1. Set up the base by arranging the three wheels of brie cheese on a large wooden board.
  2. Create playful features using Twizzlers for lips and olives for eyes.
  3. Style the hair using popcorn for Sarah and skewered pepperoni for Winifred.
  4. Assemble the remaining characters using blackberries and arrange them colorfully.
  5. Dress the witches with raspberries, green grapes, and orange slices.
  6. Add thematic accents with whimsical cheese shapes cut out with a cookie cutter.
  7. Fill in the gaps with additional fruits, crackers, or chips.
  8. Serve and celebrate the festive arrangement with your guests.

Maximize freshness by using ripe ingredients. Customize to taste with alternative cheeses if desired. Avoid soggy crackers by serving them on the side. Engage guests by involving them in assembly. Plan your layout for a balanced presentation and keep it festive with seasonal decorations.

Appetizer
charcuterie board, festive food, Halloween, Halloween recipes, Hocus Pocus Snack Board, snack board

Filed Under: Appetizer

Delicious Christmas Pecan Turtles for Sweet Holiday Treats

October 8, 2025 by grace bellamy Leave a Comment

As the holiday season approaches, the kitchen fills with delightful aromas, transporting me back to cherished family gatherings. One treat that always sweeps me off my feet is the irresistible Christmas Pecan Turtles. These sweet little confections are not just a festive indulgence; they offer a perfect blend of gooey caramel and crunchy pecans, elegantly draped in rich chocolate. What’s not to love about a dessert that’s a breeze to whip up and makes for a fantastic homemade gift? In just a few simple steps, you can create these delicious bites that will have everyone asking for seconds. So, why not level up your holiday dessert game? Let me share my favorite tips for crafting these delightful treats that will surely become a staple at your festive gatherings. Ready to make some magic in the kitchen?

Christmas Pecan Turtles

Why Make Christmas Pecan Turtles?

Irresistible flavors: The perfect balance of gooey caramel, crunchy pecans, and smooth chocolate makes every bite a heavenly experience.

Quick preparation: With just a few simple steps, you can create these delightful treats in no time.

Homemade gifts: Wrap them up beautifully for the perfect personalized holiday gift that everyone will cherish.

Crowd-pleaser: These sweet confections are sure to impress family and friends at any gathering, making them a festive favorite!

Versatile treat: Enjoy them as a snack or dessert, and they’re easy to store for later—just keep them in an airtight container. Check out more tips on how to store these delicious bites to maintain their freshness!

Christmas Pecan Turtles Ingredients

Unlock the secrets to these delightful confections!

For the Turtles
• 2 cups pecans – Pecans add a wonderful crunch and nutty flavor, a classic choice for holiday treats.
• 6 tablespoons butter – Butter creates a rich, creamy base for the caramel texture.
• ½ cup light brown sugar – This sugar contributes a lovely depth of sweetness and a hint of molasses flavor.
• ½ cup granulated sugar – Balances the brown sugar while providing the perfect sweetness.
• ½ cup light corn syrup – Ensures the caramel stays gooey without hardening.
• ½ cup sweetened condensed milk – Adds creaminess and a touch of sweetness to the caramel mixture.
• 1½ teaspoons vanilla extract – Infuses a warm, aromatic flavor that enhances all the sweet components.
• 2 cups chopped chocolate – Melting chocolate covers the turtles with a rich layer, making them irresistible.

These Christmas Pecan Turtles are not just treats; they are sweet holiday memories waiting to be made!

Step‑by‑Step Instructions for Christmas Pecan Turtles

Step 1: Preheat Your Oven
Begin by preheating your oven to 350°F (175°C). While the oven warms up, gather your baking pan and optionally line it with parchment paper for easier cleanup. The warmth of the oven will perfect the toasting of the pecans, enhancing their nutty flavor as you prepare your Christmas Pecan Turtles.

Step 2: Toast the Pecans
Spread the 2 cups of pecans evenly on the prepared baking pan. Place the pan in the preheated oven and bake them for 8 to 10 minutes, turning them halfway through. Keep a close eye on the pecans; they should become fragrant and golden brown. Once ready, remove them from the oven and let them cool.

Step 3: Chop the Pecans
After the pecans have cooled slightly, transfer them to a cutting board and chop them into smaller pieces. This step allows for easier mixing with the caramel later on. Set the chopped pecans aside in a bowl, ready to be combined with the gooey caramel in your upcoming steps.

Step 4: Melt the Butter
In a microwave-safe bowl, add 6 tablespoons of butter and melt it in the microwave. Heat the butter in short intervals of 20 to 30 seconds, stirring in between to ensure it melts evenly without bubbling over. This rich melted butter will form the base of your luscious caramel mixture.

Step 5: Combine Ingredients for Caramel
In a larger mixing bowl, combine the melted butter with ½ cup light brown sugar, ½ cup granulated sugar, ½ cup light corn syrup, and ½ cup sweetened condensed milk. Stir the mixture with a spatula until completely incorporated and smooth, ensuring an even blend for your Christmas Pecan Turtles.

Step 6: Cook the Caramel Mixture
Microwave the caramel mixture for about 6 minutes, taking care to stir it halfway through the cooking time. This step will help to thicken the mixture, creating a deliciously gooey caramel that perfectly coats the pecans. Look for a bubbling consistency just before it’s done.

Step 7: Add Vanilla Extract
Once the caramel is ready, remove it from the microwave and add 1½ teaspoons of vanilla extract. Stir vigorously to blend the vanilla into the caramel mix. This addition will infuse a warm and inviting aroma that enhances the overall flavor of your Christmas Pecan Turtles.

Step 8: Incorporate the Chopped Pecans
Gradually add the chopped pecans to the caramel mixture, stirring gently to coat each piece thoroughly. Ensure that all the pecans are immersed in the luscious caramel, as this will form the delightful base of your turtles. Set this mixture aside briefly to cool.

Step 9: Chill the Mixture
Once the caramel-pecan mixture is slightly cooled, transfer it into a greased or lined pan, spreading it evenly. Place the pan in the refrigerator for at least 30 minutes, allowing it to firm up. A cool, set mixture makes it easier to scoop and dip later, essential for crafting your Christmas Pecan Turtles.

Step 10: Melt the Chocolate
In a separate microwave-safe bowl, add 2 cups of chopped chocolate and melt it, heating in 30-second intervals. Stir between each interval until the chocolate is completely silky and smooth. This rich melted chocolate will be the final touch to your decadent turtle treats.

Step 11: Dip the Turtles
Once the caramel-pecan mixture has chilled and firmed up, scoop small portions using a spoon or cookie scoop. Quickly dip each portion into the melted chocolate, ensuring it’s well-coated. The chocolate should envelop the sticky caramel and pecans, creating a delightful treat that looks as good as it tastes.

Step 12: Cool the Chocolate-Covered Turtles
Place the chocolate-coated turtles onto a sheet of wax paper. Allow them to sit undisturbed, letting the chocolate cool and solidify. This process usually takes 10 to 15 minutes at room temperature, but for quicker results, pop them back in the refrigerator.

Step 13: Final Refrigeration
For a final setting, refrigerate the turtles for about 30 minutes. This step will ensure that your Christmas Pecan Turtles are firm and ready for enjoying or gifting. Once set, they will be the perfect sweet treat to celebrate the holiday season!

Christmas Pecan Turtles

Christmas Pecan Turtles Variations

Feel free to explore and personalize your Christmas Pecan Turtles—they’re a delightful canvas for your creativity!

  • Nut-Free: Substitute pecans with sunflower seeds or pumpkin seeds for a crunchy, nut-free alternative.
  • Dark Chocolate: Swap out the regular chocolate for dark chocolate to give it a rich, intense flavor. The bittersweet chocolate pairs beautifully with the caramel.
  • Sea Salt Finish: Sprinkle a pinch of flaky sea salt on top of the chocolate before it sets for that sweet and salty contrast. The salty bite elevates the overall taste and makes every piece extra special.
  • Caramel Sauce: For a gooey twist, drape an extra layer of caramel sauce over the chocolate after dipping. It adds a luscious layer of sweetness that’s hard to resist.
  • Spiced Variety: Enhance the caramel mixture with a dash of cinnamon or nutmeg to bring festive warmth to these treats. The warm spices complement the sweetness of the caramel so wonderfully!
  • Coconut Flakes: For a tropical flair, add shredded coconut to the pecan mixture before coating with chocolate. The chewy coconut adds a new texture, making each bite an adventure.
  • Peppermint Twist: Mix in crushed peppermint candies into the chocolate for a holiday minty burst. The crunchy peppermint bits offer a refreshing contrast to the creamy chocolate.
  • Fruit Infusion: Blend some dried cranberries or cherries into the pecans for a delightful fruity surprise. It adds a beautiful color and a hint of tartness, balancing the sweet richness perfectly.

With all these variations, you can turn your Christmas Pecan Turtles into a truly personalized treat that reflects your taste and joy of the season! Happy baking!

Expert Tips for Christmas Pecan Turtles

Toasting Tips: Use fresh pecans: Fresh nuts offer a better flavor, ensuring your Christmas Pecan Turtles are delicious and fragrant.

Caramel Consistency: Stir halfway: When microwaving the caramel, stirring halfway prevents uneven cooking, helping achieve that perfect gooey texture.

Chilling Important: Cool before scooping: Allow the caramel-pecan mixture to chill slightly to make scooping easier and cleaner for your turtles.

Coating Technique: Dip quickly: When dipping in chocolate, work quickly to prevent the caramel from warming and becoming sticky.

Storage Secrets: Airtight containers: Store your turtles in an airtight container to keep them fresh and delightful for up to a week at room temperature.

What to Serve with Christmas Pecan Turtles?

Indulging in these delightful Christmas Pecan Turtles invites the spirit of holiday gatherings, and enhancing your spread can make it even more magical.

  • Creamy Vanilla Ice Cream: The cool, creamy texture of vanilla ice cream contrasts beautifully with the chewy caramel and crunchy pecans. Scoop it alongside for a delightful treat!
  • Rich Hot Chocolate: A warm mug of hot chocolate complements the sweetness of the turtles, creating a cozy, festive experience perfect for cold winter nights.
  • Fresh Fruit Salad: A vibrant mix of fresh fruits adds a refreshing brightness, balancing the rich flavors of the turtles and enhancing the overall dessert spread.
  • Spiced Rum Cake: The warm spices in a rum cake echo the holiday flavors, making it a perfect pairing that elevates any festive gathering.
  • Nutty Toffee Coffee: A steaming cup of coffee infused with a hint of toffee provides a smooth and flavorful beverage that pairs wonderfully with these sweet treats.
  • Gingery Snickerdoodles: The soft, cinnamon-sugar goodness of snickerdoodles offers a delightful contrast, adding warmth and spice to your holiday dessert table.
  • Candied Orange Peel: The bright, citrusy notes of candied orange deepens the festive flavor palette while providing a chewiness that resonates with each turtle bite.
  • Pecan Pie Milkshake: A rich milkshake brimming with pecan pie flavors intensifies the nutty essence of the turtles, creating a decadent drinking experience for pecan lovers!
  • Peppermint Bark: This seasonal favorite introduces a refreshing minty crispness, providing a delightful contrast in flavors and textures alongside the turtles.
  • Mulled Wine: The warm spices in mulled wine perfectly complement the indulgent sweetness of Christmas Pecan Turtles, enhancing the festive spirit of any gathering.

How to Store and Freeze Christmas Pecan Turtles

Room Temperature: Keep your Christmas Pecan Turtles in an airtight container at room temperature for up to 1 week to maintain their delightful flavor and texture.

Fridge: For longer freshness, store them in the refrigerator for up to 2 weeks. Make sure they are in an airtight container to prevent them from absorbing moisture.

Freezer: To freeze, stack turtles between layers of parchment paper in a freezer-safe container. They can be frozen for up to 3 months without losing their charm.

Thawing: When ready to enjoy, simply thaw the turtles in the fridge overnight for the best texture.

Make Ahead Options

These Christmas Pecan Turtles are perfect for meal prep enthusiasts looking to save time during the busy holiday season! You can prepare the caramel-pecan mixture up to 24 hours in advance; simply follow the steps up to chilling the mixture in the refrigerator, where it will firm up beautifully and maintain its rich flavor. If you’re planning for a gathering, you can even dip the turtles into chocolate up to 3 days ahead of time; just store them in an airtight container in the refrigerator to keep them fresh. When you’re ready to serve, allow the turtles to sit at room temperature for a few minutes so the chocolate softens slightly, making for a deliciously indulgent experience without the last-minute rush!

Christmas Pecan Turtles

Christmas Pecan Turtles Recipe FAQs

How do I choose the best pecans for my Christmas Pecan Turtles?
Absolutely! Opt for fresh, whole pecans that are free from dark spots or blemishes. If they have a strong, rancid odor, it’s best to avoid them. For the best flavor, try toasting them before mixing into the caramel—this enhances their nuttiness!

What’s the best way to store Christmas Pecan Turtles?
You’ll want to keep your delightful Christmas Pecan Turtles in an airtight container at room temperature for up to 1 week. If you prefer longer storage, pop them in the fridge, where they can last for up to 2 weeks. Just make sure to separate layers with parchment paper to prevent sticking!

Can I freeze my Christmas Pecan Turtles?
Yes, indeed! To freeze your turtles, simply layer them between sheets of parchment paper in a freezer-safe container. They can be safely frozen for up to 3 months. When you’re ready to enjoy, transfer them to the fridge and let them thaw overnight—this helps maintain that perfect texture!

What should I do if my caramel is too thick?
Very good question! If your caramel mixture feels too thick after microwaving, you can add a splash of milk or a little more light corn syrup to loosen it up. Gently reheat the mixture and stir until smooth. Remember, a well-blended caramel will coat your pecans beautifully!

Are Christmas Pecan Turtles safe for pets?
Great concern! Unfortunately, the ingredients in Christmas Pecan Turtles, particularly chocolate and sugar, can be harmful to pets. It’s best to keep these treats away from any furry friends to ensure their safety and well-being.

Can I substitute ingredients in the recipe?
Of course! If you’re looking for alternatives, you could use almonds or walnuts instead of pecans for a different flavor. For a dairy-free version, try coconut cream instead of sweetened condensed milk, and use dairy-free chocolate for coating. The more the merrier when it comes to customizing your treats!

Delicious Christmas Pecan Turtles for Sweet Holiday Treats

Indulge in irresistible Christmas Pecan Turtles, a sweet holiday treat combining gooey caramel, crunchy pecans, and rich chocolate.

  • baking pan
  • Microwave-safe bowl
  • spatula
  • cutting board

For the Turtles

  • 2 cups pecans (Pecans add a wonderful crunch and nutty flavor, a classic choice for holiday treats.)
  • 6 tablespoons butter (Butter creates a rich, creamy base for the caramel texture.)
  • ½ cup light brown sugar (This sugar contributes a lovely depth of sweetness and a hint of molasses flavor.)
  • ½ cup granulated sugar (Balances the brown sugar while providing the perfect sweetness.)
  • ½ cup light corn syrup (Ensures the caramel stays gooey without hardening.)
  • ½ cup sweetened condensed milk (Adds creaminess and a touch of sweetness to the caramel mixture.)
  • 1½ teaspoons vanilla extract (Infuses a warm, aromatic flavor that enhances all the sweet components.)
  • 2 cups chopped chocolate (Melting chocolate covers the turtles with a rich layer, making them irresistible.)

Step‑by‑Step Instructions

  1. Preheat your oven to 350°F (175°C) and optionally line your baking pan with parchment paper.
  2. Spread the pecans evenly on the prepared baking pan and bake for 8 to 10 minutes, turning halfway through.
  3. Once the pecans are fragrant and golden, let them cool before chopping into smaller pieces.
  4. Melt butter in the microwave, heating in short intervals of 20 to 30 seconds until fully melted.
  5. Combine melted butter with brown sugar, granulated sugar, corn syrup, and sweetened condensed milk, stirring until smooth.
  6. Microwave the caramel mixture for about 6 minutes, stirring halfway through until thickened.
  7. Stir in vanilla extract into the caramel mixture until well combined.
  8. Fold in the chopped pecans, ensuring each piece is coated with the caramel.
  9. Transfer the mixture into a greased or lined pan and refrigerate for at least 30 minutes to set.
  10. Melt the chopped chocolate in a separate bowl, heating in 30-second intervals until smooth.
  11. Scoop portions of the chilled caramel-pecan mixture and dip each into the melted chocolate.
  12. Place the chocolate-coated turtles onto wax paper to cool until the chocolate solidifies.
  13. For final setting, refrigerate the turtles for about 30 minutes before enjoying or gifting.

Store in an airtight container at room temperature for up to a week. Refrigeration extends freshness to two weeks, while freezing allows for three months of storage.

Dessert
American
chocolate pecan candy, Christmas Pecan Turtles, easy festive recipes, holiday treats, homemade gifts, sweet desserts

Filed Under: Dessert

Delightful Frankenstein Mini Cheesecakes for Spooky Treats

October 8, 2025 by grace bellamy Leave a Comment

As I carefully unwrapped the chilled mini cheesecakes, I couldn’t help but smile at the delightfully spooky scene before me. These Frankenstein Mini Cheesecakes are not just a treat; they’re a whimsical addition that spookifies any gathering or family dinner while inviting smiles and laughter. With a quick prep time of just 15 minutes, they’ll have you spending less time in the kitchen and more time enjoying delicious homemade goodies with loved ones. Plus, their bite-sized charm makes them an irresistible crowd-pleaser, perfect for both kids and adults alike. Ready to bring a little frightful fun to your dessert table? Follow along, and let’s create some tasty mini monsters together!

Frankenstein Mini Cheesecakes

Why Are These Mini Cheesecakes Unforgettable?

Whimsical Presentation: The cute, spooky appearance of these Frankenstein Mini Cheesecakes is sure to captivate your guests and spark joy at any gathering.

Easy to Make: With just 15 minutes of prep time, you can whip up these delicious treats without spending hours in the kitchen.

Crowd-Pleasing Flavor: Creamy cheesecake combined with crunchy OREO crusts creates a delightful taste that everyone will love.

Versatile Decor: Feel free to customize the faces and colors—make them as fun or frightful as you desire!

Perfect for Any Occasion: Whether it’s Halloween, a birthday party, or a simple family dessert night, these mini cheesecakes will fit right in.

Get ready to wow your friends and family with these fun, delectable bites!

Frankenstein Mini Cheesecakes Ingredients

For the Cheesecake Mixture

  • Cream cheese – a must for that creamy base that defines any great cheesecake.
  • Sugar – balances the flavors and adds sweetness that kids love.
  • Eggs – help to set the cheesecake, giving it that perfect texture.
  • Flour – stabilizes the filling; omit for a gluten-free option.
  • Vanilla – enhances the sweetness and rounds out the flavor beautifully.
  • Green food coloring – adds that spooky Frankenstein flair; adjust to achieve your desired hue!

For the Crust

  • OREO cookies – crushed to form a rich, chocolatey foundation that’s completely irresistible.
  • Butter – binds the cookie crumbs for a cohesive crust; melted is best for mixing.

For Decorating

  • Edible eyes – bring your mini cheesecakes to life; they’re just too cute!
  • Chocolate chips – can be melted for dipping or used as embellishments for that extra chocolate kick.
  • Chocolate sprinkles – add a festive touch that kids will adore; feel free to get creative!
  • Chocolate chips (for piping) – use these for creating fun faces and features; let your imagination run wild!

These delightful Frankenstein Mini Cheesecakes are not only a feast for the eyes but also a true delight for your taste buds.

Step‑by‑Step Instructions for Frankenstein Mini Cheesecakes

Step 1: Preheat the Oven
Begin by preheating your oven to 350°F (175°C). This step is crucial to ensure your Frankenstein Mini Cheesecakes bake evenly and achieve that delightful fluffy texture. While the oven warms up, gather your mini cheesecake pan and prepare for the cookie crust.

Step 2: Prepare the Crust
In a mixing bowl, combine the crushed OREO cookies with melted butter. Stir until the crumbs are completely coated, resembling wet sand. This mixture will form the base of your mini cheesecakes, so be sure it’s well mixed. Once ready, you’ll need to form 1-inch balls and press them firmly into the bottom of your mini cheesecake pan to create a uniform layer.

Step 3: Make the Cheesecake Filling
In a separate bowl, beat the softened cream cheese with sugar, eggs, and vanilla extract until the mixture is smooth and creamy. This should take about 2-3 minutes using an electric mixer. Make sure there are no lumps left, as a silky filling is key to your Frankenstein Mini Cheesecakes.

Step 4: Add the Flour
Carefully add the flour to the cream cheese mixture, mixing until just combined. This step is important as it helps to stabilize the filling, giving it the perfect creamy texture once baked. Avoid overmixing to ensure your mini cheesecakes rise beautifully in the oven.

Step 5: Color the Cheesecake
Next, gradually add the green food coloring to the cheesecake batter, mixing until you achieve your desired shade of Frankenstein green. This vibrant color is what makes these mini cheesecakes so fun and eye-catching! Stir well to ensure the color is evenly distributed throughout the filling.

Step 6: Pour the Filling
With your crusts prepped and the green filling ready, pour the cheesecake batter into each crust, filling each cavity almost to the top. This will give your Frankenstein Mini Cheesecakes a nice dome shape. Use a spatula to smooth the top if needed, then they’re ready for baking.

Step 7: Bake the Mini Cheesecakes
Place the filled mini cheesecake pan in the preheated oven and bake for 15 minutes. You’ll know they’re done when the edges are set, but the centers still have a slight jiggle. This ensures a creamy texture that will solidify as they cool.

Step 8: Cool Completely
Once baked, remove your mini cheesecakes from the oven and let them cool in the pan for about 30 minutes. After that, transfer them to the refrigerator to chill for at least 1 hour. This cooling process is vital for achieving the perfect texture and flavor in your Frankenstein Mini Cheesecakes.

Step 9: Decorate the Cheesecakes
After they have completely cooled, gently remove the cheesecakes from the pan. To decorate, dip the tops in melted chocolate, then roll them in chocolate sprinkles for a fun finish. This sweet touch adds a festive flair and contributes to the overall presentation of your delicious mini monsters.

Step 10: Add Fun Features
Using melted chocolate, pipe little mouths and other features onto your cheesecakes to create unique faces. Finish off by placing edible eyes on top, securing them with a dot of melted chocolate. Let your creativity shine as you bring these Frankenstein Mini Cheesecakes to life!

Frankenstein Mini Cheesecakes

Frankenstein Mini Cheesecakes Variations & Substitutions

Feel free to get creative and customize your Frankenstein Mini Cheesecakes with these fun and delicious variations!

  • Gluten-Free: Substitute gluten-free cookie crumbs and flour to make this treat suitable for gluten-sensitive friends.

  • Dairy-Free: Use vegan cream cheese and dairy-free butter to keep these delightful cheesecakes plant-based without sacrificing flavor.

  • Chocolate Boost: Add cocoa powder to the filling for a rich chocolate twist that enhances the cheesecake’s flavor profile.

  • Flavor Fusions: Swap vanilla extract for almond or mint extract to introduce a new level of deliciousness to your mini cheesecakes.

  • Nutty Texture: Fold in crushed nuts like walnuts or pecans into the cheesecake batter for an added crunch and depth of flavor.

  • Spooky Swirls: Before baking, create fun patterns by swirling a contrasting colored cheesecake batter (like purple) with a skewer for a whimsical look.

  • Extra Sweetness: Drizzle caramel or fudge sauce over your finished cheesecakes for an indulgent finishing touch that everyone will love.

  • Heat It Up: For a spicy kick, add a pinch of cayenne pepper or a dash of chili powder to the batter for a unique sweet and savory flavor combination.

These variations add a fun twist to your already delightful Frankenstein Mini Cheesecakes. If you’re looking for more inspiration, check out how to make the most of your dessert with unique toppings or cake pairings!

Make Ahead Options

These delightful Frankenstein Mini Cheesecakes are perfect for meal prep, allowing you to enjoy their spooky charm without the last-minute rush! You can prepare the crust and cheesecake filling up to 24 hours in advance—just store them in separate airtight containers in the refrigerator. To assemble, simply press the crust into the mini cheesecake pan and pour in the batter when you’re ready to bake. After cooling, these mini cheesecakes can be decorated and stored for an additional up to 3 days in the fridge to maintain freshness and quality. Just remember to add the decorative touches right before serving to keep their charm intact. Enjoy stress-free baking with these make-ahead options!

Expert Tips for Frankenstein Mini Cheesecakes

Chill Properly: Ensure your cheesecakes cool completely before decorating; this prevents melting and ensures a deliciously creamy bite.

Mind the Color: Start with less green food coloring when dying your cheesecake; you can always add more to reach your desired spooky shade.

Avoid Overmixing: When adding the flour, mix just until combined to prevent over-aeration, which can make your cheesecake dense instead of light and fluffy.

Proper Baking Time: Keep an eye on the baking time. Cheesecakes should jiggle slightly in the center when done; they will set as they cool.

Creative Faces: Let your imagination run wild with decorations—use different colors of chocolate or alternative candies for unique expressions on your Frankenstein Mini Cheesecakes!

What to Serve with Frankenstein Mini Cheesecakes?

Creating a memorable meal is all about balancing flavors and textures alongside these whimsical treats.

  • Spooky Fruit Salad: A mix of seasonal fruits, like strawberries, grapes, and kiwi, adds a refreshing element to your dessert table that complements the sweetness of the cheesecakes.

  • Colorful Veggie Platter: Fresh vegetables like baby carrots, bell peppers, and cherry tomatoes provide a crunchy contrast, making for an enticing, healthy snack option for guests.

  • Ghoulish Green Punch: A punch made with lime sherbet and lemon-lime soda perfectly echoes the fun, spooky theme of the mini cheesecakes, delighting both kids and adults.

  • Chocolate-Dipped Strawberries: Rich chocolate-covered strawberries add elegance and sweetness, pairing wonderfully with the creamy cheesecake while providing a slightly tangy flavor.

  • Mini Corn Dogs: For a savory option, serve mini corn dogs on a platter—these bite-sized treats are fun, satisfying, and a huge hit at parties, drawing in those ready to indulge in both sweet and savory.

  • Pumpkin Soup: A warm, spiced pumpkin soup is a fabulous contrast to the cool, sweet cheesecakes, embracing the fall flavors that create a comforting meal.

  • Festive Cupcakes: Complement your deep green cheesecakes with orange or black frosted cupcakes for an additional pop of color and sweetness that aligns beautifully with the Halloween spirit.

  • Whipped Cream: Serve your Frankenstein Mini Cheesecakes with a side of fluffy whipped cream for an added creaminess that balances the rich flavors of the treats.

Remember, creating a delightful spread not only enhances your cheesecakes but brings your gathering to life with joy and ease!

How to Store and Freeze Frankenstein Mini Cheesecakes

Fridge: Keep your mini cheesecakes in an airtight container in the fridge for up to 3 days. This will maintain their creamy texture and delightful flavors.

Freezer: To freeze, place the cheesecakes in a single layer on a baking sheet until solid, then transfer to a freezer-safe container for up to 2 months. Allow them to thaw in the fridge before enjoying.

Reheating: If desired, you can reheat individual cheesecakes in the microwave for about 10-15 seconds to soften slightly. Enjoy these delightful Frankenstein Mini Cheesecakes chilled or at room temperature for best results.

Decoration Advice: If you plan to freeze, wait until thawed to add decorations; this will ensure they remain fresh and visually appealing!

Frankenstein Mini Cheesecakes

Frankenstein Mini Cheesecakes Recipe FAQs

How can I select the best cream cheese for my mini cheesecakes?
Absolutely! When choosing cream cheese, opt for a full-fat variety that is labeled as “brick” cream cheese, as it creates a rich and creamy texture. Be sure to check the expiration date for freshness. For the best results, let it come to room temperature before mixing to ensure a smooth batter.

How can I store leftover Frankenstein Mini Cheesecakes effectively?
Very important! Store your mini cheesecakes in an airtight container in the refrigerator for up to 3 days. To maintain their creamy texture and flavor, I recommend placing a piece of parchment paper between the cheesecakes and the lid to prevent any condensation from affecting them.

Can I freeze Frankenstein Mini Cheesecakes?
Absolutely! To freeze, first, place the cooled mini cheesecakes on a baking sheet in a single layer. Allow them to freeze until solid, about 1-2 hours. Then transfer them to a freezer-safe container or resealable plastic bag, where they can stay for up to 2 months. Just be sure to thaw them in the refrigerator before serving for the best taste and texture.

What should I do if my cheesecake batter is too lumpy?
No problem! If you find that your batter is lumpy, it might be due to the cream cheese not being softened enough. Make sure your cream cheese is at room temperature before mixing. If it’s too late, try using an electric mixer for an additional minute or two, or you can whisk it by hand vigorously until smooth. Avoid overmixing after adding the flour, as that can create a dense texture.

Can dogs eat cheesecake? Are there any ingredients to avoid?
Great question! While dogs can have small amounts of plain cream cheese as an occasional treat, avoid giving them any version of your Frankenstein Mini Cheesecakes due to ingredients like sugar and chocolate, which aren’t safe for pets. Always check for any allergies and consult your vet if uncertain.

Can I use a different type of cookie for the crust?
Absolutely! While OREO cookies provide a delightful chocolate flavor, feel free to experiment with different cookies like graham crackers or even gluten-free options. Just ensure you adjust the amounts if necessary, and follow the same melting butter and mixing method for a great crust!

Delightful Frankenstein Mini Cheesecakes for Spooky Treats

These Frankenstein Mini Cheesecakes are delightful spooky treats perfect for any gathering.

  • mini-cheesecake pan
  • Mixing bowls
  • Electric mixer
  • spatula

For the Cheesecake Mixture

  • 8 oz Cream cheese (softened)
  • 1/2 cup Sugar
  • 2 large Eggs
  • 2 tbsp Flour (omit for gluten-free)
  • 1 tsp Vanilla (extract)
  • 3 drops Green food coloring (adjust to desired hue)

For the Crust

  • 15 cookies OREO cookies (crushed)
  • 5 tbsp Butter (melted)

For Decorating

  • 12 pieces Edible eyes
  • 1/2 cup Chocolate chips (for dipping or embellishments)
  • 1/4 cup Chocolate sprinkles
  • 1/4 cup Chocolate chips (for piping)

Step-by-Step Instructions

  1. Preheat your oven to 350°F (175°C).
  2. Combine the crushed OREO cookies with melted butter in a mixing bowl and stir until thoroughly mixed. Form 1-inch balls and press them into the bottom of your mini cheesecake pan.
  3. In a separate bowl, beat the cream cheese with sugar, eggs, and vanilla until smooth and creamy, around 2-3 minutes.
  4. Add the flour to the cream cheese mixture and mix until combined, being careful not to overmix.
  5. Gradually mix in the green food coloring until your desired shade is achieved.
  6. Pour the cheesecake batter into each crust, filling each cavity almost to the top. Use a spatula to smooth the top if necessary.
  7. Bake for 15 minutes, until the edges are set but the center still jiggles slightly.
  8. Cool in the pan for about 30 minutes, then refrigerate for at least 1 hour.
  9. Dip the tops in melted chocolate and roll in chocolate sprinkles to decorate.
  10. Pipe features onto your cheesecakes using melted chocolate and place edible eyes on top.

Chill completely before decorating to avoid melting. Start with less food coloring and adjust as needed. Avoid overmixing to keep the texture light and fluffy.

Dessert
American
bite-sized cheesecakes, easy cheesecakes, Frankenstein Mini Cheesecakes, fun desserts, Halloween desserts, spooky treats

Filed Under: Dessert

Decadent Chocolate Covered Cranberry Sauce Delight

October 8, 2025 by grace bellamy Leave a Comment

As I stood in my kitchen pondering dessert ideas, a lightbulb moment struck me: why not marry two beloved flavors into one unforgettable treat? Enter my Chocolate Covered Cranberry Sauce, a delightful twist on a traditional favorite that promises to impress! This simple yet elegant recipe not only takes only minutes to prepare, but it also brings a fun and festive touch to any gathering or cozy night in. Picture those vibrant, tangy cranberry rounds enveloped in rich, velvety chocolate, offering a guilt-free indulgence that your taste buds will thank you for. Whether you need a quick bite to satisfy your sweet tooth or a unique gift for a friend, this recipe delivers on every front. Curious to find out how easily you can whip this up at home? Let’s dive in!

Chocolate Covered Cranberry Sauce

Why is this chocolate treat so special?

Irresistible Flavor: The tartness of the cranberry pairs perfectly with the richness of dark chocolate, creating a sweet-and-sour sensation that keeps you coming back for more.

Quick Preparation: This recipe is a breeze, taking just 10 minutes of active prep time, making it ideal for those with a busy schedule or anyone who wants to whip up a treat in a flash.

Versatile Treat: Serve it as a unique dessert at holiday parties, or give a quick snack a fancy twist. It’s sure to impress guests and loved ones alike!

Guilt-Free Indulgence: Enjoy a delightful treat that’s lower in calories compared to traditional desserts, thanks to its fresh ingredients.

Perfect for Gifting: Wrapped nicely, these chocolate-covered cranberries make a thoughtful gift for anyone who appreciates homemade goodies. Bring some to your next gathering and watch them disappear!

Chocolate Covered Cranberry Sauce Ingredients

For the Cranberry Base

  • Jellied cranberry sauce – Use a 14-ounce can for optimal consistency and flavor.

For the Chocolate Coating

  • Dark chocolate chips – 16 ounces provide a rich, decadent layer that perfectly complements the tartness of the cranberry sauce.
  • Coconut oil (optional) – 1 tablespoon helps the chocolate melt smoothly and gives it a glossy finish.

This delightful recipe for Chocolate Covered Cranberry Sauce is easy to assemble and a feast for both the eyes and the palate! Enjoy making these delectable treats!

Step‑by‑Step Instructions for Chocolate Covered Cranberry Sauce

Step 1: Prepare the Cranberry Sauce
Start by opening the can of jellied cranberry sauce, then cut it into approximately ½-inch thick discs. Lay each cranberry round flat on a baking sheet lined with parchment paper or a silicone mat. This provides a non-stick surface, making it easy to transfer the chocolate-covered cranberry sauce later. Place the tray in the freezer for at least 30 minutes to firm up the cranberries, allowing them to hold their shape when dipped in chocolate.

Step 2: Melt the Chocolate
While the cranberry sauce chills, prepare the chocolate coating. In a microwave-safe bowl, combine 16 ounces of dark chocolate chips and 1 tablespoon of coconut oil, if using. Heat the mixture in the microwave for 1 minute on high. Remove the bowl and stir thoroughly; continue microwaving in 15-second increments while stirring each time until the chocolate is fully melted and smooth, creating a luscious coating for your chocolate covered cranberry sauce.

Step 3: Dip the Cranberry Slices
Once the cranberry rounds are nicely firm, remove them from the freezer. Using a fork, carefully dip each cranberry slice into the melted chocolate, ensuring it’s fully coated. Allow any excess chocolate to drip off back into the bowl, then return the dipped cranberry to the lined baking sheet. This process should be done quickly to maintain the cold temperature of the cranberry sauce, ensuring a perfect coating.

Step 4: Set the Chocolate Coating
After dipping all the cranberry slices, return them to the freezer for about 30 minutes. This allows the chocolate to harden completely, forming a crisp shell around the tart cranberry. Keep an eye on them, and you’ll see the chocolate become set and glossy, giving you that beautiful finish for your chocolate covered cranberry sauce.

Step 5: Serve and Enjoy
Once the chocolate is fully set, remove the tray from the freezer. Carefully transfer the chocolate covered cranberry sauce to a serving platter or store them in an airtight container. These delightful treats can be served immediately or kept for later. Whether as a festive dessert or a sweet snack, your chocolate covered cranberry sauce is now ready to impress!

Chocolate Covered Cranberry Sauce

Chocolate Covered Cranberry Sauce Variations

Get ready to customize your Chocolate Covered Cranberry Sauce with delightful twists that will tantalize your taste buds!

  • Nutty Crunch: Add crushed almonds or hazelnuts on top before the chocolate sets for a delightful crunch and flavor contrast.
  • Spicy Kick: Incorporate a dash of cayenne pepper to your melted chocolate for those who love a little heat in their sweet treats.
  • Coconut Delight: Swap out dark chocolate for a combination of white chocolate and shredded coconut for a tropical twist that’s simply irresistible.
  • Fruit Infusion: Mix in some finely chopped orange zest or even a sprinkle of cinnamon to the chocolate for a warm, aromatic flavor enhancement.
  • Alternative Sweeteners: Use sugar-free chocolate chips for a low-calorie option, perfect for those watching their sugar intake without sacrificing taste.
  • Minty Freshness: Add a few drops of mint extract to the chocolate for a refreshing mint-chocolate experience that is sure to please.
  • Vegan-Friendly: Opt for dairy-free chocolate and coconut oil to make this a fabulous vegan dessert without losing any of the rich chocolate flavors.
  • Dried Fruit Medley: Drizzle some melted chocolate on top of nuts and dried fruits like cranberries or apricots for a sensational mixed snack, perfect for gatherings.

Remember, your kitchen is a canvas! Feel free to mix and match these ideas to create a Chocolate Covered Cranberry Sauce that reflects your unique taste. Happy cooking!

How to Store and Freeze Chocolate Covered Cranberry Sauce

Room Temperature: Keep chocolate covered cranberry sauce in a cool, dry place for up to 2 days, but avoid direct sunlight to prevent melting.

Fridge: Store in an airtight container in the fridge for up to 1 week. This will keep them fresh and help maintain the chocolate’s texture.

Freezer: For extended storage, freeze in a single layer on a baking sheet before transferring to an airtight container. They can last up to 3 months without losing their delightful quality.

Reheating: No need to reheat; simply enjoy these chocolate covered cranberry treats directly from the fridge or freezer for a delightful contrast in temperature!

Make Ahead Options

These Chocolate Covered Cranberry Sauce treats are fantastic for meal prep! You can prep the cranberry rounds up to 24 hours in advance by cutting them and placing them on a lined baking sheet in the freezer. This not only helps maintain their shape but also ensures they remain firm for the chocolate dip. When you’re ready to enjoy this delightful dessert, simply melt the dark chocolate, dip the frozen cranberry rounds, and let them set in the freezer for an additional 30 minutes. By prepping ahead, you’ll save time during the busy week and can serve these treats just as delicious and festive as if made fresh!

What to Serve with Chocolate Covered Cranberry Sauce

Looking to create a beautifully balanced meal around this tempting treat?

  • Creamy Mashed Potatoes: The rich, buttery flavor of mashed potatoes creates a comforting counterpoint to the tartness of the chocolate-covered cranberries.

  • Savory Cheese Platter: A selection of sharp cheeses can elevate your dessert, providing a delightful contrast between savory and sweet. Think aged cheddar paired with a splash of honey!

  • Fresh Salad with Citrus Vinaigrette: A zesty salad balances the sweetness, with fresh greens waking up the palate and complementing the richness of the chocolate.

  • Warm Vanilla Cake: Serve warm cake alongside the cranberries for a comforting touch, where the warm cake’s simplicity brings out the flavors of the chocolate and cranberry.

  • Sparkling Water with Mint: A refreshing drink choice to cleanse your palate, the mint adds a refreshing bright note that enhances the dessert experience.

  • Dark Chocolate Espresso: For coffee lovers, a cup of rich espresso pairs beautifully with chocolate, highlighting the decadence of your chocolate-covered cranberries.

  • Homemade Whipped Cream: A dollop of light, fluffy whipped cream adds creaminess that complements the chocolate-covered cranberries perfectly.

  • Nutty Biscotti: Crunchy biscotti delivers a satisfying texture and enhances flavors with its nutty, slightly sweet nature.

  • Fruity Sorbet: For a lighter finish, a scoop of fruit sorbet offers a refreshing palate cleanser while echoing the cranberries’ vibrant fruitiness.

Expert Tips for Chocolate Covered Cranberry Sauce

  • Chill the Rounds: Ensure the cranberry slices are well-frozen before dipping them in chocolate. This prevents the chocolate from melting immediately and allows for a better coating.

  • Use Quality Chocolate: Opt for high-quality dark chocolate for a richer flavor that pairs perfectly with the tartness of the cranberry sauce in your chocolate covered cranberry sauce.

  • Stir Frequently: When melting chocolate, stir frequently to avoid burning. A smooth melt ensures a beautiful finish.

  • Timing is Key: Dip the cranberry rounds quickly and return them to the freezer promptly; this helps maintain their shape and ensures a crisp chocolate shell.

  • Add Toppings: For an extra touch, consider adding sea salt or crushed nuts on top of the chocolate before it sets, enhancing both flavor and texture.

Chocolate Covered Cranberry Sauce

Chocolate Covered Cranberry Sauce Recipe FAQs

How do I choose the best cranberry sauce for this recipe?
Absolutely! For the best flavor and texture, opt for a 14-ounce can of jellied cranberry sauce. Look for one that has a smooth consistency with no dark spots, which indicates over-ripeness. A good cranberry sauce should be vibrant in color and free from excessive additives.

How should I store my chocolate covered cranberry sauce properly?
Great question! You can keep your chocolate covered cranberry sauce at room temperature for up to 2 days, but it’s best stored in an airtight container in the fridge for up to 1 week. This helps maintain freshness and the chocolate’s silky texture. Keep an eye on humidity, as moisture can affect the quality!

Can I freeze chocolate covered cranberry sauce? How?
Yes, you can absolutely freeze these delights! First, place the chocolate covered cranberry sauce in a single layer on a baking sheet and freeze until solid—about 1 hour. Then, transfer them to an airtight container or zip-lock bag. They can last up to 3 months in the freezer. When you’re ready to enjoy, simply pull them out and let them thaw in the fridge.

What should I do if my chocolate isn’t melting smoothly?
If you find that your chocolate is clumping or not melting properly, don’t fret! Start by adjusting the heat; microwave in shorter increments (15 seconds) and stir patiently to avoid burning. If it’s still too thick, you can add an extra teaspoon of coconut oil to help achieve a smoother consistency. Remember, it’s all about that silky finish for our chocolate covered cranberry sauce!

Are there any dietary considerations I should be aware of?
Very! This recipe is predominantly gluten-free, but always check the labels on your chocolate chips. If you have nut allergies, ensure your chocolate comes from a nut-free facility. For vegan options, look for dark chocolate chips that are dairy-free. It’s always best to tailor this recipe to meet your specific dietary needs!

Decadent Chocolate Covered Cranberry Sauce Delight

Chocolate Covered Cranberry Sauce is an unforgettable treat that combines rich chocolate and tangy cranberries for a delightful dessert experience.

  • Microwave-safe bowl
  • Baking Sheet
  • Parchment paper or silicone mat
  • fork

For the Cranberry Base

  • 1 can jellied cranberry sauce (14 ounces for optimal consistency and flavor)

For the Chocolate Coating

  • 16 ounces dark chocolate chips (provides a rich layer)
  • 1 tablespoon coconut oil (optional for smooth melting)

Step-by-Step Instructions

  1. Prepare the cranberry sauce by cutting the jellied cranberry sauce into approximately ½-inch thick discs and laying them on a baking sheet lined with parchment paper. Freeze for at least 30 minutes.
  2. Melt the chocolate by combining dark chocolate chips and coconut oil in a microwave-safe bowl, heating in the microwave until smooth.
  3. Dip each cranberry slice into the melted chocolate, ensuring full coverage, and allow excess chocolate to drip off before placing them back on the baking sheet.
  4. Once all cranberry slices are coated, return them to the freezer for about 30 minutes to set the chocolate.
  5. Serve the chocolate covered cranberry sauce on a platter or store in an airtight container. Enjoy as a festive dessert or snack.

For best results, chill the rounds well and use quality chocolate. Additional toppings like sea salt or nuts can enhance flavor and texture.

Dessert
American
chocolate, Chocolate Covered Cranberry Sauce, Cranberry Sauce, dessert, Holiday Treat

Filed Under: Dessert

Delicious Spooky Spider Sandwiches for a Fun Family Treat

October 8, 2025 by grace bellamy Leave a Comment

On a crisp autumn afternoon, with leaves crunching underfoot and the scent of pumpkin spice wafting through the air, I stumbled upon a delightful idea: Spooky Spider Sandwiches. These whimsical creations are perfect for celebrations or simply spicing up lunchtime. Barely taking 10 minutes to make, they are a fantastic way to engage kids and bring a bit of festive fun to your home. Plus, with the classic combination of peanut butter and jelly, these sandwiches are sure to please even the pickiest eaters. So, are you ready to embrace the creative chaos of Halloween cuisine? Let’s dive into this spooktacular recipe!

Spooky Spider Sandwiches

Why Make Spooky Spider Sandwiches?

Creative Fun: Transform a simple lunch into a festive masterpiece that’s perfect for Halloween or any fun occasion.

Kid-Friendly: Kids will love helping with the assembly, making this a fantastic family activity.

Quick Prep: With only 10 minutes of prep time, these sandwiches are the ideal solution for busy days.

Delicious Duo: The classic peanut butter and jelly combination ensures these treats are both tasty and familiar.

Eye-Catching Appeal: The addition of candy eyes and pretzel legs makes these sandwiches a show-stopper at parties.

Give these Spooky Spider Sandwiches a try and add some fun to your family meals! For more creative ideas, check out my Halloween treats or explore easy lunchbox favorites.

Spooky Spider Sandwich Ingredients

Get ready to whip up some playful magic with these simple ingredients!

For the Sandwiches

  • 8 slices bread – Use any type you like; whole grain adds a nutty flavor!
  • 1 cup peanut butter – Creamy or crunchy, it’s all deliciously spooky!
  • 1 cup strawberry jelly – Substitute with grape jelly for a different twist.

For the Spider Legs

  • 48 pretzel sticks – These add the perfect crunch and a fun texture!

For Decoration

  • 16 candy eyes – These are essential for bringing your spooky spiders to life!

Now that you have the ingredients gathered, you’re one step closer to creating your delightful Spooky Spider Sandwiches. Let’s get assembling!

Step‑by‑Step Instructions for Spooky Spider Sandwiches

Step 1: Prepare the Bread
Start by placing the 8 slices of bread on a clean cutting board. Using a biscuit cutter, press down firmly to cut out the center of each slice, creating circular holes. This step adds a fun element to your Spooky Spider Sandwiches! Set aside the cut-out circles; they might even come in handy for a mini snack later.

Step 2: Spread the Peanut Butter
Take four of the bread slices and spread a generous layer of peanut butter evenly across the surface using a butter knife. Make sure to cover the entire slice for maximum flavor! The peanut butter will serve as the “glue” for your spider sandwiches. Once done, you’ll have a delightful base ready for the next step.

Step 3: Add the Jelly
Now, grab the remaining four bread slices and spread a thick layer of strawberry jelly on top of each slice. The sweet jelly complements the creamy peanut butter beautifully, creating a delicious duo. Once you finish spreading, take a moment to appreciate the beautiful colors of your Spooky Spider Sandwiches!

Step 4: Assemble the Sandwiches
Carefully place a jelly-covered slice on top of a peanut butter-covered slice, pressing down gently to combine the two. Repeat with the remaining bread slices to form the sandwiches. Ensure each sandwich is evenly assembled, and take a moment to admire your handiwork as you create these festive treats.

Step 5: Create Spider Legs
With your sandwiches assembled, it’s time to make them spooky! Take 3 pretzel sticks and gently insert them into each side of the sandwich to form spider legs. Press them in until they feel secure. The pretzels should be evenly spaced for that authentic spider look. Get creative with the angle for extra pizzazz!

Step 6: Add the Candy Eyes
To finish off your Spooky Spider Sandwiches, gently place 2 candy eyes on top of each sandwich. Position them near the center to bring your creepy crawlers to life! The candy eyes will add a whimsical touch, making these sandwiches perfect for fun lunches or Halloween parties.您的美食已经准备好了!

Spooky Spider Sandwiches

Make Ahead Options

These Spooky Spider Sandwiches are fantastic for busy home cooks looking to save time! You can prepare the sandwiches up to 24 hours in advance by assembling them without the pretzel legs and candy eyes. Simply spread the peanut butter and jelly on the bread, sandwich them together, and store them in an airtight container in the refrigerator. To maintain their freshness and prevent the bread from becoming soggy, it’s essential to assemble them shortly before serving. When you’re ready to serve, just stick in the pretzel legs and candy eyes for that spooky flair! You’ll enjoy delightful, ready-to-go snacks that are just as delicious as if they were made fresh!

What to Serve with Spooky Spider Sandwiches

Embrace the playful spirit of Halloween with delightful side dishes that perfectly round out mealtime!

  • Crunchy Veggie Sticks: Fresh carrots, cucumbers, and bell peppers add a crisp contrast, ensuring a balanced, nutritious plate.
  • Creepy Cucumber Fingers: Slice cucumbers into finger shapes and use slivers of red bell pepper for “fingernails,” making them a spooky snack hit!
  • Haunted Fruit Salad: A colorful mix of spooky-themed fruits like ghostly bananas and pumpkin-shaped melons provides a sweet, refreshing finish.
  • Pumpkin Soup: Serve warm and creamy pumpkin soup in mini pumpkins for a festive touch, paired deliciously with your spider sandwiches.
  • Spooky Snacks Platter: Create a mix of cheese cubes, olives, and crackers, perfect for grazing while enjoying the fun vibes!
  • Witch’s Brew Punch: Serve a refreshing green punch with floating “eyeballs” (lychee fruits with blueberries) to elevate the Halloween experience.
  • Grainy Pudding Cups: Sweeten the evening with chocolate chia pudding topped with crushed graham crackers, resembling dirt for a spooky dessert delight.
  • Ghostly Meringue Cookies: Light-as-air meringue cookies shaped like ghosts are a whimsical addition that kids will love alongside the sandwiches.
  • Chocolate Milkshakes: Creamy chocolate shakes topped with whipped cream and crushed cookies create a deliciously indulgent finale!
  • Apple Slices with Caramel Dip: Crisp apple slices served with rich caramel dip offer a sweet bite that complements the textures of the sandwiches.

How to Store and Freeze Spooky Spider Sandwiches

Room Temperature: Keep assembled sandwiches at room temperature for up to 2 hours, especially if serving at a party. They’re best enjoyed fresh for optimal flavor and texture.

Fridge: Store any leftover Spooky Spider Sandwiches in an airtight container in the fridge for up to 3 days. This keeps them fresh for those impromptu snack cravings!

Freezer: To have some fun ready-made treats, freeze the assembled sandwiches in a single layer, wrapped tightly in plastic wrap, for up to 1 month. Thaw overnight in the fridge before serving.

Reheating: If you prefer warm sandwiches, place them in a toaster oven for a few minutes to warm them up. Just be sure to remove pretzel legs and candy eyes beforehand!

Expert Tips for Spooky Spider Sandwiches

Quality Bread: Use fresh, hearty bread for the best structure; stale bread can make the sandwiches fall apart.

Spread Evenly: Ensure your peanut butter and jelly layers are spread evenly to keep the sandwiches firm and prevent any sogginess.

Pretzel Positioning: Insert the pretzel legs at a slight angle for a creepy, realistic spider look that kids will love!

Candy Eye Placement: Make sure to center the candy eyes to maximize their spooky cuteness; this will attract kids’ attention.

Creative Variations: Feel free to swap in different spreads like Nutella or almond butter to cater to different tastes while enjoying these Spooky Spider Sandwiches!

Spooky Spider Sandwiches: Fun Variations

Feel free to unleash your creativity and give these spooky treats your own personal twist!

  • Nut-Free: Swap peanut butter for sunflower seed butter to keep it safe for nut allergies. It’s equally creamy and delicious!
  • Whole Wheat: Opt for whole wheat or multigrain bread for a healthier twist, adding a touch of nuttiness to your sandwiches.
  • Fruit-Infused: Use fruit preserves or spreads like blackberry or raspberry jelly to switch up the flavor profile and surprise the taste buds!
  • Choco-Spiders: Replace strawberry jelly with chocolate spread for a rich, decadent variation that chocolate lovers will absolutely adore. The sweetness will be a hit!
  • Veggie Twist: Add thinly sliced cucumbers or bell peppers to your sandwiches for a crunchy surprise that boosts nutrition and adds freshness. The colors will make them even more inviting!
  • Spicy Touch: For the bold, try spreading spicy pepper jelly instead of regular jelly; it adds an exciting kick that will turn heads. Get ready for a flavor adventure!
  • Monster Eyes: Instead of candy eyes, use mini marshmallows or gummy candies for a different fun look, keeping the creepy vibes alive in a playful way.
  • Sweet Spider: Drizzle some honey over the peanut butter before stacking for an added layer of sweetness that kids will love. It brings a delightful sticky sweetness to the mix!

Explore these variations to elevate your Spooky Spider Sandwiches to the next level, and don’t forget to check out my Halloween treats for more festive inspirations or dive into easy lunchbox favorites for even more fun!

Spooky Spider Sandwiches

Spooky Spider Sandwiches Recipe FAQs

What kind of bread should I use for Spooky Spider Sandwiches?
Absolutely! For the best structure and flavor, I recommend using fresh, hearty bread such as whole grain or sourdough. If you prefer a sweeter taste, you can even use white bread. Just avoid stale bread, as it can crumble easily.

How should I store leftover Spooky Spider Sandwiches?
Great question! You can keep any leftover Spooky Spider Sandwiches in an airtight container in the fridge for up to 3 days. This way, they stay fresh and ready for a quick snack. If you’re serving them at a party, it’s best to keep them at room temperature for no longer than 2 hours to maintain optimal flavor and texture.

Can I freeze Spooky Spider Sandwiches?
Yes, you can! To freeze your assembled sandwiches, wrap them tightly in plastic wrap and place them in a single layer in the freezer for up to 1 month. When you’re ready to enjoy, simply thaw them overnight in the fridge. For warm sandwiches, heat them in a toaster oven for a few minutes—just remember to remove the pretzel legs and candy eyes beforehand!

What if I have dietary restrictions or allergies?
When it comes to dietary considerations, you can easily modify this recipe. For peanut allergies, alternatives like sunflower seed butter or soy nut butter work wonderfully. If you’re looking for a gluten-free option, choose gluten-free bread and ensure that all your ingredients comply with your dietary needs. Always check labels to avoid cross-contamination.

How do I prevent sogginess in my Spooky Spider Sandwiches?
Very good point! To prevent sogginess, I recommend spreading the peanut butter first and allowing it to form a barrier on the bread. Then, apply the jelly on the other slice. By keeping the two spreads separate until they’re assembled, you minimize moisture transfer. Enjoy your delicious creations to the last bite!

What is the best way to arrange the pretzel legs for a spooky look?
For that authentic spider look, insert the three pretzel sticks at a slight angle on each side of the sandwich. Space them evenly apart for a creepy, crawly effect. And remember, the more pretzel legs, the merrier—kids will love the extra detail!

Enjoy creating these Spooky Spider Sandwiches and embrace the festive fun!

Delicious Spooky Spider Sandwiches for a Fun Family Treat

These Spooky Spider Sandwiches are a fun Halloween treat, combining peanut butter and jelly with a playful twist, perfect for family gatherings.

  • biscuit cutter
  • Butter knife
  • cutting board

For the Sandwiches

  • 8 slices bread (Use any type you like; whole grain adds a nutty flavor!)
  • 1 cup peanut butter (Creamy or crunchy, it’s all deliciously spooky!)
  • 1 cup strawberry jelly (Substitute with grape jelly for a different twist.)

For the Spider Legs

  • 48 sticks pretzel (These add the perfect crunch and a fun texture!)

For Decoration

  • 16 candy eyes (These are essential for bringing your spooky spiders to life!)

Step-by-Step Instructions

  1. Prepare the Bread: Start by placing the 8 slices of bread on a clean cutting board. Using a biscuit cutter, press down firmly to cut out the center of each slice, creating circular holes.
  2. Spread the Peanut Butter: Take four of the bread slices and spread a generous layer of peanut butter evenly across the surface using a butter knife. Ensure complete coverage.
  3. Add the Jelly: Spread a thick layer of strawberry jelly on the remaining four bread slices, complementing the peanut butter beautifully.
  4. Assemble the Sandwiches: Carefully place a jelly-covered slice on top of a peanut butter-covered slice, pressing down gently to combine.
  5. Create Spider Legs: Insert 3 pretzel sticks into each side of the sandwich to form spider legs. Press them in until they feel secure.
  6. Add the Candy Eyes: Place 2 candy eyes on top of each sandwich near the center to bring them to life!

Use fresh, hearty bread for best results. Spread evenly to keep the sandwiches firm and insert pretzel legs at a slight angle for maximum effect.

Sandwiches
American
family meals, festive food, Halloween Treats, kids lunch, sandwiches, Spooky Spider Sandwiches

Filed Under: Sandwiches

Spooktacular Halloween Deviled Eggs with a Fun Twist

October 7, 2025 by grace bellamy Leave a Comment

As I stared at the vibrant array of Halloween decorations adorning my kitchen, a curious idea sparked in my mind—the notion of creating a spooky twist on a classic favorite: Halloween Deviled Eggs! These Swamp Eggs are not only eye-catching with their vibrant hues, but they also offer a unique, healthier spin on traditional deviled eggs. Using natural dyes from frozen blueberries and a hint of chlorophyll, these festive bites are perfect for impressing guests at your Halloween gathering, all while keeping prep simple and enjoyable. Plus, they make for a fun culinary adventure that the whole family can get involved in. Ready to dive into this deliciously eerie recipe? Let’s explore how to transform ordinary eggs into a hauntingly delightful treat!

Halloween Deviled Eggs

Why are Swamp Eggs a Halloween must-try?

Spooky Transformation: These Halloween Deviled Eggs take on a thrilling twist, turning a classic appetizer into a whimsical treat.

Natural Ingredients: Instead of artificial colors, we use blueberries for a stunning dye that’s as healthy as it is vibrant.

Easy Preparation: With just a few simple steps, you’ll have beautiful, spooky eggs that impress without the hassle—perfect for all skill levels!

Family Fun: Involve the kids in the dyeing process for a memorable cooking adventure.

Unique Flavor: The delightful mix of fresh herbs and creamy yolk filling offers a burst of flavor that keeps guests coming back for more.

Get ready to delight your crowd this Halloween with these attention-grabbing Swamp Eggs!

Halloween Deviled Eggs Ingredients

Discover the delightful ingredients that make these Halloween Deviled Eggs both spooky and scrumptious!

For the Dye
• 12 large eggs – The base for your hauntingly delicious deviled eggs.
• 1 1/2 cups frozen blueberries – These create a natural dye, giving your eggs a vibrant, eerie hue.
• 1 1/2 cups hot water – Helps steep the blueberries for an effective dye.
• 3 tablespoons distilled white vinegar – Essential for enhancing the dye color and preserving the eggs.

For the Filling
• 12 large egg yolks – Retrieve these from the dyed hard-boiled eggs for a rich filling.
• 9 tablespoons mayonnaise – Provides creaminess and binds the filling together.
• 2 tablespoons liquid chlorophyll – Adds a vibrant green color and health benefits.
• 1/4 teaspoon salt – Enhances the overall flavor of the filling.
• 1/4 teaspoon black pepper – A dash of spice to elevate the taste.
• 3 tablespoons minced fresh dill – Introduces a fresh, aromatic note.
• 2 tablespoons minced fresh chives – Adds a mild onion flavor and a pop of color.
• 1 large clove garlic – Gives depth to the filling with its savory touch.

For Garnish
• 1/2 tablespoon poppy seeds – Sprinkle these on top for a unique crunchy texture and final spooky touch.

With these ingredients on hand, you’re all set to create a batch of festive Halloween Deviled Eggs that are sure to enchant your guests!

Step‑by‑Step Instructions for Halloween Deviled Eggs

Step 1: Prepare the Blueberry Dye
Start by placing 1 1/2 cups of thawed frozen blueberries in a mixing bowl. Pour 1 1/2 cups of hot water over the blueberries, followed by 3 tablespoons of distilled white vinegar. Stir gently to combine and let this mixture cool for about 30 minutes until it reaches room temperature, creating a vibrant dye for your Halloween Deviled Eggs.

Step 2: Dye the Hard-Boiled Eggs
While the dye cools, prepare your 12 large hard-boiled eggs. Once the dye is ready, carefully crack the eggshells and gently immerse each egg into the blueberry dye. Let the eggs soak for 1 hour, turning them occasionally to ensure even coloring, until they transform into a spooky shade of blue that will make these Halloween Deviled Eggs truly eye-catching.

Step 3: Peel the Dyed Eggs
After the soaking time, remove the eggs from the dye. Rinse each dyed egg under cold running water to help remove the shells easily. As you peel the eggs, you’ll uncover the beautiful, vibrant color underneath, making your Halloween Deviled Eggs look surreal and fun. Set the peeled eggs aside to cool completely.

Step 4: Prepare the Yolk Filling
In a mixing bowl, scoop out the yolks from the peeled hard-boiled eggs; you should have 12 yolks. Add in 9 tablespoons of mayonnaise, 2 tablespoons of liquid chlorophyll, 1/4 teaspoon of salt, 1/4 teaspoon of black pepper, 3 tablespoons of minced dill, 2 tablespoons of chives, and 1 clove of crushed garlic. Blend all the ingredients together until the mixture is smooth and creamy, ensuring an even distribution of flavors for your Halloween Deviled Eggs.

Step 5: Fill the Egg Whites
Using a spoon or a piping bag, carefully fill the hollowed egg whites with your prepared yolk mixture. You can create a swirled effect for a more decorative touch or simply mound it high for that classic deviled egg look. Be generous with the filling, as this will showcase the creamy goodness inside your spooky treats.

Step 6: Garnish and Serve
Finally, to add the finishing touch, sprinkle 1/2 tablespoon of poppy seeds atop each filled egg for a unique texture and a festive flair. Arrange the decorated Halloween Deviled Eggs on a serving platter, and watch as your guests delight in this spooky twist on a classic favorite. These eye-catching treats are ready to be served at your Halloween gathering!

Halloween Deviled Eggs

How to Store and Freeze Halloween Deviled Eggs

Fridge: Store your Halloween Deviled Eggs in an airtight container in the refrigerator for up to 3 days to keep them fresh and tasty.

Freezer: It’s best not to freeze filled deviled eggs, as the texture may change after thawing. However, unpeeled boiled eggs can be frozen for future use.

Reheating: If you’ve made leftover unpeeled hard-boiled eggs, simply thaw in the fridge overnight and enjoy them in various dishes, but avoid freezing the filled Halloween Deviled Eggs.

With these storage tips, you can minimize waste while still ready to enjoy your delicious spooky treat!

What to Serve with Swamp Eggs

Elevate your Halloween gathering with delightful additions that perfectly complement these spooky bites!

  • Crispy Baked Potato Wedges: Their crunchy texture contrasts beautifully with the creamy deviled eggs, creating a satisfying bite with every mouthful.

  • Garlic Butter Breadsticks: Warm, chewy breadsticks provide the perfect vehicle to soak up any leftovers, while their aromatic flavor pairs wonderfully with your eerie spread.

  • Fresh Garden Salad: A light, refreshing salad adds color and balance to your table, featuring crisp greens that brighten up the rich flavors of your Halloween Deviled Eggs.

  • Sour Cream and Chive Dip: This creamy dip is ideal for a fun snack alongside your eggs, bringing a savory element that tantalizes the taste buds and keeps guests returning for more.

  • Pumpkin Spice Sangria: This festive drink combines fruity and spiced notes, making it a delightful pairing that’s perfect for sipping as you enjoy your spooky spread.

  • Chocolate Ghost Cupcakes: These adorable desserts offer a sweet finish to your meal, with rich chocolate flavors that contrast the savory goodness of the deviled eggs.

With this array of pairings, your Halloween celebration will be a feast that guests will remember long after the festivities end!

Expert Tips for Halloween Deviled Eggs

Choose the Right Eggs: Use large, fresh eggs for easier peeling and a more impressive look once dyed.

Monitor Dye Time: Keep an eye on the immersion time; soaking for too long may cause the colors to become overly dark or uneven.

Peel Under Cold Water: Peeling the dyed eggs under cold running water will help remove the shells more easily and enhance the vibrant color of your Halloween Deviled Eggs.

Mix Thoroughly: Be sure to mix the yolk filling until smooth for a creamy consistency; this will elevate the overall taste and presentation.

Play with Garnishes: Don’t hesitate to get creative with garnishes beyond poppy seeds—consider adding tiny edible spider candies for an extra spooky touch!

Make Ahead Options

These delightful Halloween Deviled Eggs are perfect for meal prep, making your Halloween gathering a breeze! You can dye the eggs and prepare the yolk filling up to 24 hours in advance to save precious time. To do this, simply follow the dyeing and peeling steps and then store the dyed egg whites in an airtight container in the refrigerator. The yolk filling can be prepared and refrigerated separately; just make sure to cover it tightly to maintain its creamy texture. When it’s time to serve, simply fill the egg whites with the yolk mixture, garnish with poppy seeds, and your spooky treat will be just as delicious as if made fresh!

Halloween Deviled Eggs: Fun Variations

Get ready to unleash your creativity in the kitchen with these delightful twists on Halloween Deviled Eggs!

  • Spicy Kick: Add finely chopped jalapeños to the yolk mixture for a zesty flavor explosion. This fiery kick will elevate the spooky dish and leave a memorable impression on your guests.

  • Vegan Version: Substitute egg yolks with mashed avocado and use vegan mayonnaise. This creamy alternative not only keeps the spooky vibe but also makes it suitable for your plant-based friends.

  • Cheesy Delight: Mix in crumbled feta cheese for a rich, tangy flavor that pairs perfectly with the herbs. The added creaminess and flavor depth enhance these Halloween Deviled Eggs to a whole new level!

  • Smoky Flavor: Incorporate some smoked paprika into the filling for a complex flavor that surprises with each bite. This subtle smokiness will enchant your guests and add a wicked twist to this classic treat.

  • Herb Infusion: Experiment with different herbs such as basil or cilantro to create unique flavor profiles. Discover how each herb delivers its own delightful surprise, creating a feast for the senses.

  • Crunch Factor: Add finely chopped cucumbers or celery to the filling for an unexpected crunch. This textural twist not only enhances the visual appeal but also adds a refreshing bite to each spooky egg.

  • Colorful Dye: Use natural dyes from beet juice or turmeric instead of blueberries for a vibrant and different Halloween color scheme. Each hue offers a festive flair that promises to captivate your guests.

  • Pumpernickel Base: Serve these Halloween Deviled Eggs on slices of pumpernickel bread instead of traditional crackers. This nutty, slightly sweet base showcases the spooky deviled eggs perfectly while adding another layer of flavor.

Feel free to mix and match these variations and create your perfect spooky treat! Don’t forget to pair them with other delightful dishes like Boursin Scrambled Eggs for a show-stopping Halloween table!

Halloween Deviled Eggs

Swamp Eggs – Naturally Dyed Spooky Halloween Deviled Eggs Recipe FAQs

What’s the best way to select fresh eggs for my Halloween Deviled Eggs?
Absolutely! When choosing your eggs, look for ones with clean, uncracked shells. Fresh eggs typically have a firm white and a raised yolk. If you can, opt for eggs that are within the “sell by” date for the best quality.

How long can I store my Halloween Deviled Eggs?
You can keep your Halloween Deviled Eggs in an airtight container in the fridge for up to 3 days. After that, the flavor and texture might begin to decline, and you’ll want them at their best for serving!

Can I freeze leftover egg yolk filling?
While you can freeze unpeeled hard-boiled eggs for future use, it’s not advisable to freeze the filled Halloween Deviled Eggs. The texture of the mayonnaise and other ingredients can change after thawing, making them unsuitable for serving. If you have extra yolk filling, consider mixing it into salads or sandwiches instead!

What should I do if my dyed eggs have dark spots?
Dark spots often indicate uneven dye absorption or over-soaking. If you encounter this, just peel the egg mid-dye for a quick rinse before re-soaking for a more uniform color. Aim for a soaking time of about an hour for that perfect hue.

Is it safe for pets to eat these Halloween Deviled Eggs?
It’s best not to share these Halloween Deviled Eggs with your pets. The ingredients like mayonnaise can upset their stomachs, and things like garlic should be avoided as it’s harmful to dogs and cats. Stick with pet-friendly treats instead!

What alternatives can I use for the chlorophyll?
If you don’t have liquid chlorophyll on hand, you might substitute it with a few drops of green food coloring. Alternatively, pureed spinach can add a bit of color and a touch of freshness, but it will alter the flavor slightly. Happy cooking with the spooky twist of your choice!

Spooktacular Halloween Deviled Eggs with a Fun Twist

Delight your guests this Halloween with these colorful, healthier Halloween Deviled Eggs, creatively dyed with blueberries.

  • Mixing Bowl
  • spoon
  • piping bag

For the Dye

  • 12 large eggs (The base for your hauntingly delicious deviled eggs.)
  • 1.5 cups frozen blueberries (These create a natural dye.)
  • 1.5 cups hot water (Helps steep the blueberries for dye.)
  • 3 tablespoons distilled white vinegar (Essential for enhancing dye color.)

For the Filling

  • 12 large egg yolks (Retrieved from dyed hard-boiled eggs.)
  • 9 tablespoons mayonnaise (Provides creaminess.)
  • 2 tablespoons liquid chlorophyll (Adds color and health benefits.)
  • 0.25 teaspoon salt (Enhances overall flavor.)
  • 0.25 teaspoon black pepper (A dash of spice.)
  • 3 tablespoons minced fresh dill (Gives an aromatic note.)
  • 2 tablespoons minced fresh chives (Adds color and mild onion flavor.)
  • 1 large clove garlic (Gives depth to the filling.)

For Garnish

  • 0.5 tablespoon poppy seeds (Adds crunch and final spooky touch.)

Step-by-Step Instructions

  1. Prepare the Blueberry Dye: Place 1 1/2 cups of thawed frozen blueberries in a mixing bowl. Pour in 1 1/2 cups of hot water and 3 tablespoons of distilled white vinegar. Stir gently and let cool for 30 minutes.
  2. Dye the Hard-Boiled Eggs: Prepare 12 hard-boiled eggs. Immerse the eggs in the cooled dye for 1 hour, turning occasionally for even coloring.
  3. Peel the Dyed Eggs: Rinse each dyed egg under cold water and peel them to reveal vibrant colors.
  4. Prepare the Yolk Filling: Scoop out yolks from eggs and mix with mayonnaise, chlorophyll, salt, pepper, dill, chives, and garlic until smooth.
  5. Fill the Egg Whites: Use a spoon or piping bag to fill egg whites with yolk mixture, creating a decorative touch.
  6. Garnish and Serve: Sprinkle poppy seeds on top of each filled egg, then arrange on a platter for serving.

Use large, fresh eggs for better peeling and presentation. Monitor dye time to get the right color without oversaturation.

Appetizer
American
creative cooking, deviled eggs, family fun, Halloween Deviled Eggs, Halloween recipes, spooky appetizers

Filed Under: Appetizer

Spook Up Your Feast with Halloween Bloody Baked Brie

October 7, 2025 by grace bellamy Leave a Comment

Under the flicker of candlelight and the anticipation of gathering friends, I found myself in a delightful mini-crisis: how to impress with a Halloween treat that screams fun without sacrificing flavor? Enter the Halloween Bloody Baked Brie, a cheesy masterpiece that not only captivates the eye with its dramatic presentation but also satisfies the palate with its warm, gooey center. This recipe requires just 25 minutes and minimal ingredients, making it the perfect crowd-pleaser for your spooky soirée. Pair this indulgent brie with slices of warmed baguette, and you have a treat that elevates any gathering. Who wouldn’t love the playful twist of “blood” dripping from a syringe right onto that creamy goodness? Are you ready to elevate your Halloween festivities with this showstopper?

Halloween Bloody Baked Brie

Why is this Halloween appetizer a must-try?

Simplicity: This Halloween Bloody Baked Brie can be prepared in just 25 minutes, requiring minimal ingredients and effort—perfect for a last-minute gathering!

Eye-Catching: The dramatic “blood” effect from the red pepper jam is sure to steal the show and spark conversation among your guests.

Gooey Goodness: With a melty brie center, every bite is a luscious explosion of flavor, especially when paired with warm baguette slices.

Versatile: Whether it’s a spooky party or a cozy night in, this recipe suits any occasion and can be easily customized with different jams or toppings.

Crowd Favorite: Guaranteed to please cheese lovers and anyone looking to escape the mundane fast-food scene, this appetizer is a fun and flavorful alternative!

Elevate your festive feasts and check out my guide on how to create other playful appetizers like stuffed jalapeño poppers to complete your Halloween spread!

Halloween Bloody Baked Brie Ingredients

• Elevate your spooky treat with these simple, yet flavorful ingredients!

For the Brie
• 1 wheel brie cheese – Choose a high-quality brie for a rich, creamy texture that melts beautifully.
• Flaky salt (optional) – A sprinkle of flaky salt adds a delightful contrast to the sweetness of the jam and enhances the overall flavor.

For the “Blood” Sauce
• 3 tablespoons red pepper jam – This jam provides the perfect sweet and spicy kick to mimic blood, adding both flavor and flair.
• 2-3 tablespoons hot water – Adjust the amount for your desired consistency; hot water helps the jam flow easily from the syringe.

For Serving
• 1 baguette, warmed and sliced – A crispy baguette complements the gooey brie, making it perfect for scooping up all that melty goodness!

Let’s dive into the fun of preparing this eye-catching Halloween appetizer that will undoubtedly thrill your guests!

Step‑by‑Step Instructions for Halloween Bloody Baked Brie

Step 1: Preheat and Prep
Start by preheating your oven to 350 degrees F (175 degrees C). While the oven heats, line a baking sheet with parchment paper to prevent the cheese from sticking. This will also make it easier for you to transfer your Halloween Bloody Baked Brie to a serving platter once it’s baked.

Step 2: Bake the Brie
Place the wheel of brie cheese directly onto the parchment-lined baking sheet. Slide it into the preheated oven and let it bake for 15 to 20 minutes. You’ll know it’s ready when the sides begin to melt and the center is soft but not fully liquid, creating that enticing gooey texture.

Step 3: Prepare the “Blood” Sauce
While your brie is baking, mix the red pepper jam with 2 tablespoons of hot water in a small bowl. Stir until the mixture is smooth and has a pourable consistency. If needed, add the remaining tablespoon of hot water to reach your desired texture, making it perfect to fill a syringe for that Halloween flair.

Step 4: Transfer and Assemble
Once the brie is baked to perfection, carefully lift the parchment paper to transfer it to a festive serving dish. Spoon a generous layer of the red pepper jam mixture over the top, allowing some to drip down the sides like spooky “blood.” If you’re using flaky salt, sprinkle it lightly over the brie for an extra flavor boost.

Step 5: Serve with Style
Place the jam-filled syringe directly in the center of the Halloween Bloody Baked Brie to create a fun serving option. Pair it with warm, sliced baguette or crispy crackers on the side. Your guests will be delighted to scoop the luscious brie and jam, making for a memorable Halloween treat!

Halloween Bloody Baked Brie

Variations & Substitutions for Halloween Bloody Baked Brie

Feel free to get creative with this recipe; let your imagination—and taste buds—run wild!

  • Herb-Infused: Add fresh herbs like rosemary or thyme to the top of the brie before baking for a hint of earthiness. The combination of creamy cheese and aromatic herbs is simply divine.

  • Spicy Kick: Mix some crushed red pepper flakes into the red pepper jam for an extra punch. It transforms the flavor profile and excites those who enjoy a little heat!

  • Nutty Crunch: Top the brie with chopped walnuts or pecans before baking for an added crunch. This variation introduces a delightful texture that balances beautifully with the creamy brie.

  • Fruit Fusion: Swap out the red pepper jam for a sweeter option like cranberry or apple jam. The fruitiness will create a lovely contrast with the richness of the cheese, making it perfect for a fall gathering.

  • Vegan Option: Use a plant-based cheese alternative to make this dish vegan-friendly. There are excellent options available that melt well and maintain a delicious flavor.

  • Savory Medley: Sprinkle sautéed garlic and spinach over the melted brie before serving to blend savory goodness with the rich cheese. This adds a burst of flavor and a pop of color to your dish.

  • Elegant Touch: Drizzle a honey or balsamic glaze just before serving. This finishing touch elevates the dish, adding a sweet-tart note that pairs wonderfully with the brie.

  • Sweet Surprise: Incorporate a layer of dark chocolate shavings on top for a decadent twist. The interplay of sweet and savory will intrigue your guests and leave them wanting more.

Explore these delightful options and let the Halloween Bloody Baked Brie become your canvas for culinary creativity! To complement this playful appetizer, consider trying out my recipe for stuffed jalapeño poppers or a vibrant autumn salad that will round out your festive spread beautifully.

Expert Tips for Halloween Bloody Baked Brie

  • Quality Cheese Matters: Use a high-quality brie for the best melting texture. Cheaper varieties may not melt as beautifully, resulting in a less enjoyable experience.

  • Watch the Bake Time: Keep an eye on the brie to avoid overcooking. It should be soft and gooey but not fully liquid; aim for a gentle melting rather than a runny mess.

  • Adjust the Sauce: Start with 2 tablespoons of hot water when mixing the red pepper jam. Supplement as needed, but avoid making it too runny to keep the “blood” effect intact.

  • Creative Serving Ideas: If you’re feeling adventurous, swap the red pepper jam for other fruit jams or toppings, like fig or apricot, to vary the flavor while keeping the Halloween theme.

  • Pre-Warm the Baguette: Serve your sliced baguette warm to enhance the flavor and provide a delightful contrast to the creamy, melted brie.

Enjoy bringing this Halloween Bloody Baked Brie to life with these expert tips!

What to Serve with Halloween Bloody Baked Brie

Indulging in rich flavors and textures enhances your Halloween gathering, making every bite memorable and delightful.

  • Crispy Crackers: The crunch adds a delightful textural contrast to the gooey brie, making each bite an enjoyable mix of textures.

  • Savory Herb Flatbreads: Sprinkled with fresh herbs, these breads bring an aromatic element that pairs beautifully with the warm cheese and sweet sauce.

  • Garlic Roasted Vegetables: The caramelized sweetness of roasted vegetables provides a healthy, earthy balance to the richness of the brie.

  • Mixed Green Salad: A fresh side salad with a zesty vinaigrette cuts through the creamy brie, leaving your palate rejuvenated and ready for more! Its crunchiness offers a refreshing contrast as well.

  • Pumpkin Soup: This seasonal favorite complements the dish’s flavors while adding a warm, cozy element, creating a comforting meal perfect for fall gatherings.

  • Chilled White Wine: A crisp Sauvignon Blanc elevates the dish with its acidity, enhancing both the brie and the sweet pepper jam for a balanced pairing.

  • Cranberry Orange Relish: The tartness of this relish pairs wonderfully, offering a bright contrast to the cheesy richness while keeping the Halloween spirit alive!

  • Miniature Pumpkin Pies: End the evening on a sweet note with these nostalgic desserts that echo the season, offering just the right amount of sweetness after the savory brie.

  • Spooky Themed Punch: A fun and festive drink with floating fruit garnishes adds an extra layer of creativity that’s sure to delight your guests.

How to Store and Freeze Halloween Bloody Baked Brie

Fridge: Store leftover Halloween Bloody Baked Brie in an airtight container in the refrigerator for up to 3 days. Reheat gently in the oven to restore its creamy texture.

Freezer: You can freeze unbaked brie with the red pepper jam mixture on top. Wrap it tightly in plastic wrap and foil for up to 1 month. Thaw in the fridge before baking.

Reheating: For best results, reheat baked brie in a preheated oven at 350°F for about 10-15 minutes, until it’s warm and gooey. Avoid the microwave to maintain its creamy texture.

Make Ahead Options

These Halloween Bloody Baked Brie are perfect for busy home cooks planning ahead for a festive gathering! You can prepare the red pepper jam “blood” by mixing it with hot water and storing it in a sealed container in the refrigerator for up to 3 days. Additionally, the brie can be placed on the parchment-lined baking sheet and refrigerated for up to 24 hours before baking. To maintain quality, make sure to wrap the brie tightly to prevent it from drying out. When it’s time to impress your guests, simply bake the brie as directed, spoon the jam over the top, and serve with warm baguette slices for a delightful, stress-free appetizer!

Halloween Bloody Baked Brie

Halloween Bloody Baked Brie Recipe FAQs

What type of brie cheese should I use?
Absolutely! For the best results, choose a high-quality brie that has a rich, creamy texture. Look for one that is soft but firm, avoiding varieties that appear overly processed as they may not melt as beautifully.

How should I store leftovers?
Very! Store any leftover Halloween Bloody Baked Brie in an airtight container in the refrigerator. It will keep well for up to 3 days. When reheating, gently warm it in the oven to maintain that gooey texture, rather than using a microwave.

Can I freeze Halloween Bloody Baked Brie?
Certainly! You can freeze unbaked brie once it has the red pepper jam mixture on top. Wrap it tightly in plastic wrap and then in foil, ensuring it’s sealed properly to prevent freezer burn. It can be kept for up to 1 month. When ready to enjoy, thaw it in the fridge overnight before baking.

What if my brie is too runny after baking?
Oh no! If your brie turns out too runny, it could be that it was baked too long or at too high a temperature. To troubleshoot, keep a close eye on it while baking, removing it just as the sides start to melt and become gooey—aim for that perfect balance where it’s soft but not liquid.

Is this recipe suitable for guests with dietary restrictions?
Absolutely! However, make sure to keep in mind any allergies among guests. Brie is made from cow’s milk, so it’s not suitable for those with dairy allergies. For a vegan alternative, consider using a plant-based cheese designed for melting, and be sure to check that your red pepper jam doesn’t contain any non-vegan ingredients.

How can I achieve the best sauce consistency for the “blood”?
Great question! Start with 2 tablespoons of hot water when mixing the red pepper jam. Stir until smooth, adding more hot water as necessary until you reach a pourable consistency that still maintains some thickness for that dramatic drip effect. If you make it too thin, it may not hold well on the brie, so aim for a luxurious texture that enhances the visual appeal!

Spook Up Your Feast with Halloween Bloody Baked Brie

Halloween Bloody Baked Brie is a cheesy masterpiece that captivates the eye and satisfies the palate, perfect for any gathering.

  • Oven
  • Baking Sheet
  • parchment paper
  • bowl
  • Syringe

For the Brie

  • 1 wheel brie cheese (Choose a high-quality brie for best results.)
  • to taste flaky salt (Optional, for flavor enhancement.)

For the “Blood” Sauce

  • 3 tablespoons red pepper jam (Provides sweet and spicy kick.)
  • 2-3 tablespoons hot water (Adjust for desired consistency.)

For Serving

  • 1 baguette warmed and sliced (Perfect for scooping the gooey brie.)

Step-by-Step Instructions

  1. Preheat your oven to 350°F (175°C) and line a baking sheet with parchment paper.
  2. Place the wheel of brie on the baking sheet and bake for 15 to 20 minutes until soft but not liquid.
  3. Mix red pepper jam with 2 tablespoons of hot water until smooth, adjusting consistency if needed.
  4. Once baked, transfer the brie to a serving dish and spoon the jam mixture on top.
  5. Insert the jam-filled syringe into the brie and serve with warm baguette slices.

Use high-quality ingredients and serve warm for the best experience.

Appetizer
Halloween
brie cheese, cheese lovers, crowd-pleaser, Halloween Bloody Baked Brie, spooky appetizer

Filed Under: Appetizer

Deliciously Spooky Creepy Witch Finger Cookies for Halloween

October 7, 2025 by grace bellamy Leave a Comment

As the leaves turn and the air gets crisper, my kitchen transforms into a cauldron of creativity. This Halloween, I’m serving up a delightfully spooky treat: Creepy Witch Finger Cookies. These fun yet eerie cookies are not only a fantastic conversation starter but are also surprisingly easy to whip up. With just a little creativity, you can craft a batch that will wow your guests—perfect for parties or a cozy night in with loved ones. Plus, they’re an excellent way to break free from the mundane and delve into the Halloween spirit. The best part? You can customize the colors and toppings to suit your quirky style! Are you ready to impress your friends (and maybe scare a few) with these delightful concoctions? Let’s get started!

Creepy Witch Finger Cookies

Why Are Creepy Witch Finger Cookies Unique?

Visual Appeal: These cookies are not just delicious but spooky! Their eerie finger shape adorned with almonds creates an unforgettable sight on any dessert table.

Easy to Make: You don’t need to be a pro baker to whip these up. With simple steps, even beginner bakers will shine!

Colorful Creativity: Using matcha, purple sweet potato, and cocoa powder allows you to customize these treats in vibrant colors, making them uniquely yours.

Perfect for Halloween: Whether you’re hosting a party or just treating your kids, these cookies perfectly capture the Halloween spirit. For more festive ideas, check out my Halloween desserts collection.

Crowd-Pleaser: With their playful design and delicious flavor, these cookies are sure to be a hit with guests of all ages. Get ready for compliments!

Creepy Witch Finger Cookies Ingredients

For the Batter
• 226 g unsalted butter – Softened butter is key for a light and fluffy texture.
• 140 g confectioner’s sugar – This adds the perfect sweetness and smoothness.
• 1 tsp sea salt – Balances sweetness and enhances flavor.
• 4 egg yolks – Use large eggs at room temperature for the best results.
• 5 mL vanilla extract – Adds a delightful depth of flavor to your cookies.
• 454 g all-purpose flour – The foundation of your cookie dough, providing structure.
• ¼ tsp baking powder – Gives the cookies a little lift for a delightful texture.

For the Color
• 4 – 6 g matcha powder – Gives a delightful green hue for witchy vibes.
• 20 – 30 g purple sweet potato powder – Creates a spooky purple color, adding fun and flair.
• 5 – 15 g cocoa powder – Use this for a wicked brown color that enhances the cookie’s spooky appearance.

For Decorations and Filling
• 50 whole blanched almonds – The perfect “fingernails” for your witchy cookies.
• Cocoa powder (for dusting) – Use for a dirty look to make your cookies extra creepy!
• Strawberry jam or raspberry jam – This gives a gooey filling reminiscent of spooky blood.
• Red cake writing gel / piping gel – Use this for an added gruesome touch.
• Melted white chocolate or candy wafers – Drizzle or dip for a beautiful finish that ties the whole cookie together.

With these ingredients, your Creepy Witch Finger Cookies will not only look devilishly delightful but taste fabulous too! Happy baking!

Step‑by‑Step Instructions for Creepy Witch Finger Cookies

Step 1: Cream the Butter and Sugar
In a mixing bowl, combine 226 g of softened unsalted butter, 140 g of confectioner’s sugar, and 1 tsp of sea salt. Use an electric mixer to cream the mixture on medium speed for about 3–5 minutes, until it’s light and fluffy. You’ll know it’s ready when it looks airy and pale in color, creating the perfect base for your Creepy Witch Finger Cookies.

Step 2: Add Egg Yolks and Vanilla
Next, add 4 egg yolks (room temperature) and 5 mL of vanilla extract to the creamed butter and sugar mixture. Mix well on medium speed until everything is fully incorporated and smooth, about 1–2 minutes. The batter should take on a rich, golden hue, confirming it’s time to move on to the next step.

Step 3: Color the Dough
If you’d like to add color to your Creepy Witch Finger Cookies, now is the time! Divide the batter into portions and mix in your choice of colorings: 4–6 g matcha powder, 20–30 g purple sweet potato powder, or 5–15 g cocoa powder. Stir until evenly colored, ensuring the vibrant hues blend smoothly throughout the dough.

Step 4: Combine Dry Ingredients
In a separate bowl, whisk together 454 g of all-purpose flour and ¼ tsp of baking powder. Gradually fold this dry mixture into the colored butter batter using a spatula, mixing until a soft dough forms. This should take about 2–3 minutes, and your dough will become slightly sticky yet manageable to shape.

Step 5: Chill the Dough
Shape the soft dough into a disc, wrap it tightly in plastic wrap, and chill in the refrigerator for 20–30 minutes. This step is crucial as it helps the flavors meld and firms up the dough, making it easier to shape your creepy fingers later on.

Step 6: Shape the Cookies
Once chilled, retrieve the dough and roll tablespoon-sized portions into finger shapes, roughly 4 inches long. Squeeze two areas of each finger to create knuckle joints, which enhances the spooky presentation of your cookies.

Step 7: Create Knuckle Details
Grab a butter knife and use it to gently score the dough where the knuckles would be, adding texture. Press a whole blanched almond at the tip of each finger to serve as a gruesome “nail” for your Creepy Witch Finger Cookies.

Step 8: Freeze the Cookies
Transfer the shaped cookies onto a lined baking tray, making sure to leave space between them. Freeze for 40–60 minutes to solidify, ensuring that they hold their shape while baking, which is key for achieving that eerie finger appearance.

Step 9: Preheat the Oven
While the cookies are freezing, preheat your oven to 325°F (163°C). This temperature ensures even baking, creating a lovely golden-brown color on the bottoms of your creepy cookies while keeping their tops pale.

Step 10: Bake the Cookies
Once the oven is ready, bake the frozen cookies for 20–25 minutes. Keep an eye on them; they’re done once the bottoms are lightly browned, while the tops should remain pale. Remove them from the oven and let them cool on the tray for a few minutes before transferring them to a wire rack.

Step 11: Add the Jam Filling
After cooling completely, gently remove the almonds from the tips of the cookies. Fill the cavity with a tablespoon of strawberry or raspberry jam, resembling a spooky ooze, before carefully reattaching the almonds to create that signature finger look for your Creepy Witch Finger Cookies.

Step 12: Decorate the Cookies
Finally, enhance the spooky appearance by brushing cocoa powder lightly on the fingers for a dirty effect, or drizzle red cake writing gel for a gruesome touch. If desired, dip or drizzle melted white chocolate or colored candy wafers over the cookies for a festive finish that ties your creepy creation together beautifully.

Creepy Witch Finger Cookies

What to Serve with Creepy Witch Finger Cookies

As you prepare to enchant your Halloween gathering, consider delightful accompaniments that will elevate these spooky treats to centerpiece status.

  • Wicked Halloween Punch: A refreshing and colorful drink that made with fruity flavors will add a festive flair to your celebration.

  • Spooky Cheese Board: Assorted cheeses, fresh fruits, and nuts create an enticing platter that provides a savory counterpoint to the sweetness of the cookies.

  • Ghoulish Gummy Worms: These delightful candies offer a playful addition that complements the eerie atmosphere of your spooky cookies.

  • Charming Chocolate Mousse: Rich and creamy, this dessert echoes the indulgence of the cookies while providing a satisfying texture variation.

  • Crispy Caramel Popcorn: Sweet and crunchy, this treat serves as a fun contrast, inviting guests to snack mindlessly while they relish the witchy cookies.

  • Chilling Apple Cider: Serve it warm or cold for a timelessly comforting beverage that will enhance the mood without overpowering the cookies’ flavors.

  • Minty Green Smoothies: Bright, fresh, and eye-catching, these smoothies add a healthy, vibrant touch to your dessert table, making it an attractive option alongside the cookies.

  • Sinister Chocolate Dipped Strawberries: Dipped in melted chocolate, these fruity delights provide a luscious taste that perfectly complements the creepiness of your witchy theme.

How to Store and Freeze Creepy Witch Finger Cookies

Room Temperature: Store the cookies in an airtight container at room temperature for up to 3 days. This keeps them fresh and delicious for your Halloween festivities.

Fridge: If you want to extend their shelf life, place the cookies in an airtight container in the fridge for up to 1 week. Just bring them to room temperature before serving.

Freezer: For longer storage, you can freeze the cookies for up to 3 months. Layer them with parchment paper in an airtight container to prevent sticking.

Reheating: When ready to enjoy, let the cookies thaw in the fridge overnight, then serve as is, or warm them in the oven at 300°F (148°C) for a few minutes to bring back their fresh-baked taste!

Make Ahead Options

These Creepy Witch Finger Cookies are perfect for meal prep and can save you time during the busy Halloween season! You can prepare the cookie dough up to 24 hours in advance—simply follow the steps to create the dough, shape it into fingers, and then wrap it tightly in plastic wrap before refrigerating. Alternatively, you can also freeze the shaped cookies for up to 3 months. When ready to bake, there’s no need to thaw; just pop the frozen cookies straight into the preheated oven for 20–25 minutes. This method helps maintain quality, ensuring your spooky treats are just as delicious as when made fresh. Enjoy these time-saving options and impress your guests with minimal effort!

Creepy Witch Finger Cookies Variations

Feel free to let your imagination run wild with these delightful twists to make your Creepy Witch Finger Cookies even more enchanting and unique!

  • Gluten-Free: Use a gluten-free all-purpose flour blend to make these cookies safe for gluten-sensitive friends. They will still be frightfully delicious!

  • Nut-Free: Replace almonds with sunflower seeds or pumpkin seeds for a spooky nail look without any nuts. These alternatives will maintain the same fun vibe!

  • Candy Coating: Instead of melted chocolate, try using brightly colored candy melts for a festive appearance that’s sure to grab attention. Going for a pop of color can make them even more fun!

  • Spicy Kick: For those who love heat, add a pinch of cayenne pepper to the dough or sprinkle some chili powder on the finished cookies for a surprising twist.

  • Different Jam: Experiment with other fruit jams like blueberry or apricot for filling; each will add a unique flavor and a different oozy appearance that still feels delightfully festive.

  • Syrupy Horror: Drizzle with a mix of corn syrup and food coloring for a gooey, blood-like effect. Your guests will be impressed by the creativity in every detail!

  • Dairy-Free: Substitute the butter with coconut oil or vegan butter. This way, everyone gets to enjoy the terrifying treat, no matter their dietary needs.

  • Texture Variation: Try swapping half of the all-purpose flour for almond flour for a nutty flavor and a more tender cookie that adds a delightful twist!

Embrace the spirit of Halloween and use these variations to create your very own Creepy Witch Finger Cookies masterpiece! If you’re looking for other spooky delights, possible pairing ideas include these chilling Halloween cake pops or a goblin-worthy potion punch. The options are endless, and the fun you can have while creating these treats is sure to keep everyone smiling!

Expert Tips for Creepy Witch Finger Cookies

Chill the Dough: Ensure you chill the dough for at least 20–30 minutes; this helps the cookies maintain their finger shape during baking.

Shape Carefully: When forming the fingers, make sure to create pronounced knuckles. This enhances the spooky look of your Creepy Witch Finger Cookies.

Watch Baking Time: Keep an eye on the cookies as they bake; they should be lightly browned on the bottom but pale on top to achieve that eerie appearance.

Use Quality Coloring: Opt for high-quality matcha, sweet potato powder, or cocoa for vibrant colors. This elevates both the look and taste of your cookies.

Jam Filling Tip: Allow the cookies to cool completely before adding the jam; this prevents it from melting away and creates a more gruesome effect!

Creepy Witch Finger Cookies

Creepy Witch Finger Cookies Recipe FAQs

What is the best way to select ripe ingredients?
Absolutely! For the butter, ensure it is softened to room temperature for easier mixing, achieving that fluffy texture. When looking for egg yolks, pick large eggs, as they provide the richness needed in the dough. Fresh, high-quality matcha, purple sweet potato powder, and cocoa will also boost the color and flavor of your Creepy Witch Finger Cookies!

How can I store my cookies properly?
For sure! Store your cookies in an airtight container at room temperature for up to 3 days. If you’d like to keep them fresher longer, place them in the fridge where they can last up to 1 week. Just bring them back to room temperature before enjoying!

Can I freeze my Creepy Witch Finger Cookies?
Yes, definitely! To freeze your cookies, let them cool completely first. Then, layer them with parchment paper in an airtight container and place them in the freezer for up to 3 months. When you’re ready to enjoy, simply let them thaw in the fridge overnight. Want them warm? Pop them in a preheated oven at 300°F (148°C) for a few minutes!

What should I do if my dough is too sticky?
Very good question! If your dough seems overly sticky, consider chilling it a bit longer, around 10-15 minutes, which should make it more manageable. Alternatively, lightly dust your work surface with flour while shaping the fingers. Just be sure not to overdo it, as too much extra flour can affect the cookie’s texture.

Are there any dietary considerations I should keep in mind?
Absolutely! If you’re catering to allergies, remember to check for nut sensitivities since blanched almonds are used as “fingernails.” Furthermore, if you’re interested in gluten-free options, you can experiment with gluten-free all-purpose flour—though baking times may vary slightly. Always ensure that the food coloring and jams are free from ingredients that could cause reactions for those with specific dietary needs.

Deliciously Spooky Creepy Witch Finger Cookies for Halloween

These Creepy Witch Finger Cookies are a fun Halloween treat that will wow your guests with their eerie design and delicious flavor.

  • Mixing Bowl
  • Electric mixer
  • spatula
  • Plastic wrap
  • Baking Tray
  • Butter knife
  • Oven

For the Batter

  • 226 g unsalted butter (Softened butter is key for a light and fluffy texture.)
  • 140 g confectioner’s sugar (This adds the perfect sweetness and smoothness.)
  • 1 tsp sea salt (Balances sweetness and enhances flavor.)
  • 4 large egg yolks (Use large eggs at room temperature for the best results.)
  • 5 mL vanilla extract (Adds a delightful depth of flavor to your cookies.)
  • 454 g all-purpose flour (The foundation of your cookie dough, providing structure.)
  • ¼ tsp baking powder (Gives the cookies a little lift for a delightful texture.)

For the Color

  • 4 – 6 g matcha powder (Gives a delightful green hue for witchy vibes.)
  • 20 – 30 g purple sweet potato powder (Creates a spooky purple color, adding fun and flair.)
  • 5 – 15 g cocoa powder (Use this for a wicked brown color that enhances the cookie’s spooky appearance.)

For Decorations and Filling

  • 50 whole blanched almonds (The perfect ‘fingernails’ for your witchy cookies.)
  • cocoa powder (Use for dusting for a dirty look to make your cookies extra creepy!)
  • strawberry jam or raspberry jam (Gives a gooey filling reminiscent of spooky blood.)
  • red cake writing gel / piping gel (Use this for an added gruesome touch.)
  • melted white chocolate or candy wafers (Drizzle or dip for a beautiful finish that ties the whole cookie together.)

Baking Instructions

  1. In a mixing bowl, combine 226 g of softened unsalted butter, 140 g of confectioner’s sugar, and 1 tsp of sea salt. Use an electric mixer to cream the mixture on medium speed for about 3-5 minutes.
  2. Add 4 egg yolks and 5 mL of vanilla extract to the creamed mixture. Mix well on medium speed until fully incorporated and smooth, about 1-2 minutes.
  3. Divide the batter into portions and mix in your choice of colorings: 4-6 g matcha powder, 20-30 g purple sweet potato powder, or 5-15 g cocoa powder.
  4. In a separate bowl, whisk together 454 g of all-purpose flour and ¼ tsp of baking powder. Gradually fold this into the colored butter batter until a soft dough forms.
  5. Shape the soft dough into a disc, wrap it tightly, and chill in the refrigerator for 20-30 minutes.
  6. Roll tablespoon-sized portions into finger shapes, roughly 4 inches long, squeezing at two areas to create knuckle joints.
  7. Use a butter knife to gently score the dough where the knuckles would be. Press a whole blanched almond at the tip of each finger.
  8. Transfer shaped cookies onto a lined baking tray and freeze for 40-60 minutes.
  9. Preheat your oven to 325°F (163°C).
  10. Bake the frozen cookies for 20-25 minutes, until the bottoms are lightly browned.
  11. After cooling completely, gently remove the almonds from the tips, fill with a tablespoon of jam, and reattach the almonds.
  12. Brush cocoa powder lightly on the fingers, drizzle red cake writing gel, and optionally dip or drizzle melted white chocolate.

Chill the dough for at least 20-30 minutes; this helps the cookies maintain their finger shape during baking. Use quality coloring for vibrant colors and allow cookies to cool completely before adding the jam to prevent melting.

Dessert
American
Creepy Witch Finger Cookies, finger cookies, fun recipes, Halloween Cookies, holiday baking, spooky treats

Filed Under: Dessert

Make a Splash with Color Changing Lemonade Magic

October 7, 2025 by grace bellamy Leave a Comment

As I watched the mesmerizing deep blue liquid swirl into my glass, I couldn’t help but feel like a mixologist from another galaxy. This Color Changing Lemonade, or Galaxy Lemonade as I like to call it, is not just a drink; it’s an enchanting experience that turns ordinary moments into extraordinary visual delights. With just a few simple ingredients, you’ll whip up a stunning beverage that’s bound to impress friends and family. The perks? It’s incredibly fun to make and can easily be adapted for both adults and kids, making it a perfect choice for summer gatherings. Ready to witness the magic of color and flavor come together? Let’s dive into this cosmic recipe that promises to brighten your day!

Color Changing Lemonade

Why Is Color Changing Lemonade So Fun?

Visual Appeal: You’ll be amazed as the vivid blue transforms with just a splash of lemon juice, creating a stunning drink that’s as delightful to the eyes as it is to the taste buds.
Easy to Make: With just a few simple steps, you’ll have a refreshingly unique drink ready to impress guests at your next summer barbecue or gatherings.
Customizable: Add a splash of your favorite spirit to create a fun adult version or keep it kid-friendly; this recipe can cater to any crowd’s preferences.
Perfect for Parties: Watch as guests marvel at the color-changing magic! It’s a great conversation starter and sure to be a hit at any event.
Fun for All Ages: Whether you’re a home cook or a professional chef, this recipe provides a playful way to bring everyone together—perfect for those who love homemade delights! Want more refreshing ideas? Check out our sparkling lemonade for another twist on a summer classic!

Color Changing Lemonade Ingredients

• Get ready to make the magic happen with these captivating ingredients!

For the Blue Tea Base
• Dried blue pea flowers – A stunning hue and rich in antioxidants, they are the secret to that enchanting color.
• Boiling water – Essential for steeping the flowers and releasing that vivid blue pigment.

For the Lemon Syrup
• Lemon juice – Bright and zesty, it gives the lemonade its refreshing taste; feel free to adjust for more tang!
• White sugar – Balances the tartness; increase the amount for a sweeter syrup if desired.

For the Ice
• Crushed regular ice – Helps chill the drink quickly; feel free to use more if you like a slushy texture.
• Crushed butterfly pea magic ice – Adds a visual twist; using this ice will enhance the color-changing effect!

For the Assembly
• Lemon syrup – Pour about ¼ to ⅓ cup into each glass for the perfect balance of sweetness.
• Club soda – Top it off to add a lovely fizz to each glass; it’s refreshingly effervescent!
• Optional spirits – Vodka, tequila, or gin can be added for an adult twist; make it a party drink!

Now that we’ve gathered all the ingredients for this stellar Color Changing Lemonade, let’s start crafting your magical beverage!

Step‑by‑Step Instructions for Color Changing Lemonade

Step 1: Steep the Blue Pea Flowers
Begin by pouring 3 cups of boiling water over 25-30 dried blue pea flowers in a heatproof container. Allow them to steep for about 20-30 minutes, until the water transforms into a deep blue hue. Once infused, strain the petals from the liquid, and carefully pour the vibrant tea into ice cube trays. Freeze overnight until solid for the magical butterfly pea ice.

Step 2: Crush Regular Ice
While your blue tea freezes, prepare regular ice. Using an ice crushing blender, blend until you have a fluffy consistency, or place ice into a sturdy freezer bag and crush it with a mallet for a more manual approach. Once crushed, transfer the ice to the freezer to chill until you’re ready to assemble your Color Changing Lemonade.

Step 3: Make the Lemon Syrup
In a medium saucepan, combine the first measure of lemon juice and white sugar over medium heat. Stir continuously to dissolve the sugar, bringing the mixture to a gentle simmer for about 10 minutes. Watch for the syrup to thicken slightly before adding the remaining lemon juice. Remove from heat and set it aside to cool completely, allowing the flavors to meld beautifully.

Step 4: Chill the Syrup
Once your lemon syrup has cooled, transfer it to a clean bottle and store it in the refrigerator. Chilling the syrup will enhance the refreshing experience of your Color Changing Lemonade. Follow this step while your ice cubes freeze and regular ice sits in the freezer to ensure everything is perfectly chilled when it’s time to serve.

Step 5: Assemble the Drink
When you’re ready to enjoy your refreshing Color Changing Lemonade, fill a tall glass with regular crushed ice, leaving about a quarter of the glass empty. Then, layer in some crushed butterfly pea magic ice on top. This is crucial for the vibrant appearance and enchanting color transformation when the lemon syrup is added.

Step 6: Add the Lemon Syrup
Pour ¼ to ⅓ cup of the cooled lemon syrup over the ice-filled glass. You will witness a delightful swirl as the deep blue ice interacts with the bright yellow syrup, creating a stunning visual effect. This striking contrast is what makes the Color Changing Lemonade a showstopper for gatherings and those hot summer days.

Step 7: Top with Club Soda
Finish off your masterpiece by carefully pouring club soda over the syrup and ice, filling the glass to the brim. Watch as the bubbles rise and the colors shift, creating a truly mesmerizing effect. If desired, feel free to add optional spirits like vodka, tequila, or gin for an adult twist that enhances the fun of the Color Changing Lemonade.

Step 8: Serve with Flair
To round out your Color Changing Lemonade experience, sprinkle additional crushed magic ice on top for an eye-catching finish. Serve each drink with stirring sticks and straws so your guests can mix the ingredients and enjoy the enchanting flavors. Prepare for delighted reactions as they taste and watch the colors dance in their glasses!

Color Changing Lemonade

Storage Tips for Color Changing Lemonade

Fridge: Store leftover Color Changing Lemonade in an airtight container in the fridge for up to 3 days. The colors may blend over time, but it will still taste delightful!

Freezer: If you want to preserve the vibrant flavors longer, freeze the lemon syrup in ice cube trays for up to 3 months. When ready to use, pop them into drinks directly for a refreshing treat.

Reheating: If you’d like to enjoy the lemon syrup again, avoid microwaving it directly to ensure it maintains its flavor. Instead, dissolve frozen cubes in warm water before mixing them into beverages.

Serving Prep: To serve chilled lemonade again, ensure your ice is freshly crushed and prepared before serving to maintain that stunning visual impact with each pour!

Color Changing Lemonade Variations

Feel free to play around and make this delightful recipe your own with these exciting twists!

  • Minty Fresh: Add a handful of fresh mint leaves to the lemonade for an invigorating herbal touch. It’s a refreshing surprise!

  • Fruit-Infused: Toss in some sliced strawberries or blueberries while assembling for a fruity burst in every glass. The colors will add an extra pop!

  • Sweetener Swap: Substitute white sugar with honey or agave syrup for a natural sweetness. This swap brings a different layer of flavor that highlights the lemon.

  • Citrus Medley: Mix in different citrus juices like lime or orange for a zesty flavor profile. Each sip will be a delightful journey through bright, tangy notes.

  • Spicy Kick: Infuse a jalapeño slice into the lemon syrup for those who love a bit of heat. It adds an unexpected, mouthwatering spice that awakens the taste buds.

  • Herbal Twist: Incorporate a sprig of basil or rosemary in your glass as a garnish. Herbal aromas will enhance the drink’s complexity and elevate it to gourmet status.

  • Mocktail Delight: For a fun family-friendly version, skip the spirits and add extra club soda or sparkling lemonade. Everyone can enjoy the color-changing magic!

  • Creamy Layer: Top your lemonade with a splash of coconut cream for a tropical twist. This delightful addition softens the flavors and makes for a creamy, dreamy experience.

Feel inspired? Dive into the world of flavors with these variations, or let them spark new ideas of your own! And if you’re looking for another refreshing drink, don’t miss our sparkling lemonade for another fantastic way to quench your thirst!

Expert Tips for Color Changing Lemonade

Choose Quality Flowers: Use high-quality dried blue pea flowers for the best color and flavor. Avoid stale or old products which can affect the vibrant hue.

Perfect Sweetness: Adjust the sugar in the lemon syrup according to your taste. Too little can make it too tart, while too much can mask that refreshing zing in your Color Changing Lemonade.

Ice Matters: Always use fresh, crushed ice for serving. Old or overly melted ice can dilute the flavor and impact the drink’s beautiful presentation.

Layering Technique: When pouring the lemon syrup, do it gently to maintain distinct color layers. This makes the transformation even more visually stunning as you mix!

Chill Everything: Be sure the syrup and glasses are chilled before assembly to keep your drink refreshingly cold and delicious throughout.

Experiment with Flavors: Don’t hesitate to mix in other fruits or herbs for an extra twist. Adding a splash of mint or a few berries can elevate the experience of your Color Changing Lemonade!

What to Serve with Color Changing Lemonade

Nothing says summer fun quite like a refreshing drink that dances with color and flavor, inviting you to enjoy the magic of the season.

  • Grilled Shrimp Skewers: Juicy shrimp brushed with tangy marinade are incredibly satisfying, pairing beautifully with the zesty lemonade and enhancing its vibrant flavors.
  • Crispy Fish Tacos: Lightly battered fish tucked in soft tortillas bring a delightful crunch and brightness, making it a perfect companion to sip alongside your colorful drink.
  • Watermelon Salad: Juicy watermelon cubes mixed with mint and feta offer a sweet, refreshing contrast that balances the tartness of the lemonade.
  • Savory Caprese Skewers: The creaminess of mozzarella and the acidity of tomatoes are delightful with a sip of lemonade; they provide a fresh burst of flavor that’s oh-so-satisfying.
  • Lemon Garlic Hummus: Dip crunchy veggies or pita chips into this smooth and tangy hummus, echoing the citrus notes of your drink while enhancing the experience.
  • Sparkling Berry Mocktail: For a fun drink pairing minus the alcohol, try a sparkling drink with muddled berries; it aligns with the vibrant theme and adds sweetness without overpowering.
  • Mango Sorbet: End your meal on a sweet note with a scoop of refreshing mango sorbet; its tropical flavors create a lovely complement to the lemonade’s citrusy zing.
  • Herbal Iced Tea: Serve a light herbal iced tea to create a gentle contrast, providing a refreshing palate cleanser as you enjoy the color-changing spectacle of your drink.
  • Chocolate Chip Cookies: A plate of warm cookies brings nostalgia and sweetness, creating a cozy pairing that enhances the overall experience.
  • Fresh Fruit Platter: Brightly colored fruits like strawberries, blueberries, and oranges not only mirror the visual theme but also deliver a burst of natural sweetness alongside the lemonade.

Make Ahead Options

These Color Changing Lemonade preparations are perfect for busy home cooks looking to save time while still impressing guests! You can steep the blue pea flowers and freeze the infused tea in ice cube trays up to 24 hours in advance, ensuring you have the enchanting butterfly pea magic ice ready to go. Additionally, you can prepare the lemon syrup a few days ahead and store it in the fridge for up to 3 days. This way, the flavors can meld beautifully while it chills. When it’s time to serve, simply crush the regular ice, layer your magic ice and lemon syrup, top with club soda, and watch the colors swirl—creating eye-catching drinks in no time!

Color Changing Lemonade

Color Changing Lemonade Recipe FAQs

What should I look for when selecting blue pea flowers?
Absolutely! When choosing dried blue pea flowers, look for vibrant, intact petals that are free from any dark spots or signs of moisture. They should have a fresh, earthy scent. High-quality flowers yield the best color and flavor for your Color Changing Lemonade.

How should I store leftover Color Changing Lemonade?
I recommend storing any leftover Color Changing Lemonade in an airtight container in the fridge for up to 3 days. Just keep in mind that the stunning layers may blend over time, yet the delightful flavors will still remain enjoyable!

Can I freeze the lemon syrup?
Yes, very! To preserve the bright flavors, freeze the lemon syrup by pouring it into ice cube trays. It will last up to 3 months. When you’re ready to enjoy again, just pop a few cubes into your drinks, and they’ll keep everything refreshingly cool!

What if my lemon syrup is too sweet or too tart?
No worries! If your lemon syrup turns out too sweet for your taste, you can dilute it with a bit of water or add more lemon juice to balance the flavor. Conversely, if it’s too tart, you can stir in a little extra sugar while it’s still warm to help it dissolve perfectly.

Can I make a non-alcoholic version for kids?
Absolutely, the more the merrier! To create a fun, kid-friendly version of Color Changing Lemonade, simply omit the optional vodka, tequila, or gin. The youth will love mixing the syrup and watching the colors change just like the adults!

How can I ensure my ice doesn’t dilute the drink?
Great question! To prevent dilution, always use freshly crushed ice. For added flair and to maintain flavor, consider making butterfly pea ice cubes by freezing extra blue tea. This way, as they melt, they enhance the colors instead of watering down your vibrant lemonade!

Make a Splash with Color Changing Lemonade Magic

This Color Changing Lemonade is an enchanting drink that transforms from vivid blue to bright yellow, offering a delightful experience for all ages.

  • Heatproof container
  • Ice crushing blender
  • Medium saucepan
  • Ice cube trays

For the Blue Tea Base

  • 25-30 pieces dried blue pea flowers
  • 3 cups boiling water

For the Lemon Syrup

  • 1 cup lemon juice (adjust for more tang)
  • 1 cup white sugar (increase for sweeter syrup)

For the Ice

  • 2 cups crushed regular ice (use more for a slushy texture)
  • 1 cup crushed butterfly pea magic ice (for enhanced color-changing effect)

For the Assembly

  • 0.25-0.33 cup lemon syrup (for perfect balance of sweetness)
  • 1 cup club soda (to add fizz)
  • optional spirits (vodka, tequila, or gin can be added)

Step-by-Step Instructions

  1. Pour 3 cups of boiling water over 25-30 dried blue pea flowers in a heatproof container. Let steep for 20-30 minutes, then strain the petals and freeze the vibrant tea in ice cube trays overnight.
  2. Prepare regular ice by crushing it using an ice crushing blender or a mallet. Transfer to the freezer to chill until ready to assemble the drink.
  3. In a medium saucepan, combine lemon juice and white sugar over medium heat. Stir until the sugar dissolves and simmer for about 10 minutes. Remove from heat and let cool.
  4. Refrigerate the cooled lemon syrup to enhance the refreshing flavor.
  5. Fill a tall glass with regular crushed ice, leaving a quarter empty. Layer with crushed butterfly pea magic ice.
  6. Pour ¼ to ⅓ cup of lemon syrup over the ice. Watch as the deep blue interacts with the bright yellow syrup.
  7. Top with club soda, filling the glass to the brim. Optionally, add spirits for an adult twist.
  8. Sprinkle additional crushed magic ice on top for a stunning visual effect and serve with stirring sticks and straws.

Use high-quality dried blue pea flowers for best color and flavor. Adjust sugar according to taste. Always use freshly crushed ice for serving.

Drink
American
Color Changing Lemonade, fun drink, Galaxy Lemonade, party drink, refreshing beverage, summer drink

Filed Under: Drink

Hogwarts Houses Butterbeer Swirl Cheesecake for Magical Moments

October 7, 2025 by grace bellamy Leave a Comment

In the cozy corner of my kitchen, a swirling masterpiece is taking shape, gleaming like a wizard’s secret potion. This Hogwarts Houses Butterbeer Swirl Cheesecake isn’t just dessert; it’s a magical experience that brings the enchanting world of Harry Potter straight to your table. Crafted with fluffy cream cheese and a splash of fizzy cream soda, each creamy slice captures the whimsical essence of butterbeer, making it a fun twist on a classic treat. Plus, its vibrant colors representing Hogwarts houses make it a visually stunning centerpiece for any gathering—a guaranteed crowd-pleaser! Whether you’re preparing for a themed party or simply want to indulge your inner wizard, you’ll find it’s both a delightful treat and a conversation starter. Are you ready to conjure your own scrumptious slice of magic?

Hogwarts Houses Butterbeer Swirl Cheesecake

Why is This Cheesecake So Magical?

Unique Experience: This Hogwarts Houses Butterbeer Swirl Cheesecake brings the charm of the wizarding world right to your kitchen, blending nostalgic flavors with vibrant colors.
Easy Preparation: With just a few simple steps, whip up a show-stopping dessert that seems complicated but is truly manageable for any home cook.
Crowd-Pleasing: Whether it’s a birthday celebration or a Harry Potter-themed gathering, this dessert is sure to impress and delight guests young and old.
Taste Sensation: The fusion of smooth cream cheese and fizzy cream soda creates a light, dreamy flavor you won’t forget. Plus, it pairs perfectly with pumpkin juice or butterbeer cupcakes for an enchanting spread!
Make-Ahead Magic: Prepare this dessert in advance, allowing for stress-free entertaining; just chill overnight and serve!

Hogwarts Houses Butterbeer Swirl Cheesecake Ingredients

• These ingredients will conjure a magical treat that delights everyone!

For the Crust

  • Graham cracker crumbs – Adds a crunchy and sweet foundation, perfect for our creamy filling.
  • Granulated sugar – Provides a touch of sweetness that complements the crust.
  • Unsalted butter – Helps bind the crumbs together while adding richness.

For the Cheesecake Filling

  • Cream cheese – The star of the show, ensuring a rich and creamy texture in every slice.
  • Granulated sugar – Balances the richness of the cream cheese for a luscious sweetness.
  • Sour cream – Adds a tangy twist that lightens up the cheesecake incredibly.
  • Vanilla extract – Introduces a warm, comforting flavor that enhances the overall taste.
  • Large eggs – Brings everything together, giving structure and stability to the cheesecake.
  • Cream soda – Infuses a delightful sweetness and adds that signature butterbeer flavor.

For the Swirl

  • Heavy cream – Creates a luscious, thick mixture that makes the swirls beautiful and indulgent.
  • Brown sugar – Adds a deep caramel note to the butterscotch swirl.
  • Unsalted butter – Contrasts well with the sweetness to create a rich, velvety blend.
  • Gel food coloring (red, yellow, blue, and green) – Paints the cheesecake with vibrant colors representing each Hogwarts house.

Each ingredient contributes to the enchanting flavor and beautiful presentation of the Hogwarts Houses Butterbeer Swirl Cheesecake. Prepare to be delighted with each bite!

Step‑by‑Step Instructions for Hogwarts Houses Butterbeer Swirl Cheesecake

Step 1: Preheat and Prepare the Pan
Begin by preheating your oven to 325°F (160°C). While it warms up, take a springform pan and either line it with parchment paper or lightly grease it with non-stick spray. This will ensure that your stunning Hogwarts Houses Butterbeer Swirl Cheesecake comes out effortlessly after baking.

Step 2: Make the Crust
In a mixing bowl, combine 1 ½ cups of graham cracker crumbs, ¼ cup of granulated sugar, and 6 tablespoons of melted unsalted butter. Stir until the mixture resembles wet sand. Firmly press this crust mixture into the bottom of your prepared pan. Bake in the preheated oven for 8–10 minutes until lightly golden. Let it cool completely before adding the filling.

Step 3: Prepare the Cheesecake Filling
In a large mixing bowl, use an electric mixer to beat 4 packages of softened cream cheese with 1 cup of granulated sugar until the mixture is light and fluffy. Add in 1 cup of sour cream and 1 teaspoon of vanilla extract, mixing until fully incorporated. This creamy base will create the foundation of your Hogwarts Houses Butterbeer Swirl Cheesecake.

Step 4: Incorporate the Eggs and Cream Soda
Add 3 large eggs one at a time to the cream cheese mixture, gently mixing after each addition to keep it smooth. Gradually pour in ¼ cup of cream soda, being careful to mix until evenly distributed. This will infuse your cheesecake with that delightful butterbeer flavor that makes it truly magical.

Step 5: Make the Butterscotch Swirl
In a small saucepan over medium heat, combine ½ cup of heavy cream, ½ cup of brown sugar, and 4 tablespoons of unsalted butter. Stir continuously until the mixture reaches a gentle boil, then reduce the heat and let it simmer for 2–3 minutes until it thickens slightly. Remove from heat and mix in 1 teaspoon of vanilla until combined.

Step 6: Color the Swirl Mixtures
Divide the butterscotch mixture into four smaller bowls. Add a few drops of gel food coloring to each bowl: red for Gryffindor, yellow for Hufflepuff, blue for Ravenclaw, and green for Slytherin. Stir each bowl until the colors are vibrant and fully blended, ready to be swirled throughout your cheesecake.

Step 7: Layer the Cheesecake Batter and Swirl
Pour the cheesecake filling over the cooled crust in the pan, smoothing it out evenly. Next, create random patterns by drizzling the colored butterscotch mixtures over the cheesecake filling. Use a toothpick to gently swirl the colors through the batter, creating a beautiful marbled effect reminiscent of the Hogwarts Houses.

Step 8: Bake the Cheesecake
Carefully place the pan in the oven and bake for 50–60 minutes. The edges should be set while the center jiggles slightly. Once baked, turn off the oven and crack the door open, allowing the cheesecake to cool gradually, which helps prevent cracking.

Step 9: Chill the Cheesecake
After the cheesecake has cooled, transfer it to the refrigerator and chill for at least 4 hours, or preferably overnight. This will allow the flavors to meld beautifully and the texture to become firm, making it easier to slice later for serving.

Step 10: Prepare for Serving
When you’re ready to serve, drizzle additional colored butterscotch swirls on top of the cheesecake for a striking finish. Add edible gold dust, fondant house crests, or edible glitter to elevate its charm and allure for an enchanting presentation fit for any celebration.

Step 11: Slice and Enjoy
To cut clean slices of your beautiful Hogwarts Houses Butterbeer Swirl Cheesecake, dip a sharp knife in hot water, wipe it dry, and slice through the cheesecake smoothly. This technique ensures that each piece looks as good as it tastes, ready to impress your family and friends!

Hogwarts Houses Butterbeer Swirl Cheesecake

Helpful Tricks for Hogwarts Houses Butterbeer Swirl Cheesecake

  • Room Temperature Cream Cheese: Ensure your cream cheese is at room temperature before mixing. This avoids lumps and creates a silky-smooth filling for your cheesecake.
  • Gentle Mixing: When adding the eggs, mix gently to keep air bubbles out. This prevents cracks in your Hogwarts Houses Butterbeer Swirl Cheesecake.
  • Coloring Tips: Use gel food coloring for vibrant hues that won’t dilute your mixture. Start with a small amount and add more until you achieve your desired colors.
  • Cooling Gradually: After baking, crack the oven door open to let the cheesecake cool gradually. This reduces the chance of cracks forming.
  • Chill for Success: Be patient and allow the cheesecake to chill overnight. This step ensures optimal flavor and texture for your enchanting dessert.
  • Use a Hot Knife: For clean slices, dip your knife in hot water before cutting, wiping it dry after each cut to keep the edges neat and beautiful.

Hogwarts Houses Butterbeer Swirl Cheesecake Variations

Feel free to explore these enchanting twists on the classic cheesecake to suit your family’s tastes!

  • Gluten-Free: Substitute graham cracker crumbs with gluten-free cookie crumbs or crushed gluten-free pretzels for a delicious, crumbly crust.
  • Sugar-Free: Use a sugar substitute like erythritol in the crust and filling to indulge while cutting down on sugar. Sweetness without the guilt!
  • Chocolate Lover’s: Add cocoa powder to the crust or swirl in chocolate ganache for a rich, decadent variation that will satisfy any chocolate craving.
  • Fruity Twist: Incorporate fresh fruit purees, like raspberry or strawberry, into the batter for a refreshing twist that’s bursting with flavor. Just swirl gently for a pretty marbled effect!
  • Cheesecake Bars: Turn this recipe into bars by using a baking dish instead of a springform pan. Bake a little shorter and cut into squares for easy serving at gatherings.
  • Spiced Rum: Add a splash of spiced rum to the butterscotch mixture for an adult twist on this enchanting dessert, enhancing the flavors beautifully.
  • Dairy-Free: Swap cream cheese for a vegan cream cheese alternative and use coconut cream for the swirl to make this delightful dessert completely dairy-free.
  • Extra Layers: For added fun and texture, layer in crushed butterscotch candies or toffee bits in between the cheesecake layers before baking. The crunchy bits will surprise and delight!

Every variation invites a new adventure in flavor while keeping the magical spirit of the Hogwarts Houses Butterbeer Swirl Cheesecake alive!

Make Ahead Options

These Hogwarts Houses Butterbeer Swirl Cheesecake treats are perfect for busy home cooks looking to save time! You can prepare the crust and filling up to 24 hours in advance; simply follow steps 1 through 4, then cover the cheesecake batter tightly with plastic wrap before refrigerating. This method helps the flavors meld together beautifully, ensuring every slice remains just as delicious. When you’re ready to complete the cheesecake, proceed to make the butterscotch swirl (steps 5 and 6) and bake it fresh. After cooling, remember to refrigerate for at least 4 hours or overnight to fully set. This way, you’ll have a stunning dessert ready to charm your guests with minimal last-minute effort!

How to Store and Freeze Hogwarts Houses Butterbeer Swirl Cheesecake

Fridge: Store leftovers in an airtight container in the refrigerator for up to 5 days to keep the cheesecake fresh and creamy.

Freezer: For longer storage, freeze the uncut Hogwarts Houses Butterbeer Swirl Cheesecake in a freezer-safe container for up to 2 months.

Thawing: To enjoy, gently thaw the cheesecake in the fridge overnight before serving, allowing it to return to its dreamy texture.

Reheating: If desired, let slices come to room temperature for about 30 minutes before enjoying. This enhances the flavor and creaminess in each bite!

What to Serve with Hogwarts Houses Butterbeer Swirl Cheesecake

Delight in a whimsical meal experience that celebrates the enchanting flavors of butterbeer while complementing your cheesecake.

  • Pumpkin Juice: This iconic beverage offers a sweet and spiced contrast, amplifying the dessert’s flavors and adding a seasonal touch.

  • Chocolate Frogs: These fun, sweet treats provide a playful crunch that pairs well with the creamy cheesecake, making dessert time even more delightful.

  • Butterbeer Cupcakes: A mini-version of your cheesecake, these cupcakes echo the same rich flavors and buttery sweetness—perfect for sharing.

  • Fresh Berries: Tart raspberries or sweet strawberries provide a refreshing burst of juicy flavors that balance the richness of the cheesecake beautifully.

  • Whipped Cream: A light dollop on top adds a fluffy texture, enhancing each slice with creaminess that elevates the magical experience.

  • Vanilla Ice Cream: A scoop of creamy vanilla ice cream brings a classic touch while complementing the buttery swirls and vibrant colors of the cheesecake.

  • Fruit Tart: The crisp crust and luscious fruit in a tart provide a contrasting texture and fruity zing that will leave guests enchanted.

  • Mint Tea: A warm cup of mint tea is soothing and refreshing, acting as a delightful palate cleanser between bites of your rich cheesecake.

  • Sparkling Cider: A festive, bubbly drink that brings an extra touch of magic to your meal, enhancing the celebratory atmosphere when serving dessert.

Hogwarts Houses Butterbeer Swirl Cheesecake

Hogwarts Houses Butterbeer Swirl Cheesecake Recipe FAQs

What type of cream cheese should I use for the cheesecake?
Absolutely! I recommend using full-fat cream cheese for the richest and creamiest texture. Avoid reduced-fat varieties as they can lead to a less desirable consistency in your Hogwarts Houses Butterbeer Swirl Cheesecake.

How long can I store the cheesecake in the refrigerator?
You can store leftovers in an airtight container in the refrigerator for up to 5 days. Just make sure it’s well-covered to maintain its creamy texture and delightful flavors!

Can I freeze the cheesecake? If so, how?
Very! You can freeze the uncut Hogwarts Houses Butterbeer Swirl Cheesecake by placing it in a freezer-safe container or wrapping it tightly in plastic wrap and aluminum foil. It can be stored for up to 2 months. When you’re ready to enjoy it, gently thaw it in the refrigerator overnight for the best texture.

What should I do if my cheesecake cracks during baking?
No worries! Cheesecakes can be sensitive. If your Hogwarts Houses Butterbeer Swirl Cheesecake cracks, a delicious topping can easily help: simply drizzle some melted chocolate or whipped cream over the cracks when serving. To prevent cracks in the first place, remember to cool the cheesecake gradually in the oven with the door slightly ajar as it cools.

Are there any allergy considerations with the ingredients?
Absolutely! Be aware that this cheesecake contains dairy (cream cheese, sour cream, and heavy cream), eggs, and gluten (from the graham crackers). If you wish to adapt it for dietary needs, consider using gluten-free graham crackers or vegan cream cheese alternatives. Always check labels for potential allergens based on the specific products you choose.

Hogwarts Houses Butterbeer Swirl Cheesecake for Magical Moments

A delightful Hogwarts Houses Butterbeer Swirl Cheesecake that captures the magical essence of butterbeer in a creamy, dreamy dessert.

  • Springform pan
  • Mixing bowls
  • Electric mixer
  • small saucepan

For the Crust

  • 1.5 cups graham cracker crumbs (Adds a crunchy and sweet foundation)
  • 0.25 cups granulated sugar (Provides a touch of sweetness)
  • 6 tablespoons unsalted butter (Helps bind the crumbs together)

For the Cheesecake Filling

  • 4 packages cream cheese (The star of the show)
  • 1 cups granulated sugar (Balances the richness)
  • 1 cups sour cream (Adds a tangy twist)
  • 1 teaspoon vanilla extract (Enhances the overall taste)
  • 3 large eggs (Gives structure and stability)
  • 0.25 cups cream soda (Infuses with delightful sweetness)

For the Swirl

  • 0.5 cups heavy cream (Creates a luscious swirl)
  • 0.5 cups brown sugar (Adds a deep caramel note)
  • 4 tablespoons unsalted butter (Creates a rich blend)
  • 4 drops gel food coloring (red, yellow, blue, green) (For vibrant colors)

Step-by-Step Instructions

  1. Preheat your oven to 325°F (160°C) and prepare your springform pan.
  2. Combine graham cracker crumbs, granulated sugar, and melted butter. Press into the bottom of the pan.
  3. Beat cream cheese with granulated sugar until light and fluffy. Add sour cream and vanilla, mixing well.
  4. Add eggs one at a time, mixing gently. Incorporate cream soda.
  5. In a saucepan, combine heavy cream, brown sugar, and butter. Simmer until thickened, then stir in vanilla.
  6. Divide butterscotch mixture and add food coloring for each Hogwarts house.
  7. Pour cheesecake filling over crust, drizzle colored mixtures on top, and swirl gently.
  8. Bake for 50–60 minutes until edges are set; cool gradually by cracking the oven door.
  9. Chill in the refrigerator for at least 4 hours or overnight.
  10. Serve with additional swirls of butterscotch on top and enjoy!

Ensure cream cheese is at room temperature for a smooth filling. Use gel food coloring for vibrancy. Chill overnight for the best flavor and texture.

Dessert
American
butterbeer cheesecake, celebration cake, Harry Potter dessert, Hogwarts Houses Butterbeer Swirl Cheesecake, magical cheesecake, themed party dessert

Filed Under: Dessert

Create an Spooktacular Halloween Cheese Board to Impress Guests

October 7, 2025 by grace bellamy Leave a Comment

As Halloween approaches, I find myself caught up in the delightful chaos of party planning. This year, I’ve whipped up a spooky yet charming Halloween Cheese Board that captures the essence of the holiday without sacrificing taste or creativity. With just 25 minutes of prep time, this crowd-pleaser combines savory meats and cheeses with vibrant fruits and crunchy crackers, making it perfect for entertaining or a cozy gathering with friends. Plus, it’s a fantastic way to show off your culinary creativity while keeping things simple—no cooking required! Are you ready to transform your snack spread into a fang-tastic feast? Let’s dive into the fun details!

Halloween Cheese Board

Why is this Halloween Cheese Board a Must?

Effortless Elegance: In just 25 minutes, you can assemble a gorgeous spread that looks like it took hours to create. Perfect for busy schedules!

Flavor Fusion: The mix of savory meats, creamy cheeses, and fresh fruits ensures a delightful balance that will entice every palate at your gathering.

Decorative Delight: Incorporating Halloween decorations not only enhances the visual appeal but also adds an element of fun to your party. Think charming pumpkins and eerie spiders!

Crowd-Pleasing Snack: This board is versatile, making it a hit for both family nights and festive parties. Pair it with a Cheese Dip Game for a full flavor experience!

Minimal Cleanup: With everything served on one board, cleanup is a breeze, allowing you to enjoy the party too!

Get ready to impress your guests with this creative feast while keeping your time in the kitchen to a minimum!

Halloween Cheese Board Ingredients

For the Board

  • Assorted Cheeses – Choose a mix of sharp cheddar, creamy brie, and tangy blue cheese for a delightful flavor contrast.
  • Cured Meats – Select salami, prosciutto, and pepperoni for a savory punch that pairs beautifully with cheeses.
  • Fresh Fruits – Include grapes, apple slices, or figs to add a refreshing sweetness and vibrant color to your Halloween Cheese Board.
  • Crackers – Bring in a variety of crunchy textures with gourmet crackers or pita chips that serve as perfect vehicles for the cheeses.

For the Extras

  • Pub Cheese – This creamy spread complements the board perfectly, making it a favorite dip for pretzels.
  • Mini Pretzels – Use these crunchy delights for dipping into the pub cheese, giving guests an irresistible snack option.
  • Halloween Decorations – Add small pumpkins, spooky skeletons, or candy corn to elevate the festive spirit of your spread.

Serving Essentials

  • Cheese Knives – Have a set of cheese knives ready to make serving simple and elegant.
  • Cocktail Forks – Provide forks for guests to easily grab bites of meat and cheese, keeping the party flowing without fuss.

This Halloween Cheese Board not only brings flavor but also sparks creativity and joy, making it the ultimate appetizer for the season!

Step‑by‑Step Instructions for Halloween Cheese Board

Step 1: Gather Your Ingredients
Begin by collecting all the ingredients for your Halloween Cheese Board. You’ll need assorted cheeses, cured meats, fresh fruits, crackers, and pub cheese. Take a moment to select an aesthetically pleasing board or platter to arrange everything. Aim for a mix of colors and textures to create an inviting presentation.

Step 2: Arrange the Cheeses and Meats
Place your assorted cheeses—sharp cheddar, creamy brie, and tangy blue cheese—at the center of the board. Cut the cheeses into wedges or cubes for easy serving. Next, surround the cheeses with slices of salami, prosciutto, and pepperoni, creating a savory layout that complements the festive theme.

Step 3: Add Fresh Fruits and Crackers
Incorporate fresh fruit like grapes, apple slices, and figs around the meats and cheeses for a pop of color and sweetness. Then, scatter a variety of gourmet crackers or pita chips around the board, ensuring they are within reach for guests. This will enhance the overall balance of flavors in your Halloween Cheese Board.

Step 4: Include the Pub Cheese and Mini Pretzels
Pour the pub cheese into a small bowl and place it strategically on the board. Set a handful of mini pretzels beside the bowl as a delightful pairing for dipping. This creamy element will add another layer of taste to your spread, ensuring there is something for everyone to enjoy.

Step 5: Surround with Seasonal Decorations
Embellish your Halloween Cheese Board with Halloween decorations to elevate the festive spirit. Strategically place small pumpkins, spooky skeletons, or even candy corn around the board. This decorative touch not only enhances the visual appeal but also invites conversation among your guests.

Step 6: Final Touches with Serving Essentials
Finally, arrange cheese knives and cocktail forks around the board to facilitate serving. Ensure they are easy to access so that guests can effortlessly enjoy the cheeses and meats. With everything set, your Halloween Cheese Board is now ready to impress at your gathering!

Halloween Cheese Board

Tips for the Best Halloween Cheese Board

  • Balance Flavors: Aim for a variety of cheeses and meats. Pair sharp cheeses with milder meats to create a delightful flavor contrast, enhancing your Halloween Cheese Board.

  • Seasonal Touches: Incorporate fresh fruits and Halloween-themed decorations to elevate both taste and presentation. This adds a fun, festive flair to your spread.

  • Spacing Matters: Arrange ingredients with enough space to avoid crowding. This not only looks appealing but also allows guests to easily navigate the board without knocking things over.

  • Easy Dipping: Provide small bowls for spreads like pub cheese. This keeps the board organized and offers guests a clean, easy way to enjoy their snacks with the mini pretzels.

  • Visual Appeal: Use an assortment of colors and textures. Including green grapes, dark figs, and orange pumpkins creates a visually stunning Halloween Cheese Board that grabs attention.

  • Prep Ahead: Consider prepping some ingredients in advance, like slicing cheeses and meats. This allows you to enjoy your gathering without rushing at the last moment!

Make Ahead Options

These Halloween Cheese Boards are perfect for meal prep, allowing you to enjoy more time with your guests! You can slice and arrange the cheeses and cured meats up to 24 hours in advance, storing them in airtight containers in the refrigerator to maintain freshness. Fresh fruits can be prepped by slicing apples, while grapes and figs can simply be washed—do this a few hours before serving to keep everything vibrant. Assemble the board without decorations and cover it with plastic wrap, then add your festive touches just before your guests arrive. This makes entertaining easy, ensuring your Halloween Cheese Board is just as delicious and visually enticing when it’s time to serve!

Halloween Cheese Board Variations & Substitutions

Feel free to personalize your Halloween Cheese Board with these imaginative twists and substitutes that will tantalize your taste buds!

  • Vegetarian Delight: Swap out cured meats for marinated mushrooms or roasted peppers for a vibrant, plant-based option. This will add a wonderful umami flavor while keeping the board visually appealing!

  • Gluten-Free: Use rice crackers or veggie sticks instead of traditional crackers to ensure everyone can indulge without worry. They provide the perfect crunch while accommodating those with dietary restrictions.

  • Spicy Kick: Add pepper jack cheese or slices of jalapeño to introduce a kick of heat to your board. The contrast between spicy and creamy will keep your guests reaching for more!

  • Sweet Tooth: Include dark chocolate pieces or honeycomb for a sweeter touch that beautifully complements the savory elements. These surprises will delight everyone as they balance the flavors.

  • Savory Boost: Infuse some herbed goat cheese into the mix for a tangy and creamy texture. Its distinct flavor can elevate the overall experience of your Halloween spread!

  • Nutty Crunch: Scatter some seasoned nuts like candied pecans or spicy almonds around the board for added texture and flavor. They offer a delightful crunch that will enhance the snacking experience.

  • Fruit Variations: Switch out grapes for seasonal fruits like pomegranate seeds or pear slices for added color and a unique flavor profile. These brighten up the board and invite conversation among guests!

  • Themed Decor: Consider little Halloween-themed skewers or picks in addition to the cheese knives to amp up the spooky vibe. They will not only be functional but also add a playful element to your spread!

You might also enjoy pairing your Halloween Cheese Board with a delicious Cottage Cheese Blueberry creation for a sweet counterpoint or using ingredients from a Goat Cheese Sweet recipe as inspired toppings! Dive into these ideas and make your cheese board truly unforgettable!

How to Store and Freeze Halloween Cheese Board

Fridge: Store leftovers in an airtight container or tightly wrapped in plastic wrap for up to 3 days. This keeps the flavors fresh and delicious for your next snack session.

Room Temperature: If serving, keep out for a maximum of 2 hours to ensure food safety, especially on warm days.

Freezer: It’s not recommended to freeze the assembled Halloween Cheese Board, as the textures will change. However, you can freeze individual cheeses and meats for later use.

Reheating: If you have any warm components, such as baked cheese, reheat in the oven at 350°F until warmed through; use caution not to overcook your ingredients.

What to Serve with Halloween Cheese Board?

As you gather your friends for a festive celebration, here are delightful accompaniments that will complement your spooky spread beautifully.

  • Crispy Crostini: These toasted bread slices offer a crunchy texture that pairs wonderfully with creamy cheeses and savory meats.

  • Savory Hummus: A smooth and earthy dip adds an inviting flavor contrast, perfect for spreading on crackers or dipping fresh veggies.

  • Sparkling Apple Cider: This effervescent drink echoes the autumn spirit, providing a refreshing complement to the rich flavors on your board.

  • Roasted Pumpkin Seeds: Crunchy and nutty, these seasonal treats not only add texture but also tie into the Halloween theme beautifully.

  • Autumn Salad: A mix of bitter greens with slices of pear and walnuts creates a light, refreshing balance against the hearty cheese and meats.

  • Chocolate-Covered Pretzels: These sweet and salty bites provide the ideal finish, making your Halloween Cheese Board seem utterly indulgent.

Dive into this collection of pairings, each one carefully curated to enhance your culinary experience, leaving your guests enchanted and satisfied!

Halloween Cheese Board

Halloween Cheese Board Recipe FAQs

How do I choose the right ripeness of cheeses for my board?
Absolutely! Aim for a variety of cheeses with different textures and flavors. For example, go for a ripe brie that’s creamy and soft, while opting for a sharp cheddar that’s more firm. Aged cheeses like blue cheese can add a strong flavor that’s perfect for balancing lighter meats and fruits.

How should I store leftovers from the Halloween Cheese Board?
After your party, you can store any leftover components in an airtight container or tightly wrapped in plastic wrap. Make sure to refrigerate them, and they’ll be good for up to 3 days. Just remember, fruits may not last as long, so try to enjoy those first!

Can I freeze any ingredients from the Halloween Cheese Board?
Very! While I don’t recommend freezing the entire board as that changes the texture of the cheeses and meats, you can freeze individual components. Wrap cheeses tightly in plastic wrap or use freezer bags and store them in the freezer for up to 3 months. Just thaw them in the fridge before use!

What do I do if my cheese is too hard to slice?
If your cheese is harder than expected, place it in the fridge for about 15-30 minutes to slightly soften it before cutting. For even softer textures, let it sit at room temperature for 10-15 minutes—this helps bring out the flavors without making it melt.

Can I serve this cheese board to guests with food allergies?
Definitely! While assembling your Halloween Cheese Board, be mindful of common allergens. For gluten-free options, choose gluten-free crackers or veggies for dipping. When selecting cheeses and meats, look for labels and consult with guests who have known allergies to ensure everyone can enjoy it safely.

How can I make my Halloween Cheese Board more visually appealing?
To elevate its visual charm, use a variety of heights and colors in your arrangement. Place the cheeses at the center, then add the meats, fruits, and crackers around them, using bowls for dips and decorations sparingly. Spooky accents, like little pumpkins or fake spiders, can make a great discussion starter and bring a festive spirit to the ambiance!

Create an Spooktacular Halloween Cheese Board to Impress Guests

This Halloween Cheese Board is a delightful mix of meats, cheeses, and fruits perfect for entertaining.

  • cheese knives
  • cocktail forks

For the Board

  • 3 types Assorted Cheeses (sharp cheddar, creamy brie, tangy blue cheese)
  • 3 types Cured Meats (salami, prosciutto, pepperoni)
  • 3 cups Fresh Fruits (grapes, apple slices, figs)
  • 2 cups Crackers (gourmet crackers or pita chips)

For the Extras

  • 1 cup Pub Cheese (creamy spread to pair with pretzels)
  • 1 cup Mini Pretzels (for dipping into the pub cheese)
  • Halloween Decorations (small pumpkins, spooky skeletons, candy corn)

Step-by-Step Instructions

  1. Gather your ingredients and select a board or platter.
  2. Arrange the assorted cheeses and cured meats at the center of the board.
  3. Add fresh fruits and crackers around the cheeses and meats for color.
  4. Include the pub cheese in a bowl and place mini pretzels beside it.
  5. Decorate the board with seasonal Halloween decorations.
  6. Add cheese knives and cocktail forks for easy serving.

Store leftovers in an airtight container for up to 3 days. Best enjoyed fresh.

Appetizer
Appetizer, cheese board, entertaining, Halloween Cheese Board, no-cook, party food

Filed Under: Appetizer

Halloween Oreo Cookie Boo Brownies That Spell Delicious Fun

October 7, 2025 by grace bellamy Leave a Comment

As I rummaged through my pantry, the vibrant colors of Halloween treats caught my eye, and a delightful idea sparked to life: Halloween Oreo Cookie Boo Brownies. This festive twist on classic brownies is perfect for turning any gathering into a spooky celebration. With just two simple ingredients, including those iconic Halloween Boo Oreos, you can whip up a batch of these fudgy, cookie-loaded delights that are as easy to make as they are to share. Not only do they impress with their playful theme, but they also make for a comforting treat that will satisfy your chocolate cravings. Ready to elevate your Halloween dessert game? Let’s dive into baking these enchanting brownies that are sure to become a new favorite!

Halloween Oreo Cookie Boo Brownies

Why will you love these brownies?

Easy to Make: The straightforward recipe means you can whip up a batch of these Halloween Oreo Cookie Boo Brownies in no time!

Decadent and Rich: With a combination of fudgy brownie and crunchy Oreos, each bite is a delightful explosion of flavor.

Perfect for Sharing: They’re a crowd-pleaser! Bring them to your next gathering for a deliciously spooky treat that everyone will adore.

Festive Appearance: The Halloween Boo Oreos add a charming touch, making these brownies a striking addition to any dessert table.

Great for Kids: Involve the little ones in the baking process; they’ll love crushing the cookies and decorating the brownies.

Looking for more festive ideas? Check out our spooky Halloween dessert collection for additional treats that will wow your guests!

Halloween Oreo Cookie Boo Brownies Ingredients

• Here’s everything you’ll need to create these spooky delights!

For the Brownie Batter

  • 1 batch Oreo Brownies by Baker by Nature – This rich base ensures your brownies are fudgy and satisfying.
  • 1 cup chocolate chips – Adds extra gooeyness and chocolatey goodness to the batter.

For the Decoration

  • 1 package Halloween Boo Oreos – These festive cookies not only enhance flavor but also give a fun, spooky appearance.

Get ready to dive into this delicious journey with your Halloween Oreo Cookie Boo Brownies!

Step‑by‑Step Instructions for Halloween Oreo Cookie Boo Brownies

Step 1: Preheat and Prepare
Begin by preheating your oven to 350°F (175°C). While it warms up, grab a 9×13-inch baking pan and line it with parchment paper, allowing some excess to hang over the edges. This will make removing your brownies easier later. Set the pan aside and get ready to whip up the brownie batter for your Halloween Oreo Cookie Boo Brownies.

Step 2: Mix the Brownie Batter
Next, prepare the brownie batter using the Oreo Brownies recipe from Baker by Nature. In a large mixing bowl, combine your ingredients and mix until you achieve a smooth and creamy consistency. The goal is to have a luscious base that will hold all that deliciousness, so don’t rush this step. Once mixed, set the bowl aside to move on to the next tasty part.

Step 3: Fold in the Crunch
Take the brownie batter and gently fold in your crushed Halloween Boo Oreos along with a cup of semi-sweet chocolate chips. Use a spatula to ensure even distribution, as mixing too aggressively can deflate the batter. This step adds delightful bits of cookie and extra chocolatey goodness to your brownies, making them irresistible treats to bite into!

Step 4: Pour and Smooth
Now, pour the brownie batter into your prepared pan, spreading it evenly using a spatula or the back of a spoon. Smooth the top so each brownie bakes uniformly. With the enticing aroma of the Halloween Oreo Cookie Boo Brownies filling your kitchen, it’s time to add a festive touch on top before baking.

Step 5: Decorate with Oreos
Before sending your brownies into the oven, take some whole Halloween Boo Oreos and gently press them into the top of the batter, ensuring they face up for a striking presentation. This not only enhances the look but also adds a crunchy layer of fun to each bite. Now, your batter is ready for the oven!

Step 6: Bake to Perfection
Slide the pan into your preheated oven and bake for about 32 minutes. Keep an eye on them as they bake, ensuring not to overbake for the fudgy texture we desire. As the brownies rise and get puffy, a delightful aroma will fill the air, signaling their almost-ready state for removal from the oven.

Step 7: Check for Doneness
To test your brownies, insert a toothpick into the center, being cautious not to hit a chocolate chip, as they could give a false indication of doneness. You want a few moist crumbs to cling to the toothpick when they’re ready. If it comes out clean, it’s time to take your Halloween Oreo Cookie Boo Brownies out!

Step 8: Cool and Cut
Once baked, let your brownies cool completely in the pan on a wire rack. Patience is key here, as allowing them to set will make cutting into those delicious squares much easier. Once cooled, use the parchment paper overhang to lift your brownies from the pan, slice them into squares, and get ready to impress your family and friends with your festive creation!

Halloween Oreo Cookie Boo Brownies

How to Store and Freeze Halloween Oreo Cookie Boo Brownies

Room Temperature: Store brownies in an airtight container at room temperature for up to 3 days. This keeps them fresh and chewy, perfect for snacking!

Fridge: If you prefer a firmer texture, you can refrigerate the brownies for up to a week. Make sure they’re in an airtight container to avoid absorbing any odors.

Freezer: To freeze, wrap brownies tightly in plastic wrap and then place them in a freezer-safe bag. They can be frozen for up to 3 months. Thaw at room temperature before enjoying.

Reheating: For a warm treat, reheat individual squares in the microwave for about 10-15 seconds. Enjoy the gooeyness of your Halloween Oreo Cookie Boo Brownies like they just came out of the oven!

What to Serve with Halloween Oreo Cookie Boo Brownies

As you dive into the dreamy world of Halloween Oreo Cookie Boo Brownies, think about what will elevate your dessert experience to the next level!

  • Vanilla Ice Cream: The creamy richness of vanilla ice cream perfectly balances the chocolatey fudge of the brownies, creating a divine indulgence. Imagine the warm brownie melting into cold ice cream with each spoonful—heavenly!

  • Pumpkin Spice Latte: This classic fall drink adds an aromatic touch to your dessert table, complementing the Halloween vibes wonderfully. Sip on this warm, spiced beverage while savoring a brownie for the ultimate cozy experience.

  • Caramel Sauce Drizzle: A rich swirl of caramel sauce drizzled over the brownies enhances their flavors and adds a gooey texture. The sweet, slightly salty caramel brings out the best in the chocolatey delights!

  • Whipped Cream Topping: Light and airy, fresh whipped cream adds a delightful contrast to the dense brownies. Top off each square with a dollop and watch it vanish in seconds!

  • Chocolate Milk: This nostalgic drink complements the flavors of your brownies while adding a fun twist. It’s a delightful way to relive childhood memories while enjoying a Halloween treat.

  • Fresh Fruit Platter: Consider adding a vibrant selection of fruits like strawberries, raspberries, or apple slices. The natural sweetness and juiciness provide a refreshing contrast to the rich brownies, perfect for balancing flavors.

  • Chai Tea: With its warm spices and creamy texture, chai tea pairs beautifully with the brownies, enhancing their richness. It’s the ideal drink for a cozy afternoon or a festive gathering!

  • Ghostly Marshmallow Treats: For added spookiness, serve some cute ghostly marshmallow treats alongside your brownies. They’re playful, festive, and create a fun Halloween vibe at your dessert table!

Halloween Oreo Cookie Boo Brownies Variations

Feel free to mix things up and make this recipe your own with these fun twists!

  • Gluten-Free: Substitute a gluten-free brownie mix in place of traditional flour-based brownies for an inclusive treat.

  • Nutty Delight: Add 1 cup of chopped walnuts or pecans to the brownie batter for an exciting crunch that complements the fudginess. The nuts bring a contrasting texture and nutty flavor, making each bite even more satisfying!

  • Peppermint Twist: Incorporate crushed peppermint candies into the batter or sprinkle on top for a festive minty twist. This addition brightens the flavor profile, perfect for holiday gatherings!

  • Dairy-Free: Use non-dairy chocolate chips and a dairy-free brownie mix to make these brownies suitable for lactose-intolerant friends. They’ll be just as delicious and rich without the dairy!

  • Spicy Kick: Add a pinch of cayenne or chili powder to the batter for an unexpected heat that pairs beautifully with chocolate. Just a little spice can elevate these brownies to a whole new level!

  • Pumpkin Spice: Mix in 1/2 cup of pumpkin puree and a dash of pumpkin spice to the brownie batter for a seasonal flavor that gives a cozy autumnal feel. This balance of spices creates a heartwarming treat perfect for fall.

  • Orange-Candy Topping: Sprinkle chopped orange candy or orange-flavored candy melts on top before baking to give your brownies a vibrant pop of color and a sweet zing!

If you’re aiming for more Halloween-inspired goodies, consider checking out our spooky Halloween dessert collection for additional treats. Your friends and family will love having a variety of festive options!

Make Ahead Options

These Halloween Oreo Cookie Boo Brownies are perfect for busy home cooks who want to save time without sacrificing flavor! You can prepare the brownie batter and refrigerate it for up to 24 hours; simply cover the bowl with plastic wrap to maintain freshness. Additionally, you can crush the Halloween Boo Oreos a day in advance and store them in an airtight container to keep them crisp. When you’re ready to bake, just follow the final steps: pour the batter into your prepared pan, decorate with the whole Oreos, and bake as directed. This way, you’ll have delicious, fudgy brownies with minimal effort on the day of your celebration!

Expert Tips for Halloween Oreo Cookie Boo Brownies

  • Use Room Temperature Ingredients: Ensure your ingredients are at room temperature for a smoother batter that mixes well and creates a fudgy texture.

  • Don’t Overmix: When folding in crushed Oreos and chocolate chips, be gentle. Overmixing can lead to dense brownies instead of the perfect texture.

  • Check Oven Temperature: Every oven is different; invest in an oven thermometer to avoid overbaking your Halloween Oreo Cookie Boo Brownies, keeping them wonderfully fudgy.

  • Cool Completely: Allow the brownies to cool completely before cutting. This prevents them from falling apart, ensuring clean, beautiful squares.

  • Store Properly: If you have leftovers, store them in an airtight container to keep them fresh and moist; brownies can dry out quickly!

  • Get Creative: Feel free to add your favorite nuts or spices; just remember to keep the focus on those delightful Halloween Oreo Cookie Boo Brownies!

Halloween Oreo Cookie Boo Brownies

Halloween Oreo Cookie Boo Brownies Recipe FAQs

How do I select the best Oreos for this recipe?
Absolutely! When choosing your Halloween Boo Oreos, look for those with no visible damage or dark spots. You want them fresh and colorful to enhance the visual appeal of your brownies. Checking the expiration date is also a good practice to ensure they’ll taste their best in your delightful treats.

What’s the best way to store leftovers?
Very! To keep your brownies fresh, store them in an airtight container at room temperature for up to 3 days. If you’re not planning to finish them right away, refrigerate them in the same way for up to a week. This helps maintain their delicious fudgy texture—perfect for snack cravings!

Can I freeze Halloween Oreo Cookie Boo Brownies?
Absolutely! To freeze, first cut the brownies into squares, then wrap each square tightly with plastic wrap. After that, place them in a freezer-safe bag or container, ensuring they’re sealed well to avoid freezer burn. These brownies can be frozen for up to 3 months. When you’re ready to enjoy them, simply thaw at room temperature or microwave them for about 10-15 seconds for that freshly-baked goodness!

What should I do if my brownies turn out too dry?
Oh no! If your brownies turn out too dry, it might be due to overbaking. Always check them a few minutes early and use the toothpick test—don’t forget to avoid hitting chocolate chips that can give misleading results. For the next batch, consider reducing the baking time, or even testing your oven temperature with an oven thermometer to avoid future mishaps.

Are these brownies safe for pets or special dietary needs?
Certainly! Chocolate, a key ingredient in these brownies, is toxic to dogs and other pets, so keep these treats out of their reach. If you’re catering to someone with food allergies, be mindful of any potential allergens in Oreos or other ingredients. Always check labels for gluten, dairy, or nut contents if needed. You can also consider using gluten-free Oreos for an inclusive treat!

Halloween Oreo Cookie Boo Brownies That Spell Delicious Fun

These Halloween Oreo Cookie Boo Brownies are a spooky, fudgy treat perfect for gatherings, featuring crunchy Oreos and a chocolatey base.

  • Oven
  • 9×13-inch baking pan
  • Mixing Bowl
  • spatula
  • parchment paper

For the Brownie Batter

  • 1 batch Oreo Brownies by Baker by Nature (This rich base ensures your brownies are fudgy and satisfying.)
  • 1 cup chocolate chips (Adds extra gooeyness and chocolatey goodness to the batter.)

For the Decoration

  • 1 package Halloween Boo Oreos (These festive cookies enhance flavor and give a fun, spooky appearance.)

Step‑by‑Step Instructions

  1. Preheat your oven to 350°F (175°C) and line a 9×13-inch baking pan with parchment paper.
  2. Mix the brownie batter using the Oreo Brownies recipe from Baker by Nature until smooth and creamy.
  3. Fold in the crushed Halloween Boo Oreos and chocolate chips into the brownie batter.
  4. Pour the brownie batter into the prepared pan and smooth the top.
  5. Press whole Halloween Boo Oreos into the top of the batter.
  6. Bake in the preheated oven for about 32 minutes.
  7. Check for doneness using a toothpick.
  8. Let the brownies cool completely in the pan on a wire rack before cutting.

Allowing the brownies to cool completely ensures clean cuts and a better presentation.

Dessert
American
brownies, chocolate, dessert, Halloween, Oreo, Spooky

Filed Under: Dessert

Delicious Spider Pancakes That Will Wow Your Breakfast Table

October 7, 2025 by grace bellamy Leave a Comment

As I flipped through my beloved recipe book, my eyes landed on a whimsical creation that immediately sparked joy: Spider Pancakes. This playful dish transforms a simple breakfast into a fun, family-friendly feast, perfect for those who want to ditch fast food and engage their inner child. The beauty of these pancakes lies not just in their delightful appearance, but in the quick prep—ideal for busy mornings or a spontaneous brunch that everyone will love. Imagine the laughter as you drizzle sweet icing to craft a spooky spiderweb, topped with juicy blackberries and candy googly eyes. Are you ready to whip up some spider-themed fun in your kitchen?

Spider Pancakes

Why are Spider Pancakes a must-try?

Fun Twist: These Spider Pancakes are not just your average breakfast; they turn your morning into a playful culinary adventure that both kids and adults will love.

Quick to Make: With just a few simple ingredients and minimal prep time, you can enjoy a whimsical brunch without a fuss.

Customizable: Use your favorite pancake recipe—whether homemade or from a mix. Feeling adventurous? Try them with Whole Grain Banana Pancakes for extra flavor!

Eye-Catching Presentation: The spooky spiderweb design and berry “spiders” are sure to impress and spark joy at your breakfast table.

Great for All Occasions: These pancakes aren’t just for Halloween; they can be a fun, themed dish for any gathering.

Get ready to bring smiles with every bite of these playful pancakes!

Spider Pancakes Ingredients

• Perfect for a whimsical brunch!

For the Pancakes

  • Favorite Pancakes – Use homemade, mix, or frozen pancakes—whichever makes your heart happy!

For the Icing

  • Powdered Sugar – This adds sweetness and creates the spiderweb effect!
  • Water – Adjust to achieve a drizzling consistency for easy decorating.

For the Topping

  • Blackberries – They mimic spiders beautifully and add a burst of juicy flavor.
  • Candy Googly Eyes – These make your spiders come to life; they’re the fun finishing touch!

Now you’re all set to create your delightful Spider Pancakes; these ingredients are bound to bring smiles to your breakfast table!

Step‑by‑Step Instructions for Spider Pancakes

Step 1: Prepare Your Pancakes
Begin by laying out your favorite pancakes on a large, inviting plate. Whether you’ve made them from scratch, used a mix, or pulled them from the freezer, stack them nicely. Aim for a warm temperature; if using pre-made pancakes, heat them on a skillet over low heat for about 2–3 minutes until they are fluffy and soft.

Step 2: Make the Icing
In a small bowl, combine 2 tablespoons of powdered sugar with 4 teaspoons of water. Stir well until you achieve a smooth, drizzling consistency; it should be thick yet pourable. If you’re feeling adventurous, add a dash of vanilla extract for that extra flavor boost! This icing will bring your Spider Pancakes to life.

Step 3: Prepare the Decorating Bag
Transfer the icing into a small sandwich zipper bag, carefully ensuring there are no air bubbles trapped inside. Seal it tightly and snip off a tiny corner of the bag to create a makeshift piping bag. You’re now ready to craft a delicious spiderweb design on your pancakes.

Step 4: Create the Spiderweb Design
Start drizzling the icing over the pancakes with steady hands. Begin from the center and spiral outward to create a beautiful spiderweb pattern that covers the pancakes. Use your imagination; this is where the magic of Spider Pancakes unfolds! Aim for a nice balance of icing to create a striking visual.

Step 5: Add the Blackberry “Spiders”
Gently place fresh blackberries on top of the icing web. Their dark, shiny appearance mimics real spiders and adds a delicious, juicy burst of flavor. Position them strategically on the web, spreading them out for a fun and engaging look that pleases both the eyes and stomach.

Step 6: Attach the Googly Eyes
Take your candy googly eyes and attach them to the blackberries with a tiny dab of the icing. This playful finishing touch gives your Spider Pancakes an adorable personality. Be creative—mix and match placements for each “spider” to add character to your breakfast masterpiece.

Step 7: Serve and Enjoy
Once your Spider Pancakes are decorated, serve them immediately while they’re warm. Gather your family around the table and watch their faces light up with joy at this whimsical creation. With every bite, you’ll enjoy not just the delicious flavors but also the laughter that comes with this fun breakfast delight!

Spider Pancakes

Expert Tips for Spider Pancakes

  • Pancake Perfection: Ensure your pancakes are fluffy by not overmixing the batter. This keeps them light and airy for the best Spider Pancakes experience.

  • Icing Consistency: Adjust the powdered sugar and water to achieve the right drizzling thickness. Too runny will cause the design to blur, while too thick won’t pipe easily.

  • Creative Toppings: Feel free to use other berries like blueberries or strawberries for a colorful twist to your spider decorations.

  • Make It Ahead: Prepare the icing in advance and store it in the fridge. Just give it a good shake before using to keep your Spider Pancakes fun and easy!

  • Presentation Matters: Use a clean plate and arrange the pancakes neatly. A beautiful presentation elevates the fun and makes every bite more enjoyable.

With these expert tips, your Spider Pancakes will not only look delightful but also taste absolutely scrumptious!

What to Serve with Spider Pancakes?

As you prepare to delight your loved ones with these whimsical pancakes, consider completing your breakfast with tasty sides that enhance the fun.

  • Crispy Bacon: The salty crunch adds a savory balance to the sweet pancakes, creating a delightful contrast in every bite.

  • Fresh Fruit Salad: Bursting with seasonal berries and refreshing melons, this light dish brings a vibrant, juicy touch to your breakfast table.

  • Sweet Maple Syrup: Drizzling pure maple syrup lets you customize the sweetness of your pancakes, enhancing their flavor and making each bite indulgently satisfying.

  • Whipped Cream: Light and fluffy, whipped cream creates an extra layer of delight when paired with your Spider Pancakes, inviting you to dive back in for more.

  • Syrupy French Toast Sticks: Serve some easy-to-eat, decadent French toast sticks alongside for an indulgent twist, perfect for dipping in syrup.

  • Chocolate Milk: Rich and sweet, this classic drink deepens the breakfast experience while appealing to kids and adults alike.

  • Coffee or Tea: A warm cup of your favorite brew pairs beautifully, lifting the spirits as you savor your magical morning feast.

Enjoy crafting the perfect breakfast spread around your delightful Spider Pancakes that will spark joy and connection!

Spider Pancakes Customization Ideas

Get ready to unleash your creativity in the kitchen with these delightful variations that will elevate your Spider Pancakes to a whole new level!

  • Whole Grain: Swap your regular pancake mix for whole grain for a nutritious twist. Healthy doesn’t have to mean boring!

  • Spiced Up: Add a dash of cinnamon or nutmeg to the pancake batter for a warm, cozy flavor that resonates with autumn.

  • Fruit Swap: Instead of blackberries, try using raspberries or even sliced bananas for a cheerful, fruity topping that everyone will love.

  • Vegan-Friendly: Substitute the powdered sugar with coconut sugar and use almond milk in your pancake mix for a tasty plant-based option.

  • Nutty Delight: Incorporate chopped walnuts or pecans into the pancake batter to add crunch and heartiness. It’s a flavor explosion in every bite!

  • Chocolate Drizzle: Create a rich chocolate icing instead of the white glaze for a sweet indulgence that leans into dessert territory.

  • Extra Sweet: Toss in some chocolate chips into the batter right before cooking. Who can resist pancakes that are a little extra sweet?

  • Spicy Kick: For the adventurous, add a pinch of cayenne pepper to the batter. This unexpected heat will surprise and delight your palate!

Feel free to mix and match some of these ideas while trying out your Spider Pancakes; the only limit is your imagination! Want to keep exploring? You might also enjoy making Whole Grain Banana Pancakes for an innovative breakfast experience!

Make Ahead Options

These delightful Spider Pancakes are perfect for meal prep, making mornings a breeze! You can prepare the pancakes up to 3 days in advance; simply cook and cool them, then refrigerate in an airtight container. The icing can also be made ahead—whip it up and refrigerate for up to 24 hours in a sealed container. When you’re ready to serve, simply warm the pancakes in a skillet over low heat for 2-3 minutes, drizzle the prepared icing to create the spiderweb, and finish with blackberries and candy googly eyes. With these make ahead options, you’ll enjoy a whimsical breakfast with minimal effort and just as delicious results!

Storage Tips for Spider Pancakes

Fridge: Store leftover Spider Pancakes in an airtight container for up to 3 days. Reheat them in the microwave for about 20-30 seconds to enjoy them warm again.

Freezer: Freeze the pancakes in a single layer on a baking sheet, then transfer them to a freezer bag for up to 2 months. Reheat directly from the freezer in a toaster or microwave.

Icing Storage: Keep any leftover icing in a sealed container in the fridge for up to a week. Stir well before using it again for drizzling on your Spider Pancakes.

Reheating: When reheating, use a microwave or a skillet over low heat to maintain the fluffy texture and delightful taste of your Spider Pancakes.

Spider Pancakes

Spider Pancakes Recipe FAQs

What kind of pancakes should I use for Spider Pancakes?
You can use any type of pancakes you like! Whether they are homemade, from a mix, or even frozen, choose what makes your heart happiest. For a twist, try using whole grain or banana pancakes for added flavor!

How should I store leftover Spider Pancakes?
Store your leftover Spider Pancakes in an airtight container in the fridge for up to 3 days. Reheat them in the microwave for about 20–30 seconds, or until they’re warm. This way, you can enjoy your whimsical breakfast even after the fun is over!

Can I freeze Spider Pancakes?
Absolutely! To freeze them, lay the pancakes in a single layer on a baking sheet and freeze until solid. Then, transfer them to a freezer bag where they can last up to 2 months. When you’re ready to enjoy them again, reheat right from the freezer in a toaster or microwave—it’s that easy!

How do I adjust the icing if it’s too thick or too runny?
If your icing is too thick, gradually add a teaspoon of water and stir until you reach a smoother, drizzling consistency. Conversely, if it’s too runny, add a little more powdered sugar until it thickens up. Aim for a texture that flows easily but holds its shape when piped—it should feel like a soft drizzle!

Are there any dietary considerations for these Spider Pancakes?
Yes, while this recipe is quite flexible, keep in mind that the icing contains powdered sugar, which some may want to avoid for dietary reasons. You can also experiment with alternatives like sugar-free powdered sugar or a simple syrup made with fruit juice. If you’re serving it to children, ensure that the candy googly eyes don’t pose a choking hazard for younger kids. Always check for allergies with the toppings and ingredients you select!

Delicious Spider Pancakes That Will Wow Your Breakfast Table

These whimsical Spider Pancakes transform breakfast into a fun feast, perfect for engaging family and creating joyous moments.

  • Plate
  • skillet
  • small bowl
  • Zipper bag

For the Pancakes

  • Favorite Pancakes (Use homemade, mix, or frozen pancakes—whichever makes your heart happy!)

For the Icing

  • 2 tablespoons Powdered Sugar (This adds sweetness and creates the spiderweb effect!)
  • 4 teaspoons Water (Adjust to achieve a drizzling consistency for easy decorating.)

For the Topping

  • Blackberries (They mimic spiders beautifully and add a burst of juicy flavor.)
  • Candy Googly Eyes (These make your spiders come to life; they’re the fun finishing touch!)

Step-by-Step Instructions for Spider Pancakes

  1. Prepare your favorite pancakes on a large plate, keeping them warm.
  2. Make the icing by mixing powdered sugar with water until smooth and drizzling consistency is achieved.
  3. Prepare a zipper bag with the icing, sealing tightly and snipping a corner.
  4. Create a spiderweb design by drizzling icing from the center to the edges of the pancakes.
  5. Place blackberries on the spiderweb to mimic spiders.
  6. Attach candy googly eyes to the blackberries with a dab of icing.
  7. Serve immediately while warm and enjoy the smiles at the table!

For perfect pancakes, ensure they are fluffy and light by not overmixing batter. Feel free to try other berries for decorating.

Breakfast
American
family-friendly recipe, fun breakfast, Halloween pancakes, pancake recipe, Spider Pancakes, whimsical brunch

Filed Under: Breakfast

Sweet Spooky Halloween Decorated Cookies to Impress Your Guests

October 7, 2025 by grace bellamy Leave a Comment

As the crisp autumn air settles in, there’s a thrilling excitement in the kitchen, especially when it comes to baking Halloween Decorated Cookies. If you’ve ever felt the joy of crafting spooky shapes with vibrant royal icing, you know just how rewarding these little treats can be. This recipe is not only fun but also offers a quick prep time, perfect for those busy weeknights leading up to Halloween. Plus, it’s an excellent way to engage kids or friends in a delightful baking session. Imagine the laughter and creativity as you whip up festive ghouls and goblins that are sure to impress at any gathering. Are you ready to let your imagination run wild and make these cookies a frightful delight?

Halloween Decorated Cookies

Why are Halloween Decorated Cookies a must-try?

Delightful Creativity: Unleash your imagination with these cookies, perfect for decorating into spooky shapes that will be the hit of your Halloween party!

Quick Prep Time: With just 45 minutes of prep, you’ll have a delicious treat ready in no time.

Kid-Friendly Fun: Involve your little ghosts and goblins in the decorating process—watch their eyes light up with excitement!

Versatile Shapes: From bats to pumpkins, the cookie cutters you choose can reflect your unique Halloween style.

Impressive Treats: Bring crowd-pleasing goodies to your gatherings that not only taste amazing but look simply stunning!

For more delightful baking ideas, check out our delicious chocolate chip cookie variations.

Halloween Decorated Cookies Ingredients

Get ready to bake spooky delights!

For the Cookie Dough

  • 1 cup butter – makes for a rich, creamy base that gives cookies a delightful texture.
  • 3 cups powdered sugar – adds sweetness and helps create that perfect cookie structure.
  • 1 large egg – binds the ingredients together, ensuring your cookies hold their shape.
  • 3 cups all-purpose flour – forms the backbone of the cookies, providing the structure needed for decorating.
  • 1/2 cup black cocoa powder – gives your cookies a deep, dark color and a rich chocolate flavor.
  • 1/2 cup Dutch process cocoa powder – enhances the chocolatey taste while balancing the sweetness.
  • 1/2 teaspoon salt – a crucial ingredient that enhances flavor and balances sweetness.

For Decorating

  • Royal icing – the star of the show, use it in varying thicknesses for beautiful, intricate designs!

Step‑by‑Step Instructions for Halloween Decorated Cookies

Step 1: Cream the Butter
In the bowl of a stand mixer fitted with the paddle attachment, cream 1 cup of butter on medium speed until it’s creamy and smooth, taking about 2-3 minutes. This creates a rich base for your Halloween Decorated Cookies, so get it nice and fluffy before moving on.

Step 2: Add the Sugar
Next, add 3 cups of powdered sugar to the creamed butter. Beat on medium speed until the mixture is light, fluffy, and fully incorporated, approximately 3-5 minutes. You want to achieve a sweet and airy texture that will support the cookie dough’s stability.

Step 3: Incorporate the Egg
Now, crack in 1 large egg and mix on low speed until everything is well combined, which should take about 1-2 minutes. This will bind the ingredients and enhance the overall flavor of your Halloween Decorated Cookies, making them moist and delicious.

Step 4: Whisk the Dry Ingredients
In a separate bowl, sift together 3 cups of all-purpose flour, 1/2 cup of black cocoa powder, 1/2 cup of Dutch process cocoa powder, and 1/2 teaspoon of salt. Whisk gently until they blend perfectly. This step ensures that your dry ingredients are lump-free and ready to be combined with the wet mixture.

Step 5: Combine Wet and Dry Ingredients
Gradually add the dry mixture to the wet ingredients in the stand mixer. Mix on low speed just until the flour is incorporated, typically around 1-2 minutes. Be careful not to overmix; you want a cohesive dough ready for shaping into your Halloween Decorated Cookies.

Step 6: Form the Dough
Turn the dough onto a clean surface and gently bring it together into a ball using your hands. Knead slightly for about 1 minute, then flatten it into a disc about 1-inch thick. This will help the dough chill evenly, ensuring the perfect texture for cookie cutting later.

Step 7: Chill the Dough
Wrap the dough tightly in cling wrap and place it in the refrigerator to chill for at least 30-45 minutes, though you can keep it for up to 2 days. Chilling the dough makes it firmer and easier to roll out, which is essential for your Halloween Decorated Cookies.

Step 8: Roll Out the Dough
After chilling, roll out the dough between two sheets of parchment paper until it’s about 4 mm thick. This thickness is ideal for shaping spooky cookies that will hold their design during baking, so take your time to get it just right!

Step 9: Cut and Chill Shapes
Use your favorite cookie cutters to cut out spooky shapes from the rolled dough. Place them on a lined baking tray, then chill in the refrigerator for an hour or overnight. This extra chilling step helps the cookies maintain their shape while baking for your Halloween Decorated Cookies.

Step 10: Preheat the Oven
Preheat your oven to 160°C (320°F) as you wait. This ensures that your cookies will bake evenly and come out perfectly golden. Timing this step while the cookies chill is a smart way to maximize efficiency!

Step 11: Bake the Cookies
Once preheated, bake the cookies for about 10 minutes. Keep an eye on them; they should be set but not too hard, maintaining a soft center. The aroma of these Halloween Decorated Cookies will fill your kitchen with delightful anticipation!

Step 12: Cool and Decorate
Allow the cookies to cool on the baking sheet for 5 minutes, then transfer them to a cooling rack to cool completely. Once cooled, it’s time to unleash your creativity and decorate with royal icing to bring your Halloween Decorated Cookies to life!

Halloween Decorated Cookies

Halloween Decorated Cookies Variations & Substitutions

Feel free to explore these delightful twists that make your Halloween Decorated Cookies even more exciting!

  • Gluten-Free: Substitute all-purpose flour with a gluten-free blend to make these cookies accessible for everyone.
  • Chocolate Overload: Add an extra 1/4 cup of Dutch process cocoa powder for a more intense chocolate flavor that chocolate lovers will adore.
  • Spicy Kick: Mix in 1/2 teaspoon of cinnamon or chili powder to the dough for a warm, spicy surprise that adds depth to each bite.
  • Nutty Twist: Incorporate 1 cup of finely chopped walnuts or pecans into the dough for a nutty texture that pairs perfectly with the chocolate cookies.
  • Royal Icing Color: Use food coloring in your royal icing to create vibrant hues that will make your cookies pop! Imagine deep orange pumpkins or ghostly white ghouls decorating your platter.
  • Extra Crunch: Experiment with adding crushed candy corn or toffee bits into the dough for a delightful crunch and festive flavor surprise.
  • Zesty Freshness: Consider adding the zest of one orange or lemon to the dough for a refreshing citrus note that brightens the chocolate flavor.

Feel inspired? There’s always room for creativity, whether you’re crafting Halloween Decorated Cookies or whipping up delightful chocolate chip cookie variations! Don’t hesitate to mix and match these ideas to find your perfect combination. Happy baking!

Expert Tips for Halloween Decorated Cookies

Chill Properly: Make sure to chill the dough for at least 30-45 minutes. This helps the cookies maintain their shapes and prevents spreading during baking.

Don’t Overmix: When combining wet and dry ingredients, mix just until incorporated. Overmixing can result in tough cookies, affecting your Halloween Decorated Cookies’ texture.

Uniform Thickness: Roll out the dough evenly to about 4 mm thick. Uniform thickness ensures all cookies bake evenly, so you’ll have perfectly shaped goodies.

Watch Baking Time: Bake for about 10 minutes, keeping an eye on them towards the end. Cookies should be set but still soft in the center for the best flavor and texture.

Use Quality Icing: Invest in good quality royal icing. The right consistency will make decorating easy and enjoyable, bringing your Halloween Decorated Cookies to life!

How to Store and Freeze Halloween Decorated Cookies

Room Temperature: Store your Halloween Decorated Cookies in an airtight container at room temperature for up to 3 days to keep them fresh and delicious.

Fridge: For longer storage, place the cookies in the fridge in a sealed container for up to 7 days, but be aware that refrigeration may slightly alter their texture.

Freezer: Freeze undecorated cookies for up to 3 months by wrapping them in plastic wrap and placing them in a freezer bag. Thaw at room temperature before decorating.

Reheating: If you’ve frozen decorated cookies, allow them to thaw completely, then gently warm them in the oven at a low temperature for a few minutes to restore some softness.

Make Ahead Options

These Halloween Decorated Cookies are perfect for busy home cooks who want to save time during the festive season! You can prepare the cookie dough up to 3 days in advance by chilling it in the refrigerator. Simply wrap the dough tightly in cling wrap to prevent it from drying out. Additionally, you can roll out and cut your spooky shapes, then chill them on a lined baking tray for up to 24 hours before baking. When you’re ready to bake your Halloween Decorated Cookies, just preheat the oven and bake them directly from the fridge for deliciously fresh cookies that look just as stunning as ones made on the same day!

What to Serve with Halloween Decorated Cookies

As you gather your friends and family to enjoy these festive treats, consider pairing them with delightful sides and drinks that elevate the Halloween spirit.

  • Warm Apple Cider: The sweet and spiced flavors of this drink perfectly complement the rich chocolate cookies while evoking cozy autumn vibes.
  • Ghostly Marshmallow Treats: These fun, no-bake treats offer a chewy texture that contrasts beautifully with the crisp edges of your decorated cookies.
  • Pumpkin Spice Cupcakes: A seasonal favorite, these cupcakes bring warm spices that echo the flavors of fall, creating a festive dessert table.
  • Candy Corn & Nut Mix: A crunchy, colorful mix that adds a playful texture, making it an exciting contrast to the soft cookie treat.
  • Chocolate Dipped Strawberries: The fresh burst of flavor from ripe strawberries balances the sweetness of the cookies, making them a delightful addition.
  • Vanilla Ice Cream: This creamy classic can be served alongside warm cookies for a memorable dessert experience that combines temperature and texture!
  • Hot Chocolate Bar: Set up a DIY hot chocolate station with various toppings. This fun activity will enchant your guests and pair delightfully with the cookies.
  • Spooky Fruit Salad: A mix of seasonal fruits like oranges, apples, and grapes tossed with a splash of citrus; it’s refreshing and festive at the same time.
  • Pumpkin Ale: This seasonal brew offers a flavorful punch that harmonizes wonderfully with the chocolatey notes of the Halloween Decorated Cookies.

Halloween Decorated Cookies

Halloween Decorated Cookies Recipe FAQs

What’s the best way to select ripe ingredients for Halloween Decorated Cookies?
Absolutely! For the best results, ensure your butter is at room temperature before creaming. Look for high-quality butter as it significantly affects flavor. The egg should be fresh, ideally at room temperature as well, for better incorporation into the dough.

How should I store my Halloween Decorated Cookies and how long do they last?
Store your cookies in an airtight container at room temperature for up to 3 days to enjoy their best taste and texture. If you prefer, you can refrigerate them in a sealed container for about 7 days, though it may slightly alter their delightful crunch.

Can I freeze my Halloween Decorated Cookies? What’s the process?
Definitely! To freeze your cookies, wrap each undecorated cookie tightly in plastic wrap and then place them in a freezer bag. They can be frozen for up to 3 months. When you’re ready to decorate, simply thaw them at room temperature for about 1-2 hours before getting creative with the icing!

What should I do if my cookie dough is too crumbly?
If you’re facing crumbly dough that won’t hold together, it likely needs a bit of moisture. Try adding a teaspoon of milk or water and mix until the dough comes together. This should smooth things out, allowing for easier rolling and cutting into shapes.

Are there any dietary considerations I should keep in mind for Halloween Decorated Cookies?
Absolutely! Always check for allergies, especially with common ingredients like eggs and gluten in flour. For those with allergies, consider using egg substitutes like flaxseed meal or applesauce. Additionally, you can opt for gluten-free flour blends to ensure everyone can enjoy these spooky treats.

Can I use different types of cocoa powder in my Halloween Decorated Cookies?
Very much so! If you don’t have black cocoa powder, you can use regular unsweetened cocoa powder instead. Keep in mind, though, that the color will be lighter and the flavor may differ slightly. Experimenting with different cocoa types can also lead to varied flavors, making it fun to find your favorite combination!

Sweet Spooky Halloween Decorated Cookies to Impress Your Guests

Delightful Halloween Decorated Cookies that are sure to impress your guests with both taste and appearance.

  • stand mixer
  • Mixing bowls
  • cookie cutters
  • Baking Tray
  • parchment paper

For the Cookie Dough

  • 1 cup butter (makes for a rich, creamy base that gives cookies a delightful texture.)
  • 3 cups powdered sugar (adds sweetness and helps create that perfect cookie structure.)
  • 1 large egg (binds the ingredients together, ensuring your cookies hold their shape.)
  • 3 cups all-purpose flour (forms the backbone of the cookies, providing the structure needed for decorating.)
  • 1/2 cup black cocoa powder (gives your cookies a deep, dark color and a rich chocolate flavor.)
  • 1/2 cup Dutch process cocoa powder (enhances the chocolatey taste while balancing the sweetness.)
  • 1/2 teaspoon salt (a crucial ingredient that enhances flavor and balances sweetness.)

For Decorating

  • Royal icing (the star of the show, use it in varying thicknesses for beautiful, intricate designs!)

Step‑by‑Step Instructions

  1. Cream the Butter: In the bowl of a stand mixer fitted with the paddle attachment, cream 1 cup of butter on medium speed until it’s creamy and smooth, taking about 2-3 minutes.
  2. Add the Sugar: Add 3 cups of powdered sugar to the creamed butter. Beat on medium speed until the mixture is light, fluffy, and fully incorporated, approximately 3-5 minutes.
  3. Incorporate the Egg: Crack in 1 large egg and mix on low speed until everything is well combined, which should take about 1-2 minutes.
  4. Whisk the Dry Ingredients: In a separate bowl, sift together 3 cups of all-purpose flour, 1/2 cup of black cocoa powder, 1/2 cup of Dutch process cocoa powder, and 1/2 teaspoon of salt. Whisk gently until they blend perfectly.
  5. Combine Wet and Dry Ingredients: Gradually add the dry mixture to the wet ingredients in the stand mixer. Mix on low speed just until the flour is incorporated, typically around 1-2 minutes.
  6. Form the Dough: Turn the dough onto a clean surface and gently bring it together into a ball using your hands. Knead slightly for about 1 minute, then flatten it into a disc about 1-inch thick.
  7. Chill the Dough: Wrap the dough tightly in cling wrap and place it in the refrigerator to chill for at least 30-45 minutes.
  8. Roll Out the Dough: After chilling, roll out the dough between two sheets of parchment paper until it’s about 4 mm thick.
  9. Cut and Chill Shapes: Use your favorite cookie cutters to cut out spooky shapes from the rolled dough. Place them on a lined baking tray, then chill in the refrigerator for an hour or overnight.
  10. Preheat the Oven: Preheat your oven to 160°C (320°F) as you wait.
  11. Bake the Cookies: Once preheated, bake the cookies for about 10 minutes.
  12. Cool and Decorate: Allow the cookies to cool on the baking sheet for 5 minutes, then transfer them to a cooling rack to cool completely.

Ensure to chill the dough properly and avoid overmixing for the best results.

Dessert
American
baking, cookies, desserts, Halloween Decorated Cookies, holiday treats, spooky cookies

Filed Under: Dessert

Monster Face Pizza: Fun Family Dinner with a Creative Twist

October 6, 2025 by grace bellamy Leave a Comment

With just a few quirky toppings and some dough, I’m about to unveil a delightful family favorite: Monster Face Pizza! This whimsical dish elevates the pizza night experience, transforming simple ingredients into playful edible art. Besides being a total showstopper that kids adore, this monster face creation is also a breeze to prepare, making it a perfect option for busy weeknights or spontaneous gatherings. Picture the smiles as everyone gets to customize their own creepy (or cute) pizza faces! Are you ready to unleash your inner artist in the kitchen? Let’s dive into this fun recipe that brings joy to the table.

Monster Face Pizza

Why is Monster Face Pizza a Must-Try?

Fun and Creative: This whimsical pizza invites your family to unleash their creativity, crafting personalized monster faces that make dinner an interactive experience.

Quick and Easy: With just a handful of ingredients and simple steps, you can whip up a delicious meal that saves time in the kitchen.

Kid-Friendly Delight: Kids will love getting involved, turning cooking into an exciting family activity that sparks joy and laughter.

Versatile Toppings: Feel free to mix and match your favorite toppings or even experiment with seasonal ingredients for endless variations!

Perfect for Any Occasion: Whether it’s a casual weeknight or a fun gathering, Monster Face Pizza is sure to impress and satisfy both kids and adults alike.

Surprise your family with this unique spin on pizza night that they’ll be talking about for days! If you enjoy playful meals, you might also love our Pizza Roll-Ups or DIY Personal Pizzas.

Monster Face Pizza Ingredients

• Here’s everything you need to create your own delightful Monster Face Pizza!

For the Dough
• Rhodes Dinner Rolls – 6, thawed to room temperature for the perfect base.

For the Sauce
• Pizza Sauce – 1/3 cup, adding a delicious layer of flavor right under the cheese.

For the Cheese
• Mozzarella Cheese – 3/4 cup, this gooey cheese melts beautifully and holds everything together.
• Cheddar Cheese – 3/4 cup, for a sharp twist that complements the mozzarella perfectly.

For the Toppings
• Red Bell Pepper – Sliced, these bright pieces bring color and a touch of sweetness to your monster faces.
• Yellow Bell Pepper – Sliced, add additional brightness and flavor contrast.
• Green Bell Pepper – Sliced, for that fresh crunch that makes the pizza exciting!
• Green Olives – Sliced, these add a playful eye-catching element to your monsters.
• Canadian Bacon – Chopped, introducing a savory touch to complete your monster’s face!
• Tomato Slices – For an extra layer of freshness and color.
• Mozzarella Slices – Perfect for creating large monster eyes or quirky mouths.

Unleash your creativity with these ingredients and create a Monster Face Pizza that’s as fun to make as it is to eat!

Step‑by‑Step Instructions for Monster Face Pizza

Step 1: Prepare the Dough
Begin by lightly spraying your counter with non-stick cooking spray. Take the thawed Rhodes Dinner Rolls and combine them, rolling the dough into a 9×13-inch rectangle or your desired shape. Cover with plastic wrap to keep it warm, allowing it to rest while you gather and prepare your toppings.

Step 2: Assemble the Crust
Once the dough has rested, remove the plastic wrap and carefully place the dough onto a sprayed baking sheet. Spread 1/3 cup of pizza sauce evenly across the crust, ensuring every corner is coated. Then, sprinkle mozzarella and cheddar cheese generously on top, creating a delicious base for your Monster Face Pizza.

Step 3: Bake the Base
Preheat your oven to 375 degrees Fahrenheit. Place your baking sheet in the oven and bake for 10-15 minutes. Keep an eye on the pizza; you’ll know it’s ready when the cheese is melted, bubbly, and slightly golden, while the crust is cooked through and firm.

Step 4: Create Monster Faces
Once the base is baked, remove it from the oven and unleash your creativity! Using the sliced bell peppers, olives, chopped Canadian bacon, tomato slices, and mozzarella slices, start forming fun monster faces on top of the melted cheese. Get playful with the shapes and colors, making each creation uniquely yours!

Step 5: Final Bake
After designing your monster masterpieces, return the pizza to the oven and bake for an additional 5-10 minutes. This will heat the toppings through and give everything a chance to meld together beautifully. Keep a close watch until the bell peppers are tender and the whole pizza looks irresistibly inviting.

Monster Face Pizza

Make Ahead Options

These Monster Face Pizza creations are perfect for meal prep enthusiasts looking to save time during busy weeknights! You can prepare the dough and assemble the base up to 24 hours in advance; simply cover the prepared crust with plastic wrap and refrigerate. When you’re ready to serve, preheat your oven and spread the pizza sauce and cheese over the dough, then bake as directed for 10-15 minutes. For optimal freshness, add the toppings right before the final bake to keep everything vibrant and crunchy. This way, your family can enjoy a delicious homemade pizza with minimal last-minute effort, all while keeping the fun alive!

Expert Tips for Monster Face Pizza

Choose the Right Dough: Use thawed Rhodes Dinner Rolls for a dough that is easy to work with and bakes perfectly golden.

Don’t Skip Rest Time: Allow the dough to rest under plastic wrap; this helps to keep it from shrinking while you assemble your pizza.

Layer Carefully: Spread the pizza sauce evenly to ensure every bite is flavorful; don’t skimp on the cheese for maximum gooeyness!

Stay Creative: When creating monster faces, let your imagination run wild. Mix and match toppings to make each pizza a unique masterpiece!

Watch the Bake Time: Keep an eye on your pizza while it’s baking; overcooking can lead to tough crust or burnt toppings. Enjoy your delicious Monster Face Pizza!

How to Store and Freeze Monster Face Pizza

Fridge: Store leftover Monster Face Pizza in an airtight container for up to 3 days. Reheat in the oven for best results!

Freezer: For longer storage, wrap slices individually in plastic wrap and then again in aluminum foil, placing them in a freezer-safe bag. Enjoy within 1 month for optimal flavor.

Reheating: To reheat from the fridge, place slices in the oven at 350°F for about 10-15 minutes until heated through. From the freezer, add 15 minutes to the time.

Room Temperature: If consumed within 2 hours after baking, feel free to leave the pizza out on the counter. Otherwise, store properly to maintain freshness.

Monster Face Pizza Variations

Get ready to play with flavors and textures as you customize your Monster Face Pizza!

  • Gluten-Free: Swap Rhodes Dinner Rolls for gluten-free dough to cater to dietary needs while keeping the fun alive!

  • Dairy-Free: Use dairy-free cheese alternatives like cashew or almond-based cheese for a family-friendly, lactose-free option that everyone can enjoy.

  • Spicy Twist: Add sliced jalapeños or a sprinkle of red pepper flakes for a zesty kick that will thrill heat lovers.

  • Veggie Delight: Load up on additional veggies like mushrooms, spinach, or zucchini, making it a colorful and nutritious treat!

  • Protein Boost: Top the pizza with pepperoni, sausage, or rotisserie chicken for a heartier meal that satisfies protein cravings.

  • Sweet Surprise: Include some pineapple chunks for a sweet and savory combination that’s a playful contrast to the savory toppings.

  • Herb Infusion: Add fresh basil or oregano to your toppings or sprinkle them over the pizza after baking for a fragrant finish.

  • Personalized Shapes: Use cookie cutters to create unique shapes with your dough before baking, making your Monster Face Pizza even more fun!

Let your imagination guide you, and don’t forget to check out our Pizza Roll-Ups or DIY Personal Pizzas for more creative cooking adventures!

What to Serve with Monster Face Pizza

A delightful pizza night is about to get even better with these perfect pairings!

  • Garlicky Breadsticks: These golden, buttery treats add a soft, chewy texture that perfectly complements the crispy pizza crust.

  • Crunchy Salad: A fresh mixed greens salad with a tangy vinaigrette offers a refreshing contrast, balancing out the hearty flavors of the pizza.

  • Sweet Potato Fries: Crispy, sweet, and slightly smoky, these fries bring a satisfying crunch and natural sweetness that pairs beautifully with the savory pizza.

  • Vegetarian Antipasto Platter: Include marinated artichokes, olives, and roasted red peppers for colorful bites that enhance your meal with bold Mediterranean flavors.

  • Creamy Ranch Dip: Light and tangy, this dip is perfect for a fun side, allowing you to playfully dip your crusts or veggies for an extra flavor boost!

  • Fruit Kabobs: Bright and colorful fruit on skewers adds a sweet, juicy pop to your meal, bringing a touch of lightness and fun to the table.

  • Sparkling Lemonade: Refreshing and bubbly, this drink cuts through the richness of the pizza, making each bite feel even more delightful.

  • Chocolate Chip Cookies: End on a sweet note! These warm, gooey cookies are the ultimate treat after your creative pizza masterpiece, perfect for all cookie lovers.

Monster Face Pizza

Monster Face Pizza Recipe FAQs

How do I choose the right bell peppers for my Monster Face Pizza?
Absolutely! Look for bell peppers that are firm, brightly colored, and free from dark spots or wrinkles. The ideal peppers should feel heavy for their size and have a vibrant, glossy skin; this means they’re fresh and full of flavor.

What is the best way to store leftover Monster Face Pizza?
You can store leftover Monster Face Pizza by placing it in an airtight container in the fridge for up to 3 days. To reheat, simply preheat your oven to 350°F and warm the slices for about 10-15 minutes until nice and hot. This method keeps the crust crispy and the toppings tasty!

Can I freeze Monster Face Pizza?
Very! For freezing, it’s best to wrap individual slices in plastic wrap and then in aluminum foil. Place them in a freezer-safe bag or container. You can enjoy your pizza within 1 month for the best flavor and texture. When ready to eat, reheat from frozen by adding an additional 15 minutes to your baking time.

What should I do if my pizza dough shrinks while I prepare the toppings?
If your dough shrinks, don’t worry! It’s a common issue. Simply allow it to rest for an additional 10-15 minutes covered with a damp cloth. The resting time helps the gluten relax, allowing you to reshape it more easily.

Can I use different types of cheese for this pizza?
Absolutely! Feel free to experiment with different cheeses like provolone, gouda, or even vegan cheese if you want a dairy-free option. Each cheese brings its own unique flavor and meltability, adding a fun twist to your Monster Face Pizza!

Is this pizza suitable for kids with allergies?
To make the Monster Face Pizza allergy-friendly, always check ingredient labels for potential allergens. You can swap out Canadian bacon for a plant-based alternative or omit it entirely for vegetarian options. Additionally, choose lactose-free cheese for those with dairy allergies. Always consult with an allergist if unsure about any specific allergies!

Monster Face Pizza: Fun Family Dinner with a Creative Twist

Monster Face Pizza is a whimsical dish that transforms pizza night into a creative family experience, perfect for kids and adults alike.

  • Baking Sheet
  • Oven
  • Non-stick cooking spray

For the Dough

  • 6 pieces Rhodes Dinner Rolls (thawed to room temperature)

For the Sauce

  • 1/3 cup Pizza Sauce

For the Cheese

  • 3/4 cup Mozzarella Cheese
  • 3/4 cup Cheddar Cheese

For the Toppings

  • 1 medium Red Bell Pepper (sliced)
  • 1 medium Yellow Bell Pepper (sliced)
  • 1 medium Green Bell Pepper (sliced)
  • 1/4 cup Green Olives (sliced)
  • 3 slices Canadian Bacon (chopped)
  • 1 medium Tomato (sliced)
  • 2 slices Mozzarella Slices (for eyes or mouths)

Step‑by‑Step Instructions

  1. Begin by lightly spraying your counter with non-stick cooking spray. Take the thawed Rhodes Dinner Rolls and combine them, rolling the dough into a 9×13-inch rectangle or your desired shape. Cover with plastic wrap to keep it warm.
  2. Once the dough has rested, place the dough onto a sprayed baking sheet. Spread 1/3 cup of pizza sauce evenly across the crust. Sprinkle mozzarella and cheddar cheese generously on top.
  3. Preheat your oven to 375 degrees Fahrenheit. Bake the pizza for 10-15 minutes until the cheese is melted, bubbly, and slightly golden.
  4. Remove the base from the oven and begin forming monster faces on top using the toppings.
  5. Return the pizza to the oven and bake for an additional 5-10 minutes until the toppings are heated through and the bell peppers are tender.

Store leftover Monster Face Pizza in an airtight container for up to 3 days, or wrap slices for freezing. Reheat in the oven for best results.

Main Dishes
Italian
creative pizza, family dinner, fun meal, kid-friendly, Monster Face Pizza, Pizza Night

Filed Under: Main Dishes

Delightful Orange and Black Halloween Marble Cake Recipe

October 6, 2025 by grace bellamy Leave a Comment

As I stood in my kitchen, the sweet scent of pumpkin spice began to fill the air, teasing my senses and beckoning me to create something special for the Halloween season. Enter the Orange and Black Halloween Marble Cake—a whimsical treat that’s not only visually stunning but also a delight to enjoy with friends and family. This recipe is perfect for those who crave a fun twist on classic baking, offering a quick prep time and the whimsical appeal of colorful swirls. Just imagine serving this cake adorned with vibrant sprinkles and candy eyes at your next gathering! Who wouldn’t be curious to take a slice? So, are you ready to dive into a baking adventure that promises flavors and festive flair?

Orange and Black Halloween Marble Cake

Why Is This Cake a Must-Bake?

Visual Delight: The striking colors of orange and black make this cake a showstopper, perfect for Halloween festivities and gatherings.

Flavorful Twist: With pumpkin spice and cocoa, this cake offers a delightful blend of seasonal flavors that everyone will love.

Quick Prep Time: At just 15 minutes of prep, you can have this treat ready for baking, making it an ideal choice for busy bakers.

Fun for All Ages: Kids and adults alike will enjoy decorating this cake with sprinkles and candy eyes, making it a fun family activity.

Versatile and Adaptable: Swap in your favorite spices or colors, or try variations like adding chocolate chips for an added dimension of flavor!

You can learn more about the seasonal spices in fall baking favorites to elevate your cake game further!

Orange and Black Halloween Marble Cake Ingredients

For the Cake Batter
• 180 g self-raising flour – ensures a fluffy texture for your cake.
• 180 g butter (salted) – adds richness and depth of flavor.
• 180 g soft brown sugar – provides a sweet, caramel-like taste.
• 3 eggs – helps bind the ingredients together while adding moisture.
• 100 ml milk – keeps the batter smooth and easy to mix.
• 7.5 g black cocoa powder – introduces a deep, rich chocolate flavor and dark hue.
• 15 g pumpkin powder – enhances fall flavors, making it perfect for Halloween.
• 2 teaspoons pumpkin spice mix – adds warmth and aroma to the cake.
• ⅓ teaspoon baking powder – helps the cake rise beautifully.
• ⅛ teaspoon salt – balances sweetness and enhances flavor.
• ½ teaspoon vanilla extract – brings a lovely fragrance to the cake.
• A few drops of orange food coloring – brightens the orange batter for a festive touch.
• A few drops of black food coloring (optional) – intensifies the dark layer of the batter.

For the Glaze and Decoration
• 75 g powdered sugar – creates a sweet and glossy finish for your cake.
• 1½ tablespoons warm water – helps achieve the right consistency for the glaze.
• Black and orange sprinkles – add a playful crunch and visual appeal.
• Eyeball candy – perfect for enhancing the spooky theme of your cake.

Step‑by‑Step Instructions for Orange and Black Halloween Marble Cake

Step 1: Preheat the Oven and Prepare the Tin
Preheat your oven to 175℃ (350°F) to ensure it’s hot enough for baking. While it warms up, grease and flour an 8-inch by 4-inch loaf tin, making sure to coat all corners for easy release later. Set the prepared tin aside as you move on to mixing the batter for your Orange and Black Halloween Marble Cake.

Step 2: Cream Butter and Sugar
In a large mixing bowl, add 180 g of salted butter and 180 g of soft brown sugar. Use a hand mixer or stand mixer to cream them together until the mixture is light and fluffy, taking about 3-5 minutes. This step creates air pockets, helping your cake rise beautifully. Once you’ve reached that delightful texture, you can proceed to add the eggs.

Step 3: Incorporate the Eggs
Add 3 eggs to the creamed butter and sugar mixture, one at a time. Beat well with the mixer after each addition, but be careful not to overbeat; you want a smooth batter. This process enriches the flavor of your Orange and Black Halloween Marble Cake while ensuring everything is well combined and emulsified before adding the dry ingredients.

Step 4: Sift the Dry Ingredients
In a medium bowl, sift together 180 g of self-raising flour, ⅓ teaspoon of baking powder, ⅛ teaspoon of salt, and 2 teaspoons of pumpkin spice mix. Sifting aerates the flour, which helps create a light texture in your cake. This is an essential step before gradually combining it with the wet ingredients to form your flavorful batter.

Step 5: Combine Dry and Wet Ingredients
Gradually add one third of the dry flour mixture to the creamed mixture. Gently fold it in, taking care not to deflate the batter. After that, add half of the 100 ml of milk. Mix until incorporated, then repeat the process with another third of the flour, the remaining milk, and the final third of the flour, ensuring each addition is well blended into your batter.

Step 6: Add Vanilla and Mix
Once the flour is fully incorporated, add ½ teaspoon of vanilla extract to the batter. Mix until well combined; this will enhance the overall flavor of your Orange and Black Halloween Marble Cake. Make sure no flour streaks remain, which ensures a smooth and uniform batter ready for the coloring.

Step 7: Prepare the Dark Batter
Scoop out one third of the cake batter into a separate bowl. Sift in 7.5 g of black cocoa powder, mixing thoroughly to achieve a uniform dark color. Let the batter sit for about 2-3 minutes to intensify the flavor and color. If the dark hue isn’t as strong as you’d like, feel free to add a few drops of optional black food coloring.

Step 8: Color the Orange Batter
Into the remaining batter, sift the 15 g of pumpkin powder. Stir it in well to distribute the flavor evenly. Next, add a few drops of orange food coloring, mixing until you achieve your desired vibrant hue. This light and colorful batter is one half of the contrast that makes your Orange and Black Halloween Marble Cake so appealing.

Step 9: Layer the Batter in the Tin
Begin layering the batters into the prepared loaf tin. Start by spooning in a layer of the vibrant orange batter, followed by the dark cocoa batter. Repeat this process, alternating until you’ve used all the batter. Use a skewer to create gentle swirls, mixing the two colors without fully blending them, resulting in the marbled effect.

Step 10: Bake the Cake
Place the loaf tin in the preheated oven and bake for about 45 minutes. To check for doneness, insert a toothpick into the center; it should come out clean. Once baked, remove the cake from the oven and allow it to cool in the tin for approximately 10-15 minutes before transferring it to a wire rack to cool completely.

Step 11: Prepare the Glaze
While your Orange and Black Halloween Marble Cake cools, sift 75 g of powdered sugar into a bowl. Gradually mix in 1½ tablespoons of warm water until you achieve a smooth, pourable glaze consistency. This simple glaze will add a sweet finish to your cake, balancing the rich flavors perfectly.

Step 12: Decorate Your Cake
Once the cake is fully cooled, drizzle the glaze over the top, ensuring some drips down the sides for a beautiful effect. To make it festive, sprinkle black and orange sprinkles generously and place candy eyeballs on top for a fun, spooky touch that will delight your guests during Halloween celebrations!

Orange and Black Halloween Marble Cake

What to Serve with Orange and Black Halloween Marble Cake

As you indulge in a slice of this vibrant, festive treat, pairing it with complementary flavors can elevate your Halloween gathering.

  • Spiced Apple Cider: A warm cup of spiced apple cider brings out the cake’s pumpkin spice notes, creating a cozy autumn experience.
  • Whipped Cream: A dollop of lightly sweetened whipped cream adds a creamy contrast and enhances the cake’s rich flavors.
  • Caramel Sauce: Drizzling homemade caramel sauce over each slice lends a decadent touch, balancing the cake’s sweetness with buttery depth.
  • Vanilla Ice Cream: A scoop of creamy vanilla ice cream makes for a delightful contrast, cooling each warm bite of the cake.
  • Pumpkin Soup: A bowl of comforting pumpkin soup can be a delightful starter, paving the way for your Halloween dessert adventure.
  • Halloween-Themed Cocktails: Create spooky cocktails garnished with festive elements, turning your dessert into a shared celebration.
  • Chocolate Mousse: Rich, smooth chocolate mousse can be a wonderful touch, adding an extra layer of delight after the cake’s sweetness.
  • Dark Roast Coffee: A robust dark roast coffee complements the cake wonderfully, enhancing the cocoa flavors while providing a warming embrace.
  • Cranberry Chutney: Offering a tart cranberry chutney alongside balances sweetness with a refreshing zing, making each bite more interesting.

Orange and Black Halloween Marble Cake Variations

Feel free to explore these fun twists and adaptations to elevate your baking experience!

  • Gluten-Free: Substitute the self-raising flour with a gluten-free blend to cater to gluten sensitivities, ensuring everyone can enjoy this festive delight.

  • Dairy-Free: Use plant-based butter and almond milk in place of dairy ingredients for a tasty vegan version that’s still rich and satisfying.

  • Nutty Flavor: Toss in a handful of finely chopped walnuts or pecans into the batter before baking for an added crunch and nuttiness that pairs beautifully with pumpkin.

  • Spicy Kick: Add a pinch of cayenne pepper or chili powder to the cake mix for a surprising kick that balances perfectly with the sweetness of the cake.

  • Choco-Pumpkin Explosion: Fold in a cup of dark chocolate chips into the orange batter for a melty surprise with every slice, taking your flavor game to the next level.

  • Pumpkin Cream Cheese Swirl: Create a creamy filling by mixing cream cheese with a bit of sugar and additional pumpkin spice. Layer it in between batters for a decadent twist.

  • Additional Toppings: Experiment with different decorations—try caramel sauce or chocolate drizzle instead of glaze, or mix up the colors of sprinkles for a unique look that’s all your own.

Have more fun in the kitchen by experimenting with flavors! For more delicious baking ideas, check out my favorite seasonal spices that can transform your treats.

How to Store and Freeze Orange and Black Halloween Marble Cake

Room Temperature: Store the cooled cake in an airtight container at room temperature for up to 3 days. This helps maintain moisture while keeping it fresh for a few days of deliciousness.

Fridge: If you want to keep it longer, wrap the cake in plastic wrap and place it in the fridge for up to a week. This preserves the flavor while keeping it slightly firmer.

Freezer: To freeze, slice the cake and wrap each piece individually in plastic wrap, then place them in a freezer-safe bag. It can be frozen for up to 3 months, ensuring you have a festive treat ready anytime!

Reheating: To enjoy frozen slices, let them thaw in the fridge overnight. For a cozy warm-up, heat a slice in the microwave for about 15-20 seconds, perfect for reliving those delightful flavors of your Orange and Black Halloween Marble Cake!

Make Ahead Options

These Orange and Black Halloween Marble Cake is perfect for busy home cooks looking to save time during festive preparations! You can prepare the cake batter up to 24 hours in advance. Simply mix the wet and dry ingredients separately and refrigerate them in airtight containers. When you’re ready to bake, combine the batters as instructed, and pour them into the prepared loaf tin. For best results, avoid adding the glaze and decorations until just before serving; this keeps the cake fresh and visually appealing. By prepping ahead, you’ll enjoy a delightful, flavorful cake with minimal last-minute fuss—just the spooky treat your Halloween gathering needs!

Expert Tips for Orange and Black Halloween Marble Cake

Choose Quality Cocoa: Use high-quality black cocoa powder for a richer flavor and deeper color in your Orange and Black Halloween Marble Cake.

Do Not Overmix: When combining the cake batter, be careful not to overmix after adding the flour. This helps maintain a light texture.

Swirling Technique: Use a skewer or toothpick to swirl the batters gently, creating a beautiful marbled effect. Don’t fully blend; leave some distinct layers.

Room Temperature Ingredients: Ensure that your butter and eggs are at room temperature to create the fluffiest batter possible. Cold ingredients can lead to a dense cake.

Customize Toppings: Feel free to get creative with your decorations! Use different candy shapes or colors for unique themes beyond Halloween.

Orange and Black Halloween Marble Cake

Orange and Black Halloween Marble Cake Recipe FAQs

How do I choose the best ingredients for this cake?
Absolutely! For the best results, use fresh eggs at room temperature, which help create a fluffy batter. Pick high-quality black cocoa powder for deeper flavor and color, and when it comes to pumpkin powder, ensure it’s fresh to capture the best flavors of the season.

How should I store my Orange and Black Halloween Marble Cake?
You can store your cooled Orange and Black Halloween Marble Cake in an airtight container at room temperature for up to 3 days. If you’d like to keep it longer, wrap it in plastic wrap and place it in the fridge for up to a week, ensuring it stays fresh and tasty.

Can I freeze the cake?
Certainly! Slice your Orange and Black Halloween Marble Cake and wrap each piece individually in plastic wrap. Then, place them in a freezer-safe bag or container. It can be frozen for up to 3 months. When you’re ready to enjoy, just thaw in the fridge overnight and microwave for 15-20 seconds to warm it up again!

What if my cake doesn’t rise properly?
Very! If your cake doesn’t rise, it could be due to old baking powder or overmixing the batter. Check the freshness of your baking powder, and remember that when adding the flour mixture, you should fold gently to preserve the airiness of the batter. If you suspect you’ve overmixed, don’t fret—your cake can still taste delicious!

Is this cake safe for pets or those with allergies?
While the Orange and Black Halloween Marble Cake is delightful for humans, it’s not suitable for pets, especially due to the sugar and cocoa content. If you have guests with allergies, always check in advance about sensitivities to ingredients like eggs, dairy, and gluten since it’s made with all-purpose flour and butter.

Delightful Orange and Black Halloween Marble Cake Recipe

This Orange and Black Halloween Marble Cake is a delightful and visually stunning treat that brings festive flair to any gathering.

  • 8-inch by 4-inch loaf tin
  • Mixing Bowl
  • hand mixer or stand mixer
  • sifter

For the Cake Batter

  • 180 g self-raising flour (ensures a fluffy texture for your cake.)
  • 180 g butter (salted) (adds richness and depth of flavor.)
  • 180 g soft brown sugar (provides a sweet, caramel-like taste.)
  • 3 pieces eggs (helps bind the ingredients together while adding moisture.)
  • 100 ml milk (keeps the batter smooth and easy to mix.)
  • 7.5 g black cocoa powder (introduces a deep, rich chocolate flavor and dark hue.)
  • 15 g pumpkin powder (enhances fall flavors, making it perfect for Halloween.)
  • 2 teaspoons pumpkin spice mix (adds warmth and aroma to the cake.)
  • ⅓ teaspoon baking powder (helps the cake rise beautifully.)
  • ⅛ teaspoon salt (balances sweetness and enhances flavor.)
  • ½ teaspoon vanilla extract (brings a lovely fragrance to the cake.)
  • a few drops orange food coloring (brightens the orange batter for a festive touch.)
  • a few drops black food coloring (optional) (intensifies the dark layer of the batter.)

For the Glaze and Decoration

  • 75 g powdered sugar (creates a sweet and glossy finish for your cake.)
  • 1½ tablespoons warm water (helps achieve the right consistency for the glaze.)
  • Black and orange sprinkles (add a playful crunch and visual appeal.)
  • Eyeball candy (perfect for enhancing the spooky theme of your cake.)

Step-by-Step Instructions

  1. Preheat your oven to 175℃ (350°F) and grease and flour an 8-inch by 4-inch loaf tin.
  2. In a large bowl, cream together 180 g of salted butter and 180 g of soft brown sugar until light and fluffy, about 3-5 minutes.
  3. Add 3 eggs, one at a time, beating well after each addition.
  4. Sift together 180 g of self-raising flour, ⅓ teaspoon of baking powder, ⅛ teaspoon of salt, and 2 teaspoons of pumpkin spice mix in another bowl.
  5. Gradually add the dry flour mixture to the creamed mixture, alternating with half of the 100 ml of milk until incorporated.
  6. Add ½ teaspoon of vanilla extract and mix until well combined with no flour streaks.
  7. Scoop out one third of the batter; sift in 7.5 g of black cocoa powder and mix thoroughly.
  8. Into the remaining batter, sift 15 g of pumpkin powder and add a few drops of orange food coloring, mixing well.
  9. Layer the batters in the prepared tin, alternating between orange and dark cocoa batters, then swirl gently with a skewer.
  10. Bake for about 45 minutes or until a toothpick comes out clean; cool in the tin for 10-15 minutes.
  11. Sift 75 g of powdered sugar into a bowl and mix with 1½ tablespoons of warm water until smooth for the glaze.
  12. Drizzle the glaze over the cooled cake and decorate with black and orange sprinkles and eyeball candy.

For best results, use room temperature ingredients and don’t overmix the batter to retain a light texture.

Dessert
American
chocolate cake, Festive baking, Halloween desserts, Marble cake recipe, Orange and Black Halloween Marble Cake, Pumpkin spice cake

Filed Under: Dessert

Create Fun Green Apple Monsters for a Spooky Snack Attack

October 6, 2025 by grace bellamy Leave a Comment

As I was rummaging through my pantry the other day, my eyes landed on some crisp green apples, and a lightbulb moment struck: why not transform them into playful Green Apple Monsters? This delightfully fun recipe is not just a great way to involve the kids in the kitchen, but it also serves as a healthy snack that leaves behind all the guilt associated with fast food. With just a few simple ingredients, these quirky creatures combine the refreshing crunch of apples with the rich creaminess of peanut butter, making them a crowd-pleaser for both kids and adults alike. Plus, they’re quick to prep, taking only 20 minutes! Ready to unleash your creativity and make snack time a little more monstrous? Let’s dive in!

Green Apple Monsters

Why Make Green Apple Monsters?

Fun, Creative Treat: Kids will adore making these quirky monsters! Get them involved in the kitchen for a delightful bonding experience.

Healthy Snacking: Packed with fresh apples and protein-rich peanut butter, these snacks provide a nutritious alternative to fast food.

Quick Prep: In just 20 minutes, you can whip up this eye-catching treat, perfect for busy schedules.

Visually Appealing: With candy eyes and “toothy” smiles, these Green Apple Monsters make snack time exciting and fun!

Versatile Options: Swap ingredients to suit your taste—try almond butter or use different cheeses for a unique twist!

Green Apple Monsters Ingredients

For the Monsters
• Green apples – 3 crisp apples are the perfect base for creating spooky yet healthy snacks.
• Creamy peanut butter – 3 tablespoons bring rich flavor and a creamy texture that holds everything together.
• Sliced cheddar or Colby jack cheese – 2 ounces of cheese add a fun twist with a savory bite.

For the Monster “Teeth”
• Pumpkin or sunflower seeds – 2 tablespoons provide a crunchy and nutritious option for those scary smiles.

For the Eyes
• Candy eyes – One package (approximately 20 pieces) gives these sweet creatures an adorable, silly touch!

These Green Apple Monsters are not only a creative snack but also a delightful way to encourage healthier eating habits—so let your imagination go wild!

Step‑by‑Step Instructions for Green Apple Monsters

Step 1: Prepare the Apples
Start by rinsing the three green apples under cool water, then pat them dry. Carefully quarter each apple, removing the core and seeds with a sharp knife. For an extra touch of creativity, carve out a v-shape in the center of each apple quarter to form the monster mouth. This lovely green base is now ready for some fun!

Step 2: Add the Peanut Butter
Next, take a butter knife and spread a thin layer of creamy peanut butter into the v-shaped mouth of each apple quarter. Make sure the peanut butter fills the cavity thoroughly to help the other ingredients stick. This process should take about 5 minutes, and the apple pieces will soon begin to look like playful Green Apple Monsters!

Step 3: Create the Monster Teeth
Now, grab your pumpkin or sunflower seeds and press several pieces onto the edge of the peanut butter-filled mouths. These seeds will create the monster teeth and add a delightful crunch. Repeat this step for each apple quarter, ensuring each monster has a toothy grin that brings them to life visually!

Step 4: Insert the Cheese
Take the sliced cheddar or Colby jack cheese and cut triangular pieces to fit snugly into each monster’s mouth, representing their cute tongues. Position the cheese carefully to avoid it falling out. This step adds a savory element to your Green Apple Monsters, making them even more enticing as a snack.

Step 5: Attach the Candy Eyes
Using the remaining peanut butter, apply a small dab onto the back of the candy eyes. Place two candy eyes on top of each apple slice, ensuring they stick well to complete the monster look. This step adds the finishing touch, making each monster as whimsical and charming as possible.

Step 6: Serve Immediately
Once all your Green Apple Monsters are assembled, arrange them on a fun serving platter. These quirky snacks are best served fresh, so share them with eager snackers right away. Enjoy the delightful mixture of flavors and the smiles each monster brings to the table!

Green Apple Monsters

Green Apple Monsters Variations

Feel free to unleash your creativity and customize these delightful snacks for even more fun and flavors!

  • Nut-Free: Substitute peanut butter with sunbutter for a nut-free twist that still packs a delicious punch.

  • Cheese Swap: Try using cream cheese or hummus in place of cheddar for a tangy or savory alternative.

  • Fruit Medley: Add sliced strawberries or raspberries alongside the apples for a vibrant mix of flavors and colors.

  • Extra Crunch: Incorporate mini pretzels or crushed granola into the teeth for added crunch and texture.

  • Spicy Kick: Sprinkle a dash of cayenne or chili powder on the peanut butter for an unexpected, delightful heat.

  • Chocolate Drizzle: Drizzle some melted chocolate over the peanut butter for a devilishly delicious take on these cute monsters.

  • Seasonal Spices: Add a sprinkle of cinnamon or pumpkin spice to the peanut butter for a cozy, fall-inspired flavor.

  • Frozen Fun: Freeze the assembled monsters for a cool treat during warm days—just be mindful of texture change!

You can discover more creative ways to enjoy fun snacks with your family by checking out our collection of healthy snack ideas. Enjoy creating your own unique Green Apple Monsters!

Expert Tips for Green Apple Monsters

  • Choose Fresh Apples: Use crisp, firm green apples for the best texture and flavor. Soft apples won’t hold shape and might make messy monsters.

  • Peanut Butter Consistency: Make sure your peanut butter is creamy and easy to spread. If it’s too thick, warming it slightly will make it more pliable for spreading.

  • Teeth Placement: Place the pumpkin or sunflower seeds carefully on the edge of the peanut butter mouth for a stable grip, avoiding spills and ensuring your monsters maintain their toothy grins.

  • Cheese Size Matters: Cut the cheese pieces small enough to fit snugly without falling out of the monster’s mouth. Too large, and they won’t stay put!

  • Eye Placement: Use enough peanut butter on the back of the candy eyes to ensure they stick well. If needed, a little extra dab will secure them nicely.

  • Serve Fresh: For the best taste and visual appeal, serve your Green Apple Monsters immediately after assembly. They’ll be a hit with your family and friends!

Storage Tips for Green Apple Monsters

  • Room Temperature: These Green Apple Monsters are best enjoyed fresh; however, if you need to store them, keep them at room temperature for up to 2 hours to maintain their appeal.

  • Fridge: If not consumed immediately, place the assembled monsters in a sealed container in the fridge for up to 1 day. This will keep the ingredients fresh but may soften the apples a bit.

  • Freezer: Freezing is not recommended as the texture of the apples and peanut butter will change, resulting in mushy monsters upon thawing.

  • Reheating: These snacks are best eaten cold or at room temperature. If you must reassemble, do so with fresh ingredients to enjoy the delightful crunch!

Make Ahead Options

These playful Green Apple Monsters are fantastic for meal prep enthusiasts! You can slice and prepare the apples up to 24 hours in advance by quartering them, removing the cores, and carving out the monster mouths. To prevent browning, store the prepared apple pieces in an airtight container with a splash of lemon juice. In addition, you can measure out the peanut butter, cheese, and seeds ahead of time, making assembly a breeze. When you’re ready to serve, simply spread the peanut butter, add the “teeth” and cheese, and finish with the candy eyes for delightful, fresh results that will wow your guests!

What to Serve with Green Apple Monsters

As you gather your family around for a whimsical snack, let’s elevate your Green Apple Monsters experience with some delightful pairings.

  • Cheese Platter: A variety of cheeses like brie and gouda creates a rich complement to the crunchy tartness of the apple monsters.

  • Crunchy Veggie Sticks: Carrot and cucumber sticks add a fresh, crisp contrast that gives a vibrant crunch alongside these monsters.

  • Fruit Salad: A light fruit salad featuring berries and citrus keeps the meal refreshing and brings a beautiful rainbow of colors to your spread.

  • Nutty Trail Mix: A mixed nut and dried fruit trail mix incorporates a satisfying crunch and chewy texture, balancing out the sweetness of the apples.

  • Yogurt Dipping Sauce: A honey-yogurt sauce pairs perfectly as a creamy dip, adding sweetness and making each bite even more indulgent.

Pair your Green Apple Monsters with these suggestions to create a wholesome, exciting snack experience sure to delight kids and adults alike!

Green Apple Monsters

Green Apple Monsters Recipe FAQs

What type of green apples should I use for Green Apple Monsters?
Absolutely! For the best results, I recommend using crisp, firm green apples like Granny Smith. They provide the perfect crunch and tartness that complements the sweetness of peanut butter and the savory cheese. Avoid soft or overripe apples, as they won’t hold their shape and might make a messy snack.

How should I store leftover Green Apple Monsters?
Very! If you have some leftovers (though they usually disappear quickly!), store them in a sealed container in the refrigerator. They’ll remain fresh for up to 1 day. Keep in mind that the apples may soften a bit, so for the best taste, it’s recommended to consume them soon after making.

Can I freeze Green Apple Monsters?
Not at all! Freezing is not recommended for these fun snacks. The texture of the apples and peanut butter will change, resulting in mushy monsters upon thawing. If you want to prepare ingredients in advance, you can pre-slice the apples and store them in lemon water (to prevent browning) until you’re ready to assemble your Green Apple Monsters.

What should I do if my peanut butter is too thick to spread?
No worries! If your peanut butter is hard to spread, you can easily fix that. Place it in a microwave-safe bowl and warm it in the microwave for 10-15 seconds. This will make it soft and creamy, making it much easier to spread on the apple mouths. Just be sure not to overheat it!

Are there any dietary considerations for these Green Apple Monsters?
Definitely! If you’re making these playful snacks for someone with nut allergies, consider using sunflower seed butter instead of peanut butter for a similar taste and texture. Additionally, check the cheese type for any dairy allergies or lactose intolerances. Feel free to customize with allergen-free options that suit your dietary needs!

Create Fun Green Apple Monsters for a Spooky Snack Attack

Transform green apples into playful Green Apple Monsters for a fun, healthy snack that kids will love!

  • Butter knife
  • sharp knife
  • Serving platter

For the Monsters

  • 3 apples green apples (crisp apples are the perfect base)
  • 3 tablespoons creamy peanut butter
  • 2 ounces sliced cheddar or Colby jack cheese (add a fun twist)

For the Monster ‘Teeth’

  • 2 tablespoons pumpkin or sunflower seeds (provide a crunchy option)

For the Eyes

  • 1 package candy eyes (approximately 20 pieces)

Step-by-Step Instructions

  1. Start by rinsing the three green apples under cool water, then pat them dry. Carefully quarter each apple, removing the core and seeds with a sharp knife. For an extra touch of creativity, carve out a v-shape in the center of each apple quarter to form the monster mouth.
  2. Next, take a butter knife and spread a thin layer of creamy peanut butter into the v-shaped mouth of each apple quarter, filling the cavity thoroughly.
  3. Grab your pumpkin or sunflower seeds and press several pieces onto the edge of the peanut butter-filled mouths to create the monster teeth.
  4. Take the sliced cheese and cut triangular pieces to fit snugly into each monster’s mouth, representing their cute tongues.
  5. Using the remaining peanut butter, apply a small dab onto the back of the candy eyes. Place two candy eyes on top of each apple slice to complete the monster look.
  6. Once all your Green Apple Monsters are assembled, arrange them on a fun serving platter and serve immediately.

These Green Apple Monsters are best enjoyed fresh and can be made quickly with kids for a fun activity in the kitchen.

Dessert
fun snacks, Green Apple Monsters, healthy snacks, kids cooking, quick recipes

Filed Under: Dessert

Delicious Spider Web Pizza for a Spooky Treat at Home

October 6, 2025 by grace bellamy Leave a Comment

As the leaves turn and the air crispens, I find myself yearning for a bit of seasonal magic in the kitchen. This is where my Creepy Halloween Spider Web Pizza comes into play, offering a delightful twist that will charm both kids and adults alike. With just a quick prep time of 20 minutes and a total cook time of only 10 minutes, this recipe makes it easy to create a festive dish without the fuss, leaving more time for ghost stories and laughter. The combination of gooey string cheese and savory olives transforms a classic pizza into a spine-tingling centerpiece that will have your guests buzzing with excitement. Ready to whip up something that’s both fun and delicious? Let’s dive into this October delight!

Spider Web Pizza

What’s So Fun About Spider Web Pizza?

Spooktacular Presentation: This pizza looks enchanting with its whimsical spider web design, guaranteed to dazzle your Halloween guests.
Quick Prep: With only 20 minutes of prep and a total cook time of 10 minutes, you’ll be enjoying this festive treat in no time!
Customizable Toppings: Feel free to add your favorite pizza toppings or switch up the marinara sauce for a fun twist.
Great for Kids and Adults: This recipe combines creativity and flavor, making it a hit across all ages. It’s perfect for a spooky family movie night or a Halloween gathering.
Memorable Experience: Cooking together while assembling the spider web is an engaging activity that creates lasting memories. What’s not to love about that? If you’re looking to complete your Halloween menu, why not check out more festive ideas like our Spooky Mini Pumpkin Pies?

Spider Web Pizza Ingredients

Get ready to whip up this fun Spider Web Pizza!

For the Pizza Base

  • Pizza dough – this 14- to 16-ounce ball serves as the perfect canvas for your spooky masterpiece.
  • Super-Easy Marinara Sauce – ⅔ to ¾ cup adds a savory and tangy punch that complements the cheese beautifully.

For the Spider Decorations

  • Whole-milk string cheese – 4 sticks can be pulled into strips to create the iconic spider web look.
  • Pitted black olives – use 12 large ones for a creepy touch; they’ll become both the bodies and legs of your little spider friends!

Get your ingredients ready, and let’s transform these simple components into a fun and delicious Spider Web Pizza that’ll impress your guests!

Step‑by‑Step Instructions for Spider Web Pizza

Step 1: Preheat Your Oven
Begin by preheating your oven to 500°F if using a baking sheet, or as high as it will go if you’re using a baking stone or steel. Make sure you place the stone or steel in the oven before starting the preheating process to ensure it is super hot. This will help achieve a perfectly crispy crust for your delicious Spider Web Pizza.

Step 2: Prepare the Cheese and Olives
While your oven heats up, take the four sticks of whole-milk string cheese and pull them into thin strips. Set these aside for the web. Next, slice the black olives in half lengthwise; reserve eight of the halves to serve as your spiders’ bodies, and cut the remaining halves into four equal strips each—these will become the lovely spider legs for your spooky pizza.

Step 3: Shape the Pizza Dough
Now it’s time to transform your dough into a canvas! Stretch or roll out your pizza dough into a 12- to 14-inch circle. Carefully transfer it either to a baking sheet or a lightly floured pizza peel if you’re using a baking stone or steel. To prepare the dough, prick it all over with a fork to prevent bubbling during baking and ensure a uniform crust.

Step 4: Add the Marinara Sauce
With the dough prepped, it’s time to spread the pie’s core flavor! Evenly spread ⅔ to ¾ cup of your Super-Easy Marinara Sauce on top of the dough, leaving about a ½-inch border all around. This ensures a delightful crust is revealed after baking, perfectly balancing the flavors of the hearty sauce and the cheesy web.

Step 5: Pre-Bake the Crust
Once your sauce is all set, transfer the sauced dough into the preheated oven. Bake it just until the crust appears dry and turns a light golden color—approximately 3 minutes on a baking stone or steel, or around 5 minutes if using a baking sheet. This quick pre-bake will help create that perfect crunch for your Spider Web Pizza.

Step 6: Create the Spider Web
After the initial bake, remove the pizza from the oven. Act quickly to arrange the strips of string cheese on top of the pizza in a spider web design. Then, place an olive half onto the pizza for the body and use the olive slices as legs. Don’t be shy! Get creative with your spooky spider creations.

Step 7: Bake to Perfection
Return the decorated pizza to the oven for another 3 to 5 minutes. Keep an eye on it—you’re looking for the cheese to melt and become bubbly, melding beautifully with the sauce and crust. As the magic happens, your Spider Web Pizza will transform into a captivating Halloween treat.

Step 8: Serve and Enjoy
Once the cheese is melted and your pizza looks enticing, carefully remove it from the oven. Allow it to cool slightly to avoid burning your mouth on that gooey deliciousness. Slice your Spider Web Pizza into portions and serve it right away, warming everyone’s hearts with this festive and fun creation!

Spider Web Pizza

Expert Tips for Spider Web Pizza

• Dough Stretching: Make sure your dough is at room temperature for easier stretching. Cold dough can be stubborn and hard to shape.

• Cheese Technique: Pull the string cheese into strips gently; this will create a better web effect. Be creative with the placement to make the design stand out!

• Olive Eyes: Use small pieces of olives or even peppercorns to add eyes on the spiders—just a little extra fun!

• Avoid Soggy Crust: To prevent a soggy base, ensure the marinara sauce is not too watery. If necessary, let it simmer to thicken slightly before spreading.

• Cooling Time: Let the pizza cool for a couple of minutes after baking; it allows the cheese to set, making slicing easier and preventing burning.

Enjoy crafting your spooky Spider Web Pizza with these helpful tips!

Spider Web Pizza Variations & Substitutions

Feel free to unleash your creativity and customize your Spider Web Pizza with these fun and tasty twists!

  • Gluten-Free: Use a gluten-free pizza crust to make this spooky treat suitable for gluten-sensitive guests.
  • Dairy-Free: Substitute string cheese with dairy-free cheese alternatives for a vegan-friendly version that’s still delicious!
  • Add Veggies: Incorporate sliced bell peppers or spinach under the cheese web for added flavor and a nutritional boost.
  • Spicy Kick: Sprinkle some crushed red pepper flakes or diced jalapeños before baking for a heat that bites back!
  • Herb-Infused: Mix dried oregano or basil into the marinara sauce to elevate the flavors with a fragrant twist.
  • Sweet Touch: Drizzle a little honey or balsamic glaze over the finished pizza for a sweet contrast to the savory elements.
  • Extra Crunch: Add a sprinkle of toasted pine nuts or walnuts on top before serving to introduce a delightful crunch.
  • Sweet Potato Base: Swap out the traditional dough for a sweet potato crust for a unique flavor profile that pairs wonderfully with the toppings.

Transforming your Spider Web Pizza can lead to delightful taste adventures, so go ahead and experiment with these variations while keeping the festive spirit alive! If you want more creative touches for your Halloween table, check out our Spooky Mini Pumpkin Pies or discover other fun fall recipes that your family will love!

How to Store and Freeze Spider Web Pizza

Room Temperature: Allow leftover Spider Web Pizza to cool completely before covering with foil or plastic wrap. It can sit out for up to 2 hours before refrigeration.

Fridge: Place any uneaten slices in an airtight container, where they’ll stay fresh for up to 3 days. Reheat in the oven or microwave until warmed through.

Freezer: To freeze, wrap individual slices in plastic wrap and then place them in a freezer-safe bag. They can be stored for up to 2 months and reheated from frozen.

Reheating: For the best results, reheat in a preheated oven at 350°F for about 10-12 minutes, or until the cheese is bubbling. This keeps the crust crispy while warming the gooey cheese.

Make Ahead Options

These Creepy Halloween Spider Web Pizzas are perfect for meal prep and can save you precious time during the spooky season! You can prepare the pizza dough and sauce up to 24 hours in advance; simply store them separately in airtight containers in the refrigerator to maintain freshness. Additionally, you can pull the string cheese into strips and slice the olives a day ahead, keeping them in sealed bags to prevent drying. When it’s time to serve, all you have to do is assemble the web with the prepped ingredients, bake for about 6 to 8 minutes until the cheese melts, and you’ll have a delightful treat that feels fresh and festive without any fuss!

What to Serve with Creepy Halloween Spider Web Pizza

As you gather around for a night of frightful fun, these delightful bites will enhance your spooky pizza party feast.

  • Crispy Garlic Bread: A perfect crunch to accompany your pizza, with buttery goodness and melted garlic that complements every cheesy bite.
  • Mixed Green Salad: Brighten your meal with a refreshing salad tossed in zesty vinaigrette, adding a delightful crunch amid the savory pizza flavors.
  • Roasted Pumpkin Seeds: These provide a toasty, nutty flavor that ties in the seasonal theme, offering a healthy and deliciously satisfying snack.
  • Halloween Fruit Skewers: Fun fruit skewers with watermelon pumpkins, grape eyeballs, and banana ghosts add a sweet, festive touch that everyone will love!
  • Spooky Hot Chocolate: This creamy, rich drink topped with whipped cream and spooky marshmallows will warm your spirits and sweeten the evening!
  • Witch’s Brew Punch: A fizzy and fruity concoction served in a cauldron could elevate the atmosphere, delighting guests with its playful presentation and taste.

Pair your Creepy Halloween Spider Web Pizza with these delightful accompaniments for a spooktacular meal that will leave everyone buzzing with excitement!

Spider Web Pizza

Creepy Halloween Spider Web Pizza Recipe FAQs

How do I select the right olives for my Spider Web Pizza?
I recommend choosing large, pitted black olives to give your spiders a chunky appearance. Look for olives that are firm to the touch and without dark spots or blemishes. Fresh olives will enhance the flavor of your pizza and create a more appetizing presentation.

How should I store leftover Spider Web Pizza?
Once your pizza has cooled completely, cover it with aluminum foil or plastic wrap. You can store it at room temperature for up to 2 hours. After that, transfer it to an airtight container and refrigerate. It will stay fresh for up to 3 days!

Can I freeze Spider Web Pizza and how do I do it properly?
Absolutely! Freezing is a great way to save leftover pizza. Wrap individual slices in plastic wrap, making sure they’re tightly sealed. Then, place them in a freezer-safe bag or container. Your pizza can be stored in the freezer for up to 2 months. When you’re ready to enjoy it again, you can reheat it from frozen for the best quality!

What’s the best way to reheat Spider Web Pizza for optimal taste?
For an excellent reheating experience, preheat your oven to 350°F. Place the pizza on a baking sheet and warm it for about 10-12 minutes, or until the cheese is bubbling. This method keeps the crust crispy while ensuring that the cheese is gooey and delicious.

Can I use different types of cheese for the spider web?
Certainly! While whole-milk string cheese is perfect for pulling into web-like strands, feel free to experiment with other melting cheeses such as mozzarella or provolone. Just make sure whatever cheese you choose also melts nicely. It’s all about your personal preference, so the more, the merrier!

Are there any dietary considerations for pets or allergies?
Be cautious if serving this pizza to guests with dietary restrictions or allergies. The ingredients include dairy (string cheese) and olives, which may affect those with lactose intolerance or specific olive allergies. Always communicate potential allergens in your dish to your guests for a safe dining experience.

Delicious Spider Web Pizza for a Spooky Treat at Home

This Spider Web Pizza combines gooey cheese and savory olives for a festive Halloween treat.

  • Oven
  • Baking Sheet
  • Pizza Stone or Steel
  • Pizza Peel

For the Pizza Base

  • 1 14-16 ounce Pizza dough
  • ⅔ to ¾ cup Super-Easy Marinara Sauce

For the Spider Decorations

  • 4 sticks Whole-milk string cheese
  • 12 large Pitted black olives

Step-by-Step Instructions for Spider Web Pizza

  1. Preheat your oven to 500°F if using a baking sheet, or as high as it will go if using a baking stone or steel.
  2. While your oven heats up, pull four sticks of string cheese into thin strips for the web and slice the black olives in half.
  3. Stretch or roll out the pizza dough into a 12- to 14-inch circle and prick with a fork.
  4. Spread the marinara sauce on top of the dough, leaving a ½-inch border.
  5. Transfer sauced dough into the preheated oven and bake until the crust is dry and light golden.
  6. Arrange strips of string cheese on top in a spider web design and use olive halves for the spiders.
  7. Return the pizza to the oven and bake for 3 to 5 minutes until the cheese is melted and bubbly.
  8. Remove from oven, let cool slightly, slice, and serve immediately.

Allow leftover pizza to cool completely before storing. It can be stored at room temperature for up to 2 hours.

Main Dishes
Italian
easy recipes, family fun, Halloween Pizza, Pizza Recipes, Spider Web Pizza, spooky treats

Filed Under: Main Dishes

Monster Mash Brownies: Indulge in Spooktacular Flavor!

October 6, 2025 by grace bellamy Leave a Comment

As I stood in my kitchen surrounded by an array of vibrant food gels, I couldn’t help but feel like a mad scientist preparing for a sweet experiment. Enter the Monster Mash Brownies, a whimsical dessert that’s sure to impress not only the kids but also any adult with a taste for nostalgia and delight. These brownies boast an irresistible combination of rich chocolate, festive colors, and playful designs that make them perfect for Halloween parties or just a creative weekend bake. Best of all, they’re a crowd-pleaser with a gooey, fudgy texture and a hint of excitement in every bite. Ready to unleash your inner artist and turn your ordinary brownie game into an extraordinary one? Let’s dive into this deliciously fun adventure together!

Monster Mash Brownies

Why are Monster Mash Brownies a must-try?

Irresistible flavor: These brownies combine rich dark chocolate and creamy white chocolate chips for a decadent treat that delights the senses.

Spooktacular designs: Transform your bake into playful monster shapes that are perfect for Halloween or any festive gathering!

Kid-friendly fun: Get the little ones involved in decorating these fun treats—great family bonding time while creating memories in the kitchen.

Versatility at its finest: Whether you’re going for spooky, cute, or a mix, the design potential is endless—perfect for any occasion!

Time to indulge: With a total time of just over two hours, you’ll have a show-stopping dessert ready to impress your guests. If you want more fun ideas, don’t miss out on my Halloween treats collection for more festive inspiration!

Monster Mash Brownie Ingredients

Get ready to create a spooktacular treat that is sure to delight everyone!

For the Brownies

  • All-purpose flour – 1/2 cup (75 g) to help give structure to your fudgy brownies.
  • Unsweetened cocoa powder – 3/4 cup (75 g) for that deep, chocolatey flavor we’ve all come to love.
  • Granulated sugar – 1 1/2 cups (300 g) for just the right amount of sweetness to balance the rich chocolate.
  • Unsalted butter – 1 1/4 cups (300 g), melted, to keep the brownies moist and totally irresistible.
  • Dark chocolate – 1 1/2 cups (300 g), melted, adding a luscious chocolate depth to the brownies.
  • Large eggs – 6 eggs for a perfectly fudgy texture that melts in your mouth.
  • White chocolate chips – 1 cup (200 g) adds a touch of creaminess and surprises in every bite.
  • Dark chocolate chips – 1 cup (200 g) enriches the overall chocolate experience.

For the Frosting

  • American buttercream frosting – 1 1/4 batches to create vibrant, colorful decorations that truly pop.
  • Cocoa powder – 1/4 cup (20 g) to deepen the frosting’s flavor for a delightful finishing touch.
  • Milk – 2 tbsp to achieve the right consistency for easy piping of your spooky designs.

For the Food Colorings

  • Black food gel – 10 drops to create a spooky black that makes for eye-catching decorations.
  • Teal food gel – 3 drops for a fun pop of color that brings your monsters to life.
  • Yellow food gel – 5 drops total (with some in other shades) to add playful cheeriness.
  • Red food gel – 10 drops helps create that perfect vampire-inspired touch.
  • Purple food gel – 10 drops to give your monster treats a mystical vibe.
  • Pink food gel – 5 drops for brighter accents on your spooky creations.

For the Decorations

  • Liquorice – 20 cm roll cut into shapes to add some fun textures and hairstyles to your monster brownies.

Enjoy conjuring up your deliciously fun Monster Mash Brownies that are guaranteed to be a hit at any gathering!

Step‑by‑Step Instructions for Monster Mash Brownies

Step 1: Prepare the Frosting
Start by dividing your American buttercream frosting into seven portions. Create green frosting by mixing two portions with green and yellow food gels until well blended. For black frosting, mix one portion with cocoa powder, milk, and black food gel. Paint the remaining portions with colors: light yellow, one portion yellow, half portion red, one portion purple, and keep the last portion white for decoration.

Step 2: Preheat the Oven
Set your fan-forced oven to preheat at 175°C (340°F). This temperature is perfect for baking your Monster Mash Brownies evenly, ensuring a delightful fudgy consistency. While the oven heats, you can focus on preparing your baking tin, so it’s ready for the brownie batter.

Step 3: Prepare the Baking Tin
Take a 32 cm x 24 cm baking tin and spray it generously with non-stick cooking spray. Line the bottom with parchment paper for easier brownie removal later. Ensuring this step is done right will help your Monster Mash Brownies come out perfectly without sticking, so don’t skip it!

Step 4: Melt the Chocolate and Butter
In a microwave-safe bowl, combine your melted butter and dark chocolate. Microwave in 20-second increments, stirring in between each session until the mixture is smooth and glossy. This step is essential for creating the rich base of your brownies, so be patient and watch for lumps to disappear.

Step 5: Incorporate Sugar and Eggs
Once your chocolate mixture is smooth, add in the granulated sugar. Whisk together until thoroughly combined. Then, crack in the six large eggs, whisking them in one at a time until the batter is evenly blended and slightly glossy, forming the perfect chocolatey mixture for your Monster Mash Brownies.

Step 6: Mix Dry Ingredients and Chocolate Chips
Using a spatula, gently fold in the cocoa powder and all-purpose flour to your chocolate mixture. Stir just until no flour pockets remain. Next, add both types of chocolate chips—white and dark—ensuring they’re evenly mixed throughout. This will create delightful pockets of melted chocolate in your brownies.

Step 7: Bake the Brownies
Pour the brownie batter into your prepared baking tin, smoothing out the top with a spatula. Place it in the preheated oven and bake for about 30 minutes. You’ll know your Monster Mash Brownies are done when a toothpick inserted in the center comes out with moist crumbs, not wet batter.

Step 8: Cool and Chill
After baking, remove the brownies from the oven and allow them to cool at room temperature for one hour. Once cooled, place the tin in the fridge for an additional hour to firm up the brownies. This chilling step ensures your brownies hold their shape when you cut them into squares.

Step 9: Cut Out Brownie Squares
Once chilled, use a 2 ½ inch square cookie cutter to cut out 12 delightful brownie squares. Gently press the cutter down into the brownie, and twist slightly to release. The chilled and fudgy texture makes cutting easy while allowing for perfect squares filled with rich chocolate flavor.

Step 10: Create Frankenstein Brownies
Take six brownie squares and pipe a border of green frosting around each one using a small spatula to smooth it out. Set these aside while you grab the remaining three brownies for your next spooky designs. The visual of the green frosting will kick off the fun decorations for your Monster Mash Brownies.

Step 11: Decorate the Frankenstein Brownies
Fit a piping bag with a Wilton #3 tip and use it to pipe out facial features—mouth, eyes, and monobrow—on your green frosted brownies. Add stitches on the mouths and fill in the eyes with yellow frosting, using black frosting for pupils. Don’t forget to place small pieces of black liquorice for extra monster hair!

Step 12: Decorate Mummy Brownies
Using the green frosted brownies, fit a piping bag with a Wilton 2B tip and fill it with light yellow frosting. Pipe lines across the top of the brownies, creating a mummy effect, and use black frosting to pipe eyes, highlighting them by adding yellow frosting around the pupils for a spooky look.

Step 13: Make Spider Monster Brownies
For the last brownie trio, pipe a square of purple frosting around each one, smoothing it out with a spatula. With a Wilton #3 tip, create fun facial features—pipe a black smile, red fangs, and green eyes for a spooky yet adorable creature. These final touches will make your Monster Mash Brownies extra festive!

Step 14: Finish with Dracula Brownies
For Dracula brownies, fill two piping bags, one with black frosting and the other with white frosting, using a Wilton #8 tip for both. Pipe a widow’s peak on top of each of the last three brownies and fill it with white frosting. Follow the steps for the mummy brownies to finish the eyes and add the mouth for that final vampire touch.

Monster Mash Brownies

Expert Tips for Monster Mash Brownies

  • Measure Accurately: Always use a kitchen scale for precise measurements, especially with dry ingredients like flour and cocoa powder, to ensure the perfect brownie texture.

  • Don’t Overmix: When combining the dry ingredients with the wet, fold gently. Overmixing can lead to tough brownies, so mix just until incorporated for those magical Monster Mash Brownies!

  • Chill for Shape: After baking, allow the brownies to cool at room temperature and then chill in the fridge. This helps them hold their shape during cutting and decorating.

  • Piping Tips Matter: Use the correct piping tips for detailing. Wilton tips #2B and #3 create larger decorative swirls, while #8 is perfect for fine lines and features.

  • Experiment with Colors: Don’t hesitate to use different food gel colors! Combining shades can create vibrant, unique monsters and enhance the fun of decorating your Monster Mash Brownies.

Storage Tips for Monster Mash Brownies

Room Temperature: Keep your Monster Mash Brownies in an airtight container at room temperature for up to 3 days to maintain their freshness and fudgy texture.

Fridge: If you want to extend their shelf life, store the brownies in the fridge for up to a week. Be sure to wrap each piece individually to prevent drying out.

Freezer: For longer storage, freeze your Monster Mash Brownies wrapped tightly in plastic wrap and then placed in a resealable bag for up to 3 months. Thaw in the fridge for several hours before enjoying.

Reheating: To enjoy the brownies warm, microwave for 10-15 seconds. This brings back the gooey, delicious nature that makes these brownies so indulgent!

Monster Mash Brownies Variations & Substitutions

Feel free to unleash your creativity and customize these Monster Mash Brownies to suit your taste!

  • Gluten-Free: Substitute regular flour with a gluten-free blend for a delicious gluten-free version without sacrificing flavor.
  • Nutty Crunch: Add 1 cup of chopped nuts (like walnuts or pecans) to the brownie batter for a delightful texture and nutty flavor.
  • Minty Twist: Incorporate 1 teaspoon of peppermint extract into the batter for a refreshing minty flavor—perfect for those who love a unique twist!
  • Vegan Option: Use a flax egg (1 tablespoon ground flaxseed + 2.5 tablespoons water) for each egg and coconut oil instead of butter while making sure to swap in dairy-free chocolate—yummy and vegan-friendly!
  • Spicy Heat: Add a pinch of cayenne or chili powder to the brownie batter for a fun spicy kick that will surprise your taste buds.
  • Caramel Surprise: Drizzle some caramel sauce over the brownie squares before frosting for a sweet surprise in each bite!
  • Fruit Fusion: Fold in 1 cup of chopped berries (like raspberries or strawberries) to the batter for a fruity burst of flavor—this contrasts beautifully with the rich chocolate.
  • Coffee Boost: Mix in 1 tablespoon of instant coffee or espresso powder to the brownie mix for a rich, mocha flavor that chocolate lovers will adore.

Whether you want to add a new flavor or accommodate dietary needs, these variations will elevate your Monster Mash Brownies to a whole new level of delight! If you’re looking for more festive inspirations, check out my Halloween treats collection for more playful ideas!

What to Serve with Monster Mash Brownies

Imagine a lively gathering filled with laughter and festive spirit, where sweet treats take center stage alongside delightful accompaniments.

  • Vanilla Ice Cream: A scoop of creamy vanilla ice cream serves as a perfect contrast to the rich, fudgy brownies, allowing the flavors to shine together. Picture the moment when warm brownie meets cool cream—pure bliss!

  • Caramel Sauce: Drizzling warm caramel sauce over your Monster Mash Brownies adds a luxurious sweetness that complements the chocolatey goodness, elevating each bite to an indulgent experience.

  • Pumpkin Spice Latte: Embrace the cozy, warm flavors of fall with a comforting pumpkin spice latte that echoes the inviting vibes of your festive brownies—perfect for a cozy gathering!

  • Cheese Plate: A selection of cheeses, such as sharp cheddar and creamy brie, will lend a sophisticated edge, balancing the sweetness of the brownies and inviting interesting flavor contrasts.

  • Chilled Milk: For a classic pairing, serve a tall glass of cold milk beside your brownies for nostalgic indulgence that connects with the kid in all of us.

  • Coffee: Whether hot or iced, the robust flavor of coffee pairs beautifully with the rich brownie experience, awakening your taste buds for an unforgettable night.

  • Fruit Salad: A fresh fruit salad with seasonal berries and citrus adds a burst of color and freshness, making for a delightful palate cleanser between bites of chocolatey goodness.

  • Chocolate Milkshake: Blend up a decadent chocolate milkshake to double down on the chocolate experience, making your dessert meal an adventure worth savoring.

These delightful pairings transform your indulgent Monster Mash Brownies into a full-fledged dessert feast that will charm the hearts (and taste buds) of all your guests!

Make Ahead Options

These Monster Mash Brownies are perfect for meal prep, making them an excellent choice for busy home cooks looking to save time! You can prepare the brownie batter up to 24 hours in advance; simply mix and store it in an airtight container in the refrigerator. The frosted decorations can be made ahead, too—just store them separately in the fridge for up to 3 days. When you’re ready to bake, pour the batter into your lined tin, bake, and follow the chilling instructions to ensure they remain fudgy and fresh. This way, when it’s time to serve, you’ll have a delightful, festive treat with minimal hassle!

Monster Mash Brownies

Monster Mash Brownies Recipe FAQs

What kind of dark chocolate should I use for the brownies?
Absolutely! I recommend using high-quality dark chocolate with at least 70% cocoa content for an intense flavor. Look for brands that do not include added sweeteners for a richer taste that beautifully complements your Monster Mash Brownies.

How should I store leftover Monster Mash Brownies?
To keep your Monster Mash Brownies fresh, store them in an airtight container at room temperature for up to 3 days. If you want to enjoy them longer, wrap each piece individually in plastic wrap and place them in the fridge for up to a week. This helps to maintain their soft, fudgy texture.

Can I freeze Monster Mash Brownies?
Yes, you can freeze Monster Mash Brownies! Wrap them tightly in plastic wrap, then place them in a resealable freezer bag. They’ll be good for up to 3 months. When you’re ready to enjoy them, thaw the brownies in the fridge for a few hours or overnight for the best results.

What do I do if my brownies come out too cakey?
If your Monster Mash Brownies turn out too cakey, it’s often due to overmixing or excess flour. Ensure you measure ingredients accurately, and mix gently until just combined. For future batches, use less flour or a bit more butter to achieve that perfect fudgy consistency everyone loves.

Are these brownies safe for kids with egg allergies?
For those with egg allergies, you can substitute each egg with a mixture of 1/4 cup unsweetened applesauce, or 1/4 cup mashed banana for a similar binding effect. This will keep your Monster Mash Brownies moist while accommodating dietary needs. Always check the allergies related to your specific ingredients, especially with the food gels in the frosting.

Can I use different colors of food gel for decoration?
The more the merrier! Feel free to experiment with different food gel colors to create your unique monster designs. Mixing colors can add depth and vibrancy to your Monster Mash Brownies, making them even more fun and personalized for any occasion!

Monster Mash Brownies: Indulge in Spooktacular Flavor!

Indulge in Monster Mash Brownies, a delightful blend of rich chocolate and festive designs perfect for Halloween parties.

  • Microwave
  • Baking Tin
  • piping bags
  • Mixing bowls
  • spatula

For the Brownies

  • 0.5 cups all-purpose flour (to help give structure to your fudgy brownies.)
  • 0.75 cups unsweetened cocoa powder (for that deep, chocolatey flavor.)
  • 1.5 cups granulated sugar (for the right amount of sweetness.)
  • 1.25 cups unsalted butter (melted, to keep the brownies moist.)
  • 1.5 cups dark chocolate (melted, for luscious chocolate depth.)
  • 6 large eggs (for a perfectly fudgy texture.)
  • 1 cups white chocolate chips (for creaminess and surprises.)
  • 1 cups dark chocolate chips (to enrich the overall chocolate experience.)

For the Frosting

  • 1.25 batches American buttercream frosting (for vibrant decorations.)
  • 0.25 cups cocoa powder (to deepen the frosting’s flavor.)
  • 2 tbsp milk (to achieve the right consistency.)

For the Food Colorings

  • 10 drops black food gel (for spooky decorations.)
  • 3 drops teal food gel (for a pop of color.)
  • 5 drops yellow food gel (to add playful cheeriness.)
  • 10 drops red food gel (for a vampire-inspired touch.)
  • 10 drops purple food gel (for a mystical vibe.)
  • 5 drops pink food gel (for brighter accents.)

For the Decorations

  • 20 cm liquorice (cut into shapes for fun textures.)

Step‑by‑Step Instructions

  1. Prepare the frosting by dividing it into seven portions. Create green frosting and mix colors.
  2. Preheat the oven to 175°C (340°F).
  3. Prepare the baking tin with non-stick spray and parchment paper.
  4. Melt the chocolate and butter in a microwave-safe bowl.
  5. Incorporate sugar and eggs into the chocolate mixture until glossy.
  6. Mix dry ingredients with the chocolate mixture and fold in chocolate chips.
  7. Bake the brownie batter in the prepared tin for about 30 minutes.
  8. Cool at room temperature for one hour, then chill for one additional hour.
  9. Cut out brownie squares using a cookie cutter.
  10. Create Frankenstein brownies by piping green frosting around six squares.
  11. Decorate Frankenstein brownies with facial features and liquorice for hair.
  12. Decorate mummy brownies with light yellow frosting and black frosting for eyes.
  13. Make spider monster brownies by piping purple frosting and facial features.
  14. Finish with Dracula brownies by piping black and white frosting details.

Ensure to measure accurately for best results. Chill brownies for better shaping while cutting.

Dessert
American
chocolate desserts, family baking, fudgy brownies, Halloween Treats, Monster Mash Brownies, spooky desserts

Filed Under: Dessert

Strawberry Halloween Monsters That Will Wow Your Guests

October 6, 2025 by grace bellamy Leave a Comment

As the crisp fall air sets in, my kitchen transforms into a fun, spooky lair, and nothing captures this festive spirit like my Halloween Strawberry Monsters. These playful treats come together in just 20 minutes, making them perfect for busy weekends filled with pumpkin carving and family gatherings. Using fresh strawberries and a playful twist of fondant, these delightful characters are not only a hit with kids but also a healthy indulgence that gives you a break from traditional treats. Whether you’re hosting a Halloween party or just looking to add some creativity to your family’s snack time, this recipe will have everyone smiling—and possibly a little spooked! Ready to create some fruity fun? Let’s dive into this simple yet captivating recipe!

Strawberry Halloween Monsters

Why will your guests love these monsters?

Quick and Easy: With just 20 minutes of prep, you can whip up these adorable treats without spending hours in the kitchen. Perfect for busy Halloween festivities!

Healthy Treat: Made with fresh strawberries, these monsters offer a sweet yet nutritious alternative to sugary candy, making them suitable for all ages.

Creative Fun: The personalized touch of fondant ensures each strawberry monster is unique. Kids and adults alike will enjoy the creative process!

Crowd-Pleasing Appeal: These spooky snacks are simply irresistible! Their playful design and fruity flavor will delight both kids and adults, making them a standout at any gathering.

Versatile Decoration: Feel free to experiment with different designs or flavors; add colorful sprinkles or even spooky chocolate drizzle for a fabulous twist!

Strawberry Halloween Monsters Ingredients

Unleash your creativity with these playful, fruity treats!

For the Monsters

  • 12 strawberries – ripe and ready to transform into frightful delights!
  • 2 ounces white fondant (50g) – the base for creating your spooky characters.
  • Black food coloring gel – adds a fun touch for your Strawberry Halloween Monsters; or use store-bought black fondant for ease.
  • ⅓ cup powdered icing sugar – keeps your fondant from sticking while you roll it out.
  • White writing icing tube – perfect for ‘gluing’ and decorating your monstrous creations.
  • 12 candy eyes – because every monster needs to see its deliciousness!

Step‑by‑Step Instructions for Strawberry Halloween Monsters

Step 1: Prepare the Strawberries
Start by trimming the tops off the ripe strawberries, ensuring they can stand upright with the pointed tip facing up. This will be the base of your Strawberry Halloween Monsters. Make sure to slice evenly, as it helps with stability. Lay them carefully on a plate to create a fun display as you continue your spooky design.

Step 2: Color the Fondant
Next, take your white fondant and add a drop or two of black food coloring gel. Knead the fondant thoroughly until the color is evenly distributed, which should take about 2-3 minutes. You should end up with a vivid black fondant that’s easy to work with. Set the colored fondant aside while you prepare the other components.

Step 3: Roll Out the Fondant
Dust a clean work surface lightly with powdered icing sugar to prevent sticking. Roll out both the white and black fondant separately until they are about 1/8 inch thick and pliable. Aim for an even texture that will help you create your Strawberry Halloween Monsters with precision. This step will take around 5 minutes.

Step 4: Cut the Monster Features
Using a small round cutter or a knife, cut out ovals from the black fondant that will fit nicely on top of the strawberries. These ovals will serve as the mouth for your monsters. Then, cut small triangles from the white fondant for the teeth. Aim for varied sizes to give each monster its unique spooky grin.

Step 5: Assemble the Mouths
To attach the white fondant teeth to the black ovals, use a little water on your finger to ‘glue’ them together. It should take just a few moments for them to stick. Once the teeth are in place, use the white writing icing to secure the black mouths onto the strawberries. Allow them to sit for a minute to set properly.

Step 6: Add the Candy Eyes
Finally, take the candy eyes and apply a small amount of writing icing to the back of each one. Carefully place the candy eyes on top of the mouths you’ve just created. Position them so they appear to spring to life, making your Strawberry Halloween Monsters truly captivating. With just a few moments of adjustment, they will be ready to shine!

Strawberry Halloween Monsters

Strawberry Halloween Monsters Customization

Feel free to explore your creativity and make these delightful monsters your own!

  • Vegan Option: Substitute the white fondant with a vegan-friendly alternative, and use plant-based icing for a completely cruelty-free treat. It’s fun to cater to everyone’s dietary needs!

  • Dairy-Free Delight: Opt for dairy-free chocolate chips as eyes instead of candy eyes. This change brings a chocolaty twist that enhances their spooky appeal.

  • Nutty Crunch: Add chopped almonds or crushed walnuts as “monster claws” for a delightful crunch. This twist takes every bite to a whole new level of texture!

  • Spooky Color Palette: Mix different food coloring gels into the fondant to create vibrant shades—think green monsters with purple teeth! The imaginative possibilities are endless.

  • Sour Surprise: Try using sour-coated candy eyes for an unexpected tartness. This will give your Strawberry Halloween Monsters an exciting flavor contrast to the sweet strawberries.

  • Pumpkin Spice Twist: Add a sprinkle of pumpkin spice to the strawberries for a seasonal flavor boost. This warm spice can evoke the essence of fall in every bite!

  • Fiery Kick: If you love heat, consider adding a hint of chili powder to the fondant for a spicy surprise that lingers! The flavors will definitely get everyone talking.

  • Whimsical Themes: Instead of traditional monsters, transform your strawberries into friendly ghosts using white fondant with little black eyes for a lighter take. Kids will adore the playful spirits!

By thinking outside of the box, you can create a myriad of flavors and fun with these Strawberry Halloween Monsters—perfect for impressing your guests or just enjoying with family!

Helpful Tricks for Strawberry Halloween Monsters

  • Choose Ripe Strawberries: Use fresh, ripe strawberries for optimal flavor and easy decorating; underripe berries may be too firm to work with easily.

  • Avoid Sticky Fondant: Dust your work surface with powdered icing sugar to prevent the fondant from sticking, ensuring smooth rolling and cutting for your Strawberry Halloween Monsters.

  • Knead Well: Knead the fondant thoroughly to ensure even coloring and pliability; uneven color or texture can lead to a less appealing finished product.

  • Secure Features Properly: Use enough writing icing when gluing the fondant features to the strawberries to prevent them from falling off—little touches make a big difference!

  • Customize Creatively: Don’t be afraid to experiment with different shapes and sizes for the teeth and mouths—personalizing each monster will make it even more fun!

How to Store and Freeze Strawberry Halloween Monsters

Fridge: Keep your Strawberry Halloween Monsters in an airtight container for up to 3 days. This will maintain their freshness and prevent them from becoming soggy.

Room Temperature: If you plan to eat them within a day, you can leave the monsters out at room temperature on a plate, covered lightly with plastic wrap. This keeps them looking festive!

Freezer: For longer storage, you can freeze the unassembled components, such as strawberries and fondant, separately. Strawberries last up to 3 months in the freezer, but the fondant may lose texture after one month.

Reheating: If you choose to assemble them after freezing, let the strawberries thaw in the fridge overnight and decorate them as usual for a fresh look!

What to Serve with Halloween Strawberry Monsters?

Bring your Halloween gathering to life with vibrant treats that capture the spirit of the season!

  • Crispy Apple Slices: Fresh and crunchy, these slices add a juicy contrast that balances the sweetness of the strawberries perfectly. Serve them with a dash of cinnamon for an extra autumn flair!

  • Spooky Cheese Platter: A mix of sharp and creamy cheeses can add an elegant touch to your party. Pair with seasonal crackers and some fig jam for a delicious contrast of flavors.

  • Ghoulish Guacamole: This green delight is perfect for dipping! With chips by the side, its rich, savory flavor complements the fruity sweetness beautifully, creating a fun contrast that guests will love.

  • Pumpkin Spice Hot Chocolate: Warm up your festivities with this cozy drink. Its seasonal spice blends perfectly with the sweetness of the strawberries, making it a comforting choice for chilly Halloween nights.

  • Cinnamon Sugar Donuts: Add a touch of indulgence with these warm treats. Their fluffy texture and just-right sweetness make for a perfect pairing with the refreshing strawberries.

  • Halloween Fruit Punch: Create a festive beverage with mixed fruit juices and floating gummy worms for a playful drink that everyone will adore. It’s a fun and refreshing way to wash down those spooky treats!

  • Chocolate-Covered Pretzels: Offering contrasting flavors of sweet and salty, they add a nice crunch to your table. A great finger food that stands up against the sweetness of your Strawberry Halloween Monsters.

Make Ahead Options

These Strawberry Halloween Monsters are a fantastic choice for meal prep, allowing you to enjoy the festive fun without the last-minute rush! You can prep the fondant decorations and strawberries up to 24 hours in advance. Simply cut the tops off the strawberries and store them in an airtight container in the refrigerator to maintain their freshness. For the fondant features, roll and cut the black and white pieces and keep them in a sealed bag or wrap them in plastic wrap to prevent drying out. When you’re ready to serve, simply assemble the monsters by ‘gluing’ the fondant mouths and candy eyes to the strawberries, ensuring a fun and spooky treat that’s just as delicious as if made fresh!

Strawberry Halloween Monsters

Strawberry Halloween Monsters Recipe FAQs

How do I select ripe strawberries?
Absolutely! To ensure the best flavor for your Strawberry Halloween Monsters, look for strawberries that are vibrant red, firm, and free of dark spots. Ripe strawberries should have a sweet aroma and their caps should be bright green. If they are under-ripe, they might be too firm to cut and decorate properly.

How should I store my Strawberry Halloween Monsters?
You can keep your adorable Strawberry Halloween Monsters in an airtight container in the fridge for up to 3 days. This will help maintain their freshness and prevent them from getting soggy. If you’re serving them within a day, it’s fine to keep them at room temperature on a plate, lightly covered with plastic wrap.

Can I freeze the components of my Strawberry Halloween Monsters?
Yes, you can freeze the individual components! For best results, freeze your strawberries and fondant separately. Strawberries will remain good for about 3 months in the freezer, while fondant may lose its ideal texture after about 1 month. When ready to assemble, thaw the strawberries in the fridge overnight and get creative!

What if my fondant is too sticky to work with?
No worries! If you find your fondant is sticky, it’s likely that it needs more powdered icing sugar dusting during the rolling process. Kneading in a bit more sugar should help make it more manageable. Just be sure to work quickly and keep your surface dusted to achieve those fun, spooky shapes for your monsters.

Are these Strawberry Halloween Monsters safe for my pets?
Very much! While strawberries are generally safe for dogs and cats in moderation, ensure that no fondant or icing comes into contact with them. The fondant contains sugar and other ingredients that might not be suitable for your furry friends. Always check with your vet for any specific dietary concerns regarding your pets.

What should I do if my icing isn’t sticking?
If the writing icing isn’t holding the fondant pieces securely, add a tiny amount of water to your finger and dab it on the fondant before pressing them together. This little trick often helps create a stronger bond. Remember to give your assembled Strawberry Halloween Monsters a few moments to set for the best results!

Strawberry Halloween Monsters That Will Wow Your Guests

Make these playful Strawberry Halloween Monsters, a fun and healthy treat that will impress your guests.

  • cutting board
  • Knife
  • Rolling Pin
  • small round cutter
  • Plate

For the Monsters

  • 12 pieces strawberries (ripe and ready to transform into frightful delights!)
  • 2 ounces white fondant ((50g) the base for creating your spooky characters.)
  • black food coloring gel (for adding a fun touch to your monsters.)
  • ⅓ cup powdered icing sugar (to keep fondant from sticking.)
  • 1 tube white writing icing (for ‘gluing’ and decorating.)
  • 12 pieces candy eyes (because every monster needs to see its deliciousness!)

Step‑by‑Step Instructions for Strawberry Halloween Monsters

  1. Trim the tops off the ripe strawberries, ensuring they can stand upright with the pointed tip facing up.
  2. Add a drop or two of black food coloring gel to the white fondant and knead until evenly distributed.
  3. Dust a clean work surface lightly with powdered icing sugar, then roll out the white and black fondant until about 1/8 inch thick.
  4. Cut out ovals from the black fondant for mouths and triangles from the white fondant for teeth.
  5. Use water to ‘glue’ the white teeth to the black mouths, then secure the mouths onto the strawberries with writing icing.
  6. Apply writing icing to the back of the candy eyes and place them on top of the mouths.

Feel free to experiment with different designs or flavors; add colorful sprinkles or spooky chocolate drizzle for a fabulous twist!

Dessert
American
creative desserts, easy recipes, fun food, Halloween Treats, healthy snacks, Strawberry Halloween Monsters

Filed Under: Dessert

Strawberry Halloween Monsters That Will Wow Your Guests

October 6, 2025 by grace bellamy Leave a Comment

As the crisp fall air sets in, my kitchen transforms into a fun, spooky lair, and nothing captures this festive spirit like my Halloween Strawberry Monsters. These playful treats come together in just 20 minutes, making them perfect for busy weekends filled with pumpkin carving and family gatherings. Using fresh strawberries and a playful twist of fondant, these delightful characters are not only a hit with kids but also a healthy indulgence that gives you a break from traditional treats. Whether you’re hosting a Halloween party or just looking to add some creativity to your family’s snack time, this recipe will have everyone smiling—and possibly a little spooked! Ready to create some fruity fun? Let’s dive into this simple yet captivating recipe!

Strawberry Halloween Monsters

Why will your guests love these monsters?

Quick and Easy: With just 20 minutes of prep, you can whip up these adorable treats without spending hours in the kitchen. Perfect for busy Halloween festivities!

Healthy Treat: Made with fresh strawberries, these monsters offer a sweet yet nutritious alternative to sugary candy, making them suitable for all ages.

Creative Fun: The personalized touch of fondant ensures each strawberry monster is unique. Kids and adults alike will enjoy the creative process!

Crowd-Pleasing Appeal: These spooky snacks are simply irresistible! Their playful design and fruity flavor will delight both kids and adults, making them a standout at any gathering.

Versatile Decoration: Feel free to experiment with different designs or flavors; add colorful sprinkles or even spooky chocolate drizzle for a fabulous twist!

Strawberry Halloween Monsters Ingredients

Unleash your creativity with these playful, fruity treats!

For the Monsters

  • 12 strawberries – ripe and ready to transform into frightful delights!
  • 2 ounces white fondant (50g) – the base for creating your spooky characters.
  • Black food coloring gel – adds a fun touch for your Strawberry Halloween Monsters; or use store-bought black fondant for ease.
  • ⅓ cup powdered icing sugar – keeps your fondant from sticking while you roll it out.
  • White writing icing tube – perfect for ‘gluing’ and decorating your monstrous creations.
  • 12 candy eyes – because every monster needs to see its deliciousness!

Step‑by‑Step Instructions for Strawberry Halloween Monsters

Step 1: Prepare the Strawberries
Start by trimming the tops off the ripe strawberries, ensuring they can stand upright with the pointed tip facing up. This will be the base of your Strawberry Halloween Monsters. Make sure to slice evenly, as it helps with stability. Lay them carefully on a plate to create a fun display as you continue your spooky design.

Step 2: Color the Fondant
Next, take your white fondant and add a drop or two of black food coloring gel. Knead the fondant thoroughly until the color is evenly distributed, which should take about 2-3 minutes. You should end up with a vivid black fondant that’s easy to work with. Set the colored fondant aside while you prepare the other components.

Step 3: Roll Out the Fondant
Dust a clean work surface lightly with powdered icing sugar to prevent sticking. Roll out both the white and black fondant separately until they are about 1/8 inch thick and pliable. Aim for an even texture that will help you create your Strawberry Halloween Monsters with precision. This step will take around 5 minutes.

Step 4: Cut the Monster Features
Using a small round cutter or a knife, cut out ovals from the black fondant that will fit nicely on top of the strawberries. These ovals will serve as the mouth for your monsters. Then, cut small triangles from the white fondant for the teeth. Aim for varied sizes to give each monster its unique spooky grin.

Step 5: Assemble the Mouths
To attach the white fondant teeth to the black ovals, use a little water on your finger to ‘glue’ them together. It should take just a few moments for them to stick. Once the teeth are in place, use the white writing icing to secure the black mouths onto the strawberries. Allow them to sit for a minute to set properly.

Step 6: Add the Candy Eyes
Finally, take the candy eyes and apply a small amount of writing icing to the back of each one. Carefully place the candy eyes on top of the mouths you’ve just created. Position them so they appear to spring to life, making your Strawberry Halloween Monsters truly captivating. With just a few moments of adjustment, they will be ready to shine!

Strawberry Halloween Monsters

Strawberry Halloween Monsters Customization

Feel free to explore your creativity and make these delightful monsters your own!

  • Vegan Option: Substitute the white fondant with a vegan-friendly alternative, and use plant-based icing for a completely cruelty-free treat. It’s fun to cater to everyone’s dietary needs!

  • Dairy-Free Delight: Opt for dairy-free chocolate chips as eyes instead of candy eyes. This change brings a chocolaty twist that enhances their spooky appeal.

  • Nutty Crunch: Add chopped almonds or crushed walnuts as “monster claws” for a delightful crunch. This twist takes every bite to a whole new level of texture!

  • Spooky Color Palette: Mix different food coloring gels into the fondant to create vibrant shades—think green monsters with purple teeth! The imaginative possibilities are endless.

  • Sour Surprise: Try using sour-coated candy eyes for an unexpected tartness. This will give your Strawberry Halloween Monsters an exciting flavor contrast to the sweet strawberries.

  • Pumpkin Spice Twist: Add a sprinkle of pumpkin spice to the strawberries for a seasonal flavor boost. This warm spice can evoke the essence of fall in every bite!

  • Fiery Kick: If you love heat, consider adding a hint of chili powder to the fondant for a spicy surprise that lingers! The flavors will definitely get everyone talking.

  • Whimsical Themes: Instead of traditional monsters, transform your strawberries into friendly ghosts using white fondant with little black eyes for a lighter take. Kids will adore the playful spirits!

By thinking outside of the box, you can create a myriad of flavors and fun with these Strawberry Halloween Monsters—perfect for impressing your guests or just enjoying with family!

Helpful Tricks for Strawberry Halloween Monsters

  • Choose Ripe Strawberries: Use fresh, ripe strawberries for optimal flavor and easy decorating; underripe berries may be too firm to work with easily.

  • Avoid Sticky Fondant: Dust your work surface with powdered icing sugar to prevent the fondant from sticking, ensuring smooth rolling and cutting for your Strawberry Halloween Monsters.

  • Knead Well: Knead the fondant thoroughly to ensure even coloring and pliability; uneven color or texture can lead to a less appealing finished product.

  • Secure Features Properly: Use enough writing icing when gluing the fondant features to the strawberries to prevent them from falling off—little touches make a big difference!

  • Customize Creatively: Don’t be afraid to experiment with different shapes and sizes for the teeth and mouths—personalizing each monster will make it even more fun!

What to Serve with Halloween Strawberry Monsters?

Bring your Halloween gathering to life with vibrant treats that capture the spirit of the season!

  • Crispy Apple Slices: Fresh and crunchy, these slices add a juicy contrast that balances the sweetness of the strawberries perfectly. Serve them with a dash of cinnamon for an extra autumn flair!

  • Spooky Cheese Platter: A mix of sharp and creamy cheeses can add an elegant touch to your party. Pair with seasonal crackers and some fig jam for a delicious contrast of flavors.

  • Ghoulish Guacamole: This green delight is perfect for dipping! With chips by the side, its rich, savory flavor complements the fruity sweetness beautifully, creating a fun contrast that guests will love.

  • Pumpkin Spice Hot Chocolate: Warm up your festivities with this cozy drink. Its seasonal spice blends perfectly with the sweetness of the strawberries, making it a comforting choice for chilly Halloween nights.

  • Cinnamon Sugar Donuts: Add a touch of indulgence with these warm treats. Their fluffy texture and just-right sweetness make for a perfect pairing with the refreshing strawberries.

  • Halloween Fruit Punch: Create a festive beverage with mixed fruit juices and floating gummy worms for a playful drink that everyone will adore. It’s a fun and refreshing way to wash down those spooky treats!

  • Chocolate-Covered Pretzels: Offering contrasting flavors of sweet and salty, they add a nice crunch to your table. A great finger food that stands up against the sweetness of your Strawberry Halloween Monsters.

Make Ahead Options

These Strawberry Halloween Monsters are a fantastic choice for meal prep, allowing you to enjoy the festive fun without the last-minute rush! You can prep the fondant decorations and strawberries up to 24 hours in advance. Simply cut the tops off the strawberries and store them in an airtight container in the refrigerator to maintain their freshness. For the fondant features, roll and cut the black and white pieces and keep them in a sealed bag or wrap them in plastic wrap to prevent drying out. When you’re ready to serve, simply assemble the monsters by ‘gluing’ the fondant mouths and candy eyes to the strawberries, ensuring a fun and spooky treat that’s just as delicious as if made fresh!

How to Store and Freeze Strawberry Halloween Monsters

Fridge: Keep your Strawberry Halloween Monsters in an airtight container for up to 3 days. This will maintain their freshness and prevent them from becoming soggy.

Room Temperature: If you plan to eat them within a day, you can leave the monsters out at room temperature on a plate, covered lightly with plastic wrap. This keeps them looking festive!

Freezer: For longer storage, you can freeze the unassembled components, such as strawberries and fondant, separately. Strawberries last up to 3 months in the freezer, but the fondant may lose texture after one month.

Reheating: If you choose to assemble them after freezing, let the strawberries thaw in the fridge overnight and decorate them as usual for a fresh look!

Strawberry Halloween Monsters

Strawberry Halloween Monsters Recipe FAQs

How do I select ripe strawberries?
Absolutely! To ensure the best flavor for your Strawberry Halloween Monsters, look for strawberries that are vibrant red, firm, and free of dark spots. Ripe strawberries should have a sweet aroma and their caps should be bright green. If they are under-ripe, they might be too firm to cut and decorate properly.

How should I store my Strawberry Halloween Monsters?
You can keep your adorable Strawberry Halloween Monsters in an airtight container in the fridge for up to 3 days. This will help maintain their freshness and prevent them from getting soggy. If you’re serving them within a day, it’s fine to keep them at room temperature on a plate, lightly covered with plastic wrap.

Can I freeze the components of my Strawberry Halloween Monsters?
Yes, you can freeze the individual components! For best results, freeze your strawberries and fondant separately. Strawberries will remain good for about 3 months in the freezer, while fondant may lose its ideal texture after about 1 month. When ready to assemble, thaw the strawberries in the fridge overnight and get creative!

What if my fondant is too sticky to work with?
No worries! If you find your fondant is sticky, it’s likely that it needs more powdered icing sugar dusting during the rolling process. Kneading in a bit more sugar should help make it more manageable. Just be sure to work quickly and keep your surface dusted to achieve those fun, spooky shapes for your monsters.

Are these Strawberry Halloween Monsters safe for my pets?
Very much! While strawberries are generally safe for dogs and cats in moderation, ensure that no fondant or icing comes into contact with them. The fondant contains sugar and other ingredients that might not be suitable for your furry friends. Always check with your vet for any specific dietary concerns regarding your pets.

What should I do if my icing isn’t sticking?
If the writing icing isn’t holding the fondant pieces securely, add a tiny amount of water to your finger and dab it on the fondant before pressing them together. This little trick often helps create a stronger bond. Remember to give your assembled Strawberry Halloween Monsters a few moments to set for the best results!

Strawberry Halloween Monsters That Will Wow Your Guests

Make these playful Strawberry Halloween Monsters, a fun and healthy treat that will impress your guests.

  • cutting board
  • Knife
  • Rolling Pin
  • small round cutter
  • Plate

For the Monsters

  • 12 pieces strawberries (ripe and ready to transform into frightful delights!)
  • 2 ounces white fondant ((50g) the base for creating your spooky characters.)
  • black food coloring gel (for adding a fun touch to your monsters.)
  • ⅓ cup powdered icing sugar (to keep fondant from sticking.)
  • 1 tube white writing icing (for ‘gluing’ and decorating.)
  • 12 pieces candy eyes (because every monster needs to see its deliciousness!)

Step‑by‑Step Instructions for Strawberry Halloween Monsters

  1. Trim the tops off the ripe strawberries, ensuring they can stand upright with the pointed tip facing up.
  2. Add a drop or two of black food coloring gel to the white fondant and knead until evenly distributed.
  3. Dust a clean work surface lightly with powdered icing sugar, then roll out the white and black fondant until about 1/8 inch thick.
  4. Cut out ovals from the black fondant for mouths and triangles from the white fondant for teeth.
  5. Use water to ‘glue’ the white teeth to the black mouths, then secure the mouths onto the strawberries with writing icing.
  6. Apply writing icing to the back of the candy eyes and place them on top of the mouths.

Feel free to experiment with different designs or flavors; add colorful sprinkles or spooky chocolate drizzle for a fabulous twist!

Dessert
American
creative desserts, easy recipes, fun food, Halloween Treats, healthy snacks, Strawberry Halloween Monsters

Filed Under: Dessert

Irresistibly Creamy Chocolate Spiderweb Cheesecake Delight

October 6, 2025 by grace bellamy Leave a Comment

Stepping into my kitchen to whip up a dessert is always a joyous escape—especially when that dessert is a Chocolate Spiderweb Cheesecake. The rich, creamy layers of this cheesecake are both a feast for the eyes and a delight for the tastebuds. Not only is it visually stunning with its delicate spiderweb design, but it’s also incredibly simple to prepare, making it perfect for any occasion from a family dinner to a festive gathering. With minimal baking involved, this recipe delivers maximum satisfaction, and I promise it will turn heads and hearts alike! Curious about how to create this sweet masterpiece? Let’s dive into the steps to make your own Chocolate Spiderweb Cheesecake!

Chocolate Spiderweb Cheesecake

Why is this cheesecake so irresistible?

Unique presentation: The stunning spiderweb design on top makes it a showstopper at any gathering, sure to impress guests.
Rich and creamy: With layers of velvety cream cheese and chocolate, every bite is a decadent treat for chocolate lovers.
Easy to prepare: No need for complicated baking skills; this cheesecake comes together smoothly, allowing you to focus on the fun parts.
Versatile dessert: Whether it’s for a birthday, holiday, or just because, this Chocolate Spiderweb Cheesecake fits every occasion and delights all ages.
Simple customization: Want to mix things up? Consider adding a fruity element, like a raspberry sauce drizzle, or try alternatives like Rhubarb Cheesecake Fancy for a tangy twist.

Chocolate Spiderweb Cheesecake Ingredients

For the Base
• Digestive biscuits – 300 g, crushed to create a crunchy, buttery crust.
• Butter, melted – 135 g, helps bind the biscuit crumbs for a solid base.
• Cocoa powder – 1 tbsp, adds a hint of chocolatey richness to the crust.

For the Cheesecake Filling
• Full fat cream cheese – 750 g, the creamy heart of this Chocolate Spiderweb Cheesecake, ensuring it’s rich and smooth.
• Icing sugar – 175 g, sweetens the filling beautifully for that delightful balance.
• Cocoa powder – 40 g, enhances the chocolate flavor, making each bite even more indulgent.
• Double cream – 300 ml, whisked into the mixture to achieve a thick, luscious texture.

For the Ganache
• Dark chocolate – 65 g, melted for a glossy finish atop the cheesecake.
• Double cream – 65 g, combines with dark chocolate to create a velvety ganache.
• White chocolate – 30 g, adds a sweet contrast in color and flavor for the spiderweb design.
• Double cream – 15 g, used to make the white chocolate ganache creamy and easy to pipe.
• Sugarflair superwhite powder – ¼ tsp, optional for an ultra-white appearance in the ganache if desired.

With these ingredients lined up, you’re one step closer to creating a showstopping Chocolate Spiderweb Cheesecake that everyone will love!

Step‑by‑Step Instructions for Chocolate Spiderweb Cheesecake

Step 1: Prepare the Biscuit Base
Begin by crushing the digestive biscuits in a food processor until they resemble fine crumbs. If you prefer, you can place them in a bowl and use a rolling pin. Mix the melted butter and cocoa powder into the crumbs until combined. Firmly press the mixture into the base of a 23cm springform tin, ensuring it’s even, then refrigerate for 30 minutes to allow it to set.

Step 2: Make the Cheesecake Filling
In a large mixing bowl, add the full-fat cream cheese, icing sugar, and cocoa powder. Using an electric hand whisk or a food mixer with a whisk attachment, mix until the filling is completely smooth and free of lumps. This step is essential for a creamy texture in your Chocolate Spiderweb Cheesecake, which should take about 3-4 minutes.

Step 3: Add the Double Cream
Once your filling is smooth, add the 300 ml of double cream. Continue to whisk the mixture until it thickens and can hold its shape—this should take another 3-5 minutes. The filling should be thick enough to hold itself but still smooth and spreadable, creating a luxurious texture for your cheesecake.

Step 4: Set the Cheesecake
Carefully spoon the thickened cheesecake filling onto the chilled biscuit base in the springform tin. Smooth the top with a spatula to ensure an even surface. Cover the tin with plastic wrap and place it in the refrigerator for at least 4 hours, or overnight if possible, to allow it to fully set and develop its flavors.

Step 5: Remove and Smooth the Edges
Once set, remove the cheesecake from the springform tin and carefully place it onto your serving plate. Use a butter knife to gently smooth any rough edges along the sides, giving your Chocolate Spiderweb Cheesecake a neat and polished look that is ready for the ganache toppings.

Step 6: Prepare the Dark Chocolate Ganache
In a microwave-safe bowl, combine the dark chocolate and 65 ml of double cream. Microwave for 20 seconds, then stir well. Continue microwaving in 10-second intervals, stirring after each burst until the mixture is completely melted and smooth. This ganache will form a beautiful glossy layer on top of your cheesecake.

Step 7: Top with Dark Chocolate Ganache
Carefully spread the warm dark chocolate ganache over the top of the cheesecake, letting it flow to the edges. Use a spatula to help create a smooth, even layer. Once this is done, set the cheesecake aside while you prepare the white chocolate ganache, allowing it to cool slightly.

Step 8: Create the White Chocolate Ganache
In another bowl, combine the white chocolate and 15 ml of double cream. Similar to the dark chocolate, microwave for 20 seconds and stir well. Continue until melted and silky. If you’re using the Sugarflair superwhite powder, add it now and mix thoroughly for a vibrant white color.

Step 9: Pipe the Spiderweb Design
Transfer the white chocolate ganache into a piping bag. Start piping a swirl in the center of your cheesecake, gradually working your way outwards in circles. This will create the perfect canvas for your spiderweb design, showcasing the delicious white chocolate ganache against the rich dark chocolate.

Step 10: Create the Spiderweb Pattern
Using a cocktail stick, begin at the center of the swirling pattern and gently drag towards the edge of the cheesecake. Continue this process around the entire cheesecake to reveal a stunning spiderweb design. This delicate touch elevates your Chocolate Spiderweb Cheesecake, making it even more eye-catching.

Step 11: Serve and Store
Your Chocolate Spiderweb Cheesecake is now beautifully decorated and ready to impress! Serve immediately for the best texture or store any leftovers in the fridge, where they can be enjoyed for up to 3 days. The flavors will continue to improve, providing delicious slices for days to come!

Chocolate Spiderweb Cheesecake

Chocolate Spiderweb Cheesecake Variations

Feel free to personalize your Chocolate Spiderweb Cheesecake with these delightful variations that will make it truly yours.

  • Gluten-Free: Substitute digestive biscuits with gluten-free cookies for a delectable crust without the gluten.
    Make sure to check the label for gluten-free options! This simple swap lets everyone join in on the fun without compromise.

  • Fruit Infusion: Add a layer of berry compote between the cheesecake and ganache for a fruity surprise.
    Imagine the tang of fresh raspberries playing off the rich chocolate—it’s a delightful contrast that your taste buds will adore!

  • Nutty Flavor: Stir in finely chopped nuts, like hazelnuts or pecans, into the cheesecake mixture for added crunch.
    These nutty bits add texture and an unexpected depth of flavor, making each bite even more enjoyable.

  • Vegan Option: Swap the cream cheese and double cream for coconut cream and a vegan cream cheese alternative.
    Rich and creamy, this variation ensures a vegan delight that caters to dietary preferences while remaining indulgent!

  • Mint Chocolate Twist: Add a few drops of peppermint extract to the cheesecake filling for a refreshing minty taste.
    This twist transforms your dessert into a holiday favorite, bringing cheer and joy with every slice.

  • Caramel Drizzle: Drizzle warm caramel sauce over the top of the cheesecake before serving for extra decadence.
    The sweet and salty notes of caramel complement the chocolate surprisingly well, creating a flavor combination that is simply irresistible.

  • Chocolate Orange: Incorporate some orange zest into the cheesecake mixture for a citrus twist.
    This vibrant addition brightens up the flavor profile, making it an elegant treat that’s perfect for any special occasion.

  • Spiced Up: Dust the cheesecake with a pinch of cinnamon or nutmeg before serving for a warm spice touch.
    A little spice can elevate the chocolate flavor, giving your cheesecake a cozy, aromatic finish that warms the heart.

Explore these creative alternatives to make your Chocolate Spiderweb Cheesecake a unique masterpiece that reflects your personal touch! For more irresistible cheesecakes, don’t miss out on the delicious Apricot Cheesecake Gluten or the intriguing Carrot Cake Cheesecake for more flavors to delight your palate!

Make Ahead Options

These Chocolate Spiderweb Cheesecakes are perfect for busy cooks looking to save time without sacrificing flavor! You can prepare the biscuit base up to 24 hours in advance and keep it chilled in the refrigerator. Additionally, the cheesecake filling can be made a day ahead as well; just store it in an airtight container once mixed. To ensure it remains just as delicious, avoid adding the ganaches until shortly before serving. Simply spread the ganaches on top and create the spiderweb design the day you plan to serve, and you’ll have a stunning dessert ready with minimal effort, allowing you to enjoy the day!

Tips for the Best Chocolate Spiderweb Cheesecake

  • Biscuit Base Care: Ensure the biscuit mixture is pressed firmly into the tin. A well-packed base prevents crumbling when served, ensuring slices hold shape.

  • Whisking Technique: When incorporating the double cream, whisk until thick but smooth. Over-whisking can lead to a grainy texture, compromising your Chocolate Spiderweb Cheesecake’s creaminess.

  • Cooling Time: Allow your cheesecake to set overnight if possible. This extra time enhances the flavors and texture, giving you a richer flavor profile.

  • Ganache Consistency: Make sure both ganaches are slightly warm when you spread or pipe them. This makes them smooth and easy to work with for an elegant finish.

  • Designing the Web: Use a light hand with the cocktail stick when creating the spiderweb. A gentle touch will yield a delicate effect without disrupting the ganache layer.

What to Serve with Chocolate Spiderweb Cheesecake

Indulging in a slice of this creamy, chocolatey delight will leave you dreaming of the perfect accompaniments to elevate your dessert experience.

  • Fresh Berries: Juicy strawberries or raspberries add a pop of color and a refreshing tartness that contrasts beautifully with the rich cheesecake.

  • Vanilla Ice Cream: Creamy vanilla ice cream melts indulgently against the decadent chocolate flavors, making each bite a luxurious treat that’s hard to resist.

  • Espresso or Coffee: A shot of robust espresso or a warm cup of coffee enhances the chocolate notes, creating a harmonious balance that coffee lovers cherish.

  • Chocolate Sauce Drizzle: An extra drizzle of chocolate sauce intensifies the dessert experience, making every mouthful even more irresistible.

  • Whipped Cream: Light and airy whipped cream adds a touch of sweetness, complementing the dense texture of the cheesecake while inviting you to take another bite.

  • Mint Leaves: Fresh mint leaves not only add a pop of color but their cooling flavor pairs wonderfully with the intense chocolate, refreshing the palate.

  • Chocolate-Dipped Strawberries: These elegant bites, with their sweet and juicy contrast, are perfect alongside your cheesecake, making for a truly festive presentation.

  • Mint Mojito: For a refreshing drink option, a mint mojito’s bright flavors will cleanse the palate and enhance the chocolatey richness in each slice.

  • Homemade Caramel Sauce: A drizzle of warm caramel can add a sweet, buttery flavor to each bite, creating a delightful contrast with the chocolate and cream.

How to Store and Freeze Chocolate Spiderweb Cheesecake

Fridge: Store any leftover Chocolate Spiderweb Cheesecake in an airtight container in the fridge for up to 3 days. Ensure it’s well-covered to maintain its fresh flavor and creamy texture.

Freezer: If you want to keep the cheesecake longer, you can freeze individual slices wrapped tightly in plastic wrap and then aluminum foil for up to 2 months.

Thawing: To enjoy frozen cheesecake, transfer it to the fridge and allow it to thaw overnight before serving. This gradual process ensures the best texture and flavors are preserved.

Reheating: There’s no need to heat the cheesecake, as it’s best enjoyed chilled. Serve it straight from the fridge or at room temperature for the ideal experience!

Chocolate Spiderweb Cheesecake

Chocolate Spiderweb Cheesecake Recipe FAQs

How do I know if my ingredients are ripe or of good quality?
Absolutely! For the best Chocolate Spiderweb Cheesecake, choose fresh cream cheese that’s smooth with no lumps, as it can significantly affect the creamy texture. Also, ensure that your double cream is within its use-by date and has a clean scent. Your cocoa powder should be rich and dark, with no visible lumps.

How should I store my cheesecake, and how long will it last?
Very! You can store any leftover Chocolate Spiderweb Cheesecake in an airtight container in the fridge for up to 3 days. Make sure it’s well-covered to help retain its delicious flavor. If you want to keep it longer, it’s best to freeze individual slices.

What’s the best way to freeze Chocolate Spiderweb Cheesecake?
I often make a large batch and freeze slices for later! Wrap each slice tightly in plastic wrap, then in aluminum foil. Place them in a freezer-safe bag or container, and label them with the date. The cheesecake can be stored in the freezer for up to 3 months.

How do I thaw frozen cheesecake for the best taste?
To enjoy your frozen Chocolate Spiderweb Cheesecake, simply transfer it to the fridge for overnight thawing. This way, it maintains its creamy texture and irresistible flavors. Trying to thaw it quickly can result in a soggy dessert, so patience is key!

Can I give this cheesecake to my pets?
Definitely not! While the ingredients in a Chocolate Spiderweb Cheesecake are delicious for humans, they are not suitable for pets. Particularly, the rich cream cheese and high sugar content can lead to digestive issues for pets, so it’s best to keep it out of their reach.

What should I do if my cheesecake doesn’t set properly?
If you find that your Chocolate Spiderweb Cheesecake hasn’t set as expected, it may need more chilling time. Return it to the fridge for a few more hours—or even overnight—before serving. If you realize you’ve over-whipped the cream and created a grainy texture, be sure to gently fold in another small batch of softened cream cheese to smooth it out.

Irresistibly Creamy Chocolate Spiderweb Cheesecake Delight

A delightful Chocolate Spiderweb Cheesecake that is rich, creamy, and visually stunning, perfect for any occasion.

  • Food Processor
  • Mixing Bowl
  • Electric hand whisk
  • spatula
  • Springform tin
  • piping bag
  • Microwave-safe bowl

For the Base

  • 300 g Digestive biscuits (crushed to create a crunchy, buttery crust.)
  • 135 g Butter, melted (helps bind the biscuit crumbs for a solid base.)
  • 1 tbsp Cocoa powder (adds a hint of chocolatey richness to the crust.)

For the Cheesecake Filling

  • 750 g Full fat cream cheese (the creamy heart of this cheesecake.)
  • 175 g Icing sugar (sweetens the filling beautifully.)
  • 40 g Cocoa powder (enhances the chocolate flavor.)
  • 300 ml Double cream (whisked into the mixture to achieve a thick, luscious texture.)

For the Ganache

  • 65 g Dark chocolate (melted for a glossy finish.)
  • 65 g Double cream (combines with dark chocolate for a velvety ganache.)
  • 30 g White chocolate (adds a sweet contrast in color.)
  • 15 g Double cream (used to make the white chocolate ganache creamy.)
  • ¼ tsp Sugarflair superwhite powder (optional for an ultra-white appearance.)

Step‑by‑Step Instructions

  1. Begin by crushing the digestive biscuits in a food processor until they resemble fine crumbs. Mix the melted butter and cocoa powder into the crumbs until combined. Firmly press the mixture into the base of a 23cm springform tin, ensuring it’s even, then refrigerate for 30 minutes to set.
  2. In a large mixing bowl, add cream cheese, icing sugar, and cocoa powder. Mix until completely smooth, about 3-4 minutes.
  3. Add double cream and whisk until thickened, about another 3-5 minutes, creating a luxurious texture.
  4. Spoon the thickened cheesecake filling onto the chilled biscuit base. Smooth the top with a spatula, cover, and refrigerate for at least 4 hours.
  5. Carefully remove the cheesecake from the tin and smooth rough edges with a butter knife.
  6. Combine dark chocolate and 65 ml of double cream in a microwave-safe bowl. Microwave in intervals until melted and smooth.
  7. Spread the warm dark chocolate ganache over the cheesecake, letting it flow to the edges.
  8. In another bowl, combine white chocolate and 15 ml of double cream. Microwave until melted and silky.
  9. Transfer white chocolate ganache into a piping bag and create a swirl pattern on the cheesecake.
  10. Use a cocktail stick to create a spiderweb design by dragging from the center to the edges of the cheesecake.
  11. Serve immediately or store in the fridge for up to 3 days.

Press the biscuit mixture firmly and whisk the cream until thick but smooth for the best texture.

Dessert
American
cheesecake, Chocolate Spiderweb Cheesecake, creamy, dessert, party dessert, Rich

Filed Under: Dessert

Halloween Monster Energy Balls That Will Thrill Your Taste Buds

October 6, 2025 by grace bellamy Leave a Comment

As I set foot in the kitchen this Halloween season, the excitement in the air is palpable—it’s that delightful time of year when everything takes on a spooky twist! I couldn’t resist whipping up these playful Halloween Monster Energy Balls that are not only no-bake and vegan, but also packed with nutrition. Perfect as a guilt-free treat for yourself or a festive snack for the little ghouls and goblins, these energy balls are a fun way to satisfy your sweet tooth without the guilt. With a preparation time of just 30 minutes, you’ll love how easy it is to whip these up and impress your guests. So, are you ready to transform simple ingredients into some frightfully cute deliciousness?

Halloween Monster Energy Balls

Why are these energy balls a must-try?

No-Bake Convenience: These Halloween Monster Energy Balls are incredibly easy to make, requiring no baking and only 30 minutes of your time!

Healthy Indulgence: Packed with wholesome ingredients like Medjool dates, nuts, and oats, they offer a nutritious twist on traditional treats.

Vegan-Friendly: Ideal for everyone, these energy balls are completely vegan, allowing you to celebrate Halloween while keeping dietary preferences in mind.

Fun for All Ages: Kids and adults alike will love these spooky snacks, making them perfect for parties or just a fun, healthy treat at home.

Guilt-Free Sweetness: Satisfy your sweet craving without the guilt—these energy balls are delicious yet healthy, unlike much of the Halloween candy on the market!

Transform your Halloween festivities with these playful, nutritious bites that are sure to thrill your taste buds!

Ingredients for Halloween Monster Energy Balls

• Get ready to create these spooky delights!

For the Base

  • Peanuts – A great source of healthy fats; feel free to swap with almonds for a different flavor.
  • Medjool Dates – Sweet, sticky, and perfect for binding ingredients together; they add natural sweetness too!
  • Cocoa Powder – Adds a rich chocolatey flavor; opt for raw cacao if you prefer a less processed option.
  • Peanut Butter – Creamy and delicious; can be replaced with any nut or seed butter according to preference.
  • Gluten-Free Rolled Oats – Provides wholesome texture and energy; you can use regular oats if gluten isn’t a concern.

For the Decorations

  • Licorice Bars – Used for the spooky legs and wings; they provide a fun, chewy contrast—be creative!
  • Candy Eyeballs – These transform your energy balls into frightfully cute monsters; they are a must for the Halloween theme!

These Halloween Monster Energy Balls are not only fun to make, but they’re also a delightful treat that everyone will enjoy!

Step‑by‑Step Instructions for Halloween Monster Energy Balls

Step 1: Prepare the Dates
Begin by placing the pitted Medjool dates in a food processor. Pulse the dates for about 2 minutes until they form a smooth, sticky paste, resembling a thick caramel. This creates the base for your Halloween Monster Energy Balls, ensuring they hold together beautifully.

Step 2: Blend the Mixture
Add the gluten-free rolled oats, cocoa powder, peanut butter, and peanuts to the food processor with the date paste. Blend on high until all ingredients are well combined, about 1-2 minutes. If the mixture feels too dry and crumbly, drizzle in a couple of tablespoons of water to make it stickier and more cohesive.

Step 3: Roll into Balls
With clean hands, take portions of the mixture and roll them into 1-inch balls, aiming for around 16 evenly sized balls. As you shape the mixture, visualize the fun Halloween Monster Energy Balls you’re creating because these will make delightful spooky snacks perfect for any gathering.

Step 4: Add Candy Eyeballs
While the energy balls are still soft and sticky, gently press two candy eyeballs into the top of each ball. This adds a whimsical touch, transforming your nutritious snacks into adorable monsters. Make sure to press them in just enough for them to stay put.

Step 5: Cut the Licorice for Decorations
Next, slice the licorice bars into thin strips to craft the spooky legs and wings for your Halloween Monster Energy Balls. Use round cutters for bat wings and a knife to cut six spider legs per ball—get creative! This is where the fun begins, personalizing each monster.

Step 6: Attach Licorice Pieces
Carefully press the licorice pieces into the energy balls, securing them as wings or legs. If you find the licorice is too soft, make a small hole in the balls first so they’ll fit better. This step will ensure your Halloween creations look playful and festive.

Step 7: Chill and Set
Finally, arrange your spooky Halloween Monster Energy Balls on a tray and place them in the fridge. Allow them to chill for about 15-30 minutes. This will firm them up nicely, making them easier to handle and serve for your upcoming Halloween celebrations.

Halloween Monster Energy Balls

Halloween Monster Energy Balls Variations

Feel free to let your creativity shine by customizing these delightful energy balls to suit your taste and dietary needs!

  • Nut-Free: Substitute peanuts with sunflower seed butter to create a delicious allergy-friendly option that’s just as tasty.

  • Cocoa Alternative: Swap cocoa powder for carob powder for a sweeter, less bitter flavor. Kids will enjoy the difference!

  • Texture Boost: Add in a handful of chia seeds or ground flaxseeds for extra nutrition and a delightful crunch in each bite.

  • Sweeten it Up: Instead of dates, try using mashed bananas for a unique flavor twist that adds natural sweetness and moisture!

  • Spicy Kick: For a surprising flavor twist, mix in a pinch of cayenne pepper or cinnamon to bring a warm spiciness to these treats.

  • Fruit Infusion: Incorporate dried cranberries or raisins for added sweetness and texture—these little bites of fruity goodness can elevate the taste!

  • Chocolate Lovers: Drizzle melted dark chocolate over each energy ball after chilling for an indulgent finish that’s perfect for any chocolate lover.

  • Fun Shapes: Use Halloween-themed cookie cutters for shaping the energy balls instead of rolling them, adding a playful twist that kids will adore!

By exploring these variations, you can personalize your Halloween Monster Energy Balls and keep the festive spirit alive! If you want to learn more about nutritious, no-bake treats, check out my other recipes for healthy snacks.

Expert Tips for Halloween Monster Energy Balls

  • Choosing Dates Wisely: Use fresh Medjool dates; they should be soft and sticky to help bind the mixture. Dried dates can lead to a crumbly texture.

  • Nut Alternatives: Feel free to switch out peanuts for almonds or cashews if you’re looking for a different flavor profile or nut allergy concerns.

  • Perfect Binding: If your mixture is too crumbly, add water gradually. Aim for a sticky consistency that holds together—this ensures your Halloween Monster Energy Balls don’t fall apart.

  • Decoration Ideas: Get creative with licorice placement—try using different shapes or colors to make your monsters even more whimsical and appealing.

  • Chilling Time: Allow the energy balls to chill long enough. If they aren’t cool enough, they may lose their shape and look less “monstrous.”

By following these helpful tips, you’ll create spooky delights that not only look fantastic but taste delicious too!

Make Ahead Options

These Halloween Monster Energy Balls are a fantastic option for meal prep! You can prepare the base mixture up to 24 hours in advance by rolling the energy balls and then refrigerating them until you’re ready to decorate. Just make sure to keep them in an airtight container to retain freshness. When it’s time to serve, simply add the candy eyeballs and licorice decorations right before you present them, ensuring they look adorably spooky! The chilling time can also be managed, as they will stay firm and delightful for up to 3 days in the fridge, making them perfect for busy weeknights or Halloween gatherings!

What to Serve with Scary Monster Energy Balls?

These delightful energy bites are perfect for adding a spooky twist to your Halloween gatherings, enticing both kids and adults alike!

  • Veggie Sticks with Hummus: Crisp, colorful veggies provide a fresh crunch and satisfying balance to the sweet energy balls. Serve them alongside for a delightful snack platter that invites dipping.

  • Ghostly Fruit Salad: A medley of seasonal fruits like spooky blackberries, oranges, and bananas offers a sweet and nutritious contrast to the chocolatey energy balls. Each juicy bite brightens your Halloween party!

  • Almond Milk Smoothie: This creamy drink complements the rich taste of the energy balls, creating a delightful protein-packed treat. Blend in a few more Halloween-themed ingredients like pumpkin spice for an extra festive vibe!

  • Popcorn Treats: Create a playful mix of popcorn tossed with a sprinkle of cinnamon and a hint of maple syrup. The light crunch balances beautifully with the chewy texture of the monster energy balls!

  • Chocolate-Covered Pretzels: For those who crave a little extra sweetness, these crunchy treats add a fun mix of salty and sweet, just like the monster energy balls.

  • Apple Slices with Peanut Butter: Crunchy apple slices paired with creamy peanut butter echo the flavors in the energy balls, making them irresistible for a snack break that feels indulgent yet healthy!

Don’t forget to keep the festivities alive with some spooky decorations on the table, making each serving quite the charming horror show!

How to Store and Freeze Halloween Monster Energy Balls

Fridge: Store your Halloween Monster Energy Balls in an airtight container in the fridge for up to 1 week. This keeps them fresh and ready to enjoy whenever you crave a healthy snack.

Freezer: For longer storage, freeze the energy balls in a single layer. Once frozen, transfer them to a zip-top bag or container. They can last up to 3 months in the freezer without losing their delightful flavor.

Reheating: No need to reheat; simply enjoy them straight from the fridge or freezer. If frozen, let them sit at room temperature for a few minutes before indulging for the best texture.

Serving Tip: Garnish with extra candy eyeballs just before serving for a festive touch!

Halloween Monster Energy Balls

Halloween Monster Energy Balls Recipe FAQs

What type of Medjool dates should I use?
Absolutely, use fresh Medjool dates! They should be soft and sticky, which is crucial for binding the mixture together. If you’re choosing dates that are hard or dried out, it may lead to crumbly energy balls that don’t hold their shape.

How long can I store my Halloween Monster Energy Balls?
You can keep your Halloween Monster Energy Balls in an airtight container in the fridge for up to 1 week. This ensures they remain fresh and ready for snacking whenever that spooky craving hits!

Can I freeze Halloween Monster Energy Balls?
Very much! To freeze, place your energy balls in a single layer on a baking sheet for a couple of hours. Once they’re firm, transfer them to a zip-top bag or airtight container. They’ll stay delicious for up to 3 months in the freezer. When you’re ready to enjoy, just let them sit at room temperature for a few minutes.

What can I do if my energy ball mixture is too dry?
If your mixture seems too dry and crumbly, simply add a couple of tablespoons of water gradually while blending. Mix until it reaches a sticky consistency that holds together well. This ensures your Halloween Monster Energy Balls will maintain their shape beautifully!

Are these treats safe for pets or those with allergies?
While these energy balls are vegan and made with wholesome ingredients, they contain peanuts, which can be a common allergy. As a safe practice, always check with your guests regarding allergies, especially with nuts and ingredients. Plus, avoid giving them to pets, as both chocolate and certain nuts can be harmful to them.

Can I swap out any ingredients in the recipe?
Yes! Feel free to swap peanuts with almonds or cashews if you prefer a different flavor or have allergies. You can also substitute peanut butter with any nut or seed butter. Just keep in mind that the texture or taste may change slightly, but experimenting is part of the fun!

These FAQs should help clarify common questions about your Halloween Monster Energy Balls recipe! Enjoy making these fun treats!

Halloween Monster Energy Balls That Will Thrill Your Taste Buds

Delightful Halloween Monster Energy Balls are no-bake, vegan treats that satisfy your sweet tooth without the guilt.

  • Food Processor

For the Base

  • 1 cup Peanuts (Feel free to swap with almonds)
  • 1 cup Medjool Dates (Pitted)
  • 1/4 cup Cocoa Powder (Or raw cacao for less processed option)
  • 1/2 cup Peanut Butter (Can be replaced with any nut or seed butter)
  • 1 cup Gluten-Free Rolled Oats (Regular oats can be used if gluten isn’t a concern)

For the Decorations

  • 2 bars Licorice Bars (For spooky legs and wings)
  • 12 pieces Candy Eyeballs (Transform energy balls into monsters)

Step-by-Step Instructions

  1. Prepare the Dates: Place the pitted Medjool dates in a food processor and pulse until smooth, resembling a thick caramel.
  2. Blend the Mixture: Add gluten-free rolled oats, cocoa powder, peanut butter, and peanuts to the processor, blend until well combined.
  3. Roll into Balls: Shape the mixture into 1-inch balls, aiming for around 16 evenly sized balls.
  4. Add Candy Eyeballs: Press two candy eyeballs into the top of each ball.
  5. Cut the Licorice for Decorations: Slice licorice bars into thin strips for legs and wings.
  6. Attach Licorice Pieces: Press licorice strips into the energy balls as decoration.
  7. Chill and Set: Arrange balls on a tray and chill in the fridge for 15-30 minutes.

Store in an airtight container in the fridge for up to a week or freeze for longer storage.

Dessert
Vegan
Energy Balls, Halloween, healthy snacks, No-Bake, Nutritious Desserts, Vegan Treats

Filed Under: Dessert

Fabulous Mini Pumpkin Cheesecake Jack-O’-Lanterns to Savor

October 6, 2025 by grace bellamy Leave a Comment

Autumn whispers its magic, and as the vibrant leaves dance to the ground, I can’t resist the call of pumpkin treats. These delightful Mini Pumpkin Cheesecake Jack-O’-Lanterns have quickly become a favorite in my kitchen, blending the creamy goodness of cheesecake with the whimsical charm of Halloween. Not only are these treats a healthier alternative to store-bought sweets, but they also allow you to unleash your creativity as you decorate them with playful chocolate faces. With a quick prep time, you’ll have a seasonal dessert that promises to impress family and friends alike. Are you ready to create a spooky yet delicious masterpiece that’ll have everyone asking for seconds?

Mini Pumpkin Cheesecake Jack-O’-Lanterns

Why Are Mini Pumpkin Cheesecake Jack-O’-Lanterns Unforgettable?

Whimsical Appearance: These charming cheesecakes aren’t just tasty; their Jack-O’-Lantern faces make them a showstopper at any gathering!
Healthy Indulgence: Crafted with wholesome ingredients like cashews and pumpkin purée, they’re a guilt-free treat that doesn’t skimp on flavor.
Easy to Make: With simple steps and minimal cooking time, you’ll spend less time in the kitchen and more time enjoying spooky festivities.
Versatile Delight: Perfect for Halloween parties, cozy gatherings, or as a seasonal treat, they’ll please both kids and adults alike. Whether you’re a baking novice or a pro, these desserts are bound to impress. Get ready to elevate your fall dessert game with these delightful Mini Pumpkin Cheesecake Jack-O’-Lanterns!

Mini Pumpkin Cheesecake Jack-O’-Lanterns Ingredients

• Get ready to create magic in your kitchen with these delightful treats!

For the Cheesecake Filling

  • Flax meal – acts as a fabulous egg substitute, binding the ingredients together.
  • Warm water – needed to hydrate the flax meal, helping it gel for a smooth cheesecake texture.
  • Roasted cashews – soaked overnight to achieve that creamy consistency that makes these cheesecakes irresistible.
  • Pumpkin purée – the star ingredient, providing rich flavor and a beautiful autumn hue.
  • Coconut sugar – a healthier sweetener with caramel notes that complements the pumpkin beautifully.
  • Unsweetened vanilla almond milk – adds creaminess and a hint of vanilla without the dairy.
  • Maple syrup – natural sweetness that enhances the overall flavor profile of the filling.
  • Coconut oil – melted to blend seamlessly, contributing to the cheesecake’s luscious mouthfeel.
  • Pumpkin pie spice – warms up the flavor with its perfect mix of spices, embodying all things fall!
  • Pinch of salt – balances the sweetness, enhancing the flavors of the cheesecake.

For the Crust

  • Coconut oil (room temperature) – provides a butter-like consistency and richness to the crust.
  • Maple syrup – additional sweetness, tying the flavors of the crust and filling together.
  • Coconut flour – gluten-free option that gives the crust a delightful texture while absorbing moisture.
  • Unsweetened cocoa powder – adds a chocolatey depth, making the crust utterly irresistible.
  • Pinch of salt – again, it enhances flavors and helps round out the sweetness.

For Decoration

  • Dark chocolate – melted to create whimsical Jack-O’-Lantern faces, adding that signature Halloween charm.
  • Coconut oil – mixed with chocolate to ensure a smooth drizzle that sets well.
  • Mint sprigs – the perfect finishing touch to mimic pumpkin stems, adding a pop of color and flavor.

Get ready to dive into the baking adventure with these Mini Pumpkin Cheesecake Jack-O’-Lanterns that are sure to be a highlight of your fall celebrations!

Step‑by‑Step Instructions for Mini Pumpkin Cheesecake Jack-O’-Lanterns

Step 1: Preheat the Oven
Start by preheating your oven to 350°F (175°C). This temperature is key for baking your crust just right. While the oven warms, gather your ingredients and prepare your mini-cheesecake pan by greasing it lightly to ensure easy removal later.

Step 2: Prepare the Flax Mixture
In a small bowl, whisk together the flax meal and warm water to create a binding agent for your cheesecake filling. After mixing, place this bowl in the refrigerator for about 10 minutes, allowing the mixture to gel while you prepare the creamy pumpkin filling.

Step 3: Blend the Cheesecake Filling
Drain and rinse the soaked cashews, then add them to a high-powered blender. Combine the cashews with pumpkin purée, coconut sugar, almond milk, maple syrup, melted coconut oil, pumpkin pie spice, and a pinch of salt. Purée these ingredients until the mixture is thick, smooth, and creamy, then set it aside.

Step 4: Make the Crust
In a large mixing bowl, combine softened coconut oil and maple syrup, beating them together until smooth. Gradually stir in the sifted coconut flour, cocoa powder, and a pinch of salt until a cohesive dough forms. This crust will provide a deliciously rich base for your Mini Pumpkin Cheesecake Jack-O’-Lanterns.

Step 5: Divide the Dough
Using lightly heaped teaspoons, divide the crust dough evenly among the 12 cavities of your mini-cheesecake pan. Press the dough out uniformly to create a flat, even base. This will ensure a consistent texture and flavor across all the cheesecakes.

Step 6: Bake the Crusts
Place the pan in the preheated oven and bake the crusts for about 5 minutes. Keep a close eye on them; they should be set but not browned. This quick baking will give you a perfectly baked base for your cheesecakes that can hold the delightful filling.

Step 7: Combine the Cheesecake Filling
As the crusts are baking, retrieve the flax mixture from the refrigerator. Transfer the creamy cashew mixture into a large bowl and pour in the now-gelled flax mixture. Stir both mixtures together until evenly combined, creating a rich filling for your cheesecakes.

Step 8: Adjust the Crusts
Once the crusts are done, remove the pan from the oven. If any parts have risen, use a small spoon to flatten those areas and smooth out any cracks, ensuring a nice, even surface to hold the cheesecake filling.

Step 9: Fill the Cavities
Immediately fill each crust cavity with the pumpkin-cashew mixture, ensuring you fill them just over 3/4 full. This allows for a little rise as they bake, creating that fluffy cheesecake texture you’re aiming for in your Mini Pumpkin Cheesecake Jack-O’-Lanterns.

Step 10: Bake the Cheesecakes
Return the filled pan to the oven, baking for 11-12 minutes. You’ll know they’re ready when they have slightly risen and the edges appear set. Once done, remove the cheesecakes, allowing them to cool completely on the counter.

Step 11: Chill the Cheesecakes
Once cooled, cover the mini cheesecakes and refrigerate them for at least 6 hours, allowing them to set fully. This cooling process is crucial for achieving that perfect cheesecake texture and flavor.

Step 12: Prepare the Chocolate Drizzle
In a small microwave-safe bowl, melt the dark chocolate and coconut oil together using 30-second intervals at half power, stirring between each interval until the chocolate is smooth and glossy. This melted chocolate will serve as the playful decoration for your Jack-O’-Lantern faces.

Step 13: Decorate the Cheesecakes
Using a spoon or a piping bag, drizzle the melted chocolate over the top of each cheesecake, creating whimsical Jack-O’-Lantern faces. Be creative; let your imagination guide you as you bring these delightful treats to life!

Step 14: Add the Finishing Touch
To mimic pumpkin stems, gently insert a mint sprig into the top of each mini pumpkin cheesecake. This final touch will not only enhance the appearance but also add a fresh flavor that ties the dessert together beautifully.

Mini Pumpkin Cheesecake Jack-O’-Lanterns

Make Ahead Options

These Mini Pumpkin Cheesecake Jack-O’-Lanterns are perfect for meal prep enthusiasts! You can prepare the crust and filling up to 24 hours in advance. Simply bake the crust as instructed and let it cool completely; then, make the cheesecake filling and store it in an airtight container in the refrigerator. When you’re ready to finish, fill the crusts with the filling and bake them just before serving to ensure they are fresh and fluffy. To maintain the quality of the cheesecakes, be sure to refrigerate them if prepped ahead and allow at least 6 hours to chill for optimal set before decorating. You’ll have a festive dessert ready with minimal last-minute effort!

What to Serve with Mini Pumpkin Cheesecake Jack-O’-Lanterns

Indulging in these charming treats invites a delightful fall-inspired gathering, perfectly enhancing your cozy celebrations.

  • Spiced Apple Cider: A warm cup adds a touch of nostalgia, with its sweet and spiced notes beautifully complementing the pumpkin flavor.
  • Ginger Snap Cookies: Their spicy crunch creates a lovely textural contrast and a nostalgic pairing to the creamy cheesecakes. Imagine the delightful crunch as you take a bite!
  • Pecan Pie Bites: These mini bites offer a satisfying sweetness and nutty flavor that harmonizes with the pumpkin, perfect for sharing with loved ones.
  • Roasted Brussels Sprouts: Tossed with balsamic glaze, these earthy vegetables make a savory counterpoint to the sweet cheesecake, adding depth to your meal.
  • Vibrant Kale Salad: A fresh salad with citrus dressing refreshes the palate, balancing the richness of the cheesecakes and adding a pop of color to your table.
  • Vanilla Almond Milkshake: Smooth and creamy, this shake transports you to dessert heaven, making it an irresistible drink pairing for your cheesecakes.
  • Pumpkin Spice Latte: Embrace the season with this comforting drink, enhancing the pumpkin vibe and wrapping you in warm autumn flavors.
  • Chocolate-Drizzled Popcorn: This fun snack mirrors the cheesecake’s whimsical decoration, and its texture will delight both children and adults.
  • Fluffy Meringue Tarts: Light and airy, these desserts offer a sweet contrast that enhances the rich cheesecake experience without overpowering it.
  • Chai Tea: The spiced notes of this warm drink beautifully complement the flavors of the pumpkin, creating a harmonious experience to savor with each bite.

Mini Pumpkin Cheesecake Jack-O’-Lanterns Variations

Customize your delightful cheesecakes and elevate their flavors or textures with these playful twists that will tickle your taste buds!

  • Nut-Free: Use sunflower seeds instead of cashews for a creamy texture that’s perfect for those with nut allergies. The sunflower flavor complements the pumpkin beautifully!

  • Spice It Up: Add a dash of cayenne pepper or cinnamon for a warm, spicy kick. A little heat can intensify those warm, autumn flavors.

  • Chocolate Lovers: Incorporate mini chocolate chips into the filling before baking for a delightful surprise in every bite. The melted chips add a new layer of richness to each cheesecake.

  • Fruit Fusion: Stir in some pureed banana or applesauce for an extra fruity twist. This adds natural sweetness and a lovely texture, perfect for fall!

  • Coconut Delight: Use unsweetened shredded coconut in the crust for added texture and flavor. This twist will make your mini cheesecakes feel even more tropical.

  • Dairy-Free Option: Swap almond milk for your favorite plant-based milk, and use a dairy-free dark chocolate for a completely vegan treat. Enjoy creamy goodness that everyone can savor.

  • Essential Oil Infusion: A drop or two of pure vanilla or almond extract in the filling can enhance the overall flavor profile. Just remember, a little goes a long way!

  • No-Bake Version: For a no-bake alternative, set the cheesecakes in the fridge instead of baking them. Just let them chill longer until firm! Enjoy a wonderfully creamy dessert with less effort.

These variations can transform your treats into something uniquely yours, perfect for sharing with family and friends, or just indulging yourself!

Expert Tips for Mini Pumpkin Cheesecake Jack-O’-Lanterns

  • Soak Cashews Properly: Ensure your cashews are soaked overnight; this step is crucial for achieving the creamy texture in your Mini Pumpkin Cheesecake Jack-O’-Lanterns.

  • Don’t Overmix: When blending the filling, blend until smooth but avoid overmixing, which can incorporate too much air and affect the final texture.

  • Monitor Baking Time: Keep a close eye on the cheesecakes during baking. They should be set around the edges but slightly wobbly in the center to ensure creaminess.

  • Cool Before Chilling: Allow the cheesecakes to cool completely before refrigerating. This prevents unwanted moisture build-up and ensures a perfect set.

  • Creative Faces: Let your creativity shine when decorating! Different chocolate drizzles can create unique Jack-O’-Lantern faces, making each cheesecake a delightful surprise.

How to Store and Freeze Mini Pumpkin Cheesecake Jack-O’-Lanterns

Fridge: Keep your Mini Pumpkin Cheesecake Jack-O’-Lanterns covered in an airtight container in the fridge for up to 5 days. This will help maintain their creamy texture and prevent them from absorbing other flavors.

Freezer: If you’d like to save some for later, freeze them unadorned for up to 2 months. Make sure to wrap them well in plastic wrap and then place them in a freezer-safe container.

Thawing: To enjoy frozen cheesecakes, transfer them to the fridge to thaw overnight. Once thawed, add your chocolate decorations and mint sprigs before serving.

Serving: These treats are best served chilled. Simply enjoy them straight from the fridge for that delightful, creamy flavor!

Mini Pumpkin Cheesecake Jack-O’-Lanterns

Mini Pumpkin Cheesecake Jack-O’-Lanterns Recipe FAQs

How do I know if my cashews are fresh enough for this recipe?
Absolutely! When selecting cashews, look for ones that are firm and free from any dark spots. Fresh cashews should also have a pleasant, nutty aroma. If your cashews have been sitting around for a while, it’s best to check for signs of rancidity, such as an off smell or taste, as these can affect the flavor of your Mini Pumpkin Cheesecake Jack-O’-Lanterns.

How should I store my Mini Pumpkin Cheesecake Jack-O’-Lanterns?
Very importantly, you can keep your Mini Pumpkin Cheesecake Jack-O’-Lanterns in the fridge for up to 5 days. Make sure to store them in an airtight container to maintain their creamy texture and prevent them from absorbing other flavors. If you have leftovers, I recommend placing them on a layer of parchment paper to absorb moisture before sealing.

Can I freeze Mini Pumpkin Cheesecake Jack-O’-Lanterns?
Of course! You can freeze these delightful treats for up to 2 months. To freeze, ensure they’re unadorned; wrap each cheesecake tightly in plastic wrap, then place them in a freezer-safe container. This prevents freezer burn and keeps them fresh. When you’re ready to enjoy, simply transfer them to the fridge to thaw overnight.

What should I do if my cheesecakes are overbaked?
If your Mini Pumpkin Cheesecake Jack-O’-Lanterns turn out overbaked and are too firm, don’t fret! The texture might not be as creamy, but you can serve them with a drizzle of maple syrup or a scoop of non-dairy ice cream to enhance moisture. Next time, check them a minute or two earlier, as they should be slightly wobbly in the center.

Are there any dietary restrictions I should consider when making these?
Absolutely! These Mini Pumpkin Cheesecake Jack-O’-Lanterns are nut-based, so be mindful of guests with nut allergies. If needed, you can replace cashews with soaked silken tofu for similar creaminess. They are also gluten-free, making them a great option for those with gluten sensitivities. Always communicate with your guests for the best food experience!

How can I decorate my Mini Pumpkin Cheesecake Jack-O’-Lanterns differently?
The more the merrier! When decorating, you can use melted white chocolate for a spooky ghost effect, or sprinkle crushed nuts for an added crunch. I often mix in food coloring with melted chocolate for more creative faces. Let your imagination fly and personalize each dessert to make them even more special at celebrations!

Fabulous Mini Pumpkin Cheesecake Jack-O’-Lanterns to Savor

Delightful Mini Pumpkin Cheesecake Jack-O’-Lanterns are a healthier sweet treat combining creamy cheesecake with playful Halloween charm.

  • mini-cheesecake pan

For the Cheesecake Filling

  • 1 cup flax meal (acts as an egg substitute)
  • 3 tablespoons warm water (to hydrate the flax meal)
  • 2 cups roasted cashews (soaked overnight)
  • 1 cup pumpkin purée (the star ingredient)
  • 1/2 cup coconut sugar (healthier sweetener)
  • 1/2 cup unsweetened vanilla almond milk (adds creaminess)
  • 1/4 cup maple syrup (natural sweetness)
  • 1/4 cup coconut oil (melted)
  • 1 teaspoon pumpkin pie spice (warms the flavor)
  • 1 pinch salt (balances sweetness)

For the Crust

  • 1/4 cup coconut oil (room temperature)
  • 2 tablespoons maple syrup (additional sweetness)
  • 1/2 cup coconut flour (gluten-free option)
  • 2 tablespoons unsweetened cocoa powder (adds chocolatey depth)
  • 1 pinch salt (enhances flavors)

For Decoration

  • 1 cup dark chocolate (melted for decoration)
  • 1 tablespoon coconut oil (mixed with chocolate)
  • 12 sprigs mint (for finishing touch)

Step-by-Step Instructions

  1. Preheat your oven to 350°F (175°C). Grease your mini-cheesecake pan lightly.
  2. Whisk together flax meal and warm water, then refrigerate for about 10 minutes.
  3. Blend drained cashews, pumpkin purée, coconut sugar, almond milk, maple syrup, melted coconut oil, pumpkin pie spice, and a pinch of salt until smooth.
  4. In a large bowl, mix softened coconut oil and maple syrup, then stir in coconut flour, cocoa powder, and a pinch of salt until cohesive.
  5. Divide crust dough among the cavities of your mini-cheesecake pan and press flat.
  6. Bake crusts for about 5 minutes. They should be set but not browned.
  7. Mix gelled flax mixture into the creamy cashew mixture until combined.
  8. Flatten any risen parts of the crusts, ensuring an even surface.
  9. Fill each crust cavity with the pumpkin-cashew mixture, filling just over 3/4 full.
  10. Bake for 11-12 minutes or until edges are set and slightly risen.
  11. Cool completely on the counter before refrigerating for at least 6 hours.
  12. Melt dark chocolate with coconut oil in 30-second intervals until smooth.
  13. Drizzle melted chocolate over each cheesecake to create faces.
  14. Insert a mint sprig into each cheesecake to mimic pumpkin stems.

Soak cashews overnight for best texture. Monitor baking closely to ensure proper texture and flavor.

Dessert
American
cheesecake, Fall Recipes, Halloween Treats, healthy dessert, Mini Pumpkin Cheesecake Jack-O’-Lanterns, Pumpkin Dessert

Filed Under: Dessert

Witch’s Cauldron Cheesecake: A Spellbinding Treat to Share

October 6, 2025 by grace bellamy Leave a Comment

As I stirred my ingredients one chilly evening, the idea of a Witch’s Cauldron Cheesecake simmered to life in my kitchen. This delightful dessert not only captivates with its enchanting green swirls but also boasts unbeatable ease of preparation—a perfect treat for anyone looking to conjure up something unique! The beauty of this cheesecake lies in its versatility, offering you the chance to customize the crust and fillings to suit your taste. Imagine delighting friends and family with a dessert that’s not only visually stunning but also completely homemade and satisfying. Ready to brew some magic in your own kitchen? Let’s dive into this whimsical recipe together and create a show-stopping treat that’s sure to impress!

Witch’s Cauldron Cheesecake

Why is Witch’s Cauldron Cheesecake a Must-Try?

Enchanting Appearance: This cheesecake’s vibrant green swirls make it an eye-catching dessert for any occasion, captivating both kids and adults alike.

Customizable Delight: Tailor the crust and filling to your liking! Try different flavors or crusts for a personal touch—perhaps a chocolate crust or berry-infused filling.

Effortlessly Impressive: With simple ingredients and straightforward steps, you’ll impress your guests without spending all day in the kitchen.

Perfect for Sharing: Whether it’s a spooky celebration or a family dinner, this cake is enough to feed your crew, making it a fabulous crowd-pleaser.

Time-Saving Convenience: Most of the chilling time is hands-off, giving you a break while your dessert sets beautifully—a win-win!

Elevate your next get-together with this unique dessert, and don’t forget to check out how to make a graham cracker crust for a quick and easy base!

Witch’s Cauldron Cheesecake Ingredients

For the Crust
• Graham Cracker Crumbs – A sweet and crunchy base that holds your cheesecake together perfectly.
• Melted Butter – Helps bind the crumbs, giving the crust a rich flavor and texture.
• Granulated Sugar – Adds a little sweetness to the crust, balancing the overall flavor of the cheesecake.

For the Filling
• Cream Cheese – The star of the show, giving the cheesecake its creamy texture and rich taste.
• Sour Cream – Adds a gentle tanginess that brightens the flavor of the cheesecake.
• Eggs – Essential for setting the filling, ensuring a smooth and luscious texture.
• Vanilla Extract – Infuses the filling with warmth and depth, enhancing the overall flavor profile.
• Green Food Coloring – Gives the cheesecake its magical color, making it perfect for its enchanting theme!

For Garnishing
• Mint Leaves – Fresh and aromatic, these leaves add a delightful finishing touch to your cheesecake.

Gather your ingredients, and let’s create this Witch’s Cauldron Cheesecake that will surely be a conversation starter at your next gathering!

Step‑by‑Step Instructions for Witch’s Cauldron Cheesecake

Step 1: Preheat and Prepare the Crust
Preheat your oven to 350°F (175°C). In a mixing bowl, combine 1.5 cups of graham cracker crumbs, 0.5 cup of melted butter, and 0.25 cup of granulated sugar. Mix until well combined, ensuring the crumbs are evenly coated. Press this mixture firmly into the bottom of a 9-inch springform pan and slightly up the sides. Bake for about 10 minutes, or until the crust is lightly golden.

Step 2: Mix the Cheesecake Filling
In a large mixing bowl, use a hand mixer to beat together 24 ounces of softened cream cheese and 1 cup of sour cream until smooth and creamy, about 2-3 minutes. Gradually add 0.25 cup of granulated sugar, stirring until dissolved. Then, incorporate 3 whole eggs, one at a time, blending thoroughly after each addition. Finally, add 1 tablespoon of vanilla extract for enhanced flavor.

Step 3: Color and Layer the Filling
Divide the cheesecake filling in half; keep one half plain. To the other half, mix in 1 tablespoon of green food coloring until you achieve an even color. In the prepared springform pan, alternate spoonfuls of both the plain and green fillings. Use a knife or skewer to gently swirl them together, creating a marbled effect reminiscent of a witch’s cauldron.

Step 4: Bake the Cheesecake
Carefully transfer the pan to the preheated oven. Bake your Witch’s Cauldron Cheesecake for 55-60 minutes. Watch for the center to be set with just a slight jiggle. Once done, turn off the oven and crack the door open slightly, allowing the cheesecake to cool gradually inside for 30 minutes. This helps prevent cracking.

Step 5: Chill for Perfection
After the cheesecake has cooled, place it in the refrigerator. Chill for at least 4 hours, but preferably overnight. Cover it with plastic wrap to retain moisture and ensure a creamy texture. This long chilling time allows the flavors to meld and the cheesecake to set properly, making it perfectly sliceable.

Step 6: Garnish and Serve
When you’re ready to serve your Witch’s Cauldron Cheesecake, carefully remove it from the springform pan. Garnish with fresh mint leaves or chocolate shavings to add a delightful touch. Cut the cheesecake into slices and present it on a beautiful platter. Consider pairing each slice with a drizzle of chocolate sauce or a seasonal fruit compote for added flair.

Witch’s Cauldron Cheesecake

Make Ahead Options

These Witch’s Cauldron Cheesecakes are a fantastic choice for busy home cooks looking to save time! You can prepare the crust and filling up to 24 hours in advance. Simply mix your graham cracker crust and press it into the pan, then cover tightly with plastic wrap and refrigerate. For the filling, prepare it and store it in an airtight container in the fridge until you’re ready to bake. When it’s time to bake, assemble the two filling colors and swirl them as instructed. This way, you’ll have a stunning dessert ready to impress without the last-minute rush, allowing you to enjoy both the preparation and the moment of serving!

How to Store and Freeze Witch’s Cauldron Cheesecake

Fridge: Store any leftover Witch’s Cauldron Cheesecake in an airtight container in the fridge for up to 3 days to maintain its creamy texture and flavor.

Freezer: To freeze, wrap the cheesecake tightly with plastic wrap and then aluminum foil. It can be stored in the freezer for up to 2 months.

Thawing: When ready to enjoy, transfer the cheesecake from the freezer to the fridge and let it thaw overnight before serving for the best texture.

Reheating: No need to reheat; serve chilled or allow it to sit at room temperature for about 30 minutes before slicing and serving for a fresher taste.

Expert Tips for Witch’s Cauldron Cheesecake

• Room Temperature Ingredients: Ensure your cream cheese and eggs are at room temperature for a smoother filling without lumps.

• Avoid Cracks: Gradually cooling the cheesecake in the oven prevents cracks; don’t skip this crucial step!

• Chill Time Matters: Allowing the cheesecake to chill overnight enhances flavor and texture, making it more enjoyable.

• Color It Right: Mix the green food coloring thoroughly into the filling for even swirls that capture that witchy vibe!

• Garnish Wisely: Fresh mint leaves or chocolate shavings add a pop of flavor and visual appeal for your Witch’s Cauldron Cheesecake.

What to Serve with Witch’s Cauldron Cheesecake

Create a magical dining experience by pairing delightful side dishes and drinks with this enchanting cheesecake!

  • Creamy Mashed Potatoes: Their buttery richness balances the lightness of the cheesecake, making for a comforting meal that’s hard to resist.

  • Roasted Brussels Sprouts: With their nutty flavor and crispy edges, these veggies provide a perfect textural contrast to the creamy cheesecake.

  • Seasonal Fruit Salad: A refreshing mix of berries and citrus adds a burst of color and a tangy sweetness that complements the dessert beautifully.

  • Sparkling Apple Cider: This bubbly drink not only refreshes the palate but also enhances the festive vibe of the meal.

  • Chocolate Drizzle: A rich chocolate sauce drizzled over the slices deepens the flavor profile and takes the experience to the next level.

  • Minted Iced Tea: The cool mint in a chilled tea serves as a refreshing contrast to the rich cheesecake, providing a lovely herbal note with each sip.

Pair any of these delightful options with the Witch’s Cauldron Cheesecake, and you’ll create a meal that’s truly spellbinding!

Witch’s Cauldron Cheesecake Variations

Make this Witch’s Cauldron Cheesecake your own with these fun twists and swaps that promise to tantalize your taste buds!

  • Gluten-Free Crust: Substitute graham cracker crumbs with almond flour or gluten-free cookies for a delicious alternative.
  • Flavored Cheesecake: Swirl in raspberry or strawberry purée alongside the green filling for an extra fruity twist.
  • Chocolate Lovers: Add melted dark chocolate to half of the filling for a rich, chocolatey layer in your cheesecake.
  • Cheesecake Bites: Transform into mini cheesecakes by using a muffin tin and baking for a shorter time—perfect for snacking!
  • Vegan Variation: Swap the cream cheese with cashew cream and use egg replacer for a delightful vegan treat that everyone will enjoy.
  • Spicy Kick: Mix in a pinch of cayenne pepper or a few drops of hot sauce to the batter for a surprising flavor boost.
  • Nutty Crust: Enhance the crust with crushed nuts or coconut flakes for added texture and a delicious nutty flavor.
  • Festive Garnish: Top with seasonal decorations like edible flowers or themed sprinkles to make the cheesecake even more festive!

Feel free to create your own magical variations and don’t forget to pair your cheesecake with homemade whipped cream or a fresh fruit compote for a lovely touch! Let’s keep the creativity flowing!

Witch’s Cauldron Cheesecake

Witch’s Cauldron Cheesecake Recipe FAQs

How do I select ripe ingredients for the filling?
Absolutely! For the best flavor and texture, ensure your cream cheese is at room temperature and smooth without any lumps. When selecting eggs, go for large, fresh eggs for a richer taste. If using fresh mint for garnish, choose vibrant, aromatic leaves that aren’t wilted or brown.

How should I store leftover cheesecake to maintain its flavor?
Very! Store any leftover Witch’s Cauldron Cheesecake in an airtight container in the refrigerator. It should keep its delicious creaminess for up to 3 days. To prevent it from drying out, make sure it’s well-wrapped or stored in a covered container.

Can I freeze the Witch’s Cauldron Cheesecake? If so, how?
Absolutely! To freeze, wrap the cheesecake tightly with plastic wrap followed by aluminum foil to protect it from freezer burn. It can be stored in the freezer for up to 2 months. When you’re ready to enjoy it again, simply move it to the fridge and let it thaw overnight for the best texture, making it perfect for future celebrations!

What if my cheesecake cracks while baking?
Not to worry! A few common culprits can lead to cracks. Ensure you allow the cheesecake to cool gradually in the oven by cracking the door open for 30 minutes after baking. This gentle cooling helps prevent sudden temperature changes, which can cause cracks. Always check the center is just set with a slight jiggle before removing to avoid overbaking, and remember to mix your ingredients gently to maintain a smooth texture.

Can I adapt this recipe for dietary restrictions, like gluten-free or dairy-free?
Absolutely! For a gluten-free version, you can substitute the graham cracker crumbs with gluten-free cookie crumbs or almond flour. For a dairy-free cheesecake, consider using vegan cream cheese and substituting the sour cream with coconut cream. With these easy swaps, you can ensure everyone can enjoy this magical treat!

Witch’s Cauldron Cheesecake: A Spellbinding Treat to Share

Witch’s Cauldron Cheesecake is an enchanting dessert with magical green swirls, perfect for impressing guests at any gathering.

  • Mixing Bowl
  • hand mixer
  • 9-inch springform pan
  • Oven

For the Crust

  • 1.5 cups graham cracker crumbs
  • 0.5 cups melted butter
  • 0.25 cups granulated sugar

For the Filling

  • 24 ounces cream cheese (softened)
  • 1 cups sour cream
  • 3 whole eggs
  • 1 tablespoon vanilla extract
  • 1 tablespoon green food coloring

For Garnishing

  • 1 bunch mint leaves (fresh)

Crust Preparation

  1. Preheat your oven to 350°F (175°C). In a mixing bowl, combine graham cracker crumbs, melted butter, and granulated sugar. Mix until well combined. Press this mixture into the bottom of a 9-inch springform pan. Bake for about 10 minutes, until golden.

Filling Preparation

  1. In a large mixing bowl, beat together cream cheese and sour cream until smooth. Gradually add sugar, mix until dissolved, then add eggs one at a time, blending after each. Add vanilla extract.

Coloring and Layering

  1. Divide the filling in half; keep one part plain. Mix green food coloring into the other half. Alternate spoonfuls of both fillings in the pan and gently swirl them together.

Baking

  1. Bake the cheesecake for 55-60 minutes until the center is set with a slight jiggle. Turn off the oven, crack the door, and let it cool inside for 30 minutes.

Chilling

  1. After cooling, refrigerate for at least 4 hours or preferably overnight, covered to retain moisture.

Garnishing and Serving

  1. Remove from springform pan, garnish with fresh mint leaves or chocolate shavings, slice, and serve on a platter.

Ensure cream cheese and eggs are at room temperature for a smoother filling. Gradual cooling prevents cracks in the cheesecake.

Dessert
American
cheesecake recipe, Easy Desserts, Halloween dessert, holiday treats, party food, Witch’s Cauldron Cheesecake

Filed Under: Dessert

Pumpkin Juice: A Cozy Fall Drink You’ll Love

October 4, 2025 by grace bellamy Leave a Comment

As I stood in the kitchen surrounded by the warmth of autumn spices, a delightful idea flashed in my mind: why not embrace the season with a refreshing glass of Pumpkin Juice? This recipe beautifully blends the earthy sweetness of pumpkin puree with the zesty notes of apple and pineapple juice, creating a drink that’s not only vibrant but incredibly satisfying. In just 10 minutes, you can whip up this nutritious beverage that’s perfect for cozy gatherings or a midday pick-me-up. Plus, it’s a fun twist on your usual beverages, offering a healthier alternative to sugary drinks that still feels indulgent. Wouldn’t you love to sip something that captures the essence of fall? Let’s dive into making this delightful Pumpkin Juice together!

Pumpkin Juice

Why Choose Pumpkin Juice Today?

Unique Flavor Fusion: This Pumpkin Juice offers an exciting blend of flavors, merging sweet apple and tart pineapple with rich pumpkin.
Instant Boost: With only 10 minutes prep time, you can enjoy this refreshing drink in a flash—perfect for busy days!
Nutrient-Rich: Packed with vitamins and warm spices, this beverage is not just tasty but heartily nutritious; a cozy fall drink that revitalizes.
Versatile Delight: Serve it chilled for a refreshing treat or warm for a comforting drink; the choice is yours! Create a special moment by garnishing with a cinnamon stick or apple slice. If you’re looking for more fun autumn recipes, don’t miss out on savoring seasonal flavors in the kitchen!

Pumpkin Juice Ingredients

• A perfect blend of flavors awaits!

For the Juice

  • Pumpkin puree – provides a creamy texture and the essence of fall in every sip.
  • Apple juice – adds natural sweetness and a refreshing tartness to balance the flavors.
  • Pineapple juice – introduces a vibrant, tropical twist that brightens the drink.
  • Brown sugar – enhances sweetness; feel free to adjust it to your taste preference for the perfect Pumpkin Juice.

For the Spices

  • Ground cinnamon – lends a warm, comforting aroma that evokes cozy autumn days.
  • Ground ginger – adds a gentle spice kick and depth to the flavor profile.
  • Ground nutmeg – brings a nutty, earthy note that complements the pumpkin beautifully.
  • Ground allspice – a hint of sweetness with a warm, spiced finish to round out the blend.

Optional Creaminess

  • Oat milk or almond milk – adds a creamy texture; use either for a deliciously smooth Pumpkin Juice.

Step‑by‑Step Instructions for Pumpkin Juice

Step 1: Blend Base Ingredients
In a blender, combine 1 cup of pumpkin puree, 2 cups of apple juice, and 1 cup of pineapple juice. To this mixture, add 2 tablespoons of brown sugar, 1 teaspoon of ground cinnamon, ½ teaspoon of ground ginger, ¼ teaspoon of ground nutmeg, and ¼ teaspoon of ground allspice. Blend these ingredients on high for about 30 seconds, until you achieve a smooth and creamy consistency that’s well combined.

Step 2: Add Creaminess (Optional)
For an even creamier texture, consider incorporating a splash of oat milk or almond milk into the pumpkin juice mixture. Blend again for another 15 to 20 seconds, allowing the milks to integrate smoothly. This step is essential for those who enjoy a richer mouthfeel in their pumpkin juice; it should look velvety and inviting.

Step 3: Chill for Refreshment
If you prefer a chilled drink, toss in a few ice cubes during the final blending step. Blend for an additional 15 seconds or until the ice is crushed and well mixed in. This optional step transforms your pumpkin juice into a frothy and refreshing treat that will invigorate your senses, perfect for sunny autumn days.

Step 4: Serve with Style
Pour your delightful Pumpkin Juice into goblets or rustic mugs, showcasing the vibrant color. For an elegant touch, garnish with a cinnamon stick or a fresh apple slice on the rim of the glass. This presentation not only elevates the drink but also entices your guests with the warm flavors of fall, ready to be savored!

Pumpkin Juice

Expert Tips for Pumpkin Juice

  • Choosing Pumpkins: Opt for high-quality pumpkin puree, preferably 100% pure with no additives. This ensures a smooth and flavorful base for your Pumpkin Juice.
  • Sweetness Balancing: Taste your juice after blending and adjust the brown sugar to your liking. Remember, different apple and pineapple juices have varying sweetness levels!
  • Spice Adjustments: Don’t hesitate to tweak the spice amounts! If you love cinnamon, add a dash more for that extra warmth in your Pumpkin Juice.
  • Get Creamy: For an ultra-smooth texture, blend the oat or almond milk in only after the other ingredients are fully combined; this keeps the creaminess consistent.
  • Garnishing Ideas: Experiment with garnishes! Besides cinnamon sticks or apple slices, consider drizzling a little honey or maple syrup on top for a unique twist.
  • Storage Tips: If you have leftovers, store Pumpkin Juice in an airtight container in the fridge for up to 3 days. Shake well before serving again!

Storage Tips for Pumpkin Juice

Fridge: Store leftover Pumpkin Juice in an airtight container in the refrigerator for up to 3 days. Make sure to shake well before serving to re-mix the ingredients.

Freezer: For longer storage, freeze Pumpkin Juice in ice cube trays. Once frozen, transfer the cubes to a zip-top bag and use them within 3 months for smoothies or cozy drinks.

Reheating: If you prefer to enjoy your Pumpkin Juice warm, gently heat it in a saucepan over low heat, stirring occasionally. Avoid boiling to maintain flavor and texture.

Freshness: For the best flavor, consume your Pumpkin Juice soon after preparation, especially if you’ve used fresh juices for optimal taste!

Make Ahead Options

These delightful Pumpkin Juice blends are perfect for meal prep enthusiasts! You can prepare the juice mixture (excluding any optional creamy additions) up to 24 hours in advance. Simply combine the pumpkin puree, apple juice, pineapple juice, brown sugar, and spices in a blender, and store the mixture in an airtight container in the refrigerator. To maintain the vibrant flavor and texture, give it a quick blend again before serving. When you’re ready to enjoy, add any optional oat milk or almond milk, blend until smooth, and serve chilled or over ice for a refreshing treat. With these make ahead tips, you can savor a cozy fall drink with minimal effort on busy days!

Pumpkin Juice Variations & Substitutions

Don’t be afraid to get creative with this delicious Pumpkin Juice recipe—your twist can make it even more special!

  • Vegan Delight: Use maple syrup instead of brown sugar for a sweet touch without the sugarcane.

  • Coconut Cream: For a tropical vibe, stir in a spoonful of coconut cream for richness and flavor.

  • Spiced Up: Add a pinch of cayenne or chili powder for a surprising kick that balances the sweetness beautifully. Spice lovers will adore this bold twist!

  • Fruit Fusion: Swap the pineapple juice for orange juice to brighten the flavor; the citrus notes will create a refreshing contrast to the pumpkin.

  • Nutty Infusion: Blend in a tablespoon of almond or peanut butter for added creaminess and a delightful nutty flavor that complements the spices perfectly.

  • Herbal Boost: Infuse your drink with fresh mint leaves for a cooling herbal note—a great twist that’s perfect for summer!

  • Choco-licious: Add a tablespoon of cocoa powder for a unique chocolate-pumpkin flavor combo; it’s a comforting treat for chocolate lovers.

  • Wellness Elixir: Throw in a tablespoon of chia seeds for an extra health boost. They not only add great texture but enhance the nutritional profile of your drink.

Explore these variations and discover your favorite blend! Each change can turn your Pumpkin Juice into a completely new experience. And when you’re in the mood for more cozy flavors, don’t forget to check out seasonal recipes like Apple Cinnamon Muffins too!

What to Serve with Pumpkin Juice

There’s nothing quite like enjoying the cozy flavors of fall alongside a delightful drink that warms the heart.

  • Savory Pumpkin Soup: Creamy and comforting, this soup pairs beautifully with the sweetness of pumpkin juice, enhancing the autumn experience.
  • Spiced Apple Crisp: The warm, buttery notes of this dessert complement the fruity zest of the juice for a delightful contrast.
  • Gingerbread Cookies: The rich spices in gingerbread echo those in pumpkin juice, creating a harmonious holiday-inspired treat.
  • Roasted Brussels Sprouts: The earthy flavors of Brussels sprouts balance the sweetness of the juice, adding a touch of freshness to your meal.
  • Cheddar Cheese Platter: Sharp cheddar with its creamy texture enhances the flavors in pumpkin juice, making for an indulgent snack experience.
  • Warm Cinnamon Rolls: For a sweet breakfast or brunch, these rolls harmonize perfectly with pumpkin juice, creating a comforting duo to savor.
  • Herbal Tea: A steaming cup of herbal tea offers a herbal note that refreshes your palate and complements the spice blend in the juice.
  • Caramel Flan: The smooth, rich texture and sweet caramel flavor of flan pair wonderfully, perfectly contrasting the zesty juice.
  • Roasted Sweet Potatoes: The natural sweetness and caramelized edges of sweet potatoes mirror the flavors in pumpkin juice, creating a delightful balance.

Pumpkin Juice

Pumpkin Juice Recipe FAQs

What type of pumpkin puree should I use for Pumpkin Juice?
Absolutely! Opt for 100% pure pumpkin puree with no additives. This will provide a smooth texture and a rich, sweet flavor, enhancing the overall taste of your Pumpkin Juice.

How should I store leftovers of Pumpkin Juice?
Very simple! Pour any leftover Pumpkin Juice into an airtight container and store it in the refrigerator for up to 3 days. Be sure to shake or stir well before serving again to make sure everything is well mixed.

Can I freeze Pumpkin Juice? How?
Yes, you can freeze Pumpkin Juice! Pour the juice into ice cube trays and freeze until solid. Then, transfer the frozen cubes to a zip-top bag and store them in the freezer for up to 3 months. These cubes are perfect for adding to smoothies or reheating in a warm drink.

What if my Pumpkin Juice is too sweet?
If your Pumpkin Juice turns out too sweet, don’t worry! Simply add a splash of lemon juice or a bit of extra pumpkin puree to balance the flavors. Continue blending until well mixed. Remember, taste as you go!

Is this recipe suitable for allergies or special diets?
Absolutely! This Pumpkin Juice is naturally dairy-free and can be tailored to various diets. Just ensure your apple and pineapple juices are free from added sugars if you’re watching your intake. If you’re making it for kids or pets, always check for any possible allergies to the spices used.

Pumpkin Juice: A Cozy Fall Drink You’ll Love

Experience the rich flavors of fall with this refreshing Pumpkin Juice packed with earthy sweetness and zesty notes.

  • Blender

For the Juice

  • 1 cup Pumpkin puree (provides a creamy texture)
  • 2 cups Apple juice (adds natural sweetness)
  • 1 cup Pineapple juice (introduces a tropical twist)
  • 2 tablespoons Brown sugar (adjust to taste)

For the Spices

  • 1 teaspoon Ground cinnamon (lends a warm aroma)
  • 0.5 teaspoon Ground ginger (adds gentle spice)
  • 0.25 teaspoon Ground nutmeg (brings a nutty note)
  • 0.25 teaspoon Ground allspice (adds a hint of sweetness)

Optional Creaminess

  • 1 splash Oat milk or almond milk (adds a creamy texture)

Step-by-Step Instructions

  1. In a blender, combine pumpkin puree, apple juice, pineapple juice, brown sugar, ground cinnamon, ground ginger, ground nutmeg, and ground allspice. Blend on high for about 30 seconds until smooth.
  2. For extra creaminess, add a splash of oat milk or almond milk and blend again for 15-20 seconds.
  3. If desired, add ice cubes and blend for another 15 seconds for a chilled drink.
  4. Pour into glasses and garnish with a cinnamon stick or apple slice.

Store leftovers in an airtight container in the fridge for up to 3 days. Shake before serving.

Drink
American
cozy drink, fall drink, Healthy Alternative, Nutritious Beverage, Pumpkin Juice

Filed Under: Drink

  • « Previous Page
  • 1
  • …
  • 3
  • 4
  • 5
  • 6
  • 7
  • …
  • 22
  • Next Page »
RecipeCrown

Hello, beautiful people! I’m Grace Bellamy, a foodie, traveler, and writer with wanderlust in my soul. Whether crafting recipes in my kitchen or exploring flavors around the globe, my greatest joy is helping you create healthier, happier lives, one delicious bite at a time.