RecipeCrown

Easy & Delicious Recipes

  • Home
  • Breakfast
  • Main Dishes
  • Dessert
  • About
  • Contact
You are here: Home / Archives for grace bellamy

Indulge in Irresistible Snickers Cheesecake Delight

September 30, 2025 by grace bellamy Leave a Comment

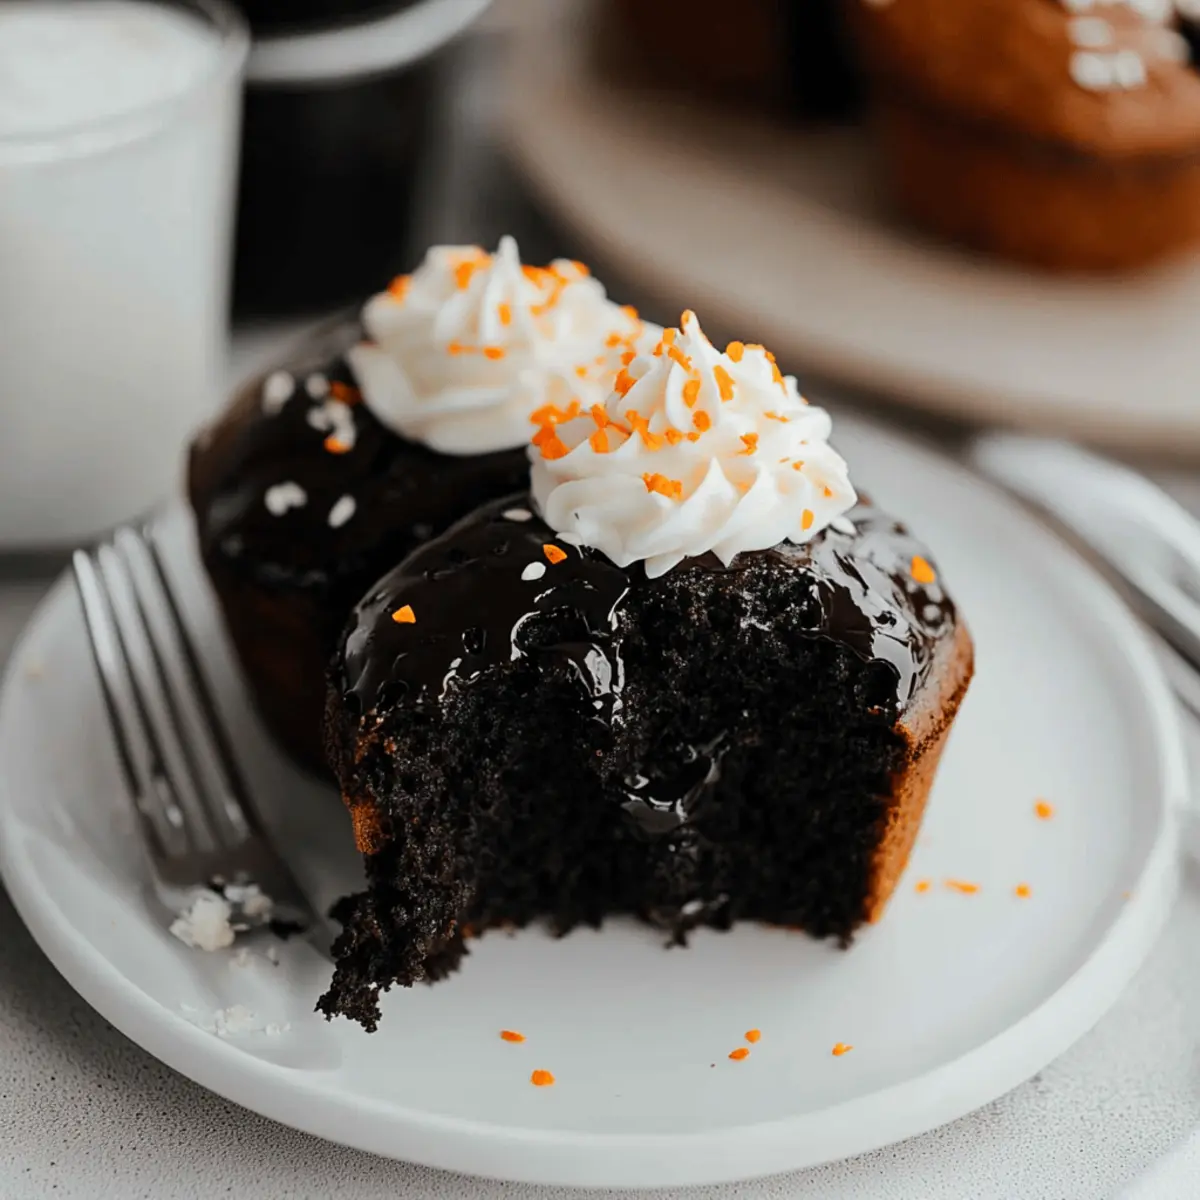
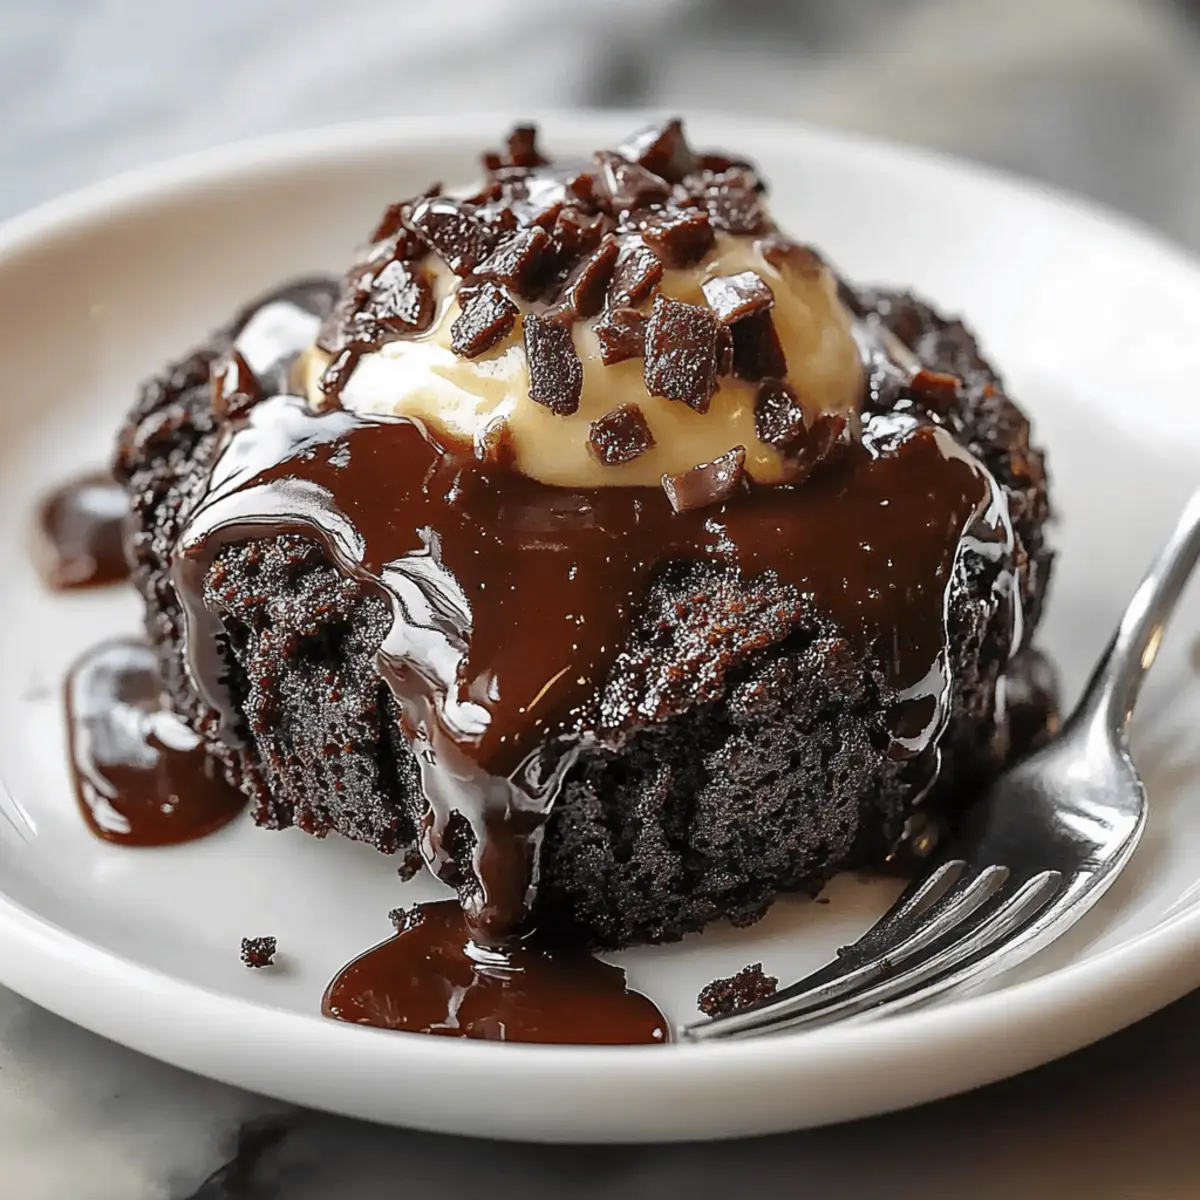
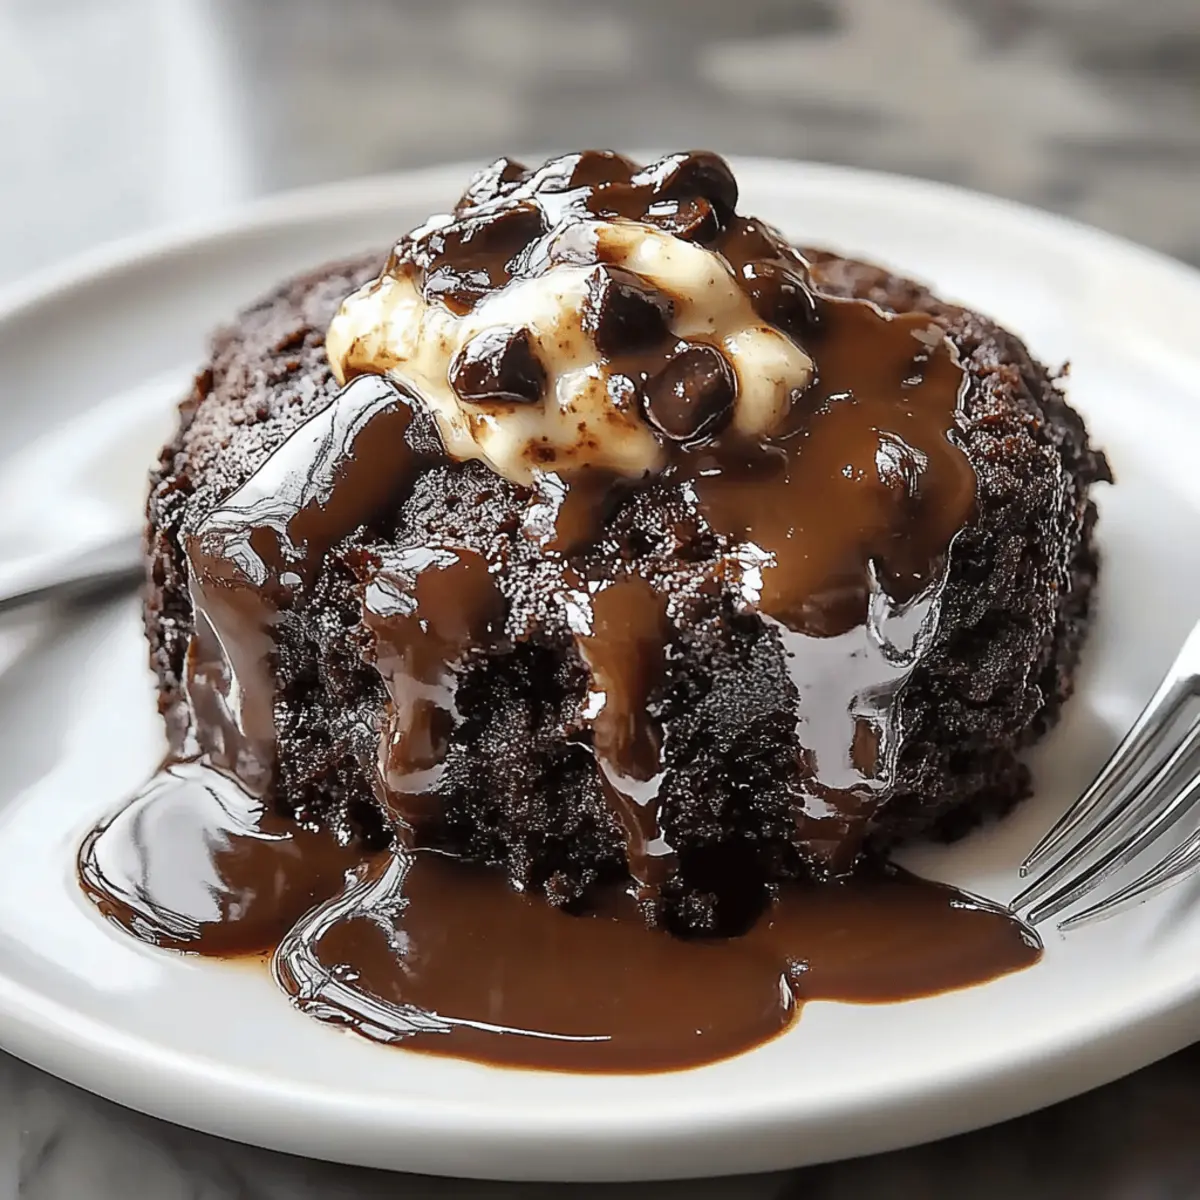
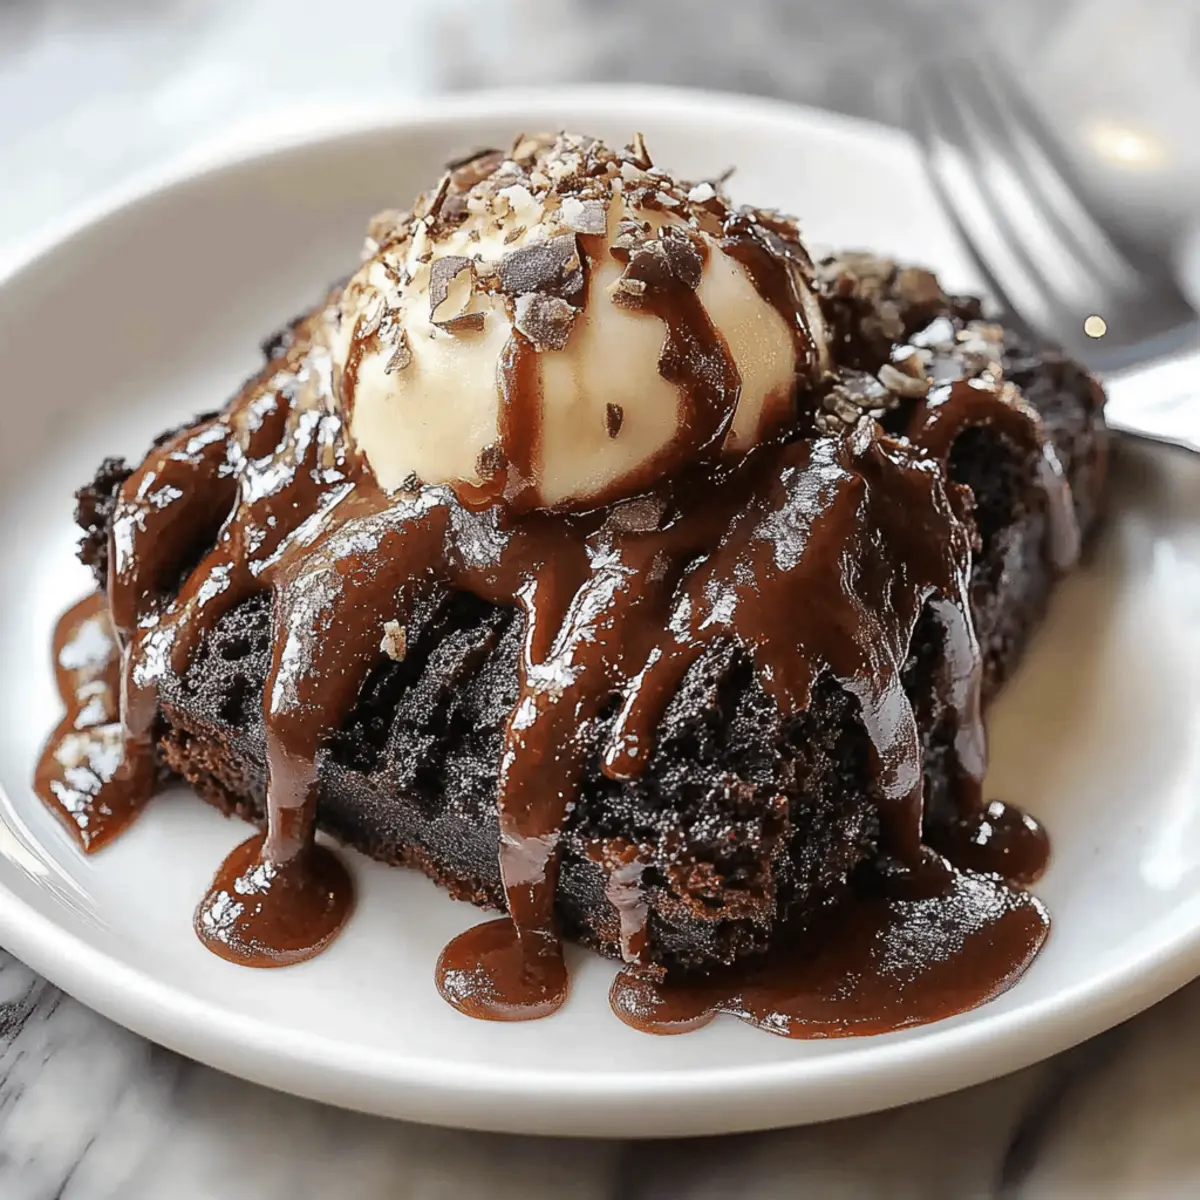
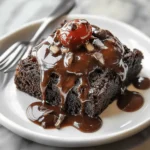
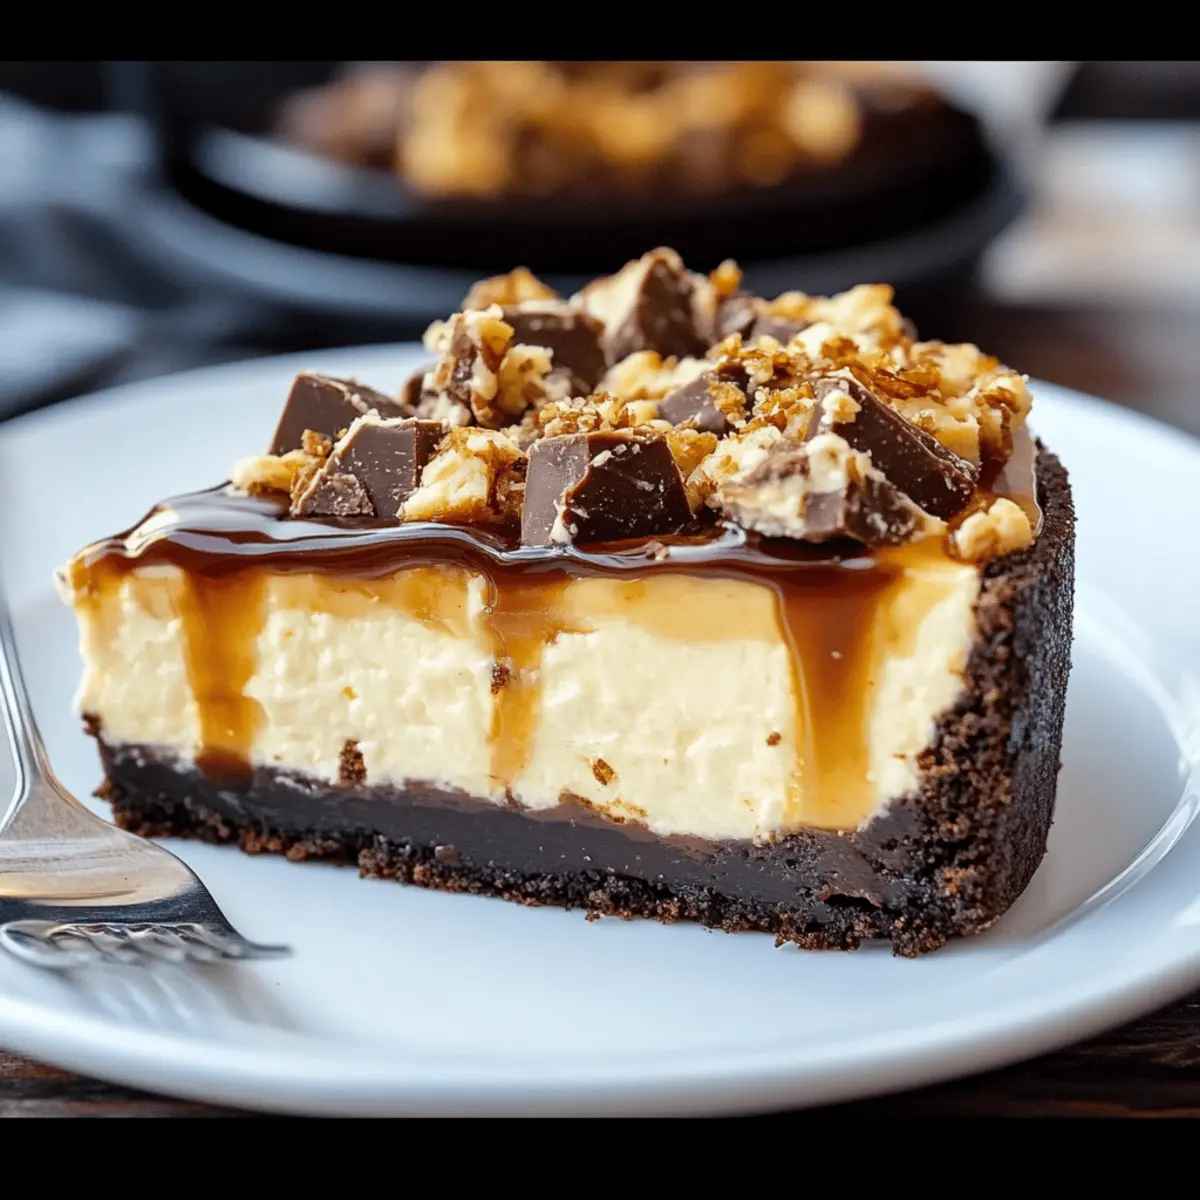
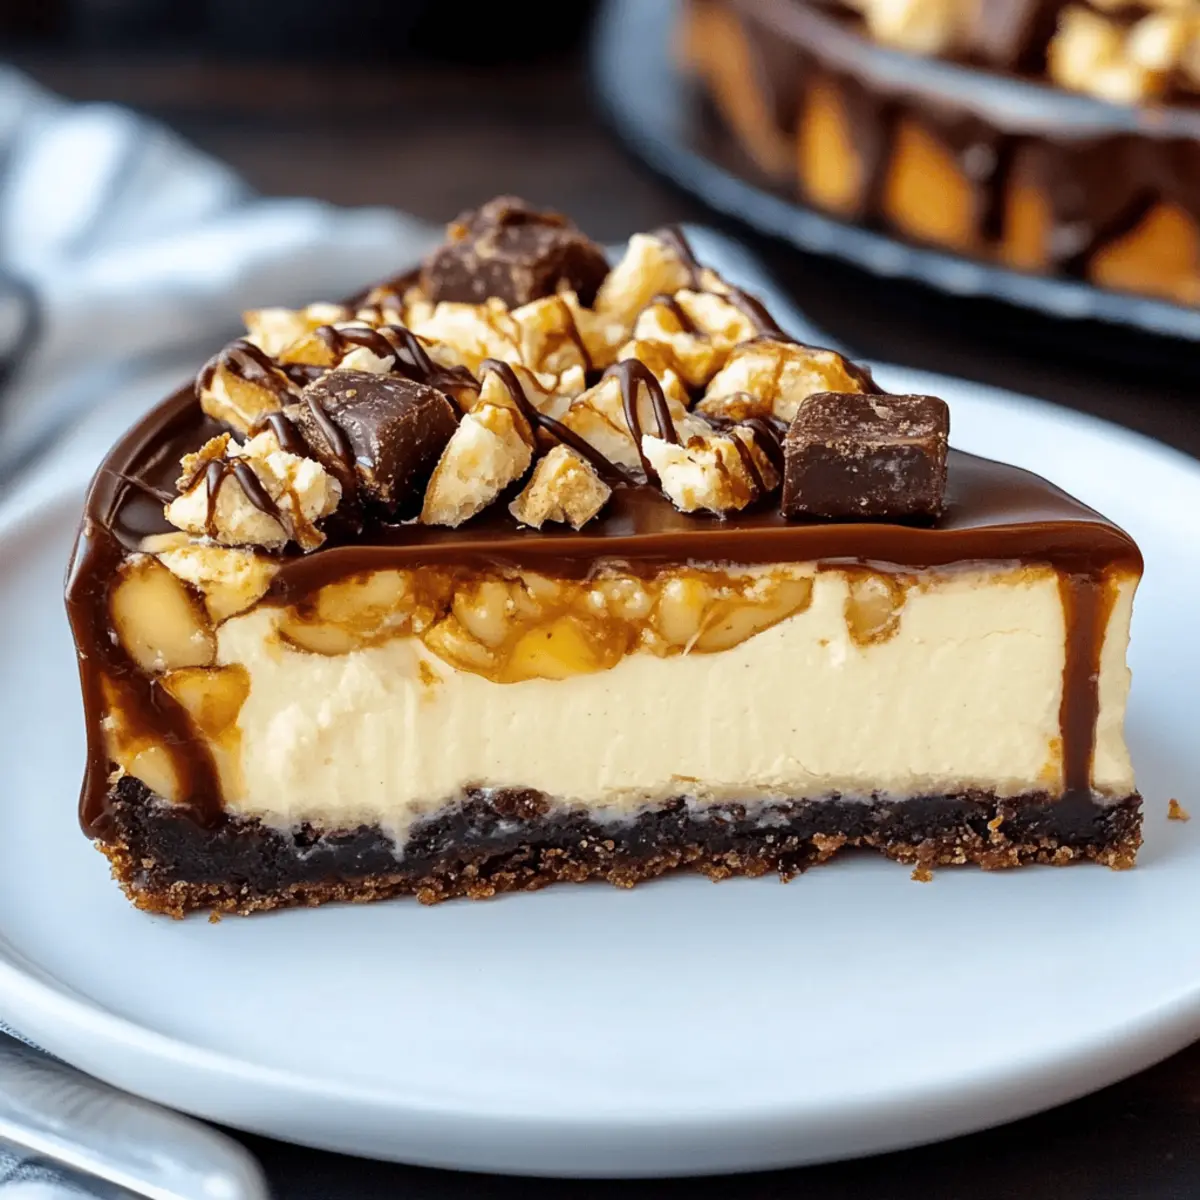
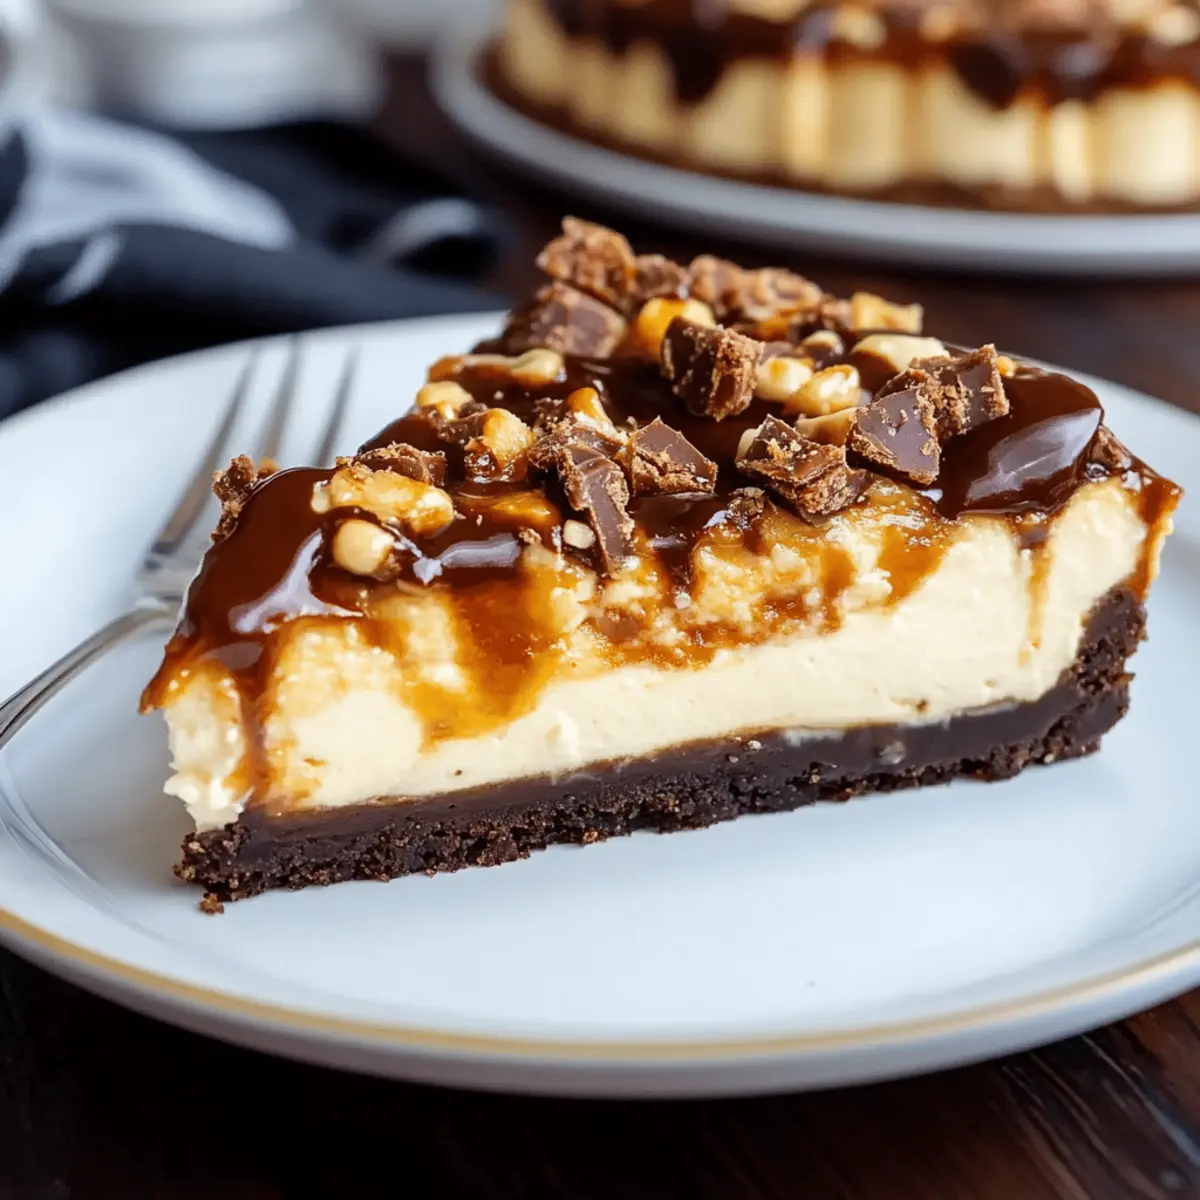
As I rummaged through my pantry in search of inspiration, I stumbled upon a beloved combination—chocolate, caramel, and peanuts—that instantly transported me back to childhood treats. Today, I’m sharing a twist on those nostalgic flavors that you’ll absolutely love: Snickers Cheesecake. This creamy delight is not only a showstopper for gatherings, but it also comes together quickly enough to satisfy your sweet tooth any night of the week. With a rich, homemade cheesecake base and a crunchy chocolate cookie crust, you’ll find it hard to resist the layers of caramel, salted peanuts, and a drizzle of chocolate. Plus, this dessert can easily be made ahead, making it perfect for entertaining or simply indulging at home. Are you ready to create a slice of heaven? Let’s dive into this irresistible recipe!

Snickers Cheesecake

Why is Snickers Cheesecake So Irresistible?

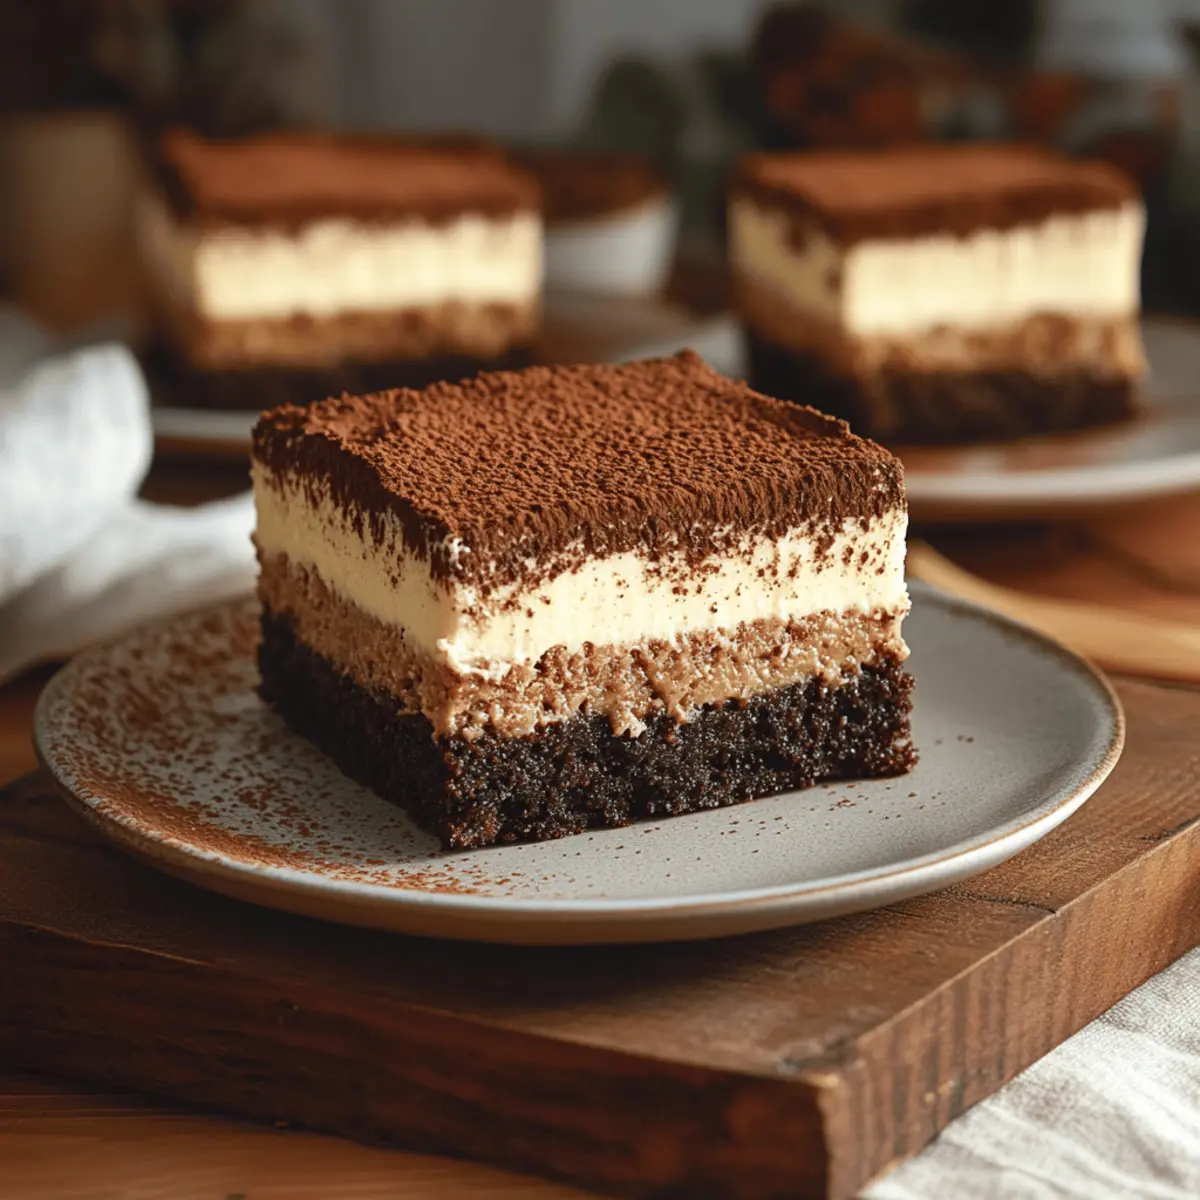
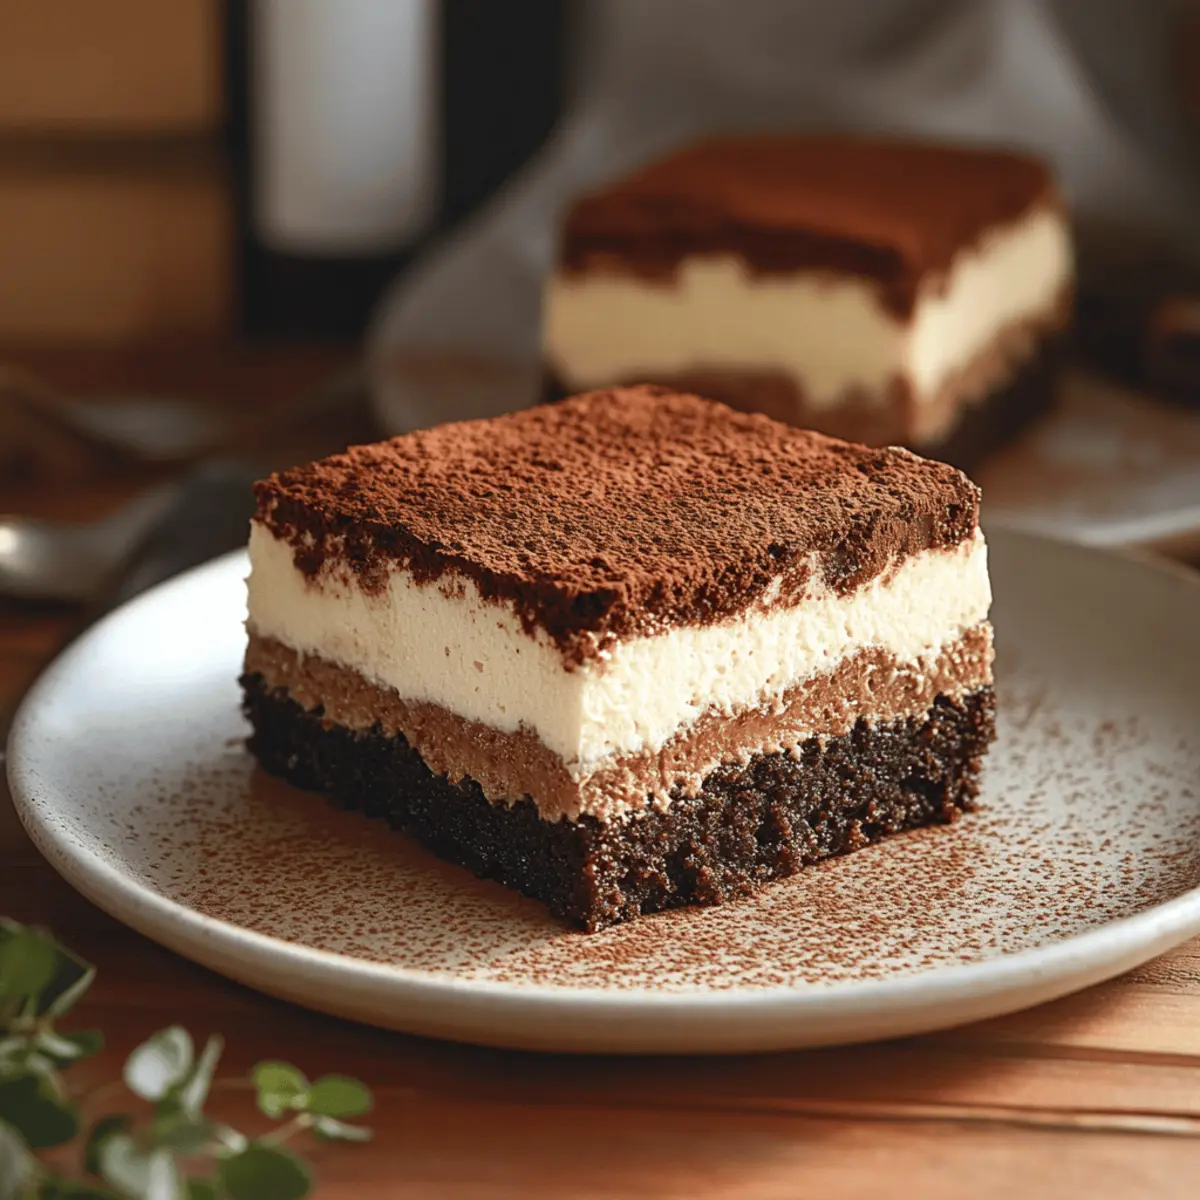
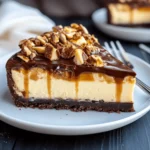
Decadent Layering: This Snickers Cheesecake features a luscious cream cheese filling layered with rich caramel and crunchy peanuts, elevating the classic cheesecake experience.
Easy to Make: With straightforward steps and easily accessible ingredients, you can whip this up without stressing, perfect for both novice and seasoned chefs!
Crowd-Pleasing: It’s a guaranteed hit at gatherings, impressing family and friends with its indulgent flavors that evoke nostalgia and satisfaction.
Make-Ahead Option: You can prepare it a day in advance, allowing the flavors to meld beautifully—ideal for stress-free entertaining!
Versatile Dessert: Pair it with a scoop of vanilla ice cream or serve alongside a fruit compote for a delightful twist. If you love creamy desserts, don’t miss my Rhubarb Cheesecake Fancy or Apricot Cheesecake Gluten.

Snickers Cheesecake Ingredients

For the Crust

  • Crushed dark chocolate cookies – adds a rich, chocolatey base that complements the creamy filling.
  • Granulated sugar – sweetens the crust, balancing the flavors of the filling.
  • Melted butter – acts as a binding agent, ensuring the crust holds together perfectly.
  • Salt – elevates the flavor, enhancing the sweetness of the chocolate.

For the Cheesecake Filling

  • Cream cheese – provides a creamy texture and tangy flavor that forms the cheesecake base.
  • Granulated sugar – sweetens the filling, creating a balanced sweetness against the saltiness of peanuts.
  • Sour cream – adds richness and a slight tang, making the cheesecake extra luscious.
  • Vanilla extract – infuses a warm sweetness that complements the flavors beautifully.
  • Large eggs – bind the filling together while providing structure during baking.

For the Topping

  • Caramel sauce – a must-have for that classic Snickers flavor; choose store-bought for convenience or homemade for extra love.
  • Chopped salted peanuts – adds crunch and enhances the nutty flavor profile of the cheesecake.
  • Chocolate chips – melted and drizzled on top for that extra decadent touch.
  • Flaked sea salt – finishes off the dessert with a delightful hint of saltiness, balancing the sweetness.

Step‑by‑Step Instructions for Snickers Cheesecake

Step 1: Preheat the Oven
Begin by preheating your oven to 325°F (163°C). This step is crucial for ensuring that your Snickers Cheesecake bakes evenly and achieves a perfect texture. While the oven warms up, gather your ingredients and equipment, including a springform pan and mixing bowls.

Step 2: Prepare the Crust
In a mixing bowl, combine 2 cups of crushed dark chocolate cookies, 1/4 cup of granulated sugar, 1/2 cup of melted butter, and 1/4 teaspoon of salt. Stir the mixture until all ingredients are well combined, resembling wet sand. This delicious crust forms the foundation for your Snickers Cheesecake, so make sure it binds well.

Step 3: Form the Crust
Press the chocolate cookie mixture firmly into the bottom of your springform pan to create an even layer. Flatten it down with the back of a measuring cup for a compact crust. Bake the crust in the preheated oven for about 10 minutes, then remove it and let it cool completely before adding the cheesecake filling.

Step 4: Make the Cheesecake Filling
In a fresh mixing bowl, beat together 4 (8 oz) packages of softened cream cheese and 1 cup of granulated sugar until the mixture is light and fluffy, about 2-3 minutes. This creamy filling is the heart of your Snickers Cheesecake, so ensure it’s smooth without lumps for the best texture.

Step 5: Add Sour Cream and Vanilla
Incorporate 1 cup of sour cream and 2 teaspoons of vanilla extract into the cream cheese mixture. Mix until smooth and perfectly blended. The sour cream adds a rich creaminess, contributing to that luscious cheesecake flavor, while the vanilla enhances the overall taste profile.

Step 6: Incorporate the Eggs
Carefully crack in 4 large eggs, one at a time, mixing gently after each addition. This method prevents overmixing, which is essential for maintaining a light and airy cheesecake. Avoid incorporating too much air to prevent cracks while baking; the mixture should be creamy and well-combined.

Step 7: Pour the Filling
Once your cheesecake filling is ready, pour it over the cooled chocolate cookie crust in the springform pan. Use a spatula to spread it evenly, ensuring the surface is smooth. This step is crucial for creating a lovely layer of creamy filling against the rich chocolate crust.

Step 8: Water Bath Preparation
Wrap the bottom and sides of the springform pan with aluminum foil to prevent water from leaking in. Place the wrapped pan inside a larger baking dish and fill it halfway with hot water. This water bath will help your Snickers Cheesecake bake gently and evenly, giving it a creamy texture.

Step 9: Bake the Cheesecake
Carefully place the entire setup in the oven and bake for approximately 1 hour. Afterward, turn off the oven and crack the door open slightly, allowing the cheesecake to sit in the oven for an additional hour. This gradual cooling process prevents sudden temperature changes and helps avoid cracks.

Step 10: Cool and Chill
After the baking time is complete, let the Snickers Cheesecake cool at room temperature for 30 minutes. Once cooled, transfer it to the refrigerator and chill for at least 6 hours, or preferably overnight. This chilling period allows all the flavors to meld beautifully, enhancing the taste.

Step 11: Add the Toppings
Once the cheesecake is fully chilled, pour 1 cup of caramel sauce over the top, ensuring even coverage. Sprinkle with 1 cup of chopped salted peanuts for that signature Snickers crunch. These toppings bring a delightful texture and flavor contrast to the creamy cheesecake.

Step 12: Drizzle with Chocolate
Melt 1 cup of chocolate chips in a microwave-safe bowl, then drizzle the melted chocolate over the caramel and peanuts. Let it sit for about 5 minutes to thicken slightly. This luxurious chocolate layer not only enhances the flavor but also adds a beautiful finish to your Snickers Cheesecake.

Step 13: Finish with Sea Salt
Finally, sprinkle a pinch of flaked sea salt over the top of the cheesecake to balance the sweetness and enhance its flavor. This elegant touch elevates the dessert, making it an irresistible treat that’s ready to impress your family and friends.

Snickers Cheesecake

How to Store and Freeze Snickers Cheesecake

Fridge: Store leftover Snickers Cheesecake covered in plastic wrap or in an airtight container in the refrigerator for up to 5 days to maintain its creamy texture.

Freezer: Wrap the Snickers Cheesecake tightly in plastic wrap and then aluminum foil. It can be frozen for up to 2 months. Thaw overnight in the fridge before serving.

Reheating: If enjoying warm, slice and place in the microwave for about 10-15 seconds. Avoid reheating the entire cheesecake to retain its texture.

Serving: Always serve cold or lightly warmed, keeping the delightful layers intact for a delicious experience.

What to Serve with Snickers Cheesecake?

There’s nothing quite like the indulgent richness of a dessert that’s both nostalgic and sophisticated, creating an unforgettable dining experience.

  • Rich Coffee: Perfectly brewed coffee enhances the caramel and chocolate flavors, providing a comforting contrast to the cheesecake’s sweetness.

  • Vanilla Ice Cream: A scoop of velvety vanilla ice cream adds creaminess, balancing the textures and making every bite even more delightful.

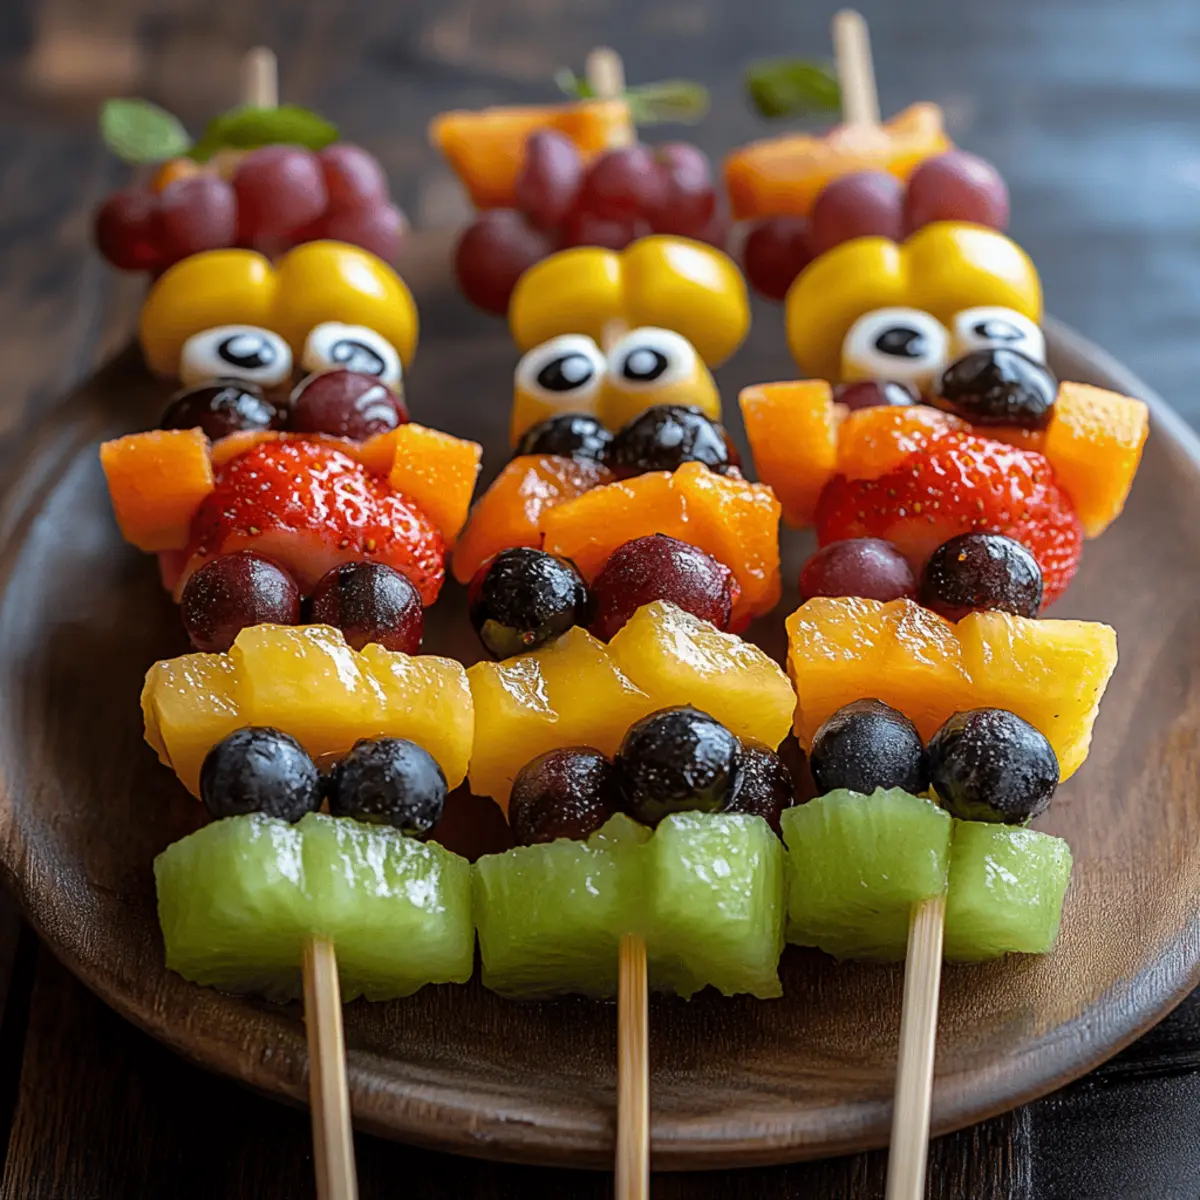
  • Fresh Berries: Their bright acidity cuts through the richness, offering a refreshing contrast that brightens each forkful of cheesecake. Try serving with a side of strawberries or raspberries for a beautiful presentation.

  • Chocolate Sauce Drizzle: Drizzling extra chocolate sauce elevates the decadent theme of your dessert and adds an indulgent touch that chocolate lovers will adore.

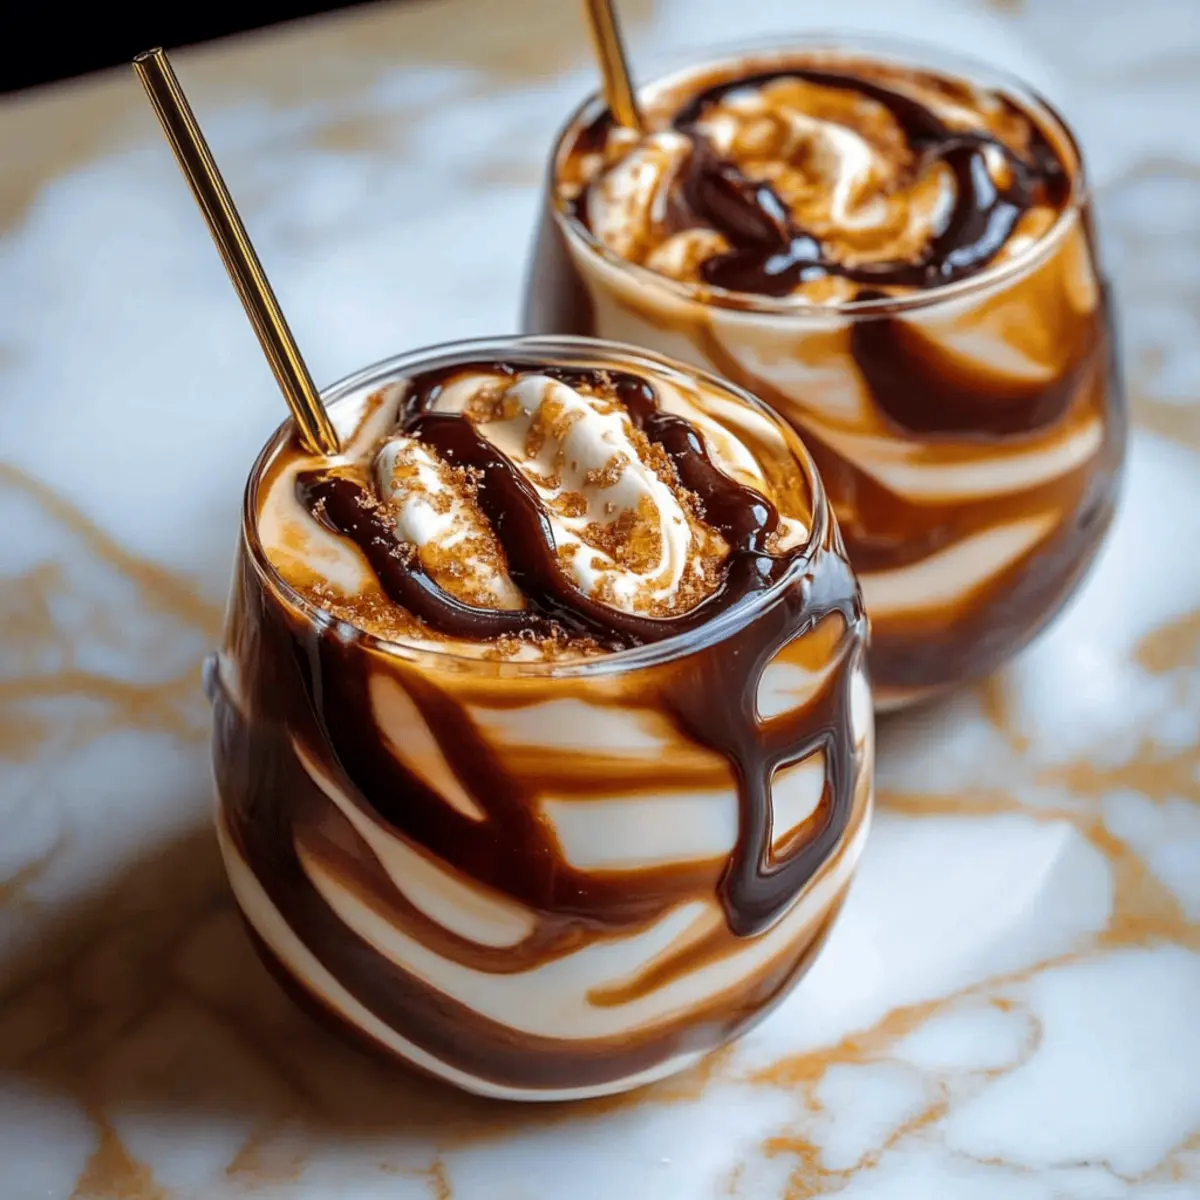
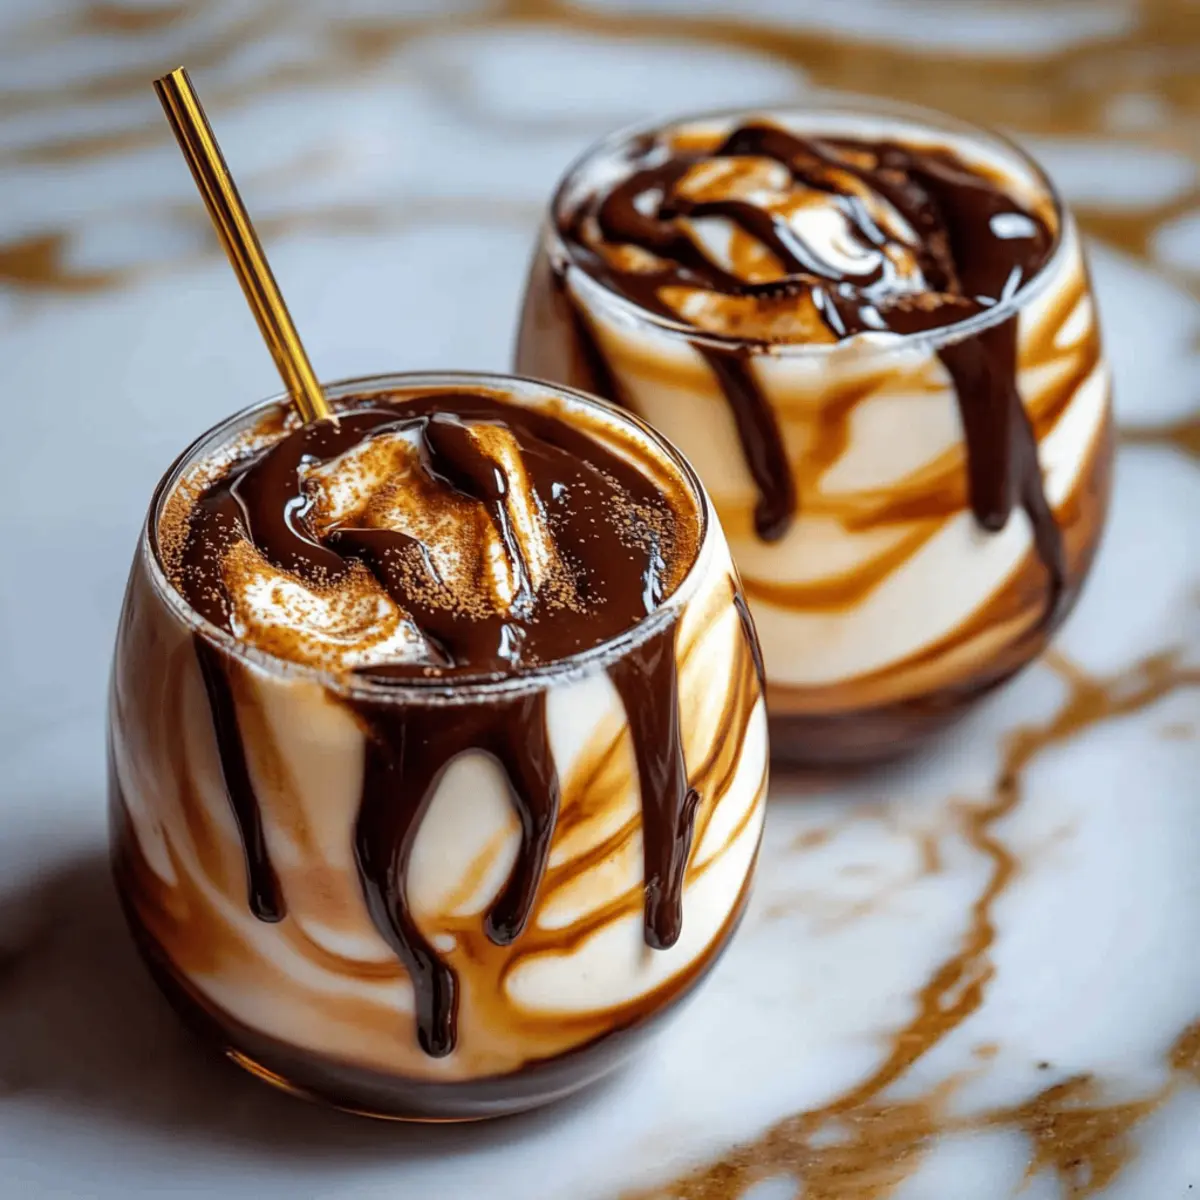
  • Peanut Butter Cup Milkshake: Pair your cheesecake with a creamy milkshake for a playful twist. The flavors complement each other exceptionally well, making every bite an indulgent treat.

  • Mint Tea: A soothing cup of mint tea rounds out the meal nicely, refreshing the palate and providing a calming finish to the rich dessert.

  • Salted Caramel Brownies: For ultimate indulgence, serve alongside fudgy brownies drizzled with salted caramel. The salty-sweet combination resonates beautifully with the Snickers Cheesecake.

  • Whipped Cream: A dollop of fluffy whipped cream adds an airy contrast, softening the rich flavors in your mouth and allowing the dessert’s complexity to shine through.

  • Sparkling Water with Lime: Keep it light with a swirl of refreshing sparkling water—a perfect palate cleanser between bites that enhances the overall experience of your meal.

Make Ahead Options

Preparing your Snickers Cheesecake ahead of time is a fantastic way to save precious moments on the day of serving! You can make the cheesecake filling and bake it up to 24 hours in advance, allowing the flavors to deepen beautifully. Just follow the recipe until the cooling step, and then chill the cheesecake in the refrigerator. To maintain its creamy texture, be sure to wrap it tightly with plastic wrap or place it in an airtight container. When you’re ready to serve, simply add the caramel sauce, chopped peanuts, and chocolate drizzle, letting it sit for 5 minutes before showcasing this decadent dessert. Enjoy the convenience of a stress-free treat that’s just as delicious on Day 2!

Expert Tips for Snickers Cheesecake

  • Use Room Temperature Ingredients: Ensure your cream cheese and eggs are at room temperature for a smooth batter, preventing lumps in your Snickers Cheesecake.

  • Prevent Cracking: Avoid overmixing the filling and use a water bath to ensure even baking. This helps your cheesecake stay rich and creamy without cracks.

  • Cool Gradually: After baking, let the cheesecake cool in the oven with the door cracked to prevent sudden temperature changes that can lead to cracks.

  • Chill Properly: Allow the cheesecake to chill overnight for the best flavor and texture. This lets the ingredients meld beautifully, enhancing your Snickers Cheesecake experience.

  • Experiment with Toppings: Feel free to customize your toppings! Try adding a drizzle of peanut butter or crushed Snickers bars for an extra indulgent twist.

Snickers Cheesecake Variations & Substitutions

Customize your Snickers Cheesecake to suit your taste buds; each twist invites delightful new flavors and textures!

  • Gluten-Free: Swap dark chocolate cookies for gluten-free cookies or almond flour to keep it delicious yet safe for gluten-sensitive friends.
  • Vegan: Use vegan cream cheese, a plant-based yogurt alternative, and flax eggs for a delightful dairy-free dessert. You’ll retain that luscious texture and flavor!
  • Nut-Free: Replace peanuts with sunflower seeds or omit nuts entirely, ensuring this dessert remains nut-allergy safe while still being pleasingly sweet.
  • Cheesecake Bites: Transform this recipe into cheesecake bites! Use a mini muffin tin and reduce baking time for bite-sized treats that are easy to share and even easier to devour.
  • Extra Caramel: Drizzle additional caramel sauce between each layer of filling for an even more indulgent version that will have you savoring each bite. Go ahead and double the sweetness!
  • Chocolate Ganache: Instead of melted chocolate chips, create a rich ganache for that dreamy, silky topping that adds a luxurious twist to the classic.
  • Fruit Infusion: Add a layer of fruit puree, like raspberry or strawberry, beneath the cheesecake layer for a fruity surprise and a pop of color. It’s a delicious touch that brightens the taste!
  • Caramelized Bananas: Sauté sliced bananas in a bit of butter and brown sugar for a fabulous topping that pairs beautifully with the other elements in the cheesecake.

As you explore these variations, remember to pair your delightful creation with your favorite desserts! If you love cheesecakes, check out my Carrot Cake Cheesecake for another deliciously inspiring twist. Enjoy making your Snickers Cheesecake truly your own!

Snickers Cheesecake

Snickers Cheesecake Recipe FAQs

How do I choose the right cookies for the crust?
Absolutely! For the crust, I recommend using high-quality dark chocolate cookies for a rich and decadent flavor. You can opt for Oreos or any similar chocolate cookie. Just make sure they are finely crushed to help form a solid base for the cheesecake.

How should I store leftover Snickers Cheesecake?
To keep your Snickers Cheesecake fresh, store any leftovers covered tightly in plastic wrap or in an airtight container in the refrigerator. It will stay delicious for up to 5 days. This helps maintain its creamy texture and the flavors will continue to meld beautifully!

Can I freeze Snickers Cheesecake?
Yes, you can! To freeze your Snickers Cheesecake, wrap it tightly in plastic wrap followed by aluminum foil to prevent freezer burn. It can be stored in the freezer for up to 2 months. When you’re ready to indulge, simply thaw it overnight in the fridge before serving. This will help retain its delightful texture.

What should I do if my cheesecake cracks?
Very! If your cheesecake cracks during baking, don’t worry! One common cause is overmixing the batter. Always mix just until blended after adding the eggs. Additionally, utilizing a water bath helps maintain moisture in the oven, which prevents cracking. If cracks do occur, you can disguise them with your toppings— drizzle with caramel or chocolate for a tasty fix.

Are there any dietary considerations I should be aware of?
Absolutely! If you have nut allergies, it’s best to skip the peanuts or try using sunflower seeds as a substitute for a similar crunch. Also, for a gluten-free option, use gluten-free chocolate cookies for the crust. Always double-check labels on your ingredients, especially the caramel sauce, to ensure they meet your dietary needs.

How do I know when my cheesecake is done baking?
The more the merrier! To check if your Snickers Cheesecake is done, it should be set around the edges but still slightly jiggly in the center. After turning off the oven, let it sit with the door cracked for an hour—this gradual cooling helps it finish cooking without overbaking and contributes to a smooth texture.

Indulge in Irresistible Snickers Cheesecake Delight

This Snickers Cheesecake combines chocolate, caramel, and peanuts for a deliciously creamy dessert that’s easy to prepare and perfect for gatherings.

  • Springform pan
  • Mixing bowls
  • Measuring Cups
  • spatula
  • Microwave-safe bowl

For the Crust

  • 2 cups crushed dark chocolate cookies (adds a rich, chocolatey base that complements the creamy filling.)
  • 1/4 cup granulated sugar (sweetens the crust, balancing the flavors of the filling.)
  • 1/2 cup melted butter (acts as a binding agent, ensuring the crust holds together perfectly.)
  • 1/4 teaspoon salt (elevates the flavor, enhancing the sweetness of the chocolate.)

For the Cheesecake Filling

  • 4 packages (8 oz) softened cream cheese (provides a creamy texture and tangy flavor.)
  • 1 cup granulated sugar (sweetens the filling, creating a balanced sweetness.)
  • 1 cup sour cream (adds richness and a slight tang.)
  • 2 teaspoons vanilla extract (infuses a warm sweetness.)
  • 4 large eggs (bind the filling together.)

For the Topping

  • 1 cup caramel sauce (a must-have for that classic Snickers flavor.)
  • 1 cup chopped salted peanuts (adds crunch and enhances the flavor profile.)
  • 1 cup chocolate chips (melted and drizzled on top.)
  • to taste flaked sea salt (balances the sweetness.)

Step‑by‑Step Instructions

  1. Preheat your oven to 325°F (163°C). Gather your ingredients and equipment.
  2. In a mixing bowl, combine crushed dark chocolate cookies, granulated sugar, melted butter, and salt. Stir until combined.
  3. Press the mixture into the bottom of the springform pan and bake for about 10 minutes.
  4. In a mixing bowl, beat together softened cream cheese and granulated sugar until light and fluffy.
  5. Incorporate sour cream and vanilla extract into the cream cheese mixture and mix until smooth.
  6. Add eggs one at a time, mixing gently after each addition.
  7. Pour the filling over the cooled crust. Spread evenly.
  8. Wrap the bottom and sides of the springform pan with aluminum foil and place in a larger baking dish with hot water.
  9. Bake for approximately 1 hour. Turn off the oven and crack the door open, leaving the cheesecake to sit for an additional hour.
  10. Let the cheesecake cool at room temperature for 30 minutes, then chill for at least 6 hours.
  11. Pour caramel sauce over the cheesecake, then sprinkle with chopped peanuts.
  12. Melt chocolate chips and drizzle over the toppings. Let it sit for about 5 minutes.
  13. Sprinkle flaked sea salt over the top before serving.

Ensure your cream cheese and eggs are at room temperature for a smooth batter. Avoid overmixing to prevent cracks.

Dessert
American
caramel, cheesecake, chocolate, dessert, Party, Snickers Cheesecake

Filed Under: Dessert

Indulge in a Spooky Black Halloween Milkshake Delight

September 30, 2025 by grace bellamy Leave a Comment

As the sun sets and Halloween decorations fill the streets, nothing feels quite as festive as sipping on a Spooky Black Halloween Milkshake. Trust me, this is not your average milkshake—it’s a fun twist that transforms a classic comfort food into a hauntingly delicious treat. With just five minutes of prep time, you can create a drink that’s as delightful as it is eerie, making it a perfect crowd-pleaser for parties or a cozy night in. Plus, it’s loaded with eye-catching toppings that will make everyone’s eyes widen in excitement! Are you ready to indulge in a wickedly fun experience that will have your taste buds dancing in delight? Let’s dive into the recipe!

Black Halloween Milkshake

Why is this Halloween Milkshake special?

Quick and Easy: Whipping up this treat takes just 5 minutes, making it ideal for busy Halloween festivities.

Spooktacular Appeal: The dramatic black color and playful toppings turn an ordinary milkshake into a showstopper, perfect for impressing your guests.

Delicious Flavor: The combination of rich vanilla ice cream and a hint of vanilla extract creates a creamy base that perfectly complements the Halloween spirit.

Customizable Toppings: You can personalize your shake with your favorite spooky candies, allowing everyone to get creative.

Family Fun: This recipe invites kids and adults alike to join the fun of decorating their milkshakes, making it a great way to celebrate together.

Elevate your Halloween gathering with this crowd-pleaser, or check out additional festive ideas to make the season even more special.

Black Halloween Milkshake Ingredients

For the Milkshake Base
• Vanilla ice cream – A creamy foundation that balances the spooky flavors.
• Milk – Adjusts the consistency for the perfect sip of your black Halloween milkshake.
• Black gel food coloring (or activated charcoal powder) – Adds that essential eerie black hue for Halloween fun.
• Vanilla extract – Enhances the overall flavor, making every sip a delightfully sweet treat.

For the Toppings
• Whipped cream – A fluffy cloud of sweetness on top that brings the spooky shake to life.
• Black and orange sprinkles – Perfect festive touch that adds crunch and color to your Halloween masterpiece.
• Crushed chocolate cookies – Creates a delightful texture and extra chocolatey flavor that kids love.
• Halloween-themed candy – Get creative with gummy worms and candy eyeballs for a whimsical finish.

For Serving
• Black straws or spoons – A fun accessory that ties the spooky theme together while enjoying your treat.

Step‑by‑Step Instructions for Black Halloween Milkshake

Step 1: Blend the Base
In a blender, combine 2 cups of vanilla ice cream, ½ cup of milk, 1 teaspoon of vanilla extract, and 1 teaspoon of black gel food coloring. Blend on high for about 30 seconds until the mixture is smooth and creamy. If the color isn’t quite dark enough, slowly add more food coloring until you achieve a rich, spooky black hue.

Step 2: Adjust the Consistency
After blending, taste your Black Halloween Milkshake and determine if you’d like to adjust the thickness. If you prefer a thicker shake, add another scoop of vanilla ice cream, blending for an additional 15-20 seconds. For a slightly thinner consistency, add a splash more milk and blend until it reaches your desired texture.

Step 3: Prepare the Glasses
Take two tall glasses and chill them in the freezer for at least 5 minutes prior to serving. This helps keep your Black Halloween Milkshake extra cold and refreshing. Once chilled, remove them from the freezer and get ready to pour in the eerie shake.

Step 4: Pour and Decorate
Carefully pour the rich black milkshake into your chilled glasses, filling them about three-quarters full. Generously top each shake with fluffy whipped cream, then sprinkle black and orange sprinkles on top for a festive touch. Don’t forget to add a layer of crushed chocolate cookies for delicious texture!

Step 5: Add Spooky Toppings
Now for the fun part: decorating! Get creative with your Halloween-themed candy and add gummy worms or candy eyeballs on top of the whipped cream. This adds a whimsical and spooky flair to your Black Halloween Milkshake, making it visually appealing for both kids and adults alike.

Step 6: Serve and Enjoy
To finish off, place black straws or spoons in each glass for serving. Present your delightfully spooky concoctions immediately, encouraging your guests to enjoy every sip of this festive treat. Your Black Halloween Milkshake is ready to bring a fun twist to your Halloween celebrations!

Black Halloween Milkshake

Make Ahead Options

These Spooky Black Halloween Milkshakes are perfect for busy home cooks looking to save time during Halloween festivities! You can prepare the milkshake base—combining the vanilla ice cream, milk, vanilla extract, and black gel food coloring—up to 24 hours in advance. Simply blend and store it in an airtight container in the refrigerator. To maintain quality, be sure to give it a quick stir before serving, and if it has thickened too much, just add a splash of milk to loosen it. When you’re ready to impress your guests, simply pour the prepared milkshake into chilled glasses, top with whipped cream and all your favorite spooky decorations, and enjoy this delightful treat!

Black Halloween Milkshake Variations

Feel free to make this spooky milkshake your own with these fun and creative twists!

  • Dairy-Free: Swap vanilla ice cream for coconut or almond milk ice cream for a lactose-free delight. The coconut adds a delightful creaminess with a touch of tropical flavor.

  • Add Some Heat: Mix in a pinch of cayenne pepper to give your shake a surprising kick. It may sound strange, but the heat perfectly contrasts the sweetness!

  • Chocolate Lovers: Use chocolate ice cream instead of vanilla for an extra chocolaty treat. This will create a rich, dark concoction that chocolate fans will adore.

  • Fruit Infusion: Blend in a handful of blackberries or blueberries for a fruity twist and an extra boost of antioxidants. This adds a hint of tartness that complements the creaminess beautifully.

  • Nutty Crunch: Top with crushed nuts like almonds or walnuts for an added crunch and a nutty flavor that pairs well with the chocolate cookies. They create a satisfying texture that everyone will love!

  • Vegan Version: Use dairy-free ice cream and a plant-based milk alternative for a delicious vegan shake that everyone can enjoy. It will still be just as creamy and satisfying!

  • Fruity Flavors: Add a splash of raspberry or cherry syrup to the mix for a fruity undertone. The brightness of the fruit flavor will create a nice balance to the overall sweetness.

  • Spooky Swirls: For a gorgeous presentation, drizzle chocolate syrup inside the glasses before pouring in the shake. This adds a deliciously decadent visual element that is sure to impress!

Experiment with these variations to create your own signature Black Halloween Milkshake! And for more festive ideas, check out our guide on delicious Halloween treats that can elevate your celebration!

How to Store and Freeze Black Halloween Milkshake

Fridge: Store any leftover milkshake in an airtight container in the fridge for up to 3 days. Before serving, give it a good stir to reincorporate any separated ingredients.

Freezer: If you want to freeze your Black Halloween Milkshake, pour it into a freezer-safe container and freeze for up to 1 month. When ready to enjoy, let it thaw in the fridge for a few hours before serving.

Reheating: Although it’s not typically reheated, if your milkshake separates after thawing, just blend it again briefly before serving to restore its creamy texture.

Serving Tips: For the best experience, re-add fresh toppings like whipped cream and sprinkles right before serving to keep it festive and delightful!

What to Serve with Spooky Black Halloween Milkshake

Indulging in a creamy, spooky drink is only the beginning of your Halloween festivities; pair it with delightful treats for a well-rounded celebration.

  • Chocolate Monster Cookies: These chewy treats offer a soft, chocolatey contrast to the creamy milkshake, making each bite and sip an adventure. With fun add-ins like colorful candies and a drizzle of frosting, they’re bound to be a hit among party-goers.

  • Caramel Apple Slices: Crisp apple slices glazed with caramel create a refreshing crunch that balances the richness of the milkshake. This light pairing adds that extra layer of autumnal flavor, making your gathering feel seasonal and festive.

  • Pumpkin Spice Popcorn: The crisp texture and warm spices of pumpkin enhance the haunting theme while providing a delightful contrast to the smooth milkshake. It’s an easy snack to munch on while sipping, offering that comforting fall vibe we adore.

  • Ghostly Brownie Bites: These fudgy brownies topped with cream cheese frosting ghosts deliver a textural delight and perfect sweet flavor. They’ll charm your guests and complement the spooky atmosphere of your Halloween gathering.

  • Candy Corn Jello Cups: These layered, colorful cups bring a festive, playful touch to your table, echoing the colors of Halloween while the gelatin adds a refreshing texture against the milkshake’s creaminess.

  • Spooky Cheese Platter: Pair creamy cheeses with black olives and crackers for a savory option that balances the sweetness of your black Halloween milkshake. Add some seasonal fruits and nuts to entice both flavor and visual appeal.

  • Wintry White Hot Chocolate: For a warm beverage option, serve this creamy drink with whipped cream and a dash of cinnamon beside your spooky treat. It’s a cozy contrast that will leave everyone feeling festive and satisfied.

  • Frightening Fruit Skewers: Skewer a mix of fruits like grapes, strawberries, and banana ghosts for a healthy addition. Their freshness contrasts wonderfully with the richness of the milkshake, ensuring there’s something for everyone.

  • Witch’s Brew Mocktail: A fizzy, colorful concoction with a hint of lime soda merges perfectly with the milkshake, providing a fun and refreshing drink option that adds a pop of excitement to your Halloween gathering.

Tips for the Best Black Halloween Milkshake

  • Chill Your Glasses: Start by chilling your glasses in the freezer for a few minutes. This keeps your milkshake nice and cold, enhancing the overall experience.

  • Adjust to Taste: Taste your milkshake before serving; if you want it thicker, add more ice cream, or for a thinner consistency, just a bit more milk will do the trick for your Black Halloween Milkshake.

  • Be Careful with Food Coloring: When adding black gel food coloring, start with a small amount. You can always add more, but it’s hard to lighten the color once it’s too dark!

  • Go Wild with Toppings: Embrace creativity with your toppings! Mix and match Halloween-themed candies to create custom and spooky looks that visually appeal to both kids and adults.

  • Serve Immediately: Serve your milkshakes as soon as they’re ready. This ensures that the whipped cream and toppings stay fresh and maintain their fun textures.

Black Halloween Milkshake

Spooky Black Halloween Milkshake Recipe FAQs

What type of vanilla ice cream should I use for the Black Halloween Milkshake?
Absolutely! Using a high-quality, creamy vanilla ice cream enhances the flavor and texture of your milkshake. Look for one with a higher fat content for a richer shake. You can also use dairy-free alternatives if needed, just ensure they have a similar consistency for the best results.

How long can I store my leftover Black Halloween Milkshake?
You can store any leftover milkshake in an airtight container in the fridge for up to 3 days. Just give it a good stir before serving to reincorporate the ingredients, as it may separate over time. But trust me, it’s best enjoyed fresh right after blending!

Can I freeze the Black Halloween Milkshake? If so, how?
Yes, you can freeze your Black Halloween Milkshake for up to 1 month! Pour it into a freezer-safe container, ensuring there’s minimal air inside to prevent freezer burn. When you’re ready to dive back in, let it thaw in the fridge for a few hours, and give it a quick blend if it separates before serving.

What should I do if my milkshake turns out too thin or too thick?
No worries at all! If your milkshake is too thin, simply add more vanilla ice cream and blend again until you reach your desired thickness. Conversely, if it’s too thick, you can add a splash of milk and blend once more. Perfect consistency is key to a delightful Black Halloween Milkshake!

Are there any dietary considerations for the toppings of my milkshake?
Definitely! If you’re serving this treat to kids or guests with dietary restrictions, consider the candies you choose. Opt for gluten-free or allergy-friendly sweets, and be mindful of added sugar if anyone is watching their intake. You can also skip the sprinkles or use natural alternatives for a healthier spin!

Can I use regular food coloring instead of black gel for the milkshake?
Very! While black gel food coloring gives a richer, deeper color, regular liquid food coloring can work too. Just remember that you may need to use more to achieve the desired hue, and it could affect the texture slightly. Start with a small amount and adjust as needed for that hauntingly perfect black color!

Indulge in a Spooky Black Halloween Milkshake Delight

Savor the festive spirit with this Black Halloween Milkshake, a deliciously eerie twist on a classic treat.

  • Blender
  • tall glasses

For the Milkshake Base

  • 2 cups vanilla ice cream (A creamy foundation that balances the spooky flavors.)
  • 0.5 cups milk (Adjusts the consistency for the perfect sip.)
  • 1 teaspoon black gel food coloring (Adds that essential eerie black hue for Halloween fun.)
  • 1 teaspoon vanilla extract (Enhances the overall flavor.)

For the Toppings

  • 1 cup whipped cream (A fluffy cloud of sweetness on top.)
  • 0.25 cups black and orange sprinkles (Adds crunch and color.)
  • 0.5 cups crushed chocolate cookies (Creates a delightful texture.)
  • Halloween-themed candy (Get creative with gummy worms and candy eyeballs.)

For Serving

  • 2 black straws or spoons (A fun accessory that ties the spooky theme together.)

Step-by-Step Instructions

  1. In a blender, combine 2 cups of vanilla ice cream, ½ cup of milk, 1 teaspoon of vanilla extract, and 1 teaspoon of black gel food coloring. Blend on high for about 30 seconds until smooth.
  2. Taste the milkshake and adjust the thickness as desired by adding more ice cream for a thicker shake or a splash of milk for a thinner consistency.
  3. Chill two tall glasses in the freezer for at least 5 minutes prior to serving to keep the milkshake extra cold.
  4. Pour the milkshake into the chilled glasses, filling them about three-quarters full, then top with whipped cream, black and orange sprinkles, and crushed chocolate cookies.
  5. Decorate with Halloween-themed candy like gummy worms and candy eyeballs on top of the whipped cream.
  6. Serve immediately with black straws or spoons, and enjoy your festive treat.

Chill glasses for best results. Adjust milkshake thickness to your liking. Be cautious with food coloring to avoid overly dark mixtures. Serve immediately for optimal freshness.

Dessert
American
Black Halloween Milkshake, creamy shake, festive drink, Halloween treat, milkshake, spooky dessert

Filed Under: Dessert

Spooky-Sweet Halloween Orange Party Punch Recipe You’ll Love

September 30, 2025 by grace bellamy Leave a Comment

As a chill breeze sweeps through the air, I find myself daydreaming about vibrant Halloween gatherings—those delightful moments when laughter echoes, and everyone gathers around a table filled with spooky treats. That’s when I realized that this year, my Halloween Orange Party Punch would be the star of the show. This refreshing drink not only comes together in just 5 minutes, but it also offers a fun, festive flair that will enchant both kids and adults alike. With its fizzy blend of Fanta and Sprite, crowned with fluffy orange sherbet, this punch is not just tasty; it’s an effortless crowd-pleaser, perfect for elevating any Halloween celebration. Curious how to whip up your own frightfully fun concoction? Let’s dive in!

Halloween Orange Party Punch

Why is This Punch a Party Essential?

Quick & Easy: In just 5 minutes, you can whip up this dazzling punch, leaving you more time to enjoy the festivities.
Kid-Friendly Fun: With the addition of tasty toppings like Trolli edible eyeballs and gummy worms, it’s sure to thrill young guests.
Refreshing Zest: The fizzy combination of Fanta and Sprite, paired with creamy orange sherbet, creates a delightful burst of flavor.
Versatile Serving: Perfect for both Halloween parties and family get-togethers—everyone will want a refill!
Visual Appeal: The striking orange color is not only eye-catching but also sets the perfect mood for a spooky celebration. Enhance your gathering with this punch, and if you’re looking for more delightful treats, check out our Spinach Artichoke Wonton or Hot Brown Dip recipes!

Halloween Orange Party Punch Ingredients

• Get ready for a spooky celebration with these delightful ingredients!

For the Base

  • Chilled 7up or Sprite – 2 liters add a fizzy sweetness to our punch.
  • Chilled Fanta Orange Soda – 2 liters infuse that vibrant orange flavor everyone loves.

For the Scoops

  • Orange Sherbet – 8-12 scoops create a creamy texture that takes this punch to another level.

For the Toppings

  • Trolli Edible Eyeballs – optional for a ghoulish touch that kids will adore.
  • Sour Gummy Worms – optional to add an extra layer of fun to each glass.

Prepare to wow your guests with this Halloween Orange Party Punch that’s as festive as it is refreshing!

Step‑by‑Step Instructions for Halloween Orange Party Punch

Step 1: Mix the Base
Start by pouring 2 liters of chilled 7up or Sprite into a large punch bowl. Next, add 2 liters of chilled Fanta Orange Soda. Use a large spoon or ladle to stir the mixture gently for about 30 seconds until you see a harmonious blend of colors and bubbles rising, signaling it’s ready for the next step.

Step 2: Add the Creamy Scoops
With your fizzy base prepared, it’s time to add the magic touch—orange sherbet! Carefully scoop 8-12 generous scoops of orange sherbet and nestle them into the punch. Watch as the sherbet gradually swirls and softens, creating a lovely creamy layer on top of the vibrant punch, adding both flavor and eye-catching charm.

Step 3: Serve the Punch
Once your Halloween Orange Party Punch is all mixed and beautifully layered, grab a ladle. Dip it into the punch bowl and pour the fizzy delight into small glasses or colorful plastic cups for fun. For a festive touch, make sure to fill them just shy of the rim, allowing for some of that frothy orange sherbet to peek out.

Step 4: Add Festive Toppings
To turn your Halloween Orange Party Punch into something truly spectacular, consider adding toppings! Sprinkle a few Trolli edible eyeballs and sour gummy worms into each glass for that creepy yet delightful touch. Your guests will love the surprise as they sip, making this punch a guaranteed hit at your Halloween gathering!

Halloween Orange Party Punch

How to Store and Freeze Halloween Orange Party Punch

Fridge: Store leftover punch in an airtight container in the fridge for up to 3 days. However, keep in mind that the fizzy element may lessen over time.

Freezer: For longer storage, freeze the punch in ice cube trays. You can use these cubes in future drinks or smoothies, but there’s no recommended storage timeframe for the pre-mixed punch itself.

Reheating: This punch is best served cold. If you’ve frozen sherbet scoops, let them thaw slightly before serving to regain that creamy texture.

Note: Always remix the punch with fresh ingredients if it’s been stored for several days to enhance flavor and presentation.

What to Serve with Halloween Orange Party Punch

As the laughter of friends and family fills the air, you’ll want to compliment your refreshing punch with delightful accompaniments.

  • Spooky Cheese Platter: A mix of sharp cheddar and creamy brie brings savory balance to the sweet punch, making for a delightful contrast.
  • Ghostly Fruit Skewers: Thread chunks of melon, strawberries, and banana onto skewers; they’re refreshing, colorful, and easy to nibble alongside our punch.
  • Crispy Veggie Cups: Serve crunchy carrots, celery, and bell peppers in individual cups with a tasty dip—perfect for munching as guests sip.
  • Mini Sandwiches: Tiny turkey and cheese or ham and pickle sandwiches will keep everyone satisfied, offering a hearty bite amidst the sweet punch.
  • Charming Cupcakes: Decorate vanilla or chocolate cupcakes with orange frosting and ghoulish toppers to add a festive flair to your spread.
  • Chilling Spider Ice Cubes: Add a spooky touch by freezing plastic spiders in ice cubes; drop them in glasses to surprise your guests!
  • Haunted Marshmallow Pops: Dip marshmallows in chocolate and sprinkles, then serve on sticks for a cute and easy sweet treat to dive into.
  • Warm Apple Pie Bites: Sweet, gooey apple pie baked in phyllo dough pairs wonderfully with the fruity flavors of your Halloween Orange Party Punch.
  • Cider Mimosa: For adults, a sparkling apple cider mimosa with a splash of champagne or prosecco complements the fruity notes perfectly.

Make Ahead Options

Prepare your Halloween Orange Party Punch in advance for a smoother celebration! You can mix the fizzy base of 2 liters each of chilled 7up or Sprite and Fanta Orange Soda up to 24 hours ahead. Simply combine these ingredients in a large punch bowl and refrigerate until you’re ready to serve. To maintain that delightful fizz, avoid adding the orange sherbet until just before serving (as it can become overly soft if left too long). When ready to impress your guests, ladle the sparkling mixture into glasses, then add 8-12 scoops of orange sherbet and any fun toppings like Trolli edible eyeballs and gummy worms. This approach not only saves you time but ensures that your punch is just as delicious on the big day!

Halloween Orange Party Punch Variations

Feel free to bring your creativity to life with these fun spins on your Halloween Orange Party Punch!

  • Dairy-Free: Substitute orange sherbet with a dairy-free sorbet to cater to lactose-intolerant guests while still keeping that creamy element.

  • Citrus Twist: Add a splash of pineapple or lime juice for an extra zing that will elevate the punch’s fruity essence.

  • Spooky Berry Blast: Toss in some frozen mixed berries or slices of fresh strawberries to add a pop of color and tartness.

  • Herbal Infusion: Add fresh mint leaves or a splash of rosemary syrup for a unique herbal twist that blends beautifully with the fruity flavors.

  • Chill with Ice: Freeze some of the punch in ice cube trays beforehand and use them as ice cubes to keep the drink chilled without diluting it.

  • Heat it Up: For an adult version, consider adding a splash of rum or vodka to give your punch a bit of an adult kick for the later festivities.

  • Fizzy Alternative: Swap out Sprite or 7up for a sparkling water or tonic for a less sugary option that still has that delightful fizz.

  • Gummy Surprise: Instead of traditional toppings, use Halloween-themed candies like gummy bats or cobwebs for a twisted, spooky surprise in every glass!

No matter how you choose to personalize your punch, it’s sure to impress your guests and keep those Halloween vibes going strong! To continue with the festive spirit, why not also prepare something savory like our Spinach Artichoke Wonton or a warming Hot Brown Dip?

Expert Tips for Halloween Orange Party Punch

• Chill Your Ingredients: Always start with chilled 7up, Sprite, and Fanta. This keeps your punch refreshing without worrying about dilution from melting ice.

• Scoop Diligently: Use an ice cream scoop for the orange sherbet to create perfectly round scoops that sit beautifully atop the punch.

• Layer Wisely: Add the sherbet gently to ensure it floats on the surface; this creates a striking visual appeal for your Halloween Orange Party Punch.

• Customize Toppings: Feel free to get creative with toppings! Candy corn, spider gummies, or even whipped cream can add a fun flair, just avoid overdoing it to maintain balance.

• Serve Fresh: For the best experience, serve the punch immediately after making it. If it sits too long, the sherbet may melt completely, altering the flavor and texture.

Halloween Orange Party Punch

Halloween Orange Party Punch Recipe FAQs

What kind of soda should I use for Halloween Orange Party Punch?
Absolutely! For the base of your Halloween Orange Party Punch, I recommend using chilled 7up or Sprite for that fizzy sweetness, paired with chilled Fanta Orange Soda to provide that vibrant, delicious orange flavor that will have everyone wanting a second glass!

How long can I store leftover Halloween Orange Party Punch?
Leftover punch can be stored in an airtight container in the fridge for up to 3 days. However, keep in mind that the fizz might diminish over time, so it’s best enjoyed fresh. If you want to save some for later, consider making individual servings instead of storing the entire bowl.

Can I freeze the Halloween Orange Party Punch?
Certainly! To freeze your punch, pour it into ice cube trays and freeze until solid. These cubes can be used in future drinks or smoothies, adding a delightful orange flavor. Just remember, the pre-mixed punch itself isn’t meant to be frozen, as it will lose its carbonation and creamy texture when thawed.

How can I make my punch stay fizzy longer?
To keep that effervescent sparkle in your Halloween Orange Party Punch, always start with chilled sodas. Serve your punch immediately after preparing it to preserve the bubbles. If you have leftover punch, consider using a soda siphon or adding a splash of fresh soda to revive the carbonation!

Are there any dietary considerations for this punch?
Very! When preparing Halloween Orange Party Punch, note that it contains dairy in the form of orange sherbet, which may not be suitable for those who are lactose intolerant or have dairy allergies. If needed, you can substitute the sherbet with a dairy-free alternative to accommodate dietary restrictions while still enjoying the spooky fun!

Spooky-Sweet Halloween Orange Party Punch Recipe You’ll Love

Enjoy this refreshing Halloween Orange Party Punch, perfect for gatherings with its fizzy blend and festive flair.

  • large punch bowl
  • ladle

For the Base

  • 2 liters Chilled 7up or Sprite (adds fizzy sweetness)
  • 2 liters Chilled Fanta Orange Soda (infuses vibrant orange flavor)

For the Scoops

  • 8-12 scoops Orange Sherbet (creates creamy texture)

For the Toppings

  • Trolli Edible Eyeballs (optional for a ghoulish touch)
  • Sour Gummy Worms (optional for extra fun)

Step-by-Step Instructions

  1. Pour 2 liters of chilled 7up or Sprite into a large punch bowl. Add 2 liters of chilled Fanta Orange Soda. Stir gently for about 30 seconds.
  2. Add 8-12 generous scoops of orange sherbet into the punch and watch as it swirls and softens.
  3. Use a ladle to serve the fizzy punch into small glasses or colorful cups, filling them just shy of the rim.
  4. Sprinkle Trolli edible eyeballs and sour gummy worms on top of each glass for a festive touch.

Chill your ingredients first to keep the punch refreshing. Customize toppings for a fun flair and serve immediately for best taste.

Drink
American
Festive, Fizzy, Halloween, party drink, Punch, refreshing

Filed Under: Drink

Spookingly Delicious Ghost Popcorn Balls for a Fun Treat

September 30, 2025 by grace bellamy Leave a Comment

As I stood in my kitchen, surrounded by the delightful scent of melting marshmallows, I couldn’t help but feel a wave of nostalgia wash over me. Ghost Popcorn Balls are not just a treat; they’re a playful nod to the joy of simple, homemade fun. With just a handful of ingredients—like fluffy popcorn, gooey marshmallows, and bright candy melts—this recipe is a breeze to whip up, making it perfect for a quick family project or a spooky gathering. Plus, they’re as magical to look at as they are to eat! The added bonus? You’ll impress your friends and family with a creative twist that’s both festive and delicious. Ready to bring a little magic to your kitchen? Let’s dive into making these charming Ghost Popcorn Balls that are sure to be a hit!

Ghost Popcorn Balls

Why are Ghost Popcorn Balls irresistible?

Simplicity: With just a few ingredients, crafting these Ghost Popcorn Balls is a breeze, perfect for both seasoned chefs and kitchen newbies alike.

Festive Fun: Their playful design makes them a fun project for family gatherings or Halloween parties.

Sweet, Chewy Goodness: The combination of gooey marshmallows and crispy popcorn creates a delightful texture that everyone loves.

Eye-Catching: Decorated with vibrant candy melts and spooky candy eyeballs, they’re sure to impress guests and spark conversation.

Quick Treat: Ready in under an hour, these delicious snacks are ideal for last-minute celebrations or movie nights.

For another exciting treat, try making Sweet Chili Meatballs, which are also great for gatherings!

Ghost Popcorn Balls Ingredients

Get ready to create some spooktacular treats!

For the Popcorn Base
• 16 cups popped popcorn – about one standard bag, ensure you remove unpopped kernels for the best results.
• 10 ounces mini marshmallows – the gooeyness that binds everything together, creating that perfect chewy texture.
• ¼ cup butter – for added richness and a smooth blending of the marshmallow mix.

For the Coating
• 1 bag Wilton bright white candy melts – used for dipping, this adds a delightful sweetness and a ghostly appearance.

For Decoration
• Candy eyeballs – these fun decorations bring your Ghost Popcorn Balls to life; regular sizes work wonderfully!

Creating these Ghost Popcorn Balls is not only simple but also a delightful way to spend time with family, all while crafting a treat that doubles as a festive decoration. Happy cooking!

Step‑by‑Step Instructions for Ghost Popcorn Balls

Step 1: Pop the Corn
Begin by popping enough popcorn to fill about 16 cups, which is roughly one standard bag. After popping, take a moment to carefully pick out any unpopped kernels to ensure a perfect texture. Transfer the fluffy popcorn into a large mixing bowl, ready to become the base of your Ghost Popcorn Balls.

Step 2: Melt the Marshmallows
In a large pot over medium heat, combine the mini marshmallows and butter. Stir occasionally as the mixture heats up, watching for it to become smooth and glossy—this should take about 5 minutes. Once melted, remove the pot from the heat and prepare to coat your popcorn with this gooey delight.

Step 3: Combine the Marshmallow and Popcorn
Pour the melted marshmallow and butter mixture over the popped popcorn in the large bowl. Use a spatula or wooden spoon to gently stir, making sure every piece of popcorn is evenly coated with the sticky goodness. The mixture should have a deliciously gooey and clumpy texture, perfect for shaping into Ghost Popcorn Balls.

Step 4: Form the Popcorn Balls
Lightly butter your hands to prevent sticking, then take handfuls of the coated popcorn mixture and shape them into balls, about the size of golf balls. Place the formed popcorn balls onto a lined baking sheet, allowing them some space to set. The mixture should hold together well, creating a fun, spooky shape.

Step 5: Cool the Balls
Let the popcorn balls cool for about 30 minutes to an hour at room temperature. This cooling time helps them firm up so they can maintain their shape. You’ll know they’re ready when they feel cool to the touch and are slightly firm but still chewy.

Step 6: Melt the Candy Coating
While the popcorn balls are cooling, melt the white candy melts according to the package instructions, usually in a microwave-safe bowl. Heat in short intervals, stirring until smooth and pourable. Prepare your workspace with the cooled popcorn balls and the melted candy ready for dipping.

Step 7: Dip the Popcorn Balls
Carefully dip the top of each popcorn ball into the melted candy, allowing any excess to drip off. This creates a delightful ghostly coating. Place the dipped balls back onto the lined baking sheet, ensuring they stay upright. The shiny candy exterior will add a festive touch to your Ghost Popcorn Balls.

Step 8: Add the Candy Eyeballs
Before the melted candy sets, add candy eyeballs to each Ghost Popcorn Ball to bring them to life! Press them gently into the candy coating, arranging them in a way that gives each ball a fun and spooky expression.

Step 9: Let Set and Serve
Allow the candy coating on your Ghost Popcorn Balls to set completely, which typically takes about 30 minutes. You can then enjoy your delightful creations immediately, or store them in an airtight container for later. These charming treats are sure to be a hit at any gathering!

Ghost Popcorn Balls

What to Serve with Ghost Popcorn Balls?

Gather your loved ones and prepare for a delightful treat that’s not only fun to make but also perfect for sharing!

  • Hot Chocolate: A warm cup of rich hot chocolate creates a cozy pairing that enhances the flavors of your sweet popcorn balls.
  • Apple Slices with Caramel Dip: The crispness of fresh apple slices balances the sweetness, adding a refreshing crunch to your dessert spread.
  • Pumpkin Spice Cupcakes: The warm spices in these cupcakes amplify the festive spirit, making your treat table irresistible and exciting.
  • Fruit Salad: A colorful mix of seasonal fruits provides a fresh contrast to the sweet, gooey popcorn, adding vibrant flavors and textures.
  • Spooky Themed Drinks: Serve mocktails or themed sodas for fun, festive beverages that bring a playful twist to your gathering and keep spirits high!
  • Chocolate-Covered Pretzels: The salty crunch from pretzels complements the sweetness of the popcorn balls, creating a delightful balance that’s hard to resist.
  • Candy Corn Mix: Create a candy corn trail mix to echo the Halloween theme and add a sweet variety to your dessert options.
  • Vanilla Ice Cream: Drizzling these popcorn balls over creamy vanilla ice cream introduces a delightful temperature contrast, making every bite a celebration of flavors!

Make Ahead Options

These Ghost Popcorn Balls are perfect for making ahead, saving you time on busy days or festive gatherings! You can prepare the popcorn mixture and shape the balls up to 24 hours in advance, storing them in an airtight container at room temperature to keep their delightful chewiness. Just remember to let them cool fully before storing to prevent sticking. When you’re ready to serve, melt the white candy melts and dip each popcorn ball, adding candy eyeballs before the candy sets. This way, your spooky treats will look fresh and inviting, ensuring they’re just as delicious as if you made them the same day!

Ghost Popcorn Balls Variations

Feel free to get creative and customize your Ghost Popcorn Balls with these fun twists!

  • Chocolate Drizzle: Drizzle melted dark or milk chocolate over the cooled popcorn balls for a rich flavor twist. It complements the sweetness beautifully and adds an extra layer of decadence.

  • Nutty Crunch: Mix in chopped nuts, such as almonds or pecans, with the popcorn before shaping. This adds a delightful crunch and a boost of protein.

  • Seasonal Spices: Sprinkle a pinch of cinnamon or nutmeg into the melted marshmallow mixture for a warm, cozy spice flavor. It’s perfect for autumn gatherings!

  • Candy Swap: Try using colorful M&M’s or gummy candies instead of candy eyeballs. This gives your popcorn balls a different pop of color and texture, appealing to younger guests.

  • Gluten-Free: Swap standard popcorn with gluten-free varieties, ensuring everyone can enjoy these festive treats without worry. This option keeps your delicious creation inclusive for all!

  • Spicy Kick: Add a dash of cayenne pepper or chili powder to your marshmallow mix for those who enjoy a bit of heat. This unexpected twist will surprise your taste buds!

  • Vegan-Friendly: Use coconut oil instead of butter and replace marshmallows with a vegan alternative to create a plant-based version of this delightful treat. Everyone will appreciate your thoughtful touch!

  • Fruit Flavor: Incorporate flavored candy melts, like strawberry or blue raspberry, for a fruity twist that stands out visually and tastes fantastic. This is especially fun for summer-themed parties!

These variations allow you to make Ghost Popcorn Balls as unique as the gatherings you celebrate. While you’re creating, don’t forget to look into making delightful Sweet Chili Meatballs for the main attraction of your festivities!

Expert Tips for Ghost Popcorn Balls

• Popcorn Selection: Use plain, air-popped popcorn to avoid added flavors that can clash with the sweet coating.

• Mixing Technique: Stir gently but thoroughly when combining the melted marshmallow with popcorn to prevent breakage; no one wants crushed popcorn balls!

• Hands-On Help: Lightly buttering your hands is key to shaping perfect balls. Dampen them slightly if you find the mixture too sticky.

• Candy Coating: Make sure the white candy melts are smooth and fully melted for an even dip and a beautifully shiny finish on your Ghost Popcorn Balls.

• Timely Eyeballs: Add the candy eyeballs right after dipping to ensure they stick well before the coating hardens.

• Storage Tips: Keep your Ghost Popcorn Balls in an airtight container at room temperature to maintain their freshness and chewiness.

Storage Tips for Ghost Popcorn Balls

  • Room Temperature: Store your Ghost Popcorn Balls in an airtight container at room temperature for up to 3 days for the best freshness and chewiness.

  • Fridge: If you prefer them cool, place them in the fridge but note that the candy coating may become slightly tacky; consume within 5 days for optimal taste.

  • Freezer: For longer storage, freeze the popcorn balls in a single layer on a baking sheet for an hour, then transfer to an airtight container. Enjoy them within a month.

  • Reheating: There’s no need to reheat these treats, but if they lose their shape, let them sit at room temperature for 15-20 minutes to soften slightly before enjoying.

Ghost Popcorn Balls

Ghost Popcorn Balls Recipe FAQs

How do I choose the best popcorn for Ghost Popcorn Balls?
Absolutely! I recommend using plain, air-popped popcorn. It’s crucial to avoid any flavored varieties to ensure the sweetness of the marshmallow coating shines through. After popping, please check for unpopped kernels to keep the texture delightful and crunchy!

How should I store Ghost Popcorn Balls?
For storing, keep your Ghost Popcorn Balls in an airtight container at room temperature to maintain that delightful chewiness. They’ll stay fresh for up to 3 days. If you choose to refrigerate them, the coating may become slightly tacky. Ideally, consume them within 5 days for the best experience!

Can I freeze Ghost Popcorn Balls?
Yes, you can freeze these fun treats! To do so, place the popcorn balls in a single layer on a baking sheet and freeze for an hour. Once they’re firm, transfer them to an airtight container or freezer bag. They’ll be good for up to a month. When you’re ready to enjoy, just let them thaw at room temperature.

What should I do if my popcorn balls are too sticky to shape?
No worries! If the mixture is too sticky, I suggest lightly buttering your hands or dampening them slightly with water to make shaping easier. This little tip works wonders in keeping the mixture from sticking to your hands and allows for perfectly rounded Ghost Popcorn Balls!

Can pets eat Ghost Popcorn Balls?
It’s best to keep these treats away from pets. The combination of butter and sugar isn’t suitable for them and may cause digestive issues. Always ensure to store these delicious snacks far from pets’ reach for their safety!

How can I add more color or creativity to my Ghost Popcorn Balls?
Very! You can mix in colorful sprinkles or edible glitter when the popcorn balls are formed but before the candy coating sets. This will add a fun touch and make them even more festive for Halloween or any celebration!

Spookingly Delicious Ghost Popcorn Balls for a Fun Treat

Enjoy these delightful Ghost Popcorn Balls, which are easy to make and perfect for festive gatherings.

  • Large Pot
  • Mixing Bowl
  • spatula
  • Baking Sheet

For the Popcorn Base

  • 16 cups popped popcorn (about one standard bag, ensure you remove unpopped kernels for the best results.)
  • 10 ounces mini marshmallows (the gooeyness that binds everything together, creating that perfect chewy texture.)
  • ¼ cup butter (for added richness and a smooth blending of the marshmallow mix.)

For the Coating

  • 1 bag Wilton bright white candy melts (used for dipping, this adds a delightful sweetness and a ghostly appearance.)

For Decoration

  • candy eyeballs (these fun decorations bring your Ghost Popcorn Balls to life; regular sizes work wonderfully!)

Step-by-Step Instructions for Ghost Popcorn Balls

  1. Begin by popping enough popcorn to fill about 16 cups, which is roughly one standard bag. After popping, take a moment to carefully pick out any unpopped kernels to ensure a perfect texture. Transfer the fluffy popcorn into a large mixing bowl, ready to become the base of your Ghost Popcorn Balls.
  2. In a large pot over medium heat, combine the mini marshmallows and butter. Stir occasionally as the mixture heats up, watching for it to become smooth and glossy—this should take about 5 minutes. Once melted, remove the pot from the heat and prepare to coat your popcorn with this gooey delight.
  3. Pour the melted marshmallow and butter mixture over the popped popcorn in the large bowl. Use a spatula or wooden spoon to gently stir, making sure every piece of popcorn is evenly coated with the sticky goodness. The mixture should have a deliciously gooey and clumpy texture, perfect for shaping into Ghost Popcorn Balls.
  4. Lightly butter your hands to prevent sticking, then take handfuls of the coated popcorn mixture and shape them into balls, about the size of golf balls. Place the formed popcorn balls onto a lined baking sheet, allowing them some space to set. The mixture should hold together well, creating a fun, spooky shape.
  5. Let the popcorn balls cool for about 30 minutes to an hour at room temperature. This cooling time helps them firm up so they can maintain their shape. You’ll know they’re ready when they feel cool to the touch and are slightly firm but still chewy.
  6. While the popcorn balls are cooling, melt the white candy melts according to the package instructions, usually in a microwave-safe bowl. Heat in short intervals, stirring until smooth and pourable. Prepare your workspace with the cooled popcorn balls and the melted candy ready for dipping.
  7. Carefully dip the top of each popcorn ball into the melted candy, allowing any excess to drip off. This creates a delightful ghostly coating. Place the dipped balls back onto the lined baking sheet, ensuring they stay upright. The shiny candy exterior will add a festive touch to your Ghost Popcorn Balls.
  8. Before the melted candy sets, add candy eyeballs to each Ghost Popcorn Ball to bring them to life! Press them gently into the candy coating, arranging them in a way that gives each ball a fun and spooky expression.
  9. Allow the candy coating on your Ghost Popcorn Balls to set completely, which typically takes about 30 minutes. You can then enjoy your delightful creations immediately, or store them in an airtight container for later. These charming treats are sure to be a hit at any gathering!

Creating these Ghost Popcorn Balls is a delightful way to spend time with family while crafting a treat that doubles as a festive decoration.

Dessert
American
easy recipes, family fun, festive snacks, Ghost Popcorn Balls, Halloween Treats, Popcorn Balls

Filed Under: Dessert

Refresh with Vampire’s Fig & Thyme Punch for a Spooky Sip!

September 30, 2025 by grace bellamy Leave a Comment

As the sun sets and shadows stretch across the kitchen, I find myself reaching for an unexpected hero—fig jam. This seemingly humble ingredient transforms an ordinary evening into something extraordinary with the delightful Vampire’s Fig & Thyme Punch. This recipe not only brightens up your gathering with its vibrant flavors, but it also comes together in just 15 minutes—perfect for those last-minute get-togethers. With a refreshing blend of gin, lemon, and a hint of thyme, this punch effortlessly elevates your drink game and becomes a crowd-pleaser in no time. Plus, the aromatic thyme syrup makes a fantastic addition to many other cocktails! Isn’t it time to impress your friends with something unique? Let’s dive into the magic of this punch together!

Vampire’s Fig & Thyme Punch

Why is this punch a must-try?

Unique flavors: The combination of fig jam and thyme syrup creates a stunning flavor profile that is both refreshing and unexpected in a beverage.

Quick and easy: With just 15 minutes of prep, this recipe is ideal for spontaneous hangouts or surprise guests—no complicated steps needed!

Versatile base: You can easily experiment by substituting other flavors—try adding thyme syrup to different cocktails or mocktails for a twist!

Impressive presentation: Garnished with sprigs of thyme and possibly a slice of fig, each glass looks gorgeous, making you the star at any gathering.

Crowd-pleaser: Whether you’re hosting a spooky Halloween party or a casual summer get-together, this punch is sure to impress!

Vampire’s Fig & Thyme Punch Ingredients

• Prepare to create a unique beverage that will enchant your guests!

For the Thyme Syrup

  • Fresh thyme – 4 sprigs for a fragrant herbal note that perfectly complements the fig.
  • Sugar – 1/2 cup; sweeten your syrup to balance the tartness of the lemon juice.
  • Water – 1/2 cup; this is essential for dissolving the sugar and extracting thyme flavor.

For the Punch

  • Fig jam – 2 tbsp; adds a luscious sweetness and depth to the Vampire’s Fig & Thyme Punch.
  • Gin – 2 oz; use your favorite brand for a smooth base that amplifies the flavors.
  • Lemon juice – 1 oz; freshly squeezed helps to brighten and cut through the sweetness.
  • Sparkling water – 3 oz; this fizzy touch lightens up the punch and adds liveliness.
  • Ice – A handful to chill your drink; use clear ice for a beautiful appearance.

With these ingredients on hand, you’ll be well on your way to crafting a delightful punch that’s not only refreshing but also wonderfully unique!

Step‑by‑Step Instructions for Vampire’s Fig & Thyme Punch

Step 1: Make the Thyme Syrup
In a small saucepan, combine 1/2 cup sugar, 1/2 cup water, and 4 sprigs of fresh thyme. Stir gently and bring the mixture to a simmer over medium heat. Let it simmer for about 5 minutes, until the sugar is fully dissolved and you can smell the thyme aroma wafting through your kitchen. Once done, remove from heat and set aside to cool before straining.

Step 2: Juice the Lemon
While the thyme syrup cools, prepare 1 oz of fresh lemon juice. Cut a lemon in half and use a juicer or simply your hands to extract juice. Strain the juice through a fine mesh sieve to remove any seeds, ensuring a smooth addition to your Vampire’s Fig & Thyme Punch. Keep the freshly squeezed juice on hand for the next step.

Step 3: Combine the Ingredients
In a cocktail shaker or a medium jar, combine 2 tbsp of fig jam, 2 oz of gin, 1 oz of lemon juice, and 1 oz of the thyme syrup you just made. Use a spoon or muddler to stir vigorously until the fig jam is well blended and the mixture is smooth. This will create a delightful base for your punch, with the fig and herbal notes mixing beautifully.

Step 4: Prepare the Glasses
Take two glasses and fill them with clear ice cubes—this will keep your Vampire’s Fig & Thyme Punch chilled without diluting it too quickly. Make sure the ice is visible through the glass for an appealing presentation. Once your glasses are prepared, it’s time to pour in the delicious punch mixture.

Step 5: Strain into Glasses
Using a fine mesh strainer, pour the fig and gin mixture over the prepared ice in each glass. The strainer will catch any bits of fig jam or thyme, leaving you with a perfectly clear and vibrant punch. Watch the colorful liquid flow around the ice, creating a visual treat for everyone.

Step 6: Add Sparkling Water
Top each glass with 3 oz of sparkling water, pouring slowly to maintain the fizz and prevent overflow. Use a spoon to stir gently, combining the flavors without losing the effervescence. The bubbly touch from the sparkling water will awaken the delightful flavors of your Vampire’s Fig & Thyme Punch.

Step 7: Garnish and Serve
Finally, add a sprig of fresh thyme to each glass for an aromatic garnish. If you have figs on hand, a thin slice can beautifully enhance the presentation. Serve your Vampire’s Fig & Thyme Punch immediately, while it’s still bubbly and chilled. Cheers to a deliciously unique drink!

Vampire’s Fig & Thyme Punch

What to Serve with Vampire’s Fig & Thyme Punch

Get ready to create a well-rounded meal that beautifully complements the unique flavors of this refreshing punch!

  • Savory Charcuterie Board: A delightful mix of cured meats, cheeses, and fresh fruit pairs wonderfully, providing a balance of flavors and textures that enhance the sipping experience.

  • Herbed Flatbread: Crispy and fragrant flatbread topped with olive oil and fresh herbs will draw out the herbal notes of the thyme, making each bite and sip a delightful union.

  • Spiced Nuts: Roasted nuts tossed in warm spices add a crunchy textural contrast and richness to the punch, making them the perfect snack to linger over while enjoying your drink.

  • Mediterranean Quinoa Salad: This light salad, brimming with cherry tomatoes, cucumbers, and a tangy dressing, provides freshness that enhances the sweet and herbal notes of the punch.

  • Creamy Goat Cheese Dip: A luscious dip served with fresh veggie sticks brings a creamy element that balances the drink’s brightness, creating a satisfying party spread.

  • Lemon Sorbet: Offering a refreshing, icy treat after sipping the punch lightens the palette and prepares you for an indulgent dessert experience.

  • Sparkling Water: Served alongside your punch, this enhances the experience of carbonation and refreshment, ensuring hydration while you enjoy your vibrant sips.

  • Dark Chocolate Truffles: The richness of truffles offers a lovely contrast to the punch, creating a luxurious end to your gathering.

Mix and match these pairings to create a memorable occasion that friends and family will rave about long after the last sip!

Tips for the Best Vampire’s Fig & Thyme Punch

Start with Fresh Herbs: Using fresh thyme instead of dried enhances the flavor significantly; dried herbs can often be too strong or bitter.

Thyme Syrup Cooling: Allow your thyme syrup to cool completely before using it; warm syrup can alter the texture of your punch.

Stir, Don’t Shake: When mixing the fig jam and gin, stir gently to avoid breaking up the jam too much, which can make your Vampire’s Fig & Thyme Punch grainy.

Choose Quality Gin: A good-quality gin can elevate the overall taste of the punch; opt for brands that you enjoy sipping on their own.

Serve Immediately: For the best experience, serve the punch right after preparing it; the sparkling water’s fizz is key to its refreshing nature.

Vampire’s Fig & Thyme Punch Variations

Feel free to let your creativity flow and customize this punch to suit your palate!

  • Herb-Infused: Swap thyme for basil for a refreshing twist that lends a whole new aromatic profile.

  • Fruity Burst: Add fresh berries like raspberries or blackberries for a pop of flavor and vibrant color. They will enhance the sweetness and tartness beautifully!

  • Ginger Zest: Incorporate a dash of ginger beer instead of sparkling water for a spicy kick that complements the punch wonderfully.

  • Non-Alcoholic: Leave out the gin and replace it with a splash of apple cider for a delightful mocktail enjoyed by everyone, including kids!

  • Citrus Medley: Mix in orange juice along with the lemon for a delightful citric explosion that brightens the drink even more.

  • Chilly Chill: Freeze some of the thyme syrup into ice cubes and add them to the punch, offering both cooling and additional flavor as they melt.

  • Sweetener Switch: Try using honey or agave syrup in place of sugar for a natural sweetness that pairs well with the fig flavor.

  • Spicy Touch: For a little heat, muddle in a few slices of jalapeño. It’s an adventurous option that will surprise and delight!

With these variations, your Vampire’s Fig & Thyme Punch can be tailored for any occasion, making it a versatile addition to your recipe collection!

How to Store and Freeze Vampire’s Fig & Thyme Punch

Fridge: Store the punch base (without sparkling water or ice) in an airtight container in the fridge for up to 2 days. This keeps the flavors vibrant for later enjoyment.

Freezer: For longer storage, you can freeze the thyme syrup in ice cube trays. Once frozen, transfer the cubes to a freezer bag and use within 3 months for the freshest flavor.

Reheating: While Vampire’s Fig & Thyme Punch is best served cold, if you prepped a warm version, gently reheat it on the stove over low heat until just warmed, then serve immediately for a cozy treat.

Serving: Always add sparkling water and ice just before serving to maintain the fizzy, refreshing taste that makes this punch special!

Make Ahead Options

These Vampire’s Fig & Thyme Punch components are perfect for busy home cooks looking to save time! You can prepare the thyme syrup and store it in the refrigerator for up to 3 days, making it easy to whip up this refreshing drink on short notice. Additionally, you can mix the fig jam, gin, lemon juice, and syrup together and refrigerate this base up to 24 hours in advance. Just be sure to give it a good stir before serving to ensure the flavors meld beautifully. When you’re ready to enjoy, simply pour over ice, add sparkling water, and garnish with thyme. Your guests will be wowed with minimal effort!

Vampire’s Fig & Thyme Punch

Vampire’s Fig & Thyme Punch Recipe FAQs

How do I select the best figs for this punch?
Absolutely! When choosing figs, look for ones that are plump, firm, and free from any dark spots or blemishes. The skin should be smooth and slightly soft to the touch, indicating ripeness. If you can find fresh figs, they will add a wonderful sweetness to your punch. Dried figs can be used in a pinch but may not provide the same depth of flavor.

What’s the best way to store leftover Vampire’s Fig & Thyme Punch?
Very important! If you have any leftover punch base, store it in an airtight container in the fridge without the sparkling water or ice. This will keep the flavors vibrant for up to 2 days. When you’re ready to serve it again, simply add fresh sparkling water and ice to maintain that refreshing fizz.

Can I freeze the thyme syrup?
Absolutely! To freeze the thyme syrup, pour the cooled syrup into ice cube trays and freeze until solid. Once frozen, transfer the cubes to a freezer bag. They can be stored in the freezer for up to 3 months. The syrup cubes are perfect for quickly sweetening cocktails or other beverages later on.

What if my punch doesn’t taste right?
If your Vampire’s Fig & Thyme Punch tastes off, you may need to adjust the balance of flavors. If it’s overly sweet, squeeze a bit more lemon juice to brighten it up. If it’s too tart, add more fig jam or syrup to sweeten it slightly. Remember to taste as you go, and don’t hesitate to adjust until you find that perfect combination that sings!

Are there any dietary considerations I should know about?
Definitely! The punch contains gin, which may not be suitable for everyone, especially those avoiding alcohol. You can easily make a delicious non-alcoholic version by replacing the gin with a splash of additional thyme syrup and using non-alcoholic sparkling water. Also, check for any allergies associated with figs and thyme—these ingredients are generally safe for most individuals but it’s always best to be cautious!

How long does it take to make this punch?
You’re in for a treat! The total time to prepare the Vampire’s Fig & Thyme Punch is just 15 minutes, with about 10 minutes for prep and 5 minutes for cooking the thyme syrup. It’s a quick and delightful recipe, perfect for those unexpected guests or spontaneous gatherings!

Refresh with Vampire’s Fig & Thyme Punch for a Spooky Sip!

Enjoy the vibrant Vampire’s Fig & Thyme Punch, a refreshing drink perfect for gatherings.

  • Saucepan
  • Cocktail shaker
  • fine-mesh strainer
  • juice extractor
  • glasses

For the Thyme Syrup

  • 4 sprigs Fresh thyme (for a fragrant herbal note)
  • 1/2 cup Sugar (to sweeten syrup)
  • 1/2 cup Water (to dissolve the sugar)

For the Punch

  • 2 tbsp Fig jam (adds sweetness)
  • 2 oz Gin (use your favorite brand)
  • 1 oz Lemon juice (freshly squeezed)
  • 3 oz Sparkling water (for fizz)
  • 1 handful Ice (use clear ice for appearance)

Thyme Syrup Preparation

  1. In a small saucepan, combine 1/2 cup sugar, 1/2 cup water, and 4 sprigs of fresh thyme. Stir gently and bring to a simmer over medium heat. Simmer for about 5 minutes, until the sugar is dissolved. Remove from heat and let cool before straining.

Making the Punch

  1. Juice a lemon to yield 1 oz of fresh lemon juice. Strain it through a fine mesh sieve to remove seeds.
  2. In a cocktail shaker, mix 2 tbsp of fig jam, 2 oz of gin, 1 oz of lemon juice, and 1 oz of thyme syrup. Stir vigorously until smooth.
  3. Fill two glasses with clear ice. Pour the mixture over the ice using a fine mesh strainer.
  4. Top each glass with 3 oz of sparkling water, stirring gently to combine, and garnish with a sprig of thyme.

Serve immediately for the best fizz. Store the punch base without sparkling water in the fridge for up to 2 days.

Drink
American
cocktail, fig jam, Punch, spooky drink, thyme syrup, Vampire’s Fig & Thyme Punch

Filed Under: Drink

Delightful Apple Pie Dirty Soda for a Refreshing Twist

September 30, 2025 by grace bellamy Leave a Comment

As I poured the vibrant liquid into the glass, the enticing scent of apple and cinnamon filled the air, and I couldn’t help but smile. This is my special twist on classic refreshment—Apple Pie Dirty Soda. Perfect for a warm day or a cozy night in, this delightful drink is not only a breeze to whip up in just five minutes, but it also serves as a fun conversation starter at any gathering. Imagine indulging in the essence of apple pie without the fuss of baking! The rich combination of soda with creamy sweetness and a hint of apple cider creates a treat that’s both nostalgic and exciting. I can’t wait for you to try it! What would you pair it with for a delicious afternoon pick-me-up?

Apple Pie Dirty Soda

Why is Apple Pie Dirty Soda a must-try?

Simplicity at its Finest: This drink comes together in just five minutes, making it an effortless choice for busy days.
Nostalgic Flavors: Experience the delightful essence of apple pie in a refreshing beverage form—perfect for both summer barbecues and cozy evenings.
Customizable Delight: Switch up the soda or cream type to suit your taste; try a Pineapple Bars Tropical variation for an unexpected twist!
Visually Stunning: Serve it in clear glasses to showcase the eye-catching layers of color, making it a standout on any table.
Crowd-Pleaser: Whether you’re entertaining friends or enjoying a quiet night, this drink sparks conversations and is sure to impress.
Taste the joy of homemade refreshment—it’s a sip of happiness in every glass!

Apple Pie Dirty Soda Ingredients

• Ready to mix up something special?

For the Soda Base
• Chilled cola or cream soda – Choose your favorite for a bubbly burst of flavor!
• Apple syrup or spiced apple syrup – Opt for spiced for an extra layer of warmth reminiscent of pie.
• Apple cider – This adds a fruity note, perfectly enhancing the classic essence of apple pie.

For the Creamy Top
• Cream, half-and-half, or coconut cream – Coconut cream lends a delightful, dairy-free twist with healthy fats.

To Serve
• Ice – Fill your glass with ice for that refreshing chill that makes every sip enjoyable.
• Optional Garnish:

  • Apple slice – A fresh finishing touch that elevates the drink’s presentation.
  • Cinnamon stick – Stir it for a charming aesthetic and added aroma.
  • Pinch of cinnamon – Sprinkle for an extra hint of warmth and spice!

This Apple Pie Dirty Soda is a captivating blend of nostalgia and innovation, ready to brighten up your day!

Step-by-Step Instructions for Apple Pie Dirty Soda

Step 1: Prepare the Glass
Begin by filling a tall glass all the way to the brim with ice. This will keep your Apple Pie Dirty Soda delightfully chilled and refreshing. Make sure the ice is packed tightly, as this helps the soda to stay cooler longer while also creating a beautiful layered effect in your drink.

Step 2: Mix the Flavors
Pour in 2 tablespoons of apple syrup and 1 ounce of apple cider over the ice. Stir gently with a long spoon to combine the syrups, allowing the sweet, fruity aromas to blend. The mixture should look rich and inviting, foreshadowing the delicious layers to come in your Apple Pie Dirty Soda.

Step 3: Add the Soda
Now, slowly pour your chilled cola or cream soda into the glass. Aim for the ice to create a barrier so you can see those lovely layers forming. Watch as the soda bubbles and fizzes, filling the glass and mixing with the apple flavors below, creating a delightful visual presentation.

Step 4: Top with Cream
Drizzle in 1 to 2 ounces of cream, half-and-half, or coconut cream over the top, allowing it to gently swirl into the soda without losing the fizz. The cream should float atop the soda, creating a beautiful, creamy layer. This is what truly transforms your drink into a luscious Apple Pie Dirty Soda experience.

Step 5: Garnish and Serve
Finally, take a moment to garnish your drink for added flair. Optionally, you can place an apple slice on the rim, add a cinnamon stick for stirring, or sprinkle a pinch of cinnamon on top. Serve your Apple Pie Dirty Soda immediately for the best experience, and enjoy the wonderful blend of flavors and textures!

Apple Pie Dirty Soda

Expert Tips for Apple Pie Dirty Soda

• Chill Everything: Make sure your soda, cream, and glass are well-chilled. This ensures the drink stays cold longer and maintains that refreshing appeal.

• Layering Trick: Pour soda slowly over the ice to preserve the layers. If done right, this will create an eye-catching visual that enhances the drinking experience of your Apple Pie Dirty Soda.

• Syrup Variation: Customize the flavor with different syrups! Try using cranberry or cherry syrup for a unique twist while still keeping that nostalgic apple essence.

• Avoid Over-Whipping: When adding cream, be careful not to over-stir. You want just enough mix to create a swirl without losing that fizzy texture.

• Garnish Wisely: Use fresh garnishes like apple slices or cinnamon sticks to elevate presentation. They also deliver a burst of flavor with every sip!

What to Serve with Apple Pie Dirty Soda

As you savor the delightful combination of sweet apple flavors and creamy fizz, consider these mouthwatering pairings to elevate your experience.

  • Savory Sliders: Miniature burgers bring a savory contrast that complements the sweetness of the drink. These handheld bites are perfect for casual gatherings and enhance the fun factor!

  • Cinnamon Sugar Donuts: These fluffy treats mirror the drink’s cinnamon notes, creating a harmonious blend of flavors. They make a lovely addition to brunch or as an indulgent afternoon snack.

  • Apple Crisp: Embrace the apple theme with a warm apple crisp served alongside your drink. The crunchy topping adds texture, while the warmth enhances the cozy feel of your soda delight.

  • Cheese Platter: A selection of sharp cheeses can create a delightful balance with the sweet beverage. Pair creamy brie or tangy goat cheese for a sophisticated touch.

  • Roasted Nuts: Seasoned almonds or pecans add a crunchy element that contrasts wonderfully with the drink’s creaminess. Their richness brings a delightful savory bite to each sip.

  • Hot Vanilla or Pumpkin Spice Latte: Choose a warm beverage to sip alongside. A rich vanilla or spiced latte can enhance the cozy ambiance, perfect for fall gatherings or chilly evenings.

  • Homemade Ice Cream: Treat yourself to a scoop of vanilla or caramel ice cream that complements the apple pie flavors. The creaminess melds with the drink, creating a dreamy, indulgent pairing.

  • Light Fruit Salad: A fresh medley of seasonal fruits offers a refreshing contrast, adding brightness and balance to your palate alongside the rich flavors of the Apple Pie Dirty Soda.

How to Store and Freeze Apple Pie Dirty Soda

Prep Ahead: Store prepared components separately in the fridge. Keep the apple syrup, apple cider, and cream chilled to maintain freshness for up to 3 days.

Ice Tip: Avoid freezing the complete drink, as the soda will lose its fizz. Instead, make ice cubes from your apple cider for a fun twist.

Serving Fresh: For the best experience, assemble your Apple Pie Dirty Soda just before serving to enjoy its delightful layers and effervescence.

Garnish Storage: Keep optional garnishes like apple slices and cinnamon sticks in an airtight container in the fridge for a day for optimal freshness and flavor.

Make Ahead Options

These Apple Pie Dirty Soda drinks are perfect for busy home cooks looking to save time! You can prepare the apple syrup and apple cider mixture up to 24 hours in advance, allowing the flavors to meld beautifully. Simply combine 2 tablespoons of apple syrup with 1 ounce of apple cider in an airtight container and refrigerate. Keep the cream and chilled soda separate until you’re ready to serve—this ensures the fizz stays intact. When it’s time to indulge, fill a tall glass with ice, add your prepped mixture, pour in the soda, and top with cream. You’ll have a refreshing treat that tastes just as delicious, effortlessly ready for your gathering!

Apple Pie Dirty Soda Variations

Feel free to make this delightful drink your own with these tempting twists that will elevate your experience!

  • Dairy-Free: Swap cream for coconut cream for a luscious and healthier alternative that maintains the indulgent texture.
  • Spiced Up: Add a dash of nutmeg or a splash of vanilla extract to enhance the warm aroma and flavor, reminiscent of baked goodies.
  • Fizzy Alternative: Use ginger ale instead of cola or cream soda for a zesty and refreshing take that’s perfect for summer!
  • Extra Fruity: Incorporate a splash of cranberry or cherry juice alongside the apple syrup for a fruity dance of flavors.
  • Maple Twist: Replace apple syrup with maple syrup for a sophisticated, earthy sweetness; this pairs beautifully with the cinnamon garnish.
  • Herbal Infusion: Add a sprig of fresh mint or basil for an invigorating hint that contrasts delightfully with the sweet apple and cream.
  • Frozen Delight: Blend the ingredients with ice for a slushy version that’s perfect for hot days; serve it in a tall glass for a fun, cooling treat.
  • More Crunch: Top with crushed graham crackers or a sprinkle of granola to add an unexpected texture that mimics pie crust.

Trying these variations can lead to delightful surprises—you might even stumble upon a new favorite! And if you’re looking for something savory to pair with your drink, consider a comforting Chicken Pot Pie for a complete indulgent experience!

Apple Pie Dirty Soda

Apple Pie Dirty Soda Recipe FAQs

What type of apple syrup should I use?
Absolutely! I recommend using either apple syrup or spiced apple syrup. The spiced version adds an extra layer of warmth that beautifully complements the apple cider and soda. If you can find it, opt for a high-quality brand to truly enhance the drink’s flavor.

How long can I store prepared components?
You can prep the apple syrup, apple cider, and cream separately and keep them chilled in the fridge for up to 3 days. This makes it easy to whip up your Apple Pie Dirty Soda at a moment’s notice!

Can I freeze my Apple Pie Dirty Soda for later?
It’s best not to freeze the entire drink as the carbonation will be lost, resulting in a flat soda. However, you can freeze some apple cider into ice cubes! Simply pour the cider into an ice cube tray and freeze until solid. These can be used in place of regular ice, adding a fun twist as they melt.

What should I do if my soda loses its fizz?
If you find that your soda has lost its fizz, there are a few things you can try. First, make sure to serve it immediately after preparation to enjoy the effervescence. If you’ve made it ahead, use chilled soda and pour it gently over ice, as this method reduces foam and helps maintain the carbonation.

Can I make this drink non-dairy?
Yes! For a dairy-free version, simply substitute the cream with coconut cream or any non-dairy alternative like almond or oat milk. These options provide a creamy texture and flavor while keeping the drink light and refreshing!

Are there any allergy considerations?
Absolutely! Since this Apple Pie Dirty Soda contains apple cider and various creams, ensure that none of the ingredients pose a risk for allergies. If serving to guests, check for sensitivities to apples or dairy. You can always opt for alternatives like coconut cream to make it allergy-friendly!

Delightful Apple Pie Dirty Soda for a Refreshing Twist

Try this Apple Pie Dirty Soda for a nostalgic and refreshing twist on classic flavors, perfect for any occasion.

  • tall glass
  • long spoon

For the Soda Base

  • 1 glass chilled cola or cream soda (Choose your favorite)
  • 2 tablespoons apple syrup or spiced apple syrup (Opt for spiced for added warmth)
  • 1 ounce apple cider (Enhances the classic apple pie essence)

For the Creamy Top

  • 1-2 ounces cream, half-and-half, or coconut cream (Coconut cream for a dairy-free option)

To Serve

  • 1 cup ice (Fill your glass with ice)
  • apple slice (Optional garnish)
  • cinnamon stick (Optional garnish)
  • pinch of cinnamon (Optional garnish)

Step-by-Step Instructions

  1. Begin by filling a tall glass all the way to the brim with ice.
  2. Pour in apple syrup and apple cider over the ice. Stir gently.
  3. Slowly pour your chilled cola or cream soda into the glass.
  4. Drizzle in cream, half-and-half, or coconut cream over the top.
  5. Garnish with an apple slice, cinnamon stick, or sprinkle of cinnamon.

Make sure your soda, cream, and glass are well-chilled for the best experience. Assemble just before serving for optimal freshness.

Drink
American
Apple Pie Dirty Soda, Easy Recipe, homemade soda, nostalgic beverage, refreshing drink

Filed Under: Drink

Campfire Cola Dirty Soda: A Sweet Summer Treat You’ll Love

September 30, 2025 by grace bellamy Leave a Comment

As the sun sets and the last embers of the campfire glow, I can’t help but smile at the nostalgia of summer nights spent basking in laughter and warmth. This is the perfect setting for a whimsical treat: Campfire Cola Dirty Soda. In just five minutes, you can whip up this indulgent drink that combines the nostalgia of sweet marshmallows with the rich flavor of chocolate. Not only is this recipe a delightful throwback to childhood memories, but it’s also a quick way to impress your friends and family during a casual gathering. With its stunning layered look and creamy texture, this fizzy delight is bound to become a favorite at your next barbecue or cozy dinner. Curious about how to create this fun twist on a classic soda? Let’s dive into the recipe!

Campfire Cola Dirty Soda

Why is Campfire Cola Dirty Soda a must-try?

Indulgent Flavor: The sweet fusion of toasted marshmallow syrup and rich chocolate syrup creates a drink bursting with nostalgic flavor.
Easy to Make: In just five minutes, anyone can whip up this sweet soda treat, making it perfect for spontaneous gatherings.
Eye-Catching Layers: The stunning visual of swirling cream over fizzy soda will wow your guests before they even take a sip!
Perfect for Any Occasion: Whether it’s a summer BBQ or a cozy movie night, this drink adds a fun twist to any event.
Crowd-Pleasing Treat: Kids and adults alike will love this whimsical twist on a classic cola—what’s not to love about sweet, fizzy goodness?

Try it alongside other nostalgic treats like s’mores for a fabulous flavor adventure!

Campfire Cola Dirty Soda Ingredients

• Here’s what you need to create this fizzy delight!

For the Drink

  • 1 cup cold Coke – The base of this indulgent drink, choose your favorite cola for the best flavor.
  • 2 tablespoons toasted marshmallow syrup – Adds that sweet campfire flavor we all love.
  • 1 tablespoon chocolate syrup – For a rich, chocolaty swirl that complements the sweetness perfectly.

For the Creamy Layer

  • 2 tablespoons heavy cream – Creates a luscious, velvety texture that elevates this soda.
  • 2 tablespoons sweetened condensed milk – Provides an extra touch of sweetness and creaminess that you’ll adore.

For Serving

  • Clear ice cubes – Make sure to use clear ice for that stunning visual effect as it showcases the layers of your drink.

With just these simple ingredients, you’re ready to experience the magic of Campfire Cola Dirty Soda!

Step‑by‑Step Instructions for Campfire Cola Dirty Soda

Step 1: Prepare the Cream Mixture
In a small jar or bowl, combine 2 tablespoons of heavy cream and 2 tablespoons of sweetened condensed milk. Whisk them together vigorously for about 1-2 minutes until the mixture is fully combined, smooth, and silky. This creamy blend will add a luxurious touch to your Campfire Cola Dirty Soda.

Step 2: Fill Your Glasses with Ice
Take two tall clear glasses and fill each one to the brim with clear ice cubes. Ensure the ice is well-packed for maximum chill. This step is crucial as it not only cools the soda but also creates a stunning visual display, setting the stage for your delightful Campfire Cola Dirty Soda.

Step 3: Pour the Cold Coke
Slowly pour 1 cup of cold Coke into each glass over the ice. Take your time to let the soda fizz and settle, creating a bubbly layer on top. This should only take about 30 seconds, and watching the bubbles dance is part of the excitement of making your Campfire Cola Dirty Soda.

Step 4: Drizzle the Marshmallow Syrup
Gently drizzle 2 tablespoons of toasted marshmallow syrup into each glass. Observe as it sinks and swirls through the Coke, adding a sweet touch. This beautiful swirl will not only enhance the flavor of your Campfire Cola Dirty Soda but also add to its visual appeal.

Step 5: Add the Chocolate Syrup
Next, pour 1 tablespoon of chocolate syrup into each glass. Allow it to mix naturally with the soda; do not stir at this point. The chocolate syrup will create delightful ribbons throughout the drink, enhancing both the flavor and the layered look of your Campfire Cola Dirty Soda.

Step 6: Pour the Creamy Blend
With utmost care, slowly pour the prepared sweet cream mixture over each drink. Watch as it gracefully swirls and floats atop the soda, creating a gorgeous layered effect. This final touch is what makes your Campfire Cola Dirty Soda truly irresistible and visually captivating.

Step 7: Serve and Enjoy
Serve the Campfire Cola Dirty Soda immediately, accompanied by a straw or a spoon. Let your guests marvel at the beautiful layers before diving in. They can choose to sip through the layers or gently stir the drink for a delightful flavor explosion—either way, this treat is sure to be a hit!

Campfire Cola Dirty Soda

Expert Tips for Campfire Cola Dirty Soda

  • Chill Everything: To avoid a watered-down drink, ensure your Coke and glass are chilled beforehand, enhancing the refreshing experience.
  • Layering Technique: Pour your cream mixture slowly over the back of a spoon for beautifully defined layers—this visual flair makes your Campfire Cola Dirty Soda extra special.
  • Syrup Choices: Experiment with different flavored syrups, such as caramel or vanilla, to customize your drink and put your own twist on this classic.
  • Avoid Overmixing: When adding the syrups, resist the temptation to stir too much; allowing them to swirl naturally maintains the appealing visual layers.
  • Serve Fresh: Enjoy your Campfire Cola Dirty Soda immediately for the best effervescent experience. The longer it sits, the more the fizz dissipates!

How to Store and Freeze Campfire Cola Dirty Soda

Fridge: Store any leftover Campfire Cola Dirty Soda in an airtight container for up to 2 days. The fizz may diminish, but the flavor will still be delightful!

Freezer: Although this drink is best enjoyed fresh, if you have extra cream mixture, it can be frozen in ice cube trays for up to 1 month. Use them in your next soda creation!

Reheating: Since this is a chilled beverage, reheating isn’t applicable. Instead, serve it ice-cold to enhance the refreshing experience.

Prep for Serving: If stored, remember to reassemble layers by giving the drink a gentle stir before serving. This will help revive that beautiful presentation!

What to Serve with Campfire Cola Dirty Soda

Elevate your summer gatherings with delightful pairings that complement the rich, sweet layers of this fizzy favorite.

  • S’mores: The gooey, smoky sweetness of s’mores pairs perfectly with the campfire theme, enhancing the nostalgic experience.
  • Grilled Veggies: Smoky grilled veggies add a savory touch, balancing the sweetness of the Campfire Cola Dirty Soda beautifully.
  • Spicy Chicken Wings: The heat from spicy wings creates a delicious contrast, making each sip of soda even more refreshing.
  • Chocolate Cake: Indulge in a slice of rich chocolate cake for a double dose of sweetness that chocolate lovers will adore.
  • Fruit Salad: A light, refreshing fruit salad adds a burst of natural sweetness and a vibrant contrast to your creamy drink.
  • Ice Cream Floats: Make the occasion even more fun by serving ice cream floats alongside your drink, allowing guests to mix flavors.
  • Pineapple Upside-Down Cake: This moist, caramelized delight complements the Campfire Cola Dirty Soda with its fruity undertones and rich flavor.
  • Sweet Tea Lemonade: Quench your thirst with this refreshing drink that offers a crisp citrus contrast to the sweet soda.
  • Campfire Chili: A cozy, spicy chili brings heartiness to the table and beautifully balances the sweetness of your fizzy treat.

Campfire Cola Dirty Soda Variations

Feel free to customize your Campfire Cola Dirty Soda with these fun twists—let your creativity shine!

  • Dairy-Free: Substitute heavy cream with coconut cream for a vegan-friendly twist, still delivering that creamy texture and flavor.

  • Flavored Syrups: Switch up the toasted marshmallow syrup for caramel or vanilla syrup to give your drink a new flavor profile. Each variation will evoke different memories.

  • Extra Crunch: Add crushed graham crackers on top for a playful texture and a s’mores-inspired experience that’s absolutely scrumptious.

  • Spicy Kick: Incorporate a dash of cinnamon or cayenne pepper to the cream mixture for a surprising heat that complements the sweetness beautifully.

  • Fruity Fusion: Add a splash of cherry juice for a fruity twist, enhancing the sweetness while keeping the retro vibe in check.

  • Alcoholic Version: For adult gatherings, consider adding a splash of rum or whiskey to transform your soda into a delightful cocktail that’s sure to impress.

  • Layered Fruit: Garnish with slices of fresh strawberries or bananas for a splash of color and an added fruity nuance—visually stunning and tasty!

  • Cold Brew Swap: For a coffee-infused version, replace the Coke with cold brew coffee, giving a rich depth while maintaining that fizzy enjoyment!

Try pairing your Campfire Cola Dirty Soda with other nostalgic treats like s’mores or a bowl of warm, gooey chocolate chip cookies for an unforgettable flavor adventure!

Make Ahead Options

These Campfire Cola Dirty Soda drinks are perfect for busy home cooks who want to impress with minimal fuss! You can prepare the creamy layer of heavy cream and sweetened condensed milk up to 24 hours in advance—just whisk them together in a jar, seal tightly, and refrigerate. Additionally, have your marshmallow and chocolate syrups measured and ready to go. When you’re ready to serve, simply fill your glasses with clear ice cubes, pour in your cold Coke, and drizzle in the syrups, finishing with the creamy mix. This way, you’ll achieve those stunning layers with ease, ensuring your drink is just as delicious and eye-catching as if made fresh!

Campfire Cola Dirty Soda

Campfire Cola Dirty Soda Recipe FAQs

What type of Coke should I use for Campfire Cola Dirty Soda?
Absolutely, you can use any variety of cold Coke that you enjoy! Regular Coke will give the traditional flavor, while Diet Coke or even a caffeine-free version can be used for a lighter option. The flavor you choose will be the foundation of your indulgent drink, so pick one that brings back those nostalgic campfire memories!

How should I store leftover Campfire Cola Dirty Soda?
Store any leftover Campfire Cola Dirty Soda in an airtight container in the fridge for up to 2 days. The carbonation may fade, but you can still enjoy the flavors! Just remember to give it a gentle stir before serving to revitalize the layers.

Can I freeze the leftover cream mixture?
Yes! If you have extra cream mixture, freeze it in ice cube trays for up to 1 month. You can pop these cubes into your next soda or use them in coffee for a creamy treat. Just let them sit at room temperature for a few minutes before using so they’re easier to work with.

What if my layers don’t swirl as beautifully as expected?
No worries! If your layers don’t form perfectly, you can achieve the desired effect by pouring the cream mixture very slowly over the back of a spoon or just over the side of the glass. This technique helps create distinct layers. Remember, the swirling doesn’t just look good—it enhances the experience, too!

Is this recipe safe for kids?
Absolutely! Campfire Cola Dirty Soda is a fun and delicious treat for all ages. Just keep in mind the sweetness level—while it’s a nostalgic hit for kids, it might be best to enjoy it as an occasional indulgence. If you’re making it for very young children, consider reducing the amount of chocolate syrup to balance the sweetness.

Can I use other syrups in this recipe?
Very! Feel free to get creative with your syrups. Options like caramel, vanilla, or even strawberry add a unique twist to your Campfire Cola Dirty Soda. Experimenting with flavors can lead to delightful discoveries, making it fun to customize your drink for your family and friends!

Campfire Cola Dirty Soda: A Sweet Summer Treat You’ll Love

Campfire Cola Dirty Soda is a nostalgic, indulgent drink that combines sweet marshmallows and rich chocolate for a delightful summer treat.

  • Glass
  • Whisk
  • Jar or bowl

For the Drink

  • 1 cup cold Coke (Choose your favorite cola for the best flavor.)
  • 2 tablespoons toasted marshmallow syrup (Adds a sweet campfire flavor.)
  • 1 tablespoon chocolate syrup (For a rich, chocolaty swirl.)

For the Creamy Layer

  • 2 tablespoons heavy cream (Creates a luscious, velvety texture.)
  • 2 tablespoons sweetened condensed milk (Provides extra sweetness and creaminess.)

For Serving

  • clear ice cubes (Use clear ice for a stunning visual effect.)

Step-by-Step Instructions

  1. In a small jar or bowl, combine 2 tablespoons of heavy cream and 2 tablespoons of sweetened condensed milk. Whisk them together vigorously for about 1-2 minutes until fully combined.
  2. Fill two tall clear glasses with clear ice cubes, packed well for maximum chill.
  3. Slowly pour 1 cup of cold Coke into each glass over the ice. Let the soda fizz and settle.
  4. Gently drizzle 2 tablespoons of toasted marshmallow syrup into each glass.
  5. Pour 1 tablespoon of chocolate syrup into each glass.
  6. Slowly pour the prepared sweet cream mixture over each drink.
  7. Serve immediately with a straw or spoon.

For best taste, serve fresh and enjoy immediately. The longer it sits, the more the fizz dissipates.

Drink
American
Campfire Cola Dirty Soda, Easy Recipe, indulgent beverage, Nostalgic Treat, soda, summer drink

Filed Under: Drink

Monster Fruit Skewers That Bring Fun to Your Fruit Platter

September 30, 2025 by grace bellamy Leave a Comment

As I was preparing for my annual Halloween bash, I stumbled upon the perfect crowd-pleaser that would steal the show—Monster Fruit Skewers! These whimsical treats not only bring a splash of color to your table, but they also present a fun, healthy option that even the pickiest eaters can’t resist. With just 15 minutes of prep time, you can assemble an array of vibrant fruits into eye-catching creations that are sure to delight friends and family. Imagine the smiles when kids and adults alike discover the hidden candy eyes! These skewers are not only festive but also a great way to enjoy nature’s sweetness without the guilt. Are you ready to bring some monster magic to your next gathering? Let’s dive into this fruity adventure!

Monster Fruit Skewers

Why are Monster Fruit Skewers so fun?

Colorful creations like these are perfect for any festive occasion, instantly brightening up your table. Easy to make, you can whip them up in just 15 minutes, making them a great option for busy hosts. Healthy indulgence meets playfulness with a mix of fruits that satisfy both sweet cravings and nutritional needs. Customizable to your taste, swap in your favorite fruits or add fun decorations for kids’ parties. Plus, the added thrill of candy eyes guarantees smiles all around—who can resist those charming faces? For more imaginative dessert ideas, check out our guide on whimsical treats.

Monster Fruit Skewers Ingredients

To create these delightful Monster Fruit Skewers, gather the following ingredients:

For the Skewers
• Green grapes – perfect for contrasting colors and a sweet, juicy bite.
• Purple grapes – add a delightful pop of flavor and color to your skewers.
• Watermelon (cubed or balled) – hydrating and naturally sweet, making it a festive favorite.
• Pineapple (cubed) – offers a tropical sweetness that pairs beautifully with other fruits.
• Cantaloupe or honeydew (optional) – adds a lovely, mellow flavor for those who enjoy a variety of tastes.
• Strawberries or blueberries (optional) – these berries provide a tangy kick that enhances the overall sweetness.

For Decoration
• Candy eyes – the fun finishing touch that brings your Monster Fruit Skewers to life!
• Wooden skewers – essential for threading your fruity masterpieces together.
• Honey or nut butter – use to secure the candy eyes to the fruit for fun, spooky vibes.

With your ingredients in hand, you’re well on your way to crafting irresistible Monster Fruit Skewers that will thrill your guests and make fruit fun!

Step‑by‑Step Instructions for Monster Fruit Skewers

Step 1: Wash and Prepare the Fruits
Begin by thoroughly washing all your fruit under cool running water. Slice the watermelon into bite-sized cubes or use a melon baller for delightful balls. Cut the pineapple into cubes and, if using, slice the cantaloupe or honeydew. Finally, ensure the grapes are stemmed and ready. This prepping process should take about 10 minutes, leaving you with a colorful array of fruits to work with.

Step 2: Assemble the Fruit Skewers
Grab your wooden skewers and start threading the fruits on them! Mix and match the colors—alternate between green grapes, watermelon, pineapple, and any other fruits you’ve chosen. Aim for about 5–7 pieces of fruit per skewer for a delightful balance. As you load them, keep an eye on the pattern for the most eye-catching and vibrant Monster Fruit Skewers. This step should take around 5 minutes.

Step 3: Add the Candy Eyes
Now comes the fun part! Select a few fruit pieces to be the “monsters” and add candy eyes to them. Dip a toothpick or your finger into a dab of honey or nut butter, and then stick the candy eyes onto the selected fruit pieces. This creative touch will bring your Monster Fruit Skewers to life—make sure they’re secure! You should spend about 5 minutes here ensuring each skewer has its playful monster.

Step 4: Serve on a Festive Platter
Once all your skewers are assembled and adorned, it’s time to present them! Arrange the Monster Fruit Skewers on a festive platter, perhaps alongside some Halloween-themed decorations for extra flair. This visual presentation will wow your guests and make the fruit look even more inviting. Aim to complete this final step in just a couple of minutes, so you’re ready to delight everyone at your gathering!

Monster Fruit Skewers

Make Ahead Options

These Monster Fruit Skewers are perfect for busy home cooks who want to save time during festive occasions! You can wash and prep all your fruits up to 24 hours in advance. Simply store the cut fruits in sealed containers in the refrigerator to keep them fresh and vibrant. Assembling the skewers can be done a few hours before the party—just wait until two hours prior to serving to attach the candy eyes using a dab of honey or nut butter for a secure hold. This way, you’ll ensure that your playful creations remain as delightful as ever, making your event planning a breeze!

Monster Fruit Skewers Variations

Get ready to make these Monster Fruit Skewers your own with a delicious twist or two!

  • Dairy-Free: Substitute nut butter with sunflower seed butter for a nut-free option that’s equally sticky.

  • Fruity Fun: Swap in kiwi or mango for a tropical vibe—each bite brings a refreshing surprise! The bright colors will also amp up the visual appeal.

  • Berry Delights: Use raspberries or blackberries instead of blueberries for a tart contrast that enhances the sweetness of the other fruits.

  • Add a Twist: Sprinkle with coconut flakes or granola before serving for added texture—a delightful crunch that will get everyone talking!

  • Veggie Boost: Add slices of cucumber or bell pepper to introduce a crunchy, savory element. It may sound unusual, but it’s a surprising and refreshing twist on the classic skewer!

  • Heat It Up: Drizzle a little spicy honey or a pinch of cayenne on your skewers for a sweet and spicy kick—a great way to liven up the flavor profile!

  • Chocolaty Touch: Dip the ends of the skewers in melted dark chocolate and let them cool for a sweet, indulgent twist that pairs beautifully with the fruits.

  • Festive Shapes: Use cookie cutters to cut some fruit into fun shapes. This playful approach can enchant kids and adults alike, boosting the festive nature of your display.

With these variations, the possibilities for your Monster Fruit Skewers are endless! Be sure to check out our ideas for adding festive elements in our section on creative presentation tips for more inspiration!

Expert Tips for Monster Fruit Skewers

  • Fruit Selection: Choose a mix of fruits with varied textures and colors to create an appealing presentation. Avoid overly ripe fruits that may fall apart.

  • Assembling Tips: Use sturdy wooden skewers to prevent bending when adding heavier fruits like pineapple. This will ensure your Monster Fruit Skewers stay intact during serving.

  • Candy Eyes: For best adhesion, apply a generous dollop of honey or nut butter behind the candy eyes. This keeps them secure during transport, avoiding any “eyeless” monsters!

  • Creative Variations: Don’t be afraid to experiment! Swap fruits based on the season or your family’s preferences, but keep in mind that using cohesive colors will create a more striking final product.

  • Make-Ahead Magic: Prep your fruits up to 24 hours in advance, but assemble the skewers no more than 2 hours before guests arrive for optimal freshness.

What to Serve with Monster Fruit Skewers?

Planning the perfect meal to complement these playful creations?

  • Yogurt Dip: A tangy yogurt dip pairs wonderfully with the sweetness of the fruits, enhancing their vibrant flavors and adding creaminess.

  • Cheese Platter: Include a variety of cheeses to balance the sweetness with savory notes. The creamy textures create a delightful contrast with the fruity skewers.

  • Veggie Sticks: Crisp cucumber and bell pepper sticks offer a refreshing crunch that enhances the overall snack experience, perfectly matching the lightness of the Monster Fruit Skewers.

  • Fruit Punch: Serve a colorful fruit punch as a refreshing beverage that mirrors the fruity fun of the skewers, making the whole meal feel festive and lively.

  • Chocolate Fondue: For a little decadence, offer a chocolate fondue station where guests can dip their skewers for a delightful unexpected twist.

  • Mini Sandwiches: Light and flavorful mini sandwiches filled with savory ingredients can create a lovely balance, providing a hearty touch to your fruity spread.

  • Sugar Cookies: Serve soft, whimsical sugar cookies alongside the skewers for a sweet treat that appeals to both kids and adults. Their sweetness complements the fruit perfectly.

  • Sparkling Water: A chilled sparkling water brings a refreshing fizz, making it a great palate cleanser between bites of fruit and other snacks.

These ideas will create a colorful and engaging meal around your delightful Monster Fruit Skewers, ensuring your gathering is as memorable as it is delicious!

Storage Tips for Monster Fruit Skewers

  • Room Temperature: Enjoy Monster Fruit Skewers fresh on the day of assembly. If left out, they’re best eaten within 2 hours to keep all fruits vibrant and safe.

  • Fridge: If preparing in advance, store prepped fruits in sealed containers in the fridge for up to 24 hours before assembling. This helps maintain freshness without browning.

  • Assembled Skewers: Once assembled, try to serve your skewers within 2 hours. If not eaten immediately, cover tightly and refrigerate for up to 2 hours—add candy eyes just before serving for the best presentation.

  • Freezing: It’s not recommended to freeze Monster Fruit Skewers, as the texture of fresh fruits does not hold up well to thawing. Instead, enjoy them fresh for the ultimate experience!

Monster Fruit Skewers

Monster Fruit Skewers Recipe FAQs

How do I choose the right fruits for my Monster Fruit Skewers?
Absolutely! When selecting fruits, look for firm and vibrant options. Avoid overly ripe fruits that may be too mushy. Aim for a colorful mix of textures—green and purple grapes, sweet watermelon, and juicy pineapple come together beautifully. If you can, go for seasonal fruits for the freshest taste and variety!

What’s the best way to store my Monster Fruit Skewers?
For optimal freshness, prep your fruit up to 24 hours in advance. Store them in sealed containers in the refrigerator, which will keep them crisp and delicious. Assemble the fruit skewers no more than 2 hours before you plan to serve to ensure every bite is refreshing. If you need to store assembled skewers, keep them tightly covered in the fridge for up to 2 hours.

Can I freeze Monster Fruit Skewers?
I wouldn’t recommend freezing Monster Fruit Skewers because the textures of fresh fruits don’t hold up well once thawed. Instead, enjoy them fresh! If you’re looking for alternatives, you could freeze individual fruit pieces and then blend them into a smoothie.

What if my candy eyes won’t stick to the fruit?
No worries! If your candy eyes aren’t sticking as planned, try using a thicker “glue” like cream cheese or a nut butter instead of honey. Simply apply a dab where you want to place the eyes, making sure they are secure. This method will help keep your fun monster faces intact, even during transport!

Are there any dietary considerations for making Monster Fruit Skewers?
Very! If you’re catering to allergies, make sure to check for any sensitivities to the fruits you choose. For instance, berries are common allergens. Additionally, some guests may have nut allergies, so using honey as your adhesive for the candy eyes can be a safer alternative. Always feel free to swap ingredients to fit your guests’ dietary needs!

Monster Fruit Skewers That Bring Fun to Your Fruit Platter

These Monster Fruit Skewers are a colorful and fun treat, perfect for Halloween gatherings, delighting both kids and adults.

  • Wooden skewers

For the Skewers

  • 2 cups Green grapes
  • 2 cups Purple grapes
  • 2 cups Watermelon (cubed or balled)
  • 2 cups Pineapple (cubed)
  • 1 cup Cantaloupe or honeydew (optional)
  • 1 cup Strawberries or blueberries (optional)

For Decoration

  • 1 pack Candy eyes
  • 1 tbsp Honey or nut butter (for securing candy eyes)

Step-by-Step Instructions for Monster Fruit Skewers

  1. Wash all the fruit under cool running water. Prepare watermelon, pineapple, and if using, cantaloupe or honeydew.
  2. Thread the fruits onto wooden skewers, alternating colors and aiming for 5-7 pieces per skewer.
  3. Add candy eyes to selected fruit pieces using honey or nut butter to secure them.
  4. Arrange the assembled skewers on a festive platter and serve.

Enjoy Monster Fruit Skewers fresh on the day of assembly. Store prepped fruits in the fridge for optimal freshness.

Appetizer
American
fruit platters, Halloween snacks, healthy treats, kid-friendly, Monster Fruit Skewers, party food

Filed Under: Appetizer

Delicious Apple Cider Float That Warms Your Heart

September 30, 2025 by grace bellamy Leave a Comment

As a chill in the air signals the arrival of sweater season, I find myself longing for cozy delights that make my heart sing. This is when my Apple Cider Float comes to life, bringing together the warmth of fresh, unfiltered apple cider and the creaminess of quality vanilla ice cream. In just 15 minutes, you can create this comforting treat that’s perfect for gatherings or a quiet night in. Not only is it super easy to whip up, but it’s also a delightful twist on traditional fall beverages that will have everyone smiling. So, are you ready to impress your family and friends with this warm, indulgent drink? Let’s dive into the recipe!

Apple Cider Float

Why is Apple Cider Float a Must-Try?

Comforting warmth: This delicious Apple Cider Float embraces the cozy flavors of fall, filling your home with an inviting aroma that feels like a hug in a mug.

Quick preparation: In just 15 minutes, you can delight your loved ones with a unique treat that requires minimal effort yet delivers maximum satisfaction.

Versatile topping options: Customize your float with optional toppings like chopped nuts or apple slices, making it perfect for any occasion.

Crowd-pleaser: This irresistible blend of sweet apple cider and creamy ice cream is sure to win over both friends and family, making it a staple at gatherings.

Perfect fall drink: Elevate your seasonal festivities with this delightful twist, and don’t forget to check out our tips for making homemade whipped cream for an extra special touch!

Apple Cider Float Ingredients

• Get ready to indulge in a delightful mix of flavors!

For the Float

  • Fresh unfiltered apple cider – the hero ingredient, providing a rich, authentic fall flavor.
  • Quality vanilla ice cream – choose a premium brand for that creamy texture and sweetness.

For Serving

  • Cinnamon sticks – not just for flavor, but they add a charming, rustic touch to your float.
  • Whipped cream – homemade or store-bought; it adds a luscious creaminess when heaped on top.
  • Caramel sauce – drizzle generously for an extra burst of sweetness that complements the cider.

Optional Toppings

  • Chopped nuts – a crunchy contrast that adds texture to your drink.
  • Apple slices – for decoration and a hint of freshness, they make your float look as good as it tastes!

This Apple Cider Float is all about comforting flavors and cozy vibes—let’s get started on creating this indulgent treat!

Step‑by‑Step Instructions for Apple Cider Float

Step 1: Warm the Cider
Pour 4 cups of fresh unfiltered apple cider into a medium saucepan and set it over medium heat. Stir occasionally as you heat the cider for about 5 minutes, or until it begins to steam gently. You’ll know it’s ready when the aroma fills your kitchen with warm, inviting notes of apple and spice.

Step 2: Prepare the Glasses
While the apple cider warms, grab your favorite glasses and use a large ice cream scoop to add two generous scoops of quality vanilla ice cream into each one. Make sure the ice cream is creamy and well-chilled for that delightful contrast with the warm cider. Set the glasses aside as you move on to the next step.

Step 3: Combine Cider and Ice Cream
Once the apple cider is steaming, carefully pour it over the scoops of vanilla ice cream in each glass until they’re filled to the top. The warmth of the cider will cause the ice cream to melt slightly, creating a beautiful and creamy float. Enjoy the sight as it swirls together in an enticing display.

Step 4: Add Final Touches
To each glass of your lovely Apple Cider Float, add a cinnamon stick for an aromatic touch. Next, pile on a generous dollop of whipped cream, letting it overflow lovingly at the edges. Finally, drizzle caramel sauce over the whipped cream, allowing it to cascade down the sides, adding both sweetness and a festive look.

Step 5: Serve Immediately
Bring the Apple Cider Floats to your table while they’re still warm, inviting your family and friends to dive into this delicious treat. The combination of creamy, warm, and sweet elements promises a delightful experience. Optional toppings like chopped nuts or apple slices can be offered on the side for those looking to add an extra crunch or flavor!

Apple Cider Float

How to Store and Freeze Apple Cider Float

Fridge: Store any leftover Apple Cider Float ingredients separately. Keep apple cider in an airtight container for up to 3 days.

Freezer: While the float itself is best served fresh, you can freeze the ice cream in an airtight container; it lasts for up to 2 months.

Reheating: If you have leftover cider, gently warm it on the stovetop before serving again.

Assembly: For the best experience, prepare the float fresh when you’re ready to serve, ensuring that ice cream stays creamy and delicious!

Expert Tips for the Best Apple Cider Float

  • Use Fresh Cider: Always opt for fresh, unfiltered apple cider for the best flavor; it’s the star of your Apple Cider Float!

  • Quality Ice Cream Counts: Choose a premium vanilla ice cream to elevate the creaminess of the float; low-quality ice cream can dilute the flavor.

  • Watch the Temperature: Warm the cider gently and avoid boiling; high heat can alter the delicious taste of your drink.

  • Whipped Cream Technique: For a perfect whipped topping, chill your mixing bowl and beat the cream until soft peaks form to get that luscious look and texture.

  • Presentation Matters: Add toppings like nuts or apple slices just before serving to keep them fresh and appealing; they make your float look even more inviting!

Make Ahead Options

These Apple Cider Floats are perfect for busy home cooks looking to save time! You can prep the fresh unfiltered apple cider up to 3 days in advance; simply pour it into an airtight container and refrigerate it until you’re ready to use it. For the ice cream, scoop out portions into glasses and cover them with plastic wrap, keeping them chilled in the freezer, for up to 24 hours. When you’re ready to serve, warm the cider in a saucepan as instructed, then combine it with the pre-scooped ice cream. Remember, adding the whipped cream and caramel sauce should be done right before serving to maintain that luscious texture. Enjoy your delightful Apple Cider Float with minimal fuss!

Apple Cider Float Variations

Feel free to tweak this delightful recipe to match your taste buds and dietary needs!

  • Dairy-Free: Substitute the vanilla ice cream with a coconut or almond milk-based ice cream for a creamy yet dairy-free delight. Your float will still taste indulgent!

  • Spiced Cider: Add cloves or allspice to the warming cider for an extra layer of spice that truly embodies the essence of fall. These spices will dance with the apple’s natural sweetness.

  • Nutty Twist: Incorporate chopped pecans or walnuts as a topping to add a crunchy texture and nutty flavor to your float. They create a delicious contrast to the sweet apple cider and creamy ice cream.

  • Caramel Apple Float: Blend in a dash of apple pie spice into the caramel sauce for a delightful flavor enhancement that echoes the flavors of the beloved dessert. It’s a sweet twist that will have you reminiscing!

  • Heat Lovers: For those who crave a kick, add a splash of cayenne pepper or a few slices of jalapeño to the cider as it warms. The heat from the spices will balance beautifully with the sweetness of the float.

  • Frozen Cider: Freeze the apple cider into ice cubes and use them instead of ice cream for a refreshing take. This cooling version will be perfect for warmer fall days.

  • Chocolate Swirl: Drizzle some chocolate sauce over the whipped cream for a luxurious flavor combination that chocolate lovers won’t be able to resist. It adds a delicious depth to the overall taste!

  • Autumn Blend: Mix in a splash of orange or cranberry juice to the cider for a fruity flavor fusion that brightens the drink and can elevate holiday vibes. Enjoy a beautiful burst of color and taste!

What to Serve with Apple Cider Float

As the warm notes of apple cider envelop you, creating the perfect cozy atmosphere, consider these delightful pairings to elevate your gathering.

  • Cinnamon Sugar Donuts: These soft, fluffy treats echo the fall flavors, making them a fun, sweet accompaniment to your float.
  • Nutty Apple Crisp: The crunchy oat-topped fruit dessert offers a delightful contrast to the creamy drink, creating a comforting duo.

Consider serving these together for an indulgent experience. The sweet flavors and crunch of the crisp pair perfectly with the Apple Cider Float, allowing your guests to enjoy a range of textures and tastes.

  • Caramel Corn: Sweet and slightly salty, this nutty snack is a playful treat that brings out the caramel notes in your float.
  • Cheesecake Bites: Rich and creamy, these small desserts balance the warm apple cider beautifully while providing a luxurious touch.

Adding a plate of these bites will create an inviting spread that makes your gathering feel complete. They’re sure to become crowd-pleasers, adding an element of surprise and delight.

  • Spiced Tea: A warm cup of spiced tea can complement the apple notes in your float, adding a layer of warmth and coziness.
  • Pumpkin Muffins: Moist and bursting with flavor, these muffins bring seasonal cheer and enhance the festive feel of your meal.

The combination of warm beverages and delicious snacks enhances the comforting experience, inviting everyone to stay a little longer and savor the flavors of fall.

Apple Cider Float

Apple Cider Float Recipe FAQs

How do I choose the right apple cider?
Absolutely! For the best flavor, opt for fresh, unfiltered apple cider. Look for cider that’s cloudy and rich in color, avoiding any that has a metallic taste or looks overly processed. The fresher the cider, the more vibrant your Apple Cider Float will be!

What’s the best way to store leftover apple cider?
Very! Store any leftover apple cider in an airtight container in your fridge. It can last up to 3 days. If you have a larger batch, you can consider freezing portions for later use, just be sure to thaw it in the refrigerator before reheating.

Can I freeze the Apple Cider Float?
Absolutely! While the float should ideally be enjoyed fresh, you can freeze the vanilla ice cream in an airtight container for up to 2 months. If you wish to save some cider, freeze it in separate portions, then thaw overnight in the refrigerator before gently heating it to serve again.

What should I do if my whipped cream isn’t thickening properly?
No worries! If your whipped cream isn’t thickening, it could be due to not enough fat content or the cream being too warm. Make sure to use heavy whipping cream and chill your mixing bowl before whipping. Start mixing on low speed, slowly increasing to medium-high speed until soft peaks form. This can take about 3-5 minutes. If it’s still not thick, try adding a teaspoon of cornstarch or powdered sugar!

Can pets have any ingredients in this recipe?
Very! Vanilla ice cream and apple cider are not suitable for pets due to the sugar content. If you want to share the fun, consider offering your furry friends a small treat of plain apple slices or unflavored, unsweetened yogurt instead. Always check if any ingredients may trigger allergies in your pets!

Delicious Apple Cider Float That Warms Your Heart

This Apple Cider Float combines warm apple cider and creamy vanilla ice cream for the perfect comforting drink.

  • Medium saucepan
  • ice cream scoop
  • glasses

For the Float

  • 4 cups fresh unfiltered apple cider (hero ingredient)
  • 2 scoops quality vanilla ice cream (choose a premium brand)

For Serving

  • 2 sticks cinnamon sticks (adds flavor and charm)
  • 1 cup whipped cream (homemade or store-bought)
  • 1/4 cup caramel sauce (drizzle generously)

Optional Toppings

  • 1/2 cup chopped nuts (adds texture)
  • 1 apple slices (for decoration)

Step-by-Step Instructions

  1. Pour 4 cups of fresh unfiltered apple cider into a medium saucepan over medium heat.
  2. Add two generous scoops of quality vanilla ice cream into each glass.
  3. Once the apple cider is steaming, carefully pour it over the scoops of vanilla ice cream.
  4. Add a cinnamon stick to each glass, followed by a generous dollop of whipped cream.
  5. Drizzle caramel sauce over the whipped cream and serve immediately.

Store leftover ingredients separately; cider lasts 3 days refrigerated while ice cream lasts 2 months in the freezer.

Drink
American
Apple Cider Float, comfort beverage, cozy drink, fall drink, indulgent treat

Filed Under: Drink

Decadent Tiramisu Brownies That Will Wow Your Taste Buds

September 30, 2025 by grace bellamy Leave a Comment

As I stood in my kitchen, the aroma of rich chocolate melted into buttery warmth, a little celebration took place within me. These Tiramisu Brownies are more than just a delightful dessert; they bring a playful twist to the classic Italian treat, marrying the smoothness of mascarpone with the deep flavors of espresso and chocolate. Perfect for impressing guests or indulging during a cozy night in, this recipe is crowd-pleaser and relatively easy to whip up—ideal for any home chef eager to step away from fast food and into the world of homemade delights. Whether you’re a chocolate lover or coffee enthusiast, these brownies are sure to become a cherished favorite. Ready to discover how to elevate your baking game? Let’s dive into the delightful world of Tiramisu Brownies!

Tiramisu Brownies

Why Are Tiramisu Brownies Irresistible?

Indulgent flavors collide in these brownies, creating a heavenly mixture of chocolate and coffee that’s hard to resist. Easy to make, this recipe is perfect for home cooks of any skill level. Unforgettable presentation with a dusting of cocoa transforms a simple dessert into a showstopper. Versatile enough to enjoy during special occasions or casual weeknights, these brownies can be served warm or cold! If you loved this recipe, you might also want to try my Banana Pudding Brownies for another sweet delight. So, grab your apron and treat yourself to these decadent delights!

Tiramisu Brownies Ingredients

For the Brownie Base
• Dark or semi-sweet chocolate – finely chopped for a rich and deep flavor.
• Natural cocoa powder – adds an extra chocolate boost to the brownies’ essence.
• Unsalted butter – enhances the fudgy texture; feel free to use salted butter if that’s what you have.
• Large eggs – at room temperature for better incorporation into the batter.
• Granulated sugar – provides sweetness and a lovely crust on top.
• Brown sugar – adds moisture and a hint of caramel flavor.
• All-purpose flour – for structure, be careful not to overmix to keep them fudgy.

For the Mascarpone Cream
• Mascarpone cheese – the star ingredient, contributing creaminess and a slight tang to balance the chocolate.
• Whipping cream – cold for an airy texture; make sure it’s full-fat for the best results.
• Powdered sugar – sweetens the cream, making it decadent but not overly sweet.
• Vanilla extract – enhances flavors beautifully; pure extract is best.

For the Coffee Soak
• Espresso powder – brings that delightful coffee essence into the brownies.
• Hot water – activates the espresso powder; make sure it’s freshly boiled for full flavor.
• Coffee liqueur or dark rum (optional) – gives an extra depth of flavor; you can skip it for a non-alcoholic version.

For Assembly
• Ladyfingers – these absorb the coffee soak beautifully, creating that classic tiramisu texture.
• Cocoa powder – for dusting before serving, adding a touch of elegance to your presentation.

Now that you have all the ingredients for these delicious Tiramisu Brownies, let’s move on to the baking magic! You won’t be disappointed with the flavors and the cozy vibes these brownies bring.

Step‑by‑Step Instructions for Tiramisu Brownies

Step 1: Preheat and Prepare the Pan
Begin by preheating your oven to 350°F (175°C). While the oven warms up, line a 9×9″ square baking pan with parchment paper, allowing some overhang for easy removal later. This step ensures your Tiramisu Brownies will come out cleanly and maintain their gorgeous presentation.

Step 2: Combine Chocolate and Cocoa
In a medium bowl, combine the finely chopped dark or semi-sweet chocolate with the cocoa powder. This dry mixture will set the foundation for the rich chocolate flavor of your brownies. Stir briefly and set aside while you prepare the butter mixture next.

Step 3: Melt the Butter
In a small saucepan, melt the unsalted butter over medium heat. Keep an eye on it, stirring occasionally until it melts completely. Allow the butter to cook until it turns golden brown and emits a nutty aroma, which usually takes about 3-5 minutes. Pour this fragrant butter over your chocolate and cocoa powder mixture, letting it sit for 3 minutes to soften the chocolate.

Step 4: Mix Eggs and Sugars
Grab a large mixing bowl and whisk together the room temperature eggs, granulated sugar, and brown sugar vigorously for about 3 minutes. You want the mixture to lighten in color and gain a bit of volume. Once fluffy, gently mix in the butter-chocolate combination until just combined, ensuring a rich flavor throughout the Tiramisu Brownies.

Step 5: Fold in the Flour
With care, fold the all-purpose flour into your wet mixture until just combined. Be cautious not to overmix, as we want to maintain the fudgy texture that makes Tiramisu Brownies irresistible. The batter should be thick and slightly glossy once the flour is fully incorporated.

Step 6: Bake the Brownies
Transfer the brownie batter into the prepared baking pan, smoothing it out into an even layer. Place the pan in the preheated oven and bake for 28-30 minutes. When done, a toothpick inserted into the center should come out mostly clean with a few moist crumbs, emphasizing that perfect fudgy texture you’re aiming for.

Step 7: Cool the Brownies
After baking, allow your brownies to cool in the pan for about 15-20 minutes. This cooling is essential for setting the structure before you prepare the delicious mascarpone cream. Resist the temptation to cut them too soon; patience will pay off with gorgeous squares later!

Step 8: Prepare the Mascarpone Cream
In a large mixing bowl, beat the cold mascarpone cheese until creamy and smooth. Gradually add in the cold whipping cream, powdered sugar, and vanilla extract. Continue beating until thickened and fluffy, which should take about 3-5 minutes. This luscious cream will perfectly complement the Tiramisu Brownies.

Step 9: Make the Coffee Soak
In a shallow bowl, whisk together the espresso powder, hot water, and coffee liqueur (if using) until combined. The hot water helps activate the espresso powder, ensuring a robust coffee flavor. This soak will infuse the ladyfingers, enhancing your brownie’s rich taste.

Step 10: Assemble the Layers
Briefly dip each ladyfinger into the coffee mixture, making sure they’re soaked on both sides but not soggy—about a second per side. Arrange the soaked ladyfingers on top of the cooled brownie layer, creating a delightful base for the mascarpone cream.

Step 11: Spread the Mascarpone Cream
Evenly spread the mascarpone cream over the soaked ladyfingers, smoothing the top so it looks inviting. Now, cover the dish and chill in the refrigerator for 1 hour. This step allows the flavors to meld beautifully and gives the cream time to set.

Step 12: Serve and Garnish
Before serving, sift cocoa powder over the top of the chilled dessert for a lovely finish. Use the parchment overhang to lift the Tiramisu Brownies out of the pan and onto a cutting board. Slice into squares and serve to your eager guests, delighting in the blend of chocolate and coffee that defines these wonderful Tiramisu Brownies.

Tiramisu Brownies

Make Ahead Options

These Tiramisu Brownies are perfect for meal prep enthusiasts! You can prepare the brownie base up to 3 days in advance—just bake them, let them cool completely, and store them in an airtight container at room temperature. The mascarpone cream can also be made up to 24 hours ahead; simply cover it tightly and refrigerate. When you’re ready to serve, dip the ladyfingers in the coffee soak, assemble the layers, and spread the mascarpone cream over them. Finally, chill for at least 1 hour before dusting with cocoa powder. This ensures your Tiramisu Brownies maintain their delightful textures and flavors, making them just as delicious for your busy weeknights or special occasions!

Tiramisu Brownies Variations & Substitutions

Feel free to play around with these Tiramisu Brownies by adding your twist to this scrumptious recipe!

  • Dairy-Free: Use coconut cream instead of mascarpone and almond milk in place of whipping cream for a dairy-free delight.
  • Gluten-Free: Substitute all-purpose flour with almond flour or a gluten-free blend for a tasty gluten-free option.
  • Chocolate Lovers: Add a handful of chocolate chips to the brownie batter for extra gooeyness and bites of chocolate throughout.
  • Nutty Crunch: Fold in crushed walnuts or hazelnuts into the brownie batter for a delightful texture contrast and nutty flavor.
  • Flavor Infusion: Swap the coffee liqueur for a flavored liqueur like hazelnut or Irish cream for a creative twist on your brownies.
  • Caramel Drizzle: Drizzle homemade or store-bought caramel sauce over the mascarpone cream for an indulgent, sweet surprise.
  • Spicy Kick: Add a pinch of cayenne pepper to the brownie batter or mascarpone cream for a delightful spicy undertone that enhances the chocolate.
  • Seasonal Touch: Incorporate spices like cinnamon or pumpkin spice in the brownie base to embrace seasonal flavors, perfect for fall!

With these variations, your Tiramisu Brownies can be tailored to suit any taste preference or dietary need. Enjoy whipping up your personalized batch, and check out my recipe for S’mores Brownies for another delightful way to treat yourself!

Expert Tips for Tiramisu Brownies

Perfect Chocolate: Use high-quality dark or semi-sweet chocolate for the best flavor and texture. Avoid chocolate chips as they won’t melt as smoothly.

Room Temperature Eggs: Make sure your eggs are at room temperature for easier mixing. This helps create a fluffier brownie texture.

Gentle Mixing: When incorporating flour, fold it gently to avoid overmixing. This preserves the fudgy consistency of your Tiramisu Brownies.

Soaking Ladyfingers: Don’t soak ladyfingers for too long—just a quick dip is enough. If they’re too soggy, they can make your brownies too wet.

Chill Properly: Allow the assembled brownies to chill in the refrigerator for at least an hour. Chilling helps set the mascarpone cream and deepens the flavors.

How to Store and Freeze Tiramisu Brownies

Room Temperature: Keep uneaten Tiramisu Brownies at room temperature for up to 2 days, covered with plastic wrap to maintain freshness.

Fridge: Store brownies in the fridge for up to 5 days. Ensure they are in an airtight container to prevent them from drying out and to preserve that creamy mascarpone layer.

Freezer: For longer storage, freeze Tiramisu Brownies for up to 3 months. Wrap each piece tightly in plastic wrap and then place in a freezer-safe container for best results.

Reheating: Thaw brownies in the fridge overnight before serving. If desired, warm them briefly in the microwave for about 10-15 seconds for a fresh-baked taste.

What to Serve with Tiramisu Brownies

Treat your taste buds to a delightful meal that perfectly complements the rich, creamy goodness of Tiramisu Brownies.

  • Fresh Berries: Their natural sweetness and tartness provide a refreshing contrast to the rich brownie flavors.
  • Vanilla Ice Cream: A scoop of creamy vanilla ice cream adds lusciousness and tempers the intense chocolate notes. The melting ice cream will blend beautifully with every bite.
  • Espresso Martini: This sophisticated cocktail mirrors the espresso flavor within the brownies, making it a perfect pairing for fun gatherings.
  • Chocolate Ganache Tart: Intensify the dessert experience with a rich chocolate tart; the two chocolate desserts combined create a decadent feast.
  • Almond Biscotti: These crunchy treats are perfect for dipping in coffee or enjoyed alongside the brownies, enhancing the coffee flavors.
  • Whipped Cream: Light and airy, whipped cream offers a sweet, creamy touch that complements the brownies’ texture while providing a lovely presentation.
  • Mint Tea: A gentle, refreshing mint tea can cleanse the palate and balance the indulgence of the brownies.
  • Ricotta Cheesecake: For a lighter dessert option, a slice of creamy ricotta cheesecake marries beautifully with the bold flavors of Tiramisu Brownies.
  • Café au Lait: This half-coffee, half-milk beverage echoes the coffee notes, creating a warm and inviting drink option to enjoy with dessert.

Tiramisu Brownies

Tiramisu Brownies Recipe FAQs

How do I choose the right chocolate for Tiramisu Brownies?
Absolutely! For the best flavor and texture, opt for high-quality dark or semi-sweet chocolate, avoiding chocolate chips as they may not melt as smoothly. Look for chocolate with at least 60% cocoa content for a rich, decadent taste.

What’s the best way to store leftovers?
Very simple! Store uneaten Tiramisu Brownies at room temperature for up to 2 days covered in plastic wrap. For longer freshness, transfer them to an airtight container and keep them in the fridge for up to 5 days. This helps preserve that luscious mascarpone layer!

Can I freeze Tiramisu Brownies?
Yes, you can! To freeze Tiramisu Brownies, wrap each piece tightly in plastic wrap and place them in a freezer-safe container. They will stay fresh for up to 3 months. When you’re ready to enjoy, simply thaw them in the fridge overnight for the best texture.

What should I do if my brownies come out too dry?
If your Tiramisu Brownies turn out dry, there are a few adjustments you can make next time! First, make sure not to overbake them; they should be pulled from the oven when a toothpick comes out mostly clean with a few moist crumbs. Additionally, check your oven temperature with an oven thermometer for accuracy, as incorrect temperatures can lead to drying out.

Are Tiramisu Brownies safe for kids or people with lactose intolerance?
Great question! These brownies contain both mascarpone cheese and whipping cream, which are high in lactose. If you want to accommodate someone with lactose intolerance, you could substitute the mascarpone with lactose-free options. For really small children, ensure the espresso liqueur is completely omitted or replaced with a non-caffeinated option.

How long should I chill the brownies before serving?
For the best flavor and consistency, it’s recommended to chill the assembled Tiramisu Brownies in the refrigerator for at least 1 hour before serving. This allows the mascarpone cream to thicken and the flavors to meld beautifully!

Decadent Tiramisu Brownies That Will Wow Your Taste Buds

These Tiramisu Brownies combine rich chocolate and coffee for an indulgent dessert experience.

  • Oven
  • 9×9-inch baking pan
  • parchment paper
  • Mixing bowls
  • Whisk
  • Saucepan
  • Rubber spatula
  • shallow bowl

For the Brownie Base

  • 8 oz Dark or semi-sweet chocolate, finely chopped (for a rich and deep flavor.)
  • 1/2 cup Natural cocoa powder (adds an extra chocolate boost.)
  • 1/2 cup Unsalted butter (or salted if preferred.)
  • 3 large Eggs (at room temperature.)
  • 1 cup Granulated sugar (provides sweetness.)
  • 1/2 cup Brown sugar (adds moisture and caramel flavor.)
  • 1 cup All-purpose flour (for structure.)

For the Mascarpone Cream

  • 8 oz Mascarpone cheese (contributes creaminess.)
  • 1 cup Whipping cream (cold and full-fat.)
  • 1/2 cup Powdered sugar (to sweeten the cream.)
  • 1 tsp Vanilla extract (pure extract is best.)

For the Coffee Soak

  • 1 tbsp Espresso powder (for coffee essence.)
  • 1 cup Hot water (freshly boiled.)
  • 2 tbsp Coffee liqueur or dark rum (optional.)

For Assembly

  • 24 pieces Ladyfingers (absorb the coffee soak.)

Step-by-Step Instructions

  1. Preheat your oven to 350°F (175°C) and line a 9×9″ baking pan with parchment paper.
  2. Combine the chopped chocolate and cocoa powder in a medium bowl; set aside.
  3. Melt unsalted butter over medium heat until golden brown; pour over chocolate and cocoa mixture.
  4. In a large bowl, whisk together eggs, granulated sugar, and brown sugar until fluffy.
  5. Gently mix in the butter-chocolate mixture until just combined.
  6. Fold in the flour until thick and glossy, being careful not to overmix.
  7. Transfer batter to the baking pan and bake for 28-30 minutes.
  8. Cool brownies in the pan for 15-20 minutes before preparing the mascarpone cream.
  9. Beat mascarpone cheese until creamy; gradually add whipping cream, powdered sugar, and vanilla until thick.
  10. Whisk together espresso powder, hot water, and liqueur in a shallow bowl.
  11. Dip ladyfingers into the coffee mixture briefly, then arrange on top of cooled brownies.
  12. Spread mascarpone cream over the ladyfingers, cover, and chill for 1 hour.
  13. Dust with cocoa powder before serving; slice and enjoy!

Use high-quality ingredients for best results. Allow to chill for one hour for better flavor integration.

Dessert
Italian
baking, chocolate, coffee, dessert, homemade, Tiramisu Brownies

Filed Under: Dessert

Decadent Black Velvet Cupcakes That Wow Every Taste Bud

September 30, 2025 by grace bellamy Leave a Comment

As I stood in my kitchen, the rich aroma of cocoa wafting through the air, I had a fleeting moment of culinary bliss. I was about to create the most indulgent treat that would soon become a favorite in our home: Black Velvet Cupcakes. These cupcakes deliver an irresistible knack for drama while remaining surprisingly easy to whip up—perfect for a night in or any special occasion. With their moist, tender texture paired with a creamy black cocoa frosting, these gems offer a unique twist to the classic treat we all love. Plus, they’re a crowd-pleaser that will elevate your dessert game without requiring hours in the kitchen. Are you ready to impress your family and friends with this delightful recipe? Let’s get baking!

Black Velvet Cupcakes

Why are Black Velvet Cupcakes irresistible?

Moist and Tender: With a combination of buttermilk and vegetable oil, these cupcakes come out super moist, ensuring every bite is a delight.

Unique Twist: The black cocoa powder adds a distinctively dark color and rich flavor, setting these cupcakes apart from the ordinary.

Quick to Make: In just 38 minutes, you can whip up a dozen indulgent treats that are perfect for sharing or keeping all to yourself!

Versatile Delight: Whether for a birthday, holiday, or simply a cozy night in, these cupcakes impress for any occasion.

Easy to Decorate: With a creamy frosting made from simple ingredients, you can get creative and personalize your dessert. Want to try more sweet treats? Check out our Decadent Desserts for inspiration!

Black Velvet Cupcake Ingredients

• Dive into the decadent world of Black Velvet Cupcakes with these essential ingredients!

For the Cupcakes

  • All-purpose flour – Acts as the base, giving structure to your cupcakes.
  • Black cocoa powder – This special ingredient provides a deep chocolate flavor and striking color.
  • Baking soda – Helps the cupcakes rise, making them light and fluffy.
  • Kosher salt – Enhances flavors and balances the sweetness.
  • Large eggs – Ensure they’re room temperature for better emulsification and texture.
  • Sugar – Creates sweetness and moisture in the batter.
  • Vegetable oil – Adds moisture without altering flavors; you can substitute with melted coconut oil for a different essence.
  • Vanilla extract – Infuses a warm, aromatic flavor.
  • Buttermilk – Adds richness and tang, enhancing the cupcake’s tenderness; sour cream can be a great substitute!
  • White vinegar – Reacts with the baking soda to give that extra lift.

For the Frosting

  • Unsalted butter – Use room temperature butter for a smooth and creamy frosting.
  • Confectioners’ sugar – Sweetens and gives body to your frosting; sift it for a smoother finish.
  • Kosher salt – Just a pinch to balance the sweetness of the frosting.
  • Vanilla extract – Adds flavor depth to your creamy topping.
  • Heavy cream – Gives the frosting a luscious consistency; milk can be used in a pinch, but the cream is richer.
  • Black cocoa powder – Reinforces that chocolate theme for the frosting, enhancing its boldness.

Get ready to create a delightful treat that will wow every taste bud—with every ingredient playing a part in the amazing flavor and texture of your Black Velvet Cupcakes!

Step‑by‑Step Instructions for Black Velvet Cupcakes

Step 1: Preheat the Oven
Begin by preheating your oven to 350°F (175°C) to ensure it’s hot when the batter is ready. While waiting for the oven to reach temperature, line a muffin tray with 12 cupcake liners for easy removal later. This simple preparation step sets you up for perfect Black Velvet Cupcakes that bake evenly.

Step 2: Mix Dry Ingredients
In a large mixing bowl, whisk together the all-purpose flour, black cocoa powder, baking soda, and kosher salt until fully combined. This step is crucial as it helps aerate the ingredients, ensuring a fluffy cupcake texture. Set the bowl aside so you can focus on the wet ingredients next.

Step 3: Combine Wet Ingredients
In a separate large jug, whisk together the eggs, vegetable oil, buttermilk, vanilla extract, white vinegar, and sugar. Mix until the mixture is smooth and homogenous, which typically takes about 1-2 minutes. The combination of these wet ingredients gives the Black Velvet Cupcakes their moist and tender qualities.

Step 4: Combine Wet and Dry Mixtures
Pour the wet mixture into the bowl of dry ingredients. Gently stir the mixture with a spatula until just combined, being careful not to overmix. The batter should be slightly lumpy which is a sign that you’ve achieved the right texture for your delicious Black Velvet Cupcakes, ready for the next step.

Step 5: Fill the Cupcake Liners
Spoon the batter into the prepared cupcake liners, filling each about halfway. This allows space for the cupcakes to rise while baking. Bake in your preheated oven for 18-20 minutes, watching for them to spring back when lightly pressed and for a toothpick inserted into the center to come out clean.

Step 6: Cool the Cupcakes
Once baked, remove the muffin tray from the oven and allow the cupcakes to cool in the tray for about 15 minutes. After that, transfer them to a cooling rack to cool completely. This step is vital as it prevents the cupcakes from becoming soggy and helps maintain their fluffy texture.

Step 7: Prepare the Frosting
In a stand mixer fitted with the paddle attachment, combine the two sticks of unsalted butter and confectioners’ sugar. Start mixing on low speed for about 2-3 minutes until well combined. This creates the foundation of your creamy topping for the Black Velvet Cupcakes that will be simply irresistible.

Step 8: Beat for Thickness
Increase the mixer speed to medium-high and beat the mixture for about 2 minutes, until it becomes thick and fluffy. This step adds volume and the perfect consistency to your frosting, which is crucial for making it easy to spread or pipe onto your Black Velvet Cupcakes.

Step 9: Add Flavorings
Stop the mixer and carefully add kosher salt, vanilla extract, and black cocoa powder. Begin mixing slowly to incorporate, then increase the speed to medium-high for another 2 minutes. This process ensures that the frosting is rich in flavor, enhancing the chocolatey goodness of your cupcakes.

Step 10: Finish the Frosting
With the mixer set to the lowest speed, gradually pour in the heavy cream. Beat the mixture until it becomes creamy and spreadable, which should take about 1-2 minutes. The addition of cream lends a luscious texture to your frosting, making each bite of your Black Velvet Cupcakes a decadent experience.

Step 11: Frost the Cupcakes
Once the cupcakes are completely cooled, frost them as desired with your creamy black cocoa frosting. You can use a piping bag for elegant swirls or simply spread it on with a spatula, giving you the freedom to get creative! Enjoy the delightful transformation of your Black Velvet Cupcakes into a visually stunning treat.

Black Velvet Cupcakes

What to Serve with Black Velvet Cupcakes

Complete your delightful dessert experience with these charming pairings that perfectly complement the rich flavors of your Black Velvet Cupcakes.

  • Fresh Berries: The tartness of raspberries or strawberries adds a refreshing contrast that balances the sweet, chocolatey indulgence.
  • Vanilla Ice Cream: Creamy and smooth, this classic pairing provides a nostalgic touch that enhances each cupcake bite.
  • Espresso: A bold cup of espresso brings out the deep cocoa notes in the cupcakes, creating a delightful flavor synergy.
  • Chocolate Ganache: For the ultimate chocolate experience, pour warm ganache over your cupcakes for a rich and decadent finish.
  • Coconut Whipped Cream: Light and airy, coconut whipped cream can add a unique tropical twist that cuts through the sweetness beautifully.
  • Salted Caramel Sauce: Drizzling caramel adds a lovely contrast to the dark chocolate, creating a sweet and salty flavor explosion.
  • Milkshake: A chocolate or vanilla milkshake is a fun, nostalgic drink that pairs perfectly for a cozy dessert time!
  • Mint Leaves: A sprinkle of fresh mint leaves not only adds a pop of color but also a refreshing flavor that brightens each bite.

Make Ahead Options

These Black Velvet Cupcakes are a fantastic choice for meal prep enthusiasts looking to save time! You can prepare the cupcake batter up to 24 hours in advance by mixing the dry ingredients and wet ingredients separately. Just refrigerate the wet mixture (to prevent the baking soda from activating) and combine them when you’re ready to bake. The baked cupcakes can last for 3 days at room temperature in an airtight container. For the frosting, you can make it a day ahead; simply store it in the fridge. When you’re ready to serve, frost the cooled cupcakes and enjoy delicious treats that taste just as fresh as the day they were made!

Black Velvet Cupcakes Variations

Feel free to sprinkle your own magic into these cupcakes, making them uniquely yours!

  • Gluten-Free: Substitute all-purpose flour with a 1:1 gluten-free blend for a safe and delicious treat.

  • Dairy-Free: Use almond or soy milk in place of buttermilk and coconut oil for the vegetable oil to keep things creamy and tasty.

  • Sugar-Free: Replace regular sugar with a suitable sugar substitute like stevia or erythritol for a lighter option.

  • Add Spice: Stir in a teaspoon of espresso powder or instant coffee for a delightful mocha flavor that enhances the chocolate.

  • Boozy Boost: A splash of Kahlúa or rum in the batter or frosting can add a sophisticated twist, making these cupcakes perfect for adult gatherings. Just a little goes a long way!

  • Nutty Crunch: Fold in chopped walnuts or pecans into the batter for added texture and a lovely nutty flavor that contrasts beautifully with the rich chocolate.

  • Fruity Delight: Top your cupcakes with a dollop of raspberry or cherry jam underneath the frosting for a surprising fruity zing with every bite.

  • Spicy Twist: Add a dash of cayenne pepper or cinnamon to the cupcake batter for a warm, spicy kick that pairs surprisingly well with the chocolate.

Feeling inspired? Check out our Decadent Desserts for more sweet creations to try!

Expert Tips for Black Velvet Cupcakes

Perfect Temperature: Ensure your eggs and buttermilk are at room temperature for a smoother batter and denser cupcakes.

Don’t Overmix: Stir the wet and dry ingredients just until combined. Overmixing can result in dense cupcakes that lose their light texture.

Baking Time: Keep a close eye on your cupcakes while they bake. Checking for doneness with a toothpick at the minimum time ensures moist, fluffy cupcakes without drying them out.

Cool Completely: Allow your cupcakes to cool fully before frosting. This prevents the frosting from melting and ensures a beautiful presentation.

Frosting Consistency: If your frosting seems too thick, add a little more heavy cream one tablespoon at a time to achieve a spreadable consistency for your Black Velvet Cupcakes.

How to Store and Freeze Black Velvet Cupcakes

Room Temperature: Store unfrosted Black Velvet Cupcakes in an airtight container at room temperature for up to 3 days to keep them soft and irresistible.

Fridge: If frosted, place the cupcakes in the fridge where they’ll stay fresh for up to 5 days. Just make sure they’re covered to prevent drying!

Freezer: For longer storage, wrap each cupcake tightly in plastic wrap and place them in a freezer-safe bag. They can be frozen for up to 3 months, ready to enjoy anytime!

Reheating: To enjoy your Black Velvet Cupcakes warm, simply reheat in the microwave for 10-15 seconds or allow them to come to room temperature on the countertop before serving.

Black Velvet Cupcakes

Black Velvet Cupcakes Recipe FAQs

What kind of cocoa powder should I use for Black Velvet Cupcakes?
Absolutely! For the best flavor and color, use black cocoa powder, which gives these cupcakes their distinctive dark hue and rich taste. Regular cocoa powder can be used, but the result will differ in color and intensity of chocolate flavor.

How do I store leftover Black Velvet Cupcakes?
To keep your cupcakes fresh, store unfrosted Black Velvet Cupcakes in an airtight container at room temperature for up to 3 days. If they are frosted, you’ll want to refrigerate them in a covered container, where they will last for about 5 days. Just remember to let them come to room temperature before serving for the best flavor!

Can I freeze Black Velvet Cupcakes?
Yes, you can! To freeze your Black Velvet Cupcakes, wrap each cooled cupcake tightly in plastic wrap. After that, place them in a freezer-safe bag. They can be stored in the freezer for up to 3 months. When you’re ready to enjoy them, simply thaw them in the fridge overnight or leave them at room temperature for a couple of hours before serving.

What should I do if my Black Velvet Cupcakes come out dense?
If your Black Velvet Cupcakes are dense, it might be due to overmixing the batter. Mixing too long can develop the gluten in the flour, resulting in a tough texture. To avoid this, combine the wet and dry ingredients until just mixed; it’s okay if there are a few lumps! Also, make sure your leavening agents (like baking soda) are fresh for optimal rise.

Are Black Velvet Cupcakes suitable for people with allergies?
While these cupcakes are delicious, they contain common allergens like eggs, dairy, and gluten. If you’re accommodating allergies, consider using egg substitutes like applesauce or flaxseed meal, and dairy-free alternatives like almond milk or coconut yogurt. Just be aware that substituting ingredients can alter the original flavor and texture slightly.

Decadent Black Velvet Cupcakes That Wow Every Taste Bud

Indulge in Black Velvet Cupcakes that are moist, tender, and easy to make for any occasion.

  • Oven
  • Muffin tray
  • Mixing bowls
  • stand mixer
  • spatula

For the Cupcakes

  • 1 1/2 cups all-purpose flour
  • 1/2 cup black cocoa powder (provides deep chocolate flavor)
  • 1 teaspoon baking soda
  • 1/2 teaspoon kosher salt
  • 2 large eggs (room temperature)
  • 1 cup sugar
  • 1/2 cup vegetable oil (or melted coconut oil)
  • 2 teaspoons vanilla extract
  • 1 cup buttermilk (or sour cream)
  • 1 teaspoon white vinegar

For the Frosting

  • 1 cup unsalted butter (room temperature)
  • 3 cups confectioners’ sugar (sift for smoothness)
  • 1/4 teaspoon kosher salt (just a pinch)
  • 2 teaspoons vanilla extract
  • 1/4 cup heavy cream (milk can be used if needed)
  • 2 tablespoons black cocoa powder (for frosting)

Cupcake Preparation

  1. Preheat the oven to 350°F (175°C) and line a muffin tray with 12 cupcake liners.
  2. In a large bowl, whisk together flour, black cocoa powder, baking soda, and kosher salt until fully combined.
  3. In a separate jug, whisk together eggs, vegetable oil, buttermilk, vanilla, vinegar, and sugar until smooth.
  4. Pour wet mixture into dry ingredients and gently stir until just combined, leaving the batter slightly lumpy.
  5. Fill each cupcake liner halfway with batter and bake for 18-20 minutes, until springy and toothpick comes out clean.
  6. Cool in the tray for 15 minutes before transferring to a cooling rack.

Frosting Preparation

  1. In a stand mixer, beat butter and confectioners’ sugar on low for 2-3 minutes until combined.
  2. Increase speed to medium-high and beat for about 2 minutes until thick and fluffy.
  3. Add kosher salt, vanilla, and black cocoa powder and mix slowly, then increase speed to medium-high for another 2 minutes.
  4. Gradually pour in heavy cream while mixing at low speed until creamy and spreadable, about 1-2 minutes.
  5. Frost cooled cupcakes with the prepared frosting as desired.

Ensure ingredients are at room temperature for best results and avoid overmixing to maintain light texture.

Dessert
American
baking, Black Velvet Cupcakes, chocolate cupcakes, cupcakes, dessert, frosting

Filed Under: Dessert

Chewbacca Brownies: Irresistibly Fun and Deliciously Decadent

September 30, 2025 by grace bellamy Leave a Comment

As the rich aroma of melting chocolate fills my kitchen, I can’t help but feel a spark of creativity take over. Today, I’m embracing my inner Star Wars fan with these delightful Chewbacca Brownies! This fun twist on a classic treat not only brings joy to any dessert table but also invites the whole family to participate in the decorating process. In just 40 minutes, you’ll have a batch of irresistibly fudgy brownies that are perfect for gatherings or a cozy night in. With just a few extra ingredients for Chewbacca’s iconic face, these brownies transform into an edible masterpiece that’s sure to impress. So, are you ready to channel your inner Wookiee and create a dessert that’s as adventurous as a galaxy far, far away? Let’s dive into the recipe!

Chewbacca Brownies

Why are Chewbacca Brownies a must-try?

Irresistible Fun: Decorating these brownies as Chewbacca brings a delightful twist that makes baking an adventure for kids and adults alike!

Decadently Fudgy: Rich chocolate paired with a gooey center creates a brownie experience that’s simply divine.

Quick & Easy: In just 40 minutes, you can whip up this crowd-pleaser without the hassle of complicated steps.

Versatile Treat: Whether for a themed party or a cozy night in, these brownies pair beautifully with items like Galactic Punch for an unforgettable experience.

Sweet Bonding Time: Include the whole family in frosting and decorating, turning dessert into a memorable event!

Chewbacca Brownies Ingredients

For the Brownie Batter

  • Unsalted butter – this adds richness; make sure it’s melted for a smooth mix.
  • Semi-sweet chocolate chips – they provide the perfect level of sweetness and chocolaty flavor.
  • Granulated sugar – this balances the bitterness of the cocoa and helps create a fudgy texture.
  • Eggs – they bind the ingredients together and contribute to a moist consistency.
  • Vanilla extract – enhances the cocoa flavor and adds warmth to the overall taste.
  • All-purpose flour – it gives structure to the brownies, ensuring they hold their form.
  • Unsweetened cocoa powder – essential for that deep chocolate flavor in your Chewbacca brownies.
  • Salt – a pinch really elevates the flavor and rounds out the sweetness.

For Decoration

  • Chocolate frosting – use this creamy goodness to cover the brownies, creating a delicious base for decoration.
  • Chocolate chips and candies – these are perfect for crafting Chewbacca’s iconic features—get creative and have fun!

Step‑by‑Step Instructions for Chewbacca Brownies

Step 1: Melt the Chocolate and Butter
Begin by combining the unsalted butter and semi-sweet chocolate chips in a saucepan over low heat. Stir continuously until the mixture is smooth and glossy, about 5 minutes. Remove from heat, allowing it to cool slightly while you prepare the next steps. This melted blend will be the rich foundation for your Chewbacca Brownies.

Step 2: Combine Sugar and Chocolate Mixture
In a large mixing bowl, add the granulated sugar to your cooled chocolate and butter mixture. Mix together until well combined, creating a silky, inviting texture. This should only take about 1 to 2 minutes. The sugar will start to dissolve, enhancing the sweetness and flavor of your Chewbacca Brownies.

Step 3: Incorporate Eggs and Vanilla
Next, crack in the eggs, adding them one at a time. Whisk until completely incorporated, then mix in the vanilla extract. You’ll want to see a smooth, cohesive mixture forming—this adds depth to the flavor. This step will take around 2 to 3 minutes as you ensure everything is evenly blended together.

Step 4: Mix Dry Ingredients
In a separate bowl, sift together the all-purpose flour, unsweetened cocoa powder, and salt. This ensures there are no lumps and evenly distributes the cocoa, setting the stage for your deliciously fudgy Chewbacca Brownies. Set aside the dry mix for a moment as you prepare to combine these elements.

Step 5: Combine Wet and Dry Ingredients
Gradually fold the dry ingredients into the wet mixture, stirring gently until just combined. Avoid overmixing to maintain that fudgy texture that makes these brownies special. You’ll see a beautifully rich batter forming, filled with deep chocolate hues—this is the heart of your Chewbacca Brownies.

Step 6: Prepare to Bake
Pour the brownie batter into a greased baking dish, smoothing out the top with a spatula. Ensure it’s evenly spread, which will help them bake uniformly. Preheat your oven to 350°F (175°C) during this step so it’s ready to go when you are.

Step 7: Bake the Brownies
Place the baking dish in the preheated oven and bake for 20 to 25 minutes. Keep an eye on them, and look for a toothpick inserted in the center to come out with only a few moist crumbs. This visual cue is essential to ensure your brownies are fudgy, not overdone.

Step 8: Cool Before Frosting
Once baked to perfection, remove the brownies from the oven and allow them to cool in the pan for about 10 minutes. Then, transfer them to a wire rack to cool completely before frosting. Patience is key here, as warm brownies can lead to messy frosting!

Step 9: Frost the Brownies
After your Chewbacca Brownies have cooled fully, spread a luxurious layer of chocolate frosting evenly over the top. Use a spatula or knife for a smooth finish that covers every inch, preparing your canvas for decoration.

Step 10: Decorate for Chewbacca
Finally, unleash your creativity by using chocolate chips and candies to craft Chewbacca’s iconic features on the frosted brownies. Get artistic here—be it his eyes, nose, or furry texture. This colorful decoration will transform your brownies into a fun and delicious tribute to the beloved character!

Chewbacca Brownies

Expert Tips for Chewbacca Brownies

  • Use Quality Chocolate: Choose high-quality semi-sweet chocolate chips for a richer flavor. This ensures your Chewbacca Brownies taste decadent!

  • Don’t Overmix: While combining wet and dry ingredients, mix just until combined. Overmixing can lead to cakey brownies instead of the desired fudginess.

  • Check for Doneness: Keep an eye on the baking time; every oven varies. A toothpick should come out with a few moist crumbs for the perfect gooey center.

  • Cool Completely: Allow brownies to cool completely before frosting to prevent the frosting from dripping off. This patience leads to a beautifully decorated Chewbacca!

  • Creative Decorations: Have fun with the decorations! Add different types of candies for unique features on your Chewbacca Brownies, making them an edible artwork.

  • Storage Tips: Store leftovers in an airtight container to maintain freshness. They’ll taste just as good for days, making them perfect for sharing!

How to Store and Freeze Chewbacca Brownies

Room Temperature: Keep your Chewbacca Brownies in an airtight container at room temperature for up to 3 days. This preserves their fudgy texture and rich flavor.

Fridge: Store brownies in the fridge for up to a week in an airtight container. This can help prolong freshness but may slightly alter the texture.

Freezer: For longer storage, freeze your brownies for up to 2 months. Wrap them tightly in plastic wrap and then in aluminum foil to prevent freezer burn.

Reheating: To enjoy your frozen Chewbacca Brownies, thaw them in the fridge overnight. For a warm treat, pop them in a microwave for 10-15 seconds before serving!

What to Serve with Chewbacca Brownies

Indulge in a delightful feast as you pair these whimsical brownies with complementary flavors and fun textures.

  • Galactic Punch: This vibrant, fruity drink adds a festive touch, perfect for themed gatherings and enhancing your dessert experience.

  • Vanilla Ice Cream: A scoop of creamy vanilla ice cream balances the rich chocolate, bringing coolness and elevating the brownie experience.

  • Fresh Berries: Strawberries or raspberries offer a refreshing tartness that cuts through the sweetness of the brownies, creating a delicious contrast.

  • Whipped Cream: Light and airy, whipped cream adds a whimsical element that complements the dense fudginess of the brownies beautifully.

Pair your Chewbacca Brownies with these delightful additions, making every bite a tasty adventure!

Chewbacca Brownies Variations & Substitutions

Feel free to unleash your creativity and customize these brownies to your taste!

  • Gluten-Free: Replace all-purpose flour with a 1:1 gluten-free baking flour blend for a deliciously inclusive treat.
  • Nutty Touch: Stir in 1/2 cup of chopped walnuts or pecans into the batter for delightful crunch and a nutty flavor in every bite. Nuts add a satisfying texture and elevate the classic brownie experience.
  • Minty Fresh: Add 1/2 teaspoon of peppermint extract to the batter for a refreshing mint chocolate twist that enhances the fudginess.
  • Coconut Bliss: Incorporate 1/2 cup of unsweetened shredded coconut into the batter for a tropical flair that perfectly complements the chocolate. Each brownie will reflect a touch of paradise, making your dessert even more enticing!
  • Spicy Kick: Add a pinch of cayenne pepper or cinnamon to the batter for an exciting heat that contrasts with the sweetness of the chocolate. This unexpected twist turns your brownies into a delightful adventure!
  • Dairy-Free: Substitute the butter with coconut oil and use dairy-free chocolate chips for a lactose-free treat that doesn’t sacrifice taste.
  • Layered Delight: Create a marbled effect by swirling in some peanut butter or Nutella before baking, giving your brownies a decadent layer of flavor.
  • Fruity Surprise: Fold in 1/2 cup of diced strawberries or raspberries for a fresh burst that brings brightness to your brownies.

These variations not only keep things exciting but also allow you to experiment while baking—you might find a new favorite! If you’re feeling adventurous, pair these brownies with a refreshing homemade Galactic Punch, creating a truly out-of-this-world experience!

Make Ahead Options

These Chewbacca Brownies are perfect for those busy days when time is tight! You can make the brownie batter up to 24 hours in advance; simply prepare it through Step 5, then cover and refrigerate it until you’re ready to bake. To maintain that rich flavor and fudgy texture, be sure to bring it back to room temperature before pouring it into the baking dish. The fully baked brownies can be stored in an airtight container at room temperature for up to 3 days or refrigerated for up to a week. When you’re ready to frost and decorate, just take them out, let them cool completely, then spread on the chocolate frosting and let the kids create Chewbacca’s iconic features—prepping ahead not only saves time but ensures a fun family activity that leaves your dessert just as delicious!

Chewbacca Brownies

Chewbacca Brownies Recipe FAQs

How do I choose the right ripeness for the ingredients?
Absolutely! For the best flavor and texture in your Chewbacca Brownies, make sure your eggs are fresh—look for eggs that have a clean, uncracked shell and are stored in the refrigerator. Using room temperature eggs can help them blend more smoothly into your brownie batter. As for the butter, it should be softened but completely melted when combined with the chocolate chips for that silky consistency.

What’s the best way to store my Chewbacca Brownies?
Very! To keep those brownies fresh, store them in an airtight container at room temperature for up to 3 days. If you want to prolong their life, refrigerate them, and they will stay good for up to a week. Just be aware that refrigeration may slightly alter the texture, making them a bit firmer. I often wrap them in parchment paper before sealing to keep their fudgy goodness intact!

Can I freeze Chewbacca Brownies?
Certainly! Freezing is a great option if you want to save some for later. Wrap each brownie tightly in plastic wrap, and then place them in a zip-top freezer bag or wrap them again in aluminum foil to prevent freezer burn. They can be stored for up to 2 months. When you’re ready to enjoy them, thaw the brownies in the fridge overnight and pop them in the microwave for 10-15 seconds for a warm treat!

What should I do if my brownies turn out cakey instead of fudgy?
That’s a common hiccup! To achieve that delicious fudgy texture, ensure you aren’t overmixing when combining your wet and dry ingredients. Mix just until everything is incorporated, and also keep a close eye on the baking time. Overbaking can lead to a drier, cakier brownie; the key is to pull them out when a toothpick comes out with just a few moist crumbs—this means fudgy perfection!

Are there any dietary considerations I should keep in mind for Chewbacca Brownies?
Yes! If you’re making these for a crowd, consider common allergens like eggs and gluten, as the recipe contains both. You can substitute in egg replacers or gluten-free flour if needed, but remember that texture may vary slightly. Also, be cautious with decorations; some candies may contain allergens like nuts or dairy, so check those labels if necessary!

Chewbacca Brownies: Irresistibly Fun and Deliciously Decadent

Chewbacca Brownies are a fun and delicious twist on a classic dessert that brings joy and creativity to any gathering.

  • Saucepan
  • Mixing Bowl
  • Baking Dish
  • spatula
  • Whisk
  • wire rack

For the Brownie Batter

  • 1 cup Unsalted butter (this adds richness; make sure it’s melted for a smooth mix.)
  • 2 cups Semi-sweet chocolate chips (they provide the perfect level of sweetness and chocolaty flavor.)
  • 1 cup Granulated sugar (this balances the bitterness of the cocoa and helps create a fudgy texture.)
  • 4 large Eggs (they bind the ingredients together and contribute to a moist consistency.)
  • 2 teaspoons Vanilla extract (enhances the cocoa flavor and adds warmth to the overall taste.)
  • 1 cup All-purpose flour (it gives structure to the brownies, ensuring they hold their form.)
  • ¾ cup Unsweetened cocoa powder (essential for that deep chocolate flavor in your Chewbacca brownies.)
  • ½ teaspoon Salt (a pinch really elevates the flavor and rounds out the sweetness.)

For Decoration

  • 1 cup Chocolate frosting (use this creamy goodness to cover the brownies, creating a delicious base for decoration.)
  • Chocolate chips and candies (perfect for crafting Chewbacca’s iconic features—get creative and have fun!)

Step-by-Step Instructions for Chewbacca Brownies

  1. Melt the Chocolate and Butter: Combine the unsalted butter and semi-sweet chocolate chips in a saucepan over low heat. Stir until smooth, about 5 minutes.
  2. Combine Sugar and Chocolate Mixture: In a large mixing bowl, add the granulated sugar to the cooled chocolate and butter mixture. Mix until well combined.
  3. Incorporate Eggs and Vanilla: Crack in the eggs one at a time and whisk until fully incorporated, then mix in the vanilla extract.
  4. Mix Dry Ingredients: In a separate bowl, sift together the all-purpose flour, unsweetened cocoa powder, and salt.
  5. Combine Wet and Dry Ingredients: Gradually fold the dry ingredients into the wet mixture, stirring gently until just combined.
  6. Prepare to Bake: Pour the brownie batter into a greased baking dish and ensure it’s evenly spread.
  7. Bake the Brownies: Bake in the preheated oven at 350°F for 20 to 25 minutes.
  8. Cool Before Frosting: Allow the brownies to cool in the pan for about 10 minutes before transferring them to a wire rack.
  9. Frost the Brownies: Spread a layer of chocolate frosting evenly over the top of the cooled brownies.
  10. Decorate for Chewbacca: Use chocolate chips and candies to craft Chewbacca’s iconic features on the frosted brownies.

Perfect for themed parties or family gatherings. Include everyone in the decorating process for a fun activity!

Dessert
American
Chewbacca Brownies, chocolate brownies, family baking, fudgy brownies, fun dessert, themed dessert

Filed Under: Dessert

Indulge in Dark Chocolate Blackberry Cupcakes Bliss

September 30, 2025 by grace bellamy Leave a Comment

As I stood in my kitchen, the rich aroma of dark chocolate danced in the air, luring me into a world of sweet possibilities. Let me introduce you to my latest indulgence: Dark Chocolate Blackberry Cupcakes. These delightful treats not only brighten up your dessert table but also come together in just 40 minutes—perfect for those spontaneous moments when a craving strikes! Each bite combines the decadence of dark chocolate with the tart burst of juicy blackberries, making them a crowd-pleaser at any gathering. Plus, they’re a fantastic way to impress your friends or a perfect reward after a long day. Who can resist a little homemade magic? Ready to dive into the recipe and bake a batch of happiness?

Dark Chocolate Blackberry Cupcakes

Why are Dark Chocolate Blackberry Cupcakes irresistible?

Heavenly harmony: The blend of rich dark chocolate and vibrant blackberries creates an unforgettable flavor combination that tantalizes your taste buds.

Quick and easy: With only 40 minutes from start to finish, these cupcakes are perfect for when you need a sweet fix without a lot of fuss.

Fresh and fruity: The addition of fresh blackberries adds a burst of juicy flavor, elevating this cupcake from ordinary to exceptional.

Crowd favorite: Whether it’s a birthday party or an afternoon treat, these cupcakes will steal the show and have everyone begging for the recipe!

Versatile option: Pair them with a scoop of vanilla ice cream or top with a dollop of freshly whipped cream for an extra touch of indulgence. So, why not bake a batch and impress your loved ones?

Dark Chocolate Blackberry Cupcake Ingredients

These Dark Chocolate Blackberry Cupcakes are made with simple yet rich ingredients that come together to create a lavish treat!

For the Cupcake Batter

  • All-purpose flour – A great foundation for a soft, fluffy cupcake.
  • Unsweetened cocoa powder – Provides that deliciously rich chocolate flavor.
  • Granulated sugar – Sweetens the batter beautifully and helps with moisture.
  • Baking powder – Ensures your cupcakes rise perfectly for a delightful texture.
  • Baking soda – Works in conjunction with baking powder for that extra lift.
  • Salt – Enhances the other flavors, balancing sweetness and richness.
  • Unsalted butter – Adds richness and moisture to each cupcake.
  • Large eggs – Binds everything together while helping the cupcakes rise.
  • Vanilla extract – Elevates the flavor profile with its warm notes.
  • Buttermilk – Keeps the cupcakes moist and tender, thanks to its acidity.

For the Add-ins

  • Fresh blackberries – Bursting with juicy goodness that adds a delightful tartness.
  • Dark chocolate chips – Melt in your mouth, creating pockets of velvety chocolate bliss.

Now that you’re equipped with all the essential ingredients, it’s time to embrace the joy of baking these tempting Dark Chocolate Blackberry Cupcakes!

Step‑by‑Step Instructions for Dark Chocolate Blackberry Cupcakes

Step 1: Preheat the Oven
Begin by preheating your oven to 350°F (175°C). As it warms up, line a cupcake pan with paper liners; this will make for easy removal once your delicious Dark Chocolate Blackberry Cupcakes are baked. Take a moment to gather your ingredients, ensuring everything is at hand and easily accessible.

Step 2: Mix Dry Ingredients
In a large mixing bowl, combine 1 cup of all-purpose flour, 1/2 cup of unsweetened cocoa powder, 1 cup of granulated sugar, 1/2 teaspoon of baking powder, 1/2 teaspoon of baking soda, and 1/4 teaspoon of salt. Whisk these dry ingredients together until they are well blended, creating a harmonious dry mix that serves as the foundation for your scrumptious cupcakes.

Step 3: Combine Wet Ingredients
Add 1/2 cup of softened unsalted butter, 2 large eggs, 1 teaspoon of vanilla extract, and 1/2 cup of buttermilk to the dry mixture. Using a hand mixer or whisk, blend everything together until you achieve a smooth and creamy batter. The mixture should be thick yet pourable, showcasing a rich chocolatey hue that’s tempting to behold.

Step 4: Fold in Blackberries and Chocolate Chips
Gently fold in 1 cup of fresh blackberries and 1/2 cup of dark chocolate chips into the batter. Take care not to overmix; you want to maintain the integrity of the blackberries and keep the dark chocolate chips nestled throughout the batter. This step brings vibrant colors and textures to your Dark Chocolate Blackberry Cupcakes.

Step 5: Fill Cupcake Liners
Distribute the luscious batter evenly into the prepared cupcake liners, filling each about two-thirds full. This allows space for the cupcakes to rise beautifully as they bake. As you scoop and pour, relish in the sight of the batter, knowing that delightful cupcakes await you in just a short while.

Step 6: Bake the Cupcakes
Place the filled cupcake pan into your preheated oven and bake for approximately 20 minutes. Keep an eye on them—when a toothpick inserted into the center comes out clean, they’re done! You’ll notice the tops spring back slightly when touched, indicating they’ve reached that perfect level of doneness.

Step 7: Cool Before Frosting
Once baked, remove the Dark Chocolate Blackberry Cupcakes from the oven and allow them to cool in the pan for about 5-10 minutes. Then, transfer them to a wire rack to cool completely. This crucial step ensures that your cupcakes set perfectly, ready to be frosted or enjoyed plain!

Dark Chocolate Blackberry Cupcakes

Dark Chocolate Blackberry Cupcakes Variations

Customize your Dark Chocolate Blackberry Cupcakes with these fun and flavor-filled suggestions! Let your creativity shine in the kitchen.

  • Gluten-Free: Substitute all-purpose flour with a gluten-free flour blend for a tasty gluten-free option. Your cupcakes will still be soft and moist!

  • Vegan Twist: Replace eggs with flaxseed meal and buttermilk with almond milk mixed with vinegar. The flavor stays rich, and your vegan friends will love them!

  • Spicy Kick: Add a pinch of cayenne pepper or chili powder to the cupcake batter for a surprising heat that complements the chocolate’s richness.

  • Nutty Delight: Fold in 1/2 cup of chopped walnuts or pecans to the batter for an extra crunch and a nutty flavor that pairs beautifully with chocolate.

  • Zesty Citrus: Incorporate the zest of one orange or lemon into the batter for a refreshing twist that brightens up the chocolate and berry flavors.

  • Berry Mix-Up: Swap blackberries for raspberries or blueberries for a different berry experience, or mix all three for a delightful medley of flavors.

  • Decadent Frosting: Whip up a chocolate ganache covering instead of standard icing for an extra indulgent finish that chocolate lovers will adore.

  • Chocolate Drizzle: Melt some extra dark chocolate and drizzle it over the cooled cupcakes for an elegant touch; it’s a feast for the eyes as much as the taste buds!

These variations can be tailored to suit your taste or dietary restrictions, making each batch a unique creation! And for an added touch of luxury, consider pairing your cupcakes with a scoop of homemade vanilla ice cream or a dollop of freshly whipped cream. Enjoy the sweet journey of exploration in your baking!

How to Store and Freeze Dark Chocolate Blackberry Cupcakes

Room Temperature: Store your Dark Chocolate Blackberry Cupcakes in an airtight container at room temperature for up to 3 days to maintain their freshness and moisture.

Fridge: If you want to extend their shelf life, place the cupcakes in the fridge, where they’ll stay delicious for up to a week. Just remember to bring them back to room temperature before serving.

Freezer: To freeze, wrap each cupcake individually in plastic wrap and then place them in a freezer bag. They can be frozen for up to 3 months. Thaw in the fridge overnight before enjoying.

Reheating: If you prefer your cupcakes warm, simply pop them in the microwave for a few seconds until warm and the chocolate is melty—a perfect indulgence!

Make Ahead Options

These Dark Chocolate Blackberry Cupcakes are ideal for busy home cooks looking to save time during the week! You can prepare the batter and refrigerate it for up to 24 hours, which not only keeps the flavors fresh but also makes it convenient when you’re ready to bake. Simply follow the first four steps of the recipe, then cover the bowl tightly with plastic wrap to prevent the batter from drying out or absorbing odors. When you’re ready to bake, just fill the cupcake liners and pop them in the oven as directed, yielding delicious cupcakes that are just as moist and flavorful as if made fresh on the spot!

What to Serve with Dark Chocolate Blackberry Cupcakes

Indulging in these moist and delectable cupcakes can be made even sweeter when paired with delightful accompaniments that elevate their richness.

  • Whipped Cream: A dollop of freshly whipped cream adds a light, airy touch that beautifully balances the chocolate’s richness.
  • Vanilla Ice Cream: Creamy vanilla ice cream is a classic pairing, offering a cool contrast against the warm chocolate tones. Imagine the flavors melding together with every bite—pure bliss!
  • Fresh Mint: A sprig of mint not only brightens the plate but adds a refreshing burst that complements the intense chocolate and fruity blackberry.
  • Chocolate Ganache: A drizzle of warm chocolate ganache offers an extra layer of decadence that chocolate lovers will adore.
  • Raspberry Coulis: This tart sauce provides a vibrant color contrast, enhancing the fruity notes while adding a touch of acidity that cuts through the sweetness.
  • Espresso: A cup of rich espresso or coffee brings out the chocolate’s depth, creating a luxurious experience with each bite.
  • Fruit Salad: A fresh fruit salad with berries can preserve brightness and offer a light, refreshing counterpoint to these decadent cupcakes.
  • Sparkling Wine: Pairing with a glass of sparkling wine can add a festive note, making your dessert feel even more special for gatherings.
  • Chocolate-Covered Strawberries: For an elegant touch, serve alongside chocolate-covered strawberries, inviting guests to savor an extravagant chocolate journey.
  • Almond Biscotti: Serve with crispy almond biscotti for a delightful crunch, making each cupcake even more memorable as you savor the textures.

Expert Tips for Dark Chocolate Blackberry Cupcakes

  • Use Fresh Blackberries: Fresh blackberries deliver the best flavor and texture. Avoid using frozen ones, as they can make the batter too liquidy.

  • Room Temperature Ingredients: Ensure your butter and eggs are at room temperature for a smoother batter that blends beautifully and produces fluffy cupcakes.

  • Don’t Overmix: When folding in the blackberries and chocolate chips, gently combine until just incorporated to maintain a light texture in your Dark Chocolate Blackberry Cupcakes.

  • Check Doneness Early: Ovens can vary, so start checking your cupcakes a couple of minutes before the recommended baking time to prevent overbaking.

  • Cooling Time Matters: Allow your cupcakes to cool completely on a wire rack before frosting. This step prevents the frosting from melting and helps the flavors develop fully.

Dark Chocolate Blackberry Cupcakes

Dark Chocolate Blackberry Cupcakes Recipe FAQs

What should I look for when selecting fresh blackberries?
Absolutely! When choosing blackberries, look for plump, shiny berries without any dark spots or signs of mold. They should be deep purple to black in color, indicating ripeness. If they’re too firm or have a dull appearance, they might not be as sweet or juicy.

How should I store leftover cupcakes?
Very simple! Store your Dark Chocolate Blackberry Cupcakes in an airtight container at room temperature for up to 3 days. If you want them to last longer, move them to the fridge where they can stay fresh for up to a week. Just ensure they come back to room temperature before serving for the best flavor and texture.

Can I freeze Dark Chocolate Blackberry Cupcakes? What’s the safest way to do it?
Definitely! To freeze, wrap each cupcake individually in plastic wrap to prevent freezer burn. Then, place them in a freezer bag. They can be stored in the freezer for up to 3 months. When you’re ready to enjoy them, thaw in the refrigerator overnight. If you’d like them warm, simply pop them in the microwave for a few seconds.

What should I do if my cupcakes turn out dry?
If your cupcakes aren’t as moist as you’d like, there could be a few reasons. First, ensure you’re measuring your ingredients accurately, especially the flour, which can easily be over-measured. Another tip is to check the baking time—overbaking can often lead to a drier texture. To remedy dry cupcakes, you can make a simple syrup with equal parts sugar and water, brush it on the cupcakes, and top with frosting for added moisture and flavor.

Are these cupcakes safe for individuals with dietary restrictions?
You might want to watch out! These cupcakes contain gluten, dairy, and eggs, so they aren’t suitable for those with gluten intolerance, dairy allergies, or vegans. However, you can make substitutions like using gluten-free flour, dairy-free butter, and egg replacements (such as applesauce or flax eggs) to accommodate different dietary needs without sacrificing flavor. It’s warm and inviting to see so many options for everyone!

Indulge in Dark Chocolate Blackberry Cupcakes Bliss

These Dark Chocolate Blackberry Cupcakes combine rich chocolate and juicy blackberries for a delightful dessert experience.

  • Oven
  • Cupcake pan
  • Mixing Bowl
  • Whisk
  • hand mixer

For the Cupcake Batter

  • 1 cup all-purpose flour
  • 1/2 cup unsweetened cocoa powder
  • 1 cup granulated sugar
  • 1/2 teaspoon baking powder
  • 1/2 teaspoon baking soda
  • 1/4 teaspoon salt
  • 1/2 cup unsalted butter (softened)
  • 2 large eggs
  • 1 teaspoon vanilla extract
  • 1/2 cup buttermilk

For the Add-ins

  • 1 cup fresh blackberries
  • 1/2 cup dark chocolate chips

Step-by-Step Instructions

  1. Preheat your oven to 350°F (175°C) and line a cupcake pan with paper liners.
  2. In a large mixing bowl, combine all-purpose flour, unsweetened cocoa powder, granulated sugar, baking powder, baking soda, and salt. Whisk together.
  3. Add softened unsalted butter, eggs, vanilla extract, and buttermilk to the dry mixture. Blend until smooth.
  4. Fold in fresh blackberries and dark chocolate chips gently.
  5. Distribute batter evenly into cupcake liners, filling each about two-thirds full.
  6. Bake for approximately 20 minutes. Check for doneness with a toothpick.
  7. Allow cupcakes to cool in the pan for 5-10 minutes, then transfer to a wire rack to cool completely.

Use room temperature ingredients for best results, and check doneness early to avoid overbaking.

Dessert
American
blackberry, chocolate, cupcakes, Dark Chocolate Blackberry Cupcakes, dessert, easy recipes

Filed Under: Dessert

Spooky Halloween Monster Mac and Cheese for a Frightful Feast

September 30, 2025 by grace bellamy Leave a Comment

As the crisp autumn air sets in, there’s something magical about creating dishes that evoke the spirit of Halloween. Enter the Halloween Monster Mac and Cheese—an easy and whimsical recipe that turns a comforting classic into a spooky surprise. In just 15 minutes, this playful dish transforms from a simple box of mac and cheese into a vibrant green spectacle topped with candy eyeballs, making it a fun crowd-pleaser for both kids and adults. Not only is it a quick-prep recipe, but it’s also perfect for anyone looking to say goodbye to fast food and hello to homemade magic. Are you ready to add a deliciously mischievous twist to your Halloween festivities?

Halloween Monster Mac and Cheese

Why is Halloween Monster Mac and Cheese a Must-Try?

Spooktacular Fun: This dish transforms a classic into a creepy masterpiece, delighting both children and adults alike.
Quick and Easy: With just 15 minutes of total time, it’s a lifesaver when Halloween festivities call for delicious food!
Creative Engagement: Your little monsters will love helping to mix in the green food coloring and place the candy eyeballs.
Endless Appeal: Fancy something different? Try pairing it with a refreshing Apple Goats Cheese salad for a balanced meal!
Ghoulishly Unique: Impress your guests with a dish that’s as tasty as it is eye-catching. This Halloween Monster Mac and Cheese will be the star of your spooky feast!

Halloween Monster Mac and Cheese Ingredients

For the Mac and Cheese

  • 1 box mac and cheese – A classic base that makes preparing this spooky delight easy and fun.
  • 4 tablespoons butter – This adds richness and creaminess to the sauce, ensuring a decadent bite.
  • green food coloring – A few drops transform your cheesy goodness into a ghoulish green treat.

For the Topping

  • candy eyeballs – These provide the perfect creepy garnish, making your dish irresistibly fun and silly!

Step‑by‑Step Instructions for Halloween Monster Mac and Cheese

Step 1: Boil the Water
Begin by bringing a large pot of water to a rolling boil over high heat. This should take about 5 minutes. Make sure the pot is big enough to allow the pasta to move freely. Once boiling, it’s time to add the pasta from your mac and cheese box, creating the perfect foundation for your Halloween Monster Mac and Cheese.

Step 2: Cook the Pasta
Add the macaroni to the boiling water and cook for 12-13 minutes. Stir occasionally to prevent sticking. You’ll know it’s done when the pasta is tender but still has a slight bite. Drain the cooked pasta in a colander, and then return it to the pot you used to boil it, ready for the next steps.

Step 3: Mix in the Cheese Sauce
With the drained pasta back in the pot, stir in the cheese sauce packet and 4 tablespoons of butter. Over low heat, mix thoroughly until the butter melts and the pasta becomes evenly coated in that creamy, cheesy goodness. This will help create a luscious base for your spooky dish, enhancing your Halloween Monster Mac and Cheese.

Step 4: Add Some Spookiness
To give your mac and cheese a frightful shade, gradually add a few drops of green food coloring. Stir and mix until the pasta reaches your desired creepy green hue. The transformation is exciting, so feel free to let the little ones help with this fun and colorful step, making your Halloween Monster Mac and Cheese even more engaging.

Step 5: Serve with a Scary Touch
Spoon the vibrant green Halloween Monster Mac and Cheese into serving bowls. To complete the spooky look, generously top each serving with candy eyeballs. These fun, creepy toppings will make your dish not only delicious but also a whimsical centerpiece for your Halloween festivities. Enjoy this playful, homemade treat!

Halloween Monster Mac and Cheese

Halloween Monster Mac and Cheese Variations

Feel the creative spirit as you explore fun twists for this spooky dish!

  • Gluten-Free: Swap the mac and cheese box for gluten-free pasta and a gluten-free cheese mix for a tasty alternative.
    This way, your gluten-sensitive friends can join in on the Halloween fun without missing out!

  • Veggie-Loaded: Incorporate chopped broccoli or spinach for a nutritious punch, making your Halloween Monster Mac and Cheese more colorful and healthy.
    It’s a great way to sneak in some greens while still keeping it deliciously creamy!

  • Spicy Kick: Add a pinch of cayenne pepper or a dash of hot sauce to the cheese sauce for a fiery twist.
    This unexpected heat can thrill those who crave a little extra zing in their Halloween feast!

  • Cheese Lovers: Mix in shredded mozzarella or pepper jack for gooey texture and flavor explosions, transforming your mac into a cheesy wonderland.
    A cheese lover’s dream, this variation turns comfort food into an unforgettable experience!

  • Protein Boost: Stir in cooked crumbled bacon or diced chicken for a hearty meal that combines spookiness with satisfyingly substantial bites.
    It’s a family-friendly way to turn this festive dish into a main course that packs a punch!

  • Herb-infused: Incorporate fresh herbs like parsley or chives for bright flavor and a lovely pop of color on top.
    This will elevate your Halloween Monster Mac and Cheese, giving it that gourmet touch you can feel good about serving!

  • Dairy-Free: Use coconut milk and dairy-free cheese alternatives to create a rich and creamy base that everyone can enjoy.
    This swap ensures your dish stays comforting, even for those avoiding dairy!

You’ll also love pairing these variations with a refreshing Beetroot Goats Cheese salad, adding a delightful contrast to your spooky feast. Enjoy getting creative with your Halloween Monster Mac and Cheese!

Expert Tips for Halloween Monster Mac and Cheese

  • Perfect Pasta: Ensure your water is at a rolling boil before adding the pasta. This helps maintain the pasta’s texture and prevents stickiness.

  • Color Gradually: When using green food coloring, add a few drops at a time. You can always make it spookier, but it’s hard to lighten it once it’s too dark.

  • Mix Thoroughly: Make sure to stir the cheese sauce and butter until fully melted and well-combined. This ensures each bite of your Halloween Monster Mac and Cheese is creamy and smooth.

  • Candy Eyeball Placement: For a visually striking presentation, randomly place the candy eyeballs on top of the mac and cheese. This adds a delightful surprise and makes serving more fun!

  • Avoid Overcooking: Keep a close watch on your pasta during cooking. Overcooked pasta can become mushy, ruining the fun of your spooky dish. Aim for al dente!

  • Custom Add-ins: Feel free to sneak in some veggies like peas or broccoli! This way, your Halloween Monster Mac and Cheese isn’t just fun—it’s packed with nutrients too.

Make Ahead Options

Preparing your Halloween Monster Mac and Cheese ahead of time makes for a quick, stress-free meal when spooky festivities are in full swing! You can cook the pasta and mix in the cheese sauce (without adding the green food coloring or candy eyeballs) up to 24 hours in advance. Simply refrigerate the mixture in an airtight container. When you’re ready to serve, reheat it gently on the stove, adding a few drops of green food coloring to revitalize that vibrant hue, and top with candy eyeballs just before serving. This ensures your dish remains just as delicious and visually appealing, cutting down your kitchen time and allowing you to enjoy the Halloween fun!

What to Serve with Halloween Monster Mac and Cheese

As you gather around with friends and family for a spooky feast, it’s essential to complement your ghoulish creation with equally delightful sides.

  • Crispy Garlic Bread: This buttery indulgence perfectly contrasts the creamy mac and cheese. Each bite delivers satisfying crunch and layers of flavor.

  • Roasted Vegetable Medley: A mix of seasonal veggies like carrots, zucchini, and bell peppers adds a healthy, colorful accompaniment that brightens the plate while balancing out the richness.

  • Halloween Spinach Salad: Toss fresh spinach with sliced strawberries, feta cheese, and a light balsamic dressing. The sweetness of the berries and tang of the cheese cut through the creaminess.

  • Pumpkin Soup: This warm, inviting soup brings in flavors of fall, making a cozy addition to your spooky meal. Serve it in small bowls for a fun presentation.

  • Creepy Spider Cupcakes: For dessert, consider Halloween-themed cupcakes topped with chocolate frosting and licorice to create spider shapes. They’re a cheeky way to end your meal!

  • Witch’s Brew Cocktail: Serve a refreshing, spooky drink by mixing green lemonade with a splash of soda water. Add floating gummy worms for a fun twist!

  • Cheesy Cauliflower Bake: A marvelous alternative for those craving more veggies. Its cheesy goodness matches well with the Halloween Monster Mac and Cheese without distracting from its appeal.

  • Apple slices with Caramel Dip: For a crunchy and sweet finish, consider fresh apple slices served with warm caramel dip. The contrast in flavors will leave everyone wanting more!

How to Store and Freeze Halloween Monster Mac and Cheese

Fridge: Store leftover Halloween Monster Mac and Cheese in an airtight container in the refrigerator for up to 3 days. Reheat in the microwave, adding a splash of milk to restore creaminess.

Freezer: Freeze any remaining mac and cheese in a freezer-safe container for up to 2 months. To reheat, thaw overnight in the fridge and warm in the microwave or on the stovetop until heated through.

Reheating: For the best texture, serve leftovers directly from the fridge, adding a bit more butter to the pot as you warm it. Stir often to prevent sticking.

Serving Size: Divide portions before freezing for easy meal prep. This way, you can enjoy your Halloween Monster Mac and Cheese any day of the week!

Halloween Monster Mac and Cheese

Halloween Monster Mac and Cheese Recipe FAQs

How do I select the right mac and cheese for this recipe?
Absolutely! When choosing a box of mac and cheese, go for a classic brand that includes a cheese sauce packet. This ensures you get that creamy, cheesy goodness while keeping preparation simple and fun.

How should I store leftover Halloween Monster Mac and Cheese?
Store leftover Halloween Monster Mac and Cheese in an airtight container in the refrigerator for up to 3 days. Make sure to let it cool down a bit before sealing it up to prevent condensation. When you’re ready to enjoy it again, reheat in the microwave and stir in a splash of milk to bring back some creaminess.

Can I freeze Halloween Monster Mac and Cheese?
Yes, you can! To freeze your Halloween Monster Mac and Cheese, place it in a freezer-safe container, making sure to leave a little space at the top as it may expand. It will keep well for up to 2 months. To reheat, simply thaw it in the fridge overnight and warm it in the microwave or on the stovetop until hot throughout, stirring frequently.

What can I do if my mac and cheese turns out too dry?
Very! If your mac and cheese seems a bit dry, don’t worry. Simply add a splash of milk or extra butter while reheating. Stir it well to combine, ensuring that it becomes creamy again. Additionally, check the stove setting—using low heat while melting the cheese can help maintain moisture.

Is this recipe safe for kids with dairy allergies?
Good question! This Halloween Monster Mac and Cheese does contain dairy. If you’re cooking for someone with a dairy allergy, I recommend using dairy-free mac and cheese alternatives and substituting the butter with plant-based options. Always check ingredient labels for any hidden dairy ingredients and have fun customizing your dish!

Spooky Halloween Monster Mac and Cheese for a Frightful Feast

Transform a classic into a spooky delight with Halloween Monster Mac and Cheese, featuring candy eyeballs and a vibrant green hue.

  • Large Pot
  • Colander
  • stirring spoon

For the Mac and Cheese

  • 1 box mac and cheese (A classic base that makes preparing this spooky delight easy and fun.)
  • 4 tablespoons butter (Adds richness and creaminess to the sauce.)
  • 1 drop green food coloring (A few drops transform the cheesy goodness into a ghoulish green treat.)

For the Topping

  • 1 cup candy eyeballs (Perfect creepy garnish for a fun presentation.)

Step-by-Step Instructions

  1. Begin by bringing a large pot of water to a rolling boil over high heat. This should take about 5 minutes.
  2. Add the macaroni to the boiling water and cook for 12-13 minutes. Stir occasionally to prevent sticking.
  3. With the drained pasta back in the pot, stir in the cheese sauce packet and 4 tablespoons of butter. Mix thoroughly until the butter melts.
  4. To give your mac and cheese a frightful shade, gradually add a few drops of green food coloring. Stir until the pasta reaches your desired hue.
  5. Spoon the Halloween Monster Mac and Cheese into serving bowls and generously top each serving with candy eyeballs.

Store leftover mac and cheese in an airtight container for up to 3 days. Freeze for up to 2 months.

Main Dishes
American
cheesy, Halloween, mac and cheese, Monster, party food, Spooky

Filed Under: Main Dishes

Delightful Midnight Malibu Dirty Soda You’ll Crave Tonight

September 30, 2025 by grace bellamy Leave a Comment

As I lounged on a warm summer evening, the sounds of laughter and chatter filled the air, and I realized just how important it is to savor the little moments. Enter the Midnight Malibu Dirty Soda—a delightful twist on a classic favorite that’s perfect for bringing a touch of the tropics to your gatherings. This refreshing concoction marries the fizzy kick of Dr Pepper with velvety coconut cream and a hint of luscious blackberry syrup, creating a unique drink that’s not only fun to make but also a crowd-pleaser. The best part? It’s incredibly quick to whip up, so you can focus more on enjoying time with loved ones and less on complex prep work. Curious about how a simple drink can transport you to a beachside paradise? Let’s dive into this flavorful journey together!

Midnight Malibu Dirty Soda

Why is Midnight Malibu Dirty Soda so special?

Refreshingly Unique: This drink combines bold flavors for an extraordinary taste experience that your taste buds will adore.

Quick and Easy: With just a few simple ingredients, you can whip up this delightful beverage in under 10 minutes, allowing you to focus on enjoyment and relaxation.

Perfect for Any Occasion: Whether it’s a sunny afternoon or a cozy gathering, this refreshing treat brings an element of fun to any setting.

Tropical Vibes: The coconut cream and blackberry syrup create a beach-inspired escape that transports you straight to your favorite tropical destination with every sip.

Crowd-Pleaser: Serve it at parties, BBQs, or even as a refreshing after-dinner drink—everyone will be asking for seconds! Don’t forget to check out our guide on homemade syrup for that extra special touch in your drinks.

Midnight Malibu Dirty Soda Ingredients

Dive into the tropical flavors of this refreshing drink with these simple yet delightful ingredients!

For the Soda

  • 12 oz Dr Pepper – Chill it like best friends, straight from the fridge for maximum fizz!

For the Creamy Mix

  • 2 tablespoons coconut cream – Thick and creamy, it adds a luscious texture that complements the soda perfectly.
  • ½ teaspoon vanilla extract – Pure vanilla elevates the flavor profile, bringing warmth and depth.

For the Sweetness

  • 1-2 tablespoons blackberry syrup – Whether homemade or store-bought, it adds a sweet and tangy touch that makes your Midnight Malibu Dirty Soda truly irresistible!

For Serving

  • Ice cubes – Perfect for keeping your drink refreshingly cool, they’re a must for that ideal beachy vibe!

Step‑by‑Step Instructions for Midnight Malibu Dirty Soda

Step 1: Prepare Your Glass
Start by filling a tall glass all the way with ice cubes, making sure to leave just a bit of space at the top. This will ensure your Midnight Malibu Dirty Soda stays refreshingly cold and bubbly. Aim for a glass that holds at least 16 ounces to accommodate the fizzy drink and creamy toppings.

Step 2: Add the Dr Pepper
Next, slowly pour the cold Dr Pepper over the ice until the glass is filled to about ¾ full. The ice will make a satisfying clinking sound as the soda cascades, creating a delightful sight. This cold base is essential for the perfect blend of flavors in your Midnight Malibu Dirty Soda.

Step 3: Drizzle in the Blackberry Syrup
Take 1–2 tablespoons of blackberry syrup and drizzle it gently into the soda. The syrup should swirl down through the Dr Pepper, creating beautiful streaks of color. This step not only adds sweetness but also gives your drink a vibrant, eye-catching appearance that invites everyone to take a sip.

Step 4: Mix Coconut Cream and Vanilla
In a small cup, combine the 2 tablespoons of thick coconut cream with ½ teaspoon of pure vanilla extract. Use a spoon to stir the mixture together until it becomes creamy and smooth. This luscious topping will float on top of your Midnight Malibu Dirty Soda, enriching each sip with tropical flavors.

Step 5: Pour the Cream Mixture
Carefully pour the coconut cream and vanilla mix over the back of a spoon into the glass. This technique allows the creamy mixture to float elegantly atop the fizzy soda, creating a beautiful layered effect. The contrast of colors will enhance the appeal of your Midnight Malibu Dirty Soda.

Step 6: Mix and Enjoy
Finally, use a straw or spoon to gently mix the layers together, ensuring the coconut cream and vanilla blend seamlessly with the Dr Pepper and blackberry syrup. Take a sip to experience the delightful fusion of flavors in this refreshing drink. Revel in the moment, and enjoy every drop of your Midnight Malibu Dirty Soda!

Midnight Malibu Dirty Soda

What to Serve with Midnight Malibu Dirty Soda

As you sip on the refreshing flavors of this tropical drink, why not elevate your gathering with some delightful pairings?

  • Savory Sliders: Mini beef or veggie sliders make for a satisfying complement, balancing the sweetness of the Midnight Malibu Dirty Soda.

  • Tropical Fruit Salad: Fresh fruits like pineapple and mango enhances the beachy vibes while adding a sweet, refreshing crunch.

  • Spicy Nachos: The heat from spicy nachos creates a delightful contrast with the drink’s creamy and fruity notes, tantalizing your taste buds.

  • Coconut Shrimp: Crispy coconut shrimp brings a savory, textural element that harmonizes with the coconut in the drink, transporting you to the tropics with each bite.

  • Chilled Guacamole: Creamy and cool, this dip pairs beautifully with the drink, adding richness along with a zesty kick that pleases the palate.

  • Lemon Sorbet: For dessert, a scoop of lemon sorbet refreshes the senses with its citrusy brightness and is a perfect sweet ending to your tropical feast.

  • Rum Punch: Elevate the party spirit with a fruity rum punch that shares the coconut essence found in the Midnight Malibu Dirty Soda, creating a wonderful synergy.

  • Chocolate-Covered Strawberries: Indulge in these decadent treats to satisfy the sweet tooth, their rich chocolate taste playing off the drink’s fruity notes and creamy finish.

How to Store and Freeze Midnight Malibu Dirty Soda

Fridge: Store any leftover Midnight Malibu Dirty Soda in an airtight container in the fridge for up to 2 days. Give it a gentle stir before serving to reblend the flavors.

Ice Cubes: If you can’t finish your drink, pour the leftovers into ice cube trays and freeze them. Use these cubes to create a quick and refreshing drink later!

Reheating: Refrain from reheating the Midnight Malibu Dirty Soda; it’s best enjoyed cold and refreshing, so stick with chilled servings for the ultimate experience.

Helpful Tricks for Midnight Malibu Dirty Soda

Chill Your Ingredients: Always use cold Dr Pepper for the best fizz! A cooler drink means a more refreshing Midnight Malibu Dirty Soda.

Layering Technique: Pour the coconut cream mixture gently over the back of a spoon to create beautiful layers. This enhances the visual appeal of your drink!

Syrup Choices: Experiment with homemade blackberry syrup for added flair, or try different fruit syrups to customize your Midnight Malibu Dirty Soda.

Don’t Rush Mixing: Allow the coconut cream to float before mixing. Gently stir to keep the creamy texture intact as you enjoy each sip.

Perfect Ice Ratio: Use enough ice to keep your drink cold, but avoid overfilling the glass which can dilute the flavors. Enjoy your tropical escape!

Make Ahead Options

These Midnight Malibu Dirty Soda drinks are perfect for meal prep! You can prepare the coconut cream and vanilla mixture up to 24 hours in advance; simply mix the 2 tablespoons of coconut cream with ½ teaspoon of vanilla extract and store it in an airtight container in the refrigerator. Additionally, the blackberry syrup can be made ahead (if homemade) and kept for up to 3 days. When ready to serve, simply fill a tall glass with ice, pour in the chilled Dr Pepper, drizzle in the syrup, and top with your prepared coconut cream and vanilla mixture. This way, you’ll have a refreshing drink at your fingertips with minimal effort—perfect for busy weeknights or spontaneous gatherings!

Midnight Malibu Dirty Soda Variations

Feel free to mix things up and personalize your Midnight Malibu Dirty Soda with these fun variations!

  • Dairy-Free: Swap coconut cream with oat or almond milk for a lighter twist that’s perfect for dairy-sensitive friends.
    Dairy-free doesn’t have to mean flavor-free! The nutty notes from oat or almond milk can elevate your drink in delightful ways.

  • Fruity Flair: Add a handful of fresh berries or slices of tropical fruit like mango or pineapple for an explosion of flavor.
    These vibrant additions not only enhance the taste but also make your drink visually stunning—perfect for summer gatherings or brunch with friends!

  • Sparkling Alternative: Try using sparkling water or tonic instead of Dr Pepper for a refreshing, zero-calorie alternative.
    If you’re looking for a lighter option, the fizzy nature of sparkling water still keeps the fun alive while allowing other flavors to take center stage.

  • Spicy Kick: Add a dash of chili powder or a slice of fresh jalapeño for a hint of heat that contrasts beautifully with the sweetness.
    Don’t be afraid to elevate your drink with a bit of spice! This can transform your Midnight Malibu Dirty Soda into an exciting adventure for your palate.

  • Gourmet Syrups: Swap blackberry syrup for flavors like passion fruit, mango, or even jalapeño-infused syrup for a gourmet touch.
    Experimenting with different syrups allows you to create your signature drink that impresses every guest and keeps them wanting more.

  • Herbal Essence: Stir in some fresh mint or basil leaves for an aromatic experience that adds freshness and complexity.
    Fresh herbs can brighten up your drink and add an unexpected depth that compliments the other flavors beautifully.

  • Coconut Milk Smoothie: Blend the ingredients with ice for a smoothie-style treat that’s even creamier and more indulgent.
    Going the smoothie route can turn your Midnight Malibu Dirty Soda into a dessert-like beverage, perfect for a hot day!

Don’t forget to explore the tropical vibes! Try making your own homemade syrup or add colorful fruit garnishes to charm your guests. Enjoy crafting your own version of this delightful drink!

Midnight Malibu Dirty Soda

Midnight Malibu Dirty Soda Recipe FAQs

How do I select the best ingredients for my Midnight Malibu Dirty Soda?
Absolutely! For the best taste, choose ripe, fresh ingredients. Look for coconut cream that’s thick and creamy, and if you’re using fresh blackberries for your syrup, select plump ones without dark spots. For the Dr Pepper, grab a cold can from the fridge to ensure maximum fizz and enjoyment!

How should I store leftovers of Midnight Malibu Dirty Soda?
Very easily! Pour any leftover Midnight Malibu Dirty Soda into an airtight container and pop it in the fridge. It should stay fresh for up to 2 days. Just remember to give it a gentle stir before serving again to redistribute those delightful flavors.

Can I freeze Midnight Malibu Dirty Soda?
Yes, you can! If you want to save some for a later treat, pour the leftover drink into ice cube trays and freeze. These flavorful ice cubes can be used to create a mini Midnight Malibu Dirty Soda later by blending them with fresh soda and a splash of coconut cream—talk about a creative twist!

What if my Midnight Malibu Dirty Soda doesn’t layer well?
No worries! This can happen sometimes if the coconut cream is too thick or the pour is too fast. To fix it, ensure you mix the coconut cream and vanilla thoroughly before pouring. Use the back of a spoon to guide the mixture gently when adding it to the soda. This will help achieve those beautiful layers you desire.

Is Midnight Malibu Dirty Soda suitable for everyone?
Yes! However, if you have dietary considerations such as lactose intolerance, feel free to substitute coconut cream with a lactose-free cream alternative. Just double-check any syrups you use to ensure they’re free from common allergens. It’s a drink everyone can enjoy!

Delightful Midnight Malibu Dirty Soda You’ll Crave Tonight

The Midnight Malibu Dirty Soda is a refreshing twist on a classic favorite, combining fizzy Dr Pepper with coconut cream and blackberry syrup.

  • tall glass
  • Small cup
  • spoon

For the Soda

  • 12 oz Dr Pepper (Chill it for maximum fizz!)

For the Creamy Mix

  • 2 tablespoons coconut cream (Adds a luscious texture.)
  • ½ teaspoon vanilla extract (Enhances flavor profile.)

For the Sweetness

  • 1-2 tablespoons blackberry syrup (Adds sweet and tangy touch.)

For Serving

  • Ice cubes (Keeps the drink refreshingly cool.)

Step-by-Step Instructions

  1. Start by filling a tall glass all the way with ice cubes, leaving a bit of space at the top.
  2. Slowly pour the cold Dr Pepper over the ice until the glass is filled to about ¾ full.
  3. Drizzle 1–2 tablespoons of blackberry syrup gently into the soda.
  4. In a small cup, combine 2 tablespoons of coconut cream with ½ teaspoon of vanilla extract and stir until creamy.
  5. Carefully pour the coconut cream and vanilla mix over the back of a spoon into the glass.
  6. Gently mix the layers together with a straw or spoon and enjoy.

Chill your ingredients for the best fizz and enjoy your tropical escape.

Drink
Tropical
easy cocktail, Midnight Malibu Dirty Soda, party drink, refreshing drink, Summer Beverage, Tropical Flavors

Filed Under: Drink

Delicious Halloween Candy Cookie Bars to Satisfy Your Cravings

September 30, 2025 by grace bellamy Leave a Comment

As I rummaged through the remnants of last October’s candy haul, a brilliant idea struck me: why not transform those leftover sweets into something utterly delightful? That’s how my Halloween Candy Cookie Bars came to life! This quick and easy recipe is not just a fun way to repurpose sweet treats, but it also serves as a delicious crowd-pleaser that everyone will love.This treat is packed with colorful candy surprises and offers a chewy, cookie-bar texture that’s perfect for sharing at gatherings or enjoying during a cozy night in. Plus, in just 33 minutes from start to finish, you can elevate your dessert game without fussing over complicated steps. Are you ready to dive into a world of sweet creativity and satisfy those sugar cravings? Let’s get baking!

Halloween Candy Cookie Bars

Why Are These Cookie Bars Irresistible?

Delightful flavors: Bursting with Reese’s Pieces and M&M’s, these bars take your taste buds on a sweet adventure!
Unique twist: Transforming leftover Halloween candy into scrumptious cookie bars is a fun way to reduce waste while enjoying a treasured treat.
Quick preparation: Whip them up in just 33 minutes, making them perfect for unexpected guests or a sweet craving!
Crowd-pleasing appeal: Whether it’s a party or family movie night, these bars are sure to impress and keep everyone coming back for more. Don’t forget to check out my other fun recipes like Christmas Cracker Candy and Pineapple Bliss Bars for more dessert inspiration!

Halloween Candy Cookie Bars Ingredients

For the Base
• 2¼ cups unbleached all-purpose flour – This flour provides the perfect structure for the cookie bars.
• 1 teaspoon baking soda – Helps the cookie bars rise to a lovely fluffy texture.
• 3/4 teaspoon kosher salt – Balances the sweetness for a well-rounded flavor.
• 3/4 cup unsalted butter – Using room temperature butter ensures a creamy, even mix.
• 3/4 cup dark brown sugar – Adds a deep, rich sweetness that complements the chocolate.
• 3/4 cup granulated sugar – For that classic cookie sweetness everyone loves.
• 2 large eggs – Binds the ingredients together for a chewy texture.
• 1½ teaspoons real vanilla extract – Infuses a warm flavor that enhances all the other ingredients.

For the Mix-ins
• 1/2 cup Reese’s Pieces – These add a delightful crunch and peanut butter flavor.
• 1/2 cup chocolate M&M’s – Adds a pop of color and extra chocolatey goodness.
• leftover Halloween candy – Use your favorite treats for a fun, personalized twist!
• candy eyes – These aren’t just for decoration; they bring a festive, spooky touch to your bars!

Enjoy cooking up these Halloween Candy Cookie Bars, and let the vibrant flavors and textures take center stage!

Step‑by‑Step Instructions for Halloween Candy Cookie Bars

Step 1: Preheat the Oven
Begin by preheating your oven to 350℉ (or 180℃). This essential first step ensures your Halloween Candy Cookie Bars bake evenly and achieve that golden-brown perfection. As the oven heats up, gather your ingredients and equipment to streamline the process, making it an enjoyable experience.

Step 2: Prepare the Baking Pan
While the oven is warming, line a 9x13x2 baking pan with parchment paper, allowing some overhang for easy removal later. Lightly spray the parchment with nonstick spray to prevent any sticky mishaps. This preparation is vital for achieving clean, beautifully shaped cookie bars.

Step 3: Mix the Dry Ingredients
In a medium bowl, whisk together 2¼ cups of unbleached all-purpose flour, 1 teaspoon of baking soda, and 3/4 teaspoon of kosher salt. This step not only combines the dry ingredients but also ensures that the baking soda and salt are evenly distributed throughout the flour, enhancing the flavor and texture of your Halloween Candy Cookie Bars.

Step 4: Cream the Sugars and Butter
In the bowl of a stand mixer, combine 3/4 cup of room-temperature unsalted butter, 3/4 cup of dark brown sugar, and 3/4 cup of granulated sugar. Blend these ingredients on medium speed until the mixture becomes creamy and smooth, about 2–3 minutes. You’ll know you’re on the right track when the color lightens, indicating the sugars have incorporated well with the butter.

Step 5: Add Eggs and Vanilla
Add 2 large eggs to the butter and sugar mixture, one at a time, mixing well after each addition. Once both eggs are incorporated, pour in 1½ teaspoons of real vanilla extract and blend until fully combined. Remember to scrape down the sides of the bowl with a spatula to incorporate all ingredients evenly, creating a rich, flavorful base for your Halloween Candy Cookie Bars.

Step 6: Combine Wet and Dry Ingredients
With the mixer on low, gradually add half of the prepared flour mixture to the wet ingredients. Mix until just combined, then add the remaining flour mixture, mixing until fully incorporated. Scrape down the sides and bottom of the bowl to ensure no flour pockets remain, yielding a smooth dough perfect for your treats.

Step 7: Fold in the Candy
Using a rubber spatula, gently fold in 1/2 cup of Reese’s Pieces, 1/2 cup of chocolate M&M’s, and your leftover Halloween candy. This step allows the colorful candies to be evenly distributed throughout the dough, adding delightful surprises in every bite of your Halloween Candy Cookie Bars, creating an enticing visual and textural appeal.

Step 8: Transfer the Dough
Transfer the cookie dough into the prepared baking pan, spreading it evenly across the bottom. Use your lightly greased fingers or a piece of wax paper to press the dough down so it forms a smooth, even layer. It’s important to ensure the dough is packed tightly to help the bars hold their shape during baking and cooling.

Step 9: Bake the Cookie Bars
Place the pan in the preheated oven and bake for 18 to 20 minutes. Rotate the pan halfway through baking for even cooking. You’ll know they are done when the edges are golden brown and a toothpick inserted in the center comes out with a few moist crumbs, promising a chewy texture in your Halloween Candy Cookie Bars.

Step 10: Prepare the Toppings
While the cookie bars are baking, unwrap and chop any additional leftover Halloween candy you’re using. This prep work not only saves time but also allows you to be ready to add sprinkles of sweetness right after the bars are out of the oven—ensuring that every bit of deliciousness is enjoyed.

Step 11: Add the Halloween Candy
As soon as the cookie bars come out of the oven, immediately press your chopped candies gently into the top while they are still soft. This step not only adds a decorative touch but ensures that the candies meld perfectly into the warm surface, making your Halloween Candy Cookie Bars irresistible.

Step 12: Cool and Slice
Allow the cookie bars to cool completely in the pan on a wire rack. This could take about 30 minutes, but patience is key! Once cooled, use the parchment overhang to lift the bars out of the pan, then slice into squares. These treats are now ready to be enjoyed, showcasing the fun and flavors of your Halloween Candy Cookie Bars!

Halloween Candy Cookie Bars

What to Serve with Halloween Candy Cookie Bars

Imagine a cozy gathering where your delicious dessert becomes the star of the show, surrounded by delightful companions that elevate the experience!

  • Vanilla Ice Cream: A scoop of creamy vanilla ice cream creates a dreamy contrast, balancing the sweetness of the bars perfectly. Drizzle with chocolate sauce for an extra indulgence.

  • Hot Chocolate: Serve a warm mug of rich hot chocolate alongside your cookie bars. The chocolatey goodness will enhance the treat and keep everyone cozy!

  • Fruit Salad: A zesty fruit salad brings brightness with its fresh flavors, cut through the sweetness, and adds a healthy twist that’s refreshing next to the cookie bars.

  • Chocolate-Covered Strawberries: These elegant delights add a touch of sophistication. The combination of fresh fruit and chocolate complements the candy-filled cookie bars beautifully.

  • Milk or Almond Milk: A classic choice, a glass of cold milk is the perfect pairing to wash down each delicious bite. Almond milk offers a nutty twist that pairs well with the bars.

  • Whipped Cream Topping: Top your cookie bars with a dollop of freshly whipped cream for a light and airy finish that plays nicely with the rich flavors of the Halloween Candy Cookie Bars.

  • Pumpkin Spice Latte: Embrace the fall vibes with this seasonal favorite. The warm spices in the latte harmonize with the sweetness of the cookie bars for a festive experience.

  • Coffee or Espresso: A strong cup of coffee balances the sweetness while adding a lovely bitterness. The combination makes for a delightful end to any meal!

Halloween Candy Cookie Bars Variations

Feel free to let your creativity shine and make these cookie bars your own with these delightful twists!

  • Gluten-Free: Substitute unbleached all-purpose flour with a 1:1 gluten-free flour blend for a safe version.

  • Nutty Addition: Toss in 1/2 cup of chopped nuts like pecans or walnuts for added crunch and flavor. The earthy notes perfectly complement the sweetness of the candies.

  • Secret Spices: Add a teaspoon of cinnamon or a pinch of nutmeg for a warm, cozy flavor. This slight warmth elevates the bars, making them a nostalgic treat.

  • Chocolatey Delight: Replace half of the Reese’s Pieces with chocolate chips to boost richness. Feel free to go dark for an indulgent twist that chocolate lovers will appreciate.

  • Fruity Flavor: Incorporate 1/2 cup of dried fruit, such as cherries or cranberries, for a tangy contrast to the sweetness. The vibrant colors and chewy texture make each bite a surprise!

  • S’mores Version: Swap out some candy for crushed graham crackers and mini marshmallows for a captivating s’mores-inspired bar. This twist takes you to summer camp all over again.

  • Candy Cane Surprise: During the holiday season, mix in crushed candy canes instead of Halloween candy for a festive seasonal treat. What a delectable way to embrace the holidays!

  • White Chocolate Wonder: Substitute regular M&M’s with white chocolate M&M’s for a milky sweetness. The different hues create a beautiful presentation that’s sure to wow guests.

Baking these bars is not just a way to use leftover candy; it’s an exciting opportunity to try new flavors and textures. Don’t forget to check out the festive goodness of Pineapple Bars Tropical or the fun of Chip Cookie Bars to inspire even more sweet creations!

Make Ahead Options

These Halloween Candy Cookie Bars are perfect for busy home cooks looking to save time! You can prepare the cookie dough up to 24 hours in advance; simply mix all the ingredients and store the dough in an airtight container in the refrigerator. If you want to get even more organized, you can pre-chop the leftover Halloween candy and keep it in a separate container for up to 3 days. When you’re ready to bake, just take the dough out of the fridge, press it into the pan, and follow the baking instructions as usual. By prepping ahead, you’ll enjoy fresh, delicious cookie bars with minimal last-minute effort—just as delightful as if you made them from scratch that day!

Tips for the Best Halloween Candy Cookie Bars

• Measure Accurately: Use the right measuring tools for flour, sugar, and butter to avoid dense cookie bars. Proper measurements make all the difference in your Halloween Candy Cookie Bars!

• Room Temperature Butter: Ensure your unsalted butter is at room temperature for easy creaming with sugars. This helps create a fluffy texture, keeping your bars chewy and delightful.

• Don’t Overmix: Once you add the flour mixture, mix until just combined. Overmixing can lead to tough bars—nobody wants that when indulging in Halloween Candy Cookie Bars!

• Cool Completely: Allow your cookie bars to cool completely before slicing. This ensures clean edges and prevents them from falling apart, giving you the perfect squares to share.

• Creative Toppings: Feel free to mix and match your favorite leftover Halloween candy! The more colorful, the better—your cookie bars will reflect your family’s tastes and creativity.

How to Store and Freeze Halloween Candy Cookie Bars

Room Temperature: Store your Halloween Candy Cookie Bars in an airtight container at room temperature for up to 3 days for optimal freshness.

Fridge: If you want them to last a bit longer, place the bars in the fridge where they can stay fresh for up to a week. Just remember to use an airtight container to prevent them from drying out.

Freezer: For long-term storage, freeze the bars by wrapping them tightly in plastic wrap and then placing them in a freezer-safe bag. They can be frozen for up to 3 months; just thaw before serving for the best texture!

Reheating: Enjoy them warm by microwaving for 10-15 seconds. This will bring back their chewy goodness and melt the candies slightly for an irresistible treat!

Halloween Candy Cookie Bars

Halloween Candy Cookie Bars Recipe FAQs

How do I select the best ingredients for my Halloween Candy Cookie Bars?
Absolutely! When selecting your ingredients, especially the butter and eggs, opt for high-quality and fresh products. For the darkest chocolate flavors, choose fresh Reese’s Pieces and M&M’s without any visible discoloration. Additionally, if you’re using leftover Halloween candy, be on the lookout for those that are still fresh and not too chewy, ensuring they blend smoothly into your bars.

How should I store my Halloween Candy Cookie Bars?
Very! Store your Halloween Candy Cookie Bars in an airtight container at room temperature for up to 3 days for the best results. If you want to extend their freshness, transfer them to the fridge in an airtight container, where they can last for up to a week. Just remember to seal them tightly, as you want to keep that soft and chewy texture.

Can I freeze Halloween Candy Cookie Bars?
Absolutely! To freeze your Halloween Candy Cookie Bars, wrap each bar tightly in plastic wrap and then place them in a freezer-safe bag or container. They will stay fresh for up to 3 months. When you’re ready to enjoy them, simply let them thaw at room temperature or microwave for 10-15 seconds to revive their chewy texture!

What if my cookie bars are too crumbly?
Not to worry! If your Halloween Candy Cookie Bars are crumbly, it could be due to overmixing the flour or adding too much flour. Ensure you measure accurately and mix gently when combining wet and dry ingredients. For next time, try reducing the flour slightly and always use room-temperature butter. This will help achieve that chewy, delightful texture!

Are these cookies safe for my pets or do they contain any allergens?
Great question! It’s vital to keep in mind that some candies like chocolate can be toxic to pets, so keep your Halloween Candy Cookie Bars out of reach. Additionally, if you’re catering to allergies, be cautious of the candy you choose to mix in, as many can contain nuts or gluten. Make sure to double-check ingredient labels if you’re baking for someone with allergies.

Can I use different types of candy or mix-ins?
Absolutely! One of the best parts about these Halloween Candy Cookie Bars is the flexibility to use your favorite treats. Mix in any leftover candy such as Snickers, Twix, or even gummy candies! The more, the merrier! Just be mindful of the overall sweetness and texture, and have fun experimenting with colorful combinations!

Delicious Halloween Candy Cookie Bars to Satisfy Your Cravings

Transform leftover candy into these delightful Halloween Candy Cookie Bars, perfect for sharing and satisfying cravings.

  • 9×13-inch baking pan
  • stand mixer
  • parchment paper
  • Rubber spatula
  • Whisk

For the Base

  • 2.25 cups unbleached all-purpose flour (This flour provides the perfect structure for the cookie bars.)
  • 1 teaspoon baking soda (Helps the cookie bars rise to a lovely fluffy texture.)
  • 0.75 teaspoon kosher salt (Balances the sweetness for a well-rounded flavor.)
  • 0.75 cup unsalted butter (Using room temperature butter ensures a creamy, even mix.)
  • 0.75 cup dark brown sugar (Adds a deep, rich sweetness that complements the chocolate.)
  • 0.75 cup granulated sugar (For that classic cookie sweetness everyone loves.)
  • 2 large eggs (Binds the ingredients together for a chewy texture.)
  • 1.5 teaspoons real vanilla extract (Infuses a warm flavor that enhances all the other ingredients.)

For the Mix-ins

  • 0.5 cup Reese’s Pieces (These add a delightful crunch and peanut butter flavor.)
  • 0.5 cup chocolate M&M’s (Adds a pop of color and extra chocolatey goodness.)
  • leftover Halloween candy (Use your favorite treats for a fun, personalized twist!)
  • candy eyes (Bring a festive, spooky touch to your bars!)

Step-by-Step Instructions

  1. Preheat your oven to 350℉ (or 180℃), gather your ingredients.
  2. Line a 9x13x2 baking pan with parchment paper and spray with nonstick spray.
  3. In a medium bowl, whisk together flour, baking soda, and salt.
  4. In a stand mixer, cream together butter, dark brown sugar, and granulated sugar until smooth.
  5. Add eggs one at a time, then mix in vanilla extract.
  6. Gradually add flour mixture until just combined.
  7. Gently fold in Reese’s Pieces, M&M’s, and leftover Halloween candy.
  8. Transfer dough into prepared baking pan and spread evenly.
  9. Bake in preheated oven for 18 to 20 minutes until edges are golden brown.
  10. Press additional chopped Halloween candy into the top while warm.
  11. Allow to cool completely before slicing into squares.

Measure accurately for best results and allow bars to cool completely before slicing.

Dessert
American
candy recipes, cookie bars, dessert, easy baking, Halloween Candy Cookie Bars, quick recipes

Filed Under: Dessert

Whip Up This Fun Bat Wing Bubble Tea Mocktail Today

September 29, 2025 by grace bellamy Leave a Comment

As the afternoon sun dips toward the horizon, I find myself craving something both refreshing and unique—especially when the usual drink choices just won’t do. Enter the Bat Wing Bubble Tea Mocktail, a whimsical twist on classic bubble tea that adds a splash of personality to any gathering. Not only is this delightful drink incredibly quick to whip up, but it’s also a vibrant, healthy alternative to sugary store-bought options. With fresh raspberries and the playful texture of boba pearls, every sip feels like a mini celebration. Curious how this fun mocktail can elevate your next get-together or cozy night in? Let’s dive into the recipe!

Bat Wing Bubble Tea Mocktail

Why is Bat Wing Bubble Tea Mocktail a Must-Try?

Refreshingly Unique: This mocktail brings a playful twist to your usual beverage choices, making it a standout at any party.

Quick & Easy: With only 25 minutes from start to finish, this recipe is perfect for those spontaneous get-togethers or a cozy evening at home.

Fruity & Fun: The blend of fresh raspberries with the chewy boba pearls creates a delightful balance of flavors and textures that will leave your taste buds dancing.

Customizable Twist: Feel free to add a splash of your favorite fruit juices or other fruits for a personalized touch—there’s no wrong way to enjoy this drink!

Crowd-Pleasing Appeal: Whether you’re entertaining guests or treating yourself, this Bat Wing Bubble Tea Mocktail will impress everyone with its vibrant color and delicious flavor.

Experience the fun and creativity of homemade drinks with this easy recipe!

Bat Wing Bubble Tea Mocktail Ingredients

• You’ll love how easy it is to gather these fresh ingredients!

For the Tea Base

  • Black tea – Choose a high-quality loose leaf or a bag for the best flavor.
  • Brown sugar – This adds a lovely depth of sweetness to balance the tartness of raspberries.

For the Boba

  • Quick-cook black tapioca pearls (boba) – These are ready in a jiffy and bring that cherished chewy texture to the mocktail.

For the Fruit

  • Fresh raspberries – Use ripe ones for a burst of natural sweetness; they’ll also create a beautiful color.

For the Fizz

  • Cold sparkling water – This elevates the drink’s refreshing quality; opt for flavored sparkling water for an extra zing.
  • Ice cubes – Keeping your drink chilled is essential for maximum enjoyment.

For Garnish

  • Black food coloring (optional) – A drop or two can enhance the fun, giving your drink a dramatic look.
  • Lemon or lime slice – This adds a citrusy twist and a beautiful presentation, making it Instagram-ready.

Dive into the world of delicious homemade drinks with this vibrant Bat Wing Bubble Tea Mocktail!

Step‑by‑Step Instructions for Bat Wing Bubble Tea Mocktail

Step 1: Brew the Tea
Start by boiling water in a kettle and then steep one bag of black tea or one teaspoon of loose black tea in half a cup of steaming water for 3 to 5 minutes. Once the tea reaches a rich, dark color, remove the tea bag or strain out the leaves. Allow the brewed tea to cool to room temperature for a refreshing base for your Bat Wing Bubble Tea Mocktail.

Step 2: Prepare the Boba Pearls
While the tea is cooling, cook the quick-cook black tapioca pearls according to the package instructions, usually around 5-7 minutes in boiling water. After cooking, rinse the pearls under cold water to stop the cooking process, then soak them in a bowl with brown sugar for a few minutes, creating a sweet syrup that will enhance the mocktail.

Step 3: Mash the Raspberries
In a medium-sized bowl, take fresh raspberries and mash them with a fork until they become nicely juicy. This should take about 2 minutes. Aim for a vibrant, pulpy mixture that captures the essence of raspberries. Set the bowl aside; you’ll combine this fruity delight with the other elements of your Bat Wing Bubble Tea Mocktail soon.

Step 4: Mix the Base Ingredients
In a large glass, pour in the cooled black tea, then add your mashed raspberries along with a spoonful of the brown sugar syrup you made with the boba pearls. Stir gently yet thoroughly to combine these flavorful components, which will provide a beautiful, colorful base for your drink.

Step 5: Add Ice and Sparkling Water
Next, fill your glass with ice cubes to create a chilled base for your Bat Wing Bubble Tea Mocktail. After the ice is settled, slowly pour in 3/4 cup of cold sparkling water, allowing the bubbles to add a lightness and fizz to your drink. Stir gently to mix the flavors without disrupting the carbonation.

Step 6: Incorporate the Boba Pearls
Spoon the cooked boba pearls into the glass, letting them settle at the bottom where they’ll await your first sip. If you desire a darker appearance for your mocktail, add 1-2 drops of black food coloring and give it a gentle stir. The boba and color enhancement will bring your drink to life!

Step 7: Garnish Your Drink
For a finishing touch, garnish your Bat Wing Bubble Tea Mocktail with extra fresh raspberries on top. Optionally, add a slice of lemon or lime for an eye-catching presentation and a zesty aroma. This playful garnish adds to the visual appeal and complements the fruity flavors of your mocktail.

Step 8: Serve and Enjoy
Your Bat Wing Bubble Tea Mocktail is now ready to serve! Grab a thick bubble tea straw, pour the vibrant drink into a cozy setting, and enjoy it immediately. Whether it’s for a gathering or a treat for yourself, this mocktail promises a delightful experience in every sip.

Bat Wing Bubble Tea Mocktail

What to Serve with Bat Wing Bubble Tea Mocktail

As you sip on this enchanting drink, why not enhance your gathering with a few irresistible pairings that will dazzle your guests?

  • Savory Spring Rolls: These crispy treats provide a delightful contrast to the sweet mocktail. Their fresh veggies and crunchy texture create a perfect balance.

  • Cucumber Sandwiches: Light and refreshing, these small bites offer a cool complement to the berry flavors. They’re easy to prepare and look stunning on the table!

  • Caramel Popcorn: The crunchy-sweet popcorn plays well with the fruity drink, creating an engaging flavor experience that’s both playful and satisfying.

  • Mini Fruit Tartlets: With their rich cream and fresh fruit, these petite desserts echo the raspberry notes in your mocktail, making for a colorful, harmonious finish.

  • Lemonade Slushies: Add a fun twist to your drink selection with these icy sips. Their tartness helps balance the sweetness of the Bat Wing Bubble Tea Mocktail.

  • Chocolate-Covered Strawberries: Indulge in a luxurious pairing that marries rich chocolate with fresh berries, enhancing that playful vibe you cherish in every sip.

Pairing these treats with your Bat Wing Bubble Tea Mocktail will create a memorable experience that feels both festive and delicious!

Expert Tips for Bat Wing Bubble Tea Mocktail

• Choose Quality Tea: Opt for high-quality loose black tea for a rich flavor in your Bat Wing Bubble Tea Mocktail that elevates the overall experience.

• Prepare Boba Right: Ensure you follow the package directions for cooking boba pearls; overcooking can lead to a mushy texture.

• Fresh is Best: Use ripe, fresh raspberries for the sweetest taste and most vibrant color; they make a big difference in your mocktail.

• Customize Your Fizz: Experiment with flavored sparkling water to give your mocktail an extra zing; blackberry or lime flavors pair particularly well.

• Avoid Over-Stirring: Gently stir your drink after adding sparkling water; over-stirring can reduce the fizz and impact the lightness of your mocktail.

How to Store and Freeze Bat Wing Bubble Tea Mocktail

Fridge: Store any leftover Bat Wing Bubble Tea Mocktail in an airtight container in the fridge for up to 2 days. The fizz may diminish, but the flavors will remain delightful.

Freezer: For long-term storage, pour the mixed ingredients (excluding boba and ice) into ice cube trays and freeze. Use within 1 month for best flavor.

Boba Pearls: Cooked boba pearls can be stored in syrup in the fridge for up to 3 days, but they lose their ideal texture if frozen.

Reheating: If you freeze and later thaw the cocktail base, blend it with ice to revive some texture before serving, and add fresh boba pearls for that classic bubble tea experience.

Bat Wing Bubble Tea Mocktail Variations

Feel empowered to craft your mocktail masterpiece with playful spins and swaps that excite your taste buds!

  • Non-Dairy: Substitute sparkling water with non-dairy milk for a creamier texture and a different flavor profile.
  • Sweetener Swap: Use maple syrup or agave nectar instead of brown sugar for a unique flavor twist that complements the raspberries.
  • Different Berries: Swap out raspberries for strawberries or blackberries, adding a different berry personality to your mocktail.
  • Herbal Infusion: Try adding a sprig of fresh mint or basil to the mixture; it adds a refreshing herbal note that’s simply divine.
  • Citrus Zest: Grate some lemon or lime zest into your mixture for an extra citrus kick that brightens up every sip.
  • Punch It Up: Add a dash of ginger syrup or fresh ginger for a spicy twist that tantalizes the palate.
  • Chai Twist: Use chai tea instead of black tea for an aromatic twist; the spices will beautifully enhance the fruity flavors.
  • Bubbly Boost: For a bubbly upgrade, use flavored sparkling water like lemon-lime or berry blend to amplify the fruity notes.

No matter how you choose to tweak this recipe, you’re sure to create a drink that reflects your unique style. For more inspiration, check out our delightful how to store and freeze Bat Wing Bubble Tea Mocktail or explore serving suggestions that will elevate your drink experience!

Make Ahead Options

These Bat Wing Bubble Tea Mocktails are perfect for busy home cooks who want to save time without skimping on flavor! You can brew the black tea and refrigerate it for up to 24 hours ahead of time, ensuring a flavorful base that’s ready to go. The boba pearls can also be cooked in advance and stored in a sugar syrup to keep them sweet and chewy for up to 3 days. When you’re ready to serve, simply mix the cooled tea with the raspberry mash, add ice cubes and sparkling water, incorporate the boba, and garnish. With these prep steps, you’ll enjoy delightful mocktails in a fraction of the time, just as delicious as when freshly made!

Bat Wing Bubble Tea Mocktail

Bat Wing Bubble Tea Mocktail Recipe FAQs

What type of black tea should I use for the Bat Wing Bubble Tea Mocktail?
I recommend using high-quality loose black tea or a tea bag for the best flavor. This choice can truly enhance the richness of your mocktail and provide a beautiful contrast to the sweetness of the raspberries.

How should I store leftover Bat Wing Bubble Tea Mocktail?
Absolutely! If you have leftovers, store your Bat Wing Bubble Tea Mocktail in an airtight container in the fridge for up to 2 days. While the carbonation may lessen, the flavors remain delightful for enjoying later!

Can I freeze the Bat Wing Bubble Tea Mocktail?
Very! For long-term storage, pour the mixed ingredients (but leave out the boba pearls and ice) into ice cube trays and freeze them. Aim to use these frozen cubes within 1 month for optimal flavor. When you’re ready to enjoy, just blend with fresh ice!

What if my cooked boba pearls get hard?
If your cooked boba pearls become hard, you can revive them by soaking them in warm water for around 10-15 minutes. It’s best to enjoy boba fresh, as they can lose their ideal texture after a few hours.

Can I adjust the sweetness of the Bat Wing Bubble Tea Mocktail?
Absolutely! You can adjust the sweetness by adding more or less brown sugar depending on your taste preference. Alternatively, you could use honey or maple syrup for a different flavor profile. Taste as you mix to find your perfect balance!

Are there any dietary considerations for this mocktail?
Yes! If you’re serving the Bat Wing Bubble Tea Mocktail to guests with allergies, it’s essential to be mindful of the ingredients. The boba pearls generally contain tapioca and may have cross-contamination with gluten, so check the packaging. Also, fresh raspberries are safe for most diets, but ensure to avoid any allergens when serving.

Whip Up This Fun Bat Wing Bubble Tea Mocktail Today

Enjoy this refreshing Bat Wing Bubble Tea Mocktail, a vibrant and healthy alternative that’s quick to make.

  • Kettle
  • Medium bowl
  • Large glass
  • spoon
  • Straw

For the Tea Base

  • 1 bag black tea (Choose high-quality loose leaf or a bag)
  • 2 tablespoons brown sugar (Adds sweetness to balance tartness)

For the Boba

  • 1 cup quick-cook black tapioca pearls (boba) (Ready in a jiffy)

For the Fruit

  • 1 cup fresh raspberries (Use ripe for sweetness and color)

For the Fizz

  • 3/4 cup cold sparkling water (Opt for flavored sparkling water for extra zing)
  • 1 cup ice cubes (Essential for chilling the drink)

For Garnish

  • 1-2 drops black food coloring (Optional for dramatic look)
  • 1 slice lemon or lime (Adds citrusy twist and nice presentation)

Step-by-Step Instructions

  1. Boil water and steep black tea for 3 to 5 minutes. Cool to room temperature.
  2. Cook boba pearls according to package instructions, usually 5-7 minutes in boiling water. Rinse under cold water and soak in brown sugar.
  3. Mash fresh raspberries in a bowl until juicy.
  4. Combine cooled tea, mashed raspberries, and brown sugar syrup in a large glass.
  5. Add ice cubes, then slowly pour in sparkling water. Stir gently.
  6. Incorporate boba pearls, adding food coloring if desired, and stir gently.
  7. Garnish with more raspberries and a slice of lemon or lime.
  8. Serve immediately with a thick straw.

This mocktail is a fun way to enjoy a refreshing drink and can be customized easily with your favorite flavors.

Drink
Asian
Bat Wing Bubble Tea Mocktail, bubble tea, Easy Recipe, mocktail, Raspberry Drink, refreshing drink

Filed Under: Drink

Savory Satay Beef Noodle Soup to Wow Your Taste Buds

September 29, 2025 by grace bellamy Leave a Comment

As I stirred the bubbling broth, a fragrant wave of spices filled my kitchen, instantly transporting me to a bustling street market in Southeast Asia. Today, I’m excited to share my beloved recipe for Satay Beef Noodle Soup, a dish that beautifully marries tender beef and silky noodles in a rich, savory broth. One of the best things about this recipe is how quickly it comes together—perfect for busy weeknights when you crave comfort without sacrificing flavor. Plus, it’s a crowd-pleaser that will leave your family and friends marveling at your culinary skills. Trust me, once you try this dish, it’ll become a go-to for those nights when you need a little bit of magic in your bowl. Are you ready to dive into this luscious, soul-satisfying soup?

Satay Beef Noodle Soup

Why Is This Satay Soup So Irresistible?

Bold flavors come together in this Satay Beef Noodle Soup, infusing your kitchen with an enticing aroma. Quick and easy, it’s perfect for weeknight dinners or surprise guests. Nutrient-dense ingredients make it wholesome, while the versatile toppings allow you to customize each bowl to your taste. Don’t forget to try pairing it with fresh spring rolls for a delightful experience. With its crowd-pleasing appeal, this dish is sure to impress at dinner parties or family gatherings!

Satay Beef Noodle Soup Ingredients

For the Soup Base
• Thinly sliced beef – Use sirloin or flank steak for a tender bite.
• Chicken stock or homemade bone broth – A rich base that enhances flavor.
• Peanut butter – Provides creaminess and a hint of nuttiness to the broth.
• Minced garlic – Infuses depth and aroma into your Satay Beef Noodle Soup.
• Ground cumin – Adds a warm, earthy flavor that complements the dish.
• Ground coriander – Brightens the flavor profile with a citrusy note.
• Soy sauce – Enhances saltiness and umami in the soup.
• Sesame oil – Introduces a lovely toasted flavor that rounds out the broth.

For the Noodles
• Rice noodles – The perfect vessel for soaking up the delicious broth.

For the Garnish
• Bean sprouts – Adds a fresh crunch and brightens every bite.
• Fresh cilantro leaves – Offers a burst of herbal flavor and color.
• Diced red chili (optional) – Introduces a kick of heat for those who love spice.
• Lime juice – Brightens the soup and adds a refreshing zest.

For Final Seasoning
• Salt – Use to adjust the seasoning to your personal taste.
• Freshly cracked black pepper – Adds a subtle spice that enhances the overall flavor.

This Satay Beef Noodle Soup comes together easily, making it perfect for any occasion—so gather your ingredients, and let’s create something unforgettable!

Step‑by‑Step Instructions for Satay Beef Noodle Soup

Step 1: Marinate the Beef
In a mixing bowl, combine the sliced beef with soy sauce, sesame oil, minced garlic, ground cumin, ground coriander, salt, and freshly cracked black pepper. Toss the ingredients until the beef is well coated. Allow it to marinate for at least 30 minutes at room temperature, letting the flavors infuse into the meat.

Step 2: Heat the Broth
In a large pot, pour in the chicken stock or homemade bone broth and bring it to a gentle simmer over medium heat. As it heats, stir occasionally to prevent it from sticking. Look for gentle bubbles forming on the surface; this should take about 5–10 minutes, setting the stage for your luscious Satay Beef Noodle Soup.

Step 3: Incorporate Peanut Butter
Once the broth is simmering, whisk in the peanut butter until it’s fully dissolved and incorporated into the liquid. This will add a rich creaminess that enhances the overall flavor. Let it simmer for about 10 minutes, stirring occasionally, and taste to adjust salt and pepper as needed for your preferred seasoning.

Step 4: Prepare the Rice Noodles
While the broth continues to simmer, bring a separate pot of water to a boil. Add the rice noodles and cook according to the package instructions, usually around 5-7 minutes until they are al dente. Once cooked, drain the noodles thoroughly and set them aside, ready to soak in the savory broth.

Step 5: Stir-Fry the Beef
In a separate pan, heat a bit of oil over high heat until shimmering. Add the marinated beef and stir-fry for 2-3 minutes, ensuring the meat is browned all over without overcooking. Look for a nice sear on the edges to lock in the juices, which will add depth to your Satay Beef Noodle Soup.

Step 6: Combine Noodles and Broth
Once the beef is well-seared, gently add the cooked rice noodles to the simmering broth along with the beef. Stir everything together carefully to ensure the noodles and beef are evenly distributed throughout the delicious broth. Allow this to simmer for an additional 2 minutes to meld the flavors.

Step 7: Final Adjustments
Taste your Satay Beef Noodle Soup one last time to check for seasoning. Adjust salt and pepper as desired, then take a moment to splash in some lime juice, enhancing the overall freshness of the dish. Stir gently to integrate these final touches into the soup.

Step 8: Serve and Garnish
Ladle your steaming Satay Beef Noodle Soup into bowls and garnish generously with fresh bean sprouts, cilantro leaves, and diced red chili if you like a little heat. Serve hot and watch everyone enjoy this aromatic, comforting dish that’s bursting with flavor.

Satay Beef Noodle Soup

Make Ahead Options

These Satay Beef Noodle Soup components can be prepped ahead, making your weeknight dinner a breeze! You can marinate the sliced beef in soy sauce, sesame oil, minced garlic, ground cumin, and ground coriander up to 24 hours in advance to lock in flavor. Additionally, the broth can be prepared and refrigerated for up to 3 days—just wait to add peanut butter until ready to serve for the best flavor. When you’re ready to enjoy your soup, simply heat the broth, add the peanut butter, stir-fry the marinated beef, and combine it with cooked noodles—resulting in a dish that’s just as delicious and comforting as if you made it fresh!

How to Store and Freeze Satay Beef Noodle Soup

Fridge: Store leftovers in airtight containers for up to 5 days. Ensure the broth and noodles are kept separate to maintain texture and freshness.

Freezer: For longer storage, freeze the broth and beef without the noodles in an airtight freezer bag for up to 3 months. Reheat gently after thawing.

Reheating: To reheat, warm the broth on the stove until simmering and add fresh noodles, cooking until heated through. This revitalizes your Satay Beef Noodle Soup to its original deliciousness.

Meal Prep: Consider prepping ingredients ahead of time! Marinating the beef and preparing the broth in advance allows for quick assembly during busy evenings.

What to Serve with Satay Beef Noodle Soup

A cozy bowl of savory goodness deserves accompaniments that elevate the experience, don’t you think?

  • Crispy Spring Rolls: These add a delightful crunch and a light freshness, perfect for dipping in sweet chili sauce as a side treat.
  • Asian-Inspired Salad: A vibrant mix of greens and veggies drizzled with sesame dressing complements the hearty soup and balances flavors.
  • Sesame Garlic Bok Choy: Lightly sautéed, this dish brings a tender crunch and nutty flavor that pairs beautifully with the rich satay soup.
  • Spicy Edamame: These flavorful beans offer protein and a kick of spice, making for a satisfying snack to enjoy alongside the soup.
  • Chilled Cucumber Salad: Refreshing and zesty, a salad tossed with rice vinegar and chilies brightens your palate and complements the rich broth.
  • Jasmine Rice: Fluffy and fragrant, a bowl of jasmine rice is a wonderful way to soak up any remaining broth for a truly comforting meal.
  • Tropical Fruit Platter: Serve fresh slices of mango, pineapple, and kiwi for a sweet and refreshing finish that cleanses the palate.
  • Iced Green Tea: This light, refreshing drink is the ideal beverage to cool your palate and enhance the spicy notes of the Satay Beef Noodle Soup.
  • Mango Sticky Rice: End your meal on a sweet note with this dessert, combining creamy coconut milk and ripe mango for delicious contrast.

Satay Beef Noodle Soup Variations & Substitutions

Feel free to explore these delightful twists and swaps to make this recipe your own and tantalize your taste buds!

  • Dairy-Free: Use almond butter in place of peanut butter for a nutty flavor that’s also dairy-free.

  • Vegetarian: Swap beef for tofu and use vegetable broth instead of chicken broth for a comforting plant-based version. You might want to press the tofu to remove excess moisture for a better sear.

  • Spicy Upgrade: Add more diced red chilies or a dash of sriracha to crank up the heat level for those who crave a fiery kick. This will ignite your taste buds and create a vibrant, unforgettable broth!

  • Gluten-Free: Replace regular soy sauce with tamari sauce for a gluten-free alternative while keeping that umami flavor intact. It’s an easy swap that won’t compromise taste.

  • Nut-Free: Omit the peanut butter and use sunflower seed butter for a creamy texture without nuts, perfect for those with allergies. It’s still rich and delicious!

  • Texture Variation: Consider adding thinly sliced bell peppers or bok choy to the stir-fried beef. These veggies not only boost nutrition but also provide a lovely crunch.

  • Herb Variations: Experiment with different herbs such as basil or mint to brighten the flavor profile and elevate your Satay Beef Noodle Soup experience.

  • Extra Protein: Mix in edamame or chickpeas for an added protein boost. These will not only enhance nourishment but also add satisfying textures.

Get ready to dive into a world of flavors with these variations, tailoring each bowl to fit your flavor cravings perfectly! Grab a bowl, and let’s make mealtime a delightful adventure together!

Expert Tips for Satay Beef Noodle Soup

  • Marinate for Flavor: Be sure to marinate the beef for at least 30 minutes. This step is crucial for infusing rich flavors into the meat, elevating your Satay Beef Noodle Soup.

  • Simmer Gently: Bring the broth to a gentle simmer, avoiding a rolling boil. This helps maintain the delicate flavors of the chicken stock and peanut butter, creating a more harmonious soup.

  • Cooking Noodles: Cook rice noodles just until al dente; they will continue to soften in the broth. If overcooked, they may become mushy, resulting in a less enjoyable texture in your soup.

  • Taste as You Go: Always taste at the end of cooking. Adjust the seasoning with salt, pepper, and lime juice until it’s just right for your palate. Each ingredient contributes to the final flavor of your Satay Beef Noodle Soup.

  • Customize Your Garnish: Feel free to experiment with garnishes! Fresh herbs, bean sprouts, and lime wedges not only enhance presentation but also add layers of flavor and freshness to your bowl.

Satay Beef Noodle Soup

Satay Beef Noodle Soup Recipe FAQs

How do I choose the best beef for my Satay Beef Noodle Soup?
Absolutely! For this recipe, I recommend using thinly sliced sirloin or flank steak, which are both tender and flavorful. Look for cuts that are bright red with minimal marbling, as this indicates freshness. Avoid beef with dark spots or a dull color, which can suggest spoilage.

What’s the best way to store leftovers of Satay Beef Noodle Soup?
Very good question! Store your leftovers in airtight containers in the refrigerator for up to 5 days. For optimal freshness, it’s wise to separate the broth from the noodles and beef. This prevents the noodles from becoming mushy when reheated.

Can I freeze Satay Beef Noodle Soup?
Absolutely! For freezing, I recommend storing the beef and broth in an airtight freezer bag for up to 3 months. Just make sure not to freeze the noodles, as they may become soggy. When you’re ready to enjoy your soup, thaw the broth in the fridge overnight, then reheat on the stove, adding freshly cooked noodles to maintain their texture.

What should I do if my broth tastes too salty?
Don’t worry; we can fix that! If your broth is too salty, add a cup of water or low-sodium chicken broth to dilute it. You can also add a dash of vinegar or a sprinkle of sugar to balance the flavors. Taste as you adjust, and keep adding small amounts until it’s just right for your palate.

Are there any dietary considerations I should be aware of?
Very important! This Satay Beef Noodle Soup contains peanuts due to the peanut butter, which can be a concern for those with nut allergies. Additionally, it has soy sauce that may contain gluten. For a gluten-free version, switch to gluten-free soy sauce or tamari, and use alternative nut butters if necessary. Always check product labels to ensure they meet your dietary needs.

How should I garnish my Satay Beef Noodle Soup for maximum flavor?
Great question! I love to add a generous handful of fresh cilantro, crispy bean sprouts, and a squeeze of lime juice to my bowls of Satay Beef Noodle Soup. For an added kick, sprinkle in diced red chili if you enjoy heat. These garnishes not only enhance the flavor but also add a pop of color to make your soup visually enticing!

Savory Satay Beef Noodle Soup to Wow Your Taste Buds

This Satay Beef Noodle Soup combines tender beef and silky noodles in a rich, savory broth that will impress your guests.

  • Mixing Bowl
  • Large Pot
  • Separate pan
  • Whisk

For the Soup Base

  • 1 pound thinly sliced beef (sirloin or flank steak)
  • 4 cups chicken stock or homemade bone broth
  • 3 tablespoons peanut butter
  • 3 cloves minced garlic
  • 1 teaspoon ground cumin
  • 1 teaspoon ground coriander
  • 4 tablespoons soy sauce
  • 1 tablespoon sesame oil

For the Noodles

  • 8 ounces rice noodles

For the Garnish

  • 1 cup bean sprouts
  • 1/2 cup fresh cilantro leaves
  • 1 medium diced red chili (optional)
  • 2 tablespoons lime juice

For Final Seasoning

  • to taste salt
  • to taste freshly cracked black pepper

Step-by-Step Instructions

  1. In a mixing bowl, combine the sliced beef with soy sauce, sesame oil, minced garlic, ground cumin, ground coriander, salt, and black pepper. Marinate for 30 minutes.
  2. In a large pot, heat the chicken stock until it simmers gently, about 5-10 minutes.
  3. Whisk in the peanut butter until fully dissolved and let it simmer for 10 minutes, adjusting seasoning as needed.
  4. Bring a separate pot of water to a boil, cook the rice noodles according to package instructions, then drain.
  5. In a separate pan, stir-fry the marinated beef in hot oil for 2-3 minutes until browned.
  6. Add the cooked noodles and stir-fried beef to the simmering broth and cook for an additional 2 minutes.
  7. Taste and adjust seasoning, then add lime juice before serving.
  8. Ladle into bowls and garnish with bean sprouts, cilantro, and chili. Serve hot.

Enhance your dish with fresh spring rolls on the side for a delightful experience.

Main Dishes
Southeast Asian
Beef Soup, comfort food, dinner ideas, noodle soup, quick recipe, Satay Beef Noodle Soup

Filed Under: Main Dishes

Savory Autumn Chicken Dinner with Sweet Potatoes and Apples

September 29, 2025 by grace bellamy Leave a Comment

As the leaves start to turn and the air grows crisp, I can’t help but crave the comforting flavors of autumn. This Autumn Chicken Dinner is my go-to recipe that showcases the season’s charm, combining tender chicken breasts with sweet potatoes and tart apples. In just 50 minutes, you can whip up a meal that’s both wholesome and a crowd-pleaser, making it perfect for cozy family dinners or a gathering with friends. Plus, the delightful aroma of garlic and cinnamon wafting through your kitchen is bound to bring everyone to the table. Are you ready to embrace fall flavors and cook up something truly special?

Autumn Chicken Dinner

Why Is This Dinner So Special?

Comforting, Seasonal Flavors: This Autumn Chicken Dinner captures the essence of fall with its warm notes of cinnamon and the sweetness of apples.
One-Pan Wonder: Simplify your cooking! Everything cooks in a single skillet, minimizing cleanup and maximizing flavor.
Quick Preparation: With only 15 minutes of prep time, it’s perfect for weeknights or last-minute gatherings.
Healthy Ingredients: Packed with wholesome sweet potatoes and nutritious chicken, it’s a dish you can feel good about.
Crowd-Pleasing Appeal: Impress family and friends with a meal that balances savory and sweet—everyone will be asking for seconds!

Autumn Chicken Dinner Ingredients

Ready to bring the flavors of fall to your table? Here you go!

For the Chicken

  • Boneless, skinless chicken breasts – perfect for quick cooking and absorbing all those delicious flavors.
  • Salt and pepper – essential for seasoning your chicken to enhance its natural taste.

For the Sauce

  • Olive oil – adds richness and helps to brown the chicken nicely.
  • Butter – for a creamy texture and an extra layer of flavor.
  • Garlic (minced) – infuses the dish with aromatic goodness.
  • Apple cider – brings a sweet-tart balance that complements the chicken perfectly.
  • Chicken broth – enhances the sauce with savory depth.
  • Dijon mustard – adds a hint of tang that brightens the overall flavor.
  • Dried thyme – unique herbal notes that evoke the essence of autumn.
  • Cinnamon – a warming spice that transforms this dish into a fall favorite.

For the Vegetables and Garnish

  • Sweet potatoes (peeled and cubed) – hearty and nutritious, they absorb the delicious sauce beautifully.
  • Large apple (cored and sliced) – sweet and slightly tart, they create a lovely contrast in textures and flavors.
  • Chopped pecans – add a delightful crunch and nutty flavor on top.
  • Fresh parsley – for a pop of color and freshness when garnishing.

This Autumn Chicken Dinner is not only delicious but also easy to prepare, making it an ideal choice for cozy meals!

Step‑by‑Step Instructions for Autumn Chicken Dinner

Step 1: Preheat the Oven
Start by preheating your oven to 400°F (200°C). This temperature will ensure your Autumn Chicken Dinner bakes perfectly, allowing the chicken to cook through while the sweet potatoes become tender. Make sure your oven is fully heated before moving on to the next steps so that everything cooks evenly.

Step 2: Season the Chicken
While the oven heats up, season the 4 boneless, skinless chicken breasts generously with salt and pepper on both sides. This step enhances the natural flavors of the chicken, preparing it to absorb the delicious sauce you’ll create later. By the time you’re ready to cook, the chicken will be perfectly seasoned.

Step 3: Brown the Chicken
In a large ovenproof skillet, heat 1 tablespoon of olive oil over medium-high heat. Once hot, add the seasoned chicken breasts and sauté for about 5–7 minutes per side until they are golden brown and cooked through. You want a nice crispiness on the outside; then remove the chicken from the skillet and set it aside.

Step 4: Sauté the Garlic
Reduce the heat to medium and melt 2 tablespoons of butter in the same skillet. Add 2 cloves of minced garlic and sauté for about 1 minute until fragrant but not browned. This aromatic mixture will form the base of the sauce, adding depth and flavor to your Autumn Chicken Dinner.

Step 5: Create the Sauce
Pour in 1 cup of apple cider and 1/2 cup of chicken broth into the skillet, using a wooden spoon to scrape up any browned bits stuck to the bottom. Allow this mixture to come to a simmer; this will take about 2–3 minutes. The liquid will reduce slightly, enriching the sauce flavors and enhancing your chicken’s taste.

Step 6: Add Flavorings
Next, stir in 1 tablespoon of Dijon mustard, 1 teaspoon of dried thyme, and 1/2 teaspoon of cinnamon into the simmering sauce. Mix well and let the sauce simmer for another 2 minutes, allowing all the flavors in your Autumn Chicken Dinner to meld together beautifully.

Step 7: Incorporate the Vegetables
Add peeled and cubed sweet potatoes and sliced apples to the skillet, stirring them to coat thoroughly with the sauce. These ingredients not only add sweetness and texture but also absorb all those delightful flavors. Spread them evenly around the pan and worry not—everything will bake together beautifully.

Step 8: Return the Chicken to the Skillet
Nestle the browned chicken breasts back into the skillet among the sweet potatoes and apples. This is your Autumn Chicken Dinner coming together! Ensure the chicken is partially submerged in the sauce to soak in all its delectable flavors while it bakes.

Step 9: Top with Pecans
Sprinkle 1/2 cup of chopped pecans over the top of the chicken and vegetables. This will add a lovely crunchy texture and nutty flavor that perfectly complements the sweetness of the dish. The pecans will toast slightly as they bake, enhancing your meal’s overall appeal.

Step 10: Bake the Dish
Carefully transfer the skillet to your preheated oven and bake for 25–30 minutes. Check for doneness; the chicken should be cooked through to an internal temperature of 165°F (75°C), and the sweet potatoes should be tender. Your kitchen will be filled with wonderful autumn aromas during this time.

Step 11: Rest and Garnish
Once done, remove the skillet from the oven and let it rest for a few minutes. This allows the juices to redistribute. Before serving, garnish the dish with fresh parsley for a pop of color and a refreshing touch. Your Autumn Chicken Dinner is now ready to be enjoyed!

Autumn Chicken Dinner

Expert Tips for Autumn Chicken Dinner

  • Perfect Seasoning: Always season your chicken generously with salt and pepper. This enhances its flavorful profile and ensures your Autumn Chicken Dinner is deliciously savory.

  • Don’t Overcrowd the Pan: When browning the chicken, ensure there’s enough space in the skillet. Overcrowding can lead to steaming rather than searing, making it harder to achieve that golden-brown crust.

  • Watch the Timing: Keep an eye on the cooking time. Remove the chicken when it reaches an internal temperature of 165°F (75°C) to avoid dryness, ensuring a moist and tender dish.

  • Customize Your Vegetables: Feel free to swap out sweet potatoes or apples based on personal preference or seasonal availability. Just remember to adjust cooking times if you choose denser vegetables.

  • Let It Rest: Allow the dish to rest after removing it from the oven. This step can dramatically improve juiciness, contributing to the overall satisfaction of your Autumn Chicken Dinner.

How to Store and Freeze Autumn Chicken Dinner

  • Fridge: Store leftover Autumn Chicken Dinner in an airtight container for up to 3 days. Allow it to cool completely before sealing to maintain its freshness.
  • Freezer: If you want to save it for later, freeze the dish in an airtight container or heavy-duty freezer bag for up to 3 months. Thaw in the fridge before reheating.
  • Reheating: To reheat, place in a preheated oven at 350°F (175°C) for about 20–25 minutes, or until heated through. Add a splash of chicken broth if the sauce is too thick.
  • Serving Suggestion: Garnish with fresh parsley before serving to bring back the delightful presentation and flavors of your autumn favorite!

What to Serve with Autumn Chicken Dinner

As you savor the comforting aromas of this dish, consider these delightful pairings to create a well-rounded meal that warms both heart and home.

  • Creamy Mashed Potatoes: Their silky texture complements the tender chicken and sweet potatoes beautifully, enhancing that cozy vibe.
  • Roasted Brussels Sprouts: Crispy and slightly bitter, these sprouts provide a perfect contrast to the sweet elements of your Autumn Chicken Dinner.
  • Apple Crisp: Finish your meal with this delightful dessert, bringing back the apple flavors while offering a crunchy, sweet ending.
  • Cranberry Sauce: A tart burst of flavor that contrasts the sweetness of the dish, this sauce elevates the overall experience.
  • Herbed Quinoa Salad: Light and refreshing, this salad adds nuttiness and texture while balancing the warm, hearty flavors of your chicken.
  • Warm Bread Rolls: Soft, buttery rolls are perfect for soaking up the delicious sauce, making every bite a comforting delight.
  • Chai Spiced Tea: A warm cup spiced with cinnamon and cloves complements the flavors of your dish, rounding off your meal perfectly.
  • Glazed Carrots: Sweet and tender, glazed carrots add a pop of color and a burst of complementary sweetness to your plate.

Make Ahead Options

These Autumn Chicken Dinner components are perfect for meal prep enthusiasts! You can season the chicken breasts and store them in the refrigerator for up to 24 hours before cooking, allowing the flavors to deepen. Additionally, you can prepare the sauce and chop the sweet potatoes and apples, refrigerating them in an airtight container for up to 3 days. This way, everything is ready to go when you want to cook. When it’s time to serve, simply brown the chicken, combine with the prepared ingredients, and follow the baking instructions as usual for a meal that’s just as delicious and ready in no time!

Autumn Chicken Dinner Variations

Feel free to unleash your creativity and adapt this recipe to your taste and dietary preferences!

  • Gluten-Free: Substitute Dijon mustard with a gluten-free brand to make this recipe safe for those with gluten intolerances.
  • Nut-Free: Omit the pecans for a nut-free version, or replace them with sunflower seeds for a delightful crunch. They provide texture without the allergens!
  • Herb Swaps: Experiment with fresh herbs like rosemary or sage instead of dried thyme; both will beautifully elevate the dish’s flavor profile. Fresh herbs can breathe new life into your cooking!
  • Spicy Kick: Add a pinch of red pepper flakes or a diced jalapeño to the sauce for a pleasant heat that contrasts with the sweet flavors. Spice lovers will appreciate this bold flavor twist!
  • Apple Variations: Try using different apple varieties like Honeycrisp or Granny Smith for unique sweetness and tartness that enhances the overall dish. Each type adds its personality to this comforting dinner.
  • Paleo-Friendly: Swap chicken broth with vegetable broth and your butter for coconut oil to create a healthy, paleo-friendly version of this comforting dish. A small twist can lead to big results!
  • Vegetarian Option: Substitute chicken with hearty chickpeas or tofu, giving the dish a protein boost while remaining vegetarian. This swap makes it just as satisfying and nourishing.
  • Sweet Potato Alternatives: If you’re in the mood for something different, use roasted butternut squash instead of sweet potatoes to change the dish’s flavor and texture. This vibrant option captures the spirit of fall while being deliciously different!

These variations allow you to personalize your Autumn Chicken Dinner while keeping the essence of the dish intact. Feel free to explore and discover what works best for you!

Autumn Chicken Dinner

Autumn Chicken Dinner Recipe FAQs

How do I choose the right apples for this recipe?
Absolutely! For this Autumn Chicken Dinner, I recommend using a sweet-tart apple variety like Gala or Fuji. These types hold their shape during cooking while adding a delightful burst of flavor. Look for firm apples without any soft spots or dark blemishes; they should be crisp and aromatic.

What’s the best way to store leftovers?
Very good question! You can store leftover Autumn Chicken Dinner in an airtight container in the fridge for up to 3 days. Allow it to cool completely before sealing it up to help maintain its freshness and flavor. For longer storage, it’s best to freeze the dish.

Can I freeze this meal for future use?
Absolutely! To freeze, allow the Autumn Chicken Dinner to cool completely. Then, place it in an airtight container or a heavy-duty freezer bag for up to 3 months. When you’re ready to enjoy it, just thaw it in the fridge overnight before reheating. This keeps the flavors intact and makes it super convenient for busy days!

What if my sweet potatoes aren’t cooking through?
No worries! If your sweet potatoes seem to be undercooked after baking, check the size of your cubes. Smaller pieces cook faster, so next time try cutting them into uniform 1-inch pieces for even cooking. If you’re still having trouble, you can microwave them for a few minutes before adding them to the skillet, giving them a head start.

Is this meal safe for my pet?
It’s wise to be cautious! While chicken is often safe for dogs in moderation, this Autumn Chicken Dinner contains ingredients like garlic and onions that can be harmful to pets. Always double-check ingredient safety and consult your veterinarian if you’re unsure about sharing human food with your furry friends, especially dishes with spices and varied ingredients.

Can I use other types of nuts instead of pecans?
The more the merrier! While pecans add a rich flavor and crunch, you can absolutely substitute them with walnuts or slivered almonds if you prefer. Just remember to toast them lightly before adding to the dish to enhance their flavor and crunch!

Savory Autumn Chicken Dinner with Sweet Potatoes and Apples

This Autumn Chicken Dinner is a comforting dish combining tender chicken with sweet potatoes and apples, perfect for celebrating fall flavors.

  • Oven
  • skillet

For the Chicken

  • 4 pieces Boneless, skinless chicken breasts
  • to taste Salt
  • to taste Pepper

For the Sauce

  • 1 tablespoon Olive oil
  • 2 tablespoons Butter
  • 2 cloves Garlic (minced)
  • 1 cup Apple cider
  • 1/2 cup Chicken broth
  • 1 tablespoon Dijon mustard
  • 1 teaspoon Dried thyme
  • 1/2 teaspoon Cinnamon

For the Vegetables and Garnish

  • 2 cups Sweet potatoes (peeled and cubed)
  • 1 large Apple (cored and sliced)
  • 1/2 cup Chopped pecans
  • to taste Fresh parsley (for garnish)

Step-by-Step Instructions

  1. Preheat your oven to 400°F (200°C).
  2. Season the 4 boneless, skinless chicken breasts generously with salt and pepper on both sides.
  3. In a large ovenproof skillet, heat 1 tablespoon of olive oil over medium-high heat. Once hot, add the seasoned chicken breasts and sauté for about 5–7 minutes per side until they are golden brown and cooked through.
  4. Reduce the heat to medium and melt 2 tablespoons of butter in the same skillet. Add 2 cloves of minced garlic and sauté for about 1 minute until fragrant but not browned.
  5. Pour in 1 cup of apple cider and 1/2 cup of chicken broth into the skillet, using a wooden spoon to scrape up any browned bits. Allow this mixture to come to a simmer for about 2–3 minutes.
  6. Stir in 1 tablespoon of Dijon mustard, 1 teaspoon of dried thyme, and 1/2 teaspoon of cinnamon into the simmering sauce.
  7. Add peeled and cubed sweet potatoes and sliced apples to the skillet, stirring them to coat thoroughly with the sauce.
  8. Nestle the browned chicken breasts back into the skillet among the sweet potatoes and apples.
  9. Sprinkle 1/2 cup of chopped pecans over the top of the chicken and vegetables.
  10. Carefully transfer the skillet to your preheated oven and bake for 25–30 minutes until the chicken is cooked through and the sweet potatoes are tender.
  11. Remove the skillet from the oven and let it rest for a few minutes. Before serving, garnish the dish with fresh parsley.

Feel free to customize your vegetables based on availability or preference. Always ensure to season generously and let the dish rest before serving for the best flavor.

Main Dishes
American
Autumn Chicken Dinner, chicken, easy dinner, Fall Recipes, One-pan meal, Sweet Potatoes

Filed Under: Main Dishes

Decadent Pecan Pie That Will Melt in Your Mouth

September 29, 2025 by grace bellamy Leave a Comment

As the aroma of roasted pecans wafts through my kitchen, I’m reminded of the cozy family gatherings where Pecan Pie was the star. This delightful dessert, rich in history and flavor, is not only a guaranteed crowd-pleaser but also a simple way to elevate any occasion. With just a handful of ingredients and a little patience, you can craft a pie that combines the sweetness of brown sugar and corn syrup with the satisfying crunch of pecans. What I love most about this Pecan Pie recipe is its versatility; it’s perfect for holiday feasts or a sweet treat any time of year. Plus, it can be prepped ahead of time, allowing you more time to enjoy the company of loved ones. Are you ready to impress your friends and family with a homemade classic that will have them begging for seconds?

Pecan Pie

Why is Pecan Pie so irresistible?

Decadent, this Pecan Pie boasts a heavenly blend of rich flavors that are sure to delight your taste buds! Easy to make, you only need basic ingredients and a short prep time to whip up this wonderful dessert. Perfect for any occasion, it’s a showstopper at family gatherings or just a cozy night in. Versatile, you can enjoy it warm with a scoop of ice cream or at room temperature with coffee. Finally, crowd-pleasing, this pie will have everyone coming back for another slice! If you adore simple yet delightful desserts, don’t forget to check out our tips on perfecting your pie crust in this helpful guide!

Pecan Pie Ingredients

For the Crust

  • 1¼ cups all-purpose flour – essential for creating a flaky base.
  • ½ cup cold butter, cubed – cold butter gives the crust its tender, flaky texture.
  • 1 tablespoon sugar – adds a touch of sweetness to the crust.
  • 1 teaspoon salt – enhances the flavor of the crust.

For the Filling

  • 1 cup corn syrup – provides sweetness and a gooey texture to the filling.
  • 1 cup brown sugar – adds depth of flavor with its rich caramel notes.
  • 3 eggs (or flax eggs) – crucial for binding the ingredients together.
  • 1 teaspoon vanilla extract – infuses the filling with a warm, inviting flavor.
  • 1 cup pecans, chopped – these are the stars of the pie, adding crunch and nuttiness.
  • Optional: additional pecans for decoration – a beautiful topping to elevate the presentation of your Pecan Pie.

Dive into this Pecan Pie recipe and create a delightful treat that’s bound to impress!

Step‑by‑Step Instructions for Pecan Pie

Step 1: Prepare the Pie Crust
In a mixing bowl, combine 1¼ cups of all-purpose flour, 1 teaspoon of salt, and 1 tablespoon of sugar. Mix these dry ingredients well, then add ½ cup of cold, cubed butter. Use a pastry cutter or fork to cut the butter into the flour mixture until it resembles coarse crumbs, creating the perfect base for your pecan pie.

Step 2: Form the Dough
Gradually add ice water, one tablespoon at a time, mixing gently until the dough holds together when pinched. Once it reaches the right consistency, form the dough into a disk. Wrap it in plastic wrap and refrigerate for at least 30 minutes. This chilling step is crucial for achieving a flaky crust in your Pecan Pie.

Step 3: Roll Out the Dough
After chilling, roll the dough out on a floured surface into a 12-inch circle. Transfer this rolled dough carefully to a 9-inch pie pan, pressing it gently to fit. Trim any excess edges to create a neat finish. The crust is the foundation of your Pecan Pie, so take your time to get it just right!

Step 4: Preheat the Oven
Preheat your oven to 350 °F (175 °C) to ensure it’s hot and ready for baking. A properly preheated oven is key for even cooking and a beautifully golden crust. While the oven heats up, you can prepare the filling for your luscious Pecan Pie.

Step 5: Make the Filling
In a large bowl, whisk together 1 cup of corn syrup and 1 cup of brown sugar until the mixture is smooth and well combined. This sweet base will create the gooey texture of your pecan pie. Take a moment to enjoy the delicious aroma before moving on to the next step.

Step 6: Add Eggs and Flavor
Add 3 eggs (or flax eggs for a vegan option) and 1 teaspoon of vanilla extract to the syrup mixture. Whisk everything together until combined, ensuring that no streaks remain. This mixture will bind all the ingredients together and contribute to the rich flavor of your Pecan Pie.

Step 7: Incorporate the Pecans
Stir in 1 cup of chopped pecans, folding them gently into the filling. This step brings in the star ingredient of the Pecan Pie! If you wish, you can save some whole pecans for decorative placement on top. The filling should now be thick and rich, ready to pour into the crust.

Step 8: Assemble the Pie
Carefully pour the pecan filling into the prepared crust, ensuring it’s evenly distributed. If you saved any whole pecans for decoration, now is the time to arrange them beautifully on top. This adds a lovely finishing touch to your Pecan Pie, making it even more enticing.

Step 9: Bake the Pie
Place the pie in the preheated oven and bake for 50–60 minutes. The filling should be set around the edges but still slightly jiggly in the center. This visual cue will tell you it’s ready to come out of the oven and will firm up as it cools, resulting in the perfect Pecan Pie.

Step 10: Cool and Serve
Once baked, remove the pie from the oven and allow it to cool completely on a wire rack. This cooling period is essential for clean slices. After it cools, slice your Pecan Pie and serve it to family and friends. The delightful flavors and textures are sure to impress!

Pecan Pie

How to Store and Freeze Pecan Pie

  • Room Temperature: Store your freshly baked Pecan Pie at room temperature for up to 2 days under a cloche or wrapped in plastic wrap to maintain its delightful texture.

  • Fridge: If you’d like to keep your pie longer, refrigerate it for up to 4 days in an airtight container. This helps preserve the flavor, ensuring each slice remains just as scrumptious.

  • Freezer: For longer storage, freeze your Pecan Pie for up to 3 months. Wrap it tightly in plastic wrap and then in aluminum foil to prevent freezer burn—perfect for making ahead of time!

  • Reheating: When you’re ready to enjoy a slice, thaw in the fridge overnight, then reheat in a 350°F (175°C) oven for about 10-15 minutes to warm it through without losing its charm.

Pecan Pie Variations & Substitutions

Ready to put your personal twist on this Pecan Pie recipe? Let your creativity shine as you explore these exciting variations!

  • Nut-Free: Substitute pecans with sunflower seeds or pumpkin seeds for a delightful crunch without tree nuts.
  • Chocolate Lovers: Add 1 cup of chocolate chips to the filling for a rich, decadent chocolate pecan pie that will satisfy your sweet tooth.
  • Maple Syrup: Swap out corn syrup for pure maple syrup to infuse the pie with a warm, earthy flavor that lifts the classic recipe.
  • Spiced Sensation: Incorporate 1 teaspoon of cinnamon or nutmeg into the filling for a cozy, aromatic kick that warms the soul.
  • Gluten-Free Crust: Use a gluten-free flour blend in place of all-purpose flour for a pie that everyone can enjoy, simply follow the same crust-making steps!
  • Caramel Drizzle: Drizzle caramel sauce over the top before serving for an extra layer of sweet bliss and a lovely presentation.
  • Vegan Delight: Use flax eggs and coconut oil instead of butter for a dairy-free and egg-free version that still delivers on deliciousness.
  • Heat It Up: Stir in a pinch of cayenne pepper to the filling, if you like a hint of unexpected warmth alongside the sweetness.

Experimenting with these variations will surely make your Pecan Pie a new favorite- who knows, it might just become your signature dish!

What to Serve with Pecan Pie

Indulging in the sweet and nutty delight of fresh Pecan Pie is always a memorable experience, especially when paired with the right accompaniments.

  • Vanilla Ice Cream: The creamy, cool texture of vanilla ice cream perfectly complements the warm, gooey filling of the pie, enhancing each bite. Plus, a generous scoop adds a delightful contrast to the pie’s sweetness.

  • Whipped Cream: A dollop of freshly whipped cream is a classic choice. Its lightness balances the rich filling and adds a luscious creaminess that both pleases the palate and beautifies the plate.

  • Coffee: A steaming cup of coffee provides an inviting acidity and warmth that cuts through the sweetness of the pecan filling, making each bite even more enjoyable. The flavors work together beautifully!

  • Chocolate Ganache: Drizzle rich chocolate ganache over the pie to add an indulgent twist. The bitterness of chocolate complements the sweet notes of the pecans, creating a dessert experience that’s irresistible.

  • Spiced Tea: A warm cup of spiced tea harmonizes nicely with the pecans, offering a fragrant touch that elevates the dessert experience. It’s a cozy pairing for a chilly evening.

  • Fruit Salad: A refreshing fruit salad, bursting with berries or citrus, offers a light, bright counterpoint to the richness of the pie. It adds a fresh component that balances sweetness with tartness.

  • Maple Syrup: A drizzle of maple syrup over each slice enhances the pie’s flavors and adds an extra layer of sweetness that echoes the nuttiness of the pecans, creating a luxurious experience.

  • Homemade Caramel Sauce: Pouring caramel sauce enhances the decadence. Its buttery, sweet notes integrate perfectly with the pecans, transforming each slice into an extra-special treat.

  • Savory Cheese Platter: For a unique twist, serve with a selection of sharp cheeses. Their richness will complement the sweetness of the pie while adding a savory element that surprises and delights.

Make Ahead Options

These Pecan Pie preparations are ideal for busy home cooks looking to save time! You can prepare the pie crust up to 3 days in advance by making the dough, wrapping it tightly in plastic wrap, and refrigerating it. The filling can also be made ahead—simply whisk together your corn syrup and brown sugar mixture, and store it in an airtight container in the fridge for up to 24 hours. To maintain the pie’s quality, assemble the crust and filling just before baking to prevent any sogginess. When you’re ready to enjoy your Pecan Pie, simply pour the filling into the chilled crust and bake as instructed. This way, you’ll have a delightful dessert with minimal last-minute effort!

Expert Tips for Pecan Pie

  • Use Cold Ingredients: Ensure your butter and water are ice-cold. This prevents the crust from becoming tough and helps maintain that flaky texture in your Pecan Pie.

  • Don’t Overmix the Dough: Mix just until the dough comes together. Overmixing can develop gluten and make the crust chewy instead of tender.

  • Adjust Baking Time: Keep an eye on the filling while baking. If it looks too jiggly in the center after 50 minutes, give it a few more minutes to avoid a runny Pecan Pie.

  • Protect the Crust: If the edges brown too fast, cover them with aluminum foil or use a pie shield to prevent burning while the filling sets.

  • Let It Cool: Allow your pie to cool completely before slicing. This not only helps with presentation but allows the filling to firm up beautifully.

Pecan Pie

Pecan Pie Recipe FAQs

What type of pecans should I use for Pecan Pie?
Absolutely! When selecting pecans for Pecan Pie, look for fresh, whole pecan halves that are free from any dark spots or mold. If you’re feeling adventurous, try toasting the pecans lightly in a dry skillet for a few minutes before adding them to the filling; this enhances their flavor beautifully!

How should I store leftover Pecan Pie?
Very! You can store your freshly baked Pecan Pie at room temperature for up to 2 days, wrapped tightly in plastic wrap or under a cloche. For longer storage, place it in an airtight container and refrigerate for up to 4 days, ensuring that the delightful flavors stay intact.

Can I freeze Pecan Pie?
Absolutely! To freeze your Pecan Pie, wrap it tightly in plastic wrap, then in aluminum foil, and place it in the freezer. It can be frozen for up to 3 months—perfect for preparing ahead of time. When ready to eat, just thaw it in the fridge overnight, then reheat in a 350°F (175°C) oven for about 10-15 minutes.

What if my Pecan Pie filling is too runny?
Oh no! If you find your Pecan Pie filling is too runny, it’s likely because it didn’t bake long enough. Make sure the edges are set and it’s only slightly jiggly in the center when you pull it out from the oven. If this happens, you can always bake it a bit longer, checking in increments of 5-10 minutes.

Is Pecan Pie safe for pets?
Very! No, it’s best to keep Pecan Pie away from pets, particularly dogs. The high sugar content, as well as ingredients like corn syrup and vanilla extract, can be harmful to them. If you’re looking for a pet-friendly treat, consider making a simple recipe with plain pumpkin or sweet potatoes instead!

Can I use flax eggs instead of regular eggs?
Absolutely! Flax eggs are a great vegan alternative and can be used in your Pecan Pie. To make one flax egg, mix 1 tablespoon of ground flaxseed with 3 tablespoons of water and let it sit until it thickens—usually about 5-10 minutes. Use 3 flax eggs in place of the regular eggs for a delicious, plant-based version!

Decadent Pecan Pie That Will Melt in Your Mouth

This Pecan Pie combines sweetness and crunch, making it a crowd-pleaser at any gathering.

  • Mixing Bowl
  • Pastry cutter
  • Rolling Pin
  • 9-inch pie pan
  • Oven

For the Crust

  • 1.25 cups all-purpose flour (essential for creating a flaky base)
  • 0.5 cups cold butter, cubed (cold butter gives the crust its tender, flaky texture)
  • 1 tablespoon sugar (adds a touch of sweetness to the crust)
  • 1 teaspoon salt (enhances the flavor of the crust)

For the Filling

  • 1 cup corn syrup (provides sweetness and a gooey texture to the filling)
  • 1 cup brown sugar (adds depth of flavor with its rich caramel notes)
  • 3 eggs eggs (or flax eggs) (crucial for binding the ingredients together)
  • 1 teaspoon vanilla extract (infuses the filling with a warm, inviting flavor)
  • 1 cup pecans, chopped (these are the stars of the pie, adding crunch and nuttiness)
  • additional pecans for decoration (a beautiful topping to elevate the presentation)

Step-by-Step Instructions for Pecan Pie

  1. In a mixing bowl, combine 1¼ cups of all-purpose flour, 1 teaspoon of salt, and 1 tablespoon of sugar.
  2. Add ½ cup of cold, cubed butter and cut it into the flour mixture until it resembles coarse crumbs.
  3. Gradually add ice water, one tablespoon at a time, mixing gently until the dough holds together.
  4. Form the dough into a disk, wrap it in plastic wrap, and refrigerate for at least 30 minutes.
  5. Roll the dough out on a floured surface into a 12-inch circle and transfer it to a 9-inch pie pan.
  6. Preheat your oven to 350 °F (175 °C).
  7. In a large bowl, whisk together 1 cup of corn syrup and 1 cup of brown sugar until the mixture is smooth.
  8. Add 3 eggs and 1 teaspoon of vanilla extract, whisk together until combined.
  9. Stir in 1 cup of chopped pecans, folding them gently into the filling.
  10. Carefully pour the filling into the prepared crust and arrange any whole pecans on top.
  11. Bake for 50–60 minutes until set around the edges but slightly jiggly in the center.
  12. Allow the pie to cool completely on a wire rack before slicing and serving.

Use cold ingredients to maintain that flaky texture, and don’t overmix the dough.

Dessert
American
dessert, Holiday, pecan pie, Pie, sweet

Filed Under: Dessert

Creamy Pumpkin Feta Pasta: A Cozy Fall Delight

September 29, 2025 by grace bellamy Leave a Comment

As the leaves turn and the air grows crisp, I find myself craving something warm and comforting yet effortlessly delicious. That’s when I whip up my beloved Pumpkin Feta Pasta. This enchanting dish seamlessly blends the earthy sweetness of pumpkin with tangy feta, creating a creamy sauce that hugs every piece of pasta. Not only is it an absolute crowd-pleaser, but it also comes together in just about 45 minutes, making it perfect for a cozy weeknight dinner! Plus, with its rich blend of flavors and nutritious ingredients, this recipe transforms an ordinary pasta night into a culinary celebration. Are you ready to bring a taste of autumn to your table? Let’s dive into this delightful recipe!

Pumpkin Feta Pasta

Why is Pumpkin Feta Pasta a Must-Try?

Comforting and cozy, this Pumpkin Feta Pasta delivers warmth in every bite, perfect for chilly evenings. Unique flavors of earthy pumpkin combined with tangy feta create a delightful harmony that’s sure to impress your guests. Quick preparation makes it a winner for busy weeknights, ready in just 45 minutes. Versatile enough for a family dinner or a casual gathering, it’s a surefire way to elevate your pasta game. Looking for additional inspiration? Check out our guide on creating the perfect pasta sauce for more delectable ideas!

Pumpkin Feta Pasta Ingredients

• Ready to create a warm, creamy delight? Here’s what you’ll need!

For the Pasta

  • 1 pound pasta – Penne, rigatoni, or your favorite shape works wonders.

For the Sauce

  • 1 (15-ounce) can pumpkin puree – Ensure it’s pure pumpkin, not pie filling, for the best flavor.
  • 4 ounces feta cheese – Crumbled for tangy richness that enhances the creamy sauce.
  • 1/2 cup heavy cream – Adds velvety smoothness to your Pumpkin Feta Pasta.
  • 1/4 cup grated Parmesan cheese – Perfect for depth of flavor; it melts beautifully into the sauce.
  • 2 cloves garlic – Minced for an aromatic kick that elevates your dish.
  • 2 tablespoons butter – A drizzle at the end gives a lovely richness.

For Flavor

  • 1/4 cup olive oil – Use extra virgin for vibrant taste and health benefits.
  • 1 small onion – Finely chopped to build a savory foundation.
  • 1/4 cup chopped fresh sage – Or 1 tablespoon dried sage, providing a warm, herbal note.
  • 1/4 teaspoon red pepper flakes (optional) – A hint of spice to balance the flavors.
  • Salt and freshly ground black pepper – To taste, enhancing all the delicious nuances.

For Serving

  • 1/4 cup toasted pumpkin seeds (pepitas) – A crunchy garnish that adds texture and nutrition.
  • 1/2 cup vegetable broth or pasta water – Reserve the broth for thinning the sauce if needed.

Let’s get cooking and transform these enticing ingredients into the coziest bowl of Pumpkin Feta Pasta!

Step‑by‑Step Instructions for Pumpkin Feta Pasta

Step 1: Sauté the Aromatics
In a large skillet or Dutch oven, heat 1/4 cup of olive oil over medium heat. Once shimmering, add a finely chopped small onion and sauté for about 5-7 minutes until softened and translucent, stirring occasionally. Your kitchen will soon be filled with a heavenly aroma, setting the stage for the delicious Pumpkin Feta Pasta to come.

Step 2: Add Garlic and Sage
With the onion perfectly cooked, stir in 2 cloves of minced garlic and 1/4 cup of chopped fresh sage. Cook for an additional minute, allowing the garlic and sage to release their fragrant essence. Be attentive here—stir constantly to prevent the garlic from burning, as it can turn bitter and affect your creamy sauce.

Step 3: Incorporate the Pumpkin
Next, pour in a 15-ounce can of pumpkin puree, stirring well to combine it with the sautéed onion, garlic, and sage. Cook for 2-3 minutes, stirring occasionally to ensure everything melds beautifully together. You’ll notice the vibrant orange color and sweet aroma, which signals the mixture is ready for the cream.

Step 4: Create the Creamy Sauce
Pour in 1/2 cup of heavy cream, stirring vigorously until the mixture becomes a smooth and luscious sauce. Then, add 1/4 cup of grated Parmesan cheese, stirring continuously until it melts into the creamy blend. The sauce should become rich and decadent, enticing you with its flavors that will envelop your pasta.

Step 5: Season the Sauce
Now, season your sauce with salt, freshly ground black pepper, and 1/4 teaspoon of red pepper flakes, if desired. Allow the sauce to simmer over low heat for about 10-15 minutes, stirring occasionally. Keep your eyes on it—if the sauce thickens too much, simply add a splash of vegetable broth or reserved pasta water to adjust the consistency.

Step 6: Cook the Pasta
While your sauce simmers, bring a large pot of salted water to a boil. Add 1 pound of your chosen pasta and cook according to the package directions until al dente, usually around 8-10 minutes. This will ensure that your pasta holds its shape and texture when combined with the rich pumpkin feta sauce.

Step 7: Reserve Pasta Water and Drain
Before draining the pasta in a colander, be sure to reserve about 1/2 cup of the pasta water. This starchy water will help you achieve the perfect silky texture in your Pumpkin Feta Pasta. Drain the pasta well, shaking off excess water to avoid a soupy final dish.

Step 8: Combine Pasta and Sauce
Add the drained pasta to the skillet with the creamy pumpkin feta sauce. Toss gently but thoroughly to coat every piece in that dreamy sauce. If you find the sauce too thick, drizzle in a little reserved pasta water, one tablespoon at a time, until you reach your preferred consistency and creamiest mouthfeel.

Step 9: Stir in Feta Cheese
Gently fold in about half of the crumbled feta cheese into the pasta, allowing it to melt slightly and enhance the flavors throughout. The combination of the earthy pumpkin with the tangy feta will have your senses dancing in anticipation of this cozy meal.

Step 10: Add Butter for Richness
To add an extra layer of richness, melt 2 tablespoons of butter in a small pan over low heat. Once melted, drizzle it over the pasta. This step elevates your Pumpkin Feta Pasta, making it even more indulgent and inviting—perfect for a comforting dinner.

Step 11: Serve Hot and Garnish
Serve your Pumpkin Feta Pasta immediately while it’s hot and creamy. Don’t forget to garnish each bowl with the remaining crumbled feta cheese and a sprinkle of toasted pumpkin seeds (pepitas) for added texture and visual flair. Get ready to enjoy a delicious bowl of seasonal delight!

Pumpkin Feta Pasta

Pumpkin Feta Pasta Variations & Substitutions

Feel free to customize this comforting dish to suit your taste buds and dietary preferences!

  • Dairy-Free: Substitute heavy cream with coconut milk and use dairy-free feta for a creamy, plant-based option.
    For an authentic flavor, try adding a splash of lemon juice for that tanginess you crave!

  • Gluten-Free: Use gluten-free pasta, like brown rice penne or chickpea rotini, to enjoy this dish without gluten.
    Plus, gluten-free versions are just as satisfying and delicious!

  • Spicy Twist: Add extra red pepper flakes or toss in some diced jalapeños for a kick that’ll warm your soul.
    Don’t shy away from turning up the heat for an exciting flavor adventure!

  • Vegetable Boost: Mix in sautéed spinach or roasted butternut squash for additional nutrients and vibrant colors.
    This not only heightens the dish’s health benefits but also adds delightful textures!

  • Herbal Medley: Swap sage for fresh thyme or rosemary for a different aromatic profile.
    Each herb brings its own charm, lending unique notes to your delicious sauce!

  • Protein-Packed: Stir in sautéed chicken, turkey, or chickpeas to make your Pumpkin Feta Pasta a heartier meal.
    This adds more depth and fills your plate with satisfying goodness.

  • Fancy Finish: Top each serving with crispy prosciutto or bacon for a salty crunch that elevates this cozy dish.
    The contrast of textures creates a gourmet experience that your diners will love!

  • Nutty Flavor: Incorporate toasted walnuts or pecans into the sauce for extra crunch and nutty richness.
    These nuts not only enhance the dish’s flavor, but also add a delightful crunch to every bite!

With these variations, you’ll discover new ways to enjoy your Pumpkin Feta Pasta while keeping the cozy comfort intact. And if you’re interested in making a delightful pasta sauce from scratch, don’t miss out on our guide for creating the perfect pasta sauce.

Make Ahead Options

These Pumpkin Feta Pasta preparations are perfect for busy weeknights! You can make the creamy sauce up to 3 days in advance; simply prepare it and store it in an airtight container in the refrigerator. When you’re ready to enjoy this delightful dish, just reheat the sauce gently over low heat, adding a splash of vegetable broth or pasta water to regain its silky texture. You can also cook the pasta ahead of time and toss it with a bit of olive oil to prevent sticking. Store the pasta separately in the fridge, and combine it with the sauce right before serving for a freshly made meal that saves time without sacrificing flavor. Enjoy the cozy comfort of homemade Pumpkin Feta Pasta with ease!

Expert Tips for Pumpkin Feta Pasta

  • Choose the Right Pasta: Opt for hearty shapes like penne or rigatoni that hold the creamy sauce well. Avoid thin pasta, as it can get lost in the richness of the sauce.

  • Fresh Herbs Matter: While dried sage can be used, fresh sage elevates the flavor profile significantly. Use fresh whenever possible for the best taste!

  • Perfectly Creamy Sauce: To avoid a greasy sauce, don’t rush the melting process of the cheeses. Stir constantly to achieve a smooth, creamy texture for your Pumpkin Feta Pasta.

  • Balance Flavors: Before serving, taste your sauce. If it’s too sweet, a dash of lemon juice can brighten flavors, balancing out the creaminess.

  • Use Pasta Water Wisely: Reserve plenty of pasta water! It’s key to adjusting sauce thickness without compromising flavor. Add gradually until you reach your desired consistency.

How to Store and Freeze Pumpkin Feta Pasta

Fridge: Store any leftovers in an airtight container for up to 3 days. Reheat gently in the microwave or on the stovetop, adding a splash of cream or broth to bring back creaminess.

Freezer: If you want to freeze your Pumpkin Feta Pasta, portion it into freezer-safe containers. It can last for up to 2 months in the freezer. Thaw in the refrigerator overnight before reheating.

Reheating: When ready to enjoy, reheat on low heat in a saucepan, stirring in reserved pasta water or cream for a smooth texture. Slowly heating will retain the flavors and prevent the sauce from separating.

Single Servings: Consider freezing individual portions, making it easy to enjoy a quick meal on busy nights while savoring the comforting goodness of this creamy dish!

What to Serve with Pumpkin Feta Pasta

Looking to elevate your dining experience with perfect pairings that complement the creamy goodness of Pumpkin Feta Pasta?

  • Crispy Garlic Bread: The crunchy exterior and soft interior of warm garlic bread provide a delightful contrast to the creaminess, perfect for soaking up extra sauce.

  • Roasted Brussels Sprouts: These caramelized veggies add a nutty crunch and freshness that balances the rich flavors of the pasta, ensuring a vibrant plate.

  • Mixed Green Salad: A light salad with tangy vinaigrette introduces a refreshing crunch, providing a great counterpoint to the sweetness of the pumpkin sauce.

  • Sautéed Green Beans: Their tender crispness and earthy flavor enhance the dish beautifully, adding a pop of color and nutritional value without overpowering.

  • Pumpkin Spice Latte: Embrace the fall vibes with a warm drink that echoes the flavor notes of the pasta—spicy, creamy, and utterly cozy.

  • Chocolate Chip Cookies: A sweet finish with warm, gooey cookies rounds out your meal and satisfies your dessert cravings without competing with the main dish.

Indulging in these delightful pairings will transform your Pumpkin Feta Pasta into a complete, heartwarming feast!

Pumpkin Feta Pasta

Pumpkin Feta Pasta Recipe FAQs

What type of pumpkin puree should I use?
Absolutely! Make sure to choose a 15-ounce can of pure pumpkin puree, not pumpkin pie filling. The latter contains sugar and spices that can alter the intended flavor of your dish, making it too sweet and masked with spices.

How should I store leftover Pumpkin Feta Pasta?
For the best results, store any leftover Pumpkin Feta Pasta in an airtight container in the refrigerator. It will keep well for up to 3 days. When reheating, add a splash of cream or vegetable broth to bring back its creamy goodness. Gently warm it on the stove or in the microwave.

Can I freeze Pumpkin Feta Pasta?
Very! To freeze, I recommend portioning the pasta into freezer-safe containers. This dish can last for up to 2 months in the freezer. Thaw your portions in the refrigerator overnight. When ready to eat, reheat gently on low heat, adding a bit of reserved pasta water or cream to maintain that silky texture.

What if my sauce is too thick?
No worries! If your sauce becomes too thick while simmering, simply add a splash of vegetable broth or reserved pasta water to thin it out. Start with one tablespoon at a time, stirring until you reach your desired consistency. This step ensures a creamy sauce that coats your pasta perfectly.

Is this recipe suitable for people with dairy allergies?
If you’re catering to someone with dairy allergies, I recommend using dairy-free substitutes! For the feta cheese, look for plant-based crumbles or omit it altogether. You can replace heavy cream with coconut cream or a cashew cream for a rich texture without the dairy. Feel free to experiment—your Pumpkin Feta Pasta can still shine!

How can I enhance flavor if the sauce tastes too sweet?
To balance out the sweetness of the pumpkin, a splash of fresh lemon juice can work wonders. Add just a teaspoon or so and taste as you go, allowing it to brighten the overall flavors of the dish. It’s an inviting way to enhance your dish and create a delightful contrast!

Creamy Pumpkin Feta Pasta: A Cozy Fall Delight

This Pumpkin Feta Pasta combines earthy sweetness with tangy feta for a warm and comforting dish.

  • Large skillet or Dutch oven
  • Colander
  • Large Pot

For the Pasta

  • 1 pound pasta (Penne, rigatoni, or your favorite shape works wonders.)

For the Sauce

  • 1 15-ounce can pumpkin puree (Ensure it’s pure pumpkin, not pie filling, for the best flavor.)
  • 4 ounces feta cheese (Crumble for tangy richness that enhances the creamy sauce.)
  • 1/2 cup heavy cream (Adds velvety smoothness to your Pumpkin Feta Pasta.)
  • 1/4 cup grated Parmesan cheese (Perfect for depth of flavor; it melts beautifully into the sauce.)
  • 2 cloves garlic (Minced for an aromatic kick that elevates your dish.)
  • 2 tablespoons butter (A drizzle at the end gives a lovely richness.)

For Flavor

  • 1/4 cup olive oil (Use extra virgin for vibrant taste and health benefits.)
  • 1 small onion (Finely chopped to build a savory foundation.)
  • 1/4 cup chopped fresh sage (Or 1 tablespoon dried sage for a warm, herbal note.)
  • 1/4 teaspoon red pepper flakes (Optional; adds a hint of spice.)
  • Salt and freshly ground black pepper (To taste, enhancing all the delicious nuances.)

For Serving

  • 1/4 cup toasted pumpkin seeds (pepitas) (A crunchy garnish that adds texture and nutrition.)
  • 1/2 cup vegetable broth or pasta water (Reserve for thinning the sauce if needed.)

Step‑by‑Step Instructions for Pumpkin Feta Pasta

  1. In a large skillet or Dutch oven, heat 1/4 cup of olive oil over medium heat. Once shimmering, add a finely chopped small onion and sauté for about 5-7 minutes until softened and translucent.
  2. Stir in 2 cloves of minced garlic and 1/4 cup of chopped fresh sage. Cook for an additional minute, allowing the garlic and sage to release their fragrant essence.
  3. Pour in a 15-ounce can of pumpkin puree, stirring well to combine it with the sautéed onion, garlic, and sage. Cook for 2-3 minutes.
  4. Pour in 1/2 cup of heavy cream, stirring vigorously until the mixture becomes a smooth and luscious sauce. Then, add 1/4 cup of grated Parmesan cheese, stirring continuously until it melts.
  5. Season your sauce with salt, freshly ground black pepper, and 1/4 teaspoon of red pepper flakes, if desired. Allow to simmer over low heat for about 10-15 minutes.
  6. While your sauce simmers, bring a large pot of salted water to a boil. Add 1 pound of pasta and cook according to the package directions.
  7. Before draining the pasta, reserve about 1/2 cup of the pasta water.
  8. Add the drained pasta to the skillet with the creamy pumpkin feta sauce. Toss gently to coat.
  9. Gently fold in half of the crumbled feta cheese into the pasta, allowing it to melt slightly.
  10. Melt 2 tablespoons of butter in a small pan over low heat. Drizzle it over the pasta.
  11. Serve your Pumpkin Feta Pasta immediately while it’s hot and creamy, garnished with the remaining crumbled feta cheese and toasted pumpkin seeds.

Store leftovers in an airtight container for up to 3 days. Reheat gently, adding a splash of cream or broth for creaminess.

Main Dishes
Italian
Cozy Dinner, creamy pasta, Fall Recipes, Pumpkin Feta Pasta, quick dinner, Vegetarian Pasta

Filed Under: Main Dishes

Sweet and Refreshing Glinda’s Pink Potion Delight

September 29, 2025 by grace bellamy Leave a Comment

A sudden nostalgia hits me as I watch the vibrant swirl of colors dance inside my glass, reminiscent of childhood fantasies. Enter Glinda’s Pink Potion, a whimsical drink that transforms an ordinary day into something extraordinary in just five minutes. This delightful concoction isn’t just a treat for the eyes; it’s also a refreshing escape from the mundane, packed with the tropical flavors of mango and dragonfruit. It’s quick to prep, making it the perfect choice for those hectic days when you crave something special but don’t have the time. Plus, the airy strawberry cold foam adds a fun twist that’s sure to impress friends and family alike. Can you imagine what this enchanting beverage will do for your next gathering? Let’s dive into the magic of this potion together!

Glinda's Pink Potion

Why is Glinda’s Pink Potion a Must-Try?

Vibrant and eye-catching, this drink adds a touch of color to any occasion and sparks joy in every sip. Quick preparation means you’ll blend this delightful potion in just five minutes, making it ideal for unexpected guests or a cozy night in. Tropical flavors come together beautifully; the mango and dragonfruit transport you to a sunny paradise. Fun for all ages, Glinda’s Pink Potion promises to charm your friends and family with its whimsical look and delicious taste. If you love fruity beverages, don’t miss out on this perfect refresher!

Glinda’s Pink Potion Ingredients

For the Refresher Base

  • Water – The foundation of this drink, bringing all the ingredients together.
  • Mango Nectar – Adds a tropical sweetness that complements the dragonfruit perfectly.
  • Granulated Sugar – Sweetens the potion; adjust according to your taste preferences.
  • Dragonfruit Powder – The magical ingredient that gives Glinda’s Pink Potion its signature color.
  • Citric Acid – Provides a zesty kick, balancing the sweetness of the mango.

For the Cold Foam

  • Barista-Style Oat Milk (or Heavy Cream) – Creates a creamy texture; oat milk is a great dairy-free option.
  • Strawberry Syrup – Infuses the cold foam with a delightful strawberry flavor that pairs beautifully with the refresher base.
  • Soy Milk (preferably barista blend) – Helps achieve a frothy consistency while adding a hint of creaminess.

For the Final Touch

  • Mango Dragonfruit Refresher Base – A key component of the drink that enhances the tropical essence.
  • Sweetened Coconut Milk – Adds richness and a hint of coconut flavor for a truly decadent sip.
  • Ice – Essential for that refreshing chill; feel free to load it up!
  • Freeze-Dried Dragonfruit Pieces – A decorative and tasty garnish that enhances the drink’s charm.
  • Pink & Green Sprinkles (optional for topping) – Add a festive flair that kids and adults will love!

Get ready to whisk up this enchanting drink; Glinda’s Pink Potion is about to become your new go-to refreshment!

Step‑by‑Step Instructions for Glinda’s Pink Potion

Step 1: Make the Refresher Base
In a medium saucepan, combine 1 ½ cups of water, ⅓ cup of mango nectar, ⅓ cup of granulated sugar, 1 tablespoon of dragonfruit powder, and ½ teaspoon of citric acid. Heat the mixture over low heat, whisking continuously for about 3 minutes until the powder and acid dissolve completely, creating a smooth vibrant base. Once done, remove from heat and allow it to cool slightly.

Step 2: Transfer the Mixture
After the refresher base has cooled, carefully pour it into a large jar with a lid. This makes it easy to store and use later. You can keep this base chilled in your refrigerator, so it’s ready whenever you’re craving Glinda’s Pink Potion. Ensure the lid is securely closed to maintain freshness.

Step 3: Prepare the Strawberry Cold Foam
In a small mason jar or glass, combine the barista-style oat milk (or heavy cream), strawberry syrup, and soy milk (preferably barista blend). Using a milk frother, froth this mixture for 20-30 seconds until it becomes pale and fully whipped, achieving a light, airy consistency. Set this delightful cold foam aside while you move on to the next step.

Step 4: Mix Glinda’s Pink Potion
Grab a cocktail shaker or large mason jar and fill it with ice. Pour in ½ cup of the mango dragonfruit refresher base, followed by ½ cup of sweetened coconut milk and 1 tablespoon of freeze-dried dragonfruit. Secure the lid tightly and shake vigorously for about 15 seconds until all ingredients are well combined, creating a colorful and refreshing drink mixture.

Step 5: Serve and Garnish
Strain the concoction from your shaker into a tall glass filled with ice. For added flair, stir in more freeze-dried dragonfruit pieces if desired. Finish this enchanting Glinda’s Pink Potion by spooning the strawberry cold foam on top, and sprinkle with pink and green sprinkles for a magical touch. Your potion is ready to enjoy!

Glinda's Pink Potion

Variations & Substitutions for Glinda’s Pink Potion

Feel free to let your creativity shine by customizing Glinda’s Pink Potion to suit your taste buds!

  • Dairy-Free: Substitute barista-style oat milk and heavy cream with coconut cream for a luscious, plant-based alternative.

  • Fruit Flavors: Swap the mango nectar with passion fruit juice for a tropical twist that’s equally refreshing and vibrant. It adds a different zing while maintaining that sunny charm.

  • Sweetener Alternatives: Use agave syrup or honey (if not vegan) instead of granulated sugar for a more natural sweetness that melts beautifully into the mix.

  • Taste the Tropics: Add a splash of pineapple juice to the refresher base for an extra burst of fruity flavor; this will transport you straight to the beach!

  • Texture Boost: Mix in chia seeds or flaxseeds for a delightful textural twist and added nutritional benefits that can enhance your potion’s appeal.

  • Spicy Kick: Incorporate a hint of jalapeño syrup or a dash of cayenne for warmth, turning your cooling potion into a fiery delight that’s perfect for warm evenings.

  • Citrus Zest: Infuse some lemon or lime juice into the mixer for a zesty brightness that elevates the tropical notes of the drink beautifully.

  • Mocktail Fun: Transform Glinda’s Pink Potion into an adult drink by adding a splash of vodka or rum, perfect for summer gatherings or celebrations. Pair it with tropical-inspired appetizers for a fun party vibe!

Whichever twist you choose, each version is bound to create joy and magic in your glass! For more delightful drink inspirations, don’t miss out on making Glinda’s Pink Potion the star of your gathering. And hey, if you’re in the mood for something heartier, my refreshing summer salads pair wonderfully too!

How to Store and Freeze Glinda’s Pink Potion

Fridge: Store the mango dragonfruit refresher base in an airtight jar in the fridge for up to 5 days. This makes it a breeze to whip up a quick Glinda’s Pink Potion anytime.

Freezer: While it’s best enjoyed fresh, you can freeze the refresher base in ice cube trays. Enjoy it within 2–3 months for a fun twist—just blend cubes with coconut milk for a quick treat!

Reheating: If you’ve frozen the base, allow it to thaw in the fridge overnight. You can also pop it in a small saucepan over low heat to gently warm before mixing.

Foam Storage: The strawberry cold foam should ideally be made fresh, but if stored in the fridge, consume within 1 day for the best texture.

Tips for the Best Glinda’s Pink Potion

  • Chill the Base: Ensure your refresher base is completely cooled before mixing to preserve its vibrant color and flavors.

  • Froth with Care: When making the cold foam, don’t rush the frothing process; perfect froth takes around 20-30 seconds for the best texture.

  • Customize Sweetness: Adjust the amount of granulated sugar to your taste; start with less, as the mango nectar and strawberry syrup also bring sweetness.

  • Garnish Generously: Don’t shy away from using freeze-dried dragonfruit pieces and sprinkles; they not only enhance the flavor but also elevate the presentation of Glinda’s Pink Potion.

  • Avoid Over-Shaking: Shake the mixture just enough to combine ingredients without losing the refreshing icy texture; around 15 seconds is ideal.

What to Serve with Glinda’s Pink Potion

Imagine spreading sunshine on your table with delightful companions that make each sip of this whimsical drink even more enchanting.

  • Tropical Fruit Salad: A vibrant mix of fresh mango, pineapple, and kiwi enhances the fruity flavors of Glinda’s Pink Potion, bringing a refreshing burst of sweetness.

  • Savory Coconut Shrimp: The subtle crunch of coconut paired with tender shrimp creates a perfect balance of sweet and savory, echoing the potion’s tropical allure.

  • Light Spring Rolls: Filled with fresh herbs and crisp veggies, these rolls offer a refreshing bite that complements the luscious flavors of the potion.

  • Fluffy Pancakes with Maple Syrup: Soft, pillowy pancakes soaked in rich maple syrup provide a comforting counterpart to the bright notes of your drink, perfect for a leisurely brunch.

  • Crispy Vegetable Chips: These crunchy delights add an exciting texture contrast to the drink while their saltiness makes Glinda’s Pink Potion even more delicious.

  • Sparkling Water with Lime: This effervescent beverage cleanses the palate and enhances the tropical essences of the potion, ideal for warm weather gatherings.

Each of these pairings not only amplifies the flavors of Glinda’s Pink Potion but also creates a harmony of textures and tastes that will elevate any occasion into something truly special.

Make Ahead Options

These delightful Glinda’s Pink Potion components are perfect for meal prep! You can prepare the mango dragonfruit refresher base up to 3 days in advance; simply follow steps one and two and store it in an airtight jar in the refrigerator to maintain its vibrant color and flavor. The strawberry cold foam can also be whipped up and refrigerated for up to 24 hours, but be sure to froth it again briefly before serving to restore its airy texture. When you’re ready to serve, simply mix the prepared refresher base with sweetened coconut milk and ice, shake it well, and top with the cold foam and sprinkles. This makes for a quick, refreshing drink that’s just as delicious as when made fresh!

Glinda's Pink Potion

Glinda’s Pink Potion Recipe FAQs

How do I select the best mango nectar?
Absolutely! When choosing mango nectar, look for brands that list “pure mango” as one of the first ingredients. Avoid those with high fructose corn syrup. It should have a vibrant golden color and a sweet aroma. If you can, taste a little before purchasing to ensure you’re getting a fresh flavor!

How should I store the Glinda’s Pink Potion refresher base?
For optimal freshness, store the mango dragonfruit refresher base in an airtight jar in the fridge. It will last for up to 5 days. Make sure to let it cool completely before sealing to prevent condensation buildup inside the jar.

Can I freeze Glinda’s Pink Potion?
Absolutely! If you’d like to freeze the refresher base, pour it into an ice cube tray and freeze for up to 2–3 months. To use, pop a few cubes into a blender with sweetened coconut milk, and blend until smooth for a quick treat. For even easier preparation, you can also freeze the entire drink mixture without the cold foam, letting it thaw slightly when you’re ready to enjoy.

What if I have dietary allergies?
Great question! If you’re concerned about dairy, opt for the barista-style oat milk and ensure the strawberry syrup is dairy-free. For those with soy allergies, consider using additional oat milk or almond milk to replace the soy milk. Always check labels to ensure ingredients fit your dietary needs!

Can I make the strawberry cold foam ahead of time?
Very! While it’s best enjoyed fresh, you can prepare the strawberry cold foam in advance; just store it in the fridge in an airtight container. For optimal texture, though, try to consume it within 1 day. When ready to use, give it a quick froth again to restore its fluffiness.

What if my drink isn’t fizzy?
If you find that your Glinda’s Pink Potion lacks that refreshing fizz, remember to shake the drink vigorously with ice for about 15 seconds. Also, ensure the sweetened coconut milk is well mixed into the concoction. Adjusting the ratio of coconut milk and refresher base may also help enhance the drink’s effervescence!

Sweet and Refreshing Glinda’s Pink Potion Delight

Glinda’s Pink Potion is a vibrant, whimsical drink that combines tropical flavors for a refreshing escape.

  • Medium saucepan
  • large jar with lid
  • mason jar or glass
  • milk frother
  • cocktail shaker or large mason jar

For the Refresher Base

  • 1 ½ cups water (The foundation of this drink.)
  • ⅓ cup mango nectar (Adds tropical sweetness.)
  • ⅓ cup granulated sugar (Adjust according to taste.)
  • 1 tablespoon dragonfruit powder (Gives the potion its color.)
  • ½ teaspoon citric acid (Provides a zesty kick.)

For the Cold Foam

  • 1 cup Barista-Style Oat Milk (or Heavy Cream) (Creates a creamy texture.)
  • 2 tablespoons strawberry syrup (Infuses cold foam with flavor.)
  • ½ cup soy milk (preferably barista blend) (Helps achieve frothy consistency.)

For the Final Touch

  • ½ cup mango dragonfruit refresher base (Enhances tropical essence.)
  • ½ cup sweetened coconut milk (Adds richness.)
  • 1 tablespoon freeze-dried dragonfruit pieces (Garnish for decoration.)
  • as desired pink & green sprinkles (Optional festive flair.)

Step-by-Step Instructions for Glinda’s Pink Potion

  1. In a medium saucepan, combine water, mango nectar, granulated sugar, dragonfruit powder, and citric acid. Heat over low heat, whisk continuously for about 3 minutes until smooth. Remove from heat and let cool.
  2. Pour the cooled refresher base into a large jar with a lid and store it in the refrigerator.
  3. In a small jar or glass, combine oat milk (or cream), strawberry syrup, and soy milk. Froth until pale and whipped.
  4. In a cocktail shaker filled with ice, combine refresher base, sweetened coconut milk, and freeze-dried dragonfruit. Shake vigorously for about 15 seconds.
  5. Strain into a tall glass filled with ice. Spoon strawberry cold foam on top and garnish with freeze-dried dragonfruit and sprinkles.

Ensure to chill the base completely before mixing for the best results. Customize sweetness to preference.

Drink
Tropical
dragonfruit, Glinda’s Pink Potion, mango, party drink, refreshing drink, strawberry cold foam

Filed Under: Drink

Delicious Ground Turkey Zucchini Casserole for Cozy Nights

September 29, 2025 by grace bellamy Leave a Comment

As I stood in my kitchen, the comforting aroma of sautéing garlic filled the air, transporting me to my favorite family gatherings. That’s the magic of my Ground Turkey Zucchini Casserole—this dish brings both warmth and nostalgia to the table. With just a handful of wholesome ingredients, you can whip up a delicious meal that’s not only satisfying but also a healthy alternative to greasy takeout. This casserole packs a punch with protein-packed turkey and tender zucchini, making it an ideal weeknight winner for busy home chefs. If you’re ready to reconnect with homemade goodness and delight your taste buds without spending hours in the kitchen, keep reading! What layers of flavor do you think we’ll uncover together?

Ground Turkey Zucchini Casserole

What makes this casserole so special?

Simplicity in preparation: With just a handful of ingredients and a straightforward method, you can have this dish on your table in under an hour.
Wholesome flavors shine through with the savory blend of ground turkey, fresh zucchini, and melty mozzarella, making every bite a delight.
Healthy indulgence: Packed with protein and veggies, this casserole is a nutritious alternative that won’t leave you feeling guilty after dinner.
Versatile for any occasion: Whether it’s a cozy family meal or a gathering with friends, this dish adapts to any setting while satisfying a range of palates.
Effortless leftovers: Enjoy the convenience of reheating it for lunch or dinner the next day, as the flavors only get better! Dive into this scrumptious dish and experience the cozy comfort of homemade goodness.

Ground Turkey Zucchini Casserole Ingredients

• All the essentials for a wholesome meal.

For the Casserole
• Ground turkey – a lean protein choice that keeps the casserole heart-healthy.
• Zucchini – these tender slices add moisture and nutrition, perfect for balancing flavors.
• Shredded mozzarella cheese – melts beautifully to create that irresistible cheesy topping.
• Chopped onion – brings a sweetness and depth to the dish with every bite.
• Minced garlic – adds a burst of aromatic flavor that elevates the entire casserole.
• Diced tomatoes – contributing acidity and moisture, they enrich the dish’s flavor profile.
• Dried Italian herbs – a blend of basil, oregano, and thyme works perfectly here to enhance the Italian flavors.
• Salt – elevates all the other ingredients, making the dish truly pop.
• Black pepper – adds a subtle kick, enhancing the taste without overpowering.
• Olive oil – used for sautéing and greasing, it adds a lovely richness to the entire casserole.

Feel the excitement build as you gather these ingredients for your delicious Ground Turkey Zucchini Casserole! Get ready to create a meal that’s sure to warm hearts and bellies alike.

Step‑by‑Step Instructions for Ground Turkey Zucchini Casserole

Step 1: Preheat the Oven
Begin by preheating your oven to 375°F (190°C), ensuring it’s nice and ready for the Ground Turkey Zucchini Casserole. While the oven warms up, grab a 9×13-inch baking dish and lightly grease it with olive oil, creating a non-stick base for your delicious layers to come.

Step 2: Sauté Aromatics
In a large skillet over medium heat, pour in a tablespoon of olive oil. Add the chopped onion and minced garlic, sautéing for about 2 minutes until they become fragrant and translucent. This step builds the flavor foundation for the casserole and makes your kitchen smell heavenly!

Step 3: Cook the Ground Turkey
Next, introduce the 1 lb of ground turkey to the skillet, breaking it up with a spoon. Cook for approximately 5-6 minutes, stirring occasionally until the turkey is browned and fully cooked. Ensure it’s no longer pink, as this will contribute to the hearty texture of your Ground Turkey Zucchini Casserole.

Step 4: Combine Ingredients
Stir in the drained diced tomatoes, dried Italian herbs, salt, and black pepper into the turkey mixture, letting it simmer for 3-4 minutes. This allows the flavors to meld beautifully, creating a rich and savory filling for the casserole that complements the zucchini perfectly.

Step 5: Layer the Casserole
Take half of the sliced zucchini and arrange it in an even layer across the bottom of the greased baking dish. Next, spoon half of the turkey mixture over the zucchini, and sprinkle half of the shredded mozzarella cheese on top. Repeat these layers to build a hearty stack for your Ground Turkey Zucchini Casserole.

Step 6: Bake the Casserole
Place the assembled casserole in the preheated oven and bake uncovered for 30-35 minutes. Watch as it bubbles and the cheese turns a beautiful golden brown, signaling that your Ground Turkey Zucchini Casserole is nearly ready to serve.

Step 7: Let it Cool
Once baked, carefully remove the casserole from the oven and let it cool for about 5 minutes. This resting period not only helps with slicing but also allows the flavors to settle beautifully. Your warm and inviting Ground Turkey Zucchini Casserole is just a few moments away from being served!

Ground Turkey Zucchini Casserole

Make Ahead Options

These Ground Turkey Zucchini Casserole layers are perfect for meal prep enthusiasts! You can prepare the turkey mixture and slice the zucchini up to 24 hours in advance, refrigerating them separately to maintain their freshness. Simply sauté the onion and garlic, then mix them with the cooked turkey, diced tomatoes, and spices. When you’re ready to bake, layer the zucchini, turkey mixture, and cheese in a greased dish and pop it in the oven. This way, you enjoy a comforting homemade meal with minimal evening fuss, knowing that every bite will be just as delicious as if you baked it fresh!

What to Serve with Ground Turkey Zucchini Casserole

Imagine sitting down to a delightful meal that perfectly complements the comforting warmth of your casserole.

  • Garlic Bread: A crispy, buttery slice of garlic bread enhances the meal, perfect for soaking up leftover sauce.
  • Mixed Green Salad: Fresh greens tossed with a zesty vinaigrette bring brightness, balancing the richness of the casserole beautifully.
  • Steamed Broccoli: Crave some crunch? Tender steamed broccoli adds fiber and pairs wonderfully with the savory flavors on your plate.
  • Roasted Carrots: Sweet and caramelized, roasted carrots provide a lovely contrast in flavor and texture to your dish.
  • Fizzy Sparkling Water: Serve this refreshing drink to cleanse your palate, making every bite of the casserole shine.
  • Chocolate Chip Cookies: End the meal on a sweet note with warm cookies that meld perfectly with the day’s culinary creation. Enjoying the blend of flavors throughout the meal will leave everyone feeling satisfied and happy!

How to Store and Freeze Ground Turkey Zucchini Casserole

Fridge: Store leftover casserole in an airtight container for up to 3 days. This ensures the flavors stay fresh and delicious for your next meal.

Freezer: For longer storage, freeze the casserole for up to 3 months. Ensure it cools completely before sealing in a freezer-safe container or wrapping tightly in foil.

Reheating: When ready to enjoy, thaw overnight in the fridge and reheat in the oven at 350°F (175°C) for 20-25 minutes or until heated through. This helps retain the casserole’s delightful texture.

Room Temperature: If serving at a gathering, keep the casserole out for no longer than 2 hours to maintain freshness and avoid any food safety risks.

Ground Turkey Zucchini Casserole Variations

Feel free to make this comforting dish your own with these fun twists and substitutions!

  • Dairy-Free: Substitute mozzarella with a dairy-free cheese alternative to keep it creamy without the dairy.
  • Vegetarian: Swap ground turkey for lentils or crumbled tofu for a hearty, plant-based option that still packs protein.
  • Spicy Kick: Add chopped jalapeños or red pepper flakes to the turkey mixture for a zesty heat that elevates the flavor. It’s perfect for those who love a fiery bite!
  • Low-Carb: Replace zucchini with cauliflower rice for a keto-friendly version, while still retaining a satisfying texture.
  • Extra Veggies: Include bell peppers, spinach, or mushrooms in the turkey mixture for more nutrition and flavor depth. The colors will brighten up your dish!
  • Herb Boost: Experiment with fresh herbs like basil or parsley instead of dried Italian herbs for a fresh, vibrant flavor profile.
  • Crunchy Topping: Add a layer of crushed breadcrumbs or panko on top before baking for a delightful crunch that contrasts beautifully with the soft layers below.
  • Stuffed Variation: Hollow out whole zucchinis and fill them with the turkey mixture for a fun and visually appealing presentation.

No matter how you choose to remix this recipe, I promise you’ll be serving up a dish that hugs the heart while tantalizing the taste buds. Enjoy the exploration of flavors, and perhaps you can pair this with a simple side salad or even some crusty bread for a complete meal. Happy cooking!

Helpful Tricks for Ground Turkey Zucchini Casserole

Prep Ahead: Consider prepping the ingredients the night before. Chop veggies and brown the turkey ahead for a quicker assembly when it’s time to cook.

Avoid Soggy Zucchini: To prevent watery casserole, slightly salt the zucchini and set aside for 10 minutes to draw out moisture before layering.

Cheese Substitutions: If you prefer a different cheese, feel free to swap mozzarella for cheddar or a dairy-free option to suit your taste.

Taste as You Go: Always taste the turkey mixture before layering to adjust seasoning. It’s essential for ensuring your Ground Turkey Zucchini Casserole is bursting with flavor.

Resting Time Matters: Allowing the casserole to rest before serving helps it firm up, making it easier to slice and serve while enhancing the flavors.

Ground Turkey Zucchini Casserole

Ground Turkey Zucchini Casserole Recipe FAQs

What type of zucchini is best for this casserole?
Absolutely! Look for firm, medium-sized zucchinis without dark spots or blemishes. They should feel slightly heavy for their size, indicating freshness. Avoid zucchinis that are soft or overly large, as they’ll tend to be watery and less flavorful in your Ground Turkey Zucchini Casserole.

How long can I store leftover casserole in the fridge?
You can keep leftover Ground Turkey Zucchini Casserole in an airtight container in the fridge for up to 3 days. To enjoy the freshness, make sure the casserole cools down completely before sealing it, which helps maintain its juicy flavors.

Can I freeze the Ground Turkey Zucchini Casserole?
Certainly! To freeze, let the casserole cool completely, then transfer it to a freezer-safe container or wrap it tightly in foil. You can freeze it for up to 3 months. For best results, label it with the date so you can enjoy it at its prime!

What’s the best way to reheat frozen casserole?
When you’re ready to dive into your frozen Ground Turkey Zucchini Casserole, thaw it overnight in the fridge. Preheat the oven to 350°F (175°C) and reheat for 20-25 minutes or until it’s heated through. This method keeps the casserole deliciously moist and cheesy!

Can I make this casserole dairy-free or gluten-free?
Very much so! To make your Ground Turkey Zucchini Casserole dairy-free, simply substitute mozzarella with a dairy-free cheese option. For a gluten-free version, check the ingredient labels to ensure all components, like sauces or canned items, are gluten-free. The more the merrier in accommodating various dietary needs!

What if my casserole turns out watery?
If you find your casserole is a bit liquidy, it’s likely due to excess moisture from the zucchini. To prevent this, you can salt the zucchini slices and let them sit for about 10 minutes before layering. This helps draw out excess water, leading to a heartier, more satisfying casserole!

Delicious Ground Turkey Zucchini Casserole for Cozy Nights

A comforting Ground Turkey Zucchini Casserole that’s warm, wholesome, and a healthy alternative to takeout.

  • 9×13-inch baking dish
  • large skillet

For the Casserole

  • 1 lb Ground turkey
  • 2 medium Zucchini (sliced)
  • 1 cup Shredded mozzarella cheese (for topping)
  • 1 medium Chopped onion
  • 2 cloves Minced garlic
  • 1 can Diced tomatoes (drained)
  • 1 tsp Dried Italian herbs
  • 1 tsp Salt
  • 1/2 tsp Black pepper
  • 1 tbsp Olive oil (for sautéing)

Step-by-Step Instructions

  1. Preheat your oven to 375°F (190°C). Lightly grease a 9×13-inch baking dish with olive oil.
  2. In a large skillet over medium heat, heat olive oil. Add chopped onion and minced garlic, sautéing for about 2 minutes until fragrant.
  3. Introduce ground turkey to the skillet, breaking it up. Cook for approximately 5-6 minutes until browned and fully cooked.
  4. Stir in the drained diced tomatoes, dried Italian herbs, salt, and black pepper. Let it simmer for 3-4 minutes.
  5. Layer half of the sliced zucchini at the bottom of the greased baking dish, followed by half of the turkey mixture, and half of the shredded mozzarella cheese. Repeat layers.
  6. Place the casserole in the oven and bake uncovered for 30-35 minutes until bubbling and cheese is golden brown.
  7. Remove from the oven and let it cool for about 5 minutes before serving.

Consider prepping the ingredients the night before for quicker assembly. To avoid soggy zucchini, salt and set aside for 10 minutes before layering.

Main Dishes
Italian
Easy Recipe, Family Meal, Ground Turkey Zucchini Casserole, healthy casserole, one dish meal, Weeknight Dinner

Filed Under: Main Dishes

Enchanting Pink Witch Punch for Magical Gatherings

September 29, 2025 by grace bellamy Leave a Comment

As the sun sets and the air turns crisp, I find myself craving something refreshing yet enchanting. Enter the Pink Witch Punch, a delightful concoction that’s not only visually stunning but also a hit at any gathering. In just 10 minutes, you can whip up this vibrant punch that brings together ginger ale, pink lemonade, and cranberry juice for a quick and crowd-pleasing drink. The best part? You can customize it to fit your Halloween-themed soirée or any festive occasion with a swirl of whipped topping and edible glitter. Trust me, your guests will love the playful twist on a classic punch! So, are you ready to add a touch of magic to your glass?

Pink Witch Punch

Why is Pink Witch Punch a Must-Try?

Quick and Easy: This delightful drink comes together in just 10 minutes, making it perfect for those spontaneous gatherings or busy days.

Colorful Presentation: The vibrant pink hue paired with edible glitter creates an eye-catching centerpiece that sparks joy at any event.

Customizable Flavor: Mix in your favorite garnishes like strawberries or lemons to personalize each serving—impressing guests has never been easier!

Crowd-Pleaser: With its sweet yet refreshing flavor, this punch is sure to satisfy both kids and adults alike, making it a hit at birthday parties or family get-togethers.

Perfect for Any Occasion: Whether it’s a Halloween bash or a summer picnic, the Pink Witch Punch adapts seamlessly to any celebration—explore more festive drink ideas here.

Pink Witch Punch Ingredients

For the Punch
• Ginger ale – 2 liters, chilled adds a bubbly sparkle to your punch, enhancing the festive feel.
• Pink lemonade – 1 bottle (64 oz / 1.9 L), chilled brings a sweet and tangy flavor that makes this drink delightfully refreshing.
• Cranberry juice – 1 cup offers a beautiful color and a hint of tartness to balance the sweetness.

For the Optional Toppings
• Whipped topping – 1-2 cups adds a creamy richness that makes your Pink Witch Punch extra indulgent.
• Edible pink glitter – as desired sprinkles whimsy and magic, making your punch unforgettable at any gathering.
• Pink sanding sugar – for rimming glasses enhances the visual appeal, making each sip feel like a special occasion.

For Garnish
• Sliced fruit (strawberries, oranges, or lemons) – as desired, they not only add flavor but also create a vibrant and inviting presentation.
• Ice – as needed keeps your punch refreshingly cold, especially on warm days.

Get ready to stir up some enchantment with these colorful and delightful Pink Witch Punch ingredients!

Step‑by‑Step Instructions for Pink Witch Punch

Step 1: Chill the Ingredients
Before you begin crafting your Pink Witch Punch, ensure your ginger ale, pink lemonade, and cranberry juice are well chilled, ideally for at least 1 hour. This will keep your drink refreshing and bubbly once mixed. You can use a large pitcher or simply place the bottles in the refrigerator while you gather your other supplies.

Step 2: Prepare the Glasses
To create a festive look, dip the rims of your glasses in water or lemon juice to moisten them. Then, gently roll the wet rims in pink sanding sugar, ensuring an even coating. This sparkly touch not only enhances the visual appeal of your Pink Witch Punch but also adds a hint of sweetness with every sip.

Step 3: Combine the Juices
In a large punch bowl or pitcher, pour in the chilled pink lemonade first, followed by the cranberry juice. Use a long spoon to stir the mixture gently, combining the two juices until they are blended seamlessly. Aim for a light pink hue; this step sets a delightful base for your enchanting drink.

Step 4: Add the Ginger Ale
With your juice mixture ready, slowly pour in the chilled ginger ale to avoid losing its bubbles. Stir lightly to incorporate the ginger ale, making sure to keep those fizzy bubbles alive. The combination will bubble up beautifully, giving you a vibrant and effervescent Pink Witch Punch.

Step 5: Finish with Toppings
Now comes the fun part! Dollop whipped topping on top of your punch for a creamy finish. If desired, sprinkle edible pink glitter over the surface to add a magical effect. Finally, toss in slices of your choice of fruit, like strawberries or lemons, to elevate the look and taste of your Pink Witch Punch.

Step 6: Serve and Enjoy
Once your Pink Witch Punch is beautifully garnished, ladle it into the prepared glasses filled with ice. Ensure each glass gets an inviting splash of fizz and a piece of fruit. Serve immediately while it’s still cold and sparkling to delight your guests with this enchanting drink!

Pink Witch Punch

Make Ahead Options

These Pink Witch Punch preparations are perfect for busy home cooks looking to save time and create a delightful drink effortlessly! You can prepare the juice mixture (pink lemonade and cranberry juice) up to 24 hours in advance. Simply mix these two ingredients and refrigerate in an airtight container to keep them fresh and flavorful. Also, consider rimming the glasses with sanding sugar ahead of time—this will stay beautiful for several hours. When you’re ready to serve, just pour in the chilled ginger ale and stir lightly to maintain those delightful bubbles. Top it off with whipped topping, edible glitter, and fruit slices right before serving for a visually stunning punch that’s just as magical and refreshing!

Expert Tips for Pink Witch Punch

  • Chill Everything First: Always ensure that your ginger ale, pink lemonade, and cranberry juice are properly chilled. This keeps your Pink Witch Punch refreshingly cool and bubbly!

  • Rimming Glasses: For an extravagant touch, remember to rim your glasses with pink sanding sugar after moistening them. This adds a sweet burst with every sip, enhancing the entire experience.

  • Gentle Mixing: When combining the juices and adding ginger ale, stir gently to maintain the fizz. Over-stirring can cause it to go flat too quickly.

  • Customization Is Key: Feel free to personalize your Pink Witch Punch with seasonal fruits or even herbs like mint. This can give your drink a unique twist tailored for special occasions.

  • Make-Ahead Option: If you’re preparing for a large gathering, mix the juices and chill them in advance. Add ginger ale and toppings just before serving to keep it bubbly.

  • Presentation Matters: Don’t forget to decorate with slices of fruit and a sprinkle of edible glitter for that extra flair. It not only looks magical but also tempts guests to dive in!

What to Serve with Pink Witch Punch?

As you prepare the enchanting Pink Witch Punch, why not elevate your gathering with these delightful pairings that will charm the palate?

  • Savory Sliders: Mini burgers bring a hearty contrast to the sweet punch, making them perfect for a fun celebration. These bite-sized delights will satisfy the crowd at any festive gathering!

  • Fruit Platter: Fresh, colorful fruits complement the drink’s flavors while providing a refreshing crunch. Pairing this with your Pink Witch Punch adds a healthy yet vibrant touch.

  • Cheese Board: A selection of creamy and sharp cheeses pairs beautifully with the sweetness of the punch, creating a delightful balance of flavors. Incorporate crackers and nuts for texture and variety.

  • Sweet Macarons: These delicate treats add an elegant touch to your spread, beautifully matching the enchanting theme of your drink. Their light sweetness harmonizes with the flavors of the Pink Witch Punch.

  • Chocolate-Covered Strawberries: Indulge the sweet tooth with these decadent bites, which enhance the puncha’s playful nature. The combination of rich chocolate and juicy strawberries is a guaranteed crowd favorite.

  • Chocolaty Brownies: Rich and fudgy brownies offer a luscious contrast to the bubbly punch. Serve them warm with a scoop of ice cream for dessert perfection after sipping the Pink Witch Punch!

  • Sparkling Water: Lighten up your beverage options with unflavored sparkling water. Guests can mix it with their punch for a refreshing twist or enjoy it on its own to cleanse their palate.

Storage Tips for Pink Witch Punch

Fridge: Store any leftover Pink Witch Punch in an airtight pitcher, and keep it chilled for up to 2 days. However, be aware that the fizz from the ginger ale may diminish over time.

Freezer: To freeze, pour the punch into ice cube trays for a fun way to chill future drinks. You can use the cubes in other beverages for a sparkly touch!

Reheating: Since Pink Witch Punch is best served cold, reheating isn’t recommended. Instead, serve it over ice to keep it refreshingly cool.

Garnish Storage: If you have leftover fruit garnishes, store them in the fridge in a sealed container for up to 1 day to maintain freshness.

Pink Witch Punch Variations & Substitutions

Feel free to get creative and personalize your Pink Witch Punch with these fun twists that enhance flavor and delight your guests!

  • Dairy-Free: Skip the whipped topping or use coconut cream for a dairy-free alternative that keeps the punch creamy.

  • Fruit-Infused: Add a handful of berries or diced peaches for an extra fruity flavor—let them float in the punch for a festive touch!

  • Spicy Kick: Toss in a splash of ginger or jalapeño syrup for a zesty surprise—this spicy twist will definitely awaken your taste buds!

  • Herbal Note: Add a few fresh mint leaves to the punch before serving for a refreshing aroma and lively presentation. It complements the fruity flavors beautifully.

  • Non-Alcoholic Sparkler: Use tonic water instead of ginger ale for a less sweet, more citrusy experience. This variation is perfect for those who prefer a more sophisticated sip.

  • Deepen the Color: Mix in a splash of blueberry juice for a darker, richer hue that maintains its fruity undertones.

  • Increased Fizz: For an even bubblier punch, substitute half of the ginger ale with club soda, ensuring there’s more sparkle in every glass.

  • Seasonal Spice: In the fall, add a hint of cinnamon or nutmeg to your punch. This adds a comforting warmth that’s perfect for cozy gatherings.

Explore these variations and customize your Pink Witch Punch to make it uniquely yours—it’s all about bringing joy and magic to every gathering!

Pink Witch Punch

Pink Witch Punch Recipe FAQs

What are the best tips for selecting ripe fruit for garnish?
When choosing fruit for your Pink Witch Punch, look for fruits that are vibrant and firm. For strawberries, opt for those with a shiny, bright red appearance and no dark spots. For oranges and lemons, seek those that feel heavy for their size, indicating juiciness. If possible, go for organic options to avoid pesticides, especially if you’ll be using the zest or peel for extra flavor.

How can I store leftover Pink Witch Punch?
Absolutely! To store any leftover Pink Witch Punch, pour it into an airtight pitcher and refrigerate. It will stay fresh for up to 2 days. Remember, though, that the ginger ale may lose some fizz during storage, so for optimal sparkle, it’s best enjoyed fresh. Just give it a gentle stir before serving!

Can I freeze Pink Witch Punch?
Yes, you can freeze it for future enjoyment! Pour the Pink Witch Punch into ice cube trays and freeze. Once frozen, pop the cubes out and store them in a resealable freezer bag. They can last in the freezer for up to 3 months. These sparkling cubes make for fantastic additions to future refreshments or even as fun ice for your guests’ glasses.

What should I do if my punch turns out too sweet?
If your Pink Witch Punch is sweeter than desired, consider adding the juice of half a lemon or lime to cut through the sweetness and enhance the flavor. Another great alternative is to add a splash of soda water or tonic water to introduce a little bitterness and balance out the taste.

Is Pink Witch Punch suitable for kids or anyone with allergies?
Very! This Pink Witch Punch is safe for children, and it’s naturally free from gluten. However, if anyone has allergies to specific fruits or components like cranberry juice or whipped topping, feel free to customize the ingredients. Opt for a juice that meets your dietary requirements, and for a vegan alternative, consider using plant-based whipped toppings. Remember to check labels for any potential allergens!

How should I prepare the glass rimming for additional toppings?
To prepare the glass rims with pink sanding sugar, first moisten the rims by dipping them in a little water or lemon juice. Then, dip the rims into a small plate filled with pink sanding sugar, ensuring they are evenly coated. This adds a lovely sweet touch to each sip and makes your Pink Witch Punch even more festive!

Enchanting Pink Witch Punch for Magical Gatherings

The Pink Witch Punch is a vibrant, refreshing drink perfect for any gathering, combining ginger ale, pink lemonade, and cranberry juice.

  • large punch bowl or pitcher
  • glasses
  • spoon

For the Punch

  • 2 liters ginger ale (chilled)
  • 1 bottle (64 oz / 1.9 L) pink lemonade (chilled)
  • 1 cup cranberry juice

For the Optional Toppings

  • 1-2 cups whipped topping
  • edible pink glitter (as desired)
  • pink sanding sugar (for rimming glasses)

For Garnish

  • sliced fruit (strawberries, oranges, or lemons) (as desired)
  • ice (as needed)

Step-by-Step Instructions for Pink Witch Punch

  1. Chill the ginger ale, pink lemonade, and cranberry juice for at least 1 hour.
  2. Prepare glasses by moistening rims and rolling them in pink sanding sugar.
  3. In a large punch bowl, combine the pink lemonade and cranberry juice, stirring gently.
  4. Slowly add the chilled ginger ale, stirring lightly to maintain bubbles.
  5. Dollop whipped topping on top and sprinkle with edible glitter. Add fruit slices.
  6. Serve the punch over ice in prepared glasses.

For an extravagant touch, rim glasses with pink sanding sugar after moistening with lemon juice. Customize with seasonal fruits or herbs for a unique twist.

Drink
crowd-pleaser, festive beverage, Halloween drink, party punch, Pink Witch Punch, refreshing drink

Filed Under: Drink

Crispy Gnocchi With Spinach And Feta: A Flavorful Delight

September 29, 2025 by grace bellamy Leave a Comment

As I was rummaging through my pantry the other day, I stumbled upon a bag of gnocchi that had been waiting patiently for its moment to shine. Inspired by the versatility of this Italian delight, I whipped up a dish that would make anyone forget fast food—Crispy Gnocchi With Spinach And Feta! In just 25 minutes, you can create a meal that not only boasts quick prep but is also a vibrant crowd-pleaser, perfect for a cozy dinner or a lively gathering. The combination of crispy gnocchi, fresh spinach, and tangy feta will have you yearning for second helpings. So, why not treat yourself to this effortlessly delightful dish? What’s more, your kitchen is about to fill up with aromas that will leave everyone curious about what’s cooking!

Crispy Gnocchi With Spinach And Feta

Why is this gnocchi recipe a must-try?

Simplicity makes this dish perfect for busy weeknights, requiring only 25 minutes from start to finish. Crispy texture elevates the gnocchi to new heights, offering a delightful crunch that contrasts beautifully with spinach and feta. Bold flavors emerge thanks to fresh garlic and optional red pepper flakes, ensuring every bite is exciting. Versatile ingredient list means you can swap in your favorite greens or cheese, making it your own. Perfectly crowd-pleasing, this dish is sure to impress family and friends craving a homemade meal.

Crispy Gnocchi With Spinach And Feta Ingredients

• Dive into deliciousness with these essential components!

For the Gnocchi

  • 1 pound gnocchi – This serves as the base for your crispy delight and is quick to prepare.

For the Sauté

  • 2 tablespoons olive oil – Helps achieve that golden-brown crispy texture.
  • 2 cloves garlic, minced – Adds aromatic depth and flavor to the dish.
  • Salt – Enhances all the vibrant flavors, adjust to your taste.
  • Black pepper – A perfect complement that adds a subtle kick.
  • 1 teaspoon red pepper flakes (optional) – For those who love a spicy touch!

For the Greens

  • 4 cups fresh spinach – Packed with nutrients and adds a lovely fresh element.

For the Creamy Finish

  • 4 ounces feta cheese, crumbled – Provides a tangy bite that ties everything together beautifully.

Elevate your meal with this Crispy Gnocchi With Spinach And Feta recipe, and savor the wonderful flavors!

Step‑by‑Step Instructions for Crispy Gnocchi With Spinach And Feta

Step 1: Boil the Gnocchi
Begin by bringing a large pot of salted water to a rolling boil. Once the water is bubbling, carefully add the gnocchi and cook according to package instructions, typically about 2-3 minutes. You’ll know they’re ready when they float to the surface. Use a slotted spoon to gently remove them and set aside in a colander to drain while you prepare the next steps.

Step 2: Sear the Gnocchi
In a large frying pan, heat two tablespoons of olive oil over medium-high heat until it shimmers. Add the cooked gnocchi to the pan in a single layer, ensuring they’re not crowded. Allow them to cook undisturbed for about 2-3 minutes, watching for a golden-brown crust to develop. This will give your Crispy Gnocchi With Spinach And Feta that delightful texture we’re aiming for.

Step 3: Crisp on All Sides
After the first side is golden, gently stir the gnocchi to chance sides, cooking for an additional 2-3 minutes until they’re crispy all around. As they cook, you’ll enjoy the satisfying sizzle! Pay attention, as this step is crucial for achieving that coveted crunchiness that balances with the spinach and feta.

Step 4: Add Garlic
Once the gnocchi is beautifully crispy, reduce the heat to medium and add the minced garlic to the pan. Sauté the garlic for about 1 minute, stirring frequently, until it’s fragrant and lightly golden. Be careful not to let it burn, as this can turn your dish bitter. The aroma will start to fill your kitchen, hinting at the deliciousness to come!

Step 5: Incorporate Spinach
Now, it’s time to add freshness! Toss the 4 cups of fresh spinach into the pan with the gnocchi and garlic. Stir gently for about 2-3 minutes, or until the spinach wilts down, exuding a beautiful green color. This adds not only flavor but also nutrition to your Crispy Gnocchi With Spinach And Feta.

Step 6: Season the Dish
Once the spinach is nicely wilted, season the mixture generously with salt, black pepper, and optional red pepper flakes if you’d like a spicy kick. Give everything a good stir to distribute the seasonings evenly. At this point, the vibrant colors and aromas will indicate you’re just steps away from serving this delightful dish.

Step 7: Add Feta and Serve
Remove the pan from heat and sprinkle the crumbled feta cheese over the colorful mixture. Stir gently to combine, allowing the feta to melt slightly and mingle with the other ingredients. Serve your Crispy Gnocchi With Spinach And Feta immediately on plates, appreciating the lovely textures and inviting aromas that will make any meal feel special!

Crispy Gnocchi With Spinach And Feta

What to Serve with Crispy Gnocchi With Spinach And Feta

Discover delightful pairings that will enhance your culinary journey and elevate this comforting dish to new heights.

  • Garlic Bread: The buttery, garlicky aroma complements the savory flavors from the gnocchi and adds a satisfying crunch.
  • Mixed Green Salad: A refreshing mix of greens with a light vinaigrette balances the richness of the feta and helps cleanse the palate.
  • Roasted Vegetables: Seasonal veggies roasted to perfection bring in a sweet and smoky contrast, enhancing the dish’s earthy tones.
  • Creamy Tomato Soup: A warm, velvety tomato soup pairs beautifully, providing creamy comfort that hugs each bite of gnocchi.
  • Zesty Lemonade: Refreshing and tangy lemonade helps cut through the richness, making your dining experience even more enjoyable.
  • Sautéed Asparagus: Lightly seasoned and crisp-tender asparagus adds elegance and a hint of crunch, enhancing the overall dining experience.
  • Wine Pairing: A glass of Sauvignon Blanc’s acidity complements the feta’s creaminess while elevating the flavors of spinach and garlic.
  • Chocolate Mousse: End with a silky, indulgent chocolate mousse for dessert, offering a sweet note that rounds out this delightful meal.

Expert Tips for Crispy Gnocchi With Spinach And Feta

• Perfect Boiling: Ensure your water is at a rapid boil before adding the gnocchi. This helps them cook evenly and float correctly.

• Crispy Heaven: Don’t crowd the frying pan when searing the gnocchi; this allows for better browning and that crucial crispy texture for your Crispy Gnocchi With Spinach And Feta.

• Careful With Garlic: Stir the garlic as it cooks to prevent burning. Burnt garlic can turn your dish bitter, ruining those lovely flavors!

• Taste As You Go: Don’t forget to taste and adjust seasoning with salt and pepper as you mix in the spinach and feta—flavors develop beautifully this way.

• Customize Greens: Feel free to replace spinach with other greens like kale or arugula based on your preference or what you have on hand!

• Serve Warm: Enjoy your dish right away while it’s warm. The crispy gnocchi and melty feta create a heavenly experience that shouldn’t be missed!

Crispy Gnocchi With Spinach And Feta Variations

Feel free to let your creativity shine as you explore these delightful twists on the classic recipe!

  • Dairy-Free: Substitute the feta with almond or cashew cheese for a creamy yet dairy-free version.
  • Veggie Boost: Throw in a cup of cherry tomatoes or bell peppers for a burst of color and sweetness in each bite.
  • Extra Crispiness: For an added crunch, toss the gnocchi in breadcrumbs before frying. The result is a delightful, golden crust that will have everyone clamoring for more!
  • Herb Infusion: Fresh herbs like basil or parsley can be added towards the end, enhancing the dish with their aromatic charm.
  • Protein-Packed: Add grilled chicken or chickpeas to the pan for a filling, protein-rich meal that will keep everyone satisfied.
  • Spicy Kick: If you’re a fan of heat, try adding sliced jalapeños or banana peppers to spice things up and bring some excitement to your crispy creation!
  • Gluten-Free: Substitute the gnocchi with gluten-free gnocchi or cauliflower gnocchi for a lighter, yet equally delicious option.
  • Lemon Zest: Sprinkle fresh lemon zest just before serving for a zesty lift that brightens the overall flavors beautifully.

These variations not only enhance flavor but also keep the recipe fresh and exciting. Enjoy experimenting! If you’re in the mood for something different, you might also consider whipping up a rich and flavorful Creamy Spinach and Feta Pasta or a cozy Garlic Butter Gnocchi.

How to Store and Freeze Crispy Gnocchi With Spinach And Feta

Room Temperature: Best enjoyed fresh! If needed, you can keep leftovers at room temperature for up to 2 hours before refrigeration.

Fridge: Store any leftovers in an airtight container in the fridge for up to 3 days. Reheat gently to maintain the crispy texture.

Freezer: For longer storage, freeze the cooked gnocchi mixture in a sealed container for up to 2 months. Thaw overnight in the fridge before reheating.

Reheating: When ready to enjoy, reheat in a pan over medium heat, adding a dash of olive oil to revive that delightful crispiness in your Crispy Gnocchi With Spinach And Feta!

Make Ahead Options

These Crispy Gnocchi With Spinach And Feta are perfect for meal prep enthusiasts! You can prepare the gnocchi and sauté them with garlic and spinach up to 24 hours in advance. Simply cook the gnocchi and toss them in olive oil with the garlic and spinach until wilted, then let it cool completely before transferring it to an airtight container. Store in the refrigerator, ensuring it stays fresh and delicious. When you’re ready to serve, reheat the mixture in a pan over medium heat, and then add the crumbled feta. This way, you’ll enjoy the same delightful flavors with minimal fuss on busy weeknights!

Crispy Gnocchi With Spinach And Feta

Crispy Gnocchi With Spinach And Feta Recipe FAQs

What type of gnocchi should I use?
Absolutely! For this recipe, I recommend using fresh or store-bought potato gnocchi. If you’re using frozen gnocchi, there’s no need to defrost them before cooking—just add them directly to the boiling water!

How should I store leftover Crispy Gnocchi With Spinach And Feta?
You can keep any leftovers in an airtight container in the fridge for up to 3 days. Just be sure to reheat gently in a pan to help regain some of that lovely crispiness. However, I recommend enjoying this dish fresh for the best texture and flavor!

Can I freeze Crispy Gnocchi With Spinach And Feta?
Definitely! To freeze, let the cooked mixture cool completely, then transfer it to a sealed container or freezer bag. It will stay good for up to 2 months. When you’re ready to enjoy it, simply thaw it overnight in the fridge and reheat in a pan over medium heat, adding a splash of olive oil to revive the crispiness.

What if my gnocchi turns out mushy when cooking?
If your gnocchi is mushy, it might have been overcooked. Always follow the package instructions for cooking times, and keep a close eye; they should float to the surface in about 2-3 minutes. If you’re using fresh gnocchi, they often take less time, so quick checks are key!

Can I make this recipe dairy-free or vegan?
Certainly! To make a dairy-free version, simply skip the feta cheese or use a dairy-free cheese alternative. Additionally, you can enhance the flavor with nutritional yeast for that cheesy taste. Adjust seasonings to your preference, and you’ve got a delicious vegan meal!

Are there any common allergens in this recipe?
This Crispy Gnocchi With Spinach And Feta recipe contains gluten (from the gnocchi) and dairy (from the feta). If anyone in your household has allergies to these ingredients, you can look for gluten-free gnocchi alternatives and plant-based cheese options instead. Always check labels to ensure they meet dietary needs.

Crispy Gnocchi With Spinach And Feta: A Flavorful Delight

Discover how to make Crispy Gnocchi With Spinach And Feta in just 25 minutes for a delicious meal.

  • Large Pot
  • Frying Pan
  • slotted spoon

For the Gnocchi

  • 1 pound gnocchi (This serves as the base for your crispy delight and is quick to prepare.)

For the Sauté

  • 2 tablespoons olive oil (Helps achieve that golden-brown crispy texture.)
  • 2 cloves garlic, minced (Adds aromatic depth and flavor to the dish.)
  • Salt (Enhances all the vibrant flavors, adjust to your taste.)
  • Black pepper (A perfect complement that adds a subtle kick.)
  • 1 teaspoon red pepper flakes (optional – For those who love a spicy touch!)

For the Greens

  • 4 cups fresh spinach (Packed with nutrients and adds a lovely fresh element.)

For the Creamy Finish

  • 4 ounces feta cheese, crumbled (Provides a tangy bite that ties everything together beautifully.)

Step-by-Step Instructions

  1. Begin by bringing a large pot of salted water to a rolling boil. Add the gnocchi and cook according to package instructions, typically about 2-3 minutes. Use a slotted spoon to gently remove them and set aside in a colander to drain while you prepare the next steps.
  2. In a large frying pan, heat two tablespoons of olive oil over medium-high heat until it shimmers. Add the cooked gnocchi to the pan in a single layer, and allow them to cook undisturbed for about 2-3 minutes for a golden-brown crust.
  3. Gently stir the gnocchi to chance sides, cooking for an additional 2-3 minutes until they’re crispy all around.
  4. Once the gnocchi is beautifully crispy, reduce the heat to medium and add the minced garlic to the pan. Sauté the garlic for about 1 minute until fragrant.
  5. Toss the 4 cups of fresh spinach into the pan with the gnocchi and garlic. Stir gently for about 2-3 minutes until the spinach wilts down.
  6. Once the spinach is wilted, season the mixture with salt, black pepper, and optional red pepper flakes. Stir to distribute the seasonings evenly.
  7. Remove the pan from heat and sprinkle the crumbled feta cheese over the mixture. Stir gently to combine and serve immediately.

Perfect for busy weeknights, this recipe can be made in just 25 minutes. Customize with your favorite greens or cheese!

Main Dishes
Italian
crispy, easy dinner, feta, gnocchi, quick meal, Spinach

Filed Under: Main Dishes

Creative Mummy Dogs That Will Wow Your Family Tonight

September 28, 2025 by grace bellamy Leave a Comment

“Hey there, fellow food enthusiasts! Have you ever found yourself in a frenzy trying to whip up something fun and easy for dinner? Let me introduce you to Mummy Dogs, an enchanting twist on a classic favorite that’s bound to bring a smile to your face and make your taste buds dance. With just a few simple ingredients, you can create these adorable little treats that are perfect for any gathering or a cozy night in. Not only do they bake up in just 15 minutes, but they also allow for customization with your favorite sauces like zesty sriracha mayo or classic ketchup. So, are you ready to unroll some dough and dive into this delightful culinary adventure?”

Mummy Dogs

Why are Mummy Dogs a family favorite?

Quick and Easy: With only a 15-minute cook time, Mummy Dogs are the perfect answer for busy nights when you crave something unique yet simple.

Fun Presentation: The “bandaged” look of these hot dogs is sure to impress both kids and adults, making them a hit at parties or family dinners.

Customizable Options: Pair them with your choice of sauces, like zesty sriracha mayo or classic ketchup, to elevate the flavor and cater to everyone’s taste buds.

Leftover Friendly: Not only are they delicious, but they can also be stored for up to three days, making for an easy lunch option. For those who love to meal prep, freezing Mummy Dogs ensures that a fun meal is always at your fingertips!

Nostalgic Comfort: Moving away from mundane fast food, these Mummy Dogs blend nostalgia with creativity—definitely a win-win for every home chef!

Mummy Dogs Ingredients

For the Hot Dogs
• Hot dogs – Fully cooked hot dogs are the star of this dish, providing a savory base for your Mummy Dogs.

For the Dough
• Crescent roll dough – You can use store-bought or homemade dough for a flaky and golden finish that wraps around the hot dogs perfectly.

For Serving (Optional)
• Ketchup – A classic choice that adds a sweet and tangy dip for your Mummy Dogs.
• Mustard – This adds a zesty bite that pairs well with the savory hot dogs.
• Sriracha mayo – A deliciously spicy twist, bringing a creamy texture and heat that elevates the overall flavor.

Embrace the fun of crafting these Mummy Dogs with simple yet delightful ingredients!

Step-by-Step Instructions for Mummy Dogs

Step 1: Preheat Your Oven
Begin by preheating your oven to 350°F (175°C). This ensures a perfectly cooked and golden finish for your Mummy Dogs. While the oven is warming up, gather your ingredients and equipment, including a baking sheet lined with parchment paper for easy cleanup.

Step 2: Prepare the Dough
Unroll the crescent roll dough and separate it into rectangles. On a clean surface, gently stretch and flatten each rectangle a little for easier handling. This dough will be wrapped around the hot dogs, so make sure it remains pliable for that “mummy” look!

Step 3: Cut Dough Strips
To create the bandage effect, cut each rectangle into thin strips, approximately ¼ inch wide. Aim for a zigzag pattern to enhance the spooky appearance of your Mummy Dogs. Lay the dough strips aside in a neat pile, ready for wrapping around the hot dogs.

Step 4: Wrap the Hot Dogs
Take a fully cooked hot dog and start wrapping it with the dough strips, leaving small gaps between strips to mimic bandages. Ensure the strips adhere well to the surface of the hot dog. This step is where the fun begins, so get creative with how you wrap them!

Step 5: Arrange on Baking Sheet
Carefully place the wrapped Mummy Dogs on your prepared baking sheet, ensuring they aren’t touching each other. This allows for even cooking and a crisp finish. The delightful sight of these bandaged hot dogs will surely bring a smile as they prepare to go into the oven.

Step 6: Bake to Golden Perfection
Slide the baking sheet into the preheated oven and bake the Mummy Dogs for 15 minutes. You’ll know they’re ready when the dough turns a lovely golden brown and puffs up slightly. The aroma wafting through your kitchen will make it hard to resist!

Step 7: Serve and Enjoy
Once baked, remove the Mummy Dogs from the oven and let them cool for a couple of minutes. Serve them with your favorite sauces like ketchup, mustard, or creamy sriracha mayo for dipping. Get ready to impress your family with these adorable Mummy Dogs!

Mummy Dogs

What to Serve with Mummy Dogs

Elevate your Mummy Dogs experience with these delightful pairings that create a fun and satisfying meal for everyone.

  • Crispy French Fries: The golden crunch of fries complements the soft, flaky texture of Mummy Dogs, making them irresistible.

  • Tangy Coleslaw: This refreshing side adds a crunchy contrast and a zesty flavor that balances the savory richness of the hot dogs.

  • Vegetable Platter: Serve with a colorful assortment of fresh veggies for a healthy crunch. Paired with hummus or ranch, it makes a perfect dipper!

  • Sweet Potato Wedges: The natural sweetness of these wedges pairs beautifully with the savory spices of the Mummy Dogs, adding a tasty twist.

  • Creamy Macaroni and Cheese: Gooey, cheesy goodness adds comfort to your meal. This classic pairing ensures there’s something for every palate.

  • Pineapple Salsa: This vibrant mix of sweet and spicy brings a tropical flair, enhancing the Mummy Dogs with a burst of fresh flavor.

  • Sparkling Lemonade: A crisp, citrusy drink refreshes the palate while the Mummy Dogs are flavorful yet not overwhelming—a balance in every bite.

  • Chocolate Chip Cookies: For a sweet finish to your dinner, serve up some warm cookies. They bring a delightful nostalgia to your Mummy Dogs meal!

Expert Tips for Mummy Dogs

  • Dough Thickness: Ensure dough strips are thin, about ¼ inch, for a better “bandaged” effect that crisps up nicely in the oven.

  • Even Wrapping: Avoid over-wrapping; leave small gaps to achieve that spooky mummy look and ensure even baking for your Mummy Dogs.

  • Baking Sheet Prep: Line your baking sheet with parchment paper to prevent sticking and make cleanup a breeze after enjoying your Mummy Dogs.

  • Don’t Rush Cooling: Allow the Mummy Dogs to cool for a few minutes before serving; this prevents burns and enhances the flavors.

  • Creative Sauce Pairings: Experiment with sauces beyond traditional ketchup and mustard! Try BBQ sauce or a spicy aioli to pack a flavorful punch with your Mummy Dogs.

Storage Tips for Mummy Dogs

Fridge: Store leftover Mummy Dogs in an airtight container in the refrigerator for up to 3 days. This keeps them fresh and ready for a quick meal!

Freezer: For longer storage, wrap each Mummy Dog individually and place them in a freezer-safe container. They can be frozen for 1-2 months without compromising quality.

Reheating: To enjoy leftover Mummy Dogs, reheat in the oven at 350°F (175°C) for 5-7 minutes, or microwave in bursts of 30 seconds until heated through.

Mummy Dogs Variations & Substitutions

Feel free to let your creativity flow as you customize these delightful Mummy Dogs to suit your family’s tastes!

  • Whole Wheat: Use whole wheat crescent roll dough for a healthier twist without sacrificing flavor or fun.

  • Vegetarian: Swap out traditional hot dogs for plant-based sausages to make it a delicious vegetarian option without losing the joy of Mummy Dogs.

  • Cheesy: Add shredded cheese inside the dough wraps before enclosing the hot dogs—melted cheese takes these treats to the next level!

  • Spicy: Incorporate jalapeños or sliced chilies into the hot dog wrap for a fiery punch that heat lovers will cherish.

  • Herb-Infused Dough: Enhance the dough flavor by adding garlic powder and dried herbs, like oregano or basil, to the crescent rolls for an aromatic touch.

  • Mini Mummy Dogs: Use cocktail hot dogs or mini sausages for bite-sized versions that are perfect for appetizers at parties or gatherings!

  • BBQ Twist: Brush the wrapped hot dogs with BBQ sauce before baking, giving them a smoky, sweet flavor that pairs beautifully with traditional dipping sauces.

  • Dough Alternatives: Try puff pastry instead of crescent roll dough for an ultra-flaky, buttery variation that elevates the entire dish.

These variations can create a delightful experience every time you make Mummy Dogs—so mix it up and enjoy the magic of customization!

Make Ahead Options

These Mummy Dogs are perfect for meal prep enthusiasts looking to save time on busy nights! You can wrap the hot dogs in crescent dough strips up to 24 hours in advance. To do this, follow the wrapping steps and place the prepared Mummy Dogs on a baking sheet, then cover them tightly with plastic wrap and refrigerate. This helps maintain their quality and prevents the dough from drying out. When you’re ready to serve, simply pop them in the preheated oven and bake for 15 minutes until golden brown. With just a bit of prep ahead of time, you’ll have these delightful Mummy Dogs ready to impress your family with minimal effort!

Mummy Dogs

Mummy Dogs Recipe FAQs

What kind of hot dogs should I use?
Absolutely! Fully cooked hot dogs are perfect for this recipe as they provide a savory base that holds the wrapping well. You can choose beef, turkey, or even plant-based hot dogs depending on your dietary preference!

How should I store leftover Mummy Dogs?
Very importantly, place any leftover Mummy Dogs in an airtight container and store them in the refrigerator for up to 3 days. This helps keep them fresh and ready for a delicious lunch or snack later in the week.

Can I freeze Mummy Dogs?
Certainly! To freeze your Mummy Dogs, wrap each one individually in plastic wrap and then place them in a freezer-safe container or a resealable freezer bag. They can be stored for up to 1-2 months. When ready to enjoy, thaw them in the refrigerator overnight before reheating in the oven or microwave.

What should I do if the dough strips aren’t sticking?
If you find that the dough strips aren’t adhering well while wrapping them, try gently pressing the edges of the dough against the hot dog. Additionally, you can lightly moisten the dough ends with a drop of water to help them stick better. Make sure not to overload the hot dog with too much dough, as that can cause it to slide off!

Are Mummy Dogs pet-friendly?
It’s important to note that while the hot dogs may seem appealing to pets, they are often high in sodium and preservatives. It’s best to avoid sharing them with your furry friends to keep them healthy and safe.

Can I use homemade dough instead of store-bought?
Absolutely! If you prefer to make your own dough, you can easily use a simple homemade bread or pizza dough as a substitute. Just roll it out to the right thickness and follow the wrapping instructions as you would with crescent roll dough. This can give your Mummy Dogs a delightful homemade touch!

Creative Mummy Dogs That Will Wow Your Family Tonight

Mummy Dogs are a fun, easy, and customizable dish perfect for family dinners or gatherings.

  • Oven
  • Baking Sheet
  • parchment paper

For the Hot Dogs

  • 4 pieces Fully cooked hot dogs

For the Dough

  • 1 package Crescent roll dough (store-bought or homemade)

For Serving (Optional)

  • ½ cup Ketchup (for dipping)
  • ½ cup Mustard (for dipping)
  • ½ cup Sriracha mayo (for dipping)

Step-by-Step Instructions for Mummy Dogs

  1. Preheat your oven to 350°F (175°C). Gather your ingredients and equipment.
  2. Unroll the crescent roll dough and separate it into rectangles. Stretch and flatten each rectangle.
  3. Cut each rectangle into thin strips (¼ inch wide) for wrapping.
  4. Wrap the hot dogs with the dough strips, leaving small gaps between strips.
  5. Place the wrapped Mummy Dogs on a prepared baking sheet, ensuring they are not touching.
  6. Bake for 15 minutes or until the dough turns golden brown.
  7. Let them cool for a few minutes before serving with your favorite sauces.

These Mummy Dogs can be stored in the fridge for up to 3 days or frozen for 1-2 months.

Main Dishes
American
easy dinner, family recipe, fun food, hot dogs, Mummy Dogs

Filed Under: Main Dishes

Delicious Shredded Chicken & Rice Stuffed Peppers for Dinner

September 28, 2025 by grace bellamy Leave a Comment

As I stood in my kitchen, the aroma of spices wafted through the air, transporting me back to family dinners filled with laughter and warmth. Today, I’m excited to share my recipe for Shredded Chicken & Rice Stuffed Peppers, a dish that’s not only easy to make but also a fantastic way to bring everyone together. With just a handful of ingredients and minimal prep time, these vibrant peppers are packed with nutritious goodness and flavor that even the pickiest eaters can’t resist. Plus, they’re freezer-friendly, making them perfect for those busy weeknights when cooking feels overwhelming. Ready to dive into a delightful culinary adventure as we fill these peppers with a hearty blend of shredded chicken, rice, and cheese? Let’s get started!

Shredded Chicken & Rice Stuffed Peppers

Why Are Stuffed Peppers So Irresistible?

Flavor-Packed Delight: Each bite of these Shredded Chicken & Rice Stuffed Peppers bursts with savory goodness, blending tender chicken, spices, and gooey cheese in a colorful bell pepper.

Quick & Easy: With simple steps and a slow cooker for the chicken, you’ll have a wholesome meal ready with minimal fuss.

Freezer-Friendly: Make a big batch and freeze the extras for those hectic days when you need a quick dish that still feels homemade.

Family Appeal: This dish appeals to everyone, from kids to adults, ensuring that dinner will be a hit and leading to happy plates all around.

Combine them with a fresh salad or your favorite side for a complete meal, and you have a family dinner that’s both effortless and satisfying!

Shredded Chicken & Rice Stuffed Peppers Ingredients

• Get ready to fill your table with flavor!

For the Chicken Filling
• 2 chicken breasts – choose skinless for a healthier option.
• 1 teaspoon cumin – adds a warm, earthy flavor that pairs well with the other spices.
• 1 teaspoon garlic salt – enhances the savory depth of the dish.
• 1 teaspoon chili powder – brings a mild kick and vibrant color to the filling.
• 1/2 teaspoon black pepper – adds a touch of heat; adjust to taste.
• 1 can diced tomatoes with green chilies – boosts moisture and flavor, making the chicken juicy.

For the Stuffed Peppers
• 4 bell peppers – pick your favorite colors for a vibrant dish; cut the tops off for easy filling.
• 2 cups Mexican rice – use pre-cooked rice or leftovers to save time.
• 1 shredded chicken breast (from above) – transforms into a delightful filling once cooked and shredded.
• 1 cup shredded cheddar cheese – sprinkle on top for melty goodness that everyone loves.
• 1 can black beans (rinsed and drained) – add fiber and protein; a perfect complement to the rice.

Transform your dinner routine with these Shredded Chicken & Rice Stuffed Peppers that offer nutrition and satisfaction in every bite.

Step‑by‑Step Instructions for Shredded Chicken & Rice Stuffed Peppers

Step 1: Prepare the Chicken
Start by placing two chicken breasts in the bottom of your slow cooker. Season with cumin, garlic salt, chili powder, and black pepper, then pour a can of diced tomatoes with green chilies on top. Cover and cook on low for 6-8 hours or on high for 4-6 hours, until the chicken is tender and easily shreds apart in the sauce.

Step 2: Prepare the Peppers
While the chicken is cooking, bring a large pot of water to a boil. Rinse your bell peppers, slice off the tops, and hollow out the insides, ensuring all seeds and white parts are removed. Optionally, you can carve fun jack-o-lantern faces into the peppers for a playful touch.

Step 3: Blanch the Peppers
Once the water is boiling, carefully add the prepared peppers and their tops. Boil for about 5 minutes, just until they start to soften. You’ll know they’re ready when they turn a vibrant color and feel tender to the touch. Remove the peppers from the water and set them aside to cool.

Step 4: Mix the Filling
In a large bowl, combine the cooked Mexican rice with the shredded chicken from the slow cooker, cheddar cheese, and rinsed black beans. Mix everything together gently until well combined, creating a colorful filling for your Shredded Chicken & Rice Stuffed Peppers.

Step 5: Stuff the Peppers
Using a spoon, generously fill each bell pepper with the chicken and rice mixture. If you prefer extra cheesiness, sprinkle some cheddar cheese on top of the filling before replacing the pepper tops. This adds an enticing gooeyness that enhances the dish’s appeal.

Step 6: Bake to Perfection
Preheat your oven to 350°F (175°C). Place the stuffed peppers upright in a baking dish and cover with foil. Bake for 30 minutes, or until the cheese is melted and bubbly, and the peppers are tender to your liking. For a make-ahead option, wrap in plastic and refrigerate, baking directly from the fridge for about 1 hour.

Shredded Chicken & Rice Stuffed Peppers

What to Serve with Shredded Chicken and Rice Stuffed Peppers

A colorful plate of Shredded Chicken and Rice Stuffed Peppers sets the stage for a hearty, satisfying family meal that’s meant to be savored.

  • Crispy Green Salad: A fresh mix of greens with a tangy vinaigrette balances the rich flavors of the stuffed peppers beautifully.
  • Guacamole and Tortilla Chips: Creamy guacamole alongside crunchy chips adds an irresistible texture contrast and a touch of fiesta to your dinner table.
  • Grilled Corn on the Cob: Sweet, smoky corn pairs perfectly with the savory stuffed peppers, creating a well-rounded meal that’s both comforting and fun.
  • Mexican Street Rice: Flavorful cilantro-lime rice echoes the Mexican themes and provides a delightful zest that complements the main dish.
  • Refreshing Fruit Salsa: A vibrant fruit salsa made with mango or pineapple offers a refreshing and sweet contrast to the savory pepper filling.
  • Spicy Black Bean Soup: Serve this velvety soup as a starter to enhance the meal with an extra layer of flavor that ties in beautifully.
  • Margaritas: A zesty or fruity margarita elevates the meal, bringing a cheerful touch that invites connection and laughter around the table.
  • Churros for Dessert: These cinnamon-sugar treats provide a sweet ending, wrapping up the meal with a little indulgence everyone will love.

Make Ahead Options

These Shredded Chicken & Rice Stuffed Peppers are perfect for meal prep, making weeknight dinners a breeze! You can prepare the chicken filling up to 3 days in advance by cooking it in the slow cooker and storing it in an airtight container in the refrigerator. Additionally, you can hollow out the peppers and have them ready to go 24 hours ahead, ensuring every flavorfully filled pepper can be assembled quickly. When you’re ready to bake, simply stuff the peppers with the chicken and rice mixture, add extra cheese if desired, and bake at 350°F (175°C) for about 30 minutes until bubbly. This way, you will save time on busy nights while still enjoying a delicious, homemade meal!

How to Store and Freeze Shredded Chicken & Rice Stuffed Peppers

Fridge: Store any leftover stuffed peppers in an airtight container for up to 3 days. This keeps them fresh and ready for quick reheating.

Freezer: If you want to prepare these stuffed peppers ahead, wrap them tightly with plastic wrap and freeze for up to 3 months. They make for a perfect last-minute dinner option!

Reheating: To reheat frozen Shredded Chicken & Rice Stuffed Peppers, thaw in the fridge overnight and bake at 350°F (175°C) for about 30 minutes. A quick cover with foil prevents excess browning.

Room Temperature: It’s best to avoid leaving stuffed peppers out at room temperature for longer than 2 hours to ensure food safety. Always refrigerate promptly!

Expert Tips for Shredded Chicken & Rice Stuffed Peppers

  • Choose the Right Peppers: Opt for firm, colorful bell peppers that will hold their shape while baking, enhancing the visual appeal of your dish.

  • Don’t Overcook Chicken: Avoid dry chicken by shredding it at the right time; it should be tender and juicy, mixing perfectly with the spices.

  • Customize the Filling: Feel free to add veggies like corn or zucchini to the filling. Just remember not to overstuff the peppers to avoid spills.

  • Avoid Soggy Peppers: Blanching the peppers helps to soften them without making them too soggy. This way, they keep their structure while baking.

  • Rest Before Serving: Allow the stuffed peppers to sit for a few minutes post-baking. This helps the filling set slightly, making them easier to serve and more flavorful.

  • Freeze for Later: These Shredded Chicken & Rice Stuffed Peppers freeze wonderfully! Just bake, let them cool completely, then wrap tightly and store for a stress-free meal.

Shredded Chicken & Rice Stuffed Peppers Variations

Feel free to unleash your creativity and make these stuffed peppers uniquely yours!

  • Dairy-Free: Substitute cheese with a dairy-free alternative or omit entirely for a lighter dish. You’ll still enjoy a delightful flavor balance without the dairy.

  • Vegetarian Delight: Replace chicken with hearty lentils or chickpeas, and boost flavors with additional spices. This option is rich in protein and perfect for veggie lovers!

  • Spicy Kick: Add diced jalapeños or a splash of hot sauce to the filling for a fiery twist. Spice lovers will adore this enhancement, elevating each bite to new heights!

  • Quinoa Boost: Swap the rice with quinoa for a nutritious, gluten-free option that adds a delightful crunch to your peppers. Quinoa’s nutty flavor complements the other ingredients beautifully.

  • Extra Veggies: Bulk up the filling with sautéed vegetables like bell peppers, zucchini, or mushrooms. This colorful mix increases nutrition and adds a wonderful texture.

  • Mexican Flair: Incorporate black olives or corn for a Southwest vibe. You may also experiment with adding taco seasoning for a zesty flavor boost that will transport you straight to a fiesta!

  • Cheesy Fusion: Use a blend of cheeses, like pepper jack or mozzarella, to create a delightful melting texture. The harmony of different cheeses adds depth and richness to the dish.

  • Herb Infusion: Sprinkle in fresh herbs like cilantro or parsley for a fresh note. This elevates the appearance and brings a vibrant flavor to each stuffed pepper, enhancing your dining experience.

These variations open a world of possibilities, ensuring your Shredded Chicken & Rice Stuffed Peppers remain delightful each time you make them! For a fresh accompaniment, consider a crisp green salad or even a hearty side like Mexican Street Corn. Enjoy the culinary journey!

Shredded Chicken & Rice Stuffed Peppers

Shredded Chicken & Rice Stuffed Peppers Recipe FAQs

How do I choose the best bell peppers for stuffing?
Absolutely! Look for firm, unblemished bell peppers with vibrant colors—green, red, yellow, or orange. Make sure they feel heavy for their size and are free from dark spots or wrinkles. These characteristics indicate freshness and will help your stuffed peppers hold their shape during baking.

How should I store leftover stuffed peppers?
You can store any leftover Shredded Chicken & Rice Stuffed Peppers in an airtight container in the refrigerator for up to 3 days. Just reheat them in the microwave or oven when you’re ready to enjoy your delicious meal again.

Can I freeze stuffed peppers? If so, how?
Very! To freeze, allow the baked stuffed peppers to cool completely. Then, wrap each pepper tightly in plastic wrap and place them in a freezer-safe container. They can be frozen for up to 3 months. When you’re ready to enjoy, thaw them in the refrigerator overnight and reheat in the oven at 350°F for about 30 minutes, covered with foil to prevent excess browning.

What should I do if the filling is too dry?
No worries! If you find your filling is dry, you can add a splash of chicken broth or a few spoonfuls of salsa to moisten it. Incorporating ingredients like diced onion or magical corn can also add moisture and texture. Just mix well, and your stuffing will be as delightful as it should be!

Are the ingredients safe for pets?
I always recommend keeping these stuffed peppers away from pets. Ingredients like garlic and onions (present in garlic salt) can be harmful to animals, especially dogs. It’s best to enjoy this dish yourself and choose pet-friendly treats for your furry friends!

How can I troubleshoot my peppers being too soggy?
Absolutely a valid concern! To avoid soggy peppers, ensure you don’t overboil them—just blanch for about 5 minutes until they’re tender but still firm. Also, draining excess moisture during the filling prep can help. If you’ve done this and they still turn out soggy, try reducing the baking time or using less liquid in your filling next time. Happy cooking!

Delicious Shredded Chicken & Rice Stuffed Peppers for Dinner

A delightful recipe for Shredded Chicken & Rice Stuffed Peppers that brings family together with nutritious goodness.

  • Slow Cooker
  • Baking Dish
  • Large Pot
  • Mixing Bowl

For the Chicken Filling

  • 2 breasts chicken (skinless for a healthier option)
  • 1 teaspoon cumin (adds warm, earthy flavor)
  • 1 teaspoon garlic salt (enhances savory depth)
  • 1 teaspoon chili powder (brings mild kick)
  • 1/2 teaspoon black pepper (adds a touch of heat)
  • 1 can diced tomatoes with green chilies (boosts moisture and flavor)

For the Stuffed Peppers

  • 4 pieces bell peppers (cut the tops off for easy filling)
  • 2 cups Mexican rice (use pre-cooked or leftovers)
  • 1 cup shredded chicken (from the cooked chicken above)
  • 1 cup shredded cheddar cheese (for melty goodness)
  • 1 can black beans (rinsed and drained)

Preparation Steps

  1. Place the chicken breasts in your slow cooker. Season with cumin, garlic salt, chili powder, and black pepper, then pour the diced tomatoes on top. Cook on low for 6-8 hours or on high for 4-6 hours.
  2. Bring a large pot of water to a boil. Rinse your bell peppers, slice off the tops, and hollow out the insides. Optionally carve jack-o-lantern faces for fun.
  3. Boil the prepared peppers and their tops for about 5 minutes until they start to soften. Remove and let cool.
  4. In a large bowl, combine the cooked rice, shredded chicken, cheddar cheese, and black beans. Mix gently until well combined.
  5. Fill each bell pepper with the chicken and rice mixture, adding extra cheese on top if desired. Replace the pepper tops.
  6. Preheat your oven to 350°F (175°C). Place the stuffed peppers in a baking dish and cover with foil. Bake for 30 minutes until cheese is melted and peppers are tender.

These stuffed peppers can be frozen for up to 3 months. Reheat by thawing and baking at 350°F until warmed through.

Main Dishes
Tex-Mex
Chicken Dinner, Easy Recipe, family dinner, Freezer-friendly, Shredded Chicken & Rice Stuffed Peppers, Stuffed Peppers

Filed Under: Main Dishes

Delicious Halloween Cakesicles That Wow Every Party Guests

September 28, 2025 by grace bellamy Leave a Comment

As the leaves turn crisp and the air fills with whispers of autumn, I can’t help but feel a spark of excitement for the upcoming Halloween festivities. This year, I’ll be wowing my guests with delightful Halloween Cakesicles that blend nostalgia and creativity in every bite. This fabulous recipe not only makes use of leftover cake or cupcakes—perfect for those with a sweet tooth—but also offers a fun, hands-on activity for both kids and adults to enjoy together. With just a quick prep time and tons of room for personalization, these spooky treats are sure to be a hit, whether you’re hosting a haunted gathering or just needing something festive for your family. So, what wild designs will you whip up for your Halloween Cakesicles?

Halloween Cakesicles

Why are Halloween Cakesicles a must-try?

Fun and Creative: Unleash your imagination with these delightful treats that can be customized for any spooky design or color!

Leftover Magic: Transform leftover cake or cupcakes into eye-popping cakesicles, reducing waste while satisfying your sweet tooth.

Quick and Easy: With just 15 minutes of active prep time, you can whip up these sweets and impress guests without spending hours in the kitchen.

Perfect for All Ages: Whether it’s a Halloween party or a cozy family night, these cakesicles are a fun, interactive way to bring everyone together.

Impressive and Delicious: Coated in decadent chocolate, each bite is creamy, rich, and bursting with flavor—a guaranteed crowd-pleaser!

So, gather your loved ones, and get ready for a spooky celebration! For more delicious inspiration, check out my 10 Best Fall Desserts for a delicious seasonal lineup!

Halloween Cakesicles Ingredients

Get ready to create magic with these delightful cakesicles!

For the Batter

  • Leftover cake or cupcakes – 2 cups of red velvet recommended, perfect for a rich flavor profile.
  • Frosting – 1 cup of buttercream recommended, adding moisture and sweetness to your mixture.

For the Coating

  • Coating chocolate or candy melts – 12 ounces, choose white or colored for those vibrant Halloween Cakesicles!

For Decoration

  • Food color – Use powdered or oil-based; a splash can elevate your designs to spooky perfection!

Step‑by‑Step Instructions for Halloween Cakesicles

Step 1: Crumble the Cakes
Begin by crumbling your leftover red velvet cake or cupcakes in a large bowl until they resemble fine crumbs. This should take about 5 minutes. Ensure there are no large chunks, as a uniform texture will help the Halloween Cakesicles hold their shape.

Step 2: Mix with Frosting
Add 1 cup of buttercream frosting to the crumbled mixture, using clean hands or a spatula to blend thoroughly. This should take another 5 minutes. The goal is a dough-like consistency that sticks together, serving as the delicious foundation for your cakesicles.

Step 3: Shape the Mixture
Press the cake and frosting mixture firmly into cakesicle molds, filling each cavity to the top. Use a spatula or your hands to ensure a tight fit, as this will help maintain the shape once frozen. Smooth the surface for an even look before moving on to the next step.

Step 4: Freeze the Cakesicles
Place the filled molds in the freezer for at least 30 minutes or until the mixture is firm to the touch. This firmness is crucial for easy removal and coating later on, ensuring your Halloween Cakesicles stay intact as you dip them into chocolate.

Step 5: Melt the Coating
While the cakesicles freeze, melt 12 ounces of chocolate or candy melts according to package instructions, typically in a microwave-safe bowl. Heat in short bursts of 15–30 seconds, stirring in between, until smooth and fully melted—this should take about 2 minutes total.

Step 6: Coat the Cakesicles
Carefully remove the frozen cakesicles from the molds. Dip each one into the melted chocolate, ensuring it is fully coated. Allow excess chocolate to drip off before placing them on a parchment-lined tray. This process will take about 5 minutes and should leave you with beautifully coated Halloween Cakesicles.

Step 7: Let Them Set
Allow the dipped cakesicles to sit at room temperature until the chocolate sets, which can take about 10-15 minutes. For quicker results, you could also refrigerate them briefly. This step ensures a solid, delicious coat that will give each cakesicle a rich crunch.

Step 8: Decorate Your Cakesicles
Get creative by decorating your set cakesicles with additional melted chocolate, sprinkles, or edible decorations of your choice. This step is where the fun really begins! It’s a perfect opportunity to let your imagination run wild, adding spooky designs that will impress each guest at your Halloween gathering.

Halloween Cakesicles

How to Store and Freeze Halloween Cakesicles

Fridge: Store leftover Halloween Cakesicles in an airtight container for up to 3 days. This will keep them fresh while enjoying the festive flavors.

Freezer: For longer storage, wrap each cakesicle in plastic wrap and place them in a zip-top freezer bag. They can be frozen for up to 2 months without losing flavor or texture.

Thawing: To enjoy frozen Halloween Cakesicles, transfer them to the fridge for a few hours or let them sit at room temperature for about 30 minutes before serving.

Reheating: There’s no need to reheat these treats; simply enjoy them chilled or allow them to warm slightly for the perfect delectable bite.

Expert Tips for Halloween Cakesicles

Chill the Mixture: Make sure to chill your dough-like mixture thoroughly before pressing it into molds. This ensures they hold shape better during dipping.

Don’t Overheat the Chocolate: Melt chocolate slowly and at lower temperatures to avoid burning. Stir frequently for a smooth, glossy coating on your Halloween Cakesicles.

Use Quality Coating: Choose high-quality chocolate or candy melts for the best flavor and texture. You’ll want a coating that tastes as good as it looks!

Decoration Timing: Decorate your cakesicles while the coating is still slightly warm for better adhesion of sprinkles or designs. Let your creativity shine!

Freeze Well: Ensure your cakesicles are completely frozen; otherwise, they may fall apart during the coating process. A firm freeze makes for a successful Halloween Cakesicle experience!

Make Ahead Options

These Halloween Cakesicles are perfect for busy cooks looking to save time! You can prepare the cake and frosting mixture up to 24 hours in advance; simply cover it tightly in plastic wrap and refrigerate to keep it fresh. Additionally, once you’ve shaped the cakesicles and frozen them, they can be stored in an airtight container in the freezer for up to 3 weeks. When you’re ready to serve, just dip the frozen cakesicles into melted chocolate, let them set, and decorate as desired. This way, you’ll have spooky, homemade treats that are just as delicious and fun to enjoy, without the last-minute rush!

What to Serve with Halloween Cakesicles?

As you gather around the table with family and friends, enhance your spooky celebration with delightful pairings that perfectly complement these festive treats.

  • Spooky Punch: A fruity, fizzy punch adds a refreshing contrast to the sweet cakesicles, keeping spirits high throughout your gathering.
  • Ghostly Cupcakes: Sweet cupcakes topped with ghostly frosting enhance the theme while providing an alternate bite-sized dessert. They’re sure to delight every little monster!
  • Crispy Veggie Platter: Crisp vegetables with a zesty dip offer a crunchy balance to the sweetness of the cakesicles, adding freshness to your dessert spread.
  • Caramel Apples: Dipped in gooey caramel, these autumn classics provide a chewy texture and rich flavor that pairs beautifully with the creamy cakesicles.
  • Mini Cheese Board: A selection of cheeses and crackers introduces a savory element that balances the sweetness while inviting guests to explore flavors.
  • Chilled Hot Chocolate: A creamy beverage laced with marshmallows provides a comforting touch, perfect for cozy vibes on a Halloween night.
  • Halloween-Themed Cookies: Witch hats or pumpkin-shaped cookies can tie into your theme while delivering a crunchy counterpart to the soft cakesicles.
  • Pumpkin Spice Latte: This warm, spiced drink beautifully complements the sweetness of the cakesicles and sets a festive mood, making every sip a celebration.

Let your imagination run wild with these pairings, ensuring your Halloween gathering is both delicious and unforgettable!

Halloween Cakesicles Variations & Substitutions

Feel free to get creative and make these Halloween Cakesicles uniquely yours with these fun variations!

  • Gluten-Free: Substitute leftover cake with gluten-free cake or cupcakes for a delightful treat everyone can enjoy.

  • Sugar-Free: Use sugar-free frosting and alternative sweeteners in your cake for a guilt-free indulgence. This way, those watching their sugar intake can still join in the fun!

  • Vegan: Swap egg-based cakes with a vegan recipe and use dairy-free frosting and chocolate, making these treats suitable for plant-based diets.

  • Flavor Explosion: Add pureed fruits, such as pumpkin or banana, to your cake mixture for an unexpected twist in flavor and moisture. Imagine sinking your teeth into those juicy bites!

  • Nutty Crunch: Toss in chopped nuts like pecans or walnuts to the cake mixture before molding. This will add a delightful texture and enhance the flavor profile beautifully.

  • Cocoa Delight: Mix in cocoa powder to your cake prior to shaping for a rich chocolatey version of your Halloween Cakesicles. Chocolate lovers will thank you for this decadent twist!

  • Spicy Kick: Sprinkle in a pinch of cayenne or chili powder to the melted chocolate for a surprising touch of heat that will wow your guests! It’s a perfect way to awaken the senses.

  • Dazzling Decor: Instead of topping with just sprinkles, why not coat your cakesicles with crushed candy bars or pretzels for an irresistible sweet-salty combination?

These variations not only open doors to culinary delight but also ensure that your tables are filled with options for everyone this Halloween! For even more delightful ideas, check out my 10 Best Fall Desserts to spice up your festive table!

Halloween Cakesicles

Halloween Cakesicles Recipe FAQs

What kind of leftover cake or cupcakes can I use?
Absolutely, you can use any leftover cake or cupcakes! While red velvet is recommended for its rich flavor, feel free to experiment with chocolate, vanilla, or any flavor you have on hand. Just ensure they are moist and not overly dry; a great texture is key to delicious Halloween Cakesicles!

How should I store leftover Halloween Cakesicles?
You can store your Halloween Cakesicles in an airtight container in the fridge for up to 3 days. Just be sure to separate layers with parchment paper to prevent them from sticking. If you want to keep them longer, wrap each cakesicle in plastic wrap and place them in a zip-top freezer bag.

Can I freeze Halloween Cakesicles? If so, how?
Yes, you can! To freeze, first wrap each cakesicle in plastic wrap tightly to prevent freezer burn. Then, place them in a zip-top freezer bag and store for up to 2 months. When you’re ready to enjoy, simply thaw them in the fridge for a few hours or at room temperature for about 30 minutes.

What if my chocolate coating is too thick or too thin?
Very common! If your chocolate is too thick, you can add a splash of coconut oil or vegetable oil and reheat gently to achieve a smoother consistency. Conversely, if it’s thin, ensure you’re dipping at the right temperature; letting the chocolate sit for a minute can help it thicken before coating!

Are these Halloween Cakesicles safe for kids with allergies?
Great question! Always check the ingredient labels—especially on the chocolate and frosting—as they may contain common allergens such as nuts or dairy. For a safer option, you can make your frosting and use allergy-friendly chocolate or candy melts to cater to different dietary needs. Always ask guests about allergies before serving!

What decorations work best for Halloween Cakesicles?
Get creative with your decorations! I often use colorful sprinkles, edible glitter, or spooky-themed decorations like candy eyes and pumpkin shapes. For an extra touch, drizzle with contrasting chocolate once they set, or use food coloring to create Halloween-themed designs. The more, the merrier!

Delicious Halloween Cakesicles That Wow Every Party Guests

These Halloween Cakesicles are a fun, interactive treat that combine leftover cake with creativity to impress every guest at your Halloween gathering.

  • Cakesicle molds
  • Microwave-safe bowl
  • spatula

For the Batter

  • 2 cups leftover cake or cupcakes (red velvet recommended)
  • 1 cup frosting (buttercream recommended)

For the Coating

  • 12 ounces coating chocolate or candy melts (white or colored)

For Decoration

  • food color (powdered or oil-based)

Step-by-Step Instructions for Halloween Cakesicles

  1. Begin by crumbling your leftover red velvet cake or cupcakes in a large bowl until they resemble fine crumbs.
  2. Add 1 cup of buttercream frosting to the crumbled mixture, blending thoroughly until dough-like.
  3. Press the cake and frosting mixture firmly into cakesicle molds, ensuring a tight fit.
  4. Place the filled molds in the freezer for at least 30 minutes until firm.
  5. Melt 12 ounces of chocolate or candy melts according to package instructions.
  6. Carefully remove frozen cakesicles from the molds and dip each one into the melted chocolate.
  7. Allow dipped cakesicles to set at room temperature until chocolate sets, about 10-15 minutes.
  8. Decorate your cakesicles with additional melted chocolate, sprinkles, or edible decorations.

Chill the mixture thoroughly before pressing into molds. Use quality coating for best results. Decorate while the coating is slightly warm for better adhesion.

Dessert
American
cakesicles, creative desserts, dessert, Halloween, Halloween Cakesicles, party treats

Filed Under: Dessert

Delightful Hufflepuff Honeycomb Butterbeer Treats Recipe

September 28, 2025 by grace bellamy Leave a Comment

I remember the first time I tasted something truly magical—a crisp, sweet honeycomb treat, perfectly reminiscent of a whimsical world. Today, I’m excited to share my recipe for Hufflepuff Honeycomb Butterbeer Treats, a delightful dessert that brings a taste of fantasy right into your kitchen. These treats are not only quick to whip up but also a crowd-pleaser that’s sure to impress family and friends. The combination of crispy honeycomb and a creamy butterbeer coating makes for an irresistible twist on classic sweets. Plus, you can easily customize them with edible gold dust or colorful sprinkles to add a touch of enchantment. Ready to embark on this sweet adventure? Let’s get cooking!

Hufflepuff Honeycomb Butterbeer Treats

Why These Treats Will Enchant You?

Magical Flavor Fusion: The blend of honeycomb with a creamy butterbeer coating creates a sweet and whimsical taste that delights the senses.

Fun to Make: You’ll enjoy the enchanting process of watching your sugar bubble and expand, transforming into something special right before your eyes.

Crowd-Pleasing Treat: Whether it’s a festive gathering or a cozy family night, these treats are sure to impress and disappear quickly, just like our beloved Puppy Chow Treats.

Customizable Fun: Add your unique flair with edible gold dust or vibrant yellow sprinkles for a festive touch that keeps every treat feeling fresh and new.

Simple Ingredients: You’ll find everything you need in your pantry, making this recipe an easy go-to for those spontaneous dessert cravings!

Hufflepuff Honeycomb Butterbeer Treats Ingredients

For the Honeycomb
• Granulated sugar – provides the sweetness and structure needed for a crispy texture.
• Light corn syrup – helps prevent crystallization and ensures a smooth finish.
• Water – is essential for dissolving the sugar and corn syrup to create a homogeneous mixture.
• Baking soda – causes the delightful bubbling and expansion that gives honeycomb its unique texture.

For the Butterbeer Coating
• White chocolate chips – add a rich creaminess to balance the sweetness of the honeycomb.
• Cream soda – infuses a delicious, nostalgic flavor reminiscent of everyone’s favorite Butterbeer.
• Vanilla extract – enhances the overall flavor, adding depth to the sweet coating.

Optional Decorations
• Edible gold dust – gives your treats a magical sparkle, perfect for any festive occasion.
• Yellow sprinkles – add a pop of color and fun, making each bite a little more whimsical.

Dive into the magic of creating your own Hufflepuff Honeycomb Butterbeer Treats that will surely cast a spell on everyone around you!

Step‑by‑Step Instructions for Hufflepuff Honeycomb Butterbeer Treats

Step 1: Prepare Your Baking Surface
Begin by lining a baking sheet with parchment paper, ensuring it’s evenly covered to prevent sticking. This surface will be essential for cooling your honeycomb once it’s ready. Make sure to set this aside at the right temperature, as you will be pouring the hot mixture onto it in the next step.

Step 2: Combine the Ingredients
In a medium saucepan, combine 1 cup of granulated sugar, ½ cup of light corn syrup, and 2 tablespoons of water over medium heat. Stir gently until the sugar completely dissolves. Once dissolved, stop stirring to allow the mixture to come to a gentle boil. Keep a close eye on it to prevent burning as you prepare to reach the perfect temperature.

Step 3: Bring the Mixture to Temperature
Using a candy thermometer, monitor the boiling mixture until it reaches 300°F (150°C), known as the hard crack stage. This process may take approximately 8-10 minutes. You’ll notice the mixture turning a beautiful golden color as it approaches the ideal temperature. Once you hit that sweet spot, remove the saucepan from heat immediately.

Step 4: Create the Honeycomb Texture
Working quickly, whisk in 1 teaspoon of baking soda into the hot sugar mixture. Watch in wonder as it bubbles and expands dramatically, creating that signature honeycomb texture. Once fully combined, quickly pour this mixture onto your prepared baking sheet. Use a spatula to spread it thinly if needed, then let it cool completely until hardened, which may take about 30 minutes.

Step 5: Break the Honeycomb
Once cooled and hard, break the honeycomb into small, irregular pieces. Aim for varied sizes to keep the treats visually enticing and exciting. You can use your hands or a mallet for this step, ensuring the pieces are bite-sized for the perfect indulgence in your Hufflepuff Honeycomb Butterbeer Treats.

Step 6: Prepare the Butterbeer Coating
In a microwave-safe bowl, combine 1 cup of white chocolate chips and ¼ cup of cream soda. Microwave the mixture in 30-second intervals, stirring after each interval until it is smooth and fully melted. This should take about 1-2 minutes total, and the result will be a velvety, creamy base for your treats.

Step 7: Add Extra Flavor
Once your butterbeer coating is smooth, stir in 1 teaspoon of vanilla extract to enhance the flavor profile of your mixture. This addition will deepen the sweetness of the coating, making your Hufflepuff Honeycomb Butterbeer Treats even more delightful. Mix well until fully combined and aromatic.

Step 8: Coat the Honeycomb Pieces
Dip each piece of honeycomb into the butterbeer coating, ensuring each piece is well-coated. Place the dipped pieces back onto the parchment paper in a single layer to avoid sticking. This step is essential for achieving that iconic flavor fusion between the crispy honeycomb and rich butterbeer coating.

Step 9: Add Finishing Touches
While the butterbeer coating is still wet, sprinkle edible gold dust or yellow sprinkles over the top of the treats to give them a magical appearance. Feel free to get creative with the placement of your decorations, making each piece uniquely enchanting. This extra touch will surely impress anyone who sees your Hufflepuff Honeycomb Butterbeer Treats.

Step 10: Let Them Set
Allow the coated honeycomb treats to sit at room temperature until the butterbeer coating is fully set. This may take about 30 minutes, ensuring they become firm and delectable. During this time, you can rejuvenate your kitchen or even think about who you’ll share these delightful treats with!

Step 11: Optional Decoration
For an extra flair, feel free to drizzle additional butterbeer coating over the treats after they have set. This step is an optional indulgence, but it brings a beautiful visual element that enhances the overall appearance of your Hufflepuff Honeycomb Butterbeer Treats, making them irresistible.

Hufflepuff Honeycomb Butterbeer Treats

Hufflepuff Honeycomb Butterbeer Treats Variations

Feel free to get creative with your Hufflepuff Honeycomb Butterbeer Treats, adding delightful twists that cater to your taste buds!

  • Nut-Free: Substitute white chocolate with dairy-free chocolate for a nut-friendly option that everyone can enjoy.
  • Vegan: Use maple syrup instead of corn syrup and plant-based chocolate chips for a delicious vegan treat.
  • Spicy Twist: Add a sprinkle of cinnamon or cayenne pepper to the butterbeer coating for a fiery kick that surprises the palate.
  • Crunchy Add-ins: Incorporate crushed pretzels or nuts for added crunch and a touch of savory flavor that complements the sweetness beautifully.
  • Fruity Flair: Mix in finely chopped dried fruits like apricots or cherries into your honeycomb base for a refreshing burst of flavor.
  • Chocolate Drizzle: For chocolate lovers, drizzle melted dark chocolate on top of the finished treats for an indulgent touch that takes them to the next level.
  • Caramel Swirl: Swirl caramel sauce into the butterbeer coating for a rich flavor contrast that adds depth to every bite.
  • Decadent Layering: Layer pieces of honeycomb with whipped cream and chocolate for an adventurous dessert parfait that elevates your treat experience.

Embrace the magic of customization as you dip, drizzle, and decorate your creations! Looking for more sweets? You might also enjoy Chewy Chocolate Chip Cookies for an irresistible classic, or dive into our delightful Homemade Fudge for an extra treat!

Expert Tips for Hufflepuff Honeycomb Butterbeer Treats

Candy Thermometer Check: Ensure your candy thermometer is accurate; a miscalibrated thermometer can lead to improperly cooked honeycomb.

Watch the Bubbles: When adding baking soda, whisk quickly to avoid overflow—this step is crucial for achieving that light, airy texture in your honeycomb.

Cool Completely: Allow the honeycomb to cool fully before breaking it; if it’s still warm, pieces may crumble and lose their charm as Hufflepuff Honeycomb Butterbeer Treats.

Dip with Precision: When coating the honeycomb, make sure each piece is evenly dipped for the best flavor balance; excess coating can make them too sweet.

Be Generous with Sprinkles: Don’t hold back on the edible gold dust or yellow sprinkles! A delightful decoration enhances the visual appeal and makes your treats even more magical.

Make Ahead Options

These delightful Hufflepuff Honeycomb Butterbeer Treats are perfect for meal prep enthusiasts! To make your busy life easier, you can prepare the honeycomb up to 24 hours in advance. Simply follow the steps to create the honeycomb, let it cool completely, and store the broken pieces in an airtight container at room temperature. When you’re ready to serve, simply prepare the butterbeer coating and dip the honeycomb pieces. For optimal texture, avoid refrigerating the honeycomb as it may become sticky; instead, keep it in a cool, dry place. This way, you can enjoy these enchanting treats with minimal effort and just as much magic on serving day!

What to Serve with Hufflepuff Honeycomb Butterbeer Treats?

Treat your loved ones to an enchanting feast that perfectly complements your delightful treats, creating a whimsical experience.

  • Chilled Apple Cider: This sweet, crisp drink balances the sugary treats, enhancing the overall flavor profile of your dessert spread. Its refreshing nature makes it a delightful contrast.
  • Vanilla Ice Cream: A scoop of vanilla ice cream with a drizzle of caramel adds creaminess and richness to the combo, making each bite of honeycomb even more indulgent.
  • Frosted Sugar Cookies: These soft, sweet cookies pair beautifully, offering a different texture while still keeping the whimsical theme alive with adorable designs.
  • Sparkling Lemonade: The zesty notes of sparkling lemonade will elevate your gathering, cutting through the sweetness while adding a bubbly, festive touch.
  • Honey Roasted Nuts: A crunchy mélange of honey roasted nuts brings a savory contrast, providing a satisfying texture alongside the buttery sweetness of the treats.
  • Whipped Cream Fruit Parfaits: Layer fresh fruits with whipped cream for a tart, creamy element that refreshes your palate between bites of rich honeycomb.
  • Mint Chocolate Brownies: The rich, fudgy layers of brownies complemented by fresh mint flavors will thrill chocolate lovers and add a chocolatey twist to your spread.
  • Mini Fruit Tarts: These bite-sized delights bring freshness to the table with a buttery crust and custard base, making it a refined addition to your dessert lineup.
  • Butterbeer Lattes: The warm, creamy flavor of a butterbeer latte matches the treats splendidly, creating a cozy vibe for your gathering.
  • Chocolate-Covered Pretzels: Salty and sweet, these snacks offer a unique crunch that will be a delightful alternative to maintain the fun, magical theme of your event.

How to Store and Freeze Hufflepuff Honeycomb Butterbeer Treats

Room Temperature: Keep your Hufflepuff Honeycomb Butterbeer Treats in an airtight container at room temperature for up to 5 days to maintain their delicious crunchiness.

Fridge: If you prefer a longer storage time, you can store the treats in the fridge for up to 2 weeks, but be aware that this may soften the texture slightly.

Freezer: For extended storage, freeze the honeycomb pieces in a single layer on a baking sheet for about 1 hour, then transfer them to an airtight container or bag for up to 3 months.

Reheating: To enjoy the treats after freezing, simply allow them to thaw at room temperature. Avoid microwaving, as this may alter the texture dramatically.

Hufflepuff Honeycomb Butterbeer Treats

Hufflepuff Honeycomb Butterbeer Treats Recipe FAQs

What kind of sugar should I use for the honeycomb?
Absolutely, using granulated sugar is essential for making honeycomb as it provides the perfect sweetness and structure needed for that crisp texture. Other types of sugar, like powdered or brown sugar, won’t create the same results, so stick with granulated!

How should I store leftover Hufflepuff Honeycomb Butterbeer Treats?
You can keep your Hufflepuff Honeycomb Butterbeer Treats in an airtight container at room temperature for up to 5 days to maintain their delightful crunchiness. If you want them to last longer, storing them in the fridge for up to 2 weeks is an option, but keep in mind that the texture may soften a bit with cooling.

Can I freeze Hufflepuff Honeycomb Butterbeer Treats? How?
Yes, you can absolutely freeze these treats! First, freeze the honeycomb pieces in a single layer on a baking sheet for about 1 hour. Once they’re firm, transfer them to an airtight container or a resealable freezer bag. They’ll stay fresh for up to 3 months. When you’re ready to enjoy them, simply let them thaw at room temperature—just avoid microwaving as it might change the texture dramatically.

What do I do if my honeycomb didn’t puff up?
If your honeycomb doesn’t puff up as expected, it could be due to not reaching the right temperature with the candy thermometer. Make sure your mixture hits 300°F (150°C) before adding the baking soda. If it’s still not working, your baking soda might be old, so double-check that it’s fresh! Finally, whisk quickly after adding baking soda to help create that airy texture.

Are there any dietary considerations for the Hufflepuff Honeycomb Butterbeer Treats?
Yes! These treats are suitable for most diets, but some components do need attention. The white chocolate chips contain dairy, so consider using dairy-free chocolate as an alternative if lactose is a concern. Also, be mindful of the sugar content, especially for those watching their sugar intake, as well as any allergies to specific ingredients like corn syrup!

Delightful Hufflepuff Honeycomb Butterbeer Treats Recipe

Discover the enchanting taste of Hufflepuff Honeycomb Butterbeer Treats, a sweet, crispy dessert that captivates with its magical flavors.

  • Medium saucepan
  • Baking Sheet
  • parchment paper
  • Candy thermometer
  • Microwave-safe bowl

For the Honeycomb

  • 1 cup granulated sugar (provides sweetness and structure for a crispy texture)
  • ½ cup light corn syrup (helps prevent crystallization)
  • 2 tablespoons water (essential for dissolving the sugar)
  • 1 teaspoon baking soda (causes bubbling and expansion of the honeycomb)

For the Butterbeer Coating

  • 1 cup white chocolate chips (adds creaminess)
  • ¼ cup cream soda (infuses nostalgic flavor)
  • 1 teaspoon vanilla extract (enhances overall flavor)

Optional Decorations

  • edible gold dust (gives a magical sparkle)
  • yellow sprinkles (adds color and fun)

Instructions

  1. Prepare Your Baking Surface by lining a baking sheet with parchment paper.
  2. Combine the Ingredients in a medium saucepan with granulated sugar, light corn syrup, and water over medium heat.
  3. Bring the Mixture to Temperature, monitoring it with a candy thermometer until it reaches 300°F.
  4. Create the Honeycomb Texture by whisking in baking soda into the hot mixture and pouring it onto the baking sheet.
  5. Break the Honeycomb into small, irregular pieces once cooled.
  6. Prepare the Butterbeer Coating by melting white chocolate chips and cream soda in a microwave-safe bowl.
  7. Add Extra Flavor by stirring in vanilla extract once the coating is smooth.
  8. Coat the Honeycomb Pieces by dipping each piece into the butterbeer coating.
  9. Add Finishing Touches by sprinkling edible gold dust or yellow sprinkles while the coating is still wet.
  10. Let Them Set at room temperature until the coating is fully firm.
  11. Optional Decoration: Drizzle additional butterbeer coating over treats after they have set.

Ensure your candy thermometer is accurate and allow honeycomb to cool completely before breaking it.

Dessert
Magical
butterbeer, dessert, honeycomb, Hufflepuff Honeycomb Butterbeer Treats, magical recipes, Sweet Treats

Filed Under: Dessert

Spooktacular Ghostly Lasagna for a Fun Family Feast

September 28, 2025 by grace bellamy Leave a Comment

The aroma of marinara bubbling in the oven feels like a warm hug on a chilly evening, and it’s even more delightful when that dish is my Ghostly Lasagna. This playful twist on a classic not only brings together layers of comfort from shredded chicken, cheesy ricotta, and spinach but also adds a whimsical touch perfect for entertaining or a family dinner. With quick prep and the fun of crafting ghostly mozzarella cutouts, this recipe ensures you create a meal that’s visually captivating and appealing to both kids and adults alike. Plus, it’s freezer-friendly, making it a perfect option for those busy nights when you still want to serve something homemade. Are you ready to dive into the spooky fun of creating this dish?

Ghostly Lasagna

Why is Ghostly Lasagna a Must-Try?

Whimsical details make this dish extraordinary—those ghost-shaped mozzarella slices and olive “eyes” turn an everyday meal into a festive delight! Easy to assemble, this recipe allows for a fun family activity where everyone can join in. Nutritious ingredients like spinach and chicken ensure a healthy outcome without compromising flavor. Freezer-friendly, you can make it ahead and enjoy it whenever the craving strikes, just like with my Taco Lasagna New. Finally, this dish caters to all ages, guaranteeing it will be a hit whether you’re entertaining guests or serving a cozy family dinner!

Ghostly Lasagna Ingredients

• Get ready to conjure up some culinary magic!

For the Noodles

  • Lasagna noodles – Choose oven-ready noodles for a quicker prep without boiling.

For the Filling

  • Cooked chicken – Shredded rotisserie chicken saves time and adds flavor.
  • Spinach – Fresh or frozen, it brings color and nutrition to your lasagna.
  • Ricotta cheese – Creamy and rich, it forms the heart of the filling.

For the Toppings

  • Shredded mozzarella cheese – Provides that gooey, stretchy goodness that everyone loves.
  • Parmesan cheese – Adds a nutty flavor and a beautiful golden crust when baked.
  • Black olives – Sliced for “eyes,” they add a fun spooky twist!

For the Sauce

  • Marinara sauce – The vibrant base that brings everything together with a burst of flavor.
  • Salt and pepper – Season to taste, enhancing the overall flavor of your Ghostly Lasagna.

Step‑by‑Step Instructions for Ghostly Lasagna

Step 1: Preheat the Oven
Begin by preheating your oven to 375°F (190°C). This is crucial for ensuring the Ghostly Lasagna bakes evenly and reaches that perfectly bubbly and golden finish. While the oven warms up, gather your ingredients and organize your workspace for a seamless cooking experience.

Step 2: Cook the Noodles
Cook the lasagna noodles according to the package instructions, usually around 8-10 minutes, until al dente. Once cooked, drain them in a colander and set aside. This step is essential for building the layers in your Ghostly Lasagna without any sogginess.

Step 3: Prepare the Ricotta Filling
In a mixing bowl, combine the ricotta cheese with the chopped spinach, adding salt and pepper to taste. Stir until everything is evenly mixed, forming a creamy filling that will enhance your Ghostly Lasagna’s flavor. This delicious mixture will add a nutritious twist and lovely texture.

Step 4: Assemble the Layers
Spread a layer of marinara sauce in the bottom of a large baking dish to prevent sticking. Then, layer the noodles, followed by the ricotta-spinach filling, shredded chicken, more marinara sauce, and a generous portion of mozzarella cheese. Repeat these layers, finishing with a final layer of sauce and mozzarella to create a delightful topping for your Ghostly Lasagna.

Step 5: Create the Ghostly Topping
For the spooky finishing touch, cut mozzarella slices into ghost shapes and place them on top of the final layer of the lasagna. Use black olive slices for eyes to make your Ghostly Lasagna visually enchanting, adding a fun element that will delight both kids and adults alike.

Step 6: Bake the Lasagna
Cover the baking dish with foil to keep the moisture in and bake your Ghostly Lasagna for 30 minutes. After this initial baking period, carefully remove the foil to allow the top to brown, then bake for an additional 10–15 minutes. Look for a bubbly, golden finish signaling that it’s done.

Step 7: Let it Rest
Once baked, take the Ghostly Lasagna out of the oven and let it rest for about 10 minutes. This resting time allows the layers to set, making it easier to slice and serve. The irresistible scent will fill your home, creating anticipation for this delightful dish.

Ghostly Lasagna

Ghostly Lasagna: Fun Variations

Feel free to play with your Ghostly Lasagna recipe and make it your own with these tasty twists!

  • Gluten-Free: Use gluten-free noodles for a delightful twist that everyone can enjoy—no one will miss the gluten!
  • Veggie Lovers: Swap out chicken for mushroom sauté for a rich, earthy flavor that highlights the spinach beautifully.
  • Creamy Spinach Boost: Add a cup of cream cheese to the ricotta filling for an extra creamy texture that melts in your mouth.
  • Spicy Kick: Incorporate jalapeños or red pepper flakes into the sauce for a warm, zesty finish that adds a little heat.
  • Herb Infusion: Sprinkle in fresh herbs like basil and oregano for a fragrant touch that brightens up the dish while elevating flavor.
  • Cheese Fiesta: Mix in some goat cheese or feta with the ricotta for a tangy surprise that contrasts beautifully with the marinara.
  • Smoky Flavor: Try smoked chicken instead of regular for a different depth of flavor that will leave your taste buds dancing.
  • Nutty Crunch: Top with toasted pine nuts or breadcrumbs blended with cheese for an added layer of crunch that creates exciting texture!

Once you’ve chosen your favorite variations, you’re bound to love how each twist offers unique flavors and fun surprises, just like with my Taco Lasagna New. Whether you stick with the classic recipe or decide to get creative, your Ghostly Lasagna is sure to be a hit!

Make Ahead Options

These Ghostly Lasagna layers can easily be prepared in advance, making them a lifesaver for busy weeknights! You can assemble the entire dish up to 24 hours ahead; simply cover it tightly with foil and refrigerate. To maintain its delightful flavors and textures, avoid adding the ghostly mozzarella toppings until just before baking. When you’re ready to bake, remove it from the fridge and uncover it for a moment to reach room temperature, then top with the mozzarella and bake for 40-45 minutes at 375°F (190°C). This way, you’ll enjoy a spooky, home-cooked meal that’s just as delicious with minimal effort!

How to Store and Freeze Ghostly Lasagna

  • Fridge: Store any leftover Ghostly Lasagna in an airtight container for up to 3 days. This ensures it stays fresh and ready for reheating!
  • Freezer: If you want to freeze it, wrap tightly in plastic wrap and aluminum foil. It can last up to 3 months in the freezer without losing flavor or texture.
  • Reheating: When ready to enjoy, thaw it overnight in the fridge, then reheat in a preheated oven at 350°F (175°C) for about 30 minutes until heated through.
  • Portioning: Consider cutting into individual portions before freezing; this makes it easy to grab a quick meal on those busy evenings!

Tips for the Best Ghostly Lasagna

  • Noodle Tips: Ensure lasagna noodles are al dente; overcooking can lead to a mushy texture. Use oven-ready noodles for added convenience.
  • Filling Consistency: Mix the ricotta and spinach thoroughly to avoid clumps, which helps every bite of your Ghostly Lasagna be creamy and flavorful.
  • Layering Technique: Start and end with sauce to keep the noodles moist. This prevents them from drying out during baking and adds to the overall flavor.
  • Mozzarella Ghosts: For the spooky topping, be creative with mozzarella shapes! Use kitchen scissors for more precise cuts, making your ghosts even more fun.
  • Resting Period: Don’t skip the resting time after baking; it allows the flavors to meld and makes slicing easier, enhancing your presentation!
  • Freezing Option: Make an extra batch for busy nights! Ghostly Lasagna freezes well; just thaw and bake when needed for a homemade goodness that’s quick.

What to Serve with Ghostly Lasagna?

As the aroma of bubbly, cheesy goodness fills your kitchen, it’s the perfect time to think about delightful side dishes!

  • Garlic Bread: The warm, buttery flavor of garlic bread perfectly complements the rich layers of your Ghostly Lasagna, making every bite a delight. Pairing this together creates a comforting meal, ideal for chilly evenings.

  • Caesar Salad: Crisp romaine, crunchy croutons, and tangy dressing offer a refreshing contrast to the cheesy lasagna. This light salad balances the richness, ensuring a well-rounded dining experience.

  • Roasted Vegetables: Add a medley of colorful seasonal vegetables roasted to caramelized perfection. The earthy flavors will enhance the overall meal and provide a nutritious touch.

  • Peppered Green Beans: Tender green beans sautéed with a hint of garlic and pepper adds a touch of freshness and a crunchy element to your feast.

  • Fizzy Lemonade: For a refreshing drink, serve fizzy lemonade that cuts through the heaviness of the lasagna with its bright, tart flavor. This bubbly twist is sure to uplift the meal experience.

  • Chocolate Mousse: End your meal on a sweet note with a rich, velvety chocolate mousse. Its light texture will provide a delightful contrast to the savory lasagna you’ve savored. This pairing adds a wink of indulgence!

  • Savory Herb Rice: Fluffy rice with fresh herbs offers a light, aromatic side that balances the hearty dish beautifully. Plus, it acts as a delightful canvas for any overflow of cheesy goodness!

  • Classic Coleslaw: Crisp, crunchy coleslaw dressed lightly brings a cool, creamy texture to the table. The acidity will cut the richness of the lasagna and offer a bright contrast.

  • Chilled White Wine: A crisp and chilled white wine, like Sauvignon Blanc, enhances the flavors of the lasagna beautifully, making each sip a refreshing addition to your meal.

Ghostly Lasagna

Ghostly Lasagna Recipe FAQs

How do I choose the right lasagna noodles?
Absolutely! For the best texture, opt for oven-ready lasagna noodles; they eliminate the prep time of boiling. If you prefer traditional noodles, make sure they are slightly undercooked (al dente) to prevent mushiness once baked in the sauce.

What is the best way to store leftover Ghostly Lasagna?
Very simple! Store any leftover Ghostly Lasagna in an airtight container in the fridge for up to 3 days. Before reheating, ensure you cover it with aluminum foil to maintain moisture, allowing for that perfectly baked experience even on day two!

Can I freeze Ghostly Lasagna?
Absolutely! To freeze your Ghostly Lasagna, wrap the dish tightly with plastic wrap, and follow with aluminum foil. This helps preserve flavor and texture. It can last in the freezer for up to 3 months. When you’re ready to enjoy it, thaw overnight in the fridge and reheat at 350°F (175°C) for about 30 minutes until hot and bubbly.

What if I have food allergies?
It’s important to know! For dairy allergies, you can substitute the ricotta and mozzarella with lactose-free versions or vegan cheese alternatives, like cashew cheese. If gluten is a concern, choosing gluten-free lasagna noodles will keep the dish safe without losing its delightful essence.

How can I prevent my lasagna from being too watery?
The key to avoiding a soggy lasagna is proper layering. Start with a thin layer of marinara sauce to absorb moisture, and ensure your ricotta and spinach filling is well-mixed to avoid excess water. If needed, add a little grated Parmesan between layers for extra absorbency!

Can I make Ghostly Lasagna ahead of time?
Certainly! You can assemble the entire lasagna the day before and keep it covered in the fridge until you’re ready to bake. This enhances the flavors as they meld overnight and allows for a stress-free mealtime. When ready to bake, pop it in the oven directly, adding an extra 10-15 minutes to the cooking time for best results.

Spooktacular Ghostly Lasagna for a Fun Family Feast

Discover the joy of making Ghostly Lasagna, a whimsical twist on a classic dish perfect for family dinners.

  • Large Baking Dish
  • Mixing Bowl
  • Colander

For the Noodles

  • 9 oz Lasagna noodles (Choose oven-ready noodles for quicker prep.)

For the Filling

  • 2 cups Cooked chicken (Shredded rotisserie chicken saves time.)
  • 2 cups Spinach (Fresh or frozen.)
  • 15 oz Ricotta cheese (Forms the heart of the filling.)

For the Toppings

  • 2 cups Shredded mozzarella cheese (Provides gooey goodness.)
  • 0.5 cups Parmesan cheese (Adds a golden crust.)
  • 0.25 cups Black olives (Sliced for ‘eyes’.)

For the Sauce

  • 24 oz Marinara sauce (The vibrant base of the dish.)
  • to taste Salt
  • to taste Pepper

Preheat and Prepare

  1. Preheat your oven to 375°F (190°C). Gather your ingredients for seamless cooking.

Cook the Noodles

  1. Cook the lasagna noodles according to package instructions (8-10 minutes) and drain.

Prepare the Ricotta Filling

  1. In a mixing bowl, combine ricotta cheese, chopped spinach, salt, and pepper, mixing until smooth.

Assemble the Layers

  1. Spread marinara sauce in the bottom of the baking dish. Layer noodles, ricotta filling, chicken, more sauce, and mozzarella. Repeat layers ending with sauce and mozzarella.

Create the Ghostly Topping

  1. Cut mozzarella into ghost shapes and place on top. Add black olives for eyes.

Bake the Lasagna

  1. Cover with foil and bake for 30 minutes. Remove foil and bake for an additional 10-15 minutes until golden.

Let it Rest

  1. Allow the lasagna to rest for about 10 minutes before slicing.

This Ghostly Lasagna is perfect for family dinners and can be made ahead of time. It freezes well for busy nights.

Main Dishes
Italian
comfort food, Family-Friendly Meals, Freezer-friendly, Ghostly Lasagna, Halloween dinner, Spooky Recipes

Filed Under: Main Dishes

Spooky Delights: Festive Halloween Salad That’s a Treat!

September 28, 2025 by grace bellamy Leave a Comment

As the air turns crisp and leaves dance underfoot, it’s the perfect time to whip up a Halloween Salad! This playful dish transforms ordinary ingredients into frightfully fun delights, such as mozzarella skulls nestled atop vibrant greens. With just a quick prep of 20 minutes, this salad brings a whimsical twist to your table that’s bound to impress friends and family, all while being a healthy alternative to those calorie-laden treats often found during spooky season. Perfect for gatherings or a fun family dinner, it’s not just about the eerie presentation—each bite is a delightful combination of fresh flavors and textures. Curious about how to bring this festive flair to your table? Let’s dive in!

Halloween Salad

What makes this Halloween Salad special?

Creative Presentation: This Halloween Salad is not just a meal; it’s a conversation starter, showcasing charming mozzarella skulls that make it the star of any spooky gathering.

Quick and Easy: With a total prep time of just 26 minutes, you can whip up this festive dish with minimal effort, leaving you more time to enjoy the festivities!

Fresh and Flavorful: Featuring vibrant greens, juicy cherry tomatoes, and a drizzle of rich balsamic glaze, every bite offers a refreshing contrast to traditional heavy Halloween treats.

Healthy Alternative: Unlike many seasonal snacks, this salad keeps the fun while providing a healthier option, perfect for those looking to indulge without the guilt.

Versatile Side or Main: Whether served as a side for your Halloween party or as a light dinner, this salad is adaptable to any occasion.

Enjoyable for Everyone: Kids and adults alike will love the playful presentation, making it a hit with the entire family. This Halloween Salad truly brings joy to the table!

Halloween Salad Ingredients

• Discover the fresh components for a spooky treat!

For the Salad

  • Mozzarella Balls – 8 oz, about 16 balls; these will transform into delightful mozzarella skulls for a festive touch.
  • Mixed Salad Greens – 6 oz; a colorful base that adds vibrant freshness to your Halloween Salad.
  • Sweet Cherry Tomatoes – 1 pint; their juicy sweetness complements the cheese perfectly.
  • Fresh Basil – 3 tablespoons, thinly sliced; this herb adds a fragrant aroma and bright flavor to your dish.

For Drizzling & Seasoning

  • Olive Oil – choose a good quality finishing oil; it enhances the flavors and adds richness to the salad.
  • Balsamic Glaze – for drizzling; a flavorful sweet tang that ties all components together beautifully.
  • Flaky Sea Salt – just a pinch enhances the taste of your ingredients.
  • Freshly Cracked Black Pepper – for a bit of warmth and spice; it elevates the flavors.
  • Lemon – ½ (optional); a squeeze can brighten the dish and add a zesty touch, enhancing the whole experience.

Step‑by‑Step Instructions for Halloween Salad

Step 1: Preheat the Oven
Begin your Halloween Salad adventure by preheating the oven to 350°F (175°C). This temperature is perfect for creating those delightful mozzarella skulls. While the oven warms up, gather your ingredients and prepare your skull molds. If preferred, take a moment to grease the molds lightly with olive oil to ensure easy removal later.

Step 2: Prepare the Mozzarella
Carefully place one mozzarella ball into each skull mold, making sure each one fits snugly. This step will shape the cheese into spooky skulls that will bring a festive flair to your Halloween Salad. Once all the molds are filled, slide them into the preheated oven and set a timer for 6 minutes, keeping an eye on them until they soften but don’t fully melt.

Step 3: Mold the Cheese
As soon as the timer goes off, remove the molds from the oven. Use the back of a spoon to gently press down on the cheese, ensuring it fills all the intricate crevices of the skull mold completely. This step is essential for achieving the perfect shape and ensures that each skull is as frighteningly fun as possible!

Step 4: Cool the Cheese
Once molded, it’s time to let the mozzarella cool. Place the molds in the refrigerator and allow the cheese to chill for 10 to 15 minutes. This cooling period will help the mozzarella firm up, making it easier to pop out of the molds later without losing that spooky skull shape.

Step 5: Unmold the Skulls
After the chilling period, carefully pop out the mozzarella skulls from each mold. If they stuck a bit, gently twist and pull, taking care not to damage your spooky shapes. Lay these delightful skulls aside as you move on to the vibrant greens that will complete your Halloween Salad.

Step 6: Prepare the Greens
In a large mixing bowl, add the mixed salad greens, creating a colorful and fresh base for your Halloween Salad. Drizzle a good splash of olive oil over the greens, and if you’re using lemon, add a squeeze of fresh juice for some zest. Toss everything together until the greens are evenly coated and dressed, bringing life to your dish.

Step 7: Assemble the Salad
Now it’s time to assemble your fabulous Halloween Salad! Begin by layering the tossed greens on a serving platter or individual plates. Then, top the greens with the sliced sweet cherry tomatoes, carefully arranging them for added color and sweetness. Place the mozzarella skulls atop the vibrant salad for that eye-catching, spooky touch.

Step 8: Drizzle and Season
Finish your Halloween Salad by drizzling it with balsamic glaze and a good quality olive oil for richness. Sprinkle flaky sea salt across the top and add freshly cracked black pepper for a delightful kick. This final touch will elevate the flavors, making every bite a delicious treat.

Step 9: Serve Immediately
Your fun and festive Halloween Salad is now ready to impress! Serve it immediately to ensure the freshness of the greens and the charming presentation of the mozzarella skulls. Enjoy this playful dish at your Halloween gatherings, or as a light dinner—it’s sure to be a hit among all ages!

Halloween Salad

Halloween Salad Variations & Substitutions

Feel free to get creative with your Halloween Salad—there are so many ways to customize this dish to suit your taste!

  • Dairy-Free: Substitute mozzarella balls with cashew cheese or tofu to create a plant-based version. This twist allows lactose-intolerant friends to join in on the spooky fun!
  • Extra Greens: Add kale or spinach for a nutrient boost. These leafy greens not only enhance flavors but also give a delightful crunch in every bite.
  • Heat It Up: Incorporate sliced jalapeños or a pinch of crushed red pepper flakes for a delicious spicy kick. This variation gives your salad an unexpected twist that adventurous eaters will love!
  • Nut-Tastic: Toss in roasted pumpkin seeds or walnuts for added texture and nutrition. They provide a wonderful crunch that complements the creamy mozzarella.
  • Sweet & Savory: Include diced apples or pomegranate seeds for a hint of sweetness. The contrast of the fruity notes against the savory salad is truly delightful!
  • Herb Boost: Experiment with different herbs like dill or cilantro for a unique flavor profile. Each herb brings its own personality to your holiday feast!
  • Vegan Glaze: For a vegan-friendly option, switch balsamic glaze with agave syrup, adding a sweeter touch that pairs wonderfully with the tartness of the vegetables.
  • Crunch Factor: Replace salad greens with coleslaw mix for a fun twist, offering a different texture while still keeping it light and refreshing.

Take these suggestions to heart, and have fun crafting a Halloween Salad that’s uniquely yours! And if you’re hungry for more tasty ideas, check out these delightful creative salad recipes that are sure to inspire you. Happy cooking!

How to Store and Freeze Halloween Salad

Fridge: Store any leftover Halloween Salad in an airtight container for up to 3 days. Keep the mozzarella skulls separate to maintain their shape and prevent sogginess.

Freezer: It’s best not to freeze this salad as the fresh ingredients, especially the greens and tomatoes, will become mushy. Enjoy it fresh for the best taste.

Reheating: If you warm up any leftover mozzarella skulls, do so in a preheated oven at 350°F (about 10 minutes) until warm, keeping them separate from the salad.

Make Ahead Options

These Halloween Salad components are perfect for busy home cooks looking to save time during the spooky season! You can prepare the mozzarella skulls up to 24 hours in advance by baking them and refrigerating them in an airtight container. The mixed salad greens and sliced cherry tomatoes can also be prepped ahead; toss the greens with olive oil (leave out the lemon if you’re prepping more than a few hours in advance) and keep them refrigerated for up to 3 days. To maintain freshness, avoid adding any dressing until you’re ready to serve. When it’s time to enjoy, simply assemble the salad with the prepared ingredients and drizzle with balsamic glaze for that festive flair, ensuring a delightful and easy Halloween treat!

What to Serve with Halloween Salad?

With its enchanting presentation and delightful flavors, this salad calls for some imaginative companions to create a festive feast.

  • Garlic Breadsticks: Their warm, crispy texture perfectly complements the fresh greens while soaking up any extra balsamic glaze.

  • Pumpkin Soup: A velvety soup adds warmth and a hint of sweetness, making for a cozy combination that enhances fall flavors.

  • Roasted Sweet Potatoes: These bring a slightly sweet and earthy flavor, providing a wonderful contrast to the tangy elements in the salad.

  • Crispy Bacon-Wrapped Asparagus: The savory crispness elevates your Halloween theme, making each bite a delicious balance of textures.

  • Spooky Sangria: A fun, fruity drink that’s both refreshing and festive; it offers a vibrant flavor profile to match the playful salad.

  • Chocolate Mousse Cups: For a sweet finish, these rich chocolatey treats are not just indulgent but align well with the Halloween spirit. Perfect for the family and friends gathered around!

Pair any of these delightful options with your Halloween Salad to create a memorable dining experience. Enjoy the magic of this seasonal celebration!

Tips for the Best Halloween Salad

Perfect Mozzarella Skulls: Ensure your skull molds are lightly greased for easy removal. This prevents breakage and keeps your skulls looking frightfully perfect!

Fresh Ingredients Matter: Always use fresh salad greens and ripe cherry tomatoes. They add vibrant flavors and textures that make your Halloween Salad truly shine.

Chill the Cheese: Allowing the mozzarella to cool in the fridge for 10-15 minutes is crucial. This step helps maintain the skull shape and prevents them from falling apart.

Layer Thoughtfully: When assembling, layer the greens first, then tomatoes, and finally the skulls. This creates a beautiful presentation and ensures a delightful mix of flavors in each bite.

Season Generously: Don’t skimp on the seasoning! A good drizzle of balsamic glaze, olive oil, and a sprinkle of flaky sea salt are key to enhancing the flavors of your Halloween Salad.

Halloween Salad

Halloween Salad Recipe FAQs

What type of mozzarella balls should I use for this Halloween Salad?
Absolutely! Fresh mozzarella balls are best to achieve that delightful soft texture. Look for ones that are plump and firm, without any dark spots or excess liquid. Mini mozzarella balls or ciliegine are great options for shaping into skulls.

How should I store leftover Halloween Salad?
After the feast, store any leftovers in an airtight container in the fridge for up to 3 days. To maintain the integrity of your delightful mozzarella skulls, keep them separate from the salad greens to avoid sogginess. When you’re ready to enjoy it again, simply reassemble the salad with fresh greens!

Can I freeze the Halloween Salad?
Very! It’s best not to freeze this salad due to the fresh ingredients, like greens and tomatoes, which will become mushy once thawed. However, if you have leftover mozzarella skulls, you can freeze them individually. Wrap each skull in plastic wrap and place them in a freezer-safe bag. They can be kept for up to 3 months. To use them, thaw in the fridge overnight and serve them with fresh salad ingredients.

How can I prevent the mozzarella skulls from sticking to the molds?
To ensure easy removal, lightly grease the molds with olive oil before placing the mozzarella balls inside. You can also gently wiggle the molds after they’ve cooled to help release the cheese. If they still stick, patiently twist the molds while pulling them apart.

Are there any dietary considerations for this Halloween Salad?
The ingredients in this Halloween Salad are nut-free and can be tailored for vegetarian diets. However, if you have lactose intolerance or dairy allergies, you can substitute mozzarella with dairy-free cheese alternatives. Just be sure to check labels for any additional allergens. Always consider your guests’ dietary restrictions when preparing dishes!

Spooky Delights: Festive Halloween Salad That’s a Treat!

Enjoy a Halloween Salad that transforms ordinary ingredients into frightfully fun delights, making it a perfect treat for the spooky season.

  • Oven
  • Skull molds
  • Mixing Bowl

For the Salad

  • 8 oz Mozzarella Balls (about 16 balls; for mozzarella skulls)
  • 6 oz Mixed Salad Greens (colorful base)
  • 1 pint Sweet Cherry Tomatoes (juicy sweetness)
  • 3 tablespoons Fresh Basil (thinly sliced)

For Drizzling & Seasoning

  • Olive Oil (good quality finishing oil)
  • Balsamic Glaze (for drizzling)
  • Flaky Sea Salt (just a pinch)
  • Freshly Cracked Black Pepper
  • ½ Lemon (optional; squeeze for zest)

Instructions

  1. Preheat the oven to 350°F (175°C). Gather your ingredients and prepare the skull molds by greasing them lightly with olive oil.
  2. Place one mozzarella ball into each skull mold. Slide them into the preheated oven and set a timer for 6 minutes.
  3. After 6 minutes, remove the molds and gently press down on the cheese to fill the crevices.
  4. Let the mozzarella cool in the refrigerator for 10 to 15 minutes.
  5. Carefully pop out the mozzarella skulls from each mold.
  6. In a large mixing bowl, add the mixed salad greens, drizzle with olive oil and lemon juice, and toss until coated.
  7. Assemble the salad by layering the greens, topping with cherry tomatoes and mozzarella skulls.
  8. Drizzle with balsamic glaze and olive oil, and sprinkle with sea salt and black pepper.
  9. Serve immediately to enjoy the freshness of the greens and the spooky presentation.

Ensure to use fresh ingredients for the best flavor. Chill the cheese before unmolding for perfect skull shapes.

Salad
American
family dinner, festive salad, Halloween food, Halloween Salad, healthy Halloween recipe, spooky salad

Filed Under: salad

Ghost Taco Hand Pies: A Spooky Twist on Taco Night

September 28, 2025 by grace bellamy Leave a Comment

As I rummaged through my pantry one rainy afternoon, I stumbled upon an old pie crust package, and inspiration struck! That moment led to the creation of my Ghost Taco Hand Pies, a fun twist on classic comfort food that’ll transport you from mundane meal prep to a festive family treat. These delightful hand pies are quick to whip up, taking just around 40 minutes from start to finish, and they’re endlessly customizable—perfect for using up leftover veggies or indulging in whatever protein suits your fancy. Not to mention, they’re a hit at gatherings, sure to impress kids and adults alike! Ready to bring some playful magic to your kitchen? Let’s dive into the spooky, savory goodness of these ghostly delights!

Ghost Taco Hand Pies

Why Are Ghost Taco Hand Pies a Must-Try?

Unforgettable fun: These Ghost Taco Hand Pies combine delicious flavors with a playful design, making meal time a celebration!

Quick prep: In just 40 minutes, you can have a crowd-pleasing dish ready, letting you skip the fast food line in favor of homemade bliss.

Endless customization: Swap out the proteins or add in your favorite veggies for a personalized touch—perfect for using up leftovers!

Dipping delight: Pair them with salsa or guacamole for an extra burst of flavor, turning every bite into a taste adventure.

Family favorite: Whether it’s Halloween or just a weekday dinner, these spooky hand pies are sure to put smiles on everyone’s faces!

Ghost Taco Hand Pie Ingredients

Unlock the secrets of making these delightful treats with fresh, tasty components!

For the Filling
• Lean ground beef, turkey, or chicken – Choose your favorite protein for a flavorful filling that keeps the whole family satisfied.
• Taco seasoning – This spice blend brings all the classic taco flavors to life in your hand pies!
• Shredded carrot (optional) – Adds sweetness and a pop of color; it’s a sneaky way to include veggies!
• Chopped bell pepper or baby spinach (optional) – Introduce some extra crunch and nutrients; both work beautifully in this mix.

For the Crust
• Pie crusts, defrosted but unbaked – Store-bought crusts save time, but feel free to use your favorite homemade recipe for a personal touch.

For Topping
• Shredded Mexican cheese – Melts beautifully, offering a creamy, dreamy texture that pairs perfectly with the savory filling.
• Egg (for brushing) – This egg wash gives your hand pies a golden, appetizing finish.

For Dipping
• Salsa – A zesty complement that boosts flavor with every bite; don’t forget to choose your favorite!

Get ready to embrace the charm of these Ghost Taco Hand Pies!

Step‑by‑Step Instructions for Ghost Taco Hand Pies

Step 1: Cook the Meat
In a medium skillet over medium-high heat, add your chosen ground meat—beef, turkey, or chicken. Cook for about 5-6 minutes, breaking it apart into crumbles with a spatula. When the meat is fully browned and no longer pink, sprinkle in the taco seasoning along with any optional vegetables like shredded carrot or chopped bell pepper.

Step 2: Preheat the Oven
While the meat mixture cools, preheat your oven to 425 degrees F. Prepare two large baking sheets by lining them with parchment paper to prevent sticking and make cleanup a breeze. This is a great time to ensure your kitchen is tidy and get ready for a fun baking session with your Ghost Taco Hand Pies!

Step 3: Roll and Cut the Pie Crust
On a lightly floured surface, roll out the defrosted pie crusts to about ¼ inch thick. Using ghost-shaped cookie cutters, cut out shapes from the crust, making sure you have equal numbers for both the tops and bottoms of your hand pies. The whimsical shapes add to the festive flair of your Ghost Taco Hand Pies and will delight everyone at the table.

Step 4: Assemble the Hand Pies
Place half of the ghost-shaped cutouts on your prepared baking sheets. Spoon a small amount of the taco filling onto the center of each ghost shape, then sprinkle a little Mexican cheese on top for that gooey, delicious goodness. This step helps to ensure each bite is stuffed with savory, cheesy delight!

Step 5: Create the Eyes and Mouths
Take the remaining ghost cutouts and carefully cut out eyes and mouths using a small round object or knife. These cutouts will serve as the tops of your hand pies. Place these cutouts gently over each filled ghost, aligning them so the filling is still visible. This adds a spooky touch to your Ghost Taco Hand Pies that everyone will love!

Step 6: Seal the Edges
Using a fork, press down gently along the edges of each hand pie to seal them tightly. This not only keeps the flavorful filling secure but also creates a lovely crimped design on the edges, making your Ghost Taco Hand Pies look extra appealing. Make sure there are no gaps where the filling could escape during baking!

Step 7: Apply the Egg Wash
In a small bowl, mix together one egg with a splash of water or milk to create a smooth egg wash. Brush this mixture over each sealed pie, ensuring even coverage for a beautiful golden-brown finish when baked. This step is key to that appetizing, glossy appearance in your final Ghost Taco Hand Pies.

Step 8: Bake the Hand Pies
Carefully place the baking sheets in the preheated oven and bake for 10-14 minutes, keeping an eye on them as they cook. You’ll know they’re done when the tops are golden brown and puffed slightly. The enticing aroma will fill your kitchen, inviting everyone to gather around for delicious Ghost Taco Hand Pies!

Step 9: Serve with Dipping Sauce
Once baked, remove the hand pies from the oven and let them cool for a few minutes. Serve your Ghost Taco Hand Pies warm with a side of salsa or guacamole for dipping. The combination of flavors and textures makes each bite a delightful treat, perfect for celebrations or family dinners alike.

Ghost Taco Hand Pies

What to Serve with Ghost Taco Hand Pies?

Elevate your meal with delicious sides and drinks that pair perfectly with festive hand pies.

  • Creamy Guacamole: This smooth avocado dip adds a rich, buttery flavor, balancing the savory spices of the hand pies beautifully.

  • Zesty Mexican Rice: Fluffy rice infused with spices and tomatoes offers a comforting contrast, making your meal feel complete and satisfying.

  • Fresh Salsa: A tangy, fresh salsa enhances each bite, bringing a refreshing twist that complements the spicy filling of the hand pies.

  • Chilled Corn Salad: Sweet corn, bell peppers, and a lime dressing create a crunchy, vibrant side that brightens up the dish with fiber and freshness.

  • Crispy Tortilla Chips: Serve these golden chips for added crunch and a fun way to scoop up that zesty salsa—perfect for sharing!

  • Refreshing Margaritas: Pair your hand pies with a classic margarita for a festive drink that adds a zesty kick and brightens the mood.

  • Churros for Dessert: End your meal on a sweet note with crispy churros, offering a delightful contrast to the savory flavors of the hand pies.

Let these sides transform your Ghost Taco Hand Pies into a festive feast!

Expert Tips for Ghost Taco Hand Pies

Perfectly Sealed: Always ensure your edges are tightly sealed with a fork; this prevents filling from leaking during baking.

Customize the Filling: Feel free to swap the protein or add different veggies to suit your family’s tastes and make the Ghost Taco Hand Pies unique.

Watch the Bake Time: Keep an eye on your pies while they bake; they can go from golden to overdone quickly, especially at high temperatures!

Chill the Dough: If your pie crusts feel too soft to cut, pop them in the fridge for 10-15 minutes to make cutting easier and neater ghost shapes.

Add Extra Flavor: Mix some shredded cheese into the meat filling for an added layer of cheesy goodness in your Ghost Taco Hand Pies.

Ghost Taco Hand Pies Variations

Feel free to explore these delightful variations to make your Ghost Taco Hand Pies even more thrilling!

  • Vegetarian: Substitute the meat with black beans or lentils, seasoned with your favorite taco spices for a hearty and flavorful filling that even meat-lovers will adore.

  • Spicy Twist: Add chopped jalapeños or a pinch of cayenne pepper to the filling for a kick that brings the heat, elevating your hand pies to a fiery favorite!

  • Cheese Lover: Mix in cream cheese or add more shredded cheese into the filling for a melty surprise that takes these hand pies to the next level.

  • Southwestern Style: Incorporate corn and diced tomatoes for a fresh twist, adding a pop of color and flavor that celebrates the essence of Southwestern cuisine.

  • Gluten-Free: Use gluten-free pie crusts for everyone to enjoy without missing out, ensuring even those with dietary restrictions can delight in this spooky treat.

  • Breakfast Edition: Swap out the beef for scrambled eggs and breakfast sausage, then serve with salsa for a tasty, fun breakfast hand pie suitable for any morning gathering!

  • Sweet Surprise: For dessert, fill them with a mixture of cream cheese and pumpkin puree, then sprinkle with cinnamon sugar for a seasonal twist that celebrates fall festivities.

  • Herb Infusion: Try stirring in some fresh chopped cilantro or parsley for a taste of freshness, enhancing the overall flavor profile and creating an aromatic experience!

No matter how you decide to mix it up, these variations guarantee that your Ghost Taco Hand Pies will be a hit at any gathering. Who said hand pies can only be savory? Let your creativity shine! For an even more festive feast, consider pairing your hand pies with some delicious dipping options like homemade salsa or guacamole. Enjoy every tasty bite!

How to Store and Freeze Ghost Taco Hand Pies

Room Temperature: Store baked Ghost Taco Hand Pies at room temperature for up to 2 days in an airtight container to keep them fresh and tasty.

Fridge: For longer freshness, keep them in the fridge for up to 5 days. Make sure they’re in a sealed container to prevent them from drying out.

Freezer: Freeze unbaked hand pies for up to 3 months. Layer them with parchment paper in an airtight container before sealing; bake from frozen, adding a few extra minutes.

Reheating: To reheat, place baked pies in a preheated oven at 350°F for about 10 minutes or until warmed through. Enjoy with salsa for an extra kick!

Make Ahead Options

These Ghost Taco Hand Pies are perfect for meal prep enthusiasts! You can prepare the taco filling up to 3 days in advance, storing it in an airtight container in the refrigerator to maintain its flavor and moisture. Additionally, you can cut out the ghost-shaped pie crusts and keep them layered between parchment paper in the fridge for up to 24 hours. When you’re ready to serve, simply fill the crusts with the prepped filling, seal, brush with egg wash, and bake as directed. This approach allows you to enjoy all the flavors of these hand pies without the last-minute rush—ideal for busy weeknights or surprise gatherings!

Ghost Taco Hand Pies

Ghost Taco Hand Pies Recipe FAQs

How do I choose ripe ingredients for the filling?
Absolutely! For the freshest flavor, choose vegetables that are vibrant and firm. Look for bell peppers that are smooth and shiny without any blemishes or dark spots. If using spinach, select leaves that are bright green and free from wilting. This ensures your Ghost Taco Hand Pies have excellent quality and taste!

How should I store leftover Ghost Taco Hand Pies?
Very! For short-term storage, keep your baked Ghost Taco Hand Pies in an airtight container at room temperature for up to 2 days. If you’d like them to last longer, refrigerate them in a sealed container for up to 5 days. This helps maintain their deliciousness and keeps them ready for a quick snack!

Can I freeze Ghost Taco Hand Pies?
Absolutely! To freeze unbaked Ghost Taco Hand Pies, layer them between sheets of parchment paper in an airtight container and store in the freezer for up to 3 months. When you’re ready to bake, you can cook them straight from frozen, just add an extra couple of minutes to the baking time. This is a fantastic way to have a quick meal at hand!

What should I do if my hand pie filling leaks during baking?
If you find that your filling leaks, it may be due to the edges not being sealed properly. To avoid this, ensure you’ve pressed firmly with a fork around the edges. If it’s too late, you can still save the day! Simply place a baking sheet underneath to catch any drips while they bake, and enjoy the savory aroma wafting through your kitchen.

Are these Ghost Taco Hand Pies suitable for kids with allergies?
Certainly! You can customize these hand pies to fit dietary needs. If someone has a dairy allergy, opt for a dairy-free cheese alternative or skip the cheese entirely. Always double-check the ingredients in your taco seasoning, as some brands may contain allergens. It’s all about making these Ghost Taco Hand Pies fit your family’s needs while keeping them delicious!

Ghost Taco Hand Pies: A Spooky Twist on Taco Night

Ghost Taco Hand Pies are a fun, customizable twist on classic tacos, perfect for family gatherings and Halloween celebrations.

  • skillet
  • Oven
  • cookie cutters
  • Baking sheets
  • parchment paper
  • Mixing Bowl

For the Filling

  • 1 lb Lean ground beef, turkey, or chicken
  • 1 packet Taco seasoning
  • 1/2 cup Shredded carrot (optional)
  • 1/2 cup Chopped bell pepper or baby spinach (optional)

For the Crust

  • 2 pkg Pie crusts, defrosted but unbaked

For Topping

  • 1 cup Shredded Mexican cheese
  • 1 large Egg (for brushing)

For Dipping

  • 1 cup Salsa (choose your favorite)

Step-by-Step Instructions

  1. In a medium skillet over medium-high heat, cook the ground meat until browned, about 5-6 minutes. Add taco seasoning and optional vegetables.
  2. Preheat oven to 425°F and line baking sheets with parchment paper.
  3. Roll out pie crusts to ¼ inch thickness and cut ghost shapes.
  4. Place half of the shapes on prepared baking sheets, fill with taco filling and sprinkle with cheese.
  5. Cut eyes and mouths in the remaining shapes and place on top of the filled shapes.
  6. Seal the edges with a fork, ensuring there are no gaps.
  7. Mix egg with a splash of water or milk and brush over the hand pies.
  8. Bake for 10-14 minutes until golden brown and puffed.
  9. Let the hand pies cool for a few minutes and serve with salsa or guacamole.

Customize the filling with your preferred proteins and vegetables. Keep an eye on bake time to avoid overcooking.

Main Dishes
Mexican
easy recipes, Ghost Taco Hand Pies, Halloween recipes, hand pies, taco night

Filed Under: Main Dishes

Irresistible Vampire Fudge: A Sinful Sweet Treat to Try!

September 28, 2025 by grace bellamy Leave a Comment

Have you ever wandered through a spooky season haunted by cravings for something sweet? Enter Vampire Fudge, a playful and irresistible treat that’s perfect for satisfying your sweet tooth. This dessert combines rich semi-sweet chocolate with a tantalizing twist of raspberry jam for a treat that’s not just a feast for the eyes, but also a delightful crowd-pleaser. With a quick prep time of just 10 minutes and the added charm of chilling in the fridge, you’ll find that this fudge is as simple as it is indulgent. Whether you’re hosting a Halloween party or just seeking a fun way to elevate your dessert game, this recipe will surely be a hit. What daring flavors will you swirl into your fudge?

Vampire Fudge

Why is Vampire Fudge a must-try?

Decadent Chocolate: The rich, semi-sweet chocolate pairs perfectly with the tangy raspberry jam, creating a flavor combination that’s truly irresistible.

Quick and Easy: With just 10 minutes of prep and a simple melting process, you can whip up this delightful dessert in no time.

Eye-Catching Presentation: The dramatic “bloody” swirl of raspberry jam gives your fudge a fun twist, making it perfect for Halloween parties or casual get-togethers.

Versatile Treat: Customize your fudge by experimenting with different jams or toppings to suit your cravings or impress guests!

Crowd-Pleaser: This recipe yields 16 squares, making it an ideal treat for sharing or satisfying a sweet tooth. For more easy and delicious options, try out my Chocolate Peanut Butter Bars or explore other sweet delights in the Dessert Recipes section.

Vampire Fudge Ingredients

For the Fudge

  • Semi-sweet chocolate chips – these provide the rich base for your fudge and melting bliss.
  • Sweetened condensed milk – this ingredient adds creaminess and sweetness, making the texture irresistibly smooth.

For the Raspberry Swirl

  • Raspberry jam or preserves – go for seedless for a smoother finish that beautifully contrasts the chocolate.

Dive into this delightful Vampire Fudge creation and let your taste buds trick you into treating yourself!

Step-by-Step Instructions for Vampire Fudge

Step 1: Prepare the Pan
Begin by lining an 8×8-inch square pan with parchment paper, ensuring that the paper extends over the sides for easy removal later. This will create a smooth surface for your Vampire Fudge and make it easier to cut into squares once set.

Step 2: Melt the Chocolate Mixture
In a saucepan set over low heat or a microwave-safe bowl, combine the semi-sweet chocolate chips and sweetened condensed milk. Stir continuously until the mixture is fully melted and smooth, taking about 5 minutes on the stovetop or 1–2 minutes in the microwave, pausing to stir frequently to avoid burning.

Step 3: Spread the Fudge Base
Once your chocolate mixture is smooth and glossy, pour it into the prepared pan. Use a spatula to spread it evenly across the bottom, smoothing out any bumps and creating a flat surface that will hold the raspberry swirl beautifully.

Step 4: Prepare the Raspberry Jam
To achieve a pourable consistency for your raspberry jam, warm it slightly in the microwave for about 15–20 seconds. This makes it easier to drizzle over the fudge and helps create those tantalizing “bloody” swirls that will make your Vampire Fudge visually stunning.

Step 5: Create the Raspberry Swirl
Drizzle the warmed raspberry jam over the chocolate fudge in the pan. Using a knife or skewer, gently swirl the jam into the fudge, creating a beautiful marbled effect that resembles a delightful spooky treat. Aim for a mix of swirls and blobs for a fun appearance.

Step 6: Chill the Fudge
Place the pan in the refrigerator and let the Vampire Fudge chill for at least 2 hours, or until it has firmed up completely. This chilling process allows the flavors to meld together and ensures clean cuts when you slice the fudge later.

Step 7: Slice and Serve
Once the fudge is firm, remove it from the pan using the parchment overhang. Place it on a cutting board and slice into 16 squares for serving. Enjoy your Vampire Fudge chilled, as this helps maintain its rich texture and enhances the delightful contrast of flavors.

Vampire Fudge

Vampire Fudge Variations & Substitutions

Feel free to get creative with your Vampire Fudge! Let your taste buds guide you as you explore these delightful twists and swaps.

  • Nutty Addition: Toss in 1/2 cup of chopped walnuts or almonds for a crunchy texture that perfectly contrasts the creamy fudge.

  • Spicy Kick: For those who like a little heat, add a pinch of cayenne pepper to the chocolate mixture for a surprising zing!

  • Flavor Swap: Substitute raspberry jam with cherry or strawberry jam for a new fruity twist that offers a vibrant flavor profile.

  • Dairy-Free: Use dairy-free chocolate chips and coconut cream instead of sweetened condensed milk for a luscious vegan version everyone can enjoy.

  • Extra Chocolatey: Mix in a tablespoon of cocoa powder for an even deeper chocolate flavor that will satisfy the most passionate chocoholics.

  • Minty Fresh: Add a few drops of peppermint extract into the melted chocolate for a refreshing flavor that reminds you of candy canes!

  • Gourmet Touch: Drizzle the finished fudge with white chocolate for a stunning contrast and a touch of elegance that’s perfect for special occasions.

  • Fun Toppers: Sprinkle holiday-themed sprinkles or edible glitter on top before chilling for a festive and eye-catching finish.

Enjoy experimenting with these variations and enhance your Vampire Fudge experience! For more delightful dessert ideas, check out my recipe for Chocolate Peanut Butter Bars or browse other sweet treats in the Dessert Recipes section.

What to Serve with Vampire Fudge?

Imagine the joyful laughter echoing in your kitchen as you create the perfect feast alongside your delightful Vampire Fudge.

  • Creamy Vanilla Ice Cream: A scoop of vanilla ice cream adds a cool, creamy contrast, making each bite of fudge even more indulgent.

  • Fresh Berries: Bright strawberries or raspberries introduce a burst of freshness, beautifully balancing the sweetness of the fudge.

  • Crunchy Pretzel Bites: The salty crunch complements the rich chocolate, providing a delightful texture contrast that makes for an exciting treat.

  • Coffee or Espresso: A warm cup of coffee or espresso brings an aromatic richness, enhancing the chocolate flavors while giving you an energizing boost.

  • Whipped Cream Topping: Light, airy whipped cream lends a cloud-like fluffiness, making the experience of enjoying your fudge feel extra special.

  • Chilled Sparkling Water: For a refreshing palate cleanser, pair your fudge with bubbly sparkling water infused with lemon or lime for a hint of zest.

  • Chocolate-Covered Almonds: The nutty flavor and crunch of chocolate-covered almonds can create a luxurious finishing touch and deepen your chocolate experience.

Channel your creativity as you explore these pairings; they’ll surely enhance your dessert festivities!

How to Store and Freeze Vampire Fudge

Fridge: Store leftover Vampire Fudge in an airtight container in the refrigerator for up to 1 week. Chilling keeps it fresh and helps preserve its delicious texture.

Freezer: If you want to enjoy your fudge later, wrap individual squares tightly in plastic wrap and place them in a freezer-safe container. It can be frozen for up to 3 months.

Thawing: To thaw, simply move the fudge from the freezer to the fridge for several hours or overnight. Enjoy it chilled for the best flavor and texture.

Serving: When ready to serve, slice as needed and enjoy straight from the fridge, where the fudgy texture remains wonderfully firm yet creamy.

Make Ahead Options

Preparing your Vampire Fudge in advance is a fantastic way to save time for busy weeknights or festive gatherings! You can make the fudge base (steps 1-5) up to 24 hours ahead. Simply complete the melting and swirling process, then cover the pan tightly with plastic wrap after chilling for at least 2 hours to prevent any dryness or contamination. When you’re ready to serve, slice the fudge into squares and enjoy the chilled treat. If stored in an airtight container in the refrigerator, your Vampire Fudge will remain just as delicious for up to 3 days. This make-ahead option ensures you delight family and friends without the last-minute rush!

Expert Tips for the Best Vampire Fudge

  • Use Quality Chocolate: Choose high-quality semi-sweet chocolate chips for the richest flavor in your Vampire Fudge. It makes all the difference!

  • Avoid Overheating: When melting the chocolate and condensed milk, use low heat and stir constantly. This prevents burning and ensures a smooth texture.

  • Create Perfect Swirls: Warm raspberry jam makes it easier to swirl. If it’s too thick, you can also mix in a drop of water to achieve a better consistency.

  • Chill Thoroughly: Allow the fudge to chill for a full 2 hours before slicing. This ensures clean cuts and helps the flavors deepen and develop.

  • Experiment with Flavors: Don’t be afraid to mix and match! Try different jams or even adding nuts or sprinkles for a unique twist on your Vampire Fudge.

Vampire Fudge

Vampire Fudge Recipe FAQs

What type of chocolate chips should I use for Vampire Fudge?
Absolutely! I recommend using high-quality semi-sweet chocolate chips for the richest flavor in your fudge. The better the chocolate, the more decadent your fudge will taste!

How should I store leftover Vampire Fudge?
Store leftover Vampire Fudge in an airtight container in the refrigerator for up to 1 week. This helps maintain its delicious texture while keeping it fresh and ready for indulgent snacking.

Can I freeze Vampire Fudge? If so, how?
Yes, you can freeze Vampire Fudge! Wrap individual squares tightly in plastic wrap, then place them in a freezer-safe container or bag. This will keep them delicious for up to 3 months. When you’re ready to enjoy, simply move the fudge to the fridge for thawing, which can take several hours or overnight.

What should I do if my fudge isn’t setting properly?
If your fudge isn’t setting, it may need more chilling time. Be sure to chill it for a full 2 hours to ensure it firms up. If the problem persists, check if you’ve used the correct proportions of chocolate chips and sweetened condensed milk. If it seems too soft, you can also try adding a little more chocolate to your mixture and re-chill.

Is this recipe safe for pets or those with nut allergies?
Great question! Vampire Fudge contains chocolate, which is toxic to pets like dogs and cats, so be sure to keep it out of their reach. As for nut allergies, this specific recipe is nut-free unless you choose to add nuts as a topping or mix-in, so always check additional ingredients for any allergens.

What can I substitute for raspberry jam?
The more the merrier! While raspberry jam gives the best “bloody” look, you can use other seedless fruit jams like cherry, strawberry, or even a mix of your favorites for different flavors. Just make sure to warm it slightly before adding for easy swirling!

Irresistible Vampire Fudge: A Sinful Sweet Treat to Try!

Delight in the irresistible Vampire Fudge, a blend of rich semi-sweet chocolate and raspberry jam for your sweet cravings.

  • 8×8-inch square pan
  • Saucepan
  • spatula
  • Knife

For the Fudge

  • 2 cups semi-sweet chocolate chips (these provide the rich base for your fudge)
  • 1 can sweetened condensed milk (adds creaminess and sweetness)

For the Raspberry Swirl

  • 1/2 cup raspberry jam or preserves (use seedless for smoother finish)

Step-by-Step Instructions for Vampire Fudge

  1. Prepare the Pan by lining an 8×8-inch square pan with parchment paper.
  2. Melt the Chocolate Mixture by combining semi-sweet chocolate chips and sweetened condensed milk in a saucepan over low heat until melted.
  3. Spread the Fudge Base into the prepared pan, smoothing it out evenly.
  4. Prepare the Raspberry Jam by warming it slightly in the microwave for a pourable consistency.
  5. Create the Raspberry Swirl by drizzling warmed raspberry jam over the fudge and swirling with a knife.
  6. Chill the Fudge in the refrigerator for at least 2 hours until it has firmed up completely.
  7. Slice and Serve by removing the fudge from the pan and cutting it into squares.

Allow the fudge to chill for a full 2 hours for the best texture and flavor. This recipe is customizable by trying different jams or toppings.

Dessert
American
chocolate, easy dessert, fudge recipe, Halloween treat, sweet treat, Vampire Fudge

Filed Under: Dessert

Wicked Witch Hat Brownies: Spooktacular Treats to Delight!

September 26, 2025 by grace bellamy Leave a Comment

As I rummaged through my cupboards, a delightful idea for Halloween struck me like a bolt of lightning—Wicked Witch Hat Brownies! This playful twist on traditional brownies not only satisfies your sweet cravings but also adds a festive flair to your fall gatherings. With easy-to-follow steps and minimal prep time, they promise to be a crowd-pleaser, perfect for both kids and adults who relish homemade desserts over fast food. The combination of rich, fudgy brownies topped with whimsical witch hats made from chocolate ice cream cones is nothing short of enchanting. Ready to stir up some Halloween magic in your kitchen? Let’s get baking!

Wicked Witch Hat Brownies

Why Are These Brownies So Special?

Whimsical Fun: These Wicked Witch Hat Brownies bring a magical twist to your dessert table, making them a hit at any Halloween gathering.

Decadent Richness: Each brownie is rich and fudgy, satisfying even the strongest chocolate cravings with every bite.

Quick and Easy: With just 50 minutes total time, you’ll be in and out of the kitchen in no time, which leaves plenty of room for festive fun!

Creative Presentation: Topped with chocolate ice cream cones, these brownies add a unique visual flair, turning a classic treat into an eye-catching centerpiece.

Perfect for Everyone: Whether for kids’ parties or adult gatherings, these brownies appeal to all ages and can be personalized with your favorite sprinkles or toppings!

Looking for more festive ideas? Be sure to check out our collection of easy Halloween recipes.

Wicked Witch Hat Brownies Ingredients

For the Brownies
• Unsalted butter – 1 cup (225g) adds a rich, creamy flavor to your batter.
• Granulated sugar – 2 cups (400g) sweetens the brownies, balancing the cocoa’s bitterness.
• Large eggs – 4 provide structure and moisture for these delicious brownies.
• Vanilla extract – 1 teaspoon enhances the flavor profile of the chocolate.
• All-purpose flour – 1 cup (125g) gives the brownies their desired consistency.
• Unsweetened cocoa powder – 1 cup (90g), the star ingredient that makes these brownies rich and fudgy.
• Salt – 1/2 teaspoon enhances all the flavors in your Wicked Witch Hat Brownies.
• Baking powder – 1/2 teaspoon helps the brownies rise slightly for a soft texture.

For the Witch Hats
• Chocolate ice cream cones – 12 create whimsical witch hats that really steal the show.

For the Frosting
• Powdered sugar – 2 cups (300g) ensures a smooth and sweet topping for your brownies.
• Milk – 1/4 cup (60ml) adds creaminess to the frosting for that perfect spreadability.
• Vanilla extract (for frosting) – 1 teaspoon gives a lovely aroma and flavor to the icing.
• Green food coloring – Use to create a spooky hue on your frosting for those witchy vibes!
• Halloween-themed sprinkles – These fun embellishments make the dessert extra festive and delightful.

Gather these ingredients and let your creativity shine as you create these enchanting Wicked Witch Hat Brownies!

Step‑by‑Step Instructions for Wicked Witch Hat Brownies

Step 1: Melt the Butter
Begin by melting 1 cup (225g) of unsalted butter in a medium saucepan over low heat for about 5 minutes. Once fully melted, remove it from the heat and let it cool for a few minutes until it’s just warm. This will ensure a rich base for your Wicked Witch Hat Brownies.

Step 2: Mix the Wet Ingredients
In a large mixing bowl, combine the melted butter with 2 cups (400g) of granulated sugar. Stir the mixture until it’s smooth and creamy. Next, add in 4 large eggs one at a time, mixing well after each addition to incorporate them fully. Stir in 1 teaspoon of vanilla extract to enhance the flavor of the brownies.

Step 3: Combine Dry Ingredients
In a separate bowl, whisk together 1 cup (125g) of all-purpose flour, 1 cup (90g) of unsweetened cocoa powder, 1/2 teaspoon of salt, and 1/2 teaspoon of baking powder. Gradually mix this dry mixture into the wet ingredients from your large bowl, stirring until just combined. Be careful not to overmix; your brownies will maintain their richness!

Step 4: Bake the Brownies
Pour the brownie batter into a prepared 9×13 inch baking pan, spreading it evenly. Preheat your oven to 350°F (175°C) and bake the brownies for 25-30 minutes. To check for doneness, insert a toothpick into the center; it should come out with a few moist crumbs, indicating a fudgy texture perfect for the Wicked Witch Hat Brownies.

Step 5: Cool the Brownies
Once baked, remove the brownies from the oven and allow them to cool completely in the pan on a wire rack. This cooling process will take about 20-30 minutes and ensures they set properly, making them easier to cut into squares later.

Step 6: Prepare the Witch Hats
If desired, take chocolate ice cream cones and dip the tops in melted chocolate. Then, sprinkle them with Halloween-themed sprinkles for a festive touch. This optional step adds a delightful witchy appearance to your cones, which will be placed on top of the brownies.

Step 7: Make the Frosting
In a mixing bowl, combine 2 cups (300g) of powdered sugar, 1/4 cup (60ml) of milk, and 1 teaspoon of vanilla extract for the frosting, mixing until smooth. Add green food coloring until you reach your desired spooky shade. The frosting should be spreadable but thick enough to stay on the brownies.

Step 8: Frost the Brownies
Spread a generous layer of the green frosting over the top of each brownie square once they are completely cool. This vibrant layer will serve as the base for your witch hats and add a light sweetness that complements the brownies.

Step 9: Assemble the Witch Hats
To complete your Wicked Witch Hat Brownies, place an upside-down chocolate ice cream cone on top of each frosted brownie. This will create the look of a witch’s hat. Add additional Halloween-themed sprinkles on top for a final festive garnish, bringing your spooky desserts to life!

Wicked Witch Hat Brownies

Wicked Witch Hat Brownies Variations

Embrace your creativity with these fun variations that will make your Wicked Witch Hat Brownies even more delightful!

  • Nut Butter: Substitute half the butter with creamy nut butter for an added layer of flavor and a hint of nuttiness.
  • Gluten-Free: Use gluten-free all-purpose flour instead of regular flour to make these brownies accessible for everyone. Your loved ones won’t even notice the difference!
  • Minty Fresh: Add a few drops of mint extract to the brownie batter for a refreshing twist that beautifully contrasts the chocolate.
  • Spicy Kick: Mix in a pinch of cayenne pepper or chili powder for a surprising spicy kick that’ll keep taste buds intrigued. It’s a fun and daring option that can spark conversations at your gathering!
  • Caramel Drizzle: Drizzle melted caramel over the frosted brownies before adding the witch hats for an extra layer of decadence and flavor that complements the chocolate beautifully.
  • Brownie Bites: Pour the brownie batter into mini muffin tins instead of a large pan for delightful bite-sized treats. These adorable little morsels are perfect for parties or just for snacking!
  • Halloween Mix-Ins: Fold in your favorite Halloween candy pieces into the brownie batter or topping for a playful crunch. You can choose anything from candy corn to chocolate-covered pretzels.
  • Vegan Version: Substitute the eggs with flax eggs and the butter with vegan margarine for a delicious vegan adaptation that everyone can enjoy!

Looking for more creative ideas? Try adding some seasonal flair with our tasty easy Halloween recipes or explore festive Halloween dessert ideas that can spice up your celebrations even further!

Expert Tips for Wicked Witch Hat Brownies

Quality Ingredients: Choose high-quality cocoa powder for a richer chocolate flavor in your Wicked Witch Hat Brownies, enhancing the overall taste.

Don’t Overmix: When combining wet and dry ingredients, mix just until incorporated. Overmixing can lead to dense brownies instead of fudgy ones.

Cooling Time: Ensure your brownies cool completely before frosting. This prevents the frosting from melting and creates a beautiful, layered effect.

Sprinkle Options: Get creative with your Halloween-themed sprinkles! Mix and match colors and shapes for a festive touch that adds to the visual appeal.

Storage Tips: Store your brownies in an airtight container at room temperature for up to 3 days to keep them fresh and fudgy, perfect for enjoying later!

How to Store and Freeze Wicked Witch Hat Brownies

Room Temperature: Store your brownies in an airtight container at room temperature for up to 3 days to keep them fresh and fudgy.

Fridge: If you’d like to prolong their shelf life, you can refrigerate the brownies for up to 1 week. Just be sure to wrap them tightly to prevent drying out.

Freezer: For longer storage, freeze the brownies in an airtight container for up to 3 months. Thaw in the fridge overnight before serving.

Reheating: If you prefer warm brownies, microwave individual squares for 10-15 seconds before enjoying, making them delightfully gooey again!

Make Ahead Options

These Wicked Witch Hat Brownies are perfect for meal prep, making your Halloween festivities a breeze! You can prepare the brownie batter up to 24 hours in advance; simply store it in the refrigerator in an airtight container to maintain its freshness. Additionally, you can bake the brownies a day ahead and let them cool completely before refrigerating them. For the witch hats, dip the ice cream cones in melted chocolate and sprinkles up to 3 days ahead, allowing them to harden at room temperature. When you’re ready to serve, spread the green frosting over the brownies, assemble the hats, and you’ll have a delightful treat that’s just as delicious as if it were freshly made!

What to Serve with Wicked Witch Hat Brownies

Elevate your Halloween festivities with these delicious brownie treats that spark joy with every bite!

  • Spooktacular Milkshakes: Serve rich chocolate or vanilla milkshakes with a touch of Halloween magic. The creamy texture pairs perfectly with the fudgy brownies.

  • Festive Fruit Salad: A light and refreshing fruit salad with autumn fruits like pears and pomegranates adds a burst of color and sweetness to balance the chocolatey richness.

  • Pumpkin Spice Whipped Cream: This seasonal twist on whipped cream makes a delightful topping for your brownies, enhancing the fall flavors while adding lightness and creaminess to each bite.

  • Candied Apples: The crunchy, sweet glaze of candy-coated apples creates a delightful contrast to the soft brownies. Plus, they’re fun and festive!

  • Hot Cocoa Bar: Set up a cozy hot cocoa station with marshmallows, whipped cream, and toppings for a comforting drink that pairs beautifully with the brownies.

  • Gingerbread Cookies: Offer these spiced cookies as a zesty sidekick to your brownies, providing a contrasting flavor that captures the spirit of the season.

  • Coffee or Espresso: A rich cup of coffee or a festive pumpkin spice latte elevates the dessert experience, enhancing chocolate’s deep flavors and creating a warm atmosphere.

  • Spider Web Cheesecake: For an impressive dessert spread, consider serving an alluring cheesecake adorned with a spider web design; its creaminess beautifully complements the brownies’ texture.

These delightful pairings will not only enhance your Wicked Witch Hat Brownies but also create an enchanting Halloween dining experience!

Wicked Witch Hat Brownies

Wicked Witch Hat Brownies Recipe FAQs

How do I select ripe ingredients for my Wicked Witch Hat Brownies?
Absolutely! The key to delicious brownies is using fresh ingredients. Look for unsalted butter that’s creamy and smooth without any discoloration. For eggs, choose ones that are clean and free of cracks. Opt for granulated sugar that’s dry and free-flowing. Fresh vanilla extract should have a rich aroma, while cocoa powder should be a deep, dark color, indicating freshness.

What’s the best way to store Wicked Witch Hat Brownies?
Very simple! Store your brownies in an airtight container at room temperature for up to 3 days to keep them fresh and fudgy. If you want to extend their shelf life, you can refrigerate them for up to 1 week, but make sure to wrap them tightly to prevent them from drying out. I often place a slice of bread in the container to help maintain moisture.

Can I freeze Wicked Witch Hat Brownies?
Of course! To freeze your brownies, first, allow them to cool completely, and then cut them into squares. Place them in an airtight container or wrap them tightly in plastic wrap, followed by aluminum foil, to ensure they don’t get freezer burn. They can be frozen for up to 3 months! When ready to enjoy, thaw them in the fridge overnight or let them sit at room temperature for a couple of hours.

What should I do if my brownies turn out dry or crumbly?
Cooking time varies from oven to oven; you may have overbaked them. Always check doneness by inserting a toothpick; it should come out with a few moist crumbs rather than dry. If your brownies are already baked and dry, you can try warming them up in the microwave with a scoop of ice cream or serve them with whipped cream to add moisture back.

Are there any allergy considerations for Wicked Witch Hat Brownies?
Certainly! These brownies contain gluten from all-purpose flour, dairy from butter and milk, and eggs, which may not be suitable for those with allergies. You can swap in gluten-free flour, dairy-free butter, and aquafaba (chickpea water) as an egg substitute for a vegan option. Always check ingredient labels to ensure they meet dietary restrictions, particularly if serving to children or guests with allergies.

How can I customize my Wicked Witch Hat Brownies?
You can personalize these delightful treats by adding your preferred toppings! Substitute the Halloween sprinkles for any seasonal flavored sprinkles or swap out the green food coloring for orange or purple for different occasions. Alternatively, add nuts, chocolate chips, or even a swirl of caramel on top of the frosting for a unique twist that speaks to your tastes and style.

Wicked Witch Hat Brownies: Spooktacular Treats to Delight!

These Wicked Witch Hat Brownies combine rich, fudgy brownies with whimsical witch hats for a magical Halloween treat.

  • Medium saucepan
  • large mixing bowl
  • Whisk
  • spatula
  • 9×13-inch baking pan
  • Mixing Bowl
  • wire rack

For the Brownies

  • 1 cup unsalted butter (adds a rich, creamy flavor to your batter)
  • 2 cups granulated sugar (sweetens the brownies, balancing the cocoa’s bitterness)
  • 4 large eggs (provides structure and moisture)
  • 1 teaspoon vanilla extract (enhances the flavor profile)
  • 1 cup all-purpose flour (gives the brownies their desired consistency)
  • 1 cup unsweetened cocoa powder (the star ingredient that makes these brownies rich and fudgy)
  • 1/2 teaspoon salt (enhances all the flavors)
  • 1/2 teaspoon baking powder (helps the brownies rise slightly for a soft texture)

For the Witch Hats

  • 12 chocolate ice cream cones (create whimsical witch hats)

For the Frosting

  • 2 cups powdered sugar (ensures a smooth and sweet topping)
  • 1/4 cup milk (adds creaminess to the frosting)
  • 1 teaspoon vanilla extract (gives a lovely aroma and flavor to the icing)
  • green food coloring (use to create a spooky hue)
  • Halloween-themed sprinkles (fun embellishments that make the dessert festive)

Step-by-Step Instructions

  1. Begin by melting 1 cup of unsalted butter in a medium saucepan over low heat for about 5 minutes.
  2. Combine melted butter with 2 cups of granulated sugar in a large mixing bowl.
  3. Add 4 large eggs one at a time, mixing well after each addition. Stir in 1 teaspoon of vanilla extract.
  4. In a separate bowl, whisk together 1 cup of all-purpose flour, 1 cup of unsweetened cocoa powder, 1/2 teaspoon of salt, and 1/2 teaspoon of baking powder.
  5. Gradually mix the dry mixture into the wet ingredients, stirring until just combined.
  6. Pour the brownie batter into a prepared 9×13 inch baking pan and bake at 350°F for 25-30 minutes.
  7. Allow the brownies to cool completely in the pan on a wire rack.
  8. Prepare the witch hats by dipping chocolate ice cream cones in melted chocolate and sprinkling with Halloween-themed sprinkles.
  9. In a mixing bowl, combine 2 cups of powdered sugar, 1/4 cup of milk, and 1 teaspoon of vanilla extract. Mix until smooth and add green food coloring.
  10. Spread a layer of green frosting over the cooled brownies and place the witch hats on top.
  11. Garnish with additional Halloween-themed sprinkles.

Choose high-quality cocoa powder for better flavor. Ensure brownies cool completely before frosting to avoid melting. Store brownies in an airtight container.

Dessert
Halloween
brownies, chocolate, dessert, fudgy brownies, Halloween Treats, Wicked Witch Hat Brownies

Filed Under: Dessert

Creamy Halloween Pumpkin Ale Mac and Cheese to Bewitch You

September 26, 2025 by grace bellamy Leave a Comment

As the leaves turn and the air gets crisper, I find myself craving a cozy, comforting meal that captures the spirit of fall—like Halloween Pumpkin Ale Mac and Cheese! This delightful dish takes two beloved favorites and combines them into a creamy, cheesy masterpiece that’s sure to impress your friends and family. Not only is it quick to whip up in just 25 minutes, but it’s also a wonderful twist on classic comfort food with an unexpected touch of pumpkin ale. The black bean rotini adds a playful contrast both in color and nutrition, making it a unique staple for your autumn gatherings. So, are you ready to transform your dinner table into a seasonal celebration? Let’s dive into the recipe and discover how to make this festive dish come alive!

Halloween Pumpkin Ale Mac and Cheese

Why is this mac and cheese special?

Comforting and festive, this Halloween Pumpkin Ale Mac and Cheese brings a delightful twist to a classic dish. Creamy and cheesy, the sharp cheddar melds beautifully with the unique flavors of pumpkin ale, creating a rich sauce that comforts the soul. Quick to prepare, you’ll be serving this remarkable dish in just 25 minutes, making it perfect for busy weeknights or spontaneous gatherings. Visually striking, the vibrant colors of black bean rotini elevate your dinner presentation, intriguing everyone at the table. Lastly, crowd-pleasing and satisfying, this recipe is guaranteed to become a seasonal favorite!

Halloween Pumpkin Ale Mac and Cheese Ingredients

For the Sauce

  • Pumpkin ale – adds a delightful autumn flavor that elevates your mac and cheese.
  • Heavy cream – creates a rich, velvety texture that holds everything together.
  • Sharp cheddar – provides a beautiful sharpness that cuts through the creaminess.
  • Flour – helps thicken the sauce for that perfect gooey consistency.
  • Smoked paprika – introduces a hint of warmth and depth to the flavor profile.
  • Turmeric – gives a lovely golden hue, enhancing the overall visual appeal.
  • Salt – enhances all the flavors, making each bite truly delicious.
  • Pepper – adds a little heat to balance the creaminess.

For the Pasta

  • Black bean rotini – not only striking in color but also adds nutritional value and protein.

For Drizzling

  • Olive oil – prevents the pasta from sticking together, ensuring a perfect serve every time.

This Halloween Pumpkin Ale Mac and Cheese will undoubtedly impress your guests and solidify your reputation as a home-cooking magician!

Step‑by‑Step Instructions for Halloween Pumpkin Ale Mac and Cheese

Step 1: Prepare the Sauce
In a medium saucepan, combine 12 oz of pumpkin ale, ¾ cup of heavy cream, ½ tsp of smoked paprika, ½ tsp of turmeric, ¼ cup of flour, ½ tsp of salt, and ½ tsp of pepper. Place the saucepan over medium heat and stir the mixture continuously for about 5–7 minutes, or until it thickens and bubbles gently. You’ll know it’s ready when it coats the back of a spoon.

Step 2: Melt the Cheese
Once your sauce has thickened, reduce the heat to low and stir in ½ pound of shredded sharp cheddar. Continue to stir for 2–3 minutes, until the cheese fully melts and integrates into the pumpkin ale sauce, creating a smooth, creamy consistency. This luscious sauce is what makes your Halloween Pumpkin Ale Mac and Cheese so irresistible!

Step 3: Cook the Pasta
While the cheese sauce is cooking, bring a large pot of salted water to a boil. Add 12 oz of black bean rotini and cook according to package instructions until al dente, about 7–10 minutes. Drain the rotini and immediately drizzle with 1 tbsp of olive oil to prevent it from sticking together, tossing gently to ensure every piece is coated.

Step 4: Combine and Serve
In a large mixing bowl, combine the black bean rotini with the pumpkin ale cheese sauce, tossing until every piece is well-coated with the velvety sauce. For a stunning presentation, plate the creamy Halloween Pumpkin Ale Mac and Cheese in individual bowls, allowing the rich colors of the dish to shine. Invite everyone to dig in and enjoy this seasonal delight!

Halloween Pumpkin Ale Mac and Cheese

Expert Tips for Halloween Pumpkin Ale Mac and Cheese

  • Choose the Right Ale: Selecting a high-quality pumpkin ale can enhance the dish’s flavor profile. Avoid overly sweet options to ensure balance.

  • Check for Thickness: If your sauce isn’t thickening, let it cook a little longer. Remember, it should coat the back of a spoon effectively before adding the cheese.

  • Fresh Cheese: For the best melt, use freshly shredded sharp cheddar. Pre-packaged shredded cheese can contain anti-caking agents that inhibit melting.

  • Pasta Preference: Black bean rotini adds color and protein, but feel free to use any pasta shape you love. Just keep an eye on cook times for the perfect al dente bite.

  • Add Some Crunch: For a fun texture twist, consider topping your mac and cheese with breadcrumbs before baking for a delightful crunch.

  • Make Ahead: This Halloween Pumpkin Ale Mac and Cheese can be prepared a day in advance. Just store the sauce and pasta separately, then combine and heat before serving.

How to Store and Freeze Halloween Pumpkin Ale Mac and Cheese

Fridge: Store any leftovers in an airtight container for up to 3 days. Reheat in the microwave or on the stovetop, adding a splash of milk for creaminess.

Freezer: Freeze the mac and cheese in a freezer-safe container for up to 2 months. Thaw overnight in the fridge before reheating.

Reheating: When ready to enjoy, add a little cream or milk to rehydrate the sauce while reheating, ensuring a creamy consistency.

Serving Tip: For more flavor, consider garnishing with fresh herbs or a sprinkle of smoked paprika when serving.

Make Ahead Options

These Halloween Pumpkin Ale Mac and Cheese are perfect for meal prep enthusiasts looking to save time on busy weeknights! You can prepare the cheesy sauce up to 24 hours in advance. Simply follow the steps to combine the pumpkin ale, heavy cream, spices, flour, salt, and pepper, then let it cool before refrigerating it in an airtight container. The black bean rotini can also be cooked ahead of time and stored in the refrigerator for up to 3 days; just drizzle it with olive oil and toss to prevent sticking. When you’re ready to serve, reheat the cheese sauce gently on the stovetop, combine it with the rotini, and enjoy restaurant-quality deliciousness with minimal effort!

Halloween Pumpkin Ale Mac and Cheese Variations

Feel free to make this Halloween Pumpkin Ale Mac and Cheese your own with these fun and flavorful twists!

  • Gluten-Free: Substitute regular flour with a gluten-free blend and choose gluten-free pasta to make this dish celiac-friendly.
  • Vegan: Use plant-based pumpkin ale, coconut cream, and dairy-free cheese to create a creamy, animal-free alternative that everyone can enjoy.
  • Extra Cheesy: For a cheesier experience, mix in some mozzarella or fontina cheese along with the cheddar for that melty goodness.
  • Smoky Flavor: Add cooked and crumbled bacon or pancetta to the mac and cheese before serving for a savory, homemade touch that adds depth.
  • Spicy Kick: Incorporate diced jalapeños or a pinch of cayenne pepper into the cheese sauce for those who enjoy a little heat with their comfort food.
  • Nutty Twist: Stir in some toasted pine nuts or walnuts after combining the pasta and sauce; they’ll add a satisfying crunch and nutty flavor.
  • Herby Freshness: Fresh herbs like sage, thyme, or chives can elevate the dish’s flavor—consider mixing them into the cheese sauce or sprinking on top before serving.
  • Roasted Veggies: Add some roasted butternut squash or Brussels sprouts to your mac for a heartier dish that brings autumn’s bounty to the plate.

No matter how you choose to customize, your Halloween Pumpkin Ale Mac and Cheese will surely delight! If you want to experiment even more, consider pairing it with some delightful homemade garlic bread or a crisp autumn salad for a complete meal.

What to Serve with Halloween Pumpkin Ale Mac and Cheese

As the cozy aroma of this creamy dish fills your kitchen, consider these delightful pairings to complete your autumn meal experience.

  • Garlic Bread: The crispy, buttery crust adds a satisfying crunch that contrasts beautifully with the creamy mac and cheese. It’s the perfect dish to mop up any leftover cheese sauce!

  • Roasted Brussels Sprouts: These caramelized bites bring an earthy flavor and a dash of freshness, balancing the richness of the pumpkin ale mac and cheese while packing a nutritious punch.

  • Crispy Bacon Bits: Adding a sprinkle of bacon bits introduces a smoky, savory element that heightens the flavor profile of your mac and cheese, making every bite even more indulgent.

  • Autumn Salad: A mixed green salad with apples, walnuts, and a hint of vinaigrette offers a refreshing crispness that complements the creaminess of the dish, providing a well-rounded meal experience.

  • Apple Cider: This warm, spiced drink brings a seasonal touch and a slight tang that pairs wonderfully with the creamy and cheesy notes, making it a perfect beverage for your fall gathering.

  • Pumpkin Spice Cookies: For dessert, these sweet treats echo the flavors of the season and round off your meal with a cozy sweetness that will have everyone coming back for seconds. Enjoy the delightful contrast!

Halloween Pumpkin Ale Mac and Cheese

Halloween Pumpkin Ale Mac and Cheese Recipe FAQs

How do I choose the right pumpkin ale for this recipe?
Absolutely! When selecting a pumpkin ale, opt for one that’s not overly sweet, as it can throw off the balance of flavors. Look for ales that showcase spices like cinnamon and nutmeg without being too dessert-like. This will enhance the savory notes in your Halloween Pumpkin Ale Mac and Cheese.

How should I store leftovers of the Halloween Pumpkin Ale Mac and Cheese?
Very! Store any leftovers in an airtight container in the fridge for up to 3 days. To reheat, simply warm it gently in the microwave or on the stovetop, adding a splash of milk or cream if needed for that perfect creamy texture.

Can I freeze Halloween Pumpkin Ale Mac and Cheese?
Yes, indeed! You can freeze your mac and cheese in a freezer-safe container for up to 2 months. To do this, let it cool completely before transferring it to the container. When you’re ready to enjoy it, thaw overnight in the fridge and then reheat on the stove, adding a little cream for creaminess.

What should I do if my cheese sauce isn’t thickening?
Oh, no worries! If your sauce isn’t thickening as expected, simply let it cook for a little longer over medium heat. Aim for about 5–7 minutes until it coats the back of a spoon and bubbles gently. If it’s still not thick enough, you can add a bit more flour, mixed with a little water to avoid clumping, and stir it in.

Are there any dietary considerations for this Halloween Pumpkin Ale Mac and Cheese?
Certainly! This dish contains dairy and gluten from the cheese and flour, which may not suit everyone. For a gluten-free option, consider using gluten-free pasta and a suitable thickening agent like cornstarch or gluten-free flour. If you’re concerned about dairy, you can experiment with dairy-free cheese alternatives, but keep in mind the taste and consistency may vary.

Can I use a different type of pasta for this recipe?
Absolutely! While black bean rotini adds a delightful flavor and color contrast, feel free to substitute it with any pasta shape you love, such as elbow macaroni or penne. Just remember to adjust the cooking time accordingly to ensure that it remains al dente for the best texture in your Halloween Pumpkin Ale Mac and Cheese!

Creamy Halloween Pumpkin Ale Mac and Cheese to Bewitch You

Enjoy a cozy and comforting Halloween Pumpkin Ale Mac and Cheese that combines two favorites in a creamy dish.

  • Medium saucepan
  • Large Pot
  • Mixing Bowl

For the Sauce

  • 12 oz pumpkin ale
  • 3/4 cup heavy cream
  • 1/2 tsp smoked paprika
  • 1/2 tsp turmeric
  • 1/4 cup flour
  • 1/2 tsp salt
  • 1/2 tsp pepper
  • 8 oz sharp cheddar (shredded)

For the Pasta

  • 12 oz black bean rotini

For Drizzling

  • 1 tbsp olive oil

Step-by-Step Instructions

  1. In a medium saucepan, combine pumpkin ale, heavy cream, smoked paprika, turmeric, flour, salt, and pepper. Place over medium heat and stir continuously for about 5–7 minutes until thickened.
  2. Reduce heat to low and stir in shredded sharp cheddar until fully melted and integrated, creating a creamy sauce.
  3. In a large pot, boil salted water, add black bean rotini, and cook for 7–10 minutes until al dente. Drain and drizzle with olive oil.
  4. Combine rotini with the pumpkin ale cheese sauce, tossing well to coat. Serve in individual bowls for a festive presentation.

Store leftovers in an airtight container for up to 3 days. Can be frozen for up to 2 months. Reheat with a splash of cream or milk for creaminess.

Main Dishes
American
cheesy pasta, comfort food, Halloween, mac and cheese, Pumpkin Ale, Seasonal Dish

Filed Under: Main Dishes

Irresistibly Delicious Spooky Chorizo Hand Pies to Make Today

September 26, 2025 by grace bellamy Leave a Comment

As I rolled out the chilled dough, the kitchen filled with an irresistible aroma that whispered secrets of the delightful Spooky Chorizo Hand Pies soon to come. These playful pastries pack a punch of flavor, marrying spicy chorizo with melting Oaxaca and Manchego cheeses, creating a deliciously cheesy filling that you won’t be able to resist. Not only are they a fun bite-sized treat perfect for any gathering, but they also make for a hearty meal that will have everyone coming back for more. Whether you’re looking to impress guests or simply want to elevate your weeknight dinners, these hand pies provide a comforting, homemade alternative to fast food. Who knew cooking could be this fun? Are you ready to dive into this festive culinary adventure?

Spooky Chorizo Hand Pies

Why Are Spooky Chorizo Hand Pies So Great?

Irresistible Flavor: Each bite is bursting with a zesty blend of chorizo and melted cheese, making it an unforgettable experience.
Festive Fun: Their playful pumpkin shape and whimsical faces add a festive touch to any occasion, perfect for bringing smiles during gatherings.
Homemade Goodness: Ditch the fast food! These hand pies deliver wholesome ingredients that you can feel good about serving to friends and family.
Versatile Filling: Feel free to swap ingredients! Use your favorite meats or cheeses for a personalized twist, making them adaptable to any preference.
Time Worth Spent: Although they require a little time and effort, the final result—golden, flaky hand pies—will make it all worthwhile. Enjoy with a side of dipping sauce for an extra delight, and if you’re looking for sides, don’t miss our guide on quick dinner ideas.

Spooky Chorizo Hand Pies Ingredients

For the Pastry
• All-purpose flour – 16 oz (4 cups), preferably chilled for a flakier crust.
• Sea salt – 1 tsp, enhances the dough flavor and balances sweetness.
• Unsalted butter – 170 g (6 oz, 1½ sticks), chilled and cubed for a rich, buttery taste.
• Chilled water – ½ cup plus 2-3 tbsp more if needed to bind the dough.
• Egg – 1, gives the dough a beautiful golden color when baked.
• Apple cider vinegar or lemon juice – 1 tsp, helps create a tender crust.

For the Filling
• Chorizo – 255 g (9 oz), ground (beef or pork) adds a spicy kick and robust flavor.
• Minced pork – 285 g (10 oz), can be substituted with beef, chicken, or turkey for variety.
• Paprika – 1 tsp, amplifies the warmth and depth of the filling.
• Onion – ½, finely chopped, for sweetness and savory balance.
• Garlic – 3 cloves, finely chopped, infuses the filling with a fragrant aroma.
• Cayenne pepper – ½ tsp (optional), gives an extra spicy punch if desired.
• Salt – to taste, always essential for bringing flavors to life.

For the Cheese
• Oaxaca cheese – 170 g (6 oz, about 1½ cups), shredded for its melting creaminess.
• Manchego cheese – 170 g (6 oz, about 1½ cups), shredded, adds a unique nutty flavor.

To Seal the Pies
• Room temperature water – for sealing the pie edges tightly.
• Egg – 1 (for egg wash), ensures a beautifully shiny, golden finish.

These Spooky Chorizo Hand Pies are more than just a treat; they’re a delightful journey into flavor that will keep your loved ones asking for seconds! 🥧✨

Step‑by‑Step Instructions for Spooky Chorizo Hand Pies

Step 1: Prepare the Dough
In a large bowl, whisk together 4 cups of chilled all-purpose flour and 1 teaspoon of sea salt until evenly mixed. Add the cubed, chilled unsalted butter and rub it into the flour with your fingers until it resembles coarse crumbs, with some pea-sized butter chunks remaining. This will create a flaky texture for your Spooky Chorizo Hand Pies.

Step 2: Combine Wet Ingredients
In a separate bowl, mix together ¼ cup of chilled water, 1 egg, and 1 teaspoon of apple cider vinegar or lemon juice. Create a well in your flour mixture and pour the liquid mixture into it. Gently combine using a fork until all the flour is absorbed, ensuring there are no dry patches; this is crucial for smooth, delicious hand pies.

Step 3: Form the Dough
Knead the dough on a lightly floured surface just until it comes together in a ball, adding more water if it feels too dry or some flour if it’s sticky. Wrap the dough in plastic wrap and flatten it into a rectangle. Chill the dough in the refrigerator for at least 1 hour—this resting time is essential for developing flavor and ensuring a flaky crust.

Step 4: Cook the Filling
While the dough chills, heat a non-stick pan over medium-high heat. Add ½ finely chopped onion and sauté for a few minutes until softened. Then, stir in 9 ounces of ground chorizo, 10 ounces of minced pork, 1 teaspoon of paprika, and 3 finely chopped garlic cloves. If desired, sprinkle in ½ teaspoon of cayenne pepper for added spice, cooking for 15-20 minutes until the meat is fully cooked and beautifully browned.

Step 5: Chill the Filling
Once the filling is cooked through, transfer it to a bowl and allow it to cool. This step is important not only for safety, but also to prevent your hand pies from getting soggy. Refrigerating the filling will ensure it’s nice and firm when you assemble your Spooky Chorizo Hand Pies later on, making them easier to handle.

Step 6: Preheat the Oven
Preheat your oven to 375°F (190°C) and line a baking tray with parchment paper. This will be the perfect temperature to achieve that golden-brown finish on your Spooky Chorizo Hand Pies, giving you a crispy exterior that pairs perfectly with the cheesy filling you’ve prepared.

Step 7: Roll Out the Dough
On a floured surface, roll out the chilled dough to about 3 mm thick. Use a rolling pin to ensure even thickness. This step is vital for creating a sturdy yet flaky crust for your hand pies. The more even your rolling, the better your final results will be.

Step 8: Cut the Shapes
Using a 4-inch pumpkin cookie cutter, cut out pumpkin shapes from the rolled dough. Don’t forget to re-roll the scraps to maximize your dough! These fun shapes will create the festive appearance of your Spooky Chorizo Hand Pies, making them perfect for gatherings.

Step 9: Create Pumpkin Faces
On half of the pumpkin-shaped cutouts, use a smaller cutter or a knife to carve out spooky faces. This will add a delightful touch to your hand pies, inviting smiles with each bite. Get creative here—your hand pies will be as much fun to look at as they are to eat!

Step 10: Assemble the Hand Pies
On an uncut pumpkin shape, layer a generous amount of shredded Oaxaca and Manchego cheese, then add a heaping spoonful of the cooling chorizo filling. The cheese will melt beautifully inside, making every bite heavenly. Make sure to leave the edges clear for sealing!

Step 11: Seal the Pies
Moisten the edges of your pumpkin pie dough with a bit of water before placing a face-shaped dough piece on top. Press down gently to seal it well, and use a fork to crimp the edges for an extra secure closure. This step ensures your filling stays inside during baking.

Step 12: Brush and Bake
Brush the tops of the hand pies with egg wash for a beautiful golden finish. Place them on the prepared baking tray, ensuring adequate space between each pie. Bake in the preheated oven for 20-30 minutes, until they are gloriously golden brown and flaky—perfectly delicious Spooky Chorizo Hand Pies ready to enjoy!

Spooky Chorizo Hand Pies

How to Store and Freeze Spooky Chorizo Hand Pies

Room Temperature: Enjoy Spooky Chorizo Hand Pies fresh out of the oven or keep them at room temperature for up to 2 hours for optimal flavor.

Fridge: Store any leftovers in an airtight container for up to 3 days. Reheat in the oven or microwave until warm, maintaining their delightful texture.

Freezer: For longer storage, freeze the baked hand pies for up to 3 months. Lay them flat in a single layer before transferring to a freezer-safe bag once solid.

Reheating: To reheat frozen hand pies, bake them directly from the freezer at 350°F (175°C) for 20-25 minutes or until heated through and crispy again.

Make Ahead Options

These Spooky Chorizo Hand Pies are perfect for meal prep enthusiasts! You can prepare the dough and filling up to 24 hours in advance, refrigerating both separately to maintain their freshness and prevent sogginess. To prep, simply follow the initial steps of making the dough and cooking the filling, then cool and wrap each component tightly in plastic wrap or store in airtight containers. When you’re ready to assemble, roll out the dough and fill the pies as directed, brushing them with egg wash before baking. This way, you’ll enjoy delicious, homemade Spooky Chorizo Hand Pies with minimal effort, just as tasty as when fresh!

Tips for the Best Spooky Chorizo Hand Pies

Chill the Dough: Keep your dough and butter chilled to ensure a flaky texture. Don’t skip the chilling time—it makes a world of difference!

Moderate the Spice: Adjust the cayenne pepper in the filling according to your taste. Add a little for warmth, but too much can overwhelm the other flavors.

Seal Thoroughly: Make sure to moisten the edges well before sealing. A secure crimp prevents any delicious filling from leaking out during baking.

Even Rolling: Roll out the dough to an even thickness of about 3 mm. This ensures that all hand pies cook uniformly, giving you that perfect flaky crust.

Keep Filling Cool: Allow the filling to cool before assembling to prevent sogginess. A well-chilled filling keeps your Spooky Chorizo Hand Pies crispy!

Watch the Bake Time: Keep an eye on the pies as they bake; ovens can vary. Look for that golden brown color for the best result.

Spooky Chorizo Hand Pies Variations

Explore exciting twists on the classic Spooky Chorizo Hand Pies to make them uniquely yours!

  • Vegetarian: Swap out chorizo and minced pork for a mix of black beans, corn, and bell peppers for a delicious plant-based filling.
  • Gluten-Free: Use a gluten-free all-purpose flour blend in place of regular flour for a lettuce leaf-wrapped option. Your favorite gluten-free pastry can also work wonderfully!
  • Add Veggies: Incorporate some finely chopped spinach or bell peppers in the filling for a colorful pop and added nutrition. The freshness of these veggies will balance the richness of the meat perfectly.
  • Cheese Lovers: Try adding a mix of cheddar and pepper jack instead of Oaxaca and Manchego for a cheesy kick. The melty, stringy goodness will make every bite indulgent!
  • Spicy Kick: Increase the cayenne pepper or add diced jalapeños to the filling for an extra punch of heat. This brings more vibrancy and excitement to each mouthful!
  • Sweet Twist: Add a dash of cinnamon and a handful of chopped apples to the meat filling for a sweet and savory combo that surprises the palate. Pairing unexpected flavors can lead to delightful discoveries!
  • Honey Drizzle: After baking, drizzle honey or a spicy honey glaze over the hand pies for a surprising sweet touch that plays off the spices beautifully.
  • Make Mini: Create smaller versions using a 2-inch cutter, perfect for appetizers or party snacks. These little bites will have everyone reaching for more!

Feel free to experiment with these variations, and don’t forget to explore different dipping sauces to accompany your Spooky Chorizo Hand Pies! If you’re considering sides, check out our guide on quick dinner ideas for delightful inspirations.

What to Serve with Spooky Chorizo Hand Pies

Pairing these playful pastries with delightful sides will elevate your meal into an unforgettable feast.

  • Crispy Green Salad: A fresh, crunchy salad with crisp romaine, cherry tomatoes, and a zesty vinaigrette complements the hearty filling beautifully.

  • Savory Black Bean Soup: This rich, flavorful soup adds a comforting warmth, perfect for dipping your hand pies and balancing the spices.

  • Roasted Veggies: Roasted brussels sprouts or seasonal squash sprinkled with olive oil and herbs bring a caramelized sweetness, harmonizing wonderfully with the savory hand pies.

  • Salsa Verde: This tangy, herbaceous sauce brightens up the rich flavors of the pies, giving guests a vibrant option for dipping.

  • Spicy Corn Salsa: Add a burst of sweetness and heat with corn salsa that incorporates fresh cilantro, jalapeños, and lime—perfect for a fiesta feel!

  • Cilantro Lime Rice: Fluffy rice with bright cilantro and a hint of lime is a light and zesty side that pairs well with the bold chorizo flavors.

  • Creamy Avocado Dip: Rich and creamy, this dip soothes the spices while adding a fresh element that perfectly complements the warmth of the hand pies.

  • Margaritas: A classic margarita with a salt rim is a festive drink that adds a tangy twist, perfect for a celebratory mood while savoring your hand pies.

Spooky Chorizo Hand Pies

Spooky Chorizo Hand Pies Recipe FAQs

How do I choose ripe ingredients for my Spooky Chorizo Hand Pies?
Absolutely! For the best flavor, ensure your onions and garlic are fresh—look for firm onions with no dark spots and plump garlic cloves. Use quality chorizo that’s aromatic and flavorful; the richness of the meat will shine through in the pies.

How should I store leftover Spooky Chorizo Hand Pies?
Very! If you have any hand pies left, store them in an airtight container in the fridge for up to 3 days. They’ll retain their deliciousness when reheated, so simply pop them in the oven at 350°F (175°C) until warm and crispy.

Can I freeze Spooky Chorizo Hand Pies?
Yes, indeed! To freeze, allow the baked hand pies to cool completely. Then, lay them flat on a baking sheet in a single layer in the freezer. Once solid, transfer them to a freezer-safe bag, sealing as much air out as possible. They’re good for up to 3 months!

What should I do if my pie dough is too sticky or too dry?
A common hiccup, but don’t worry! If your dough is too sticky, sprinkle in a little extra flour (1 tablespoon at a time) until it’s workable. If it feels too dry, add very small amounts of chilled water (1 teaspoon at a time) and knead until it comes together. Achieving the right consistency can take a moment, but it’s worth the patience!

Are there any dietary considerations for making Spooky Chorizo Hand Pies?
Yes! If you’re preparing these for others, be mindful of allergens such as gluten in the flour or dairy in the cheese. Feel free to use gluten-free flour, and alternative cheeses can work beautifully here, too. Additionally, you can substitute the meats for plant-based options if you’re looking for a vegetarian twist.

How long will my Spooky Chorizo Hand Pies last at room temperature?
Good question! You can keep them at room temperature for about 2 hours without compromising safety. After that, it’s best to store any leftover hand pies in the fridge or freezer to maintain their deliciousness.

Irresistibly Delicious Spooky Chorizo Hand Pies to Make Today

These Spooky Chorizo Hand Pies are a flavorful and fun treat, combining spicy chorizo and cheeses in a delightful pastry.

  • large bowl
  • Whisk
  • Mixing spoon
  • non-stick pan
  • cookie cutter
  • Rolling Pin
  • Baking Tray
  • parchment paper

Pastry

  • 16 oz all-purpose flour (preferably chilled for a flakier crust.)
  • 1 tsp sea salt (enhances the dough flavor and balances sweetness.)
  • 170 g unsalted butter (chilled and cubed for a rich, buttery taste.)
  • ½ cup chilled water (plus 2-3 tbsp more if needed to bind the dough.)
  • 1 unit egg (gives the dough a beautiful golden color when baked.)
  • 1 tsp apple cider vinegar or lemon juice (helps create a tender crust.)

Filling

  • 255 g chorizo (ground (beef or pork) adds a spicy kick.)
  • 285 g minced pork (can be substituted with beef, chicken, or turkey.)
  • 1 tsp paprika (amplifies the warmth and depth of the filling.)
  • ½ unit onion (finely chopped, for sweetness and savory balance.)
  • 3 cloves garlic (finely chopped, infuses the filling with a fragrant aroma.)
  • ½ tsp cayenne pepper (optional, gives an extra spicy punch if desired.)
  • to taste salt (essential for bringing flavors to life.)

Cheese

  • 170 g Oaxaca cheese (shredded for its melting creaminess.)
  • 170 g Manchego cheese (shredded, adds a unique nutty flavor.)

Sealing

  • room temperature water (for sealing the pie edges tightly.)
  • 1 unit egg (for egg wash.)

Dough Preparation

  1. In a large bowl, whisk together 4 cups of chilled all-purpose flour and 1 teaspoon of sea salt until evenly mixed.
  2. Add the cubed, chilled unsalted butter and rub it into the flour until it resembles coarse crumbs.
  3. In a separate bowl, mix ¼ cup of chilled water, 1 egg, and 1 teaspoon of apple cider vinegar or lemon juice. Create a well in your flour mixture and pour the liquid mixture into it.
  4. Combine using a fork until all the flour is absorbed and there are no dry patches.
  5. Knead the dough on a lightly floured surface just until it comes together. Wrap in plastic wrap and flatten into a rectangle. Chill for at least 1 hour.

Filling Preparation

  1. Heat a non-stick pan over medium-high heat. Add ½ finely chopped onion and sauté until softened.
  2. Stir in ground chorizo, minced pork, 1 teaspoon of paprika, and garlic. If desired, sprinkle in cayenne pepper, cooking for 15-20 minutes.
  3. Once cooked, transfer the filling to a bowl to cool.

Baking Process

  1. Preheat your oven to 375°F (190°C) and line a baking tray with parchment paper.
  2. Roll out the chilled dough to about 3 mm thick. Cut out pumpkin shapes using a 4-inch cookie cutter.
  3. On half of the pumpkin shapes, carve out spooky faces using a smaller cutter or knife.
  4. On an uncut pumpkin shape, layer shredded Oaxaca and Manchego cheese, then add a spoonful of the cooling chorizo filling.
  5. Moisten the edges with water before placing a face-shaped piece on top. Press down gently to seal and use a fork to crimp the edges.
  6. Brush the tops with egg wash and bake in the preheated oven for 20-30 minutes until golden brown.

Enjoy your Spooky Chorizo Hand Pies fresh or store in an airtight container. These playful treats are ideal for gatherings.

Main Dishes
Mexican
Cheese, chorizo, festive snacks, hand pies, Spooky Chorizo Hand Pies

Filed Under: Main Dishes

Refreshing Black Lemonade: A Fun Twist on Summer Sips

September 26, 2025 by grace bellamy Leave a Comment

It’s an unusual twist on a classic that caught my eye at a summer picnic—a deep, mysterious lemonade that seemed to defy tradition. This Black Lemonade is not just a festive drink; it’s an eye-catching conversation starter perfect for any gathering. With just 10 minutes of prep and a delightful balance of tangy lemon and sweet syrup, this recipe is both quick and fun to whip up. Whether you’re hosting a party or just looking for a unique sipper to cool off, this drink will surely amaze your guests. Plus, it’s a fantastic way to break away from the mundane fast-food routine. Are you ready to brew up some intrigue with your next drink?

Black Lemonade

What makes Black Lemonade so special?

Uniqueness: This isn’t your average lemonade! The striking black hue creates a visual delight that intrigues everyone.

Quick Prep: You can whip up this refreshing drink in just 10 minutes, perfect for those spontaneous summer gatherings.

Balanced Flavor: With the right blend of zesty lemon and sweet syrup, each sip offers a delightful taste sensation that’ll leave you wanting more.

Versatile Serving: Enjoy it over ice for that refreshing chill, or jazz it up with a garnish of lemon slices or spooky decor for a themed party!

Party Favorite: This eye-catching drink is a surefire way to impress guests and spark conversations, breaking the ice as soon as it’s served.

Black Lemonade Ingredients

Unlock the mystery behind the perfect Black Lemonade!

For the Syrup

  • Sugar – A sweet base that balances the tartness of lemon, essential for the perfect black lemonade.
  • Water – Used to dissolve and create your syrup; ensures a smooth consistency.
  • Black Gel Food Color – This is the secret ingredient that gives your lemonade its dramatic, dark hue.

For the Lemonade

  • Fresh Lemon Juice – Offers a tangy kick that elevates the flavor, bringing that classic lemonade taste with a twist.
  • Cold Water – Dilutes the syrup for a refreshing sip; you can adjust the amount for your desired strength.

Enjoy crafting this intriguing drink that is bound to be a crowd-pleaser!

Step‑by‑Step Instructions for Black Lemonade

Step 1: Prepare the Sugar Syrup
In a small pot, combine 3/4 cup of sugar with 3/4 cup of water. Heat on medium-high until boiling, then reduce to a simmer. Allow it to simmer gently without stirring for about 3 to 4 minutes, or until the sugar completely dissolves and the mixture is clear. Once done, remove from heat. Add 1 tablespoon of black gel food color and stir until fully integrated. Set aside to cool.

Step 2: Mix the Lemonade
In a large pitcher, pour in 1 1/2 cups of fresh lemon juice, which will bring a zesty brightness to your Black Lemonade. Next, add the cooled black sugar syrup to the pitcher, creating a striking contrast. Finally, mix in 4 cups of cold water to dilute the syrup, ensuring the flavors balance perfectly. Stir gently until everything is well combined.

Step 3: Serve Over Ice
To serve your refreshing Black Lemonade, fill glasses with ice cubes for that chilled delight. Pour the vibrant drink over the ice, allowing the cold to perk up the flavors. For an extra touch, consider garnishing each glass with a slice of lemon or even some whimsical decorations if you’re feeling festive. Enjoy the surprise and delight of this unique beverage!

Black Lemonade

Make Ahead Options

These Black Lemonade drinks are perfect for busy home cooks looking to save time during summer gatherings! You can prepare the sugar syrup up to 24 hours in advance; simply mix the sugar with water and food color as directed, then refrigerate it in an airtight container to maintain its rich flavor. The fresh lemon juice should be squeezed and stored separately in the fridge for up to 3 days. When you’re ready to serve, combine the cooled syrup with the lemon juice and cold water, give it a good stir, and pour it over ice. This way, you’ll have a refreshing drink that’s just as delicious without the last-minute rush!

What to Serve with Black Lemonade

Imagine a sunny afternoon gathering, where your guests sip on this strikingly dark drink, surrounded by bright flavors and delightful dishes.

  • Grilled Shrimp Skewers: The sweetness of the grilled shrimp complements the tartness of Black Lemonade, creating a balanced blend of flavors.
  • Spicy Nachos: Crunchy and cheesy, these nachos bring a savory contrast to the zesty lemonade, making each bite a flavor fiesta.

The textures and spices of spicy nachos beautifully counter the drink’s sweetness, ensuring your palate dances with joy.

  • Citrus Fruit Salad: Fresh fruits like oranges and strawberries brighten the table and provide a refreshing counterpart to the lemonade.
  • Savory Cheese Platter: A mix of creamy and sharp cheeses, paired with crackers, enhances the drink’s complexity while inviting nibbles between sips.

Pairing savory cheeses with the bright citrus notes of Black Lemonade will elevate your gathering, transforming it into a delightful experience.

  • Summer Pasta Salad: Loaded with colorful veggies and a tangy dressing, this salad adds refreshing crunch and vibrant tastes that pair wonderfully with the beverage.
  • Mojito Mocktails: Mixing mint and lime with soda gives your guests a refreshing alternative while keeping the vibe bright and festive.

These mocktails complement Black Lemonade perfectly, offering a fizzy contrast that leaves guests feeling refreshed and spirited.

How to Store and Freeze Black Lemonade

Fridge: Keep any leftover Black Lemonade in an airtight container in the refrigerator for up to 3 days. Stir well before serving to mix the flavors again.

Freezer: If you want to store it longer, pour the lemonade into ice cube trays or freezer-safe containers. It can be frozen for up to 3 months, allowing you to enjoy it anytime.

Thawing: To thaw, simply transfer the frozen lemonade to the fridge overnight or let it sit at room temperature for a quick refresh—stir again before serving.

Serving Suggestions: If you choose to freeze, consider blending the thawed lemonade with fresh ice for a slushy treat on hot days!

Expert Tips for Black Lemonade

  • Cooling the Syrup: Let the sugar syrup cool completely before mixing it with lemon juice and cold water to ensure the flavors meld nicely without losing crispness.

  • Choosing Lemons: Use fresh lemons rather than bottled juice for the ultimate flavor. Fresh juice provides a vibrant zing that elevates your Black Lemonade.

  • Adjusting Sweetness: Feel free to tweak the sugar based on your taste. If you’re looking for a lighter drink, reduce the sugar or use a sugar substitute!

  • Getting the Color Right: Start with a little black gel food color, adding more gradually until you achieve the perfect hue for your Black Lemonade—too much can make it opaque.

  • Flavor Enhancements: For a twist, consider adding herbs like mint or basil. This addition can elevate the drink and give it a refreshing edge for summer gatherings.

Black Lemonade Variations & Substitutions

Feel free to explore these delightful twists and swaps that will personalize your Black Lemonade experience!

  • Dairy-Free: Use coconut cream instead of regular cream for a creamy texture that’s equally delicious and vegan-friendly. Just a tablespoon will add a rich twist!

  • Herb-Infused: Try adding fresh mint or basil leaves in with the lemon juice for an herby aroma that’ll brighten every sip. Gently muddle the herbs before mixing for maximum flavor!

  • Sparkling Version: Replace still water with sparkling water for a bubbly, festive drink that adds a fun fizz. The bubbles elevate the experience, perfect for parties!

  • Lower Sugar: Substitute sugar with a natural sweetener like stevia or monk fruit, adjusting to taste for a lighter version that doesn’t skimp on flavor.

  • Fruit Punch: Blend in pureed fruits like strawberries or raspberries with the lemon juice for a colorful fruit twist. The berries infuse a sweet and tangy note that everyone will love.

  • Spicy Kick: Add a splash of cayenne pepper for those who enjoy a bit of heat—the smokiness of cayenne beautifully offsets the sweetness!

  • Frozen Treats: Pour leftover Black Lemonade into ice pop molds for a unique summer treat. These colorful pops will be a hit on warm days.

  • Ginger Zing: Mix in some fresh grated ginger or ginger syrup to introduce a spicy zing that perfectly complements the citrus notes. This adds an invigorating depth to the drink.

Black Lemonade

Black Lemonade Recipe FAQs

What kind of lemons should I use for the best flavor?
Absolutely! Fresh lemons are key for that zesty punch. Look for lemons that feel heavy for their size, have a bright yellow skin, and are slightly glossy. Avoid any that are overly soft or have dark spots. If fresh lemons are unavailable, opt for bottled lemon juice as a last resort, but it won’t provide the same vibrancy.

How do I store leftover Black Lemonade?
To keep your Black Lemonade refreshing, store any leftovers in an airtight container. It will stay fresh in the refrigerator for up to 3 days. Just give it a good stir before serving as the flavors may separate.

Can I freeze Black Lemonade for later?
Yes, you can! To freeze your Black Lemonade, pour it into ice cube trays or freezer-safe containers. Ensure there’s some space for expansion. It can be stored in the freezer for up to 3 months. When you’re ready to enjoy it again, thaw in the fridge overnight or let it sit at room temperature until slushy. Stir before serving.

What should I do if my lemonade turns out too sweet?
Very! If your Black Lemonade is on the sweet side, you can balance it by adding more fresh lemon juice or a splash of water to dilute the sweet flavor. Taste as you go, adjusting until it meets your preference. If it’s still too sweet after dilution, a pinch of salt can also help cut through the sweetness!

Is this recipe safe for my pets?
While a small amount of lemonade won’t harm pets, it’s best to keep this delightful drink away from them. The sugar content and acidity from the lemons can upset their stomachs. Stick with pet-safe treats or water for your furry friends while you enjoy your refreshing Black Lemonade!

What if the color of my lemonade doesn’t look right?
If you’re not happy with the hue, don’t fret! Start by adding a little black gel food coloring at a time—it’s always easier to darken than to lighten. Mix well each time before adding more. The goal is a striking black, but remember that too much food color can obscure the drink’s refreshing clarity.

Refreshing Black Lemonade: A Fun Twist on Summer Sips

This Black Lemonade is a unique and eye-catching drink that balances tangy lemon with sweet syrup, perfect for summer gatherings.

  • small pot
  • large pitcher

For the Syrup

  • 3/4 cup sugar
  • 3/4 cup water
  • 1 tablespoon black gel food color

For the Lemonade

  • 1 1/2 cups fresh lemon juice
  • 4 cups cold water

Step-by-Step Instructions for Black Lemonade

  1. Prepare the Sugar Syrup: In a small pot, combine 3/4 cup of sugar with 3/4 cup of water. Heat on medium-high until boiling, then reduce to a simmer. Allow it to simmer gently without stirring for about 3 to 4 minutes, or until the mixture is clear. Remove from heat, add 1 tablespoon of black gel food color, stir, and set aside to cool.
  2. Mix the Lemonade: In a large pitcher, pour in 1 1/2 cups of fresh lemon juice. Add the cooled black sugar syrup and 4 cups of cold water. Stir gently until well combined.
  3. Serve Over Ice: Fill glasses with ice cubes, pour the Black Lemonade over the ice, and garnish each glass with a slice of lemon if desired.

Use fresh lemons for optimal flavor. Adjust sugar based on personal taste preference.

Drink
Black Lemonade, fun drink, party drink, refreshing beverage, summer drink, unique lemonade

Filed Under: Drink

Decadent Crockpot Chocolate Lava Cake You’ll Love at Home

September 26, 2025 by grace bellamy Leave a Comment

As I stirred through the rich aroma wafting from my kitchen, a delightful wave of nostalgia washed over me—a sweet reminder of those cherished family gatherings filled with laughter and indulgence. This Crockpot Chocolate Lava Cake is the ultimate crowd-pleaser, and the best part? It requires just 10 minutes of hands-on time! With a decadent, gooey center that flows like molten chocolate, it’s the perfect comfort dessert that will have everyone asking for seconds. No more rushing to the store for takeout; this effortless recipe brings the warmth of homemade goodness back to your table. Just picture it: your loved ones gathered around, savoring every mouthful as they discover the hidden treasure within this luscious cake. Are you ready to create a moment of culinary magic?

Crockpot Chocolate Lava Cake

Why is this dessert a must-try?

Decadence redefined: This Crockpot Chocolate Lava Cake is not just a dessert; it’s an experience that delights all your senses.

Minimal effort: With only 10 minutes of prep, you can sit back while the crockpot does the hard work for you.

Rich, gooey center: Imagine a warm chocolate cake with a river of molten chocolate just waiting to be uncovered!

Crowd favorite: Perfect for gatherings, its irresistible taste is sure to win over even the pickiest eaters.

Versatile indulgence: Serve it with vanilla ice cream or fresh berries for added elegance. Your family will rave about this recipe, and it’s a fantastic way to bring homemade magic back to dessert time!

Crockpot Chocolate Lava Cake Ingredients

For the Cake Batter
• Chocolate cake mix – A 15.25 oz box gives you a rich, chocolatey base.
• Whole milk – 1 ¼ cups adds moisture and creates a soft texture.
• Canola oil – ½ cup ensures a tender crumb and prevents sticking.
• Eggs – 3 large eggs help bind the ingredients and add fluffiness.

For the Pudding Layer
• Chocolate instant pudding mix – A 3.9 oz box adds a luscious, creamy layer that complements the cake perfectly.
• Milk – 2 cups mixed with the pudding creates that delightful, smooth texture.

For the Topping
• Chocolate chips – An 11.5 oz bag brings extra chocolatey goodness and a delightful melty surprise in every bite.

Embrace the warmth and comfort of this Crockpot Chocolate Lava Cake that promises to transform your dessert experience!

Step‑by‑Step Instructions for Crockpot Chocolate Lava Cake

Step 1: Prepare Your Crockpot
Begin by prepping your crockpot for the sumptuous Crockpot Chocolate Lava Cake. Generously spray the inner sides of the crockpot with non-stick cooking spray, ensuring every corner is coated to prevent sticking. This simple step is crucial, as it guarantees that your dessert will slide out effortlessly once it’s cooked and ready to serve.

Step 2: Mix the Cake Batter
In a large mixing bowl, combine the chocolate cake mix, 1 ¼ cups of whole milk, ½ cup of canola oil, and 3 eggs. Using a whisk or electric mixer, stir until the mixture is smooth, and all ingredients are well incorporated. This should take about 2 minutes, resulting in a thick and rich batter that’s delightful on its own, just wait until it’s baked!

Step 3: Pour Batter into Crockpot
Once your batter is ready, pour it into the prepared crockpot. Use a spatula to spread the batter evenly across the bottom, ensuring a uniform layer that will rise beautifully during cooking. You’ll see the rich chocolate hue already, which promises a decadently chocolaty flavor after it’s done baking.

Step 4: Prepare the Pudding
In a separate medium mixing bowl, combine the chocolate instant pudding mix with 2 cups of milk. Whisk these together vigorously for about 2 minutes until the mixture becomes smooth and slightly thickened. This luscious chocolate pudding layer will bring a gooey, indulgent element to your Crockpot Chocolate Lava Cake.

Step 5: Add Pudding and Chocolate Chips
Carefully pour the thickened pudding mixture over the cake batter in the crockpot, ensuring it covers the batter evenly. Then, sprinkle the chocolate chips generously on top. As they melt during cooking, they will create divine pockets of molten chocolate throughout your lava cake, making every bite irresistible.

Step 6: Cook
Cover the crockpot with its lid and set it to high heat for 2 ½ hours. Resist the urge to peek too often, as keeping the lid closed is key to retaining the heat. As it cooks, the heavenly aroma of the Crockpot Chocolate Lava Cake will fill your kitchen, signaling that something magical is happening inside.

Step 7: Serve
Once the cooking time is complete, carefully remove the lid and check for doneness; the top should look set, while the center remains soft and gooey. Scoop out generous portions and serve warm, ideally topped with a scoop of vanilla ice cream or a dollop of whipped cream to elevate this decadent dessert experience even further.

Crockpot Chocolate Lava Cake

Storage Tips for Crockpot Chocolate Lava Cake

Fridge: Store any leftover Crockpot Chocolate Lava Cake in an airtight container for up to 5 days, ensuring it stays moist and fresh.

Freezer: If you’d like to keep it longer, freeze individual portions wrapped tightly in plastic wrap and placed in a freezer-safe bag for up to 2 months.

Reheating: To enjoy leftovers, simply reheat in the microwave in 30-second increments until warmed through, keeping it deliciously gooey.

Serving Options: Elevate your dessert by serving warmed slices with whipped cream or ice cream for a delightful treat!

Variations & Substitutions for Crockpot Chocolate Lava Cake

Feel free to explore these delightful twists on your Crockpot Chocolate Lava Cake to tailor it to your taste!

  • Gluten-Free: Use a gluten-free chocolate cake mix to make this dessert accessible for those with gluten sensitivities. This swap offers the same rich flavor with a more inclusive touch.

  • Dairy-Free: Replace whole milk with almond or coconut milk, and use a dairy-free cake mix for a delicious alternative. This works beautifully and still gives you that ooey-gooey goodness everyone loves.

  • Less Sugar: Opt for a sugar-free cake mix and pudding mix to enjoy a lower-sugar version of this indulgent dessert. Your guests won’t miss the extra sweet, thanks to the chocolate chips!

  • Nutty Addition: Stir in half a cup of chopped nuts, like walnuts or pecans, into the cake batter for added texture and flavor. Their crunch will perfectly complement the molten chocolate.

  • Spicy Kick: Add 1 teaspoon of cayenne pepper or chili powder to the cake batter for a warm, tantalizing twist. This surprising addition makes for a delightful flavor contrast that’ll intrigue your taste buds!

  • Coffee Infusion: Mix 1 cup of brewed coffee into the cake batter to deepen the chocolate flavor and provide a subtle caffeine boost. If you’re a coffee lover, this is an irresistible option!

  • Fruit Fusion: Layer in some fresh raspberries or sliced strawberries on top of the pudding before sprinkling with chocolate chips. The fruity notes will bring a vibrant freshness to each bite.

  • Marshmallow Delight: Add a handful of mini marshmallows over the chocolate chips before cooking for an extra layer of gooey sweetness that kids (and adults!) will adore.

No matter how you decide to customize this Crockpot Chocolate Lava Cake, it’s bound to enchant everyone at your table! For a delightful pairing, consider enjoying it with some homemade whipped cream or a scoop of decadent vanilla ice cream to truly elevate your dessert experience.

What to Serve with Crockpot Chocolate Lava Cake

A warm, gooey chocolate experience awaits you, but let’s elevate it with some perfect pairings!

  • Vanilla Ice Cream: The creamy texture and cool vanilla flavor beautifully contrasts the warm, molten chocolate, creating a divine combination.

  • Fresh Berries: Raspberries or strawberries add a refreshing burst of acidity, cutting through the richness and adding vibrant color to your dessert plate.

  • Whipped Cream: A dollop of light, airy whipped cream provides a dreamy texture, making each spoonful feel even more indulgent.

  • Chocolate Sauce: For true chocoholics, a drizzle of chocolate sauce intensifies the experience and adds an extra layer of sweetness.

  • Espresso or Coffee: A strong cup of coffee balances the sweetness of the cake, enhancing those rich chocolate notes with every sip.

  • Mint Sprigs: A sprig of fresh mint on top adds a captivating aroma and a touch of freshness that brightens the entire dessert experience.

  • Caramel Sauce: The buttery, slightly salty taste of caramel and chocolate creates an irresistible rich symphony in each bite.

This dessert is all about melting hearts and taste buds, so let your culinary creativity shine!

Expert Tips for Perfect Crockpot Chocolate Lava Cake

• Prevent Sticking: Make sure to generously spray the crockpot with non-stick spray before adding the batter; this ensures a clean release of your dessert.

• Monitor Cooking Time: Avoid overcooking by setting a timer for 2 hours and 30 minutes; check occasionally, as crockpot temperatures can vary.

• Layer Wisely: Pour the pudding gently over the cake batter to keep the layers distinct, ensuring that the gooey center develops beautifully.

• Check for Doneness: The top should look firm while the center remains soft; if it appears too set, reduce cooking time on future attempts.

• Serve Warm: For the best experience, serve your Crockpot Chocolate Lava Cake warm, allowing the chocolate center to flow and create that indulgent texture.

Make Ahead Options

These Crockpot Chocolate Lava Cakes are perfect for meal prep enthusiasts! You can mix the cake batter and prepare the pudding layer up to 24 hours in advance. To do this, prepare both mixtures as directed, but instead of adding them to the crockpot, store them separately in airtight containers in the fridge. This not only saves you time on busy days but also ensures freshness. When you’re ready to indulge, simply pour the cake batter into the crockpot, layer the pudding on top, sprinkle with chocolate chips, and set your crockpot to cook. In just 2 ½ hours, you’ll have a warm, gooey chocolate delight that’s just as delicious as if you made it from scratch that same day!

Crockpot Chocolate Lava Cake

Crockpot Chocolate Lava Cake Recipe FAQs

How do I choose the right chocolate cake mix?
Absolutely! When selecting a chocolate cake mix, opt for one that features cocoa as the first ingredient to ensure a rich flavor. Check for freshness on the expiration date, and if you’re making it for a special occasion, consider a premium brand for an elevated taste experience.

How should I store leftover Crockpot Chocolate Lava Cake?
Leftovers should be stored in an airtight container in the fridge for up to 5 days. To maintain its moisture, I recommend placing a piece of parchment paper between the cake and the lid. This way, you can enjoy your home-baked treat without losing its delicious softness!

Can I freeze the Crockpot Chocolate Lava Cake?
Yes, you can! To freeze, slice the cake into individual portions, wrap each slice tightly in plastic wrap, and then place them in a freezer bag. This keeps for up to 2 months. When you’re ready to enjoy your slice, simply thaw in the fridge overnight and reheat in the microwave for about 30 seconds.

What if my cake turns out too dry?
If your Crockpot Chocolate Lava Cake seems too dry, it could be due to overcooking. To ensure a gooey center, check it around the 2-hour mark. If it’s already set, you might want to add a scoop of ice cream when serving for extra richness. For next time, monitor the cooking time carefully based on your specific crockpot, as some cook faster than others.

Are there any allergy considerations I should keep in mind?
Yes! This recipe contains common allergens like eggs, dairy, and gluten. If you’re cooking for someone with allergies, consider using a gluten-free chocolate cake mix and dairy alternatives like almond milk and egg replacers. It’s a great way to make your Crockpot Chocolate Lava Cake accessible to everyone while still keeping it delicious!

Decadent Crockpot Chocolate Lava Cake You’ll Love at Home

This Crockpot Chocolate Lava Cake is a delightful dessert experience that combines minimal effort and rich flavors.

  • Crockpot

For the Cake Batter

  • 15.25 oz chocolate cake mix
  • 1.25 cups whole milk
  • 0.5 cups canola oil
  • 3 large eggs

For the Pudding Layer

  • 3.9 oz chocolate instant pudding mix
  • 2 cups milk

For the Topping

  • 11.5 oz chocolate chips

Step‑by‑Step Instructions for Crockpot Chocolate Lava Cake

  1. Prepare Your Crockpot by generously spraying the inner sides with non-stick cooking spray.
  2. In a large mixing bowl, combine the chocolate cake mix, whole milk, canola oil, and eggs. Mix until smooth.
  3. Pour the batter into the prepared crockpot, spreading evenly.
  4. In a separate bowl, combine the chocolate instant pudding mix with milk and whisk until smooth.
  5. Carefully pour the pudding mixture over the cake batter and sprinkle chocolate chips on top.
  6. Cover the crockpot and cook on high for 2 ½ hours.
  7. Once done, check for doneness and serve warm, optionally with ice cream or whipped cream.

Make sure to generously spray the crockpot with non-stick spray before adding the batter to ensure a clean release.

Dessert
American
chocolate cake, Crockpot Chocolate Lava Cake, easy dessert, lava cake, molten chocolate, slow cooker dessert

Filed Under: Dessert

Deliciously Creepy Spooky Skull Potatoes for Halloween Fun

September 25, 2025 by grace bellamy Leave a Comment

As I stood in my kitchen, the autumn air heavy with the scents of cinnamon and nutmeg, I stumbled upon a delightful surprise—mashed potatoes shaped like spooky skulls! These Spooky Skull Potatoes not only make for an eye-catching side dish, but they are also incredibly easy to whip up, ready in just 30 minutes. Imagine the fun of crafting these little ghoulish delights while bringing warmth and comfort to your table. Perfect for Halloween gatherings or simply to add a playful twist to family dinners, this recipe will surely charm both kids and adults alike. Ready to take your potato game to a hauntingly delicious level? Let’s dive in!

Spooky Skull Potatoes

Why Are Spooky Skull Potatoes So Fun?

Unique Presentation: Transforming ordinary mashed potatoes into spooky skulls creates an exhilarating dish that’s sure to impress at any gathering.

Kid-Friendly: It’s a great way to engage kids in the kitchen while turning a simple side dish into a Halloween treat.

Quick and Easy: Ready in just 30 minutes, this recipe balances fun with convenience, making it perfect for busy weeknights or last-minute parties.

Flavorful Comfort: Rich, creamy potatoes paired with playful design bring both comfort and festivity to your table.

For more creative potato side dishes, check out our Cheesy Scalloped Potatoes and Baked Feta Potatoes!

Spooky Skull Potatoes Ingredients

For the Potatoes
• Russet potatoes – These large potatoes create the perfect fluffy texture for your mash.
• Heavy cream – Adds richness and creaminess for the ultimate comfort food experience.
• Butter – Enhances the flavor and gives your potatoes a delightful buttery taste.
• Salt and pepper – Essential seasonings to elevate the overall flavor of your spooky creation.

For the Decoration
• Black olives – Use these to create expressive eyes and mouths, making your skulls come to life (or rather, afterlife!).
• Fresh chives or green onions – Optional, but they add a nice pop of color and flavor as a garnish.

Crafting your own Spooky Skull Potatoes is not just a cooking task; it’s a fun project that brings joy and creativity to your kitchen!

Step‑by‑Step Instructions for Spooky Skull Potatoes

Step 1: Boil the Potatoes
Start by peeling and chopping the 4 large russet potatoes into evenly sized chunks. Place the potatoes in a pot filled with salted water, ensuring they are fully submerged. Bring the water to a boil over medium-high heat, then reduce to a simmer and cook for about 15-20 minutes until the potatoes are fork-tender and easily break apart.

Step 2: Mash the Potatoes
Once tender, drain the potatoes well and return them to the pot. Add ½ cup of heavy cream, ¼ cup of melted butter, and sprinkle in salt and pepper to taste. Use a potato masher or a hand mixer to mash the mixture until it’s smooth and creamy, making sure to combine everything well. This creamy base will be the foundation of your deliciously spooky skull potatoes.

Step 3: Shape the Skulls
Prepare a skull mold or use your hands to form the mashed potatoes into skull shapes. If using a mold, pack the potato mixture tightly to maintain the shape, then carefully invert it onto a plate. If shaping by hand, sculpt the potatoes with your fingers, ensuring they have defined features. These spooky skulls should be ready to come to life!

Step 4: Decorate with Olives
Slice the black olives into small circles to create eyes and cut small pieces for a mouth. Arrange the olive slices on each potato skull, pressing gently to secure them in place. Feel free to get creative with additional olive pieces, making expressions that give your Spooky Skull Potatoes personality and charm to delight your guests.

Step 5: Garnish and Serve
For an extra touch, finely chop fresh chives or green onions and sprinkle them atop your spooky creations. This will add a pop of color and a fresh flavor that complements the rich potatoes. Serve your Spooky Skull Potatoes warm as a delightfully eerie side dish, perfect for Halloween gatherings or any fun family meal!

Spooky Skull Potatoes

What to Serve with Spooky Skull Potatoes?

As you gather around the table for a fun-filled Halloween feast, it’s time to complement those spooky skulls with delightful dishes that will enchant and satisfy everyone.

  • Crispy Roasted Brussels Sprouts: Their earthy flavor pairs beautifully with the creamy potatoes, adding a delightful crunch to the meal.

  • Garlic Butter Green Beans: This vibrant side dish brings a fresh touch, perfectly balancing the richness of the mashed potatoes with a burst of garlic aroma.

  • Savory Pumpkin Soup: A warm, creamy soup enhances the seasonal vibe and invites comfort into your Halloween dinner.

  • Cheesy Garlic Bread: The gooey cheese and crispy crust offer a wonderful contrast to the soft texture of the skull potatoes—a great way to squeeze every last drop of rich flavor!

  • Spiced Apple Cider: A cup of this warm beverage will warm your soul, making it a cozy drink that complements the spooky theme beautifully.

  • Chocolate Graveyard Cupcakes: For dessert, these hauntingly delicious cupcakes will keep the festive spirit alive, delighting kids with their playful designs.

  • Cranberry Salad: Its tartness adds a refreshing contrast to the creamy potatoes—this bright-colored side is a holiday favorite!

  • Roasted Chicken Thighs: Juicy chicken seasoned perfectly enhances the comfort of your meal, providing a well-rounded dinner full of homey flavors.

How to Store and Freeze Spooky Skull Potatoes

Fridge: Store leftover Spooky Skull Potatoes in an airtight container in the fridge for up to 3 days. Reheat in the microwave or on the stovetop with a splash of cream for added moisture.

Freezer: If you want to freeze them, shape the skulls first, then place them on a baking sheet to freeze until solid. Transfer to a freezer-safe bag for up to 2 months.

Reheating: To reheat frozen skulls, thaw in the fridge overnight, then bake at 350°F until heated through. Add a touch of fresh butter for that creamy texture!

Wrapping: Make sure to wrap the skulls tightly in plastic wrap or aluminum foil before freezing to prevent freezer burn and keep your spooky creation delicious!

Make Ahead Options

These Spooky Skull Potatoes are fantastic for meal prep, allowing you to create adorable skulls ahead of time for a stress-free gathering! You can prepare the mashed potatoes and shape them into skulls up to 24 hours in advance; simply refrigerate them before decoration to keep them fresh. For decorating, slice the black olives ahead and store them in an airtight container; they’ll stay good for up to 3 days. When you’re ready to serve, just reheat the shaped potatoes in the microwave or oven until warm, then decorate with the olives and garnish with chives. This will ensure they’re just as delicious and charming on the day you serve them!

Helpful Tricks for Spooky Skull Potatoes

  • Perfect Consistency: Aim for fluffy potatoes by not overcooking them. Check doneness with a fork; they should break apart easily without becoming mush.

  • Creative Molding: If you don’t have a skull mold, use your hands! Shape them gently and focus on getting those recognizable features for the perfect spooky effect.

  • Olive Decoration: To avoid slipping, press the olive slices gently into the potatoes. Secure them well to ensure they stay put during serving.

  • Taste Boosters: Experiment with adding garlic powder or cheese to the mashed potatoes for an extra layer of flavor in your Spooky Skull Potatoes.

  • Presentation Magic: Pair with a fun platter or festive garnish for Halloween to enhance both appeal and excitement, making your spooky dish a centerpiece!

Spooky Skull Potatoes Variations

Feel free to have fun with these variations and make the spooky skull potatoes uniquely yours!

  • Dairy-Free: Substitute heavy cream with coconut milk and use olive oil instead of butter for a plant-based twist.

  • Cheesy Delight: Mix in shredded cheddar or parmesan into the mash before shaping for a richer flavor profile.

  • Garlicky Goodness: Add minced garlic or garlic powder to the potatoes for an aromatic kick that will elevate the dish.

  • Spicy Skulls: Incorporate a sprinkle of cayenne or crushed red pepper flakes into the mashed potatoes for a delightful heat.

  • Herb-Infused: Blend in fresh herbs such as rosemary or thyme to the mash for an enchanting flavor that dances in your mouth.

  • Sweet Potato Variation: Swap out russet potatoes for orange sweet potatoes to add a beautiful hue and a subtle sweetness.

  • Baked Option: Instead of mashing, bake halved potatoes with the same toppings for a delicious twist on presentation.

  • Decorative Faces: Use bell pepper pieces or cherry tomatoes for alternative spooky facial features. This adds a fun pop of color too!

Spooky Skull Potatoes

Spooky Skull Potatoes Recipe FAQs

How do I choose the right potatoes for this recipe?
Absolutely! For the perfect Spooky Skull Potatoes, I recommend using large russet potatoes. Their starchy texture makes for a fluffy and creamy mash, which forms well into shapes. Look for potatoes that are firm and free of dark spots or blemishes.

How long can I store leftover Spooky Skull Potatoes?
You can store any leftovers in an airtight container in the fridge for up to 3 days. To reheat, simply pop them in the microwave or warm them on the stovetop with a splash of cream to get that luscious texture back. They’ll taste just as delightful!

Can I freeze Spooky Skull Potatoes, and how?
Absolutely! To freeze, shape your mashed potatoes into skulls first. Lay them on a baking sheet lined with parchment paper and freeze until solid, about 1-2 hours. Then, transfer them to a freezer-safe bag or container, where they can be stored for up to 2 months. This way, you can prepare ahead and enjoy them later!

What should I do if the mashed potatoes are too thick?
If your potatoes are thicker than you’d like, it’s an easy fix! Simply add a little more heavy cream or butter while mashing. Stir well until you reach your desired creamy consistency. You can also add a splash of milk for extra silkiness.

Are there any dietary considerations I should keep in mind?
Very! If you’re cooking for those with dairy allergies, consider swapping out the heavy cream and butter with a dairy-free alternative. I often use coconut milk and vegan butter, which still results in creamy, delightful Spooky Skull Potatoes. For pet-friendly diets, avoid giving them any mashed potatoes, as they can be harmful to dogs due to seasoning or other ingredients. Always check for specific allergies before serving!

Deliciously Creepy Spooky Skull Potatoes for Halloween Fun

Spooky Skull Potatoes are a fun and eye-catching side dish perfect for Halloween gatherings.

  • Pot
  • potato masher
  • skull mold

For the Potatoes

  • 4 pieces Russet potatoes (Peeled and chopped)
  • 0.5 cup Heavy cream (Adds richness)
  • 0.25 cup Butter (Melted)
  • to taste Salt
  • to taste Pepper

For the Decoration

  • 1 cup Black olives (Sliced for decoration)
  • 0.25 cup Fresh chives or green onions (Optional garnish)

Step‑by‑Step Instructions

  1. Start by peeling and chopping the 4 large russet potatoes into evenly sized chunks. Place the potatoes in a pot filled with salted water, ensuring they are fully submerged. Bring the water to a boil over medium-high heat, then reduce to a simmer and cook for about 15-20 minutes until the potatoes are fork-tender and easily break apart.
  2. Once tender, drain the potatoes well and return them to the pot. Add ½ cup of heavy cream, ¼ cup of melted butter, and sprinkle in salt and pepper to taste. Use a potato masher or a hand mixer to mash the mixture until it’s smooth and creamy.
  3. Prepare a skull mold or use your hands to form the mashed potatoes into skull shapes. If using a mold, pack the potato mixture tightly to maintain the shape, then carefully invert it onto a plate. If shaping by hand, sculpt the potatoes with your fingers, ensuring they have defined features.
  4. Slice the black olives into small circles to create eyes and cut small pieces for a mouth. Arrange the olive slices on each potato skull, pressing gently to secure them in place.
  5. For an extra touch, finely chop fresh chives or green onions and sprinkle them atop your spooky creations. Serve your Spooky Skull Potatoes warm as a delightfully eerie side dish.

Aim for fluffy potatoes by not overcooking them. If you don’t have a skull mold, use your hands! Also, experiment with adding garlic powder or cheese for an extra layer of flavor.

Side Dishes
American
creepy food, fun side dishes, Halloween recipes, Kid-friendly dishes, mashed potatoes, Spooky Skull Potatoes

Filed Under: Side Dishes

Delightful Spooky Skull Potatoes for a Fun Family Feast

September 25, 2025 by grace bellamy Leave a Comment

As the chilly air of fall creeps in, my kitchen transforms into a playground of seasonal delights. This year, I’m excited to whip up a dish that’s not only a scream to look at but also a crowd-pleaser: Spooky Skull Potatoes. Perfect for Halloween gatherings or simply to liven up your dinner table, these mashed potato skulls bring a playful twist to a classic comfort food. Plus, they’re quick to prepare, allowing you to focus on the fun side of cooking rather than long hours in the kitchen. With just a handful of ingredients and a little creativity, you can serve up smiles and giggles along with warm, creamy deliciousness. Are you ready to conjure up some culinary magic and impress your friends and family? Let’s dive in!

Spooky Skull Potatoes

Why Are Spooky Skull Potatoes a Hit?

Delightful and playful, these spooky skull potatoes redefine side dishes for Halloween! Perfect for gatherings, they add a fun twist to traditional mashed potatoes. Easy to create, you’ll only need basic ingredients and a little imagination. Plus, they’re a fantastic conversation starter that everyone will love—serve them alongside Cheesy Scalloped Potatoes for a truly festive feast! Get ready to make dinner a joyous occasion filled with laughter and flavor!

Spooky Skull Potatoes Ingredients

For the Spooky Skull Mash
• 4 large russet potatoes – these hearty potatoes create the perfect creamy base for shaping skulls.
• ½ cup heavy cream – adds richness and velvety texture to your mashed potatoes.
• ¼ cup butter, melted – enhances flavor and helps achieve that desirable smoothness.
• Salt and pepper to taste – essential for enhancing the overall flavor profile of your spooky skull potatoes.

For the Decoration
• Black olives – these provide a fun and eerie touch for eyes and mouth details on your potato skulls.
• Fresh chives or green onions – optional, but they add a fresh pop of color and flavor that complements the dish beautifully.

Step‑by‑Step Instructions for Spooky Skull Potatoes

Step 1: Prepare the Potatoes
Begin by peeling and chopping the 4 large russet potatoes into even chunks. Place them in a large pot filled with salted water, then bring it to a rolling boil over medium-high heat. Cook the potatoes until they are fork-tender, which should take about 15 to 20 minutes. You’ll know they’re ready when a fork easily pierces them without resistance.

Step 2: Mash to Perfection
Once the potatoes are tender, drain them well and return them to the pot. Add ½ cup of heavy cream and ¼ cup of melted butter to the potatoes, then season with salt and pepper to taste. Use a potato masher or hand mixer to mash everything together until the mixture is smooth and creamy. This fluffy mix will be the spooky base for your skull potatoes.

Step 3: Shape the Skull Potatoes
Now comes the fun part—shaping the mashed potatoes into skulls! If you have a skull mold, spoon the mashed potatoes into it, packing them tightly. If you’re shaping by hand, take a portion of the mix and mold it into a skull shape, ensuring it’s well-defined. Allow the formed skulls to rest for a moment to set their shape.

Step 4: Add the Eerie Features
Slice black olives into small circles to create the eyes for your spooky skulls. Carefully press two olive slices into the appropriate spots on each skull. Use additional olive pieces to form a mouth or other facial features—let your creativity shine! These details will give your Spooky Skull Potatoes their character and charm.

Step 5: Garnish and Serve
If desired, chop up fresh chives or green onions for a vibrant garnish. Sprinkle them over the tops of your spooky skull potatoes for an extra splash of color. Serve them warm as a delightful side dish that’s sure to impress at any gathering, adding a playful yet delicious touch to your meal.

Spooky Skull Potatoes

Expert Tips for Spooky Skull Potatoes

  • Choose the Right Potatoes: Opt for large russet potatoes as they mash beautifully and hold their shape well when molded into skulls.

  • No Clumps Allowed: Ensure your mashed potatoes are super smooth by mashing them well. Clumps can ruin the visual appeal of your spooky skulls.

  • Mold Wisely: If using a skull mold, pack the potatoes tightly to maintain their shape. If shaping by hand, be patient to define the skull features clearly.

  • Eye for Details: Use small pieces of black olives creatively for eyes, mouths, or even fun expressions. Ensure they’re placed securely to avoid sliding off.

  • Garnish for Color: Fresh chives or green onions not only add flavor but also a pop of color. Don’t skip this step for extra visual appeal!

  • Serve Warm: These Spooky Skull Potatoes are best served warm, allowing their creamy texture to shine and making them a cozy, inviting side dish.

Spooky Skull Potatoes Variations

Feel free to unleash your creativity and customize these spooky skull potatoes to suit your taste buds!

  • Vegan: Substitute heavy cream and butter with coconut cream and vegan butter for a plant-based twist. This creamy alternative maintains the richness that everyone loves.

  • Mashed Sweet Potatoes: Swap russet potatoes for sweet potatoes to create a naturally sweet version that beautifully contrasts with the salty flavors of olives. This twist adds vibrant color and a hint of sweetness!

  • Cheesy Delight: Fold in shredded cheddar or your favorite cheese into the mashed potatoes before shaping. For cheese lovers, this variation brings a deliciously gooey surprise in every bite.

  • Herbed Infusion: Add fresh herbs like rosemary or thyme to the potatoes for aromatic flavor. Not only will this enhance the dish, but it also gives it a sophisticated twist!

  • Spicy Kick: Mix in a pinch of cayenne pepper or crushed red pepper flakes for a spicy twist! This heat adds an exciting layer of flavor that’ll wake up your taste buds.

  • Green Goodness: Throw in some finely chopped spinach or kale while mashing the potatoes for a nutritious boost. It brings vibrant color and essential nutrients to your spooky skulls.

  • Crunchy Topping: For added texture, sprinkle crispy fried onions or breadcrumbs on top before serving. This delightful crunch will delight both kids and adults alike.

  • Flavor Bomb: Integrate roasted garlic into the mash for a robust flavor boost. The sweetness of roasted garlic complements the creamy potatoes beautifully, making each bite luscious.

Each of these variations offers a distinct take on the classic spooky skull potatoes. Whether you’re looking for a comforting side dish or a fun way to impress your guests, these recipes are bound to send your culinary creativity soaring! Pair them with Baked Feta Potatoes for a complete, flavor-packed meal. Enjoy your spooky kitchen adventures!

Storage Tips for Spooky Skull Potatoes

  • Room Temperature: Serve your Spooky Skull Potatoes warm for the best taste. If you have leftovers, they can sit out for up to 2 hours before needing refrigeration.
  • Fridge: Store any uneaten skull potatoes in an airtight container in the fridge for up to 3 days. This keeps them fresh and ready for a tasty reheat.
  • Freezer: For longer storage, place the skulls in a freezer-safe container. They can be frozen for up to 2 months. Just be sure to wrap them well to prevent freezer burn.
  • Reheating: To enjoy your spooky skull potatoes again, reheat in the oven at 350°F (175°C) until warmed through, about 15-20 minutes. You can also microwave them in short intervals, stirring occasionally for even heating.

Make Ahead Options

These Spooky Skull Potatoes are perfect for meal prep, allowing you to enjoy them even on your busiest days! You can prepare the mashed potatoes and shape them into skulls up to 24 hours in advance. Simply make the mashed potato mixture as directed, form it into skulls, and cover them tightly with plastic wrap before refrigerating. To maintain their delightful texture, avoid adding the decorative olive eyes until just before serving. When you’re ready to impress your guests, pop them in the oven to reheat, and add the olives and garnishes for a fresh look. With this prep, you’ll save time and still serve delicious, fun side dishes!

What to Serve with Spooky Skull Potatoes

Looking to create a delightful spread that pairs perfectly with these whimsical mashed potatoes?

  • Crispy Oven-Baked Chicken: Tender and juicy chicken with a crunchy exterior adds a satisfying contrast to the creamy skull potatoes. The flavors harmonize, making it a perfect main dish for any festive gathering.

  • Garlicky Green Beans: Bright and crisp, green beans tossed in garlic and olive oil bring a pop of color and freshness to your meal. They create a beautiful plate alongside the spooky potatoes, offering a delightful crunch.

  • Roasted Pumpkin Soup: A warm, velvety soup bursting with fall flavors complements the skull potatoes beautifully. The richness of the soup with a touch of sweetness emphasizes the playful nature of the potatoes.

  • Stuffed Bell Peppers: Loaded with savory fillings, these peppers add a cheerful burst of color to your table. Their hearty filling pairs excellently with the soft texture of the spooky skull potatoes.

  • Homemade Applesauce: Sweet and tangy, applesauce brings a nice balance to the savory elements of your meal. Its warmth and sweetness make it a comforting companion to the skull potatoes.

  • Sparkling Cider: This bubbly beverage offers a festive touch to your dinner, making it an excellent choice for adult gatherings. The refreshing fizz will contrast delightfully with the richness of the potatoes.

  • Monster Cookie Bars: For dessert, these fun, chewy bars filled with chocolate chunks will keep the spooky theme alive! They’re sweet, easy to prepare, and a hit with both kids and adults alike.

Spooky Skull Potatoes

Spooky Skull Potatoes Recipe FAQs

How do I choose the right potatoes for the Spooky Skull Potatoes?
Absolutely! For the best results, I recommend using large russet potatoes. They have the perfect starch content, which makes them light and fluffy when mashed, and they hold their shape beautifully when molded into skulls.

How should I store leftover Spooky Skull Potatoes?
Great question! Store any uneaten skull potatoes in an airtight container in the fridge for up to 3 days. If you have a bit more time, you can freeze them in a freezer-safe container for up to 2 months to enjoy later. Just make sure to wrap them well to avoid freezer burn!

Can I freeze Spooky Skull Potatoes?
Yes, indeed! To freeze, let the skull potatoes cool completely first. Then, place them in a single layer on a baking sheet and freeze until solid. After that, transfer them to a freezer-safe container or bag, separating layers with parchment paper. They can be frozen for up to 2 months. When you’re ready to enjoy, reheat them in the oven at 350°F (175°C) until warmed through.

What can I do if my mashed potatoes are lumpy?
Very understandably! If you find your mashed potatoes have lumps, you can try passing them through a potato ricer or a fine sieve for a super smooth texture. If you’re mashing by hand, ensure you mash thoroughly and use a mixer if needed to achieve the creamy consistency that makes your spooky skulls look appealing!

Are there any dietary considerations I should be aware of?
Certainly! If you’re catering to any dietary restrictions, keep in mind that the recipe contains dairy ingredients like heavy cream and butter. For a vegan alternative, you can use plant-based cream and non-dairy butter substitutes. Always double-check that your black olives are free from any allergens, just to be safe!

Delightful Spooky Skull Potatoes for a Fun Family Feast

Delightful Spooky Skull Potatoes are the perfect addition to your Halloween gatherings, combining playful presentation with creamy comfort.

  • Large Pot
  • potato masher
  • skull mold

For the Spooky Skull Mash

  • 4 large russet potatoes (These hearty potatoes create the perfect creamy base for shaping skulls.)
  • 0.5 cup heavy cream (Adds richness and velvety texture to your mashed potatoes.)
  • 0.25 cup butter (Melted butter enhances flavor and helps achieve that desirable smoothness.)
  • Salt (To taste, essential for enhancing overall flavor.)
  • Pepper (To taste, essential for enhancing overall flavor.)

For the Decoration

  • Black olives (For eyes and mouth details on your potato skulls.)
  • Fresh chives or green onions (Optional, adds a fresh pop of color and flavor.)

Step-by-Step Instructions for Spooky Skull Potatoes

  1. Begin by peeling and chopping the 4 large russet potatoes into even chunks. Place them in a large pot filled with salted water, then bring it to a rolling boil over medium-high heat. Cook the potatoes until they are fork-tender, which should take about 15 to 20 minutes.
  2. Once the potatoes are tender, drain them well and return them to the pot. Add ½ cup of heavy cream and ¼ cup of melted butter to the potatoes, then season with salt and pepper to taste. Use a potato masher or hand mixer to mash everything together until the mixture is smooth and creamy.
  3. Now comes the fun part—shaping the mashed potatoes into skulls! If you have a skull mold, spoon the mashed potatoes into it, packing them tightly. If you’re shaping by hand, take a portion of the mix and mold it into a skull shape, ensuring it’s well-defined.
  4. Slice black olives into small circles to create the eyes for your spooky skulls. Carefully press two olive slices into the appropriate spots on each skull. Use additional olive pieces to form a mouth or other facial features.
  5. If desired, chop up fresh chives or green onions for a vibrant garnish. Sprinkle them over the tops of your spooky skull potatoes for an extra splash of color. Serve them warm.

Serve warm for the best taste. Ensure mashed potatoes are super smooth and well-defined in shape. Garnish for extra visual appeal.

Side Dishes
American
comfort food, family feast, Halloween recipes, mashed potatoes, Spooky Skull Potatoes

Filed Under: Side Dishes

Delicious Marshmallow Rice Bubbles Halloween Brains Recipe

September 25, 2025 by grace bellamy Leave a Comment

Amid the autumn chill, I found myself in a delightful panic—Halloween was just around the corner, and I needed a treat that would wow both kids and adults alike. Enter my Marshmallow Rice Bubbles Halloween Brains, the perfect blend of spooky fun and nostalgic flavors. In just 20 minutes, this simple yet creative recipe transforms ordinary ingredients into an eye-catching dessert that’s guaranteed to be a hit at your next gathering. Plus, it’s incredibly quick to whip up, making it an ideal option for those last-minute celebrations. With its whimsical shape and a touch of playful color, these edible “brains” not only satisfy a sweet tooth but also evoke laughter and a sense of festivity. Ready to impress your friends with your culinary creativity? Let’s dive into the spooky spirit together!

Marshmallow Rice Bubbles Halloween Brains

Why are These Halloween Brains So Fun?

Creatively Spooky: These Marshmallow Rice Bubbles Halloween Brains can steal the show at any Halloween gathering with their quirky shape and vibrant red veins. Quick to Make: In just 20 minutes, you can whip up a batch, making them a great last-minute treat. Kid-Friendly Fun: Kids love getting involved in shaping and decorating these unique goodies, giving you a chance to bond over baking. Nostalgic Flavor: With a texture that combines gooey marshmallows and crunchy Rice Bubbles, each bite is a delightful trip down memory lane. Dazzling Display: These edible brains not only taste great but also make for an eye-catching centerpiece on any Halloween table! Need more sweet ideas? Check out Newfie Rice Pudding for a comforting twist.

Marshmallow Rice Bubbles Halloween Brains Ingredients

For the Base

  • Unsalted butter – 85 g is best for a rich, creamy texture.
  • Regular marshmallows – 6 cups create that gooey sweetness we all adore.
  • Rice Bubbles (Krispies) – 4 cups provide that perfect crunch to balance the softness of the marshmallows.
  • Salt – ½ tsp enhances the flavors and balances the sweetness.

For the Coloring

  • Red food coloring – Just a drop or two adds a spooky flair to your Halloween brains.

Step‑by‑Step Instructions for Marshmallow Rice Bubbles Halloween Brains

Step 1: Prepare the Bain-Marie
Begin by placing ½ cup of water into a small pot. Heat the pot on medium until the water reaches a gentle boil. Next, carefully position a large heatproof bowl over the pot, ensuring it doesn’t touch the water. This setup will create a warm environment perfect for melting your ingredients smoothly to craft the delightful Marshmallow Rice Bubbles Halloween Brains.

Step 2: Melt Butter and Marshmallows
Add 85 g of unsalted butter and 6 cups of regular marshmallows to the heatproof bowl. Using a whisk, stir the mixture continuously for about 2-4 minutes, or until it transforms into a smooth, glossy paste. Keep a watchful eye for any lumps, as the aim is to achieve a consistent texture, ensuring your Halloween brains will have the delightful gooeyness that everyone loves.

Step 3: Mix in Color and Seasoning
Carefully remove the heatproof bowl from the pot, using oven mitts or a tea towel to protect your hands from heat. Add ½ teaspoon of salt along with a drop or two of red food coloring. Whisk the mixture until the red color is fully integrated, giving it a spooky hue. The rich, vibrant color will set the tone for your Marshmallow Rice Bubbles Halloween Brains, making them irresistibly festive.

Step 4: Combine with Rice Bubbles
In a large mixing bowl, pour 4 cups of Rice Bubbles. Gently drizzle the melted marshmallow mixture over the Rice Bubbles, ensuring every piece gets coated evenly. Using a sturdy spatula or wooden spoon, fold the mixture together until all the Rice Bubbles are fully enveloped in the marshmallow goodness. This step ensures that your spooky treats will hold together beautifully when shaped.

Step 5: Shape the Halloween Brains
With clean, oiled hands to prevent sticking, take portions of the coated Rice Bubbles and shape them into oval brain-like forms. Aim for a size that fits comfortably in your hand, resembling delightful spooky treats. As you shape each piece, use a butter knife to gently press down in the center of each oval to create a satisfying dent, mimicking the look of real brains.

Step 6: Decorate with Red Veins
To add a touch of eerie authenticity to your Marshmallow Rice Bubbles Halloween Brains, dip a toothpick into the remaining red food coloring. Carefully draw thin veins on each shaped brain, making snake-like swirls and lines that enhance their spooky appearance. This step invites a fun creative twist, so let your imagination run wild as you give each brain its wicked character.

Step 7: Store Your Delightful Treats
Once your Marshmallow Rice Bubbles Halloween Brains have set, transfer them to an airtight container. This will help preserve their freshness for up to one week. Keep them stored in a cool, dry place, ready to scare and delight your family and friends at any Halloween gathering or as a special sweet treat, ensuring these unique goodies are always within reach!

Marshmallow Rice Bubbles Halloween Brains

Make Ahead Options

These Marshmallow Rice Bubbles Halloween Brains are perfect for meal prep enthusiasts chasing a little spooky fun! You can shape the brains and store them in an airtight container up to 3 days in advance to save valuable time before your Halloween festivities. Just be sure to keep them in a cool, dry place to maintain their delightful textures. On the day of your celebration, simply draw the red veins using food coloring right before serving for that fresh, eye-catching look. This way, you can enjoy all the fun of decorating without the last-minute stress, serving up treats that are just as delicious!

Marshmallow Rice Bubbles Halloween Brains Variations

Feel free to unleash your creativity and customize these spooky treats in delightful ways!

  • Gluten-Free: Substitute Rice Bubbles with gluten-free cereal or puffed rice for a playful twist that keeps everyone happy.

  • Chocolate Drizzle: Add a rich twist by drizzling melted dark or milk chocolate over the formed brains. It enhances the sweetness, making them even more indulgent!

  • Nutty Flavor: Incorporate chopped nuts like almonds or peanuts for an added crunch and nutty flavor. These little surprises will keep everyone guessing and delighted!

  • Color Variations: Experiment with different food coloring shades—green or purple can offer a fun, creepy vibe perfect for Halloween.

  • Spiced Treats: Spice things up by adding a sprinkle of cinnamon or even cayenne pepper to the marshmallow mixture. The warm spices will surprise and delight your taste buds!

  • Mini Brains: Create bite-sized versions for a fun party platter. These mini marshmallow brains are perfect for sneaky snacking during Halloween gatherings.

  • Fruit Infusion: Add small pieces of dried fruits like cranberries or raisins for a hint of natural sweetness that pairs beautifully with the marshmallows.

  • S’mores Twist: Introduce crushed graham crackers into the mixture for a s’mores flavor! This addition provides a delightful texture and nostalgic flavor reminiscent of campfires.

Feel inspired? For more sweet ideas, don’t miss out on the comforting charm of Hamburger Rice Casserole or the delightful simplicity of Crock Pot Chicken and Rice. Each recipe brings its own joy to the table!

What to Serve with Marshmallow Rice Bubbles Halloween Brains

As you prepare these delightful Halloween treats, think about adding some complementary dishes to round out your spooky celebration.

  • Fresh Fruit Salad: A vibrant mix of seasonal fruits provides a refreshing contrast to the sweet richness of the marshmallows. Juicy apples and crisp pears add a perfect crunch.

  • Chocolate Dipped Pretzels: The salty, crunchy pretzels coated in smooth chocolate create a flavor explosion that pairs beautifully with the sweet treats. Each bite brings a satisfying textural variation that’s simply irresistible.

  • Pumpkin Spice Cookies: These soft, warm cookies, infused with aromatic spices, harmonize with the whimsical flavors of your Halloween brains. Their cozy sweetness enhances the overall festive mood.

  • Candy Corn Trail Mix: Combine candy corn, nuts, and chocolate for a fun, crunchy snack that echoes the Halloween theme. It’s perfect for nibbling alongside your spooky dessert.

  • Spiced Apple Cider: Warm, spiced apple cider offers a delightful drink option that perfectly complements the sweetness of your treats. The rich flavors evoke a nostalgic fall feeling, making it an ideal pairing.

  • Ghostly Cupcakes: Decorate vanilla cupcakes with ghostly designs and piping for a playful dessert addition. They offer more sweet variety and contribute to the festive table with charm.

  • Caramel Popcorn: This crunchy, sweet treat adds an unexpected texture that balances the soft gooeyness of your Halloween brains. It’s a perfect addition for those who enjoy a bit of crunch in their sweets.

  • Halloween Themed Cheese Board: Bring out a spooky cheese board with assorted cheeses, crackers, and Halloween-themed treats for a savory complement. It creates a delightful balance of flavor when enjoyed alongside the sweet marshmallow treats.

Tips for the Best Marshmallow Rice Bubbles Halloween Brains

  • Even Melting: Stir continuously while melting butter and marshmallows to avoid burning. This ensures a smooth mixture, crucial for your Halloween brains’ texture.

  • Coating Consistency: Ensure all Rice Bubbles are well-coated with the marshmallow mix by folding gently. Unevenly coated pieces might fall apart when shaping.

  • Shape with Ease: Oil your hands before shaping. This prevents the marshmallow mixture from sticking and allows for easier molding into oval brain forms.

  • Creative Decoration: Use a light touch when drawing veins with the toothpick. The subtlety enhances the spooky effect without overwhelming the design of your Marshmallow Rice Bubbles Halloween Brains.

  • Storage Tip: Store in an airtight container to keep them fresh for up to a week. This prevents them from getting tough and retains their delightful chewiness.

How to Store and Freeze Marshmallow Rice Bubbles Halloween Brains

  • Room Temperature: Keep your Marshmallow Rice Bubbles Halloween Brains in an airtight container at room temperature for up to 1 week. This helps maintain their delightful gooeyness and crunch.

  • Fridge: If you prefer a firmer texture, store them in the fridge. They’ll stay fresh for up to 2 weeks but may lose some of their original crispness.

  • Freezer: For longer storage, place the shaped brains in a single layer on a baking sheet until frozen, then transfer to a freezer bag. They can be kept for up to 2 months, but remember to thaw at room temperature before serving.

  • Reheating: There’s no need to reheat these treats, as they taste best at room temperature. Just allow your frozen Marshmallow Rice Bubbles Halloween Brains to thaw, and they’re ready to wow your friends!

Marshmallow Rice Bubbles Halloween Brains

Marshmallow Rice Bubbles Halloween Brains Recipe FAQs

What type of marshmallows work best for this recipe?
Absolutely! Regular marshmallows are ideal to achieve that gooey sweetness. Mini marshmallows can work too, but I recommend using the classic ones for the perfect texture in your Marshmallow Rice Bubbles Halloween Brains.

How should I store the Marshmallow Rice Bubbles Halloween Brains?
Store your Halloween brains in an airtight container at room temperature for up to one week. This keeps them delightfully soft and chewy. If you prefer a firmer texture, you can refrigerate them, where they’ll stay fresh for about two weeks but might lose a bit of their original crunch.

Can I freeze these treats? How?
Yes, you can freeze your Marshmallow Rice Bubbles Halloween Brains! To do this, place the shaped brains on a baking sheet in a single layer, ensuring they don’t touch each other. Freeze until solid, then transfer them to a freezer bag. They can be kept for up to two months—just thaw them at room temperature when you’re ready to enjoy!

What if my mixture is too sticky to shape?
That can happen! If your marshmallow mixture is excessively sticky, try oiling your hands a bit more while shaping. This helps the mixture not stick to your fingers. Alternatively, chilling the mixture in the fridge for about 10-15 minutes can make it easier to handle while still keeping it pliable enough to form shapes.

Are these treats safe for pets?
While the flavors may seem appealing, it’s best to keep your Marshmallow Rice Bubbles Halloween Brains away from pets. They contain sugar and butter that aren’t ideal for animals, potentially leading to upset stomachs or more serious issues if consumed in large amounts. Always err on the side of caution!

Delicious Marshmallow Rice Bubbles Halloween Brains Recipe

Delightful Marshmallow Rice Bubbles Halloween Brains combine spooky fun with nostalgic flavors for a perfect Halloween treat.

  • heatproof bowl
  • small pot
  • Whisk
  • spatula
  • Butter knife
  • Airtight Container
  • Baking Sheet

Base Ingredients

  • 85 g Unsalted butter (for a rich, creamy texture)
  • 6 cups Regular marshmallows (for gooey sweetness)
  • 4 cups Rice Bubbles (Krispies) (for crunch)
  • 0.5 tsp Salt (to enhance flavor)

Coloring Ingredients

  • 1-2 drops Red food coloring (to add spooky flair)

Preparation Steps

  1. Prepare the Bain-Marie by placing ½ cup of water into a small pot and heating it on medium until gently boiling. Position a large heatproof bowl over the pot.
  2. Melt butter and marshmallows by adding 85 g of unsalted butter and 6 cups of regular marshmallows to the bowl, stirring continuously for 2-4 minutes until smooth.
  3. Mix in salt and red food coloring, whisking until the color is fully integrated.
  4. Combine with Rice Bubbles by pouring 4 cups of Rice Bubbles into a large bowl and drizzling the melted mixture over them, folding until well coated.
  5. Shape the Halloween brains using oiled hands, forming oval shapes and creating a dent with a butter knife.
  6. Decorate with red veins by dipping a toothpick in red food coloring and drawing swirls on each brain.
  7. Store in an airtight container at room temperature, enjoying them within a week.

Stir continuously while melting to avoid burning. Store in an airtight container to maintain freshness.

Dessert
easy Halloween recipe, festive sweets, Halloween Treats, kid-friendly dessert, Marshmallow Rice Bubbles Halloween Brains, spooky dessert

Filed Under: Dessert

Spooky Marshmallow Rice Bubbles Halloween Brains Treats

September 25, 2025 by grace bellamy Leave a Comment

As I rummaged through my kitchen, I stumbled upon an oversized bag of Rice Bubbles just waiting for a spooky transformation. When Halloween rolls around, nothing brings out my inner child quite like crafting these delightful Marshmallow Rice Bubbles Halloween Brains. This recipe is a total winner, offering both a quick prep time of just 20 minutes and a fun, festive treat that’ll leave your guests chuckling and craving more. With just a handful of simple ingredients, you can whip up these playful creations that are sure to ignite the imagination, whether you’re planning a haunted gathering or simply looking to indulge your creative side. Trust me, I can’t wait to hear your spooky twists—what candy eyes or spooky accessories will you use to take these brains to the next level?

Marshmallow Rice Bubbles Halloween Brains

Why are these treats a Halloween must?

Spooky appeal: These Marshmallow Rice Bubbles Halloween Brains are irresistibly fun, making them the star of any Halloween gathering! Quick prep: At just 20 minutes, you won’t need hours in the kitchen to create these delights. Simple ingredients: With just a handful of items, even beginner chefs can join in the fun. Creative customization: Use candy eyes or drizzled icing to make them uniquely yours. Family-friendly activity: Get everyone involved in shaping and decorating these treats, sparking creativity and laughter. Plus, if you’re in the mood for more sweet treats, check out my recipe for Newfie Rice Pudding—another playful dessert!

Marshmallow Rice Bubbles Halloween Brains Ingredients

For the Basic Mixture
• Unsalted butter – 85 g adds a rich flavor and smooth texture to your marshmallow mix.
• Regular marshmallows – 6 cups, the essential star of your Marshmallow Rice Bubbles Halloween Brains, providing sweetness and that sticky texture we love.
• Salt – ½ tsp enhances the sweetness and balances the flavors in your mixture.

For the Coating
• Rice Bubbles (Krispies) – 4 cups provide the delightful crunch that makes these brains so fun to eat!

For the Decoration
• Red food coloring – A few drops for that spooky touch, adding an eye-catching effect that will truly make your Halloween treats pop!

Step‑by‑Step Instructions for Marshmallow Rice Bubbles Halloween Brains

Step 1: Set Up a Bain-Marie
Begin by preparing a Bain-Marie. Pour about ½ cup of water into a small pot, bringing it to a gentle boil over medium heat. While waiting, select a large heatproof bowl and place it on top of the pot, ensuring it’s secure. This method will gently melt the butter and marshmallows while preventing direct exposure to high heat, making it perfect for creating your Marshmallow Rice Bubbles Halloween Brains.

Step 2: Melt the Mixture
Add the 85 g of unsalted butter and 6 cups of regular marshmallows to the heatproof bowl. Using a whisk, stir continuously for about 2-4 minutes until the mixture transforms into a smooth, glossy paste. You’ll know it’s ready when you can see no lumps of marshmallow or butter, and it flows gently off the whisk. This step brings the base flavor that your Halloween brains will need!

Step 3: Add Color and Flavor
Once your mixture is silky smooth, carefully lift the heatproof bowl from the pot using oven mitts or a towel to avoid burns. Immediately add ½ tsp of salt, followed by a few drops of red food coloring. Whisk everything together until well combined, and the mixture has taken on a spooky pinkish hue. This will create the sweet and salty flavor needed for your Marshmallow Rice Bubbles Halloween Brains.

Step 4: Combine with Rice Bubbles
In a large mixing bowl, place your 4 cups of Rice Bubbles. Slowly pour the melted marshmallow mixture over the Rice Bubbles while stirring gently. Aim to coat every Rice Bubble evenly, ensuring no clumps remain. Continue mixing until you have a gooey, uniform blend, crucial for forming the brains. This sticky goodness is what makes these Halloween treats so delightful!

Step 5: Shape the Brains
Prepare for some fun by oiling your hands lightly with cooking spray or oil to prevent sticking. Take a generous handful of the coated Rice Bubbles and mold them into ovals, resembling classic brain shapes. Be sure to flatten them slightly and use a butter knife to gently create a dent in the centers, adding realistic detail to your Marshmallow Rice Bubbles Halloween Brains!

Step 6: Create the Veins
Now comes the fun part—decorating! Dip a toothpick into the remaining red food coloring and carefully draw veins on the surface of each shaped brain. The contrasting color will enhance the spooky visual effect, making your treats both appetizing and perfect for Halloween festivities. Take your time with this, as it’s all about adding personality to your Marshmallow Rice Bubbles Halloween Brains.

Step 7: Storage for Freshness
Finally, let the shaped treats cool for a few moments. Once set, store your Marshmallow Rice Bubbles Halloween Brains in an airtight container. They can last for up to a week, keeping the festive spirit alive for several days. Make sure to keep them in a cool place to maintain their delightful texture, ready to impress any ghoulish guests!

Marshmallow Rice Bubbles Halloween Brains

Make Ahead Options

These Marshmallow Rice Bubbles Halloween Brains are perfect for busy cooks looking to save time! You can prepare the marshmallow mixture up to 24 hours in advance by melting the butter and marshmallows, adding salt and red food coloring, then letting it cool before refrigerating it in an airtight container. The Rice Bubbles can also be measured and set aside for convenience. When you’re ready to shape and decorate the brains, simply reheat the marshmallow mixture gently until it becomes pourable again. This allows you to enjoy freshly shaped, just-as-delicious treats with minimal effort, making your Halloween preparation a spooky breeze!

Tips for the Best Marshmallow Rice Bubbles Halloween Brains

• Melt Carefully: Use a Bain-Marie to melt the marshmallows and butter. This gentle heat prevents burning, ensuring a smooth mixture.

• Avoid Sticking: Lightly oil your hands before shaping the brains. This simple step makes molding the Rice Bubbles much easier and mess-free.

• Mix Thoroughly: Ensure every Rice Bubble is evenly coated with the marshmallow mix. Skipping this could lead to unevenly shaped treats that won’t hold together well.

• Vein Design: Be creative with the red food coloring veins! Don’t rush this step; take your time for spooky designs, enhancing the visual appeal of your treats.

• Store Properly: Place your finished Marshmallow Rice Bubbles Halloween Brains in an airtight container. Proper storage helps maintain their freshness and keeps them chewy for up to a week.

What to Serve with Marshmallow Rice Bubbles Halloween Brains

Transform your Halloween gathering into a memorable feast with these delightful treats as the centerpiece.

  • Crispy Apple Slices: Fresh and crunchy, these provide a refreshing contrast to the chewy texture of the brains, perfect for balancing sweetness.
  • Spooky Punch: A vibrant, red punch, perhaps with floating gummy eyeballs, adds flair and excitement, perfectly complementing the festive theme.
  • Chocolate-Dipped Pretzels: Crunchy and salty, these treats offer a satisfying bite against the soft marshmallow texture, adding a delightful twist to your dessert table.
  • Pumpkin Spice Cookies: Their warm spices harmonize beautifully with the flavors of the Rice Bubbles, making for a cozy autumnal pairing.
  • Ghostly Marshmallow Pops: These sweet treats echo the marshmallow flavor while bringing a spooky vibe, enticing both kids and adults alike.
  • Caramel Corn: Sweet and crunchy, this makes for a fun snacking option, adding a nice variety to your Halloween spread.
  • Fruit Wands: Skewers of fresh fruits like strawberries and grapes offer a light and refreshing counterpoint to the sweet marshmallow treat.
  • Cider Donuts: Soft and spiced, these will have your guests celebrating cozy flavors that complement the seasonal spirit.

Marshmallow Rice Bubbles Halloween Brains Variations

Feel free to sprinkle your own magic and twist up these treats to make them uniquely yours!

  • Dairy-Free: Substitute unsalted butter with coconut oil for a delightful, dairy-free version. It adds a subtle tropical flavor.
  • Colorful Twist: Instead of red food coloring, use green or purple for a vibrant Halloween vibe. These hues can create a mystical effect!
  • Nutty Crunch: Add 1 cup of crushed nuts to the mixture for a deliciously crunchy texture that complements the marshmallow’s softness. It’s a delightful surprise in every bite!
  • Pumpkin Spice: Mix in 1 teaspoon of pumpkin spice to give your brains a seasonal twist. The warm spice flavor will evoke cozy autumn memories.
  • Chocolate Drizzle: Drizzle melted chocolate over the shaped brains for an extra layer of sweetness. The contrast of chocolate with marshmallow is simply irresistible!
  • Mini Brains: Make bite-sized versions of the marshmallow brains for a fun treat that’s easy to grab and enjoy. They’re perfect for little hands or party snacks!
  • Spicy Kick: Add a dash of cayenne pepper to the marshmallow mixture for a sweet and spicy surprise that will intrigue adventurous taste buds! A bold twist to keep things exciting.
  • Creative Garnishes: Top your brains with edible glitter or sprinkles before they set, adding a fun and festive touch that’s especially delightful for kids and party-goers alike.

And if you’re looking for more delightful rice recipes, try my Crock Pot Chicken and Rice for an easy dinner option or whip up some Hamburger Rice Casserole for a comforting meal. Happy cooking!

How to Store and Freeze Marshmallow Rice Bubbles Halloween Brains

Airtight Container: Store your Marshmallow Rice Bubbles Halloween Brains in an airtight container at room temperature for up to one week to keep them fresh and chewy.

Avoid Fridge Storage: Storing in the fridge can make your treats hard and sticky. Stick to room temperature for optimal texture!

Freezing Tips: If you want to keep them longer, wrap individual treats in plastic wrap and place them in a freezer-safe bag. They can freeze for up to 3 months.

Thawing Instructions: To enjoy, simply pull them out and let them thaw at room temperature for about 30 minutes before serving.

Marshmallow Rice Bubbles Halloween Brains

Marshmallow Rice Bubbles Halloween Brains Recipe FAQs

How can I ensure my marshmallows are perfectly fresh for this recipe?
Absolutely! When selecting marshmallows, look for those that are plump and soft without any signs of hardening or sticking together. If you see any dark spots or they feel overly sticky, it’s best to choose another bag—fresh ones will provide the ideal texture for your Marshmallow Rice Bubbles Halloween Brains!

What’s the best way to store these spooky treats?
To keep your Marshmallow Rice Bubbles Halloween Brains fresh, place them in an airtight container at room temperature. They will stay delightful for up to one week. It’s best to keep them away from the fridge, as chilling can make them hard and unappetizing.

Can I freeze my Halloween brains for later enjoyment?
Very! If you’d like to freeze your treats, wrap each Marshmallow Rice Bubbles Halloween Brain individually in plastic wrap and place them in a freezer-safe bag. They can be happily frozen for up to 3 months. When you’re ready to enjoy, simply let them thaw at room temperature for about 30 minutes—easy peasy!

What should I do if my marshmallow mixture is too sticky or hard to shape?
If you find that the mixture is too sticky, don’t worry! Simply oil your hands lightly with cooking spray or butter before forming the shapes. This will help reduce the stickiness, making it easier to shape your brains. If it’s too hard, try gently reheating the mixture over the Bain-Marie for a few minutes to soften it back to a workable texture.

Can I use alternatives to Rice Bubbles for this recipe?
Absolutely! While Rice Bubbles provide that delightful crunch, you can substitute them with other cereals like cornflakes or even puffed rice for a different texture. Just ensure they are light and airy to create that fun shape and maintain the spooky look of your Marshmallow Rice Bubbles Halloween Brains.

Are there any allergy considerations I should keep in mind?
Very good question! This recipe contains butter and marshmallows, which may have allergens like dairy or gluten, depending on the brands used. Always check labels for specific dietary needs or use allergen-free versions of these ingredients if necessary. Enjoy these treats responsibly, and you can even make pet-friendly versions using alternatives safe for them!

Spooky Marshmallow Rice Bubbles Halloween Brains Treats

Delightful Marshmallow Rice Bubbles Halloween Brains that are quick, fun, and perfect for Halloween gatherings.

  • small pot
  • large heatproof bowl
  • Whisk
  • Mixing Bowl
  • Toothpick
  • Cooking spray

For the Basic Mixture

  • 85 g unsalted butter (adds a rich flavor and smooth texture)
  • 6 cups regular marshmallows (the essential star providing sweetness)
  • 0.5 tsp salt (enhances sweetness and balances flavors)

For the Coating

  • 4 cups Rice Bubbles (Krispies) (provides a delightful crunch)

For the Decoration

  • red food coloring (a few drops for spooky touch)

Step‑by‑Step Instructions

  1. Begin by preparing a Bain-Marie with ½ cup of water in a small pot over medium heat, placing a large heatproof bowl on top.
  2. Add the unsalted butter and regular marshmallows to the bowl, whisking continuously for 2-4 minutes until smooth.
  3. Carefully lift the bowl and stir in salt and red food coloring until well combined.
  4. In a large mixing bowl, place Rice Bubbles and pour the melted marshmallow mixture over them, mixing gently to coat.
  5. Lightly oil your hands and mold the mixture into oval shapes resembling brains, creating a dent in the centers.
  6. Use a toothpick dipped in red food coloring to draw veins on each shaped brain.
  7. Let the treats cool before storing them in an airtight container.

Store in an airtight container at room temperature for up to one week. Avoid fridge storage to maintain texture.

Dessert
Halloween
easy dessert, Halloween Treats, Kid-Friendly Recipe, Marshmallow Rice Bubbles Halloween Brains, Rice Bubbles Treats, spooky snacks

Filed Under: Dessert

  • « Previous Page
  • 1
  • …
  • 5
  • 6
  • 7
  • 8
  • 9
  • …
  • 22
  • Next Page »
RecipeCrown

Hello, beautiful people! I’m Grace Bellamy, a foodie, traveler, and writer with wanderlust in my soul. Whether crafting recipes in my kitchen or exploring flavors around the globe, my greatest joy is helping you create healthier, happier lives, one delicious bite at a time.