RecipeCrown

Easy & Delicious Recipes

  • Home
  • Breakfast
  • Main Dishes
  • Dessert
  • About
  • Contact
You are here: Home / Archives for Soups

Irresistibly Easy One Pot Macaroni Cheeseburger Soup

June 30, 2025 by Maya Rowan Leave a Comment

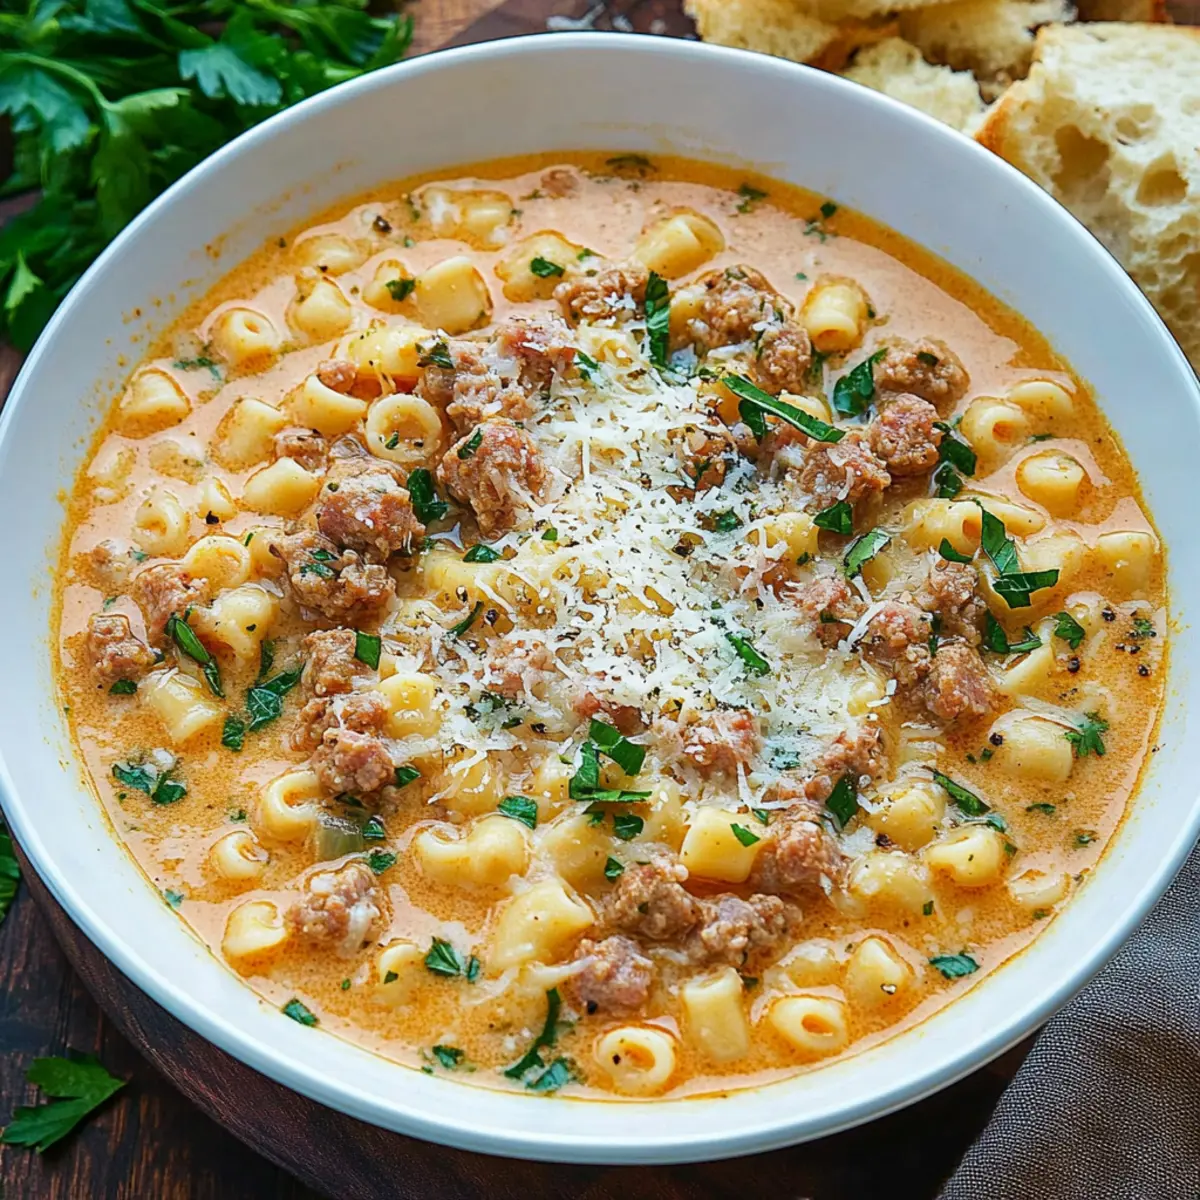
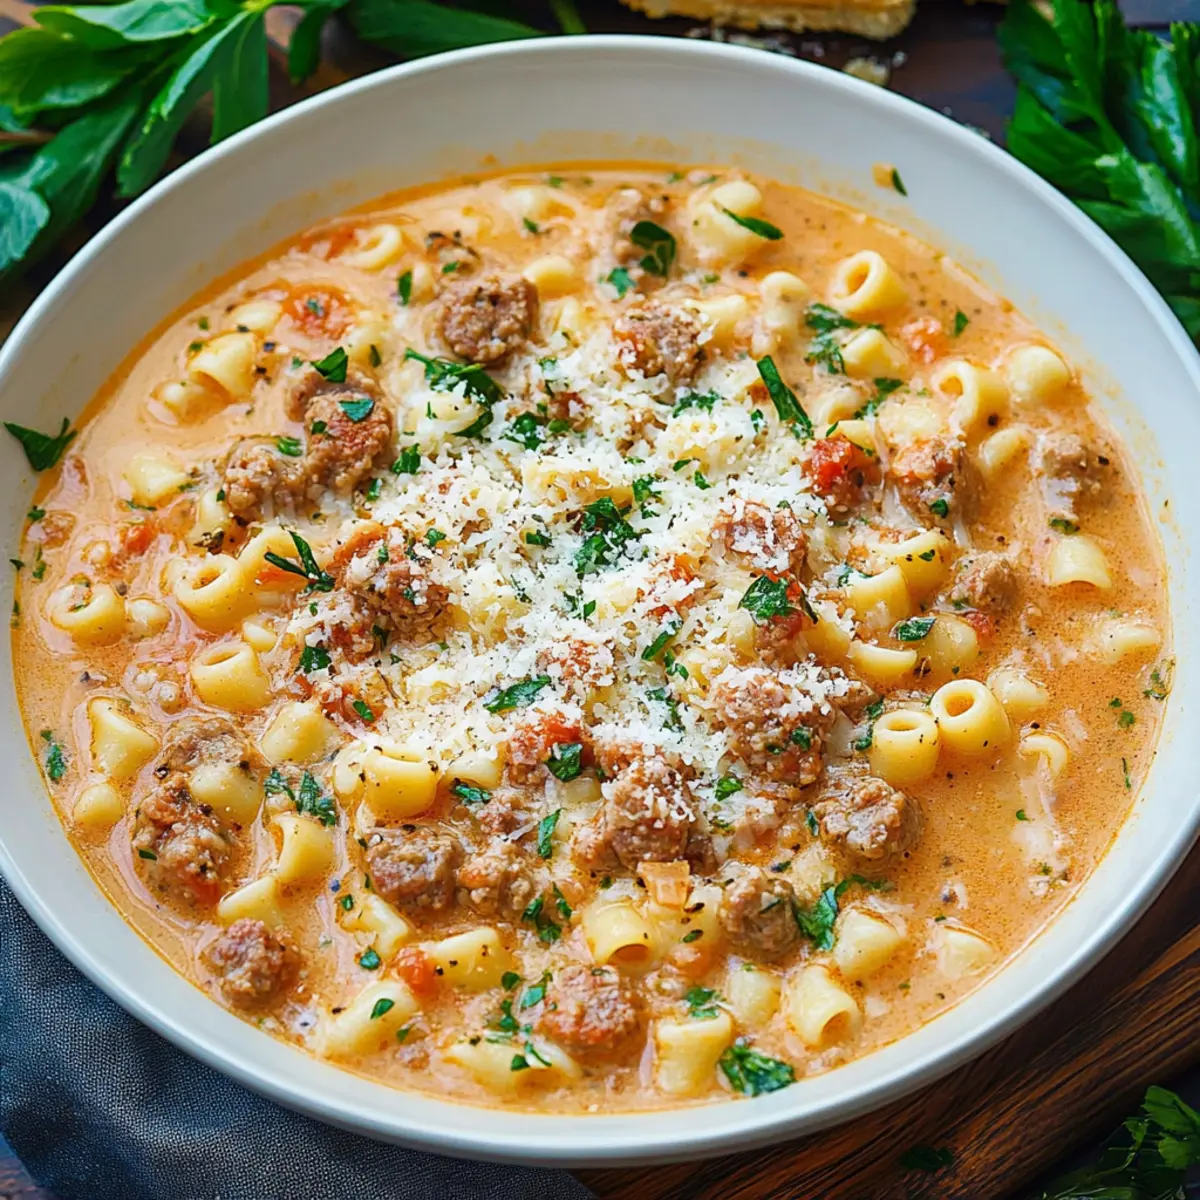
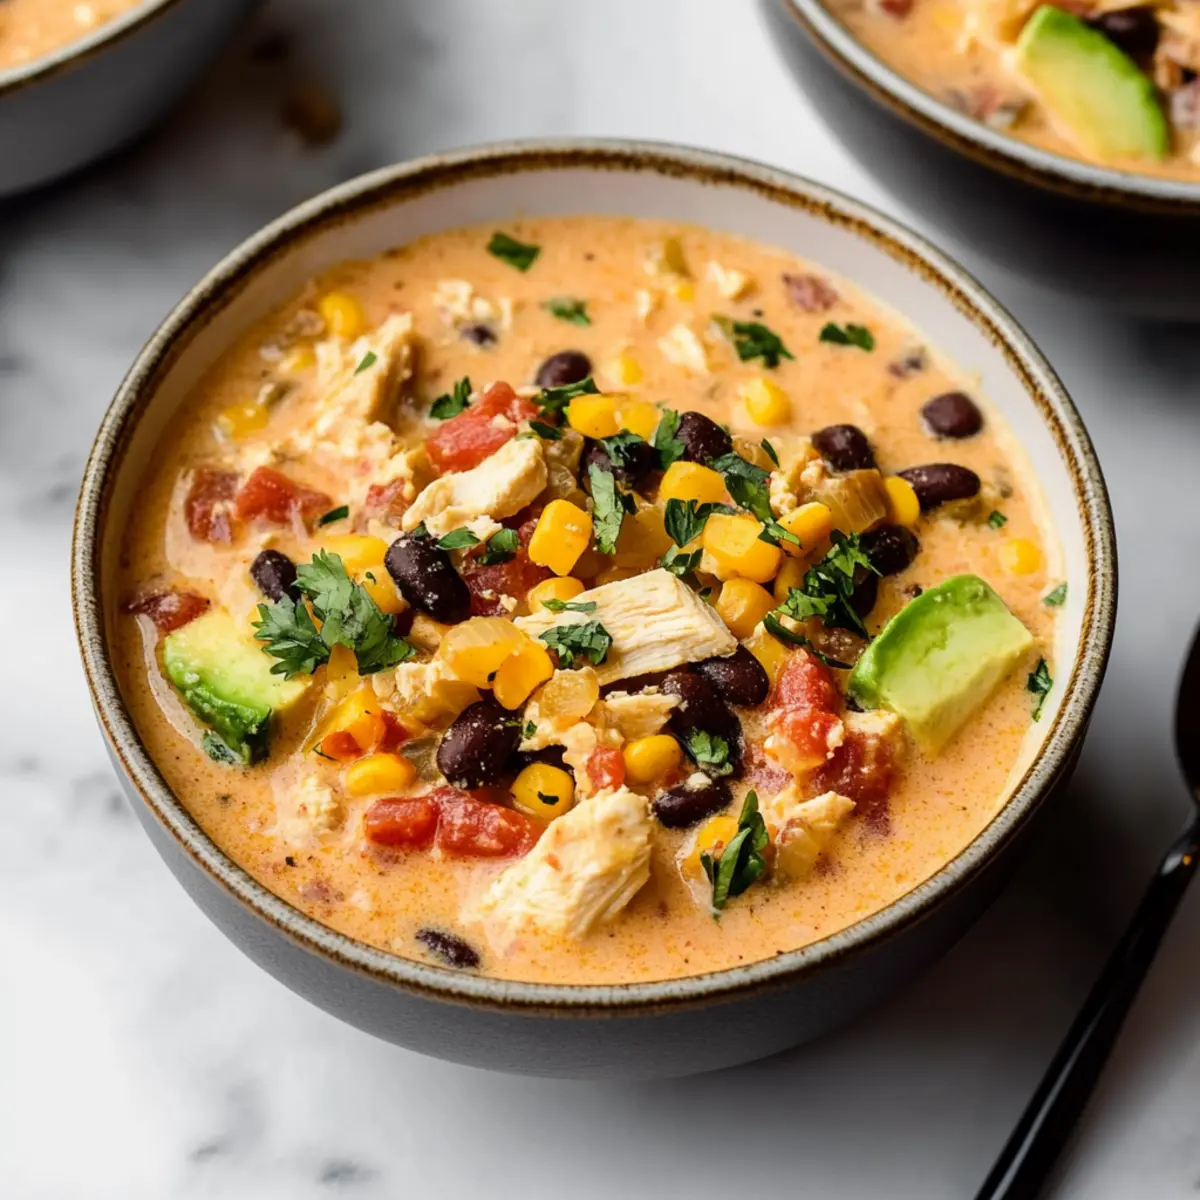
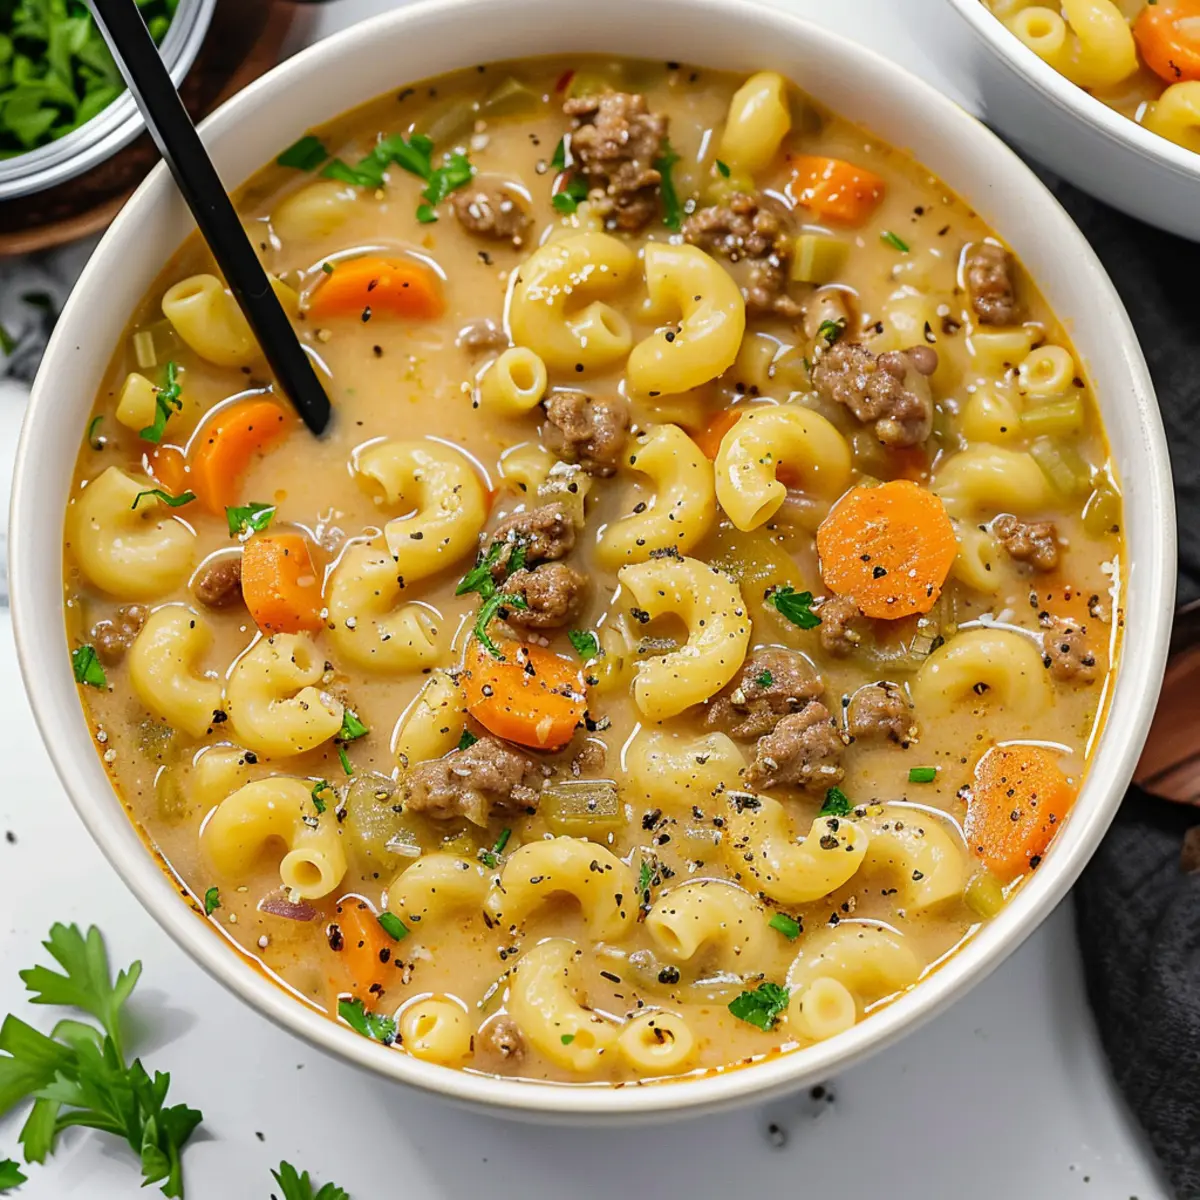
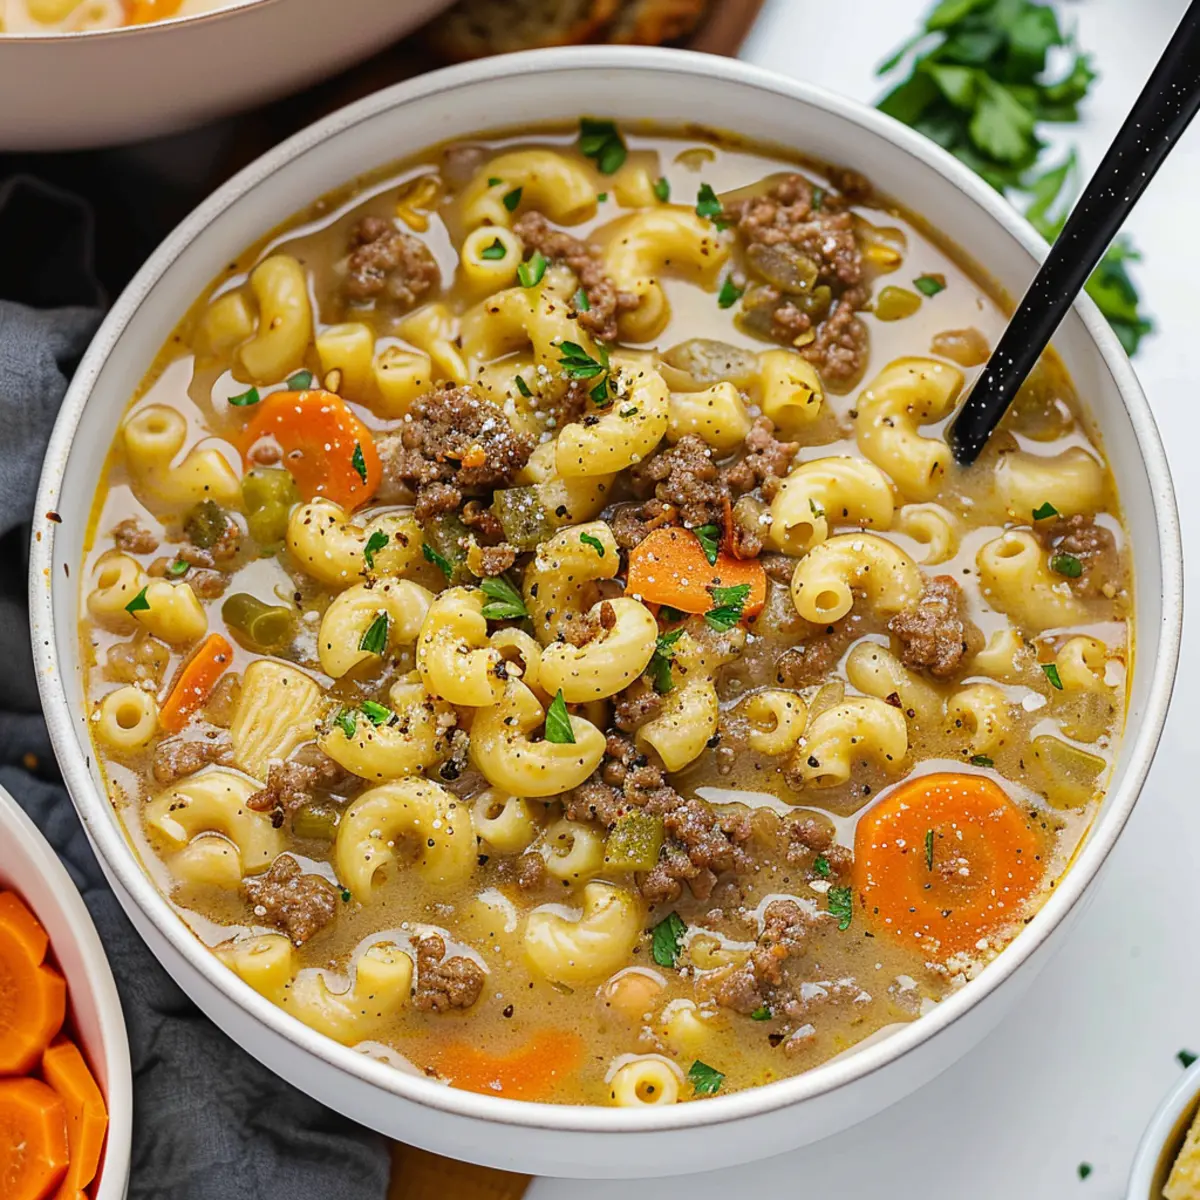
It was a chilly evening when I first concocted this One-Pot Macaroni Cheeseburger Soup, and I vividly recall the way the warm, cheesy aroma enveloped my kitchen like a comforting hug. With a busy week ahead of me, I desperately sought something easy yet satisfying, and this recipe came to the rescue in under 30 minutes! The simple beauty of this soup lies in its hearty combination of ground beef, macaroni, and fresh vegetables, all simmered together to create a comforting dish without the need for any processed cheese.

This recipe not only satisfies those cravings for comfort food but also brings the family together around the dinner table, allowing for scrumptious variations that everyone can enjoy. Whether you’re a busy parent, a home chef, or just someone tired of the same old takeout, this creamy, cheesy delight is your answer to weeknight dining. Join me as we dive into making this delicious One-Pot Macaroni Cheeseburger Soup, where real ingredients shine, and every bite feels a little bit like home.

Why is One Pot Macaroni Cheeseburger Soup so popular?

Comforting flavors and simple preparation make this dish a family favorite. This one-pot wonder brings together the delightful taste of cheeseburgers with the heartiness of macaroni soup, all while keeping cleanup to a minimum! In just about 30 minutes, you can enjoy a creamy mix of ground beef, tender vegetables, and perfectly cooked pasta, making it an ideal meal for busy weeknights.

Plus, it offers unexpected versatility: you can easily transform it into a vegetarian option with plant-based meat or add extra toppings like crispy bacon for more flavor. So whether it’s a cozy family dinner or a meal prep for the week, this one-pot recipe delivers comfort that will keep everyone coming back for more!

One Pot Macaroni Cheeseburger Soup Ingredients

• Short note: Gather these simple ingredients for a delightful One Pot Macaroni Cheeseburger Soup that the whole family will love!

For the Soup
• Ground Beef – Use 80/20 organic grass-fed or substitute with plant-based meat, black beans, or ground turkey for a healthier twist.
• Dried Oregano – Provides subtle herby flavor that enhances the soup’s taste.
• Dried Thyme – Complements the oregano with its earthy notes.
• Butter – Adds richness and flavor, making every spoonful more satisfying.
• Yellow Onion – Brings a savory base to the soup, deepening the flavor profile.
• Carrots – Adds flavor and essential nutrients, making it a wholesome meal.
• Celery – Creates a mirepoix base with the onion and carrots for added depth.
• Garlic – Introduces a delicious depth of flavor; you can substitute with garlic powder (½ tsp) if needed.
• Flour – Thickens the soup, creating a creamy texture that’s hard to resist.
• Chicken Broth – Provides the liquid base; veggie or beef broth can be used based on preference.
• Elbow Macaroni – The classic pasta base; feel free to use your favorite short cut of pasta, or even potatoes or cauliflower for a twist.
• Heavy Cream – Gives the soup its rich, silky texture; half and half can be swapped for a lighter option.
• Sharp Cheddar Cheese – Adds cheesy flavor and creamy texture; remember to add it at the end, not while boiling!
• White Balsamic Vinegar – Offers a tangy flavor that balances the richness of the soup.
• Kosher Salt – Adjust to taste for the perfect seasoning.
• Fresh Cracked Pepper – Adds warmth and enhances overall flavor; adjust to your liking.

Step-by-Step Instructions for One Pot Macaroni Cheeseburger Soup

  1. Brown the Ground Beef In a large Dutch oven, heat on medium-high and add the ground beef with dried oregano, thyme, kosher salt, and fresh cracked pepper. Cook for about 5-7 minutes until browned, breaking it up with a spoon. This step adds rich flavor and depth to your soup, ensuring that every spoonful is packed with deliciousness.
  2. Sauté the Vegetables Remove the browned beef from the pot and set aside. Add butter to the same pot, allowing it to melt over medium heat. Sauté the yellow onion, carrots, and celery for 10 minutes until the onions are translucent. This mirepoix base is crucial as it creates a flavorful foundation for your soup.
  3. Add Garlic and Herbs Stir in minced garlic, along with an additional sprinkle of oregano and thyme. Sauté for 1 minute until fragrant. This step infuses the soup with incredible aroma and flavor, setting the stage for your creamy concoction.
  4. Thicken the Soup Sprinkle flour over the sautéed vegetables, stirring well and cooking for 1 minute. This helps to form a roux that thickens the soup, creating that satisfying creamy texture everyone loves.
  5. Deglaze the Pot Pour a splash of chicken broth into the pot while scraping up any browned bits stuck to the bottom. This step enhances the flavor by incorporating those delicious bits, ensuring no taste goes to waste.
  6. Add Broth and Noodles Pour in the remaining chicken broth and bring to a gentle simmer. Stir in elbow macaroni, then reduce the heat to medium-low. Cook for 5-7 minutes until the pasta is al dente. Stirring occasionally prevents sticking and ensures even cooking, making sure your pasta has the right bite.
  7. Stir in Dairy and Cheese Once the pasta is cooked, remove the pot from heat. Gently mix in heavy cream and shredded sharp cheddar cheese, stirring until melted and creamy. Adding these ingredients off the heat prevents curdling and maintains that smooth texture, which is key for a luxurious soup.
  8. Finish the Soup Add white balsamic vinegar, and then return the cooked ground beef to the pot. Gently stir to combine, letting the flavors blend for 2-3 minutes while warming through. This step harmonizes the savory elements, balancing richness with a touch of tang that elevates the dish.
  9. Season to Taste Taste and adjust the seasoning with additional kosher salt and fresh cracked pepper, if needed. This is your chance to make the soup just right for your palate. The right balance of seasoning transforms good soup into great soup!
  10. Serve and Enjoy Ladle the One Pot Macaroni Cheeseburger Soup into bowls and enjoy with your favorite toppings like crispy bacon or fresh herbs. The creamy, cheesy goodness combined with the delightful textures makes every bite a comforting experience. Enjoy this cozy family meal with love!

Step-by-Step Instructions for One-Pot Macaroni Cheeseburger Soup

  1. Brown the Ground Beef
    In a large Dutch oven, heat over medium-high and add the ground beef, sprinkling in dried oregano, thyme, kosher salt, and fresh cracked pepper. Cook for about 5-7 minutes until it’s nicely browned, breaking it up with a spoon. This step adds rich flavor and depth to your soup, ensuring that every spoonful is packed with deliciousness.
  2. Sauté the Vegetables
    Remove the browned beef from the pot and set aside. Add butter to the same pot, allowing it to melt over medium heat. Sauté the yellow onion, carrots, and celery for 10 minutes until the onions are translucent. This mirepoix base is crucial as it creates a flavorful foundation for your soup, preparing it for the creamy goodness to come.
  3. Add Garlic and Herbs
    Stir in minced garlic along with an additional sprinkle of oregano and thyme. Sauté for 1 minute until fragrant. This step infuses the soup with incredible aroma and flavor, setting the stage for your creamy concoction, and it helps release the flavors locked in the garlic and herbs.
  4. Thicken the Soup
    Sprinkle flour over the sautéed vegetables, stirring well and cooking for 1 minute. This helps to form a roux that thickens the soup, creating that satisfying creamy texture everyone loves. Ensure you cook the flour for a short time to remove its raw taste, which enhances the overall flavor.
  5. Deglaze the Pot
    Pour a splash of chicken broth into the pot while scraping up any browned bits stuck to the bottom. This step enhances the flavor by incorporating those delicious bits, ensuring no taste goes to waste. The fond left behind from cooking the beef adds an extra layer of richness to your soup.
  6. Add Broth and Noodles
    Pour in the remaining chicken broth and bring to a gentle simmer. Stir in elbow macaroni, then reduce the heat to medium-low. Cook for 5-7 minutes until the pasta is al dente, stirring occasionally to prevent sticking. This crucial step ensures your pasta has the right bite, blending perfectly with the creamy soup texture.
  7. Stir in Dairy and Cheese
    Once the pasta is cooked, remove the pot from heat. Gently mix in heavy cream and shredded sharp cheddar cheese, stirring until melted and creamy. Adding these ingredients off the heat prevents curdling and maintains that smooth texture, which is key for a luxurious soup everyone will love.
  8. Finish the Soup
    Add white balsamic vinegar, and then return the cooked ground beef to the pot. Gently stir to combine, letting the flavors blend for 2-3 minutes while warming through. This harmony of savory elements balances richness with a touch of tang that elevates the dish, ensuring every bite is a comforting experience.
  9. Season to Taste
    Taste and adjust the seasoning with additional kosher salt and fresh cracked pepper, if needed. This is your opportunity to make the soup just right for your palate. The right balance of seasoning transforms good soup into great soup, enhancing the overall flavor profile.
  10. Serve and Enjoy
    Ladle the One-Pot Macaroni Cheeseburger Soup into bowls and enjoy with your favorite toppings, such as crispy bacon or fresh herbs. The creamy, cheesy goodness combined with the delightful textures makes every bite a comforting experience. Serve this cozy family meal with love, bringing everyone together around the table!

Turn It Into A Party!

When it comes to entertaining, One-Pot Macaroni Cheeseburger Soup is an absolute winner! With its comforting, cheesy flavors and hearty ingredients, this dish is sure to delight your guests and satisfy their cravings. Serve it up with crunchy chips or crispy crackers for added texture and fun! 🎉 A few tips if serving for a crowd:

  • Keep it Warm: Use a slow cooker setting on low to keep the soup warm throughout the party! (This is perfect for those who might arrive fashionably late. )
  • Make-Ahead Magic: Prepare the soup a day in advance and simply reheat it before serving! (Just cook the pasta separately and mix it in when ready to serve for the best consistency.)
  • Seasonal Twist: Add seasonal veggies like zucchini or bell peppers for a fresh twist that celebrates the season! (You can even give it a festive vibe with toppings like fresh herbs or spicy jalapeños!)

What to Serve with One-Pot Macaroni Cheeseburger Soup?

Enhance your delightful soup experience with these comforting side dishes and treats that complement its creamy, cheesy goodness.

  • Garlic Bread: Perfect for dipping, this crispy, buttery bread enhances the soup’s flavors and adds a delightful crunch to every bite.
  • Simple Green Salad: A fresh, zesty salad balances the richness of the soup, providing a splash of color and crunch. Toss in your favorite veggies and a light vinaigrette to brighten the meal.
  • Honey Butter Cornbread: Moist and slightly sweet, this cornbread pairs beautifully with the savory notes of the soup, making it a winning combination that’s hard to resist.
  • Roasted Vegetables: Seasonal roasted veggies add a lovely roasted flavor and extra nutrients. Their natural sweetness pairs nicely with the savory depth of the cheeseburger soup.
  • Classic Coleslaw: The crisp and tangy bite of coleslaw contrasts perfectly with the creamy soup, adding layers of flavor and texture that delight the senses.
  • Iced Tea or Lemonade: A refreshing beverage like sweet iced tea or homemade lemonade cuts through the richness of the soup, making every spoonful feel even more satisfying.

Each of these side dishes will create a warm, inviting meal that ensures your family and guests feel completely at home, making your One-Pot Macaroni Cheeseburger Soup the star of the dinner table!

How to Store and Freeze One Pot Macaroni Cheeseburger Soup

Fridge: Store leftover One Pot Macaroni Cheeseburger Soup in an airtight container for up to 3 days. Reheat gently on the stove or in the microwave, adding a splash of broth to restore creaminess.

Freezer: This soup freezes well! Divide into portion-sized containers and store in the freezer for up to 2 months. Thaw overnight in the fridge before reheating.

Reheating: To reheat, place the soup in a pot over low heat. Stir frequently, adding a little milk or broth if needed to return to its creamy consistency.

Room Temperature: Avoid leaving the soup out at room temperature for more than 2 hours to ensure food safety.

Substitutions

Can’t find a few of these ingredients? No problem! They can easily be replaced with the suggestions below:

  • Ground Beef: Replace it with plant-based meat or black beans (for a vegetarian option). You could also use ground turkey for a lighter alternative.
  • Dried Oregano: Replace it with 1 teaspoon of Italian seasoning if you have it on hand. This will maintain the herby flavor profile.
  • Heavy Cream: Replace it with ½ cup of half and half for a lighter consistency, or use 1 cup of whole milk for a thinner soup.
  • White Balsamic Vinegar: Replace it with apple cider vinegar or white wine vinegar for a similar tangy flavor.
  • Elbow Macaroni: Replace it with any short pasta, like fusilli or penne, or use 1 medium diced potato or cauliflower florets for a different twist.

One-Pot Macaroni Cheeseburger Soup Recipe FAQs

What is the best way to choose ripe ingredients for this recipe?
Absolutely! When selecting your ingredients, opt for fresh produce. Look for yellow onions that are firm with no soft spots; carrots should be vibrant and crisp; and celery should be firm too. For ground beef, if sourcing local, choose organic and grass-fed if possible. The best ground beef has a bright red color. For the cheese, shredded sharp cheddar is ideal for melting, while the heavy cream should be fresh with no sour smell.

How should I store leftover One-Pot Macaroni Cheeseburger Soup?
After enjoying your delicious soup, promptly cool it and transfer it to an airtight container. In the fridge, it can last for up to 3 days. When reheating, just add a splash of chicken broth to restore its creamy texture before warming gently either on the stove or in the microwave.

Can I freeze One-Pot Macaroni Cheeseburger Soup?
Yes, you can freeze this delightful soup! First, allow it to cool completely, then divide it into portion-sized containers. It will stay fresh in the freezer for up to 2 months. To reheat, thaw it overnight in the fridge. When ready, warm it on low heat, stirring often and adding a little milk or broth if necessary to regain its rich creaminess.

What should I do if my soup turns out too thick?
Very common! If your One-Pot Macaroni Cheeseburger Soup is thicker than desired, simply add a bit of chicken broth or milk to thin it out. Start with ¼ cup, stirring well, and gradually add more until your preferred consistency is reached.

Is this recipe safe for those with allergies?
Always a good question! This recipe contains dairy (butter, heavy cream, cheddar cheese) and gluten (due to the flour and macaroni). For those with allergies, I recommend substituting heavy cream with non-dairy milk (like almond or oat milk) and using gluten-free pasta and flour. If you’re cooking for pets, avoid giving them any soup with onions or garlic, as these are harmful to dogs and cats. Always tailor it to keep everyone safe!

Can I make this soup vegetarian or vegan?
Definitely! For a vegetarian version, substitute the ground beef with plant-based meat or canned black beans. To create a vegan version, use the same plant-based options, omit the dairy entirely, and instead use coconut milk or a nut-based cream. Plus, feel free to load it with your favorite veggies for added nutrition!

[tasty-recipe id=”2281″]

Filed Under: Soups

Creamy Cheddar Broccoli Potato Soup You’ll Want Every Day

June 30, 2025 by grace bellamy Leave a Comment

As the chilly air of autumn settles in, I find myself craving hearty comfort foods that wrap me in warmth. One of my ultimate go-to recipes is creamy Cheddar Broccoli Potato Soup. This delightful dish, often affectionately referred to as Cheesy Vegetable Chowder, masterfully combines the rich flavors of melted cheese, fresh broccoli, and tender potatoes into a single warm bowl of happiness. The moment those vibrant veggies simmer alongside savory garlic and onions, the aroma fills my kitchen, making every corner feel like home.

What truly sets this soup apart is its incredible versatility—you can easily tweak the cheese or switch up the milk for a lighter option without sacrificing the creamy goodness. Designed to satisfy even the pickiest eaters, this soup is perfect for cozy family dinners or intimate gatherings with friends. So, whether you’re looking for a quick weeknight meal or a comforting dish to share, this Cheddar Broccoli Potato Soup is about to become your new favorite!

Why is Cheddar Broccoli Potato Soup so special?

Comforting Warmth: This Cheddar Broccoli Potato Soup is a hug in a bowl, keeping you cozy during chilly evenings.
Satisfying All Ages: Its creamy texture and cheesy flavor make it a hit with kids and adults alike.
Flexible Ingredients: Easily modify it—even simple swaps like different cheeses or milk alternatives can tailor it to your taste.
Quick & Easy: With simple steps, you can whip up a comforting dish in no time, perfect for busy weeknights.
Nourishing and Flavorful: Packed with nutrients from broccoli and heartiness from potatoes, you’ll feel good about every bite. For an even more comforting experience, pair it with a side of Creamy Potato Soup for a delightful savoring session!

Cheddar Broccoli Potato Soup Ingredients

For the Soup Base
• Butter – adds richness and helps sauté vegetables.
• Chopped Carrots – provides sweetness and vibrant color.
• Chopped Celery – adds a savory flavor foundation.
• Chopped Yellow Onion – contributes essential flavor depth.
• Garlic – enhances the savory experience.
• Low-sodium Chicken Broth – forms the flavorful heart of the soup.
• Peeled and Cubed Russet Potatoes – adds substance and makes it hearty.
• Chopped Broccoli Florets – delivers nutrition and lovely texture.
• Dried Thyme – infuses a gentle herbal note.
• Salt and Freshly Ground Black Pepper – essential for seasoning.

To Thicken and Creamify
• All-purpose Flour – thickens the soup perfectly; a crucial step!
• Milk – brings creaminess; use lower-fat options if desired.
• Heavy Cream – adds significant richness for that dreamy texture.

For the Cheese Lovers
• Shredded Sharp Cheddar Cheese – imparts that iconic cheesy flavor.
• Finely Shredded Parmesan Cheese – adds an extra layer of cheesiness.

Full measurements are in the recipe card below.

How to Make Cheddar Broccoli Potato Soup

  1. Melt Butter: In a large pot, melt 3 tablespoons of butter over medium heat. Add chopped carrots, celery, and onion, sautéing until softened, about 5-7 minutes. The kitchen will start to smell delightful!

  2. Add Garlic: Stir in the minced garlic and cook for 1 additional minute until fragrant, being careful not to let it brown. This step adds a wonderful savory note to your soup.

  3. Simmer Broth and Potatoes: Pour in the low-sodium chicken broth and add the peeled, cubed potatoes. Bring to a gentle simmer and let it cook for about 15-20 minutes, until the potatoes are tender.

  4. Incorporate Broccoli: Add the chopped broccoli florets and dried thyme, cooking for another 5 minutes, or until the broccoli is vibrant green and tender. This will enhance the soup’s color and nutrition!

  5. Make the Roux: In a separate pan, whisk the remaining 2 1/2 tablespoons of butter with the flour over medium heat. Cook until bubbly and golden, about 1-2 minutes. This thickening agent is essential for creaminess.

  6. Create the Cream Base: Gradually whisk in the milk to the roux until smooth and thickened, about 3-4 minutes. Stir in the heavy cream and remove from heat.

  7. Combine and Melt: Pour the cream mixture into the soup pot, stirring until everything is well combined and heated through.

  8. Melt the Cheeses: Add the shredded cheddar and parmesan cheese, stirring until melted and creamy. You’ll love how it transforms the soup into pure comfort!

Optional: For an extra pop of flavor, sprinkle with fresh chives before serving.

Exact quantities are listed in the recipe card below.

Cheddar Broccoli Potato Soup Variations

Feel free to play around with these suggestions to make your soup truly yours!

  • Corn Addition: Fold in fresh corn off the cob for a sweet, crunchy texture that brightens every bite. It adds a delightful sweetness, making your soup even more comforting.

  • Cheese Adjustments: Modify the amount of cheese to suit your family’s taste; more cheese equals extra creaminess! Experimenting with different cheese ratios can lead to exciting new flavors.

  • Milk Swaps: Use almond, oat, or soy milk for a dairy-free option that still keeps the soup creamy. This change accommodates those with dietary restrictions without compromising taste.

  • Spicy Twist: Add a pinch of cayenne pepper or a dash of hot sauce for a warming kick. This fun twist can elevate the whole dish, making it perfect for spice lovers.

  • Herb Variations: Try fresh herbs like basil or parsley instead of thyme for a fresh, vibrant flavor. Fresh herbs bring another level of brightness to your Cheddar Broccoli Potato Soup.

  • Texture Additions: Toss in cooked bacon or croutons for a crunchy element that contrasts with the soup’s creaminess. This delightful contrast gives you both texture and richness in every spoonful.

  • Veggie Boost: Mix in some fresh spinach or kale to up the nutritional value while adding a pop of color. This swap makes your soup even heartier and packed with goodness.

  • Roasted Garlic Infusion: For richer flavor, roast the garlic before adding it to the soup. Roasting mellows out the garlic’s bite, creating a warmer, sweeter flavor that melds beautifully with the cheese.

What to Serve with Cheddar Broccoli Potato Soup?

Warm up your dining experience with delightful pairings that enhance this creamy comfort food.

  • Crusty Bread: Perfect for dipping, a warm, crusty baguette elevates the soup, soaking up every cheesy morsel.
  • Garden Salad: A fresh garden salad adds a crisp counterpoint, with vibrant greens providing a refreshing crunch to balance the richness.
  • Garlic Breadsticks: These warm, buttery delights bring a savory, aromatic touch, making this meal feel extra special and indulgent.
  • Grilled Cheese Sandwich: An all-time favorite, a melty grilled cheese brings nostalgia and a delightful crunch alongside your comforting soup.
  • Roasted Veggies: Roasted seasonal vegetables add earthy flavors and texture, enriching the meal while offering a nutritious addition.
  • Chardonnay: A chilled glass of Chardonnay complements the cheese wonderfully, its crispness cutting through the richness of the soup.
  • Crunchy Tortilla Chips: Serve these for a fun, casual lunch option, adding a crunchy texture that pairs nicely with the creamy soup.
  • Apple Crisp: End your meal on a sweet note with a warm apple crisp, balancing the savory flavors with a hint of sweetness.
  • Cornbread Muffins: Tender and slightly sweet, cornbread muffins pair beautifully, rounding out the meal with a comforting Southern flair.
  • Pineapple Smoothie: Refreshing and light, this fruity drink can provide a zesty kick, making the meal feel vibrant and lively.

How to Store and Freeze Cheddar Broccoli Potato Soup

• Fridge: Store your Cheddar Broccoli Potato Soup in an airtight container for up to 3 days. Allow it to cool completely before refrigerating to maintain its creamy texture.

• Freezer: For longer storage, freeze the soup in freezer-safe containers for up to 3 months. Ensure to leave some space for expansion, as the soup may thicken upon freezing.

• Reheating: When ready to enjoy, thaw the soup overnight in the fridge and reheat on the stove over medium-low heat, stirring frequently. Add a splash of milk or broth if it thickens too much.

• Avoid Repeated Refreezing: To maintain the best flavor and texture, avoid refreezing once thawed. Enjoy this comforting Cheddar Broccoli Potato Soup fresh!

Expert Tips for Cheddar Broccoli Potato Soup

• Cheese Quality Matters: Using high-quality sharp cheddar cheese enhances flavor. Don’t opt for pre-shredded cheese, as it often contains anti-caking agents that prevent melting.

• Cook Veggies Thoroughly: Ensure all vegetables are tender before adding cheese to achieve a smooth and creamy texture in your Cheddar Broccoli Potato Soup.

• Thickening Techniques: If you prefer a thicker soup, add more flour to the roux or let the soup simmer longer after incorporating the cream.

• Season Gradually: Taste and adjust seasoning towards the end of cooking. Adding salt at the beginning may lead to an overly salty soup.

• Experiment with Variations: Don’t hesitate to add fresh corn, spinach, or even bacon for a twist on your Cheddar Broccoli Potato Soup! Adjust these additions to fit your family’s taste.

Cheddar Broccoli Potato Soup Recipe FAQs

What is the secret ingredient in broccoli cheese soup?
Absolutely! While broccoli cheese soup is traditionally made with cheese and broccoli, a secret ingredient that many chefs love to use is a bit of mustard. It adds a wonderful depth of flavor without overpowering the dish. If you’re feeling adventurous, try adding a teaspoon of Dijon mustard to your Cheddar Broccoli Potato Soup for an extra twist!

Do you put potatoes in broccoli cheddar soup?
Very much so! Potatoes bring a delightful heartiness to the Cheddar Broccoli Potato Soup. They not only add substance but also enhance the creamy texture. So yes, including peeled and cubed russet potatoes is essential for creating that comforting, filling bowl of soup.

What are some storage methods for Cheddar Broccoli Potato Soup?
When storing your soup, place it in an airtight container, allowing it to cool completely first to maintain its creamy texture. In the refrigerator, it will last up to 3 days. For the freezer, transfer to freezer-safe containers, leaving some space for expansion, and it can be stored for up to 3 months. Always remember to label your containers with the date!

How do I reheat frozen Cheddar Broccoli Potato Soup without losing creaminess?
To reheat frozen Cheddar Broccoli Potato Soup effectively, first, thaw it overnight in the refrigerator. Once thawed, pour it into a saucepan and reheat over medium-low heat. Stir frequently, and if it seems too thick, add a splash of milk or chicken broth to bring it back to that creamy consistency. This method preserves the flavor and texture beautifully.

Why won’t my cheese melt in broccoli cheddar soup?
A common issue with melting cheese in soups is the use of pre-shredded cheese, which often contains anti-caking agents that hinder smooth melting. To ensure a beautifully creamy result, always use freshly shredded sharp cheddar cheese. This will melt beautifully into your Cheddar Broccoli Potato Soup and enhance the flavor perfectly!

What dietary considerations should I keep in mind for this soup?
For those with dietary restrictions, it’s important to consider allergies to dairy and gluten. You can easily make this soup gluten-free by substituting all-purpose flour with cornstarch or a gluten-free flour blend. For a dairy-free version, opt for plant-based milk and a vegan cheese alternative. Always check labels to ensure all ingredients align with your dietary needs.

[tasty-recipe id=”2266″]

Filed Under: Soups

Cozy Up with the Best Easy Potsticker Soup Recipe Ever

June 30, 2025 by Maya Rowan Leave a Comment

It was a chilly evening when the craving hit me—a warm, comforting bowl of soup that wraps you in a cozy hug. I rummaged through my freezer and discovered a bag of frozen potstickers—my secret weapon for busy nights. That’s when the idea struck me: why not transform these beloved dumplings into a hearty potsticker soup? Within just 25 minutes, I had a steaming bowl full of fragrant broth, tender dumplings, and vibrant vegetables, perfect for chasing away the winter blues.

What I adore about this potsticker soup is its incredible versatility. You can easily customize it to your liking, whether you have a stash of leftover veggies or want to toss in a sprinkle of your favorite toppings. It’s a dish that thrives on creativity! With each spoonful, I’m reminded that comfort food doesn’t have to be tedious to make—this delicious soup is quick, easy, and a true family favorite. Ready to make your own? Let’s dive into this delightful recipe!

Why is Potsticker Soup so popular?

Quick and comforting, potsticker soup has become a household favorite for good reason. In just 25 minutes, you can create a deliciously savory meal that warms the soul. This soup combines tender potstickers with a fragrant broth, making it an irresistible choice for busy weeknights. What’s even better? It’s entirely customizable! Toss in your favorite veggies, mix different broths, or experiment with various toppings like fried garlic or chili crisp. Each bowl is a unique creation, ensuring that everyone at the table can enjoy their own twist on this delightful dish. Say goodbye to takeout and hello to homemade comfort—this soup is calling your name! For more quick and easy recipes, check out chicken pot pie soup.

Potsticker Soup Ingredients

This potsticker soup is as flavorful as it is easy to make!

For the Base
• Oil – For sautéing aromatic ingredients for a deeper flavor.
• Mushrooms (e.g., shiitake or baby bella) – Add umami and texture to the soup.
• Garlic – Enhances the overall flavor profile.
• Ginger – Introduces a fresh, zesty kick.
• Vegetable Broth – Serves as the primary liquid base; feel free to swap with chicken or pho broth.
• Soy Sauce – Provides umami and saltiness; tamari is a great gluten-free substitute.

For the Star Ingredient
• Frozen Potstickers – The key to the soup’s heartiness; choose your favorite meat or vegetarian option.

For the Vegetables
• Bok Choy – Adds texture and a slight bitterness; can be replaced with spinach, Swiss chard, or cabbage.
• Scallions – For garnish, providing a fresh onion flavor.

For Seasoning
• Sesame Oil (Toasted) – Delivers an aromatic and nutty essence.
• Freshly-ground Black Pepper – Adds an element of warmth.
• Chili Crisp – Optional for those who like a bit of heat.

For Optional Ingredients
• Miso – For depth of flavor; perfect if you want to level up your soup.
• Curry Paste – Adds a unique twist on this flavorful dish.
• Red Chili Flakes – Sprinkle in for an extra kick!
• Rice Wine Vinegar – A splash adds a touch of acidity that brightens the broth.
• Cilantro – Optional topping that enhances the dish’s freshness.
• Furikake – A delightful topping for an additional layer of flavor.
• Fried Garlic – Sprinkles of this add crunch and richness.
• Worcestershire Sauce (1 T) – For savory depth, enhancing overall taste.

For Added Protein
• Cooked Shrimp/Tofu – Consider adding for an extra protein punch.
• Sweet Onion and Fresh Carrots (diced) – Optional, providing sweetness and texture to balance the dish.

Delve into this delightful potsticker soup today! The possibilities are endless, so tailor it to your taste and enjoy every cozy bite.

Step-by-Step Instructions for Potsticker Soup

  1. Heat the Oil In a large pot, warm 1 tablespoon of oil over medium heat. This step is essential for sautéing the aromatics and enhancing the flavor of the soup. Once the oil is shimmering, you’re ready to add the mushrooms.
  2. Sauté the Mushrooms Add 1 cup of sliced mushrooms to the pot and cook for about 4-5 minutes until they’re browned and tender. Browning the mushrooms adds a rich umami flavor, creating a deeper base for your soup. Stir frequently to avoid burning.
  3. Add Aromatics Incorporate 2 minced garlic cloves and 1 tablespoon of grated fresh ginger into the pot. Sauté for another 1-2 minutes until fragrant. This step layers in delightful aromas that make your kitchen feel inviting and warm, setting the stage for a delicious meal.
  4. Pour in Broth Add 4 cups of vegetable broth and 2 tablespoons of soy sauce to the pot, bringing the mixture to a gentle boil over high heat. The broth forms the base of the soup, and this boiling action will help meld all the flavors together beautifully.
  5. Cook the Potstickers Once boiling, gently drop in 12 frozen potstickers and 2 cups of chopped bok choy. Reduce heat to medium and cook for 3-4 minutes until the potstickers are heated through. This step ensures the dumplings are perfectly tender while adding vibrant greens to your soup.
  6. Finish with Seasoning Stir in 1 teaspoon of toasted sesame oil and freshly-ground black pepper to taste. This step enhances the flavor profile with added depth—sesame oil provides an aromatic finish that harmonizes with the broth, enticing the senses.
  7. Serve and Enjoy Ladle the potsticker soup into bowls, garnishing with sliced scallions and any optional toppings you desire, such as chili crisp or cilantro. This final touch not only elevates the presentation but also allows each bowl to reflect your personal taste. Enjoy your cozy bowl of potsticker goodness!

Tips for making the most flavorful Potsticker Soup

  • Browning Potstickers: Before adding the frozen potstickers to the soup, consider browning them in a separate pan for about 3-4 minutes. This step not only adds a delightful crispness but also helps prevent them from becoming mushy in the soup. A little texture goes a long way!
  • Broth Choices: While vegetable broth is a great base, I’m a big fan of using chicken or pho broth for an extra depth of flavor. If you’re looking for a vegetarian option, mushroom broth will enhance the umami notes beautifully. Experiment with what you have on hand!
  • Vegetable Variety: Feel free to get creative and toss in your favorite vegetables! Carrots, red bell pepper, or even some snap peas can add a fun crunch and nutritional boost. Just remember to chop them small so they cook evenly alongside the potstickers.
  • Seasoning Enhancements: Adding sesame oil at the end is key for its nutty aroma. For a punch of flavor, think about incorporating a splash of rice wine vinegar or a tablespoon of miso, which both brighten the broth and elevate the soup’s taste. Trust me, you’ll want that extra layer!
  • Custom Toppings: Don’t skimp on the toppings! Fresh cilantro, scallions, and a sprinkle of fried garlic not only add flavor but also a pop of color to your soup. If you enjoy heat, a drizzle of chili crisp or a few red chili flakes will definitely elevate each spoonful.
  • Protein Power: If you’re looking to make this soup heartier, consider adding cooked shrimp or cubed tofu at the end of cooking. They’ll warm through quickly without breaking apart, giving you a satisfying protein boost to round out the meal.

Turn It Into A Party!

Imagine serving up a pot of Potsticker Soup at your next gathering! This delightfully warm and flavorful dish is bound to impress your guests with its customizable elements—everyone can create their own bowl of comfort! Whether paired with crunchy chips or savory crackers, it’s a surefire way to keep your crowd satisfied and smiling.  A few tips if serving for a crowd:

  • Prepare a buffet-style setup! Set out various dumpling options and toppings (like fried garlic or chili crisp) for guests to customize their bowls just the way they like it! (This adds a fun, interactive element to your gathering! )
  • Keep it warm on the stove! If you’re serving a larger group, keep the soup on a low simmer to ensure it stays warm throughout the party! (Just stir occasionally to prevent sticking! )
  • Make it ahead of time! You can whip up the soup a few hours in advance and reheat it just before serving—perfect for stress-free entertaining! (Adding extra broth if needed will help keep it from thickening too much! 🕒)

Substitutions

Can’t find a few of these ingredients? No problem! They can easily be replaced with the suggestions below:

  • Oil: Replace it with olive oil. (It has a different flavor but still works great for sautéing!)
  • Mushrooms: Replace it with 1 cup of diced zucchini. (Zucchini will add a different texture but will keep it light!)
  • Vegetable Broth: Replace it with chicken broth or pho broth. (Both options add rich flavor to your soup!)
  • Soy Sauce: Replace it with tamari for a gluten-free option. (Same delicious umami flavor, gluten-free!)
  • Bok Choy: Replace it with 2 cups of chopped spinach. (Spinach wilts nicely and offers a similar texture.)

What to Serve with Potsticker Soup?

Transform your simple potsticker soup into a memorable meal with these delightful pairings.

  • Crispy Egg Rolls: These add a satisfying crunch and are filled with savory veggies. The textures enhance your soup experience perfectly.
  • Steamed Jasmine Rice: This fragrant rice helps soak up the rich broth, making each bite more flavorful and comforting. A warm bed of rice complements the soup beautifully.
  • Garlic Noodles: Quick to whip up, these buttery noodles carry a hint of garlic that pairs wonderfully with the soup’s savory notes. Slurping them up adds a fun element to your dining experience.
  • Sesame Broccoli: Lightly steamed with a drizzle of sesame oil, this vegetable adds freshness and crunch, balancing the soup’s rich flavors. Plus, the vibrant green makes your plate pop!
  • Asian Cucumber Salad: Crisp cucumbers tossed in rice vinegar offer a refreshing crunch that contrasts with the warmth of the soup. This bright salad is a delightful sidekick.
  • Chili Oil: A drizzle of this spicy oil can rev up the flavor of your soup. It’s not just for heat; the aromatic oils enhance the entire dish.
  • Green Tea: Serve steaming cups of this warm, delicate beverage alongside your meal. Its lightness complements the heartiness of the potsticker soup.
  • Mango Sticky Rice: For a sweet finish, this dessert brings a lovely sweetness and creamy texture that rounds out your meal beautifully.

Let your creativity flow and enjoy this comforting feast!

How to Store and Freeze Potsticker Soup

Fridge: Store leftover potsticker soup in an airtight container for up to 3 days. Reheat gently on the stovetop, adding a splash of broth if needed to maintain moisture.

Freezer: Place cooled potsticker soup in freezer-safe containers, leaving space for expansion. It can be frozen for up to 3 months. Thaw overnight in the fridge before reheating.

Reheating: For best results, reheat on the stovetop over low heat, stirring frequently. Enjoy your comforting potsticker soup just like the first time!

Potsticker Soup Recipe FAQs

How do I choose the right vegetables for my potsticker soup?
Absolutely! When selecting vegetables, aim for vibrant and fresh produce. I recommend hearty greens like bok choy or spinach, as they hold up well in the broth. Other great options include diced sweet onions, carrots, or red bell peppers, which add sweetness and color. Just remember to chop them small for even cooking!

How long can I store leftover potsticker soup in the fridge?
Very! You can keep your leftover potsticker soup in an airtight container in the refrigerator for up to 3 days. When you’re ready to enjoy it again, simply reheat it gently on the stovetop. If the soup is too thick, feel free to add a splash of broth to bring back its lovely consistency!

Can I freeze potsticker soup? If so, how?
Definitely! To freeze your potsticker soup, allow it to cool completely. Then transfer it to freezer-safe containers, leaving a bit of space at the top for expansion. It will stay fresh for about 3 months. To thaw, just place it in the fridge overnight. When you’re ready to eat, reheat it on low heat on the stovetop, stirring often.

What should I do if my potstickers are falling apart in the soup?
Oh dear! If you find your potstickers are falling apart, it might be due to cooking them too long or not browning them first. I often recommend browning your potstickers in a separate pan for about 3-4 minutes before adding them to the soup. This helps form a crust that keeps them intact while they cook. Additionally, stir gently to avoid breaking them up.

Are there any dietary considerations I should keep in mind with this soup?
Very! If you or someone at your table has dietary restrictions, don’t worry. You can easily make this potsticker soup gluten-free by using tamari instead of regular soy sauce and gluten-free potstickers. For a vegan version, ensure your potstickers and broth are plant-based. Be sure to check the ingredient labels on all packaged items to avoid allergens.

Can I use a different broth for this soup?
Absolutely! While vegetable broth is a fantastic base, feel free to swap it out for chicken or pho broth for a deeper flavor profile. If you’re feeling adventurous, a homemade mushroom broth could elevate the umami notes of this comforting potsticker soup beautifully. Just adjust the seasoning as needed, and you’ll have a bowl full of deliciousness!

[tasty-recipe id=”2277″]

Filed Under: Soups

Creamy Marry Me Chicken Soup Recipe That Wins Hearts

June 30, 2025 by Maya Rowan Leave a Comment

On a chilly evening last fall, I found myself nestled on the couch, a warm blanket draped across my knees as the rain pitter-pattered against the windowpane. My stomach growled, pulling me from my cozy cocoon, seeking comfort food that felt like a hug in a bowl. That’s when the thought of my Marry Me Chicken Soup popped into my mind — a creamy, Tuscan-inspired delight that has become the star of many dinner tables, including my own.

The combination of tender chicken, vibrant veggies, and a rich cream sauce enveloped in cozy flavors never fails to lift my spirits. Whether you’re whipping it up for a simple weeknight dinner or for a cozy gathering with friends, this one-pot wonder is sure to impress! With its versatility, you can easily adapt it to suit your taste, whether you prefer a gluten-free option or want to mix in some kielbasa sausage for a twist. So grab your ingredients and let’s cook up a pot of happiness together!

Why is Marry Me Chicken Soup so popular?

Rich and Creamy, this beloved dish has charmed its way into the hearts of many home cooks. Combining tender chicken with a delightful medley of vegetables and a luxurious cream base, it creates a flavorful symphony that resonates with comfort. Whether you’re serving it on a wintry night or for a cozy family gathering, the ease of preparation shines through, making it the perfect choice for busy weeknights.

Moreover, its adaptability adds to its appeal—feeling adventurous? Consider adding Kielbasa sausage or opting for gluten-free pasta. Each bowl of this soup brings smiles and satisfaction, making it a must-try in your recipe repertoire. Dive in and discover why it’s often referred to as “marry me” chicken! For more delicious variations, check out our Marry Me Chicken recipe.

Marry Me Chicken Soup Ingredients

• Here’s everything you need to create this delicious soup!

For the Soup

  • Olive Oil – for cooking and adding flavor.
  • Boneless, Skinless Chicken Breasts or Thighs (1-1½ pounds) – main protein, with thighs providing more flavor; you can also use pre-cooked rotisserie chicken.
  • Italian Seasoning (2 teaspoons, divided) – adds a Mediterranean flavor base; use 1 tsp for chicken and 1 tsp for the broth.
  • Salt and Pepper – to taste for seasoning.
  • Diced Carrots (½ cup) – adds natural sweetness and texture.
  • Diced Celery (½ cup) – contributes flavor and depth.
  • Diced Onions (½ cup) – enhances overall taste.
  • Diced Sundried Tomatoes (¼ cup) – offers concentrated tomato flavor.
  • Minced Garlic (3 cloves) – infuses the soup with aromatic goodness.
  • Flour (¼ cup) – thickens the soup for a creamy consistency; can substitute with cream cheese (4oz).
  • Tomato Paste (2 tablespoons, optional) – enhances the tomato flavor.
  • Chicken Broth (6-8 cups) – forms the base of the soup; start with 6 cups and adjust for desired thickness.
  • Pasta (6 oz) – adds body to the soup; consider small Italian shells or macaroni elbows.
  • Heavy Whipping Cream (1 cup) – imparts rich creaminess; substitutes include half and half, milk, or full-fat coconut milk (will alter texture).
  • Grated Parmesan Reggiano Cheese (½-1 cup) – adds flavor and creaminess.
  • Fresh Spinach (2½-3 cups) – adds a fresh touch to each bowl.

Optional Add-ins

  • Cooked Bacon – for extra flavor and texture.
  • Cajun Seasoning – to spice things up.
  • Dry White Wine (2 tablespoons to ¼ cup) – to add a subtle depth of flavor if desired.
  • Truffle Oil – for a gourmet twist.
  • Sesame Oil – can introduce a unique flavor profile.
  • Fresh Herbs (like Parsley, Thyme, or Basil) – enhances freshness and aroma.

This Marry Me Chicken Soup Recipe is sure to win hearts and fill bowls with joy!

Step-by-Step Instructions for Marry Me Chicken Soup Recipe

  1. Heat the Olive Oil In a large soup pot or Dutch oven, warm 2 tablespoons of olive oil over medium-high heat. This initial step is vital as it not only coats the bottom of the pot but also helps to sauté the chicken evenly, creating a deliciously browned exterior and a base of flavor for the soup.

  2. Cook the Chicken Add 1-1½ pounds of diced boneless, skinless chicken breasts or thighs to the pot along with 1 teaspoon of Italian seasoning, salt, and pepper. Sauté the chicken for about 4-5 minutes until it’s golden-brown. This step ensures that the chicken is sealed, locking in its juices and enhancing the overall taste of the soup.

  3. Sauté the Vegetables Toss in ½ cup of diced onions, ½ cup of diced carrots, ½ cup of diced celery, ¼ cup of sundried tomatoes, and 3 minced garlic cloves. Cook for approximately 3-4 minutes until the onions are translucent. This combination adds layers of flavor and an inviting aroma that fills the kitchen.

  4. Thicken the Soup Sprinkle ¼ cup of flour into the pot and stir well to combine, followed by 2 tablespoons of tomato paste if desired. This will create a roux that thickens your soup, giving it that creamy texture we all love. Cooking the flour for a minute also eliminates any raw taste, enriching the final dish.

  5. Add the Broth Gradually whisk in 6-8 cups of chicken broth, starting with 6 cups for a thicker soup. This gradual addition helps prevent lumps. Increase to the desired consistency as needed. Bring the pot to a rolling boil, as this step is crucial for melding all the flavors in your Marry Me Chicken Soup.

  6. Incorporate the Pasta Once boiling, stir in 6 ounces of pasta along with the remaining 1 teaspoon of Italian seasoning, additional salt, and pepper to taste. Simmer the soup uncovered for about 20 minutes, or until the chicken is cooked through and the pasta is al dente. Keeping the pasta slightly firm ensures that it won’t turn mushy, maintaining the soup’s structure.

  7. Add Cream and Spinach Stir in 1 cup of heavy whipping cream, 2½-3 cups of fresh spinach, and ½ to 1 cup of grated Parmesan cheese. Allow the mixture to simmer for another 5 minutes. This final step adds richness and a pop of color, making the soup irresistible and comforting.

  8. Finish with Optional Ingredients If desired, mix in cooked bacon, Cajun seasoning, or a splash of dry white wine at the end. These additions can elevate your Marry Me Chicken Soup, imparting unique flavors that make it truly special. This flexibility allows you to personalize your dish according to your preferences!

Note: For an easy variation, consider cooking the pasta separately to avoid potential mushiness when storing leftovers. Enjoy your bowl of warmth and comfort!

Substitutions

Can’t find a few of these ingredients? No problem! They can easily be replaced with the suggestions below:

  • Flour: Replace it with 4 oz cream cheese. This will give you a creamy texture without the flour.
  • Heavy Whipping Cream: Replace it with 1 cup half and half or 1 cup full-fat coconut milk (this will alter the texture slightly).
  • Chicken Broth: Replace it with vegetable broth for a lighter option or homemade stock for enriched flavor.
  • Pasta: Replace it with gluten-free pasta to keep it suitable for gluten sensitivities, or consider using diced potatoes for a comforting alternative.
  • Diced Sundried Tomatoes: Replace it with 2 tablespoons of tomato sauce if you don’t have sundried tomatoes on hand. This will still add a tomato flavor without overpowering the dish.

Tips for making the most flavorful Creamy Marry Me Chicken Soup

  • Ingredient Quality: Always opt for the freshest ingredients you can find. Fresh chicken, vegetables, and herbs significantly enhance the flavor profile, creating a more vibrant and delicious soup. So, I like to hit up my local farmers’ market when possible!

  • Substituting Protein: If chicken isn’t your thing, consider using Kielbasa sausage instead! It adds a smoky flavor that complements the creaminess beautifully. Just slice it up and toss it in with the veggies — a perfect twist that keeps the heartiness intact.

  • Avoiding Mushy Pasta: Important tip: If you want your pasta to maintain its texture, cook it separately and stir it into each bowl right before serving. This way, you won’t end up with a mushy mess when you store the leftovers, which I know can be a common challenge.

  • Cream Alternatives: If you’re looking to lighten up this dish, try substituting heavy cream with half and half or coconut milk. This alters the texture a bit but still provides a lovely creaminess. Just remember that not all substitutes will yield the same rich flavor, so use them based on your taste preference!

  • Selecting Broth: Using high-quality chicken broth makes a world of difference in the flavor. You can even make your own! Just simmer bones, veggies, and herbs together over a few hours. Trust me, the depth of flavor will be worth it.

  • Seasoning Wisely: It’s best to season in layers. Start by salting the chicken while cooking, and continue adding salt and pepper gradually as you introduce more ingredients. This way, each element of your soup gets a chance to shine, creating a well-rounded flavor that’s simply irresistible!

What to Serve with Marry Me Chicken Soup?

When it comes to pairing for the delightful warmth of your creamy masterpiece, think of the perfect companions that will elevate your dining experience!

  • Garlic Bread: A buttery, crusty delight that brings a crunchy contrast—perfect for dipping into the creamy broth and soaking up all that flavor.

  • Caesar Salad: Crisp romaine, croutons, and tangy dressing add a refreshing bite that balances the richness of the soup. It’s a classic combination that steals hearts!

  • Roasted Vegetables: Seasoned with herbs, these add a lovely earthiness and sweetness. The caramelization enhances their flavors, making each bite a cozy experience.

  • Risotto: This creamy, Italian risotto is an indulgent complement. The creamy texture mirrors your soup and adds a gourmet touch to your meal.

  • Crusty Baguette: Simple yet effective, a fresh baguette is great for soaking up every drop of your Marry Me Chicken Soup, adding a satisfying crunch to your meal.

  • Chardonnay: This white wine pairs beautifully with the creamy elements of the soup. Its bright acidity cuts through the richness and enhances the overall experience.

  • Cheese Platter: A mix of soft cheeses and a tangy chutney will provide delightful grazing before or after the soup. It’s an easy way to elevate your dinner gathering.

Turn It Into A Party!

Gather your friends and family for a delightful get-together with this Marry Me Chicken Soup that’s sure to be the highlight of your gathering! Its comforting, creamy flavors and hearty ingredients make it a crowd-pleaser—perfect for cozy evenings! Serve it alongside crunchy crackers or warm crusty bread for dipping. 😉 A few tips if serving for a crowd:

  • Keep it Warm! Use a slow cooker to maintain that inviting heat during the party (set it on low and stir occasionally!).
  • Make-Ahead Magic! Prepare the soup a day in advance and let the flavors meld overnight. Just reheat and add the cream and spinach before serving!
  • Seasonal Twist! Consider adding seasonal vegetables like butternut squash or kale for a fresh spin (this will also boost nutrition!).

Let’s create some unforgettable memories while enjoying this delicious soup! 🥣✨

How to Store and Freeze Marry Me Chicken Soup

Fridge: Store leftover Marry Me Chicken Soup in an airtight container in the refrigerator for up to 3 days. The soup will thicken as it sits, which makes it perfect for reheating with a splash of broth.

Freezer: For freezer storage, place the soup in freezer-safe containers or bags, avoiding heavy cream if possible. Freeze for up to 3 months. When ready to enjoy, thaw in the fridge overnight and reintroduce the cream while reheating.

Reheating: Reheat gently on the stovetop over low heat, stirring occasionally. If the soup has thickened, add a bit of chicken broth to loosen it before serving. Enjoy the warm, comforting flavors of your Marry Me Chicken Soup.

Marry Me Chicken Soup Recipe FAQs

What is the best way to select chicken for the soup?
Absolutely! When selecting chicken, choose boneless, skinless breasts or thighs that are fresh and free from any dark spots. Chicken thighs bring a bit more flavor and richness to the soup. If in a hurry, pre-cooked rotisserie chicken is a fantastic time-saver; just be sure to add it towards the end to keep it tender and juicy.

How should I store leftover Marry Me Chicken Soup?
For sure! Store your leftover soup in an airtight container in the refrigerator for up to 3 days. The flavor actually intensifies as it sits, but be aware that the soup will thicken. Simply add a splash of chicken broth when reheating to restore your beloved creamy consistency.

Can I freeze Marry Me Chicken Soup?
Certainly! If you plan to freeze it, omit the heavy cream before freezing. Instead, place the cooled soup in freezer-safe containers or bags, avoiding excess air. It can be frozen for up to 3 months. When you’re ready to enjoy it, thaw it overnight in the refrigerator and add the cream back in while reheating on low heat.

What should I do if my pasta is overcooked in the soup?
The more the merrier! To avoid mushy pasta next time, consider cooking it separately and adding it just before serving. This way, you retain the texture and prevent it from absorbing too much broth. If your pasta happens to overcook, you can still salvage it by focusing on keeping the soup flavorful through richer herbs and spices.

Are there any dietary considerations for Marry Me Chicken Soup?
Yes, indeed! If you or someone you’re cooking for has dietary restrictions, this soup is incredibly adaptable. For gluten-free options, use gluten-free pasta or substitute with potatoes. Also, feel free to swap the chicken for kielbasa sausage or modify the cream with half and half, coconut milk, or even omit it for a lighter dish. As for pets, ensure any leftover ingredients (like garlic) aren’t shared with them, as these can be harmful to certain animals.

What’s the best way to reheat frozen Marry Me Chicken Soup?
Absolutely! To reheat your frozen soup, begin by letting it thaw in the refrigerator overnight. When ready, pour it into a pot and slowly heat it over low to medium heat. Stir frequently, and if the soup feels too thick, add chicken broth gradually until you reach your desired consistency. The love you put into this soup will be fully evident when you share it again with family and friends!

[tasty-recipe id=”2256″]

Filed Under: Soups

Easiest Thai Chicken Curry Soup: Comfort in Every Spoonful

May 29, 2025 by Maya Rowan Leave a Comment

There’s something undeniably comforting about a warm bowl of soup, especially when it transports you to a far-off place with every aromatic spoonful. I can still remember the first time I savored a Thai Chicken Curry Soup at a cozy little restaurant tucked away in the bustling streets of Bangkok. The aromatic blend of ginger, lime, and coconut milk wrapped around me like a hug, and I found myself enchanted by the vibrant flavors.

Fast forward to a busy weeknight in my own kitchen, and I longed for that same comfort but didn’t have hours to spare. Enter this Easy Thai Chicken Curry Soup! In just 20 minutes, I can whip up a delightful dish that features succulent rotisserie chicken, fragrant spices, and a bright splash of lime. Whether it’s for a quick weeknight dinner or a comforting meal to share with friends, this soup checks all the boxes: it’s easy, bursting with flavor, and utterly satisfying. Plus, it cleverly utilizes leftovers, making it a genius answer to my “What’s for dinner?” dilemma. So, let’s dive into this deliciously simple recipe that’s sure to brighten your evening!

Table of Contents
  • Why is Thai Chicken Curry Soup so popular?
  • Thai Chicken Curry Soup Ingredients
  • Step-by-Step Instructions for Easy Thai Chicken Curry Soup
  • What to Serve with Easy Thai Chicken Curry Soup?
  • Turn It Into A Party!
  • Tips for Making the Most Flavorful Easy Thai Chicken Curry Soup
  • How to Store and Freeze Thai Chicken Curry Soup
  • Substitutions
  • Easy Thai Chicken Curry Soup Recipe FAQs
    • How do I choose the right ingredients for my Thai Chicken Curry Soup?
    • How should I store my leftover Thai Chicken Curry Soup?
    • Can I freeze Thai Chicken Curry Soup?
    • What if my soup is too spicy?
    • Can I make this soup suitable for dietary restrictions?
    • What do I do if the noodles absorb too much broth?

Why is Thai Chicken Curry Soup so popular?

Incredible Versatility is one of the many reasons Thai Chicken Curry Soup has become a beloved favorite around the world. With its rich broth, tender noodles, and the perfect balance of sweet, spicy, and tangy flavors, it adapts effortlessly to various tastes and dietary preferences. You can whip it up in just 20 minutes, making it an ideal choice for busy weeknights or last-minute gatherings.

Another reason for its popularity is its ability to use whatever you have on hand — from rotisserie chicken and fresh vegetables to the delightful kick of Thai red curry paste. Serve it alongside a refreshing salad or with lime wedges for an added zing, and enjoy this delightful dish any night of the week! For a comforting twist, try it with chicken pot pie soup for cozy evenings.

Thai Chicken Curry Soup Ingredients

For the Soup Base
• Olive Oil – Perfect for sautéing the finely chopped onions and creating a flavorful foundation.
• Onion (1/2 medium, chopped finely) – Adds rich aromatics to the soup, enhancing its warmth.
• Grated Fresh Ginger (1 teaspoon) – Offers a zesty, warming kick that reflects the essence of Thai cuisine.
• Garlic (3 cloves, minced) – Infuses deep, pungent flavor that complements the spices beautifully.
• Thai Red Curry Paste (4 heaping tablespoons) – The soul of the soup; adjust based on your preferred spice level and brand. Note: Thai Kitchen brand is recommended.
• Chicken or Vegetable Broth (4 cups) – Forms the liquid cornerstone of the soup, enriching its base.
• Water (2 cups) – Balance’s the broth and adjusts the soup’s desired consistency.
• Lime Juice (Juice of 1 lime) – Adds brightness, balancing the richness of the coconut milk and spice.

For the Noodles
• Uncooked Rice Noodles (3.5 ounces) – These noodles provide the perfect texture; opt for thicker rice noodles (3 mm) for the best results. Note: Thai Kitchen stir fry noodles work wonderfully.

For the Creamy Finish
• Full-Fat Coconut Milk (1 (13.5 ounce) can) – Introduces a creamy texture and signature Thai flavor, making each spoonful delightful.
• Shredded Cooked Chicken (2 cups) – An effortless way to incorporate protein; leftover rotisserie chicken works wonders here.

For Garnishing
• Fresh Basil (Generous handful, torn) – Lends vibrant, herbal notes that elevate the dish.
• Fresh Cilantro (Handful, chopped) – Infuses a fresh taste synonymous with Thai recipes.
• Chopped Scallions – Provides a mild onion flavor; sprinkle to taste for added freshness.
• Salt & Pepper – Season to taste, allowing the flavors to shine through.
• Lime Wedges (for serving, optional) – An extra squeeze elevates the soup’s flavor profile, adding more tanginess to each bowl.

This delightful Thai Chicken Curry Soup is sure to become a favorite in your home, delivering a comforting taste of Thailand with every cozy spoonful!

Step-by-Step Instructions for Easy Thai Chicken Curry Soup

  1. Prepare the Aromatics Heat 2 tablespoons of olive oil in a large pot over medium heat. Add the finely chopped onion and sauté for about 5 minutes until it becomes translucent and fragrant. This step builds a flavorful base for the soup, enhancing the overall aroma and taste.

  2. Add Flavorful Ingredients Stir in the grated fresh ginger, minced garlic, and Thai red curry paste. Cook for about 30 seconds until the mixture becomes fragrant, releasing the essential oils and spices. This step ensures that all the bold flavors meld together, laying the groundwork for a delicious soup.

  3. Create the Soup Base Pour in 4 cups of chicken or vegetable broth along with 2 cups of water and the juice of one lime. Bring the mixture to a gentle boil, then add the 3.5 ounces of uncooked rice noodles. Boil for about 3-4 minutes; this allows the noodles to absorb the flavors while softening.

  4. Incorporate Creaminess Reduce the heat and stir in one can of full-fat coconut milk and the 2 cups of shredded rotisserie chicken. Let it simmer for 10 minutes, allowing the soup to thicken and the flavors to blend beautifully. This slow cooking ensures a rich and creamy texture that’s signature to Thai cuisine.

  5. Add Fresh Herbs Stir in a generous handful of torn fresh basil, a handful of chopped cilantro, and chopped scallions. Season with salt and pepper to taste. This step brightens the soup, showcasing the vibrant fresh ingredients that elevate the dish and give it that authentic Thai flair.

  6. Serve and Enjoy Ladle the soup into bowls and serve immediately, accompanied by lime wedges for an extra punch of acidity if desired. Enjoy the comforting warmth of this Easy Thai Chicken Curry Soup, which wraps you in its aromatic embrace with every spoonful! Note: If you have leftovers, consider adding extra broth, as the noodles will absorb liquid over time.

What to Serve with Easy Thai Chicken Curry Soup?

To create a deliciously balanced meal around this comforting soup, consider these delightful pairings that enhance its vibrant flavors.

  • Crispy Spring Rolls: These crunchy delights serve as a perfect contrast to the creamy soup, adding texture and a hint of sweetness.

  • Thai Cucumber Salad: This refreshing side, with its crunchy cucumbers and tangy dressing, complements the warmth of the curry soup beautifully. It’s a refreshing palate cleanser that brightens each bite.

  • Jasmine Rice: Fluffy jasmine rice is a classic accompaniment, absorbing the rich broth and making each spoonful even more satisfying.

  • Sriracha or Chili Paste: For those who love a kick, serve a small dish on the side. It allows everyone to customize their soup experience and add depth of heat.

  • Mango Sticky Rice: This iconic dessert offers a sweet counterpoint to the spiciness of the soup, wrapping up your meal with a delightful mix of textures and flavors.

  • Iced Thai Tea: A sweet, creamy iced Thai tea is a wonderful beverage choice, balancing the spices with its smooth sweetness while providing a refreshing drink alongside the meal.

By mixing these options with your Easy Thai Chicken Curry Soup, you’ll create an unforgettable dining experience that’s hearty and fulfilling from start to finish!

Turn It Into A Party!

If you’re planning a gathering, the Easy Thai Chicken Curry Soup is an absolute showstopper! Its vibrant flavors make it a crowd-pleaser, and it’s easy to serve up in big batches. I love offering it with crispy chips or crusty bread for dipping! 😉 A few tips if serving for a crowd:

  • Keep it warm throughout the party! Use a slow cooker to maintain the soup’s temperature, allowing guests to serve themselves as they please! (Cuddle up in that warmth! 🔥)

  • Make-ahead magic! Prepare the soup the day before and let the flavors meld beautifully in the fridge overnight. Just reheat before serving, and add a splash of broth if it thickens too much! (Life-saver for busy hosts! ⏰)

  • Seasonal variations for fun! Try adding seasonal veggies like butternut squash or kale for an autumn twist. Adjust the spice level by starting with less curry paste and letting guests add more at the table! (Make it personal and customizable! 🎉)

Tips for Making the Most Flavorful Easy Thai Chicken Curry Soup

  • Fresh Ingredients: Always opt for fresh herbs like basil and cilantro for garnishing. They add brightness and elevate the flavors of the soup, giving you that vibrant Thai taste that dried herbs simply can’t match. I like to tear the basil leaves rather than chop; it keeps the oils intact and releases more flavor!

  • Spice Adjustment: Not all Thai red curry pastes are created equal. Start with less than the 4 tablespoons suggested and taste as you go, especially if you’re unsure of your heat tolerance. This way, you can perfectly balance the soup to your preference without it becoming overly spicy.

  • Rotisserie Chicken Hack: Utilizing pre-cooked rotisserie chicken not only saves time but also enhances the soup’s flavor. It’s packed with seasoning; just shred or chop and toss it in! If you want to get creative, you could also use leftover roasted chicken for a different flavor profile.

  • Texture Tip: Use thicker rice noodles (around 3 mm) for the best texture. These will hold up better in the soup, soaking in the broth’s flavor while providing a satisfying bite. If the noodles do get too soft, don’t worry; simply add more broth when reheating leftovers to restore balance!

  • Sweetness Balancer: If you find the soup a bit tangy after adding lime juice, a small teaspoon of sugar can help balance the acidity. It’s a trick I learned from Thai chefs; it rounds out the flavors beautifully without overpowering that refreshing zing.

  • Save Time Chopping: Prepping your fresh herbs and toppings while the soup simmers is a fantastic time-saver. It allows you to focus on the cooking process, making the whole experience more enjoyable. Plus, you can serve the soup while it’s piping hot, right off the stove!

How to Store and Freeze Thai Chicken Curry Soup

Fridge: Store your Thai Chicken Curry Soup in an airtight container for up to 3 days. Reheat gently on the stove or in the microwave, adding a splash of broth if needed.

Freezer: Freeze the soup in a freezer-safe container for up to 3 months. For best results, leave some space for expansion. Thaw overnight in the fridge before reheating.

Reheating: When ready to enjoy leftovers, reheat thoroughly on the stovetop, adding extra broth to restore desired consistency as noodles can absorb liquid.

Serving Freshness: For optimal taste, it’s best to enjoy the soup fresh, but storing for later meals ensures you savor the delightful flavors whenever you need comfort!

Substitutions

Can’t find a few of these ingredients? No problem! They can easily be replaced with the suggestions below:

  • Olive Oil: Replace it with canola oil. This alternative has a similar flavor and smoke point, making it great for sautéing.
  • Grated Fresh Ginger: Replace it with 1 teaspoon of ground ginger. While fresh has a brighter flavor, ground ginger will still give you the warmth you need.
  • Thai Red Curry Paste: Replace it with 4 tablespoons of curry powder (adjust to taste). This will give you a slightly different flavor profile but still works beautifully in the soup.
  • Uncooked Rice Noodles: Replace with 3.5 ounces of vermicelli noodles. They are thinner but will soak in the flavors once cooked.
  • Fresh Basil: Replace it with 1 teaspoon of dried basil. While fresh is ideal, dried will still add a nice flavor to the dish. Be sure to crush it before adding for enhanced flavor!

🍝 Love easy weeknight meals? Follow Our Pinterest for daily recipes.

Easy Thai Chicken Curry Soup Recipe FAQs

How do I choose the right ingredients for my Thai Chicken Curry Soup?

Absolutely! For the best flavor, pick fresh herbs like basil and cilantro, which elevate the soup’s taste. When selecting ginger, look for firm roots without any dark spots or wrinkles, ensuring you get the freshest flavor. Choose a good quality Thai red curry paste; I recommend Thai Kitchen brand, as it provides a wonderful balance of flavors.

How should I store my leftover Thai Chicken Curry Soup?

Store your Thai Chicken Curry Soup in an airtight container in the refrigerator for up to 3 days. Be sure to let it cool completely before sealing. When reheating, add a splash of broth to restore moisture, as the noodles will soak up some liquid.

Can I freeze Thai Chicken Curry Soup?

Yes, you can! Freeze the soup in a freezer-safe container for up to 3 months. Just leave about an inch of space at the top for expansion. To thaw, place it in the refrigerator overnight. When ready to eat, reheat on the stove, adding extra broth to adjust the consistency of the noodles.

What if my soup is too spicy?

If your Thai Chicken Curry Soup turns out spicier than expected, a simple trick is to add a teaspoon of sugar to balance the heat. This can round out the flavors and give a sweeter profile without overpowering the intended taste of the dish.

Can I make this soup suitable for dietary restrictions?

Very! If you want to make the soup gluten-free, use gluten-free noodles and ensure your broth is gluten-free as well. For a vegan version, simply substitute shredded chicken with tofu or extra veggies, and use vegetable broth and coconut milk. Always check labels for allergens, especially with curry paste and broth!

What do I do if the noodles absorb too much broth?

If you notice the noodles have soaked up too much broth after some time in the refrigerator, don’t worry! Just add a bit of warm broth or water when you reheat the soup to restore the desired consistency. This way, you’ll enjoy each bowl just as comforting as the first!

Feel free to reach out with any more questions about your Thai Chicken Curry Soup — I’m here to help make your cooking experience delightful!

Filed Under: Soups

Irresistibly Creamy Parmesan Italian Sausage Ditalini Soup Delight

May 29, 2025 by grace bellamy Leave a Comment

I still remember the first chilly evening I decided to whip up a pot of Creamy Parmesan Italian Sausage Ditalini Soup. As the rich aroma of sautéed garlic and Italian sausage danced through my kitchen, I could already feel the warmth wrapping around me like a cozy blanket. My family gathered around the table, eager to dig into a bowl of this comforting goodness. With its creamy broth and tender ditalini pasta, every spoonful felt like a warm hug—a perfect antidote to those hectic weeknights when fast food just won’t cut it.

What makes this soup truly special is its adaptability. Whether you prefer spicy Italian sausage for a kick or turkey sausage for a lighter twist, this recipe is incredibly versatile. You can toss in seasonal veggies like fresh spinach or zucchini for added nutrition, making it a family favorite year-round. So why wait? Grab your favorite pot and let’s create a dish that will have everyone begging for seconds!

Table of Contents
  • Why is Creamy Parmesan Italian Sausage Ditalini Soup so special?
  • Creamy Parmesan Italian Sausage Ditalini Soup Ingredients
  • How to Make Creamy Parmesan Italian Sausage Ditalini Soup
  • Tips for the Best Creamy Parmesan Italian Sausage Ditalini Soup
  • What to Serve with Creamy Parmesan Italian Sausage Ditalini Soup?
  • Creamy Parmesan Italian Sausage Ditalini Soup Variations
  • How to Store and Freeze Creamy Parmesan Italian Sausage Ditalini Soup
  • Creamy Parmesan Italian Sausage Ditalini Soup Recipe FAQs
    • What type of Italian sausage should I use?
    • How can I store leftover Creamy Parmesan Italian Sausage Ditalini Soup?
    • Can I freeze this soup?
    • Why is my pasta getting mushy in the soup?
    • What if I have food allergies or dietary restrictions?
    • How can I enhance the flavor further?

Why is Creamy Parmesan Italian Sausage Ditalini Soup so special?

Irresistibly comforting, this soup wraps you in warmth with every bite. Adaptable to your tastes, you can easily switch out sausages or add vibrant seasonal veggies, making it a true crowd-pleaser. Rich flavors of Parmesan infuse every spoonful, providing that ultimate soul-soothing experience. Plus, it’s simple enough for weeknight dinners, ensuring delicious home-cooked meals on busy evenings. If you’re looking for more comforting dishes, check out the delightful garlic butter chicken bites with creamy parmesan pasta for another family favorite!

Creamy Parmesan Italian Sausage Ditalini Soup Ingredients

Get ready to dive into comfort with these essential ingredients!

For the Soup
• Italian Sausage – The hearty protein base; opt for spicy sausage for heat or turkey sausage for a leaner choice.
• Olive Oil – Essential for browning the sausage and sautéing vegetables to perfection.
• Onion – Adds a depth of flavor; sauté until translucent for optimal sweetness.
• Garlic – This aromatic staple creates a savory foundation for the soup.
• Diced Tomatoes – Adds essential acidity and body to the creamy broth.
• Chicken Stock – The flavorful liquid base that brings the soup together.
• Dried Basil and Oregano – These herbs provide that classic Italian flair, enhancing the overall taste.
• Ditalini Pasta – Its small shape absorbs the broth beautifully; toasting it first in olive oil adds a delightful nuttiness.
• Heavy Cream – The magic ingredient for achieving that irresistible creamy texture.
• Parmesan Cheese – Offers a rich, savory flavor; freshly grated is a must for melting into the soup.
• Fresh Parsley – This bright garnish elevates the dish; substitute with basil in summer for a refreshing twist.
• Salt and Black Pepper – Essential for seasoning to taste, balancing all the flavors perfectly.

You’ll find full measurements in the recipe card below.

How to Make Creamy Parmesan Italian Sausage Ditalini Soup

  1. Brown the sausage: In a large pot, heat olive oil over medium-high heat. Add Italian sausage and break it up into small pieces, cooking until it’s browned and cooked through, about 5-7 minutes. Remove from the pot and set aside.

  2. Sauté onions and garlic: In the same pot, add diced onions and minced garlic, sautéing until the onions become translucent and fragrant, roughly 3-4 minutes. This will create a flavorful base for your soup.

  3. Combine ingredients: Stir in the diced tomatoes, chicken stock, dried basil, oregano, and the browned sausage. Bring the mixture to a gentle simmer, allowing the flavors to meld for about 10 minutes.

  4. Add the pasta: Toss in the ditalini pasta and cook according to package instructions, generally 7-9 minutes. For added flavor, lightly toast the pasta in olive oil before this step for a nutty touch.

  5. Stir in cream and cheese: Lower the heat and mix in the heavy cream and freshly grated Parmesan cheese, stirring until melted and blended into the soup. Don’t forget to reserve some pasta cooking water to adjust the consistency if needed!

  6. Season and garnish: Season with salt and black pepper to taste. Ladle the soup into bowls and garnish with fresh parsley for a pop of color and flavor.

Optional: Serve with a sprinkle of extra Parmesan for that cheesy goodness!

Exact quantities are listed in the recipe card below.

🍳 Craving extra flavor inspo? Follow our Pinterest for fresh ideas every day!

Tips for the Best Creamy Parmesan Italian Sausage Ditalini Soup

Use Quality Cheese: Freshly grated Parmesan: Opt for high-quality Parmesan cheese, preferably Parmigiano Reggiano, for rich flavors and a perfect melt.

Toast the Pasta: Enhance flavor: Lightly toast the ditalini in olive oil before adding to the soup for added nuttiness and warmth.

Add Veggies Wisely: Boost nutrition: Incorporate seasonal vegetables like spinach or zucchini, but be cautious not to overcrowd—balance is key!

Mind the Pasta: Avoid mushiness: Do not overcook the pasta; it should remain al dente to absorb broth while maintaining its shape.

Adjust Consistency: Perfect reheating tip: When reheating leftovers, add a splash of chicken stock to restore that desired creamy consistency.

What to Serve with Creamy Parmesan Italian Sausage Ditalini Soup?

Creating a stunning meal is easy when you have delightful sides and drinks in mind to complement that creamy bowl of goodness.

  • Crusty Italian Bread: Pair with warm, crusty bread to soak up the creamy soup. A light spread of garlic butter takes it to the next level.

  • Simple Green Salad: A fresh green salad dressed with olive oil and balsamic vinegar adds a bright contrast, balancing the richness of the soup.

  • Roasted Vegetables: Seasoned and roasted seasonal vegetables offer a deliciously sweet complement. The caramelization enhances the flavors of both the soup and the veggies.

  • Cheesy Garlic Knots: These warm, cheesy bites are perfect for dipping into the soup, making each bite irresistible.

  • Red Wine: A glass of robust red wine elevates the meal. The wine’s depth complements the savory Italian flavors beautifully.

  • Chilled Lemonade: If you prefer a non-alcoholic option, a refreshing glass of lemonade adds a zingy brightness that contrasts the soup’s creaminess.

  • Dessert: Finish off with a light dessert, like panna cotta or fruit sorbet, to cleanse the palate without overwhelming it.

Each pairing not only enhances your creamy Parmesan Italian Sausage Ditalini Soup but also transforms it into a complete dining experience your family will adore!

Creamy Parmesan Italian Sausage Ditalini Soup Variations

Feel free to explore these delightful twists to make this comforting soup your own!

  • Spicy Kick: Use spicy Italian sausage for an extra layer of heat that’ll warm your soul on chilly nights.
  • Turkey Swap: Opt for turkey sausage for a lighter, guilt-free version without compromising flavor.
  • Orzo Option: Replace ditalini with orzo or small shells, adding a unique texture to delight your palate.
  • Veggie Boost: Toss in fresh spinach or kale, zucchini, or cherry tomatoes for a burst of color and nutrition.
  • White Bean Delight: Incorporate white beans for added creaminess and protein, making it even heartier.
  • Herb Twist: Consider fresh basil during summer for a fragrant change, or chives for a milder herb kick.
  • Creamy Alternative: Swap heavy cream with half-and-half for a slightly lighter soup without losing that creaminess.

Each of these variations brings a fresh spin to your bowl, making the recipe endlessly adaptable for your family’s tastes. So, gather your ingredients, and let your creativity flow!

How to Store and Freeze Creamy Parmesan Italian Sausage Ditalini Soup

Fridge: Store leftover soup in an airtight container in the refrigerator for up to 3 days. This keeps the creamy goodness fresh!

Freezer: For longer storage, freeze the soup in a freezer-safe container for up to 3 months. Avoid freezing with pasta to prevent it from becoming mushy.

Reheating: When ready to enjoy, thaw in the fridge overnight, then reheat on the stove. Add a splash of chicken stock to maintain the creamy texture.

Make-Ahead Tip: Prepare the soup in advance but store the pasta separately to prevent it from absorbing too much liquid before serving.

Creamy Parmesan Italian Sausage Ditalini Soup Recipe FAQs

What type of Italian sausage should I use?

Absolutely! The choice between spicy Italian sausage and turkey sausage is all yours. If you desire a little kick, spicy sausage will add heat and zest to the soup. For a lighter meal, turkey sausage is an excellent alternative—it’s flavorful but cuts down on fat. I often recommend experimenting with both to discover your family’s favorite!

How can I store leftover Creamy Parmesan Italian Sausage Ditalini Soup?

Very easily! Simply transfer any leftover soup into an airtight container and store it in the refrigerator for up to 3 days. Ensure it’s cooled down to room temperature before sealing to maintain freshness. This way, you’ll have delicious comfort food ready for busy days ahead!

Can I freeze this soup?

Of course! Freezing is a great option for longer storage. I recommend that you freeze the soup in a freezer-safe container for up to 3 months. Just remember to leave out the pasta before freezing, as it can become mushy after thawing. When you’re ready to enjoy, thaw the soup overnight in the fridge, then reheat on the stove, adding a bit of chicken stock if needed for creaminess.

Why is my pasta getting mushy in the soup?

Oh, don’t worry! This happens when the pasta is overcooked or if it sits in the broth too long. To avoid this, make sure to add the ditalini during the last few minutes of cooking. Also, you can cook the pasta separately and combine it with the soup only when serving. This way, the pasta remains perfectly al dente and maintains its delightful texture.

What if I have food allergies or dietary restrictions?

Definitely consider ingredient substitutions! If you’re cooking for someone with gluten sensitivities, you can use gluten-free pasta like rice or quinoa. For dairy-free options, coconut cream or almond milk can serve as great alternatives to heavy cream. Just remember to read the labels, especially when it comes to sausage, to ensure they meet any dietary needs.

How can I enhance the flavor further?

The more, the merrier! To amp up the flavor, try toasting your ditalini in olive oil before adding it to the soup—this step adds a lovely nuttiness. You can also incorporate your favorite seasonal veggies—such as spinach or zucchini—just be cautious not to overcrowd the soup. Adding fresh herbs right before serving can also elevate its flavor profile!

Filed Under: Soups

Irresistibly Creamy Mexican Street Corn Soup Recipe You’ll Love

May 29, 2025 by Maya Rowan Leave a Comment

I’ve always had a soft spot for street food, especially the rich, smoky goodness of elote—the Mexican grilled corn slathered in creamy sauces and sprinkled with cheese. One chilly evening, I found myself craving that bold flavor, but without the fuss of grilling. That’s when I decided to whip up this Mexican Street Corn Soup. The moment I took the first spoonful, I was transported back to warm summer nights at local fairs, where the sweet aroma of corn and spices fills the air.

This soup captures all those delightful flavors in a comforting bowl, perfect for a light dinner or a refreshing lunch. It’s incredibly easy to make and surprisingly customizable! Whether you prefer your soup spicy with a kick or mild and creamy, this recipe allows you to adjust everything to your taste. Topped with Cotija cheese, fresh cilantro, and a squeeze of lime, every bite is a celebration of summer, no matter the season. Join me in creating a dish that’s bound to become a family favorite!

Table of Contents
  • Why is Mexican Street Corn Soup so popular?
  • Mexican Street Corn Soup Ingredients
  • Step-by-Step Instructions for Mexican Street Corn Soup
  • What to Serve with Mexican Street Corn Soup?
  • How to Store and Freeze Mexican Street Corn Soup
  • Tips for making the most flavorful Mexican Street Corn Soup
  • Substitutions
  • Turn It Into A Party!
  • Mexican Street Corn Soup Recipe FAQs

Why is Mexican Street Corn Soup so popular?

Bursting with flavor, this Mexican Street Corn Soup has captured the hearts of many home cooks and food enthusiasts alike. Its creamy texture and delightful balance of sweet corn, tangy Cotija cheese, and zesty lime create a taste experience reminiscent of vibrant summer fairs. This versatile dish can easily adapt to your preferences—add jalapeños for a spicy kick or swap in your favorite cheese for a personalized touch. Plus, it’s a quick and comforting option for busy weeknights. Serve it alongside crunchy tortilla chips or a fresh garden salad for a complete meal. Once you try it, you’ll see why this dish is a beloved staple in many kitchens! For a fun twist, check out Mexican Street Corn Dip to delight your guests!

Mexican Street Corn Soup Ingredients

A delicious exploration of flavors!

For the Soup
• Olive or Vegetable Oil – for sautéing and developing a rich flavor base.
• Fresh Corn Kernels (6 cups) – the star ingredient, providing natural sweetness and texture (important note: avoid frozen or canned corn).
• Chopped Yellow Onion – adds essential savory depth to the soup.
• Ancho Chili Powder (1/4 teaspoon) – brings smokiness and a touch of heat; adjust according to your spice preference.
• Kosher Salt & Freshly Ground Black Pepper – for seasoning and enhancing the overall taste.
• Chopped Garlic (2 large cloves) – introduces aromatic flavor that elevates the dish.
• Chicken or Vegetable Broth (4 cups) – the flavorful liquid base that ties everything together.
• Sour Cream (1/2 cup) – offers creaminess and tang, making the soup richer.
• Grated Dry/Aged Cotija Cheese (1/2 cup + extra for garnish) – imparts salty, tangy notes; can be substituted with Parmesan or Romano cheese.
• Fresh Lime Juice (1 tablespoon) – adds a refreshing zest and acidity.
• Grated Lime Zest (1 teaspoon) – enhances the citrus flavor profile.
• Chopped Cilantro (2 tablespoons + 2 teaspoons, divided) – fresh herb that brightens the soup and serves as garnish.

For Garnishing
• Extra Cotija Cheese – perfect for sprinkling on top to create a beautiful finish.
• Reserved Corn Mixture – adds texture and visual appeal to the final serving.

With this Mexican Street Corn Soup ingredient list at hand, you’re well on your way to creating a bowl of warmth and comfort!

Step-by-Step Instructions for Mexican Street Corn Soup

  1. Sauté Aromatics Heat 2 tablespoons of olive oil in a large pot over medium heat. Add 6 cups of fresh corn kernels, 1 chopped yellow onion, 1/4 teaspoon of ancho chili powder, 1 teaspoon of kosher salt, and 1/2 teaspoon of freshly ground black pepper. Cook for about 8-10 minutes until the corn is softened and slightly charred. Note: The charring adds a smoky depth, enhancing the soup’s overall flavor.

  2. Add Garlic Stir in 2 large chopped garlic cloves, cooking for another 2 minutes until fragrant. This step releases the luscious aroma of garlic into the mixture, creating a welcoming base for your soup. Make sure to stir frequently to prevent the garlic from burning and becoming bitter.

  3. Reserve Corn Mixture Carefully remove 1 1/2 cups of the sautéed corn mixture and set it aside in a bowl. This reserved mixture will be added back later for texture and visual appeal, providing delicious bursts of corn in every spoonful.

  4. Simmer Cobs Add 4 cups of chicken or vegetable broth and the stripped cobs from the corn to the pot. Bring this mixture to a gentle boil and let it simmer for 20 minutes. Note: Simmering with the cobs enriches the broth with an incredible corn flavor, making the soup more robust.

  5. Remove Cobs After simmering, carefully fish out the cobs and discard them. They’ve done their job infusing flavor into the broth, and this step prevents any unwanted textural elements from the cobs in your final soup.

  6. Blend Soup Lower the heat and stir in 1/2 cup of sour cream and 1/2 cup of grated Cotija cheese until combined. Then, pour the mixture into a blender or food processor and blend until smooth and creamy. This step is essential for achieving that rich, velvety texture that makes this Mexican Street Corn Soup so delightful.

  7. Reheat & Finish Pour the blended soup back into the pot and reheat gently. Stir in 3/4 cup of the reserved corn mixture, 1 tablespoon of fresh lime juice, and 2 tablespoons of chopped cilantro. Taste and adjust seasoning as needed with more salt or pepper. Note: The lime juice brightens the soup and balances the creaminess beautifully.

  8. Garnish In a small bowl, toss the remaining reserved corn with the zest of 1 lime and a sprinkle of cilantro. Serve the soup hot, topped with this garnished mixture and extra Cotija cheese. This finishing touch elevates the presentation and adds a fresh burst of flavor, making every spoonful a celebration of the beloved Mexican street corn experience!

🍽️ Looking for more delicious inspo? Follow our Pinterest board for brand-new recipes every day!

What to Serve with Mexican Street Corn Soup?

Elevate your dining experience with perfect pairings that complement this vibrant, creamy delight.

  • Crunchy Tortilla Chips: The perfect vessel for scooping up soup, their saltiness enhances every flavorful spoonful.
  • Fresh Garden Salad: A mix of crisp greens and tangy vinaigrette provides a refreshing contrast to the richness of the soup.
  • Spicy Grilled Shrimp: Succulent shrimp seasoned with lime and chili add a savory punch, making your meal feel festive.
  • Cornbread Muffins: Their slightly sweet flavor and soft texture pair beautifully with the creamy soup, adding warmth to the meal.

For a memorable finish, consider serving a light dessert alongside your soup.

  • Key Lime Pie: The tartness of this classic dessert mirrors the soup’s lime notes and leaves your palate refreshed.
  • Margaritas: A chilled margarita, whether classic or fruity, provides a delightful zing that enhances the Mexican flavors of your meal.

How to Store and Freeze Mexican Street Corn Soup

Fridge: Store leftover Mexican Street Corn Soup in an airtight container for up to 3 days. Make sure to let it cool completely before sealing to prevent condensation.

Freezer: For longer storage, freeze the soup in freezer-safe containers or resealable bags for up to 3 months. Leave some space for expansion as it freezes.

Reheating: When ready to enjoy, thaw overnight in the fridge, then reheat on the stovetop over medium heat until warmed through. Stir well to reincorporate any separated ingredients.

Airtight Tips: Always label your containers with the date, so you keep track of freshness and enjoy your delicious Mexican Street Corn Soup at its best!

Tips for making the most flavorful Mexican Street Corn Soup

  • Fresh Corn is Key: The main star of this soup is fresh corn on the cob. Using frozen or canned corn will compromise the sweet, robust flavor. When possible, choose sweet corn that’s in season for the best taste.

  • Get Charred Corn Flavor: Charring the corn adds fantastic depth. I’m a big fan of giving the corn a good sear in the pot before adding other ingredients—it brings out natural sugars and improves the soup’s richness.

  • Customize the Heat Level: If you prefer a milder soup, start with just a pinch of ancho chili powder and gradually add to your taste. Remember, you can always add more but you can’t take out the heat once it’s in there!

  • Broth Matters: Use homemade or quality store-bought broth for a better flavor base. The broth will significantly enhance the overall depth of your soup, while low-quality brands might leave it flat.

  • Simmering Secrets: Don’t skip simmering the corn cobs in the broth! This step infuses the soup with incredible corn flavor, allowing you to extract every drop of sweetness. It’s a simple trick that elevates your dish tremendously.

  • Blend to Perfection: For that velvety texture, pureeing the soup is essential. I like to blend it until completely smooth, which transforms the dish into a cozy, comforting bowl of goodness. You can use either a blender or a food processor, just ensure you blend it carefully and safely!

Substitutions

Can’t find a few of these ingredients? No problem! They can easily be replaced with the suggestions below:

  • Olive or Vegetable Oil: Replace it with canola oil. This option has a mild flavor that works well for sautéing.
  • Ancho Chili Powder (1/4 teaspoon): Replace it with smoked paprika. Start with 1/4 teaspoon, tasting it and adding more if needed for smokiness.
  • Sour Cream (1/2 cup): Replace it with Greek yogurt. It adds creaminess with a little tang, perfect for a healthier option.
  • Grated Dry/Aged Cotija Cheese (1/2 cup + extra for garnish): Replace it with Parmesan cheese or Romano cheese. These cheeses offer similar salty and tangy flavors.
  • Fresh Lime Juice (1 tablespoon): Replace it with lemon juice. It provides a similar tartness, brightening the soup’s flavor.

Turn It Into A Party!

Ready to bring the festive spirit to your table? This Mexican Street Corn Soup is an absolute crowd-pleaser that tantalizes with its rich flavors and creamy texture! It’s perfect for parties because everyone loves a warm, cozy bowl of goodness. Serve it alongside crunchy tortilla chips or fresh, crusty bread for a delightful experience! 😉 A few tips if serving for a crowd:

  • Keep it warm! Pour the soup into a slow cooker on low heat to maintain the perfect serving temperature throughout your gathering! (This also makes it easy for guests to serve themselves. 😊)

  • Make it ahead! Prepare the soup a day in advance, and simply reheat before serving! (Flavors will deepen overnight, making it even more delicious!)

  • Seasonal twist: Try adding roasted bell peppers for a pop of color and sweetness during summer or sprinkle in some diced jalapeños for an extra kick during cooler months! (Adjust the heat level to suit your guests’ preferences! 🌶️)

Mexican Street Corn Soup Recipe FAQs

What type of corn should I use for the Mexican Street Corn Soup?
Absolutely, using fresh corn on the cob is key to achieving the best flavor and texture for your Mexican Street Corn Soup. I recommend selecting sweet corn at its peak ripeness—look for bright green husks and plump kernels. Avoid frozen or canned corn, as they don’t yield the same sweetness and richness you’ll desire in this dish.

How should I store leftover Mexican Street Corn Soup?
Store any leftover soup in an airtight container, and keep it in the refrigerator for up to 3 days. Make sure it cools completely before sealing the lid to prevent condensation, which could dilute your delicious flavors. When you’re ready to enjoy it again, just reheat on the stovetop!

Can I freeze Mexican Street Corn Soup?
Certainly! To freeze your Mexican Street Corn Soup, transfer it into freezer-safe containers or resealable bags, leaving space for expansion—it’s important! It can be frozen for up to 3 months. When you’re ready to devour it, simply thaw in the fridge overnight, then reheat gently on the stovetop.

What if my soup turned out too thick?
If your soup ends up too thick for your liking, don’t fret! You can easily fix it by adding additional broth or water gradually, while stirring continuously until you reach your desired consistency. Just be sure to taste and adjust seasoning afterward, as this may dilute the flavors a bit.

Are there any dietary considerations for Mexican Street Corn Soup?
Very! This soup can easily be made vegetarian by using vegetable broth instead of chicken broth. For those with dairy restrictions, you can swap sour cream with a plant-based alternative. Remember to always check ingredient labels for potential allergens, especially if you’ll be serving it to guests.

Can I adjust the spice level in Mexican Street Corn Soup?
Absolutely! If you prefer a milder soup, start conservatively with the ancho chili powder. You can always add more as you cook until you reach your preferred level of heat. For an extra kick, consider adding finely chopped jalapeños alongside the onions during the sautéing step. Every palate is unique, and I encourage you to experiment!

Filed Under: Soups

Irresistibly Creamy Butternut Squash Soup You’ll Love

May 27, 2025 by Lawra Moraya Leave a Comment

I still remember the first time I tasted butternut squash soup during a cozy fall gathering. The aroma of simmering garlic and fresh herbs danced through the air, inviting everyone to the table. As I took my first sip, the velvety texture enveloped my senses, and I knew this would become a cherished staple in my kitchen. Today, I’m excited to share my Creamy Vegan Butternut Squash Soup that’s just as comforting, yet easy enough for any weeknight.

Made with wholesome, simple ingredients like sweet butternut squash, aromatic herbs, and a touch of ginger, this soup is a delightful bowl of nourishment, perfect for those who are craving something more homemade instead of the usual fast food fare. Whether you enjoy it as a starter, a side dish, or the star of your cozy meal paired with crusty bread, this vegan soup is not just delicious; it’s a hug in a bowl that warms your heart during the chilly months. Let’s dive into this easy fall recipe that will surely impress your family and friends!

Why is Butternut Squash Soup so special?

Comforting, creamy goodness: This butternut squash soup is a warm embrace in a bowl, perfect for cozy nights. Fresh ingredients: Made with wholesome ingredients like sweet squash and aromatic herbs. Vegan delight: Enjoy a rich, plant-based recipe that even non-vegans will love. Quick to prepare: With simple steps, you can whip it up in no time! Versatile serving options: Whether as a starter or main dish, it’s easy to pair with crusty bread or a hearty salad. For more comforting soup options, you might also want to check out this creamy vegetable soup.

Butternut Squash Soup Ingredients

For the Soup Base
• Extra-virgin olive oil – for sautéing vegetables to build flavor.
• Yellow onion – provides a savory depth that complements the sweetness of the squash.
• Sea salt – enhances the overall flavors of the soup.
• Butternut squash – the star ingredient, peeled, seeded, and cubed for a creamy texture.
• Garlic cloves – adds a pungent flavor that elevates the dish.
• Fresh sage – imparts herbaceous aromatics that brighten the soup.
• Fresh rosemary – adds earthy notes for a balanced flavor.
• Fresh ginger – introduces warmth and a slight spice that’s delightful.
• Vegetable broth – serves as the base liquid for simmering the soup to perfection.
• Freshly ground black pepper – to taste, adding a hint of spice.

For Garnishing (Optional)
• Chopped parsley – freshens up the dish and adds a pop of color.
• Toasted pepitas – gives a crunchy texture that contrasts beautifully with the smooth soup.
• Crusty bread – perfect for soaking up every last drop of this comforting butternut squash soup.

Remember, full measurements are in the recipe card below for your convenience.

How to Make Butternut Squash Soup

  1. Heat the oil: In a large pot, warm the extra-virgin olive oil over medium heat. Sauté the yellow onion and add sea salt until they soften, around 5-8 minutes.

  2. Add the squash: Stir in the cubed butternut squash. Cook for about 8-10 minutes, stirring occasionally, until the squash is softened and slightly caramelized.

  3. Incorporate herbs: Add the minced garlic, fresh sage, fresh rosemary, and freshly grated ginger. Cook for another 30 seconds to 1 minute, until those delightful aromas fill your kitchen!

  4. Simmer: Pour in the vegetable broth and bring the mixture to a boil. Once boiling, cover the pot and reduce the heat to a simmer, allowing it to cook for 20-30 minutes until the squash is tender.

  5. Blend until smooth: Remove the pot from heat and let it cool slightly. Carefully blend the soup in batches until silky smooth. If it’s too thick, add more vegetable broth to reach your desired consistency.

  6. Season and serve: Taste the soup and adjust seasoning with freshly ground black pepper. Garnish with chopped parsley, toasted pepitas, and serve with warm, crusty bread for a comforting meal!

Optional: Drizzle a hint of olive oil on top for an extra touch of richness.

Exact quantities are listed in the recipe card below.

What to Serve with Butternut Squash Soup?

Creating a cozy meal to accompany your creamy, comforting soup can elevate your dining experience to new heights.

  • Crusty Bread: The perfect vehicle for soaking up every last drop of the velvety soup, adding a satisfying crunch. A rustic loaf, warm from the oven, works wonders!

  • Homemade Focaccia: Flavored with herbs and garlic, this soft, pillowy bread adds an aromatic touch. Serve it alongside for a delightful dipper.

  • Simple Fall Salad: A light salad with mixed greens, pear slices, and a maple vinaigrette provides a refreshing contrast to the richness of the soup.

  • Avocado Toast: Creamy avocado topped with chili flakes on crusty bread complements the flavors beautifully, adding a creamy element that enhances the meal.

  • Roasted Cauliflower Steaks: These hearty vegetarian steaks bring a delightful chewiness that pairs well with the creamy butternut squash soup’s smoothness.

  • Vegan Meatball Sandwiches: For a heartier option, these flavorful sandwiches can create a fulfilling main dish alongside your soup, making the meal more substantial.

  • Toasted Pepitas: Sprinkling these crunchy pumpkin seeds on top of your soup adds a delightful texture and nutty flavor that truly elevates your dining experience.

  • Spiced Hot Apple Cider: This warm, sweet beverage brings seasonal flavors to your meal while highlighting the soup’s comforting nature. A lovely pairing!

Expert Tips for Butternut Squash Soup

  • Roasting Squash: Roast the butternut squash before adding it to the soup for deeper, richer flavor. The caramelization heightens sweetness!

  • Balanced Ginger: If ginger flavor is too intense, mellow it with a splash of lemon juice or a dash of apple cider vinegar. It creates a delightful balance!

  • Blend Smartly: Always blend in batches to avoid overheating and splattering, ensuring a smooth and creamy butternut squash soup.

  • Thickness Control: Adjust the soup’s thickness by adding vegetable broth gradually during blending. Keep it creamy but not too thick!

  • Herb Variants: Experiment with different herbs like thyme or cilantro if you’re looking for a unique twist on your classic butternut squash soup.

How to Store and Freeze Butternut Squash Soup

Fridge: Store your butternut squash soup in an airtight container for up to 4 days. Make sure it’s completely cooled before sealing.

Freezer: For longer storage, freeze the soup in freezer-safe containers for up to 3 months. Leave some space at the top, as the soup will expand while freezing.

Reheating: To reheat, thaw overnight in the fridge and gently warm on the stove over low heat, stirring occasionally until heated through. You can add a splash of vegetable broth if the soup is too thick.

Make-Ahead Tips: Prepare the soup a day in advance for flavors to meld. Just store it in the fridge until you’re ready to serve!

Butternut Squash Soup Variations

Customize your butternut squash soup to suit your taste buds and dietary needs—let’s get creative!

  • Creamy Coconut: Substitute one cup of vegetable broth with unsweetened coconut milk for an extra luscious texture. This twist adds a tropical flair that will surprise you!

  • Spicy Kick: Incorporate cayenne pepper to taste, along with a sprinkle of cinnamon and brown sugar for warmth. Turn up the heat and elevate the flavor in one simple step.

  • Hearty Complements: Enjoy the soup with delicious options like homemade focaccia or avocado toast. Pairing will enhance the cozy experience with delightful textures.

  • Flavorful Base: Swap out fresh ginger for a hint of nutmeg or allspice to infuse warming, seasonal flavor. These spices can add a delightful twist that’s perfect for fall!

  • Add Veggies: Toss in diced carrots or celery for an increased veggie boost during the sauté stage. These additions enrich the taste and nutrition in each bowl.

  • Herb Adventures: Switch fresh sage with thyme or oregano for a different herby profile. Each herb brings its unique personality, taking this comforting soup in new directions.

  • Silky Swirl: Blend in a splash of cashew cream after blending for an ultra-creamy finish. This elevates your soup and creates a gourmet touch without the fuss.

  • Tangy Surprise: Squeeze in a bit of fresh lime or lemon juice before serving to brighten the flavors. This playful touch balances the sweetness of the squash beautifully!

Butternut Squash Soup Recipe FAQs

Why does my butternut squash soup taste sour?
Sometimes, a sour taste can occur due to the acidity in the broth or overcooked garlic. To remedy this, try adding a pinch of sugar or a splash of almond milk to balance the flavors and smooth out the acidity.

What seasonings go in butternut squash soup?
Essential seasonings for butternut squash soup include salt, freshly ground black pepper, and herbs like fresh sage and rosemary. For an extra layer of flavor, consider adding a sprinkle of cinnamon or nutmeg, which accentuates the natural sweetness of the squash.

How to enhance the flavor of butternut squash soup?
To elevate the flavor, start by roasting the butternut squash before adding it to the soup. This caramelization process intensifies the sweetness. You can also sauté the garlic with the onion longer until it’s golden. Lastly, adding a dash of maple syrup creates a lovely sweetness that balances the soup beautifully!

How do you make squash soup less bland?
A great way to amp up flavors is to introduce layers of aromatics. Start with sautéing the onions, garlic, and spices first before adding the butternut squash. Experiment with herbs like thyme or a pinch of cayenne pepper for warmth. Consider garnishing with fresh herbs or a drizzle of olive oil for that extra pop!

How to store butternut squash soup?
Store your butternut squash soup in an airtight container in the refrigerator for up to 4 days. Make sure to let it cool before sealing the container to preserve freshness. For freezing, transfer it to freezer-safe containers, leaving space at the top since the soup will expand as it freezes. It can last for up to 3 months!

How do you get the acidic taste out of soup?
If your butternut squash soup has an acidic flavor, you can reduce acidity by adding a small amount of sweetener, like sugar or honey. Additionally, balancing the taste with a splash of cream or coconut milk can help mellow the acidity, making it more enjoyable.

[tasty-recipe id=”1609″]

Filed Under: Soups

Irresistibly Creamy Chicken Pot Pie Soup for Cozy Nights

May 27, 2025 by Rauz Karoline Leave a Comment

As the brisk autumn air started to sweep through our neighborhood, I couldn’t help but reminisce about those cozy evenings spent in my grandmother’s kitchen. The aroma of rich, homemade chicken pot pie would always fill the air, a warm hug after a long day. But let’s be real—while the memories were delightful, making the flaky crust? Not so much. That’s when my love for this Chicken Pot Pie Soup came into play.

Imagine all the comforting flavors of classic chicken pot pie, but in a creamy, hearty soup that’s as easy as a Sunday morning. This one-pot wonder brings together tender chicken, savory vegetables, and the richness of cream, creating a dish that warms your soul. It’s perfect for busy weeknights or lazy Sundays, and yes, even your next potluck.

So grab your favorite spoon, because this creamy chicken pot pie soup is about to become your new go-to comfort food!

Why is Chicken Pot Pie Soup so beloved?

Comforting warmth: This Chicken Pot Pie Soup wraps you in cozy flavors, reminiscent of family dinners and chilly evenings.
One-pot simplicity: Minimal cleanup means more time savoring every delicious spoonful.
Rich, creamy goodness: It blends hearty chicken, fresh veggies, and velvety cream for a mouthwatering experience.
Versatile delight: Easily switch ingredients for leftover turkey or ham, adapting it to what you have on hand.
Crowd-pleasing favorite: Perfect for gatherings or just a cozy night in; everyone will be asking for seconds!

You might also enjoy pairing it with some delicious Chicken Pot Pie for an even heartier meal option!

Chicken Pot Pie Soup Ingredients

Get ready to cozy up with this flavorful dish!

For the Soup Base
• Unsalted Butter – adds rich flavor and helps to sauté the vegetables.
• Medium Yellow Onion – crucial for an aromatic base; use 1 cup chopped.
• Medium Carrots – brings sweetness and texture, sliced into rings.
• Celery Sticks – lends savory notes to the soup; finely chopped for best results.
• White or Brown Mushrooms – they provide an earthy flavor and texture; sliced.
• Garlic – adds another layer of flavor; use minced garlic for richness.
• All-Purpose Flour – thickens the soup for a creamy consistency.

For the Broth
• Chicken Stock – the flavorful base of the soup; essential for depth of flavor.
• Salt – season to taste for the perfect balance.
• Black Pepper – adds a touch of spice that complements the other flavors.

For the Hearty Ingredients
• Yukon Gold Potatoes – these provide a creamy texture, peeled and sliced into 1/4” thick pieces.
• Cooked Chicken – your main protein; opt for shredded leftover rotisserie chicken.
• Frozen Peas – for a pop of freshness, color, and texture.
• Corn – frozen or canned; adds sweetness and delightful crunch.

For the Creaminess
• Whipping Cream – the secret ingredient for that rich and creamy finish.
• Parsley – gives a fresh touch and color; finely chopped, plus more for garnish.

For exact measurements, check the recipe card below!

Step-by-Step Instructions for Chicken Pot Pie Soup

Step 1
Start by melting 4 tablespoons of unsalted butter in a large Dutch oven or soup pot over medium heat. Once the butter is bubbling, add 1 cup of chopped medium yellow onion, 2 finely chopped celery sticks, and 2 medium carrots sliced into rings. Sauté these vegetables for about 5-7 minutes, or until they become tender and fragrant, transforming the kitchen with a delightful aroma.

Step 2
Next, incorporate 2 cups of sliced white or brown mushrooms and 3 minced garlic cloves into the pot. Continue to sauté for an additional 3-4 minutes until the mushrooms soften and release their juices. This step enhances the depth of flavor in your Chicken Pot Pie Soup, promising a heartwarming meal.

Step 3
To thicken your soup, stir in 1/3 cup of all-purpose flour, mixing well until the flour turns golden, about 2 minutes. This creates a roux that will give your soup a wonderfully creamy texture. Ensure everything is evenly blended to avoid lumps, providing a silky finish to your Chicken Pot Pie Soup.

Step 4
Gradually pour in 6 cups of chicken stock while stirring continuously. Add 2 medium Yukon Gold potatoes, peeled and sliced into 1/4” thick pieces, along with salt and black pepper to taste. Bring the mixture to a gentle boil, then reduce the heat to medium-low. Let it simmer for about 15-20 minutes, or until the potatoes are fork-tender and have absorbed all those comforting flavors.

Step 5
Once the potatoes are perfectly tender, stir in 2 cups of shredded cooked chicken, 1 cup of frozen peas, and 1 cup of corn. Allow the soup to simmer for an additional 5 minutes until all ingredients are heated through. The colors will brighten, giving your Chicken Pot Pie Soup an inviting and hearty appearance.

Step 6
To finish, slowly stir in 1 cup of whipping cream and 1/4 cup of finely chopped parsley, enhancing the soup’s richness and adding a fresh touch. Adjust seasoning with a little more salt and pepper if needed, then let the Chicken Pot Pie Soup sit for a few minutes before serving. Enjoy every warm spoonful garnished with additional parsley for a pop of color!

Chicken Pot Pie Soup Variations

Customize your Chicken Pot Pie Soup with these delightful options that elevate the original flavors in unexpected ways.

  • Turkey Substitute: Swap chicken for shredded leftover turkey to create a delicious turkey pot pie soup, ideal after the holidays.
  • Ham Addition: For a smoky twist, use diced ham instead of chicken; it will add a savory depth that’s irresistible.
  • Vegetarian Option: Replace chicken with hearty roasted vegetables and vegetable stock, allowing the soup to shine with plant-based goodness.
  • Creamy Alternative: For a lighter take, substitute half the whipping cream with coconut milk; it will lend a lovely tropical note.
  • Herb Infusion: Experiment with fresh herbs like thyme or rosemary for an aromatic boost that complements the soup’s natural flavors.
  • Spicy Kick: Add a pinch of cayenne pepper or diced jalapeños to heat things up; balance it with extra cream for a rich finish.
  • Different Veggies: Switch up the veggies by adding green beans or sweet potatoes; each will lend a unique sweetness and texture.
  • Savory Biscuits: Serve your soup with freshly-baked biscuits on the side; their buttery goodness makes every bite even more comforting.

Make Ahead Options

These Chicken Pot Pie Soup meal prep tips are a lifesaver for busy home cooks! You can chop the vegetables, sauté them, and even prepare the roux (flour and butter mixture) up to 24 hours in advance. Simply refrigerate the cooked components in an airtight container. When you’re ready to complete your soup, add the chicken stock, potatoes, and seasonings, then simmer until everything is heated through and the potatoes are tender. To maintain the creamy texture, stir in the whipping cream at the end just before serving. This way, your Chicken Pot Pie Soup will taste just as delicious as if you made it all in one go!

Expert Tips for Chicken Pot Pie Soup

• Season Thoughtfully: Always taste your soup before serving, adding salt and pepper gradually to reach the desired flavor profile.

• Flour Alternatives: For a gluten-free version of Chicken Pot Pie Soup, consider using a cornstarch slurry made from 1/2 cup cold water mixed with 2 tablespoons cornstarch.

• Cooking Device Choice: Use a Dutch oven to ensure even heat distribution while cooking, making it easier to transition from stovetop to oven if needed.

• Rotisserie Chicken Magic: Using leftover rotisserie chicken not only saves time but also enhances the soup’s flavor. Feel free to use cooked chicken breast as a substitute too.

• Texture Tweaks: To keep the soup creamy and avoid separation, add the whipping cream at the end and avoid boiling it after adding.

• Storage Secrets: Store your Chicken Pot Pie Soup in an airtight container in the fridge for up to 3-4 days. Reheat gently on the stovetop or in the microwave for best results.

What to Serve with Chicken Pot Pie Soup?

Complete your cozy meal with delightful pairings that heighten the warmth and comfort of this creamy soup.

  • Buttery Biscuits: Fluffy and warm, these buttery biscuits are perfect for soaking up every drop of soup, adding a soft texture to the meal.
  • Garlic Bread: Crispy and aromatic, garlic bread brings a satisfying crunch and enhances the comfort food experience with its flavorful aroma.
  • Mixed Green Salad: A light, refreshing salad balances the richness of the soup. Consider adding a zesty vinaigrette for a bright contrast.
  • Roasted Vegetables: Caramelized and flavorful, roasted root vegetables add depth and sweetness to the meal, perfectly complementing the heartiness of the soup.
  • Cornbread Muffins: Soft and sweet cornbread muffins add a delightful touch, offering a comforting, nostalgic taste that pairs beautifully with creamy dishes.
  • Chardonnay: A crisp glass of Chardonnay complements the flavors of Chicken Pot Pie Soup, enhancing the overall dining experience with its fruity and buttery notes.
  • Chocolate Cake: For dessert, a slice of rich chocolate cake offers a sweet finish, creating a satisfying contrast to the savory soup. The indulgence will leave everyone smiling.

How to Store and Freeze Chicken Pot Pie Soup

Fridge: Store your Chicken Pot Pie Soup in an airtight container for up to 3-4 days. Reheat it gently on the stovetop or in the microwave, stirring occasionally.

Freezer: Freeze the soup in freezer-safe containers for up to 3 months. Leave some space at the top for expansion, as it can thicken when frozen.

Reheating: Thaw overnight in the fridge before reheating. If it’s too thick after thawing, add a splash of chicken stock to return it to a creamy consistency.

Serving Freshness: For the best texture, consume the soup within the first few days if stored in the fridge; it’s at its creamiest right after making!

Chicken Pot Pie Soup Recipe FAQs

What kind of chicken should I use for the Chicken Pot Pie Soup?
Absolutely! Using cooked chicken, such as shredded leftover rotisserie chicken, is perfect for this soup. Not only does it save time, but it also enhances the flavor. If you don’t have rotisserie chicken, feel free to use cooked chicken breast; just make sure it’s shredded for the best texture in your soup.

How can I tell if the vegetables are fresh enough for Chicken Pot Pie Soup?
Very good question! When selecting vegetables, look for vibrant colors without any wilting or dark spots. Ideally, the onions should be firm, carrots crisp with no soft spots, and mushrooms fresh and plump. Avoid using any produce with visible dark spots or signs of spoilage, as these can affect the taste and texture of your soup.

What is the best way to store Chicken Pot Pie Soup?
I often recommend storing your Chicken Pot Pie Soup in airtight containers. It keeps well in the refrigerator for about 3-4 days. Ensure to reheat on the stovetop or in the microwave, stirring occasionally, for best results. Just remember, the freshness is all about how quickly you consume it, so enjoy those warm, tasty bowls while it’s at its creamiest!

Can I freeze Chicken Pot Pie Soup?
Absolutely! To freeze your Chicken Pot Pie Soup, let it cool completely before transferring it to freezer-safe containers. It can be stored in the freezer for up to 3 months. Be sure to leave some space at the top of the container to allow for expansion as the soup thickens when frozen. When you’re ready to enjoy it again, thaw it overnight in the fridge and reheat gently.

What if my Chicken Pot Pie Soup is too thick after reheating?
No worries! If you find your soup has thickened up too much after thawing, simply add a splash of chicken stock while reheating. Stir until it reaches a creamy consistency again. This way, you’ll be back to enjoying that rich, comforting texture without any hassle!

Are there any dietary considerations with this Chicken Pot Pie Soup?
Very much so! If you or your guests have any dietary restrictions, consider using gluten-free flour or a cornstarch slurry (1/2 cup cold water + 2 tablespoons cornstarch) for a gluten-free option. You might also want to ensure no one is allergic to any ingredients like peas or mushrooms. Feel free to swap out any ingredients that don’t fit your needs; it’s very adaptable!

[tasty-recipe id=”1593″]

Filed Under: Soups

Comforting Creamy Vegetable Soup That’s Better Than Takeout

May 26, 2025 by Maya Rowan Leave a Comment

It was one of those crisp autumn evenings when the leaves danced outside my window, and all I craved was something warm and comforting. As the sun dipped below the horizon, I rummaged through my fridge filled with colorful veggies, remnants from last week’s grocery haul. That’s when it hit me: a creamy vegetable soup could be just the ticket to cozy up my kitchen and my stomach.

This Easy Creamy Vegetable Soup is not only a hug in a bowl, but it’s also a fantastic way to utilize whatever you have left behind, transforming simple ingredients into a rich, luscious feast. With its vibrant vegetables and a satisfying creamy base, this dish easily adapts to your dietary preferences—just swap in vegetable broth, and voilà! It becomes a heartwarming vegetarian option. Whether you’re looking to impress guests or simply pamper yourself after a long day, this soup is bound to become a family favorite. Let’s dive into this comforting recipe that warms both the heart and the home!

Why is Creamy Vegetable Soup so popular?

Comforting and delicious, the popularity of Creamy Vegetable Soup can be traced back to its irresistible flavor and homey appeal. This dish combines the warmth of hearty vegetables with a rich, creamy base, making it a staple during chilly months. But beyond its cozy vibes, the ease of preparation makes it a crowd-pleaser; you can whip it up in under an hour! Plus, it offers incredible versatility—swap in your favorite veggies or experiment with spices for a unique twist. Serve it alongside a hunk of buttered bread for a satisfying meal that’s perfect for family gatherings or a quiet night in. For more delightful recipes, check out this Creamy Potato Soup!

Creamy Vegetable Soup Ingredients

• Perfect for a warm, inviting meal.

For the Soup Base

  • Unsalted Butter – Adds richness and flavor; separate for different stages.
  • Olive Oil – Provides flavor and helps sauté vegetables.
  • Mirepoix (Carrots, Celery, Onion) – The aromatic foundation of the soup.
  • Minced Garlic – Infuses a pungent flavor, enhancing the overall taste.
  • Baby Potatoes (Gold or Red) – Offers body and texture when diced.
  • Italian Seasoning – Imparts an herbaceous flavor; versatile for various soups.
  • Salt – Enhances all the other flavors in the soup.
  • Pepper – Adds a touch of warmth and spice.
  • Chicken Stock/Broth – Forms the savory base; use vegetable broth for a vegetarian creamy vegetable soup.

For the Vegetables

  • Frozen Broccoli Florets – Adds texture and nutrition; thawed and chopped.
  • Frozen Corn – Provides a hint of sweetness and varied texture.

For the Creaminess

  • Flour – Acts as a thickening agent for a luscious consistency.
  • Whole Milk – Essential for creaminess; must be included.
  • Heavy Cream – Elevates richness and creates a velvety texture.
  • Shredded Sharp Cheddar Cheese – Introduces flavor and additional creaminess.

For Serving

  • Buttered Bread (Optional) – Perfect for dipping and enjoying with your soup.
  • Fresh Herbs (Parsley or Thyme) (Optional) – Brightens up the presentation as a garnish.

Step-by-Step Instructions for Easy Creamy Vegetable Soup

  1. Sauté the Mirepoix In a large pot, heat 1 tablespoon of olive oil and 1 tablespoon of unsalted butter over medium heat. Add the diced carrots, celery, and onions, cooking for 5–7 minutes until softened and fragrant. This step builds a flavorful base for your soup by releasing the natural sweetness of the vegetables.
  2. Add Garlic for Flavor Stir in the minced garlic and sauté for an additional minute, allowing the pungent aroma to fill your kitchen. Garlic not only enhances the taste but also adds a wonderful depth to the soup. Stir continuously to prevent it from burning, which could create bitterness.
  3. Incorporate the Potatoes Add the diced baby potatoes, Italian seasoning, salt, and pepper to the pot. Pour in 4 cups of chicken stock (or vegetable broth for a vegetarian version) and bring the mixture to a boil. Once boiling, reduce the heat to low and let it simmer for 15 minutes, or until the potatoes are crisp-tender. This slow cooking is key to ensuring the potatoes absorb all the fantastic flavors.
  4. Mix in Broccoli and Corn Stir in the thawed broccoli florets and corn, continuing to cook for an additional 5–7 minutes until the broccoli is tender but still vibrant green. This step not only adds nutrition but also contributes a lovely texture and subtle sweetness to your soup.
  5. Prepare the Creamy Base In a separate saucepan, melt the remaining 2 tablespoons of unsalted butter over medium heat. Whisk in ¼ cup of flour, cooking for 1 minute to form a roux. Gradually whisk in 2 cups of whole milk, stirring constantly until the mixture thickens. This step ensures a luscious, creamy texture by incorporating the flour smoothly without lumps.
  6. Combine and Add Cheese Remove the saucepan from heat and stir in 1 cup of heavy cream. Slowly pour this creamy mixture into the vegetable soup, adding 1 cup of shredded sharp cheddar cheese a handful at a time, stirring continuously until melted. This technique allows the cheese to melt evenly, enhancing the richness of your creamy vegetable soup.
  7. Serve and Enjoy Taste the soup and adjust seasonings as necessary, adding more salt and pepper if desired. Ladle the soup into bowls, garnishing with fresh herbs like parsley or thyme, if using. Serve warm with buttered bread for a cozy and comforting meal that wraps you in warmth.

How to Store and Freeze Creamy Vegetable Soup

Fridge: Store your creamy vegetable soup in an airtight container for up to 4 days. Make sure it cools completely before sealing; this preserves its rich flavor.

Freezer: For longer storage, freeze the soup for up to 3 months. Use freezer-safe containers, leaving some space for expansion during freezing.

Reheating: Thaw in the fridge overnight, then reheat on low heat, stirring occasionally. If the soup has thickened, add a splash of broth to regain that creamy texture.

Make-Ahead Tip: Prepare the soup in advance and follow these storage tips to enjoy a comforting meal whenever you need a warm pick-me-up!

Substitutions

Can’t find a few of these ingredients? No problem! They can easily be replaced with the suggestions below:

  • Unsalted Butter: Replace it with salted butter (just reduce added salt slightly) or coconut oil for a dairy-free option.
  • Olive Oil: Replace it with avocado oil or canola oil, both of which have a mild flavor and are great for sautéing.
  • Baby Potatoes: Replace them with diced sweet potatoes (they’ll add a touch of sweetness) or cauliflower florets for a lower-carb option.
  • Chicken Stock/Broth: Replace it with vegetable broth for a vegetarian version. Homemade or store-bought options work well!
  • Whole Milk: Replace it with half-and-half for richer creaminess or almond milk for a dairy-free alternative (keep in mind it may alter the flavor slightly).

Turn It Into A Party!

When it comes to entertaining, Creamy Vegetable Soup is a star attraction! Its comforting flavors and colorful ingredients make it a crowd-pleaser that warms hearts and bellies alike. I love serving it in a big pot with an assortment of crispy chips or crunchy crackers for that perfect dunk! 😉 A few tips if serving for a crowd:

  • Keep it warm: Set your soup pot over low heat during the party! (This way, everyone can enjoy it at the perfect temperature throughout the evening!).
  • Make it ahead: Prepare your soup a day in advance and store it in the fridge! (The flavors meld beautifully overnight, and all you need to do before serving is reheat it on the stove!).
  • Seasonal variations: Try adding pumpkin or butternut squash during the fall! (This not only boosts flavor but also adds a festive twist to your party spread!).

With these tips, your Creamy Vegetable Soup will be the highlight of any gathering! Enjoy serving up warmth and joy! 🍲✨

Tips for making the most flavorful Creamy Vegetable Soup

  • Choose Fresh Veggies: Always opt for fresh vegetables when possible. Their vibrant colors and crisp textures will enhance your soup’s flavor and nutritional value. If you need to use frozen, thaw and drain any excess water to prevent a watery soup.
  • Vegetarian Swap: If you’re aiming to make a vegetarian version, using vegetable broth instead of chicken broth is a fantastic choice. This swap not only maintains the rich flavor but also ensures everyone at the table can enjoy warmth in a bowl.
  • Avoid Overcooking: Keep a close eye on those veggies! You want them to be crisp-tender—this maintains their vibrant color and fresh taste while also making your soup more visually appealing. Test them with a fork; they should be soft but still have a little bite.
  • Cheese Melting Technique: When adding your cheddar cheese, do so gradually—this helps it blend perfectly without clumping. Stir continuously to ensure each handful fully melts before adding more, creating that dreamy, creamy texture we all crave.
  • Customize Your Herbs: Feel free to get creative with your herbs! While parsley and thyme are classic choices, try adding a sprinkle of fresh basil or dill for a unique twist. They can significantly elevate the soup’s aroma and flavor profile.
  • Storage Tips: If you plan to make it ahead, cool your soup completely before storing. Use airtight containers and keep it in the refrigerator for up to four days. If freezing, leave room for expansion, and reheat slowly to retain that decadent texture we all love. A splash of broth during reheating can help revive the creaminess!

What to Serve with Creamy Vegetable Soup?

Pairing your soup with delicious sides elevates the whole meal experience.

  • Buttered Bread: This classic addition is perfect for dipping into the creamy soup, soaking up all that rich flavor.
  • Crusty French Baguette: The crunchy texture of a fresh baguette complements the smoothness of the soup beautifully. Enjoy it warm, slathered in butter.
  • Garlic Parmesan Roasted Potatoes: Their crispy exterior and cheesy goodness create a delightful contrast to the velvety soup, making each bite heavenly.
  • Simple Green Salad: A fresh salad with mixed greens and a tangy vinaigrette brightens up the meal and offers a refreshing balance to the rich soup.
  • Savory Herb Scones: Fluffy and moist, these scones add a delightful nod to the herbiness of the soup while being a perfect vessel for all that cream.
  • Apple Crisp Dessert: The sweet, warm flavors of baked apples with a crunchy topping offer a comforting finish to the meal, making it feel truly special.
  • Iced Herbal Tea: Refresh with a cold drink that beautifully contrasts the warm soup, enhancing your leisurely dining experience.
  • Cheesy Garlic Breadsticks: Chewy and cheesy, they’re fun to dip and keep the cozy vibes going alongside the creamy vegetable soup.
  • Zesty Stovetop Mac and Cheese: For some nostalgic comfort, this side will definitely make everyone smile, pairing perfectly with the richness of the soup.

Creamy Vegetable Soup Recipe FAQs

What kind of vegetables should I use for the best creamy vegetable soup?
Absolutely! Fresh vegetables bring out vibrant flavors and textures in the soup. Aim for a mix of seasonal favorites like carrots, celery, and potatoes. If you’re tight on time, frozen veggies like broccoli and corn work great too! Just remember to thaw and drain them before cooking to avoid a watery soup.

How should I store leftover creamy vegetable soup?
To keep your soup fresh, let it cool completely, then transfer it to an airtight container. It can be refrigerated for up to 4 days. If you plan to keep it longer, consider freezing it.

Can I freeze creamy vegetable soup, and if so, how?
Definitely! To freeze, pour your creamy vegetable soup into freezer-safe containers, leaving about an inch of space at the top for expansion. It can keep well for up to 3 months. When you’re ready to enjoy it, thaw it in the fridge overnight and reheat it gently on the stove, stirring occasionally. If it’s too thick after freezing, just add a splash of broth to restore that creamy texture.

Why did my soup come out too thick or too thin?
No worries! If your soup is too thick, try adding a bit of broth or water gradually while stirring until you reach your desired consistency. On the flip side, if it’s too thin, consider mixing a tablespoon of flour in a separate bowl with some broth, then stir this mixture back into your soup and let it simmer until thickened.

Is this creamy vegetable soup suitable for vegetarians?
Very! Simply swap the chicken broth with vegetable broth for a delicious vegetarian version of creamy vegetable soup that everyone can enjoy. You’ll still experience that hearty, comforting flavor without any meat.

Can I add different spices or herbs to this soup?
Of course! Feel free to experiment with your favorite spices. A dash of paprika or cayenne can add a nice kick, while fresh herbs like basil or dill will brighten up the flavor. The more the merrier when it comes to making this dish uniquely yours!

[tasty-recipe id=”1601″]

Filed Under: Soups

Indulgent Olive Garden Chicken Gnocchi Soup You’ll Crave!

May 22, 2025 by grace bellamy Leave a Comment

I still remember the first chilly evening that I decided to recreate my favorite Olive Garden dish—Chicken Gnocchi Soup. The comforting aroma of sautéed garlic and onions filled my kitchen, instantly transporting me back to the cozy restaurant, with its warm ambiance and laughter all around. This beloved Italian staple has a way of embracing you like a soft blanket on a cold day, and best of all, it can be ready in just about 30 minutes!

This creamy, dreamy copycat recipe brings the restaurant’s rich flavor right to your table, making it perfect for busy weeknights or when you need that extra dose of comfort food. Whether you’re using leftover rotisserie chicken or wanting to try a slow cooker variation, this soup adapts beautifully to your needs. Trust me, once you make this version, you may never look back at takeout again! Let’s dive into the recipe and make some mouthwatering memories together.

Why is Olive Garden Chicken Gnocchi Soup a Must-Try?

Comfort Food at its finest: This creamy soup wraps you in warmth, providing the perfect remedy for chilly evenings.
Quick and Easy: With just 30 minutes needed, it’s ideal for busy weeknights.
Customizable: Want it dairy-free? Try coconut milk! Prefer slow cooking? I’ve got you covered too.
Crowd-Pleasing: This dish is always a hit; serve it with some Olive Garden breadsticks for a complete experience!
Rich Flavors: A delightful blend of sautéed vegetables, chicken, and gnocchi creates a restaurant-quality meal that’s simply irresistible.

Olive Garden Chicken Gnocchi Soup Ingredients

Get ready to savor this creamy delight!

For the Soup Base
• Cooked Chicken – Use diced boneless, skinless chicken breasts for tender bites; rotisserie chicken also works well!
• Celery – Chopped celery lends a nice vegetable base for depth of flavor.
• White Onion – Diced onion provides aromatic sweetness and enhances the soup’s savory notes.
• Minced Garlic – A must for flavor; don’t skip this essential ingredient!
• Shredded Carrots – Adds a touch of sweetness and a pop of color.
• Olive Oil – Perfect for sautéing the vegetables until they’re tender and fragrant.
• Low Sodium Chicken Broth – Serves as the soup’s delicious liquid base, enhancing every bite.
• Salt and Pepper – To taste, adjusting to fit your personal flavor preference.
• Thyme – This herb adds aromatic depth, making your soup oh-so-inviting.

For the Gnocchi
• Potato Gnocchi – The star ingredient here; its pillowy texture makes the soup extra comforting!

For the Creaminess
• Half and Half – Creates that dreamy, creamy texture; you can swap it with heavy cream for more richness.
• Fresh Spinach – Adds color and nutritional value; roughly chopping it will help it blend beautifully.

Remember, full measurements are in the recipe card below.

How to Make Olive Garden Chicken Gnocchi Soup

  1. Sauté vegetables: In a large pot, heat olive oil over medium heat. Add chopped celery, diced onion, and minced garlic. Cook until the vegetables are translucent and fragrant, about 5 minutes.
  2. Add chicken mixture: Stir in your cooked chicken, low-sodium chicken broth, salt, pepper, and thyme. Bring the mixture to a boil, allowing the flavors to meld beautifully, about 2-3 minutes.
  3. Gently stir in gnocchi: Carefully add the potato gnocchi to the pot and boil for 3-4 minutes. Watch for the gnocchi to float, indicating they are cooked and ready!
  4. Simmer the soup: Reduce the heat to a simmer and let the soup cook for 10 minutes. This will allow the flavors to deepen and come together in perfect harmony.
  5. Add creamy finish: Stir in the half and half and add the roughly chopped spinach. Cook for an additional 2-3 minutes until the spinach is tender, then season with extra salt and pepper to taste.

Optional: Top with grated Parmesan cheese for an extra touch of flavor!

Expert Tips for Olive Garden Chicken Gnocchi Soup

• Perfect Chicken Texture: Always use cooked and diced chicken; it ensures tender bites throughout the soup without overcooking.

• Gnocchi Timing: Gnocchi should be added only when the soup is boiling; this prevents them from becoming overly soft and mushy.

• Broth Quality: Opt for low sodium chicken broth to control the saltiness; adjust with salt and pepper as needed for your taste.

• Slow Cooker Note: If using the slow cooker, add gnocchi, half and half, and spinach in the last hour to keep their textures intact.

• Freezing Tips: Keep in mind that gnocchi can become softer after freezing, so enjoy fresh or store components separately if you plan to freeze.

• Custom Flavor Boost: For a rich variation, try substituting half and half with heavy cream or add a sprinkle of parmesan on top for added flavor to your Olive Garden Chicken Gnocchi Soup.

How to Store and Freeze Olive Garden Chicken Gnocchi Soup

Fridge: Store in an airtight container for up to 3 days. Reheat gently on the stove or in the microwave, adding a splash of broth if needed.

Freezer: Freeze the soup in airtight containers for up to 2 months. Note that gnocchi may become softer after freezing, so consider freezing separately if desired.

Reheating: Thaw overnight in the fridge, then reheat on the stove over medium heat. Stir frequently to prevent sticking and ensure even heating.

Serving Suggestions: For the best texture, enjoy freshly made soup. If you love to save leftovers, try adding fresh spinach before serving to revive its vibrant color!

What to Serve with Olive Garden Chicken Gnocchi Soup?

Every comforting bowl of this rich soup deserves delicious companions to make your meal complete and unforgettable.

  • Olive Garden Breadsticks: Soft and warm, these buttery breadsticks pair beautifully, perfect for dipping into the creamy soup. Their light garlic flavor enhances the overall experience.
  • Italian Green Salad: A fresh, crunchy salad with greens, olives, and a zesty dressing adds a refreshing contrast to the creamy soup, balancing richness with brightness.
  • Garlic Parmesan Roasted Vegetables: Crispy, roasted vegetables with garlic and parmesan bring wonderful texture and flavor, making each bite delightful and hearty.
  • Cheesy Fontina Risotto: Creamy risotto enriched with fontina cheese offers a luxurious additional side dish that complements the soup’s comforting essence.
  • Herb Focaccia: Soft and fragrant, a slice of focaccia drizzled with olive oil is perfect for sopping up the last bits of your soup, enhancing every mouthful.
  • Chardonnay or Pinot Grigio: A chilled glass of these crisp white wines brings out the flavors in the soup, making it an excellent pairing with the creaminess and garlic notes.
  • Tiramisu: Ending your meal on a sweet note, this coffee-flavored dessert provides a delightful contrast to the savory soup, ensuring a well-rounded dining experience.

Olive Garden Chicken Gnocchi Soup Variations

Let your creativity shine as you make this comforting soup your very own with these delightful twists!

  • Slow Cooker: Prepare the soup in your slow cooker; sauté the veggies first, then combine with other ingredients and cook on low for 3-4 hours.
  • Dairy-Free: Swap half and half for dairy-free coconut milk to enjoy creamy goodness without the dairy.
  • Parmesan Topping: Finish off your bowl with freshly grated Parmesan cheese for that classic Italian touch; it adds a lovely salty kick.
  • Chicken Thighs: Use chicken thighs instead of breasts for a richer, juicier flavor that elevates the overall dish.
  • Butter Sauté: Add a pat of butter when sautéing the vegetables for a richer depth of flavor that enhances the comforting essence of the soup.
  • Green Chiles: For a kick, toss in some green chiles to infuse a delightful warmth and a hint of spice.
  • Vegetable Medley: Incorporate your favorite veggies like zucchini or bell peppers for added nutrition and a colorful presentation.
  • Herb Fusion: Experiment with fresh herbs like basil or oregano to bring a fresh, aromatic layer that transforms each bowl into an Italian delight.

FAQs About Olive Garden Chicken Gnocchi Soup

This section answers some common queries you might have about creating this delightful soup.

What is the most popular soup at Olive Garden?

The most popular soup at Olive Garden is the Chicken Gnocchi Soup, beloved for its creamy texture and rich flavor.

How does Olive Garden make their soup?

Olive Garden’s Chicken Gnocchi Soup is made with sautéed vegetables, chicken, gnocchi, and a creamy broth base, creating comfort food magic.

Should you cook gnocchi before adding to soup?

No, you should add uncooked gnocchi directly to the soup; they cook quickly and puff up beautifully while boiling.

How many calories are in Olive Garden chicken and gnocchi soup?

A serving of Olive Garden’s Chicken Gnocchi Soup typically contains around 300 calories, though this can vary with portion size.

What is Queen Elizabeth’s favorite soup?

Queen Elizabeth’s favorite soup is reportedly a classic, comforting cream of tomato, balancing simplicity and elegance.

Can you buy Olive Garden soup at the grocery store?

Yes, select Olive Garden soups, including Chicken Gnocchi, can often be found pre-packaged in grocery stores, bringing restaurant flavors home.

[tasty-recipe id=”1354″]

Filed Under: Soups

Cozy Lemon Chicken Orzo Soup for a Bright Comfort Meal

May 22, 2025 by grace bellamy Leave a Comment

There’s something magical about the first chill in the air that makes me crave cozy bowls of soup. Just last week, I found myself in the kitchen, reminiscing about those comforting flavors of my childhood, particularly my mom’s legendary chicken noodle soup. It was then that the idea of a lighter, yet equally satisfying Lemon Chicken Orzo Soup struck me.

As I chopped the celery and carrots, the fresh aroma filled the room, instantly uplifting my spirits. I knew I was onto something special—this soup is all about simplicity without sacrificing flavor. Bright, zesty lemon harmonizes with tender chicken and just the right amount of savory herbs, making it a family favorite that’s sure to bring comfort, especially as the seasons change.

Whether you’re winding down after a hectic day or hosting loved ones for a cozy dinner, this Lemon Chicken Orzo Soup is the perfect choice. Quick to whip up yet undeniably delicious, it’s like a warm hug in a bowl, perfect for any occasion. Let’s dive into this delightful recipe that promises to rekindle your love for homemade meals!

Why is LEMON CHICKEN ORZO SOUP so special?

Simplicity for Everyone: This recipe is incredibly easy to follow, making it perfect for both novice cooks and seasoned chefs alike.

Bright Flavor Explosion: The zesty lemon harmonizes beautifully with savory herbs, creating a delightful taste that’s both refreshing and comforting.

Quick and Convenient: In under an hour, you can have a delicious, homemade meal that warms the soul, saving you from fast food temptations.

Crowd-Pleasing Favorite: Whether it’s a family dinner or a cozy get-together, everyone will love this dish.

Versatile Options: You can easily switch up the protein or add greens like spinach to customize it to your taste.

Elevate your mealtime experience with this comforting Chicken Taco  Soup, guaranteed to leave everyone smiling!

LEMON CHICKEN ORZO SOUP Ingredients

Full measurements are in the recipe card below.

For the Soup Base
• Celery – adds flavor and texture; chop finely for the best results.
• Carrots – offers sweetness and vibrant color; peeled & chopped finely.
• Onion – provides savory aromatics; make sure to chop it well.
• Butter – adds richness and flavor that elevates the broth.
• Olive Oil – for cooking and to enhance the overall flavor.
• Garlic – imparts a pungent and delicious kick; be sure to mince it.

For the Broth
• Flour – acts as a thickening agent to create a hearty broth.
• Chicken Broth – the essential base for your Lemon Chicken Orzo Soup; opt for low-sodium if desired.
• Italian Seasoning – adds depth of flavor to your comforting soup.

For the Main Ingredients
• Uncooked Chicken Breasts – the star protein; tender and juicy.
• Uncooked Orzo – this rice-shaped pasta is the perfect addition; cook it until al dente.
• Lemon Juice – brightens up the soup; add to taste for that zesty flair.
• Chopped Fresh Parsley – for a touch of freshness; also add to taste.

For Seasoning
• Salt & Pepper – essential for seasoning; adjust to your palate.

This cozy dish is simple yet bursting with flavor, making it a standout recipe!

How to Make Lemon Chicken Orzo Soup

  1. Sauté Vegetables: In a large pot, melt 2 tablespoons of butter with 1 tablespoon of olive oil over medium heat. Add 1 finely chopped celery stalk, 1 finely chopped carrot, and 1 chopped onion. Cook for 5-7 minutes until softened and aromatically fragrant.
  2. Add Garlic: Toss in 3 cloves of minced garlic, stirring for 30 seconds until it turns golden and releases its pungent aroma.
  3. Incorporate Flour: Sprinkle in 2 tablespoons of flour and stir for 1 minute to eliminate the raw taste, creating a slight roux.
  4. Pour Broth: Gradually add 6 cups of chicken broth while stirring until the flour dissolves completely. Add 1 teaspoon Italian seasoning and 2 uncooked chicken breasts. Bring to a gentle boil.
  5. Simmer: Cover the pot (keeping the lid slightly ajar) and let it simmer for 15 minutes, allowing the chicken to cook through and the flavors to meld.
  6. Cook Orzo: Stir in 1 cup of uncooked orzo until well combined, and continue cooking for about 10 minutes, stirring occasionally until the orzo is al dente.
  7. Shred Chicken: Carefully remove the chicken from the pot, cut it into bite-sized pieces, and return it to the soup, ensuring that every spoonful is packed with tender chicken.
  8. Finish and Serve: Add the juice of 1 lemon, freshly chopped parsley, and salt and pepper to taste. Serve immediately, and enjoy the comforting warmth of this delightful soup!

Optional: Garnish with extra parsley and lemon slices for a fresh touch.

Exact quantities are listed in the recipe card below.

Expert Tips for LEMON CHICKEN ORZO SOUP

• Perfect Chicken: Use an instant-read meat thermometer to ensure chicken reaches 165°F; this keeps it juicy and prevents drying out.

• Broth Matters: Opt for low-sodium chicken broth if you’re sensitive to salt; you’ll be able to control taste while keeping it healthy.

• Orzo Caution: Stir the orzo frequently while cooking; it can stick to the bottom of the pot, making for an uneven texture in your soup.

• Brighten Up: Feel free to add more lemon juice before serving; it enhances the freshness of this LEMON CHICKEN ORZO SOUP.

• Leftover Love: If you plan on storing leftovers, remember that orzo absorbs liquid; add extra broth when reheating to revive its wonderfully comforting texture.

How to Store and Freeze LEMON CHICKEN ORZO SOUP

Fridge: Store in an airtight container in the refrigerator for up to 3 days. Reheat on the stovetop over medium heat or in the microwave until heated through.

Freezer: Freeze in a freezer-safe container for up to 2 months. Thaw in the fridge overnight before reheating; you may need to add additional broth as the orzo absorbs liquid.

Leftover Adjustments: When reheating, be prepared to add more chicken broth or water to restore the soup’s desired consistency, as the orzo will continue to absorb the liquid.

Serving Tip: For an extra fresh touch, squeeze some lemon juice into the soup just before serving, enhancing the bright flavors of your LEMON CHICKEN ORZO SOUP.

What to Serve with LEMON CHICKEN ORZO SOUP?

Cozy up your dinner table with delightful pairings that complement the bright, zesty flavors of your soup.

  • Crusty Bread: A warm, crusty loaf is perfect for dipping, soaking up those savory broth flavors.
  • Garden Salad: A fresh, crisp salad with seasonal greens and a tangy vinaigrette adds brightness alongside the soup.
  • Crispy Brussels Sprouts: Roasted with a hint of lemon, these sprouts echo the soup’s flavors while adding a delightful crunch.
  • Cheese Platter: An assortment of cheeses like goat cheese or sharp cheddar elevates the meal—perfect for nibbling in between spoonfuls.
  • Herbed Rice: Simple, fluffy rice with herbs enhances the meal’s heartiness, making every bowl feel surprisingly satisfying.
  • Refreshing Lemonade: A cold glass of homemade lemonade echoes the lemony kick in the soup and keeps things light and refreshing.

Pair these options to create a warm, inviting meal that encourages laughter and love around your dinner table!

LEMON CHICKEN ORZO SOUP Variations

Get ready to put your personal touch on this delightful soup with these fun twists!

  • Chicken Thighs: Swap chicken breasts for thighs to enjoy a richer, more flavorful dish. Thighs are juicy and add depth to the broth.
  • Add Spinach: Toss in a handful of chopped spinach during the last few minutes of cooking for a burst of color and nutrition. It wilts beautifully, enhancing both flavor and health benefits.
  • Zucchini Noodles: Replace orzo with spiralized zucchini for a low-carb option. This fresh twist adds a lovely texture and is great for summer meals.
  • Lemon Zest Boost: Grate in some lemon zest along with the juice to amplify that zesty citrus flavor. It’s like sunshine in a bowl!
  • Herb Swaps: Experiment with fresh herbs like dill or thyme instead of Italian seasoning. Each herb brings a unique flavor profile that can transform the soup.
  • Spicy Kick: Add red pepper flakes or diced jalapeños for a fiery twist! This variation is perfect for those who crave a little heat in their comforting soup.
  • Creamy Version: Stir in a splash of heavy cream or coconut milk at the end for a luxurious, creamy texture. This makes the soup even more decadent and satisfying.
  • Mushroom Medley: Toss in sautéed mushrooms for an earthy flavor that complements the lemon beautifully. They bring a savory richness that balances the soup’s brightness.

FAQs About LEMON CHICKEN ORZO SOUP

What’s in lemon chicken orzo soup?

This delicious soup typically includes chicken, orzo pasta, celery, carrots, onion, garlic, chicken broth, and herbs, all tied together with zesty lemon juice.

What does lemon do to chicken soup?

Lemon adds brightness and acidity, elevating the flavors and creating a refreshing twist on traditional chicken soup.

What does adding lemon juice to soup do?

Adding lemon juice enriches the soup’s flavor profile, giving it a vibrant, tangy taste that balances savory ingredients beautifully.

What does adding lemon juice to chicken do?

It tenderizes the chicken while imparting a bright, uplifting flavor, making every bite pop with freshness.

Is orzo rice or pasta?

Orzo is actually a form of pasta, shaped like rice, making it a delightful addition to soups and salads alike.

What is the best soup when you’re sick?

Lemon Chicken Orzo Soup is fantastic when you’re under the weather; its warm broth and nutritious ingredients provide comfort and nourishment.

[tasty-recipe id=”1334″]

Filed Under: Main Dishes, Soups

Creamy Chicken Taco Soup: Easy Weeknight Tex-Mex Delight

May 22, 2025 by grace bellamy Leave a Comment

I still remember the first time I tried my hand at making Chicken Taco Soup on a cozy, rain-soaked afternoon. The aroma of sizzling onions and spices wafted through my kitchen, instantly transforming the space into a warm haven filled with comforting Tex-Mex vibes. Family gatherings and game nights come to life with this dish, as it effortlessly combines tender chicken, vibrant black beans, and sweet corn in a creamy broth that beckons you to take another bite.

This Easy Chicken Taco Soup is not just a meal; it’s a moment you can share with loved ones or savor alone for that well-deserved self-care night. Ready in just 35 minutes and adaptable for stovetop, Instant Pot, or Crockpot, it’s a fantastic option for any busy weeknight. Plus, the simplicity of the ingredients—like the zesty Rotel tomatoes and smooth cream cheese—means you can whip it up with minimal fuss while keeping your taste buds dancing. So, let’s dive into this delicious recipe that’s sure to become a cherished favorite in your home!

Why is Chicken Taco Soup the ultimate comfort food?

Ease of Preparation: This Chicken Taco Soup comes together in just 35 minutes, making it perfect for busy weeknights.

Flavorful Ingredients: With zesty Rotel tomatoes and creamy cream cheese, each bite bursts with Tex-Mex flavors that everyone will love.

Versatile Cooking Methods: Whether you prefer stovetop, Instant Pot, or Crockpot, this recipe adapts to your lifestyle seamlessly.

Crowd-Pleasing Appeal: Ideal for family gatherings or cozy nights in, it’s a dish that brings people together and invites seconds.

Customizable Toppings: Add your favorite toppings like avocado, cilantro, or tortilla strips to make every bowl unique and delightful.

For a comforting soup pairing, check out my chicken soup recipe that will warm your heart further!

Chicken Taco Soup Ingredients

Delicious components for your creamy soup!

For the Soup
• Olive Oil – Aids in sautéing the onion for a savory base.
• Onion (1/2 medium, chopped) – Infuses the soup with rich, flavorful depth.
• Chicken Broth (3 cups) – The flavorful liquid base; opt for low sodium if preferred.
• Rotel Diced Tomatoes & Green Chilies (2 x 10 oz cans, with juices) – Provides that tangy, spicy essence people crave in Chicken Taco Soup.
• Black Beans (1 x 14 oz can, drained & rinsed) – Offers hearty texture and adds much-needed protein.
• Corn (1 x 12 oz can, drained) – Brings in a hint of sweetness and additional texture.
• Red Bell Pepper (1/2, chopped) – Introduces vibrant flavor and a pop of color to the mix.
• Chili Powder (1 tablespoon) – The secret to that beautiful taco flavor everyone loves.
• Garlic Powder (1 teaspoon) – Elevates the savory profile of the soup.
• Ground Cumin (1 teaspoon) – Adds a warm, earthy note characteristic of Tex-Mex cooking.
• Smoked Paprika (1 teaspoon) – Infuses the soup with a delightful smoky flavor.
• Cream Cheese (8 ounces, softened) – Gives the soup its creamy, rich texture; make sure to soften it well!
• Cooked/Rotisserie Chicken (2 cups, shredded) – This is the star protein that makes the soup hearty!
• Salt & Pepper – Essential for seasoning to taste.

For Toppings
• Shredded Mexican Cheese Blend – Adds a melty, cheesy layer on top.
• Avocado – Provides a creamy contrast and freshness.
• Cilantro – Brings a bright, herbal touch to every spoonful.
• Tortilla Strips – Adds crunch and a familiar taco flair to finish off the dish.

Remember, full measurements are in the recipe card below.

How to Make Chicken Taco Soup

  1. Sauté the onion in olive oil over medium heat for 5 minutes until it’s softened and fragrant. This starts building the hearty flavor base of your soup.
  2. Add the remaining soup ingredients, except for the cream cheese, chicken, salt, and pepper. Stir well to combine all the delightful flavors for your Chicken Taco Soup.
  3. Bring the mixture to a boil, then reduce the heat and simmer uncovered for 5 minutes. This allows the flavors to meld beautifully together.
  4. Cut the softened cream cheese into small pieces and stir them into the soup. Allow them to melt while stirring until the mixture is creamy and smooth.
  5. Incorporate the shredded chicken and cook until warmed through, about 5-7 minutes. This adds that satisfying protein goodness to your soup.
  6. Season with salt and pepper to taste. Make sure to adjust it according to your preference. Serve your Chicken Taco Soup with your favorite toppings!

Optional: Top with shredded cheese or avocado for an extra creamy finish.

Exact quantities are listed in the recipe card below.

Expert Tips for Chicken Taco Soup

• Cream Cheese Prep: Ensure your cream cheese is very soft before adding it to the soup. This ensures a smooth integration and prevents lumps.

• Broth Choice: Opt for low-sodium chicken broth if you’re watching sodium levels. It allows you to control the dish’s final saltiness better.

• Spice Balance: Taste as you go; add more chili powder for heat or extra cumin for depth. This will give your chicken taco soup a personalized touch!

• Ingredient Substitutions: If Rotel isn’t available, use diced green chilies instead for a similar flavor profile. Always keep the Tex-Mex vibe alive!

• Leftover Love: Any leftovers can be stored in the fridge for up to three days. Reheat gently, adding a splash of broth if needed for consistency.

How to Store and Freeze Chicken Taco Soup

Fridge: Store your Chicken Taco Soup in an airtight container for up to 3 days. This will help preserve its creamy texture and vibrant flavors for your next meal.

Freezer: If you want to enjoy it later, freeze the soup in freezer-safe containers for up to 3 months. Just remember to leave some space at the top as it will expand while freezing.

Thawing: To enjoy frozen Chicken Taco Soup, thaw it overnight in the fridge. Reheat gently on the stovetop or microwave, adding a splash of broth if needed to restore creaminess.

Reheating: Reheat individual portions in the microwave for about 2–3 minutes or until hot. Stir before serving and consider adding extra toppings for a fresh touch!

What to Serve with Chicken Taco Soup?

Cozy up to a full Tex-Mex meal that pairs perfectly with this delightful soup.

  • Crispy Tortilla Chips: These provide a satisfying crunch that contrasts beautifully with the creamy soup, making each bite a treat.
  • Guacamole: Creamy and rich, guacamole adds a fresh twist and balances the spice of the soup perfectly. Its smoothness invites you to dip and savor every moment.
  • Mexican Street Corn Salad: This vibrant dish combines sweet corn, lime, and spices, adding a fresh zesty flair that complements the flavors of the soup wonderfully.
  • Mexican Rice: Fluffy, seasoned rice soaks up the soup’s goodness while adding a comforting grainy texture to your meal.
  • Sour Cream: A dollop of this tangy delight adds a cooling contrast to the warmth of the soup, enhancing its richness and flavor profile.
  • Margaritas: Sip on a refreshing margarita for a festive twist! The citrusy notes refresh your palate between hearty spoonfuls.
  • Fruit Salsa: A sweet, fruity salsa made with mango or pineapple brightens up the meal and adds a delightful contrast to the savory soup.
  • Churros: End on a sweet note with these cinnamon-sugar-coated treats! They provide a delightful crunch and sweetness after your savory feast.
  • Cheesy Quesadillas: Gooey, melty quesadillas filled with cheese make a comforting addition, perfect for dipping into your Chicken Taco Soup.

Chicken Taco Soup Variations

Customize your Chicken Taco Soup to suit your tastes and dietary needs with these delightful twists!

  • Ground Beef: Swap the shredded chicken for 2 cups of browned ground beef for a heartier flavor.
  • Vegetarian: Replace chicken with 1 cup of diced zucchini and add more beans for protein, making a delicious vegetarian version.
  • Spicy Kick: Add diced jalapeños or a splash of hot sauce to elevate the heat level and tantalize your taste buds.
  • Creamy Avocado: Blend an avocado into the broth for added creaminess and a smooth texture without using cream cheese.
  • Corn Variants: Use fresh corn kernels or even roasted corn for a slightly sweet, caramelized flavor boost.
  • Herb Infusion: Add a handful of fresh cilantro or a few sprigs of oregano while simmering for an aromatic touch.
  • Coconut Milk: Stir in a can of coconut milk instead of cream cheese for a tropical twist and a lighter feel.
  • Tex-Mex Rice: Serve it over cooked rice for a heartier meal, turning your soup into a comforting Tex-Mex bowl.

Each variation offers new layers of flavors that make this soup even more exciting to enjoy with family and friends!

FAQs About Chicken Taco Soup

This section answers common questions to help you create the perfect Chicken Taco Soup!

What is the secret ingredient in chicken tortilla soup?

A pinch of lime juice or a tablespoon of vinegar can brighten the flavors beautifully, enhancing the overall taste profile.

What kind of broth goes in taco soup?

Chicken broth is ideal for Chicken Taco Soup, adding richness. You can also use vegetable broth for a vegetarian version.

What’s the difference between taco soup and tortilla soup?

Taco soup features taco ingredients like beans and ground meat, while tortilla soup is often broth-based with crispy tortilla strips as a topping.

What is in Chick-fil-A tortilla soup?

Chick-fil-A’s tortilla soup usually contains shredded chicken, black beans, corn, and diced tomatoes in a savory broth, topped with tortilla strips.

What makes chicken tortilla soup creamy?

Creamy elements like cream cheese or sour cream are often stirred in to achieve a luscious texture and comforting richness.

Why do you put vinegar in chicken soup?

Adding vinegar can enhance the flavors and balance the richness by introducing a subtle tang, making the soup taste brighter overall.

[tasty-recipe id=”1327″]

Filed Under: Soups

Indulgent French Onion Soup Recipe for Cozy Comfort Nights

May 13, 2025 by grace bellamy Leave a Comment

French Onion Soup Recipe: A Warm Embrace in a Bowl

The first time I inhaled the rich, sweet aroma of a bubbling French onion soup recipe simmering away in my grandmother’s kitchen, I felt an instant warmth that wrapped around me like a cozy blanket. The simple act of caramelizing onions became a cherished ritual, resulting in a deeply satisfying dish that effortlessly brought my family together. This French onion soup recipe is not just a meal; it’s a heartfelt invitation to slow down, breathe in the rich flavors, and savor the comforting embrace of this classic dish.

What I love most about this recipe is its speed and meal-prep friendly nature. You can whip it up on a busy weekday, or caramelize a batch of onions ahead of time for an easy recipe that fits seamlessly into your routine. With every spoonful, you’re not only indulging in healthy comfort food but also reliving those precious moments of gathering around the table—something I believe we all crave, especially in today’s busy world.

What makes a French onion soup recipe special?

There’s something magical about a warm bowl of this classic dish, bubbling with savory broth, caramelized onions, and gooey, melted cheese. It’s the perfect antidote to a long day, inviting you to savor each comforting spoonful. For an even richer experience, consider enhancing your meal with some homemade croutons that elevate the texture and flavor beautifully.

Ingredients

You’ll find full measurements in the recipe card below.

For the Soup
• Yellow onions – the backbone of any great French onion soup, providing sweetness when caramelized.
• Butter – adds richness and depth to the flavor; feel free to use olive oil for a lighter touch.
• Beef broth – gives the soup its signature savory base; you can substitute with vegetable broth for a vegetarian option.
• White wine – enhances the broth with acidity; use a dry variety for best results.
• Thyme – brings earthy, aromatic notes that are essential in a classic French onion soup recipe.
• Bay leaves – infuses the soup with a subtle layer of flavor as it simmers.

For the Topping
• Baguette slices – toasted to add a delightful crunch; use any crusty bread for a tasty variation.
• Gruyère cheese – melts beautifully and adds a nutty flavor; Swiss cheese is a great substitute if you’re in a pinch.
• Parmesan cheese – sprinkles on top for an extra punch of saltiness and depth; consider pecorino for a different taste.

Optional Garnishes
• Fresh parsley – adds a pop of color and freshness when sprinkled on top before serving; cilantro can be an interesting twist.
• Ground black pepper – for an added kick of heat; adjust to your taste preference.

How to Make French Onion Soup Recipe

  1. Melt 2 tablespoons of butter in a large pot over medium heat. Allow it to foam and bubble slightly, which indicates it’s time to add the onions.
  2. Add 4 cups of thinly sliced onions, stirring well to coat them in the melted butter. Cook for about 15-20 minutes, stirring occasionally, until they turn a lovely golden brown and caramelized.
  3. Sprinkle 1 teaspoon of salt and 1 teaspoon of sugar over the onions. This step enhances sweetness, helping the onions caramelize even more beautifully.
  4. Pour in 1 cup of dry white wine, scraping the bottom of the pot to loosen any flavorful bits. Let it simmer for 5-7 minutes until the wine reduces slightly.
  5. Stir in 4 cups of beef broth and bring the mixture to a gentle boil. Reduce the heat and let it simmer for 30 minutes, allowing all the flavors to marry together.
  6. Season with salt and freshly cracked pepper to taste. Adjust the seasoning to your liking, as the broth adds its own saltiness.
  7. Preheat your oven to 400°F while you prepare the topping. Slice a French baguette and toast the slices for crispness.
  8. Assemble the soup in oven-safe bowls—ladle in the hot soup and top each bowl with a couple of toasted baguette slices.
  9. Top generously with grated Gruyère cheese. Broil the bowls for 3-5 minutes or until the cheese is bubbly and golden brown.

Optional: Garnish with fresh thyme leaves for a delightful aromatic touch.

Exact quantities are listed in the recipe card below.

Expert Tips for French Onion Soup

  • Choose Quality Onions: Select sweet onions like Vidalia or Walla Walla for a rich, caramelized flavor that enhances your French onion soup recipe.
  • Low and Slow Cooking: Caramelizing onions takes time. Cook them on low heat to avoid burning, ensuring a deep brown color and sweet taste.
  • Deglaze Wisely: When adding wine, choose a dry variety and scrape the bottom of the pot to lift the flavorful bits stuck there, enriching the broth.
  • Layer Your Cheese: Instead of just one type of cheese, mix Gruyère with a bit of Parmesan for a complex, gooey, and crispy topping.
  • Serve Right: For the best experience, ladle the soup into broiler-safe bowls and bake right before serving—this creates a beautifully melted cheese crust.

How to Store and Freeze French Onion Soup

Fridge: Keep your homemade French onion soup in an airtight container for up to 3 days to retain its savory flavors.

Freezer: For longer storage, freeze the soup in individual portions for up to 3 months. Use freezer-safe containers or bags, removing excess air.

Reheating: When ready to enjoy, thaw overnight in the fridge, then reheat on the stove over medium heat until warmed through. Avoid freezing the cheese topping, which is best added fresh.

FAQs About French Onion Soup

Q: What is the secret to French onion soup?
A: The secret lies in perfectly caramelizing the onions, which brings out their natural sweetness, creating a rich and flavorful base for the soup.

Q: What are the ingredients of French onion soup?
A: Key ingredients include yellow onions, butter, beef broth, dry white wine, Gruyère cheese, and fresh thyme, forming a deliciously hearty soup.

Q: How do you deepen the flavor of French onion soup?
A: To deepen the flavor, use a mix of onions and add a splash of sherry or balsamic vinegar, enhancing the savory notes of the French onion soup recipe.

Q: What onions are best for French onion soup?
A: Yellow onions are the best choice for French onion soup due to their balanced sweetness and strong flavor that intensifies when caramelized.

Q: What is the best alcohol to use in French onion soup?
A: A dry white wine, like Sauvignon Blanc, adds acidity and complexity to the soup while complementing the rich flavors beautifully.

Q: Why do you put baking soda in French onion soup?
A: A pinch of baking soda can help speed up caramelization by increasing the pH, allowing the sugars in the onions to brown more quickly and deeply.

[tasty-recipe id=”1016″]

Filed Under: Main Dishes, Soups

Nourishing Chicken Soup Recipe for Cozy Comfort on Chilly Days

May 13, 2025 by grace bellamy Leave a Comment

Chicken Soup Recipe: A Warm Hug in a Bowl

As the comforting aroma of simmering broth fills my kitchen, I can’t help but think of those chilly evenings spent huddled around the table with my family, bowls of warm goodness in hand. This chicken soup recipe brings back memories of laughter, healing, and togetherness, transforming a simple meal into a heartfelt experience.

What I love most about this dish is its speed and warmth—perfect for a quick weeknight dinner when time is tight but comfort is needed. With just a handful of ingredients, this family-friendly meal can be on the table in no time, making it an effortless choice for meal-prep lovers. Trust me, whether you’re looking to nourish a sick day or simply warm your soul, this chicken soup recipe is here to deliver healthy comfort food that feels like a warm hug.

What makes a perfect chicken soup recipe?

Imagine the aroma of savory chicken simmering gently with fresh vegetables, filling your home with warmth and comfort. This cozy dish is not just a meal; it’s a hug in a bowl that brings folks together, especially on chilly days. Join me as we explore how to craft the ultimate comfort food that surpasses any store-bought version and warms your heart.

Ingredients

Full measurements are in the recipe card below.

For the Soup Base
• Chicken broth – a rich base that deeply flavors your chicken soup recipe.
• Cooked chicken – shredded or diced, it’s the main protein that brings heartiness to your dish.
• Onion – chopped, it adds a beautiful aromatic sweetness to the soup.
• Garlic – minced, for a punch of flavor that complements the chicken perfectly.

For the Vegetables
• Carrots – sliced, they bring a delicious sweetness and a vibrant color to your soup.
• Celery – diced, it adds a delightful crunch and depth of flavor.
• Potatoes – cubed, these create a comforting hearty texture in every spoonful.

For the Seasoning
• Dried thyme – a must-have herb that enhances the earthiness of the chicken.
• Bay leaf – it infuses a subtle depth that rounds out the flavors beautifully.
• Salt and black pepper – essential for balancing and enhancing the overall taste of the soup.

For Garnish
• Fresh parsley – chopped and sprinkled on top for a burst of freshness and color.
• Lemon juice – a splash adds brightness and lifts the flavors beautifully.

How to Make Chicken Soup Recipe

  1. Sauté the Aromatics: Start by heating a splash of olive oil in a large pot over medium heat. Add diced onions, carrots, and celery, cooking until they soften and become fragrant, about 5-7 minutes.
  2. Add the Chicken: Next, toss in bone-in, skin-on chicken pieces into the pot. Brown them for about 5 minutes on each side, creating a rich flavor base for your soup.
  3. Pour in the Broth: After browning, carefully pour in enough chicken broth to cover the chicken by about an inch. Add your favorite herbs like thyme and bay leaf. Bring to a gentle simmer.
  4. Simmer the Soup: Cover the pot and let it simmer on low heat for 30-40 minutes. You’ll know the chicken is cooked when it reaches an internal temperature of 165°F.
  5. Shred the Chicken: Remove the chicken from the soup and let it cool slightly. Discard the skin and bones, then shred the meat into bite-sized pieces before adding it back to the pot.
  6. Add Noodles (Optional): If you’d like, stir in some egg noodles or rice now. Cook them according to package instructions, just until al dente, and mingle them throughout the soup.
  7. Season to Taste: Finally, taste your chicken soup and season with salt and pepper as desired. A squeeze of lemon juice can brighten the flavors beautifully!

Optional: Garnish with fresh parsley for a pop of color and freshness.

Exact quantities are listed in the recipe card below.

Expert Tips for Chicken Soup Recipe

  • Use Fresh Ingredients: Fresh vegetables and herbs elevate your chicken soup recipe, enhancing flavor and nutrients for a wholesome result.
  • Choose the Right Chicken: Opt for bone-in, skin-on chicken for richer flavor and a heartier broth; this will also improve your soup’s texture.
  • Adjust Cook Time: Avoid overcooking the chicken; it should be tender but not falling apart to ensure each bite is juicy and flavorful.
  • Layer Flavors: Start with sautéing onions and garlic before adding other ingredients. This simple step builds a deep, savory base for your chicken soup.
  • Season Gradually: Add salt and spices in stages to prevent oversalting. Taste as you go to achieve the perfect balance in your chicken soup recipe.
  • Rest Before Serving: Allow the soup to sit for 10-15 minutes after cooking. This helps the flavors meld beautifully, making each bowl even more delicious.

How to Store and Freeze Chicken Soup

Room Temperature: Let your chicken soup cool to room temperature before storing. It can stay out for up to 2 hours but should be refrigerated or frozen within that time to maintain freshness.

Fridge: Store chicken soup in an airtight container in the fridge for up to 3 days. When ready to enjoy, give it a good stir and reheat on the stove or in the microwave until piping hot.

Freezer: For longer storage, freeze chicken soup in freezer-safe containers or bags for up to 3 months. Leave some space at the top for expansion. Thaw overnight in the fridge before reheating.

Reheating: When reheating chicken soup, do so thoroughly until it reaches at least 165°F (74°C). You can add a splash of broth or water to restore its original consistency if needed.

FAQs About Chicken Soup Recipe

Q: What ingredients to put in chicken soup?
A: You can include rotisserie or fresh chicken, vegetables like carrots and celery, herbs such as thyme and parsley, and your choice of broth to create a heartwarming chicken soup recipe.

Q: What is the secret to good chicken soup?
A: The secret lies in using high-quality broth, fresh herbs, and allowing all the ingredients to simmer slowly. This enhances the flavors and creates the perfect comfort meal.

Q: How to make simple chicken soup at home?
A: To make a simple chicken soup at home, sauté your veggies, add cooked chicken, pour in broth, season, and simmer until everything’s tender. It’s that easy and satisfying!

Q: What is the best broth for chicken soup?
A: Homemade chicken broth is ideal for the best flavor, but low-sodium store-bought broth works well too. Look for options made with real ingredients for a wholesome chicken soup recipe.

Q: What is the most important ingredient in soup?
A: The most important ingredient is the broth. It serves as the base for all flavors in your chicken soup, so choose one that complements your ingredients beautifully.

Q: Why do you put lemon juice in chicken soup?
A: Lemon juice adds a bright acidity that balances the richness of the soup, enhancing its overall flavor profile and making every spoonful more delightful.

[tasty-recipe id=”1008″]

Filed Under: Soups

Easy Chicken Noodle Soup: Mom’s Best Comfort Food Recipe

May 13, 2025 by grace bellamy Leave a Comment

Chicken Noodle Soup: A Cozy Favorite for Chilly Evenings

There’s nothing quite like a warm bowl of Chicken Noodle Soup on a chilly evening, is there? I still remember the comforting aroma wafting from my grandmother’s kitchen, filling the air as we gathered around the table, laughter and stories mingling with the scent of savory broth. Making it at home is not only a cozy ritual but also a delightful way to nourish your loved ones with a quick weeknight dinner that’s sure to please everyone.

This Chicken Noodle Soup recipe is a go-to for busy nights, allowing you to whip up a heartwarming meal in under 30 minutes. It’s a family-friendly option that’s as versatile as it is delicious, accommodating any last-minute additions you might have in your fridge. Plus, with its healthy comfort food flair, it’s meal-prep friendly for those days when you just want to dive into something wholesome. Grab your apron, and let’s bring the joy of homemade soup to your kitchen!

What makes Chicken Noodle Soup special?

The warmth of a bubbling pot of chicken noodle soup is like a hug for the soul, bringing memories of cozy family dinners and chilly evenings. This beloved dish, with its tender chicken, hearty noodles, and fresh vegetables, isn’t just a meal—it’s a comfort ritual. As we dive into this classic recipe, discover the secrets behind its rich flavors that have made it a cherished favorite in kitchens around the world.

Ingredients

Full measurements are in the recipe card below.

For the Soup
• Chicken – Premium quality, boneless thighs or breasts work best for a tender texture.
• Noodles – Egg noodles are traditional; they perfectly soak up the chicken broth.
• Carrots – Freshly diced carrots add sweetness and color to the dish.
• Celery – This brings a lovely crunch and enhances the flavor profile.
• Onion – Chopped onion adds depth to the soup’s savory base.
• Garlic – Minced garlic brings a wonderful aroma and elevates the taste.
• Chicken Broth – Look for low-sodium broth; it allows you to control the saltiness.
• Bay Leaves – A couple of dried bay leaves infuse herbal notes into the soup.
• Thyme – Fresh thyme gives a touch of earthiness; dried can work if fresh isn’t available.
• Pepper – Freshly cracked black pepper adds a subtle kick.

For the Finish
• Parsley – Chopped fresh parsley brightens the soup and adds a pop of color.
• Lemon Juice – A splash just before serving gives a refreshing zing to the Chicken Noodle Soup.

How to Make Chicken Noodle Soup

  1. Sauté vegetables. Begin by heating a tablespoon of olive oil in a large pot over medium heat. Add diced onions, carrots, and celery, and sauté until they become tender and fragrant, about 5-7 minutes.
  2. Add garlic and herbs. Stir in minced garlic, dried thyme, and bay leaves. Continue to cook for another minute until the garlic is aromatic. This step layers the flavors beautifully, making your soup irresistible.
  3. Pour in broth. Gradually add 8 cups of chicken broth to the pot, stirring gently. Bring the mixture to a boil, then reduce the heat to a simmer. Let the broth bubble away for about 10 minutes to allow the flavors to meld.
  4. Introduce chicken. Add diced or shredded cooked chicken to the pot. If using raw chicken, simmer until it’s fully cooked (about 15-20 minutes), then remove and shred afterward. This step ensures your chicken is moist and flavorful.
  5. Mix in noodles. Once the chicken is ready, add 2 cups of egg noodles to the simmering soup. Cook for 8-10 minutes until the noodles are tender but still al dente. Watch them closely to avoid overcooking!
  6. Season to taste. Remove the bay leaves and season with salt and pepper according to your preference. A sprinkle of fresh parsley or a squeeze of lemon juice can enhance the flavors further.

Optional: Serve with crusty bread for a complete meal.

Exact quantities are listed in the recipe card below.

Expert Tips for Chicken Noodle Soup

• Perfect Chicken Choices: Use a combination of dark and white meat for richer flavor and tenderness in your chicken noodle soup.

• Fresh vs. Dried Herbs: Opt for fresh herbs like thyme and parsley when possible; they bring brightness that elevates the overall dish.

• Avoid Overcooking: Don’t add noodles too early; they can get mushy. Add them in the last 10-15 minutes of cooking for perfect texture.

• Customize to Taste: Feel free to experiment with vegetables beyond carrots and celery; peas or spinach can add a pop of color and nutrition.

• Leftover Magic: Save any leftovers! This chicken noodle soup tastes even better the next day, as the flavors meld beautifully in the fridge.

How to Store and Freeze Chicken Noodle Soup

Fridge: Enjoy your chicken noodle soup fresh for up to 3 days in an airtight container. Let it cool completely before refrigerating to maintain flavor.

Freezer: Freeze chicken noodle soup for up to 3 months. Portion into freezer-safe containers, leaving space for expansion. Thaw in the fridge overnight when ready to enjoy.

Reheating: When reheating, add a splash of water or broth to restore consistency. Heat on the stovetop or microwave until piping hot, ensuring all ingredients are heated through.

Storage Tip: If you plan to freeze, consider preparing the noodles separately to prevent them from becoming mushy during storage. Add them to the soup when reheating for the best texture.

FAQs About Chicken Noodle Soup

Q: What ingredients are in chicken noodle soup?
A: Chicken noodle soup typically includes chicken, egg noodles, carrots, celery, onion, and broth, seasoned with herbs like thyme and bay leaves for a comforting flavor.

Q: What can I add to my chicken soup to give it flavor?
A: Enhance the flavor of chicken noodle soup by adding garlic, fresh herbs like parsley or dill, a splash of lemon juice, or even a dash of hot sauce for a little kick!

Q: How to enhance the flavor of chicken noodle soup?
A: To elevate your chicken noodle soup, sauté the vegetables in olive oil before adding broth, use homemade stock, and season gradually to taste, allowing flavors to meld beautifully.

Q: Can I put uncooked noodles in my chicken soup?
A: Yes, you can add uncooked noodles directly to chicken noodle soup; just keep in mind they will absorb some broth, so adjust liquid amounts accordingly for a perfect consistency.

Q: What vegetables go in chicken noodle soup?
A: Carrots and celery are classic choices in chicken noodle soup. You can also add peas, corn, or green beans for added texture and nutrition.

Q: What is the main ingredient in chicken soup?
A: The main ingredient in chicken noodle soup is, unsurprisingly, chicken! This gives the soup its hearty base and rich flavor profile.

[tasty-recipe id=”1004″]

Filed Under: Soups

Deliciously Creamy Potato Soup Ready in Just 30 Minutes

May 13, 2025 by grace bellamy Leave a Comment

There’s something truly magical about a warm bowl of Creamy Potato Soup that transports me back to my grandmother’s cozy kitchen, where the scent of simmering potatoes and herbs greeted us as we walked in from the cold. Each spoonful felt like a hug, offering comfort on chilly nights and making all the worries of the day melt away. This delicious soup isn’t just a nostalgic treat; it’s also an easy recipe that can be whipped up quickly, making it a perfect solution for those busy weeknights when you crave something hearty yet simple.

With just a handful of ingredients, this Creamy Potato Soup is a delightful way to gather your loved ones around the table, indulging in a family-friendly meal that warms both the heart and the soul. Plus, it’s incredibly versatile—feel free to toss in whatever veggies you have on hand! Whether you’re looking to meal-prep for the week or serve it fresh on a cozy evening, this recipe promises to satisfy your comfort food cravings without the hassle. Let’s dive into the warmth and joy of this classic dish!

Why is Creamy Potato Soup so comforting?

There’s something undeniably warm and nurturing about a bowl of creamy potato soup, isn’t there? The way it envelops you with its velvety texture and rich flavors makes it a perfect companion for chilly evenings. If you’re looking to take your soup game to the next level, consider exploring some delicious variations or helpful tips to elevate your dish even further!

Ingredients

All measurements are provided in the recipe card below.

For the Soup Base
• Potatoes – use starchy varieties like Russets for a fluffy texture.
• Onion – adds sweetness and depth; sauté until translucent.
• Garlic – fresh cloves work best for robust flavor; mince finely.
• Vegetable Broth – use low-sodium to control saltiness; it’s the heart of the soup.
• Heavy Cream – for that luxurious creaminess; can be substituted with coconut milk for a dairy-free option.

For Seasoning
• Thyme – dried or fresh, it brings an earthy aroma that beautifully complements the potatoes.
• Salt – enhances all flavors; adjust to taste as you go.
• Pepper – freshly cracked for the best kick; consider adding a pinch of paprika for warmth.

For Garnish
• Chives – chopped fresh chives add a pop of color and slight onion flavor.
• Cheddar Cheese – shredded on top melts wonderfully; feel free to use a vegan alternative.

This creamy potato soup is a labor of love, and each ingredient adds to the wholesome goodness of this delicious dish!

How to Make Creamy Potato Soup

  1. Prep the Ingredients: Start by washing and peeling about 4 large potatoes. Cut them into small, even cubes for uniform cooking. Gather 1 onion, 3 cloves of garlic, and a cup of vegetable or chicken broth for a savory base.
  2. Sauté Aromatics: In a large pot, heat 2 tablespoons of butter over medium heat. Add the chopped onion and minced garlic, cooking until they turn translucent and fragrant, about 3-5 minutes.
  3. Cook the Potatoes: Once the aromatics are ready, add the potato cubes to the pot. Pour in the broth and bring it to a gentle boil. Cover and simmer for 15-20 minutes, or until the potatoes are tender and easily pierced with a fork.
  4. Blend until Creamy: Remove the pot from heat and let it cool slightly. Using an immersion blender, blend the soup until it reaches your desired creamy texture. For a chunkier soup, blend just half of it.
  5. Add Creaminess: Stir in 1 cup of heavy cream (or milk for a lighter version) and season with salt and pepper to taste. Heat on low for another 5 minutes, making it warm and inviting.

Optional: Garnish with fresh chives or crispy bacon bits for a delightful finish.

Exact quantities are listed in the recipe card below.

Expert Tips for Creamy Potato Soup

• Perfect Potatoes: Choose starchy potatoes like Russets for the best creamy texture; avoid waxy varieties, which can make your soup too dense.

• Sauté Aromatics: Always sauté onions and garlic first for a flavor boost. This prevents bitterness and enriches the creamy potato soup experience.

• Blend Smoothly: Use an immersion blender for a velvety texture. If using a regular blender, blend in batches to ensure safety and prevent spills.

• Adjust Creaminess: Feel free to adjust the cream level based on preference; substitute half-and-half or yogurt for a lighter version, but avoid too much liquid.

• Season Gradually: Season in layers, starting with the broth and then adjusting as you blend; this helps achieve a balanced flavor in your creamy potato soup.

How to Store and Freeze Creamy Potato Soup

Fridge: Store any leftover creamy potato soup in an airtight container for up to 4 days. This will help retain its rich flavor and creamy texture.

Freezer: To freeze, cool the soup completely, then transfer it to freezer-safe containers, leaving some space for expansion. It can be stored for up to 3 months.

Reheating: Thaw frozen soup overnight in the fridge. Reheat gently on the stovetop over low heat, adding a splash of broth for creaminess if needed.

Avoid Separation: To prevent the cream from separating after freezing, consider omitting dairy when freezing and adding it during reheating for optimal flavor and consistency.

FAQs About Creamy Potato Soup

Q: What are the ingredients for potato soup?
A: The basic ingredients for creamy potato soup include potatoes, onions, garlic, broth, milk or cream, and seasonings, creating a warm, comforting bowl that’s perfect for any meal.

Q: What is the thickener in potato soup?
A: The thickener in creamy potato soup usually comes from the starches released by the potatoes during cooking, giving it that luscious, velvety texture.

Q: What can I add to my potato soup to make it more flavorful?
A: To enhance the flavor of your creamy potato soup, consider adding crispy bacon, shredded cheese, fresh herbs, or a splash of lemon juice for a delightful twist.

Q: What seasonings go best in potato soup?
A: Seasonings like salt, pepper, thyme, and rosemary pair beautifully in creamy potato soup, infusing it with a delightful warmth and making each spoonful irresistible.

Q: What is the most important ingredient in soup?
A: The most important ingredient in any soup, including creamy potato soup, is a well-made broth, as it lays the foundation for much of the dish’s flavor.

Q: Do you boil potatoes before making potato soup?
A: Yes, you do boil the potatoes before adding them to the creamy potato soup, allowing them to soften and cook through, which helps create that creamy consistency we all love.

[tasty-recipe id=”992″]

Filed Under: Soups

RecipeCrown

Hello, beautiful people! I’m Grace Bellamy, a foodie, traveler, and writer with wanderlust in my soul. Whether crafting recipes in my kitchen or exploring flavors around the globe, my greatest joy is helping you create healthier, happier lives, one delicious bite at a time.