RecipeCrown

Easy & Delicious Recipes

  • Home
  • Breakfast
  • Main Dishes
  • Dessert
  • About
  • Contact
You are here: Home / Archives for Drink

Chocolate Peanut Butter Protein Shake for a Creamy Boost

January 18, 2026 by grace bellamy Leave a Comment

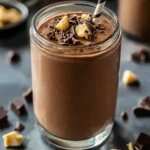
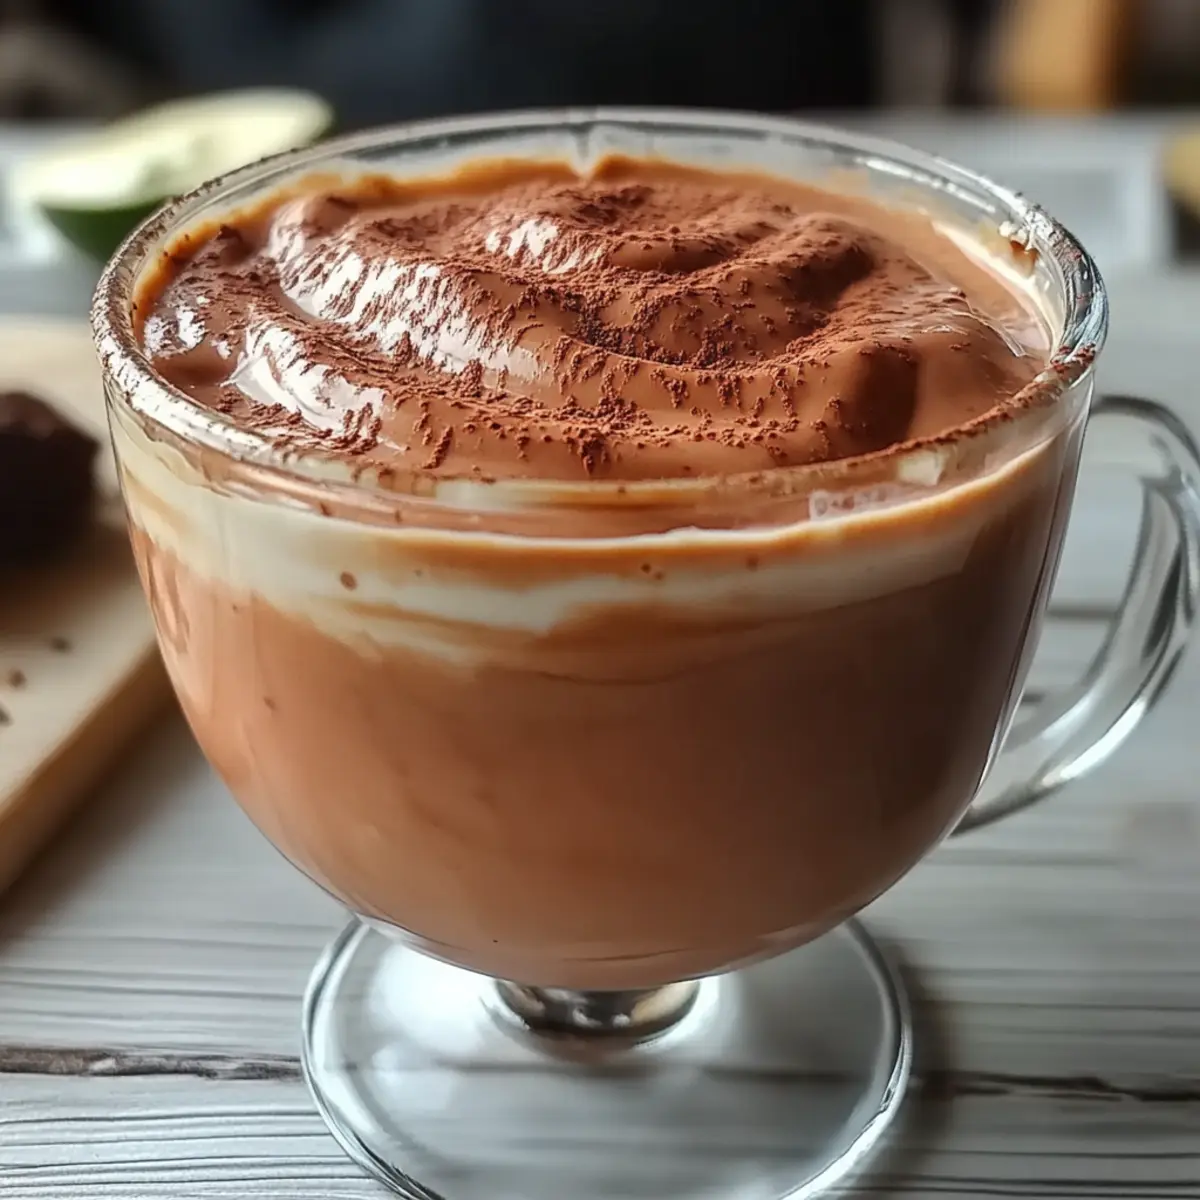
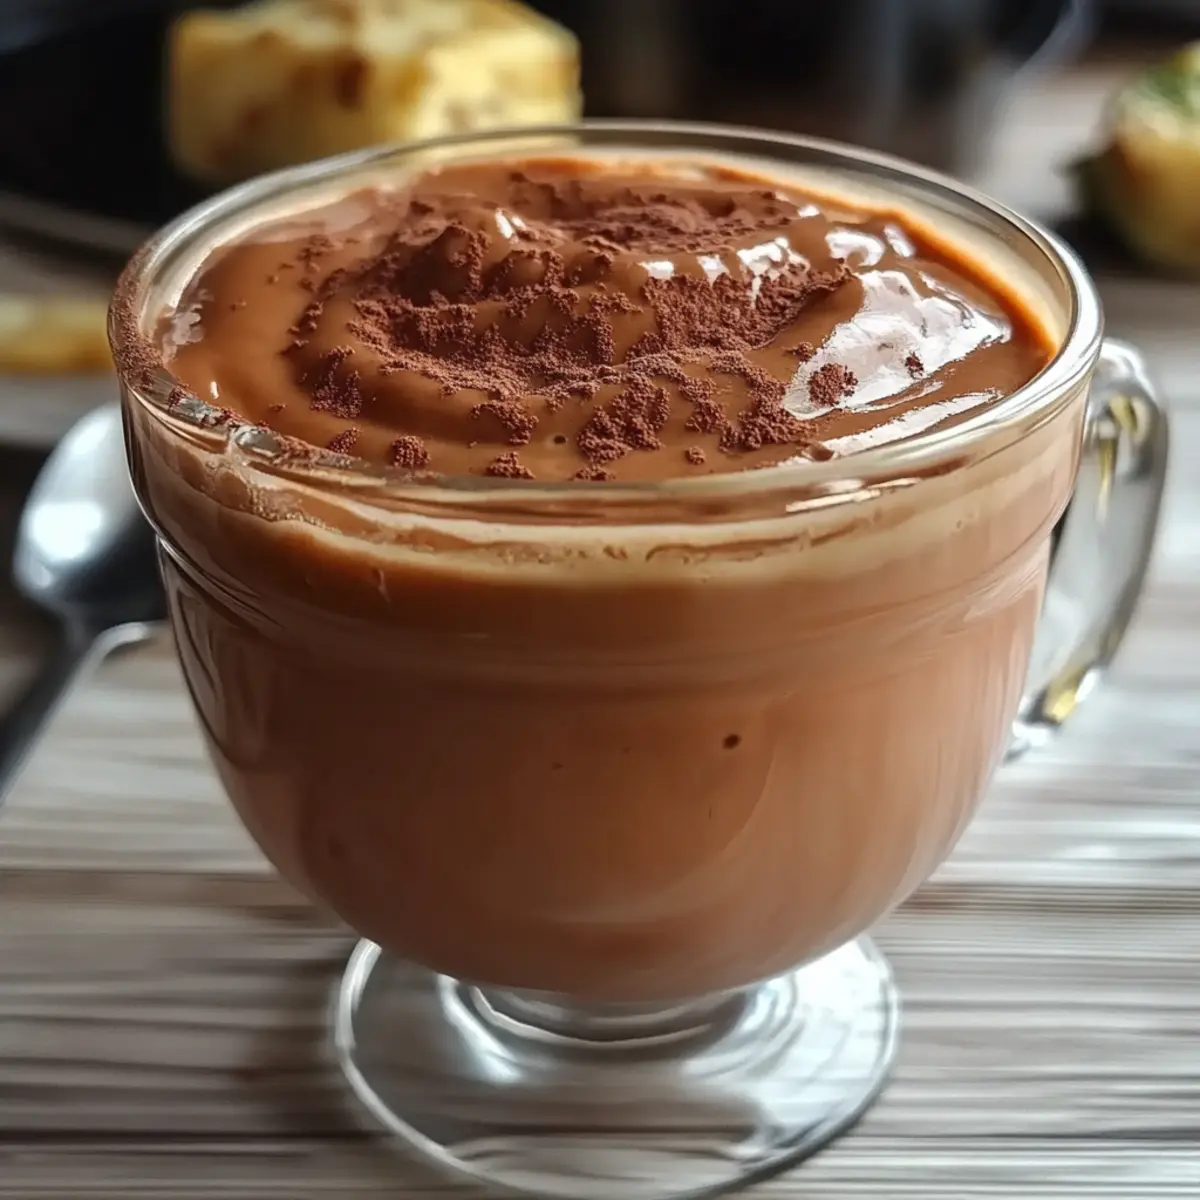
As I flipped through my recipe notebook, I stumbled upon a blissful memory: the first time I blended creamy peanut butter and rich cocoa together. That moment sparked the delightful creation of the Chocolate Peanut Butter Protein Shake, a drink that’s been my go-to for a quick, nourishing boost. This shake isn’t just a treat; it’s the ultimate time-saver, taking a mere 6-7 minutes to whip up, making it perfect for busy mornings or post-workout refuels. With an impressive 30 grams of protein packed into each serving, it’s both satisfying and energizing. Whether you enjoy it as an indulgent breakfast or a sweet afternoon snack, you’ll find ways to customize it with your favorite ingredients. What twist will you give your shake today?

Chocolate Peanut Butter Protein Shake

Why is this shake a must-try?

**Satisfying ** your cravings: The rich combination of peanut butter and cocoa provides a delightful balance of sweetness and creaminess without the guilt.
**Protein-packed ** goodness: With 30 grams of protein, this shake fuels your day while promoting muscle recovery.
**Versatile ** options: Customize it with frozen fruits, protein powder, or your favorite milk alternatives for a personal touch.
**Quick & Easy ** preparation: Ready in just 6-7 minutes, it’s perfect for busy mornings or as a refreshing snack.
**Crowd-pleaser ** appeal: Whether for yourself or serving friends, everyone will love this delicious shake that feels indulgent yet nutritious.

Chocolate Peanut Butter Protein Shake Ingredients

For the Shake

  • Peanut Butter – a rich source of healthy fats and protein, making it the perfect base for your shake.
  • Milk – use your choice of dairy or plant-based milk for creaminess and added nutrients.
  • Cocoa Powder – adds a chocolatey flavor while being low in calories for guilt-free indulgence.
  • Vanilla Extract – enhances the overall taste with a lovely aroma and sweetness.
  • Ice – creates a frosty texture that makes your shake refreshing and enjoyable.

Optional Add-ins

  • Frozen Fruits – bananas or berries can sweeten your shake naturally while adding fiber and vitamins.
  • Protein Powder – for an extra protein boost, ideal post-workout!
  • Sweetener of choice – honey or maple syrup can be added if you’d like it a bit sweeter.

Feel free to mix and match these ingredients for your perfect Chocolate Peanut Butter Protein Shake!

Step‑by‑Step Instructions for Chocolate Peanut Butter Protein Shake

Step 1: Combine Ingredients
In a powerful blender, add 1 tablespoon of creamy peanut butter, 1 cup of your preferred milk, 1 tablespoon of cocoa powder, and ½ teaspoon of vanilla extract. Top it all off with 1 cup of ice. Ensure all the ingredients are neatly piled to facilitate even blending, and secure the lid tightly to avoid any spills.

Step 2: Blend Until Smooth
Blend on high speed for about 30-60 seconds, or until the mixture becomes a rich, creamy consistency without any lumps. Pause occasionally to check the texture, ensuring that the cocoa and peanut butter are well incorporated into the shake. You’ll know it’s ready when the shake is velvety smooth and has a vibrant chocolate color.

Step 3: Adjust Consistency
If your Chocolate Peanut Butter Protein Shake seems too thick for your liking, add a splash more milk and blend again for 10-15 seconds. Alternatively, if you prefer a thicker shake, toss in an extra handful of ice. Play around with the consistency until it meets your personal preference for that perfect, indulgent sip.

Step 4: Serve and Enjoy
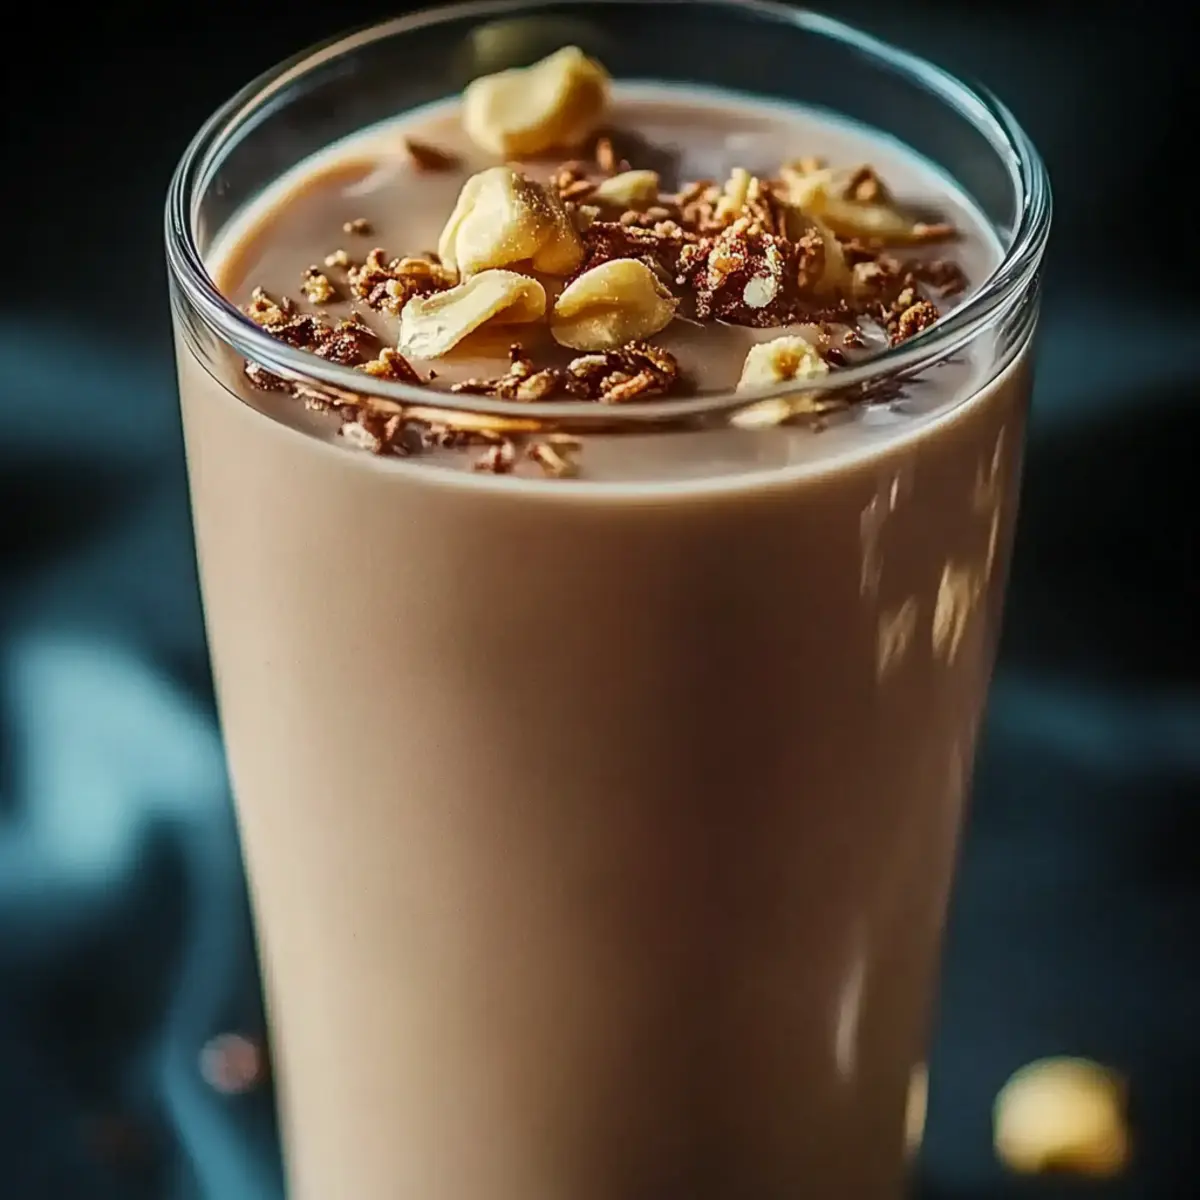
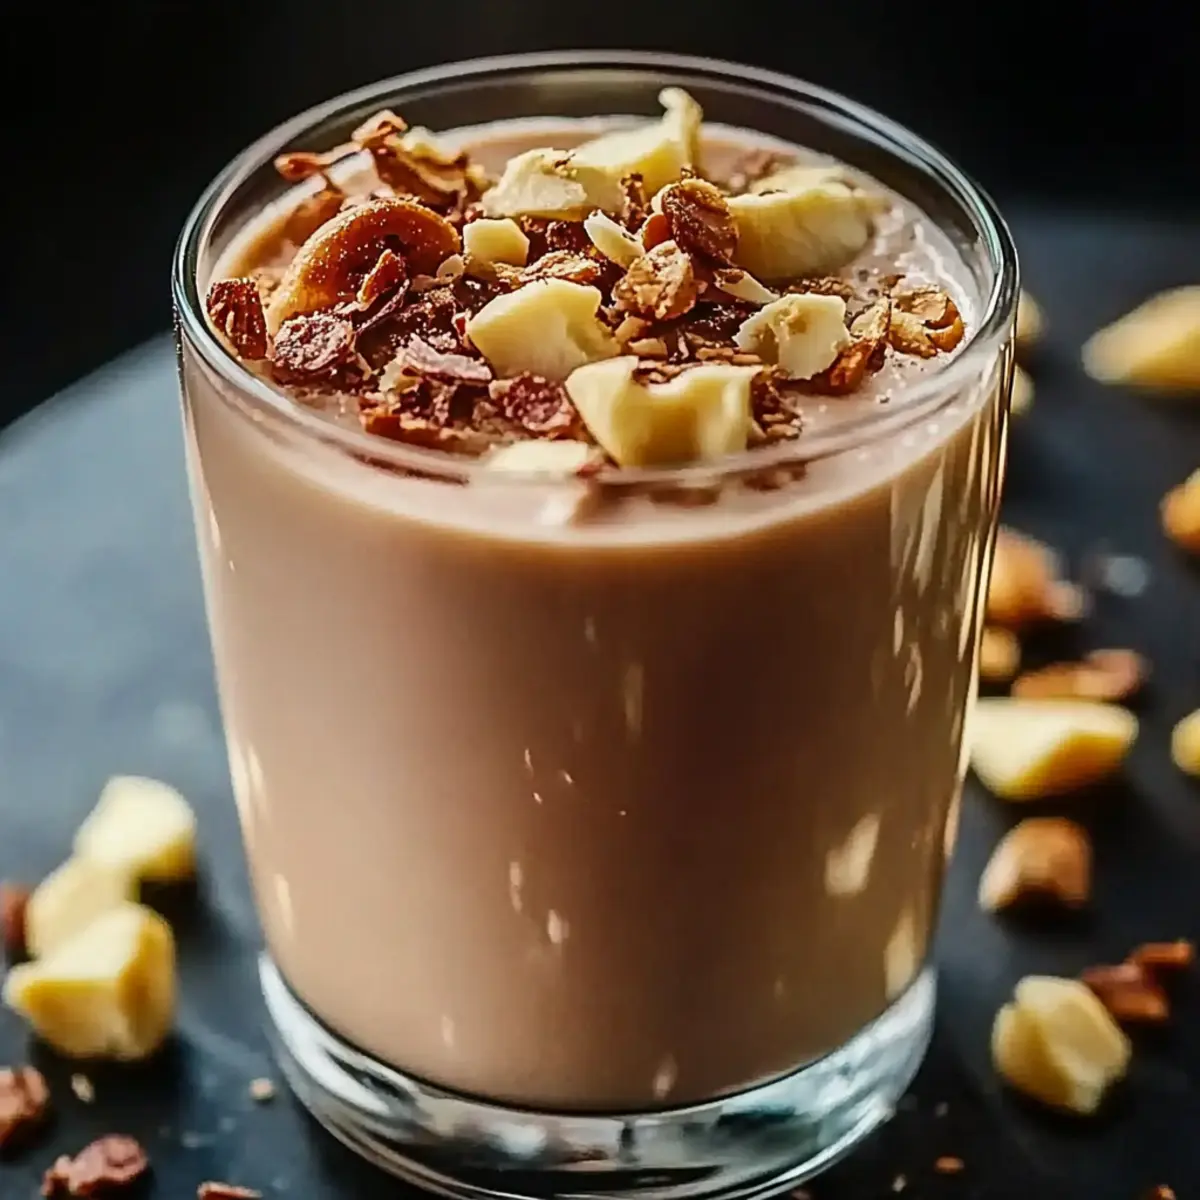
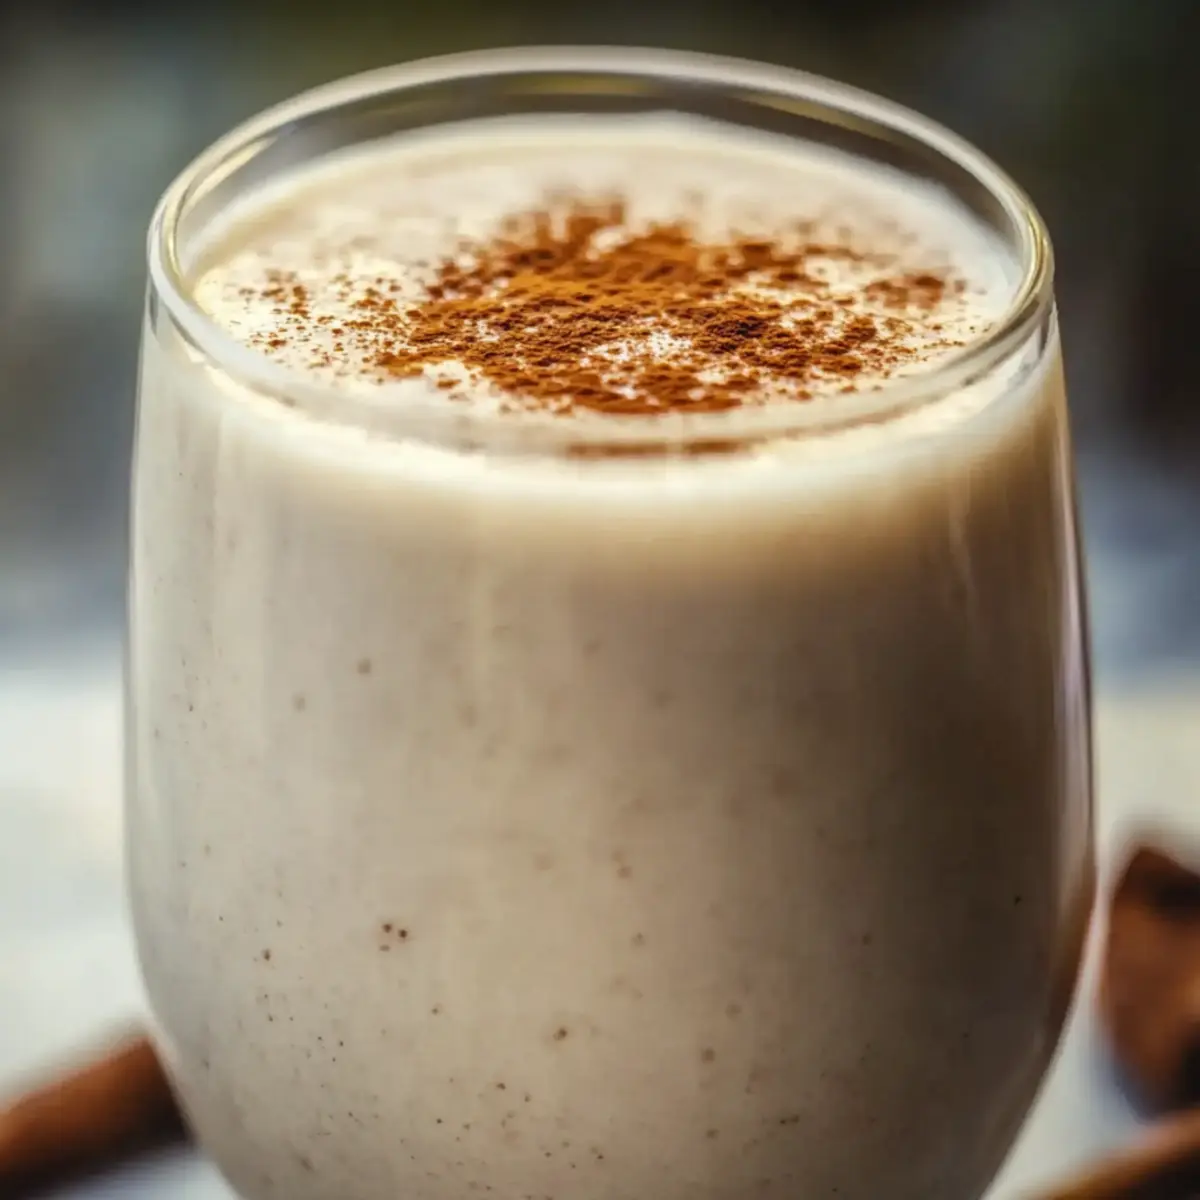
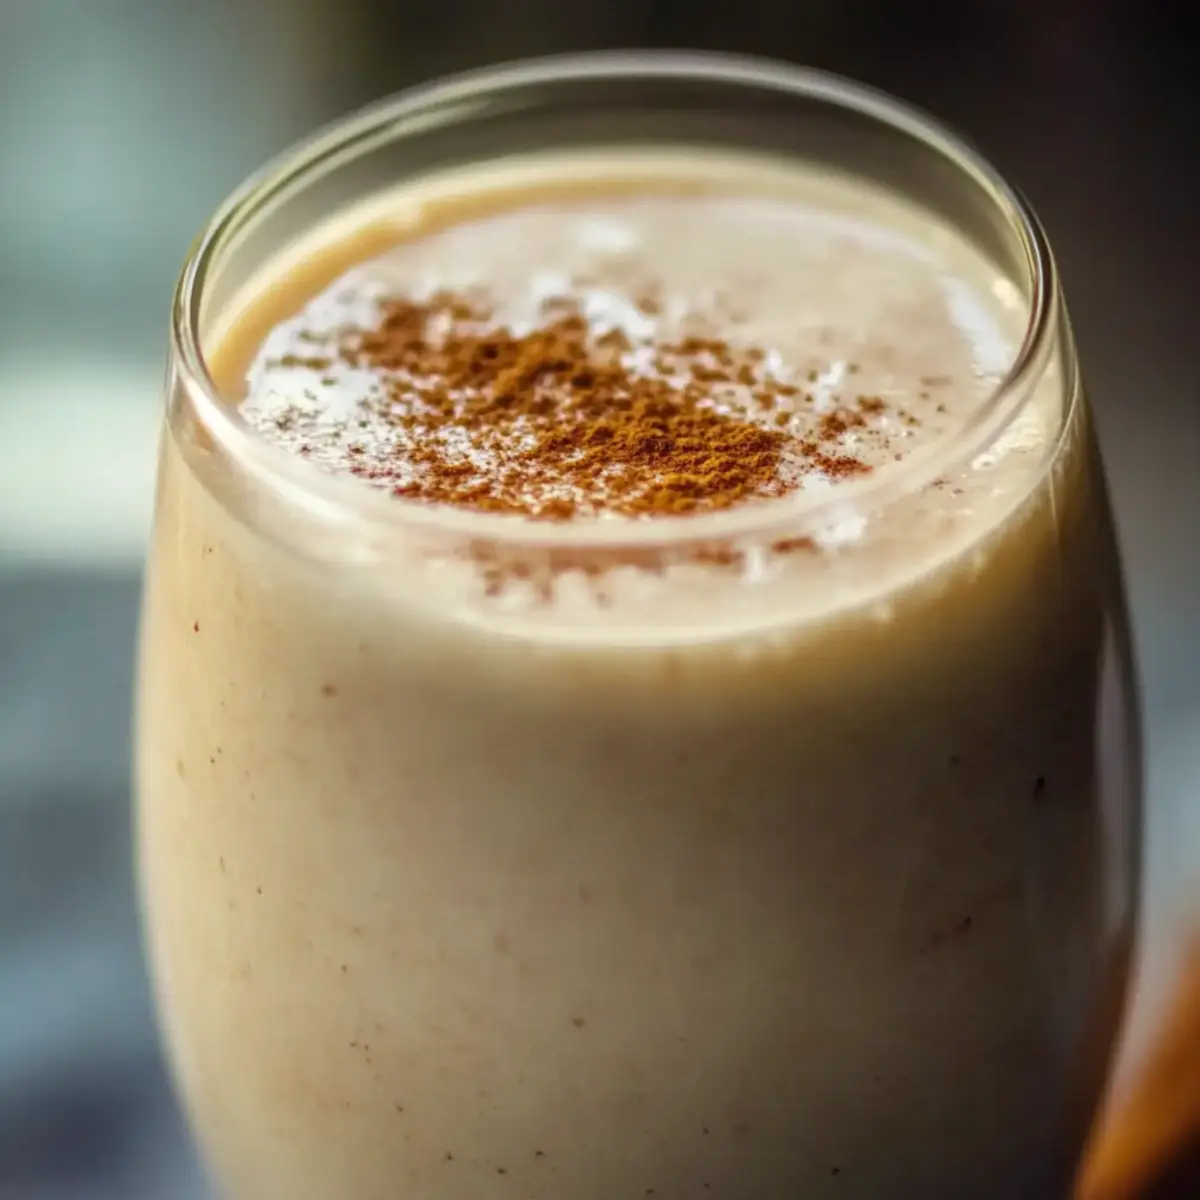
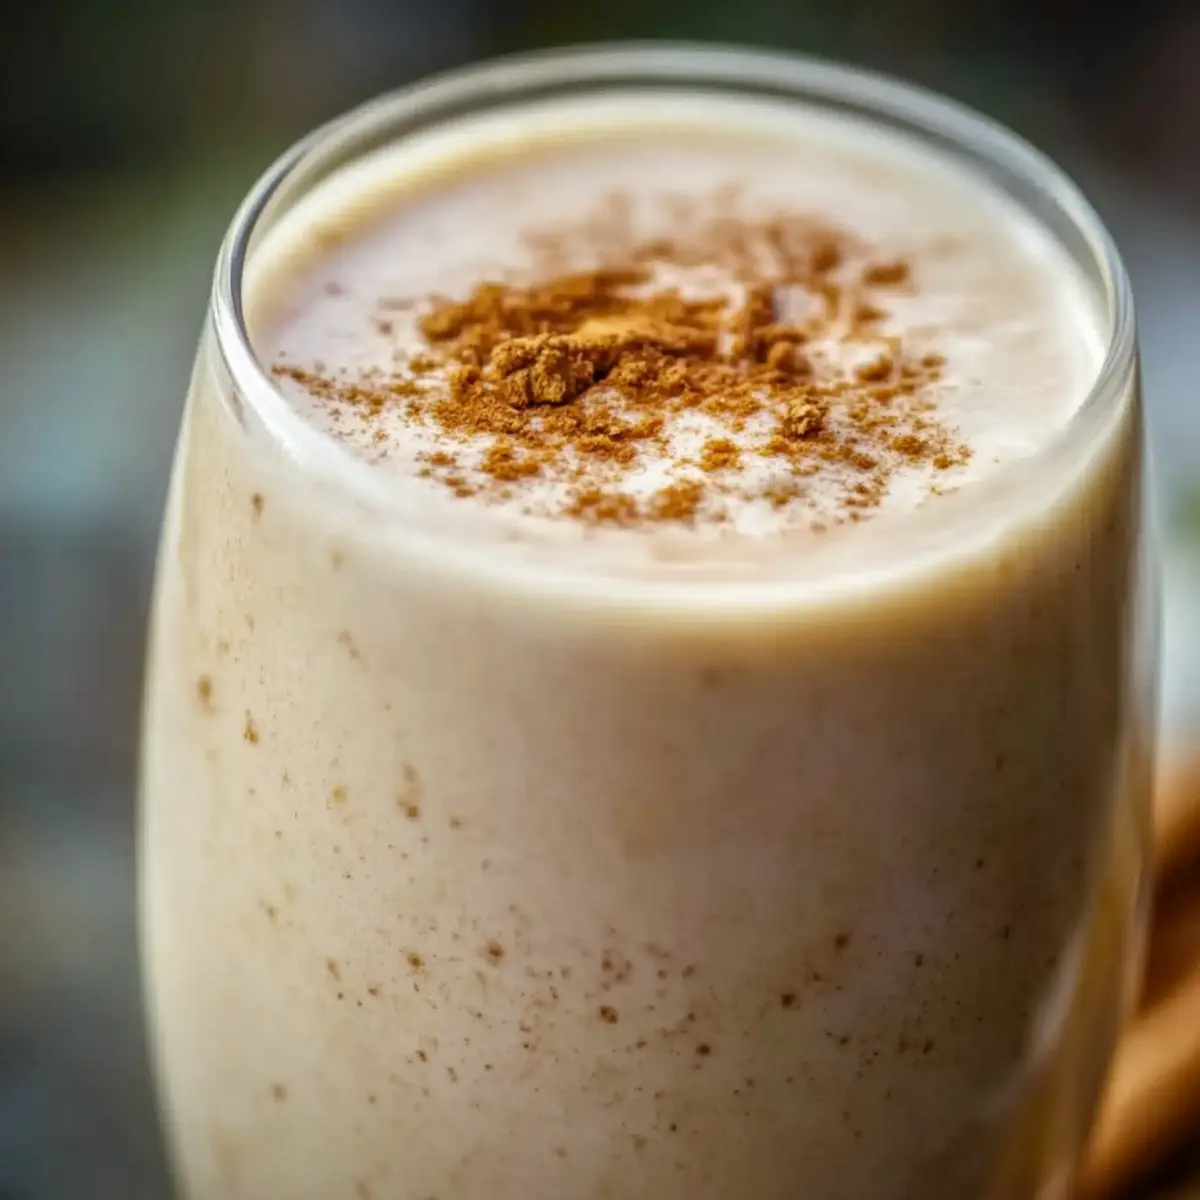
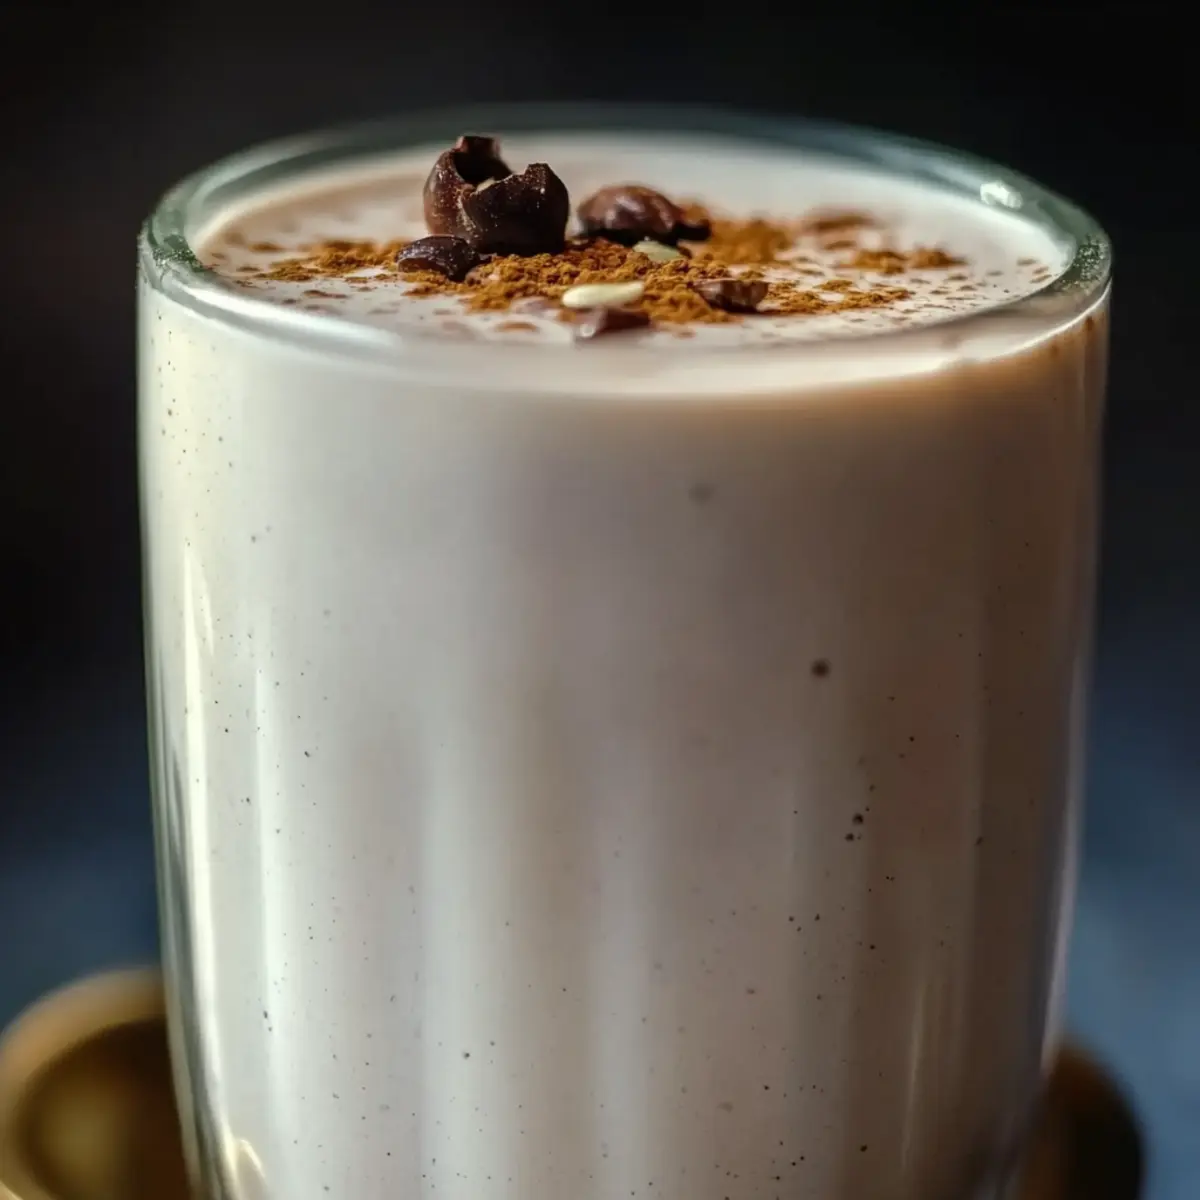
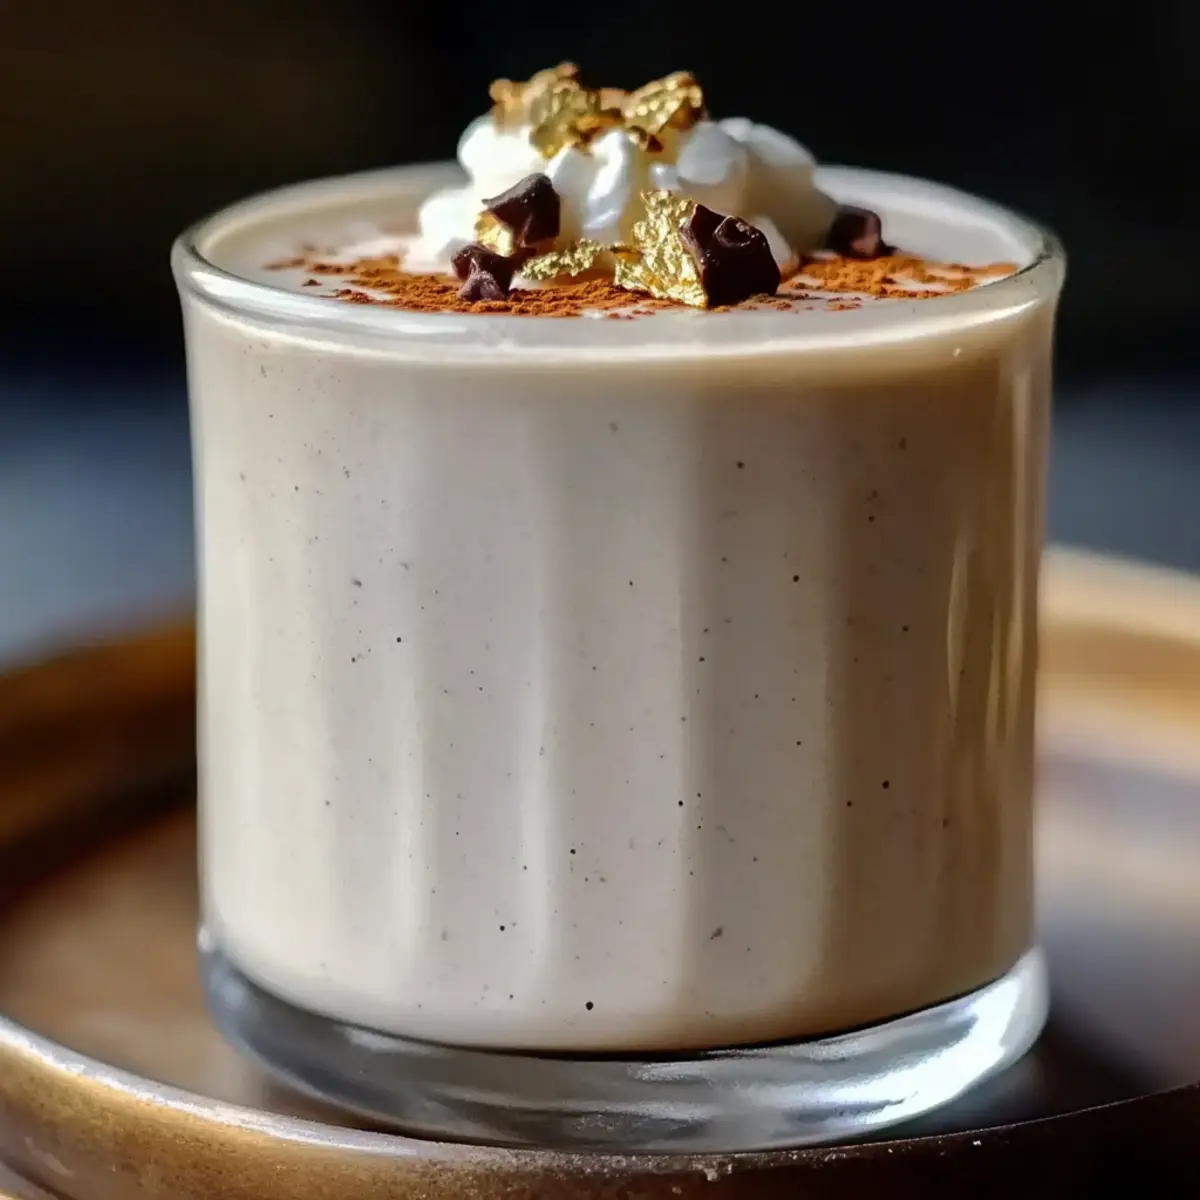
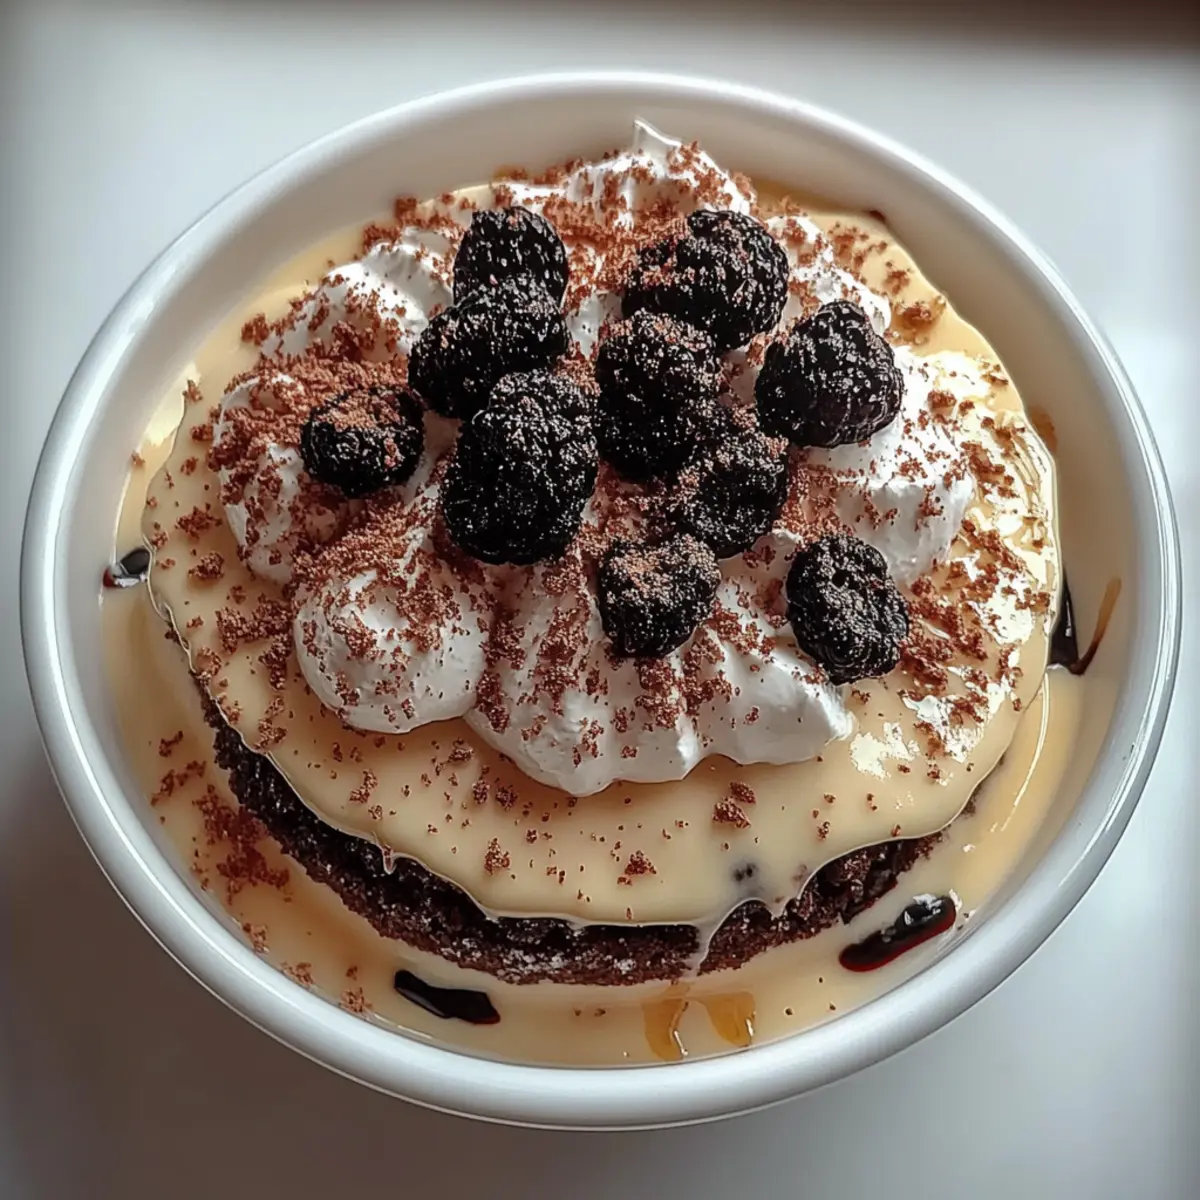
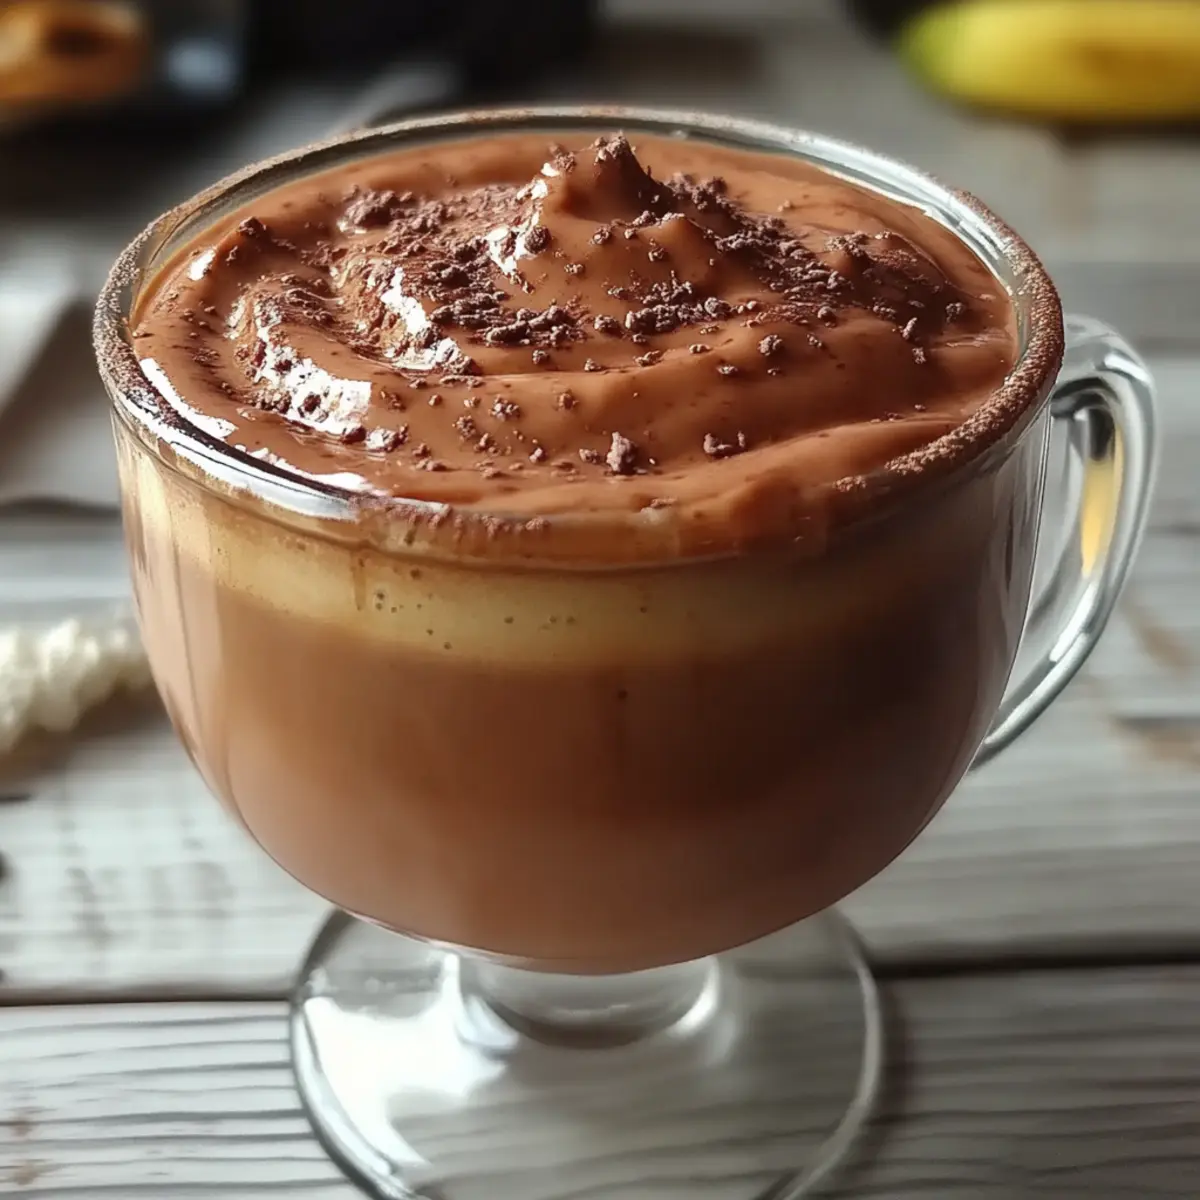
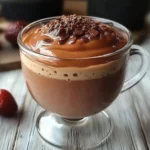
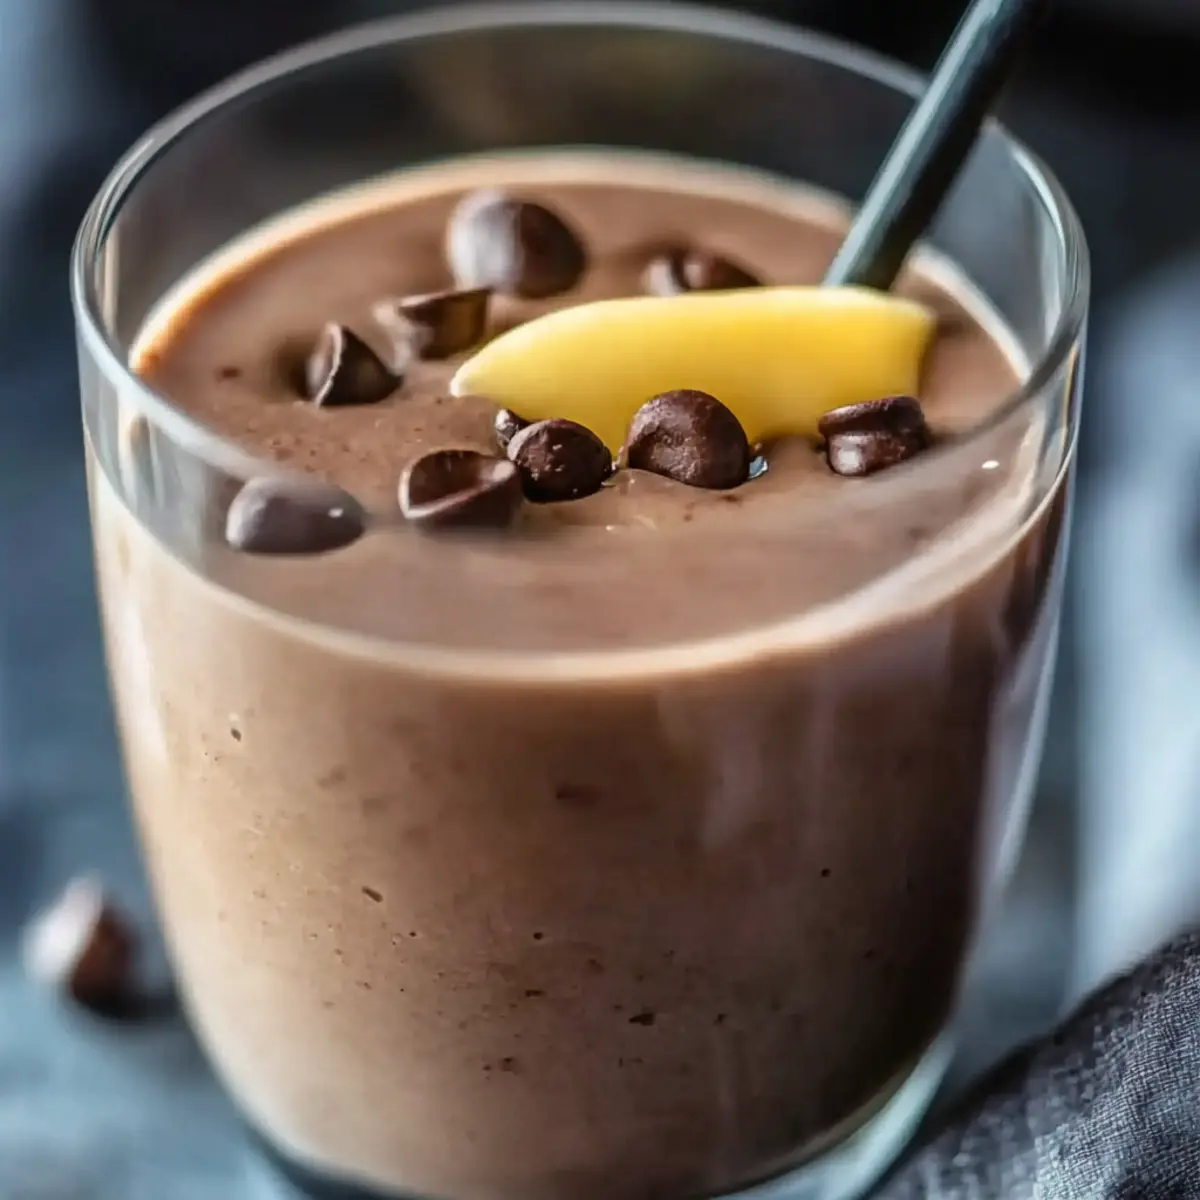
Pour the shake into a tall glass and visualize that creamy texture. You can garnish it with a drizzle of peanut butter or a sprinkle of cocoa powder on top for added flair. Serve immediately for a refreshing and nutritious treat, whether it’s breakfast on-the-go or a midday pick-me-up that’ll surely satisfy your cravings!

Chocolate Peanut Butter Protein Shake

Chocolate Peanut Butter Protein Shake Variations

Feel free to unleash your creativity and customize this shake with some exciting twists that will elevate your experience!

  • Dairy-Free: Swap regular milk for almond or oat milk for a creamy, nutty flavor without the dairy.
  • Nut-Free: Replace peanut butter with sunflower seed butter for a deliciously nut-free alternative that’s equally satisfying.
  • Chocolate Lover’s Delight: Add a tablespoon of chocolate syrup or a handful of chocolate chips for an even richer chocolatey flavor.
  • Fruit Fusion: Toss in a ripe banana or a handful of frozen berries to add natural sweetness and a fruity twist.
  • Spicy Kick: Sprinkle in a pinch of cayenne pepper or a dash of cinnamon to give your shake an unexpected heat and depth.

Imagine blending in those vibrant berries—their fruity aroma wafting in the air, transforming your shake into a fresh smoothie-like delight!

  • Green Boost: Blend in a handful of spinach or kale for added nutrients without compromising the delicious flavor.
  • Protein Power-Up: Mix in your favorite protein powder to boost the protein content even further, perfect for post-workout recovery!

Whether you’re looking to satisfy your sweet cravings or indulge in a nutritious treat, let your imagination guide you in creating the ultimate Chocolate Peanut Butter Protein Shake! For some extra inspiration, check out ideas on how to incorporate delicious froze fruits or the benefits of adding protein powder for your personalized shake!

Make Ahead Options

These Chocolate Peanut Butter Protein Shakes are perfect for meal prep enthusiasts! You can prep the base ingredients—peanut butter, cocoa powder, and vanilla extract—up to 24 hours in advance. Just mix them in a bowl and store in an airtight container in the refrigerator. When you’re ready to enjoy, simply blend the prepped mixture with 1 cup of milk and ice for a quick shake on busy mornings. For optimal taste and texture, remember to blend right before serving. This way, you’ll still get that heavenly creamy goodness, making your Chocolate Peanut Butter Protein Shake just as delightful as when freshly made!

How to Store and Freeze Chocolate Peanut Butter Protein Shake

Fridge: Store any leftover Chocolate Peanut Butter Protein Shake in an airtight container in the refrigerator for up to 3 days. Give it a good shake before enjoying again!

Freezer: For longer storage, pour the shake into ice cube trays or freezer-safe bags. It can be frozen for up to a month; blend again with a splash of milk before serving.

Reheating: While it’s best enjoyed cold, you can slightly warm it in the microwave if you prefer a cozy drink. Just be sure to blend again for a smooth texture!

Expert Tips for the Best Chocolate Peanut Butter Protein Shake

  • Choose the Right Peanut Butter: Opt for natural peanut butter without added sugars or oils; it enhances the shake’s flavor while keeping it healthy.
  • Blend at High Speed: Ensure you blend on high to achieve that smooth, creamy consistency—this is essential for the ultimate Chocolate Peanut Butter Protein Shake experience!
  • Adjust for Sweetness: Taste your shake before serving; if you prefer it sweeter, stir in a little honey or maple syrup, ensuring you maintain a balanced flavor.
  • Ice Matters: For a delightful frosty texture, use fresh ice and blend thoroughly to avoid a watery shake. If it’s too thick, add more milk gradually.
  • Customize Wisely: Experiment with different add-ins like frozen bananas or protein powder, but remember not to overload it; these should enhance, not overpower, the chocolatey goodness!

What to Serve with Chocolate Peanut Butter Protein Shake?

Imagine enjoying the velvety goodness of your shake alongside delightful accompaniments that elevate your experience and satisfy your hunger.

  • Granola Bar: A crunchy texture and nutty flavor complement the smooth shake, making for a delightful snack pairing.
  • Fresh Fruit Salad: Refreshing and vibrant, a mix of berries and tropical fruits brings a burst of flavor that brightens your meal.
  • Whole Grain Toast: Spread with avocado or nut butter, it balances the shake’s richness while providing wholesome, filling carbs.
  • Greek Yogurt Parfait: Layer with fruit and granola for a delicious, protein-packed treat that harmonizes with your shake’s indulgent taste.
  • Almond Milk Latte: The creamy coffee flavor offers a comforting contrast to the chocolate, perfect for a morning energy boost.
  • Chocolate-Dipped Strawberries: Indulge your sweet tooth with this decadent treat; they pair wonderfully with the shake’s rich flavors.
  • Peanut Butter Cookies: For a sweet and savory union, these take your dessert game up a notch and echo the shake’s nutty essence.
  • Trail Mix: A handful of this crunchy mix adds a fulfilling crunch and a perfect energy hit when enjoying your shake.

Chocolate Peanut Butter Protein Shake

Chocolate Peanut Butter Protein Shake Recipe FAQs

What type of peanut butter should I use?
Absolutely! I recommend opting for natural peanut butter without added sugars or oils. This not only enhances the shake’s flavor but also keeps it healthy and delicious. Look for a smooth variety for the best blending experience.

How should I store leftover shakes?
If you have any leftovers, store the Chocolate Peanut Butter Protein Shake in an airtight container in the refrigerator. It will stay fresh for up to 3 days. Don’t forget to give it a good shake or stir before enjoying it again, as ingredients may separate.

Can I freeze the shake for later?
Yes, you can freeze the shake for longer storage! Pour it into ice cube trays or freezer-safe bags. It can be frozen for up to a month. When you’re ready to enjoy it, simply blend the frozen shake with a splash of milk for a refreshing treat.

What are some common troubleshooting tips for my shake?
If you find your Chocolate Peanut Butter Protein Shake is too thick, don’t fret! Just add a little more milk and blend again until you reach your desired consistency. On the contrary, if it’s too thin, toss in some extra ice and blend until smooth. Keep experimenting until it’s just right for you!

Is this shake suitable for people with allergies?
If you or someone else has nut allergies, it’s best to skip the peanut butter or use a nut-free alternative like sunflower seed butter. Additionally, if anyone is lactose intolerant, swapping out dairy milk for a plant-based option like almond or oat milk can make the shake suitable for their diet.

Chocolate Peanut Butter Protein Shake for a Creamy Boost

Indulge in a delicious Chocolate Peanut Butter Protein Shake packed with 30 grams of protein for a nourishing boost.

  • Blender

For the Shake

  • 1 tablespoon creamy peanut butter (rich source of healthy fats and protein)
  • 1 cup milk (your choice of dairy or plant-based)
  • 1 tablespoon cocoa powder (adds chocolatey flavor)
  • ½ teaspoon vanilla extract (enhances overall taste)
  • 1 cup ice (creates a frosty texture)

Optional Add-ins

  • frozen fruits (bananas or berries can sweeten naturally)
  • protein powder (for an extra protein boost)
  • sweetener of choice (honey or maple syrup to taste)

Step-by-Step Instructions

  1. In a powerful blender, add the peanut butter, milk, cocoa powder, vanilla extract, and ice. Secure the lid tightly.
  2. Blend on high speed for about 30-60 seconds until smooth and creamy.
  3. If too thick, add a splash more milk; if too thin, add more ice and blend again.
  4. Pour into a tall glass, garnish if desired, and serve immediately.

Customize your shake for a personal touch with various add-ins.

Drink
Chocolate Peanut Butter Protein Shake, Healthy Drink, Post-Workout Snack, Protein Shake, Quick Breakfast, smoothie

Filed Under: Drink

Creamy Cottage Cheese Peanut Butter Smoothie Bliss

January 16, 2026 by grace bellamy Leave a Comment

As I stood in my kitchen, surrounded by the quiet hum of morning light, I felt a craving for something both energizing and wholesome. That’s when I stumbled upon the perfect solution: a Cottage Cheese Peanut Butter Smoothie. Packed with protein, this delightful blend not only takes just five minutes to whip up but also serves as a creamy canvas for your favorite flavors. Combining cottage cheese with rich peanut butter and ripe banana creates a dreamy, satisfying drink that will kickstart your day like nothing else. Whether you’re rushing out the door or looking to refuel after that evening workout, this smoothie is a guilt-free indulgence that marries convenience with deliciousness. Curious to see how this quick blend can transform your mornings?

Cottage Cheese Peanut Butter Smoothie

Why Choose This Smoothie Recipe?

Quick and Easy: This smoothie requires just five minutes to prepare, making it ideal for busy mornings when time is of the essence.

Protein-Packed: With cottage cheese and peanut butter at its core, you’ll enjoy a wholesome boost of energy, essential for an active lifestyle.

Flavorful Fusion: The combination of peanut butter and banana creates a sweet, satisfying flavor that’s sure to delight your taste buds.

Versatile Delight: Customize your smoothie by adding different fruits or toppings, making it a fun option for the whole family. Whether you prefer almond milk or a drizzle of honey, the possibilities are endless!

Nutrient-Rich: This drink isn’t just yummy; it’s also packed with nutrients providing a guilt-free indulgence you can enjoy any time of the day.

Try this Cottage Cheese Peanut Butter Smoothie for a delicious and satisfying start!

Cottage Cheese Peanut Butter Smoothie Ingredients

For the Smoothie
• Cottage cheese – A creamy base that’s rich in protein to keep you full longer.
• Peanut butter – Adds a nutty flavor and healthy fats that can keep your energy up!
• Banana – Provides natural sweetness and creaminess for a smooth texture.
• Dairy or plant-based milk – Use your favorite milk to adjust the creaminess and flavor to your liking.
• Honey or sweetener of choice (optional) – Customize the sweetness to match your taste preferences.
• Vanilla extract – A splash enhances the flavor profile, making your Cottage Cheese Peanut Butter Smoothie a treat!

Step‑by‑Step Instructions for Cottage Cheese Peanut Butter Smoothie

Step 1: Gather Your Ingredients
Start by gathering all your ingredients for the Cottage Cheese Peanut Butter Smoothie. You’ll need cottage cheese, peanut butter, a ripe banana, milk of your choice, honey, and vanilla extract. Ensure your banana is perfectly ripe for that natural sweetness. Once everything is ready, grab your blender and prepare for a delicious blend.

Step 2: Combine Ingredients in Blender
In your blender, combine 1 cup of cottage cheese, 2 tablespoons of peanut butter, 1 banana, and 1 cup of milk. If you opted for honey, add 1 tablespoon to sweeten your mixture. Finally, splash in 1/2 teaspoon of vanilla extract for a delightful flavor boost. Secure the lid tightly on the blender to avoid any spills during blending.

Step 3: Blend Until Smooth
Blend your mixture on high speed for about 30 seconds or until it reaches a silky smooth consistency. You want to ensure there are no lumps from the cottage cheese or banana. Pause briefly to check the texture, then blend for an additional 10–15 seconds if necessary, creating a creamy Cottage Cheese Peanut Butter Smoothie that is simply irresistible.

Step 4: Taste and Adjust Sweetness
Once blended, take a quick taste of your smoothie. If you prefer it sweeter, feel free to add more honey or your chosen sweetener. Blend again for about 10 seconds to incorporate any additional sweetness. Your smoothie should be perfectly balanced and rich in flavor, ready to fuel your day.

Step 5: Serve Immediately
Pour your luscious Cottage Cheese Peanut Butter Smoothie into a tall glass. The creamy texture should flow beautifully, showcasing its rich color. Consider garnishing it with a sprinkle of nuts or seeds for added crunch, if you like. Serve your smoothie immediately for the best flavor and texture!

Cottage Cheese Peanut Butter Smoothie

Make Ahead Options

These Cottage Cheese Peanut Butter Smoothies are perfect for meal prep enthusiasts! You can prepare the ingredients up to 24 hours in advance by measuring out the cottage cheese, peanut butter, banana, and vanilla extract, and storing them in an airtight container in the refrigerator. Just keep your milk separate until you’re ready to blend, to maintain freshness. When you’re ready to enjoy, simply add the prepped ingredients to your blender with the milk and blend until smooth. This method ensures your smoothies are just as delicious, providing you with a quick, energizing option on busy mornings.

What to Serve with Cottage Cheese Peanut Butter Smoothie

Elevate your smoothie experience with delicious pairings that balance flavors and textures, crafting a wonderfully satisfying meal.

  • Granola Parfait: Layered with Greek yogurt and your favorite fruits, this parfait adds a delightful crunch and freshness, complementing the creamy smoothie perfectly.

  • Almond Butter Toast: Crunchy whole-grain toast spread with almond butter creates a crunchy contrast and nutty flavor that harmonizes with the smoothie.

  • Chia Seed Pudding: This light, nutritious treat offers a subtly sweet flavor and delightful texture, making it an excellent sidekick to your smoothie.

  • Fresh Berries: A mix of strawberries, blueberries, and raspberries brings a burst of flavor and refreshing juiciness that brightens each sip.

  • Spiced Roasted Nuts: The savory crunch of spiced nuts adds satisfying texture and flavor, enriching the overall snacking experience.

  • Mint Tea: A glass of cool mint tea refreshes the palate, offering a soothing contrast to the rich creaminess of the Cottage Cheese Peanut Butter Smoothie.

  • Chocolate Protein Bites: Rich and chocolatey, these bites are a perfect sweet addition to your meal, boosting energy while satisfying your sweet tooth.

How to Store and Freeze Cottage Cheese Peanut Butter Smoothie

Fridge: Store any leftover Cottage Cheese Peanut Butter Smoothie in an airtight container for up to 2 days. To maintain freshness, give it a good shake or blend before serving again.

Freezer: You can freeze your smoothie for up to 1 month. Pour it into ice cube trays or freezer-safe containers for easy portions. Thaw in the fridge overnight when ready to enjoy.

Reheating: Although it’s best enjoyed cold, if you prefer a warm version, gently heat the smoothie in a saucepan over low heat, stirring frequently until warmed through.

Serving Suggestion: For the best taste experience, consume your smoothie fresh. However, if freezing, blend again with a splash of milk for that creamy consistency!

Expert Tips for Cottage Cheese Peanut Butter Smoothie

• Choose Ripened Bananas: A ripe banana enhances sweetness and creaminess. Avoid green bananas for better texture and flavor.

• Blend Thoroughly: Blend until completely smooth; lumps from cottage cheese or banana can ruin the experience. Check consistency before serving.

• Adjust to Taste: Always taste before pouring! If it’s not sweet enough, add more honey or a dash of cinnamon for extra flavor.

• Chill Your Ingredients: For a refreshing twist, chill your cottage cheese and milk beforehand, maximizing that cool, creamy texture.

• Experiment with Add-Ins: Mix in spinach, flaxseeds, or protein powder for added nutrition without sacrificing taste in your Cottage Cheese Peanut Butter Smoothie.

Cottage Cheese Peanut Butter Smoothie Variations

Feel free to have fun with this recipe and let your creativity shine in the kitchen!

  • Dairy-Free: Substitute cottage cheese with a dairy-free alternative like almond or coconut yogurt for a creamy, plant-based twist.
    Elevate the flavors with a sprinkle of cinnamon to add warmth and complexity to your smoothie.

  • Add Greens: Toss in a handful of spinach or kale for a nutritious boost, blending seamlessly with the other flavors.
    This green goodness will pack an extra punch without altering the delicious taste you adore.

  • Chocolate Delight: Mix in a tablespoon of cocoa powder or add some dark chocolate chips for a rich and indulgent treat.
    Chocolate and peanut butter is a classic pairing, perfect for satisfying those sweet cravings!

  • Protein Boost: For an extra protein punch, add a scoop of your favorite protein powder to keep you full longer.
    This simple addition can transform your smoothie into a post-workout powerhouse without compromising flavor.

  • Nutty Variations: Switch peanut butter for almond or cashew butter for a delightful change while still enjoying that nutty creaminess.
    Each nut butter brings its unique flavor profile, opening up new taste adventures in every sip!

  • Spicy Kick: Spice things up by adding a pinch of cayenne pepper or a slice of fresh ginger for a zesty twist.
    The heat will awaken your taste buds, transforming your smoothie into an exciting fusion of flavors.

  • Sweeten Naturally: Use ripe dates or pure maple syrup as natural sweeteners instead of honey for a different sweet profile.
    Trying these alternatives can redefine your smoothie experience, giving it a distinctively rich sweetness.

  • Fruity Fusion: Incorporate other fruits like strawberries or mango to create a vibrant blend bursting with different flavors.
    Each fruit brings its own refreshing essence, making every smoothie a delightful surprise for your palate!

For more delicious inspiration, consider checking out our recipe for Blueberry Cottage Cheese Smoothie or explore the refreshing mix in our Tropical Cottage Cheese Smoothie. Enjoy blending!

Cottage Cheese Peanut Butter Smoothie

Cottage Cheese Peanut Butter Smoothie Recipe FAQs

What type of banana should I use?
Absolutely! For the best flavor and texture in your Cottage Cheese Peanut Butter Smoothie, choose a ripe banana. A banana with a few brown spots on the peel indicates it’s sweet and perfect for blending. Avoid green bananas, as they can be starchy and firm, resulting in a less enjoyable smoothie.

How should I store leftover smoothie?
You can store any leftover Cottage Cheese Peanut Butter Smoothie in an airtight container in the fridge for up to 2 days. To keep it fresh and maintain the creamy texture, give it a shake or blend it again before serving. If you’re like me, you’d want that silky consistency every time!

Can I freeze this smoothie?
Yes, indeed! You can freeze your Cottage Cheese Peanut Butter Smoothie for up to 1 month. Pour it into ice cube trays or freezer-safe containers, making portion control a breeze. When you’re ready to enjoy it, thaw overnight in the fridge or blend with a splash of milk for a refreshing, creamy delight!

What if my smoothie is too thick?
If your Cottage Cheese Peanut Butter Smoothie ends up thicker than you’d like, don’t worry! Simply add a little more milk (dairy or plant-based) to the blender and blend again until you reach your desired consistency. Remember, it’s all about personal preference—adjust it until it feels just right for you.

Are there any dietary considerations I should be aware of?
Certainly! If you’re making this smoothie for someone with allergies, be mindful of the peanut butter, which can be a common allergen. You can replace peanut butter with almond butter or sunflower seed butter for those with nut allergies. Always check labels for any added ingredients that may not align with dietary restrictions.

Creamy Cottage Cheese Peanut Butter Smoothie Bliss

Experience the energizing and wholesome Cottage Cheese Peanut Butter Smoothie, packed with protein and flavor.

  • Blender

For the Smoothie

  • 1 cup cottage cheese (A creamy base that’s rich in protein)
  • 2 tablespoons peanut butter (Adds nutty flavor and healthy fats)
  • 1 banana (Provides natural sweetness and creaminess)
  • 1 cup dairy or plant-based milk (Use your favorite milk)
  • 1 tablespoon honey or sweetener of choice (Optional, customize sweetness)
  • 1/2 teaspoon vanilla extract (Enhances flavor profile)

Step-by-Step Instructions

  1. Gather all your ingredients for the smoothie.
  2. Combine cottage cheese, peanut butter, banana, milk, honey, and vanilla extract in your blender.
  3. Blend on high speed for about 30 seconds until smooth.
  4. Taste and adjust sweetness as needed, blend again if necessary.
  5. Pour into a glass and serve immediately.

For a creamy texture, chill your cottage cheese and milk beforehand or add ice for a cold smoothie.

Drink
Cottage Cheese, Healthy, Peanut Butter, Protein-Packed, Quick, smoothie

Filed Under: Drink

Cinnamon Roll Protein Shake: A Creamy, Guilt-Free Delight

January 16, 2026 by grace bellamy Leave a Comment

As I stood in the kitchen, the aroma of warm cinnamon rolls wafted through my imagination, teasing my taste buds. What if I could capture that blissful flavor in a convenient drink? Enter the Cinnamon Roll Protein Shake, a delightful fusion that transforms this classic treat into a powerhouse of nutrition. Perfect for those bustling mornings or a post-workout boost, this shake not only offers a deliciously creamy texture but also packs a punch with 22 grams of protein to keep you energized. Plus, it’s dairy-free, making it a fantastic choice for anyone navigating dietary restrictions. Ready to blend up a healthier version of your favorite indulgence? Let’s dive into this delightful recipe!

Cinnamon Roll Protein Shake

Why is this shake a must-try?

Deliciously Creamy: This Cinnamon Roll Protein Shake perfectly captures the essence of warm cinnamon rolls, blending flavors that are simply irresistible.

Quick and Easy: With just five minutes of prep, you can whip up a nutritious shake that fits perfectly into your busy lifestyle.

Nutritious Boost: Packed with 22 grams of protein, this shake not only satisfies your sweet tooth but also fuels your body post-workout.

Dairy-Free Delight: A fantastic option for lactose-intolerant or vegan diets, offering everyone a chance to indulge without the guilt.

Versatile Enjoyment: Enjoy it breakfast-style or as a delightful snack; it’s the ideal pick-me-up anytime. Dive into this delightful shake, and don’t forget to check out other delicious lactose-free recipes for more inspiration!

Cinnamon Roll Protein Shake Ingredients

Unlock the secret to this delectable shake!

For the Shake

  • Almond milk – A creamy base that keeps this shake dairy-free and delicious.
  • Banana – Adds natural sweetness and a creamy texture.
  • Protein powder – Choose either plant-based or whey for a protein boost; this is key for enhancing the shake’s nutrition.
  • Almond butter – Provides healthy fats and a nutty flavor that complements the cinnamon.
  • Ground cinnamon – The star spice that gives the shake its signature flavor reminiscent of cinnamon rolls.
  • Maple syrup – Use this optional sweetener for an extra touch of sweetness that pairs beautifully with cinnamon.
  • Ice cubes – Adjusts the thickness to your liking, making your Cinnamon Roll Protein Shake refreshingly cool.

Step‑by‑Step Instructions for Cinnamon Roll Protein Shake

Step 1: Combine Ingredients
In a blender, add 1 cup of almond milk as your creamy base. Then, slice in one ripe banana for natural sweetness along with 1 scoop of your favorite protein powder, whether plant-based or whey. Next, spoon in 1 tablespoon of almond butter and sprinkle in 1 teaspoon of ground cinnamon. If you desire additional sweetness, drizzle in a tablespoon of maple syrup, and prepare for a deliciously indulgent Cinnamon Roll Protein Shake.

Step 2: Blend Until Smooth
Secure the blender lid and blend all the ingredients on high for about 30-45 seconds. Keep an eye on the texture; you want it to be smooth and creamy without any lumps. This step is essential for achieving that rich consistency reminiscent of decadent cinnamon rolls—just close your eyes, and you’ll almost smell them baking!

Step 3: Adjust Thickness
Once your mixture is smooth, it’s time to customize your shake’s thickness. Add a handful of ice cubes—start with 3-4 and blend again for an additional 15 seconds, checking in between. If you prefer a thicker Cinnamon Roll Protein Shake, feel free to add more ice and blend until you reach your desired consistency. It should be refreshing and cool!

Step 4: Serve and Enjoy
With your shake perfectly blended, pour the creamy goodness into a tall glass. For an added touch, you can sprinkle a little extra ground cinnamon on top or drizzle with a bit of maple syrup if you want to indulge even more. Now, it’s time to savor every sip of this delightful Cinnamon Roll Protein Shake—perfect for breakfast or a post-workout treat!

Cinnamon Roll Protein Shake

Cinnamon Roll Protein Shake Variations

Feel free to get creative and customize this shake to suit your taste and dietary needs!

  • Nut-Free: Substitute almond butter with sunflower seed butter for a nut-free option that’s just as creamy.
  • Lower Sugar: Swap out the maple syrup for a few drops of stevia or monk fruit sweetener for a sugar-free alternative. This way, you still enjoy a touch of sweetness without the calories!
  • Extra Spice: Add a pinch of nutmeg or a dash of vanilla extract to enhance the flavor depth. It’s like turning your shake into a festive treat!
  • Oatmeal Blend: Toss in a handful of rolled oats for added fiber and a heartier texture; this delicious twist keeps you fuller for longer.
  • Chocolate Lovers: Mix in a scoop of chocolate protein powder alongside the other ingredients for a delightful chocolate-cinnamon combination. It’s an adventure for your taste buds!
  • Green Goodness: Add a handful of spinach or kale for a nutrient boost without compromising flavor. The greens are practically invisible but add lots of vitamins!
  • Creamy Coconut: For a tropical twist, swap out almond milk for coconut milk and add shredded coconut. You’ll feel like you’re on a beach vacation with each sip!
  • Spicy Kick: If you enjoy a bit of heat, include a pinch of cayenne pepper or ginger for an unexpected kick! The contrast with the sweet cinnamon is simply divine.

For more vibrant variations, be sure to check out our tasty banana-centric options or creative smoothie takes, each waiting to inspire your culinary adventure!

Storage Tips for Cinnamon Roll Protein Shake

Fridge: For the best taste, consume your Cinnamon Roll Protein Shake fresh. However, it can be stored in an airtight container in the fridge for up to 24 hours.

Reheating: If you prefer it warm, gently reheat your shake in the microwave for 15-30 seconds. Stir well and enjoy the creamy goodness!

Separation: If stored, you may notice some separation; simply give it a quick shake or stir before enjoying.

Freezer: For longer storage, pour the shake into ice cube trays and freeze. Blend a few cubes later for a quick, creamy treat!

What to Serve with Cinnamon Roll Protein Shake

Picture enjoying a creamy shake that mimics the warmth of freshly baked cinnamon rolls while surrounding it with delightful pairings that enhance the experience.

  • Avocado Toast: This hearty option adds healthy fats and a satisfying crunch, perfectly balancing the shake’s creamy texture.
    The richness of avocado beautifully complements the sweetness of the shake, creating a harmonious breakfast experience.

  • Fresh Berries: A burst of tartness from strawberries or blueberries cuts through the shake’s sweetness, refreshing your palate.
    These vibrant fruits not only look beautiful alongside the shake but also provide a boost of antioxidants.

  • Nutty Granola: A sprinkle of homemade or store-bought granola offers a delightful crunch and adds a layer of flavor to your meal.
    With each bite of granola, you’ll enjoy a contrast in texture that pairs wonderfully with the smooth shake.

  • Egg Muffins: Savory egg muffins packed with veggies make for a balanced and filling option alongside the shake.
    These protein-rich muffins provide a hearty counterpart, making your breakfast truly satisfying.

  • Chia Seed Pudding: This creamy and nutty pudding is a delightful addition that complements the shake’s cinnamon tones.
    It provides an extra nutrition boost while maintaining a light and refreshing quality on your breakfast table.

  • Iced Coffee: If you’re in need of a caffeine boost, pairing your shake with a refreshing iced coffee can elevate your morning ritual.
    The slight bitterness will balance the sweetness of the shake, creating a perfect morning beverage combo.

  • Dark Chocolate Square: For a touch of indulgence, a piece of dark chocolate elevates the experience with its rich and bitter notes.
    The semi-sweet chocolate adds a luxurious twist, making your breakfast feel extra special without the guilt.

  • Coconut Yogurt: Creamy coconut yogurt topped with nuts or seeds is a refreshing addition with tropical vibes to complement the shake.
    Its tanginess harmonizes beautifully with the shake’s sweetness, creating a delightful contrast in flavors.

Expert Tips for Cinnamon Roll Protein Shake

  • Choose the Right Protein: Select a protein powder that you enjoy. Both plant-based and whey options work well in this Cinnamon Roll Protein Shake.
  • Banana Ripeness Matters: Use a ripe banana for optimal sweetness and creaminess. Overripe bananas can add an extra flavor depth that enhances your shake.
  • Adjust to Your Taste: Feel free to modify the amount of maple syrup used based on your sweetness preference. Start with a little, and add more if needed to suit your palate.
  • Ice It Right: Don’t overcrowd with ice. Start with a small amount and blend to achieve your desired thickness; you can always add more if necessary.
  • Blend Thoroughly: Ensure all ingredients are well-blended to avoid lumps. A smooth texture is key to mimicking that beloved cinnamon roll experience.

Make Ahead Options

These Cinnamon Roll Protein Shake preparations are perfect for busy mornings or quick post-workout snacks! You can combine the dry ingredients—protein powder, ground cinnamon, and almond butter—up to 3 days in advance into a container for easy access. Simply store this mix in an airtight container to maintain freshness. When you’re ready to make your shake, add the dry mixture to the blender with 1 cup of almond milk and 1 banana, then blend until smooth. If you prefer, you can also prepare the shake itself and refrigerate it for up to 24 hours; just give it a quick stir or re-blend before serving to keep it creamy and delicious. Enjoy time-saving convenience without compromising taste!

Cinnamon Roll Protein Shake

Cinnamon Roll Protein Shake Recipe FAQs

How do I choose the right banana for this shake?
Absolutely! It’s best to use a ripe banana for your Cinnamon Roll Protein Shake. Look for one that has a few brown spots but isn’t overly mushy. A ripe banana will add natural sweetness and a creamy texture that enhances the shake’s flavor, making it reminiscent of fresh cinnamon rolls.

How long can I store my shake in the fridge?
The Cinnamon Roll Protein Shake is best enjoyed fresh, but if you need to store it, you can keep it in an airtight container in the refrigerator for up to 24 hours. Just remember that some separation may occur, so give it a good shake or stir before you enjoy it again!

Can I freeze the shake for later use?
Absolutely! If you want to save your Cinnamon Roll Protein Shake for later, pour it into ice cube trays and freeze. When you’re ready for a quick treat, simply blend a few of those ice cubes together. This method also allows you to enjoy a creamy, chilled shake without any fuss.

What should I do if my shake turns out too thick or too thin?
No worries! If your shake is too thick, simply add a splash more almond milk and blend again until you reach your desired consistency. Conversely, if it’s too thin, toss in a handful of ice cubes and blend again. The more you adjust, the merrier your shake will be!

Are there any dietary considerations I should keep in mind?
Very! This Cinnamon Roll Protein Shake is not only dairy-free but also suitable for those with lactose intolerance or those following a vegan diet. If you have nut allergies, consider substituting almond butter with sunflower seed butter or peanut butter for a safe, yet delicious alternative.

Can I use a different type of protein powder?
Certainly! You have the flexibility to use either plant-based or whey protein powder based on your preference. If you’re looking for a vegan option, make sure the protein powder is marked as dairy-free. Either choice will add a great protein boost, so it’s all about what suits your taste buds!

Cinnamon Roll Protein Shake: A Creamy, Guilt-Free Delight

The Cinnamon Roll Protein Shake offers a creamy, guilt-free delight packed with flavor and 22 grams of protein.

  • Blender

For the Shake

  • 1 cup Almond milk (A creamy base that keeps this shake dairy-free and delicious.)
  • 1 Banana (Adds natural sweetness and a creamy texture.)
  • 1 scoop Protein powder (Choose either plant-based or whey for a protein boost.)
  • 1 tablespoon Almond butter (Provides healthy fats and a nutty flavor.)
  • 1 teaspoon Ground cinnamon (The star spice that gives the shake its signature flavor.)
  • 1 tablespoon Maple syrup (Optional sweetener for an extra touch of sweetness.)
  • 3-4 Ice cubes (Adjusts the thickness to your liking.)

Step‑by‑Step Instructions

  1. In a blender, add almond milk as your creamy base. Then, slice in one ripe banana, add protein powder, almond butter, and ground cinnamon. If desired, drizzle in maple syrup.
  2. Secure the blender lid and blend all the ingredients on high for about 30-45 seconds until smooth and creamy.
  3. Add a handful of ice cubes to adjust thickness; blend again for 15 seconds until you reach desired consistency.
  4. Pour the creamy shake into a tall glass. Optionally, sprinkle extra ground cinnamon or drizzle with maple syrup before serving.

Best consumed fresh, but can be stored in an airtight container in the fridge for up to 24 hours.

Drink
American
Cinnamon Roll Protein Shake, dairy-free, Healthy Drink, nutritious shake, post-workout, quick recipe

Filed Under: Drink

Delicious Watermelon Blueberry Protein Smoothie to Energize Your Day

January 12, 2026 by grace bellamy Leave a Comment

As I stood in my kitchen, the sweet aroma of summer filled the air—my watermelon sat proudly on the counter, waiting to be transformed. When I blend that juicy, refreshing watermelon with plump blueberries, I create the ultimate Watermelon Blueberry Protein Smoothie. This delightful concoction is not only a burst of hydration but also packed with antioxidants, making it a guilt-free treat you can whip up in just five minutes. Whether you’re craving a nutritious pick-me-up after a workout or simply want to enjoy a cooling snack during a hot day, this smoothie is both quick to prepare and irresistibly delicious. Who could resist a splash of summer in a glass? Ready to dive into the vibrant world of smoothies? Let’s blend!

Watermelon Blueberry Protein Smoothie

Why Is This Smoothie So Special?

Easy to whip up in just five minutes, this Watermelon Blueberry Protein Smoothie is perfect for busy days. Hydrating and refreshing, it’s packed with vitamins and antioxidants, making it an excellent post-workout treat. Versatile, you can easily customize it with your favorite protein source or sweetener. Deliciously fruity, the combination of watermelon and blueberries creates a flavor explosion that feels like summer in every sip. Plus, you can enjoy it guilt-free knowing it’s a wholesome option! So why not impress your friends with a glass of this revitalizing smoothie that you can serve chilled?

Watermelon Blueberry Protein Smoothie Ingredients

• Get ready for a refreshing blend!

For the Smoothie

  • Watermelon – hydrating and sweet, it forms the base of this refreshing smoothie.
  • Blueberries – packed with antioxidants, they provide a burst of flavor and nutrition.
  • Protein Source (e.g., protein powder, yogurt) – adds creaminess and helps keep you full longer.
  • Sweetener (if desired) – honey, agave, or stevia can enhance sweetness to your liking.
  • Liquid (e.g., almond milk, oat milk, dairy milk) – helps achieve the perfect consistency.

This Watermelon Blueberry Protein Smoothie is not just delicious; it’s a quick and easy way to nourish your body!

Step‑by‑Step Instructions for Watermelon Blueberry Protein Smoothie

Step 1: Prepare the Ingredients
Begin by gathering all your ingredients for the Watermelon Blueberry Protein Smoothie. Dice 1 cup of fresh watermelon into manageable chunks and rinse 1 cup of blueberries under cool water. Having these ready will make your blending process smooth and efficient. Make sure to have your preferred protein source, sweetener, and liquid at hand as well.

Step 2: Combine in the Blender
Place the diced watermelon, blueberries, your chosen protein source, sweetener (if using), and ½ cup of your preferred liquid into a blender. This combo creates the delicious base for your Watermelon Blueberry Protein Smoothie. Ensure the blender lid is secured tightly to avoid any spills during blending.

Step 3: Blend to Perfection
Blend the mixture on medium speed for about 30–45 seconds, or until it transforms into a smooth and creamy consistency. Keep an eye on the texture; you want it to be velvety without any chunky bits of fruit left behind. This is where the magic happens, so enjoy the transformation!

Step 4: Taste and Adjust
Once blended, pour a small amount into a glass for tasting. Check the sweetness and flavor of your smoothie. If you find it needs more sweetness, add a touch more sweetener, then blend again for a few seconds to incorporate. This ensures your Watermelon Blueberry Protein Smoothie is just right for your taste buds.

Step 5: Serve and Enjoy
Pour the finished smoothie into a tall glass, admiring its vibrant colors. For a refreshing touch, serve immediately and consider garnishing with a few unblended blueberries or a slice of watermelon on the rim. It’s a perfect way to make your Watermelon Blueberry Protein Smoothie both delightful and visually appealing!

Watermelon Blueberry Protein Smoothie

Expert Tips for Watermelon Blueberry Protein Smoothie

  • Choose Ripe Produce: Always select ripe watermelon and blueberries for maximum sweetness and flavor. Overripe fruit may taste mushy in the smoothie.
  • Balancing Sweetness: If using natural sweeteners, start with a small amount and taste as you blend. It’s easy to add but hard to fix if it’s too sweet!
  • Protein Options: Experiment with different protein sources like Greek yogurt or plant-based protein powder for unique flavors and textures in your Watermelon Blueberry Protein Smoothie.
  • Liquid Consistency: Adjust the amount of liquid based on how thick or thin you prefer your smoothie. Less liquid creates a thicker texture, reminiscent of a creamy shake.
  • Add-ins for Nutrition: Consider adding a handful of spinach or a scoop of chia seeds for extra nutrients without compromising the flavor; they blend easily with the fruits.

How to Store and Freeze Watermelon Blueberry Protein Smoothie

Refrigerator: Consume your Watermelon Blueberry Protein Smoothie fresh for the best flavor, but it can be stored in the fridge for up to 1 hour before it loses texture.

Freezer: For longer storage, pour the smoothie into an airtight container or freezer-safe bag, and freeze for up to 3 months. Thaw overnight in the fridge before consuming.

Reheating: If you’re in a pinch, you can blend frozen cubes of your smoothie with a splash of liquid for a quick, refreshing treat.

Containers: Store your smoothie in a glass or BPA-free plastic container to maintain flavor and enjoy it on the go!

What to Serve with Watermelon Blueberry Protein Smoothie

Nothing pairs better with a refreshing smoothie than delightful sides that elevate your snack or meal experience.

  • Greek Yogurt Parfait: A creamy parfait layered with granola and fresh fruit adds a delightful crunch to your smoothie. The cool creaminess of yogurt beautifully complements the fruity flavors, making it a perfect snack combo.

  • Avocado Toast: The rich, buttery flavor of mashed avocado spreads wonderfully over whole-grain toast. This hearty addition contrasts beautifully with the light and fruity notes of your smoothie.

  • Crispy Vegetable Sticks: Raw carrot, cucumber, and bell pepper sticks provide a satisfying crunch and a burst of freshness, making them the perfect guilt-free snack alongside your smoothie.

  • Oatmeal Cookies: A lightly sweetened oatmeal cookie gives a pleasant chewiness and is a delightful treat that pairs beautifully with the refreshing smoothie. The wholesome ingredients create a balanced snack that feels indulgent yet nutritious.

  • Frozen Grapes: For a quirky twist, serve frozen grapes as a refreshing side for your smoothie. Their natural sweetness and icy texture keep the vibe of summer alive in your meal.

  • Mint Infused Water: A glass of mint-infused water brings a refreshing twist that enhances the hydrating elements of both the smoothie and the drink, making it a perfect pairing on a warm day.

For a delightful and balanced meal, mix and match these options to create an invigorating experience that celebrates vibrant flavors and nourishing ingredients!

Watermelon Blueberry Protein Smoothie Variations

Feel free to get creative and transform your smoothie with these fun variations!

  • Dairy-Free: Use coconut yogurt or almond milk for a creamy, dairy-free twist that’s just as satisfying.
  • Protein Boost: Swap regular yogurt for Greek yogurt for an extra protein punch and a creamier texture. It’s perfect for muscle recovery post-workout!
  • Sweet & Spicy: Add a pinch of cayenne or a splash of ginger to give your smoothie a spicy kick that complements the sweetness beautifully.
  • Berry Blend: Mix in other berries like strawberries or raspberries for a colorful, antioxidant-rich twist that elevates the flavor. Just imagine the vibrant hues dancing in your glass!
  • Nutty & Creamy: Toss in a tablespoon of nut butter, like almond or peanut. This adds healthy fats and a delicious creaminess that pairs perfectly with fruity flavors.
  • Green Smoothie: Blend in a handful of spinach or kale for added nutrients without significantly changing the taste. You’ll enjoy all the greens’ goodness while still relishing the refreshing fruit flavors!
  • Chocolate Indulgence: Add a tablespoon of cocoa powder or a scoop of chocolate protein powder for a deliciously rich and decadent smoothie that satisfies your sweet cravings.

By swapping ingredients and adding new flavors, every blend can be a new adventure! If you’re looking for more inspiration, check out my tips on experimenting with smoothie bowls or desserts infused with healthy ingredients.

Make Ahead Options

These Watermelon Blueberry Protein Smoothies are perfect for meal prep enthusiasts! You can chop and refrigerate the watermelon and blueberries up to 24 hours in advance, which will save you precious time on busy mornings. Simply store them in an airtight container to maintain freshness and prevent browning. When you’re ready to make your smoothie, add the prepped fruit along with your protein source, sweetener, and liquid to the blender. Blend until smooth, and enjoy a refreshing, energizing drink that’s just as delicious as if it were freshly made! This is a great way to ensure you’re always ready for a nutritious boost without any hassle.

Watermelon Blueberry Protein Smoothie

Watermelon Blueberry Protein Smoothie Recipe FAQs

What should I look for when selecting watermelon and blueberries?
Absolutely! When choosing watermelon, look for a uniform shape, with a deep green rind and a yellow spot where it rested on the ground—this indicates ripeness. For blueberries, opt for plump, firm berries that are deep blue without any reddish hue or dark spots. The fresher the fruit, the sweeter and more flavorful your Watermelon Blueberry Protein Smoothie will be!

How long can I store the Watermelon Blueberry Protein Smoothie in the refrigerator?
Very! It’s best consumed fresh for optimal taste and texture. However, you can store your smoothie in the refrigerator for up to 1 hour. After that, it may start to separate and lose its creamy consistency, so make sure to enjoy it soon after blending!

Can I freeze the Watermelon Blueberry Protein Smoothie for later?
Absolutely! To freeze, pour your blended smoothie into an airtight container or a freezer-safe bag. Make sure to leave some space at the top, as liquids expand when frozen. You can keep it in the freezer for up to 3 months. When you’re ready to enjoy, simply thaw the smoothie overnight in the fridge, or blend frozen cubes with a splash of your preferred liquid for a quick treat!

What if my smoothie turns out too watery or too thick?
Don’t worry, this can easily happen! If your Watermelon Blueberry Protein Smoothie is too watery, try adding a bit more of your protein source or a frozen banana to thicken it up. If it’s too thick, simply blend in a little more liquid until you reach your desired consistency. Adjusting the ratio is all part of the fun in creating your perfect smoothie!

Are there any dietary considerations I should be aware of?
Very! If you have allergies, ensure that your protein source is suitable for your dietary needs, such as choosing dairy-free yogurt if you’re lactose intolerant. This smoothie is generally gluten-free and vegan (if using plant-based protein and sweeteners). Always check ingredient labels, especially for sweeteners that may contain allergens. Enjoy your smoothie safely!

Delicious Watermelon Blueberry Protein Smoothie to Energize Your Day

A refreshing Watermelon Blueberry Protein Smoothie packed with antioxidants, perfect for hydration and energy.

  • Blender

For the Smoothie

  • 1 cup watermelon (diced, hydrating and sweet)
  • 1 cup blueberries (fresh, packed with antioxidants)
  • 1 scoop protein source (such as protein powder or yogurt)
  • to taste sweetener (like honey, agave, or stevia)
  • 1/2 cup liquid (almond milk, oat milk, or dairy milk)

Step-by-Step Instructions for Watermelon Blueberry Protein Smoothie

  1. Prepare the Ingredients: Gather and dice 1 cup of fresh watermelon and rinse 1 cup of blueberries.
  2. Combine in the Blender: Place watermelon, blueberries, protein source, sweetener, and 1/2 cup of liquid into the blender.
  3. Blend to Perfection: Blend on medium speed for 30–45 seconds until smooth and creamy.
  4. Taste and Adjust: Taste the smoothie, and add more sweetener if necessary, blending again to incorporate.
  5. Serve and Enjoy: Pour into a tall glass and garnish if desired.

Choose ripe fruits for maximum sweetness. Adjust liquid to achieve desired consistency.

Drink
American
Healthy Drink, hydrating smoothie, post-workout drink, smoothie, Watermelon Blueberry Protein Smoothie

Filed Under: Drink

Delicious Strawberry Banana Smoothie for a Quick Refresh

January 12, 2026 by grace bellamy Leave a Comment

As I stood in my kitchen on a lazy summer afternoon, the sweet aroma of ripe strawberries and bananas filled the air, stirring memories of sunny picnics. That’s when I decided to whip up a Strawberry Banana Smoothie—a delightful treat that takes only five minutes to create! This recipe is perfect for anyone looking to escape the fast-food cycle, offering a quick, nutritious option packed with vitamins and flavor. It’s not just a delicious blend of fruits; the addition of yogurt enhances its creaminess, making it a satisfying and healthy treat for breakfast or an afternoon snack. Ready to join me in creating this vibrant smoothie? Trust me, you won’t want to miss the burst of freshness with every sip!

Strawberry Banana Smoothie

Why is this smoothie so irresistible?

Freshness bursts with every sip: The combination of ripe strawberries and bananas creates a refreshing explosion of flavors that will lift your spirits.
Quick and Easy: In just 5 minutes, you can whip up this nutritious treat, perfect for any busy lifestyle looking to ditch fast food.
Healthy Benefits: Packed with vitamins and probiotics from yogurt, this smoothie is a guilt-free indulgence that supports your wellness journey.
Versatile Ingredients: Whether you’re making it for breakfast, a snack, or to impress guests, this recipe adapts perfectly to your needs.
Crowd-Pleaser: Its vibrant color and delicious taste make it a hit with kids and adults alike—a win-win for the whole family!
Get creative with your smoothie by exploring more delightful recipes like our Creamy Avocado Smoothie for added nutrients and flavor!

Strawberry Banana Smoothie Ingredients

For the Smoothie
• 1 cup strawberries – use fresh or frozen; frozen berries make it extra cold and creamy.
• 1 cup bananas – overripe bananas add natural sweetness and a smooth texture.
• ½ cup yogurt – Greek yogurt is a great choice for added protein and creaminess.
• 1 tablespoon honey (optional) – adds sweetness if desired, but the fruits usually provide enough.

Embrace the fruity goodness and indulge in the perfect Strawberry Banana Smoothie that’s not only refreshing but easy to make!

Step‑by‑Step Instructions for Strawberry Banana Smoothie

Step 1: Prepare the Ingredients
Start by rinsing your strawberries under cold water to remove any dirt and pat them dry. For the best flavor, choose ripe fruits. Next, peel the bananas and slice them into chunks for easy blending. Assemble all the ingredients, including the yogurt and honey, at your workstation.

Step 2: Blend the Base
Place the strawberries and banana chunks into a blender. Secure the lid tightly and blend on high for about 30 seconds, or until the mixture becomes smooth and creamy. Keep an eye on the texture; it should seamlessly blend together into a vibrant, pink puree.

Step 3: Add Creaminess
Once your fruit mixture is smooth, add in the yogurt to enrich the texture of your Strawberry Banana Smoothie. If you’re opting for honey, drizzle it in now for a touch of natural sweetness. Blend again for another 20-30 seconds, ensuring everything is well incorporated and creamy.

Step 4: Check Consistency
After blending, pause to check the consistency of your smoothie. If it’s too thick for your liking, feel free to add a splash of milk or water to reach your desired texture. Blend for an additional 10-15 seconds to combine, creating a refreshing, pourable smoothie.

Step 5: Serve and Enjoy
Pour the Strawberry Banana Smoothie into chilled glasses, garnishing with a few whole strawberries or banana slices for an inviting presentation. Serve immediately to enjoy the fresh flavors at their peak. Grab a straw or spoon, and savor the delightful flavors of your homemade smoothie!

Strawberry Banana Smoothie

What to Serve with Strawberry Banana Smoothie

Elevate your smoothie experience with these delightful pairings that create a wholesome, heartwarming meal.

  • Avocado Toast: The creamy richness of avocado on toasted bread offers a satisfying contrast to the fruity freshness of the smoothie.
  • Granola Parfait: Layered yogurt and granola provide a crunchy texture that complements the smoothness, making for a balanced breakfast or snack.

A parfait’s combination of flavors and textures works in harmony with the smoothie’s sweetness. Together, they create a nourishing treat that will keep you energized throughout the day.

  • Fresh Fruit Salad: A medley of seasonal fruits brightens the table and enhances the smoothie experience, adding vibrant colors and varied flavors.
  • Spinach Salad with Feta: The earthy greens and creamy feta cheese add a savory element to your meal, balancing the smoothie’s sweetness beautifully.

The freshness of salad greens, paired with the strawberry banana flavor, makes for an invigorating dish that leaves you feeling satisfied yet light.

  • Coconut Water: This hydrating drink enhances the tropical vibe of your smoothie while keeping you refreshed and replenished.
  • Chocolate Chip Cookies: For a sweet finish, indulge in classic cookies that play off the smoothie’s fruitiness and satisfy your sweet tooth.

Together, these pairings craft a delightful meal experience that goes beyond the ordinary, making your Strawberry Banana Smoothie even more enjoyable!

Expert Tips for the Best Strawberry Banana Smoothie

  • Choose Ripe Fruit: The key to a delicious Strawberry Banana Smoothie lies in using perfectly ripe strawberries and bananas for optimal sweetness and flavor.

  • Blending Technique: Start with the harder fruits first, like strawberries, followed by softer bananas. This ensures a smoother blend without any chunks.

  • Adjust Consistency: If you prefer a thinner smoothie, add a splash of almond milk or coconut water. Blend again until you achieve the perfect consistency.

  • Yogurt Choices: Greek yogurt thickens your smoothie while adding protein. For lactose-free options, opt for almond or coconut yogurt instead.

  • Avoid Over-Blending: Stop blending when your ingredients are fully combined. Over-blending can cause the smoothie to become foamy instead of creamy.

Enjoy whipping up your delicious Strawberry Banana Smoothie!

Strawberry Banana Smoothie Variations

Feel free to personalize your smoothie with these delightful twists and substitutions, turning each glass into your own masterpiece!

  • Vegan: Swap yogurt for a plant-based yogurt or simply use extra bananas for creaminess. You won’t miss the dairy!

  • Protein-Packed: Add a scoop of your favorite protein powder for an extra boost. Perfect for post-workout recovery or a filling breakfast.

  • Nutty Delight: Toss in a tablespoon of almond or peanut butter for a rich, nutty flavor that adds healthy fats. It’s a deliciously satisfying twist!

  • Berry Blend: Mix in other berries like blueberries or raspberries for a vibrant flavor explosion. Each berry brings a unique sweet tartness that brightens up the mix.

  • Coconut Creaminess: Substitute yogurt with coconut cream for a tropical flair. The creamy texture and hint of coconut will transport you to a sunny beach.

  • Spicy Kick: Add a pinch of cayenne or ginger for a surprising spicy undertone that balances the sweetness beautifully. It’s a fun way to wake up your taste buds!

  • Minty Fresh: Toss in a handful of fresh mint leaves before blending for a refreshing twist. The mint adds a delightful zing that enhances the overall flavor!

  • Chocolate Lover: Blend in a tablespoon of cocoa powder or chocolate syrup for a chocolatey version that’s indulgent and perfect for dessert. Who said smoothies can’t be a treat?

Get inspired to create your own delectable versions of this Strawberry Banana Smoothie and explore delightful recipes like our Creamy Avocado Smoothie or Chocolate Banana Smoothie for more tasty options!

How to Store and Freeze Strawberry Banana Smoothie

  • Fridge: Store any leftover Strawberry Banana Smoothie in an airtight container for up to 2 days. Be sure to give it a good shake before enjoying again.
  • Freezer: If you’d like to save it for later, pour your smoothie into freezer-safe bags or containers and freeze for up to 3 months. Just remember to leave some space for expansion!
  • Thawing: To enjoy frozen smoothies, transfer them to the fridge overnight or blend them directly from the freezer with a splash of milk or water for a quick refresh.
  • Airtight Storage: Always use airtight containers to prevent freezer burn and to keep that delightful strawberry and banana flavor intact!

Make Ahead Options

These Strawberry Banana Smoothies are perfect for meal prep enthusiasts! You can slice and freeze the strawberries and bananas up to 3 days in advance, ensuring they remain vibrant and fresh. Just wash and chop the fruits, spread them on a baking sheet, and freeze until solid before transferring them to a zip-top bag. This way, they’ll be ready to blend whenever you need a quick, nutritious treat. When you’re ready to enjoy your smoothie, simply add the frozen fruit to the blender with yogurt and honey, then blend until smooth. This method not only saves time on busy mornings but also delivers a creamy, delicious smoothie just as enjoyable as if you made it fresh!

Strawberry Banana Smoothie

Strawberry Banana Smoothie Recipe FAQs

How do I choose the best strawberries and bananas?
Absolutely! When selecting strawberries, look for bright red ones without any dark spots, as these indicate ripeness. For bananas, overripe ones with slight brown spots will taste sweeter and blend smoother. Fresh, seasonal produce usually offers the best flavor.

How should I store any leftover smoothie?
You can store your leftover Strawberry Banana Smoothie in an airtight container in the fridge for up to 2 days. Make sure to give it a good shake before consuming as separation may occur. If you find it thickened too much, just add a little milk or water to bring it back to life!

Can I freeze my smoothie for later?
Certainly! You can freeze your Strawberry Banana Smoothie in freezer-safe bags or containers for up to 3 months. Just remember to leave a little space at the top to allow for expansion. When you’re ready to enjoy, thaw it in the fridge overnight or blend directly from the freezer, adding a splash of milk or water for a creamy texture.

What if the smoothie is too thick or too thin?
No problem! If your smoothie turns out too thick, add a small amount of milk, water, or juice to thin it out. Blend again until you reach your desired consistency. On the flip side, if it’s too thin, simply toss in a few more frozen strawberries or banana slices and blend again for that perfect creamy goodness.

Can pets enjoy a Strawberry Banana Smoothie?
While ripe strawberries and bananas are safe for pets in moderation, be cautious when adding yogurt or honey, as dairy can sometimes upset their stomachs. Always consult your vet if you’re unsure, and stick to plain, blended fruits so they can savor a taste of freshness too!

Any dietary considerations for allergies?
Absolutely! This Strawberry Banana Smoothie can be easily modified for dietary needs. You can use lactose-free yogurt or plant-based alternatives like almond or coconut yogurt for a dairy-free option. If you’re concerned about sugars, feel free to skip the honey—this smoothie is naturally sweetened by the ripe fruits!

Delicious Strawberry Banana Smoothie for a Quick Refresh

A refreshing Strawberry Banana Smoothie that’s quick and nutritious, perfect for any time.

  • Blender

For the Smoothie

  • 1 cup strawberries (use fresh or frozen; frozen makes it extra cold and creamy)
  • 1 cup bananas (overripe bananas add natural sweetness and a smooth texture)
  • ½ cup yogurt (Greek yogurt is a great choice for added protein and creaminess)
  • 1 tablespoon honey (optional; adds sweetness if desired)

Step-by-Step Instructions for Strawberry Banana Smoothie

  1. Start by rinsing your strawberries under cold water to remove any dirt and pat them dry. For the best flavor, choose ripe fruits. Next, peel the bananas and slice them into chunks for easy blending. Assemble all the ingredients, including the yogurt and honey, at your workstation.
  2. Place the strawberries and banana chunks into a blender. Secure the lid tightly and blend on high for about 30 seconds, or until the mixture becomes smooth and creamy.
  3. Once your fruit mixture is smooth, add in the yogurt and honey (if using) for added creaminess. Blend again for another 20-30 seconds.
  4. After blending, check the consistency of your smoothie. If it’s too thick, add a splash of milk or water to reach your desired texture.
  5. Pour the Strawberry Banana Smoothie into chilled glasses, garnishing with whole strawberries or banana slices for an inviting presentation. Serve immediately.

Choose ripe fruits for the best flavor and adjust consistency to preference with milk or water.

Drink
Healthy Recipe, Nutritious Snack, refreshing drink, smoothie, Strawberry Banana Smoothie

Filed Under: Drink

Delightful Cherry White Russian: A Creamy Twist on Tradition

January 7, 2026 by grace bellamy Leave a Comment

The moment I took my first sip of a Cherry White Russian, it was as if I had unlocked a secret cocktail treasure. This delightful twist on the classic combines the smooth richness of cream with a vibrant cherry kick and a splash of coffee liqueur, creating an indulgent drink that’s perfect for any occasion. With just five minutes of prep time, this recipe is an effortless crowd-pleaser that elevates your home bar game and leaves fast food far behind. Whether you’re crafting it for a cozy evening in or shaking things up at a gathering, you’ll quickly discover how this refreshing concoction brings a touch of elegance to your night. Ready to impress your friends and tantalize your taste buds? Let’s dive into mixing this sensational drink!

Cherry White Russian

Why is Cherry White Russian a must-try?

Creamy Indulgence: The luxurious blend of heavy cream envelops the vibrant cherry syrup, creating a delightful contrast that’s irresistible.

Quick & Easy: In just 5 minutes, you can whip up this cocktail, leaving you more time to enjoy the festivities!

Unique Twist: This drink offers a fresh spin on a traditional favorite, combining coffee liqueur and cherry for bold flavor.

Perfect for Any Occasion: Whether it’s a casual night in or a lively gathering, this drink effortlessly impresses your guests.

Crowd Favorite: The Cherry White Russian caters to diverse palates, ensuring everyone will love your impressive cocktail skills. Want to explore more delightful drinks? Check out our guide on delicious cocktail recipes.

Cherry White Russian Ingredients

For the Cocktail
• Vodka – adds a smooth base to this delightful Cherry White Russian.
• Coffee liqueur – brings a rich, comforting flavor to balance the sweetness.
• Cherry syrup (or cherry liqueur) – provides a vibrant cherry kick that brightens up the drink.
• Heavy cream – gives the cocktail its luxurious, creamy texture.

For Serving
• Ice cubes – cool down the drink and enhance its refreshing qualities.
• Maraschino cherry – a classic garnish that adds a pop of color and an extra touch of sweetness.

Step‑by‑Step Instructions for Cherry White Russian

Step 1: Gather Ingredients
Start by gathering all your ingredients for the Cherry White Russian, including vodka, coffee liqueur, cherry syrup (or liqueur), heavy cream, and ice cubes. Make sure everything is chilled to enhance the drink’s refreshing qualities. Prepare a cocktail shaker and a lowball glass, setting yourself up for a smooth mixing experience.

Step 2: Fill Shaker with Ice
Next, fill your cocktail shaker with plenty of ice cubes, about halfway full. This will ensure that your ingredients chill quickly while mixing. Visualize a frosty layer forming on the sides of the shaker as you prepare to infuse your Cherry White Russian with flavor.

Step 3: Add the Spirits
Pour in 2 ounces of vodka, followed by 1 ounce of coffee liqueur, and 1 ounce of cherry syrup (or liqueur) into the shaker over the ice. Each pour should blend seamlessly, allowing the rich flavors to mingle. The vibrant colors of the cherry syrup will be a visual delight as you prepare the drink.

Step 4: Shake Vigorously
Secure the lid on the cocktail shaker and shake vigorously for about 15 seconds. Your Cherry White Russian mixture should feel cold and well-combined by the end of this time. Listen for the ice clinking as you shake, which tells you that everything is blending to perfection.

Step 5: Prepare the Glass
While you shake, grab your lowball glass and fill it with fresh ice cubes. This will keep your drink nice and cool once it’s poured. The clinking sound of the ice adds to the excitement as you get ready to serve your delightful Cherry White Russian to your guests.

Step 6: Strain the Cocktail
Carefully strain the mixed cocktail into your prepared lowball glass over the ice. You should see the vibrant red from the cherry syrup blending through the transparent liquid. This visual layering is a treat for the eyes, hinting at the delicious flavors to come.

Step 7: Add the Cream
Now it’s time to create that luxurious finish! Slowly pour 1 ounce of heavy cream over the top of the drink, allowing it to float and create an elegant layered effect. Watch as the cream gently swirls and mingles with the colorful layers below, adding richness to your Cherry White Russian.

Step 8: Garnish and Serve
Finally, garnish your Cherry White Russian with a maraschino cherry on top. This little burst of color not only enhances the presentation but adds a touch of sweetness. Serve immediately and get ready to impress your friends with this stunning cocktail creation!

Cherry White Russian

Make Ahead Options

These Cherry White Russians are perfect for meal prep enthusiasts! You can mix the vodka, coffee liqueur, and cherry syrup (or cherry liqueur) up to 24 hours in advance, storing the mixture in an airtight container in the refrigerator. To maintain the cocktail’s quality and vibrant flavors, avoid adding the cream until just before serving, as it can separate if left too long. When you’re ready to enjoy, simply pour the mixture over ice in a lowball glass, gently layer in the heavy cream, and garnish with a maraschino cherry. This approach not only saves time but also offers you a delightful drink with minimal effort!

Cherry White Russian Variations

You’re about to embark on a journey of incredible flavors! Customize your Cherry White Russian to suit your tastes and impress your guests.

  • Dairy-Free: Use coconut cream or almond milk instead of heavy cream for a lighter, dairy-free version. The tropical notes from coconut add an intriguing twist!
  • Spicy Touch: Add a pinch of cayenne pepper or a dash of chili liqueur for a surprising kick. This will engage your taste buds in a new and exciting way.
  • Chocolate Bliss: Swirl in a tablespoon of chocolate syrup for a decadent chocolate cherry twist. Imagine the rich cocoa flavor dancing with the cherry notes!
  • Fruit Fusion: Substitute the cherry syrup with raspberry or strawberry syrup for a fruity variation that’ll excite your palate. This twist brings a fresh, seasonal vibe to your cocktail.
  • Coffee Boost: Replace the coffee liqueur with espresso for an extra kick of caffeine. It enhances the richness while retaining the delightful layers of flavors.
  • Nutty Flavor: Incorporate a splash of hazelnut liqueur for an added depth of flavor. This nutty essence elevates the creamy texture and rounds off the sweetness.
  • Less Sweet: Decrease the cherry syrup and compensate with a squeeze of fresh lemon juice for a refreshing balance. This twist creates a more sophisticated drink.
  • Frozen Treat: Blend the ingredients with ice for a frosty, slushy version. Picture yourself sipping on this icy delight while lounging on a sunny day!

Feeling adventurous? Try these variations and discover your favorites! If you’re on the hunt for more cocktail inspiration, don’t miss our fabulous selection of delicious cocktail recipes.

What to Serve with Cherry White Russian

Imagine a cozy gathering, clinking glasses filled with delightful flavors that enhance your Cherry White Russian experience!

  • Savory Charcuterie Board: A mix of cheeses, cured meats, and olives complements the cocktail’s sweetness, creating a balanced palate experience. The combination invites your guests to graze and sip, making mingling effortless.

  • Decadent Chocolate Mousse: This rich dessert’s creamy texture pairs perfectly with the Cherry White Russian, harmonizing the bold cherry and coffee liqueur flavors. Each spoonful brings a luscious sweetness, creating a delightful ending to your gathering.

  • Spicy Chicken Wings: The heat from the wings contrasts beautifully with the creamy cocktail, creating an exciting flavor adventure. This classic pairing is a sure crowd-pleaser that keeps the energy high and the fun flowing.

  • Crispy Sweet Potato Fries: These fries bring a delightful sweetness and crunch that mirrors the cherry notes in your drink. Dipping them in a zesty mayo accentuates the pairing, creating a casual yet elevated experience.

  • Refreshing Garden Salad: Crunchy greens and a tangy vinaigrette freshen up the palate between sips of your Cherry White Russian. This light pairing provides balance, making it perfect for sunny afternoons or elegant evening gatherings.

  • Artisan Bread and Dips: A selection of warm artisan bread served with creamy dips invites guests to indulge alongside their drinks. The bread’s texture adds warmth and comfort, enhancing the experience of sipping away on your cocktail.

How to Store and Freeze Cherry White Russian

Fridge: Store any leftover Cherry White Russian components separately in airtight containers for up to 3 days to maintain freshness.

Room Temperature: Avoid leaving the mixed drink at room temperature for more than 2 hours to prevent spoilage.

Freezer: While it’s best to enjoy Cherry White Russian fresh, if needed, you can freeze it. Pour the mixture into an ice cube tray (strain out the cream), and freeze. Blend with cream when ready to serve.

Reheating: For the best flavor, always serve your Cherry White Russian cold; avoid reheating or refreezing once mixed to preserve the taste.

Tips for the Best Cherry White Russian

• Chill Everything: Make sure to chill your vodka, liqueurs, and glass beforehand. This keeps your Cherry White Russian cool and refreshing.

• Perfect Layering: Pour the heavy cream slowly to achieve that beautiful layered effect. A gentle touch allows the cream to float instead of mixing immediately.

• Adjust Sweetness: If you prefer a less sweet cocktail, reduce the amount of cherry syrup. Tasting as you mix helps you find the perfect balance.

• Use Quality Ingredients: High-quality vodka and coffee liqueur can elevate your drink’s flavor profile. Cheap alternatives may leave out the rich taste you want.

• Shake Well: Ensure you shake the mixture vigorously for about 15 seconds. This is key to integrating flavors and chilling your Cherry White Russian properly.

Cherry White Russian

Cherry White Russian Recipe FAQs

How do I choose the best cherries for my Cherry White Russian?
Absolutely! When selecting cherries, look for ones that are plump and firm, with vibrant color and no dark spots. Dark, juicy cherries will elevate your cocktail’s flavor. If using maraschino cherries for garnish, choose high-quality brands that use real cherry juice for better taste.

What’s the best way to store leftover ingredients?
To maintain their quality, keep your vodka and coffee liqueur sealed in cool, dark places. The cherry syrup or liqueur can be stored in the refrigerator for up to 3 months after opening. Always check for a change in smell or color before using.

Can I freeze my Cherry White Russian?
Yes, you can! However, I recommend freezing only the cocktail mixture without cream. Pour the Cherry White Russian ingredients into an ice cube tray and freeze. When you’re ready to enjoy it again, blend the frozen cubes with fresh cream for a quick and delicious treat. This method keeps the drink’s texture intact, allowing you to savor its original flavor.

What should I do if the flavors aren’t balanced?
If you find your Cherry White Russian a bit off, don’t fret! Start by adjusting the sweetness. If it’s too sweet, add a splash more coffee liqueur or reduce the cherry syrup. If it lacks richness, increase the heavy cream gradually while tasting until it hits your preferred note. Sometimes, it only takes a tiny tweak to achieve that perfect balance.

Are there any dietary considerations I should keep in mind?
Definitely! If you’re preparing for guests, ensure you check for any allergies. Some people may have sensitivities to alcohol or dairy. For lactose-free options, substitute heavy cream with coconut cream or a non-dairy milk alternative. If you have a friend who prefers a non-alcoholic drink, you can craft a mocktail version using soda water, cherry syrup, and a splash of coffee-flavored syrup.

How long can I keep my Cherry White Russian at room temperature?
It’s best to consume your Cherry White Russian immediately after mixing. If you need to leave it out, don’t let it sit for more than 2 hours to ensure safety and preserve the flavors. After that, any leftover drink should be discarded to avoid spoilage.

Delightful Cherry White Russian: A Creamy Twist on Tradition

A delightful Cherry White Russian combines smooth cream, vibrant cherry syrup, and coffee liqueur, creating an indulgent drink perfect for any occasion.

  • Cocktail shaker
  • lowball glass

For the Cocktail

  • 2 oz vodka (adds a smooth base to this delightful Cherry White Russian)
  • 1 oz coffee liqueur (brings a rich, comforting flavor)
  • 1 oz cherry syrup (or cherry liqueur) (provides a vibrant cherry kick)
  • 1 oz heavy cream (gives the cocktail its luxurious, creamy texture)

For Serving

  • 1 cup ice cubes (cool down the drink)
  • 1 piece maraschino cherry (for garnishing)

Step-by-Step Instructions

  1. Gather all your ingredients for the Cherry White Russian, including vodka, coffee liqueur, cherry syrup (or liqueur), heavy cream, and ice cubes.
  2. Fill your cocktail shaker with plenty of ice cubes, about halfway full.
  3. Pour in 2 ounces of vodka, followed by 1 ounce of coffee liqueur, and 1 ounce of cherry syrup (or liqueur) into the shaker over the ice.
  4. Secure the lid on the cocktail shaker and shake vigorously for about 15 seconds.
  5. Grab your lowball glass and fill it with fresh ice cubes.
  6. Carefully strain the mixed cocktail into your prepared lowball glass over the ice.
  7. Slowly pour 1 ounce of heavy cream over the top of the drink.
  8. Garnish your Cherry White Russian with a maraschino cherry on top and serve immediately.

Chill vodka, liqueurs, and glass beforehand for a refreshing experience. Adjust sweetness by reducing cherry syrup as needed.

Drink
beverages, Cherry White Russian, cocktail, drinks, easy cocktail, party drinks

Filed Under: Drink

Gingerbread White Russian Holiday Cocktail for Cozy Nights

January 7, 2026 by grace bellamy Leave a Comment

The moment the smell of ginger and nutmeg fills the air, I know the holidays are truly in full swing. This Gingerbread White Russian Holiday Cocktail is my go-to recipe for cozy gatherings, whether I’m hosting friends or simply indulging in a quiet evening by the fire. With its creamy texture and festive flair, this easy-to-make drink has become a crowd-pleaser that warms not just the body but the spirit as well. In just 10 minutes, you can whip up this delightful cocktail, making it perfect for those who want to elevate their holiday celebrations without extensive prep work. Get ready to tantalize your taste buds with this creamy cocktail that encapsulates all the seasonal magic. Are you ready to toast to the season with a drink that feels like a warm hug in a glass?

Gingerbread White Russian Holiday Cocktail

Why Is This Cocktail So Irresistible?

Creamy Delight: The Gingerbread White Russian Holiday Cocktail combines the smoothness of heavy cream with a spiced, gingerbread twist, creating a warm hug in a glass.

Quick & Easy: Whip this festive drink up in just 10 minutes, perfect for busy holiday nights. Say goodbye to complicated cocktails!

Festive Flavors: Revel in the delicious blend of vodka, coffee liqueur, and gingerbread syrup, evoking joyful holiday memories with every sip.

Crowd-Pleaser: Whether you’re hosting a party or having a cozy night in, this cocktail is sure to impress your guests or satisfy your cravings.

Aromatic Garnish: Topped with fresh cinnamon and nutmeg, the inviting aroma adds an extra layer of joy to your festive gathering. Pair it with some homemade gingerbread cookies for an extra special treat!

Gingerbread White Russian Holiday Cocktail Ingredients

For the Cocktail
• Vodka – 2 oz – This smooth spirit forms the base of your drink, giving it a lovely kick.
• Coffee liqueur – 1 oz – A rich addition like Kahlúa brings depth and sweetness to your festive cocktail.
• Gingerbread syrup – 1 oz – Use homemade or store-bought for that delicious gingerbread flavor that defines the season.
• Heavy cream – 2 oz – This creates the cocktail’s creamy texture, making each sip oh-so-satisfying.

For Garnish
• Ground cinnamon – 1/2 tsp – A dash on top adds a warm, aromatic essence to your drink.
• Ground nutmeg – 1/2 tsp – This enhances the festive flavors and adds a lovely visual touch.
• Crushed ice – For serving – Keep your cocktail chilled and refreshing throughout your cozy evening.
• Gingerbread cookies – (optional, for garnish) – Elevate your presentation with these delightful treats, perfect for dipping!

Step‑by‑Step Instructions for Gingerbread White Russian Holiday Cocktail

Step 1: Prepare the Glass
Begin by selecting a short rocks glass to showcase your Gingerbread White Russian Holiday Cocktail. Fill it with crushed ice, allowing it to chill while you prepare the cocktail components. The ice will help achieve a perfectly cold drink, making every sip refreshing and delightful.

Step 2: Mix the Base Ingredients
In a cocktail shaker, pour in 2 oz of vodka, 1 oz of coffee liqueur, and 1 oz of gingerbread syrup. Then, add fresh ice to the shaker, filling it about halfway, and seal the lid tightly. This is where the magic begins as you blend the flavors for about 15 seconds, shaking vigorously until everything is well combined and chilled.

Step 3: Strain the Mixture
Remove the rocks glass filled with ice from the freezer or discard the chilling ice. Strain the shaken mixture carefully into the glass over the crushed ice, creating a beautiful foundation for your creamy cocktail. The combination of colors invites you to indulge!

Step 4: Whip the Heavy Cream
In a separate mixing bowl, gently whip 2 oz of heavy cream using a whisk until it thickens slightly but remains pourable. Aim for a silky consistency that will add a luscious texture to your cocktail. This step is crucial for achieving that divine cream layer atop your drink.

Step 5: Create the Layered Effect
With a steady hand, slowly pour the whipped cream over the back of a spoon onto the top of your Gingerbread White Russian Holiday Cocktail. This technique will ensure that the cream floats on top, creating an eye-catching layered effect that’s as delicious as it is visually appealing.

Step 6: Garnish with Spices
Sprinkle 1/2 tsp of ground cinnamon and 1/2 tsp of ground nutmeg over the cream layer. These aromatic spices not only enhance the visual allure of your cocktail but also infuse the drink with a warm, holiday fragrance that is simply irresistible.

Step 7: Add the Finishing Touch
If you like, garnish your drink with a gingerbread cookie perched on the rim of the glass. This delightful addition gives your Gingerbread White Russian Holiday Cocktail an extra festive flair, inviting everyone to take a sip and enjoy the flavors of the season.

Gingerbread White Russian Holiday Cocktail

Expert Tips for Gingerbread White Russian Holiday Cocktail

• Quality Ingredients: Use good-quality vodka and liqueur; it makes all the difference in your Gingerbread White Russian Holiday Cocktail’s flavor.

• Chill the Glass: Preparing your glass with crushed ice not only cools it but also enhances the cocktail experience by keeping it refreshing longer.

• Perfect Cream Layer: Whip the heavy cream just enough to thicken, ensuring it maintains a smooth consistency for that beautiful layered effect on top.

• Garnish Wisely: Don’t skip the spices! A sprinkle of cinnamon and nutmeg elevates the drink’s aroma and holiday appeal.

• Taste as You Go: Adjust the gingerbread syrup based on your sweetness preference to ensure it’s just right for your palate.

Make Ahead Options

These Gingerbread White Russian Holiday Cocktails are perfect for busy holiday gatherings! You can mix the vodka, coffee liqueur, and gingerbread syrup up to 24 hours in advance. Simply combine these ingredients in a sealed container and refrigerate. The heavy cream should be whipped fresh just before serving to maintain its frothy quality; however, you can pre-measure it and store it in the fridge for quick assembly. When you’re ready to serve, pour the prepared mixture over crushed ice, layer with freshly whipped cream, and sprinkle with spices. This way, you’ll have a festive drink that tastes just as delicious while saving you precious time during the holiday rush!

How to Store and Freeze Gingerbread White Russian Holiday Cocktail

Fridge: Store any leftover cocktail components separately in the fridge for up to 3 days. Keep the whipped cream in an airtight container to maintain its texture.

Freezer: While it’s best to enjoy the Gingerbread White Russian Holiday Cocktail fresh, you can freeze the gingerbread syrup if you have any leftovers. It will keep well for up to 2 months in a sealed container.

Reheating: If you’ve made extra gingerbread syrup, simply thaw it overnight in the fridge and stir well before using in future cocktails.

What to Serve with Gingerbread White Russian Holiday Cocktail

It’s the perfect time to create a delightful holiday spread that complements your warm and creamy drink.

  • Savory Cheese Platter: A selection of sharp cheeses balances the sweetness of the cocktail, creating a delightful contrast that delights the palate.
  • Crispy Bacon-Wrapped Dates: These sweet and salty bites add texture and richness, enhancing the festive flavor profile of your drink. They’re sure to be gobbled up quickly!
  • Spiced Nuts: A mix of cinnamon and nutmeg-spiced nuts brings out the same flavors found in your cocktail, creating a harmonious snacking experience.
  • Charcuterie Board: Combine meats like prosciutto and salami with seasonal fruits such as figs. The flavors complement each other beautifully, perfect for festive gatherings.
  • Gingerbread Cookies: Continue the ginger theme with this classic treat. Each bite with the cocktail feels like a warm hug, making every moment magical.
  • Pumpkin Pie: A slice of pumpkin pie adds a comforting and familiar flavor that rounds out any holiday spread alongside your Gingerbread White Russian Holiday Cocktail.
  • Hot Chocolate Bar: For those who prefer a non-cocktail option, a DIY hot chocolate station with toppings like whipped cream and peppermint can be a cozy alternative.

Gingerbread White Russian Holiday Cocktail Twists

Feel free to explore these delightful variations that add a personal touch to your festive drink experience!

  • Dairy-Free: Substitute heavy cream with coconut cream for a dairy-free option that’s rich and creamy with a hint of coconut.
    This swap not only accommodates dietary preferences but also adds a tropical twist to your holiday cocktail.

  • Spicy Kick: Add a dash of cayenne pepper or chili powder for a surprising heat that complements the sweetness of gingerbread.
    A little spice can transform this creamy cocktail into a fun conversation starter at your holiday gatherings!

  • Nutty Flavor: Swap vodka for hazelnut liqueur like Frangelico to infuse a nutty complexity into your drink.
    The hazelnut adds a gorgeous layering of flavor and elevates the holiday spirit with each sip.

  • Vegan Version: Replace heavy cream with a whipped coconut cream and use a plant-based coffee liqueur.
    This makes for a festive vegan treat that everyone can enjoy! Pair it with some vegan gingerbread cookies for an irresistible duo.

  • Coffee-Lover’s Dream: Use espresso vodka instead of regular vodka for an extra kick of coffee flavor that coffee lovers will adore.
    Increasing the coffee intensity brings out delightful depth, echoing the rich layers of classic gingerbread.

  • Caramel Swirl: Drizzle in caramel syrup for a sweet, decadent touch that pairs beautifully with the spicy flavors of gingerbread.
    Swirling caramel into your cocktail will create a wonderful flavor harmony and an irresistible visual element.

  • Minty Fresh: Add a splash of peppermint schnapps for a refreshing mint twist that celebrates the season’s festive vibes.
    It’s the perfect finish to a holiday gathering, inviting cheerful memories and warming the heart.

  • Chocolate Bliss: Incorporate a splash of chocolate liqueur for a rich, chocolaty twist that enhances the holiday spirit.
    Chocolate and gingerbread are a match made in culinary heaven, crafting a sumptuous treat you’ll want to recreate every year!

Gingerbread White Russian Holiday Cocktail

Gingerbread White Russian Holiday Cocktail Recipe FAQs

What type of gingerbread syrup should I use?
You can use either homemade or store-bought gingerbread syrup for your cocktail. If you choose to make your own, a simple recipe consists of equal parts brown sugar and water combined with ground ginger, cinnamon, and molasses. Simmer until blended, then cool before using. Homemade syrup allows you to customize the sweetness and spice levels to your taste!

How should I store leftover Gingerbread White Russian Holiday Cocktail ingredients?
Absolutely! Store any leftover cocktail components separately in the fridge for up to 3 days. Be sure to keep the whipped cream in an airtight container to maintain its texture. When you’re ready to enjoy another cocktail, just whip up a fresh batch of the Gingerbread White Russian using the chilled ingredients!

Can I freeze the gingerbread syrup?
Yes, you can! While I recommend enjoying the Gingerbread White Russian Holiday Cocktail fresh, any leftover gingerbread syrup can be frozen. Place it in a sealed container and it will keep well for up to 2 months. When you’re ready to use it, simply thaw overnight in the fridge and stir well before adding it to your cocktails.

What should I do if my whipped cream doesn’t thicken?
If your whipped cream isn’t thickening, it’s likely that it’s either over-whipped or hasn’t been chilled properly. Ensure your heavy cream is cold before whisking and stop as soon as you achieve a slight thickness—it should remain pourable. If it’s over-whipped, you might consider gently folding in a bit more cold cream to regain some smoothness!

Is this cocktail safe for pets or those with allergies?
No, this cocktail contains alcohol which is harmful to pets, so make sure to keep it out of their reach. Additionally, if anyone has dairy allergies, consider using a dairy-free whipped topping to substitute the heavy cream, and check for gluten-free gingerbread syrup if needed. Always double-check ingredients for allergies!

Gingerbread White Russian Holiday Cocktail for Cozy Nights

This Gingerbread White Russian Holiday Cocktail is a festive drink that combines creamy textures with warm spices, perfect for holiday celebrations.

  • Cocktail shaker
  • rocks glass
  • Mixing Bowl
  • Whisk

For the Cocktail

  • 2 oz Vodka (This smooth spirit forms the base of your drink, giving it a lovely kick.)
  • 1 oz Coffee liqueur (A rich addition like Kahlúa brings depth and sweetness to your festive cocktail.)
  • 1 oz Gingerbread syrup (Use homemade or store-bought for that delicious gingerbread flavor that defines the season.)
  • 2 oz Heavy cream (This creates the cocktail’s creamy texture, making each sip oh-so-satisfying.)

For Garnish

  • 1/2 tsp Ground cinnamon (A dash on top adds a warm, aromatic essence to your drink.)
  • 1/2 tsp Ground nutmeg (This enhances the festive flavors and adds a lovely visual touch.)
  • Crushed ice (Keep your cocktail chilled and refreshing throughout your cozy evening.)
  • Gingerbread cookies (Optional, for garnish; elevate your presentation with these delightful treats.)

Step-by-Step Instructions

  1. Prepare the Glass: Begin by selecting a short rocks glass to showcase your Gingerbread White Russian Holiday Cocktail. Fill it with crushed ice, allowing it to chill while you prepare the cocktail components.
  2. Mix the Base Ingredients: In a cocktail shaker, pour in 2 oz of vodka, 1 oz of coffee liqueur, and 1 oz of gingerbread syrup. Then, add fresh ice to the shaker, filling it about halfway, and seal the lid tightly. Shake vigorously for about 15 seconds until well combined and chilled.
  3. Strain the Mixture: Remove the rocks glass filled with ice from the freezer or discard the chilling ice. Strain the shaken mixture carefully into the glass over the crushed ice.
  4. Whip the Heavy Cream: In a separate mixing bowl, gently whip 2 oz of heavy cream until it thickens slightly but remains pourable.
  5. Create the Layered Effect: Slowly pour the whipped cream over the back of a spoon onto the top of your Gingerbread White Russian Holiday Cocktail.
  6. Garnish with Spices: Sprinkle 1/2 tsp of ground cinnamon and 1/2 tsp of ground nutmeg over the cream layer.
  7. Add the Finishing Touch: If you like, garnish your drink with a gingerbread cookie perched on the rim of the glass.

Use quality ingredients for the best flavor. Chill the glass to enhance the cocktail experience, and don’t skip the spices for aroma and appeal.

Drink
American
Creamy Cocktail, festive drink, Gingerbread White Russian, Holiday Cocktail

Filed Under: Drink

Delicious Cake Batter Protein Shake for a Fun Boost

January 2, 2026 by grace bellamy Leave a Comment

I was rummaging through my pantry on a lazy afternoon when inspiration struck! What if I could turn my favorite childhood cake flavor into a protein-packed treat? That’s how the Cake Batter Protein Shake was born. This delightful concoction is not only quick to whip up—taking just five minutes—but it’s also a fantastic way to sneak some extra protein into your day. Whether you’re looking for a post-workout boost or a fun afternoon pick-me-up, this shake delivers the nostalgic essence of cake batter with every sip. Trust me, it’ll make your taste buds dance! Ready to shake things up? Let’s dive into this dreamy recipe!

Cake Batter Protein Shake

Why is this shake so special?

Delicious flavors of cake batter: Enjoy a nostalgic taste that reminds you of your favorite childhood treats.

Quick and easy: With just five minutes of prep, you can savor this delightful shake without any hassle.

Nutritious boost: Packed with 25 grams of protein, it’s perfect for post-workout recovery or a midday pick-me-up.

Customizable toppings: Top with whipped cream or sprinkles for an extra fun touch—perfect for the kids (or the kid in you)!

Allergy-friendly alternatives: Easily substitute almond milk for oat or soy milk, making this shake a delightful option for everyone.

Cake Batter Protein Shake Ingredients

• Here’s everything you need to create your delightful shake!

For the Base

  • Almond milk – A creamy base that adds a subtle nutty flavor.
  • Protein powder – Choose vanilla, chocolate, or cake batter flavor to enhance that cake-like essence.
  • Almond flour – Adds a hint of texture and nutty goodness for a heartier shake.
  • Maple syrup or honey – Natural sweeteners that complement the cake batter flavor beautifully.
  • Vanilla extract – A star ingredient that amplifies the sweet, traditional cake taste.
  • Baking powder – A tiny touch that helps create that airy cake vibe in your drink.

For the Toppings

  • Sprinkles – Instant fun and color, turning your shake into a festive treat.
  • Whipped cream – A luxurious topping that adds creaminess and indulgence to your shake.

Now that you have everything outlined, let’s get blending and enjoy this energizing cake batter protein shake!

Step‑by‑Step Instructions for Cake Batter Protein Shake

Step 1: Combine Ingredients
In a blender, place 1 cup of almond milk, 1 scoop of your chosen protein powder (vanilla, chocolate, or cake batter), 1 tablespoon of almond flour, 1 tablespoon of maple syrup or honey, 1 teaspoon of vanilla extract, and ½ teaspoon of baking powder. Ensure all ingredients are within reach to streamline your prep and keep the workflow smooth.

Step 2: Blend Until Smooth
Secure the lid on your blender, and blend on high speed for about 30 seconds. You’ll know it’s ready when the mixture is silky and creamy, with a consistent and smooth texture. If you spot any lumps, keep blending for an additional 10 seconds until fully combined. This creates the luscious base of your Cake Batter Protein Shake.

Step 3: Pour and Top
Once the mixture is well-blended, carefully pour it into a tall glass. Take a moment to admire the inviting hue of your shake! Now, if you’re feeling a little extra, add sprinkles or whipped cream on top for a festive touch that enhances the delightful cake experience.

Step 4: Serve Immediately
Your Cake Batter Protein Shake is best enjoyed fresh! Grab a straw or sip directly from the glass, and relish in the deliciousness of your creation. Each sip will transport you back to your favorite childhood cake moments, providing both nutrition and nostalgia in just five minutes.

Cake Batter Protein Shake

Expert Tips for Cake Batter Protein Shake

Perfect Consistency: Use cold almond milk to create a cool and refreshing shake that’s creamy and smooth.

Blend Thoroughly: Make sure to blend long enough for a silky texture; any lumps can affect the delightful experience of your Cake Batter Protein Shake.

Adjust Sweetness: Taste as you go! Feel free to adjust the sweetness with more maple syrup or honey according to your preference.

Shelf Life Reminder: Enjoy your shake fresh; if it sits too long, it may separate and lose its creamy goodness.

Fun Variations: Experiment with flavored protein powders or mix in a banana for added thickness and nutrition.

What to Serve with Cake Batter Protein Shake

Treat your taste buds to an unforgettable experience by adding delightful pairings to your shake.

  • Fluffy Pancakes: Serve alongside warm pancakes drizzled with syrup for a breakfast that feels like dessert.
  • Fresh Berries: Juicy strawberries or blueberries add a burst of freshness, balancing the sweetness of the shake perfectly.
  • Greek Yogurt Parfait: Layered yogurt with granola and fruit creates a delightful texture contrast while boosting your protein intake.
  • Chocolate Chip Cookies: Indulge your sweet cravings with soft cookies that echo the deliciousness of cake batter.

Pair with a homemade smoothie bowl and sprinkle on granola for added crunch! The creamy shake and crunchy toppings create a delightful dance of textures.

  • Nutty Granola Bars: Crunchy bars provide a satisfying, wholesome element that complements the rich flavors of the shake.
  • Iced Coffee: A refreshing iced coffee sips well alongside your shake and gives an extra kick, perfect for a mid-afternoon boost.

Cake Batter Protein Shake Variations

Feel free to get creative with your Cake Batter Protein Shake to match your taste and dietary needs!

  • Dairy-Free: Simply substitute the almond milk for coconut milk for a rich, creamy experience full of tropical flavor.
  • Nut-Free: Swap almond flour with oat flour or all-purpose flour to keep it delicious but friendly for those with nut allergies.
  • Extra Thick: Add 1 frozen banana during blending for a thicker shake that’s reminiscent of a frozen treat.
  • Flavor Boost: Mix in a tablespoon of cocoa powder for a chocolatey twist that complements the cake batter essence beautifully.
  • Green Goodness: Toss in a handful of spinach for a nutrition boost without altering the delightful cake flavor—perfect for those sneaky greens!

Each variation offers a unique spin while keeping the heart of this shake intact. Whichever route you choose, enjoy the delightful balance of flavors that makes this shake so special! If you’re exploring more ways to enhance your shake, check out the fun customizable toppings to really amp up the flavor experience.

Make Ahead Options

These Cake Batter Protein Shakes are perfect for busy home cooks looking to streamline their meal prep! You can mix all the base ingredients (almond milk, protein powder, almond flour, maple syrup, vanilla extract, and baking powder) and refrigerate the mixture up to 24 hours in advance. Just make sure to store it in an airtight container to maintain freshness. When you’re ready to enjoy your shake, simply blend it again for a quick refresh and pour it into a glass. Top with sprinkles or whipped cream, and you’ll have a delightful, nutritious treat that tastes just as delicious as when freshly made!

How to Store and Freeze Cake Batter Protein Shake

Fridge: Enjoy your Cake Batter Protein Shake fresh for the best taste. If needed, store in an airtight container in the fridge for up to 1 day.

Freezer: Although freezing is not recommended due to potential texture changes, if you must, pour into a freezer-safe container and store for up to 2 months.

Reheating: When ready to enjoy a frozen shake, let it thaw in the fridge overnight, then blend again briefly to restore creaminess.

Serving Tip: For a fresher taste, try to consume your shake right after making it; it’s simply more delightful that way!

Cake Batter Protein Shake

Cake Batter Protein Shake Recipe FAQs

How do I choose the right protein powder for this shake?
Absolutely! For the best cake batter flavor, I recommend using either vanilla or cake batter-flavored protein powder as they complement the taste remarkably. Chocolate protein powder also works if you’re looking for a different twist. Just ensure it’s a good quality protein for optimal taste and texture.

How should I store leftovers of my Cake Batter Protein Shake?
If you have any leftover shake, store it in an airtight container in the fridge. However, I suggest consuming it within 1 day for the best flavor and texture. When stored, it may separate; a quick shake or stir before enjoying can help blend everything back together.

Can I freeze my Cake Batter Protein Shake?
While it’s best enjoyed fresh, you can freeze it if needed. Pour the shake into a freezer-safe container and make sure to leave some space on top for expansion. It will keep well for up to 2 months. To enjoy, thaw the shake in the fridge overnight, then blend briefly to restore its creamy texture.

What should I do if my shake is too thick?
Very! If you find your shake is thicker than desired, simply add a little more almond milk or water and blend until you reach your preferred consistency. This is a great way to customize it to your liking.

Are there any allergenic considerations with this recipe?
Indeed! If you or anyone you’re serving has a nut allergy, feel free to substitute almond milk with oat or soy milk to maintain that creamy goodness without the risk. Additionally, make sure your protein powder is free from allergens you want to avoid.

Can I use fresh fruits in my Cake Batter Protein Shake?
Absolutely! Adding a banana or a handful of berries can enhance the shake’s nutritional profile and flavor. Just chop them up and blend them in with the other ingredients, adjusting the sweetness accordingly, if needed.

Delicious Cake Batter Protein Shake for a Fun Boost

This Cake Batter Protein Shake is a nostalgic and nutritious treat, perfect for a post-workout boost or afternoon pick-me-up.

  • Blender

For the Base

  • 1 cup Almond milk (A creamy base that adds a subtle nutty flavor.)
  • 1 scoop Protein powder (Choose vanilla, chocolate, or cake batter flavor.)
  • 1 tablespoon Almond flour (Adds a hint of texture and nutty goodness.)
  • 1 tablespoon Maple syrup or honey (Natural sweeteners that complement the cake batter flavor.)
  • 1 teaspoon Vanilla extract (A star ingredient that amplifies the cake taste.)
  • 1/2 teaspoon Baking powder (Helps create that airy cake vibe.)

For the Toppings

  • to taste Sprinkles (Adds fun and color.)
  • to taste Whipped cream (Adds creaminess and indulgence.)

Step-by-Step Instructions

  1. In a blender, place 1 cup of almond milk, 1 scoop of your chosen protein powder, 1 tablespoon of almond flour, 1 tablespoon of maple syrup or honey, 1 teaspoon of vanilla extract, and 1/2 teaspoon of baking powder.
  2. Secure the lid on your blender, and blend on high speed for about 30 seconds until silky and creamy.
  3. Once blended, carefully pour it into a tall glass and add sprinkles or whipped cream on top if desired.
  4. Serve immediately and enjoy!

For best taste, consume fresh. Adjust sweetness as preferred.

Drink
American
Cake Batter Protein Shake, Healthy Drink, Nostalgic Drink, Post-Workout Shake, Protein Shake

Filed Under: Drink

Creamy Chocolate Peanut Butter Protein Smoothie Delight

January 1, 2026 by grace bellamy Leave a Comment

As I stood in my kitchen, the blender whirred to life, creating a melody of sweet and nutty aromas that danced through the air. That’s when I knew I was about to whip up something special: a Creamy Chocolate Peanut Butter Protein Smoothie. This delightful drink not only satisfies my chocolate cravings but also packs a hearty protein punch to keep me energized throughout the day. With just five minutes of prep, it’s a quick and guilt-free indulgence that beats any fast food run. Plus, it’s completely dairy-free and full of wholesome ingredients, making it a perfect choice for anyone seeking a nourishing boost. Are you ready to blend your way to creamy bliss?

Creamy Chocolate Peanut Butter Protein Smoothie

Why is this smoothie a must-try?

Quick and Easy: The five-minute prep means you can enjoy a delicious, nourishing drink without spending all day in the kitchen.

Guilt-Free Indulgence: This smoothie brilliantly balances chocolate and peanut butter flavors, delivering a decadent taste without the calories.

Protein Powerhouse: With 15g of protein per serving, it’s a perfect post-workout refreshment or meal replacement for a busy afternoon.

Dairy-Free Delight: Made with dairy-free milk, it meets various dietary needs, inviting everyone to indulge without the compromise.

Versatile Base: Feel free to customize it by adding fruits or greens! For a boost, try mixing in some spinach like you would in my Creamy Chicken and Mushroom recipe.

This Creamy Chocolate Peanut Butter Protein Smoothie is sure to become your go-to drink for satisfying sweetness and energy!

Creamy Chocolate Peanut Butter Protein Smoothie Ingredients

• The perfect combo for your blender!

For the Base

  • Dairy-free milk – This keeps the smoothie creamy while catering to non-dairy diets.
  • Peanut butter – Adds rich, nutty flavor and healthy fats for a satisfying blend.
  • Chocolate protein powder – Enhances the chocolaty goodness while providing a protein boost—perfect for a Creamy Chocolate Peanut Butter Protein Smoothie!

For the Texture

  • Oats – Help to thicken the smoothie and add fiber, making it more filling.
  • Vanilla extract – A dash of this elevates the flavors, giving it a warm, sweet undertone.

Enjoy whipping up this nourishing delight that promises both taste and nutrition!

Step‑by‑Step Instructions for Creamy Chocolate Peanut Butter Protein Smoothie

Step 1: Gather Your Ingredients
Start by measuring out all your ingredients for the Creamy Chocolate Peanut Butter Protein Smoothie. You’ll need 1 cup of dairy-free milk, 2 tablespoons of peanut butter, 2 tablespoons of chocolate protein powder, 1 tablespoon of oats, and ½ teaspoon of vanilla extract. Lay them out on your countertop for easy access, ensuring an organized and enjoyable blending experience.

Step 2: Blend the Smoothie
In your blender, combine the dairy-free milk, peanut butter, chocolate protein powder, oats, and vanilla extract. Secure the lid tightly and blend on high for about 30-45 seconds, or until the mixture is smooth and creamy. Watch for small flecks of oats to disappear, indicating that your smoothie is beautifully blended and all flavors are well combined.

Step 3: Adjust Consistency
After blending, take a moment to check the consistency of your Creamy Chocolate Peanut Butter Protein Smoothie. If it’s thicker than you prefer, add a splash more of dairy-free milk and blend for an additional 10-15 seconds. This adjustment ensures that your smoothie is perfectly creamy, just how you like it!

Step 4: Serve and Enjoy
Once blended to perfection, pour the smoothie into a glass. If desired, you can top it with a sprinkle of oats or a drizzle of peanut butter for an extra touch. The inviting aroma of chocolate and peanut butter will fill the air as you get ready to enjoy your deliciously nutritious creation!

Creamy Chocolate Peanut Butter Protein Smoothie

Helpful Tricks for Smoothie Perfection

  • Perfect Blend: Blend ingredients at high speed until completely smooth. If you see clumps or flecks of oats, continue blending for a few more seconds.

  • Consistency Check: Adjust the thickness by adding more dairy-free milk, a little at a time, blending until your desired creamy texture is achieved.

  • Flavor Boost: For an extra flavor kick, consider adding a dash of cinnamon or a banana for natural sweetness, keeping the Creamy Chocolate Peanut Butter Protein Smoothie deliciously rich!

  • Creamy Options: Using a high-quality peanut butter will enhance the creaminess and flavor. Avoid the natural kind that separates—look for a smooth, no-stir option.

  • Protein Variation: Experiment with different protein powders or even add Greek yogurt for a thicker protein boost while retaining great taste in your smoothie.

Creamy Chocolate Peanut Butter Protein Smoothie Variations

Ready to unleash your creative culinary talents? Customize this delightful smoothie to suit your taste and dietary preferences!

  • Nut-Free: Swap peanut butter for sunflower seed butter to enjoy a nut-free version that still brings creaminess and flavor.

  • Extra Fruity: Blend in a banana or a handful of berries prior to mixing for a burst of natural sweetness and added nutrients.

  • Chocolate Lovers’ Dream: Enhance the chocolate flavor with a tablespoon of cocoa powder. This will intensify the rich taste, making your smoothie even more decadent!

  • Vegetable Boost: Add a handful of spinach or kale for a nutritious veggie kick. You won’t even taste them, but your body will thank you!

  • Higher Protein: Incorporate a scoop of Greek yogurt for a thicker texture and an extra protein boost, making your smoothie even more satisfying post-workout.

  • Spicy Kick: For the adventurous palate, add a pinch of cayenne pepper. This adds a surprising heat that complements the sweetness beautifully.

  • Richer Flavor: Drizzle in maple syrup or honey for a touch of natural sweetness—perfect for those who enjoy a little extra indulgence in their smoothies.

  • Creamier Finish: Use coconut cream instead of dairy-free milk for a richer, creamier texture that takes your smoothie to the next level!

With these delightful twists, your Creamy Chocolate Peanut Butter Protein Smoothie will always feel fresh and exciting, just like a new adventure awaits you in the kitchen!

How to Store and Freeze Creamy Chocolate Peanut Butter Protein Smoothie

  • Room Temperature: Enjoy your smoothie fresh for the best flavor and nutrition; it’s not recommended to leave it at room temperature for more than 2 hours.

  • Fridge: Store any leftover smoothie in an airtight container in the fridge for up to 3 days. Just give it a good shake or stir before enjoying again!

  • Freezer: To freeze, pour the smoothie into ice cube trays or freezer-safe containers. It can last up to 1 month. When ready, blend the frozen cubes with a splash of dairy-free milk for a quick treat.

  • Reheating: This smoothie is best enjoyed chilled. If you prefer it warm, gently heat it on the stove over low heat, stirring constantly to maintain creaminess.

Make Ahead Options

These Creamy Chocolate Peanut Butter Protein Smoothies are fantastic for meal prep! You can prepare all the dry ingredients—chocolate protein powder, oats, and vanilla extract—up to 3 days in advance. Simply combine them in an airtight container and store them in the fridge. When you’re ready to enjoy your smoothie, just add the measured dairy-free milk and peanut butter to the blender with the pre-mixed dry ingredients, and blend until smooth. This not only saves you time on busy mornings but also ensures your smoothie is just as delicious as when freshly made. Plus, you’ll have a protein-packed treat ready to go in no time!

What to Serve with Creamy Chocolate Peanut Butter Protein Smoothie

Indulging in a creamy, sweet concoction is just the beginning of your delicious experience—let’s create a well-rounded meal!

  • Crunchy Granola Bars: Perfect for that satisfying crunch, these bars add texture while balancing the smoothie’s creamy richness. They’re great for an on-the-go snack!

  • Fresh Fruit Salad: A delightful mix of seasonal fruits brings vibrant colors and refreshing flavors, adding a delightful lightness to your meal. The sweetness contrasts beautifully with the peanut butter’s richness.

  • Avocado Toast: The creamy, buttery avocado brings a savory note to the table, making it an excellent match for your smoothie’s sweet profile. Topped with a sprinkle of salt and pepper, it’s a delectable pairing!

  • Nutty Hummus with Veggies: Dip crunchy veggies into smooth hummus for a satisfying combo of flavors and textures. The nuttiness complements the peanut butter perfectly while adding nutritional variety.

  • Chocolate Almond Bliss Balls: These little bites of joy are loaded with energy and flavor. The chocolate pairs beautifully with your smoothie, and their chewy texture makes them an irresistible treat!

  • Chai or Matcha Latte: A warm, spiced drink enhances the soothing elements of your meal while creating a cozy atmosphere around the smoothie. The unique flavors pair wonderfully with the peanut butter and chocolate.

Creamy Chocolate Peanut Butter Protein Smoothie

Creamy Chocolate Peanut Butter Protein Smoothie Recipe FAQs

How do I choose ripe ingredients for my smoothie?
Absolutely! For the best Creamy Chocolate Peanut Butter Protein Smoothie, make sure your peanut butter is fresh and smooth, avoiding any that has separated. If you’re adding any fruits, pick ones that are bright and not overly soft or bruised, as that can affect the flavor and texture.

How should I store leftovers of my smoothie?
Very! Store any leftover smoothie in an airtight container in the fridge for up to 3 days. Just give it a good shake or stir before you enjoy it again. It’s always best when freshly made, but if you find you have some leftover, it can still be a delicious treat later on.

Can I freeze my smoothie?
Absolutely! To freeze your Creamy Chocolate Peanut Butter Protein Smoothie, pour it into ice cube trays or freezer-safe containers. It can last for up to 1 month. When you’re ready to enjoy it, just blend the frozen cubes with a splash of dairy-free milk – a quick and easy treat that transports you right back to that first delightful sip!

What if my smoothie is too thick?
No worries! If you find the consistency of your smoothie is thicker than you’d like, simply add a little more dairy-free milk in small increments until you reach your desired creaminess. Blend again after each addition to ensure it’s fully combined. It’s all about finding the balance that suits your taste!

Are there any dietary considerations I should keep in mind?
Definitely! If you have allergies, be cautious with peanut butter and the protein powder you choose, as these can contain allergens. You can easily switch to almond butter or sunflower seed butter for a nut-free option. Always check labels to ensure they align with your dietary preferences.

How can I make this smoothie more nutritious?
You can enhance your smoothie by adding a handful of spinach or kale for added vitamins and minerals. It’s a fantastic way to fortify your drink without sacrificing taste. Just blend in the greens with the other ingredients, and you’ll barely notice the difference – just a nutritious boost to your delicious Creamy Chocolate Peanut Butter Protein Smoothie!

Creamy Chocolate Peanut Butter Protein Smoothie Delight

Indulge in a Creamy Chocolate Peanut Butter Protein Smoothie that satisfies cravings while delivering a protein boost. Perfectly dairy-free and quick to prepare.

  • Blender

For the Base

  • 1 cup dairy-free milk
  • 2 tablespoons peanut butter (smooth variety recommended)
  • 2 tablespoons chocolate protein powder

For the Texture

  • 1 tablespoon oats
  • 0.5 teaspoon vanilla extract

Step-by-Step Instructions

  1. Gather all your ingredients including dairy-free milk, peanut butter, chocolate protein powder, oats, and vanilla extract.
  2. Blend the dairy-free milk, peanut butter, chocolate protein powder, oats, and vanilla extract on high for about 30-45 seconds.
  3. Check the consistency. If too thick, add more dairy-free milk and blend for another 10-15 seconds.
  4. Pour the smoothie into a glass and enjoy. Add oats or peanut butter on top if desired.

Best enjoyed fresh; can be stored in the fridge for up to 3 days or frozen for up to 1 month.

Drink
Creamy Chocolate Peanut Butter Protein Smoothie, dairy-free, Guilt-Free, protein, Quick, smoothie

Filed Under: Drink

Delightful Baileys & Amaretto Christmas Sugar Cookie Shots

December 31, 2025 by grace bellamy Leave a Comment

The other day, while flipping through my favorite holiday memories, I stumbled upon a delightful recipe that instantly transported me back to cozy gatherings and laughter. These Baileys & Amaretto Christmas Sugar Cookie Vodka Shots not only deliver a cheerful festivity but also come together in just 15 minutes! What makes this concoction truly special is how it combines the classic flavors of the season with a fun twist that elevates any holiday party. Complete with a sugared rim and a fluffy whipped cream topping, these shots are a guaranteed hit that’ll have your friends coming back for more. Curious how to whip up this creamy, boozy delight? Let’s dive in!

Baileys & Amaretto Christmas Sugar Cookie Vodka Shots

Why are these shots a must-try?

Festive Flavor Explosion: The combination of Baileys, Amaretto, and vanilla vodka creates a delectable mix that’s reminiscent of holiday cookies.

Quick to Make: In just 15 minutes, you can have these eye-catching shots ready to serve, making them perfect for last-minute gatherings.

Crowd-Pleaser: With a sweetness that appeals to many, you’ll find these shots bring smiles while being a unique twist on traditional holiday drinks.

Fun Presentation: The sugared rim and whipped cream topping not only look festive but add a delightful texture to each sip.

Ready to bring a little merriment to your celebrations? Check out our tips for easy holiday entertaining that’ll help you shine at your next party!

Baileys & Amaretto Christmas Sugar Cookie Vodka Shots Ingredients

For the Shot Mixture
• Vanilla vodka – a smooth base that enhances the creamy flavor profile of the shots.
• Baileys Irish Cream – adds a rich, velvety texture that’s irresistibly festive.
• Amaretto liqueur – contributes a sweet, nutty flavor, reminiscent of holiday cookies.
• Vanilla extract – use pure for a more authentic taste that elevates the overall flavor.
• Almond extract – a little goes a long way in reinforcing the sugar cookie theme.

For Rimming and Topping
• Sugar – for the rim of the glasses, providing a sweet crunch that complements the shots beautifully.
• Whipped cream – not just for decoration; it balances out the flavors with its lightness.
• Christmas-themed sprinkles – these add a pop of color and fun to make your presentation festive.

For Serving
• Shot glasses – make sure to have 12 ready for serving, as friends will definitely want more than one of these delightful Baileys & Amaretto Christmas Sugar Cookie Vodka Shots!

Step‑by‑Step Instructions for Baileys & Amaretto Christmas Sugar Cookie Vodka Shots

Step 1: Prepare the Shot Glasses
Start by pouring sugar onto a shallow plate. Moisten the rims of each of the 12 shot glasses with water or a touch of vanilla extract. Carefully dip each rim into the sugar to ensure an even coating, allowing the sugar to adhere well. Set the glasses aside and let them dry while you move on to the next steps.

Step 2: Mix the Shot Ingredients
In a large mixing bowl, combine 1 cup of vanilla vodka, 1/2 cup Baileys Irish Cream, 1/4 cup Amaretto liqueur, 1/4 teaspoon vanilla extract, and 1/4 teaspoon almond extract. Use a whisk to stir the mixture until it’s smooth and well blended. This creamy concoction forms the base of your Baileys & Amaretto Christmas Sugar Cookie Vodka Shots, so make sure all ingredients are thoroughly combined.

Step 3: Fill the Shot Glasses
With the prepared shot glasses ready and the mixture complete, it’s time to fill each glass. Use a pour spout or a measuring cup to carefully pour the creamy mixture into each glass, filling them to the rim without disturbing the sugared edges. Take your time with this step to ensure a clean and beautiful presentation.

Step 4: Add Whipped Cream Topping
Next, top each filled shot glass with a generous dollop of whipped cream. For a neater look, consider using a piping bag to achieve a professional finish. The light and fluffy whipped cream enhances the festive feel of your Baileys & Amaretto Christmas Sugar Cookie Vodka Shots, making each sip even more delightful.

Step 5: Garnish for Festivity
To add that final holiday touch, sprinkle festive Christmas-themed sprinkles over the whipped cream on each shot. This not only makes the shots visually appealing but also adds a fun texture and burst of color that will impress your guests and elevate your holiday gathering.

Step 6: Serve and Enjoy
These delightful Baileys & Amaretto Christmas Sugar Cookie Vodka Shots are best served immediately, so gather your friends and share the joy! If you prefer a chilled experience, feel free to refrigerate them for about 30 minutes before serving, keeping everything festive and refreshing for your holiday festivities.

Baileys & Amaretto Christmas Sugar Cookie Vodka Shots

What to Serve with Baileys & Amaretto Christmas Sugar Cookie Vodka Shots

Looking to craft a festive feast that pairs wonderfully with these sweet and creamy holiday delights?

  • Gingerbread Cookies: The spicy warmth of gingerbread complements the sweet flavors of the shots, creating a perfect holiday atmosphere. Enjoy them side by side for a classic combination that sings of the season.

  • Chocolate Fondue: This indulgent dip offers a rich contrast to the sweetness of the vodka shots, inviting guests to dive in. Pair with fruits, marshmallows, and pretzels for delightful textures and flavors.

  • Pecan Pie: The nutty, buttery flavor of pecan pie plays beautifully against the creamy notes of the shots, making for a comforting dessert. Serve this duo together for a touch of nostalgia and joyous sweetness.

  • Creamy Eggnog: Enhancing the holiday spirit, a glass of creamy eggnog is a delightful match. This festive drink harmonizes well with the flavors of Baileys and Amaretto, leaving everyone in a merry mood.

  • Spiced Apple Cider: The warm, spiced notes of apple cider balance the creaminess of the shots. Serve it hot alongside the shots for a cozy, wintertime treat that’s impossible to resist.

  • Candied Nuts: Crunchy, sweet, and a little salty, these nuts provide a delightful contrast. Their texture and flavor enhance the overall tasting experience of the shots, making them an irresistible snack.

  • Vanilla Ice Cream: Pairing vanilla ice cream drizzled with chocolate sauce alongside the shots creates a delightful dessert experience. Each flavor complements the other, leading to an indulgent finish.

  • Sparkling Wine: A light sparkling wine or Prosecco adds a refreshing fizz that offsets the richness of the shots. This bubbly pairing brings an extra layer of celebration to your holiday gatherings.

Expert Tips for Baileys & Amaretto Christmas Sugar Cookie Vodka Shots

  • Perfect Rim: Use vanilla extract to moisten the glass rims; it complements the flavors and ensures the sugar sticks properly for that pretty sugared edge.

  • Mixing Technique: Stir gently to blend the ingredients without creating too many bubbles. This keeps your shots smooth and creamy, enhancing the overall experience of your Baileys & Amaretto Christmas Sugar Cookie Vodka Shots.

  • Whipped Cream Application: For a lovely presentation, consider using a piping bag to dollop the whipped cream. This gives your shots a professional touch that everyone will admire.

  • Chilling Time: If you want to serve your shots chilled, pop them in the refrigerator for about 30 minutes. This enhances the flavors and gives a refreshing experience.

  • Creative Garnishing: Don’t shy away from adding a little extra flair—consider different holiday-themed sprinkles or even a drizzle of chocolate syrup for a unique twist.

Make Ahead Options

These Baileys & Amaretto Christmas Sugar Cookie Vodka Shots are a fantastic choice for meal prep enthusiasts! You can prepare the shot mixture (1 cup vanilla vodka, 1/2 cup Baileys Irish Cream, 1/4 cup Amaretto liqueur, and extracts) up to 24 hours in advance and store it in an airtight container in the refrigerator to keep it fresh and delicious. For added convenience, you can rim the shot glasses and prepare the sugar coating a day ahead as well; just make sure to store them separately to prevent moisture from ruining the sugary finish. When you’re ready to serve, fill each glass with the mixture, add the whipped cream topping, sprinkle with festive garnishes, and you’ll have a delightful party-ready treat with minimal effort!

Baileys & Amaretto Christmas Sugar Cookie Vodka Shots Variations

Feel free to get creative with this recipe, adding your personal touch to make it even more delightful!

  • Nut-Free: Replace Amaretto with vanilla or hazelnut liqueur for a similar sweetness without the almonds.

  • Light & Tasty: Opt for low-calorie whipped cream and sugar alternatives to make these shots a lighter treat without compromising flavor. It’s a small switch that can make a big difference!

  • Chocolate Lovers: Add a splash of chocolate liqueur to the mixture for a rich, decadent twist. This adds a heavenly depth that chocolate enthusiasts will adore.

  • Vanilla Bean Twist: Substitute regular vanilla extract with real vanilla bean paste for an infusion of authentic depth. The little flecks of vanilla will not only enhance flavor but also elevate the presentation.

  • Spicy Kick: Introduce a hint of cinnamon or nutmeg to the mixture for a festive spice explosion. Just a sprinkle can transport your shots to a cozy winter retreat!

  • Dairy-Free: Use coconut cream or almond milk in place of Baileys for a deliciously creamy consistency suitable for dairy-free guests. They won’t miss a thing!

  • Fruit-Infused: Mix in a splash of your favorite fruit liqueur, like cherry or raspberry, for a tangy twist that adds a refreshing zing to each sip.

  • Gourmet Touch: Drizzle flavored oils, like peppermint or hazelnut, over the whipped cream for an extra indulgent and aromatic experience. Your guests will be raving about this delightful surprise!

Remember, these small alterations can turn a festive shot into a unique experience tailored just for you and your loved ones. In the spirit of holiday entertaining, check out our ideas for easy party snacks and creative drink pairings to elevate your festive gatherings even further!

How to Store and Freeze Baileys & Amaretto Christmas Sugar Cookie Vodka Shots

Fridge: Keep the shots covered in an airtight container for up to 3 days. This ensures freshness while maintaining the delicious flavors of the Baileys & Amaretto Christmas Sugar Cookie Vodka Shots.

Freezer: While best consumed fresh, you can freeze the shots in a freezer-safe container for up to a month. Just be aware the texture might change slightly upon thawing.

Reheating: These shots are meant to be served cold, so no reheating is necessary. Simply chill in the fridge before serving for that refreshing touch.

Baileys & Amaretto Christmas Sugar Cookie Vodka Shots

Baileys & Amaretto Christmas Sugar Cookie Vodka Shots Recipe FAQs

What is the best way to select ripe ingredients for this recipe?
Absolutely! When choosing your ingredients, especially the Baileys Irish Cream, look for bottles that have been stored upright and don’t show signs of separation or sediment. For the Amaretto, ensure it has a smooth caramel color and is free from any floating particles. Higher-quality brands will enhance the overall flavor of your shots.

How long can I store the leftover vodka shots?
You can keep the Baileys & Amaretto Christmas Sugar Cookie Vodka Shots in the fridge, covered in an airtight container, for up to 3 days. This will help maintain their delightful flavors and freshness. Just make sure they are well-sealed to prevent any unwanted odors from the fridge affecting their taste.

Can I freeze these shots for later use?
Yes, you can! To freeze the Baileys & Amaretto Christmas Sugar Cookie Vodka Shots, pour them into a freezer-safe container and seal tightly. They can be stored for up to 1 month. When ready to enjoy, thaw them in the refrigerator overnight and remember that the texture might change slightly. Shake well to mix before serving!

What should I do if the whipped cream doesn’t hold its shape?
If your whipped cream isn’t holding its shape, it may be a little overbeaten or not whipped enough. To troubleshoot, you can add a teaspoon of cornstarch to your cream before whipping, which will help stabilize it. Make sure to whip until soft peaks form—be careful not to go past that!

Are these shots safe for those with allergies?
Good question! The Baileys & Amaretto Christmas Sugar Cookie Vodka Shots contain dairy from Baileys Irish Cream, so they’re not suitable for those with lactose intolerance or dairy allergies. For a non-dairy option, I recommend using a dairy-free Irish cream alternative along with your favorite non-dairy whipped topping. Always check ingredient labels for cross-contamination warnings if allergies are a concern.

Delightful Baileys & Amaretto Christmas Sugar Cookie Shots

These Baileys & Amaretto Christmas Sugar Cookie Vodka Shots combine festive flavors for a delightful holiday drink.

  • shot glasses

For the Shot Mixture

  • 1 cup vanilla vodka (a smooth base)
  • 1/2 cup Baileys Irish Cream (adds a rich texture)
  • 1/4 cup Amaretto liqueur (contributes a sweet, nutty flavor)
  • 1/4 teaspoon vanilla extract (use pure for better flavor)
  • 1/4 teaspoon almond extract (reinforces the sugar cookie theme)

For Rimming and Topping

  • 1 cup sugar (for rimming the glasses)
  • 1 cup whipped cream (to balance flavors)
  • 1 cup Christmas-themed sprinkles (for festive presentation)

For Serving

  • 12 pieces shot glasses (for serving the shots)

Preparation Steps

  1. Pour sugar onto a shallow plate and moisten the rims of shot glasses with water or vanilla extract. Dip each rim into the sugar and set aside to dry.
  2. In a large mixing bowl, combine vanilla vodka, Baileys Irish Cream, Amaretto, vanilla extract, and almond extract. Whisk until smooth.
  3. Carefully pour the creamy mixture into each glass, filling to the rim without disturbing the sugared edges.
  4. Top each shot glass with a generous dollop of whipped cream, optionally using a piping bag for a neat finish.
  5. Sprinkle festive Christmas-themed sprinkles over the whipped cream on each shot.
  6. Serve immediately or refrigerate for about 30 minutes before serving if a chilled experience is desired.

These shots can be stored in an airtight container in the fridge for up to 3 days, or frozen for up to a month. Chilling before serving enhances the flavors.

Drink
Holiday
Amaretto, Baileys, Christmas, Festive, Sugar Cookie, Vodka Shots

Filed Under: Drink

Sparkling Aperol Spritz Cocktail With Zesty Citrus Punch

December 31, 2025 by grace bellamy Leave a Comment

As I poured the vibrant Aperol into my glass, the warm glow of orange caught my eye, instantly transforming my kitchen into a little Italian bistro. This Sparkling Aperol Spritz Cocktail is the perfect antidote to fast-paced days, offering a refreshing escape with just a few simple ingredients. In merely five minutes, you can whip up this delightful drink, making it an ideal choice for gatherings or a cozy evening on the porch. With the zesty notes of orange and lemon and a hint of fizz from the Prosecco, each sip is both invigorating and elegant. Whether you’re toasting a special moment or simply unwinding after a busy week, this cocktail promises to elevate your spirits. What’s your favorite drink to enjoy as the sun sets?

Sparkling Aperol Spritz Cocktail

Why is this cocktail a crowd-pleaser?

Simplicity at its finest: With just five minutes of prep time, this Sparkling Aperol Spritz Cocktail is a breeze to make, even for beginners. Vibrant citrus flavors: The refreshing blend of orange and lemon will brighten any occasion. Gorgeous presentation: Its colorful layers and garnishes not only taste amazing but look wow-worthy too. Versatile for any setting: Whether it’s a summer barbecue or a cozy dinner, this cocktail fits perfectly. Plus, check out how easy it is to pair with your favorite appetizers in my snack pairing guide.

Sparkling Aperol Spritz Cocktail Ingredients

• Here’s what you’ll need to create this delightful drink!

For the Cocktail

  • Aperol – 3 ounces – A sweet Italian liqueur that provides that signature orange flavor.
  • Prosecco – 3 ounces – Sparkling wine that adds the delightful fizz and brightness to the cocktail.
  • Soda water – 1 ounce – Balances the sweetness while adding extra bubbles for a refreshing touch.

For the Garnish

  • Orange – 1 (for zest and garnish) – Use both the zest for aroma and wedges for a pop of color!
  • Lemon – 1 (for garnish) – Fresh slices add a zesty brightness that complements the flavors beautifully.
  • Ice cubes – Fill your glass for an ultra-cooling experience while sipping.
  • Fresh mint leaves – A few sprigs for garnish – Not just pretty, the mint adds a refreshing aroma and flavor layer.

Enjoy crafting your Sparkling Aperol Spritz Cocktail with these fresh ingredients!

Step‑by‑Step Instructions for Sparkling Aperol Spritz Cocktail

Step 1: Zest and Slice Citrus
Begin by using a vegetable peeler or zester to carefully peel a strip of zest from the orange, ensuring you avoid the bitter white pith. Set this fragrant zest aside as it will add a burst of aroma. Next, slice half of the orange into wedges for garnish and cut the lemon into thin wheels. This vibrant citrus prep is essential for your refreshing Sparkling Aperol Spritz Cocktail.

Step 2: Prepare the Glass
Take a large wine glass or cocktail glass and fill it halfway with ice cubes. Ensure the ice is well-packed to keep your drink chilled as you mix the ingredients. The cold temperature will enhance the experience of your Sparkling Aperol Spritz Cocktail, making each sip refreshing and enjoyable.

Step 3: Add Aperol and Prosecco
Pour 3 ounces of Aperol over the ice, watching the vibrant orange color mingle with the ice. Following this, gently pour in 3 ounces of Prosecco. The sparkling bubbles will lend a lively texture to your cocktail. Take a moment to enjoy the visual layers forming, setting the stage for your delicious drink.

Step 4: Mix in Soda Water
Slowly add 1 ounce of soda water to the glass, allowing it to cascade gently through the Aperol and Prosecco. This step is crucial, as it preserves the fizz while mixing the flavors beautifully. Use a long spoon to stir gently, ensuring the ingredients are combined without disrupting the sparkling bubbles.

Step 5: Add Orange Zest
Take the reserved orange zest and give it a quick twist over your cocktail to release its essential oils, amplifying the citrus aroma. Then, drop the zest directly into the glass. This simple action elevates the flavor profile of your Sparkling Aperol Spritz Cocktail, introducing a depth that reflects its zesty nature.

Step 6: Garnish Your Cocktail
To finish, garnish your cocktail with a few fresh mint leaves, an orange wedge, and a slice of lemon. The mint not only adds a dash of color but also contributes a refreshing fragrance. Take a moment to savor the visual appeal of your Sparkling Aperol Spritz Cocktail before you serve it, heightening the anticipation of its delightful taste.

Step 7: Serve Immediately
Your refreshing Sparkling Aperol Spritz Cocktail is now ready to be enjoyed! Serve it right away to ensure that the bubbles remain lively and the flavors are vibrant. Gather with friends or savor it during a quiet evening, allowing the citrusy fizz to elevate the moment. Cheers!

Sparkling Aperol Spritz Cocktail

Sparkling Aperol Spritz Cocktail Variations

Explore these delightful twists on the classic Sparkling Aperol Spritz Cocktail that cater to your taste and mood!

  • Dairy-Free: Substitute soda water with tonic water for a unique flavor profile with added bitterness.
  • Low-Calorie: Use a low-calorie sweetener like stevia in place of Aperol to reduce the calorie count while keeping the zesty kick.
  • Herbal Twist: Add fresh basil along with mint for a fragrant herbal infusion that enhances the drink’s aroma.
  • Fruit-Infused: Muddle a handful of berries like raspberries or strawberries in the glass before adding the cocktail ingredients for a fruity upgrade.
  • Spicy Kick: Dash a few drops of hot sauce or add sliced jalapeños for an unexpected spicy twist that will ignite your palate.

For a more seasonal approach, mix in a splash of fresh grapefruit juice instead of soda water. This variation adds tanginess and vibrancy to each sip! You can also consider experimenting with flavored sparkling waters, like lemon-basil or elderflower, to further personalize your drink experience, making it uniquely yours. Enjoy crafting and sipping!

Expert Tips for Sparkling Aperol Spritz Cocktail

  • Proper Ice Use: Always fill your glass halfway with ice. This keeps your cocktail chilled without diluting it too quickly.

  • Gentle Mixing: When adding soda water, pour it slowly and stir gently. This preserves the fizz and keeps your Sparkling Aperol Spritz Cocktail bubbly and lively.

  • Zest Technique: Use a zester or peeler to create long strips of orange zest without the pith. This enhances aroma and avoids bitterness in your drink.

  • Garnish Woes: Don’t skip the mint! It not only looks beautiful but also adds an inviting fragrance to your cocktail.

  • Fresh Ingredients: Opt for fresh citrus and mint for the best flavor. Avoid pre-packaged garnishes which can lack the brightness your cocktail deserves.

Make Ahead Options

These Sparkling Aperol Spritz Cocktails are perfect for meal prep enthusiasts looking to save time during busy gatherings! You can zest the orange and slice the citrus garnishes up to 24 hours in advance; just keep them refrigerated in an airtight container to maintain their freshness. When you’re ready to serve, fill your glass with ice, pour in the Aperol, Prosecco, and soda water, then add the prepared orange zest and garnishes. This way, you’ll enjoy a delightful cocktail that’s just as refreshing and vibrant without the last-minute rush. Cheers to planning ahead!

Storage Tips for Sparkling Aperol Spritz Cocktail

Room Temperature: It’s best to enjoy your Sparkling Aperol Spritz Cocktail fresh, but if necessary, keep it at room temperature for no more than 1 hour to maintain flavor.

Fridge: If you have leftover cocktail components, store Aperol and Prosecco in the fridge for up to 1 week, tightly sealed to keep their fizz intact.

Freezer: Avoid freezing the mixed cocktail as the ice would dilute its flavor; however, individual ingredients can be frozen for future use.

Reheating: There’s no need to reheat; serve your Sparkling Aperol Spritz Cocktail chilled and freshly mixed for the best taste experience.

What to Serve with Sparkling Aperol Spritz Cocktail

As you embark on your cocktail journey, consider what delightful dishes to complement the invigorating flavors of this bubbly favorite.

  • Bruschetta with Tomatoes: This fresh, crispy appetizer offers a bright, tomato flavor that balances the cocktail’s sweetness.

  • Shrimp Cocktail: Juicy, tender shrimp paired with zesty cocktail sauce make for a classy pairing that enhances the refreshing notes.

  • Cheese Platter: A selection of soft cheeses and tangy accompaniments adds creaminess to contrast the drink’s effervescence. Try pairing it with a light Brie and some sharp cheddar!

  • Citrus Salad: A vibrant mix of oranges and greens with a light vinaigrette echoes the cocktail’s zesty flavors, creating a harmonious side. This refreshing option can serve as a perfect palate cleanser between sips.

  • Grilled Veggie Skewers: Smoky, grilled vegetables provide a hearty, savory complement to the lightness of your Sparkling Aperol Spritz Cocktail. Their charred flavors will elevate every tune with each sip you take.

  • Prosecco-infused Sorbet: For a sweet finish, enjoy this frozen delight, echoing the cocktail’s bubbles while offering a refined dessert experience. Each spoonful will keep the festive mood alive until the last drop.

Sparkling Aperol Spritz Cocktail

Sparkling Aperol Spritz Cocktail Recipe FAQs

What type of orange is best for zest?
Absolutely! For zesting, I recommend using Navel oranges or Cara Cara oranges. They have a thicker skin, which makes zesting a breeze, and their flavor is sweet and tangy, perfect for complementing your Sparkling Aperol Spritz Cocktail.

How long can I store the ingredients for this cocktail?
To keep your ingredients fresh, store Aperol and Prosecco in the refrigerator for up to 1 week. Ensure the bottles are tightly sealed to maintain their fizz. The citrus fruits should be kept in the fridge and are best used within 3 to 4 days for optimum flavor.

Can I freeze the ingredients?
While you shouldn’t freeze the mixed Sparkling Aperol Spritz Cocktail as it dilutes the flavor, you can freeze the citrus fruits! Slice the orange and lemon, place them on a baking sheet, and freeze until solid. Then, transfer them to a freezer bag for use in the future—perfect for an instant zesty addition to your future cocktails!

What if my drink gets flat?
If your Sparkling Aperol Spritz Cocktail has lost its fizz, don’t worry! Just add a splash more soda water to liven it up. Alternatively, make sure to seal your Prosecco tightly after opening to retain bubbles and always pour gently to minimize foam.

Can I make a non-alcoholic version?
Absolutely! To create a refreshing non-alcoholic Sparkling Aperol Spritz Cocktail, substitute Aperol with a non-alcoholic aperitif and maintain the Prosecco or use club soda for a lighter option. Garnish with the citrus peels and fresh mint to keep it delicious and visually appealing.

Is this cocktail safe for pets?
Definitely not! Alcohol is toxic to pets, so ensure your Sparkling Aperol Spritz Cocktail is enjoyed safely away from your furry friends. Keep any left-over ingredients well out of their reach, and let your pets enjoy their snacks while you sip your refreshing drink!

Sparkling Aperol Spritz Cocktail With Zesty Citrus Punch

This Sparkling Aperol Spritz Cocktail is a refreshing blend of Aperol, Prosecco, and citrus, perfect for gatherings.

  • wine glass

For the Cocktail

  • 3 ounces Aperol (A sweet Italian liqueur that provides that signature orange flavor.)
  • 3 ounces Prosecco (Sparkling wine that adds the delightful fizz and brightness to the cocktail.)
  • 1 ounce Soda water (Balances the sweetness while adding extra bubbles for a refreshing touch.)

For the Garnish

  • 1 Orange (Use both the zest for aroma and wedges for a pop of color!)
  • 1 Lemon (Fresh slices add a zesty brightness that complements the flavors beautifully.)
  • Ice cubes (Fill your glass for an ultra-cooling experience while sipping.)
  • a few sprigs Fresh mint leaves (Not just pretty, the mint adds a refreshing aroma and flavor layer.)

Step‑by‑Step Instructions

  1. Begin by using a vegetable peeler or zester to carefully peel a strip of zest from the orange, ensuring you avoid the bitter white pith. Set this fragrant zest aside as it will add a burst of aroma. Next, slice half of the orange into wedges for garnish and cut the lemon into thin wheels.
  2. Take a large wine glass or cocktail glass and fill it halfway with ice cubes. Ensure the ice is well-packed to keep your drink chilled as you mix the ingredients.
  3. Pour 3 ounces of Aperol over the ice, then gently pour in 3 ounces of Prosecco.
  4. Slowly add 1 ounce of soda water to the glass, allowing it to cascade gently through the Aperol and Prosecco. Use a long spoon to stir gently.
  5. Take the reserved orange zest and give it a quick twist over your cocktail to release its essential oils. Then, drop the zest directly into the glass.
  6. To finish, garnish your cocktail with a few fresh mint leaves, an orange wedge, and a slice of lemon.
  7. Your refreshing Sparkling Aperol Spritz Cocktail is now ready to be enjoyed! Serve it right away.

Always fill your glass halfway with ice to keep your cocktail chilled without diluting it too quickly. Opt for fresh citrus and mint for the best flavor.

Drink
Italian
Aperol, Citrus, cocktail, Prosecco, refreshing, Sparkling Aperol Spritz Cocktail

Filed Under: Drink

Indulge in This Creamy Salted Caramel Protein Shake

December 28, 2025 by grace bellamy Leave a Comment

As I stood in my kitchen, the fragrant aroma of caramel wafted through the air, instantly igniting my cravings. It was the perfect moment to whip up a Salted Caramel Protein Shake, my go-to recipe for a delightful yet nutritious treat. Packed with 25 grams of protein and a surprise hint of sweetness, this shake is not only a quick five-minute rescue from unhealthy snacking but also a deliciously indulgent way to refuel after a workout. Whether you’re a busy professional or a weekend warrior in the kitchen, you’ll love how simple and satisfying this recipe is. Are you ready to blend up some creamy goodness that will make your taste buds dance?

Salted Caramel Protein Shake

Why is this shake so irresistible?

Simplicity at its finest: Whip up this shake in just 7 minutes using five simple ingredients—perfect for any busy schedule!
Decadent flavor: The rich blend of salted caramel and banana combines to create a creamy delight that feels like dessert yet fuels your day.
Nutritious boost: With 25 grams of protein, it’s a great post-workout recovery option or a wholesome snack.
Versatile: Whether you prefer dairy or a non-dairy option, feel free to customize the ingredients to match your taste and dietary needs.
Crowd pleaser: Serve it at your next gathering or enjoy it solo—it’s a delicious surprise that everyone will love! For another sweet fix, try out Pecan Cake Caramel for a delightful dessert experience.

Salted Caramel Protein Shake Ingredients

For the Base
• 1 cup milk – Use dairy or non-dairy alternatives like almond or oat milk for a creamy texture.
• 1 scoop protein powder – Choose your favorite flavor to enhance the shake’s taste.
• 1 banana – Adds natural sweetness and creaminess for the perfect consistency.

For Flavor
• 2 tablespoons salted caramel sauce – This provides that indulgent sweetness that makes this shake irresistible.
• ½ teaspoon vanilla extract – A dash of vanilla elevates the flavors for an extra comforting taste.

For Texture
• Ice cubes – Add as many as you like for a frosty, thick shake that’s both refreshing and satisfying.

Enjoy this Salted Caramel Protein Shake as a quick meal replacement or a delightful post-workout treat!

Step‑by‑Step Instructions for Salted Caramel Protein Shake

Step 1: Gather Your Ingredients
Start by measuring out all your ingredients for the Salted Caramel Protein Shake: 1 cup of your preferred milk, 1 scoop of protein powder, 1 ripe banana, 2 tablespoons of salted caramel sauce, and ½ teaspoon of vanilla extract. Having everything ready will streamline the blending process and save you time.

Step 2: Combine Ingredients in Blender
In a blender, add the milk first, followed by the protein powder, banana, salted caramel sauce, and vanilla extract. Layering the ingredients this way helps ensure smooth blending. Secure the blender lid tightly, and get ready for a delightful blend of flavors that will come together beautifully.

Step 3: Blend Until Smooth
Blend the mixture on high for about 30-45 seconds, or until completely smooth. You’re looking for a creamy consistency without any lumps from the banana or powder. If you prefer a thicker shake, stop the blender and stir the mixture, then add ice cubes, and blend again until your desired thickness is achieved.

Step 4: Adjust Thickness and Sweetness
If you find the shake is too thin for your liking, add a few ice cubes and blend once more for an extra frosty treat. Taste your shake and, if you want an added sweetness, feel free to drizzle in more salted caramel sauce and blend again briefly to combine.

Step 5: Serve and Enjoy
Carefully pour your Salted Caramel Protein Shake into a tall glass, letting the creamy goodness cascade down the sides. You can top it with a swirl of extra salted caramel sauce for garnish if desired. Refreshing and indulgent, it’s the perfect treat whether you’re winding down or recharging after a workout.

Salted Caramel Protein Shake

Make Ahead Options

For those busy home cooks looking to enjoy a Salted Caramel Protein Shake without the last-minute rush, you can prep components in advance to save time. You can slice the banana and refrigerate it in an airtight container for up to 24 hours to maintain freshness and prevent browning. Additionally, you can measure out your protein powder and salted caramel sauce so they’re ready to go when you’re craving that delicious shake. When you’re ready to blend, simply add the prepped ingredients (milk, banana, protein powder, salted caramel sauce, and vanilla extract) into the blender, blend until smooth, and then adjust thickness with ice cubes. This way, you’ll have a nutritious and indulgent shake in no time, just perfect for post-workout recovery or a satisfying snack!

What to Serve with Salted Caramel Protein Shake

Indulging in a creamy, velvety protein shake is even more delightful when paired with savory and sweet companions that elevate your experience.

  • Oven-Baked Sweet Potato Fries: Their crispy exterior and slight sweetness balance perfectly with the rich caramel flavor, adding a satisfying crunch.

  • Greek Yogurt Parfait: Layered with fresh berries and granola, this refreshing option adds texture and tang, creating a lovely contrast to the shake.

  • Chocolate Chip Oatmeal Cookies: The chewy cookies, with their warm chocolate bursts, bring a nostalgic sweetness that melds beautifully with the salted caramel hints.

  • Fruit Salad with Mint: A vibrant mix of seasonal fruits, sprinkled with fresh mint, will provide a refreshing zing that cuts through the shake’s creamy richness and adds brightness.

  • Homemade Granola Bars: These chewy bars are packed with nourishing ingredients and a hint of sweetness, making them a perfect grab-and-go snack with your shake.

  • Iced Herbal Tea: A soothing iced tea with notes of lemon or hibiscus creates a refreshing contrast, allowing you to sip and savor the shake’s indulgent flavors.

Each of these pairings contributes its unique texture and flavor profile, transforming your salted caramel protein shake into a complete and satisfying meal experience.

Expert Tips for the Best Salted Caramel Protein Shake

  • Use Frozen Bananas: For an even creamier texture, freeze ripe bananas beforehand. This cold addition enhances the shake’s thickness without needing too much ice.

  • Protein Powder Choice: Experiment with different flavors of protein powder. Vanilla or even chocolate can elevate the overall taste of your Salted Caramel Protein Shake.

  • Watch the Sweetness: If you’re watching your sugar intake, use less of the salted caramel sauce or opt for a sugar-free version. You can always add more if needed!

  • Blend Time Matters: Make sure to blend long enough to break down the banana and mix everything thoroughly. A smooth shake is far more enjoyable than one with lumps.

  • Storage Tip: If you have leftovers, store them in the fridge for up to 24 hours. Give it a good shake or blend again before enjoying, as the ingredients may settle.

How to Store and Freeze Salted Caramel Protein Shake

Fridge: Store any leftover Salted Caramel Protein Shake in an airtight container in the refrigerator for up to 24 hours. Shake or blend again before enjoying.

Freezer: To keep your shake longer, pour it into ice cube trays and freeze. Pop a few cubes into a blender for a quick, frosty treat later!

Reheating: This shake is best enjoyed cold, so avoid microwaving. Instead, just blend it with a bit of milk if it thickens in the fridge.

Prep Ahead: For meal prepping, mix the dry ingredients (protein powder, vanilla, and caramel sauce) in advance. Just add milk and banana when you’re ready to blend!

Salted Caramel Protein Shake Variations

Feel free to get creative with this shake and make it your own delicious masterpiece!

  • Dairy-Free: Use almond or coconut milk in place of regular milk for a creamy, non-dairy option. This change maintains the luscious taste while accommodating lactose intolerance.

  • Nutty Boost: Add a tablespoon of almond or peanut butter for rich flavor and healthy fats. The nutty aroma mingles beautifully with the caramel and banana, making each sip a delight!

  • Chocolatey Twist: Mix in 1-2 tablespoons of cocoa powder or chocolate protein powder for a chocolate caramel experience. The combination of chocolate and caramel is utterly indulgent!

  • Fruit Medley: Toss in a handful of berries or mango for an extra fruity punch. Their vibrant flavors can brighten the shake and add a refreshing twist to the overall taste.

  • Extra Creamy: Blend in a splash of heavy cream for a thicker, richer texture. This option turns your shake into an even more decadent treat that feels like dessert!

  • Spicy Kick: Add a pinch of cayenne pepper for a surprising spicy kick. The heat beautifully contrasts with the sweetness of the caramel and banana, creating a unique flavor profile.

  • Chilled Treats: Freeze the shake into popsicle molds for a delicious frozen treat. Perfect for hot summer days, these popsicles offer a nutritious cool-down option.

  • Protein Punch: Boost the protein even more by adding Greek yogurt or cottage cheese. This adds thickness and creamy texture while packing in the protein punch, making it great for post-workout recovery.

Experiment with these variations and discover your personal favorite blend, because the perfect Salted Caramel Protein Shake is just a spin away!

Salted Caramel Protein Shake

Salted Caramel Protein Shake Recipe FAQs

What kind of milk should I use?
Absolutely! You can use any milk you prefer, whether it’s dairy or non-dairy alternatives like almond, soy, or oat milk. Each type adds a unique flavor and creaminess to your Salted Caramel Protein Shake.

How long can I store my Salted Caramel Protein Shake in the fridge?
I often recommend storing any leftover shake in an airtight container in the refrigerator. It will stay fresh for up to 24 hours. Just remember to give it a good shake or blend again to recombine the ingredients before you dive back in!

Can I freeze my Salted Caramel Protein Shake?
Definitely! To freeze, pour the shake into ice cube trays and freeze until solid. When you’re ready for a tasty treat, pop a few cubes into your blender and blend with a splash of milk for a quick, frosty shake anytime.

My shake turned out too thick; what can I do?
No worries at all! If you find your shake is too thick, simply add a splash of milk and blend it again until you reach your desired consistency. You can also add ice cubes to make it thicker, but remember to blend until smooth for the best texture.

Can I use a different protein powder?
Very much so! Feel free to experiment with different flavors of protein powder—vanilla, chocolate, or even salted caramel itself can enhance your shake! Just keep in mind that the flavor will vary with each type, so choose what you love most.

Is this shake suitable for everyone, including those with allergies?
This shake can be made suitable for various dietary preferences. If you have allergies, check the labels on your protein powder and salted caramel sauce. For instance, some protein powders may contain gluten or dairy, so opt for plant-based options if necessary.

Indulge in This Creamy Salted Caramel Protein Shake

A quick and delicious Salted Caramel Protein Shake packed with 25 grams of protein, perfect for a nutritious treat.

  • Blender

For the Base

  • 1 cup milk (Use dairy or non-dairy alternatives like almond or oat milk for a creamy texture.)
  • 1 scoop protein powder (Choose your favorite flavor to enhance the shake’s taste.)
  • 1 banana banana (Adds natural sweetness and creaminess for the perfect consistency.)

For Flavor

  • 2 tablespoons salted caramel sauce (This provides that indulgent sweetness that makes this shake irresistible.)
  • 0.5 teaspoon vanilla extract (A dash of vanilla elevates the flavors for an extra comforting taste.)

For Texture

  • ice cubes (Add as many as you like for a frosty, thick shake that’s both refreshing and satisfying.)

Step-by-Step Instructions for Salted Caramel Protein Shake

  1. Gather all your ingredients: 1 cup milk, 1 scoop protein powder, 1 ripe banana, 2 tablespoons salted caramel sauce, and ½ teaspoon vanilla extract.
  2. In a blender, add the milk first, followed by the protein powder, banana, salted caramel sauce, and vanilla extract.
  3. Blend the mixture on high for about 30-45 seconds, or until completely smooth.
  4. If the shake is too thin, add a few ice cubes and blend again for a frostier treat.
  5. Pour your Salted Caramel Protein Shake into a tall glass and enjoy!

For an even creamier texture, freeze ripe bananas beforehand. Store leftovers in the fridge for up to 24 hours.

Drink
American
Easy Recipe, Healthy Drink, Nutritious Snack, Post-Workout Shake, Protein Shake, Salted Caramel Protein Shake

Filed Under: Drink

Delicious Vanilla Chai Protein Shake to Energize Your Day

December 28, 2025 by grace bellamy Leave a Comment

The aroma of warm spices can take you on a comforting journey, and that’s precisely what I experienced recently when I whipped up this delightful Vanilla Chai Protein Shake. Perfect for those hectic mornings or a refreshing afternoon boost, this shake combines the rich flavors of chai with the creamy goodness of almond milk and a protein-packed punch. With just five minutes of prep, this recipe not only helps you skip the fast-food line but also turns healthy eating into a delicious moment to savor. Whether you’re a seasoned home-chef or just beginning your culinary adventure, I promise this shake will become a favorite in your repertoire. Curious about how these simple ingredients transform into a satisfying delight? Let’s dive in!

Vanilla Chai Protein Shake

Why will you love this shake?

Bold flavors: The combination of warm chai spices and creamy vanilla creates a vibrant taste that awakens your senses.

Quick and easy: With only five minutes of prep, you can whip up this nutritious shake before rushing out the door.

Protein-packed: Each serving delivers a satisfying 20g of protein, making it an excellent post-workout fuel or meal substitute.

Versatile options: Feel free to customize with additional ingredients like your favorite nut butter or a banana for extra creaminess.

Crowd-pleaser: This shake isn’t just for you—everyone in the family will love its delightful flavor. Check out our other refreshing drinks here.

Vanilla Chai Protein Shake Ingredients

• Unlock the magic of this shake with these straightforward ingredients!

For the Base

  • Almond milk – A creamy, dairy-free alternative that adds a subtle nutty flavor.
  • Protein powder – Choose your favorite flavor to enhance the shake’s richness and nutritional value.
  • Vanilla extract – This adds a sweet aroma and depth to the overall taste.

For the Spice

  • Chai spice blend – Infuse warmth and invigorating flavors; alternatively, use ground cinnamon for a classic touch.

With these simple and wholesome ingredients, your Vanilla Chai Protein Shake will be both delicious and rewarding!

Step‑by‑Step Instructions for Vanilla Chai Protein Shake

Step 1: Gather Your Ingredients
Start by gathering your ingredients to prepare a delightful Vanilla Chai Protein Shake. You’ll need 1 cup of almond milk, 1 scoop of your favorite protein powder, 1 tablespoon of vanilla extract, and 1/2 teaspoon of chai spice blend. Measure these ingredients accurately to ensure the best flavor, and have your blender ready on the countertop.

Step 2: Blend the Base
In your blender, pour the almond milk first, followed by the protein powder, vanilla extract, and chai spice blend. Secure the lid tightly to prevent any spills, and blend on high for about 30 seconds until the mixture is smooth and creamy. You’re looking for a consistency that is thick yet pourable, with no lumps visible.

Step 3: Taste and Adjust
After blending, stop the machine and give your Vanilla Chai Protein Shake a taste. If you want a stronger chai flavor, add a pinch more chai spice and blend for an additional 10 seconds. This step ensures that the flavor is just right for your palate, making each sip a little slice of joy.

Step 4: Serve Immediately
Once you reach your desired flavor and consistency, pour the shake into a tall glass. As you pour, you’ll notice the creamy texture gliding smoothly into the glass, inviting you to enjoy. Feel free to garnish with a sprinkle of cinnamon or a cinnamon stick for an extra touch of warmth and presentation.

Step 5: Enjoy Every Sip
Your Vanilla Chai Protein Shake is ready to be savored! Take a moment to appreciate the aroma of the warm spices, then enjoy it immediately for the freshest taste. This shake is not only energizing but also a delicious alternative to fast food, making it perfect for any busy day!

Vanilla Chai Protein Shake

What to Serve with Vanilla Chai Protein Shake

Indulge in a wholesome meal experience that perfectly complements your refreshing, spiced shake.

  • Nutty Granola Bar: A crunchy, satisfying snack that balances the creaminess of the shake while adding fiber to your breakfast.
  • Avocado Toast: Creamy, rich avocado spread on whole-grain bread brings a savory touch that pairs delightfully with the shake’s sweetness.
  • Fresh Fruit Salad: A colorful blend of seasonal fruits adds a refreshing, zesty contrast, keeping your meal light and vibrant.
  • Cinnamon Oatmeal: Warm, comforting oatmeal topped with a sprinkle of cinnamon complements the chai spices beautifully while boosting your energy.
  • Honey Almond Yogurt: Creamy yogurt drizzled with honey enriches the flavor profile, and the protein gives an additional nutritional punch.
  • Matcha Green Tea: Sip on this fragrant tea for an extra antioxidant boost; its earthy notes enhance the shake’s warmth.
  • Protein Pancakes: Fluffy, protein-packed pancakes provide a satisfying foundation for your breakfast, perfect for topping with fruit or syrup.
  • Chai Spiced Cookies: Embrace the warm chai flavors in soft-baked cookies as a sweet treat alongside your protein shake delight.

How to Store and Freeze Vanilla Chai Protein Shake

Fridge: Store any leftovers in an airtight container for up to 3 days. Give it a good shake or stir before enjoying again!

Freezer: Pour the shake into an ice cube tray to freeze individual portions. These can last up to 2 months and are perfect for blending into future shakes.

Reheating: While it’s best enjoyed cold, if you prefer it warm, gently heat it on the stove or in the microwave, stirring frequently to avoid curdling.

Texture Tip: When thawing frozen shakes, blend again to restore creaminess, ensuring your Vanilla Chai Protein Shake is as delightful as when it was freshly made!

Vanilla Chai Protein Shake Variations

Feel free to unleash your creativity and tailor this shake to your taste buds with these delightful variations!

  • Dairy-Free: Substitute almond milk with oat, coconut, or soy milk for a different flavor profile and texture.

  • Flavor Boost: Add a tablespoon of pure honey or maple syrup for an extra hint of sweetness and a dash more warmth.

  • Nutty Twist: Blend in a tablespoon of almond or cashew butter for a richer texture and additional protein.

  • Banana Bliss: Toss in half a frozen banana for creaminess, adding a naturally sweet and smooth banana flavor, perfect for breakfast.

  • Spicy Kick: If you like heat, add a pinch of cayenne pepper or a drop of hot sauce to enliven the flavors and give it a surprising kick!

  • Chocolate Version: Mix in a tablespoon of cocoa powder to transform your shake into a luscious chocolate-chai delight.

  • Tropical Surprise: Swap a portion of the almond milk for coconut milk and add a dash of vanilla for a summery flavor that dances on your palate.

  • Pumpkin Spice: Incorporate a spoonful of pumpkin puree along with a sprinkle of pumpkin spice for a cozy, autumn-inspired shake.

With these variations, your Vanilla Chai Protein Shake will always be a delightful adventure! Plus, for an extra treat, consider pairing it with a refreshing smoothie or dessert for a well-rounded experience.

Make Ahead Options

These Vanilla Chai Protein Shakes are perfect for meal prep lovers! You can mix all your ingredients—1 cup of almond milk, 1 scoop of protein powder, 1 tablespoon of vanilla extract, and 1/2 teaspoon of chai spice blend—up to 24 hours in advance. Simply blend them together, then store the mixture in an airtight container in the refrigerator. To maintain the shake’s creamy texture and vibrant flavor, give it a good shake or stir before serving. When you’re ready to enjoy your shake, simply pour it into a glass and add ice if desired for a refreshing treat. This way, you’ll have a nutritious and delightful shake ready to energize your busy day with minimal effort!

Helpful Tricks for Vanilla Chai Protein Shake

  • Use Frozen Almond Milk: Freeze almond milk in ice cube trays for a chilled, thicker shake without watering it down.

  • Protein Powder Choice: Choose a flavored protein powder that complements the vanilla and chai—like vanilla or an unsweetened blend—to enhance the shake.

  • Adjust Sweetness: Taste before serving and add a natural sweetener like honey or maple syrup if desired. Balance is key for the Vanilla Chai Protein Shake!

  • Spice Sensitivity: If you’re new to chai spices, start with less and gradually increase to avoid overpowering flavors—everyone has different preferences.

  • Garnishing Ideas: Elevate presentation and enjoyment by garnishing with a dash of cinnamon or a sprinkle of chia seeds on top. It’s simple but adds a delightful touch!

Vanilla Chai Protein Shake

Vanilla Chai Protein Shake Recipe FAQs

What type of almond milk should I use?
Absolutely! You can use either sweetened or unsweetened almond milk, depending on your taste preferences. Unsweetened almond milk is a fantastic option if you prefer a lower-sugar shake, while sweetened almond milk will naturally enhance the sweetness of the Vanilla Chai Protein Shake without additional sweeteners.

How long can I store the shake in the fridge?
You can store any leftovers of your Vanilla Chai Protein Shake in an airtight container in the refrigerator for up to 3 days. Just remember to give it a good shake or stir before enjoying it again to re-mix the ingredients that may have settled.

Can I freeze the Vanilla Chai Protein Shake?
Definitely! To freeze your shake, pour it into an ice cube tray and freeze until solid. These shake cubes can last up to 2 months in the freezer. When you’re ready to enjoy it, simply blend a few cubes with some fresh almond milk or yogurt for a quick and creamy treat.

What should I do if my shake is too thick?
Very! If your shake turns out thicker than you’d like, just add a splash of almond milk gradually while blending until you reach your desired consistency. Remember, blending too long can make it thicker; stop blending once it’s nicely combined for the perfect texture!

Are there any dietary considerations for this recipe?
Yes, indeed! This Vanilla Chai Protein Shake can be adjusted for various dietary needs. If you have nut allergies, you can substitute almond milk with oat or coconut milk. Additionally, make sure to choose a protein powder that aligns with your dietary restrictions—vegan options are available if needed. Always check labels for allergens missing from your diet, like gluten or dairy.

Delicious Vanilla Chai Protein Shake to Energize Your Day

Enjoy a refreshing Vanilla Chai Protein Shake packed with delectable flavors and 20g of protein to energize your day.

  • Blender

For the Base

  • 1 cup almond milk (a creamy, dairy-free alternative)
  • 1 scoop protein powder (choose your favorite flavor)
  • 1 tablespoon vanilla extract (adds sweetness and depth)

For the Spice

  • 1/2 teaspoon chai spice blend (or use ground cinnamon instead)

Step-by-Step Instructions

  1. Gather your ingredients to prepare the Vanilla Chai Protein Shake. You’ll need almond milk, protein powder, vanilla extract, and chai spice blend.
  2. In your blender, pour the almond milk followed by the protein powder, vanilla extract, and chai spice blend. Blend on high for about 30 seconds until the mixture is smooth.
  3. Taste the shake. If desired, add more chai spice and blend for an additional 10 seconds.
  4. Pour the shake into a tall glass and garnish with a sprinkle of cinnamon or a cinnamon stick if you like.
  5. Enjoy the Vanilla Chai Protein Shake immediately for the best taste and aroma.

Use frozen almond milk cubes for a thicker shake, and adjust sweetness with honey or maple syrup as preferred.

Drink
American
Breakfast, chocolate protein shake, Drink, healthy shake, smoothie, Vanilla Chai Protein Shake

Filed Under: Drink

Indulge in This Creamy Oreo Protein Shake Bliss

December 28, 2025 by grace bellamy Leave a Comment

On a hectic day, when I’m chasing deadlines and dreaming of delicious distractions, the idea of whipping up an Oreo Protein Shake feels like pure magic. This delightful blend not only satisfies my sweet tooth but packs a nutritious punch with 25 grams of protein! In just five minutes, you can swap that fast-food craving for a creamy, rich treat that you can actually feel good about indulging in. Plus, it’s incredibly customizable—add peanut butter for that extra nutty flair or top it with whipped cream and crushed Oreos for a fun twist. Are you ready to treat yourself to a shake that balances indulgence and nutrition? Let’s dive in!

Oreo Protein Shake

Why is this shake a must-try?

Indulgence at its finest: This Oreo Protein Shake transforms an everyday snack into a protein-packed delight that satisfies your cravings without the guilt.

Quick and easy: With only five minutes of prep time, you can whip up this creamy treat, making it perfect for busy days.

Customizable options: Feel free to add a tablespoon of peanut butter for extra richness, or top it with whipped cream for an indulgent finish—perfect for making it your own.

Satisfying nutrition: With 25 grams of protein per serving, this shake is not just a treat, but a meal replacement or post-workout recovery drink.

Crowd-pleaser: Whether you’re entertaining guests or needing a pick-me-up, this versatile shake is sure to impress everyone at the table. Enjoy it today and say goodbye to fast food temptation!

Oreo Protein Shake Ingredients

For the Shake
• 1 cup milk – Use any variety, dairy or non-dairy, to customize richness and flavor.
• 1 scoop protein powder – Choose your favorite flavor; vanilla or chocolate works great!
• 4 Oreo cookies – This classic treat adds that signature sweet crunch to your shake.
• 1 tablespoon peanut butter (optional) – Adds a creamy, nutty twist for an extra boost of flavor.
• 1/2 cup ice – Ensures your shake is perfectly chilled and refreshing!

Indulging in this Oreo Protein Shake is not just a delicious choice, it can also be your new go-to for a protein-packed pick-me-up!

Step‑by‑Step Instructions for Oreo Protein Shake

Step 1: Blend the Ingredients
In a blender, add 1 cup of milk, 1 scoop of protein powder, 4 Oreo cookies, and 1/2 cup of ice. If you’re opting for a creamier flavor, toss in 1 tablespoon of peanut butter. Secure the lid tightly and blend on high for about 30-45 seconds, or until the mixture transforms into a smooth, creamy consistency.

Step 2: Check the Consistency
After blending, pause to check the shake’s consistency. It should be thick yet pourable, with no clumps of oats or cookie pieces. If you prefer a thinner shake, add a splash more milk and blend for an additional 10 seconds. Once satisfied, prepare to pour your delicious Oreo Protein Shake into a glass.

Step 3: Serve and Garnish
Pour your creamy Oreo Protein Shake into a tall glass, appreciating its rich, dark color. For an extra treat, top with whipped cream and sprinkle some crushed Oreos on top for garnish. This delightful addition not only enhances the presentation, but it also gives a fun textural contrast.

Step 4: Enjoy Immediately
Sip your beautifully crafted Oreo Protein Shake right away to fully enjoy its chilled, creamy flavor. This shake is perfect as a post-workout treat or a quick meal replacement, and its delicious taste will keep you coming back for more!

Oreo Protein Shake

How to Store and Freeze Oreo Protein Shake

Best Enjoyed Fresh: For optimal taste and texture, an Oreo Protein Shake is best enjoyed immediately after blending. Its creamy consistency shines when served fresh.

Fridge Storage: If you must store leftovers, keep them in an airtight container in the fridge for up to 1 day. Note that separation may occur, so give it a good shake before consuming.

Freezer Tip: While freezing is not recommended, if you want to store the shake, freeze it in a sealed container for up to 1 month. Thaw overnight in the fridge and blend again for a smoother texture.

Reheating: Avoid reheating the shake; instead, blend with a few ice cubes to restore that refreshing chill and creamy consistency!

Expert Tips for the Best Oreo Protein Shake

  • Choose Your Milk: Use your favorite milk—dairy or non-dairy—to adjust the flavor and creaminess of your Oreo Protein Shake.

  • Protein Powder Flavor: Select a protein powder that complements the Oreo flavor, like chocolate or vanilla, for the best results.

  • Avoid Crumbles: Ensure the ingredients are blended long enough to prevent clumps. If the shake is too chunky, blend a bit longer to achieve smoothness.

  • Chill Before Serving: For a refreshingly cold shake, chill the glass beforehand or add extra ice for a frosty treat!

  • Skip the Guilt: Feel free to enjoy this shake as a meal replacement or post-workout snack, thanks to its satisfying 25 grams of protein!

  • Garnish Creatively: Experiment with toppings like whipped cream or crushed Oreos to elevate your shake’s look and flavor, making it even more enticing!

Oreo Protein Shake Variations

Feel free to spark joy in your kitchen by putting your unique spin on this delightful shake!

  • Nut-Free: Swap peanut butter for sunflower seed butter for a nut-free yet creamy texture. This retains that indulgent feel without the worry!

  • Dairy-Free: Use almond milk or oat milk instead of regular milk. This will make your shake light and refreshing, perfect for those avoiding dairy.

  • Chocolate Lovers: Add a tablespoon of chocolate syrup for an extra dose of sweetness. This twist caters to those with a serious chocolate craving!

  • Fruit Boost: Toss in half a banana for natural sweetness and added creaminess. This little addition brightens the flavor and offers a nutritious boost!

  • Minty Fresh: A drop of peppermint extract can bring a refreshing minty twist. It’ll remind you of mint chocolate chip desserts!

  • Protein Punch: Use chocolate-flavored Greek yogurt instead of milk for an even richer shake. This will amp up the protein and create a thicker texture.

  • Spicy Kick: Add a pinch of cayenne pepper for an unexpected heat that beautifully balances the sweetness of the Oreos. Just a little will do the trick!

  • Nutty Delight: Mix in some crushed almonds or walnuts for added crunch and nutrition. They create a delightful contrast to the creamy shake while providing healthy fats.

With these variations, you can easily create a delightful Oreo Protein Shake that perfectly suits your taste buds or dietary needs! If you want to further explore creative protein options, check out our guide on healthy protein shake recipes. Enjoy your flavorful adventure in the kitchen!

Make Ahead Options

These Oreo Protein Shakes are perfect for busy home cooks looking to streamline their meal prep! You can blend the milk, protein powder, and Oreo cookies up to 24 hours in advance and store the mix in an airtight container in the refrigerator. The ice should be added just before serving to ensure the shake stays creamy and refreshing. For an even richer flavor, consider prepping the peanut butter separately; mixing it in right before enjoying will maintain the creamy texture. When you’re ready to indulge, just blend the chilled mixture with ice, pour, and savor every delightful sip without any hassle!

What to Serve with Oreo Protein Shake

Elevate your indulgent shake experience with delightful pairings that complement its creamy goodness.

  • Fresh Fruit Salad: A burst of vibrant flavors and textures balances the shake’s richness, offering a refreshing contrast.
  • Granola Bar: The crunchy texture and wholesome ingredients provide a satisfying bite, perfect for pairing with your shake.
  • Peanut Butter Toast: The nutty flavor echoes the shake’s peanut butter option, making for a hearty, protein-packed snack.
  • Chocolate Muffins: Indulge in more chocolatey goodness; their moist texture pairs beautifully with the smooth shake for a dessert-like bliss.
  • Oreo Cheesecake Bites: For a decadent treat, these bites enhance the Oreo flavor, creating a theme and a delightful after-meal indulgence.
  • Almond Milk Latte: The warm, nutty drink complements the sweetness of the shake, making it an ideal morning or afternoon combo.
  • Homemade Trail Mix: Mixing nuts, seeds, and a few chocolate morsels provides an easy-on-the-go snack that matches the shake’s nutritious profile.
  • Whipped Cream Topping: Elevate your shake by adding a dollop of whipped cream, making each sip feel extra luxurious and indulgent.

Oreo Protein Shake

Oreo Protein Shake Recipe FAQs

How do I choose the best Oreo cookies for my shake?
Absolutely! For the best results, choose fresh Oreo cookies that are free from any dark spots or signs of aging. Stale or hard cookies can affect the shake’s smoothness. If you’re feeling adventurous, try using different Oreo flavors like mint or peanut butter for a unique twist!

How can I store my leftover Oreo Protein Shake?
Very! If you have any shake left after indulging, transfer it to an airtight container and keep it in the fridge for up to 1 day. Keep in mind that it might separate, so give it a good shake before enjoying it again. However, for the best taste and texture, it’s recommended to consume it fresh!

Can I freeze my Oreo Protein Shake for later?
Of course! If you’d like to freeze your shake, pour it into a sealed container and store it for up to 1 month. When you’re ready to enjoy it, let it thaw in the refrigerator overnight. To restore its delightful creaminess, blend it again with a handful of ice cubes before serving.

What if my shake comes out too thick?
Absolutely no worries! If your shake is too thick, simply add a splash of milk and blend for an additional 10 seconds. You’re on the right track to creating the perfect consistency! Adjust gradually until you achieve that silky-smooth texture you desire.

Are there any dietary considerations for this shake?
Very much so! If you’re lactose intolerant or have a dairy allergy, you can easily substitute dairy milk with almond, soy, or oat milk. Additionally, be cautious about using flavored protein powders, as some may contain allergens. Always check labels if you’re serving this shake to guests with dietary restrictions.

Can I modify the protein content in this shake?
Definitely! If you want to increase the protein content, you can add a second scoop of protein powder or incorporate a tablespoon of Greek yogurt. Just blend it all together! Not only will this enhance nutritional value, but it’ll also give your shake an even creamier texture.

Oreo Protein Shake Recipe FAQs

Indulge in This Creamy Oreo Protein Shake Bliss

Satisfy your sweet tooth with this Oreo Protein Shake that packs 25 grams of protein and is perfect for any occasion.

  • Blender

For the Shake

  • 1 cup milk (Use any variety, dairy or non-dairy, to customize richness and flavor.)
  • 1 scoop protein powder (Choose your favorite flavor; vanilla or chocolate works great!)
  • 4 cookies Oreo (These cookies add that signature sweet crunch.)
  • 1 tablespoon peanut butter (Optional, adds a creamy, nutty twist.)
  • 1/2 cup ice (Ensures your shake is perfectly chilled.)

Step-by-Step Instructions

  1. In a blender, add 1 cup of milk, 1 scoop of protein powder, 4 Oreo cookies, and 1/2 cup of ice. If opting for a creamier flavor, add 1 tablespoon of peanut butter. Blend on high for 30-45 seconds until smooth.
  2. Check the shake’s consistency; it should be thick yet pourable. If too chunky, add more milk and blend for an additional 10 seconds.
  3. Pour the shake into a tall glass. Top with whipped cream and crushed Oreos for garnish.
  4. Enjoy immediately to experience its chilled, creamy flavor.

For optimal taste, enjoy fresh. If needed, store in an airtight container in the fridge for up to 1 day. Shake well before consuming.

Drink
American
dessert drink, healthy shake, meal replacement, Oreo Protein Shake, Oreo recipe, Protein Shake

Filed Under: Drink

Delicious High Protein Berries Smoothie for Instant Energy

December 27, 2025 by grace bellamy Leave a Comment

As I blended the vibrant colors of fresh berries into my trusty kitchen companion, an unexpected moment of triumph washed over me. There’s something incredibly satisfying about whipping up a nutritious High Protein Berries Smoothie that not only fuels my day but also banishes the allure of fast food. In just five minutes, I enjoy a delicious, wholesome treat that’s rich in protein and bursting with berry goodness! It’s perfect for a quick breakfast or an energizing snack post-workout, all while keeping my taste buds dancing. With just four simple ingredients, you can easily create a smoothie that’s not just food for the body, but also a feast for the senses. Curious how to blend this beautiful concoction? Let’s dive into this easy recipe together!

High Protein Berries Smoothie

Why choose this smoothie recipe?

Quick and Easy: Just five minutes to whip up a delicious, nutritious blend. Perfect for busy mornings!

Nutrient Boost: Packed with 20g of protein, this High Protein Berries Smoothie keeps you energized and satisfied.

Fresh and Flavorful: The vibrant combo of fresh berries with smooth almond milk makes each sip a delightful experience.

Versatile Delight: Enjoy it as a post-workout recovery drink or an afternoon pick-me-up. Don’t forget to check out our Healthy Smoothie Variations for more creativity!

Diet-Friendly: This recipe is easily customizable; use your preferred protein powder and sweetener for a personalized touch.

High Protein Berries Smoothie Ingredients

For the Smoothie

  • Fresh Berries – A mix of blueberries, strawberries, or raspberries adds vibrant flavor and antioxidants.
  • Almond Milk – Creamy and dairy-free, offering a subtle nutty taste; you can substitute it with any milk of choice.
  • Protein Powder – Choose your favorite flavor to boost the protein content; it’s essential for a filling smoothie.
  • Honey (optional) – Adds a touch of natural sweetness; feel free to adjust based on your taste preference or skip it entirely for a lower sugar option.

This High Protein Berries Smoothie is a deliciously nutritious choice that’s sure to brighten your day!

Step‑by‑Step Instructions for High Protein Berries Smoothie

Step 1: Gather Ingredients
Start by assembling all your ingredients: 1 cup of fresh berries, 1 cup of almond milk, 1 tablespoon of protein powder, and optional honey. This vibrant mix sets the stage for your delightful High Protein Berries Smoothie. Measure and prepare your ingredients on the counter, making sure you have your blender ready for action.

Step 2: Blend the Smoothie Base
In your blender, combine the fresh berries, almond milk, protein powder, and honey if desired. Secure the lid tightly, ensuring no spills. Blend on high for 30–45 seconds, or until you achieve a smooth and creamy consistency. Look for a velvety texture without any chunks of fruit for the perfect smoothie experience.

Step 3: Adjust Consistency
Pause the blending process and check the smoothie’s thickness. For a thinner High Protein Berries Smoothie, add a little more almond milk and blend for an additional 10 seconds. If you prefer a thicker texture, reduce the almond milk slightly and mix until fully incorporated. This step allows you to customize the smoothie to your liking!

Step 4: Serve Immediately
Once you’re satisfied with the consistency, it’s time to serve! Pour the vibrant smoothie into a tall glass, allowing the colors to shine through. Consider garnishing with a few whole berries on top for an eye-catching finish. The time to enjoy your nutritious creation is now—sip on this delightful High Protein Berries Smoothie right away for the best flavor and texture!

High Protein Berries Smoothie

High Protein Berries Smoothie Variations

Feel free to unleash your creativity and customize this smoothie in delightful ways that tickle your taste buds!

  • Green Boost: Add a handful of spinach for a nutrient-rich twist. This not only enhances the color but also packs in more vitamins!

  • Nutty Flavor: Incorporate a tablespoon of almond or peanut butter for added creaminess and healthy fats. The nutty undertones complement the berries beautifully!

  • Coconut Delight: Swap almond milk for coconut milk for a tropical vibe. This will add a new level of creaminess and subtle coconut flavor!

  • Extra Sweetness: For those with a sweet tooth, toss in a banana for extra sweetness and a creamier texture. It’s nature’s candy blended right into your glass!

  • Berry Medley: Mix different types of berries like blackberries or cranberries for a flavor explosion. Each berry brings its own unique taste and nutrients!

  • Spiced Up: Sprinkle in a pinch of cinnamon or nutmeg for a warm flavor boost. These spices can elevate the smoothie to a cozy, comforting treat!

  • Protein Packed: Use Greek yogurt instead of protein powder for a creamy texture and a higher protein content. It’s also a great way to add a tangy note!

  • Zesty Kick: Add a squeeze of fresh lemon or lime juice for a refreshing zing. This will brighten the flavors and make every sip invigorating!

Make Ahead Options

These High Protein Berries Smoothies are fantastic for meal prep enthusiasts! You can prepare all the ingredients up to 24 hours in advance by blending the fresh berries with the almond milk and protein powder, then refrigerating the mixture in an airtight container. To maintain quality and prevent separation, give it a good shake or stir before serving. When you’re ready to enjoy, simply blend the chilled mixture again for a creamy consistency, adding honey if desired. This method not only saves precious time on busy mornings but ensures you have a nutritious smoothie ready whenever you need a wholesome boost!

What to Serve with High Protein Berries Smoothie

A delightful smoothie experience deserves complementary dishes that enhance your meal.

  • Crunchy Granola: A sprinkle of granola adds texture and a satisfying crunch, making each sip feel complete. Perfect for breakfast or a snack!

  • Greek Yogurt Parfait: Layer creamy Greek yogurt with fresh fruit for a refreshing contrast. It’s a protein-packed duo that even kids will adore.

  • Avocado Toast: The creamy avocado pairs beautifully with the fruity notes of the smoothie and provides healthy fats. A balanced breakfast combination!

  • Fruit Salad: A vibrant mix of seasonal fruits mirrors the smoothie’s flavors while adding a refreshing zing. It’s light and bright—just like your drink!

  • Vegetable Omelette: Fluffy eggs loaded with colorful veggies create a savory balance to your smoothie’s sweetness. A nutritious way to fuel your day.

  • Almond Biscotti: This crunchy Italian treat is perfect for dipping into your smoothie. Its nutty flavor complements the almond milk base beautifully.

  • Coconut Water: Refresh yourself with a splash of coconut water; its natural sweetness enhances hydration and pairs well with berry flavors.

  • Dark Chocolate: A small piece of dark chocolate can satisfy any sweet cravings while keeping it gourmet. It’s the perfect treat alongside your smoothie!

How to Store and Freeze High Protein Berries Smoothie

Fridge: Store any leftover smoothie in an airtight container for up to 2 days in the fridge. Give it a good shake or stir before enjoying again!

Freezer: If you want to make a batch ahead of time, pour the smoothie into ice cube trays or freezer bags. It can be frozen for up to 2 months.

Reheating: Smoothies are best enjoyed cold! If frozen, allow it to thaw in the fridge overnight before blending again for a refreshing sip.

Pro Tip: Since the High Protein Berries Smoothie can separate upon storing, simply re-blend or shake to restore that creamy texture before serving!

Expert Tips for High Protein Berries Smoothie

• Berry Selection: Choose ripe, fresh berries for the best flavor. Frozen berries can be used too, but adjust almond milk for consistency.

• Protein Powder Choice: Pick a protein powder that aligns with your dietary needs and taste preferences. This affects the overall flavor of your High Protein Berries Smoothie.

• Consistency Check: Always blend for a full smooth 30-45 seconds, but pause to adjust thickness as needed. A good balance makes a delightful smoothie experience!

• Sweetness Control: Use honey sparingly; it’s optional. Taste your smoothie before adding, as berries can vary in sweetness.

• Mix It Up: For added nutrition, toss in a handful of spinach or a scoop of nut butter. This can enhance your High Protein Berries Smoothie in both flavor and health benefits!

High Protein Berries Smoothie

High Protein Berries Smoothie Recipe FAQs

What fresh berries should I use for the smoothie?
Absolutely! Using a mix of ripe berries like blueberries, strawberries, and raspberries brings out the best flavor and nutritional benefits. Look for berries that are firm and vibrant in color; avoid any with dark spots or mushiness, as these may not taste as fresh. If you only have frozen berries on hand, that’s a great alternative! Just remember to adjust the almond milk to get your desired consistency.

How long can I store the High Protein Berries Smoothie in the fridge?
You can store any leftover smoothie in an airtight container in the fridge for up to 2 days. I recommend giving it a good shake or stir before enjoying it again, as some separation may occur. This way, you can relish that fresh taste without any fuss!

Can I freeze the High Protein Berries Smoothie?
Yes, you can! For a convenient meal prep solution, pour your smoothie into ice cube trays or freezer bags. Once it’s well sealed, it can be frozen for up to 2 months. When you’re ready to enjoy it again, simply thaw in the fridge overnight, and if needed, blend again to restore its creamy texture.

What should I do if my smoothie is too thick?
No worries—this is a common issue! If your smoothie turns out thicker than desired, simply add a little more almond milk to it. Blend thoroughly for an additional 10 seconds, and this will help loosen the mix to your preferred consistency. The goal is to find that perfect velvety texture, so feel free to adjust until it’s just right!

Is this smoothie safe for everyone, including pets or those with allergies?
While this High Protein Berries Smoothie is generally nutritious, it should not be shared with pets, especially due to the almond milk as some pets may have sensitivities. As for allergies, be cautious with the protein powder and honey—choose brands that specifically cater to dietary restrictions or allergens. Always double-check ingredients if you’re serving someone with food allergies to ensure it’s safe for them to enjoy!

Delicious High Protein Berries Smoothie for Instant Energy

A tasty High Protein Berries Smoothie that provides instant energy and nourishment, perfect for busy mornings.

  • Blender

For the Smoothie

  • 1 cup Fresh Berries (A mix of blueberries, strawberries, or raspberries.)
  • 1 cup Almond Milk (Creamy and dairy-free.)
  • 1 tablespoon Protein Powder (Choose your favorite flavor.)
  • 1 tablespoon Honey (Optional, adjust based on taste.)

Step-by-Step Instructions for High Protein Berries Smoothie

  1. Gather your ingredients: fresh berries, almond milk, protein powder, and optional honey.
  2. Combine fresh berries, almond milk, protein powder, and honey in the blender. Blend on high for 30-45 seconds.
  3. Check the smoothie’s thickness. Add more almond milk for a thinner smoothie or reduce for a thicker texture.
  4. Pour the smoothie into a tall glass and enjoy immediately.

A great post-workout recovery drink or afternoon pick-me-up. Customize with different protein powders or sweeteners as desired.

Drink
energizing snack, healthy smoothie, High Protein Berries Smoothie, Nutritious Drink, post-workout beverage, Quick Breakfast

Filed Under: Drink

Refreshing Festive White Christmas Sangria for Holiday Cheer

December 26, 2025 by grace bellamy Leave a Comment

As the holidays approach, there’s a certain magic in the air that invites us to gather and celebrate. This year, I’m spicing up our festive soirées with a pitcher of Festive White Christmas Sangria that’s utterly enchanting. Not only is this refreshing drink a breeze to whip up, but it’s also a show-stopping crowd-pleaser, perfect for toasting to memories and new beginnings. Packed with vibrant fruits and a splash of bubbly, it brings a colorful twist to traditional holiday beverages. Whether you’re stirring it up for a cozy family gathering or a lively party with friends, this sangria is sure to bring smiles all around. Are you ready to impress your guests with this sparkling delight? Let’s get started!

Festive White Christmas Sangria

Why is this sangria so special?

Festive Vibes: This Festive White Christmas Sangria is the perfect combination of holiday cheer and refreshing flavors, making it a standout drink for any celebration.
Quick & Easy: With just 10 minutes of prep, you can create an elegant and flavorful drink that impresses without the fuss.
Colorful Presentation: The vibrant mix of fruits not only enhances the taste but adds a beautiful touch to your table, making it as delightful to look at as it is to sip.
Crowd-Pleaser: Perfect for large gatherings, this sangria easily serves a crowd, ensuring everyone gets a taste of the holiday spirit.
Add a splash of joy to your festive occasions with this delightful drink and explore more holiday-inspired recipes for your gatherings!

Festive White Christmas Sangria Ingredients

• Let’s gather the essentials for your delightful drink!

For the Base

  • Dry white wine – a 750ml bottle such as Sauvignon Blanc or Pinot Grigio adds a crisp foundation.
  • Cranberry juice – 1 cup for a touch of tartness that enhances the festive flavors.
  • Orange liqueur – 1/2 cup (like Cointreau or Grand Marnier) introduces a rich citrus note to the drink.

For the Fizz

  • Sparkling water or club soda – 1 cup brings the delightful bubbles that make this sangria refreshing.

For the Fruits

  • Fresh cranberries – 1 cup not only looks stunning but adds a burst of flavor.
  • Orange – 1, thinly sliced, infuses a vibrant, citrusy essence.
  • Lemon – 1, thinly sliced, adds brightness and balances the sweetness.
  • Lime – 1, thinly sliced, for an extra layer of citrus zing.
  • Pomegranate seeds – 1/2 cup provides a delightful pop of color and taste.

For the Finish

  • Fresh mint leaves – perfect for garnish, adding a lovely aroma and burst of freshness.
  • Ice cubes – to chill your sangria and keep it refreshing on those holiday gatherings.

With these delightful ingredients, your Festive White Christmas Sangria will not only taste incredible but also become the highlight of your holiday celebrations!

Step‑by‑Step Instructions for Festive White Christmas Sangria

Step 1: Combine Wine and Juices
In a large pitcher, pour in the entire bottle of dry white wine, 1 cup of cranberry juice, and 1/2 cup of orange liqueur. Stir gently with a wooden spoon for about 30 seconds until all ingredients are well blended. Ensure the mixture has a uniform color before proceeding to create a refreshing base for your Festive White Christmas Sangria.

Step 2: Add Fresh Fruits
Next, add 1 cup of fresh cranberries, thinly sliced orange, lemon, and lime (one of each), along with 1/2 cup of pomegranate seeds into the pitcher. Stir gently to evenly distribute the fruit throughout the mixture, giving a cheerful splash of color. The fruits will enhance the flavor profile of your sangria while making it visually enticing.

Step 3: Chill the Mixture
Cover the pitcher and place it in the refrigerator for at least 2 hours, though overnight is ideal for allowing the flavors to meld beautifully. As it chills, the fruits will infuse the wine, making your Festive White Christmas Sangria even more delicious and aromatic.

Step 4: Add Bubbles
Just before serving, pull out the chilled pitcher and gently stir in 1 cup of sparkling water or club soda. This bubbles will invigorate your drink and add a delightful fizz, enhancing the refreshing nature of the sangria. Mix just enough to combine, ensuring that you preserve the effervescence for an exciting touch.

Step 5: Serve with Ice
Fill each glass with ice cubes, making sure to leave enough room for the sangria. Using a ladle, pour the sangria over the ice in each glass, allowing some of the fruit pieces to accompany the drink. The ice will keep your Festive White Christmas Sangria chilled and enjoyable during your holiday festivities.

Step 6: Garnish and Enjoy
To finish, garnish each glass with fresh mint leaves, adding a pop of green and a refreshing aroma to your delightful drink. Take a moment to appreciate the vibrant colors and inviting scents before sharing the Festive White Christmas Sangria with friends and family. Cheers to creating joyful memories together!

Festive White Christmas Sangria

Make Ahead Options

These delightful Festive White Christmas Sangria ingredients can certainly be prepped ahead to save time for your holiday gatherings! You can combine the dry white wine, cranberry juice, and orange liqueur in advance and refrigerate the mixture for up to 3 days, allowing the flavors to meld harmoniously. Just add the fresh cranberries, citrus slices, and pomegranate seeds 24 hours before serving to maintain their freshness and vibrant appearance. Finally, when you’re ready to enjoy, simply stir in the sparkling water or club soda and pour over ice for a refreshing and beautiful drink. This way, you can spend less time in the kitchen and more time celebrating with family and friends!

Festive White Christmas Sangria Variations

Feel free to get creative and make this drink even more exciting with these simple twists!

  • Non-Alcoholic: Substitute the wine and liqueur with a mix of white grape juice and additional sparkling water for a refreshing mocktail.
  • Spiced Up: Add a dash of cinnamon or cloves to the mixture for a warm, spicy flavor that perfectly complements the festive season.
  • Berry Boost: Incorporate strawberries or blueberries in addition to the existing fruits for an added sweetness and a colorful twist.
  • Herbal Infusion: Swap mint for fresh basil or rosemary to give your sangria a unique aromatic profile that’ll surprise your guests.
  • Tropical Touch: Enhance with diced pineapple or mango for a vibrant, tropical flavor that sings holiday cheer!
  • Citrus Variety: Experiment by using different citrus fruits like grapefruit or blood oranges for a delightful change in flavor.
  • Bubbles and More Bubbles: Replace club soda with ginger ale or lemon-lime soda for a sweeter, extra fizzy version that’s just bursting with joy.
  • Chilly Chiller: Freeze some of the fruits in ice trays with water to make beautiful fruit ice cubes that can keep your drink cool without dilution.

Each of these variations allows your Festive White Christmas Sangria to shine in new and inventive ways. While you’re enjoying this refreshing drink, consider pairing it with delicious snacks like cheesy holiday charcuterie or savory stuffed mushrooms to make your festive gathering even more delightful!

What to Serve with Festive White Christmas Sangria

As you sip on this refreshing drink, let’s complete your holiday gathering with some delightful pairings that will elevate the experience.

  • Cheese Platter: A selection of creamy brie, sharp cheddar, and tangy goat cheese perfectly complements the fruity notes of the sangria.

  • Herbed Focaccia: Warm, soft focaccia with rosemary and sea salt enhances the overall taste while providing a delightful texture contrast.

  • Shrimp Cocktail: Chill with succulent shrimp served with a zesty cocktail sauce; the lightness pairs beautifully with the sangria’s fizz.

  • Stuffed Mushrooms: Savory bites filled with cheese and herbs offer a wonderful umami balance, making each sip of sangria even more enjoyable.

  • Seasonal Fruit Salad: Bright fruits like kiwi and strawberries add a refreshing touch, echoing the sangria’s vibrant fruit components.

  • Chocolate-Covered Strawberries: Decadent treats that surprise and delight, creating a sweet end to your festive gathering, they harmonize beautifully with the fruity sangria.

With these tasty companions, your Festive White Christmas Sangria will undoubtedly shine at your holiday table!

Expert Tips for Festive White Christmas Sangria

  • Choose Quality Wine: Using a good quality dry white wine will significantly elevate the flavor of your Festive White Christmas Sangria. Avoid overly sweet wines to maintain balance.
  • Fresh Fruits Matter: Opt for fresh, ripe fruits for the best taste. Overripe or pre-cut fruits may not add the intended vibrancy.
  • Chill Covered: Always refrigerate the sangria covered for optimal flavor infusion. Leaving it uncovered can dilute the fruity essence from evaporation.
  • Bubbles Last: Add sparkling water or club soda just before serving to retain their fizz. If added too early, the bubbles will diminish, losing that refreshing sparkle.
  • Garnish Wisely: Fresh mint not only looks beautiful but also enhances the drink’s aroma. Consider crushing the leaves slightly to release their fragrance.

How to Store and Freeze Festive White Christmas Sangria

Fridge: Store any leftover Festive White Christmas Sangria in an airtight pitcher in the fridge for up to 3 days. The flavors will continue to meld, but freshness may diminish slightly over time.

Freezer: If you want to preserve your sangria for longer, pour it into an airtight container, leaving some space for expansion, and freeze for up to 1 month. Thaw in the fridge before serving.

Reheating: While sangria is best enjoyed chilled, if you prefer a warm version, gently heat the mixture on the stove, but do not let it boil, to maintain the crisp flavors.

Serving Recommendations: Fresh mint and fruit will lose texture over time. Consider adding a little extra fresh fruit or mint just before serving for a vibrant touch!

Festive White Christmas Sangria

Festive White Christmas Sangria Recipe FAQs

How do I choose the best fruits for my sangria?
Absolutely! When selecting fruits for your Festive White Christmas Sangria, opt for fresh and ripe ingredients. Look for firm cranberries, glossy oranges, lemons, and limes without dark spots or blemishes. The sweeter your fruits, the better the balance in your sangria. Remember, avoid overripe fruits, as they can alter the flavor profile and texture once added!

What is the best way to store leftover sangria, and how long will it last?
For best results, store any leftover Festive White Christmas Sangria in an airtight pitcher in the refrigerator. It will stay fresh for up to 3 days. However, the vibrant flavors will meld together more over time, and you’ll notice a slight softening of the fruit textures. If you want to enjoy it later, consider freezing it!

Can I freeze my sangria, and how do I do it?
Absolutely! Freezing your Festive White Christmas Sangria is a great way to preserve it. Pour the sangria into an airtight container, leaving about an inch of headspace to allow for expansion. You can freeze it for up to 1 month. When you’re ready to enjoy it again, simply thaw it in the refrigerator overnight. Stir gently before serving for a refreshing taste!

What can I do if my sangria turns out too sweet or too tart?
If your Festive White Christmas Sangria leans towards being too sweet, adding a splash of sparkling water or soda helps to cut the sweetness. Alternatively, if it’s too tart, try adding a little more orange liqueur or a dash of simple syrup to balance the flavors. Taste as you go and adjust accordingly; after all, your sangria should reflect your personal preferences!

Can I make this sangria ahead of time for a party?
Very! The Festive White Christmas Sangria is perfect for making ahead. I often prepare it the night before my gatherings. Just remember to add the sparkling water or club soda right before serving to keep that bubbly freshness intact. The extra chilling time also enhances the infusion of flavors, making it even more delightful.

Is this sangria safe for pets or anyone with allergies?
Always double-check with your guests if they have any allergies, as ingredients like citrus fruits and alcohol can trigger reactions in some individuals. Keep the Festive White Christmas Sangria away from pets, as grapes and certain alcohols can be harmful to them. It’s best to ensure everyone can enjoy the festivities safely!

Refreshing Festive White Christmas Sangria for Holiday Cheer

This Festive White Christmas Sangria is a refreshing drink perfect for holiday cheer and gatherings.

  • Pitcher
  • Wooden Spoon
  • ladle

For the Base

  • 750 ml dry white wine (such as Sauvignon Blanc or Pinot Grigio)
  • 1 cup cranberry juice
  • 1/2 cup orange liqueur (like Cointreau or Grand Marnier)

For the Fizz

  • 1 cup sparkling water or club soda

For the Fruits

  • 1 cup fresh cranberries
  • 1 orange (thinly sliced)
  • 1 lemon (thinly sliced)
  • 1 lime (thinly sliced)
  • 1/2 cup pomegranate seeds

For the Finish

  • fresh mint leaves (for garnish)
  • ice cubes

Step-by-Step Instructions

  1. In a large pitcher, pour in the entire bottle of dry white wine, 1 cup of cranberry juice, and 1/2 cup of orange liqueur. Stir gently with a wooden spoon for about 30 seconds until all ingredients are well blended.
  2. Next, add 1 cup of fresh cranberries, thinly sliced orange, lemon, and lime (one of each), along with 1/2 cup of pomegranate seeds into the pitcher. Stir gently to evenly distribute the fruit.
  3. Cover the pitcher and place it in the refrigerator for at least 2 hours, though overnight is ideal for allowing the flavors to meld beautifully.
  4. Just before serving, gently stir in 1 cup of sparkling water or club soda.
  5. Fill each glass with ice cubes, then pour the sangria over the ice, allowing some fruit pieces to accompany the drink.
  6. Garnish each glass with fresh mint leaves before serving.

Store any leftover sangria in an airtight pitcher in the fridge for up to 3 days. Optionally, you can freeze for up to 1 month.

Drink
Holiday
festive cocktail, Festive White Christmas Sangria, holiday drink, Party Beverage, refreshing drink, Sangria

Filed Under: Drink

Chill Out with Jack Frost Mimosas for Festive Sips

December 25, 2025 by grace bellamy Leave a Comment

As the holiday season approaches, the idea of celebrating with friends conjures a whirlwind of vibrant colors and festive flavors. Enter the Jack Frost Mimosas, my go-to drink that turns any gathering into a sparkling occasion. This fun twist on a classic cocktail not only offers a quick prep time of just ten minutes but also guarantees a refreshing sip that everyone will love. With bright blue hues and a tropical flair from coconut rum and pineapple juice, it’s the perfect treat to banish any winter blues. So, how about elevating your next brunch or holiday party with this delightful drink? Grab your flutes, and let’s mix up some magic!

Jack Frost Mimosas

Why Are Jack Frost Mimosas a Must-Try?

Vibrant Appearance: The stunning blue color adds an eye-catching flair to your holiday gatherings.

Tropical Flavor: With the delightful mix of coconut rum and pineapple juice, each sip transports you to a sun-soaked paradise.

Quick & Easy: Ready in just 10 minutes, it’s a fantastic time-saver when hosting guests.

Crowd-Pleasing: This festive cocktail is sure to impress both friends and family, making it a perfect addition to any celebration.

Garnish Goodness: Fresh blueberries and mint leaves not only enhance the look but also provide a burst of freshness in every glass.

Elevate your next brunch or holiday party with these delicious Jack Frost Mimosas!

Jack Frost Mimosas Ingredients

For the Base

  • Blue curaçao – adds that enchanting blue hue to your Jack Frost Mimosas.
  • Coconut rum – brings tropical vibes, perfect for a festive cheer.
  • Pineapple juice – enhances sweetness and complements the coconut flavor.
  • White cranberry juice – provides a subtle tartness and keeps the drink vibrant.

For the Sparkle

  • Sparkling wine – use champagne or prosecco for a bubbly finish that elevates your mimosas.

For Serving

  • Ice cubes – chill your glasses for an extra refreshing sip on warmer days.
  • Fresh blueberries – these not only add a pop of color but also a burst of juicy flavor.
  • Mint leaves – a fragrant garnish that enhances the drink’s freshness and aroma.

Now you’re ready to create your own delightful Jack Frost Mimosas!

Step‑by‑Step Instructions for Jack Frost Mimosas

Step 1: Prepare the Pitcher
Start by grabbing a large pitcher to create your Jack Frost Mimosas base. Pour in 1 cup of blue curaçao, watching its vibrant color as it cascades into the pitcher. This blue base will set the tone for a fun and festive drink.

Step 2: Add the Coconut Rum
Next, pour in 1 cup of coconut rum, which brings a delightful tropical flair to your mixture. Stir gently with a long spoon to combine the rum with the blue curaçao, ensuring those sunny flavors begin to intermingle beautifully.

Step 3: Introduce the Pineapple Juice
Now, incorporate 1 cup of pineapple juice into the pitcher, adding a sweet and juicy component to the mix. As you pour, admire how the bright juice blends with the blue hues. This tropical addition will enhance the overall flavor profile of your Jack Frost Mimosas.

Step 4: Mix in White Cranberry Juice
Follow up by adding 1 cup of white cranberry juice to the pitcher. This ingredient introduces a subtle tartness that balances the sweetness of the pineapple juice and rum. Gently mix all the components to ensure they unite without losing carbonation.

Step 5: Stir for a Unified Blend
Using a large spoon, stir the mixture gently. Aim to combine everything thoroughly while preserving the bubbles from the sparkling wine you’re about to add. This step is crucial as it maintains the effervescence that makes Jack Frost Mimosas truly festive.

Step 6: Prepare the Flutes
When you’re ready to serve, take your champagne flutes and fill each one about halfway with the vibrant mixture from the pitcher. This provides the perfect base for your sparkling addition and allows guests to see those stunning colors.

Step 7: Top with Sparkling Wine
Now, carefully top off each glass with sparkling wine, whether it’s champagne or prosecco. Pour slowly to maintain the fizz, and watch as the bubbles rise and mingle with the tropical mixture, creating an enticing visual display in each flute.

Step 8: Add Ice if Desired
If you like your drinks chilled, toss a few ice cubes into each flute now. This optional step will keep your Jack Frost Mimosas refreshingly cool, enhancing the experience for you and your guests during any festive gathering.

Step 9: Garnish for Presentation
Finally, garnish each glass with a handful of fresh blueberries and a sprig of mint. The blueberries not only add a pop of color but also a burst of juicy flavor. The mint leaves bring a fresh aroma, completing your beautiful Jack Frost Mimosas for a stunning presentation.

Jack Frost Mimosas

Storage Tips for Jack Frost Mimosas

Fridge: If you have any leftover Jack Frost Mimosas, store them in the fridge in an airtight container for up to 24 hours. However, be mindful that the sparkling wine will lose its fizz.

Freezer: While not ideal for mimosas, if you want to freeze the mixture, do so in ice cube trays. Once frozen, transfer to a zip-top bag for up to 1 month, then blend with fresh sparkling wine when ready to enjoy.

Reheating: Reheating is not applicable for Jack Frost Mimosas. Instead, make fresh batches to ensure you get that delightful carbonation and vibrant flavors.

Variations & Substitutions for Jack Frost Mimosas

Feel free to get creative with your Jack Frost Mimosas—there are endless possibilities to explore, and your taste buds will thank you!

  • Non-Alcoholic: Replace blue curaçao and rum with club soda and a splash of blue food coloring for family-friendly fun. It keeps the beautiful color and festive spirit alive.

  • Fruit-Infused: Use fresh kiwi or mango juice instead of pineapple for a tropical twist that adds a delightful, fruity layer to the drink. This fruitier version invites sunshine to every sip!

  • Spice it Up: A dash of ginger syrup can add a warming kick. This unexpected twist brings a lovely complexity that may surprise and please your guests.

  • Berry Bliss: Swap fresh blueberries for fresh raspberries or strawberries for a different flavor contrast. Visual art on your table makes everyone eager to take a sip!

  • Citrus Zing: Add a splash of fresh lime or lemon juice for a bright tang that cuts through the sweetness. This elevates your Jack Frost Mimosas by creating a refreshing balance.

  • Caribbean Style: Substitute coconut rum with spiced rum for a richer, deeper flavor. It evokes a sense of vacation that pairs well with the drink’s tropical elements.

  • Lower Sugar: Opt for a sugar-free cranberry juice or dilute your pineapple juice with sparkling water to reduce the sweetness. You don’t have to compromise on taste while watching those sugar levels!

  • Vegan Variation: Ensure the sparkling wine is vegan, and you’re all set for a cruelty-free, delightful celebration. Check labels as not all brands are created equal!

Let these variations elevate your gathering as you enjoy crafting the perfect Jack Frost Mimosas tailored to your unique palate!

What to Serve with Jack Frost Mimosas

Creating a festive brunch or holiday gathering is as easy as pairing these vibrant drinks with delicious accompaniments that enhance the experience.

  • Flaky Croissants: The light, buttery texture of croissants complements the bubbles perfectly, making for a delightful breakfast treat.

  • Tropical Fruit Platter: Fresh pineapple, mango, and berries echo the tropical flavors in your mimosas, adding a refreshing touch.

  • Savory Quiche: A slice of rich quiche balances the sweetness of the mimosas, making for a hearty and satisfying brunch option.

  • Spiced Nuts: Crunchy nuts with a hint of spice provide a contrasting texture while enhancing the festive vibe of your gathering.

  • Mini Pancakes: Stack these bite-sized delights high! Drizzle with maple syrup for a sweet indulgence that pairs beautifully with the fruity notes.

  • Sparkling Water: Serve alongside your mimosas for guests who prefer a bubbly, refreshing non-alcoholic option. It’s a perfect palate cleanser.

  • Chocolate-Dipped Strawberries: These indulgent treats pair beautifully with the vibrant flavors of Jack Frost Mimosas, adding a touch of romance.

Make your celebration a memorable one with these delightful pairings that complete your lovely Jack Frost Mimosas!

Tips for the Best Jack Frost Mimosas

Use Chilled Ingredients: Ensure your sparkling wine and juices are well-chilled beforehand. This helps keep your Jack Frost Mimosas refreshingly cold.

Gently Combine: When mixing, stir the ingredients gently to maintain the carbonation. Over-stirring can flatten the drink before serving, losing its festive effervescence.

Experiment with Garnishes: Don’t hesitate to mix up garnishes! Try adding edible flowers or citrus slices for a different flair beyond blueberries and mint.

Balance Sweetness: Adjust the amount of pineapple juice based on your sweetness preference. Remember, the mix should be deliciously sweet but not overwhelmingly so.

Right Glassware: Use elegant champagne flutes to present your Jack Frost Mimosas beautifully, enhancing the festive vibe for any celebration.

Make Ahead Options

These Jack Frost Mimosas are perfect for busy home cooks looking to save time during festive gatherings! You can prepare the cocktail base—consisting of the blue curaçao, coconut rum, pineapple juice, and white cranberry juice—up to 24 hours in advance. Simply combine these ingredients in a large pitcher and refrigerate it overnight to allow the flavors to meld beautifully. When ready to serve, pour the mixture into champagne flutes, top with sparkling wine, add ice cubes if desired, and garnish each glass with fresh blueberries and mint leaves for that stunning final touch. This method not only ensures fresh, delicious Jack Frost Mimosas but also creates a stress-free serving experience!

Jack Frost Mimosas

Jack Frost Mimosas Recipe FAQs

What type of sparkling wine is best for Jack Frost Mimosas?
Absolutely! Champagne or prosecco works wonders in this recipe. If you’re looking for a drier option, opt for brut champagne. For a sweeter experience, go with an extra dry prosecco. Both options will add delightful bubbles that bring the drink to life.

How do I know if the ingredients are ripe or fresh?
For the best Jack Frost Mimosas, ensure your pineapple juice is fresh—avoid anything labeled as ‘from concentrate.’ When it comes to fresh blueberries, look for plump, firm ones with a deep blue color. They should be free of dark spots and should look vibrant.

Can I store leftover Jack Frost Mimosas?
Sure! Store any leftover Jack Frost Mimosas in an airtight container in the fridge for up to 24 hours. Keep in mind that the sparkly fizz may fade. So, it’s always best served fresh, but if you need to save it, just remember to enjoy the leftovers while they’re still bubbly!

How can I freeze the Jack Frost Mimosas mixture?
Very! To freeze, pour the mixed base (blue curaçao, coconut rum, pineapple juice, and white cranberry juice) into ice cube trays and freeze until solid—this usually takes about 4-6 hours. Once frozen, transfer the cubes to a zip-top bag and store them in the freezer for up to 3 months. When you’re ready to enjoy, blend the frozen cubes with fresh sparkling wine for a quick frozen treat!

Are there any dietary considerations I should be aware of?
Definitely! This recipe contains alcohol, so it’s not suitable for consumption by children or anyone avoiding alcohol for health reasons. For gluten-free options, ensure that your sparkling wine is gluten-free (most are!). If you’re concerned about allergies, double-check the labels on your juices and spirits to ensure they meet dietary needs.

What if my Jack Frost Mimosas don’t have enough sweetness?
If you find your Jack Frost Mimosas a tad too tart for your liking, simply adjust the sweetness. You can add a splash more pineapple juice to sweeten it up or consider a dash of simple syrup. Just mix until the flavors balance out—you want that perfect tropical delight, not too sweet but pleasantly refreshing!

Chill Out with Jack Frost Mimosas for Festive Sips

Jack Frost Mimosas are a vibrant, refreshing drink perfect for holiday gatherings, offering a tropical flavor and quick prep time.

  • large pitcher
  • long spoon
  • champagne flutes

For the Base

  • 1 cup blue curaçao
  • 1 cup coconut rum
  • 1 cup pineapple juice
  • 1 cup white cranberry juice

For the Sparkle

  • 1 bottle sparkling wine (champagne or prosecco)

For Serving

  • as needed ice cubes
  • as needed fresh blueberries
  • as needed mint leaves

Step‑by‑Step Instructions for Jack Frost Mimosas

  1. Start by grabbing a large pitcher. Pour in 1 cup of blue curaçao.
  2. Next, pour in 1 cup of coconut rum and stir gently to combine.
  3. Incorporate 1 cup of pineapple juice into the mixture.
  4. Add 1 cup of white cranberry juice and gently mix all components.
  5. Stir the mixture gently to combine thoroughly while preserving the bubbles.
  6. Fill each champagne flute halfway with the mixture from the pitcher.
  7. Carefully top off each glass with sparkling wine, pouring slowly to maintain fizz.
  8. If desired, toss a few ice cubes into each flute for an extra refreshment.
  9. Garnish each glass with fresh blueberries and a sprig of mint.

Ensure all ingredients are well-chilled for the best serving experience. Adjust peach juice quantity based on desired sweetness.

Drink
Cocktail
brunch drinks, festive drinks, holiday cocktails, Jack Frost Mimosas, sparkling beverages, tropical drinks

Filed Under: Drink

Delight in a Refreshing Holiday Lemon Drop Cocktail

December 22, 2025 by grace bellamy Leave a Comment

As I sipped on my delightful concoction, the citrusy aroma of freshly squeezed lemons brought back memories of sun-kissed summer gatherings. This Holiday Lemon Drop is your perfect solution to elevate any festive occasion, giving a refreshing twist that will have you and your guests grinning from ear to ear. With just five minutes of prep time, you can whip up this crowd-pleasing cocktail that feels like a celebration in a glass. Not only does it taste amazing, but the rim of sugar adds a touch of sweetness to each sip, making it a far more inviting choice than any quick-to-make mixed drink. Ready to impress your friends with a cocktail that’s as stunning as it is simple? Let’s mix things up!

Holiday Lemon Drop

Why is this cocktail a must-try?

Simplicity at its Finest: In just five minutes, you can create a cocktail worthy of any gathering, making it perfect for busy hosts looking to impress.

Zesty Flavor Explosion: The freshly squeezed lemon juice combined with vodka and triple sec delivers a vibrant, tangy flavor that beautifully balances sweetness.

Perfect for Any Occasion: Whether it’s a cozy dinner or an elegant holiday party, this Holiday Lemon Drop stands out as an irresistible crowd-pleaser.

Garnished to Perfection: The sugar-rimmed glass and lemon twist not only enhance the presentation but also provide an extra layer of delightful flavor with every sip.

Cheers to Versatility: Enjoy it as an aperitif or during celebrations, demonstrating how this cocktail can adapt to many settings while still stealing the spotlight.

Elevate your cocktail game with the vibrant flavors in this recipe, and for more festive ideas, check out our guide on delicious cocktail recipes for every occasion.

Holiday Lemon Drop Ingredients

For the Cocktail
• Vodka – A smooth base spirit that provides a clean taste.
• Freshly squeezed lemon juice – Offers bright, zesty flavor for a refreshing kick in your Holiday Lemon Drop.
• Simple syrup – Adds just the right amount of sweetness to balance the tartness of the lemon.
• Triple sec – This orange-flavored liqueur enhances the cocktail with a hint of citrus complexity.

For the Glass
• Sugar – Use this to rim your glass for an extra sweetness that complements the drink beautifully.
• Lemon twist or wheel – Perfect for garnish, it gives an aromatic touch that elevates the overall experience.
• Ice – Essential for chilling this delightful cocktail to perfection.

Get ready to create an unforgettable beverage that will brighten any gathering!

Step‑by‑Step Instructions for Holiday Lemon Drop

Step 1: Prepare the Glass
Start by taking a fresh lemon wedge and gently running it around the rim of a chilled cocktail glass. This step is crucial as it creates a sticky surface for the sugar to adhere to, enhancing your Holiday Lemon Drop’s presentation and flavor.

Step 2: Rim with Sugar
Next, dip the rim of the glass into a shallow plate of sugar, ensuring an even coating all around. The sugar will add a delightful sweetness to your first sip, perfectly balancing the citrusy elements of the Holiday Lemon Drop.

Step 3: Combine Ingredients
In a cocktail shaker, pour in 2 oz of vodka, 1 oz of freshly squeezed lemon juice, 1 oz of simple syrup, and 1 oz of triple sec. These ingredients are crucial for achieving that zesty flavor explosion, so make sure to use fresh lemon juice for the best taste.

Step 4: Shake It Up
Fill the cocktail shaker with ice, making sure to pack it well to chill the mixture effectively. Secure the lid tightly and shake vigorously for about 15-20 seconds. You want the outside of the shaker to feel cold before moving on, signaling that your Holiday Lemon Drop is getting perfectly chilled.

Step 5: Strain the Cocktail
Once shaken, carefully strain the mixture into the prepared glass, allowing it to flow smoothly. Be sure to leave some space at the top for garnishing, enhancing both the look and taste of your Holiday Lemon Drop.

Step 6: Garnish Beautifully
To elevate your cocktail, garnish with a lemon twist or wheel placed delicately on the rim. This not only adds an aromatic touch but also brings out the whimsical aspect of a Holiday Lemon Drop, making it visually appealing.

Step 7: Serve Immediately
Your delightful Holiday Lemon Drop is now ready to be served! Share it with friends and family, and enjoy the refreshing flavors and festive spirit of this wonderful cocktail. Cheers to creating memories with a delicious drink in hand!

Holiday Lemon Drop

Make Ahead Options

These Holiday Lemon Drop cocktails are perfect for busy hosts looking to save time without sacrificing flavor! You can prep the cocktail mixture (vodka, lemon juice, simple syrup, and triple sec) and store it in an airtight container in the refrigerator for up to 24 hours. This helps maintain the zesty flavor without any loss in quality. Just remember to give the mixture a good shake before serving to refresh the ingredients. To avoid soggy sugar rims, it’s best to prepare the sugar-rimmed glasses just before serving. When you’re ready to impress your guests, simply combine the mixture with ice, strain into the prepared glasses, garnish, and enjoy!

Holiday Lemon Drop Variations

Feel free to explore and tailor this cocktail to your taste—every sip can be a new adventure!

  • Dairy-Free: Replace simple syrup with agave syrup for a healthier, plant-based sweetness.
  • Herbal Twist: Add a sprig of fresh rosemary to the shaker for a fragrant herbal note that elevates the cocktail.
  • Sparkling Version: Top your Holiday Lemon Drop with club soda or sparkling water for a bubbly spin that adds a refreshing fizz.
  • Spice It Up: Incorporate a hint of cayenne pepper or a few dashes of hot sauce to fire up your palate and bring warmth to the cocktail.
  • Lemon-Lime Fusion: Mix in a splash of lime juice to add a zesty twist that enhances the drink’s overall brightness.
  • Frozen Delight: Blend the ingredients with ice for a slushy Holiday Lemon Drop that will cool you down during warmer celebrations.
  • Fruit Infusion: Muddle fresh berries or cucumber slices at the bottom of your shaker for an enticing flavor combo that adds freshness.
  • Lower Sugar: Substitute the simple syrup with a sugar-free sweetener to enjoy this cocktail without the extra calories.

As you try these variations, remember that every twist carries with it the possibility of creating cherished memories with friends and family. To elevate your cocktail collection even further, check out our guide on unique cocktail twists and discover all the ways you can shake things up!

Tips for the Best Holiday Lemon Drop

  • Chill Your Glass: Make sure to chill your cocktail glass beforehand; a cold glass keeps your Holiday Lemon Drop refreshing and enjoyable longer.

  • Fresh Ingredients Matter: Always use freshly squeezed lemon juice for the best flavor. Bottled lemon juice lacks the vibrant zest your cocktail deserves.

  • Balance Sweetness: Adjust the amount of simple syrup to your taste; if you prefer a tangier twist, reduce the syrup slightly.

  • Shake It Well: Don’t skip out on shaking the mixture vigorously. This not only chills the drink but also blends the flavors harmoniously.

  • Sugar Rim Techniques: Ensure to coat the glass evenly with sugar for a consistent taste in every sip. A well-prepared rim enhances your overall experience.

How to Store and Freeze Holiday Lemon Drop

Room Temperature: Avoid leaving your Holiday Lemon Drop at room temperature for over 2 hours to ensure its freshness and flavor.

Fridge: If you have leftover cocktail mixture (without ice), store it in an airtight container in the fridge for up to 24 hours; simply shake well before serving.

Freezer: While freezing isn’t recommended, you can freeze the simple syrup for up to 6 months. Just thaw before using for your next delightful Holiday Lemon Drop.

Reheating: For the best taste, enjoy your cocktail fresh! If served chilled, there’s no need for reheating; just pour over fresh ice instead.

What to Serve with Holiday Lemon Drop

Creating an unforgettable gathering is all about pairing flavors that delight the senses and encourage cheerful conversation.

  • Savory Cheese Platter: A selection of sharp and creamy cheeses complements the cocktail’s citrus, encouraging guests to savor each sip. Think of tangy goat cheese and rich brie to create a perfect contrast.

  • Garlic Butter Shrimp: Juicy, savory shrimp tossed in garlic and butter provides a beautiful flavor pairing with the bright citrus notes of the drink, resulting in a delightful blend of taste.

  • Crispy Sweet Potato Fries: The sweetness and crunch of these fries balance the zingy notes in your Holiday Lemon Drop, creating a delicious texture contrast that invites indulgence.

  • Mixed Green Salad: A refreshing salad with seasonal vegetables and a light vinaigrette adds crispness while enhancing the cocktail’s zesty profile, keeping the meal fresh and balanced.

  • Spicy Chicken Skewers: Tender, grilled chicken with a hint of spice pairs beautifully, as the heat complements the tangy sweetness of the cocktail, leading to flavorful bites and sips.

  • Lemon Sorbet: For dessert, a scoop of lemon sorbet echoes the cocktail’s citrus essence and provides a refreshing, sweet close to your meal, while keeping the festive spirit alive.

  • Chilled Prosecco: A bubbly option, Prosecco adds a light and sparkling touch that pairs nicely with the Holiday Lemon Drop without overpowering its vibrant flavors.

  • Fruit Tart: A beautiful, fruity dessert adds a colorful finish to the gathering, harmonizing with the cocktail’s brightness and showcasing seasonal flavors.

Holiday Lemon Drop

Holiday Lemon Drop Recipe FAQs

How do I choose the best lemons for my cocktail?
When selecting lemons for your Holiday Lemon Drop, look for firm, bright yellow lemons that feel heavy for their size. These indicate juiciness and ripeness. Avoid any with dark spots or wrinkles, as these may be past their prime.

How should I store leftover Holiday Lemon Drop mixture?
If you have leftover mixture without ice, pour it into an airtight container and refrigerate it for up to 24 hours. Be sure to shake it well before serving to re-mix any separated ingredients. Enjoying it fresh is always best for flavor!

Can I freeze any part of the Holiday Lemon Drop?
While it’s not recommended to freeze the completed cocktail, you can freeze the simple syrup for up to 6 months. Pour the cooled syrup into ice cube trays and allow them to freeze. When you’re ready to make your drink, simply thaw the cubes and use them as needed.

What should I do if my cocktail is too sweet or too tart?
Absolutely! If your Holiday Lemon Drop turns out too sweet for your taste, you can add a splash more lemon juice to balance it out. Conversely, if it’s too tart, a tad more simple syrup will do the trick. Just remember, balance is key! Adjust gradually, tasting as you go until you achieve that perfect harmony.

Are there any dietary considerations for this cocktail?
Yes! If you’re serving guests with dietary restrictions, it’s good to know that this recipe is naturally gluten-free, as all ingredients can be gluten-free. However, please check the labels of your vodka and triple sec to ensure they meet dietary needs. Also, for those who are avoiding sugar, consider using a sugar substitute for the rim or experimenting with a low-calorie sweetener in the simple syrup.

How can I ensure my cocktail stays chilled during a gathering?
To keep your Holiday Lemon Drop chilled throughout your gathering, I often recommend pre-chilling your cocktail glasses in the freezer for at least 10-15 minutes before serving. Alternatively, you might fill a cocktail shaker with ice during preparation and shake vigorously for the maximum chill before serving!

Delight in a Refreshing Holiday Lemon Drop Cocktail

Enjoy this Holiday Lemon Drop cocktail, a refreshing twist perfect for festive occasions.

  • Cocktail shaker
  • cocktail glass
  • shallow plate

For the Cocktail

  • 2 oz vodka (A smooth base spirit)
  • 1 oz freshly squeezed lemon juice (For bright, zesty flavor)
  • 1 oz simple syrup (To add sweetness)
  • 1 oz triple sec (Enhances with a hint of citrus)

For the Glass

  • 1 tbsp sugar (For rimming the glass)
  • 1 lemon twist or wheel (For garnish)
  • 1 cup ice (For chilling the cocktail)

Step-by-Step Instructions for Holiday Lemon Drop

  1. Start by taking a fresh lemon wedge and gently running it around the rim of a chilled cocktail glass.
  2. Dip the rim of the glass into a shallow plate of sugar for an even coating.
  3. In a cocktail shaker, pour in 2 oz of vodka, 1 oz of freshly squeezed lemon juice, 1 oz of simple syrup, and 1 oz of triple sec.
  4. Fill the cocktail shaker with ice and shake vigorously for about 15-20 seconds.
  5. Carefully strain the mixture into the prepared glass, leaving space for garnishing.
  6. Garnish with a lemon twist or wheel placed on the rim.
  7. Serve immediately and enjoy!

Ensure to chill your glass beforehand and use fresh ingredients for the best flavor.

Drink
Cocktail
cocktail, festive cocktail, Holiday Lemon Drop, lemon cocktail, refreshing drink, vodka cocktail

Filed Under: Drink

Refreshing Vanilla Cranberry Crush Mocktail You’ll Love

December 22, 2025 by grace bellamy Leave a Comment

As I poured the vibrant cranberry juice into my glass, I felt a rush of excitement—today was all about refreshing flavors and delightful combinations. Enter the Vanilla Cranberry Crush Mocktail, a drink that not only catches the eye but delights the taste buds with its effervescent charm. Perfect for gatherings or a cozy evening in, this mocktail boasts a quick prep time of just 10 minutes and offers a bubbly twist that will impress everyone at your table. With a touch of vanilla syrup and a splash of fresh lime juice, it transforms humble ingredients into an unforgettable sipper. Curious about how this delightful concoction comes together? Let’s dive into the recipe and make magic happen!

Vanilla Cranberry Crush Mocktail

Why is this mocktail a must-try?

Refreshing and invigorating, this Vanilla Cranberry Crush Mocktail is the perfect drink for any occasion. Effortless to prepare, it comes together in just 10 minutes, making it a fantastic choice for last-minute gatherings. Vibrant flavors of cranberry and vanilla create a delightful balance that’ll tantalize your taste buds. Garnished with fresh mint and cranberries, it looks as good as it tastes. Ideal for everyone, it’s a sophisticated sip without the alcohol, making it a fantastic alternative to boring fast food. Elevate your home mixology with this delightful beverage!

Vanilla Cranberry Crush Mocktail Ingredients

• A delightful blend awaits!

For the Drink

  • Cranberry juice – A sweet-tart base that gives the mocktail its refreshing flavor.
  • Sparkling water or club soda – Adds fizz and lightness, perfect for a bubbly experience.
  • Vanilla syrup – Introduces a warm note that beautifully complements the cranberry.
  • Fresh lime juice – Brightens the drink and balances out the sweetness.

For Garnish

  • Fresh cranberries – Enhance the visual appeal while adding a pop of color.
  • Lime slices – Provides a lovely garnish and a hint of extra zest.
  • Fresh mint leaves – Offer an aromatic freshness that elevates each sip.
  • Ice cubes – Keep your mocktail chilled and refreshing.

Now you’re all set to shake up this Vanilla Cranberry Crush Mocktail! Enjoy mixing and let your creativity flow!

Step‑by‑Step Instructions for Vanilla Cranberry Crush Mocktail

Step 1: Prepare Your Workspace
Begin by gathering all your ingredients for the Vanilla Cranberry Crush Mocktail and ensuring your work area is clean. You’ll need a cocktail shaker or a large mixing glass, along with refreshing garnishes. Having everything at hand makes the preparation flow smoothly and keeps you organized as you mix your flavorful beverage.

Step 2: Chill the Ingredients
Fill your cocktail shaker or mixing glass with ice cubes to chill the ingredients effectively. Aim for a good amount of ice coverage, which will give your mocktail a refreshing, icy touch. Allow the ice to sit for a moment while you gather the next ingredients, keeping everything cool and delightful for your mix.

Step 3: Combine the Juices
Pour 1 cup of cranberry juice directly into your shaker over the ice, creating a vibrant base. Next, add 1 tablespoon of vanilla syrup along with 1 tablespoon of fresh lime juice for a zesty kick. The combination of flavors will begin to shine bright, so make sure to visually check that the liquids mingle well together before shaking.

Step 4: Shake It Up!
Secure the lid onto your shaker and shake gently for about 10–15 seconds. You’re looking for the outside of the shaker to become frosty, indicating that the ingredients are chilling and blending seamlessly. This step beautifully combines the tart and sweet flavors into a refreshing mocktail, creating a delightful anticipation for what’s to come.

Step 5: Prepare Your Glass
Take a clean glass and fill it about halfway with fresh ice cubes. The ice will keep your Vanilla Cranberry Crush Mocktail cool and enjoyable. As you prepare the glass, you can already picture the colorful drink that will soon sit elegantly within it, ready for garnishing.

Step 6: Strain the Mixture
Carefully strain the mixed liquid from the shaker into the prepared glass filled with ice. This step allows for a smooth pour, ensuring that only the flavorful liquid makes it into your mocktail. Watch as the vibrant cranberry juice glides over the ice, creating a stunning display in your glass.

Step 7: Add the Fizz
Top your beautiful mocktail with sparkling water or club soda, giving it a gentle stir to incorporate the bubbles. This effervescent addition lightens the drink, enhancing its refreshing qualities. The sparkle brings your Vanilla Cranberry Crush Mocktail to life, adding texture and excitement.

Step 8: Garnish for Perfection
Now it’s time to make your mocktail visually irresistible! Garnish with a handful of fresh cranberries, a vibrant lime slice on the rim, and a few sprigs of fresh mint. These colorful accents not only elevate the presentation but also offer delightful aromas as you sip.

Step 9: Serve Immediately
With your Vanilla Cranberry Crush Mocktail beautifully assembled, it’s best to serve it right away. Enjoy the burst of flavor and the sparkling refreshment this mocktail brings, ideal for any occasion or a simple treat for yourself. Delight in every sip of your homemade creation!

Vanilla Cranberry Crush Mocktail

How to Store and Freeze Vanilla Cranberry Crush Mocktail

Fridge: Store any leftover mocktail in an airtight container in the fridge for up to 2 days. The flavors may mellow, but it will still be refreshing!

Freezer: Freeze the mocktail mixture (without ice) in an airtight container for up to 1 month. When ready to enjoy, thaw in the fridge overnight and mix with fresh sparkling water.

Reheating: Since this is a mocktail, reheating isn’t necessary. Just shake or stir well to reintroduce the bubbles after storage.

Serving Tip: For the best taste, always add ice and garnishes fresh before serving, ensuring your Vanilla Cranberry Crush Mocktail remains as delightful as intended!

Tips for the Best Vanilla Cranberry Crush Mocktail

  • Quality Juice: Use 100% cranberry juice for the best flavor. Avoid juice cocktails as they may contain added sugars that dilute the taste.

  • Right Proportions: Ensure the correct balance of vanilla syrup and lime juice. Too much syrup can overpower; start with a tablespoon and adjust to your taste.

  • Chill the Glass: Chill your serving glass beforehand. This keeps your Vanilla Cranberry Crush Mocktail icy cold longer, enhancing the experience.

  • Fresh Garnishes: Use fresh cranberries and mint for garnishing. They not only make the drink look enticing but also provide a lovely aroma that complements the flavors.

  • Mixing Technique: Shake gently but thoroughly to combine flavors without making the mocktail too watery. A quick, light shake ensures the perfect mix of all ingredients.

  • Serve Immediately: Enjoy right after preparation. The sparkling bubbles from the soda are best when they’re fresh, adding to the mocktail’s refreshing quality.

Make Ahead Options

These Vanilla Cranberry Crush Mocktails are perfect for meal prep enthusiasts looking to save time on busy days! You can pre-mix the base by combining 1 cup of cranberry juice, 1 tablespoon of vanilla syrup, and 1 tablespoon of fresh lime juice, and refrigerate this mixture for up to 24 hours. When you’re ready to serve, simply fill a glass with ice, pour the pre-prepared mixture over it, top with sparkling water or club soda, and garnish with fresh cranberries, lime slices, and mint leaves. This way, you’ll enjoy the same refreshing flavor with minimal effort, ensuring your mocktail is just as delicious as if made fresh!

What to Serve with Vanilla Cranberry Crush Mocktail

Create a beautiful spread that elevates your mocktail experience and delights your guests.

  • Cheese Platter: A selection of creamy and sharp cheeses pairs wonderfully with the sweet-tart flavors, enhancing every sip of your mocktail. Add fruits like apples and a spread of nuts for variety.

  • Savory Bruschetta: The crunch of toasted bread topped with tomatoes and basil complements the effervescence of your mocktail perfectly. The freshness of the toppings mirrors the drink’s vibrant ingredients.

  • Sweet Fruit Tart: A light, fruity dessert harmonizes with the mocktail’s fruity notes, offering a pleasant balance. The creamy filling adds texture while echoing the refreshing theme.

  • Spicy Nachos: A plate of spicy nachos with fresh guacamole creates a delicious contrast to the sweetness of the mocktail. The heat from the toppings will elevate flavor profiles with each sip.

  • Grilled Shrimp Skewers: Light yet full of flavor, these skewers add a savory touch while providing a juicy bite that lingers delightfully with your drink. Their smokiness beautifully complements the sweet notes of the mocktail.

  • Lemon Sorbet: For a refreshing dessert, a scoop of lemon sorbet refreshes the palate and provides a zesty counter to the vanilla and cranberry flavors in your drink. It’s a cool way to conclude your meal.

  • Sparkling Water: Serve alongside your mocktail for even more fizz! Flavored sparkling water enhances the experience while keeping the drinks lively and refreshing.

  • Dark Chocolate Covered Strawberries: The richness of dark chocolate paired with the fruitiness will intensify your mocktail experience, making each sip even more indulgent and satisfying.

Enjoy this delightful combination for a meal that elevates your Vanilla Cranberry Crush Mocktail to new heights!

Vanilla Cranberry Crush Mocktail Variations

Feel free to explore these creative twists on the classic Vanilla Cranberry Crush Mocktail for a personalized touch!

  • Dairy-Free: Use coconut syrup instead of vanilla syrup for a tropical twist that adds a hint of creaminess. The coconut flavor will transport you to a warm beach setting with every sip.

  • Sparkling Fruit: Swap the sparkling water for flavored sparkling lemonade for an added citrus burst. The refreshing bubbles will elevate your drink to a whole new level of fun and flavor.

  • Herbal Infusion: Add fresh basil leaves alongside mint for a unique herbal note. This addition gives the mocktail a refreshing twist, making it feel even more like a delightful garden party in a glass.

  • Spicy Kick: Incorporate a dash of cayenne pepper or sliced jalapeños for some heat. This unexpected addition will surprise your taste buds and leave you wanting more!

  • Frozen Twist: Blend the ingredients with ice instead of shaking for a slushy version. Picture the fun of a frosty drink on a hot summer day, perfect for outdoor gatherings!

  • Wellness Boost: Add a splash of fresh ginger juice for a zesty health boost. Ginger brings warmth and an added zing, making the mocktail not just tasty but a healthful choice too.

  • Substitute Juices: Experiment with pomegranate juice or raspberry juice in place of cranberry juice. Different flavors will provide unique profiles, keeping your mocktail adventures exciting.

  • Fruit Garnish: Use slices of strawberries or orange in place of lime for a fruity garnish finish. These fruits not only look stunning but also add a hint of sweetness to the drink’s overall taste.

There’s no limit to the delightful combinations waiting to be explored with your Vanilla Cranberry Crush Mocktail! Happy mixing!

Vanilla Cranberry Crush Mocktail

Vanilla Cranberry Crush Mocktail Recipe FAQs

What type of cranberry juice should I use?
Absolutely! For the best flavor in your Vanilla Cranberry Crush Mocktail, I recommend using 100% cranberry juice. Avoid juice cocktails that can be overly sweet and contain added sugars; opting for pure juice ensures a perfect sweet-tart balance that complements the vanilla and lime beautifully.

How should I store leftovers of the mocktail?
You can store any leftover Vanilla Cranberry Crush Mocktail in an airtight container in the fridge for up to 2 days. Keep in mind that while the flavors may mellow a little, it will still be refreshing! Just give it a gentle stir before enjoying it again.

Can I freeze the mocktail for later use?
Absolutely! To freeze your Vanilla Cranberry Crush Mocktail, pour the mixture (without ice) into an airtight container, leaving some space at the top since the liquid will expand. You can store it in the freezer for up to 1 month. When you’re ready to indulge, simply thaw it in the fridge overnight and mix it with fresh sparkling water for that bubbly goodness!

What if my mocktail isn’t fizzy enough?
If you find your Vanilla Cranberry Crush Mocktail lacks fizz, that may be due to letting it sit for too long after mixing. To ensure a bubbly experience, add the sparkling water or club soda right before serving. Additionally, use chilled ingredients and serve in a pre-chilled glass to keep it effervescent and refreshing!

Are there any dietary considerations I should keep in mind?
Very! This mocktail is suitable for various dietary needs as it is alcohol-free and can be adjusted for different tastes. If you have guests who are sensitive to sugars, you can opt for a sugar-free vanilla syrup or adjust the sweetness by reducing the amount of syrup. Always check the labels on your garnishes to ensure they align with any dietary restrictions.

What’s the best way to garnish the mocktail?
For a gorgeous presentation, I recommend using fresh cranberries, a slice of lime on the rim, and sprigs of fresh mint. These not only enhance the visual appeal but also add delightful aromas that elevate each sip of your Vanilla Cranberry Crush Mocktail. Enjoy the vibrant colors and scents that make your homemade creation stand out!

Refreshing Vanilla Cranberry Crush Mocktail

Enjoy this Vanilla Cranberry Crush Mocktail, a refreshing drink perfect for any occasion.

  • Cocktail shaker
  • mixing glass

For the Drink

  • 1 cup cranberry juice (100% juice recommended)
  • 1 tablespoon vanilla syrup
  • 1 tablespoon fresh lime juice
  • 1 cup sparkling water or club soda (for topping)
  • 1 cup ice cubes (for chilling)

For Garnish

  • a handful fresh cranberries
  • 2 lime slices
  • a few sprigs fresh mint leaves

Preparation Steps

  1. Gather all your ingredients and ensure your work area is clean.
  2. Fill your cocktail shaker or mixing glass with ice cubes.
  3. Pour 1 cup of cranberry juice into the shaker over the ice. Add 1 tablespoon of vanilla syrup and 1 tablespoon of fresh lime juice.
  4. Secure the lid and shake gently for about 10-15 seconds until frosty.
  5. Fill a clean glass halfway with fresh ice cubes.
  6. Strain the mixed liquid from the shaker into the prepared glass.
  7. Top with sparkling water or club soda and give it a gentle stir.
  8. Garnish with fresh cranberries, a lime slice, and a few mint sprigs.
  9. Serve immediately and enjoy!

For best results, use fresh ingredients and serve immediately to maintain the fizz.

Drink
American
mocktail, non-alcoholic drink, party drink, refreshing drink, summer drink, Vanilla Cranberry Crush Mocktail

Filed Under: Drink

Elderflower Winter Gin Cocktail: A Cozy, Refreshing Sip

December 18, 2025 by grace bellamy Leave a Comment

As I was savoring the first sip of this delightful drink, the warmth of winter seemed to melt away into a cozy escape. An Elderflower Winter Gin Cocktail is the perfect antidote for those chilly evenings, elevating your home bar with its refreshing twist on traditional winter beverages. With just a short prep time of around 10 minutes, you can effortlessly impress your guests or enjoy a well-deserved treat after a long day. This cocktail not only boasts freshness from its ingredients but also carries a unique elegance that adds a festive flair. Imagine clinking glasses adorned with fragrant rosemary and bright lemon—who wouldn’t feel festive? Are you ready to shake up your cocktail game and indulge in this seasonal delight? Let’s dive in!

Elderflower Winter Gin Cocktail

Why is Elderflower Winter Gin Cocktail special?

Unique Flavors: This cocktail marries the floral notes of elderflower liqueur with the zesty brightness of fresh lemon juice, resulting in a vibrant taste that dances on your palate.

Quick to Make: With just 10 minutes of prep, you can whip up a stunning drink that looks and tastes like you spent hours crafting it.

Festive Appeal: Garnished with rosemary and lemon, it’s a visual showstopper that’s perfect for holiday gatherings or cozy nights in.

Versatility: This cocktail easily transitions through seasons—swap gin for prosecco in the summer for a refreshing spritz!

Crowd Favorite: Impress friends at your next gathering—they’ll be asking for your secret recipe! For more delightful cocktails, check out our seasonal favorites that can elevate any occasion!

Elderflower Winter Gin Cocktail Ingredients

• Here’s everything you need for this refreshing sip!

For the Cocktail Base

  • Gin – 2 oz – A classic spirit that provides a botanical backbone to the cocktail.
  • Elderflower Liqueur – 1 oz – Adds floral sweetness; St. Germain is a great choice.
  • Fresh Lemon Juice – 1 oz – Brightens the drink with a zesty, fresh flavor.
  • Simple Syrup – 1 oz – Balances the tartness with a touch of sweetness; homemade is best!

For the Fizz

  • Tonic Water – 3 oz – Gives the cocktail a bubbly lift and refreshing finish.

For Garnish

  • Fresh Rosemary Sprigs – For garnish – Adds an aromatic touch and festive flair.
  • Lemon Wheel – For garnish – Brightens the presentation and complements the lemon juice.
  • Ice Cubes – For mixing and serving – Keeps the cocktail chilled and enjoyable.

Indulge in the cozy flavors of this Elderflower Winter Gin Cocktail and elevate your home evenings with ease!

Step‑by‑Step Instructions for Elderflower Winter Gin Cocktail

Step 1: Prepare the Simple Syrup
In a small saucepan, combine equal parts sugar and water over low heat, stirring constantly until the sugar fully dissolves. This should take about 3-5 minutes. Once dissolved, remove from the heat and allow the syrup to cool to room temperature, which typically takes around 10 minutes.

Step 2: Fill the Cocktail Shaker
While your simple syrup is cooling, grab a cocktail shaker and fill it halfway with ice cubes to ensure your Elderflower Winter Gin Cocktail is chilled. Aim for larger cubes, as they melt slower and prevent dilution.

Step 3: Combine the Ingredients
Next, add 2 oz of gin, 1 oz of elderflower liqueur, 1 oz of fresh lemon juice, and the cooled simple syrup into the shaker. The combination of these ingredients will create a harmonious blend of flavors. Ensure the lid is securely fastened to avoid any spills during shaking!

Step 4: Shake the Mixture
With your shaker tightly closed, shake vigorously for about 15 seconds. This step is crucial as it fully blends the flavors while chilling the mixture. You should hear the ice clinking as you shake, confirming a well-mixed cocktail.

Step 5: Strain into a Glass
Take a glass filled with fresh ice cubes and carefully strain the mixture from your shaker into the glass. Straining ensures the cocktail is smooth, removing any ice chips or pulp. You’ll see the beautiful, crisp color of your Elderflower Winter Gin Cocktail as you pour.

Step 6: Add the Tonic Water
Gently top the cocktail with 3 oz of tonic water, pouring slowly to maintain its refreshing fizz. This bubbly addition enhances the drink’s effervescence, making every sip more delightful without losing the carbonation.

Step 7: Garnish Your Cocktail
To add a festive touch to your Elderflower Winter Gin Cocktail, finish with a sprig of fresh rosemary and a lemon wheel for garnish. The aroma from the rosemary and the bright color of the lemon complement the drink beautifully, making it visually appealing and aromatic.

Elderflower Winter Gin Cocktail

Elderflower Winter Gin Cocktail Variations

Let your creativity flow by customizing this Elderflower Winter Gin Cocktail to suit your taste buds!

  • Herbal Infusion: Infuse the gin with other herbs like basil or mint for an enchanting twist. The combination can create a garden-fresh flavor that complements the elderflower beautifully.

  • Citrus Burst: Add a splash of orange juice or grapefruit juice to the mix for a zesty zing that elevates the drink. This variation blends wonderfully with the elderflower liqueur, making for a refreshing and vibrant cocktail.

  • Sparkling Twist: Substitute tonic water with sparkling water for a lighter and less sweet version. This swap maintains the effervescence while allowing the floral notes to shine even brighter.

  • Spicy Kick: Include a slice of fresh jalapeño or a dash of chili-infused syrup for an exciting heat that contrasts with the sweetness. The warmth invites a whole new dimension to your sipping experience!

  • Fruity Delight: Muddle some fresh berries like raspberries or blueberries at the bottom of the shaker. This creates a luscious, fruity twist and adds a pop of color to your cocktail.

  • Festive Touch: Add a splash of cranberry juice for a holiday vibe—perfect for winter gatherings! The tartness of cranberry complements the floral liqueur and gives a beautiful red hue.

For more inspiration, check out our seasonal favorites or whip up a warm spiced apple cider cocktail that brings cozy comforts to your gatherings. Each sip tells a story, evolving with every delightful tweak you make!

Make Ahead Options

These Elderflower Winter Gin Cocktails are perfect for meal prep enthusiasts! You can prepare the simple syrup up to 3 days in advance and store it in an airtight container in the refrigerator to maintain its freshness. Additionally, you can measure out the gin, elderflower liqueur, and lemon juice ahead of time—combine them in a shaker and refrigerate for up to 24 hours. When you’re ready to serve, simply add the tonic water and ice, shake gently, and garnish with rosemary and a lemon wheel. This way, you save time on busy evenings without compromising on flavor or freshness, ensuring your cocktail is just as delightful as if it were made fresh!

Tips for the Best Elderflower Winter Gin Cocktail

• Choose Quality Ingredients: Use a high-quality gin and elderflower liqueur to ensure a rich and vibrant flavor that stands out in your cocktail.

• Fresh is Best: Always opt for fresh lemon juice rather than bottled; it brightens the cocktail and enhances flavor depth.

• Cool the Simple Syrup: Be patient with cooling the simple syrup; using it warm can dilute your cocktail and affect the taste.

• Gentle Tonic Addition: When topping with tonic water, pour gently to keep the bubbles intact—this ensures a refreshing fizzy texture.

• Garnish Wisely: Don’t skip the rosemary and lemon wheel as garnishes; they not only look pretty but also add aromatic elements that enhance the overall experience.

• Avoid Over-shaking: Shake the mixture just long enough—about 15 seconds—to blend without diluting. Over-shaking can water down your Elderflower Winter Gin Cocktail and lessen its delight!

What to Serve with Elderflower Winter Gin Cocktail

Create a memorable evening with these delightful pairings that will enchant your palate and elevate your gathering.

  • Savory Cheese Platter: A selection of aged gouda, creamy brie, and sharp cheddar provides a delightful contrast to the cocktail’s floral sweetness.

  • Herbed Flatbreads: These warm, crispy delights with a hint of garlic and rosemary will complement the fresh herbal notes of the cocktail beautifully.

  • Roasted Nuts: The salty crunch of roasted almonds or cashews adds texture and enhances the cocktail’s refreshing flavor with a savory bite.

  • Citrus Salad: A bright salad featuring arugula, orange segments, and a light vinaigrette complements the lemony freshness of the gin cocktail.

  • Lemon Tart: The tartness of this dessert mirrors the zesty lemon juice, creating a satisfying end to your meal while echoing the cocktail’s vibrant notes.

  • Sparkling Water: For a refreshing non-alcoholic option, serve sparkling water with a slice of lemon to balance the cocktail’s richness while enhancing the overall experience.

  • Chocolate-Dipped Strawberries: These indulgent treats add a sweet, romantic touch that pairs wonderfully with the elegant flavors of an Elderflower Winter Gin Cocktail.

Storage Tips for Elderflower Winter Gin Cocktail

Room Temperature: Enjoy your Elderflower Winter Gin Cocktail fresh for the best flavor; it’s not ideal to store it at room temperature.

Fridge: If you have any leftovers, store the cocktail (without tonic) in an airtight container in the fridge for up to 24 hours. Just remember to add tonic before serving!

Freezer: It’s not recommended to freeze the cocktail due to the tonic water, which loses carbonation. However, you can freeze the simple syrup for up to 3 months for future use.

Reheating: Instead of reheating, shake up a fresh cocktail! This will ensure you have that delightful fizz and fresh taste every time you enjoy your drink.

Elderflower Winter Gin Cocktail

Elderflower Winter Gin Cocktail Recipe FAQs

What type of gin works best for the Elderflower Winter Gin Cocktail?
Absolutely! A classic London Dry gin pairs beautifully with elderflower liqueur due to its botanical notes. Brands like Tanqueray or Bombay Sapphire are fantastic choices, as they add depth without overpowering the floral sweetness. Alternatively, a more herbaceous gin can enhance the cocktail’s complexity, making each sip a delightful surprise!

How can I store leftover Elderflower Winter Gin Cocktail?
If you have any leftover cocktail, store it in an airtight container in your refrigerator for up to 24 hours—but remember to omit the tonic water! Add tonic only when you’re ready to serve to retain its refreshing fizz. This ensures you can enjoy the same deliciousness the next day.

Can I freeze any part of the Elderflower Winter Gin Cocktail?
While freezing the entire cocktail isn’t recommended due to the tonic water losing carbonation, you can absolutely freeze the simple syrup! Pour any leftover syrup into an ice cube tray and freeze for future use. Simply pop out a cube when you’re ready to whip up another delicious cocktail. It will last in the freezer for up to 3 months!

Are there any dietary considerations with this cocktail?
Very! The Elderflower Winter Gin Cocktail is generally safe for most diets, but ensure everyone is aware of potential allergens. If someone has a sensitivity, check for gluten in gin brands and choose a gluten-free option if needed. Additionally, for a non-alcoholic version, substitute the gin with sparkling water or a tonic alternative for a refreshing mocktail.

What if my cocktail becomes too sweet?
If you find your Elderflower Winter Gin Cocktail is overly sweet, you can balance it out by adding a splash more fresh lemon juice. This brightens the drink and cuts through the sweetness, enhancing the overall flavor. Remember, tasting as you go is key! Adjust until you find your perfect balance.

How can I tell if my elderflower liqueur has gone bad?
Look for visual cues like sediment at the bottom or if the liquid appears cloudy. If it has a strange smell or taste—perhaps off or excessively sweet—it’s best to err on the side of caution and dispose of it. Typically, a good elderflower liqueur can last for years when stored properly in a cool, dark place!

Elderflower Winter Gin Cocktail: A Cozy, Refreshing Sip

Enjoy a delightful Elderflower Winter Gin Cocktail, the perfect antidote for chilly evenings, ready in just 10 minutes.

  • Cocktail shaker
  • small saucepan
  • Glass

Cocktail Base

  • 2 oz Gin (A classic spirit that provides a botanical backbone to the cocktail.)
  • 1 oz Elderflower Liqueur (Adds floral sweetness; St. Germain is a great choice.)
  • 1 oz Fresh Lemon Juice (Brightens the drink with a zesty, fresh flavor.)
  • 1 oz Simple Syrup (Balances the tartness with a touch of sweetness; homemade is best!)

Fizz

  • 3 oz Tonic Water (Gives the cocktail a bubbly lift and refreshing finish.)

Garnish

  • Fresh Rosemary Sprigs (Adds an aromatic touch and festive flair.)
  • Lemon Wheel (Brightens the presentation and complements the lemon juice.)
  • Ice Cubes (Keeps the cocktail chilled and enjoyable.)

Preparation

  1. In a small saucepan, combine equal parts sugar and water over low heat, stirring constantly until the sugar fully dissolves. This should take about 3-5 minutes. Remove from heat and allow the syrup to cool to room temperature.
  2. Grab a cocktail shaker and fill it halfway with ice cubes.
  3. Add 2 oz of gin, 1 oz of elderflower liqueur, 1 oz of fresh lemon juice, and the cooled simple syrup into the shaker.
  4. Shake vigorously for about 15 seconds.
  5. Strain the mixture into a glass filled with fresh ice cubes.
  6. Gently top the cocktail with 3 oz of tonic water.
  7. Garnish with a sprig of fresh rosemary and a lemon wheel.

Choose high-quality ingredients for the best flavor; the simple syrup should not be warm when used to avoid dilution.

Drink
American
cocktail, easy cocktail, Elderflower Winter Gin Cocktail, festive drink, winter cocktail

Filed Under: Drink

Indulge in a Dirty Snowman Baileys Ice Cream Cocktail

December 16, 2025 by grace bellamy Leave a Comment

The first sip of the Dirty Snowman Baileys Ice Cream Cocktail feels like a snowy day wrapped in a warm, cozy blanket. This delightful concoction marries the rich flavors of chocolate ice cream and Baileys Irish Cream, ensuring every sip transports you straight to a winter wonderland. Not only is it a total crowd-pleaser—perfect for gatherings or chilled evenings at home—but it comes together in just 10 minutes, allowing you to impress friends without a hefty time commitment. The combination of whipped cream, crushed Oreos, and a drizzle of chocolate syrup adds that special touch we’ve all been craving. So, are you ready to indulge in a drink that feels like both dessert and cocktail in one? Let’s get blending!

Dirty Snowman Baileys Ice Cream Cocktail

Why is this cocktail so irresistible?

Indulgent, creamy texture: Each sip of the Dirty Snowman Baileys Ice Cream Cocktail wraps you in a velvety embrace, merging the richness of chocolate ice cream with the warmth of Baileys.
Quick and easy: With just 10 minutes of prep time, you can impress guests or treat yourself without spending hours in the kitchen.
Customizable flavors: Adjust the sweetness or alcohol content to fit your preferences, ensuring a perfect drink every time.
Show-stopping presentation: The whipped cream and crushed Oreo topping not only enhance the taste but also make for a visually stunning centerpiece.
Crowd-pleaser: Whether for a festive gathering or a cozy night in, this cocktail will be a hit. For more delightful drink ideas, check out our easy cocktail recipes section!

Dirty Snowman Baileys Ice Cream Cocktail Ingredients

Discover the perfect blend of flavors!

For the Cocktail
• Chocolate ice cream – the creaminess and rich flavor are essential for a decadent drink.
• Baileys Irish Cream – brings a smooth, velvety taste that enhances the overall experience.
• Milk – adjusts the thickness; feel free to add more for a lighter consistency.
• Vodka (optional) – adds an extra kick; omit if you prefer a non-alcoholic version.
• Chocolate syrup – perfect for drizzling and enhancing the chocolaty goodness.
• Vanilla extract – adds depth and a hint of sweetness.

For the Toppings
• Whipped cream – make it generous; it creates that dreamy, inviting look.
• Crushed Oreos or chocolate shavings – these versatile garnishes add texture and flavor contrast.
• Cocoa powder – a sprinkle on top brings a refined finish and enhances chocolate notes.

Step‑by‑Step Instructions for Dirty Snowman Baileys Ice Cream Cocktail

Step 1: Blend the Ingredients
In a blender, combine 1 cup of chocolate ice cream, 1/2 cup of Baileys Irish Cream, 1/4 cup of milk, 1/4 cup of vodka (if using), 2 tablespoons of chocolate syrup, and 1/4 teaspoon of vanilla extract. Blend on medium speed for about 30–45 seconds, until the mixture is smooth and creamy. Adjust the amount of milk to achieve your desired thickness for this delightful Dirty Snowman Baileys Ice Cream Cocktail.

Step 2: Taste and Adjust
After blending, taste your cocktail to find the perfect balance of sweetness and creaminess. If you desire a sweeter flavor, you can add a little more chocolate syrup or Baileys. For a stronger kick, incorporate a splash more of vodka. This step ensures your Dirty Snowman Baileys Ice Cream Cocktail is tailored to your personal taste.

Step 3: Prepare the Glass
Take a tall glass and drizzle chocolate syrup along the inner sides, creating a beautiful, decadent design. This not only enhances the visual appeal, but also adds extra chocolaty goodness to each sip. Make sure the syrup clings to the glass as you prepare to pour in your blended mixture.

Step 4: Pour the Cocktail
Pour the blended cocktail into the prepared glass, filling it right to the top. Take a moment to admire the luscious, creamy texture and the striking presentation of your Dirty Snowman Baileys Ice Cream Cocktail. Be gentle while pouring so as not to disturb the chocolate drizzle on the sides.

Step 5: Add Whipped Cream
Generously top your cocktail with a generous dollop of whipped cream, allowing it to spill over the edges for an indulgent look. The whipped cream is not just a topping but an essential part of the experience, adding a lightness to the rich flavors of the drink.

Step 6: Garnish with Style
Sprinkle crushed Oreos or chocolate shavings generously over the whipped cream, creating a crunchy contrast to the creamy texture below. Finally, dust a sprinkle of cocoa powder on top to enhance the chocolate flavor and add an elegant touch to your Dirty Snowman Baileys Ice Cream Cocktail.

Step 7: Serve and Enjoy
Serve the cocktail immediately, offering a straw or a spoon for enjoyment. The combination of rich flavors and beautiful presentation is sure to impress as you indulge in your very own Dirty Snowman Baileys Ice Cream Cocktail. Perfect for cozy evenings or festive gatherings!

Dirty Snowman Baileys Ice Cream Cocktail

Dirty Snowman Baileys Ice Cream Cocktail Variations

Feel free to get creative with your cocktail; customization opens a world of delightful possibilities!

  • Non-Dairy: Substitute chocolate ice cream with a non-dairy version to make this cocktail vegan-friendly. Coconut or almond ice cream always adds a unique twist!

  • Coffee Lover’s Delight: Incorporate a shot of espresso or coffee liqueur for a caffeine kick that’ll wake up your senses while still feeling decadent.

  • Minty Fresh: Add a few drops of peppermint extract to infuse a refreshing twist that makes this cocktail enchanting during the holiday season.

  • Chocolate Hazelnut: Swap Baileys for Nutella liqueur for an added nutty flavor that blends wonderfully with chocolate ice cream.

  • Spicy Kick: Introduce a dash of cinnamon or chili powder for a warm, spicy note; this adventurous combination is perfect for those seeking a flavor pairing that surprises!

  • Fruity Fusion: Blend in a handful of fresh or frozen raspberries to create a tart contrast to the sweetness for a berry-infused cocktail experience that’s simply delightful.

  • Frozen Treat: Pour the mixture into popsicle molds and freeze; these adults-only frozen treats will turn any summer gathering into a cocktail party!

  • Rich Caramel: Drizzle caramel sauce along with the chocolate syrup for a decadent touch that brings a luscious note to this already indulgent drink.

Enjoy experimenting with these variations and transform your cocktail into something uniquely yours! Looking for more ideas? Check out our delicious easy cocktail recipes for endless inspiration!

Expert Tips for Dirty Snowman Baileys Ice Cream Cocktail

Perfect Consistency: Adjust milk: Vary the amount of milk to control the thickness of your Dirty Snowman Baileys Ice Cream Cocktail; more milk yields a lighter drink.

Taste Test: Personalize your cocktail: Always taste before serving! Adjust sweetness with extra chocolate syrup or increase the alcohol for a stronger flavor.

Glass Presentation: Drizzle strategically: Drizzling chocolate syrup inside the glass creates a stunning effect, enhancing both taste and visual appeal.

Garnish Generously: Layer toppings: Don’t be shy with the whipped cream and garnishes! A generous layer adds richness and elevates the cocktail’s indulgence.

Serve Fresh: Enjoy immediately: This delightful cocktail is best enjoyed fresh to maintain its creamy consistency and vibrant toppings.

What to Serve with Dirty Snowman Baileys Ice Cream Cocktail

Indulge in a full experience that perfectly complements the sweet decadence of your cocktail.

  • Chocolate Lava Cake: The molten center contrasts beautifully with the cocktail’s creaminess, creating a heavenly duo you won’t forget.

  • Vanilla Bean Ice Cream: A simple, creamy side that provides a neutral balance to the rich flavors, enhancing the overall dessert experience.

  • Strawberry Shortcake: Juicy strawberries and fluffy cake add a fresh and fruity element that lightens each sip of the cocktail.

  • Homemade Brownies: Chewy and fudgy, they echo the chocolatey goodness of your Dirty Snowman Baileys Ice Cream Cocktail, crafting a blissful chocolate lover’s feast.

  • Spiced Hot Chocolate: Warm and comforting, this cocoa treat pairs beautifully, drawing out the chocolate and Irish cream notes.

  • Coffee or Espresso: A cup of freshly brewed coffee serves as a perfect contrast, awakening your palate after the rich cocktail.

  • Mint Chocolate Chip Cookies: These cookies add a refreshing twist, enhancing the chocolaty aspects while introducing a delightful minty coolness.

Elevate your cocktail experience with these delightful treats that create a meal that feels both special and indulgent!

Make Ahead Options

These Dirty Snowman Baileys Ice Cream Cocktails are perfect for meal prep, making your festive gatherings feel effortless! You can blend the cocktail ingredients (1 cup chocolate ice cream, 1/2 cup Baileys Irish Cream, 1/4 cup milk, optional vodka, 2 tablespoons chocolate syrup, and 1/4 teaspoon vanilla extract) up to 24 hours in advance. Just refrigerate the mixture in an airtight container. To maintain the creamy texture, give it a quick blend before pouring it into the drizzled glass and topping with whipped cream, crushed Oreos, or chocolate shavings. This way, you’ll serve a delicious drink with minimum fuss and maximum flavor, impressing your guests while saving precious time!

How to Store and Freeze Dirty Snowman Baileys Ice Cream Cocktail

Fridge: Store any leftover cocktail in an airtight container in the fridge for up to 1 day. Note that the whipped cream will lose its texture.

Freezer: If you want to freeze the cocktail, blend all ingredients without the whipped cream and freeze for up to 1 month. Thaw completely before serving.

Reheating: This cocktail is best enjoyed cold and should not be reheated. Serve it chilled for the full Dirty Snowman Baileys Ice Cream Cocktail experience.

Dirty Snowman Baileys Ice Cream Cocktail

Dirty Snowman Baileys Ice Cream Cocktail Recipe FAQs

How do I choose the right chocolate ice cream for this cocktail?
Absolutely! Opt for high-quality chocolate ice cream with a rich and creamy texture. Look for options with minimal air incorporated and a high cocoa content, which will elevate the luxurious flavor of your Dirty Snowman Baileys Ice Cream Cocktail.

How should I store leftover Dirty Snowman Baileys Ice Cream Cocktail?
You can store any leftover cocktail in an airtight container in the fridge for up to 1 day. However, keep in mind that the whipped cream may lose its vibrant texture. For the best experience, it’s ideal to enjoy it fresh.

Can I freeze this cocktail for later?
Definitely! If you want to freeze your Dirty Snowman Baileys Ice Cream Cocktail, blend all the ingredients (excluding the whipped cream) and transfer the mixture into an airtight container. You can freeze it for up to 1 month. When you’re ready to enjoy it, thaw completely in the fridge before serving, stirring well to reincorporate the ingredients.

What if my cocktail is too thick or too thin?
No worries! If your Dirty Snowman Baileys Ice Cream Cocktail turns out too thick, simply add a splash more milk and blend again until you reach that creamy, drinkable consistency. Conversely, if it’s too thin, try adding a bit more chocolate ice cream to thicken it up. It’s all about finding that perfect balance for your taste!

Are there any dietary considerations I should keep in mind?
Very! If you have dietary restrictions, you can use dairy-free chocolate ice cream and substitute Baileys with a non-alcoholic Irish cream alternative. Always check labels for potential allergens, especially if serving to guests with food allergies. And remember, the optional vodka can be omitted for a non-alcoholic version!

How can I enhance the presentation of my cocktail?
For a show-stopping look, drizzle chocolate syrup not only inside the glass but also create a decorative pattern on the top of the whipped cream before adding your garnishes. Consider adding a sprig of mint or festive sprinkles for an inviting touch!

Indulge in a Dirty Snowman Baileys Ice Cream Cocktail

The Dirty Snowman Baileys Ice Cream Cocktail is a decadent drink that combines chocolate ice cream, Baileys Irish Cream, and delightful toppings for a perfect winter indulgence.

  • Blender
  • tall glass

For the Cocktail

  • 1 cup chocolate ice cream (the creaminess and rich flavor are essential for a decadent drink)
  • 1/2 cup Baileys Irish Cream (brings a smooth, velvety taste)
  • 1/4 cup milk (adjusts the thickness)
  • 1/4 cup vodka (optional, adds an extra kick)
  • 2 tablespoons chocolate syrup (perfect for drizzling)
  • 1/4 teaspoon vanilla extract (adds depth and sweetness)

For the Toppings

  • 1 cup whipped cream (make it generous for a dreamy look)
  • 1/2 cup crushed Oreos (or chocolate shavings for garnish)
  • 1 tablespoon cocoa powder (for a refined finish)

Step-by-Step Instructions

  1. In a blender, combine 1 cup of chocolate ice cream, 1/2 cup of Baileys Irish Cream, 1/4 cup of milk, 1/4 cup of vodka (if using), 2 tablespoons of chocolate syrup, and 1/4 teaspoon of vanilla extract. Blend on medium speed for about 30–45 seconds, until the mixture is smooth and creamy.
  2. After blending, taste your cocktail to find the perfect balance of sweetness and creaminess. Adjust as desired.
  3. Take a tall glass and drizzle chocolate syrup along the inner sides, creating a beautiful design.
  4. Pour the blended cocktail into the prepared glass, filling it right to the top.
  5. Generously top your cocktail with whipped cream, allowing it to spill over the edges.
  6. Sprinkle crushed Oreos or chocolate shavings over the whipped cream, then dust with cocoa powder.
  7. Serve the cocktail immediately with a straw or spoon.

Best enjoyed fresh, adjust milk for desired thickness, and personalize flavors to taste.

Drink
Irish
Baileys cocktail, cocktail, dessert drink, Dirty Snowman Baileys Ice Cream Cocktail, easy cocktail recipe, winter drink

Filed Under: Drink

Indulge in Creamy Thick Italian Hot Chocolate Bliss

December 11, 2025 by grace bellamy Leave a Comment

There’s something magical about curling up with a mug of rich, velvety hot chocolate after a long day. My Thick Italian Hot Chocolate captures that warmth and comfort perfectly, combining whole milk and bittersweet chocolate for an indulgent treat that feels like a big hug in a cup. This recipe isn’t just a cozy companion; it’s also incredibly quick to prepare, taking less than 20 minutes from start to finish. Whether you’re treating yourself on a chilly afternoon or impressing guests at your next gathering, this thick hot chocolate is guaranteed to be a showstopper. Have you ever thought about how one simple recipe could transform your afternoon? Let’s dive into this delightful concoction together!

Thick Italian Hot Chocolate

Why is Thick Italian Hot Chocolate Irresistible?

Comforting warmth: This rich beverage wraps you in cozy bliss, making it perfect for chilly days.
Decadent texture: A luscious blend of whole milk and bittersweet chocolate results in an indulgently thick experience that’s simply divine.
Quick to make: In just 20 minutes, you can whip up this delightful treat, ideal for those sudden cravings.
Versatile pairings: Top with whipped cream, chocolate shavings, or even a sprinkle of cinnamon for a personalized touch.
Crowd-pleaser: Serve it at gatherings or treat yourself—it’s a drink that’s sure to impress everyone!

Thick Italian Hot Chocolate Ingredients

• Dive into the key elements for this luxurious treat!

For the Base

  • Whole milk – A creamy foundation that adds richness to your hot chocolate.
  • Cocoa powder – For that deep chocolate flavor; look for high-quality brands.
  • Sugar – Balances the bitterness of the chocolate, making it a sweet delight.

For the Chocolate Bliss

  • Bittersweet chocolate – Finely chopped for easy melting; it’s essential for achieving that indulgent thickness in your thick Italian hot chocolate.
  • Vanilla extract – A dash of this adds aromatic warmth to the overall flavor profile.

For Thickening

  • Cornstarch – This ingredient helps give your hot chocolate its luscious, velvety consistency.
  • Cold water – Used to create a slurry with cornstarch for easy incorporation without clumping.

For Finishing Touches

  • Pinch of salt – Enhances all the flavors, making your hot chocolate even more delicious!

Step‑by‑Step Instructions for Thick Italian Hot Chocolate

Step 1: Heat the Milk
In a medium saucepan, pour in 2 cups of whole milk and set it over medium-low heat. Stir occasionally to ensure the milk warms evenly without scalding, and remove it from heat as soon as it starts to steam, about 3–5 minutes, but make sure it doesn’t boil.

Step 2: Mix Cocoa and Sugar
Once the milk is warm, add 2 tablespoons of cocoa powder and 2 tablespoons of sugar directly into the saucepan. Whisk the mixture vigorously until both ingredients are fully dissolved and the mixture becomes smooth and glossy, creating a deliciously rich base for your Thick Italian Hot Chocolate.

Step 3: Melt the Bittersweet Chocolate
Now, add 4 ounces of finely chopped bittersweet chocolate to the saucepan. Continue whisking to help the chocolate melt completely into the warm mixture, ensuring there are no lumps left behind. This should take about 2-3 minutes, resulting in a velvety texture.

Step 4: Prepare the Cornstarch Slurry
In a small bowl, mix 1 tablespoon of cornstarch with 1 tablespoon of cold water to create a smooth slurry. This step will help thicken your hot chocolate, so make sure there are no lumps in the mixture before it’s added.

Step 5: Thicken the Hot Chocolate
Gradually pour the cornstarch slurry into the hot chocolate while whisking continuously to avoid clumps. Keep whisking for about 2-3 minutes over low heat until the mixture thickens to your desired consistency, making your Thick Italian Hot Chocolate luxuriously creamy.

Step 6: Add Flavorings
Remove the saucepan from the heat and stir in ½ teaspoon of vanilla extract and a pinch of salt. These ingredients elevate the overall flavor profile, enhancing the sweetness and richness of your Thick Italian Hot Chocolate, making each sip delightful.

Step 7: Serve and Garnish
Pour the thick hot chocolate into your favorite mugs while it’s still hot. For an indulgent finishing touch, top each serving with whipped cream and consider garnishing with chocolate shavings or a light dusting of cocoa powder, enhancing the treat visually and tastefully.

Thick Italian Hot Chocolate

How to Store and Freeze Thick Italian Hot Chocolate

Fridge: Store any leftover thick Italian hot chocolate in an airtight container in the refrigerator for up to 3 days. Reheat gently on the stove or in the microwave, stirring well to restore its creaminess.

Freezer: For longer storage, freeze the thick hot chocolate in an ice cube tray or freezer-safe container for up to 2 months. Thaw in the fridge overnight, then reheat and enjoy!

Serving Tip: When reheating, you may want to add a splash of milk to restore its velvety texture. Enjoy your indulgent treat!

Thick Italian Hot Chocolate Variations

Feel free to explore these delightful twists on your hot chocolate, each promising to elevate your cozy experience!

  • Dairy-Free: Substitute whole milk with almond, soy, or oat milk for a vegan-friendly option. Choose dairy-free chocolate for a fully plant-based treat.

  • Minty Fresh: Add a few drops of peppermint extract to bring a refreshing twist. This variation brings a festive vibe, perfect for the holidays!

  • Spiced Delight: Stir in a dash of ground cinnamon or nutmeg while heating. This adds warmth and depth, making your drink perfect for chilly winter days.

  • Nutty Flavor: Consider adding a spoonful of hazelnut syrup or almond extract. A touch of nuttiness complements the chocolate beautifully, creating a delightful flavor profile.

  • Chili Kick: For those who enjoy heat, add a pinch of cayenne pepper. This unexpected kick will awaken your senses and make every sip exciting.

  • Rich Caramel: Drizzle a bit of caramel sauce into your hot chocolate for a silky sweetness. It perfectly enhances the chocolate experience, creating an indulgent treat.

  • Marshmallow Heaven: Top with miniature marshmallows or toasted marshmallow fluff for a fun and sweet finish. It’s like a warm hug in a cup!

  • Double Chocolate: Amp up the chocolate intensity by adding an extra ounce of bittersweet chocolate. This deliciously rich combination is a dream for chocolate lovers!

These variations not only personalize your hot chocolate but might inspire you to discover new favorites, just like in my Classic Italian Risotto or a comforting bowl of Creamy Tomato Basil Soup! Enjoy your cozy moments with these delightful twists on a timeless classic.

Make Ahead Options

These Thick Italian Hot Chocolate preparations are perfect for busy home cooks looking to save time! You can prepare the hot chocolate base (milk, cocoa powder, sugar, and chocolate melted together) up to 24 hours in advance. Simply store it in an airtight container in the fridge to maintain its creamy quality. When you’re ready to enjoy, reheat the mixture gently over low heat while whisking. Add the cornstarch slurry and cook until thickened for just a couple of minutes before adding your vanilla extract and salt. This way, you can indulge in a rich hot chocolate without any fuss on a chilly evening!

What to Serve with Thick Italian Hot Chocolate

There’s no better way to elevate your cozy hot chocolate experience than with delightful accompaniments that satisfy both the palate and the heart.

  • Crispy Italian Biscotti: These crunchy cookies are perfect for dipping, adding a satisfying texture contrast to your creamy drink. Their flavors can range from almond to chocolate, enhancing your overall indulgence.

  • Marshmallow Topping: Soft, fluffy marshmallows melt delightfully into your hot chocolate, providing a sweet and gooey contrast that feels like a warm hug in every sip.

  • Spiced Churros: Freshly fried churros dusted with cinnamon sugar are a delicious treat to accompany your thick Italian hot chocolate and offer a delightful crunch.

  • Creamy Whipped Cream: A classic topping for a reason! Whipped cream adds a light and airy element that perfectly complements the deep flavors of your hot chocolate.

  • Dark Chocolate Shavings: Sprinkling chocolate shavings on top adds an extra touch of decadence and intensifies the chocolate experience with rich, creamy bites.

  • Fresh Berries: Strawberries or raspberries provide a tart contrast that balances the sweetness of your thick Italian hot chocolate, brightening each sip.

  • Peppermint Candy Canes: Perfect for the holiday season! Stir one into your hot chocolate for a festive twist that adds a refreshing minty flavor.

  • Nutty Panforte: This chewy Italian dessert packed with nuts and dried fruit pairs wonderfully with the warmth of your thick hot chocolate, adding depth and an additional flavor layer.

Expert Tips for Thick Italian Hot Chocolate

  • Use Quality Chocolate: Always opt for high-quality bittersweet chocolate. This greatly enhances the depth of flavor and creaminess of your Thick Italian Hot Chocolate.

  • Whisk Vigorously: Ensure you whisk well during each step, especially when mixing cocoa and sugar. This helps prevent lumps and maintains a smooth texture throughout.

  • Perfect Heating: Heat the milk gently and avoid boiling. Scalded milk can alter the flavor and texture, so keep an eye on it while it warms.

  • Adjust Sweetness: Taste before serving and adjust the sugar to your preference. Some like it sweeter, while others appreciate a more bittersweet profile in their Thick Italian Hot Chocolate.

  • Cornstarch Care: When mixing the cornstarch with cold water, make sure there are no lumps. A smooth slurry is key to achieving that coveted thick consistency without clumps.

Thick Italian Hot Chocolate

Thick Italian Hot Chocolate Recipe FAQs

How do I select the best chocolate for my Thick Italian Hot Chocolate?
Absolutely! When choosing your bittersweet chocolate, look for quality brands with a cocoa content of at least 60%. Avoid chocolate bars with added ingredients like preservatives, as they can affect the flavor. A good rule of thumb is to choose chocolate that you enjoy eating on its own.

How should I store leftover Thick Italian Hot Chocolate?
If you have any thick Italian hot chocolate left over, store it in an airtight container in the fridge for up to 3 days. When you’re ready to enjoy it again, gently reheat on the stove or in the microwave, stirring well to restore its creamy texture. This little step makes all the difference!

Can I freeze Thick Italian Hot Chocolate?
Very! To freeze your thick Italian hot chocolate, pour it into an ice cube tray or a freezer-safe container. It can be stored this way for up to 2 months. When you’re ready to enjoy it, simply thaw overnight in the fridge, then reheat on the stove. For added creaminess, consider adding a splash of milk when reheating.

Are there any common issues I should watch for while making Thick Italian Hot Chocolate?
Absolutely! One common issue is having lumps when adding the cocoa powder or cornstarch. Make sure to whisk vigorously and dissolve these ingredients completely in the warm milk before adding the chocolate. If your hot chocolate is too thick, don’t worry—just thin it out with a bit of extra milk!

Can I make this recipe vegan?
Yes, you can! To make a vegan version of this thick Italian hot chocolate, simply substitute whole milk with your favorite plant-based milk like almond, soy, or oat milk. Additionally, be sure to use dairy-free chocolate that fits your dietary preferences. This way, everyone can indulge in this delightful treat!

What’s the best way to enhance the flavor of my Thick Italian Hot Chocolate?
I often recommend adding a splash of vanilla extract, as it works beautifully to elevate the drink’s overall flavor. You could also experiment with flavors like peppermint extract or hazelnut syrup for a twist! Topping it off with whipped cream and chocolate shavings can turn your hot chocolate into an irresistible masterpiece.

Indulge in Creamy Thick Italian Hot Chocolate Bliss

Enjoy the comforting magic of Thick Italian Hot Chocolate, a quick and indulgent delight perfect for chilly days.

  • Medium saucepan
  • small bowl
  • Whisk

For the Base

  • 2 cups whole milk (A creamy foundation that adds richness to your hot chocolate.)
  • 2 tablespoons cocoa powder (For deep chocolate flavor; look for high-quality brands.)
  • 2 tablespoons sugar (Balances the bitterness of the chocolate.)

For the Chocolate Bliss

  • 4 ounces bittersweet chocolate (Finely chopped for easy melting.)
  • ½ teaspoon vanilla extract (Adds aromatic warmth to the overall flavor profile.)

For Thickening

  • 1 tablespoon cornstarch (Helps give your hot chocolate its luscious, velvety consistency.)
  • 1 tablespoon cold water (Used to create a slurry with cornstarch.)

For Finishing Touches

  • 1 pinch salt (Enhances all the flavors.)

Step-by-Step Instructions

  1. In a medium saucepan, pour in 2 cups of whole milk and set it over medium-low heat. Stir occasionally to ensure the milk warms evenly without scalding.
  2. Once the milk is warm, add 2 tablespoons of cocoa powder and 2 tablespoons of sugar directly into the saucepan. Whisk until fully dissolved.
  3. Add 4 ounces of finely chopped bittersweet chocolate and continue whisking until melted and smooth.
  4. In a small bowl, mix 1 tablespoon of cornstarch with 1 tablespoon of cold water to create a smooth slurry.
  5. Gradually pour the cornstarch slurry into the hot chocolate while whisking continuously until thickened.
  6. Remove from heat and stir in ½ teaspoon of vanilla extract and a pinch of salt.
  7. Pour into mugs while hot and top with whipped cream and chocolate shavings if desired.

Store leftovers in the fridge for up to 3 days or freeze for up to 2 months. Reheat with a splash of milk for restoring creaminess.

Drink
Italian
chocolate drink, comfort drink, creamy hot chocolate, drink recipe, hot chocolate, Thick Italian Hot Chocolate

Filed Under: Drink

Witchy Green Smoothie That Magically Boosts Your Energy

October 15, 2025 by grace bellamy Leave a Comment

As I stood in the kitchen, surrounded by the sounds of bubbling cauldrons and whispering spices, I felt an irresistible spark of creativity. Halloween isn’t just about spooks and treats; it’s a golden opportunity to transform your breakfast into something delightfully magical. Enter the Witchy Green Smoothie—an enchanting blend that’s as vibrant as it is healthy! This quick recipe is perfect for busy mornings, and it’s a fantastic way to sneak in your daily dose of greens without anyone batting an eye. Plus, it’s not just nutritious; it’s an instant showstopper that brings a festive flair to your table. So, are you ready to brew up some Halloween magic in your kitchen? Let’s dive into these Halloween breakfast ideas that will thrill both kids and adults alike!

Witchy Green Smoothie

Why Is This Smoothie So Magical?

Deliciously nutritious: The Witchy Green Smoothie combines spinach, banana, and almond milk for a naturally sweet and creamy beverage that packs a healthy punch.

Time-saving: Whip this up in minutes, making it perfect for hectic mornings or last-minute Halloween get-togethers.

Creative presentation: Serve it in cauldron-like mugs to capture the festive spirit—great for kids and adults alike!

Versatile ingredients: Feel free to swap in your favorite fruits or greens depending on what you have on hand.

Insta-worthy: The vibrant green color is sure to impress your guests, making this smoothie an instant photo-worthy hit!

For more fun twists on classic recipes, check out my Halloween Breakfast Ideas.

Witchy Green Smoothie Ingredients

• Here’s what you’ll need to conjure up this refreshing treat!

For the Smoothie

  • Spinach – A powerhouse green that blends smoothly and adds vibrant color.
  • Banana – Naturally sweet, it helps create a creamy texture and balances the greens.
  • Almond Milk – Use this dairy-free option for a silky finish; it can be substituted with any milk of your choice.

For Decoration

  • Chia Seeds – Sprinkle on top for a fun texture and a boost of Omega-3s.
  • Fruits – Add sliced bananas or berries to customize your smoothie and make it even more visually appealing.

This Witchy Green Smoothie is just one of the spooktacular breakfast ideas to enchant your family this Halloween!

Step‑by‑Step Instructions for Witchy Green Smoothie

Step 1: Prepare the Ingredients
Start by gathering all your ingredients for the Witchy Green Smoothie. You’ll need fresh spinach, a ripe banana, and almond milk. Rinse the spinach thoroughly to remove any dirt or grit, and peel the banana, breaking it into chunks for easier blending. This prep step ensures a smooth and vibrant result.

Step 2: Blend the Smoothie
In a blender, combine the prepared spinach, banana, and about one cup of almond milk. Blend on high for 30–45 seconds until the mixture is perfectly smooth and creamy, with no visible chunks remaining. The vibrant green color should be rich and inviting, signaling that it’s ready for the next step.

Step 3: Taste and Adjust
After blending, taste your Witchy Green Smoothie for sweetness. If you prefer a sweeter smoothie, feel free to add a dash of honey or maple syrup. Blend again for 10–15 seconds to incorporate any added sweetness and give it one last whirl to ensure everything is nicely mixed together.

Step 4: Serve Creatively
Pour the smoothie into fun, cauldron-like mugs to capture the festive spirit of Halloween! This playful presentation adds a whimsical touch that both kids and adults will love. Aim for a vibrant swirl as you pour to enhance the visual appeal of your Witchy Green Smoothie.

Step 5: Add Decorations
Sprinkle chia seeds on top for added texture and a boost of Omega-3s. You can also add a few sliced banana pieces or berries for an extra pop of color and flavor. These eye-catching decorations make the smoothie not only delicious but also visually stunning, perfect for your festive breakfast table.

Step 6: Enjoy Immediately
For the best taste and texture, enjoy your Witchy Green Smoothie right after preparing it. This smoothie is a refreshing treat that’s perfect for any busy morning or Halloween gathering—let the enchanting flavors invigorate your day!

Witchy Green Smoothie

Make Ahead Options

The Witchy Green Smoothie is a fantastic option for meal prep, saving you precious time on busy mornings! You can prepare all the ingredients—spinach, banana, and almond milk—up to 24 hours in advance. Simply wash and chop the spinach, peel and slice the banana, and mix them in a container with the almond milk, ensuring an airtight seal to keep everything fresh. When you’re ready to enjoy your smoothie, just pour the prepped mixture into a blender, blend until smooth, and serve in your favorite cauldron-like mugs. This way, you’ll have a deliciously nutritious meal ready in minutes, perfect for those hectic school-day breakfasts!

How to Store and Freeze Witchy Green Smoothie

Fridge: Keep any leftover Witchy Green Smoothie in an airtight container for up to 2 days. Just give it a quick stir or re-blend before drinking to restore its smooth texture.

Freezer: Pour the smoothie into ice cube trays or freezer-safe bags to freeze for up to 3 months. Blend frozen cubes with a splash of almond milk for an instant refreshing drink!

Thawing: If frozen, transfer the desired amount to the fridge for several hours or overnight to thaw. For a quicker option, blend straight from the freezer with a bit more liquid.

Reheating: This smoothie is best enjoyed cold; avoid reheating as it may alter the taste and texture. Enjoy it fresh for maximum vibrant flavors!

What to Serve with Witchy Green Smoothie

The perfect companion to your morning magic, these delicious sides will make your Halloween breakfast a memorable feast.

  • Pumpkin Pancakes: Fluffy and spiced with the essence of fall, these pancakes topped with maple syrup are a sweet way to start your day.
  • Ghostly Yogurt Parfaits: Layered with vanilla yogurt, granola, and fresh berries, these parfaits not only look festive but offer a delightful crunch that pairs wonderfully with your smoothie.
  • Monster Avocado Toast: Creamy avocado spread on whole-grain toast, adorned with cucumbers and olives. It’s a savory complement that contrasts beautifully with the smoothie’s sweetness.
  • Chocolate Waffles: Shaped like witch hats, these indulgent waffles topped with whipped cream will satisfy any sweet tooth and are fun for the kids!
  • Spooky Smoothie Bowls: Blend your favorite fruits with a bit of spinach for a vibrant bowl. Serve with chia seeds and sliced fruits to enhance your breakfast spread.
  • Mummy Toasts: Whole-grain toast dressed in cream cheese and banana slices resembling mummies adds a whimsical touch to your table.
  • Dracula’s Blood Red Juice: A refreshing pomegranate or berry juice adds a bold splash of color and tangy flavor that beautifully complements the smoothies.

Let your kitchen be filled with delightful flavors while creating a Halloween breakfast that’s enchanting from the first sip to the last bite!

Expert Tips for Witchy Green Smoothie

Fresh Greens: Use fresh spinach instead of frozen to achieve the best vibrant color and smooth texture. Frozen may dilute the flavor.

Quality Blender: A high-speed blender will ensure all ingredients combine smoothly, giving you that delightful creaminess in your Witchy Green Smoothie.

Customize Sweetness: Adjust sweetness with honey or maple syrup according to your taste—just add a little at a time to avoid over-sweetening.

Presentation Matters: Use fun, whimsical cups or jars for serving to enhance the festive Halloween spirit; vibrant colors make the drink more inviting.

Drink Immediately: Enjoy your smoothie right after preparation to preserve freshness and nutrition; it’s at its best when served right away!

Witchy Green Smoothie Variations

Feel free to sprinkle your own magic into this Witchy Green Smoothie with these fun and creative twists!

  • Dairy-Free: Substitute almond milk with coconut milk for a tropical twist that adds a creamy richness.
  • Protein Boost: Mix in a scoop of your favorite protein powder to make this smoothie an energizing post-workout treat.
  • Nutty Flavor: Add a tablespoon of almond butter or peanut butter for a nutty touch and added creaminess—it’s a game-changer!
  • Extra Greens: Swap half of the spinach for kale or Swiss chard to elevate the nutritional profile and adjust the flavor.
  • Berry Blast: Toss in a handful of mixed berries like strawberries or blueberries for a delightful fruitiness and vibrant color.
  • Citrus Zing: A squeeze of lemon or lime juice will add a refreshing zing that brightens up your smoothie.
  • Choco-Mint: Blend in a teaspoon of cocoa powder and a drop of mint extract for a deliciously decadent and refreshing flavor combo.
  • Spicy Kick: If you enjoy a bit of heat, add a sprinkle of cayenne pepper or a dash of ginger to give your smoothie an exciting edge.

Embrace your creative side—these variations can make your Witchy Green Smoothie even more enchanting! For more thrilling breakfast ideas, don’t miss my Halloween Breakfast Ideas and discover how to make festive flavors come alive!

Witchy Green Smoothie

Witchy Green Smoothie Recipe FAQs

What kind of spinach should I use for the Witchy Green Smoothie?
Absolutely! Fresh baby spinach is your best bet. It’s tender, blends smoothly, and has a mild flavor that won’t overpower the sweetness of the banana. Avoid spinach with dark spots or wilted leaves, as these are signs of aging.

How long can I store leftover Witchy Green Smoothie?
You’re in luck! You can keep any leftover smoothie in an airtight container in the fridge for up to 2 days. Just remember to give it a quick stir or re-blend to regain that creamy texture before enjoying it again!

Can I freeze the Witchy Green Smoothie?
Certainly! Pour your smoothie into ice cube trays or freezer-safe bags. Freeze for up to 3 months. When you’re ready for a refreshing treat, blend the frozen cubes with a splash of almond milk. It’s a super quick way to enjoy your smoothie on busy mornings.

What should I do if my smoothie is too thick?
Very easily! If you find your smoothie too thick, simply add a little more almond milk or water while blending until you reach your desired consistency. You can always adjust it to your taste preferences—smoothies are wonderfully forgiving!

Are there any dietary considerations for the Witchy Green Smoothie?
Yes! This recipe is vegan and dairy-free due to the use of almond milk. However, if you have a nut allergy, feel free to substitute with oat milk or another non-dairy milk that works for you. It’s great to adjust recipes so everyone can enjoy them!

Can I use other fruits in the Witchy Green Smoothie?
Absolutely! You can easily swap out the banana for avocados or mango for a different flavor profile. Just keep in mind that the sweetness level may change, so you might want to adjust the sweetener accordingly. Have fun experimenting with different combinations!

Witchy Green Smoothie That Magically Boosts Your Energy

A vibrant Witchy Green Smoothie that magically boosts your energy with nutritious greens, perfect for Halloween mornings.

  • Blender

For the Smoothie

  • 2 cups Spinach (Fresh)
  • 1 medium Banana (Ripe)
  • 1 cup Almond Milk (Dairy-free option)

For Decoration

  • 1 tablespoon Chia Seeds (Optional)
  • Fruits (Sliced bananas or berries as desired)

Preparation

  1. Gather all your ingredients for the Witchy Green Smoothie.
  2. Rinse the spinach thoroughly to remove any dirt.
  3. Peel the banana and break it into chunks.

Blending

  1. Combine the spinach, banana, and almond milk in a blender.
  2. Blend on high for 30–45 seconds until smooth.

Adjusting Taste

  1. Taste the smoothie and adjust sweetness if desired.
  2. Blend again for 10–15 seconds to incorporate.

Serving

  1. Pour the smoothie into cauldron-like mugs for a festive touch.
  2. Aim for a vibrant swirl while pouring.

Decorating

  1. Sprinkle chia seeds on top.
  2. Add sliced bananas or berries for color.

Enjoying

  1. Serve immediately for the best taste and texture.

Use fresh spinach for the best vibrant color and texture. A high-speed blender will ensure smoothness.

Drink
Healthy
Energy Boost, Green Smoothie, Halloween, Healthy Breakfast, Nutritious Drink, Witchy Green Smoothie

Filed Under: Drink

Delightful Festive Peppermint Float Recipe to Savor

October 15, 2025 by grace bellamy Leave a Comment

As I poured the shimmering mixture into the punch bowl, the festive spirit filled the air, making it impossible not to smile. If you’re looking for a delightful drink that brings joy to any holiday gathering, the Festive Peppermint Float is just what you need! This creation combines the refreshing taste of peppermint with the creaminess of ice cream, making it a perfect balance for all ages. Not only is it quick to prepare, freeing you from kitchen stress, but its whimsical presentation also transforms any gathering into a celebration. Ready to impress your family and friends with this showstopper? Let’s dive into the details of making a joyfully delicious Peppermint Christmas Float!

Festive Peppermint Float

Why is this Peppermint Float so special?

Festive Spirit: The vibrant colors and refreshing flavors instantly elevate your holiday gatherings.

Easy Preparation: Just mix and serve! You’ll have more time to enjoy the festivities with loved ones rather than in the kitchen.

Crowd-Pleaser: Perfect for all ages, this drink brings smiles to kids and adults alike, making it an instant hit at parties and family get-togethers.

Customizable: Feel free to experiment with different ice cream flavors or toppings for a unique twist each time.

Visual Delight: The whimsical presentation, topped with crushed peppermint, is sure to impress your guests, making it a true showstopper.

Try pairing it with my Holiday Cheese Platter for a complete festive experience!

Festive Peppermint Float Ingredients

• Effortlessly create your holiday drink sensation with these simple ingredients!

For the Drink Base

  • Sparkling Water – This adds a delightful fizz that complements the creamy ice cream.
  • Peppermint Syrup – A must-have for that iconic festive flavor; adjust the quantity for your preferred sweetness.
  • Milk – Using whole milk creates a richer taste, but you can swap for almond or oat milk for a lighter option.

For the Topping

  • Ice Cream – Vanilla or peppermint ice cream adds a creamy sweetness that balances the drink beautifully.
  • Crushed Peppermint Candy – Sprinkle on top for an extra festive crunch and an eye-catching finish.

Now that you have everything ready, let the magic of the Festive Peppermint Float begin!

Step‑by‑Step Instructions for Festive Peppermint Float

Step 1: Prepare the Bowl
Begin by selecting a big punch bowl or a large-serving beverage jar. Ensure it’s clean and dry, ready to hold your delightful mixture. Position it on a stable surface for easy serving. Visualize filling it with your vibrant ingredients, evoking the festive spirit as you prepare to craft the Festive Peppermint Float.

Step 2: Mix the Drink Base
Pour in the base ingredients for your Festive Peppermint Float: sparkling water, peppermint syrup, and milk. Stir the mixture gently with a large spoon for about 30 seconds, ensuring that all the flavors meld beautifully. You should see delightful bubbles forming as the ingredients come together; the sweet peppermint scent will fill the air, enhancing the festive ambiance.

Step 3: Serve the Drink
Using a ladle, carefully pour the mixed drink from the punch bowl into your chosen serving glasses. Aim for about three-quarters full, allowing room for the ice cream. You want your guests to see the effervescent and well-blended mixture, which sets the stage for the delicious toppings to come.

Step 4: Add Ice Cream and Peppermint
Now comes the fun part! Top each glass with a generous scoop of ice cream, allowing it to float gracefully atop the drink. This creamy addition should contrast beautifully with the vibrant colors below. Next, sprinkle crushed peppermint candy over the ice cream, catching the light with a festive sparkle. This visual delight will surely captivate your guests.

Step 5: Present and Enjoy
Serve each drink with a colorful straw and a small spoon to savor every sip and bite. As your friends and family gather around, they’ll be eager to taste the Festive Peppermint Float. The combination of refreshing flavors and holiday cheer will make this drink a hit at your celebration, encouraging laughter and conversation as everyone enjoys their festive creation.

Festive Peppermint Float

Make Ahead Options

The Festive Peppermint Float is a perfect candidate for meal prep, saving you precious time on busy holiday days! You can mix the drink base (sparkling water, peppermint syrup, and milk) up to 24 hours in advance; simply refrigerate it in an airtight container to keep the fizz intact. When it’s time to serve, pour the mixture into glasses, add a scoop of ice cream, and sprinkle with crushed peppermint candy. This way, you and your guests can enjoy a refreshing, festive drink that’s just as delightful, minus the last-minute rush! Enjoy the ease of having your holiday punch prepared ahead, allowing you to focus on what truly matters—spending time with loved ones.

Expert Tips for Festive Peppermint Float

  • Ingredient Quality: Use fresh sparkling water and high-quality peppermint syrup. This ensures vibrant flavors and a delightful fizz in your Festive Peppermint Float.

  • Temperature Matters: Chill your glasses beforehand! Cold glasses keep the drink frosty longer, enhancing the overall experience during your celebrations.

  • Perfect Mixing: Stir gently to combine the ingredients without losing too much fizz. Excessive stirring can deflate the bubbles, affecting the drink’s fun texture.

  • Customizable Toppings: Experiment with different ice cream flavors, like chocolate or coffee, for a unique twist. Just remember to maintain that festive peppermint essence!

  • Serving Size: Fill glasses three-quarters full to allow ample space for ice cream. This prevents overflow and maintains a lovely presentation for your guests.

  • Garnish with Flair: Take it up a notch by adding a sprig of mint or edible glitter for an extra festive touch. Visual appeal is crucial for impressing your holiday guests!

How to Store and Freeze Festive Peppermint Float

Leftover Peppermint Float: If you have any leftover drink, store it in an airtight container in the fridge for up to 2 days; however, for best flavor, consume it as soon as possible.

Ice Cream Separation: If stored, the ice cream will eventually melt into the drink. To maintain texture, consider adding the ice cream just before serving.

Freezing Leftovers: While not recommended, you can freeze the drink base without ice cream in a freezer-safe container for up to 1 month. Thaw it in the fridge and add fresh ice cream before serving.

Reheating Instructions: If the drink base separates after refrigeration, give it a gentle stir and enjoy chilled or over ice for a refreshing twist.

Festive Peppermint Float Variations

Feel free to put your own spin on this delightful drink and cater to your family’s tastes!

  • Dairy-Free: Substitute milk with almond, oat, or coconut milk for a creamy base that keeps everyone happy.

  • Sugar-Free: Use sugar-free peppermint syrup or a natural sweetener to enjoy the same great flavor without the extra calories. It’s a guilt-free treat!

  • Chocolate Twist: Add a splash of chocolate syrup for an indulgent chocolate-peppermint blend that adds depth and richness to each sip.

  • Minty Boost: Enhance the peppermint flavor by adding a few drops of peppermint extract, giving your float a more intense and refreshing taste.

  • Fruity Surprise: Blend in some fresh berries or a splash of cranberry juice for a tangy twist that complements the sweetness with a fruity punch.

  • Spicy Kick: Muddle in a pinch of cinnamon or nutmeg to warm up your float and add a festive spice that perfectly complements the holidays.

  • Layered Delight: To impress your guests, layer the ingredients in the glass before adding the ice cream.

  • Adult Version: Add a splash of peppermint schnapps for a spirited touch that makes this festive drink a delightful holiday cocktail.

For those looking to take their holiday gatherings to the next level, consider serving the Peppermint Float alongside some homemade snacks. Try pairing it with my Gourmet Charcuterie Board or delightful Holiday Appetizer Recipes for a spread that leaves a lasting impression!

What to Serve with Festive Peppermint Float

Imagine a cheerful gathering where laughter fills the air, and every sip of your Peppermint Float is accompanied by delightful treats that elevate the festive spirit.

  • Chocolate Chip Cookies: A classic pairing that complements the minty flavors with rich, sweet chocolate bits, inviting warm memories with each bite.

  • Gingerbread Men: Their spiced goodness brings warmth to your holiday table, creating a nostalgic match for the refreshing Peppermint Float.

  • Roasted Nuts: Crunchy and savory, they offer a satisfying contrast to the sweet, creamy drink, making snacking even more enjoyable.

  • Fruit Skewers: Fresh fruits like strawberries and pineapple add color and brightness to your spread, enhancing the float’s vibrant presentation. The juicy bites balance out the rich sweetness, refreshing your palate.

  • Spiced Apple Cider: This warm beverage infuses your gathering with cozy spices, providing a perfect cozy balance to the chilly Peppermint Float.

  • Marshmallow Treats: Their chewy texture pairs well with the float’s creamy base, adding a fun and festive touch that kids will love.

  • Festive Cheeseboard: Create a mix of cheeses, crackers, and seasonal fruits for a savory contrast that engages all taste buds at your celebration. The combination of flavors keeps guests intrigued and delighted.

  • Pecan Pie: This holiday classic delivers a nutty sweetness, providing a rich finish that beautifully contrasts the lightness of your Peppermint Float.

With all these delightful pairings, your festive gathering will be unforgettable, filled with warmth, laughter, and delicious flavors.

Festive Peppermint Float

Festive Peppermint Float Recipe FAQs

How do I choose the right peppermint syrup?
Look for high-quality peppermint syrup with natural ingredients for the best flavor. A clear syrup indicates purity, while a cloudy one may contain additives. Always check the label to find a syrup that suits your taste, and feel free to adjust the amount according to how sweet you like your float!

How long can I store leftover Peppermint Float?
You can keep any leftover Peppermint Float in an airtight container in the fridge for up to 2 days. However, I recommend consuming it soon after preparation for the best experience, as the ice cream can melt and alter the texture of the drink.

Can I freeze the Festive Peppermint Float?
While I wouldn’t recommend freezing the entire float with ice cream, you can freeze the drink base without it. Pour the mixture into a freezer-safe container and freeze for up to 1 month. When you’re ready to enjoy, simply thaw it in the fridge, then add fresh ice cream just before serving for a delightful treat!

What adjustments can I make for dietary restrictions?
Absolutely! You can use almond, oat, or coconut milk as a dairy-free alternative. If someone has a peppermint allergy, feel free to substitute vanilla syrup in place of the peppermint syrup for a deliciously different flavor. Always keep an eye out for any specific ice cream allergies too and adjust accordingly!

Why is my Peppermint Float flat?
If your float turns out flat, it could be due to stirring too vigorously, which can deflate the bubbles in the sparkling water. To avoid this, mix gently and don’t over-stir once you’ve combined the ingredients. Additionally, make sure your sparkling water is fresh and fizzy for that celebratory bubble effect!

Delightful Festive Peppermint Float Recipe to Savor

Enjoy a refreshing Festive Peppermint Float, blending peppermint and ice cream for holiday joy.

  • punch bowl
  • large spoon
  • ladle
  • Serving glasses

For the Drink Base

  • 4 cups Sparkling Water (Freshly opened for fizz)
  • 1/2 cup Peppermint Syrup (Adjust for sweetness)
  • 2 cups Milk (Whole or alternative milk)

For the Topping

  • 2 cups Ice Cream (Vanilla or peppermint)
  • 1/2 cup Crushed Peppermint Candy (For garnish)

Step‑by‑Step Instructions

  1. Begin by selecting a big punch bowl or a large-serving beverage jar. Ensure it’s clean and dry, ready to hold your delightful mixture.
  2. Pour in the base ingredients for your Festive Peppermint Float: sparkling water, peppermint syrup, and milk. Stir gently for about 30 seconds.
  3. Using a ladle, carefully pour the mixed drink from the punch bowl into your serving glasses, filling about three-quarters full.
  4. Top each glass with a generous scoop of ice cream and sprinkle crushed peppermint candy over the ice cream.
  5. Serve each drink with a colored straw and small spoon, encouraging everyone to enjoy the festive creation.

Chill your serving glasses in advance for best experience. Customize flavors and toppings as desired.

Drink
American
easy festive drink, Festive Peppermint Float, holiday drink, peppermint float, peppermint recipe

Filed Under: Drink

Whip Up Glinda’s Pink Potion for a Magical Refreshing Treat

October 9, 2025 by grace bellamy Leave a Comment

As I stirred the bright pink concoction, a burst of fruity aroma filled the kitchen, instantly whisking me away to a sunny island retreat. In a world where quick fixes and fast food reign supreme, discovering Glinda’s Pink Potion feels like a triumph—especially on those days when you want a taste of magic without the fuss. This delightful drink combines the sweetness of mango with the exotic notes of dragonfruit, creating a refreshing experience that’s perfect for any gathering or a little self-indulgence. In just five minutes, you can whip up this vibrant potion, making it a fantastic choice for both entertaining guests and enjoying a quick pick-me-up. What color will your next sip of wonder be?

Glinda's Pink Potion

Why Is Glinda’s Pink Potion So Irresistible?

Ease of Preparation: With a total time of just 5 minutes, this is the perfect recipe for busy days or spontaneous gatherings.

Vibrant Flavor Explosion: The combination of mango and dragonfruit creates a refreshing and tropical taste that dances on your palate.

Fun Presentation: Topped with strawberry cold foam and colorful sprinkles, this drink not only tantalizes taste buds but also pleases the eyes—perfect for impressing guests!

Versatile Enjoyment: Whether you’re sipping it on a sunny afternoon or serving at a brunch, Glinda’s Pink Potion fits any occasion.

Crowd-Pleasing Appeal: Kids and adults alike will love this enchanting drink, making it an instant favorite at any gathering. For more delightful drinks, you might also want to check out our post on refreshing summer beverages. Enjoy this magical treat!

Glinda’s Pink Potion Ingredients

For the Refresher Base

  • Water – 1 ½ cups to help dissolve the flavors and hydrate your potion.
  • Mango Nectar – ⅓ cup brings a sweet, tropical essence that complements the drink beautifully.
  • Granulated Sugar – ⅓ cup enhances the sweetness, making your potion delightfully refreshing.
  • Dragonfruit Powder – 1 tablespoon adds not only color but also a hint of exotic flavor.
  • Citric Acid – ½ teaspoon balances the sweetness with a little tang.

For the Cold Foam

  • Barista-Style Oat Milk (or Heavy Cream) – 2 tablespoons create a creamy texture, perfect for floating on top.
  • Strawberry Syrup – 1 ½ tablespoons infuses the foam with a lovely fruity flavor.
  • Soy Milk (preferably barista blend) – 1 tablespoon adds richness while keeping it plant-based.

To Assemble the Potion

  • Mango Dragonfruit Refresher Base – ½ cup provides the base, making this truly a Glinda’s Pink Potion!
  • Sweetened Coconut Milk – ½ cup enriches your drink with a creamy, tropical note.
  • Ice – as desired, to keep your potion cool and refreshing.
  • Freeze-Dried Dragonfruit Pieces – 1 tablespoon for an extra touch of texture.
  • Pink & Green Sprinkles – optional for topping, because every magical drink deserves a sprinkle of joy!

Step‑by‑Step Instructions for Glinda’s Pink Potion

Step 1: Make the Refresher Base
In a medium saucepan, combine 1 ½ cups of water, ⅓ cup of mango nectar, ⅓ cup of granulated sugar, 1 tablespoon of dragonfruit powder, and ½ teaspoon of citric acid. Heat over low temperature, whisking continuously for about 3 minutes until the mixture is fully dissolved and smooth. Once combined, remove the saucepan from the heat and let it cool slightly.

Step 2: Transfer the Mixture
When the refresher base has cooled, carefully pour it into a large jar with a tight-fitting lid. This will keep the mixture fresh and ready for use. Make sure to leave some space at the top to shake it later if you desire. Set the jar aside as you prepare the next components of Glinda’s Pink Potion.

Step 3: Prepare the Strawberry Cold Foam
In a small mason jar, add 2 tablespoons of barista-style oat milk (or heavy cream), 1 ½ tablespoons of strawberry syrup, and 1 tablespoon of soy milk. Using a milk frother, froth the mixture for about 20-30 seconds until it turns pale and thickened. The foam should have a light, airy texture that will sit beautifully atop your Glinda’s Pink Potion.

Step 4: Assemble the Potion Base
Grab a cocktail shaker and fill it with ice. Pour in ½ cup of your prepared mango dragonfruit refresher base, followed by ½ cup of sweetened coconut milk, and 1 tablespoon of freeze-dried dragonfruit pieces. Secure the lid firmly and shake vigorously for about 15-20 seconds until everything is well mixed and chilled.

Step 5: Strain and Serve
Strain the combined mixture into a tall glass filled with ice, allowing the vibrant colors of Glinda’s Pink Potion to sparkle through. If desired, stir in additional freeze-dried dragonfruit pieces for an extra burst of flavor. Top your potion with the strawberry cold foam and add a sprinkle of pink and green sprinkles for that magical finishing touch.

Glinda's Pink Potion

Expert Tips for Making Glinda’s Pink Potion

Fresh Ingredients: Use the freshest mango nectar and sweetened coconut milk for a vibrant flavor. Store them properly to maintain their taste.

Mind the Heat: When making the refresher base, heat gently to prevent the sugar from caramelizing, which could change the flavor of your Glinda’s Pink Potion.

Perfect Foam: Ensure the milk is cold when frothing the strawberry cold foam. This will help achieve the desired thick and airy consistency that tops your drink perfectly.

Customize It: Feel free to add more or less sugar based on your sweetness preference. Just remember, too much sugar can overpower the tropical essence!

Chill Your Glass: For an even cooler experience, chill your glass in the freezer before serving. This little trick keeps your potion cold longer!

What to Serve With Glinda’s Pink Potion

Dive into the joy of pairing delicious bites with this enchanting drink for a full magical experience.

  • Fresh Fruit Salad: A medley of diced seasonal fruits complements the tropical flavors of Glinda’s Pink Potion flawlessly, adding freshness to each sip.
  • Coconut Macaroons: The chewy sweetness and texture of coconut macaroons enhance the drink’s creamy coconut notes, creating a delightful balance.
  • Savory Spinach and Feta Tart: This flaky pastry offers a savory contrast, playing beautifully against the sweetness of the potion for a unique taste adventure.
  • Mini Vegetable Spring Rolls: Light and crispy, these spring rolls add a crunchy texture that invites a refreshing palette cleanser between sips of your drink.
  • Tropical Quinoa Salad: With hints of mango and lime, this salad mirrors the flavors of the potion while providing a wholesome and vibrant side.
  • Sparkling Water with Lime: For a bubbly refreshment that enhances the potion’s fruity essence without overpowering it, a zesty sparkling beverage is just the ticket.
  • Chocolate-Dipped Strawberries: The rich chocolate creates a luscious bite to contrast with the potion’s vibrant sweetness—a truly romantic pairing for any occasion.
  • Lemon Meringue Pie: The tartness from the pie perfectly cuts through the sweetness of Glinda’s Pink Potion, offering a delightful burst of flavor with every bite.

Make Ahead Options

These Glinda’s Pink Potion components are perfect for meal prep, saving you valuable time during busy weeknights! You can prepare the mango dragonfruit refresher base up to 3 days in advance. Simply make it according to the recipe, allow it to cool, and store it in a tightly sealed jar in the refrigerator to maintain freshness and flavor. The strawberry cold foam can also be made ahead of time, ideally up to 24 hours before serving, stored in an airtight container. When you’re ready to enjoy your potion, simply shake the refresher base with ice, add the coconut milk and freeze-dried dragonfruit pieces, then top it off with the cold foam for that delightful finishing touch. This way, you’ll have a magical drink ready to impress with minimal effort!

Variations & Substitutions for Glinda’s Pink Potion

Feel free to get creative and tailor Glinda’s Pink Potion to your taste and dietary needs!

  • Dairy-Free: Use coconut cream in place of oat milk for a richer, plant-based alternative that enhances the tropical flavor.
  • Lower Sugar: Swap granulated sugar with a natural sweetener like stevia or monk fruit for a guilt-free potion without sacrificing sweetness.
  • Citrus Twist: Add a splash of fresh lime or lemon juice for a zesty kick that brightens the drink and enhances the tropical essence.
  • Frozen Fruit: Blend in some fresh or frozen mango pieces for an icy, slushy texture that doubles down on the fruity goodness.
  • Berry Blast: Substitute strawberry syrup with raspberry or blueberry syrup for a different fruity note that brings a vibrant new flavor profile.
  • Spicy Heat: For those who love a challenge, add a dash of cayenne pepper or jalapeño slices to the shaker for a surprising heat that complements the sweetness.
  • Garnish Ideas: Top your potion with fresh mint leaves or edible flowers for a stunning presentation that also elevates the drink’s fragrance.
  • Fizzy Delight: Mix in some soda water or sparkling coconut water just before serving for a bubbly and refreshing twist.

Get ready to explore the delightful possibilities with Glinda’s Pink Potion! For a fun summer vibe, try pairing your potion with some summer snacks like tropical fruit skewers for a perfect warm-weather feast. Enjoy!

How to Store and Freeze Glinda’s Pink Potion

Fridge: Store any leftover Glinda’s Pink Potion in an airtight container in the fridge for up to 2 days. This keeps the tropical flavors fresh and vibrant.

Freezer: If you want to freeze your potion, pour it into an ice cube tray and freeze. These cubes can be blended later for a refreshing smoothie.

Reheating: As Glinda’s Pink Potion is best served chilled, avoid reheating it. Instead, shake well with ice for a delightful refreshment anytime!

Keep the Foam Fresh: Prepare the strawberry cold foam fresh before serving. It doesn’t store well but can be quickly whipped up in less than a minute!

Glinda's Pink Potion

Glinda’s Pink Potion Recipe FAQs

What kind of mango nectar should I use?
I recommend using 100% pure mango nectar with no added sugars or preservatives for the best flavor. This ensures that your Glinda’s Pink Potion is both delicious and healthy. Look for a brand that features real mango puree for that tropical taste!

How should I store leftover Glinda’s Pink Potion?
To keep your potion fresh, store any leftovers in an airtight container in the fridge for up to 2 days. Make sure to give it a good shake before enjoying, as ingredients may settle.

Can I freeze Glinda’s Pink Potion?
Absolutely! Pour your mixture into an ice cube tray and freeze it for up to 3 months. Later, blend the frozen cubes with a splash of coconut milk for a quick and refreshing smoothie! It’s a fun way to enjoy the flavors without wasting any potion!

What if my strawberry cold foam doesn’t thicken?
No worries! If your foam isn’t thickening, ensure your milk is really cold, and froth for a full 30 seconds. If possible, use a barista blend soy milk, as it has a higher fat content which helps achieve that lovely airy texture!

Is Glinda’s Pink Potion safe for my kids?
Yes, this delightful drink is safe for kids, providing a fun and colorful option without any harmful ingredients. Just be mindful of any allergies to dragonfruit or other components, and feel free to adjust sweetness for younger palates.

How can I make Glinda’s Pink Potion lower in sugar?
You can reduce the amount of sugar by using unsweetened coconut milk and less granulated sugar. Alternatively, try using a sugar substitute like monk fruit or agave syrup to lower the sugar content without sacrificing flavor!

Whip Up Glinda’s Pink Potion for a Magical Refreshing Treat

Glinda’s Pink Potion is a delightful drink combining tropical flavors and vibrant colors, perfect for any gathering.

  • Medium saucepan
  • large jar with tight-fitting lid
  • small mason jar
  • milk frother
  • Cocktail shaker
  • tall glass

For the Refresher Base

  • 1.5 cups Water (to help dissolve the flavors and hydrate your potion)
  • 0.33 cups Mango Nectar (brings a sweet, tropical essence)
  • 0.33 cups Granulated Sugar (enhances the sweetness)
  • 1 tablespoon Dragonfruit Powder (adds color and a hint of flavor)
  • 0.5 teaspoon Citric Acid (balances the sweetness with tang)

For the Cold Foam

  • 2 tablespoons Barista-Style Oat Milk (or Heavy Cream) (creates a creamy texture)
  • 1.5 tablespoons Strawberry Syrup (infuses the foam with fruity flavor)
  • 1 tablespoon Soy Milk (preferably barista blend) (adds richness)

To Assemble the Potion

  • 0.5 cups Mango Dragonfruit Refresher Base (provides the base for the potion)
  • 0.5 cups Sweetened Coconut Milk (enriches your drink)
  • as desired cups Ice (to keep your potion cool)
  • 1 tablespoon Freeze-Dried Dragonfruit Pieces (for an extra touch of texture)
  • Pink & Green Sprinkles (optional for topping)

Step-by-Step Instructions for Glinda’s Pink Potion

  1. In a medium saucepan, combine water, mango nectar, granulated sugar, dragonfruit powder, and citric acid. Heat over low, whisking for about 3 minutes until smooth.
  2. Carefully pour the mixture into a large jar with a tight-fitting lid and let it cool slightly.
  3. In a small mason jar, add oat milk, strawberry syrup, and soy milk. Froth the mixture for about 20-30 seconds until thickened.
  4. In a cocktail shaker with ice, combine refresher base, sweetened coconut milk, and freeze-dried dragonfruit. Shake for 15-20 seconds.
  5. Strain the mixture into a tall glass filled with ice. Top with cold foam and sprinkle with pink and green sprinkles.

Serve chilled and enjoy the magical flavors of Glinda’s Pink Potion. For best results, prepare the cold foam just before serving.

Drink
Tropical
Easy Recipe, Glinda’s Pink Potion, magical treat, refreshing drink, tropical beverage

Filed Under: Drink

Delightful Festive Peppermint Float to Brighten Your Holidays

October 8, 2025 by grace bellamy Leave a Comment

The delicate aroma of peppermint wafting through the air instantly transports me to cozy holiday gatherings, where laughter mingles with the clinking of glasses. This Festive Peppermint Float captures all those joyful moments in a delightful drink that’s perfect for any celebration. With just a few simple steps, you can whip up this festive beverage that not only dazzles the senses but also brings people together—imagine serving it at your next party and watching everyone’s faces light up! Plus, it’s a total crowd-pleaser, and the combination of fizzy goodness topped with creamy ice cream is sure to make hearts—and taste buds—happy. Curious about how to make this magical holiday treat? Let’s dive in!

Festive Peppermint Float

Why Is the Festive Peppermint Float Special?

Delightful flavors come together in this drink, combining the refreshing taste of peppermint with smooth ice cream for a truly festive experience. Quick and easy to prepare, you can have this holiday treat ready in a matter of minutes—perfect for last-minute gatherings. Endless versatility means you can customize it with different sodas or toppings to match your style. Family-friendly fun makes this a hit with both kids and adults alike. For tips on creating a perfect holiday drink spread, check out our holiday beverage guide!

Festive Peppermint Float Ingredients

• Let’s gather the ingredients to make this delightful drink!

For the Base

  • Peppermint soda – This adds that classic minty flavor that makes the Festive Peppermint Float so special.
  • Lemon-lime soda – A splash of this fizzy drink harmonizes the sweetness and enhances the refreshing quality.

For the Ice Cream

  • Vanilla ice cream – Creamy and smooth, it balances the fizzy soda perfectly for a rich texture.

For the Garnish

  • Crushed peppermint candy – Not only does this add a beautiful sprinkle of color, but it also provides that extra crunch and minty sweetness on top.
  • Whipped cream (optional) – A dollop of whipped cream adds a luxurious finish to your float.

Get ready to splash some cheer into your gatherings with this Festive Peppermint Float, and delight everyone at your holiday table!

Step‑by‑Step Instructions for Festive Peppermint Float

Step 1: Prepare Your Serving Vessel
Start by taking a large punch bowl or a beverage jar, ensuring it’s clean and ready for mixing. This is where the magic of your Festive Peppermint Float will happen! Choose a vessel that holds at least 2 quarts to accommodate all the bubbly goodness. Set it on a flat surface to make pouring and serving easier later on.

Step 2: Blend the Ingredients
Add your peppermint soda and lemon-lime soda into the punch bowl. Pour both sodas simultaneously to create a beautiful fizz that adds excitement to your float. Stir gently for about 30 seconds, ensuring all the flavors meld perfectly together and create a refreshing base. You’ll know it’s ready when the mixture appears bubbly yet well-combined.

Step 3: Pour into Glasses
Using a ladle or measuring cup, carefully pour the fizzy mixture into your serving glasses. Aim to fill each glass about three-quarters full, leaving some space for that delightful ice cream scoop. This stage should take around 5 minutes, allowing everyone to see the enticing bubbly liquid and anticipate the next delicious step.

Step 4: Top with Ice Cream
Now, for the star of the show! Add a generous scoop of vanilla ice cream to each glass, allowing it to gently float on top of the fizzy mixture. The ice cream should slowly start to melt, creating a luxurious swirl in your Festive Peppermint Float. Take your time with this step to ensure each glass is beautifully presented and ready for all to enjoy.

Step 5: Garnish with Peppermint Candy
Sprinkle a handful of crushed peppermint candy over the ice cream tops, ensuring each glass sparkles with festive cheer. This adds a colorful crunch and enhances the peppermint flavor, making your drink visually appealing. This step is quick, taking only about 2 minutes, but it makes a delightful difference in presentation.

Step 6: Serve with Love
Finally, present each glass with a spoon and a straw for easy sipping and enjoyment. Encourage your loved ones to dive in immediately, as the combination of flavors is best enjoyed fresh! Gather everyone around, and watch their faces light up as they take the first sip of this deliciously festive Peppermint Float.

Festive Peppermint Float

How to Store and Freeze Festive Peppermint Float

Fridge: Keep any leftover Peppermint Float in the fridge for up to 2 days, but be aware that the fizz will diminish over time.

Freezer: You can freeze the mixture (without ice cream) for up to 1 month. Just pour it into an airtight container, leaving some space for expansion.

Reheating: When ready to enjoy, simply defrost in the fridge overnight and add fresh ice cream to revive the festive flavors.

Ice Cream Storage: If you have leftover ice cream, store it in the freezer in its original container or an airtight one, where it can stay fresh for up to 2 weeks.

Helpful Tricks for Festive Peppermint Float

  • Choose the Right Soda: Opt for a high-quality peppermint soda for an authentic flavor. Generic sodas may lack the festive zing that elevates your Festive Peppermint Float.

  • Ice Cream Matters: Use good-quality vanilla ice cream with high butterfat content. This ensures a creamy texture that balances perfectly with the fizzy base.

  • Mind the Fizz: Pour the sodas slowly to maintain carbonation. Adding them too quickly can cause excessive fizz overflow and a less appealing presentation.

  • Garnish Generously: Don’t skimp on the crushed peppermint candy. A generous sprinkle not only adds flavor but makes your drinks visually stunning.

  • Serve Immediately: To enjoy the perfect combination of flavors and textures, serve your floats right after preparing. The longer they sit, the more the ice cream melts.

Festive Peppermint Float Variations

Feel free to get creative with your Festive Peppermint Float and explore these delicious twists!

  • Dairy-Free: Substitute the vanilla ice cream with coconut or almond milk ice cream for a creamy yet plant-based delight.
    The rich texture of dairy-free ice creams can elevate the float while keeping it festive and inclusive for everyone.

  • Chocolate Twist: Add chocolate syrup drizzled on top of the ice cream for a sweet complement to the minty flavors.
    This sweet addition introduces a decadent layer, making it a chocolate-lover’s paradise alongside the refreshing peppermint.

  • Fruit Infusion: Mix in some fresh raspberries or crushed strawberries to add a fruity flair to your float.
    The pop of color and flavor from the berries not only looks terrific but also adds a tangy sweetness that enhances the overall taste.

  • Spicy Kick: Sprinkle in a dash of cayenne pepper or cinnamon for a surprising burst of heat and warmth.
    This twist adds an exciting contrast, balancing the chill of the peppermint with a gentle warmth that’s perfect for cozy gatherings.

  • Mocktail Version: Replace the sodas with elderflower cordial mixed with sparkling water for a sophisticated twist on the classic float.
    This unique blend invites a floral sweetness that’s still festive but feels elegant enough for any gathering.

  • Gourmet Garnish: Top your float with a dollop of whipped cream and a drizzle of chocolate or caramel sauce for the ultimate treat.
    This indulgent finishing touch creates a luxurious wow factor that guests will rave about long after the last sip.

  • Citrus Burst: Instead of lemon-lime soda, try using a splash of orange soda for a zesty, refreshing taste.
    This simple swap packs a fruity punch, creating a delightful medley that will enchant everyone at your holiday table.

  • Alcoholic Version: Add a splash of peppermint schnapps for an adults-only version that’s as festive as it is fun.
    With just a touch of spirit, this variation gives the float a warm, inviting feel that’s perfect for holiday celebrations!

Don’t hesitate to explore these variations for a personal touch, and watch your guests fall in love all over again with this delightful drink!

Make Ahead Options

These Festive Peppermint Floats are perfect for meal prep during the bustling holiday season! You can mix the peppermint and lemon-lime sodas together up to 24 hours in advance and store the mixture in the refrigerator to keep it fizzy and fresh. Just remember to wait to add the ice cream and peppermint candy until you’re ready to serve, as this ensures each float maintains its delightful texture and presentation. When it’s time to celebrate, simply pour the prepped soda mixture into glasses, top each with a scoop of vanilla ice cream, garnish with crushed peppermint candy, and enjoy a festive drink that feels special and saves you time!

What to Serve with Festive Peppermint Float

As you gather around with loved ones, imagine a delightful spread that beautifully complements this joyful beverage!

  • Gingerbread Cookies: These classic treats bring warm spices that pair perfectly with the refreshing float, enhancing the holiday spirit.
  • Cheesy Pigs in a Blanket: The savory bites offer a fantastic contrast to the sweet float, making them perfect for mingling and sharing.
  • Winter Fruit Salad: A mix of seasonal fruits like oranges and pomegranates adds a vibrant, fresh pop, balancing the rich and sweet flavors.
  • Chocolate Fudge Brownies: These fudgy delights provide a rich, decadent treat that brings extra indulgence to your festivities.
  • Hot Cocoa Bar: Offer a cozy drink option alongside the float, allowing guests to choose their toppings, from marshmallows to candy canes, for a festive twist.
  • Honey Glazed Ham: For something savory, this dish makes an exquisite pairing, with its sweetness echoing the float while offering a hearty option.
  • Sparkling Cider: As a beverage complement, this bubbly option echoes the festive effervescence of the float while adding a touch of crispness.
  • Peppermint Bark: Create visual and flavor cohesion by pairing this sweet treat, as the minty flavors align beautifully with your Peppermint Float.
  • Sugar Cookies: These soft, buttery cookies provide a deliciously understated sweetness that pairs harmoniously without overpowering the main drink.

Festive Peppermint Float

Festive Peppermint Christmas Float Recipe FAQs

What kind of peppermint soda should I use?
Opt for a high-quality peppermint soda for the best flavor. It’s essential to choose a brand that has a strong, authentic minty taste, as this enhances the overall experience of your Festive Peppermint Float. Generic sodas may not deliver that delightful zing that makes this drink truly special.

How long can I store leftover Festive Peppermint Float?
You can keep any leftover Peppermint Float in the fridge for up to 2 days, but keep in mind that the fizz will fade over time. If you want to maintain some bubbles, consider only preparing what you think you’ll consume, and enjoy the leftovers as a refreshing treat the next day!

Can I freeze my Festive Peppermint Float?
Absolutely! You can freeze the soda mixture (without ice cream) for up to 1 month. Just pour it into an airtight container, leaving room for expansion as the liquid freezes. When you’re ready to enjoy it, let it defrost in the fridge overnight, then add fresh ice cream to revive the flavors.

What should I do if my float overflows while pouring the sodas?
If you find that your mixture is fizzing excessively and threatening to spill over, take a breather! Simply stop pouring, allow the fizz to settle for a moment, then continue pouring slowly. This approach helps maintain that delightful, effervescent presentation of your Festive Peppermint Float.

Are there any dietary considerations for this drink?
Yes! If you’re serving this at a gathering, be aware of any guests with dairy allergies or those avoiding certain sugars. Consider using dairy-free ice cream or a sugar-free soda option as alternatives. Always check ingredient labels to ensure they align with guests’ dietary needs and preferences.

Delightful Festive Peppermint Float to Brighten Your Holidays

This Festive Peppermint Float is a delightful drink that captures the joy of holiday gatherings.

  • Large punch bowl or beverage jar

For the Base

  • 2 cups peppermint soda (This adds that classic minty flavor that makes the Festive Peppermint Float so special.)
  • 2 cups lemon-lime soda (A splash of this fizzy drink harmonizes the sweetness and enhances the refreshing quality.)

For the Ice Cream

  • 4 scoops vanilla ice cream (Creamy and smooth, it balances the fizzy soda perfectly for a rich texture.)

For the Garnish

  • 1/2 cup crushed peppermint candy (Adds a beautiful sprinkle of color and provides extra crunch and minty sweetness.)
  • 1 cup whipped cream (A dollop of whipped cream adds a luxurious finish to your float.)

Step‑by‑Step Instructions

  1. Prepare Your Serving Vessel: Take a large punch bowl or beverage jar, ensuring it’s clean and ready for mixing.
  2. Blend the Ingredients: Add peppermint soda and lemon-lime soda into the punch bowl and stir gently for about 30 seconds.
  3. Pour into Glasses: Carefully pour the fizzy mixture into your serving glasses, filling each glass about three-quarters full.
  4. Top with Ice Cream: Add a generous scoop of vanilla ice cream to each glass, allowing it to gently float on top.
  5. Garnish with Peppermint Candy: Sprinkle a handful of crushed peppermint candy over the ice cream tops.
  6. Serve with Love: Present each glass with a spoon and a straw for easy sipping and enjoyment.

Keep any leftover Peppermint Float in the fridge for up to 2 days, and freeze the mixture (without ice cream) for up to 1 month.

Drink
festive beverage, Festive Peppermint Float, holiday drink, peppermint soda, vanilla ice cream

Filed Under: Drink

Make a Splash with Color Changing Lemonade Magic

October 7, 2025 by grace bellamy Leave a Comment

As I watched the mesmerizing deep blue liquid swirl into my glass, I couldn’t help but feel like a mixologist from another galaxy. This Color Changing Lemonade, or Galaxy Lemonade as I like to call it, is not just a drink; it’s an enchanting experience that turns ordinary moments into extraordinary visual delights. With just a few simple ingredients, you’ll whip up a stunning beverage that’s bound to impress friends and family. The perks? It’s incredibly fun to make and can easily be adapted for both adults and kids, making it a perfect choice for summer gatherings. Ready to witness the magic of color and flavor come together? Let’s dive into this cosmic recipe that promises to brighten your day!

Color Changing Lemonade

Why Is Color Changing Lemonade So Fun?

Visual Appeal: You’ll be amazed as the vivid blue transforms with just a splash of lemon juice, creating a stunning drink that’s as delightful to the eyes as it is to the taste buds.
Easy to Make: With just a few simple steps, you’ll have a refreshingly unique drink ready to impress guests at your next summer barbecue or gatherings.
Customizable: Add a splash of your favorite spirit to create a fun adult version or keep it kid-friendly; this recipe can cater to any crowd’s preferences.
Perfect for Parties: Watch as guests marvel at the color-changing magic! It’s a great conversation starter and sure to be a hit at any event.
Fun for All Ages: Whether you’re a home cook or a professional chef, this recipe provides a playful way to bring everyone together—perfect for those who love homemade delights! Want more refreshing ideas? Check out our sparkling lemonade for another twist on a summer classic!

Color Changing Lemonade Ingredients

• Get ready to make the magic happen with these captivating ingredients!

For the Blue Tea Base
• Dried blue pea flowers – A stunning hue and rich in antioxidants, they are the secret to that enchanting color.
• Boiling water – Essential for steeping the flowers and releasing that vivid blue pigment.

For the Lemon Syrup
• Lemon juice – Bright and zesty, it gives the lemonade its refreshing taste; feel free to adjust for more tang!
• White sugar – Balances the tartness; increase the amount for a sweeter syrup if desired.

For the Ice
• Crushed regular ice – Helps chill the drink quickly; feel free to use more if you like a slushy texture.
• Crushed butterfly pea magic ice – Adds a visual twist; using this ice will enhance the color-changing effect!

For the Assembly
• Lemon syrup – Pour about ¼ to ⅓ cup into each glass for the perfect balance of sweetness.
• Club soda – Top it off to add a lovely fizz to each glass; it’s refreshingly effervescent!
• Optional spirits – Vodka, tequila, or gin can be added for an adult twist; make it a party drink!

Now that we’ve gathered all the ingredients for this stellar Color Changing Lemonade, let’s start crafting your magical beverage!

Step‑by‑Step Instructions for Color Changing Lemonade

Step 1: Steep the Blue Pea Flowers
Begin by pouring 3 cups of boiling water over 25-30 dried blue pea flowers in a heatproof container. Allow them to steep for about 20-30 minutes, until the water transforms into a deep blue hue. Once infused, strain the petals from the liquid, and carefully pour the vibrant tea into ice cube trays. Freeze overnight until solid for the magical butterfly pea ice.

Step 2: Crush Regular Ice
While your blue tea freezes, prepare regular ice. Using an ice crushing blender, blend until you have a fluffy consistency, or place ice into a sturdy freezer bag and crush it with a mallet for a more manual approach. Once crushed, transfer the ice to the freezer to chill until you’re ready to assemble your Color Changing Lemonade.

Step 3: Make the Lemon Syrup
In a medium saucepan, combine the first measure of lemon juice and white sugar over medium heat. Stir continuously to dissolve the sugar, bringing the mixture to a gentle simmer for about 10 minutes. Watch for the syrup to thicken slightly before adding the remaining lemon juice. Remove from heat and set it aside to cool completely, allowing the flavors to meld beautifully.

Step 4: Chill the Syrup
Once your lemon syrup has cooled, transfer it to a clean bottle and store it in the refrigerator. Chilling the syrup will enhance the refreshing experience of your Color Changing Lemonade. Follow this step while your ice cubes freeze and regular ice sits in the freezer to ensure everything is perfectly chilled when it’s time to serve.

Step 5: Assemble the Drink
When you’re ready to enjoy your refreshing Color Changing Lemonade, fill a tall glass with regular crushed ice, leaving about a quarter of the glass empty. Then, layer in some crushed butterfly pea magic ice on top. This is crucial for the vibrant appearance and enchanting color transformation when the lemon syrup is added.

Step 6: Add the Lemon Syrup
Pour ¼ to ⅓ cup of the cooled lemon syrup over the ice-filled glass. You will witness a delightful swirl as the deep blue ice interacts with the bright yellow syrup, creating a stunning visual effect. This striking contrast is what makes the Color Changing Lemonade a showstopper for gatherings and those hot summer days.

Step 7: Top with Club Soda
Finish off your masterpiece by carefully pouring club soda over the syrup and ice, filling the glass to the brim. Watch as the bubbles rise and the colors shift, creating a truly mesmerizing effect. If desired, feel free to add optional spirits like vodka, tequila, or gin for an adult twist that enhances the fun of the Color Changing Lemonade.

Step 8: Serve with Flair
To round out your Color Changing Lemonade experience, sprinkle additional crushed magic ice on top for an eye-catching finish. Serve each drink with stirring sticks and straws so your guests can mix the ingredients and enjoy the enchanting flavors. Prepare for delighted reactions as they taste and watch the colors dance in their glasses!

Color Changing Lemonade

Storage Tips for Color Changing Lemonade

Fridge: Store leftover Color Changing Lemonade in an airtight container in the fridge for up to 3 days. The colors may blend over time, but it will still taste delightful!

Freezer: If you want to preserve the vibrant flavors longer, freeze the lemon syrup in ice cube trays for up to 3 months. When ready to use, pop them into drinks directly for a refreshing treat.

Reheating: If you’d like to enjoy the lemon syrup again, avoid microwaving it directly to ensure it maintains its flavor. Instead, dissolve frozen cubes in warm water before mixing them into beverages.

Serving Prep: To serve chilled lemonade again, ensure your ice is freshly crushed and prepared before serving to maintain that stunning visual impact with each pour!

Color Changing Lemonade Variations

Feel free to play around and make this delightful recipe your own with these exciting twists!

  • Minty Fresh: Add a handful of fresh mint leaves to the lemonade for an invigorating herbal touch. It’s a refreshing surprise!

  • Fruit-Infused: Toss in some sliced strawberries or blueberries while assembling for a fruity burst in every glass. The colors will add an extra pop!

  • Sweetener Swap: Substitute white sugar with honey or agave syrup for a natural sweetness. This swap brings a different layer of flavor that highlights the lemon.

  • Citrus Medley: Mix in different citrus juices like lime or orange for a zesty flavor profile. Each sip will be a delightful journey through bright, tangy notes.

  • Spicy Kick: Infuse a jalapeño slice into the lemon syrup for those who love a bit of heat. It adds an unexpected, mouthwatering spice that awakens the taste buds.

  • Herbal Twist: Incorporate a sprig of basil or rosemary in your glass as a garnish. Herbal aromas will enhance the drink’s complexity and elevate it to gourmet status.

  • Mocktail Delight: For a fun family-friendly version, skip the spirits and add extra club soda or sparkling lemonade. Everyone can enjoy the color-changing magic!

  • Creamy Layer: Top your lemonade with a splash of coconut cream for a tropical twist. This delightful addition softens the flavors and makes for a creamy, dreamy experience.

Feel inspired? Dive into the world of flavors with these variations, or let them spark new ideas of your own! And if you’re looking for another refreshing drink, don’t miss our sparkling lemonade for another fantastic way to quench your thirst!

Expert Tips for Color Changing Lemonade

Choose Quality Flowers: Use high-quality dried blue pea flowers for the best color and flavor. Avoid stale or old products which can affect the vibrant hue.

Perfect Sweetness: Adjust the sugar in the lemon syrup according to your taste. Too little can make it too tart, while too much can mask that refreshing zing in your Color Changing Lemonade.

Ice Matters: Always use fresh, crushed ice for serving. Old or overly melted ice can dilute the flavor and impact the drink’s beautiful presentation.

Layering Technique: When pouring the lemon syrup, do it gently to maintain distinct color layers. This makes the transformation even more visually stunning as you mix!

Chill Everything: Be sure the syrup and glasses are chilled before assembly to keep your drink refreshingly cold and delicious throughout.

Experiment with Flavors: Don’t hesitate to mix in other fruits or herbs for an extra twist. Adding a splash of mint or a few berries can elevate the experience of your Color Changing Lemonade!

What to Serve with Color Changing Lemonade

Nothing says summer fun quite like a refreshing drink that dances with color and flavor, inviting you to enjoy the magic of the season.

  • Grilled Shrimp Skewers: Juicy shrimp brushed with tangy marinade are incredibly satisfying, pairing beautifully with the zesty lemonade and enhancing its vibrant flavors.
  • Crispy Fish Tacos: Lightly battered fish tucked in soft tortillas bring a delightful crunch and brightness, making it a perfect companion to sip alongside your colorful drink.
  • Watermelon Salad: Juicy watermelon cubes mixed with mint and feta offer a sweet, refreshing contrast that balances the tartness of the lemonade.
  • Savory Caprese Skewers: The creaminess of mozzarella and the acidity of tomatoes are delightful with a sip of lemonade; they provide a fresh burst of flavor that’s oh-so-satisfying.
  • Lemon Garlic Hummus: Dip crunchy veggies or pita chips into this smooth and tangy hummus, echoing the citrus notes of your drink while enhancing the experience.
  • Sparkling Berry Mocktail: For a fun drink pairing minus the alcohol, try a sparkling drink with muddled berries; it aligns with the vibrant theme and adds sweetness without overpowering.
  • Mango Sorbet: End your meal on a sweet note with a scoop of refreshing mango sorbet; its tropical flavors create a lovely complement to the lemonade’s citrusy zing.
  • Herbal Iced Tea: Serve a light herbal iced tea to create a gentle contrast, providing a refreshing palate cleanser as you enjoy the color-changing spectacle of your drink.
  • Chocolate Chip Cookies: A plate of warm cookies brings nostalgia and sweetness, creating a cozy pairing that enhances the overall experience.
  • Fresh Fruit Platter: Brightly colored fruits like strawberries, blueberries, and oranges not only mirror the visual theme but also deliver a burst of natural sweetness alongside the lemonade.

Make Ahead Options

These Color Changing Lemonade preparations are perfect for busy home cooks looking to save time while still impressing guests! You can steep the blue pea flowers and freeze the infused tea in ice cube trays up to 24 hours in advance, ensuring you have the enchanting butterfly pea magic ice ready to go. Additionally, you can prepare the lemon syrup a few days ahead and store it in the fridge for up to 3 days. This way, the flavors can meld beautifully while it chills. When it’s time to serve, simply crush the regular ice, layer your magic ice and lemon syrup, top with club soda, and watch the colors swirl—creating eye-catching drinks in no time!

Color Changing Lemonade

Color Changing Lemonade Recipe FAQs

What should I look for when selecting blue pea flowers?
Absolutely! When choosing dried blue pea flowers, look for vibrant, intact petals that are free from any dark spots or signs of moisture. They should have a fresh, earthy scent. High-quality flowers yield the best color and flavor for your Color Changing Lemonade.

How should I store leftover Color Changing Lemonade?
I recommend storing any leftover Color Changing Lemonade in an airtight container in the fridge for up to 3 days. Just keep in mind that the stunning layers may blend over time, yet the delightful flavors will still remain enjoyable!

Can I freeze the lemon syrup?
Yes, very! To preserve the bright flavors, freeze the lemon syrup by pouring it into ice cube trays. It will last up to 3 months. When you’re ready to enjoy again, just pop a few cubes into your drinks, and they’ll keep everything refreshingly cool!

What if my lemon syrup is too sweet or too tart?
No worries! If your lemon syrup turns out too sweet for your taste, you can dilute it with a bit of water or add more lemon juice to balance the flavor. Conversely, if it’s too tart, you can stir in a little extra sugar while it’s still warm to help it dissolve perfectly.

Can I make a non-alcoholic version for kids?
Absolutely, the more the merrier! To create a fun, kid-friendly version of Color Changing Lemonade, simply omit the optional vodka, tequila, or gin. The youth will love mixing the syrup and watching the colors change just like the adults!

How can I ensure my ice doesn’t dilute the drink?
Great question! To prevent dilution, always use freshly crushed ice. For added flair and to maintain flavor, consider making butterfly pea ice cubes by freezing extra blue tea. This way, as they melt, they enhance the colors instead of watering down your vibrant lemonade!

Make a Splash with Color Changing Lemonade Magic

This Color Changing Lemonade is an enchanting drink that transforms from vivid blue to bright yellow, offering a delightful experience for all ages.

  • Heatproof container
  • Ice crushing blender
  • Medium saucepan
  • Ice cube trays

For the Blue Tea Base

  • 25-30 pieces dried blue pea flowers
  • 3 cups boiling water

For the Lemon Syrup

  • 1 cup lemon juice (adjust for more tang)
  • 1 cup white sugar (increase for sweeter syrup)

For the Ice

  • 2 cups crushed regular ice (use more for a slushy texture)
  • 1 cup crushed butterfly pea magic ice (for enhanced color-changing effect)

For the Assembly

  • 0.25-0.33 cup lemon syrup (for perfect balance of sweetness)
  • 1 cup club soda (to add fizz)
  • optional spirits (vodka, tequila, or gin can be added)

Step-by-Step Instructions

  1. Pour 3 cups of boiling water over 25-30 dried blue pea flowers in a heatproof container. Let steep for 20-30 minutes, then strain the petals and freeze the vibrant tea in ice cube trays overnight.
  2. Prepare regular ice by crushing it using an ice crushing blender or a mallet. Transfer to the freezer to chill until ready to assemble the drink.
  3. In a medium saucepan, combine lemon juice and white sugar over medium heat. Stir until the sugar dissolves and simmer for about 10 minutes. Remove from heat and let cool.
  4. Refrigerate the cooled lemon syrup to enhance the refreshing flavor.
  5. Fill a tall glass with regular crushed ice, leaving a quarter empty. Layer with crushed butterfly pea magic ice.
  6. Pour ¼ to ⅓ cup of lemon syrup over the ice. Watch as the deep blue interacts with the bright yellow syrup.
  7. Top with club soda, filling the glass to the brim. Optionally, add spirits for an adult twist.
  8. Sprinkle additional crushed magic ice on top for a stunning visual effect and serve with stirring sticks and straws.

Use high-quality dried blue pea flowers for best color and flavor. Adjust sugar according to taste. Always use freshly crushed ice for serving.

Drink
American
Color Changing Lemonade, fun drink, Galaxy Lemonade, party drink, refreshing beverage, summer drink

Filed Under: Drink

Pumpkin Juice: A Cozy Fall Drink You’ll Love

October 4, 2025 by grace bellamy Leave a Comment

As I stood in the kitchen surrounded by the warmth of autumn spices, a delightful idea flashed in my mind: why not embrace the season with a refreshing glass of Pumpkin Juice? This recipe beautifully blends the earthy sweetness of pumpkin puree with the zesty notes of apple and pineapple juice, creating a drink that’s not only vibrant but incredibly satisfying. In just 10 minutes, you can whip up this nutritious beverage that’s perfect for cozy gatherings or a midday pick-me-up. Plus, it’s a fun twist on your usual beverages, offering a healthier alternative to sugary drinks that still feels indulgent. Wouldn’t you love to sip something that captures the essence of fall? Let’s dive into making this delightful Pumpkin Juice together!

Pumpkin Juice

Why Choose Pumpkin Juice Today?

Unique Flavor Fusion: This Pumpkin Juice offers an exciting blend of flavors, merging sweet apple and tart pineapple with rich pumpkin.
Instant Boost: With only 10 minutes prep time, you can enjoy this refreshing drink in a flash—perfect for busy days!
Nutrient-Rich: Packed with vitamins and warm spices, this beverage is not just tasty but heartily nutritious; a cozy fall drink that revitalizes.
Versatile Delight: Serve it chilled for a refreshing treat or warm for a comforting drink; the choice is yours! Create a special moment by garnishing with a cinnamon stick or apple slice. If you’re looking for more fun autumn recipes, don’t miss out on savoring seasonal flavors in the kitchen!

Pumpkin Juice Ingredients

• A perfect blend of flavors awaits!

For the Juice

  • Pumpkin puree – provides a creamy texture and the essence of fall in every sip.
  • Apple juice – adds natural sweetness and a refreshing tartness to balance the flavors.
  • Pineapple juice – introduces a vibrant, tropical twist that brightens the drink.
  • Brown sugar – enhances sweetness; feel free to adjust it to your taste preference for the perfect Pumpkin Juice.

For the Spices

  • Ground cinnamon – lends a warm, comforting aroma that evokes cozy autumn days.
  • Ground ginger – adds a gentle spice kick and depth to the flavor profile.
  • Ground nutmeg – brings a nutty, earthy note that complements the pumpkin beautifully.
  • Ground allspice – a hint of sweetness with a warm, spiced finish to round out the blend.

Optional Creaminess

  • Oat milk or almond milk – adds a creamy texture; use either for a deliciously smooth Pumpkin Juice.

Step‑by‑Step Instructions for Pumpkin Juice

Step 1: Blend Base Ingredients
In a blender, combine 1 cup of pumpkin puree, 2 cups of apple juice, and 1 cup of pineapple juice. To this mixture, add 2 tablespoons of brown sugar, 1 teaspoon of ground cinnamon, ½ teaspoon of ground ginger, ¼ teaspoon of ground nutmeg, and ¼ teaspoon of ground allspice. Blend these ingredients on high for about 30 seconds, until you achieve a smooth and creamy consistency that’s well combined.

Step 2: Add Creaminess (Optional)
For an even creamier texture, consider incorporating a splash of oat milk or almond milk into the pumpkin juice mixture. Blend again for another 15 to 20 seconds, allowing the milks to integrate smoothly. This step is essential for those who enjoy a richer mouthfeel in their pumpkin juice; it should look velvety and inviting.

Step 3: Chill for Refreshment
If you prefer a chilled drink, toss in a few ice cubes during the final blending step. Blend for an additional 15 seconds or until the ice is crushed and well mixed in. This optional step transforms your pumpkin juice into a frothy and refreshing treat that will invigorate your senses, perfect for sunny autumn days.

Step 4: Serve with Style
Pour your delightful Pumpkin Juice into goblets or rustic mugs, showcasing the vibrant color. For an elegant touch, garnish with a cinnamon stick or a fresh apple slice on the rim of the glass. This presentation not only elevates the drink but also entices your guests with the warm flavors of fall, ready to be savored!

Pumpkin Juice

Expert Tips for Pumpkin Juice

  • Choosing Pumpkins: Opt for high-quality pumpkin puree, preferably 100% pure with no additives. This ensures a smooth and flavorful base for your Pumpkin Juice.
  • Sweetness Balancing: Taste your juice after blending and adjust the brown sugar to your liking. Remember, different apple and pineapple juices have varying sweetness levels!
  • Spice Adjustments: Don’t hesitate to tweak the spice amounts! If you love cinnamon, add a dash more for that extra warmth in your Pumpkin Juice.
  • Get Creamy: For an ultra-smooth texture, blend the oat or almond milk in only after the other ingredients are fully combined; this keeps the creaminess consistent.
  • Garnishing Ideas: Experiment with garnishes! Besides cinnamon sticks or apple slices, consider drizzling a little honey or maple syrup on top for a unique twist.
  • Storage Tips: If you have leftovers, store Pumpkin Juice in an airtight container in the fridge for up to 3 days. Shake well before serving again!

Storage Tips for Pumpkin Juice

Fridge: Store leftover Pumpkin Juice in an airtight container in the refrigerator for up to 3 days. Make sure to shake well before serving to re-mix the ingredients.

Freezer: For longer storage, freeze Pumpkin Juice in ice cube trays. Once frozen, transfer the cubes to a zip-top bag and use them within 3 months for smoothies or cozy drinks.

Reheating: If you prefer to enjoy your Pumpkin Juice warm, gently heat it in a saucepan over low heat, stirring occasionally. Avoid boiling to maintain flavor and texture.

Freshness: For the best flavor, consume your Pumpkin Juice soon after preparation, especially if you’ve used fresh juices for optimal taste!

Make Ahead Options

These delightful Pumpkin Juice blends are perfect for meal prep enthusiasts! You can prepare the juice mixture (excluding any optional creamy additions) up to 24 hours in advance. Simply combine the pumpkin puree, apple juice, pineapple juice, brown sugar, and spices in a blender, and store the mixture in an airtight container in the refrigerator. To maintain the vibrant flavor and texture, give it a quick blend again before serving. When you’re ready to enjoy, add any optional oat milk or almond milk, blend until smooth, and serve chilled or over ice for a refreshing treat. With these make ahead tips, you can savor a cozy fall drink with minimal effort on busy days!

Pumpkin Juice Variations & Substitutions

Don’t be afraid to get creative with this delicious Pumpkin Juice recipe—your twist can make it even more special!

  • Vegan Delight: Use maple syrup instead of brown sugar for a sweet touch without the sugarcane.

  • Coconut Cream: For a tropical vibe, stir in a spoonful of coconut cream for richness and flavor.

  • Spiced Up: Add a pinch of cayenne or chili powder for a surprising kick that balances the sweetness beautifully. Spice lovers will adore this bold twist!

  • Fruit Fusion: Swap the pineapple juice for orange juice to brighten the flavor; the citrus notes will create a refreshing contrast to the pumpkin.

  • Nutty Infusion: Blend in a tablespoon of almond or peanut butter for added creaminess and a delightful nutty flavor that complements the spices perfectly.

  • Herbal Boost: Infuse your drink with fresh mint leaves for a cooling herbal note—a great twist that’s perfect for summer!

  • Choco-licious: Add a tablespoon of cocoa powder for a unique chocolate-pumpkin flavor combo; it’s a comforting treat for chocolate lovers.

  • Wellness Elixir: Throw in a tablespoon of chia seeds for an extra health boost. They not only add great texture but enhance the nutritional profile of your drink.

Explore these variations and discover your favorite blend! Each change can turn your Pumpkin Juice into a completely new experience. And when you’re in the mood for more cozy flavors, don’t forget to check out seasonal recipes like Apple Cinnamon Muffins too!

What to Serve with Pumpkin Juice

There’s nothing quite like enjoying the cozy flavors of fall alongside a delightful drink that warms the heart.

  • Savory Pumpkin Soup: Creamy and comforting, this soup pairs beautifully with the sweetness of pumpkin juice, enhancing the autumn experience.
  • Spiced Apple Crisp: The warm, buttery notes of this dessert complement the fruity zest of the juice for a delightful contrast.
  • Gingerbread Cookies: The rich spices in gingerbread echo those in pumpkin juice, creating a harmonious holiday-inspired treat.
  • Roasted Brussels Sprouts: The earthy flavors of Brussels sprouts balance the sweetness of the juice, adding a touch of freshness to your meal.
  • Cheddar Cheese Platter: Sharp cheddar with its creamy texture enhances the flavors in pumpkin juice, making for an indulgent snack experience.
  • Warm Cinnamon Rolls: For a sweet breakfast or brunch, these rolls harmonize perfectly with pumpkin juice, creating a comforting duo to savor.
  • Herbal Tea: A steaming cup of herbal tea offers a herbal note that refreshes your palate and complements the spice blend in the juice.
  • Caramel Flan: The smooth, rich texture and sweet caramel flavor of flan pair wonderfully, perfectly contrasting the zesty juice.
  • Roasted Sweet Potatoes: The natural sweetness and caramelized edges of sweet potatoes mirror the flavors in pumpkin juice, creating a delightful balance.

Pumpkin Juice

Pumpkin Juice Recipe FAQs

What type of pumpkin puree should I use for Pumpkin Juice?
Absolutely! Opt for 100% pure pumpkin puree with no additives. This will provide a smooth texture and a rich, sweet flavor, enhancing the overall taste of your Pumpkin Juice.

How should I store leftovers of Pumpkin Juice?
Very simple! Pour any leftover Pumpkin Juice into an airtight container and store it in the refrigerator for up to 3 days. Be sure to shake or stir well before serving again to make sure everything is well mixed.

Can I freeze Pumpkin Juice? How?
Yes, you can freeze Pumpkin Juice! Pour the juice into ice cube trays and freeze until solid. Then, transfer the frozen cubes to a zip-top bag and store them in the freezer for up to 3 months. These cubes are perfect for adding to smoothies or reheating in a warm drink.

What if my Pumpkin Juice is too sweet?
If your Pumpkin Juice turns out too sweet, don’t worry! Simply add a splash of lemon juice or a bit of extra pumpkin puree to balance the flavors. Continue blending until well mixed. Remember, taste as you go!

Is this recipe suitable for allergies or special diets?
Absolutely! This Pumpkin Juice is naturally dairy-free and can be tailored to various diets. Just ensure your apple and pineapple juices are free from added sugars if you’re watching your intake. If you’re making it for kids or pets, always check for any possible allergies to the spices used.

Pumpkin Juice: A Cozy Fall Drink You’ll Love

Experience the rich flavors of fall with this refreshing Pumpkin Juice packed with earthy sweetness and zesty notes.

  • Blender

For the Juice

  • 1 cup Pumpkin puree (provides a creamy texture)
  • 2 cups Apple juice (adds natural sweetness)
  • 1 cup Pineapple juice (introduces a tropical twist)
  • 2 tablespoons Brown sugar (adjust to taste)

For the Spices

  • 1 teaspoon Ground cinnamon (lends a warm aroma)
  • 0.5 teaspoon Ground ginger (adds gentle spice)
  • 0.25 teaspoon Ground nutmeg (brings a nutty note)
  • 0.25 teaspoon Ground allspice (adds a hint of sweetness)

Optional Creaminess

  • 1 splash Oat milk or almond milk (adds a creamy texture)

Step-by-Step Instructions

  1. In a blender, combine pumpkin puree, apple juice, pineapple juice, brown sugar, ground cinnamon, ground ginger, ground nutmeg, and ground allspice. Blend on high for about 30 seconds until smooth.
  2. For extra creaminess, add a splash of oat milk or almond milk and blend again for 15-20 seconds.
  3. If desired, add ice cubes and blend for another 15 seconds for a chilled drink.
  4. Pour into glasses and garnish with a cinnamon stick or apple slice.

Store leftovers in an airtight container in the fridge for up to 3 days. Shake before serving.

Drink
American
cozy drink, fall drink, Healthy Alternative, Nutritious Beverage, Pumpkin Juice

Filed Under: Drink

Spooktacular Halloween Jello Shots for a Fun Party Treat

October 4, 2025 by grace bellamy Leave a Comment

Amidst the flickering candlelight and playful spookiness of Halloween, there’s a delightful twist that always steals the show at my parties: Halloween Jello Shots. With their vibrant layers of orange and creamy white, these little gems are not just a feast for the eyes, but also a creative way to enjoy a festive treat without the fuss of complicated recipes. In just a mere 10 minutes of prep time, you can whip up a batch that’s sure to enchant your friends and elevate your Halloween gatherings. Not only do these shots provide a fun way to toast the season, but they also offer a playful, nostalgic nod to our childhood favorites. Are you ready to bring a little magic to your celebration with these spooktacular treats?

Halloween Jello Shots

Why Are Halloween Jello Shots a Must?

Easy Peasy: With only 10 minutes of prep, you can impress your guests without spending all day in the kitchen.

Colorful Creation: The vibrant layers of orange, yellow, and creamy white not only look fabulous but also add a festive flair that’s perfect for Halloween parties.

Unique Twist: These Jello shots reinvent a classic dessert, merging nostalgia with playful fun that both kids and adults will love (just keep the vodka for the grown-ups!).

Crowd-Pleaser: With 20 servings, they’re an excellent choice for larger gatherings, guaranteeing there’s enough for everyone to enjoy.

Customizable Fun: Feel free to get creative! Use different colors or add even more layers to make your own spooky mix. For more fun festive drinks, check out our Halloween Cocktail Ideas.

Garnish Your Delight: Topping them with candy corn can turn an already fun treat into an extraordinary one that leaves lasting impressions.

Halloween Jello Shots Ingredients

• Dive into the festive flavors with these delightful treats!

For the Base

  • 1 3-oz box orange Jell-O – This gives your shots that classic fall flavor and vibrant color!
  • 3 1-oz packets unflavored gelatin – Essential for that signature jiggly texture everyone loves.
  • 7 oz sweetened condensed milk – Adds a creamy layer that provides a delicious contrast to the fruity base.
  • 2 cups water – The perfect amount for dissolving the gelatin and mixing your layers!

For the Flavor

  • 2/3 cup vanilla vodka – This ingredient elevates the fun, making your Halloween Jello Shots extra festive!
  • 1/3 cup fresh orange juice – Freshness is key; it’ll enhance the flavor of your orange Jell-O layer.

For the Halloween Touch

  • Yellow food coloring – A few drops will help you achieve that spooktacular yellow layer!
  • Candy corn for garnish, optional – Lightens up the creepy vibe and adds a sweet surprise!

These Halloween Jello Shots are not just tasty; they’re an impressive spectacle that will thrill your guests!

Step‑by‑Step Instructions for Halloween Jello Shots

Step 1: Prepare the Gelatin Base
Pour 1 cup of water into a small saucepan and sprinkle 2 packets of unflavored gelatin over the water. Warm this mixture over low heat, stirring occasionally for about 3–5 minutes until the gelatin dissolves completely. Once dissolved, remove from heat and mix in half of the sweetened condensed milk. Stir well until fully combined for a smooth, creamy texture.

Step 2: Fill the First Layer of Jello Shots
With the first gelatin mixture ready, incorporate the vanilla vodka and give it another good stir. Set aside half of the mixture for the final layer. Carefully pour the remaining mixture into shot glasses, filling them about one-third full. Place the shot glasses in the refrigerator for at least 30 minutes or until the layer is firm to the touch.

Step 3: Create the Orange Layer
In a separate saucepan, pour in 1 cup of water and sprinkle in the last packet of unflavored gelatin. Heat over low flame, stirring gently until completely dissolved, which should take around 3–4 minutes. Remove from heat, then add the orange Jell-O powder and mix until no granules remain, creating a vibrant orange mixture.

Step 4: Assemble the Middle Layer
To bring a burst of citrus flavor, stir in the fresh orange juice into the dissolved orange Jell-O mix. Once combined, carefully pour this orange mixture over the set white layer in the shot glasses. Return the glasses to the refrigerator and let them chill until firm, which typically takes about 1 hour.

Step 5: Prepare the Yellow Layer
After the orange layer has set, take the reserved white gelatin mixture and add a few drops of yellow food coloring. Stir until evenly tinted, giving you that spooky Halloween hue. Gently pour this yellow mixture over the now-firm orange layer in each shot glass, filling them to the top. Refrigerate for an additional 2 hours or until fully set.

Step 6: Garnish and Serve
Once all layers are perfectly firm, take the shot glasses out of the refrigerator. Optionally, top each Jello shot with a few pieces of candy corn for that festive touch. These Halloween Jello Shots are now ready to serve, bringing a delightful splash of color and fun to your Halloween festivities!

Halloween Jello Shots

Make Ahead Options

These Halloween Jello Shots are perfect for meal prep enthusiasts looking to save time during the spookiest season! You can prepare the first two layers, the creamy base and the orange layer, up to 24 hours in advance. Simply make them as directed, cover the shot glasses with plastic wrap, and refrigerate until you’re ready to continue. When you’re set to finish, simply add the yellow layer, which only takes a few minutes to mix and pour. This way, when guests arrive, your Halloween Jello Shots will be just as delicious and fun, allowing you more time to enjoy the festivities rather than stressing in the kitchen!

Expert Tips for Halloween Jello Shots

Perfect Layering: Ensure each layer is fully set before adding the next one to avoid them mixing together. Patience pays off for stunning visual effects!

Gelatin Magic: Always dissolve gelatin completely; clumps can ruin the texture. Stir constantly while heating for best results.

Customize Flavors: Feel free to experiment with flavored vodkas or even replace orange juice with your favorite fruit juice for a twist on the classic Halloween Jello Shots.

Chill Time: Don’t rush the chilling process. Allow adequate time in the fridge between layers to guarantee a perfectly firm finish.

Garnishing Fun: While candy corn is a festive touch, feel free to get creative with other toppings like gummy worms or spooky sprinkles to make them your own!

How to Store and Freeze Halloween Jello Shots

Fridge: Store uneaten Halloween Jello Shots in the refrigerator, covered with plastic wrap, for up to 3 days to maintain their chewy texture and vibrant layers.

Freezer: If you want to keep your Jello shots longer, freeze them in an airtight container for up to 1 month. Thaw in the fridge for a few hours before serving.

Reheating: There’s no need to reheat Jello shots, but serve them chilled for the best flavor experience.

Presentation: For a playful touch, consider garnishing just before serving; add candy corn or other fun toppings to elevate their appeal!

What to Serve with Halloween Jello Shots

Elevate your Halloween gatherings with delightful pairings that enhance the playful spirit of your festive treats.

  • Crispy Veggie Platter: A colorful array of fresh veggies offers a crunchy contrast, balancing the sweetness of your Jello shots beautifully.
  • Cheesy Garlic Bread: The warm, cheesy goodness provides a comforting side, perfect for dipping into while sipping on these vibrant shots.
  • Spooky Mocktail: A fizzy drink made of lemonade and soda with a hint of orange not only refreshes but also complements the fruity layers of your Jello shots.
  • Pumpkin Spice Cupcakes: Light and fluffy with a hint of fall flavor, these cupcakes add a charming sweetness that pairs well with the playful nature of the shots.
  • Ghoulish Fruit Salad: A medley of seasonal fruits, like pears and pomegranates, will add a fresh element and vibrant color to your spooky spread.
  • Mini Sausage Rolls: These savory bites bring a delightful contrast to the sweet treats, keeping your guests satisfied while they enjoy their fun desserts.
  • Chocolate Mousse: Rich and creamy chocolate mousse provides a decadent touch, appealing to those who want a little more indulgence after the Jello shots.
  • Coffee or Hot Chocolate: Finish the night with cozy drinks that warm the soul, offering a comforting end to the joyous celebration of Halloween fun.
  • Ghostly Ice Cream Sundaes: Top vanilla ice cream with spooky sprinkles for a whimsical dessert that mirrors the excitement of your Halloween Jello Shots!

Variations & Substitutions for Halloween Jello Shots

Get ready to let your creativity soar as you customize these festive treats to suit your flavor whims!

  • Dairy-Free: Use coconut milk instead of sweetened condensed milk for a tropical twist that still delivers creamy goodness. Coconut adds a subtle sweetness and works beautifully with the orange flavor.

  • Flavor Boost: Substitute vanilla vodka with peach or raspberry-flavored vodka. This will infuse your Jello shots with a delightful fruity essence that brings an exciting layer of flavor to the mix!

  • Vegan-Friendly: Swap unflavored gelatin for agar-agar, a fantastic plant-based alternative. Just be sure to follow the package instructions to achieve that signature jiggle!

  • Less Sugar: For a lighter option, replace sweetened condensed milk with a sugar-free alternative. This way, you can enjoy the festive fun without the extra sweetness!

  • Heat it Up: Add a splash of jalapeño-infused vodka for a spicy kick that’s sure to surprise your guests. The heat contrasts wonderfully with the sweetness for a bold adventure.

  • Layering Finesse: Use green and purple Jell-O for a Halloween themed look instead of orange and yellow. This twist will create alluring layers and add a seasonal flare that’s perfect for any spooky gathering!

  • Fruit-Infused: Enhance the flavor by adding small pieces of chopped fruit, like mandarin oranges or berries, to the layers before they set. This adds freshness and a delightful chewy texture.

  • Alcohol-Free: Simply replace vodka with sparkling water or juice for a fun, family-friendly version. This way everyone can partake in the vibrant shots without the spirits!

Feel free to mix and match these ideas for your perfect spooky creation! And for another round of fun, check out our Halloween Dessert Ideas and Festive Mocktail Recipes. Happy haunting in the kitchen!

Halloween Jello Shots

Halloween Jello Shots Recipe FAQs

How do I select ripe ingredients for Halloween Jello Shots?
Absolutely! For the best flavor and texture, use fresh orange juice for your Jello shots. Look for oranges that are firm and heavy for their size, indicating juiciness. If you can, choose oranges with a vibrant color without dark spots or blemishes. For the candy corn garnish, select pieces that are fresh and have not started to harden.

What’s the best way to store Halloween Jello Shots?
Store your uneaten Halloween Jello Shots in the refrigerator, covered tightly with plastic wrap or in an airtight container. They can last for up to 3 days without losing their chewy texture. If you know you won’t finish them, keeping them chilled is key to hold onto that delightful jiggle.

Can I freeze Halloween Jello Shots?
Yes, you can freeze Halloween Jello Shots! Place them in an airtight container and store them for up to 1 month. To thaw, simply move them to the fridge for a few hours before serving. Enjoy them chilled for the best flavor, and make sure to garnish just before serving for that festive flair!

How can I troubleshoot common issues with my Jello Shots?
If your layers are mixing, this usually means one of the layers wasn’t fully set before adding the next. Always allow each layer to firm up completely; this may take an hour or more. If your Jello has clumps, ensure you’re stirring it continuously over low heat until everything is fully dissolved for a smooth finish. Don’t fret if things don’t go perfectly—each attempt is a chance to learn and create something delicious!

Are there any dietary considerations for Halloween Jello Shots?
Very! If you’re serving these at a party, remember that the vanilla vodka is for adults only; for a kid-friendly version, you can simply omit the vodka and replace it with extra orange juice or soda for some fizz. As for allergies, be mindful of anyone who may have sensitivities to gelatin, as it’s derived from animal collagen. Additionally, check the labels of your Jell-O and candy corn for any potential allergens if you have guests with specific dietary restrictions.

Spooktacular Halloween Jello Shots for a Fun Party Treat

Delight in vibrant Halloween Jello Shots, perfect for any party with their playful layers and festive flavors.

  • small saucepan
  • shot glasses

For the Base

  • 1 3-oz box orange Jell-O (Provides classic fall flavor and vibrant color.)
  • 3 1-oz packets unflavored gelatin (Essential for signature jiggly texture.)
  • 7 oz sweetened condensed milk (Adds a creamy layer.)
  • 2 cups water (For dissolving the gelatin.)

For the Flavor

  • 2/3 cup vanilla vodka (Elevates the fun.)
  • 1/3 cup fresh orange juice (Enhances flavor of orange layer.)

For the Halloween Touch

  • yellow food coloring (A few drops for yellow layer.)
  • candy corn (Optional garnish.)

Prepare the Gelatin Base

  1. Pour 1 cup of water into a small saucepan and sprinkle 2 packets of unflavored gelatin over the water. Warm over low heat, stirring for about 3–5 minutes until dissolved. Remove from heat and mix in half of the sweetened condensed milk.

Fill the First Layer of Jello Shots

  1. Incorporate vanilla vodka into the gelatin mixture. Set aside half of the mixture for the final layer. Pour the remaining mixture into shot glasses, filling them about one-third full. Place in the refrigerator for at least 30 minutes.

Create the Orange Layer

  1. Pour in 1 cup of water and sprinkle in the last packet of unflavored gelatin in a separate saucepan. Heat over low flame, stirring until dissolved, about 3–4 minutes. Add orange Jell-O powder and mix.

Assemble the Middle Layer

  1. Stir in fresh orange juice into the dissolved orange Jell-O mix. Pour this mixture over the set white layer in shot glasses. Chill until firm, about 1 hour.

Prepare the Yellow Layer

  1. Add a few drops of yellow food coloring to the reserved white gelatin mixture. Pour this yellow mixture over the now-firm orange layer in shot glasses. Refrigerate for an additional 2 hours.

Garnish and Serve

  1. Top each Jello shot with candy corn for a festive touch. Serve chilled.

Ensure each layer is fully set before adding the next to avoid mixing. Experiment with flavored vodkas for variety.

Drink
American
easy recipes, festive drinks, Halloween Jello Shots, Halloween recipes, Jello shots, party treats

Filed Under: Drink

Hocus Pocus Non-Alcoholic Halloween Punch for Spooky Fun

October 4, 2025 by grace bellamy Leave a Comment

As the leaves turn to vibrant shades of amber and pumpkin spice fills the air, I can’t help but feel the magic of Halloween creeping in. This year, I’m excited to share my recipe for Hocus Pocus Non-Alcoholic Halloween Punch—a delightful concoction bursting with autumn flavors that’s perfect for any spooky gathering. This punch is not only incredibly quick to whip up, taking just 15 minutes, but it also serves a crowd of ten, making it a fantastic choice for parties without the worry of too much sugar or alcohol. Imagine everyone delighting in the fruity concoction, adorned with floating strawberries and grapes that resemble spooky eyeballs! Are you ready to conjure up some festive fun in your kitchen? Let’s brew this enchanting punch together!

Hocus Pocus Non-Alcoholic Halloween Punch

Why is this punch so irresistible?

Quick and Easy: This punch takes just 15 minutes to prepare, allowing you to spend more time enjoying the festivities with friends and family.

Kid-Friendly: Made without alcohol, it’s a perfect choice for all ages, ensuring that everyone can join in the spooky celebration.

Flavor Explosion: The blend of apple cider, cranberry, and citrus juices creates a refreshing and fruity drink that will please any palate.

Visual Delight: With floating strawberries and grapes, plus optional edible glitter for that magical touch, this punch looks as fabulous as it tastes!

Crowd-Pleasing: Serving ten, this recipe is perfect for parties, giving guests a sweet, thirst-quenching treat without the guilt of heavy sugars.

Elevate your gatherings with this enchanting drink and check out our tips for spooky party snacks to complete your Halloween spread!

Hocus Pocus Non-Alcoholic Halloween Punch Ingredients

• Dive into the deliciousness of this punch with these simple ingredients!

For the Base

  • Apple cider – adds a warm, autumnal flavor that sets the perfect spooky tone.
  • Cranberry juice – brings a tart sweetness and stunning color that delights the senses.
  • Orange juice – offers a citrusy brightness that balances the flavors beautifully.
  • Pineapple juice – adds tropical notes that transport you right to a fall fiesta.
  • Lemon-lime soda – brings effervescence to the punch, giving it a refreshing fizz.

For the Sweetness

  • Grenadine syrup – provides a splash of red color and a sweet undertone perfect for Halloween fun.
  • Fresh lime juice – enhances the punch with a zesty kick to keep things lively.

For the Spooky Touch

  • Frozen whole strawberries – serve as your eerie floating eyeballs and keep the punch chilled.
  • Green grapes, halved – add a ghoulish twist while giving a delightful pop of flavor.
  • Lime, thinly sliced – for garnishing, adds an extra layer of spookiness and tangy taste.

Extras

  • Ice cubes – essential for keeping your punch refreshingly cold.
  • Optional: Edible glitter – sprinkle on top for that enchanting sparkle that will wow your guests!

Now you’re all set to create your Hocus Pocus Non-Alcoholic Halloween Punch—let’s get brewing!

Step‑by‑Step Instructions for Hocus Pocus Non-Alcoholic Halloween Punch

Step 1: Combine the Juices
In a large punch bowl, mix together 4 cups of apple cider, 2 cups of cranberry juice, 1 cup of orange juice, and 1 cup of pineapple juice. Pour these vibrant juices slowly to watch them swirl together beautifully. This colorful base will create the perfect backdrop for your Hocus Pocus Non-Alcoholic Halloween Punch.

Step 2: Add the Fizz
Gently stir in 1 liter of lemon-lime soda, incorporating it slowly to preserve the drink’s lovely fizz. As you mix, listen for that delightful bubbling sound, signaling the effervescence that makes your punch refreshing and fun. Make sure everything is well combined for the ultimate taste.

Step 3: Sweeten the Pot
Now, drizzle in ½ cup of grenadine syrup and ¼ cup of fresh lime juice. This step adds not only a sweet flavor but also a stunning red hue, reminiscent of Halloween magic. Stir again until everything is beautifully blended, with the bright colors merging seamlessly.

Step 4: Add the Spooky Elements
Gently drop in 1 cup of frozen whole strawberries, 1 cup of halved green grapes, and several thin slices of lime into the punch bowl. These eerie ingredients will float in the punch like spooky eyeballs, adding an inviting charm. Take a moment to admire the delightful sight before moving on.

Step 5: Chill the Punch
To ensure your Hocus Pocus Non-Alcoholic Halloween Punch stays refreshingly cold, add a generous amount of ice cubes to the bowl. The ice will help maintain its chill as guests enjoy their spooky refreshments. It’s best to do this just before serving for maximum cooling effect.

Step 6: Add the Magical Touch
For an enchanting finish, sprinkle a touch of edible glitter over the top of the punch. This optional yet whimsical step will create a sparkly effect that is sure to wow your guests and add a truly magical essence to your Halloween gathering.

Step 7: Serve and Delight
Carefully ladle the punch into festive cups, ensuring everyone gets a bit of the floating “eyeballs.” Set the cups out on a Halloween-themed table, and watch smiles spread as guests take their first sips of the Hocus Pocus Non-Alcoholic Halloween Punch. Enjoy the celebration!

Hocus Pocus Non-Alcoholic Halloween Punch

Hocus Pocus Non-Alcoholic Halloween Punch Variations

Feel the joy of making this recipe your own with creative twists and tasty swaps!

  • Dairy-Free: Swap any sweetened mixers like grape or ginger ale for a bubbly, non-dairy alternative that still tickles the taste buds.
    If you want a little extra fizz, a splash of tonic water can elevate the fun!

  • Sparkling Alternative: Replace lemon-lime soda with sparkling water for a lighter remix that brings bubbly joy without the added sugars.
    This option allows the fruity flavors to shine while keeping it refreshingly crisp.

  • Herbal Infusion: Add a handful of fresh mint or basil leaves for a fragrant twist that enhances the overall experience of your punch.
    These herbs will add depth and a refreshingly herbal note that surprises and delights!

  • Tropical Delight: Swap pineapple juice for mango or passion fruit juice for a tropical escape that transports you to the beach.
    Pair it with coconut water for an even more refreshing vibe, perfect for any festive celebration!

  • Spicy Kick: Toss in a few slices of fresh jalapeño or a dash of hot sauce for enthusiasts who crave a bit of heat in their punch.
    This twist will surely spark conversations and excitement among your guests!

  • Seasonal Twist: Incorporate flavors like pumpkin puree or cinnamon for a fall-inspired variation that embraces the season beautifully.
    Each sip will bring warmth and comfort, making your Halloween punch truly unique!

  • Berry Blast: Add a mix of frozen mixed berries for an extra fruity flair that’ll brighten up your punch visually and flavor-wise.
    These berries not only add taste but also a burst of color, making your punch even more visually captivating!

Perfect for complementing your Halloween festivities, check out our ideas for delightful spooky party snacks that will complete your gathering!

What to Serve with Hocus Pocus Non-Alcoholic Halloween Punch

As your guests gather around the mystical bowl of punch, elevate the festive atmosphere with complementary treats that delight the senses.

  • Savory Cheese Platter: A selection of cheeses adds a rich, savory contrast to the fruity punch, enhancing your festive spread. Pair with some crackers for crunch.
  • Spooky Halloween Charcuterie Board: Fill it with meats, olives, and nuts to balance the sweetness of the punch, providing a variety of flavors and textures.
  • Mini Pumpkin Pies: These bite-sized sweets capture the essence of autumn, offering a warming spice that pairs beautifully with the fruity notes of the punch.
  • Ghostly Cupcakes: Decorated with cream cheese frosting and ghoulish designs, these sweet bites bring a playful touch to your gathering and complement the punch delightfully.
  • Crispy Veggie Platter: Fresh and crunchy veggies with a vibrant dip provide a refreshing contrast to the drink’s richness, making for a well-rounded menu.
  • Apple Slices with Caramel Dip: The sweetness of caramel alongside crisp, tart apple slices echoes the apple cider in the punch, creating a harmonious pairing.
  • Cinnamon Sugar Donuts: Soft, warm, and slightly spicy donuts make a perfect sweet treat alongside the cooling refreshment of the punch, inviting indulgent sips.
  • Hot Chocolate Bar: For the extra cozy touch, set up a hot chocolate station with toppings that will warm hearts and complement the punch’s chill.
  • Pumpkin Spice Cookies: Their warming spices echo the flavors in the punch, creating a unified theme that embraces the spirit of Halloween festivity.
  • Sparkling Water with Lime: For a lower-calorie beverage option, sparkling water with lime enhances the punch and keeps the party refreshing and festive!

How to Store and Freeze Hocus Pocus Non-Alcoholic Halloween Punch

Fridge: Store any leftover punch in an airtight container in the fridge for up to 3 days. This keeps it fresh while retaining the delicious flavors.

Ice Cubes: If you’ve added ice to your punch, strain it before storing to avoid diluting the flavors. Ice cubes can water down your delightful concoction over time.

Freezer: For longer storage, freeze leftover punch in ice cube trays. These fruity cubes can be added to other drinks or thawed for a refreshing treat later on!

Reheating: While traditionally served cold, if you’d like to warm it up, gently heat the stored punch on the stove over low heat until warmed through, but avoid boiling to preserve the flavors.

Make Ahead Options

These Hocus Pocus Non-Alcoholic Halloween Punch preparations are perfect for busy home cooks looking to save time! You can mix the juice base (apple cider, cranberry juice, orange juice, and pineapple juice) up to 24 hours in advance and store it in the refrigerator. Additionally, you can pre-slice your lime and halve the grapes, keeping them in an airtight container for the same duration. When you’re ready to serve, simply stir in the chilled lemon-lime soda, add the frozen strawberries for spooky “eyeballs,” and top it off with ice cubes. This simple prep not only saves you time but ensures that your punch remains just as refreshing and vibrant for your festive gathering!

Helpful Tricks for Hocus Pocus Non-Alcoholic Halloween Punch

Mix Wisely: Stir gently when combining the juices and soda to preserve the fizzy texture. Over-mixing can lead to a flat punch.

Chill Ingredients: Keep all juices and soda chilled before mixing to ensure your punch stays refreshingly cold longer without excessive ice.

Fresh is Best: Use fresh lime juice for a brighter flavor instead of bottled juice, which can taste less vibrant in your Hocus Pocus punch.

Eye-catching Garnish: Consider using additional floating fruits, like blueberries or pomegranate seeds, to enhance the visual appeal and spooky theme.

Avoid Sweet Overload: Adjust the amount of grenadine syrup based on your preferred sweetness; taste as you go to find the perfect balance that’s still festive!

Hocus Pocus Non-Alcoholic Halloween Punch

Hocus Pocus Non-Alcoholic Halloween Punch Recipe FAQs

How do I choose the best apple cider for the punch?
Absolutely! When selecting apple cider, look for fresh, unfiltered cider from local orchards if available. Ensure it’s clear and free of dark spots or sediment at the bottom for the best taste.

Can I make the punch ahead of time?
Very! You can prepare the punch up to 24 hours in advance. Just mix all the ingredients except for the lemon-lime soda and ice. Store it in the fridge and add the soda and ice right before serving to maintain its fizzy freshness.

How long does the punch last in the fridge?
Your Hocus Pocus Non-Alcoholic Halloween Punch will stay fresh in the refrigerator for about 3 days. Make sure to store it in an airtight container to preserve the flavors, and remember to strain out any ice to prevent dilution.

Can I freeze leftover punch?
Of course! To freeze, pour the leftover punch into ice cube trays. Once frozen, pop the cubes into a zip-top bag and store them in the freezer for up to 3 months. These fruity cubes are great for adding to future beverages or as a refreshing snack!

Are there any allergy concerns with this punch?
Yes! Be cautious with the ingredients if you’re serving guests with allergies. Common allergens include citrus fruits (like oranges and limes) and grenadine (which may contain preservatives or colorants). Always check labels and opt for allergen-free versions when possible.

How can I troubleshoot if my punch tastes too sweet?
No worries! If your punch turns out sweeter than expected, you can balance it by adding a splash of extra lime juice to brighten flavors and reduce the overall sweetness. Taste and adjust gradually until it reaches your desired flavor profile!

Hocus Pocus Non-Alcoholic Halloween Punch for Spooky Fun

Enjoy the Hocus Pocus Non-Alcoholic Halloween Punch, a delightful autumn drink perfect for spooky celebrations.

  • large punch bowl

For the Base

  • 4 cups apple cider (adds a warm, autumnal flavor)
  • 2 cups cranberry juice (brings a tart sweetness)
  • 1 cup orange juice (offers a citrusy brightness)
  • 1 cup pineapple juice (adds tropical notes)
  • 1 liter lemon-lime soda (brings effervescence)

For the Sweetness

  • ½ cup grenadine syrup (provides a splash of red color)
  • ¼ cup fresh lime juice (enhances the punch with a zesty kick)

For the Spooky Touch

  • 1 cup frozen whole strawberries (serve as eerie floating eyeballs)
  • 1 cup green grapes, halved (add a ghoulish twist)
  • several lime, thinly sliced (for garnishing)

Extras

  • as needed ice cubes (essential for keeping the punch cold)
  • optional edible glitter (for enchanting sparkle)

Step-by-Step Instructions

  1. In a large punch bowl, mix together 4 cups of apple cider, 2 cups of cranberry juice, 1 cup of orange juice, and 1 cup of pineapple juice.
  2. Gently stir in 1 liter of lemon-lime soda, incorporating it slowly to preserve the drink’s fizz.
  3. Drizzle in ½ cup of grenadine syrup and ¼ cup of fresh lime juice, and stir until well blended.
  4. Drop in 1 cup of frozen whole strawberries, 1 cup of halved green grapes, and several thin slices of lime into the punch bowl.
  5. Add a generous amount of ice cubes to the bowl to keep your punch refreshingly cold.
  6. Sprinkle a touch of edible glitter over the top of the punch for a magical finish.
  7. Carefully ladle the punch into festive cups and serve to guests.

Stir gently when combining ingredients to preserve fizz. Chill all juices beforehand for best results.

Drink
Autumn
Fall Beverage, Fruity Punch, Halloween Punch, Hocus Pocus Non-Alcoholic Halloween Punch, non-alcoholic drink, Spooky Party Drink

Filed Under: Drink

Revitalize Your Day with a Blackberry Basil Blast Mocktail

October 4, 2025 by grace bellamy Leave a Comment

As I stood in my kitchen, the sun-dappled counter filled with vibrant blackberries and fragrant basil, I realized that magic often happens in just five minutes. This is the essence of my Blackberry Basil Blast Mocktail, a refreshing escape from the ordinary and a delightful way to meet your hydration goals. What I love about this mocktail is its effortlessly quick prep—perfect for impromptu gatherings or simply indulging in a moment of self-care. Plus, the unique pairing of sweet blackberries and aromatic basil elevates your beverage game without the fuss of complicated recipes. So, whether you’re impressing guests or treating yourself to a little luxury, this mocktail is sure to spark joy. Who’s ready to mix up something fabulous?

Blackberry Basil Blast Mocktail

Why Is This Mocktail So Refreshing?

Unmatched Flavor: The unexpected combination of juicy blackberries and fragrant basil creates a refreshingly unique taste that dances on your palate.

Quick to Make: In just five minutes, you can whip this delightful drink together, making it the ideal choice for busy days or spontaneous gatherings.

Guilt-Free Indulgence: With natural sweetness from honey and no added sugars, this mocktail offers a healthy alternative to sugary beverages.

Eye-Catching Presentation: The vibrant colors of the blackberries paired with fresh basil not only make for a delicious drink but also a stunning treat for the eyes—perfect for impressing guests!

Versatile Delight: Serve it at brunch, showers, or cozy nights in; this mocktail fits seamlessly into any occasion. Ready for more delicious combinations? Check out my guide on Refreshing Non-Alcoholic Drinks.

Blackberry Basil Blast Mocktail Ingredients

For the Mocktail
• Fresh blackberries – These are the star of the drink, providing a burst of flavor; frozen can be used too.
• Fresh basil leaves – This aromatic herb complements the sweetness of blackberries beautifully.
• Honey or maple syrup – Use honey for a floral note; maple syrup offers a unique twist if desired.
• Fresh lime juice – Adds brightness and balances the sweetness perfectly.
• Sparkling water – This brings a fizzy touch; feel free to choose flavored options for added zing.
• Ice cubes – Keep it cold and refreshing!
• Extra blackberries for garnish – A pretty addition that enhances the mocktail’s appeal.

Each ingredient in this Blackberry Basil Blast Mocktail contributes to a uniquely refreshing experience.

Step‑by‑Step Instructions for Blackberry Basil Blast Mocktail

Step 1: Muddle the Ingredients
Begin by adding ½ cup of fresh blackberries and 6–8 fresh basil leaves into a cocktail shaker. Using a muddler, gently press down on the blackberries and basil, mixing them until the berries are juicy and aromatic basil fills the air—this should take about 30 seconds.

Step 2: Add Sweetness and Lime
Pour in 1 tablespoon of honey or maple syrup, followed by 1 tablespoon of fresh lime juice. The combination adds that perfect sweetness and brightness. Add a handful of ice cubes to the shaker, filling it up to halfway, which will chill the drink beautifully.

Step 3: Shake It Up
Secure the lid on the shaker tightly and shake vigorously for about 20 seconds. You want to ensure everything is well combined and chilled. As you shake, listen for the ice clinking—this means you’re on the right track to a refreshing Blackberry Basil Blast Mocktail!

Step 4: Strain the Mixture
Place a fine mesh strainer over a tall glass and slowly pour the mixture in, capturing any seeds and herb remnants. This step is crucial for a smooth sip, so be patient as you allow the rich color and flavors to flow into your glass.

Step 5: Add the Bubbles
Top off your strained mixture with ½ cup of sparkling water, adding that delightful fizz. Stir gently to combine the layers without losing the effervescence. The sparkling element will enhance the refreshing nature of your Blackberry Basil Blast Mocktail.

Step 6: Final Touches
If desired, add more ice cubes for an extra chilled experience. Garnish your mocktail with extra basil leaves and a few whole blackberries on top, creating a beautiful presentation that invites everyone to take a sip of your delicious creation.

Blackberry Basil Blast Mocktail

How to Store and Freeze Blackberry Basil Blast Mocktail

Fridge: Enjoy your mocktail fresh! If you have any leftovers, store them in the fridge for up to 1 day in an airtight container.

Freezer: Freezing is not recommended, as the textures of fresh blackberries and basil can change. Instead, consider freezing the ingredients separately for future use, lasting up to 3 months.

Reheating: The Blackberry Basil Blast Mocktail is best enjoyed cold. If stored in the fridge, simply stir and add ice before serving again for optimal refreshing flavors.

What to Serve with Blackberry Basil Blast Mocktail

Elevate your mocktail experience with perfect pairings that tantalize the taste buds and create a memorable occasion.

  • Savory Cheese Platter: The richness of a cheese platter featuring creamy brie and tangy goat cheese harmonizes beautifully with the sweet and herbaceous notes in the mocktail. Enjoy this combination for a delightful taste sensation.

  • Spicy Shrimp Tacos: Crispy tacos filled with spicy shrimp and fresh veggies bring a satisfying crunch that complements the drink’s refreshing qualities. Each sip of the mocktail cools down the heat, creating a fantastic balance.

  • Caprese Salad Skewers: These charming skewers of mozzarella, tomatoes, and basil offer a bite-sized burst of freshness. The flavors echo the mocktail while adding varied textures to the table, making for a refreshing appetizer.

  • Lemon Coconut Bars: Sweet and tart lemon bars with a coconut twist provide a delightful contrast to the berry flavors in your drink. The zesty dessert complements the mocktail perfectly, creating a refreshing finish to your meal.

  • Grilled Vegetable Platter: A medley of grilled vegetables drizzled with balsamic glaze adds an earthy richness that pairs well with the lightness of the mocktail. This combination is a favorite among health-conscious diners.

  • Cucumber Mint Salad: Crisp cucumbers tossed with mint, lime, and a touch of honey echo the flavors in the mocktail beautifully, refreshing your palate and enhancing your dining experience.

  • Sparkling Water with Citrus Slices: For a simple yet effective pairing, serve sparkling water with citrus slices alongside the mocktail. This effervescent drink echoes the sparkling water in your Blackberry Basil Blast Mocktail and adds a hint of zesty brightness.

Make Ahead Options

These Blackberry Basil Blast Mocktails are a fantastic choice for meal prep lovers eager to save time during busy days! You can prepare the muddled blackberry and basil mixture up to 24 hours in advance and refrigerate it in an airtight container, allowing the flavors to meld beautifully. Just remember to add the honey and lime juice right before serving to ensure maximum freshness. When you’re ready to enjoy your mocktail, simply shake the prepared mixture with ice, strain it into a glass, and top off with sparkling water for that refreshing fizz. This way, you will have a delightful and vibrant drink at your fingertips with minimal effort—perfect for impressing guests or treating yourself!

Blackberry Basil Blast Mocktail Variations

Feel free to play around with this mocktail and make it your own with these delightful variations!

  • Boozy Option: Add 1 ounce of gin or vodka for a spirited twist that’s perfect for summer soirées. The herbal notes intertwine beautifully with the blackberries for an aromatic experience.

  • Herb Swap: Try mint instead of basil for a brighter, refreshing flavor. Mint adds a cool touch that pairs well with the sweetness of the blackberries, creating a vibrant summer sipper.

  • Citrus Burst: Incorporate a splash of orange or grapefruit juice for an extra citrus kick. The zesty flavors will brighten the drink even further while making it a bit more tangy.

  • Spice it Up: Add a pinch of cayenne pepper or a few drops of hot sauce for those who crave a kick. Just a hint will balance the sweetness beautifully and awaken the palate.

  • Honey Alternatives: Use agave nectar or coconut sugar instead of honey for a vegan-friendly version. These alternatives will provide sweetness with their unique flavors—perfect for those adjusting to new diets.

  • Berry Blend: Experiment with other berries like raspberries or strawberries! Mixing in different fruits can create delightful flavor harmony, maintaining both the sweetness and tartness.

  • Fizzy Flavor: Infuse the sparkling water with a few slices of ginger or cucumber for added flavor. The spices or coolness will elevate the refreshing quality of this mocktail beyond expectations.

  • Mocktail Punch: Transform this recipe into a punch by doubling the ingredients and serving in a large bowl. Perfect for gatherings, add a mix of ice and extra fruits for guests to help themselves!

Embrace these variations to craft a personalized drink that satisfies your cravings! If you’re curious about other refreshing options, take a peek at my guide on Refreshing Non-Alcoholic Drinks.

Expert Tips for Blackberry Basil Blast Mocktail

• Choose Ripe Berries: Use fresh, ripe blackberries for the best flavor. Overripe berries can lead to a mushy mix—aim for firm yet juicy fruit.

• Fresh Basil Matters: Opt for fresh basil instead of dried. Dried herbs won’t give you the aromatic essence that enhances your Blackberry Basil Blast Mocktail.

• Sweetness Balance: Adjust the honey or maple syrup to taste. Start with less—it’s easy to add more, but hard to fix an overly sweet drink!

• Garnish Creatively: Enhance visual appeal with various garnishes. Use mint leaves or citrus slices alongside your basil for an inviting mocktail.

• Chill Your Glasses: For an extra refreshing touch, chill your glasses in the freezer for about 10 minutes before pouring your mocktail.

• Experiment with Flavors: Don’t hesitate to add other fruits or herbs for an exciting twist. Try adding mint or lime to your Blackberry Basil Blast Mocktail for varied tastes!

Blackberry Basil Blast Mocktail

Blackberry Basil Blast Mocktail Recipe FAQs

How do I select ripe blackberries for my mocktail?
Absolutely! When choosing blackberries, look for ones that are plump, firm, and a deep black color. Avoid berries with dark spots all over or that feel mushy, as these indicate overripeness. For the best flavor, try to use fresh berries within a day or two of purchase!

How should I store my Blackberry Basil Blast Mocktail?
Very! If you have any leftovers, store your mocktail in an airtight container in the fridge for up to 1 day. However, it’s best enjoyed fresh. To maintain flavor, avoid letting it sit too long. Just give it a good stir and add ice if you’re serving the next day!

Can I freeze the Blackberry Basil Blast Mocktail?
I recommend against freezing the finished mocktail, as this can affect the texture of the blackberries and basil. Instead, you can freeze blackberries and basil separately. Just wash and dry the ingredients, then spread them out on a baking sheet to freeze individually for up to 3 months before transferring them to freezer bags.

What if my mocktail is too sweet or too sour?
If your Blackberry Basil Blast Mocktail is too sweet, you can balance it out by adding a splash more of lime juice or sparkling water. For a sweeter taste, just stir in a little extra honey or maple syrup until you reach your desired sweetness. Remember, it’s all about personal preference!

Are there any dietary considerations for this mocktail?
Absolutely! This mocktail is a great choice for everyone, but if you’re concerned about allergies, double-check that your honey or maple syrup is free from any additives. Additionally, remember that some people might be allergic to basil or blackberries, so it’s always good to ask guests before serving!

How can I enhance the presentation of my Blackberry Basil Blast Mocktail?
Yes, presentation can elevate your drink experience! Chill your glasses in the freezer before serving, and use extra fresh basil leaves and whole blackberries as garnishes. You can also rim the glasses with sugar or lime juice for an elegant touch that will impress your guests!

Revitalize Your Day with a Blackberry Basil Blast Mocktail

Enjoy a refreshing Blackberry Basil Blast Mocktail, a perfect balance of juicy blackberries and aromatic basil, ready in just five minutes.

  • Cocktail shaker

For the Mocktail

  • 1/2 cup fresh blackberries (can use frozen)
  • 6-8 leaves fresh basil leaves (aromatic herb)
  • 1 tablespoon honey or maple syrup (adjust to taste)
  • 1 tablespoon fresh lime juice (adds brightness)
  • 1/2 cup sparkling water (for fizz)
  • 1 cup ice cubes (to keep it cold)
  • 1/2 cup extra blackberries for garnish (enhances appeal)

Step-by-Step Instructions

  1. Muddle the blackberries and basil in a cocktail shaker for 30 seconds until juicy and aromatic.
  2. Add honey or maple syrup and lime juice, then fill shaker halfway with ice.
  3. Shake well for about 20 seconds until combined and chilled.
  4. Strain the mixture into a tall glass through a fine mesh strainer.
  5. Top with sparkling water and stir gently to combine.
  6. Garnish with extra basil leaves and blackberries before serving.

Enjoy fresh! Store any leftovers in the fridge for up to 1 day. Freezing not recommended due to texture changes.

Drink
Non-Alcoholic
Blackberry Basil Blast Mocktail, easy recipes, mocktail, non-alcoholic, refreshing drink, Summer Drinks

Filed Under: Drink

Sip on Goblin Green Punch Mocktail for a Flavorful Escape

October 4, 2025 by grace bellamy Leave a Comment

In the midst of summer, nothing delights quite like a cool, refreshing drink that transports you straight to a tropical paradise. Enter the Goblin Green Punch Mocktail—a vibrant and whimsical concoction that’s perfect for any occasion. This recipe not only offers a quick 10-minute prep time but also serves as a fun, family-friendly alternative to sugary sodas. With the zesty combination of pineapple juice and fresh lime, you’ll find your taste buds dancing with joy. Plus, how adorable is that black sanding sugar rim? It adds a playful touch that’s sure to impress guests of all ages. Are you ready to sip on something spectacular? Let’s dive into this delightful recipe!

Goblin Green Punch Mocktail

Why is Goblin Green Punch Mocktail a Must-Try?

Refreshing, this mocktail will instantly lift your spirits as you sip on its tropical flavors.
Quick prep, with just 10 minutes needed, it’s the perfect drink for those unexpected gatherings.
Versatile options for garnishes mean you can get creative—use lime slices, juicy pineapple chunks, or even green grapes!
Fun presentation with the striking black sanding sugar rim makes every glass a showstopper.
Family-friendly, this alcohol-free drink invites everyone to raise a glass and join the fun without the typical sugary drinks.
Enjoy this delightful Goblin Green Punch Mocktail at your next summer bash or cozy family get-together!

Goblin Green Punch Mocktail Ingredients

• Here’s what you’ll need for a magical sip!

For the Punch

  • Lemon-lime soda – Adds a fizzy, refreshing base that perfectly complements the fruity flavors.
  • Chilled pineapple juice – Provides a tropical sweetness that’s bright and refreshing.
  • Simple syrup – Balances the tanginess with just the right amount of sweetness.
  • Fresh lime juice – Offers a zesty kick that revives your taste buds.

For the Garnish

  • Ice cubes – Keep your punch icy cold for the ultimate refreshment.
  • Black sanding sugar – Rimming the glasses with this adds a fun, whimsical touch.
  • Lime slices – A beautiful and zesty garnish that enhances each sip.
  • Pineapple chunks – Adds a tropical flair both visually and in flavor.
  • Green grapes (optional) – A playful addition that blends well and adds color.

Your Goblin Green Punch Mocktail is just a few ingredients away—let’s get mixing!

Step‑by‑Step Instructions for Goblin Green Punch Mocktail

Step 1: Rim the Glasses
Begin by preparing your glasses for the Goblin Green Punch Mocktail! Wet the rims of each glass with fresh lime juice. Make sure the juice is evenly applied, then dip each glass into black sanding sugar, twisting gently to coat the rim completely. This will create a delicious and visually striking contrast, setting the stage for your drink.

Step 2: Add Ice Cubes
Once your glasses are rimmed, fill each one generously with ice cubes. Take a moment to ensure the ice reaches the top of the glass, as this will keep your mocktail refreshingly cold and crisp. The sight of the ice sitting in the glasses is exciting, hinting at the tropical delight to come.

Step 3: Mix the Juices
Next, grab a cocktail shaker and pour in 1 cup of chilled pineapple juice along with 1 tablespoon of fresh lime juice and 2 tablespoons of simple syrup. Secure the shaker lid and shake vigorously for about 15 seconds until the mixture is well combined and frothy. You’ll see the bright yellow blend beautifully, creating a vibrant liquid ready for pouring.

Step 4: Pour the Juice Mixture
Carefully open the shaker and slowly pour the juice mixture into each prepared glass, filling them about halfway. The bright yellow juice against the black-rimmed glasses is visually stunning! Take your time with this step to avoid splashing, allowing the ice to chill the liquid as you build your Goblin Green Punch Mocktail.

Step 5: Top with Lemon-Lime Soda
Now it’s time to add that fizzy element! Gently top off each glass with lemon-lime soda, watching as the bubbles dance and rise to the surface. Aim to fill each glass just to the top, maintaining a delightful balance between the sweet pineapple mix and the refreshing soda’s effervescence.

Step 6: Garnish and Serve
Finalize your Goblin Green Punch Mocktail with thoughtful garnishes. Add a few slices of lime and pineapple chunks to each glass, allowing the colors to pop against the green backdrop. If desired, include a couple of green grapes for a playful touch. Your beautifully crafted mocktails are now ready to be served—cheers to family fun!

Goblin Green Punch Mocktail

Make Ahead Options

Preparing your Goblin Green Punch Mocktail ahead of time is a fantastic way to save time during busy gatherings! You can mix the pineapple juice, lime juice, and simple syrup up to 24 hours in advance—just keep the mixture refrigerated in an airtight container to maintain its fresh taste. Additionally, you can rim the glasses with black sanding sugar and store them in a cool, dry place until you’re ready to serve. When you’re ready to impress your guests, simply add ice, pour in your prepped juice mixture, top it off with lemon-lime soda, and garnish with lime slices, pineapple chunks, or green grapes. Your mocktail will still be just as delightful and refreshing as if made on the spot!

Goblin Green Punch Mocktail Variations

Feel free to personalize this delightful mocktail to suit your taste, making it uniquely yours!

  • Dairy-Free: Swap out simple syrup for agave nectar for a vegan-friendly option with a hint of caramel-like sweetness.
  • Grenadine Twist: Add a splash of grenadine for a vibrant sunset hue, balancing sweetness and tartness beautifully. This could become a family favorite, with its eye-catching colors and flavors almost telling a story in your glass!
  • Herbal Infusion: Experiment by adding fresh mint leaves to the shaker while mixing the juices. It’ll provide a refreshing herbal note that complements the tropical flavors perfectly.
  • Fruity Variations: Try substituting pineapple juice with mango juice for a different tropical experience. The juicy tanginess will transport you to an exotic beach!
  • Heat Level: For some excitement, incorporate a small pinch of cayenne pepper or chili powder into the juice mixture, adding an intriguing kick. It’s an unexpected flavor twist that adventurous friends will love!
  • Sparkling Water: Replace lemon-lime soda with flavored sparkling water for a lighter, more whimsical drink option. Think citrus or berry flavors that can add new dimensions to your mocktail!
  • Garnish Galore: Use fresh fruit skewers as your garnish—combine lime slices, pineapple, and even cherries! It not only looks amazing but also gives impromptu snack options.
  • Alternative Sweetener: For a healthier twist, consider using stevia or monk fruit sweetener in place of simple syrup. You’ll enjoy the same sweetness while cutting back on sugar!

Get inspired and let your creativity flow as you craft the perfect Goblin Green Punch Mocktail! Try pairing it with a tropical fruit salad or some homemade nachos for a fun and festive gathering.

Proper Storage for Goblin Green Punch Mocktail

Fridge: Keep any leftover Goblin Green Punch Mocktail in the fridge for up to 3 days in an airtight container, but be aware that the fizz may diminish over time.

Ice: Ideally, prepare the punch fresh, as it tastes best when served immediately with ice. However, you can store the juice mixture (without soda) in the fridge for up to 2 days before serving.

Garnishes: Store any unused garnishes, like lime slices and pineapple chunks, in the fridge. They can remain fresh for up to 1 day in an airtight container.

Reheating: Since this is a cold mocktail, no reheating is needed. Simply remix the ingredients with fresh soda when ready to serve!

What to Serve with Goblin Green Punch Mocktail

Imagine a sun-soaked gathering where laughter fills the air, and a delightful drink complements the cheerful ambiance.

  • Tropical Fruit Platter: A vibrant selection of fresh fruits like mango, pineapple, and kiwi enhances the refreshing mocktail experience.
    You’ll find these fruity bites harmonizing beautifully, allowing guests to indulge in juicy flavors alongside each sip.

  • Savory Sliders: Mini burgers or pulled pork sliders provide a savory contrast to the inherent sweetness of the punch.
    These satisfying bites will delightfully balance your meal, making it a hit at any party.

  • Spicy Nachos: Crunchy tortilla chips layered with melted cheese, jalapeños, and fresh salsa create a wonderful crunch intertwined with refreshing dips.
    The zing from the toppings pairs fabulously with the sweet and tangy notes of the Goblin Green Punch.

  • Coconut Rice: This creamy and light side dish brings out tropical vibes, harmonizing with the tropical flavors of your mocktail.
    Each bite envelops you in a delightful escape, enhancing the entire dining experience.

  • Herbed Quinoa Salad: A refreshing blend of quinoa, cucumbers, and fresh herbs rounds out your meal with plenty of texture and flavor.
    Its zesty dressing offers a zesty brightness, making it a perfect companion to the sweet punch.

  • Chilled Cucumber Soup: Cool and refreshing, this light appetizer provides a burst of freshness to start off your meal in style.
    Each spoonful complements the bubbly Goblin Green Punch, making for a memorable pairing.

  • Sparkling Water: Keep the bubbles going with plain or flavored sparkling water alongside your mocktail for a refreshing cleanse between sips.
    This option keeps the celebration effervescent while offering guests a hydrating choice.

Expert Tips for Goblin Green Punch Mocktail

  • Rim Like a Pro: Ensure you wet the glass rims evenly with lime juice before dipping them in black sanding sugar. This helps the sugar adhere properly.
  • Choose the Right Ice: Use larger ice cubes rather than crushed ice to prevent rapid dilution of your Goblin Green Punch Mocktail.
  • Balance Sweetness: Taste your juice mixture before pouring. If you love sweeter drinks, feel free to adjust the amount of simple syrup!
  • Fizzy Finish: When topping with lemon-lime soda, do it slowly to maintain the fizzy effect; this will keep your mocktail light and bubbly.
  • Garnish Creatively: Mix and match garnishes for a new look each time—don’t be afraid to get experimental with fruits!

Goblin Green Punch Mocktail

Goblin Green Punch Mocktail Recipe FAQs

What kind of pineapple juice should I use for the Goblin Green Punch Mocktail?
Absolutely! I recommend using 100% pure pineapple juice for the best flavor. Look for options that are labeled as “not from concentrate” for a fresher taste. If you’re feeling adventurous, you can also use fresh pineapple juice for a homemade twist!

How should I store leftover Goblin Green Punch Mocktail?
Any leftovers should ideally be stored in an airtight container in the fridge for up to 3 days. However, the fizzy lemon-lime soda may lose its sparkle over time, so it’s best enjoyed fresh. If you’ve made a juice mix without soda, that can last up to 2 days before serving.

Can I freeze the Goblin Green Punch Mocktail?
Yes, you can! To freeze, pour the juice mixture (without the soda) into ice cube trays and freeze for up to 3 months. When you’re ready to enjoy, blend the frozen cubes with soda for a refreshing slushy version of your Goblin Green Punch Mocktail. Just be careful not to add soda before freezing, as it can expand and make a mess!

What if I don’t have black sanding sugar?
No worries! If you don’t have black sanding sugar on hand, you can substitute it with regular granulated sugar or even colored sprinkles for a festive touch. For a more dramatic look, if you’re feeling creative, try using crushed cookies or edible glitter.

Is this mocktail suitable for kids or those avoiding alcohol?
Very! The Goblin Green Punch Mocktail is alcohol-free and perfect for all ages. It’s a fun drink that kids will love, and it is also suitable for family gatherings or parties. Plus, it’s a great way to offer a sweet treat without the added sugars typically found in sodas.

How can I add more flavor to my Goblin Green Punch Mocktail?
To enhance the taste, consider adding fresh herbs like mint or basil for an aromatic twist! You can also mix in other fruit juices, such as orange or cranberry, depending on your preference. Just remember to balance the sweetness so it doesn’t overpower the tropical flavors!

Sip on Goblin Green Punch Mocktail for a Flavorful Escape

Enjoy the refreshing Goblin Green Punch Mocktail—a tropical, family-friendly drink perfect for summer gatherings.

  • Cocktail shaker

For the Punch

  • 1 cup chilled pineapple juice
  • 2 tablespoons simple syrup (adjust to taste)
  • 1 tablespoon fresh lime juice
  • 1 can lemon-lime soda (to top off drink)

For the Garnish

Directions

  1. Rim the glasses with fresh lime juice and dip in black sanding sugar.
  2. Fill each glass generously with ice cubes.
  3. In a cocktail shaker, combine chilled pineapple juice, fresh lime juice, and simple syrup. Shake for about 15 seconds until well combined.
  4. Pour the juice mixture into each glass, filling about halfway.
  5. Top each glass with lemon-lime soda.
  6. Garnish with lime slices and pineapple chunks, and add green grapes if desired.

Ensure the ice cubes are larger to prevent rapid dilution. Adjust sweetness based on preference. Serve immediately for the best experience.

Drink
family-friendly, Goblin Green Punch Mocktail, mocktail, refreshing, summer drink

Filed Under: Drink

Irresistible Pumpkin Pie Milkshake to Savor This Fall

October 2, 2025 by grace bellamy Leave a Comment

There’s something magical about savoring the seasonal flavors of fall, and nothing captures that better than a Pumpkin Pie Milkshake. In just five minutes, you can blend together creamy vanilla ice cream, rich pumpkin puree, and aromatic pumpkin pie spice to create a delightful treat that’s perfect for all ages. Not only is this recipe a quick prep delight, but it also brings the joy of classic pumpkin pie in a fun, refreshing format—perfect for those hot autumn days when you still want to feel cozy. Are you ready to take your taste buds on a creamy adventure with this delightful milkshake?

Pumpkin Pie Milkshake

Why is this milkshake a must-try?

Quick and Easy: In just five minutes, you can whip up a delicious Pumpkin Pie Milkshake that impresses everyone.

Seasonal Delight: Experience the flavors of fall, capturing the essence of pumpkin pie in every sip.

Crowd-Pleasing: It’s a treat that’s perfect for all ages, making it a hit at any gathering or fun fall afternoon.

Creamy and Flavorful: The smooth texture of vanilla ice cream combined with aromatic pumpkin pie spice offers an indulgent experience you won’t forget.

Versatile Option: Feel free to tweak it! You can swap the vanilla ice cream for a dairy-free alternative or add a dash of maple syrup for extra sweetness.

Enjoy this delightful milkshake as a seasonal refreshment or a fun twist on a classic dessert. Want more fall-inspired treats? Explore our favorite pumpkin recipes to keep the cozy vibes flowing!

Pumpkin Pie Milkshake Ingredients

For the Milkshake

  • Vanilla ice cream – A creamy base that adds sweetness and richness to your Pumpkin Pie Milkshake.
  • Milk – Use whole milk for a richer flavor, or swap for almond milk for a dairy-free option.
  • Pumpkin puree – Provides that iconic pumpkin flavor that’s perfect for this fall-inspired treat.
  • Pumpkin pie spice – A blend of spices that adds warmth and depth, making your milkshake taste like autumn in a glass.

For the Garnish

  • Crushed graham crackers – These add a nice crunch and a hint of sweetness; about 2 cookie sheets gives a perfect sprinkle!
  • Whipped cream – A luscious topping that finishes off the milkshake beautifully, making it extra indulgent.

Dive into this delightful Pumpkin Pie Milkshake and savor every sip of fall’s favorite flavors!

Step‑by‑Step Instructions for Pumpkin Pie Milkshake

Step 1: Blend the Base
In a blender, combine 3 cups of vanilla ice cream, 1/2 cup of milk, 1/2 cup of pumpkin puree, and 1 teaspoon of pumpkin pie spice. Blend on high speed for about 30-60 seconds, or until the mixture is creamy and smooth. You’ll know it’s ready when there are no lumps and it reaches a delightful, velvety consistency that beckons you to taste!

Step 2: Prepare the Glasses
Take two serving glasses and sprinkle about a tablespoon of crushed graham crackers into the bottom of each glass. This will add a lovely crunch to your Pumpkin Pie Milkshake. Once that’s done, carefully pour the blended milkshake into each glass, filling them almost to the top, as it will look inviting and delightful!

Step 3: Garnish with Whipped Cream
To elevate your Pumpkin Pie Milkshake, add a generous swirl of whipped cream on top of each milkshake. Use a piping bag for a beautiful presentation, or simply spoon it on with love. The creamy topping will beautifully contrast with the rich orange hue of the milkshake underneath, creating an indulgent look.

Step 4: Add the Finishing Touches
Sprinkle any remaining crushed graham crackers over the whipped cream, along with a dusting of pumpkin pie spice for a touch of autumn charm. This final step not only adds flavor but also enhances the visual appeal of your delicious Pumpkin Pie Milkshake, making it a feast for the eyes as well.

Step 5: Serve and Enjoy
Insert a straw into each glass, and your Pumpkin Pie Milkshake is now ready to serve. Gather your loved ones, and watch their faces light up as they sip this delightful treat that captures the essence of fall in every creamy gulp!

Pumpkin Pie Milkshake

Pumpkin Pie Milkshake Variations

Customize your delightful Pumpkin Pie Milkshake with these tasty options that bring a little extra zing to every sip!

  • Dairy-Free: Substitute vanilla ice cream with coconut or almond milk ice cream for a creamy, dairy-free alternative that’s just as delicious.

  • Spiced Up: Add an extra pinch of cinnamon or nutmeg for a warm, spicy kick that enhances that cozy autumn vibe.

  • Chocolate Drizzle: Swirl in some chocolate syrup while blending for a decadent twist that complements the pumpkin flavor beautifully.

  • Nutty Flavor: Blend in a tablespoon of almond or peanut butter to introduce creaminess and an amazing nutty flavor that pairs perfectly with pumpkin.

  • Maple Sweetness: Swap out refined sugar for a splash of maple syrup for added sweetness with a wonderfully rich flavor that captures fall.

  • Crunchy Topping: Top with crushed pecans or walnuts for an added crunchy texture that contrasts beautifully with the smoothness of the milkshake.

  • Pumpkin Spice Latte: Include a shot of espresso while blending for a caffeinated twist that perfectly combines the flavors of a pumpkin spice latte.

  • Chilled Refreshment: Add a handful of ice before blending for an even colder treat that’s perfect for those lingering warm autumn days.

Feel free to mix and match these variations to create your uniquely delightful milkshake. Enjoy sipping it alongside some cozy fall desserts, and don’t forget to check out our favorite pumpkin recipes to keep the flavor inspiration flowing!

What to Serve with Pumpkin Pie Milkshake

Enjoy a cozy and delightful meal that perfectly complements this rich and creamy treat.

  • Spiced Pumpkin Muffins: These warm muffins echo the flavors of your milkshake, making for a comforting snack that’s perfect for autumn.

  • Caramel Apple Slices: Sweet and crunchy, these apples dipped in rich caramel balance the creamy milkshake, adding a refreshing contrast.

  • Buttery Popcorn: A crunchy side that provides a delightful texture contrast. Sprinkle with cinnamon for an extra touch of fall flavor!

  • Maple Pecan Pie: Elevate dessert time by pairing the milkshake with a slice of rich pecan pie, amplifying the autumnal vibe.

  • Cinnamon Sugar Donuts: Soft, fluffy, and dusted with sweet cinnamon, these donuts are perfect for dipping in your milkshake for a fun treat.

  • Chai Tea Latte: A warm beverage option that brings spiced flavors to the table, enhancing the cozy experience alongside your creamy milkshake.

  • Ginger Snaps: These crispy cookies offer a spicy crunch that beautifully complements the smoothness of the Pumpkin Pie Milkshake.

  • Pumpkin Spice Latte: For a drink pairing, a pumpkin spice latte provides an extra cozy kick—perfect for chilly fall afternoons.

Make Ahead Options

These Pumpkin Pie Milkshakes are perfect for meal prep enthusiasts! You can blend the milkshake base (3 cups vanilla ice cream, 1/2 cup milk, 1/2 cup pumpkin puree, and 1 teaspoon pumpkin pie spice) up to 24 hours in advance and store it in an airtight container in the freezer. However, for the best texture, pour the milkshake into glasses just before serving and avoid freezing the garnishes. Prepare the glasses with the crushed graham crackers in advance and refrigerate them. When you’re ready to serve, simply reblend for a smoother consistency if needed, pour into your prepared glasses, top with whipped cream, and enjoy the delightful flavors of fall with minimal effort!

How to Store and Freeze Pumpkin Pie Milkshake

Fridge: Keep any leftover Pumpkin Pie Milkshake in an airtight container for up to 1 day. Stir well before serving again, as separation may occur.

Freezer: For longer storage, pour the milkshake into a freezer-safe container and freeze for up to 1 month. Let it sit at room temperature for a few minutes to soften before blending again for a creamy texture.

Reheating: Since this is a frozen treat, there’s no reheating needed. Just blend again after thawing to bring back that smooth consistency!

Serving Tips: If you’ve frozen your milkshake, give it a good stir or blend it again to make it easy to pour into your glasses for serving.

Expert Tips for Pumpkin Pie Milkshake

  • Quality Ingredients: Use high-quality vanilla ice cream for a richer taste. The better the ingredients, the more delicious your Pumpkin Pie Milkshake will be!

  • Balance Sweetness: If you prefer a less sweet shake, adjust the amount of pumpkin puree and graham cracker crumbs. Taste as you go!

  • Spice It Up: Don’t be shy with the pumpkin pie spice! A little extra can elevate the flavor and make your milkshake even cozier.

  • Blend Well: Ensure everything is blended until completely smooth; lumps can ruin the creamy texture of your Pumpkin Pie Milkshake.

  • Chill the Glasses: For an extra refreshing experience, place your serving glasses in the freezer for a few minutes before pouring in the milkshake.

  • Experiment with Toppings: Try adding caramel drizzle or a sprinkle of cinnamon for a personalized twist on this delightful treat!

Pumpkin Pie Milkshake

Pumpkin Pie Milkshake Recipe FAQs

What type of pumpkin puree should I use for the best flavor?
I recommend using 100% pure pumpkin puree from a can or homemade puree from fresh pumpkins. Avoid pumpkin pie filling, as it usually contains added sugars and spices which might alter the flavor of your Pumpkin Pie Milkshake.

How long can I store leftover Pumpkin Pie Milkshake?
Any leftovers should be stored in an airtight container in the fridge for up to 1 day. Make sure to stir it well before you enjoy it again, as some separation may occur. If you’re not planning to consume it right away, freezing is a great option!

Can I freeze the Pumpkin Pie Milkshake? What’s the best way to do it?
Absolutely! To freeze your Pumpkin Pie Milkshake, pour it into a freezer-safe container, leaving some space at the top for expansion. It can be stored for up to 1 month. When you’re ready to enjoy it again, let it sit at room temperature for about 5-10 minutes to soften, then blend it briefly until smooth again before serving.

What if my milkshake is too thick or too thin?
If your Pumpkin Pie Milkshake is too thick, simply add a splash more milk and blend again until you reach your desired consistency. Conversely, if it’s too thin, add a bit more vanilla ice cream to thicken it up. Adjusting those ratios can make all the difference!

Are there any dietary considerations I should know about?
Great question! If you have dairy allergies, you can easily substitute the vanilla ice cream and milk with dairy-free versions, such as coconut or almond milk ice cream. Always check your toppings too—some whipped creams may contain dairy. If serving to young children or those with allergies, please ensure all ingredients are safe for their dietary needs.

How can I enhance the flavor of my Pumpkin Pie Milkshake?
If you want to spice things up, consider adding an extra dash of pumpkin pie spice, or even a bit of vanilla extract for depth. For a touch of sweetness, a tablespoon of maple syrup or caramel sauce can elevate your milkshake beautifully. Don’t be shy to experiment with flavors until it’s just how you like it!

Irresistible Pumpkin Pie Milkshake to Savor This Fall

Enjoy the delightful flavors of fall with a creamy Pumpkin Pie Milkshake perfect for all ages.

  • Blender

For the Milkshake

  • 3 cups vanilla ice cream (A creamy base that adds sweetness and richness.)
  • 1/2 cup milk (Use whole milk for richness or almond milk for dairy-free.)
  • 1/2 cup pumpkin puree (Provides the iconic pumpkin flavor.)
  • 1 teaspoon pumpkin pie spice (A blend of spices that adds warmth.)

For the Garnish

  • 2 cookie sheets crushed graham crackers (Adds a nice crunch.)
  • to taste whipped cream (A luscious topping for an indulgent finish.)

Step-by-Step Instructions

  1. In a blender, combine 3 cups of vanilla ice cream, 1/2 cup of milk, 1/2 cup of pumpkin puree, and 1 teaspoon of pumpkin pie spice. Blend on high speed for about 30-60 seconds until creamy and smooth.
  2. Take two serving glasses and sprinkle about a tablespoon of crushed graham crackers into the bottom of each glass.
  3. Pour the blended milkshake into each glass, filling them almost to the top.
  4. Add a generous swirl of whipped cream on top of each milkshake.
  5. Sprinkle any remaining crushed graham crackers over the whipped cream and dust with pumpkin pie spice.
  6. Insert a straw into each glass, and serve.

Use high-quality ingredients for the best flavor and adjust sweetness to taste. Chill glasses for an extra refreshing experience.

Drink
American
dessert, Fall, milkshake, pumpkin, Pumpkin Pie Milkshake

Filed Under: Drink

Goblin Green Punch Mocktail: A Magical Sip for Everyone

October 2, 2025 by grace bellamy Leave a Comment

As a vibrant splash of color hits your glass, it’s impossible not to smile at the sight of this Goblin Green Punch Mocktail. With Halloween just around the corner or even for a fun get-together, this concoction is your ticket to a festive and refreshing drink that everyone can enjoy, regardless of age. Prepared in just 10 minutes, the mocktail combines the sweetness of pineapple juice with the zesty kick of lime, making it not only a quick treat but also a satisfying alternative to sugary sodas. Plus, the black sanding sugar garnish adds a whimsical touch that’s sure to impress your guests. Ready to whip up this delightful drink? Let’s dive into the recipe and bring some green magic into your kitchen!

Goblin Green Punch Mocktail

Why is this mocktail a must-try?

Festive Appeal: This Goblin Green Punch Mocktail brings a fun, enchanting twist to your gatherings, perfect for Halloween or any celebration.

Refreshing Flavor: The sweet pineapple juice and zesty lime combine to create a delightful burst of tropical goodness.

Quick and Easy: Ready in just 10 minutes, it’s a hassle-free option for those busy days when you want to impress.

Versatile Garnishes: Customize it with lime slices, pineapple chunks, or green grapes for that extra flair!

Family-Friendly: With no alcohol, this drink is suitable for all ages, making it a favorite at parties, from kids to adults.

Crowd-Pleaser: Its vibrant color and playful presentation are sure to be a conversation starter, reminiscent of a festive punch bowl. Want to explore more refreshing options? Check out our delightful mocktail recipes for inspiration!

Goblin Green Punch Mocktail Ingredients

Get ready to create this enchanting drink!

For the Base

  • Lemon-lime soda – adds the perfect fizziness and sweetness to the mocktail.
  • Chilled pineapple juice – brings a tropical flair that balances the tangy lime.
  • Simple syrup – sweetens the drink; you can adjust to taste based on your preference.
  • Fresh lime juice – adds a zesty kick that elevates the overall flavor.

For Serving

  • Ice cubes – chill the drink and keep it refreshingly cold.
  • Black sanding sugar – gives a magical touch to the glass rims for a wow factor.

Optional Garnishes

  • Lime slices – for a pop of color and an additional hint of citrus.
  • Pineapple chunks – adds a fun garnish that echoes the juice’s flavor.
  • Green grapes – perfect for a whimsical touch, enhancing the mocktail’s festive spirit.

Now that you have all your Goblin Green Punch Mocktail ingredients ready, it’s time to bring some green magic to your kitchen!

Step‑by‑Step Instructions for Goblin Green Punch Mocktail

Step 1: Rim the Glasses
Begin by preparing your glasses for the Goblin Green Punch Mocktail. Wet the rims with fresh lime juice, ensuring the moisture is even around the edge. Then, dip each rim into black sanding sugar, turning them gently to coat thoroughly. This adds an enchanting touch that will catch the light and your guests’ eyes.

Step 2: Add Ice
Next, fill each beautifully rimmed glass with ice cubes. Aim to pack them loosely to ensure that the drink remains cold without losing its refreshing fizz. The ice should fill the glasses about three-quarters of the way, providing a perfect base for your mocktail and keeping the drinks crisp and chilled.

Step 3: Mix the Base
In a cocktail shaker or pitcher, combine 1 cup of chilled pineapple juice, 1 tablespoon of fresh lime juice, and 2 tablespoons of simple syrup. Stir or shake well for about 15-20 seconds until all the ingredients are nicely blended, creating a vibrant green mixture. The juice should smell refreshing and zesty, ready to complement the ice.

Step 4: Pour the Mixture
Now, carefully pour the mixed pineapple concoction into each glass, filling them about halfway. You should see the vivid green color contrasting beautifully against the black-sugared rim and the clear ice. Take a moment to appreciate the colors coming together; it’s sure to spark excitement for the Goblin Green Punch Mocktail!

Step 5: Top with Soda
Gently top each glass with lemon-lime soda to bring a delightful fizziness to your mocktail. Aim for a bubbly finish by pouring it slowly over the mixture until the glass is nearly full. Watch as the bubbles dance and rise, creating a lively, festive appearance that will make everyone eager for a taste.

Step 6: Stir Gently
With the glass filled, take a long spoon or a straw and stir gently to combine the soda with the base mix. This step is crucial to maintain the drink’s effervescence; you want the flavors to mingle without losing that sparkling touch. The bright green hue should be inviting and eye-catching at this stage!

Step 7: Garnish
Finally, add your choice of garnishes for that extra magical touch. Place slices of lime, chunks of pineapple, or green grapes on the rim of the glass or float them delicately on top of the drink. These embellishments not only enhance the visual appeal of the Goblin Green Punch Mocktail but also add enticing aromas that invite everyone to sip away!

Goblin Green Punch Mocktail

What to Serve with Goblin Green Punch Mocktail

Imagine creating a delightful spread that pairs perfectly with this enchanting drink, making your gathering truly memorable.

  • Savory Sliders: Mini burgers with a tangy sauce bring a satisfying bite that complements the fruity flavors of the mocktail. The combination is a crowd-pleaser that balances sweetness with savory.

  • Tropical Fruit Platter: An assortment of fresh fruits like pineapple, kiwi, and grapes offers a refreshing contrast that enhances the drink’s vibrant theme. The bright colors and natural sweetness echo the mocktail’s flavors beautifully.

  • Spicy Nachos: Crispy tortilla chips topped with zesty cheese and jalapeños create a fun, crunchy pairing that contrasts the smoothness of the mocktail. The heat from the nachos provides a lively kick to every sip!

  • Creamy Dip with Veggies: A cool, creamy ranch dip alongside crisp carrots, cucumbers, and bell peppers brings a refreshing crunch, perfectly cooling down the palate between sips of your Goblin Green Punch Mocktail.

  • Zesty Cheese Platter: A selection of tangy cheeses, like feta or goat cheese, can be paired with crackers for a classy touch. The richness of the cheese enhances the mocktail’s refreshing zing, creating a balanced flavor medley.

  • Chilled Sparkling Water: For guests preferring a non-sweet option, offering plain or flavored sparkling water allows everyone to enjoy the effervescence. This creates a cohesive theme with the mocktail and ensures hydration throughout the event.

Expert Tips for Goblin Green Punch Mocktail

  • Choose Quality Ingredients: Always opt for fresh lime juice and high-quality pineapple juice for the best flavor. Freshness elevates your Goblin Green Punch Mocktail to new heights.

  • Adjust the Sweetness: Start with the recommended simple syrup and adjust to your taste. Some may prefer a tad sweeter, while others might enjoy a more tart sip—experiment to find your perfect blend!

  • Ice to Perfection: Use larger ice cubes to keep the mocktail cold longer without diluting the flavors too quickly. This way, you can enjoy every last drop of your refreshing drink.

  • Rimming Made Easy: Make sure the lime juice is applied evenly before dipping in black sanding sugar. A well-coated rim can really enhance the look and taste of your Goblin Green Punch Mocktail.

  • Garnish with Purpose: Use garnishes not just as decoration but as flavor enhancers. Lime slices and pineapple chunks bring a delightful aroma that complements the drink beautifully.

  • Serving Variations: Don’t hesitate to swap in different sodas or juices for a fun twist! Lemonade, ginger ale, or even coconut water can create unique variations of the Goblin Green Punch Mocktail.

Goblin Green Punch Mocktail Variations

Feel free to put your own spin on this delightful drink and create a version that suits your taste!

  • Dairy-Free: Use coconut milk instead of simple syrup for a creamy, tropical twist. The coconut flavor enhances the mocktail’s sweetness while keeping it light.

  • Sparkling Substitution: Swap the lemon-lime soda for ginger ale for an extra zing! The spiciness of ginger pairs beautifully with the pineapple’s sweetness.

  • Herbal Infusion: Add fresh mint leaves for a refreshing herbal note. The mint provides a fragrant counterpoint to the fruity flavors and elevates the overall experience.

  • Lower Sugar: Replace the simple syrup with agave nectar for a healthier option. This subtle change reduces the sweetness while still keeping the punch delightful and enjoyable.

  • Seasonal Fruits: Experiment with different fruit juices! Try pomegranate, apple, or cranberry juice as a base for unique flavor profiles, especially during the holiday season.

  • Spicy Kick: Add a dash of jalapeño or a few slices of fresh ginger for some heat. This twist brings a fun surprise to your mocktail and is perfect for adventurous palates.

  • Frozen Fruit Garnish: Use frozen berries as garnishes instead of fresh. They’ll keep your drink cold and add a splash of color that complements the vibrant green.

  • Punch Bowl Version: Scale up the recipe for gatherings! Mix all the ingredients in a large punch bowl and let guests serve themselves, adding ice and garnishes on demand. This makes entertaining effortless and fun!

Let your creativity flow and experiment with these ideas to craft the perfect Goblin Green Punch Mocktail for any occasion, and don’t forget to explore more captivating mocktail recipes for additional inspiration!

How to Store and Freeze Goblin Green Punch Mocktail

Fridge: Store any unused Goblin Green Punch Mocktail in an airtight container for up to 2 days. However, keep in mind that the fizzy element may lose some sparkle over time.

Freezer: If you want to save the mocktail, pour it into ice cube trays and freeze for future use. Simply blend the frozen cubes with fresh soda for a refreshing drink later on.

Reheating: Since this is a chilled mocktail served over ice, reheating isn’t applicable. Instead, enjoy it cold, or use the frozen cubes to keep your drinks cool!

Preparation: Always mix fresh ingredients right before serving to ensure maximum freshness and flavor in your Goblin Green Punch Mocktail.

Make Ahead Options

These Goblin Green Punch Mocktails are perfect for busy home cooks looking to save time without sacrificing flavor! You can prepare the punch base (pineapple juice, lime juice, and simple syrup) up to 24 hours in advance. Simply mix these ingredients in a pitcher and refrigerate them until you’re ready to serve. On the day of your gathering, just rim the glasses with lime juice and black sanding sugar, fill them with ice, pour in the prepared mixture, and top with lemon-lime soda for a refreshing finish. This way, your magical drink is just as delightful and vibrant, allowing you to spend more time enjoying with your guests!

Goblin Green Punch Mocktail

Goblin Green Punch Mocktail Recipe FAQs

How do I select ripe ingredients for the Goblin Green Punch Mocktail?
Absolutely! For the best flavor, choose ripe pineapples that feel slightly soft when gently squeezed, indicating juiciness. Look for limes that are firm and heavy for their size; they should give a little when squeezed, but not too much, as this can indicate overripeness.

How should I store leftover Goblin Green Punch Mocktail?
Very! If you happen to have any leftovers, store them in an airtight container in the fridge. Ideally, consume the mocktail within 2 days to enjoy the best fizz and freshness, though the soda may lose some of its sparkle over time.

Can I freeze the Goblin Green Punch Mocktail?
Certainly! To freeze, pour any leftover mocktail into ice cube trays. Once frozen, you can blend the cubes with fresh lemon-lime soda when you’re ready for a refreshing treat again. This keeps the flavors vibrant and allows you to create a quick drink in minutes!

What if my mocktail isn’t as sweet as I’d like?
No worries! Simply add a little more simple syrup to your Goblin Green Punch Mocktail. Start with a teaspoon at a time, mixing well after each addition, until it reaches your desired sweetness. You can also adjust the lime juice if you prefer a more balanced taste.

Are there any dietary considerations for the Goblin Green Punch Mocktail?
Absolutely! This refreshing mocktail is alcohol-free, making it suitable for all ages. If you’re concerned about allergies, ensure that the black sanding sugar doesn’t contain any unacceptable ingredients. Most brands are safe, but it’s always worth double-checking!

What’s the best way to make the black sanding sugar stick to the glasses?
Easy peasy! Just wet the rims of your glasses generously using fresh lime juice, then immediately dip them into the black sanding sugar. Make sure to twist them gently to ensure an even coating; this magical touch not only looks great but also adds a delightful sweetness to each sip!

Goblin Green Punch Mocktail: A Magical Sip for Everyone

Experience the festive Goblin Green Punch Mocktail, a refreshing, non-alcoholic drink combining pineapple juice and lime for all ages.

  • Cocktail shaker
  • Measuring Cups
  • Measuring Spoons
  • glasses

For the Base

  • 1 cup chilled pineapple juice
  • 1 tablespoon fresh lime juice
  • 2 tablespoons simple syrup
  • 1 can lemon-lime soda (for topping)

For Serving

  • as needed ice cubes (to chill the drink)
  • as needed black sanding sugar (for rimming glasses)

Optional Garnishes

  • as needed lime slices (for garnish)
  • as needed pineapple chunks (for garnish)
  • as needed green grapes (for garnish)

Directions

  1. Wet the rims of the glasses with fresh lime juice and dip in black sanding sugar.
  2. Fill each glass with ice cubes, about three-quarters full.
  3. In a cocktail shaker, combine pineapple juice, fresh lime juice, and simple syrup. Shake well.
  4. Pour the mixture into each glass, filling them halfway.
  5. Top each glass with lemon-lime soda.
  6. Stir gently to combine without losing the fizz.
  7. Garnish with lime slices, pineapple chunks, or green grapes.

For sparkling freshness, mix ingredients just before serving. Adjust sweetness to taste if desired.

Drink
easy cocktail, Goblin Green Punch Mocktail, Halloween mocktail, non-alcoholic drink, party drink, refreshing beverage

Filed Under: Drink

Spooktacular Hocus Pocus Non-Alcoholic Halloween Punch

October 2, 2025 by grace bellamy Leave a Comment

The moment I poured that vibrant punch into the bowl, a wave of nostalgia washed over me, transporting me straight to childhood Halloween parties filled with laughter and delight. This Hocus Pocus Non-Alcoholic Halloween Punch is the perfect concoction to spark joy and revitalize your holiday celebrations. With just 15 minutes of prep, it’s impressively quick to put together and a total showstopper for your guests. The balance of fruity flavors mixed with fizzy goodness makes it a festive treat everyone will adore. Plus, it’s a great way to keep the spirits high while ensuring everyone, young and old, can enjoy a delightful beverage without the need for alcohol. What spooky surprises will you add for your Halloween gathering? Let’s dive into this magical recipe!

Hocus Pocus Non-Alcoholic Halloween Punch

What makes this punch a Halloween favorite?

Vibrant, Festive Colors: The stunning blend of apple cider, cranberry juice, and sparkling soda creates a delightful punch that looks as enchanting as it tastes.

Quick and Easy: With just 15 minutes of prep time, you can whip up a crowd-pleaser that doesn’t demand hours in the kitchen.

Kid-Friendly Delight: Everyone can join in on the fun—no need for adult beverages when you have a magical punch that kids and adults alike can enjoy!

Spooky Visuals: The addition of frozen strawberries and grapes adds a playful touch, turning your punch into spooky “eyeballs” that will wow your guests.

Customizable Twist: Feel free to get creative by adding your own mix of fruits or even trying out other flavors! And if you love fun garnishes, check out this vibrant Halloween cocktail inspiration.

Serve up this Hocus Pocus Non-Alcoholic Halloween Punch at your next gathering, and watch it disappear!

Hocus Pocus Non-Alcoholic Halloween Punch Ingredients

Prepare to enchant your guests with this spellbinding punch!

For the Punch Base

  • Apple cider – A sweet autumn staple that brings warmth and depth to the punch.
  • Cranberry juice – Adds a delightful tartness that perfectly complements the other flavors.
  • Orange juice – Infuses a refreshing citrusy zing that brightens the overall taste.
  • Pineapple juice – Introduces tropical sweetness, enhancing the fruity profile.
  • Lemon-lime soda – Provides a fizzy kick that adds a fun, bubbly texture to your punch.

For the Flavor Boost

  • Grenadine syrup – A sweet, vibrant splash that enhances the color and sweetness of the punch.
  • Fresh lime juice – Offers a zesty tang that balances the sweetness wonderfully.

For the Spooky Touch

  • Frozen whole strawberries – These act as chilling “eyeballs” while keeping the punch cold and fruity!
  • Green grapes, halved – Add a playful, creepy element while bringing a crunchy texture to every sip.
  • Lime, thinly sliced – A garnish that not only looks great but also intensifies the citrus flavors.
  • Ice cubes – Essential for keeping your punch refreshingly cool throughout the party.

For the Magical Finish

  • Optional: Edible glitter – Sprinkle some on top for a sparkling, witchy effect that mesmerizes your guests.

This Hocus Pocus Non-Alcoholic Halloween Punch is sure to cast a spell on everyone at your celebration!

Step‑by‑Step Instructions for Hocus Pocus Non-Alcoholic Halloween Punch

Step 1: Mix the Juices
In a large punch bowl, start by pouring in 4 cups of apple cider, followed by 2 cups of cranberry juice, 1 cup of orange juice, and 1 cup of pineapple juice. Next, add 1 liter of lemon-lime soda to introduce a beautiful fizz. Gently stir the mixture with a large spoon until everything is well combined, forming a vibrant base for your Hocus Pocus Non-Alcoholic Halloween Punch.

Step 2: Add Flavor Enhancers
Once your juices are blended, it’s time to elevate the flavor! Add 1/2 cup of grenadine syrup and 1/4 cup of fresh lime juice into the punch. Stir the concoction again, ensuring that the sweet and tart elements integrate seamlessly. This step not only enhances the taste but also adds a rich hue to your Halloween punch, making it even more inviting.

Step 3: Incorporate the Spooky Elements
Now, introduce the fun part! Gently place 1 cup of frozen whole strawberries and 1 cup of halved green grapes into the punch bowl. These fruity “eyeballs” float charmingly in your punch, adding a playful touch. Additionally, toss in a few thin slices of lime to boost the aesthetics and flavor, ensuring your Hocus Pocus Non-Alcoholic Halloween Punch looks as enchanting as it tastes.

Step 4: Chill the Punch
Add a generous handful of ice cubes to your punch mixture to keep it refreshingly cool. As the ice gradually melts, it will chill the Hocus Pocus Non-Alcoholic Halloween Punch without diluting the flavor too much, allowing your guests to savor every flavorful sip throughout your Halloween gathering.

Step 5: Create the Magical Finish
For an enchanting touch, consider sprinkling a small amount of edible glitter on top of the punch. This will add a sparkling, witchy effect that captivates the eyes. It’s the perfect finishing touch for your Hocus Pocus Non-Alcoholic Halloween Punch, making it feel even more special and festive for your guests.

Step 6: Serve and Enjoy
Finally, ladle your delightful Hocus Pocus Non-Alcoholic Halloween Punch into festive cups or glasses for serving. As you present this colorful concoction, watch as smiles light up faces—everyone will be eager to dive into this magical beverage. Gather around, toast to the festivities, and enjoy the refreshing flavors together!

Hocus Pocus Non-Alcoholic Halloween Punch

Make Ahead Options

These Hocus Pocus Non-Alcoholic Halloween Punch ingredients can be prepped in advance to streamline your party planning! You can mix all the juices (apple cider, cranberry juice, orange juice, pineapple juice, and lemon-lime soda) up to 24 hours ahead of time and refrigerate the mixture in an airtight container. Additionally, prepare the frozen strawberries, green grapes, and lime slices, keeping them sealed until you’re ready to serve. When it’s time to enjoy, simply add the grenadine syrup and fresh lime juice to the punch base, stir gently, and toss in your spooky fruit “eyeballs” along with some ice. This method saves you precious moments on the day of the celebration, ensuring your punch is just as delightful and refreshing!

Helpful Tricks for Hocus Pocus Punch

  • Proper Mixing: Stir gently to combine the juices without losing carbonation from the lemon-lime soda—validate that your Hocus Pocus Non-Alcoholic Halloween Punch remains bubbly!

  • Chill Before Serving: Always use cold or frozen fruits and add ice cubes last to maintain optimal temperature. This prevents dilution and keeps flavors vibrant throughout the party.

  • Garnish with Care: Avoid overdoing edible glitter; a small sprinkle is enchanting, while too much can overshadow the beautiful colors of the punch.

  • Taste Test: Adjust sweetness by adding more lime juice or grenadine if desired. Balancing flavors ensures every sip of your Hocus Pocus Non-Alcoholic Halloween Punch is delightful!

  • Creative Floaters: Experiment with different fruits for the floating “eyeballs.” Try blueberries or slices of oranges for a twist, enhancing both taste and visual appeal.

  • Festive Presentation: Serve in spooky-themed cups or punch bowls to elevate the festive ambiance and impress your guests with your creativity.

How to Store and Freeze Hocus Pocus Non-Alcoholic Halloween Punch

Fridge: Store any leftovers in an airtight container in the fridge for up to 3 days to maintain flavor and fizz.

Freezer: You can freeze the punch in ice cube trays, allowing you to use them later as a fruity addition to drinks. Use within 1 month for peak freshness.

Reheating: Since this punch is served cold, there’s no need to reheat. Just enjoy it chilled, or add frozen fruits to keep it cool!

Serving Suggestions: Consider pouring over ice as you serve to ensure a refreshing experience every time, no matter how long it’s been stored.

What to Serve with Hocus Pocus Non-Alcoholic Halloween Punch?

Creating the perfect festive ambiance for your gathering is easy when you know what to pair with this vibrant punch!

  • Witch’s Broomstick Snacks: These cheesy pretzel stick snacks are fun and easy to make, giving a delightful crunch that complements the fruity punch perfectly.

  • Ghostly Fruit Platter: A mix of spooky-shaped fruits and cheese creates a fresh, colorful display that adds a healthy touch while still being thematic.

  • Mini Pumpkin Pies: Their sweet and spicy flavors will evoke the spirit of the season, balancing the fruity brightness of your Hocus Pocus Punch beautifully.

  • Spooky Vegetable Platter: Carrots and bell peppers arranged like creepy crawling bugs plus a creamy dip provide a crunchy and refreshing contrast to the sweet punch.

  • Halloween Cupcakes: Decorated with ghostly icing or pumpkin toppers, they’re a sweet treat that pairs exquisitely with the whimsical nature of your punch.

  • Cinnamon Apple Cider Donuts: These warm, spiced treats enhance the autumn flavor of your punch while adding a cozy vibe to your celebration.

  • Sparkling Water with Lime: For a refreshing, light drink option, serving sparkling water with lime slices will keep guests refreshed without overpowering the punch’s flavors.

Feel free to mix and match these ideas to cast a delicious spell on your Halloween festivities!

Hocus Pocus Non-Alcoholic Halloween Punch Variations

Feel free to explore creative twists on this enchanting concoction, bringing your personal touch to every sip!

  • Dairy-Free: Substitute a splash of coconut water for a tropical flair while keeping it dairy-free and refreshing.

  • Spicy Kick: Add a pinch of cayenne pepper or sliced jalapeños for a surprising heat that will electrify your punch! Just remember, a little goes a long way.

  • Berry Blast: Mix in different frozen berries such as blueberries or raspberries to enhance the fruity depth and add new colors to your punch. These will add a delightful burst of flavor with every sip.

  • Herb Infusion: Toss in a handful of fresh mint leaves for a refreshing herbal note, creating a beautiful balance with the fruity flavors. This subtle addition will elevate the punch to a whole new level!

  • Sparkling Variety: Experiment with different sparkling waters or flavored sodas in place of lemon-lime soda. Ginger ale or elderflower soda make fabulous alternatives to tickle your taste buds.

  • Citrus Zinger: Incorporate zest from oranges or lemons to intensify the citrus flavors, adding a refreshing zing and delightful fragrance to your punch. Try rubbing the zest on the rim of the serving cups for a beautiful presentation!

  • Mocktail Version: Transform this punch into a whimsical mocktail by serving it in cocktail glasses with stylish garnishes and a fun straw. Your guests will love the festive upgrade without the alcohol!

  • Sweet and Savory: Add a dash of balsamic vinegar for a tangy twist that complements the sweetness, creating an intriguing flavor experience that will leave everyone guessing.

Whichever variations you choose, I hope you enjoy this Hocus Pocus Non-Alcoholic Halloween Punch with family and friends!

Hocus Pocus Non-Alcoholic Halloween Punch

Hocus Pocus Non-Alcoholic Halloween Punch Recipe FAQs

How do I choose the best apple cider for this punch?
Absolutely! When selecting apple cider, look for fresh, unfiltered varieties that boast a rich flavor. Aim for cider without added sugars or preservatives for the purest apple taste. If you see a deep, golden color, that’s a great visual cue—it typically means it’s packed with flavor!

How should I store leftover Hocus Pocus Non-Alcoholic Halloween Punch?
You can keep any leftovers in an airtight container in the fridge for up to 3 days. Be sure to store it without ice to prevent dilution. To retain that delightful fizz, it’s best enjoyed fresh, but it’ll still taste good for a couple of days if kept sealed!

Can I freeze the punch for later use?
Absolutely! Pour the punch into ice cube trays and freeze it, allowing you to create refreshing, fruity ice cubes later on. Just remember to use them within 1 month for optimal freshness. These cubes are great additions to other beverages too!

What if my punch turns out too sweet?
No problem! If your Hocus Pocus Non-Alcoholic Halloween Punch tastes too sweet, you can balance it out with a splash more of fresh lime juice. Start by adding 1 tablespoon at a time, stirring well after each addition until you reach the desired flavor. This will bring a refreshing tang without ruining the festive sweetness.

Is this punch safe for pets?
Very! This punch is made from fruits and juices that are safe for pets in moderate amounts. Still, it’s best to keep them away from any sodas or sweeteners, as they can be harmful to animals. Always consult your veterinarian if you’re unsure!

What can I do if I don’t have all the fruit ingredients?
No worries! You can swap in other favorite fruits like raspberries, blueberries, or even slices of citrus like oranges or lemons. The more, the merrier! Just ensure the fruits you choose complement the existing flavors—adding a splash of creativity to your Hocus Pocus Non-Alcoholic Halloween Punch!

Spooktacular Hocus Pocus Non-Alcoholic Halloween Punch

A delightful Hocus Pocus Non-Alcoholic Halloween Punch, perfect for adding festive cheer to any gathering.

  • large punch bowl
  • large spoon

For the Punch Base

  • 4 cups apple cider (A sweet autumn staple)
  • 2 cups cranberry juice (Adds a delightful tartness)
  • 1 cup orange juice (Infuses a refreshing citrusy zing)
  • 1 cup pineapple juice (Introduces tropical sweetness)
  • 1 liter lemon-lime soda (Provides a fizzy kick)

For the Flavor Boost

  • 1/2 cup grenadine syrup (Enhances color and sweetness)
  • 1/4 cup fresh lime juice (Offers a zesty tang)

For the Spooky Touch

  • 1 cup frozen whole strawberries (Acts as chilling ‘eyeballs’)
  • 1 cup green grapes, halved (A playful, creepy element)
  • 1 lime thinly sliced (Garnish for aesthetics and flavor)
  • ice cubes (Essential for keeping punch cool)

For the Magical Finish

  • edible glitter (Optional for a sparkling effect)

Step-by-Step Instructions

  1. In a large punch bowl, pour in 4 cups of apple cider, followed by 2 cups of cranberry juice, 1 cup of orange juice, and 1 cup of pineapple juice. Then, add 1 liter of lemon-lime soda and stir gently.
  2. Add 1/2 cup of grenadine syrup and 1/4 cup of fresh lime juice. Stir again until well combined.
  3. Gently add 1 cup of frozen strawberries and 1 cup of halved green grapes to the punch bowl.
  4. Add a handful of ice cubes to keep the punch cool.
  5. Sprinkle some edible glitter on top for a festive finish.
  6. Serve in festive cups and enjoy!

Stir gently to maintain carbonation and serve with cold fruits to keep flavors vibrant.

Drink
American
festive beverage, Halloween Punch, Holiday Recipe, Kid-Friendly Drink, non-alcoholic drink, party punch

Filed Under: Drink

Revitalize Your Day with Otter’s Fizzy Orange Juice Delight

October 2, 2025 by grace bellamy Leave a Comment

On a sunny afternoon, I spotted my kids gazing longingly at a fizzy drink recipe on their favorite show. It sparked a mini crisis: how could I transform ordinary orange juice into something they’ll eagerly sip rather than reach for that fast-food soda? Enter Otter’s Fizzy Orange Juice—a delightful concoction that’s as fun to make as it is to drink! This recipe is not only quick to prep, but it also adds a fizzy twist to the classic juice we all love. With a touch of honey, a hint of cinnamon, and creamy French vanilla coffee creamer, you can whip up an enchanting beverage that will impress even the pickiest palate. Curious about how to bring a little magic to your next family gathering? Let’s dive into this effervescent treat!

Otter’s Fizzy Orange Juice

Why is Otter’s Fizzy Orange Juice so special?

Effortless Refreshment: In just 10 minutes, you can create a drink that’s both delicious and eye-catching. Unique Flavor Fusion: The blend of honey, cinnamon, and vanilla coffee creamer brings an unexpected depth to classic orange juice. Fizz Factor: Top it off with soda water for a bubbly finish that elevates your beverage experience. Fun for Everyone: This delightful drink is perfect for kids and adults alike, making it a hit at family gatherings or casual brunches. Elevated Presentation: Honeyed and sugared rims add an elegant touch, impressing guests with minimal effort. Make sure to try out other fun drinks with our easy-to-follow guide on creative homemade beverages!

Otter’s Fizzy Orange Juice Ingredients

Unleash the fizz with these delightful components!

For the Sweet Base
• Honey – Acts as a natural sweetener, adding a cozy touch to your drink.
• Demerara sugar or raw white sugar – Offers a hint of caramel flavor, enhancing the sweetness beautifully.
• Cinnamon – Brings warmth and spice, elevating the overall taste profile.

For the Drink
• Crushed ice – Essential for that frosty feel; the more, the merrier!
• Orange juice – Use freshly squeezed for the best flavor; it’s the star of the show!
• French vanilla coffee creamer – Adds a smooth, creamy layer that pairs perfectly with the sweetness.

To Finish
• Soda water – Top off your creation for that refreshing fizz; adjust to your taste for a bubbly experience!

With these ingredients, your Otter’s Fizzy Orange Juice will turn into a captivating treat that lights up any occasion. Enjoy the magic of homemade flavors!

Step‑by‑Step Instructions for Otter’s Fizzy Orange Juice

Step 1: Chill Your Ingredients
Begin by chilling all of your ingredients, including the serving glasses, for at least one hour. This ensures that your Otter’s Fizzy Orange Juice is refreshingly cold when served. Place the honey, demerara sugar, cinnamon, orange juice, coffee creamer, and soda water in the refrigerator while you prepare the glasses.

Step 2: Prepare the Glasses
On a shallow dish, drizzle honey enough to coat the rims of your glasses. Carefully flip each glass into the honey, allowing excess to drip off. This step not only adds sweetness but also provides a sticky surface for the cinnamon-sugar mix to adhere to, giving your drinks an appealing, decorative touch.

Step 3: Add Cinnamon-Sugar Coating
In another shallow dish, whisk together the demerara sugar and cinnamon until combined. Dip the honey-coated rims of the glasses into this mixture, ensuring they’re evenly covered. This adds a delightful crunch and a burst of flavor to your Otter’s Fizzy Orange Juice, making each sip even more enjoyable.

Step 4: Fill with Crushed Ice
Next, fill each glass about three-quarters full with crushed ice. The ice not only cools the drink but also creates a fun, frosty appearance. Make sure the ice is compact enough to support the liquids you’ll be adding next while still leaving room for the delicious toppings.

Step 5: Layer with French Vanilla Creamer
Drizzle the French vanilla coffee creamer over the ice, allowing it to seep and settle at the bottom of each glass. This layering technique creates a beautiful visual effect, enhancing the overall experience of your Otter’s Fizzy Orange Juice. The creamy layer mingles with the ice and juice as you pour, inviting you to take a sip.

Step 6: Add the Orange Juice
Pour the orange juice into each glass, covering the ice fully. Aim for a vibrant layering effect while pouring slowly to avoid disturbing the cream too much. This bright, zesty orange juice is the heart of Otter’s Fizzy Orange Juice, bringing a splash of sunshine to your refreshing concoction.

Step 7: Finish with Soda Water
Top each glass with soda water to taste, depending on how fizzy you want your drink to be. For a livelier fizz, add more soda water; for a juicier feel, use less. The carbonation combines beautifully with the other layers, making your Otter’s Fizzy Orange Juice a delightful and effervescent treat.

Step 8: Serve and Share
Your refreshing Otter’s Fizzy Orange Juice is now ready to be served! Enjoy it immediately for the best experience. Gather your loved ones around to share this delightful drink; its sweet and fizzy nature is sure to bring smiles and satisfaction at any gathering.

Otter’s Fizzy Orange Juice

How to Store and Freeze Otter’s Fizzy Orange Juice

Fridge: Store any leftover Otter’s Fizzy Orange Juice in an airtight container for up to 2 days. Keep in mind that the fizz will diminish over time.

Freezer: If you wish to freeze leftovers, pour the juice into ice cube trays. Freeze for up to 3 months, and blend these cubes into smoothies for a refreshing treat later.

Reheating: Thaw frozen juice cubes in the fridge overnight before use. They can be added directly to drinks for a chilled effect, as refreezing won’t harm their quality.

Helpful Tricks for Otter’s Fizzy Orange Juice

  • Chill Everything: Ensure all ingredients are well-chilled for that refreshing taste. Warm ingredients can lead to a less enjoyable drink experience.

  • Layering Technique: For the best presentation, pour the coffee creamer first, then the orange juice. This creates beautiful layers that enhance the visual appeal of your Otter’s Fizzy Orange Juice.

  • Soda Water Choices: Adjust the amount of soda water based on personal preference. More soda results in a fizzier drink, while less gives a more juice-like texture.

  • Honey Application: When coating the glass rims with honey, don’t rush. A thorough coat makes the cinnamon-sugar stick better, maximizing flavor as you sip.

  • Variations Galore: Feel free to experiment with different flavors for the coffee creamer, like hazelnut or caramel, to customize your Otter’s Fizzy Orange Juice to your liking!

Otter’s Fizzy Orange Juice Variations

Feel free to get creative with your Otter’s Fizzy Orange Juice and customize it to suit your taste buds!

  • Dairy-Free: Swap the French vanilla coffee creamer for coconut or almond milk creamer for a dairy-free treat. Both options add a unique flavor twist while keeping the drink creamy.

  • Extra Fruity: Mix in a few ounces of pineapple or mango juice to enhance the tropical vibe of your beverage. This fruity addition will brighten up the drink, making it even more refreshing.

  • Spicy Kick: Add a pinch of cayenne pepper or a few dashes of hot sauce for an unexpected bit of heat. This interesting flavor contrast can really elevate your Otter’s Fizzy Orange Juice, making it a conversation starter at parties.

  • Herbal Infusion: Try infusing the orange juice with fresh herbs like mint or basil before mixing. Simply muddle your chosen herb and let it steep in the juice for a fragrant and refreshing twist on this classic drink.

  • Berry Bliss: Incorporate some muddled berries such as strawberries, blueberries, or raspberries into your drink. This adds a pop of color and a burst of flavor that pairs beautifully with the orange juice.

When you’re ready to explore even more options, consider adding a splash of vanilla extract for depth or a dollop of whipped cream on top for extra indulgence. Remember, experimenting with flavors can lead to delightful surprises, so don’t hesitate to make each batch of Otter’s Fizzy Orange Juice uniquely yours! You might even want to pair it with some refreshing snacks; check out our guide on light appetizers for summer gatherings!

Make Ahead Options

Preparing Otter’s Fizzy Orange Juice in advance is a fantastic time-saver, especially for busy hosts! You can chill the ingredients (orange juice, soda water, and French vanilla coffee creamer) up to 24 hours beforehand, making it easy to throw everything together last minute. Just be sure to keep the soda water separate until you’re ready to serve to maintain the fizz. The glasses can also be prepared a few hours in advance by dipping them in honey and the cinnamon-sugar mixture to prevent the sugars from melting. When it’s time to serve, simply fill the chilled glasses with crushed ice, layer the creamer and juice, top with soda water, and you’ll have refreshing Otter’s Fizzy Orange Juice ready in no time!

What to Serve with Otter’s Fizzy Orange Juice

Nothing complements the cheerful notes of this fizzy drink like a spread of delightful snacks and dishes that truly elevate your meal experience.

  • Zesty Shrimp Tacos: These fresh tacos bring a burst of flavor and a splash of color, perfectly harmonizing with the bright citrus notes of the juice.

  • Mini Caprese Skewers: A light and refreshing appetizer, with creamy mozzarella and ripe tomatoes that contrast beautifully against the sweetness of the Otter’s Fizzy Orange Juice.

  • Savory Spinach and Feta Pastry Bites: Each flaky pastry packs a savory punch, balancing the sweetness of the drink and creating an elegant pairing that guests adore.

  • Crispy Veggie Chips: These provide a delightful crunch, with the saltiness of the chips enhancing the fizzy, sweet profile of the drink. Serve alongside your juice for a playful mix!

  • Fruit Salad with Honey-Lime Dressing: Bright, refreshing, and an excellent palate cleanser, this dish makes a perfect complement to the sweet citrus beverages, creating harmony in flavors.

  • Light Greek Yogurt Parfaits: Layered with fresh berries and a sprinkle of granola, these make for a creamy, textured delight that’s ideal alongside your fizzy treat.

  • Iced Herbal Teas: For a refreshing beverage option, consider herbal teas infused with mint or hibiscus, providing a cooling effect that pairs well with the effervescence of the drink.

Creating a vibrant table with these pairings will ensure that your Otter’s Fizzy Orange Juice shines brightly at your next gathering!

Otter’s Fizzy Orange Juice

Otter’s Fizzy Orange Juice Recipe FAQs

How do I choose ripe oranges for the juice?
Absolutely! Look for oranges that are firm and heavy for their size; this indicates juiciness. The skin should be smooth and free of dark spots. If you can find them, Valencia or Navel oranges are excellent choices for their sweet flavor.

How should I store leftover Otter’s Fizzy Orange Juice?
You can store any leftover Otter’s Fizzy Orange Juice in an airtight container in the refrigerator for up to 2 days. Keep in mind that as time goes by, the fizz will gradually fade, so it’s best to enjoy it fresh.

Can I freeze Otter’s Fizzy Orange Juice?
Yes, you can! To freeze leftovers, pour the juice into ice cube trays and freeze for up to 3 months. Once frozen, transfer the juice cubes to a zip-top freezer bag. They can be blended into smoothies or added to drinks later for a refreshing chill!

What can I do if the soda water fizz is too strong for my taste?
Very! If you find the fizz too intense, just pour a little less soda water into your glass next time. You can also let the soda water sit for a minute before adding it to help reduce some of the carbonation. Adjusting to your preference is key!

Are there any dietary considerations I should be aware of?
The ingredients in Otter’s Fizzy Orange Juice are generally safe for most diets, but if you’re monitoring sugar intake, consider using less honey and sugar, or explore sugar-free alternatives. If serving to pets, it’s best to avoid giving them any juice due to sugar content.

What if I find the drink too sweet?
Totally understandable! If you find Otter’s Fizzy Orange Juice a bit too sweet, you can adjust by adding more soda water or fresh orange juice. You can also experiment by reducing the amount of honey and demerara sugar. It’s all about discovering your perfect balance!

Revitalize Your Day with Otter’s Fizzy Orange Juice Delight

Otter’s Fizzy Orange Juice is a delightful and refreshing drink that combines orange juice with honey, cinnamon, and soda for a fizzy twist.

  • Shallow Dish
  • Serving glasses
  • Refrigerator

For the Sweet Base

  • 2 tablespoons Honey (Acts as a natural sweetener)
  • 2 tablespoons Demerara sugar or raw white sugar (Offers a hint of caramel flavor)
  • 1 teaspoon Cinnamon (Brings warmth and spice)

For the Drink

  • 2 cups Crushed ice (Essential for that frosty feel)
  • 2 cups Freshly squeezed orange juice (The star of the show)
  • 1 cup French vanilla coffee creamer (Adds a smooth, creamy layer)

To Finish

  • 1 cup Soda water (Top off your creation for fizz)

Step‑by‑Step Instructions

  1. Chill all ingredients and serving glasses for at least one hour.
  2. On a shallow dish, drizzle honey to coat the rims of your glasses, then dip them in cinnamon-sugar mixture.
  3. Whisk together demerara sugar and cinnamon, then dip honey-coated rims into this mixture.
  4. Fill each glass three-quarters full with crushed ice.
  5. Drizzle French vanilla coffee creamer over the ice.
  6. Pour freshly squeezed orange juice into each glass.
  7. Top each glass with soda water to taste.
  8. Serve immediately and enjoy!

Chill all ingredients for the best experience. Experiment with different flavors for the coffee creamer to customize your drink.

Drink
American
easy recipes, family beverages, fizzy orange juice, homemade drinks, Otter’s Fizzy Orange Juice, refreshing drinks

Filed Under: Drink

Sip on Bliss with Blackberry Spider Soda Mocktail Delight

October 2, 2025 by grace bellamy Leave a Comment

There’s something magical about summer gatherings that calls for refreshing drinks, and this Blackberry Spider Soda Mocktail embodies that spirit perfectly. With the tangy zip of fresh lime and the sweet burst of juicy blackberries, it’s a delightful way to elevate any occasion. Plus, it’s super quick to whip up—ready in just five minutes, making it an effortless crowd-pleaser. Want a little extra treat? You can top it off with a scoop of creamy vanilla ice cream for a nostalgic twist that will delight both kids and adults alike. Get ready to impress your friends and family with this vibrant mocktail. Curious about how you can make your own? Let’s dive into the details!

Blackberry Spider Soda Mocktail

Why is this mocktail a must-try?

Refreshing, This Blackberry Spider Soda Mocktail is the perfect thirst-quencher for hot summer days, balancing sweetness and tartness in every sip. Quick to prepare, needing just five minutes, it’s a lifesaver for those busy moments. Versatile, you can easily adjust sweetness or add a scoop of ice cream for an indulgent twist! Crowd-pleasing, it’s a hit with both kids and adults, making it ideal for gatherings. Don’t forget to explore other delightful drinks, like my Mango Mint Fizz or Strawberry Basil Spritzer for more summer vibes!

Blackberry Spider Soda Mocktail Ingredients

• Get ready to mix up a fun drink!

For the Mocktail
• ½ cup fresh blackberries – the stars of the show, bringing vibrant color and flavor.
• ½ lime, juiced – adds a zesty kick to balance the sweetness.
• 2 tablespoons simple syrup or granulated sugar – adjust based on your sweetness preference.
• 6–8 fresh mint leaves – enhance the refreshing taste and aroma, plus a sprig for garnish.
• 1 cup club soda or sparkling water – for that fizzy delight, chill ahead of time!
• 1 scoop vanilla ice cream (optional) – perfect for the “spider” style and adds creamy richness.
• Ice cubes – to keep your drink refreshingly cold!

For Optional Garnishes
• Extra blackberries – for a beautiful touch on top.
• Lime wheel – elevate your presentation with a slice of lime.
• Mint sprig – adds a lovely finishing touch and extra freshness.

Whip up this Blackberry Spider Soda Mocktail and add a splash of joy to your summer gatherings!

Step‑by‑Step Instructions for Blackberry Spider Soda Mocktail

Step 1: Prepare the Base
In a tall glass, start by adding the ½ cup of fresh blackberries, 2 tablespoons of simple syrup or granulated sugar, and 6–8 fresh mint leaves. Using a muddler or fork, gently muddle these ingredients together for about 30 seconds until the blackberries release their juicy goodness, and you can visually see the mixture becomes a vibrant berry mash.

Step 2: Add the Zest
Next, squeeze in the juice of ½ lime into the muddled berry mix. Stir everything together well for about 15 seconds, ensuring that the tangy lime properly combines with the blackberries and mint. The color should deepen, and you’ll notice a refreshing aroma of mint and lime filling the air—this is the perfect foundation for your Blackberry Spider Soda Mocktail.

Step 3: Optional Strain
If you prefer a smoother mocktail, consider straining the mixture into a clean glass using a fine mesh strainer. This step is optional but helps remove seeds and pulp, creating a sleek presentation. Allow a few seconds for the liquid to flow through, discarding any solids while retaining the beautifully colored blackberry juice.

Step 4: Fill with Ice
Fill the glass approximately ¾ full with ice cubes. Watch as the ice catches the light, creating a delightful visual for your drink. Aim to use plenty of ice to keep the mocktail chilled, ensuring a refreshing experience as you prepare to add the fizzy element.

Step 5: Add the Sparkle
Now, slowly pour in 1 cup of chilled club soda or sparkling water over the ice. Stir gently with a long spoon for about 10 seconds to mix the soda with the berry base, creating a lively fizz. You’ll hear the delightful bubbles pop while the drink takes on a refreshing sparkle perfect for a warm day.

Step 6: Optional Spider Style
For the ultimate indulgence, add a scoop of vanilla ice cream on top of your fizzy mocktail for a “spider” style treat. The creaminess will contrast beautifully with the fizzy drink below, adding both a whimsical touch and richness. The ice cream should sit atop like a fluffy cloud, melting slightly into the refreshing concoction.

Step 7: Garnish and Present
Finally, garnish your Blackberry Spider Soda Mocktail with a few extra blackberries, a fresh mint sprig, or a lime wheel for a pop of color and visual appeal. Arrange them artfully atop the drink to catch your guests’ attention. This finishing touch not only makes the drink look inviting but also enhances the flavors, inviting everyone to take a sip immediately.

Step 8: Serve Immediately
Serve your delightful Blackberry Spider Soda Mocktail right away while it’s still cold and fizzy. This refreshing beverage is best enjoyed fresh, so gather your friends and family, and bring joy to your summer gatherings with this vibrant drink, perfect for any occasion.

Blackberry Spider Soda Mocktail

Make Ahead Options

Preparing the Blackberry Spider Soda Mocktail ahead of time is a breeze and a major time-saver for busy cooks! You can make the muddled blackberry base (blackberries, lime juice, simple syrup, and mint) up to 24 hours in advance. Just store it in an airtight container in the refrigerator to maintain freshness. When you’re ready to serve, simply pour the chilled club soda into the muddled mixture over ice and add the optional scoop of vanilla ice cream for that classic “spider” look. This way, you’ll have a refreshing mocktail ready to enjoy with minimal effort, leaving you time to relax and enjoy your gathering!

Expert Tips for Blackberry Spider Soda Mocktail

• Perfectly Muddled: Ensure you gently muddle the blackberries and mint to release flavors without smashing them too much. Over-muddling can make the drink taste overly bitter and muddy!

• Optimize Sweetness: Adjust the amount of simple syrup based on your taste. Fresh blackberries can be quite tart, so taste as you go to find that perfect balance for your Blackberry Spider Soda Mocktail.

• Chill Your Ingredients: For a refreshing experience, be sure to chill your club soda or sparkling water beforehand. Warm soda can dilute the drink more quickly and lessen the fizzy effect!

• Garnish Wisely: Use extra blackberries, lime wheels, and mint sprigs for garnish. Not only do they enhance the visual appeal, but they also provide hints of the flavors to come with each sip.

• Serve Immediately: This mocktail is best when served fresh and cold. The longer it sits, the fizz will decrease, and the ice could dilute the flavors, so don’t wait too long to enjoy!

Blackberry Spider Soda Mocktail Variations

Feel free to get creative and tailor this delightful mocktail to your taste and preferences!

  • Dairy-Free: Skip the vanilla ice cream and add a splash of coconut cream instead for tropical flair. The coconut will add a creamy texture while keeping it dairy-free.

  • Berry Mix: Swap blackberries for other berries like raspberries or blueberries to create a colorful assortment. Each berry will bring its unique flavor and sweetness, making it a fun twist!

  • Citrus Burst: Experiment with different citrus juices, such as orange or grapefruit, to replace lime juice for a sweet and tangy vibe. The combination can add a delightful zing that excites your palate.

  • Herbal Infusion: Use basil or lemon balm instead of mint for a fresh aromatic experience. Both herbs add a unique flavor profile that beautifully complements the berries.

  • Sparkling Variations: Try flavored sparkling waters, like lemon or raspberry, for added depth. Each variation brings a new layer of excitement and fun, whether you’re swapping for a special occasion or just indulging yourself!

  • Sweetness Adjustments: Adjust the sweetness by using honey, agave syrup, or stevia instead of simple syrup, catering to your dietary needs. Each option can slightly modify the taste while still delivering a delicious drunken delight.

  • Spicy Kick: For adults, add a pinch of cayenne pepper or sliced jalapeños for a spicy twist that contrasts with the sweetness of the blackberries. Just a little heat can enhance the flavor and make this drink a conversation starter!

  • Frozen Treat: Blend the ingredients with ice to create a frozen version of this mocktail, perfect for summer days. Imagine sipping on a slushy berry delight to cool you off while adding a fun texture!

Don’t forget to check out my refreshing Mango Mint Fizz or the zesty Strawberry Basil Spritzer for even more exciting alternatives to elevate your summer drink game!

What to Serve with Blackberry Spider Soda Mocktail

Refreshing summer gatherings become even more vibrant when paired with delightful accompaniments that enhance the experience.

  • Savory Cheese Platter: The rich flavors of various cheeses pair wonderfully with the sweetness of the mocktail, offering a delightful contrast. Include creamy brie and tangy goat cheese for variety.

  • Crispy Vegetable Chips: These add a delightful crunch that nicely complements the fizzy mocktail while offering a healthy snack option to balance out the sweetness.

  • Fruit Skewers: Bright and colorful skewers of seasonal fruits enhance the fruits in the mocktail, creating a cohesive summer vibe. Think juicy melon, sweet pineapple, and fresh mint!

  • Mini Bruschetta: Toasty slices topped with fresh tomatoes, basil, and a drizzle of balsamic complement the refreshing fruit notes while adding savory richness to your spread.

  • Pineapple Coconut Fruit Salad: A cool, tropical fruit salad with pineapple and coconut provides a refreshing balance as a light side that pairs beautifully with the mocktail’s flavors.

  • Sparkling Lemonade: For an extra fizzy treat, serve chilled sparkling lemonade. Its citrus notes will harmonize wonderfully with the lime in your drink, making it a perfect match.

  • Lime Sorbet: A scoop of lime sorbet makes a delightful palate cleanser that echoes the citrus notes in your mocktail, adding a creamy, icy treat to cool off.

  • Grilled Shrimp Skewers: The smoky flavor of grilled shrimp offers an enticing contrast to the refreshingly sweet and tangy flavors of the Blackberry Spider Soda Mocktail, creating a beautiful balance.

  • Dark Chocolate-Dipped Strawberries: These decadent treats provide a sweet component that enhances the mocktail’s berry flavors, perfect for a sophisticated dessert to end on a high note.

How to Store and Freeze Blackberry Spider Soda Mocktail

Fridge: Keep your uncarbonated mocktail base in an airtight container in the fridge for up to 2 days. Just add soda and ice when ready to serve!

Freezer: Unfortunately, freezing is not recommended for Blackberry Spider Soda Mocktail, as the ice will dilute the flavors when thawed, making it less enjoyable.

Reheating: Since this is a refreshing cold beverage, reheating isn’t necessary. Enjoy it iced and fresh for the best experience!

Blackberry Spider Soda Mocktail

Blackberry Spider Soda Mocktail Recipe FAQs

How do I select the best blackberries for my mocktail?
Absolutely! When selecting blackberries, look for ones that are plump, shiny, and deep purple or black in color. Avoid any with dark spots all over, as these can indicate overripeness or decay. Fresh blackberries should feel firm and slightly soft to the touch, ensuring they are perfectly ripe for that juicy burst in your mocktail.

How should I store leftovers of my Blackberry Spider Soda Mocktail?
You can store the uncarbonated base of your mocktail in an airtight container in the fridge for up to 2 days. Just be sure to keep the soda and ice separate until you’re ready to serve. This way, your drink stays fresh and fizzy without losing that delightful sparkle!

Can I freeze the Blackberry Spider Soda Mocktail?
I wouldn’t recommend freezing this mocktail. Freezing can lead to the ice cubes, when thawed, diluting the lovely flavors and textures of your drink. Instead, prepare fresh-filled glasses and enjoy it while it’s chilled and fizzy for the best experience!

What can I do if my mocktail is too sweet or too tart?
Very good question! If your Blackberry Spider Soda Mocktail turns out too sweet, you can balance it by adding a squeeze more lime juice. On the other hand, if it’s too tart, a little extra simple syrup can mellow out the acidity. The more the merrier, so always taste as you go to achieve your perfect flavor!

Is this mocktail suitable for everyone, including kids?
Yes! This mocktail is family-friendly, making it a great option for gathering with little ones. Just keep in mind that if children are enjoying it, you might want to skip the optional vanilla ice cream or reduce the amount of sugar for a less sweet version. And make sure to enjoy responsibly!

How can I enhance the flavors of my mocktail?
A fantastic way to boost flavors is by infusing your mocktail with additional herbs like basil or even a touch of ginger. Simply muddle those along with your blackberries for an exciting twist. Adjust the sweetener again based on any added ingredients, ensuring a well-balanced flavor throughout your Blackberry Spider Soda Mocktail.

Sip on Bliss with Blackberry Spider Soda Mocktail Delight

This Blackberry Spider Soda Mocktail is a refreshing and quick drink perfect for summer gatherings.

  • tall glass
  • muddler or fork
  • fine-mesh strainer
  • long spoon

For the Mocktail

  • ½ cup fresh blackberries (the stars of the show, bringing vibrant color and flavor)
  • ½ lime juiced (adds a zesty kick to balance the sweetness)
  • 2 tablespoons simple syrup or granulated sugar (adjust based on your sweetness preference)
  • 6–8 fresh mint leaves (enhance the refreshing taste and aroma, plus a sprig for garnish)
  • 1 cup club soda or sparkling water (for that fizzy delight, chill ahead of time)
  • 1 scoop vanilla ice cream (optional, perfect for the ‘spider’ style)
  • Ice cubes (to keep your drink refreshingly cold)

For Optional Garnishes

  • Extra blackberries (for a beautiful touch on top)
  • Lime wheel (elevate your presentation with a slice of lime)
  • Mint sprig (adds a lovely finishing touch)

Step-by-Step Instructions for Blackberry Spider Soda Mocktail

  1. In a tall glass, start by adding the fresh blackberries, simple syrup or granulated sugar, and fresh mint leaves. Muddle these ingredients for about 30 seconds.
  2. Squeeze the juice of ½ lime into the muddled berry mix and stir well for about 15 seconds.
  3. Optionally, strain the mixture into a clean glass using a fine mesh strainer.
  4. Fill the glass approximately ¾ full with ice cubes.
  5. Slowly pour in chilled club soda or sparkling water over the ice and stir gently.
  6. Add a scoop of vanilla ice cream on top for a ‘spider’ style treat.
  7. Garnish with extra blackberries, a fresh mint sprig, or a lime wheel.
  8. Serve immediately while it’s still cold and fizzy.

Serve immediately for the best flavor and effervescence. Adjust sweetness as needed based on personal preference.

Drink
Beverage, Blackberry Spider Soda Mocktail, mocktail, non-alcoholic, refreshing, summer drink

Filed Under: Drink

Delicious Halloween Jello Shots That Wow Your Guests

October 2, 2025 by grace bellamy Leave a Comment

As the fall air crispens and leaves turn to gold, the thrill of Halloween festivities fills our kitchens with excitement. This year, let’s take a delightful twist on the traditional party fare with my Candy Corn Jello Shots. These vibrant, three-layer treats are not just a feast for the eyes; they’re also super fun to make and a guaranteed crowd-pleaser. Perfect for entertaining, they whip up in no time and can be prepped ahead, allowing you to focus on enjoying the spooky season with friends and family. The playful mix of orange and white layers captures the essence of Halloween, while the splash of vanilla vodka adds a delightful kick. Ready to impress your guests with a whimsical treat that’ll satisfy both your sweet tooth and your Halloween spirit? Let’s dive into this festive concoction!

Halloween Jello Shots

Why These Halloween Jello Shots Are a Hit?

Unforgettable Presentation: The stunning orange and white layers create a visually appealing treat that will wow your guests.

Easy to Make: This recipe is beginner-friendly, requiring just basic cooking skills and a few simple steps.

Crowd-Pleasing Flavor: The blend of vanilla vodka and fresh orange juice produces a delightful taste that adults will love.

Perfect for Parties: With 20 servings, these treats are ideal for gatherings, making them a stress-free addition to any Halloween bash.

Make-Ahead Convenience: Prep them ahead of time, allowing you to relax and enjoy the festivities without the last-minute rush.

Dive into these delicious Halloween Jello Shots and bring a fun twist to your Halloween gatherings!

Halloween Jello Shots Ingredients

• Get ready to create a spooktacular treat!

For the Orange Layer

  • 1 (3-oz) box orange Jell-O – ensures a vibrant, Halloween-themed flavor.
  • 1/3 cup fresh orange juice – adds natural sweetness and enhances the orange flavor.
  • 2 cups water – necessary to dissolve the gelatin and Jell-O.
  • 3 (1-oz) packets unflavored gelatin – provides structure and stability to your jello shots.

For the Creamy Layer

  • 7 oz sweetened condensed milk – gives the shots a creamy texture and delicious sweetness.
  • 2/3 cup vanilla vodka – adds a fun twist and makes these Halloween Jello Shots a grown-up treat.

For the Finishing Touch

  • Yellow food coloring – creates a fun gradient effect to mimic candy corn.
  • Candy corn for garnish (optional) – a playful touch that enhances the Halloween theme.

Step‑by‑Step Instructions for Halloween Jello Shots

Step 1: Prepare the Gelatin Base
In a small saucepan, pour 1 cup of water and stir in 2 packets of unflavored gelatin. Warm the mixture over low heat, stirring occasionally until the gelatin has dissolved completely, about 3–5 minutes. Once dissolved, remove from heat and add half of the sweetened condensed milk, stirring until well combined. This mixture will form the creamy base of your Halloween Jello Shots.

Step 2: Fill the First Layer
Set aside half of the gelatin mixture, and pour the remaining creamy mixture into shot glasses, filling each about 1/3 full. Place the shot glasses in the refrigerator for 30 minutes, or until the first layer is firm and solid. This creamy layer will give your Halloween Jello Shots a delightful texture, so be sure to wait for it to set before adding the next layer.

Step 3: Create the Orange Layer
While the first layer sets, prepare the vibrant orange layer. In a clean saucepan, combine 1 cup of water and the remaining unflavored gelatin packet. Warm the mixture over low heat, stirring until the gelatin dissolves completely. Remove from heat, mix in the orange Jell-O until fully dissolved, and then stir in the fresh orange juice. This joyous orange layer will add a zingy flavor to your Halloween Jello Shots.

Step 4: Assemble the Layers
Carefully pour the orange layer over the set white layer in each shot glass, filling them up to the top. Gently place the shot glasses back in the refrigerator and let them chill until the orange layer is firm, about 1–2 hours. Be cautious when pouring to keep the layers distinct and visually appealing, making these Halloween Jello Shots a festive treat.

Step 5: Finish with the Final Touch
Once the orange layer is solid, take the reserved white mixture and add a few drops of yellow food coloring, stirring until you achieve a vibrant yellow hue. Pour this yellow layer on top of the orange layer in each shot glass, creating that candy corn effect. Return the shot glasses to the refrigerator for an additional 2 hours, allowing the layers to meld beautifully.

Step 6: Garnish and Serve
After chilling for a total of 3 hours, your Halloween Jello Shots will be perfectly set. Just before serving, feel free to garnish each shot with a piece of candy corn for that extra festive touch. These layered treats are now ready to dazzle your guests and become the highlight of your Halloween gathering!

Halloween Jello Shots

What to Serve with Halloween Jello Shots

Add a festive touch to your Halloween gathering with these companion delights that perfectly complement your vibrant treats.

  • Spooky Cheese Platter: A mix of sharp and creamy cheeses paired with halloween-themed crackers. This savory addition balances the sweetness of the jello shots.

  • Pumpkin Soup: Cozy and warm, the earthy flavors offer a comforting contrast to the fruity jello shots. Perfect for keeping guests satisfied!

  • Mini Ghost Pizzas: These cute, bite-sized treats are a hit with both kids and adults, providing a savory counterpart to your sweet dessert.

  • Witch’s Brew Punch: Create a refreshing drink with a mix of fruit juices, soda, and a splash of your favorite spirit. This bubbly concoction heightens the party atmosphere!

  • Chocolaty Spider Cookies: Rich and chewy treats featuring chocolate, they add a playful vibe that pairs well with your fruity jello shots.

  • Crispy Veggie Sticks with Dip: Fresh, crunchy, and colorful, they bring a healthy counterbalance to the sweetness of the Halloween Jello Shots.

Enhancing your celebration with these pairings guarantees a well-rounded feast that everyone will love!

How to Store and Freeze Halloween Jello Shots

Fridge: Store the Halloween Jello Shots in an airtight container in the fridge for up to 3 days. This will keep them fresh and ready for your next gathering.

Freezer: Avoid freezing Jello Shots as the texture can change once thawed. They are best enjoyed fresh to maintain the layered appearance and flavor.

Reheating: There’s no need to reheat Jello Shots. Serve them chilled straight from the fridge for maximum enjoyment and refreshment!

Serving Tips: If making ahead, garnish with candy corn just before serving to ensure they remain vibrant and appealing!

Make Ahead Options

These Halloween Jello Shots are a fantastic option for meal prep, allowing you to enjoy the festive season without the last-minute rush! You can prepare the creamy layer up to 24 hours in advance and store it in the refrigerator. Simply follow the first two steps, fill your shot glasses, and refrigerate them. For the orange layer, make it on the same day you intend to serve, or up to 3 hours before guests arrive, ensuring it’s fresh and firm before layering. Feel free to complete the final yellow layer and keep them chilled until you’re ready to garnish with candy corn right before serving. This method maintains the shots’ vibrant colors and delightful textures, ensuring they’re just as delicious when enjoyed!

Tips for the Best Halloween Jello Shots

• Use Cold Ingredients: Ensure your water and juice are cold before mixing. This helps the gelatin set faster and keep its layers distinct.

• Let Each Layer Set: Patience is key! Allow each layer to set fully in the refrigerator before adding the next. This prevents them from bleeding together.

• Measure Carefully: Pour equal amounts of each layer to maintain that lovely candy corn look. A steady hand makes for gorgeous shots!

• Experiment with Flavors: Don’t hesitate to mix up the flavors! You can swap in different Jell-O flavors or juices to create your signature Halloween Jello Shots.

• Mind the Garnish: If using candy corn as a garnish, add it just before serving. Otherwise, it might become too sticky or lose its charm after sitting.

Enjoy creating these delightful Halloween Jello Shots, and let them add the perfect festive touch to your celebrations!

Halloween Jello Shots Variations

Feel free to unleash your creativity and customize these festive treats!

  • Vegan-Friendly: Use agar-agar instead of gelatin and substitute sweetened condensed milk with coconut cream for a delicious plant-based twist.
    For a unique option, try using fruit juice, like pineapple or grape, instead of the fresh orange juice. This will add a new flavor dimension while accommodating dietary preferences.

  • Fruit-Infused: Replace vanilla vodka with your favorite fruit-flavored vodka, such as peach or raspberry, to add a fun twist to the overall taste.
    This variation brings an extra punch of flavor and vibrancy to your shots, making them even more enjoyable for guests.

  • Low-Sugar: Opt for sugar-free Jell-O and use a low-calorie mixer in place of vodka for a guilt-free treat.
    This way, you can enjoy a sweet sensation while keeping guilt at bay. Whether for a health-conscious crowd or just a lighter option, everyone will appreciate it!

  • Spicy Kick: Add a few drops of cinnamon or pumpkin spice syrup to the orange mixture for a delightful autumn-inspired flavor.
    A little heat goes a long way in this treat! It offers a comforting warmth that perfectly complements Halloween gatherings, creating warm memories with each sip.

  • Layer it Up: Create additional layers by adding your choice of flavored gelatin (like raspberry or lemon) in between the existing layers for extra colors and flavors.
    Each layer can play off the others beautifully, making your presentation even more striking than before!

  • Colorful Combinations: Try mixing different colors of gelatin for a multi-colored (and eye-catching) effect! Think lemon and cherry for a vibrant display.
    Not only do these shots offer visual appeal, but they also serve as a reminder of sheer fun and creativity, sparking joy among your guests.

  • Alcohol-Free Version: For a kid-friendly treat, skip the vodka and increase the orange juice or add soda for fizzy fun.
    This way, everyone can join in on the festivities! Kids will love the playful colors, while parents can rejoice in a non-alcoholic option that is just as delightful.

  • Orange Creamsicle: Swap the sweetened condensed milk for whipped cream for a creamy, dreamy take that resembles your favorite dessert.
    This luscious version brings a nostalgic touch to your Halloween celebrations, inviting everyone to indulge in the flavors that remind us of childhood.

Embrace these variations and make your Halloween Jello Shots truly your own! If you’re looking for more delightful treats to explore, check out our Tips for the Best Halloween Jello Shots. Your creativity is the only limit!

Halloween Jello Shots

Candy Corn Jello Shots Recipe FAQs

What’s the best way to select ripe oranges for this recipe?
Absolutely! Look for oranges that are firm, heavy for their size, and have smooth skin without dark spots. The sweetness and juiciness will greatly enhance the flavor of your Jello shots, so fresh, ripe oranges are key!

How long can I store my Halloween Jello Shots in the fridge?
Very! You can keep your Jello Shots in an airtight container in the fridge for up to 3 days. Just make sure they’re well-covered to prevent them from absorbing any odors from your fridge.

Can I freeze Halloween Jello Shots?
Oh, it’s best not to freeze them! Freezing can alter the texture of the gelatin, making it less enjoyable once thawed. I recommend enjoying them fresh for the best taste and presentation.

What if my Jello Shots don’t layer nicely?
No worries! If layers mix, it may be due to not allowing each layer to set long enough. For a perfect layered look, ensure each layer is fully firm before adding the next one. Don’t rush it; patience makes for delightful results!

Are these Halloween Jello Shots safe for my pets?
I highly advise against letting pets ingest any part of these Jello Shots, primarily due to the sugar and alcohol content. Always keep treats like these out of reach from your furry friends to ensure their safety.

Can I use other flavors of Jell-O for these shots?
Absolutely! Feel free to experiment with different Jell-O flavors or juices to create your signature versions. Just remember to maintain the color contrast for that festive aesthetic!

Delicious Halloween Jello Shots That Wow Your Guests

Impress your guests with vibrant Halloween Jello Shots that combine layers of flavor and fun for the perfect spooky celebration.

  • small saucepan
  • shot glasses

For the Orange Layer

  • 1 box orange Jell-O (ensures a vibrant, Halloween-themed flavor)
  • 1/3 cup fresh orange juice (adds natural sweetness and enhances the orange flavor)
  • 2 cups water (necessary to dissolve the gelatin and Jell-O)
  • 3 packets unflavored gelatin (provides structure and stability to your jello shots)

For the Creamy Layer

  • 7 oz sweetened condensed milk (gives the shots a creamy texture and delicious sweetness)
  • 2/3 cup vanilla vodka (adds a fun twist and makes these drinks a grown-up treat)

For the Finishing Touch

  • yellow food coloring (creates a fun gradient effect to mimic candy corn)
  • candy corn for garnish (optional, enhances the Halloween theme)

Instructions

  1. In a small saucepan, pour 1 cup of water and stir in 2 packets of unflavored gelatin. Warm the mixture over low heat, stirring occasionally until the gelatin has dissolved completely, about 3–5 minutes. Remove from heat and add half of the sweetened condensed milk, stirring until well combined.
  2. Set aside half of the gelatin mixture, and pour the remaining creamy mixture into shot glasses, filling each about 1/3 full. Refrigerate for 30 minutes, or until the first layer is firm.
  3. In a clean saucepan, combine 1 cup of water and the remaining unflavored gelatin packet. Warm the mixture over low heat, stirring until the gelatin dissolves completely. Remove from heat, mix in the orange Jell-O until fully dissolved, and then stir in the fresh orange juice.
  4. Carefully pour the orange layer over the set white layer in each shot glass, filling them up to the top. Refrigerate until the orange layer is firm, about 1–2 hours.
  5. Once the orange layer is solid, take the reserved white mixture and add a few drops of yellow food coloring. Pour this yellow layer on top of the orange layer in each shot glass.
  6. Refrigerate for an additional 2 hours, allowing the layers to meld beautifully.
  7. After chilling for a total of 3 hours, your Halloween Jello Shots will be ready. Garnish each shot with a piece of candy corn just before serving.

Ensure your ingredients are cold for faster setting. Allow each layer to set fully before adding the next to maintain distinct layers.

Drink
American
candy corn, Halloween Jello Shots, Halloween recipes, Jello shots, party drinks, spooky treats

Filed Under: Drink

Craft a Refreshing Blackberry Basil Blast Mocktail Today

October 2, 2025 by grace bellamy Leave a Comment

On a warm afternoon, there’s nothing more refreshing than a sip of something vibrant and zesty. That’s where the Blackberry Basil Blast Mocktail comes into play! This delightful drink is a perfect blend of sweet blackberries and aromatic basil, creating a refreshing escape from the everyday. With just five minutes of prep time, it’s ideal for those busy moments when you crave something special without the fuss—perfect for entertaining guests or just treating yourself! Plus, it’s a guilt-free pleasure that skips the sugary additives of store-bought drinks. Are you ready to be inspired by this deliciously simple recipe that adds a splash of joy to your day?

Blackberry Basil Blast Mocktail

Why Will You Love This Mocktail?

Refreshingly Unique: The Blackberry Basil Blast Mocktail combines sweet, juicy blackberries with the aromatic earthiness of basil, offering a flavor experience that’s delightfully unexpected.

Quick and Easy: With only five minutes of prep, you can whip up a stunning drink that impresses instantly. No bartending skills required!

Guilt-Free Indulgence: This mocktail is naturally sweetened with honey or maple syrup, allowing you to enjoy a refreshment without the added sugars of store-bought options.

Versatile for Any Occasion: Whether it’s a backyard barbecue, brunch with friends, or a cozy evening at home, this drink fits perfectly into any setting.

Beautiful Presentation: Garnished with vibrant basil and fresh blackberries, it’s not just tasty but also a feast for the eyes. For more fun drink ideas, check out our guide on mocktail magic.

Craft this delightful beverage today and enjoy a moment of bliss!

Blackberry Basil Blast Mocktail Ingredients

• Here’s everything you need!

For the Mocktail

  • ½ cup fresh blackberries – Juicy and sweet, they give this drink its signature flavor.
  • 6–8 fresh basil leaves – Adds a unique herbaceous note that complements the blackberries beautifully.
  • 1 tablespoon honey or maple syrup – A natural sweetener that balances acidity in the drink.
  • 1 tablespoon fresh lime juice – This zesty addition enhances the freshness of the Blackberry Basil Blast Mocktail.
  • ½ cup sparkling water – Use plain or lime-flavored for a bubbly finish that lifts the drink.
  • Ice cubes – Keeps your mocktail chilled and refreshing for a perfect sip every time.
  • Extra blackberries for garnish – These not only look pretty but also add an extra burst of flavor!

Now that you have everything lined up, your flavorful journey to crafting the Blackberry Basil Blast Mocktail is just moments away!

Step‑by‑Step Instructions for Blackberry Basil Blast Mocktail

Step 1: Muddle Blackberries and Basil
Begin by adding the fresh blackberries and 6–8 basil leaves into a cocktail shaker. Using a muddler or the back of a spoon, gently press down on the blackberries until they release their juices and the basil becomes fragrant—a delightful 30 seconds will do the trick!

Step 2: Add Sweetness and Acidity
Next, pour in 1 tablespoon of honey or maple syrup, followed by 1 tablespoon of freshly squeezed lime juice. These ingredients will balance the flavors beautifully. Now, add a handful of ice cubes to the shaker, filling it about halfway to ensure your Blackberry Basil Blast Mocktail is nice and chilled.

Step 3: Shake It Up
Secure the lid on the cocktail shaker and shake vigorously for about 20 seconds. You want to blend all the flavors and chill the mixture thoroughly. Listen for the ice clinking as you shake; this means your drink is getting frosty and delicious!

Step 4: Strain Into Glass
Once shaken, carefully strain the mixture into a tall glass. Use a fine strainer to catch any seeds or basil remnants. The result should be a vibrant purple liquid that glistens in the light, showcasing the rich flavors of your Blackberry Basil Blast Mocktail.

Step 5: Add Bubbles
Top off your drink with ½ cup of sparkling water to introduce a refreshing fizz. Choose plain or lime-flavored sparkling water based on your preference. Stir gently with a spoon to mix—be careful not to muddle the layers you’ve created.

Step 6: Garnish for Flair
For the finishing touch, add more ice if desired, and garnish your mocktail with extra basil leaves and a few whole blackberries. This creates a visually stunning presentation that invites everyone to take a sip of your delightful Blackberry Basil Blast Mocktail!

Blackberry Basil Blast Mocktail

How to Store and Freeze Blackberry Basil Blast Mocktail

Fridge: Store any leftover mocktail in an airtight container for up to 2 days to preserve flavor and freshness. Be sure to give it a gentle stir before serving again.

Ice Cubes: Pour leftover mocktail into ice cube trays and freeze for up to 3 months. These cubes make a refreshing addition to future drinks!

Garnish Storage: Keep basil and extra blackberries in the fridge, wrapped in a damp paper towel, for up to 3 days to maintain their freshness and flavor.

Reheating/Serving: The Blackberry Basil Blast Mocktail is best served cold; however, if desired, you can adjust it with fresh ingredients before serving for a new experience!

Make Ahead Options

The Blackberry Basil Blast Mocktail is perfect for busy home cooks looking to save time while entertaining! You can prep the blackberry and basil mixture up to 24 hours in advance: simply muddle the blackberries and basil leaves together, add honey and lime juice, and store the mixture in an airtight container in the refrigerator. This ensures the flavors meld beautifully. When you’re ready to serve, simply shake the prepped mixture with ice, strain it into a glass, and top with sparkling water. By prepping ahead, you guarantee every sip is just as refreshing as if you made it on the spot, allowing you to focus on enjoying the moment!

Blackberry Basil Blast Mocktail Variations

Feel free to explore and personalize your drink with these fun twists that will surely delight your palate!

  • Sparkling Citrus: Add a splash of orange juice for a refreshing citrus twist to brighten up the flavors.
  • Berry Medley: Swap blackberries with raspberries or strawberries for a different berry explosion—you can’t go wrong with that vibrant taste!
  • Herb Swap: Replace basil with fresh mint or thyme to introduce new aromatic notes that offer a refreshing surprise!
  • Spicy Kick: Add a thin slice of jalapeño before shaking for a zesty kick that brings a playful punch to the mocktail.
  • Honey-Free: Use agave syrup instead of honey for a vegan-friendly version that provides smooth sweetness—perfect for everyone!
  • Chilled Fruit Fusion: Freeze blackberries beforehand as ice cubes; not only do they look stunning, but they also keep your drink cool without watering it down.
  • Fizzy Upgrade: Experiment with flavored sparkling water, like raspberry or lemon, to enhance the taste and add an element of surprise!
  • Ginger Zest: Incorporate a splash of ginger ale for a vivacious kick, balancing the sweetness of the berries with a tinge of warmth.

As you personalize this drink, remember to have fun with it! The possibilities are endless when it comes to crafting your own unique refreshment. For more captivating beverages, don’t forget to check out our delicious guide on mocktail ingredients.

Expert Tips for Blackberry Basil Blast Mocktail

  • Choose Ripe Blackberries: When making your Blackberry Basil Blast Mocktail, ensure your blackberries are ripe for the sweetest flavor. Overripe or underripe can affect the taste.

  • Fresh Basil Matters: Use fresh basil leaves rather than dried for that vibrant herbal aroma. Gently muddle to release their full fragrance without tearing them too much.

  • Adjust Sweetness: Feel free to tweak the honey or maple syrup according to your taste preferences. Start with less and add more if needed!

  • Strain Carefully: Use a fine mesh strainer to catch the seeds and basil. This helps your mocktail have a smooth texture for an elegant sippable experience.

  • Chill Your Glass: For a refreshing touch, chill your glass beforehand. This simple trick keeps your Blackberry Basil Blast Mocktail cool for longer.

  • Experiment with Flavors: Don’t hesitate to mix different herbs or fruits! Try swapping basil with mint or adding a splash of orange juice for a twist.

What to Serve with Blackberry Basil Blast Mocktail

Elevate your refreshment experience by pairing this invigorating drink with delightful bites that embrace summer’s best flavors.

  • Crispy Vegetable Spring Rolls: These fresh rolls offer a crunchy texture filled with colorful veggies, perfectly complementing the vibrant mocktail.
  • Caprese Skewers: With juicy tomatoes, creamy mozzarella, and basil drizzled in balsamic, these skewers echo the basil notes in the drink.
  • Grilled Shrimp Tacos: Light and zesty, topped with a refreshing slaw, these tacos balance the sweetness of your mocktail for a satisfying bite.
  • Zesty Citrus Salad: A blend of oranges, grapefruit, and a light vinaigrette creates a refreshing contrast, emphasizing the drink’s tart lime notes.
  • Savory Cheese Platter: Feature tangy goat cheese, fruity preserves, and assorted nuts to pair with the mocktail, tantalizing your taste buds.
  • Chilled Ahi Tuna Poke: This dish’s umami-filled flavor mingles well with the fruity notes of the mocktail, making every sip and bite memorable.
  • Lemon Berry Shortcake: End your culinary experience with something sweet. Light and airy, this dessert enhances the berry flavors in your drink.
  • Sparkling Water with Lime: If you want to keep the drink vibes going, a simple glass of sparkling water garnished with lime is a delightful companion.
  • Coconut Lime Rice: This subtly sweet and tangy rice dish brings a comforting element to the table, inviting a balanced taste alongside your mocktail.

Blackberry Basil Blast Mocktail

Blackberry Basil Blast Mocktail Recipe FAQs

What type of blackberries should I use for the best flavor?
Absolutely! Choose ripe, plump blackberries with a deep purple-black hue. They should be sweet with a slight give when pressed. Avoid those with dark spots or an overly mushy texture, as they may taste fermented and not as pleasant in your mocktail.

How should I store leftover Blackberry Basil Blast Mocktail?
If you have any leftover mocktail, store it in an airtight container in the fridge for up to 2 days. Make sure to stir gently before you serve it again, as the ingredients may settle. If you’re planning on enjoying it later, keeping the added sparkling water separate until you’re ready to serve ensures that it stays bubbly!

Can I freeze the Blackberry Basil Blast Mocktail?
Certainly! Pour any leftover mocktail into ice cube trays and freeze for up to 3 months. This way, you can pop them into your future beverages for an instant refreshing upgrade. Just blend or shake your favorite ingredients with a few of these frozen cubes for a quick mocktail fix!

What if my basil leaves are wilted?
Very! If your basil leaves are wilted, they might not provide that aromatic punch that’s essential to the Blackberry Basil Blast Mocktail. I recommend fresh basil for the best flavor. If you only have dried basil, you can use it in a pinch, but use much less—about 1/4 teaspoon—since it’s more concentrated.

Is this mocktail safe for kids and pets?
Absolutely! The Blackberry Basil Blast Mocktail is not just a delightful treat for adults; it’s also suitable for kids. Just ensure to keep it relatively low in sweetness if you are serving it to them. As for pets, while the ingredients are generally safe, the honey may not be appropriate for puppies under one year old. Always check for specific allergies and consult your vet when unsure!

What’s the best way to garnish my mocktail?
For an elegant presentation, I recommend using fresh basil leaves and whole blackberries as garnishes. To add a personal touch, consider threading a few blackberries onto a cocktail pick or adding a slice of lime to the rim of the glass for that extra pop. Garnishing elevates the experience and makes your mocktail visually stunning!

Craft a Refreshing Blackberry Basil Blast Mocktail Today

Enjoy a refreshing Blackberry Basil Blast Mocktail, a vibrant and zesty drink with sweet blackberries and aromatic basil.

  • Cocktail shaker
  • fine strainer
  • tall glass

For the Mocktail

  • 0.5 cup fresh blackberries (Juicy and sweet, they give this drink its signature flavor.)
  • 6-8 leaves fresh basil (Adds a unique herbaceous note that complements the blackberries beautifully.)
  • 1 tablespoon honey or maple syrup (A natural sweetener that balances acidity in the drink.)
  • 1 tablespoon fresh lime juice (This zesty addition enhances the freshness of the drink.)
  • 0.5 cup sparkling water (Use plain or lime-flavored for a bubbly finish.)
  • ice cubes (Keeps your mocktail chilled and refreshing.)
  • extra blackberries for garnish (Add an extra burst of flavor.)

Step-by-Step Instructions

  1. Muddle blackberries and basil in a cocktail shaker for about 30 seconds.
  2. Add honey or maple syrup, fresh lime juice, and a handful of ice cubes to the shaker.
  3. Shake vigorously for about 20 seconds until the mixture is chilled.
  4. Strain the mixture into a tall glass using a fine strainer.
  5. Top off with sparkling water and stir gently.
  6. Garnish with extra basil leaves and blackberries before serving.

Store any leftover mocktail in an airtight container for up to 2 days. For a refreshing touch, chill your glass beforehand.

Drink
American
Blackberry Basil Blast Mocktail, cocktail, Easy Recipe, mocktail, non-alcoholic, refreshing drink

Filed Under: Drink

Spooky-Sweet Halloween Orange Party Punch Recipe You’ll Love

September 30, 2025 by grace bellamy Leave a Comment

As a chill breeze sweeps through the air, I find myself daydreaming about vibrant Halloween gatherings—those delightful moments when laughter echoes, and everyone gathers around a table filled with spooky treats. That’s when I realized that this year, my Halloween Orange Party Punch would be the star of the show. This refreshing drink not only comes together in just 5 minutes, but it also offers a fun, festive flair that will enchant both kids and adults alike. With its fizzy blend of Fanta and Sprite, crowned with fluffy orange sherbet, this punch is not just tasty; it’s an effortless crowd-pleaser, perfect for elevating any Halloween celebration. Curious how to whip up your own frightfully fun concoction? Let’s dive in!

Halloween Orange Party Punch

Why is This Punch a Party Essential?

Quick & Easy: In just 5 minutes, you can whip up this dazzling punch, leaving you more time to enjoy the festivities.
Kid-Friendly Fun: With the addition of tasty toppings like Trolli edible eyeballs and gummy worms, it’s sure to thrill young guests.
Refreshing Zest: The fizzy combination of Fanta and Sprite, paired with creamy orange sherbet, creates a delightful burst of flavor.
Versatile Serving: Perfect for both Halloween parties and family get-togethers—everyone will want a refill!
Visual Appeal: The striking orange color is not only eye-catching but also sets the perfect mood for a spooky celebration. Enhance your gathering with this punch, and if you’re looking for more delightful treats, check out our Spinach Artichoke Wonton or Hot Brown Dip recipes!

Halloween Orange Party Punch Ingredients

• Get ready for a spooky celebration with these delightful ingredients!

For the Base

  • Chilled 7up or Sprite – 2 liters add a fizzy sweetness to our punch.
  • Chilled Fanta Orange Soda – 2 liters infuse that vibrant orange flavor everyone loves.

For the Scoops

  • Orange Sherbet – 8-12 scoops create a creamy texture that takes this punch to another level.

For the Toppings

  • Trolli Edible Eyeballs – optional for a ghoulish touch that kids will adore.
  • Sour Gummy Worms – optional to add an extra layer of fun to each glass.

Prepare to wow your guests with this Halloween Orange Party Punch that’s as festive as it is refreshing!

Step‑by‑Step Instructions for Halloween Orange Party Punch

Step 1: Mix the Base
Start by pouring 2 liters of chilled 7up or Sprite into a large punch bowl. Next, add 2 liters of chilled Fanta Orange Soda. Use a large spoon or ladle to stir the mixture gently for about 30 seconds until you see a harmonious blend of colors and bubbles rising, signaling it’s ready for the next step.

Step 2: Add the Creamy Scoops
With your fizzy base prepared, it’s time to add the magic touch—orange sherbet! Carefully scoop 8-12 generous scoops of orange sherbet and nestle them into the punch. Watch as the sherbet gradually swirls and softens, creating a lovely creamy layer on top of the vibrant punch, adding both flavor and eye-catching charm.

Step 3: Serve the Punch
Once your Halloween Orange Party Punch is all mixed and beautifully layered, grab a ladle. Dip it into the punch bowl and pour the fizzy delight into small glasses or colorful plastic cups for fun. For a festive touch, make sure to fill them just shy of the rim, allowing for some of that frothy orange sherbet to peek out.

Step 4: Add Festive Toppings
To turn your Halloween Orange Party Punch into something truly spectacular, consider adding toppings! Sprinkle a few Trolli edible eyeballs and sour gummy worms into each glass for that creepy yet delightful touch. Your guests will love the surprise as they sip, making this punch a guaranteed hit at your Halloween gathering!

Halloween Orange Party Punch

How to Store and Freeze Halloween Orange Party Punch

Fridge: Store leftover punch in an airtight container in the fridge for up to 3 days. However, keep in mind that the fizzy element may lessen over time.

Freezer: For longer storage, freeze the punch in ice cube trays. You can use these cubes in future drinks or smoothies, but there’s no recommended storage timeframe for the pre-mixed punch itself.

Reheating: This punch is best served cold. If you’ve frozen sherbet scoops, let them thaw slightly before serving to regain that creamy texture.

Note: Always remix the punch with fresh ingredients if it’s been stored for several days to enhance flavor and presentation.

What to Serve with Halloween Orange Party Punch

As the laughter of friends and family fills the air, you’ll want to compliment your refreshing punch with delightful accompaniments.

  • Spooky Cheese Platter: A mix of sharp cheddar and creamy brie brings savory balance to the sweet punch, making for a delightful contrast.
  • Ghostly Fruit Skewers: Thread chunks of melon, strawberries, and banana onto skewers; they’re refreshing, colorful, and easy to nibble alongside our punch.
  • Crispy Veggie Cups: Serve crunchy carrots, celery, and bell peppers in individual cups with a tasty dip—perfect for munching as guests sip.
  • Mini Sandwiches: Tiny turkey and cheese or ham and pickle sandwiches will keep everyone satisfied, offering a hearty bite amidst the sweet punch.
  • Charming Cupcakes: Decorate vanilla or chocolate cupcakes with orange frosting and ghoulish toppers to add a festive flair to your spread.
  • Chilling Spider Ice Cubes: Add a spooky touch by freezing plastic spiders in ice cubes; drop them in glasses to surprise your guests!
  • Haunted Marshmallow Pops: Dip marshmallows in chocolate and sprinkles, then serve on sticks for a cute and easy sweet treat to dive into.
  • Warm Apple Pie Bites: Sweet, gooey apple pie baked in phyllo dough pairs wonderfully with the fruity flavors of your Halloween Orange Party Punch.
  • Cider Mimosa: For adults, a sparkling apple cider mimosa with a splash of champagne or prosecco complements the fruity notes perfectly.

Make Ahead Options

Prepare your Halloween Orange Party Punch in advance for a smoother celebration! You can mix the fizzy base of 2 liters each of chilled 7up or Sprite and Fanta Orange Soda up to 24 hours ahead. Simply combine these ingredients in a large punch bowl and refrigerate until you’re ready to serve. To maintain that delightful fizz, avoid adding the orange sherbet until just before serving (as it can become overly soft if left too long). When ready to impress your guests, ladle the sparkling mixture into glasses, then add 8-12 scoops of orange sherbet and any fun toppings like Trolli edible eyeballs and gummy worms. This approach not only saves you time but ensures that your punch is just as delicious on the big day!

Halloween Orange Party Punch Variations

Feel free to bring your creativity to life with these fun spins on your Halloween Orange Party Punch!

  • Dairy-Free: Substitute orange sherbet with a dairy-free sorbet to cater to lactose-intolerant guests while still keeping that creamy element.

  • Citrus Twist: Add a splash of pineapple or lime juice for an extra zing that will elevate the punch’s fruity essence.

  • Spooky Berry Blast: Toss in some frozen mixed berries or slices of fresh strawberries to add a pop of color and tartness.

  • Herbal Infusion: Add fresh mint leaves or a splash of rosemary syrup for a unique herbal twist that blends beautifully with the fruity flavors.

  • Chill with Ice: Freeze some of the punch in ice cube trays beforehand and use them as ice cubes to keep the drink chilled without diluting it.

  • Heat it Up: For an adult version, consider adding a splash of rum or vodka to give your punch a bit of an adult kick for the later festivities.

  • Fizzy Alternative: Swap out Sprite or 7up for a sparkling water or tonic for a less sugary option that still has that delightful fizz.

  • Gummy Surprise: Instead of traditional toppings, use Halloween-themed candies like gummy bats or cobwebs for a twisted, spooky surprise in every glass!

No matter how you choose to personalize your punch, it’s sure to impress your guests and keep those Halloween vibes going strong! To continue with the festive spirit, why not also prepare something savory like our Spinach Artichoke Wonton or a warming Hot Brown Dip?

Expert Tips for Halloween Orange Party Punch

• Chill Your Ingredients: Always start with chilled 7up, Sprite, and Fanta. This keeps your punch refreshing without worrying about dilution from melting ice.

• Scoop Diligently: Use an ice cream scoop for the orange sherbet to create perfectly round scoops that sit beautifully atop the punch.

• Layer Wisely: Add the sherbet gently to ensure it floats on the surface; this creates a striking visual appeal for your Halloween Orange Party Punch.

• Customize Toppings: Feel free to get creative with toppings! Candy corn, spider gummies, or even whipped cream can add a fun flair, just avoid overdoing it to maintain balance.

• Serve Fresh: For the best experience, serve the punch immediately after making it. If it sits too long, the sherbet may melt completely, altering the flavor and texture.

Halloween Orange Party Punch

Halloween Orange Party Punch Recipe FAQs

What kind of soda should I use for Halloween Orange Party Punch?
Absolutely! For the base of your Halloween Orange Party Punch, I recommend using chilled 7up or Sprite for that fizzy sweetness, paired with chilled Fanta Orange Soda to provide that vibrant, delicious orange flavor that will have everyone wanting a second glass!

How long can I store leftover Halloween Orange Party Punch?
Leftover punch can be stored in an airtight container in the fridge for up to 3 days. However, keep in mind that the fizz might diminish over time, so it’s best enjoyed fresh. If you want to save some for later, consider making individual servings instead of storing the entire bowl.

Can I freeze the Halloween Orange Party Punch?
Certainly! To freeze your punch, pour it into ice cube trays and freeze until solid. These cubes can be used in future drinks or smoothies, adding a delightful orange flavor. Just remember, the pre-mixed punch itself isn’t meant to be frozen, as it will lose its carbonation and creamy texture when thawed.

How can I make my punch stay fizzy longer?
To keep that effervescent sparkle in your Halloween Orange Party Punch, always start with chilled sodas. Serve your punch immediately after preparing it to preserve the bubbles. If you have leftover punch, consider using a soda siphon or adding a splash of fresh soda to revive the carbonation!

Are there any dietary considerations for this punch?
Very! When preparing Halloween Orange Party Punch, note that it contains dairy in the form of orange sherbet, which may not be suitable for those who are lactose intolerant or have dairy allergies. If needed, you can substitute the sherbet with a dairy-free alternative to accommodate dietary restrictions while still enjoying the spooky fun!

Spooky-Sweet Halloween Orange Party Punch Recipe You’ll Love

Enjoy this refreshing Halloween Orange Party Punch, perfect for gatherings with its fizzy blend and festive flair.

  • large punch bowl
  • ladle

For the Base

  • 2 liters Chilled 7up or Sprite (adds fizzy sweetness)
  • 2 liters Chilled Fanta Orange Soda (infuses vibrant orange flavor)

For the Scoops

  • 8-12 scoops Orange Sherbet (creates creamy texture)

For the Toppings

  • Trolli Edible Eyeballs (optional for a ghoulish touch)
  • Sour Gummy Worms (optional for extra fun)

Step-by-Step Instructions

  1. Pour 2 liters of chilled 7up or Sprite into a large punch bowl. Add 2 liters of chilled Fanta Orange Soda. Stir gently for about 30 seconds.
  2. Add 8-12 generous scoops of orange sherbet into the punch and watch as it swirls and softens.
  3. Use a ladle to serve the fizzy punch into small glasses or colorful cups, filling them just shy of the rim.
  4. Sprinkle Trolli edible eyeballs and sour gummy worms on top of each glass for a festive touch.

Chill your ingredients first to keep the punch refreshing. Customize toppings for a fun flair and serve immediately for best taste.

Drink
American
Festive, Fizzy, Halloween, party drink, Punch, refreshing

Filed Under: Drink

Refresh with Vampire’s Fig & Thyme Punch for a Spooky Sip!

September 30, 2025 by grace bellamy Leave a Comment

As the sun sets and shadows stretch across the kitchen, I find myself reaching for an unexpected hero—fig jam. This seemingly humble ingredient transforms an ordinary evening into something extraordinary with the delightful Vampire’s Fig & Thyme Punch. This recipe not only brightens up your gathering with its vibrant flavors, but it also comes together in just 15 minutes—perfect for those last-minute get-togethers. With a refreshing blend of gin, lemon, and a hint of thyme, this punch effortlessly elevates your drink game and becomes a crowd-pleaser in no time. Plus, the aromatic thyme syrup makes a fantastic addition to many other cocktails! Isn’t it time to impress your friends with something unique? Let’s dive into the magic of this punch together!

Vampire’s Fig & Thyme Punch

Why is this punch a must-try?

Unique flavors: The combination of fig jam and thyme syrup creates a stunning flavor profile that is both refreshing and unexpected in a beverage.

Quick and easy: With just 15 minutes of prep, this recipe is ideal for spontaneous hangouts or surprise guests—no complicated steps needed!

Versatile base: You can easily experiment by substituting other flavors—try adding thyme syrup to different cocktails or mocktails for a twist!

Impressive presentation: Garnished with sprigs of thyme and possibly a slice of fig, each glass looks gorgeous, making you the star at any gathering.

Crowd-pleaser: Whether you’re hosting a spooky Halloween party or a casual summer get-together, this punch is sure to impress!

Vampire’s Fig & Thyme Punch Ingredients

• Prepare to create a unique beverage that will enchant your guests!

For the Thyme Syrup

  • Fresh thyme – 4 sprigs for a fragrant herbal note that perfectly complements the fig.
  • Sugar – 1/2 cup; sweeten your syrup to balance the tartness of the lemon juice.
  • Water – 1/2 cup; this is essential for dissolving the sugar and extracting thyme flavor.

For the Punch

  • Fig jam – 2 tbsp; adds a luscious sweetness and depth to the Vampire’s Fig & Thyme Punch.
  • Gin – 2 oz; use your favorite brand for a smooth base that amplifies the flavors.
  • Lemon juice – 1 oz; freshly squeezed helps to brighten and cut through the sweetness.
  • Sparkling water – 3 oz; this fizzy touch lightens up the punch and adds liveliness.
  • Ice – A handful to chill your drink; use clear ice for a beautiful appearance.

With these ingredients on hand, you’ll be well on your way to crafting a delightful punch that’s not only refreshing but also wonderfully unique!

Step‑by‑Step Instructions for Vampire’s Fig & Thyme Punch

Step 1: Make the Thyme Syrup
In a small saucepan, combine 1/2 cup sugar, 1/2 cup water, and 4 sprigs of fresh thyme. Stir gently and bring the mixture to a simmer over medium heat. Let it simmer for about 5 minutes, until the sugar is fully dissolved and you can smell the thyme aroma wafting through your kitchen. Once done, remove from heat and set aside to cool before straining.

Step 2: Juice the Lemon
While the thyme syrup cools, prepare 1 oz of fresh lemon juice. Cut a lemon in half and use a juicer or simply your hands to extract juice. Strain the juice through a fine mesh sieve to remove any seeds, ensuring a smooth addition to your Vampire’s Fig & Thyme Punch. Keep the freshly squeezed juice on hand for the next step.

Step 3: Combine the Ingredients
In a cocktail shaker or a medium jar, combine 2 tbsp of fig jam, 2 oz of gin, 1 oz of lemon juice, and 1 oz of the thyme syrup you just made. Use a spoon or muddler to stir vigorously until the fig jam is well blended and the mixture is smooth. This will create a delightful base for your punch, with the fig and herbal notes mixing beautifully.

Step 4: Prepare the Glasses
Take two glasses and fill them with clear ice cubes—this will keep your Vampire’s Fig & Thyme Punch chilled without diluting it too quickly. Make sure the ice is visible through the glass for an appealing presentation. Once your glasses are prepared, it’s time to pour in the delicious punch mixture.

Step 5: Strain into Glasses
Using a fine mesh strainer, pour the fig and gin mixture over the prepared ice in each glass. The strainer will catch any bits of fig jam or thyme, leaving you with a perfectly clear and vibrant punch. Watch the colorful liquid flow around the ice, creating a visual treat for everyone.

Step 6: Add Sparkling Water
Top each glass with 3 oz of sparkling water, pouring slowly to maintain the fizz and prevent overflow. Use a spoon to stir gently, combining the flavors without losing the effervescence. The bubbly touch from the sparkling water will awaken the delightful flavors of your Vampire’s Fig & Thyme Punch.

Step 7: Garnish and Serve
Finally, add a sprig of fresh thyme to each glass for an aromatic garnish. If you have figs on hand, a thin slice can beautifully enhance the presentation. Serve your Vampire’s Fig & Thyme Punch immediately, while it’s still bubbly and chilled. Cheers to a deliciously unique drink!

Vampire’s Fig & Thyme Punch

What to Serve with Vampire’s Fig & Thyme Punch

Get ready to create a well-rounded meal that beautifully complements the unique flavors of this refreshing punch!

  • Savory Charcuterie Board: A delightful mix of cured meats, cheeses, and fresh fruit pairs wonderfully, providing a balance of flavors and textures that enhance the sipping experience.

  • Herbed Flatbread: Crispy and fragrant flatbread topped with olive oil and fresh herbs will draw out the herbal notes of the thyme, making each bite and sip a delightful union.

  • Spiced Nuts: Roasted nuts tossed in warm spices add a crunchy textural contrast and richness to the punch, making them the perfect snack to linger over while enjoying your drink.

  • Mediterranean Quinoa Salad: This light salad, brimming with cherry tomatoes, cucumbers, and a tangy dressing, provides freshness that enhances the sweet and herbal notes of the punch.

  • Creamy Goat Cheese Dip: A luscious dip served with fresh veggie sticks brings a creamy element that balances the drink’s brightness, creating a satisfying party spread.

  • Lemon Sorbet: Offering a refreshing, icy treat after sipping the punch lightens the palette and prepares you for an indulgent dessert experience.

  • Sparkling Water: Served alongside your punch, this enhances the experience of carbonation and refreshment, ensuring hydration while you enjoy your vibrant sips.

  • Dark Chocolate Truffles: The richness of truffles offers a lovely contrast to the punch, creating a luxurious end to your gathering.

Mix and match these pairings to create a memorable occasion that friends and family will rave about long after the last sip!

Tips for the Best Vampire’s Fig & Thyme Punch

Start with Fresh Herbs: Using fresh thyme instead of dried enhances the flavor significantly; dried herbs can often be too strong or bitter.

Thyme Syrup Cooling: Allow your thyme syrup to cool completely before using it; warm syrup can alter the texture of your punch.

Stir, Don’t Shake: When mixing the fig jam and gin, stir gently to avoid breaking up the jam too much, which can make your Vampire’s Fig & Thyme Punch grainy.

Choose Quality Gin: A good-quality gin can elevate the overall taste of the punch; opt for brands that you enjoy sipping on their own.

Serve Immediately: For the best experience, serve the punch right after preparing it; the sparkling water’s fizz is key to its refreshing nature.

Vampire’s Fig & Thyme Punch Variations

Feel free to let your creativity flow and customize this punch to suit your palate!

  • Herb-Infused: Swap thyme for basil for a refreshing twist that lends a whole new aromatic profile.

  • Fruity Burst: Add fresh berries like raspberries or blackberries for a pop of flavor and vibrant color. They will enhance the sweetness and tartness beautifully!

  • Ginger Zest: Incorporate a dash of ginger beer instead of sparkling water for a spicy kick that complements the punch wonderfully.

  • Non-Alcoholic: Leave out the gin and replace it with a splash of apple cider for a delightful mocktail enjoyed by everyone, including kids!

  • Citrus Medley: Mix in orange juice along with the lemon for a delightful citric explosion that brightens the drink even more.

  • Chilly Chill: Freeze some of the thyme syrup into ice cubes and add them to the punch, offering both cooling and additional flavor as they melt.

  • Sweetener Switch: Try using honey or agave syrup in place of sugar for a natural sweetness that pairs well with the fig flavor.

  • Spicy Touch: For a little heat, muddle in a few slices of jalapeño. It’s an adventurous option that will surprise and delight!

With these variations, your Vampire’s Fig & Thyme Punch can be tailored for any occasion, making it a versatile addition to your recipe collection!

How to Store and Freeze Vampire’s Fig & Thyme Punch

Fridge: Store the punch base (without sparkling water or ice) in an airtight container in the fridge for up to 2 days. This keeps the flavors vibrant for later enjoyment.

Freezer: For longer storage, you can freeze the thyme syrup in ice cube trays. Once frozen, transfer the cubes to a freezer bag and use within 3 months for the freshest flavor.

Reheating: While Vampire’s Fig & Thyme Punch is best served cold, if you prepped a warm version, gently reheat it on the stove over low heat until just warmed, then serve immediately for a cozy treat.

Serving: Always add sparkling water and ice just before serving to maintain the fizzy, refreshing taste that makes this punch special!

Make Ahead Options

These Vampire’s Fig & Thyme Punch components are perfect for busy home cooks looking to save time! You can prepare the thyme syrup and store it in the refrigerator for up to 3 days, making it easy to whip up this refreshing drink on short notice. Additionally, you can mix the fig jam, gin, lemon juice, and syrup together and refrigerate this base up to 24 hours in advance. Just be sure to give it a good stir before serving to ensure the flavors meld beautifully. When you’re ready to enjoy, simply pour over ice, add sparkling water, and garnish with thyme. Your guests will be wowed with minimal effort!

Vampire’s Fig & Thyme Punch

Vampire’s Fig & Thyme Punch Recipe FAQs

How do I select the best figs for this punch?
Absolutely! When choosing figs, look for ones that are plump, firm, and free from any dark spots or blemishes. The skin should be smooth and slightly soft to the touch, indicating ripeness. If you can find fresh figs, they will add a wonderful sweetness to your punch. Dried figs can be used in a pinch but may not provide the same depth of flavor.

What’s the best way to store leftover Vampire’s Fig & Thyme Punch?
Very important! If you have any leftover punch base, store it in an airtight container in the fridge without the sparkling water or ice. This will keep the flavors vibrant for up to 2 days. When you’re ready to serve it again, simply add fresh sparkling water and ice to maintain that refreshing fizz.

Can I freeze the thyme syrup?
Absolutely! To freeze the thyme syrup, pour the cooled syrup into ice cube trays and freeze until solid. Once frozen, transfer the cubes to a freezer bag. They can be stored in the freezer for up to 3 months. The syrup cubes are perfect for quickly sweetening cocktails or other beverages later on.

What if my punch doesn’t taste right?
If your Vampire’s Fig & Thyme Punch tastes off, you may need to adjust the balance of flavors. If it’s overly sweet, squeeze a bit more lemon juice to brighten it up. If it’s too tart, add more fig jam or syrup to sweeten it slightly. Remember to taste as you go, and don’t hesitate to adjust until you find that perfect combination that sings!

Are there any dietary considerations I should know about?
Definitely! The punch contains gin, which may not be suitable for everyone, especially those avoiding alcohol. You can easily make a delicious non-alcoholic version by replacing the gin with a splash of additional thyme syrup and using non-alcoholic sparkling water. Also, check for any allergies associated with figs and thyme—these ingredients are generally safe for most individuals but it’s always best to be cautious!

How long does it take to make this punch?
You’re in for a treat! The total time to prepare the Vampire’s Fig & Thyme Punch is just 15 minutes, with about 10 minutes for prep and 5 minutes for cooking the thyme syrup. It’s a quick and delightful recipe, perfect for those unexpected guests or spontaneous gatherings!

Refresh with Vampire’s Fig & Thyme Punch for a Spooky Sip!

Enjoy the vibrant Vampire’s Fig & Thyme Punch, a refreshing drink perfect for gatherings.

  • Saucepan
  • Cocktail shaker
  • fine-mesh strainer
  • juice extractor
  • glasses

For the Thyme Syrup

  • 4 sprigs Fresh thyme (for a fragrant herbal note)
  • 1/2 cup Sugar (to sweeten syrup)
  • 1/2 cup Water (to dissolve the sugar)

For the Punch

  • 2 tbsp Fig jam (adds sweetness)
  • 2 oz Gin (use your favorite brand)
  • 1 oz Lemon juice (freshly squeezed)
  • 3 oz Sparkling water (for fizz)
  • 1 handful Ice (use clear ice for appearance)

Thyme Syrup Preparation

  1. In a small saucepan, combine 1/2 cup sugar, 1/2 cup water, and 4 sprigs of fresh thyme. Stir gently and bring to a simmer over medium heat. Simmer for about 5 minutes, until the sugar is dissolved. Remove from heat and let cool before straining.

Making the Punch

  1. Juice a lemon to yield 1 oz of fresh lemon juice. Strain it through a fine mesh sieve to remove seeds.
  2. In a cocktail shaker, mix 2 tbsp of fig jam, 2 oz of gin, 1 oz of lemon juice, and 1 oz of thyme syrup. Stir vigorously until smooth.
  3. Fill two glasses with clear ice. Pour the mixture over the ice using a fine mesh strainer.
  4. Top each glass with 3 oz of sparkling water, stirring gently to combine, and garnish with a sprig of thyme.

Serve immediately for the best fizz. Store the punch base without sparkling water in the fridge for up to 2 days.

Drink
American
cocktail, fig jam, Punch, spooky drink, thyme syrup, Vampire’s Fig & Thyme Punch

Filed Under: Drink

Delightful Apple Pie Dirty Soda for a Refreshing Twist

September 30, 2025 by grace bellamy Leave a Comment

As I poured the vibrant liquid into the glass, the enticing scent of apple and cinnamon filled the air, and I couldn’t help but smile. This is my special twist on classic refreshment—Apple Pie Dirty Soda. Perfect for a warm day or a cozy night in, this delightful drink is not only a breeze to whip up in just five minutes, but it also serves as a fun conversation starter at any gathering. Imagine indulging in the essence of apple pie without the fuss of baking! The rich combination of soda with creamy sweetness and a hint of apple cider creates a treat that’s both nostalgic and exciting. I can’t wait for you to try it! What would you pair it with for a delicious afternoon pick-me-up?

Apple Pie Dirty Soda

Why is Apple Pie Dirty Soda a must-try?

Simplicity at its Finest: This drink comes together in just five minutes, making it an effortless choice for busy days.
Nostalgic Flavors: Experience the delightful essence of apple pie in a refreshing beverage form—perfect for both summer barbecues and cozy evenings.
Customizable Delight: Switch up the soda or cream type to suit your taste; try a Pineapple Bars Tropical variation for an unexpected twist!
Visually Stunning: Serve it in clear glasses to showcase the eye-catching layers of color, making it a standout on any table.
Crowd-Pleaser: Whether you’re entertaining friends or enjoying a quiet night, this drink sparks conversations and is sure to impress.
Taste the joy of homemade refreshment—it’s a sip of happiness in every glass!

Apple Pie Dirty Soda Ingredients

• Ready to mix up something special?

For the Soda Base
• Chilled cola or cream soda – Choose your favorite for a bubbly burst of flavor!
• Apple syrup or spiced apple syrup – Opt for spiced for an extra layer of warmth reminiscent of pie.
• Apple cider – This adds a fruity note, perfectly enhancing the classic essence of apple pie.

For the Creamy Top
• Cream, half-and-half, or coconut cream – Coconut cream lends a delightful, dairy-free twist with healthy fats.

To Serve
• Ice – Fill your glass with ice for that refreshing chill that makes every sip enjoyable.
• Optional Garnish:

  • Apple slice – A fresh finishing touch that elevates the drink’s presentation.
  • Cinnamon stick – Stir it for a charming aesthetic and added aroma.
  • Pinch of cinnamon – Sprinkle for an extra hint of warmth and spice!

This Apple Pie Dirty Soda is a captivating blend of nostalgia and innovation, ready to brighten up your day!

Step-by-Step Instructions for Apple Pie Dirty Soda

Step 1: Prepare the Glass
Begin by filling a tall glass all the way to the brim with ice. This will keep your Apple Pie Dirty Soda delightfully chilled and refreshing. Make sure the ice is packed tightly, as this helps the soda to stay cooler longer while also creating a beautiful layered effect in your drink.

Step 2: Mix the Flavors
Pour in 2 tablespoons of apple syrup and 1 ounce of apple cider over the ice. Stir gently with a long spoon to combine the syrups, allowing the sweet, fruity aromas to blend. The mixture should look rich and inviting, foreshadowing the delicious layers to come in your Apple Pie Dirty Soda.

Step 3: Add the Soda
Now, slowly pour your chilled cola or cream soda into the glass. Aim for the ice to create a barrier so you can see those lovely layers forming. Watch as the soda bubbles and fizzes, filling the glass and mixing with the apple flavors below, creating a delightful visual presentation.

Step 4: Top with Cream
Drizzle in 1 to 2 ounces of cream, half-and-half, or coconut cream over the top, allowing it to gently swirl into the soda without losing the fizz. The cream should float atop the soda, creating a beautiful, creamy layer. This is what truly transforms your drink into a luscious Apple Pie Dirty Soda experience.

Step 5: Garnish and Serve
Finally, take a moment to garnish your drink for added flair. Optionally, you can place an apple slice on the rim, add a cinnamon stick for stirring, or sprinkle a pinch of cinnamon on top. Serve your Apple Pie Dirty Soda immediately for the best experience, and enjoy the wonderful blend of flavors and textures!

Apple Pie Dirty Soda

Expert Tips for Apple Pie Dirty Soda

• Chill Everything: Make sure your soda, cream, and glass are well-chilled. This ensures the drink stays cold longer and maintains that refreshing appeal.

• Layering Trick: Pour soda slowly over the ice to preserve the layers. If done right, this will create an eye-catching visual that enhances the drinking experience of your Apple Pie Dirty Soda.

• Syrup Variation: Customize the flavor with different syrups! Try using cranberry or cherry syrup for a unique twist while still keeping that nostalgic apple essence.

• Avoid Over-Whipping: When adding cream, be careful not to over-stir. You want just enough mix to create a swirl without losing that fizzy texture.

• Garnish Wisely: Use fresh garnishes like apple slices or cinnamon sticks to elevate presentation. They also deliver a burst of flavor with every sip!

What to Serve with Apple Pie Dirty Soda

As you savor the delightful combination of sweet apple flavors and creamy fizz, consider these mouthwatering pairings to elevate your experience.

  • Savory Sliders: Miniature burgers bring a savory contrast that complements the sweetness of the drink. These handheld bites are perfect for casual gatherings and enhance the fun factor!

  • Cinnamon Sugar Donuts: These fluffy treats mirror the drink’s cinnamon notes, creating a harmonious blend of flavors. They make a lovely addition to brunch or as an indulgent afternoon snack.

  • Apple Crisp: Embrace the apple theme with a warm apple crisp served alongside your drink. The crunchy topping adds texture, while the warmth enhances the cozy feel of your soda delight.

  • Cheese Platter: A selection of sharp cheeses can create a delightful balance with the sweet beverage. Pair creamy brie or tangy goat cheese for a sophisticated touch.

  • Roasted Nuts: Seasoned almonds or pecans add a crunchy element that contrasts wonderfully with the drink’s creaminess. Their richness brings a delightful savory bite to each sip.

  • Hot Vanilla or Pumpkin Spice Latte: Choose a warm beverage to sip alongside. A rich vanilla or spiced latte can enhance the cozy ambiance, perfect for fall gatherings or chilly evenings.

  • Homemade Ice Cream: Treat yourself to a scoop of vanilla or caramel ice cream that complements the apple pie flavors. The creaminess melds with the drink, creating a dreamy, indulgent pairing.

  • Light Fruit Salad: A fresh medley of seasonal fruits offers a refreshing contrast, adding brightness and balance to your palate alongside the rich flavors of the Apple Pie Dirty Soda.

How to Store and Freeze Apple Pie Dirty Soda

Prep Ahead: Store prepared components separately in the fridge. Keep the apple syrup, apple cider, and cream chilled to maintain freshness for up to 3 days.

Ice Tip: Avoid freezing the complete drink, as the soda will lose its fizz. Instead, make ice cubes from your apple cider for a fun twist.

Serving Fresh: For the best experience, assemble your Apple Pie Dirty Soda just before serving to enjoy its delightful layers and effervescence.

Garnish Storage: Keep optional garnishes like apple slices and cinnamon sticks in an airtight container in the fridge for a day for optimal freshness and flavor.

Make Ahead Options

These Apple Pie Dirty Soda drinks are perfect for busy home cooks looking to save time! You can prepare the apple syrup and apple cider mixture up to 24 hours in advance, allowing the flavors to meld beautifully. Simply combine 2 tablespoons of apple syrup with 1 ounce of apple cider in an airtight container and refrigerate. Keep the cream and chilled soda separate until you’re ready to serve—this ensures the fizz stays intact. When it’s time to indulge, fill a tall glass with ice, add your prepped mixture, pour in the soda, and top with cream. You’ll have a refreshing treat that tastes just as delicious, effortlessly ready for your gathering!

Apple Pie Dirty Soda Variations

Feel free to make this delightful drink your own with these tempting twists that will elevate your experience!

  • Dairy-Free: Swap cream for coconut cream for a luscious and healthier alternative that maintains the indulgent texture.
  • Spiced Up: Add a dash of nutmeg or a splash of vanilla extract to enhance the warm aroma and flavor, reminiscent of baked goodies.
  • Fizzy Alternative: Use ginger ale instead of cola or cream soda for a zesty and refreshing take that’s perfect for summer!
  • Extra Fruity: Incorporate a splash of cranberry or cherry juice alongside the apple syrup for a fruity dance of flavors.
  • Maple Twist: Replace apple syrup with maple syrup for a sophisticated, earthy sweetness; this pairs beautifully with the cinnamon garnish.
  • Herbal Infusion: Add a sprig of fresh mint or basil for an invigorating hint that contrasts delightfully with the sweet apple and cream.
  • Frozen Delight: Blend the ingredients with ice for a slushy version that’s perfect for hot days; serve it in a tall glass for a fun, cooling treat.
  • More Crunch: Top with crushed graham crackers or a sprinkle of granola to add an unexpected texture that mimics pie crust.

Trying these variations can lead to delightful surprises—you might even stumble upon a new favorite! And if you’re looking for something savory to pair with your drink, consider a comforting Chicken Pot Pie for a complete indulgent experience!

Apple Pie Dirty Soda

Apple Pie Dirty Soda Recipe FAQs

What type of apple syrup should I use?
Absolutely! I recommend using either apple syrup or spiced apple syrup. The spiced version adds an extra layer of warmth that beautifully complements the apple cider and soda. If you can find it, opt for a high-quality brand to truly enhance the drink’s flavor.

How long can I store prepared components?
You can prep the apple syrup, apple cider, and cream separately and keep them chilled in the fridge for up to 3 days. This makes it easy to whip up your Apple Pie Dirty Soda at a moment’s notice!

Can I freeze my Apple Pie Dirty Soda for later?
It’s best not to freeze the entire drink as the carbonation will be lost, resulting in a flat soda. However, you can freeze some apple cider into ice cubes! Simply pour the cider into an ice cube tray and freeze until solid. These can be used in place of regular ice, adding a fun twist as they melt.

What should I do if my soda loses its fizz?
If you find that your soda has lost its fizz, there are a few things you can try. First, make sure to serve it immediately after preparation to enjoy the effervescence. If you’ve made it ahead, use chilled soda and pour it gently over ice, as this method reduces foam and helps maintain the carbonation.

Can I make this drink non-dairy?
Yes! For a dairy-free version, simply substitute the cream with coconut cream or any non-dairy alternative like almond or oat milk. These options provide a creamy texture and flavor while keeping the drink light and refreshing!

Are there any allergy considerations?
Absolutely! Since this Apple Pie Dirty Soda contains apple cider and various creams, ensure that none of the ingredients pose a risk for allergies. If serving to guests, check for sensitivities to apples or dairy. You can always opt for alternatives like coconut cream to make it allergy-friendly!

Delightful Apple Pie Dirty Soda for a Refreshing Twist

Try this Apple Pie Dirty Soda for a nostalgic and refreshing twist on classic flavors, perfect for any occasion.

  • tall glass
  • long spoon

For the Soda Base

  • 1 glass chilled cola or cream soda (Choose your favorite)
  • 2 tablespoons apple syrup or spiced apple syrup (Opt for spiced for added warmth)
  • 1 ounce apple cider (Enhances the classic apple pie essence)

For the Creamy Top

  • 1-2 ounces cream, half-and-half, or coconut cream (Coconut cream for a dairy-free option)

To Serve

  • 1 cup ice (Fill your glass with ice)
  • apple slice (Optional garnish)
  • cinnamon stick (Optional garnish)
  • pinch of cinnamon (Optional garnish)

Step-by-Step Instructions

  1. Begin by filling a tall glass all the way to the brim with ice.
  2. Pour in apple syrup and apple cider over the ice. Stir gently.
  3. Slowly pour your chilled cola or cream soda into the glass.
  4. Drizzle in cream, half-and-half, or coconut cream over the top.
  5. Garnish with an apple slice, cinnamon stick, or sprinkle of cinnamon.

Make sure your soda, cream, and glass are well-chilled for the best experience. Assemble just before serving for optimal freshness.

Drink
American
Apple Pie Dirty Soda, Easy Recipe, homemade soda, nostalgic beverage, refreshing drink

Filed Under: Drink

  • 1
  • 2
  • Next Page »
RecipeCrown

Hello, beautiful people! I’m Grace Bellamy, a foodie, traveler, and writer with wanderlust in my soul. Whether crafting recipes in my kitchen or exploring flavors around the globe, my greatest joy is helping you create healthier, happier lives, one delicious bite at a time.