RecipeCrown

Easy & Delicious Recipes

  • Home
  • Breakfast
  • Main Dishes
  • Dessert
  • About
  • Contact
You are here: Home / Archives for Drink

Campfire Cola Dirty Soda: A Sweet Summer Treat You’ll Love

September 30, 2025 by grace bellamy Leave a Comment

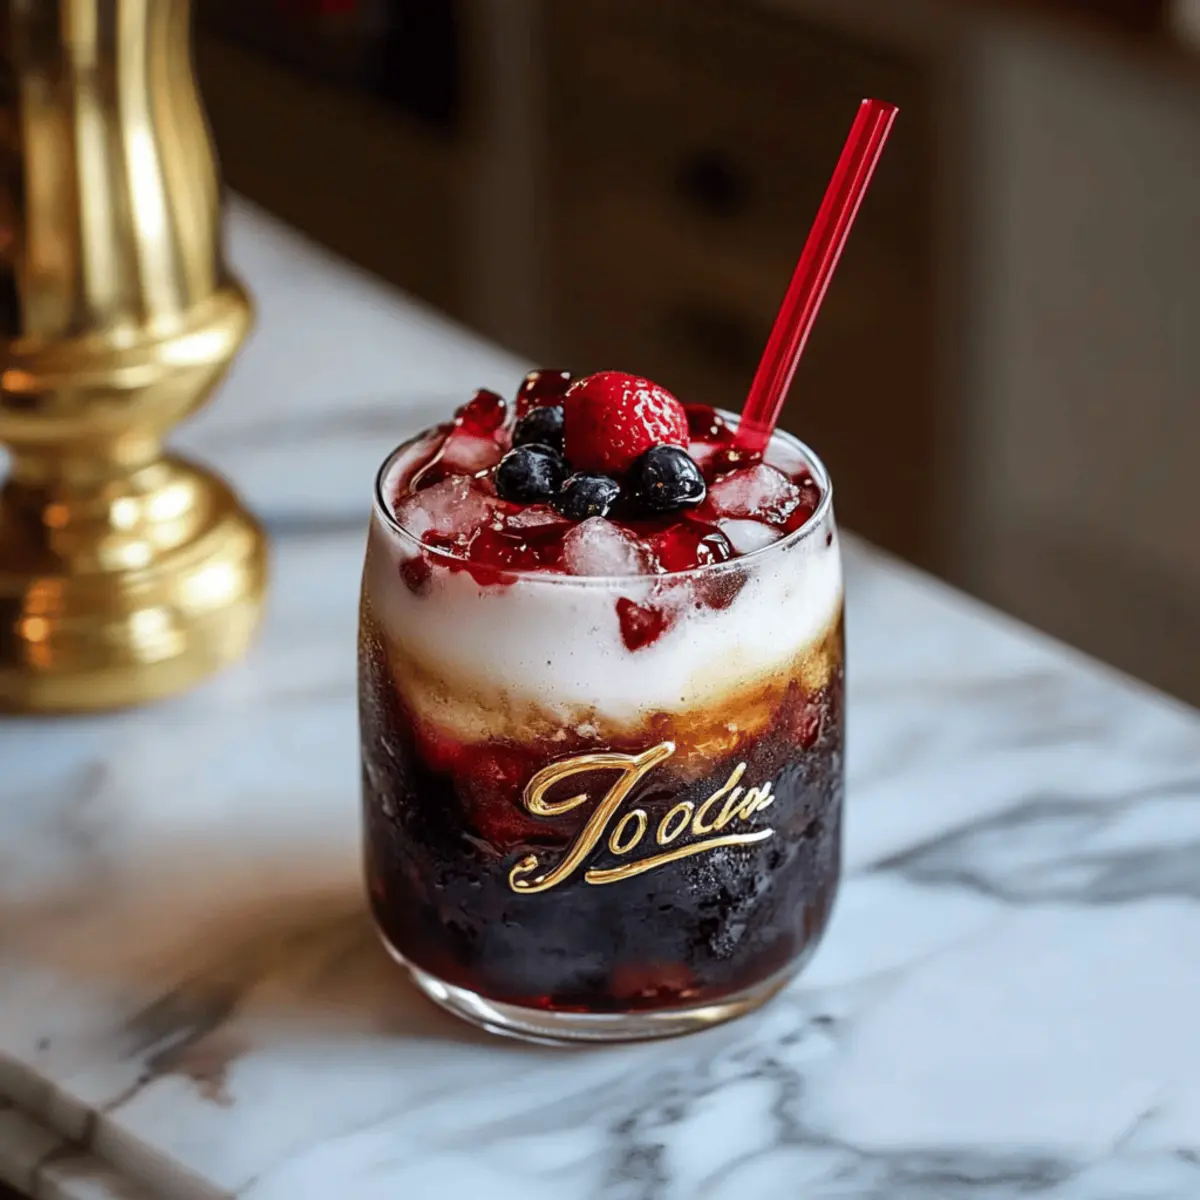
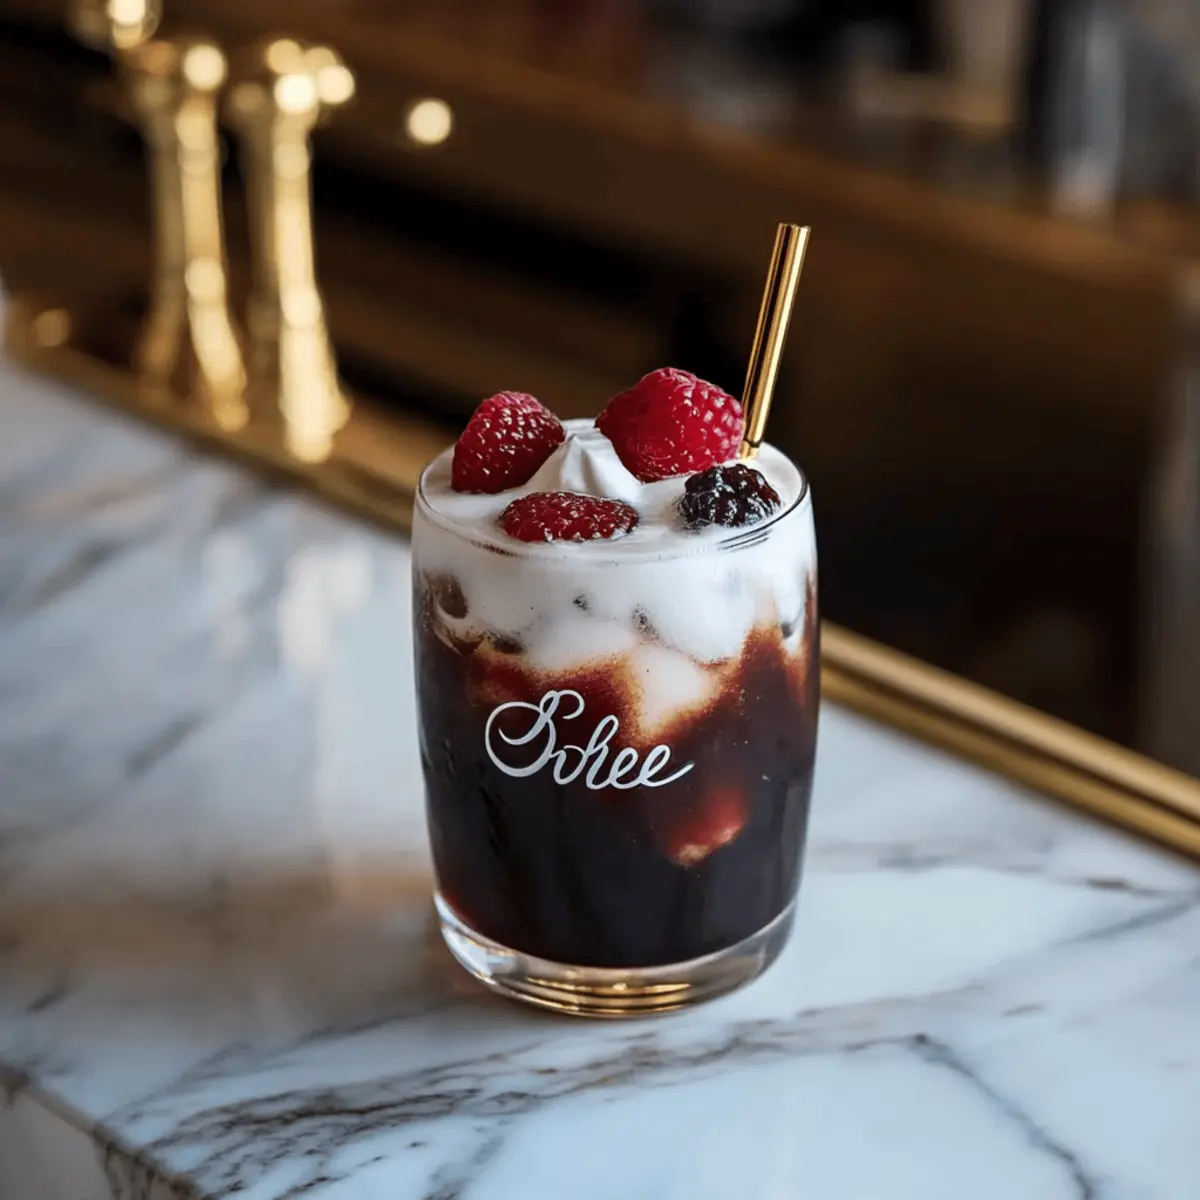
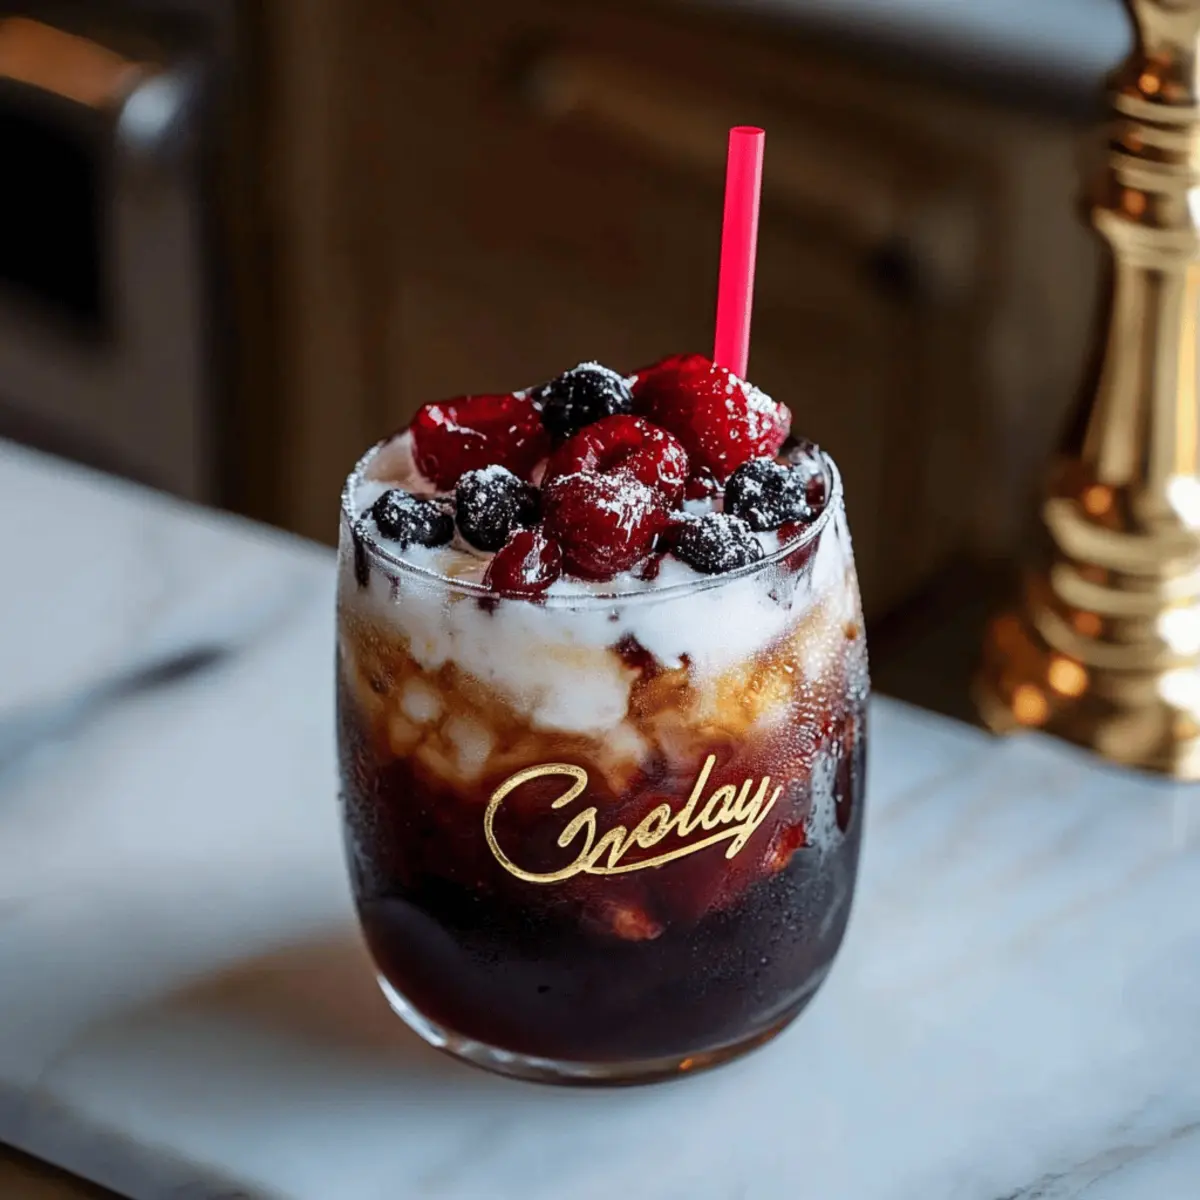
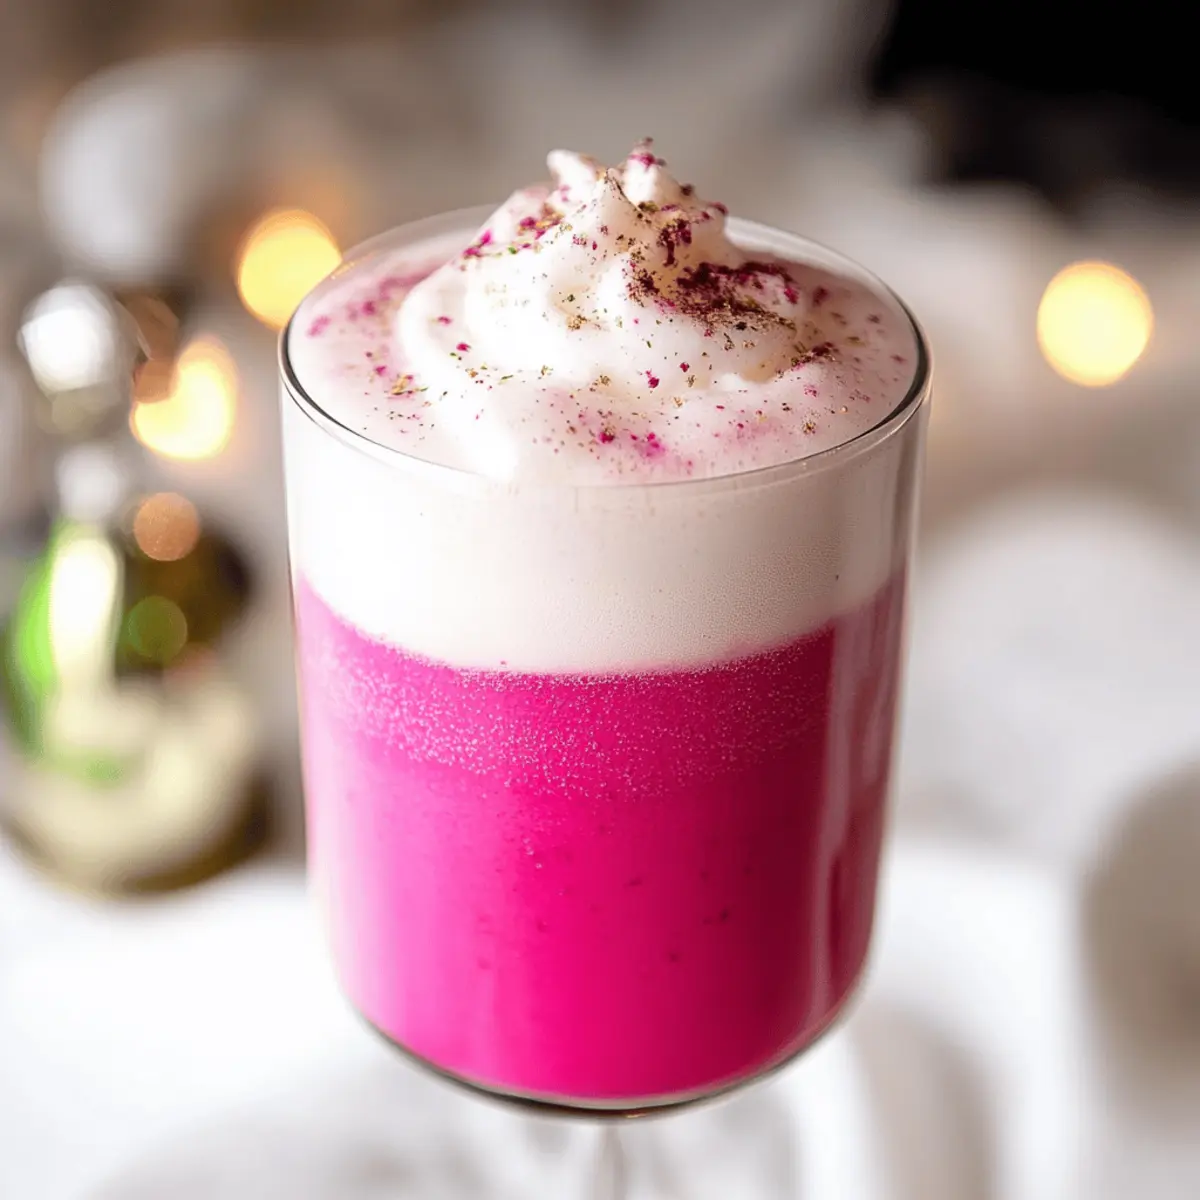
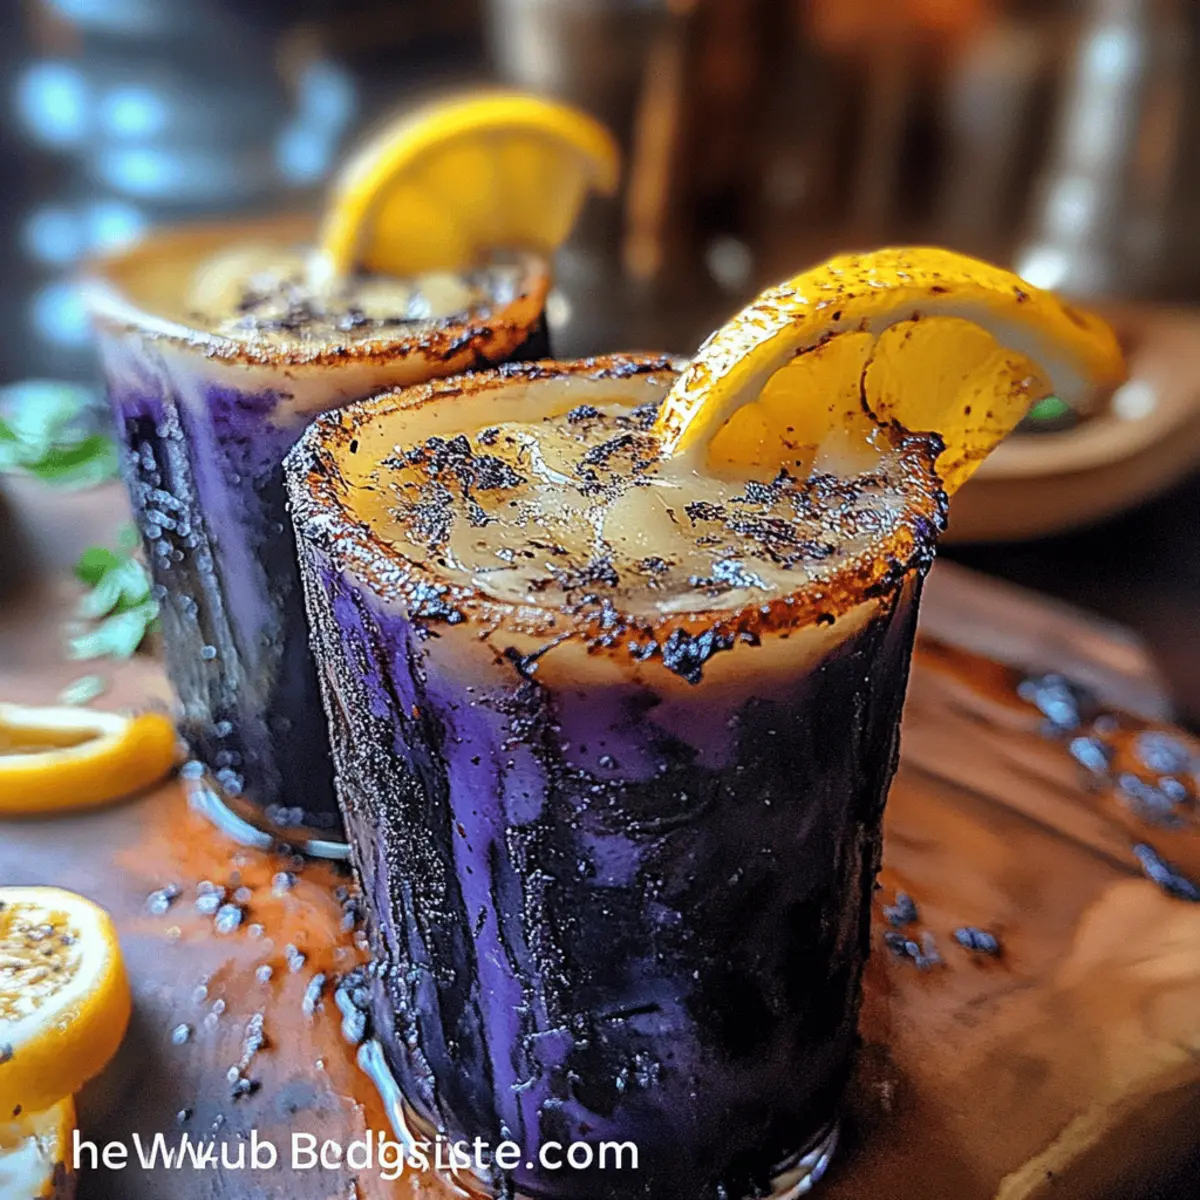
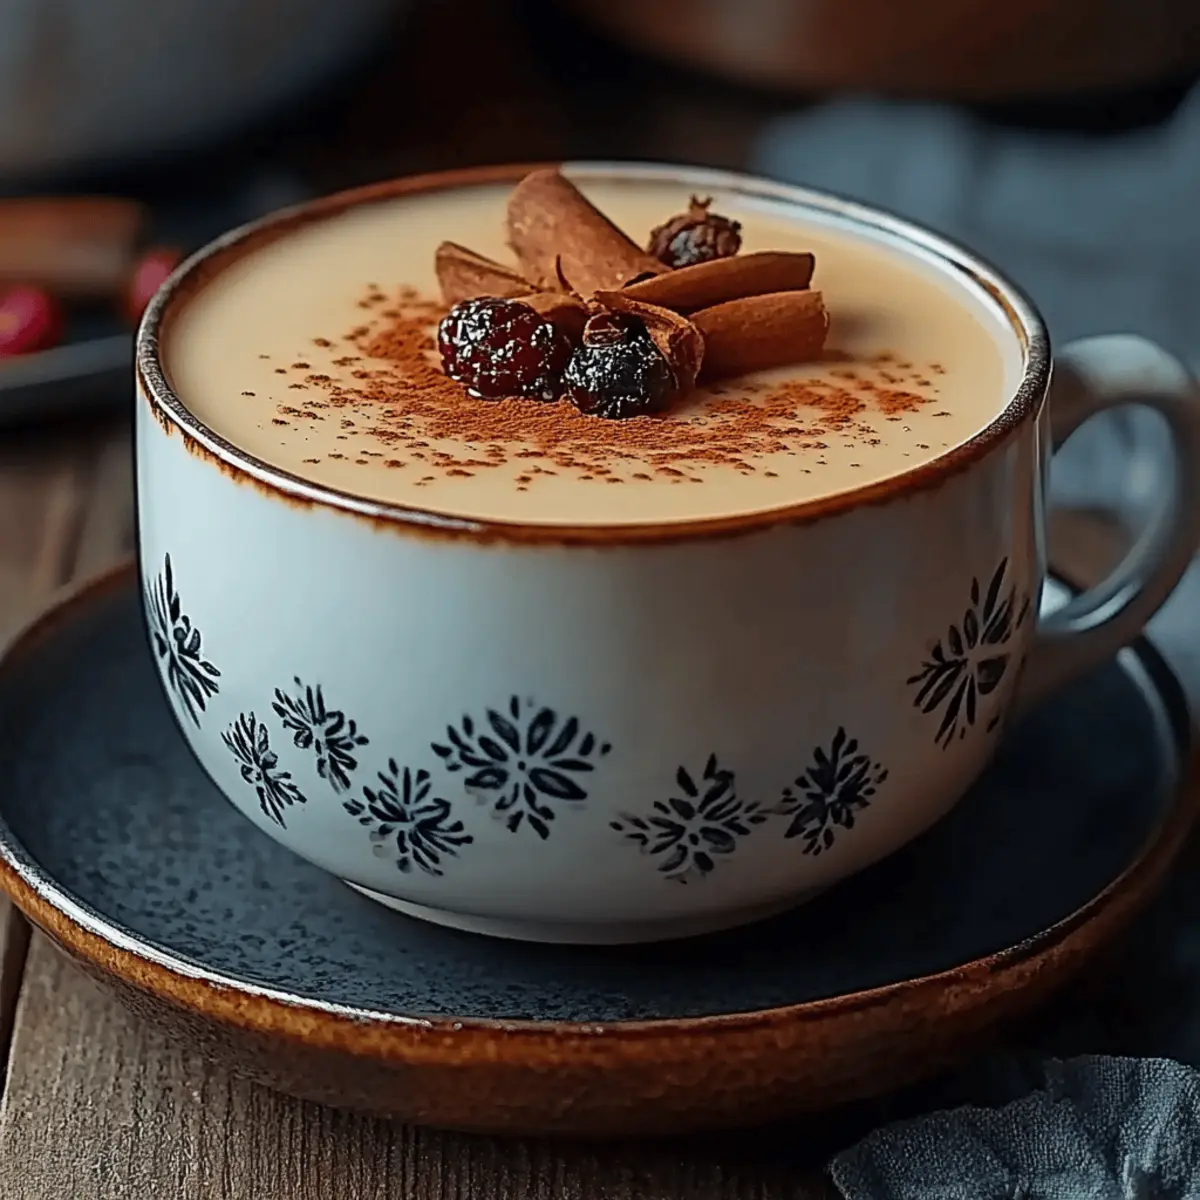
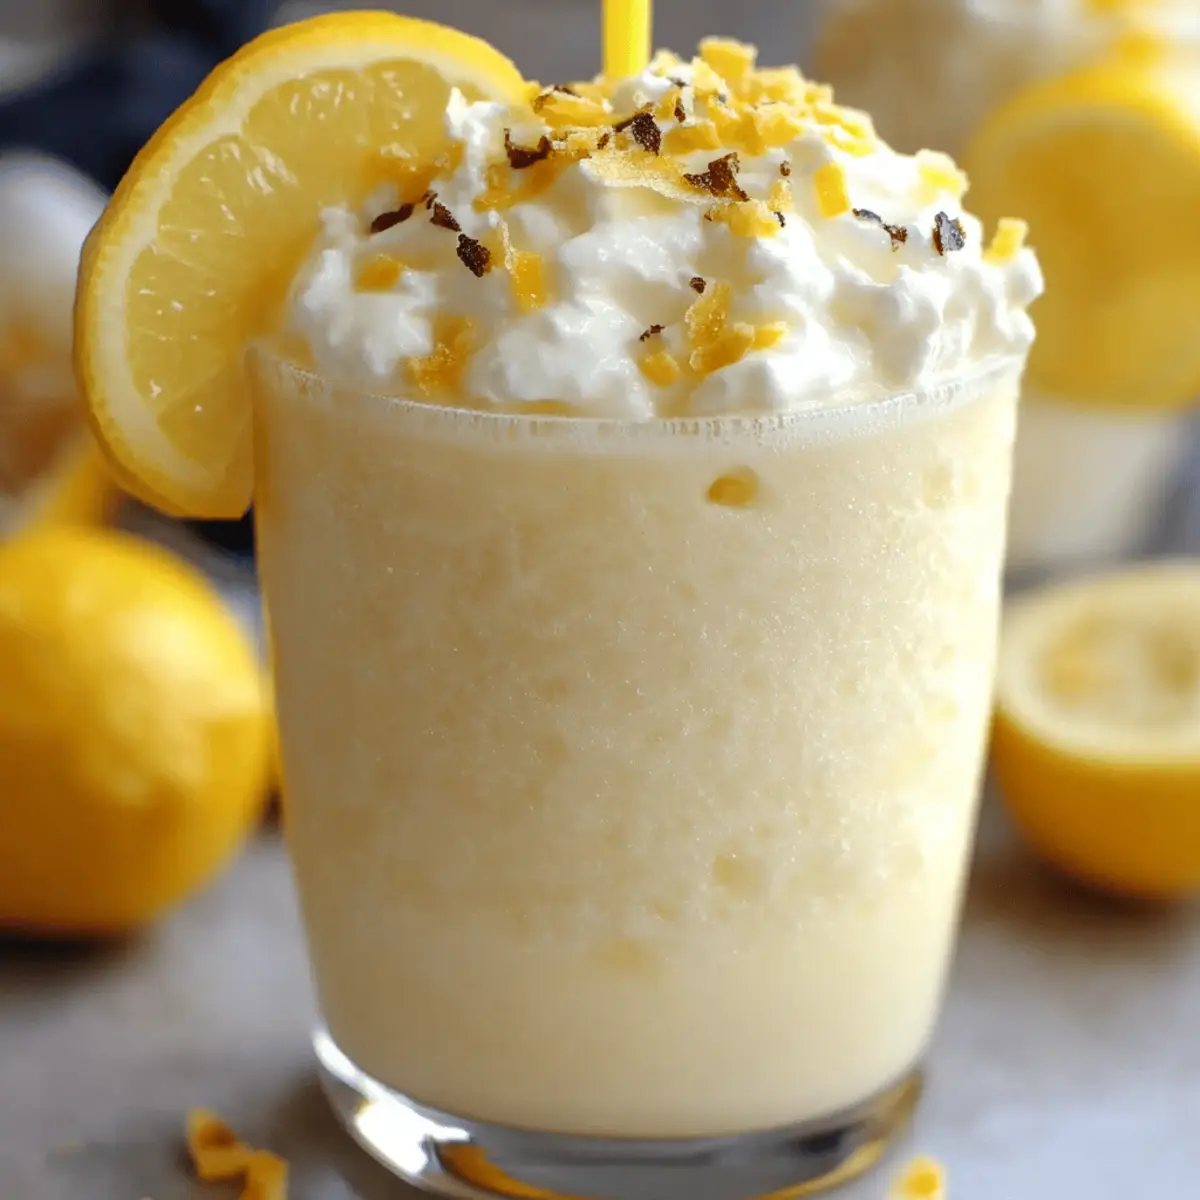
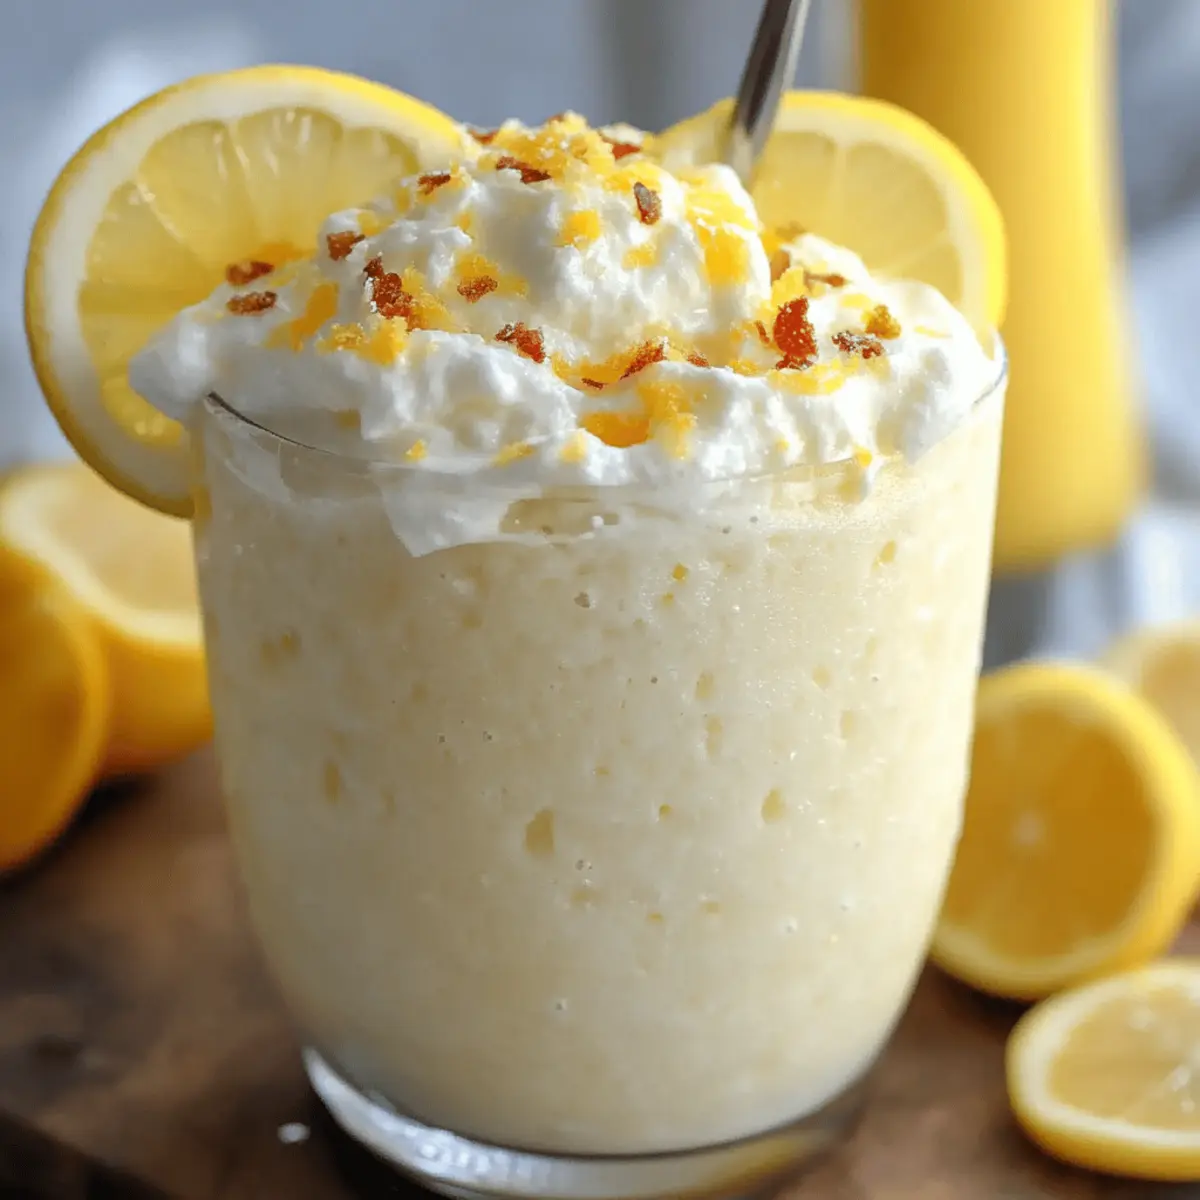
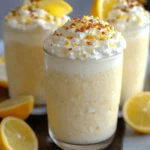
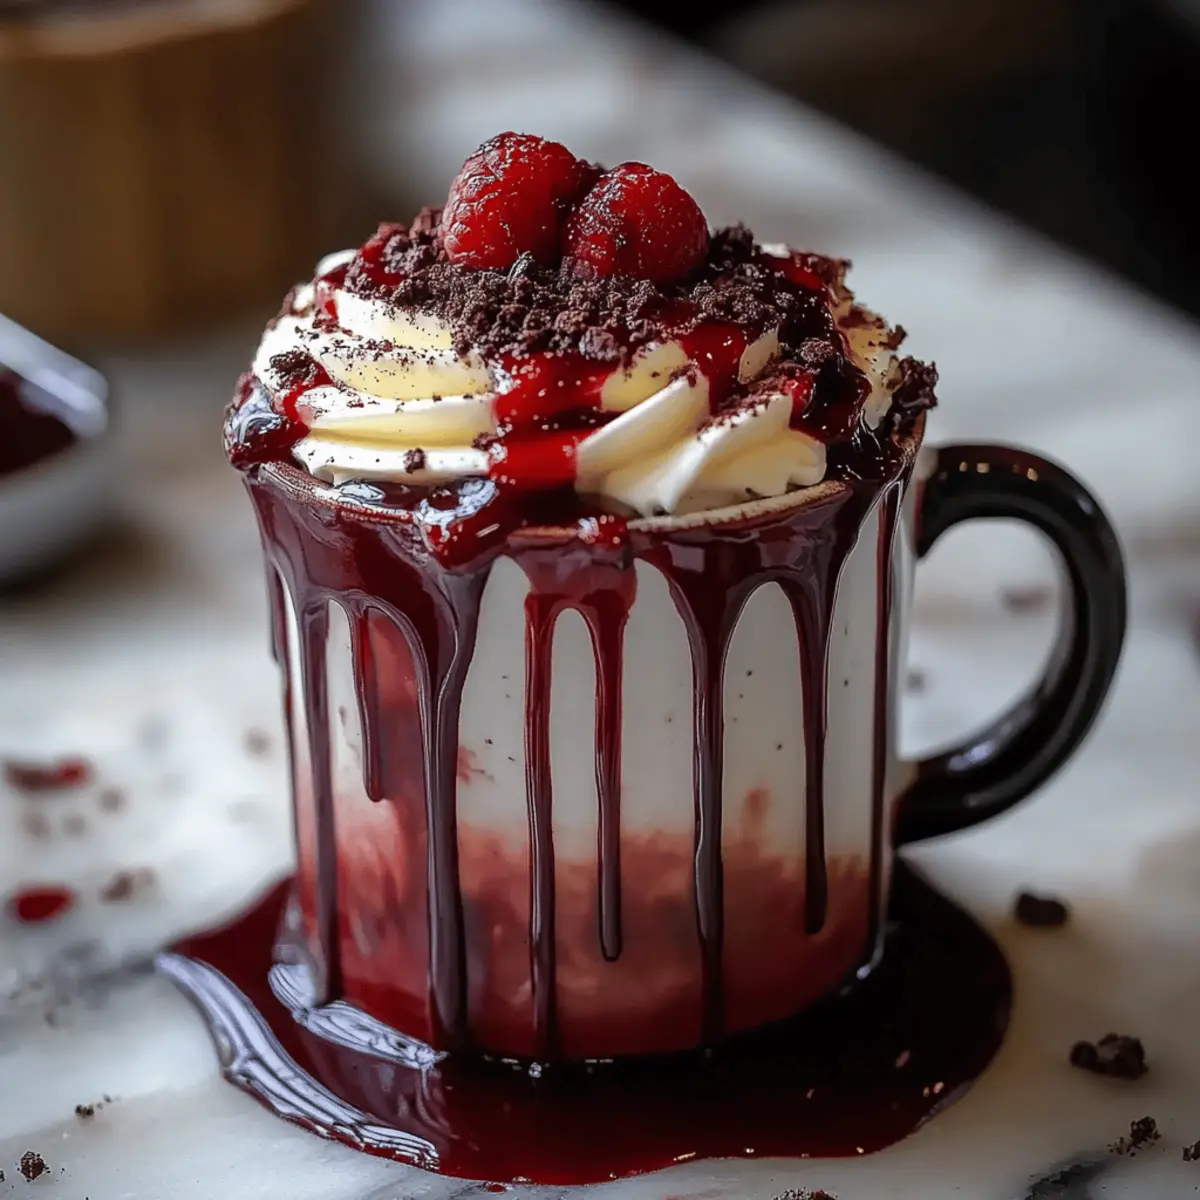
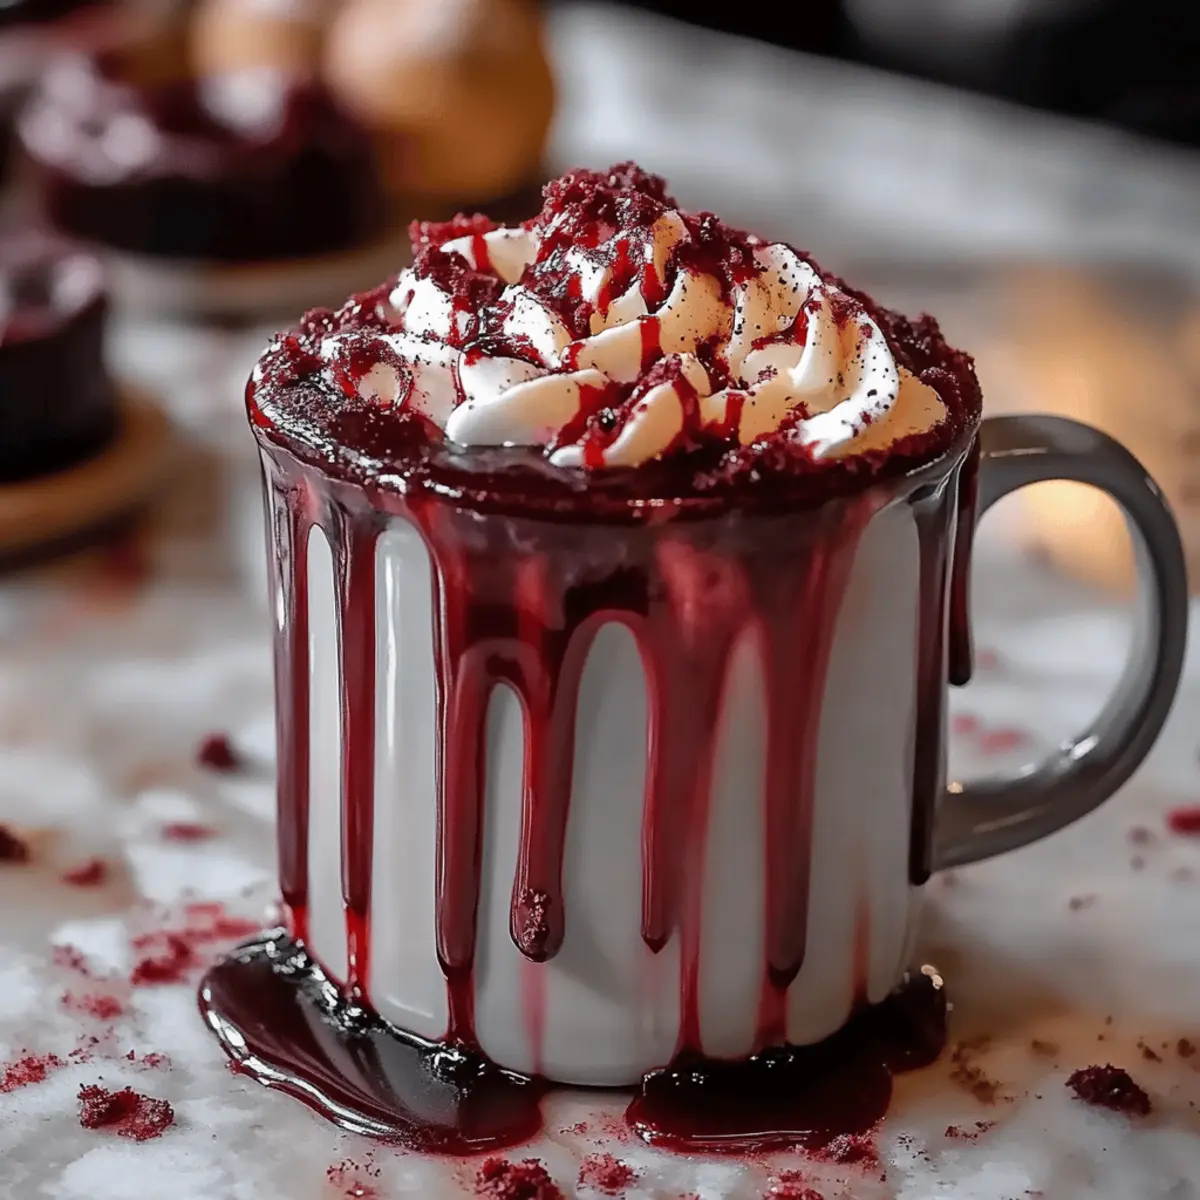
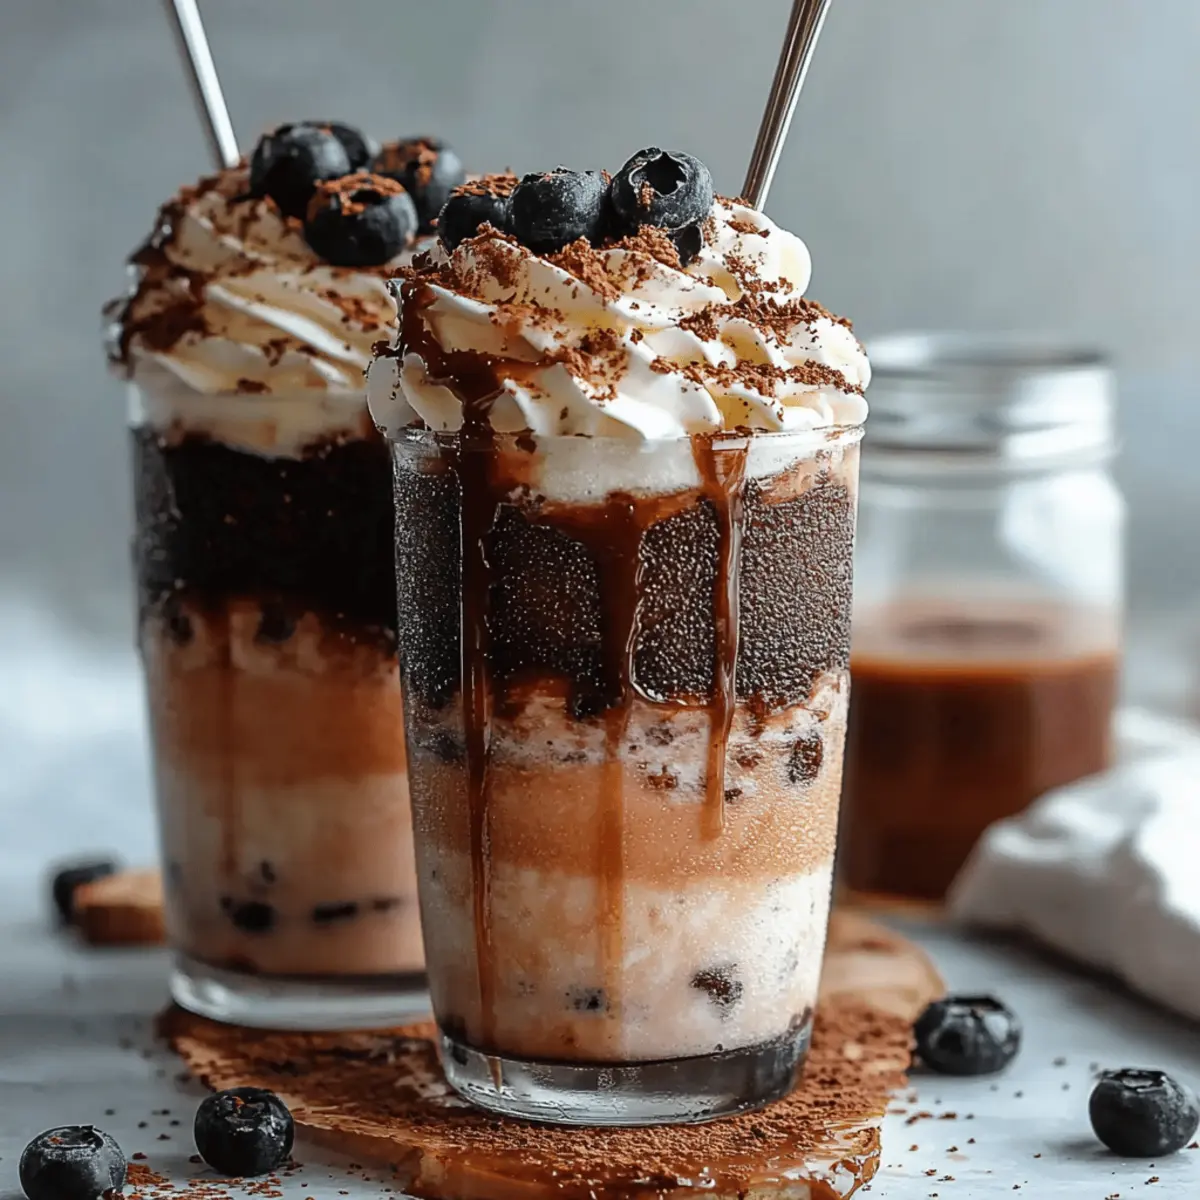
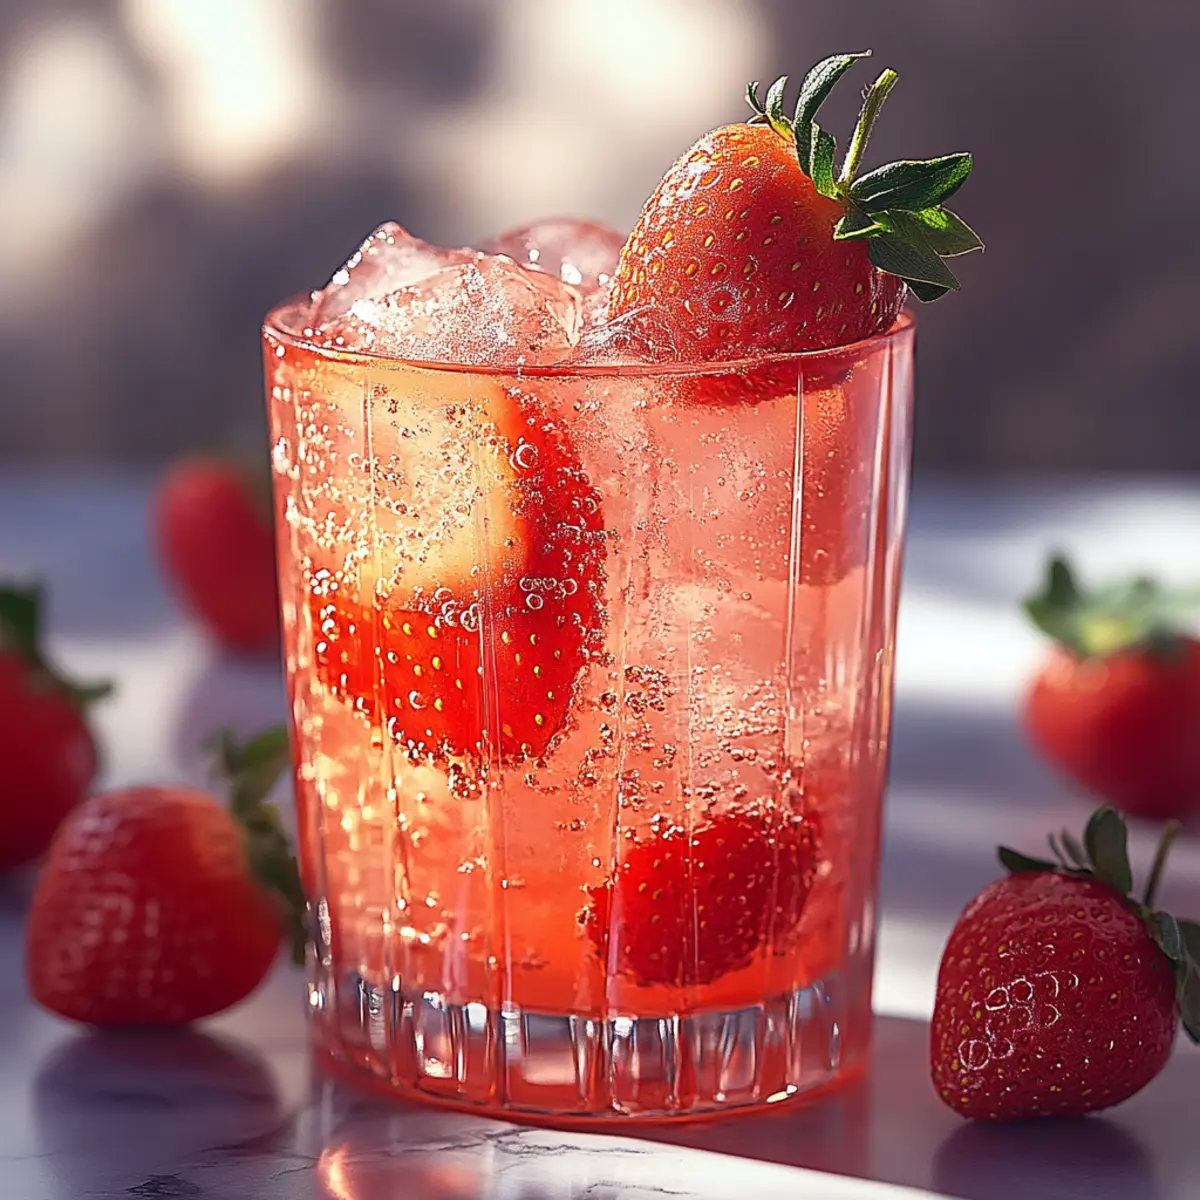
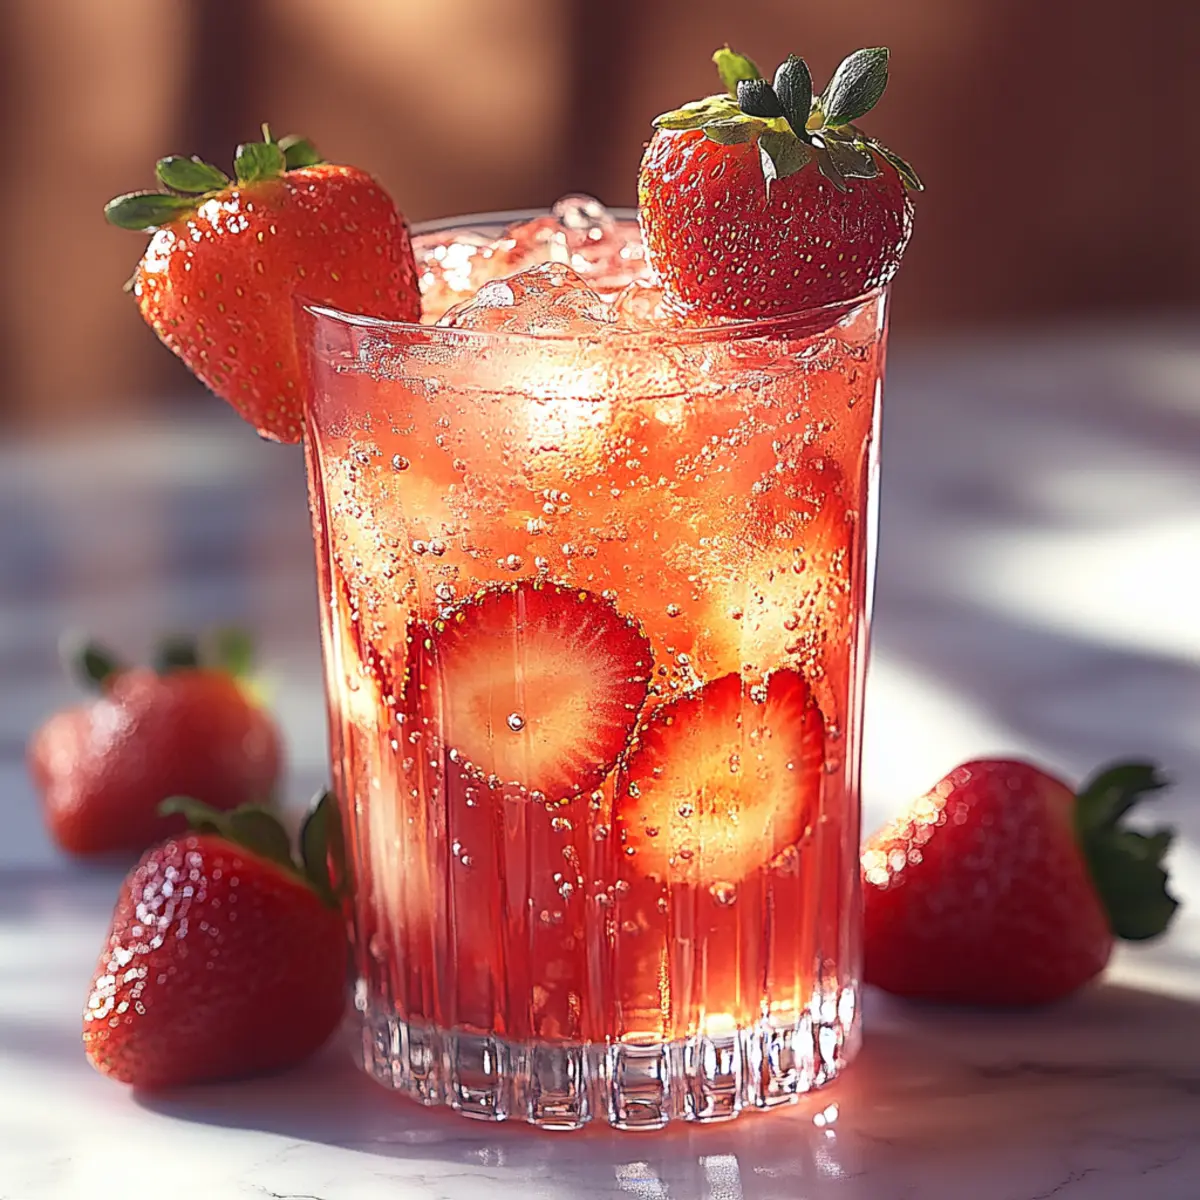
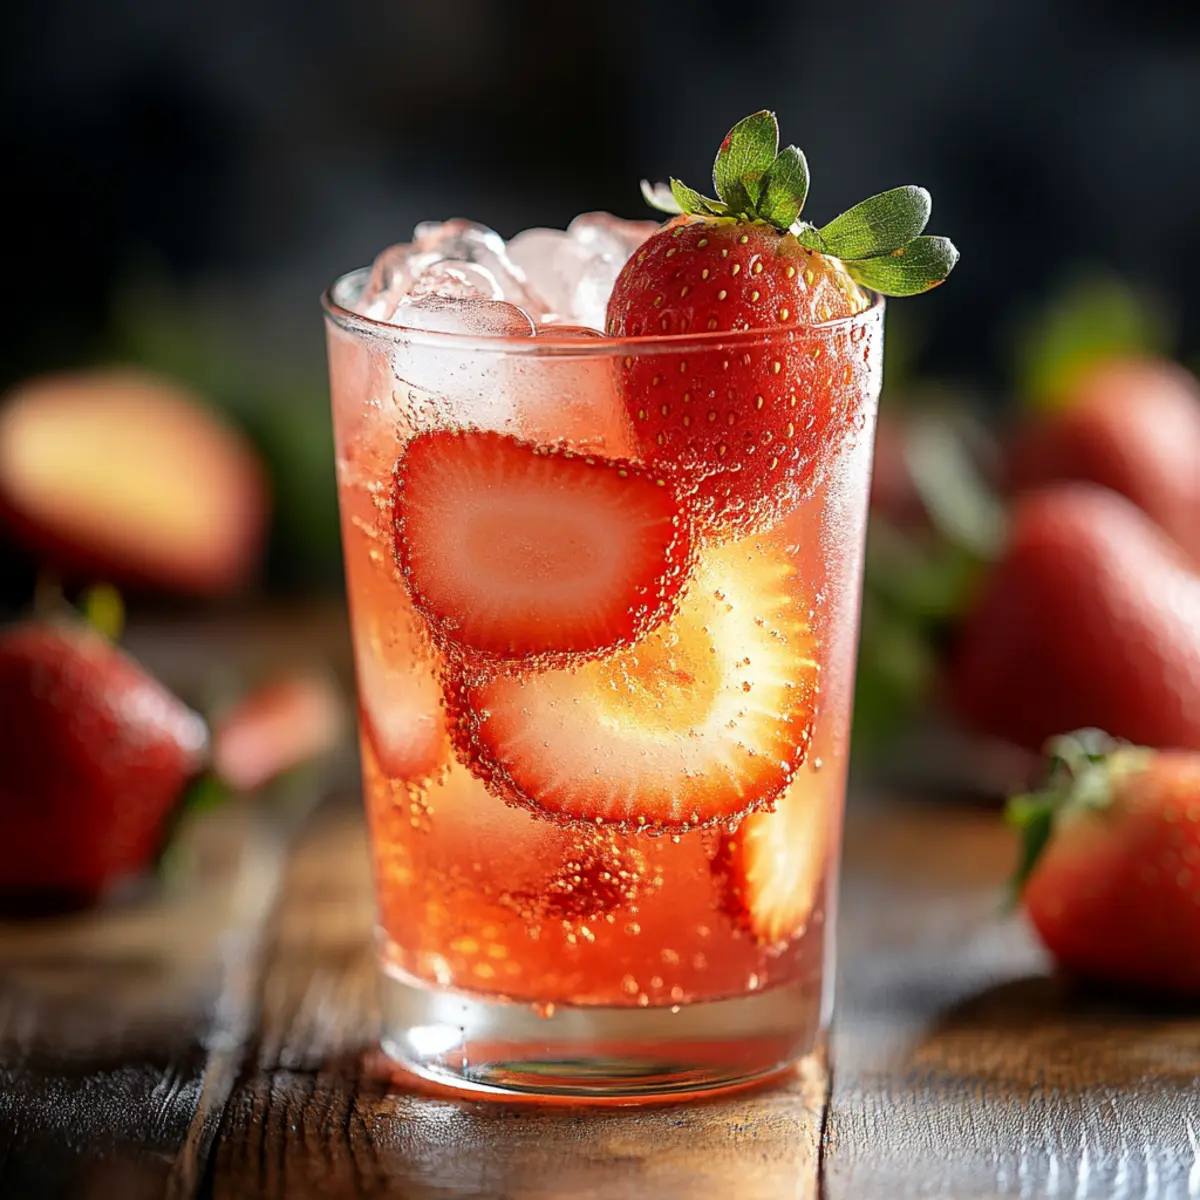
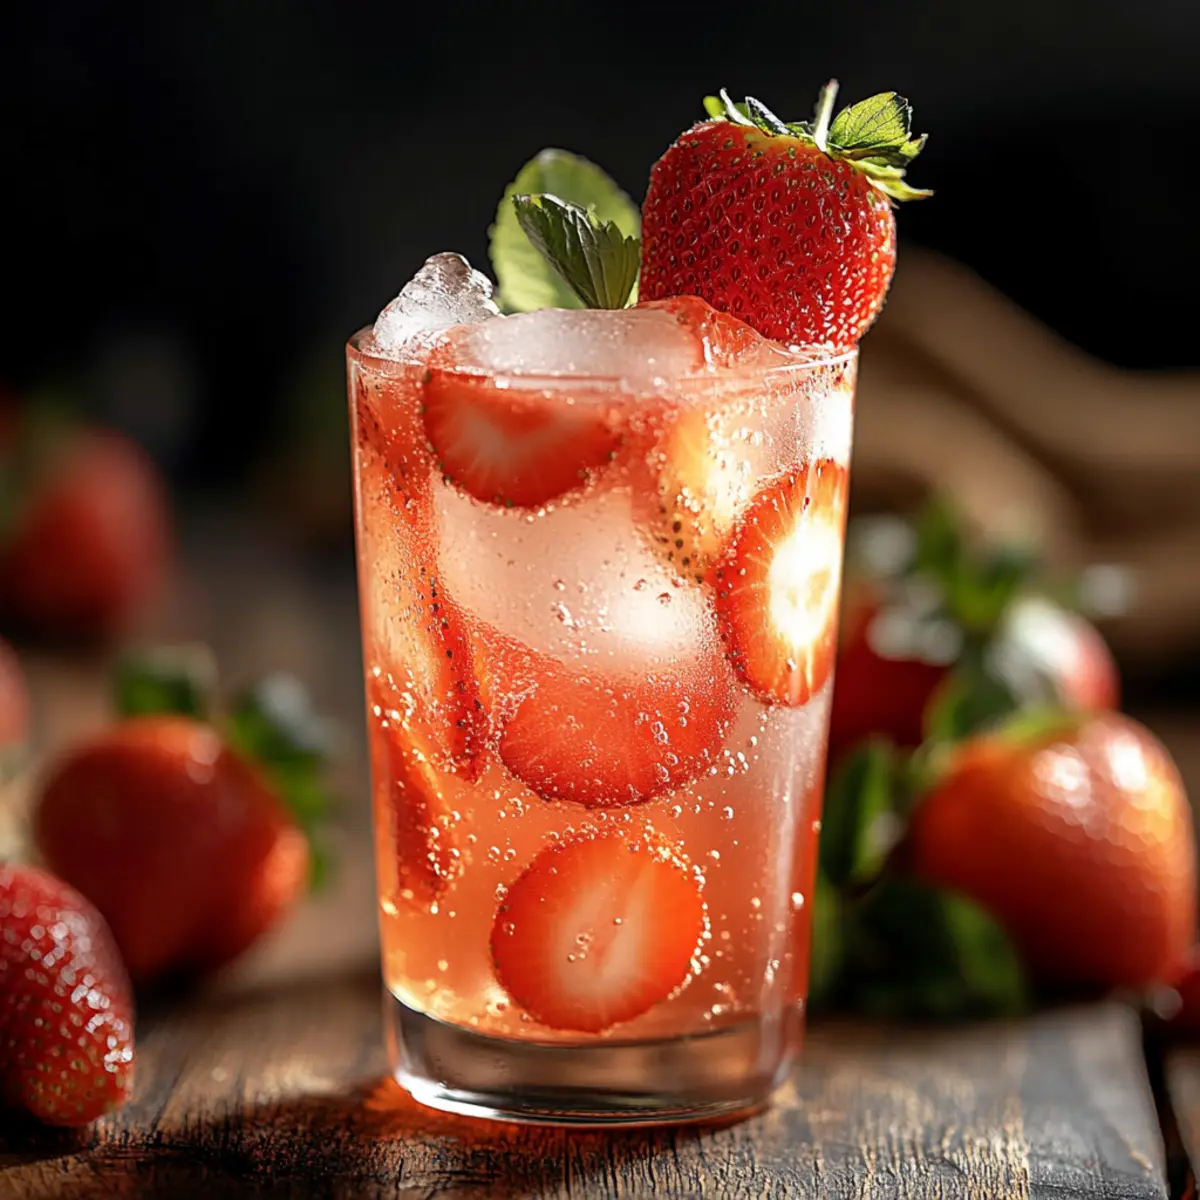
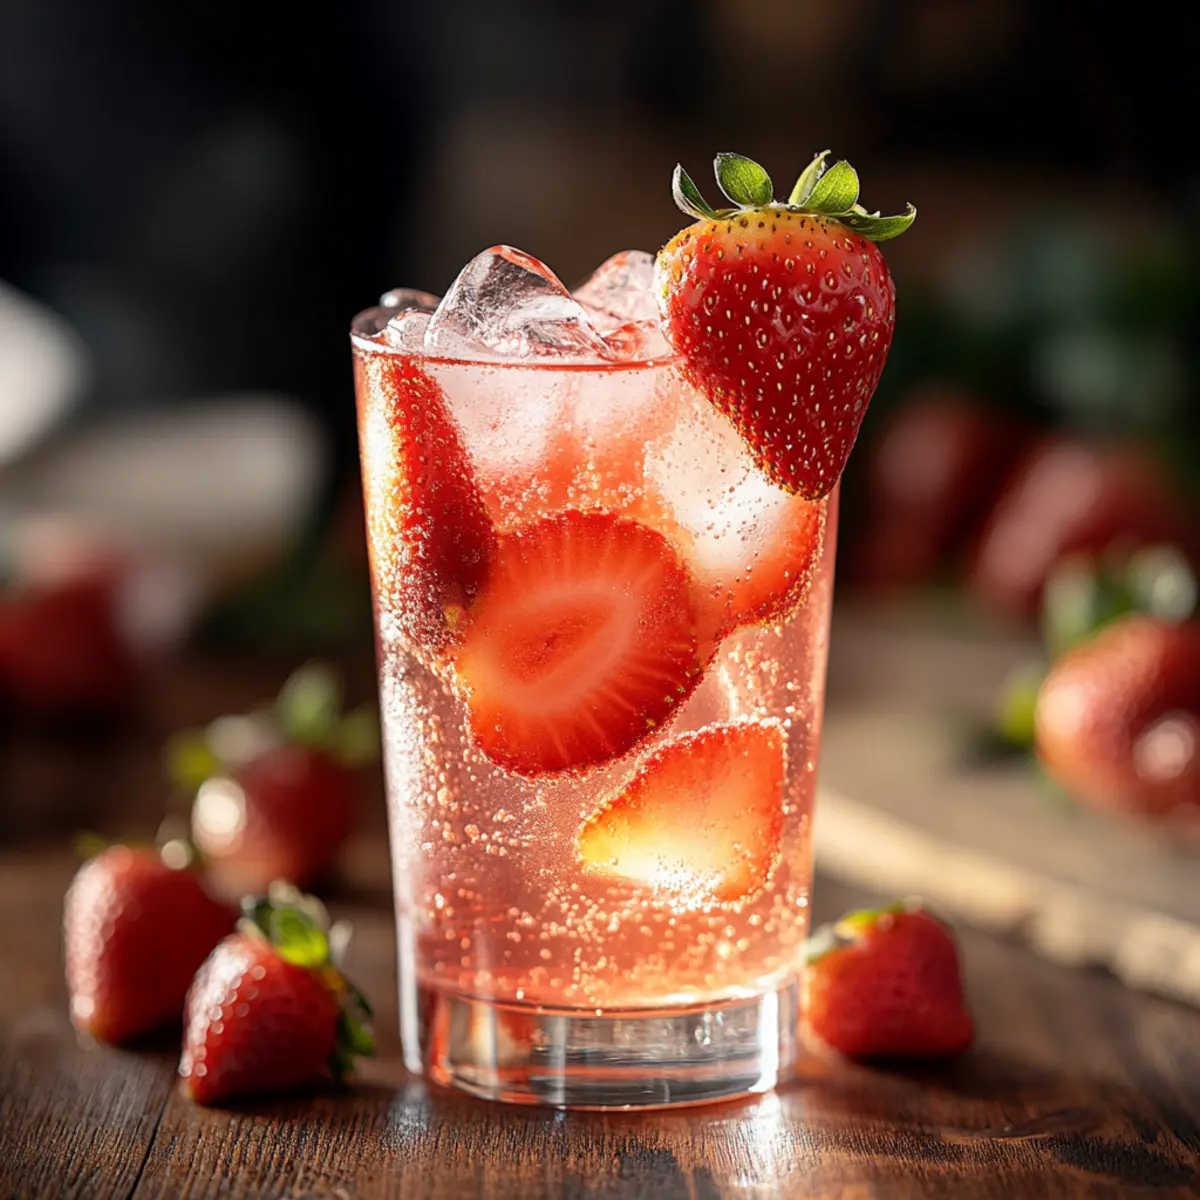
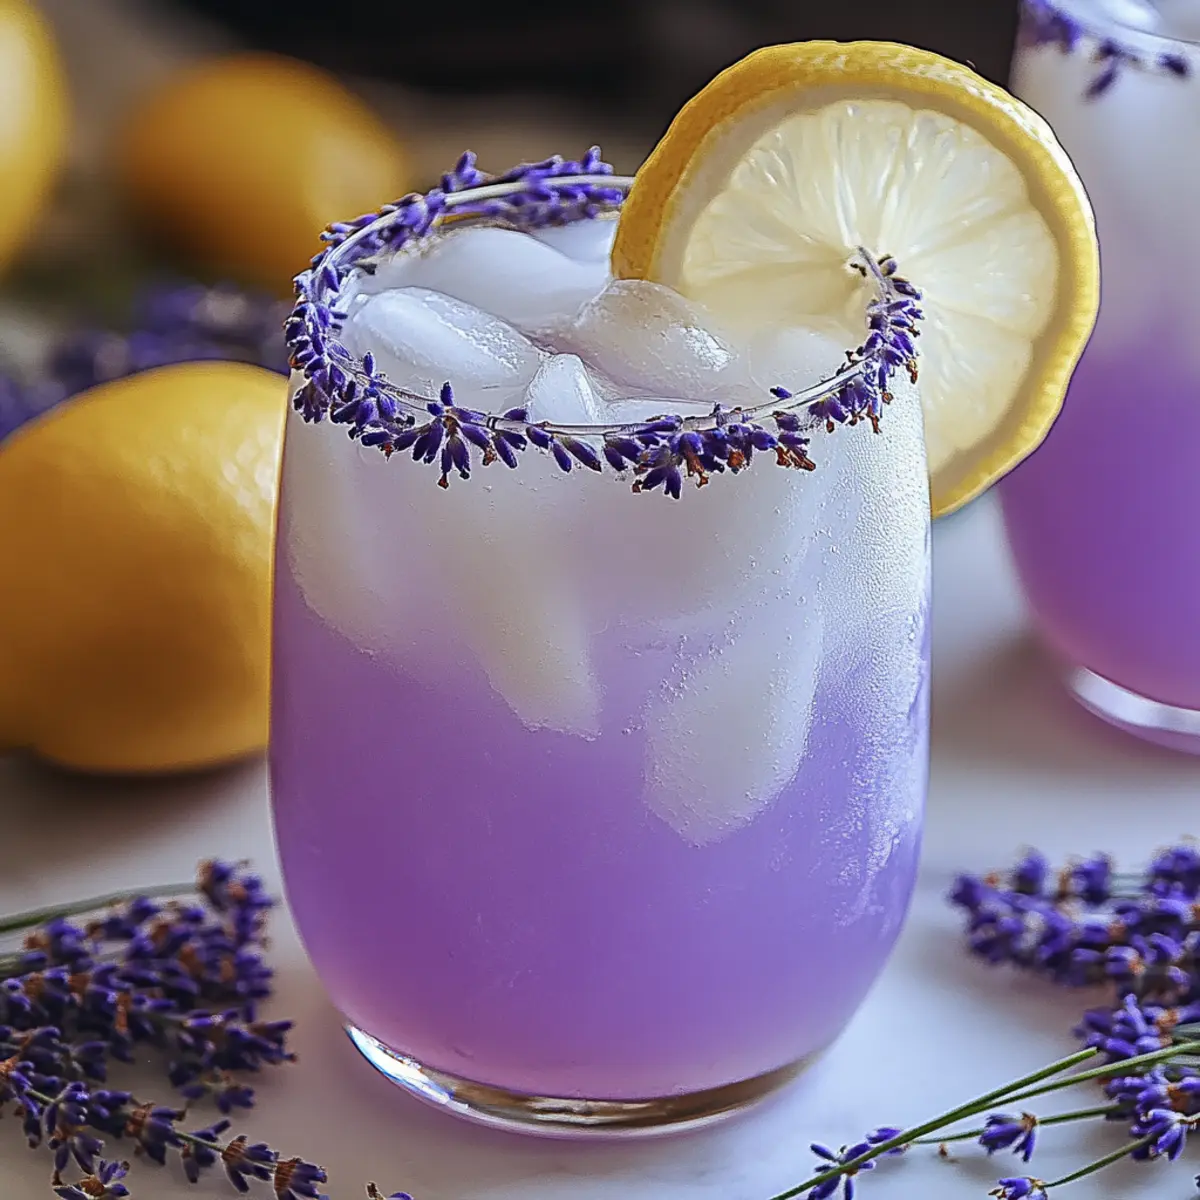
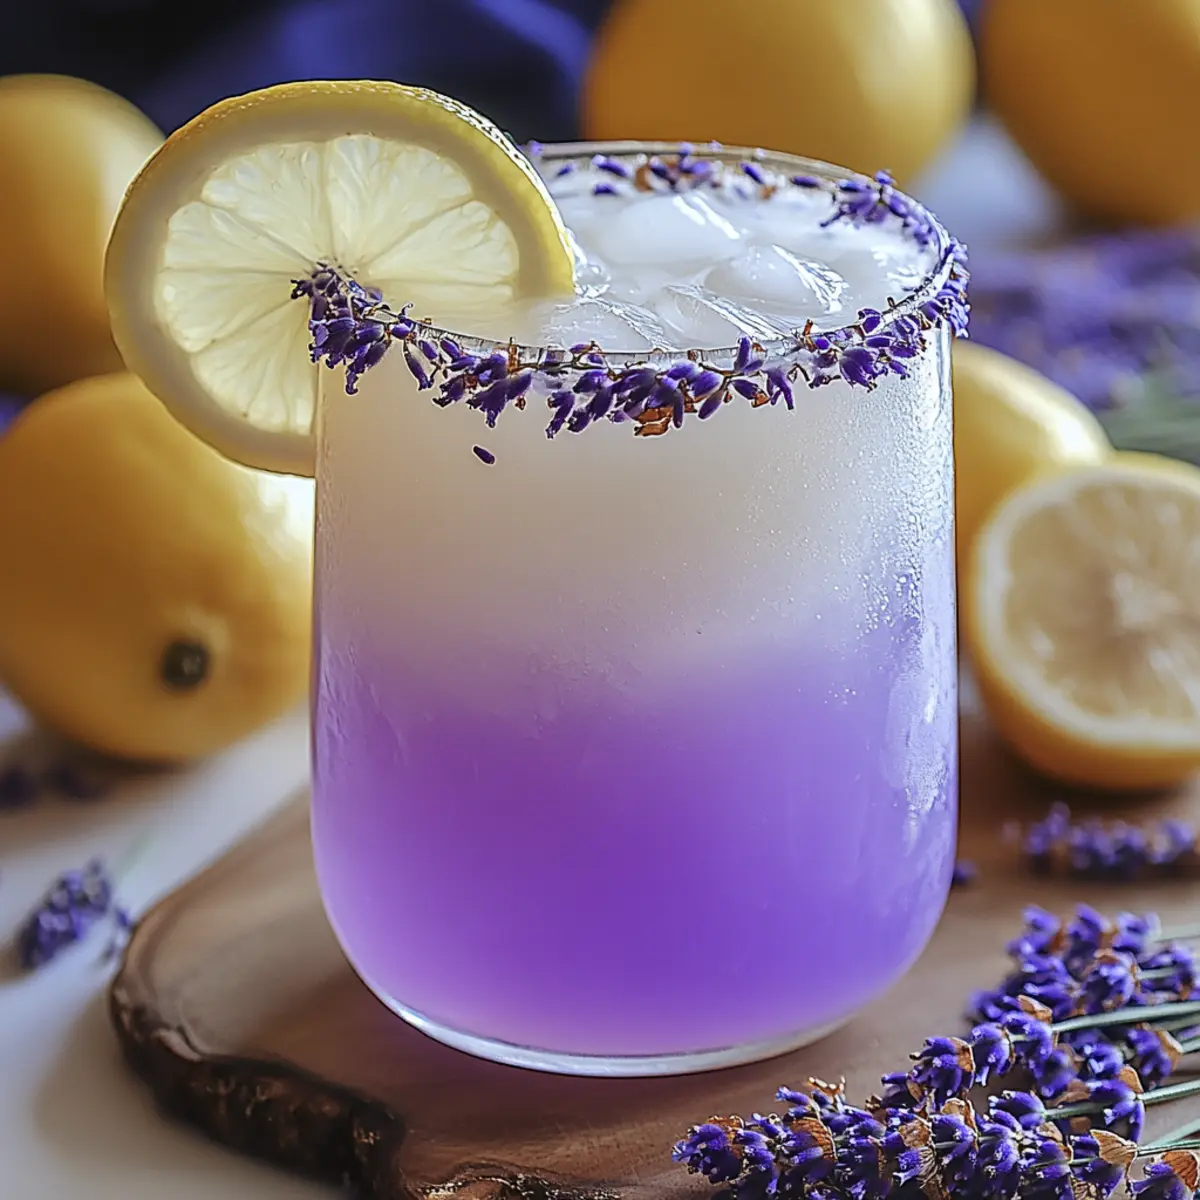
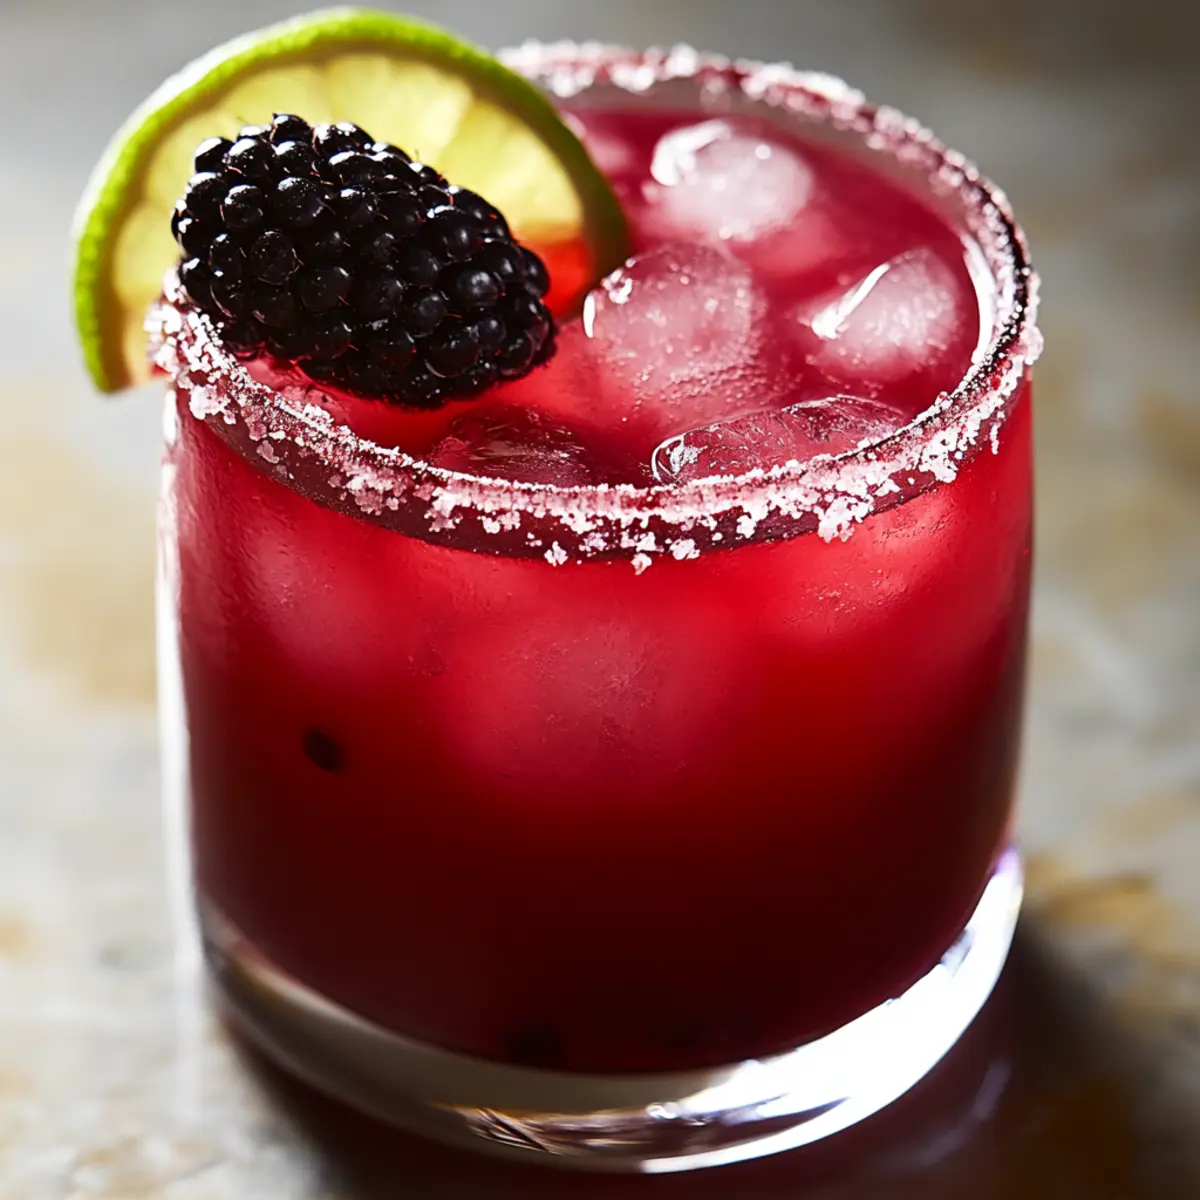
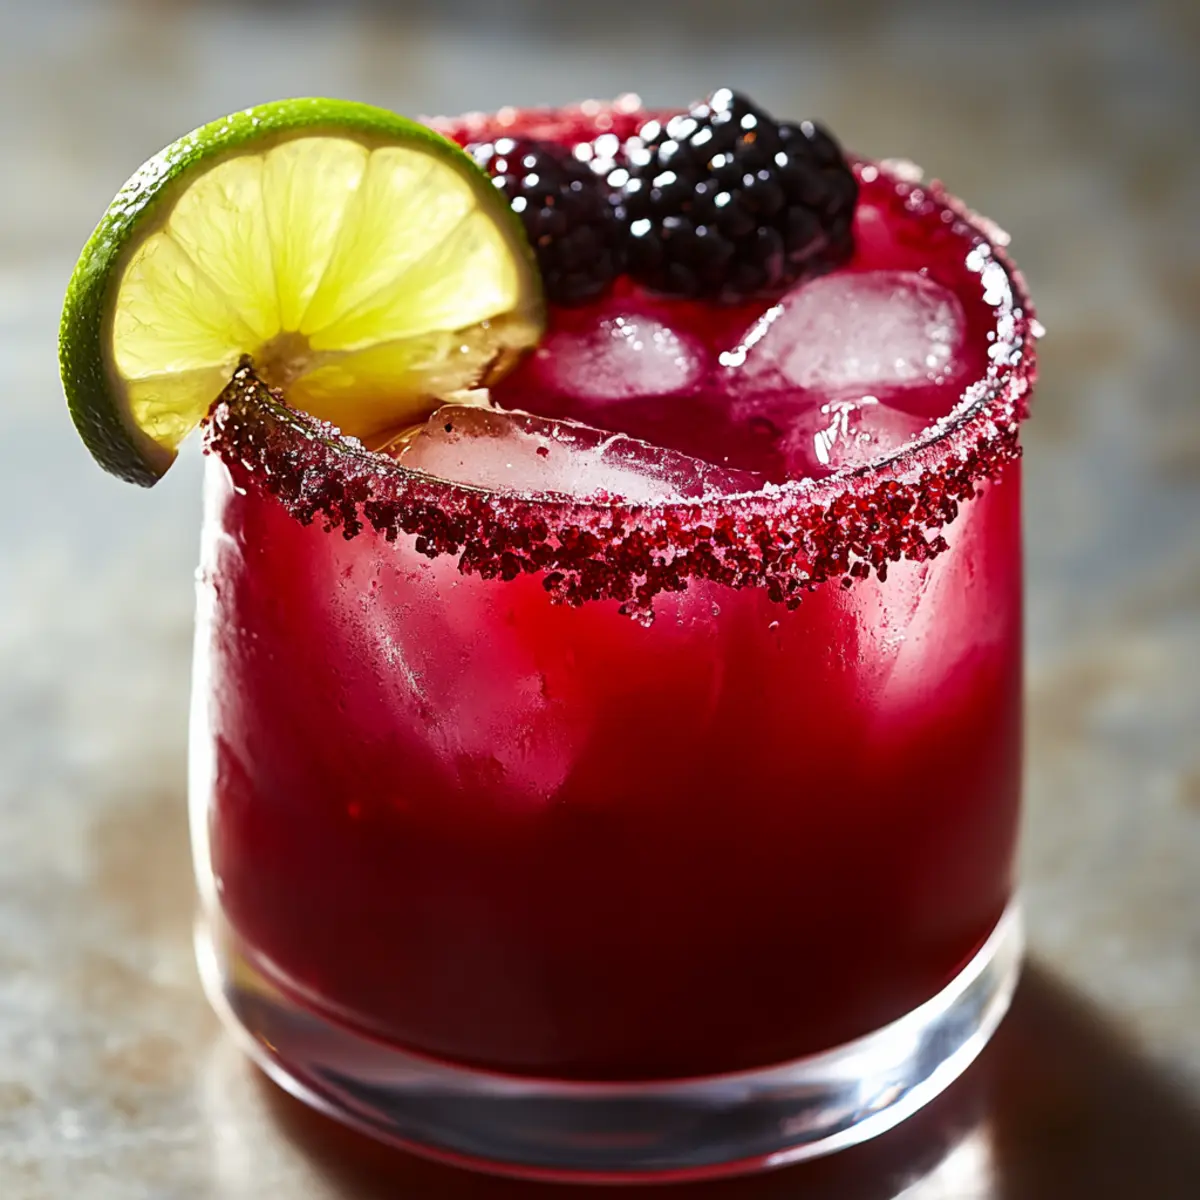
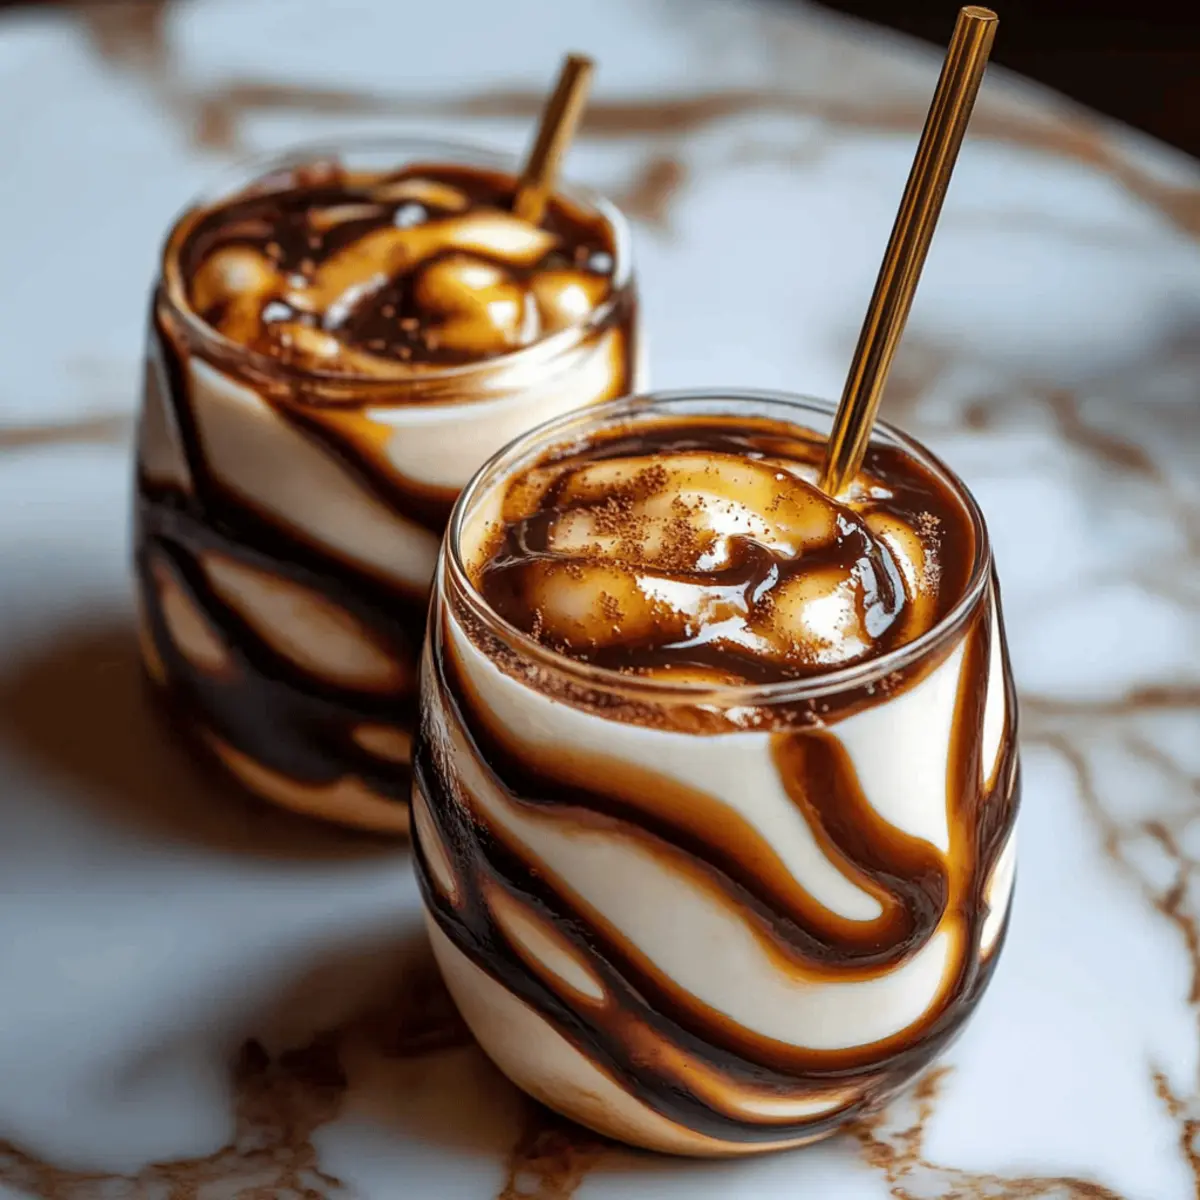
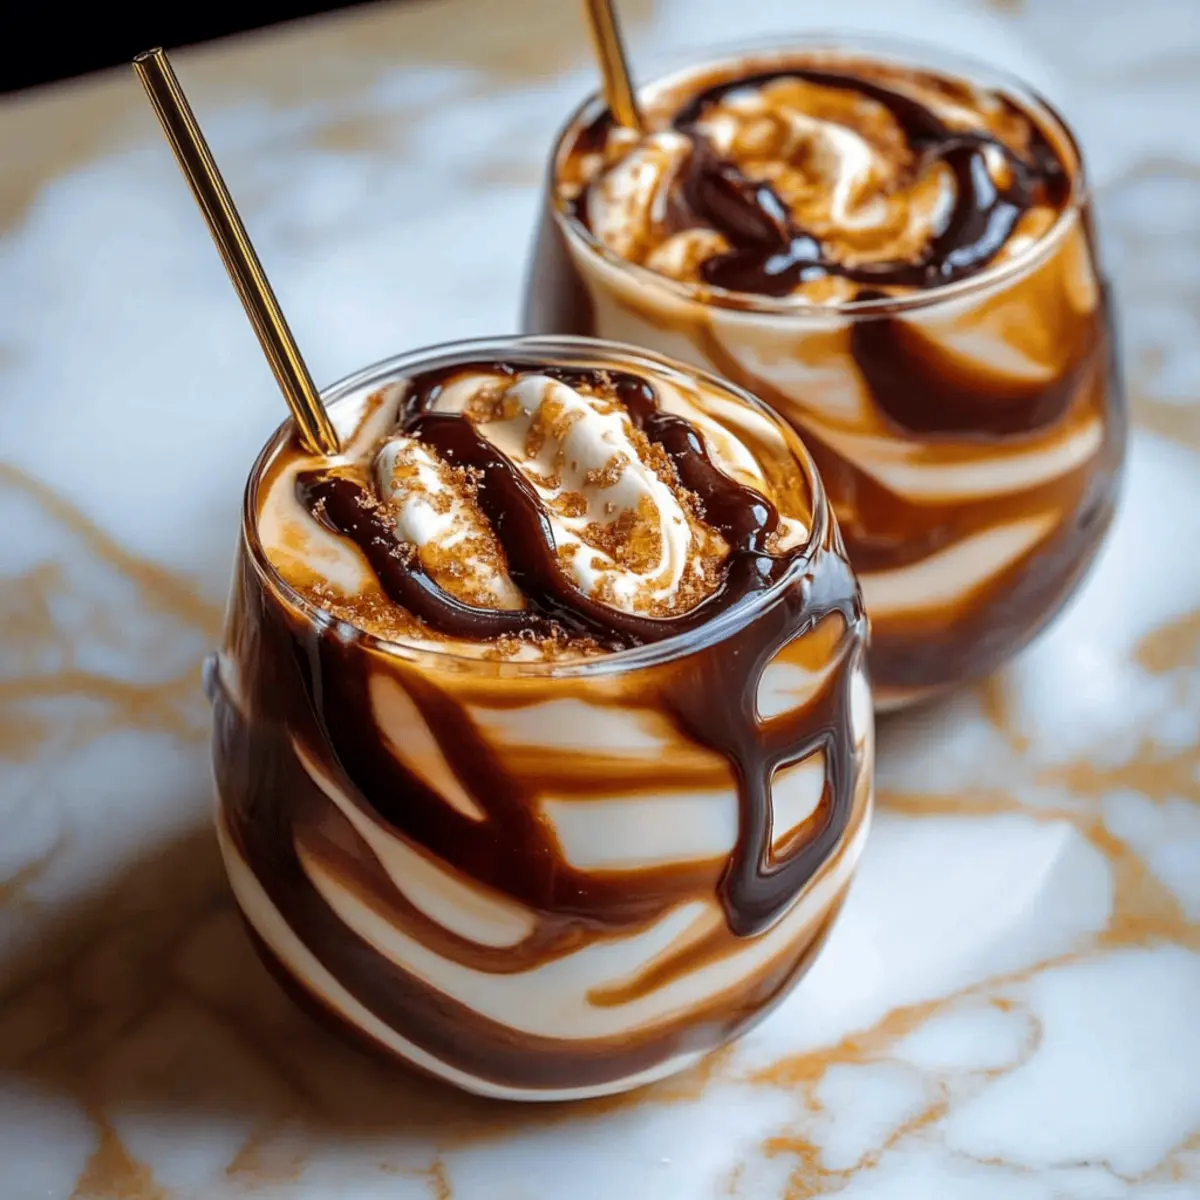
As the sun sets and the last embers of the campfire glow, I can’t help but smile at the nostalgia of summer nights spent basking in laughter and warmth. This is the perfect setting for a whimsical treat: Campfire Cola Dirty Soda. In just five minutes, you can whip up this indulgent drink that combines the nostalgia of sweet marshmallows with the rich flavor of chocolate. Not only is this recipe a delightful throwback to childhood memories, but it’s also a quick way to impress your friends and family during a casual gathering. With its stunning layered look and creamy texture, this fizzy delight is bound to become a favorite at your next barbecue or cozy dinner. Curious about how to create this fun twist on a classic soda? Let’s dive into the recipe!

Campfire Cola Dirty Soda

Why is Campfire Cola Dirty Soda a must-try?

Indulgent Flavor: The sweet fusion of toasted marshmallow syrup and rich chocolate syrup creates a drink bursting with nostalgic flavor.
Easy to Make: In just five minutes, anyone can whip up this sweet soda treat, making it perfect for spontaneous gatherings.
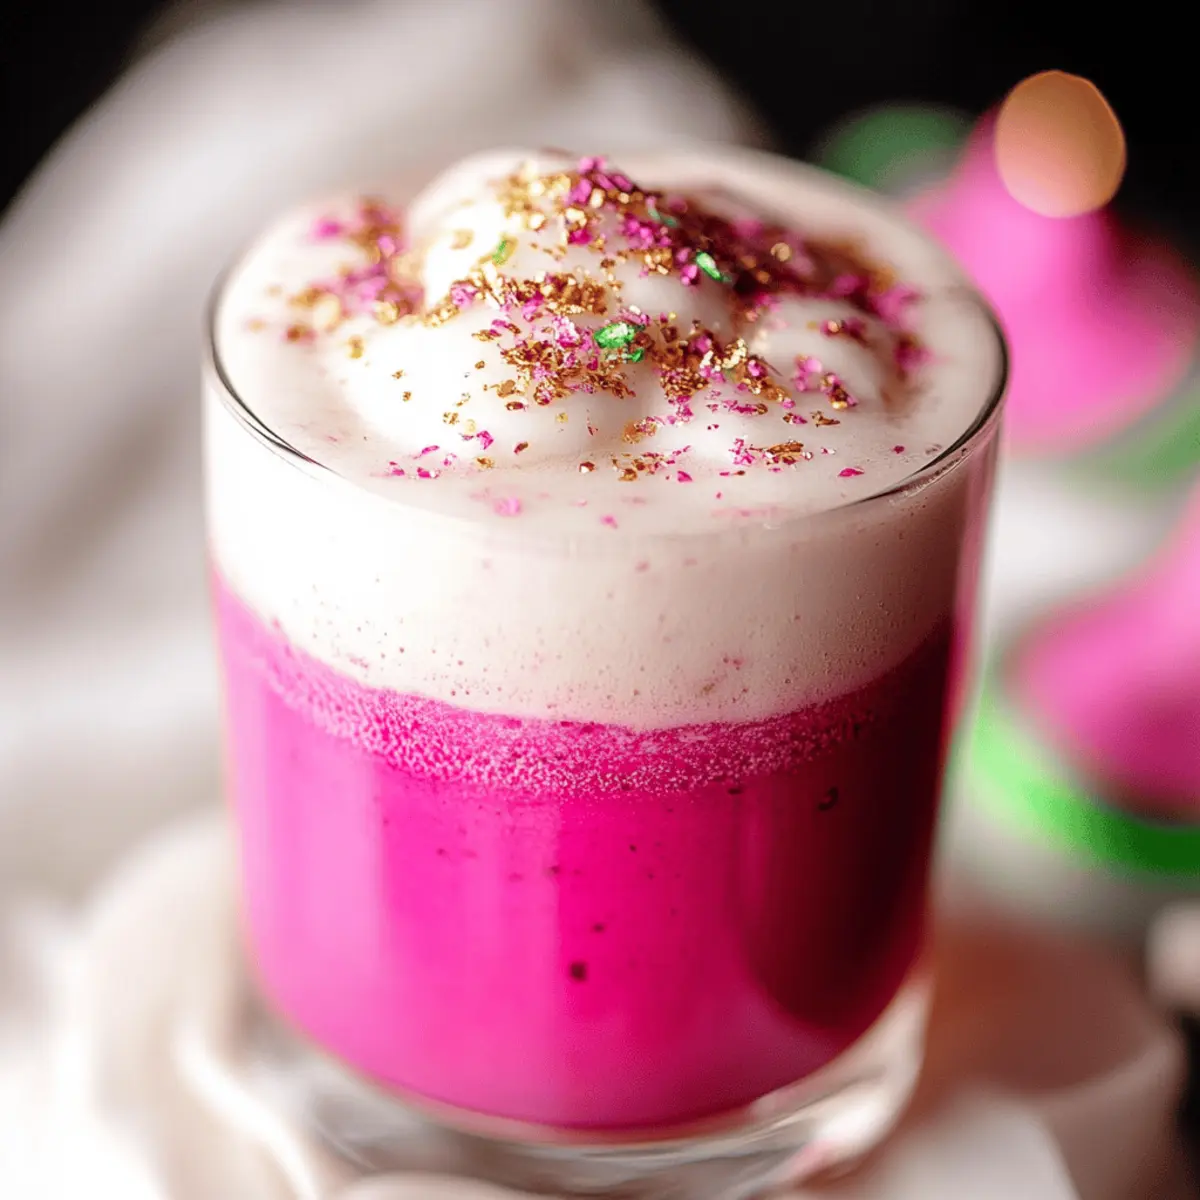
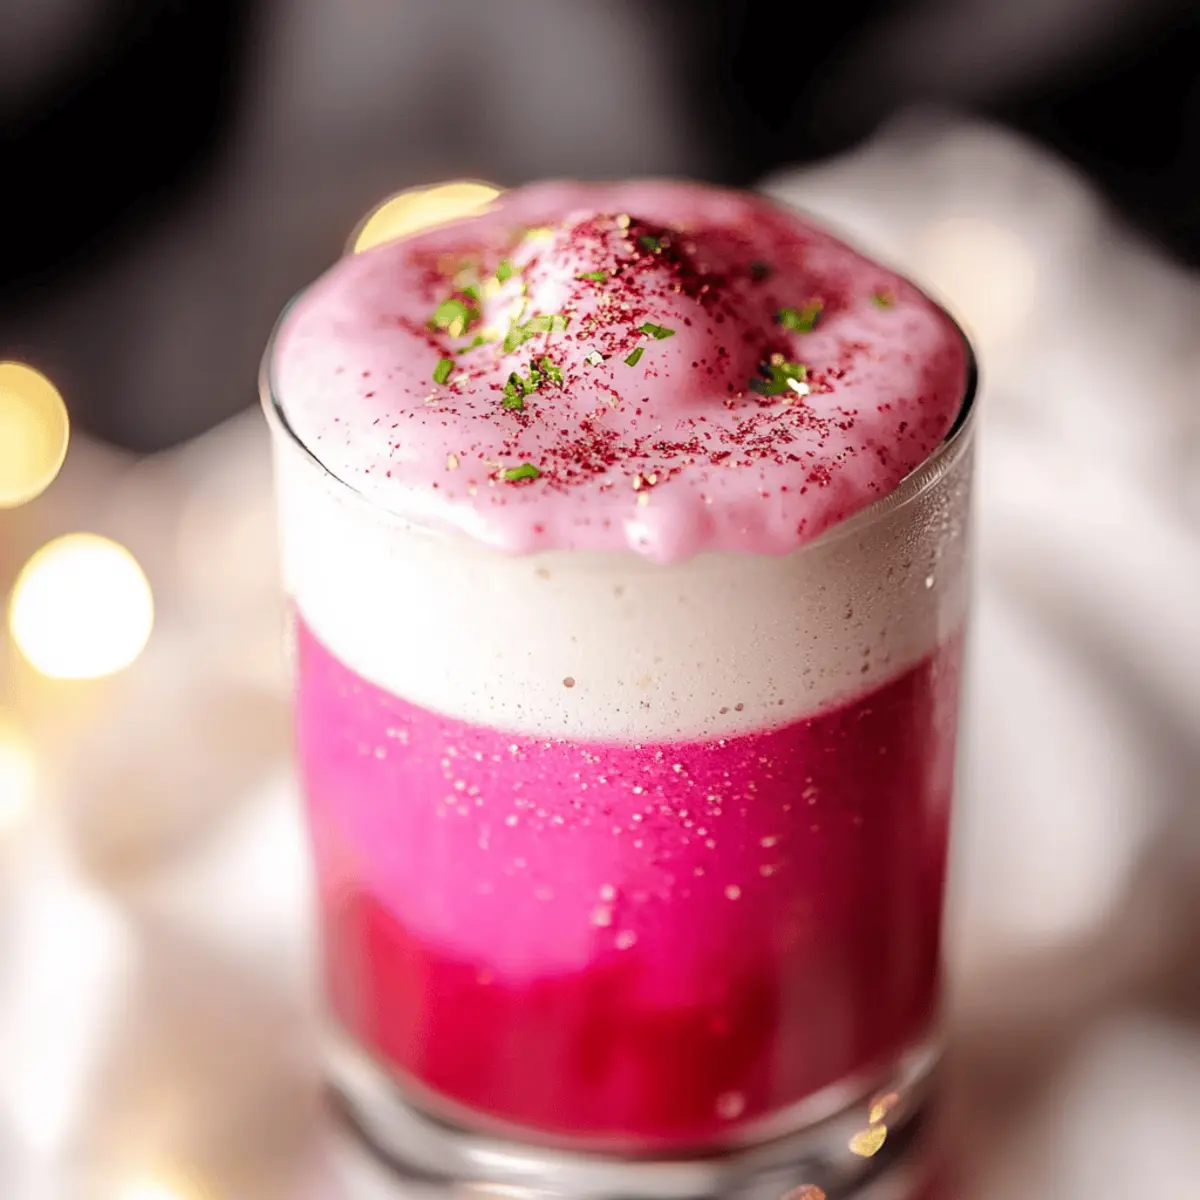
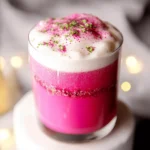
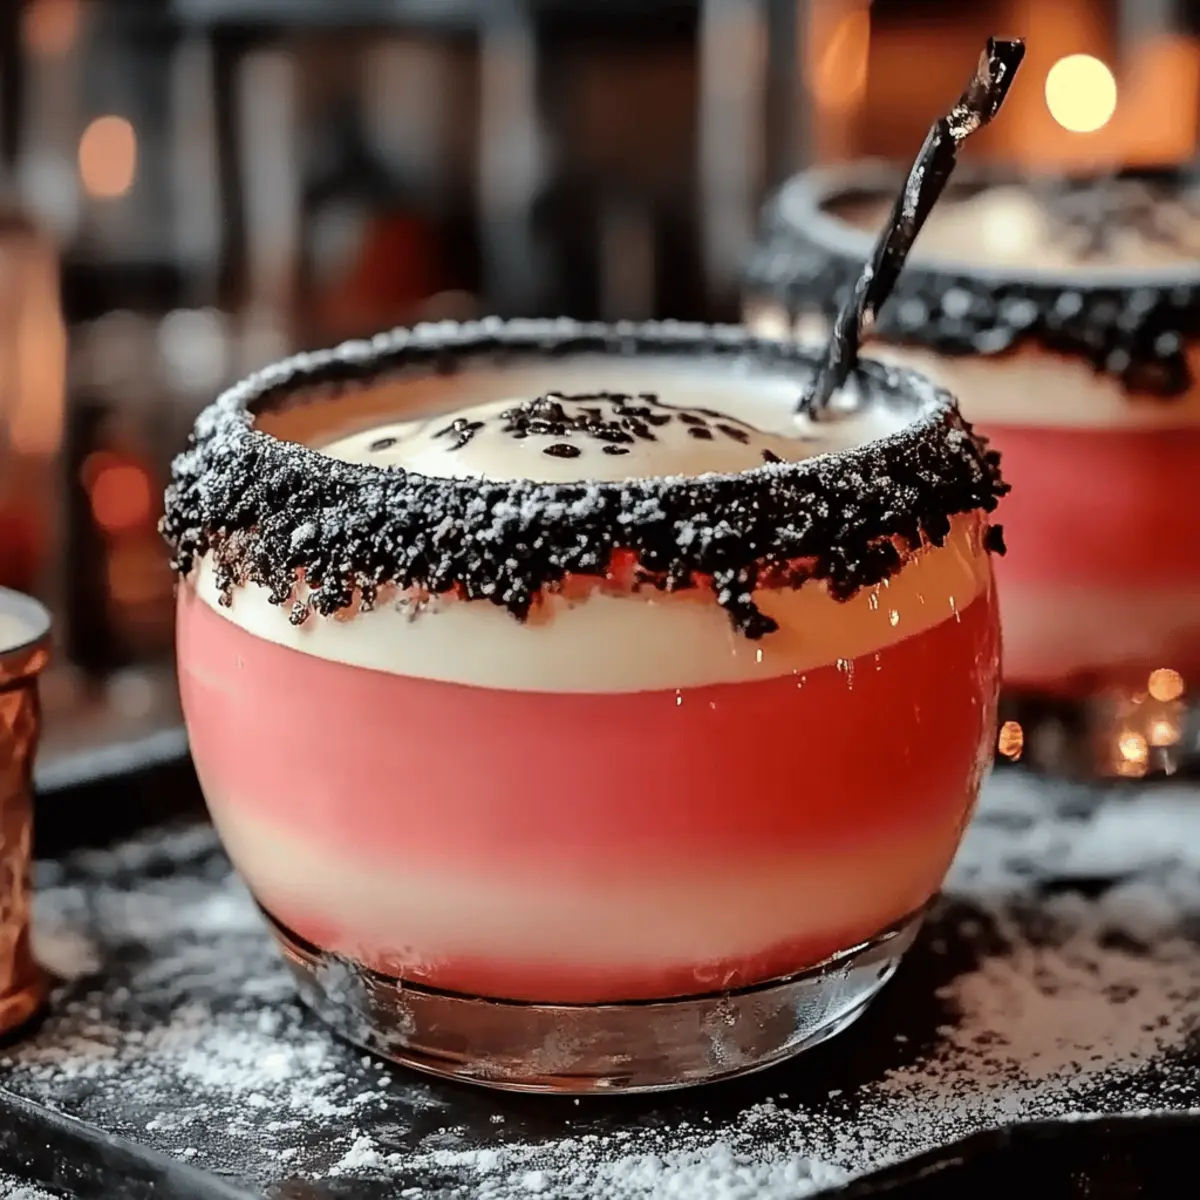
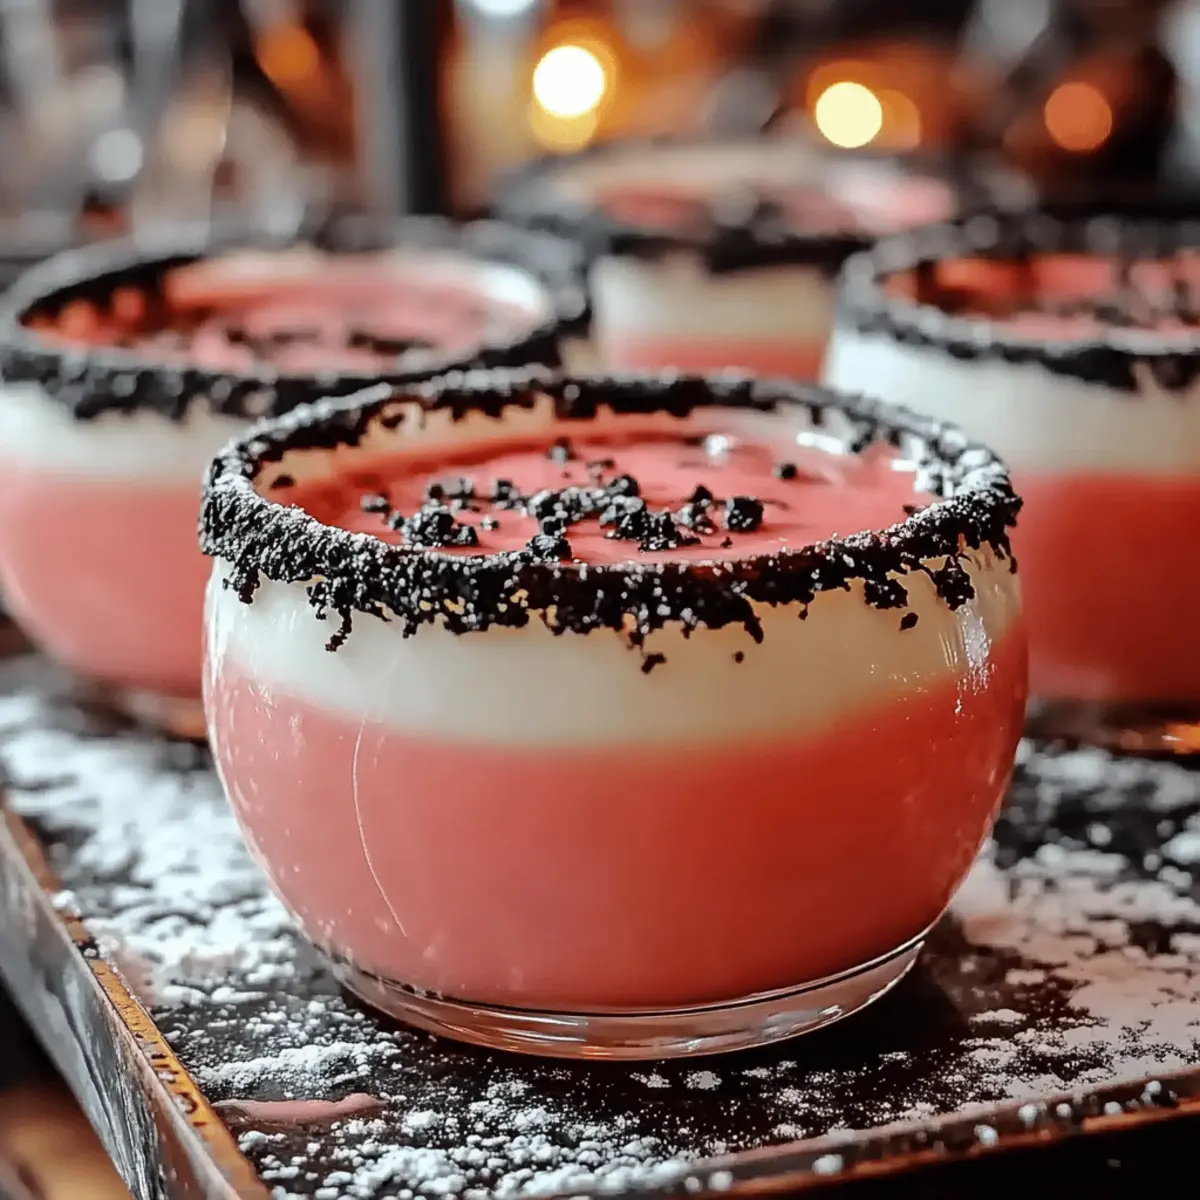
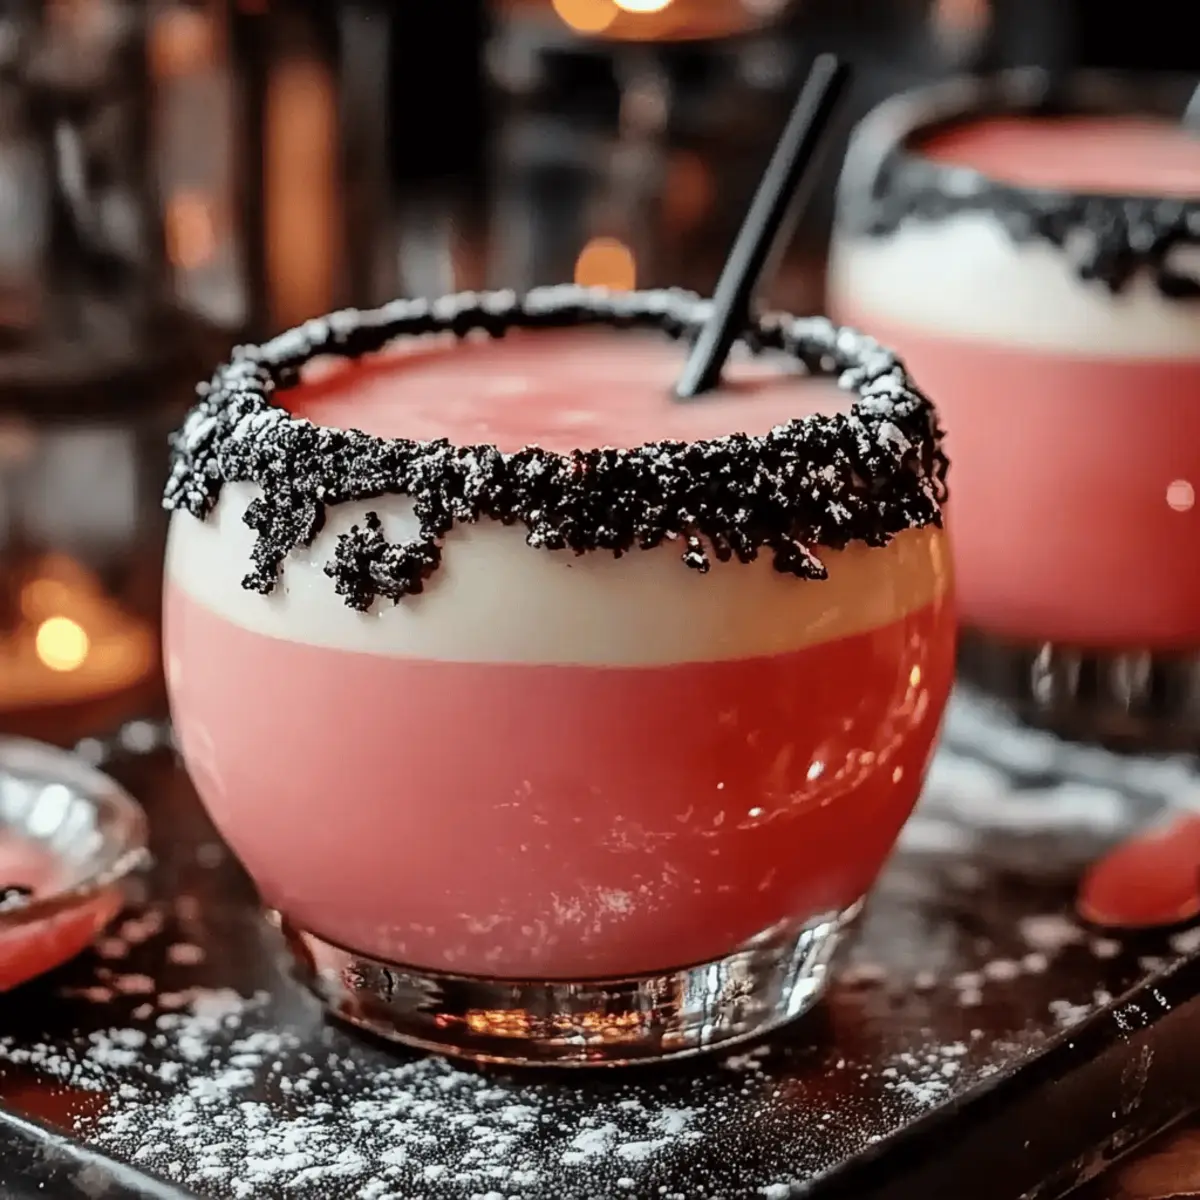
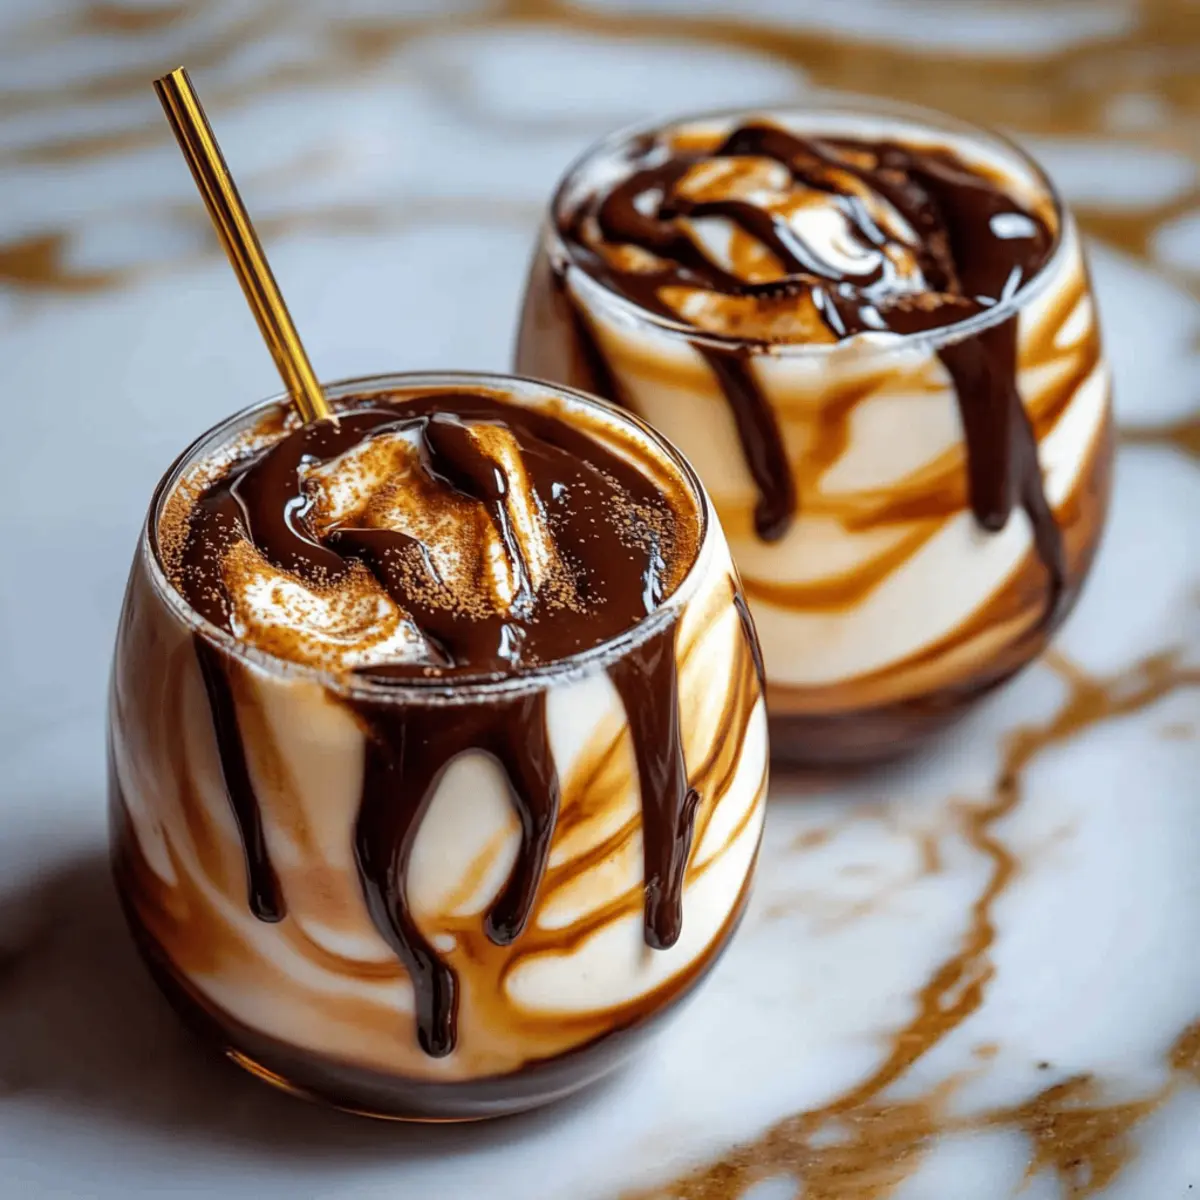
Eye-Catching Layers: The stunning visual of swirling cream over fizzy soda will wow your guests before they even take a sip!
Perfect for Any Occasion: Whether it’s a summer BBQ or a cozy movie night, this drink adds a fun twist to any event.
Crowd-Pleasing Treat: Kids and adults alike will love this whimsical twist on a classic cola—what’s not to love about sweet, fizzy goodness?

Try it alongside other nostalgic treats like s’mores for a fabulous flavor adventure!

Campfire Cola Dirty Soda Ingredients

• Here’s what you need to create this fizzy delight!

For the Drink

  • 1 cup cold Coke – The base of this indulgent drink, choose your favorite cola for the best flavor.
  • 2 tablespoons toasted marshmallow syrup – Adds that sweet campfire flavor we all love.
  • 1 tablespoon chocolate syrup – For a rich, chocolaty swirl that complements the sweetness perfectly.

For the Creamy Layer

  • 2 tablespoons heavy cream – Creates a luscious, velvety texture that elevates this soda.
  • 2 tablespoons sweetened condensed milk – Provides an extra touch of sweetness and creaminess that you’ll adore.

For Serving

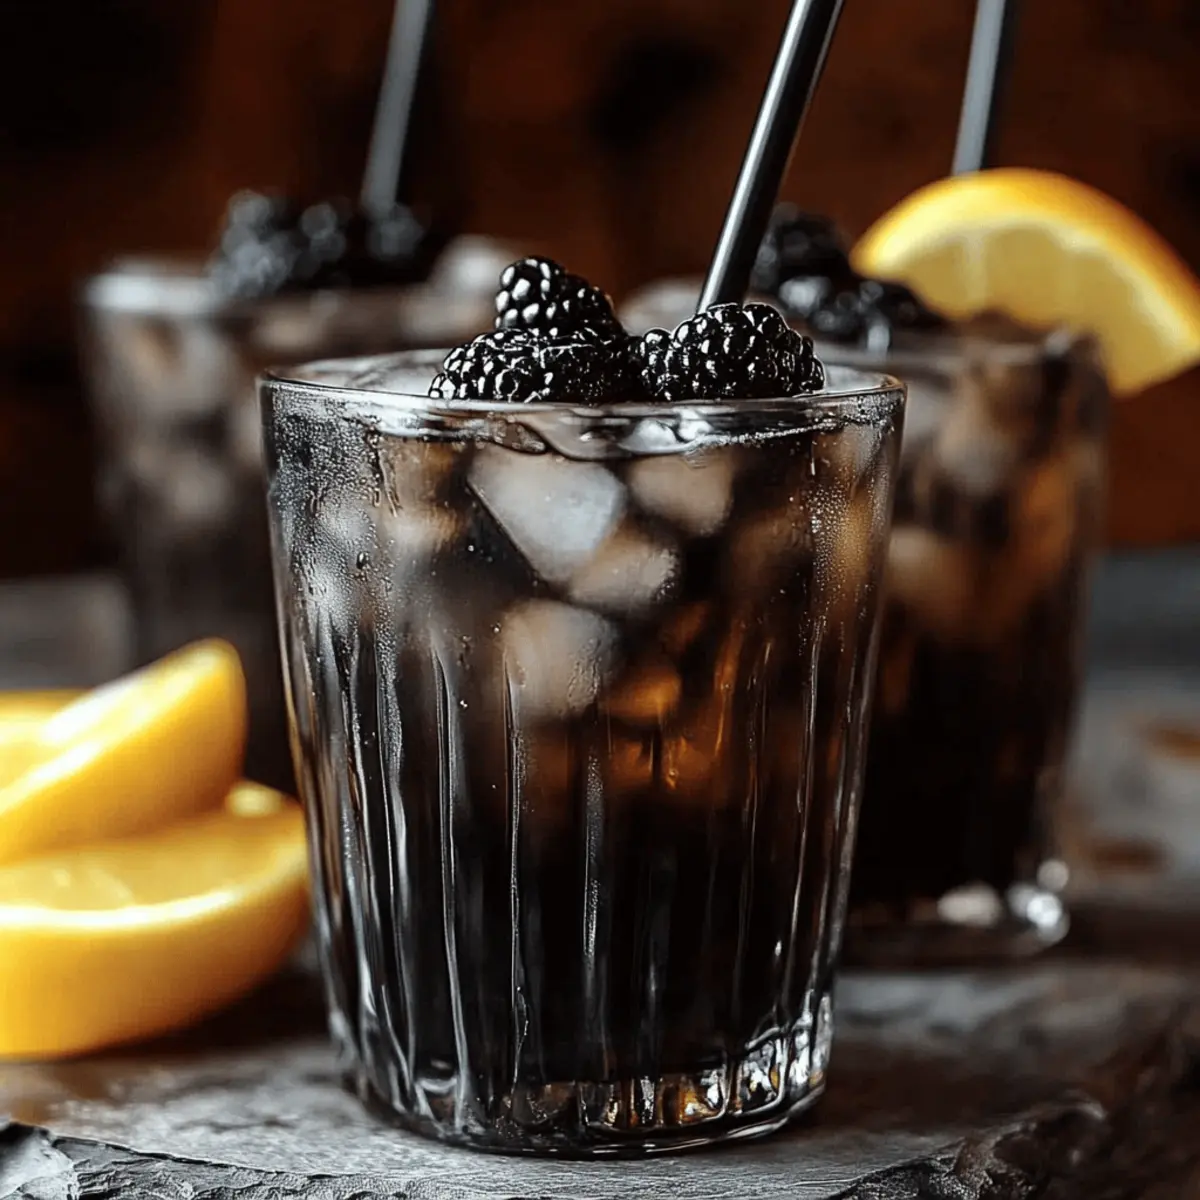
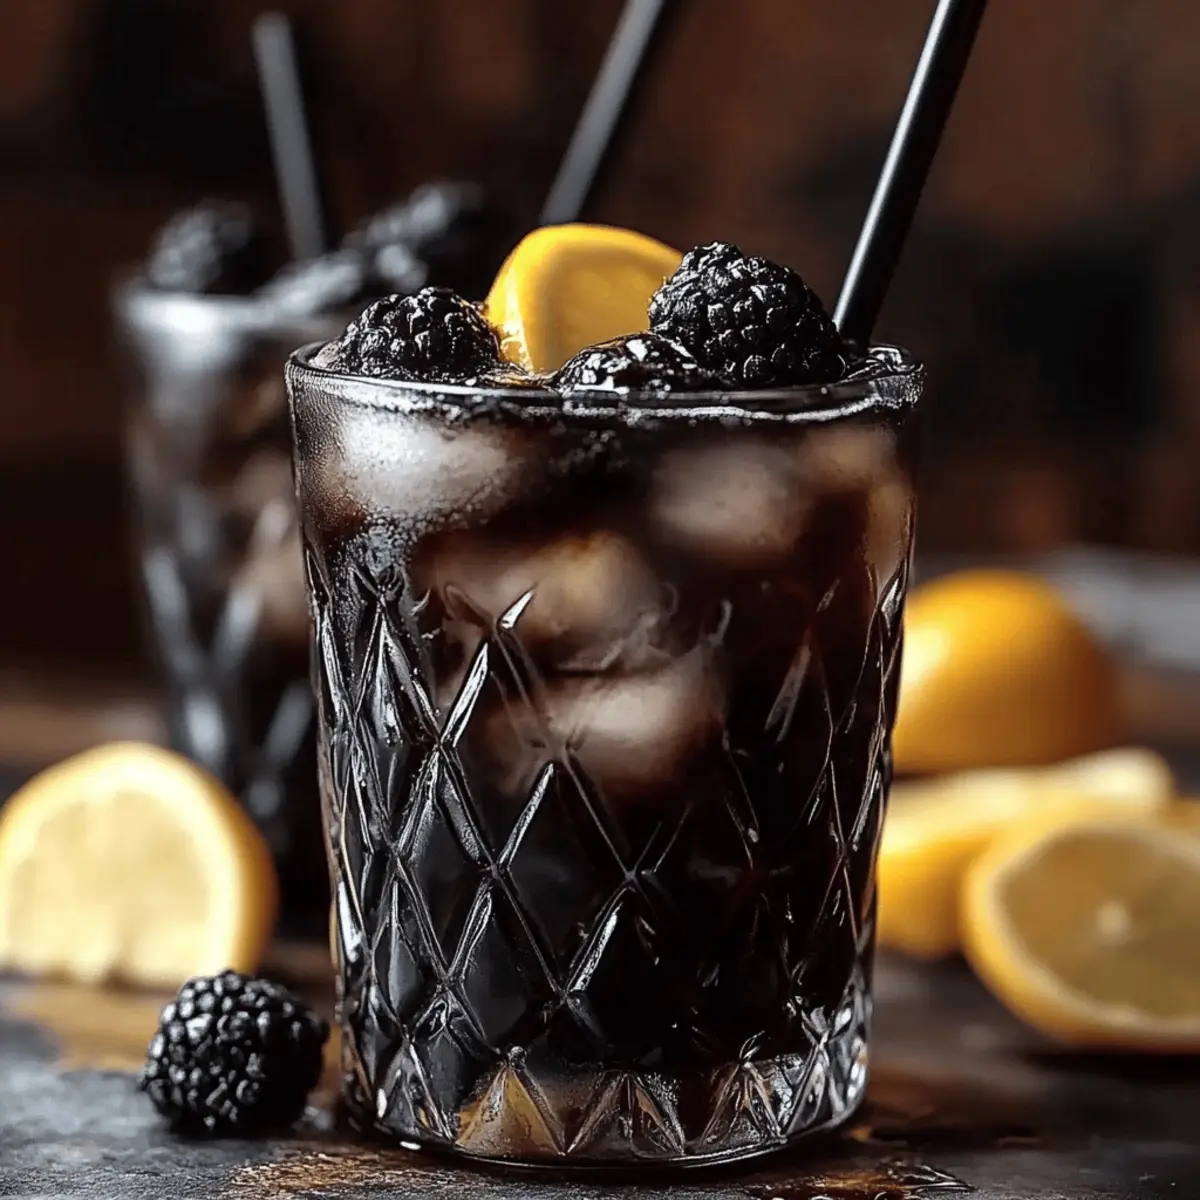
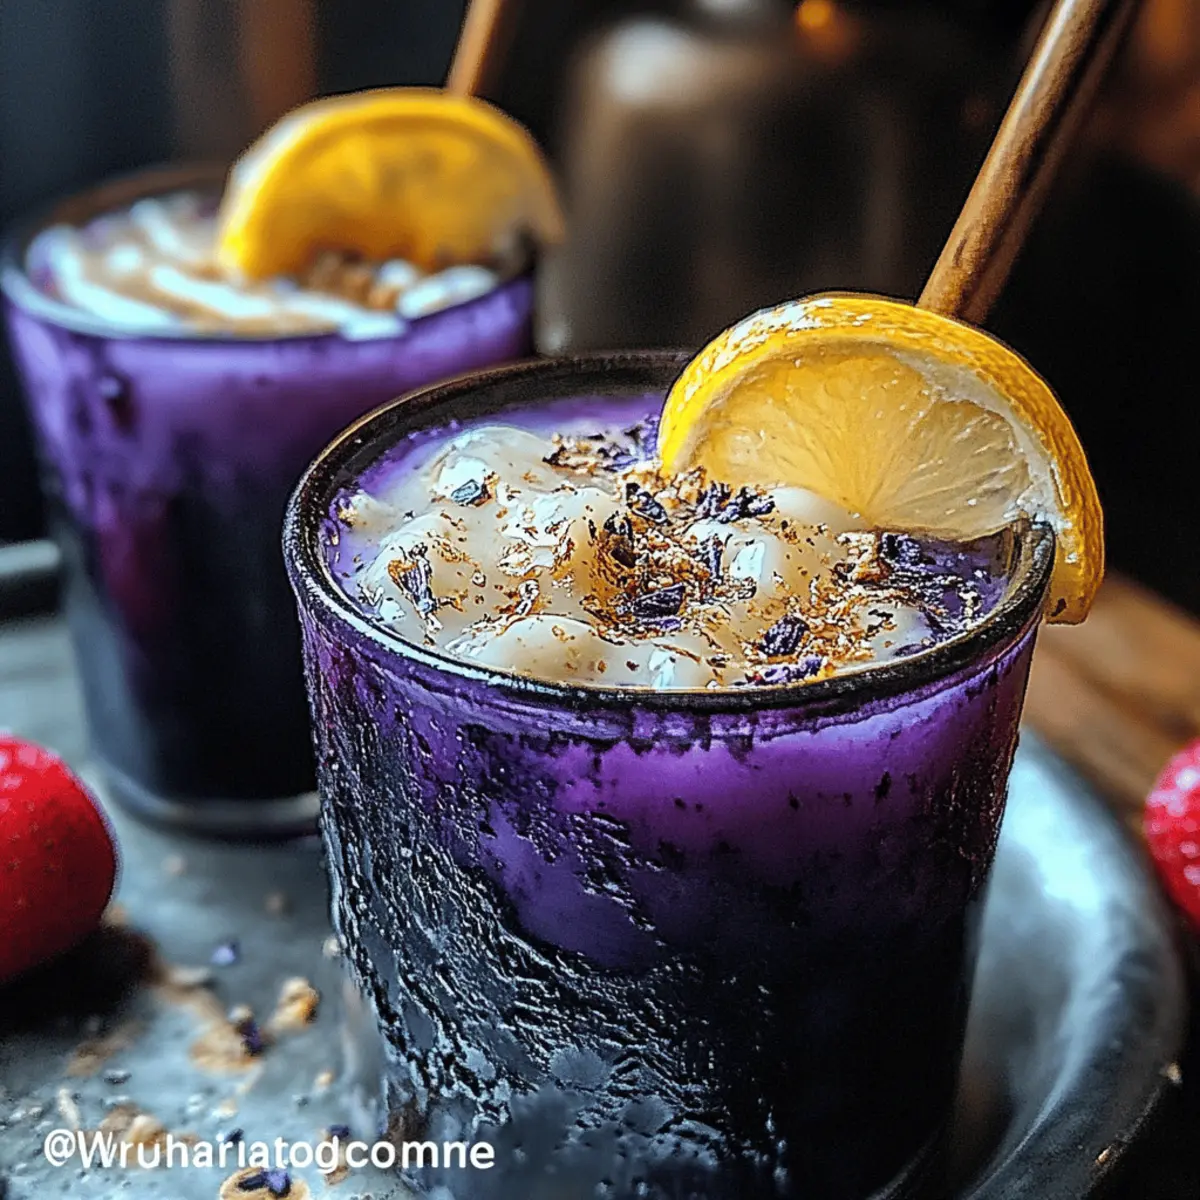
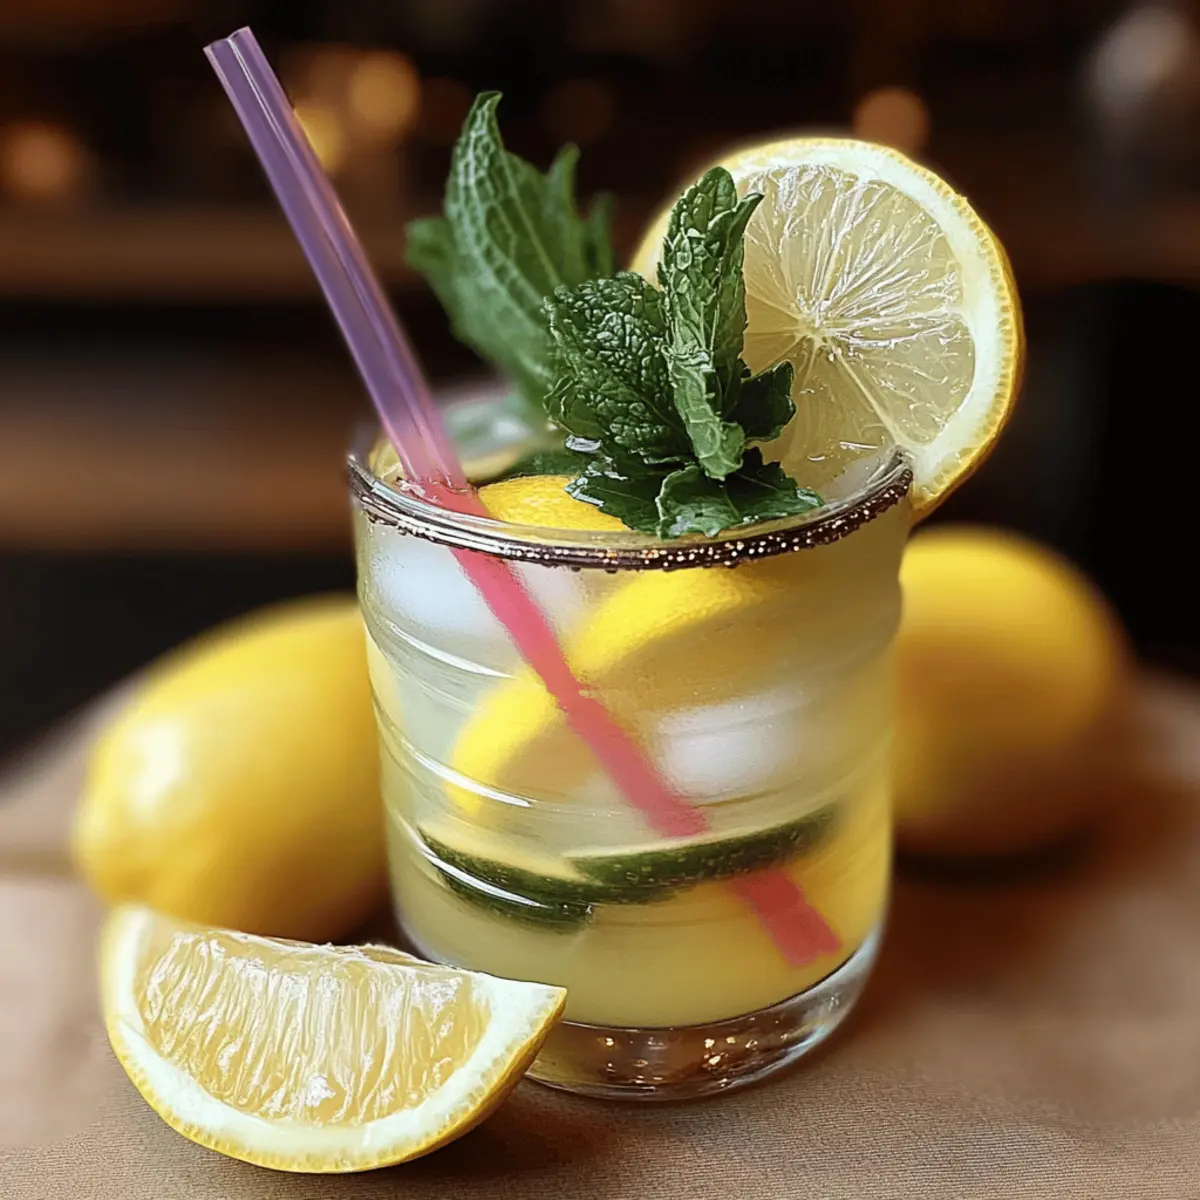
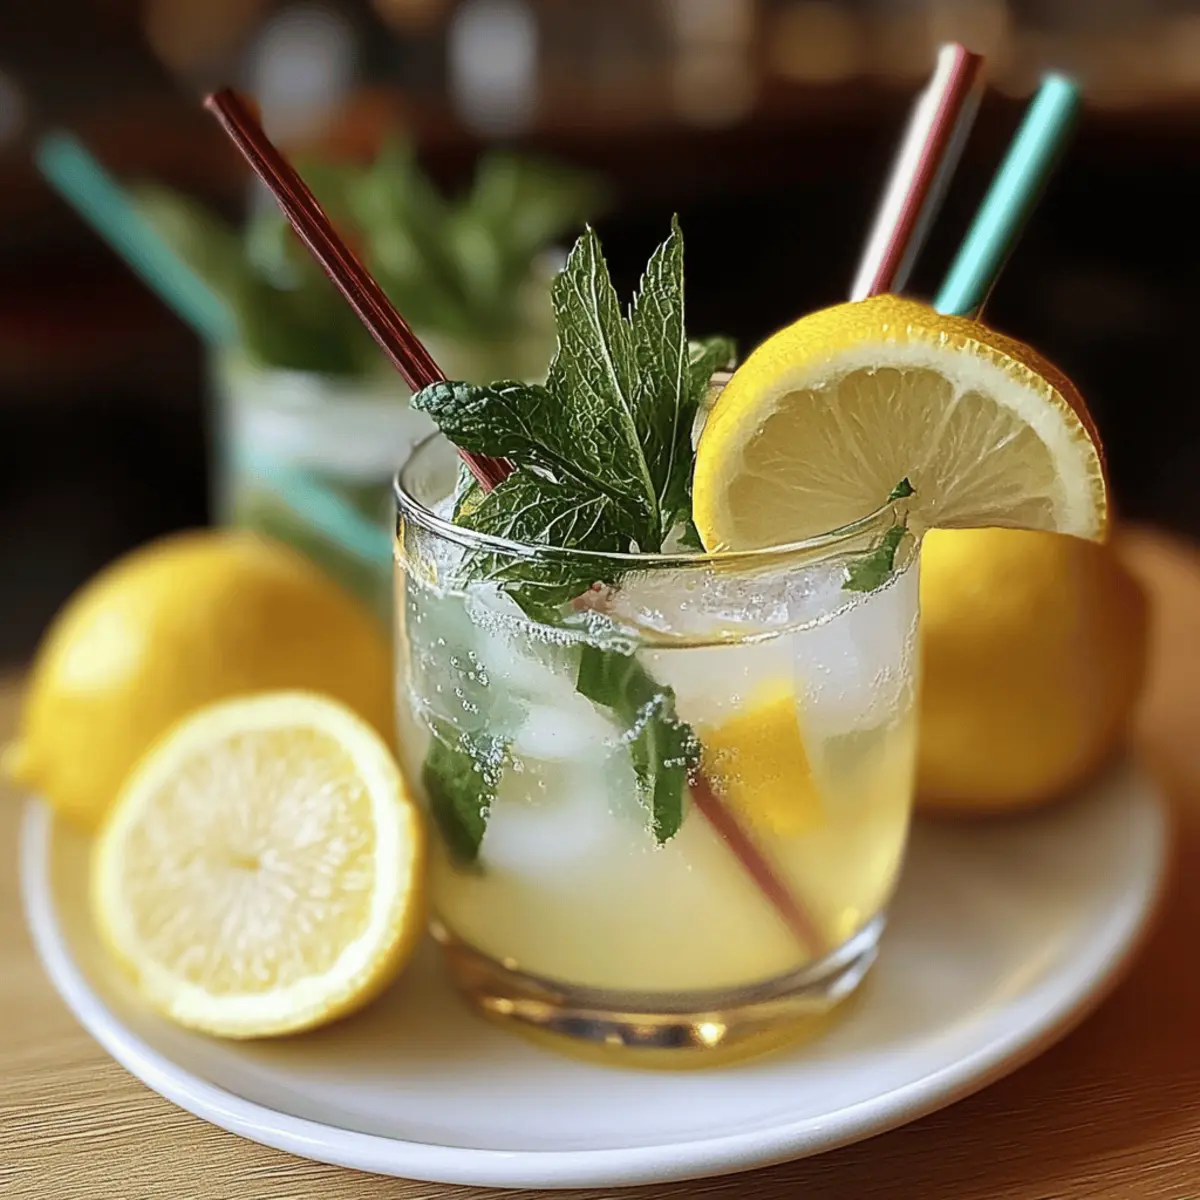
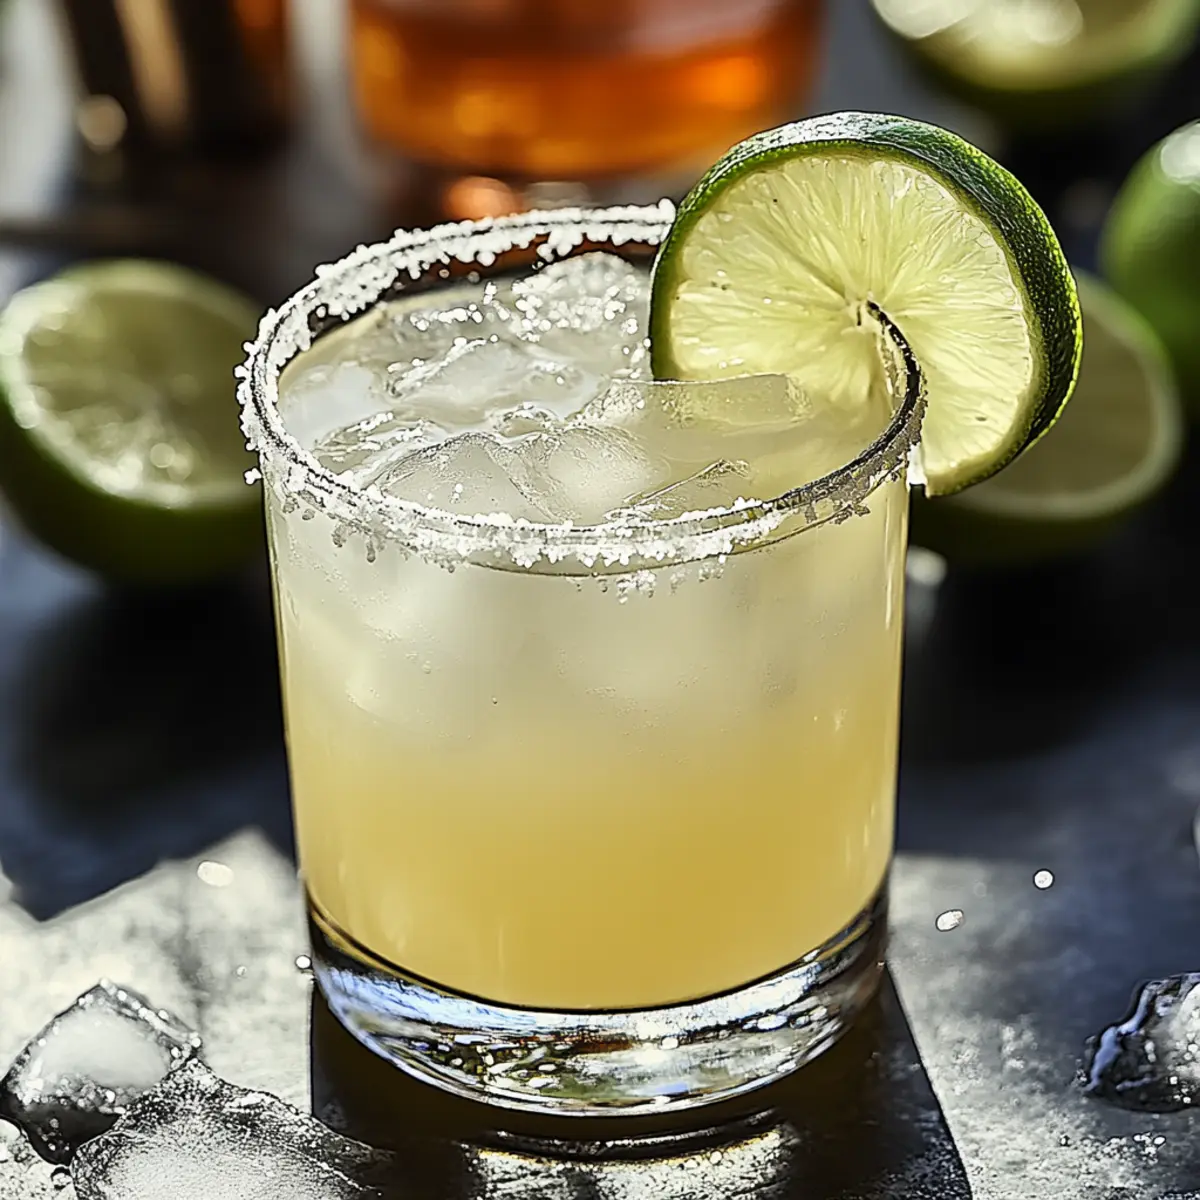
  • Clear ice cubes – Make sure to use clear ice for that stunning visual effect as it showcases the layers of your drink.

With just these simple ingredients, you’re ready to experience the magic of Campfire Cola Dirty Soda!

Step‑by‑Step Instructions for Campfire Cola Dirty Soda

Step 1: Prepare the Cream Mixture
In a small jar or bowl, combine 2 tablespoons of heavy cream and 2 tablespoons of sweetened condensed milk. Whisk them together vigorously for about 1-2 minutes until the mixture is fully combined, smooth, and silky. This creamy blend will add a luxurious touch to your Campfire Cola Dirty Soda.

Step 2: Fill Your Glasses with Ice
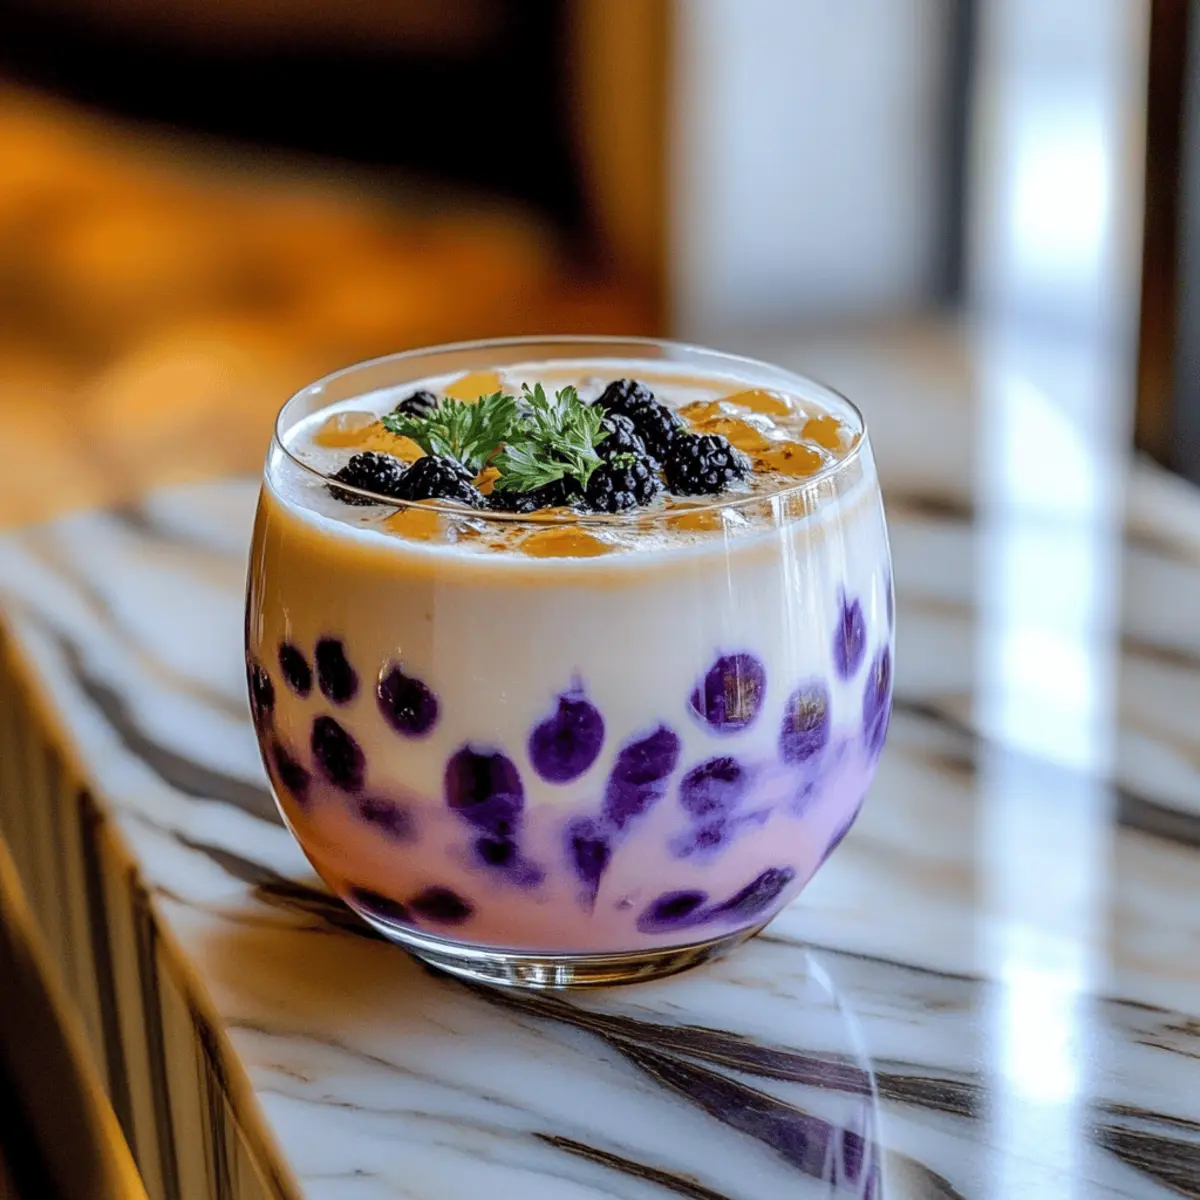
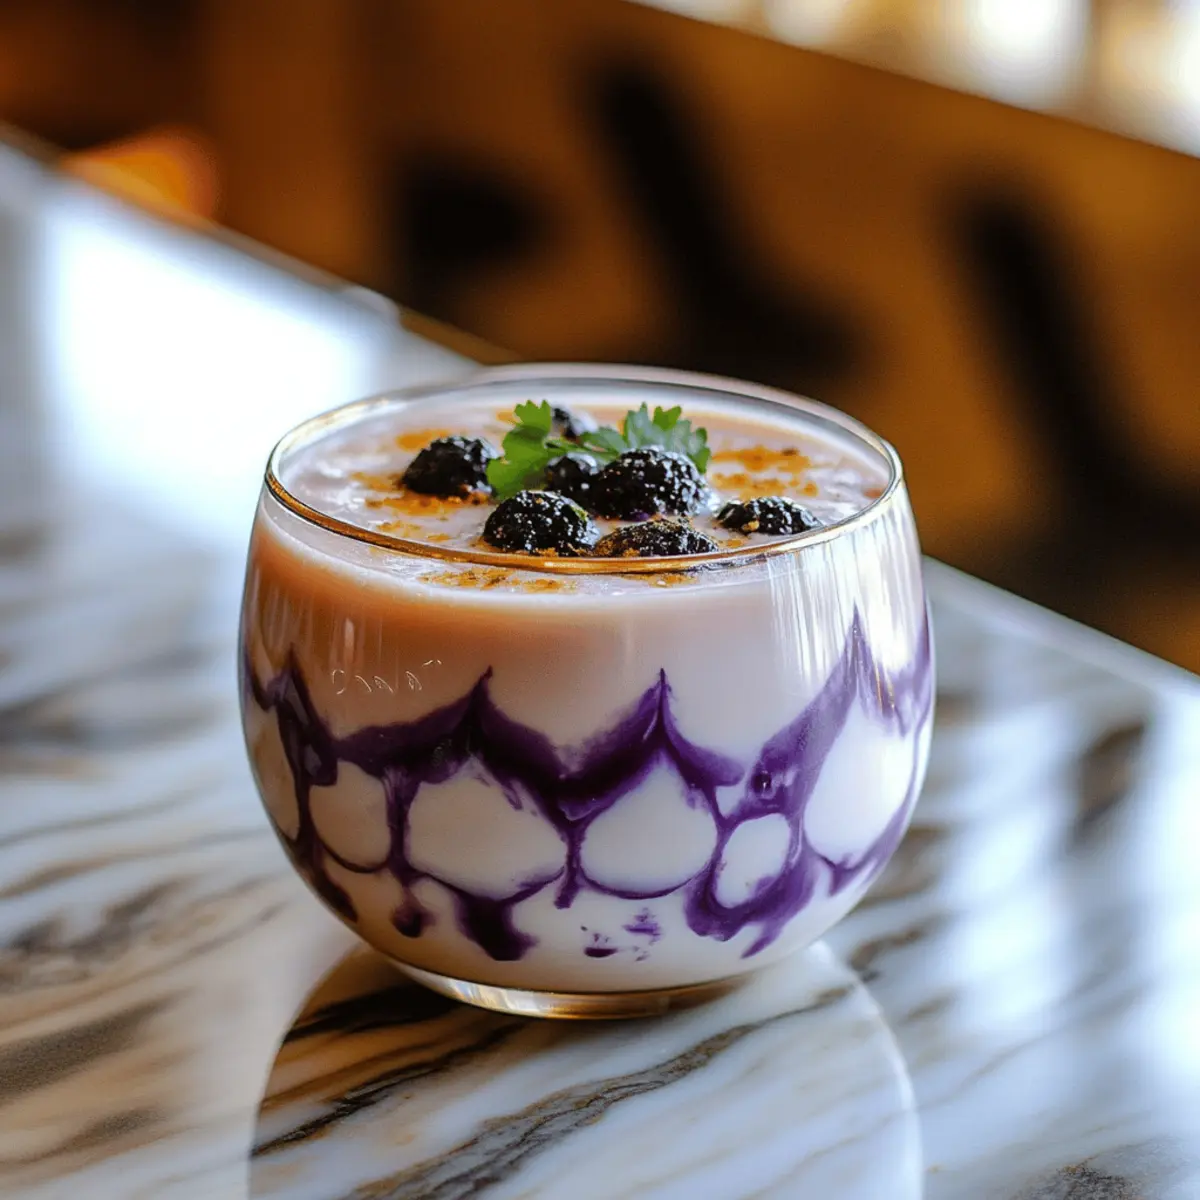
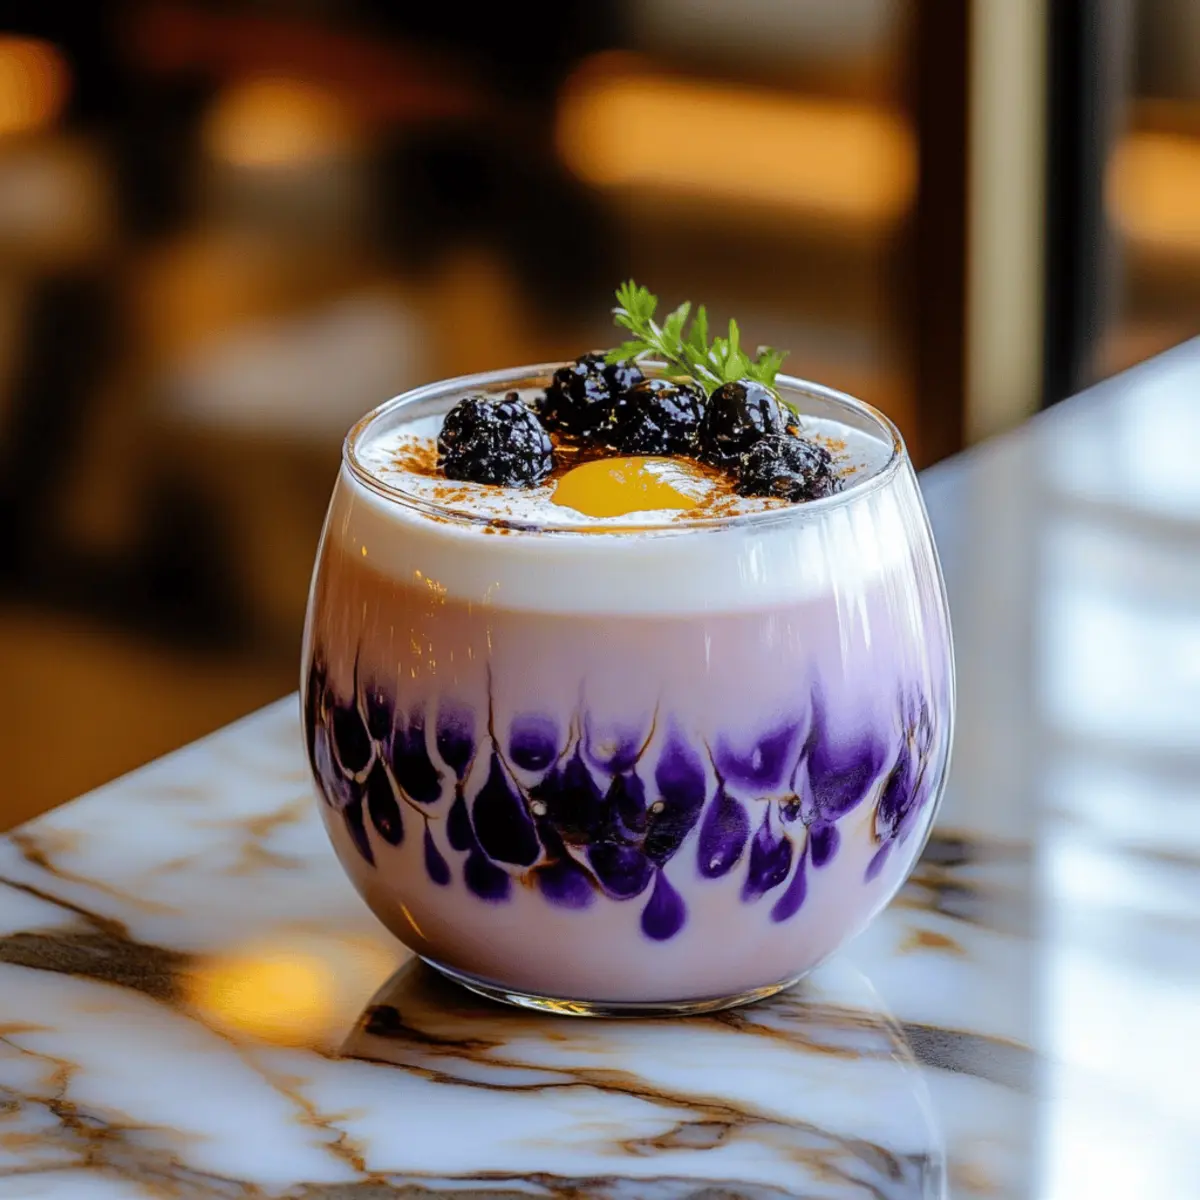
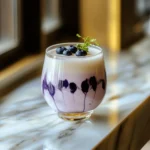
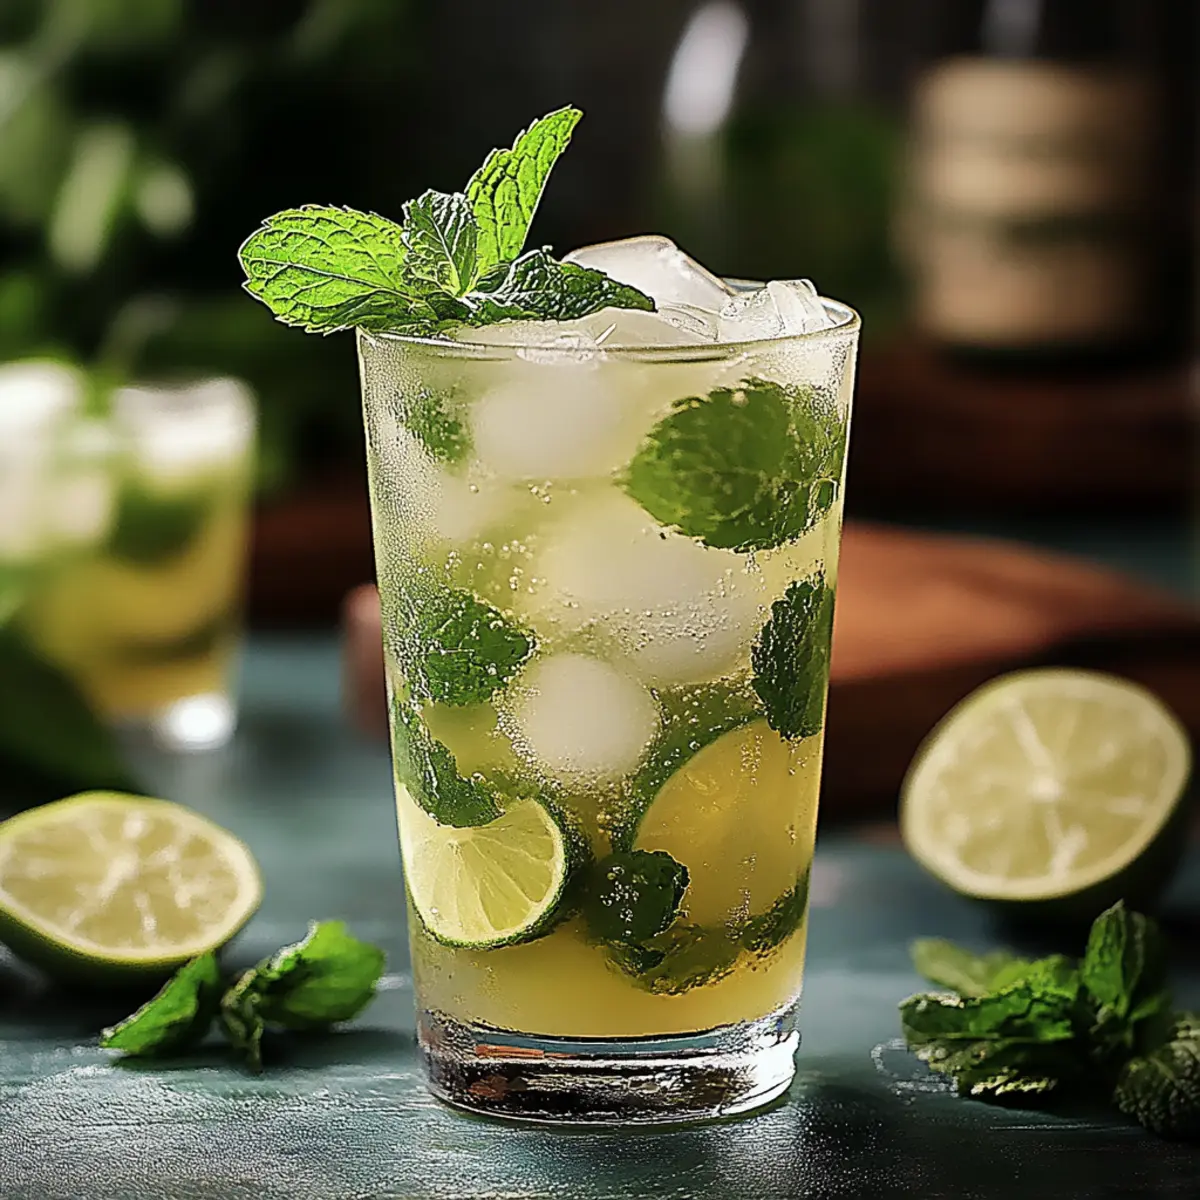
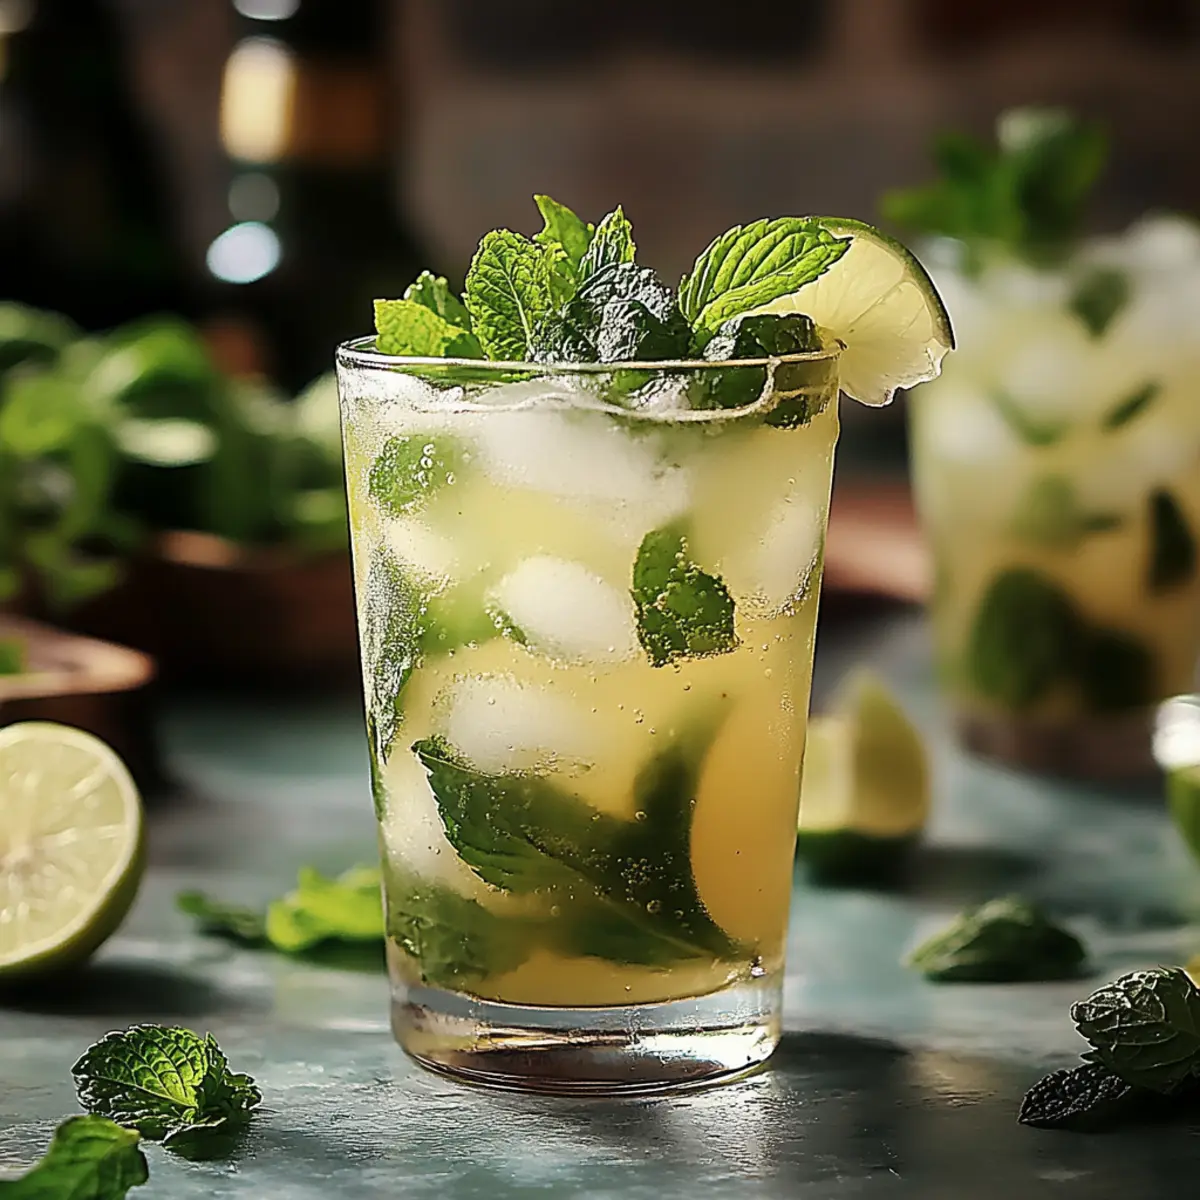
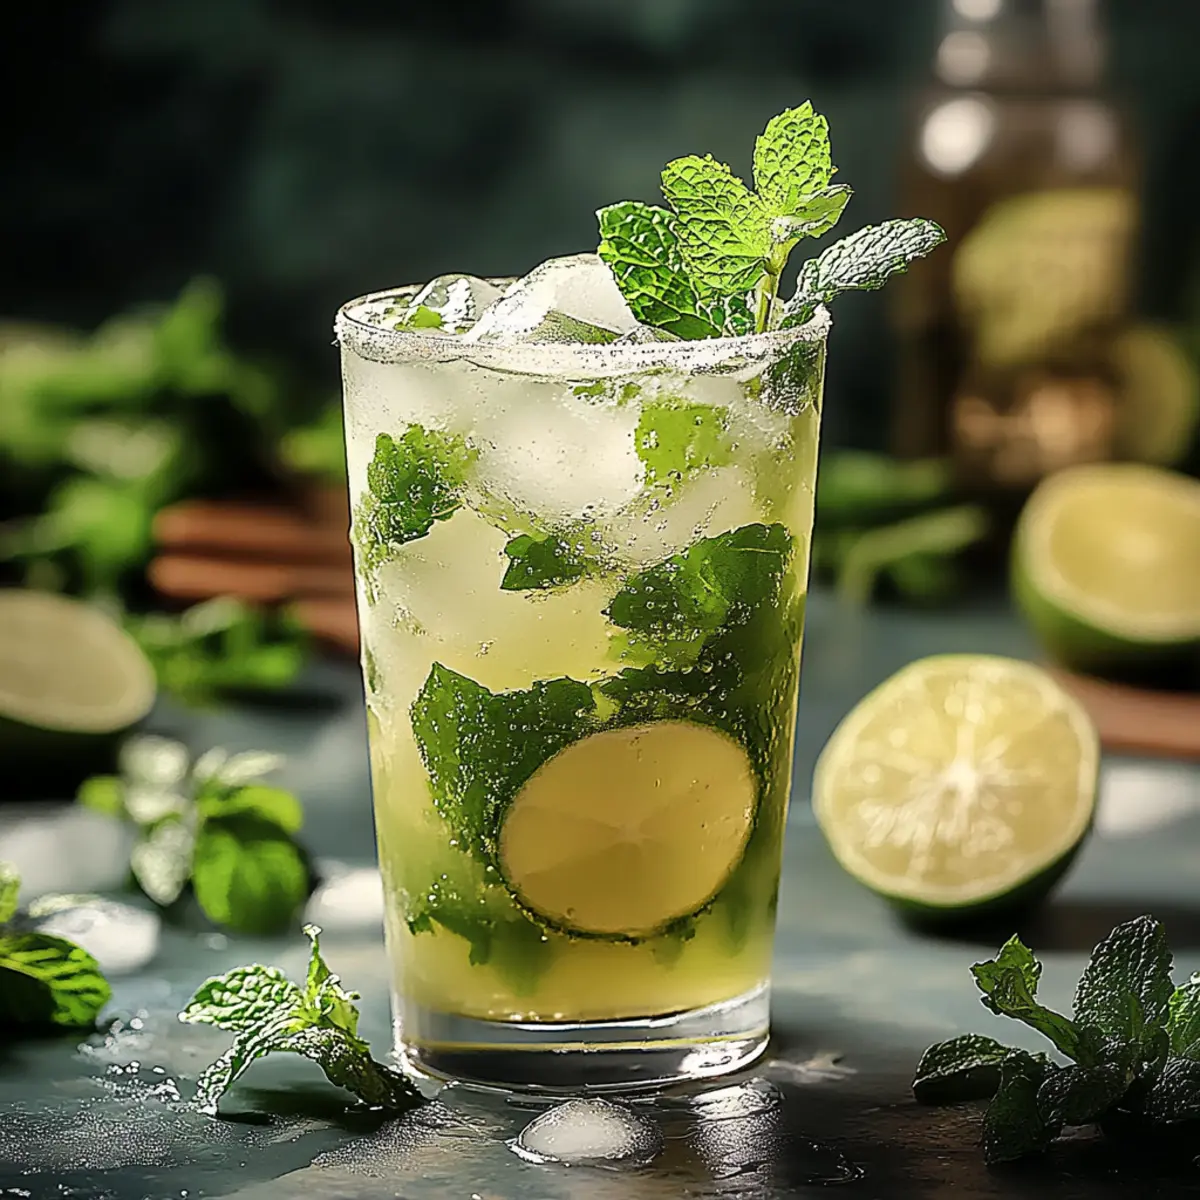
Take two tall clear glasses and fill each one to the brim with clear ice cubes. Ensure the ice is well-packed for maximum chill. This step is crucial as it not only cools the soda but also creates a stunning visual display, setting the stage for your delightful Campfire Cola Dirty Soda.

Step 3: Pour the Cold Coke
Slowly pour 1 cup of cold Coke into each glass over the ice. Take your time to let the soda fizz and settle, creating a bubbly layer on top. This should only take about 30 seconds, and watching the bubbles dance is part of the excitement of making your Campfire Cola Dirty Soda.

Step 4: Drizzle the Marshmallow Syrup
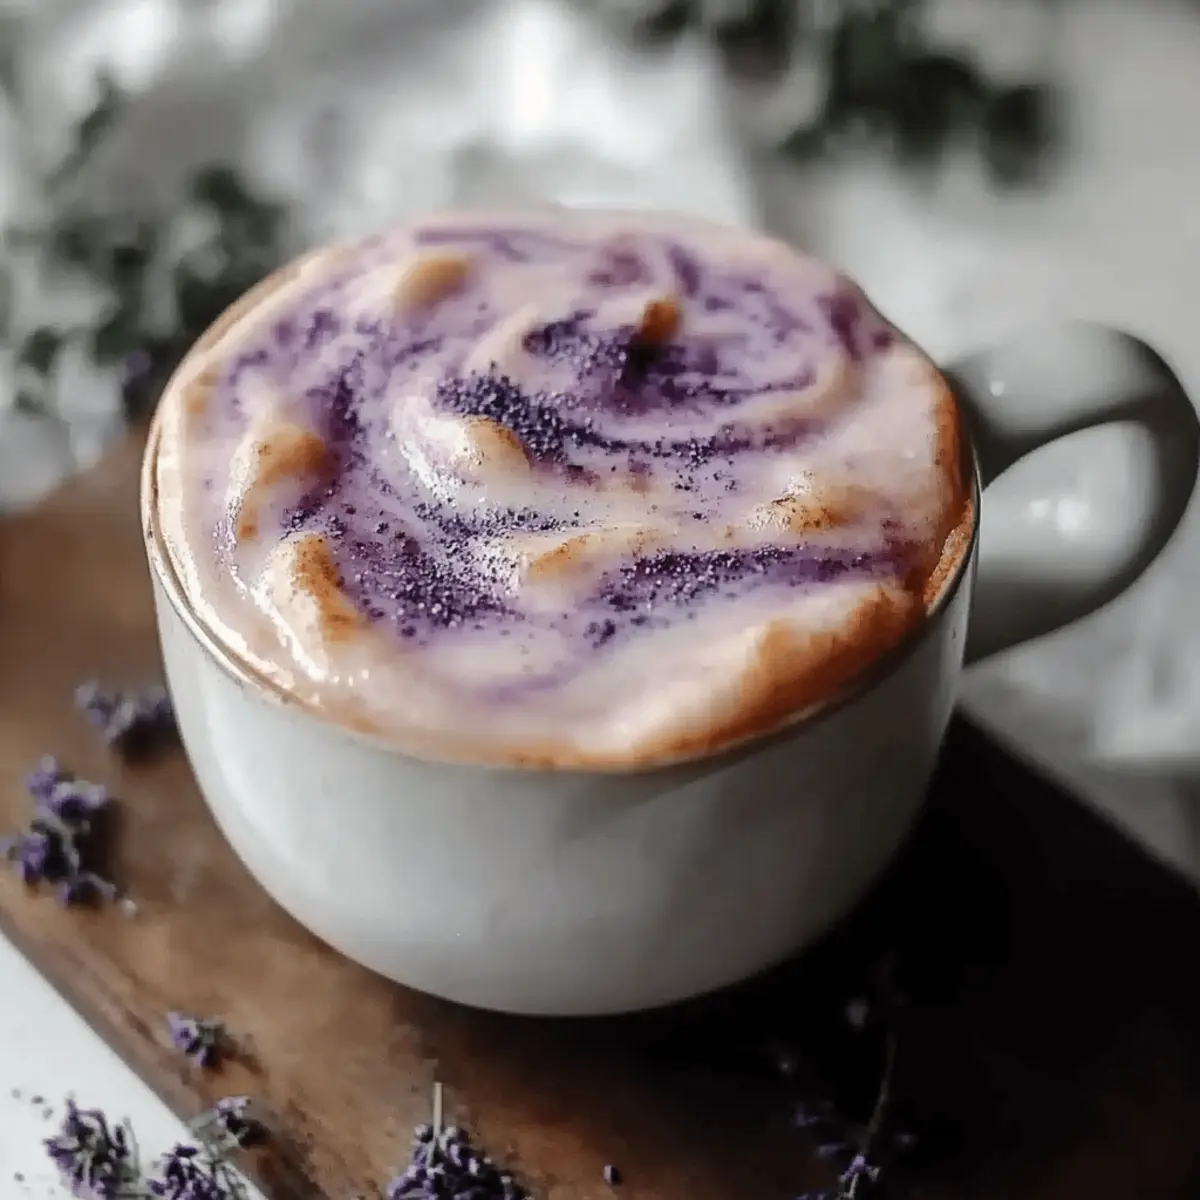
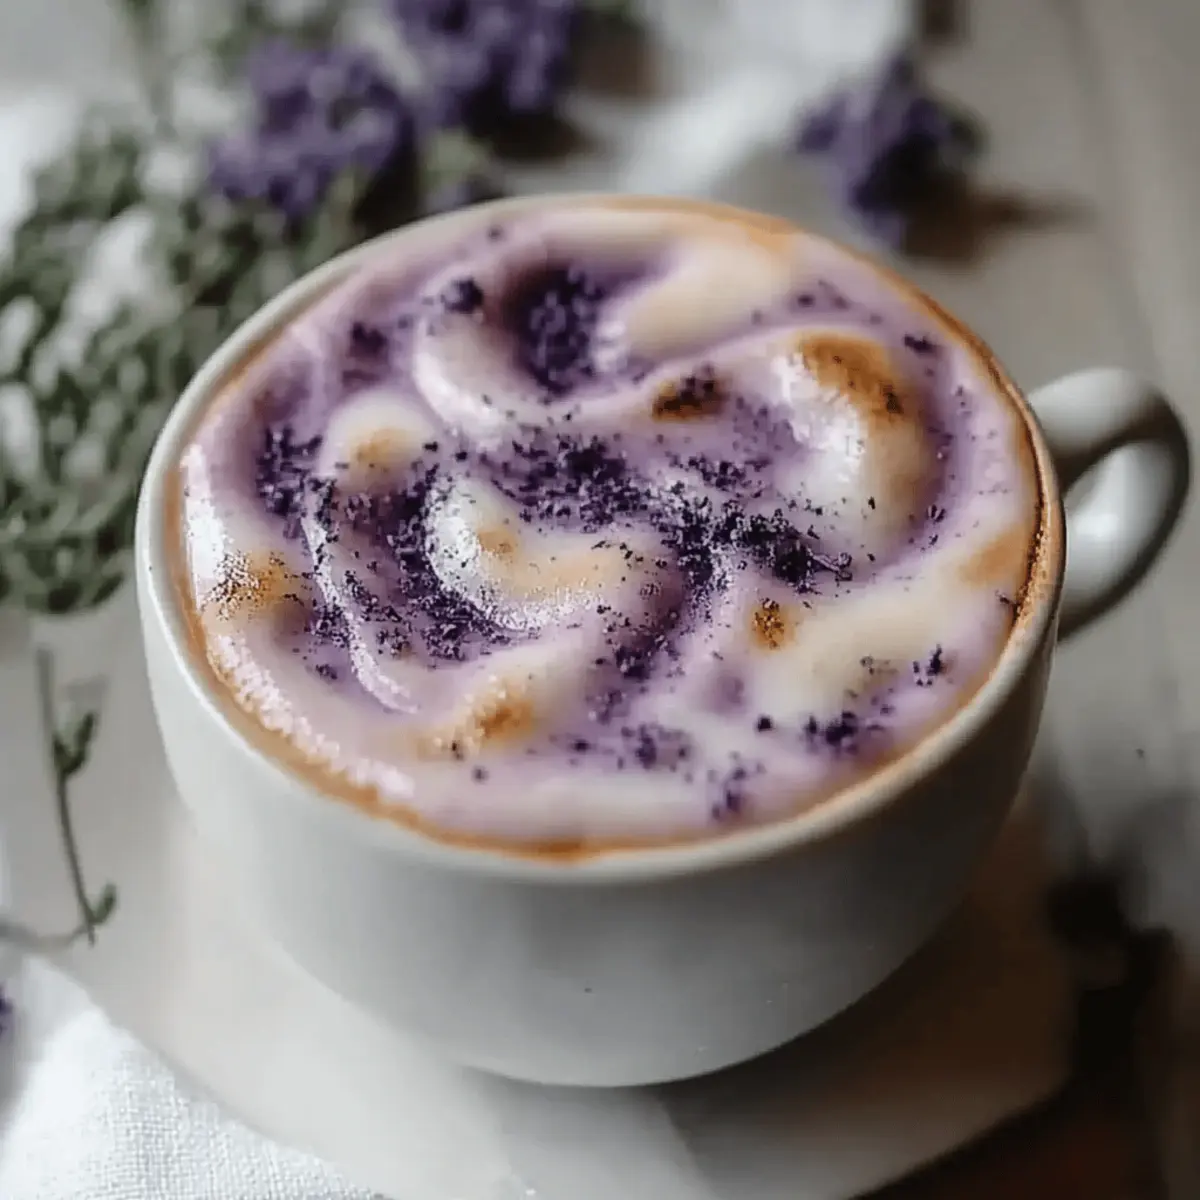
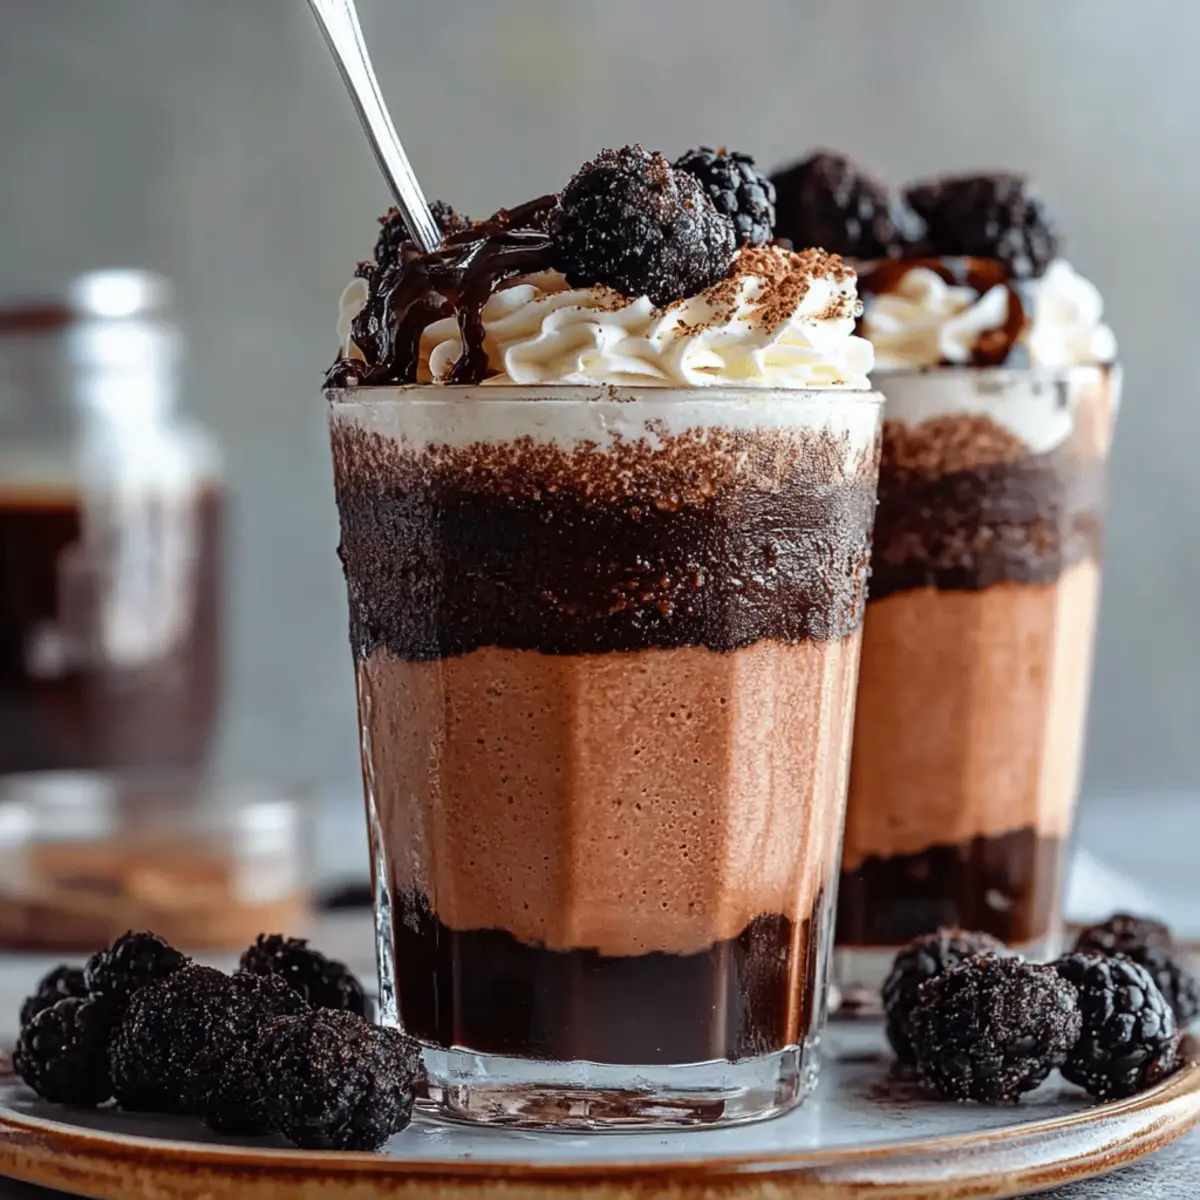
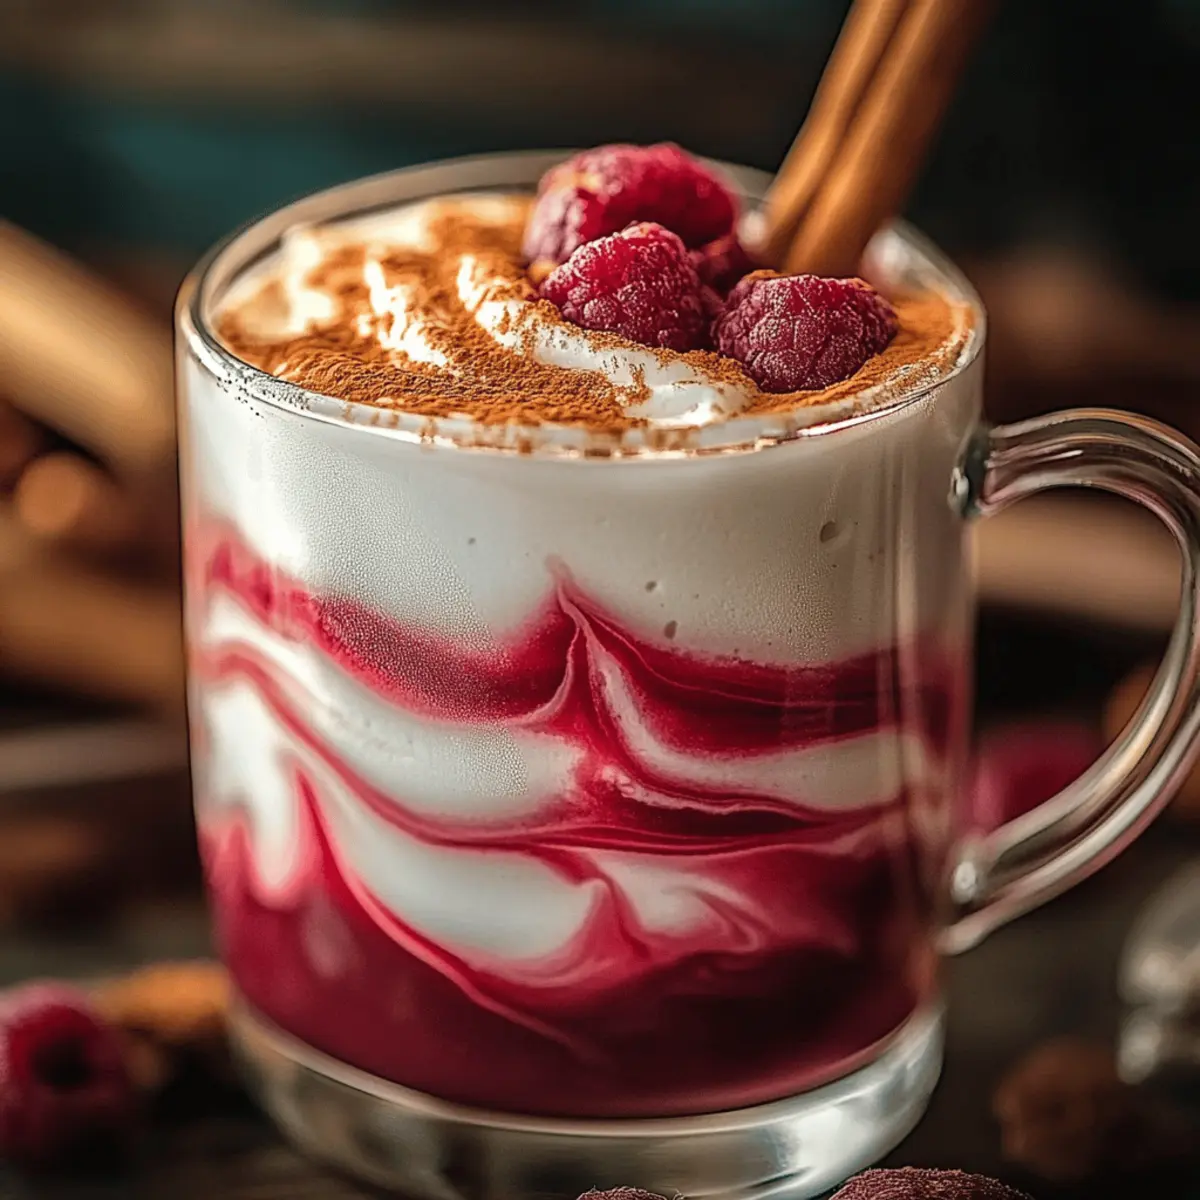
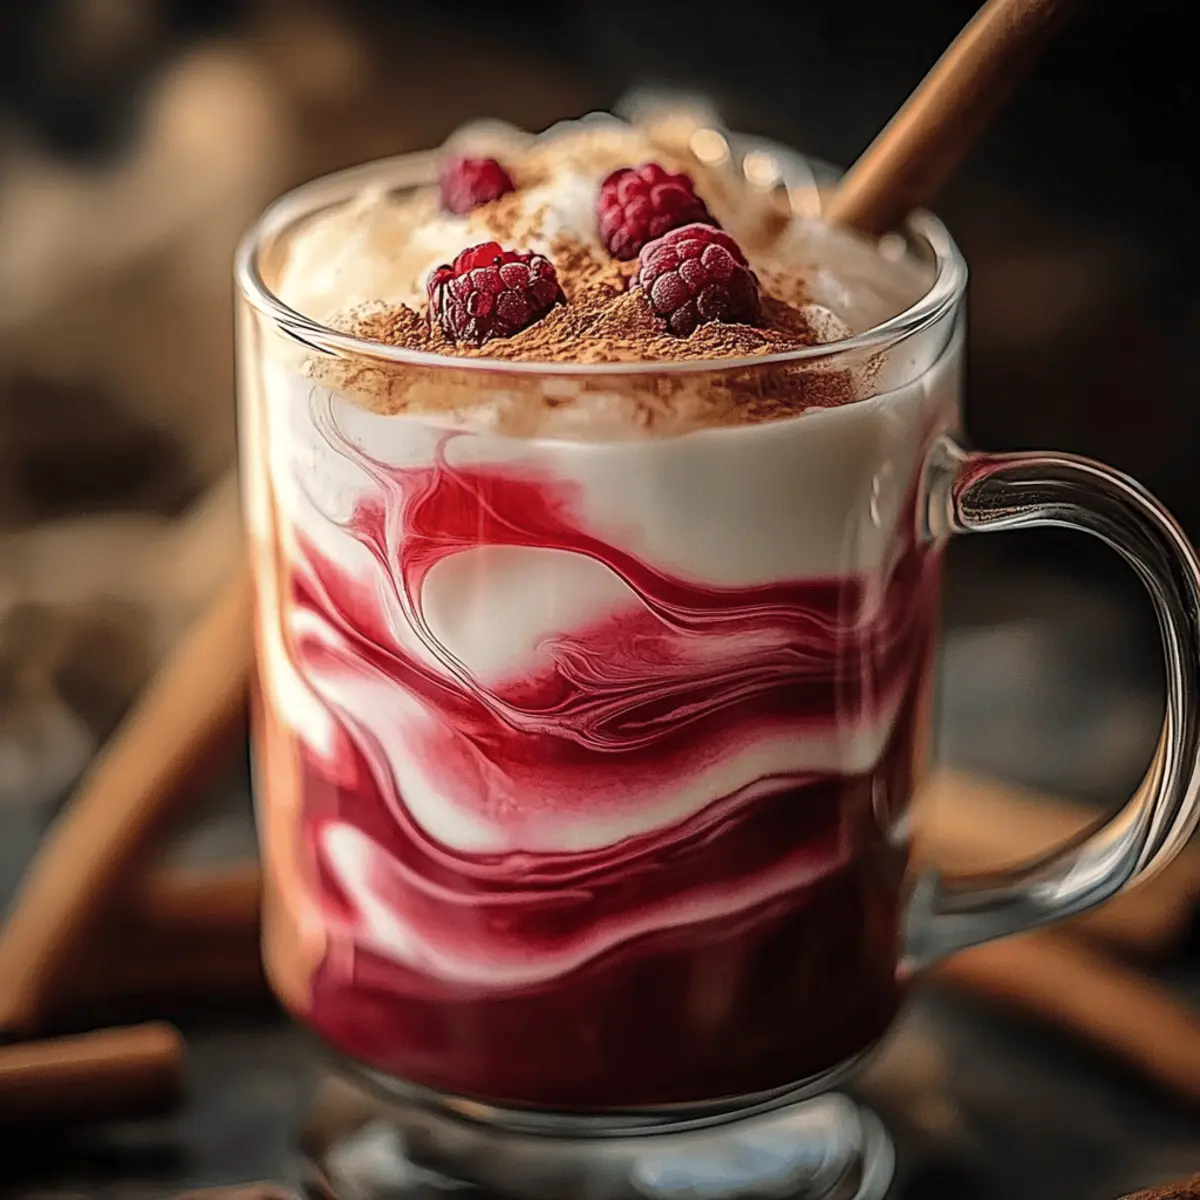
Gently drizzle 2 tablespoons of toasted marshmallow syrup into each glass. Observe as it sinks and swirls through the Coke, adding a sweet touch. This beautiful swirl will not only enhance the flavor of your Campfire Cola Dirty Soda but also add to its visual appeal.

Step 5: Add the Chocolate Syrup
Next, pour 1 tablespoon of chocolate syrup into each glass. Allow it to mix naturally with the soda; do not stir at this point. The chocolate syrup will create delightful ribbons throughout the drink, enhancing both the flavor and the layered look of your Campfire Cola Dirty Soda.

Step 6: Pour the Creamy Blend
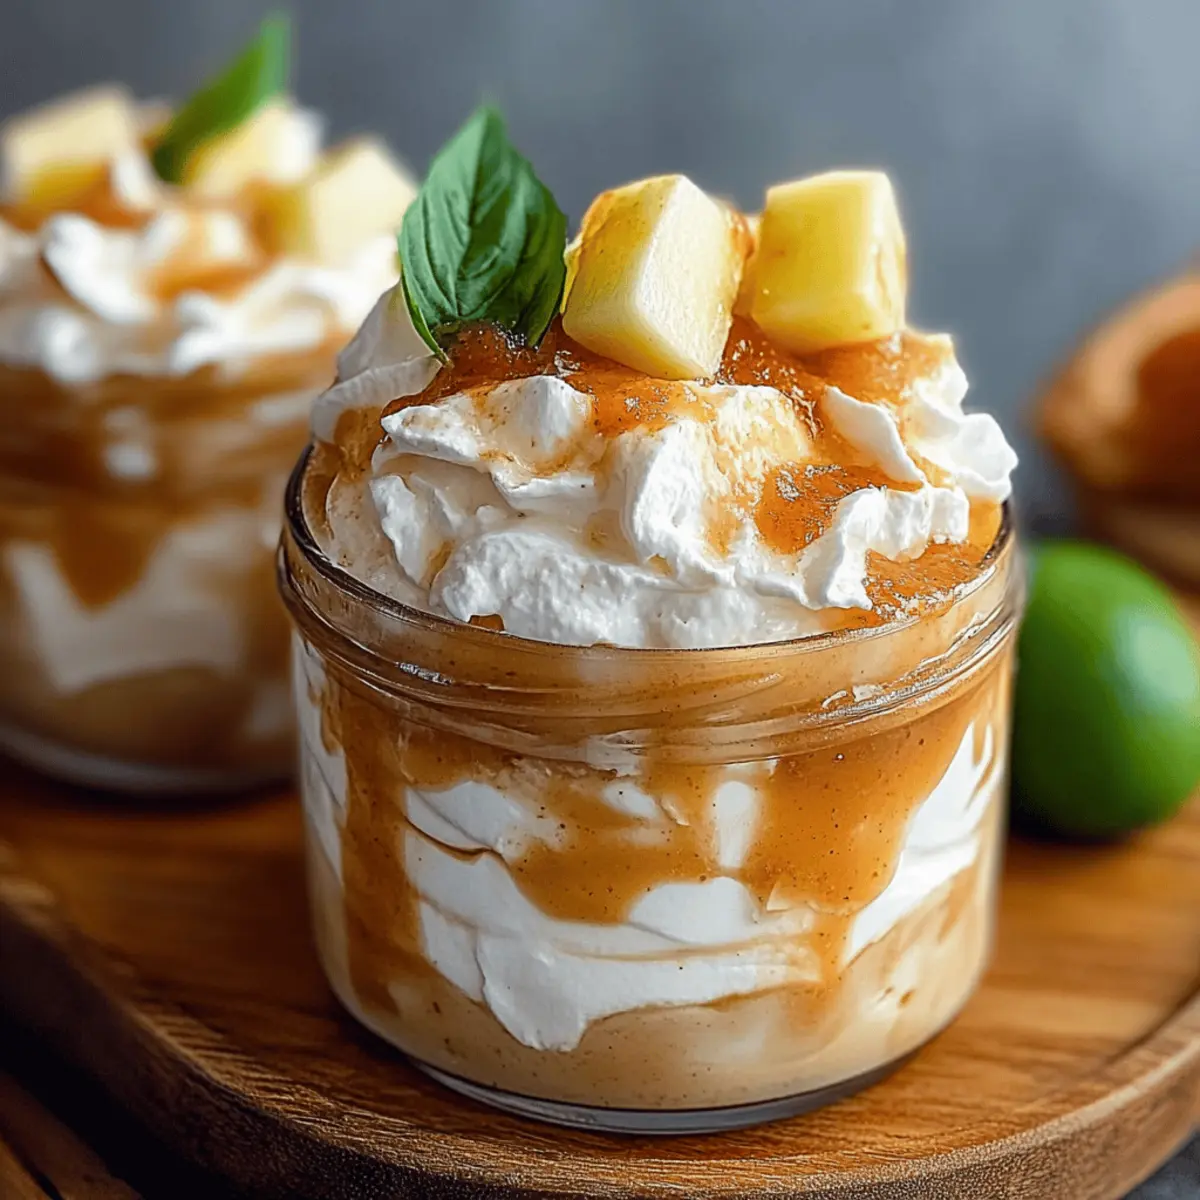
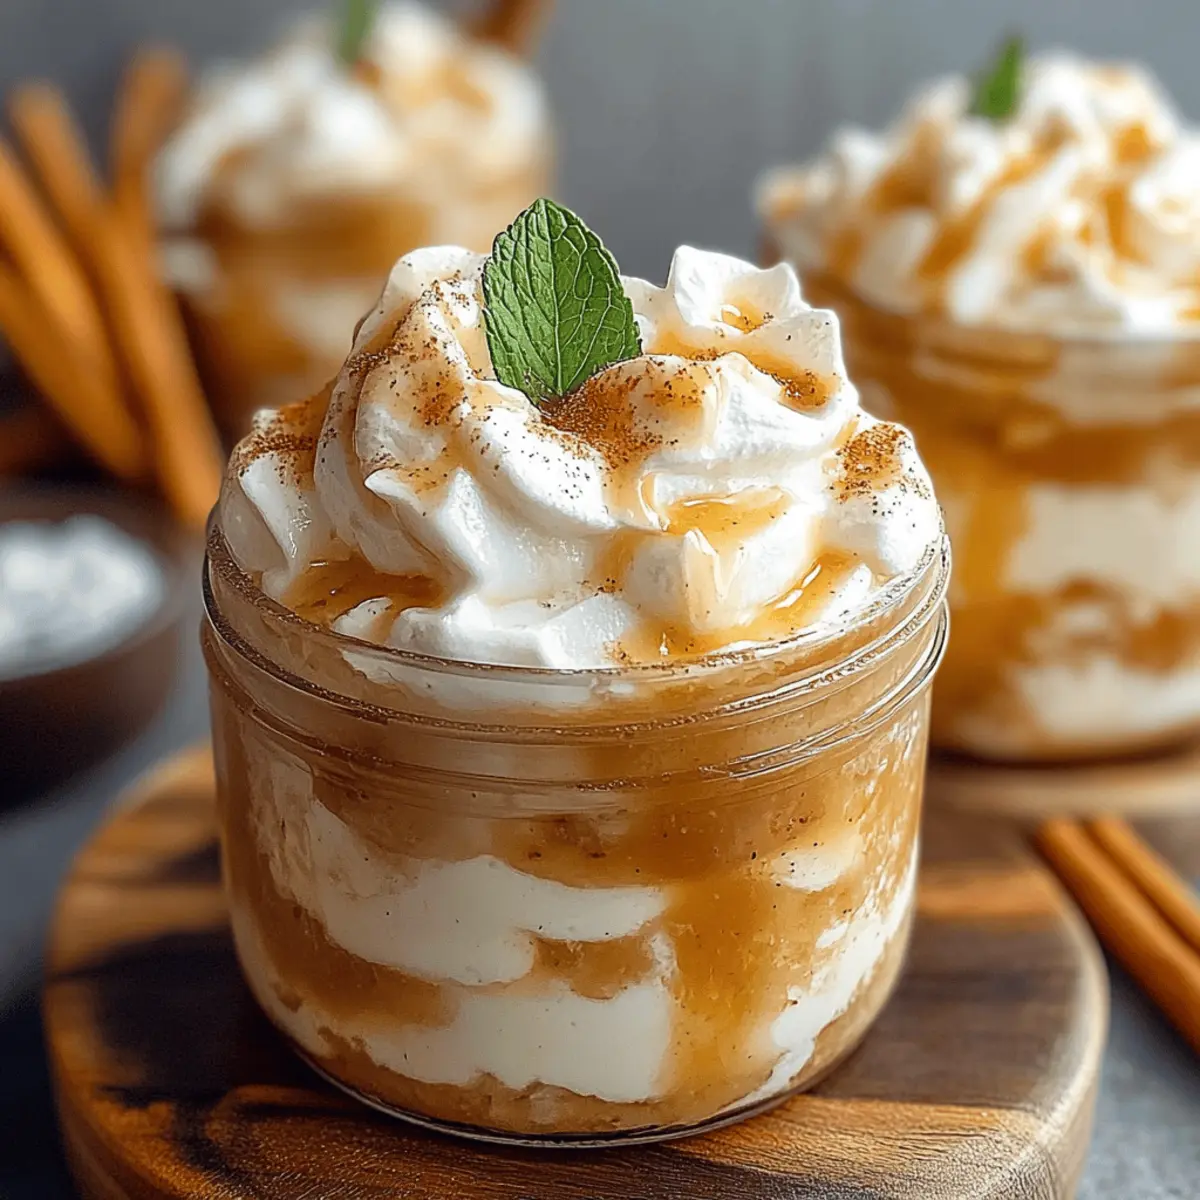
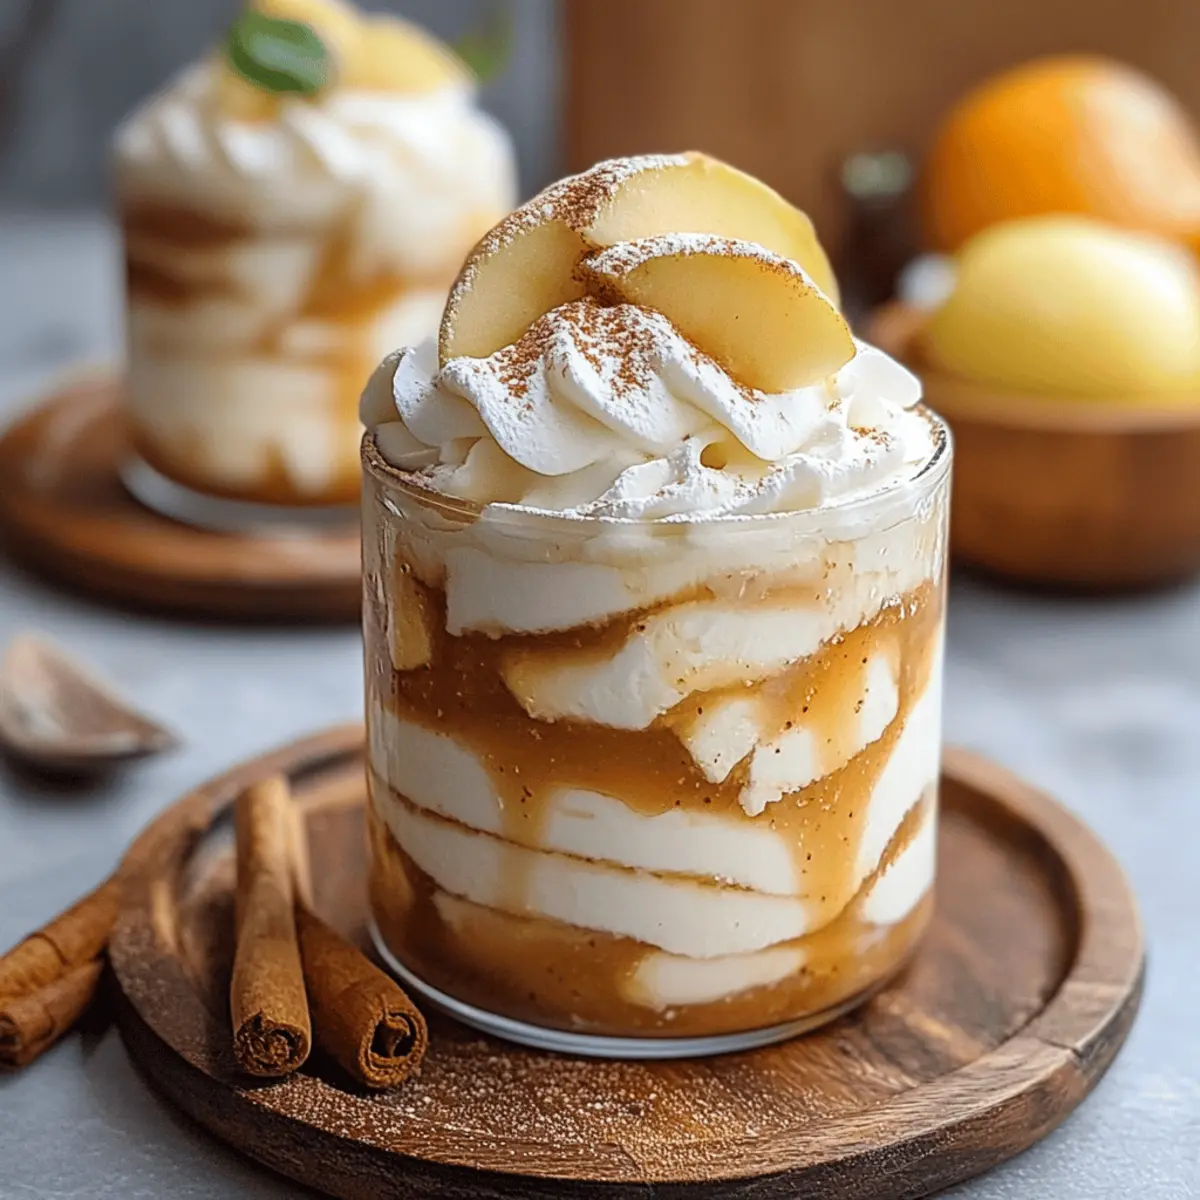
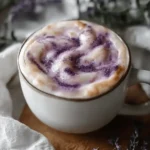
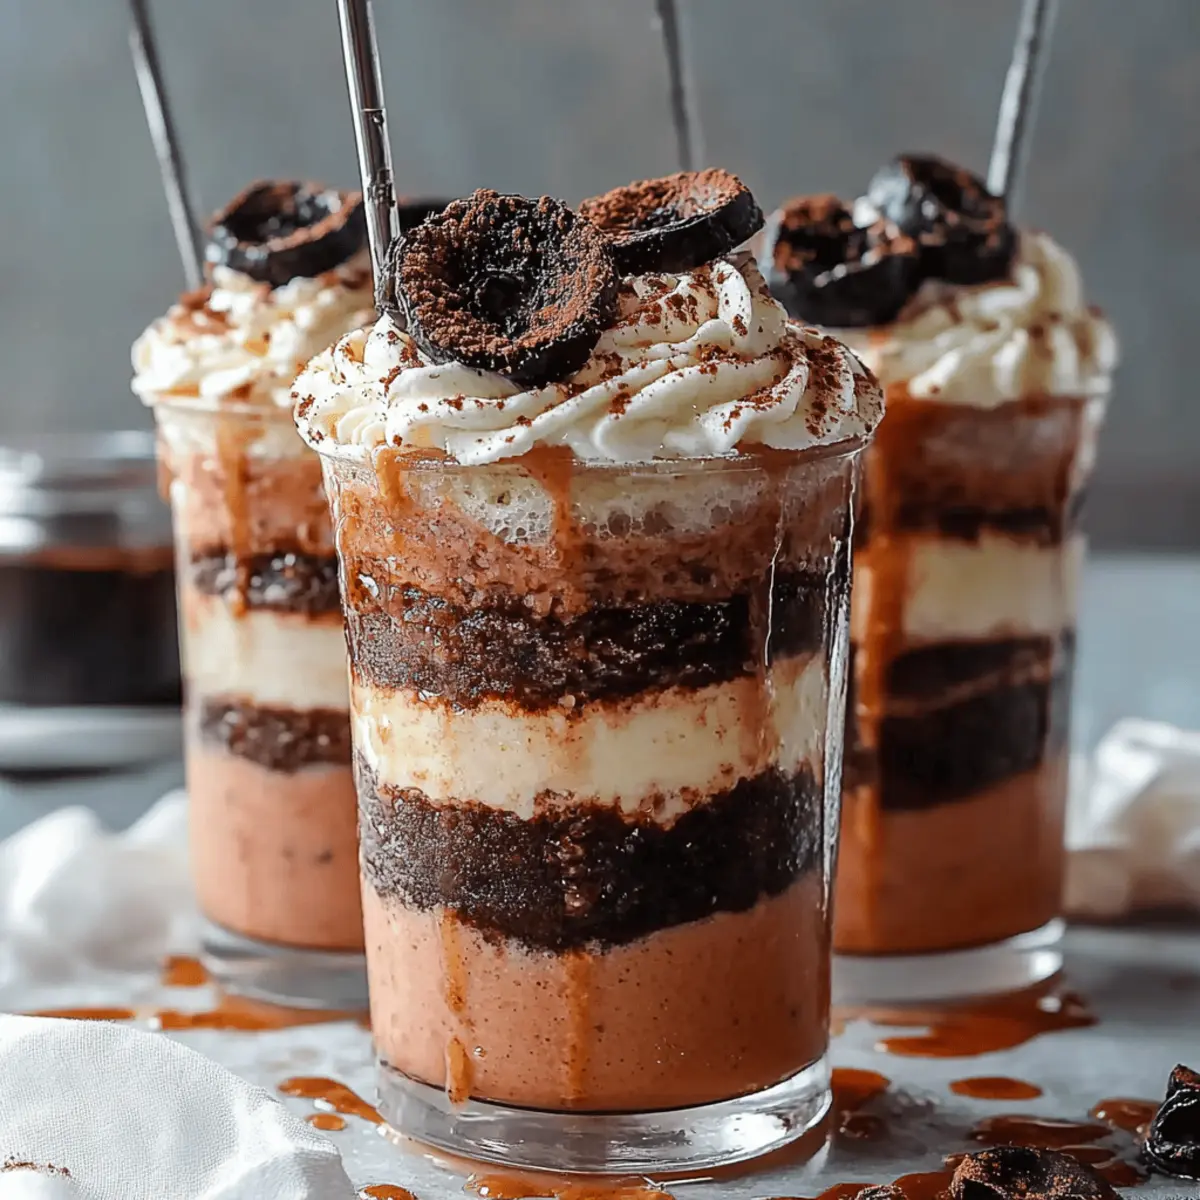
With utmost care, slowly pour the prepared sweet cream mixture over each drink. Watch as it gracefully swirls and floats atop the soda, creating a gorgeous layered effect. This final touch is what makes your Campfire Cola Dirty Soda truly irresistible and visually captivating.

Step 7: Serve and Enjoy
Serve the Campfire Cola Dirty Soda immediately, accompanied by a straw or a spoon. Let your guests marvel at the beautiful layers before diving in. They can choose to sip through the layers or gently stir the drink for a delightful flavor explosion—either way, this treat is sure to be a hit!

Campfire Cola Dirty Soda

Expert Tips for Campfire Cola Dirty Soda

  • Chill Everything: To avoid a watered-down drink, ensure your Coke and glass are chilled beforehand, enhancing the refreshing experience.
  • Layering Technique: Pour your cream mixture slowly over the back of a spoon for beautifully defined layers—this visual flair makes your Campfire Cola Dirty Soda extra special.
  • Syrup Choices: Experiment with different flavored syrups, such as caramel or vanilla, to customize your drink and put your own twist on this classic.
  • Avoid Overmixing: When adding the syrups, resist the temptation to stir too much; allowing them to swirl naturally maintains the appealing visual layers.
  • Serve Fresh: Enjoy your Campfire Cola Dirty Soda immediately for the best effervescent experience. The longer it sits, the more the fizz dissipates!

How to Store and Freeze Campfire Cola Dirty Soda

Fridge: Store any leftover Campfire Cola Dirty Soda in an airtight container for up to 2 days. The fizz may diminish, but the flavor will still be delightful!

Freezer: Although this drink is best enjoyed fresh, if you have extra cream mixture, it can be frozen in ice cube trays for up to 1 month. Use them in your next soda creation!

Reheating: Since this is a chilled beverage, reheating isn’t applicable. Instead, serve it ice-cold to enhance the refreshing experience.

Prep for Serving: If stored, remember to reassemble layers by giving the drink a gentle stir before serving. This will help revive that beautiful presentation!

What to Serve with Campfire Cola Dirty Soda

Elevate your summer gatherings with delightful pairings that complement the rich, sweet layers of this fizzy favorite.

  • S’mores: The gooey, smoky sweetness of s’mores pairs perfectly with the campfire theme, enhancing the nostalgic experience.
  • Grilled Veggies: Smoky grilled veggies add a savory touch, balancing the sweetness of the Campfire Cola Dirty Soda beautifully.
  • Spicy Chicken Wings: The heat from spicy wings creates a delicious contrast, making each sip of soda even more refreshing.
  • Chocolate Cake: Indulge in a slice of rich chocolate cake for a double dose of sweetness that chocolate lovers will adore.
  • Fruit Salad: A light, refreshing fruit salad adds a burst of natural sweetness and a vibrant contrast to your creamy drink.
  • Ice Cream Floats: Make the occasion even more fun by serving ice cream floats alongside your drink, allowing guests to mix flavors.
  • Pineapple Upside-Down Cake: This moist, caramelized delight complements the Campfire Cola Dirty Soda with its fruity undertones and rich flavor.
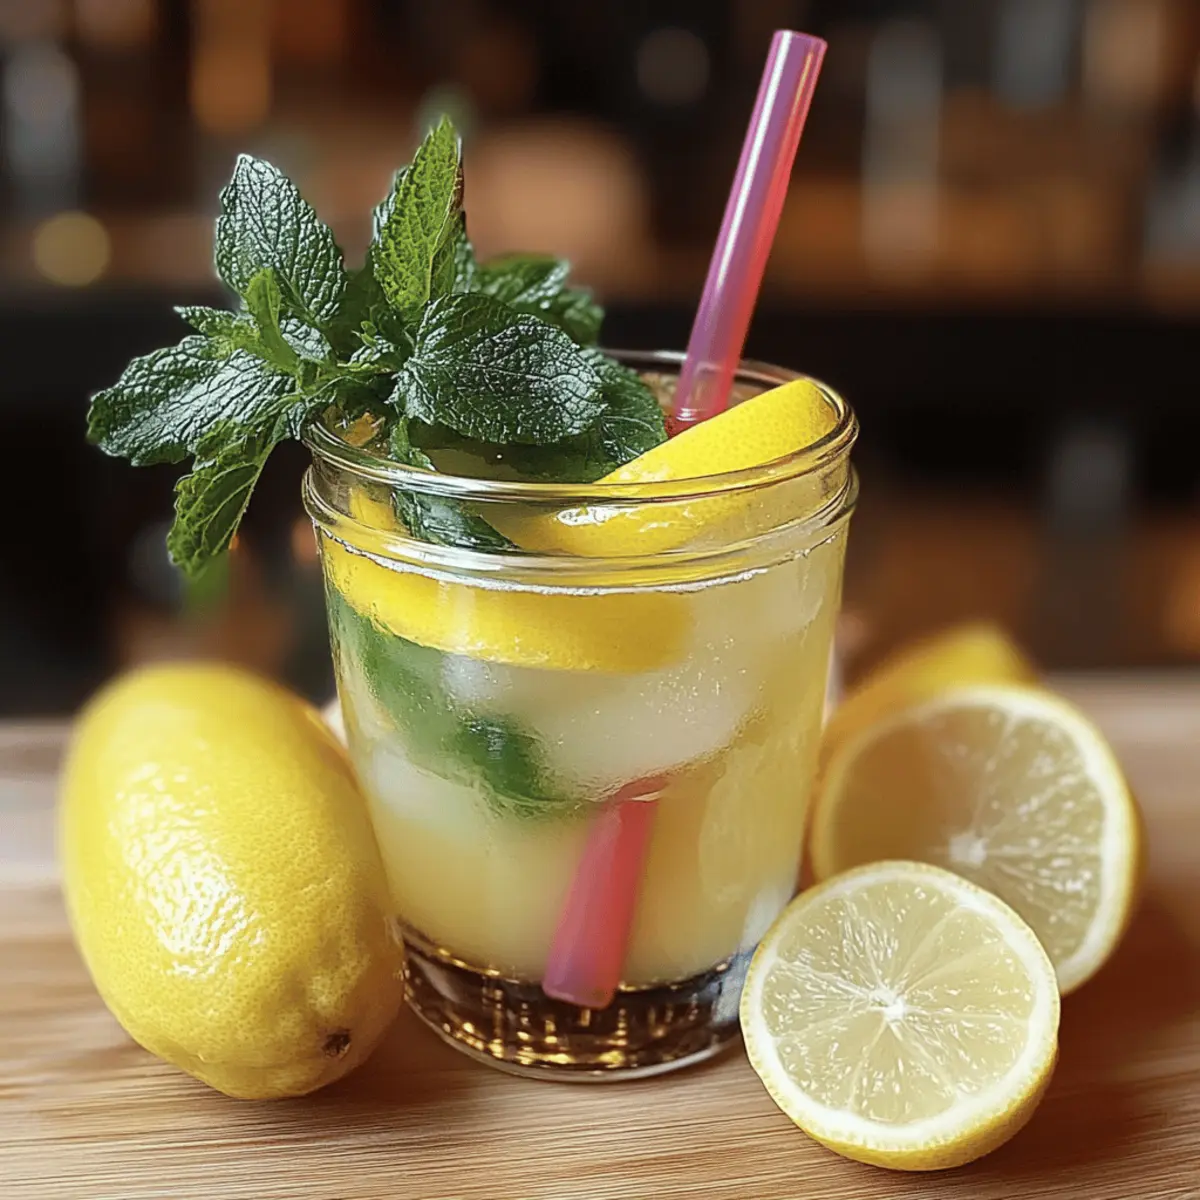
  • Sweet Tea Lemonade: Quench your thirst with this refreshing drink that offers a crisp citrus contrast to the sweet soda.
  • Campfire Chili: A cozy, spicy chili brings heartiness to the table and beautifully balances the sweetness of your fizzy treat.

Campfire Cola Dirty Soda Variations

Feel free to customize your Campfire Cola Dirty Soda with these fun twists—let your creativity shine!

  • Dairy-Free: Substitute heavy cream with coconut cream for a vegan-friendly twist, still delivering that creamy texture and flavor.

  • Flavored Syrups: Switch up the toasted marshmallow syrup for caramel or vanilla syrup to give your drink a new flavor profile. Each variation will evoke different memories.

  • Extra Crunch: Add crushed graham crackers on top for a playful texture and a s’mores-inspired experience that’s absolutely scrumptious.

  • Spicy Kick: Incorporate a dash of cinnamon or cayenne pepper to the cream mixture for a surprising heat that complements the sweetness beautifully.

  • Fruity Fusion: Add a splash of cherry juice for a fruity twist, enhancing the sweetness while keeping the retro vibe in check.

  • Alcoholic Version: For adult gatherings, consider adding a splash of rum or whiskey to transform your soda into a delightful cocktail that’s sure to impress.

  • Layered Fruit: Garnish with slices of fresh strawberries or bananas for a splash of color and an added fruity nuance—visually stunning and tasty!

  • Cold Brew Swap: For a coffee-infused version, replace the Coke with cold brew coffee, giving a rich depth while maintaining that fizzy enjoyment!

Try pairing your Campfire Cola Dirty Soda with other nostalgic treats like s’mores or a bowl of warm, gooey chocolate chip cookies for an unforgettable flavor adventure!

Make Ahead Options

These Campfire Cola Dirty Soda drinks are perfect for busy home cooks who want to impress with minimal fuss! You can prepare the creamy layer of heavy cream and sweetened condensed milk up to 24 hours in advance—just whisk them together in a jar, seal tightly, and refrigerate. Additionally, have your marshmallow and chocolate syrups measured and ready to go. When you’re ready to serve, simply fill your glasses with clear ice cubes, pour in your cold Coke, and drizzle in the syrups, finishing with the creamy mix. This way, you’ll achieve those stunning layers with ease, ensuring your drink is just as delicious and eye-catching as if made fresh!

Campfire Cola Dirty Soda

Campfire Cola Dirty Soda Recipe FAQs

What type of Coke should I use for Campfire Cola Dirty Soda?
Absolutely, you can use any variety of cold Coke that you enjoy! Regular Coke will give the traditional flavor, while Diet Coke or even a caffeine-free version can be used for a lighter option. The flavor you choose will be the foundation of your indulgent drink, so pick one that brings back those nostalgic campfire memories!

How should I store leftover Campfire Cola Dirty Soda?
Store any leftover Campfire Cola Dirty Soda in an airtight container in the fridge for up to 2 days. The carbonation may fade, but you can still enjoy the flavors! Just remember to give it a gentle stir before serving to revitalize the layers.

Can I freeze the leftover cream mixture?
Yes! If you have extra cream mixture, freeze it in ice cube trays for up to 1 month. You can pop these cubes into your next soda or use them in coffee for a creamy treat. Just let them sit at room temperature for a few minutes before using so they’re easier to work with.

What if my layers don’t swirl as beautifully as expected?
No worries! If your layers don’t form perfectly, you can achieve the desired effect by pouring the cream mixture very slowly over the back of a spoon or just over the side of the glass. This technique helps create distinct layers. Remember, the swirling doesn’t just look good—it enhances the experience, too!

Is this recipe safe for kids?
Absolutely! Campfire Cola Dirty Soda is a fun and delicious treat for all ages. Just keep in mind the sweetness level—while it’s a nostalgic hit for kids, it might be best to enjoy it as an occasional indulgence. If you’re making it for very young children, consider reducing the amount of chocolate syrup to balance the sweetness.

Can I use other syrups in this recipe?
Very! Feel free to get creative with your syrups. Options like caramel, vanilla, or even strawberry add a unique twist to your Campfire Cola Dirty Soda. Experimenting with flavors can lead to delightful discoveries, making it fun to customize your drink for your family and friends!

Campfire Cola Dirty Soda: A Sweet Summer Treat You’ll Love

Campfire Cola Dirty Soda is a nostalgic, indulgent drink that combines sweet marshmallows and rich chocolate for a delightful summer treat.

  • Glass
  • Whisk
  • Jar or bowl

For the Drink

  • 1 cup cold Coke (Choose your favorite cola for the best flavor.)
  • 2 tablespoons toasted marshmallow syrup (Adds a sweet campfire flavor.)
  • 1 tablespoon chocolate syrup (For a rich, chocolaty swirl.)

For the Creamy Layer

  • 2 tablespoons heavy cream (Creates a luscious, velvety texture.)
  • 2 tablespoons sweetened condensed milk (Provides extra sweetness and creaminess.)

For Serving

  • clear ice cubes (Use clear ice for a stunning visual effect.)

Step-by-Step Instructions

  1. In a small jar or bowl, combine 2 tablespoons of heavy cream and 2 tablespoons of sweetened condensed milk. Whisk them together vigorously for about 1-2 minutes until fully combined.
  2. Fill two tall clear glasses with clear ice cubes, packed well for maximum chill.
  3. Slowly pour 1 cup of cold Coke into each glass over the ice. Let the soda fizz and settle.
  4. Gently drizzle 2 tablespoons of toasted marshmallow syrup into each glass.
  5. Pour 1 tablespoon of chocolate syrup into each glass.
  6. Slowly pour the prepared sweet cream mixture over each drink.
  7. Serve immediately with a straw or spoon.

For best taste, serve fresh and enjoy immediately. The longer it sits, the more the fizz dissipates.

Drink
American
Campfire Cola Dirty Soda, Easy Recipe, indulgent beverage, Nostalgic Treat, soda, summer drink

Filed Under: Drink

Delicious Apple Cider Float That Warms Your Heart

September 30, 2025 by grace bellamy Leave a Comment

As a chill in the air signals the arrival of sweater season, I find myself longing for cozy delights that make my heart sing. This is when my Apple Cider Float comes to life, bringing together the warmth of fresh, unfiltered apple cider and the creaminess of quality vanilla ice cream. In just 15 minutes, you can create this comforting treat that’s perfect for gatherings or a quiet night in. Not only is it super easy to whip up, but it’s also a delightful twist on traditional fall beverages that will have everyone smiling. So, are you ready to impress your family and friends with this warm, indulgent drink? Let’s dive into the recipe!

Apple Cider Float

Why is Apple Cider Float a Must-Try?

Comforting warmth: This delicious Apple Cider Float embraces the cozy flavors of fall, filling your home with an inviting aroma that feels like a hug in a mug.

Quick preparation: In just 15 minutes, you can delight your loved ones with a unique treat that requires minimal effort yet delivers maximum satisfaction.

Versatile topping options: Customize your float with optional toppings like chopped nuts or apple slices, making it perfect for any occasion.

Crowd-pleaser: This irresistible blend of sweet apple cider and creamy ice cream is sure to win over both friends and family, making it a staple at gatherings.

Perfect fall drink: Elevate your seasonal festivities with this delightful twist, and don’t forget to check out our tips for making homemade whipped cream for an extra special touch!

Apple Cider Float Ingredients

• Get ready to indulge in a delightful mix of flavors!

For the Float

  • Fresh unfiltered apple cider – the hero ingredient, providing a rich, authentic fall flavor.
  • Quality vanilla ice cream – choose a premium brand for that creamy texture and sweetness.

For Serving

  • Cinnamon sticks – not just for flavor, but they add a charming, rustic touch to your float.
  • Whipped cream – homemade or store-bought; it adds a luscious creaminess when heaped on top.
  • Caramel sauce – drizzle generously for an extra burst of sweetness that complements the cider.

Optional Toppings

  • Chopped nuts – a crunchy contrast that adds texture to your drink.
  • Apple slices – for decoration and a hint of freshness, they make your float look as good as it tastes!

This Apple Cider Float is all about comforting flavors and cozy vibes—let’s get started on creating this indulgent treat!

Step‑by‑Step Instructions for Apple Cider Float

Step 1: Warm the Cider
Pour 4 cups of fresh unfiltered apple cider into a medium saucepan and set it over medium heat. Stir occasionally as you heat the cider for about 5 minutes, or until it begins to steam gently. You’ll know it’s ready when the aroma fills your kitchen with warm, inviting notes of apple and spice.

Step 2: Prepare the Glasses
While the apple cider warms, grab your favorite glasses and use a large ice cream scoop to add two generous scoops of quality vanilla ice cream into each one. Make sure the ice cream is creamy and well-chilled for that delightful contrast with the warm cider. Set the glasses aside as you move on to the next step.

Step 3: Combine Cider and Ice Cream
Once the apple cider is steaming, carefully pour it over the scoops of vanilla ice cream in each glass until they’re filled to the top. The warmth of the cider will cause the ice cream to melt slightly, creating a beautiful and creamy float. Enjoy the sight as it swirls together in an enticing display.

Step 4: Add Final Touches
To each glass of your lovely Apple Cider Float, add a cinnamon stick for an aromatic touch. Next, pile on a generous dollop of whipped cream, letting it overflow lovingly at the edges. Finally, drizzle caramel sauce over the whipped cream, allowing it to cascade down the sides, adding both sweetness and a festive look.

Step 5: Serve Immediately
Bring the Apple Cider Floats to your table while they’re still warm, inviting your family and friends to dive into this delicious treat. The combination of creamy, warm, and sweet elements promises a delightful experience. Optional toppings like chopped nuts or apple slices can be offered on the side for those looking to add an extra crunch or flavor!

Apple Cider Float

How to Store and Freeze Apple Cider Float

Fridge: Store any leftover Apple Cider Float ingredients separately. Keep apple cider in an airtight container for up to 3 days.

Freezer: While the float itself is best served fresh, you can freeze the ice cream in an airtight container; it lasts for up to 2 months.

Reheating: If you have leftover cider, gently warm it on the stovetop before serving again.

Assembly: For the best experience, prepare the float fresh when you’re ready to serve, ensuring that ice cream stays creamy and delicious!

Expert Tips for the Best Apple Cider Float

  • Use Fresh Cider: Always opt for fresh, unfiltered apple cider for the best flavor; it’s the star of your Apple Cider Float!

  • Quality Ice Cream Counts: Choose a premium vanilla ice cream to elevate the creaminess of the float; low-quality ice cream can dilute the flavor.

  • Watch the Temperature: Warm the cider gently and avoid boiling; high heat can alter the delicious taste of your drink.

  • Whipped Cream Technique: For a perfect whipped topping, chill your mixing bowl and beat the cream until soft peaks form to get that luscious look and texture.

  • Presentation Matters: Add toppings like nuts or apple slices just before serving to keep them fresh and appealing; they make your float look even more inviting!

Make Ahead Options

These Apple Cider Floats are perfect for busy home cooks looking to save time! You can prep the fresh unfiltered apple cider up to 3 days in advance; simply pour it into an airtight container and refrigerate it until you’re ready to use it. For the ice cream, scoop out portions into glasses and cover them with plastic wrap, keeping them chilled in the freezer, for up to 24 hours. When you’re ready to serve, warm the cider in a saucepan as instructed, then combine it with the pre-scooped ice cream. Remember, adding the whipped cream and caramel sauce should be done right before serving to maintain that luscious texture. Enjoy your delightful Apple Cider Float with minimal fuss!

Apple Cider Float Variations

Feel free to tweak this delightful recipe to match your taste buds and dietary needs!

  • Dairy-Free: Substitute the vanilla ice cream with a coconut or almond milk-based ice cream for a creamy yet dairy-free delight. Your float will still taste indulgent!

  • Spiced Cider: Add cloves or allspice to the warming cider for an extra layer of spice that truly embodies the essence of fall. These spices will dance with the apple’s natural sweetness.

  • Nutty Twist: Incorporate chopped pecans or walnuts as a topping to add a crunchy texture and nutty flavor to your float. They create a delicious contrast to the sweet apple cider and creamy ice cream.

  • Caramel Apple Float: Blend in a dash of apple pie spice into the caramel sauce for a delightful flavor enhancement that echoes the flavors of the beloved dessert. It’s a sweet twist that will have you reminiscing!

  • Heat Lovers: For those who crave a kick, add a splash of cayenne pepper or a few slices of jalapeño to the cider as it warms. The heat from the spices will balance beautifully with the sweetness of the float.

  • Frozen Cider: Freeze the apple cider into ice cubes and use them instead of ice cream for a refreshing take. This cooling version will be perfect for warmer fall days.

  • Chocolate Swirl: Drizzle some chocolate sauce over the whipped cream for a luxurious flavor combination that chocolate lovers won’t be able to resist. It adds a delicious depth to the overall taste!

  • Autumn Blend: Mix in a splash of orange or cranberry juice to the cider for a fruity flavor fusion that brightens the drink and can elevate holiday vibes. Enjoy a beautiful burst of color and taste!

What to Serve with Apple Cider Float

As the warm notes of apple cider envelop you, creating the perfect cozy atmosphere, consider these delightful pairings to elevate your gathering.

  • Cinnamon Sugar Donuts: These soft, fluffy treats echo the fall flavors, making them a fun, sweet accompaniment to your float.
  • Nutty Apple Crisp: The crunchy oat-topped fruit dessert offers a delightful contrast to the creamy drink, creating a comforting duo.

Consider serving these together for an indulgent experience. The sweet flavors and crunch of the crisp pair perfectly with the Apple Cider Float, allowing your guests to enjoy a range of textures and tastes.

  • Caramel Corn: Sweet and slightly salty, this nutty snack is a playful treat that brings out the caramel notes in your float.
  • Cheesecake Bites: Rich and creamy, these small desserts balance the warm apple cider beautifully while providing a luxurious touch.

Adding a plate of these bites will create an inviting spread that makes your gathering feel complete. They’re sure to become crowd-pleasers, adding an element of surprise and delight.

  • Spiced Tea: A warm cup of spiced tea can complement the apple notes in your float, adding a layer of warmth and coziness.
  • Pumpkin Muffins: Moist and bursting with flavor, these muffins bring seasonal cheer and enhance the festive feel of your meal.

The combination of warm beverages and delicious snacks enhances the comforting experience, inviting everyone to stay a little longer and savor the flavors of fall.

Apple Cider Float

Apple Cider Float Recipe FAQs

How do I choose the right apple cider?
Absolutely! For the best flavor, opt for fresh, unfiltered apple cider. Look for cider that’s cloudy and rich in color, avoiding any that has a metallic taste or looks overly processed. The fresher the cider, the more vibrant your Apple Cider Float will be!

What’s the best way to store leftover apple cider?
Very! Store any leftover apple cider in an airtight container in your fridge. It can last up to 3 days. If you have a larger batch, you can consider freezing portions for later use, just be sure to thaw it in the refrigerator before reheating.

Can I freeze the Apple Cider Float?
Absolutely! While the float should ideally be enjoyed fresh, you can freeze the vanilla ice cream in an airtight container for up to 2 months. If you wish to save some cider, freeze it in separate portions, then thaw overnight in the refrigerator before gently heating it to serve again.

What should I do if my whipped cream isn’t thickening properly?
No worries! If your whipped cream isn’t thickening, it could be due to not enough fat content or the cream being too warm. Make sure to use heavy whipping cream and chill your mixing bowl before whipping. Start mixing on low speed, slowly increasing to medium-high speed until soft peaks form. This can take about 3-5 minutes. If it’s still not thick, try adding a teaspoon of cornstarch or powdered sugar!

Can pets have any ingredients in this recipe?
Very! Vanilla ice cream and apple cider are not suitable for pets due to the sugar content. If you want to share the fun, consider offering your furry friends a small treat of plain apple slices or unflavored, unsweetened yogurt instead. Always check if any ingredients may trigger allergies in your pets!

Delicious Apple Cider Float That Warms Your Heart

This Apple Cider Float combines warm apple cider and creamy vanilla ice cream for the perfect comforting drink.

  • Medium saucepan
  • ice cream scoop
  • glasses

For the Float

  • 4 cups fresh unfiltered apple cider (hero ingredient)
  • 2 scoops quality vanilla ice cream (choose a premium brand)

For Serving

  • 2 sticks cinnamon sticks (adds flavor and charm)
  • 1 cup whipped cream (homemade or store-bought)
  • 1/4 cup caramel sauce (drizzle generously)

Optional Toppings

  • 1/2 cup chopped nuts (adds texture)
  • 1 apple slices (for decoration)

Step-by-Step Instructions

  1. Pour 4 cups of fresh unfiltered apple cider into a medium saucepan over medium heat.
  2. Add two generous scoops of quality vanilla ice cream into each glass.
  3. Once the apple cider is steaming, carefully pour it over the scoops of vanilla ice cream.
  4. Add a cinnamon stick to each glass, followed by a generous dollop of whipped cream.
  5. Drizzle caramel sauce over the whipped cream and serve immediately.

Store leftover ingredients separately; cider lasts 3 days refrigerated while ice cream lasts 2 months in the freezer.

Drink
American
Apple Cider Float, comfort beverage, cozy drink, fall drink, indulgent treat

Filed Under: Drink

Delightful Midnight Malibu Dirty Soda You’ll Crave Tonight

September 30, 2025 by grace bellamy Leave a Comment

As I lounged on a warm summer evening, the sounds of laughter and chatter filled the air, and I realized just how important it is to savor the little moments. Enter the Midnight Malibu Dirty Soda—a delightful twist on a classic favorite that’s perfect for bringing a touch of the tropics to your gatherings. This refreshing concoction marries the fizzy kick of Dr Pepper with velvety coconut cream and a hint of luscious blackberry syrup, creating a unique drink that’s not only fun to make but also a crowd-pleaser. The best part? It’s incredibly quick to whip up, so you can focus more on enjoying time with loved ones and less on complex prep work. Curious about how a simple drink can transport you to a beachside paradise? Let’s dive into this flavorful journey together!

Midnight Malibu Dirty Soda

Why is Midnight Malibu Dirty Soda so special?

Refreshingly Unique: This drink combines bold flavors for an extraordinary taste experience that your taste buds will adore.

Quick and Easy: With just a few simple ingredients, you can whip up this delightful beverage in under 10 minutes, allowing you to focus on enjoyment and relaxation.

Perfect for Any Occasion: Whether it’s a sunny afternoon or a cozy gathering, this refreshing treat brings an element of fun to any setting.

Tropical Vibes: The coconut cream and blackberry syrup create a beach-inspired escape that transports you straight to your favorite tropical destination with every sip.

Crowd-Pleaser: Serve it at parties, BBQs, or even as a refreshing after-dinner drink—everyone will be asking for seconds! Don’t forget to check out our guide on homemade syrup for that extra special touch in your drinks.

Midnight Malibu Dirty Soda Ingredients

Dive into the tropical flavors of this refreshing drink with these simple yet delightful ingredients!

For the Soda

  • 12 oz Dr Pepper – Chill it like best friends, straight from the fridge for maximum fizz!

For the Creamy Mix

  • 2 tablespoons coconut cream – Thick and creamy, it adds a luscious texture that complements the soda perfectly.
  • ½ teaspoon vanilla extract – Pure vanilla elevates the flavor profile, bringing warmth and depth.

For the Sweetness

  • 1-2 tablespoons blackberry syrup – Whether homemade or store-bought, it adds a sweet and tangy touch that makes your Midnight Malibu Dirty Soda truly irresistible!

For Serving

  • Ice cubes – Perfect for keeping your drink refreshingly cool, they’re a must for that ideal beachy vibe!

Step‑by‑Step Instructions for Midnight Malibu Dirty Soda

Step 1: Prepare Your Glass
Start by filling a tall glass all the way with ice cubes, making sure to leave just a bit of space at the top. This will ensure your Midnight Malibu Dirty Soda stays refreshingly cold and bubbly. Aim for a glass that holds at least 16 ounces to accommodate the fizzy drink and creamy toppings.

Step 2: Add the Dr Pepper
Next, slowly pour the cold Dr Pepper over the ice until the glass is filled to about ¾ full. The ice will make a satisfying clinking sound as the soda cascades, creating a delightful sight. This cold base is essential for the perfect blend of flavors in your Midnight Malibu Dirty Soda.

Step 3: Drizzle in the Blackberry Syrup
Take 1–2 tablespoons of blackberry syrup and drizzle it gently into the soda. The syrup should swirl down through the Dr Pepper, creating beautiful streaks of color. This step not only adds sweetness but also gives your drink a vibrant, eye-catching appearance that invites everyone to take a sip.

Step 4: Mix Coconut Cream and Vanilla
In a small cup, combine the 2 tablespoons of thick coconut cream with ½ teaspoon of pure vanilla extract. Use a spoon to stir the mixture together until it becomes creamy and smooth. This luscious topping will float on top of your Midnight Malibu Dirty Soda, enriching each sip with tropical flavors.

Step 5: Pour the Cream Mixture
Carefully pour the coconut cream and vanilla mix over the back of a spoon into the glass. This technique allows the creamy mixture to float elegantly atop the fizzy soda, creating a beautiful layered effect. The contrast of colors will enhance the appeal of your Midnight Malibu Dirty Soda.

Step 6: Mix and Enjoy
Finally, use a straw or spoon to gently mix the layers together, ensuring the coconut cream and vanilla blend seamlessly with the Dr Pepper and blackberry syrup. Take a sip to experience the delightful fusion of flavors in this refreshing drink. Revel in the moment, and enjoy every drop of your Midnight Malibu Dirty Soda!

Midnight Malibu Dirty Soda

What to Serve with Midnight Malibu Dirty Soda

As you sip on the refreshing flavors of this tropical drink, why not elevate your gathering with some delightful pairings?

  • Savory Sliders: Mini beef or veggie sliders make for a satisfying complement, balancing the sweetness of the Midnight Malibu Dirty Soda.

  • Tropical Fruit Salad: Fresh fruits like pineapple and mango enhances the beachy vibes while adding a sweet, refreshing crunch.

  • Spicy Nachos: The heat from spicy nachos creates a delightful contrast with the drink’s creamy and fruity notes, tantalizing your taste buds.

  • Coconut Shrimp: Crispy coconut shrimp brings a savory, textural element that harmonizes with the coconut in the drink, transporting you to the tropics with each bite.

  • Chilled Guacamole: Creamy and cool, this dip pairs beautifully with the drink, adding richness along with a zesty kick that pleases the palate.

  • Lemon Sorbet: For dessert, a scoop of lemon sorbet refreshes the senses with its citrusy brightness and is a perfect sweet ending to your tropical feast.

  • Rum Punch: Elevate the party spirit with a fruity rum punch that shares the coconut essence found in the Midnight Malibu Dirty Soda, creating a wonderful synergy.

  • Chocolate-Covered Strawberries: Indulge in these decadent treats to satisfy the sweet tooth, their rich chocolate taste playing off the drink’s fruity notes and creamy finish.

How to Store and Freeze Midnight Malibu Dirty Soda

Fridge: Store any leftover Midnight Malibu Dirty Soda in an airtight container in the fridge for up to 2 days. Give it a gentle stir before serving to reblend the flavors.

Ice Cubes: If you can’t finish your drink, pour the leftovers into ice cube trays and freeze them. Use these cubes to create a quick and refreshing drink later!

Reheating: Refrain from reheating the Midnight Malibu Dirty Soda; it’s best enjoyed cold and refreshing, so stick with chilled servings for the ultimate experience.

Helpful Tricks for Midnight Malibu Dirty Soda

Chill Your Ingredients: Always use cold Dr Pepper for the best fizz! A cooler drink means a more refreshing Midnight Malibu Dirty Soda.

Layering Technique: Pour the coconut cream mixture gently over the back of a spoon to create beautiful layers. This enhances the visual appeal of your drink!

Syrup Choices: Experiment with homemade blackberry syrup for added flair, or try different fruit syrups to customize your Midnight Malibu Dirty Soda.

Don’t Rush Mixing: Allow the coconut cream to float before mixing. Gently stir to keep the creamy texture intact as you enjoy each sip.

Perfect Ice Ratio: Use enough ice to keep your drink cold, but avoid overfilling the glass which can dilute the flavors. Enjoy your tropical escape!

Make Ahead Options

These Midnight Malibu Dirty Soda drinks are perfect for meal prep! You can prepare the coconut cream and vanilla mixture up to 24 hours in advance; simply mix the 2 tablespoons of coconut cream with ½ teaspoon of vanilla extract and store it in an airtight container in the refrigerator. Additionally, the blackberry syrup can be made ahead (if homemade) and kept for up to 3 days. When ready to serve, simply fill a tall glass with ice, pour in the chilled Dr Pepper, drizzle in the syrup, and top with your prepared coconut cream and vanilla mixture. This way, you’ll have a refreshing drink at your fingertips with minimal effort—perfect for busy weeknights or spontaneous gatherings!

Midnight Malibu Dirty Soda Variations

Feel free to mix things up and personalize your Midnight Malibu Dirty Soda with these fun variations!

  • Dairy-Free: Swap coconut cream with oat or almond milk for a lighter twist that’s perfect for dairy-sensitive friends.
    Dairy-free doesn’t have to mean flavor-free! The nutty notes from oat or almond milk can elevate your drink in delightful ways.

  • Fruity Flair: Add a handful of fresh berries or slices of tropical fruit like mango or pineapple for an explosion of flavor.
    These vibrant additions not only enhance the taste but also make your drink visually stunning—perfect for summer gatherings or brunch with friends!

  • Sparkling Alternative: Try using sparkling water or tonic instead of Dr Pepper for a refreshing, zero-calorie alternative.
    If you’re looking for a lighter option, the fizzy nature of sparkling water still keeps the fun alive while allowing other flavors to take center stage.

  • Spicy Kick: Add a dash of chili powder or a slice of fresh jalapeño for a hint of heat that contrasts beautifully with the sweetness.
    Don’t be afraid to elevate your drink with a bit of spice! This can transform your Midnight Malibu Dirty Soda into an exciting adventure for your palate.

  • Gourmet Syrups: Swap blackberry syrup for flavors like passion fruit, mango, or even jalapeño-infused syrup for a gourmet touch.
    Experimenting with different syrups allows you to create your signature drink that impresses every guest and keeps them wanting more.

  • Herbal Essence: Stir in some fresh mint or basil leaves for an aromatic experience that adds freshness and complexity.
    Fresh herbs can brighten up your drink and add an unexpected depth that compliments the other flavors beautifully.

  • Coconut Milk Smoothie: Blend the ingredients with ice for a smoothie-style treat that’s even creamier and more indulgent.
    Going the smoothie route can turn your Midnight Malibu Dirty Soda into a dessert-like beverage, perfect for a hot day!

Don’t forget to explore the tropical vibes! Try making your own homemade syrup or add colorful fruit garnishes to charm your guests. Enjoy crafting your own version of this delightful drink!

Midnight Malibu Dirty Soda

Midnight Malibu Dirty Soda Recipe FAQs

How do I select the best ingredients for my Midnight Malibu Dirty Soda?
Absolutely! For the best taste, choose ripe, fresh ingredients. Look for coconut cream that’s thick and creamy, and if you’re using fresh blackberries for your syrup, select plump ones without dark spots. For the Dr Pepper, grab a cold can from the fridge to ensure maximum fizz and enjoyment!

How should I store leftovers of Midnight Malibu Dirty Soda?
Very easily! Pour any leftover Midnight Malibu Dirty Soda into an airtight container and pop it in the fridge. It should stay fresh for up to 2 days. Just remember to give it a gentle stir before serving again to redistribute those delightful flavors.

Can I freeze Midnight Malibu Dirty Soda?
Yes, you can! If you want to save some for a later treat, pour the leftover drink into ice cube trays and freeze. These flavorful ice cubes can be used to create a mini Midnight Malibu Dirty Soda later by blending them with fresh soda and a splash of coconut cream—talk about a creative twist!

What if my Midnight Malibu Dirty Soda doesn’t layer well?
No worries! This can happen sometimes if the coconut cream is too thick or the pour is too fast. To fix it, ensure you mix the coconut cream and vanilla thoroughly before pouring. Use the back of a spoon to guide the mixture gently when adding it to the soda. This will help achieve those beautiful layers you desire.

Is Midnight Malibu Dirty Soda suitable for everyone?
Yes! However, if you have dietary considerations such as lactose intolerance, feel free to substitute coconut cream with a lactose-free cream alternative. Just double-check any syrups you use to ensure they’re free from common allergens. It’s a drink everyone can enjoy!

Delightful Midnight Malibu Dirty Soda You’ll Crave Tonight

The Midnight Malibu Dirty Soda is a refreshing twist on a classic favorite, combining fizzy Dr Pepper with coconut cream and blackberry syrup.

  • tall glass
  • Small cup
  • spoon

For the Soda

  • 12 oz Dr Pepper (Chill it for maximum fizz!)

For the Creamy Mix

  • 2 tablespoons coconut cream (Adds a luscious texture.)
  • ½ teaspoon vanilla extract (Enhances flavor profile.)

For the Sweetness

  • 1-2 tablespoons blackberry syrup (Adds sweet and tangy touch.)

For Serving

  • Ice cubes (Keeps the drink refreshingly cool.)

Step-by-Step Instructions

  1. Start by filling a tall glass all the way with ice cubes, leaving a bit of space at the top.
  2. Slowly pour the cold Dr Pepper over the ice until the glass is filled to about ¾ full.
  3. Drizzle 1–2 tablespoons of blackberry syrup gently into the soda.
  4. In a small cup, combine 2 tablespoons of coconut cream with ½ teaspoon of vanilla extract and stir until creamy.
  5. Carefully pour the coconut cream and vanilla mix over the back of a spoon into the glass.
  6. Gently mix the layers together with a straw or spoon and enjoy.

Chill your ingredients for the best fizz and enjoy your tropical escape.

Drink
Tropical
easy cocktail, Midnight Malibu Dirty Soda, party drink, refreshing drink, Summer Beverage, Tropical Flavors

Filed Under: Drink

Whip Up This Fun Bat Wing Bubble Tea Mocktail Today

September 29, 2025 by grace bellamy Leave a Comment

As the afternoon sun dips toward the horizon, I find myself craving something both refreshing and unique—especially when the usual drink choices just won’t do. Enter the Bat Wing Bubble Tea Mocktail, a whimsical twist on classic bubble tea that adds a splash of personality to any gathering. Not only is this delightful drink incredibly quick to whip up, but it’s also a vibrant, healthy alternative to sugary store-bought options. With fresh raspberries and the playful texture of boba pearls, every sip feels like a mini celebration. Curious how this fun mocktail can elevate your next get-together or cozy night in? Let’s dive into the recipe!

Bat Wing Bubble Tea Mocktail

Why is Bat Wing Bubble Tea Mocktail a Must-Try?

Refreshingly Unique: This mocktail brings a playful twist to your usual beverage choices, making it a standout at any party.

Quick & Easy: With only 25 minutes from start to finish, this recipe is perfect for those spontaneous get-togethers or a cozy evening at home.

Fruity & Fun: The blend of fresh raspberries with the chewy boba pearls creates a delightful balance of flavors and textures that will leave your taste buds dancing.

Customizable Twist: Feel free to add a splash of your favorite fruit juices or other fruits for a personalized touch—there’s no wrong way to enjoy this drink!

Crowd-Pleasing Appeal: Whether you’re entertaining guests or treating yourself, this Bat Wing Bubble Tea Mocktail will impress everyone with its vibrant color and delicious flavor.

Experience the fun and creativity of homemade drinks with this easy recipe!

Bat Wing Bubble Tea Mocktail Ingredients

• You’ll love how easy it is to gather these fresh ingredients!

For the Tea Base

  • Black tea – Choose a high-quality loose leaf or a bag for the best flavor.
  • Brown sugar – This adds a lovely depth of sweetness to balance the tartness of raspberries.

For the Boba

  • Quick-cook black tapioca pearls (boba) – These are ready in a jiffy and bring that cherished chewy texture to the mocktail.

For the Fruit

  • Fresh raspberries – Use ripe ones for a burst of natural sweetness; they’ll also create a beautiful color.

For the Fizz

  • Cold sparkling water – This elevates the drink’s refreshing quality; opt for flavored sparkling water for an extra zing.
  • Ice cubes – Keeping your drink chilled is essential for maximum enjoyment.

For Garnish

  • Black food coloring (optional) – A drop or two can enhance the fun, giving your drink a dramatic look.
  • Lemon or lime slice – This adds a citrusy twist and a beautiful presentation, making it Instagram-ready.

Dive into the world of delicious homemade drinks with this vibrant Bat Wing Bubble Tea Mocktail!

Step‑by‑Step Instructions for Bat Wing Bubble Tea Mocktail

Step 1: Brew the Tea
Start by boiling water in a kettle and then steep one bag of black tea or one teaspoon of loose black tea in half a cup of steaming water for 3 to 5 minutes. Once the tea reaches a rich, dark color, remove the tea bag or strain out the leaves. Allow the brewed tea to cool to room temperature for a refreshing base for your Bat Wing Bubble Tea Mocktail.

Step 2: Prepare the Boba Pearls
While the tea is cooling, cook the quick-cook black tapioca pearls according to the package instructions, usually around 5-7 minutes in boiling water. After cooking, rinse the pearls under cold water to stop the cooking process, then soak them in a bowl with brown sugar for a few minutes, creating a sweet syrup that will enhance the mocktail.

Step 3: Mash the Raspberries
In a medium-sized bowl, take fresh raspberries and mash them with a fork until they become nicely juicy. This should take about 2 minutes. Aim for a vibrant, pulpy mixture that captures the essence of raspberries. Set the bowl aside; you’ll combine this fruity delight with the other elements of your Bat Wing Bubble Tea Mocktail soon.

Step 4: Mix the Base Ingredients
In a large glass, pour in the cooled black tea, then add your mashed raspberries along with a spoonful of the brown sugar syrup you made with the boba pearls. Stir gently yet thoroughly to combine these flavorful components, which will provide a beautiful, colorful base for your drink.

Step 5: Add Ice and Sparkling Water
Next, fill your glass with ice cubes to create a chilled base for your Bat Wing Bubble Tea Mocktail. After the ice is settled, slowly pour in 3/4 cup of cold sparkling water, allowing the bubbles to add a lightness and fizz to your drink. Stir gently to mix the flavors without disrupting the carbonation.

Step 6: Incorporate the Boba Pearls
Spoon the cooked boba pearls into the glass, letting them settle at the bottom where they’ll await your first sip. If you desire a darker appearance for your mocktail, add 1-2 drops of black food coloring and give it a gentle stir. The boba and color enhancement will bring your drink to life!

Step 7: Garnish Your Drink
For a finishing touch, garnish your Bat Wing Bubble Tea Mocktail with extra fresh raspberries on top. Optionally, add a slice of lemon or lime for an eye-catching presentation and a zesty aroma. This playful garnish adds to the visual appeal and complements the fruity flavors of your mocktail.

Step 8: Serve and Enjoy
Your Bat Wing Bubble Tea Mocktail is now ready to serve! Grab a thick bubble tea straw, pour the vibrant drink into a cozy setting, and enjoy it immediately. Whether it’s for a gathering or a treat for yourself, this mocktail promises a delightful experience in every sip.

Bat Wing Bubble Tea Mocktail

What to Serve with Bat Wing Bubble Tea Mocktail

As you sip on this enchanting drink, why not enhance your gathering with a few irresistible pairings that will dazzle your guests?

  • Savory Spring Rolls: These crispy treats provide a delightful contrast to the sweet mocktail. Their fresh veggies and crunchy texture create a perfect balance.

  • Cucumber Sandwiches: Light and refreshing, these small bites offer a cool complement to the berry flavors. They’re easy to prepare and look stunning on the table!

  • Caramel Popcorn: The crunchy-sweet popcorn plays well with the fruity drink, creating an engaging flavor experience that’s both playful and satisfying.

  • Mini Fruit Tartlets: With their rich cream and fresh fruit, these petite desserts echo the raspberry notes in your mocktail, making for a colorful, harmonious finish.

  • Lemonade Slushies: Add a fun twist to your drink selection with these icy sips. Their tartness helps balance the sweetness of the Bat Wing Bubble Tea Mocktail.

  • Chocolate-Covered Strawberries: Indulge in a luxurious pairing that marries rich chocolate with fresh berries, enhancing that playful vibe you cherish in every sip.

Pairing these treats with your Bat Wing Bubble Tea Mocktail will create a memorable experience that feels both festive and delicious!

Expert Tips for Bat Wing Bubble Tea Mocktail

• Choose Quality Tea: Opt for high-quality loose black tea for a rich flavor in your Bat Wing Bubble Tea Mocktail that elevates the overall experience.

• Prepare Boba Right: Ensure you follow the package directions for cooking boba pearls; overcooking can lead to a mushy texture.

• Fresh is Best: Use ripe, fresh raspberries for the sweetest taste and most vibrant color; they make a big difference in your mocktail.

• Customize Your Fizz: Experiment with flavored sparkling water to give your mocktail an extra zing; blackberry or lime flavors pair particularly well.

• Avoid Over-Stirring: Gently stir your drink after adding sparkling water; over-stirring can reduce the fizz and impact the lightness of your mocktail.

How to Store and Freeze Bat Wing Bubble Tea Mocktail

Fridge: Store any leftover Bat Wing Bubble Tea Mocktail in an airtight container in the fridge for up to 2 days. The fizz may diminish, but the flavors will remain delightful.

Freezer: For long-term storage, pour the mixed ingredients (excluding boba and ice) into ice cube trays and freeze. Use within 1 month for best flavor.

Boba Pearls: Cooked boba pearls can be stored in syrup in the fridge for up to 3 days, but they lose their ideal texture if frozen.

Reheating: If you freeze and later thaw the cocktail base, blend it with ice to revive some texture before serving, and add fresh boba pearls for that classic bubble tea experience.

Bat Wing Bubble Tea Mocktail Variations

Feel empowered to craft your mocktail masterpiece with playful spins and swaps that excite your taste buds!

  • Non-Dairy: Substitute sparkling water with non-dairy milk for a creamier texture and a different flavor profile.
  • Sweetener Swap: Use maple syrup or agave nectar instead of brown sugar for a unique flavor twist that complements the raspberries.
  • Different Berries: Swap out raspberries for strawberries or blackberries, adding a different berry personality to your mocktail.
  • Herbal Infusion: Try adding a sprig of fresh mint or basil to the mixture; it adds a refreshing herbal note that’s simply divine.
  • Citrus Zest: Grate some lemon or lime zest into your mixture for an extra citrus kick that brightens up every sip.
  • Punch It Up: Add a dash of ginger syrup or fresh ginger for a spicy twist that tantalizes the palate.
  • Chai Twist: Use chai tea instead of black tea for an aromatic twist; the spices will beautifully enhance the fruity flavors.
  • Bubbly Boost: For a bubbly upgrade, use flavored sparkling water like lemon-lime or berry blend to amplify the fruity notes.

No matter how you choose to tweak this recipe, you’re sure to create a drink that reflects your unique style. For more inspiration, check out our delightful how to store and freeze Bat Wing Bubble Tea Mocktail or explore serving suggestions that will elevate your drink experience!

Make Ahead Options

These Bat Wing Bubble Tea Mocktails are perfect for busy home cooks who want to save time without skimping on flavor! You can brew the black tea and refrigerate it for up to 24 hours ahead of time, ensuring a flavorful base that’s ready to go. The boba pearls can also be cooked in advance and stored in a sugar syrup to keep them sweet and chewy for up to 3 days. When you’re ready to serve, simply mix the cooled tea with the raspberry mash, add ice cubes and sparkling water, incorporate the boba, and garnish. With these prep steps, you’ll enjoy delightful mocktails in a fraction of the time, just as delicious as when freshly made!

Bat Wing Bubble Tea Mocktail

Bat Wing Bubble Tea Mocktail Recipe FAQs

What type of black tea should I use for the Bat Wing Bubble Tea Mocktail?
I recommend using high-quality loose black tea or a tea bag for the best flavor. This choice can truly enhance the richness of your mocktail and provide a beautiful contrast to the sweetness of the raspberries.

How should I store leftover Bat Wing Bubble Tea Mocktail?
Absolutely! If you have leftovers, store your Bat Wing Bubble Tea Mocktail in an airtight container in the fridge for up to 2 days. While the carbonation may lessen, the flavors remain delightful for enjoying later!

Can I freeze the Bat Wing Bubble Tea Mocktail?
Very! For long-term storage, pour the mixed ingredients (but leave out the boba pearls and ice) into ice cube trays and freeze them. Aim to use these frozen cubes within 1 month for optimal flavor. When you’re ready to enjoy, just blend with fresh ice!

What if my cooked boba pearls get hard?
If your cooked boba pearls become hard, you can revive them by soaking them in warm water for around 10-15 minutes. It’s best to enjoy boba fresh, as they can lose their ideal texture after a few hours.

Can I adjust the sweetness of the Bat Wing Bubble Tea Mocktail?
Absolutely! You can adjust the sweetness by adding more or less brown sugar depending on your taste preference. Alternatively, you could use honey or maple syrup for a different flavor profile. Taste as you mix to find your perfect balance!

Are there any dietary considerations for this mocktail?
Yes! If you’re serving the Bat Wing Bubble Tea Mocktail to guests with allergies, it’s essential to be mindful of the ingredients. The boba pearls generally contain tapioca and may have cross-contamination with gluten, so check the packaging. Also, fresh raspberries are safe for most diets, but ensure to avoid any allergens when serving.

Whip Up This Fun Bat Wing Bubble Tea Mocktail Today

Enjoy this refreshing Bat Wing Bubble Tea Mocktail, a vibrant and healthy alternative that’s quick to make.

  • Kettle
  • Medium bowl
  • Large glass
  • spoon
  • Straw

For the Tea Base

  • 1 bag black tea (Choose high-quality loose leaf or a bag)
  • 2 tablespoons brown sugar (Adds sweetness to balance tartness)

For the Boba

  • 1 cup quick-cook black tapioca pearls (boba) (Ready in a jiffy)

For the Fruit

  • 1 cup fresh raspberries (Use ripe for sweetness and color)

For the Fizz

  • 3/4 cup cold sparkling water (Opt for flavored sparkling water for extra zing)
  • 1 cup ice cubes (Essential for chilling the drink)

For Garnish

  • 1-2 drops black food coloring (Optional for dramatic look)
  • 1 slice lemon or lime (Adds citrusy twist and nice presentation)

Step-by-Step Instructions

  1. Boil water and steep black tea for 3 to 5 minutes. Cool to room temperature.
  2. Cook boba pearls according to package instructions, usually 5-7 minutes in boiling water. Rinse under cold water and soak in brown sugar.
  3. Mash fresh raspberries in a bowl until juicy.
  4. Combine cooled tea, mashed raspberries, and brown sugar syrup in a large glass.
  5. Add ice cubes, then slowly pour in sparkling water. Stir gently.
  6. Incorporate boba pearls, adding food coloring if desired, and stir gently.
  7. Garnish with more raspberries and a slice of lemon or lime.
  8. Serve immediately with a thick straw.

This mocktail is a fun way to enjoy a refreshing drink and can be customized easily with your favorite flavors.

Drink
Asian
Bat Wing Bubble Tea Mocktail, bubble tea, Easy Recipe, mocktail, Raspberry Drink, refreshing drink

Filed Under: Drink

Sweet and Refreshing Glinda’s Pink Potion Delight

September 29, 2025 by grace bellamy Leave a Comment

A sudden nostalgia hits me as I watch the vibrant swirl of colors dance inside my glass, reminiscent of childhood fantasies. Enter Glinda’s Pink Potion, a whimsical drink that transforms an ordinary day into something extraordinary in just five minutes. This delightful concoction isn’t just a treat for the eyes; it’s also a refreshing escape from the mundane, packed with the tropical flavors of mango and dragonfruit. It’s quick to prep, making it the perfect choice for those hectic days when you crave something special but don’t have the time. Plus, the airy strawberry cold foam adds a fun twist that’s sure to impress friends and family alike. Can you imagine what this enchanting beverage will do for your next gathering? Let’s dive into the magic of this potion together!

Glinda's Pink Potion

Why is Glinda’s Pink Potion a Must-Try?

Vibrant and eye-catching, this drink adds a touch of color to any occasion and sparks joy in every sip. Quick preparation means you’ll blend this delightful potion in just five minutes, making it ideal for unexpected guests or a cozy night in. Tropical flavors come together beautifully; the mango and dragonfruit transport you to a sunny paradise. Fun for all ages, Glinda’s Pink Potion promises to charm your friends and family with its whimsical look and delicious taste. If you love fruity beverages, don’t miss out on this perfect refresher!

Glinda’s Pink Potion Ingredients

For the Refresher Base

  • Water – The foundation of this drink, bringing all the ingredients together.
  • Mango Nectar – Adds a tropical sweetness that complements the dragonfruit perfectly.
  • Granulated Sugar – Sweetens the potion; adjust according to your taste preferences.
  • Dragonfruit Powder – The magical ingredient that gives Glinda’s Pink Potion its signature color.
  • Citric Acid – Provides a zesty kick, balancing the sweetness of the mango.

For the Cold Foam

  • Barista-Style Oat Milk (or Heavy Cream) – Creates a creamy texture; oat milk is a great dairy-free option.
  • Strawberry Syrup – Infuses the cold foam with a delightful strawberry flavor that pairs beautifully with the refresher base.
  • Soy Milk (preferably barista blend) – Helps achieve a frothy consistency while adding a hint of creaminess.

For the Final Touch

  • Mango Dragonfruit Refresher Base – A key component of the drink that enhances the tropical essence.
  • Sweetened Coconut Milk – Adds richness and a hint of coconut flavor for a truly decadent sip.
  • Ice – Essential for that refreshing chill; feel free to load it up!
  • Freeze-Dried Dragonfruit Pieces – A decorative and tasty garnish that enhances the drink’s charm.
  • Pink & Green Sprinkles (optional for topping) – Add a festive flair that kids and adults will love!

Get ready to whisk up this enchanting drink; Glinda’s Pink Potion is about to become your new go-to refreshment!

Step‑by‑Step Instructions for Glinda’s Pink Potion

Step 1: Make the Refresher Base
In a medium saucepan, combine 1 ½ cups of water, ⅓ cup of mango nectar, ⅓ cup of granulated sugar, 1 tablespoon of dragonfruit powder, and ½ teaspoon of citric acid. Heat the mixture over low heat, whisking continuously for about 3 minutes until the powder and acid dissolve completely, creating a smooth vibrant base. Once done, remove from heat and allow it to cool slightly.

Step 2: Transfer the Mixture
After the refresher base has cooled, carefully pour it into a large jar with a lid. This makes it easy to store and use later. You can keep this base chilled in your refrigerator, so it’s ready whenever you’re craving Glinda’s Pink Potion. Ensure the lid is securely closed to maintain freshness.

Step 3: Prepare the Strawberry Cold Foam
In a small mason jar or glass, combine the barista-style oat milk (or heavy cream), strawberry syrup, and soy milk (preferably barista blend). Using a milk frother, froth this mixture for 20-30 seconds until it becomes pale and fully whipped, achieving a light, airy consistency. Set this delightful cold foam aside while you move on to the next step.

Step 4: Mix Glinda’s Pink Potion
Grab a cocktail shaker or large mason jar and fill it with ice. Pour in ½ cup of the mango dragonfruit refresher base, followed by ½ cup of sweetened coconut milk and 1 tablespoon of freeze-dried dragonfruit. Secure the lid tightly and shake vigorously for about 15 seconds until all ingredients are well combined, creating a colorful and refreshing drink mixture.

Step 5: Serve and Garnish
Strain the concoction from your shaker into a tall glass filled with ice. For added flair, stir in more freeze-dried dragonfruit pieces if desired. Finish this enchanting Glinda’s Pink Potion by spooning the strawberry cold foam on top, and sprinkle with pink and green sprinkles for a magical touch. Your potion is ready to enjoy!

Glinda's Pink Potion

Variations & Substitutions for Glinda’s Pink Potion

Feel free to let your creativity shine by customizing Glinda’s Pink Potion to suit your taste buds!

  • Dairy-Free: Substitute barista-style oat milk and heavy cream with coconut cream for a luscious, plant-based alternative.

  • Fruit Flavors: Swap the mango nectar with passion fruit juice for a tropical twist that’s equally refreshing and vibrant. It adds a different zing while maintaining that sunny charm.

  • Sweetener Alternatives: Use agave syrup or honey (if not vegan) instead of granulated sugar for a more natural sweetness that melts beautifully into the mix.

  • Taste the Tropics: Add a splash of pineapple juice to the refresher base for an extra burst of fruity flavor; this will transport you straight to the beach!

  • Texture Boost: Mix in chia seeds or flaxseeds for a delightful textural twist and added nutritional benefits that can enhance your potion’s appeal.

  • Spicy Kick: Incorporate a hint of jalapeño syrup or a dash of cayenne for warmth, turning your cooling potion into a fiery delight that’s perfect for warm evenings.

  • Citrus Zest: Infuse some lemon or lime juice into the mixer for a zesty brightness that elevates the tropical notes of the drink beautifully.

  • Mocktail Fun: Transform Glinda’s Pink Potion into an adult drink by adding a splash of vodka or rum, perfect for summer gatherings or celebrations. Pair it with tropical-inspired appetizers for a fun party vibe!

Whichever twist you choose, each version is bound to create joy and magic in your glass! For more delightful drink inspirations, don’t miss out on making Glinda’s Pink Potion the star of your gathering. And hey, if you’re in the mood for something heartier, my refreshing summer salads pair wonderfully too!

How to Store and Freeze Glinda’s Pink Potion

Fridge: Store the mango dragonfruit refresher base in an airtight jar in the fridge for up to 5 days. This makes it a breeze to whip up a quick Glinda’s Pink Potion anytime.

Freezer: While it’s best enjoyed fresh, you can freeze the refresher base in ice cube trays. Enjoy it within 2–3 months for a fun twist—just blend cubes with coconut milk for a quick treat!

Reheating: If you’ve frozen the base, allow it to thaw in the fridge overnight. You can also pop it in a small saucepan over low heat to gently warm before mixing.

Foam Storage: The strawberry cold foam should ideally be made fresh, but if stored in the fridge, consume within 1 day for the best texture.

Tips for the Best Glinda’s Pink Potion

  • Chill the Base: Ensure your refresher base is completely cooled before mixing to preserve its vibrant color and flavors.

  • Froth with Care: When making the cold foam, don’t rush the frothing process; perfect froth takes around 20-30 seconds for the best texture.

  • Customize Sweetness: Adjust the amount of granulated sugar to your taste; start with less, as the mango nectar and strawberry syrup also bring sweetness.

  • Garnish Generously: Don’t shy away from using freeze-dried dragonfruit pieces and sprinkles; they not only enhance the flavor but also elevate the presentation of Glinda’s Pink Potion.

  • Avoid Over-Shaking: Shake the mixture just enough to combine ingredients without losing the refreshing icy texture; around 15 seconds is ideal.

What to Serve with Glinda’s Pink Potion

Imagine spreading sunshine on your table with delightful companions that make each sip of this whimsical drink even more enchanting.

  • Tropical Fruit Salad: A vibrant mix of fresh mango, pineapple, and kiwi enhances the fruity flavors of Glinda’s Pink Potion, bringing a refreshing burst of sweetness.

  • Savory Coconut Shrimp: The subtle crunch of coconut paired with tender shrimp creates a perfect balance of sweet and savory, echoing the potion’s tropical allure.

  • Light Spring Rolls: Filled with fresh herbs and crisp veggies, these rolls offer a refreshing bite that complements the luscious flavors of the potion.

  • Fluffy Pancakes with Maple Syrup: Soft, pillowy pancakes soaked in rich maple syrup provide a comforting counterpart to the bright notes of your drink, perfect for a leisurely brunch.

  • Crispy Vegetable Chips: These crunchy delights add an exciting texture contrast to the drink while their saltiness makes Glinda’s Pink Potion even more delicious.

  • Sparkling Water with Lime: This effervescent beverage cleanses the palate and enhances the tropical essences of the potion, ideal for warm weather gatherings.

Each of these pairings not only amplifies the flavors of Glinda’s Pink Potion but also creates a harmony of textures and tastes that will elevate any occasion into something truly special.

Make Ahead Options

These delightful Glinda’s Pink Potion components are perfect for meal prep! You can prepare the mango dragonfruit refresher base up to 3 days in advance; simply follow steps one and two and store it in an airtight jar in the refrigerator to maintain its vibrant color and flavor. The strawberry cold foam can also be whipped up and refrigerated for up to 24 hours, but be sure to froth it again briefly before serving to restore its airy texture. When you’re ready to serve, simply mix the prepared refresher base with sweetened coconut milk and ice, shake it well, and top with the cold foam and sprinkles. This makes for a quick, refreshing drink that’s just as delicious as when made fresh!

Glinda's Pink Potion

Glinda’s Pink Potion Recipe FAQs

How do I select the best mango nectar?
Absolutely! When choosing mango nectar, look for brands that list “pure mango” as one of the first ingredients. Avoid those with high fructose corn syrup. It should have a vibrant golden color and a sweet aroma. If you can, taste a little before purchasing to ensure you’re getting a fresh flavor!

How should I store the Glinda’s Pink Potion refresher base?
For optimal freshness, store the mango dragonfruit refresher base in an airtight jar in the fridge. It will last for up to 5 days. Make sure to let it cool completely before sealing to prevent condensation buildup inside the jar.

Can I freeze Glinda’s Pink Potion?
Absolutely! If you’d like to freeze the refresher base, pour it into an ice cube tray and freeze for up to 2–3 months. To use, pop a few cubes into a blender with sweetened coconut milk, and blend until smooth for a quick treat. For even easier preparation, you can also freeze the entire drink mixture without the cold foam, letting it thaw slightly when you’re ready to enjoy.

What if I have dietary allergies?
Great question! If you’re concerned about dairy, opt for the barista-style oat milk and ensure the strawberry syrup is dairy-free. For those with soy allergies, consider using additional oat milk or almond milk to replace the soy milk. Always check labels to ensure ingredients fit your dietary needs!

Can I make the strawberry cold foam ahead of time?
Very! While it’s best enjoyed fresh, you can prepare the strawberry cold foam in advance; just store it in the fridge in an airtight container. For optimal texture, though, try to consume it within 1 day. When ready to use, give it a quick froth again to restore its fluffiness.

What if my drink isn’t fizzy?
If you find that your Glinda’s Pink Potion lacks that refreshing fizz, remember to shake the drink vigorously with ice for about 15 seconds. Also, ensure the sweetened coconut milk is well mixed into the concoction. Adjusting the ratio of coconut milk and refresher base may also help enhance the drink’s effervescence!

Sweet and Refreshing Glinda’s Pink Potion Delight

Glinda’s Pink Potion is a vibrant, whimsical drink that combines tropical flavors for a refreshing escape.

  • Medium saucepan
  • large jar with lid
  • mason jar or glass
  • milk frother
  • cocktail shaker or large mason jar

For the Refresher Base

  • 1 ½ cups water (The foundation of this drink.)
  • ⅓ cup mango nectar (Adds tropical sweetness.)
  • ⅓ cup granulated sugar (Adjust according to taste.)
  • 1 tablespoon dragonfruit powder (Gives the potion its color.)
  • ½ teaspoon citric acid (Provides a zesty kick.)

For the Cold Foam

  • 1 cup Barista-Style Oat Milk (or Heavy Cream) (Creates a creamy texture.)
  • 2 tablespoons strawberry syrup (Infuses cold foam with flavor.)
  • ½ cup soy milk (preferably barista blend) (Helps achieve frothy consistency.)

For the Final Touch

  • ½ cup mango dragonfruit refresher base (Enhances tropical essence.)
  • ½ cup sweetened coconut milk (Adds richness.)
  • 1 tablespoon freeze-dried dragonfruit pieces (Garnish for decoration.)
  • as desired pink & green sprinkles (Optional festive flair.)

Step-by-Step Instructions for Glinda’s Pink Potion

  1. In a medium saucepan, combine water, mango nectar, granulated sugar, dragonfruit powder, and citric acid. Heat over low heat, whisk continuously for about 3 minutes until smooth. Remove from heat and let cool.
  2. Pour the cooled refresher base into a large jar with a lid and store it in the refrigerator.
  3. In a small jar or glass, combine oat milk (or cream), strawberry syrup, and soy milk. Froth until pale and whipped.
  4. In a cocktail shaker filled with ice, combine refresher base, sweetened coconut milk, and freeze-dried dragonfruit. Shake vigorously for about 15 seconds.
  5. Strain into a tall glass filled with ice. Spoon strawberry cold foam on top and garnish with freeze-dried dragonfruit and sprinkles.

Ensure to chill the base completely before mixing for the best results. Customize sweetness to preference.

Drink
Tropical
dragonfruit, Glinda’s Pink Potion, mango, party drink, refreshing drink, strawberry cold foam

Filed Under: Drink

Enchanting Pink Witch Punch for Magical Gatherings

September 29, 2025 by grace bellamy Leave a Comment

As the sun sets and the air turns crisp, I find myself craving something refreshing yet enchanting. Enter the Pink Witch Punch, a delightful concoction that’s not only visually stunning but also a hit at any gathering. In just 10 minutes, you can whip up this vibrant punch that brings together ginger ale, pink lemonade, and cranberry juice for a quick and crowd-pleasing drink. The best part? You can customize it to fit your Halloween-themed soirée or any festive occasion with a swirl of whipped topping and edible glitter. Trust me, your guests will love the playful twist on a classic punch! So, are you ready to add a touch of magic to your glass?

Pink Witch Punch

Why is Pink Witch Punch a Must-Try?

Quick and Easy: This delightful drink comes together in just 10 minutes, making it perfect for those spontaneous gatherings or busy days.

Colorful Presentation: The vibrant pink hue paired with edible glitter creates an eye-catching centerpiece that sparks joy at any event.

Customizable Flavor: Mix in your favorite garnishes like strawberries or lemons to personalize each serving—impressing guests has never been easier!

Crowd-Pleaser: With its sweet yet refreshing flavor, this punch is sure to satisfy both kids and adults alike, making it a hit at birthday parties or family get-togethers.

Perfect for Any Occasion: Whether it’s a Halloween bash or a summer picnic, the Pink Witch Punch adapts seamlessly to any celebration—explore more festive drink ideas here.

Pink Witch Punch Ingredients

For the Punch
• Ginger ale – 2 liters, chilled adds a bubbly sparkle to your punch, enhancing the festive feel.
• Pink lemonade – 1 bottle (64 oz / 1.9 L), chilled brings a sweet and tangy flavor that makes this drink delightfully refreshing.
• Cranberry juice – 1 cup offers a beautiful color and a hint of tartness to balance the sweetness.

For the Optional Toppings
• Whipped topping – 1-2 cups adds a creamy richness that makes your Pink Witch Punch extra indulgent.
• Edible pink glitter – as desired sprinkles whimsy and magic, making your punch unforgettable at any gathering.
• Pink sanding sugar – for rimming glasses enhances the visual appeal, making each sip feel like a special occasion.

For Garnish
• Sliced fruit (strawberries, oranges, or lemons) – as desired, they not only add flavor but also create a vibrant and inviting presentation.
• Ice – as needed keeps your punch refreshingly cold, especially on warm days.

Get ready to stir up some enchantment with these colorful and delightful Pink Witch Punch ingredients!

Step‑by‑Step Instructions for Pink Witch Punch

Step 1: Chill the Ingredients
Before you begin crafting your Pink Witch Punch, ensure your ginger ale, pink lemonade, and cranberry juice are well chilled, ideally for at least 1 hour. This will keep your drink refreshing and bubbly once mixed. You can use a large pitcher or simply place the bottles in the refrigerator while you gather your other supplies.

Step 2: Prepare the Glasses
To create a festive look, dip the rims of your glasses in water or lemon juice to moisten them. Then, gently roll the wet rims in pink sanding sugar, ensuring an even coating. This sparkly touch not only enhances the visual appeal of your Pink Witch Punch but also adds a hint of sweetness with every sip.

Step 3: Combine the Juices
In a large punch bowl or pitcher, pour in the chilled pink lemonade first, followed by the cranberry juice. Use a long spoon to stir the mixture gently, combining the two juices until they are blended seamlessly. Aim for a light pink hue; this step sets a delightful base for your enchanting drink.

Step 4: Add the Ginger Ale
With your juice mixture ready, slowly pour in the chilled ginger ale to avoid losing its bubbles. Stir lightly to incorporate the ginger ale, making sure to keep those fizzy bubbles alive. The combination will bubble up beautifully, giving you a vibrant and effervescent Pink Witch Punch.

Step 5: Finish with Toppings
Now comes the fun part! Dollop whipped topping on top of your punch for a creamy finish. If desired, sprinkle edible pink glitter over the surface to add a magical effect. Finally, toss in slices of your choice of fruit, like strawberries or lemons, to elevate the look and taste of your Pink Witch Punch.

Step 6: Serve and Enjoy
Once your Pink Witch Punch is beautifully garnished, ladle it into the prepared glasses filled with ice. Ensure each glass gets an inviting splash of fizz and a piece of fruit. Serve immediately while it’s still cold and sparkling to delight your guests with this enchanting drink!

Pink Witch Punch

Make Ahead Options

These Pink Witch Punch preparations are perfect for busy home cooks looking to save time and create a delightful drink effortlessly! You can prepare the juice mixture (pink lemonade and cranberry juice) up to 24 hours in advance. Simply mix these two ingredients and refrigerate in an airtight container to keep them fresh and flavorful. Also, consider rimming the glasses with sanding sugar ahead of time—this will stay beautiful for several hours. When you’re ready to serve, just pour in the chilled ginger ale and stir lightly to maintain those delightful bubbles. Top it off with whipped topping, edible glitter, and fruit slices right before serving for a visually stunning punch that’s just as magical and refreshing!

Expert Tips for Pink Witch Punch

  • Chill Everything First: Always ensure that your ginger ale, pink lemonade, and cranberry juice are properly chilled. This keeps your Pink Witch Punch refreshingly cool and bubbly!

  • Rimming Glasses: For an extravagant touch, remember to rim your glasses with pink sanding sugar after moistening them. This adds a sweet burst with every sip, enhancing the entire experience.

  • Gentle Mixing: When combining the juices and adding ginger ale, stir gently to maintain the fizz. Over-stirring can cause it to go flat too quickly.

  • Customization Is Key: Feel free to personalize your Pink Witch Punch with seasonal fruits or even herbs like mint. This can give your drink a unique twist tailored for special occasions.

  • Make-Ahead Option: If you’re preparing for a large gathering, mix the juices and chill them in advance. Add ginger ale and toppings just before serving to keep it bubbly.

  • Presentation Matters: Don’t forget to decorate with slices of fruit and a sprinkle of edible glitter for that extra flair. It not only looks magical but also tempts guests to dive in!

What to Serve with Pink Witch Punch?

As you prepare the enchanting Pink Witch Punch, why not elevate your gathering with these delightful pairings that will charm the palate?

  • Savory Sliders: Mini burgers bring a hearty contrast to the sweet punch, making them perfect for a fun celebration. These bite-sized delights will satisfy the crowd at any festive gathering!

  • Fruit Platter: Fresh, colorful fruits complement the drink’s flavors while providing a refreshing crunch. Pairing this with your Pink Witch Punch adds a healthy yet vibrant touch.

  • Cheese Board: A selection of creamy and sharp cheeses pairs beautifully with the sweetness of the punch, creating a delightful balance of flavors. Incorporate crackers and nuts for texture and variety.

  • Sweet Macarons: These delicate treats add an elegant touch to your spread, beautifully matching the enchanting theme of your drink. Their light sweetness harmonizes with the flavors of the Pink Witch Punch.

  • Chocolate-Covered Strawberries: Indulge the sweet tooth with these decadent bites, which enhance the puncha’s playful nature. The combination of rich chocolate and juicy strawberries is a guaranteed crowd favorite.

  • Chocolaty Brownies: Rich and fudgy brownies offer a luscious contrast to the bubbly punch. Serve them warm with a scoop of ice cream for dessert perfection after sipping the Pink Witch Punch!

  • Sparkling Water: Lighten up your beverage options with unflavored sparkling water. Guests can mix it with their punch for a refreshing twist or enjoy it on its own to cleanse their palate.

Storage Tips for Pink Witch Punch

Fridge: Store any leftover Pink Witch Punch in an airtight pitcher, and keep it chilled for up to 2 days. However, be aware that the fizz from the ginger ale may diminish over time.

Freezer: To freeze, pour the punch into ice cube trays for a fun way to chill future drinks. You can use the cubes in other beverages for a sparkly touch!

Reheating: Since Pink Witch Punch is best served cold, reheating isn’t recommended. Instead, serve it over ice to keep it refreshingly cool.

Garnish Storage: If you have leftover fruit garnishes, store them in the fridge in a sealed container for up to 1 day to maintain freshness.

Pink Witch Punch Variations & Substitutions

Feel free to get creative and personalize your Pink Witch Punch with these fun twists that enhance flavor and delight your guests!

  • Dairy-Free: Skip the whipped topping or use coconut cream for a dairy-free alternative that keeps the punch creamy.

  • Fruit-Infused: Add a handful of berries or diced peaches for an extra fruity flavor—let them float in the punch for a festive touch!

  • Spicy Kick: Toss in a splash of ginger or jalapeño syrup for a zesty surprise—this spicy twist will definitely awaken your taste buds!

  • Herbal Note: Add a few fresh mint leaves to the punch before serving for a refreshing aroma and lively presentation. It complements the fruity flavors beautifully.

  • Non-Alcoholic Sparkler: Use tonic water instead of ginger ale for a less sweet, more citrusy experience. This variation is perfect for those who prefer a more sophisticated sip.

  • Deepen the Color: Mix in a splash of blueberry juice for a darker, richer hue that maintains its fruity undertones.

  • Increased Fizz: For an even bubblier punch, substitute half of the ginger ale with club soda, ensuring there’s more sparkle in every glass.

  • Seasonal Spice: In the fall, add a hint of cinnamon or nutmeg to your punch. This adds a comforting warmth that’s perfect for cozy gatherings.

Explore these variations and customize your Pink Witch Punch to make it uniquely yours—it’s all about bringing joy and magic to every gathering!

Pink Witch Punch

Pink Witch Punch Recipe FAQs

What are the best tips for selecting ripe fruit for garnish?
When choosing fruit for your Pink Witch Punch, look for fruits that are vibrant and firm. For strawberries, opt for those with a shiny, bright red appearance and no dark spots. For oranges and lemons, seek those that feel heavy for their size, indicating juiciness. If possible, go for organic options to avoid pesticides, especially if you’ll be using the zest or peel for extra flavor.

How can I store leftover Pink Witch Punch?
Absolutely! To store any leftover Pink Witch Punch, pour it into an airtight pitcher and refrigerate. It will stay fresh for up to 2 days. Remember, though, that the ginger ale may lose some fizz during storage, so for optimal sparkle, it’s best enjoyed fresh. Just give it a gentle stir before serving!

Can I freeze Pink Witch Punch?
Yes, you can freeze it for future enjoyment! Pour the Pink Witch Punch into ice cube trays and freeze. Once frozen, pop the cubes out and store them in a resealable freezer bag. They can last in the freezer for up to 3 months. These sparkling cubes make for fantastic additions to future refreshments or even as fun ice for your guests’ glasses.

What should I do if my punch turns out too sweet?
If your Pink Witch Punch is sweeter than desired, consider adding the juice of half a lemon or lime to cut through the sweetness and enhance the flavor. Another great alternative is to add a splash of soda water or tonic water to introduce a little bitterness and balance out the taste.

Is Pink Witch Punch suitable for kids or anyone with allergies?
Very! This Pink Witch Punch is safe for children, and it’s naturally free from gluten. However, if anyone has allergies to specific fruits or components like cranberry juice or whipped topping, feel free to customize the ingredients. Opt for a juice that meets your dietary requirements, and for a vegan alternative, consider using plant-based whipped toppings. Remember to check labels for any potential allergens!

How should I prepare the glass rimming for additional toppings?
To prepare the glass rims with pink sanding sugar, first moisten the rims by dipping them in a little water or lemon juice. Then, dip the rims into a small plate filled with pink sanding sugar, ensuring they are evenly coated. This adds a lovely sweet touch to each sip and makes your Pink Witch Punch even more festive!

Enchanting Pink Witch Punch for Magical Gatherings

The Pink Witch Punch is a vibrant, refreshing drink perfect for any gathering, combining ginger ale, pink lemonade, and cranberry juice.

  • large punch bowl or pitcher
  • glasses
  • spoon

For the Punch

  • 2 liters ginger ale (chilled)
  • 1 bottle (64 oz / 1.9 L) pink lemonade (chilled)
  • 1 cup cranberry juice

For the Optional Toppings

  • 1-2 cups whipped topping
  • edible pink glitter (as desired)
  • pink sanding sugar (for rimming glasses)

For Garnish

  • sliced fruit (strawberries, oranges, or lemons) (as desired)
  • ice (as needed)

Step-by-Step Instructions for Pink Witch Punch

  1. Chill the ginger ale, pink lemonade, and cranberry juice for at least 1 hour.
  2. Prepare glasses by moistening rims and rolling them in pink sanding sugar.
  3. In a large punch bowl, combine the pink lemonade and cranberry juice, stirring gently.
  4. Slowly add the chilled ginger ale, stirring lightly to maintain bubbles.
  5. Dollop whipped topping on top and sprinkle with edible glitter. Add fruit slices.
  6. Serve the punch over ice in prepared glasses.

For an extravagant touch, rim glasses with pink sanding sugar after moistening with lemon juice. Customize with seasonal fruits or herbs for a unique twist.

Drink
crowd-pleaser, festive beverage, Halloween drink, party punch, Pink Witch Punch, refreshing drink

Filed Under: Drink

Refreshing Black Lemonade: A Fun Twist on Summer Sips

September 26, 2025 by grace bellamy Leave a Comment

It’s an unusual twist on a classic that caught my eye at a summer picnic—a deep, mysterious lemonade that seemed to defy tradition. This Black Lemonade is not just a festive drink; it’s an eye-catching conversation starter perfect for any gathering. With just 10 minutes of prep and a delightful balance of tangy lemon and sweet syrup, this recipe is both quick and fun to whip up. Whether you’re hosting a party or just looking for a unique sipper to cool off, this drink will surely amaze your guests. Plus, it’s a fantastic way to break away from the mundane fast-food routine. Are you ready to brew up some intrigue with your next drink?

Black Lemonade

What makes Black Lemonade so special?

Uniqueness: This isn’t your average lemonade! The striking black hue creates a visual delight that intrigues everyone.

Quick Prep: You can whip up this refreshing drink in just 10 minutes, perfect for those spontaneous summer gatherings.

Balanced Flavor: With the right blend of zesty lemon and sweet syrup, each sip offers a delightful taste sensation that’ll leave you wanting more.

Versatile Serving: Enjoy it over ice for that refreshing chill, or jazz it up with a garnish of lemon slices or spooky decor for a themed party!

Party Favorite: This eye-catching drink is a surefire way to impress guests and spark conversations, breaking the ice as soon as it’s served.

Black Lemonade Ingredients

Unlock the mystery behind the perfect Black Lemonade!

For the Syrup

  • Sugar – A sweet base that balances the tartness of lemon, essential for the perfect black lemonade.
  • Water – Used to dissolve and create your syrup; ensures a smooth consistency.
  • Black Gel Food Color – This is the secret ingredient that gives your lemonade its dramatic, dark hue.

For the Lemonade

  • Fresh Lemon Juice – Offers a tangy kick that elevates the flavor, bringing that classic lemonade taste with a twist.
  • Cold Water – Dilutes the syrup for a refreshing sip; you can adjust the amount for your desired strength.

Enjoy crafting this intriguing drink that is bound to be a crowd-pleaser!

Step‑by‑Step Instructions for Black Lemonade

Step 1: Prepare the Sugar Syrup
In a small pot, combine 3/4 cup of sugar with 3/4 cup of water. Heat on medium-high until boiling, then reduce to a simmer. Allow it to simmer gently without stirring for about 3 to 4 minutes, or until the sugar completely dissolves and the mixture is clear. Once done, remove from heat. Add 1 tablespoon of black gel food color and stir until fully integrated. Set aside to cool.

Step 2: Mix the Lemonade
In a large pitcher, pour in 1 1/2 cups of fresh lemon juice, which will bring a zesty brightness to your Black Lemonade. Next, add the cooled black sugar syrup to the pitcher, creating a striking contrast. Finally, mix in 4 cups of cold water to dilute the syrup, ensuring the flavors balance perfectly. Stir gently until everything is well combined.

Step 3: Serve Over Ice
To serve your refreshing Black Lemonade, fill glasses with ice cubes for that chilled delight. Pour the vibrant drink over the ice, allowing the cold to perk up the flavors. For an extra touch, consider garnishing each glass with a slice of lemon or even some whimsical decorations if you’re feeling festive. Enjoy the surprise and delight of this unique beverage!

Black Lemonade

Make Ahead Options

These Black Lemonade drinks are perfect for busy home cooks looking to save time during summer gatherings! You can prepare the sugar syrup up to 24 hours in advance; simply mix the sugar with water and food color as directed, then refrigerate it in an airtight container to maintain its rich flavor. The fresh lemon juice should be squeezed and stored separately in the fridge for up to 3 days. When you’re ready to serve, combine the cooled syrup with the lemon juice and cold water, give it a good stir, and pour it over ice. This way, you’ll have a refreshing drink that’s just as delicious without the last-minute rush!

What to Serve with Black Lemonade

Imagine a sunny afternoon gathering, where your guests sip on this strikingly dark drink, surrounded by bright flavors and delightful dishes.

  • Grilled Shrimp Skewers: The sweetness of the grilled shrimp complements the tartness of Black Lemonade, creating a balanced blend of flavors.
  • Spicy Nachos: Crunchy and cheesy, these nachos bring a savory contrast to the zesty lemonade, making each bite a flavor fiesta.

The textures and spices of spicy nachos beautifully counter the drink’s sweetness, ensuring your palate dances with joy.

  • Citrus Fruit Salad: Fresh fruits like oranges and strawberries brighten the table and provide a refreshing counterpart to the lemonade.
  • Savory Cheese Platter: A mix of creamy and sharp cheeses, paired with crackers, enhances the drink’s complexity while inviting nibbles between sips.

Pairing savory cheeses with the bright citrus notes of Black Lemonade will elevate your gathering, transforming it into a delightful experience.

  • Summer Pasta Salad: Loaded with colorful veggies and a tangy dressing, this salad adds refreshing crunch and vibrant tastes that pair wonderfully with the beverage.
  • Mojito Mocktails: Mixing mint and lime with soda gives your guests a refreshing alternative while keeping the vibe bright and festive.

These mocktails complement Black Lemonade perfectly, offering a fizzy contrast that leaves guests feeling refreshed and spirited.

How to Store and Freeze Black Lemonade

Fridge: Keep any leftover Black Lemonade in an airtight container in the refrigerator for up to 3 days. Stir well before serving to mix the flavors again.

Freezer: If you want to store it longer, pour the lemonade into ice cube trays or freezer-safe containers. It can be frozen for up to 3 months, allowing you to enjoy it anytime.

Thawing: To thaw, simply transfer the frozen lemonade to the fridge overnight or let it sit at room temperature for a quick refresh—stir again before serving.

Serving Suggestions: If you choose to freeze, consider blending the thawed lemonade with fresh ice for a slushy treat on hot days!

Expert Tips for Black Lemonade

  • Cooling the Syrup: Let the sugar syrup cool completely before mixing it with lemon juice and cold water to ensure the flavors meld nicely without losing crispness.

  • Choosing Lemons: Use fresh lemons rather than bottled juice for the ultimate flavor. Fresh juice provides a vibrant zing that elevates your Black Lemonade.

  • Adjusting Sweetness: Feel free to tweak the sugar based on your taste. If you’re looking for a lighter drink, reduce the sugar or use a sugar substitute!

  • Getting the Color Right: Start with a little black gel food color, adding more gradually until you achieve the perfect hue for your Black Lemonade—too much can make it opaque.

  • Flavor Enhancements: For a twist, consider adding herbs like mint or basil. This addition can elevate the drink and give it a refreshing edge for summer gatherings.

Black Lemonade Variations & Substitutions

Feel free to explore these delightful twists and swaps that will personalize your Black Lemonade experience!

  • Dairy-Free: Use coconut cream instead of regular cream for a creamy texture that’s equally delicious and vegan-friendly. Just a tablespoon will add a rich twist!

  • Herb-Infused: Try adding fresh mint or basil leaves in with the lemon juice for an herby aroma that’ll brighten every sip. Gently muddle the herbs before mixing for maximum flavor!

  • Sparkling Version: Replace still water with sparkling water for a bubbly, festive drink that adds a fun fizz. The bubbles elevate the experience, perfect for parties!

  • Lower Sugar: Substitute sugar with a natural sweetener like stevia or monk fruit, adjusting to taste for a lighter version that doesn’t skimp on flavor.

  • Fruit Punch: Blend in pureed fruits like strawberries or raspberries with the lemon juice for a colorful fruit twist. The berries infuse a sweet and tangy note that everyone will love.

  • Spicy Kick: Add a splash of cayenne pepper for those who enjoy a bit of heat—the smokiness of cayenne beautifully offsets the sweetness!

  • Frozen Treats: Pour leftover Black Lemonade into ice pop molds for a unique summer treat. These colorful pops will be a hit on warm days.

  • Ginger Zing: Mix in some fresh grated ginger or ginger syrup to introduce a spicy zing that perfectly complements the citrus notes. This adds an invigorating depth to the drink.

Black Lemonade

Black Lemonade Recipe FAQs

What kind of lemons should I use for the best flavor?
Absolutely! Fresh lemons are key for that zesty punch. Look for lemons that feel heavy for their size, have a bright yellow skin, and are slightly glossy. Avoid any that are overly soft or have dark spots. If fresh lemons are unavailable, opt for bottled lemon juice as a last resort, but it won’t provide the same vibrancy.

How do I store leftover Black Lemonade?
To keep your Black Lemonade refreshing, store any leftovers in an airtight container. It will stay fresh in the refrigerator for up to 3 days. Just give it a good stir before serving as the flavors may separate.

Can I freeze Black Lemonade for later?
Yes, you can! To freeze your Black Lemonade, pour it into ice cube trays or freezer-safe containers. Ensure there’s some space for expansion. It can be stored in the freezer for up to 3 months. When you’re ready to enjoy it again, thaw in the fridge overnight or let it sit at room temperature until slushy. Stir before serving.

What should I do if my lemonade turns out too sweet?
Very! If your Black Lemonade is on the sweet side, you can balance it by adding more fresh lemon juice or a splash of water to dilute the sweet flavor. Taste as you go, adjusting until it meets your preference. If it’s still too sweet after dilution, a pinch of salt can also help cut through the sweetness!

Is this recipe safe for my pets?
While a small amount of lemonade won’t harm pets, it’s best to keep this delightful drink away from them. The sugar content and acidity from the lemons can upset their stomachs. Stick with pet-safe treats or water for your furry friends while you enjoy your refreshing Black Lemonade!

What if the color of my lemonade doesn’t look right?
If you’re not happy with the hue, don’t fret! Start by adding a little black gel food coloring at a time—it’s always easier to darken than to lighten. Mix well each time before adding more. The goal is a striking black, but remember that too much food color can obscure the drink’s refreshing clarity.

Refreshing Black Lemonade: A Fun Twist on Summer Sips

This Black Lemonade is a unique and eye-catching drink that balances tangy lemon with sweet syrup, perfect for summer gatherings.

  • small pot
  • large pitcher

For the Syrup

  • 3/4 cup sugar
  • 3/4 cup water
  • 1 tablespoon black gel food color

For the Lemonade

  • 1 1/2 cups fresh lemon juice
  • 4 cups cold water

Step-by-Step Instructions for Black Lemonade

  1. Prepare the Sugar Syrup: In a small pot, combine 3/4 cup of sugar with 3/4 cup of water. Heat on medium-high until boiling, then reduce to a simmer. Allow it to simmer gently without stirring for about 3 to 4 minutes, or until the mixture is clear. Remove from heat, add 1 tablespoon of black gel food color, stir, and set aside to cool.
  2. Mix the Lemonade: In a large pitcher, pour in 1 1/2 cups of fresh lemon juice. Add the cooled black sugar syrup and 4 cups of cold water. Stir gently until well combined.
  3. Serve Over Ice: Fill glasses with ice cubes, pour the Black Lemonade over the ice, and garnish each glass with a slice of lemon if desired.

Use fresh lemons for optimal flavor. Adjust sugar based on personal taste preference.

Drink
Black Lemonade, fun drink, party drink, refreshing beverage, summer drink, unique lemonade

Filed Under: Drink

Spellbinding Witches Brew Lemonade That Thrills Your Tastebuds

September 23, 2025 by grace bellamy Leave a Comment

As the leaves start to turn and a crispness fills the air, my mind drifts to Halloween festivities and the enchanting recipes that accompany them. One standout that always casts a spell on my gatherings is Witches Brew Lemonade, an invigorating non-alcoholic mocktail that’s as eerie as it is delicious. This drink isn’t just visually striking with its deep black hue from activated charcoal; it’s also wonderfully refreshing and adaptable to suit any palate, making it a hit with both kids and adults. In just 15 minutes, you can mix up a cauldron of this magical concoction that’s perfect for parties, playdates, or simply celebrating the season. Would you like to add a twist of your own? Let’s dive into the recipe!

Witches Brew Lemonade

Why is Witches Brew Lemonade a Must-Try?

Spellbinding flavor: This Witches Brew Lemonade mixes the tartness of fresh lemons with a hint of sweetness, perfect for all ages.

Ghoulishly fun: The eerie black color from activated charcoal makes it a showstopper at any Halloween gathering!

Quick and easy: In just 15 minutes, you can whip up this spooky delight, leaving you plenty of time to enjoy the festivities.

Versatile: Adjust the sweetness to your liking, making it suitable for everyone, whether they prefer a sweeter or tangier taste.

Crowd-pleaser: With garnishes like gummy worms and candy eyeballs, it’s sure to be a hit with kids and adults alike! Serve alongside some delicious Halloween treats to elevate the experience.

Witches Brew Lemonade Ingredients

For the Base

  • Water – 4 cups of water sets the stage for our refreshingly spooky drink.
  • Freshly squeezed lemon juice – 1 cup adds a tangy kick that balances the sweetness perfectly.
  • Granulated sugar – 1 cup enhances the flavors and can be adjusted for a sweeter potion.

For the Dark Twist

  • Activated charcoal powder – 1 teaspoon gives the lemonade its signature eerie black hue, perfect for the Halloween theme.

For the Fizz

  • Soda water – 1 cup provides a sparkling finish, making each sip deliciously effervescent.

For the Garnish

  • Fresh lemon slices – Add them for a zesty and eye-catching garnish.
  • Gummy worms or candy eyeballs – Use these for a playful decoration that adds a fun twist to your Witches Brew Lemonade!

Step‑by‑Step Instructions for Witches Brew Lemonade

Step 1: Combine the Base Ingredients
In a large pitcher, pour in 4 cups of water, 1 cup of freshly squeezed lemon juice, and 1 cup of granulated sugar. Stir the mixture vigorously for about 2-3 minutes, or until the sugar is fully dissolved. The lemonade’s bright yellow hue should be visible, creating a refreshing base for your Witches Brew Lemonade.

Step 2: Add the Dark Twist
Next, sprinkle in 1 teaspoon of activated charcoal powder while continuously stirring. Mix for an additional 1-2 minutes until the lemonade transforms into a deep, eerie black color. This unique visual effect is what makes the Witches Brew Lemonade truly captivating and sets the mood for your Halloween celebration.

Step 3: Introduce the Fizz
Gently pour in 1 cup of soda water, being careful not to stir too vigorously. Use a spoon to lightly stir the mixture for about 30 seconds, ensuring that the fizz stays intact. The carbonation will add a delightful sparkle to your Witches Brew Lemonade, enhancing its refreshing qualities.

Step 4: Prepare the Garnishes
While the lemonade is chilling, slice fresh lemons into thin rounds and set them aside. These tangy slices will not only add flavor but also serve as a visually appealing garnish for your spooky drink. Aim for thin slices that are about 1/4 inch thick for optimal decoration.

Step 5: Assemble the Drinks
Fill your favorite glasses with ice cubes, ensuring they are about three-quarters full. Carefully pour the Witches Brew Lemonade over the ice until the glasses are filled to the brim. The contrast of the black lemonade against the crystal-clear ice creates an intriguing visual perfect for your Halloween theme.

Step 6: Add Fun Decorations
To complete your Witches Brew Lemonade, artfully place a lemon slice on the rim of each glass. For an extra spooky touch, add gummy worms or candy eyeballs on top of the drink. This playful decoration not only looks fantastic but also makes the drink even more fun for guests of all ages!

Witches Brew Lemonade

Witches Brew Lemonade Variations

Feel free to sprinkle your own magic into the Witches Brew Lemonade recipe and make it truly yours!

  • Dairy-Free: Swap granulated sugar for agave nectar or maple syrup for a unique sweetener that’s gentle on the stomach.
  • Herbal Twist: Add fresh mint leaves or a splash of basil for an aromatic punch that complements the lemony zest beautifully. The herbaceous notes will create a refreshing layer to your spooky potion.
  • Citrus Burst: Replace half of the lemon juice with orange or lime juice for a tangy flavor explosion. This variation brightens up the drink while staying true to the Halloween theme!
  • Berry Infusion: Blend in some muddled blackberries or raspberries to create a layer of delightful fruitiness, turning your lemonade into a vibrant potion packed with antioxidants. This is a lovely way to bring in a burst of color!
  • Spicy Kick: Mix in a dash of cayenne pepper or a few slices of fresh jalapeño for a thrilling heat. Just a little will elevate the flavor profile and present a daring twist to your drink!
  • Sparkling Surprise: For a fizzy lift, substitute soda water with ginger ale or flavored sparkling water, adding both sweetness and zest to each delightful sip. This change adds an effervescent flair that’s sure to amaze your guests.
  • Non-Sweet Option: Eliminate sugar entirely and use a natural sweetener like stevia or monk fruit for a lower-calorie version that’s still thirst-quenching. It’s a great way to cater to those watching their sugar intake!

These variations allow your creativity to shine as you conjure up your ideal Witches Brew Lemonade. Ready to whip up your own enchanting batch?

How to Store and Freeze Witches Brew Lemonade

  • Fridge: Store leftover Witches Brew Lemonade in an airtight container in the refrigerator for up to 2 days. This keeps the flavors fresh and the drink cool.
  • Freezer: For longer storage, freeze the lemonade in ice cube trays. These can be used later to add chill to other drinks without diluting flavors.
  • Reheating: This lemonade is best served cold; minimize reheating to maintain its refreshing flavor. Simply blend frozen cubes with a splash of soda water for a quick slushy treat.
  • Make-Ahead Tips: If preparing in advance, mix the lemonade base but add soda water and garnishes just before serving to preserve fizz and aesthetics.

Make Ahead Options

Preparing Witches Brew Lemonade is a breeze, making it perfect for meal prep enthusiasts looking to save time during busy Halloween festivities! You can mix the base components (water, lemon juice, and sugar) up to 24 hours in advance, storing the mixture in the refrigerator to keep it fresh. Just remember to add the activated charcoal powder and soda water right before serving to maintain that delightful fizz and eerie black hue. For a visually stunning finish, slice fresh lemons ahead of time, but wait to garnish with lemon slices, gummy worms, or candy eyeballs until you’re ready to serve. This make-ahead approach ensures your Witches Brew Lemonade is just as delicious and magical, freeing you up to enjoy the celebrations!

Expert Tips for Witches Brew Lemonade

Perfect Sweetness: Start with the sugar amount suggested, but feel free to adjust it based on your taste preferences. Balance is key in your Witches Brew Lemonade!

Dissolve Completely: Make sure the sugar is fully dissolved in the mixture; otherwise, granules might settle at the bottom, affecting the overall texture and sweetness.

Activated Charcoal Handling: When adding activated charcoal, breathe carefully when mixing to avoid inhaling the fine powder. This step brings the spooky color to life!

Preserve Fizz: To keep the soda water bubbly, add it at the end and stir gently. Over-stirring can release the carbonation that adds sparkle to your drink.

Garnishing Ideas: Get creative with your garnishes! Aside from gummy worms and eyeballs, use spooky straws or Halloween-themed glasses to elevate the presentation of your Witches Brew Lemonade.

What to Serve with Witches Brew Lemonade?

As you conjure up the perfect Halloween vibe, complement your spooky concoction with deliciously themed treats that enchant every guest.

  • Pumpkin Spice Cookies: These soft, autumn-flavored delights add a sweet, comforting touch that balances the tangy lemonade beautifully.
  • Spooky Cheese Platter: A mix of creamy cheeses with Halloween-themed crackers and fresh fruit will entice both kids and adults.
  • Ghostly Guacamole: Dressed with spooky designs, this creamy dip pairs well with tortilla chips, bringing savory goodness to the sweet lemonade.
  • Creepy Veggie Cups: Individual cups filled with colorful veggies and a tasty dip offer a refreshing crunch that complements the drink’s sweetness.
  • Witch’s Hat Cupcakes: Chocolate cupcakes topped with pointed hats made of cookies are a delightful and visually appealing treat that matches the Halloween spirit.
  • Eerie Apple Cider: Serve a glass of spiced apple cider warm or cold to enhance the cozy flavors of autumn alongside your refreshing lemonade.
  • Candy Corn Parfait: Layered with yogurt and fruit, this dessert adds a fun, colorful element that resonates with Halloween festivities.
  • Chilling Mocktail: Mix in some sparkling cranberry juice or tonic water for an additional effervescent drink that pairs well with your Witches Brew Lemonade.
  • Ghoulish Green Salad: Rustle up a salad with greens, pumpkin seeds, and a zesty dressing to provide a refreshing and healthy bite amidst the festivities.

Witches Brew Lemonade

Witches Brew Lemonade Recipe FAQs

How do I choose ripe lemons for the Witches Brew Lemonade?
Absolutely! When selecting lemons, look for ones that are firm and bright yellow. A little give when you squeeze them indicates juiciness. Avoid lemons with dark spots or wrinkles, as they may have less juice and flavor.

How should I store leftovers of Witches Brew Lemonade?
To store any leftover lemonade, pour it into an airtight container and place it in the refrigerator. It can be kept for about 1-2 days to ensure that you enjoy it while the flavors are still vibrant and fresh!

Can I freeze Witches Brew Lemonade?
Very! To freeze, pour your lemonade into ice cube trays and freeze for several hours. Once solid, transfer the cubes to a resealable plastic bag. These icy cubes can be used later to chill drinks without watering them down. For a fun slushy treat, blend a few frozen cubes with a splash of soda water!

What if my lemonade doesn’t taste sweet enough?
No problem at all! If you find your Witches Brew Lemonade isn’t sweet enough, you can easily add more sugar to taste. To do this, create a simple syrup by heating equal parts sugar and water in a saucepan until the sugar dissolves, then stir it into the lemonade until you reach your desired sweetness.

Are there any dietary considerations for Witches Brew Lemonade?
Yes! If you have guests with allergies, be cautious with the add-ins. The activated charcoal is generally safe for most people, but some may want to avoid it for various health reasons. Additionally, make sure any garnishes like gummy worms or candy eyeballs are suitable for all guests, particularly children or those with dietary restrictions.

How can I make Witches Brew Lemonade kid-friendly?
The more the merrier! This recipe is already non-alcoholic, but to make it even more appealing to kids, consider swapping out the activated charcoal for a colorful fruit puree. For example, blend some blueberries or strawberries to create a vibrant twist on the classic recipe, making it a fun and colorful drink for your Halloween festivities!

Spellbinding Witches Brew Lemonade That Thrills Your Tastebuds

Witches Brew Lemonade is a refreshing, eerie mocktail perfect for Halloween festivities that pleases all ages.

  • large pitcher
  • spoon
  • ice cube tray

For the Base

  • 4 cups water
  • 1 cup freshly squeezed lemon juice
  • 1 cup granulated sugar (adjust for sweetness)

For the Dark Twist

  • 1 teaspoon activated charcoal powder

For the Fizz

  • 1 cup soda water

For the Garnish

  • fresh lemon slices (for garnishing)
  • gummy worms or candy eyeballs (for decoration)

Instructions

  1. In a large pitcher, pour in 4 cups of water, 1 cup of freshly squeezed lemon juice, and 1 cup of granulated sugar. Stir vigorously for about 2-3 minutes until sugar is dissolved.
  2. Sprinkle in 1 teaspoon of activated charcoal powder while continuously stirring. Mix for an additional 1-2 minutes until lemonade turns deep black.
  3. Gently pour in 1 cup of soda water, stirring lightly for about 30 seconds to keep carbonation intact.
  4. Slice fresh lemons into thin rounds and set aside for garnishing.
  5. Fill glasses with ice cubes, about three-quarters full, then pour in Witches Brew Lemonade until full.
  6. Garnish each glass with a lemon slice and add gummy worms or candy eyeballs for decoration.

Adjust sweetness to preference. Dissolve sugar completely and handle activated charcoal carefully.

Drink
Halloween
Halloween drink, mocktail, non-alcoholic, refreshing, Witches Brew Lemonade

Filed Under: Drink

Chill Out with Refreshing Witch’s Potion Punch Delight

September 23, 2025 by grace bellamy Leave a Comment

As the leaves turn and a crisp chill fills the air, it’s the perfect time to whip up something enchanting and fun: Witch’s Potion Punch. Imagine a vibrant concoction where grape juice meets a zing of citrus, promising to delight both kids and adults alike at any gathering. This playful beverage not only takes just 15 minutes to prepare but also has the magical ability to transform any party into a whimsical experience. With a fizzy splash of lemon-lime soda and a handful of gummy worms, this punch guarantees smiles all around. Are you ready to brew up some excitement and charm your guests? Let’s jump into the spellbinding world of mixology!

Witch’s Potion Punch

Why is Witch’s Potion Punch a Must-Try?

Quick and Easy: This whimsical drink comes together in just 15 minutes, making it the perfect option for last-minute gatherings.

Festive Flavor Profile: The delightful mix of grape, orange, and pineapple juices creates an exciting fusion of fruity goodness that everyone will love.

Kid-Approved Fun: With its vibrant color and playful gummy worm garnish, it’s a guaranteed crowd-pleaser for both kids and adults at any occasion.

Versatile Refreshment: Whether it’s Halloween or a summer BBQ, this punch can adapt to any celebration, ensuring your guests leave with exciting memories.

Make-Ahead Magic: Prep the juices a day ahead, so you can relax and enjoy your party while the punch is ready to fizz when you are! If you’re intrigued by more creative drink ideas, check out our refreshing summer beverages that can wow your guests any time of year.

Witch’s Potion Punch Ingredients

• Here’s what you need to conjure up this magical brew!

For the Base

  • Grape juice – Sweet and rich, it forms the enchanting foundation of your Witch’s Potion Punch.
  • Orange juice – Adds a bright, zesty flavor that balances the sweetness perfectly.
  • Pineapple juice – For a tropical twist, infusing the punch with a refreshing hint of the islands.
  • Fresh lime juice – A splash of acidity that elevates all the flavors and adds a delightful zing.

For the Fizz

  • Lemon-lime soda – Just before serving, this carbonation delivers a bubbly charm that’ll keep everyone coming back for more!

For the Garnish

  • Gummy worms – A spooky finishing touch that turns this drink into a playful essential for any gathering.

Brew up some fun with this Witch’s Potion Punch and let the laughter begin!

Step‑by‑Step Instructions for Witch’s Potion Punch

Step 1: Combine the Juices
In a large mixing bowl or cauldron, pour together 4 cups of grape juice, 1 cup of orange juice, 1 cup of pineapple juice, and 1/2 cup of fresh lime juice. Using a whisk, mix the ingredients for about a minute until the juices are blended seamlessly. The vibrant colors will start to swirl together, creating a tempting base for your Witch’s Potion Punch.

Step 2: Add the Soda
Just before serving, add 2 cups of lemon-lime soda to your juice mixture. Gently stir with a large spoon to combine, being careful not to agitate it too much to maintain the carbonation. You’ll notice the mixture bubbling and sparkling—this is the magic of your potion coming to life!

Step 3: Prepare the Glasses
While the potion fizzes, grab your favorite glasses and fill them halfway with ice cubes. The ice not only chills the Witch’s Potion Punch but also makes it visually appealing with the colors contrasting against the clear glass. This presentation is sure to entice your guests!

Step 4: Pour and Garnish
Carefully pour the sparkling punch into each glass over the ice, filling them about three-quarters full to leave room for the garnish. To add a whimsical touch, drape gummy worms over the rim of each glass or let a few float on top of the punch. This serves as a playful invitation to indulge in your delightful Witch’s Potion Punch!

Witch’s Potion Punch

Storage Tips for Witch’s Potion Punch

Fridge: If you have any leftover Witch’s Potion Punch, transfer it to an airtight container and store it in the refrigerator for up to 2 days. The magic of the flavors will still be there, but beware—the soda might lose some fizz over time.

Make-Ahead: You can prepare the juice mixture a day in advance. Just remember to wait until you’re ready to serve to add the lemon-lime soda for that extra refreshing sparkle.

Serving Note: When ready to serve, gently mix or stir the punch again to revive the flavors before pouring over ice. Enjoy the enchanting taste once more!

Witch’s Potion Punch Variations

Get ready to add your personal touch to this enchanting drink, making it perfect for every occasion!

  • Dairy-Free: Substitute regular juice brands with 100% fruit juice options that do not contain any additives.
  • Sparkling Citrus: Swap the lemon-lime soda for ginger ale for a zesty kick that brings unique flavor and fizz.
  • Tropical Twist: Add coconut water instead of pineapple juice for a lighter, refreshing flavor that transports you to paradise.
  • Extra Fruity: Toss in a cup of mixed berries to enhance texture and flavor; they will float beautifully in your punch.
  • Heat Things Up: Add a slice or two of fresh jalapeño for a surprising spicy element that mingles intriguing heat with sweetness.
  • Mocktail Version: Use club soda instead of soda for a less sweet, sparkling treat that’s still vibrant and fun.
  • Herbal Infusion: Add a few sprigs of mint to the punch for a refreshing herbal twist, perfect for summer gatherings!
  • Party Packs: For a unique serving experience, layer the juices in clear cups and let guests mix their own potion, creating delightful colors!

With these variations, your Witch’s Potion Punch is bound to be as magical as your gatherings. If you’re in the mood for more drink ideas, don’t miss our delightful refreshing summer beverages that will keep your celebrations sparkling!

Make Ahead Options

Preparing the Witch’s Potion Punch in advance is a fantastic way to save time and ensure your gathering is stress-free! You can mix together the grape juice, orange juice, pineapple juice, and fresh lime juice up to 24 hours ahead of time. Simply combine these juices in a large bowl or cauldron and refrigerate them to keep everything fresh and flavorful. Remember to hold off on adding the lemon-lime soda until just before serving to maintain its fizz and sparkle. When it’s time to serve, simply pour the bubbly soda into the juice mixture, give it a gentle stir, and pour over ice with those charming gummy worms on top. Your guests will love this magical punch, and you’ll appreciate the extra time saved!

What to Serve with Witch’s Potion Punch

As you gather around for a magical evening, consider these delightful pairings to enhance your Witch’s Potion Punch experience.

  • Spooky Cheese Platter: Create a mix of sharp cheeses with crackers. The saltiness balances the sweet punch beautifully and adds a festive touch.
    Pair with some dried fruits and nuts for an enticing contrast that keeps the party munching.

  • Pumpkin Spice Cupcakes: Irresistibly moist and warm with spices, these cupcakes provide a cozy contrast to your refreshing drink.
    Their autumn flavors will embody the spirit of the season, inviting guests to indulge.

  • Mini Hot Dogs: These savory bites are a perfect finger food, providing a hearty complement to the fruity sweetness.
    Serve them with an array of mustards for dipping, adding an interactive touch to the feast.

  • Crispy Veggie Sticks with Dip: Freshness is key! Carrot, cucumber, and bell pepper sticks with a zesty ranch dip offer a crunchy texture that balances the drink.
    This colorful platter is light and healthy, ensuring there’s something for everyone.

  • Chocolate-Covered Pretzels: Combining sweet and salty, these treats are fantastic for munching alongside your punch.
    Their crunchiness adds delightful contrast while the chocolate satisfies any sweet tooth in the crowd.

  • Fizzy Fruit Salad: A bowl of mixed fruits like watermelon, berries, and citrus, tossed with a splash of lemon-lime soda, echoes the punch’s fizzy charm.
    Bright flavors and colors make this a refreshing side that all guests will adore.

  • Candy Corn and Popcorn Mix: The sweetness of candy corn mixed with buttery popcorn gives a nostalgic flavor.
    This playful snack brings out the fun side of your gathering and echoes the festive spirit of your punch.

Expert Tips for Witch’s Potion Punch

• Juice Selection: Use high-quality juices for a more flavorful punch, ensuring a delightful taste that will impress guests.

• Soda Timing: Add lemon-lime soda just before serving to keep the fizz alive! If added too early, it may lose its sparkle.

• Ice Alternatives: Instead of regular ice cubes, consider using frozen fruit cubes to prevent dilution while adding extra flavor.

• Creative Garnishes: Beyond gummy worms, add plastic spiders or eyeball candies for an eye-catching presentation that enhances the Halloween vibe.

• Storage Awareness: If there are leftovers, store in an airtight container but consume within two days as the soda may lose its fizz.

Witch’s Potion Punch

Witch’s Potion Punch Recipe FAQs

What type of grape juice should I use?
I recommend using 100% pure grape juice for the best flavor. Look for varieties that don’t have added sugars or preservatives to ensure a deliciously rich and natural taste.

How long can I store leftover Witch’s Potion Punch?
If you have any punch left over, transfer it to an airtight container and store it in the refrigerator for up to 2 days. Just be aware that if soda is already mixed in, the fizz will diminish over time, so it’s best enjoyed fresh!

Can I freeze Witch’s Potion Punch?
Absolutely! To freeze, prepare the juice mixture without the soda and pour it into ice cube trays or a silicone mold. Once frozen, you can store the cubes in a freezer-safe bag for up to 3 months. When you’re ready to serve, simply thaw the cubes and mix with fresh lemon-lime soda for that bubbly effect right before serving.

What should I do if my punch tastes too sweet?
If your punch turns out sweeter than expected, adding a small amount of fresh lime or lemon juice can balance the flavor beautifully. Start with a tablespoon of lime juice, stir, and taste. You can always add more as needed to reach your preferred flavor profile!

Can I make this recipe allergen-free?
Yes, this recipe can easily accommodate various dietary considerations! If you’re concerned about allergies, choose juices without potential allergens and make sure to avoid any sugary garnishes that may contain common allergens. You can use gummy worms that are specifically labeled as allergen-free to ensure everyone can join in on the fun!

Chill Out with Refreshing Witch’s Potion Punch Delight

Enjoy the enchanting experience of Witch’s Potion Punch, a delightful mix of juices and fizz perfect for gatherings.

  • large mixing bowl
  • Whisk
  • large spoon
  • glasses

For the Base

  • 4 cups grape juice (Sweet and rich base)
  • 1 cup orange juice (Bright and zesty flavor)
  • 1 cup pineapple juice (Tropical twist)
  • 1/2 cup fresh lime juice (Adds a zing)

For the Fizz

  • 2 cups lemon-lime soda (Add before serving)

For the Garnish

  • 1 package gummy worms (Playful decoration)

Instructions

  1. In a large mixing bowl or cauldron, pour together the grape juice, orange juice, pineapple juice, and fresh lime juice. Whisk for about a minute until well blended.
  2. Just before serving, add the lemon-lime soda to the juice mixture and gently stir to combine.
  3. Fill your favorite glasses halfway with ice cubes for a visually appealing presentation.
  4. Carefully pour the punch into each glass over the ice, filling them about three-quarters full. Garnish with gummy worms.

Use high-quality juices for the best flavor. Add lemon-lime soda just before serving to maintain fizz. For a fun twist, use frozen fruit cubes instead of ice.

Drink
American
easy drink, Halloween drink, party punch, punch recipe, refreshing beverage, Witch’s Potion Punch

Filed Under: Drink

Awaken Your Senses with Homemade Smoky Masala Chai

September 22, 2025 by grace bellamy Leave a Comment

The first chill of autumn always nudges me toward something warm and comforting, stirring memories of cozy evenings spent at home. One sip of this Smoky Masala Chai and you’ll understand why it’s become my go-to remedy for those cooler days. This recipe is not just easy to whip up—in just 20 minutes, you’ll create a fragrant blend of spices that transforms an ordinary afternoon into a delightful retreat. Plus, it’s incredibly versatile; whether you prefer dairy or non-dairy milk, it adapts beautifully to your taste. So, are you ready to brew some magic in your kitchen?

Smoky Masala Chai

Why is Smoky Masala Chai Magical?

Aromatic spices create a unique flavor that awakens the senses and makes every sip delightful. Quick to prepare, this homemade chai takes just 20 minutes, perfect for a cozy afternoon treat! Versatile enough, you can easily switch between dairy and non-dairy options. Nostalgic vibes come through with each cup, reminding you of warm gatherings and shared moments. Plus, it’s an excellent departure from fast food, letting you embrace the heartwarming essence of home-cooked goodness. For more cozy recipes, check out our Better Than Takeout Chai to expand your tea repertoire!

Smoky Masala Chai Ingredients

Dive into the rich flavors of Smoky Masala Chai with these delightful ingredients!

For the Spice Mix

  • Black peppercorns – add a peppery warmth that enhances the chai’s depth.
  • Whole cloves – infuse your drink with a sweet and slightly bitter taste.
  • Green cardamom pods – crush slightly to release their fragrant oils for an aromatic boost.
  • Cinnamon stick – warms the mixture and adds a comforting sweetness.

For the Tea

  • Loose-leaf smoky black tea or tea bags – choose loose-leaf for a fuller flavor or teabags for convenience.

For the Creaminess

  • Milk (dairy or non-dairy) – makes the chai rich and creamy; try almond or oat milk for a twist.

For Sweetness

  • Brown sugar – adds a deep caramel note, but feel free to adjust according to your taste!

Step‑by‑Step Instructions for Smoky Masala Chai

Step 1: Boil the Water and Spices
Begin by pouring 2 cups of water into a medium pot and bring it to a rolling boil over medium-high heat. Once boiling, add in the black peppercorns, cloves, cardamom pods, and cinnamon stick. Reduce the heat to low and let the spice mix simmer for about 5 minutes, allowing the fragrant aromas to fill your kitchen.

Step 2: Steep the Tea
Next, introduce the smoky black tea—either loose-leaf or tea bags—into the simmering mixture. Allow it to steep for 3 to 4 minutes, adjusting the steeping time based on your desired strength of the Smoky Masala Chai. You’ll know it’s ready when the water deepens in color and the spices dance in harmony.

Step 3: Add Milk and Sugar
Once the tea has steeped to your liking, stir in 1 cup of your chosen milk, whether it be dairy or a non-dairy option. Add 1 to 2 tablespoons of brown sugar for sweetness, adjusting to your preference. Keep the mixture on low heat and let it gently simmer for another 3 to 4 minutes, stirring occasionally. You’ll notice a creamy richness beginning to develop.

Step 4: Strain and Serve
Remove the pot from heat and prepare to strain your Smoky Masala Chai into mugs. Using a fine mesh strainer, pour the chai to separate the spices and tea leaves from the liquid. As you pour, savor the fragrant steam rising from your cups—your cozy chai is ready to warm your heart!

Smoky Masala Chai

Tips for the Best Smoky Masala Chai

  • Spice Balance: Adjusting the amount of spices can dramatically change the flavor. Start with smaller amounts and gradually increase to find your perfect blend.
  • Tea Strength: Steep your smoky black tea according to your preference; the longer you steep, the stronger and richer the Smoky Masala Chai will become.
  • Not Too Hot: When adding milk, ensure it doesn’t boil to maintain a creamy texture without scalding. Low and slow is the key!
  • Sweetness Control: Brown sugar is delicious, but feel free to swap it with honey or maple syrup for a different profile. Taste and adjust as necessary!
  • Storage Tip: If you make extra chai, store it in the fridge and reheat gently; it still tastes lovely the next day!

Make Ahead Options

These Smoky Masala Chai preparations are perfect for busy home cooks seeking a cozy treat without the last-minute rush! You can prepare the spice mixture (black peppercorns, cloves, cardamom, and cinnamon) up to 3 days in advance. Store it in an airtight container in the refrigerator to maintain its aromatic freshness. Additionally, you can measure out the loose-leaf smoky black tea or tea bags the night before. When you’re ready to enjoy, simply boil the prepped spices in water, steep the tea, and add your milk and sugar—creating your warm, comforting chai in just minutes. Remember, a gentle simmer ensures that your freshly brewed Smoky Masala Chai is just as delicious as if it were made from scratch!

Smoky Masala Chai Variations

Feel free to let your creativity flourish and tweak the flavors of this delightful chai to your liking!

  • Dairy-Free: Use your favorite non-dairy milk like almond or oat for a creamy but lactose-free option.
  • Spiced Up: Add a pinch of nutmeg or star anise for an extra layer of warmth and complexity.
  • Sweet Swap: Replace brown sugar with honey or maple syrup for a natural sweetness that perfectly balances the spices.
  • Chilies: Spice it up! Add a slice of fresh ginger or a pinch of cayenne for a warming kick of heat.
  • Herbal Boost: Swap in herbal tea like peppermint or chamomile instead of black tea for a soothing, caffeine-free variation.

For a truly unique twist, you might consider topping the chai with a dollop of whipped cream sprinkled with cardamom. The rich creaminess combined with the fragrant spices creates a luxurious experience. Each variation will inspire you to savor this cozy drink in new ways. If you love exploring bold flavors, check out our Better Than Takeout Chai for another delightful recipe!

How to Store and Freeze Smoky Masala Chai

Fridge: Store any leftover Smoky Masala Chai in an airtight container in the fridge for up to 3 days. Reheat gently on the stovetop or in the microwave.

Freezer: For longer storage, freeze the chai in individual portions using ice cube trays or freezer-safe containers for up to a month.

Reheating: Thaw frozen chai overnight in the fridge and gently reheat on low heat, stirring occasionally to restore its creamy texture.

Avoid Reboiling: When reheating, avoid bringing the chai to a rolling boil to maintain its fresh flavors and smooth consistency.

What to Serve with Smoky Masala Chai

Enhance your cozy tea experience with delightful pairings that evoke warmth and comfort.

  • Savory Samosas: Crisp pastry filled with spiced potatoes and peas, perfect for balancing the chai’s smoky sweetness. The crunch of these savory bites juxtaposes beautifully with the smoothness of your tea.

  • Spiced Cookies: Ginger snaps or chai-flavored cookies provide a lovely hint of sweetness and spice that echoes the flavors kicking in your chai. This duo invites conversations and cozy afternoons spent sharing stories.

  • Cheese and Crackers: A platter of mild cheese paired with whole-grain crackers adds a satisfying crunch and rich creaminess, making the flavors of your chai pop.

  • Fruit Salad: A refreshing mix of seasonal fruits offers a juicy counterpoint to the warm spices, cleansing the palate with each bite. Pineapples or berries could add a delightful twist!

  • Nutty Granola Bars: Homemade or store-bought, these bars deliver a chewy texture and nutty flavor that harmonizes beautifully with the chai. The wholesome nature promotes that warm, feel-good vibe.

  • Dark Chocolate: A few squares of dark chocolate make an indulgent treat that pairs wonderfully with the aromatic spices. Chocolates with a hint of sea salt bring balance to each sip of chai.

  • Milk Cake: The sweetness of this soft, spongy dessert adds a delicate finish to your chai experience. Lush and satisfying, it makes for the perfect sweet pairing!

  • Almond Biscotti: Dipped into your chai, biscotti adds a satisfying crunch while the almond flavor resonates with the chai’s spices. Enjoy this delightful marriage of textures with each sip!

  • Mango Lassi: This creamy yogurt drink serves as a refreshing balance to the warmth of your chai, enhancing the overall flavor journey. Its sweetness and tang will delight your taste buds.

  • Apple Crumble: Warm apple crumble with a scoop of vanilla ice cream is the perfect dessert to enjoy alongside your homemade chai. The comforting textures and spices create a nostalgic scene any time of year.

Smoky Masala Chai

Smoky Masala Chai Recipe FAQs

What type of black tea should I use for Smoky Masala Chai?
Absolutely! I recommend using loose-leaf smoky black tea for a richer flavor, but tea bags work just as well for convenience. Look for teas labeled “smoky” or “Lapsang Souchong” for that signature taste.

How long does Smoky Masala Chai last in the fridge?
You can store leftover Smoky Masala Chai in an airtight container in the fridge for up to 3 days. Just make sure to reheat it gently to preserve its creamy texture and delightful flavor!

Can I freeze Smoky Masala Chai?
Yes, you can freeze Smoky Masala Chai! Pour it into ice cube trays or freezer-safe containers and freeze for up to 3 months. When you’re ready to enjoy, thaw a portion overnight in the fridge and reheat on low heat, stirring occasionally.

What should I do if my Smoky Masala Chai is too spicy?
If your chai packs too much heat, don’t worry! Simply add more milk to tone it down. This will create a creamier texture while softening those robust spices. Also, try adding an extra teaspoon of sugar to balance the flavors!

Are there any dietary considerations for Smoky Masala Chai?
When making your Smoky Masala Chai, feel free to adapt the recipe for dietary needs! You can use non-dairy milk like almond, oat, or coconut for those who are lactose intolerant. Just be cautious with potential allergies—especially with spices like cinnamon and cardamom.

How do I know when my spices are fresh enough for Smoky Masala Chai?
Great question! Fresh spices should have a strong aroma and vibrant color. If your spices have lost their fragrance or show dark spots, they might be past their prime and could affect the flavor of your chai. Always opt for the freshest ingredients for the best results!

Awaken Your Senses with Homemade Smoky Masala Chai

Enjoy a delightful cup of Smoky Masala Chai, an aromatic blend perfect for cozy autumn afternoons.

  • Medium pot
  • fine-mesh strainer

For the Spice Mix

  • 1 teaspoon Black peppercorns (adds a peppery warmth)
  • 4 whole Cloves (infuses a sweet and slightly bitter taste)
  • 4 pods Green cardamom (crushed slightly)
  • 1 stick Cinnamon (adds warmth and sweetness)

For the Tea

  • 2 cups Loose-leaf smoky black tea or tea bags (choose based on preference)

For the Creaminess

  • 1 cup Milk (dairy or non-dairy option)

For Sweetness

  • 1 to 2 tablespoons Brown sugar (adjust to taste)

Step-by-Step Instructions

  1. Boil the water and spices. In a medium pot, bring 2 cups of water to a rolling boil. Add black peppercorns, cloves, cardamom pods, and cinnamon stick. Reduce heat to low and simmer for 5 minutes.
  2. Steep the tea. Introduce the smoky black tea to the mixture. Allow it to steep for 3 to 4 minutes, adjusting based on desired strength.
  3. Add milk and sugar. Stir in 1 cup of milk and 1 to 2 tablespoons of brown sugar. Simmer on low for another 3 to 4 minutes.
  4. Strain and serve. Remove from heat and strain the chai into mugs, enjoying the fragrant steam.

Adjust spices and sweetness to suit your taste. Store leftovers in the fridge for up to 3 days.

Drink
Indian
Beverage, Chai, homemade, Smoky Masala Chai, Tea

Filed Under: Drink

Refreshing Frosted Lemonade: A Creamy Summer Delight

September 20, 2025 by grace bellamy Leave a Comment

The moment I took that first invigorating sip of Frosted Lemonade, my taste buds danced with joy, as if welcoming summer in a glass. Inspired by a beloved classic, this effortless recipe blends the tartness of freshly squeezed lemon juice with the creamy goodness of vanilla ice cream, transforming simple ingredients into a delightful treat worth celebrating. With just five minutes of prep, you’ll have a cool, refreshing drink that’s perfect for sunny afternoons or as an eye-catching dessert at your next gathering. Not only does this Frosted Lemonade offer a fun twist on a fast-food favorite, but it also allows you to indulge guilt-free, bringing the taste of summer right to your kitchen. Are you ready to whip up this creamy citrus concoction and make your own sunshine?

Frosted Lemonade

Why is Frosted Lemonade So Irresistible?

Refreshing, this Frosted Lemonade is your ticket to a cool summer vibe, combining the zingy flavor of fresh lemons with the creamy texture of vanilla ice cream. Quick to make, with just five minutes of prep, this treat is perfect for busy days or spontaneous gatherings. Crowd-pleaser, it’s a guaranteed hit, whether served poolside or at a backyard barbecue. Plus, guilt-free indulgence means you can enjoy this delicious drink with zero regrets. For those seeking more refreshing recipes, don’t miss out on trying our lemonade variations or our delicious ice cream desserts.

Frosted Lemonade Ingredients

• To create this creamy and delightful Frosted Lemonade, gather these easy-to-find ingredients!

For the Base

  • Freshly squeezed lemon juice or lemonade – adds a bright and tart flavor that refreshes your palate.
  • Vanilla ice cream – contributes creaminess and a sweet balance to the tangy citrus.
  • Cold water – helps achieve a smoother blend, making it ultra-refreshing.

For Serving

  • Ice cubes – essential for chilling the cold water quickly, giving your drink that frosty finish.

Now that you have everything you need, let’s blend up some sunshine in a glass!

Step‑by‑Step Instructions for Frosted Lemonade

Step 1: Chill the Water
Begin by placing ½ cup of cold water into the refrigerator, adding a few ice cubes to expedite the chilling process. This should take about 5 minutes. Chilled water is essential for achieving that frosty, refreshing vibe in your homemade Frosted Lemonade.

Step 2: Combine Ingredients
Once chilled, grab your blender and add the 1 cup of freshly squeezed lemon juice or lemonade, along with 2 cups of creamy vanilla ice cream. Pour in the cold water from the fridge. This harmonious blend of flavors will set the stage for your delightful treat.

Step 3: Blend to Perfection
Secure the lid on your blender and blend the mixture on high speed for about 30-45 seconds. Keep an eye on the texture; you’re aiming for a smooth and creamy consistency without any chunks. The vibrant color will reflect the freshness of your Frosted Lemonade.

Step 4: Serve Immediately
Once blended, pour your creamy Frosted Lemonade into tall, chilled glasses. The consistency should be thick yet pourable. For an extra touch, consider adding a lemon slice or a sprig of mint as a garnish, and enjoy this refreshing drink right away for the best taste experience.

Frosted Lemonade

What to Serve with Frosted Lemonade

Imagine a sunny day, sipping on a creamy Frosted Lemonade while savoring delightful dishes that enhance your summer experience.

  • Grilled Shrimp Tacos: These zesty tacos bring a burst of flavor that pairs wonderfully with the refreshing tartness of your drink. The lightness of shrimp means you won’t feel weighed down on a hot day.

  • Caprese Salad: This fresh, vibrant salad with tomatoes, mozzarella, and basil mirrors the vibrant citrus notes of your Frosted Lemonade, providing a contrast in textures and a beautiful presentation.

  • BBQ Chicken Sliders: Juicy and smoky, these sliders balance the sweetness of the Frosted Lemonade with savory goodness, making each bite and sip an explosion of summer flavors.

  • Chilled Cucumber Soup: Light and refreshing, this soup serves as a perfect counterpart to your dessert-like drink, offering a cool, creamy texture and fresh taste that complements the lemonade’s tang.

  • Fruit Skewers: A colorful array of seasonal fruits adds a crunchy, sweet element that perfectly matches the citrusy zing of your drink, making it an ideal snack for warm gatherings.

  • Sparkling Water: For a simple yet delightful drink pairing, sparkling water enhances the refreshing experience while cleansing the palate between sips of your Frosted Lemonade.

  • Lemon Bars: Elevate your dessert game with tangy lemon bars that echo the flavors of your drink, creating a harmonious blend of textures and tastes that will leave everyone wanting more.

  • Mint Mojito Mocktail: For an extra touch, this refreshing mocktail provides a minty contrast, harmonizing with the bright flavors of your Frosted Lemonade for a delightful experience.

Frosted Lemonade Variations & Substitutions

Feel free to explore these delightful twists that will let you tailor your Frosted Lemonade experience!

  • Dairy-Free: Use coconut or almond milk ice cream for a creamy, non-dairy alternative that retains the drink’s icy charm.
    Swap out traditional ice cream while still enjoying this refreshing treat in a new light.

  • Sugar-Free: Substitute with a sugar-free sweetener or agave syrup to cater to low-sugar diets while keeping it delicious.
    This variation lets you enjoy all the flavors without the added calories, perfect for health-conscious sippers.

  • Fruity Twist: Add a handful of fresh berries or a banana to the blender for an extra fruity flavor boost.
    This simple addition will create a vibrant color and enhance the natural sweetness while keeping everything balanced.

  • Citrus Fusion: Combine lemon juice with lime or orange for a tangy, multi-layered citrus experience.
    Different citrus fruits can create a refreshing depth that excites your taste buds even further!

  • Spicy Kick: Incorporate a pinch of cayenne or a splash of ginger juice for a zesty surprise that adds warmth.
    This surprising twist will intrigue those who crave a little heat amidst the cool creaminess.

  • Herbal Infusion: Try adding a sprig of fresh mint or basil to the mix for an aromatic, refreshing essence.
    Herbs can elevate your Frosted Lemonade, providing a unique refreshing note that surprises the palate.

  • Alcoholic Version: Blend in a splash of vodka or gin for an adult twist to this summer favorite.
    This version transforms a simple drink into a fun cocktail worthy of any summer gathering.

  • Chocolate Delight: Mix in some chocolate syrup or cocoa powder for a rich, indulgent variation that complements the lemon.
    Combining chocolate with lemon might sound unusual, but it creates a decadent treat that tickles the taste buds.

For even more exciting drink ideas, check out our creative lemonade variations or explore our selection of thrilling summer cocktail recipes. Enjoy customizing and discovering your perfect Frosted Lemonade!

How to Store and Freeze Frosted Lemonade

Fridge: Store any leftovers in an airtight container for up to 2 days. Before enjoying again, blend briefly to restore its creamy texture.

Freezer: For long-term storage, transfer leftover Frosted Lemonade into a freezer-safe container. It can be kept for up to a month. When ready to enjoy, let it thaw slightly before blending with additional ice cream for a fresh taste.

Reheating: Since this is a creamy beverage, there’s no need to reheat—just blend again for a smooth consistency!

Make Ahead Options

These Frosted Lemonades are perfect for making ahead, allowing you to impress guests or enjoy a refreshing treat whenever you crave it! You can prepare the base mixture—combining 1 cup of lemon juice and 2 cups of vanilla ice cream—up to 24 hours in advance. Simply store it in an airtight container in the freezer. When you’re ready to serve, add the chilled cold water and blend until smooth for a creamy and frosty delight just as delicious as when freshly made. To maintain quality, avoid blending until just before serving to keep the texture ideal. Make the most of your time and enjoy this summer favorite whenever the mood strikes!

Expert Tips for Frosted Lemonade

  • Use Fresh Lemons: Freshly squeezed lemon juice provides a vibrant flavor that bottled options can’t match. Remember, too much bottled juice can be overly tart or sweet.
  • Blend Wisely: Start on a low speed to combine the ingredients, but ramp up to high for a smooth finish. Over-blending can lead to a runny texture, so keep an eye on it!
  • Adjust Sweetness: Taste your Frosted Lemonade before serving. If it’s too tart, add a bit of sugar or adjust the ratio of ice cream to lemon juice. Find that perfect balance!
  • Serving Temperature: Chilling your glasses beforehand helps keep your Frosted Lemonade cool longer. No one loves a warm slushy, right?
  • Leftover Storage: If you have any left, freeze it for a few hours then blend with a little extra ice cream for a deliciously creamy treat later!

Frosted Lemonade

Frosted Lemonade Recipe FAQs

What type of lemons should I use for the best flavor?
Absolutely! For the most vibrant and refreshing taste, opt for fresh, ripe lemons. Look for firm lemons with a bright yellow color and no dark spots. These will yield the juiciest juice, making your Frosted Lemonade burst with flavor!

How long can I store leftover Frosted Lemonade?
If you have any leftovers, you can store them in an airtight container in the fridge for up to 2 days. Just remember, the texture may change, so a quick blend before enjoying again can help restore its creamy consistency!

Can I freeze leftover Frosted Lemonade?
Yes! For a yummy treat later, pour any leftover Frosted Lemonade into a freezer-safe container and keep it for up to a month. When you’re ready to enjoy it, let it thaw slightly at room temperature for about 15-20 minutes, then give it a quick blend with an extra scoop of ice cream for the perfect creamy treat.

What if my Frosted Lemonade is too tart?
Very common! If your Frosted Lemonade turns out too tart, don’t fret. Simply add a tablespoon of sugar or honey and blend again until fully incorporated. You may also adjust the ratio of vanilla ice cream to lemon juice. Aim for a balance that satisfies your sweet tooth!

Is Frosted Lemonade suitable for kids?
Definitely! Frosted Lemonade is a kid-friendly drink, but do keep an eye on the sugar content from the ice cream and any added sweeteners. If you wish to reduce the sugar, you can substitute with a low-sugar ice cream, ensuring the treat remains enjoyable for little ones without the added guilt.

Can pets enjoy Frosted Lemonade?
While the lemon juice and sugar aren’t suitable for pets, a small taste of vanilla ice cream is usually safe for dogs. Just remember, moderation is key! Always consult your vet if you’re unsure about introducing new treats into your pet’s diet.

Refreshing Frosted Lemonade: A Creamy Summer Delight

Frosted Lemonade offers a guilt-free, creamy refreshment perfect for summer days.

  • Blender

For the Base

  • 1 cup freshly squeezed lemon juice or lemonade
  • 2 cups vanilla ice cream
  • 0.5 cup cold water

For Serving

  • ice cubes

Step-by-Step Instructions for Frosted Lemonade

  1. Chill the Water: Place ½ cup of cold water into the refrigerator with a few ice cubes for about 5 minutes.
  2. Combine Ingredients: Add 1 cup of freshly squeezed lemon juice, 2 cups of vanilla ice cream, and the chilled cold water to the blender.
  3. Blend to Perfection: Blend on high for 30-45 seconds until smooth and creamy.
  4. Serve Immediately: Pour into tall glasses and garnish with a lemon slice or mint if desired.

Use fresh lemons for the best flavor and adjust sweetness as needed. Chill glasses beforehand for optimal enjoyment.

Drink
American
creamy beverage, Frosted Lemonade, lemonade, refreshing drink, summer drink

Filed Under: Drink

Whip Up Dreamy Lavender Cream Cold Foam for Your Drinks

September 20, 2025 by grace bellamy Leave a Comment

The other day, I found myself daydreaming about a delightful café perched on a sunlit terrace, where every sip of my drink was topped with a silky cloud of Lavender Cream Cold Foam. This whimsical treat transforms your favorite beverages into something utterly enchanting. With just a few simple ingredients, you’ll impress friends and family alike while indulging in a moment of pure indulgence. Not only is this recipe a fun twist on traditional coffee creamers, but it also offers a light and airy foam that’s perfect for brightening up your morning routine or jazzing up an afternoon pick-me-up. Are you ready to elevate your drink game and infuse it with a touch of herbal magic? Let’s dive into the creamy, dreamy world of lavender!

Lavender Cream Cold Foam

Why is Lavender Cream Cold Foam a Must-Try?

Irresistible Flavor: The floral notes of lavender combined with the creaminess of milk create a unique taste that elevates any drink.

Ease of Preparation: With just three simple ingredients, you can whip up this delightful topping in minutes—perfect for those busy mornings!

Versatile Delight: Enjoy it on coffee, matcha, or iced tea, making it a perfect addition to a variety of beverages for any occasion.

Crowd-Pleasing Upgrade: Impress guests with an eye-catching, elegant foam that’s bound to spark conversations and smiles.

Perfectly Textured: This foam is airy and light, adding a whimsical touch without overpowering your drink’s original flavors.

Give your drinks a delightful twist with this Lavender Cream Cold Foam—perfect for a cozy gathering or a relaxing afternoon!

Lavender Cream Cold Foam Ingredients

• Get ready to create a dreamy topping for your beverages!

For the Foam
• Heavy whipping cream – 50 ml, cold for the ideal creamy texture that blends beautifully.
• Whole milk – 50 ml, helps create a fluffy, light foam that balances the richness of the cream.
• Purple lavender syrup – 3 tablespoons, providing the enchanting floral flavor that defines this Lavender Cream Cold Foam.

Enjoy crafting this delightful foam, and watch your drinks transform into a whimsical treat!

Step‑by‑Step Instructions for Lavender Cream Cold Foam

Step 1: Combine Ingredients
Begin by pouring 50 ml of cold heavy whipping cream, 50 ml of whole milk, and 3 tablespoons of purple lavender syrup into a tall mason jar or a cup. Make sure all the ingredients are measured accurately to achieve the perfect balance of flavor. The combination of the cream and lavender syrup creates the base for your Lavender Cream Cold Foam.

Step 2: Whip the Mixture
Using a handheld frother, whip the mixture until it becomes slightly foamy and aerated, typically about 30 seconds to 1 minute. Watch for small bubbles forming and a light froth developing on the surface. Be careful not to overwhip, as you want the foam to retain its airy texture without turning into whipped cream.

Step 3: Serve the Foam
Once your Lavender Cream Cold Foam reaches the desired consistency, gently pour it over your choice of drink, such as coffee, matcha, or chai tea. Allow it to float gracefully on top, creating an inviting visual appeal. This delightful foam will not only enhance the look of your beverage but also add a touch of floral flavor to each sip.

Lavender Cream Cold Foam

Lavender Cream Cold Foam Variations

Feel free to explore these creative twists that take your Lavender Cream Cold Foam to new heights and cater to your personal tastes!

  • Non-Dairy Twist: Substitute heavy cream and milk with coconut cream and almond milk for a dairy-free delight. The rich coconut flavor teams beautifully with lavender, creating a tropical experience.

  • Sweetener Swap: Exchange lavender syrup for honey or agave nectar for a different sweet note. Adjust the quantity to suit your taste; this can provide a lovely floral and herbal flavor.

  • Herb Infusion: Add a sprig of fresh mint or basil during the frothing process for a refreshing herbal kick. The mint adds a cooling sensation while complementing the lavender’s floral notes.

  • Chai Bliss: Mix a teaspoon of chai spice into the foam for a warm, spiced version. This addition not only changes the flavor profile but also enhances the inviting aroma of your drinks.

  • Citrus Zest: Incorporate a pinch of lemon or orange zest for a zesty lift. This brightens the foam and balances the sweetness, bringing a refreshing twist that will awaken your palate.

  • Nutty Fusion: Blend in a splash of almond or hazelnut milk for a nutty flavor boost. You’ll create a creamier texture that further enhances the richness of the foam while adding a lovely depth.

  • Iced Delight: Freeze small dollops of the foam into ice cube trays and use them in iced coffee or tea. These enchanting lavender ice cubes will melt into your drinks, releasing flavor while keeping them cool.

  • Chocolate Indulgence: For a decadent treat, mix in cocoa powder to create a chocolate lavender flavor. This luxurious combination will turn any drink into a rich dessert-worthy indulgence.

Explore these variations to craft a Lavender Cream Cold Foam that feels uniquely yours! Whether you’re trying it in a refreshing iced tea, a cozy chai, or a bold cold brew, your imagination is the only limit. If you’re looking for more delightful drink ideas, don’t forget to check out my recipe for Lavender Lemonade or a fabulous Homemade Chai Tea! Enjoy the journey of flavor!

Expert Tips for Lavender Cream Cold Foam

  • Cold Ingredients Matter: Always use cold heavy whipping cream and milk for the best results. This ensures a better frothy texture and creaminess.

  • Frothing Technique: Don’t rush the frothing process; take your time. Aim for a light, airy foam instead of overwhipping, which can lead to a thicker, less desirable texture.

  • Choosing Syrup: Opt for quality lavender syrup for authentic flavor. Homemade syrup can elevate your Lavender Cream Cold Foam, allowing for customization in sweetness and intensity.

  • Serving Suggestions: Experiment with other drinks like iced herbal teas or even sparkling water. The versatility of Lavender Cream Cold Foam can add a floral twist to countless beverages!

  • Avoid Separation: If you’re storing the foam, remember to give it a good stir before use. Separation may occur in the fridge, but it’s easy to bring back to life!

What to Serve with Lavender Cream Cold Foam

Imagine a sunny brunch where your drink is transformed into a floral masterpiece, tantalizing your taste buds and delighting your senses.

  • Fruity Iced Tea: The refreshing tang of iced tea pairs beautifully with the sweet floral hints of lavender, making for an invigorating sip.

  • Rich Espresso: The bold flavors of espresso create a perfect contrast with the light, airy lavender foam, enhancing both taste experiences.

  • Vanilla Almond Muffins: These softly sweet muffins add a lovely texture and flavor complement, perfect for a cozy afternoon treat.

  • Chai Latte: The warm spices in chai harmonize with the lavender, creating a comforting drink that warms the soul.

  • Matcha Tea: The earthy notes of matcha balanced with the sweet lavender foam make for an elegant fusion that feels like a day at the spa.

  • Lemon Shortbread Cookies: The zesty crunch of lemon cookies perfectly offsets the creamy foam, creating a delightful tea-time treat.

  • Sparkling Water: A sip of bubbly water with lavender cream offers a refreshing contrast, lightening the experience while adding an aromatic touch.

Transform your drink experience with these perfect pairings, inviting both elegance and flavor into your next gathering!

Make Ahead Options

These Lavender Cream Cold Foam is a fantastic choice for meal prep enthusiasts! You can whip up the lavender cream mixture and refrigerate it in an airtight container for up to 2 days. By doing this, you save valuable time on busy mornings. Just remember to stir the foam before using, as separation may occur. When you’re ready to enjoy, simply re-whip the mixture with a handheld frother for a few seconds and pour it generously over your favorite drink. This way, you’ll have the same delightful flavor and airy quality of freshly made Lavender Cream Cold Foam, all with minimal effort!

Storage Tips for Lavender Cream Cold Foam

  • Fridge: Store in an airtight container in the fridge for up to 2 days. Be sure to stir before using, as separation can happen due to the creamy components.
  • Freezer: Avoid freezing Lavender Cream Cold Foam; the texture will change and it may become grainy once thawed.
  • Reheating: If you need to use it after storage, simply gently stir or froth again to restore its delightful foaminess before using.

Lavender Cream Cold Foam

Lavender Cream Cold Foam Recipe FAQs

How do I select the best lavender syrup?
Absolutely! Look for high-quality lavender syrup with natural ingredients and minimal additives. Check for a vibrant color and fragrant aroma—if it smells like fresh lavender, you’re in for a treat! If you’re feeling adventurous, you could even make your own syrup at home using dried culinary lavender, sugar, and water for a personalized touch.

How should I store Lavender Cream Cold Foam?
Store your Lavender Cream Cold Foam in an airtight container in the fridge for up to 2 days. The foam might separate, so be sure to give it a good stir before using. I often find that gently re-frothing can help restore its airy texture, making your drinks just as delightful as when freshly made!

Can I freeze Lavender Cream Cold Foam?
I recommend against freezing Lavender Cream Cold Foam, as it can alter the texture and make it grainy upon thawing. The delicate bubbles that provide that dream-like foaminess won’t survive the freezer. Instead, enjoy it fresh, and if you want a batch for later, simply prepare it in smaller quantities!

What should I do if my foam is too thick?
If you find your Lavender Cream Cold Foam is too thick, don’t worry! You can adjust it by adding a touch more milk or cream and giving it a brief froth again. Aim for a lighter consistency that’s fluffy and airy—if you overwhipped it initially, a gentle mix will help bring it back to life.

Is Lavender Cream Cold Foam suitable for everyone?
Very! This foam is a fantastic treat for many, but be cautious if you’re serving those with allergies to dairy or lavender. For a vegan option, consider using oat milk and a plant-based whipping cream, along with a lavender-flavored syrup made without any animal products. Everyone deserves a splash of floral goodness!

Whip Up Dreamy Lavender Cream Cold Foam for Your Drinks

Lavender Cream Cold Foam elevates your drinks with a unique floral flavor and light, airy texture.

  • Handheld frother
  • Mason jar or cup

For the Foam

  • 50 ml Heavy whipping cream (cold)
  • 50 ml Whole milk
  • 3 tablespoons Purple lavender syrup

Step‑by‑Step Instructions for Lavender Cream Cold Foam

  1. Begin by pouring 50 ml of cold heavy whipping cream, 50 ml of whole milk, and 3 tablespoons of purple lavender syrup into a tall mason jar or a cup.
  2. Using a handheld frother, whip the mixture until it becomes slightly foamy and aerated, typically about 30 seconds to 1 minute.
  3. Once your Lavender Cream Cold Foam reaches the desired consistency, gently pour it over your choice of drink, such as coffee, matcha, or chai tea.

Always use cold ingredients for the best results. Stir stored foam before use to prevent separation.

Drink
coffee, Drink, Foam, lavender, Lavender Cream Cold Foam, Tea

Filed Under: Drink

Eerie Vampire Hot Chocolate to Indulge Your Taste Buds

September 18, 2025 by grace bellamy Leave a Comment

As the air turns crisp and whispers of autumn fill the atmosphere, I find myself gravitating towards cozy rituals that make the season special. One such indulgence is this delightful Vampire Hot Chocolate, a whimsical twist on a classic favorite. Imagine wrapping your hands around a warm mug filled with rich chocolate, seamlessly blending the sweetness of creamy milk and the thrill of a playful edible blood drizzle. This mean concoction is perfect for both intimate gatherings or a spooky night in, boasting quick prep and customizable elements that thrill both kids and adults alike. Whether you’re hosting a Halloween bash or simply treating yourself to a comforting evening, this recipe is sure to evoke smiles and laughter. Curious about how to pull off this enchanting beverage? Let’s dive into the magic!

Vampire Hot Chocolate

Why is This Vampire Hot Chocolate Unforgettable?

Decadent Flavors: This hot chocolate is a rich blend of whole milk, heavy cream, and dark chocolate that will awaken your taste buds.

Eye-Catching: The addition of an edible blood drizzle makes it a captivating centerpiece for your Halloween gatherings.

Easy to Prepare: With just 25 minutes total, this recipe is perfect for those busy evenings when you crave something special.

Customizable Treat: Feel free to adjust sweetness or opt for a vegan version with plant-based milk and dairy-free chocolate!

Crowd-Pleasing: It’s a fun twist that will leave both kids and adults enchanted—just wait for the smiles as they take their first sip!

For more fun Halloween treats, check out our guide on spooky snacks that are sure to impress!

Vampire Hot Chocolate Ingredients

For the Hot Chocolate

  • Whole milk – provides a creamy base that enhances the richness of the chocolate.
  • Heavy cream – adds a luxurious texture, making each sip feel indulgent.
  • Chocolate chips (60%-70% cocoa) – for a deep, dark chocolate flavor that resonates beautifully with the sweetness.
  • Cocoa powder – intensifies the chocolate essence, creating a delightful contrast with the creamy elements.
  • Pinch of salt – a tiny addition that balances the sweetness and enhances overall flavor.
  • Sugar to taste – customize your sweetness level—feel free to adjust based on your preference!

For the Edible Blood Drizzle

  • Red food coloring – a playful way to give your hot chocolate its eerie touch.
  • Corn syrup – acts as a base for the edible blood, ensuring it has a glossy finish.
  • Chocolate syrup or powdered sugar – choose either for thickness and an extra sweet touch to the drizzle.

Optional Toppings

  • Vanilla extract – optional for whipped cream; it provides a fragrant note that elevates your drink.

With these Vampire Hot Chocolate ingredients, you’ll be ready to create a spine-tingling treat that elevates your cozy evenings and Halloween celebrations!

Step‑by‑Step Instructions for Vampire Hot Chocolate

Step 1: Heat the Dairy
In a medium saucepan, combine 2 cups of whole milk and 1 cup of heavy cream. Place the saucepan over medium heat and gently warm the mixture while stirring occasionally. You want the milk and cream to be warm but not boiling—look for steam rising and small bubbles forming around the edges, which should take about 5 minutes.

Step 2: Create the Chocolate Base
Once the dairy mixture is warmed, add 1 cup of chocolate chips and 2 tablespoons of cocoa powder. Stir continuously with a whisk or wooden spoon until the chocolate chips are fully melted and the mixture is smooth and creamy. This should take about 3–4 minutes. You’ll know it’s ready when the chocolate is completely combined, and it has a luscious, velvety texture.

Step 3: Sweeten the Mixture
Next, add a pinch of salt to the chocolate base, which will enhance the flavors beautifully. Taste the mixture and adjust the sweetness by adding sugar as desired. Stir well to dissolve the sugar completely, which should take around 1–2 minutes. The Vampire Hot Chocolate should have a rich chocolate flavor with just the right balance of sweetness.

Step 4: Prepare the Edible Blood
In a separate small bowl, create the edible blood drizzle. Combine corn syrup with a few drops of red food coloring, then add either chocolate syrup or powdered sugar to achieve your desired thickness and color. Mix everything together until smooth and glossy. This process should take about 2 minutes, and it should have a vibrant red hue that will enhance the spooky presentation.

Step 5: Rim the Mugs
To elevate your Vampire Hot Chocolate experience, optionally rim your mugs with cocoa powder or red sanding sugar. Lightly dampen the edge of each mug with water, then dip it into the sugar to coat. This fun touch adds flavor and a nice visual element, and should take just about 3 minutes for all your mugs.

Step 6: Assemble the Hot Chocolate
Pour the delicious hot chocolate into each prepared mug, filling them until there’s about an inch of space at the top. This step should take around 2–3 minutes, allowing you to savor the moment as you watch that rich chocolate cascade into each mug, creating a delightful treat that’s ready to be dressed up.

Step 7: Top with Whipped Cream
If desired, whip heavy cream in a mixing bowl, adding a splash of vanilla extract for extra flavor. Use a hand mixer to beat the cream until soft peaks form, which should take about 3–5 minutes. Pipe this whipped cream generously on top of the hot chocolate, creating a fluffy cloud that begs to be indulged in.

Step 8: Drizzle the Edible Blood
Finally, take your prepared edible blood drizzle and artfully drizzle it over the whipped cream, letting some of it trail down the sides of the mugs for a spooky effect. This last step should take about 1–2 minutes, and it will transform your Vampire Hot Chocolate into an eye-catching treat that’s sure to impress everyone!

Vampire Hot Chocolate

Helpful Tricks for Vampire Hot Chocolate

Mind the Heat: Always heat your milk and cream gently; boiling can curdle the dairy and ruin the smooth texture of your Vampire Hot Chocolate.

Smooth Chocolate: Stir continuously when adding chocolate chips to ensure a lump-free, velvety mixture. Patience is key for the best results!

Perfect Blood Drizzle: Adjust the thickness of your edible blood drizzle by playing with the amount of corn syrup or powdered sugar—aim for a glossy, flowing consistency.

Customize Sweetness: Taste and tweak the sweetness as you go! Start with less sugar, so your Vampire Hot Chocolate remains rich without becoming overly sweet.

Presentation Matters: Rim your mugs for an impressive touch; it not only looks great but also enhances the experience with extra flavor!

What to Serve with Vampire Hot Chocolate

As you sip your rich and whimsical creation, consider these delightful pairings that elevate your cozy experience to new heights.

  • Gingerbread Cookies: The warm spices of gingerbread create a beautiful contrast to the creamy chocolate, bringing out the best in both flavors.

  • Caramel Popcorn: The salty-sweet crunch of caramel popcorn makes for a fun and unexpected contrast, perfect for nibbling alongside your hot chocolate.

  • Vanilla Ice Cream: A scoop of vanilla melts elegantly into the warm drink, creating an indulgent mix of flavors and an irresistible creamy texture.

  • Marshmallow Skewers: Toasted marshmallows add a smoky sweetness, with their soft, fluffy texture beautifully complementing the richness of your Vampire Hot Chocolate.

  • Pumpkin Spice Muffins: The cozy fall flavors of pumpkin spice muffins offer warmth and sweetness that pairs well with dark chocolate.

  • Spiced Apple Cider: This warm drink adds a fruity note and a touch of spice, creating a lovely contrast to the heavy richness of hot chocolate.

  • Chocolate-Covered Strawberries: The freshness of strawberries adds a pop of color and a burst of flavor, balancing the richness of your drink while providing a fun, decadent treat.

  • Red Velvet Cake: For a festive touch, this delicious cake echoes the theme with its stunning color and decadent frosting, making it a true showstopper.

  • Chai Tea: The fragrant spices of chai add warmth and depth, creating a unique blend of flavors that will have everyone talking.

Make Ahead Options

These delightful Vampire Hot Chocolate creations are perfect for busy home cooks looking to save time during hectic evenings! You can prepare the hot chocolate base up to 24 hours in advance; simply refrigerate it in an airtight container to maintain its rich flavors. When you’re ready to indulge, gently reheat the mixture on the stovetop, stirring until warmed through. Additionally, the edible blood drizzle can be made ahead and stored in a squeeze bottle in the refrigerator for up to one week, allowing you to elevate your presentation effortlessly. With these prep-ahead tips, you can enjoy a whimsical and spooky treat with minimal effort!

How to Store and Freeze Vampire Hot Chocolate

Fridge: Store leftover Vampire Hot Chocolate in an airtight container for up to 3 days. When ready to enjoy, gently reheat on the stove over low heat until warmed through.

Freezer: You can freeze the hot chocolate base for up to 1 month. Pour into freezer-safe containers, leaving space for expansion, and thaw in the fridge overnight before reheating.

Edible Blood Drizzle: Keep the edible blood drizzle in a squeeze bottle or jar in the refrigerator for up to one week. Give it a good shake before using, ensuring it remains pourable.

Reheating: For both the hot chocolate and drizzle, reheat gently to maintain creamy texture without compromising flavor. Enjoy the cozy vibes even after a few days!

Vampire Hot Chocolate Variations

Feel free to unleash your creativity and tailor this spooky delight to your taste buds!

  • Dairy-Free: Substitute whole milk and heavy cream with almond, oat, or coconut milk for a delicious vegan version.
    Not only will you enjoy a lighter twist, but it’ll also keep all ghostly flavors intact!

  • Spicy Kick: Add a pinch of cayenne pepper or ground cinnamon to the hot chocolate for a warm, spicy finish.
    This adds a delightful surprise that balances nicely with the sweetness!

  • Nutty Flavor: Swap half the whole milk for hazelnut milk for a nutty twist that warms the soul.
    Each sip will transport you to a cozy autumn café, rich with flavor!

  • Minty Fresh: Incorporate peppermint extract into the hot chocolate for a refreshing minty variant.
    This twist can create a delightful combination reminiscent of winter holidays!

  • Extra Decadent: Toss in a handful of mini marshmallows or drizzle with caramel sauce for an extra sweet treat.
    Marshmallows bring a nostalgic comfort, adding delight for kids and grown-ups alike!

  • Chocolate Ganache: Use chocolate ganache instead of whipped cream for an upscale, rich topping.
    Pouring a luscious ganache adds a luxurious element that’s perfect for special occasions!

  • Fruit Flavors: Mix in a splash of raspberry or cherry syrup for a surprising fruity complement.
    This fruity addition will evoke the most delightful flavors, keeping the Halloween spirit alive!

  • Alcoholic Elegance: Stir in a splash of coffee liqueur or spiced rum for an adult-friendly twist.
    This indulgent addition transforms your cozy treat into a captivating evening delight!

Explore these variations to craft your own unique Vampire Hot Chocolate that’s custom-made for you and your guests. And while you’re in the festive spirit, don’t forget to check out our guide on spooky snacks that are sure to impress. Enjoy!

Vampire Hot Chocolate

Vampire Hot Chocolate Recipe FAQs

How do I choose the best chocolate chips for Vampire Hot Chocolate?
Absolutely! Look for chocolate chips that are between 60%-70% cocoa for a rich and deep flavor. Avoid using milk chocolate, as it can make the drink overly sweet and mask the true chocolate essence that gives this Vampire Hot Chocolate its character.

What is the best way to store leftover Vampire Hot Chocolate?
You can store leftovers in an airtight container in the fridge for up to 3 days. When you’re ready to enjoy it again, simply reheat it gently on the stove over low heat until warmed through, stirring occasionally to maintain that velvety texture.

Can I freeze Vampire Hot Chocolate?
Yes, you can freeze the hot chocolate base for up to 1 month! Pour it into freezer-safe containers but be sure to leave some space at the top for expansion. When you’re ready to use it, thaw in the refrigerator overnight and then reheat gently on the stove. This way, you can enjoy a cozy cup anytime without starting from scratch!

What can I do if my edible blood drizzle is too thick?
If your edible blood drizzle turns out too thick, don’t worry! Start by adding a small amount of corn syrup or water and mix thoroughly until desired consistency is reached. If it’s too thin, a sprinkle of powdered sugar can help thicken it up. Aim for a smooth, glossy texture that beautifully drips from the whipped cream!

Is there a vegan option for this Vampire Hot Chocolate?
Very much so! To make a vegan version of Vampire Hot Chocolate, substitute the whole milk and heavy cream with your favorite plant-based milk, such as almond, oat, or coconut. Additionally, choose dairy-free chocolate chips to keep it all vegan-friendly while still maintaining that deliciously rich flavor!

Can pets safely consume Vampire Hot Chocolate?
It’s best to keep this Vampire Hot Chocolate away from pets! Cocoa and chocolate are toxic to dogs and cats, even in small amounts. Be sure to enjoy this enchanting beverage yourself and provide your furry friends with tasty, safe treats instead!

Eerie Vampire Hot Chocolate to Indulge Your Taste Buds

Enjoy this whimsical Vampire Hot Chocolate, a rich blend of chocolate and creamy milk, perfect for cozy autumn evenings.

  • Medium saucepan
  • Whisk
  • Mixing Bowl
  • hand mixer
  • squeeze bottle or jar

For the Hot Chocolate

  • 2 cups whole milk (provides a creamy base)
  • 1 cup heavy cream (adds a luxurious texture)
  • 1 cup chocolate chips (60%-70% cocoa) (for deep chocolate flavor)
  • 2 tablespoons cocoa powder (intensifies chocolate essence)
  • a pinch salt (balances sweetness)
  • to taste tablespoons sugar (customize sweetness level)

For the Edible Blood Drizzle

  • a few drops red food coloring (adds an eerie touch)
  • 1 cup corn syrup (acts as a base for edible blood)
  • to achieve thickness chocolate syrup or powdered sugar (adds sweetness to the drizzle)

Optional Toppings

  • 1 teaspoon vanilla extract (optional for whipped cream)

Step-by-Step Instructions

  1. Heat the Dairy: In a medium saucepan, combine 2 cups of whole milk and 1 cup of heavy cream. Place over medium heat and warm without boiling for about 5 minutes.
  2. Create the Chocolate Base: Add 1 cup of chocolate chips and 2 tablespoons of cocoa powder. Stir continuously until melted and smooth, about 3-4 minutes.
  3. Sweeten the Mixture: Add a pinch of salt and adjust sweetness with sugar as desired, stirring until dissolved, about 1-2 minutes.
  4. Prepare the Edible Blood: In a bowl, combine corn syrup and red food coloring, then add chocolate syrup or powdered sugar to desired thickness.
  5. Rim the Mugs: Optionally, rim mugs with cocoa powder or red sanding sugar by dampening the edges and dipping into the sugar.
  6. Assemble the Hot Chocolate: Pour hot chocolate into prepared mugs, leaving about an inch of space at the top, taking 2-3 minutes.
  7. Top with Whipped Cream: Whip heavy cream with vanilla extract until soft peaks form, then pipe onto hot chocolate.
  8. Drizzle the Edible Blood: Artfully drizzle the edible blood over whipped cream, letting some trail down the sides.

Store leftover Vampire Hot Chocolate in an airtight container for up to 3 days. The edible blood drizzle can be kept in the refrigerator for up to a week.

Drink
Halloween
cozy beverages, Fall Recipes, Halloween drinks, Rich Chocolate, spooky drinks, Vampire Hot Chocolate

Filed Under: Drink

Refreshing Mint and Rosemary Lemonade with Vanilla Bliss

August 21, 2025 by grace bellamy Leave a Comment

As I stood in my kitchen, a small bunch of fresh herbs caught my eye—a mix of mint and rosemary that instantly transported me to sun-drenched gardens. This is the inspiration behind my refreshing Mint and Rosemary Lemonade with Vanilla, a delightful twist on a classic beverage that’s perfect for summer gatherings or a quiet afternoon on the patio. What makes this recipe so appealing? For starters, it’s incredibly easy to whip up with just a few ingredients, and it fills your home with an invigorating aroma that’s hard to resist. Plus, the infusion process means you can make it ahead of time and let the flavors deepen while you prepare for your event. Ready to elevate your hydration game? Let’s dive in!

Why is This Lemonade So Irresistible?

Bold, Unique Flavor: This Mint and Rosemary Lemonade with Vanilla blends refreshing herbs with a hint of sweetness, delivering a refreshing sip unlike any store-bought drink.

Easy Preparation: With just 10 minutes of prep time and a few hours of infusion, you’ll have a crowd-pleasing beverage ready without the fuss.

Aromatic Experience: As it infuses, the enticing aroma fills your kitchen, making it perfect for gatherings or simply enjoying alone.

Versatile Serving: Serve it over ice in clear glasses for a stunning display, perfect for showcasing its vibrant color and garnished with fresh mint or rosemary.

Make-Ahead Convenience: Prepare it the night before for convenience—ideal for summer parties or a refreshing afternoon treat. This lemonade truly embodies the essence of homemade goodness! For more delicious drink ideas, don’t miss my recipe for Cucumber Mint Cooler that pairs beautifully with this lemonade.

Mint and Rosemary Lemonade Ingredients

• Prepare this refreshing Mint and Rosemary Lemonade with Vanilla and indulge in its vibrant flavors!

For the Lemonade Base

  • Lemon slices – Freshly sliced lemons add a bright and zesty flavor that’s essential for a classic lemonade.
  • Sugar – This sweetener balances the tartness of lemons and enhances the overall taste.
  • Fresh mint leaves – Mint provides a cool, aromatic touch that elevates the lemonade to refreshingly new heights.
  • Fresh rosemary leaves – Having an earthy note, rosemary complements the mint beautifully and gives depth to the flavor profile.
  • Vanilla seeds (and pod if using) – Vanilla adds a lovely sweetness and complexity, making your lemonade feel like a special treat.

For Mixing

  • Cold water – Opt for chilled water to ensure your lemonade is crisp and refreshing right from the start.

Step‑by‑Step Instructions for Mint and Rosemary Lemonade with Vanilla

Step 1: Prepare the Herb Mixture
In a large mixing bowl, combine the lemon slices, sugar, fresh mint leaves, fresh rosemary leaves, and vanilla seeds (and pod, if using). Gently massage the mixture with your hands for about 2–3 minutes, until the lemons release their juice and the herbs become coated in sugar, creating a fragrant blend that excites the senses.

Step 2: Infuse the Flavors
Cover the bowl tightly with plastic wrap and place it in the refrigerator for a minimum of 3–4 hours, or overnight if time allows. This infusion period allows the flavors of the mint, rosemary, and vanilla to meld beautifully with the lemon, enhancing the overall taste of your Mint and Rosemary Lemonade with Vanilla.

Step 3: Strain the Juice
Once the infusion time is complete, retrieve the bowl from the refrigerator. Set a fine-mesh strainer over a large pitcher, and pour the infused mixture through it. Use your hands to press down on the lemon slices to extract as much juice as possible. Discard the solids left in the strainer, leaving you with a vibrant lemon concentrate full of flavor.

Step 4: Combine with Water
To the pitcher containing your fresh lemon concentrate, add 8 cups of cold water. Stir the mixture vigorously with a large spoon, ensuring that the flavors are evenly combined. The result should be a refreshing Mint and Rosemary Lemonade with Vanilla, bursting with bright flavors and an enticing aroma.

Step 5: Serve and Garnish
Fill glasses with ice cubes to keep your lemonade chilled. Pour the Mint and Rosemary Lemonade with Vanilla over the ice, allowing it to cascade beautifully. For an elegant touch, garnish each glass with a sprig of fresh mint or rosemary, showcasing this delightful drink as a perfect refreshment for any occasion.

Make Ahead Options

Preparing this delightful Mint and Rosemary Lemonade with Vanilla in advance is a fantastic time-saver for busy home cooks! You can combine the lemon slices, sugar, mint, rosemary, and vanilla up to 24 hours before serving, allowing the flavors to infuse overnight in the refrigerator. This not only deepens the taste but also makes the final preparation a breeze. When you’re ready to serve, simply strain the mixture to extract the juice and combine it with 8 cups of cold water. For the best quality, keep the infusion covered in the fridge and ensure to strain just before serving, so it remains fresh and vibrant for your guests. Enjoy a refreshing drink with minimal effort!

Mint and Rosemary Lemonade Variations

Feel free to get creative with your Mint and Rosemary Lemonade with Vanilla and discover new flavor profiles that tantalize your taste buds!

  • Agave Sweetener: Swap sugar for agave syrup for a lower-glycemic alternative that adds a slight caramel flavor.
  • Citrus Zest: Add the zest of a lemon or lime to the infusion for an extra burst of citrusy fragrance that brightens every sip.
  • Herbal Fusion: Mix in some fresh basil leaves along with the mint and rosemary to create a delightful herb blend with a unique twist.
  • Spicy Kick: For a fun kick, muddle in slices of fresh jalapeño during the infusion process to add a hint of heat that pairs wonderfully with the sweetness.
  • Berry Blast: Toss in a handful of fresh berries like strawberries or raspberries before straining for a fruity twist that enhances both flavor and color.
  • Sparkling Water: Substitute part of the cold water with sparkling water for a bubbly, festive version that adds an exciting fizz to each glass.
  • Chilled Tea Base: Use cooled herbal tea instead of water for an aromatic base—try chamomile or green tea for a soothing effect.
  • Vanilla Bean Addition: Enhance the vanilla essence by adding a whole vanilla bean pod during the infusion for an even more intense flavor experience.

For a delightful summer treat, consider pairing your refreshing lemonade with a light salad, like a Watermelon Feta Salad, to balance the sweetness and enhance your outdoor dining experience!

Tips for the Best Lemonade

• Herb Freshness Matters: Use fresh mint and rosemary to ensure vibrant flavors; dried herbs can result in a dull taste in your Mint and Rosemary Lemonade with Vanilla.

• Infusion Time: For maximum flavor, allow the mixture to infuse overnight if possible; short infusion times may lead to a less aromatic drink.

• Proper Straining: Make sure to press the lemon slices well through the strainer to extract every bit of juice; neglecting this can leave your lemonade weak in flavor.

• Water Temperature: Always use cold water; this enhances the refreshment factor of your lemonade and keeps it crisp and enjoyable.

• Adjust Sweetness: Taste and adjust the sweetness according to your preference, as lemon varieties and personal taste can vary—don’t be afraid to play with sugar levels!

How to Store and Freeze Mint and Rosemary Lemonade with Vanilla

Fridge: Store leftover Mint and Rosemary Lemonade with Vanilla in an airtight container in the refrigerator for up to 3 days to maintain its freshness and flavor.

Freezer: For longer storage, pour the lemonade into ice cube trays and freeze. Once solid, transfer the cubes to a zip-top bag for use in cocktails or drinks later.

Reheating: If serving warm, gently heat the lemonade on the stove over low heat; avoid boiling to preserve the delicate flavors. Add a sprig of fresh herbs for extra aroma while warming.

Infusion Reminder: If you’re preparing a new batch, remember, the longer it infuses (up to overnight), the better the flavor.

What to Serve with Mint and Rosemary Lemonade with Vanilla

Picture a warm summer day, a gentle breeze rustling the leaves, and the sun casting a golden glow as you savor the refreshing sip of this invigorating beverage.

  • Grilled Lemon Herb Chicken: The zestiness of grilled chicken pairs beautifully with the herbaceous notes in the lemonade, making for a perfectly balanced meal.
  • Mediterranean Couscous Salad: This dish adds a delightful texture with its fluffy couscous and fresh veggies, perfectly complementing the refreshing drink. A burst of flavors meets a cooling sip, creating a harmonious experience.
  • Feta & Watermelon Skewers: The sweetness of watermelon enhances the lemonade’s brightness, making these skewers ideal for a light and refreshing appetizer. The salty feta creates a contrast that’s deliciously mouthwatering.
  • Roasted Veggie Platter: Roasted vegetables with a hint of olive oil bring warmth and earthiness, creating a beautiful contrast to the chilled lemonade. Textures and flavors intermingle, enhancing your culinary journey.
  • Spicy Shrimp Tacos: The heat from the shrimp tacos offers a delightful kick that is mellowed by the cooling qualities of the mint and rosemary lemonade. Each bite and sip complements the other in a fiesta of flavors!
  • Berry Tart with Vanilla Cream: This dessert’s sweetness and vibrant colors echo the refreshing feelings of your lemonade. The vanilla cream enhances the vanilla undertone in the drink for an elevated dessert experience.
  • Herb-Infused Olive Oil Bread: Soft, warm bread drizzled with herb-infused olive oil provides a comforting accompaniment. The earthy flavors enhance the freshness of your drink for an exceptional pairing.

Mint and Rosemary Lemonade with Vanilla Recipe FAQs

How do I select the best lemons for my lemonade?
Absolutely! When choosing lemons, look for ones that are bright yellow and slightly firm, indicating they are ripe. If they have a nice fragrance and feel heavy for their size, they’re perfect for juicing. Avoid lemons with dark spots or blemishes, as these can signal overripeness or spoilage.

What’s the best way to store leftovers?
Very! Leftover Mint and Rosemary Lemonade with Vanilla can be stored in an airtight container in the refrigerator for up to 3 days. Make sure to keep it well-sealed to prevent any absorption of other odors from the fridge. If you need longer storage, try freezing!

Can I freeze the lemonade for later use?
Absolutely! To freeze your lemonade, pour it into ice cube trays and freeze until solid. Once frozen, transfer the cubes to a zip-top bag and store in the freezer for up to 3 months. These flavorful cubes can be used in drinks or smoothies to keep them cool without diluting flavor!

What if my lemonade doesn’t taste sweet enough?
No worries! If you find your Mint and Rosemary Lemonade with Vanilla isn’t sweet enough, simply prepare a simple syrup by heating equal parts sugar and water until dissolved. Stir this into your lemonade a little at a time, tasting as you go, until you reach your desired sweetness.

Are there any dietary considerations I should keep in mind?
Of course! If you’re serving this lemonade at a gathering, it’s thoughtful to note that members with allergies might need to avoid vanilla if they’re sensitive, or opt for an alternative sweetener like agave syrup for a sugar-free option. Always keep an eye out for those who may have sensitivities to herbs as well!

How can I enhance the infusion process?
For the best results, allow the herb and lemon mixture to infuse overnight. This gives the flavors plenty of time to blend. During the infusion, consider giving the mixture a gentle stir once or twice to help release those delicious aromas. The longer it sits (up to 24 hours), the more flavorful your lemonade will be!

Refreshing Mint and Rosemary Lemonade with Vanilla Bliss

This Mint and Rosemary Lemonade with Vanilla offers a delightful twist on a classic beverage, perfect for summer gatherings.

  • Mixing Bowl
  • fine-mesh strainer
  • Pitcher

Lemonade Base

  • 4 slices Lemon slices (Freshly sliced lemons add a bright and zesty flavor that’s essential for a classic lemonade.)
  • 1 cup Sugar (This sweetener balances the tartness of lemons and enhances the overall taste.)
  • 1 cup Fresh mint leaves (Mint provides a cool, aromatic touch that elevates the lemonade to refreshingly new heights.)
  • 1 cup Fresh rosemary leaves (Having an earthy note, rosemary complements the mint beautifully and gives depth to the flavor profile.)
  • 1 tablespoon Vanilla seeds (Vanilla adds a lovely sweetness and complexity, making your lemonade feel like a special treat.)
  • 8 cups Cold water (Opt for chilled water to ensure your lemonade is crisp and refreshing right from the start.)

Preparation Steps

  1. In a large mixing bowl, combine the lemon slices, sugar, fresh mint leaves, fresh rosemary leaves, and vanilla seeds (and pod, if using). Gently massage the mixture with your hands for about 2–3 minutes, until the lemons release their juice and the herbs become coated in sugar, creating a fragrant blend that excites the senses.
  2. Cover the bowl tightly with plastic wrap and place it in the refrigerator for a minimum of 3–4 hours, or overnight if time allows. This infusion period allows the flavors of the mint, rosemary, and vanilla to meld beautifully with the lemon, enhancing the overall taste of your Mint and Rosemary Lemonade with Vanilla.
  3. Once the infusion time is complete, retrieve the bowl from the refrigerator. Set a fine-mesh strainer over a large pitcher, and pour the infused mixture through it. Use your hands to press down on the lemon slices to extract as much juice as possible. Discard the solids left in the strainer, leaving you with a vibrant lemon concentrate full of flavor.
  4. To the pitcher containing your fresh lemon concentrate, add 8 cups of cold water. Stir the mixture vigorously with a large spoon, ensuring that the flavors are evenly combined. The result should be a refreshing Mint and Rosemary Lemonade with Vanilla, bursting with bright flavors and an enticing aroma.
  5. Fill glasses with ice cubes to keep your lemonade chilled. Pour the Mint and Rosemary Lemonade with Vanilla over the ice, allowing it to cascade beautifully. For an elegant touch, garnish each glass with a sprig of fresh mint or rosemary, showcasing this delightful drink as a perfect refreshment for any occasion.

For maximum flavor, allow the mixture to infuse overnight if possible; short infusion times may lead to a less aromatic drink. Use fresh mint and rosemary to ensure vibrant flavors; dried herbs can result in a dull taste.

Drink
American
easy lemonade recipe, homemade lemonade, infused lemonade, Mint and Rosemary Lemonade with Vanilla, refreshing drink, Summer Beverage

Filed Under: Drink

Indulge in a Mocha Cookie Crumble Frappuccino Bliss

August 20, 2025 by grace bellamy Leave a Comment

As the sun drips its golden light through the kitchen window, I reach for a handful of chocolate cookies, feeling a delightful sense of creativity bubble within me. There’s something magical about crafting a Mocha Cookie Crumble Frappuccino that transforms an ordinary afternoon into a sweet escape. This deliciously easy recipe is my go-to for when I’m craving a caffeine kick blended with dessert-like indulgence. Not only can you whip it up in just 10 minutes, but it’s also a marvelous way to impress friends and family, making it a real crowd-pleaser. With layers of rich coffee, creamy milk, and crunchy Oreos, who could resist? Are you ready to blend up your new favorite treat?

Why is This Frappuccino So Irresistible?

Creamy Delight: The luscious mixture of whipped cream, milk, and chocolate syrup creates a melt-in-your-mouth experience.
Coffee Boost: With rich cold brew coffee, you’ll savor every sip while getting that caffeine kick to power you through the day.
Decadent Flavors: The combination of chocolate chips and Oreo cookies makes each drink a dessert in disguise, satisfying your sweet tooth.
Quick & Easy: Ready in just 10 minutes, this frappuccino is perfect for busy days or spontaneous gatherings with friends.
Crowd-Pleaser: Serve it at parties or cozy get-togethers, and watch it become the star of the show. You might also enjoy our Chocolate Chip Cookie Recipe for more delicious treats!

Mocha Cookie Crumble Frappuccino Ingredients

For the Creamy Layer
• Whipped cream – adds a fluffy and rich texture to your frappuccino.
• Chocolate syrup – gives a sweet, chocolatey kick that complements the coffee beautifully.

For the Coffee Base
• Cold brew coffee – provides a smooth coffee flavor without the bitterness; feel free to substitute with chilled espresso.
• Whole milk – enhances creaminess; any milk alternative works too if you have dietary preferences.

For the Cookie Crunch
• Chocolate chips – they melt slightly, creating a delightful chocolate experience with every sip.
• Oreo cookies – bring a crunchy texture and delicious flavor; reserve some for topping to add an extra crunch.

For Flavoring
• Pure vanilla extract – a must-have for elevating the entire flavor profile of your frappuccino.
• Ice cubes – essential for achieving that cold, refreshing consistency.

Now that you have all the ingredients ready, let’s dive into creating this indulgent Mocha Cookie Crumble Frappuccino that will surely tantalize your taste buds!

Step‑by‑Step Instructions for Mocha Cookie Crumble Frappuccino

Step 1: Chill the Glasses
Begin by taking two tall glasses and adding ¼ cup of whipped cream and 1 tablespoon of chocolate syrup to the bottom of each. This delightful mixture will create a sweet surprise when you pour in your frappuccino. Place the glasses in the fridge to chill while you prepare the coffee base, allowing the whipped cream to firm up slightly.

Step 2: Blend the Coffee Base
In a high-speed blender, combine 1 cup of cold brew coffee, ½ cup of whole milk, ⅓ cup of chocolate chips, 2 tablespoons of chocolate syrup, most of the chopped Oreo cookies, and 1 teaspoon of pure vanilla extract. Blend briefly until the ingredients are well mixed and the chocolate chips have started to break down, blending all the rich flavors together for your Mocha Cookie Crumble Frappuccino.

Step 3: Add Ice and Blend
Next, add 2 cups of ice cubes to the blender and blend again until you achieve a smooth and frothy texture. Adjust the consistency by adding more ice for a thicker frappuccino or blending longer for a thinner result. You want a creamy and icy blend that’s perfect for indulging on a warm day.

Step 4: Pour Over the Creamy Layer
Take your chilled glasses from the fridge and pour the blended mocha mixture over the prepared whipped cream and chocolate syrup. Watch as the rich, creamy frappuccino cascades into the glass, blending beautifully with the sweet layers below, setting the stage for your delicious Mocha Cookie Crumble Frappuccino.

Step 5: Garnish and Serve
Finally, generously top each frappuccino with the remaining whipped cream, a drizzle of chocolate syrup, and an additional sprinkle of chopped Oreo cookies for that crunchy texture. This not only adds an appealing visual element but also enhances the flavor with every delightful sip. Serve immediately to enjoy the luscious layers at their best!

How to Store and Freeze Mocha Cookie Crumble Frappuccino

Fridge: Enjoy your Mocha Cookie Crumble Frappuccino fresh for the best taste. If you have leftovers, store them in an airtight container in the fridge for up to 2 days.

Freezer: For longer storage, pour the frappuccino into ice cube trays and freeze. When craving a treat, blend a few cubes with fresh milk to revive the flavor!

Reheating: Since this recipe is best served cold, avoid reheating. If it’s melted, simply blend with ice again for that delightful texture.

Layering Tips: If you want to enjoy it later, prepare the creamy layer (whipped cream and syrup) separately and combine just before serving for optimal freshness.

Make Ahead Options

These Mocha Cookie Crumble Frappuccinos are perfect for meal prep, allowing you to enjoy this indulgent treat whenever you crave it! You can prepare the coffee base by blending together the cold brew coffee, milk, chocolate chips, 2 tablespoons of chocolate syrup, most of the chopped Oreos, and vanilla extract up to 24 hours in advance. Simply store the mixture in an airtight container in the refrigerator. When you’re ready to serve, blend in the ice cubes until smooth and pour it over the prepared whipped cream and chocolate syrup in your chilled glasses. This way, you’ll have a delicious and refreshing drink ready to savor in no time, just as delightful as if you made it fresh!

Expert Tips for Mocha Cookie Crumble Frappuccino

Chill the Glasses: Ensure your glasses are chilled before pouring in the frappuccino for a refreshing experience. This keeps your drink cold and delicious longer.

Blend Wisely: Avoid over-blending your frappuccino; just a few pulses will do. Stop blending when chocolate chips are broken down but still offer texture for a delightful sip!

Milk Alternatives: Feel free to experiment with milk alternatives, such as almond or oat milk. Choose what’s best for your taste, but make sure it’s unsweetened for balance.

Adjust Sweetness: If you prefer a sweeter treat, add an extra tablespoon of chocolate syrup or a dash of sugar. Start small and taste-test as you go to get your perfect Mocha Cookie Crumble Frappuccino!

Cookie Variations: Don’t limit yourself to just Oreos; try different types of cookies for unique flavor twists. Peanut butter or chocolate chip cookies can give an exciting new flair!

Serve Fresh: For the best taste and texture, serve your frappuccino immediately after preparation. It ensures the blend is frothy and the layers remain intact.

What to Serve with Mocha Cookie Crumble Frappuccino

As you sip on the creamy goodness of your frappuccino, consider adding delightful pairings that enhance the experience and create an indulgent meal.

  • Chocolate Chip Cookies: These classic cookies echo the flavors of your frappuccino, enhancing the chocolate experience with each bite.
  • Fresh Fruit Salad: The bright, juicy fruits provide a refreshing contrast to the richness of the frappuccino, cleansing your palate beautifully.
  • Savory Muffins: A warm, cheesy muffin balances the sweetness of the frappuccino, creating a perfect blend of savory and sweet flavors.
  • Vanilla Ice Cream: Elevate your frappuccino to an even more decadent dessert by pairing it with a scoop of smooth vanilla ice cream.
  • Pistachio Biscotti: Crunchy and slightly nutty, biscotti adds texture and pairs wonderfully with the chocolate and coffee notes in the frappuccino.
  • Drizzled Cheesecake: A slice of creamy cheesecake, drizzled with chocolate syrup or caramel, makes for an extravagant dessert alongside your drink.
  • Iced Herbal Tea: For a lighter drink option, consider a refreshing iced herbal tea, creating a beautiful balance with the rich coffee flavors.

Mocha Cookie Crumble Frappuccino Variations

Feel free to express your creativity and customize this delightful frappuccino to suit your taste buds!

  • Pumpkin Spice: Add 2 tablespoons of pumpkin puree and 1 teaspoon of pumpkin spice for a cozy fall twist. This variation brings warm, spiced flavors into your drink, perfect for chilly days.

  • Nutty Treat: Swap the regular chocolate chips for hazelnut or almond chocolate chips for an exciting nutty flavor. With each sip, you’ll enjoy a burst of delicious nuttiness to complement the creamy layers.

  • Vegan Option: Substitute dairy products with coconut whipped cream and almond milk for a vegan-friendly treat. You won’t miss the creaminess, and the coconut adds a tropical flair to every sip.

  • Minty Fresh: Incorporate a few drops of peppermint extract for a refreshing mint flavor. It pairs beautifully with the chocolate and coffee, creating a delightful coffeehouse-inspired experience.

  • Banana Bliss: Blend in half a frozen banana for a fruity twist and added creaminess. The banana transforms the texture and brings a wonderful sweetness that complements the chocolate.

  • Spicy Kick: Add a pinch of cayenne pepper or cinnamon for a spicy, sweet contrast. This unexpected twist adds warmth and excitement, making each sip a new adventure.

  • Caramel Drizzle: Replace the chocolate syrup with caramel sauce or add a layer of caramel for a divine twist. The buttery sweetness of caramel melds beautifully with the coffee and chocolate flavors.

  • Double Chocolate: Use chocolate almond milk instead of regular milk and increase the chocolate chips for an intense chocolate experience. This variation is for true chocolate lovers—every sip will feel indulgent.

Feel free to explore these variations or invent your delightful blend inspired by this Mocha Cookie Crumble Frappuccino! You might also want to try our classic Homemade Milkshake recipe for another delicious twist on creamy beverages.

Mocha Cookie Crumble Frappuccino Recipe FAQs

What type of coffee should I use for the Mocha Cookie Crumble Frappuccino?
Absolutely! I recommend using cold brew coffee for a smoother flavor, but if you don’t have it, chilled espresso works wonderfully. Just make sure it’s strong enough to stand out against the chocolate and cream.

How long can I store my Mocha Cookie Crumble Frappuccino in the fridge?
To keep your drink fresh, store it in an airtight container in the fridge for up to 2 days. However, be prepared that the texture might change slightly, so it’s best enjoyed fresh!

Can I freeze the Mocha Cookie Crumble Frappuccino?
Yes! For long-term storage, pour the frappuccino into ice cube trays and freeze. When you’re ready to enjoy, blend a few frozen cubes with a splash of fresh milk until smooth and creamy again. This method preserves the delicious flavors and refreshing texture!

What ingredients should I look for to ensure they’re fresh?
When selecting ingredients, opt for cookies without any dark spots – this signals they’re fresh. For whipped cream, check the expiration date and opt for brands that use real ingredients. If you’re using milk alternatives, ensure they don’t have an odd odor.

Is this frappuccino suitable for people with dairy allergies?
Yes! The Mocha Cookie Crumble Frappuccino can easily accommodate dairy allergies by substituting whole milk with almond, oat, or coconut milk. Just be sure to check if your cookie choice is also dairy-free.

How can I make my frappuccino thicker or thinner?
For a thicker consistency, simply add more ice to the blender and pulse again. To thin it out, blending for a few extra seconds often does the trick! Adjust as needed to find your perfect balance.

Indulge in a Mocha Cookie Crumble Frappuccino Bliss

Craft a Mocha Cookie Crumble Frappuccino that transforms an ordinary afternoon into a sweet escape.

  • Blender
  • tall glasses

For the Creamy Layer

  • 1/4 cup whipped cream (adds a fluffy and rich texture)
  • 1 tablespoon chocolate syrup (gives a sweet chocolatey kick)

For the Coffee Base

  • 1 cup cold brew coffee (provides a smooth coffee flavor)
  • 1/2 cup whole milk (enhances creaminess; any milk alternative works)

For the Cookie Crunch

  • 1/3 cup chocolate chips (melt slightly to create a delightful experience)
  • 3 cookies Oreo cookies (reserve some for topping)

For Flavoring

  • 1 teaspoon pure vanilla extract (elevates the flavor profile)
  • 2 cups ice cubes (essential for achieving cold consistency)

Step‑by‑Step Instructions

  1. Chill two tall glasses with 1/4 cup whipped cream and 1 tablespoon chocolate syrup at the bottom of each.
  2. In a blender, combine 1 cup cold brew coffee, 1/2 cup whole milk, 1/3 cup chocolate chips, 2 tablespoons chocolate syrup, most chopped Oreo cookies, and 1 teaspoon vanilla extract. Blend until mixed.
  3. Add 2 cups ice cubes to the blender and blend until smooth and frothy.
  4. Pour the blended mocha mixture over the prepared whipped cream and chocolate syrup in the chilled glasses.
  5. Top with remaining whipped cream, a drizzle of chocolate syrup, and chopped Oreo cookies. Serve immediately.

Ensure glasses are chilled for the best experience. Adjust sweetness as desired and experiment with cookie variations.

Drink
American
coffee, dessert, Frappuccino, Indulgence, Mocha Cookie Crumble Frappuccino

Filed Under: Drink

Iced Raspberry Vanilla Chai for a Refreshing Summer Treat

August 13, 2025 by grace bellamy Leave a Comment

On a particularly warm day, I found myself yearning for a refreshing twist to my usual iced beverage. Enter the Iced Raspberry Vanilla Chai—a delightful fusion that delivers a burst of flavor while soothing my craving for something special. This recipe combines the aromatic spices of chai tea with the vibrant essence of fresh raspberries and creamy vanilla, making it an ideal choice for those wanting to elevate their afternoon routine. Not only is it a breeze to prepare in just 20 minutes, but it’s also a stunning showstopper for gatherings, delighting guests with its vibrant colors and delightful taste. Whether you sip it by the pool or enjoy it with a good book, this homemade drink promises to invigorate your day. Shall we dive into the refreshing details of how to create this little masterpiece?

Why is Iced Raspberry Vanilla Chai so Special?

Sippable Delight: This drink combines the comforting warmth of chai with fruity freshness, making it perfect for warm days.

Quick Prep: In just 10 minutes of prep, you can have a vibrant, refreshing drink that impresses everyone.

Customizable: Easily adapt the flavors by adding more raspberries or adjusting the sweetness to your liking.

Crowd-Pleaser: Served at gatherings, this drink will definitely be a conversation starter, with its stunning presentation and unique flavor.

Nutrient Boost: It’s not just delicious; the fresh raspberries are loaded with antioxidants, adding a healthy twist.

Enjoy this refreshing summer treat by making it part of your entertaining lineup! You might also find inspiration from our recipes for refreshing summer beverages that can pair beautifully with this chai.

Iced Raspberry Vanilla Chai Ingredients

For the Chai Base
• Brewed chai tea – Use freshly brewed chai for the best flavor; chilled is essential for this refreshing drink.
• Vanilla extract – Adds a warm, inviting flavor; pure vanilla extract elevates the taste significantly.

For the Raspberry Element
• Fresh raspberries – These juicy gems bring a burst of flavor; feel free to substitute with raspberry puree if needed.
• Honey or sugar – Use to sweeten the drink to your preference; honey works well for a natural touch.

For the Creamy Finish
• Milk or dairy-free milk alternative – This provides a creamy texture; experiment with almond or coconut milk for a different twist.
• Ice cubes – Essential for keeping your drink chilled and refreshing as you savor each sip.

Optional Garnish
• Fresh raspberries – Use as a lovely garnish for a pop of color and flavor.
• Sprinkle of cinnamon – Adds a warm, aromatic finish that complements the chai wonderfully.

Now that you have all the ingredients needed for your Iced Raspberry Vanilla Chai, let’s blend these flavors together and enjoy!

Step‑by‑Step Instructions for Iced Raspberry Vanilla Chai

Step 1: Brew the Chai Tea
Start by brewing 2 cups of chai tea using either two tea bags or loose-leaf chai steeped in boiling water for about five minutes. Allow it to cool completely, then transfer the chai tea to the refrigerator and chill for at least 15 minutes until it reaches a refreshing, cold temperature.

Step 2: Prepare the Raspberry Purée
While the chai tea is chilling, combine 1/2 cup of fresh raspberries (or raspberry puree) with 1 teaspoon of honey or sugar in a blender. Blend until smooth, ensuring the mixture is vibrant and creamy. For a smoother texture, strain the purée through a fine mesh sieve to remove the seeds, if desired.

Step 3: Combine Chai and Flavorings
Once the chai tea is chilled, pour it into a tall glass, allowing the contents to glisten invitingly. Add 1 teaspoon of vanilla extract to the glass, followed by the raspberry purée you prepared. Use a spoon to gently stir both ingredients together, creating a lovely swirl of color and flavor that promises a delightful sip.

Step 4: Add Ice and Creamy Milk
Next, drop a generous handful of ice cubes into the glass, filling it halfway to keep your drink refreshingly cold. Slowly pour in 1/2 cup of milk or your favorite dairy-free alternative over the ice, enhancing the creamy texture while creating a beautiful layered effect. The flavors will begin to blend together harmoniously.

Step 5: Garnish and Serve
To finish your Iced Raspberry Vanilla Chai, add a few extra fresh raspberries on top for an eye-catching garnish. For an aromatic touch, sprinkle a light dusting of cinnamon over the drink. This vibrant presentation not only enhances the visual appeal but also adds a warming spice that perfectly complements the chai.

Expert Tips for Iced Raspberry Vanilla Chai

Use Fresh Ingredients: Always opt for fresh raspberries and quality chai tea; their flavors will elevate your Iced Raspberry Vanilla Chai immensely.

Chill Tea Thoroughly: Make sure the chai tea is completely chilled before mixing; a warm base can dilute the refreshing taste you want.

Blend Carefully: For the raspberry purée, blend until smooth but don’t overblend. You want a vibrant texture without losing the fruit essence.

Sweetness Matters: Adjust the sweetness to your liking. Start with a small amount of honey or sugar; you can always add more for your perfect flavor.

Layering Technique: Pour the milk slowly over the ice after the chai mix; this creates a beautiful swirl that will impress your guests.

Garnish Generously: Don’t skip the garnish! Fresh raspberries and a sprinkle of cinnamon make your Iced Raspberry Vanilla Chai not just tasty but visually appealing.

How to Store and Freeze Iced Raspberry Vanilla Chai

Fridge: Store any leftover iced raspberry vanilla chai in an airtight container for up to 2 days. Give it a quick stir before serving, as the ingredients may separate.

Freezer: You can freeze the chai base (without ice or milk) in an airtight container for up to 1 month. Thaw in the fridge overnight before using, then blend with fresh raspberries and milk.

Preparation Notes: If making a large batch for a gathering, consider preparing the chai and raspberry purée ahead of time, then assembling right before serving for the best flavor.

Reheating: While this drink is best enjoyed cold, you can gently warm the chai base on the stove for a unique hot version if desired.

Iced Raspberry Vanilla Chai Variations

Explore these delightful twists and creative substitutions to make your Iced Raspberry Vanilla Chai truly your own!

  • Dairy-Free: Substitute regular milk with almond, coconut, or oat milk for a creamy, non-dairy option. The nutty flavors add an extra layer of richness that complements the chai beautifully.

  • Sweetener Swap: Replace honey with agave syrup or maple syrup for a vegan-friendly and unique twist on sweetness. Each will impart a different flavor profile, enhancing the overall experience.

  • Spice it Up: Add a pinch of cayenne pepper or a splash of ginger syrup for an unexpected kick. This will enliven the warm spices in the chai, making each sip an adventure.

  • Fruity Burst: Experiment with other berries, like blueberries or strawberries, in place of raspberries. Each fruit brings its own character; strawberries give a lighter, sweeter note while blueberries add a deep, rich flavor.

  • Chai Variance: Switch up your chai tea with different flavors, such as vanilla chai or spiced chai, for a new aromatic experience that keeps things interesting and fresh.

  • Frozen Treat: Pour the prepared chai into ice molds instead of serving on ice. Once frozen, blend the chai cubes into a slushy delight that’s ultra-refreshing for those scorching days.

  • Garnish Upgrade: Try using mint leaves or edible flowers alongside fresh raspberries to elevate the visual appeal and add a refreshing twist. The mint can brighten the drink even more!

These variations invite you to play and personalize your Iced Raspberry Vanilla Chai to your heart’s content! If you’re looking for more refreshing ideas, consider adding a splash of flavor with a homemade fruit syrup or check out our selection of other cool summer drinks to keep your taste buds excited!

Make Ahead Options

Preparing your Iced Raspberry Vanilla Chai in advance can make busy days feel a little lighter! You can brew the chai tea and refrigerate it for up to 3 days; simply let it cool completely before storing. The raspberry purée can also be made ahead and kept in the fridge for up to 2 days—just remember to cover it tightly to maintain freshness. When you’re ready to enjoy, mix the chilled chai with vanilla extract, add ice, and pour in the milk. This way, your refreshing drink will taste just as delicious as if you made it fresh!

What to Serve with Iced Raspberry Vanilla Chai

Imagine sipping a vibrant drink, surrounded by delicious dishes that perfectly complement the refreshing notes of your chai.

  • Crispy Tacos: The crunchy texture and zesty flavors of tacos pair beautifully with the smooth creaminess of the chai.
  • Mediterranean Quinoa Salad: A light, herb-infused salad brings a refreshing element that balances the spicy chai flavors.
  • Fresh Fruit Skewers: Juicy, sweet fruits add a pop of color and a cooling aspect alongside the complex spices of the drink.
  • Spicy Chicken Wings: The heat from the wings contrasts delightful with the calming sweetness of the Iced Raspberry Vanilla Chai, creating a fantastic flavor balance.
  • Mini Quiches: Savory, eggy bites with vegetables or cheese enhance your chai experience, making for a wonderfully cozy afternoon treat.
  • Lemon Tart: The tartness and sweetness of a lemon dessert echo the fruity notes in the chai while providing a refreshing finish to your meal.
  • Sparkling Water with Mint: A light, bubbly drink infused with fresh mint complements the iced chai while keeping the palate refreshed.

Serve your Iced Raspberry Vanilla Chai in style with these delightful pairings for an unforgettable culinary experience!

Iced Raspberry Vanilla Chai Recipe FAQs

How do I choose the best raspberries for this recipe?
Absolutely! Look for fresh raspberries that are plump and bright in color. Avoid any that have dark spots or appear mushy, as these may be overripe. You want them to be fragrant and firm, ensuring a burst of flavor in your chai!

How should I store leftover Iced Raspberry Vanilla Chai?
Store any leftovers in an airtight container in the fridge for up to 2 days. However, it’s best to give it a quick stir before serving, as the ingredients may separate over time. Simply refresh your drink by adding a few more ice cubes to bring back that chill!

Can I freeze the Iced Raspberry Vanilla Chai?
Yes, you can! To freeze, take the chai base (without ice and milk) and pour it into an airtight container for up to 1 month. When you’re ready to enjoy it, simply thaw it in the fridge overnight. Once thawed, blend it with fresh raspberries and milk for a delicious treat.

What if my raspberry purée is too chunky?
If your purée turns out chunkier than you’d prefer, don’t worry! Simply pour it through a fine mesh sieve or strainer to remove the seeds and achieve a smoother consistency. You can also blend it again to make it creamier, adjusting the texture to your liking.

Are there any dietary considerations for this recipe?
Very! If you have allergies, you can easily adapt this beverage. For nut allergies, choose a dairy milk option like oat or soy. If you prefer it vegan, opt for plant-based milk and use agave instead of honey for sweetening. Always check ingredient labels to ensure they are allergy-friendly.

How can I make this recipe lower in sugar?
Certainly! To lower the sugar content, consider reducing the amount of honey or sugar, or using a natural sweetener such as stevia or monk fruit. You can also skip the sweeteners altogether if your raspberries are very ripe and sweet, allowing their natural flavor to shine.

Iced Raspberry Vanilla Chai for a Refreshing Summer Treat

Iced Raspberry Vanilla Chai is a delightful fusion of chai tea, fresh raspberries, and vanilla, perfect for a refreshing summer treat.

  • Blender
  • Glass
  • Measuring Cups
  • spoon
  • Fine Mesh Sieve

For the Chai Base

  • 2 cups Brewed chai tea (Chilled for best flavor)
  • 1 teaspoon Vanilla extract (Pure vanilla recommended)

For the Raspberry Element

  • 1/2 cup Fresh raspberries (Or raspberry puree)
  • 1 teaspoon Honey or sugar (To taste)

For the Creamy Finish

  • 1/2 cup Milk or dairy-free milk alternative (Almond or coconut milk suggested)
  • 1 cup Ice cubes (Essential for a refreshing drink)

Optional Garnish

  • 2 tablespoons Fresh raspberries (For garnish)
  • 1 teaspoon Cinnamon (Sprinkle for flavor)

Step-by-Step Instructions for Iced Raspberry Vanilla Chai

  1. Brew 2 cups of chai tea and chill for at least 15 minutes.
  2. Blend 1/2 cup of fresh raspberries with 1 teaspoon of honey or sugar until smooth.
  3. Combine chilled chai tea with 1 teaspoon of vanilla extract and raspberry purée.
  4. Add ice cubes to the glass and pour in 1/2 cup of milk or dairy-free alternative.
  5. Garnish with fresh raspberries and a sprinkle of cinnamon before serving.

Store leftovers in an airtight container in the fridge for up to 2 days. Freeze the chai base for up to 1 month for best results.

Drink
Fusion
Chai Tea, Homemade Chai, Iced Raspberry Vanilla Chai, Raspberry Drink, refreshing drink, Summer Beverage

Filed Under: Drink

Refreshing Strawberry Dirty Sprite: Perfect Summer Sip

July 29, 2025 by grace bellamy Leave a Comment

As I leaned against the kitchen counter, sipping on a vibrant Strawberry Dirty Sprite, the summer sun streamed through the window, making the drink sparkle like a ruby. This refreshing concoction spritzes together the natural sweetness of juicy strawberries with the effervescence of lemon-lime soda, creating just the right balance of fun and flavor. What I love most about this recipe is its effortless preparation and endless customization options—whether a splash more citrus or a different type of berry, you can truly make it your own! Perfect for summer outings with friends or cozy afternoons at home, this drink is gluten-free and vegan, appealing to a variety of dietary needs. Are you ready to mix up a drink that’ll have everyone asking for seconds?

Why is Strawberry Dirty Sprite a must-try?

Vibrant Color: The bright red hues of strawberries make this drink visually stunning! It’s the perfect centerpiece for any summer gathering.

Effortless Preparation: With minimal steps, you can whip up this refreshing beverage in just minutes—ideal for impromptu parties or lazy afternoons.

Customizable Delight: Feel free to experiment! Swap in different berries or adjust the sweetness to craft a drink that suits your taste perfectly.

Crowd Favorite: This drink is sure to impress friends and family alike, making it a go-to at barbecues or brunches.

Health-Conscious Choice: Indulge guilt-free; it’s gluten-free and vegan, making it a guiltless pleasure for everyone.

Why not pair it with your favorite summer salad or some light grilled chicken for a delightful meal? This Strawberry Dirty Sprite is sure to be the highlight of your summer sipping!

Strawberry Dirty Sprite Ingredients

For the Drink
• Fresh Strawberries – These provide the vibrant, natural sweetness that makes the drink shine; frozen strawberries can be used for a thicker consistency.
• Lemon-Lime Soda – The bubbly base of the drink adds essential fizz and a refreshing tang; feel free to substitute with citrus-flavored sparkling water for a twist.
• Simple Syrup or Sugar – Optional sweeteners to heighten the berry flavor; adjust according to your sweetness preference as you create your Strawberry Dirty Sprite.
• Fresh Lemon or Lime Wedge – This adds bright acidity; while optional, a squeeze of citrus really enhances the flavors.
• Ice Cubes – Essential for keeping your drink refreshingly chilled during those warm summer days.

Carefully gather these ingredients, and you’ll be well on your way to creating a delightful Strawberry Dirty Sprite that not only quenches your thirst but also brings joy to all who sip it!

Step‑by‑Step Instructions for Strawberry Dirty Sprite

Step 1: Prepare Strawberries
Begin by washing 4-5 medium fresh strawberries under cold water, ensuring they are clean and vibrant. Slice the strawberries into thin pieces for easy incorporation into your drink. For a smoother texture, you can choose to puree or muddle them in a bowl or glass; this should take about 2-3 minutes. The vibrant red color will pop and set the stage for your refreshing Strawberry Dirty Sprite.

Step 2: Combine Ingredients
Grab a tall glass and fill it halfway with ice cubes, which will chill your drink beautifully. Pour in 8 ounces of lemon-lime soda over the ice, allowing the fizzy bubbles to rise. The effervescence will mix with the strawberries as you work, creating a delightfully refreshing base for your Strawberry Dirty Sprite. Take a moment to enjoy the delightful fizz!

Step 3: Sweeten Your Drink
Now it’s time to add a personal touch of sweetness! Stir in simple syrup or sugar according to your taste preference, ensuring it dissolves completely in the bubbly mixture. This step can take around 30 seconds. As you mix, the sweetness will enhance the natural flavors of the strawberries and soda, making each sip jubilantly refreshing.

Step 4: Add Citrus
To brighten up your Strawberry Dirty Sprite, squeeze a fresh lemon or lime wedge over the drink. This addition not only enhances the flavor but also adds a vibrant zest that complements the sweetness of the strawberries. Allow the juice to mix with the drink for about 15-20 seconds, ensuring that the tangy notes infuse every refreshing drop.

Step 5: Stir and Garnish
Gently stir the concoction with a spoon to combine all the flavors harmoniously, observing how the vibrant red of the strawberries mingles with the citrusy fizz. After a thorough mix, it’s time to wrap up your drink: garnish the rim with a fresh strawberry or a lime wedge for a pop of color and a beautiful presentation. Let it sit for a moment, allowing the flavors to settle.

Step 6: Serve
Your Strawberry Dirty Sprite is all set! Pour the mixture into tall, clear glasses or mason jars to showcase the delightful layers and bubbles. Serve immediately to friends and family, ensuring each glass captures the essence of summer in its color and freshness. Cheers to a refreshing and customizable experience with your homemade Strawberry Dirty Sprite!

Strawberry Dirty Sprite Variations

Feel free to unleash your creativity and personalize this drink to suit your taste and mood!

  • Berry Blend: Mix in raspberries or blueberries along with strawberries for a burst of flavors. The combination adds a lovely complexity that will delight your palate.

  • Citrus Kick: Replace lemon-lime soda with grapefruit soda for a tangy twist. This swap will add a zesty note that’s perfect for sunny afternoons!

  • Minty Fresh: Add muddled fresh mint leaves for a refreshing herbal touch. This will elevate your drink and make it taste like a summer garden in a glass.

  • Sweetness Swap: Try honey or agave syrup instead of simple syrup for a natural sweetener. This adjustment not only changes the sweetness but lends an earthy undertone too.

  • Fruity Fizz: Use fruit-flavored sparkling water instead of soda for a lighter, refreshing drink. It’s a perfect way to cut the sweetness while enjoying vibrant flavors.

  • Frozen Treat: Blend all ingredients with ice for a slushy version of your Strawberry Dirty Sprite. This icy treat will cool you down on those hot days!

  • Spicy Surprise: Add a pinch of cayenne pepper or a splash of hot sauce for a surprising kick. The heat juxtaposed with the sweetness is a delightful experience worth trying!

  • Adult Version: Splash in a hint of vodka or rum for a fun cocktail that’s perfect for summer gatherings. It adds a playful twist and turns this drink into a festive favorite.

With all these options, your Strawberry Dirty Sprite can be an ever-evolving drink that brings joy to every gathering. Pair it with a light salad or a delicious grilled dish, and you’ll have a refreshing summer meal that’s sure to impress!

Storage Tips for Strawberry Dirty Sprite

  • Room Temperature: For the best taste, serve the drink fresh immediately after preparation. Avoid leaving it at room temperature for more than 2 hours to maintain quality.
  • Fridge: If you have leftovers, store the Strawberry Dirty Sprite in a sealed container in the refrigerator. Aim to consume within 24 hours to preserve freshness and fizz.
  • Freezer: Freezing is not recommended as it may alter the texture of the strawberries and affect the carbonation.
  • Reheating: There’s no need to reheat this drink—enjoy it chilled, fresh, and bubbly for a delightful experience!

Make Ahead Options

These Strawberry Dirty Sprites are perfect for busy home cooks looking to save time while still delivering a refreshing treat! You can wash and slice the strawberries up to 24 hours in advance, storing them in an airtight container in the refrigerator to maintain their vibrant color and sweetness. The lemon-lime soda should be kept separate until you’re ready to serve to keep the fizz intact. When it’s time to enjoy your drink, simply mix the prepared strawberries with chilled soda, add your desired sweetener, and finish with a squeeze of fresh citrus. With these simple make-ahead tips, you’ll have a deliciously refreshing Strawberry Dirty Sprite ready to impress your family and friends!

What to Serve with Strawberry Dirty Sprite

As the sun shines down and your Strawberry Dirty Sprite sparkles in the glass, it’s time to think about the perfect companions that will elevate your sipping experience.

  • Crispy Summer Salad: A refreshing salad with mixed greens and light vinaigrette balances the sweetness of the drink, making each bite as refreshing as every sip.
  • Grilled Chicken Skewers: Juicy, marinated chicken enhances the essence of summer cookouts and pairs wonderfully with the fruity flavors of your beverage.
  • Zesty Shrimp Tacos: The bright, zesty flavors of fresh shrimp tacos offer a delightful contrast to the sweetness of your drink, providing a beach-vibe meal.
  • Fruit Tart: A light dessert featuring fresh fruits mirrors the strawberry theme and adds a touch of sweetness without overwhelming the palate.
  • Lemon Sorbet: This cool and tangy sorbet perfectly complements the Strawberry Dirty Sprite, offering an icy treat to keep you refreshed and cool.
  • Sparkling Water: A flavored sparkling water alongside enhances the effervescence of the drink, providing a refreshing alternative for anyone wanting to slow down the sweetness.
  • Cheese Platter: Mild cheeses like mozzarella or goat cheese contrast the sweet flavors, making for a lovely combination of textures and tastes.

So, gather your favorites and let the summer vibes flow! Each pairing is designed to complement the Strawberry Dirty Sprite, creating a memorable and delightful meal.

Expert Tips for Strawberry Dirty Sprite

Blend it Smooth: Use a blender to puree the strawberries for a silkier texture. Muddling gives you a delightful chunky feel but can be less smooth.

Garnish Creatively: Consider using fresh mint leaves or a slice of lime as garnish; it adds both aroma and visual appeal to your Strawberry Dirty Sprite.

Adjust Sweetness: Start with a little sweetener and taste before adding more. This will help you find the perfect balance without overpowering the berry flavor.

Keep it Fresh: If you have leftovers, store them in a sealed container, but remember, the carbonation will fade quickly—it’s best enjoyed fresh!

Experiment with Bubbles: Swap lemon-lime soda for flavored sparkling water to create different flavor profiles, sparking creativity while enjoying your Strawberry Dirty Sprite!

Strawberry Dirty Sprite Recipe FAQs

How do I select ripe strawberries for my Strawberry Dirty Sprite?
Absolutely! When choosing strawberries, look for those that are bright red, firm, and fragrant. Avoid any with dark spots all over as these indicate overripeness. If possible, choose organic strawberries to reduce pesticide exposure. If strawberries are not in season, you can opt for frozen strawberries for a thicker texture.

What’s the best way to store leftovers from my Strawberry Dirty Sprite?
To keep your Strawberry Dirty Sprite fresh, store any leftovers in a sealed container in the refrigerator. It’s best enjoyed within 24 hours as the carbonation will diminish rapidly. If you notice that the drink has lost its fizz, stir it gently before serving again to reintroduce a bit of effervescence.

Can I freeze my Strawberry Dirty Sprite?
Freezing isn’t recommended for the Strawberry Dirty Sprite, as the carbonation will be lost and the texture of the strawberries will change. However, if you want a slushy version, try blending the ingredients together and then freezing the mixture in an ice cube tray for up to 3 months. This way, you can create a refreshing slushy later by blending the frozen cubes again!

What should I do if my drink is too sweet?
Very! If you find that your Strawberry Dirty Sprite is too sweet for your taste, simply add a splash more lemon or lime juice to balance the sweetness. You can also dilute the drink with a little additional lemon-lime soda or sparking water. The acidity will help cut through the sugar and enhance the flavor profile.

Are there any dietary considerations I should be aware of for the Strawberry Dirty Sprite?
Indeed! This Strawberry Dirty Sprite is naturally gluten-free and vegan, making it suitable for most dietary needs. However, if you are serving guests with allergies, ensure that all ingredients, especially any sweeteners or syrups, are allergy-friendly. Using agave or a sugar substitute can cater to those with sugar sensitivities when sweetening.

How do I add variety to my Strawberry Dirty Sprite?
Feel free to get creative! Substituting lemon-lime soda with flavored sparkling water can give your drink a unique twist. You could also mix in different berries such as raspberries or blueberries, or even add fresh herbs like basil or mint for an invigorating flavor! Don’t hesitate to explore—everyone’s taste is different, and customization makes your Strawberry Dirty Sprite truly special!

Refreshing Strawberry Dirty Sprite: Perfect Summer Sip

A vibrant Strawberry Dirty Sprite spritzes together natural sweetness and effervescence, making it a must-try summer drink.

  • tall glass
  • spoon

For the Drink

  • 4-5 medium fresh strawberries (can use frozen for thicker consistency)
  • 8 ounces lemon-lime soda (or substitute with citrus-flavored sparkling water)
  • 1-2 tablespoons simple syrup or sugar (adjust according to sweetness preference)
  • 1 slice fresh lemon or lime wedge (optional, for bright acidity)
  • 1 cup ice cubes (for chilling the drink)

Step-by-Step Instructions for Strawberry Dirty Sprite

  1. Wash 4-5 medium fresh strawberries under cold water, slice them into thin pieces or puree/muddle for a smoother texture.
  2. Fill a tall glass halfway with ice cubes and pour in 8 ounces of lemon-lime soda.
  3. Stir in simple syrup or sugar according to taste, allowing it to dissolve fully.
  4. Squeeze a fresh lemon or lime wedge over the drink for added flavor.
  5. Stir gently to combine flavors and garnish as desired before serving.
  6. Pour into tall, clear glasses and serve immediately.

Garnish creatively with mint leaves or lime for added aroma. Adjust sweetness based on personal preference. Best enjoyed fresh.

Drink
American
Easy Recipe, gluten-free, refreshing beverage, Strawberry Dirty Sprite, summer drink, Vegan

Filed Under: Drink

Delicious Classic Margarita – Your Perfect Cocktail Escape

July 29, 2025 by grace bellamy Leave a Comment

As I watched the sun dip below the horizon, I felt that familiar excitement bubbling within me—the kind that only a perfectly crafted Classic Margarita can inspire. This refreshing cocktail, with its harmonious blend of smooth tequila, zesty fresh lime juice, and just the right hint of orange liqueur, has a way of elevating any occasion. What’s more, whipping up a Classic Margarita is a breeze, making it an ideal choice whether you’re entertaining friends or enjoying a cozy evening at home. With its enticing flavors and a tantalizing salted rim, this gluten-free delight is sure to delight your taste buds and impress your guests. Curious how to create this tangy treat yourself? Let’s dive right into the recipe!

Why is the Classic Margarita a Must-Try?

Simplicity at its finest: This iconic cocktail requires just a handful of ingredients, making it easy for anyone to whip up at home.

Versatile flavors: Feel free to personalize your Classic Margarita with unique twists like flavored syrups or different citrus juices, ensuring a new experience with every drink.

Perfect for any occasion: Whether it’s a backyard BBQ or a quiet night in, this drink complements both lively gatherings and intimate moments beautifully.

Gluten-free goodness: Enjoy a guilt-free indulgence that meets dietary needs while still delivering on taste.

Crowd-pleasing appeal: The refreshing, tangy flavor profile entices guests of all ages, making it a staple at any gathering—just pair it with some chips and guacamole for the ultimate experience!

You can easily prepare a batch of Margarita mix in advance for convenience, letting you focus on enjoying time with loved ones.

Classic Margarita Ingredients

• Get ready to mix up your favorite drink!

For the Cocktail

  • Tequila Blanco – Opt for 100% agave tequila to capture the authentic taste of a Classic Margarita.
  • Fresh Lime Juice – Use freshly squeezed lime juice for a bright, zesty flavor that bottled juice can’t match.
  • Orange Liqueur – Cointreau or Triple Sec adds a sweet touch that perfectly balances the tangy lime.
  • Simple Syrup – Sweeten to your liking; starting with a small amount lets you control the level of sweetness.

For the Rim

  • Coarse Salt – A salted rim enhances the cocktail’s overall flavor; flavored salts can add an exciting twist!

For Garnishing

  • Lime Wedge/Wheel – This not only makes for a beautiful garnish but also adds an aromatic touch to your drink.

Step‑by‑Step Instructions for Classic Margarita

Step 1: Prepare the Glass
Begin your Classic Margarita by preparing your glass. Wet the rim with a lime wedge and dip it into coarse salt, ensuring an even coating. This salty rim will add a delightful contrast to the tangy flavors of your drink. Set the glass aside and let the salt adhere while you gather the ingredients.

Step 2: Mix in the Shaker
In a cocktail shaker filled with ice, combine 2 oz of tequila, 1 oz of fresh lime juice, 1 oz of orange liqueur, and ½ oz of simple syrup. Make sure to use freshly squeezed lime juice for optimal freshness. Secure the shaker lid tightly and shake vigorously for about 15 seconds until the mixture is well-chilled and frosty to the touch.

Step 3: Strain the Mixture
Remove the shaker lid and strain the chilled mixture into your prepared glass filled with fresh ice cubes. The vibrant colors of the Classic Margarita should be visible as you pour, signaling a refreshing treat ahead. Ensure you filter out any ice shards for a smooth and enjoyable sipping experience.

Step 4: Garnish Your Drink
To finish your Classic Margarita, garnish it with a lime wheel or wedge perched on the rim of the glass. This adds not only a decorative touch but also a burst of aroma each time you take a sip. For an extra flair, you might also consider adding a sprig of mint or a slice of jalapeño for an unexpected twist.

Make Ahead Options

You can easily prepare your Classic Margarita mix in advance, making it perfect for those busy nights when you want a cocktail without the fuss! Simply mix together the tequila, fresh lime juice, orange liqueur, and simple syrup (without ice) and refrigerate the mixture in an airtight container for up to 24 hours. To maintain the cocktail’s vibrant flavor, be sure to squeeze the lime fresh just before mixing to serve. When you’re ready to enjoy, simply shake the prepped mix with ice, strain it into your prepared glass, and garnish as desired. This way, you’ll have a refreshing margarita ready to go with minimal effort!

How to Store and Freeze Classic Margarita

Fridge: Store any remaining Classic Margarita mix in an airtight container for up to 24 hours. This keeps the flavors fresh, perfect for enjoying later!

Salted Rims: Keep glass rims prepared with coarse salt in a separate container, ready for a quick refill just before serving. This maintains texture and flavor without making it too soggy.

Freezing: To freeze leftover mix, pour it into ice cube trays. Once frozen, transfer the cubes to a zip-top bag for up to 3 months. Thaw when ready to enjoy a chilled margarita!

Reheating Tips: If you’ve prepared a blended version and stored it in the freezer, blend again for a refreshing slushy texture when ready to serve.

What to Serve with Classic Margarita

Elevate your cocktail experience by pairing your Classic Margarita with delicious complementary dishes and drinks that enhance its vibrant flavors.

  • Chips and Guacamole: The creamy avocado and crunchy chips offer a delightful contrast to the tangy cocktail, making this a classic duo.
  • Ceviche: Fresh fish and zesty citrus elevate the summer vibes, balancing the sweetness of the margarita beautifully.
  • Grilled Shrimp Tacos: These scrumptious tacos provide a smoky flavor with fresh toppings, enhancing the margarita’s zest. Each bite and sip work harmoniously together.
  • Spicy Salsa: Pair your margarita with a zesty salsa that adds a kick, igniting your palate and enhancing every sip of your Classic Margarita.
  • Black Bean Quesadillas: A savory cheesy filling complements the drink’s refreshing aspects, ensuring a truly satisfying meal.
  • Watermelon Salad: The sweet, juicy burst of watermelon contrasts beautifully with the tangy drink, serving as a refreshing palate cleanser.
  • Tequila Sunrise: For a themed twist, sip on this colorful cocktail alongside your margarita, enjoying the blend of fruity flavors.
  • Chocolate Mousse: Indulge in a rich dessert that beautifully balances the tart margarita, creating a luxurious end to your meal.

Tips for the Best Classic Margarita

  • Freshness Matters: Always use fresh lime juice. Bottled alternatives can dull the flavor and spoil the refreshing quality of your Classic Margarita.

  • Salt Sensation: When rimming the glass with salt, ensure it sticks well. Wet the rim with lime juice and dip it in salt while the glass is still wet for the best adhesion.

  • Sweetness Control: Adjust the sweetness by starting with less simple syrup. You can always add more, but it’s hard to take sweetness away once it’s mixed!

  • Shake it Right: Shake vigorously for about 15 seconds to mix fully and chill the Classic Margarita. A well-shaken cocktail is key to a delightful experience.

  • Chill Your Glass: For an extra-refreshing sip, chill your glass in the freezer before pouring in the margarita mix. A cold glass enhances the entire drinking experience.

Classic Margarita Variations & Substitutions

Customize your Classic Margarita with these exciting twists and swaps that will have your taste buds dancing!

  • Dairy-Free: Substitute any creamy mixers with coconut cream for a tropical twist that brings a lush, velvety texture.
  • Spicy Kick: Add a splash of jalapeño juice to your shaker for a spicy version that excites the palate. This fiery addition will have heat lovers coming back for more!
  • Fruit-Infused: Muddle fresh fruit like strawberries, passion fruit, or mango in the shaker before adding the other ingredients for a fruity explosion in every sip. Try blending different fruits to create your signature margarita!
  • Herbaceous: Toss in fresh basil or cilantro when shaking for a fresh herbal note that brightens up the drink beautifully. These aromatic herbs can transform your Classic Margarita into a garden of flavors!
  • Low-Calorie: Replace simple syrup with agave nectar or a low-calorie sweetener, retaining sweetness without the extra calories. This way, you can indulge guilt-free!
  • Citrus Medley: Experiment with other citrus juices like grapefruit or blood orange, balancing them with lime for an intriguing variation that’s both delicious and vibrant. Mixing citrus will give you a delightful twist that’s anything but ordinary.
  • Non-Alcoholic: For a refreshing mocktail, swap the tequila with sparkling water while keeping lime juice and orange juice for a lively blend. This way, everyone can join in the fun!

These variations add a personal touch to your drink, ensuring that every gathering is filled with delightful surprises. And if you’re looking for something to munch on while sipping your margarita, consider whipping up some classic Meatloaf Moist Flavorful to pair with your cocktails!

Classic Margarita Recipe FAQs

How do I choose the best tequila for my Classic Margarita?
Choose a 100% agave tequila for the best flavor. Tequila Blanco is the most common choice for margaritas, and brands like Patron or Tres Agaves offer excellent quality. Avoid mixto tequilas, which contain added sugars and aren’t as authentic.

How should I store leftover Classic Margarita mix?
You can store any remaining Classic Margarita mix in an airtight container in the fridge for up to 24 hours. This keeps the fresh lime juice and other components flavorful. For optimal enjoyment, prepare the salted rims just before serving to maintain their texture.

Can I freeze Classic Margarita mix?
Absolutely! To freeze, pour the leftover mix into ice cube trays and freeze until solid. Once frozen, transfer the cubes to a zip-top plastic bag. This method allows you to enjoy a quick margarita anytime, and the mix can last up to 3 months in the freezer. Just blend some cubes with fresh ice when you’re ready for a drink!

What do I do if my Classic Margarita tastes too tart?
If your margarita is too tart, simply adjust the sweetness! Start by adding a touch more simple syrup, about ½ teaspoon at a time, and stir gently. Remember to taste as you go, adjusting until it suits your palate. Fresh lime juice can vary in acidity, so it’s great to experiment to find your ideal balance.

Is the Classic Margarita safe for those with dietary restrictions?
Yes, the Classic Margarita is gluten-free, making it suitable for folks avoiding gluten. However, always check your specific brands of orange liqueur and simple syrup for any potential allergens. If you’re concerned about sugar content, substitute the simple syrup with agave nectar or a sugar-free sweetener.

How do I tell if my lime juice is fresh enough for the Classic Margarita?
Fresh lime juice is typically vibrant and aromatic with no off-putting odor. If you notice a dull color or if the juice has started to separate (or if there are dark spots inside the lime), it’s best to grab new limes. Fresh juice ensures a tangy punch that elevates your margarita experience!

Delicious Classic Margarita – Your Perfect Cocktail Escape

A refreshing Classic Margarita with smooth tequila, zesty lime juice, and orange liqueur.

  • Cocktail shaker
  • Glass

For the Cocktail

  • 2 oz Tequila Blanco (Opt for 100% agave tequila.)
  • 1 oz Fresh Lime Juice (Use freshly squeezed for optimal flavor.)
  • 1 oz Orange Liqueur (Cointreau or Triple Sec recommended.)
  • ½ oz Simple Syrup (Adjust to taste.)

For the Rim

  • to taste Coarse Salt (Enhances flavor of cocktail.)

For Garnishing

  • 1 Lime Wedge/Wheel (For garnish and aroma.)

Step‑by‑Step Instructions

  1. Prepare your glass by wetting the rim with a lime wedge and dipping it into coarse salt.
  2. In a cocktail shaker filled with ice, combine 2 oz of tequila, 1 oz of fresh lime juice, 1 oz of orange liqueur, and ½ oz of simple syrup. Shake vigorously for about 15 seconds.
  3. Strain the mixture into your prepared glass filled with fresh ice cubes.
  4. Garnish with a lime wheel or wedge on the rim of the glass.

Always use fresh lime juice and consider adding flavors like flavored syrups for variation.

Drink
Mexican
Classic Margarita, easy cocktail, gluten-free, party drink, refreshing drink, Tequila cocktail

Filed Under: Drink

Refreshing Mint Mojito Cocktail for a Fun Summer Escape

July 29, 2025 by grace bellamy Leave a Comment

As summer days stretch longer and the sun glistens on the horizon, I can’t help but crave something refreshing—like a Mint Mojito Cocktail. This vibrant drink captures the essence of a sun-soaked afternoon, blending zesty lime, aromatic mint, and sparkling soda water into a symphony of flavors. Crafting this irresistible cocktail is not only a breeze, but it also promises to impress your friends at any summer gathering. With its gluten-free appeal and the option to turn it into a mocktail, the Mint Mojito is as versatile as it is delightful. Imagine clinking glasses filled with this refreshing elixir while soaking up the warmth of your patio or garden. So, are you ready to elevate your summer sip game? Let’s dive into this invigorating recipe!

Why is the Mint Mojito Cocktail a Must-Try?

Refreshing, this Mint Mojito Cocktail is the ultimate summer quencher, perfect for those sunny afternoons. Customizable with options for mocktails or fruity variations, it welcomes creativity. Easy to make, you’ll impress guests without the fuss. Light and bubbly, it’s a delightful balance of flavors that will keep everyone coming back for more. Perfectly gluten-free, it’s a drink everyone can enjoy. Whether paired with grilled seafood or served at a backyard BBQ, your gatherings just became a lot more fun!

Mint Mojito Cocktail Ingredients

• To create the perfect Mint Mojito Cocktail, gather these fresh ingredients for a delightful summer drink!

For the Cocktail

  • Fresh Mint Leaves – Essential for that invigorating aroma; use fresh for the best experience.
  • White Sugar – Balances the drink’s tartness; consider replacing with agave syrup for a healthier option.
  • Fresh Lime Juice – Adds a zesty punch that wakes up the flavors; always opt for freshly squeezed for maximum taste.
  • White Rum – The backbone of this cocktail; silver rum is ideal, but feel free to substitute with a non-alcoholic version for a mocktail.
  • Sparkling Soda Water – Introduces a refreshing fizz; any carbonated water will do the trick.
  • Ice Cubes – Necessary for a chilled experience, keeping your Mojito perfectly refreshing on hot days.

Step‑by‑Step Instructions for Mint Mojito Cocktail

Step 1: Muddle Mint and Sugar
In a sturdy glass, add about 10 fresh mint leaves and 2 teaspoons of white sugar. Using a muddler or the back of a spoon, gently press down on the mint leaves to release their essential oils—this should take about 30 seconds. Be careful not to bruise the mint too harshly, as it can turn bitter. You want to see the mint leaves release their vibrant green color.

Step 2: Add Lime Juice
Next, squeeze the juice of one freshly cut lime into the glass, ensuring to catch any seeds as you do so. Stir the mixture gently with a spoon to combine the sugar and lime juice with the muddled mint, taking about 15 to 20 seconds. You’ll notice a fragrant aroma filling the air, setting the stage for your refreshing Mint Mojito Cocktail.

Step 3: Mix in Rum
Pour in 1.5 ounces of white rum to the muddled mixture, then gently stir again for about 10 seconds. Be careful not to crush the mint further; just aim to blend the ingredients. The rum should meld seamlessly into the vibrant green base, adding a depth of flavor that enhances the freshness of the mint and lime.

Step 4: Add Ice
Fill the glass with ice cubes, leaving a little room at the top. Aim to use about 3/4 cup of ice, allowing your cocktail to remain beautifully chilled. As the ice settles in, it should slightly splash the vibrant mixture, giving your Mint Mojito a refreshing visual while keeping it cool and enjoyable on warm summer days.

Step 5: Top with Soda Water
Next, carefully pour sparkling soda water over the ice until the glass is full. This should take about 3 to 4 ounces, depending on your preferred fizziness. Watch as the bubbles rise and dance, adding enthusiasm to your Mint Mojito Cocktail. A gentle stir may be needed to integrate the soda with the rest of the ingredients while maintaining the effervescence.

Step 6: Garnish and Serve
Finally, garnish your Mint Mojito with a sprig of fresh mint and a lime wheel on the rim of the glass for an inviting presentation. Take a moment to appreciate the vibrant colors and enticing aroma. Serve immediately, enjoying the chilled, refreshing drink that showcases the summer essence perfectly.

Make Ahead Options

Preparing a Mint Mojito Cocktail ahead of time can save you precious moments during busy summer gatherings! You can make the mint and lime base (muddled mint, sugar, and lime juice) up to 24 hours in advance; simply store it in an airtight container in the refrigerator to keep the flavors fresh. When you’re ready to serve, just stir in the white rum and pour over ice before topping with sparkling soda water. This method not only enhances the flavors as they meld but also ensures that your cocktail remains just as delicious and refreshing when served. Enjoy the ease of being the host with the most!

Mint Mojito Cocktail Variations

Feel free to mix things up and add your personal touch to this delightful drink!

  • Mocktail: Omit the rum for a refreshing non-alcoholic version that everyone can enjoy at summer gatherings. Just increase the soda water and lime juice!

  • Berry Blast: Toss in some muddled berries (like strawberries or raspberries) for a burst of fruity flavor that beautifully complements the mint.

  • Mango Delight: Add fresh mango puree for a tropical twist that brings a sunny vibe to your Mojito. It’s the perfect blend of sweet and refreshing!

  • Basil Swap: Try swapping mint with fresh basil leaves for an herbaceous variation. The unexpected flavor combo adds a delightful twist to this classic drink.

  • Spicy Kick: For those who enjoy a little heat, muddle in some sliced jalapeños or a dash of hot sauce. This spice elevates the flavor profile wonderfully!

  • Coconut Infusion: Use coconut water instead of soda water for a creamy, tropical touch that enhances the refreshing qualities of the drink. A perfect beach vibe in a glass!

  • Ginger Zing: Add a splash of ginger beer for a zesty twist. This adds a lovely bite that complements the mint and lime beautifully.

  • Herbal Garden: Mix in a few sprigs of other herbs, like rosemary or thyme, for an aromatic infusion that will surprise and delight your taste buds. It’s a sophisticated twist on a classic!

What to Serve With Mint Mojito Cocktail

As you sip on this refreshing drink, consider complementing your gathering with some delightful pairings that elevate your summer experience.

  • Grilled Shrimp Skewers: The smoky char and succulent shrimp enhance the cocktail’s refreshing quality, making each sip more vibrant.
  • Zesty Ceviche: The bright citrus flavors of ceviche harmonize beautifully with the tangy lime and mint, creating a refreshing harmony. Enjoy it as a chilled appetizer.
  • Light Green Salad: A crisp salad with mixed greens, avocados, and a citrus vinaigrette adds a fresh crunch that balances the mojito’s sweetness, perfect for a light meal.
  • Tropical Fruit Platter: Fresh fruits like pineapple, mango, and berries provide a colorful, sweet contrast to the minty cocktail. These juicy bites will keep spirits high.
  • Coconut Rice: This subtly sweet and creamy side dish complements the mojito’s fresh notes, adding an exotic touch to your summer feast.
  • Sparkling Water: Enhance your hydration with refreshing carbonated water infused with lime slices for a chic non-alcoholic option that pairs beautifully with the mint mojito, keeping the vibe light and refreshing.
  • Berry Sorbet: A cool, fruity dessert option that cleanses the palate and mirrors the cocktail’s refreshing essence, perfect for a warm sunny day.
  • Grilled Corn on the Cob: The sweetness and char from grilled corn drizzled with lime butter will marry wonderfully with your Mint Mojito, creating a delicious, seasonal flavor profile.

Expert Tips for the Best Mint Mojito Cocktail

  • Choose Fresh Mint: Use only fresh mint leaves for an aromatic and vibrant flavor. Dried mint will not yield the same refreshing qualities.

  • Gentle Muddling: Muddle mint leaves lightly to release essential oils. Over-muddling can lead to bitterness, ruining the balance of your Mint Mojito Cocktail.

  • Quality Lime Juice: Always opt for freshly squeezed lime juice to enhance the cocktail’s tanginess. Bottled lime juice lacks the fresh burst of zest that makes this drink shine.

  • Chill Your Glass: Pre-chill your glass or use ice-cold ingredients to keep your Mint Mojito Cocktail extra refreshing on hot summer days.

  • Customize Wisely: Experiment with fruit additions like berries or mango for a fun twist, but be mindful not to overpower the classic mint flavor in your cocktail.

How to Store and Freeze Mint Mojito Cocktail

Fridge: Store any leftover Mint Mojito Cocktail in an airtight container for up to 2 days. However, it’s best to keep the soda water separate until serving to maintain fizziness.

Make-Ahead: For a quick option, prepare the syrup base by muddling mint, sugar, and lime juice ahead of time. Just add rum and soda water before serving for optimal freshness.

Freezer: While freezing isn’t ideal for cocktails, you can freeze the mint syrup in ice cube trays to use later in new drinks; use within 2 months for best flavor.

Reheating: This Mint Mojito Cocktail is best enjoyed chilled and fresh, so there’s no need to reheat—simply mix and serve for a refreshing experience!

Mint Mojito Cocktail Recipe FAQs

What type of mint should I use for the Mint Mojito Cocktail?
Absolutely! Fresh mint leaves are essential for capturing the invigorating aroma and vibrant flavor of this cocktail. I recommend using spearmint for its sweetness and natural mintiness. Avoid dried mint, as it won’t provide the same essence in your drink.

How should I store leftover Mint Mojito Cocktail?
You can store any leftovers in an airtight container in the fridge for up to 2 days. However, to keep that refreshing fizz intact, it’s best to keep the soda water separate and add it right before serving. This way, your cocktail remains bubbly and delightful!

Can I freeze the Mint Mojito Cocktail?
While freezing a complete cocktail isn’t advised since the texture will change, you can freeze the mint syrup base! Simply muddle the mint, sugar, and lime juice, then pour it into ice cube trays. Use these mint syrup cubes within 2 months in future drinks for a quick refreshment.

Why does my Mint Mojito taste bitter?
This can happen if you muddle the mint too forcefully, which releases bitter compounds. Instead, be gentle when muddling to extract the essential oils without bruising the leaves. Focus on pressing lightly to maintain the refreshing quality of your Mojito.

Is the Mint Mojito Cocktail suitable for special diets?
Yes! The Mint Mojito Cocktail is naturally gluten-free and can easily be tailored to fit various dietary preferences. For a non-alcoholic version, simply omit the rum and increase the soda water and lime juice for a refreshing mocktail that everyone can enjoy!

Refreshing Mint Mojito Cocktail for a Fun Summer Escape

Mint Mojito Cocktail is a refreshing drink perfect for summer gatherings, featuring zesty lime, aromatic mint, and sparkling soda water.

  • sturdy glass
  • muddler
  • spoon

For the Cocktail

  • 10 leaves Fresh Mint Leaves (Use fresh for the best experience.)
  • 2 teaspoons White Sugar (Consider replacing with agave syrup for a healthier option.)
  • 1 ounce Fresh Lime Juice (Always opt for freshly squeezed for maximum taste.)
  • 1.5 ounces White Rum (Silver rum is ideal, but can substitute with a non-alcoholic version for a mocktail.)
  • 3-4 ounces Sparkling Soda Water (Any carbonated water will do.)
  • 3/4 cup Ice Cubes (Necessary for a chilled experience.)

Preparation Steps

  1. In a sturdy glass, add about 10 fresh mint leaves and 2 teaspoons of white sugar. Gently press down on the mint leaves to release their essential oils for about 30 seconds.
  2. Squeeze the juice of one freshly cut lime into the glass, stirring gently with a spoon to combine the sugar and lime juice with the muddled mint for about 15 to 20 seconds.
  3. Pour in 1.5 ounces of white rum to the muddled mixture, then gently stir again for about 10 seconds to blend the ingredients.
  4. Fill the glass with ice cubes, leaving a little room at the top. Aim for about 3/4 cup of ice.
  5. Carefully pour sparkling soda water over the ice until the glass is full, integrating the soda with the rest of the ingredients with a gentle stir.
  6. Garnish with a sprig of fresh mint and a lime wheel on the rim of the glass, then serve immediately.

For optimal freshness, prepare the syrup base ahead of time and just add rum and soda water before serving.

Drink
Cocktail
easy cocktail, gluten-free, Mint Mojito Cocktail, mocktail, refreshing cocktail, summer drink

Filed Under: Drink

Korean Apple Ginger Tea: A Warm, Immune-Boosting Treat

July 29, 2025 by grace bellamy Leave a Comment

A delightful aroma wafts through the air as I prepare a cozy pot of Korean Apple Ginger Tea, instantly transporting me to a comforting world where warmth and wellness meet. This soothing beverage marries the natural sweetness of fresh apples with the invigorating zest of ginger, creating a delightful drink that’s both delicious and immune-boosting. What’s more, this recipe is gluten-free and can easily be made vegan with a simple sweetener swap! Whether you’re enjoying it on a chilly evening or needing a revitalizing sip, this tea promises not just refreshment, but a moment of self-care. Have you ever experienced the joy of a homemade brew that wraps you in a warm hug? Let’s dive into the magic of this comforting tea together!

Why is Korean Apple Ginger Tea special?

Immune-Boosting Benefits: This delightful brew combines ginger’s spiciness with apples’ sweetness, creating a healthful drink that not only warms you up but also strengthens your immune system. Simplicity in Preparation: Just a few wholesome ingredients and a quick simmer, and you’re set. Personalize It: Feel free to swap in your favorite sweetener or add lemon for a zesty kick! Comforting Aroma: The soothing scent alone is enough to make your day better. Perfect for All Seasons: Enjoy it hot in the winter or chilled in the summer; it’s versatile! Why not pair it with some light snacks, like rice cakes or dumplings, for a perfect afternoon treat?

Korean Apple Ginger Tea Ingredients

For the Tea
• Fresh Apples – Choose your favorite variety, leaving the skin on for added nutrients and natural sweetness.
• Fresh Ginger – Peel and slice thinly to maximize its spicy zest and immune-boosting properties.
• Filtered Water – The purest base for your tea, ensuring a clean taste that enhances the flavors.
• Honey or Preferred Sweetener – Sweeten the tea; for a vegan option, consider agave or maple syrup.
• Lemon Juice (optional) – Adds a refreshing tang and a boost of vitamin C; adjust to personal preference.

For Garnish
• Thin Apple Slices – For visual appeal and extra bites of sweetness.
• Crystallized Ginger – Adds a hint of chewy sweetness, complementing the spicy ginger flavor.
• Fresh Mint Sprig – A lovely touch that introduces a refreshing aroma.

Prepare this Korean Apple Ginger Tea to indulge in a cozy, immune-boosting delight that wraps you in warmth!

Step‑by‑Step Instructions for Korean Apple Ginger Tea

Step 1: Prepare Ingredients
Start by washing and slicing two fresh apples, keeping the skin on for added nutrients. Next, peel and thinly slice a piece of fresh ginger, ensuring the slices are delicate to maximize flavor extraction. Have your honey or preferred sweetener ready for later. This initial preparation sets a delightful foundation for your Korean Apple Ginger Tea.

Step 2: Boil Water
Pour four cups of filtered water into a medium-sized pot and set it on the stove over medium-high heat. Allow the water to come to a gentle boil, watching carefully for small bubbles to form, signaling that it’s near boiling. This pure water will serve as the base for your soothing tea, enhancing all the vibrant flavors.

Step 3: Add Ingredients
Once the water is boiling, carefully add the sliced apples and ginger to the pot. Immediately cover with a lid to trap the aromatic steam and flavors. Allow this beautiful combination of fresh apples and zesty ginger to infuse the water, creating a robust and fragrant brew that epitomizes the essence of Korean Apple Ginger Tea.

Step 4: Simmer
Reduce the heat to low and let the mixture simmer gently for 20 to 30 minutes. During this time, the flavors will meld beautifully, and you’ll notice the tea takes on a warm golden hue. Keep an eye on it, as the aroma fills your kitchen, enveloping you in warmth and comfort.

Step 5: Strain and Sweeten
After simmering, take the pot off the heat and strain the mixture using a fine sieve into your favorite teacups. As you pour, the vibrant colors and fragrant notes will awaken your senses. While the tea is still warm, stir in your honey or chosen sweetener to taste, allowing it to dissolve thoroughly for a perfectly sweetened Korean Apple Ginger Tea.

Step 6: Optional Additions
If you desire an extra zest, now’s the time to add a splash of lemon juice. This brightens the tea and adds a refreshing burst of vitamin C. For a lovely presentation, consider garnishing each cup with thin apple slices, crystallized ginger, or a sprig of fresh mint for an uplifting visual touch.

Step 7: Serve
Your Korean Apple Ginger Tea is now ready to enjoy! Serve it steaming hot for a cozy treat or chill it in the fridge for a refreshing summer drink. Pair it with light snacks like rice cakes or dumplings to enhance your experience, as you immerse yourself in the delightful flavors of this immune-boosting beverage.

Variations & Substitutions for Korean Apple Ginger Tea

Feel free to let your creativity flow with these delightful twists, enhancing the flavors and personalizing your tea experience.

  • Dairy-Free: Use coconut milk instead of water for a creamy texture and subtle sweetness that complements the ginger beautifully.

  • Herb-Infused: Add fresh mint or basil during simmering to infuse a refreshing herbal note, elevating your tea to a whole new level of taste.

  • Spicy Kick: Incorporate a pinch of cayenne or crushed red pepper for an extra heat boost. This can really invigorate the senses and warm you up!

  • Citrus Burst: Swap in orange or lime juice instead of lemon for a different citrus flair, adding layers of flavor while enhancing vitamin C content.

  • Sweetener Swap: Try maple syrup or stevia to vary sweetness; each comes with its unique flavor profile that can pleasantly surprise you.

  • Apple Variety: Experiment with different apple types, like tart Granny Smith or sweeter Fuji, to achieve the perfect flavor balance that suits your palate.

  • Chill It: For refreshing summer vibes, serve your tea over ice with a splash of sparkling water, transforming it into a delightful iced drink.

  • Flavor Wisdom: Combine with spices such as turmeric or cinnamon for added health benefits; this not only boosts flavor but also enhances the immune-boosting properties of your tea.

With these engaging adaptations, your Korean Apple Ginger Tea can be as unique as you are! If you’re looking for delightful snacks to enjoy alongside, consider pairing it with some delicious Mini Pineapple Upside Down Cakes or simply munching on some Pineapple Bars.

What to Serve with Korean Apple Ginger Tea

Imagine curling up with a steaming cup of tea as it warms your soul while you savor delightful flavors alongside simple snacks.

  • Rice Cakes: These chewy treats provide a lovely contrast, complementing the tea’s warmth without overpowering its delicate flavors.
  • Dumplings: Whether filled with savory meats or vegetables, their hearty texture pairs beautifully with the soothing beverage, making for a satisfying bite.
  • Mild Cheeses: Soft cheeses, like brie or goat cheese, enhance the sweetness of the tea, creating a rich and creamy mouthfeel.
  • Light Salads: A refreshing salad with crisp greens and a tangy dressing balances the nourishing qualities of the tea, enhancing your meal experience.
  • Fruit Platter: Fresh fruits like pear, melon, and citrus offer bright flavors, providing a zesty counterpoint to the cozy tea.
  • Cookies: Homemade oatmeal cookies or ginger snaps elevate tea time, adding a touch of sweetness that echoes the apple and ginger.
  • Nut Mix: A handful of roasted nuts adds crunch and a savory note, perfectly balancing the tea’s comforting sweetness.
  • Sparkling Water: For a refreshing twist, serve the tea with a side of sparkling water to cleanse the palate between each warm sip.
  • Dark Chocolate: The richness of dark chocolate pairs wonderfully with the tea’s spice, creating a decadent treat that beckons you for another cup.
  • Scones: These buttery delights, especially if served with a little fruit jam, keep your tea company and make for an enchanting afternoon snack.

Expert Tips for Korean Apple Ginger Tea

  • Use Fresh Ingredients: Fresh apples and ginger yield the best flavor and health benefits. Avoid old or dried ingredients to enhance your tea’s taste.

  • Adjust Sweetness: Start with a little honey or agave and taste before adding more. This allows you to customize the sweetness of your Korean Apple Ginger Tea just right.

  • Experiment with Flavors: Feel free to introduce spices like cinnamon or cardamom for added depth. These can turn your tea into a unique flavor adventure!

  • Think Ahead: Make a larger batch and refrigerate leftovers for up to 3 days. You can even freeze them in ice cube trays for quick, flavorful additions later.

  • Gentle Reheating: When reheating, do so gently and avoid boiling, as high heat can alter the delicate flavors and nutrients of your tea.

How to Store and Freeze Korean Apple Ginger Tea

Fridge: Store any leftover Korean Apple Ginger Tea in an airtight container in the refrigerator for up to 3 days. This keeps the flavors fresh and vibrant for your next cozy sip.

Freezer: For longer storage, pour the tea into ice cube trays and freeze. Once frozen, transfer the cubes to a zip-top bag for easy blending into future drinks or as a cool addition to smoothies.

Reheating: When ready to enjoy your tea again, gently reheat on the stove over low heat, avoiding boiling to preserve its delicate flavors. Stir in any additional sweetener to adjust the taste if necessary.

Enjoy Cold or Hot: Whether you prefer your Korean Apple Ginger Tea warm or chilled, these storage tips ensure it’s ready to brighten your day in any season!

Make Ahead Options

Korean Apple Ginger Tea is a fantastic recipe for meal prep, saving you time on busy days! You can wash and slice the apples and ginger up to 24 hours in advance, refrigerating them in an airtight container to keep them fresh and prevent browning. Alternatively, you can prepare the tea mixture and let it cool before storing it in the refrigerator for up to 3 days. When you’re ready to enjoy your comforting brew, simply reheat the mixture gently without boiling, strain, and sweeten to taste. This means you can enjoy a cozy cup of tea with minimal effort, perfect for those hectic weeknights!

Korean Apple Ginger Tea Recipe FAQs

What type of apples should I use for Korean Apple Ginger Tea?
Absolutely! You can choose any variety of fresh apples you enjoy, such as Fuji, Honeycrisp, or Granny Smith. Keep the skin on to enhance the nutritional value and add a nice sweetness to your tea. Look for apples that are firm and free of dark spots to ensure the best flavor!

How should I store leftover Korean Apple Ginger Tea?
To keep your tea fresh, store it in an airtight container in the refrigerator for up to 3 days. This way, you can enjoy the delightful flavors without losing any of its comforting aroma. Just give it a gentle stir before serving again!

Can I freeze Korean Apple Ginger Tea?
Very! To freeze, pour the cooled tea into ice cube trays and freeze until solid. Once frozen, transfer the cubes to a zip-top bag. They last up to 3 months. These cubes can be added to smoothies or blended back into water to enjoy a refreshing drink on the go!

What if my Korean Apple Ginger Tea tastes too strong or too weak?
If you find your tea strong, simply add additional hot water until it reaches your desired taste. For a weaker tea, you can try reducing the amount of ginger next time or simmering it for a shorter duration—around 15-20 minutes should suffice for a lighter flavor without losing its immune-boosting benefits.

Is Korean Apple Ginger Tea safe for pets, particularly dogs?
It’s best to be cautious! While small amounts of ginger are generally safe for dogs, it’s a good idea to avoid giving them any sweetened tea, as sugar and sweeteners can be harmful. If ever in doubt, consulting your veterinarian is a great choice!

Can I make Korean Apple Ginger Tea vegan?
Absolutely! To make this delightful tea vegan, simply replace honey with a plant-based sweetener like agave syrup or maple syrup. This allows everyone to enjoy the comforting flavors while keeping it vegan-friendly!

Korean Apple Ginger Tea: A Warm, Immune-Boosting Treat

Korean Apple Ginger Tea is a soothing beverage that blends apples and ginger for a delicious, immune-boosting experience.

  • medium-sized pot
  • fine sieve

For the Tea

  • 2 pieces Fresh Apples (Choose your favorite variety, leaving the skin on.)
  • 1 piece Fresh Ginger (Peel and slice thinly.)
  • 4 cups Filtered Water (For boiling.)
  • to taste tablespoons Honey or Preferred Sweetener (For a vegan option, consider agave or maple syrup.)
  • 1 tablespoon Lemon Juice (Optional; adjust to preference.)

For Garnish

  • 2 slices Thin Apple Slices (For visual appeal.)
  • 1 tablespoon Crystallized Ginger (Adds a hint of chewy sweetness.)
  • 1 sprig Fresh Mint (For garnish.)

Step-by-Step Instructions

  1. Start by washing and slicing two fresh apples, keeping the skin on for added nutrients. Peel and thinly slice fresh ginger.
  2. Pour four cups of filtered water into a medium-sized pot and set it on the stove over medium-high heat until it comes to a gentle boil.
  3. Once the water is boiling, add the sliced apples and ginger, cover with a lid to infuse flavors.
  4. Reduce the heat to low and let the mixture simmer gently for 20 to 30 minutes.
  5. After simmering, strain the mixture into teacups. Stir in honey or chosen sweetener to taste.
  6. Add lemon juice if desired and garnish with thin apple slices, crystallized ginger, or fresh mint.
  7. Serve steaming hot or chilled, and enjoy with light snacks like rice cakes or dumplings.

You can personalize this recipe by swapping sweeteners or adding spices like cinnamon. Store leftovers in the refrigerator for up to 3 days or freeze in ice cube trays for future use.

Drink
Korean
apple tea, cozy drink, ginger tea, immune-boosting, Korean Apple Ginger Tea

Filed Under: Drink

Delicious Strawberry Sprite Mocktail for a Refreshing Escape

July 28, 2025 by grace bellamy Leave a Comment

As summer sunshine pours in, a delightful memory flashes: laughter, friends gathered around, and the refreshing sip of a fruity beverage in hand. That’s where the Strawberry Sprite Mocktail comes into play—a vibrant, fizzy escape that transforms any gathering into a joyous celebration. With its quick prep time and customizable sweetness, this mocktail is the perfect alternative to sugary sodas, allowing you to enjoy a bubbly treat that everyone in the family can indulge in. Plus, it’s gluten-free and can easily be made vegan by using agave syrup instead of simple syrup, catering to various dietary needs. So, are you ready to mix up something special that will keep you cool and smiling all summer long?

What makes this mocktail special?

Vibrant Colors: The Strawberry Sprite Mocktail is not only delicious but visually stunning, perfect for brightening up your summer gatherings.

Quick to Make: With just a few simple ingredients, this mocktail comes together in minutes—a fantastic time saver for busy hosts.

Customizable Sweetness: Adjust the sweetness to your taste, using agave syrup for a vegan twist or opting for a sugar-free sweetener to suit your preferences.

Refreshing Fizz: The combination of puree with bubbly Sprite creates a delightful effervescence, making it a favorite for all ages.

Diet Friendly: Gluten-free and vegetarian, the mocktail easily caters to diverse dietary needs, ensuring everyone can enjoy this treat.

Add this refreshing beverage to your menu at your next picnic or family gathering, and enjoy the smiles it brings!

Strawberry Sprite Mocktail Ingredients

• Get ready to blend and fizz with these easy ingredients!

For the Mocktail Base

  • Fresh Strawberries – Adds natural sweetness and fruity flair; for convenience, you can substitute with frozen strawberries, just thaw them slightly.
  • Lemon Juice – Provides the perfect tanginess to balance the sweetness; lime juice can also be swapped for a zesty twist.
  • Simple Syrup – Sweetens the drink beautifully; to make it lighter, consider using a sugar-free sweetener like stevia or erythritol.

For the Fizz

  • Sprite (or Lemon-Lime Soda) – Adds a refreshing fizz; feel free to choose diet or caffeine-free options if you prefer.

For Serving

  • Ice Cubes – Chill your drink to perfection; crushed ice can add a fun, slushy texture if that’s what you like!
  • Fresh Mint Leaves (Optional) – Not only enhances aroma but also gives your mocktail a lovely visual touch—perfect for garnishing!

This Strawberry Sprite Mocktail is sure to become a refreshing favorite all summer long!

Step‑by‑Step Instructions for Strawberry Sprite Mocktail

Step 1: Prepare the Strawberries
Begin by rinsing and hulling 1 cup of fresh strawberries under cool water, ensuring they are clean. Once prepared, place half of the strawberries into a blender and puree until smooth, which should take about 30 seconds. If you prefer a chunkier texture, lightly mash the strawberries instead. This fresh strawberry puree will create the flavorful base for your Strawberry Sprite Mocktail.

Step 2: Mix the Base
In a large glass or pitcher, combine 2 tablespoons of fresh lemon juice with 2 tablespoons of simple syrup. Stir the mixture well for about 15 seconds, adjusting the sweetness to your preference—more syrup for sweetness or less if you enjoy a tangy punch. This creates a refreshing lemony foundation that will beautifully complement the strawberry flavor.

Step 3: Combine Strawberry Puree
Add the strawberry puree from Step 1 into the lemon-sweetened mixture in your pitcher. Gently stir with a spoon for another 15-20 seconds until fully incorporated, transforming it into a vibrant liquid filled with the essence of fresh strawberries. This step is crucial for balancing flavors in your Strawberry Sprite Mocktail.

Step 4: Prepare the Glasses
Fill serving glasses to the brim with ice cubes, using about ½ cup of ice for each glass to keep the mocktail chilled. If you desire a slushy texture, consider using crushed ice. This will give your Strawberry Sprite Mocktail a delightful chill, making it even more refreshing during hot weather.

Step 5: Add the Sparkle
Slowly pour cold Sprite or lemon-lime soda into each glass over the ice, filling them about three-quarters full. Aim for about ½ to ¾ cup of soda per glass to maintain the fizziness. As you pour, gently stir the drink with a straw or a spoon to mix while preserving the bubbles. This effervescence makes each sip a joyful experience.

Step 6: Garnish and Serve
For an appealing presentation, garnish your Strawberry Sprite Mocktail with fresh mint leaves or sliced strawberries on the rim of the glass. Create a colorful arrangement that draws the eye and enhances the flavor. Serve immediately to ensure your guests enjoy the refreshing fizz and vibrant taste of this delightful mocktail!

Strawberry Sprite Mocktail Variations

Feel free to get creative with your mocktail for a tailor-made delight that suits your taste buds!

  • Agave Sweetener: Replace simple syrup with agave syrup for a vegan-friendly option that still packs a sweet punch.
  • Berry Medley: Swap strawberries for a mix of berries like raspberries and blueberries to create a vibrant flavor explosion! Each berry brings its unique personality to the drink.
  • Peachy Twist: Add fresh peach puree for a summery flavor that pairs beautifully with strawberries. The sweetness and fragrance will transport you to a sunny picnic!
  • Zesty Lime: Use lime juice instead of lemon for a zippier twist that cuts through the sweetness perfectly. It adds a delightful kick that’s sure to awaken your senses!
  • Mango Magic: Incorporate mango puree for an exotic flair and tropical vibe, turning your mocktail into a mini beach getaway. This velvety addition will add richness to every sip!
  • Sparkling Water Swap: For a less sweet version, replace Sprite with sparkling water. This keeps it refreshing while allowing the natural fruit flavors to shine through.
  • Chili Infusion: For those who love a kick, consider adding a pinch of chili powder or fresh jalapeño slices for a spicy twist that will surprise and delight your palate. It’s an unexpected adventure in flavors!
  • Dairy-Free Creaminess: Blend in a scoop of coconut cream for a creamy, dairy-free variation that gives a luscious mouthfeel and tropical notes. The creaminess can balance the fizzy elements and enrich the flavor.

Incorporate these twists to make your Strawberry Sprite Mocktail uniquely yours! And if you’re in the mood for lighter bites, pair it with a refreshing cucumber salad or some homemade bruschetta for a delightful and harmonious spread. Enjoy every sip and bite!

Make Ahead Options

Preparation for your Strawberry Sprite Mocktail can save you precious time on busy days! You can prepare the strawberry puree and the lemon-sweetener mixture up to 24 hours in advance—just refrigerate them in an airtight container to keep the flavors fresh. Avoid adding Sprite until you’re ready to serve, as this ensures maximum fizziness. Additionally, you can freeze portions of the strawberry puree in ice trays for easy access in the future. When it’s time to enjoy your mocktail, simply fill your glasses with ice, combine the prepped strawberry mixture with cold Sprite, and garnish to your liking. This way, you’ll have a refreshing treat ready to impress your family and friends in no time!

How to Store and Freeze Strawberry Sprite Mocktail

Fridge: Store leftover strawberry-lemon mixture (without soda) in an airtight container in the fridge for up to 24 hours. Add Sprite just before serving to keep it fizzy.

Freezer: Freeze strawberry puree in ice cube trays for up to 3 months. This can be a great way to prepare ahead for your next Strawberry Sprite Mocktail. Avoid freezing the complete mocktail with soda.

Room Temperature: It’s best to serve the mocktail fresh. If left out, consume within 2 hours to ensure the best flavor and freshness.

Reheating: No reheating is needed; enjoy this refreshing drink cold for a delightful summer experience!

Expert Tips for Strawberry Sprite Mocktail

  • Freshness Matters: Use ripe, in-season strawberries for maximum flavor. Overripe or mushy strawberries can lead to a less enjoyable drink.

  • Adjust Sweetness: Don’t hesitate to modify the sugar level. Too much sweetener can overpower the fresh strawberry flavor, affecting your Strawberry Sprite Mocktail.

  • Fizz Preservation: Add the Sprite just before serving. This helps maintain the carbonation and ensures your drink remains bubbly throughout the gathering.

  • Garnish Well: A few mint leaves or a strawberry slice not only elevate the visual appeal but also enhance the flavor. Don’t skip this step for presentation!

  • Make-Ahead Prep: Prepare the strawberry-lemon mixture in advance and store it in the fridge. Just add the Sprite when you’re ready to serve for a quick setup.

What to Serve with Strawberry Sprite Mocktail

Bring your summer gatherings to life with delightful pairings that enhance the refreshment of this fruity drink.

  • Cucumber Sandwiches: Light and crisp, these sandwiches provide a refreshing contrast to the mocktail’s sweetness, perfect for afternoon tea.

  • Fruit Platter: A colorful array of seasonal fruits adds a burst of freshness and complements the berry flavor while keeping things light.

  • Mini Quiches: Savory mini quiches offer a delightful bite-sized option that balances the sweetness of the mocktail, making for a delightful brunch spread.

  • Caprese Skewers: Juicy cherry tomatoes, fresh basil, and mozzarella create a burst of flavor that pairs beautifully with the drink’s fruity profile.

  • Lemon Bars: The tangy citrus notes in these bars beautifully echo the mocktail’s lemony base, adding a sweet and tart dessert option.

  • Iced Tea: A refreshing brewed iced tea allows your guests to mix up their beverages, creating a lovely balance of flavors.

  • Chocolate-Dipped Strawberries: These decadent treats resonate with the mocktail’s strawberry base, providing a perfect sweet finish to your summertime gathering.

Elevate your serving experience and make every sip and bite memorable!

Strawberry Sprite Mocktail Recipe FAQs

How do I select the best strawberries for my mocktail?
Absolutely! Look for bright red fresh strawberries with a vibrant green cap. Ripe strawberries should be firm and plump, without any dark spots or mold. If you only have frozen strawberries available, just thaw them slightly before use to maintain their texture.

What’s the best way to store leftover strawberry-lemon mixture?
You can store any leftover strawberry-lemon mixture (without soda) in an airtight container in the fridge for up to 24 hours. Just remember to add the Sprite right before serving to keep that thrilling fizz intact!

Can I freeze the strawberry puree for later use?
Yes, freezing strawberry puree is a fantastic way to prepare ahead! Pour the puree into ice cube trays, allowing them to freeze completely for up to 3 months. When you’re ready to make your mocktail, simply blend a few cubes with cold Sprite for an instant refreshment.

What should I do if my mocktail is too sweet?
If you find your Strawberry Sprite Mocktail is on the sweeter side, you can balance it by adding a splash of fresh lemon or lime juice. This extra acidity will cut through the sweetness and enhance the overall flavor profile of the drink.

Is this mocktail safe for people with dietary restrictions?
Very! The Strawberry Sprite Mocktail is gluten-free and can easily be made vegan by substituting simple syrup with agave syrup. Always double-check ingredient labels for any allergic reactions and consider substituting the Sprite with a natural soda for an even healthier option.

Can I make this mocktail in larger quantities for a party?
Absolutely! To make a larger batch, simply multiply the quantities of the strawberry puree, lemon juice, and simple syrup while keeping the ratio, then serve in a large pitcher. When it’s time to serve, pour over ice and add the Sprite for that irresistible fizz!

Delicious Strawberry Sprite Mocktail for a Refreshing Escape

Enjoy the vibrant, fizzy Strawberry Sprite Mocktail, a perfect refreshing drink for summer gatherings.

  • Blender
  • Measuring Spoons
  • Pitcher
  • Serving glasses

For the Mocktail Base

  • 1 cup Fresh Strawberries (Can substitute with frozen strawberries, thawed)
  • 2 tablespoons Lemon Juice (Can substitute with lime juice)
  • 2 tablespoons Simple Syrup (Can use sugar-free sweetener)

For the Fizz

  • Sprite (or Lemon-Lime Soda) (Use diet or caffeine-free if preferred)

For Serving

  • 1/2 cup Ice Cubes (Crushed ice can also be used)
  • Fresh Mint Leaves (Optional) (For garnish)

Preparation Steps

  1. Rinse and hull 1 cup of fresh strawberries, then puree half in a blender until smooth.
  2. In a large glass or pitcher, combine 2 tablespoons of lemon juice and 2 tablespoons of simple syrup; stir well.
  3. Add the strawberry puree to the lemon-sweetened mixture and stir gently until fully incorporated.
  4. Fill serving glasses with about 1/2 cup of ice cubes to chill the mocktail.
  5. Pour cold Sprite or lemon-lime soda into each glass, filling them about three-quarters full; stir gently.
  6. Garnish with fresh mint leaves or sliced strawberries before serving immediately.

This mocktail can be prepared in advance; just add the soda before serving to maintain fizz. Can be adjusted for sweetness as needed.

Drink
American
mocktail, non-alcoholic beverage, party drink, refreshing drink, Strawberry Sprite Mocktail, summer drink

Filed Under: Drink

Refreshing Lavender Coconut Lemonade for Ultimate Chill Vibes

July 28, 2025 by grace bellamy Leave a Comment

As I enjoyed a sun-soaked afternoon on my patio, a delightful fusion of scents wafted through the air, coaxing my senses alive. That’s when I decided it was time to whip up a batch of refreshing Lavender Coconut Lemonade. This vibrant drink marries the calming floral notes of lavender and the creamy sweetness of coconut with the zesty brightness of fresh lemons, making it the perfect antidote to those monotonous sugar-laden beverages. Not only is this recipe incredibly easy to make, but it’s also completely vegan and gluten-free, allowing you to enjoy a guilt-free sip that’s bursting with character. Plus, it’s versatile, so feel free to customize it according to your taste buds! Ready to elevate your refreshment game and impress your friends at your next gathering? Let’s dive into making some Lavender Coconut Lemonade together!

Why is Lavender Coconut Lemonade Unique?

Uniqueness: This delightful drink combines unexpected flavors, showcasing a refreshing twist on traditional lemonade with the calming essence of lavender.
Versatility: Feel free to customize it to suit your taste! Replace the sweetener with maple syrup for a vegan-friendly option or add herbs like mint for a fresh kick.
Easy to Make: With just a few simple ingredients and minimal effort, you can whip up this gorgeous beverage in no time, proving that sophisticated drinks can be accessible to everyone.
Crowd-Pleaser: Perfect for gatherings, it pairs beautifully with light snacks and will impress your guests with its elegant flavor profile. You can serve it alongside a light appetizer like Coconut Ice Slice for a delightful experience.
Healthier Alternative: This Lavender Coconut Lemonade is a naturally sweetened, gluten-free, and vegan delight that keeps sugary beverages at bay, making it perfect for guilt-free sipping.

Lavender Coconut Lemonade Ingredients

• Here’s what you’ll need for the perfect Lavender Coconut Lemonade!

For the Infusion

  • Dried Culinary Lavender – Provides the delightful floral aroma; ensure it’s culinary-grade for safe consumption.
  • Hot Water – Helps to extract the full flavor of lavender during infusion.

For the Base

  • Fresh Lemons – Adds acidity and zesty brightness; freshly squeezed juice works best for vibrant flavor.
  • Coconut Water – Infuses tropical sweetness; you can also use sparkling water for a bubbly twist.
  • Natural Sweetener (Honey or Agave) – Balances flavors; use maple syrup for a vegan option.

For Serving

  • Ice Cubes – Essential for chilling your drink to perfection, making each sip refreshing and cool.
  • Lemon Slices and Fresh Herbs – Perfect for garnish, adding visual appeal and a burst of aroma.

Now you’re all set to create your beautifully refreshing Lavender Coconut Lemonade!

Step‑by‑Step Instructions for Lavender Coconut Lemonade

Step 1: Prepare the Lavender Infusion
Begin by boiling 2 cups of water in a medium saucepan over high heat. Once boiling, remove from heat and add 1-2 tablespoons of dried culinary lavender. Cover and let the mixture steep for about 10 minutes, allowing the floral notes to infuse into the water. Check for a fragrant aroma, then strain the lavender leaves through a fine mesh sieve into a bowl, discarding the solids.

Step 2: Squeeze the Lemons
While the lavender is steeping, grab 4-6 fresh lemons and cut them in half. Use a citrus juicer or reamer to extract juice until you have about 1 cup of freshly squeezed lemon juice. Take a moment to savor the vibrant citrus aroma filling your kitchen. Set this juice aside, ensuring you capture every drop of that zesty goodness for your Lavender Coconut Lemonade.

Step 3: Combine the Ingredients
In a large pitcher, pour the strained lavender infusion and add the freshly squeezed lemon juice along with 3 cups of coconut water. If you prefer a sweeter lemonade, gradually mix in your choice of natural sweetener, such as honey or agave, stirring until fully dissolved. The fusion of flavors will create a beautifully refreshing Lavender Coconut Lemonade.

Step 4: Chill and Serve
Fill serving glasses with plenty of ice cubes to keep your lemonade super cool. Pour the Lavender Coconut Lemonade over the ice, allowing it to cascade and mix delightfully. Garnish each glass with a slice of lemon and a sprig of fresh herbs for an elegant touch, enhancing both aroma and presentation. Your refreshing Lavender Coconut Lemonade is now ready to be enjoyed!

Make Ahead Options

These Refreshing Lavender Coconut Lemonade drinks are perfect for busy home cooks looking to streamline their meal prep! You can prepare the lavender infusion and squeeze your lemon juice up to 24 hours in advance, storing both in the refrigerator in sealed containers to maintain their vibrant flavors. Additionally, mix the lavender infusion with lemon juice and coconut water up to 3 days ahead; just be sure to refrigerate it tightly sealed. When you’re ready to serve, simply stir in your sweetener if desired, pour over ice, and garnish with lemon slices and fresh herbs for that delightful finishing touch. With these make-ahead tips, you’ll have a refreshing drink ready to impress at any moment without the last-minute rush!

Lavender Coconut Lemonade Variations

Feel free to get creative with your Lavender Coconut Lemonade and make it truly yours!

  • Vegan Sweetener: Substitute honey with maple syrup for a deliciously vegan-friendly version that retains the sweetness without the guilt. It’s delightful to savor the natural flavors of your ingredients.

  • Herbaceous Twist: Add muddled fresh mint or basil leaves to the mix to infuse a refreshing herbaceous note. This twist elevates your drink, bringing a garden-fresh vibe to your sipping experience.

  • Sparkling Version: Swap half of the coconut water with sparkling water for a fun bubbly drink that dances on your palate. The effervescence adds a lovely zing, perfect for festive occasions!

  • Floral Infusion: Experiment with other edible flowers like hibiscus or chamomile in place of lavender for a unique flavor profile. Each flower brings its own charm, letting you indulge in different floral aromas.

  • Spicy Kick: Add a pinch of cayenne pepper or sliced jalapeño for an unexpected kick of heat. It creates an exciting flavor contrast that keeps you coming back for more.

  • Frozen Treat: Pour the lemonade into ice pop molds before freezing for a refreshing treat that’s perfect for hot days. These freeze without losing the signature taste of your Lavender Coconut Lemonade.

  • Cocktail Magic: Mix in a splash of gin or rum for a sophisticated cocktail twist. The addition of alcohol brings a new depth, making it an impressive option for evening gatherings.

  • Creamy Indulgence: Blend in a splash of coconut milk for an ultra-creamy texture that fuses tropical flavors with floral notes beautifully. It’s like enjoying a smoothie and a refreshing beverage all at once!

What to Serve with Lavender Coconut Lemonade

Elevate your refreshing Lavender Coconut Lemonade experience by pairing it with delightful dishes that complement its unique flavor profile.

  • Grilled Chicken Skewers: Juicy and savory, these skewers perfectly contrast the drink’s floral sweetness, making each sip an adventure.
  • Fresh Fruit Salad: A colorful mix of seasonal fruits adds a refreshing and vibrant element that enhances the natural citrus notes of the lemonade.
  • Cheese Platter: Creamy brie or tangy goat cheese provide a luscious counterpoint, while crackers add a satisfying crunch to your sipping experience.
  • Herbed Flatbread: Soft and warm flatbreads with a swirl of herbal pesto or garlic butter pair beautifully, making for a satisfying, flavor-rich bite between sips.
  • Coconut Macaroons: These sweet treats echo the coconut water in your lemonade, creating a delightful texture contrast and enhancing the tropical vibe.
  • Sparkling Water with Lime: Keep it light and refreshing with some sparkling water on the side, accented with a slice of lime, for an extra layer of brightness.
  • Lemon Tart: A tangy, sweet dessert that mirrors the zesty notes of your drink, the lemon tart will add a deliciously indulgent finish to your meal.
  • Minty Cucumber Salad: Crisp, cool cucumbers with a sprinkle of fresh mint provide a refreshing crunch that complements the soothing lavender aroma beautifully.
  • Roasted Veggies: Sweet and savory roasted seasonal vegetables like carrots or zucchini meld excellently with the lemonade, enhancing its pastel flavors.
  • Light White Wine: Enjoy a glass of chilled Sauvignon Blanc or Pinot Grigio that echoes the drink’s citrusy freshness for an elegant pairing.

Expert Tips for Lavender Coconut Lemonade

• Taste as You Go: Start with a smaller amount of sweetener and adjust to your preference, ensuring a perfectly balanced Lavender Coconut Lemonade.

• Choose Fresh: Use freshly squeezed lemon juice instead of bottled. It drastically enhances the flavor and vibrancy of your drink.

• Simple Straining: To avoid any lavender bits in your lemonade, strain the infusion well through a fine mesh sieve to achieve a smooth texture.

• Chill Factor: For the best experience, chill the lemonade in the fridge before serving, or prepare it a few hours in advance for maximum refreshment.

• Creative Variations: Don’t hesitate to explore flavors by infusing mint or adding fresh herbs to your Lavender Coconut Lemonade for a unique twist!

How to Store and Freeze Lavender Coconut Lemonade

Fridge: Store your Lavender Coconut Lemonade in an airtight container in the refrigerator for up to 3 days to maintain its delightful flavor and freshness.

Freezer: Pour leftovers into ice cube trays and freeze for convenient use later. These lavender-infused ice cubes can be added to future beverages without diluting the flavor.

Reheating: While it’s best served cold, if you prefer a warm twist on this drink, gently heat it in a saucepan over low heat, ensuring it doesn’t boil, to preserve the floral notes.

Lavender Coconut Lemonade Recipe FAQs

How do you select fresh lemons for the Lavender Coconut Lemonade?
Look for lemons that are firm to the touch with a vibrant yellow color and no dark spots. The skin should feel smooth; avoid any that feel soft or have wrinkled skin, as these are likely past their prime.

What’s the best way to store Lavender Coconut Lemonade?
Store your Lavender Coconut Lemonade in an airtight container in the refrigerator for up to 3 days. Make sure the container is sealed to prevent any absorption of other odors in the fridge.

Can you freeze Lavender Coconut Lemonade?
Absolutely! To freeze, pour any leftovers into ice cube trays and place them in the freezer. Once frozen, transfer the cubes to a resealable bag for up to 3 months. This way, you can add a cube or two to future drinks for a delightful lavender hint.

What should I do if my Lavender Coconut Lemonade is too sweet?
If your lemonade turns out too sweet, try adding a splash of freshly squeezed lemon juice to balance it out. Start by adding a tablespoon or two, taste, and adjust until you achieve the desired flavor. Alternatively, you can dilute it with a little more coconut water or plain water.

Are there any dietary considerations for Lavender Coconut Lemonade?
Yes! This recipe is naturally gluten-free and can easily be made vegan by using agave or maple syrup as a sweetener. Always check for any allergies concerning the ingredients used, like lavender or coconut, especially if serving to guests.

Refreshing Lavender Coconut Lemonade for Ultimate Chill Vibes

Enjoy a vibrant Lavender Coconut Lemonade, a refreshing twist on traditional drinks with calming floral notes and zesty brightness.

  • Medium saucepan
  • citrus juicer
  • Fine Mesh Sieve
  • large pitcher

For the Infusion

  • 1-2 tablespoons Dried Culinary Lavender (Ensure it’s culinary-grade for safe consumption)
  • 2 cups Hot Water

For the Base

  • 4-6 pieces Fresh Lemons (Freshly squeezed juice works best)
  • 3 cups Coconut Water (You can also use sparkling water)
  • to taste tablespoons Natural Sweetener (Honey or Agave) (Use maple syrup for a vegan option)

For Serving

  • as needed Ice Cubes (For chilling the drink)
  • as needed Lemon Slices and Fresh Herbs (For garnish)

Step-by-Step Instructions

  1. Prepare the Lavender Infusion by boiling 2 cups of water. Once boiling, add 1-2 tablespoons of dried lavender and steep for 10 minutes. Strain and discard the lavender.
  2. While the lavender is steeping, juice 4-6 fresh lemons to obtain about 1 cup of lemon juice. Set aside.
  3. In a pitcher, combine the strained lavender infusion, freshly squeezed lemon juice, and 3 cups of coconut water. Stir in your sweetener to taste.
  4. Fill glasses with ice cubes. Pour the Lavender Coconut Lemonade over the ice and garnish with lemon slices and fresh herbs.

Taste as you go to adjust sweetness. Use fresh lemon juice for best flavor. Store in refrigerator for up to 3 days.

Drink
Gluten-Free, Vegan
easy recipes, gluten-free drink, homemade lemonade, Lavender Coconut Lemonade, refreshing drink, vegan beverage

Filed Under: Drink

Easy Blackberry Margaritas for a Refreshing Summer Sip

July 28, 2025 by grace bellamy Leave a Comment

As the sun sets and the air warms up, nothing beats the refreshing burst of a delightful Blackberry Margarita in hand. This vibrant cocktail combines the tartness of fresh blackberries with zesty lime and a hint of sweetness from agave syrup, making it a must-try for any summer gathering. Not only are these Blackberry Margaritas incredibly easy to whip up, but they also cater to various tastes with simple adjustments for mocktails or keto-friendly variations. Imagine sippin’ on this colorful concoction, its smooth texture perfectly complementing light appetizers like tacos or ceviche. Ready to elevate your cocktail game to a new level of crisp, juicy bliss? Let’s dive into the recipe and discover how to make this fruity twist on a classic!

Why Choose Blackberry Margaritas?

Refreshing Twist: The combination of fresh blackberries and lime creates a uniquely refreshing flavor profile that’s perfect for summer gatherings.

Easy Preparation: You’ll appreciate how quickly you can whip these up using just a few ingredients—ideal for last-minute plans!

Versatile Options: Easily make substitutions for keto-friendly versions or delightful mocktails, accommodating various dietary needs.

Crowd-Pleasing Appeal: These vibrant cocktails are sure to impress guests at any celebration or backyard barbecue, sparking joy with every sip.

Storage Friendly: Leftover mix can be saved for up to 24 hours without losing flavor—perfect for enjoying a second round later!

Get ready to unleash your creativity and mix up your cocktails with this easy Blackberry Margaritas recipe!

Blackberry Margaritas Ingredients

• Discover the essentials for a delicious cocktail!

For the Margarita Mix

  • Fresh Blackberries – Provide natural sweetness and a vibrant color. Substitution: Frozen blackberries can be used for a colder, frosty drink.
  • Silver Tequila – The main spirit that lends a clean flavor, allowing the blackberry and lime to shine. Note: Opt for premium brands for best results.
  • Fresh Lime Juice – Adds tanginess, balancing the sweetness of the agave. Preparation: Freshly squeezed is best; bottled juice can detract from flavor.
  • Orange Liqueur – Enhances the cocktail’s complexity with sweet citrus notes. Substitution: Triple sec or orange juice concentrate can be used for a different flavor.
  • Agave Syrup – Sweetens the drink, harmonizing flavors. Substitution: Can be replaced with honey or a sugar-free alternative for a keto-friendly version.

For the Glass Rim

  • Coarse Sea Salt – Used for rimming glasses, adding a traditional margarita touch.

Step‑by‑Step Instructions for Blackberry Margaritas

Step 1: Prepare Blackberry Puree
Begin by rinsing 1 cup of fresh blackberries under cold water to clean them thoroughly. Place the washed blackberries in a blender and blend on high for about 30 seconds until smooth. If you prefer a smoother texture for your Blackberry Margaritas, strain the mixture through a fine mesh sieve to remove the seeds, ensuring a silky-smooth puree.

Step 2: Mix Cocktail Ingredients
In a cocktail shaker, combine 2 ounces of silver tequila, 1 ounce of freshly squeezed lime juice, 1 ounce of orange liqueur, ¾ ounce of agave syrup, and 2 tablespoons of the freshly prepared blackberry puree. Fill the shaker with ice, secure the lid, and shake vigorously for 15 to 20 seconds until well mixed and chilled. Observe the shake and feel for it to chill – you’re looking for a frosty exterior on the shaker.

Step 3: Prepare the Glass
While the cocktail is chilling, take a lime wedge and run it around the rim of your glass to add some zest. Dip the rim of the glass into coarse sea salt, allowing it to stick to the lime juice. This preparation not only enhances the visual appeal of your Blackberry Margaritas but also adds a delightful salty balance to each sip. Fill the glass with fresh ice cubes to keep your drink cool.

Step 4: Serve the Cocktail
Carefully strain the shaken cocktail mixture into your prepared glass, allowing the vibrant coloration of the blackberry margarita to showcase itself beautifully. To add a touch of flair, garnish your drink with a few fresh blackberries and a lime wheel on the side. Make sure to enjoy your refreshing Blackberry Margaritas immediately for the best flavor and temperature!

How to Store and Freeze Blackberry Margaritas

Fridge: Store any leftover blackberry margarita mix in an airtight container in the refrigerator for up to 24 hours. Shake well before serving to redistribute flavors.

Freezer: For longer storage, freeze portions of the margarita mix in ice cube trays. Once frozen, transfer to a freezer-safe bag for up to 1 month. Blend with fresh ingredients before serving.

Preparation Tip: If using frozen mix, let it thaw slightly before shaking with fresh ice to ensure a smooth texture.

Serving Reminder: Enjoy your Blackberry Margaritas immediately for the best taste and chill, especially on warm days!

Blackberry Margaritas Variations & Substitutions

Let your creativity shine and make these Blackberry Margaritas uniquely yours with these fun adjustments!

  • Mocktail Version: Replace tequila and orange liqueur with sparkling water and a splash of orange juice concentrate. This refreshing option is perfect for all ages!

  • Keto-Friendly: Swap agave syrup with a sugar-free sweetener like erythritol or monk fruit for a guilt-free delight. Your taste buds won’t even notice the difference!

  • Spicy Kick: Add a few slices of fresh jalapeño to the shaker for an unexpected kick that pairs beautifully with the sweetness of blackberries.

  • Berry Medley: Mix blackberries with other fruits like raspberries or strawberries for a colorful twist. Each sip brings a new burst of flavor!

  • Frozen Delight: Use frozen blackberries instead of fresh for a frostier, slushy texture. This is especially refreshing on a hot summer day!

  • Seasonal Switch: In the fall, try replacing blackberries with ripe pears and a dash of cinnamon for an autumn-inspired concoction. The cozy flavors will surprise and delight!

  • Citrus Boost: Enhance the flavor by adding a splash of grapefruit juice alongside the lime. This twist provides a tangy zing that’s simply irresistible.

  • Herbal Infusion: Muddle fresh mint or basil leaves into your mix for an aromatic burst. The herbaceous notes elevate the cocktail to new heights!

Feel free to customize and mix up these delightful variations! No matter the occasion, your Blackberry Margaritas are sure to impress, and if you have any leftovers, consider pairing them with light appetizers like ceviche or fresh salads for a perfect match.

Expert Tips for Blackberry Margaritas

Shake Well: Ensure to shake the cocktail thoroughly to mix the flavors properly; a good shake helps create a balanced and refreshing Blackberry Margarita.

Use Fresh Ingredients: Opt for fresh lime juice and ripe blackberries for the best flavor; bottled lime juice can diminish the cocktail’s vibrancy.

Adjust Sweetness: Experiment with the amount of agave syrup based on your taste preference—start with less and add more if needed to achieve your ideal sweetness.

Smooth Puree: For a silky texture, use a fine mesh sieve to strain blackberry puree, removing seeds that can disrupt the smooth drink experience.

Chill Your Glasses: Pre-chill your glasses in the freezer for a few minutes before serving, maximizing the refreshment of your icy Blackberry Margaritas.

Serve Immediately: Enjoy the cocktails as soon as they’re made to ensure the best flavor; if left too long, they may lose their chill and vibrancy.

Make Ahead Options

These Blackberry Margaritas are perfect for meal prep enthusiasts looking to save time for gatherings! You can prepare the blackberry puree up to 3 days in advance; simply blend the blackberries, strain for a smoother texture, and store it in an airtight container in the refrigerator. Additionally, you can measure out and combine the tequila, lime juice, orange liqueur, and agave syrup ahead of time, keeping it in the fridge for up to 24 hours. When you’re ready to serve, just shake the mix with ice, prepare your glasses with salt rims, and pour in the chilled mixture for delicious results that are just as refreshing!

What to Serve with Easy Blackberry Margaritas

Imagine basking in the sun with a glass of vibrant Blackberry Margarita in hand, perfectly paired with delightful bites that enhance your experience.

  • Spicy Shrimp Tacos: The zesty flavors of shrimp tacos mingle wonderfully with the sweetness of the margarita, creating a mouthwatering fiesta in every bite. These tacos bring a pop of excitement that’s hard to resist.
  • Ceviche: The refreshing combination of citrus and seafood in ceviche complements the tangy lime in your cocktail, elevating your taste buds to a new level of fresh. It’s a classic pairing that suits any warm day gathering.
  • Guacamole with Tortilla Chips: A creamy, rich guacamole served with crispy chips balances the tartness of the blackberry margarita perfectly. The smooth texture of guacamole adds a delightful contrast, making it a hit.
  • Fresh Green Salad: A light garden salad with a citrus vinaigrette cleanses the palate, allowing the richness of the margarita’s flavors to shine. Use seasonal greens to keep things vibrant and refreshing.
  • Grilled Veggies: Smoky grilled vegetables like zucchini and bell peppers bring savory goodness to your feast while allowing the fruity margarita to stand out beautifully. Their charred flavor adds depth to your meal.
  • Lime Sorbet: For a sweet finale, serve a scoop of lime sorbet. This simple dessert echoes the margarita’s tang and acts as a refreshing palate cleanser after your meal.
  • Sparkling Water: Keep it light with a chilled sparkling water. Infused with a citrus slice, it makes a great palate cleanser between sips, ensuring you’re perfectly refreshed throughout your gathering.
  • Chocolate-Covered Strawberries: Indulge in sweet chocolate-covered strawberries as they create a harmonious balance of sweet and tart flavors, making your dessert experience memorable.

These pairings promise to create a delightful symphony of flavors alongside your Blackberry Margaritas, ensuring a memorable summer gathering!

Blackberry Margaritas Recipe FAQs

What kind of blackberries should I use for the best flavor?
Absolutely! Fresh, ripe blackberries are the key to a flavorful blackberry margarita. Look for berries that are deep purple, firm, and free of dark spots. If fresh blackberries are out of season, frozen blackberries can be a great alternative for a colder, frosty drink.

How should I store leftover blackberry margarita mix?
You can store any leftover blackberry margarita mix in an airtight container in the refrigerator for up to 24 hours. Just be sure to give it a good shake before serving again to mix any settled ingredients back together. This is a simple way to enjoy another round without much hassle!

Can I freeze my blackberry margarita mix?
Yes, you can! To freeze, pour your blackberry margarita mix into ice cube trays and freeze until solid. Once frozen, transfer the cubes to a freezer-safe bag where they can be stored for up to 1 month. When ready to enjoy, blend the frozen cubes with fresh lime juice and tequila to recreate that fresh taste.

What if my blackberry margarita is too sweet or tart?
Very! If your margarita turns out too sweet or tart, don’t worry. You can balance it by adding a splash of fresh lime juice for tartness or a bit more agave syrup for sweetness. Start with small amounts, mixing and tasting until you find your perfect balance. Remember, everyone’s taste is different!

Are there any dietary considerations for these margaritas?
Of course! This blackberry margarita recipe is naturally gluten-free. If you’re accommodating dietary preferences like keto, you can substitute agave syrup with a sugar-free sweetener. For a delightful mocktail version, simply swap out the tequila and orange liqueur with sparkling water mixed with a bit of orange juice concentrate—the flavor remains delicious!

Can I adjust the recipe for a larger crowd?
Absolutely! To scale up the recipe for a party, simply multiply each ingredient by the number of servings you need. For example, if making for 10 guests, you can mix 10 oz of tequila, 5 oz of lime juice, and so forth. Just ensure you have a large enough pitcher or shaker to mix everything well—everyone will enjoy this colorful blackberry margarita together!

Easy Blackberry Margaritas for a Refreshing Summer Sip

Enjoy a refreshing burst of flavor with these easy Blackberry Margaritas, perfect for summer gatherings.

  • Blender
  • Cocktail shaker
  • Fine Mesh Sieve
  • Measuring jigger
  • Glass

For the Margarita Mix

  • 1 cup Fresh Blackberries (Substitution: Frozen blackberries can be used for a colder, frosty drink.)
  • 2 ounces Silver Tequila (Opt for premium brands for best results.)
  • 1 ounce Fresh Lime Juice (Freshly squeezed is best; bottled juice can detract from flavor.)
  • 1 ounce Orange Liqueur (Substitution: Triple sec or orange juice concentrate can be used for a different flavor.)
  • ¾ ounce Agave Syrup (Can be replaced with honey or a sugar-free alternative for a keto-friendly version.)

For the Glass Rim

  • 1 tablespoon Coarse Sea Salt

Step-by-Step Instructions for Blackberry Margaritas

  1. Begin by rinsing 1 cup of fresh blackberries under cold water to clean them thoroughly. Place the washed blackberries in a blender and blend on high for about 30 seconds until smooth. Strain the mixture through a fine mesh sieve to remove the seeds, ensuring a silky-smooth puree.
  2. In a cocktail shaker, combine 2 ounces of silver tequila, 1 ounce of freshly squeezed lime juice, 1 ounce of orange liqueur, ¾ ounce of agave syrup, and 2 tablespoons of the freshly prepared blackberry puree. Fill the shaker with ice, secure the lid, and shake vigorously for 15 to 20 seconds until well mixed and chilled.
  3. While the cocktail is chilling, take a lime wedge and run it around the rim of your glass to add some zest. Dip the rim of the glass into coarse sea salt, allowing it to stick. Fill the glass with fresh ice cubes.
  4. Carefully strain the shaken cocktail mixture into your prepared glass, and garnish with fresh blackberries and a lime wheel. Enjoy immediately!

Use fresh ingredients for the best flavor and enjoy the cocktails as soon as they’re made for optimal taste.

Drink
Mexican
Blackberry Margaritas, cocktail, Easy Recipe, refreshing drink, summer, tequila

Filed Under: Drink

Ginger Turmeric Herbal Tea for Cozy Comfort and Wellness

July 28, 2025 by grace bellamy Leave a Comment

The first sip of Ginger-Turmeric Herbal Tea unfolds like a warm, cozy hug against a chilly evening sky. With each fragrant waft of fresh ginger and earthy turmeric, I’m transported to a serene moment where wellness blends effortlessly with comfort. This delightful brew is more than just a tasty drink—it’s an immunity-boosting elixir that packs a powerful anti-inflammatory punch, making it the perfect addition to your health routine. In just 20 minutes, you can craft this herbal wonder to soothe your body and soul. Plus, it’s gluten-free, ensuring everyone can indulge guilt-free. Are you ready to turn your kitchen into a haven of warmth and wellness? Let’s get brewing!

Why Is Ginger-Turmeric Tea So Special?

Comfort in a cup: This Ginger-Turmeric Herbal Tea envelops you in warmth, making it perfect for chilly evenings or self-care moments.
Health Benefits abound: Packed with anti-inflammatory properties, it’s a powerful ally for your immune system and digestive health.
Simplicity at its finest: With just a few fresh ingredients, you can create a satisfying brew in under 20 minutes.
Versatile delights: Feel free to customize with options like honey, lemon, or even a pinch of cayenne for a spicy twist.
Crowd pleaser: Share this soothing beverage with family and friends—everyone will appreciate the comforting flavors and wellness benefits! Take it a step further by pairing with light snacks like fresh fruit or almond biscotti for a delightful experience.

Ginger-Turmeric Herbal Tea Ingredients

• Discover the essential components that make this tea magical!

For the Tea Base

  • Fresh Ginger – Provides a spicy kick and supports digestion; you can substitute it with powdered ginger if fresh is unavailable.
  • Fresh Turmeric – Adds earthy flavor and anti-inflammatory benefits; ground turmeric can be used as a substitute.
  • Water – The base for the tea infusion; use filtered water for the best results.

For Sweetness and Balance

  • Honey – Sweetens the tea naturally; feel free to swap it for maple syrup or agave nectar if you prefer.
  • Lemon Juice – Enhances flavor and adds vitamin C; lime juice works well if you’re looking for a twist.

Enjoy your cozy cup of Ginger-Turmeric Herbal Tea, a drink that not only warms your hands but also boosts your well-being!

Step‑by‑Step Instructions for Ginger-Turmeric Herbal Tea

Step 1: Prepare the Ingredients
Start by peeling and thinly slicing 1-2 teaspoons of fresh ginger and 1 teaspoon of fresh turmeric. Use a sharp knife or a peeler for efficiency. Aim for slices about 1/8 inch thick to maximize flavor extraction. Set these vibrant slices aside as we move on to brewing your Ginger-Turmeric Herbal Tea.

Step 2: Boil the Water
In a small pot, pour in 2 cups of fresh, filtered water and bring it to a rolling boil over medium-high heat. As the water heats, keep an eye on it for small bubbles starting to form. This process should take about 5 minutes, depending on your stovetop. Once boiling, get ready for the next exciting step!

Step 3: Add Ginger and Turmeric
When the water is boiling vigorously, carefully add the sliced ginger and turmeric to the pot. Stir gently to combine and allow the flavors to intermingle. Watch as the water transforms into a beautiful golden hue. This aromatically rich infusion will be the essence of your Ginger-Turmeric Herbal Tea.

Step 4: Simmer the Tea
Lower the heat to a gentle simmer and cover the pot. Allow the mixture to simmer for 10-15 minutes, which helps to deepen the flavors. Stir occasionally, and enjoy the warming aroma wafting from the pot. The longer you simmer, the more robust your tea will become, so adjust according to your taste preferences.

Step 5: Strain the Mixture
After the simmering time, remove the pot from heat and set it aside. Grab a fine-mesh strainer or a tea infuser to pour the tea into a mug, separating the liquid from the ginger and turmeric slices. This step captures the rich flavors while leaving behind any solids, resulting in a smooth and comforting cup of Ginger-Turmeric Herbal Tea.

Step 6: Add Sweetness and Zing
To enhance the flavor of your tea, stir in honey and fresh lemon juice to taste. Start with a teaspoon of each, adjusting according to your preference for sweetness and tartness. The honey will dissolve beautifully into the warm tea, and the lemon will bring a bright, fresh note to your herbal brew.

Step 7: Serve and Garnish
Your Ginger-Turmeric Herbal Tea is now ready to be enjoyed! Pour it into a favorite mug and consider garnishing with fresh mint, a lemon wedge, or even a cinnamon stick for added flair. Take a moment to admire the vibrant color and inviting aroma before sipping your warm cup of wellness.

What to Serve with Ginger-Turmeric Herbal Tea

Enhance your comforting tea experience with these delightful pairings that ignite your senses and elevate your wellness journey.

  • Almond Biscotti: Perfect for dipping, these crunchy treats add a sweet almond flavor that contrasts beautifully with your herbal tea.

  • Fresh Fruit Salad: A refreshingly light option, vibrant fruits like oranges, apples, and berries offer a natural sweetness and bright flavors that balance the spicy notes of the tea.

  • Spiced Nuts: Roasted nuts with a hint of cinnamon or cayenne provide a satisfying crunch and a warm, savory flavor that pairs exquisitely with the rich essence of your brew.

  • Honey Drizzle Butter Toast: Lightly toasted bread spread with a hint of butter and a drizzle of honey becomes an irresistible comfort alongside your cozy cup, enhancing the smoothness of the tea.

  • Coconut Macarons: These chewy, sweet treats introduce a tropical flair and a delightful texture that complements the warming spices in the tea.

  • Dark Chocolate Squares: Treat yourself to rich dark chocolate, offering a slightly bitter contrast to the sweetness of the tea and enhancing its comforting experience.

Sip on your Ginger-Turmeric Herbal Tea and indulge in these pairings to make your cozy moments even more special!

Make Ahead Options

These Ginger-Turmeric Herbal Tea components are perfect for busy home cooks looking to save time! You can slice the ginger and turmeric up to 24 hours ahead of time and store them in an airtight container in the refrigerator to maintain freshness. Additionally, you can prepare the tea infusion and strain it, allowing it to cool before refrigerating for up to 3 days. When you’re ready to enjoy your tea, simply reheat the infusion on the stove, then add honey and lemon juice to taste right before serving. This way, your comforting cup of Ginger-Turmeric Herbal Tea will be just as delicious, providing warm wellness with minimal effort during your hectic days!

Expert Tips for Ginger-Turmeric Herbal Tea

  • Fresh Ingredients Matter: Always use fresh ginger and turmeric for the best flavor and health benefits. They provide a vibrant aroma that powdered versions can’t match.
  • Mind the Simmer: If you simmer the tea for too long, it could turn bitter. Aim for a gentle simmer of 10-15 minutes to keep that perfect balance of flavors.
  • Perfect Sweetness: Start with a teaspoon of honey and lemon juice, then adjust to your taste. Too much sweetness can overshadow the herbal notes of the Ginger-Turmeric Herbal Tea.
  • Experiment with Flavor: Feel free to add spices like cinnamon or cardamom during simmering. They complement the tea beautifully and offer additional health benefits.
  • Serve Immediately: For the freshest taste, enjoy your Ginger-Turmeric Herbal Tea right away. If storing, keep it in an airtight container in the fridge for no more than two days.

Variations & Substitutions for Ginger-Turmeric Herbal Tea

Don’t hesitate to make this ginger-turmeric tea uniquely yours; the flavors are yours to explore!

  • Spicy Twist: Add a pinch of cayenne pepper for an extra kick that warms your soul and invigorates your senses. Just a dash will do the trick!

  • Herbal Base: Replace plain water with chamomile or peppermint tea for a delightful flavor shift, adding a soothing layer to your tea experience.

  • Minty Freshness: Infuse with fresh mint leaves during simmering for a refreshing twist that lightens the herbal notes wonderfully.

  • Cinnamon Flavor: Toss in a cinnamon stick while simmering for a warm, spiced undertone that perfectly complements the ginger and turmeric.

  • Orange Zest: Enhance the citrus goodness by adding a few strips of orange peel while brewing. This bright note adds a delightful sweetness.

  • Chai Inspiration: Create a chai-inspired version by adding cardamom pods and black peppercorns, rounding out the flavors in a cozy, aromatic blend.

  • Vanilla Touch: A drop of vanilla extract at the end gives your tea a sweet, comforting warmth that elevates the overall experience.

  • Vegan Sweetness: Substitute honey with agave nectar or maple syrup for a delicious plant-based sweetener that allows everyone to enjoy this soothing brew!

Feel free to mix and match these ideas! And while you’re at it, pair your tea with delightful accompaniments like almond biscotti or fresh fruit to create a complete cozy moment. Each variation invites creativity, ensuring each cup is a heartfelt expression of comfort and warmth.

How to Store and Freeze Ginger-Turmeric Herbal Tea

Fridge: Store any leftover Ginger-Turmeric Herbal Tea in an airtight container for up to 2 days to maintain freshness and flavor.

Freezer: For long-term storage, pour the cooled tea into ice cube trays. Freeze until solid, then transfer to a freezer bag for convenient, quick-use cubes.

Reheating: To enjoy, simply thaw the cubes in the microwave or let them sit at room temperature. Add hot water if needed to regain the original flavor intensity.

Airtight Storage: Always ensure containers are sealed tightly to prevent any air exposure, which can diminish the tea’s lovely herbal qualities.

Ginger-Turmeric Herbal Tea Recipe FAQs

What is the best way to select fresh ginger and turmeric?
Absolutely! When selecting fresh ginger, look for firm, smooth roots with a spicy aroma. Avoid any that feel soft or have dark spots. For turmeric, choose roots that are vibrant orange in color and feel firm. If using powdered versions, look for high-quality brands without additives for the best flavor and benefits.

How should I store leftover ginger-turmeric tea?
Store any leftover Ginger-Turmeric Herbal Tea in an airtight container in your refrigerator for up to 2 days. For longer preservation, you can freeze it—just pour the cooled tea into ice cube trays and freeze until solid. Afterward, transfer the tea cubes to a freezer bag, and they will last for up to 3 months!

Can I freeze Ginger-Turmeric Herbal Tea? How?
Yes, you can definitely freeze Ginger-Turmeric Herbal Tea! Here’s how:

  1. Allow the tea to cool to room temperature after brewing.
  2. Pour the cooled tea into ice cube trays, filling each compartment but not overflowing.
  3. Place the trays in the freezer until solid, which usually takes about 4 hours.
  4. Once frozen, pop the cubes out of the trays and store them in a labeled freezer bag for easy use later. Thaw them in the refrigerator or toss them into a warm mug of water when you want a quick brew!

What should I do if my tea turns bitter?
Very good question! If your Ginger-Turmeric Herbal Tea turns bitter, it often means it was simmered too long or at too high a heat. Aim for a gentle simmer for 10-15 minutes. If it does become bitter, try adding a little more honey or lemon juice to balance it out. Experimenting with spices like cinnamon can also add depth and mask any bitterness.

Are there any dietary considerations for Ginger-Turmeric Herbal Tea?
Yes! This tea is gluten-free and generally safe for most diets. However, if you are allergic to ginger, turmeric, or honey, it’s best to avoid it. For pet owners, be cautious—while ginger can be good for dogs, turmeric should only be given in moderation. Always consult with your vet if you’re unsure how these ingredients may affect your pets.

Ginger Turmeric Herbal Tea for Cozy Comfort and Wellness

Ginger Turmeric Herbal Tea is a soothing drink that boosts immunity and offers comfort, perfect for chilly evenings.

  • small pot
  • sharp knife
  • fine-mesh strainer
  • Measuring Spoons

For the Tea Base

  • 1-2 teaspoons Fresh Ginger (Peeled and sliced)
  • 1 teaspoon Fresh Turmeric (Peeled and sliced)
  • 2 cups Water (Use filtered water)

For Sweetness and Balance

  • 1 teaspoon Honey (Can substitute with maple syrup or agave nectar)
  • 1 teaspoon Lemon Juice (Or lime juice for a twist)

Step-by-Step Instructions

  1. Start by peeling and thinly slicing 1-2 teaspoons of fresh ginger and 1 teaspoon of fresh turmeric. Set these aside.
  2. In a small pot, pour in 2 cups of fresh, filtered water and bring it to a rolling boil over medium-high heat.
  3. When the water is boiling, add the sliced ginger and turmeric to the pot and stir gently to combine.
  4. Lower the heat to a gentle simmer and cover the pot. Allow the mixture to simmer for 10-15 minutes, stirring occasionally.
  5. After simmering, remove the pot from heat and strain the tea through a fine-mesh strainer into a mug.
  6. Stir in honey and fresh lemon juice to taste, starting with a teaspoon of each.
  7. Enjoy your tea in a favorite mug, garnished with fresh mint, lemon wedge, or a cinnamon stick if desired.

For the freshest taste, enjoy your Ginger-Turmeric Herbal Tea right away. Store any leftovers in an airtight container in the fridge for up to 2 days.

Drink
Herbal
anti-inflammatory, comfort beverage, cozy drink, Ginger Turmeric Herbal Tea, immunity boost, wellness tea

Filed Under: Drink

Irresistibly Easy Whipped Pink Lemonade for Summer Sips

July 3, 2025 by grace bellamy Leave a Comment

Did you know that lemonade has been a soothing summer staple for centuries? This sunny delight offers a refreshing escape from the heat, but I want to elevate your beverage experience with a twist. Introducing my Easy Whipped Pink Lemonade—a delightful blend that’s a feast for the eyes and the taste buds!

This fun and easy recipe is perfect for parties, picnics, or enjoyably lazy afternoons. With the whimsical pink hue and creamy texture, it’s a mocktail that’s sure to impress both kids and adults alike. Just a handful of simple ingredients come together to create a drink that’s incredibly inviting. You don’t have to worry about complex steps; it’s a breeze to whip up—ideal for those hot summer days when you’re looking to quench your thirst without resorting to fast food.

Plus, the whipped cream adds a luxurious touch that takes this classic beverage to a new level of indulgence! Are you ready to tantalize your taste buds and make your summer sizzle? Keep scrolling!

Why is Whipped Pink Lemonade a must-try?

Refreshing Taste: This whipped pink lemonade is bursting with zesty flavor, providing the perfect counterbalance to the heat of summer.
Simple Ingredients: With just a few pantry staples needed, it’s a hassle-free recipe anyone can make.
Eye-Catching Presentation: The vibrant pink color paired with a creamy topping makes it a delightful centerpiece for any gathering.
Versatile: Consider swapping in Kool-Aid for an entirely different flavor experience! Get creative and explore other fun variations.
Crowd-Pleasing: This mocktail is bound to impress guests, whether you’re at a backyard BBQ or hosting a picnic. Discover more about fun beverages like this in the Cooking section!

Whipped Pink Lemonade Ingredients

• Whip up this refreshing drink with just a few simple ingredients!

For the Whipped Base

  • Pink Lemonade Mix (e.g., Country Time) – Provides the delightful flavor and sweetness that makes this drink pop.
  • Heavy Whipping Cream – This is the star ingredient that creates that luscious whipped texture you’ll love!

For the Drink

  • Water – Acts as a diluter, balancing the sweetness of the lemonade mix, ensuring it’s just right.
  • Ice – Keeps your drink beautifully chilled and refreshing, perfect for hot summer days.

Step-by-Step Instructions for Easy Whipped Pink Lemonade

Step 1
Begin by preparing the whipped base for your Easy Whipped Pink Lemonade. In a large mixing bowl, combine 1/4 cup of pink lemonade mix and 1 cup of heavy whipping cream. Using an electric mixer, whip the ingredients on high speed for about 3-5 minutes, or until the mixture thickens and forms stiff peaks. The color should transform into a delightful pastel pink, indicating that it’s ready to be dolloped on top of your lemonade.

Step 2
Next, it’s time to create the drink itself. In two tall serving glasses, add 1 tablespoon of pink lemonade mix to each glass. Pour in 3/4 cup of cold water for each glass and stir well using a spoon until the mix is fully dissolved. You’ll want the lemonade to be nicely blended, with no clumps remaining, creating a refreshingly vibrant color that invites you to take a sip.

Step 3
After blending your drink, add ice to each glass. Fill the glasses about two-thirds full with ice cubes to ensure your lemonade stays cold and refreshing. Watch as the ice clinks gently against the glass, creating a light and festive atmosphere. This step not only cools your drink but also adds to the visual appeal, showcasing the lovely pink lemonade mix.

Step 4
Now comes the star of the show—the whipped pink lemonade cream! Carefully spoon the whipped mixture over the lemonade in each glass, creating a fluffy, cloud-like topping. The whipped cream should sit lightly atop the lemonade, adding a creamy allure. This is where the fun begins, as your Easy Whipped Pink Lemonade starts to look like a dreamy dessert.

Step 5
Finally, before serving, gently stir the whipped cream into the drink with a long spoon to combine the layers just before enjoying. This adds a lovely swirl of creamy texture to your lemonade, making every sip a delightful experience. Serve immediately, and watch the smiles as family and friends enjoy this refreshing summer mocktail!

Whipped Pink Lemonade Variations

Feel free to make this recipe your own with these fun variations that will keep your taste buds dancing!

  • Kool-Aid Twist: Swap pink lemonade mix for your favorite Kool-Aid flavor to create a colorful, fruity delight. Each variation can surprise you with a new taste experience!

  • Coconut Cream: Substitute heavy whipping cream with coconut cream for a tropical flair that pairs beautifully with the lemonade’s tartness.

  • Sparkling Version: Use sparkling water instead of regular water for a fizzy, refreshing twist that adds bubbles to your summer sips.

  • Fruit-Infused: Mash fresh berries like strawberries or raspberries and mix them into your lemonade for an extra fruity punch that looks as good as it tastes.

  • Minty Fresh: Toss in fresh mint leaves while mixing your lemonade for a refreshing herbal note that complements the sweetness beautifully.

  • Spicy Kick: Add a pinch of cayenne pepper to the whipped cream for a surprising heat that will awaken your senses with each sip.

  • Sugar-Free Option: Use a sugar-free pink lemonade mix if you’re looking to cut back on sugar while still enjoying that delightful flavor.

  • Chocolate Drizzle: Drizzle melted chocolate over the whipped topping for a decadent finish that will give your lemonade a dessert-like twist.

Let your creativity shine and make these variations a part of your summer beverage rotation!

How to Store and Freeze Whipped Pink Lemonade

Fridge: Keep your whipped pink lemonade covered in an airtight container for up to 3 days. Stir before serving, as separation may occur.

Freezer: For longer storage, freeze the whipped base in an airtight container for up to 2 months. When ready to enjoy, thaw in the fridge overnight and re-whip for best texture.

Serve Fresh: It’s best enjoyed fresh! Layering the whipped cream on top right before serving keeps the drink looking and tasting its best.

Reheating: For a unique twist, consider warming up leftover lemonade gently over low heat, but avoid boiling to maintain the flavors.

What to Serve with Whipped Pink Lemonade?

Elevate your summer gatherings and create a delightful, refreshing meal experience with complementary dishes!

  • Fresh Fruit Skewers: A colorful assortment of seasonal fruits adds a refreshing sweetness that pairs beautifully with the pink lemonade.

  • Crispy Chicken Tenders: The savory crunch of these tenders provides a satisfying contrast to the creamy and zesty drink, making it a hit with both kids and adults.

For a picnic platter, think finger foods:

  • Vegetable Platter with Dip: Crisp cucumbers, bell peppers, and cherry tomatoes, served with a zesty ranch dip, contrast the sweetness of the lemonade perfectly.

  • Caprese Salad Bites: The combination of tangy balsamic reduction drizzled over fresh mozzarella, tomatoes, and basil offers a delightful burst of flavor.

  • Classic Potato Salad: Creamy and comforting, potato salad is a picnic staple that complements the bright, summery vibes of whipped pink lemonade.

  • Sweet Scones: Pair with a dollop of whipped cream or jam, these pastries add a sweet touch, rounding out your summer feast beautifully!

Make Ahead Options

These Whipped Pink Lemonade preparations are a lifesaver for busy home cooks looking to save time! You can whip the creamy base (1/4 cup pink lemonade mix and 1 cup heavy whipping cream) up to 24 hours ahead of time; just store it in an airtight container in the refrigerator to maintain that delightful texture. The drink mixture can be prepped in advance too—mix 1 tablespoon of pink lemonade mix with 3/4 cup of cold water and keep that refrigerated for up to 3 days. When you’re ready to serve, simply fill glasses with ice, add the chilled lemonade mixture, and top with the whipped cream—stir before sipping for a refreshing treat that’s just as delicious!

Expert Tips for Whipped Pink Lemonade

  • Perfect Whipping: Use cold heavy cream: Chilled cream whips better, ensuring that your whipped pink lemonade has a fluffy texture with stiff peaks.

  • Mix Wisely: Avoid clumps: When mixing the lemonade with water, stir thoroughly to prevent any clumps of powder, giving you a smooth, refreshing drink.

  • Ice Balance: Don’t overfill with ice: Fill your glasses about two-thirds full with ice to keep the drink cold without diluting the vibrant flavors too quickly.

  • Presentation Matters: Garnish creatively: Add a slice of lemon or fresh berries on top for an extra splash of color and elegance, enhancing your whipped pink lemonade’s visual appeal.

  • Taste Adjustments: Sweetness checks: If you prefer a sweeter drink, adjust the lemonade mix to your taste, but be careful not to overpower the fresh lemonade flavor.

Whipped Pink Lemonade Recipe FAQs

What is the best way to choose pink lemonade mix?
Absolutely! When selecting pink lemonade mix, opt for one that is free of artificial colors and flavors, like Country Time. Look for vibrant colors without dark spots that might indicate age. Check the expiration date to ensure maximum freshness and taste.

How should I store leftover whipped pink lemonade?
Very good question! Keep your whipped pink lemonade in an airtight container in the refrigerator. It should last for up to 3 days. Just make sure to stir it well before serving, as some separation can occur over time.

Can I freeze whipped pink lemonade?
Yes, you can! To freeze the whipped base, place it in an airtight container. It can be kept for up to 2 months! When you’re ready to enjoy, simply thaw it in the refrigerator overnight and re-whip for the best texture before serving again.

What to do if the whipped cream doesn’t form stiff peaks?
Don’t worry at all! If your whipped cream isn’t reaching stiff peaks, ensure that your heavy cream is cold and that you’re using high speed on your mixer. Sometimes, adding just a touch of vanilla extract can help stabilize it. If it’s still too soft, try whipping it a little longer—it usually does the trick!

Is this recipe suitable for people with dairy allergies?
Nice consideration! Unfortunately, since heavy whipping cream is a key ingredient, this whipped pink lemonade is not suitable for those with dairy allergies. However, you could experiment with coconut cream or a dairy-free whipped topping as an alternative for a similar texture.

Can I make this drink more kid-friendly?
Certainly! Adjusting the sweetness is simple! Add less pink lemonade mix for a lighter flavor or even blend in a little fresh fruit puree like strawberries for an adorable twist that kids will love! The more the merrier when it comes to adding fun flavors!

[tasty-recipe id=”2299″]

Filed Under: Drink

Irresistibly Creamy Peach Smoothie: Refreshing & Easy Bliss

June 15, 2025 by grace bellamy Leave a Comment

It was a sun-drenched afternoon when I stumbled upon a rather ripe peach sitting forlornly on my kitchen counter. The fruit was tender and fragrant, exuding a sweetness that transported me back to summer picnics filled with laughter and late-afternoon sunshine. Inspired by that nostalgic aroma, I decided to whip up a Peach Smoothie, and instantly, the kitchen transformed into a haven of delightful scents.

This luscious, creamy smoothie is not just a treat; it’s a refreshing escape any time of day. With just a few simple ingredients—frozen peaches, a splash of almond milk, and a hint of honey—it comes together in mere minutes. Plus, it’s easily adaptable to meet various dietary needs, including a vegan option that skips the yogurt while maintaining its sumptuous texture.

Drawing from the very essence of summer, this Peach Smoothie is bursting with flavor and versatility, making it a family favorite that keeps everyone coming back for more. Let’s dive in and bring that sunny nostalgia to your glass!

Table of Contents
  • Why is this Peach Smoothie a must-try?
  • Peach Smoothie Ingredients
  • Step-by-Step Instructions for Peach Smoothie
  • How to Store and Freeze Peach Smoothie
  • What to Serve with Peach Smoothie?
  • Expert Tips for the Best Peach Smoothie
  • Make Ahead Options
  • Peach Smoothie Variations
  • Peach Smoothie Recipe FAQs
    • What fruits mix well with peaches?
    • Are peaches good for a smoothie?
    • What is the best combination with peach for a smoothie?
    • How to store leftover Peach Smoothie?
    • How do I freeze a Peach Smoothie properly?
    • What dietary considerations should I keep in mind when making a Peach Smoothie?

Why is this Peach Smoothie a must-try?

Creamy Delight: The combination of frozen peaches and yogurt creates a lush texture that’s irresistible.
Quick Preparation: With just a few minutes needed, this smoothie fits perfectly into any busy schedule.
Flavor Versatility: Easily switch it up by adding strawberries for a fruity twist or go vegan by using non-dairy milk.
Healthy Indulgence: Packed with natural sweetness and nutrients, it satisfies cravings without any guilt.
Sunshine in a Glass: Enjoy a bright, refreshing burst of flavor that embodies the essence of summer, making it a hit for everyone—perfect for a family breakfast or a post-workout refuel! Don’t forget to try this delightful Vegan Peach Smoothie variation for a plant-based option!

Peach Smoothie Ingredients

  • For the Base

  • Unsweetened Almond Milk – This creamy liquid provides the base; substitute with any milk of your choice for flexibility.

  • Nonfat Plain or Vanilla Greek Yogurt – Adds a rich creaminess that enhances the smoothie’s texture.

  • For the Fruit

  • Frozen Peaches – The star of the show! Ensure they are unsweetened for a natural sweet flavor.

  • Frozen Banana Slices – Contributes to smoothness and adds a touch of natural sweetness.

  • For Sweetness & Flavor

  • Honey – A natural sweetener; adjust to your taste by adding more if desired.

  • Vanilla Extract – Enhances the overall flavor, making each sip even more delightful.

  • Ground Cinnamon – Introduces warmth and a hint of spice to balance the sweetness.

  • Ground Ginger – Adds a subtle, zesty flavor that pairs beautifully with peaches.

  • For Consistency

  • Ice Cubes – Optional but recommended for a thicker, frosty finish to this refreshing smoothie.

For exact measurements, check the recipe card below.

Step-by-Step Instructions for Peach Smoothie

Step 1
Begin by gathering all your ingredients for the Peach Smoothie. In a high-powered blender, add the unsweetened almond milk, which creates a creamy base, followed by the nonfat plain or vanilla Greek yogurt to enhance the smoothie’s richness. Next, add the frozen peaches and banana slices; these will provide the delightful fruity flavor and creamy texture. Layering the ingredients in this order helps the blender to operate smoothly.

Step 2
Cover the blender with its lid and blend the mixture on high speed for about 30 seconds. Keep an eye on the consistency—you’re aiming for a smooth and creamy texture without any lumps. If you’re using a less powerful blender, it’s helpful to add the fruit gradually; this can prevent the motor from straining. Once blended, you should see a beautiful golden hue from the peaches.

Step 3
After achieving the desired consistency, it’s time to taste your Peach Smoothie. Add honey according to your preference for sweetness—perhaps start with one tablespoon and adjust as needed. Blend again for an additional 10-15 seconds to incorporate the honey completely. The excitement builds as the smoothie transforms into a luscious, vibrant drink that’s bursting with peach flavor.

Step 4
If you wish to make the Peach Smoothie thicker, this is where the ice cubes come in. Add a handful of ice cubes to the blender and blend on high for another 20-30 seconds. This step gives the smoothie a frosty finish, making it perfect for those warm days. Stop to check once more that the texture is creamy and inviting, then pour it into your favorite glass.

Step 5
Once poured, feel free to garnish your Peach Smoothie with a sprinkle of ground cinnamon or extra peach slices for a touch of elegance. Enjoy immediately while it’s cold and fresh—each sip is a beautiful reminder of summer. This delightful and refreshing Peach Smoothie is perfect for breakfast or a mid-afternoon pick-me-up!

How to Store and Freeze Peach Smoothie

Fridge: Store leftover Peach Smoothie in an airtight container in the refrigerator for up to 3 days. Give it a good shake or stir before enjoying it again.

Freezer: If you’d like to freeze your smoothie, pour it into freezer-safe bags or containers, leaving some space for expansion. It can stay good for up to 3 months.

Reheating: When ready to enjoy, thaw in the fridge overnight or blend from frozen with a splash of almond milk until smooth.

Make-ahead: Prepare individual portions of the Peach Smoothie by freezing them. This way, you have a nutritious option ready to go whenever a craving strikes!

What to Serve with Peach Smoothie?

Brighten up your smoothie experience with these delicious pairings that will enhance your meals and satisfy your cravings.

  • Granola Parfait: Layered with yogurt and fresh fruit, granola provides a delightful crunch that complements the smooth, creamy texture of the peach smoothie.

  • Avocado Toast: The creamy richness of avocado on whole grain bread offers a fulfilling contrast, while healthy fats keep you energized.

  • Fruit Salad: A colorful mix of seasonal fruits adds a refreshing touch, balancing the sweetness of the smoothie with zesty, bright flavors.

  • Coconut Chia Pudding: This creamy, textured pudding pairs beautifully with a peach smoothie, providing healthy fiber and a tropical flair.

  • Nut Butter Energy Balls: These bite-sized snacks offer protein and healthy fats, making them a perfect on-the-go complement for your fruity drink.

  • Berry Medley: Fresh strawberries or blueberries offer a vibrant burst of flavor and antioxidants, enhancing the smoothie while adding visual appeal.

  • Iced Green Tea: Serve alongside a refreshing iced green tea for a hydrating and energizing drink, balancing the smoothie’s sweetness with a gentle, herbal touch.

  • Oatmeal Cookies: Soft, chewy oatmeal cookies work wonderfully as a dessert option, grounding the fruity smoothie with their heartiness and subtle sweetness.

Expert Tips for the Best Peach Smoothie

  • Fruits First: Always add your liquids before the fruit in the blender. This helps the blades move smoothly and ensures a well-blended Peach Smoothie.

  • Frozen is Best: Use frozen peaches and bananas for optimal texture. They provide creaminess without needing ice, giving your smoothie a sweeter flavor.

  • Taste Test: Always taste your smoothie after blending. You can adjust sweetness by adding more honey if desired, ensuring it’s just right for you!

  • Customize Wisely: When adding other fruits like strawberries, be cautious of overpowering the peach flavor. A little goes a long way, so start with small amounts!

  • Vegan Version: For the vegan Peach Smoothie, skip the yogurt and use extra frozen fruit to achieve that perfect creamy consistency. Add more ice if needed!

Make Ahead Options

These Peach Smoothies are perfect for busy home cooks looking to save time! You can prepare the base ingredients—unsweetened almond milk, Greek yogurt, frozen peaches, and banana slices—up to 24 hours in advance by blending them and storing the mixture in the refrigerator. To maintain quality and prevent browning, cover the container tightly. When you’re ready to enjoy, simply give the mixture a quick blend again, taste, and adjust sweetness with honey if needed. For a thicker texture, adding ice cubes just before serving ensures your smoothie remains irresistibly refreshing. With this prep method, you’ll have a delicious, healthy treat ready when you need it most!

Peach Smoothie Variations

Feel free to take this delightful recipe to new heights with your creative twists and flavorful combinations.

  • Vegan Peach Smoothie: Substitute Greek yogurt with your favorite non-dairy yogurt and increase the ice for a creamy texture.

  • Strawberry-Peach Fusion: Add fresh or frozen strawberries instead of banana for a colorful, fruity delight. A hint of lemon juice brightens the blend even further.

  • Coconut Bliss: Swap almond milk with coconut milk for a tropical, creamy experience. This variation is a mini-vacation in a glass!

  • Nutty Flavor: Add a tablespoon of almond butter or peanut butter for a nutty taste and added protein. It creates a satisfying richness that’s simply delightful.

  • Spicy Kick: Sprinkle in a pinch of cayenne pepper or a splash of ginger for a spicy twist that warms the palate. It’s an adventurous option for the bold!

  • Berry Boost: Toss in a handful of blueberries or raspberries for an antioxidant punch and a beautiful pop of color. They blend seamlessly, boosting both flavor and health.

  • Mango Magic: Combine peaches with frozen mango chunks for an irresistible sunset-inspired smoothie that sings of summer.

  • Protein Power: Mix in a scoop of your favorite protein powder to turn this smoothie into a post-workout pick-me-up. It keeps you fueled and ready for whatever comes next!

Peach Smoothie Recipe FAQs

What fruits mix well with peaches?

Absolutely! Peaches pair beautifully with a variety of fruits. Some excellent combinations include strawberries, bananas, and mangoes. You can even mix them with berries like blueberries or raspberries for a colorful, delicious blend. Each fruit brings out the natural sweetness of peaches, enhancing the overall flavor of your smoothie.

Are peaches good for a smoothie?

Very! Peaches not only add a delightful sweetness but also contribute a creamy texture when frozen. Their flavor is vibrant, and they blend well with other fruits, making them a perfect choice for smoothies. Plus, they are packed with vitamins A and C, making your peach smoothie not just delicious but also nutritious!

What is the best combination with peach for a smoothie?

The best combinations often include ingredients that complement peaches’ sweet and aromatic profile. Mixing peaches with banana creates a creamy base, while adding strawberries contributes a refreshing tartness. You could also enhance your smoothie by adding a splash of orange juice for a zesty twist or sprinkle a few nuts for added nuttiness.

How to store leftover Peach Smoothie?

To store leftover Peach Smoothie, pour it into an airtight container and refrigerate. It should stay fresh for up to 3 days. Just give it a good shake or stir before enjoying it again. If you want to prepare it for later use, consider freezing portions in freezer-safe bags or containers. Remember to leave some space for expansion, and you can enjoy it for up to 3 months!

How do I freeze a Peach Smoothie properly?

When freezing your Peach Smoothie, follow these simple steps:
Prepare the smoothie as usual and pour it into freezer-safe bags or containers.
Leave about an inch of space at the top to allow the smoothie to expand when frozen.
Seal the bags tightly and label them with the date.
Freeze for up to 3 months.
When ready to enjoy the frozen smoothie, you can blend it right from the freezer with a splash of non-dairy milk for a quick and refreshing treat.

What dietary considerations should I keep in mind when making a Peach Smoothie?

If you have allergies, always ensure your ingredients are safe for consumption. For vegan options, substitute Greek yogurt with non-dairy yogurt or increase the amount of frozen fruit along with ice. Also, consider any sensitivities to honey; you can use agave syrup or a sugar substitute instead for sweetness.

Filed Under: Drink

margarita recipe

February 7, 2025 by grace bellamy Leave a Comment

Classic Margarita Recipe: Perfect Mix Every Time

A classic margarita cocktail presented on a slate serving board, with a glass rimmed with salt. The drink is made with clear tequila, fresh lime juice, and triple sec, creating a vibrant green-yellow hue. Garnished with a lime wedge, the drink sits on a wooden table, with a blurred background of lush greenery or a coastal setting. Warm, natural lighting casts a soft glow, enhancing the refreshing, summery atmosphere. Crisp, high-resolution focus captures the intricate details of the drink’s ingredients and presentation.

Imagine a warm summer evening. The sound of ice clinking and the smell of a tequila cocktail fill the air. The classic margarita is more than a drink; it’s a journey to Mexico’s lively streets with every sip.

classic margarita recipe

Starting your margarita journey here is exciting. This drink is a mix of simplicity and flavor. With silver tequila, orange liqueur, and lime juice, you’ll make a drink that’s both classy and tasty.

This cocktail’s beauty is in its balance. A single serving is 3.5 ounces, stronger than many restaurant versions. Whether you love cocktails or just like to mix drinks, this recipe will improve your bartending skills.

Get ready to wow your friends and excite your taste buds. Your perfect margarita is just around the corner!

Understanding the Classic Margarita’s Heritage

The margarita is more than a drink; it’s a cultural icon with a rich history. It’s deeply rooted in Mexican traditions. This cocktail has won the hearts of many with its fascinating origins and journey.

A vintage bar scene, bathed in warm, golden light. On the counter, a pristine margarita glass, its rim coated in coarse salt, stands beside a bottle of premium tequila and a freshly cut lime wedge. In the background, an ornate wall-mounted mirror reflects the rich history of this classic cocktail, showcasing vintage cocktail shakers, aged liquor bottles, and a framed menu from a 1950s Mexican cantina. The atmosphere exudes a sense of sophistication and timelessness, capturing the enduring legacy of the margarita as a beloved staple of the cocktail canon.

The margarita’s story is full of intrigue and different tales. One story says Carlos “Danny” Herrera created it in 1938 for a tequila-allergic patron. Another story points to socialite Margarita Sames in the 1940s.

Mexican Origins and Cultural Significance

Tequila’s homeland, Mexico, was key in the margarita’s growth. Its popularity soared with Mexico’s tourism in the 1950s and 60s. It went from a local favorite to a global hit.

Evolution from Traditional to Modern Variations

  • 1970s: Introduction of the frozen margarita
  • Popular in warm-weather states like California, Texas, and Florida
  • Expanding flavor profiles and preparation techniques

The Meaning Behind the Name

Interestingly, margarita means “daisy” in Spanish. The name adds a poetic touch to this beloved cocktail. It reflects its delicate and vibrant nature.

“A great margarita is like a perfect dance—balanced, smooth, and unforgettable.”

Today, the margarita is the #8 best-selling cocktail worldwide. The United States leads in sales. Its journey from a local Mexican drink to a global favorite shows the power of drink ingredients and cultural exchange.

Essential Ingredients for the Perfect Margarita

Making a top-notch margarita begins with picking the best ingredients. The quality of your drink depends on the right mix of components. Together, they create a drink that’s both refreshing and harmonious.

Choosing the Right Tequila

Tequila is the heart of a great margarita. Opt for 100% blue agave tequila. Blanco or reposado tequilas are best. Here’s what to consider:

  • Blanco tequila gives a clean, sharp taste
  • Reposado adds a hint of oak
  • Always go for 100% agave for the best flavor

Orange Liqueur: Cointreau vs Triple Sec

The choice of orange liqueur is crucial. Bartenders often suggest:

  • Cointreau for its balanced sweetness
  • Triple sec as a more affordable choice
  • Use 1.5 ounces per cocktail

The Importance of Fresh Lime Juice

Fresh lime juice is essential for a real margarita. Using a cocktail shaker ensures the best mix. Here’s how to get it right:

  • Use juice from ripe limes
  • Go for 1.5 ounces per drink
  • Squeeze about a quarter of a lime

“A great margarita is all about fresh, quality ingredients” – Cocktail Expert

A well-lit, high-angle shot of a wooden table showcasing the essential ingredients for a classic margarita: a bottle of premium tequila, a fresh lime, a salt-rimmed glass, a bottle of triple sec, and a bowl of ice cubes. The lighting is soft and warm, accentuating the vibrant colors and textures of the ingredients. The composition is balanced and visually appealing, drawing the viewer’s attention to the key components needed to create the perfect margarita. The overall mood is one of sophistication and attention to detail, reflecting the care and precision required to craft this iconic cocktail.

When you mix these ingredients with care in your cocktail shaker, magic happens. The perfect blend of tequila, triple sec, and lime juice makes a drink that’s both classy and refreshing.

The 3-2-1 Margarita Recipe: Master the Perfect Ratio

Making the perfect margarita starts with the classic 3-2-1 ratio. This simple formula helps balance your drink ingredients. It ensures a delicious cocktail every time.

For a standard serving, this means:

  1. 1½ oz blanco tequila
  2. 1 oz triple sec
  3. ¾ oz fresh lime juice

“The beauty of the 3-2-1 ratio is its simplicity – anyone can remember and replicate it!” – Professional Bartender

When mixing your margarita, measure the ingredients carefully. For a sweeter taste, add 2 tablespoons of simple syrup. Bartenders suggest shaking for 15-20 seconds until the shaker gets a light frost.

Pro tip: Use premium 100% de agave tequila like Espolon Blanco or Casamigos. The right ingredients make your margarita unforgettable.

Professional Bartending Techniques for Mixing

Making the perfect margarita is more than just mixing ingredients. It’s about mastering techniques that make your drink stand out. A good bartender’s guide teaches you how to mix like a pro.

Your cocktail shaker is key when making a margarita. Bartenders know that the right way to mix can change the flavor and look of your drink.

Proper Shaking Methods

Shaking is a must for making cocktails. Here are some tips to make your margarita perfect:

  • Use a high-quality cocktail shaker with a tight seal
  • Shake vigorously for 8-10 seconds
  • Hold the shaker with both hands
  • Move in a controlled, rhythmic motion

Straining and Serving Tips

Straining right is key to a smooth margarita. Use a Hawthorne strainer to catch ice and pour cleanly.

“A great cocktail is about precision and passion” – Professional Mixologist

Ice Selection and Management

Ice is important in making cocktails. Choose big, dense cubes that chill fast but don’t water down your drink. Fresh, clean ice keeps your margarita’s flavor sharp.

  1. Use fresh, filtered water for ice
  2. Avoid cloudy or old ice
  3. Consider using larger cubes for slower melting

With these professional techniques, your homemade margarita will go from good to great.

Margarita Recipe: Step-by-Step Guide

Making a great tequila cocktail at home is simple. The key is using fresh ingredients and a precise mixing method. Let’s go through it step by step.

First, gather what you need for a classic margarita:

  • 1 1/2 ounces silver tequila
  • 1 ounce orange liqueur (Cointreau recommended)
  • 3/4 ounce freshly squeezed lime juice
  • Optional simple syrup to taste
  • Coarse salt for rimming
  • Ice
  • Lime wedge for garnish

Getting your glass ready is important. Rub a lime wedge around the rim and then dip it in coarse salt. This makes a signature salted rim that boosts the drink’s taste.

“A great margarita is all about balance and fresh ingredients” – Mixology Expert

To mix, fill a cocktail shaker with ice. Add the tequila, orange liqueur, and lime juice. Shake hard for 15-20 seconds until the shaker gets frosty. This makes sure your drink is cold and well-blended.

Tip: Always use freshly squeezed lime juice for the best flavor. Bottled juice just can’t match the fresh, zesty taste of real citrus.

Strain the mix into your glass over ice, add a lime wedge, and enjoy your homemade margarita!

Glassware and Presentation Essentials

Making the perfect margarita is more than just mixing drinks. The right glassware and presentation can make your cocktail stand out. The way your margarita looks is just as key as how it tastes.

Choosing the right glass is key for a top-notch margarita. Margarita glasses have wide rims for the classic salt rim. This design is not just for looks; it improves the drinking experience.

Creating the Perfect Salt Rim

Getting the salt rim just right takes skill and technique. Here’s how to do it perfectly:

  • Run a lime wedge garnish around the glass rim
  • Use a shallow plate filled with coarse salt
  • Dip the moistened rim into the salt at a 45-degree angle
  • Rotate the glass to ensure even salt coverage

Garnishing Techniques

Your lime wedge garnish does more than look good. It adds a fresh citrus scent and lets guests tweak the drink’s tartness. Tip: cut a small notch in the lime wedge for a perfect fit on the glass rim.

Temperature Considerations

Drink your margarita right after you make it. Cold glasses help keep the drink at the best temperature. Chill your glasses in the freezer for 10-15 minutes before serving for a cooler drink.

“The difference between a good margarita and a great margarita is often in the details of presentation.” – Professional Bartender’s Wisdom

Scaling Up: How to Make Pitcher Margaritas

Want to serve a crowd with your favorite tequila cocktail? Making margaritas for a big group is simpler than you think. The trick is knowing how to scale up your margarita recipe right.

Here’s a simple way to make a tasty pitcher of margaritas that will impress your guests. Stick to the classic 3-2-1 ratio but adjust the amounts based on how many you’re serving. Professional bartenders suggest using exact measurements for the best taste.

Ingredients for a standard pitcher (about 16 servings):

  • 3 cups silver tequila
  • 2 cups orange liqueur
  • 1½ cups freshly squeezed lime juice
  • Optional sweetener (agave syrup or simple syrup)
  • Ice for chilling
  • Lime wedges for garnish
  • Coarse salt for rimming glasses

Pro tips for your margarita recipe:

  1. Always use fresh lime juice for the best flavor
  2. Chill the pitcher before serving
  3. Prepare salt-rimmed glasses in advance
  4. Mix ingredients just before serving to maintain freshness

“The perfect margarita is a balance of sweet, sour, and spirit” – Cocktail Wisdom

Remember, your tequila cocktail can be made ahead of time. But it’s best served within 8 hours of mixing. Keep it in the fridge if needed. Add ice just before serving to keep your margaritas cold.

Customization Options and Variations

Ready to elevate your tequila cocktail? Exploring margarita variations introduces exciting ingredients and flavors. You can turn this classic cocktail into something uniquely yours.

Classic margaritas are a great starting point for creativity. Here are some popular ways to customize:

  • Spicy Margaritas: Add muddled jalapeños or a Tajin rim for a fiery kick
  • Fruit-Infused Versions: Try flavors like prickly pear, blood orange, or pomegranate
  • Skinny Margaritas: Use fresh orange juice and less agave for a lighter version
  • Frozen Margaritas: Great for summer and cooling off

Choosing the right tequila is key to your drink’s taste. Here are some options:

  1. Blanco (unaged) tequila for a crisp, clean taste
  2. Reposado tequila for subtle oak-aged complexity
  3. Añejo tequila for a richer, more sophisticated flavor

“The beauty of a margarita is its incredible versatility. Don’t be afraid to experiment!” – Mixology Expert

For those who don’t drink alcohol, virgin margaritas are a great choice. Just leave out the tequila and orange liqueur. Use fresh lime juice, agave syrup, and creative garnishes instead.

The perfect margarita is the one that makes you happy. Whether it’s a classic or a new twist, your ideal tequila cocktail is out there waiting for you.

Conclusion

Your margarita recipe adventure doesn’t end here. This classic cocktail is more than a drink. It’s a cultural experience filled with rich Mexican heritage. By learning to make the perfect margarita, you’ve opened a world of mixology skills.

The margarita is very versatile. You can make a traditional recipe or try fruit-infused ones. You now know how to make amazing cocktails at home. From choosing the best tequila to mastering the salt rim, every step is important.

Don’t forget, practice makes perfect. Every skilled bartender started where you are now. You’re eager to learn and passionate about making unforgettable drinks. Your new skills will impress your friends and make your home bartending better. The margarita is an art form waiting for your touch.

Now, you’re ready to dive into the world of margaritas. Cheers to your mixology journey!

FAQ

What are the essential ingredients for a classic margarita?

A classic margarita needs tequila, triple sec (or Cointreau), and fresh lime juice. Don’t forget a salt rim. Use top-notch ingredients, like 100% agave tequila and fresh lime juice.

What is the perfect margarita ratio?

The 3-2-1 ratio is the best: 3 parts tequila, 2 parts triple sec, and 1 part lime juice. This mix makes a cocktail that’s just right, not too strong or weak.

How do I create the perfect salt rim?

First, run a lime wedge around the glass rim. Then, dip the rim in kosher salt or margarita salt. Make sure to rotate the glass for an even coat. Tap off any extra salt for a clean look.

What type of tequila is best for margaritas?

For classic margaritas, use Blanco or silver tequila. Choose 100% agave tequila from brands like Patrón, Don Julio, or Herradura for the best taste.

Can I make a large batch of margaritas for a party?

Yes, you can make a big batch! Just use the same 3-2-1 ratio. Mix everything in a large pitcher. Serve over ice and add fresh lime juice just before serving for the best flavor.

What’s the difference between Cointreau and triple sec?

Cointreau is a premium orange liqueur with a refined taste. Triple sec is a broader term for orange-flavored spirits. Cointreau is usually considered better quality and can make your margarita taste even better.

How should I shake a margarita?

Fill a cocktail shaker with ice. Shake it hard for 10-15 seconds. This makes the drink cold and well-mixed, with a bit of froth.

What are some popular margarita variations?

There are many variations like strawberry, spicy jalapeño, mango, and smoky mezcal margaritas. You can try different fruits, flavored salts, or even change the base spirit.

Filed Under: Drink

  • « Previous Page
  • 1
  • 2
RecipeCrown

Hello, beautiful people! I’m Grace Bellamy, a foodie, traveler, and writer with wanderlust in my soul. Whether crafting recipes in my kitchen or exploring flavors around the globe, my greatest joy is helping you create healthier, happier lives, one delicious bite at a time.