Main Dishes
-
Savory Braised Beef Pasta That Will Warm Your Soul
-
Deliciously Healthy Sticky Chicken Bowls for Every Home Chef
-
Savor Crispy Chicken Alfredo Tacos for a Flavorful Twist
-
Savory Greek Turkey Meatballs with Creamy Tzatziki Sauce
-
Savory BBQ Chicken Tater Tot Casserole Family Favorite
-
Zesty Honey Lime Chicken & Avocado Rice Stack Delight
-
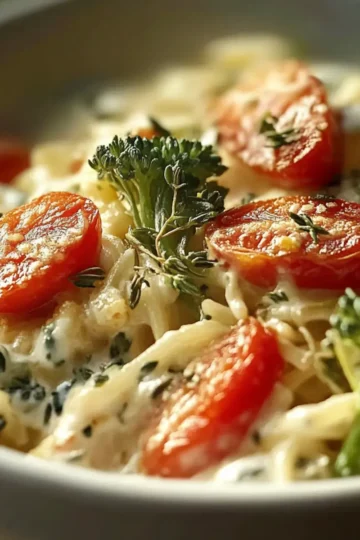
One-Pan Butter Parmesan Pasta for Effortless Comfort Food
-
Boursin Orzo Bake: Creamy One-Pan Dinner Everyone Will Love
-
Sizzling Steak Fried Rice: A Flavor-Packed Comfort Bowl
-
Garlic Butter Steak Rigatoni: A Comforting Taste of Home
-
Savory Pan Fried Noodles: A Cozy Dinner Delight
-
Irresistible Spicy Thai Grilled Peanut Chicken Recipe
-
Delicious White Lasagna with Garlicky Greens and Mushrooms
-
Delicious Healthy Grilled Shrimp Quinoa Bowl for Easy Meals
-
Spicy Salmon Bowls with Fluffy Coconut Rice Magic
-
Delicious California Sushi Bowls to Elevate Your Dinner Game
-
Irresistibly Sweet Pineapple Glazed Salmon Recipe for Grilling
-
Indulge in Decadent Buttered Lobster Pasta Tonight
-
Indulge in Comfort: Creamy Shrimp Newburg Recipe
-
Tender & Flavorful Asian Pork Tenderloin: A Home Cook's Dream
-
Irresistible Blackstone Smash Burgers You'll Crave
-
Cozy Up with Crock Pot Shipwreck Stew for a Flavorful Feast
-
Creamy Coconut Milk Chicken for a Taste of Tropical Bliss
-
Deliciously Creamy Honey Pepper Chicken Mac and Cheese Bliss
-
Savor the Warmth of Traditional Italian Broccoli Soup
-
Savor the Flavors of Caribbean-Style Plantain Curry at Home
-
Savor the Sweet Heat of Hot Honey Chicken Bowl
-
Creamy Nutty Noodle Soup That Will Warm Your Soul
-
Delicious Tinga de Pollo: A Flavorful Twist on Tacos
-
Indulge in Creamy Sea Scallops Pasta for a Cozy Dinner
-
Melt-In-Your-Mouth Tender Braised Beef Brisket Recipe
-
Irresistible Spinach Stuffed Pie: A Comfort Food Delight
-
Savory Beef Osso Bucco: A Comforting Homemade Delight
-
Irresistible Stuffed Manicotti with Meat Sauce Delight
-
Maggiano's Lasagna: A Cozy Taste of Homemade Comfort
-
Savory Thai Red Curry Soup that Warms the Soul
-
Savory Black Beans, Sausage and Rice Skillet Delight
-
Comforting Broccoli Cheddar Soup Like a Cozy Hug in a Bowl
-
Zesty Coconut Lime Fish Curry with Jasmine Rice Delight
-
Comforting Cozy Mac and Cheese Meatloaf Casserole Delight
-
Cozy One-Pot Egg Roll Soup to Warm Your Soul This Winter
-
Honey Mustard Chicken Bliss in Your Slow Cooker Tonight