
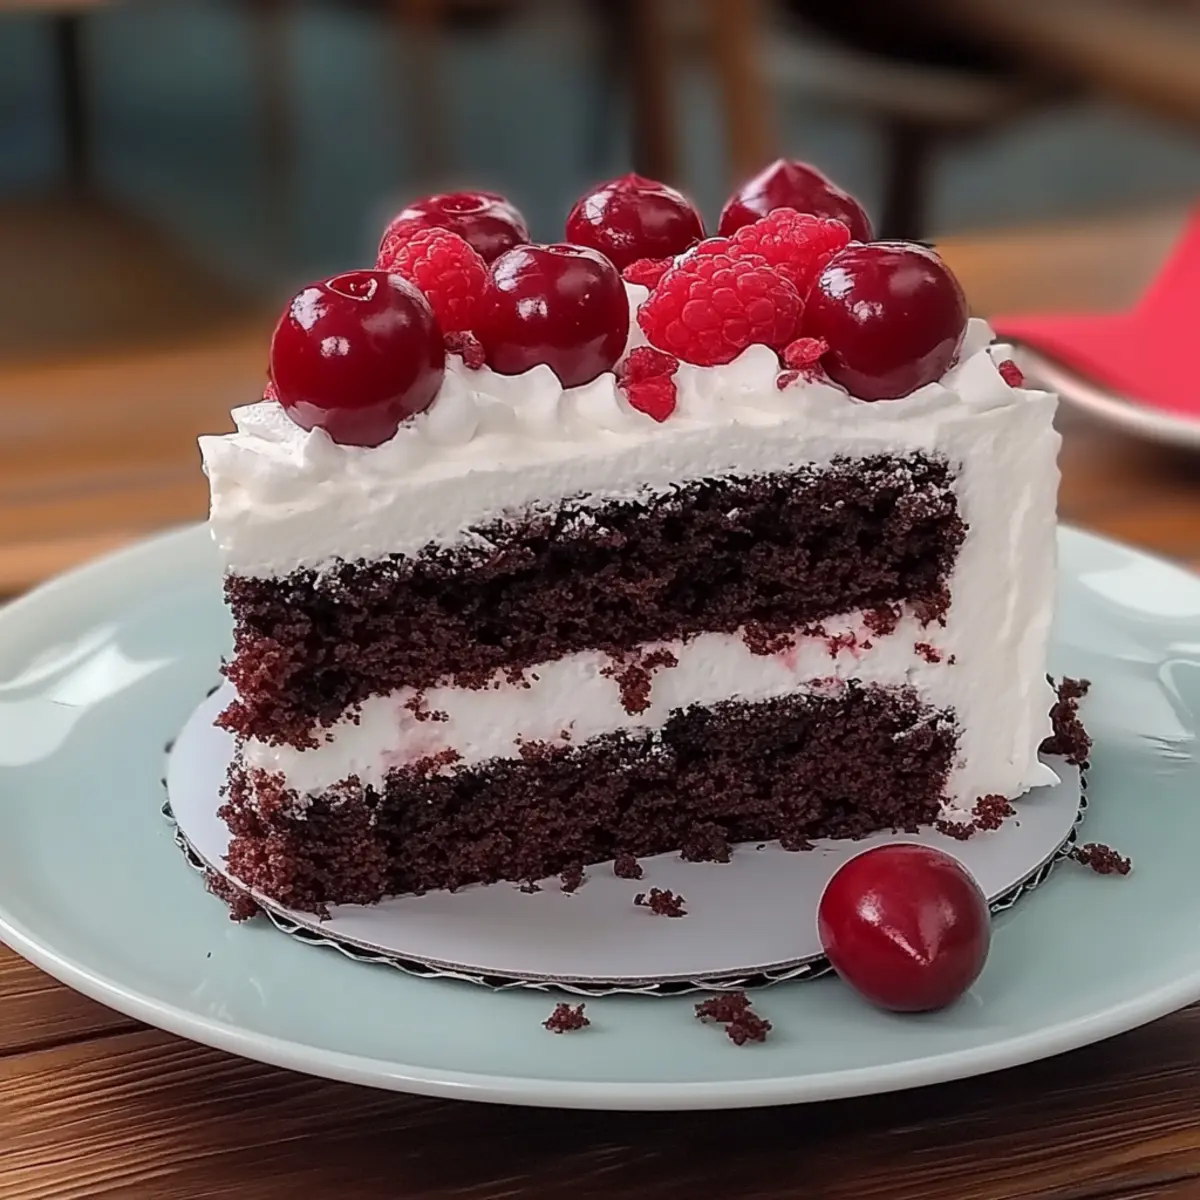
As I stood in my kitchen, the rich aroma of cocoa swirling around me, I could hardly contain my excitement to recreate the classic Black Forest Cake. This indulgent dessert transports me straight to the heart of Germany, with its layers of moist chocolate sponge, luscious whipped cream, and delightful cherries. Not only is this cake a showstopper for any gathering, but it’s also surprisingly simple to whip up! Perfect for those moments when you want to impress without spending all day in the kitchen, this recipe is a crowd-pleaser that will have everyone coming back for seconds. Want to learn how to make this timeless delight and add a spark of joy to your next celebration? Let’s dive into the delicious details!

Why is Black Forest Cake a Must-Try?
Decadent, rich flavors: The combination of cocoa, cherries, and cream creates a heavenly taste explosion that delights every palate.
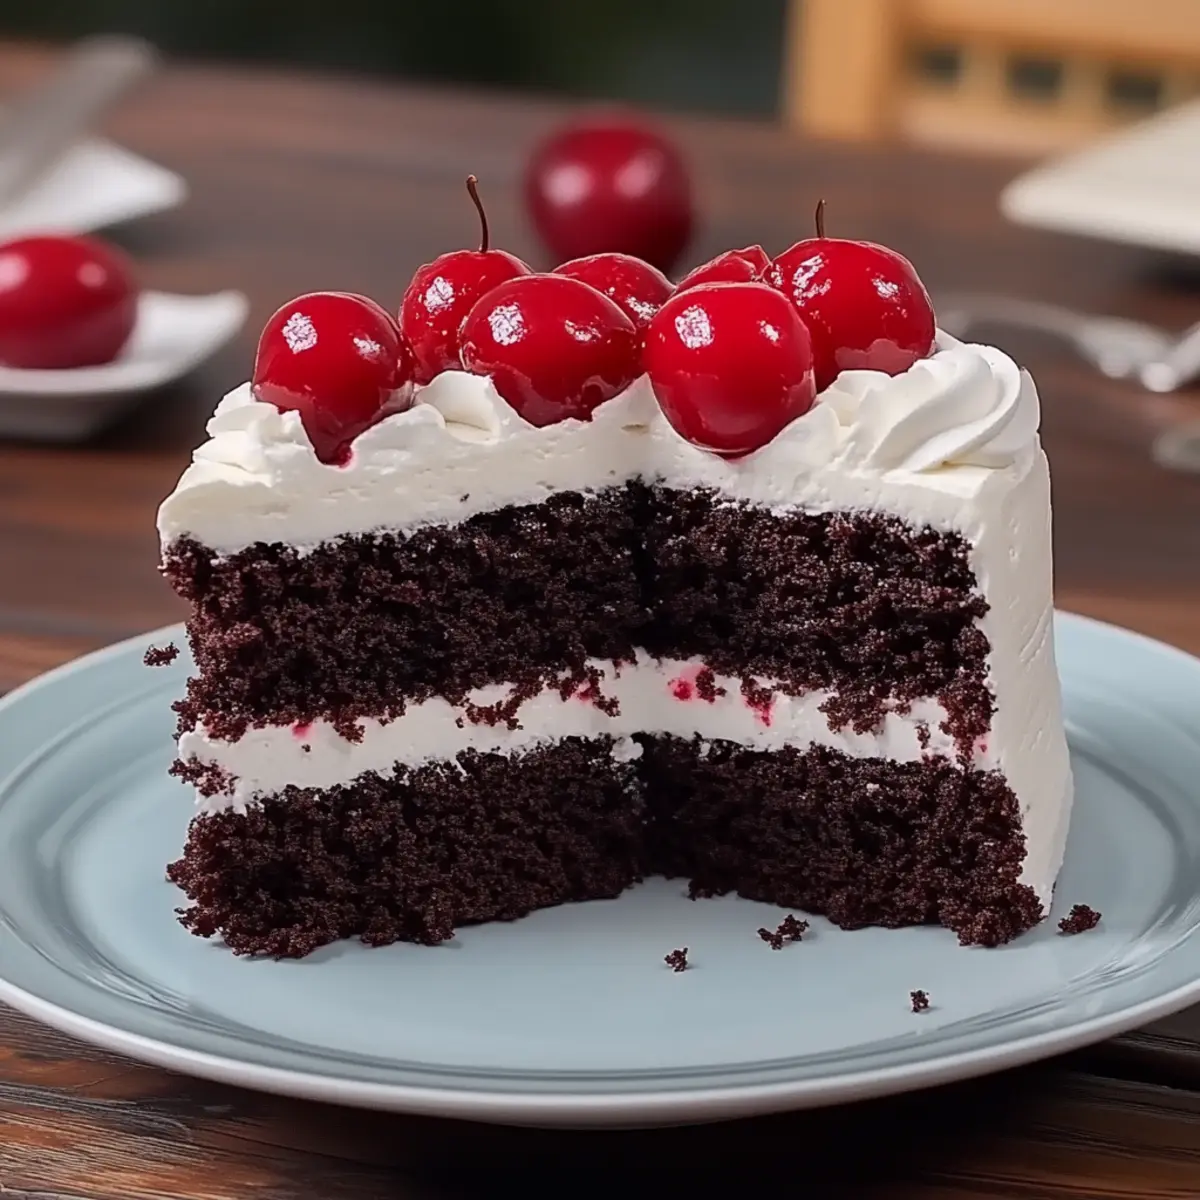
Impressive presentation: Towering layers of chocolate and whipped cream garnished with cherries make it a striking centerpiece.
Simple to make: You don’t need to be a pastry chef to bake this showstopper! The steps are easy to follow, similar to whipping up a delicious Cheese Blueberry Cake.
Versatile delight: Perfect for birthdays, anniversaries, or simply a treat for yourself, this cake suits any occasion!
Chill time for flavor: Allowing the cake to rest enhances the taste, making it perfect for planning ahead.
With these qualities, it’s no wonder why Black Forest Cake has remained a favorite for generations!
Black Forest Cake Ingredients
• Get ready to create magic with this indulgent dessert!
For the Cake
- All-purpose flour – gives the cake structure and texture; sifting ensures a light cake.
- Granulated sugar – sweetens and helps create a moist crumb.
- Unsweetened cocoa powder – this is what makes the cake incredibly chocolatey; opt for high-quality cocoa for the best flavor.
- Baking powder – acts as a leavening agent for the cake to rise beautifully.
- Baking soda – helps the cake achieve that perfect fluffiness.
- Salt – balances the sweetness and enriches the overall flavor.
- Large eggs – bind the ingredients together and add richness to the cake.
- Whole milk – contributes to a moist and tender cake; you can substitute with almond milk for a dairy-free option.
- Vegetable oil – keeps the cake moist and adds depth of flavor.
- Vanilla extract – enhances the flavor profile; use pure vanilla for an aromatic boost.
- Boiling water – brings the cake batter together and intensifies the cocoa flavor.
For the Whipped Cream
- Heavy whipping cream – the optional whipped topping that adds a rich, creamy layer; keep it chilled before whipping for best results.
- Powdered sugar – sweetens the cream without graininess; you can adjust to taste.
- Vanilla extract – for added fragrance and flavor in the whipped cream.
For the Decoration
- Cherries – fresh cherries are perfect for layering and decoration, adding a juicy burst.
- Chocolate shavings – sprinkle on top for an elegant touch that screams indulgence.
With these ingredients in hand, you’ll be on your way to crafting a breathtaking Black Forest Cake that’s sure to impress everyone!
Step‑by‑Step Instructions for Black Forest Cake
Step 1: Preheat and Prepare Pans
Begin by preheating your oven to 350°F (175°C). While it heats, grease and flour two 9-inch round cake pans, ensuring they are well coated to prevent sticking. This simple preparation will guarantee that your cake comes out perfectly shaped and ready for layering!
Step 2: Mix Dry Ingredients
In a large mixing bowl, combine 2 cups of all-purpose flour, 2 cups of granulated sugar, ¾ cup of unsweetened cocoa powder, 1½ teaspoons of baking powder, 1½ teaspoons of baking soda, and 1 teaspoon of salt. Whisk these dry ingredients thoroughly until they’re well-mixed, creating a beautiful dry base that will give your Black Forest Cake its rich flavor.
Step 3: Combine Wet Ingredients
Next, add 2 large eggs, 1 cup of whole milk, ½ cup of vegetable oil, and 2 teaspoons of vanilla extract to the dry mixture. Beat this mixture on medium speed for about two minutes, or until you achieve a smooth and creamy consistency. The batter should be thick yet pourable, full of delicious chocolatey goodness.
Step 4: Add Boiling Water
Carefully stir in 1 cup of boiling water, mixing until the batter is smooth and well-combined. This step may seem unusual because the batter will be quite thin; however, this is crucial for creating a moist Black Forest Cake. You'll see the cocoa intensifying, making the mixture irresistible!
Step 5: Bake the Cakes
Pour the thin batter evenly into the prepared cake pans, ensuring they are filled equally. Place the pans in the preheated oven and bake for 30–35 minutes. A toothpick inserted into the center should come out clean when the cakes are done, indicating that they are perfectly baked and ready to cool.
Step 6: Cool the Cakes
After baking, let the cakes sit in the pans for about ten minutes. Then, carefully transfer them to wire racks to cool completely. This cooling step is vital to prevent the layers from crumbling and will help you assemble your decadent Black Forest Cake with ease.
Step 7: Slice the Cake Layers
Once the cakes are completely cooled, use a serrated knife to slice each layer horizontally in half. You'll end up with four equal layers of tender chocolate cake, ready to be filled with luscious whipped cream and vibrant cherries, creating the delightful layers of the Black Forest Cake.
Step 8: Prepare the Cherries
Drain the cherries and reserve the juice for later. This juice will be used to moisten the cake layers, infusing each bite with a burst of cherry flavor. Set the cherries aside, ensuring they’re ready for the next assembly step, adding to the cake's lovely fruitiness.
Step 9: Whip the Cream
In a large mixing bowl, whip together 3 cups of heavy whipping cream, ½ cup of powdered sugar, and 1 teaspoon of vanilla extract. Beat on high speed until stiff peaks form, creating a fluffy, sweet whipped cream that will be the magical filling for your Black Forest Cake layers. Ensure to keep everything chilled for the best texture.
Step 10: Layer the Cake
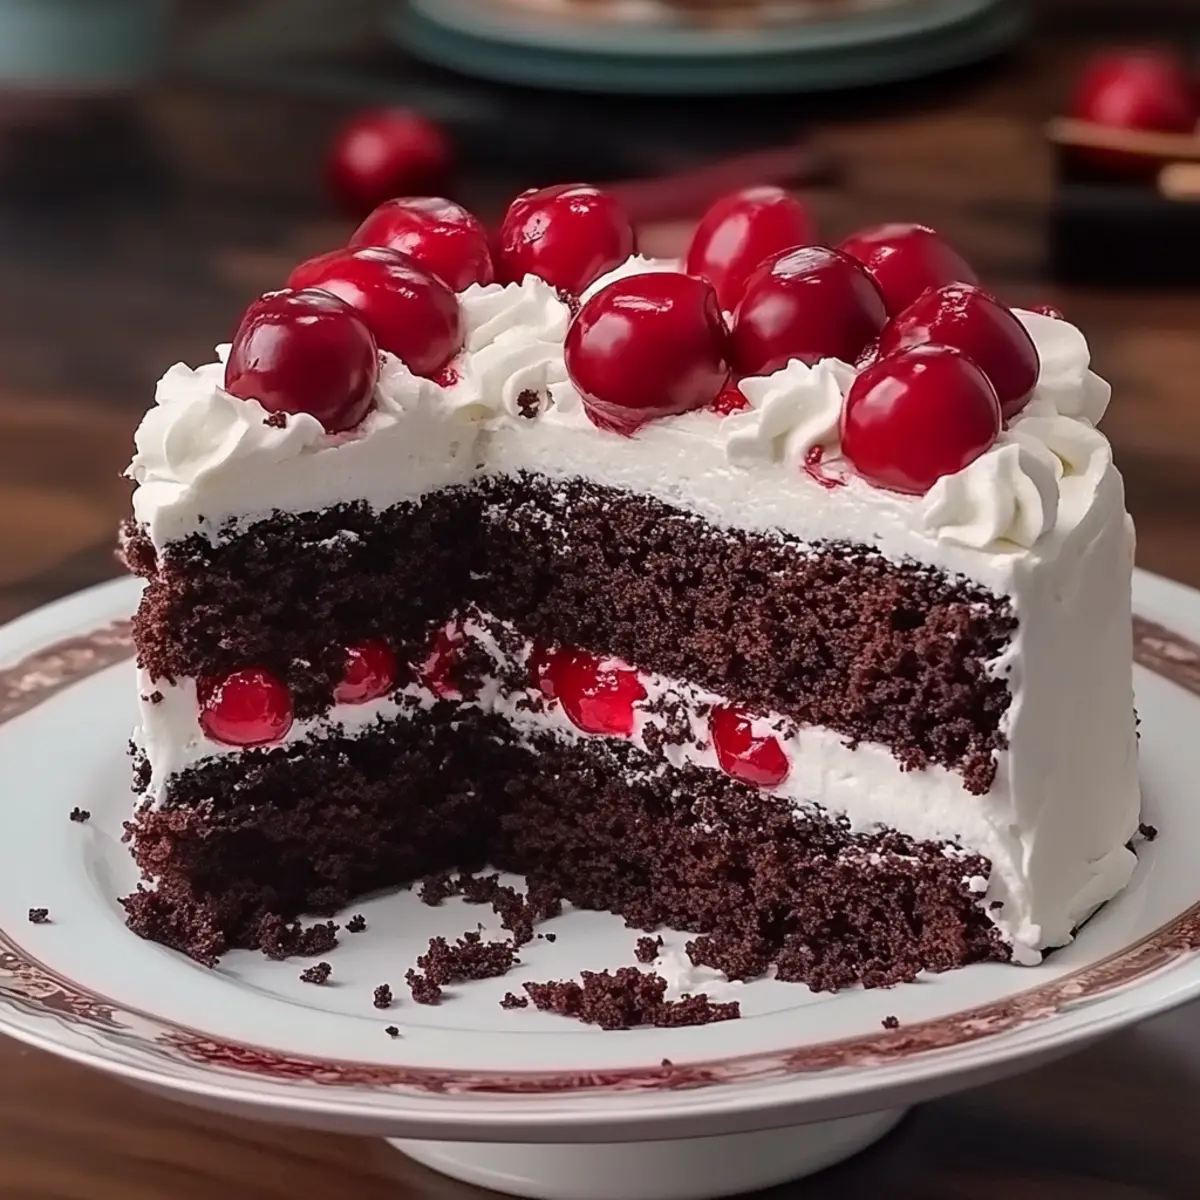
Start by placing one layer of cake on a serving platter. Moisten it generously with the reserved cherry juice, making sure to soak it for added flavor. Spread a layer of whipped cream over it, followed by a handful of cherries. Repeat this process with two more layers, creating a beautiful, multi-layered cake filled with cream and fruit.
Step 11: Top and Decorate
Once the final layer is added, generously cover the top and sides of the cake with the remaining whipped cream. For a stunning presentation, finish off by decorating with chocolate shavings and extra cherries on top. This elegant touch not only looks appealing but hints at the indulgent layers inside your Black Forest Cake.
Step 12: Chill and Serve
Finally, let the assembled cake chill in the refrigerator for at least thirty minutes. This step allows the flavors to meld beautifully and enhances the overall taste. Once chilled, slice your impressive Black Forest Cake to serve, and watch as it brightens everyone's day with its rich, heavenly flavors!
Expert Tips for Baking Black Forest Cake
-
Quality Ingredients: Use high-quality cocoa and fresh cherries for the best flavor. It makes a noticeable difference in your Black Forest Cake!
-
Chill the Cream: Keep your mixing bowl and cream chilled before whipping. This helps achieve that perfect fluffy texture in the whipped cream.
-
Don't Skip the Soak: Moistening each layer with cherry juice is essential. It enhances the cake’s rich flavor and keeps the layers beautifully moist.
-
Layering Skills: When assembling your cake, spread whipped cream evenly. This ensures each slice has a fantastic balance of cake, cream, and cherries.
-
Cool Completely: Make sure the cakes are completely cooled before slicing and layering. This prevents crumbling and gives you clean cuts for a stunning presentation.
These tips will help you perfect your Black Forest Cake, creating a delightful dessert that everyone will love!
Black Forest Cake Variations & Substitutions
Feel free to explore these delightful twists and swaps to make this Black Forest Cake truly your own!
- Gluten-Free: Substitute all-purpose flour with a gluten-free blend to keep all the rich flavors without the gluten.
- Dairy-Free: Use almond milk and coconut cream instead of whole milk and heavy cream for a delicious dairy-free option. It’s a great way to keep the creaminess while being kind to lactose-intolerant friends!
- Sugar-Free: Try using a sugar substitute like erythritol or stevia to keep sweetness without sugar. This is perfect for those watching their sugar intake without sacrificing flavor.
- Fruit Twist: Incorporate sliced strawberries or raspberries along with the cherries to add a fresh, fruity flair. This brings in a bright, tart contrast to the rich chocolate, creating an exciting taste experience.
- Nutty Crunch: Add crushed walnuts or almonds between the cake layers for a delightful crunch. This variation not only adds texture but also infuses the cake with a lovely nutty flavor.
- Maraschino Magic: Swap fresh cherries for maraschino cherries for an extra sweet and nostalgic treat. This simple change can bring a pop of vibrant color and a different sweetness to your cake.
- Spicy Accent: For a unique twist, add a pinch of cinnamon or a splash of almond extract to the batter for an exciting flavor boost. This subtle addition can transform the cake into a warm and inviting dessert.
- Coffee Infusion: Mix in a teaspoon of instant coffee granules with the boiling water to enhance the chocolate flavor. It’s a secret trick that deepens the richness of your cake!
Feel inspired? Each variation adds your personal touch to this timeless recipe, making your Black Forest Cake a memorable culinary delight. And for more tasty inspiration, check out my Carrot Cake Recipe or take a look at this lovely Pineapple Cake Recipe for even more dessert ideas!
How to Store and Freeze Black Forest Cake
Room Temperature: Store the Black Forest Cake at room temperature in a covered cake stand for up to 2 days. This keeps it fresh, though be careful of any hot, humid conditions.
Fridge: If you have leftovers, refrigerate the cake for up to 5 days. Cover it with plastic wrap or place it in an airtight container to prevent the cake from drying out.
Freezer: For longer storage, freeze individual slices of the Black Forest Cake. Wrap each slice tightly in plastic wrap followed by aluminum foil; it will stay fresh for up to 3 months.
Reheating: To enjoy frozen slices, thaw them in the refrigerator overnight. You can enjoy them cold, or gently warm them in the microwave for a delightful treat!
Make Ahead Options
These Black Forest Cakes are a dream for busy home cooks! You can prepare the cake layers up to 2 days in advance; simply bake and cool them completely, then wrap tightly in plastic wrap and refrigerate to maintain freshness. The whipped cream can also be made up to 24 hours ahead; just keep it chilled in the fridge until you’re ready to use it. When assembling, layer the moistened cake with whipped cream and cherries, but avoid adding the final whipped cream layer and decorations until just before serving to ensure that they stay beautiful and fresh. With these make-ahead tips, you’ll find that your Black Forest Cake will be just as delicious, saving you precious time for more celebrating!
What to Serve with Black Forest Cake
As you envision your gathering filled with laughter and joy, let's create the perfect meal to complement this tantalizing dessert.
-
Rich Vanilla Ice Cream: The creamy, sweet vanilla swirls perfectly with the chocolate and cherries, adding a cool contrast that’s simply irresistible.
-
Fresh Berries Medley: A mix of raspberries, blueberries, and strawberries provides a burst of freshness, enhancing the cake's rich flavors while adding a vibrant, colorful touch.
-
Decadent Chocolate Ganache: A drizzle of glossy ganache over each slice adds an extra layer of indulgence, elevating your dessert experience to heavenly heights.
-
Coffee or Espresso: The bold, rich flavors of coffee perfectly balance the sweetness of the cake, making each bite even more enjoyable—the best companion for dessert!
-
Sparkling Water: Light and refreshing, sparkling water is a great palate cleanser, allowing the flavors of the cake to shine through with every delightful bite.
-
Cherry-Limeade: This refreshing drink, made with cherry juice and a hint of lime, ties in the cake’s fruity notes, making a delightful pairing that’s both tasty and thirst-quenching.
By mixing these delicious sides and drinks with your Black Forest Cake, you’ll ensure your gathering is memorable, creating a feast that warms the heart and ignites cheerful conversation!
Black Forest Cake Recipe FAQs
How do I choose the right cherries for my Black Forest Cake?
Look for fresh, firm cherries with a glossy skin and no dark spots. The more colorful and juicy they are, the better! Avoid any that feel soft or look shriveled, as they may not have the sweetest flavor you're aiming for in your delightful cake.
What is the best way to store leftover Black Forest Cake?
For the freshest taste, store your cake in the fridge, lightly covered, where it will stay delicious for up to 5 days. You can use aluminum foil or plastic wrap to keep it moist. Alternatively, if you're planning to eat it later, you can keep it at room temperature for up to 2 days, but be mindful of the humidity as it can affect the cake texture.
Can I freeze my Black Forest Cake? If so, how?
Absolutely! To freeze, slice the cake first, then wrap each piece tightly in plastic wrap and store it in an airtight container. This way, you can grab a slice whenever the craving strikes! It's best enjoyed within 3 months of freezing. To thaw, just move the slices to the fridge overnight, and consider warming them up gently in the microwave for that fresh-out-of-the-oven taste.
What should I do if my cake layers turn out too dry?
If your cake layers feel dry, it might be due to overbaking or not enough moisture from the cherry juice. To remedy this, moisten the layers with additional cherry juice when assembling the cake, ensuring each layer is soaked well. For future bakes, keep an eye on the baking time and do the toothpick test early!
Are there any dietary considerations I should keep in mind for this Black Forest Cake?
Definitely! If someone is gluten-sensitive, consider using a gluten-free flour blend to replace all-purpose flour. For dairy alternatives, almond milk or coconut cream can work wonderfully in the cake and whipped cream. And if you’re sharing it with pets, be aware that cherries are not safe for them, so keep the cake away from furry friends!
How do I know if my whipped cream is ready?
When whipping cream, look for stiff peaks, meaning when you lift the beaters out of the bowl, the cream holds its shape! This means your whipped cream is ready to gracefully layer into your Black Forest Cake. Make sure to keep your bowl and cream chilled before whipping for the best results.
Decadent Black Forest Cake That’ll Impress Everyone!
Ingredients
Equipment
Method
- Preheat your oven to 350°F (175°C) and prepare two 9-inch round cake pans by greasing and flouring them.
- In a large mixing bowl, combine dry ingredients: flour, sugar, cocoa powder, baking powder, baking soda, and salt. Whisk thoroughly.
- Add wet ingredients: eggs, milk, oil, and vanilla to the dry mixture and beat for 2 minutes until smooth.
- Stir in boiling water until the batter is smooth. The batter will be thin.
- Pour evenly into prepared pans and bake for 30–35 minutes, or until a toothpick inserted comes out clean.
- Let the cakes cool in the pans for 10 minutes, then transfer to wire racks to cool completely.
- Once cooled, slice each cake layer horizontally in half to create four layers.
- Drain cherries and reserve juice for moisten the cake layers.
- Whip together the cream, powdered sugar, and vanilla until stiff peaks form.
- Layer the cake: moisten each layer with cherry juice, add whipped cream, and cherries. Repeat with two more layers.
- Cover the entire cake with remaining whipped cream, decorate with chocolate shavings and cherries.
- Chill the assembled cake in the refrigerator for at least 30 minutes before serving.


Leave a Reply