
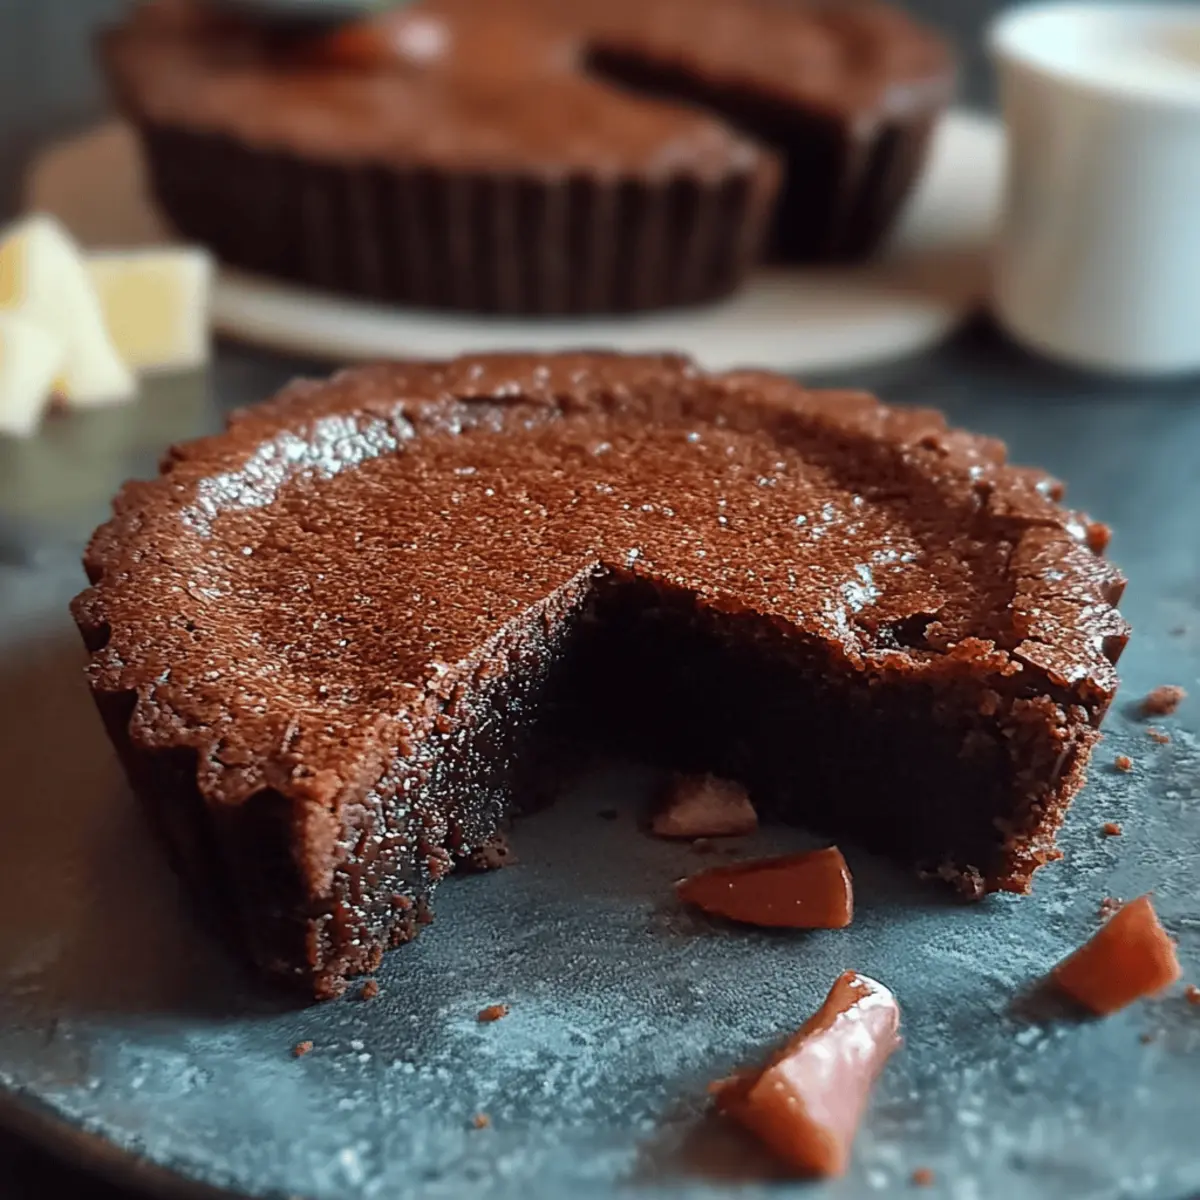
As I stood in my kitchen, the rich aroma of melted dark chocolate whispered promises of indulgence, transporting me straight to a quaint Italian café. This Italian Chocolate Tart, or Crostata al Cioccolato, has become my go-to dessert for gatherings, easily impressing friends and family alike. Not only is it a delightful crowd-pleaser, but its elegant presentation is also a testament to the magic of homemade desserts. With a buttery cocoa crust cradling a velvety chocolate filling, this treat delivers a comforting taste of Italy that feels both indulgent and accessible. Whip it up in just over an hour, and you’ll have a dessert that rivals your favorite bakery. So, are you ready to unleash your inner pastry chef and take a bite into this chocolatey heaven?
Why is this tart a must-bake?
Decadent flavors: The Italian Chocolate Tart combines a rich chocolate filling with a buttery cocoa crust, creating layers of exquisite taste that will have everyone asking for seconds.
Quick to prepare: With just over an hour of your time, you can master this delightful dessert that’s perfect for any occasion.
Perfect presentation: Impress your guests with its elegant look; this tart is as beautiful as it is delicious.
Versatile delight: Whether served with ice cream or fresh berries, this dessert can be dressed up or down to suit any gathering.
Family favorite: This recipe is not just for special occasions; it’s an instant classic that your loved ones will cherish! Enjoy the scrumptious experience of making it at home by exploring more delightful desserts like Chocolate Lava Cake or Tiramisu!
Italian Chocolate Tart Ingredients
• Elevate your baking skills with these essentials!
For the Tart Shell
- Flour – 200 g – A key ingredient that forms the base of the tart, providing structure.
- Granulated Sugar – 100 g – Balances the cocoa's bitterness and sweetens the crust beautifully.
- Cocoa Powder – 40 g – Adds that rich chocolate flavor to the crust, enhancing the overall taste.
- Salt – ¼ teaspoon – Enhances the flavors and balances the sweetness of the tart shell.
- Cold Butter – 120 g – Ensures a flaky texture in the pastry; remember to use chilled butter!
- Egg – 1 – Binds the crust ingredients together for a smooth dough.
- Egg Yolk – 1 – Adds richness and helps with the tart's lovely texture.
For the Chocolate Filling
- Milk – 400 ml – Creates a creamy filling; whole milk is preferred for richness.
- Egg Yolks – 4 – Contributes to the custard-like filling that makes this tart decadent.
- Granulated Sugar – 80 g (for filling) – Sweetens the filling; adjust to taste!
- Flour – 40 g (for filling) – Thickens the filling, giving it a perfect consistency.
- Dark Chocolate – Use a good quality (amount as needed) – The star of the show that will melt into a luxurious filling!
Get ready to impress with this Italian Chocolate Tart and savor the delightful experience of homemade desserts!
Step‑by‑Step Instructions for Italian Chocolate Tart
Step 1: Prepare the Tart Dough
In a mixing bowl, whisk together 200 g of flour, 100 g of granulated sugar, 40 g of cocoa powder, and ¼ teaspoon of salt until well combined. Cut in 120 g of cold butter using a pastry cutter until the mixture resembles coarse crumbs.
Step 2: Form the Dough
Add 1 egg and 1 egg yolk to the mixture, and mix until a dough forms, ensuring everything is evenly combined. Once ready, wrap the dough in plastic wrap and refrigerate for at least 30 minutes to firm up, which helps in achieving that perfect buttery crust for your Italian Chocolate Tart.
Step 3: Preheat the Oven
While the dough chills, preheat your oven to 180°C (350°F). This ensures your tart shell bakes evenly and gets that lovely golden finish once you start assembling your Italian Chocolate Tart.
Step 4: Roll Out the Dough
On a lightly floured surface, roll out the chilled dough until it's large enough to fit into a 9-inch tart pan. Aim for about a ¼ inch thickness, and keep an eye out for any cracks. This will create a beautiful shell for your tart.
Step 5: Fit the Dough into the Pan
Gently transfer the rolled-out dough into the tart pan, pressing it into the edges and trimming any excess that hangs over. Use a fork to prick the bottom lightly to prevent bubbling during baking; this will help create a flawless crust for your Italian Chocolate Tart.
Step 6: Bake the Tart Shell
Bake the crust in your preheated oven for about 15 minutes, or until it feels firm and slightly set. You’ll know it’s ready when the edges start to look golden. Remove from the oven and allow the tart shell to cool completely as you prepare the filling.
Step 7: Heat the Milk
In a saucepan, heat 400 ml of milk over medium heat until it reaches just below boiling, stirring occasionally to prevent scorching. This hot milk will be fundamental for creating a creamy chocolate filling that is the heart of your Italian Chocolate Tart.
Step 8: Whisk the Egg Mixture
In a separate bowl, whisk together 4 egg yolks, 80 g granulated sugar, and 40 g of flour until the mixture is smooth and well-combined. This step ensures a lump-free filling when combining with the hot milk.
Step 9: Combine Mixtures
Slowly pour the hot milk into the egg mixture while whisking constantly to temper the eggs. This gradual process prevents the eggs from scrambling, ensuring a velvety filling for your tart.
Step 10: Thicken the Filling
Pour the combined mixture back into the saucepan and cook over medium heat. Stir continuously until the filling thickens and coats the back of a spoon, roughly 5-7 minutes. Once thickened, remove from heat.
Step 11: Melt the Chocolate
Stir in your desired amount of dark chocolate into the thickened filling until it melts completely and the mixture is smooth. This rich chocolate component will infuse the filling with delightful flavor, making your Italian Chocolate Tart irresistible.
Step 12: Assemble and Chill the Tart
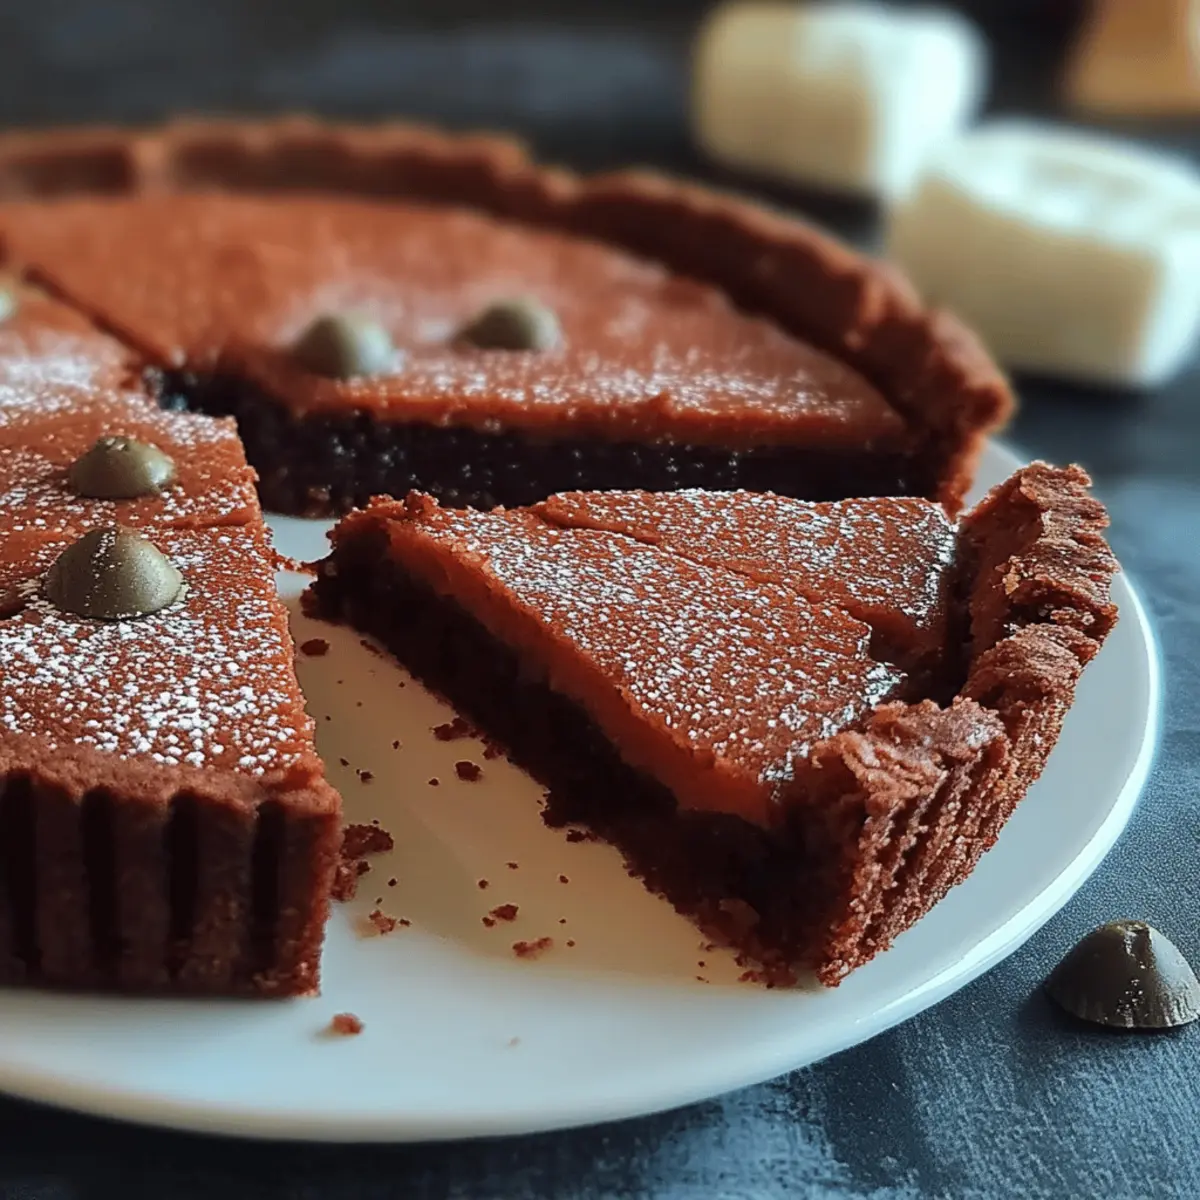
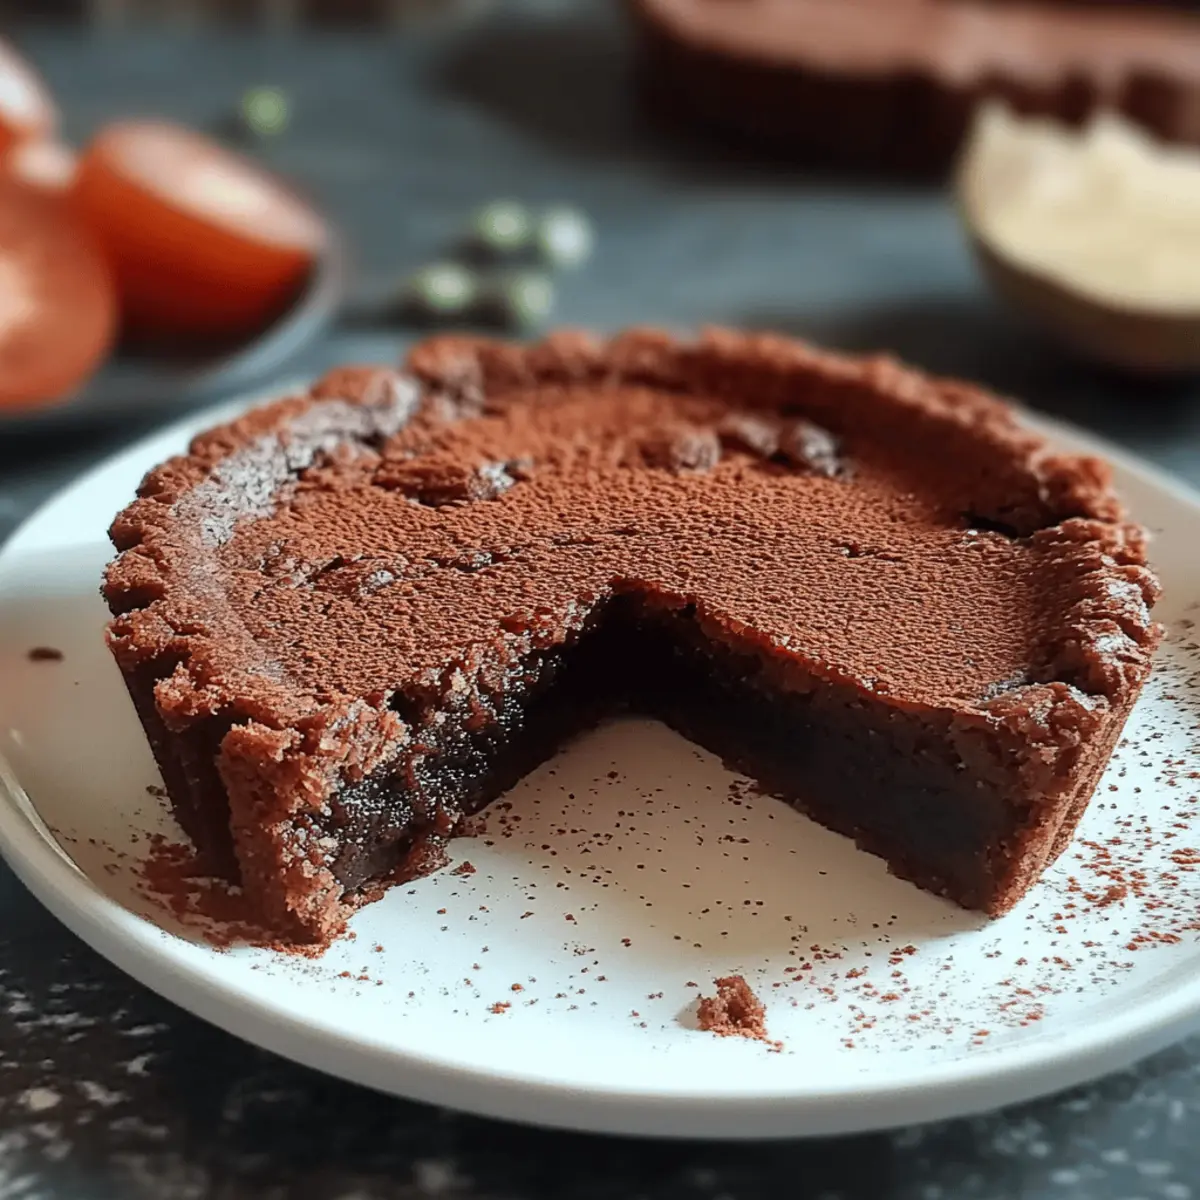
Pour the luscious filling into the cooled tart shell, smoothing the top with a spatula. Refrigerate the tart for at least 30 minutes to allow the filling to set before serving. For an elegant touch, garnish with chocolate shavings or nuts if desired before slicing and enjoying!
Expert Tips for Italian Chocolate Tart
• Chill the Dough: Always refrigerate the dough for at least 30 minutes; this ensures a flaky crust and makes it easier to roll out.
• Use Quality Chocolate: The richness of your filling greatly depends on the dark chocolate you choose. Select high-quality chocolate for the best flavor in your Italian Chocolate Tart.
• Prevent Scrambling: When combining your hot milk with the egg mixture, pour slowly while whisking constantly to prevent the eggs from cooking too quickly.
• Check Consistency: When thickening the filling on the stovetop, stir continuously until it coats the back of a spoon; this way, you’ll achieve that velvety texture!
• Cool Properly: Allow the tart shell to cool completely before adding the filling; hot shells can cause the chocolate mixture to curdle or break.
What to Serve with Italian Chocolate Tart
Indulging in a dessert can be truly special, especially when it’s surrounded by delightful companions that enhance its richness.
-
Whipped Cream: The light, airy texture of whipped cream offers a perfect contrast to the dense chocolate tart, elevating each bite. A dollop on top or alongside creates an inviting presentation.
-
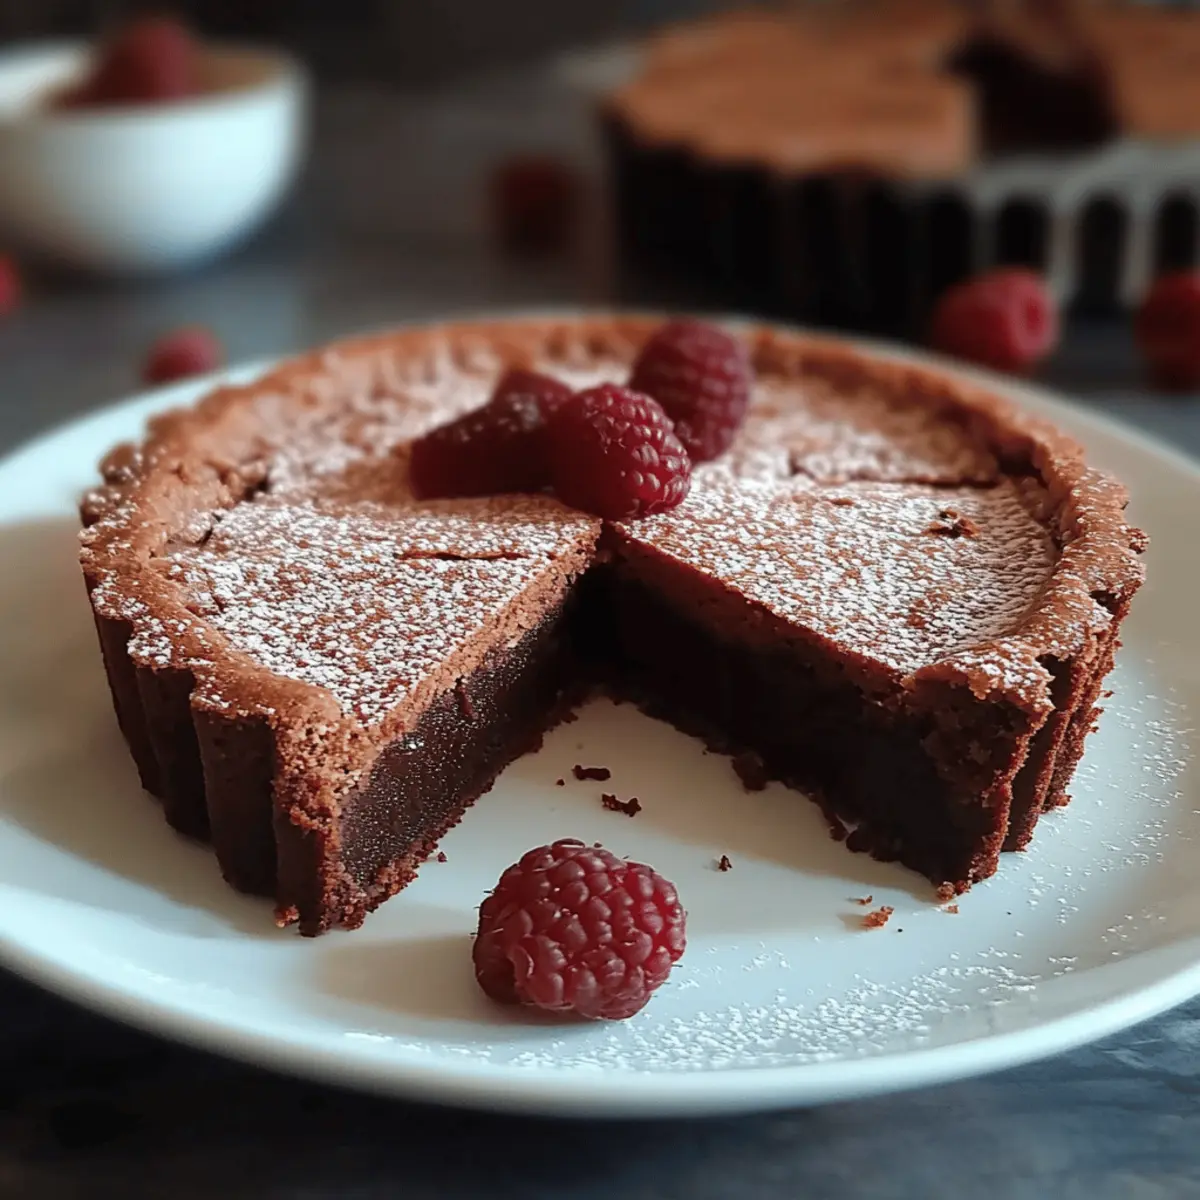
Fresh Berries: Juicy raspberries or strawberries add a burst of freshness that balances the tart's sweetness. Their bright flavor also adds a vibrant pop of color to the dessert plate.
-
Vanilla Ice Cream: Creamy vanilla ice cream provides a classic pairing. As it melts over the warm tart, it creates a luscious blend that delights the palate.
-
Mint Leaves: A few sprigs of fresh mint introduce a refreshing element to the rich chocolate. The aromatic notes enhance the overall experience, making each bite feel invigorating.
-
Espresso or Coffee: A bold cup of espresso complements the chocolate’s depth beautifully. The robust flavor creates a sophisticated pairing, perfect for a cozy finish to a meal.
-
Chocolate Sauce: Drizzling a bit of warm chocolate sauce over the slice elevates the chocolate experience, turning an already decadent dessert into a truly indulgent treat.
-
Hazelnut Praline: Adding a sprinkle of crunchy hazelnut praline introduces a delightful textural contrast. The nutty flavor harmonizes beautifully with the chocolate and contributes a gourmet touch.
Italian Chocolate Tart Variations
Feel free to take this delightful dessert and make it your own with these tasty twists.
-
Gluten-Free: Substitute all-purpose flour with a gluten-free blend for a gluten-free option that everyone can enjoy. The texture may be slightly different, but it will still be delicious!
-
Nutty Crust: Add 50 g of ground almonds to the crust for a nutty flavor that complements the chocolate. This will give your tart a lovely crunch.
-
Mint Chocolate: Stir in a few drops of peppermint extract into the filling before pouring it into the crust for a refreshing minty twist. This vibrant flavor will surprise your guests!
-
Spicy Kick: Add a pinch of cayenne pepper or chili powder to the filling for a subtle heat that enhances the chocolate's richness. Just a little goes a long way!
-
Fruit Fusion: Top your finished tart with fresh raspberries or strawberries before serving. The tangy fruit balances the sweetness and adds a vibrant look.
-
Vegan Alternative: Use coconut milk, aquafaba for egg replacements, and coconut oil instead of butter for a delightful vegan twist. This way, everyone can indulge without compromising their dietary choices!
-
Caramel Layer: Drizzle a layer of caramel sauce between the tart shell and chocolate filling for an unexpected burst of sweetness. This adds a luscious touch with every bite!
-
Sea Salt Finish: Just before serving, sprinkle a pinch of flaky sea salt on top of the chilled tart. The contrast of sweet and salty will elevate your dessert experience to new heights.
Explore these variations to suit your tastes, and watch as your Italian Chocolate Tart becomes an irresistible centerpiece at your gatherings! And if you’re inspired for more indulgences, don’t forget to check out the rich flavors in our Chocolate Lava Cake or our heavenly Tiramisu recipes!
Make Ahead Options
Preparing the Italian Chocolate Tart in advance is a fantastic way to save time for busy weeknights or special occasions! You can make the tart shell up to 24 hours ahead of time; just bake it, let it cool completely, and store it in an airtight container at room temperature. The chocolate filling can also be prepared a day in advance (stored in the fridge) to maintain its luscious texture. When you’re ready to serve, simply pour the filling into the chilled tart shell, refrigerate for about 30 minutes to set, and garnish as desired. This way, you'll enjoy that delightful homemade taste without the last-minute rush!
How to Store and Freeze Italian Chocolate Tart
Fridge: Keep any leftover Italian Chocolate Tart covered in the refrigerator for up to 3 days to maintain its flavor and texture. Use plastic wrap or an airtight container.
Freezer: If you'd like to store the tart for a longer period, you can freeze it for up to 2 months. Wrap it tightly in plastic wrap, followed by aluminum foil for extra protection against freezer burn.
Reheating: To enjoy the tart after freezing, thaw it in the fridge overnight. Reheat in a preheated oven at 150°C (300°F) for about 10-15 minutes, allowing it to warm through without becoming overly soft.
Serving Tip: When serving from the fridge, let the tart sit at room temperature for about 15 minutes before slicing to enhance the flavors of the delicious chocolate filling.
Italian Chocolate Tart Recipe FAQs
How do I select the right chocolate for my tart?
Absolutely! For the best results, always choose high-quality dark chocolate with a cocoa content of at least 60%. This will provide a rich and deep flavor to your filling. Look for bars that you enjoy eating on their own, as the chocolate's quality will shine through in the tart. If you prefer a sweeter filling, consider using chocolate with a lower cocoa content, but I often go for bittersweet chocolate for a nice balance.
What’s the best way to store leftover Italian Chocolate Tart?
Very simple! Store any leftover tart covered in the refrigerator for up to 3 days. Use plastic wrap or an airtight container to keep it fresh and prevent it from absorbing odors from the fridge. If you'd like to keep it longer, you can freeze it for up to 2 months. Just remember to wrap it tightly in plastic wrap and then in aluminum foil to avoid freezer burn.
Can I freeze the Italian Chocolate Tart?
Absolutely! Freezing is a great option if you want to prepare ahead of time. After the tart has cooled completely, wrap it tightly in plastic wrap, then in aluminum foil. It can be stored in the freezer for up to 2 months. When you're ready to enjoy it, simply thaw it in the refrigerator overnight and reheat it in a preheated oven at 150°C (300°F) for about 10-15 minutes.
What if my tart filling doesn’t thicken properly?
Don’t worry! If your filling isn’t thickening as expected, it may simply need a bit more time on the heat. Make sure to cook it over medium heat, stirring continuously until it coats the back of a spoon. If it still doesn’t thicken, you can mix a little extra flour with milk to create a slurry and add it to the mixture while stirring constantly. This should help achieve that desired consistency for your Italian Chocolate Tart!
Is this recipe suitable for people with allergies?
Very! However, this Italian Chocolate Tart contains common allergens such as eggs and dairy. If you're preparing it for guests with specific dietary restrictions, options like vegan butter or egg substitutes can be used in place of traditional ingredients. You could try using unsweetened applesauce or mashed bananas as a replacement for eggs, though this may slightly alter the texture. Always check ingredient labels to ensure they meet your dietary needs!
How do I know when the tart shell is fully baked?
A great question! You can tell the tart shell is fully baked when it feels firm and the edges start turning a lovely golden brown, usually about 15 minutes at 180°C (350°F). Prick the bottom with a fork before baking to prevent bubbles. If it looks a little puffy during baking, don’t worry; it will relax as it cools. Trust your instincts, and you’ll have a beautiful crust ready to hold that luscious filling!
Decadent Italian Chocolate Tart to Elevate Your Dessert Game
Ingredients
Equipment
Method
- In a mixing bowl, whisk together 200 g of flour, 100 g of granulated sugar, 40 g of cocoa powder, and ¼ teaspoon of salt until well combined.
- Cut in 120 g of cold butter using a pastry cutter until the mixture resembles coarse crumbs.
- Add 1 egg and 1 egg yolk to the mixture, and mix until a dough forms; wrap the dough in plastic wrap and refrigerate for at least 30 minutes.
- Preheat your oven to 180°C (350°F). This ensures your tart shell bakes evenly.
- On a lightly floured surface, roll out the chilled dough to fit into a 9-inch tart pan.
- Transfer the rolled-out dough into the tart pan, pressing into the edges and trimming any excess.
- Bake the crust for about 15 minutes, or until firm and slightly set. Allow cooling.
- In a saucepan, heat 400 ml of milk over medium heat until just below boiling.
- In a separate bowl, whisk together 4 egg yolks, 80 g granulated sugar, and 40 g of flour until smooth.
- Slowly pour hot milk into the egg mixture while whisking constantly to temper the eggs.
- Pour the combined mixture back into the saucepan and cook over medium heat, stirring continuously until thickened.
- Stir in dark chocolate until melted completely into the filling.
- Pour the filling into the cooled tart shell and refrigerate for at least 30 minutes to set.


Leave a Reply