
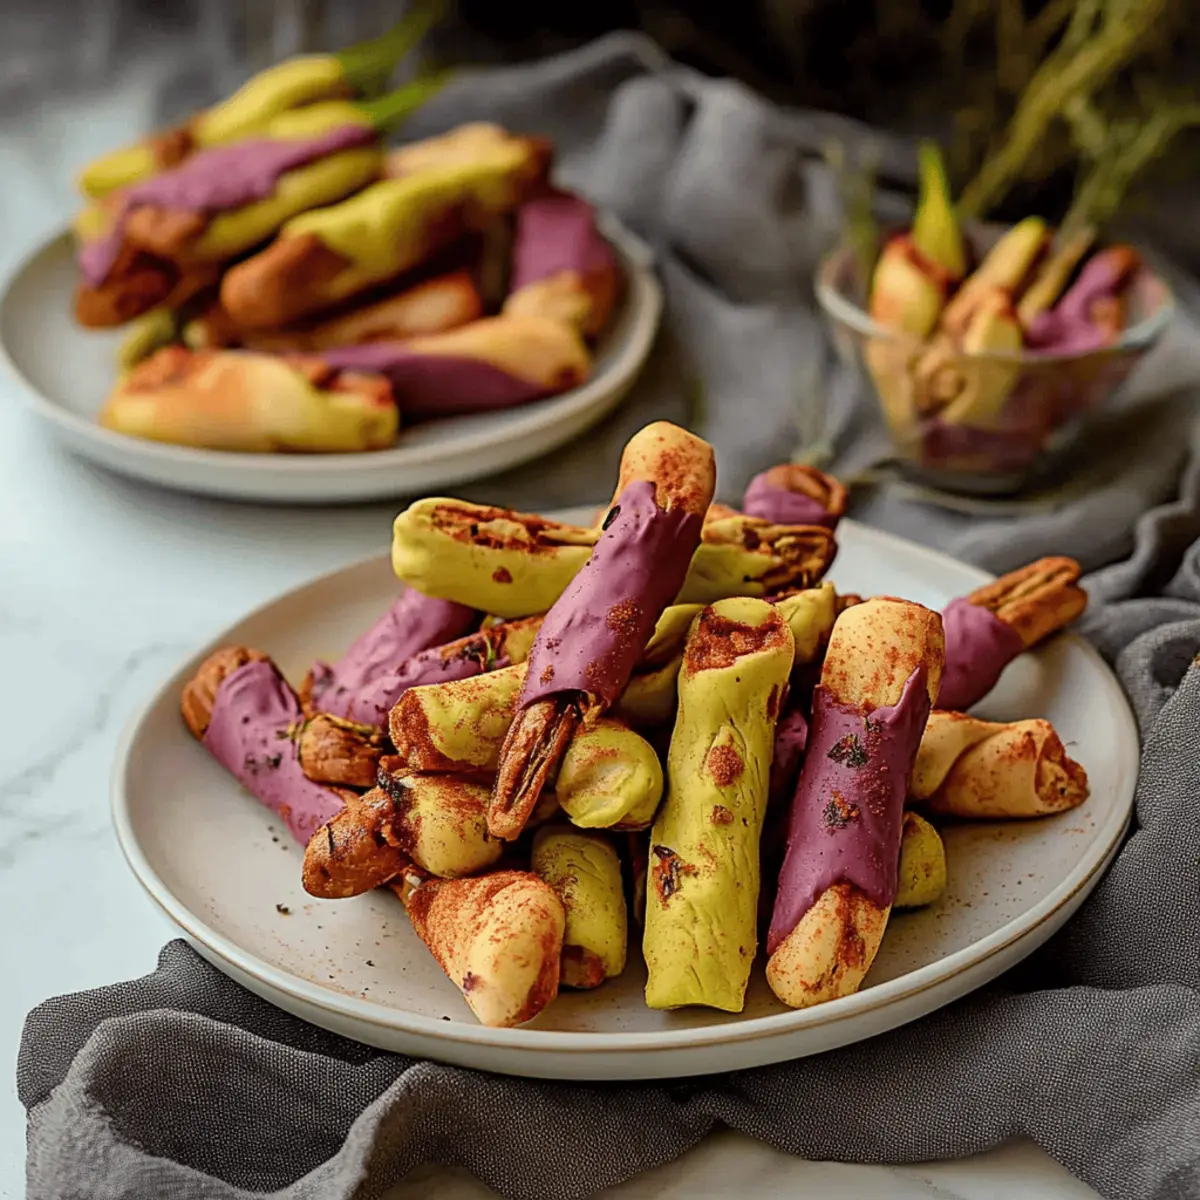
As the leaves turn and the air gets crisper, my kitchen transforms into a cauldron of creativity. This Halloween, I'm serving up a delightfully spooky treat: Creepy Witch Finger Cookies. These fun yet eerie cookies are not only a fantastic conversation starter but are also surprisingly easy to whip up. With just a little creativity, you can craft a batch that will wow your guests—perfect for parties or a cozy night in with loved ones. Plus, they’re an excellent way to break free from the mundane and delve into the Halloween spirit. The best part? You can customize the colors and toppings to suit your quirky style! Are you ready to impress your friends (and maybe scare a few) with these delightful concoctions? Let’s get started!
Why Are Creepy Witch Finger Cookies Unique?
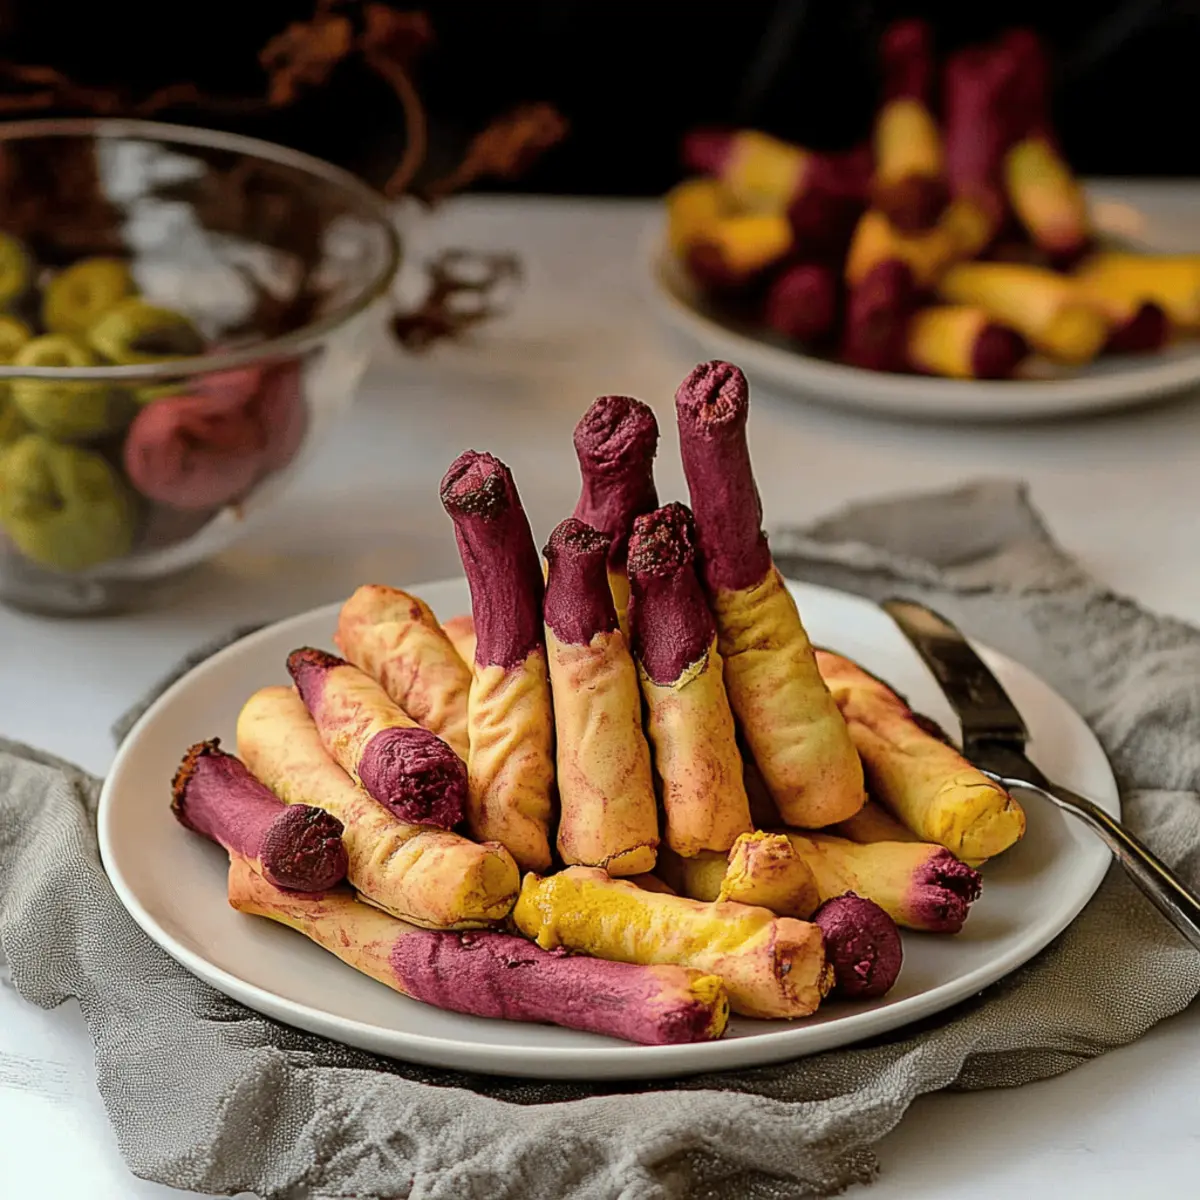
Visual Appeal: These cookies are not just delicious but spooky! Their eerie finger shape adorned with almonds creates an unforgettable sight on any dessert table.
Easy to Make: You don’t need to be a pro baker to whip these up. With simple steps, even beginner bakers will shine!
Colorful Creativity: Using matcha, purple sweet potato, and cocoa powder allows you to customize these treats in vibrant colors, making them uniquely yours.
Perfect for Halloween: Whether you're hosting a party or just treating your kids, these cookies perfectly capture the Halloween spirit. For more festive ideas, check out my Halloween desserts collection.
Crowd-Pleaser: With their playful design and delicious flavor, these cookies are sure to be a hit with guests of all ages. Get ready for compliments!
Creepy Witch Finger Cookies Ingredients
For the Batter
• 226 g unsalted butter – Softened butter is key for a light and fluffy texture.
• 140 g confectioner's sugar – This adds the perfect sweetness and smoothness.
• 1 teaspoon sea salt – Balances sweetness and enhances flavor.
• 4 egg yolks – Use large eggs at room temperature for the best results.
• 5 mL vanilla extract – Adds a delightful depth of flavor to your cookies.
• 454 g all-purpose flour – The foundation of your cookie dough, providing structure.
• ¼ teaspoon baking powder – Gives the cookies a little lift for a delightful texture.
For the Color
• 4 – 6 g matcha powder – Gives a delightful green hue for witchy vibes.
• 20 – 30 g purple sweet potato powder – Creates a spooky purple color, adding fun and flair.
• 5 – 15 g cocoa powder – Use this for a wicked brown color that enhances the cookie's spooky appearance.
For Decorations and Filling
• 50 whole blanched almonds – The perfect "fingernails” for your witchy cookies.
• Cocoa powder (for dusting) – Use for a dirty look to make your cookies extra creepy!
• Strawberry jam or raspberry jam – This gives a gooey filling reminiscent of spooky blood.
• Red cake writing gel / piping gel – Use this for an added gruesome touch.
• Melted white chocolate or candy wafers – Drizzle or dip for a beautiful finish that ties the whole cookie together.
With these ingredients, your Creepy Witch Finger Cookies will not only look devilishly delightful but taste fabulous too! Happy baking!
Step‑by‑Step Instructions for Creepy Witch Finger Cookies
Step 1: Cream the Butter and Sugar
In a mixing bowl, combine 226 g of softened unsalted butter, 140 g of confectioner's sugar, and 1 teaspoon of sea salt. Use an electric mixer to cream the mixture on medium speed for about 3–5 minutes, until it’s light and fluffy. You’ll know it’s ready when it looks airy and pale in color, creating the perfect base for your Creepy Witch Finger Cookies.
Step 2: Add Egg Yolks and Vanilla
Next, add 4 egg yolks (room temperature) and 5 mL of vanilla extract to the creamed butter and sugar mixture. Mix well on medium speed until everything is fully incorporated and smooth, about 1–2 minutes. The batter should take on a rich, golden hue, confirming it's time to move on to the next step.
Step 3: Color the Dough
If you’d like to add color to your Creepy Witch Finger Cookies, now is the time! Divide the batter into portions and mix in your choice of colorings: 4–6 g matcha powder, 20–30 g purple sweet potato powder, or 5–15 g cocoa powder. Stir until evenly colored, ensuring the vibrant hues blend smoothly throughout the dough.
Step 4: Combine Dry Ingredients
In a separate bowl, whisk together 454 g of all-purpose flour and ¼ teaspoon of baking powder. Gradually fold this dry mixture into the colored butter batter using a spatula, mixing until a soft dough forms. This should take about 2–3 minutes, and your dough will become slightly sticky yet manageable to shape.
Step 5: Chill the Dough
Shape the soft dough into a disc, wrap it tightly in plastic wrap, and chill in the refrigerator for 20–30 minutes. This step is crucial as it helps the flavors meld and firms up the dough, making it easier to shape your creepy fingers later on.
Step 6: Shape the Cookies
Once chilled, retrieve the dough and roll tablespoon-sized portions into finger shapes, roughly 4 inches long. Squeeze two areas of each finger to create knuckle joints, which enhances the spooky presentation of your cookies.
Step 7: Create Knuckle Details
Grab a butter knife and use it to gently score the dough where the knuckles would be, adding texture. Press a whole blanched almond at the tip of each finger to serve as a gruesome “nail” for your Creepy Witch Finger Cookies.
Step 8: Freeze the Cookies
Transfer the shaped cookies onto a lined baking tray, making sure to leave space between them. Freeze for 40–60 minutes to solidify, ensuring that they hold their shape while baking, which is key for achieving that eerie finger appearance.
Step 9: Preheat the Oven
While the cookies are freezing, preheat your oven to 325°F (163°C). This temperature ensures even baking, creating a lovely golden-brown color on the bottoms of your creepy cookies while keeping their tops pale.
Step 10: Bake the Cookies
Once the oven is ready, bake the frozen cookies for 20–25 minutes. Keep an eye on them; they're done once the bottoms are lightly browned, while the tops should remain pale. Remove them from the oven and let them cool on the tray for a few minutes before transferring them to a wire rack.
Step 11: Add the Jam Filling
After cooling completely, gently remove the almonds from the tips of the cookies. Fill the cavity with a tablespoon of strawberry or raspberry jam, resembling a spooky ooze, before carefully reattaching the almonds to create that signature finger look for your Creepy Witch Finger Cookies.
Step 12: Decorate the Cookies
Finally, enhance the spooky appearance by brushing cocoa powder lightly on the fingers for a dirty effect, or drizzle red cake writing gel for a gruesome touch. If desired, dip or drizzle melted white chocolate or colored candy wafers over the cookies for a festive finish that ties your creepy creation together beautifully.
What to Serve with Creepy Witch Finger Cookies
As you prepare to enchant your Halloween gathering, consider delightful accompaniments that will elevate these spooky treats to centerpiece status.
-
Wicked Halloween Punch: A refreshing and colorful drink that made with fruity flavors will add a festive flair to your celebration.
-
Spooky Cheese Board: Assorted cheeses, fresh fruits, and nuts create an enticing platter that provides a savory counterpoint to the sweetness of the cookies.
-
Ghoulish Gummy Worms: These delightful candies offer a playful addition that complements the eerie atmosphere of your spooky cookies.
-
Charming Chocolate Mousse: Rich and creamy, this dessert echoes the indulgence of the cookies while providing a satisfying texture variation.
-
Crispy Caramel Popcorn: Sweet and crunchy, this treat serves as a fun contrast, inviting guests to snack mindlessly while they relish the witchy cookies.
-
Chilling Apple Cider: Serve it warm or cold for a timelessly comforting beverage that will enhance the mood without overpowering the cookies' flavors.
-
Minty Green Smoothies: Bright, fresh, and eye-catching, these smoothies add a healthy, vibrant touch to your dessert table, making it an attractive option alongside the cookies.
-
Sinister Chocolate Dipped Strawberries: Dipped in melted chocolate, these fruity delights provide a luscious taste that perfectly complements the creepiness of your witchy theme.
How to Store and Freeze Creepy Witch Finger Cookies
Room Temperature: Store the cookies in an airtight container at room temperature for up to 3 days. This keeps them fresh and delicious for your Halloween festivities.
Fridge: If you want to extend their shelf life, place the cookies in an airtight container in the fridge for up to 1 week. Just bring them to room temperature before serving.
Freezer: For longer storage, you can freeze the cookies for up to 3 months. Layer them with parchment paper in an airtight container to prevent sticking.
Reheating: When ready to enjoy, let the cookies thaw in the fridge overnight, then serve as is, or warm them in the oven at 300°F (148°C) for a few minutes to bring back their fresh-baked taste!
Make Ahead Options
These Creepy Witch Finger Cookies are perfect for meal prep and can save you time during the busy Halloween season! You can prepare the cookie dough up to 24 hours in advance—simply follow the steps to create the dough, shape it into fingers, and then wrap it tightly in plastic wrap before refrigerating. Alternatively, you can also freeze the shaped cookies for up to 3 months. When ready to bake, there's no need to thaw; just pop the frozen cookies straight into the preheated oven for 20–25 minutes. This method helps maintain quality, ensuring your spooky treats are just as delicious as when made fresh. Enjoy these time-saving options and impress your guests with minimal effort!
Creepy Witch Finger Cookies Variations
Feel free to let your imagination run wild with these delightful twists to make your Creepy Witch Finger Cookies even more enchanting and unique!
-
Gluten-Free: Use a gluten-free all-purpose flour blend to make these cookies safe for gluten-sensitive friends. They will still be frightfully delicious!
-
Nut-Free: Replace almonds with sunflower seeds or pumpkin seeds for a spooky nail look without any nuts. These alternatives will maintain the same fun vibe!
-
Candy Coating: Instead of melted chocolate, try using brightly colored candy melts for a festive appearance that’s sure to grab attention. Going for a pop of color can make them even more fun!
-
Spicy Kick: For those who love heat, add a pinch of cayenne pepper to the dough or sprinkle some chili powder on the finished cookies for a surprising twist.
-
Different Jam: Experiment with other fruit jams like blueberry or apricot for filling; each will add a unique flavor and a different oozy appearance that still feels delightfully festive.
-
Syrupy Horror: Drizzle with a mix of corn syrup and food coloring for a gooey, blood-like effect. Your guests will be impressed by the creativity in every detail!
-
Dairy-Free: Substitute the butter with coconut oil or vegan butter. This way, everyone gets to enjoy the terrifying treat, no matter their dietary needs.
-
Texture Variation: Try swapping half of the all-purpose flour for almond flour for a nutty flavor and a more tender cookie that adds a delightful twist!
Embrace the spirit of Halloween and use these variations to create your very own Creepy Witch Finger Cookies masterpiece! If you're looking for other spooky delights, possible pairing ideas include these chilling Halloween cake pops or a goblin-worthy potion punch. The options are endless, and the fun you can have while creating these treats is sure to keep everyone smiling!
Expert Tips for Creepy Witch Finger Cookies
Chill the Dough: Ensure you chill the dough for at least 20–30 minutes; this helps the cookies maintain their finger shape during baking.
Shape Carefully: When forming the fingers, make sure to create pronounced knuckles. This enhances the spooky look of your Creepy Witch Finger Cookies.
Watch Baking Time: Keep an eye on the cookies as they bake; they should be lightly browned on the bottom but pale on top to achieve that eerie appearance.
Use Quality Coloring: Opt for high-quality matcha, sweet potato powder, or cocoa for vibrant colors. This elevates both the look and taste of your cookies.
Jam Filling Tip: Allow the cookies to cool completely before adding the jam; this prevents it from melting away and creates a more gruesome effect!

Creepy Witch Finger Cookies Recipe FAQs
What is the best way to select ripe ingredients?
Absolutely! For the butter, ensure it is softened to room temperature for easier mixing, achieving that fluffy texture. When looking for egg yolks, pick large eggs, as they provide the richness needed in the dough. Fresh, high-quality matcha, purple sweet potato powder, and cocoa will also boost the color and flavor of your Creepy Witch Finger Cookies!
How can I store my cookies properly?
For sure! Store your cookies in an airtight container at room temperature for up to 3 days. If you'd like to keep them fresher longer, place them in the fridge where they can last up to 1 week. Just bring them back to room temperature before enjoying!
Can I freeze my Creepy Witch Finger Cookies?
Yes, definitely! To freeze your cookies, let them cool completely first. Then, layer them with parchment paper in an airtight container and place them in the freezer for up to 3 months. When you're ready to enjoy, simply let them thaw in the fridge overnight. Want them warm? Pop them in a preheated oven at 300°F (148°C) for a few minutes!
What should I do if my dough is too sticky?
Very good question! If your dough seems overly sticky, consider chilling it a bit longer, around 10-15 minutes, which should make it more manageable. Alternatively, lightly dust your work surface with flour while shaping the fingers. Just be sure not to overdo it, as too much extra flour can affect the cookie’s texture.
Are there any dietary considerations I should keep in mind?
Absolutely! If you’re catering to allergies, remember to check for nut sensitivities since blanched almonds are used as “fingernails.” Furthermore, if you're interested in gluten-free options, you can experiment with gluten-free all-purpose flour—though baking times may vary slightly. Always ensure that the food coloring and jams are free from ingredients that could cause reactions for those with specific dietary needs.

Deliciously Spooky Creepy Witch Finger Cookies for Halloween
Ingredients
Equipment
Method
- In a mixing bowl, combine 226 g of softened unsalted butter, 140 g of confectioner's sugar, and 1 teaspoon of sea salt. Use an electric mixer to cream the mixture on medium speed for about 3-5 minutes.
- Add 4 egg yolks and 5 mL of vanilla extract to the creamed mixture. Mix well on medium speed until fully incorporated and smooth, about 1-2 minutes.
- Divide the batter into portions and mix in your choice of colorings: 4-6 g matcha powder, 20-30 g purple sweet potato powder, or 5-15 g cocoa powder.
- In a separate bowl, whisk together 454 g of all-purpose flour and ¼ teaspoon of baking powder. Gradually fold this into the colored butter batter until a soft dough forms.
- Shape the soft dough into a disc, wrap it tightly, and chill in the refrigerator for 20-30 minutes.
- Roll tablespoon-sized portions into finger shapes, roughly 4 inches long, squeezing at two areas to create knuckle joints.
- Use a butter knife to gently score the dough where the knuckles would be. Press a whole blanched almond at the tip of each finger.
- Transfer shaped cookies onto a lined baking tray and freeze for 40-60 minutes.
- Preheat your oven to 325°F (163°C).
- Bake the frozen cookies for 20-25 minutes, until the bottoms are lightly browned.
- After cooling completely, gently remove the almonds from the tips, fill with a tablespoon of jam, and reattach the almonds.
- Brush cocoa powder lightly on the fingers, drizzle red cake writing gel, and optionally dip or drizzle melted white chocolate.


Leave a Reply