
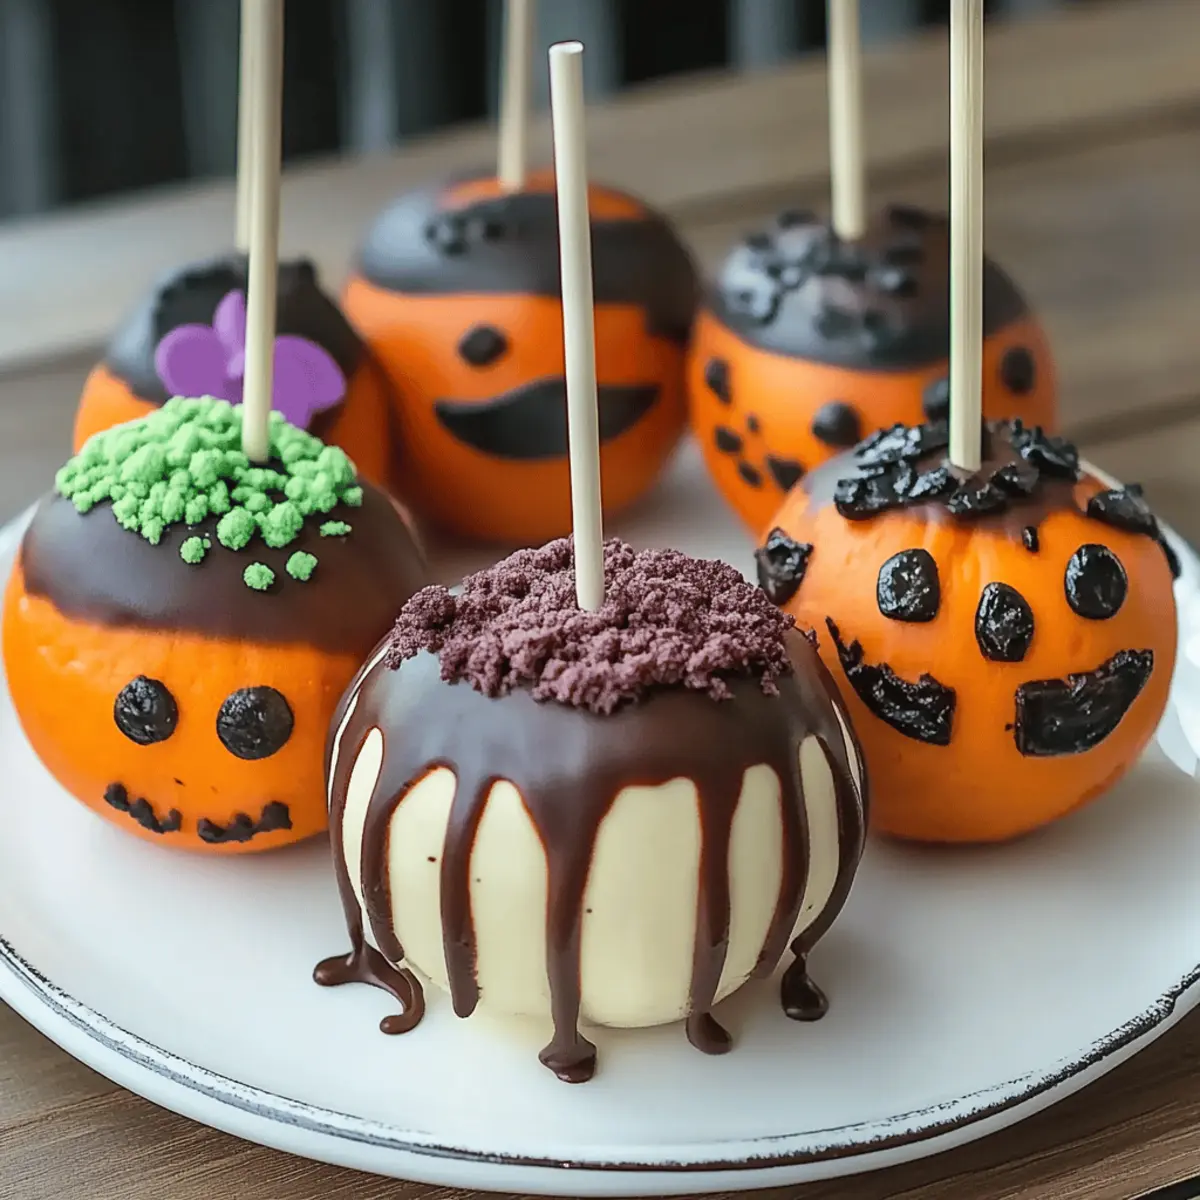
As I rummaged through the pantry, the sight of vibrant colored sprinkles and candy melts sparked a delightful idea—Halloween Cake Pops! These whimsical treats not only ignite a festive spirit but also make for the perfect crowd-pleaser at any gathering. What I love about this recipe is how quick and simple it is; with just a box of cake mix and some decorations, you can whip up 24 spooky delights that everyone will rave about. Plus, they're a fantastic way to unleash your creativity—experimenting with colors and textures is half the fun! Whether it's a Halloween bash or a cozy family get-together, these cake pops will surely bring smiles all around. Ready to dive into this deliciously fun project? Let's get started!
What Makes These Cake Pops Spooky Fun?
Simplicity at its best: With just a box of cake mix, you can create these adorable Halloween Cake Pops that fascinate both kids and adults alike.
Creative canvas: Let your imagination run wild with colors and designs—shape them into pumpkins, ghosts, or anything else your heart desires!
Crowd-pleaser: Perfect for parties, your Halloween gathering will be the hit of the season with these tasty treats on display.
Quick prep: Ready in under three hours, you can prepare these cake pops well in advance, making them a time-saving option during the busy holiday season.
By following this recipe, you’ll discover how enjoyable homemade treats can be and even consider checking out our 10 Halloween Party Recipes to continue the festive spirit!
Halloween Cake Pops Ingredients
• Here’s everything you need to create these spooky delights!
For the Cake Base
- 1 box cake mix – Any flavor works, but chocolate and red velvet are Halloween favorites!
- Eggs – Use the quantity specified on the cake mix box for the perfect texture.
- Oil – Follow the package instructions to keep your cake moist and delicious.
- Water – Don't forget to add the recommended water for an ideal batter consistency.
For the Frosting
- ½ to 1 cup frosting – Cream cheese or chocolate frosting complements cake pops beautifully; adjust for sweetness preference.
For the Candy Coating
- 12 oz candy melts – Choose from orange, black, white, or green candy melts for a festive touch.
For Assembly & Decoration
- 24 lollipop sticks – A must-have for transforming cake balls into delightful pops.
- Candy eyeballs – These add a playful and spooky garnish.
- Halloween sprinkles – Perfect for that extra festive flair!
- Colored sugar – Use orange, black, or purple to create colorful accents.
- Gel food coloring (optional) – Tint white chocolate for even more creative designs.
- Red gel icing – Use it to create spooky eyeball veins!
- Green frosting or fondant – Ideal for crafting cute pumpkin stems.
With these Halloween Cake Pops ingredients, you're ready to embark on a delightful baking adventure that will enchant your family and friends alike!
Step‑by‑Step Instructions for Halloween Cake Pops
Step 1: Prepare the Cake
Begin by preheating your oven to the temperature specified on your cake mix box. Grease and flour your baking pan to ensure easy release later. Prepare the cake mix according to package instructions, adding the required eggs, oil, and water. Bake until a toothpick inserted in the center comes out clean, usually around 25 minutes. Once baked, let the cake cool completely on a wire rack.
Step 2: Crumble the Cake
Once fully cooled, transfer the cake to a large bowl and crumble it into fine, even crumbs using your hands or a fork. This step is crucial for achieving the right texture for your Halloween Cake Pops. Gradually blend in frosting, starting with ½ cup, until the mixture reaches a consistency that feels like sticky dough. You want it to hold together well when shaped.
Step 3: Shape the Cake Pops
Using a small cookie scoop or your hands, scoop out generous portions of the cake mixture and roll them into 1-inch balls. Place each ball on a lined baking sheet, ensuring they're spaced apart. This will allow them to chill without sticking together. Once formed, refrigerate the cake balls for 1-2 hours, or freeze them for about 30 minutes to firm them up before proceeding.
Step 4: Insert Lollipop Sticks
In a microwave-safe bowl, melt about 2 oz of candy melts in 30-second intervals, stirring in between everything until smooth. Dip one end of each lollipop stick about ½ inch into the melted chocolate. This step helps secure the stick when inserted into the chilled cake balls. Gently push the stick into each chilled cake ball, then chill them again for about 10 minutes to set.
Step 5: Dip the Cake Pops
Melt the remaining candy melts according to the package instructions until smooth and fluid. Carefully dip each cake pop into the melted chocolate, ensuring it's fully coated. Gently tap the stick against the edge of the bowl to remove any excess chocolate, which can make your Halloween Cake Pops look neater and more professional.
Step 6: Decorate the Cake Pops
While the chocolate coating is still wet, unleash your creativity by decorating each cake pop with Halloween sprinkles, colored sugar, or candy eyeballs. Arrange your decorations beautifully to enhance the spooky theme. It’s essential to do this quickly, as the chocolate hardens fast, making it impossible to adhere the decorations later.
Step 7: Set the Cake Pops
To let your Halloween Cake Pops dry, place them upright in a Styrofoam block or a cardboard box with holes poked in it. This ensures they maintain their round shape. Allow them to dry at room temperature for about 15-20 minutes, or pop them in the refrigerator for about 10 minutes if you’re in a hurry. Once set, your delightful cake pops are all ready for the Halloween festivities!
Make Ahead Options
These Halloween Cake Pops are perfect for busy home cooks looking to save time! You can prepare the cake base up to 3 days in advance. Simply bake the cake, let it cool, crumble it, and mix it with frosting before forming the cake balls. Place them in an airtight container and refrigerate until you're ready to proceed. On the day you want to serve them, insert the lollipop sticks, dip them in melted chocolate, and decorate as desired. This way, your cake pops remain just as delicious while allowing you to enjoy more family time during the spooky festivities!
What to Serve with Halloween Cake Pops
Create a festive feast that will delight and surprise your guests!
- Witch’s Brew Punch: A spooky, colorful punch that’s perfect for kids and adults alike, making every sip feel like a Halloween treat.
- Mini Corn Dogs: Their savory goodness provides a satisfying contrast to the sweet cake pops, creating a balanced snack platter.
- Pumpkin Soup: This creamy dish complements the Halloween theme with its rich flavors, warming your guests inside out. Serve it in small cups for a delightful dip!
- Apple Slices with Caramel Dip: Fresh and crunchy, the sweet caramel adds an indulgent twist, elevating your dessert table effortlessly.
- Spooky Cheese Board: Include various cheeses, crackers, and festive candies to engage the senses while providing a savory contrast to your sweet treats.
- Ghostly Cupcakes: Enhance the festive atmosphere with adorable cupcakes decorated as ghosts to please everyone’s sweet tooth and create a fun visual display.
- Cinnamon Sugar Donut Holes: These bite-sized delights offer a sweet, spicy touch that pairs nicely with the cake pops, creating a comforting dessert duo.
- Hot Chocolate Bar: Set up a cozy drink station with marshmallows and whipped cream for a warming treat, especially if it’s chilly during your Halloween gathering!
Halloween Cake Pops: Customization Ideas
Feel free to make these Halloween Cake Pops your own—let your creativity shine through with fun twists and variations!
- Gluten-Free: Substitute regular cake mix with a gluten-free variety to accommodate dietary needs without losing flavor.
- Low-Sugar: Use sugar-free frosting and cake mix for a guilt-free treat that's still deliciously festive.
- Flavor Infusion: Experiment with flavored extracts like almond, lemon, or pumpkin spice for a unique twist in your cake batter.
- Chocolate Explosion: Mix in chocolate chips or chopped candy bars into the cake mixture for an extra burst of sweetness.
- Heat It Up: Add a pinch of cayenne pepper to your frosting for a surprising spicy kick that contrasts beautifully with the sweetness.
- Nutty Crunch: Fold in crushed nuts or granola into the cake mixture for added texture and a delightful crunch in every bite.
- Festive Shapes: Instead of balls, shape the mixture into ghosts or bats using cookie cutters for a whimsical variation.
- Fruity Surprise: Incorporate finely chopped dried fruits or freeze-dried fruits into the cake mixture for pops of flavor and color.
With these variations, your Halloween Cake Pops will surely be unique, engaging, and absolutely delightful! If you're looking for more creative ideas, why not check out our Tips for the Best Halloween Treats? They'll inspire you to push those culinary boundaries even further!
Tips for the Best Halloween Cake Pops
Cool Completely: Ensure your cake is fully cooled before crumbling. Warm cake can make the cake pop mixture too mushy to hold shape.
Frosting Balance: Add frosting gradually—too much can make the mixture overly sticky. Aim for a doughy texture that holds together without falling apart.
Chill Firmly: Don’t skip the chilling steps! Firm cake balls are easier to dip and will hold their shape better when coated.
Quick Dipping: Work swiftly when dipping to prevent the coating from hardening. It’s best to sprinkle decorations immediately after dipping.
Be Creative: Don’t be afraid to experiment with different colors and decorations! Your Halloween Cake Pops can be as unique as your imagination allows.
Enjoy crafting your spooky treats and don’t forget to share your creations with friends and family!
How to Store and Freeze Halloween Cake Pops
Fridge: Store your Halloween Cake Pops in an airtight container in the fridge for up to 1 week. Ensure the pops aren't stacked, as this can ruin their decoration.
Freezer: For longer storage, freeze the cake pops by placing them in a single layer on a baking sheet until solid, then transfer to a freezer-safe bag for up to 3 months.
Thawing: To enjoy your frozen Halloween Cake Pops, move them to the fridge for a few hours or let them sit at room temperature for about 30 minutes before serving.
Reheating: If the chocolate coating has softened, briefly refrigerate them for 10 minutes before enjoying to get that firm bite back!

Halloween Cake Pops Recipe FAQs
How do I choose the right cake mix for my Halloween Cake Pops?
Absolutely! You can use any flavor of cake mix, but chocolate and red velvet tend to be favorites during Halloween due to their rich colors and flavors. If you want something fun, consider trying a vanilla or funfetti mix and tinting the frosting or the candy coating with gel food coloring!
How long can I store my Halloween Cake Pops, and what’s the best way?
Very good question! Store your Halloween Cake Pops in an airtight container in the fridge for up to 1 week. Be sure to keep them upright to prevent damage to the decorations. If stacked, use parchment paper between layers to protect the pops.
Can I freeze leftover Halloween Cake Pops?
Yes, indeed! To freeze your Halloween Cake Pops, firstly, place them in a single layer on a baking sheet until they're solid. Then, transfer them into a freezer-safe bag or container, and they can last up to 3 months!
How do I properly thaw frozen cake pops? What’s the best method?
To thaw your frozen Halloween Cake Pops, simply move them to the fridge for a few hours or allow them to sit at room temperature for about 30 minutes before serving. This gentle thawing method helps retain their texture and flavors without compromising the chocolate coating.
What if my cake pop mixture is too dry or too sticky?
No worries! If your mixture feels too dry, add a little more frosting, one tablespoon at a time until it reaches a sticky, moldable consistency. On the other hand, if it’s too sticky, consider chilling it in the refrigerator for a brief period to firm it up. This should help you form the perfect balls for your Halloween Cake Pops!
Can I make these cake pops pet-friendly?
While some dogs may enjoy plain cake mixes, the icing and chocolate are generally not safe for pets due to high sugar and fat content. It's best to keep these delightful Halloween Cake Pops for human consumption only, ensuring your furry friends are safe from any harmful ingredients!
Deliciously Spooky Halloween Cake Pops Your Kids Will Love
Ingredients
Equipment
Method
- Preheat your oven as per cake mix instructions. Grease and flour your baking pan.
- Prepare the cake mix according to package instructions with required eggs, oil, and water. Bake for about 25 minutes until a toothpick comes out clean, then cool completely.
- Crumble the cooled cake into fine crumbs, blend in frosting until it has a doughy texture that holds together.
- Roll the mixture into 1-inch balls, space them on a lined baking sheet, and chill for 1-2 hours.
- Melt about 2 oz of candy melts in 30-second intervals. Dip one end of each lollipop stick into melted chocolate and insert into each chilled cake ball. Chill again for 10 minutes.
- Melt remaining candy melts until smooth and dip each cake pop, tapping off excess chocolate.
- Decorate the wet chocolate with sprinkles, colored sugar, or candy eyeballs immediately.
- Place cake pops upright in a Styrofoam block or cardboard box to dry for 15-20 minutes, or refrigerate for about 10 minutes.


Leave a Reply