
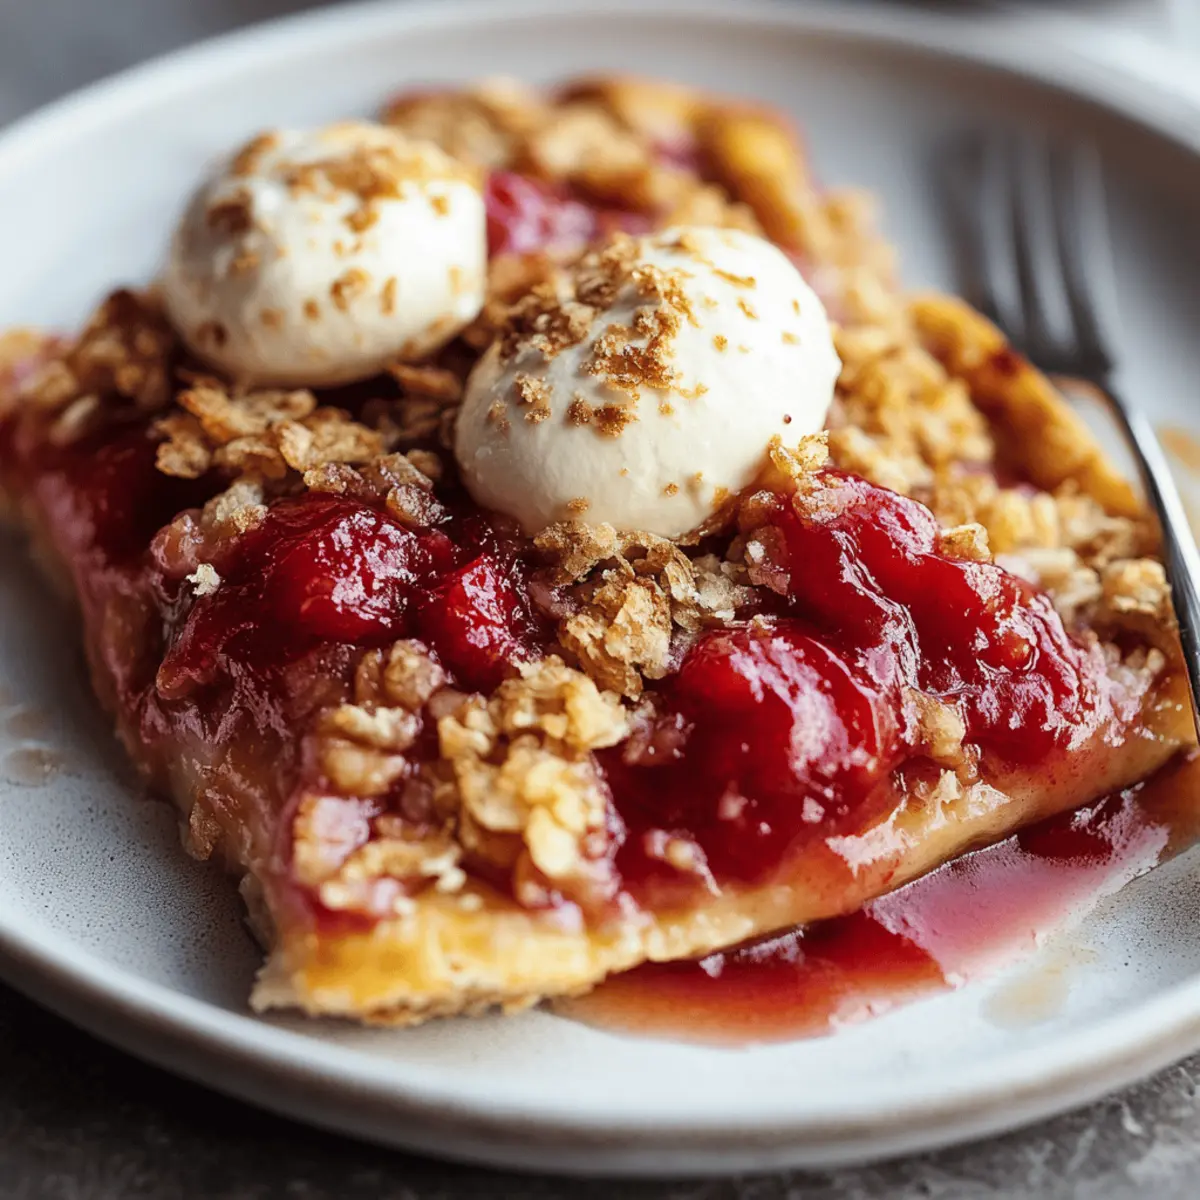
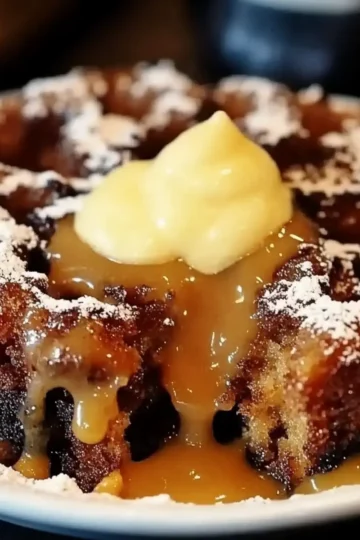
The tangy aroma of fresh rhubarb baking in the oven has a way of whisking me back to childhood afternoons, where sweet and tart flavors danced together like an old friend. This Rhubarb Crisp is not just a delightful dessert but also a tribute to those nostalgic moments spent in the kitchen. With its quick prep time and comforting warm flavors, it’s the perfect antidote to a long day or a fast-food rut. Imagine scooping a generous portion of this warm crumble topped with a scoop of ice cream, melting into every crevice—it's pure bliss on a plate! Plus, it’s easily freezable, ensuring that your future self will thank you when a sweet craving strikes. So, are you ready to discover how to create this cozy classic? Let’s dive in!
Why Is Rhubarb Crisp So Irresistible?
Unforgettable Flavor: The vibrant combination of tangy rhubarb and sweet crumble creates a unique taste that hits the sweet spot every time.
Quick and Easy: You’ll whip this up in just 15 minutes of prep! Perfect for those busy afternoons when you crave something homemade yet effortless.
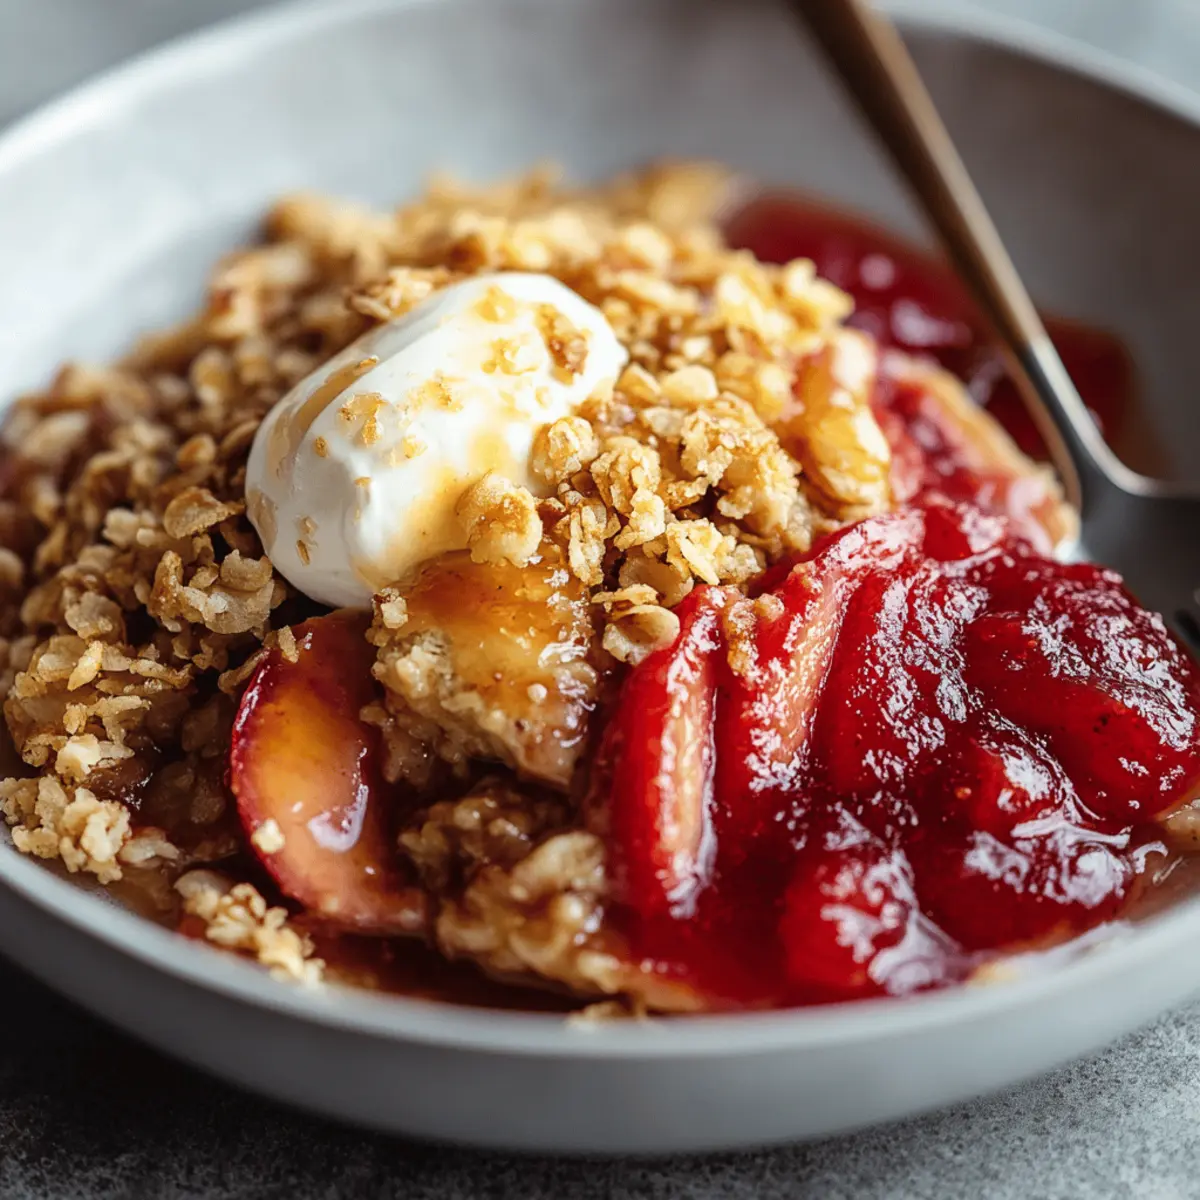
Versatile Delight: Serve it warm with vanilla ice cream, or enjoy it chilled over breakfast—this dessert fits any occasion.
Crowd-Pleaser: Whether it’s a family gathering or a weeknight dinner, Rhubarb Crisp always disappears quickly and leaves everyone wanting more!
Make-Ahead Magic: Freeze before or after baking for an instant dessert option. You’ll thank yourself later when cravings arise and all it takes is a quick reheat.
Rhubarb Crisp Ingredients
For the Rhubarb Filling
- Rhubarb – 1 pound, the tart base that gives Rhubarb Crisp its signature flavor.
- Granulated Sugar – 1 cup, to balance the tartness of the rhubarb and enhance sweetness.
- All-Purpose Flour – 1 tablespoon, helps thicken the rhubarb juices for a better texture.
- Lemon Juice – 1 tablespoon, adds brightness and enhances the flavor of the rhubarb.
For the Crisp Topping
- Rolled Oats – 1 cup, provides a delightful chewiness and hearty texture.
- All-Purpose Flour – 1 cup, helps bind the topping together for a perfect crumble.
- Brown Sugar – ½ cup, adds depth and a hint of caramel flavor to the topping.
- Cold Butter (cubed) – ½ cup, ensures a flaky, crisp topping when blended with dry ingredients.
Step‑by‑Step Instructions for Rhubarb Crisp
Step 1: Preheat the Oven
Begin by preheating your oven to 375°F (190°C). This crucial first step ensures that your Rhubarb Crisp bakes evenly. While the oven warms up, line your baking dish with grease for easy serving later. You’ll want to feel the warmth radiating from the oven before placing your dish inside.
Step 2: Prepare the Rhubarb Filling
In a mixing bowl, combine 1 pound of chopped rhubarb with 1 cup granulated sugar, 1 tablespoon of flour, and 1 tablespoon of lemon juice. Stir well until the mixture is evenly coated and glossy. The sugar will begin to draw moisture from the rhubarb, making it slightly syrupy. Spread this delicious mixture evenly in your greased 8×8-inch baking dish.
Step 3: Make the Crisp Topping
In a separate bowl, combine 1 cup rolled oats, 1 cup all-purpose flour, and ½ cup brown sugar. Next, add ½ cup of cold, cubed butter. Using your fingers or a pastry cutter, blend the ingredients until the mixture resembles coarse crumbs—this should take about 5 minutes. The cold butter will create a flaky, delicious topping for your Rhubarb Crisp.
Step 4: Assemble the Crisp
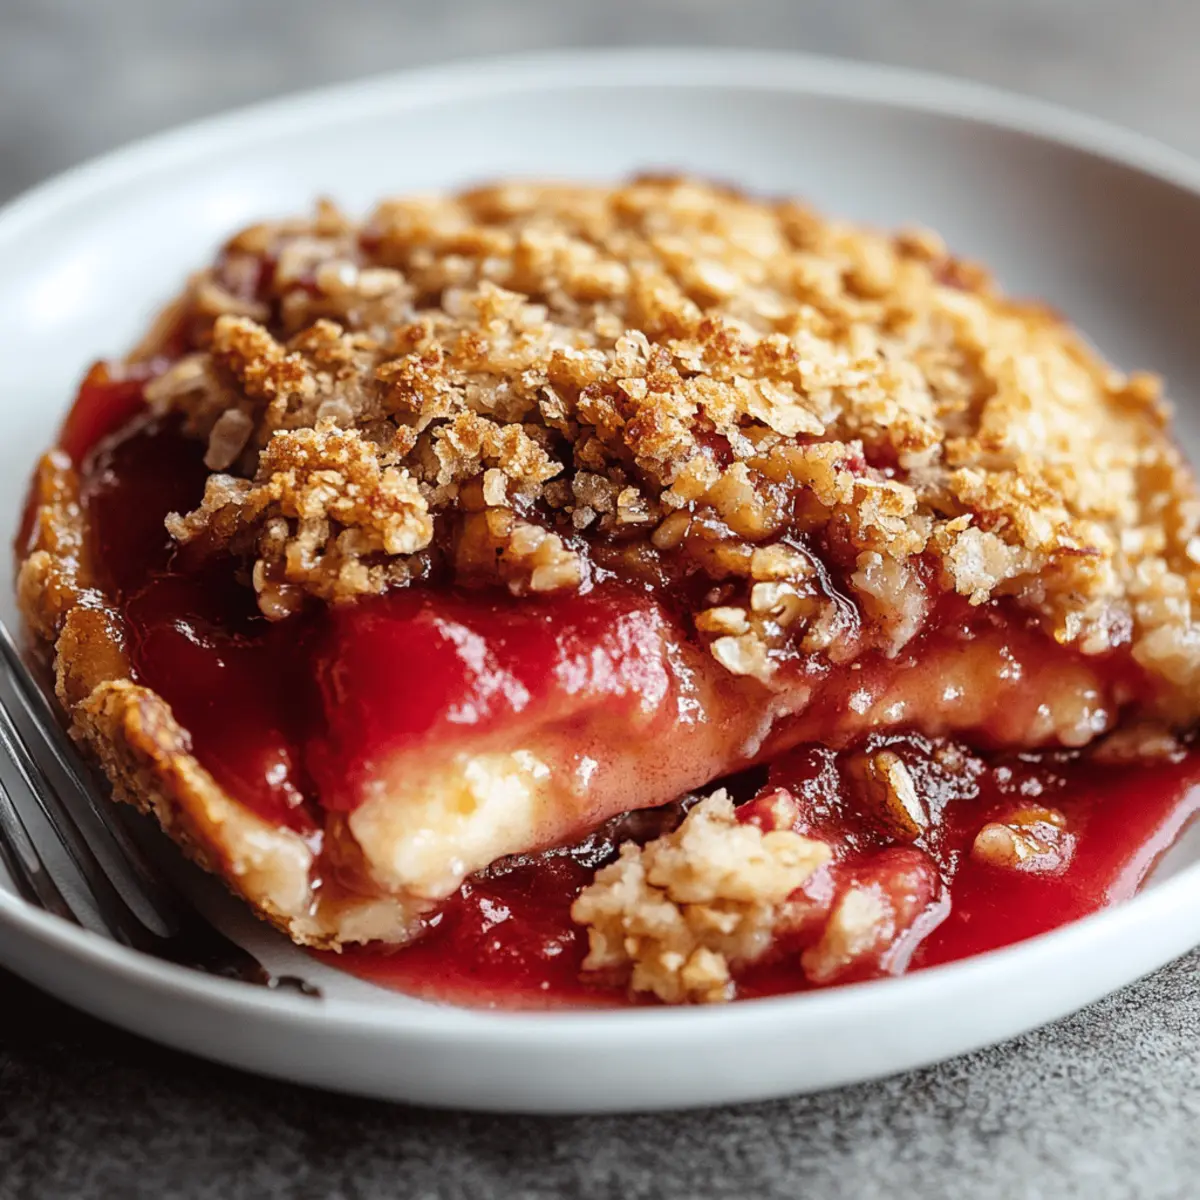
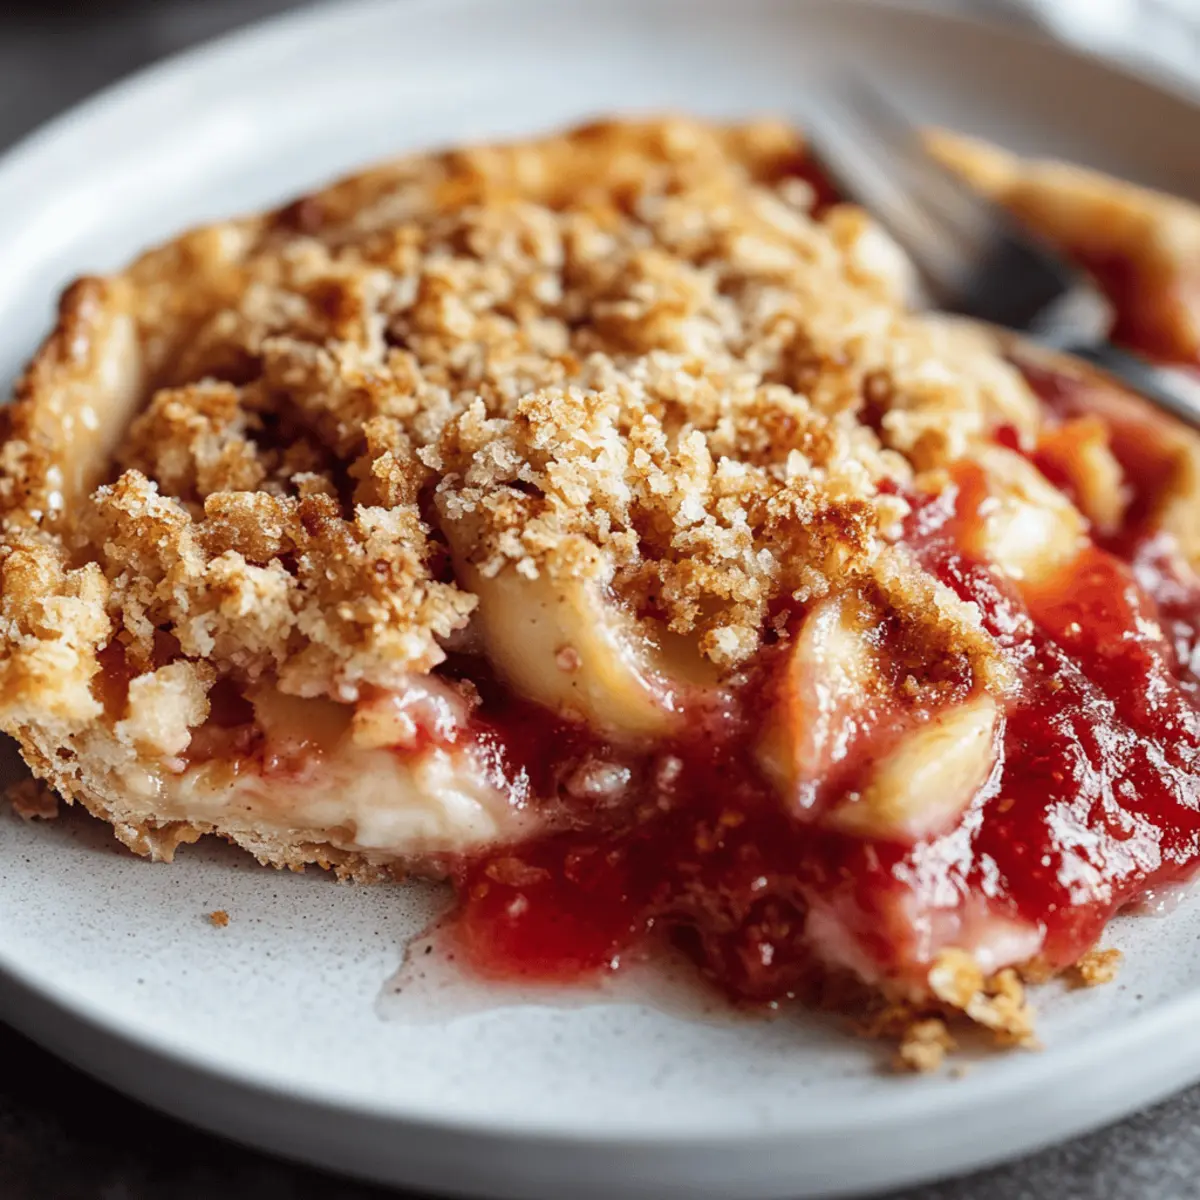
Sprinkle the oat topping evenly over the rhubarb layer in your baking dish. Use your hands to ensure every bit of fruit is covered, forming a delightful crunchy layer. As you look at the dish, you should see a thick, textured blanket of the crisp mixture enveloping the vibrant rhubarb below.
Step 5: Bake Your Crisp
Place your assembled Rhubarb Crisp in the preheated oven and allow it to bake uncovered for 35–40 minutes. Keep an eye on it; the topping should turn a beautiful golden brown. If it browns too quickly, loosely cover it with foil for the last 10 minutes to prevent burning while allowing the filling to cook perfectly.
Step 6: Cool and Serve
Once baked, remove your Rhubarb Crisp from the oven and let it rest for 15–20 minutes before serving. This resting time is essential for allowing the juices to set and makes serving easier. Whether you enjoy it warm, at room temperature, or chilled, this delightful dessert is ready to be enjoyed and shared!
Make Ahead Options
These Rhubarb Crisp preparations are perfect for busy home cooks looking to save time! You can prepare the rhubarb filling up to 24 hours in advance by mixing the chopped rhubarb, granulated sugar, flour, and lemon juice, then refrigerating it in an airtight container. The crisp topping can also be made ahead and stored in the fridge for up to 3 days. Just combine the oats, flour, brown sugar, and butter, then keep it covered until ready to assemble. When you’re set to bake, simply spread the chilled filling in your dish and sprinkle the crisp topping on before placing it in the oven. By prepping these components ahead of time, you’ll have a delicious dessert ready to go with minimal effort!
What to Serve with Rhubarb Crisp
Imagine a delightful spread around your Rhubarb Crisp, where every dish complements its sweet-tart charm and nostalgic warmth.
-
Vanilla Ice Cream: The creamy richness of ice cream contrasts perfectly with the tartness of the crisp, creating an irresistible flavor combination.
-
Whipped Cream: Light and airy, a dollop of whipped cream adds a soft texture that enhances the dessert’s warm, baked goodness.
-
Greek Yogurt: For a tangy twist, serve with Greek yogurt; its creaminess complements the crisp while offering a refreshing balance.
-
Fresh Berries: Add a burst of color and freshness with mixed berries; their juiciness brings out the rhubarb's natural tartness.
-
Caramel Sauce: Drizzling warm caramel sauce over the crisp amplifies the sweetness and adds a decadent touch to each bite.
-
Herbal Iced Tea: A glass of chilled herbal iced tea refreshes the palate, balancing the sweetness and enhancing the overall dining experience.
-
Homemade Lemonade: Bright and zesty, a glass of homemade lemonade contrasts with the rich flavors of the crisp, creating a vibrant meal.
-
Shortbread Cookies: Serve alongside buttery shortbread for an extra crunch and melt-in-your-mouth contrast that delights your taste buds.
-
Coffee: A warm cup of coffee complements the warmth of the rhubarb crisp while its slight bitterness brilliantly contrasts the dessert’s sweetness.
Storage Tips for Rhubarb Crisp
Room Temperature: Serve your Rhubarb Crisp warm or at room temperature. For any leftovers, keep them covered at room temperature for up to 2 days.
Fridge: Store cooled Rhubarb Crisp in an airtight container in the fridge for up to 3 days. Reheat covered with foil to prevent the topping from drying out.
Freezer: For long-term storage, freeze the Rhubarb Crisp either before baking or after. If frozen uncooked, bake directly from the freezer, adding extra time as needed.
Reheating: Reheat leftovers in the oven at 350°F (175°C) until warmed through, keeping the topping covered with foil to maintain its texture.
Rhubarb Crisp Variations & Substitutions
Feel free to explore these delightful twists on the traditional Rhubarb Crisp and make it your own!
- Gluten-Free: Use gluten-free flour and oats instead of regular flour and oats for a celiac-safe dessert.
- Sweetener Swap: Substitute granulated sugar with honey or maple syrup for a natural sweetness that’s equally delicious.
- Berry Boost: Add a cup of strawberries or blueberries for an extra fruity kick; they complement the rhubarb perfectly. The sweet-tart mix brings a new depth to the dish that family members will rave about.
- Nutty Crunch: Add ½ cup of chopped nuts (like pecans or walnuts) to the topping for added flavor and crunch. They’ll toast beautifully in the oven and create a delightful mix of textures.
- Spice It Up: Toss in a teaspoon of cinnamon or ginger to the rhubarb mixture for a warm, aromatic layer of flavor that brightens the dessert. Just a hint can transform the experience and provide a perfect cozy sensation!
- Dairy-Free: Swap the butter for coconut oil or a dairy-free buttery spread to make this dessert friendly for lactose-intolerant guests. The flavor will be slightly different, but equally enticing.
- Heat Level: For a spicy twist, add a pinch of cayenne or chili powder to the topping. This unexpected heat will surprise and delight those who love a little kick!
- Layered Dessert: Serve your crisp in individual ramekins with a layer of Greek yogurt at the bottom for a special touch; it's a fun and elegant way to elevate your dessert presentation.
If you're looking for more recipe ideas, check out this Storage Tips for Rhubarb Crisp to keep your delicious creations fresh longer or discover how to make this dessert even more delightful with our suggestions for serving it with whipped cream or ice cream!
Expert Tips for Rhubarb Crisp
Balance the Sweetness: Adjust sugar to taste based on the tartness of your rhubarb; some varieties may require more sweetness.
Chill the Butter: Ensure your butter is cold before mixing; it helps achieve a crumbly, flaky topping that’s the hallmark of a perfect Rhubarb Crisp.
Proper Layering: Spread the oat mixture evenly, ensuring all the rhubarb is covered. This prevents burning while baking and ensures each bite is filled with deliciousness.
Resting is Key: Don't skip the resting time after baking! Letting the crisp sit for 15–20 minutes allows the filling to set, making serving easier and neater.
Freezer-Friendly: Consider freezing the assembled but uncooked crisp. Bake directly from frozen, extending the bake time by about 10-15 minutes for an effortless last-minute dessert.
Rhubarb Crisp Recipe FAQs
How do I choose ripe rhubarb?
Absolutely! Look for rhubarb stalks that are firm and crisp, with a vibrant pink or red color. Avoid any that are wilted or have dark spots, which indicate overripeness. The stalks should be smooth and shiny, as this suggests freshness.
How should I store leftovers?
Very! Once your delicious Rhubarb Crisp has cooled, place it in an airtight container in the refrigerator. It will stay fresh for up to 3 days. When you're ready to enjoy it again, simply reheat it covered with foil to keep the topping from drying out.
Can I freeze Rhubarb Crisp?
Yes, you can! If you prefer to freeze it, do so either before baking or after. For freezing before baking, assemble your crisp, then wrap it tightly in plastic wrap and aluminum foil. It will stay fresh for up to 3 months. When you're ready to bake, you can place it directly from the freezer into the oven, adding about 10-15 extra minutes to the baking time. For freezing after baking, let it cool completely, then freeze in an airtight container.
What if my topping isn’t crumbly enough?
Don’t worry, it happens! If your topping is not crumbly, ensure that you're using cold butter and properly blending the mixture until it resembles coarse crumbs. If you're still struggling, try adding a teaspoon of cold water to the mixture to help it bind together. Remember, the right texture will make for a delightful crunch!
Are there any allergy considerations with this recipe?
Definitely! This Rhubarb Crisp contains gluten from the all-purpose flour and oats, so it's not suitable for those with gluten allergies. You can try substituting gluten-free all-purpose flour and oats to accommodate dietary needs. Always ensure that any substitutes you use are certified gluten-free to avoid cross-contamination.
Deliciously Sweet Rhubarb Crisp: Your New Favorite Dessert
Ingredients
Equipment
Method
- Preheat your oven to 375°F (190°C) and line your baking dish with grease.
- Combine 1 pound of chopped rhubarb with 1 cup granulated sugar, 1 tablespoon of flour, and 1 tablespoon of lemon juice. Stir well and spread evenly in your greased 8×8-inch baking dish.
- In a separate bowl, combine 1 cup rolled oats, 1 cup all-purpose flour, and ½ cup brown sugar. Add ½ cup of cold, cubed butter and blend until the mixture resembles coarse crumbs.
- Sprinkle the oat topping evenly over the rhubarb layer in your baking dish.
- Bake uncovered for 35–40 minutes until the topping is golden brown. Cover with foil if it browns too quickly.
- Let it cool for 15–20 minutes before serving.


Leave a Reply