
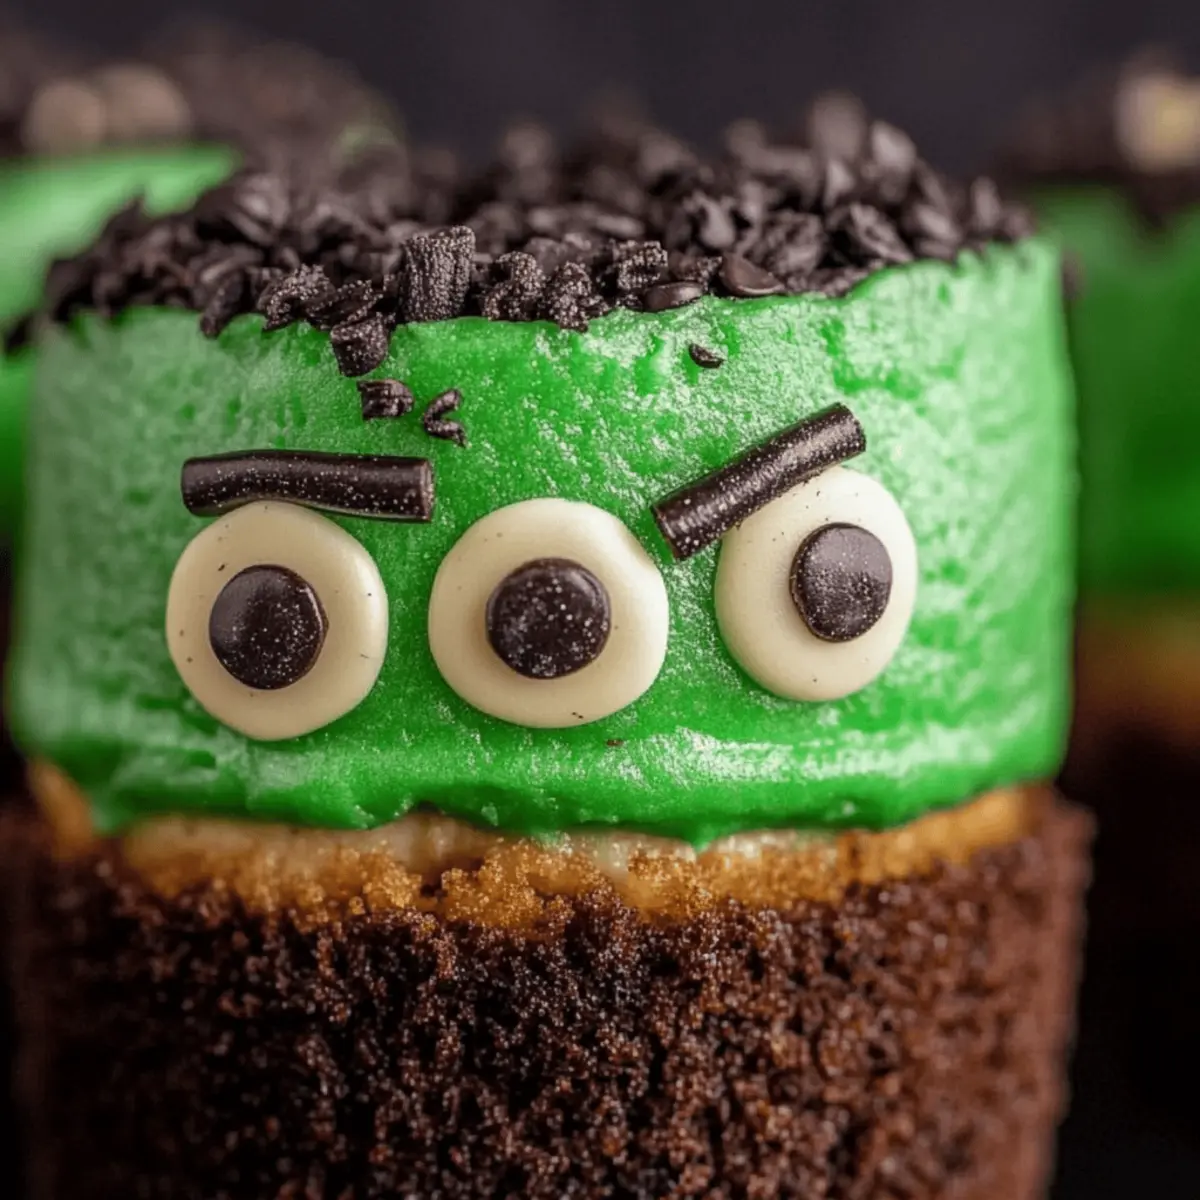
As I carefully unwrapped the chilled mini cheesecakes, I couldn't help but smile at the delightfully spooky scene before me. These Frankenstein Mini Cheesecakes are not just a treat; they're a whimsical addition that spookifies any gathering or family dinner while inviting smiles and laughter. With a quick prep time of just 15 minutes, they’ll have you spending less time in the kitchen and more time enjoying delicious homemade goodies with loved ones. Plus, their bite-sized charm makes them an irresistible crowd-pleaser, perfect for both kids and adults alike. Ready to bring a little frightful fun to your dessert table? Follow along, and let’s create some tasty mini monsters together!
Why Are These Mini Cheesecakes Unforgettable?
Whimsical Presentation: The cute, spooky appearance of these Frankenstein Mini Cheesecakes is sure to captivate your guests and spark joy at any gathering.
Easy to Make: With just 15 minutes of prep time, you can whip up these delicious treats without spending hours in the kitchen.
Crowd-Pleasing Flavor: Creamy cheesecake combined with crunchy OREO crusts creates a delightful taste that everyone will love.
Versatile Decor: Feel free to customize the faces and colors—make them as fun or frightful as you desire!
Perfect for Any Occasion: Whether it's Halloween, a birthday party, or a simple family dessert night, these mini cheesecakes will fit right in.
Get ready to wow your friends and family with these fun, delectable bites!
Frankenstein Mini Cheesecakes Ingredients
For the Cheesecake Mixture
- Cream cheese – a must for that creamy base that defines any great cheesecake.
- Sugar – balances the flavors and adds sweetness that kids love.
- Eggs – help to set the cheesecake, giving it that perfect texture.
- Flour – stabilizes the filling; omit for a gluten-free option.
- Vanilla – enhances the sweetness and rounds out the flavor beautifully.
- Green food coloring – adds that spooky Frankenstein flair; adjust to achieve your desired hue!
For the Crust
- OREO cookies – crushed to form a rich, chocolatey foundation that's completely irresistible.
- Butter – binds the cookie crumbs for a cohesive crust; melted is best for mixing.
For Decorating
- Edible eyes – bring your mini cheesecakes to life; they're just too cute!
- Chocolate chips – can be melted for dipping or used as embellishments for that extra chocolate kick.
- Chocolate sprinkles – add a festive touch that kids will adore; feel free to get creative!
- Chocolate chips (for piping) – use these for creating fun faces and features; let your imagination run wild!
These delightful Frankenstein Mini Cheesecakes are not only a feast for the eyes but also a true delight for your taste buds.
Step‑by‑Step Instructions for Frankenstein Mini Cheesecakes
Step 1: Preheat the Oven
Begin by preheating your oven to 350°F (175°C). This step is crucial to ensure your Frankenstein Mini Cheesecakes bake evenly and achieve that delightful fluffy texture. While the oven warms up, gather your mini cheesecake pan and prepare for the cookie crust.
Step 2: Prepare the Crust
In a mixing bowl, combine the crushed OREO cookies with melted butter. Stir until the crumbs are completely coated, resembling wet sand. This mixture will form the base of your mini cheesecakes, so be sure it’s well mixed. Once ready, you’ll need to form 1-inch balls and press them firmly into the bottom of your mini cheesecake pan to create a uniform layer.
Step 3: Make the Cheesecake Filling
In a separate bowl, beat the softened cream cheese with sugar, eggs, and vanilla extract until the mixture is smooth and creamy. This should take about 2-3 minutes using an electric mixer. Make sure there are no lumps left, as a silky filling is key to your Frankenstein Mini Cheesecakes.
Step 4: Add the Flour
Carefully add the flour to the cream cheese mixture, mixing until just combined. This step is important as it helps to stabilize the filling, giving it the perfect creamy texture once baked. Avoid overmixing to ensure your mini cheesecakes rise beautifully in the oven.
Step 5: Color the Cheesecake
Next, gradually add the green food coloring to the cheesecake batter, mixing until you achieve your desired shade of Frankenstein green. This vibrant color is what makes these mini cheesecakes so fun and eye-catching! Stir well to ensure the color is evenly distributed throughout the filling.
Step 6: Pour the Filling
With your crusts prepped and the green filling ready, pour the cheesecake batter into each crust, filling each cavity almost to the top. This will give your Frankenstein Mini Cheesecakes a nice dome shape. Use a spatula to smooth the top if needed, then they’re ready for baking.
Step 7: Bake the Mini Cheesecakes
Place the filled mini cheesecake pan in the preheated oven and bake for 15 minutes. You’ll know they’re done when the edges are set, but the centers still have a slight jiggle. This ensures a creamy texture that will solidify as they cool.
Step 8: Cool Completely
Once baked, remove your mini cheesecakes from the oven and let them cool in the pan for about 30 minutes. After that, transfer them to the refrigerator to chill for at least 1 hour. This cooling process is vital for achieving the perfect texture and flavor in your Frankenstein Mini Cheesecakes.
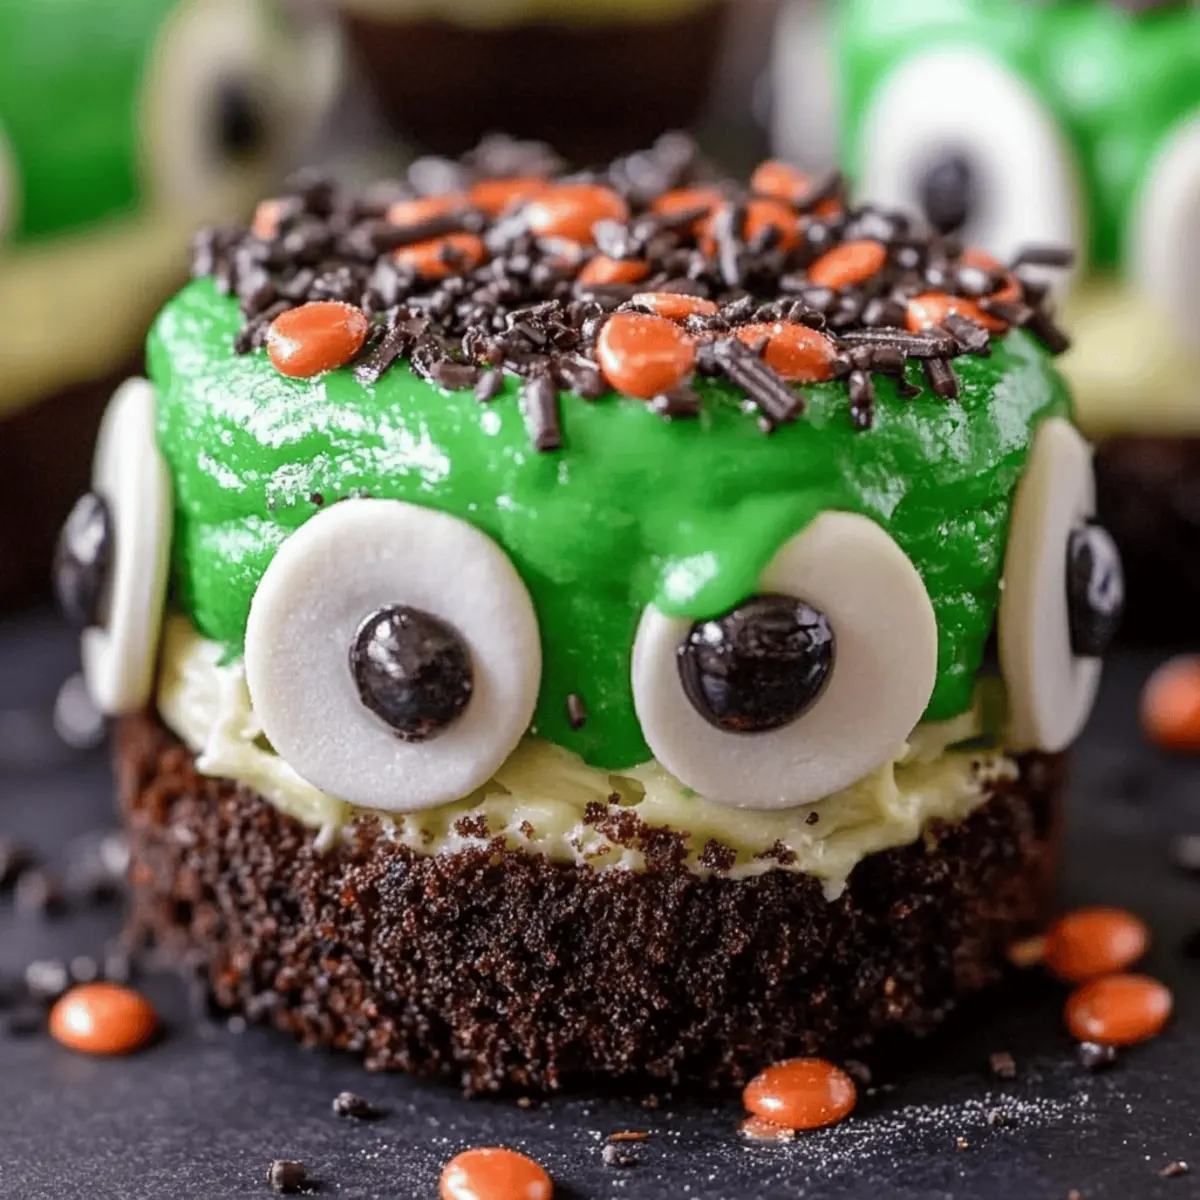
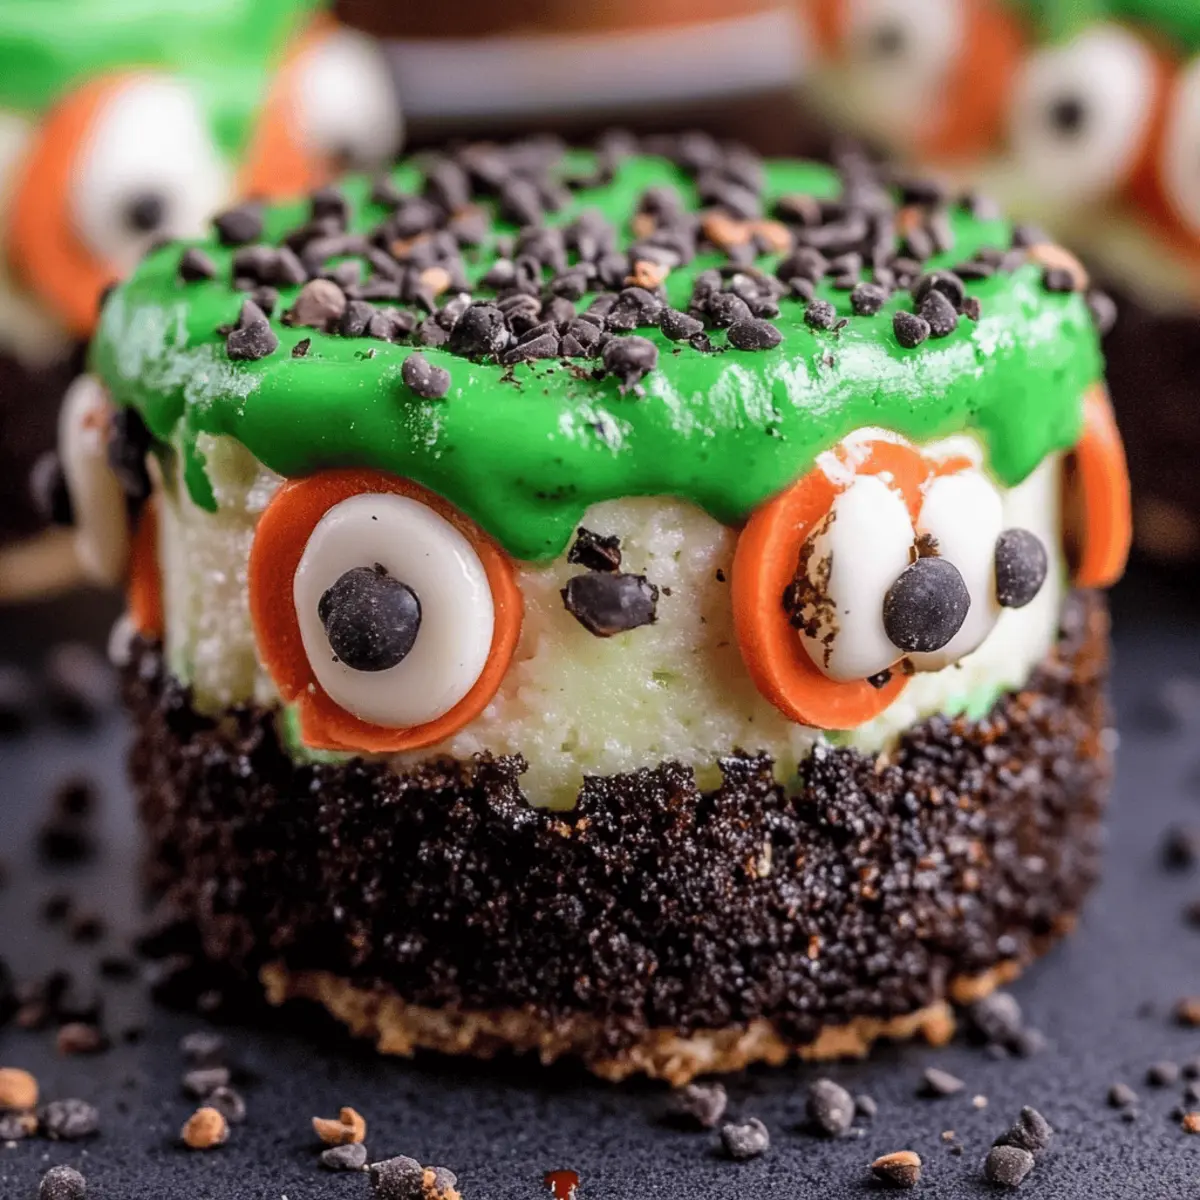
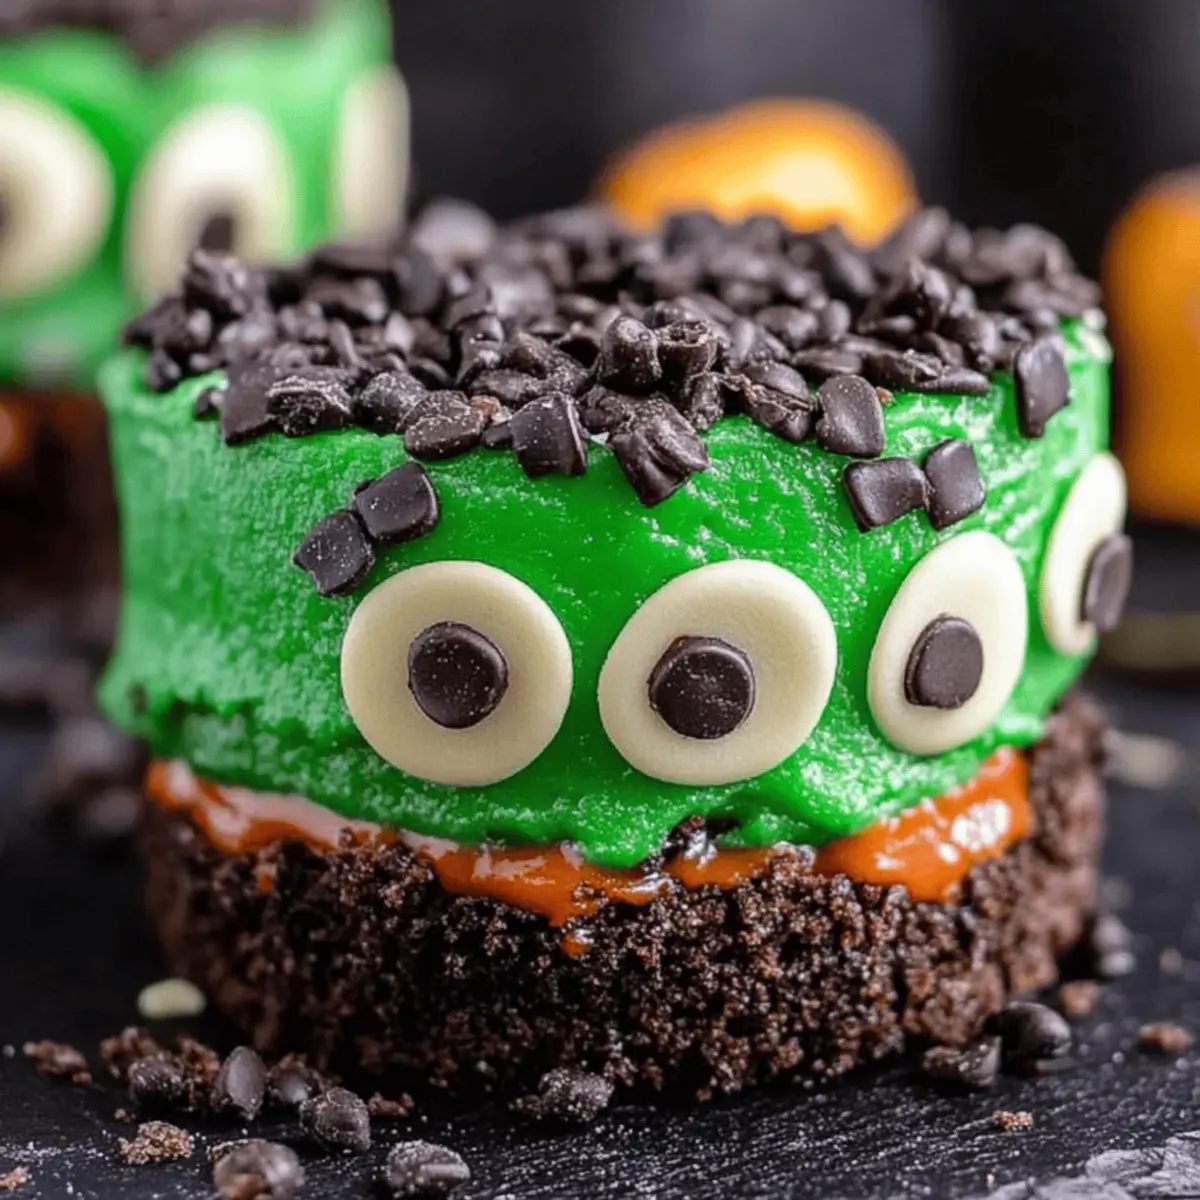
Step 9: Decorate the Cheesecakes
After they have completely cooled, gently remove the cheesecakes from the pan. To decorate, dip the tops in melted chocolate, then roll them in chocolate sprinkles for a fun finish. This sweet touch adds a festive flair and contributes to the overall presentation of your delicious mini monsters.
Step 10: Add Fun Features
Using melted chocolate, pipe little mouths and other features onto your cheesecakes to create unique faces. Finish off by placing edible eyes on top, securing them with a dot of melted chocolate. Let your creativity shine as you bring these Frankenstein Mini Cheesecakes to life!
Frankenstein Mini Cheesecakes Variations & Substitutions
Feel free to get creative and customize your Frankenstein Mini Cheesecakes with these fun and delicious variations!
-
Gluten-Free: Substitute gluten-free cookie crumbs and flour to make this treat suitable for gluten-sensitive friends.
-
Dairy-Free: Use vegan cream cheese and dairy-free butter to keep these delightful cheesecakes plant-based without sacrificing flavor.
-
Chocolate Boost: Add cocoa powder to the filling for a rich chocolate twist that enhances the cheesecake's flavor profile.
-
Flavor Fusions: Swap vanilla extract for almond or mint extract to introduce a new level of deliciousness to your mini cheesecakes.
-
Nutty Texture: Fold in crushed nuts like walnuts or pecans into the cheesecake batter for an added crunch and depth of flavor.
-
Spooky Swirls: Before baking, create fun patterns by swirling a contrasting colored cheesecake batter (like purple) with a skewer for a whimsical look.
-
Extra Sweetness: Drizzle caramel or fudge sauce over your finished cheesecakes for an indulgent finishing touch that everyone will love.
-
Heat It Up: For a spicy kick, add a pinch of cayenne pepper or a dash of chili powder to the batter for a unique sweet and savory flavor combination.
These variations add a fun twist to your already delightful Frankenstein Mini Cheesecakes. If you’re looking for more inspiration, check out how to make the most of your dessert with unique toppings or cake pairings!
Make Ahead Options
These delightful Frankenstein Mini Cheesecakes are perfect for meal prep, allowing you to enjoy their spooky charm without the last-minute rush! You can prepare the crust and cheesecake filling up to 24 hours in advance—just store them in separate airtight containers in the refrigerator. To assemble, simply press the crust into the mini cheesecake pan and pour in the batter when you're ready to bake. After cooling, these mini cheesecakes can be decorated and stored for an additional up to 3 days in the fridge to maintain freshness and quality. Just remember to add the decorative touches right before serving to keep their charm intact. Enjoy stress-free baking with these make-ahead options!
Expert Tips for Frankenstein Mini Cheesecakes
Chill Properly: Ensure your cheesecakes cool completely before decorating; this prevents melting and ensures a deliciously creamy bite.
Mind the Color: Start with less green food coloring when dying your cheesecake; you can always add more to reach your desired spooky shade.
Avoid Overmixing: When adding the flour, mix just until combined to prevent over-aeration, which can make your cheesecake dense instead of light and fluffy.
Proper Baking Time: Keep an eye on the baking time. Cheesecakes should jiggle slightly in the center when done; they will set as they cool.
Creative Faces: Let your imagination run wild with decorations—use different colors of chocolate or alternative candies for unique expressions on your Frankenstein Mini Cheesecakes!
What to Serve with Frankenstein Mini Cheesecakes?
Creating a memorable meal is all about balancing flavors and textures alongside these whimsical treats.
-
Spooky Fruit Salad: A mix of seasonal fruits, like strawberries, grapes, and kiwi, adds a refreshing element to your dessert table that complements the sweetness of the cheesecakes.
-
Colorful Veggie Platter: Fresh vegetables like baby carrots, bell peppers, and cherry tomatoes provide a crunchy contrast, making for an enticing, healthy snack option for guests.
-
Ghoulish Green Punch: A punch made with lime sherbet and lemon-lime soda perfectly echoes the fun, spooky theme of the mini cheesecakes, delighting both kids and adults.
-
Chocolate-Dipped Strawberries: Rich chocolate-covered strawberries add elegance and sweetness, pairing wonderfully with the creamy cheesecake while providing a slightly tangy flavor.
-
Mini Corn Dogs: For a savory option, serve mini corn dogs on a platter—these bite-sized treats are fun, satisfying, and a huge hit at parties, drawing in those ready to indulge in both sweet and savory.
-
Pumpkin Soup: A warm, spiced pumpkin soup is a fabulous contrast to the cool, sweet cheesecakes, embracing the fall flavors that create a comforting meal.
-
Festive Cupcakes: Complement your deep green cheesecakes with orange or black frosted cupcakes for an additional pop of color and sweetness that aligns beautifully with the Halloween spirit.
-
Whipped Cream: Serve your Frankenstein Mini Cheesecakes with a side of fluffy whipped cream for an added creaminess that balances the rich flavors of the treats.
Remember, creating a delightful spread not only enhances your cheesecakes but brings your gathering to life with joy and ease!
How to Store and Freeze Frankenstein Mini Cheesecakes
Fridge: Keep your mini cheesecakes in an airtight container in the fridge for up to 3 days. This will maintain their creamy texture and delightful flavors.
Freezer: To freeze, place the cheesecakes in a single layer on a baking sheet until solid, then transfer to a freezer-safe container for up to 2 months. Allow them to thaw in the fridge before enjoying.
Reheating: If desired, you can reheat individual cheesecakes in the microwave for about 10-15 seconds to soften slightly. Enjoy these delightful Frankenstein Mini Cheesecakes chilled or at room temperature for best results.
Decoration Advice: If you plan to freeze, wait until thawed to add decorations; this will ensure they remain fresh and visually appealing!
Frankenstein Mini Cheesecakes Recipe FAQs
How can I select the best cream cheese for my mini cheesecakes?
Absolutely! When choosing cream cheese, opt for a full-fat variety that is labeled as "brick" cream cheese, as it creates a rich and creamy texture. Be sure to check the expiration date for freshness. For the best results, let it come to room temperature before mixing to ensure a smooth batter.
How can I store leftover Frankenstein Mini Cheesecakes effectively?
Very important! Store your mini cheesecakes in an airtight container in the refrigerator for up to 3 days. To maintain their creamy texture and flavor, I recommend placing a piece of parchment paper between the cheesecakes and the lid to prevent any condensation from affecting them.
Can I freeze Frankenstein Mini Cheesecakes?
Absolutely! To freeze, first, place the cooled mini cheesecakes on a baking sheet in a single layer. Allow them to freeze until solid, about 1-2 hours. Then transfer them to a freezer-safe container or resealable plastic bag, where they can stay for up to 2 months. Just be sure to thaw them in the refrigerator before serving for the best taste and texture.
What should I do if my cheesecake batter is too lumpy?
No problem! If you find that your batter is lumpy, it might be due to the cream cheese not being softened enough. Make sure your cream cheese is at room temperature before mixing. If it's too late, try using an electric mixer for an additional minute or two, or you can whisk it by hand vigorously until smooth. Avoid overmixing after adding the flour, as that can create a dense texture.
Can dogs eat cheesecake? Are there any ingredients to avoid?
Great question! While dogs can have small amounts of plain cream cheese as an occasional treat, avoid giving them any version of your Frankenstein Mini Cheesecakes due to ingredients like sugar and chocolate, which aren’t safe for pets. Always check for any allergies and consult your vet if uncertain.
Can I use a different type of cookie for the crust?
Absolutely! While OREO cookies provide a delightful chocolate flavor, feel free to experiment with different cookies like graham crackers or even gluten-free options. Just ensure you adjust the amounts if necessary, and follow the same melting butter and mixing method for a great crust!
Delightful Frankenstein Mini Cheesecakes for Spooky Treats
Ingredients
Equipment
Method
- Preheat your oven to 350°F (175°C).
- Combine the crushed OREO cookies with melted butter in a mixing bowl and stir until thoroughly mixed. Form 1-inch balls and press them into the bottom of your mini cheesecake pan.
- In a separate bowl, beat the cream cheese with sugar, eggs, and vanilla until smooth and creamy, around 2-3 minutes.
- Add the flour to the cream cheese mixture and mix until combined, being careful not to overmix.
- Gradually mix in the green food coloring until your desired shade is achieved.
- Pour the cheesecake batter into each crust, filling each cavity almost to the top. Use a spatula to smooth the top if necessary.
- Bake for 15 minutes, until the edges are set but the center still jiggles slightly.
- Cool in the pan for about 30 minutes, then refrigerate for at least 1 hour.
- Dip the tops in melted chocolate and roll in chocolate sprinkles to decorate.
- Pipe features onto your cheesecakes using melted chocolate and place edible eyes on top.


Leave a Reply