
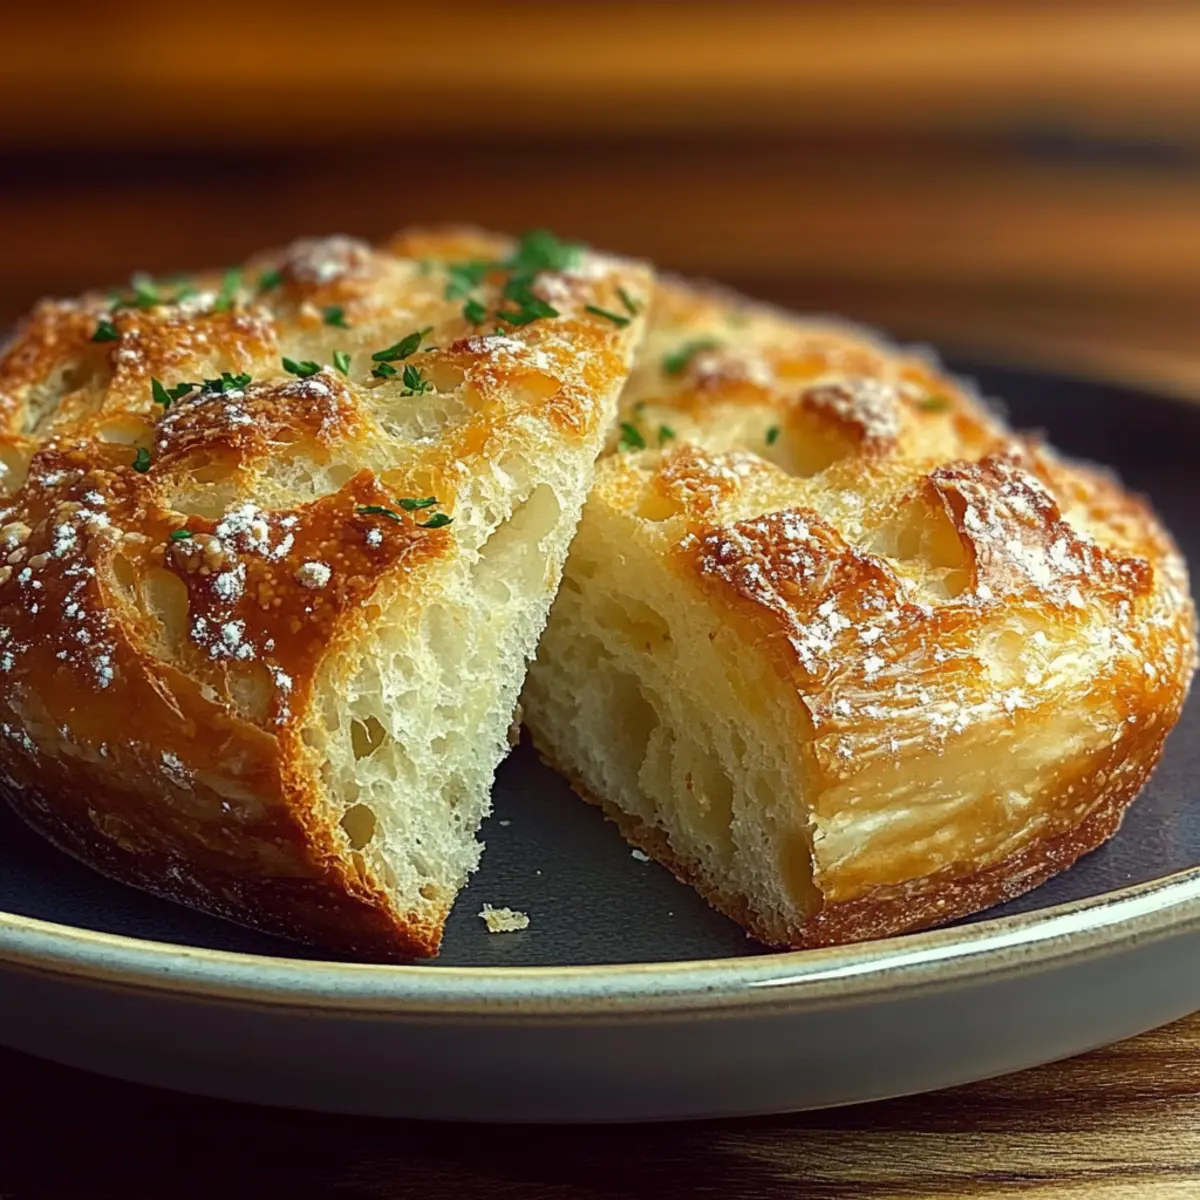
There’s something magical about the aroma of freshly baked bread wafting through your kitchen, isn’t there? Enter my Garlic Herb Dutch Oven Bread, an impressive yet simple recipe that transforms just a handful of ingredients into a golden, crusty masterpiece. This bread not only looks stunning but also offers a crowd-pleasing twist with its delightful mix of garlic and herbs. The best part? With minimal hands-on time and a long fermentation process, you can set it and forget it, leaving you free to tend to other tasks or simply enjoy a cup of tea. Whether you’re hosting friends or just craving comfort food, this recipe is sure to steal the show. Ready to dive into the art of bread-making? Let's knead our way to something truly delicious!
What makes this bread recipe special?
Simplicity, this Garlic Herb Dutch Oven Bread requires minimal ingredients and effort, making it perfect for both beginners and seasoned bakers alike.
Flavor explosion, the rich combination of garlic and fresh herbs adds a punch that will have your taste buds dancing.
Versatile, use this bread as a side for soups, as a base for sandwiches, or simply enjoy it warm with butter.
Time-saving, with its long fermentation process, you can prep it and move on to other tasks, returning to a beautifully risen dough.
Crowd-pleasing, serve warm at gatherings, and watch as everyone raves about your homemade masterpiece – they won’t believe it’s so easy!
Garlic Herb Dutch Oven Bread Ingredients
For the Dough
• All-purpose flour – 3 cups provide the perfect base for a chewy, crusty bread.
• Salt – 1 ¼ teaspoons enhances the flavors and balances the richness of the garlic.
• Instant yeast – ½ teaspoon helps the dough rise quickly and easily.
• Warm water – 1 ½ cups (about 110°F) activates the yeast for a fluffy texture.
• Olive oil – 3 tablespoons adds moisture and a hint of richness to the bread.
For the Flavor
• Garlic – 4 cloves minced infuse the bread with an aromatic flavor that’s simply irresistible.
• Fresh rosemary – 1 tablespoon chopped brings a woodsy note that pairs beautifully with garlic.
• Fresh thyme – 1 tablespoon chopped adds a subtle earthiness, balancing the bread's flavors.
• Fresh parsley – 1 tablespoon chopped gives a fresh burst that brightens each bite.
For Dusting
• Additional flour – Use as needed for dusting your work surface to prevent sticking while shaping the dough.
This delicious Garlic Herb Dutch Oven Bread is sure to impress family and friends alike!
Step‑by‑Step Instructions for Garlic Herb Dutch Oven Bread
Step 1: Prepare the Dry Ingredients
In a large mixing bowl, combine 3 cups of all-purpose flour, 1 ¼ teaspoons of salt, and ½ teaspoon of instant yeast. Stir these dry ingredients together until well mixed, ensuring an even distribution of the yeast and salt. This is the foundation for your Garlic Herb Dutch Oven Bread, so take a moment to get it right!
Step 2: Mix the Wet Ingredients
In a separate bowl, whisk together 1 ½ cups of warm water (around 110°F), 4 minced cloves of garlic, and 3 tablespoons of olive oil. Toss in 1 tablespoon each of chopped fresh rosemary, thyme, and parsley. Mix well until the garlic is distributed, infusing the wet mixture with flavorful herbs. This aromatic blend will give your bread a delightful taste.
Step 3: Combine Wet and Dry Mixtures
Pour the wet mixture into the bowl with the dry ingredients. Using a wooden spoon or your hands, stir until a shaggy, somewhat sticky dough forms. Remember, the dough will be wet and messy at this stage, but that’s perfectly fine! The combination of flavors is key to your Garlic Herb Dutch Oven Bread, so embrace the stickiness.
Step 4: Let the Dough Rise
Cover the bowl with plastic wrap or a clean kitchen towel to keep the warmth in. Set it aside at room temperature for 12 to 18 hours, allowing it to rise until it doubles in volume and the surface is bubbly. As it rises, the wonderful aromas will start to fill your kitchen, signaling that delicious homemade bread is on the way!
Step 5: Shape the Dough
Once the dough has risen impressively, dust a clean work surface with flour. Carefully turn out the dough onto the floured surface, while handling it gently to preserve its airy texture. With floured hands, shape the dough into a round loaf. Don’t knead it too much; you want to maintain that light, fluffy quality that defines a great Garlic Herb Dutch Oven Bread.
Step 6: Second Rise
Dust the top of your newly shaped loaf lightly with flour, then cover it with a kitchen towel to prevent drying. Allow it to rest for another 1 to 2 hours, or until it puffs up slightly. Your patience will be rewarded as the dough continues to rise, promising a beautifully airy loaf.
Step 7: Preheat the Dutch Oven
About 30 minutes before you're ready to bake, place a Dutch oven with its lid in the oven and preheat to 450°F (230°C). This step ensures your baking vessel is hot, creating the perfect crust on your Garlic Herb Dutch Oven Bread. Watch the temperature closely, as a properly heated Dutch oven will help achieve that gorgeous golden-brown exterior.
Step 8: Bake the Bread
Once preheated, carefully remove the Dutch oven from the oven and take off the lid. Gently place the shaped bread loaf inside, then cover it with the lid again. Bake the bread for 30 minutes with the lid on, allowing it to steam and create a perfect crust.
Step 9: Finish Baking
After 30 minutes, remove the lid from the Dutch oven. Continue baking for an additional 15 to 20 minutes, or until the bread is beautifully golden brown and crusty. Keep an eye out for that nice color, as this visual cue means your Garlic Herb Dutch Oven Bread is ready to shine.
Step 10: Cool and Slice
Once baked to perfection, transfer the bread to a wire rack to cool slightly before slicing. Letting it cool allows the interior to set, making it easier to slice. Now you have a warm, inviting Garlic Herb Dutch Oven Bread ready to be enjoyed by family and friends!
Make Ahead Options
These Garlic Herb Dutch Oven Bread are perfect for busy home cooks looking to save time during the week! You can prepare the dough up to 24 hours in advance, allowing you to mix the dry ingredients and wet ingredients the night before. Simply follow the first three steps, cover the dough, and let it rise at room temperature. On baking day, just shape your loaf and allow it to rest for another 1 to 2 hours before preheating your Dutch oven. To maintain quality, ensure it's covered with a kitchen towel to prevent drying. This way, you’ll serve warm, fresh Garlic Herb Dutch Oven Bread that’s just as delicious on a busy weeknight!
What to Serve with Garlic Herb Dutch Oven Bread
There's nothing quite like the aroma of warm, crusty bread paired with delightful sides that elevate your meal experience.
- Creamy Tomato Soup: The tangy richness of this soup contrasts beautifully with the garlic herb bread, creating a cozy pairing that warms the soul.
- Butter Garlic Shrimp: Juicy shrimp sautéed in butter and garlic marry perfectly with the herbaceous notes of your bread, making every bite a treat.
- Fresh Green Salad: A light mix of greens, cucumbers, and cherry tomatoes provides a refreshing balance against the warm, hearty bread. Add a zesty vinaigrette for an extra pop!
- Savory Cheese Platter: Pair with a selection of cheeses—brie, goat, or aged cheddar—to enhance the flavors of both bread and cheese, creating a culinary masterpiece.
- Roasted Vegetables: Seasonal veggies tossed in olive oil and herbs bring a medley of colors and flavors that complement the aromatic profile of the bread wonderfully.
- Herb-Infused Olive Oil: For a classic, simple dip, serve a dish of good olive oil infused with rosemary and thyme to truly highlight the herbaceous essence of your Garlic Herb Dutch Oven Bread.
- Red Wine: A glass of rich, fruity red wine enhances the flavors of both the bread and accompanying dishes, turning your meal into a delightful evening affair.
- Chocolate Chip Cookies: For dessert, indulge your sweet tooth with warm, gooey cookies that contrast the bread’s savory notes—a perfect way to end a comforting meal!
Garlic Herb Dutch Oven Bread Variations
Feel free to get creative and personalize your bread with these delightful variations that will tantalize your taste buds!
-
Whole Wheat: Substitute half of the all-purpose flour with whole wheat flour for a nuttier flavor and added fiber. This gives a heartier texture without sacrificing that delightful chew!
-
Spicy Twist: Add ½ teaspoon of red pepper flakes to the dry ingredients for a kick of heat. This fiery touch pairs beautifully with the garlic and herbs, perfect for those who love a bit of warmth.
-
Cheesy Goodness: Mix in 1 cup of shredded cheese (like cheddar or mozzarella) into the dough for a savory, cheesy delight. Imagine that melty goodness; it’s simply irresistible!
-
Herb Variations: Experiment with different herbs such as oregano, basil, or even dill to create unique flavor profiles. Each herb brings its own character, allowing for endless culinary adventures!
-
Garlic Lovers: For an extra garlicky bread, incorporate roasted garlic instead of minced garlic. Roasting mellows the flavor and adds a rich sweetness. Your kitchen will smell divine!
-
Olive Oil Infusion: Swap olive oil for flavored oils, such as rosemary or garlic oil, for an extra layer of flavor. This small change will elevate your bread to gourmet status!
-
Nutty Addition: Add a ½ cup of chopped nuts, like walnuts or pecans, to the dough for unexpected texture and taste. These crunchy bites add a delightful surprise to every slice.
-
Sweet Option: Elevate your bread to the breakfast table by adding ¼ cup of honey or maple syrup for a hint of sweetness. This variation works wonders when paired with cream cheese or butter!
Explore these options and let your creativity flow, ensuring each loaf is uniquely yours! Try pairing your Garlic Herb Dutch Oven Bread with a comforting bowl of soup or even as a base for your favorite sandwiches – the possibilities are endless. Don’t forget to check out our tips on how to store and freeze your bread for future indulgence!
How to Store and Freeze Garlic Herb Dutch Oven Bread
Room Temperature: Store the bread in a breadbox or wrapped in a kitchen towel for up to 3 days. This helps retain its crust while keeping the inside soft and delicious.
Fridge: If you want to extend the shelf life, wrap the bread tightly in plastic wrap and place it in the fridge for up to a week. Just remember that refrigeration can make the crust less crispy.
Freezer: To freeze, wrap the cooled Garlic Herb Dutch Oven Bread tightly in aluminum foil or a freezer-safe bag and store it for up to 3 months. Thaw overnight in the fridge before enjoying.
Reheating: For the best results, reheat the bread in a preheated oven at 350°F (175°C) for about 10-15 minutes until warmed through and the crust is crispy again.
Expert Tips for Garlic Herb Dutch Oven Bread
Hydration is Key: Ensure your dough is sticky—this higher hydration level is what creates that airy texture you’re looking for in your Garlic Herb Dutch Oven Bread.
Don’t Rush the Rise: Allow enough time for the dough to rise properly. Rushing this step can lead to dense bread; patience is essential!
Preheat Thoroughly: Make sure the Dutch oven is fully preheated before adding the dough. This maximizes steam and results in a crusty, golden exterior.
Gentle Shaping: When shaping your dough, handle it gently to preserve the bubbles formed during fermentation. Overworking can lead to a tough loaf.
Cool Before Slicing: Allow your bread to cool on a wire rack for at least 30 minutes before slicing. This lets the structure set, giving you perfect slices!
Garlic Herb Dutch Oven Bread Recipe FAQs
How do I choose the right flour for this recipe?
Absolutely! It's best to use all-purpose flour for a perfect balance of chewiness and crustiness. If you want a nuttier flavor, you could try mixing in some whole wheat flour, but keep in mind it may slightly alter the texture.
How should I store Garlic Herb Dutch Oven Bread?
Store your bread at room temperature in a breadbox or wrapped in a kitchen towel for up to 3 days to keep it fresh. For longer storage, wrap tightly in plastic wrap and refrigerate for up to a week. Just remember, refrigeration can soften the crust.
Can I freeze Garlic Herb Dutch Oven Bread?
Absolutely! To freeze your Garlic Herb Dutch Oven Bread, wrap it tightly in aluminum foil or in a freezer-safe bag. It will maintain its quality for up to 3 months. When you're ready to enjoy, thaw it overnight in the fridge, then reheat in a preheated oven at 350°F for about 10-15 minutes to regain that lovely crust.
What should I do if my dough doesn’t rise?
If your dough isn’t rising, check that your yeast is fresh and properly activated. Ensure your water temperature is around 110°F, which is ideal for activation. If your kitchen is too cold, try moving the dough to a warmer spot, like near an oven or in a sunny area, to encourage rising.
Is this bread suitable for people with dietary restrictions?
Yes, this Garlic Herb Dutch Oven Bread can accommodate various dietary needs. It’s vegetarian and can be kept dairy-free if you substitute the olive oil for any other vegetable oil. However, make sure to check for any allergies, particularly with herbs and gluten in the flour.
How can I troubleshoot if my bread is too dense?
If your bread turns out dense, it may be due to insufficient rise time or handling the dough too much while shaping. Make sure to give it ample resting time for the yeast to work its magic—letting it rest for 12 to 18 hours is ideal. When shaping, be gentle; avoid kneading too much as you want to keep that airy structure!
Irresistible Garlic Herb Dutch Oven Bread for Cozy Evenings
Ingredients
Equipment
Method
- In a large mixing bowl, combine 3 cups of all-purpose flour, 1 ¼ teaspoons of salt, and ½ teaspoon of instant yeast. Stir until well mixed.
- In a separate bowl, whisk together 1 ½ cups of warm water, 4 minced cloves of garlic, and 3 tablespoons of olive oil. Add 1 tablespoon each of chopped fresh rosemary, thyme, and parsley, and mix well.
- Pour the wet mixture into the bowl with the dry ingredients. Stir until a shaggy, somewhat sticky dough forms.
- Cover the bowl with plastic wrap or a clean kitchen towel and set aside at room temperature for 12 to 18 hours.
- Dust a clean work surface with flour and turn out the dough onto the floured surface. Shape it into a round loaf without kneading too much.
- Dust the top of the shaped loaf lightly with flour, cover with a kitchen towel, and let it rest for another 1 to 2 hours.
- About 30 minutes before baking, preheat a Dutch oven to 450°F (230°C).
- Carefully remove the Dutch oven, place the shaped loaf inside, cover with the lid, and bake for 30 minutes.
- After 30 minutes, remove the lid and continue baking for another 15 to 20 minutes until golden brown.
- Transfer the bread to a wire rack to cool slightly before slicing.


Leave a Reply