
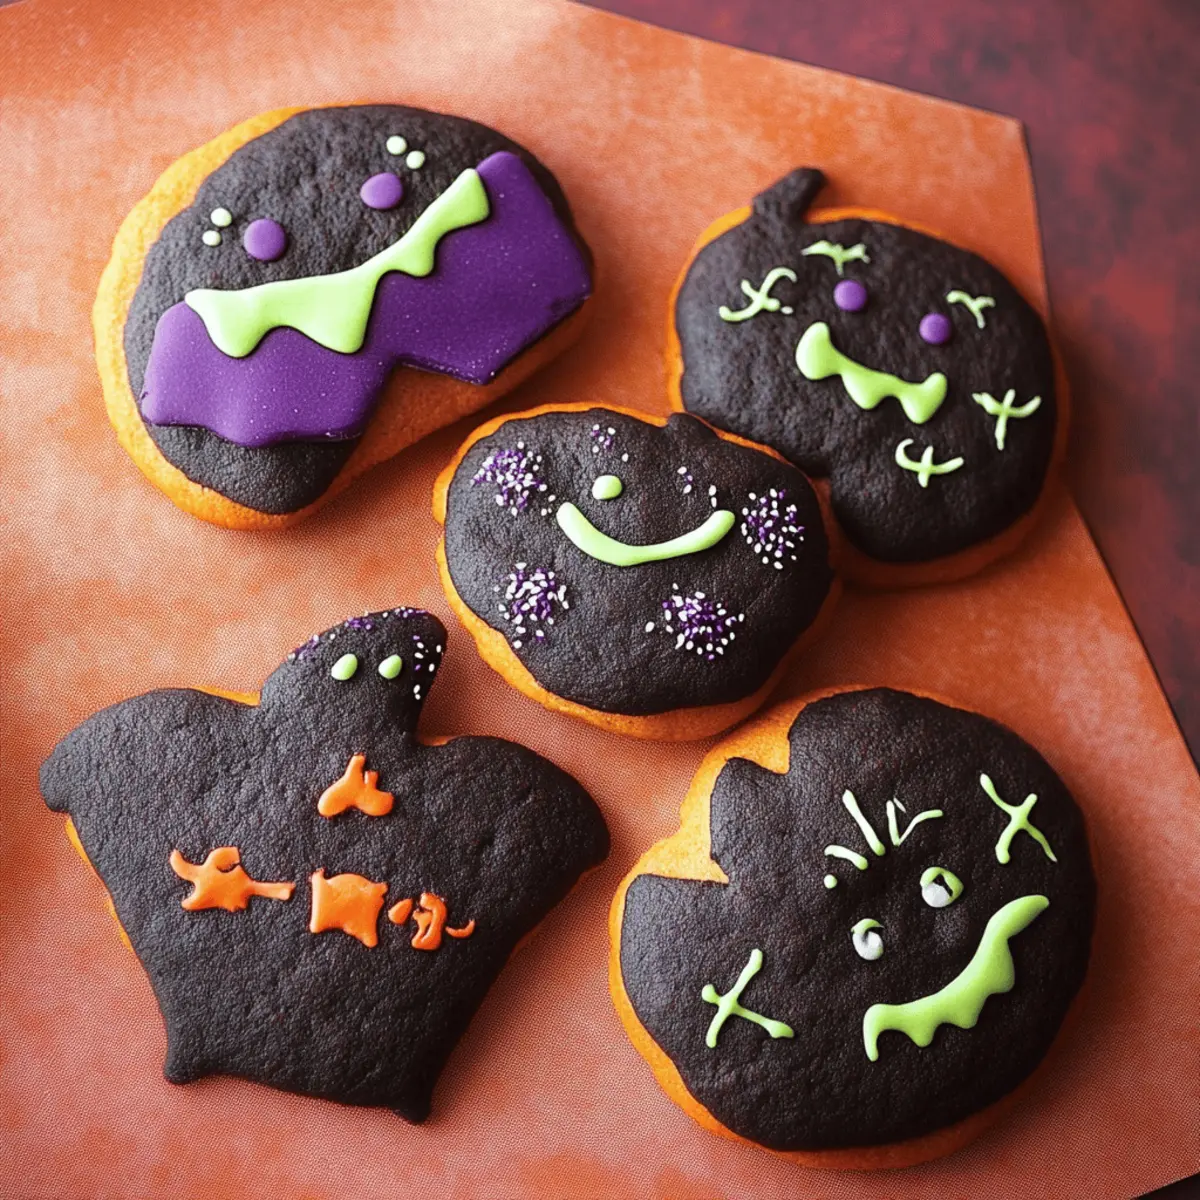
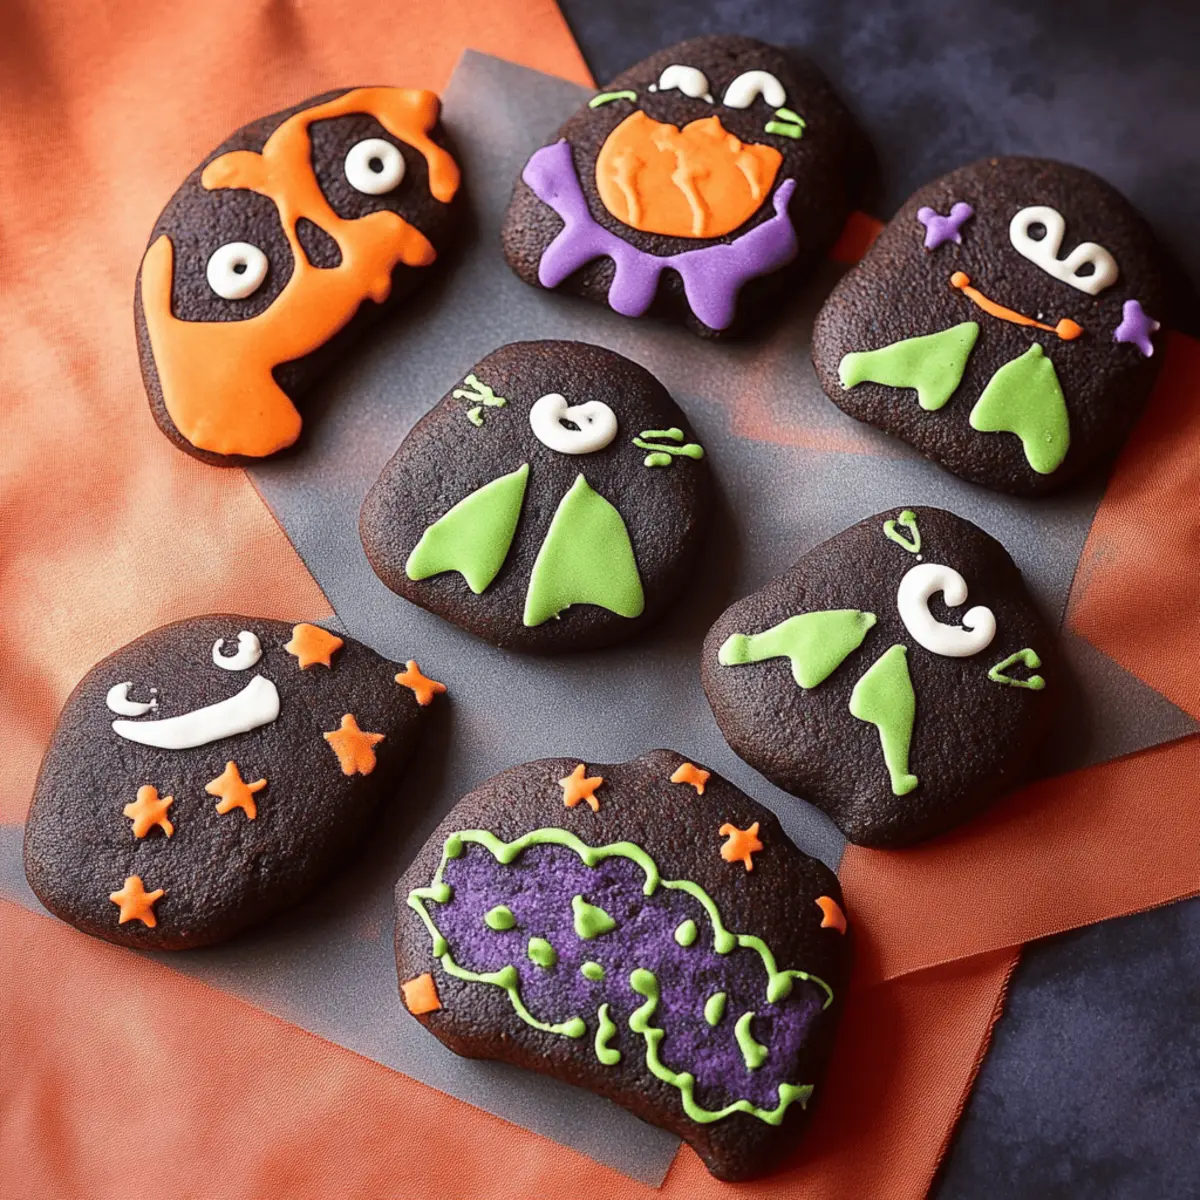
As the crisp autumn air settles in, there's a thrilling excitement in the kitchen, especially when it comes to baking Halloween Decorated Cookies. If you’ve ever felt the joy of crafting spooky shapes with vibrant royal icing, you know just how rewarding these little treats can be. This recipe is not only fun but also offers a quick prep time, perfect for those busy weeknights leading up to Halloween. Plus, it's an excellent way to engage kids or friends in a delightful baking session. Imagine the laughter and creativity as you whip up festive ghouls and goblins that are sure to impress at any gathering. Are you ready to let your imagination run wild and make these cookies a frightful delight?

Why are Halloween Decorated Cookies a must-try?
Delightful Creativity: Unleash your imagination with these cookies, perfect for decorating into spooky shapes that will be the hit of your Halloween party!
Quick Prep Time: With just 45 minutes of prep, you'll have a delicious treat ready in no time.
Kid-Friendly Fun: Involve your little ghosts and goblins in the decorating process—watch their eyes light up with excitement!
Versatile Shapes: From bats to pumpkins, the cookie cutters you choose can reflect your unique Halloween style.
Impressive Treats: Bring crowd-pleasing goodies to your gatherings that not only taste amazing but look simply stunning!
For more delightful baking ideas, check out our delicious chocolate chip cookie variations.
Halloween Decorated Cookies Ingredients
Get ready to bake spooky delights!
For the Cookie Dough
- 1 cup butter – makes for a rich, creamy base that gives cookies a delightful texture.
- 3 cups powdered sugar – adds sweetness and helps create that perfect cookie structure.
- 1 large egg – binds the ingredients together, ensuring your cookies hold their shape.
- 3 cups all-purpose flour – forms the backbone of the cookies, providing the structure needed for decorating.
- ½ cup black cocoa powder – gives your cookies a deep, dark color and a rich chocolate flavor.
- ½ cup Dutch process cocoa powder – enhances the chocolatey taste while balancing the sweetness.
- ½ teaspoon salt – a crucial ingredient that enhances flavor and balances sweetness.
For Decorating
- Royal icing – the star of the show, use it in varying thicknesses for beautiful, intricate designs!
Step‑by‑Step Instructions for Halloween Decorated Cookies
Step 1: Cream the Butter
In the bowl of a stand mixer fitted with the paddle attachment, cream 1 cup of butter on medium speed until it's creamy and smooth, taking about 2-3 minutes. This creates a rich base for your Halloween Decorated Cookies, so get it nice and fluffy before moving on.
Step 2: Add the Sugar
Next, add 3 cups of powdered sugar to the creamed butter. Beat on medium speed until the mixture is light, fluffy, and fully incorporated, approximately 3-5 minutes. You want to achieve a sweet and airy texture that will support the cookie dough's stability.
Step 3: Incorporate the Egg
Now, crack in 1 large egg and mix on low speed until everything is well combined, which should take about 1-2 minutes. This will bind the ingredients and enhance the overall flavor of your Halloween Decorated Cookies, making them moist and delicious.
Step 4: Whisk the Dry Ingredients
In a separate bowl, sift together 3 cups of all-purpose flour, ½ cup of black cocoa powder, ½ cup of Dutch process cocoa powder, and ½ teaspoon of salt. Whisk gently until they blend perfectly. This step ensures that your dry ingredients are lump-free and ready to be combined with the wet mixture.
Step 5: Combine Wet and Dry Ingredients
Gradually add the dry mixture to the wet ingredients in the stand mixer. Mix on low speed just until the flour is incorporated, typically around 1-2 minutes. Be careful not to overmix; you want a cohesive dough ready for shaping into your Halloween Decorated Cookies.
Step 6: Form the Dough
Turn the dough onto a clean surface and gently bring it together into a ball using your hands. Knead slightly for about 1 minute, then flatten it into a disc about 1-inch thick. This will help the dough chill evenly, ensuring the perfect texture for cookie cutting later.
Step 7: Chill the Dough
Wrap the dough tightly in cling wrap and place it in the refrigerator to chill for at least 30-45 minutes, though you can keep it for up to 2 days. Chilling the dough makes it firmer and easier to roll out, which is essential for your Halloween Decorated Cookies.
Step 8: Roll Out the Dough
After chilling, roll out the dough between two sheets of parchment paper until it's about 4 mm thick. This thickness is ideal for shaping spooky cookies that will hold their design during baking, so take your time to get it just right!
Step 9: Cut and Chill Shapes
Use your favorite cookie cutters to cut out spooky shapes from the rolled dough. Place them on a lined baking tray, then chill in the refrigerator for an hour or overnight. This extra chilling step helps the cookies maintain their shape while baking for your Halloween Decorated Cookies.
Step 10: Preheat the Oven
Preheat your oven to 160°C (320°F) as you wait. This ensures that your cookies will bake evenly and come out perfectly golden. Timing this step while the cookies chill is a smart way to maximize efficiency!
Step 11: Bake the Cookies
Once preheated, bake the cookies for about 10 minutes. Keep an eye on them; they should be set but not too hard, maintaining a soft center. The aroma of these Halloween Decorated Cookies will fill your kitchen with delightful anticipation!
Step 12: Cool and Decorate
Allow the cookies to cool on the baking sheet for 5 minutes, then transfer them to a cooling rack to cool completely. Once cooled, it's time to unleash your creativity and decorate with royal icing to bring your Halloween Decorated Cookies to life!
Halloween Decorated Cookies Variations & Substitutions
Feel free to explore these delightful twists that make your Halloween Decorated Cookies even more exciting!
- Gluten-Free: Substitute all-purpose flour with a gluten-free blend to make these cookies accessible for everyone.
- Chocolate Overload: Add an extra ¼ cup of Dutch process cocoa powder for a more intense chocolate flavor that chocolate lovers will adore.
- Spicy Kick: Mix in ½ teaspoon of cinnamon or chili powder to the dough for a warm, spicy surprise that adds depth to each bite.
- Nutty Twist: Incorporate 1 cup of finely chopped walnuts or pecans into the dough for a nutty texture that pairs perfectly with the chocolate cookies.
- Royal Icing Color: Use food coloring in your royal icing to create vibrant hues that will make your cookies pop! Imagine deep orange pumpkins or ghostly white ghouls decorating your platter.
- Extra Crunch: Experiment with adding crushed candy corn or toffee bits into the dough for a delightful crunch and festive flavor surprise.
- Zesty Freshness: Consider adding the zest of one orange or lemon to the dough for a refreshing citrus note that brightens the chocolate flavor.
Feel inspired? There’s always room for creativity, whether you’re crafting Halloween Decorated Cookies or whipping up delightful chocolate chip cookie variations! Don’t hesitate to mix and match these ideas to find your perfect combination. Happy baking!
Expert Tips for Halloween Decorated Cookies
Chill Properly: Make sure to chill the dough for at least 30-45 minutes. This helps the cookies maintain their shapes and prevents spreading during baking.
Don’t Overmix: When combining wet and dry ingredients, mix just until incorporated. Overmixing can result in tough cookies, affecting your Halloween Decorated Cookies’ texture.
Uniform Thickness: Roll out the dough evenly to about 4 mm thick. Uniform thickness ensures all cookies bake evenly, so you’ll have perfectly shaped goodies.
Watch Baking Time: Bake for about 10 minutes, keeping an eye on them towards the end. Cookies should be set but still soft in the center for the best flavor and texture.
Use Quality Icing: Invest in good quality royal icing. The right consistency will make decorating easy and enjoyable, bringing your Halloween Decorated Cookies to life!
How to Store and Freeze Halloween Decorated Cookies
Room Temperature: Store your Halloween Decorated Cookies in an airtight container at room temperature for up to 3 days to keep them fresh and delicious.
Fridge: For longer storage, place the cookies in the fridge in a sealed container for up to 7 days, but be aware that refrigeration may slightly alter their texture.
Freezer: Freeze undecorated cookies for up to 3 months by wrapping them in plastic wrap and placing them in a freezer bag. Thaw at room temperature before decorating.
Reheating: If you've frozen decorated cookies, allow them to thaw completely, then gently warm them in the oven at a low temperature for a few minutes to restore some softness.
Make Ahead Options
These Halloween Decorated Cookies are perfect for busy home cooks who want to save time during the festive season! You can prepare the cookie dough up to 3 days in advance by chilling it in the refrigerator. Simply wrap the dough tightly in cling wrap to prevent it from drying out. Additionally, you can roll out and cut your spooky shapes, then chill them on a lined baking tray for up to 24 hours before baking. When you're ready to bake your Halloween Decorated Cookies, just preheat the oven and bake them directly from the fridge for deliciously fresh cookies that look just as stunning as ones made on the same day!
What to Serve with Halloween Decorated Cookies
As you gather your friends and family to enjoy these festive treats, consider pairing them with delightful sides and drinks that elevate the Halloween spirit.
- Warm Apple Cider: The sweet and spiced flavors of this drink perfectly complement the rich chocolate cookies while evoking cozy autumn vibes.
- Ghostly Marshmallow Treats: These fun, no-bake treats offer a chewy texture that contrasts beautifully with the crisp edges of your decorated cookies.
- Pumpkin Spice Cupcakes: A seasonal favorite, these cupcakes bring warm spices that echo the flavors of fall, creating a festive dessert table.
- Candy Corn & Nut Mix: A crunchy, colorful mix that adds a playful texture, making it an exciting contrast to the soft cookie treat.
- Chocolate Dipped Strawberries: The fresh burst of flavor from ripe strawberries balances the sweetness of the cookies, making them a delightful addition.
- Vanilla Ice Cream: This creamy classic can be served alongside warm cookies for a memorable dessert experience that combines temperature and texture!
- Hot Chocolate Bar: Set up a DIY hot chocolate station with various toppings. This fun activity will enchant your guests and pair delightfully with the cookies.
- Spooky Fruit Salad: A mix of seasonal fruits like oranges, apples, and grapes tossed with a splash of citrus; it's refreshing and festive at the same time.
- Pumpkin Ale: This seasonal brew offers a flavorful punch that harmonizes wonderfully with the chocolatey notes of the Halloween Decorated Cookies.
Halloween Decorated Cookies Recipe FAQs
What’s the best way to select ripe ingredients for Halloween Decorated Cookies?
Absolutely! For the best results, ensure your butter is at room temperature before creaming. Look for high-quality butter as it significantly affects flavor. The egg should be fresh, ideally at room temperature as well, for better incorporation into the dough.
How should I store my Halloween Decorated Cookies and how long do they last?
Store your cookies in an airtight container at room temperature for up to 3 days to enjoy their best taste and texture. If you prefer, you can refrigerate them in a sealed container for about 7 days, though it may slightly alter their delightful crunch.
Can I freeze my Halloween Decorated Cookies? What’s the process?
Definitely! To freeze your cookies, wrap each undecorated cookie tightly in plastic wrap and then place them in a freezer bag. They can be frozen for up to 3 months. When you’re ready to decorate, simply thaw them at room temperature for about 1-2 hours before getting creative with the icing!
What should I do if my cookie dough is too crumbly?
If you're facing crumbly dough that won't hold together, it likely needs a bit of moisture. Try adding a teaspoon of milk or water and mix until the dough comes together. This should smooth things out, allowing for easier rolling and cutting into shapes.
Are there any dietary considerations I should keep in mind for Halloween Decorated Cookies?
Absolutely! Always check for allergies, especially with common ingredients like eggs and gluten in flour. For those with allergies, consider using egg substitutes like flaxseed meal or applesauce. Additionally, you can opt for gluten-free flour blends to ensure everyone can enjoy these spooky treats.
Can I use different types of cocoa powder in my Halloween Decorated Cookies?
Very much so! If you don't have black cocoa powder, you can use regular unsweetened cocoa powder instead. Keep in mind, though, that the color will be lighter and the flavor may differ slightly. Experimenting with different cocoa types can also lead to varied flavors, making it fun to find your favorite combination!

Sweet Spooky Halloween Decorated Cookies to Impress Your Guests
Ingredients
Equipment
Method
- Cream the Butter: In the bowl of a stand mixer fitted with the paddle attachment, cream 1 cup of butter on medium speed until it's creamy and smooth, taking about 2-3 minutes.
- Add the Sugar: Add 3 cups of powdered sugar to the creamed butter. Beat on medium speed until the mixture is light, fluffy, and fully incorporated, approximately 3-5 minutes.
- Incorporate the Egg: Crack in 1 large egg and mix on low speed until everything is well combined, which should take about 1-2 minutes.
- Whisk the Dry Ingredients: In a separate bowl, sift together 3 cups of all-purpose flour, ½ cup of black cocoa powder, ½ cup of Dutch process cocoa powder, and ½ teaspoon of salt. Whisk gently until they blend perfectly.
- Combine Wet and Dry Ingredients: Gradually add the dry mixture to the wet ingredients in the stand mixer. Mix on low speed just until the flour is incorporated, typically around 1-2 minutes.
- Form the Dough: Turn the dough onto a clean surface and gently bring it together into a ball using your hands. Knead slightly for about 1 minute, then flatten it into a disc about 1-inch thick.
- Chill the Dough: Wrap the dough tightly in cling wrap and place it in the refrigerator to chill for at least 30-45 minutes.
- Roll Out the Dough: After chilling, roll out the dough between two sheets of parchment paper until it's about 4 mm thick.
- Cut and Chill Shapes: Use your favorite cookie cutters to cut out spooky shapes from the rolled dough. Place them on a lined baking tray, then chill in the refrigerator for an hour or overnight.
- Preheat the Oven: Preheat your oven to 160°C (320°F) as you wait.
- Bake the Cookies: Once preheated, bake the cookies for about 10 minutes.
- Cool and Decorate: Allow the cookies to cool on the baking sheet for 5 minutes, then transfer them to a cooling rack to cool completely.


Leave a Reply