
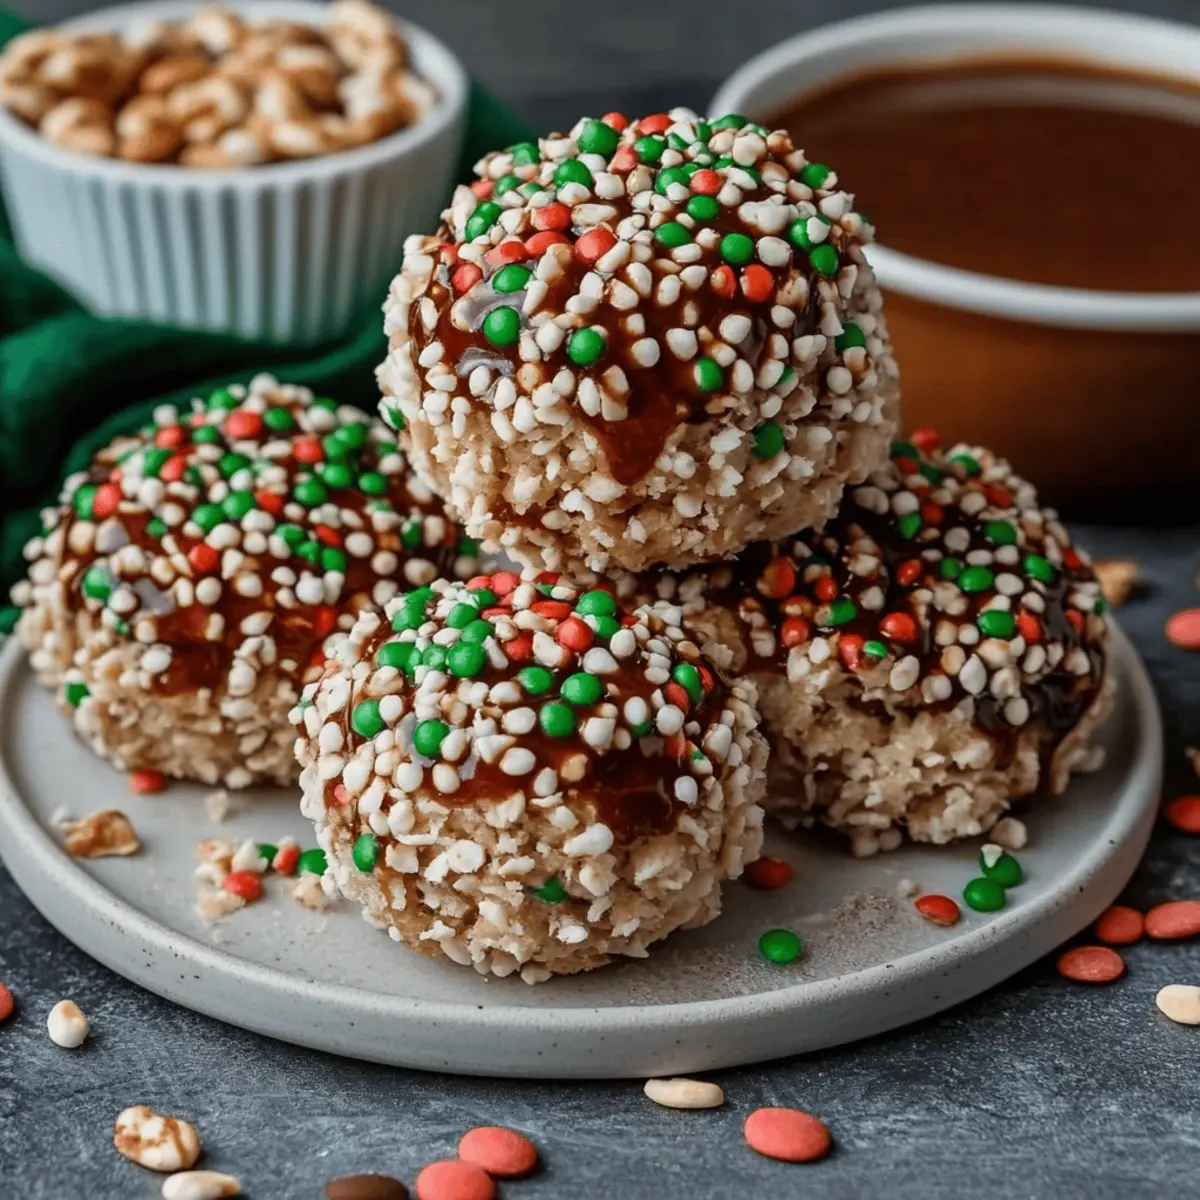
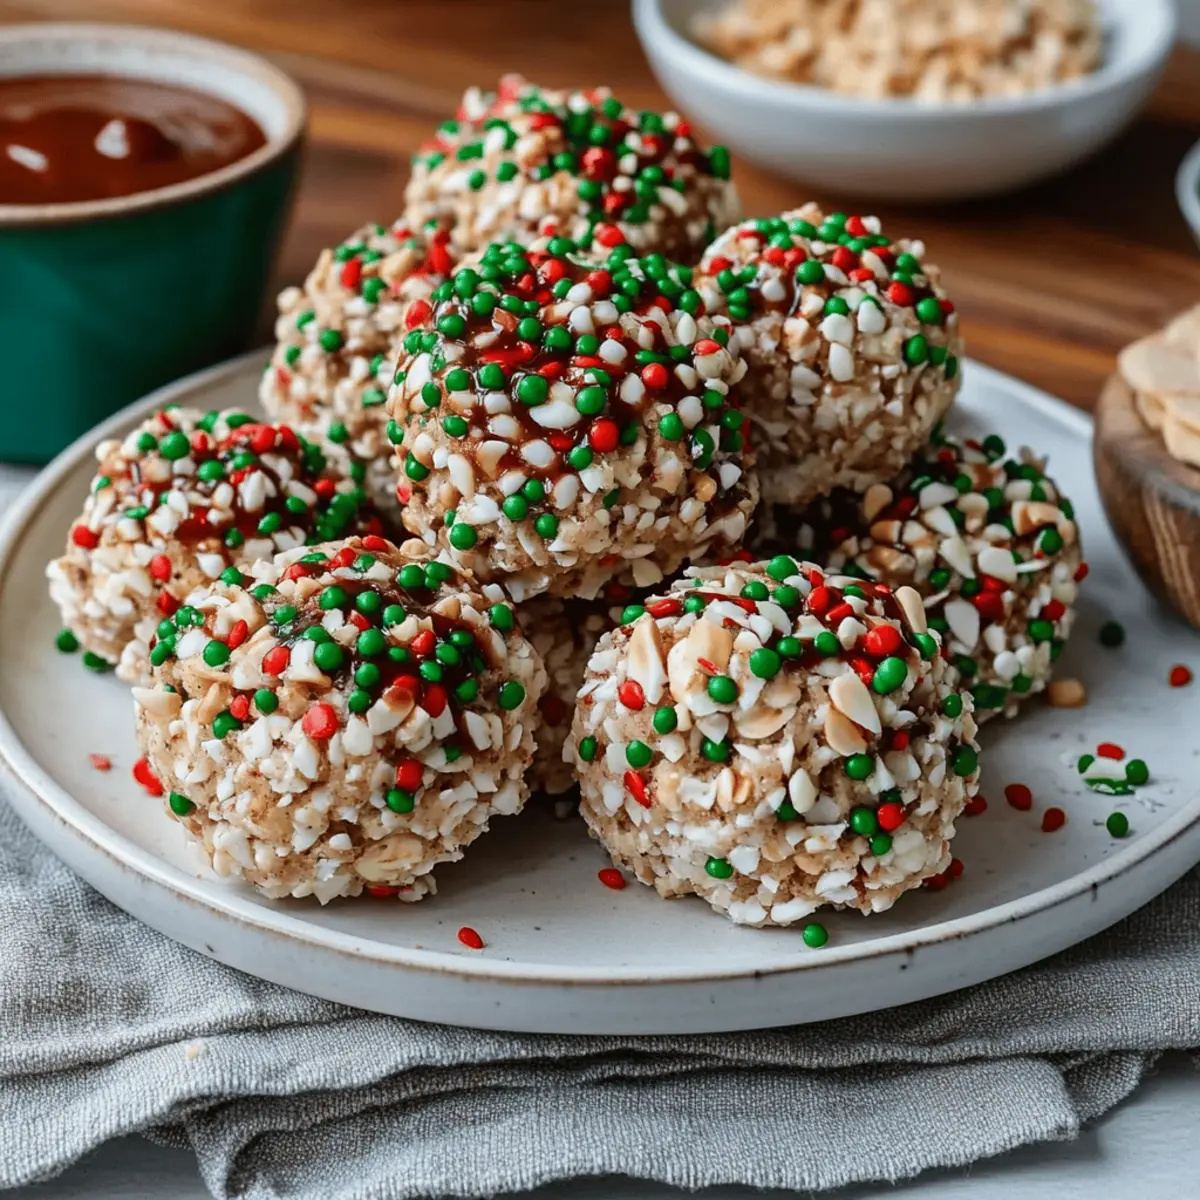
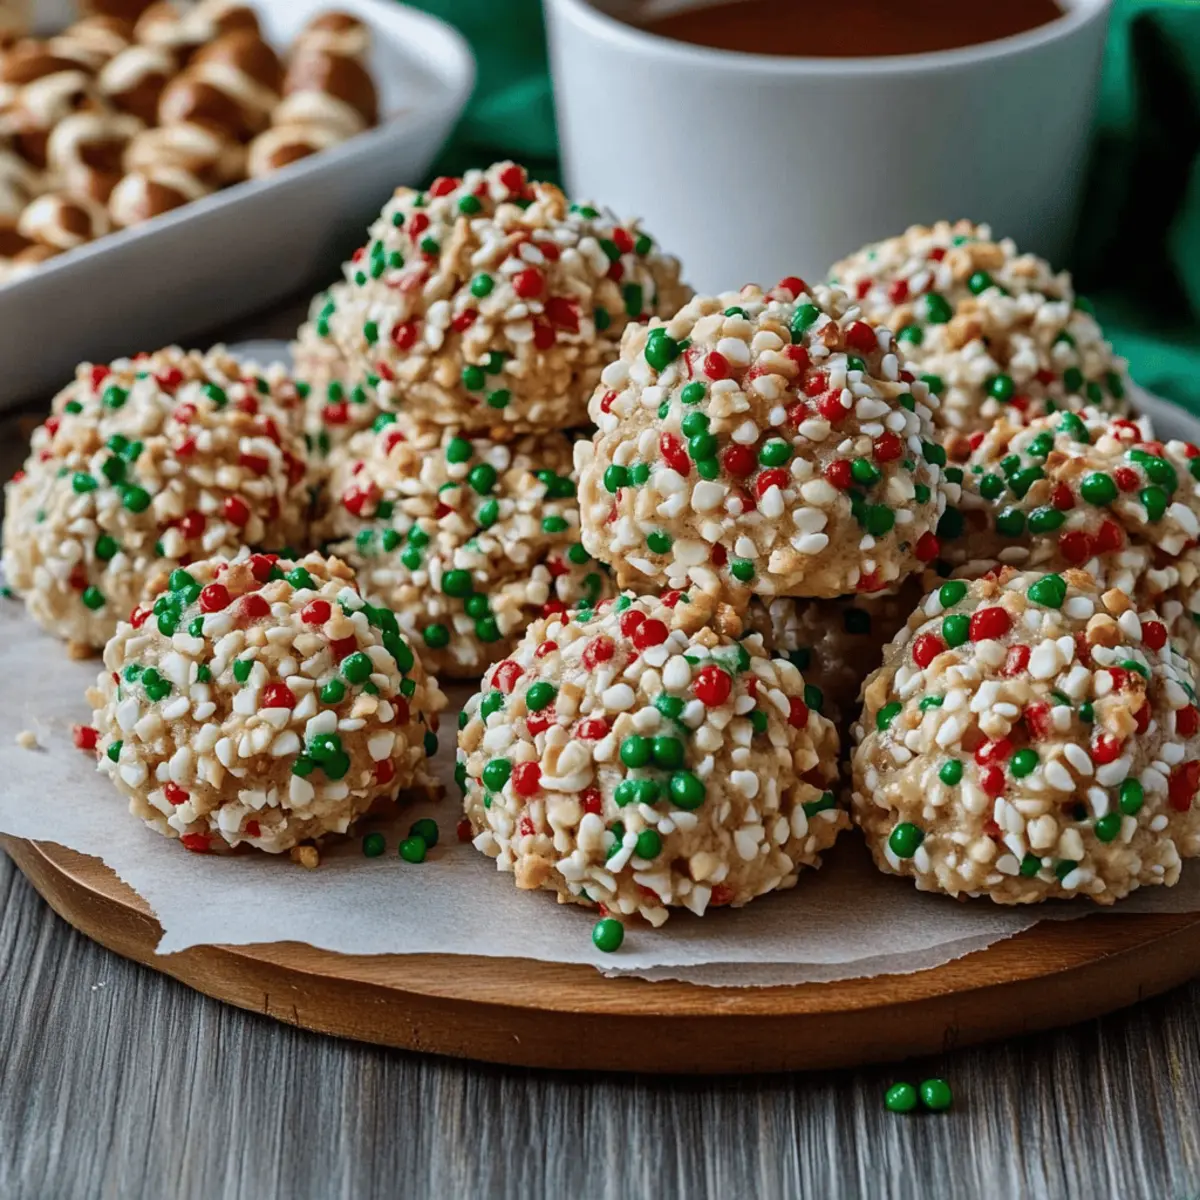
As I stood in the kitchen, the sweet, nutty aroma of melting peanut butter filled the air, instantly transporting me back to my childhood. There's something magical about the simplicity of no-bake desserts, and these Chocolate Rice Krispie Balls are no exception. Not only are they a breeze to whip up, but they also cater to your craving for both sweet and crunchy in every delightful bite. With a handful of ingredients, this versatile treat allows for endless possibilities; change up the nut butter, get creative with different toppings, or enjoy them straight up. These little gems are perfect for stashing away for a late-night snack or serving at your next gathering. Are you ready to dive into a delightful world of chocolatey goodness? Let’s roll up our sleeves!
Why are Chocolate Rice Krispie Balls a must-try?
Simplicity: With just a few staples, these no-bake treats come together in minutes, making them perfect for any skill level.
Decadent Flavors: The rich combination of peanut butter and chocolate creates a treat that both kids and adults will crave!
Versatile: Feel free to experiment with different nut butters or toppings, allowing for personalized creations every time!
Crowd-Pleaser: Great for gatherings, these bite-sized delights will disappear faster than you can say “delicious.”
Easy Storage: They keep wonderfully in the fridge, so you can enjoy them anytime the sweet tooth strikes! If you're looking for more quick and delightful treats, check out our other snack ideas!
Chocolate Rice Krispie Balls Ingredients
Get ready to whip up these delightful treats!
For the Base
- Creamy or crunchy peanut butter – A smooth consistency makes these chocolate rice Krispie balls easy to form and deliciously nutty.
- Unsalted butter – It adds richness and keeps the mixture from being too dry.
- Powdered sugar – This sweetens the base and gives it that melt-in-your-mouth texture.
- Vanilla extract – A splash of this enhances the overall flavor of the chocolate rice Krispie balls beautifully.
For the Crunch
- Crispy rice cereal – The star ingredient that provides that satisfying crunch and holds the candies together.
For the Coating
- Semi-sweet or dark chocolate chips or melting wafers – Melting these will cover your balls in a rich chocolate layer; choose according to your sweetness preference.
Feeling inspired? Let's create something magical in the kitchen together!
Step‑by‑Step Instructions for Chocolate Rice Krispie Balls
Step 1: Mix the Base
In a large bowl, combine 1 cup of creamy or crunchy peanut butter with 4 tablespoons of unsalted butter. Using a spatula, mix these two ingredients together until smooth and creamy, which should take about 2-3 minutes. This will create a rich base for your Chocolate Rice Krispie Balls, so make sure there are no lumps before moving on.
Step 2: Add Flavoring
Next, pour in 1 teaspoon of vanilla extract and mix it thoroughly into the peanut butter and butter mixture. Stir until the extract is fully blended, usually around 1-2 minutes. This step enhances the flavor beautifully, infusing your Chocolate Rice Krispie Balls with a delightful aroma that will tempt your taste buds.
Step 3: Sweeten the Mixture
Gradually add 2 cups of powdered sugar into the bowl, mixing continuously until you achieve a thick, creamy consistency. This should take about 3-4 minutes. The sugar will sweeten your mixture and help it hold together, making it essential for the perfect texture of your Chocolate Rice Krispie Balls.
Step 4: Fold in the Crunch
Gently fold in 1 ½ cups of crispy rice cereal, ensuring each piece is evenly coated in the peanut butter mixture. Take your time here, about 2-3 minutes, as this cereal provides the crunch that complements the rich flavors of Chocolate Rice Krispie Balls. You'll want to see the cereal fully incorporated without it breaking apart.
Step 5: Shape the Balls
Using your hands, scoop out portions of the mixture and shape them into 1-inch balls. Place each ball onto a parchment-lined baking sheet as you go. This step should take approximately 5 minutes, and you’ll know it’s done when you have a beautiful array of Chocolate Rice Krispie Balls ready for chilling!
Step 6: Chill and Firm Up
Once shaped, place the baking sheet with the balls in the freezer and chill for at least 20 minutes. This will help firm them up, making them easier to coat in chocolate later. After 20 minutes, the balls should feel slightly firm to the touch, signaling they're ready for the next step.
Step 7: Melt the Chocolate
While the balls chill, melt 8-10 ounces of semi-sweet or dark chocolate using a double boiler or microwave. Stir constantly until smooth, about 2-3 minutes in the microwave (checking every 30 seconds) or until fully melted using the double boiler. If the chocolate seems too thick, stir in 1-2 teaspoons of vegetable oil for a smoother consistency.
Step 8: Coat the Balls
Using a toothpick or dipping tool, dip each chilled ball into the melted chocolate, ensuring it's evenly coated. Allow any excess chocolate to drip off, then carefully return the coated Chocolate Rice Krispie Balls back to the parchment-lined sheet. This should be done quickly for the chocolate to adhere well.
Step 9: Set and Enjoy
Finally, let the chocolate-coated balls set completely at room temperature or place them in the fridge for about 10-15 minutes. You'll know they're ready when the chocolate is firm to the touch. Once set, your delicious Chocolate Rice Krispie Balls are ready to be enjoyed as a sweet, crunchy snack!
What to Serve with Chocolate Rice Krispie Balls?
Indulging in these delightful treats opens the door to a world of delicious pairings that enhance the experience.
-
Refreshing Fruit Salad: A light and fruity accompaniment balances the rich chocolate and peanut butter flavors, providing a palate-cleansing contrast.
-
Vanilla Ice Cream: Serving a scoop of creamy vanilla ice cream brings a classic touch, perfectly complementing the crunchy texture of the chocolate rice Krispie balls.
-
Nutty Granola: Crunchy granola made with nuts and honey adds an earthy flavor dimension, creating a delightful texture harmony with each bite.
-
Caramel Dipping Sauce: For those who feel adventurous, a drizzle of warm caramel elevates the sweetness, turning an ordinary snack into a gourmet experience.
-
Hot Chocolate: Sip on a mug of rich hot chocolate for a cozy pairing. The warmth enhances the chocolate, making each sweet bite even more irresistible.
-
Coffee or Espresso: The bold bitterness of coffee contrasts beautifully with the sweet, crunchy treats, making for an energizing afternoon snack.
-
Chewy Cookies: Consider pairing with some homemade oatmeal or chocolate chip cookies for a deliciously indulgent dessert spread that will please all ages.
-
Chocolate-Covered Strawberries: For an elegant touch, these fruity bites add freshness while mirroring the chocolatey essence of your treats.
-
Chilled Milk: Can't go wrong with a classic! The creaminess of milk is the perfect way to savor these bites, especially for the kids.
-
Sparkling Water with Lemon: To cleanse the palate, serve sparkling water with a hint of lemon for a refreshing finish after each sweet morsel.
Make Ahead Options
These Chocolate Rice Krispie Balls are perfect for meal prep enthusiasts! You can prepare the base mixture up to 24 hours in advance; just shape the balls and chill them in the freezer. Store the uncoated balls in an airtight container to maintain their freshness and texture. When you're ready to finish them, simply melt the chocolate (this can be done in 3-5 minutes) and coat the chilled balls. Place the coated Chocolate Rice Krispie Balls back on the parchment-lined sheet and allow the chocolate to set completely before enjoying. This approach not only saves time but ensures you can whip up a delightful treat at a moment's notice!
How to Store and Freeze Chocolate Rice Krispie Balls
Fridge: Store your Chocolate Rice Krispie Balls in an airtight container in the fridge for up to 1 week. They’ll stay fresh and ready to enjoy whenever the sweet tooth strikes!
Freezer: For longer storage, freeze the balls in a single layer on a baking sheet until solid, then transfer to a zip-top bag for up to 2 months. Simply thaw in the fridge before serving!
Reheating: There's no need to reheat these no-bake treats, as they are best enjoyed chilled. You can grab them straight from the fridge or freezer for a refreshing snack!
Wrap It Up: Ensure each ball is individually wrapped in plastic wrap or parchment before freezing. This will keep them from sticking together and maintain their chocolatey goodness!
Expert Tips for Chocolate Rice Krispie Balls
Perfect Peanut Butter: Use room temperature peanut butter for easy mixing. If it’s refrigerated, it can be difficult to blend with the butter and sugar.
Chill Effectively: Don’t skip the chilling step! This firms up the mixture, making it easier to shape into balls that hold together beautifully.
Smooth Coating: If your chocolate isn’t melting smoothly, add a teaspoon of vegetable oil to achieve a nice, glossy finish. This makes your Chocolate Rice Krispie Balls look even more tempting!
Avoid Overmixing: Be gentle when folding in the crispy rice cereal. Overmixing can crush the cereal and diminish that delightful crunch we all love!
Customize Flavors: Feel free to experiment with different nut butters or toppings. The sky's the limit, making these Chocolate Rice Krispie Balls a truly versatile treat!
Chocolate Rice Krispie Balls Variations
Feel free to get creative with these delightful treats, ensuring every batch has a unique twist that suits your taste buds!
-
Nut Butter Swap: Substitute peanut butter with almond, cashew, or sunflower seed butter for a different nutty flavor.
-
Coconut Delight: Fold in ½ cup of shredded coconut for a tropical twist that adds a chewy texture. You'll love the way coconut complements the rich chocolate!
-
Crunchy Add-Ins: Incorporate chopped nuts, mini marshmallows, or crispy bacon pieces into the mixture for an unexpected crunch that will surprise your palate.
-
Spicy Kick: Add a pinch of cayenne pepper or a sprinkle of crushed red pepper flakes to the chocolate for a subtle heat that elevates the dessert experience.
-
Sweet Toppings: Drizzle melted white chocolate or caramel sauce on top for added sweetness and visual appeal. This adds a gorgeous finish and an irresistible flavor that everyone will love!
-
Flavor Infusion: Experiment with flavored extracts like almond or hazelnut instead of vanilla extract for an exciting new taste sensation. Each extract brings a distinct aroma, enhancing your Chocolate Rice Krispie Balls beautifully.
-
Fruit Essence: Mix in dried fruits like cranberries, raisins, or chopped dates for a burst of natural sweetness and chewiness. The contrast of flavors will leave you wanting more!
-
Decadent Dipping: Instead of just chocolate, try covering the balls in melted peanut butter or drizzling it over the top for a peanut buttery explosion of flavor. You can't go wrong with a little extra peanut butter love!
If you’re looking for more ways to customize your treats, be sure to check out our easy storage tips to keep them fresher for longer or explore other snack ideas to spark your creativity!
Chocolate Rice Krispie Balls Recipe FAQs
How do I choose the right peanut butter?
Absolutely! For the best results, opt for creamy peanut butter as it blends smoothly with the other ingredients, giving your Chocolate Rice Krispie Balls a luscious texture. If you're a fan of the crunch, go for crunchy peanut butter, but remember, it may alter the mixing dynamics a little, so be sure to blend thoroughly!
How should I store my Chocolate Rice Krispie Balls?
To keep your Chocolate Rice Krispie Balls fresh, store them in an airtight container in the refrigerator for up to 1 week. They’ll maintain their deliciousness, ready for any sweet craving that strikes! Just be sure to separate layers with parchment paper if you're stacking them.
Can I freeze these balls?
Yes indeed! For longer storage, you can freeze your Chocolate Rice Krispie Balls. First, arrange them in a single layer on a baking sheet and freeze until solid—this usually takes about 1-2 hours. Once they are firm, transfer them to a zip-top bag, where they’ll stay good for up to 2 months. To enjoy, simply thaw in the refrigerator before serving!
What should I do if my chocolate coating is too thick?
Oh no, we want your balls to look fabulous! If your melted chocolate is too thick, simply add 1-2 teaspoons of vegetable oil and stir until it’s smooth and glossy. This little trick not only makes the coating easier but also results in a beautiful finish for your Chocolate Rice Krispie Balls!
Are there any allergy concerns with this recipe?
It's very important to consider dietary preferences! If you're making these for someone with peanut allergies, feel free to substitute the peanut butter with sun butter or almond butter. Just remember to check for allergies in other ingredients like chocolate or toppings! Always ensure that ingredients are suitable for all those who will be enjoying these delightful treats!
Irresistible Chocolate Rice Krispie Balls for Your Sweet Cravings
Ingredients
Equipment
Method
- In a large bowl, combine 1 cup of creamy or crunchy peanut butter with 4 tablespoons of unsalted butter. Mix until smooth and creamy.
- Pour in 1 teaspoon of vanilla extract and mix thoroughly into the peanut butter and butter mixture.
- Gradually add 2 cups of powdered sugar, mixing continuously until thick and creamy.
- Gently fold in 1 ½ cups of crispy rice cereal until evenly coated.
- Shape the mixture into 1-inch balls and place on a parchment-lined baking sheet.
- Chill the balls in the freezer for at least 20 minutes to firm up.
- Melt 8-10 ounces of chocolate, stirring until smooth.
- Dip each chilled ball into the melted chocolate until evenly coated, and return to the parchment-lined sheet.
- Let the chocolate-coated balls set completely at room temperature or in the fridge for about 10-15 minutes.


Leave a Reply