
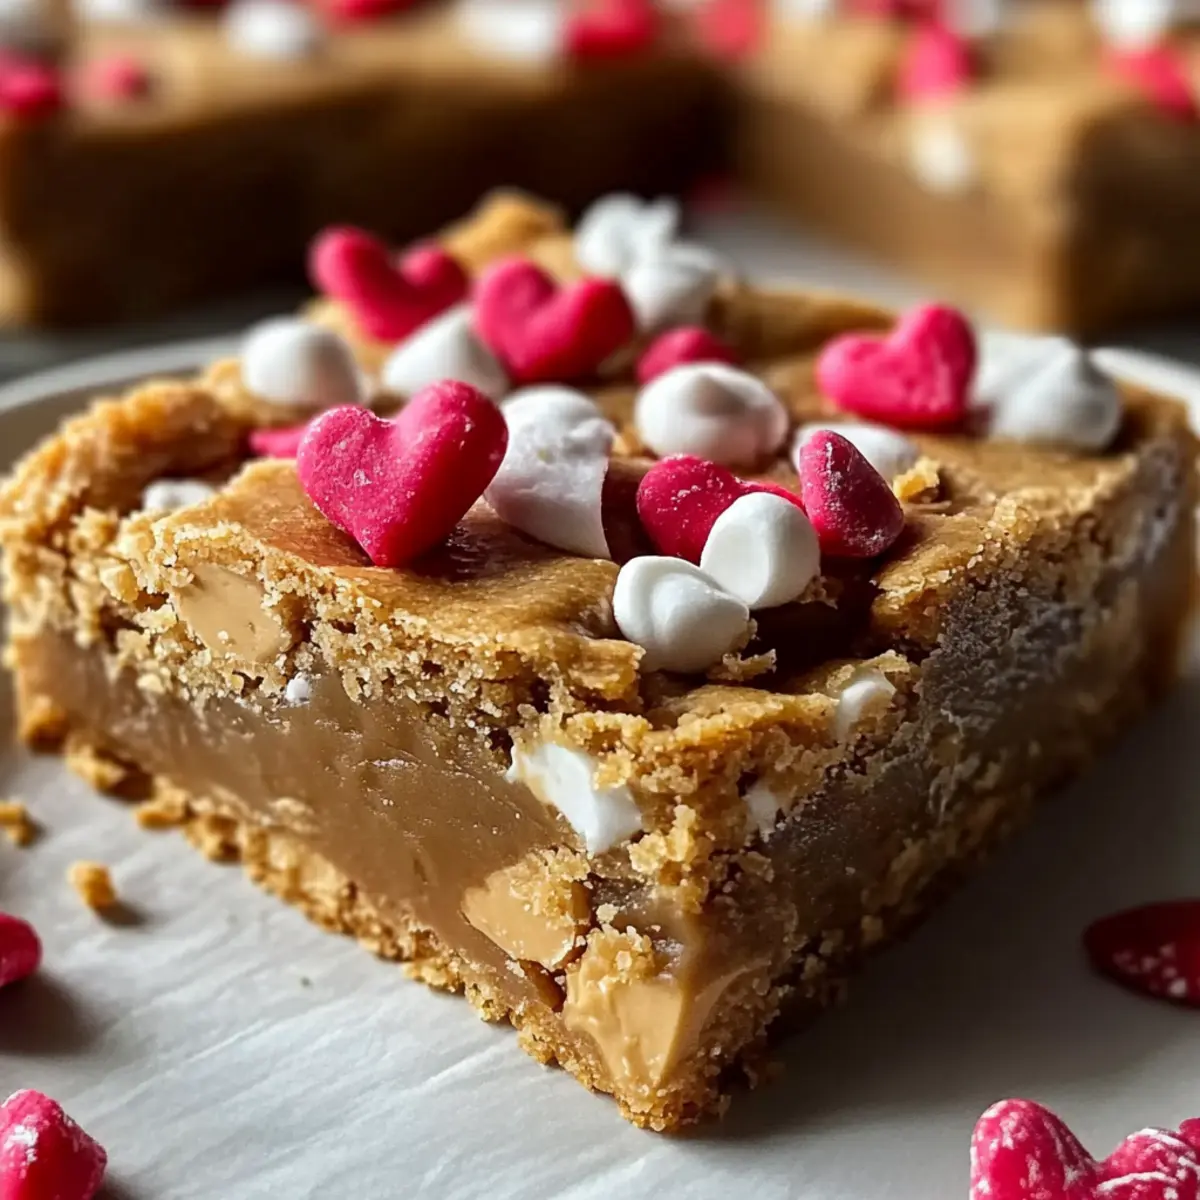
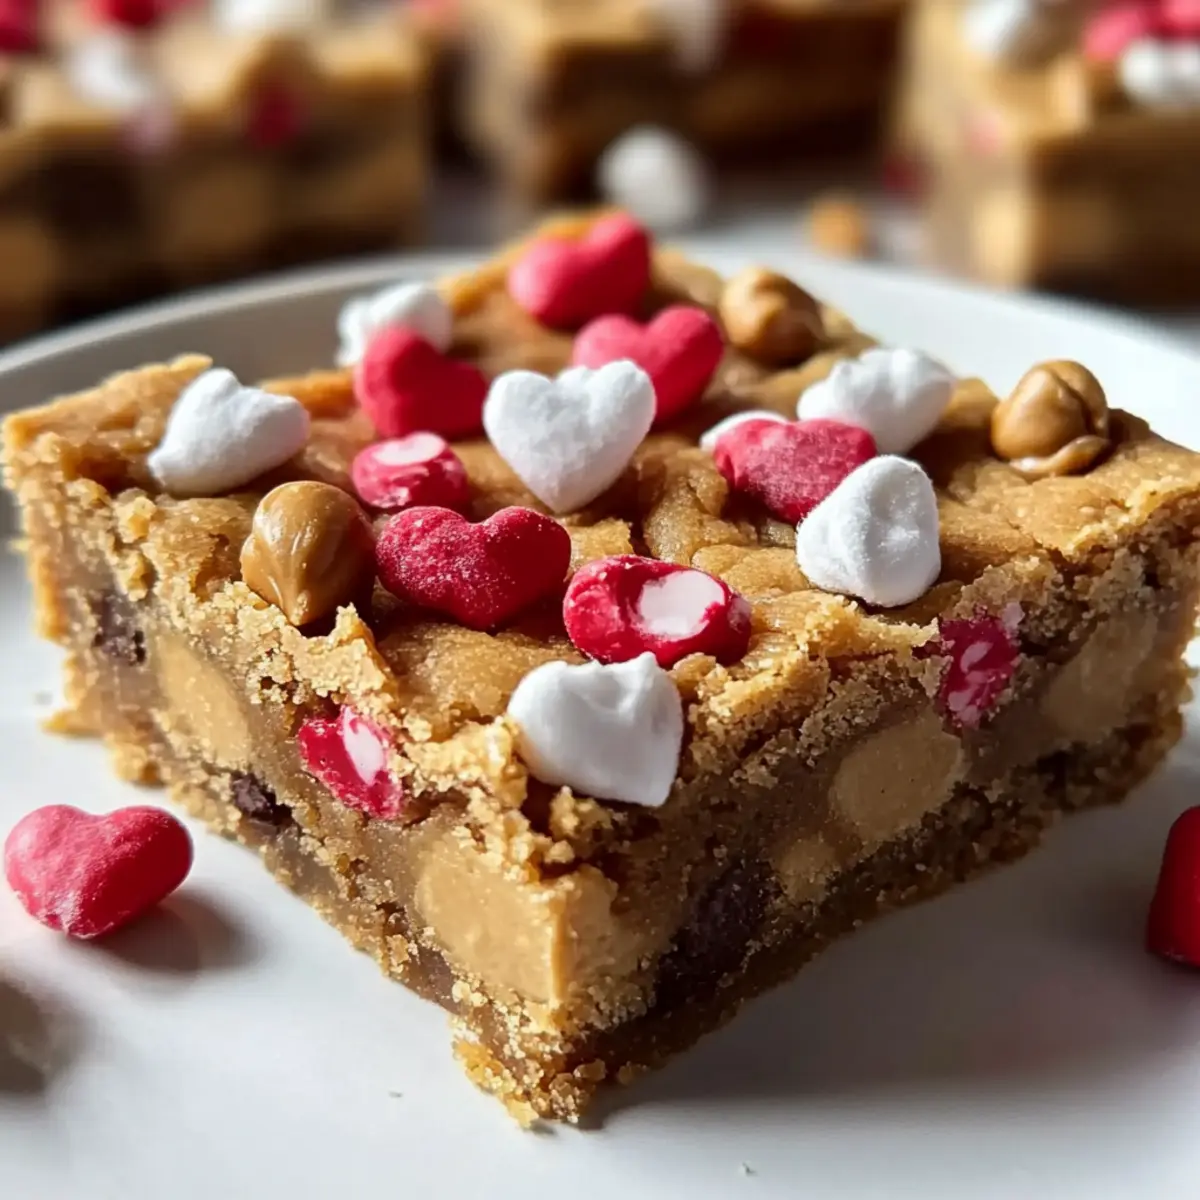
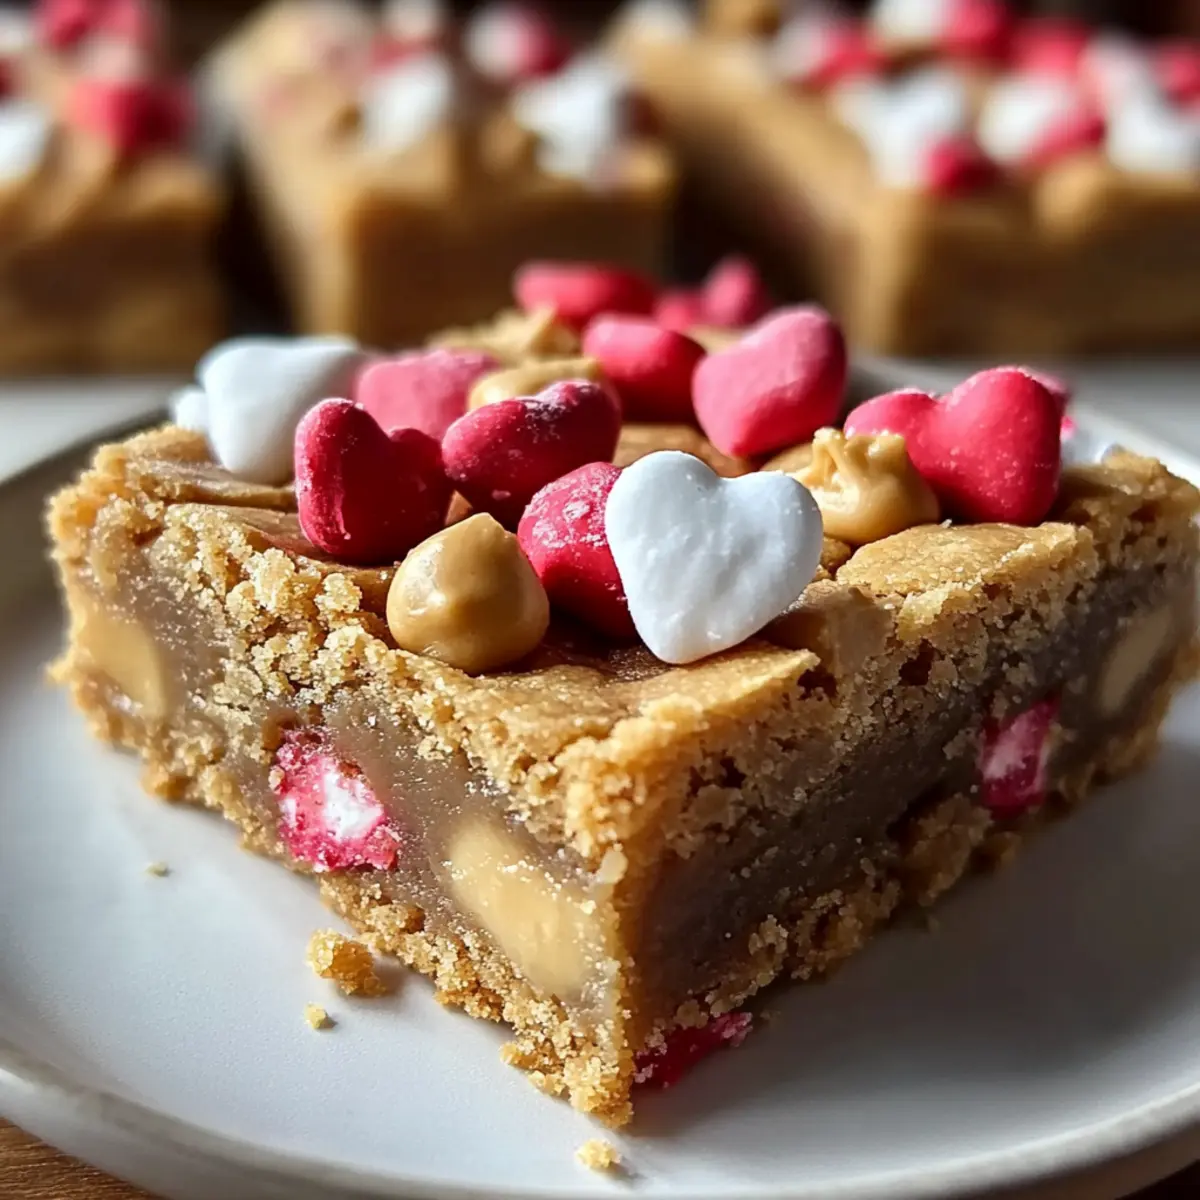
As I sifted through my pantry, I stumbled upon a jar of creamy peanut butter—its comforting aroma immediately transported me to sunny afternoons spent baking with my grandmother. That’s when the idea struck me: I needed to whip up a batch of irresistible Peanut Butter Cookie Bars! Perfect for Valentine’s Day or just a cozy night in, these bars boast an easy prep time and a delightful fusion of chocolate and festive sprinkles that makes them an instant crowd-pleaser. They’re not only deliciously chewy but also freezer-friendly, ensuring you’ll always have a sweet treat on hand for any occasion! Are you ready to indulge in a bite of nostalgia and love? Let’s get baking!
Why are these Peanut Butter Cookie Bars a must-try?
Irresistible Flavor: The rich combination of creamy peanut butter and semi-sweet chocolate creates a mouthwatering experience that will leave you craving more!
Festively Fun: Topped with Valentine-colored M&M’s and sprinkles, these bars are not only delicious but also eye-catching, making them a perfect treat for any occasion.
Easy to Make: With a straightforward process, even novice bakers can whip up these bars in no time—no need for complicated techniques!
Freezer-Friendly: Save some for later! These bars freeze beautifully, allowing you to enjoy a sweet treat whenever the mood strikes.
Once you try these Peanut Butter Cookie Bars, you might want to explore other delightful recipes like the Pineapple Bliss Bars or the Garlic Butter Chicken. Get ready to impress your friends and family!
Peanut Butter Cookie Bars Ingredients
For the Base
• Unsalted butter – ½ cup melted and slightly cooled, it adds richness to the bars.
• Creamy peanut butter – ¾ cup, go for well-stirred but not natural for the best texture.
• Light brown sugar – 1 cup packed, it contributes sweetness and moisture.
• Granulated sugar – ¼ cup, for added sweetness and a delightful crunch.
• Large eggs – 2, at room temperature to help with even mixing.
• Pure vanilla extract – 1 ½ teaspoons, it enhances the overall flavor of the bars.
For the Dry Mix
• All-purpose flour – 1 ¼ cups, spooned and leveled for accurate measurement.
• Baking powder – ½ teaspoon, to give the bars a fluffy texture.
• Baking soda – ¼ teaspoon, helps with the rising process.
• Fine sea salt – ½ teaspoon, to balance the sweetness.
For the Mix-Ins
• Semi-sweet chocolate chips – 1 cup, or substitute with milk chocolate for a sweeter taste.
• White chocolate chips – ½ cup, they provide a creamy contrast to the dark chocolate.
• Valentine M&M’s – ¾ to 1 cup, they add a pop of color and fun!
• Valentine sprinkles – 2 tablespoons, optional but add a festive touch.
• Flaky sea salt – for sprinkling on top, optional but enhances the flavor delightfully.
For the Optional Drizzle
• White chocolate chips – ½ cup, for a sweet finishing touch.
• Neutral oil – 1 teaspoon, like vegetable or canola, helps achieve a smooth drizzle.
With these ingredients, you’re well on your way to creating scrumptious Peanut Butter Cookie Bars that are sure to bring smiles to your loved ones!
Step‑by‑Step Instructions for Peanut Butter Cookie Bars
Step 1: Prepare the Baking Pan
Start by lightly greasing a 9 x 13 inch baking pan with butter or nonstick spray. Then, lay parchment paper into the pan, making sure to leave an overhang to aid in lifting the bars later. Give the parchment a light grease as well to prevent sticking, and set the prepared pan aside while you preheat your oven.
Step 2: Preheat the Oven
Preheat your oven to 350°F (175°C) and adjust the rack to the center position. This temperature is crucial for achieving the ideal texture of your Peanut Butter Cookie Bars, so make sure the oven is fully heated before baking ensures even cooking.
Step 3: Mix the Wet Ingredients
In a large mixing bowl, combine melted butter and creamy peanut butter using a whisk until the mixture is perfectly smooth. Gradually add in both the light brown and granulated sugars, whisking until the mixture becomes thick and glossy. Incorporate the eggs one at a time, whisking well after each addition, followed by the pure vanilla extract for depth of flavor.
Step 4: Combine the Dry Ingredients
In a medium bowl, whisk together the all-purpose flour, baking powder, baking soda, and fine sea salt. This dry mix will provide the structure for your bars, so make sure all the ingredients are well blended before moving on to the next step.
Step 5: Fold the Mixtures Together
Gently add the dry ingredients into the wet mixture using a spatula or wooden spoon. Carefully fold the mixtures together until just combined, taking care to stop as soon as no dry streaks remain, ensuring your Peanut Butter Cookie Bars are soft and chewy.
Step 6: Add the Chocolate Chips
Sprinkle the semi-sweet and white chocolate chips over the combined dough. Using your spatula, gently fold them in until they are evenly distributed throughout the batter, adding delicious pockets of chocolate in each bite of your delicious bars.
Step 7: Spread the Dough into the Pan
Transfer the cookie dough into your prepared baking pan. Using a spatula or lightly greased hands, press the dough firmly into the edges and corners of the pan, ensuring a smooth, even surface. This step is important for an evenly baked product that’s easy to slice later.
Step 8: Add Festive Toppings
Press half to two-thirds of the Valentine M&M’s into the surface of the dough, allowing them to stick beautifully. If desired, sprinkle Valentine sprinkles on top for a festive touch, reserving any remaining M&M’s for post-baking decoration.
Step 9: Bake the Cookie Bars
Bake your Peanut Butter Cookie Bars in the preheated oven for 18 to 24 minutes, checking for doneness starting at the 18-minute mark. The edges should be lightly golden, while the center may still jiggle slightly. A toothpick inserted into the center should come out with a few moist crumbs for that perfect chewy texture.
Step 10: Finishing Touches
Once out of the oven, immediately press the reserved M&M’s into any bare spots on top of the bars, giving them an eye-catching finish. If desired, sprinkle flaky sea salt on top, enhancing the flavor while creating a delightful contrast to the sweet.
Step 11: Cool and Slice
Allow the bars to cool in the pan for at least 1 to 1½ hours for them to set properly. If you prefer extra-fudgy bars, chill them in the refrigerator for 30 to 45 minutes before lifting them out using the parchment overhang and slicing into squares or rectangles.
Step 12: Optional Drizzle
For a delightful drizzle, combine the white chocolate chips and neutral oil in a microwave-safe bowl. Heat in 15–20 second bursts until the mixture is smooth. Drizzle generously over the cooled Peanut Butter Cookie Bars and scatter remaining sprinkles for that festive flair.
Step 13: Storage Tips
Store your cooled Peanut Butter Cookie Bars in an airtight container at room temperature for up to 3–4 days. For longer freshness, refrigerate for up to a week or freeze individual bars for up to 2 months, ensuring delicious treats are always at hand!

How to Store and Freeze Peanut Butter Cookie Bars
Room Temperature: Store cooled Peanut Butter Cookie Bars in an airtight container at room temperature for up to 3–4 days, keeping them soft and chewy.
Fridge: If you want to prolong freshness, refrigerate the bars for up to one week. Simply slice and enjoy them chilled or let them come to room temperature before serving.
Freezer: For long-term storage, freeze individual bars in a freezer-safe bag or container for up to 2 months. Thaw them overnight in the fridge or enjoy them straight from the freezer for a cold treat!
Reheating: To enjoy warm bars, pop them in the microwave for about 10-15 seconds. This brings back that fresh-out-of-the-oven comfort!
Peanut Butter Cookie Bars Variations
Feel free to get creative with these Peanut Butter Cookie Bars by adding your personal touch and flair!
-
Gluten-Free: Swap all-purpose flour for a gluten-free blend to make these delicious bars suitable for gluten-sensitive family members.
A cozy, gluten-free treat means everyone can enjoy a bite of nostalgia! -
Nutty Twist: Add ½ cup of chopped nuts, such as pecans or walnuts, for an extra crunch.
The nutty crunch will complement the creamy base beautifully! -
Dairy-Free: Use coconut oil instead of butter and dairy-free chocolate chips for a delightful dairy-free option.
You won’t miss the dairy when these bars are this rich and flavorful! -
Caramel Drizzle: Drizzle some caramel sauce over the top before serving for an added layer of sweetness.
This twist brings a delightful contrast to the peanut butter’s natural nuttiness! -
Super Chocolaty: Replace semi-sweet chocolate chips with dark chocolate chips for an intense chocolate experience.
For true chocoholics, this variation will elevate your bars to a whole new level of indulgence! -
Fire It Up: Add a pinch of cayenne pepper to the mix for a subtly spicy kick.
The warmth will surprise your taste buds and leave everyone wanting more! -
Fruit Addition: Toss in ½ cup of chopped dried fruits like cranberries or cherries for a burst of natural sweetness.
The chewy fruits will add a delightful texture to the peanut buttery goodness! -
Layer It Up: Create layers by adding a layer of cookie batter, then a layer of marshmallow fluff, and topping with more batter.
This makes for a s'mores-inspired treat that your family will rave about!
Once you've enjoyed these Peanut Butter Cookie Bars, don’t forget to explore other delightful recipes like the Pineapple Bars Tropical or perhaps the Cowboy Butter Chicken for your next meal. Indulging in homemade sweets has never been so fun!
Expert Tips for Peanut Butter Cookie Bars
Perfect Peanut Butter: Use creamy peanut butter that’s well-stirred, avoiding natural varieties. This ensures a smooth texture and consistent flavor in your bars.
Sweet Success: Don’t skip weighing your brown sugar—packing it is essential for the right sweetness and moisture balance in the Peanut Butter Cookie Bars.
Mix Gently: Fold the dry ingredients into the wet slowly to avoid overmixing. This preserves the chewy texture, preventing a dense final product.
Watch the Oven: Start checking for doneness at 18 minutes. Overbaking can result in a dry cookie bar, while underbaking will keep them delightfully chewy!
Chill for Chewiness: For extra fudgy bars, refrigerate for 30–45 minutes after cooling. This enhances the texture, making them even more irresistible.
Make Ahead Options
These Peanut Butter Cookie Bars are perfect for meal prep! You can prepare the dough up to 24 hours in advance; simply mix all the ingredients up to Step 6, cover, and refrigerate to keep the flavors rich and creamy. If you're short on time, you can also bake the bars ahead of time and store them in an airtight container for up to 3-4 days at room temperature. For added freshness, refrigerate them for up to a week or freeze individual bars for up to 2 months. When ready to enjoy, just thaw at room temperature, and you'll have chewy, delicious Peanut Butter Cookie Bars that are just as delightful!
What to Serve with Valentine Peanut Butter Cookie Bars
Imagine cozying up with your loved ones over a delightful spread that perfectly complements these chewy treats, enhancing every blissful bite.
-
Creamy Vanilla Ice Cream: The rich, smooth creaminess balances the bars' flavor, offering a refreshing contrast to their sweetness. A scoop on the side makes each bite even more indulgent.
-
Chocolate Dipped Strawberries: Their fresh, juicy flavor adds a lightness that complements the bars. Plus, the chocolate ties in beautifully with the cocoa-infused treats, creating a romantic mood.
-
Hot Chocolate or Coffee: A warm beverage is perfect for dipping or sipping alongside your Peanut Butter Cookie Bars, enhancing their comforting flavors. The warmth pairs beautifully with the gooey chocolate chips.
-
Nutty Trail Mix: A crunchy trail mix incorporates different textures and flavors—add some dried fruits to bring a pop of color and a hint of sweetness that unites with the bars perfectly.
-
Fresh Berries Salad: A medley of strawberries, blueberries, and raspberries brings a refreshing tartness that contrasts delightfully with the rich sweetness of the cookies, brightening the overall meal.
-
Milkshake: Whip up a decadent peanut butter milkshake using ice cream and milk. The creamy thickness complements the bar's texture, creating a sweet temptation you won't resist!
-
Cheesecake Bites: These mini desserts offer creaminess and a tangy flavor that pairs well with the bars' sweetness. Plus, their small size makes them perfect for sharing and indulging.
Pair these delights with your Valentine Peanut Butter Cookie Bars for a meal that warms the heart and satisfies the sweetest cravings!
Peanut Butter Cookie Bars Recipe FAQs
What type of peanut butter should I use?
Absolutely! For the best results, use creamy peanut butter that is well-stirred, avoiding natural varieties, as they can often separate and yield inconsistent textures in your Peanut Butter Cookie Bars.
How should I store leftover cookie bars?
Store your cooled Peanut Butter Cookie Bars in an airtight container at room temperature for up to 3–4 days to keep them soft and chewy. If you're aiming for longer freshness, refrigerate them for up to a week, ensuring they’re still delicious when you're ready for a treat!
Can I freeze these cookie bars?
Yes, you can definitely freeze individual Peanut Butter Cookie Bars! For optimal freshness, wrap each bar in plastic wrap and place them in a freezer-safe bag or container. They can be frozen for up to 2 months. To enjoy, simply thaw them overnight in the fridge or enjoy directly from the freezer for a delightful surprise!
What should I do if my bars come out too dry?
If your Peanut Butter Cookie Bars turn out dry, it may be due to overbaking. Be sure to start checking for doneness at 18 minutes; the edges should be golden while the center retains a slight jiggle. For a remedy, you can also try adding a small dollop of peanut butter or a drizzle of chocolate on top to revive their moisture!
Are these bars safe for pets or those with allergies?
No, it’s important to note that these Peanut Butter Cookie Bars contain ingredients like chocolate and peanut butter, which can be harmful to pets. Moreover, if you have allergies to nuts, chocolate, or gluten, I recommend exploring alternative recipes that are allergen-friendly to ensure everyone can enjoy safely.
Irresistibly Chewy Peanut Butter Cookie Bars for Everyone
Ingredients
Equipment
Method
- Prepare the Baking Pan: Lightly grease a 9 x 13 inch baking pan with butter or nonstick spray, then lay parchment paper into the pan with overhang.
- Preheat the Oven: Preheat your oven to 350°F (175°C) and adjust the rack to the center position.
- Mix the Wet Ingredients: In a large bowl, combine melted butter and peanut butter. Gradually add sugars, then incorporate eggs and vanilla.
- Combine the Dry Ingredients: In a separate bowl, whisk together flour, baking powder, baking soda, and fine sea salt.
- Fold the Mixtures Together: Gently add dry ingredients into wet, folding until just combined.
- Add the Chocolate Chips: Sprinkle in chocolate chips and mix gently until evenly distributed.
- Spread the Dough into the Pan: Transfer dough into prepared pan and press down evenly.
- Add Festive Toppings: Press M&M’s into the surface; sprinkle on Valentine's sprinkles if desired.
- Bake the Cookie Bars: Bake in preheated oven for 18 to 24 minutes, checking for doneness.
- Finishing Touches: Press reserved M&M’s on top and sprinkle with flaky sea salt.
- Cool and Slice: Cool in the pan for 1 to 1½ hours; slice after lifting out with parchment.
- Optional Drizzle: Combine white chocolate chips and oil, heat, then drizzle over cooled bars.
- Storage Tips: Store in an airtight container at room temperature for 3-4 days or refrigerate up to a week.

Leave a Reply