
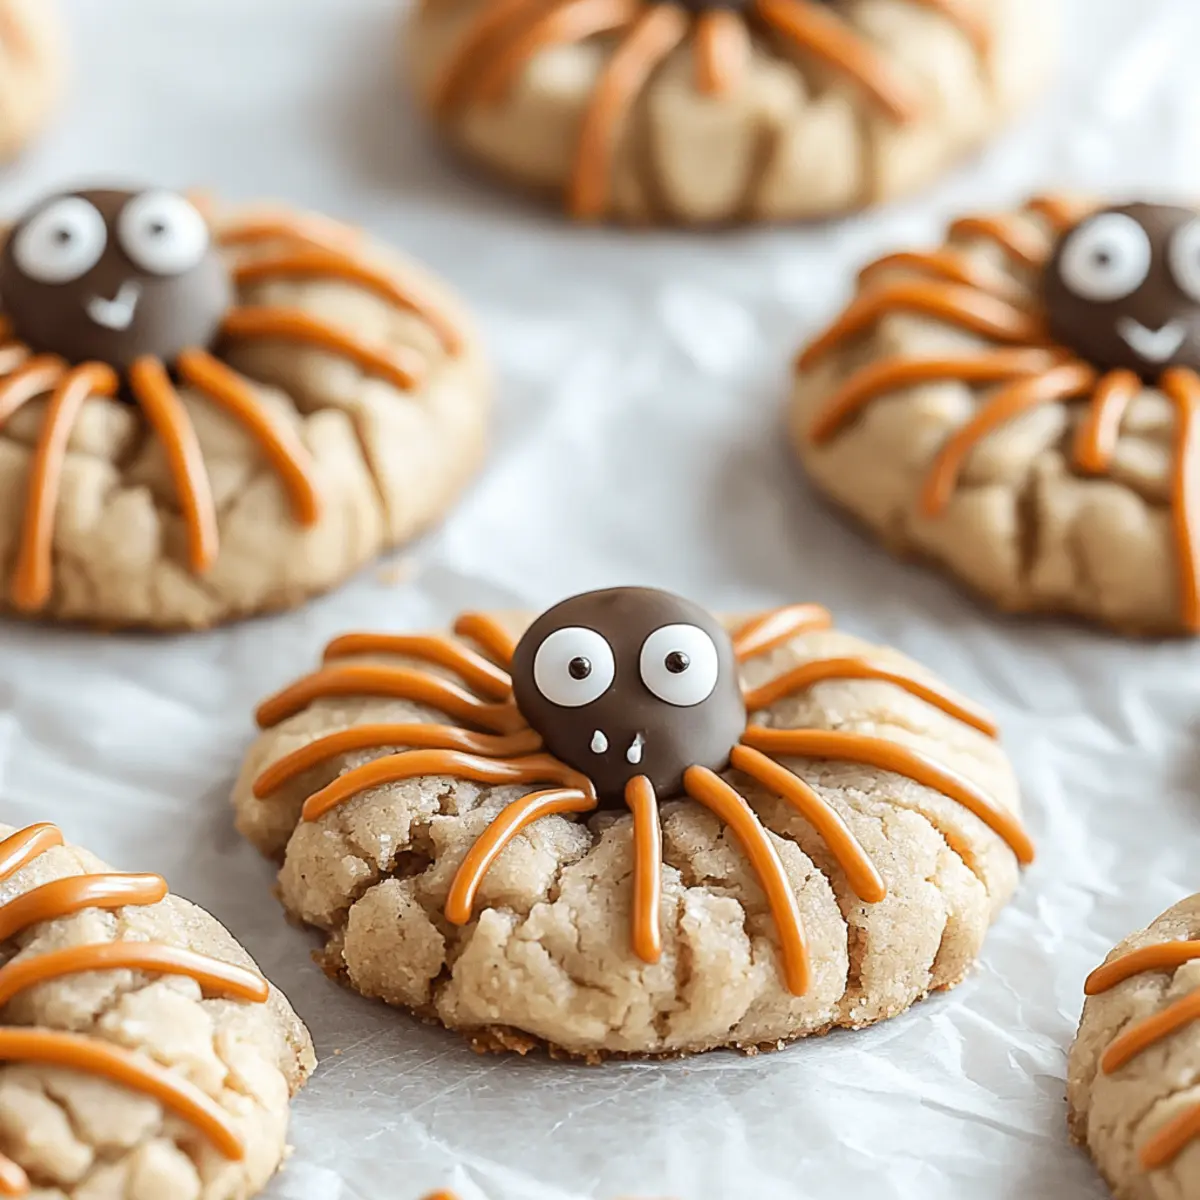
As I rummaged through my kitchen pantry, I was hit with a delightful wave of nostalgia that transported me back to my childhood. Cue the playful giggles and Halloween whispers as I fondly recall the excitement of creating a mini cookie monster masterpiece. This year, I’m adding a spooky twist to our annual Halloween festivities with my fun and easy recipe for Spooky Spider Cookies. Not only are these cookies a creative centerpiece for any Halloween gathering, but they also promise a tasty treat the whole family will love. With minimal effort and a dash of fun, they’re perfect for those of us who want to craft something memorable without spending hours in the kitchen. Are you ready to conjure up some deliciousness? Let’s dive into the whimsical world of Halloween baking!
Why Are Spooky Spider Cookies a Must?
Irresistible Appeal: These cookies are not just a treat; they're a playful centerpiece that will captivate both kids and adults alike.
Simple to Make: With minimal ingredients and a straightforward process, even novice bakers can whip these up in no time.
Creative Customization: Get creative by adding different toppings or using various cookie shapes to make them uniquely yours.
Perfect for Parties: They are the ideal treat for Halloween bashes, adding a touch of fun and festivity to your dessert table.
Tasty and Fun: These cookies blend rich chocolate flavor with a delightful crunch that will have everyone reaching for seconds.
Try pairing them with other spooky treats like Bloody Red Velvet Cake Pops or Vampire Donuts for a complete Halloween spread!
Spooky Spider Cookies Ingredients
Unleash your creativity with these tasty treats!
For the Cookies
- All-purpose flour – the base for your dough, giving it the perfect structure.
- Unsweetened cocoa powder – adds a rich, chocolatey flavor that makes these spiders irresistible.
- Baking soda – helps the cookies rise, ensuring a light and tender texture.
- Butter – brings a creamy richness; you can substitute with margarine if needed.
- Granulated sugar – sweetens the dough; brown sugar can add a hint of caramel flavor.
- Egg – binds the ingredients together and adds moisture; a flax egg is a great vegan alternative.
- Vanilla extract – enhances the flavor profile, making the cookies even more delicious.
For the Decoration
- Peanut butter cups – create the spider’s body; opt for any chocolate candy if you're allergic.
- Pretzel sticks – perfect for those long, spider legs; use thick ones for a more robust look.
- Candy eyes – these bring your spooky spiders to life; substitute with chocolate chips for a simple effect.
Get ready to create a delightful batch of Spooky Spider Cookies that will thrill your Halloween bash!
Step‑by‑Step Instructions for Spooky Spider Cookies
Step 1: Prepare the Cookie Dough
Start by preheating your oven to 350°F (175°C). In a large mixing bowl, cream together 1 cup of softened butter and 1 cup of granulated sugar until the mixture is light and fluffy. Add in 1 egg and 1 teaspoon of vanilla extract, mixing until well combined. Gradually incorporate 2 cups of all-purpose flour, ¾ cup of unsweetened cocoa powder, and 1 teaspoon of baking soda until a dough forms. Your Spooky Spider Cookies dough should be smooth and slightly sticky.
Step 2: Shape the Cookies
With clean hands, scoop out tablespoon-sized portions of the dough and roll them into balls. Place each ball on a greased or parchment-lined baking sheet, spacing them about 2 inches apart. Gently flatten each ball with the palm of your hand to form thick discs. Bake the cookies in the preheated oven for 10-12 minutes or until the edges are firm and the centers appear set. Let the cookies cool on the baking sheet for a few minutes before transferring them to a wire rack to cool completely.
Step 3: Decorate the Cookies
While the spooky spider cookies cool, unwrap your peanut butter cups and get ready to assemble your creepy crawlers. Once the cookies are completely cooled, melt some chocolate in a microwave-safe bowl in 30-second intervals, stirring each time until smooth. Dip the bottom of each peanut butter cup into the melted chocolate and place it in the center of a cookie to form the spider’s body.
Step 4: Add the Legs
Now, grab your pretzel sticks, and break them into smaller segments for the spider legs. Insert four pretzel pieces on each side of the peanut butter cup to create a spooky spider shape. Ensure they are firmly placed in the cookie, so they stay standing. At this stage, your Spooky Spider Cookies will start to take on a delightful Halloween appearance.
Step 5: Bring Your Spiders to Life
Finally, complete your Spooky Spider Cookies by adding candy eyes to the peanut butter cups using a dab of melted chocolate to secure them in place. Allow the chocolate to set, which will take about 15 minutes, creating an adorable and slightly eerie effect. Your charming Halloween treats are now ready to thrill at your next party!
How to Store and Freeze Spooky Spider Cookies
Room Temperature: Keep your Spooky Spider Cookies in an airtight container at room temperature for up to 5 days. This will maintain their freshness and delightful texture.
Fridge: For extended freshness, store the cookies in the refrigerator for up to 1 week. Just remember to seal them well to prevent them from absorbing other odors.
Freezer: To freeze, place the fully decorated cookies in a single layer on a baking sheet for about an hour. Once firm, transfer them to a freezer bag or container. They’ll stay delicious for up to 3 months.
Reheating: For best results, thaw your cookies in the fridge overnight before bringing them to room temperature. If you want a warm treat, microwave them lightly for 10-15 seconds.
Make Ahead Options
These Spooky Spider Cookies are a fantastic choice for meal prep, making your Halloween festivities less hectic! You can prepare the cookie dough up to 24 hours in advance; simply mix everything together, shape into balls, and refrigerate them in an airtight container. By chilling the dough, you'll allow the flavors to deepen while keeping the cookies tender when baked. On the day of your celebration, just preheat the oven, bake the cookies, and let them cool before adding the peanut butter cups and pretzel legs. The cookies taste just as delicious, and this planning allows your spooky creations to take center stage without stress, making them perfect for your busy schedule!
What to Serve with Spooky Spider Cookies
There's nothing like a festive Halloween spread to get everyone in the ghostly spirit of the season!
- Bloody Red Velvet Cake Pops: These charming cake pops add a splash of color and frightful fun, making them perfect companions for your spooky treats.
- Witch Hat Cupcakes: Combining chocolate cupcakes topped with sugar cones, these whimsical creations provide a delightful contrast to the richness of the cookies.
- Frankenstein Rice Krispie Bars: With their fun green color and candy eyes, these treats add a playful flair while complementing the Halloween theme.
- Pumpkin Spice Cookies: These spiced delights create a warm fall flavor that pairs beautifully with the chocolatey goodness of your Spooky Spider Cookies.
- Vampire Donuts: These red-iced donuts with candy eyes offer a visual and textural delight that enhances the festive mood of your treat table.
- Candy Corn Cheesecake Bars: A creamy and rich dessert, these bars present a pleasing contrast to the crunch of your spider cookies, creating a well-rounded dessert experience.
Serve these together for a frightfully delightful Halloween gathering that will enchant all ages!
Spooky Spider Cookies Variations
Get ready to unleash your creativity and make these delightful treats even more enchanting!
-
Gluten-Free: Substitute all-purpose flour with a 1:1 gluten-free baking blend for the same tasty goodness without the gluten.
-
Nut-Free: Use carob chips instead of peanut butter cups to create a spider's body, perfect for those with nut allergies.
-
Vegan: Replace the egg with a flax egg and use dairy-free chocolate for a delicious vegan version that everyone can enjoy.
-
Flavor Twists: Add a pinch of cinnamon or a splash of almond extract to the dough for an exciting twist on the classic chocolate flavor.
-
Fruity Surprise: Incorporate mini marshmallows or fruit leather cut into strips for a fun and fruity addition, making your spider cookies even more whimsical!
-
Chocolate Lovers: Drizzle additional melted chocolate over the finished cookies for a decadent touch that will have chocolate lovers swooning.
-
Hot & Spicy: Mix in a dash of cayenne pepper or chili powder to the cookie dough for a surprising kick that will set your spooky batch apart.
-
Funky Decorations: Up your decoration game with colorful icing for the spider legs or use edible glitter to make your cookies shine like Halloween stars!
Why not pair your delightful Spooky Spider Cookies with some Pumpkin Spice Cookies or Mummy Brownies for a full-blown Halloween dessert table that will impress all your guests? They’ll love the variety and fun in every bite!
Expert Tips for Spooky Spider Cookies
• Chill the Dough: This helps the cookies hold their shape while baking and prevents spreading, ensuring those spooky spiders look perfect!
• Avoid Overbaking: Keep an eye on the cookies; they should be soft in the center upon removal. Overbaked cookies can become dry and crumbly.
• Customize the Legs: Try using colored candy sticks or licorice for a fun twist! Experimenting with toppings makes your Spooky Spider Cookies uniquely yours.
• Warm Chocolate for Decoration: Always melt the chocolate slowly to prevent burning. A smooth consistency makes it easier to attach pretzel legs and candy eyes.
• Mix Flour/ Cocoa Well: Ensure the all-purpose flour and cocoa powder are fully combined before adding them to the wet ingredients. This prevents clumping and gives an even bake.
Spooky Spider Cookies Recipe FAQs
What kind of cocoa powder should I use for Spooky Spider Cookies?
Absolutely! Unsweetened cocoa powder is best for achieving that rich chocolate flavor. If you can, opt for a high-quality cocoa for deeper taste. Avoid using Dutch-processed cocoa as it can alter the cookie's texture.
How should I store Spooky Spider Cookies?
Store your Spooky Spider Cookies in an airtight container at room temperature for up to 5 days. This keeps them fresh and maintains their delightful, chewy texture. If you prefer them chilled, they can be kept in the refrigerator for up to a week, just be sure to have them sealed tightly to ward off any other food odors!
Can I freeze Spooky Spider Cookies, and how?
Yes, you can! To freeze your Spooky Spider Cookies, first place the fully decorated cookies in a single layer on a baking sheet and pop them in the freezer for about an hour until they're firm. Then, transfer them to a freezer bag or an airtight container, where they can stay delicious for up to 3 months. When you're ready to enjoy, thaw them in the refrigerator overnight and let them reach room temperature for the best taste.
What should I do if my cookie dough is too sticky?
If your dough feels overly sticky, don’t worry! Just sprinkle in a little extra flour, about a tablespoon at a time, until the dough reaches a workable consistency. This will help in rolling the dough into balls without it sticking to your hands. If you chill the dough for 30 minutes, it can also help firm it up for easier handling!
Are there allergy-friendly alternatives for the ingredients?
Very! For a more allergy-friendly version, use gluten-free flour instead of all-purpose flour, and swap the butter for a dairy-free alternative such as coconut oil or a vegan butter substitute. To replace the egg, simply make a flax egg by mixing one tablespoon of ground flaxseed with three tablespoons of water—let it sit for about 5 minutes until it thickens!
Spooky Spider Cookies That’ll Thrill Your Halloween Bash
Ingredients
Equipment
Method
- Preheat your oven to 350°F (175°C). In a mixing bowl, cream together butter and sugar until light and fluffy. Add in egg and vanilla extract, mixing until well combined. Gradually incorporate flour, cocoa powder, and baking soda until a dough forms.
- Scoop out tablespoon-sized portions of dough, roll them into balls, and place them on a greased or parchment-lined baking sheet. Flatten each ball to form thick discs. Bake for 10-12 minutes until edges are firm and centers are set. Cool on baking sheet for a few minutes before transferring to a wire rack.
- While the cookies cool, unwrap peanut butter cups. Melt chocolate in a microwave-safe bowl in 30-second intervals until smooth. Dip the bottom of each peanut butter cup into melted chocolate and place in the center of a cookie.
- Break pretzel sticks into smaller segments for legs. Insert four pretzel pieces on each side of the peanut butter cup to create a spider shape.
- Add candy eyes to the peanut butter cups using melted chocolate to secure them in place. Allow chocolate to set for about 15 minutes before serving.


Leave a Reply