
The moment I took my first forkful of Texas-Style Brisket, I was transported to a sun-soaked backyard barbecue, where laughter mingled with the smoky aroma wafting from the grill. This mouthwatering dish brings the flavors of Texas right into your kitchen, making it a standout meal for family gatherings or when you simply want to treat yourself to something special. What I love most about making this Texas-Style Brisket in the Oven is how utterly satisfying it is—nothing beats that tender, juicy bite after hours of slow cooking, and the recipe is surprisingly easy to master! Plus, it’s a fantastic way to infuse rich flavors without the need for a grill. Are you ready to impress your friends and family with this delicious, home-cooked classic? Let’s dive into the smoky magic of this brisket recipe!
Why is Texas-Style Brisket a Must-Try?
Tender, Juicy Perfection: Achieving that melt-in-your-mouth texture is easy with the low and slow cooking method.
Bold Flavor Explosion: The Texas-Style Brisket Rub infuses each slice with a savory, aromatic kick that elevates your meal.
Kitchen-Friendly: No fancy equipment needed! This recipe brings the barbecue experience right into your oven, making it perfect for home cooks.
Family Favorites: Impress your loved ones at your next gathering—this dish is sure to be a crowd-pleaser.
Easy Cleanup: With simple prep and minimal dishes, you can focus more on enjoying the meal and less on the mess.
Now that you’re ready to bring a taste of Texas to your table, don’t forget to check out the tips for perfect brisket and learn how to slice it just right for an unbeatable meal!
Texas-Style Brisket Ingredients
For the Brisket
• Brisket – Choose a USDA Choice or Prime cut for the best flavor and tenderness.
For the Rub
• Texas-Style Brisket Rub – This blend of spices will give your brisket that authentic Texas flavor kick!
With these key ingredients in hand, you're one step closer to creating mouthwatering Texas-Style Brisket in the Oven that will leave everyone asking for seconds!
Step‑by‑Step Instructions for Texas-Style Brisket in the Oven
Step 1: Choose the Right Brisket
Select a brisket cut that boasts good marbling—this is key for moisture and flavor. Aim for a USDA Choice or Prime cut, which will yield the best results. Remove any excess fat, but leave a thin layer to help baste the meat as it cooks. This simple preparation step sets the stage for an incredible Texas-Style Brisket in the Oven.
Step 2: Season Generously
Rub the brisket evenly with the Texas-Style Brisket Rub, making sure to cover all sides generously. Allow the spices to penetrate the meat by letting it sit for at least 30 minutes at room temperature. This will enhance the flavor profile, making each bite a savory delight. Your brisket should begin to shimmer as the rub adheres perfectly.
Step 3: Preheat the Oven
Preheat your oven to a low temperature of 250°F (121°C). This low and slow method is essential for achieving the tender, juicy texture that Texas-Style Brisket is known for. While the oven is warming, prepare a roasting pan lined with aluminum foil for easy cleanup and set a wire rack on top to hold the brisket.
Step 4: Insert the Brisket
Place the seasoned brisket on the wire rack in the roasting pan, fat side up. This position allows the fat to render down, basting the meat as it cooks. Insert a meat thermometer into the thickest part of the brisket, ensuring it doesn’t touch any bone. Now, gently slide the pan into your preheated oven.
Step 5: Cook Low and Slow
Let the brisket cook in the oven for approximately 1 hour per pound. Keep an eye on the thermometer as it approaches 165°F (74°C), a critical threshold for wrapping. The brisket will become darker and develop a gorgeous crust as it cooks, filling your kitchen with mouthwatering aromas.
Step 6: Wrap for Moisture
Once the internal temperature hits 165°F, carefully remove the brisket from the oven. Wrap it tightly in aluminum foil or butcher paper to preserve moisture during the final cooking phase. This step is crucial for achieving the melt-in-your-mouth texture that defines a great Texas-Style Brisket in the Oven.
Step 7: Finish Cooking
Return the wrapped brisket to the oven and continue cooking until it reaches an internal temperature of around 200°F (93°C). This will typically take an additional 1 to 2 hours, depending on the size. When done, the brisket should feel tender when probed with a fork, signifying it’s ready to come out.
Step 8: Resting Period
Remove the brisket from the oven, carefully unwrap it, and let it rest on a cutting board for at least 30 to 45 minutes. This resting period allows the juices to redistribute throughout the meat, enhancing flavor and tenderness. Cover it loosely with foil to keep it warm while resting.
Step 9: Slice and Serve
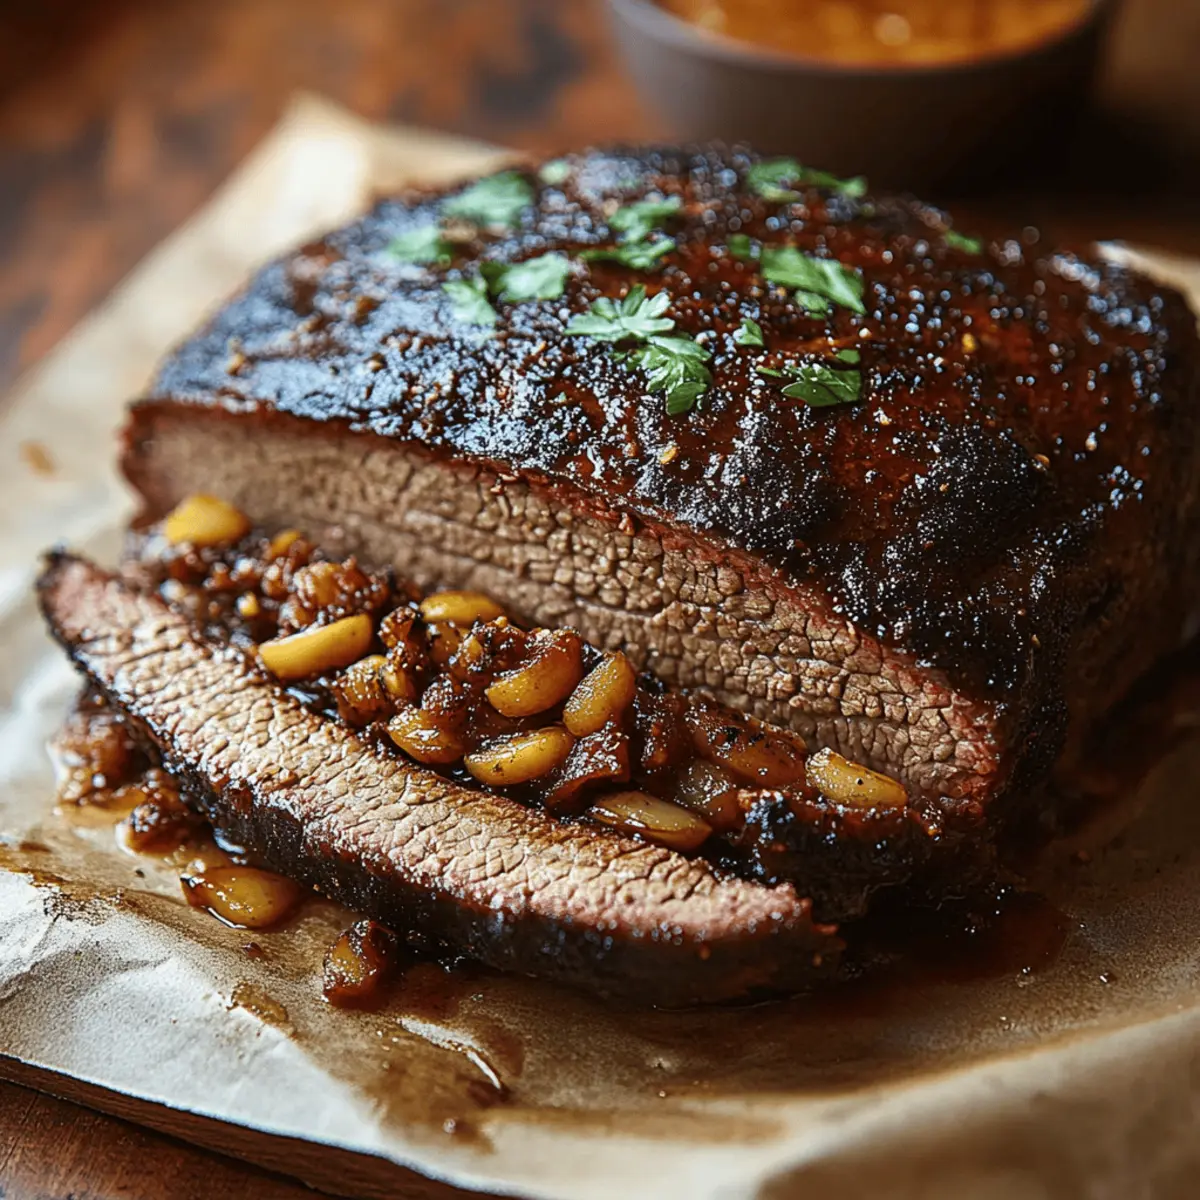
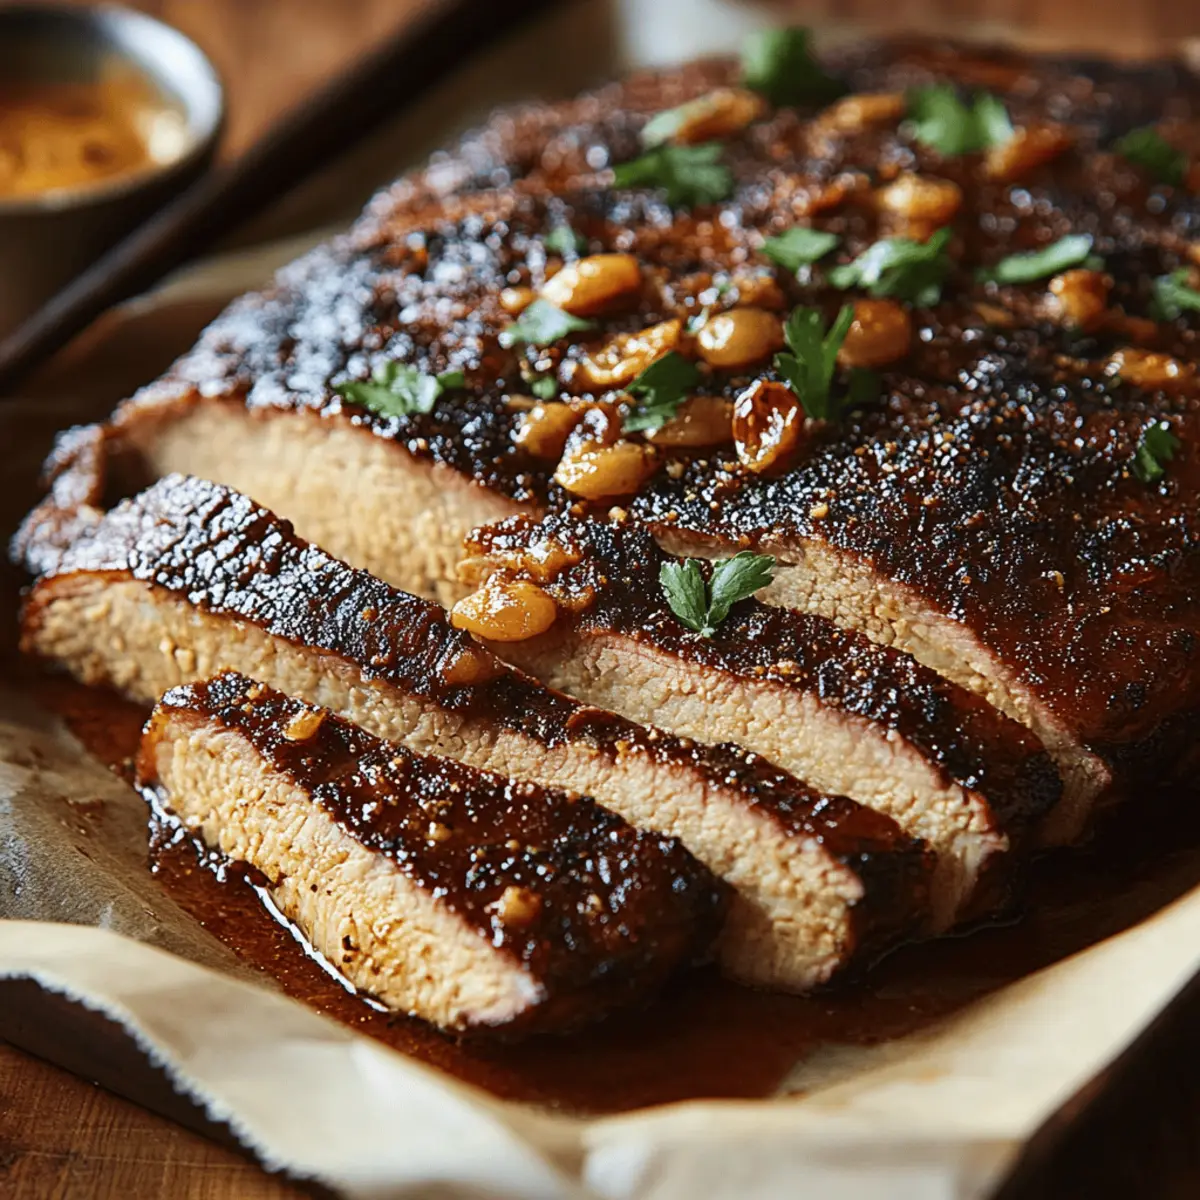
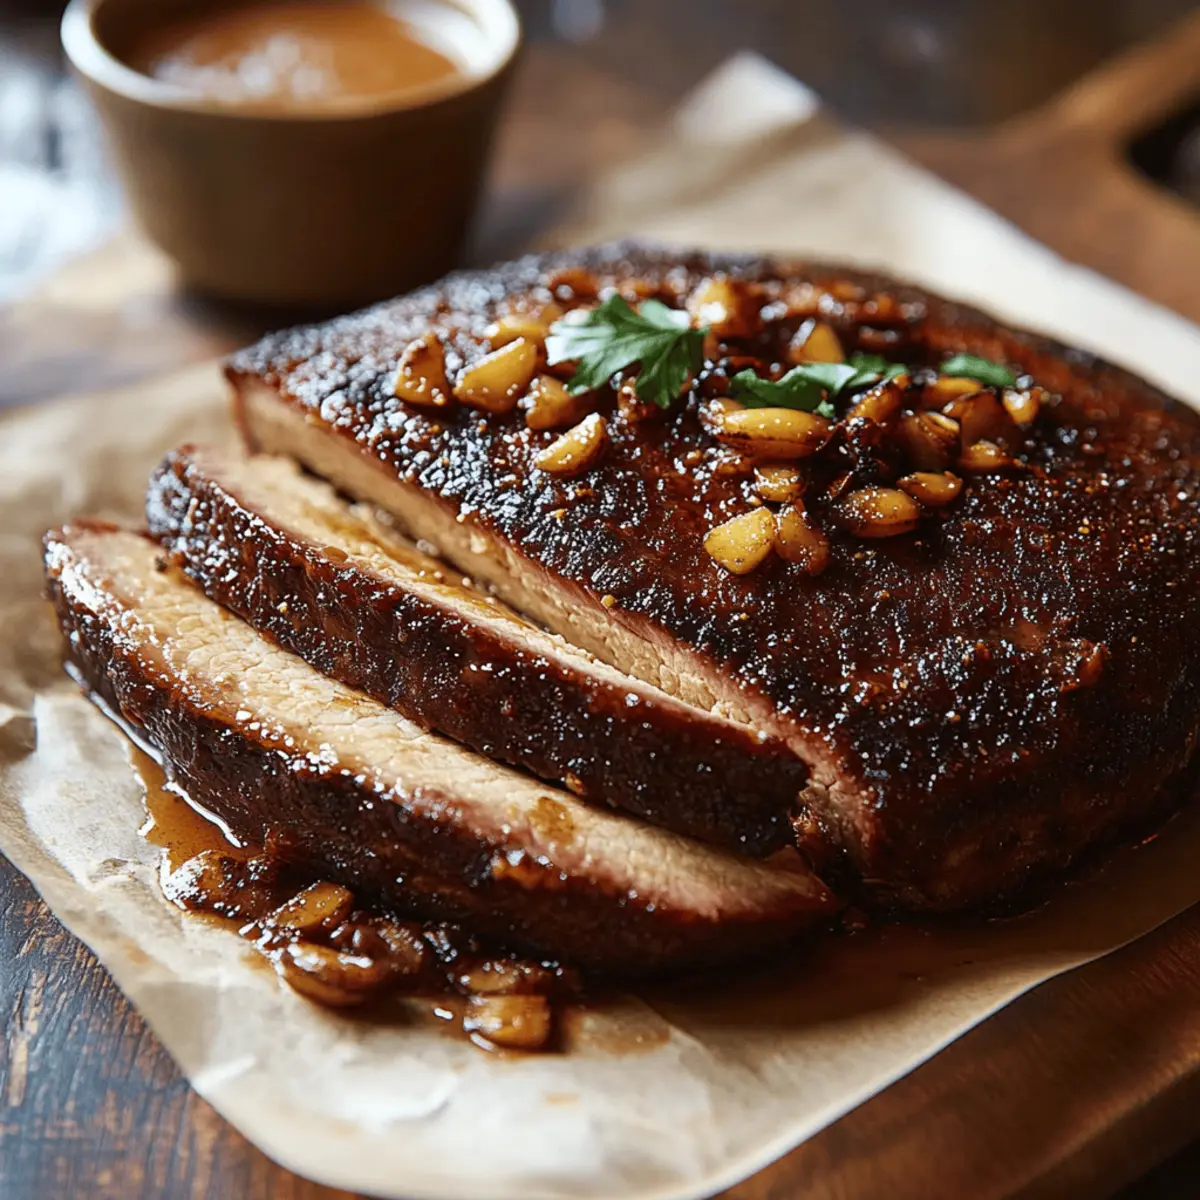
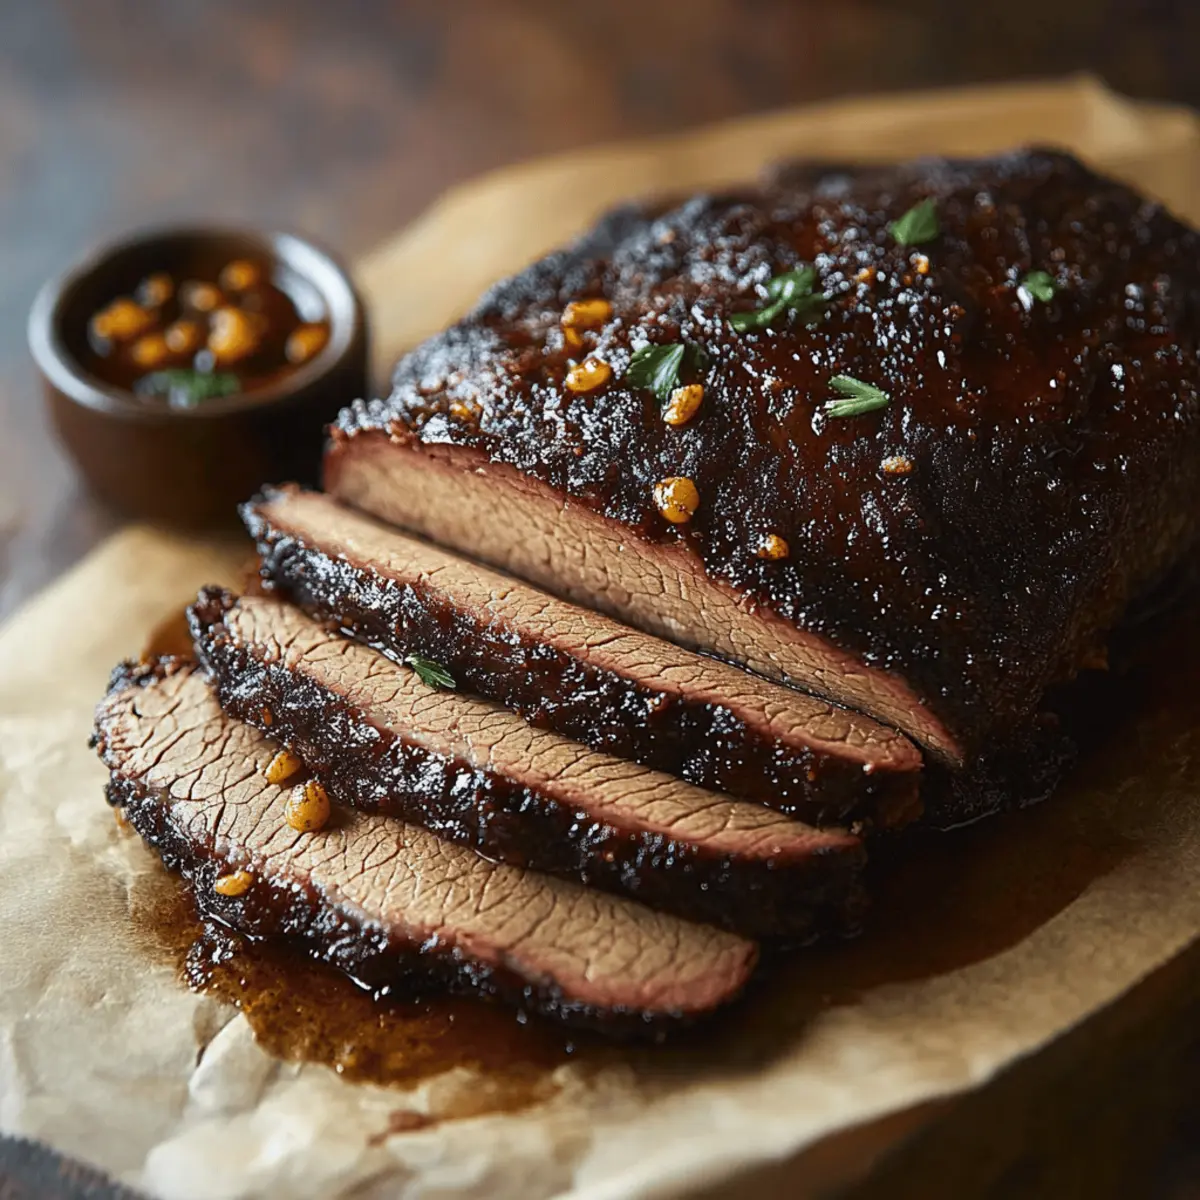
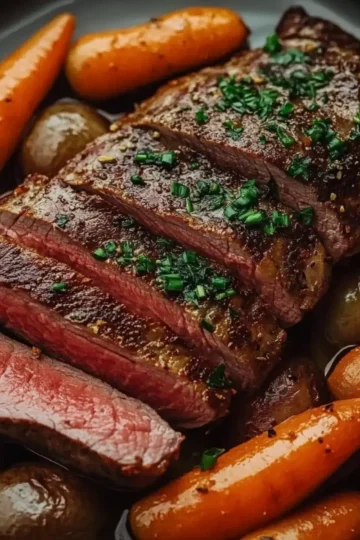
Using a sharp knife, slice the brisket against the grain to ensure each piece remains tender. Aim for about ¼-inch thick slices for a perfect bite. Serve your Texas-Style Brisket in the Oven with your favorite sides, and watch as family and friends rave about your incredible culinary achievement!
Texas-Style Brisket Variations
Feel free to get creative as you prepare your Texas-Style Brisket, making it your own with flavorful twists and substitutions!
-
Spicy Kick: Add crushed red pepper flakes or cayenne to the rub for a zesty heat. Your taste buds will thank you for a thrilling burst of spice with each bite!
-
Herb Infusion: Mix in fresh herbs like rosemary or thyme into the rub to elevate the flavor profile. Just a sprinkle will introduce a delightful aromatic touch to your brisket.
-
Smoky Flavor: If you miss the grill, add a few drops of liquid smoke to the rub for that classic barbecue taste. It captures the essence of outdoor cooking right in your oven!
-
Sweet Twist: Incorporate brown sugar into the rub to enhance caramelization during cooking. This addition not only balances the spice but gives a lovely sweetness, creating a dynamic flavor contrast.
-
Garlic Goodness: Mince fresh garlic or include garlic powder in your rub for an irresistible savory depth. It’s amazing how this simple addition can transform the flavor landscape of your brisket!
-
Vegetarian Option: Substitute a hearty vegetable like portobello mushroom in place of brisket. Follow the same rub and cooking method for a delightful plant-based treat that captures the essence of the original dish!
-
Beer Braised: Replace some of the moisture with beer in the cooking process for rich, malty undertones. This creates a beautifully tender brisket with an added layer of complexity, sure to impress your guests!
-
BBQ Sauce Slather: Serve with your favorite homemade or store-bought barbecue sauce brushed on before baking for extra flavor. This tangy addition makes each slice even more delectable!
As you embark on your brisket journey, remember to explore different flavors and adapt the recipe to your taste. For tips on perfecting your cut, check out our guide on how to slice it just right for an unbeatable dining experience!
Expert Tips for Texas-Style Brisket
Select Wisely: Choose a brisket with good marbling to ensure juicy and flavorful meat. Avoid lean cuts, as they can dry out during cooking.
Rub It Right: Don’t skimp on the Texas-Style Brisket Rub; generous seasoning is key for a robust flavor. Let it rest before cooking for best results.
Temperature Check: Use a reliable meat thermometer to monitor the internal temperature. Wrapping the brisket too early can lead to undercooked meat.
Resting is Essential: Allow the brisket to rest after cooking to lock in juices. This step transforms good brisket into unbelievably tender Texas-Style Brisket in the Oven.
Slice Against the Grain: Always slice your brisket against the grain to ensure tender, melt-in-your-mouth pieces. Tricky, but practice makes perfect!
Make Ahead Options
These Texas-Style Brisket in the Oven are perfect for busy home cooks looking to save time while still enjoying a delicious meal! You can prepare the brisket by applying the Texas-Style Brisket Rub up to 24 hours in advance; simply wrap the seasoned meat in plastic wrap and refrigerate to allow the flavors to meld beautifully. Additionally, the brisket itself can be cooked ahead and stored in the fridge for up to 3 days. Just wrap it tightly in foil after cooking to maintain moisture. When you're ready to serve, simply reheat in a low oven or on the grill for that fresh-out-of-the-oven taste, ensuring every bite is just as tender and juicy as if it were made that day!
What to Serve with Texas-Style Brisket in the Oven
A hearty meal deserves equally delightful accompaniments that will enhance each bite and complete your dining experience.
-
Creamy Coleslaw: This cool, crunchy side adds a light contrast to the rich, smoky brisket, brightening each mouthful.
-
Buttery Cornbread: Soft and sweet, cornbread perfectly soaks up brisket juices while offering a comforting, Southern charm to your meal. Pairing this bread with the savory meat brings a delightful balance of flavors.
-
Garlic Mashed Potatoes: Creamy and garlicky, these mashed potatoes serve as an ideal base for drizzling that delicious brisket sauce. The creamy texture envelops the flavors beautifully.
-
Pickled Jalapeños: For those who crave a little heat, adding pickled jalapeños gives a zesty kick that elevates the brisket. Their acidity provides a fresh counterpoint to the richness of the meat.
-
Grilled Vegetables: A colorful array of grilled vegetables offers a smoky char that complements the brisket while introducing a subtle sweetness. This vibrant side not only looks appealing but brings added nutrition to your plate.
-
Sweet Tea: A classic pairing, the sweet and refreshing taste of sweet tea balances the savory elements of the Texas-Style Brisket, making each bite even more enjoyable.
-
Chocolate Pecan Pie: End your meal on a sweet note with this decadent dessert. Its rich chocolate and nutty flavors create a delightful closure to the feast, leaving everyone satisfied and happy.
How to Store and Freeze Texas-Style Brisket
Fridge: Store leftover Texas-Style Brisket in an airtight container for up to 3 days. Allow it to cool completely before refrigerating to preserve moisture and flavor.
Freezer: Wrap brisket tightly in plastic wrap followed by aluminum foil or place in a freezer-safe bag for up to 3 months. This prevents freezer burn and keeps it delicious for later use.
Reheating: To reheat, thaw brisket overnight in the fridge. Warm slices gently in the oven at 300°F (150°C) covered with foil for about 15-20 minutes, or until heated through. Enjoy the same tender goodness!
Texas-Style Oven Brisket Recipe FAQs
What type of brisket should I choose for the best flavor?
Absolutely! For the best flavor and tenderness, look for a USDA Choice or Prime brisket cut that has good marbling. This fat will melt during cooking, ensuring a juicy and flavorful result. Steer clear of lean cuts, as they can dry out and won't deliver that melt-in-your-mouth experience you're aiming for.
How should I store leftover Texas-Style Brisket?
Very simple! Store your leftovers in an airtight container in the fridge for up to 3 days. Make sure to let the brisket cool completely before refrigerating; this helps maintain its moisture and flavor. If you want to enjoy it beyond the three-day mark, consider freezing it!
Can I freeze Texas-Style Brisket, and how do I do it?
Yes, you can absolutely freeze it! To do so, wrap the brisket tightly in plastic wrap, ensuring all surfaces are covered. Next, wrap it in aluminum foil or place it in a freezer-safe bag to prevent freezer burn. When stored this way, it can last up to 3 months. When you're ready to enjoy it again, just thaw it overnight in the fridge and reheat gently.
What are some common issues when cooking brisket?
One issue might be undercooking it; always use a reliable meat thermometer to ensure it reaches around 200°F for that tender texture. If you find your brisket is tough, it might not have been cooked long enough. Cooking low and slow is key, so don't rush this process! If it’s too dry, you may have wrapped it too early—waiting until it hits 165°F before wrapping helps lock in moisture.
Are there any dietary considerations I should keep in mind for my Texas-Style Brisket?
Absolutely! If you're serving guests, take note of potential allergies; brisket is naturally gluten-free, but pre-packaged rubs can sometimes contain gluten or other allergens. As always, check labels or consider making your own rub to ensure it meets dietary needs. And if you're cooking for pets, keep in mind that some ingredients may not be safe for them, so it's best to avoid sharing brisket with furry friends!
How long should I let the brisket rest after cooking?
Resting is essential! Aim to let your cooked brisket rest for at least 30 to 45 minutes after it comes out of the oven. This resting period allows the juices to redistribute throughout the meat, enhancing its flavor and making it even more tender. During this time, loosely cover it with foil to keep it warm and create even juicier slices when serving.
Tender Texas-Style Brisket in the Oven for Flavor Bliss
Ingredients
Equipment
Method
- Choose a brisket cut that boasts good marbling—aim for a USDA Choice or Prime cut. Remove excess fat, leaving a thin layer.
- Rub the brisket evenly with the Texas-Style Brisket Rub, covering all sides generously. Let it rest for at least 30 minutes.
- Preheat your oven to 250°F (121°C) and prepare a roasting pan lined with aluminum foil and set a wire rack on top.
- Place the seasoned brisket on the wire rack, fat side up. Insert a meat thermometer into the thickest part.
- Cook the brisket for approximately 1 hour per pound, monitoring the thermometer as it approaches 165°F (74°C).
- Once at 165°F, remove the brisket and wrap it tightly in aluminum foil or butcher paper.
- Return the wrapped brisket to the oven until it reaches around 200°F (93°C), which takes an additional 1 to 2 hours.
- Remove the brisket, unwrap, and let it rest on a cutting board for 30 to 45 minutes.
- Slice the brisket against the grain into about ¼-inch thick pieces and serve with your favorite sides.

Leave a Reply