
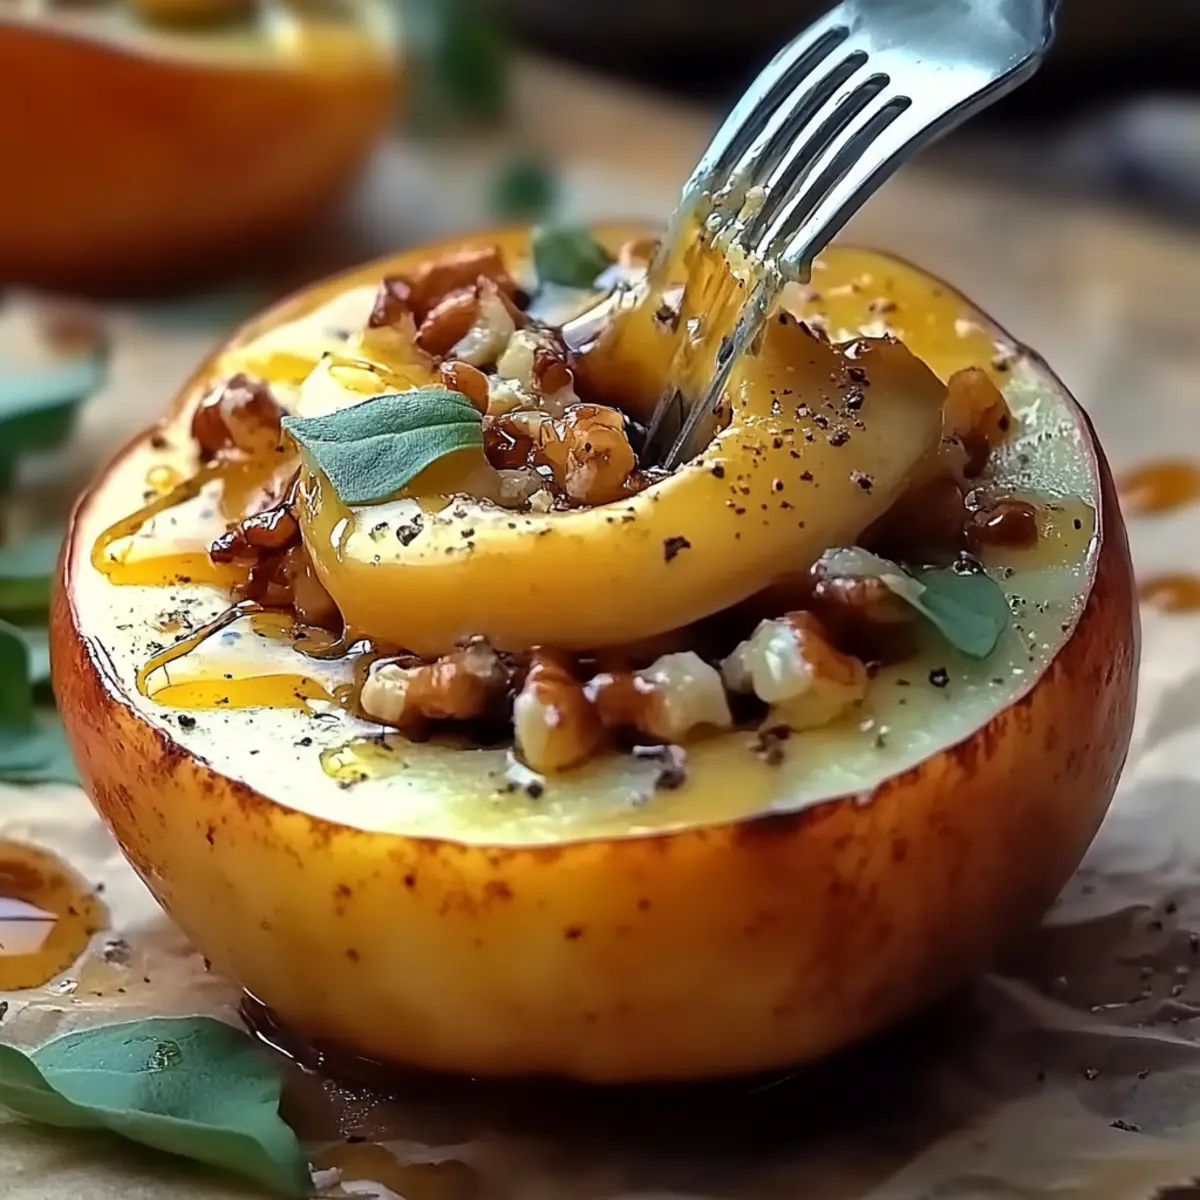
One evening, with the sun casting a golden hue through my kitchen window, I discovered a delightful way to transform simple pears into a breathtaking appetizer. These Blue Cheese Stuffed Pears are a true testament to the magic of home cooking. With just a handful of ingredients, including creamy blue cheese and crunchy walnuts, this recipe is not only quick to prepare but also an impressive crowd-pleaser. Whether you’re hosting a dinner party or simply seeking an elegant treat for yourself, these pears offer a wonderful balance of sweet and savory flavors. Plus, they can be enjoyed warm, drizzled with honey, or served cold as part of a lovely cheese board. Ready to elevate your culinary game? Let’s dive into this delicious adventure together!

Why Make Blue Cheese Stuffed Pears?
Elegant Appetizer: These stuffed pears create a stunning dish that impresses guests without the fuss.
Flavor Explosion: The glorious combination of creamy blue cheese, crunchy walnuts, and sweet honey offers a decadent taste that’s hard to resist.
Quick Preparation: With only 30 minutes from prep to plate, you’ll have a sophisticated dish ready without spending hours in the kitchen.
Versatile Serving: Perfect as a warm appetizer or a chilled addition to your cheese board, they suit any occasion!
Healthier Alternative: Why settle for fast food when you can enjoy this delightful and nutritious option that brings together fresh ingredients? Serve them alongside a light salad for a complete meal experience!
Blue Cheese Stuffed Pears Ingredients
• Create a savory treat that’s irresistible!
For the Pears
- 2 ripe pears – Choose Bartlett or Anjou for their sweet and juicy flavor.
For the Filling
- 4 ounces blue cheese – This adds a rich creaminess that elevates the dish.
- ½ cup walnuts – Chop them for a delightful crunch and nutty flavor.
- 1 tablespoon fresh lemon juice – This brightens the filling and balances richness.
- Salt – A pinch enhances the flavors beautifully.
- Pepper – Freshly cracked adds a dash of warmth.
For Drizzling
- Honey – Drizzle just before serving for extra sweetness, making these Blue Cheese Stuffed Pears even more delicious!
Step‑by‑Step Instructions for Blue Cheese Stuffed Pears
Step 1: Preheat the Oven
Begin by preheating your oven to 375°F (190°C). This ensures that your Blue Cheese Stuffed Pears will bake evenly and efficiently. While the oven warms up, gather your ingredients and tools, including a baking sheet lined with parchment paper to prevent sticking, making clean-up a breeze.
Step 2: Prepare the Pears
Carefully slice the ripe pears in half lengthwise, removing the core using a melon baller or a small spoon. Once halved, place the pear halves cut side up on the parchment-lined baking sheet. At this stage, the pears should be perfectly ripe, showcasing their sweet, juicy flesh, which will complement the savory filling beautifully.
Step 3: Make the Filling
In a small mixing bowl, combine the crumbled blue cheese, chopped walnuts, fresh lemon juice, salt, and pepper. Mix well until all ingredients are evenly distributed, creating a rich and flavorful stuffing. The blue cheese should be creamy and the walnuts should add a delightful crunch, making each bite of your Blue Cheese Stuffed Pears a burst of flavor.
Step 4: Stuff the Pears
Generously spoon the blue cheese mixture into the center of each pear half, ensuring an even distribution among them. The filling should be heaped slightly above the pear edges to create a beautiful presentation. As you fill each pear, the aroma of the blue cheese will start to waft through your kitchen, hinting at the deliciousness to come.
Step 5: Drizzle with Honey
Once the pears are stuffed, take a moment to drizzle the honey over each pear half. This sweet touch will enhance the dish’s flavor profile and create a lovely contrast to the savory blue cheese. The honey will also caramelize as the Blue Cheese Stuffed Pears bake, adding a glossy finish.
Step 6: Bake the Pears
Place the baking sheet with the stuffed pears into the preheated oven and bake for 15-20 minutes. Keep an eye on them, as you’ll want the pears to become tender and the filling to take on a golden brown hue. When done, the edges should be slightly bubbling, indicating the filling is beautifully cooked.
Step 7: Cool and Serve
Once baked, remove the Blue Cheese Stuffed Pears from the oven and allow them to cool for a few minutes. You can drizzle with additional honey if desired for an extra touch of sweetness. Serve them warm on a bed of fresh arugula or mixed greens to add a pop of color and a burst of freshness to your elegant appetizer.

Storage Tips for Blue Cheese Stuffed Pears
Fridge: Store leftovers in an airtight container in the refrigerator for up to 2 days, ensuring the flavors remain fresh and vibrant.
Freezer: For longer storage, freeze the stuffed pears in a single layer on a baking sheet before transferring them to a freezer-safe bag. They will keep well for up to 3 months.
Reheating: When ready to enjoy, reheat the Blue Cheese Stuffed Pears in a preheated oven at 350°F (175°C) for about 10-15 minutes, or until warmed through.
Serving Suggestion: Serve them warm or let them cool and layer them as part of a cheese board for a delightful treat that impresses.
Tips for the Best Blue Cheese Stuffed Pears
-
Choose Ripe Pears: Select pears that are ripe but still slightly firm. Overripe pears can become mushy after baking, ruining the texture.
-
Balance Flavors: Adjust the amount of honey based on your taste preferences. Too much can overshadow the savory notes of the blue cheese in your Blue Cheese Stuffed Pears.
-
Mix Well: Ensure the filling ingredients are thoroughly blended for a consistent flavor throughout the dish. Uneven distribution can lead to some bites being overly salty or bland.
-
Watch Baking Time: Keep a close eye on your pears while baking. They should be tender but not mushy, ideally taking about 15-20 minutes, depending on their ripeness.
-
Garnish Creatively: Consider topping your Blue Cheese Stuffed Pears with fresh herbs or additional walnuts before serving for added texture and visual appeal.
Blue Cheese Stuffed Pears Variations
Feel free to indulge your creativity and personalize this delightful recipe to suit your taste and dietary preferences!
-
Vegan Alternative: Swap blue cheese for a creamy vegan cheese and use pecans instead of walnuts for a plant-based twist. The substitution won’t compromise on flavor!
-
Nut-Free Option: Omit walnuts completely and replace them with crispy breadcrumbs seasoned with herbs for a delightful crunch. This way, everyone can enjoy the stuffed pears without worry.
-
Spicy Kick: Add a pinch of cayenne pepper or a drizzle of sriracha to the cheese filling for an unexpected heat that beautifully contrasts with the sweetness of the fruit.
-
Herb-Infused: Stir in fresh herbs like thyme or rosemary into the blue cheese mixture for an aromatic twist that elevates each bite with a fragrant touch. The complexity of flavors will enchant your palate!
-
Balsamic Drizzle: Replace honey with a tangy balsamic reduction drizzled on top for a sophisticated flavor profile that perfectly balances the sweetness of the pears.
-
Cheese Medley: Mix in a bit of crumbled goat cheese or feta with the blue cheese for added creaminess and a tangy flavor boost. Each stuffed pear will become a delicious surprise!
-
Stuffing Variations: Incorporate sautéed mushrooms or spinach into the filling mixture for added depth and texture. These earthy flavors can make your dish even more satisfying.
-
Grilled Version: Try grilling the pears instead of baking them for a smoky flavor that adds an incredible depth to your Blue Cheese Stuffed Pears. Grilling truly transforms the dish into something memorable!
Remember to explore and mix flavors to create a version that truly speaks to your heart and palate! If you're interested in how to make flavorful salads to pair with your stuffed pears, be sure to check out my suggestions for what to serve with Blue Cheese Stuffed Pears. Enjoy the culinary journey!
What to Serve with Blue Cheese Stuffed Pears
Enhance the experience of these delightful stuffed pears by pairing them with complementary flavors and textures.
-
Creamy Mashed Potatoes: Their buttery richness balances the savory blue cheese, creating a comforting contrast on your plate.
-
Fresh Arugula Salad: Tossed lightly with lemon vinaigrette, it adds a peppery crunch that brightens your meal while accentuating the pears' sweetness.
-
Caramelized Brussel Sprouts: Their caramelized, slightly nutty flavor pairs beautifully with the pears, adding depth and sophistication to the dish.
-
Charcuterie Board: Featuring assorted cheeses, nuts, and cured meats, this offer a delightful variety, perfect for mingling flavors with the blue cheese stuffed pears.
-
Honeyed Walnuts: A simple, sweet snack that echoes the flavors in your dish, adding extra crunch and sweetness.
-
Sparkling White Wine: A crisp, refreshing sip cleanses the palate and elevates the entire meal, complementing the richness of the cheese.
-
Balsamic Reduction Drizzle: Swirling this tangy reduction over the pears enhances their sweetness while providing an elegant finish to the presentation.
-
Dark Chocolate Truffles: For dessert, the rich bitterness of dark chocolate offers a luxurious ending that pairs splendidly with the savory notes of your meal.
Make Ahead Options
These Blue Cheese Stuffed Pears are perfect for busy home cooks looking to save time without sacrificing flavor! You can prepare the filling (blue cheese, walnuts, lemon juice, salt, and pepper) up to 24 hours in advance; just store it in an airtight container in the refrigerator to maintain its freshness. Additionally, you can slice the pears and toss them with a bit of lemon juice to prevent browning—store them in a separate container for optimal quality. When you’re ready to cook, simply stuff the pears with the prepared filling, drizzle with honey, and bake as directed. This way, you'll have a gourmet appetizer ready to impress with minimal day-of effort!

Blue Cheese Stuffed Pears Recipe FAQs
How do I choose ripe pears for this recipe?
Absolutely! When selecting pears, look for Bartlett or Anjou varieties that yield slightly to gentle pressure but aren’t overly soft. Ideal ripeness should show no dark spots or bruising—just a little firmness with a sweet aroma.
How should I store leftover Blue Cheese Stuffed Pears?
For optimal freshness, store any leftovers in an airtight container in the refrigerator for up to 2 days. Make sure they are completely cooled before sealing. This way, you’ll preserve their delightful flavors!
Can I freeze Blue Cheese Stuffed Pears?
Very! To freeze, place the stuffed pears in a single layer on a baking sheet and freeze until solid. Then, transfer them to a freezer-safe bag or container. They can be stored for up to 3 months. When you’re ready to enjoy, thaw in the refrigerator overnight and reheat gently.
What should I do if the filling is too salty?
No worries! If your filling tastes too salty, try balancing it by adding a touch more honey or a small squeeze of lemon juice to the mixture before stuffing the pears. This will help cut through and balance out the flavor.
Are these Blue Cheese Stuffed Pears suitable for my gluten-free guests?
Absolutely! All the main ingredients in this recipe are gluten-free, making it a perfect choice for guests with gluten sensitivities. Just ensure your blue cheese and any added garnishes are also gluten-free, and everyone can indulge together.
How do I know when to take the pears out of the oven?
You’ll want to keep an eye on them as they bake. The pears should be tender when pierced with a fork, and the filling will be slightly golden brown after about 15-20 minutes. The edges may also bubble, which is perfectly normal!
Delicious Blue Cheese Stuffed Pears for a Cozy Evening
Ingredients
Equipment
Method
- Preheat your oven to 375°F (190°C) and prepare a baking sheet lined with parchment paper.
- Slice the pears in half lengthwise and remove the core.
- In a bowl, combine blue cheese, walnuts, lemon juice, salt, and pepper. Mix well.
- Stuff the pear halves with the blue cheese mixture, heaping slightly above the edges.
- Drizzle honey over each pear half before baking.
- Bake the stuffed pears for 15-20 minutes until tender and filling is golden brown.
- Cool for a few minutes, then serve warm on a bed of arugula or mixed greens.


Leave a Reply