
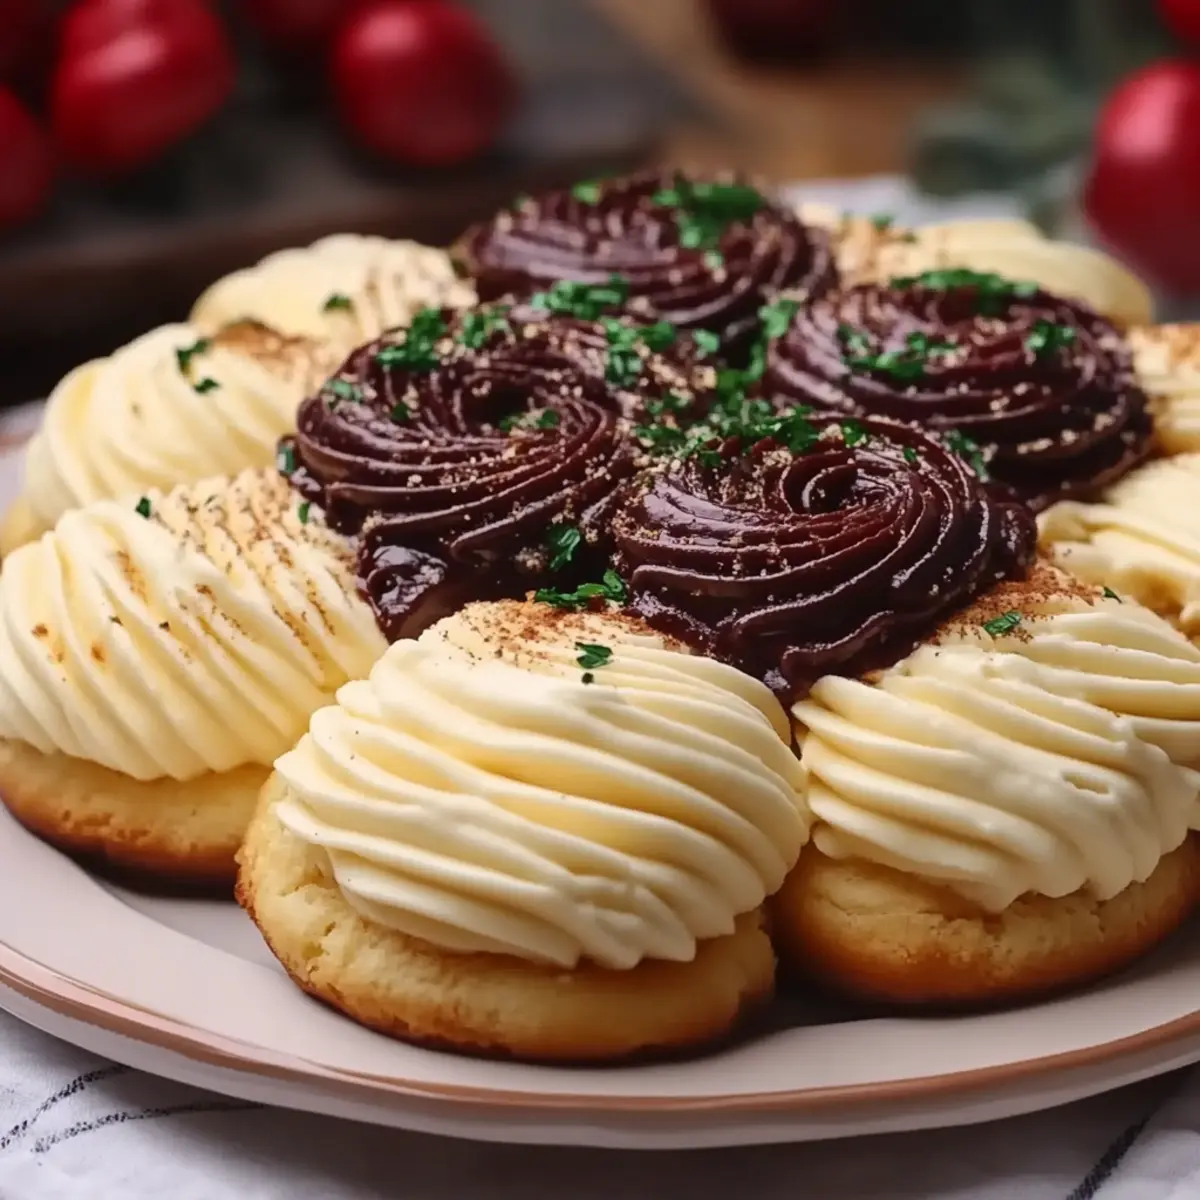
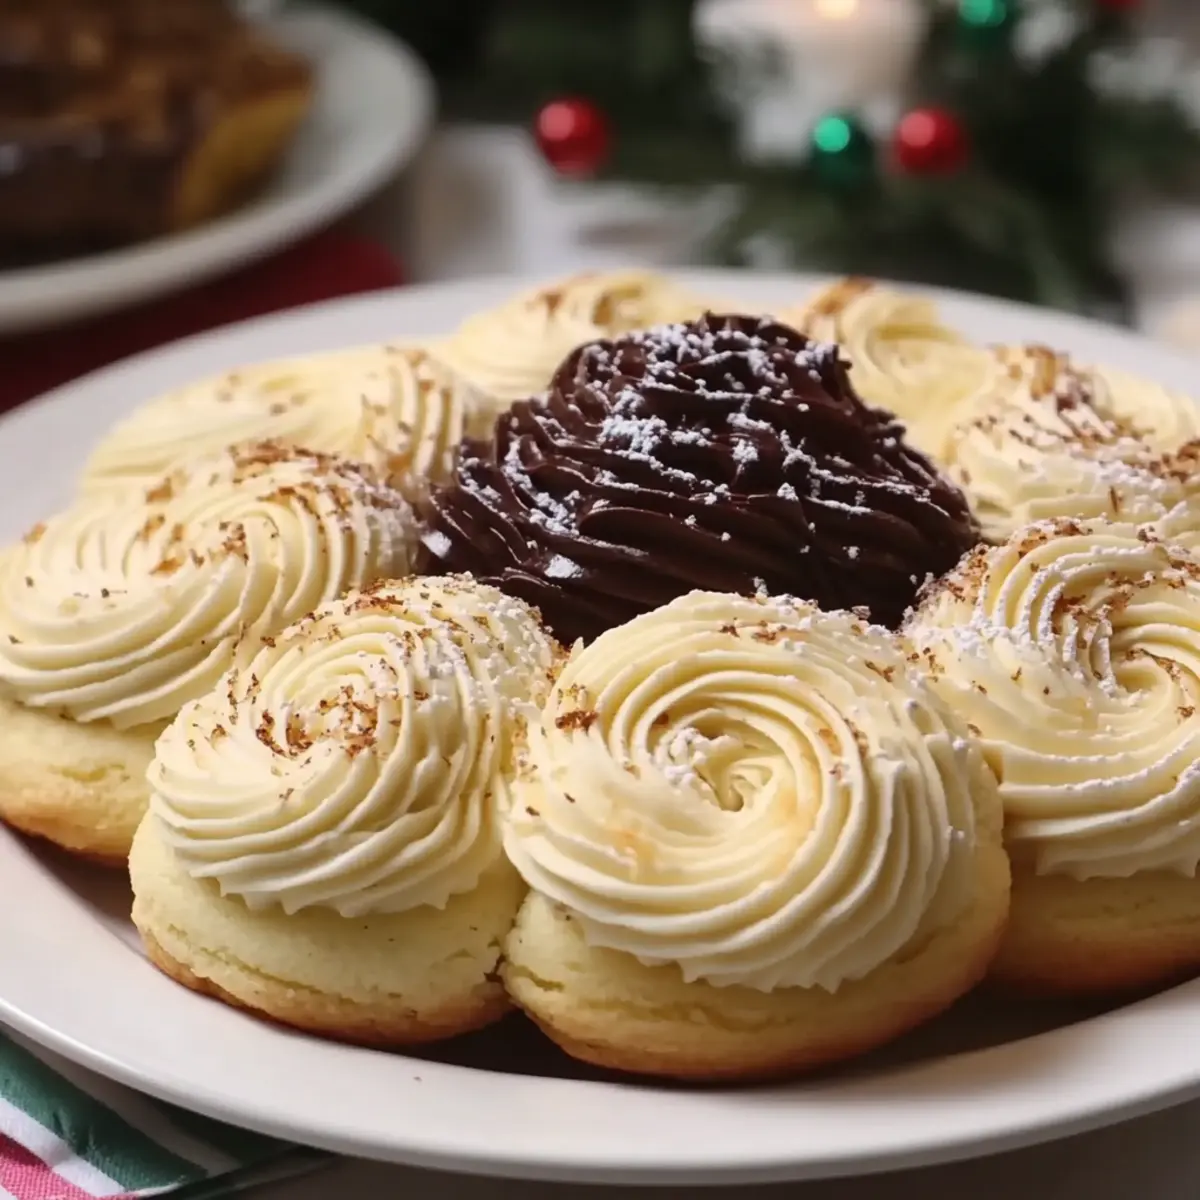
As I stood in my kitchen, the rich aroma of unsalted butter softening on the counter transported me straight to the charming cafés of Denmark. This easy and delightful Danish Butter recipe is a game-changer for anyone looking to elevate their breakfast routine or add a touch of luxury to everyday meals. In just 10 minutes of prep, you’ll craft a creamy spread that transforms simple toast, pancakes, or even desserts into gourmet delights. Not only is this butter a breeze to whip up, but it’s also a customizable treat—you can add a splash of lemon juice or extra cream to tailor it to your taste. Curious how a simple ingredient can make such a lovely difference at your table? Let's dive into this culinary adventure!

Why is Danish Butter a Must-Try?
Creamy Luxury: Whip up this Danish Butter in just 10 minutes, and infuse your meals with rich indulgence!
Versatile Delight: Perfect on toast, pancakes, or desserts, it's a crowd-pleaser.
Customizable Flavor: Add lemon juice or heavy cream for your unique twist, making it tailored to your palate.
Prep Ahead: Enjoy the convenience of making it in advance—ideal for those busy mornings.
Elevate your dishes with this incredible spread, and don’t forget to explore serving suggestions in our Serving Suggestions!
Danish Butter Ingredients
• Get ready to blend creamy perfection!
For the Butter Mixture
- Unsalted butter – essential for that smooth, creamy texture; always allow it to soften.
- Powdered sugar – adds just the right amount of sweetness without grittiness.
- Vanilla extract – a beautiful aromatic touch that elevates the flavor profile.
- Salt – enhances the overall taste, balancing the sweetness perfectly.
Optional Add-ins
- Heavy cream – makes the butter even richer and more luxurious for a proper Danish treat.
- Lemon juice – adds a delightful tang that brightens the flavors and makes your Danish Butter unique.
Explore these ingredients and let your creativity shine in the kitchen!
Step‑by‑Step Instructions for Danish Butter
Step 1: Soften the Butter
Begin by allowing 1 cup of unsalted butter to rest at room temperature for about 30 minutes, or until it’s completely soft. You’ll know it’s ready when it easily yields to a gentle touch, leaving a slight indent. This step is crucial for creating the smooth, spreadable texture that defines your Danish Butter.
Step 2: Combine Ingredients
In a large mixing bowl, combine the softened butter with 1 cup of powdered sugar, 1 teaspoon of vanilla extract, and 1 teaspoon of salt. Use a spatula to help incorporate the ingredients, ensuring everything is evenly mixed before moving to the next step, which helps in achieving that creamy blend.
Step 3: Blend Until Smooth
Utilizing an electric mixer set to medium speed, beat the mixture for about 3-4 minutes. As you blend, watch for the ingredients to transform into a fluffy and smooth consistency, with a pale yellow color. This process aerates the butter, making it light and delightful.
Step 4: Customize the Flavor
If you prefer a richer flavor, add 1-2 tablespoons of heavy cream and/or 1-2 teaspoons of lemon juice to the butter mixture. Continue beating for an additional 2 minutes until the ingredients are well incorporated, achieving a silky smooth texture. Taste the mixture to see if the flavors to your liking.
Step 5: Adjust Sweetness or Salt
Take a moment to taste your Danish Butter and decide if you want to adjust the sweetness or saltiness. If you prefer a sweeter profile, add a bit more powdered sugar; if you want more balance, sprinkle in a pinch of salt, then blend briefly to mix.
Step 6: Transfer to Container
Using a spatula, carefully spoon the creamy Danish Butter mixture into an airtight container or silicone mold. Make sure to pack it down gently to eliminate any air pockets, ensuring it retains its fresh texture and flavor when refrigerated.
Step 7: Chill to Firm Up
Place the container in the refrigerator for at least 30 minutes to allow the Danish Butter to firm up. Aim for a cool consistency that allows it to be easily spread yet retains its shape. Once chilled, it’s ready to elevate your baked goods or breakfast staples!

What to Serve with Danish Butter?
Imagine a cozy breakfast spread where every bite is enhanced by a creamy, dreamy touch that elevates your morning routine!
-
Fresh Warm Bread: The perfect canvas for Danish Butter’s rich flavor, creating a delightful breakfast experience.
-
Fluffy Pancakes: Drizzling this butter onto warm pancakes adds a sumptuous layer of sweetness and creaminess that’s irresistible.
-
Golden Waffles: Crispy on the outside, soft inside—Danish Butter melts beautifully into each pocket, enhancing your favorite brunch treat.
-
Savory Muffins: Pair with savory muffins for a surprising balance; the butter’s sweetness and texture make for a unique experience.
-
Scones With Jam: Serve Danish Butter alongside scones and jam for an upscale tea experience, marrying the richness with fruity tang.
-
Oven-Baked Cookies: Elevate classic cookies by using this butter as a spread, making each bite decadent and memorable.
For drinks, consider serving it with freshly brewed coffee or a soothing chai latte to round out the flavors on your table. Enjoy the magic of Danish Butter!
How to Store and Freeze Danish Butter
Fridge: Store your Danish Butter in an airtight container in the refrigerator, where it will remain fresh for up to two weeks. This way, you can enjoy this creamy delight anytime!
Freezer: For longer storage, freeze the Danish Butter in an airtight container or tightly wrapped in plastic wrap for up to three months. Just remember to label it for easy identification.
Thawing: When you're ready to use frozen Danish Butter, simply transfer it to the fridge for a few hours or overnight to thaw gently before serving. Avoid microwaving, as it may alter the texture.
Reheating: While Danish Butter is meant to be enjoyed cold or at room temperature, you can let it sit briefly at room temperature for easier spreading after refrigeration.
Danish Butter Variations & Substitutions
Feel free to get creative with this delightful butter masterpiece; your taste buds will thank you!
- Dairy-Free: Substitute unsalted butter with a plant-based butter alternative for a vegan-friendly twist.
- Sweetness Control: Reduce powdered sugar to ½ cup for a less sweet option that still maintains creaminess.
- Zesty Kick: Add orange zest instead of lemon juice for a warm, citrusy flair that brightens up your Danish Butter.
- Herbal Infusion: Blend in finely chopped fresh herbs like rosemary or thyme for a savory spread option—perfect for brunch!
- Spicy Touch: Stir in a pinch of cayenne pepper for a surprising heat that will tickle your taste buds and thrill your palate.
- Nutty Flavor: Incorporate a tablespoon of almond or hazelnut extract for a luscious nutty flavor that complements sweet and savory dishes alike.
- Flavor Boost: Mix in a teaspoon of ground cinnamon for a warm, cozy element that pairs beautifully with breakfast favorites like toast and pancakes.
- Light & Fluffy: Whip in a tablespoon or two of Greek yogurt for a tangy twist that lightens this butter and adds a creamy texture.
Explore these variations, and don’t hesitate to share your favorites or discover more delicious serving ideas in our Serving Suggestions!
Make Ahead Options
These delightful Danish Butter recipes are a fantastic option for meal prep enthusiasts! You can make the butter mixture up to 3 days in advance, storing it in an airtight container in the refrigerator. To maintain its luscious texture, ensure the butter is thoroughly blended and smoothed out before chilling. When you’re ready to serve, simply scoop it out and let it sit at room temperature for about 10-15 minutes—this will make spreading a breeze, bringing back that creamy consistency. With these prep ahead tips, you’ll save valuable time during busy mornings while still enjoying this gourmet treat!
Expert Tips for Danish Butter
- Perfect Temperature: Allow the butter to soften completely at room temperature; this ensures a smooth blend without lumps.
- Taste Test: Don’t forget to taste your Danish Butter! Adjust sweetness or salt to achieve your perfect balance.
- Custom Add-ins: Experiment with flavors like lemon or heavy cream; small adjustments can make a big difference in your Danish Butter.
- Storage Secrets: Keep it in an airtight container in the fridge for freshness; it can last up to two weeks!
- Easy Serving: Serve with warm bread or waffles for a delightful experience; a small amount goes a long way!
Danish Butter Recipe FAQs
How do I choose the right butter for Danish Butter?
Absolutely! For the perfect Danish Butter, always use unsalted butter. This allows you to control the saltiness of your spread. Make sure the butter is fresh and at room temperature, which helps achieve that creamy texture. If you notice any dark spots or odd smells, it's best to discard it.
What’s the best way to store Danish Butter?
I recommend storing your Danish Butter in an airtight container to keep it fresh for up to two weeks in the refrigerator. If you're planning to use it later, this spread can last even longer—up to three months—in the freezer. Just make sure to use a freezer-safe container!
Can I freeze Danish Butter?
Definitely! To freeze Danish Butter, scoop it into an airtight container or wrap it tightly in plastic wrap, then place it in a freezer bag. Remember to label the package with the date. When you're ready to use it, allow the butter to thaw in the refrigerator for a few hours or overnight for best results.
What if my Danish Butter doesn’t blend smoothly?
Very! If your Danish Butter isn’t smooth, it may simply be that the butter wasn’t softened enough. Try letting the butter sit at room temperature longer and then rebeat it with your electric mixer. If that doesn’t work, you can try adding a small amount of heavy cream to loosen it up; blend until you achieve the desired consistency.
Are there any dietary considerations for Danish Butter?
Yes, keep in mind that this recipe includes dairy, which may not be suitable for lactose-intolerant individuals. Additionally, if you're serving it to guests, it's wise to ask about any allergies related to ingredients like butter or vanilla extract. A vegan alternative could be plant-based butter with a similar approach in preparation!
Can I add other flavors to my Danish Butter?
Absolutely! One of the joys of making your own Danish Butter is the ability to customize it. You can add various flavorings like cinnamon, nutmeg, or even herbs such as dill for a savory twist. Simply mix in your added flavors after combining the primary ingredients and before chilling the butter. Enjoy experimenting!
Deliciously Creamy Danish Butter for Homemade Delights
Ingredients
Equipment
Method
- Soften the butter at room temperature for about 30 minutes until completely soft.
- Combine the softened butter, powdered sugar, vanilla extract, and salt in a mixing bowl.
- Blend using an electric mixer on medium speed for 3-4 minutes until fluffy and smooth.
- For richer flavor, add heavy cream and/or lemon juice, then blend for an additional 2 minutes.
- Taste and adjust sweetness or saltiness as needed, blending briefly to mix.
- Transfer the mixture to an airtight container and pack it down to eliminate air pockets.
- Chill in the refrigerator for at least 30 minutes to firm up.


Leave a Reply