
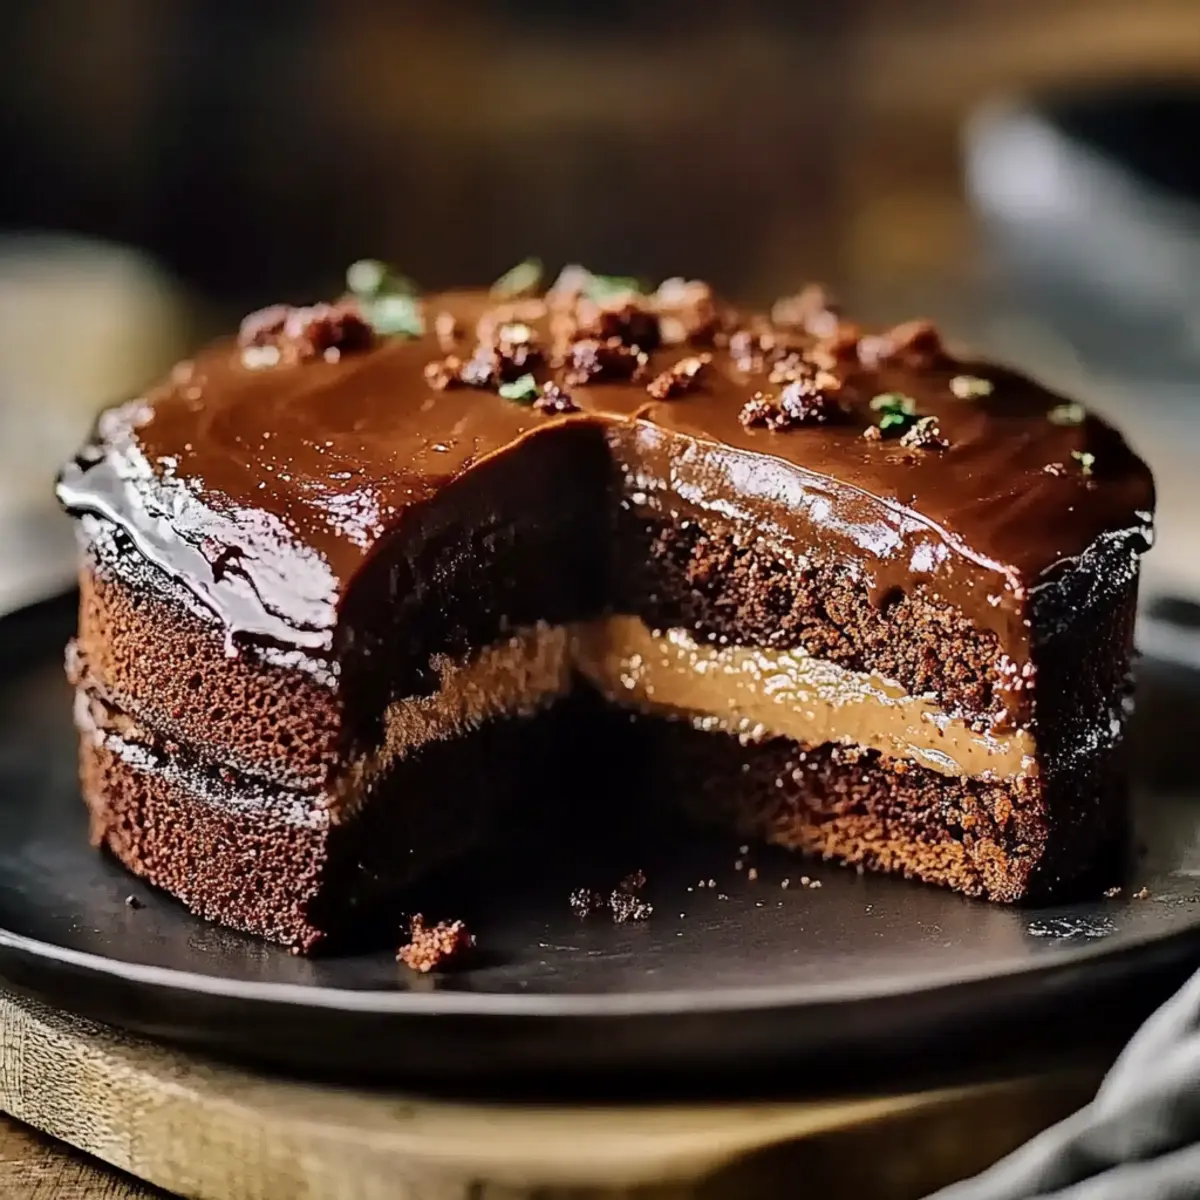
As I sifted through the rich cocoa powder, a wave of nostalgia washed over me, transporting me to childhood kitchen escapades. There’s something truly magical about baking Matilda's Chocolate Cake—it's more than just a dessert; it’s a heartwarming indulgence that brings people together. This delightful chocolate cake is not only quick to whip up, but it’s also a guaranteed crowd-pleaser that can transform any ordinary day into a joyous celebration. Whether you’re treating yourself or impressing guests, this cake is a homemade treasure that never disappoints. Are you ready to discover the secrets of creating a cake that’s simply irresistible? Let’s dive in!
Why is this chocolate cake special?
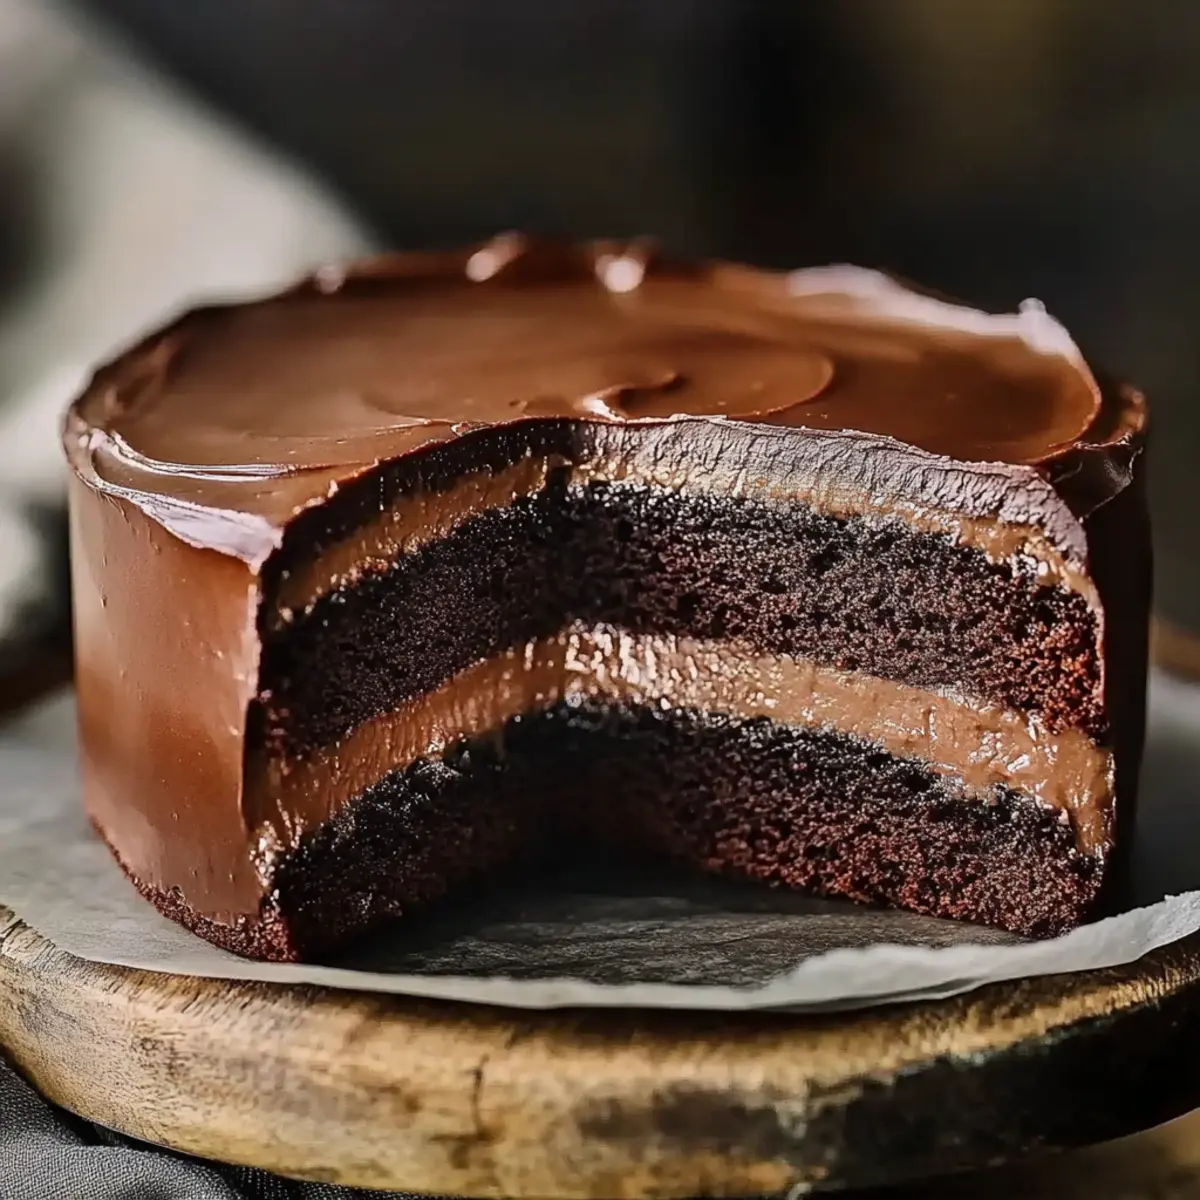
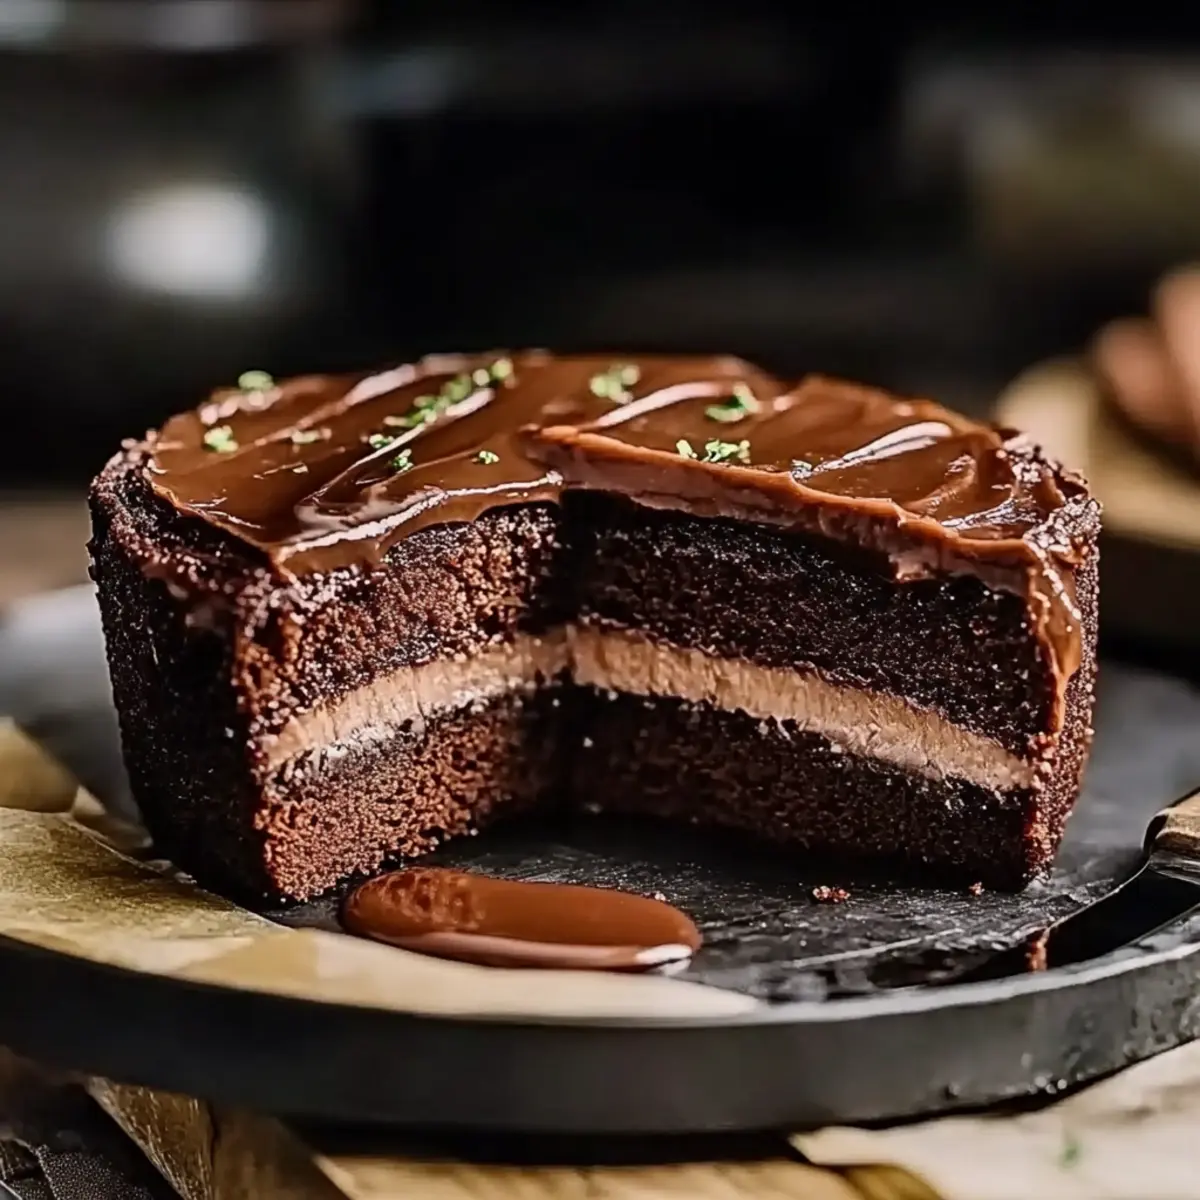
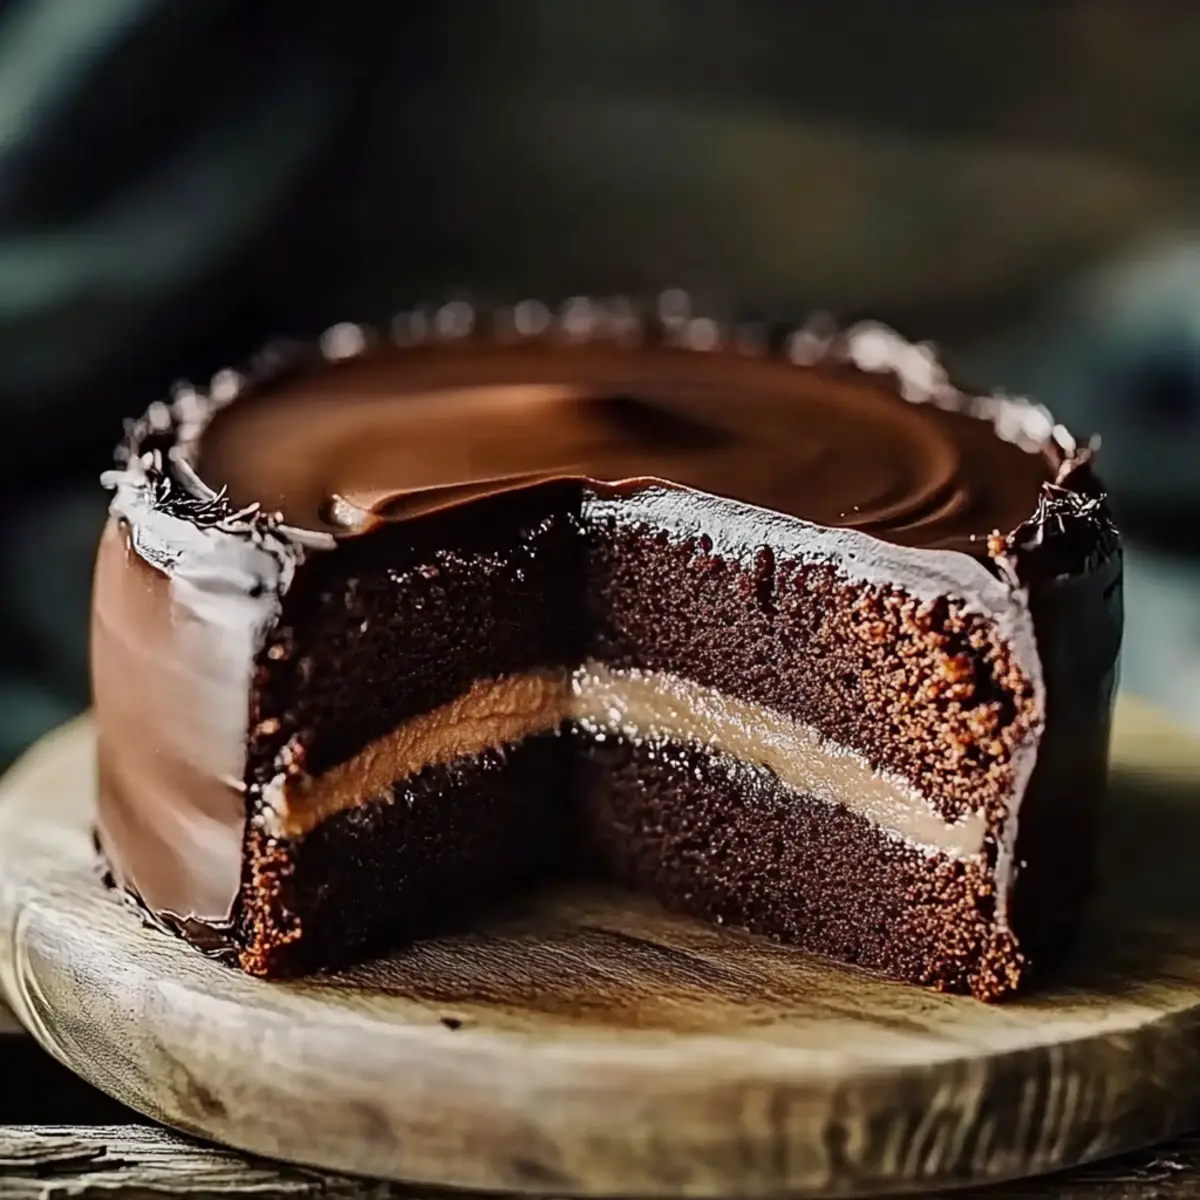
Decadent, Rich Flavor: Each bite of Matilda's Chocolate Cake is a chocolate lover's dream, crafted to showcase the deep, luscious cocoa that will leave you craving more.
Simple Process: With just a few basic steps, even novice bakers can whip up this delightful treat without the fuss—perfect for those busy weeknights!
Versatile Treat: Serve it as-is, top it with whipped cream, or drizzle over chocolate ganache for an added touch of luxury; there's no wrong way to enjoy this cake!
Make-Ahead Friendly: Bake it a day in advance for stress-free entertaining, allowing the flavors to meld while saving you time on your special occasion. Need further inspiration? Check out our tips on make-ahead desserts.
Crowd-Pleasing Delight: Whether for birthdays, anniversaries, or just an afternoon snack, this cake is sure to impress family and friends alike! Enjoy the smiles it brings with each slice.
Chocolate Cake Ingredients
Here’s everything you need to create the ultimate chocolate cake experience!
For the Cake
- All-purpose flour – Essential for structure; be sure to sift it for a lighter texture!
- Granulated sugar – Sweetens and enhances the cake's moistness.
- Unsweetened cocoa powder – This is what gives your chocolate cake its rich flavor; opt for high-quality for the best results.
- Baking soda – Helps the cake rise and achieve a fluffy consistency.
- Baking powder – Works alongside baking soda for an extra lift!
- Salt – Balances the sweetness and intensifies the cocoa flavor.
- Whole milk – Adds moisture and creaminess; use 2% if you want a lighter option.
- Vegetable oil – Contributes to a moist cake; can be replaced with melted butter for a richer taste.
- Large eggs – Provide structure and richness; make sure they’re at room temperature for better mixing.
- Vanilla extract – A splash adds depth of flavor that perfectly complements chocolate.
- Boiling water – Creates a thin batter that results in an incredibly moist cake!
Feel free to explore variations or add extra touches to make this chocolate cake uniquely yours! Enjoy baking and every scrumptious bite that follows!
Step‑by‑Step Instructions for Matilda's Chocolate Cake
Step 1: Preheat and Prepare
Start by preheating your oven to 350°F (175°C). While it's warming up, grease and flour two 9-inch round cake pans to ensure your delicious chocolate cake easily releases after baking. This step not only prevents sticking but also helps in achieving a beautiful, even crust on your cakes.
Step 2: Mix Dry Ingredients
In a large mixing bowl, sift together 2 cups of all-purpose flour, 2 cups of granulated sugar, ¾ cup of unsweetened cocoa powder, 1½ teaspoons of baking soda, 1½ teaspoons of baking powder, and 1 teaspoon of salt. This thorough mixing ensures all the ingredients are evenly distributed and helps to create a light and fluffy chocolate cake.
Step 3: Combine Wet Ingredients
Add 1 cup of whole milk, ½ cup of vegetable oil, 2 large eggs, and 2 teaspoons of vanilla extract to the dry mixture. Using a hand mixer or whisk, blend the ingredients until you achieve a smooth, well-combined batter with no visible flour streaks, about 2-3 minutes. The mixture should have a rich and inviting chocolate aroma.
Step 4: Add Boiling Water
Gradually stir in 1 cup of boiling water, which will thin out the batter, making it pourable. Be careful as the batter may splatter slightly; switch to a spatula if necessary. This step is crucial as the hot water helps to enhance the cocoa flavor and ensures a moist cake.
Step 5: Pour Batter into Pans
Carefully pour the rich batter evenly into the prepared cake pans, filling them about halfway to allow for rising. You can use a scale or measuring cup to ensure uniform distribution. Give each pan a gentle tap on the countertop to release any air bubbles trapped within the batter.
Step 6: Bake to Perfection
Bake in the preheated oven for 25-30 minutes. Keep an eye on the cakes during the baking process. They are ready when a toothpick inserted into the center comes out clean or with a few moist crumbs attached. The tops should look set and slightly spring back when gently pressed.
Step 7: Cool Down
Once baked, remove your chocolate cakes from the oven, and let them cool in the pans for about 10 minutes. This cooling period allows the cakes to firm up slightly, making them easier to transfer. Then, gently run a knife around the edges of each pan before turning them out onto wire racks to cool completely.
Make Ahead Options
Want to enjoy Matilda's Chocolate Cake without the last-minute rush? This delightful recipe is perfect for meal prep! You can mix the dry ingredients (flour, sugar, cocoa powder, baking soda, baking powder, and salt) up to 3 days in advance and store them in an airtight container. Additionally, you can prepare the wet ingredients (milk, oil, eggs, and vanilla) and refrigerate them for up to 24 hours. When you’re ready to bake, simply heat the boiling water and combine everything as per the original instructions. By pre-measuring your ingredients, you not only save time, but you also ensure that the cake remains just as delicious and moist when it’s time to serve!
How to Store and Freeze Chocolate Cake
Room Temperature: If you plan to enjoy your chocolate cake within a few days, simply wrap it tightly in plastic wrap and store it at room temperature for up to 3 days to maintain its softness.
Fridge: For longer freshness, store the wrapped cake in the refrigerator, where it will stay delicious for up to 5 days—just be sure to let it come to room temperature before serving!
Freezer: To freeze, slice the cake and wrap individual pieces in plastic wrap, then place them in an airtight container. It can be frozen for up to 3 months, making it perfect for future indulgences.
Reheating: When you're ready to enjoy your frozen chocolate cake, allow it to thaw in the fridge overnight. For a warm treat, pop a slice in the microwave for about 10-15 seconds!
Chocolate Cake Variations & Substitutions
Feel free to explore these creative twists to personalize your chocolate cake experience!
- Gluten-Free: Substitute all-purpose flour with a gluten-free flour blend for a delicious, accommodating treat that everyone can enjoy.
- Dairy-Free: Use almond milk or oat milk in place of whole milk and a plant-based oil to create a cake that’s rich without dairy!
- Sweetener Swap: Replace granulated sugar with coconut sugar or a sugar alternative like stevia for a lower-calorie option that still satisfies your sweet tooth.
- Nutty Addition: Fold in 1 cup of chopped walnuts or pecans into the batter before pouring it into the pans for a delightful crunch. The nuts enhance the texture and flavor profile, making every bite a surprise!
- Flavor Boost: Add 1 tablespoon of brewed espresso or coffee to intensify the chocolate flavor; it's a game-changer that brings out the richness!
- Zesty Twist: Grate some orange zest into your batter for a subtle citrus brightness that perfectly contrasts the chocolate. It’s an unexpected delight that elevates the classic!
- Fruity Layers: Incorporate layers of raspberry or strawberry jam between the cake layers for a sweet and fruity surprise that complements the chocolate beautifully.
- Spicy Kick: Add a pinch of cayenne pepper or chili powder to the batter to introduce a warm spice that contrasts perfectly with the chocolate sweetness. It’s an adventurous tweak for those who love a little heat!
Let these variations inspire you and create a unique chocolate cake that speaks to your taste! And if you're looking to add more delicious treats to your baking repertoire, don't miss our guide on after-school snacks to round out your dessert lineup!
Tips for the Best Chocolate Cake
Use Quality Cocoa: Always opt for high-quality unsweetened cocoa powder; it greatly enhances the chocolate flavor and richness of your cake.
Temperature Matters: Make sure your eggs and milk are at room temperature before mixing; this helps create a smooth batter and fluffy chocolate cake.
Careful Mixing: Avoid over-mixing once you add the wet ingredients—mix just until combined to keep your cake light and airy!
Don’t Overbake: Keep an eye on your cakes as they bake; check for doneness a couple of minutes early to prevent a dry chocolate cake.
Cool Completely: Ensure the cakes cool completely before frosting to prevent melting your icing and ruining all that hard work you put into baking!
Personal Touches: Feel free to add your favorite ingredients like chocolate chips or nuts for a special twist on this chocolate cake!
What to Serve with Matilda's Chocolate Cake
Imagine indulging in a decadent dessert and elevating your entire meal experience with the perfect accompaniments.
-
Whipped Cream: This light and fluffy topping adds a creamy contrast, balancing the rich chocolate and enhancing each bite of the cake.
-
Fresh Berries: Juicy strawberries or raspberries bring a burst of freshness, brightening the dessert and offering a lovely tart flavor.
-
Chocolate Ganache: Luxurious and glossy, ganache drizzled over the cake intensifies the chocolate experience, making it a true delight for chocolate lovers.
-
Vanilla Ice Cream: The classic pairing with chocolate cake, vanilla ice cream adds a cool creaminess that harmonizes beautifully with the cake's warm, rich flavors.
-
Salted Caramel Sauce: A drizzle of this sweet and salty sauce creates an unexpected twist, enhancing the depth of flavor in every decadent slice.
-
Coffee or Espresso: A warm cup of coffee or a shot of espresso can elevate your dessert experience, cutting through the sweetness and enhancing the chocolate notes in the cake.
Enjoy Matilda's Chocolate Cake with these accompanying delights, creating a memorable meal that will warm your heart and satisfy your cravings!
Matilda's Chocolate Cake Recipe FAQs
How do I select the best cocoa powder for my chocolate cake?
Absolutely! For the richest chocolate flavor, choose a high-quality unsweetened cocoa powder. Look for brands that are Dutch-processed or natural; they offer deep, robust flavor profiles. Check for freshness by ensuring the cocoa isn’t past its expiration date, and if you see it in the store, the packaging should be intact without any signs of moisture.
What’s the best way to store leftover chocolate cake?
Very! If you're planning to enjoy your cake within a few days, simply wrap it tightly in plastic wrap and keep it at room temperature for up to 3 days. If you want it to last longer, store it in the refrigerator for up to 5 days—just remember to bring it to room temperature before indulging!
Can I freeze chocolate cake, and how?
Absolutely! To freeze your chocolate cake, slice it into individual pieces and wrap each slice in plastic wrap. Then, place the wrapped slices in an airtight container or a freezer bag. This method preserves flavor and moisture for up to 3 months. When you're ready to enjoy a piece, simply thaw it in the fridge overnight, or pop it in the microwave for a warm treat—just 10-15 seconds will do!
What should I do if my chocolate cake is rising unevenly?
If your cake doesn't rise evenly, it could be due to improper mixing or oven temperature. Ensure your ingredients, especially eggs and milk, are at room temperature before mixing, which helps the batter come together smoothly. Also, check if your oven is truly preheated; an oven thermometer can help. To fix uneven baking in the future, consider rotating the cake pans halfway through baking.
Are there any dietary considerations I should keep in mind?
Very! If you or your guests have allergies, feel free to substitute the all-purpose flour with gluten-free flour if needed. For dairy-free options, almond or soy milk can replace whole milk, and you can use vegetable oil instead of butter. Always check labels for potential allergens, especially in chocolates and additives.
Decadent Chocolate Cake That’ll Bring You Joy
Ingredients
Equipment
Method
- Preheat your oven to 350°F (175°C). Grease and flour two 9-inch round cake pans.
- In a large bowl, sift together the dry ingredients: flour, sugar, cocoa powder, baking soda, baking powder, and salt.
- Add the wet ingredients: milk, vegetable oil, eggs, and vanilla to the dry ingredients. Mix until smooth, about 2-3 minutes.
- Gradually stir in boiling water to thin the batter.
- Pour the batter evenly into the prepared pans, filling them halfway.
- Bake for 25-30 minutes until a toothpick inserted comes out clean.
- Cool in pans for 10 minutes before transferring to wire racks to cool completely.


Leave a Reply