
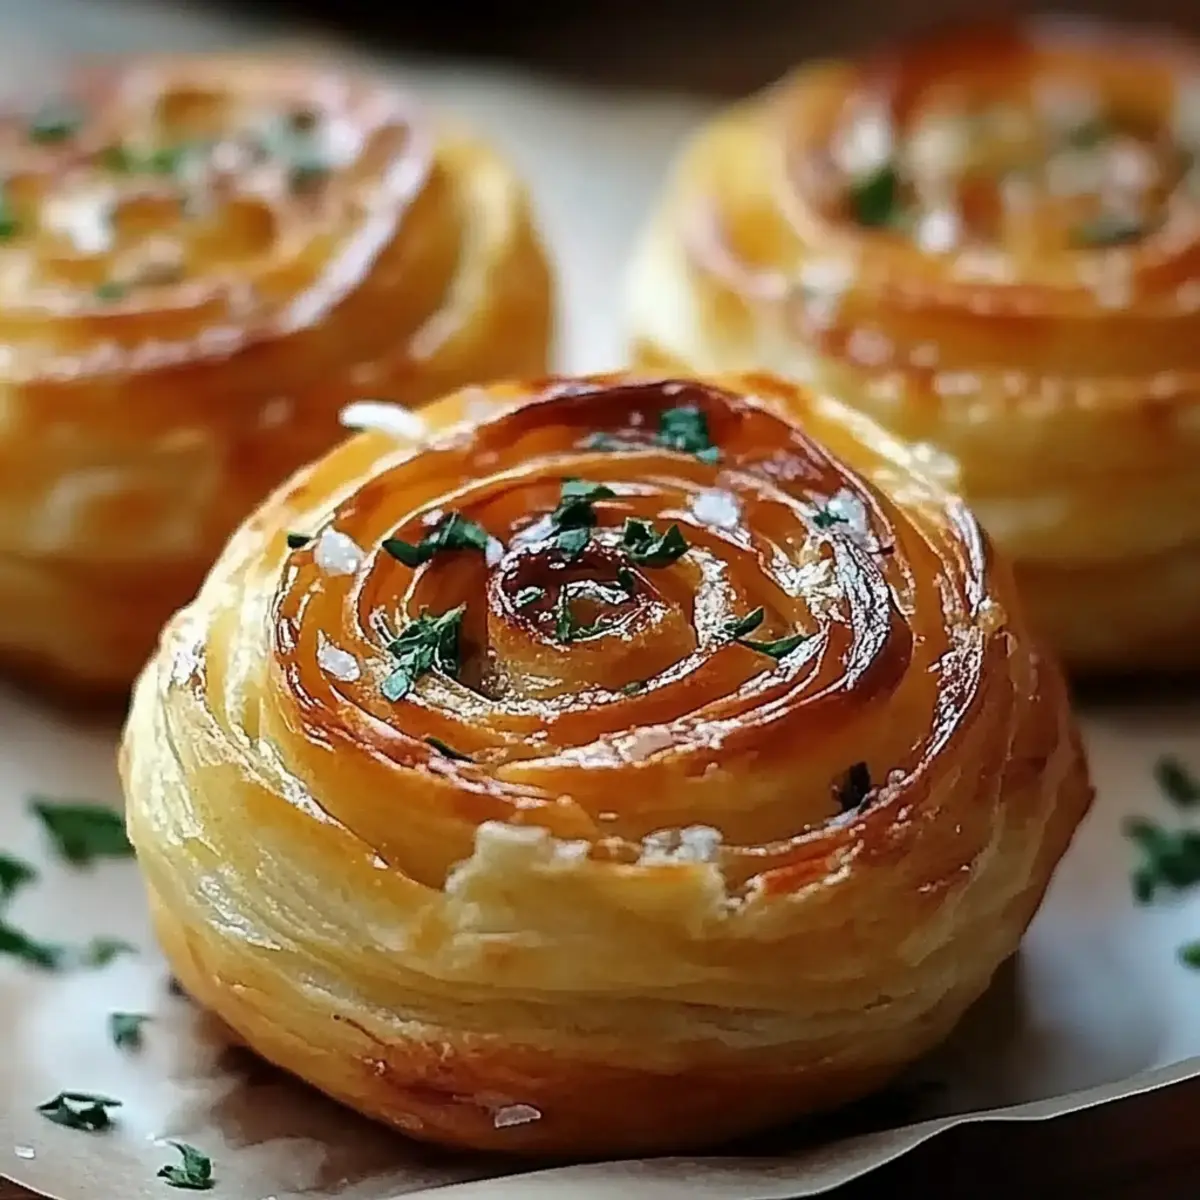
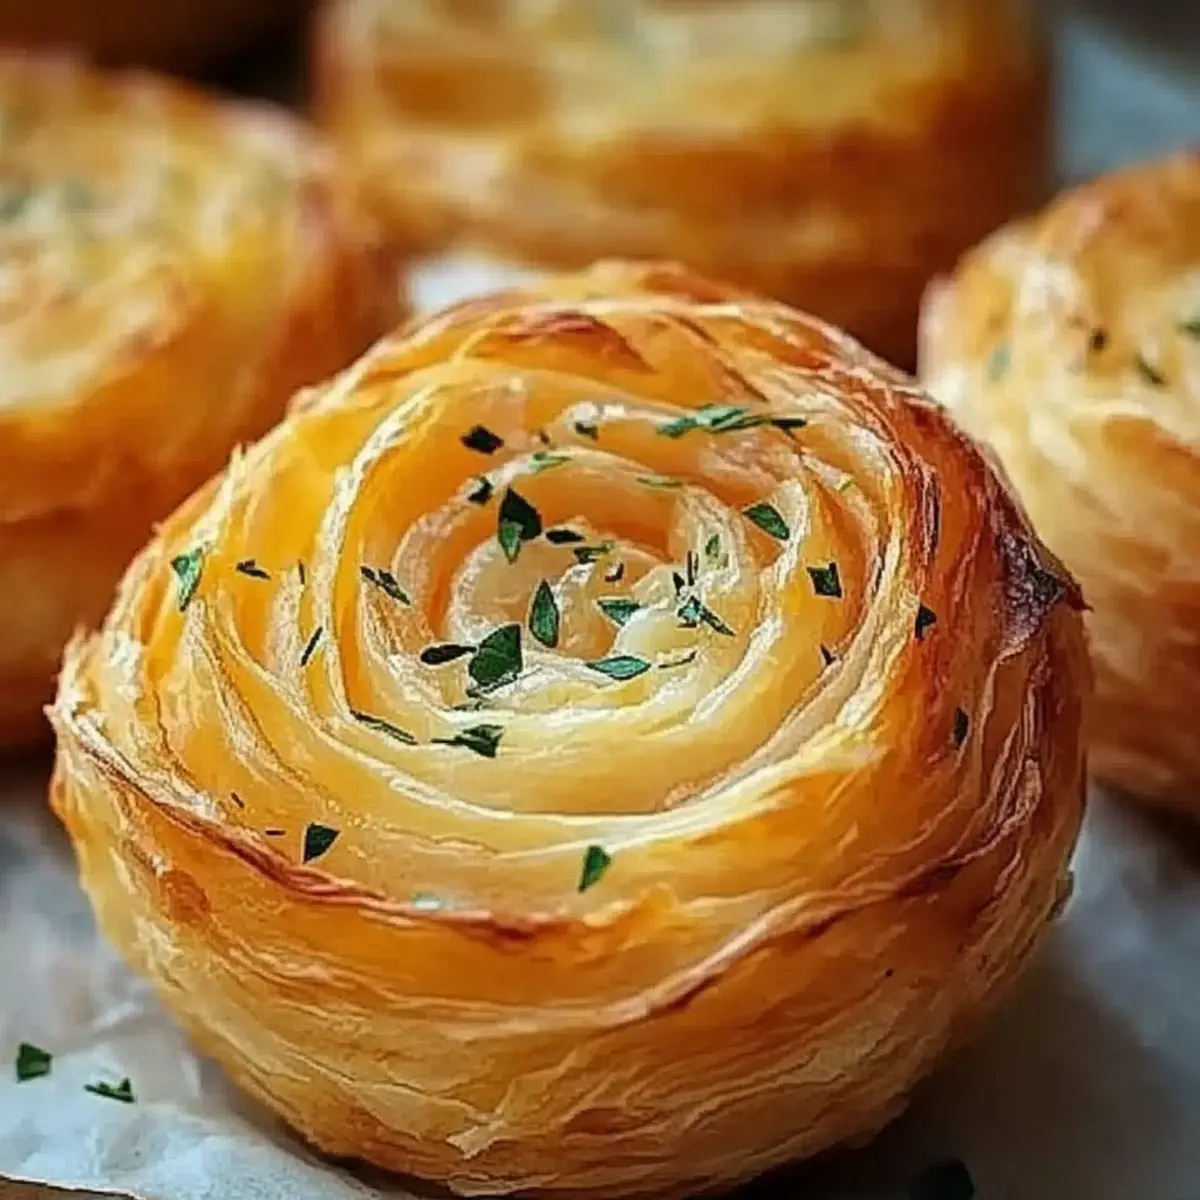
The kitchen filled with the irresistible aroma of melted cheese and savory garlic, pulling me into a moment of sheer delight. Today, I'm thrilled to share my take on Cheesy Garlic Cruffins—an enchanting blend of flaky muffin meets gooey cheese. These delightful bites are not only a crowd-pleaser, but they also make for a quick and comforting dish that elevates any meal. Whether you're serving them as a fun appetizer or a warm side to your favorite soup, their delectable flavor and warm, cheesy goodness are bound to impress even the pickiest eaters. So, are you ready to transform your kitchen into a haven of irresistible smells and taste? Let’s dive in and whip up these scrumptious cruffins together!
Why Are These Cruffins So Irresistible?
Melt-in-Your-Mouth goodness: With the perfect balance of flaky texture and cheesy richness, each bite delivers a delightful surprise.
Quick to Make: In just 45 minutes, you can whip up a batch that’s sure to impress. It’s a fantastic option when you need something delicious on short notice.
Flavor Explosion: The combination of garlic, cheese, and fresh parsley creates an aromatic experience that’s bound to elevate your dining table.
Versatile & Fun: Serve them as an appetizer, side dish, or even a standalone snack. These cruffins adapt to any occasion seamlessly.
Perfect for Sharing: Watch as friends and family gather around the table, irresistibly drawn to the inviting aroma of these cheesy delights! If you’re looking for more delicious ideas, check out my Savory Muffins or explore how to make Garlic Butter Dishes for your next meal!
Cheesy Garlic Cruffins Ingredients
For the Batter
• 2 cups all-purpose flour – This is the base for your dreamy cruffins, providing structure.
• 1 tablespoon baking powder – Ensures the cruffins rise beautifully, yielding a fluffy interior.
• ½ teaspoon salt – Enhances the overall flavor, balancing out the richness of the cheese.
• ½ teaspoon garlic powder – Adds an extra layer of garlicky goodness to the batter.
For the Wet Mixture
• ½ cup unsalted butter, melted – Brings richness and helps create a tender crumb.
• ¾ cup milk – Adds moisture and a touch of creaminess to the dough.
• 1 large egg – Acts as a binder, giving structure to your cruffins.
For the Flavor
• 1 cup shredded cheddar cheese – The star ingredient that melts and oozes, creating that cheesy magic we love.
• 2 tablespoons minced garlic – Fresh garlic offers a robust flavor that elevates these cruffins to the next level.
• 2 tablespoons chopped fresh parsley – This adds a fresh touch and a pop of color, making them even more appetizing.
For Brushing
• 1 tablespoon melted butter – Brush this on top for extra richness and a glossy finish!
These Cheesy Garlic Cruffins are about to make your kitchen unforgettable!
Step‑by‑Step Instructions for Cheesy Garlic Cruffins
Step 1: Preheat the Oven
Begin by preheating your oven to 375°F (190°C). While the oven warms, take a moment to grease your muffin tin using non-stick spray or a brush with melted butter. This will ensure your Cheesy Garlic Cruffins come out effortlessly after baking, with golden tops that are easy to remove from the pan.
Step 2: Combine Dry Ingredients
In a large mixing bowl, whisk together the 2 cups of all-purpose flour, 1 tablespoon of baking powder, ½ teaspoon of salt, and ½ teaspoon of garlic powder. The goal is to blend these ingredients well, ensuring that the leavening agent is evenly distributed throughout the flour. This step is essential for achieving those light and fluffy cruffins!
Step 3: Mix Wet Ingredients
In a separate bowl, whisk together the ½ cup of melted unsalted butter, ¾ cup of milk, and 1 large egg until smooth and fully combined. The mixture should have a creamy consistency that will help bind the dry ingredients later on. This is where the richness and moisture come into play, so take your time to mix well.
Step 4: Combine Wet and Dry Mixtures
Pour the wet mixture into the bowl of dry ingredients, gently stirring until just combined. Be cautious not to overmix, as this can affect the texture of your Cheesy Garlic Cruffins. You want to see some flour pockets, as this will keep them light and airy.
Step 5: Fold in Flavorful Additions
Now, fold in the 1 cup of shredded cheddar cheese, 2 tablespoons of minced garlic, and 2 tablespoons of chopped fresh parsley. Gently stir until everything is evenly incorporated. The cheese will be the star of the show, melting into gooey perfection amidst the garlic and parsley, giving each cruffin that irresistible flavor.
Step 6: Fill the Muffin Tin
Using a spoon or a cookie scoop, fill each muffin cup about two-thirds full with the batter. Aim for an even distribution for consistent baking, as this allows the Cheesy Garlic Cruffins to rise beautifully. You'll want to leave some space for them to expand, creating those lovely domed tops.
Step 7: Bake to Golden Perfection
Place the muffin tin in your preheated oven and bake for 20-25 minutes. Keep an eye out for that glorious golden brown color on top, and check for doneness by inserting a toothpick into the center—if it comes out clean, your cruffins are ready to shine!
Step 8: Brush with Butter
As soon as your Cheesy Garlic Cruffins are out of the oven, brush the tops generously with the 1 tablespoon of melted butter. This final touch adds an extra layer of richness and gives them a beautiful, glossy finish that is simply irresistible.
Step 9: Cool and Serve
Allow the cruffins to cool slightly in the muffin tin before gently removing them. This will help them set up a bit more and makes for easier handling. Serve warm and watch as everyone gathers to enjoy these delightful cheesy treats!
Cheesy Garlic Cruffins Variations
Feel free to get creative and make these cruffins truly your own with just a few simple swaps or additions!
-
Dairy-Free: Substitute the milk with almond or oat milk and use dairy-free cheese for a lactose-free treat. The flavor remains rich and satisfying without the dairy!
-
Herb-Infused: Swap out parsley for fresh chives or thyme for a delightful twist. Each herb brings its unique aroma that can elevate the flavor journey.
-
Spicy Kick: Add finely chopped jalapeños or sprinkle crushed red pepper flakes into the batter. This will provide a spicy undertone that dances on your palate!
-
Smoky Flavor: Introduce a hint of smoked paprika for a rich, smoky depth. This adds another layer of complexity, making these cruffins even more irresistible.
-
Vegetable Twist: Fold in some finely chopped spinach or sun-dried tomatoes for added texture and nutrition. The colors will make your cruffins pop, and your taste buds will thank you!
-
Bacon Lovers: Mix in crispy, crumbled bacon for a savory addition. Smoky, meaty bites nestled in these cruffins create a heartwarming combination for a cozy gathering.
-
Garlic Butter Brush: Instead of plain melted butter for brushing, mix in minced garlic and parsley for a garlicky finish that ties all the flavors together in a delightful way.
-
Mini Cruffins: Use a mini muffin tin for bite-sized delights perfect for parties or gatherings. These tiny treats are perfect for snacking while mingling!
As you experiment, think about pairing these Cheesy Garlic Cruffins with a hearty soup or a refreshing salad for a well-rounded meal. If you’re craving more delicious ideas, explore my Savory Muffins for more delightful bites or check out my tips on enhancing your dishes with Garlic Butter Dishes!
What to Serve with Cheesy Garlic Cruffins
Transform your Cheesy Garlic Cruffins into a memorable feast by pairing them with these delightful dishes!
- Creamy Tomato Soup: The rich, creamy texture beautifully complements the cheesy cruffins, providing a warm, comforting contrast.
- Fresh Garden Salad: Crisp greens and a zesty vinaigrette bring a refreshing balance, lightening the overall meal while enhancing the flavors.
- Roasted Vegetables: Seasonal roasted veggies offer a savory medley and a satisfying crunch, making each bite of cruffin even more enjoyable.
- Savory Herb Butter: A dollop of herb-infused butter melted over warm cruffins elevates the flavors, adding an extra level of indulgence.
- Garlic Herb Quinoa: This fluffy, protein-packed dish with hints of garlic enhances the cruffins, tying together the meal’s theme of savoriness.
- Sparkling Lemonade: A fizzy beverage with a citrus twist refreshes the palate, balancing the cheesy richness with its bright acidity.
- Chili con Carne: The robust flavors of this chili dish bring a hearty aspect to your table, giving a fun twist to your dinner experience.
- Chocolate Lava Cake: End on a sweet note by serving a warm dessert that contrasts the savory cruffins, pleasing all taste buds at the table.
How to Store and Freeze Cheesy Garlic Cruffins
Room Temperature: Keep the Cheesy Garlic Cruffins in an airtight container at room temperature for up to 2 days to enjoy their fresh, flaky texture.
Fridge: Store any leftover cruffins in an airtight container in the fridge for up to 5 days. Reheat in the microwave or toaster oven to restore warmth.
Freezer: For longer storage, freeze cruffins individually wrapped in plastic wrap and sealed in a freezer bag for up to 3 months. Thaw in the fridge overnight before reheating.
Reheating: To enjoy these cheesy delights again, reheat from frozen at 350°F (175°C) for about 15 minutes or until warmed through and gooey!
Make Ahead Options
These Cheesy Garlic Cruffins are perfect for busy weeknights, allowing you to enjoy homemade goodness with minimal last-minute effort! You can prepare the batter up to 24 hours in advance. Simply mix the dry and wet ingredients, fold in the cheese and garlic, and store the mixture in an airtight container in the refrigerator. For the best results, refrigerate the batter and ensure to stir gently before baking to maintain that fluffy texture. When you're ready to bake, just scoop the batter into your greased muffin tin and follow the baking instructions. This way, you’ll have delicious, gooey cruffins with a fresh-out-of-the-oven taste, saving you precious time and ensuring everyone is delighted!
Expert Tips for Cheesy Garlic Cruffins
Mixing Technique: Be gentle when mixing the wet and dry ingredients. Overmixing can cause your Cheesy Garlic Cruffins to turn out dense instead of light and fluffy.
Cheese Choice: For an extra flavor kick, try mixing different types of cheese like mozzarella or pepper jack with the cheddar.
Even Filling: Use a cookie scoop for evenly filling the muffin tin. This helps ensure that all the cruffins bake at the same rate.
Watch the Bake Time: Ovens can vary, so start checking your cruffins at the 20-minute mark. Remove them as soon as they're golden brown and a toothpick comes out clean.
Cooling Tip: Let them cool for a few minutes in the muffin tin before transferring to a wire rack. This prevents them from sticking and keeps them fluffy!
Cheesy Garlic Cruffins Recipe FAQs
How do I choose the best ingredients for my Cheesy Garlic Cruffins?
Absolutely! For the best results, select all-purpose flour that is fresh and free of dark spots, which could indicate staleness. When choosing cheese, opt for high-quality sharp cheddar for a more robust flavor that melts beautifully. Fresh garlic is a must; look for firm cloves without any sprouting or bruises. Fresh parsley should be vibrant and deep green with no wilting.
How should I store Cheesy Garlic Cruffins to maintain freshness?
Very! To keep your Cheesy Garlic Cruffins at their best, store them in an airtight container at room temperature for up to 2 days. If you need to keep them longer, place them in the fridge where they can last up to 5 days. Just reheating in the microwave or toaster oven is a quick way to bring back their warm, flaky texture.
Can I freeze Cheesy Garlic Cruffins, and if so, how?
Absolutely! To freeze your Cheesy Garlic Cruffins, allow them to cool completely first. Wrap each cruffin individually in plastic wrap to prevent freezer burn, then place them in a freezer-safe bag or container. They can be stored in the freezer for up to 3 months. When you're ready to indulge again, simply thaw them overnight in the fridge and reheat in the oven at 350°F (175°C) for about 15 minutes until warm and gooey!
What should I do if my cruffins come out dense rather than fluffy?
Absolutely! If your Cheesy Garlic Cruffins turn out dense, it may be due to overmixing the batter, which can make them tough. When combining wet and dry ingredients, mix them just until incorporated and allow some flour pockets to remain. Also, ensure that your baking powder is fresh; old leavening agents might not provide the lift needed. Lastly, avoid packing the muffin tin too tightly when filling; leave room for them to rise!
Are Cheesy Garlic Cruffins safe for my pets?
Very! While the ingredients in Cheesy Garlic Cruffins are safe for humans, they might not be suitable for pets, especially dogs. Garlic in large amounts can be toxic to dogs. If you’re looking for a pet-friendly treat, consider making a simple muffin without garlic and only include safe ingredients, like oat flour and mashed bananas. Always consult your veterinarian for safe treat options!
Can I make Cheesy Garlic Cruffins gluten-free?
Absolutely! To make these Cheesy Garlic Cruffins gluten-free, simply substitute all-purpose flour with a gluten-free 1:1 baking blend. Additionally, ensure that any additional ingredients, like baking powder, are certified gluten-free to avoid cross-contamination. This variation can yield equally delicious cruffins that everyone can enjoy!
Cheesy Garlic Cruffins: Irresistibly Gooey and Oh-So-Delicious
Ingredients
Equipment
Method
- Preheat your oven to 375°F (190°C) and grease your muffin tin using non-stick spray or melted butter.
- In a large mixing bowl, whisk together the all-purpose flour, baking powder, salt, and garlic powder.
- In a separate bowl, whisk together the melted unsalted butter, milk, and egg until smooth.
- Pour the wet mixture into the bowl of dry ingredients, gently stirring until just combined.
- Fold in the shredded cheddar cheese, minced garlic, and chopped parsley until evenly incorporated.
- Fill each muffin cup about two-thirds full with the batter for even baking.
- Place the muffin tin in the oven and bake for 20-25 minutes until golden brown.
- Brush the tops generously with melted butter as soon as they are out of the oven.
- Allow the cruffins to cool slightly in the tin before removing and serving warm.

Leave a Reply