
There’s something heartwarming about the approaching chill of autumn that stirs memories of cozy kitchens and seasonal treats. This year, I couldn’t resist the urge to whip up some delightful Peanut Butter Pumpkins that not only capture the spirit of fall but also bring joy to everyone around. With simple ingredients like creamy peanut butter and crispy rice cereal, these irresistible little bites are quick to prepare and make for a fun weekend project—perfect for kids and adults alike. Plus, they’re a fantastic way to satisfy that sweet tooth without resorting to store-bought snacks. Imagine arranging a tray of these charming creations, complete with adorable chocolate chip eyes and vibrant orange candy coating. What could be more inviting? Are you ready to create your own little patch of sweetness?
Why You'll Adore These Peanut Butter Pumpkins?
Fun and Festive: These adorable treats are perfect for fall festivities, bringing a touch of whimsy to any gathering.
Quick to Make: With just 10 minutes of prep time, you'll have these delightful pumpkins ready to chill and coat!
No-Bake Option: Just mix, roll, and dip—no oven required, making it an ideal recipe for new bakers or busy parents.
Kid-Friendly Fun: Involve the little ones in creating their own edible pumpkins; it’s a great way to foster creativity in the kitchen.
Deliciously Sweet: The combination of creamy peanut butter with a candy coating hits a perfect sweet spot, ensuring they disappear quickly at parties!
Perfect for Sharing: Whether at a Halloween party or just a cozy family night, these Peanut Butter Pumpkins will be a hit with everyone! For more sweet treats, check out my recipe for Chocolate Caramel Brownies.
Peanut Butter Pumpkins Ingredients
For the Peanut Butter Mixture
• Creamy peanut butter – adds rich flavor and a smooth texture that's crucial for this recipe.
• Powdered sugar – provides sweetness and helps bind the ingredients together beautifully.
• Vanilla extract – enhances the overall taste with a touch of warmth that complements the peanut butter.
For the Coating
• Orange candy melts – bring vibrant color and a delightful candy coating that captures the essence of fall.
• Vegetable oil – helps achieve a smooth consistency for melting the candy melts.
For Decoration
• Green candy melts – perfect for creating charming little leaves, giving your pumpkins that authentic touch.
• Mini chocolate chips – used for the eyes, adding a cute and playful character to your sweet creations.
With these delightful ingredients, you'll be well on your way to making the cutest Peanut Butter Pumpkins that everyone will love!
Step‑by‑Step Instructions for Peanut Butter Pumpkins
Step 1: Prepare Your Workspace
Begin by clearing and thoroughly cleaning your kitchen counter or workspace. This ensures you have ample room to work and prevents any mix-ups. Gather all your ingredients and equipment, including mixing bowls, a spatula, a parchment-lined baking sheet, and plastic wrap. Having everything prepared will make the process of creating your Peanut Butter Pumpkins smooth and enjoyable.
Step 2: Mix Peanut Butter Mixture
In a large mixing bowl, combine 1 cup of creamy peanut butter, 1 cup of powdered sugar, and 1 teaspoon of vanilla extract. Use a spatula to stir these ingredients until they are well blended and the mixture is silky smooth, which should take about 2-3 minutes. This mixture will form the delicious base for your Peanut Butter Pumpkins, so ensure there are no lumps.
Step 3: Add Rice Cereal
Gently fold in 2 cups of crispy rice cereal into the peanut butter mixture until it's fully combined. Use a spatula to carefully incorporate the cereal, being cautious not to crush it. This should take about 1-2 minutes. The crispy texture will provide a delightful crunch to your Peanut Butter Pumpkins, making each bite a treat.
Step 4: Form Pumpkins
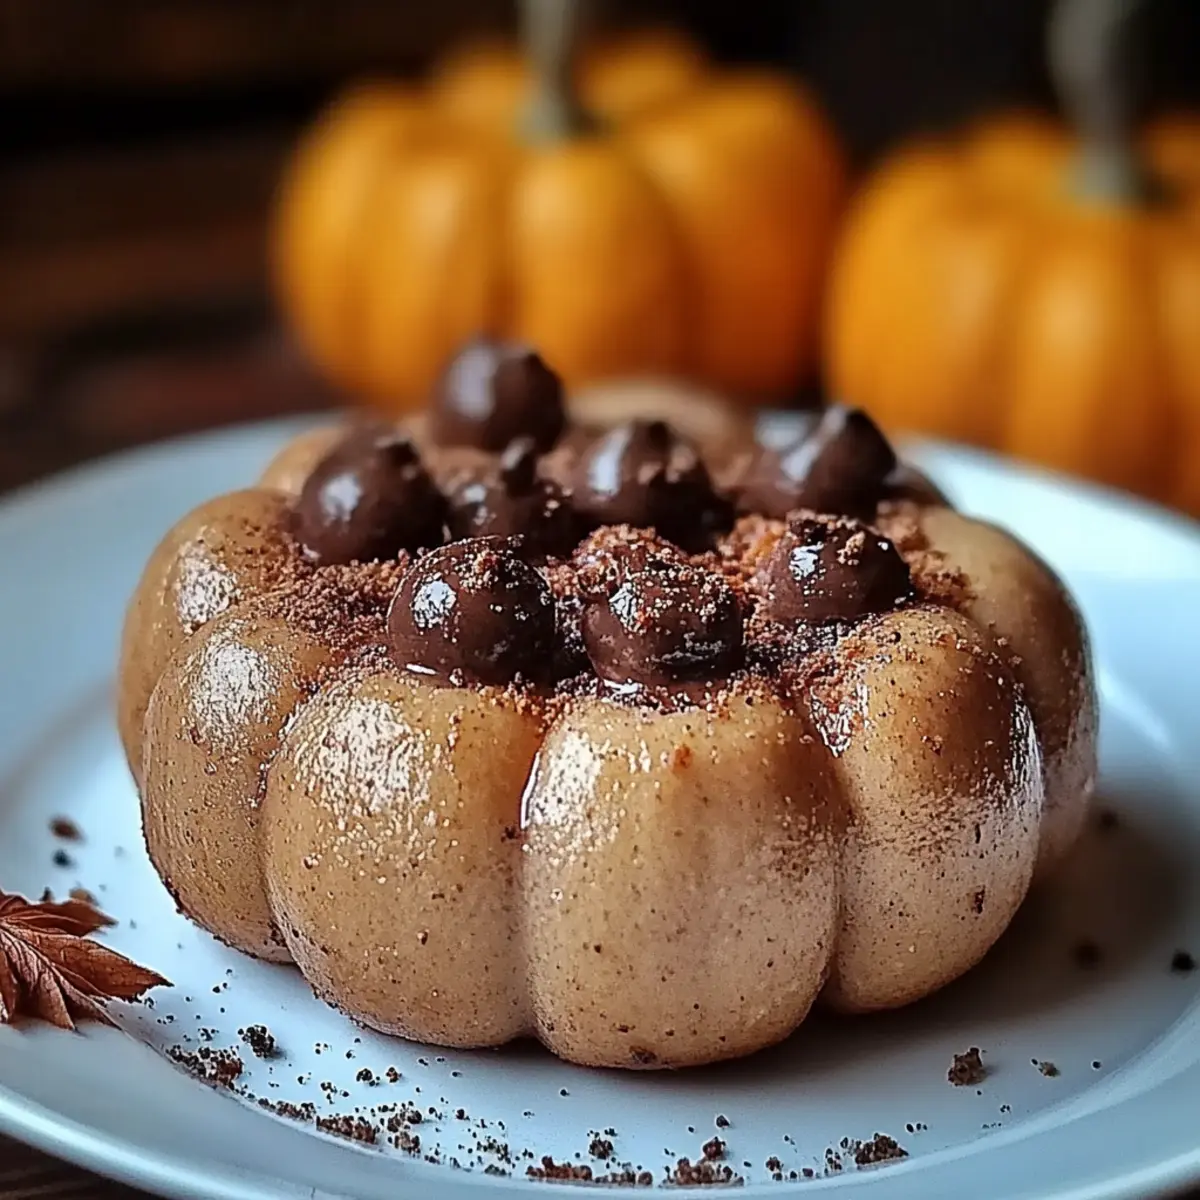
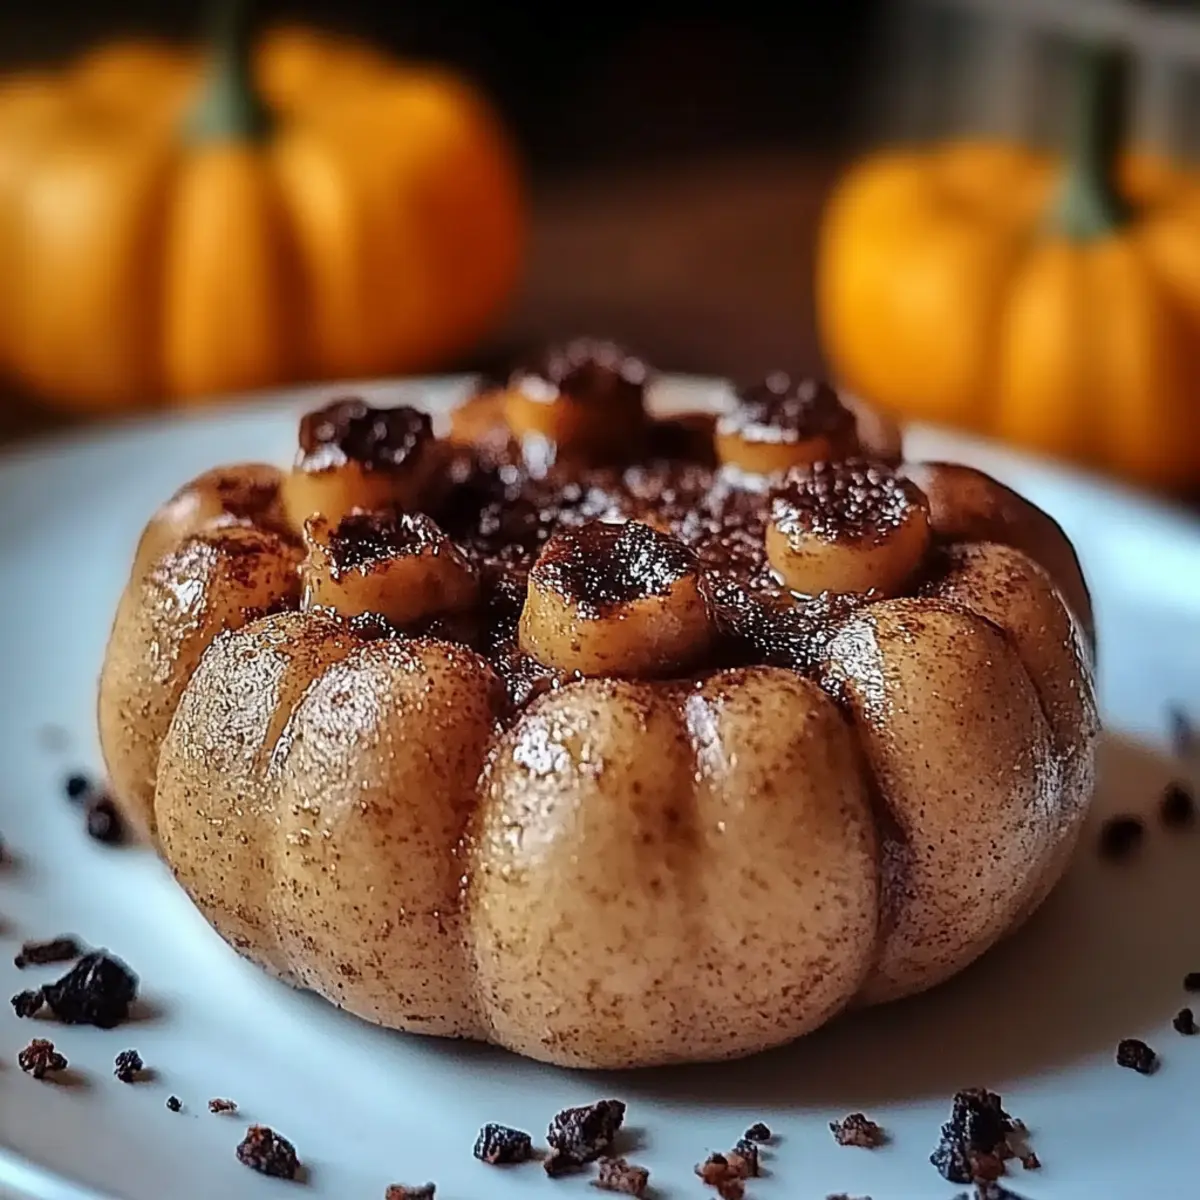
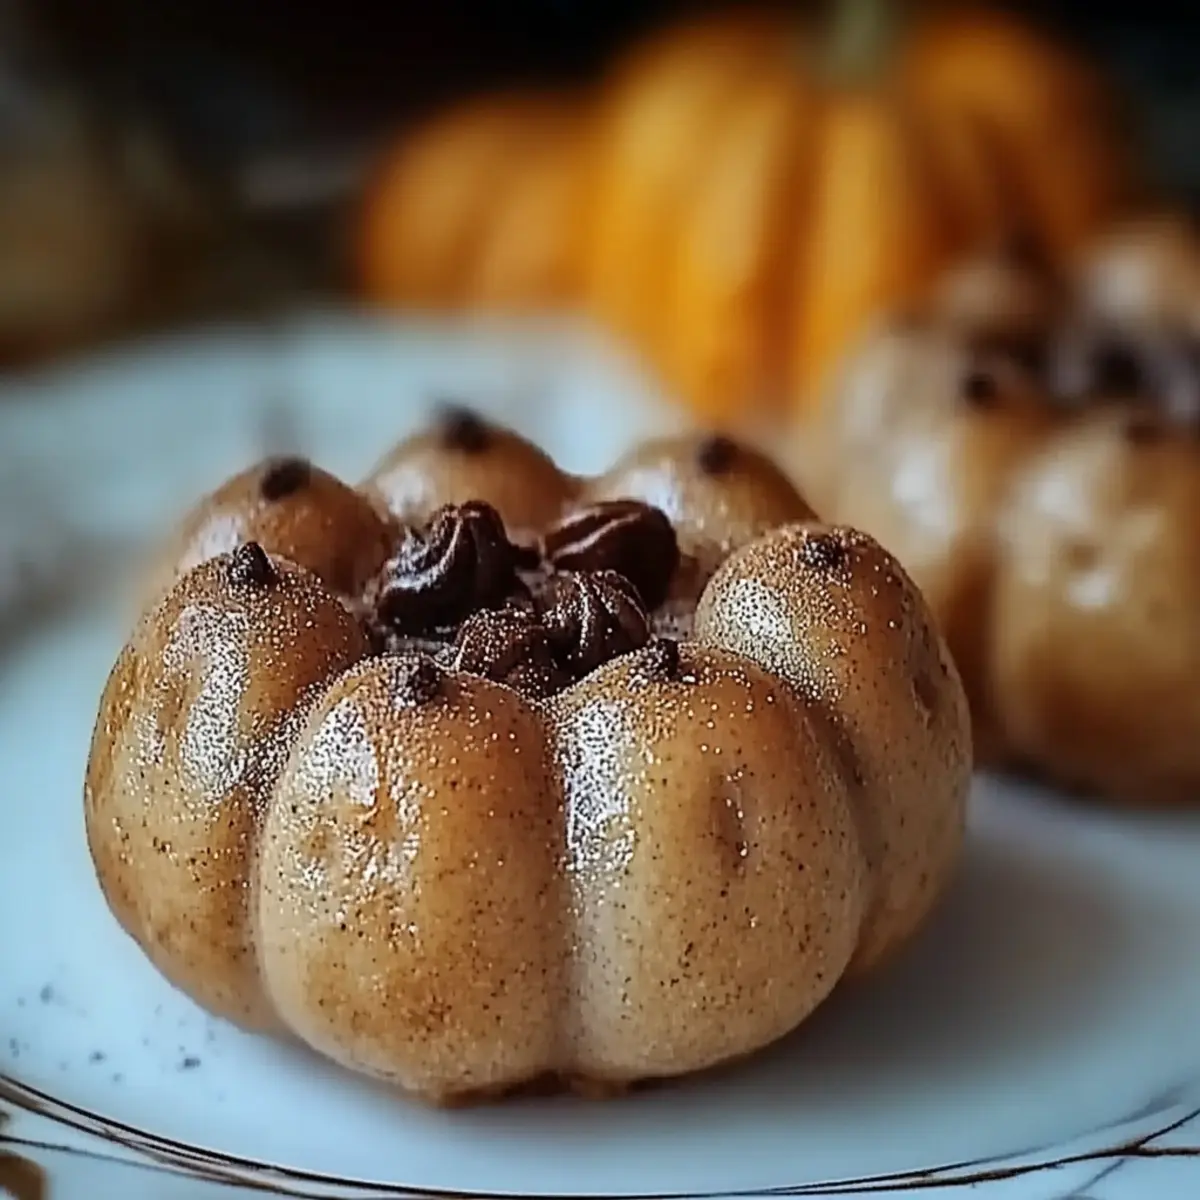
Using your hands, take small portions of the mixture and roll them into round pumpkin shapes, about 1-2 inches in diameter. Place each pumpkin on the parchment-lined baking sheet, spacing them apart to prevent sticking. This step should take around 5-10 minutes. Your Pumpkin shapes don’t need to be perfect; the charm lies in their whimsical look!
Step 5: Chill
Cover the baking sheet with plastic wrap and place it in the refrigerator for about 30 minutes, or until the pumpkins are firm to the touch. This chilling step is crucial as it helps the Peanut Butter Pumpkins hold their shape when coated. Check them after 20 minutes to see how firm they've become.
Step 6: Melt Candy Coating
In a microwave-safe bowl, combine 1 cup of orange candy melts and 1 tablespoon of vegetable oil. Microwave the mixture in 30-second intervals, stirring in between, until it is completely melted and smooth, typically taking about 1-2 minutes. The addition of vegetable oil will help create a glossy coating for your Peanut Butter Pumpkins.
Step 7: Coat Pumpkins
Once your peanut butter balls are firm, dip each one into the melted orange candy coating using a fork for easier handling. Ensure each pumpkin is fully covered and then place them back onto the parchment-lined baking sheet. This step should take about 10 minutes and will transform your creations into adorable autumn treats.
Step 8: Add Leaves and Eyes
While the orange candy coating is still wet, add two mini chocolate chips to each pumpkin for eyes. Then, use the melted green candy melts to create small leaves on top, utilizing a toothpick for shaping if needed. This step gives your Peanut Butter Pumpkins a final touch of character and whimsy, so take your time to make them look sweet.
Step 9: Set
Allow your coated Peanut Butter Pumpkins to set at room temperature until the candy coating hardens completely, which may take about 15-30 minutes. Once set, they will be ready to serve. Enjoy the delightful results of your hard work, and be prepared for compliments on your charming fall treats!
What to Serve with Peanut Butter Pumpkins?
Imagine a fall gathering where sweets aren’t just treats, but delightful conversations waiting to be shared.
- Crisp Apple Slices: Fresh, crunchy, and vibrant, they offer a refreshing contrast to the rich sweetness of the pumpkins.
- Warm Apple Cider: The cozy, spiced flavors pair beautifully with the creamy treats, evoking the warmth of fall gatherings.
- Shortbread Cookies: Their buttery crunch complements the soft peanut butter interior, creating a delightful mix of textures.
- Chocolate Milk: Rich and soothing, it enhances the childhood joy these pumpkin treats evoke, making dessert even more indulgent.
- Cheese Platter: Including tangy cheeses adds a savory balance to the sweet peanut butter pumpkins, creating an inviting variety.
- Pumpkin Spice Latte: This seasonal favorite captures the essence of fall and enlivens the pumpkin vibe in every sip.
- Vanilla Ice Cream: Creamy and refreshing, this classic pairing brings a lovely contrast to the sweetness of the pumpkins.
The beauty of these pairings lies in the harmony they create, turning a simple treat into a festive spread that warms the heart!
Peanut Butter Pumpkins Variations
Feel free to let your creativity shine as you customize these charming little treats for your taste and dietary needs!
-
Vegan: Substitute creamy peanut butter with almond or sun butter, and use dairy-free candy melts for a vegan-friendly twist.
-
Nut-Free: Replace peanut butter with sunflower seed butter to create a delightful nut-free version that’s still sweet and creamy.
-
Gluten-Free: Ensure your crispy rice cereal is gluten-free to accommodate those with gluten sensitivities without sacrificing texture or flavor.
-
Spicy Kick: For a surprising flavor twist, add a pinch of cayenne pepper or cinnamon to the peanut butter mixture for a warm, zesty touch.
-
Chocolate Delight: Replace the orange candy melts with melted chocolate for a rich, decadent coating that takes your pumpkins to a whole new level!
-
Colorful Coating: Use different colored candy melts for seasonal or themed events—think purple for Halloween or pastel colors for springtime treats!
-
Crunchy Additions: Toss in mini pretzel pieces or chopped nuts into the peanut butter mixture for an added crunch and delightful contrast in textures.
-
Rolled in Sprinkles: After coating the pumpkins with candy melts, roll them in festive sprinkles before the coating hardens for an extra fun and colorful finish!
For even more delightful recipes, try adding a touch of deliciousness to your gatherings with my Chocolate Caramel Brownies or a comforting batch of Homemade Mac and Cheese.
Make Ahead Options
These Peanut Butter Pumpkins are perfect for meal prep enthusiasts looking to save time on busy days! You can mix and form the pumpkin shapes up to 24 hours in advance; simply cover them tightly with plastic wrap and refrigerate. If you prefer, you can also chill the formed pumpkins for up to 3 days before coating. When you're ready to serve, melt the orange candy coating and dip the refrigerated pumpkins. To maintain their delightful texture, keep the finished Peanut Butter Pumpkins at room temperature until the coating hardens, ensuring they'll be just as delicious as the day you made them!
How to Store and Freeze Peanut Butter Pumpkins
Fridge: Store your Peanut Butter Pumpkins in an airtight container in the fridge for up to one week. This keeps them fresh and delicious while retaining their delightful texture.
Freezer: For longer storage, freeze uncoated peanut butter balls for up to three months. Once frozen, you can dip them in chocolate right before serving for a quick treat!
Thawing: When ready to enjoy, move the frozen pumpkins to the fridge for a few hours to thaw. After that, you can coat and decorate them, making it a fun activity on demand!
Room Temperature: If you're planning to consume your Peanut Butter Pumpkins within a day, they can be kept at room temperature in an airtight container but avoid direct sunlight to maintain their shape.
Expert Tips for Peanut Butter Pumpkins
Perfect Texture: Use creamy peanut butter for a smooth consistency. Natural or crunchy varieties may lead to a rougher mix, affecting the final result.
Gentle Mixing: When adding the crispy rice cereal, fold gently to avoid crushing it. This maintains the delightful crunch in your Peanut Butter Pumpkins.
Chill Well: Don't skip the chilling step! It solidifies the mixture, making it easier to dip in candy melts without losing shape.
Smooth Coating: Ensure the candy melts are completely melted and smooth before dipping. Adding a little vegetable oil helps achieve a glossy finish.
Creative Decorations: Feel free to get creative with your decorations! Experiment with different shapes for the leaves or use colorful candy for eyes to make unique designs.
Storage Made Easy: To keep your Peanut Butter Pumpkins fresh, store them in an airtight container in the refrigerator. They can last up to one week!
Peanut Butter Pumpkins Recipe FAQs
What is the best way to select ripe ingredients for Peanut Butter Pumpkins?
Absolutely! For the peanut butter, I recommend using a creamy variety that is natural and free from added sugars or oils for the best flavor and consistency. Make sure your vanilla extract is pure, as this elevates the taste. As for candy melts, check that they’re fresh and haven’t been exposed to moisture, which can cause clumping.
How should I store leftover Peanut Butter Pumpkins, and how long do they last?
Very simple! Store your Peanut Butter Pumpkins in an airtight container in the refrigerator for up to one week. This keeps them fresh and prevents them from drying out. Be sure to check for any signs of spoilage, such as an off smell or noticeable texture changes!
Can I freeze Peanut Butter Pumpkins, and what is the process?
Yes, you can! For long-term storage, freeze the uncoated peanut butter balls for up to three months. Start by shaping the mixture into balls and placing them on a parchment-lined tray. Freeze until solid, then transfer to a freezer-safe bag or container. When you're ready to enjoy, thaw them in the fridge for a few hours, then coat and decorate as desired.
What should I do if my candy coating becomes clumpy?
If your candy melts start to clump or seize, don’t worry! Gently heat them in the microwave in 30-second intervals, stirring frequently until they’re smooth again. If they remain thick, try adding a tiny bit of vegetable oil—this will help achieve a more liquid consistency for dipping!
Are there any dietary considerations for Peanut Butter Pumpkins?
Definitely! If you have allergies, be mindful of the ingredients. The recipe uses peanut butter, which can be a common allergen. Consider using sunflower seed butter as a wonderful alternative that’s safe for those with nut allergies. Also, check the chocolate chips and candy melts to ensure they are allergy-friendly.

Adorable Peanut Butter Pumpkins that Are Perfect for Fall
Ingredients
Equipment
Method
- Prepare your workspace by cleaning your kitchen counter and gathering all ingredients and equipment.
- In a large mixing bowl, combine peanut butter, powdered sugar, and vanilla extract. Stir until silky smooth.
- Gently fold in crispy rice cereal until fully combined without crushing.
- Roll small portions into round shapes (1-2 inches in diameter) and place on the baking sheet.
- Cover and refrigerate for about 30 minutes until firm.
- In a microwave-safe bowl, melt orange candy melts and vegetable oil in 30-second intervals until smooth.
- Dip each peanut butter ball in the melted coating and place back on the tray.
- While coating is wet, add mini chocolate chips for eyes and shape green candy melts into leaves.
- Allow the pumpkins to set at room temperature until the candy coating hardens completely.


Leave a Reply