
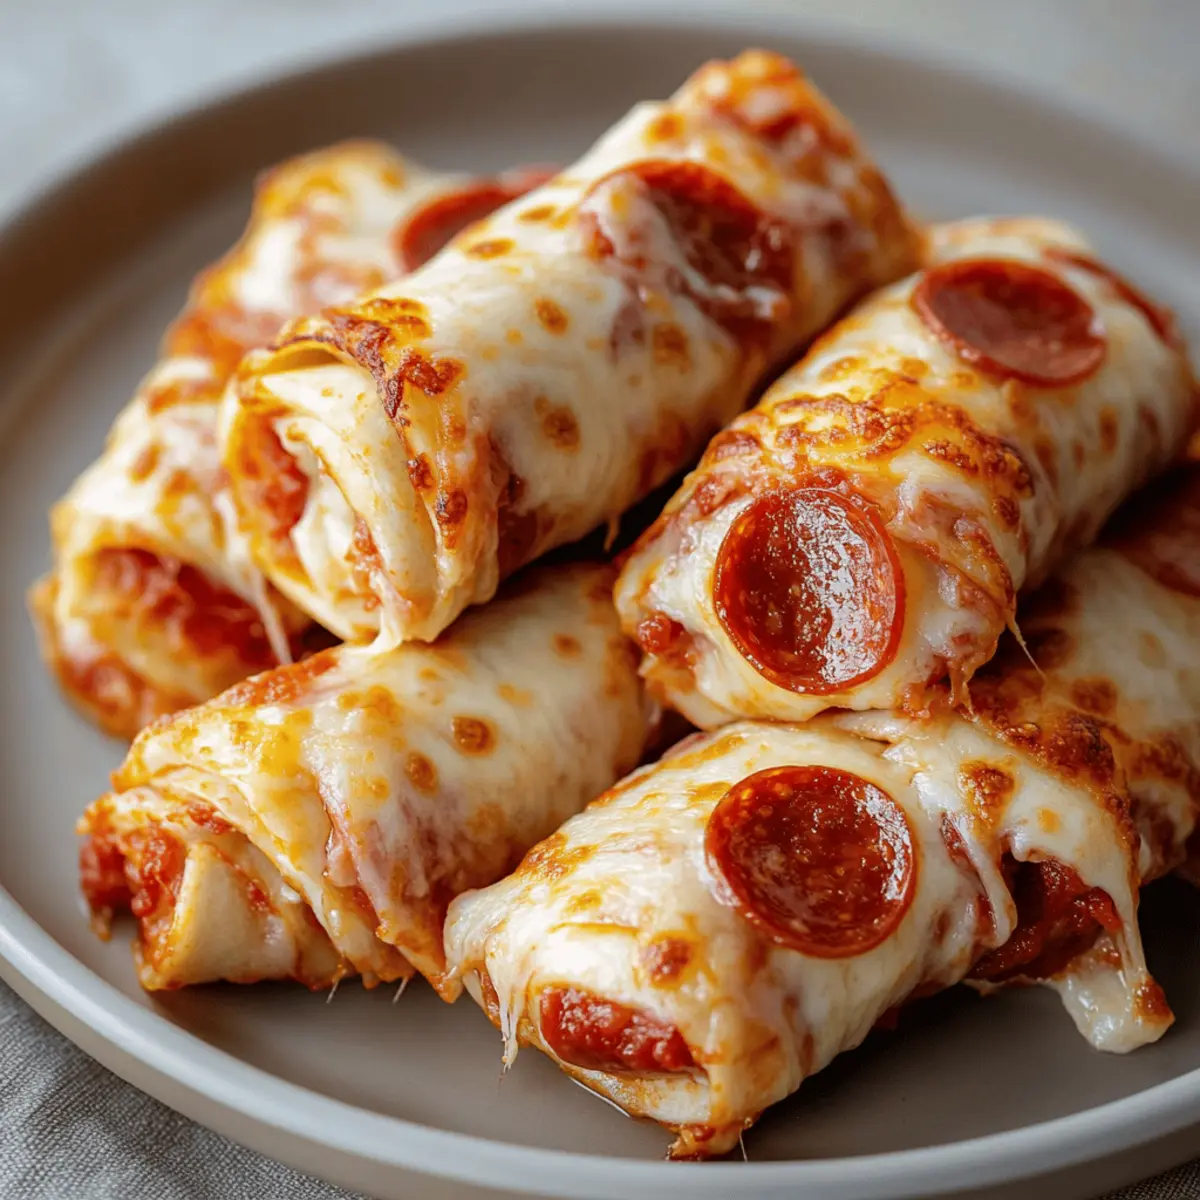
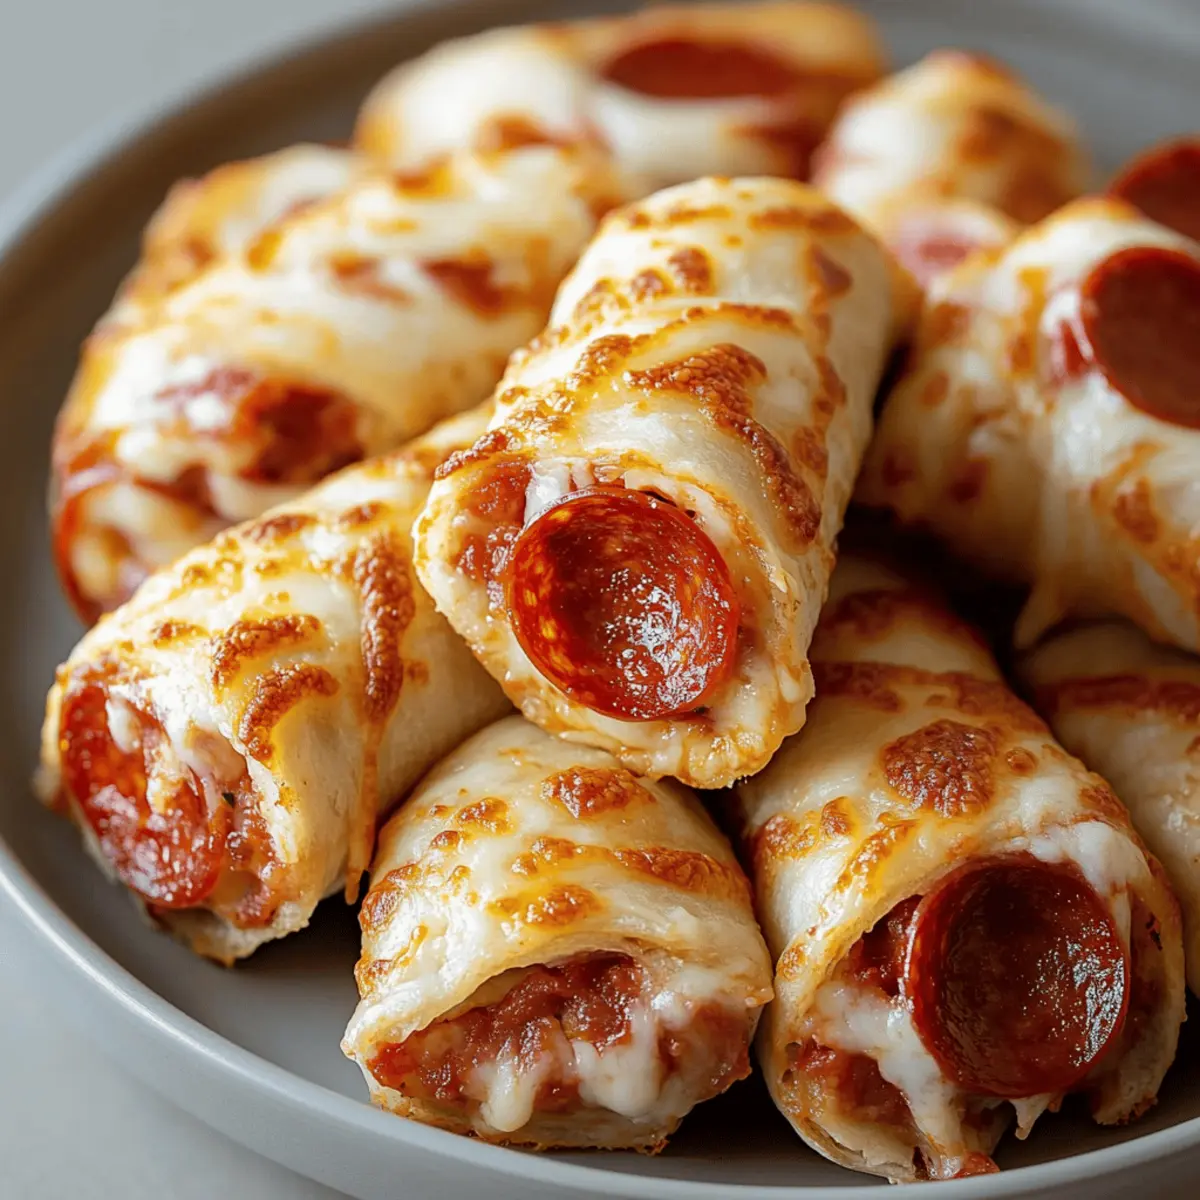
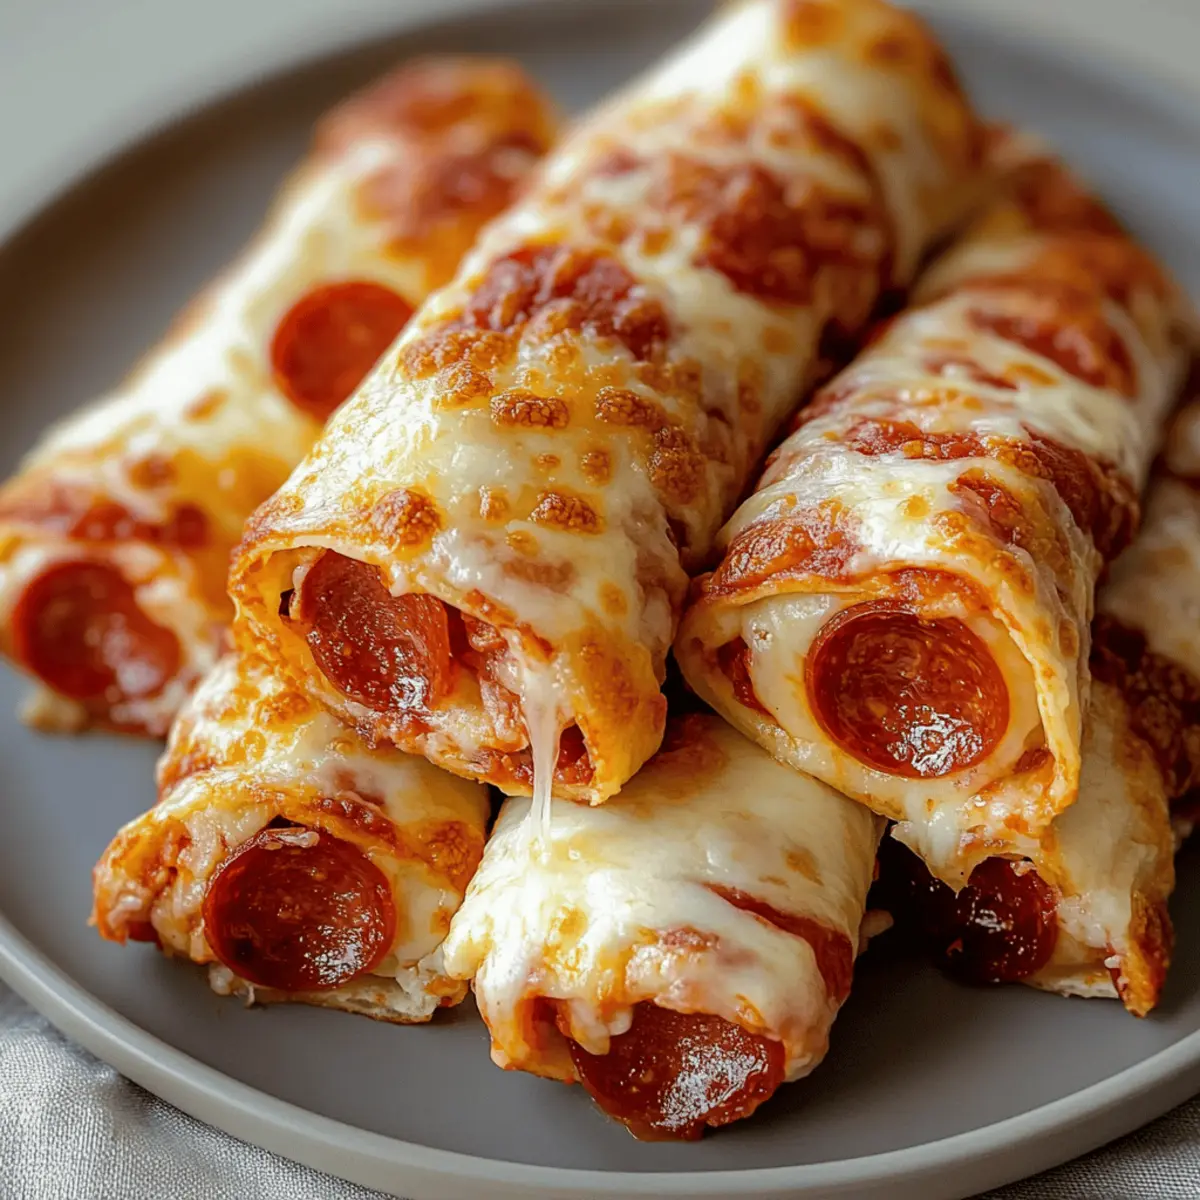
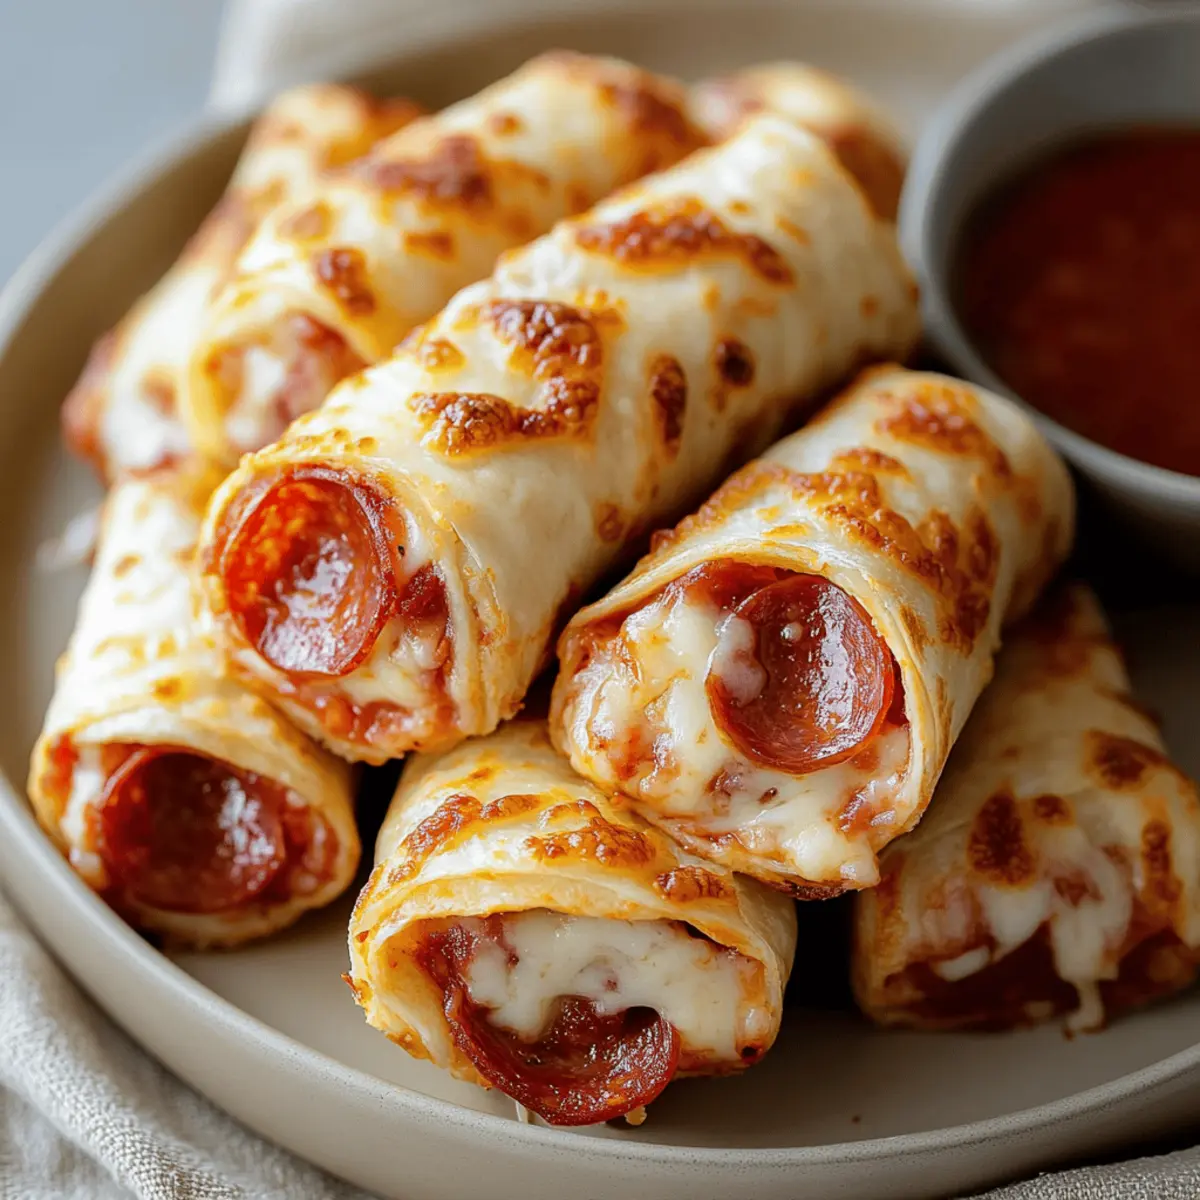
As I rummaged through my fridge last week, a little culinary spark ignited—what if I could transform my usual snack into something fun and indulgent? Enter my Cheesy Pepperoni Pizza Roll Ups, the perfect solution for busy weeknights or a cozy movie marathon! In just 17 minutes, you'll have these crowd-pleasers on the table, offering a satisfying crunch and that delightful melted cheese we all crave. Plus, they’re low-carb, making them a fantastic guilt-free treat for everyone. Whether you’re entertaining friends or just treating yourself, these roll-ups are bound to become a new favorite. Are you ready to tackle this quick and delicious recipe together?
Why Are These Roll Ups So Irresistible?
Quick preparation means you'll be enjoying these Cheesy Pepperoni Pizza Roll Ups in just 17 minutes! Flavor-packed with melty cheese and pepperoni wrapped in a crispy tortilla, they’re a family favorite for a reason. Versatile enough to customize with your favorite toppings, you can easily swap in veggies or different cheeses. Perfect for movie night or game day, they’ll satisfy cravings without the guilt of fast food. Plus, pair them with a refreshing side, like a California Roll Cucumber Salad, for a complete meal!
Cheesy Pepperoni Pizza Roll Ups Ingredients
For the Filling
• Mozzarella cheese – A must-have for that gooey, melty goodness.
• Marinara sauce – Use your favorite brand for a burst of Italian flavor.
• Pepperoni slices – Feel free to adjust the quantity for your ideal meaty bite.
For the Wrap
• Low-carb tortillas – A healthy alternative that keeps your roll-ups light and crispy.
• Olive oil – Brushing this on adds a delightful golden finish while baking.
Enjoy crafting your Cheesy Pepperoni Pizza Roll Ups!
Step‑by‑Step Instructions for Cheesy Pepperoni Pizza Roll Ups
Step 1: Preheat the Oven
Start by preheating your oven to 375°F (190°C). This temperature is perfect for achieving that crispy outer layer while keeping the cheese inside melty and delicious. While the oven heats up, gather all your ingredients and equipment like a baking sheet and a brush for the olive oil, preparing for a smooth cooking experience.
Step 2: Prepare the Tortillas
Lay your low-carb tortillas flat on a clean surface. Make sure they are fully open and ready to be filled. This step is key to ensuring your Cheesy Pepperoni Pizza Roll Ups roll up neatly, so arrange them side by side with a little space in between, giving you room to work without any mess.
Step 3: Spread the Marinara Sauce
Using about 2 tablespoons of marinara sauce, spread it evenly over each tortilla, leaving about a half-inch border around the edges. The sauce not only adds flavor but also helps to bind the ingredients together. Be generous yet mindful, making sure the sauce doesn't reach the edges, helping your roll-ups stay intact during baking.
Step 4: Add the Cheese
Now, sprinkle shredded mozzarella cheese evenly over the marinara sauce on each tortilla. The cheese is the star of your Cheesy Pepperoni Pizza Roll Ups, so ensure an even coating to create that irresistible gooeyness. Don't skimp on this step, as a good layer of cheese is what brings these tasty bites alive!
Step 5: Layer the Pepperoni
Take your pepperoni slices and arrange them on top of the cheese. Feel free to be creative with the amount; a layer of pepperoni adds a wonderful contrast and a savory flavor that complements the cheese beautifully. Make sure each roll-up contains a hearty amount of this delicious topping to guarantee tasty bites.
Step 6: Roll Them Up
Starting from one end, carefully roll each tortilla tightly without tearing. This step is crucial to keep all the delightful fillings secure inside. As you roll, pinch the sides slightly to tuck in the ingredients, ensuring a neat and flavorful roll-up that will hold its shape during baking.
Step 7: Brush with Olive Oil
Once rolled, brush the outside of each roll-up generously with olive oil. This will help achieve a lovely golden color and crispiness as they bake. The oil also adds a bit of flavor, making your Cheesy Pepperoni Pizza Roll Ups even more irresistible. Use a pastry brush for the best results.
Step 8: Bake for Perfection
Place the roll-ups seam-side down on a baking sheet lined with parchment paper. Bake them in your preheated oven for about 10-12 minutes, or until the outside is golden brown and you can see the cheese bubbling out. This visual cue indicates that your Cheesy Pepperoni Pizza Roll Ups are almost ready to be devoured!
Step 9: Cool Slightly Before Serving
After baking, remove the roll-ups from the oven and let them cool for a few minutes. This resting period allows the cheese to set a bit, making them easier to slice. The golden outside will be hot, and letting them cool will ensure a perfect bite whenever you serve these tasty treats!
Cheesy Pepperoni Pizza Roll Ups Variations
Feel free to personalize your Cheesy Pepperoni Pizza Roll Ups to match your taste buds and dietary preferences.
-
Veggie-Packed: Add finely chopped bell peppers, mushrooms, or spinach to amp up the flavor and nutrition. These colorful additions introduce both freshness and crunch to each bite.
-
Spicy Kick: Sprinkle in red pepper flakes or sliced jalapeños for a fiery version. The heat will tantalize your taste buds, making each roll-up feel like an adventure!
-
Cheddar Twist: Swap mozzarella for sharp cheddar cheese for a bolder flavor. The unique taste of cheddar adds a new dimension to this classic roll-up, sure to impress any cheese lover.
-
Gluten-Free: Use gluten-free tortillas to accommodate those with dietary restrictions. Many brands ensure that you won’t miss out on the classic taste and texture!
-
Herb Infusion: Mix dried Italian herbs like oregano and basil into the cheese for a fragrant aroma. This small twist makes a big difference, transporting you straight to an Italian pizzeria.
-
Crunchy Topping: Add a sprinkle of crushed tortilla chips on top for extra crunch before baking. This twist elevates the texture and gives a delightful contrast to the gooey cheese inside.
-
Sweet Surprise: Drizzle your roll-ups with a balsamic glaze post-bake for a sweet and tangy finish. This unexpected addition enhances the flavor profile and makes a remarkable starter or snack.
For a well-rounded meal, consider pairing these delicious roll-ups with a side of Cheesy Scalloped Potatoes or enjoy a refreshing dish like California Roll Cucumber Salad. Enjoy the creativity in your kitchen!
How to Store and Freeze Cheesy Pepperoni Pizza Roll Ups
Room Temperature: Store cooled Cheesy Pepperoni Pizza Roll Ups in an airtight container at room temperature for up to 2 hours. This keeps them tasty for a quick snack!
Fridge: Keep any leftovers in the fridge for up to 3 days, wrapped tightly in plastic wrap or placed in an airtight container. Reheat in the oven for a crispy finish!
Freezer: For longer storage, freeze the roll-ups tightly wrapped in foil or placed in a freezer-safe bag for up to 2 months. Thaw in the fridge overnight before reheating.
Reheating: To reheat, bake in a preheated oven at 375°F (190°C) for 10 minutes or until heated through. This ensures they stay crispy and delicious!
What to Serve with Cheesy Pepperoni Pizza Roll Ups?
These scrumptious roll-ups are perfect for creating a complete meal that satisfies every craving and warms the heart.
-
Crunchy Caesar Salad: Crisp romaine and tangy dressing provide a refreshing contrast to the cheesy goodness of the roll-ups.
-
Garlic Bread Sticks: Soft, buttery breadsticks with a touch of garlic are perfect for dipping into extra marinara sauce.
-
Roasted Vegetable Medley: A colorful mix of seasonal veggies adds a healthy, flavorful element and pairs wonderfully with the flavors of pizza.
-
Zesty Coleslaw: The crunch and tanginess of coleslaw balance the richness of the roll-ups, making every bite exciting.
-
Fresh Fruit Salad: Juicy fruits like watermelon and berries bring a sweet, refreshing palate cleanser between cheesy bites.
-
Pale Ale or Craft Beer: A cold beer enhances the meal, cutting through the richness and perfectly complementing the savory flavors.
These accompanying dishes and drinks will lift your Cheesy Pepperoni Pizza Roll Ups experience to new heights!
Make Ahead Options
These Cheesy Pepperoni Pizza Roll Ups are perfect for meal prep enthusiasts looking to save time during busy weeknights! You can prepare the roll-ups up to 24 hours in advance by assembling them through Step 6 and then refrigerating them in an airtight container. When it's time to serve, brush the outside with olive oil and bake directly from the fridge for an additional 2-3 minutes to ensure they heat through without losing that delightful crisp. This method allows you to enjoy fresh, gooey goodness with minimal effort, ensuring your roll-ups taste just as delicious as when freshly made!
Expert Tips for Cheesy Pepperoni Pizza Roll Ups
-
Perfect Rolling: Ensure a snug roll without tearing the tortillas. If they crack, warm them briefly in the microwave to soften before filling.
-
Cheese Quality: Use high-quality mozzarella cheese for maximum meltiness. Fresh cheese yields a creamier texture compared to pre-shredded varieties.
-
Avoid Overfilling: Don’t overload with toppings, as this might cause spills during baking. Aim for a balanced layer of cheese and pepperoni for the ideal Cheesy Pepperoni Pizza Roll Ups.
-
Baking Time: Keep an eye on the roll-ups towards the end of the baking time. Ovens may vary, and you want to catch them at that perfect golden-brown moment.
-
Serve Fresh: Enjoy your roll-ups right after cooling slightly for optimal flavor and texture. They’re best fresh out of the oven!
Cheesy Pepperoni Pizza Roll Ups Recipe FAQs
What is the best way to choose ripe ingredients for my Cheesy Pepperoni Pizza Roll Ups?
Absolutely! When selecting ingredients, opt for fresh mozzarella that is soft and creamy for the best melting quality. Check the expiration date and ensure the cheese has no dark spots or unusual odors. For marinara sauce, look for a brand that uses natural ingredients and has a vibrant color; avoid anything overly watery.
How should I store leftovers of my Cheesy Pepperoni Pizza Roll Ups?
The more the merrier with storing! After they’ve cooled, wrap your leftovers tightly in plastic wrap or place them in an airtight container. They will stay fresh in the refrigerator for up to 3 days. To enjoy them again, I recommend reheating them in the oven for a crispy texture!
Can I freeze Cheesy Pepperoni Pizza Roll Ups?
Certainly! To freeze your Cheesy Pepperoni Pizza Roll Ups, first let them cool completely. Next, wrap each roll tightly in aluminum foil, then place them in a freezer-safe bag. They can be stored in the freezer for up to 3 months. When ready to eat, thaw them overnight in the fridge and reheat as noted above for that fresh-baked taste!
What can I do if my roll-ups come apart while baking?
No worries at all! If your roll-ups come apart, it could be due to overstuffing or rolling too loosely. To repair, simply use toothpicks to hold them together during baking. In the future, ensure an even distribution of fillings and roll tightly to maintain their shape. If your tortillas crack, warm them briefly in the microwave to make them easier to handle.
Are there any dietary considerations for the Cheesy Pepperoni Pizza Roll Ups?
Very much so! These roll-ups are low-carb but always check the specific brands of tortillas and marinara sauce for potential allergens. Those with sensitivities to gluten should choose gluten-free tortillas. Additionally, feel free to substitute turkey or veggie pepperoni for a healthier or vegetarian option. Enjoy customizing for everyone at your table!
Cheesy Pepperoni Pizza Roll Ups You’ll Crave Every Time
Ingredients
Equipment
Method
- Preheat your oven to 375°F (190°C). Gather ingredients and a baking sheet.
- Lay tortillas flat on a clean surface, side by side.
- Spread about 2 tablespoons of marinara sauce evenly over each tortilla.
- Sprinkle shredded mozzarella cheese evenly over the marinara on each tortilla.
- Arrange pepperoni slices on top of the cheese.
- Carefully roll each tortilla tightly without tearing.
- Brush the outside of each roll-up generously with olive oil.
- Place roll-ups seam-side down on a lined baking sheet and bake for 10-12 minutes.
- Remove from oven and let cool for a few minutes before serving.


Leave a Reply