
As the leaves turn crisp and the air fills with whispers of autumn, I can’t help but feel a spark of excitement for the upcoming Halloween festivities. This year, I'll be wowing my guests with delightful Halloween Cakesicles that blend nostalgia and creativity in every bite. This fabulous recipe not only makes use of leftover cake or cupcakes—perfect for those with a sweet tooth—but also offers a fun, hands-on activity for both kids and adults to enjoy together. With just a quick prep time and tons of room for personalization, these spooky treats are sure to be a hit, whether you’re hosting a haunted gathering or just needing something festive for your family. So, what wild designs will you whip up for your Halloween Cakesicles?
Why are Halloween Cakesicles a must-try?
Fun and Creative: Unleash your imagination with these delightful treats that can be customized for any spooky design or color!
Leftover Magic: Transform leftover cake or cupcakes into eye-popping cakesicles, reducing waste while satisfying your sweet tooth.
Quick and Easy: With just 15 minutes of active prep time, you can whip up these sweets and impress guests without spending hours in the kitchen.
Perfect for All Ages: Whether it’s a Halloween party or a cozy family night, these cakesicles are a fun, interactive way to bring everyone together.
Impressive and Delicious: Coated in decadent chocolate, each bite is creamy, rich, and bursting with flavor—a guaranteed crowd-pleaser!
So, gather your loved ones, and get ready for a spooky celebration! For more delicious inspiration, check out my 10 Best Fall Desserts for a delicious seasonal lineup!
Halloween Cakesicles Ingredients
Get ready to create magic with these delightful cakesicles!
For the Batter
- Leftover cake or cupcakes – 2 cups of red velvet recommended, perfect for a rich flavor profile.
- Frosting – 1 cup of buttercream recommended, adding moisture and sweetness to your mixture.
For the Coating
- Coating chocolate or candy melts – 12 ounces, choose white or colored for those vibrant Halloween Cakesicles!
For Decoration
- Food color – Use powdered or oil-based; a splash can elevate your designs to spooky perfection!
Step‑by‑Step Instructions for Halloween Cakesicles
Step 1: Crumble the Cakes
Begin by crumbling your leftover red velvet cake or cupcakes in a large bowl until they resemble fine crumbs. This should take about 5 minutes. Ensure there are no large chunks, as a uniform texture will help the Halloween Cakesicles hold their shape.
Step 2: Mix with Frosting
Add 1 cup of buttercream frosting to the crumbled mixture, using clean hands or a spatula to blend thoroughly. This should take another 5 minutes. The goal is a dough-like consistency that sticks together, serving as the delicious foundation for your cakesicles.
Step 3: Shape the Mixture
Press the cake and frosting mixture firmly into cakesicle molds, filling each cavity to the top. Use a spatula or your hands to ensure a tight fit, as this will help maintain the shape once frozen. Smooth the surface for an even look before moving on to the next step.
Step 4: Freeze the Cakesicles
Place the filled molds in the freezer for at least 30 minutes or until the mixture is firm to the touch. This firmness is crucial for easy removal and coating later on, ensuring your Halloween Cakesicles stay intact as you dip them into chocolate.
Step 5: Melt the Coating
While the cakesicles freeze, melt 12 ounces of chocolate or candy melts according to package instructions, typically in a microwave-safe bowl. Heat in short bursts of 15–30 seconds, stirring in between, until smooth and fully melted—this should take about 2 minutes total.
Step 6: Coat the Cakesicles
Carefully remove the frozen cakesicles from the molds. Dip each one into the melted chocolate, ensuring it is fully coated. Allow excess chocolate to drip off before placing them on a parchment-lined tray. This process will take about 5 minutes and should leave you with beautifully coated Halloween Cakesicles.
Step 7: Let Them Set
Allow the dipped cakesicles to sit at room temperature until the chocolate sets, which can take about 10-15 minutes. For quicker results, you could also refrigerate them briefly. This step ensures a solid, delicious coat that will give each cakesicle a rich crunch.
Step 8: Decorate Your Cakesicles
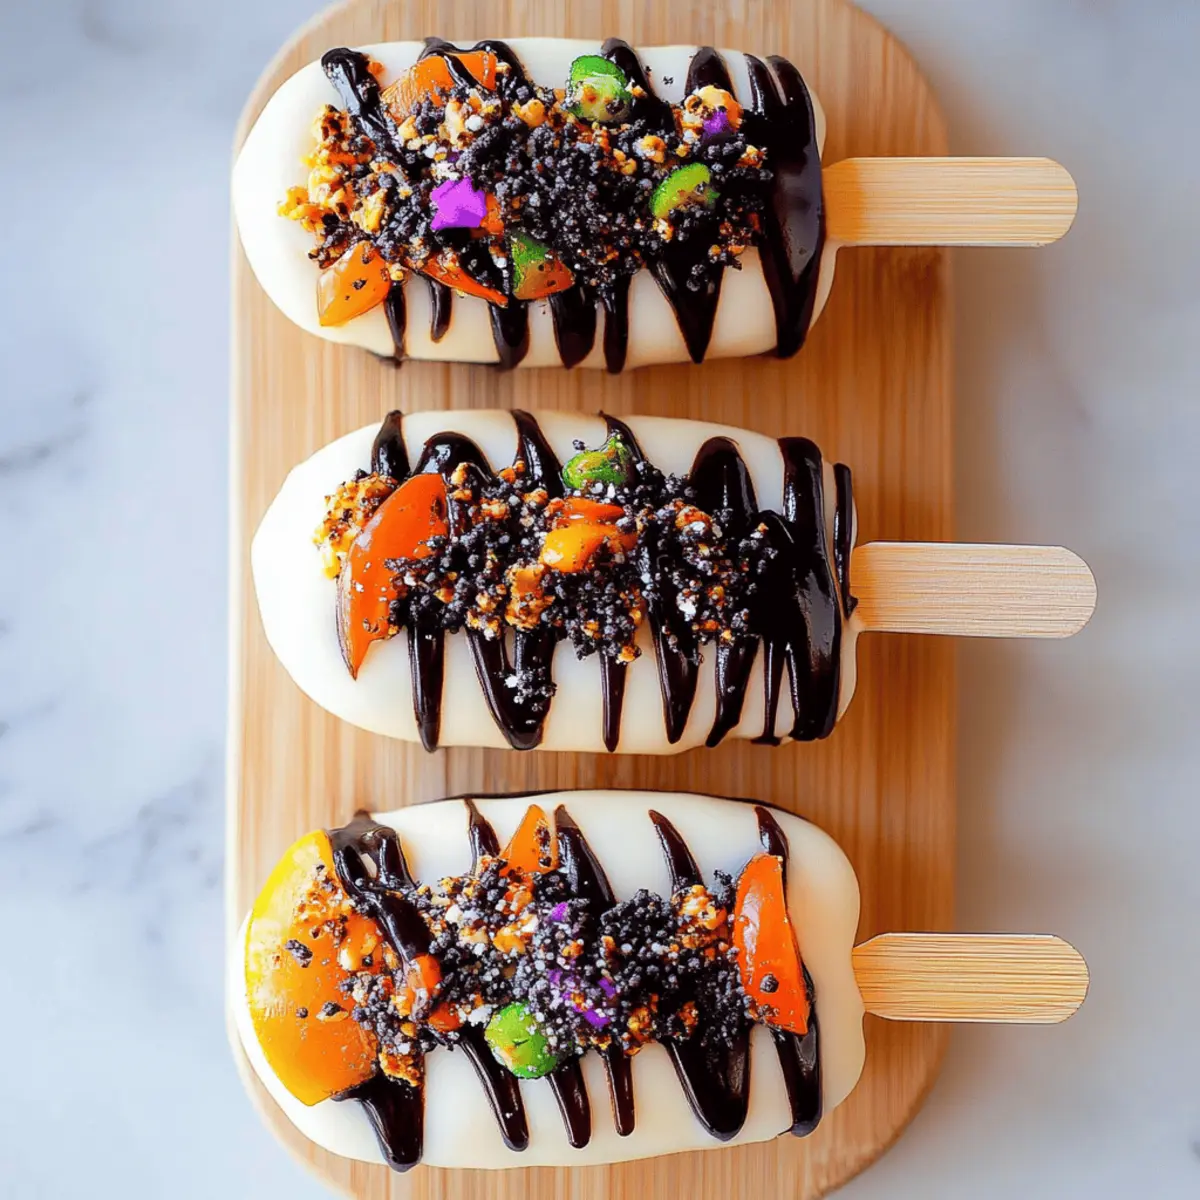
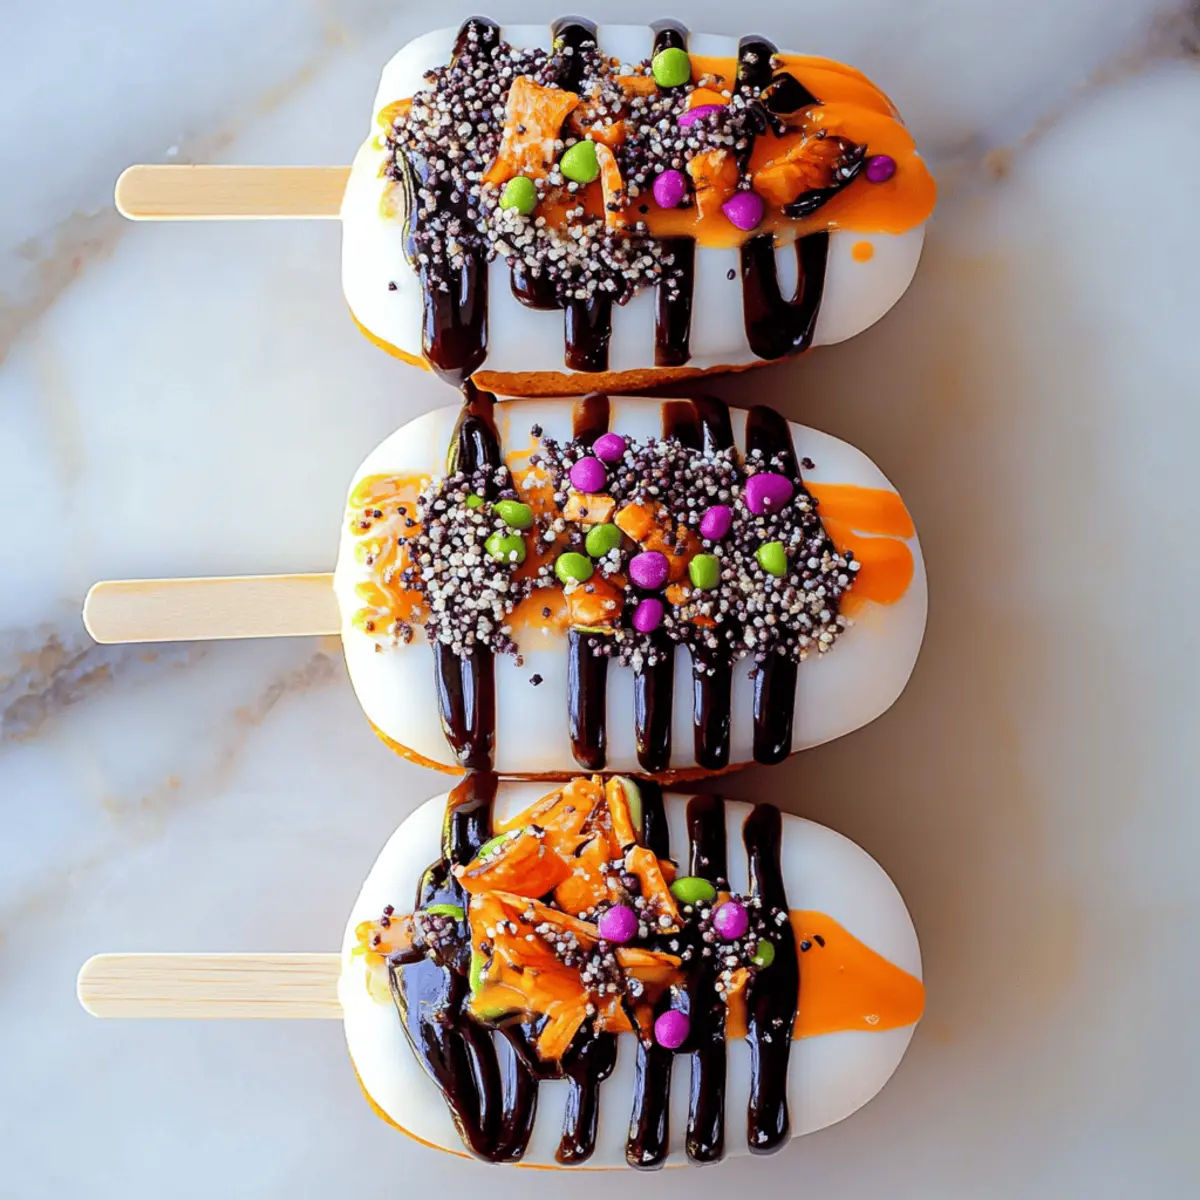
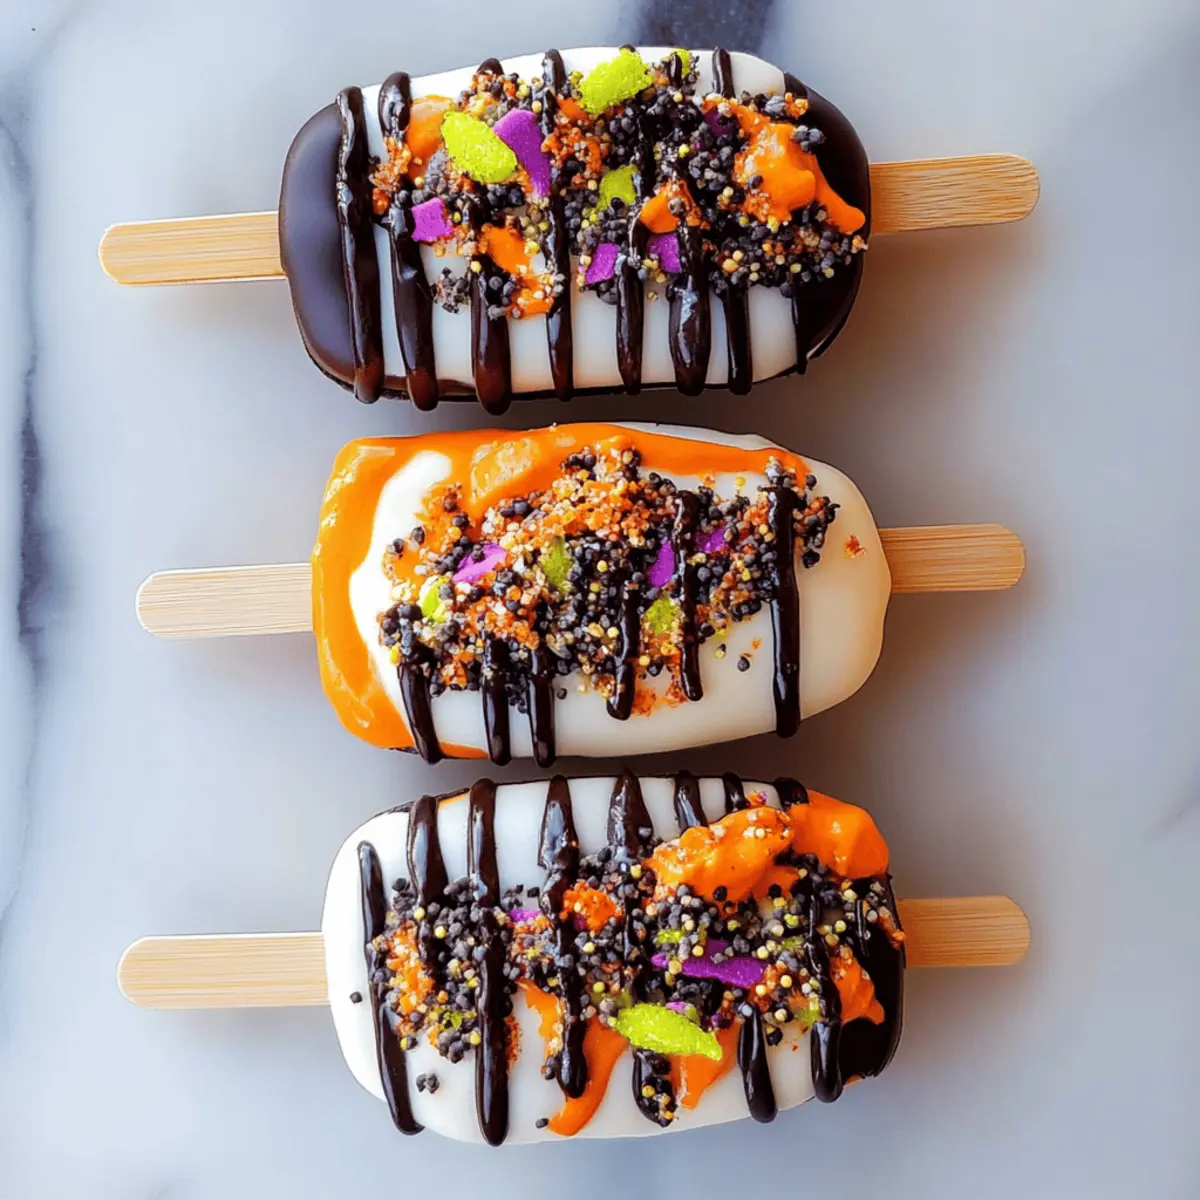
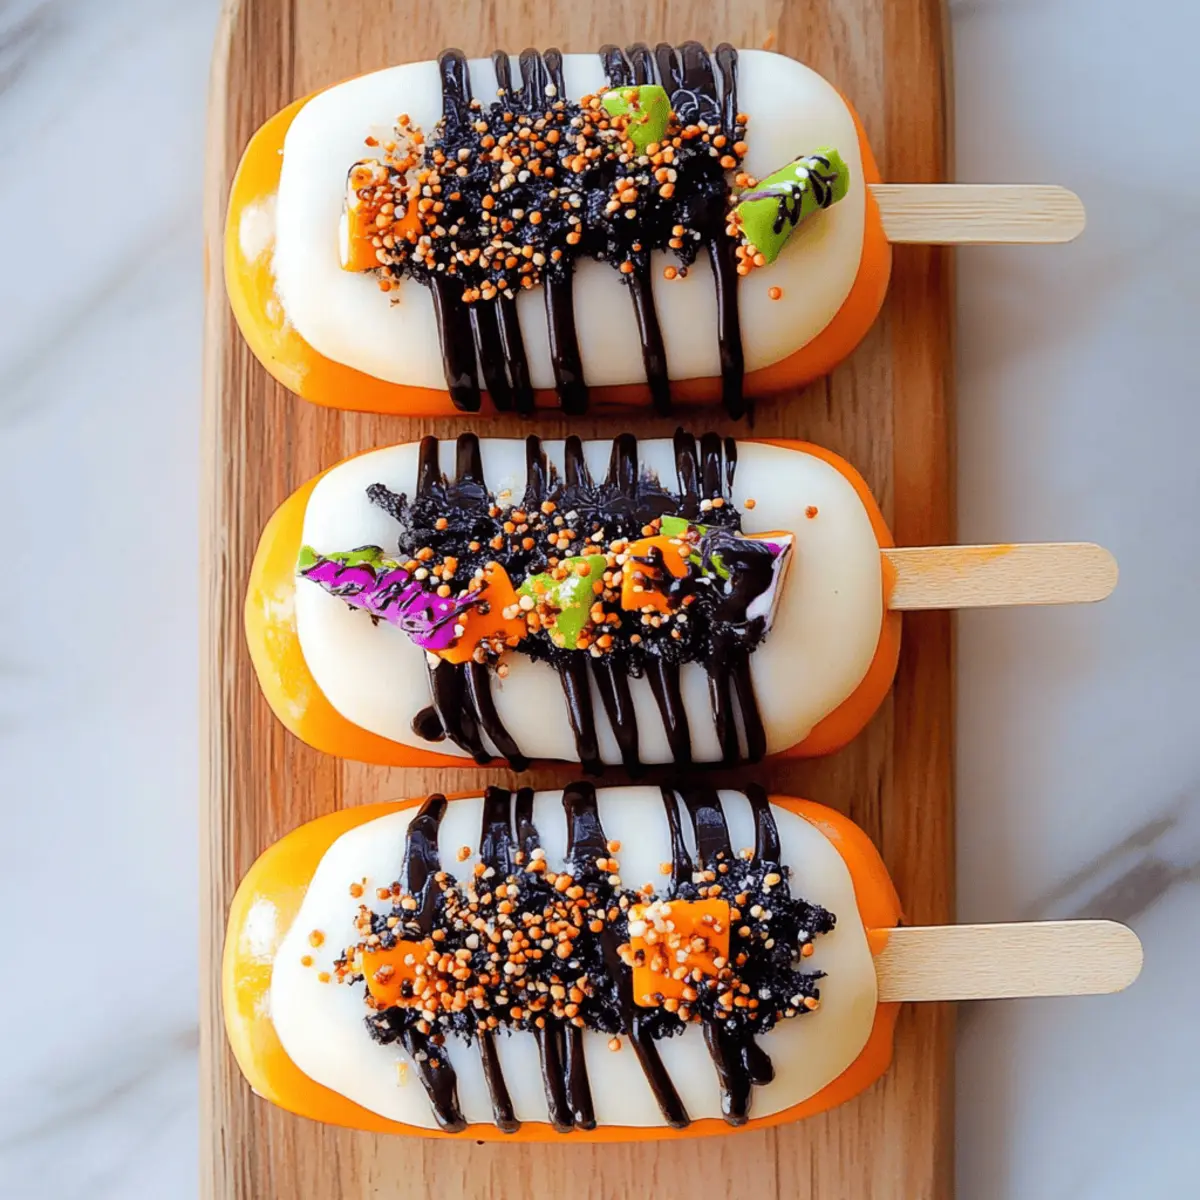
Get creative by decorating your set cakesicles with additional melted chocolate, sprinkles, or edible decorations of your choice. This step is where the fun really begins! It’s a perfect opportunity to let your imagination run wild, adding spooky designs that will impress each guest at your Halloween gathering.
How to Store and Freeze Halloween Cakesicles
Fridge: Store leftover Halloween Cakesicles in an airtight container for up to 3 days. This will keep them fresh while enjoying the festive flavors.
Freezer: For longer storage, wrap each cakesicle in plastic wrap and place them in a zip-top freezer bag. They can be frozen for up to 2 months without losing flavor or texture.
Thawing: To enjoy frozen Halloween Cakesicles, transfer them to the fridge for a few hours or let them sit at room temperature for about 30 minutes before serving.
Reheating: There's no need to reheat these treats; simply enjoy them chilled or allow them to warm slightly for the perfect delectable bite.
Expert Tips for Halloween Cakesicles
Chill the Mixture: Make sure to chill your dough-like mixture thoroughly before pressing it into molds. This ensures they hold shape better during dipping.
Don’t Overheat the Chocolate: Melt chocolate slowly and at lower temperatures to avoid burning. Stir frequently for a smooth, glossy coating on your Halloween Cakesicles.
Use Quality Coating: Choose high-quality chocolate or candy melts for the best flavor and texture. You'll want a coating that tastes as good as it looks!
Decoration Timing: Decorate your cakesicles while the coating is still slightly warm for better adhesion of sprinkles or designs. Let your creativity shine!
Freeze Well: Ensure your cakesicles are completely frozen; otherwise, they may fall apart during the coating process. A firm freeze makes for a successful Halloween Cakesicle experience!
Make Ahead Options
These Halloween Cakesicles are perfect for busy cooks looking to save time! You can prepare the cake and frosting mixture up to 24 hours in advance; simply cover it tightly in plastic wrap and refrigerate to keep it fresh. Additionally, once you've shaped the cakesicles and frozen them, they can be stored in an airtight container in the freezer for up to 3 weeks. When you're ready to serve, just dip the frozen cakesicles into melted chocolate, let them set, and decorate as desired. This way, you'll have spooky, homemade treats that are just as delicious and fun to enjoy, without the last-minute rush!
What to Serve with Halloween Cakesicles?
As you gather around the table with family and friends, enhance your spooky celebration with delightful pairings that perfectly complement these festive treats.
- Spooky Punch: A fruity, fizzy punch adds a refreshing contrast to the sweet cakesicles, keeping spirits high throughout your gathering.
- Ghostly Cupcakes: Sweet cupcakes topped with ghostly frosting enhance the theme while providing an alternate bite-sized dessert. They’re sure to delight every little monster!
- Crispy Veggie Platter: Crisp vegetables with a zesty dip offer a crunchy balance to the sweetness of the cakesicles, adding freshness to your dessert spread.
- Caramel Apples: Dipped in gooey caramel, these autumn classics provide a chewy texture and rich flavor that pairs beautifully with the creamy cakesicles.
- Mini Cheese Board: A selection of cheeses and crackers introduces a savory element that balances the sweetness while inviting guests to explore flavors.
- Chilled Hot Chocolate: A creamy beverage laced with marshmallows provides a comforting touch, perfect for cozy vibes on a Halloween night.
- Halloween-Themed Cookies: Witch hats or pumpkin-shaped cookies can tie into your theme while delivering a crunchy counterpart to the soft cakesicles.
- Pumpkin Spice Latte: This warm, spiced drink beautifully complements the sweetness of the cakesicles and sets a festive mood, making every sip a celebration.
Let your imagination run wild with these pairings, ensuring your Halloween gathering is both delicious and unforgettable!
Halloween Cakesicles Variations & Substitutions
Feel free to get creative and make these Halloween Cakesicles uniquely yours with these fun variations!
-
Gluten-Free: Substitute leftover cake with gluten-free cake or cupcakes for a delightful treat everyone can enjoy.
-
Sugar-Free: Use sugar-free frosting and alternative sweeteners in your cake for a guilt-free indulgence. This way, those watching their sugar intake can still join in the fun!
-
Vegan: Swap egg-based cakes with a vegan recipe and use dairy-free frosting and chocolate, making these treats suitable for plant-based diets.
-
Flavor Explosion: Add pureed fruits, such as pumpkin or banana, to your cake mixture for an unexpected twist in flavor and moisture. Imagine sinking your teeth into those juicy bites!
-
Nutty Crunch: Toss in chopped nuts like pecans or walnuts to the cake mixture before molding. This will add a delightful texture and enhance the flavor profile beautifully.
-
Cocoa Delight: Mix in cocoa powder to your cake prior to shaping for a rich chocolatey version of your Halloween Cakesicles. Chocolate lovers will thank you for this decadent twist!
-
Spicy Kick: Sprinkle in a pinch of cayenne or chili powder to the melted chocolate for a surprising touch of heat that will wow your guests! It’s a perfect way to awaken the senses.
-
Dazzling Decor: Instead of topping with just sprinkles, why not coat your cakesicles with crushed candy bars or pretzels for an irresistible sweet-salty combination?
These variations not only open doors to culinary delight but also ensure that your tables are filled with options for everyone this Halloween! For even more delightful ideas, check out my 10 Best Fall Desserts to spice up your festive table!
Halloween Cakesicles Recipe FAQs
What kind of leftover cake or cupcakes can I use?
Absolutely, you can use any leftover cake or cupcakes! While red velvet is recommended for its rich flavor, feel free to experiment with chocolate, vanilla, or any flavor you have on hand. Just ensure they are moist and not overly dry; a great texture is key to delicious Halloween Cakesicles!
How should I store leftover Halloween Cakesicles?
You can store your Halloween Cakesicles in an airtight container in the fridge for up to 3 days. Just be sure to separate layers with parchment paper to prevent them from sticking. If you want to keep them longer, wrap each cakesicle in plastic wrap and place them in a zip-top freezer bag.
Can I freeze Halloween Cakesicles? If so, how?
Yes, you can! To freeze, first wrap each cakesicle in plastic wrap tightly to prevent freezer burn. Then, place them in a zip-top freezer bag and store for up to 2 months. When you're ready to enjoy, simply thaw them in the fridge for a few hours or at room temperature for about 30 minutes.
What if my chocolate coating is too thick or too thin?
Very common! If your chocolate is too thick, you can add a splash of coconut oil or vegetable oil and reheat gently to achieve a smoother consistency. Conversely, if it’s thin, ensure you’re dipping at the right temperature; letting the chocolate sit for a minute can help it thicken before coating!
Are these Halloween Cakesicles safe for kids with allergies?
Great question! Always check the ingredient labels—especially on the chocolate and frosting—as they may contain common allergens such as nuts or dairy. For a safer option, you can make your frosting and use allergy-friendly chocolate or candy melts to cater to different dietary needs. Always ask guests about allergies before serving!
What decorations work best for Halloween Cakesicles?
Get creative with your decorations! I often use colorful sprinkles, edible glitter, or spooky-themed decorations like candy eyes and pumpkin shapes. For an extra touch, drizzle with contrasting chocolate once they set, or use food coloring to create Halloween-themed designs. The more, the merrier!
Delicious Halloween Cakesicles That Wow Every Party Guests
Ingredients
Equipment
Method
- Begin by crumbling your leftover red velvet cake or cupcakes in a large bowl until they resemble fine crumbs.
- Add 1 cup of buttercream frosting to the crumbled mixture, blending thoroughly until dough-like.
- Press the cake and frosting mixture firmly into cakesicle molds, ensuring a tight fit.
- Place the filled molds in the freezer for at least 30 minutes until firm.
- Melt 12 ounces of chocolate or candy melts according to package instructions.
- Carefully remove frozen cakesicles from the molds and dip each one into the melted chocolate.
- Allow dipped cakesicles to set at room temperature until chocolate sets, about 10-15 minutes.
- Decorate your cakesicles with additional melted chocolate, sprinkles, or edible decorations.


Leave a Reply