
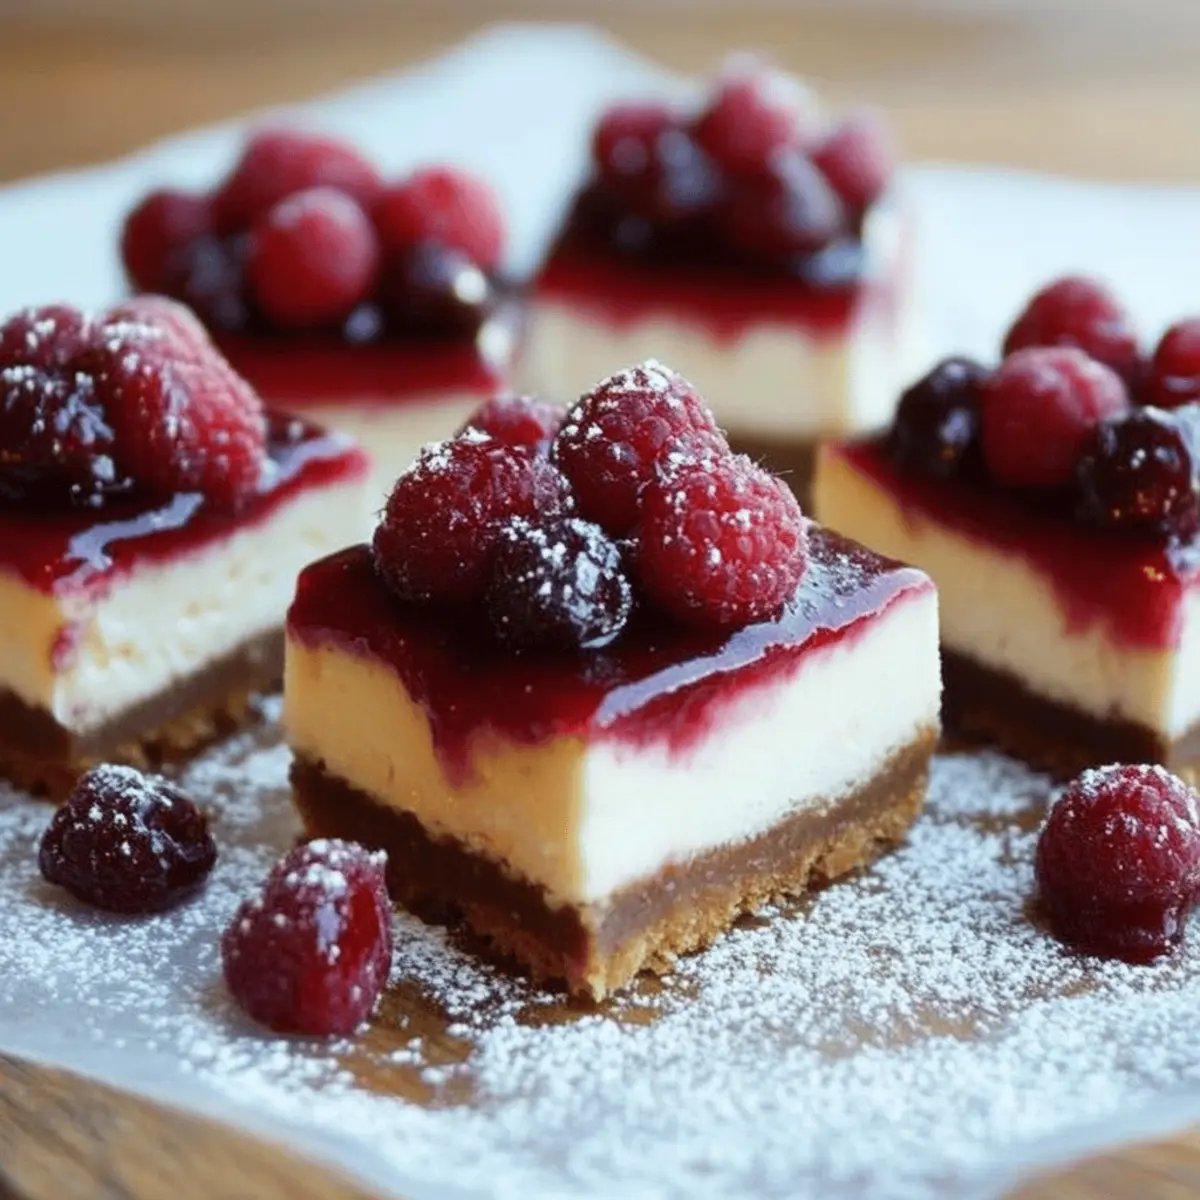
As the holidays approach, the allure of homemade treats fills the air, and you're left wondering how to bring joy without the stress of baking. Meet my solution: No-Bake Christmas Cheesecake Bars. These delightful bites not only save time but also make entertaining a breeze, transforming any gathering into a festive occasion. With just a few simple ingredients, you’ll have a creamy, indulgent dessert that satisfies your sweet cravings while keeping your kitchen cool and your spirits high. Plus, they’re perfect for gifting, neatly packaged to delight friends and family alike. Are you ready to discover the joy of these hassle-free treats that everyone will adore?
Why are No-Bake Treats So Loved?
Effortless Creation: No need for an oven! These No-Bake Christmas Cheesecake Bars require minimal effort, making them perfect for busy holiday schedules.
Decadent Delight: Each bite is rich and creamy, offering the indulgence of a traditional cheesecake without all the fuss.
Gift-Worthy Presentation: Easily package them for gifts, enhancing your holiday celebrations and sharing joy with friends and family.
Holiday Versatility: Customize with your favorite toppings or flavors—these bars can be tailored to suit any festive gathering.
Quick Chill Time: With minimal setting time in the fridge, you can whip these up last minute and still impress your guests! For more festive ideas, check out my Easy Holiday Dessert Recipes.
No-Bake Christmas Cheesecake Bars Ingredients
For the Cheesecake Filling
- Cream Cheese – Use softened cream cheese for a smooth and creamy texture in your filling.
- Powdered Sugar – Sweeten the filling effortlessly; it blends better than granulated sugar for a silky finish.
- Whipped Topping – Incorporates lightness and fluffy creaminess, making the cheesecake bars irresistible.
- Vanilla Extract – Adds a warm, inviting flavor that beautifully enhances the overall taste of your cheesecake.
For the Crust
- Graham Cracker Crumbs – Provides a deliciously crunchy base; you can also use crushed Oreos for a chocolatey twist.
- Butter – Helps bind the crumbs together and adds richness to the crust.
- Sugar – A touch of sweetness balances the buttery crust, making every bite delightful.
For Toppings
- Chocolate Sauce – Drizzle on top for added decadence and a visually appealing finish.
- Whipped Cream – A dollop on each bar creates an inviting look and extra creaminess.
- Crushed Candy Canes – Add a festive touch and a minty crunch—perfect for the holiday season!
These No-Bake Christmas Cheesecake Bars are sure to become a highlight of your holiday gatherings!
Step‑by‑Step Instructions for No-Bake Christmas Cheesecake Bars
Step 1: Gather Ingredients and Tools
Begin by collecting all your ingredients for the No-Bake Christmas Cheesecake Bars, including softened cream cheese, powdered sugar, whipped topping, and graham cracker crumbs. Ensure you have essential tools such as a mixing bowl, a spatula, a baking dish, and parchment paper on hand to streamline your preparation process.
Step 2: Prepare the Crust
In a mixing bowl, combine the graham cracker crumbs, sugar, and melted butter, stirring until the mixture is well-coated and resembles wet sand. Press this mixture firmly into the bottom of your baking dish, creating an even layer. Chill the crust in the refrigerator for about 10 minutes to set while you prepare the creamy cheesecake filling.
Step 3: Make the Cheesecake Filling
In a clean mixing bowl, beat the softened cream cheese and powdered sugar together until smooth and fluffy, about 2-3 minutes. Gently fold in the whipped topping and vanilla extract using a spatula until fully combined, being careful not to deflate the mixture. The filling should be light and airy, ready to be spread over your chilled crust.
Step 4: Assemble the Bars
Spread the cheesecake filling evenly over the chilled crust, smoothing the top with your spatula for a beautiful finish. Tap the dish lightly on the counter to eliminate any air bubbles and ensure a solid layer. Cover the dish with plastic wrap, then refrigerate for at least 4 hours, or until the filling is set and firm to the touch.
Step 5: Cut and Decorate
Once your No-Bake Christmas Cheesecake Bars have set, remove them from the refrigerator. Use a sharp knife to cut them into squares or rectangles, wiping the knife with a damp cloth between cuts for clean edges. Decorate each bar with drizzles of chocolate sauce, dollops of whipped cream, and a sprinkle of crushed candy canes for a festive touch.
Step 6: Serve and Enjoy
Arrange your beautifully decorated cheesecake bars on a serving platter or package them as delightful gifts for family and friends. Serve chilled, and witness the smiles as everyone indulges in these creamy, festive treats. These No-Bake Christmas Cheesecake Bars are sure to be the highlight of your holiday celebrations!
How to Store and Freeze No-Bake Christmas Cheesecake Bars
Fridge: Store any leftover No-Bake Christmas Cheesecake Bars in an airtight container in the fridge for up to 5 days to maintain freshness.
Freezer: For longer storage, freeze the cheesecake bars in individual slices wrapped in plastic wrap and then aluminum foil for up to 2 months.
Thawing: To enjoy frozen bars, thaw them in the fridge overnight before serving. This keeps the texture luscious and creamy.
Serving Tip: Drizzle with chocolate sauce or top with whipped cream just before serving for a delightful touch!
What to Serve with No-Bake Christmas Cheesecake Bars
Elevate your festive gathering with delightful pairings that bring joy to every bite!
-
Fresh Fruit Salad: A colorful medley of seasonal fruits adds a refreshing contrast to the rich cheesecake bars, balancing flavors beautifully. Picture a vibrant bowl filled with strawberries, blueberries, and tangerines.
-
Spiced Ginger Cookies: These warm, aromatic cookies complement the creamy sweetness, bringing a cozy, homemade feel to your dessert spread. Their crisp texture provides a delightful crunch against the smooth cheesecake bars.
-
Peppermint Hot Chocolate: This festive, indulgent drink warms the heart while echoing the minty notes of crushed candy canes on the bars. Perfect for sipping beside a crackling fire!
-
Chocolate-Covered Pretzels: The salty crunch of pretzels draped in luscious chocolate creates a satisfying contrast, enhancing the overall flavor experience. Each bite brings a mix of sweet and savory.
-
Whipped Cream Clouds: An airy dollop of this classic topping brings extra creaminess to your bars, inviting guests to indulge even further. Garnish with a sprinkle of cocoa for a touch of elegance.
-
Mulled Wine: Infused with spices and citrus, this warm drink enhances the festive ambiance while providing a soothing, aromatic experience alongside your sweet treats.
-
Sliced Almonds: A sprinkle of these crunchy nuts on each cheesecake square adds a delightful texture and nutty flavor that pairs wonderfully with the creamy filling.
-
Chocolate Mint Truffles: Rich and decadent, these bite-sized delights echo the cheesecake bars' flavors, perfect for chocolate lovers at your gathering.
Expert Tips for No-Bake Christmas Cheesecake Bars
• Use Softened Cream Cheese: Make sure your cream cheese is at room temperature to avoid lumps and achieve a smooth, creamy filling.
• Chill the Crust: Don’t skip chilling the crust! It helps it set properly and prevents the filling from making it soggy.
• Avoid Overmixing: When adding whipped topping, fold gently to maintain its lightness. Overmixing can lead to a dense filling.
• Customize Your Toppings: Experiment with different toppings like fresh fruits or cookie crumbles for variety. Include your favorite flavors!
• Serve Cold: These No-Bake Christmas Cheesecake Bars taste best when chilled. Serve them cold for a refreshing dessert experience.
Make Ahead Options
These delightful No-Bake Christmas Cheesecake Bars are perfect for busy home cooks who want to save time during the holiday rush! You can prepare the crust up to 3 days in advance by mixing the graham cracker crumbs, sugar, and melted butter, then pressing it into your baking dish. Simply keep it covered in the refrigerator to maintain its freshness. The creamy filling can also be made ahead; mix it and spread it over the chilled crust up to 24 hours before serving. Just remember to cover the dish with plastic wrap to prevent any drying out. When you’re ready to indulge, simply cut and decorate your bars with toppings and enjoy these festive treats just as delicious as if freshly made!
No-Bake Christmas Cheesecake Bars Variations
Feel free to get creative and personalize your no-bake cheesecake bars with these fun twists!
- Dairy-Free: Substitute cream cheese with vegan cream cheese and use coconut whipped topping for a delightful dairy-free treat.
- Gluten-Free: Use gluten-free graham cracker crumbs or almond flour to ensure everyone can indulge without worry. A delicious alternative!
- Chocolate Lovers: Add melted chocolate to the cheesecake filling for a rich chocolate flavor that will have chocolate enthusiasts swooning.
- Minty Fresh: Incorporate peppermint extract into the filling to provide a refreshing minty twist, perfect for holiday cheer!
- Nutty Crunch: Mix in crushed nuts such as walnuts or pecans into the crust for an added crunch that complements the creamy filling beautifully.
- Fruit-Topped: Add a layer of fresh berries or a fruit compote on top of the cheesecake bars for a burst of flavor and vibrant color.
- Spiced Delight: Sprinkle in ground cinnamon or nutmeg to the filling for a warm, spiced flavor that’s perfect for cozying up during the holidays.
- Boozy Twist: For adult gatherings, add a splash of your favorite liqueur like Baileys or Kahlua to the cheesecake filling for an adult version of these festive bars.
With these variations, your No-Bake Christmas Cheesecake Bars can be uniquely yours! If you're looking for more festive inspiration, don’t miss my Easy Holiday Dessert Recipes.
No-Bake Christmas Cheesecake Bars Recipe FAQs
What cream cheese should I use for the filling?
Absolutely, I recommend using full-fat cream cheese that is softened to room temperature. This helps achieve a smooth and creamy texture without any lumps, making your cheesecake bars delightful!
How should I store any leftover cheesecake bars?
To keep your No-Bake Christmas Cheesecake Bars fresh, simply place them in an airtight container and store them in the fridge for up to 5 days. This ensures they maintain their creamy texture and delicious flavor.
Can I freeze these cheesecake bars?
Very! Freezing is simple: wrap your cheesecake bars in plastic wrap and then aluminum foil to prevent freezer burn. They can be stored for up to 2 months. When you're ready to enjoy them, let them thaw in the fridge overnight for the best texture.
What should I do if my cheesecake filling doesn't set?
If your filling isn’t setting, it might be due to insufficient chilling time or not using softened cream cheese. Make sure to refrigerate the cheesecake bars for at least 4 hours, or better yet, overnight! If you're in a hurry, placing them in the freezer for about 1 hour can help them firm up.
Are there any allergy considerations for this recipe?
It’s important to consider that this recipe contains dairy and gluten, especially due to the cream cheese and graham crackers. If you or your guests have any allergies, look for gluten-free graham crackers and use dairy-free cream cheese to make it accommodating for all!
Can I customize the toppings based on my preference?
Absolutely! The more the merrier when it comes to toppings! Feel free to experiment with fresh fruits, chocolate shavings, or different types of sauces. It's a great way to personalize your No-Bake Christmas Cheesecake Bars while adding a touch of festive flair.
Delicious No-Bake Christmas Cheesecake Bars to Sweeten Your Holiday
Ingredients
Equipment
Method
- Gather all ingredients and tools needed for the recipe.
- Prepare the crust by combining graham cracker crumbs, sugar, and melted butter, then press into a baking dish.
- Make the cheesecake filling by beating cream cheese and powdered sugar until smooth, then fold in whipped topping and vanilla.
- Assemble the bars by spreading the cheesecake filling over the chilled crust and refrigerate for at least 4 hours.
- Cut into squares and decorate with toppings before serving.
- Serve chilled and enjoy your holiday treat!


Leave a Reply