
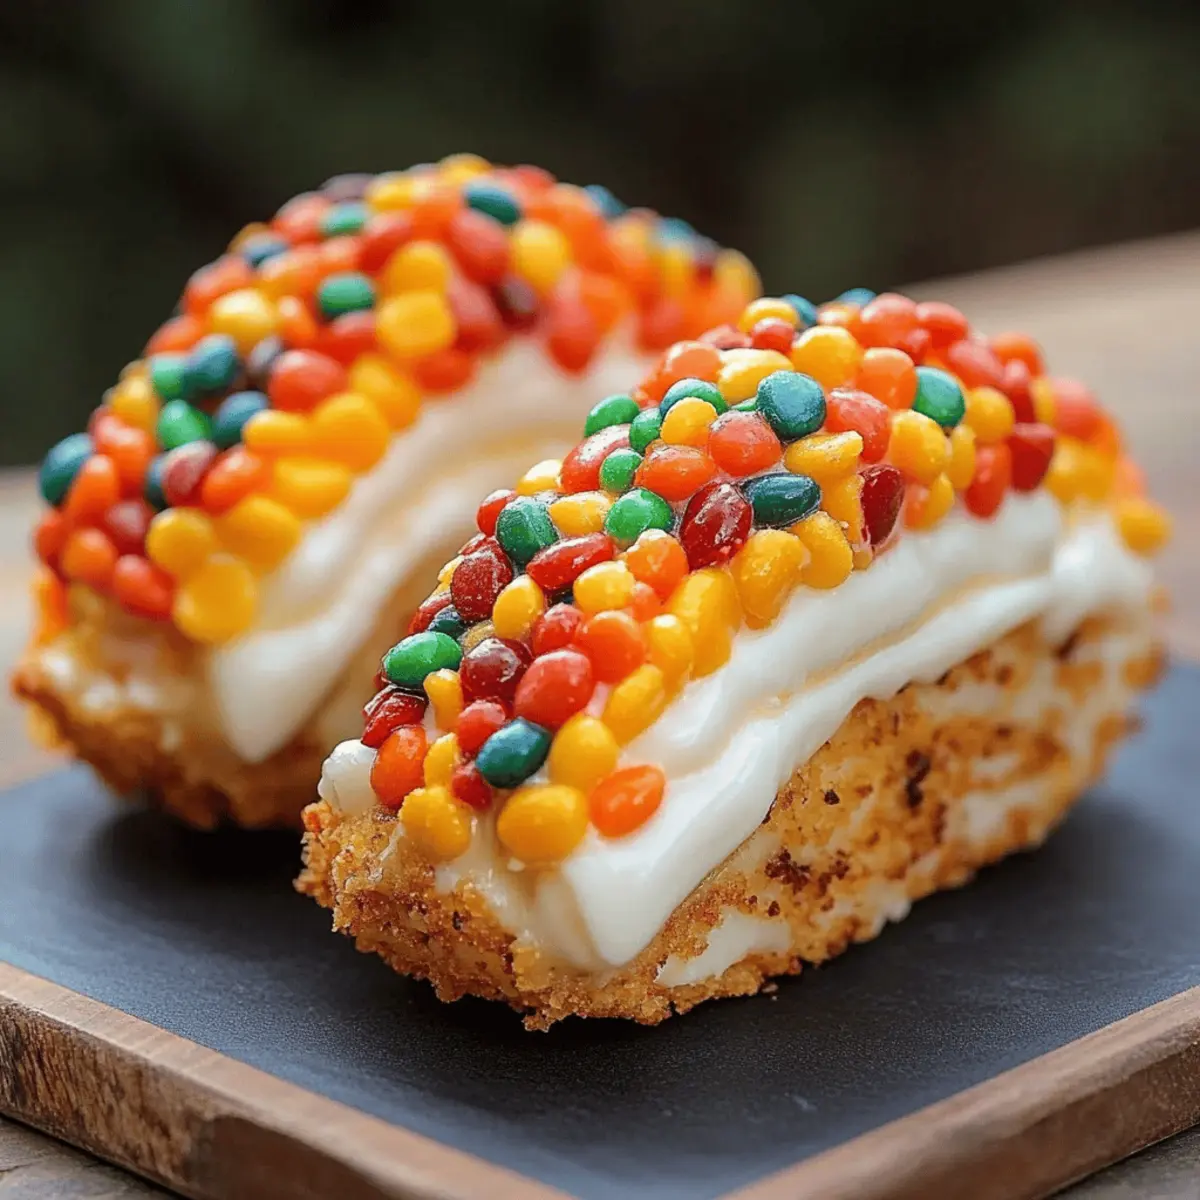
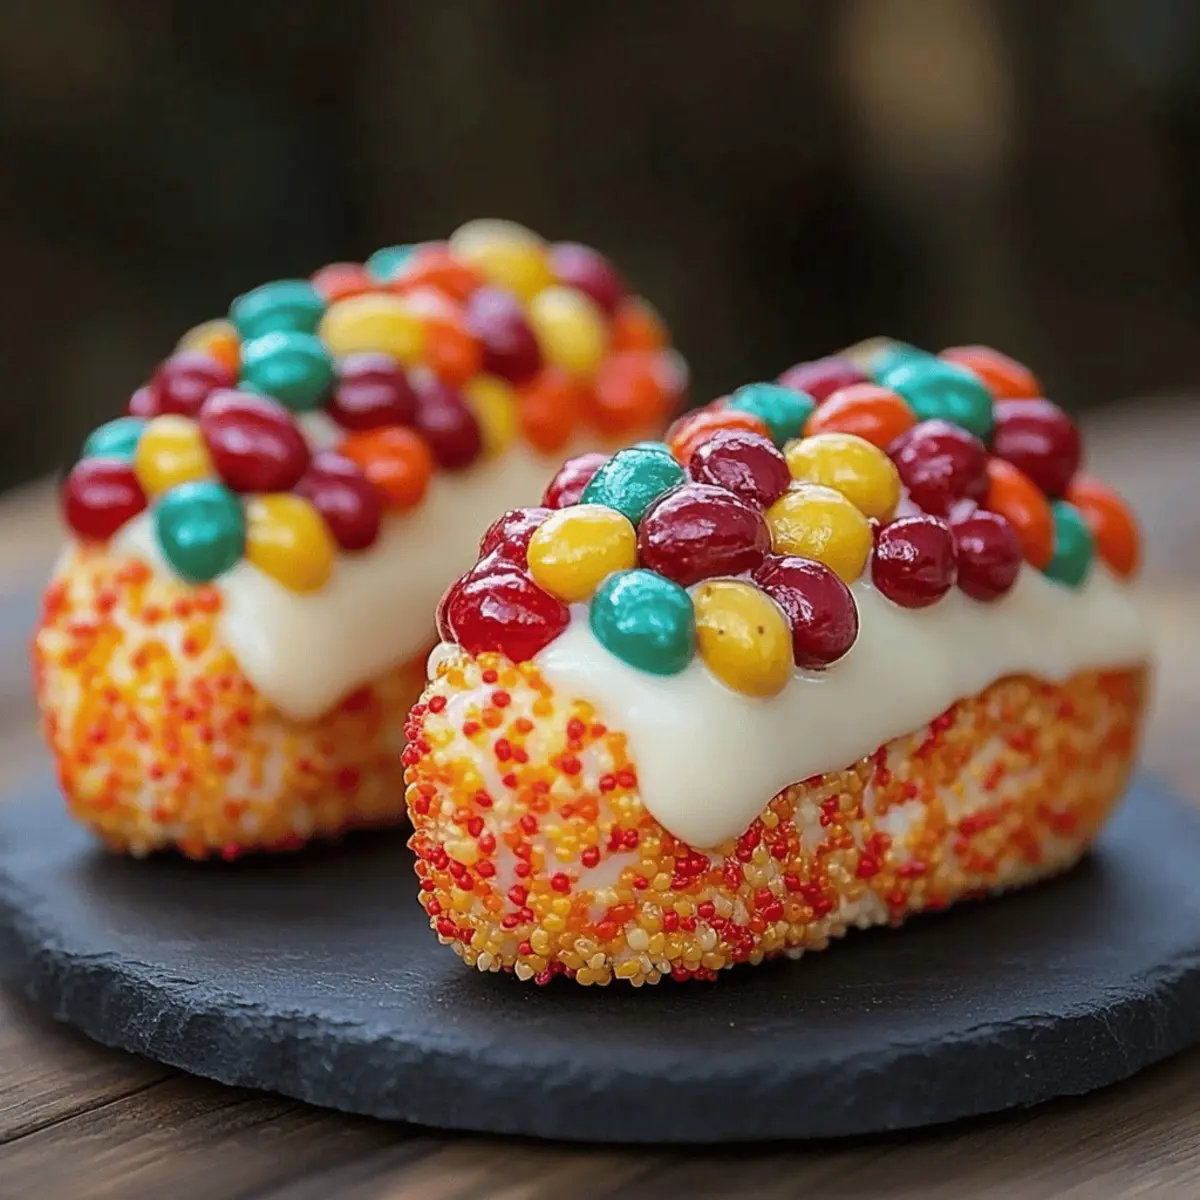
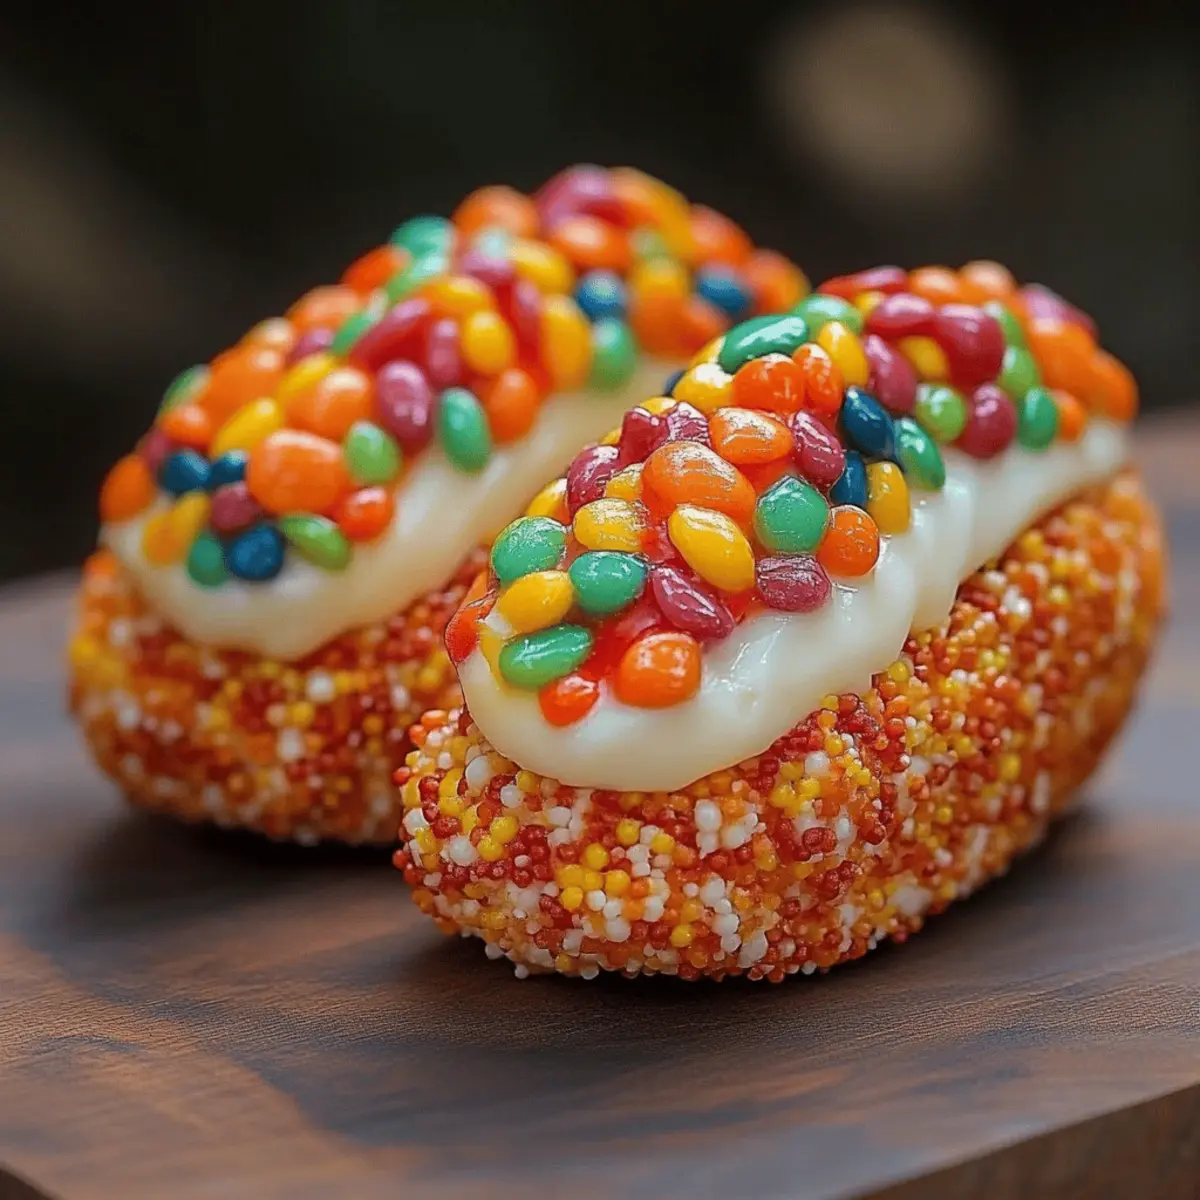
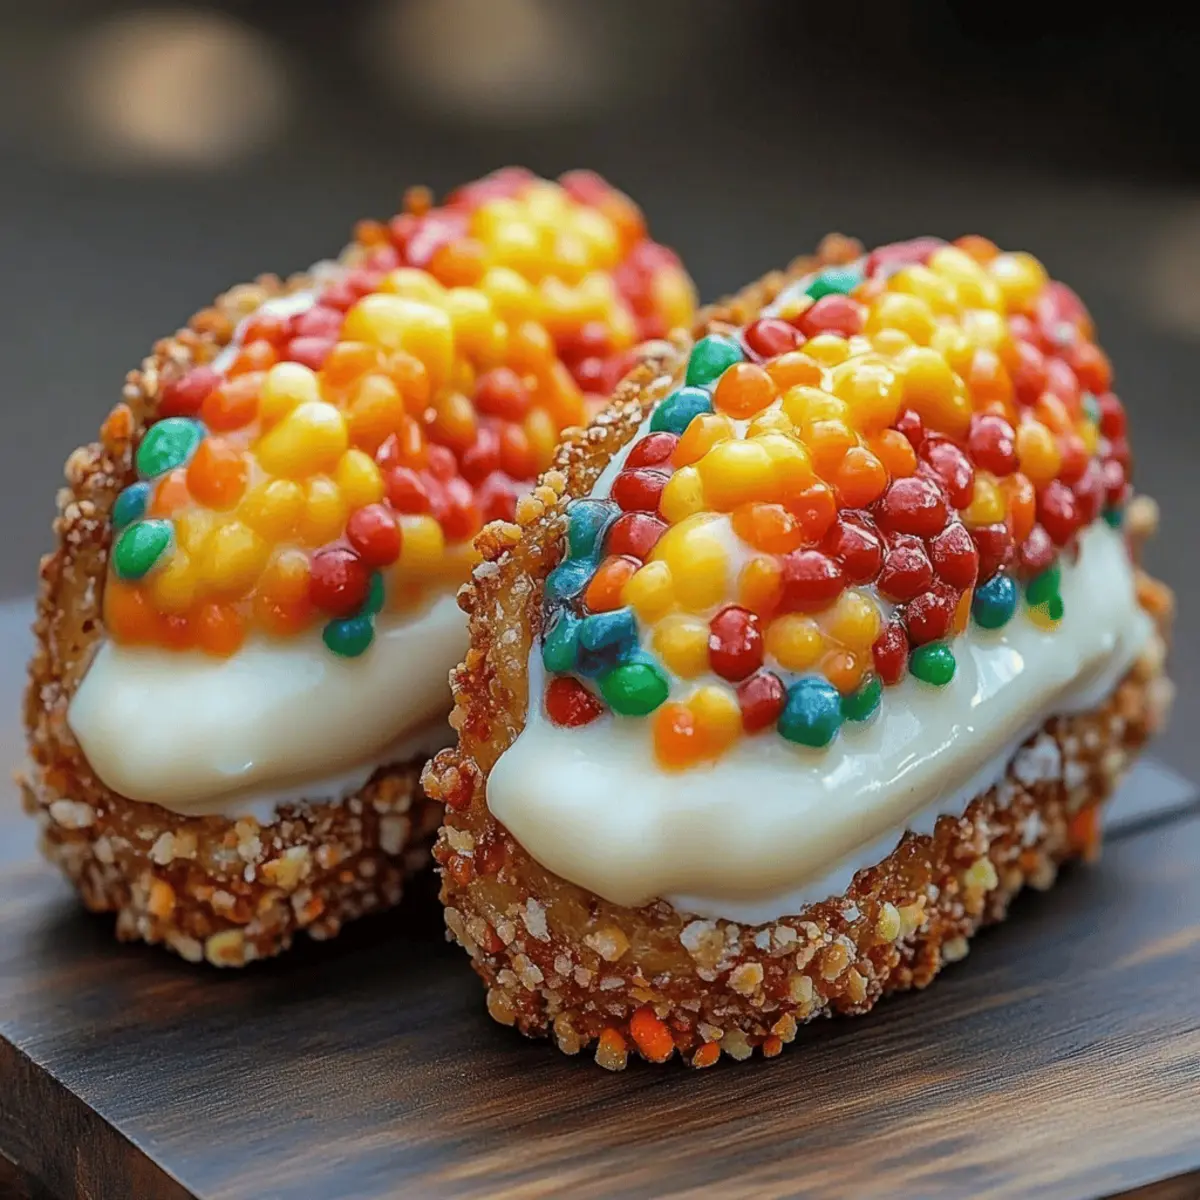
As I sift through the colorful cereal aisle, a wave of nostalgia washes over me—echoes of childhood mornings spent devouring my favorite fruity cereal. Today, I’m taking that vibrant taste and transforming it into something utterly delicious: Fruity Pebbles Cheesecake Tacos. Not only are these sweet bites a playful twist on traditional cheesecake, but they come together in under an hour, making them the perfect go-to dessert for any occasion. With the delightful crunch of cereal shells cradling a creamy, dreamy filling, you'll find them irresistible and ideal for impressing guests or treating yourself on a cozy evening. Are you ready to unlock a delightful flavor adventure that’ll have everyone begging for seconds? Let's dive into this cheerful recipe!
Why are Fruity Pebbles Cheesecake Tacos irresistible?
Colorful, Fun Presentation: These Fruity Pebbles Cheesecake Tacos not only look fantastic but also bring joy to any dessert table.
Creative Twist: Merging two beloved treats into one stunning dessert provides a unique way to enjoy cheesecake.
Quick and Easy: With a total preparation time of just 50 minutes, they’re perfect for last-minute gatherings or when you want something sweet without the fuss.
Endless Customization: Feel free to experiment with your favorite cereals or toppings to create delightful variations that suit every taste!
Crowd-Pleasing Delight: These mini tacos are sure to impress friends and family, making them a hit at parties or family dinners.
Experience the joy of homemade desserts again with these playful treats—your tastebuds will thank you!
Fruity Pebbles Cheesecake Tacos Ingredients
For the Cereal Shells
- Fruity cereal – 3 cups will create that delightful crunch and colorful exterior that’s a nostalgic throwback.
- Unsalted butter – ½ cup, melted helps bind the cereal together for a sturdy shell that holds all the goodness inside.
For the Cheesecake Filling
- Cream cheese – 8 oz, softened to room temperature ensures a smooth and creamy texture for the filling.
- Powdered sugar – ½ cup, sifted adds just the right sweetness without grittiness.
- Pure vanilla extract – 1 teaspoon infuses the filling with a lovely depth of flavor.
- Whipped cream – 1 cup, which lightens the mixture, creating an airy texture that's simply irresistible.
For Garnish
- Additional fruity cereal – a sprinkle on top adds a delightful crunch and even more color, making these Fruity Pebbles Cheesecake Tacos pop!
Step‑by‑Step Instructions for Fruity Pebbles Cheesecake Tacos
Step 1: Prepare the Cereal Mixture
In a large mixing bowl, combine 3 cups of fruity cereal with ½ cup of melted unsalted butter. Stir the mixture thoroughly until every piece of cereal is evenly coated in the buttery goodness, turning bright colors into a cohesive, glistening blend. This step should take about 5 minutes, and the mixture will have a wet, shiny appearance.
Step 2: Form the Cereal Shells
Using small taco-shaped molds or muffin tins, press the cereal mixture firmly into the shapes, ensuring to compact them tightly. This creates sturdy shells that will hold the creamy filling later. Once shaped, place the molds in the refrigerator and chill for at least 30 minutes, allowing them to set properly until firm.
Step 3: Beat the Cream Cheese
While the cereal shells chill, grab a mixing bowl and a hand mixer. Beat 8 oz of softened cream cheese until it's light and fluffy, which should take about 3-5 minutes. The mixture should appear smooth and creamy, perfect for blending in the other ingredients for your Fruity Pebbles Cheesecake Tacos.
Step 4: Mix in Sweetness and Flavor
Gradually add ½ cup of sifted powdered sugar and 1 teaspoon of pure vanilla extract to the beaten cream cheese. Continue mixing until everything is blended smoothly, with no lumps remaining. This step will enhance the flavor profile while ensuring a sweet, rich filling, taking about 2-3 minutes.
Step 5: Fold in the Whipped Cream
Gently fold in 1 cup of whipped cream into the cream cheese mixture using a spatula. Be careful to maintain the airiness of the whipped cream, which adds a light texture to your filling. This step should take about 2 minutes, and you’ll know it’s ready once the mixture is uniformly fluffy and delightful.
Step 6: Fill the Cereal Shells
Once the cereal shells have set firmly in the refrigerator, carefully remove them from the molds. Spoon the creamy cheesecake filling generously into each shell. As you fill, aim for a visually appealing, heaping portion that showcases the color and richness of your Fruity Pebbles Cheesecake Tacos.
Step 7: Garnish and Serve
To finish, sprinkle additional fruity cereal over the filled shells for a pop of color and added crunch. These mini tacos are best served immediately, but if you prefer a firmer texture, feel free to chill them in the refrigerator for an extra 10-15 minutes before serving. Enjoy the fun and joy these treats bring!
What to Serve with Fruity Pebbles Cheesecake Tacos
Imagine the joy of delighting your loved ones with a full meal that complements every creamy bite of these colorful tacos.
- Fruit Salad: A vibrant medley of fresh fruits enhances the sweet flavors, adding a refreshing crunch to your dessert spread.
- Vanilla Ice Cream: Creamy vanilla ice cream acts as a perfect contrast, balancing the sweetness of the cheesecake tacos with its rich, smooth texture.
- Chocolate Fondue: Dive into indulgence! Dipping fresh fruits or biscuits in warm chocolate adds a luxurious touch to the meal.
- Sparkling Water with Lime: A bubbly drink with a twist of lime refreshes the palate and brightens the overall experience of your sweet dessert.
- Mini Cookies: Pairing with mini cookies provides additional crunch and flavor variety, making the dessert table even more inviting.
- Coffee or Espresso: A shot of rich coffee can beautifully cut through the sweetness, adding balance and warmth to your dessert.
- Peanut Butter Dipping Sauce: For an unexpected twist, a creamy peanut butter sauce can enhance the tropical feel and add a savory note.
- Pineapple Coconut Smoothie: This creamy and dreamy smoothie serves as a fun drink option, enhancing the tropical vibe of the Fruity Pebbles Cheesecake Tacos.
- Rainbow Sprinkles: A sprinkle of colorful fun on top not only adds a touch of whimsy but also complements the dessert’s vibrant presentation.
- Almond Biscotti: This crunchy treat offers a nutty flavor that contrasts nicely with the creaminess of the cheesecake, making it a delightful combination.
Make Ahead Options
These Fruity Pebbles Cheesecake Tacos are perfect for busy home cooks looking to save time! You can prepare the cereal shells up to 24 hours in advance by pressing the mixture into molds and refrigerating them. The cheesecake filling can also be made up to 3 days ahead; simply store it in an airtight container in the fridge to maintain its luscious quality. When you’re ready to serve, fill the shells with the cream cheese mixture and garnish with additional fruity cereal. By prepping in advance, you’ll have a delightful dessert ready to impress with minimal effort—just as delicious as when freshly made!
Fruity Pebbles Cheesecake Tacos Variations
Feel free to unleash your creativity and personalize your Fruity Pebbles Cheesecake Tacos with these delightful twists!
-
Gluten-Free: Swap fruity cereal for gluten-free varieties or use homemade gluten-free granola for added crunch and flavor.
-
Vegan: Replace cream cheese with a vegan cream cheese alternative and use coconut whipped cream instead—just as creamy with a tropical twist.
-
Chocolate Drizzle: Add a decadent chocolate drizzle over the top before serving for an irresistibly sweet touch that plays beautifully with fruity flavors.
-
Extra Fruity: Toss in some chopped fresh fruits like strawberries or bananas into the cheesecake filling for a refreshing burst of flavor.
-
Spicy Kick: Mix in a pinch of cayenne pepper or chili powder into the cream cheese mixture to create a surprising yet delightful contrast.
-
Nutty Crunch: Stir in crushed nuts or granola into the cereal mixture for an exciting texture and nutty flavor that elevates the overall dish.
-
Frozen Treats: Freeze the filled tacos for a refreshing, creamy dessert that’s perfect for hot days—just let them sit for a few minutes before serving.
-
Seasonal Flavors: Experiment with seasonal spices like pumpkin spice in the filling for fall or peppermint extract for a festive winter twist—endless possibilities await!
These variations are just the beginning; feel free to mix and match to find your perfect version. If you want a different take on dessert, try out my No-Bake Cheesecake or take a closer look at some delightful Homemade Ice Cream. Your kitchen is the canvas—let your imagination run wild!
Expert Tips for Fruity Pebbles Cheesecake Tacos
- Cereal Coating: Ensure every cereal piece is coated in melted butter for a sturdy shell. Avoid skipping this step to prevent crumbling.
- Chilling Time: Don’t rush the chilling process! Waiting at least 30 minutes gives the shells their structure, so be patient for the best Fruity Pebbles Cheesecake Tacos.
- Whipped Cream Technique: Gently fold in the whipped cream to keep the mixture airy. Overmixing can lead to a dense filling—trust the lightness!
- Serving Suggestions: For an extra fun touch, consider serving with colorful sprinkles or a drizzle of chocolate sauce to elevate your dessert's appeal.
- Storage Tips: If you have leftovers, store the filling separately from the shells to prevent them from becoming soggy. Assemble just before serving for maximum crunch!
How to Store and Freeze Fruity Pebbles Cheesecake Tacos
Fridge: Store assembled Fruity Pebbles Cheesecake Tacos in an airtight container for up to 2 days. This keeps the shells crunchy and the filling fresh.
Freezer: For longer storage, freeze the cheesecake filling separately in a sealed container for up to 1 month. Thaw it in the fridge before assembling.
Cereal Shells: If you want to make the shells ahead of time, they can be stored at room temperature in a sealed container for short-term freshness, but best consumed within 3 days.
Reheating: Avoid reheating the filled tacos, as it may make the shells soggy. Just enjoy them chilled straight from the fridge for the best experience!
Fruity Pebbles Cheesecake Tacos Recipe FAQs
What type of fruity cereal should I use?
Absolutely! For the best results, I recommend using classic Fruity Pebbles cereal. It offers that iconic flavor and vibrant color. You can also experiment with similar fruity cereals, but try to avoid those with overly large pieces, as they won’t create the same delightful texture in the shells.
How should I store the leftover Fruity Pebbles Cheesecake Tacos?
Very importantly, store any remaining assembled Fruity Pebbles Cheesecake Tacos in an airtight container in the refrigerator for up to 2 days. To maintain the crunch of the shells, it’s best to keep the filling separate if you anticipate leftovers. Simply assemble right before serving to enjoy the perfect texture!
Can I freeze the cheesecake filling for later use?
Certainly! To freeze the cheesecake filling, place it in a sealed container and store it in the freezer for up to 1 month. When you're ready to use it, just transfer the container to the refrigerator to thaw overnight. Once thawed, give it a good stir before spooning it into your cereal shells for a quick and delightful treat.
What if my cereal shells are too crumbly?
If your cereal shells are crumbling, it usually means they weren't compressed tightly enough during molding. Next time, ensure that you pack the mixture firmly into the molds. You can also try adding a bit more melted butter to help bind the cereal better—aim for a wet, shiny mixture before pressing it into shape!
Are these Fruity Pebbles Cheesecake Tacos suitable for kids?
Absolutely! These colorful treats are not only fun to eat but also kid-approved due to their vibrant appearance and delicious flavors. Just keep an eye on any allergies to dairy or gluten that your little ones may have, and feel free to swap out ingredients as needed to cater to dietary restrictions.
Can I make these tacos ahead of time?
Yes, you can prepare the cereal shells the day before and store them at room temperature until you're ready to fill them. Just be sure to assemble the Fruity Pebbles Cheesecake Tacos no more than a few hours before serving for the best crunchy texture. Enjoy the sweet fun!
Fruity Pebbles Cheesecake Tacos
Ingredients
Equipment
Method
- In a large mixing bowl, combine 3 cups of fruity cereal with ½ cup of melted unsalted butter. Stir until evenly coated.
- Using taco-shaped molds or muffin tins, press the cereal mixture firmly into shapes. Chill for at least 30 minutes.
- Beat 8 oz of softened cream cheese until light and fluffy, about 3-5 minutes.
- Gradually add ½ cup of sifted powdered sugar and 1 teaspoon of vanilla extract to the cream cheese. Mix until smooth.
- Gently fold in 1 cup of whipped cream until uniformly fluffy.
- Carefully remove the cereal shells from the molds and spoon the cheesecake filling generously into each shell.
- Sprinkle additional fruity cereal on top before serving. Enjoy!


Leave a Reply