
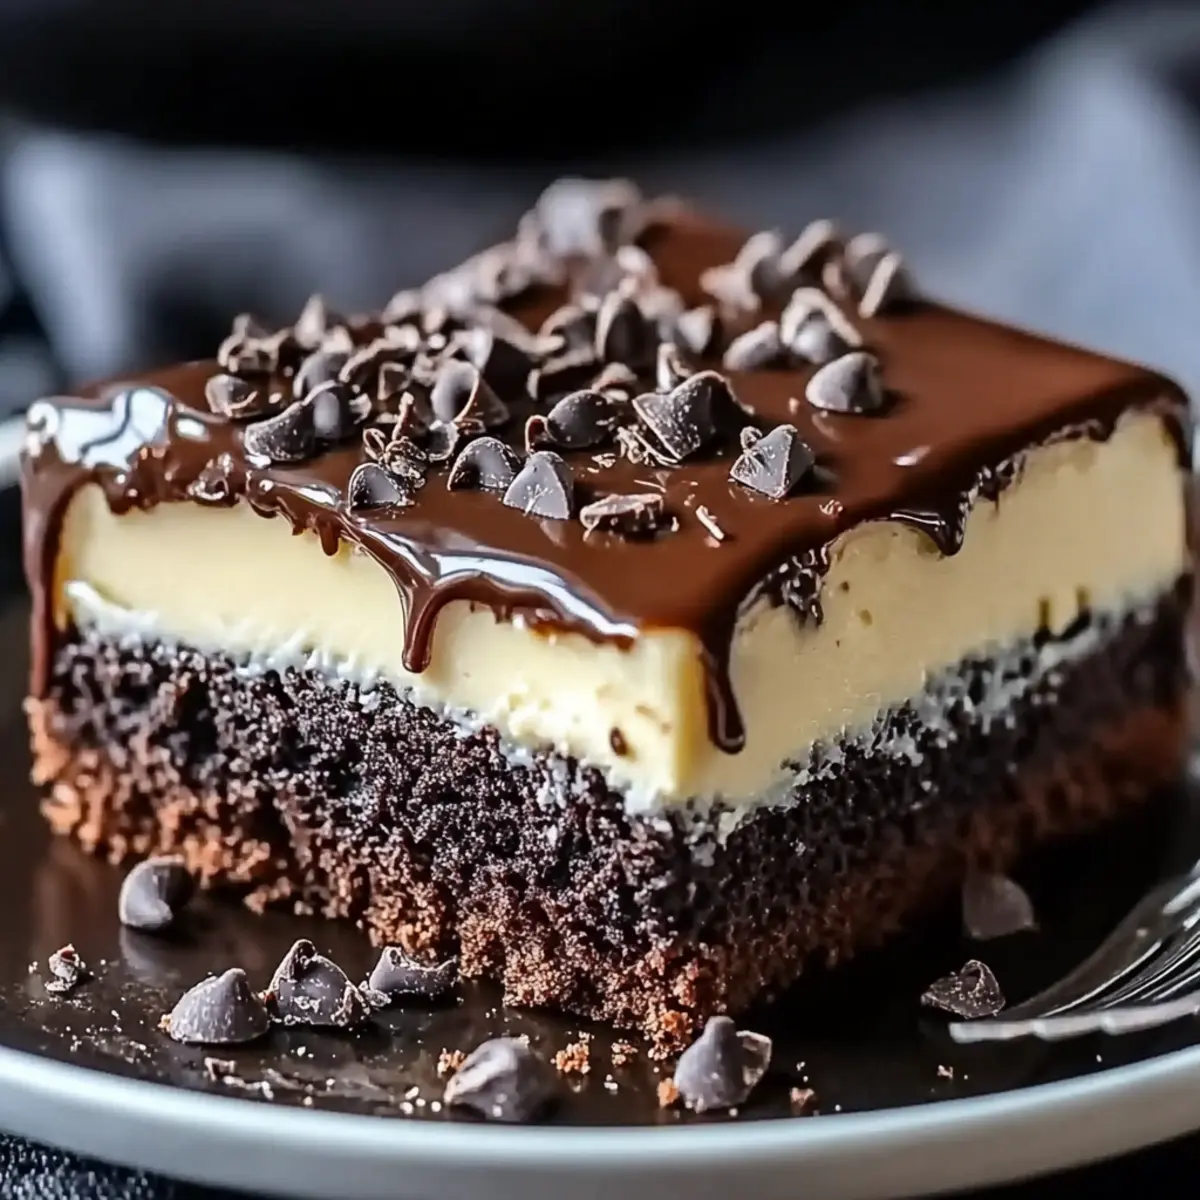
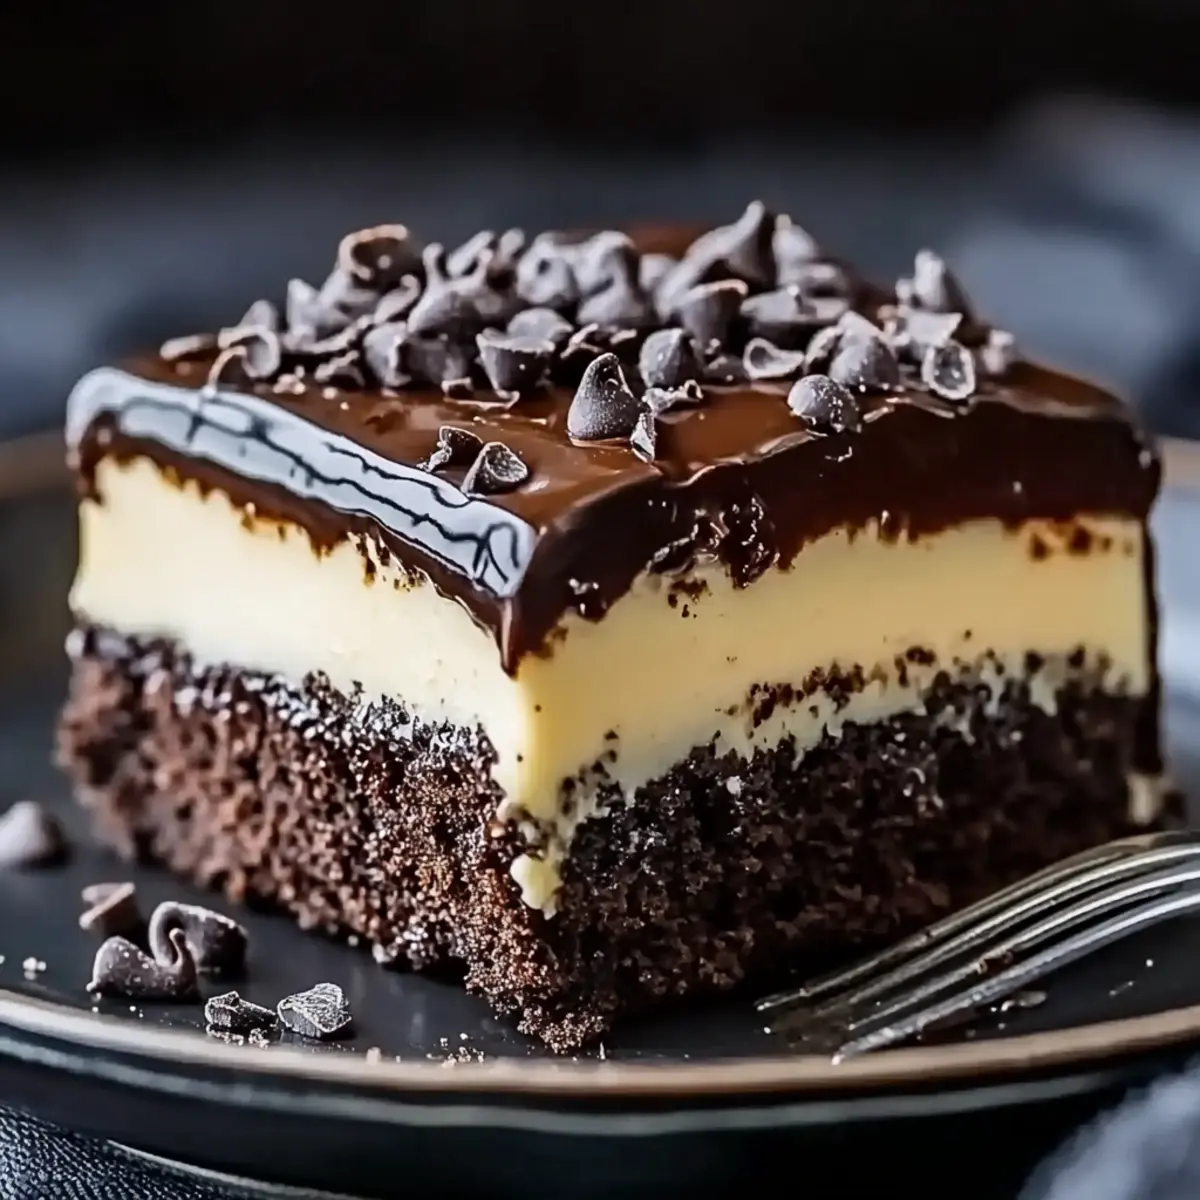
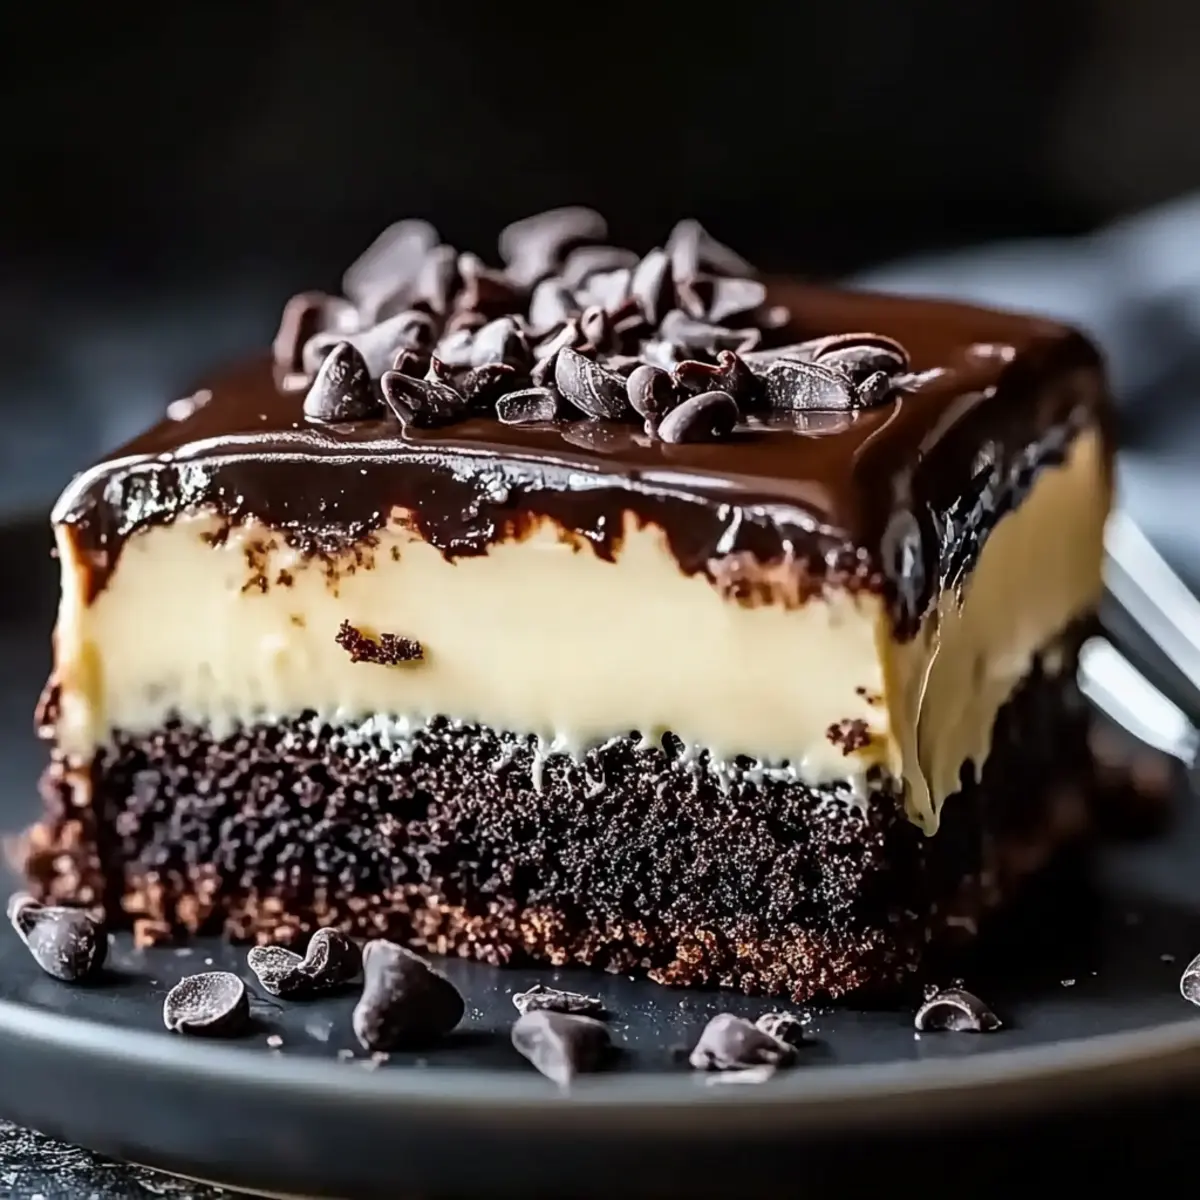
As the rich, comforting aroma of Chocolate Ooey Gooey Cake drifts through my kitchen, I can’t help but smile at the memories it evokes of family gatherings and celebrations. This culinary gem perfectly balances the deep, decadent taste of chocolate while offering an irresistibly moist texture that’s simply unforgettable. With just 20 minutes of prep time, you can whip up this delightful dessert that will leave your friends and family raving—and asking for seconds! Plus, serving it warm with a scoop of vanilla ice cream creates a cozy, indulgent experience that transforms any ordinary day into something special. Curious to learn how to make this chocolate wonder in your own kitchen? Let’s dive in!
Why is Chocolate Ooey Gooey Cake a must-try?
Decadent flavor: This cake is a chocolate lover's dream, delivering a rich and indulgent taste that’s hard to resist.
Effortless preparation: With just 20 minutes of prep, you can create a show-stopping dessert that looks and tastes like you spent hours on it!
Versatile serving options: Whether warm with vanilla ice cream or chilled, it adapts perfectly to any occasion, just like my favorite Cheese Blueberry Cake.
Crowd-pleaser: Perfect for gatherings, it sparks joy as your friends and family delight in every gooey bite.
Speedy baking time: In about 35-40 minutes, you'll have a scrumptious treat ready for your hungry guests!
Treat yourself to this delightful cake and rediscover the joy of homemade desserts!
Chocolate Ooey Gooey Cake Ingredients
For the Cake
• Chocolate Syrup – A cup of this sweet, thick syrup gives the cake its rich chocolatey flavor.
• Unsalted Butter – Half a cup, melted, ensures the cake has a moist and tender crumb.
• Large Eggs – Three eggs help bind the ingredients and add richness to the cake.
• All-Purpose Flour – One cup to give the cake structure while still keeping it ooey-gooey.
• Granulated Sugar – Half a cup balances the richness with sweetness.
• Vanilla Extract – A teaspoon enhances the overall flavor profile beautifully.
• Chocolate Cake Mix – Two cups for a convenient, chocolate-packed base that makes preparation a breeze.
Treat your loved ones to this irresistible Chocolate Ooey Gooey Cake and bask in their joy!
Step‑by‑Step Instructions for Chocolate Ooey Gooey Cake
Step 1: Preheat Your Oven
Begin by preheating your oven to 350°F (175°C). This temperature ensures that when your Chocolate Ooey Gooey Cake batter is ready, the oven is hot and prepared for baking. While the oven warms up, gather all your ingredients and equipment, including a mixing bowl and a greased baking pan, to streamline your process.
Step 2: Combine Syrup and Butter
In a medium mixing bowl, pour in 1 cup of chocolate syrup and ½ cup of melted unsalted butter. Use a whisk to mix these two ingredients together until everything is fully combined and glossy. This rich mixture serves as the base for your ooey gooey cake, providing both flavor and moisture that will shine through every bite.
Step 3: Incorporate the Eggs
Now, crack in 3 large eggs, adding them one at a time to the chocolate mixture. After each egg, mix well using your whisk, ensuring a smooth, homogeneous batter. You should see the mixture thicken slightly as the eggs blend in, bringing additional richness and body that’s crucial for your final cake.
Step 4: Add Dry Ingredients
Next, sift in 1 cup of all-purpose flour and ½ cup of granulated sugar, followed by 1 teaspoon of vanilla extract. Stir gently with a spatula until just combined, being careful not to overmix. The batter will be thick and slightly lumpy, but that's exactly what you want for your Chocolate Ooey Gooey Cake.
Step 5: Fold in Cake Mix
Now it’s time to add 2 cups of chocolate cake mix to the batter. Gently fold the cake mix into the existing mixture until it’s fully incorporated and the batter is smooth. This cake mix will enhance the chocolate flavor and contribute to the delightful texture, setting the stage for the perfect dessert.
Step 6: Transfer to Baking Pan
Carefully pour the batter into your greased baking pan, using a spatula to spread it evenly. Make sure the batter fills the pan to about the halfway mark to prevent overflow while baking. Visualize a luscious, gooey cake forming as it bakes—your family will be eagerly waiting for this chocolate delight!
Step 7: Bake to Perfection
Place the pan in your preheated oven and bake for 35-40 minutes. The cake is done when a toothpick inserted in the center comes out with moist crumbs rather than wet batter. Keep an eye on the clock, and start checking at the 35-minute mark to avoid overbaking.
Step 8: Cool and Serve
Once baked, remove the Chocolate Ooey Gooey Cake from the oven and let it cool for about 10 minutes in the pan. This resting period allows the gooey center to set slightly for easier serving. When ready, cut into squares and consider pairing with a scoop of vanilla ice cream for an indulgent finish!
Expert Tips for Chocolate Ooey Gooey Cake
Moisture Matters: Ensure you don’t overbake the cake; check for moist crumbs with the toothpick test to maintain that ooey-gooey texture.
Let It Cool: Allowing the cake to cool for at least 10 minutes helps set the gooey center, making it easier to slice and serve.
Experiment with Flavors: Feel free to add a pinch of espresso powder or a splash of almond extract to enhance the chocolate flavor in your Chocolate Ooey Gooey Cake.
Use Quality Ingredients: Opt for high-quality chocolate syrup and cake mix, as these will significantly enhance the final taste of your cake.
Don’t Skip the Ice Cream: Serving warm slices with a scoop of vanilla ice cream creates an unforgettable blend of flavors and textures!
Storage Savvy: Store leftovers in an airtight container to keep the cake moist; it’s best enjoyed within three days.
What to Serve with Chocolate Ooey Gooey Cake
Create a scrumptious experience alongside your indulgent dessert that tantalizes every taste bud.
- Vanilla Ice Cream: The classic creamy companion enhances the cake's rich chocolate flavor and offers a delightful temperature contrast.
- Fresh Berries: Bright, juicy strawberries or raspberries provide a fresh zing that beautifully balances the cake's sweetness and richness.
- Whipped Cream: Light and airy, a dollop of whipped cream adds a touch of elegance and a silky texture to each gooey slice.
- Chocolate Sauce Drizzle: Intensify the chocolate experience by adding extra chocolate sauce on top—it's like a hug in dessert form!
- Caramel Sauce: A ribbon of warm caramel introduces a luxurious layer of sweetness and a slightly salty undertone to the cake.
- Coffee: A sensitive cup of brewed coffee serves as a fantastic contrast, enhancing the cake's flavors while breaking the sweetness.
- Mint Leaves: For a touch of freshness, garnish with mint leaves; their cool notes are a lovely surprise amidst the chocolate richness.
- Nutty Crunch: Toasted nuts, such as pecans or walnuts, provide a satisfying crunch that complements the soft, gooey texture of the cake.
Chocolate Ooey Gooey Cake Variations
Feel free to put your own spin on this velvety Chocolate Ooey Gooey Cake and make it uniquely yours!
- Gluten-Free: Substitute regular cake mix with a gluten-free cake mix for a delicious version that everyone can enjoy.
- Add Nuts: Sprinkle in chopped walnuts or pecans for a delightful crunch and added richness throughout.
- Peppermint Twist: Fold in crushed peppermint candies or a few drops of peppermint extract for a festive variation.
- Spicy Fun: Add a teaspoon of cayenne pepper or chili powder to the batter for a surprising kick that complements the chocolate beautifully.
- Mocha Magic: Mix in a tablespoon of instant coffee or espresso powder to deepen the flavor and give it that sophisticated mocha touch.
- Tropical Bliss: Incorporate shredded coconut or top with caramelized pineapple chunks for a delightful tropical twist.
- Fruit Fusion: Add a cup of fresh raspberries or chopped strawberries to the batter for a fruity explosion in every bite.
- Heavenly Layering: Turn it into a layered cake by baking two rounds and filling with whipped cream or your choice of frosting.
With these variations, your Chocolate Ooey Gooey Cake can be a canvas for your wildest dessert dreams, just like how I love to share the joy of my Chocolate Chip Cookie recipe! Let your imagination soar in the kitchen!
Make Ahead Options
These Chocolate Ooey Gooey Cake preparations are perfect for busy home cooks looking to save time! You can prepare the batter up to 24 hours in advance by mixing all the ingredients together and storing it in an airtight container in the refrigerator. This not only saves you time but allows the flavors to meld beautifully. When you're ready to bake, simply pour the chilled batter into a greased baking pan and pop it in the preheated oven. Alternatively, if you have leftovers, store them in an airtight container at room temperature for up to 3 days. Enjoy this delicious dessert anytime without the last-minute rush!
How to Store and Freeze Chocolate Ooey Gooey Cake
Room Temperature: Keep the cake in an airtight container at room temperature for up to 3 days to maintain moisture and flavor.
Fridge: If you want to extend its freshness, refrigerate the cake for up to a week, ensuring it's covered to prevent it from drying out.
Freezer: For longer storage, wrap individual slices tightly in plastic wrap and aluminum foil, then freeze for up to 2 months. Thaw in the fridge before enjoying.
Reheating: To savor the ooey-gooey texture, warm slices in the microwave for about 15-20 seconds before serving. You'll love the warmth of the chocolate in every delightful bite!
Chocolate Ooey Gooey Cake Recipe FAQs
How do I know if my ingredients are ripe or fresh?
Absolutely! Fresh ingredients are key to a delicious Chocolate Ooey Gooey Cake. For eggs, make sure they are within their expiration date and free of any unpleasant odor. When it comes to cake mix, check that it hasn’t passed its best by date, as this can affect the rise and texture.
What is the best way to store leftover Chocolate Ooey Gooey Cake?
To keep your cake fresh and moist, store it in an airtight container at room temperature for up to 3 days. If you need a bit more time, refrigerate it for up to a week while ensuring it’s covered to prevent it from drying out. When ready to enjoy, simply slice and savor!
Can I freeze Chocolate Ooey Gooey Cake?
Yes, you can! For the best experience, wrap individual slices tightly in plastic wrap followed by aluminum foil. This will protect the cake from freezer burn, allowing it to be stored for up to 2 months. When you’re craving a slice, just thaw it in the fridge overnight before gently reheating it in the microwave for about 15-20 seconds.
What if my cake comes out too dry?
If you find that your Chocolate Ooey Gooey Cake is too dry, it could be due to overbaking. Always start checking for doneness at the 35-minute mark by inserting a toothpick into the center. You’re aiming for moist crumbs rather than cleanly baked results. For future bakes, try adding a tablespoon of extra chocolate syrup to the batter for added moisture!
Is this recipe suitable for people with gluten allergies?
Very much so! You can easily make this Chocolate Ooey Gooey Cake gluten-free by substituting the regular chocolate cake mix with a gluten-free version. Just ensure that all your ingredients, including the chocolate syrup, are certified gluten-free to keep your dessert safe and delicious!

Indulge in Irresistible Chocolate Ooey Gooey Cake Bliss
Ingredients
Equipment
Method
- Preheat your oven to 350°F (175°C). Gather all your ingredients and equipment for easy access.
- In a medium mixing bowl, pour in 1 cup of chocolate syrup and ½ cup of melted unsalted butter. Whisk until glossy.
- Crack in 3 large eggs, one at a time, mixing well after each addition until smooth.
- Sift in 1 cup of flour, ½ cup of sugar, and 1 teaspoon of vanilla extract. Stir gently until just combined.
- Fold in 2 cups of chocolate cake mix until fully incorporated. The batter will be thick.
- Pour the batter into a greased baking pan, filling it to about halfway.
- Bake for 35-40 minutes, checking for moist crumbs with a toothpick.
- Cool in the pan for about 10 minutes, then slice and serve warm, optionally with vanilla ice cream.


Leave a Reply