
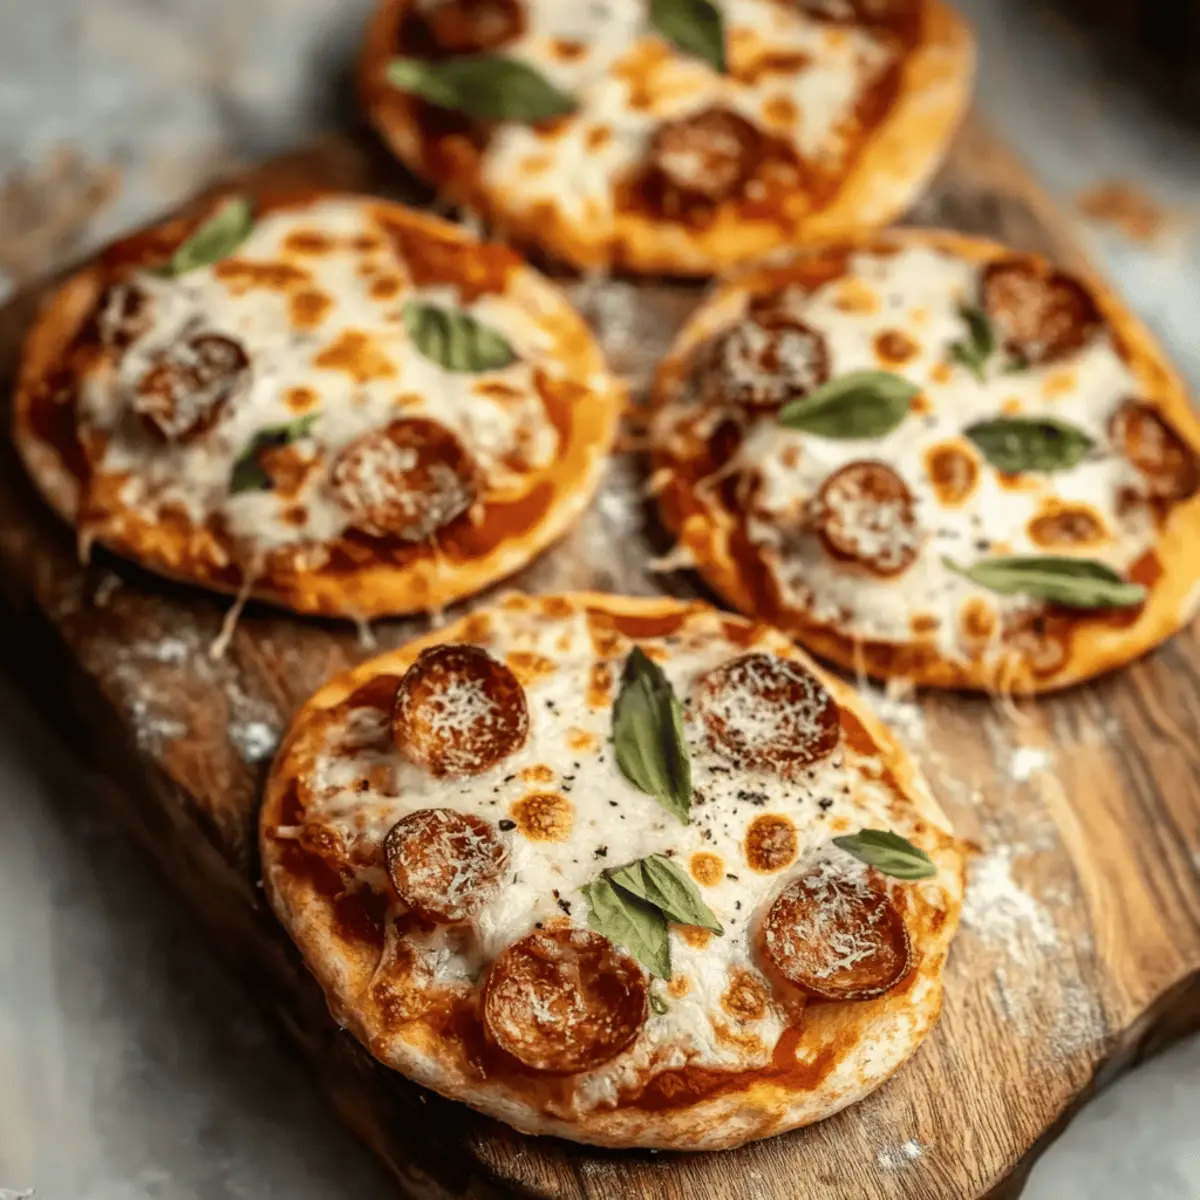
As I stumbled upon a late afternoon craving, a lightbulb flicked on—why not whip up some Mini Pizzas? These little gems will take only 20 minutes from start to finish, making them the perfect solution for anyone who’s had enough of fast food. With just a few ingredients, you can create a customizable culinary delight that’s both quick to prepare and delightful to eat. Whether you’re cooking for yourself or hosting friends, this recipe not only satisfies those pizza cravings but also showcases your creativity in the kitchen. Plus, these Mini Pizzas are a fantastic way to get the kids involved—they’ll love choosing their own toppings! What toppings would you choose for your own mini masterpiece?
Why Are Mini Pizzas So Appealing?
Quick and Easy: In just 20 minutes, you can whip up delicious Mini Pizzas that are perfect for any occasion.
Customizable to Taste: From pepperoni to veggies, each pizza can be tailored to your unique cravings—perfect for picky eaters!
Fun for Everyone: Get the kids involved by letting them choose their favorite toppings. Cooking together has never been this enjoyable!
No Fuss Cleaning: Using refrigerated biscuit dough means fewer dishes and a less stressful kitchen cleanup—more time for you to relax!
Crowd-Pleasing Snack: These bite-sized treats are sure to impress at any gathering, turning any gathering into a mini pizza party. For a perfect pairing, try some homemade pizza sauce.
Mini Pizzas Ingredients
• Ready to create your own delicious mini pizzas? Here’s what you need!
For the Crust
• Refrigerated biscuit dough – a quick base that brings a fluffy, buttery goodness to your pizzas.
For the Sauce
• Pizza sauce – opt for 1–2 tablespoons to add that classic pizza flavor; feel free to use a homemade version for extra freshness!
For the Topping
• Shredded mozzarella cheese – about 1 cup delivers that melty, stretchy goodness we all love on pizzas.
• Pepperoni or favorite toppings – use as much as desired for customization; get creative with veggies or other proteins, too!
For the Garnish
• Grated Parmesan cheese – sprinkle on top for an extra burst of savory flavor that elevates your mini pizzas.
Enjoy crafting your delicious mini pizzas—each bite is a step into homemade bliss!
Step‑by‑Step Instructions for Mini Pizzas
Step 1: Preheat the Oven
Begin by preheating your oven to 400°F (200°C). This ensures your Mini Pizzas will bake evenly and reach that delicious golden-brown color. Using the right temperature is key for achieving a crispy crust that holds all your toppings perfectly.
Step 2: Prepare the Biscuit Dough
On a lightly floured surface, take each piece of refrigerated biscuit dough and roll it out gently into a flat round shape, about ¼-inch thick. This process will create the foundation for your Mini Pizzas. Keep an eye on the thickness so you don’t overdo it—ideal dough should be soft yet sturdy.
Step 3: Arrange on Baking Sheets
Dust two baking sheets lightly with cornmeal to prevent sticking and add a little crunch. Place your rolled dough rounds on the baking sheets, leaving about 1-inch of space between each round. This spacing allows the Mini Pizzas to bake evenly without merging together.
Step 4: Add Pizza Sauce
Spread 1–2 tablespoons of pizza sauce on each dough round, using the back of a spoon to create an even layer. The sauce should cover the base, but be careful not to over-sauce, which could make the crust soggy. This adds that classic flavor that makes Mini Pizzas irresistibly delicious.
Step 5: Sprinkle with Cheese
Generously sprinkle about 1 cup of shredded mozzarella cheese over the sauce on each Mini Pizza. The cheese will melt beautifully during baking, creating that gooey texture we all crave. Make sure to reach the edges for a cheesy bite every time!
Step 6: Add Toppings
Now it's time to get creative! Scatter your choice of pepperoni or other favorite toppings over the cheese. Whether you prefer classic pepperoni or a mix of veggies, this step is all about personalization. Feel free to go wild with your choices and make these Mini Pizzas uniquely yours.
Step 7: Bake the Mini Pizzas
Place the baking sheets in your preheated oven and bake for 15–18 minutes. Keep an eye on them and look for a golden-brown crust and bubbling cheese. If you desire a little more color on the cheese, broil for an additional 1–2 minutes, watching closely to avoid burning.
Step 8: Garnish and Serve
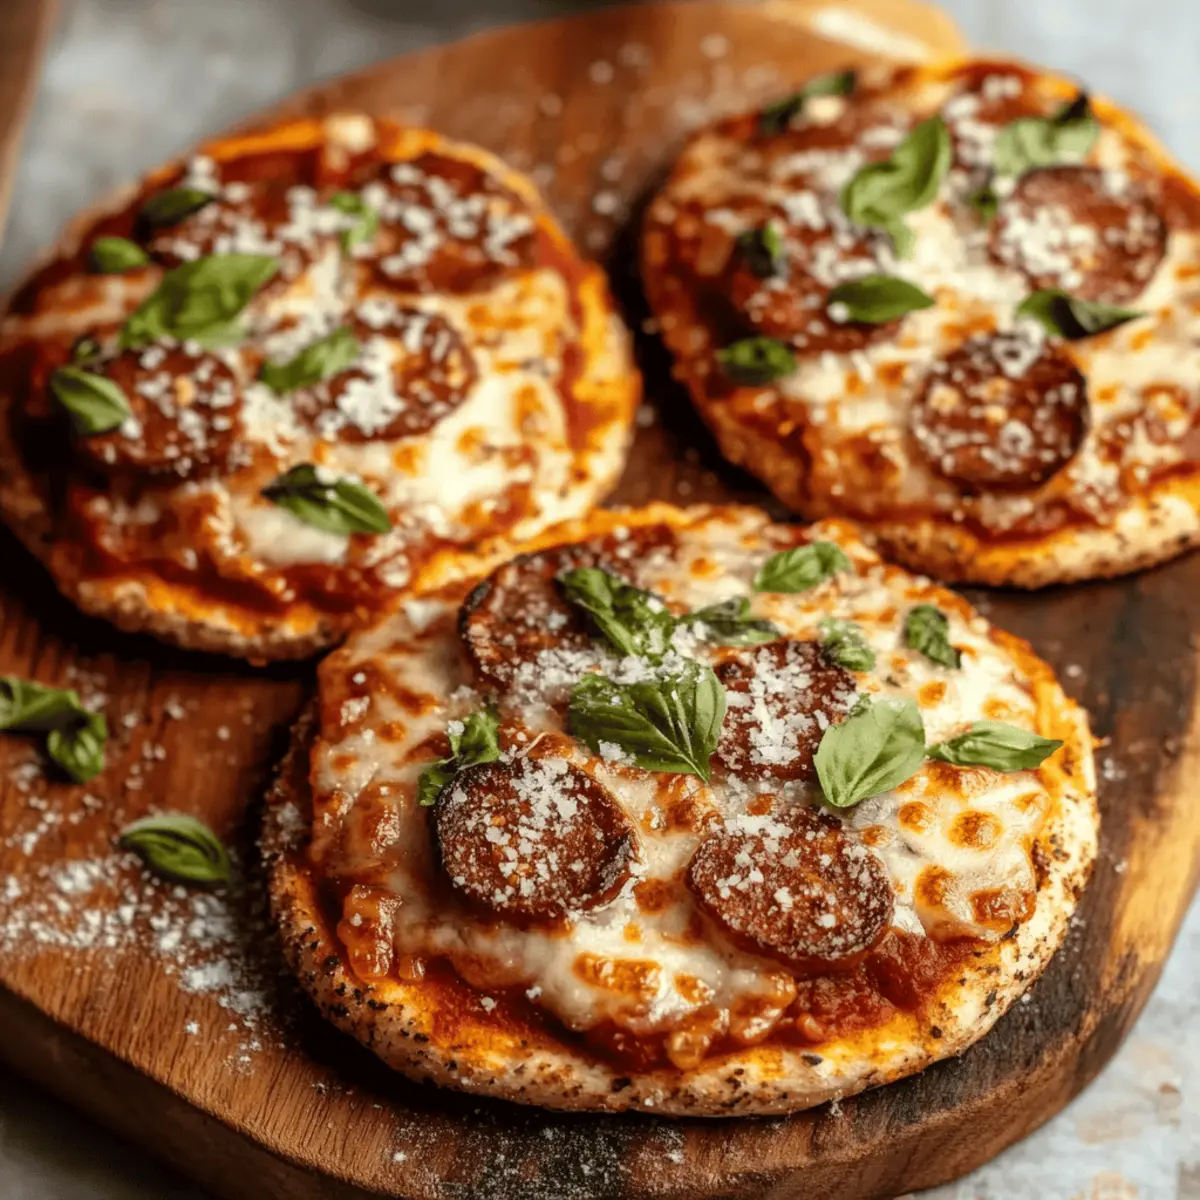
Once out of the oven, garnish your Mini Pizzas with a sprinkle of grated Parmesan cheese for an extra layer of flavor. Serve them warm on a platter and watch as everyone enjoys these delightful bites. They make for a fantastic snack or a quick meal whenever pizza cravings strike!

Expert Tips for Mini Pizzas
Prevent Soggy Crust: Use just enough sauce to flavor the dough without soaking it. Maintaining balance is key to enjoying your Mini Pizzas!
Perfect Baking Time: Keep a close eye on your pizzas in the oven, especially if broiling. Every oven varies, so adjust baking time as needed to achieve golden-brown crust.
Creative Toppings: Don’t be afraid to mix it up! Experiment with different cheeses and fresh ingredients; the more unique the topping, the more flavorful your Mini Pizzas!
Avoid Overcrowding: Space your dough rounds about 1 inch apart on the baking sheets to ensure proper airflow during baking. This helps them cook evenly and maintain crispness.
Use Fresh Ingredients: Whenever possible, opt for fresh vegetables and quality cheeses to elevate the flavor of your Mini Pizzas. Quality makes a remarkable difference!
Mini Pizzas Variations & Substitutions
To elevate your Mini Pizzas experience, feel free to customize each bite to your heart's delight!
-
Gluten-Free: Substitute regular biscuit dough with gluten-free dough for a satisfying treat everyone can enjoy.
-
Vegan: Use dairy-free cheese and skip the pepperoni; load up on veggies like mushrooms and bell peppers instead.
-
Spicy Kick: Add sliced jalapeños or sprinkle crushed red pepper flakes on top of your Mini Pizzas for an unforgettable heat.
-
Herb Infusion: Mix dried oregano and basil into the biscuit dough before rolling it out to enhance the flavor of your crust.
-
Sweet Twist: Try a dessert version by using chocolate hazelnut spread as the base and topping with fresh strawberries and a sprinkle of powdered sugar.
-
Loaded Veggie: Pile on your favorite sautéed vegetables, such as zucchini, spinach, and onions, for a wholesome vegetarian delight that also packs a health punch.
-
BBQ Flavor: Swap the pizza sauce with barbecue sauce and top with grilled chicken and red onions for a unique twist that satisfies savory cravings.
-
Cheesy Variations: Experiment with different cheeses, like feta or gouda, for an exciting flavor profile that makes every bite feel special.
Which variation will you try first? Remember, there's no right or wrong way to make these Mini Pizzas—let your creativity shine through! If you're looking for a perfect sauce pairing, don’t forget to check out our guide to homemade pizza sauce to add that extra flair!
What to Serve with Mini Pizzas?
Pairing your Mini Pizzas with the right sides and drinks creates a wonderful, inviting meal that warms the heart and tantalizes the taste buds.
-
Crisp Garden Salad: A fresh salad filled with vibrant greens and crisp veggies adds a refreshing contrast to the cheesy pizzas. Toss in a light vinaigrette for a zesty kick!
-
Garlic Breadsticks: Soft and buttery, these are dipped into marinara sauce—an ultra-comforting companion that echoes pizza’s flavors.
-
Creamy Coleslaw: The crunch from the slaw balances the gooey goodness of the pizzas. It’s a textural delight that complements every bite!
-
Stuffed Mushrooms: Baked mushrooms filled with cheese and herbs offer a savory, rich side that enhances your pizza experience with an earthy twist.
-
Tropical Fruit Platter: Juicy strawberries, pineapples, and melons create a sweet contrast to the savory pizzas, making for a vibrant and lively addition to your table.
-
Italian Soda: A bubbly, fruity soda pairs wonderfully with the pizza’s flavors, adding a refreshing fizz that lifts the meal to another level of enjoyment.
-
Chocolate Chip Cookies: For dessert, indulge in warm cookies that bring a sense of nostalgia and sweetness after a savory meal—perfect for a family dinner or gathering!
Make Ahead Options
These Mini Pizzas are perfect for meal prep enthusiasts! You can prepare the dough rounds and toppings up to 24 hours in advance, storing them separately in airtight containers in the refrigerator to maintain freshness. Simply roll out the biscuit dough and arrange the rounds on a sheet, then cover tightly with plastic wrap or foil. For the toppings, slice and prepare your desired ingredients, keeping them chilled for maximum crispness. When you're ready to enjoy, just spread the pizza sauce on the dough, add the cheese and toppings, and bake them for 15–18 minutes until golden and bubbly. This way, you’ll save time on busy weeknights while still indulging in delicious homemade Mini Pizzas!
How to Store and Freeze Mini Pizzas
Fridge: Store any leftover Mini Pizzas in an airtight container for up to 3 days. Layer parchment paper between them to prevent sticking and maintain freshness.
Freezer: Freeze Mini Pizzas individually wrapped in plastic wrap, then place them in a freezer-safe bag for up to 2 months. Allow them to cool completely before freezing to retain texture.
Reheating: To reheat, bake frozen Mini Pizzas at 375°F (190°C) for 15-20 minutes or until heated through. You can also microwave them for a quick fix, but the oven will keep them crisp!
Thawing: For best results, thaw any frozen Mini Pizzas in the fridge overnight before reheating. This helps in achieving a great texture without compromising flavor.

Mini Pizzas Recipe FAQs
What type of biscuit dough should I use for Mini Pizzas?
Absolutely! I recommend using refrigerated biscuit dough for its ease and fluffy texture. Look for the dough that’s meant for baking biscuits—often found in the refrigerated section of your grocery store. If you're feeling adventurous, you can also make your own dough from scratch!
How should I store leftover Mini Pizzas?
Very easily! Just place the leftover Mini Pizzas in an airtight container and refrigerate them. They can stay fresh for up to 3 days. To prevent any sticking, use parchment paper between the pizzas if you stack them. This way, you’ll enjoy yummy leftovers without a soggy crust!
Can I freeze Mini Pizzas for later?
Definitely! To freeze your Mini Pizzas, allow them to cool completely first. Then, individually wrap each one in plastic wrap and place them in a freezer-safe bag. They can be stored for up to 2 months. When you're ready to enjoy them, just bake them at 375°F (190°C) for 15-20 minutes after thawing in the fridge overnight.
What’s the best way to reheat Mini Pizzas?
For the crispiest result, reheat your Mini Pizzas in the oven at 375°F (190°C) for about 15-20 minutes until heated through. While the microwave is a quick option, it may leave the crust soft. Reheating in the oven keeps that delightful crunch intact!
Are Mini Pizzas suitable for people with allergies?
The answer depends! If anyone has allergies, be mindful of your chosen toppings and sauces. For instance, consider gluten-free biscuit dough and cheese substitutes for lactose intolerances. Always check the labels of pre-made ingredients to ensure they are safe for those with specific dietary needs.
Can I make Mini Pizzas ahead of time?
Absolutely! You can prepare the dough and add the toppings ahead of time. Assemble the Mini Pizzas, place them on a baking sheet, cover with plastic wrap, and refrigerate. Bake them within 24 hours for a quick, fresh treat! Just keep in mind that they might need an extra minute or two in the oven if they come straight from the fridge.
These Mini Pizzas are the perfect quick and fun solution for meal times or gatherings, ensuring there's something for everyone!
Irresistible Mini Pizzas in Just 20 Minutes for a Quick Treat
Ingredients
Equipment
Method
- Preheat your oven to 400°F (200°C).
- On a lightly floured surface, roll out each piece of refrigerated biscuit dough into a flat round shape, about ¼-inch thick.
- Dust baking sheets lightly with cornmeal. Place the rolled dough rounds on the sheets, leaving about 1-inch of space between each round.
- Spread 1-2 tablespoons of pizza sauce on each dough round.
- Sprinkle about 1 cup of shredded mozzarella cheese over the sauce.
- Scatter your choice of pepperoni or other favorite toppings over the cheese.
- Bake in the preheated oven for 15-18 minutes until golden brown.
- Garnish with grated Parmesan cheese before serving.


Leave a Reply