
As I unwrapped each brightly colored candy cane from its glossy wrapper, a whimsical idea struck me: why not combine the joy of the holiday season with the deliciousness of cheesecake? Enter the star of today’s recipe adventure—Cheesecake Balls. These no-bake treats not only bring a festive flair to your table, but they’re also incredibly quick to whip up, making them a perfect option for unexpected guests or a fun holiday project with the kids. With creamy goodness and delightful toppings, they transform every bite into a celebration. Plus, they’re an excellent way to use up leftover holiday ingredients! Ready to explore the sweet possibilities? Let’s dive into a world of sugary delight and festive fun!
Why Are These Cheesecake Balls Irresistible?
Delightfully Easy: You only need a few simple ingredients to whip up these cheesecake balls, which means you can create them even on a busy holiday afternoon!
Creamy and Decadent: The luscious cream cheese mingles perfectly with sweetness, making each bite a creamy delight that melts in your mouth.
Customizable Toppings: Daring to switch up flavors? You can easily add different toppings or mix-ins, like coconut or crushed candy canes, to suit your taste.
Perfect for Any Gathering: Whether you’re hosting a holiday party or just looking for a sweet snack, these cheesecake balls are sure to impress your guests and become an instant favorite.
Make-Ahead Potential: Whip these up in advance; they store beautifully in the fridge and are ready to serve when you are! Pair these with some delightful no-bake treats for a festive spread.
Cheesecake Balls Ingredients
For the Cheesecake Mixture
- Cream Cheese – 2 packages of softened cream cheese create the rich base for your luscious cheesecake balls.
- Sugar – 1 cup of sugar adds the perfect sweetness to balance the creamy tang of cream cheese.
- Vanilla Extract – 1 teaspoon of vanilla extract enhances the overall flavor and adds warmth to the filling.
For the Coating
- Chocolate Chips – 1 cup of chocolate chips can be melted and drizzled over the cheesecake balls for an indulgent layer.
- Crushed Candy Canes – ½ cup of crushed candy canes lends a festive crunch and minty freshness, perfect for the holiday spirit.
- Coconut Flakes – 1 cup of coconut adds a chewy texture and tropical flavor, making your cheesecake balls even more irresistible.
For the Optional Add-Ins
- Peanut Butter – 1 cup of peanut butter can be added for an extra layer of flavor that pairs beautifully with the creaminess.
- Graham Cracker Crumbs – 1 cup of graham cracker crumbs can be mixed into the batter for a delightful cheesecake crust essence.
Each ingredient in these cheesecake balls contributes to the festive joy, making them a delightful treat for any occasion!
Step‑by‑Step Instructions for Cheesecake Balls
Step 1: Prepare the Cheesecake Mixture
In a mixing bowl, blend 2 packages of softened cream cheese, 1 cup of sugar, and 1 teaspoon of vanilla extract until smooth and creamy. Use a hand mixer on medium speed for about 2-3 minutes until the mixture is fluffy and well-combined. This rich cheesecake filling will serve as the delicious base for your cheesecake balls.
Step 2: Incorporate Optional Add-Ins
For added flavor and texture, fold in 1 cup of peanut butter or 1 cup of graham cracker crumbs into the cheesecake mixture. Use a spatula to gently mix until evenly distributed, making sure not to overmix. This step enhances the cheesecake balls, providing a delightful twist that suits both peanut butter lovers and cheesecake enthusiasts alike.
Step 3: Shape the Cheesecake Balls
Using your hands or a small cookie scoop, take about 1 tablespoon of the mixture and roll it into a ball shape, creating around 24 cheesecake balls. Place them on a parchment-lined baking sheet for easy handling. This step is crucial as uniformity ensures even coating and presentation, so aim for a consistent size each time.
Step 4: Chill the Cheesecake Balls
Cover the baking sheet with plastic wrap and refrigerate the formed cheesecake balls for at least 30 minutes or until they are firm to the touch. Chilling allows the flavors to meld and makes the balls easier to coat. When you gently press them, they should hold their shape without squishing.
Step 5: Melt the Coatings
While the cheesecake balls chill, prepare your coatings by melting 1 cup of chocolate chips in a microwave-safe bowl. Heat in 30-second increments, stirring well between each until completely smooth and shiny. This melted chocolate will provide a decadent layer over your cheesecake balls, enhancing their festive charm.
Step 6: Coat the Cheesecake Balls
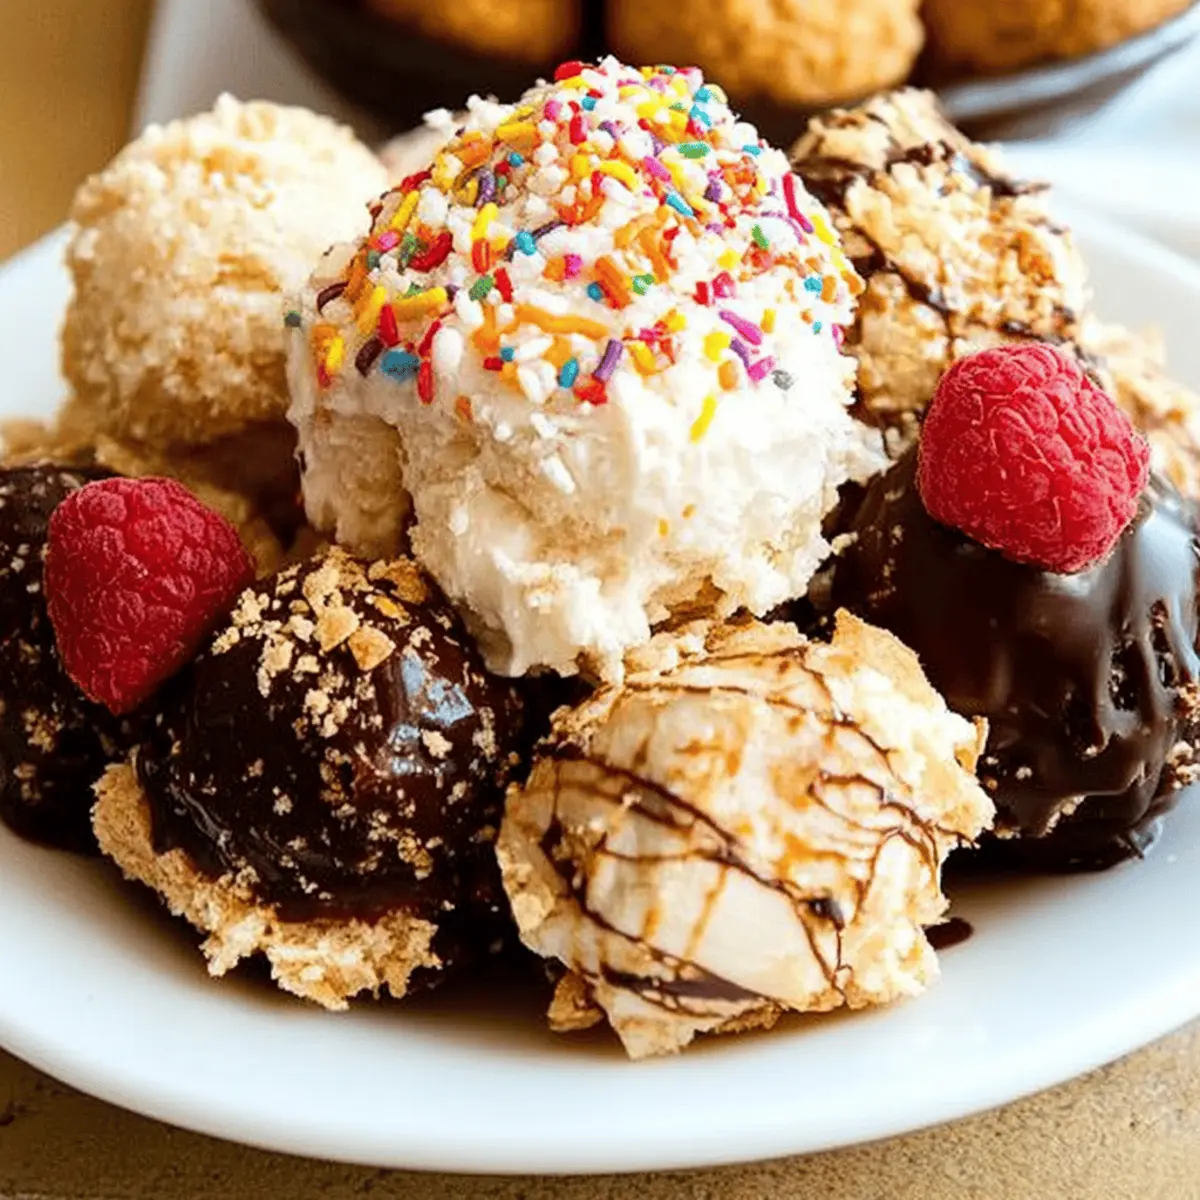
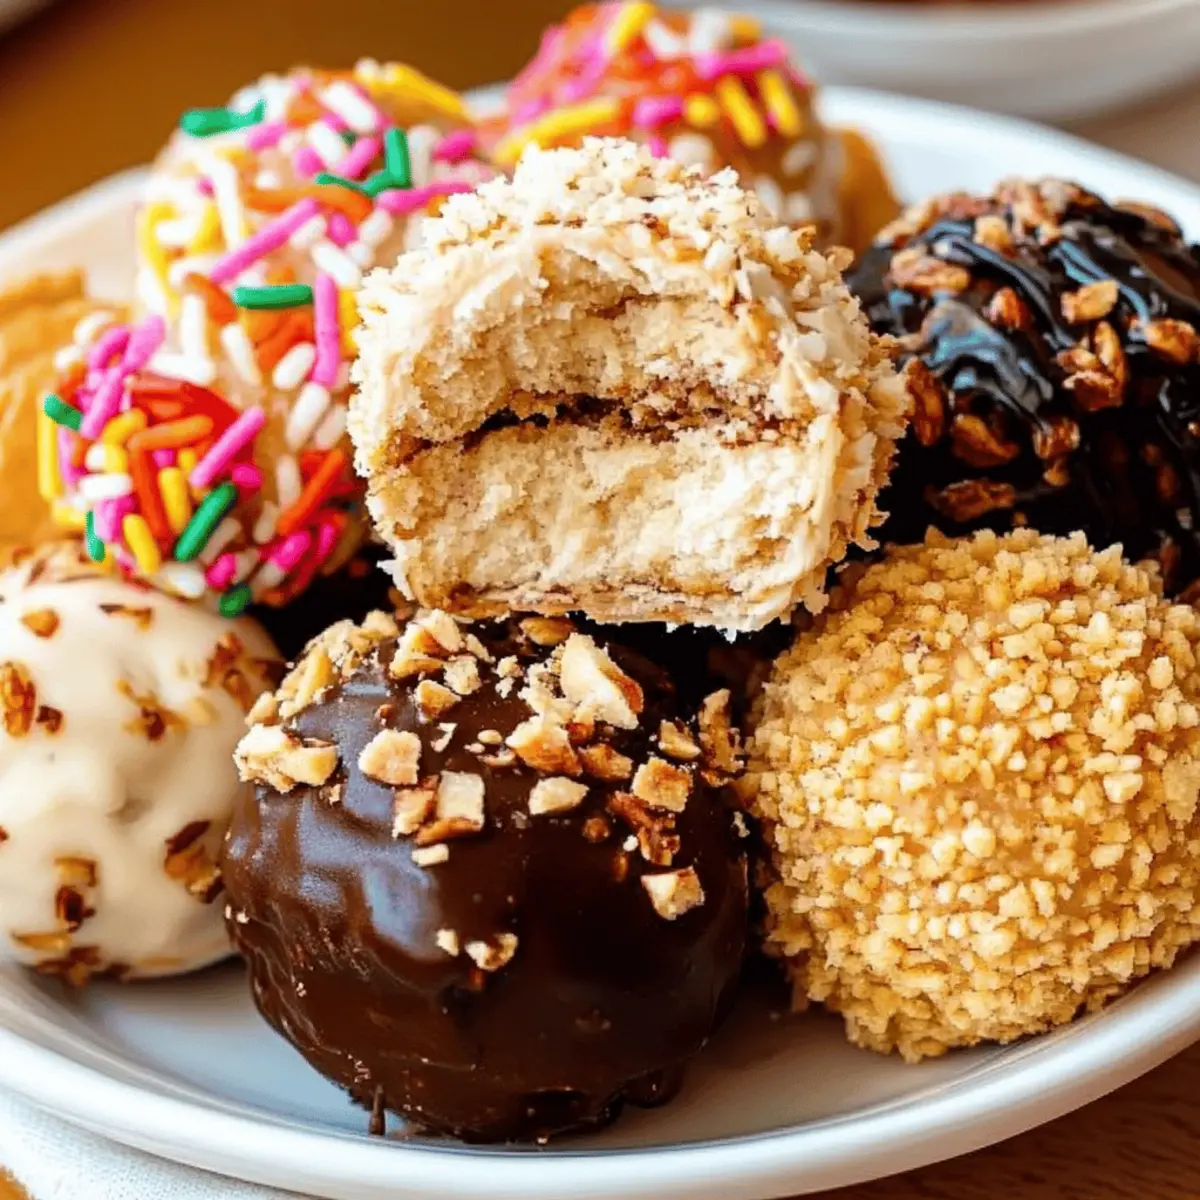
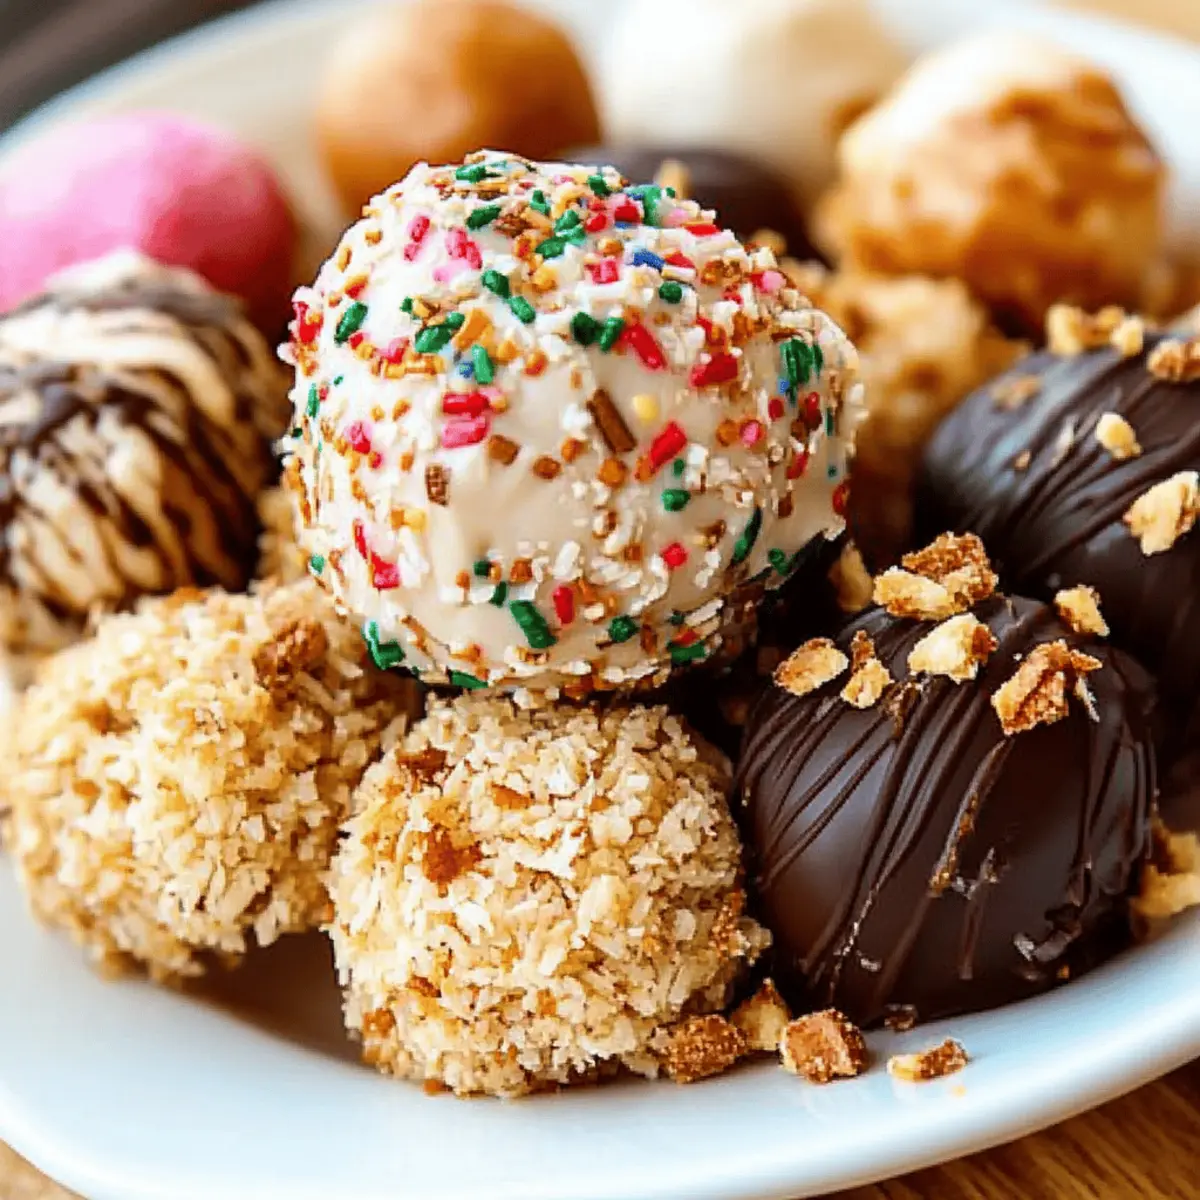
Remove the chilled cheesecake balls from the fridge and dip each ball into the melted chocolate, ensuring they are fully coated. Use a fork to lift them out, allowing excess chocolate to drip back into the bowl, and return them to the parchment-lined sheet. You can also sprinkle crushed candy canes or coconut flakes on top before the chocolate sets for an added festive touch.
Step 7: Refrigerate Again
Once all the cheesecake balls are coated, place them back in the fridge for an additional 30 minutes to allow the chocolate coating to harden completely. This step secures the toppings in place and ensures a delightful crunch when you take a bite, making your cheesecake balls irresistible and perfect for sharing.
Step 8: Serve and Enjoy
Once the chocolate coating is fully set, serve your delightful cheesecake balls on a festive platter. These no-bake treats are perfect for any holiday gathering or sweet cravings throughout the year. Relish in the creamy texture and sweet toppings, and watch them quickly disappear from your table!
Cheesecake Balls Variations & Substitutions
Feel free to let your creativity shine by customizing these cheesecake balls to suit your tastes!
-
Dairy-Free: Substitute cream cheese with a dairy-free alternative and use coconut cream for extra richness.
For a deliciously creamy base, opt for cashew cream mixed with powdered sugar. You won’t miss the dairy one bit! -
Gluten-Free: Choose gluten-free graham cracker crumbs for a cookie crust infusion that’s friendly for gluten-sensitive guests.
Transform your cheesecake balls with a crunchy base while ensuring everyone can indulge without worry. -
Nut-Free: Swap peanut butter for sunflower seed butter to accommodate nut allergies while still enjoying a delicious flavor variant.
This will keep your cheesecake balls tasty and nut-free, perfect for sharing with all your friends! -
Mint Chocolate Chip: Add ½ cup of mini chocolate chips and a few drops of peppermint extract for a fun, minty twist.
Combining the refreshing taste of mint with rich chocolate, these will keep your flavor game exciting this holiday! -
Choco-Coconut Delight: Roll the finished cheesecake balls in toasted coconut flakes instead of chocolate for a tropical touch.
The chewy coconut adds an irresistible texture that complements the creamy filling perfectly. -
Fruit-Infused: Mix in crushed strawberries or raspberries into the cheesecake filling for a luscious burst of fruitiness.
The added fruity flavor makes each bite a celebration of fresh sweetness, elevating your treat to a new level. -
Savory Cheese Swap: For a unique twist, use goat cheese in place of cream cheese for a tangy, sophisticated flavor.
This will give your cheesecake balls a gourmet edge, making them a conversation starter at any gathering! -
Spicy Cinnamon Kick: Add a sprinkle of cayenne pepper or chili powder to the batter for an unexpected spicy finish.
A hint of heat balances the sweetness, creating a delightful contrast that keeps your palate guessing.
Explore these tasty variations to make your cheesecake balls even more delightful! For more ideas, check out delicious no-bake treats or whip up an equally tempting festive fudge recipe that pairs beautifully!
Expert Tips for Cheesecake Balls
Chill Time Matters: Allow enough chilling time for the cheesecake balls; this ensures they hold their shape and make coating easier.
Use Room Temperature Cream Cheese: For a smooth mixture, ensure your cream cheese is softened to room temperature before mixing.
Experiment with Flavors: Don’t hesitate to swap in different extracts or add-ins, like lemon zest or crushed nuts, to customize your cheesecake balls.
Coating Techniques: When dipping, use a fork to help shake off excess chocolate and create an even coating around your cheesecake balls.
Storage Tips: Keep your cheesecake balls in the fridge in an airtight container to maintain their freshness for up to a week.
Make Ahead Options
These Cheesecake Balls are perfect for meal prep, making your holiday entertaining a breeze! You can prepare the cheesecake mixture up to 24 hours in advance; simply blend the cream cheese, sugar, and vanilla, then store it in an airtight container in the refrigerator. Form the mixture into balls, but wait until you're ready to serve to coat them in chocolate to maintain that delightful crunch. If you prefer, you can also roll them in crushed candy canes or coconut just before serving, ensuring that they’re just as delicious and festive. This way, you save time and stress, indulging in sweet treats perfect for any occasion!
Storage Tips for Cheesecake Balls
Fridge: Store your cheesecake balls in an airtight container in the refrigerator for up to 1 week. This keeps them fresh and creamy, ready to indulge whenever those sweet cravings hit.
Freezer: You can freeze cheesecake balls for up to 3 months. Make sure to place them in a single layer in an airtight container or freezer bag, separating layers with parchment paper to prevent sticking.
Thawing: To enjoy frozen cheesecake balls, simply transfer them to the fridge for a few hours or overnight before serving. This gradual thawing maintains their delightful texture and flavor.
Serving: For best taste and texture, serve the cheesecake balls chilled. If they’re slightly soft after thawing, return them to the fridge for a bit before enjoying your creamy cheesecake treat!
What to Serve with No-Bake Christmas Treats
As you gather with loved ones, complement the heavenly sweetness of your festive bites with these delightful additions.
-
Warm Apple Cider: The spiced aroma and comforting warmth perfectly balance the sweetness of your treats, creating an inviting atmosphere.
-
Chocolate Fondue: Dip fruits or cookies into a bubbling pot of chocolate for an interactive dessert experience that enhances the overall indulgence. It's a perfect centerpiece for holiday gatherings.
-
Creamy Vanilla Ice Cream: A scoop of cold ice cream effortlessly contrasts the chewy textures of your no-bake treats, offering a refreshing finish to the meal.
-
Peppermint Hot Chocolate: This rich, chocolaty beverage infused with peppermint ties together the seasonal theme, and its warmth complements the chilled treats beautifully.
-
Gingerbread Cookies: The spiced flavor of gingerbread cookies harmonizes with the sweet notes of the no-bake treats, adding a traditional holiday element to your dessert table.
-
Fruit Salad: Bright, fresh fruits add a pop of color and a refreshing tang that cuts through the sweetness, providing balance and nutrition amidst the festive indulgence.
-
Cheese Platter: Pairing with a variety of cheeses, including creamy brie and sharp cheddar, adds a savory element to your spread, enhancing the complexity of flavors.
-
Sparkling Water with Citrus: A refreshing, bubbly drink garnished with citrus slices cleanses the palate and offers a lighter option for hydration alongside your sweet treats.
-
Christmas Cookie Platter: Include an assortment of seasonal cookies to encourage sharing and sampling, creating a festive atmosphere that celebrates the joys of the season.
Cheesecake Balls Recipe FAQs
What should I look for when selecting cream cheese?
Absolutely! When selecting cream cheese, opt for blocks instead of spreads for the best texture. Look for a product that's full-fat and has a smooth, creamy consistency. This ensures your cheesecake balls will be rich and decadent, making every bite irresistible.
How should I store leftover cheesecake balls?
You can store your cheesecake balls conveniently in an airtight container in the fridge for up to 1 week. This keeps them fresh and ready for whenever those sweet cravings strike. Just be sure to allow them to chill before serving for the best texture!
Can I freeze cheesecake balls, and if so, how?
Yes, you absolutely can freeze cheesecake balls! First, place them in a single layer on a baking sheet and freeze for about 1-2 hours until firm. Then, transfer the balls into an airtight container or freezer bag, separating layers with parchment paper to avoid sticking. They can be stored for up to 3 months.
What ingredients can I substitute for someone with peanut allergies?
If you’re making these cheesecake balls for someone with a peanut allergy, I recommend substituting the peanut butter with an equal amount of sunbutter or almond butter, if appropriate. You can also choose to skip the nut entirely, as the cheesecake mixture is delicious on its own! Just make sure to check for any allergens in the prepared toppings too.
My cheesecake balls are too soft to roll; what can I do?
Very! If your mixture feels too soft to shape into balls, simply return it to the fridge for an additional 30 minutes to firm up. If they still seem too loose after chilling, you can try mixing in a few crushed graham cracker crumbs or even a bit more cream cheese to help bind the mixture together.
Can these cheesecake balls be decorated differently?
The more the merrier! Feel free to get creative with your toppings. Instead of crushed candy canes, try rolling them in nuts, sprinkles, or even cocoa powder! You can also drizzle with melted chocolate of any flavor to give it a unique twist—your imagination is the limit!

Irresistibly Creamy Cheesecake Balls for Your Sweet Cravings
Ingredients
Equipment
Method
- Blend cream cheese, sugar, and vanilla extract until smooth and creamy.
- Fold in peanut butter or graham cracker crumbs to the mixture.
- Shape the mixture into balls, approximately 1 tablespoon each.
- Refrigerate the balls for at least 30 minutes until firm.
- Melt chocolate chips in a microwave-safe bowl.
- Dip each ball into melted chocolate and coat evenly.
- Refrigerate coated balls for another 30 minutes to set the chocolate.
- Serve chilled and enjoy the creamy cheesecake experience.


Leave a Reply