
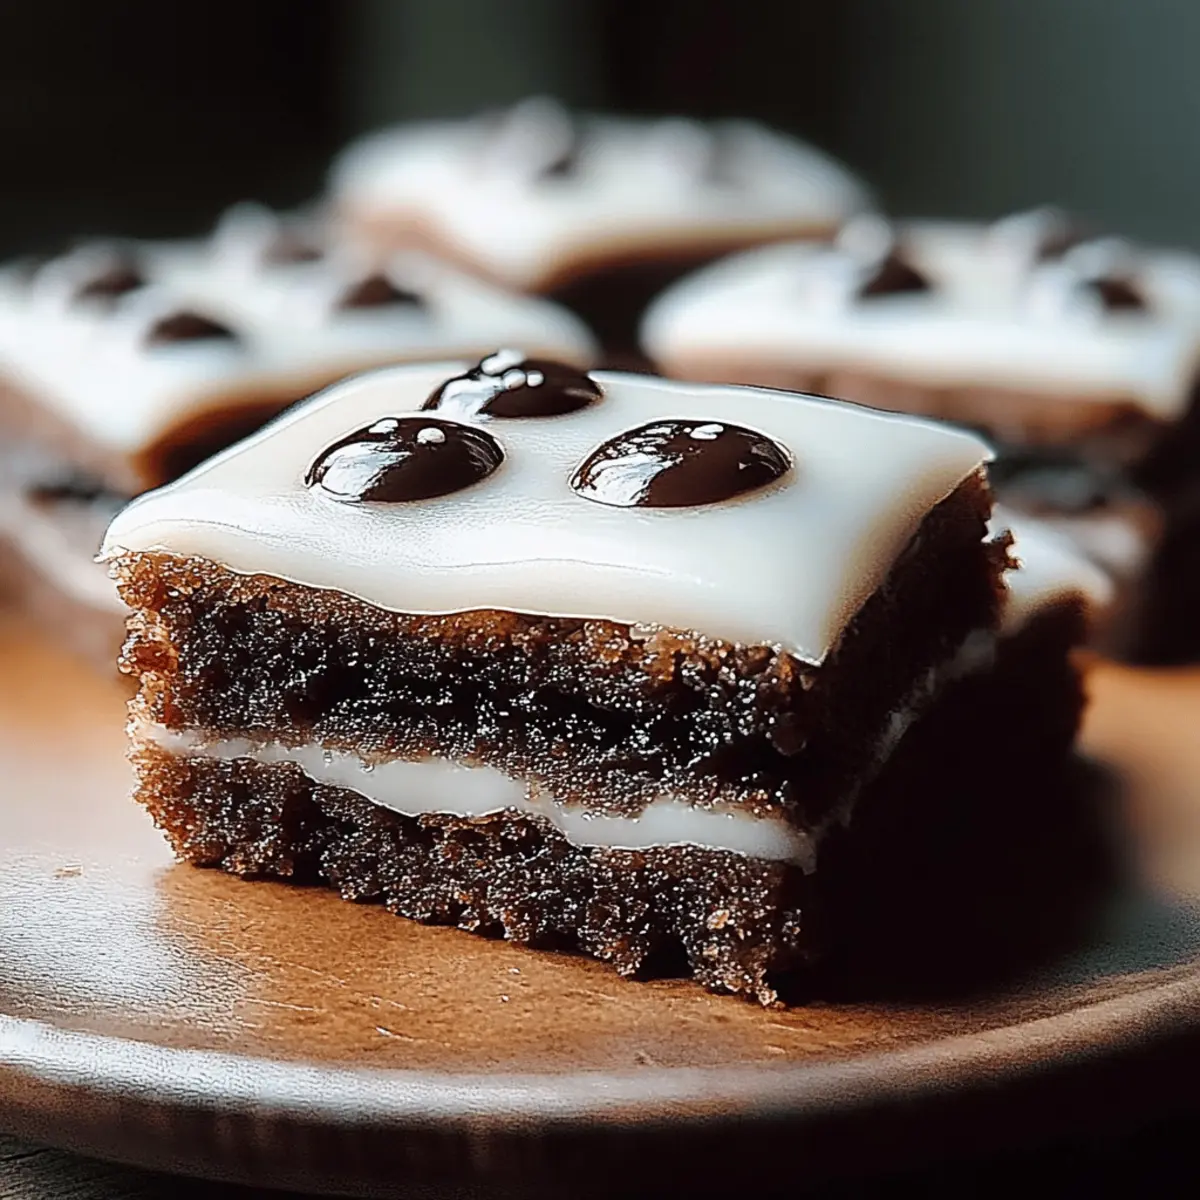
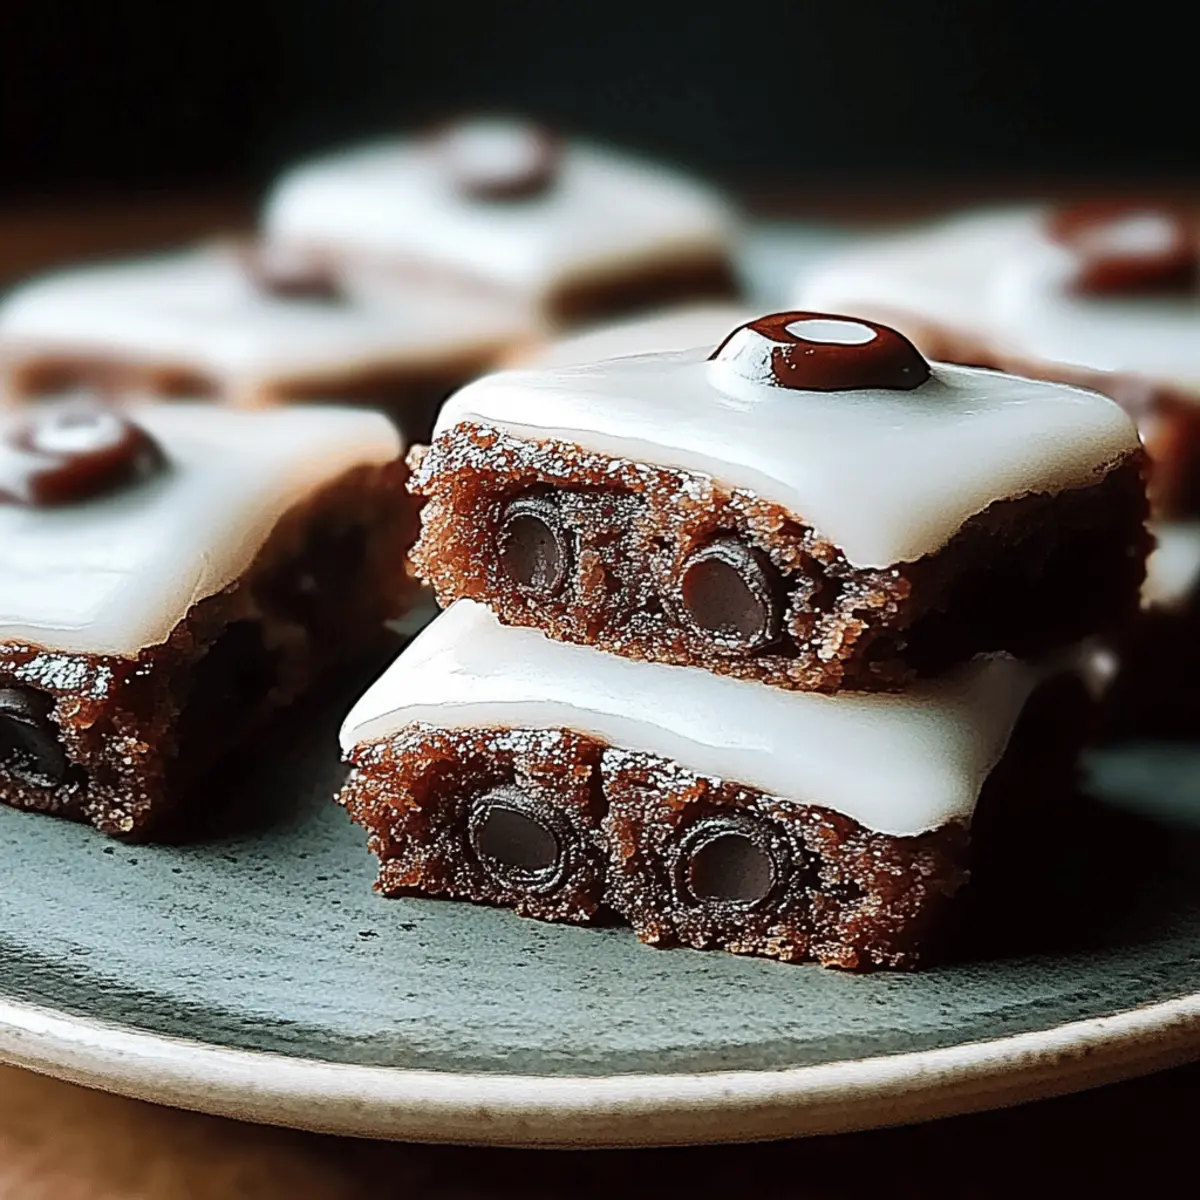
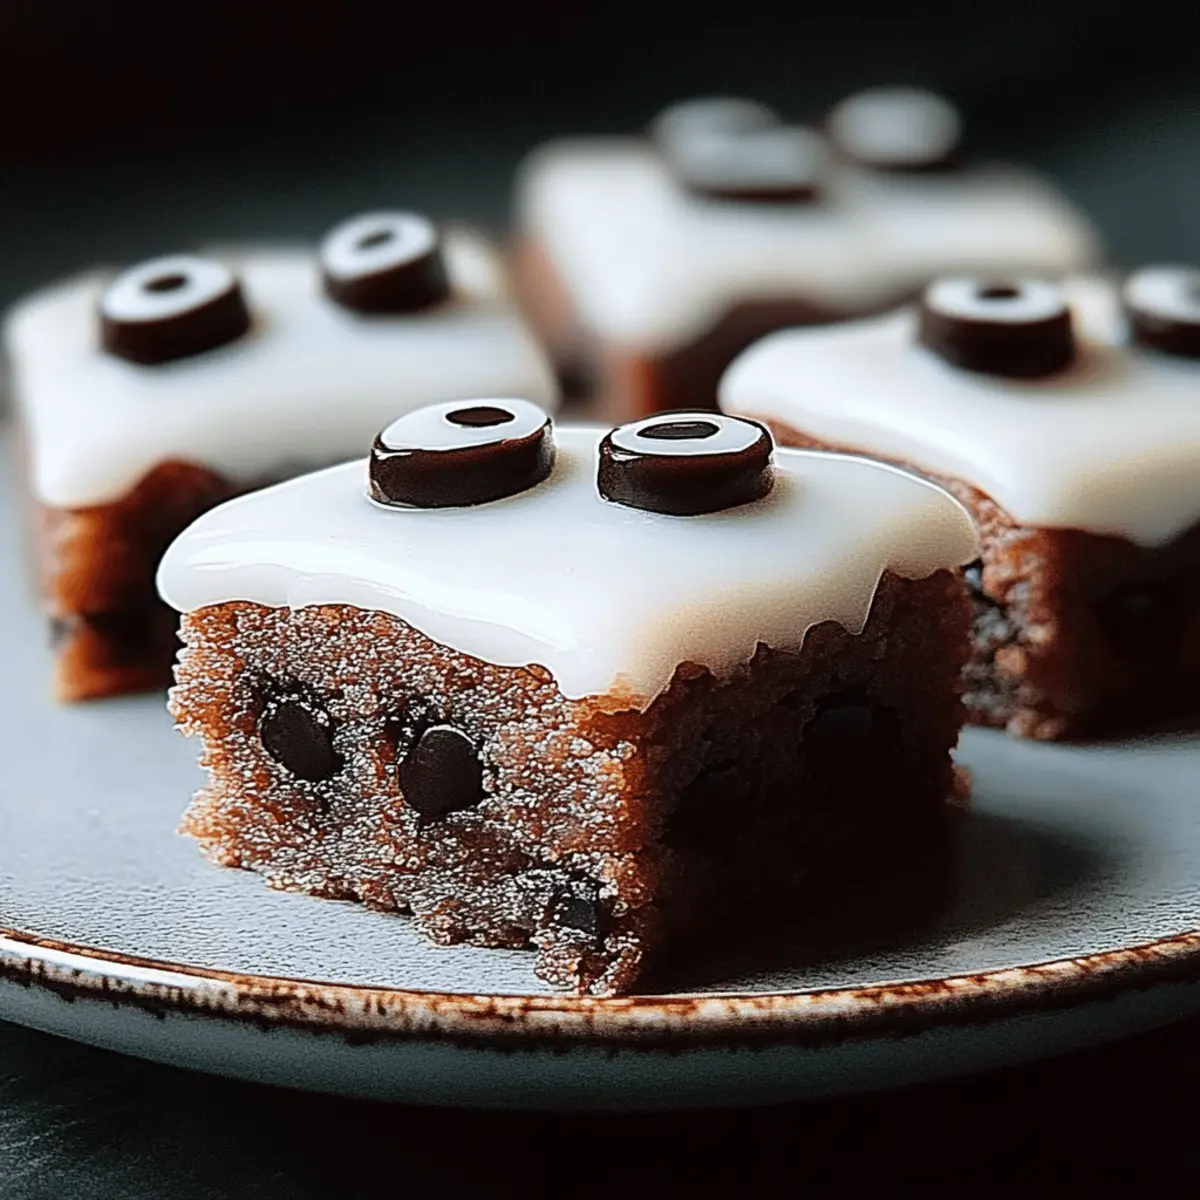
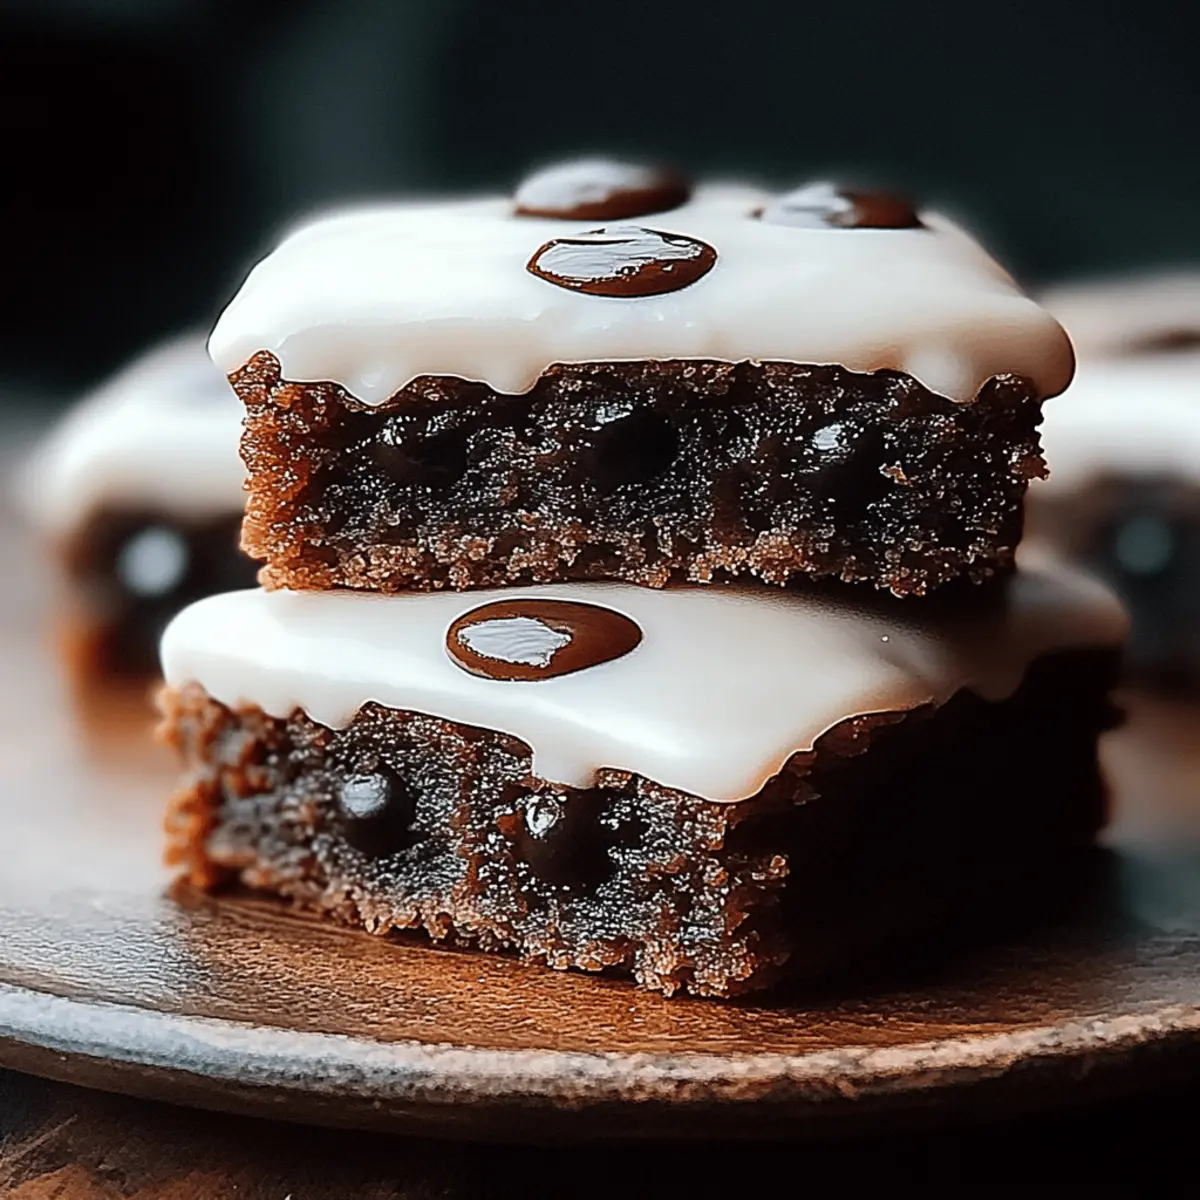
As I was dusting off my fall decorations, an idea struck me: why not bring the Halloween spirit into my kitchen? Enter Mummy Brownies, the spooktacular dessert that’s as easy to whip up as it is to devour. These delightful treats are not only a crowd-pleaser but also a wonderful way to get everyone involved in a bit of holiday fun! With just 15 minutes of prep, you can create fudgy brownies that are perfect for parties or cozy family movie nights. Topped with a simple white icing that mimics mummy wrappings, you’ll be surprised by how something so festive can come together so quickly. Ready to bake some magic and impress your loved ones? Let’s unmask the secrets to these adorable Mummy Brownies!
Why are Mummy Brownies a must-try?
Irresistible fudginess: Each bite of these brownies is a chewy delight, perfect for anyone who loves a rich dessert.
Quick and easy: With just 15 minutes of prep time, you can whip up a batch of Mummy Brownies that are ready for the oven!
Festive fun: The spooky decoration makes them a hit for Halloween parties, bringing an instant cheer to your gatherings.
Family involvement: Get the kids involved in creating their own mummy designs—it's a great bonding activity!
Versatile treats: Perfectly pair these brownies with ice cream for a double dessert experience or serve them at any celebration.
With these delicious Mummy Brownies, you can elevate your dessert game and create unforgettable memories. For more festive ideas, check out my Halloween Dessert Collection.
Mummy Brownies Ingredients
• Create delicious Mummy Brownies with these simple ingredients!
For the Brownie Batter
- Unsweetened cocoa powder – Gives these brownies their rich, chocolatey flavor.
- Granulated sugar – Sweetens the brownies and balances the cocoa’s bitterness.
- All-purpose flour – Provides structure, making the brownies perfectly chewy.
- Large eggs – Binds the ingredients together and adds moisture for fudginess.
- Unsalted butter (melted) – Adds a rich flavor and enhances the brownie texture.
For the Decoration
- White icing – Used to create the mummy’s wrapping, adding a spooky touch!
Get ready to impress with these Mummy Brownies, where each bite is a delightful treat!
Step-by-Step Instructions for Mummy Brownies
Step 1: Preheat and Prepare
Begin by preheating your oven to 350°F (175°C). While the oven heats up, take a moment to grease a baking pan or line it with parchment paper for easy removal later. This step ensures that your Mummy Brownies come out perfectly every time without sticking to the pan.
Step 2: Mix the Dry Ingredients
In a large mixing bowl, whisk together 1 cup of unsweetened cocoa powder, 1 cup of granulated sugar, 1 cup of all-purpose flour, and a pinch of salt. The mixture should become smooth and uniform, with no lumps remaining. This blend will create the base of your rich brownies, so make sure it's well combined before moving on.
Step 3: Prepare the Wet Ingredients
In a separate bowl, melt ½ cup of unsalted butter and allow it to cool slightly. Once cooled, mix in 2 large eggs using a whisk until the mixture is smooth and fully blended. This will create a luscious wet base that adds moisture and richness, essential for your Mummy Brownies.
Step 4: Combine and Stir
Gently fold the wet mixture into the dry ingredients until just combined. Be careful not to overmix; this helps maintain the fudginess that makes Mummy Brownies so delightful. The batter should appear thick and lusciously chocolatey, ready to be spread into the baking pan.
Step 5: Bake the Brownies
Pour the brownie batter into the prepared baking pan, spreading it evenly for consistent baking. Place the pan in the preheated oven and bake for 25-30 minutes. Keep an eye on the brownies—look for a toothpick inserted in the center to come out with a few moist crumbs, signaling they are perfectly baked.
Step 6: Cool and Decorate
Once baked, remove the pan from the oven and allow the brownies to cool in the pan for about 10-15 minutes. After cooling, carefully cut the brownies into squares. Use white icing to create zigzag patterns on top, mimicking the wrappings of mummies, and finish by adding candies for adorable eyes to complete your festive Mummy Brownies!
What to Serve with Mummy Brownies?
Indulging in a cozy baking session has never felt so delightful, especially when paired with a few scrumptious additions.
-
Vanilla Ice Cream: A scoop of creamy vanilla ice cream adds a luscious contrast to the fudgy texture, creating a delectable experience.
When the warm brownies melt the ice cream slightly, every bite becomes a delightful blend of flavors. -
Fresh Berries: Bright and tangy berries, like raspberries or strawberries, provide a refreshing pop that balances the sweetness of the brownies.
Their natural acidity cuts through the rich chocolate, enhancing the overall taste. -
Chocolate Sauce: Drizzling warm chocolate sauce over the brownies intensifies their chocolate flavor and creates an extra layer of indulgence.
It's a simple way to elevate your dessert into an unforgettable treat. -
Whipped Cream: Light and airy whipped cream brings a delightful contrast to the rich brownies, adding a smooth finish with every forkful.
Consider adding a sprinkle of cocoa powder for a charming touch. -
Mint Tea: A cup of soothing mint tea complements the chocolatey richness, refreshing your palate and creating a balanced dessert experience.
The fragrant aroma enhances dessert enjoyment, perfect for winding down after a meal. -
Caramel Sauce: Drizzling caramel sauce adds a deliciously sweet layer that brings harmony and warmth to those rich, fudgy brownies.
It’s a match made in dessert heaven that’s sure to please every sweet tooth. -
Milk: A classic pairing, a glass of cold milk provides a refreshing contrast against the richness of the Mummy Brownies.
It’s the ultimate childhood staple that enhances the nostalgic experience. -
Coffee: A warm cup of coffee or espresso elevates the chocolate flavor while enhancing your senses with its bold aroma.
The slight bitterness contrasts beautifully, making each brownie taste even more delightful.
Enjoy crafting the perfect dessert experience with these pairings!
How to Store and Freeze Mummy Brownies
Room Temperature: Store leftover Mummy Brownies in an airtight container at room temperature for up to 3 days to keep them fresh and moist.
Fridge: If you want to extend their shelf life, you can refrigerate them for up to a week. Just be sure to wrap them tightly to avoid drying out.
Freezer: For longer storage, freeze Mummy Brownies in a well-sealed container for up to 3 months. Let them thaw at room temperature before enjoying.
Reheating: To reheat, pop them in the microwave for 10-15 seconds or warm them in an oven at 350°F (175°C) for a few minutes until just warmed through.
Mummy Brownies Variations & Substitutions
Feel free to get creative and customize your Mummy Brownies with these fun twists that will elevate their flavor and flair!
-
Gluten-Free: Substitute all-purpose flour with a 1:1 gluten-free blend for a delicious gluten-free treat. Your brownies will still be fudgy and delightful!
-
Vegan: Swap eggs for flaxseed meal (1 tablespoon ground flaxseed + 3 tablespoons water per egg) and use vegan butter. You won't miss the eggs one bit!
-
Nutty Touch: Add ½ cup of chopped walnuts or pecans to the batter for a delightful crunch. The added texture complements the fudginess beautifully!
-
Peppermint Twist: Mix in 1 teaspoon of peppermint extract into your batter for a festive, seasonal flavor. This adds a refreshing touch to your Halloween-themed treats!
-
Spicy Kick: Incorporate ½ teaspoon of cayenne pepper or chili powder into the dry ingredients for a unique heat that surprises with every bite. Who said Halloween treats couldn’t be a little fiery?
-
Dairy-Free: Replace unsalted butter with coconut oil or a dairy-free butter alternative for a rich, buttery flavor without the dairy. This swap keeps your brownies indulgent yet accessible!
-
Gourmet Toppings: Instead of white icing, drizzle dark chocolate icing or caramel sauce for a richer finish. You’ll elevate the dessert while keeping that spooky charm intact!
-
Berry Goodness: Fold in a handful of mini chocolate chips or freeze-dried raspberries into the batter before baking. These additions bring bursts of flavor in each fudgy square!
With these delightful variations, you can personalize your Mummy Brownies to fit every dietary preference and impress everyone at your Halloween gathering. For more creative ideas, don't forget to check out my Halloween Dessert Collection for more spooktacular treats!
Tips for the Best Mummy Brownies
-
Don’t Overmix: Gently combine the wet and dry ingredients until just blended. Overmixing can lead to dry brownies, losing that fudgy texture.
-
Correct Baking Time: Keep an eye on the baking time; check with a toothpick around 25 minutes. Remove them while moist for a fudgy finish!
-
Icing Tips: Allow the brownies to cool completely before icing. This prevents the icing from sliding off and helps achieve the perfect mummy look.
-
Customize Your Mummies: Use different candies for the eyes—try chocolate chips, M&M's, or even gummy worms for a fun twist!
-
Storage Matters: Store leftover Mummy Brownies in an airtight container at room temperature for up to 3 days to keep them fresh and delicious.
With these tips, you're well on your way to baking the best Mummy Brownies that will delight all your family and friends!
Make Ahead Options
These Mummy Brownies are perfect for meal prep, allowing you to enjoy the festive fun without the last-minute rush! You can prepare the brownie batter up to 24 hours in advance by mixing the dry ingredients and storing them in an airtight container. Additionally, you can melt the butter and mix it with the eggs, storing this mixture in the fridge until ready to bake. When you’re ready to serve, simply combine the wet and dry ingredients, pour the batter into the pan, and bake as directed. This way, you'll have delicious Mummy Brownies that taste just as fresh and fudgy, saving you time on busy days!
Mummy Brownies Recipe FAQs
What kind of cocoa powder should I use for Mummy Brownies?
Absolutely! For the richest flavor, I recommend using unsweetened cocoa powder. It gives the brownies their deep chocolate essence without adding extra sweetness. If you prefer a more intense chocolate flavor, you could even use Dutch-processed cocoa, but just be aware it may result in a slightly different texture.
How should I store leftover Mummy Brownies?
To keep your Mummy Brownies fresh, store them in an airtight container at room temperature for up to 3 days. If you want them to last a bit longer, refrigerate them for up to a week, making sure they’re tightly wrapped to avoid drying out. They should remain delightfully chewy and fudgy!
Can I freeze Mummy Brownies?
Yes, you can freeze Mummy Brownies! To do this, cut them into squares once cooled and place them in a well-sealed container or wrap them individually in plastic wrap and then foil. They can be frozen for up to 3 months. When you’re ready to enjoy them, simply let them thaw at room temperature for a couple of hours, or microwave them for 10-15 seconds for a quick treat!
What if my brownies turn out too cakey?
Very! If your brownies are more cakey than fudgy, it could be due to overmixing the batter or baking it for too long. Remember to combine the wet and dry ingredients just until mixed, and start checking for doneness at 25 minutes. If your brownies have already baked too long, consider serving them warm with ice cream—it’ll add a delicious creaminess!
Are there any dietary considerations for pets?
Definitely keep in mind that chocolate is toxic to dogs and other pets! If you're planning to share your Mummy Brownies with family and friends, be sure to keep them out of reach of pets or simply make a pet-friendly treat to enjoy together. Always prioritize safety for your furry friends!
Mummy Brownies: Spooktacular Treats for Halloween Fun!
Ingredients
Equipment
Method
- Preheat your oven to 350°F (175°C) and grease a baking pan or line it with parchment paper.
- In a large mixing bowl, whisk together the cocoa powder, granulated sugar, all-purpose flour, and a pinch of salt.
- In a separate bowl, melt the butter and mix in the eggs until smooth.
- Gently fold the wet mixture into the dry ingredients until just combined.
- Pour the brownie batter into the prepared baking pan and bake for 25-30 minutes.
- Allow the brownies to cool for 10-15 minutes, then cut into squares and decorate with white icing.


Leave a Reply