
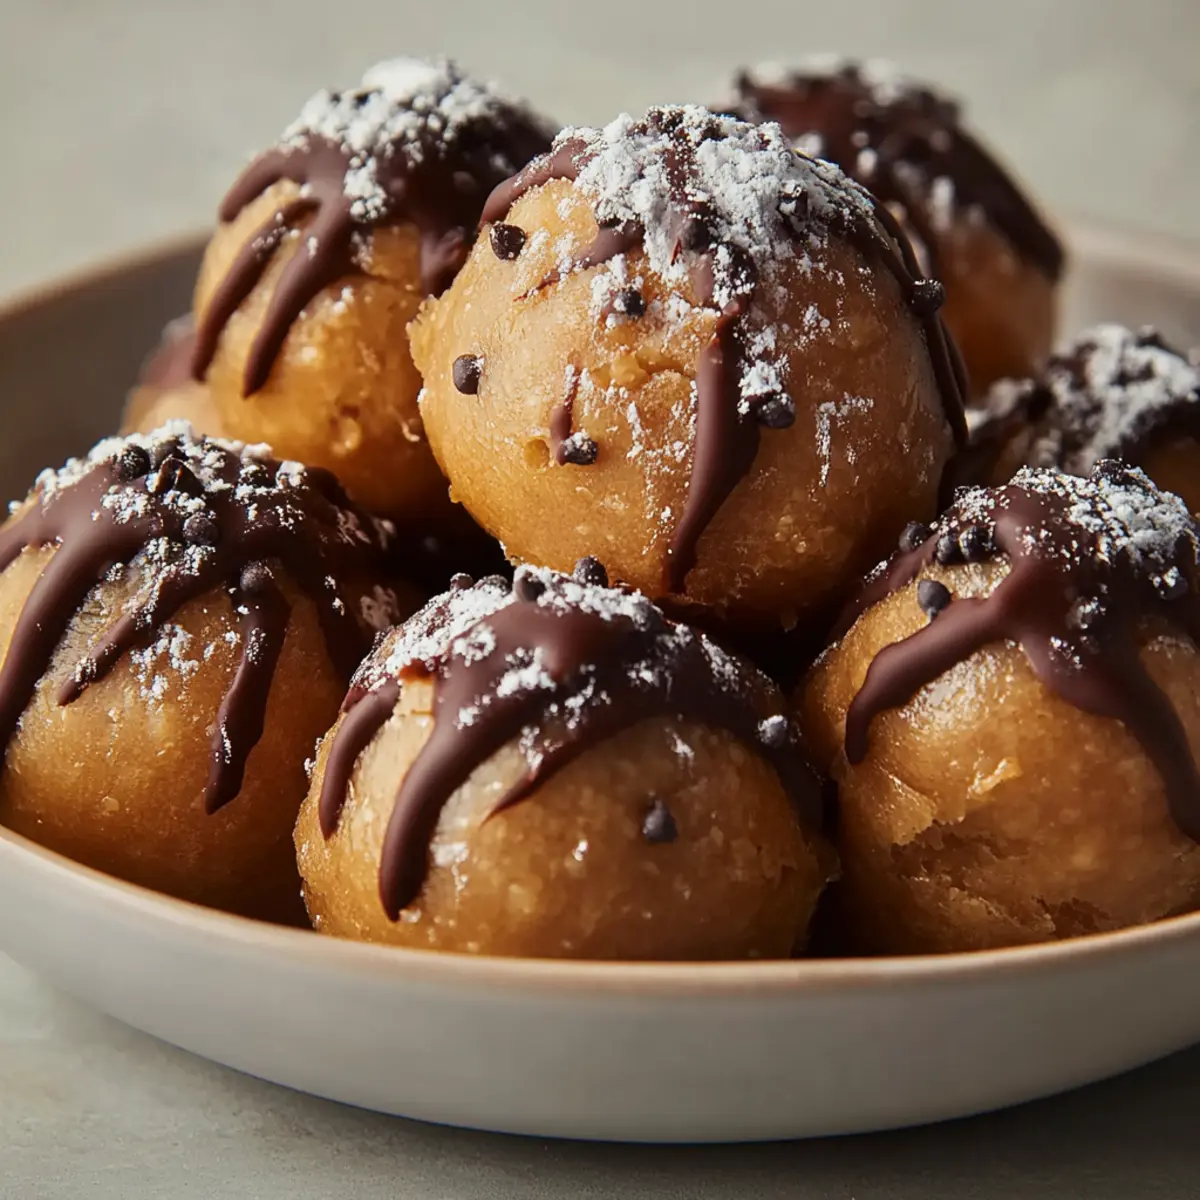
In the midst of a busy week, I stumbled upon a delightful solution to quell my sweet cravings without sacrificing my health goals—No-Bake Chocolate Peanut Butter Protein Balls. These little gems are not only super easy to whip up, but they also pack a protein punch that makes them the perfect post-workout snack or midday treat. With just a handful of wholesome ingredients like creamy peanut butter, rolled oats, and dark chocolate, you can create a satisfying bite that’s both delicious and nutritious. Plus, they’re incredibly versatile; feel free to toss in your favorite nuts or dried fruits for a subtle twist. Are you ready to indulge guilt-free? Let’s dive in and get rolling!
Why Are These Protein Balls a Must-Try?
Quick and Easy: You only need 20 minutes to prep! Simply mix, roll, and chill for a delicious snack without any baking fuss.
Nutritious Boost: Packed with protein from peanut butter and chocolate protein powder, they’re ideal for refueling after workouts or satisfying mid-afternoon cravings.
Versatile Flavors: Customize these with your favorite add-ins like coconut, peanuts, or dried fruits for a unique touch every time.
Crowd-Pleasing Treat: Perfect for sharing at parties or keeping on hand for family snacks, these protein balls make a healthy alternative to processed sweets.
Elevate your snacking game with our easy protein ball recipe that the whole family will love!
No-Bake Chocolate Peanut Butter Protein Balls Ingredients
For the Base
- Natural creamy peanut butter – well-stirred for the best texture and flavor.
- Honey or pure maple syrup – adds natural sweetness; use maple for a vegan option.
- Pure vanilla extract – enhances the overall taste with a warm aroma.
- Old-fashioned rolled oats – provides a hearty base and chewy texture.
- Quick oats – helps bind the mixture and offers a softer bite.
- Chocolate protein powder – boosts protein content and makes them satisfying.
- Unsweetened cocoa powder – gives a rich chocolaty flavor without added sugars.
- Ground flaxseed or chia seeds – packed with omega-3s and helps with binding.
- Fine sea salt – a pinch heightens all the flavors beautifully.
For Texture & Sweetness
- Mini dark chocolate chips – adds delightful chunks of sweetness; feel free to chop dark chocolate for a gourmet touch.
- Water or milk of choice – adjust consistency; add more if the dough is crumbly.
Optional Mix-Ins
- Shredded unsweetened coconut – adds tropical flair and a chewy texture.
- Chopped peanuts – for an extra crunch and nutty flavor.
- Hemp hearts – a great source of plant-based protein and omega fats.
- Dried fruit, finely chopped – provides natural sweetness and chewy texture; go for cranberries or apricots!
Now that you have all the ingredients ready, it's time to transform these into delectable No-Bake Chocolate Peanut Butter Protein Balls!
Step‑by‑Step Instructions for No-Bake Chocolate Peanut Butter Protein Balls
Step 1: Prepare Your Workspace
Start by lining a baking sheet or a large plate with parchment paper, creating a non-stick surface for your No-Bake Chocolate Peanut Butter Protein Balls. This step is essential as it ensures that your protein balls won't stick once they're formed and chilled. Have a medium and a separate mixing bowl ready for combining your ingredients.
Step 2: Mix the Wet Ingredients
In a medium bowl, combine the well-stirred natural creamy peanut butter, honey or pure maple syrup, and pure vanilla extract. Use a spatula or a whisk to stir these ingredients together until the mixture is smooth and homogenous. This sweetness base is vital for flavor, so ensure everything is blended well before moving on to the dry ingredients.
Step 3: Combine the Dry Ingredients
In a separate bowl, whisk together the old-fashioned rolled oats, quick oats, chocolate protein powder, unsweetened cocoa powder, ground flaxseed or chia seeds, and fine sea salt. Whisking helps to break up any clumps and ensures even mixing. This combination provides a hearty foundation for your protein balls, contributing not only to flavor but also to their nutritional value.
Step 4: Form the Dough Mixture
Gradually combine the dry ingredient mixture with the peanut butter mixture, stirring until a thick dough forms. This dough should be sticky and hold together well; you may need to use your hands to fully incorporate all the ingredients. If the mixture feels too dry or crumbly, don’t worry, that’s when you’ll adjust the texture in the next step.
Step 5: Adjust Dough Consistency
If your mixture seems too crumbly, add water or milk a tablespoon at a time, mixing well after each addition. You’re looking for a consistency similar to cookie dough—soft but not too wet. This adjustment makes it easier to roll the dough into balls without falling apart. Once you reach the right texture, you're ready for the fun part!
Step 6: Incorporate Chocolate Chips and Mix-Ins
Gently stir in the mini dark chocolate chips or finely chopped dark chocolate along with any optional mix-ins you desire, such as shredded coconut or chopped peanuts. Ensure that these delightful additions are evenly distributed throughout the dough. Each bite of your No-Bake Chocolate Peanut Butter Protein Balls will now include a burst of sweetness and texture!
Step 7: Chill the Mixture
If your mixture feels too soft to roll into balls, chill it in the refrigerator for about 15 to 20 minutes. This step helps firm up the dough, making it easier to handle. While you’re waiting, you can set up your workspace for rolling your protein balls, ensuring everything is ready for the next step!
Step 8: Roll Into Balls
Once chilled, use a small cookie scoop or a tablespoon to portion the dough. Roll each mound into balls about 1 to 1.5 inches in diameter. The warmth of your hands may help to shape them smoothly. Place each rolled ball onto the prepared baking sheet, keeping them spaced out as they’ll need room to chill.
Step 9: Set in the Refrigerator
Finally, refrigerate your rolled No-Bake Chocolate Peanut Butter Protein Balls for at least 30 minutes. This chilling time allows them to set and firm up perfectly, creating a delicious, satisfying treat that's ready to enjoy. Once they’re firm, you can store them in an airtight container or enjoy them right away!
Make Ahead Options
These No-Bake Chocolate Peanut Butter Protein Balls are perfect for busy meal prep! You can mix the wet and dry ingredients and form the dough up to 24 hours in advance; just store it in an airtight container in the refrigerator. If you prefer, you can also roll the balls into shape and refrigerate them up to 3 days ahead of time. To maintain their quality, ensure they are tightly stored to prevent drying out or absorbing any odors. When you're ready to enjoy a protein-packed snack, you can simply grab them from the fridge and indulge in a treat just as delicious as when freshly made!
Expert Tips for No-Bake Chocolate Peanut Butter Protein Balls
-
Sticky Dough Solution: If your dough is too sticky, dust your hands with cocoa powder or oat flour to prevent it from sticking while rolling.
-
Customize Wisely: Don’t overload on optional mix-ins; keep it under ½ cup total to maintain dough integrity and the delight of the No-Bake Chocolate Peanut Butter Protein Balls.
-
Chill Time Importance: Always refrigerate after rolling; this helps the protein balls firm up properly, making them easier to handle and enhancing their flavors.
-
Avoid Crumbliness: If the mixture feels too dry, add moisture gradually—1 tablespoon of water or milk at a time—until the dough holds together like cookie dough.
-
Even Balls: Use a cookie scoop for uniformity in size; this ensures all protein balls are evenly proportioned for consistent flavor and calorie content.
What to Serve with No-Bake Chocolate Peanut Butter Protein Balls
Looking to create a delightful spread that perfectly complements these delicious no-bake treats?
-
Fresh Fruit Salad: Juicy and vibrant fruits add a refreshing sweetness and contrast beautifully with the rich chocolate flavors, making each bite more enjoyable.
-
Greek Yogurt: Creamy and tangy, Greek yogurt serves as a luscious dip, enhancing the protein content while providing a custardy contrast to the chewy texture of the protein balls.
-
Nutty Granola: A crunchy sprinkle of granola over your protein balls adds delightful texture. The oats and nuts synergize with the flavors of the protein balls perfectly.
-
Trail Mix: A side of homemade trail mix combining nuts, seeds, and dried fruits mirrors the healthy, on-the-go vibe of the protein balls, creating a wholesome snack experience.
-
Smoothie: A thick, chocolate-banana smoothie not only pairs beautifully in flavor but also enhances your post-workout refreshment with a creamy, indulgent finish.
-
Herbal Tea: A warm cup of herbal tea like chamomile or peppermint offers a soothing balance to the sweet richness of the protein balls, creating a comforting snack time.
-
Coconut Chia Pudding: This light and creamy dessert brings a delightful chewiness that complements the rich flavors of the protein balls while adding a healthy twist.
Transform your snack time into a delightful experience that leaves everyone satisfied!
How to Store and Freeze No-Bake Chocolate Peanut Butter Protein Balls
Refrigerator: Store protein balls in an airtight container in the fridge for up to 1 week to maintain freshness and flavor. Perfect for a quick snack whenever cravings hit!
Freezer: For longer storage, freeze them in a single layer on a baking sheet for 1-2 hours, then transfer to a zip-top bag. They will last for 2-3 months in the freezer.
Thawing: When you're ready to enjoy, simply take out the desired number of No-Bake Chocolate Peanut Butter Protein Balls and let them thaw in the fridge or at room temperature for about 15 minutes.
Reheating: There's no need to reheat these treats. Just enjoy them chilled or at room temperature, as they taste best that way!
No-Bake Chocolate Peanut Butter Protein Balls Variations
Get ready to elevate your No-Bake Chocolate Peanut Butter Protein Balls by mixing in flavors and textures that will delight your taste buds!
-
Nut-Free: Swap peanut butter for almond or sunflower seed butter for a similar creamy texture without the nuts.
You’ll still enjoy the same satisfying bite while accommodating allergies. -
Coconut Bliss: Add ¼ cup shredded unsweetened coconut for a tropical twist that enhances flavor and texture.
This addition brings a unique chewiness that pairs beautifully with the chocolate. -
Spiced Up: Incorporate 1 teaspoon cinnamon or a pinch of cayenne pepper for a warm flavor boost that tantalizes the palate.
The heat will surprise and delight with every chew! -
Fruit Fusion: Toss in ¼ cup dried cranberries or apricots, finely chopped, for a burst of natural sweetness.
This fruity addition not only complements the chocolate but also adds a lovely chewy texture. -
Superfood Boost: Mix in 2 tablespoons of chia seeds or hemp hearts for added nutrition and crunch.
These power-packed seeds take your protein balls to a new level, enriching them with omega-3s. -
Sugar-Free Delight: Use a sugar substitute like monk fruit or stevia in place of honey or maple syrup for a lower-calorie option.
Enjoy the same great flavor while staying true to your dietary goals! -
Healthy Fats: Add 2 tablespoons of nut or seed oil to enrich the texture while keeping the protein balls moist.
A drizzle of walnut or flaxseed oil makes these snacks even more nutrient-rich. -
Chocolate Lovers: Increase the amount of mini dark chocolate chips to ½ cup or swirl in peanut butter chips for a double chocolate delight.
Making the chocolate the hero of your protein balls will satisfy every sweet craving!
Feel free to explore these variations with your family, and don't forget to check out our expert tips for even more ways to customize this recipe!
No-Bake Chocolate Peanut Butter Protein Balls Recipe FAQs
How do I know if my peanut butter is the right consistency?
Absolutely! You want to use natural creamy peanut butter that is well-stirred. Look for a smooth, pourable consistency without any separation. If it’s too thick, it may be difficult to mix and roll the dough.
What’s the best way to store leftovers?
To keep your No-Bake Chocolate Peanut Butter Protein Balls fresh, store them in an airtight container in the refrigerator for up to 1 week. This ensures they remain flavorful and ready for snacking whenever you need a tasty boost!
Can I freeze these protein balls?
Yes, you can! To freeze your No-Bake Chocolate Peanut Butter Protein Balls, place them in a single layer on a baking sheet and freeze for 1-2 hours. Once they’re firm, transfer them to a zip-top bag or container and freeze for up to 2-3 months. Make sure to label the bag with the date!
What if my dough is too crumbly?
If your mixture feels too dry and crumbly, don’t worry! Add water or milk, 1 tablespoon at a time, mixing well after each addition. Continue until the dough holds together like cookie dough, which usually takes about 2-4 tablespoons total. This step is crucial for achieving those perfectly round, satisfying bites!
Are these safe for everyone in my family?
While the ingredients in No-Bake Chocolate Peanut Butter Protein Balls are generally safe for most diets, make sure to check for any allergies, especially to nuts or gluten. You can easily substitute with nut-free alternatives, and you may opt for gluten-free oats to make them suitable for everyone!
How can I customize the flavors?
Very! You can add up to ½ cup total of optional mix-ins such as shredded coconut, chopped nuts, dried fruits, or even a pinch of cinnamon. Choosing your mix-ins not only alters the flavor but also tailors this healthy treat to your preferences, providing a new twist each time!
No-Bake Chocolate Peanut Butter Protein Balls for Quick Energy
Ingredients
Equipment
Method
- Line a baking sheet or large plate with parchment paper.
- In a medium bowl, combine the peanut butter, honey or maple syrup, and vanilla extract until smooth.
- In a separate bowl, whisk together the rolled oats, quick oats, protein powder, cocoa powder, flaxseed, and salt.
- Gradually combine the dry mixture with the wet mixture, stirring until a thick dough forms.
- If the dough is crumbly, add water or milk a tablespoon at a time until the right consistency is reached.
- Stir in the chocolate chips and any optional mix-ins, ensuring even distribution.
- Chill the mixture in the refrigerator for 15 to 20 minutes to firm up.
- Use a scoop to portion the dough and roll into balls. Place them on the prepared sheet.
- Refrigerate the rolled protein balls for at least 30 minutes to set.

Leave a Reply