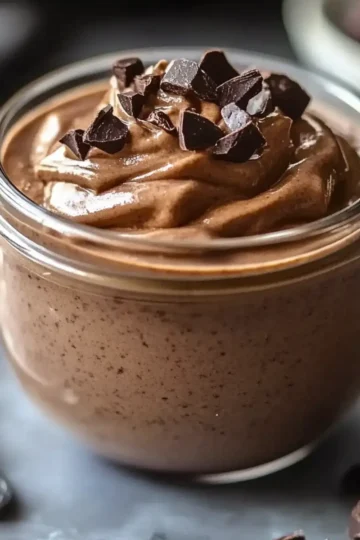
As I grabbed the last of the Oreo cookies from the pantry, a lightbulb moment struck—why not transform these crunchy delights into something even more irresistible? That’s when I decided to whip up a batch of Oreo Balls, the perfect simple dessert for any occasion. Not only do they come together in just 30 minutes, but they’re also a show-stopping crowd-pleaser that’s sure to impress. With a luscious chocolate coating wrapping around a creamy, dreamy Oreo center, these bite-sized treats make for a fun, no-bake solution to satisfy any sweet tooth. Who could resist the charm of homemade delights like these? Ready to roll up your sleeves and indulge? Let’s dive into this delectable adventure!

Why Make Oreo Balls Today?
Simplicity reigns supreme with this recipe, taking just 30 minutes from start to finish. Decadent flavor combines the rich taste of chocolate with the delightful crunch of Oreos, creating a dessert that’s utterly irresistible. Versatile treat – perfect for parties, holidays, or just a sweet craving! These delicious bites are also kid-friendly, making them a fun activity for family time. If you love quick and easy desserts, check out other sweet favorites like Sweet Chili Meatballs for a perfect balance of savory and sweet. Don't miss out on the joy of homemade sweets!
Oreo Balls Ingredients
Get ready to create your very own indulgent treats!
For the Oreo Mixture
• Oreo cookies – 8 ounces (225g) crushed, the star ingredient for that classic flavor.
• Melted butter – 3 tablespoons (45g) to bind everything together and enhance the richness.
• Milk – 1 teaspoon to ensure the mixture is perfectly moist when rolling into balls.
For the Chocolate Coating
• Chocolate – 8 ounces, choose your favorite type; dark chocolate brings a rich contrast to the sweet Oreo balls and makes them hard to resist!
Crafting these Oreo Balls isn’t just about the ingredients; it’s about creating delightful memories in the kitchen. Enjoy every bite!
Step‑by‑Step Instructions for Oreo Balls
Step 1: Crush the Oreos
Begin by placing 8 ounces of Oreo cookies in a food processor, pulsing until they turn into fine crumbs. Alternatively, you can use a rolling pin to smash the cookies within a sealed plastic bag. This process should take about 2-3 minutes, and you’ll know it’s ready when there are no large pieces remaining.
Step 2: Mix the Ingredients
In a large mixing bowl, combine the crushed Oreo cookies with 3 tablespoons of melted butter and 1 teaspoon of milk. Stir the mixture until it’s well combined and forms a thick, cohesive dough. This should take around 2-3 minutes of mixing. The consistency will be slightly sticky but will hold together when you roll it into balls.
Step 3: Form the Balls
Using your hands, scoop out approximately one tablespoon of the Oreo mixture and roll it into small balls, about 1 inch in diameter. Place each ball on a baking sheet lined with parchment paper. Aim to create about 16 balls, and set the baking sheet in the refrigerator to firm up while you prepare the chocolate coating, which will take about 10 minutes.
Step 4: Melt the Chocolate
In a microwave-safe bowl, add 8 ounces of your favorite chocolate for coating. Melt the chocolate in the microwave in 30-second intervals, stirring between each until it’s smooth and fully melted, totaling about 1-2 minutes. Ensure the chocolate is warm but not too hot, as this will help achieve a perfect coating for your Oreo Balls.
Step 5: Dip the Oreo Balls
Remove the Oreo balls from the refrigerator. Using a fork, dip each ball into the melted chocolate, ensuring it’s fully coated. Lift it out and gently shake off any excess chocolate before placing it back onto the lined baking sheet. Repeat this process until all balls are dipped, making sure to keep the coating even and smooth.
Step 6: Let the Chocolate Set
Allow the coated Oreo Balls to set at room temperature for about 15 minutes or until the chocolate hardens slightly. For a quicker option, pop them into the refrigerator for about 10 minutes. Once the chocolate has set completely, your delicious Oreo Balls are ready to be enjoyed, whether at a gathering or just for a sweet treat!

Make Ahead Options
These Oreo Balls are perfect for meal prep enthusiasts! You can prepare the Oreo mixture and form the balls up to 24 hours in advance, storing them in an airtight container in the refrigerator to maintain freshness. This not only saves you time on busy days, but also allows the flavors to meld beautifully. To finish, simply melt the chocolate and dip the chilled balls just before you’re ready to serve. If you want to make them even earlier, the rolled balls can be frozen for up to 3 months—just thaw in the refrigerator overnight before coating. With this make-ahead strategy, you’ll have delightful treats ready anytime, just as delicious as if made fresh!
Expert Tips for Oreo Balls
-
Crushing Oreos: Make sure to crush the Oreos into fine crumbs; large pieces can make it harder to roll nice, round balls.
-
Right Consistency: The mixture should be slightly sticky yet hold its shape. If too dry, add a touch more milk or butter until perfect.
-
Chocolate Options: Feel free to use milk, dark, or white chocolate for coating. Just remember that each type of chocolate will offer a different flavor profile for your Oreo Balls.
-
Avoid Overheating: When melting chocolate, do it gradually to prevent burning. Overheated chocolate can seize up, making it unusable for coating.
-
Chill Time: Refrigerating the balls after rolling makes them firmer and easier to coat. Don't skip this step for perfectly coated treats!
Oreo Balls Variations & Substitutions
Feel free to play around and make these Oreo Balls your own! The possibilities are endless with this delicious base recipe.
-
Nut-Free: Replace Oreos with gluten-free chocolate cookies for a safe, nut-free option without sacrificing flavor.
You can enjoy the same satisfying crunch and sweetness by making this simple swap, bringing joy to a wider audience. -
Vegan: Use dairy-free chocolate and coconut cream instead of butter for an entirely plant-based version.
Vegan treats can be just as delightful, ensuring everyone can savor the goodness of Oreo Balls without missing out on flavor. -
Flavor Infusion: Add a teaspoon of vanilla extract to the mixture for a hint of warmth and depth.
This small touch creates a beautifully aromatic treat that elevates the classic taste of Oreos, delighting anyone who takes a bite. -
Coconut Coating: Garnish the chocolate-coated Oreo Balls with shredded coconut for a tropical twist.
Not only does this add texture, but it lends an exotic flair that will have your guests swooning with every mouthful. -
Spicy Kick: Stir in a pinch of cayenne pepper to the chocolate for a surprising hint of heat.
The unexpected warmth instantly elevates the dessert, creating a captivating flavor profile that excites the palate. -
Peanut Butter Delight: Fold in a couple of tablespoons of peanut butter into the Oreo mix for a nutty richness.
The creamy goodness perfectly balances the sweetness, making it an irresistible treat for peanut butter aficionados. -
Minty Fresh: Incorporate peppermint extract into the chocolate for a refreshing mint chocolate flavor.
This version is perfect for those cozy winter holidays—just imagine how delightful these minty bites will be at your gatherings! -
Caramel Drizzle: Drizzle warm caramel sauce over the finished Oreo Balls for a sweet indulgence.
The gooey goodness enhances the chocolate and Oreo combination, turning them into a truly decadent dessert experience!
Explore these variations to make this beloved dessert truly your own, and consider pairing them with other delicious recipes like Sweet Chili Meatballs for a perfect balance of flavors. Happy cooking!
How to Store and Freeze Oreo Balls
Room Temperature: Store your Oreo Balls in an airtight container for up to 2 days at room temperature, enjoying their sweet crunch without any fuss.
Fridge: To keep them fresh longer, place the Oreo Balls in an airtight container in the refrigerator for up to 1 week. This helps retain their creamy texture and delicious chocolate coating.
Freezer: For extended storage, freeze the Oreo Balls in a single layer on a baking sheet for 1-2 hours, then transfer to a freezer-safe container. They can be frozen for up to 3 months.
Reheating: No reheating is necessary! Enjoy the Oreo Balls straight from the fridge or freezer for a delightful treat anytime you crave something sweet.
What to Serve with Oreo Balls?
These delightful treats beckon to be paired with just the right companions to elevate your dessert experience.
-
Vanilla Ice Cream: Creamy vanilla ice cream complements the richness of Oreo Balls, bringing a refreshing balance that's hard to resist. Scoop it on the side for a delightful contrast!
-
Fresh Berries: Juicy strawberries or raspberries add a burst of tangy freshness that cuts through the sweetness, making each bite of the Oreo Balls even more enjoyable.
-
Chocolate Sauce Drizzle: Enhance the decadence with a drizzle of warm chocolate sauce, allowing the melt-in-your-mouth experience to reach new heights of indulgence and richness.
-
Crushed Nuts: Topping with chopped almonds or hazelnuts introduces a satisfying crunch and nutty flavor that pairs beautifully with the softness of the Oreo Balls.
-
Coffee or Espresso: A comforting cup of coffee or a shot of espresso serves as the perfect bitter counterpoint to the sweet Oreo Balls, creating a balanced dessert experience.
-
Milkshake: A chocolate or Oreo milkshake brings a fun, nostalgic touch, making this pairing an exciting treat for both adults and kids alike.
-
Mint Chocolate Tea: The refreshing notes of mint tea with chocolate undertones offer a soothing contrast that heightens the indulgent elements of Oreo Balls.
-
S’mores Dip: This warm, gooey s'mores dip can create a fun dessert spread, inviting everyone to dip their Oreo Balls while mingling flavors for an unforgettable experience.

Oreo Balls Recipe FAQs
What type of Oreos should I use for Oreo Balls?
Absolutely, you can use any variety of Oreo cookies for this recipe—classic, double-stuff, or even seasonal flavors like pumpkin spice! Each will give your Oreo Balls a unique twist, so feel free to experiment and find your favorite combination.
How long can I store Oreo Balls and what's the best method?
Oreo Balls can be stored at room temperature in an airtight container for up to 2 days. To best preserve their flavors and texture, keep them in the fridge for up to 1 week. Make sure they’re sealed tightly to prevent them from drying out or absorbing other odors in the fridge.
Can I freeze Oreo Balls for later?
Yes, you certainly can! To freeze your Oreo Balls, first, place them in a single layer on a baking sheet and freeze for about 1-2 hours until solid. Then, transfer them into a freezer-safe container or a zip-top bag. They can be frozen for up to 3 months. To enjoy, simply take them out and let them thaw in the fridge for a couple of hours before savoring that deliciousness!
What do I do if the chocolate coating is too thick or seizes up?
If you find your melted chocolate too thick, it might be due to overheating. If this happens, you can add a teaspoon of vegetable oil or shortening while mixing it to smooth out the texture. If the chocolate seizes, it’s best to start over with a fresh batch. Alternatively, gently reheating the chocolate in short intervals while stirring continuously may soften it again.
Are Oreo Balls safe for kids or individuals with allergies?
Great question! While Oreo Balls are fun for kids, they do contain common allergens like dairy and gluten from the Oreos and chocolate. Always check the labels to ensure they fit within any dietary restrictions, especially for nut allergies. If needed, you can substitute with gluten-free Oreos and dairy-free chocolate to make them a safe delicious treat for everyone!
How can I garnish my Oreo Balls for extra flair?
For a lovely presentation, you can drizzle melted white chocolate over the cooled Oreo Balls or sprinkle some crushed nuts or colorful sprinkles on top before the chocolate sets. This adds a personal touch and makes them even more tempting for parties or celebrations!

Decadent Oreo Balls You Can't Resist Making at Home
Ingredients
Equipment
Method
- Crush the Oreos in a food processor until fine crumbs remain.
- Mix the crushed Oreos with melted butter and milk until a thick dough forms.
- Roll one tablespoon of the mixture into a ball and place onto a baking sheet.
- Melt chocolate in the microwave in 30-second intervals until smooth.
- Dip each ball into the melted chocolate, ensuring even coating.
- Let the balls set at room temperature for 15 minutes or refrigerate for faster hardening.


Leave a Reply