
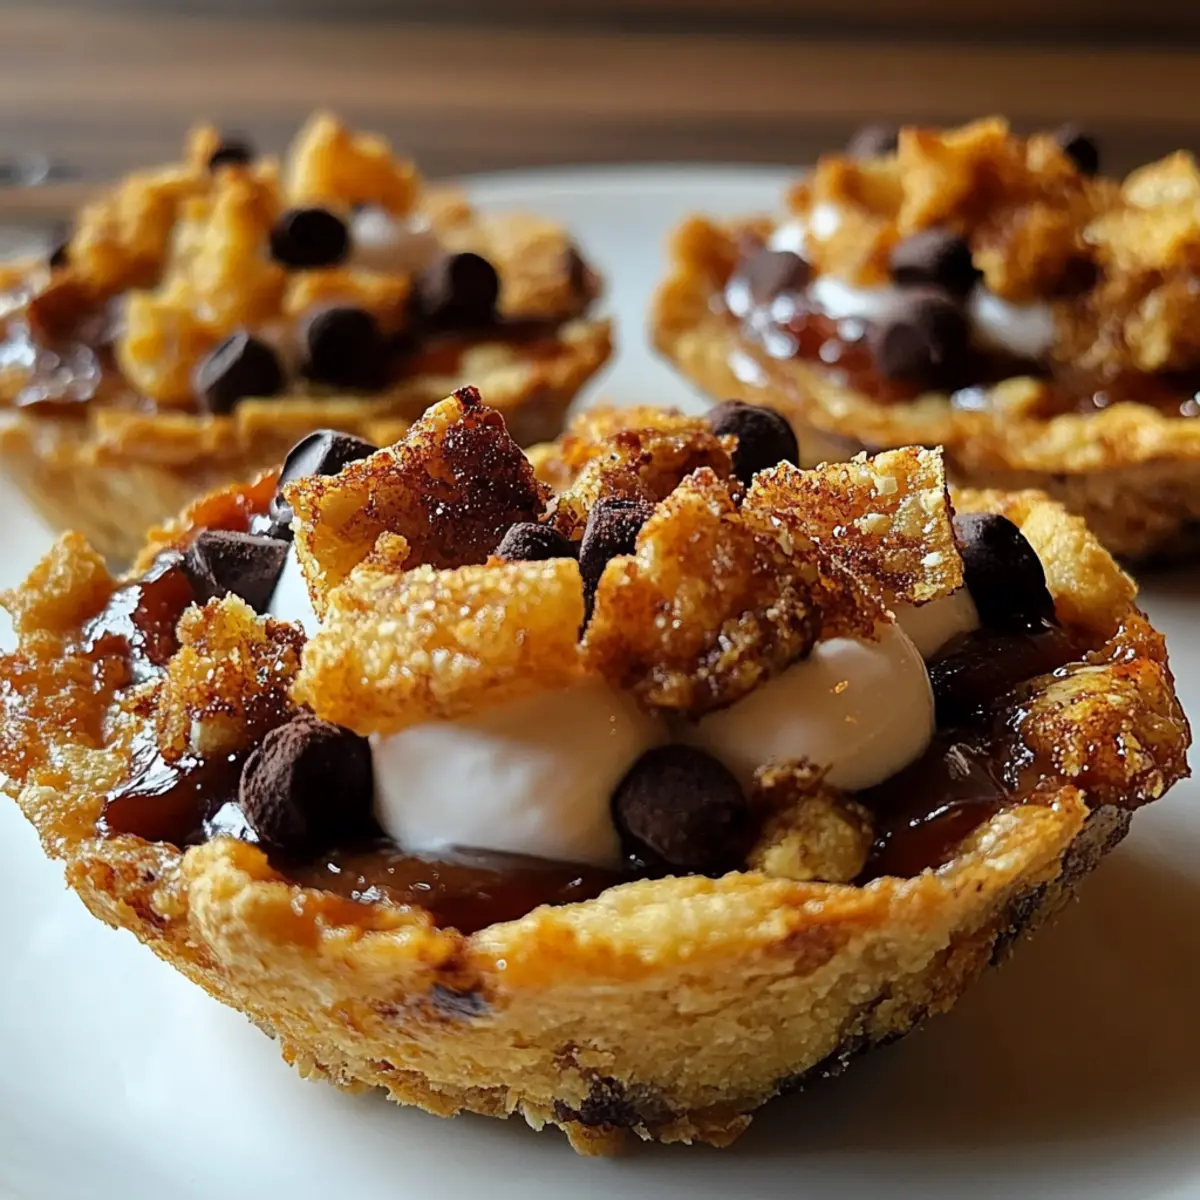
The moment I sunk my teeth into a warm S’mores Cookie Cup, I was whisked away to summer nights around the campfire, the warmth of gooey marshmallows and chocolate wrapping around me like a cozy blanket. These delightful treats are not just a nostalgic dessert; they pack a punch of satisfaction in every adorable mini version. What makes S’mores Cookie Cups a must-make is their quick prep time, taking only 20 minutes, making them the perfect treat for those unexpected cravings or last-minute gatherings. Plus, they’re a crowd-pleaser, sure to ignite joy among family and friends! Are you ready to create mini morsels of happiness that bring the outdoors in? Let’s dive into this delightful recipe together!
Why are S’mores Cookie Cups irresistible?
Nostalgic flavors: Each bite transports you back to warm campfire nights, making them more than just a dessert.
Quick and easy: With only 20 minutes of prep, you can whip up these delightful treats in no time.
Versatile: Perfect for parties, movie nights, or just a sweet indulgence at home, they fit every occasion.
Kid-approved: Their fun, mini size appeals to both kids and adults, ensuring smiles all around.
Gooey goodness: The toasted marshmallow topping and chocolate center create a delightful texture that keeps you coming back for more.
So why wait? Grab your ingredients and also check out our delicious cookie recipes to complement these sweet treats!
S’mores Cookie Cups Ingredients
• Get ready to whip up some deliciousness!
For the Dough
- Unsalted butter – 1 cup, softened; this adds richness for a perfect base.
- Granulated sugar – 1 cup; sweetens the dough beautifully.
- Brown sugar – 1 cup, packed; provides a delightful caramel flavor.
- Large eggs – 2; binding agents that keep your cookie cups moist.
- Vanilla extract – 1 teaspoon; enhances the overall sweetness with a warm note.
- All-purpose flour – 2 ½ cups; the structure needed for those perfect cups.
- Baking soda – 1 teaspoon; helps your cookie cups rise just right.
- Salt – ½ teaspoon; a touch of salt brings out the sweetness.
For the Filling
- Milk chocolate chips – 1 cup; these provide gooey, melty joy in every bite.
- Graham cracker squares – 12, broken into pieces; add that classic s’mores crunch.
For the Topping
- Large marshmallows – 6, halved; for that iconic toasted marshmallow goodness, making these S’mores Cookie Cups irresistible!
Ready to get baking? These ingredients will come together to create the ultimate cozy dessert delight that everyone loves!
Step‑by‑Step Instructions for S’mores Cookie Cups
Step 1: Preheat your oven
Begin by preheating your oven to 350°F (175°C) to ensure it’s hot and ready for baking. While the oven warms up, lightly grease a mini muffin pan with cooking spray or butter, making sure each cup is well-coated to prevent sticking. This step sets the stage for perfectly formed S’mores Cookie Cups that will slide out easily once baked.
Step 2: Cream the buttery goodness
In a mixing bowl, combine 1 cup of softened unsalted butter, 1 cup of granulated sugar, and 1 cup of packed brown sugar. Using a hand mixer or stand mixer, beat the mixture on medium speed until it becomes light and fluffy, usually about 2–3 minutes. This creaming process incorporates air into the mix, resulting in soft, buttery cookie cups that melt in your mouth.
Step 3: Add the eggs and vanilla
Next, crack in 2 large eggs, one at a time, beating well after each addition to ensure they are fully incorporated. Stir in 1 teaspoon of vanilla extract, blending until smooth. The eggs and vanilla will enhance the flavor and create a richer texture, forming the perfect base for your delightful S’mores Cookie Cups.
Step 4: Whisk the dry ingredients
In a separate bowl, whisk together 2 ½ cups of all-purpose flour, 1 teaspoon of baking soda, and ½ teaspoon of salt until evenly combined. This step is crucial as it ensures the leavening agent is distributed throughout the flour, which helps the cookie cups rise beautifully. Add the dry mixture to your wet ingredients in the previous bowl, stirring until just combined for a thick, doughy consistency.
Step 5: Mix in the chocolate chips
Carefully fold in 1 cup of milk chocolate chips, ensuring that they are evenly distributed throughout the cookie dough. The chocolate will provide that delicious gooeyness that makes S’mores Cookie Cups irresistible. Be gentle while mixing to maintain the airy texture created during the creaming process.
Step 6: Prepare graham cracker bases
Take the prepped mini muffin pan and place a few pieces of broken graham cracker squares into the bottom of each well. This creates a crunchy base that will complement the soft cookie cups. Make sure each well has a generous layer of graham cracker, as this will enhance the traditional s’mores flavor.
Step 7: Scoop the cookie dough
Using a cookie scoop or spoon, fill each muffin well with the cookie dough, being careful to fill each cup about two-thirds full. Gently press the dough down to form cup shapes in the pan. This will create pockets within each S’mores Cookie Cup to hold the melted marshmallows and chocolate, making for a delightful treat.
Step 8: Bake to golden perfection
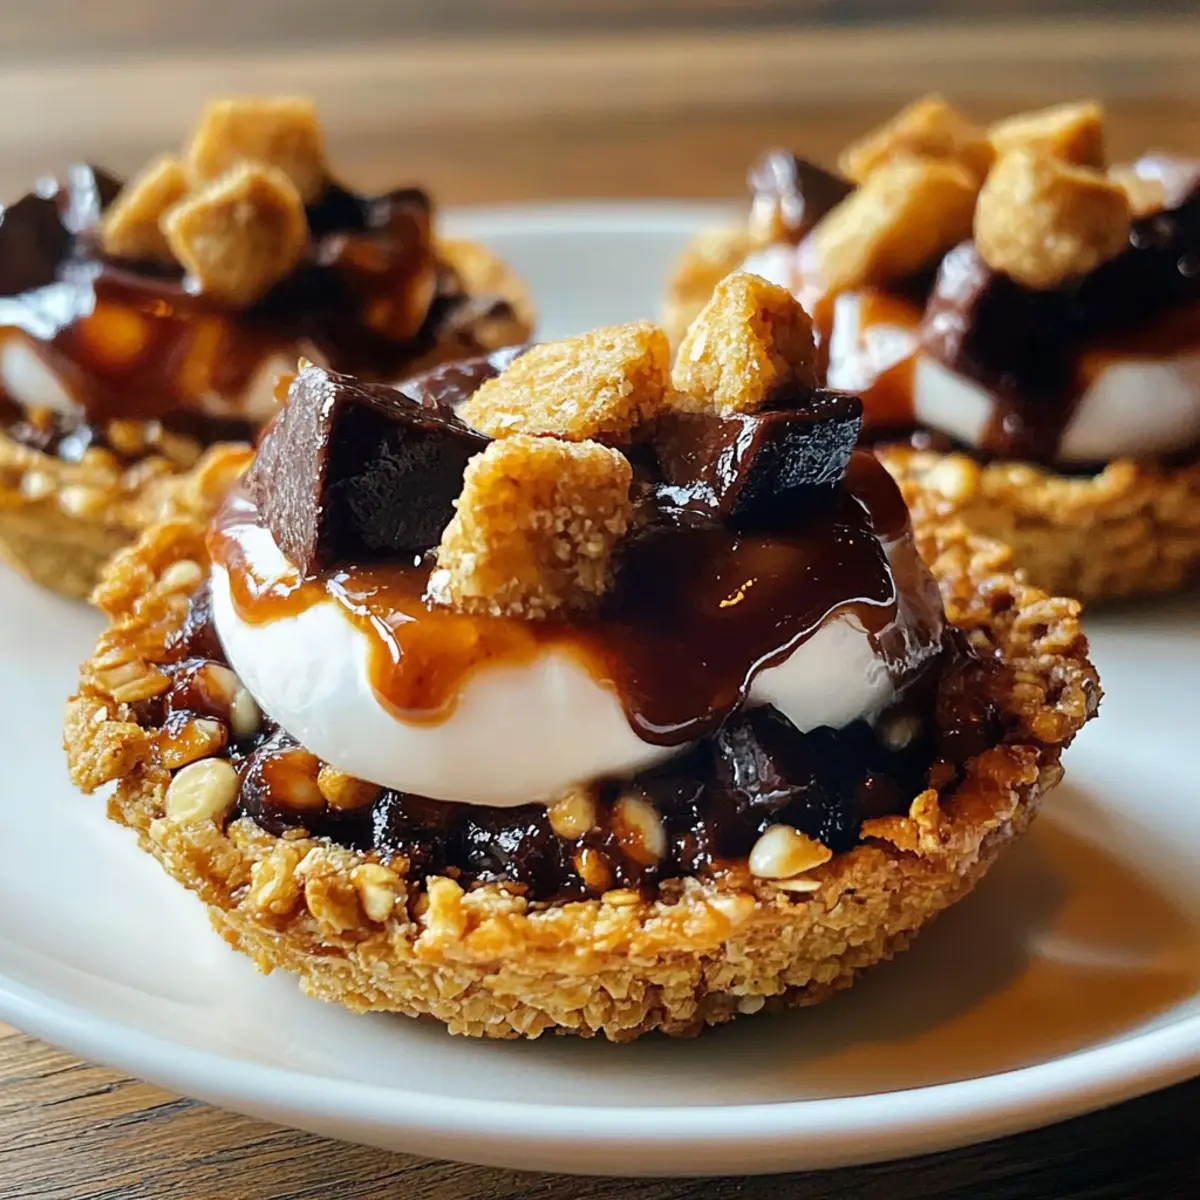
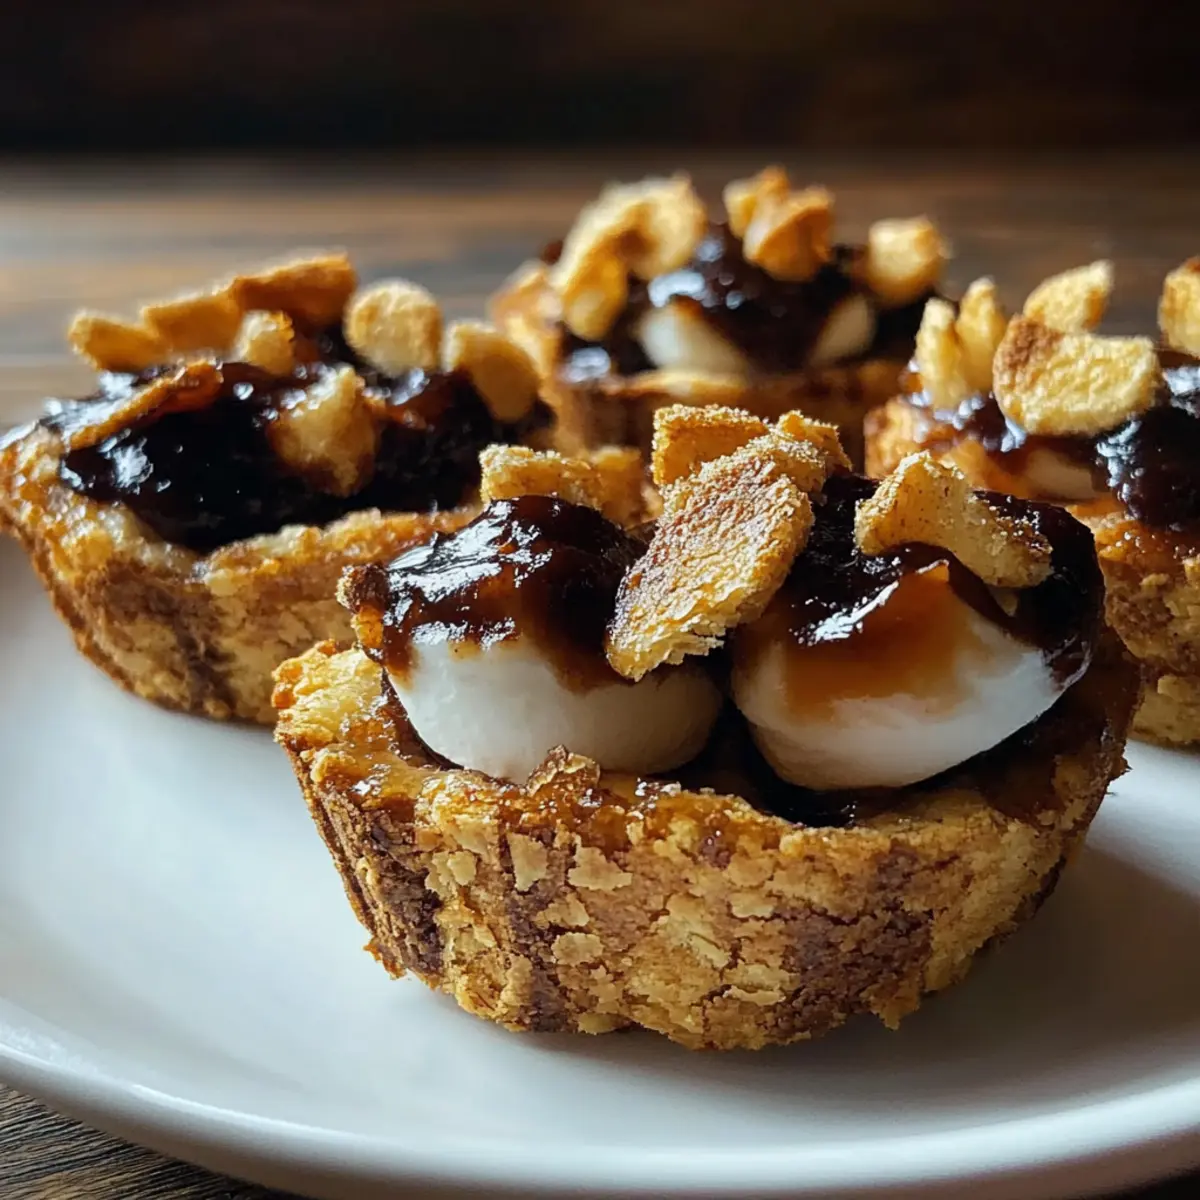
Place the muffin pan in your preheated oven and bake for 10 minutes, or until the edges of the cookie cups turn golden brown. You want them to look nicely set around the edges while still soft in the center, ready to embrace the melted marshmallow topping soon to come!
Step 9: Add the marshmallow topping
Once baked, carefully remove the pan from the oven and immediately add a halved marshmallow to the top of each cookie cup. Make sure the cut side faces up to maximize toasting. The hot cookie cups will slightly melt the marshmallows and prepare them for toasting in the next step.
Step 10: Broil for toastiness
Return the muffin pan to the oven and switch to broil on high for 1–2 minutes. Watch closely as you do this, as marshmallows can burn quickly! You want them to toast to a beautiful golden brown, creating that signature gooey topping that defines the S’mores Cookie Cups.
Step 11: Cool before enjoying
After toasting, allow the cookie cups to cool in the pan for about 5 minutes. This resting time will help them set further, making it easier to transfer them. Once slightly cooled, use a small spatula to gently remove each cookie cup and place them on a wire rack to cool completely before serving.
S’mores Cookie Cups Variations
Feel free to mix and match these ideas to create your perfect version of S’mores Cookie Cups!
-
Gluten-Free: Substitute all-purpose flour with a gluten-free blend, ensuring the same delightful texture without the gluten.
Try using a one-to-one gluten-free flour mix; it’s an effortless switch for those avoiding gluten. -
Nutty Twist: Add ½ cup of chopped walnuts or pecans to the dough for a crunchy, nutty flavor.
The added nuts not only enhance the texture but also provide a delicious contrast to the sweetness. -
Dark Chocolate Delight: Swap milk chocolate chips for dark chocolate for a richer, more intense flavor experience.
This variation is a hit for chocolate lovers, elevating your S’mores Cookie Cups to gourmet status! -
Coconut Lovers: Mix in ½ cup of shredded coconut into the cookie dough for a tropical twist.
The coconut brings a chewy texture and a subtle flavor that perfectly complements the overall sweetness. -
Peanut Butter Cup: Add mini peanut butter cups instead of chocolate chips for a delightful twist on the classic.
The creamy, nutty taste elevates those nostalgic flavors to new heights—your taste buds will thank you! -
Spicy Kick: Add a pinch of cayenne pepper or cinnamon to the dough for a surprising hint of warmth.
It’s a delightful way to wake up those comforting flavors with a little spice; your friends will be asking for the secret ingredient! -
Yummy Pretzel Crunch: Incorporate crushed pretzels into the graham cracker layer for an extra crunchy bite.
This adds an intriguing salty-sweet contrast that makes every bite a flavor adventure. -
S’mores Bites: Instead of muffin cups, bake the dough in a larger pan to make S’mores Cookie Bars, cutting them into squares afterward.
Perfect for serving at parties, these bars are a great way to enjoy the same cozy treat in a different style.
These creative ideas will help you explore new flavor dimensions while making S’mores Cookie Cups! For more sweet inspiration, don’t forget to check out our easy cookie recipes to keep everyone's sweet tooth satisfied!
How to Store and Freeze S’mores Cookie Cups
Room Temperature: Allow your S’mores Cookie Cups to cool completely before storing them in an airtight container. They’ll stay fresh for up to 3 days at room temperature.
Fridge: If you want to extend their freshness, store in the fridge for up to a week. Just remember to let them come to room temperature before enjoying for the best texture.
Freezer: To freeze, individually wrap each cookie cup in plastic wrap and place them in a freezer-safe bag. They can be frozen for up to 3 months without losing flavor.
Reheating: For the perfect treat, reheat from frozen in the microwave for about 15-20 seconds or warm in the oven at 350°F for 5-7 minutes until warmed through. Enjoy your gooey S’mores Cookie Cups!
Expert Tips for S’mores Cookie Cups
-
Chill the dough: If your cookie dough is too soft to scoop, chill it in the fridge for 10-15 minutes. This ensures perfect shaping and prevents spreading during baking.
-
Watch the marshmallows: When broiling, keep a close eye on the marshmallows! They can quickly turn from golden to burnt, so stay nearby during this step.
-
Use fresh ingredients: Always check that your baking powder and flour are fresh to achieve the best rise and texture in your S’mores Cookie Cups.
-
Graham cracker base: Don’t skimp on the graham cracker crumbs at the bottom! They add that classic s’mores flavor and balance out the sweetness of the cookies.
-
Mixing technique: Avoid overmixing the dough once you add the flour. This keeps your cookie cups light and soft instead of dense and chewy.
Make Ahead Options
These S’mores Cookie Cups are perfect for meal prep, allowing you to enjoy their gooey goodness with minimal effort on busy days! You can prepare the cookie dough up to 3 days in advance by mixing all the wet and dry ingredients and storing the dough in an airtight container in the refrigerator. Additionally, you can also press the graham cracker pieces into the muffin pan up to 24 hours ahead. When you're ready to bake, simply scoop the chilled dough into the prepared muffin wells, bake as instructed, and top with marshmallows. With these make-ahead tips, you can savor delicious homemade treats without the last-minute rush!
What to Serve with S’mores Cookie Cups?
Indulging in S’mores Cookie Cups opens a world of delicious possibilities for a complete meal experience.
-
Vanilla Ice Cream: The creamy coldness of vanilla ice cream balances the warm, gooey cookie cups perfectly, creating a delightful contrast in temperatures. A scoop on the side adds a touch of elegance and marries beautifully with the sweet flavors.
-
Fresh Berries: Ripe strawberries or tart raspberries bring a refreshing burst of flavor that brightens the dessert experience. Their natural acidity cuts through the sweetness, offering a lovely palate balance.
-
Chocolate Milkshake: Elevate your dessert with a rich chocolate milkshake. The thick, creamy texture pairs perfectly with the chocolatey goodness of the cookie cups, turning this treat into a decadent experience.
-
Caramel Sauce: Drizzling warm caramel sauce over the top will create a luxurious, indulgent layer, harmonizing with the flavors of chocolate and marshmallow. It’s an extra touch that transforms each bite into a true s'mores adventure.
-
Coffee: A freshly brewed cup of coffee serves as a perfect pairing, with its rich bitterness contrasting the sweetness of the cookie cups. The warmth and aroma of coffee makes for a cozy complement to your dessert.
-
Whipped Cream: Light and airy whipped cream adds a delightful texture that enhances the overall dessert experience. It’s an easy way to amplify both sweetness and creaminess, making each bite even more irresistible.
These pairing ideas will take your S'mores Cookie Cups from delightful treats to a full-fledged culinary experience that your family and friends will cherish!
S’mores Cookie Cups Recipe FAQs
How do I choose the right chocolate chips for my S’mores Cookie Cups?
Absolutely! For that delightful melty goodness, I recommend using high-quality milk chocolate chips. However, you can also try semi-sweet chocolate chips for a richer flavor, or even dark chocolate for a more indulgent twist. Each option brings a unique taste to your cookie cups!
How should I store my S’mores Cookie Cups?
Once your delicious S’mores Cookie Cups have completely cooled, store them in an airtight container at room temperature. They will stay fresh for up to 3 days. If you prefer, you can extend their freshness by refrigerating them, where they can last for about a week.
Can I freeze S’mores Cookie Cups?
Yes, you can freeze them! Individually wrap each cookie cup in plastic wrap and place them in a freezer-safe bag or container. They can be frozen for up to 3 months. When you’re ready to enjoy, simply reheat from frozen in the microwave for about 15-20 seconds or warm them in a preheated oven at 350°F for 5-7 minutes.
What if my cookie dough is too sticky to scoop?
Very! If your dough feels too sticky or soft, chilling it in the refrigerator for about 10-15 minutes can help firm it up, making it easier to scoop and shape into cups. This way, your S’mores Cookie Cups will hold their shape perfectly when baked.
Can I modify the recipe for dietary restrictions?
Definitely! If you're looking for a gluten-free option, substitute the all-purpose flour with a gluten-free 1:1 baking blend. You can also use dairy-free butter and chocolate chips to make it suitable for those with lactose intolerance. Remember to check for any other allergens, especially in chocolate and graham crackers, to ensure it fits your dietary needs!

S’mores Cookie Cups: The Ultimate Cozy Dessert Delight
Ingredients
Equipment
Method
- Preheat your oven to 350°F (175°C) and grease a mini muffin pan.
- Cream together 1 cup of softened butter, 1 cup of granulated sugar, and 1 cup of brown sugar until light and fluffy.
- Add 2 large eggs one at a time, then mix in 1 teaspoon of vanilla extract.
- In a separate bowl, whisk together 2.5 cups of flour, 1 teaspoon of baking soda, and 0.5 teaspoon of salt.
- Fold the dry ingredients into the wet ingredients until just combined.
- Mix in 1 cup of milk chocolate chips evenly into the dough.
- Place pieces of broken graham cracker into the bottom of each muffin well.
- Fill each muffin well about two-thirds full with the cookie dough.
- Bake for 10 minutes until edges are golden brown.
- Add a halved marshmallow to each cookie cup and place back in the oven.
- Broil for 1-2 minutes until marshmallows are toasted.
- Allow to cool for 5 minutes in the pan before transferring to a wire rack.


Leave a Reply