
As I rummaged through my pantry one evening, a hidden treasure caught my eye: a pack of Korean rice cakes. It took me back to a bustling street in Seoul where the tantalizing scent of Tteokbokki filled the air, igniting my passion for this beloved dish. This easy Tteokbokki recipe brings that vibrant, comforting street food right to your kitchen in just 20 minutes. Not only is it a quick and satisfying meal, but it’s also an exciting way to dip into the world of Korean cuisine. The rich, spicy sauce envelops the chewy rice cakes and tender fish cakes, creating a dish that’s sure to leave you craving more. Are you ready to spice up your dinner routine and impress your loved ones? Let’s dive into the deliciousness!
Why is Tteokbokki a Must-Try?
Easy to Make: Within just 20 minutes, you can whip up this flavorful delight, making it a perfect weeknight dinner.
Chewy, Satisfying Textures: The combination of soft and chewy rice cakes mixed with tender fish cakes provides a delightful mouthfeel you'll adore.
Authentic Korean Flavor: With a rich blend of Gochujang and spices, this dish transports you straight to the streets of Seoul, vibrant and indulgent.
Versatile Customize: Feel free to adjust the chili level or add your favorite vegetables to make it your own!
Crowd-Pleasing Appeal: Tteokbokki is sure to impress family and friends; serve it at gatherings or cozy dinners, and watch it disappear!
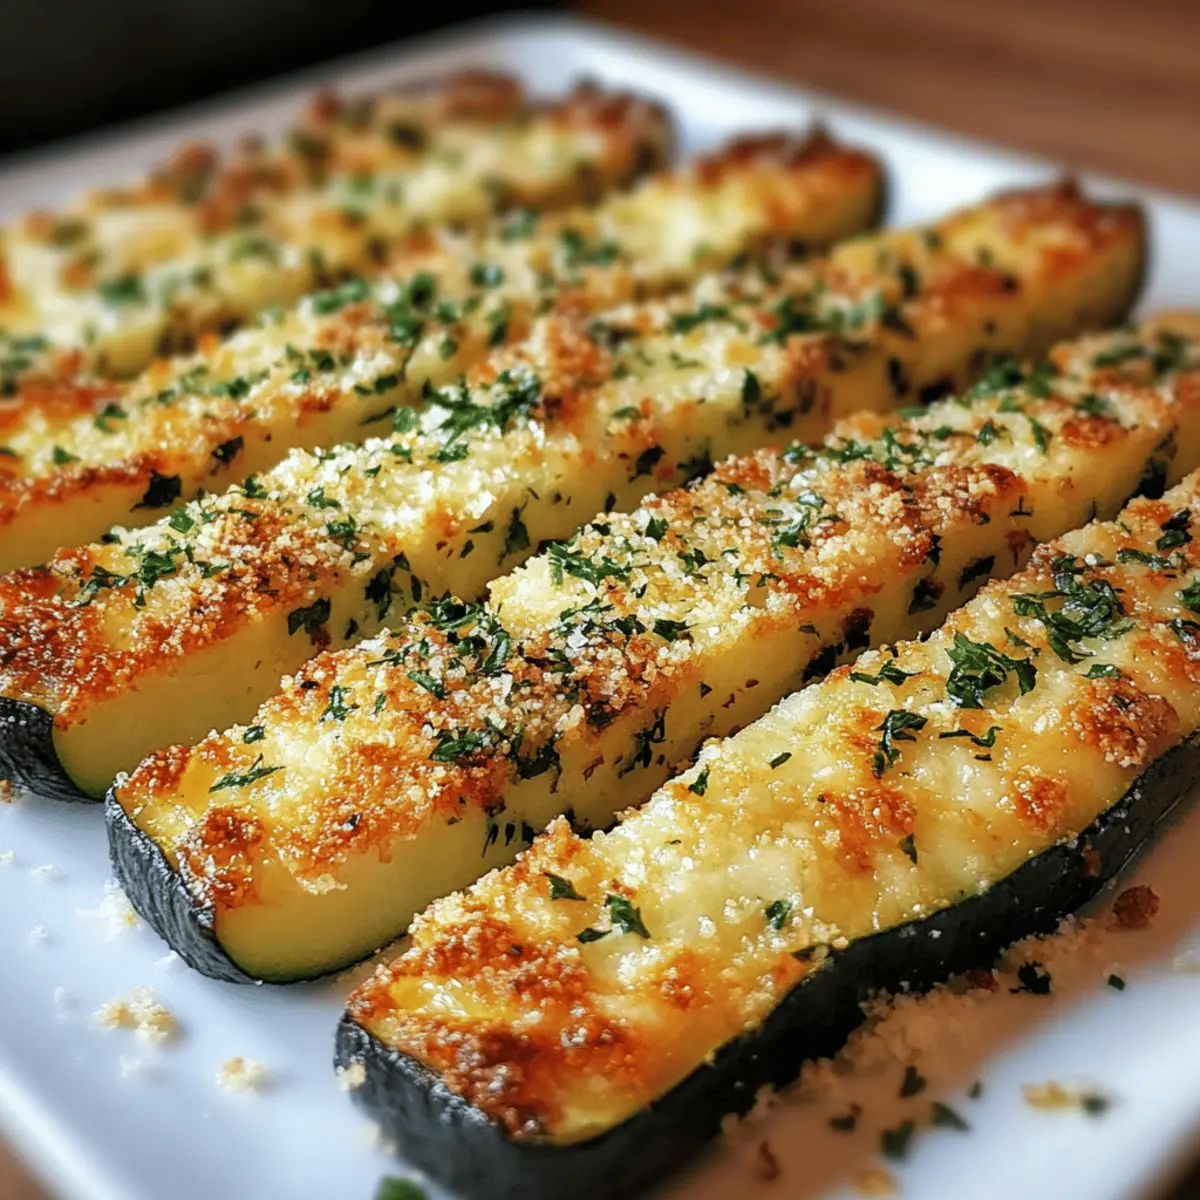
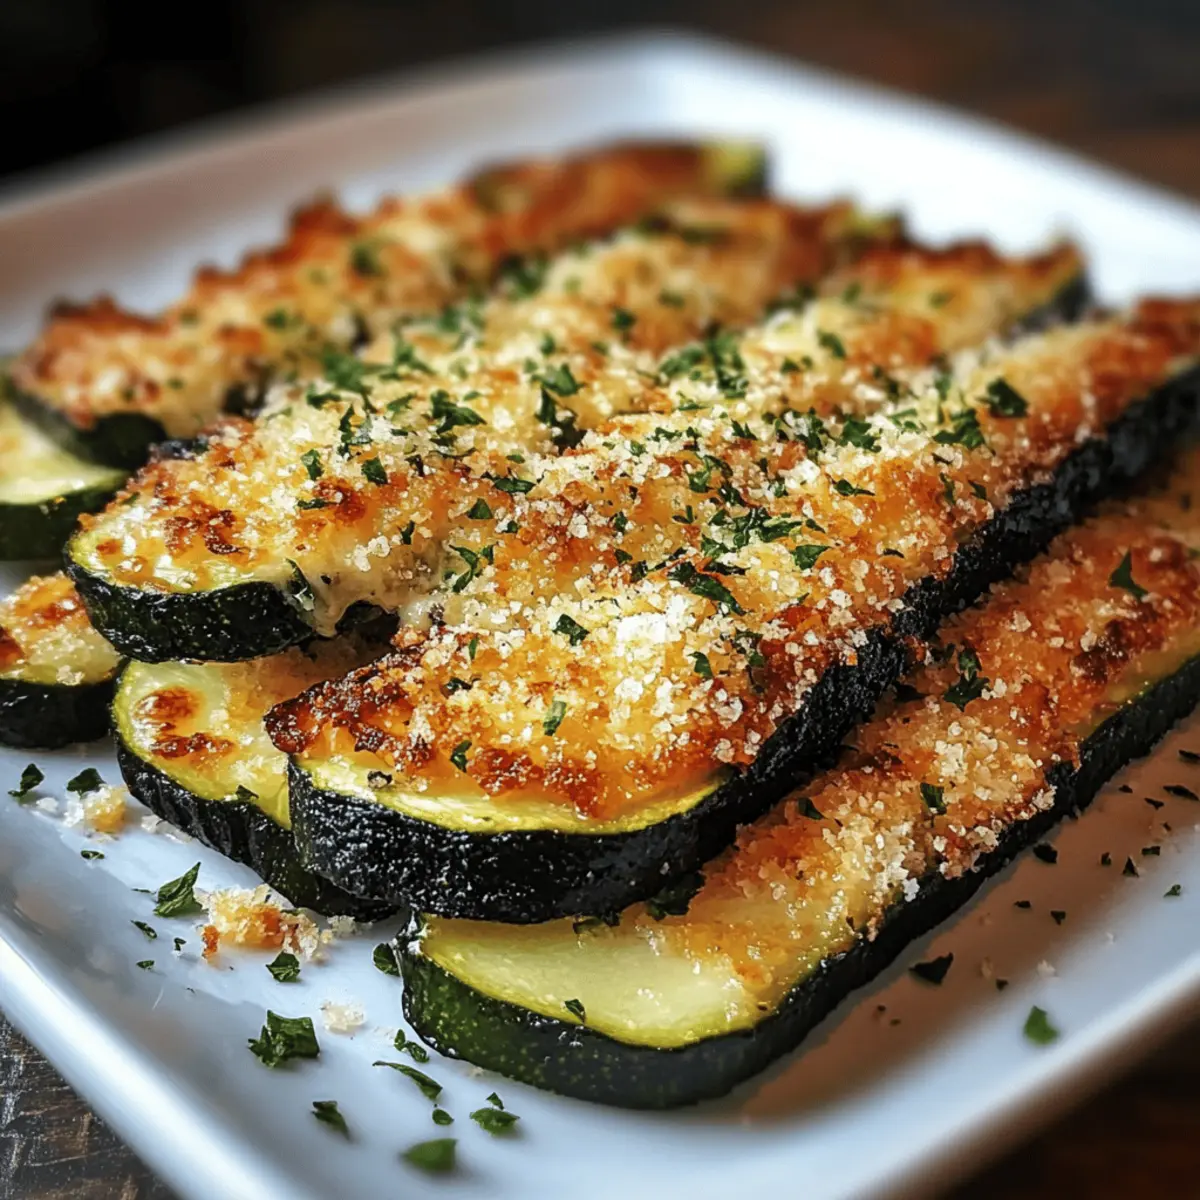
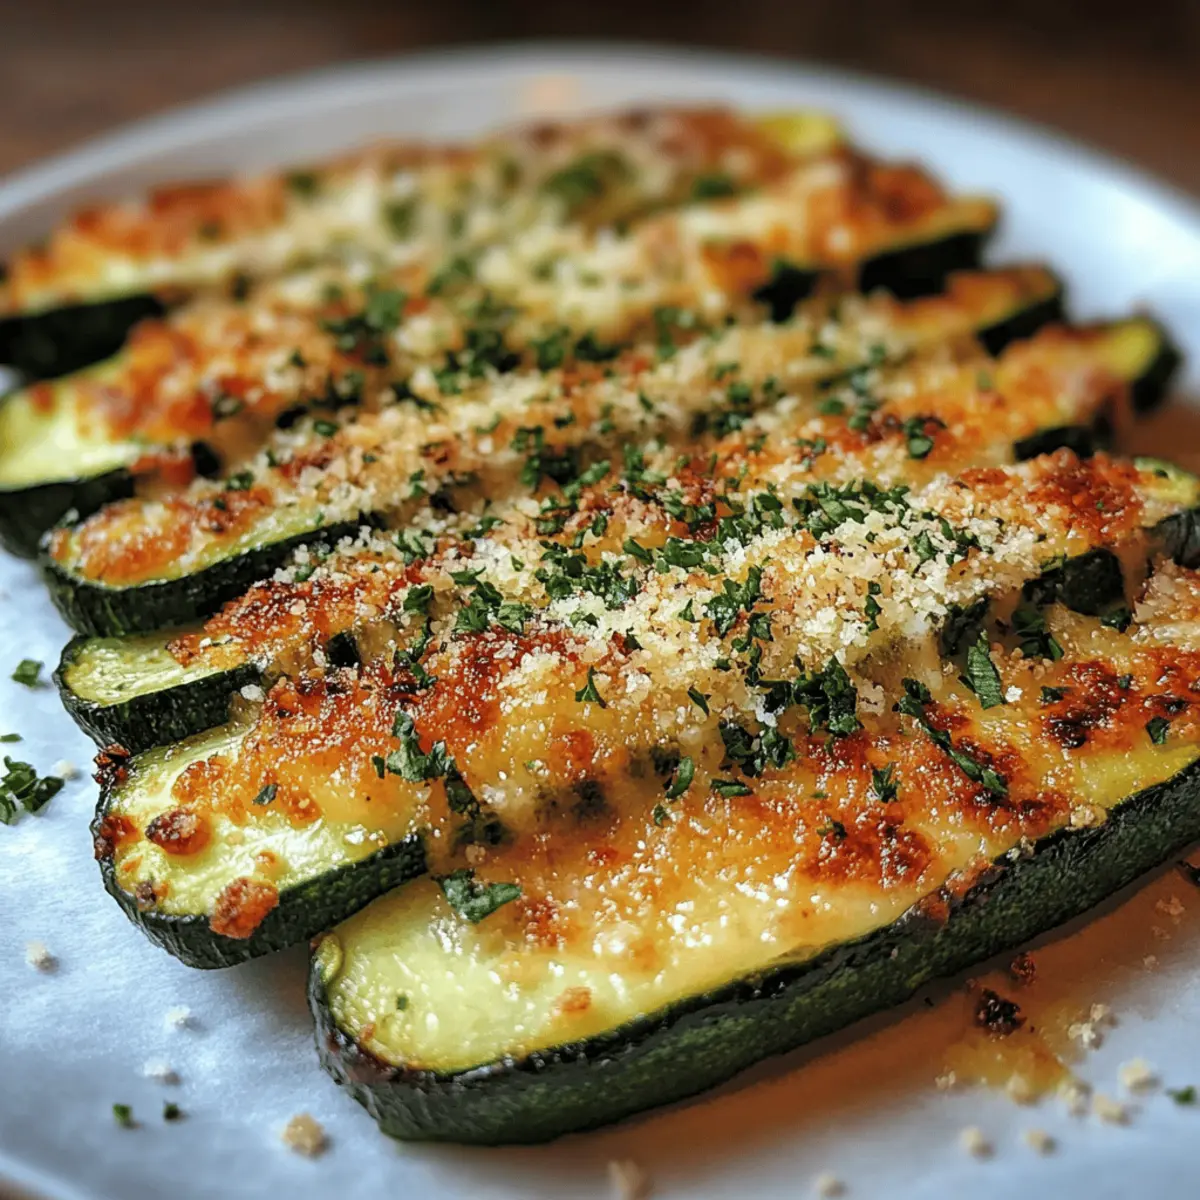
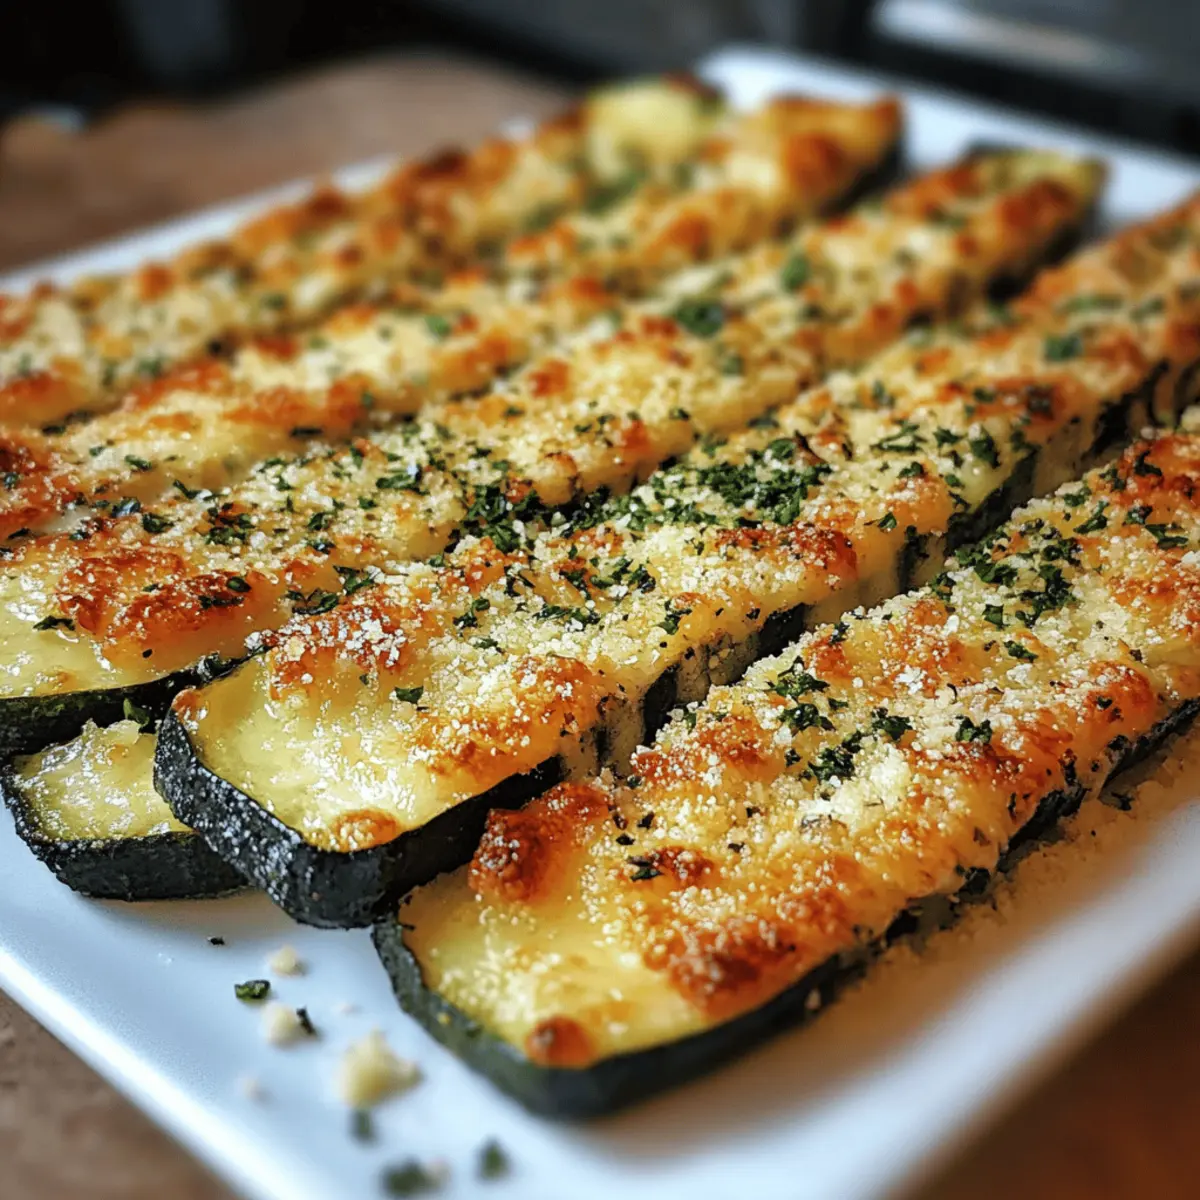
Ready to explore other delicious recipes? Try adding some Crispy Baked Parmesan Zucchini on the side for a delightful combo!
Tteokbokki Ingredients
• Here’s everything you need to make this iconic dish!
For the Sauce
- Soy sauce – enriches the umami flavor in Tteokbokki.
- Sugar – balances the spice; you can reduce for lighter sweetness.
- Gochugaru – adjust the heat to your preference with this Korean chili powder.
- Garlic – adds depth and aromatic goodness to the sauce.
- Honey – provides natural sweetness; feel free to substitute with rice syrup or oligo syrup.
- Gochujang – the star of your Tteokbokki; it brings that authentic Korean kick!
For the Dish
- Anchovy stock, dashi, or unsalted chicken stock – gives a rich, savory base for the Tteokbokki.
- Korean rice cakes – the chewy texture you’ll fall in love with; don’t skip this!
- Korean fish cakes – adds protein and another layer of flavor; cut into bite-sized pieces for easy eating.
- Green onion – optional for a pop of freshness on top.
With these ingredients in hand, you're just steps away from creating a Tteokbokki everyone will crave!
Step‑by‑Step Instructions for Tteokbokki
Step 1: Prepare the Sauce
In a small bowl, combine the soy sauce, sugar, Gochugaru, minced garlic, honey, and Gochujang to create your Tteokbokki sauce. Mix until smooth and fully blended, ensuring the ingredients are well combined. Set it aside for now; this rich and spicy sauce will transform your dish into a flavor bomb later!
Step 2: Defrost the Rice Cakes
If your Korean rice cakes are frozen, place them in a bowl and soak them in warm water for about 10 minutes. You want them to become soft and pliable for cooking. This step is essential for achieving that delightful chewy texture once they’re added to the sauce.
Step 3: Heat the Stock
In a large pan, pour in 3 cups of your choice of anchovy stock, dashi, or unsalted chicken stock. Set the heat to medium and bring the liquid to a gentle boil. You should start to see steam rising and small bubbles forming; this indicates that your base is ready for the rice cakes!
Step 4: Combine Rice Cakes and Sauce
Once the stock is boiling, drain the soaked rice cakes and add them to the pan. Immediately pour in the prepared Tteokbokki sauce, stirring gently to coat the rice cakes evenly. Keep the heat at medium and allow everything to simmer together for about 10 minutes, stirring occasionally until the sauce thickens and glistens.
Step 5: Cook the Fish Cakes
Add the defrosted fish cakes to the pan and continue to cook for an additional 2 minutes. Stir the mixture lightly; you'll notice the fish cakes heating through and the flavors melding beautifully with the sauce. Keep an eye on the consistency, looking for a nice, thick coating on all the ingredients.
Step 6: Serve and Garnish
Once everything is well combined and cooked, remove the Tteokbokki from the heat. If desired, slice some green onions for garnish and sprinkle them over the dish for a fresh touch. Serve immediately in bowls to enjoy this amazing, street-style Tteokbokki!
What to Serve with Tteokbokki?
Pairing delicious sides with your Tteokbokki creates a memorable feast that tantalizes the senses.
-
Crispy Baked Parmesan Zucchini: The crunch and cheesy flavor harmonize beautifully with the chewy texture of the rice cakes and spicy sauce. This side adds a refreshing veggie component to your meal.
-
Korean Fried Chicken: Juicy and perfectly crispy, this savory delight balances the heat of Tteokbokki while satisfying your craving for comfort food. The combination guarantees a banquet of flavor in each bite.
-
Pickled Radish: This tangy and crispy side cut through the richness of the Tteokbokki, refreshing your palate and enhancing your dining experience. It’s a vibrant addition that brightens up the plate!
-
Seaweed Salad: Light and refreshing, this salad introduces a unique umami flavor that complements the spiciness of Tteokbokki. The textures contrast elegantly, making every bite delightful.
-
Kimchi: The fermented heat and tanginess of kimchi pair perfectly with Tteokbokki, adding depth and tradition to your meal. It’s a classic Korean side that never disappoints!
-
Rice: Steamed short-grain rice serves as a blank canvas to absorb the savory sauce, providing balance and heartiness to your dinner.
-
Soda or Sweet Tea: Sipping on a cold soda or sweet tea helps to cool down the palate, contrasting the spicy deliciousness of your Tteokbokki. Refreshing and delightful, it captures the essence of a fulfilling meal.
-
Mochi Dessert: End your meal on a sweet note with chewy mochi that’s both fun to eat and deliciously sweet. Perfect for indulging after your savory feast!
Make Ahead Options
These Tteokbokki are perfect for busy home cooks looking to save time during the week! You can prepare the Tteokbokki sauce and soak the rice cakes up to 24 hours in advance; simply store them separately in the refrigerator. The sauce keeps its rich flavor, while soaking the rice cakes makes them ready to cook. To finish, just heat the stock, add the soaked rice cakes along with the sauce, and cook for about 10 minutes before adding the fish cakes for another 2 minutes. This way, you can enjoy a delicious, homemade meal without the last-minute rush, making dinner a breeze!
How to Store and Freeze Tteokbokki
Fridge: Store leftover Tteokbokki in an airtight container in the refrigerator for up to 3 days. Be sure to cover it well to retain moisture and flavor.
Freezer: If you want to freeze Tteokbokki, place it in a freezer-safe container after it has cooled completely. It can last for up to 2 months in the freezer.
Reheating: To reheat, thaw in the refrigerator overnight if frozen. Heat on the stovetop over low-medium heat, adding a splash of water or stock to restore the sauce's consistency.
Texture Note: Keep in mind that once frozen, the texture of rice cakes may become slightly softer, but the delicious Tteokbokki flavors will still shine through!
Baked Parmesan Zucchini Variations
Feel free to play around with these delightful twists that will make your dish uniquely yours!
-
Cheesy Twist: Add shredded mozzarella for a gooey, melty layer, enhancing the cheesy goodness of your zucchini bake. Pair it with a rich marinara sauce for dipping.
-
Herb-Infused: Include fresh herbs like basil or thyme into the breadcrumb mixture for an aromatic experience; these herbs bring a garden-fresh taste that pairs beautifully with the cheesy texture.
-
Spicy Kick: Sprinkle in some red pepper flakes or a dash of cayenne pepper before baking to turn up the heat, creating a zesty contrast that will surprise your taste buds beautifully.
-
Veggie Boost: Mix in diced bell peppers or spinach to the zucchini before baking for added nutrition and vibrant color. These vegetables not only amp up the flavor, but they also make the dish more wholesome.
-
Gluten-Free Option: Substitute regular breadcrumbs with almond flour or gluten-free breadcrumbs for a lighter, gluten-free version that still delivers on crunch and flavor.
-
Mediterranean Flair: Incorporate feta or olives for a Mediterranean touch that elevates the dish to new flavors and sensations. Their briny richness works perfectly alongside the cheesy zucchini!
-
Creamy Addition: Drizzle with a little heavy cream or sour cream before baking for a luscious, creamy texture that makes every bite feel indulgent and satisfying.
-
Zucchini Noodle Surprise: Use spiralized zucchini instead of rounds for a fun twist that adds an extra layer of texture. It’s a great way to make it lighter while still being incredibly delicious!
Enjoy experimenting with these variations, and don’t forget to pair your Baked Parmesan Zucchini with Tteokbokki for a flavorful meal packed with delights!
Expert Tips for Tteokbokki
• Perfect Texture: Soak rice cakes: Ensuring your Korean rice cakes are well-soaked in warm water is key to achieving that chewy texture without them becoming mushy.
• Customize Heat: Adjust spice level: Start with less Gochugaru and Gochujang if you're unsure about spice; you can always add more to suit your taste buds!
• Avoid Clumping: Stir consistently: To prevent the rice cakes from sticking together, keep stirring gently during cooking, especially as the sauce thickens.
• Extra Flavor: Enhance with veggies: Feel free to add vegetables like cabbage or carrots during the last few minutes of cooking to elevate the dish’s flavor and nutrition.
• Serving Suggestion: Pair with side dishes: Tteokbokki is delicious on its own, but it shines even more when paired with other Korean specialties—consider serving alongside crispy Baked Parmesan Zucchini!
Tteokbokki Recipe FAQs
How do I select the right Korean rice cakes?
Absolutely! When choosing Korean rice cakes, look for ones that are firm and pliable. They should be free from dark spots or odd discolorations. If you can find fresh rice cakes, those are usually the best option. Frozen rice cakes are also wonderful, just make sure to soak them well before cooking for that perfect chewy texture.
How should I store leftover Tteokbokki?
Very! To store leftover Tteokbokki, place it in an airtight container, ensuring it's well sealed. It will stay fresh in your fridge for up to 3 days. To keep it tasty, be cautious not to leave it uncovered, as that can dry it out or alter its flavors.
Can Tteokbokki be frozen?
Absolutely! To freeze Tteokbokki, allow it to cool completely first. Then, transfer it into a freezer-safe container. It can be stored for up to 2 months in the freezer. For reheating, simply thaw it overnight in the fridge and heat it gently on the stovetop, adding a splash of water or stock to help revive the sauce's consistency.
What if my Tteokbokki sauce is too spicy?
If your sauce turns out to be a bit too fiery, don’t fret! You can balance it out by adding a bit more sugar or honey into the sauce while it’s cooking. Additionally, a splash of coconut milk or some diced vegetables might help to mellow the flavors without losing that delicious Tteokbokki essence.
Are there any dietary considerations for Tteokbokki?
Indeed! If you’re serving Tteokbokki to someone with food allergies, be sure to check the labels on your condiments. Both Gochujang and soy sauce can contain gluten and other allergens. For gluten-free options, look for tamari or gluten-free soy sauce and ensure your rice cakes are gluten-free as well. Additionally, if you’re cooking for vegetarian or vegan friends, you can substitute fish cakes with tofu or more vegetables for a delightful twist!
How long does it take to cook Tteokbokki?
Cooking Tteokbokki is quite quick! The total time is about 20 minutes, with 5 minutes for prep and 15 minutes of cooking. This makes it an excellent choice for a speedy weeknight meal. Just remember to keep an eye on it as you cook, stirring occasionally to ensure even cooking and sauce distribution.
Enjoy your culinary journey with Tteokbokki, and happy cooking!
Crispy Baked Parmesan Zucchini That You'll Crave Again!
Ingredients
Equipment
Method
- Preheat the oven to 425°F (220°C).
- In a mixing bowl, combine Parmesan cheese, breadcrumbs, garlic powder, salt, and pepper.
- Dip each zucchini stick into olive oil, then coat with the breadcrumb mixture.
- Arrange the coated zucchini sticks on a baking sheet in a single layer.
- Bake in the preheated oven for 25 minutes or until golden brown.
- Serve hot and enjoy your crispy Baked Parmesan Zucchini!


Leave a Reply