
As I stood in my kitchen, the aroma of baking bread wafted through the air, igniting a wave of nostalgia. There’s something truly special about homemade bread, especially when it comes in the form of my Yogurt Bread Gluten-Free Zero Carb Option. Not only is this recipe a lifesaver for those on a gluten-free or low-carb journey, but it's also a delightful way to embrace wholesome ingredients that nourish the body. With just a handful of easy-to-find items, you can whip up this satisfying, versatile loaf that pairs perfectly with everything from soups to sandwiches. Plus, it’s a breeze to make—ideal for busy weeknights—or even a cozy weekend brunch. Curious to learn how you can transform yogurt into a scrumptious loaf that your whole family will love? Let’s get baking!
Why Is Yogurt Bread a Game Changer?
Healthy and Guilt-Free: This Yogurt Bread Gluten-Free Zero Carb Option allows you to indulge without the carbs, making it perfect for any dietary lifestyle.
Flavorful Options: Customize the taste with herbs, garlic, or cheese to fit your cravings.
Simplicity and Speed: With just 20 minutes of prep, this recipe fits seamlessly into your busy life, allowing delicious home-baked bread in no time!
Versatile Use: Enjoy it as a base for your favorite sandwiches, or toast it up for a fulfilling breakfast with a spread of butter or avocado.
Kid-Friendly Appeal: This bread is not only nutritious but also irresistible to kids, making it a fantastic way to introduce healthier options at home.
For other tasty gluten-free recipes, be sure to explore my collection!
Yogurt Bread Gluten-Free Zero Carb Option Ingredients
• Discover all that makes this Yogurt Bread Gluten-Free Zero Carb Option a delight!
For the Batter
• Full-fat Greek yogurt – Provides moisture and a rich flavor while keeping the bread gluten-free.
• Large eggs – Essential for binding the ingredients and providing a fluffy texture.
• Olive oil or melted butter – Adds moisture and a lovely flavor; use it to grease the pan as well.
• Fine almond flour – The star of the show for a low-carb base; ensures a soft crumb.
• Coconut flour – Absorbs moisture and enhances the texture; a little goes a long way.
• Ground psyllium husk – Acts as a thickener, giving the bread the perfect structure without carbs.
• Gluten-free baking powder – Essential for leavening, helping the bread to rise beautifully.
• Baking soda – Works with the acidic yogurt to create a light, airy loaf.
• Fine sea salt – Balances the flavors and enhances the overall taste.
• Sweetener of choice – Optional, but adds a hint of sweetness if you desire.
For Adjusting Consistency
• Water or unsweetened almond milk – Added as needed to achieve the ideal batter consistency.
Optional Flavor Enhancers
• Apple cider vinegar or lemon juice – Adds a slight tang and improves the bread’s texture.
• Garlic powder + dried herbs – Great for adding flavor; tailor it to your taste preferences!
• Grated Parmesan cheese – A delicious way to elevate the bread’s flavor profile.
• Sesame seeds, sunflower seeds, or pumpkin seeds – Perfect for a nutritious, crunchy topping that adds texture.
Step‑by‑Step Instructions for Yogurt Bread Gluten-Free Zero Carb Option
Step 1: Prepare the pan
Start by preheating your oven to 350°F (175°C). While the oven heats up, take an 8.5 x 4.5 in or 9 x 5 in loaf pan and grease it generously with olive oil or melted butter. For easy loaf removal later, consider lining the pan with parchment paper, allowing for a smooth transition from pan to plate.
Step 2: Mix the wet ingredients
In a medium mixing bowl, whisk together 1 cup of full-fat Greek yogurt, 4 large eggs (at room temperature), and 2 tablespoons of olive oil until the mixture is smooth and well combined. If you’re looking to add a bit of acidity, stir in 1 teaspoon of apple cider vinegar or lemon juice at this stage to enhance the flavor profile of the Yogurt Bread Gluten-Free Zero Carb Option.
Step 3: Combine the dry ingredients
In a large mixing bowl, combine 1 cup of fine almond flour, ⅓ cup of coconut flour, and 3 tablespoons of ground psyllium husk. Add in 2 teaspoons of gluten-free baking powder, 1.5 teaspoons of baking soda, 1.5 teaspoons of fine sea salt, and any sweetener if desired. Mix these dry ingredients thoroughly so that everything blends uniformly, creating a solid foundation for your bread.
Step 4: Bring the batter together
Carefully pour the wet mixture into the bowl with the dry ingredients, using a spatula to fold them together until just combined. Allow the batter to rest for 30-60 seconds, as this will help the psyllium husk absorb moisture, resulting in a thicker consistency that's perfect for a zero-carb loaf.
Step 5: Adjust for zero-carb option
For those using defatted almond flour, the batter may be too thick; add 2-4 tablespoons of water or unsweetened almond milk gradually. Mix until the batter is thick yet spreadable. If it still feels too stiff, you can incorporate an extra egg to achieve the desired consistency for your Yogurt Bread Gluten-Free Zero Carb Option.
Step 6: Add flavorings
Now is the time to personalize your bread! Gently fold in any additional flavorings you desire, like garlic powder, dried herbs, or grated Parmesan cheese. Take care not to overmix, as you want to maintain the airiness of the batter, ensuring a delightful texture in your gluten-free bread.
Step 7: Fill the pan
Transfer the batter into the prepared loaf pan, using a spatula to create a smooth, even surface. Shape the batter into the corners of the pan, mounding it slightly in the center to promote even rising. If you’re feeling adventurous, sprinkle the top with seeds or cheese for an attractive and flavorful finish.
Step 8: Bake the bread
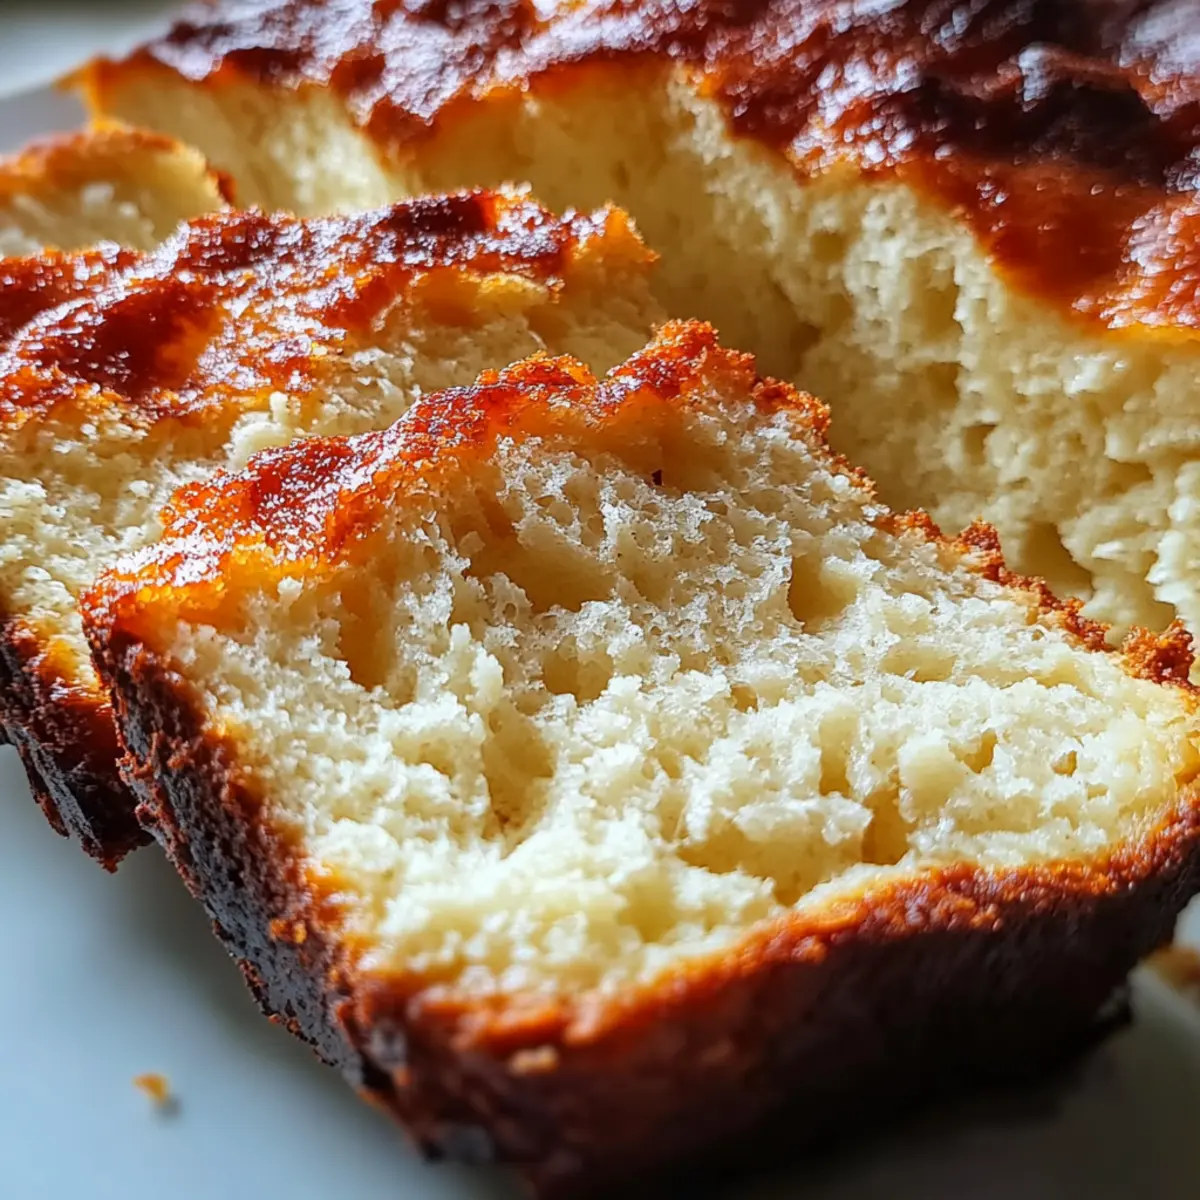
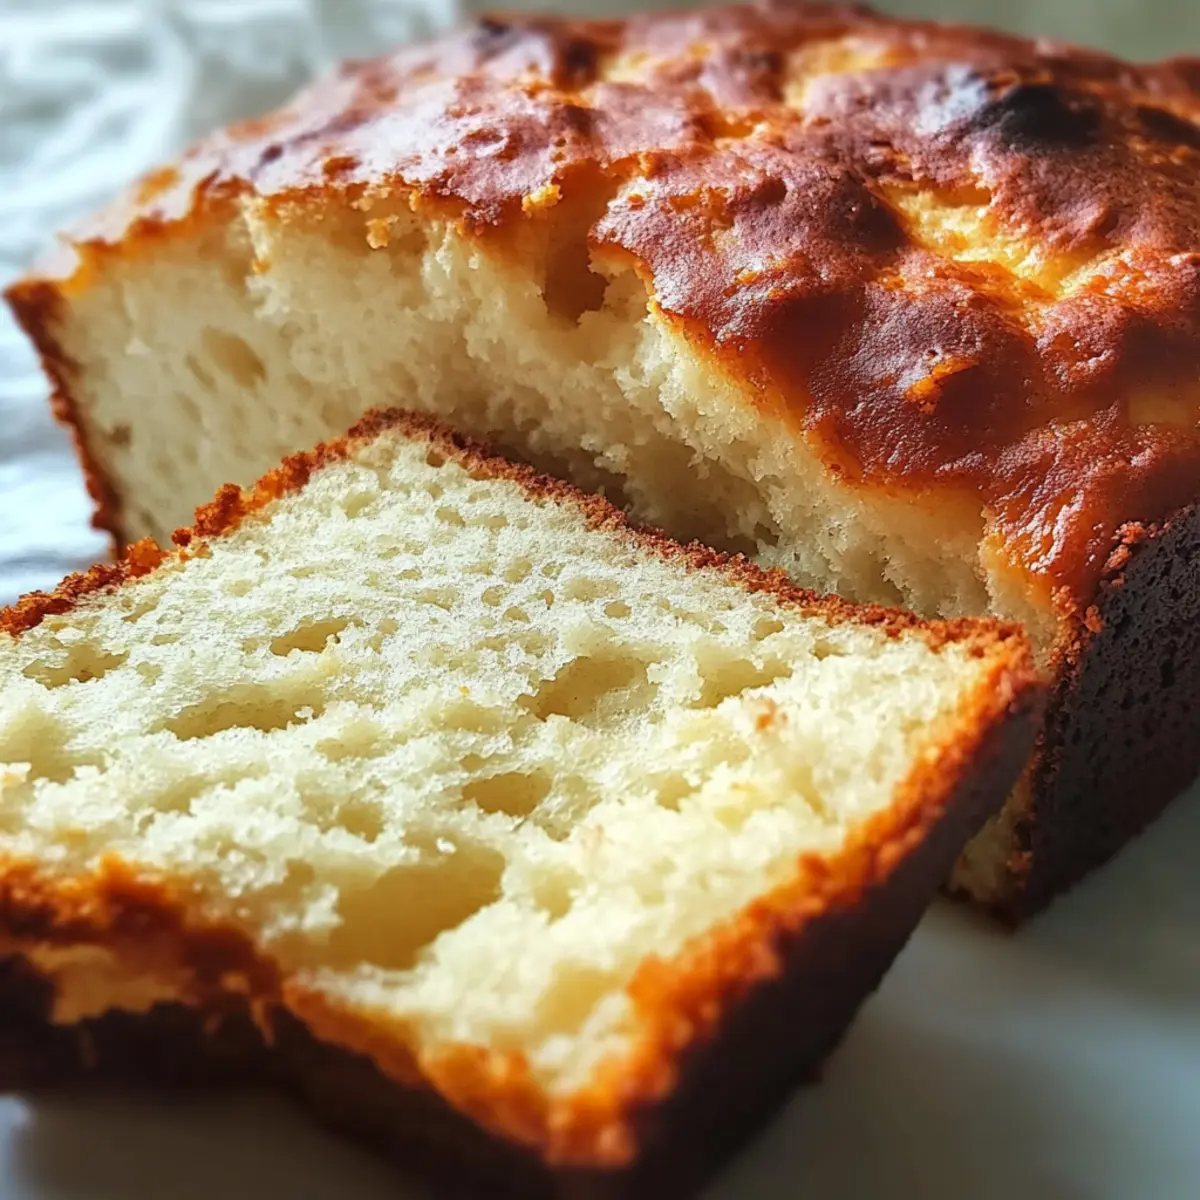
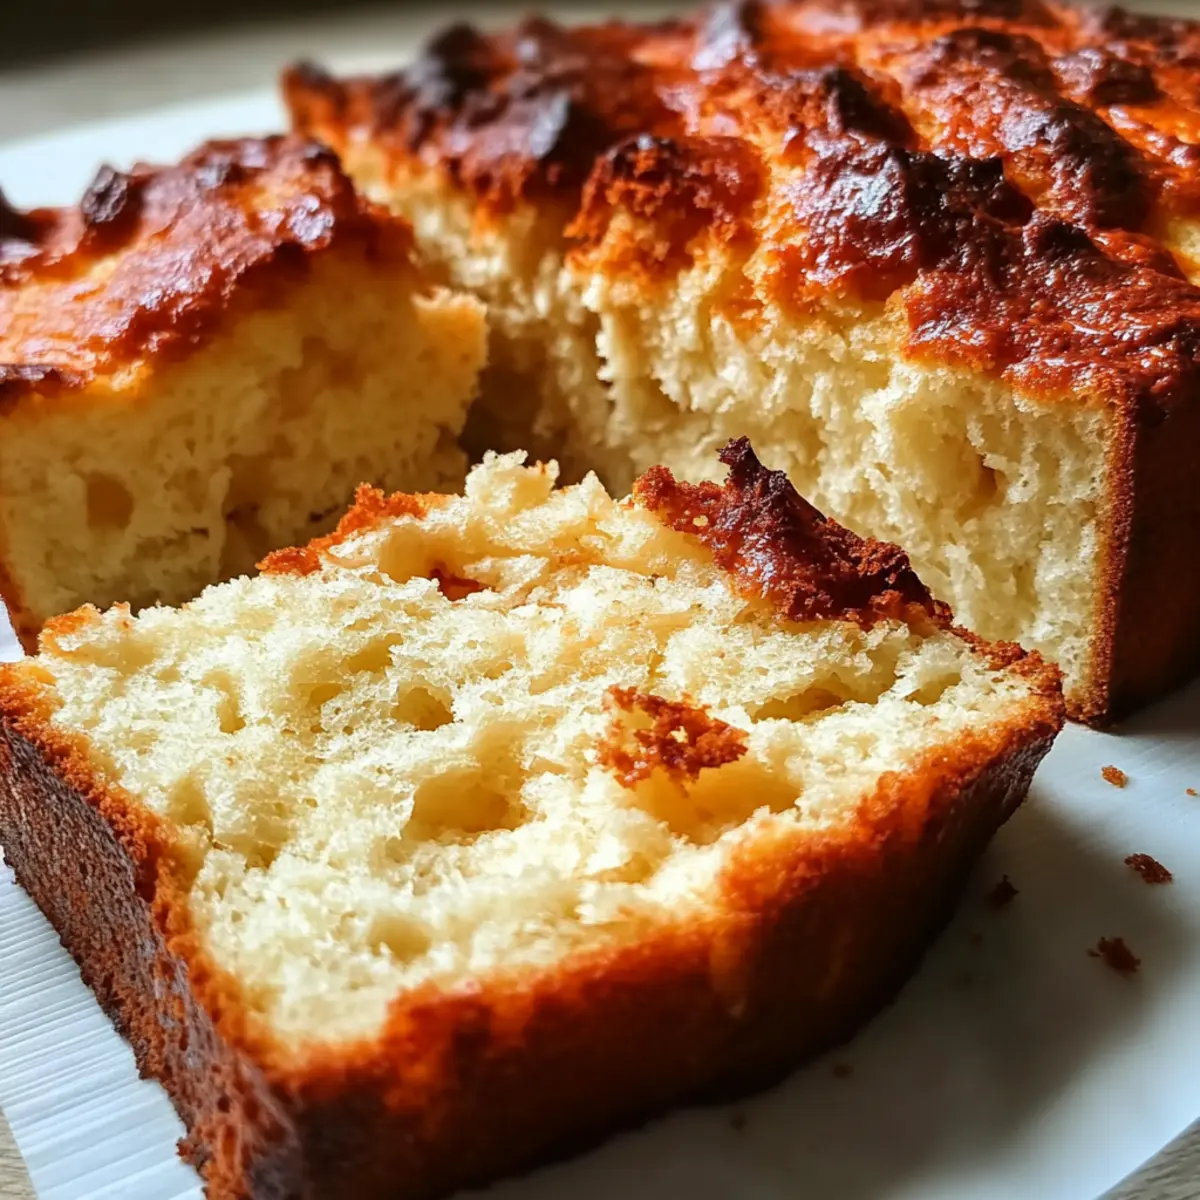
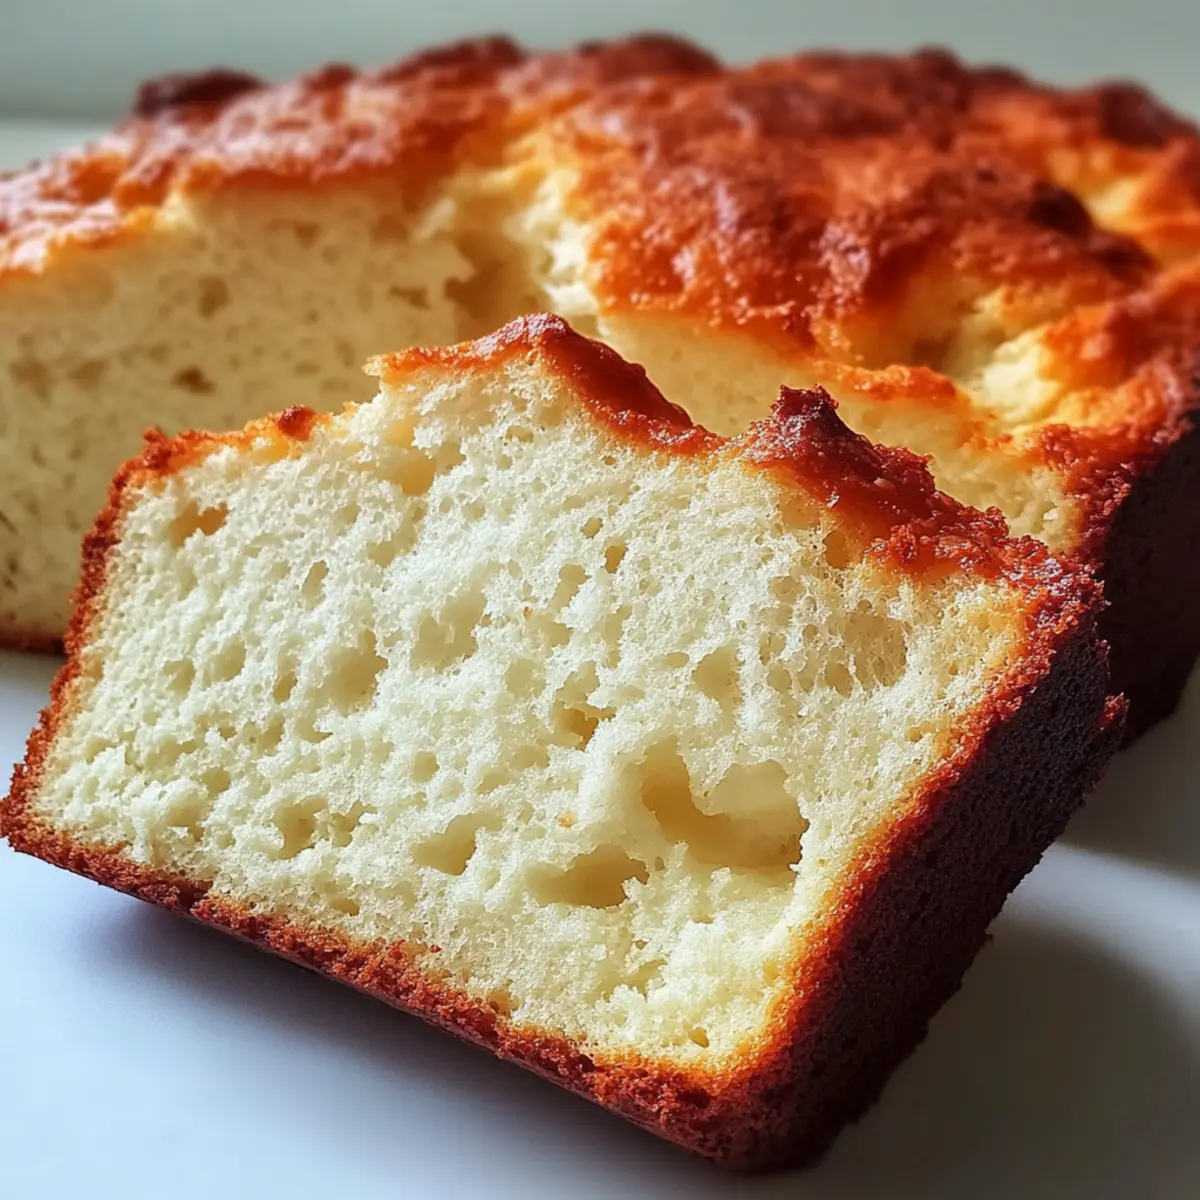
Place the loaf pan on the middle rack of your preheated oven and let it bake for 40-50 minutes. Start checking the bread around 35 minutes; it should be golden brown on top and spring back when gently pressed. This visual cue indicates that your Yogurt Bread Gluten-Free Zero Carb Option is baking to perfection.
Step 9: Cool the loaf properly
Once baked, remove the pan from the oven and let it rest for 15-20 minutes on a wire rack. Carefully lift the bread out using the parchment paper and allow it to cool completely for 1-2 hours. This cooling period is crucial for achieving a firm, sliceable texture.
Step 10: Slice and serve
Once the loaf is completely cool, grab a sharp serrated knife and slice the bread to your preferred thickness. Whether you opt for thick slices for sandwiches or thinner pieces for delightful toast, this Yogurt Bread Gluten-Free Zero Carb Option is simply scrumptious topped with butter or avocado.
Step 11: Storage
After a good cooling period, store the slices in an airtight container in your fridge for 5-6 days. Alternatively, for longer freshness, freeze the bread slices for 2-3 months, making it easy to reheat individual pieces straight from the freezer in a toaster or oven.
Make Ahead Options
These Yogurt Bread Gluten-Free Zero Carb Option is perfect for meal prep aficionados looking to streamline busy weeknights! You can prepare the batter up to 24 hours in advance; simply mix your wet and dry ingredients, then store them separately in airtight containers in the fridge to keep everything fresh. For the best quality, combine them together and let the mixture rest 30-60 seconds before baking. You can also bake the bread ahead of time and store sliced pieces in an airtight container in the fridge for 5-6 days or freeze them for up to 3 months; just reheat in a toaster for delicious, warm bread with minimal effort!
Expert Tips for Yogurt Bread
• Choose Quality Yogurt: Use full-fat Greek yogurt for the best flavor and moisture. Low-fat versions may make the bread dry.
• Room Temperature Eggs: Ensure your eggs are at room temperature to help create a fluffier texture in the Yogurt Bread Gluten-Free Zero Carb Option.
• Measure Accurately: Use a kitchen scale for the almond and coconut flour to maintain consistency and achieve the perfect batter.
• Avoid Overmixing: Gently fold your ingredients together to keep the bread light and airy. Overmixing can lead to a dense loaf.
• Cooling Time Matters: Always allow the bread to cool completely before slicing; it helps set the structure and makes for neater slices.
Yogurt Bread Gluten-Free Zero Carb Option Variations
Feel free to customize this delightful bread, exploring flavors and textures that excite your palate!
-
Dairy-Free: Substitute Greek yogurt with coconut yogurt for a creamy, plant-based option.
Add the apple cider vinegar or lemon juice to balance the flavors. -
Herb-Infused: Incorporate fresh herbs like rosemary or thyme to elevate the flavor profile.
This simple addition adds a fresh, aromatic touch that keeps every slice interesting! -
Cheesy Delight: Mix in a half cup of your favorite shredded cheese, such as cheddar or mozzarella.
The melty goodness creates a savory, satisfying loaf that’s absolutely irresistible. -
Nutty Crunch: Add a handful of chopped walnuts or pecans for added texture and flavor.
The crunch complements the soft bread, making each bite more enjoyable! -
Spicy Kick: Mix in some crushed red pepper flakes or jalapeño for a little heat.
This spicy variation will wake up your taste buds and add a fun twist to your meals! -
Sweet Treat: Consider adding a tablespoon of cinnamon and a handful of dried fruit like cranberries.
This transforms your loaf into a sweet snack that pairs beautifully with morning coffee! -
Low-Carb Seed Bread: Top with various seeds such as chia, flax, and sunflower for a nutritious crunch.
This not only adds flavor but also boosts the healthy omega-3 fatty acids in each slice! -
Avocado Cream Cheese Spread: Serve with a blend of cream cheese and smashed avocado for a creamy topping.
This delightful combination enhances the richness of the yogurt bread with a refreshing twist!
For more delightful gluten-free ideas, don't forget to check out my favorite low-carb snacks or explore other creative bread variations!
How to Store and Freeze Yogurt Bread
Fridge: Store slices in an airtight container, where they'll stay fresh for up to 5-6 days. This keeps your Yogurt Bread Gluten-Free Zero Carb Option moist and delicious.
Freezer: For longer storage, freeze the bread slices in a single layer for 2-3 months. Wrap them tightly in plastic wrap or foil, then place them in a freezer bag for added protection.
Reheating: Reheat frozen slices directly in a toaster or oven. For the toaster, aim for a few minutes until warmed through and slightly crispy—a treat on cold mornings!
What to Serve with Yogurt Bread Gluten-Free Zero Carb Option
There's nothing quite like a warm slice of freshly baked bread to complete a cozy meal at home.
- Creamy Avocado Toast: Spread ripe avocado on your toasted slices for a nutritious and satisfying breakfast or snack. The creaminess beautifully contrasts the bread's texture.
- Savory Spinach and Cheese Omelet: Pair slices with a fluffy omelet bursting with flavor and feel good knowing you're fueling your body with wholesome ingredients.
- Hearty Chicken Salad: This bread makes a perfect accompaniment to a zesty chicken salad, bringing a delightful crunch and lightness to the dish that balances the richness.
- Tomato Basil Soup: A bowl of this rich soup with a side of yogurt bread creates a delightful lunch scenario that warms the heart and cocoons the soul.
- Mixed Green Salad: Fresh, crisp greens with citrusy vinaigrette provide a refreshing contrast, balancing the yogurt bread's satisfying richness.
- Homemade Hummus: Serve thick slices with your favorite hummus; the creamy dip enhances the bread's flavor and adds a healthy punch rich in protein.
- Lemonade or Iced Tea: Sip on a refreshing drink alongside your meal, as these light beverages elevate your dining experience with their vibrant flavors.
- Decadent Chocolate Mousse: For dessert, indulge in a rich chocolate mousse; the yogurt bread serves as a sophisticated base for this sweet finish.
Yogurt Bread Gluten-Free Zero Carb Option Recipe FAQs
What type of yogurt should I use?
Absolutely! For the best results, I recommend using full-fat Greek yogurt. It adds moisture and richness to your Yogurt Bread Gluten-Free Zero Carb Option. Avoid low-fat or fat-free yogurts as they can lead to a dryer texture.
How should I store the bread after making it?
Once your yogurt bread has cooled completely, store the slices in an airtight container in the fridge. It will remain fresh for about 5-6 days. Just be sure to keep it sealed tight to maintain its moisture.
Can I freeze this bread for later use?
Very! To freeze your Yogurt Bread Gluten-Free Zero Carb Option, slice it first and wrap each slice tightly in plastic wrap or foil. Then, place the wrapped slices in a freezer bag. It can be frozen for up to 2-3 months. When you're ready to enjoy, simply reheat the slices directly from the freezer in a toaster or oven.
What should I do if my bread is too dense or doesn’t rise?
No problem! If your bread turns out dense, a few things could help. First, ensure your baking powder and baking soda are fresh, as expired leavening agents can impact rising. Secondly, avoid overmixing the batter—mix until just combined. The batter should be thick yet spreadable; if it seems too stiff, try adding a bit more water or almond milk until you reach the right consistency.
Can my pets have yogurt bread?
While Greek yogurt can be safe for dogs in moderation, it's best to avoid sharing the bread as the almond and coconut flours may not sit well with them. Always consult your vet about introducing new foods into their diet. Plus, this bread includes ingredients like salt and eggs that aren't suitable for pets in large quantities.
Yogurt Bread Gluten-Free Zero Carb Option for Guilt-Free Indulgence
Ingredients
Equipment
Method
- Preheat the oven to 350°F (175°C) and grease the loaf pan with olive oil or melted butter.
- In a medium bowl, whisk together the yogurt, eggs, and olive oil until smooth. Optionally, add vinegar or lemon juice.
- In a large bowl, combine almond flour, coconut flour, psyllium husk, baking powder, baking soda, salt, and sweetener. Mix well.
- Pour the wet mixture into the dry ingredients and gently fold together. Let the batter rest for 30-60 seconds.
- If the batter is too thick, add water or almond milk gradually until it reaches a thick yet spreadable consistency.
- Fold in any additional flavorings like garlic powder, herbs, or cheese without overmixing.
- Transfer the batter to the loaf pan, smoothing the top and mounding slightly in the center.
- Bake for 40-50 minutes, checking at 35 minutes until golden brown and springy.
- Remove from the oven and let cool on a wire rack for 15-20 minutes. Lift out using parchment paper.
- Allow the bread to cool completely for 1-2 hours before slicing to ensure a firm texture.
- Slice with a serrated knife to your preferred thickness and enjoy with toppings like butter or avocado.
- Store slices in an airtight container in the fridge for 5-6 days, or freeze for 2-3 months.


Leave a Reply