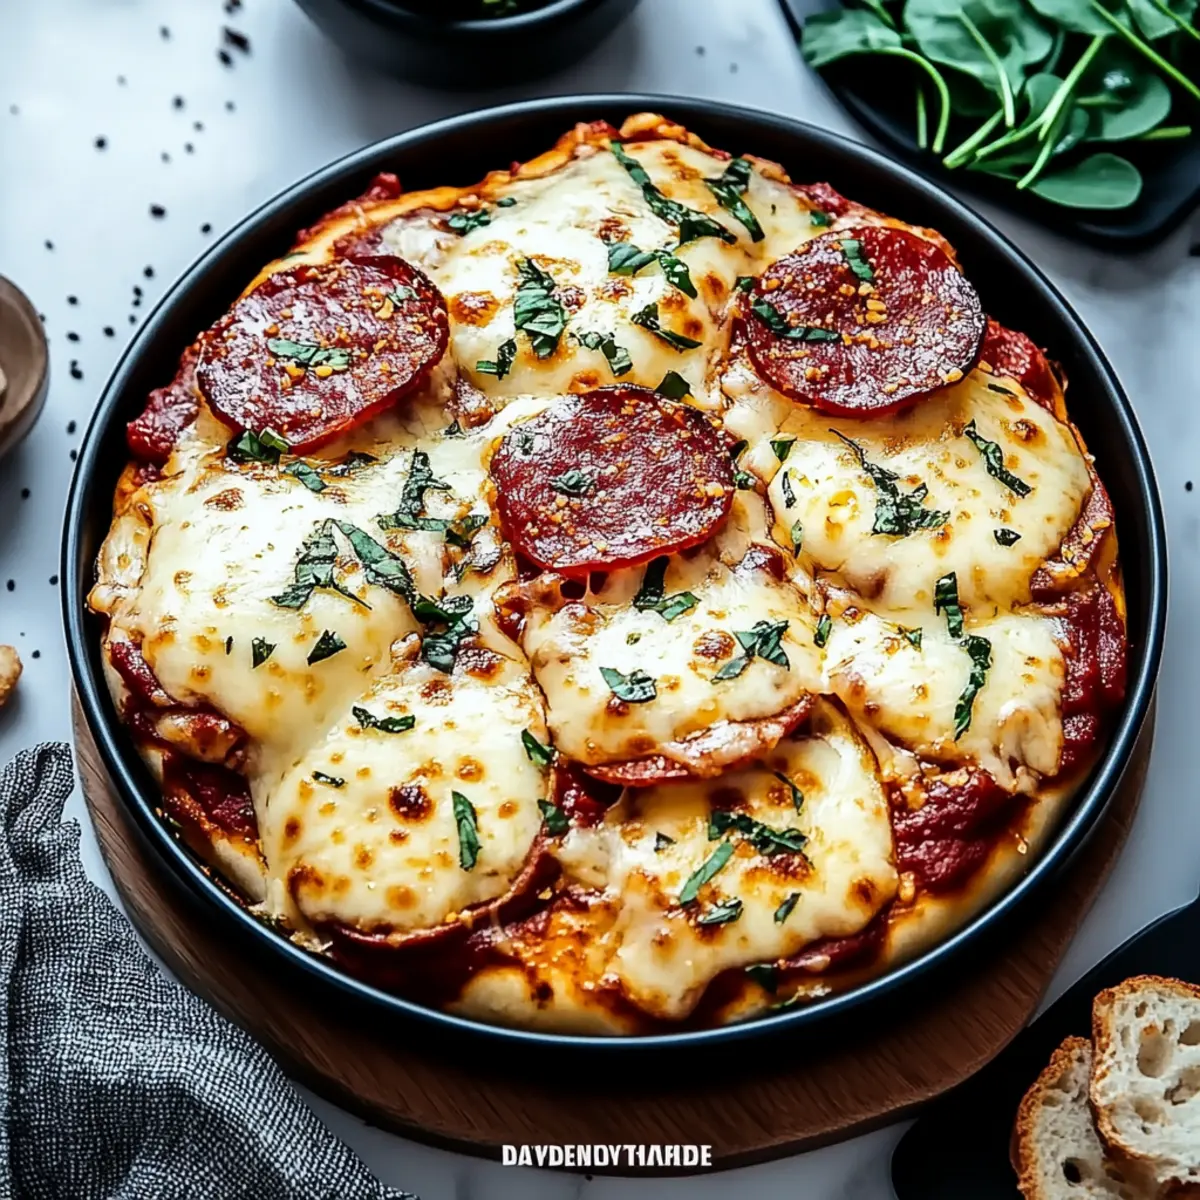
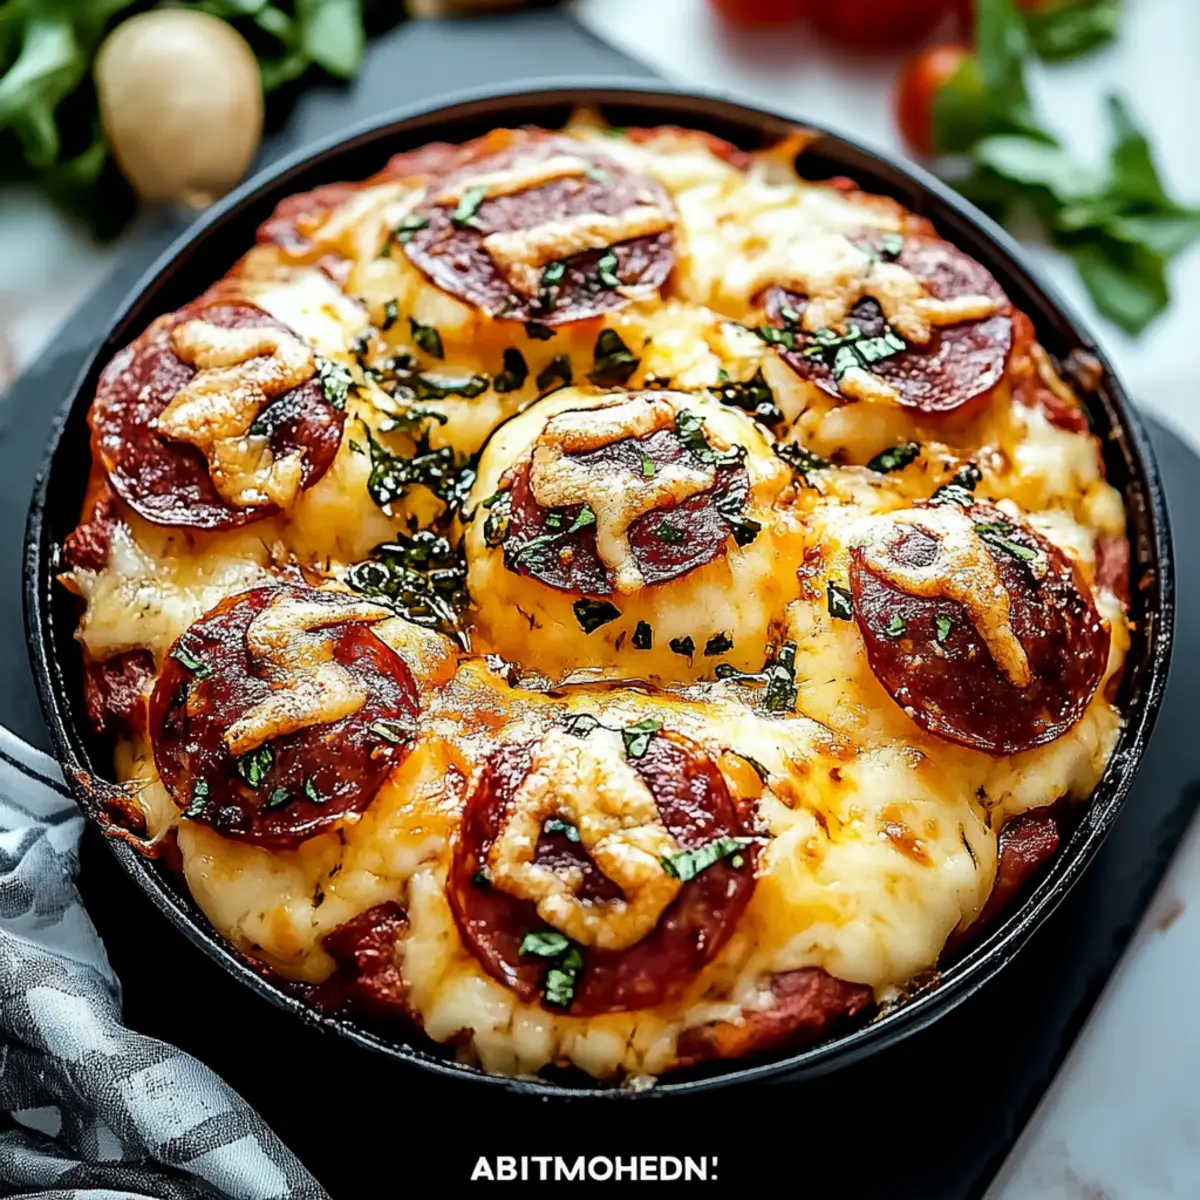
RecipeCrown

  • Home
  • Breakfast
  • Main Dishes
  • Dessert
  • About
  • Contact
menu icon
go to homepage
  • Home
  • Breakfast
  • Main Dishes
  • Dessert
  • About
  • Contact
search icon
Homepage link
  • Home
  • Breakfast
  • Main Dishes
  • Dessert
  • About
  • Contact
×

Irresistibly Chewy Chai Pumpkin Cookies Recipe You'll Love

July 23, 2025 by grace bellamy Leave a Comment

As I took a moment to savor the warmth wafting through my kitchen, I couldn’t help but smile at the mix of spices dancing in the air. This chai pumpkin cookies recipe is my go-to treat when I crave that cozy, autumn vibe, no matter the season. Soft and chewy with hints of cinnamon, ginger, and nutmeg, these cookies are inviting and packed with flavor. Plus, they come together quickly, making them the perfect solution for a last-minute gathering or an afternoon snack. Whether you follow a gluten-free or vegan diet, you'll find a variation that suits your needs, ensuring everyone can indulge. Ready to discover how the magic happens in just a few simple steps? Let’s dive in!

Why Are These Cookies a Must-Try?

Irresistible flavor: Each bite of these cookies bursts with the warm, soothing spices of chai and the rich, comforting taste of pumpkin, making them a perfect treat for any time of year.

Chewy perfection: The texture is exquisitely chewy, ensuring a satisfying mouthfeel that pairs beautifully with a warm cup of tea or coffee.

Quick to make: In just minutes, you’ll have a delicious batch of cookies from your oven, perfect for unexpected guests or a cozy afternoon treat.

Versatile options: Whether you’re seeking gluten-free or vegan alternatives, this recipe adapts to fit your dietary needs, so no one has to miss out!

Crowd-pleaser: These chai pumpkin cookies are sure to win hearts and taste buds alike, making them a beloved addition to any dessert table alongside classics like Cheesy Scalloped Potatoes or Carrot Cake.

Get ready to impress with these delightful cookies that combine the essence of fall with extraordinary flavor!

Chai Pumpkin Cookies Recipe

For the Cookies

  • All-Purpose Flour – Creates the perfect structure; for gluten-free, use a blend designed for baking.
  • Baking Soda – Provides lift for a softer cookie; check for freshness for best results.
  • Salt – Enhances flavor; opt for sea salt to add a delicate touch.
  • Granulated Sugar – Sweetens and contributes to texture; coconut sugar is a great lower-glycemic substitution.
  • Brown Sugar – Adds moisture and a rich flavor; dark brown sugar intensifies the caramel notes beautifully.
  • Pumpkin Puree – Gives moisture and flavor; make sure to use pure pumpkin, not pumpkin pie filling.
  • Butter (or Coconut Oil for Vegan) – Offers richness; unsalted butter is best for controlling salt content.
  • Egg (or Flax Egg for Vegan) – Binds ingredients while adding moisture; substitute by mixing 1 tablespoon flaxseed meal with 2.5 tablespoons water.
  • Vanilla Extract – Boosts sweetness and aroma; pure vanilla is preferable for a more authentic flavor.
  • Chai Spice Mix – A blend of warming spices for flavor; cinnamon, ginger, and nutmeg make for a delicious contrast.
  • Chocolate Chips – Adds a delightful sweetness; dark or dairy-free chips cater to varying dietary preferences.

Embrace this chai pumpkin cookies recipe that mixes tradition with innovation, catering to everyone at your table!

Step‑by‑Step Instructions for chai pumpkin cookies recipe

Step 1: Preheat the Oven
Begin by preheating your oven to 350°F (175°C). While it warming up, line a baking sheet with parchment paper to ensure easy cleanup and prevent sticking. This step is crucial for achieving that perfect chewy texture in your chai pumpkin cookies, so make sure you're set to go before mixing your ingredients.

Step 2: Combine Dry Ingredients
In a medium bowl, whisk together the all-purpose flour, baking soda, and salt until well blended. This helps to evenly distribute the leavening agent. Make sure there are no lumps, as a smooth mixture ensures uniform baking. Set this bowl aside while focusing on the wet ingredients for the chai pumpkin cookies recipe.

Step 3: Cream the Butters and Sugars
In a large mixing bowl, cream together the softened butter (or coconut oil for vegan) with granulated sugar and brown sugar until the mixture is light and fluffy, about 2-3 minutes. This method incorporates air for lighter cookies. It’s the perfect base for adding your pumpkin and spices, creating a rich blend of flavors in every bite.

Step 4: Mix in Wet Ingredients
Add the pumpkin puree, vanilla extract, and egg (or flax egg for the vegan version) to the creamed mixture. Beat everything together until fully combined and smooth, ensuring all the wet ingredients meld together. This is where the rich flavor and moisture come from, giving your chai pumpkin cookies their signature chewiness.

Step 5: Combine Dry and Wet Mixtures
Gradually add the dry flour mixture to the wet ingredients, stirring gently until just combined. Be careful not to overmix, as this can lead to tougher cookies. The dough should come together nicely and start to take shape, providing a lovely foundation for the lovely spices you'll add next.

Step 6: Fold in Spices and Chocolate
At this stage, fold in the chai spice mix and chocolate chips with a spatula or wooden spoon. This is where your chai pumpkin cookies will take on their delightful character, giving them that aromatic warmth. Ensure the spices and chocolate are evenly distributed throughout the dough for a burst of flavor in every cookie.

Step 7: Scoop the Dough
Using a tablespoon or cookie scoop, portion out the cookie dough onto the prepared baking sheet, spacing them about 2 inches apart. This spacing will allow for spreading while baking. You’ll want to see equal-sized scoops to achieve consistent baking, which results in uniform chewy textures across your chai pumpkin cookies.

Step 8: Bake the Cookies
Place the baking sheet in your preheated oven and bake for 10-12 minutes. You'll know they're ready when the edges are golden, and the centers look slightly underbaked. This is key to maintaining that chewy center while still allowing the flavors to meld perfectly.

Step 9: Cool and Enjoy
Once done, remove the chai pumpkin cookies from the oven and let them cool on the baking sheet for about 5 minutes. This allows them to set perfectly before being transferred to wire racks. Letting them cool fully enhances their chewy texture, creating an irresistible treat perfect for any occasion!

What to Serve with Ultimate Chewy Chocolate Chip Cookies

As you indulge in the rich, warm flavors of these cookies, why not enhance the experience with delightful pairings that will leave everyone asking for more?

  • Cold Glass of Milk: The classic duo of cookies and milk is a no-brainer, offering a sweet balance that beautifully complements the chocolatey goodness.
  • Warm Coffee: A cup of freshly brewed coffee pairs wonderfully with the cookies' chewy texture, creating a cozy afternoon treat for that perfect pick-me-up.
  • Vanilla Ice Cream: Serve these cookies warm alongside a scoop of creamy vanilla ice cream for a decadent dessert. The melting ice cream will enhance the flavors in every bite!
  • Fresh Berries: Add a pop of tartness with a side of juicy berries. The acidity of raspberries or strawberries cuts through the sweetness, creating a refreshing contrast.
  • Spiced Chai Latte: Embrace the warming spices of chai to echo the flavors in your cookies. This delightful drink is perfect for a chilly day and will wrap you in comfort.
  • Sweet Wine: Pair with a light dessert wine, such as Moscato. The fruity notes complement the chocolate chips, making for an elegant dessert experience.
  • Nutty Granola: For a crunchy texture, serve cookies with a side of nutty granola. The added crunch and flavor create a delightful contrast in your dessert spread.
  • Coconut Cream: Dollop some rich coconut cream beside your cookies to introduce a silky texture and a hint of tropical flavor that’s simply irresistible.
  • Homemade Caramel Sauce: Drizzling warm caramel sauce over your cookies adds a rich, sweet layer, making an already delicious treat even more indulgent.

With these imaginative pairings, your chocolate chip cookie experience will be enhanced to new heights, delighting everyone who gets a taste!

How to Store and Freeze Chai Pumpkin Cookies

Airtight Container: Store your chai pumpkin cookies in an airtight container at room temperature for up to 1 week to retain their delightful chewiness.

Refrigeration: If you live in a humid climate, consider refrigerating them to keep them fresh for up to 2 weeks; just cover the container tightly.

Freezer: For longer storage, freeze the cookies in a single layer on a baking sheet, then transfer to a freezer-safe bag for up to 3 months.

Reheating: To enjoy warm cookies, reheat in the microwave for about 10-15 seconds, and savor the delicious aroma as they come back to life!

Make Ahead Options

These chai pumpkin cookies are perfect for busy home cooks looking to save time! You can prepare the cookie dough up to 72 hours in advance; simply wrap it tightly in plastic wrap and refrigerate. If you’d like to store it even longer, freeze the dough for up to 3 months. To retain their delightful chewiness, make sure to label the wrap with the date. When you're ready to bake, preheat your oven and scoop out the desired portion of dough directly from the fridge or freezer. Bake as directed, adding an extra minute or two for frozen dough. Enjoy irresistible cookies that taste just as fresh as if you made them today!

Chai Pumpkin Cookies Recipe Variations

Feel free to get creative and make these cookies your own with delightful twists that tantalize your taste buds!

  • Gluten-Free: Substitute all-purpose flour with a gluten-free blend to enjoy the same chewy goodness without the gluten.
  • Vegan: Use coconut oil in place of butter and a flax egg; these cookies become just as soft and delicious!
  • Nutty Delight: Add chopped walnuts or pecans for a satisfying crunch, complementing the chewy texture beautifully.
  • Spiced Up: Incorporate a pinch of cardamom along with the chai spices for an exotic flavor that dances on your palate.
  • Dried Fruit: Fold in dried cranberries or raisins for a burst of sweetness and a slight chew that contrasts nicely with the melt-in-your-mouth chocolate.
  • Crispy Treat: For a crunchier cookie, bake them a minute or two longer until they’re golden brown all over—perfection for those who prefer a crisp texture.
  • Chocolate Variation: Experiment with white chocolate or peanut butter chips for a unique take on the classic recipe!
  • Chai Latte Touch: Stir in a teaspoon of instant coffee to mimic the flavors of a chai latte, adding a robust coffee essence that enhances the overall flavor.

With these variations, your chai pumpkin cookies can be tailored to satisfy every craving and dietary need! If you're exploring similar delightful treats, you might consider making a scrumptious Puff Pastry Dessert or a rich Chocolate Chip Cookie recipe to enjoy alongside these cookies. Let your kitchen be your canvas!

Expert Tips for Chai Pumpkin Cookies

  • Use Fresh Ingredients: Ensure your baking soda and spices are fresh to achieve the best rise and flavor. Old ingredients can hinder the overall texture and taste of your chai pumpkin cookies.

  • Don’t Overmix: Gently combine the wet and dry ingredients to maintain that delicious chewiness. Overmixing can lead to tough cookies, so mix just until incorporated.

  • Chill the Dough: If your dough seems too soft or sticky, chill it for about 30 minutes before baking. This helps firm up the cookies for better shaping and texture.

  • Watch the Bake Time: Keep an eye on your cookies in the oven. Every oven is different; remove them when the edges are golden but the centers appear slightly underbaked for a chewy finish.

  • Add Personal Touches: Feel free to experiment! Add nuts, or alternative spices, or even swap out chocolate chips for dried fruits. Your chai pumpkin cookies can be a canvas for your creativity!

  • Storage Matters: Store your cookies in an airtight container to retain their chewy goodness. If they harden, pop them in the microwave for a few seconds to bring back that fresh-baked feel.

Chai Pumpkin Cookies Recipe FAQs

What type of flour should I use for chai pumpkin cookies?
For the best texture, all-purpose flour works wonderfully in this chai pumpkin cookies recipe. However, if you require a gluten-free option, I recommend using a gluten-free flour blend specifically designed for baking, which will maintain the cookie's chewy characteristics.

How can I store leftover chai pumpkin cookies?
Store your chai pumpkin cookies in an airtight container at room temperature for up to 1 week. If you happen to live in a humid climate, refrigerating them can extend their freshness for up to 2 weeks. Just be sure to keep the container tightly covered to avoid moisture buildup!

Can I freeze chai pumpkin cookies?
Absolutely! For optimal freshness, freeze your cookies in a single layer on a baking sheet until firm. Then, transfer them to a freezer-safe bag or container. These cookies can be frozen for up to 3 months. When you're ready to enjoy, simply reheat them in the microwave for about 10-15 seconds.

What should I do if my chai pumpkin cookie dough is too sticky?
If you find your dough is too soft or sticky, don't fret! Simply chill it in the refrigerator for about 30 minutes before baking. This will firm up the dough, making it easier to scoop and shape into perfect cookie rounds. It’s a great trick for achieving that ideal chewy texture!

How can I ensure my chai pumpkin cookies turn out chewy?
To maintain that delightful chewiness, avoid overmixing the dough once you combine the dry and wet ingredients. Softly mixing until just combined, and baking the cookies until the edges are golden but the centers are slightly underbaked, will create that irresistible chewy center you’re aiming for.

Can these cookies be made vegan?
Yes! To make these chai pumpkin cookies vegan, simply substitute the butter with coconut oil and the egg with a flax egg. Prepare the flax egg by mixing 1 tablespoon of flaxseed meal with 2.5 tablespoons of water, letting it sit for a few minutes until it thickens. Enjoy these delicious cookies that everyone can savor!

chai pumpkin cookies recipe

Irresistibly Chewy Chai Pumpkin Cookies Recipe You'll Love

This chai pumpkin cookies recipe delivers soft, chewy cookies with spices, perfect for any time of year.
Print Recipe Pin Recipe
Prep Time 15 minutes mins
Cook Time 12 minutes mins
Cooling Time 5 minutes mins
Total Time 32 minutes mins
Servings: 24 cookies
Course: Dessert
Cuisine: American
Calories: 150
Ingredients Equipment Method Nutrition Notes

Ingredients
  

Dry Ingredients
  • 2 cups All-Purpose Flour For gluten-free, use a blend designed for baking.
  • 1 teaspoon Baking Soda Check for freshness.
  • ½ teaspoon Salt Opt for sea salt.
Wet Ingredients
  • 1 cup Granulated Sugar Coconut sugar is a lower-glycemic option.
  • ½ cup Brown Sugar Dark brown sugar is ideal.
  • 1 cup Pumpkin Puree Use pure pumpkin, not pie filling.
  • ½ cup Butter Or Coconut Oil for vegan.
  • 1 large Egg Or Flax Egg for vegan substitute.
  • 1 teaspoon Vanilla Extract Pure vanilla is preferable.
Flavor Ingredients
  • 2 teaspoons Chai Spice Mix A blend of warm spices.
  • 1 cup Chocolate Chips Use dark or dairy-free for variations.

Equipment

  • Oven
  • Mixing bowls
  • Baking Sheet
  • parchment paper
  • Whisk
  • spatula
  • Cookie scoop

Method
 

Baking Instructions
  1. Preheat your oven to 350°F (175°C) and line a baking sheet with parchment paper.
  2. In a medium bowl, whisk together the all-purpose flour, baking soda, and salt.
  3. In a large mixing bowl, cream together the softened butter (or coconut oil) with granulated sugar and brown sugar until light and fluffy.
  4. Add the pumpkin puree, vanilla extract, and egg (or flax egg) to the creamed mixture, mixing until combined.
  5. Gradually add the dry flour mixture to the wet ingredients, stirring gently until just combined.
  6. Fold in the chai spice mix and chocolate chips until evenly distributed.
  7. Using a tablespoon or cookie scoop, portion out the cookie dough onto the prepared baking sheet, leaving space between each.
  8. Bake for 10-12 minutes until the edges are golden and the centers look slightly underbaked.
  9. Remove from the oven and let cool on the baking sheet for about 5 minutes before transferring to wire racks.

Nutrition

Serving: 1cookieCalories: 150kcalCarbohydrates: 22gProtein: 1gFat: 7gSaturated Fat: 4gPolyunsaturated Fat: 1gMonounsaturated Fat: 2gCholesterol: 20mgSodium: 90mgPotassium: 50mgFiber: 1gSugar: 10gVitamin A: 250IUCalcium: 10mgIron: 0.5mg

Notes

Store cookies in an airtight container for up to 1 week. If they harden, reheat in the microwave for a few seconds to revive their chewy texture.

Tried this recipe?

Let us know how it was!

Butternut Squash Kale Lasagna Recipe

July 23, 2025 by grace bellamy Leave a Comment

Step‑by‑Step Instructions for butternut squash kale lasagna recipe

Step 1: Roast the Butternut Squash
Preheat your oven to 400°F (200°C). Dice the butternut squash into small cubes and spread them evenly on a baking sheet lined with parchment paper. Drizzle with olive oil, sprinkle with salt, and roast for 25-30 minutes or until tender and lightly browned, stirring halfway through for even cooking.

Step 2: Sauté the Kale
In a large skillet over medium heat, add a splash of olive oil and heat until shimmering. Sauté diced onion for 3-4 minutes until softened and translucent, then add minced garlic and continue cooking for another 1-2 minutes until fragrant. Stir in the chopped kale and cook until wilted, about 5-7 minutes, then set aside.

Step 3: Prepare Cheese Mixture
In a mixing bowl, combine ricotta cheese with a pinch of salt and pepper, mixing until smooth and creamy. This ricotta will add a rich, delightful layer to your butternut squash kale lasagna recipe. If you'd like, you can also blend in some grated Parmesan for extra flavor.

Step 4: Assemble the Lasagna
In a 9x13 baking dish, start layering by placing a thin layer of béchamel (if using) at the bottom. Add a layer of lasagna noodles, followed by half of the roasted butternut squash, the sautéed kale, dollops of ricotta, and a sprinkle of mozzarella. Repeat the layers and finish with a final layer of noodles topped with remaining mozzarella.

Step 5: Bake the Lasagna
Cover the baking dish with aluminum foil and bake in the preheated oven for 30 minutes. After this time, remove the foil to allow the top to brown, baking for an additional 15-20 minutes until the cheese is bubbly and golden. The lasagna should be heated through with a delightful aroma wafting through the kitchen.

Step 6: Cool and Serve
Once baked, take the butternut squash kale lasagna out of the oven and let it cool for about 10-15 minutes. This cooling time allows the layers to set beautifully, making it easier to slice. Serve hot, paired with a fresh salad or crusty bread, for a comforting meal.

Butternut Squash Kale Lasagna Recipe Tips

Feel free to get creative with this comforting dish, adding your own special flair and flavors!

  • Gluten-Free: Use gluten-free lasagna noodles to make it suitable for those with dietary restrictions.
  • Dairy-Free: Substitute ricotta and mozzarella with cashew cheese or any dairy-free alternatives to make it vegan-friendly.
  • Extra Veggies: Add layers of thinly sliced zucchini or mushrooms for an additional boost of flavor and texture.
  • Spicy Kick: Sprinkle red pepper flakes between layers to add a delightful touch of heat that enhances the overall taste.
  • Fresh Herbs: Mix fresh herbs like thyme or basil into the cheese mixture for a fragrant twist that elevates the flavor.
  • Creamy Béchamel: If you're a fan of creamy sauces, layering with a homemade béchamel will add a luxurious richness—check out my Cheesy Scalloped Potatoes for béchamel inspiration!
  • Nutty Flavor: Add a handful of toasted pine nuts or walnuts between layers for a delightful crunch and nuttiness that complements the squash beautifully.
  • Balsamic Glaze: Drizzle some balsamic glaze on top before serving for an additional glossy finish and a tangy spark that tastes divine!

As you whip up this butternut squash kale lasagna recipe, let your personal style shine through, making it uniquely yours!

Expert Tips for Butternut Squash Kale Lasagna Recipe

• Perfectly Roasted Squash: Ensure the butternut squash is uniformly diced for even roasting. Don't overcrowd the baking sheet, or it will steam instead of roast!

• Kale Variations: Feel free to substitute or mix in other greens like spinach or Swiss chard for a twist in flavor. Just remember to sauté until wilted!

• Cheese Creaminess: For an even creamier texture, mix a bit of heavy cream into the ricotta cheese. This helps balance the flavors in your butternut squash kale lasagna recipe.

• Layering Wisely: Remember to spread béchamel generously if using; it adds moisture. Avoid dry lasagna by ensuring each layer is well-sauced.

• Cool Before Serving: Always let the lasagna rest after baking! This cooling time helps the layers hold together and makes for prettier servings.

• Storing Leftovers: Store any leftovers in an airtight container in the fridge. Reheating in the oven will keep the cheese gooey and the layers intact.

Make Ahead Options

These butternut squash kale lasagna recipe components are perfect for meal prep, saving you precious time on busy weeknights! You can roast the butternut squash and sauté the kale up to 24 hours in advance; simply refrigerate them in airtight containers to maintain their flavors. Additionally, you can prepare the ricotta mixture ahead of time and store it as well. When you’re ready to enjoy your lasagna, layer the ingredients in the baking dish and bake as instructed. This method not only keeps the lasagna delicious but also allows you to enjoy a warm, hearty meal with minimal effort!

How to Store and Freeze Butternut Squash Kale Lasagna

Fridge: Store leftovers in an airtight container for up to 3 days. This keeps your butternut squash kale lasagna recipe fresh, ready to enjoy any time!

Freezer: Freeze individual portions wrapped tightly in plastic wrap and then in a freezer-safe bag for up to 3 months. Thaw in the refrigerator before baking or reheating.

Reheating: For best results, reheat slices in the oven at 350°F (175°C) covered with foil for about 20 minutes. This keeps the cheese deliciously gooey.

Assembly Tips: If you plan to freeze, consider assembling the lasagna without baking and freeze it unbaked for a quick meal on busy days!

What to Serve with Creamy Butternut Squash and Kale Lasagna

Complementing your cozy, layered treasure creates a meal that warms the heart and delights the palate.

  • Garlicky Green Salad: Bright, zesty flavors and crisp greens add freshness, balancing the richness of the lasagna. Toss in a light vinaigrette for a perfect pairing.

  • Crusty Garlic Bread: The crunchy exterior and soft interior of garlic bread provide a wonderful contrast, ideal for savoring each cheesy bite of the lasagna. It’s a match made in comfort food heaven.

  • Roasted Brussels Sprouts: These tender and caramelized veggies offer a slightly nutty flavor that aligns beautifully with the sweetness of the butternut squash.

  • Creamy Polenta: The smooth, buttery texture of polenta complements the lasagna's richness while adding an Italian flair. Top with fresh herbs for an extra touch.

  • Sautéed Spinach: Quick to prepare, sautéed spinach with a dash of lemon brings vibrant color and a slightly tart flavor, enhancing your meal experience.

  • Apple Crisp: For dessert, this warm, sweet treat rounds out the meal perfectly. The crisp topping contrasts nicely with its soft, spiced filling, echoing the warmth of the lasagna.

  • White Wine Spritzer: This refreshing drink adds a hint of sparkle, cutting through the creamy layers beautifully and making your meal feel special.

  • Herb-Infused Olive Oil: Drizzle this over your lasagna for an aromatic finish that elevates its flavor while inviting family and friends to indulge.

Butternut Squash Kale Lasagna Recipe FAQs

What should I look for when selecting butternut squash?
Absolutely! When choosing butternut squash, look for a squash that feels heavy for its size and has smooth, unblemished skin. The color should be a deep beige, without any dark spots or soft areas, as these indicate overripeness.

How should I store leftover butternut squash kale lasagna?
Store any leftovers in an airtight container in the fridge for up to 3 days. I recommend placing a piece of parchment paper between the lasagna and the lid to help with airflow, keeping it fresh for longer!

Can I freeze butternut squash kale lasagna?
Indeed! To freeze, first cool the lasagna completely, then wrap individual portions in plastic wrap, followed by aluminum foil. Place them in a freezer-safe bag, and it will last for up to 3 months. When ready to enjoy, simply thaw in the refrigerator overnight before reheating.

How can I ensure my lasagna doesn’t turn out dry?
Very good question! The key to a moist lasagna lies in proper layering and sauce. Make sure each layer contains adequate ricotta, béchamel, or marinara sauce if using. Also, remember to cover the baking dish with foil during the first half of baking to trap moisture, then uncover to achieve a beautifully golden top.

Are there any dietary considerations I should think about?
Definitely! For gluten-free diets, consider using gluten-free lasagna noodles to reconstruct this creamy butternut squash kale lasagna recipe without missing out on flavors. Additionally, if there are dairy allergies, swap ricotta and mozzarella for dairy-free cheese alternatives, ensuring a delightful experience for everyone.

What are some alternatives for kale in this recipe?
If you’re not a fan of kale, you can absolutely substitute it with other greens. Spinach is a great option and requires less cooking time—just wilt it for a minute or two! Swiss chard or even collard greens can add a unique flavor profile, making this lasagna even more versatile.

butternut squash kale lasagna recipe

Butternut Squash Kale Lasagna

This butternut squash kale lasagna recipe is a comforting, delicious dish perfect for a hearty meal.
Print Recipe Pin Recipe
Prep Time 15 minutes mins
Cook Time 1 hour hr 15 minutes mins
Cooling Time 15 minutes mins
Total Time 1 hour hr 45 minutes mins
Servings: 6 slices
Course: Main Dishes
Cuisine: Italian
Calories: 350
Ingredients Equipment Method Nutrition Notes

Ingredients
  

Vegetables
  • 1 medium Butternut Squash diced
  • 1 small Onion diced
  • 2 cloves Garlic minced
  • 4 cups Kale chopped
Cheese
  • 15 ounces Ricotta Cheese
  • 1 cup Mozzarella Cheese shredded
  • ½ cup Parmesan Cheese optional, grated
Lasagna Components
  • 9 sheets Lasagna Noodles no-boil preferred
  • ½ cup Béchamel Sauce optional
  • 2 tablespoons Olive Oil for roasting and sautéing
  • to taste Salt
  • to taste Black Pepper

Equipment

  • Oven
  • Baking Sheet
  • skillet
  • Mixing Bowl
  • 9x13 Baking Dish

Method
 

Roasting and Sautéing
  1. Preheat your oven to 400°F (200°C). Dice the butternut squash into small cubes, spread on a baking sheet, drizzle with olive oil and salt, and roast for 25-30 minutes.
  2. In a large skillet over medium heat, add olive oil. Sauté onion for 3-4 minutes. Add garlic and continue for 1-2 minutes. Stir in kale and cook until wilted, about 5-7 minutes.
Cheese Mixture and Assembly
  1. In a bowl, combine ricotta cheese with salt and pepper until smooth. Begin layering in a baking dish with béchamel, noodles, butternut squash, kale, ricotta, and mozzarella. Repeat layers, finishing with noodles and mozzarella.
Baking and Serving
  1. Cover with foil and bake for 30 minutes. Remove the foil and bake an additional 15-20 minutes until cheese is bubbly and golden.
  2. Let it cool for 10-15 minutes before serving to set the layers. Enjoy warm with a salad or bread.

Nutrition

Serving: 1sliceCalories: 350kcalCarbohydrates: 45gProtein: 15gFat: 12gSaturated Fat: 7gPolyunsaturated Fat: 1gMonounsaturated Fat: 4gCholesterol: 40mgSodium: 400mgPotassium: 600mgFiber: 4gSugar: 6gVitamin A: 8000IUVitamin C: 80mgCalcium: 250mgIron: 3mg

Notes

For best results, allow the lasagna to rest before serving to help the layers hold together. Store leftovers in an airtight container in the fridge for up to 3 days.

Tried this recipe?

Let us know how it was!

Irresistibly Cheesy Buffalo Chicken Mac and Cheese Delight

July 20, 2025 by grace bellamy Leave a Comment

As I stood over the bubbling pot, a wave of warmth and nostalgia washed over me, transporting me back to cozy dinners filled with laughter. Today, I’m excited to share my Spicy Buffalo Chicken Mac and Cheese, a dish that combines the rich, creamy goodness of classic mac and cheese with a fiery twist. This comfort food marvel is not only a crowd-pleaser but also incredibly simple to whip up on any weeknight. With high protein from the chicken and an irresistible cheesy sauce, it’s perfect for those evenings when you crave something satisfying yet easy. Trust me, once it’s on your table, your guests will be begging for seconds. Ready to discover how to make this deliciously spicy dish? Let’s dive into the recipe!

Why is Buffalo Chicken Mac and Cheese a Must-Try?

Irresistible Combo: This dish harmoniously blends the comfort of mac and cheese with a spicy buffalo punch, making it a standout at any dinner table.
Quick and Easy: Perfect for weeknight meals, it can be assembled in under an hour, so no need for complicated preparations!
High-Protein Delight: Packed with chicken, it offers a hearty serving of protein, satisfying both hunger and cravings.
Crowd Pleaser: Serve it at your next gathering, and watch as guests rave over its gooey, cheesy goodness reminiscent of a restaurant favorite.
Versatile Options: Swap the chicken for shrimp or even try a vegetarian twist with baked veggies, making it adaptable to any dietary preference.
Dive into this flavor-packed experience and also check out ideas for Crock Pot Chicken for more easy meals!

Buffalo Chicken Mac and Cheese Ingredients

• Note: Get ready to whip up a delightful dish that captures the spirit of comfort food!

For the Cheese Sauce
• Unsalted Butter – Creates a rich sauce base; feel free to replace it with olive oil if desired.
• Plain Flour – Thickens the cheese sauce; gluten-free flour can work as a substitution.
• Whole Milk – Provides creaminess; using 2% milk is an option for a lighter sauce.
• Sour Cream – Adds a tangy richness; Greek yogurt can be swapped for a similar texture.
• Garlic Powder – Infuses depth of flavor; fresh minced garlic can elevate its taste.
• Smoked Paprika – Delivers smokiness and vibrant color; regular paprika is a mild alternative.
• Onion Powder – Contributes savory notes; you can sauté fresh onions for a fresher kick.
• Salt and Black Pepper – For seasoning; adjust to your personal taste preferences.

For the Cheesy Pasta
• Freshly Grated Cheddar Cheese – The star for creaminess and flavor; try sharp provolone for a twist.
• Freshly Grated Mozzarella – Provides stretchiness; low-moisture mozzarella melts beautifully.
• Sspirali Pasta (or Macaroni) – The main carbohydrate source; consider gluten-free pasta if needed.
• Cooked Chicken – Essential for protein; use leftover chicken or rotisserie chicken for convenience.
• Frank's Buffalo Sauce – Brings the heat and iconic flavor; avoid regular hot sauce for an authentic zing.
• Freshly Grated Red Leicester Cheese – Perfect for topping and extra flavor; more cheddar can do in a pinch.

Optional Toppings
• Blue Cheese Sauce – For an extra kick; drizzle it on top to enrich your dish.
• Extra Buffalo Sauce – Add more heat if you like it spicy; adjust based on your preferences.
• Fresh Chives – Brings brightness and freshness; sprinkle generously for garnish.
• Crispy Bacon – A delightful crunch that complements the creamy texture beautifully.

Now that you're equipped with the ingredients for the Buffalo Chicken Mac and Cheese, let’s dive into creating this hearty delight!

Step‑by‑Step Instructions for Buffalo Chicken Mac and Cheese

Step 1: Preheat the Oven
Begin by preheating your oven to 180°C (350°F). This ensures it's hot and ready for baking once your Buffalo Chicken Mac and Cheese is assembled. While it heats up, you can gather your ingredients and prep your workspace, making the cooking process smoother and more enjoyable.

Step 2: Cook the Pasta
In a large pot, bring salted water to a boil. Add your spirali pasta and cook according to package instructions until al dente, usually about 8-10 minutes. Drain the pasta and set it aside, making sure to toss it lightly with a drizzle of olive oil to prevent sticking while you prepare the cheesy sauce.

Step 3: Make the Roux
In a large saucepan over medium heat, melt 4 tablespoons of unsalted butter until bubbly. Gradually whisk in 4 tablespoons of plain flour, stirring constantly for about 2-3 minutes until you form a thick roux mixture. The color should be light golden, indicating you’ve built a solid base for your cheese sauce.

Step 4: Create the Cheese Sauce
Slowly whisk in 2 cups of whole milk to the roux, stirring continuously until the mixture thickens and becomes smooth—this usually takes about 5 minutes. Once thickened, mix in ½ cup of sour cream along with garlic powder, smoked paprika, onion powder, salt, and pepper. Let the sauce simmer for another minute, allowing the flavors to marry beautifully.

Step 5: Melt the Cheeses
Gradually add 1 cup each of freshly grated cheddar and mozzarella cheese into the sauce, stirring until completely melted and creamy. Aim for a gooey consistency—this is what makes your Buffalo Chicken Mac and Cheese irresistibly cheesy and deliciously comforting.

Step 6: Combine Pasta and Chicken
Add the drained pasta and 2 cups of cooked chicken to the cheese sauce, followed by ½ cup of Frank's Buffalo Sauce. Stir everything together until the pasta is evenly coated in that creamy, spicy bliss. Make sure the chicken is well-mixed so every bite is packed with flavor.

Step 7: Transfer to Baking Dish
Pour the mixture into a large baking dish, spreading it evenly. To elevate the cheesy topping, sprinkle 1 cup of freshly grated Red Leicester cheese generously over the surface. This will create a delightful crust as it bakes, ensuring your Buffalo Chicken Mac and Cheese looks as good as it tastes.

Step 8: Bake to Perfection
Place the baking dish in the preheated oven and bake for 15 minutes, or until the cheese is bubbly and golden. Keep an eye on it—you're looking for a slight bubbling and a golden color that signals it's ready to come out.

Step 9: Broil for Extra Crispiness
For an extra touch, switch the oven to broil and let your Buffalo Chicken Mac and Cheese broil for an additional 2-3 minutes. This step will give the cheese topping a lovely crispness, adding texture to your dish. Just be vigilant; it can burn quickly under high heat!

Step 10: Serve and Garnish
Once done, remove the dish from the oven, let it cool for a few minutes, and serve hot. To make it even more appetizing, garnish with fresh chives, crispy bacon, or a drizzle of blue cheese sauce. Each aspect boosts flavor, making your Buffalo Chicken Mac and Cheese a true delight at the dinner table!

Expert Tips for Buffalo Chicken Mac and Cheese

• Perfect Pasta: Ensure your pasta is cooked al dente; overcooking can result in a mushy texture post-baking.

• Fresh Cheese Only: Always use freshly grated cheese for a smoother and creamier sauce, avoiding pre-packaged shredded cheese that may contain anti-caking agents.

• Timing is Key: Add the buffalo sauce at the end of your cheese mixture to keep it creamy—the vinegar can curdle the milk if added too early.

• Adjust Spice Levels: Feel free to modify the amount of Frank's Buffalo Sauce, depending on your crowd's spice tolerance. A little goes a long way!

• Toppings for Variety: Customize your dish with optional toppings based on personal taste; crispy bacon and fresh chives are fantastic additions.

• Make-Ahead Magic: Prepare your Buffalo Chicken Mac and Cheese ahead of time. Just reheat before serving for a quick meal that tastes freshly made!

What to Serve with Buffalo Chicken Mac and Cheese

Experience a delightful culinary adventure by pairing your creamy, zesty dish with these flavorful accompaniments.

  • Garlic Bread: The crispy, buttery texture complements the creamy sauce, adding a crunchy element for a satisfying meal.

  • Ceasar Salad: A fresh, tangy salad with crunchy romaine and creamy dressing balances the richness of mac and cheese beautifully.

  • Roasted Vegetables: Seasonal veggies add a colorful and nutritious performance to your plate, enhancing the overall flavor and texture experience. Caramelized sweetness contrasts perfectly with the spiciness of the buffalo sauce.

  • Corn on the Cob: A sweet side that adds a pop of freshness, it brings a fun crunch contrasting with the gooeyness of the dish. Enjoy it with a touch of butter and a sprinkle of salt!

  • Sweet Tea or Lemonade: These refreshing beverages offer a slight sweetness, making the spicy kick of the buffalo chicken more enjoyable.

  • Chocolate Chip Cookies: For dessert, the warmth and gooeyness of these cookies serve as a perfect contrast to the richness of your mac and cheese, wrapping up the meal on a sweet note.

Buffalo Chicken Mac and Cheese Variations

Feel free to unleash your creativity with these delightful twists that can elevate your Buffalo Chicken Mac and Cheese to new heights!

  • Dairy-Free: Swap the cheese for a nut-based cheese alternative and use coconut milk for the sauce, keeping the creaminess intact. With the right spices, you won't miss the dairy at all!

  • Vegetarian: Replace the chicken with roasted vegetables like broccoli or cauliflower, drizzling them with buffalo sauce for a spicy kick. This makes for a hearty, colorful dish that everyone will love.

  • Pasta Alternatives: Use whole wheat or chickpea pasta to boost the nutritional profile while adding a distinct flavor. It’s a great way to keep your meal hearty and wholesome.

  • Gourmet Touch: Add crumbled blue cheese on top before baking for an additional layer of tanginess. The combination of flavors will take this dish to a whole new gourmet level—perfect for impressing your guests!

  • Heat Lovers: For a mega spicy version, toss in some diced jalapeños or a splash of extra hot sauce. Just be prepared for the extra heat, and savor every bite!

  • BBQ Twist: Swap buffalo sauce for BBQ sauce for a slightly sweeter flavor. Combine pulled pork with the pasta for a southern-style masterpiece that's sure to please any crowd.

  • Texture Boost: Add panko breadcrumbs mixed with melted butter on top before baking for a crunchy layer. This adds a delightful texture that's irresistible when you dig in.

  • Leftover Remix: Use leftovers from your favorite rotisserie chicken or even turkey for a quick weeknight meal. It'll cut down on prep time while still providing a hearty flavor.

Want some inspiration for your next dish? Dive into a savory adventure with Crispy Beef and Cheese Chimichangas for a flavor-packed meal the whole family will adore!

Make Ahead Options

These Spicy Buffalo Chicken Mac and Cheese are perfect for meal prep enthusiasts! You can prepare the cheese sauce and assemble the dish up to 24 hours in advance. Simply cook the pasta, make the creamy cheese sauce, and combine with the chicken and buffalo sauce, then refrigerate in a covered baking dish. To maintain quality, store the cheese topping separately, adding it just before baking. When you're ready to enjoy this comfort food, simply preheat your oven and bake for about 20-25 minutes until bubbly and golden. This way, you’ll have a delicious dinner ready with minimal effort on busy weeknights!

How to Store and Freeze Buffalo Chicken Mac and Cheese

Fridge: Store leftovers in an airtight container for up to 3 days. Reheat in the oven or microwave until heated through, ensuring the cheese remains creamy.

Freezer: Portion out servings in freezer-safe containers. Buffalo Chicken Mac and Cheese can be frozen for up to 2 months. Thaw overnight in the fridge before reheating.

Reheating: When ready to enjoy again, heat in a preheated oven at 180°C (350°F) for 20-25 minutes or until warmed through. You may add a splash of milk to restore creaminess if needed.

Room Temperature: For short-term storage, you can leave it out for up to 2 hours, but be sure to refrigerate any leftovers promptly for safety.

Buffalo Chicken Mac and Cheese Recipe FAQs

How do I select the best ingredients for Buffalo Chicken Mac and Cheese?
Absolutely! When choosing your chicken, opt for cooked rotisserie chicken for convenience, ensuring it's fresh and moist. For cheeses, use freshly grated cheddar and mozzarella for the best meltability and texture. Look for pasta labeled "durum wheat" as it holds up better during cooking—aim for a brand that ensures al dente results. Lastly, when choosing your buffalo sauce, Frank's is a popular choice, known for its ideal balance of heat and flavor.

How should I store leftovers of Buffalo Chicken Mac and Cheese?
You can store leftover Buffalo Chicken Mac and Cheese in airtight containers in the fridge for up to 3 days. For best results, reheat in the oven (covered, at 180°C/350°F) for about 20 minutes until warmed throughout, or 5-7 minutes in the microwave. Avoid overcooking to retain the creamy texture!

Can I freeze Buffalo Chicken Mac and Cheese?
Certainly! To freeze, allow the dish to cool completely before transferring it to freezer-safe containers. It can be frozen for up to 2 months. Thaw overnight in the fridge before reheating. When you're back in the mood for a cheesy bite, preheat your oven to 180°C (350°F) and bake for 20-25 minutes, adding a splash of milk if the sauce seems too thick!

What should I do if my cheese sauce is too thick or lumpy?
Very! If your cheese sauce becomes too thick, simply whisk in a little more milk (about 1-2 tablespoons at a time) over low heat until you achieve your desired consistency. If it's lumpy, try blending the sauce with an immersion blender to create a smoother texture. Remember, patience is key—don't rush the process, and keep stirring for the best results.

Is Buffalo Chicken Mac and Cheese suitable for those with dietary restrictions?
Yes! This dish can be easily adapted. For lactose-intolerant individuals, using lactose-free milk and cheese will ensure a creamy result. If gluten is a concern, substituting with gluten-free pasta and flour will keep everyone happy. Just make sure your buffalo sauce is gluten-free if needed. Always double-check labels for allergens if serving to guests with specific needs!

Can I add extras to Buffalo Chicken Mac and Cheese?
Absolutely! You can take this dish to the next level by incorporating sautéed vegetables like spinach or mushrooms for added nutrition. Swap the chicken out for shrimp or even a plant-based protein for a vegetarian option. Toppings like crumbled blue cheese, crispy bacon, or fresh herbs can also personalize your dish—because the more, the merrier with comfort food!

Buffalo Chicken Mac and Cheese

Irresistibly Cheesy Buffalo Chicken Mac and Cheese Delight

Enjoy this Buffalo Chicken Mac and Cheese, a comforting blend of cheesy goodness and spicy flavor.
Print Recipe Pin Recipe
Prep Time 15 minutes mins
Cook Time 30 minutes mins
Total Time 45 minutes mins
Servings: 6 servings
Course: Main Dishes
Cuisine: American
Calories: 600
Ingredients Equipment Method Nutrition Notes

Ingredients
  

For the Cheese Sauce
  • 4 tablespoons Unsalted Butter Feel free to replace with olive oil if desired.
  • 4 tablespoons Plain Flour Gluten-free flour can work as a substitution.
  • 2 cups Whole Milk Using 2% milk is an option for a lighter sauce.
  • ½ cup Sour Cream Greek yogurt can be swapped for a similar texture.
  • 1 teaspoon Garlic Powder Fresh minced garlic can elevate its taste.
  • 1 teaspoon Smoked Paprika Regular paprika is a mild alternative.
  • 1 teaspoon Onion Powder You can sauté fresh onions for a fresher kick.
  • Salt and Black Pepper Adjust to your personal taste preferences.
For the Cheesy Pasta
  • 1 cup Freshly Grated Cheddar Cheese Try sharp provolone for a twist.
  • 1 cup Freshly Grated Mozzarella Low-moisture mozzarella melts beautifully.
  • 8 ounces Spirali Pasta (or Macaroni) Consider gluten-free pasta if needed.
  • 2 cups Cooked Chicken Use leftover chicken or rotisserie chicken for convenience.
  • ½ cup Frank's Buffalo Sauce Avoid regular hot sauce for an authentic zing.
  • 1 cup Freshly Grated Red Leicester Cheese More cheddar can do in a pinch.
Optional Toppings
  • Blue Cheese Sauce Drizzle it on top to enrich your dish.
  • Extra Buffalo Sauce Add more heat if you like it spicy.
  • Fresh Chives Sprinkle generously for garnish.
  • Crispy Bacon A delightful crunch that complements the creamy texture beautifully.

Equipment

  • Large Pot
  • Large Saucepan
  • Baking Dish
  • Whisk
  • Measuring Cups
  • Measuring Spoons

Method
 

Step-by-Step Instructions
  1. Preheat your oven to 180°C (350°F).
  2. In a large pot, bring salted water to a boil. Add your spirali pasta and cook according to package instructions until al dente, about 8-10 minutes. Drain the pasta and set it aside, lightly tossing with olive oil to prevent sticking.
  3. In a large saucepan over medium heat, melt the unsalted butter until bubbly. Gradually whisk in the plain flour, stirring constantly for 2-3 minutes until you form a thick roux mixture.
  4. Slowly whisk in the whole milk to the roux, stirring continuously until it thickens and becomes smooth, about 5 minutes. Mix in the sour cream, garlic powder, smoked paprika, onion powder, salt, and pepper. Let simmer for another minute.
  5. Gradually add the freshly grated cheddar and mozzarella cheese into the sauce, stirring until completely melted and creamy.
  6. Add the drained pasta and cooked chicken to the cheese sauce, followed by the Frank's Buffalo Sauce. Stir until everything is evenly coated.
  7. Pour the mixture into a large baking dish and sprinkle the freshly grated Red Leicester cheese on top.
  8. Place in the preheated oven and bake for 15 minutes until the cheese is bubbly and golden.
  9. Switch the oven to broil and let broil for an additional 2-3 minutes for extra crispiness.
  10. Remove from the oven, let cool for a few minutes, and serve hot, garnished with fresh chives, crispy bacon, or a drizzle of blue cheese sauce.

Nutrition

Serving: 1servingCalories: 600kcalCarbohydrates: 50gProtein: 35gFat: 30gSaturated Fat: 15gPolyunsaturated Fat: 5gMonounsaturated Fat: 5gCholesterol: 100mgSodium: 800mgPotassium: 600mgFiber: 2gSugar: 2gVitamin A: 250IUVitamin C: 2mgCalcium: 400mgIron: 2mg

Notes

Store leftovers in an airtight container for up to 3 days. Reheat in the oven or microwave to maintain creaminess.

Tried this recipe?

Let us know how it was!

Juicy Mediterranean Steak Grain Bowl for Easy Weeknight Meals

July 20, 2025 by grace bellamy Leave a Comment

I'm not usually one to skip breakfast, but when I do, it means I'm gearing up to create something special—like a Mediterranean Steak Grain Bowl that will have everyone asking for seconds. In just 30 minutes, this recipe brings the vibrant flavors of the Mediterranean right to your plate, with a hearty base of protein-packed quinoa and creamy hummus. It's customizable too, helping you cater to every palate at the table. Busy weeknights can be a hassle, but this bowl not only simplifies dinner prep, it also ensures you're fueling your family with fresh ingredients and delightful textures. What’s your favorite flavor to add to a grain bowl?

Why is this bowl a dinner favorite?

Simplicity makes it a breeze: In just 30 minutes, you’ll have a delicious meal ready to enjoy.

Customizable options elevate the experience: Each family member can craft their own perfect bowl, adding personal touches that everyone will love.

Packed with nutrition: From protein-rich quinoa to colorful veggies, this dish strikes a balance that keeps everyone satisfied.

Vibrant flavors come alive: The combination of grilled steak, fresh herbs, and zesty dressing creates a mouthwatering experience with each bite.

Ideal for meal prep: Prepare the components ahead of time, allowing for easy assembly during busy days. You can even explore making a Street Corn Bowl as a delightful side or variation for future dinners!

Complete meal potential: Perfectly pairs with dishes like Air Fryer Zucchini Chips for an ideal family meal that everyone will rave about.

Ingredients for Mediterranean Steak Grain Bowl

• Dive into the flavorful world of Mediterranean Steak Grain Bowl with these essential ingredients!

For the Protein

  • Flank Steak – A lean source of protein, iron, and vitamin B12; try skirt steak or chicken for a variation.

For the Base

  • Quinoa – Nutty and packed with protein and fiber; remember to rinse it before cooking!
  • Hummus – Adds creaminess and flavor; opt for your favorite flavored store-bought variety.

For the Veggies

  • Cherry Tomatoes – Sweet and vibrant, these enhance the bowl's flavor; substitute any small tomato if needed.
  • Bell Pepper – Crunchy bites full of vitamin C; use any color that appeals to you!
  • Red Onion – Adds sharpness and depth; switch to green onions for a milder taste.

For the Toppings

  • Crumbled Feta – Creamy and salty goodness; goat cheese is a great tangy alternative.
  • Kalamata Olives – Rich and salty, these elevate the bowl; green olives can be tried for a different twist.

For the Dressing

  • Greek Yogurt – The base of the creamy dressing; feel free to use non-dairy yogurt for a vegan version.
  • Lemon – Adds a bright acidity; freshly squeezed is the way to go!
  • Garlic – A flavor punch; always choose fresh for the best taste.
  • Oregano – Bold flavor boost in the dressing; dried Italian herbs work in a pinch.
  • Mint – A hint of sweetness; parsley is a great substitute if you prefer it.
  • Olive Oil – A healthy fat source for both cooking and dressing; consider avocado oil for grilling.
  • Salt and Pepper – Essentials for flavoring; adjust to taste!

Step‑by‑Step Instructions for Mediterranean Steak Grain Bowl

Step 1: Cook Quinoa
Begin by rinsing 1 cup of quinoa under cold water to remove any bitterness. In a saucepan, combine the rinsed quinoa with 2 cups of water and a pinch of salt. Bring it to a boil over medium-high heat, then reduce to low, covering the pot for 15 minutes until the quinoa is fluffy and the water is absorbed. Remove from heat and let it rest, covered, while you prepare the other components.

Step 2: Prepare Dressing
In a mixing bowl, whisk together 1 cup of Greek yogurt, the juice of 1 lemon, 2 minced garlic cloves, 1 teaspoon of oregano, a handful of chopped mint, and 2 tablespoons of olive oil. Season with salt and pepper to taste. Mix until the dressing is smooth and creamy, then set it aside so the flavors can meld while you grill the steak.

Step 3: Grill Steak
Preheat a cast iron grill pan or outdoor grill over medium-high heat. Season 1 pound of flank steak generously with salt and pepper. Once hot, place the steak on the grill and cook for about 5 minutes on each side for medium-rare, or longer if you prefer it more done. When ready, let the steak rest for 5 minutes before slicing it against the grain for maximum tenderness.

Step 4: Prep Vegetables
While the steak is resting, chop the vegetables. Dice 1 cup of cherry tomatoes, slice 1 bell pepper into strips, and thinly slice half a red onion. Arrange them on a cutting board, and enjoy the vibrant colors as you prepare to assemble your Mediterranean Steak Grain Bowl.

Step 5: Assemble Bowls
To assemble your Mediterranean Steak Grain Bowl, start by placing a generous scoop of the cooked quinoa and a dollop of hummus in each serving bowl. Next, top with the sliced grilled steak, the chopped vegetables, and finish with crumbled feta and a handful of Kalamata olives. Drizzle with the creamy herb yogurt dressing for a mouthwatering finish that brings all the Mediterranean flavors together beautifully.

Expert Tips for Mediterranean Steak Grain Bowl

  • Perfectly Cooked Steak: Use a meat thermometer to ensure your flank steak is cooked to your desired doneness—145°F for medium-rare, avoiding overcooking.

  • Cool Your Quinoa: Allow your cooked quinoa to cool before assembly to prevent wilting the veggies, achieving a fresh and vibrant bowl.

  • Prep Ahead: Chop your vegetables and prepare the dressing in advance. Store them separately to save time on busy weeknights while assembling the Mediterranean Steak Grain Bowl.

  • Mix and Match: Don’t hesitate to try different toppings or bases like farro or brown rice, making the meal even more versatile and tailored to your family's tastes.

  • Taste As You Go: Season each component as you prepare, ensuring each layer bursts with flavor in the final bowl. Remember, a sprinkle of salt can make a huge difference!

  • Storing Leftovers: Store leftovers in individual containers with the dressing on the side to keep textures intact, allowing for easy reheating.

Mediterranean Steak Grain Bowl Variations

Feel free to explore these delicious twists and substitutions to make this recipe uniquely yours!

  • Gluten-Free: Swap quinoa for gluten-free grain options like brown rice or cauliflower rice for a lightened version.
    Cauliflower rice adds a delightful texture and reduces the carbohydrate content, making it a smart choice for a gluten-free meal.

  • Dairy-Free: Use a non-dairy yogurt alternative in the dressing instead of Greek yogurt for a vegan-friendly option.
    This keeps the creamy flavor while catering to those with dairy sensitivities without sacrificing taste.

  • Extra Veggies: Add slices of cucumber or roasted beets for a burst of freshness and color.
    These vegetables not only enhance the bowl’s visual appeal but also contribute additional nutrients and vibrant flavors.

  • Heat It Up: Include jalapeños or a drizzle of sriracha to spice things up for those who love a kick.
    A little heat can elevate the overall flavor profile of your bowl and add dimension to each bite.

  • Flavorful Grains: Experiment with farro or wild rice instead of quinoa for a heartier grain base.
    Using different grains invites a delightful nutty taste and texture that complements the savory steak.

  • Zingy Citrus: Incorporate orange or grapefruit segments for a sweet and citrusy contrast to the savory elements.
    The burst of citrus will brighten the entire dish, balancing flavors superbly.

  • Herb Boost: Infuse the dressing with fresh basil or dill for a refreshing twist on flavor.
    These herbs can transform your creamy dressing, adding a unique nuance that pairs beautifully with steak and veggies.

Feel inspired? This Mediterranean Steak Grain Bowl is a canvas for your culinary creativity! Don’t hesitate to try combining these elements and see what becomes your new favorite version. Pairing this dish with a side like Corn and Tomato Salad can create a delightful ending to your meal.

How to Store and Freeze Mediterranean Steak Grain Bowl

Fridge: Store any leftovers in an airtight container for up to 3-4 days. Keep the dressing separate to prevent sogginess.

Freezer: The quinoa and grilled steak can be frozen for up to 3 months. Lay them flat in freezer bags to save space and allow for easy thawing.

Reheating: When ready to enjoy, thaw overnight in the fridge and reheat the quinoa and steak in the microwave or on the stovetop until warmed through.

Fresh Components: Fresh vegetables should be consumed within a few days to maintain their crispness and flavor. Assemble your Mediterranean Steak Grain Bowl right before serving for the best taste!

What to Serve with Mediterranean Steak Grain Bowl

Elevate your dinner experience with delightful sides and drinks that complement the vibrant flavors of this Mediterranean-inspired dish.

  • Air Fryer Zucchini Chips: These crispy chips provide a crunchy contrast to the creamy textures of the grain bowl, adding a light and satisfying side.

  • Corn and Tomato Salad: A refreshing mix of sweet corn and juicy tomatoes brightens up the meal with its fresh, zesty flavors.

  • Crispy Garlic Bread: This warm, buttery accompaniment is perfect for soaking up any leftover dressing, enhancing the overall meal experience.

  • Roasted Red Pepper Hummus: Elevate the grain bowl with a flavorful twist on traditional hummus, adding depth and a smoky note.

  • Mediterranean Couscous Salad: This light, fluffy salad combines herbs, veggies, and spices, offering a fluffy base that pairs perfectly with the grain bowl’s textures.

  • Crisp Green Salad: A simple yet refreshing mix of mixed greens with a lemon vinaigrette complements the hearty bowl beautifully without overpowering it.

  • Mint Lemonade: Cool down your palate with a refreshing mint lemonade—a delightful drink that echoes the fresh flavors of your Mediterranean meal.

Make Ahead Options

These Mediterranean Steak Grain Bowls are ideal for meal prep, saving you valuable time on busy weeknights! You can prepare the quinoa and the herb yogurt dressing up to 3 days in advance; simply store them in airtight containers in the refrigerator. Additionally, the grilled steak can be cooked and refrigerated for up to 24 hours. To maintain the steak’s juiciness, allow it to cool completely before slicing and storing. When you're ready to enjoy, just reheat the steak gently in a skillet, assemble your bowls with the chopped vegetables, hummus, and feta, then drizzle with the prepared dressing. With this prep strategy, you’ll have a delicious, restaurant-quality Mediterranean Steak Grain Bowl ready in no time!

Mediterranean Steak Grain Bowl Recipe FAQs

How do I choose ripe vegetables for my Mediterranean Steak Grain Bowl?
Absolutely! For the best flavor, look for cherry tomatoes that are vibrant and firm, without dark spots. Select bell peppers that are smooth and shiny, indicating freshness. Red onions should be heavy and firm, avoiding ones that feel lightweight or soft.

How should I store leftovers of the Mediterranean Steak Grain Bowl?
Great question! Store your leftovers in an airtight container in the fridge for 3-4 days. To keep the textures fresh, it’s best to keep the dressing separate from the veggies and grains.

Can I freeze components of the Mediterranean Steak Grain Bowl?
Yes! You can freeze the cooked quinoa and the grilled steak for up to 3 months. I recommend portioning them into freezer bags, laying them flat to save space. When you’re ready to enjoy them again, thaw overnight in the refrigerator, then reheat on the stovetop or microwave until warmed through.

What should I do if my quinoa tastes bitter?
Very! If your quinoa has a bitter taste, it may not have been rinsed well. Always rinse quinoa under cold water in a fine mesh strainer before cooking to remove natural saponins that can give it an unpleasant flavor. This step ensures a clean, nutty flavor that pairs beautifully with your Mediterranean Bowl.

Are there any allergen considerations for the Mediterranean Steak Grain Bowl?
Definitely! If you're concerned about allergies, be cautious with the feta cheese and possible gluten in hummus. Opt for lactose-free yogurt and dairy substitutes if needed. Additionally, always check for traces of nuts in packaged items like hummus—most should be nut-free, but it’s always wise to verify.

Can I prepare the Mediterranean Steak Grain Bowl ahead of time?
Absolutely! To optimize your time, you can prep the quinoa, chop the vegetables, and mix the dressing ahead of time. Store each component separately in the fridge for up to 3 days. When you’re ready to enjoy, simply assemble all the components in your bowl and drizzle with dressing for a quick, nutritious meal!

Mediterranean Steak Grain Bowl

Juicy Mediterranean Steak Grain Bowl for Easy Weeknight Meals

This Mediterranean Steak Grain Bowl brings vibrant flavors and nutrition to your table in just 30 minutes.
Print Recipe Pin Recipe
Prep Time 15 minutes mins
Cook Time 15 minutes mins
Resting Time 5 minutes mins
Total Time 30 minutes mins
Servings: 4 bowls
Course: Main Dishes
Cuisine: Mediterranean
Calories: 450
Ingredients Equipment Method Nutrition Notes

Ingredients
  

For the Protein
  • 1 pound Flank Steak Can substitute with skirt steak or chicken.
For the Base
  • 1 cup Quinoa Rinse before cooking.
  • 1 cup Hummus Use your favorite variety.
For the Veggies
  • 1 cup Cherry Tomatoes Can substitute with any small tomato.
  • 1 unit Bell Pepper Any color is fine.
  • 0.5 unit Red Onion Green onions can be used for milder flavor.
For the Toppings
  • 0.5 cup Crumbled Feta Goat cheese is a tangy alternative.
  • 0.25 cup Kalamata Olives Green olives can be substituted.
For the Dressing
  • 1 cup Greek Yogurt Non-dairy yogurt is a vegan alternative.
  • 1 unit Lemon Freshly squeezed is best.
  • 2 cloves Garlic Always use fresh.
  • 1 teaspoon Oregano Dried Italian herbs can be used.
  • 1 handful Mint Parsley is a suitable substitute.
  • 2 tablespoons Olive Oil Avocado oil is a good grilling option.
  • Salt Adjust to taste.
  • Pepper Adjust to taste.

Equipment

  • Saucepan
  • grill pan
  • Mixing Bowl

Method
 

Step‑by‑Step Instructions
  1. Rinse 1 cup of quinoa under cold water. In a saucepan, combine with 2 cups of water and a pinch of salt. Bring to a boil, reduce to low, cover and cook for 15 minutes until fluffy.
  2. In a mixing bowl, whisk together 1 cup of Greek yogurt, juice of 1 lemon, 2 minced garlic cloves, 1 teaspoon of oregano, chopped mint, and 2 tablespoons of olive oil. Season to taste.
  3. Preheat grill pan or outdoor grill over medium-high heat. Season 1 pound of flank steak with salt and pepper. Grill for about 5 minutes on each side for medium-rare. Let rest for 5 minutes before slicing.
  4. Chop vegetables: dice 1 cup of cherry tomatoes, slice 1 bell pepper, and thinly slice half a red onion.
  5. To assemble, place quinoa and hummus in bowls, top with steak, vegetables, feta, and olives. Drizzle with dressing.

Nutrition

Serving: 1bowlCalories: 450kcalCarbohydrates: 40gProtein: 35gFat: 20gSaturated Fat: 5gPolyunsaturated Fat: 2gMonounsaturated Fat: 12gCholesterol: 85mgSodium: 500mgPotassium: 800mgFiber: 8gSugar: 4gVitamin A: 15IUVitamin C: 30mgCalcium: 10mgIron: 20mg

Notes

For optimal flavor, season each component as you prepare. Store leftovers separately to maintain texture.

Tried this recipe?

Let us know how it was!

Indulgent Crockpot Pierogi Casserole with Kielbasa Delight

July 20, 2025 by grace bellamy Leave a Comment

As the scent of savory kielbasa starts to waft through the kitchen, memories of my grandma’s family gatherings come rushing back. There’s something undeniably comforting about the Slow Cooker Pierogi Casserole with Kielbasa that wraps you in a warm hug on chilly nights. This dish is not only a crowd-pleaser, but it also takes mere minutes to assemble—leaving you with plenty of time to indulge in the cozy moments of home cooking. With creamy cheddar pierogies bathed in rich chicken broth and the delightful smokiness of kielbasa, you can easily adapt this recipe to fit your family’s tastes. Whether you’re feeding a hungry crew after a hectic day or looking for a cozy weekend meal, this casserole is a delightful treat. Curious about the secret ingredient that makes it extra special? Keep reading to uncover the magic of this heartwarming dish!

Why is this casserole a must-try?

Comforting and Indulgent: This dish is the ultimate comfort food, perfect for those chilly nights when you crave something warm and satisfying.

Easy Assembly: With minimal prep time, you can have this delicious casserole simmering away in your slow cooker in just minutes.

Family-Friendly Delight: The creamy cheddar pierogies and smoky kielbasa create a flavor combination that even picky eaters will love.

Customizable: Feel free to switch up ingredients—try adding sautéed vegetables or swapping out the kielbasa for your favorite sausage for a personalized touch.

Make-ahead Convenience: Ideal for busy weeknights, this casserole can be assembled ahead of time and stored in the fridge until you're ready to cook.

Nostalgic Flavors: This recipe is reminiscent of family gatherings, combining comforting, nostalgic ingredients into one heartwarming dish. Don't miss trying it out alongside some delicious Overnight Breakfast Casserole for another cozy meal option!

Crockpot Pierogi Casserole Ingredients

• For the Casserole

  • Mrs. T’s Cheddar Pierogies – The star of the show, adding that rich, cheesy flavor—look for 12-count packages (around 24 ounces total).
  • Chicken Broth – Provides a savory foundation for your casserole; you can substitute with vegetable broth for a vegetarian twist.
  • Cream Cheese – This ingredient adds creaminess and binds everything together; light cream cheese works beautifully too.
  • Shredded Cheddar Cheese – Elevates the cheesy goodness and creates a delicious topping; mozzarella or a cheese blend can be great substitutes.
  • Kielbasa – Lends a smoky, savory flavor; feel free to use any smoked sausage, or turkey kielbasa for a lighter option.
  • Salt and Pepper – Essential for seasoning; adjust to taste for the best flavor.

• For the Topping

  • Extra Shredded Cheddar Cheese – A half cup added at the end gives a delightful melt on top; feel free to use your favorite cheese blend for variety.

This Crockpot Pierogi Casserole with Kielbasa is not only delicious but can easily adapt to suit your taste preferences, ensuring a dish everyone will enjoy!

Step‑by‑Step Instructions for Crockpot Pierogi Casserole with Kielbasa

Step 1: Combine Ingredients in Crockpot
Begin by pouring 3 cups of chicken broth into a 4-6 quart crockpot. Next, add the frozen Mrs. T's Cheddar Pierogies and sliced kielbasa evenly across the broth. Sprinkle 1 cup of shredded cheddar cheese on top, then gently stir the mixture to combine, ensuring the pierogies are submerged in the savory liquid.

Step 2: Cook Casserole
Cover the crockpot with its lid and set it to cook on high for 3 hours or low for 6 hours. It’s important to resist the urge to lift the lid during cooking to maintain the heat and ensure the pierogies become tender without turning mushy. You’ll know it's ready when everything is heated through and bubbling.

Step 3: Prepare Cream Cheese Mixture
About 30 minutes before the cooking time is up, take your cream cheese and cut it into cubes for easier melting. In a small saucepan over low heat, combine the cream cheese with a little bit of broth from the crockpot. Stir continuously until the mixture is smooth and creamy, which should take around 5-7 minutes.

Step 4: Final Assembly
Once the cooking time has elapsed, carefully pour the creamy mixture into the crockpot. Use a spatula to gently fold it into the casserole, being careful not to break the pierogies apart. Top the casserole with an additional half cup of shredded cheddar cheese for a deliciously melty finish.

Step 5: Serve
Allow the casserole to cook on low for an extra 30 minutes, which lets the flavors meld beautifully. Once ready, serve the Crockpot Pierogi Casserole with Kielbasa hot, garnished with sliced green onions for a fresh touch. Enjoy this hearty dish that’s sure to delight friends and family alike!

How to Store and Freeze Crockpot Pierogi Casserole with Kielbasa

Fridge: Store leftovers in an airtight container for up to 3 days for the best flavor and texture.

Freezer: Freeze portions in freezer-safe containers for up to 2 months. Make sure to leave space for expansion as it freezes.

Reheating: When ready to enjoy, reheat gently in the microwave or on the stovetop, adding a splash of chicken broth to restore creaminess.

Packaging: For optimal freshness, wrap tightly in plastic wrap before placing in containers. This helps preserve the flavors of your delicious Crockpot Pierogi Casserole with Kielbasa.

Tips for the Best Crockpot Pierogi Casserole

  • Don’t Overcook: Keep a close eye on the cooking time; overcooking can turn your pierogies mushy. Stick to 3 hours on high or 6 hours on low for the best texture.

  • Layer Wisely: Start by pouring the chicken broth first, then layering the ingredients. This ensures even cooking and prevents pierogies from getting stuck at the bottom.

  • Cream Cheese Magic: Add the cream cheese mixture with gentle folds after cooking; stirring vigorously can break apart your beloved pierogies.

  • Season with Care: Adjust salt and pepper to taste after cooking, as flavors can concentrate over time. Remember, the cheese and broth also contribute to the overall seasoning.

  • Flavor Enhancements: For an extra burst of flavor, consider browning the kielbasa first. This step adds depth and a lovely caramelized note to the dish.

  • Storage Savvy: Leftovers can be stored in an airtight container for up to 3 days. Reheat gently with a splash of broth to keep it creamy and delicious.

Crockpot Pierogi Casserole with Kielbasa Variations

Feel free to get creative and tailor this recipe to your taste buds for an even more delightful experience.

  • Vegetable Boost: Swap some cheese for sautéed onions, mushrooms, or bell peppers. This will enhance both flavor and nutrition, adding a colorful twist to your dish.

  • Alternate Pasta: Try using tortellini or gnocchi instead of pierogies for a different texture. Each option brings its own unique charm to the casserole.

  • Spicy Kick: Incorporate a splash of your favorite hot sauce or diced jalapeños for an extra burst of heat. It’ll transform the dish into a bold, exciting meal!

  • Dairy-Free Option: Use a dairy-free cream cheese alternative and vegan shredded cheese. This makes the casserole accessible for those who need to avoid dairy while still enjoying its comforting qualities.

  • Protein Swap: Substitute smoked sausage with diced cooked chicken or even lentils for a meatless twist. The dish can remain hearty and satisfying while accommodating your dietary needs.

  • Herb Infusion: Add fresh herbs like dill or chives right before serving. They brighten up the flavors and add a lovely touch of freshness to the final dish.

  • Crunchy Topping: Top the casserole with crushed buttered breadcrumbs or crispy fried onions during the last few minutes of cooking for a delightful crunchy texture.

  • Slow Cooker Magic: Use a different slow cooker setting by adding a can of diced tomatoes or beans for an exciting, hearty variation that gives a nod to chili flavors.

Feel free to pair this comforting casserole with a side of garlic bread or a fresh green salad for a complete meal. If you're looking for more delicious slow-cooked recipes, try out the Cheesy Ground Casserole or the Chili Meatballs Crockpot for exceptional family-friendly options!

Make Ahead Options

These Crockpot Pierogi Casserole with Kielbasa are perfect for busy home cooks looking to save time during the week! You can assemble the casserole up to 24 hours in advance by combining the frozen pierogies, sliced kielbasa, chicken broth, and cheese in the crockpot. Simply cover and refrigerate it until you're ready to cook. When it's time to enjoy, just set your crockpot to high for 3 hours or low for 6 hours, then prepare the cream cheese mixture as instructed. This way, you'll have a comforting meal waiting for you without sacrificing quality—just as delicious and warm, ready to nourish your family after a hectic day!

What to Serve with Crockpot Pierogi Casserole with Kielbasa

Complete your meal experience with delightful pairings that enhance the warmth and flavors of this comforting dish.

  • Garlic Bread: The crispy, buttery texture complements the creamy casserole perfectly, making each bite a delicious adventure.

  • Fresh Green Salad: A light and refreshing side adds a crisp contrast, balancing the richness of the casserole while introducing vibrant colors to your plate.

  • Roasted Vegetables: Tossed in olive oil and herbs, these add a savory depth and nutritional boost that pairs beautifully with the hearty flavors.

  • Steamed Broccoli: Bright green and slightly crunchy, steamed broccoli adds a delightful texture and a pop of freshness, elevating the entire meal.

  • Creamy Coleslaw: This tangy dish with its crunch factor provides a refreshing contrast, enhancing the richness of the casserole with each bite.

  • Apple Sauce: The sweet, fruity tang serves as a wonderful palate cleanser, bringing a touch of nostalgia and sweetness to your table.

  • Light White Wine: A chilled Sauvignon Blanc or a Pinot Grigio offers a crisp finish, beautifully complementing the flavors of the kielbasa and cheese.

  • Chocolate Chip Cookies: For dessert, these classic treats bring warmth and sweetness to the end of your meal, creating a well-rounded family-centered dining experience.

Make this mealtime not just about feeding the belly, but about celebrating love and togetherness with every dish you serve alongside the Crockpot Pierogi Casserole with Kielbasa!

Crockpot Pierogi Casserole with Kielbasa Recipe FAQs

What is the best way to choose pierogies?
Absolutely! When selecting Mrs. T’s Cheddar Pierogies, look for packages that feel firm and show no signs of frostbite. Avoid bags with dark spots or ice crystals, which can indicate freezer burn and affect flavor. Always check the expiration date for freshness!

How should I store leftovers?
Leftovers can be placed in an airtight container and stored in the refrigerator for up to 3 days. To maintain the casserole's creaminess, I recommend reheating it gently on the stove or in the microwave, adding a splash of chicken broth if needed.

Can I freeze the Crockpot Pierogi Casserole with Kielbasa?
Yes, you can! To freeze, allow it to cool completely before portioning into freezer-safe containers; this ensures the best quality. Make sure to leave some space in each container for expansion—up to 2 months in the freezer! When you're ready to enjoy, thaw overnight in the refrigerator and reheat gently, adding a bit of broth to restore its creamy texture.

What can I do if my casserole turns out mushy?
If your casserole ends up mushy, it might be due to overcooking. To avoid this, be sure to stick with the recommended cooking times—high for 3 hours or low for 6. If you're already facing mushy pierogies, consider adding a splash of cream or additional cheese when reheating, which can help thicken the mixture up a bit.

Are there any dietary considerations I should keep in mind?
Very! If you're cooking for someone with dietary restrictions, be mindful of the kielbasa—there are many delicious alternatives, like turkey kielbasa or even plant-based sausage for vegetarians. Additionally, recipes can be easily adapted for lactose intolerance by using dairy-free cream cheese and cheese options.

How can I enhance the flavors in my casserole?
For an extra layer of flavor, I recommend browning the kielbasa in a skillet before adding it to the crockpot. This step enhances the smokiness and creates a delightful caramelization that elevates the dish. You can also sprinkle fresh herbs like parsley or add sautéed onions for added depth.

Crockpot Pierogi Casserole with Kielbasa

Indulgent Crockpot Pierogi Casserole with Kielbasa Delight

This Crockpot Pierogi Casserole with Kielbasa is a comforting, family-friendly dish that combines cheesy pierogies with smoky kielbasa.
Print Recipe Pin Recipe
Prep Time 15 minutes mins
Cook Time 6 hours hrs
Resting Time 30 minutes mins
Total Time 6 hours hrs 45 minutes mins
Servings: 6 servings
Course: Main Dishes
Cuisine: American, Polish
Calories: 490
Ingredients Equipment Method Nutrition Notes

Ingredients
  

For the Casserole
  • 24 ounces Mrs. T’s Cheddar Pierogies
  • 3 cups Chicken Broth Substitute with vegetable broth for vegetarian option.
  • 8 ounces Cream Cheese Light cream cheese works well.
  • 1 cup Shredded Cheddar Cheese Can substitute with mozzarella or cheese blend.
  • 12 ounces Kielbasa Feel free to use any smoked sausage or turkey kielbasa.
  • to taste Salt
  • to taste Pepper
For the Topping
  • 0.5 cup Extra Shredded Cheddar Cheese Use your favorite cheese blend if desired.

Equipment

  • Crockpot

Method
 

Preparation
  1. Pour 3 cups of chicken broth into a 4-6 quart crockpot. Add frozen Mrs. T's Cheddar Pierogies and sliced kielbasa evenly over the broth. Sprinkle 1 cup of shredded cheddar cheese on top, then gently stir to combine.
  2. Cover the crockpot and set it to cook on high for 3 hours or low for 6 hours, avoiding lifting the lid during cooking.
  3. About 30 minutes before cooking time is up, cut cream cheese into cubes and combine in a small saucepan with a bit of broth. Stir over low heat until smooth and creamy, around 5-7 minutes.
  4. Once cooking time is up, pour the creamy mixture into the crockpot and gently fold with a spatula. Top with 0.5 cup of shredded cheddar cheese.
  5. Cook on low for an additional 30 minutes to meld flavors. Serve hot, garnished with sliced green onions.

Nutrition

Serving: 1servingCalories: 490kcalCarbohydrates: 36gProtein: 22gFat: 30gSaturated Fat: 15gPolyunsaturated Fat: 2gMonounsaturated Fat: 7gTrans Fat: 1gCholesterol: 90mgSodium: 1200mgPotassium: 600mgFiber: 2gSugar: 2gVitamin A: 800IUVitamin C: 2mgCalcium: 350mgIron: 2mg

Notes

Store leftovers in an airtight container for up to 3 days. Reheat gently with a splash of broth for best results.

Tried this recipe?

Let us know how it was!

Irresistibly Juicy Crock Pot Meatballs Everyone Will Love

July 20, 2025 by grace bellamy Leave a Comment

The aroma of sweet and spicy wafts through my kitchen as I prepare a batch of Honey Buffalo Meatballs, a dish that never fails to ignite excitement. These Crock Pot Meatballs are not only incredibly easy to make, but they also promise to be a real crowd-pleaser at any gathering. With their tender texture and sticky honey buffalo glaze, they make the ideal make-ahead appetizer or a satisfying addition to dinner. Plus, you can customize the heat level to fit everyone's palate, ensuring that no one is left out. Whether you're hosting a lively game day party or looking for a weeknight family meal, you'll find these meatballs satisfy both cravings and convenience. Are you ready to dive into a recipe that's sure to make your taste buds dance?

Why Are Honey Buffalo Meatballs a Must-Try?

Irresistible Flavor: The sweet and spicy combination creates an unforgettable taste experience that leaves everyone wanting more.

Effortless Preparation: These Crock Pot Meatballs come together with minimal hands-on time, letting your slow cooker do the work for you.

Customizable Heat: You can easily adjust the spice level to cater to both mild and fiery preferences with just a dash of sauce.

Crowd-Pleasing Appeal: Perfect for parties or family gatherings, these meatballs will have your guests raving—especially when served alongside dishes like Chicken Pot Pie or Crock Pot Chicken.

Make-Ahead Magic: Prep in advance and simply reheat when it's time to eat, perfect for busy weeknights or entertaining.

Unique Texture: Enjoy tender meatballs with a delightful glaze that brings a touch of gourmet to your table without the fuss.

Crock Pot Meatballs Ingredients

• Note: These Honey Buffalo Meatballs are a fantastic choice for your slow cooker!

  • For the Meatballs

  • Lean Ground Beef – Provides rich flavor and tender texture; substitute with ground turkey or chicken for a lighter option.

  • Eggs – Acts as a binding agent to keep your meatballs moist and together.

  • Saltine Crackers (crushed) – Adds structure and a unique flavor compared to traditional breadcrumbs.

  • Dried Minced Onion – Enhances overall flavor depth; fresh onion can be used but may alter the meatball's texture.

  • Milk – Provides moisture to ensure the meatball mixture stays juicy.

  • Spices (Garlic Powder, Onion Powder, Chili Powder, Smoked Paprika, Ground Cumin, Salt, Pepper) – Contributes to a delicious flavor profile; adjust the spices to match your palate.

  • For the Honey Buffalo Sauce

  • Frank’s Red Hot Original Sauce – The star ingredient that defines the iconic honey buffalo flavor; modify the quantity to manage spice level.

  • Honey – Delivers sweetness that beautifully balances the heat of the sauce.

  • Apricot Preserves – Adds a fruity layer to the sauce, enhancing the overall taste experience.

  • Brown Sugar – Helps sweeten the sauce further, creating a sticky glaze.

  • Reduced Sodium Soy Sauce – Introduces umami flavor into the sauce for depth.

  • Cornstarch – Use to thicken the sauce if you prefer a denser consistency.

Step‑by‑Step Instructions for Honey Buffalo Meatballs

Step 1: Preheat the Oven
Start by preheating your oven to 450°F (232°C). Line a baking sheet with foil for easy cleanup and to help the meatballs brown nicely. The foil will prevent sticking and allow for easy transfer of the meatballs to the slow cooker later. This initial step is crucial to ensure a crispy exterior on your meatballs.

Step 2: Mix the Meatball Ingredients
In a large mixing bowl, combine the lean ground beef, eggs, crushed saltines, dried minced onion, milk, and your selected spices. Use your hands or a fork to blend these ingredients until just combined—avoid overmixing to keep the meatballs tender and juicy. This mixture is the base of your delicious Honey Buffalo Meatballs.

Step 3: Shape the Meatballs
Using your hands, shape the mixture into 1-inch meatballs and place them evenly spaced on the prepared baking sheet. The uniform size helps them cook evenly, ensuring a tender bite every time. Bake the meatballs in the oven for about 15–20 minutes, or until they are nicely browned and cooked through, reaching an internal temperature of 160°F (71°C).

Step 4: Prepare the Honey Buffalo Sauce
While the meatballs are baking, whisk together the Frank’s Red Hot sauce, honey, apricot preserves, brown sugar, and reduced sodium soy sauce in a separate bowl. This sticky sauce will coat your meatballs perfectly, adding that sweet and spicy flavor that makes these Honey Buffalo Meatballs truly irresistible.

Step 5: Combine in the Slow Cooker
Once the meatballs are cooked and slightly cooled, transfer them to the slow cooker. Pour the prepared honey buffalo sauce over the meatballs, ensuring they are evenly coated. This step allows the flavors to meld together beautifully while the slow cooker does the work, making your meal prep effortless.

Step 6: Cook in the Slow Cooker
Set the slow cooker on LOW for 2–4 hours. Stir the meatballs gently after the first hour to ensure that they are thoroughly coated in sauce and absorb all the flavors. Cooking them slowly allows the meatballs to soak up that delicious honey buffalo glaze, resulting in a mouthwatering dish every time.

Step 7: Serve and Enjoy
When you're ready to serve, you can keep the slow cooker on the WARM setting until everyone is ready to enjoy these Crock Pot Meatballs. The warm sauce will keep them juicy and flavorful. Serve these delightful meatballs as an appetizer or over rice, ensuring all guests get to enjoy the sweet and spicy explosion in every bite.

Make Ahead Options

These Honey Buffalo Meatballs are perfect for meal prep enthusiasts! You can mix and shape the meatballs up to 24 hours in advance, storing them in the refrigerator to maintain their freshness. Additionally, the honey buffalo sauce can be prepared and refrigerated for up to 3 days. When you're ready to cook, simply bake the meatballs, then transfer them to the slow cooker, add the sauce, and enjoy as they simmer away. For the best results, ensure the meatballs are well-coated in sauce before heating, as this helps preserve their moist texture. With just a bit of planning, you can have a hassle-free dinner or party appetizer ready to go!

How to Store and Freeze Crock Pot Meatballs

Fridge: Store cooked Crock Pot Meatballs in an airtight container in the refrigerator for up to 3 days. Ensure the sauce fully coats the meatballs to maintain moisture.

Freezer: Freeze meatballs before or after cooking! Place in an airtight container or freezer bag for up to 3 months. For best results, freeze them in sauce to retain flavor.

Reheating: Thaw in the fridge overnight, then reheat in the microwave or on the stovetop over low heat until warmed through, ensuring they stay juicy and delicious.

Make-Ahead Magic: Prepare and freeze your meatballs ahead of time, making them a convenient option for busy days or impromptu gatherings!

Expert Tips for Crock Pot Meatballs

  • Avoid Overmixing: Combine ingredients gently to prevent tough meatballs. Your goal is a tender texture, so mix just until integrated.

  • Double the Sauce: Consider making extra honey buffalo sauce for an irresistible, flavorful coating. It enhances the dish and keeps the meatballs moist.

  • Consistent Size: Shape your meatballs in uniform sizes to ensure even cooking. This will lead to perfectly tender bites across the board.

  • Adjust Spice Level: Tailor the heat of your Crock Pot Meatballs based on personal preference. A little less hot sauce results in milder flavors that everyone can enjoy.

  • Prep Ahead: You can make meatballs in advance and freeze them cooked or raw. They thaw wonderfully and make for an easy weeknight dinner or last-minute party dish.

Crock Pot Meatballs Variations

Feel free to get creative with your Honey Buffalo Meatballs, letting your taste buds guide you to delicious new twists!

  • Dairy-Free: Substitute milk with almond or oat milk for a creamy texture without dairy.

  • Spicy Kick: Increase the hot sauce in the honey buffalo sauce for a stronger heat that will make your taste buds tingle.

  • Vegetarian Option: Swap ground beef with lentils or black beans, mashed and mixed with the same binding ingredients for a hearty, plant-based version.

  • Hawaiian Twist: Add diced pineapple to the sauce for a tropical sweet note that beautifully complements the spice.

  • Herb-Infused: Mix in fresh herbs like parsley or cilantro for a burst of freshness that enhances overall flavor and presentation.

  • Zesty Citrus: Add a splash of orange juice or zest to the sauce for a bright citrus flavor that balances the sweetness.

  • Crunchy Coating: Roll meatballs in crushed nuts or seeds before baking for added texture and flavor that everyone will love.

  • Sweet & Tangy: Replace apricot preserves with BBQ sauce for a smoky-sweet variation that brings a BBQ party vibe to your meal.

What to Serve with Honey Buffalo Meatballs

These flavorful meatballs can shine even brighter when paired with complementary sides and drinks.

  • Creamy Mashed Potatoes: The rich, buttery texture of mashed potatoes balances the spicy heat of the meatballs, providing a comforting side that’s always a crowd-pleaser.

  • Fresh Salad: A crisp mixed greens salad offers a refreshing contrast to the hearty meatballs, adding a burst of color and crunch to your table. Toss in some cherry tomatoes and cucumbers for added flavor!

  • Steamed Broccoli: Lightly steamed broccoli not only brings vibrant color to the meal but also adds a nutritious element that beautifully complements the rich sauce. The tenderness of the broccoli lets you savor the sweetness of the honey buffalo glaze.

  • Garlic Bread: Deliciously crispy on the outside yet soft on the inside, garlic bread provides the perfect scoop for your saucy meatballs. Dip it in the leftover honey buffalo sauce for an extra burst of flavor.

  • Coleslaw: A tangy coleslaw can cut through the sweetness of the meatballs, creating a delightful balance. The crunchy texture and zesty flavor enhance the overall dining experience.

  • Sparkling Water or Sweet Tea: For a refreshing drink option, try sparkling water with a squeeze of lemon or a sweet southern-style iced tea. Both pair perfectly with the bold flavors of the meatballs, making mealtime even more enjoyable.

Honey Buffalo Meatballs Recipe FAQs

How do I choose the right ground beef for my meatballs?
Absolutely! Select lean ground beef, ideally 80/20 for rich flavor and tenderness. Avoid overly fatty options to prevent greasy meatballs. If you're looking for a lighter alternative, ground turkey or chicken works well, but just remember they may be less juicy.

What’s the best way to store leftover honey buffalo meatballs?
Store your cooked Crock Pot Meatballs in an airtight container in the fridge for up to 3 days. Ensure they're completely coated in sauce to keep them moist and flavorful. If you're prepping for a busier week, these meatballs make a tasty, quick option for lunch or dinner!

Can I freeze honey buffalo meatballs? If so, how?
Absolutely! You can freeze these meatballs both before and after cooking. For best results, place them in a single layer on a baking sheet to freeze, then transfer them to an airtight container or freezer bag once solid. If freezing after cooking, ensure they’re submerged in sauce for retained flavor. They can be kept for up to 3 months.

What if my meatballs turn out too dry or dense?
If your meatballs are dry, it might be due to overmixing the meat. To keep them tender, mix the ingredients gently until just combined, and avoid compacting the mixture tightly. Additionally, adding a touch more milk or an extra egg can increase moisture and help achieve that juicy texture you're after.

Are honey buffalo meatballs safe for my pets?
While the ingredients in honey buffalo meatballs are safe for humans, it's best to avoid sharing them with pets due to the spices and high sodium content. If you wish to share a treat, set aside unseasoned versions made with plain ground meat and no additives.

How can I adjust the heat level of my honey buffalo sauce?
Very easily! The base of your heat comes from Frank’s Red Hot sauce, which you can adjust according to your taste. For a milder sauce, reduce the amount of hot sauce and blend in additional honey and apricot preserves. For extra kick, feel free to add more hot sauce or even some cayenne pepper, depending on your preference.

Crock Pot Meatballs

Irresistibly Juicy Crock Pot Meatballs Everyone Will Love

These Crock Pot Meatballs feature a sweet and spicy honey buffalo sauce, perfect for appetizers or dinner.
Print Recipe Pin Recipe
Prep Time 15 minutes mins
Cook Time 3 hours hrs
Total Time 3 hours hrs 15 minutes mins
Servings: 6 meatballs
Course: Appetizer
Cuisine: American
Calories: 250
Ingredients Equipment Method Nutrition Notes

Ingredients
  

For the Meatballs
  • 1 lb Lean Ground Beef Can substitute with ground turkey or chicken.
  • 1 large Eggs Acts as a binding agent.
  • 1 cup Saltine Crackers (crushed) Adds structure and unique flavor.
  • 2 tablespoon Dried Minced Onion Enhances overall flavor depth.
  • ¼ cup Milk Provides moisture.
  • 1 tablespoon Garlic Powder Part of the spice mix.
  • 1 tablespoon Onion Powder Part of the spice mix.
  • 1 tablespoon Chili Powder Part of the spice mix.
  • 1 tablespoon Smoked Paprika Part of the spice mix.
  • 1 tablespoon Ground Cumin Part of the spice mix.
  • 1 teaspoon Salt To taste.
  • 1 teaspoon Pepper To taste.
For the Honey Buffalo Sauce
  • 1 cup Frank’s Red Hot Original Sauce Adjust quantity to manage spice level.
  • ½ cup Honey Adds sweetness.
  • 1 cup Apricot Preserves Enhances overall taste.
  • ¼ cup Brown Sugar For sweetness.
  • 1 tablespoon Reduced Sodium Soy Sauce Adds umami flavor.
  • 2 tablespoon Cornstarch Use for thickening sauce if desired.

Equipment

  • Slow Cooker
  • Oven
  • Mixing Bowl
  • Baking Sheet

Method
 

Step-by-Step Instructions
  1. Preheat your oven to 450°F (232°C). Line a baking sheet with foil.
  2. In a large mixing bowl, combine the lean ground beef, eggs, crushed saltines, dried minced onion, milk, and selected spices. Mix gently.
  3. Shape the mixture into 1-inch meatballs and place them on the baking sheet. Bake for 15-20 minutes until browned and cooked through.
  4. Whisk together the Frank’s Red Hot sauce, honey, apricot preserves, brown sugar, and soy sauce in a bowl.
  5. Transfer the cooked meatballs to the slow cooker and pour the honey buffalo sauce over them. Coat evenly.
  6. Set the slow cooker on LOW for 2-4 hours. Stir gently after the first hour.
  7. Keep the slow cooker on WARM until serving. Enjoy as an appetizer or over rice.

Nutrition

Serving: 1meatballCalories: 250kcalCarbohydrates: 20gProtein: 15gFat: 12gSaturated Fat: 4gPolyunsaturated Fat: 1gMonounsaturated Fat: 7gCholesterol: 60mgSodium: 450mgPotassium: 200mgFiber: 1gSugar: 8gVitamin A: 100IUVitamin C: 1mgCalcium: 30mgIron: 2mg

Notes

These meatballs can be made ahead and frozen for easy weeknight meals. Adjust spices to your heat preference.

Tried this recipe?

Let us know how it was!

Indulge in Flavorful Jalapeno Pepper Jack Sausage Balls

July 20, 2025 by grace bellamy Leave a Comment

At my last backyard gathering, a delightful aroma wafted from the kitchen, piquing everyone's interest. It was the unmistakable scent of Jalapeno Pepper Jack Sausage Balls that had my friends lining up for more! These savory snacks pack a punch of heat and gooey cheese, making them the highlight of any party. Whether you're hosting a big event or simply craving a tasty bite, this recipe is your ticket to flavor town. With minimal prep time and ingredients, you can whip up these delicious bites in under an hour—perfect for a last-minute appetizer. Plus, they’re a fantastic make-ahead option that keeps well in the fridge, giving you the freedom to enjoy the party, too. Curious how to make these irresistible snacks a crowd favorite? Let’s dive into the recipe!

Why Are Jalapeno Pepper Jack Sausage Balls Irresistible?

Bold flavors: Each sausage ball is packed with spicy jalapeno heat and creamy pepper jack cheese, making every bite an explosion of taste. Quick to make: With just a few simple ingredients, you'll have a crowd-pleaser ready in under 30 minutes, perfect for unexpected guests. Versatile: These bites shine not just as appetizers but also work well for snacks, game nights, or potlucks. Make ahead: Prepare a batch in advance and simply reheat before serving for effortless entertaining! Pair them with your favorite dipping sauces like Cranberry Jalapeno Dip for an extra tasty twist. Say goodbye to fast food and hello to these delightful homemade snacks!

Jalapeno Pepper Jack Sausage Balls Ingredients

• Note: Gather these ingredients for the best vibrant, spicy flavor!

For the Base

  • Sausage – a main protein that gives these balls their savory depth.
  • Cream Cheese – enhances richness and moisture; it’s optional, but highly recommended!
  • Bisquick Mix – serves as a binding agent; feel free to use gluten-free for dietary needs.

For the Flavor

  • Pepper Jack Cheese – adds a delightful creaminess and a hint of heat; cheddar can be used for a milder experience.
  • Pickled Jalapenos – injects acidity and spice; using fresh jalapenos will elevate the flavor vibrancy.

These ingredients will come together beautifully, creating your new favorite party appetizer: Jalapeno Pepper Jack Sausage Balls!

Step‑by‑Step Instructions for Jalapeno Pepper Jack Sausage Balls

Step 1: Preheat the Oven
Begin by preheating your oven to 350°F (175°C). This ensures a perfectly cooked exterior on your Jalapeno Pepper Jack Sausage Balls. While the oven heats, gather your mixing bowls and baking sheets, ready to transform your delicious ingredients into mouthwatering bites.

Step 2: Mix Ingredients
In a large mixing bowl, combine the sausage, cream cheese, Bisquick mix, pepper jack cheese, and pickled jalapenos. Using your hands or a sturdy spatula, mix until evenly blended—aim for a consistent texture but avoid overmixing to maintain a tender bite. This step brings all the flavors together, ensuring every Jalapeno Pepper Jack Sausage Ball is a delight.

Step 3: Form the Balls
Now it’s time to shape your mixture! Scoop out a generous portion and roll it into 1-inch balls, ensuring they are uniformly sized for even cooking. Place each formed ball on a baking sheet lined with parchment paper or lightly greased to prevent sticking. Visualize those beautiful, golden bites ready to burst with flavor!

Step 4: Bake
Pop your tray of sausage balls into the preheated oven and set a timer for 20-25 minutes. Keep an eye on them; they should turn a lovely golden brown and have a slightly crispy texture when done. You’ll know they’re ready when the cheese is bubbling and the edges appear firm.

Step 5: Cool and Serve
Once baked, carefully remove the baking sheet from the oven and let the Jalapeno Pepper Jack Sausage Balls cool for a few minutes—this helps set their shape. Serve warm to enjoy that gooey, cheesy texture, and consider pairing them with your favorite dipping sauces for an extra kick of flavor!

Expert Tips for Jalapeno Pepper Jack Sausage Balls

  • Sausage Selection: Choose high-quality sausage to enhance overall flavor; spicy Italian sausage works wonderfully for extra zest.
  • Cheese Matters: For a perfect melt, use shredded cheese instead of blocks; it blends seamlessly into the mixture for a gooey texture.
  • Don’t Skip Cooling: Allow the sausage balls to cool before serving; this also firms up their structure and makes them easier to handle.
  • Adjusting Heat: Feel free to tweak the amount of jalapenos according to your spice preference; start small and increase gradually for the perfect kick.
  • Avoid Overmixing: Mix just until combined; overmixing can result in tough sausage balls, differing from the desired tender texture of Jalapeno Pepper Jack Sausage Balls.

Jalapeno Pepper Jack Sausage Balls Variations

Feel free to let your creativity shine by customizing your Jalapeno Pepper Jack Sausage Balls with these delicious twists!

  • Cheese Swap: Choose sharp cheddar for a milder flavor or mix both cheddar and Monterey Jack for a creamy goodness. The option is yours, creating a lovely melty experience.

  • Dairy-Free: Substitute cream cheese with a vegan cream cheese alternative and use dairy-free cheese for a tasty version everyone can savor.

  • Heat Level: If you love a spicy kick, add extra chopped jalapenos or a dash of cayenne pepper for a fiery adventure! Your taste buds will thank you with this exciting modification.

  • Herb Infusion: Add fresh chopped cilantro or parsley to the mixture for an aromatic twist. This simple addition elevates the flavor profile beautifully, giving your sausage balls a garden-fresh zest.

  • Texture Boost: Mix in some cooked and crumbled bacon for added crunch and savory goodness, turning each bite into a delightful treat that friends and family can’t resist.

  • Different Sausages: Experiment with turkey or chicken sausage for a lighter option that doesn’t skimp on flavor. You’ll be amazed at how tasty these can be while still hitting the spot.

  • Veggie Power: Incorporate finely chopped bell peppers or onions to add a pop of color and extra flavor to your savory bites. Not only will this make them visually appealing, but it'll also bring an added sweetness to the experience.

  • Serving Suggestions: Why not pair these savory delights with some delicious dipping sauces? Try them with ranch, hot sauce, or even a homemade Cranberry Jalapeno Dip for a burst of flavor!

Feel empowered to make these variations your own, and watch your family and friends come back for seconds!

What to Serve with Jalapeno Pepper Jack Sausage Balls

Elevate your gathering with the perfect side dishes that complement these spicy, cheesy bites.

  • Creamy Ranch Dip: A classic, creamy ranch dip cools the heat of the sausage balls while adding a delightful tang.
  • Fresh Veggie Platter: Crisp carrots, cucumbers, and bell peppers provide freshness and crunch, balancing the bold flavors of the sausage.
  • Spicy Honey Mustard: This sweet and spicy dip brings a zesty kick that pairs beautifully with the savory depth of the sausage balls.
  • Cheesy Garlic Bread: Soft, warm garlic bread adds a comforting element to each bite, enhancing the cheesy goodness of your sausage balls.
  • Crisp Potato Wedges: Seasoned to perfection, these crunchy potato wedges add a hearty touch to a flavor-packed plate.
  • Tangy Coleslaw: The cool, crunchy slaw offers a refreshing contrast, cutting through the richness of the sausage balls with its vinegar kick.
  • Cilantro Lime Rice: This zesty rice dish adds a fresh flavor profile, making every bite feel light and uplifting amidst the spicy richness.
  • Craft Beer: Serve these sausage balls with a cold craft beer to enhance the flavors, especially those with hoppy notes that play well with the spice.
  • Chocolate Brownies: End your meal on a sweet note! Rich, fudgy brownies create a delightful balance to the spicy and savory sausage balls, leaving everyone satisfied.

How to Store and Freeze Jalapeno Pepper Jack Sausage Balls

Fridge: Store your Jalapeno Pepper Jack Sausage Balls in an airtight container for up to 3 days. Make sure they are completely cool before sealing to maintain freshness.

Freezer: You can freeze these savory bites for up to 3 months. Place them in a single layer on a baking sheet to freeze, then transfer to a freezer-safe bag, removing excess air.

Reheating: To enjoy leftovers, reheat the sausage balls in the oven at 350°F (175°C) for about 10-15 minutes until warmed through. This keeps them crispy on the outside and gooey on the inside.

Make-Ahead Tip: Prepare and shape the sausage balls in advance, then freeze them uncooked. Bake directly from the freezer, adding a few extra minutes to the cooking time for fresh, hot snacks anytime!

Make Ahead Options

These Jalapeno Pepper Jack Sausage Balls are a fantastic option for meal prep aficionados! You can mix the ingredients and form the balls up to 24 hours in advance; simply cover them tightly and refrigerate to maintain their freshness. To keep the flavors vibrant and to prevent them from drying out, ensure the mixture is well combined and stored in an airtight container. When you're ready to serve, just pop them in a preheated oven at 350°F (175°C) for about 25-30 minutes, until golden and bubbling. With these make-ahead tips, you can enjoy delicious, hassle-free party bites without the last-minute rush!

Jalapeno Pepper Jack Sausage Balls Recipe FAQs

Can you use pancake mix instead of Bisquick for sausage balls?
Absolutely! You can substitute pancake mix for Bisquick, as both serve a similar function as a binding agent. Just keep in mind that pancake mix may add a slight sweetness to the flavor, which could be interesting! Be sure to adjust the consistency by adding a bit more cheese or jalapenos if necessary to balance the taste.

Why are my sausage balls dry?
Very importantly, dryness in sausage balls can occur if the meat is overcooked or if the proportion of dry ingredients is too high. To prevent this, make sure the sausage isn't overbaked. Additionally, including cream cheese helps retain moisture—so don’t skip it! Mixing all ingredients until just combined will also aid in keeping them tender, preventing a dry texture.

What to dip sausage balls into?
The more the merrier! These Jalapeno Pepper Jack Sausage Balls pair beautifully with a variety of dipping sauces. Classic choices include ranch dressing for its creamy goodness or spicy mustard for an extra punch. You can also try serving them with a sweet-and-spicy sauce like sriracha mixed with honey for a delightful contrast in flavors!

How should I store leftover sausage balls?
To store your Jalapeno Pepper Jack Sausage Balls, place them in an airtight container in the refrigerator for up to 3 days. Make sure they have cooled completely before sealing to keep their freshness. For best results, reheat in the oven to keep them crispy!

Can I freeze sausage balls, and how?
Yes, you can! Freeze your Jalapeno Pepper Jack Sausage Balls for up to 3 months. Here’s how: First, place them in a single layer on a baking sheet to freeze individually. Once frozen, transfer them to a freezer-safe bag or container, squeezing out as much air as possible. When you're ready to enjoy them, bake straight from the freezer at 350°F (175°C) for about 25-30 minutes.

Are Jalapeno Pepper Jack Sausage Balls safe for pets?
When it comes to your furry friends, it’s important to keep them safe! It’s best not to feed sausage balls to dogs or cats, primarily due to the spices and fatty ingredients that may cause digestive issues. Always consult your vet before introducing new foods to your pet's diet.

Jalapeno Pepper Jack Sausage Balls

Indulge in Flavorful Jalapeno Pepper Jack Sausage Balls

Delicious Jalapeno Pepper Jack Sausage Balls packed with spicy flavor, perfect for any gathering.
Print Recipe Pin Recipe
Prep Time 10 minutes mins
Cook Time 25 minutes mins
Cooling Time 5 minutes mins
Total Time 40 minutes mins
Servings: 12 balls
Course: Appetizer
Cuisine: American
Calories: 250
Ingredients Equipment Method Nutrition Notes

Ingredients
  

For the Base
  • 1 pound Sausage high-quality sausage
  • 8 ounces Cream Cheese softened, optional
  • 2 cups Bisquick Mix can use gluten-free
For the Flavor
  • 1 cup Pepper Jack Cheese shredded
  • ¼ cup Pickled Jalapenos chopped, or fresh jalapenos

Equipment

  • Mixing Bowl
  • Baking Sheet
  • Oven

Method
 

Steps
  1. Preheat your oven to 350°F (175°C).
  2. In a large mixing bowl, combine the sausage, cream cheese, Bisquick mix, pepper jack cheese, and pickled jalapenos. Mix until blended.
  3. Scoop out a generous portion and roll it into 1-inch balls. Place on a baking sheet lined with parchment paper.
  4. Bake for 20-25 minutes until golden brown and cheese is bubbling.
  5. Let cool for a few minutes before serving warm.

Nutrition

Serving: 2ballsCalories: 250kcalCarbohydrates: 10gProtein: 12gFat: 18gSaturated Fat: 8gPolyunsaturated Fat: 1gMonounsaturated Fat: 7gCholesterol: 45mgSodium: 550mgPotassium: 180mgFiber: 1gSugar: 1gVitamin A: 500IUVitamin C: 5mgCalcium: 150mgIron: 1mg

Notes

Serve with favorite dipping sauces for extra flavor. These can be made ahead and frozen for easy entertaining.

Tried this recipe?

Let us know how it was!

Irresistibly Moist Cinnamon Sugar Pumpkin Bread Recipe

July 20, 2025 by grace bellamy Leave a Comment

The smell of cinnamon and sugar wafting through the kitchen always takes me back to cozy autumn afternoons. This Cinnamon Sugar Pumpkin Bread brings those warm, nostalgic feelings to life, wrapped up in a delicious, vegan package. Perfectly soft and fluffy, it features the delightful richness of pumpkin and a crown of crunchy sweetness that makes each slice simply irresistible. Not only is this quick bread a fantastic, guilt-free treat, but it’s also versatile enough to whip up as three mini loaves or one generous slice to share. Imagine pairing it with your favorite hot beverage, turning an ordinary day into something special. Ready to embrace the flavors of fall? Let’s dive into making this delightful bread!

Why Is This Pumpkin Bread So Special?

Moisture and Flavor: This Cinnamon Sugar Pumpkin Bread is exceptionally moist, thanks to the pumpkin puree and a blend of sugars that aligns perfectly with warm fall spices.

Vegan Delight: No eggs or dairy are needed here; this recipe is vegan, making it accessible to a wider audience without sacrificing taste.

Quick and Easy: With straightforward steps, you can whip this up in no time—ideal for busy bakers looking for a delicious treat without the hassle.

Versatile Options: Customize it with chocolate chips or nuts, just like you can with my other favorites, such as Garlic Crack Bread or Cornbread.

Crowd-Pleasing: Perfect for gatherings, this flavorful bread is sure to be a hit, making your autumn celebrations even sweeter!

Cinnamon Sugar Pumpkin Bread Ingredients

• Here’s what you’ll need to create this delightful quick bread:

For the Bread

  • All-Purpose Flour – Provides structure; feel free to substitute with gluten-free flour for a different spin.
  • Baking Powder – Acts as a leavening agent for that perfectly light texture.
  • Pumpkin Pie Spice – Infuses warm, autumn flavors that elevate your Cinnamon Sugar Pumpkin Bread.
  • Salt – Enhances the overall flavor, bringing out the sweetness of the bread.
  • Granulated Sugar – Contributes sweetness and moisture to the bread.
  • Light Brown Sugar – Adds depth and moisture for a more complex flavor profile.
  • Pumpkin Puree – The star of the show; ensure it’s plain pumpkin puree, not pie filling.
  • Vegetable Oil – Keeps the bread moist and rich; can easily be substituted with canola or melted coconut oil.
  • Almond Milk – Provides moisture; any neutral milk like soy or oat can work as a substitute.
  • Molasses – Delivers a deep, rich flavor; use mild or medium for best results.
  • Vanilla Extract – Enhances the sweetness and overall flavor of the bread.

For the Topping

  • Cinnamon – Adds that delightful spice; use generously for a crunchy topping.
  • Granulated Sugar – Sprinkle on top for a sweet, crunchy finish that perfectly complements the warm spices.

Step‑by‑Step Instructions for Cinnamon Sugar Pumpkin Bread

Step 1: Preheat the Oven
Begin by preheating your oven to 400°F (200°C). While the oven is warming up, grease and flour either three mini loaf pans or one 9x5-inch loaf pan to ensure easy release once your Cinnamon Sugar Pumpkin Bread is baked. This preparation will help create a lovely crust on the outside while keeping the inside moist.

Step 2: Whisk the Dry Ingredients
In a large mixing bowl, whisk together 2 cups of all-purpose flour, 2 teaspoons of baking powder, 2 teaspoons of pumpkin pie spice, and ½ teaspoon of salt. This combination not only creates the structure needed for your bread but also ensures that the spices are evenly distributed. Set this dry mixture aside while you work on the wet ingredients.

Step 3: Combine the Wet Ingredients
In a separate bowl, add 1 cup of granulated sugar, ½ cup of light brown sugar, 1 cup of pumpkin puree, ½ cup of vegetable oil, 1 cup of almond milk, ¼ cup of molasses, and 1 teaspoon of vanilla extract. Whisk these ingredients together until the mixture is smooth and well combined, ensuring a rich flavor throughout your Cinnamon Sugar Pumpkin Bread.

Step 4: Mix Wet and Dry Ingredients
Gently pour the wet mixture into the bowl with your dry ingredients. Stir carefully using a spatula until just combined; be cautious not to overmix as this can affect the bread's tenderness. You want a thick batter with specks of flour still visible, which indicates it will bake up beautifully fluffy.

Step 5: Prepare the Pans
Distribute the batter evenly among the prepared pans, filling each about two-thirds of the way full. This allows room for the bread to rise without overflowing. You'll love the enticing aroma of pumpkin spice filling your kitchen as it bakes, so make sure it's divided as evenly as possible for a uniform bake.

Step 6: Add Topping
In a small bowl, mix 2 tablespoons of granulated sugar with 1 teaspoon of cinnamon to create the topping for your bread. Evenly sprinkle this mixture over each loaf of batter, creating a crunchy, sweet topping that complements the soft texture of the Cinnamon Sugar Pumpkin Bread perfectly.

Step 7: Bake the Bread
Place your prepared pans in the preheated oven and bake for 40-43 minutes. At around the 30-minute mark, start checking for doneness by inserting a toothpick into the center; it should come out clean when the bread is ready. Keep an eye on the tops to ensure they don’t brown too quickly.

Step 8: Cool the Bread
Once baked, remove the Cinnamon Sugar Pumpkin Bread from the oven and let it cool in the pans for about 15 minutes. This cooling period allows the loaves to set, making it easier to transfer them to a cooling rack. After this time, gently remove the bread from the pans and let them cool completely on a wire rack.

What to Serve with Cinnamon Sugar Pumpkin Bread?

A warm slice of this decadent bread opens the doors to endless culinary possibilities, elevating cozy moments into delicious experiences.

  • Creamy Vegan Butter: Spread a generous layer of this silky delight on a warm slice; it enhances the pumpkin flavors and adds richness.
  • Spiced Chai Tea: The aromatic spices in this tea perfectly balance the sweetness of the bread, creating a comforting, fall-inspired pairing.
  • Maple-Glazed Pecans: Sprinkle these crunchy, caramelized nuts on top for delightful texture and a nutty contrast to the soft bread.
  • Fresh Apple Slices: Crisp, tart apples give a refreshing lift, balancing the bread's sweetness and echoing the fall theme.
  • Warm Almond Milk: Pour a steaming mug alongside your bread; its subtle nutty sweetness complements the rich pumpkin perfectly.
  • Cinnamon Maple Drizzle: A light drizzle over the bread adds an extra layer of flavor that ties together the warm spices beautifully.
  • Roasted Pumpkin Soup: Pair this savory and creamy soup alongside your bread for a delightful contrast of textures and flavors; perfect for lunch or dinner!
  • Chocolate Hazelnut Spread: For a whimsical dessert, slather some spread on a slice and enjoy a decadent treat that will satisfy any sweet tooth.
  • Creamy Coconut Yogurt: A dollop of this tangy goodness brings freshness and a creamy contrast, enhancing the overall flavor experience.

How to Store and Freeze Cinnamon Sugar Pumpkin Bread

Room Temperature: Store your Cinnamon Sugar Pumpkin Bread in an airtight container at room temperature for up to 5 days to maintain its delightful moisture and flavor.

Fridge: If you prefer it cold, you can refrigerate the bread for up to 7 days, wrapped tightly to prevent drying out.

Freezer: To freeze, wrap each loaf tightly in plastic wrap and then in aluminum foil, storing in the freezer for up to 3 months.

Reheating: When ready to enjoy, thaw in the fridge overnight, then warm slices in a toaster or microwave for a cozy treat.

Cinnamon Sugar Pumpkin Bread Variations

Feel free to make this recipe your own and experiment with delightful twists that ignite your taste buds!

  • Mini Loaves: Divide the batter into three mini loaf pans for adorable, shareable treats perfect for gifting or sampling. Everyone loves a mini version of their favorite snacks!

  • Gluten-Free: Substitute all-purpose flour with a gluten-free blend to make this bread accessible to those with dietary restrictions while maintaining its lovely texture.

  • Nutty Delight: Add ½ cup of chopped walnuts or pecans for a satisfying crunch and enhanced flavor. Nuts bring a delightful contrast to the soft bread, making every bite an experience.

  • Chocolate Chip Heaven: Stir in ½ cup of vegan chocolate chips for a rich, sweet contrast that complements the pumpkin and spices. Who wouldn’t love a little chocolate surprise in their autumn treat?

  • Spicy Kick: Add a pinch of cayenne pepper for a hint of heat that balances the sweetness and warms your palate. It's a fun way to surprise those who love a little spice in their life!

  • Applesauce Twist: Replace ¼ cup of pumpkin puree with applesauce for a unique flavor and added moisture. This combo creates a luscious bread with fruity undertones that are simply delightful.

  • Streusel Topping: Create a crumbly topping by mixing flour, oats, and brown sugar, then sprinkling it on top before baking. This adds a delicious, crunchy texture that your guests will adore.

  • Pumpkin Spice Glaze: Drizzle a simple pumpkin spice glaze made from powdered sugar, almond milk, and pumpkin spice over the cooled bread for an extra flavor boost that makes each slice even more irresistible.

Elevate your baking skills with these variations and keep your family excited for more delectable homemade treats! While you’re at it, pair your Cinnamon Sugar Pumpkin Bread with a cup of coffee or a slice of Cornbread for a cozy experience.

Tips for the Best Cinnamon Sugar Pumpkin Bread

  • Check Early: Start checking your mini loaves at 30 minutes to prevent overbaking, which can lead to a dry texture.

  • Cover If Needed: If the tops brown too quickly, cover them lightly with foil. This helps maintain moisture while baking.

  • Use Pure Pumpkin: Always use plain pumpkin puree for the best flavor—avoid pie filling, which often contains added sugars and spices.

  • Don’t Overmix: When combining wet and dry ingredients, stir gently until just combined. Overmixing can create a dense loaf instead of a fluffy one.

  • Cool Properly: Allow the bread to cool in the pans for 15 minutes before transferring to a wire rack. This step prevents them from breaking apart.

Make Ahead Options

These Cinnamon Sugar Pumpkin Bread loaves are perfect for meal prep enthusiasts! You can prepare the batter up to 24 hours in advance by mixing together the dry ingredients and wet mixture separately, refrigerating them in airtight containers. The pumpkin puree helps maintain moisture, ensuring the bread is just as delicious when baked later. If you prefer, you can also bake the bread ahead of time and store it at room temperature for up to 3 days, or freeze for up to 3 months. To finish, simply slice and serve, allowing the enchanting fall flavors to shine through in your busy weeknight meals!

Cinnamon Sugar Pumpkin Bread Recipe FAQs

What kind of sugar is best for pumpkin bread?
Absolutely! For this Cinnamon Sugar Pumpkin Bread, a combination of granulated sugar and light brown sugar works best. The granulated sugar adds sweetness, while the light brown sugar contributes moisture and a hint of caramel flavor, making your bread richer and more delightful.

How to eat Trader Joe's cinnamon sugar bread?
While I’m not directly affiliated, I recommend treating yourself with a warm slice straight from the oven—perfect for breakfast or a cozy afternoon snack. You might enjoy it topped with a little vegan butter or served alongside a warm cup of apple cider or chai tea.

What can I add to pumpkin bread to make it taste better?
Very! You can enhance your Cinnamon Sugar Pumpkin Bread by incorporating mini chocolate chips, chopped nuts, or even dried fruits like cranberries or raisins for an extra layer of flavor. You could also experiment with spices—add an extra teaspoon of cinnamon or a dash of nutmeg to amplify that autumn feel.

Can you put cinnamon and sugar on pumpkin seeds?
Yes, indeed! After roasting your pumpkin seeds, toss them with a mixture of cinnamon and sugar while they’re still warm. This creates a deliciously sweet and crunchy snack, perfect for enjoying alongside your Cinnamon Sugar Pumpkin Bread.

How do I store leftover pumpkin bread?
To keep your Cinnamon Sugar Pumpkin Bread fresh, store it in an airtight container at room temperature for up to 5 days. If you want to enjoy it longer, you can freeze it: wrap each loaf in plastic wrap and then in aluminum foil. Properly stored, it can last in the freezer for up to 3 months. When you’re ready to indulge, simply thaw it in the fridge overnight and warm it up for a delightful treat!

Can I make this recipe gluten-free?
You absolutely can! Substitute the all-purpose flour with a gluten-free flour blend. Just ensure it has a good binding agent like xanthan gum to maintain the structure of your Cinnamon Sugar Pumpkin Bread. Follow the rest of the recipe as usual for a delightful vegan treat that everyone can enjoy!

Cinnamon Sugar Pumpkin Bread

Irresistibly Moist Cinnamon Sugar Pumpkin Bread Recipe

This Cinnamon Sugar Pumpkin Bread is a delightful vegan treat full of flavor, making it a perfect dessert for autumn.
Print Recipe Pin Recipe
Prep Time 15 minutes mins
Cook Time 43 minutes mins
Cooling Time 15 minutes mins
Total Time 1 hour hr 13 minutes mins
Servings: 10 slices
Course: Dessert
Cuisine: Vegan
Calories: 180
Ingredients Equipment Method Nutrition Notes

Ingredients
  

For the Bread
  • 2 cups All-Purpose Flour Feel free to substitute with gluten-free flour.
  • 2 teaspoons Baking Powder
  • 2 teaspoons Pumpkin Pie Spice
  • ½ teaspoon Salt
  • 1 cup Granulated Sugar
  • ½ cup Light Brown Sugar
  • 1 cup Pumpkin Puree Ensure it’s plain pumpkin puree.
  • ½ cup Vegetable Oil Can substitute with canola or melted coconut oil.
  • 1 cup Almond Milk Any neutral milk like soy or oat can work.
  • ¼ cup Molasses Use mild or medium for best results.
  • 1 teaspoon Vanilla Extract
For the Topping
  • 1 teaspoon Cinnamon Use generously for a crunchy topping.
  • 2 tablespoons Granulated Sugar For the topping.

Equipment

  • Loaf pans
  • Mixing bowls
  • Whisk
  • spatula

Method
 

Step-by-Step Instructions
  1. Preheat your oven to 400°F (200°C) and grease and flour either three mini loaf pans or one 9x5-inch loaf pan.
  2. Whisk together the all-purpose flour, baking powder, pumpkin pie spice, and salt in a large mixing bowl.
  3. In a separate bowl, combine the granulated sugar, light brown sugar, pumpkin puree, vegetable oil, almond milk, molasses, and vanilla extract; whisk until smooth.
  4. Pour the wet mixture into the dry ingredients and stir gently until just combined.
  5. Distribute the batter evenly among the prepared pans, filling each about two-thirds full.
  6. Mix granulated sugar and cinnamon for the topping and sprinkle over the batter in each loaf pan.
  7. Bake for 40-43 minutes, checking for doneness with a toothpick.
  8. Let the bread cool in the pans for 15 minutes before transferring to a cooling rack.

Nutrition

Serving: 1sliceCalories: 180kcalCarbohydrates: 28gProtein: 2gFat: 7gSaturated Fat: 1gPolyunsaturated Fat: 3gMonounsaturated Fat: 2gSodium: 150mgPotassium: 100mgFiber: 1gSugar: 8gVitamin A: 100IUCalcium: 4mgIron: 6mg

Notes

For best results, check for doneness early and follow cooling instructions to prevent breaking.

Tried this recipe?

Let us know how it was!

Irresistibly Moist Pumpkin Bread with Crunchy Streusel Top

July 20, 2025 by grace bellamy Leave a Comment

The aroma of cinnamon and nutmeg wafting through your kitchen can only mean one thing: it's time for some heartwarming fall baking. Enter my Moist Pumpkin Bread with Buttery Streusel Topping, a recipe that captures the essence of autumn in every delicious slice. This delightful pumpkin bread is not only quick and easy to whip up, but it also stays incredibly moist—perfect for those cozy gatherings with family and friends. You’ll love how the crunchy, buttery streusel topping elevates this comfort food classic, making it a true crowd-pleaser. Ready to make your home smell like a piece of fall heaven? Let’s dive into this irresistible pumpkin bread recipe that will bring smiles and warmth to your table!

Why Is This Pumpkin Bread Special?

Unbeatable Moisture: Each bite of this bread is delightfully moist, thanks to the pumpkin puree and canola oil, making it a perfect treat any time of day.
Buttery Crunch: The streusel topping adds a crunchy, buttery contrast that takes this bread from simple to spectacular!
Easy to Make: With straightforward steps, it’s ideal for both novice and experienced bakers looking to add a seasonal favorite to their repertoire.
Versatile Flavors: Feel free to play with spices or add your choice of nuts and chocolate chips for a personalized twist.
Perfect for Sharing: This pumpkin bread is perfect for gatherings—serve it warm alongside cream cheese spread, or even as a delightful dessert after dinner. Overall, it’s a must-try for chilly autumn days! Check out my recipe for Garlic Crack Bread to pair with your pumpkin bread for the ultimate fall feast!

Pumpkin Bread Ingredients

For the Bread
• Pumpkin Puree – The star of the dish, providing rich flavor and moisture; be sure to use pure pumpkin puree, not pie filling.
• All-Purpose Flour – Creates the bread’s structure; no substitutions specified for optimal texture.
• Granulated Sugar – Brings sweetness to balance the spices; can adjust according to taste.
• Light Brown Sugar – Adds moisture and a hint of caramel flavor; dark brown sugar can be used for a more robust sweetness.
• Canola Oil – Ensures a tender crumb; feel free to substitute with vegetable oil if preferred.
• Large Eggs – Acts as a binding agent while adding richness; there are no notable substitutes.
• Vanilla Extract – Enhances the bread’s overall sweetness and depth; no substitutions required.
• Ground Cinnamon – Infuses a warm, spiced flavor; you may swap with nutmeg for a different spin.
• Pumpkin Pie Spice – Elevates the seasonal essence; can substitute with a mix of cinnamon, cloves, ginger, and nutmeg.
• Salt – Amplifies all the flavors in the bread; essential for balance.

For the Streusel Topping
• Salted Butter – Provides richness and helps to create that crisp topping; use unsalted butter with a pinch of salt if you prefer.
• All-Purpose Flour – Necessary for structure in the streusel; stick with the same flour for consistency.
• Light Brown Sugar – Adds a caramel undertone and moisture; can swap for dark brown sugar for a deeper flavor.
• Ground Cinnamon – Offers a warm, inviting taste; you can replace this with nutmeg for an alternative spice twist.

Indulge in this comforting pumpkin bread and let its warmth fill your home with delightful aromas this fall! 🍂

Step‑by‑Step Instructions for Moist Pumpkin Bread with Buttery Streusel Topping

Step 1: Preheat the Oven
Begin by preheating your oven to 350°F (175°C). This is a crucial first step for ensuring even baking of your Moist Pumpkin Bread with Buttery Streusel Topping. While the oven heats, gather your equipment—a 9x5 inch loaf pan, mixing bowls, whisk, and rubber spatula, so you’ll be ready for the next steps.

Step 2: Prepare the Loaf Pan
Grease your loaf pan with cooking spray and line the bottom with parchment paper for easy removal later. The parchment will help the bread slide out smoothly once it’s baked and cooled. This simple preparation ensures that your delicious pumpkin bread won’t stick and will have a beautiful presentation when served.

Step 3: Make the Streusel Topping
In a medium bowl, combine light brown sugar, white sugar, all-purpose flour, ground cinnamon, and melted salted butter. Mix these ingredients together until they form a crumbly texture. This buttery streusel will provide a delightful crunch on top of your pumpkin bread, enhancing its overall appeal and flavor profile.

Step 4: Mix Dry Ingredients
In a separate large mixing bowl, whisk together all-purpose flour, baking powder, cinnamon, pumpkin pie spice, and salt. This dry mixture sets the foundation for your pumpkin bread, ensuring that all the dry ingredients are well incorporated. The spices will infuse the bread with that warm, comforting flavor characteristic of fall.

Step 5: Combine Wet Ingredients
In another large bowl, blend canola oil, granulated sugar, light brown sugar, large eggs, pumpkin puree, and vanilla extract until smooth and well combined. Use a whisk for this step to help aerate the mixture, which is essential for a fluffy texture in your moist pumpkin bread.

Step 6: Incorporate Dry Ingredients
Gently fold the dry ingredient mixture into the wet ingredients until just combined. Be careful not to overmix, as this can lead to a dense texture. The goal is to keep the batter slightly lumpy, as this will maintain the moisture and tender crumb you desire in your pumpkin bread.

Step 7: Fill the Loaf Pan
Pour the batter into the prepared loaf pan, smoothing it out evenly with a spatula. Make sure to fill the pan about two-thirds full to allow room for the bread to rise. Once the batter is evenly distributed, sprinkle the prepared streusel topping generously over the surface for that buttery, crunchy finish.

Step 8: Bake the Bread
Place the loaf pan in your preheated oven and bake for approximately 65 minutes. You’ll know the pumpkin bread is ready when a toothpick inserted into the center comes out clean or with just a few moist crumbs clinging to it. The top should be golden brown and fragrant, filling your kitchen with mouthwatering fall aromas.

Step 9: Cooling Time
After baking, remove the pan from the oven and let the bread cool in the pan for about 10 minutes. Then, use the parchment paper to gently lift the bread out of the pan and transfer it to a wire rack to cool completely. This step allows the bread to firm up, making it easier to slice and enjoy.

Storage Tips for Pumpkin Bread

Room Temperature: Store leftover pumpkin bread in an airtight container at room temperature for up to 4-5 days to maintain its delicious moistness.

Freezer: For longer storage, wrap the pumpkin bread tightly in plastic wrap and aluminum foil, then freeze for up to 3 months.

Thawing: To enjoy frozen pumpkin bread, simply transfer it to the fridge overnight or leave it at room temperature until thawed.

Reheating: For a warm, fresh experience, reheat slices in the microwave for about 10-15 seconds or in the oven at 350°F for a few minutes until warmed through.

Expert Tips for the Best Pumpkin Bread

  • Use Pure Pumpkin: Ensure you’re using pure pumpkin puree and not pumpkin pie filling, which contains added sugars and spices that won't yield the desired flavor.
  • Avoid Overmixing: Mix the wet and dry ingredients just until combined. Overmixing can lead to dense pumpkin bread instead of the light, moist texture we aim for.
  • Check Doneness: Begin checking for doneness at around 60 minutes. Every oven is different, and your pumpkin bread should feel springy and a toothpick should come out clean.
  • Let It Cool: Allow the bread to cool completely before slicing; this helps maintain its structure and moisture.
  • Customize Flavors: Experiment with spices, nuts, or chocolate chips to make this pumpkin bread your own! Adding unique flavors can excite your palate and impress your guests.
  • Storage Secrets: Keep any leftovers in an airtight container at room temperature for up to 5 days, or freeze for later while keeping the pumpkin bread perfectly fresh.

Pumpkin Bread Variations & Substitutions

Feel free to get creative with this pumpkin bread recipe and make it your own with these fun customizations!

  • Nutty Delight: Add chopped walnuts or pecans to the batter for a delightful crunch that complements the moist texture. Just fold in about half a cup, and feel the added warmth of earthy flavors.

  • Chocolate Lovers: Swap in chocolate chips for a touch of indulgence! This adds a sweet surprise that pairs beautifully with the spices, making each slice a decadent treat.

  • Maple Sweet: For a unique twist, use maple syrup instead of granulated sugar. The rich, earthy sweetness enhances the pumpkin's flavor beautifully—perfect for true maple enthusiasts!

  • Spicy Kick: Add a pinch of cayenne pepper to the batter for a subtle heat that balances the sweetness. Just a hint can add an exciting surprise without overpowering the comforting flavors.

  • Dairy-Free: Substitute coconut oil or a plant-based butter for the butter in the streusel. This will keep that crunchy topping perfect while catering to dairy-free diets.

  • Fruit Fusion: Toss in dried cranberries or raisins for an added burst of flavor and chewiness in the bread. These fruity additions bring a mouthwatering contrast to the spices.

  • Herbal Note: A touch of fresh ginger in the batter gives the bread an aromatic zing that enhances the fall spices. Use about a tablespoon of finely grated ginger for a refreshing twist.

  • Gluten-Free: Use a gluten-free all-purpose flour blend to make this pumpkin bread gluten-free without losing its signature moistness. Just be sure your baking powder is also gluten-free!

With these variations, your pumpkin bread will always feel new and exciting! And for an ideal pairing, consider serving it alongside my fabulous Caesar Salad Flatbreads for a delightful meal. 🍂

What to Serve with Moist Pumpkin Bread with Buttery Streusel Topping

Indulging in a slice of pumpkin bread is just the beginning of a delightful fall feast. Imagine how delicious your cozy gathering can be when you complement this warm treat with perfect pairings!

  • Cream Cheese Spread: Elevate each slice with a smooth and creamy layer of cream cheese spread that perfectly balances the sweetness of the bread.

  • Vanilla Ice Cream: Serve warm pumpkin bread with a scoop of vanilla ice cream. It melts slightly, creating a delightful contrast of temperatures and flavors.

  • Spiced Chai Latte: A steaming cup of spiced chai latte offers a comforting, aromatic pairing that enhances the warm spices in the bread.

  • Candied Pecans: The crunchy texture and sweet flavor of candied pecans add a delightful crunch, turning your pumpkin bread into a gourmet treat.

  • Apple Cider: Enjoy a glass of crisp apple cider next to your pumpkin bread—it mirrors autumn flavors while refreshing your palate between bites.

  • Caramel Drizzle: Drizzling warm caramel sauce on top of the bread adds a luxurious sweetness that will have everyone coming back for seconds.

  • Chocolate Chip Cookies: Create a dessert plate with fresh chocolate chip cookies to complement the spice of the pumpkin bread with a rich, chocolatey flavor.

  • Salted Caramel Hot Cocoa: And nothing warms you up on a chilly day quite like a mug of salted caramel hot cocoa to sip while enjoying your pumpkin bread.

These pairings will enhance the experience and make your pumpkin bread the star of your autumn gatherings! 🍂

Make Ahead Options

These Moist Pumpkin Bread with Buttery Streusel Topping are perfect for meal prep! You can mix the dry ingredients and store them in an airtight container up to 3 days ahead, ensuring maximum freshness before baking. Additionally, you can pre-make the streusel topping and refrigerate it overnight to maintain its crisp texture. When you're ready to bake, simply combine the wet and dry ingredients, pour the batter into the prepared pan, and sprinkle the chilled streusel on top. Bake as directed, and enjoy a deliciously moist pumpkin bread that tastes just as wonderful as if made fresh that day—perfect for busy weeknights or unexpected guests!

Pumpkin Bread Recipe FAQs

What is the difference between a crumb topping and a streusel?
Absolutely! While both crumb toppings and streusels provide a crunchy layer, a streusel typically contains butter, flour, and sugar mixed until crumbly, often with added spices. Sticking with the right ratios will yield that delightful buttery crunch we love in our pumpkin bread—just like in this recipe! Crumb toppings usually have a lighter texture and might not use as much butter, resulting in a less rich flavor.

How can I enhance pumpkin bread flavor?
Very! You can elevate the flavor of your pumpkin bread by adding a splash of freshly squeezed orange juice or zest to the wet ingredients for a bright citrus note. You might also consider incorporating additional spices like nutmeg, ground ginger, or allspice for a more complex profile. A handful of chopped pecans or walnuts can add a nutty flavor, while chocolate chips will provide a sweet surprise in every bite. The more the merrier!

How do I keep my pumpkin bread from being crumbly?
To ensure your pumpkin bread has a moist and tender crumb, be cautious not to overmix your batter—mix just until the dry ingredients are incorporated. Using the right wet-to-dry ingredient ratio is vital, so ensure you’re following the ingredient measurements closely. Additionally, letting the bread cool completely before slicing helps it maintain its structure, reducing crumbliness.

How can I achieve a crunchy crust on my pumpkin bread?
To achieve that perfect crunchy crust, consider raising the oven temperature slightly (to about 375°F) during the last 10-15 minutes of baking, which encourages a deeper golden brown on top. You can even sprinkle a little extra sugar on the surface before baking; as it caramelizes, it creates a deliciously crunchy topping. Be sure to keep an eye on it, and remember, every oven is a little different!

How should I store my pumpkin bread? Can I freeze it?
Store your leftover pumpkin bread in an airtight container at room temperature for 4-5 days, which helps retain its moistness. For longer storage, wrap it tightly in plastic wrap and aluminum foil and place it in the freezer for up to 3 months. When you're ready to enjoy, thaw it in the fridge overnight or at room temperature for a few hours. For that fresh-from-the-oven feel, reheat slices in the microwave for about 10-15 seconds or in the oven at 350°F for a few minutes, and you’re good to go!

Is this pumpkin bread safe for pets?
While pumpkin itself is safe for pets in small amounts, you should avoid sharing any pumpkin bread with them due to sugar and spices that can be harmful. Always consult with your vet if you're unsure about introducing new foods into your pet's diet. Keeping this delightful comfort food for yourself ensures those delicious flavors remain part of your fall experience!

Pumpkin Bread

Irresistibly Moist Pumpkin Bread with Crunchy Streusel Top

This delightful pumpkin bread captures the essence of autumn with its moist texture and crunchy streusel topping.
Print Recipe Pin Recipe
Prep Time 20 minutes mins
Cook Time 1 hour hr 5 minutes mins
Cooling Time 10 minutes mins
Total Time 1 hour hr 35 minutes mins
Servings: 8 slices
Course: Breakfast
Cuisine: American
Calories: 180
Ingredients Equipment Method Nutrition Notes

Ingredients
  

For the Bread
  • 1 cup Pumpkin Puree use pure pumpkin puree, not pie filling
  • 2 cups All-Purpose Flour no substitutions specified
  • 1 cup Granulated Sugar adjust according to taste
  • 1 cup Light Brown Sugar can use dark brown sugar
  • ½ cup Canola Oil can substitute with vegetable oil
  • 2 large Eggs
  • 1 teaspoon Vanilla Extract
  • 1 teaspoon Ground Cinnamon may swap with nutmeg
  • 1 teaspoon Pumpkin Pie Spice can substitute with a mix of spices
  • 1 teaspoon Salt
For the Streusel Topping
  • ½ cup Salted Butter can use unsalted with a pinch of salt
  • 1 cup All-Purpose Flour consistent with bread
  • ½ cup Light Brown Sugar can swap for dark brown sugar
  • 1 teaspoon Ground Cinnamon may replace with nutmeg

Equipment

  • 9x5 inch loaf pan
  • Mixing bowls
  • Whisk
  • Rubber spatula

Method
 

Preparation Steps
  1. Preheat your oven to 350°F (175°C).
  2. Grease your loaf pan and line the bottom with parchment paper.
  3. In a medium bowl, combine light brown sugar, white sugar, all-purpose flour, ground cinnamon, and melted salted butter for streusel.
  4. Whisk together all-purpose flour, baking powder, cinnamon, pumpkin pie spice, and salt in a large mixing bowl.
  5. Blend canola oil, granulated sugar, light brown sugar, large eggs, pumpkin puree, and vanilla extract until smooth in another bowl.
  6. Gently fold the dry ingredients into the wet ingredients until just combined.
  7. Pour the batter into the prepared loaf pan and sprinkle the streusel topping on top.
  8. Bake in the oven for approximately 65 minutes or until a toothpick comes out clean.
  9. Let the bread cool in the pan for 10 minutes, then transfer to a wire rack to cool completely.

Nutrition

Serving: 1sliceCalories: 180kcalCarbohydrates: 25gProtein: 3gFat: 8gSaturated Fat: 4gPolyunsaturated Fat: 1gMonounsaturated Fat: 2gCholesterol: 50mgSodium: 200mgPotassium: 150mgFiber: 1gSugar: 12gVitamin A: 500IUVitamin C: 1mgCalcium: 20mgIron: 1mg

Notes

Serve warm alongside cream cheese spread or as a delightful dessert. Customize with spices, nuts, or chocolate chips for a personalized touch.

Tried this recipe?

Let us know how it was!

Best Sweet Potato Cinnamon Bread for Cozy Fall Days

July 20, 2025 by grace bellamy Leave a Comment

As the leaves turn to golden hues and a crisp chill fills the air, the allure of homemade Sweet Potato Cinnamon Bread draws me in like a warm hug. This delightful recipe captures the essence of comfort food—all while being surprisingly quick to whip up! Infused with aromatic spices and topped with a sweet cinnamon crunch, it’s the perfect addition to your fall baking lineup. Whether you savor it as breakfast alongside your morning coffee or indulge in a slice for an afternoon treat, every bite of this bread offers a cozy reminder of the season. Plus, it’s easily customizable—double the recipe for extra loaves to share or freeze for later. Are you ready to fill your kitchen with the inviting scents of autumn? Let’s get baking!

Why is This Bread So Irresistible?

Comforting flavors of sweet potato and cinnamon unite in this delightful quick bread, making it perfect for cozy fall days. Easy to make, this recipe allows you to enjoy homemade goodness without hours in the kitchen. Customizable, you can add nuts or chocolate chips to suit your taste. Makes great gifts—impress friends and family by sharing loaves. Versatile enough for breakfast, snacks, or dessert; this bread truly hits the mark. Plus, if you're loving the fall vibe, check out our delicious Parmesan Sweet Potato bites for another tasty treat!

  1. Sweet Potato Cinnamon Bread Ingredients

  2. For the Batter
    • Sweet Potatoes – 1.5 cups, mashed; adds moisture and sweetness to the bread. Can substitute with canned sweet potatoes or yams.
    • Butter – 0.5 cup, softened; provides richness and tenderness. Can replace with applesauce for a lighter option.
    • Granulated Sugar – 1 cup + 0.25 cup (for topping); sweetens the bread and enhances the topping's crunch. Brown sugar can be used for a deeper flavor.
    • Eggs – 2 large; acts as a binding agent and adds structure. For vegan substitution, use flax eggs or applesauce.
    • Vanilla Extract – 1 teaspoon; enhances sweetness and flavor complexity. Can be omitted for a simpler taste.
    • All-Purpose Flour – 1.5 cups; provides structure. Substitute with gluten-free flour blend if needed.
    • Baking Soda – 1 teaspoon; helps the bread rise. Ensure it’s fresh for best results.
    • Salt – 0.5 teaspoon; enhances overall flavor without making the bread overly salty.
    • Ground Cinnamon – 1 teaspoon; main spice for flavor; can increase for a stronger cinnamon taste.
    • Ground Nutmeg – 0.25 teaspoon; adds warmth and complexity to the flavor profile.

  3. For the Topping
    • Granulated Sugar – 0.25 cup; adds sweetness and crunch to the topping for your Sweet Potato Cinnamon Bread.
    • Ground Cinnamon – 1 teaspoon; enhances the aromatic appeal of the topping; feel free to adjust for extra flavor.

Step‑by‑Step Instructions for Sweet Potato Cinnamon Bread

Step 1: Preheat the Oven
Begin by preheating your oven to 350°F (175°C). While it warms up, grease a 9.25 x 5.25 inch loaf pan. For easy removal later, consider lining the bottom with parchment paper. This preparation ensures your Sweet Potato Cinnamon Bread cooks evenly and comes out smoothly once baked.

Step 2: Cream Butter and Sugar
In a large mixing bowl, combine the softened butter and granulated sugar. Using a hand mixer or a whisk, beat the mixture until it becomes light, fluffy, and pale in color—about 3-4 minutes. This step is vital for creating a tender texture in the Sweet Potato Cinnamon Bread, so be sure to incorporate enough air.

Step 3: Incorporate Eggs and Sweet Potatoes
Next, add the eggs one at a time, mixing well after each addition. Once fully integrated, stir in the vanilla extract, followed by the mashed sweet potatoes. This mixture should be smooth and well-blended, creating a moist base for your bread.

Step 4: Mix the Dry Ingredients
In a separate bowl, whisk together the all-purpose flour, baking soda, salt, ground cinnamon, and nutmeg. Combine these dry ingredients thoroughly; this ensures the leavening agent and spices are evenly distributed throughout the mixture, which is key for the rise and flavor of the Sweet Potato Cinnamon Bread.

Step 5: Combine Wet and Dry Mixtures
Gradually add the dry ingredients into the wet sweet potato mixture, stirring gently until just combined. Be careful not to overmix, as this can result in a denser bread. The dough should appear slightly lumpy, retaining some moisture from the sweet potatoes.

Step 6: Prepare the Cinnamon Sugar Topping
In a small bowl, blend the additional 0.25 cup of granulated sugar with the remaining ground cinnamon. This cinnamon sugar topping adds a delightful crunch as it bakes. Stir until well combined, setting it aside for later use.

Step 7: Transfer to the Loaf Pan
Carefully pour the batter into the prepared loaf pan, smoothing the top with a spatula. Evenly sprinkle about ¾ of the cinnamon sugar mixture over the batter. This will create a beautiful crust as the Sweet Potato Cinnamon Bread bakes, enhancing both the flavor and texture.

Step 8: Bake the Bread
Place the loaf pan in the preheated oven and bake for 55-65 minutes. Check for doneness by inserting a toothpick into the center; it should come out clean with just a few moist crumbs attached. If the top begins to brown too quickly, you can tent it with foil during the last few minutes of baking.

Step 9: Cool and Slice
Once baked, remove the Sweet Potato Cinnamon Bread from the oven and let it cool in the pan for about 15 minutes. Gently run a knife around the sides to loosen it, then carefully invert onto a wire rack. Allow it to cool completely before slicing, giving the flavors time to develop beautifully.

What to Serve with Sweet Potato Cinnamon Bread

As the aroma of sweet spices fills your home, it’s time to create the perfect full meal with delightful pairings.

  • Creamy Mashed Potatoes: The smooth texture and buttery flavor harmonize beautifully, making for a comforting, rich side to balance the sweetness of the bread.
  • Maple Butter: A dollop of this sweet spread adds an indulgent twist, enhancing the flavors while echoing fall vibes with every bite.
  • Fresh Fruit Salad: Juicy apples and tart cranberries provide a refreshing contrast, brightening up your plate with their vibrant colors and tastes.
  • Savory Sausage Links: The savory elements and spices in sausage links create a delightful contrast to the sweet bread, offering a brunch option that satisfies all cravings.
  • Hot Cocoa or Chai Tea: Cozy beverages like a rich hot cocoa or spiced chai tea warm your heart and complement the fragrant spices of the bread.
  • Cream Cheese Frosting: Spread a thin layer of this tangy frosting on a slice for a dessert-like treat that elevates the experience unique and scrummy!

Just picture the flavors mingling together at your table—such a delightful eat!

Make Ahead Options

These Sweet Potato Cinnamon Bread preparations are perfect for busy home cooks looking to streamline their meal planning! You can prepare the batter up to 24 hours in advance—simply mix all the wet and dry ingredients together and store in an airtight container in the refrigerator to keep everything fresh. When you're ready to bake, just give the batter a quick stir before transferring it to your loaf pan and sprinkling with the cinnamon sugar topping. Additionally, you can bake extra loaves and freeze them for up to 3 months. Just make sure to wrap them tightly in plastic wrap to prevent freezer burn. This way, you’ll have delicious, homemade Sweet Potato Cinnamon Bread on hand whenever you want a comforting treat, with minimal effort involved!

Expert Tips

  • Perfectly Mashed Potatoes: Ensure your sweet potatoes are smooth and lump-free for the best texture in your Sweet Potato Cinnamon Bread.

  • Avoid Overmixing: Mix just until the ingredients are combined to keep your bread light and fluffy. Overmixing can lead to a dense loaf.

  • Top with Love: Reserve some cinnamon sugar topping to sprinkle on after baking for an extra sweet crunch. You can always adjust the amount based on your sweetness preference.

  • Check Doneness: Use a toothpick to test the center; you can also gently press the top of the bread. If it springs back, it’s perfect!

  • Cool Completely: Allow the bread to cool fully before slicing; this helps set the flavors and prevents crumbling.

  • Doubling the Recipe: Don’t hesitate to double this recipe for extra loaves! Your friends and family will thank you for sharing this comforting treat.

Sweet Potato Cinnamon Bread Variations

Feel free to let your creativity shine and customize your Sweet Potato Cinnamon Bread with these delightful twists!

  • Nutty Addition: Stir in ½ cup of chopped walnuts or pecans for a crunchy texture that complements the bread's moistness. The added nutty flavor enhances each slice beautifully.

  • Chocolate Delight: Mix in ½ cup of chocolate chips for a sweet surprise throughout the bread. The rich chocolate pairs wonderfully with the spices, making it a dessert favorite!

  • Spice Up: Increase the ground cinnamon to 1.5 teaspoons or add ½ teaspoon of ground ginger for a warming kick. These spices enhance the cozy flavors even further.

  • Apple Cinnamon Twist: Fold in 1 cup of finely diced apples for added moisture and a burst of fruity flavor. The apples soften as they bake, creating a deliciously sweet experience.

  • Dairy-Free: Replace butter with melted coconut oil or use a dairy-free butter substitute to keep your bread vegan-friendly. This will maintain the richness while accommodating dietary preferences.

  • Gluten-Free: Use a high-quality gluten-free flour blend in place of all-purpose flour to make it suitable for those with gluten sensitivity. Ensure you've got a blend that contains xanthan gum for the best results.

  • Maple Infusion: Substitute granulated sugar with maple syrup in the batter for a rich, earthy sweetness. Adjust the flour slightly to keep the right consistency, and enjoy a flavor twist that celebrates fall.

  • Tropical Touch: Add ½ cup of shredded coconut for a hint of the tropics right in your bread. It pairs beautifully with sweet potatoes and can transport you to a sunny paradise!

For more ideas that embrace the sweet potato goodness, check out our Cheese Sweet Potatoes or try delightful Sweet Chili Meatballs for a savory side!

Storage Tips for Sweet Potato Cinnamon Bread

  • Room Temperature: Store the bread in an airtight container for up to 3 days. This keeps it moist and allows those delicious flavors to meld even further.

  • Fridge: If you want to extend its freshness, place the Sweet Potato Cinnamon Bread in a ziplock bag and refrigerate for up to 5 days. This helps to maintain its texture while preventing mold.

  • Freezer: For longer storage, wrap individual slices in plastic wrap, then place them in a freezer-safe bag. This way, you can enjoy your bread for up to 3 months without losing taste or quality.

  • Reheating: To warm slices, pop them in the toaster or microwave for about 10-15 seconds. You can also enjoy it cold or at room temperature!

Sweet Potato Cinnamon Bread Recipe FAQs

Why do you soak sweet potatoes before baking?
Soaking sweet potatoes before baking is not necessary for this recipe, but it can help remove excess starch, leading to a fluffier texture. If you choose to soak them, simply peel and cut into pieces, then soak in cold water for 30 minutes. Drain and pat dry before mashing.

How to make sweet potato taste amazing?
To elevate the flavor of sweet potatoes, consider roasting them with a drizzle of olive oil and a sprinkle of salt before adding to your bread batter. This caramelizes their natural sugars and deepens their sweet taste. You could also incorporate spices like smoked paprika or cinnamon, and for a hint of heat, some ground ginger or cayenne pepper can work wonders!

Can diabetics eat sweet potato bread?
Sweet potatoes possess a lower glycemic index than regular bread, making them a friendlier choice for diabetics when enjoyed in moderation. The fiber content in sweet potatoes also helps regulate blood sugar levels. However, it's wise to consult with a healthcare professional or nutritionist regarding portion sizes and the overall carbohydrate content in the Sweet Potato Cinnamon Bread.

What does Patti LaBelle put in her sweet potato pie?
Patti LaBelle enhances her sweet potato pie with a blend of spices, including cinnamon and nutmeg, along with rich ingredients like butter, cream, and eggs. Her recipe often features vanilla extract and brown sugar for an added depth of flavor. The combination results in a beautifully smooth and creamy pie that captures the essence of Southern comfort food!

How do you store sweet potato cinnamon bread?
Store your Sweet Potato Cinnamon Bread in an airtight container at room temperature for up to 3 days to maintain moisture. For longer freshness, wrap slices in plastic wrap, place them in a freezer-safe bag, and freeze for up to 3 months. To enjoy, simply reheat in a toaster or microwave for about 10-15 seconds, or savor at room temperature.

Can this recipe be modified for allergies?
Absolutely! To make this Sweet Potato Cinnamon Bread allergy-friendly, substitute the butter with a dairy-free spread or applesauce. You can use flax eggs instead of chicken eggs for a vegan option. Always ensure that any gluten-free flour blend is safe for those with celiac disease or gluten intolerance. Enjoy baking without worries!

Sweet Potato Cinnamon Bread

Best Sweet Potato Cinnamon Bread for Cozy Fall Days

This Sweet Potato Cinnamon Bread combines comforting flavors in a quick recipe, perfect for cozy fall days.
Print Recipe Pin Recipe
Prep Time 15 minutes mins
Cook Time 1 hour hr
Total Time 1 hour hr 15 minutes mins
Servings: 12 slices
Course: Breakfast
Cuisine: American
Calories: 180
Ingredients Equipment Method Nutrition Notes

Ingredients
  

For the Batter
  • 1.5 cups Sweet Potatoes, mashed Can substitute with canned sweet potatoes or yams.
  • 0.5 cup Butter, softened Can replace with applesauce for a lighter option.
  • 1 cup Granulated Sugar Plus 0.25 cup for topping; brown sugar can be used for a deeper flavor.
  • 2 large Eggs For vegan substitution, use flax eggs or applesauce.
  • 1 teaspoon Vanilla Extract Can be omitted for a simpler taste.
  • 1.5 cups All-Purpose Flour Substitute with gluten-free flour blend if needed.
  • 1 teaspoon Baking Soda Ensure it’s fresh for best results.
  • 0.5 teaspoon Salt Enhances overall flavor without making the bread overly salty.
  • 1 teaspoon Ground Cinnamon Can increase for a stronger cinnamon taste.
  • 0.25 teaspoon Ground Nutmeg Adds warmth and complexity to the flavor profile.
For the Topping
  • 0.25 cup Granulated Sugar Adds sweetness and crunch to the topping.
  • 1 teaspoon Ground Cinnamon Enhances the aromatic appeal of the topping.

Equipment

  • loaf pan
  • Mixing bowls
  • Whisk
  • hand mixer

Method
 

Step-by-Step Instructions for Sweet Potato Cinnamon Bread
  1. Preheat your oven to 350°F (175°C) and grease a 9.25 x 5.25 inch loaf pan.
  2. In a large mixing bowl, combine softened butter and granulated sugar. Beat until light, fluffy, and pale, about 3-4 minutes.
  3. Add the eggs one at a time, mixing well after each addition. Stir in the vanilla extract and mashed sweet potatoes.
  4. In a separate bowl, whisk together flour, baking soda, salt, ground cinnamon, and nutmeg.
  5. Gradually add the dry ingredients to the wet mixture, stirring gently until just combined.
  6. In a small bowl, blend 0.25 cup of granulated sugar with the remaining ground cinnamon.
  7. Pour the batter into the prepared loaf pan and sprinkle about ¾ of the cinnamon sugar mixture on top.
  8. Bake for 55-65 minutes, checking for doneness with a toothpick.
  9. Let the bread cool in the pan for about 15 minutes, then transfer to a wire rack to cool completely.

Nutrition

Serving: 1sliceCalories: 180kcalCarbohydrates: 28gProtein: 2gFat: 7gSaturated Fat: 4gPolyunsaturated Fat: 0.5gMonounsaturated Fat: 2.5gCholesterol: 40mgSodium: 150mgPotassium: 150mgFiber: 2gSugar: 10gVitamin A: 500IUVitamin C: 2mgCalcium: 20mgIron: 0.5mg

Notes

Ensure sweet potatoes are smooth for the best texture. Mix just until combined to keep the bread light and fluffy. Reserve some topping for after baking for extra crunch. Cool completely before slicing.

Tried this recipe?

Let us know how it was!

Indulgent Short Rib Onion Soup Perfect for Cozy Nights

July 20, 2025 by grace bellamy Leave a Comment

As the first chill of winter sweeps in, I find myself gravitating toward the warm embrace of a steaming bowl of Short Rib Onion Soup. This delightful dish is more than just a hearty soup; it’s a soulful remedy that transforms a cold, dreary day into a comforting experience. With tender chunks of braised beef and a rich broth, this recipe is not only a true crowd-pleaser but also a fantastic way to unwind after a long day. Plus, the addition of gruyère toast elevates it to an indulgent meal that's both satisfying and heartwarming. Are you ready to dive into a bowl of pure comfort? Let’s get started!

Why is this soup your new favorite?

Comforting warmth: This Short Rib Onion Soup wraps you in a cozy hug, perfect for those chilly nights.
Rich, hearty flavors: The tender short ribs create a broth so flavorful, it'll leave you craving more.
Indulgent cheese toast: Gruyère melts into goodness, adding that extra touch of luxury.
Easy to prepare: With straightforward steps, you can impress family and friends with minimal effort.
Make-ahead magic: This dish improves overnight, making it a convenient choice for busy days.
Serve it alongside a crisp salad or enjoy it on its own—either way, it’s a crowd favorite!

Short Rib Onion Soup Ingredients

For the Soup Base
• Short Ribs – A key protein source, opt for bone-in for deeper flavor.
• Kosher Salt & Freshly Ground Pepper – Essential for seasoning; adjust to your taste.
• Olive or Vegetable Oil – Used for searing the ribs and enhancing overall flavor.
• Carrots – Adds sweetness to the broth; feel free to substitute with parsnips.
• Onions/Leeks – Foundation of flavor; leeks offer a milder, sweeter taste.
• Fresh Thyme – Enhances aroma; dried thyme can be used if needed.
• Bay Leaf – Infuses a subtle warmth; remember to remove before serving.
• Garlic – Fresh cloves deliver the best depth of flavor.
• Tomato Paste – Adds richness and umami; it’s optional if you prefer a lighter broth.
• Red Wine – Deepens the broth's flavor; use a dry variety to avoid sweetness.
• Beef Broth – The heart of your soup, low-sodium options work great here.
• Unsalted Butter – Essential for caramelizing onions and contributing richness.
• Dry Sherry – Brings complexity to caramelized onions; substitute with white wine if needed.

For the Cheese Toasts
• Sourdough or Country Bread – A crusty bread choice for toasts; any sturdy bread will do.
• Gruyère Cheese – Melts beautifully on top; consider Swiss or fontina as substitutes.

For Garnish
• Chopped Fresh Chives – Adds a touch of freshness and a mild onion flavor.

Dive into this delicious Short Rib Onion Soup—a comforting dish that feels like a warm hug in a bowl!

Step‑by‑Step Instructions for Short Rib Onion Soup

Step 1: Preheat Your Oven
Begin by preheating your oven to 325°F (160°C) to get it ready for the braising process. This gentle heat will ensure your short ribs become perfectly tender and flavorful. Make sure the oven rack is positioned in the center, allowing for even cooking as the steam envelops the ribs during the long, leisurely bake.

Step 2: Sear the Short Ribs
Season the short ribs generously with kosher salt and freshly ground pepper. In a heavy, oven-safe pot, heat a tablespoon of olive or vegetable oil over medium-high heat until shimmering. Add the short ribs, browning them on all sides for about 8–10 minutes, until they develop a beautiful, deep brown crust. Once seared, remove them from the pot and set aside.

Step 3: Sauté the Vegetables
In the same pot, add chopped carrots and sliced onions or leeks, stirring to combine. Sauté the vegetables over medium heat for about 5–7 minutes until they become slightly caramelized and fragrant. This step builds the base of flavor for your comforting Short Rib Onion Soup, as the aromatics release their delightful essence.

Step 4: Add Flavorings
Stir in a tablespoon of tomato paste, mixing well with the sautéed vegetables for about 1 minute. Next, pour in a generous cup of dry red wine, scraping the bottom of the pot to deglaze and release any flavorful bits. Allow the mixture to simmer for 3–5 minutes until reduced by half, intensifying the flavors in your broth.

Step 5: Braise the Ribs
Return the seared short ribs to the pot, followed by minced garlic, fresh thyme sprigs, and a bay leaf. Pour in enough beef broth to just cover the meat, roughly 4–5 cups. Cover the pot with a lid and place it in the preheated oven, allowing it to braise for 2.5 to 3 hours. Check occasionally for liquid levels, ensuring the meat remains submerged and tender.

Step 6: Caramelize the Onions
While the ribs are braising, melt 1-2 tablespoons of unsalted butter in a separate skillet over low heat. Add thinly sliced onions and cook slowly, stirring frequently for about 40 to 90 minutes, until they develop a deep, rich brown color. This step enriches the flavor of your Short Rib Onion Soup, so take your time and be attentive to avoid burning.

Step 7: Combine Ingredients
Once the ribs are tender, remove them from the oven and shred the meat into bite-sized pieces, discarding any bones. Carefully strain the broth through a fine-mesh sieve, discarding the solids, and then return the broth to the pot. Stir in the caramelized onions and shredded meat, blending the flavors together to create a hearty soup base.

Step 8: Simmer Together
Bring the combined soup mixture to a gentle simmer over medium heat, allowing the flavors to meld and deepen for about 10 minutes. Taste and adjust the seasoning with salt and pepper as needed for optimal flavor balance. The Short Rib Onion Soup should be rich and inviting at this stage, ready for its indulgent finishing touches.

Step 9: Prepare Cheese Toasts
While the soup simmers, preheat your broiler. Slice the sourdough or country bread, arranging it on a baking sheet. Top each slice with a generous amount of grated gruyère cheese and broil for 2–4 minutes, or until the cheese is bubbly and golden. This decadent touch will add both texture and flavor to your warming bowl of soup.

Step 10: Serve and Enjoy
Ladle the warm Short Rib Onion Soup into bowls, topping each serving with a cheesy toast. Garnish with freshly chopped chives to add a splash of color and bright flavor. Your hearty soup is now ready to warm you from the inside out—perfect for cozy nights spent enjoying food and company!

Storage Tips for Short Rib Onion Soup

Fridge: Store any leftover Short Rib Onion Soup in an airtight container for up to 3 days. The flavors will continue to deepen as it sits, making it even more delicious!

Freezer: If you're looking to save some for later, freeze the soup in individual portions for up to 3 months. Use freezer-safe containers or bags to prevent freezer burn.

Reheating: To reheat, thaw in the fridge overnight if frozen, then gently warm on the stove over low heat. Add a splash of broth if needed to reach your desired consistency.

Room Temperature: It’s best to avoid keeping the soup at room temperature for more than 2 hours to ensure food safety. Enjoy warm, right after serving!

Make Ahead Options

These Short Rib Onion Soup bowls are perfect for busy home cooks looking to save time! You can prepare the soup base up to 3 days in advance, allowing the rich flavors to deepen as they sit in the refrigerator. Simply follow the recipe until Step 7, then let it cool completely before storing it in an airtight container. When you're ready to enjoy, reheat the soup on the stove over low heat, adding a splash of broth if needed for consistency. For the cheesy toasts, prep the bread slices up to 24 hours ahead; top them with grated gruyère, cover, and refrigerate. Just broil them for a few minutes before serving, and you'll have a delicious meal that's just as warming and comforting!

Expert Tips for Short Rib Onion Soup

• Sear Well: Make sure to sear the short ribs thoroughly for a rich flavor. A well-browned surface enhances the soup’s depth.

• Chill and Serve: For the best flavor, allow the soup to chill overnight in the fridge and reheat before serving. The ingredients meld beautifully!

• Onion Patience: Caramelizing onions is time-consuming; stay patient and avoid high heat to prevent burning—this sweetness is worth the wait!

• Use Low-Sodium Broth: For healthier comfort, opt for low-sodium beef broth, allowing you to control the saltiness of the final dish.

• Customize Your Toasts: Experiment with different cheeses on your toasts, such as aged cheddar or pepper jack, to add a unique twist to your Short Rib Onion Soup.

Short Rib Onion Soup Variations

Feel free to get creative with this comforting Short Rib Onion Soup, tailoring it to your tastes and dietary needs.

  • Chuck Roast: Swap short ribs with chuck roast for a tender, flavorful alternative that’s also budget-friendly.
  • Spicy Kick: Add a pinch of smoked paprika or crushed red pepper flakes for a delightful touch of heat.
  • Cheese Exchange: Try using aged cheddar or provolone for the toasts to offer a new flavor profile.
  • Vegetable Boost: Toss in some chopped celery or parsnips for a heartier vegetable presence in the soup. Experience the different textures and flavors they bring!
  • Wine Variation: Use a splash of balsamic vinegar if you don’t want to use wine; it adds a nice depth too.
  • Herb Twist: Experiment with fresh rosemary or sage instead of thyme for a unique herbal note. A fragrant change that can elevate your soup!
  • Gluten-Free Option: Serve with gluten-free bread or skip the toasts entirely for a lighter, gluten-free version.
  • Creamy Addition: Stir in a dollop of sour cream or crème fraîche per bowl before serving for a touch of creaminess that adds richness.

With these variations, your Short Rib Onion Soup will remain comforting and satisfying while catering to diverse palates! For a great pairing, consider a fresh green salad or a slice of Amish Onion Fritters for an extra side that complements the soup beautifully.

What to Serve with Hearty Short Rib Onion Soup

As you savor the deep flavors of this comforting soup, complement it with delightful sides and beverages to create a satisfying meal.

  • Crispy Green Salad: The freshness of a green salad balances the richness of the soup, providing a crunchy texture and vibrant flavors. Toss it with a light vinaigrette for a refreshing touch.

  • Garlic Breadsticks: Soft, buttery breadsticks infused with garlic add a delicious, aromatic side that pairs wonderfully with the hearty broth. Dip them into your soup for an extra layer of indulgence.

  • Roasted Root Vegetables: Earthy roasted carrots and parsnips bring sweetness and complement the savory notes of the soup. Their caramelized edges add a comforting depth to your meal.

  • Cheesy Polenta: Creamy polenta topped with melted cheese offers a sumptuous, comforting base that echoes the richness of the Short Rib Onion Soup. Plus, it makes every spoonful feel like a hug!

  • Sauvignon Blanc: A crisp glass of Sauvignon Blanc cleanses the palate with its bright acidity, enhancing the flavors of both the soup and any accompanying dishes.

  • Chocolate Mousse: For dessert, serve a silky chocolate mousse. Its rich, velvety texture is the perfect sweet conclusion to balance the savory soup, ensuring a memorable dining experience.

Short Rib Onion Soup Recipe FAQs

How do I choose the best short ribs for this soup?
For the best flavor, opt for bone-in short ribs. They add depth and richness to the broth. Look for well-marbled ribs, which will become tender during the long cooking process. If you can, ask your butcher for ribs that have a layer of fat on top; this will help to keep the meat juicy while braising.

What’s the best way to store leftover Short Rib Onion Soup?
Store your leftover soup in an airtight container in the refrigerator for up to 3 days. This allows the flavors to deepen, making the soup even more delectable upon reheating. If you’re not planning to eat it within that timeframe, consider freezing it for later enjoyment.

Can I freeze Short Rib Onion Soup?
Absolutely! To freeze, allow the soup to cool completely. Then, portion it into freezer-safe containers or bags, leaving some space for expansion. It can be frozen for up to 3 months. When you're ready to enjoy it, thaw overnight in the fridge and reheat gently on the stove, adding a little broth if needed.

What if my soup turned out too salty?
If you find your soup is too salty, you can balance the flavors by adding a bit of water or low-sodium broth. Start with a small amount, about ¼ cup, and adjust to taste. Adding a little boiled potato for about 10-15 minutes can also help absorb some of the excess salt.

Are there any common dietary allergens in this soup?
Yes, the Short Rib Onion Soup contains common allergens such as beef and dairy from the cheese. If you have guests with allergies, consider using a dairy-free cheese alternative or serving the soup without the cheese to make it a more inclusive dish.

Can I prepare this soup a day in advance?
Yes! In fact, I often suggest making it a day ahead. The flavors meld beautifully as it sits, enhancing the overall taste. Simply prepare the soup as instructed, cool it completely, and store it in the refrigerator overnight. Reheat gently when you're ready to serve.

Short Rib Onion Soup

Indulgent Short Rib Onion Soup Perfect for Cozy Nights

This delicious Short Rib Onion Soup offers comforting warmth and rich flavors, making it your new favorite cozy dish.
Print Recipe Pin Recipe
Prep Time 30 minutes mins
Cook Time 3 hours hrs
Total Time 3 hours hrs 30 minutes mins
Servings: 4 bowls
Course: Main Dishes
Cuisine: American
Calories: 650
Ingredients Equipment Method Nutrition Notes

Ingredients
  

For the Soup Base
  • 3 pounds Short Ribs Opt for bone-in for deeper flavor
  • 1 tablespoon Kosher Salt Adjust to taste
  • 1 teaspoon Freshly Ground Pepper Adjust to taste
  • 1 tablespoon Olive or Vegetable Oil
  • 2 medium Carrots Feel free to substitute with parsnips
  • 2 large Onions Leeks offer a milder, sweeter taste
  • 5 sprigs Fresh Thyme Dried thyme can be used if needed
  • 1 leaf Bay Leaf Remove before serving
  • 4 cloves Garlic Minced
  • 1 tablespoon Tomato Paste Optional if you prefer a lighter broth
  • 1 cup Red Wine Use a dry variety to avoid sweetness
  • 4-5 cups Beef Broth Low-sodium options work great
  • 1-2 tablespoons Unsalted Butter Essential for caramelizing onions
  • 1 tablespoon Dry Sherry Substitute with white wine if needed
For the Cheese Toasts
  • 4 slices Sourdough or Country Bread Any sturdy bread will do
  • 1 cup Gruyère Cheese Melts beautifully on top
For Garnish
  • 2 tablespoons Chopped Fresh Chives Adds freshness

Equipment

  • Oven-safe pot
  • skillet
  • Baking Sheet

Method
 

Step-by-Step Instructions for Short Rib Onion Soup
  1. Preheat your oven to 325°F (160°C) to prepare for the braising process.
  2. Season the short ribs with kosher salt and freshly ground pepper. Heat olive oil in a heavy, oven-safe pot over medium-high heat and brown the short ribs for 8-10 minutes.
  3. In the same pot, add chopped carrots and sliced onions or leeks, sautéing for 5-7 minutes until caramelized.
  4. Stir in tomato paste and cook for 1 minute, then add red wine and simmer for 3-5 minutes.
  5. Return short ribs to the pot, add garlic, thyme, and bay leaf. Pour in enough beef broth to cover the meat and braise in the oven for 2.5 to 3 hours.
  6. Meanwhile, melt butter in a skillet and cook sliced onions over low heat for 40-90 minutes until deep brown.
  7. Once ribs are tender, shred the meat and strain the broth, returning it to the pot with caramelized onions.
  8. Simmer the combined soup for about 10 minutes, adjusting seasoning as needed.
  9. Preheat your broiler, slice the bread, top with gruyère cheese, and broil for 2-4 minutes.
  10. Ladle soup into bowls, top with cheese toast and garnish with chives.

Nutrition

Serving: 1bowlCalories: 650kcalCarbohydrates: 42gProtein: 36gFat: 37gSaturated Fat: 20gPolyunsaturated Fat: 2gMonounsaturated Fat: 14gTrans Fat: 1.5gCholesterol: 90mgSodium: 1450mgPotassium: 800mgFiber: 3gSugar: 8gVitamin A: 1400IUVitamin C: 12mgCalcium: 250mgIron: 5mg

Notes

This Short Rib Onion Soup is perfect for cozy nights and can be made ahead to improve flavors.

Tried this recipe?

Let us know how it was!

Indulgent Baked Custard with Tapioca – A Hong Kong Gem

July 20, 2025 by grace bellamy Leave a Comment

There’s a certain joy that fills the kitchen when I decide to whip up a dessert that marries tradition with an unexpected twist. Enter the Baked Custard with Tapioca, a creamy delight that evokes memories of bustling Hong Kong dessert shops. The first time I tasted this dish, the comforting blend of rich custard with chewy tapioca pearls made me feel like I was wrapped in a warm hug.

The best part? This recipe invites you to personalize your experience by swapping in sweet fillings like lotus paste or red bean paste, making it a versatile option for any occasion. Whether you’re treating yourself after a long week or impressing friends at a gathering, I guarantee this dessert will bring smiles and nods of approval. So, roll up your sleeves and let’s embark on this delightful culinary journey together!

Why is Baked Custard with Tapioca so beloved?

Comforting Flavor: The Baked Custard with Tapioca blends creamy custard with delightful chewy pearls, creating an indulgent texture.
Endless Variations: With options like lotus paste or chestnut spread, it invites culinary creativity.
Crowd Pleaser: Perfect for gatherings, this dish is sure to impress guests and family alike.
Quick Prep: It comes together easily, making it ideal for both novice cooks and seasoned chefs.
Culinary Adventure: Experience a taste of Hong Kong in your own kitchen, perfect for those seeking something beyond fast food.
For a delightful snack, consider pairing it with these Garlic Butter Chicken Bites.

Baked Custard with Tapioca Ingredients

• Here’s everything you need for this creamy dessert.

For the Custard

  • Tapioca Pearls – Adds a unique texture; make sure to rinse after cooking for the best results.
  • Custard Powder – Essential for creating the smooth base; cornstarch is a good substitute if needed.
  • Whole Milk – Provides the creaminess; remember to split it for two cooking stages.
  • Eggs – Large eggs are best for richness and structure.
  • Evaporated Milk – Enhances the dessert's creaminess; use extra whole milk as a substitute.
  • Sugar – Adjust according to your sweetness preference; it balances the flavors beautifully.
  • Unsalted Butter – Adds a rich, creamy texture; don’t skip this ingredient for the best mouthfeel.

For the Filling

  • Lotus Paste – Brings a sweet, nutty flavor; try red bean paste or chestnut spread for a twist!

Embrace the joy of making this Baked Custard with Tapioca and relish each creamy, chewy bite that takes you straight to Hong Kong!

How to Make Baked Custard with Tapioca

  1. Prepare Tapioca Pearls:
    Begin by boiling water in a pot. Once it's boiling, add the tapioca pearls and cook them for about 10 minutes, stirring gently to prevent sticking. After cooking, cover the pot and remove it from heat, letting it sit for an additional 15 minutes. Finally, drain and rinse the pearls under cold water to stop the cooking process.

  2. Make Custard:
    Preheat your oven to 400°F. While it's warming up, in a mixing bowl, whisk together the custard powder with half of the milk and eggs until smooth. In a saucepan, gently simmer the remaining milk, evaporated milk, sugar, and butter on low heat until the sugar is fully dissolved. Gradually whisk in the custard mixture, cooking it on low heat until it thickens, which should take about 5 minutes. Then, gently stir in the cooked tapioca pearls for that perfect chewy texture.

  3. Assemble Ramekins:
    Carefully fill your ramekins halfway with the custard mixture. Add about a tablespoon of lotus paste to each ramekin for that delightful surprise, then top them off with more custard until nearly full. Place the filled ramekins into a baking pan, adding hot water to the pan until it reaches halfway up the sides of the ramekins, creating a gentle steam bath.

  4. Bake:
    Slide the baking pan into your preheated oven and let it bake for 20 minutes. After that, turn on the broiler for 3-5 minutes, keeping a close eye until the tops are slightly puffed and beautifully caramelized. Once done, take them out of the oven and allow the ramekins to cool for at least 15 minutes before digging in.

Optional: Enjoy with a sprinkle of toasted coconut on top for added flavor and texture.
Exact quantities are listed in the recipe card below.

What to Serve with Baked Custard with Tapioca?

After indulging in this delightful dessert, consider pairing it with options that elevate your meal to new heights and enhance the flavors of the custard.

  • Fresh Mango Slices:
    Juicy, sweet mango adds a refreshing contrast to the creamy texture of the baked custard, making each bite even more enjoyable.

  • Toasted Coconut Flakes:
    Adding toasted coconut gives a delightful crunch and tropical flavor, complementing the dessert’s rich, soft custard.

  • Jasmine Tea:
    The delicate floral notes of jasmine tea create a soothing experience after dessert, balancing sweetness with its aromatic essence.

  • Matcha Green Tea Ice Cream:
    The earthy bitterness of matcha ice cream provides an exciting flavor contrast, making this a perfect indulgent pairing.

  • Black Sesame Soup:
    Serve a small bowl of warm black sesame soup alongside the custard for a traditional Asian twist that’s nutty and comforting.

  • Crispy Spring Rolls:
    Crunchy and mildly sweet spring rolls filled with fruit can serve as a light appetizer to start your meal, whetting your appetite perfectly.

These pairings will surely enchant your taste buds and make your dining experience even more memorable!

Make Ahead Options

These delightful Baked Custard with Tapioca desserts are perfect for meal prep! You can prepare the custard mixture and the tapioca pearls up to 24 hours in advance. Simply cook the tapioca pearls as directed and let them cool, then combine them with the custard mixture. Store them covered in the refrigerator. On the day you plan to serve, fill your ramekins and bake as instructed for best results. To maintain quality, avoid baking until you're ready to enjoy, ensuring they remain just as creamy and delectable. With this simple prep, you can have a restaurant-quality dessert ready with minimal effort on busy weeknights!

Baked Custard with Tapioca Variations

Feel free to get creative with your Baked Custard with Tapioca and tailor it to your taste buds!

  • Chestnut Spread: Swap lotus paste for chestnut spread for a sweeter, nutty flavor. Just reduce the amount slightly since it's sweeter.

  • Red Bean Paste: Try red bean paste instead of lotus paste for a traditional twist that offers a lovely earthy sweetness.

  • Fruit Addition: Incorporate chopped fruits, like juicy mango or fresh coconut, into the custard mixture for a tropical surprise in every bite.

  • Coconut Milk: Use coconut milk instead of whole milk for a delightful coconut essence that pairs beautifully with the tapioca.

  • Spice It Up: Add a pinch of cinnamon or nutmeg to the custard mixture for warm, fragrant notes that elevate the dessert to a new level.

  • Dairy-Free Variation: Replace the milk and evaporated milk with almond or oat milk to make a dairy-free version without losing creaminess.

  • Chocolate Twist: Melt dark chocolate and swirl it into the custard for a deliciously decadent version that chocolate lovers will adore.

  • Matcha Infusion: Mix in a teaspoon of matcha powder for a vibrant green color and a unique, earthy flavor that celebrates Asian culinary traditions.

Let your imagination run wild and enjoy the process of making Baked Custard with Tapioca uniquely yours!

Expert Tips for Baked Custard with Tapioca

  • Perfect Proofing: Use room temperature ingredients for the custard to ensure a smooth mixture without lumps.
  • Gentle Heat: Cook the custard over low heat, whisking continuously to prevent curdling, ensuring a silky baked custard with tapioca.
  • Eye on Broiling: Keep a close watch during broiling; the sugar can go from caramelized to burnt quickly if left unattended.
  • Ramekin Care: Ensure the water bath doesn't splash into the ramekins; this keeps the custard's texture pristine and creamy.
  • Flavor Infusion: Experiment with adding a pinch of vanilla extract to the custard for an additional aromatic touch; it elevates the flavor beautifully.

How to Store and Freeze Baked Custard with Tapioca

Fridge: Store any leftover Baked Custard with Tapioca in an airtight container for up to 3 days. It's best enjoyed fresh, but refrigeration can help preserve its delightful texture.

Freezer: For longer storage, freeze the custard without its toppings for up to 1 month. Wrap each ramekin tightly in plastic wrap, then aluminum foil to prevent freezer burn.

Reheating: When ready to enjoy, thaw overnight in the fridge and then reheat gently in the microwave. Aim for short intervals to avoid overheating and drying out the custard.

Serving Temperature: Allow the custard to come to room temperature or serve chilled, enhancing the flavors and textures of this delicious treat.

Baked Custard with Tapioca Recipe FAQs

What should I look for when selecting tapioca pearls?
Look for shiny, translucent tapioca pearls without any dark spots or excessive cloudiness. They should feel firm to the touch but not overly hard. I always source my tapioca from Asian supermarkets, where you can find varieties specifically meant for dessert cooking.

How long can I store baked custard with tapioca in the refrigerator?
You can store your Baked Custard with Tapioca in an airtight container in the fridge for up to 3 days. However, the texture is always best within the first day or two after baking, so try to enjoy it fresh for that creamy, delightful experience!

Can I freeze the baked custard?
Absolutely! For freezing, it's best to wrap each ramekin tightly in plastic wrap and then in aluminum foil to guard against freezer burn. It can be frozen for up to a month. When you're ready to enjoy it, thaw it overnight in the fridge and gently reheat in the microwave. Just be careful not to overheat, as that can dry it out!

What if my custard doesn’t set properly?
If your custard is still runny after baking, it may need a bit more cooking time. Another option is to return it to the oven and bake for an additional 5-10 minutes. Ensure it’s in a water bath, which helps regulate the cooking temperature. Alternatively, you can consider adding an extra egg or adjusting the custard powder for future batches.

Are there any dietary concerns with this recipe?
Yes, always check for allergies, particularly since the recipe includes eggs, dairy, and specific fillers like lotus paste or red bean paste. If you have guests with allergies, consider using alternative fillings or simply omitting them. Additionally, this dessert is rich in carbohydrates, so it’s great for energy but should be enjoyed in moderation.

How can I personalize the flavor of my custard?
What a delightful idea! To add a personal touch, try incorporating different flavors into the custard itself, such as a splash of vanilla extract or a hint of orange zest. You can also experiment with alternative fillings like chestnut spread or even fruit chunks, which brings a fresh and vibrant twist to the classic recipe!

Baked Custard with Tapioca

Indulgent Baked Custard with Tapioca

This Baked Custard with Tapioca is a creamy delight, marrying tradition with a twist and capturing the essence of Hong Kong's dessert culture.
Print Recipe Pin Recipe
Prep Time 15 minutes mins
Cook Time 25 minutes mins
Cooling Time 15 minutes mins
Total Time 55 minutes mins
Servings: 4 ramekins
Course: Dessert
Cuisine: Hong Kong
Calories: 320
Ingredients Equipment Method Nutrition Notes

Ingredients
  

For the Custard
  • 1 cup Tapioca Pearls Rinse after cooking.
  • ½ cup Custard Powder Cornstarch can be used as a substitute.
  • 2 cups Whole Milk Split for two cooking stages.
  • 3 large Eggs For richness and structure.
  • 1 cup Evaporated Milk Use extra whole milk as a substitute.
  • ½ cup Sugar Adjust according to sweetness preference.
  • 2 tablespoons Unsalted Butter For rich, creamy texture.
For the Filling
  • 1 tablespoon Lotus Paste Can substitute with red bean paste or chestnut spread.

Equipment

  • Mixing Bowl
  • Saucepan
  • baking pan
  • Ramekins

Method
 

Custard Preparation
  1. Prepare Tapioca Pearls: Boil water in a pot, add tapioca pearls, and cook for about 10 minutes. Let sit covered for 15 minutes, then drain and rinse.
  2. Make Custard: Preheat oven to 400°F. Whisk custard powder with half of the milk and eggs. In saucepan, simmer remaining milk, evaporated milk, sugar, and butter until dissolved. Gradually whisk in custard mixture until thickened.
Assembly and Baking
  1. Assemble Ramekins: Fill ramekins halfway with custard, add a tablespoon of lotus paste, then top with more custard. Place into a baking pan with hot water.
  2. Bake: Bake in the oven for 20 minutes, then broil for 3-5 minutes until tops are slightly puffed.

Nutrition

Serving: 1ramekinCalories: 320kcalCarbohydrates: 45gProtein: 8gFat: 12gSaturated Fat: 7gCholesterol: 100mgSodium: 200mgPotassium: 200mgFiber: 1gSugar: 20gVitamin A: 500IUCalcium: 300mgIron: 0.5mg

Notes

Enjoy with sprinkled toasted coconut for added flavor.

Tried this recipe?

Let us know how it was!

Delicious Greek Salad Dressing Ready in Just 5 Minutes

July 20, 2025 by grace bellamy Leave a Comment

Have you ever found yourself in the kitchen, staring blankly at a bowl of greens, desperately in need of inspiration? Well, say goodbye to boring salads, because this 5-Minute Greek Salad Dressing is about to change the game! Whipping up this recipe is a breeze—you'll have a vibrant, homemade dressing ready in no time, packed with fresh garlic, zesty lemon, and aromatic herbs. With its quick prep time and the added bonus of being dairy-free, it's the ideal choice for those craving a flavorful and healthy alternative to store-bought versions. Imagine drizzling this irresistible dressing over a colorful salad, or using it to elevate your roasted vegetables—it’s versatile enough to make every meal pop! So, are you ready to transform your cooking routine? Let's dive into this deliciously easy recipe!

Why is Greek Salad Dressing so Special?

Quick Preparation: This dressing is a lifesaver for busy weeknights, taking only 5 minutes to prepare.

Fresh Ingredients: Packed with bold flavors like garlic, lemon, and oregano, it brings meals to life without any preservatives.

Versatile Usage: Drizzle it over salads, roasted veggies, or grilled proteins for a delightful twist. It’s even great as a marinade!

Creamy Variation: Want to enhance the richness? Try swapping half the olive oil with Greek yogurt or mayonnaise for a creamy delight.

Health Conscious: This dressing is dairy-free and gluten-free, making it suitable for various dietary preferences while keeping calories in check.

In a pinch for a great meal? Chicken Caesar Salad and Pomegranate Rocket Salad are excellent pairing ideas that complement this zesty dressing beautifully!

Greek Salad Dressing Ingredients

For the Dressing

  • Garlic – Adds a bold, aromatic flavor; one large clove or two small cloves, crushed, works best.
  • Dried Oregano – Provides earthy and herbal notes; you can use fresh oregano if it's on hand.
  • Lemon Juice – Offers a bright, acidic component; fresh lemon juice elevates the flavor significantly.
  • Red Wine Vinegar – Brings tanginess and depth; substitute with apple cider vinegar if desired for a slightly different taste.
  • Dijon Mustard – Acts as an emulsifier while adding a mild spiciness; yellow mustard is a suitable substitute if needed.
  • Extra Virgin Olive Oil – Forms the base, lending richness to the dressing; opt for high-quality oil for the best flavor.
  • Sea Salt and Black Pepper – Enhance overall taste; adjust according to your preferences for seasoning.

Step‑by‑Step Instructions for 5-Minute Greek Salad Dressing

Step 1: Combine Base Ingredients
In a small mixing bowl or jar, add one crushed clove of garlic, one teaspoon of dried oregano, three tablespoons of fresh lemon juice, two tablespoons of red wine vinegar, and one teaspoon of Dijon mustard. Using a fork or small whisk, mix these ingredients together for about 30 seconds until well blended, creating a flavorful base for your Greek Salad Dressing.

Step 2: Emulsify with Oil
Gradually introduce a half cup of extra virgin olive oil to the mixture from Step 1. If you’re using a bowl, whisk vigorously for about 30 seconds until the dressing begins to emulsify, appearing thicker and well combined. Alternatively, if using a mason jar, securely seal the lid and shake it energetically for around 30 seconds until everything is fully mixed and emulsified.

Step 3: Season to Taste
Open your dressing jar or bowl, and taste the concoction, adjusting to your preference by adding sea salt and freshly ground black pepper. Start with roughly half a teaspoon of each and stir or shake well. You’ll know the dressing is ready when the flavors are harmonized, offering a zesty and balanced taste that's perfect for drizzling over salads.

Step 4: Chill and Serve
Once seasoned, refrigerate the Greek Salad Dressing for at least 15 minutes if possible; this allows the flavors to meld beautifully. Before serving, give the jar a good shake or whisk the mixture again to ensure it's well combined, then drizzle it over your favorite salads or roasted vegetables for a fresh, vibrant lift!

Greek Salad Dressing Variations

Customize this delightful Greek Salad Dressing to fit your taste buds and dietary needs!

  • Creamy Twist: Swap half the olive oil with Greek yogurt or mayonnaise for a luscious, creamy dressing that’s still light and zesty.
  • Herb Infusion: Switch out dried oregano for fresh basil or parsley. This bold change brings a garden-fresh flair that elevates every bite.
  • Sweet Note: Stir in a spoonful of honey or maple syrup to add a bit of sweetness; it contrasts beautifully with the tangy elements.
  • Spicy Kick: Add a pinch of red pepper flakes for a touch of heat. This simple adjustment will awaken your taste buds and give it an exciting edge.
  • Nutty Depth: Incorporate a teaspoon of tahini for a nutty flavor depth, adding richness without overwhelming the fresh essence of the dressing.
  • Citrus Burst: Mix in the zest of lemon or orange to brighten up the flavor profile. This extra zing makes the dressing even more vibrant and zesty.
  • Balsamic Bliss: Replace red wine vinegar with balsamic vinegar. This swap introduces a sweeter, richer flavor that pairs well with roasted veggies.
  • Garlic Lovers: Increase the garlic by adding an extra clove or two if you crave that bold aromatics. The more garlic, the merrier for those who adore its distinct flavor!

Enjoy exploring these variations to make this recipe even more personal! Don't forget to drizzle your delicious dressing over fresh salads, or try it with a refreshing Pasta Salad for a complete meal experience.

How to Store and Freeze Greek Salad Dressing

Fridge: Store leftover Greek Salad Dressing in an airtight container in the refrigerator for up to 5 days. Always give it a good shake before using, as ingredients may separate.

Freezer: While it's best fresh, you can freeze the dressing in an ice cube tray for up to 3 months. Once frozen, transfer the cubes to a zip-top bag for easy use later.

Thawing: When ready to use frozen dressing, simply thaw it in the fridge overnight or at room temperature for a couple of hours. Shake or stir well before serving to restore its creamy consistency.

Serving Freshness: For best flavor and freshness, consume the dressing within a week. This ensures you experience the vibrant taste of your homemade Greek Salad Dressing!

What to Serve with 5-Minute Greek Salad Dressing

Elevate your meals effortlessly with these delightful pairings that complement the bright, zesty flavors of this delicious dressing.

  • Crispy Greek Salad: This classic combination features fresh greens, cucumbers, tomatoes, and feta, perfectly dressed with the Greek Salad Dressing.

  • Roasted Vegetables: Toss seasonal veggies like zucchini and bell peppers with olive oil and herbs; the dressing adds a burst of flavor to roasted delights.

  • Grilled Chicken Skewers: Marinate chicken pieces in the Greek Salad Dressing for a savory twist, then grill to perfection for juicy bites.

  • Quinoa Tabbouleh: This refreshing salad made with parsley, bulgur, and tomatoes pairs beautifully, enhancing each ingredient's fresh taste with the dressing.

  • Pita Bread and Hummus: Serve this dressing alongside creamy hummus for a tangy dip that adds a delightful kick to your snack platter.

  • Mediterranean Couscous: Fluffy couscous mixed with cucumber, olives, and herbs provides a flavorful base to drizzle dressing over, brightening the dish effortlessly.

  • Mediterranean Sangria: A fruity, refreshing drink with hints of citrus complements vibrant flavors and makes for a perfect pairing on warm evenings.

  • Baklava: For dessert, the nutty sweetness of baklava contrasts beautifully with the dressing's tanginess when served thoughtfully as part of a meal.

  • Greek Yogurt Parfait: Layer yogurt with granola and fruits, then drizzle with the dressing for a surprising and tasty treat to finish off your feast.

Make Ahead Options

These 5-Minute Greek Salad Dressing preparations are perfect for busy home cooks looking to save time during the week! You can mix all the ingredients—garlic, dried oregano, lemon juice, red wine vinegar, Dijon mustard, and extra virgin olive oil—up to 3 days in advance. Just combine them in a jar, seal it tightly, and refrigerate. This process helps the flavors meld, making it even tastier when you’re ready to serve! When ready to enjoy, simply give the dressing a good shake or whisk to re-emulsify before drizzling it over your salads. This way, you guarantee a fresh and vibrant dressing with minimal effort, allowing for delicious meals at a moment's notice!

Tips for the Best Greek Salad Dressing

  • Quality Ingredients: Always opt for high-quality extra virgin olive oil; it significantly enhances the dressing's flavor and freshness.

  • Fresh is Best: Use fresh lemon juice instead of bottled. It makes a world of difference in taste and brightness for your Greek Salad Dressing.

  • Shake Before Serving: Remember to shake or whisk the dressing well each time before using, as ingredients may separate during storage, impacting flavor.

  • Adjust Seasoning: Taste your dressing before serving; don’t hesitate to adjust salt and pepper to suit your preferences, creating the perfect balance.

  • Experiment with Herbs: Feel free to mix in different herbs like basil or dill to customize your Greek Salad Dressing for unique flavor profiles.

5-Minute Greek Salad Dressing Recipe FAQs

What is a quick dressing for Greek salad?
Absolutely! This 5-Minute Greek Salad Dressing is the perfect quick option. With only a handful of fresh ingredients, it elevates your salad in no time, bringing together garlic, lemon, oregano, and olive oil for that classic Greek flavor.

What are the 5 ingredients in Greek dressing?
The five essential ingredients for this delightful Greek Salad Dressing include garlic, dried oregano, lemon juice, red wine vinegar, and Dijon mustard. These components blend to create a vibrant and zesty dressing that perfectly complements any salad.

What is the dressing made of in a traditional Greek salad?
Traditional Greek salad dressing typically comprises olive oil, red wine vinegar, lemon juice, garlic, and herbs like oregano. This essential dressing highlights the fresh, simple ingredients often found in Greek cuisine, focusing on quality and flavor.

How should I store Greek Salad Dressing?
To keep your homemade Greek Salad Dressing fresh, store it in an airtight container in the refrigerator for up to 5 days. Always remember to shake or stir before serving, as the ingredients can separate during storage.

Can I freeze Greek Salad Dressing?
Yes, you can! To freeze, pour the dressing into an ice cube tray and freeze for up to 3 months. Once frozen, transfer the cubes to a zip-top bag. To use, simply thaw the desired amount in the fridge overnight or at room temperature for a couple of hours.

What should I do if my dressing is too thick?
If your Greek Salad Dressing turns out too thick, no worries! Simply whisk in a bit of water or additional olive oil to achieve your desired consistency. You could also add a splash of lemon juice or vinegar to retain that refreshing flavor while thinning it out.

Greek Salad Dressing

Delicious Greek Salad Dressing Ready in Just 5 Minutes

This Greek Salad Dressing is a quick, flavorful blend of fresh ingredients that elevates any salad or dish.
Print Recipe Pin Recipe
Prep Time 5 minutes mins
Chill Time 15 minutes mins
Total Time 20 minutes mins
Servings: 4 servings
Course: Condiment
Cuisine: Greek
Calories: 110
Ingredients Equipment Method Nutrition Notes

Ingredients
  

For the Dressing
  • 1 clove Garlic crushed
  • 1 teaspoon Dried Oregano or fresh
  • 3 tablespoons Lemon Juice fresh preferred
  • 2 tablespoons Red Wine Vinegar or apple cider vinegar
  • 1 teaspoon Dijon Mustard or yellow mustard
  • ½ cup Extra Virgin Olive Oil high quality
  • to taste Sea Salt
  • to taste Black Pepper

Equipment

  • Mixing Bowl
  • Whisk
  • mason jar

Method
 

Step-by-Step Instructions
  1. In a small mixing bowl or jar, add the crushed garlic, oregano, lemon juice, red wine vinegar, and Dijon mustard. Whisk together for about 30 seconds.
  2. Gradually add the olive oil while whisking vigorously or shaking in a mason jar for about 30 seconds until emulsified.
  3. Taste and adjust seasoning with sea salt and black pepper, starting with half a teaspoon of each.
  4. Refrigerate for at least 15 minutes before serving, shaking or whisking again before drizzling over salads or vegetables.

Nutrition

Serving: 2tablespoonsCalories: 110kcalCarbohydrates: 1gFat: 12gSaturated Fat: 2gPolyunsaturated Fat: 1gMonounsaturated Fat: 9gSodium: 100mgPotassium: 15mgVitamin C: 1mgIron: 1mg

Notes

For a creamy variation, substitute half the olive oil with Greek yogurt or mayonnaise. Store in the refrigerator for up to 5 days.

Tried this recipe?

Let us know how it was!

Delightful Snowball Cake Recipe for Sweet Spring Goodness

July 19, 2025 by grace bellamy Leave a Comment

As I whisked together the ingredients for this Raspberry Coconut Snowball Cake, a scent of sweet anticipation filled my kitchen. Light and fluffy, this cake is the perfect dessert for spring celebrations, showcasing a beautiful swirl of raspberry and a graceful coat of coconut that looks as delightful as it tastes. This snowball cake recipe stands out not only for its stunning presentation but also for being an unfrosted treat that won’t weigh you down. Whether you're hosting a picnic or just treating yourself, its quick prep makes it an easy indulgence without sacrificing flavor or charm. Curious about how to create this delightful masterpiece? Let's dive into the world of soft, cloud-like cake with a refreshing twist!

Why Choose This Snowball Cake Recipe?

Simplicity at Its Best: Creating this stunning Raspberry Coconut Snowball Cake requires minimal effort, making it perfect for both novice and experienced bakers alike.

Light and Fluffy: This cake boasts a moist, airy texture, thanks to a careful balance of ingredients, ensuring everyone will enjoy a slice without feeling weighed down.

Versatile Flavor Options: While raspberry steals the show, feel free to swap in different fruit preserves like pineapple or blueberry for a personalized touch that suits your taste.

Visually Stunning: Its unique marbled design presents a feast for the eyes, perfect for impressing guests at any gathering or celebration.

Quick Prep Time: With just a few straightforward steps, you can whip up this cake in no time, freeing you to focus on more important things—like enjoying it!

Why not pair a slice with a cup of coffee, or drizzle some raspberry sauce over it for a charming dessert treat? This makes a perfect complement to lighter meals or afternoon teas, just like our delightful Carrot Cake Cheesecake.

Snowball Cake Recipe Ingredients

For the Cake
• All-purpose flour – Gives the cake its structure; can substitute with a gluten-free flour blend for a lighter option.
• Baking powder – A leavening agent that ensures the cake rises beautifully; always check freshness for optimal results.
• Salt – Enhances the overall flavors; feel free to reduce slightly if you're watching your sodium intake.
• Unsalted butter – Adds richness and moisture; margarine works as a dairy-free alternative if needed.
• Granulated sugar – Sweetens the cake; consider using coconut sugar for a subtle caramel note.
• Eggs – Act as a binding agent providing texture; flax eggs can be used for a vegan version (mix 1 tablespoon flaxseed meal with 2.5 tablespoon water).
• Vanilla extract – Imparts flavor; fresh vanilla beans can offer an even richer taste experience.
• Whole milk – Keeps the cake moist; almond or any non-dairy milk can be swapped in for a lighter option.
• Raspberry preserves – Provides a delightful flavor swirl; fresh mashed raspberries mixed with sugar are a fresh substitute.
• Sweetened shredded coconut – Coats the cake beautifully; using unsweetened coconut will reduce the cake's sweetness.
• Powdered sugar – Optional for garnish; skip it for a sugar-free version if you prefer a healthier treat.

Dive into this exciting snowball cake recipe with its playful layers, and get ready to impress your friends and family!

Step‑by‑Step Instructions for Raspberry Coconut Snowball Cake Recipe

Step 1: Prepare the Pan
Begin by greasing a dome-shaped cake pan with butter or cooking spray to ensure easy release. Dust the inside with a light layer of flour, shaking out any excess. Preheat your oven to 350°F (175°C), allowing it to fully heat while you prepare the cake batter, and gather your mixing bowls and measuring tools.

Step 2: Make the Batter
In a mixing bowl, cream together 1 cup of unsalted butter and 1 cup of granulated sugar until light and fluffy, about 3-4 minutes. Beat in 4 large eggs, one at a time, followed by 1 teaspoon of vanilla extract. In a separate bowl, whisk together 2 cups of all-purpose flour, 2 teaspoons of baking powder, and ½ teaspoon of salt. Gradually add this dry mixture to the butter mixture, alternating with 1 cup of whole milk, until the batter is smooth.

Step 3: Add the Swirl
Pour half of the prepared batter into the greased cake pan, smoothing it out evenly with a spatula. Spoon dollops of raspberry preserves over this layer, allowing the flavors to mix slightly without fully blending. Pour the remaining batter on top, gently spreading it to cover the preserves. Use a knife to lightly swirl the raspberry preserves into the batter for a beautiful marbled effect.

Step 4: Bake the Cake
Place the cake pan in the preheated oven and bake for 45-55 minutes. The cake is done when a toothpick inserted in the center comes out clean or with a few moist crumbs. Once baked, carefully remove the cake from the oven and let it cool in the pan for 10 minutes before transferring it to a wire rack to cool completely, ensuring it's fully set.

Step 5: Coat the Cake
Once the cake is completely cooled, prepare to coat it in shredded coconut. Lightly brush the surface of the cake with water or a simple syrup to help the coconut adhere better. Generously press sweetened shredded coconut over the top and sides, ensuring an even layer, and optionally dust with powdered sugar for an added sweetness and visual appeal if desired.

Step 6: Serve and Enjoy
Slice the Raspberry Coconut Snowball Cake into wedges or smaller pieces and serve it on a decorative platter. This light and fluffy dessert pairs beautifully with a cup of tea or coffee, making it a perfect treat for spring gatherings. Enjoy this enticing snowball cake recipe that brings a lovely sweet touch to your table!

Storage Tips for Raspberry Coconut Snowball Cake

Room Temperature: Store leftovers in an airtight container at room temperature for up to 3 days to maintain moisture and freshness.

Fridge: If you wish to extend shelf life, refrigerate the cake in a sealed container for up to 5 days. Be sure to bring it to room temperature before serving for the best flavor.

Freezer: For longer storage, wrap individual slices in parchment paper and place them in a freezer-safe bag for up to 1 month. Thaw in the fridge overnight before enjoying.

Reheating: If desired, gently reheat slices in the microwave for 10-15 seconds to enjoy a warm, delightful treat. The snowball cake recipe remains delicious even after freezing!

Expert Tips for Snowball Cake Recipe

Swirl Wisely: Gently swirl the raspberry preserves into the batter to achieve a beautiful marbled design; overmixing can result in a blended color rather than a distinct pattern.

Room Temperature Eggs: Allow your eggs to reach room temperature before adding them to the batter; this ensures better incorporation and a fluffier cake.

Cool Completely: Be patient and let the cake cool fully before applying the shredded coconut coating; a warm cake can melt the coconut, making it difficult to stick.

Check Baking Powder: Always check that your baking powder is fresh to guarantee the best rise; old baking powder can lead to dense cake.

Alternate Flavor Swaps: Feel free to experiment with different fruit preserves, such as pineapple or blueberry, to create your unique twist on this delightful snowball cake recipe.

Make Ahead Options

Prepare your Raspberry Coconut Snowball Cake ahead of time for easy meal planning! You can make the cake itself up to 24 hours in advance—simply bake, cool completely, and wrap it tightly in plastic wrap, storing it at room temperature to maintain moisture. The shredded coconut coating can be prepared separately and kept in an airtight container for up to 3 days. When it's time to serve, brush the cooled cake lightly with water or syrup to help the coconut adhere, then press the coconut on top. This method ensures that your cake retains its light and fluffy texture, making it just as delightful as when freshly baked!

What to Serve with Raspberry Coconut Snowball Cake?

Indulging in a slice of this light and fluffy cake offers a delightful experience that beckons for equally charming accompaniments.

  • Fresh Berries: The bright, tangy flavor of fresh strawberries or blueberries complements the sweetness of the raspberry swirl, enhancing the cake's fruity notes.

  • Coconut Whipped Cream: A light cloud of coconut whipped cream brings a luscious creaminess to each bite, echoing the cake's shredded coconut coating.

  • Mint Sprig Garnish: Add a sprig of fresh mint on top for a pop of color and a refreshing herbal touch that pairs beautifully with the cake's sweetness.

  • Iced Tea: A cool glass of iced tea, perhaps with a hint of lemon, serves as a refreshing contrast, elevating your dessert experience with a sophisticated flair.

  • Vanilla Ice Cream: Creamy vanilla ice cream served alongside the warm cake creates a delicious contrast in temperatures and textures—pure bliss on a spring day!

  • Chocolate Drizzle: A subtle drizzle of chocolate sauce can add a decadent touch, enhancing the flavor profile and creating a visual feast on your dessert plate.

  • Honey-Lemon Glaze: Drizzle a light honey-lemon glaze over individual slices to add a citrusy brightness that beautifully contrasts with the cake's rich coconut flavor.

  • Sparkling Water: For a light and refreshing beverage, serve sparkling water with a slice of lemon—its effervescence complements the fluffy texture of the cake effortlessly.

Snowball Cake Recipe Variations

Customize your Snowball Cake to suit your taste buds and dietary preferences with these delightful variations!

  • Gluten-Free: Use a gluten-free flour blend instead of all-purpose flour for a light, gluten-free option. This way, everyone can enjoy a slice without missing out on the fun.
  • Dairy-Free: Swap unsalted butter for margarine and use almond milk to make this a dairy-free delight. The cake remains moist and delicious while catering to those with dietary restrictions.
  • Fruit Swaps: Substitute raspberry preserves with lime, pineapple, or blueberry preserves for a unique flavor twist that will surprise your taste buds. Each option adds its own charm and sweetness!
  • Mini Treats: Use cupcake pans instead of a cake pan for bite-sized versions of this recipe. Just adjust your baking time to 18-22 minutes for the perfect mini snowball cakes.
  • Nutty Addition: Add toasted almonds or chopped walnuts to the batter for a lovely crunch. The nutty flavor complements the sweetness beautifully, making it even more irresistible.
  • Chocolate Delight: Fold in chocolate chips for a rich touch that pairs perfectly with the fruity undertones of the cake. The delightful combination will have everyone coming back for seconds!
  • Coconut Variants: Change things up by using unsweetened shredded coconut if you prefer a less sugary flavor. It creates a new layer of subtlety that lets the natural flavors shine.
  • Spice It Up: Add a pinch of cinnamon or nutmeg to the batter for a warm spice kick that makes this cake perfect for cozy gatherings.

Let your creativity soar with these variations, and embrace the joy of baking! And while you're at it, why not explore other delightful recipes like our Cheese Blueberry Cake or Apple Pecan Cake with Caramel Glaze?

Raspberry Coconut Snowball Cake Recipe FAQs

How do I choose ripe raspberries for the preserves?
Absolutely! Look for fresh raspberries that are plump and have a vibrant red color. Avoid any that are mushy or show signs of mold. If using frozen raspberries, make sure they don’t have ice crystals or freezer burn, as these can affect the flavor of your snowball cake.

What is the best way to store the Raspberry Coconut Snowball Cake?
For optimal freshness, store the cake in an airtight container at room temperature for up to 3 days. If you prefer to keep it longer, refrigerate it for up to 5 days. Always bring the cake back to room temperature before serving to enhance its flavor and texture.

Can I freeze the Raspberry Coconut Snowball Cake?
Yes, you can definitely freeze this lovely cake! Wrap individual slices in parchment paper, then place them in a freezer-safe bag. The cake can be frozen for up to 1 month. When you're ready to enjoy a slice, simply thaw it overnight in the fridge and allow it to come to room temperature before serving for the best taste.

What should I do if my cake is too dense?
If your snowball cake turns out denser than expected, it might be due to overmixing the batter or using expired baking powder. To achieve a lighter texture, mix the wet and dry ingredients just until combined. Also, ensure that your baking powder is fresh for optimal leavening. Remember, gentle swirling of the raspberry preserves also helps maintain the cake's lightness!

Can this snowball cake be made gluten-free?
Very! To make this Raspberry Coconut Snowball Cake gluten-free, substitute the all-purpose flour with a gluten-free flour blend, ensuring it has xanthan gum or another binding agent included. This way, you’ll still achieve that lovely fluffy texture without sacrificing flavor!

Are there any allergy considerations for this recipe?
Definitely! This cake contains dairy (butter and milk) and eggs. If you need a dairy-free version, you can substitute margarine for the butter and use almond, soy, or any non-dairy milk. For egg-free options, swap in flax eggs (1 tablespoon flaxseed meal + 2.5 tablespoon water) for each egg. Always check the labels on your ingredients to avoid cross-contamination with allergens!

Snowball Cake Recipe

Delightful Snowball Cake Recipe for Sweet Spring Goodness

This delightful raspberry coconut snowball cake recipe offers a light and fluffy dessert perfect for spring celebrations, showcasing a beautiful mix of raspberry and coconut.
Print Recipe Pin Recipe
Prep Time 20 minutes mins
Cook Time 50 minutes mins
Cooling Time 10 minutes mins
Total Time 1 hour hr 20 minutes mins
Servings: 12 slices
Course: Dessert
Cuisine: American
Calories: 320
Ingredients Equipment Method Nutrition Notes

Ingredients
  

For the Cake
  • 2 cups all-purpose flour can substitute with a gluten-free flour blend
  • 2 teaspoons baking powder always check freshness
  • ½ teaspoon salt reduce slightly if watching sodium intake
  • 1 cup unsalted butter adds richness; margarine works as a dairy-free alternative
  • 1 cup granulated sugar consider using coconut sugar for a caramel note
  • 4 large eggs can use flax eggs for a vegan version
  • 1 teaspoon vanilla extract fresh vanilla beans enhance flavor
  • 1 cup whole milk can swap with almond or any non-dairy milk
  • 1 cup raspberry preserves fresh mashed raspberries mixed with sugar can substitute
  • 2 cups sweetened shredded coconut using unsweetened will reduce sweetness
  • 1 cup powdered sugar optional for garnish

Equipment

  • Dome-shaped cake pan
  • Mixing bowls
  • Measuring tools

Method
 

Step-by-Step Instructions
  1. Grease a dome-shaped cake pan with butter or cooking spray, dust with flour, and preheat your oven to 350°F (175°C).
  2. Cream together 1 cup of unsalted butter and 1 cup of granulated sugar until light and fluffy, about 3-4 minutes. Beat in 4 large eggs, one at a time, followed by 1 teaspoon of vanilla extract. In a separate bowl, whisk together 2 cups of all-purpose flour, 2 teaspoons of baking powder, and ½ teaspoon of salt. Gradually add this dry mixture to the butter mixture, alternating with 1 cup of whole milk, until the batter is smooth.
  3. Pour half of the prepared batter into the greased cake pan, smoothing it out evenly with a spatula. Spoon dollops of raspberry preserves over this layer. Pour the remaining batter on top and lightly swirl the raspberry preserves into the batter.
  4. Bake for 45-55 minutes until a toothpick inserted in the center comes out clean. Allow the cake to cool in the pan for 10 minutes before transferring it to a wire rack to cool completely.
  5. Brush the cooled cake with water or simple syrup, then generously press sweetened shredded coconut over the top and sides. Optionally dust with powdered sugar.
  6. Slice the cake into wedges and serve on a decorative platter. Enjoy with tea or coffee.

Nutrition

Serving: 1sliceCalories: 320kcalCarbohydrates: 44gProtein: 3gFat: 15gSaturated Fat: 9gPolyunsaturated Fat: 1gMonounsaturated Fat: 4gCholesterol: 80mgSodium: 200mgPotassium: 100mgFiber: 1gSugar: 26gVitamin A: 500IUVitamin C: 1mgCalcium: 80mgIron: 1mg

Notes

Expert tips include swirling the raspberry preserves carefully, using room temperature eggs, and ensuring the cake is cool before coating with coconut. Experiment with different fruit preserves for variations.

Tried this recipe?

Let us know how it was!

Zesty Lemon Raspberry Bars to Brighten Your Day

July 19, 2025 by grace bellamy Leave a Comment

The sun was shining, sending warm rays through my kitchen window as I whipped up a batch of Lemon Raspberry Bars. These delightful treats celebrate summer with their vibrant colors and refreshing taste, perfectly blending tangy lemon and the subtle sweetness of raspberries atop a buttery shortbread crust. What I love about these bars is not just their gorgeous presentation but also their quick prep time—ideal for impromptu gatherings or a sweet escape after a long day. They’re the ultimate crowd-pleasers and make for a perfect vegetarian dessert that can be enjoyed by everyone. Ready to learn how to bring a taste of summer into your home? Let’s dive into this simple recipe that will have you savoring each delightful bite!

Why You'll Crave These Bars?

Simplicity at Its Best: With just a few basic ingredients, these Lemon Raspberry Bars come together effortlessly, making them an easy option for home bakers of all levels.

Zesty Freshness: The bright blend of tangy lemon and sweet raspberries creates a refreshing flavor explosion that perfectly encapsulates summer vibes.

Versatile Delight: Whether you’re hosting a summer barbecue or looking for a sweet treat to brighten your day, these bars are sure to impress friends and family alike.

Gorgeous Presentation: The vibrant pink raspberry layer over the buttery shortbread crust not only pleases the palate but also serves as a stunning centerpiece for any dessert table.

Quick to Make: In under an hour, you can whip up these bars, giving you more time to enjoy life or try out Pineapple Bliss Bars as another sweet alternative!

Crowd-Pleasing Treat: No one can resist these delightful bars; they’re perfect for potlucks, picnics, or simply indulging at home. Give them a try and watch them disappear!

Lemon Raspberry Bars Ingredients

For the Shortbread Crust
• All-Purpose Flour – Provides structure; gluten-free flour can be used for a gluten-free version.
• Granulated Sugar – Sweetens the crust; coconut sugar is a less refined alternative.
• Corn Starch – Stabilizes the crust and thickens; no direct substitute, but use extra flour if needed.
• Salt – Balances the sweetness in the crust.
• Unsalted Butter – Adds richness; swap with vegan butter for a dairy-free option.

For the Raspberry Filling
• Raspberries – Infuses sweetness and fruity flavor; fresh is preferred, but frozen works too.
• Eggs – Provide structure; flax eggs can be used for a vegan substitute.
• Lemon Juice – Essential for tartness; always opt for freshly squeezed for the best flavor.
• Reduced Raspberry Puree – Ensures the right texture and flavor intensity; make from blended raspberries.
• Corn Starch – Helps thicken the filling; ensures a firm yet creamy consistency.

These Lemon Raspberry Bars are a delightful treat you won’t want to miss out on!

Step‑by‑Step Instructions for Lemon Raspberry Bars

Step 1: Prepare Raspberry Puree
Start by blending fresh raspberries in a food processor until smooth, approximately 2-3 minutes. If desired, strain the mixture through a fine mesh sieve to remove seeds for a smoother filling. Transfer the puree to a saucepan and gently boil over medium heat for 15-20 minutes, stirring often, until it thickens and reduces to about ¼ to ⅓ cup. Set aside to cool while preparing the crust.

Step 2: Make Shortbread Base
Preheat your oven to 325°F (160°C). In a mixing bowl, whisk together all-purpose flour, granulated sugar, cornstarch, and a pinch of salt. Melt unsalted butter and mix it into the dry ingredients until a thick dough forms. Press this mixture evenly into a parchment-lined 9x13 inch baking pan, creating a slight lip around the edges. Bake for 20-25 minutes, or until the crust is golden and set.

Step 3: Cool and Prick Base
Remove the shortbread crust from the oven and allow it to cool for about 10 minutes. Using a fork, gently prick the top of the crust to prevent bubbling during the next baking phase. Let it cool completely while you prepare the filling to ensure it adheres well to the tart base.

Step 4: Prepare Filling
In a clean mixing bowl, whisk together granulated sugar, cornstarch, and a pinch of salt. Add in the eggs, cooling raspberry puree, and freshly squeezed lemon juice. Mix until the filling is smooth and well combined, allowing the vibrant flavors to meld together. This refreshing blend will be the star of your Lemon Raspberry Bars.

Step 5: Bake Filling
Pour the raspberry-lemon filling evenly over the cooled shortbread crust. Bake in the same oven at 325°F (160°C) for an additional 20-25 minutes, or until the filling is set and slightly firm to the touch. The edges should be lightly golden, signaling that your filling is perfectly cooked and ready for chilling.

Step 6: Chill and Slice
After baking, remove the pan from the oven and cool at room temperature for about 1 hour. Once cooled, transfer the bars to the refrigerator and chill for at least 2 hours, allowing the flavors to deepen and the texture to firm up. When ready to serve, use a sharp knife to slice the chilled Lemon Raspberry Bars into squares for clean cuts.

What to Serve with Tangy Lemon Raspberry Bars?

Indulging in these sweet, tangy morsels brings to mind the carefree days of summer, and the perfect meal deserves accompanying delights.

  • Creamy Whipped Cream: A dollop of this fluffy topping enhances the tartness of the bars, bringing everything together in a luscious embrace. The airy texture supports the vibrant flavors without overshadowing them.
  • Fresh Berry Salad: A medley of strawberries, blueberries, and blackberries offers a refreshing contrast. Tossed in a squeeze of lemon juice, this salad enhances the berry notes in the bars while adding a splash of color to your plate.
  • Lemon Sorbet: This icy treat mirrors the zesty flavor of the bars, making it a refreshing palate cleanser. Its light, tangy taste is perfectly refreshing, especially on a warm day.
  • Iced Tea with Mint: The refreshing coolness of iced tea brewed with fresh mint complements the tartness of the bars. Sipping this alongside gives a delightful balance of warmth and chill, making each bite even more enjoyable.
  • Toasted Almonds: Scattered on top or served on the side, the crunch of toasted almonds adds texture. Their subtle nutty flavor works surprisingly well with the sweet and tangy layers of the bars.
  • Chilled White Wine: A glass of chilled Sauvignon Blanc elevates the experience with its sharp acidity, harmonizing with the lemony notes of the bars. Perfect for a sunny afternoon with friends, it’ll make this dessert shine even more.
  • Lemonade Floats: For a playful dessert twist, consider pairing your bars with a lemonade float. A scoop of vanilla ice cream in fresh lemonade offers creaminess and a burst of citrus that’s utterly delightful alongside the tart bars.
  • Sugar Cookie Crust: For a fun variation, serve the bars over a sugar cookie crust, adding a little more sweetness and chewy texture to the existing layers, making each bite ever more indulgent.

These pairings will elevate your Lemon Raspberry Bars from a simple treat to a festive centerpiece that will leave your guests raving!

Expert Tips for Lemon Raspberry Bars

Fresh Juice Only: Always use freshly squeezed lemon juice for the best flavor; bottled versions often lack the zesty punch that makes these bars special.

Perfect Puree: Ensure the raspberry puree is thick enough to prevent a runny filling by simmering it down until it reduces properly—avoid taking shortcuts here!

Chill Time Matters: Allow the bars to chill in the fridge for at least 2 hours before slicing; this improves texture and makes cutting easier.

Neat Slices: Use a sharp knife to slice the Lemon Raspberry Bars and clean it between cuts for clean, beautiful edges—no one likes messy pieces!

Bake with Love: Keep an eye on the baking time; under-baking the filling can result in a soft texture rather than the firm, creamy filling you want!

Lemon Raspberry Bars Variations

Feel free to explore these delicious variations and make this recipe your own!

  • Berry Switch: Substitute raspberries with blueberries or strawberries for a unique fruit flavor experience. Each fruit brings its own sweetness, providing delightful new twists.
  • Zesty Lime: Use lime juice instead of lemon for a refreshing, tangy version. The vibrant lime adds a tropical twist that will brighten your day.
  • Coconut Crunch: Mix shredded coconut into the shortbread base for a chewy texture. This enhancement creates a delightful tropical flavor perfect for summer gatherings.
  • Nutty Delight: Add chopped almonds or walnuts to the crust for a nutty depth. The extra crunch contrasts beautifully with the smooth filling.
  • Herb Infusion: Fresh basil or mint can be added to the raspberry layer for an unexpected flavor burst. This herbaceous touch elevates your dessert to a gourmet experience.
  • Sweet Swaps: Instead of granulated sugar, try maple syrup or honey for a more natural sweetness. These alternatives add an intriguing flavor while keeping things wholesome.
  • Spicy Kick: For those who enjoy a little heat, add a pinch of cayenne pepper to the filling. It introduces a delightful surprise that beautifully pairs with the sweet and tangy elements.
  • Frozen Goodies: Make these bars into frozen treats by freezing the assembled mixture before slicing. They transform into a refreshing summer dessert that’s perfect for hot days!

These tasty ideas can enhance your experience with Lemon Raspberry Bars, and if you're in the mood for more fruity delights, try out the refreshing Chip Cookie Bars next!

Storage Tips for Lemon Raspberry Bars

Fridge: Store your Lemon Raspberry Bars in an airtight container in the fridge for up to 5 days to maintain their freshness and flavor.

Freezer: If you want to keep them longer, freeze the bars in a freezer-safe container, separating layers with parchment paper. They can be stored for up to 3 months.

Thawing: To enjoy frozen bars, let them thaw in the fridge overnight before serving, ensuring they maintain their delightful texture.

Reheating: If you prefer them warm, gently warm individual bars in the microwave for a few seconds, just until the filling is slightly warm, but be careful not to overheat!

Make Ahead Options

These Lemon Raspberry Bars are an excellent choice for meal prep! You can prepare the buttery shortbread crust up to 3 days in advance, simply wrap it tightly in plastic wrap and refrigerate to keep it fresh. Additionally, the raspberry puree can be made ahead of time and stored in an airtight container in the fridge for up to 2 days. When you're ready to enjoy these bars, just follow the final steps: whisk the filling and bake it over the chilled crust for about 20-25 minutes until set. This way, you'll have a refreshing dessert that's just as delicious, saving you time on busy weeknights!

Lemon Raspberry Bars Recipe FAQs

How do I select the best raspberries for my lemon raspberry bars?
Absolutely! For optimal flavor, look for fresh raspberries that are plump, firm, and free from dark spots or mold. They should have a vibrant color and a sweet aroma. If fresh ones are unavailable, frozen raspberries can be a great alternative—they should be thawed and drained before use.

How should I store leftover lemon raspberry bars?
To keep your delicious bars fresh, store them in an airtight container in the fridge for up to 5 days. This keeps their flavor intact and prevents them from drying out. Make sure they’re completely cooled before sealing them up to maintain the perfect texture!

Can I freeze lemon raspberry bars?
Absolutely! If you want to enjoy these treats later, freeze your lemon raspberry bars. Allow them to cool completely, then wrap each bar tightly in plastic wrap and place them in a freezer-safe container, separating layers with parchment paper. They can be stored for up to 3 months. To enjoy, simply thaw them in the fridge overnight.

What should I do if my filling doesn't set properly?
Very! If your filling is soft or runny after baking, it may need a little more time in the oven. Make sure you bake it until the edges are lightly golden and the filling is set to a slight firmness. If it's still runny, next time ensure your raspberry puree is well reduced, as excess moisture can affect the filling's consistency.

Are lemon raspberry bars suitable for people with allergies?
For a vegetarian-friendly dessert, yes! However, always check for allergies. If you or a guest has an egg allergy, you can replace eggs with flax eggs (1 tablespoon of flaxseed meal mixed with 2.5 tablespoons of water per egg). If you need to avoid gluten, a gluten-free flour blend could be substituted for all-purpose flour.

How can I achieve a clean slice when cutting my lemon raspberry bars?
To get those perfect slices, there are a few tricks! After chilling, use a sharp knife and clean it between cuts by running it under warm water and wiping it dry. This technique reduces sticking and ensures clean edges, making your presentation even more appealing!

Lemon Raspberry Bars

Zesty Lemon Raspberry Bars to Brighten Your Day

Delight in these Lemon Raspberry Bars, a refreshing dessert perfect for summer gatherings.
Print Recipe Pin Recipe
Prep Time 15 minutes mins
Cook Time 25 minutes mins
Chilling Time 2 hours hrs
Total Time 2 hours hrs 40 minutes mins
Servings: 12 bars
Course: Dessert
Cuisine: American
Calories: 150
Ingredients Equipment Method Nutrition Notes

Ingredients
  

For the Shortbread Crust
  • 2 cups All-Purpose Flour Gluten-free flour can be used for a gluten-free version.
  • 0.5 cups Granulated Sugar Coconut sugar is a less refined alternative.
  • 0.25 cups Corn Starch Use extra flour if needed as a substitute.
  • 0.5 teaspoon Salt Balances the sweetness.
  • 1 cup Unsalted Butter Swap with vegan butter for a dairy-free option.
For the Raspberry Filling
  • 2 cups Raspberries Fresh preferred, but frozen works too.
  • 3 large Eggs Flax eggs can be used for a vegan substitute.
  • 0.5 cup Lemon Juice Always use freshly squeezed for the best flavor.
  • 0.5 cup Reduced Raspberry Puree Make from blended raspberries.
  • 0.25 cups Corn Starch Helps thicken the filling.

Equipment

  • Food Processor
  • Mixing Bowl
  • Whisk
  • baking pan
  • Oven
  • Fine Mesh Sieve

Method
 

Step-by-Step Instructions
  1. Start by blending fresh raspberries in a food processor until smooth, about 2-3 minutes. Strain if desired and boil in a saucepan over medium heat for 15-20 minutes until thickened. Set aside to cool.
  2. Preheat your oven to 325°F (160°C). Whisk together flour, sugar, cornstarch, and salt. Melt butter and mix into the dry ingredients until a dough forms. Press into a parchment-lined baking pan and bake for 20-25 minutes.
  3. Remove the crust from the oven and cool for about 10 minutes, pricking the top with a fork. Let it cool completely while preparing the filling.
  4. In a mixing bowl, whisk together sugar, cornstarch, and salt. Add eggs, cooled raspberry puree, and lemon juice, mixing until smooth.
  5. Pour the raspberry-lemon filling over the cooled crust and bake for another 20-25 minutes until set and golden on the edges.
  6. Cool at room temperature for 1 hour, then refrigerate for at least 2 hours before slicing into squares.

Nutrition

Serving: 1barCalories: 150kcalCarbohydrates: 20gProtein: 2gFat: 7gSaturated Fat: 4gPolyunsaturated Fat: 0.5gMonounsaturated Fat: 2gCholesterol: 40mgSodium: 100mgPotassium: 50mgFiber: 1gSugar: 10gVitamin A: 200IUVitamin C: 10mgCalcium: 20mgIron: 0.5mg

Notes

Using freshly squeezed lemon juice and allowing sufficient chilling time will enhance the texture and flavor of these bars.

Tried this recipe?

Let us know how it was!

BBQ Bacon Cheeseburger Nachos

July 18, 2025 by grace bellamy Leave a Comment

As the oven warms up, the tantalizing aroma of barbecue wafts through the air, instantly sparking a craving for my favorite game day snack—BBQ Bacon Cheeseburger Nachos! This mouthwatering twist on a classic dish combines lean ground turkey with gooey cheddar and a crunchy, zesty cole slaw topping that takes it over the top. Not only are they quick to prepare in just 20 minutes, but these nachos are also a healthier alternative that everyone at your gathering will devour. The blend of flavors and textures makes them the perfect appetizer for any occasion, whether you’re hosting friends or enjoying a cozy night in. Are you ready to create a nacho masterpiece that’ll have everyone coming back for seconds?

Why Are These Nachos So Irresistible?

Flavor Explosion: The combination of savory ground turkey, smoky bacon, and melty cheddar creates an indulgent taste experience that’s hard to resist.

Quick Prep: Ready in just 20 minutes, these nachos are perfect for impromptu gatherings or satisfying late-night cravings.

Health-Conscious Twist: By using ground turkey, you’ll enjoy a lighter alternative to traditional nachos, proving that indulgence doesn’t have to mean sacrificing health.

Crowd-Pleaser: Whether it’s game day or a movie night, these BBQ Bacon Cheeseburger Nachos are sure to be a hit that everyone will love!

Easy Customization: Experiment with toppings like avocado or jalapeños, or even try variations using ground beef or tempeh for a unique take. Grab your friends and get ready to tray up this delightful dish! For more hearty meal ideas, check out my delicious Bbq Chicken Roasted bowls!

BBQ Bacon Cheeseburger Nachos Ingredients

  • For the Nachos
  • Olive Oil – Adds moisture and helps sauté onions; substitute with avocado oil for a different flavor.
  • Onion – Provides sweetness and depth; yellow or white onion can be used if needed.
  • Ground Turkey (93% lean) – The star protein for a healthier option compared to traditional beef; feel free to swap in ground chicken.
  • Barbecue Sauce – Brings sweetness and richness; opt for low-sugar versions for a healthier feel.
  • Corn Tortilla Chips – The crunchy base; for a lighter treat, try baked chips.
  • Cheddar Cheese (shredded) – Melts beautifully to hold the toppings; mozzarella is a great substitute for a milder taste.
  • Bacon (cooked and crumbled) – Delivers a smoky and salty burst; turkey bacon can replace it for a leaner choice.
  • Orange Bell Peppers – Adds vibrant color and crunch; jalapeños will spice things up if you prefer heat.
  • Tomatoes (diced) – Offers freshness and acidity to balance out the richness; grape or cherry tomatoes work well too.
  • Reser’s Stadium Cole Slaw – Adds unique texture and tang; homemade slaw or fresh greens can be a tasty alternative.

Elevate your gatherings with this delightful BBQ Bacon Cheeseburger Nachos recipe, perfect for those who crave both flavor and a healthier option!

Step‑by‑Step Instructions for BBQ Bacon Cheeseburger Nachos

Step 1: Preheat the Oven
Begin by preheating your oven to 350°F (175°C). This ensures that your BBQ Bacon Cheeseburger Nachos will bake evenly and achieve the perfect melty cheese texture. While the oven heats up, gather all your ingredients to streamline your cooking process and create a delightful atmosphere in your kitchen.

Step 2: Sauté the Onions
In a large skillet, add a splash of olive oil over medium heat. Once hot, toss in your diced onions and sauté for about 5 minutes, stirring occasionally until they become translucent and fragrant. This step not only enhances the flavor of your nachos but also sets a delicious foundation for the ground turkey that follows.

Step 3: Cook the Ground Turkey
Add the ground turkey to the skillet with the sautéed onions, breaking it apart with a spatula. Cook, stirring frequently, until the turkey is browned and no longer pink, about 6-8 minutes. Drain any excess fat if necessary, and then stir in a generous amount of barbecue sauce, mixing thoroughly before removing from heat.

Step 4: Layer the Nachos
On a large baking sheet, start by laying out a layer of corn tortilla chips. Sprinkle a generous amount of shredded cheddar cheese over the chips. For added goodness, place a second layer of chips and top them again with cheddar. This layering technique will ensure each bite of your BBQ Bacon Cheeseburger Nachos is loaded with flavor.

Step 5: Add Toppings
Now it’s time to pile on that delicious ground turkey mixture evenly over your nachos. Sprinkle the crumbled bacon across the top, followed by diced orange bell peppers for a burst of color and crunch. The combination of these savory toppings pairs beautifully with the gooey melted cheese, creating a mouthwatering dish that's hard to resist.

Step 6: Bake the Nachos
Carefully place the loaded baking sheet in your preheated oven. Bake for approximately 10 minutes, or until the cheese is thoroughly melted but not bubbling over. Keep an eye on your BBQ Bacon Cheeseburger Nachos during the last few minutes to ensure they don't overcook, as you want them to maintain a delightful texture.

Step 7: Finish with Fresh Toppings
Once out of the oven, immediately top your nachos with freshly diced tomatoes and a generous helping of cole slaw. If you like, drizzle additional barbecue sauce for a final touch of flavor. These fresh ingredients not only enhance the visual appeal but also add a refreshing crunch that complements the rich nacho base.

Step 8: Serve and Enjoy
Your BBQ Bacon Cheeseburger Nachos are now ready to serve! Gather your friends and family, and enjoy this delightful dish hot out of the oven. The explosion of flavors and textures will surely make these nachos a favorite at your gatherings, ensuring everyone comes back for seconds!

Expert Tips for BBQ Bacon Cheeseburger Nachos

  • Check the Temperature: Ensure the ground turkey reaches 165°F for safe eating; use a meat thermometer to avoid any health risks.
  • Layer Wisely: Prevent soggy nachos by layering chips and cheese without overloading; this keeps them crunchy and enjoyable.
  • Watch the Bake Time: Keep an eye on them in the oven—bake just until the cheese melts for the best texture of your BBQ Bacon Cheeseburger Nachos.
  • Upgrade Your Slaw: Use high-quality ingredients for the cole slaw; this will enhance the overall flavor and texture of your nachos.
  • Stay Creative: Feel free to experiment with toppings like guacamole or spicy jalapeños to personalize your BBQ Bacon Cheeseburger Nachos to your taste!

What to Serve with BBQ Bacon Cheeseburger Nachos

Delight your guests by crafting a full, unforgettable meal around these mouthwatering nachos that are bursting with flavor.

  • Fresh Garden Salad: A light, crisp salad with mixed greens and a tangy vinaigrette complements the richness of the nachos beautifully, adding freshness to every bite.

  • Crispy Potato Wedges: Golden-brown wedges drizzled with herbs and spices provide a satisfying crunch, making them the perfect side to accompany the gooey cheesiness of the nachos.

  • Creamy Avocado Dip: Smooth and cool avocado dip elevates the BBQ flavors while adding a creamy texture that balances the nachos’ crunch.

  • Spicy Jalapeño Poppers: These fiery bites bring an extra kick to the table, aligning perfectly with the smoky BBQ essence of your nachos, creating a flavor party everyone will enjoy.

  • Fruit Salsa: A refreshing blend of diced fruits like mango and pineapple brings sweetness and acidity, beautifully contrasting with the savory elements of the nachos.

  • Craft Beer: A crisp lager or a fruity IPA cuts through the richness of the nachos, enhancing their flavor with every sip and making it a delightful pairing for your gathering.

  • Lemonade Spritzer: The refreshing fizz paired with citrus notes cleanses the palate, making it a refreshing drink alongside the BBQ Bacon Cheeseburger Nachos.

  • Chocolate Chip Cookies: End your meal on a sweet note with warm, gooey cookies—this familiar comfort food creates a cozy finale everyone will love!

BBQ Bacon Cheeseburger Nachos Variations

Feel free to unleash your creativity and tailor these nachos to match your flavor preferences!

  • Beefy Option: Swap the ground turkey for ground beef for a classic flavor boost; it's a heartier alternative everyone will love.

  • Dairy-Free Delight: Use dairy-free cheese instead of cheddar for a completely vegan version, and don’t forget to load up on your favorite toppings!

  • Spicy Kick: Replace cheddar with pepper jack cheese to introduce a delightful spice level that complements the BBQ flavors beautifully.

  • Vegetarian-Friendly: Substitute ground turkey with tempeh or black beans for a protein-packed, plant-based alternative that’s just as satisfying.

  • Tex-Mex Twist: Add chopped jalapeños and diced avocado to introduce a vibrant Tex-Mex tableau bursting with flavor and freshness; this combination truly packs a punch!

  • Crunch Upgrade: Swap out regular tortilla chips for crispy baked sweet potato chips for an exciting, nutritious alternative that adds a hint of sweetness.

  • Cole Slaw Swap: Create your homemade slaw with lime juice and cilantro for a refreshing twist that brightens each bite, while keeping the essence of the original.

  • Flavorful Barbecue: Experiment with different barbecue sauces, like honey or chipotle-flavored, to take the taste of these nachos to new heights!

These variations allow you to create a new nacho experience each time, making these BBQ Bacon Cheeseburger Nachos a truly customizable dish. And if you’re still looking for hearty meals, check out my delicious Bbq Chicken Roasted bowls for more inspiration!

Storage Tips for BBQ Bacon Cheeseburger Nachos

Fridge: Store any leftover BBQ Bacon Cheeseburger Nachos in an airtight container for up to 2 days to maintain freshness and texture.

Freezer: For long-term storage, freeze the nacho toppings (like the ground turkey and cheese) in a sealed bag for up to 3 months. Assemble fresh nachos when ready to eat.

Reheating: To reheat, place nachos in a preheated oven at 350°F (175°C) for 10–15 minutes until warmed through, ensuring the cheesiness returns without becoming rubbery.

Serving Freshness: Always add fresh toppings, like cole slaw and tomatoes, after reheating to keep their crunch and flavor intact.

Make Ahead Options

These BBQ Bacon Cheeseburger Nachos are perfect for meal prep enthusiasts! You can prepare the ground turkey mixture and the sautéed onions up to 24 hours in advance. Just store them in an airtight container in the refrigerator to maintain freshness. You can also slice the bell peppers and dice the tomatoes ahead of time for quicker assembly. When you're ready to enjoy, simply layer the chips and cheese, add the prepped turkey mixture, and bake as instructed. This way, you’ll have a delicious, time-saving dish with all the flavors intact, making weeknight dinners or gatherings a breeze!

BBQ Bacon Cheeseburger Nachos Recipe FAQs

How do I choose ripe ingredients for my nachos?
Absolutely! Selecting ripe ingredients can significantly enhance the flavor of your BBQ Bacon Cheeseburger Nachos. For tomatoes, look for ones that are firm but slightly yielding when gently squeezed, without any dark spots. The onions should be solid and heavy, avoiding any soft or sprouting ones. As for bell peppers, choose ones with smooth skin and vibrant color; if they have blemishes or wrinkles, they might be past their prime.

What’s the best way to store leftovers?
Very good question! To store your BBQ Bacon Cheeseburger Nachos leftovers, place them in an airtight container and keep them in the refrigerator for up to 2 days. This helps maintain their freshness and prevents them from becoming soggy. It’s best to store the fresh toppings like cole slaw and tomatoes separately and add them just before serving to retain their crunch.

Can I freeze my nachos?
Definitely! If you want to prepare ahead, consider freezing just the nacho toppings to preserve their taste. After cooking the ground turkey and letting it cool, place the turkey and cheese in a sealed freezer bag and store in the freezer for up to 3 months. When you're ready to enjoy, simply thaw and reheat your toppings, then assemble your nachos fresh with chips and cold toppings!

What should I do if my cheese doesn't melt properly?
Good to know! If your cheese doesn't melt well, it may be due to the type of cheese used or the baking time. Ensure you're using a good-quality cheese—shredded cheddar works beautifully—and try increasing the baking time slightly, watching closely to prevent overcooking. If you notice the cheese is only warming rather than melting, consider covering the nachos with foil during the first part of the baking process to trap the heat and moisture, which helps the melting process.

Are there any dietary considerations I should keep in mind for my nachos?
Absolutely! When preparing BBQ Bacon Cheeseburger Nachos, it's wise to consider food allergies and dietary preferences. If serving to guests or family, ask if anyone has allergies to common ingredients like dairy or gluten (found in the chips). You can substitute dairy cheese with vegan cheese for a dairy-free option, and use gluten-free tortilla chips for those with gluten sensitivities. And if you're concerned about sodium, opt for low-sodium barbecue sauce!

BBQ Bacon Cheeseburger Nachos

Indulgent BBQ Bacon Cheeseburger Nachos Everyone Will Love

BBQ Bacon Cheeseburger Nachos combine lean ground turkey, gooey cheddar, and crunchy cole slaw for a delicious game day snack.
Print Recipe Pin Recipe
Prep Time 10 minutes mins
Cook Time 10 minutes mins
Total Time 20 minutes mins
Servings: 6 servings
Course: Appetizer
Cuisine: American
Calories: 500
Ingredients Equipment Method Nutrition Notes

Ingredients
  

For the Nachos
  • 1 tablespoon Olive Oil Substitute with avocado oil for a different flavor.
  • 1 medium Onion Yellow or white onion can be used if needed.
  • 1 pound Ground Turkey (93% lean) Feel free to swap in ground chicken.
  • ½ cup Barbecue Sauce Opt for low-sugar versions for a healthier feel.
  • 8 ounces Corn Tortilla Chips For a lighter treat, try baked chips.
  • 2 cups Cheddar Cheese (shredded) Mozzarella is a great substitute.
  • 4 slices Bacon (cooked and crumbled) Turkey bacon can replace it for a leaner choice.
  • 1 medium Orange Bell Pepper Jalapeños can be used for heat.
  • 1 cup Tomatoes (diced) Grape or cherry tomatoes work well too.
  • 1 cup Reser’s Stadium Cole Slaw Homemade slaw or fresh greens can be an alternative.

Equipment

  • skillet
  • Baking Sheet

Method
 

Step-By-Step Instructions
  1. Preheat your oven to 350°F (175°C).
  2. In a large skillet, add a splash of olive oil over medium heat. Sauté diced onions for about 5 minutes until translucent.
  3. Add ground turkey to the skillet and cook until browned, about 6-8 minutes. Stir in barbecue sauce before removing from heat.
  4. On a large baking sheet, layer corn tortilla chips, sprinkle a generous amount of cheddar cheese, and add a second layer of chips with more cheese.
  5. Evenly pile the ground turkey mixture over the nachos. Top with crumbled bacon and diced orange bell peppers.
  6. Bake in the preheated oven for approximately 10 minutes until the cheese is melted.
  7. Top nachos with diced tomatoes and cole slaw. Drizzle additional barbecue sauce if desired.
  8. Serve hot and enjoy your BBQ Bacon Cheeseburger Nachos!

Nutrition

Serving: 1servingCalories: 500kcalCarbohydrates: 45gProtein: 30gFat: 25gSaturated Fat: 10gPolyunsaturated Fat: 5gMonounsaturated Fat: 10gCholesterol: 70mgSodium: 800mgPotassium: 600mgFiber: 5gSugar: 10gVitamin A: 800IUVitamin C: 30mgCalcium: 300mgIron: 3mg

Notes

Store any leftovers in an airtight container for up to 2 days. Freeze toppings for long-term storage, reheat at 350°F for 10-15 minutes.

Tried this recipe?

Let us know how it was!

Garlic Parmesan Steak Pasta

July 18, 2025 by grace bellamy Leave a Comment

There’s something magical about the cozy aroma of a rich, creamy sauce simmering on the stove, and that’s precisely what you’ll experience with my Garlic Parmesan Steak Pasta. This dish is more than just food; it’s an invitation to savor a moment, whether it’s a special date night or a relaxed family dinner. The tender ribeye steak wrapped in a velvety sauce makes this hearty pasta both a comforting favorite and an effortless gourmet meal. Plus, it’s quick to prepare, making it a perfect option for any weeknight craving or celebration. Are you ready to elevate your dining experience with this delectable dish? Let's dive into the recipe!

Why is this recipe a must-try?

Comforting Flavor: This Garlic Parmesan Steak Pasta combines rich creaminess with hearty ribeye steak, making it the ultimate comfort food.

Effortlessly Gourmet: Impress your family or that special someone with a dish that tastes like it came straight from a fine restaurant, without all the fuss.

Time-Saving Delight: Quick preparations mean you can whip up this meal in under 30 minutes, perfect for busy weeknights or spontaneous dinner parties.

Versatile Ingredients: Feel free to customize with available pantry staples—substituting Rigatoni for another pasta type or adding your choice of veggies can make it your own!

Crowd-Pleasing Appeal: This dish is guaranteed to be a hit at your table, satisfying even the pickiest eaters while elevating your regular dinner routine.

Pair it with a side of Cheese Garlic Crack for a complete meal that everyone will love!

Garlic Parmesan Steak Pasta Ingredients

For the Steak

  • Ribeye Steak – This tender cut offers unbeatable flavor; sirloin or ground beef can be great alternatives.
  • Paprika – Adds a warm, smoky depth; consider using cayenne for an extra kick.
  • Dried Parsley – Brightens the seasoning; switch to fresh parsley or oregano for varied flavors.
  • Olive Oil – Perfect for searing; feel free to use avocado oil as a substitution.

For the Sauce

  • Butter – Creates a rich, golden crust; use salted or unsalted based on your preference.
  • Salt & Pepper – Key for balancing flavors; season to taste for the best flavor profile.
  • Onion – Delivers a sweet, caramelized element; shallots or leeks work well too.
  • Garlic Cloves – Imparts aromatic quality; garlic powder is a suitable backup if fresh is unavailable.
  • Chicken Broth – Deepens sauce flavor; opt for vegetable or beef stock if desired.
  • Heavy Cream – Gives a luxurious creamy texture; cream cheese or coconut cream are excellent dairy-free swaps.
  • Parmesan Cheese – Provides that nutty goodness; Pecorino Romano or nutritional yeast can be used for a different twist.

For the Pasta

  • Rigatoni – Ideal for sauce adherence; any short pasta or gluten-free versions work fine too.
  • Fresh Parsley – A garnish that adds color and freshness; basil or chives can be delightful alternatives.

Enjoy crafting this Garlic Parmesan Steak Pasta that will impress your family and friends with its exquisite flavor!

Step‑by‑Step Instructions for Garlic Parmesan Steak Pasta

Step 1: Prepare Premium Ingredients
Begin by seasoning your ribeye steaks generously with paprika, dried parsley, salt, and pepper. Drizzle a bit of olive oil over the steaks to ensure they develop a nice crust during cooking. Allow the steaks to rest for about 15 minutes at room temperature to enhance their tenderness and flavor before cooking.

Step 2: Cook Pasta
In a large pot, bring salted water to a rolling boil. Once boiling, carefully add rigatoni and cook according to package instructions, usually around 8-10 minutes, until al dente. Stir occasionally to prevent sticking. Drain the pasta, reserving about a cup of pasta water for later, and set it aside while you prepare the sauce.

Step 3: Sear the Steaks
Heat a large frying pan over medium-high heat until hot. Carefully place the seasoned ribeye steaks in the pan and sear for 1-2 minutes on each side until a golden-brown crust forms. After flipping, add a knob of butter to the pan; as it melts, baste the steaks with the butter for enhanced flavor. Remove the cooked steaks from the pan and let them rest for 5-10 minutes, keeping the pan on the heat.

Step 4: Make Sauce
In the same pan used for the steaks, lower the heat to medium and add a bit more butter if needed. Sauté the diced onion for 3-4 minutes until softened and translucent, stirring frequently to avoid burning. Add minced garlic and cook for an additional 30 seconds, allowing the fragrant aroma to fill the kitchen. If you're using white wine, deglaze the pan at this point to incorporate any browned bits.

Step 5: Combine Ingredients
Pour in the chicken broth and heavy cream, stirring to combine. Allow the mixture to simmer gently for 3-5 minutes until it starts to thicken, stirring occasionally. Gradually add in the Parmesan cheese, mixing until it melts smoothly into the sauce. If the sauce becomes too thick, use the reserved pasta water to achieve your desired consistency.

Step 6: Serve
Slice the rested ribeye steaks against the grain into bite-sized pieces. Toss the cooked rigatoni into the creamy sauce, ensuring each piece is well-coated. Plate the pasta, then top with the sliced steak pieces, and finish off with a sprinkle of fresh parsley and extra Parmesan cheese. This Garlic Parmesan Steak Pasta is now ready to impress your guests!

Expert Tips for Garlic Parmesan Steak Pasta

  • Rest the Steak: Allow ribeye steaks to rest after cooking to lock in juices and enhance the flavor. Skipping this step can lead to dry meat.

  • Pasta Perfection: Cook rigatoni just until al dente. Overcooking can cause it to become mushy, making it harder to hold onto the creamy sauce.

  • Sauce Consistency: To achieve the perfect creaminess in your garlic parmesan steak pasta, reserve some pasta water. This helps adjust the sauce without thickening it too much.

  • Aromatics Matter: Take care when sautéing garlic and onion; cook them until softened and fragrant, but don’t let them burn. Bitter flavors can spoil your dish’s delicate balance.

  • Tweak for Flavors: Personalize the dish! Adding vegetables like spinach or sun-dried tomatoes can uplift your garlic parmesan steak pasta with new textures and taste.

What to Serve with Creamy Garlic Parmesan Steak Pasta

When you serve this comforting dish, you’re inviting warmth and joy into the dining experience, perfect for gathering loved ones around the table.

  • Garlic Bread: This warm, buttery treat perfectly complements the creamy sauce, making each bite a heavenly experience that enhances your meal.

  • Fresh Green Salad: Crisp greens with a zesty vinaigrette offer a refreshing contrast to the hearty pasta, lifting flavors while balancing the richness.

  • Roasted Vegetables: A medley of roasted veggies like bell peppers and zucchini adds an earthy touch, contributing texture and color that rounds out the plate beautifully.

  • Red Wine: A glass of medium-bodied red wine, such as Merlot, brings out the flavors of the steak while making a romantic pairing on date nights.

  • Chocolate Mousse: End the meal on a sweet note with rich, creamy chocolate mousse, providing a delightful contrast to the savory pasta and a touch of indulgence.

  • Homemade Coleslaw: This crunchy, tangy side dish adds brightness and a pop of flavor, enhancing the overall experience with its fresh texture.

How to Store and Freeze Garlic Parmesan Steak Pasta

Fridge: Store leftover Garlic Parmesan Steak Pasta in an airtight container for up to 3 days. Keep the pasta and steak separate to maintain texture.

Reheating: When reheating, add a splash of cream or chicken broth to the pasta to prevent it from drying out. Use a low microwave setting or heat on the stove until warmed through.

Freezer: Avoid freezing due to the creamy sauce's potential separation, which can alter the dish's texture and flavor.

Leftovers: If you have a sauce without pasta, store it separately for up to 3 days and serve with fresh pasta later for a quick meal!

Make Ahead Options

These Creamy Garlic Parmesan Steak Pasta are perfect for busy home cooks looking to save time without sacrificing flavor! You can prepare the ribeye steaks and season them up to 24 hours in advance—just keep them refrigerated in an airtight container. Additionally, cook the rigatoni and store it separately in the fridge, ensuring both components retain their quality. When you're ready to serve, simply heat a little butter in a skillet, add the cooked pasta, and toss it with the sauce you prepared in advance—this can be done up to 3 days before serving. Finish by slicing the steaks and combining everything together for a delicious meal that's just as satisfying as when freshly made!

Garlic Parmesan Steak Pasta Variations

Feel free to explore exciting twists on this Garlic Parmesan Steak Pasta recipe and make it uniquely yours!

  • Spicy Kick: Add a teaspoon of red pepper flakes while cooking the sauce for a delightful spice boost that awakens your taste buds.

  • Deluxe Upgrade: Use filet mignon instead of ribeye for an ultra-tender, gourmet experience! Pair this with caramelized onions for added sweetness and depth.

  • Veggie Delight: Toss in sautéed vegetables like bell peppers, spinach, or sun-dried tomatoes for a colorful and hearty meal. It's a great way to sneak extra nutrients in!

  • Creamy Dream: For an extra luxurious sauce, mix in a dollop of cream cheese along with the heavy cream. It adds an incredible creaminess that's hard to resist.

  • Herb Infusion: Use fresh basil or thyme in place of dried parsley for a burst of freshness that pairs beautifully with the rich flavors of the sauce.

  • Cheesy Swap: Try using Pecorino Romano instead of Parmesan for a sharper, saltier profile that will really elevate the richness of the dish.

  • Gluten-Free: Substitute rigatoni with gluten-free pasta options like brown rice or quinoa pasta to cater to dietary needs without sacrificing flavor.

Enhance your culinary journey with these variations, and don't hesitate to serve this dish alongside a side of Garlic Butter Pasta or a fresh salad for a complete dining experience!

Garlic Parmesan Steak Pasta Recipe FAQs

How do I choose the right steak for my Garlic Parmesan Steak Pasta?
When selecting your ribeye steak, look for cuts with good marbling; this will ensure a tender and flavorful result. The ideal steak should have a bright red color with minimal dark spots. If you're looking for alternatives, sirloin or flank steaks are both excellent options that can provide a great flavor at a lower cost.

What’s the best way to store leftover Garlic Parmesan Steak Pasta?
Store any leftover pasta in an airtight container in the fridge for up to 3 days. To maintain the quality, it’s best to separate the steak and pasta before refrigeration, as this helps preserve the texture. When reheating, add a splash of cream or broth to help rehydrate the sauce and keep it creamy.

Can I freeze Garlic Parmesan Steak Pasta?
Freezing this dish is not recommended due to the creamy sauce's tendency to separate and alter its texture upon thawing. However, you can freeze the sauce on its own for up to 3 months and then combine it with freshly cooked pasta later.

How do I fix a sauce that’s too thick?
If your sauce becomes too thick, simply add a bit of reserved pasta water while stirring over low heat. Start with a tablespoon at a time and mix until you reach your desired consistency. This technique works wonderfully to maintain a creamy texture without thinning out the flavor.

What dietary considerations should I keep in mind?
For those who prefer dairy-free options, you can substitute heavy cream with coconut cream or cashew cream for a similar texture. Additionally, if you or your guests have gluten sensitivities, using a gluten-free pasta can make this dish accessible while still being delicious!

Are there any common mistakes I should avoid?
Absolutely! One common mistake is overcooking the pasta, which can lead to a mushy texture that doesn't hold the sauce well. Additionally, don't rush the steak resting process—allow it to rest for at least 5 minutes post-cooking to seal in the juices for a more flavorful bite.

Garlic Parmesan Steak Pasta

Indulgent Garlic Parmesan Steak Pasta That Delights Every Bite

This Garlic Parmesan Steak Pasta is a comforting dish combining creaminess and tender ribeye that promises to elevate your dining experience.
Print Recipe Pin Recipe
Prep Time 15 minutes mins
Cook Time 15 minutes mins
Resting Time 10 minutes mins
Total Time 40 minutes mins
Servings: 4 servings
Course: Main Dishes
Cuisine: Italian
Calories: 650
Ingredients Equipment Method Nutrition Notes

Ingredients
  

For the Steak
  • 2 pounds Ribeye Steak Sirloin or ground beef can be great alternatives.
  • 1 teaspoon Paprika Consider using cayenne for an extra kick.
  • 1 teaspoon Dried Parsley Switch to fresh parsley or oregano for varied flavors.
  • 2 tablespoons Olive Oil Feel free to use avocado oil as a substitution.
For the Sauce
  • 3 tablespoons Butter Use salted or unsalted based on your preference.
  • to taste Salt Season to taste for the best flavor profile.
  • to taste Pepper Season to taste for the best flavor profile.
  • 1 medium Onion Shallots or leeks work well too.
  • 4 cloves Garlic Cloves Garlic powder is a suitable backup if fresh is unavailable.
  • 1 cup Chicken Broth Opt for vegetable or beef stock if desired.
  • 1 cup Heavy Cream Cream cheese or coconut cream are excellent dairy-free swaps.
  • 1 cup Parmesan Cheese Pecorino Romano or nutritional yeast can be used for a different twist.
For the Pasta
  • 12 ounces Rigatoni Any short pasta or gluten-free versions work fine too.
  • 2 tablespoons Fresh Parsley Basil or chives can be delightful alternatives.

Equipment

  • Large Pot
  • Frying Pan
  • Knife
  • cutting board
  • Measuring Cups
  • Measuring Spoons

Method
 

Step‑by‑Step Instructions
  1. Season the ribeye steaks generously with paprika, dried parsley, salt, and pepper. Drizzle olive oil over the steaks and allow them to rest for about 15 minutes.
  2. Bring salted water to a rolling boil in a large pot. Once boiling, add rigatoni and cook according to package instructions, about 8-10 minutes, until al dente. Drain the pasta, reserving a cup of pasta water, and set aside.
  3. Heat a large frying pan over medium-high heat. Sear the seasoned ribeye steaks for 1-2 minutes on each side until golden-brown. Add a knob of butter while flipping and baste the steaks. Remove and let them rest for 5-10 minutes.
  4. In the same pan, lower the heat to medium, add butter if needed, and sauté diced onion for 3-4 minutes until softened. Add minced garlic and cook for 30 seconds
  5. Pour in chicken broth and heavy cream, stirring to combine. Let simmer for 3-5 minutes until thickened. Gradually add Parmesan cheese until it melts into the sauce, adding reserved pasta water as needed.
  6. Slice the rested ribeye steaks and toss the cooked rigatoni into the creamy sauce. Plate the pasta, top with steak, and sprinkle with fresh parsley and extra Parmesan.

Nutrition

Serving: 1servingCalories: 650kcalCarbohydrates: 60gProtein: 40gFat: 30gSaturated Fat: 15gPolyunsaturated Fat: 3gMonounsaturated Fat: 7gCholesterol: 130mgSodium: 800mgPotassium: 600mgFiber: 3gSugar: 4gVitamin A: 500IUVitamin C: 2mgCalcium: 250mgIron: 3mg

Notes

Store leftovers in an airtight container for up to 3 days. Reheating may require adding splashes of cream or broth to maintain texture.

Tried this recipe?

Let us know how it was!

Savory Bang Bang Cauliflower

July 18, 2025 by grace bellamy Leave a Comment

“Imagine hosting a gathering where everyone raves about your homemade appetizer.” That’s exactly what I experienced the first time I served these Crispy Vegan Bang Bang Cauliflower Wings. They deliver a satisfying combination of chewy and crunchy textures, all wrapped in the irresistible sweetness of Thai chili sauce. This recipe is not only quick to whip up—ideal for those busy weeknights—but also checks the boxes for being vegan, oil-free, and gluten-free. Plus, you can choose between battered and non-battered options, making it a versatile dish for any palate. What’s your favorite way to enjoy cauliflower? Let’s dive into this delightful recipe that’s sure to wow your taste buds!

Why Bang Bang Cauliflower Will Delight You

Crowd-Pleaser: These crispy wings are guaranteed to impress both vegans and non-vegans alike at your next gathering.

Versatile Options: With both battered and non-battered variations, customizing them to suit your guests' preferences is a breeze.

Easy to Make: You’ll whip these up in no time, utilizing everyday ingredients and simple techniques. Plus, you can prepare them in an oven or air fryer for a quick weeknight meal.

Flavor Explosion: The sweet and spicy contrast of the Thai sweet chili sauce will have everyone reaching for more. Pair them with a side of rice, or enjoy them straight from the bowl for a snack!

For more quick appetizer ideas, check out our collection of easy vegan snacks that you can customize to your craving. These Bang Bang Cauliflower Wings are bound to become one of your favorites!

Bang Bang Cauliflower Ingredients

For the Cauliflower
• Cauliflower – A small head (about 3 cups) serves as the base; pre-cut florets offer convenience.

For the Batter
• Flour of choice – Use all-purpose or gluten-free 1:1 flour as a binding agent for the batter.
• Unsweetened non-dairy milk – Almond, soy, or oat milk create the ideal batter consistency; avoid flavored varieties.
• Spices – Garlic powder, onion powder, ground ginger, and sea salt infuse flavor into the batter.

For Extra Crispiness
• Panko bread crumbs – Provides a deliciously crunchy coating; gluten-free options are available for this Bang Bang Cauliflower.

For the Sauce
• Thai Sweet Chili Sauce – The star of the dish, bringing that sweet and tangy flavor to life.
• Vegan mayo – Adds creaminess to the bang bang sauce; homemade or store-bought works well.
• Sriracha – Add this optional ingredient for a spicy kick that can be adjusted to taste.
• Nutritional yeast – Optional for added savory flavor and slight thickening of the sauce.
• Sea salt – Enhances all flavors; can be omitted if using salty store-bought mayo.

Step‑by‑Step Instructions for Crispy Vegan Bang Bang Cauliflower Wings

Step 1: Preheat the Oven
Begin by preheating your oven to 425°F (218°C). While waiting for the oven, prepare a baking tray lined with parchment paper or a silicone mat to ensure the crispy Vegan Bang Bang Cauliflower Wings don’t stick. This preliminary setup will help you efficiently transition between steps.

Step 2: Mix the Spice Blend
In a large mixing bowl, combine your choice of flour with garlic powder, onion powder, ground ginger, and sea salt. Stir the mixture well until all the spices are evenly incorporated, ensuring your batter will be flavorful. This step is crucial to achieve a delicious coating that enhances the overall flavor of the cauliflower.

Step 3: Combine Milk and Flour
Next, pour in the unsweetened non-dairy milk and whisk until the batter is smooth and creamy. The consistency should be thick enough to adhere to the cauliflower but still pourable. This batter will be the perfect coating for your crispy Vegan Bang Bang Cauliflower Wings, so take your time to get it just right.

Step 4: Prepare the Cauliflower
While the batter sits, cut your cauliflower into large florets. Each piece should be roughly the size of a large bite to ensure even cooking and a satisfying texture. This preparation step is essential, as it creates the base for your Vegan Bang Bang Cauliflower Wings, which will be both tender and crispy.

Step 5: Coat Cauliflower
For a non-battered option, toss the cauliflower florets in olive oil, sweet chili sauce, and your spice blend until evenly coated. If you’re going for the battered version, dip each floret into the batter, allowing any excess to drip off, then roll it in Panko breadcrumbs for an extra crunch. Ensure all pieces are well covered to get the maximum flavor and texture.

Step 6: Arrange on Tray
Carefully place the coated cauliflower florets on your prepared baking tray, ensuring there’s enough space between each piece for optimal air circulation. This spacing is key to producing the signature crispiness you desire in the baked Vegan Bang Bang Cauliflower Wings, so don’t overcrowd the tray.

Step 7: Bake or Air Fry
If baking, roast the cauliflower for 30-40 minutes, flipping halfway through to achieve an even golden-brown color. For air frying, set your air fryer to 400°F (205°C) and cook for 15-25 minutes, shaking the basket halfway for even cooking. Both methods will result in perfectly crispy and tender wings—choose whichever you prefer!

Step 8: Prepare the Sauce
While your cauliflower cooks, prepare the bang bang sauce by mixing together vegan mayo, Thai sweet chili sauce, sriracha (if using), nutritional yeast, and sea salt in a bowl. Stir well until fully combined. This sauce will compliment your crispy Vegan Bang Bang Cauliflower Wings and add layers of flavor, creating a delightful balance.

Step 9: Toss with Sauce
Once the cauliflower is golden and crispy from the oven or air fryer, immediately toss the warm wings in the prepared bang bang sauce. Ensure every piece is generously coated for maximum flavor. This step transforms your dish, introducing the irresistible sweet and spicy notes that define Bang Bang Cauliflower.

Step 10: Serve and Enjoy
Finally, transfer the coated Vegan Bang Bang Cauliflower Wings to a serving platter and garnish as desired, such as with sliced green onions or sesame seeds. Serve them alongside rice or fresh veggies for a complete meal experience that’s simply unbeatable. Enjoy every bite of this deliciously satisfying dish!

Make Ahead Options

These Crispy Vegan Bang Bang Cauliflower Wings are ideal for meal prep enthusiasts looking to save time! You can coat the cauliflower florets up to 24 hours in advance, ensuring they are well-covered in the batter or seasoning before refrigerating. To maintain their crispiness, place them on a parchment-lined tray in a single layer, covering them tightly with plastic wrap. When you're ready to serve, simply bake or air fry as directed straight from the fridge, increasing the cooking time by about 5 minutes if needed. This way, you’ll enjoy deliciously crispy wings that taste just as fresh and flavorful as if they were made right before serving.

Bang Bang Cauliflower Variations & Substitutions

Feel free to get creative and customize your bang bang cauliflower wings with these enticing variations and swaps!

  • Broccoli Boost: Swap out cauliflower for broccoli florets for a vibrant twist that adds a different texture and flavor.

  • Gluten-Free Option: Ensure your flour and Panko breadcrumbs are gluten-free for a safe and delicious version that everyone can enjoy.

  • Spice It Up: Mix in different seasonings like smoked paprika or cayenne pepper for an extra kick that will awaken your taste buds.

  • Nuts for Crunch: Before serving, toss in some roasted cashews or peanuts for added crunch and a delightful nutty flavor.

  • Buffalo Style: Exchange the bang bang sauce for a spicy buffalo sauce for a fiery twist that pairs perfectly with celery sticks and vegan ranch.

  • Sweet & Sour: Opt for a sweet and sour sauce instead of the traditional bang bang sauce for a tangy twist that offers a different finish.

  • Herb Infusion: Add fresh chopped herbs like cilantro or parsley to your sauce for an herby aroma that brings freshness to each bite.

  • Creamy Alternatives: Instead of vegan mayo, use tahini or coconut yogurt for a creamy sauce that offers a unique flavor profile.

These variations will ensure your bang bang cauliflower is not just a dish, but an exciting culinary experience suitable for any occasion! If you’re interested in more enticing ideas, check out our guide on easy vegan appetizers for even more ways to delight your guests.

How to Store and Freeze Bang Bang Cauliflower

Fridge: Store leftover Bang Bang Cauliflower in an airtight container in the refrigerator for up to 3 days to maintain freshness and flavor.

Freezer: For longer storage, freeze the cooled cauliflower wings in a single layer on a baking sheet, then transfer to a freezer-safe bag for up to 2 months.

Reheating: To reheat, place frozen wings directly into the oven at 400°F (205°C) for 10-15 minutes until crispy and heated through, avoiding the microwave to keep that delightful crunch.

Expert Tips for Bang Bang Cauliflower

  • Choose Fresh Cauliflower: Opt for firm, fresh cauliflower with no brown spots for the best flavor and texture in your bang bang cauliflower wings.

  • Space Perfectly: Ensure florets are well spaced on the baking tray to achieve ultimate crispiness. Crowding can lead to steaming rather than baking.

  • Correct Batter Consistency: Achieve a batter that's thick enough to cling to the cauliflower but not overly thick, which can prevent even coating.

  • Use Quality Spices: Fresh spices can significantly enhance flavor. Ensure yours are not past their expiration for the best results in your Bang Bang Cauliflower.

  • Sauce it Up: Feel free to adjust the sriracha levels in the sauce to suit your taste. For milder flavors, start small and build up!

  • Leftover Storage: Refrigerate any leftovers in an airtight container; consume within 2-3 days for the best taste and texture. Reheat in the oven to retain crispiness.

What to Serve with Crispy Vegan Bang Bang Cauliflower Wings

Imagine a table filled with vibrant, colorful sides that perfectly complement the irresistible crunch of these savory wings.

  • Coconut Jasmine Rice: Fluffy rice infused with coconut milk creates a creamy backdrop that balances the spiciness of the bang bang sauce beautifully, making each bite divine.

  • Fresh Crunchy Slaw: A zesty slaw made with shredded cabbage and a tangy vinaigrette brings a refreshing crunch that contrasts wonderfully with the crispy cauliflower wings.

  • Roasted Veggies: A mix of seasonal roasted vegetables drizzled with olive oil provides a warm, earthy counterpart, enhancing the sweetness of the Thai chili sauce.

  • Spicy Mango Salsa: Bright, fruity salsa made with diced mango, red onion, and jalapeño adds a sweet and spicy punch, elevating your wing experience to tropical bliss.

  • Creamy Avocado Dip: A smooth avocado dip infused with lime juice creates a creamy, rich element that softens the heat while offering a satisfying texture.

  • Crispy Potato Wedges: Golden, seasoned potato wedges not only add heartiness to your meal but also provide a satisfying crunch that pairs excellently with the wings' unique flavor.

  • Cool Mint Yogurt Sauce: A cooling yogurt sauce with fresh mint and cucumber offers a delightful contrast to the wings’ heat, refreshing your palate with each bite.

  • Sparking Lemonade: A glass of zesty sparkling lemonade complements the sweet and spicy flavors, making for a bright and refreshing beverage pairing.

  • Chilled Cucumber Salad: Slices of cucumber seasoned with rice vinegar and a hint of sesame oil provide crunch and coolness that cleanse the palate, perfect alongside your bang bang wings.

Bang Bang Cauliflower Recipe FAQs

Is Bang Bang Cauliflower vegan?
Absolutely! Bang Bang Cauliflower is entirely vegan, as it relies on cauliflower as the main ingredient and uses plant-based substitutes for the sauce and batter. No animal products are involved in creating this delicious and guilt-free dish!

What are the seasonings in Bang Bang Cauliflower?
The seasonings typically include garlic powder, onion powder, ground ginger, and sea salt, creating a delightful flavor profile that enhances the crispiness of the cauliflower. These spices are added to the flour mixture for the batter, ensuring every single piece is packed with taste!

What goes with Bang Bang Cauliflower in a vegetarian meal?
Bang Bang Cauliflower pairs beautifully with several accompaniments! Consider serving it over rice for a filling meal, or in tacos for a fun twist. Fresh veggies on the side, like carrot sticks or cucumber slices, also complement this dish, adding a refreshing crunch that contrasts nicely with the crispy cauliflower.

What is the sauce for Bang Bang Cauliflower?
The sauce for Bang Bang Cauliflower typically includes a mix of Thai sweet chili sauce, vegan mayo, and optional sriracha for heat. This sweet and tangy sauce coats the cauliflower wings, bringing all the flavors together and creating the crave-worthy experience that makes this dish so special!

How should I store and reheat leftover Bang Bang Cauliflower?
To store leftover Bang Bang Cauliflower, place it in an airtight container in the refrigerator for up to 3 days. When you're ready to enjoy it again, I recommend reheating it in the oven at 400°F (205°C) for about 10-15 minutes. This will ensure it stays crispy and delicious; microwaving can make it soggy. If you have more leftovers, freeze them in a single layer on a baking sheet, then transfer to a freezer-safe bag for up to 2 months. When ready, simply bake from frozen for that perfect crunch again!

Can pets eat Bang Bang Cauliflower?
While cauliflower can be a healthy treat for pets, it's essential to serve it plain and cooked without any seasonings or sauces. Avoid giving your pets the spiced and sauced version of Bang Bang Cauliflower, as ingredients like garlic and onion can be harmful to them. Always consult your vet before introducing new foods to your pet's diet.

Bang Bang Cauliflower Recipe FAQs

Bang Bang Cauliflower

Savory Bang Bang Cauliflower for a Guilt-Free Indulgence

Discover the delightful flavors of Bang Bang Cauliflower, a vegan appetizer that impresses everyone with its crispy texture and sweet-spicy sauce.
Print Recipe Pin Recipe
Prep Time 15 minutes mins
Cook Time 35 minutes mins
Total Time 50 minutes mins
Servings: 4 wings
Course: Appetizer
Cuisine: Thai, Vegan
Calories: 250
Ingredients Equipment Method Nutrition Notes

Ingredients
  

For the Cauliflower
  • 1 head Cauliflower About 3 cups; pre-cut florets for convenience
For the Batter
  • 1 cup Flour of choice All-purpose or gluten-free 1:1 flour
  • 1 cup Unsweetened non-dairy milk Almond, soy, or oat milk
  • 1 teaspoon Garlic powder
  • 1 teaspoon Onion powder
  • 1 teaspoon Ground ginger
  • 1 teaspoon Sea salt
For Extra Crispiness
  • 1 cup Panko bread crumbs Gluten-free options available
For the Sauce
  • 1 cup Thai Sweet Chili Sauce The star of the dish
  • ½ cup Vegan mayo Homemade or store-bought
  • 1 tablespoon Sriracha Optional for spice
  • 2 tablespoons Nutritional yeast Optional for added flavor
  • 1 teaspoon Sea salt Can be omitted if using salty mayo

Equipment

  • Oven
  • Mixing Bowl
  • Baking Tray
  • parchment paper
  • Whisk

Method
 

Step-by-Step Instructions
  1. Preheat your oven to 425°F (218°C) and prepare a baking tray lined with parchment paper.
  2. In a bowl, mix flour with garlic powder, onion powder, ground ginger, and sea salt until well combined.
  3. Pour in the non-dairy milk and whisk until the batter is smooth and creamy.
  4. Cut cauliflower into large florets to ensure even cooking.
  5. Coat cauliflower florets in the batter or toss with oil, sweet chili sauce, and spice blend for non-battered.
  6. Arrange the coated florets on the baking tray, spacing them well.
  7. Bake for 30-40 minutes or air fry at 400°F (205°C) for 15-25 minutes until golden-brown.
  8. Prepare the bang bang sauce by mixing vegan mayo, sweet chili sauce, sriracha, nutritional yeast, and sea salt together.
  9. Toss the cooked cauliflower in the prepared bang bang sauce immediately after cooking.
  10. Serve on a platter and enjoy with rice or veggies.

Nutrition

Serving: 4wingsCalories: 250kcalCarbohydrates: 32gProtein: 6gFat: 10gSaturated Fat: 1gPolyunsaturated Fat: 1gMonounsaturated Fat: 8gSodium: 300mgPotassium: 500mgFiber: 4gSugar: 5gVitamin C: 50mgCalcium: 5mgIron: 10mg

Notes

Store leftovers in an airtight container in the fridge for up to 3 days. Reheat in the oven for best results.

Tried this recipe?

Let us know how it was!

Juicy Maryland Crab Cakes

July 18, 2025 by grace bellamy Leave a Comment

As I stood by the water's edge, the salty breeze carried with it the unmistakable scent of Chesapeake Bay—the very essence of Maryland. This longing for the coast inspired me to create these authentic Maryland Crab Cakes, a dish that perfectly marries convenience with a traditional flavor profile. With their easy prep and low-filler approach, these crab cakes allow the sweet, succulent crab meat to shine without any overpowering distractions. Baked to perfection, they bring the delightful crunch of a well-seared cake with a tender, juicy interior, making them an irresistible main course for any gathering. Are you ready to transport your taste buds to a seaside feast right in your own kitchen?

Why are Maryland Crab Cakes a Must-Try?

Perfection in Every Bite: These Maryland Crab Cakes captivate with their tender, sweet crab meat front and center, making them a delight for seafood fans.
Healthy and Delicious: Baked instead of fried, they're a guilt-free indulgence that won't compromise on flavor!
Quick Prep Time: Enjoy this dish in about 30 minutes, allowing more time for celebration and less for cooking—ideal for busy weeknights or last-minute gatherings!
Crowd-Pleasing Appeal: Serve with your favorite dipping sauces for a versatile dish that guests will rave about, just like my popular Crab Stuffed Mushrooms.
Flexible Options: Customize with spices or other seafood, or pair them with flavorful sides, such as a refreshing salad or delicious cornbread, just like my Grain Banana Pancakes. Dive into this irresistible coastal treasure!

Maryland Crab Cakes Ingredients

• Discover the essential components for making perfect Maryland Crab Cakes.

For the Crab Mixture

  • Crab Meat – Fresh jumbo lump or lump crab meat provides the main flavor and substance. Use high-quality fresh crab from the Atlantic coast for optimal taste.
  • Egg – Acts as a binder to hold the crab cakes together. A large egg is essential; omit for vegan variations.
  • Mayonnaise – Adds moisture and richness. Can substitute with Greek yogurt for a lighter version.
  • Dijon Mustard – Enhances flavor with a subtle tang. Yellow mustard can be used as a substitute for mildness.
  • Worcestershire Sauce – Provides depth of flavor. Use vegan Worcestershire sauce for a plant-based alternative.
  • Lemon Juice – Brightens up the flavors. Extra lemon wedges can be served for added freshness.
  • Old Bay Seasoning – A classic Maryland spice mix that adds distinctive taste. Adjust to taste or use a homemade blend of celery salt, black pepper, and paprika.
  • Fresh Parsley – Adds freshness and color. Substitute with chives or omit if not desired.

For Structure

  • Cracker Crumbs – The only filler used for structure. Make your own from saltines or use panko bread crumbs as an alternative.

Get ready to savor the vibrant tastes of Maryland with these delightful crab cakes!

Step‑by‑Step Instructions for Maryland Crab Cakes

Step 1: Prep Mix
In a large mixing bowl, whisk together ½ cup of mayonnaise, 1 large egg, 1 tablespoon of Dijon mustard, 1 tablespoon of Worcestershire sauce, 1 tablespoon of Old Bay seasoning, and the juice of 1 lemon. Ensure the mixture is smooth and creamy as you combine these ingredients, which will become the flavorful base for your Maryland Crab Cakes.

Step 2: Combine Crab
Gently fold in 1 pound of fresh jumbo lump crab meat into the mayonnaise mixture, being cautious not to break the crab lumps. After the crab is well incorporated, sprinkle in ¼ cup of cracker crumbs and mix lightly until just combined. This will create a cohesive yet delicate texture, perfect for shaping your crab cakes.

Step 3: Chill
Cover the crab mixture with plastic wrap or a lid and refrigerate for at least 30 minutes. Chilling the mixture allows it to firm up, making it easier to portion and shape into cakes. This step is crucial for preventing your Maryland Crab Cakes from falling apart during baking.

Step 4: Preheat Oven
While the crab mixture is chilling, preheat your oven to 400°F (200°C). A hot oven will help achieve the ideal golden-brown crust on your Maryland Crab Cakes, providing that satisfying crisp texture on the outside while keeping the crab meat tender inside.

Step 5: Form Cakes
Once chilled, divide the crab mixture into six equal portions. Shape each portion into a slightly flattened round cake, about ¾ inch thick. Use your hands to lightly press the mixture together, ensuring each cake maintains its structure without overworking the delicate crab.

Step 6: Bake
Place the formed crab cakes on a parchment-lined baking sheet, evenly spaced apart. Bake in the preheated oven for 15-18 minutes, or until the crab cakes are golden brown and reach an internal temperature of 165°F. Watch for a nice crisp crust developing, as this indicates they are ready to serve.

Step 7: Serve
Remove the Maryland Crab Cakes from the oven and let them cool for a few minutes. Serve warm with tartar or cocktail sauce, and garnish with freshly squeezed lemon wedges. This final touch enhances the flavors and adds a refreshing citrus zing that perfectly complements the sweet crab meat.

Make Ahead Options

These Maryland Crab Cakes are not only delicious but perfect for meal prep! You can prepare the crab mixture up to 24 hours in advance—just mix all ingredients, cover, and refrigerate. This resting period enhances the flavors and helps the mixture firm up, making it easier to shape the cakes when you’re ready to bake. On the day of serving, simply form the chilled mixture into cakes and bake them straight from the refrigerator. This ensures you’ll have fresh, crispy Maryland Crab Cakes ready to impress with minimal effort, all while saving precious time on busy weeknights!

What to Serve with Perfect Maryland Crab Cakes

As you prepare to indulge in these succulent Maryland Crab Cakes, consider pairing them with delightful sides and beverages that will enhance your seafood feast experience.

  • Creamy Coleslaw: This crunchy, tangy side adds a refreshing contrast to the rich crab cakes while complementing their sweetness.
  • Garlic Mashed Potatoes: The creamy, buttery texture of mashed potatoes pairs beautifully with the crispy crab cakes, offering a comforting and satisfying dish.
  • Cornbread Muffins: Sweet and moist cornbread brings a Southern twist that complements the savory flavors of the crab cakes, making for a delightful bite.
  • Steamed Asparagus: Tender and lightly seasoned asparagus provide a pop of color and are a perfect light side dish that won’t overpower the main attraction.
  • Cucumber Salad: This cool, crisp salad offers a refreshing crunch and a hint of acidity that balances the richness of the crab cakes perfectly.
  • Lemon Dill Aioli: A zesty dipping sauce elevates your crab cakes, infusing them with a burst of bright flavor while enhancing each bite with creamy goodness.
  • Sauvignon Blanc: A chilled glass of this crisp white wine brings citrus notes that harmonize with the sweet crab meat, creating a refreshing dining experience.
  • Key Lime Pie: For dessert, this tangy-sweet pie provides a delightful finish, sweetening the palate after savoring the savory crab cakes.

Maryland Crab Cakes Variations

Feel free to explore these exciting variations that will add a personal touch and elevate your Maryland Crab Cakes to new levels of deliciousness!

  • Seafood Medley: Substitute crab meat with shrimp or a combination of your favorite seafood for a delightful twist. This ensures every bite is packed with juicy flavor and a variety of textures!

  • Spicy Kick: Add diced jalapeños or a dash of your favorite hot sauce to the mixture for an extra zing. This twist will tantalize your taste buds while still allowing the crab to shine through beautifully.

  • Herb Swap: Experiment with different herbs like dill or cilantro instead of parsley for unique flavor profiles. Fresh herbs can completely transform the crabcakes and create exciting new aromas!

  • Detox Delight: For a healthier take, use Greek yogurt instead of mayonnaise. This substitution cuts down on calories without sacrificing moisture or flavor, making your crab cakes feel light yet satisfying.

  • Grain-Free: To make these cakes gluten-free, use crushed gluten-free crackers or almond flour in place of traditional cracker crumbs. Discover the joy of accommodating dietary needs without compromising on taste!

  • Zesty Citrus: Incorporate lime juice or zest along with the lemon for a refreshing citrus twist. The added brightness beautifully enhances the sweet crab meat, giving it a vibrant flavor boost.

  • Baked Version Variations: For an even lighter option, consider air-frying the crab cakes. This method provides a delightful crunch while reducing the use of oil, making them a guilt-free indulgence that still satisfies your cravings.

  • Sweet and Spicy: Add a touch of brown sugar to the mix for a sweet caramelization as they bake, and pair with a chipotle aioli for dipping. This unexpected combination offers a delicious contrast that’s sure to impress your guests!

Embrace your creativity and customize these Maryland Crab Cakes just the way you like them! They make for a delightful meal, whether paired with a fresh salad, like a zesty lemon arugula salad, or alongside warm homemade cornbread, reminiscent of a sunny day by the bay. Enjoy cooking, and happy dining!

Expert Tips for Maryland Crab Cakes

  • Quality Crab: Always choose fresh crab meat from trusted sources, avoiding canned options from Asia for the best flavor in your Maryland Crab Cakes.

  • Chill Time Matters: Don't skip chilling the mixture for at least 30 minutes; this step is crucial for helping the cakes hold their shape during baking.

  • Baking Tips: If you're baking, make sure your oven is at 400°F (200°C) for that perfect golden exterior. Fresh crab needs to shine, not hide in excess oil!

  • Forming Cakes: When shaping the crab cakes, be gentle. Over-mixing can break up the chunks of crab that give the cakes a delightful texture and flavor.

  • Temperature Check: Always use an instant-read thermometer to ensure your crab cakes reach an internal temperature of 165°F, ensuring they're perfectly cooked and safe to eat.

Storage Tips for Maryland Crab Cakes

Fridge: Store leftover Maryland Crab Cakes in an airtight container in the refrigerator for up to 3 days. Ensure they're cooled completely before sealing to maintain texture.

Freezer: For longer storage, freeze the unbaked crab cakes in a single layer on a baking sheet, then transfer them to a freezer bag for up to 3 months.

Reheating: To reheat, bake from frozen at 375°F (190°C) for 20-25 minutes or until heated through, ensuring the cakes retain their crispy exterior.

Make Ahead: Crab cakes can be prepared in advance and stored in the fridge for up to 24 hours before baking, making party prep a breeze!

Maryland Crab Cakes Recipe FAQs

What makes a Maryland crab cake different?
Maryland crab cakes are distinctively known for their high ratio of crab meat to filler, often featuring fresh jumbo lump crab. A hallmark spice is Old Bay seasoning, which adds depth and celebrates the flavors of the Chesapeake Bay region. The traditional preparation is baked to reduce unnecessary calories while maintaining a crisp, golden exterior.

What are the ingredients in Maryland crab cakes?
The main ingredients include fresh jumbo lump crab meat, egg for binding, mayonnaise for moisture, Dijon mustard for tang, Worcestershire sauce for depth, lemon juice for brightness, Old Bay seasoning for flavor, fresh parsley for a pop of color, and cracker crumbs for structure. This combination creates a deliciously simple recipe that showcases the sweetness of the crab meat.

What is the secret to the best crab cake?
Absolutely! The key lies in using fresh, high-quality crab meat and minimizing fillers—following a low-filler approach truly lets the crab shine. Chilling the mixture for at least 30 minutes before baking is also essential; it firms up the mixture, helping the cakes hold their shape during cooking. Lastly, ensure they reach an internal temperature of 165°F for perfect texture and safety.

How do I store Maryland crab cakes properly?
To store cooked Maryland crab cakes, place them in an airtight container in the refrigerator for up to 3 days. For longer storage, freeze unbaked crab cakes. First, lay them out in a single layer on a baking sheet, freeze until solid, then transfer to a freezer bag for up to 3 months. When you're ready to enjoy them, bake from frozen at 375°F (190°C) for 20-25 minutes until heated through.

Can my pets eat Maryland crab cakes?
While crab meat can be safe for pets in small amounts, it’s important to avoid dishes containing spices, onion, or garlic like Worcestershire sauce. Always check with your vet before sharing any human food with pets.

What should I do if my crab cakes fall apart during cooking?
Don’t worry—this can happen! If it does, it usually indicates that the mixture was either too wet or not chilled sufficiently. To troubleshoot, you can add a bit more cracker crumbs or chilling the mixture for a longer time next time might help. Form the cakes gently when shaping, ensuring you keep those lumps of crab intact for the best texture!

Maryland Crab Cakes

Juicy Maryland Crab Cakes That Will Wow Your Taste Buds

Enjoy the authentic flavor of Maryland Crab Cakes - a seafood delight with fresh crab meat.
Print Recipe Pin Recipe
Prep Time 30 minutes mins
Cook Time 18 minutes mins
Chilling Time 30 minutes mins
Total Time 1 hour hr 18 minutes mins
Servings: 6 cakes
Course: Main Dishes
Cuisine: American, Seafood
Calories: 250
Ingredients Equipment Method Nutrition Notes

Ingredients
  

For the Crab Mixture
  • 1 pound fresh jumbo lump crab meat Use high-quality fresh crab from the Atlantic coast for optimal taste.
  • 1 large egg A large egg is essential; omit for vegan variations.
  • ½ cup mayonnaise Can substitute with Greek yogurt for a lighter version.
  • 1 tablespoon Dijon mustard Yellow mustard can be used as a substitute for mildness.
  • 1 tablespoon Worcestershire sauce Use vegan Worcestershire sauce for a plant-based alternative.
  • 1 tablespoon lemon juice Extra lemon wedges can be served for added freshness.
  • 1 tablespoon Old Bay seasoning Adjust to taste or use a homemade blend of celery salt, black pepper, and paprika.
  • ¼ cup cracker crumbs Make your own from saltines or use panko bread crumbs as an alternative.
  • 2 tablespoons fresh parsley Substitute with chives or omit if not desired.

Equipment

  • Mixing Bowl
  • Baking Sheet
  • Plastic wrap

Method
 

Step-by-Step Instructions for Maryland Crab Cakes
  1. In a large mixing bowl, whisk together ½ cup of mayonnaise, 1 large egg, 1 tablespoon of Dijon mustard, 1 tablespoon of Worcestershire sauce, 1 tablespoon of Old Bay seasoning, and the juice of 1 lemon. Ensure the mixture is smooth and creamy as you combine these ingredients.
  2. Gently fold in 1 pound of fresh jumbo lump crab meat into the mayonnaise mixture, being cautious not to break the crab lumps. After the crab is well incorporated, sprinkle in ¼ cup of cracker crumbs and mix lightly until just combined.
  3. Cover the crab mixture with plastic wrap or a lid and refrigerate for at least 30 minutes.
  4. While the crab mixture is chilling, preheat your oven to 400°F (200°C).
  5. Once chilled, divide the crab mixture into six equal portions. Shape each portion into a slightly flattened round cake, about ¾ inch thick.
  6. Place the formed crab cakes on a parchment-lined baking sheet, evenly spaced apart. Bake in the preheated oven for 15-18 minutes, or until the crab cakes are golden brown and reach an internal temperature of 165°F.
  7. Remove the Maryland Crab Cakes from the oven and let them cool for a few minutes. Serve warm with tartar or cocktail sauce, and garnish with freshly squeezed lemon wedges.

Nutrition

Serving: 1cakeCalories: 250kcalCarbohydrates: 15gProtein: 20gFat: 12gSaturated Fat: 2gPolyunsaturated Fat: 1gMonounsaturated Fat: 8gCholesterol: 100mgSodium: 500mgPotassium: 300mgFiber: 1gSugar: 1gVitamin A: 500IUVitamin C: 5mgCalcium: 50mgIron: 1mg

Notes

Always choose fresh crab meat from trusted sources, avoiding canned options from Asia for the best flavor. Don't skip chilling the mixture for at least 30 minutes; this step is crucial for helping the cakes hold their shape during baking.

Tried this recipe?

Let us know how it was!

Easy Honey Lemon Vinaigrette

July 18, 2025 by grace bellamy Leave a Comment

The moment the vivid yellow dressing gracefully drizzles over a fresh salad is nothing short of magical. This Honey Lemon Vinaigrette recipe is a game-changer, effortlessly transforming mundane greens into a vibrant medley of flavors. With just a handful of fresh ingredients, this easy homemade dressing not only elevates your meals but also keeps those pesky additives at bay. In mere minutes, you can whip up this delightful concoction, making it the perfect companion for spring and summer meals. Whether you're hosting a sunny brunch or simply elevating your dinner routine, this vinaigrette is sure to impress. Are you ready to take your salad game to new heights? Let’s dive into this refreshing recipe together!

Why is Honey Lemon Vinaigrette a Must-Try?

Simplicity at Its Best: With just a few fresh ingredients, this vinaigrette is incredibly easy to make, allowing anyone to create a delicious dressing at home.

Zesty Flavor Explosion: The bright lemon juice and sweet honey bring a refreshing balance to any dish, making salads sing with flavor.

Versatile Ingredient Usage: Great for enhancing salads, marinating proteins, or even as a dip for fresh veggies—this dressing adapts to your cooking needs!

Healthy Alternative: Avoid those store-bought additives—this vinaigrette is lower in calories and packed with nutrition, making it a guilt-free addition to your meals.

Make-Ahead Convenience: Prepare it in advance and keep it in the fridge for up to a week! Just give it a shake before use, and you’re ready to go.

Transform your meals today with this delightful honey lemon vinaigrette recipe!

Honey Lemon Vinaigrette Ingredients

Perfect for a fresh dressing!

For the Vinaigrette

  • Fresh Lemon Juice – Provides acidity and brightness; fresh-squeezed juice yields the best flavor.
  • Fresh Lemon Zest – Enhances the lemon flavor and adds a fragrant aroma; use a microplane for fine zesting.
  • Honey – Adds natural sweetness to balance the acidity; swap with maple syrup for a vegan alternative.
  • White Vinegar – Contributes additional acidity; feel free to substitute with apple cider vinegar for a unique flavor.
  • Dijon Mustard – Acts as an emulsifier, adding depth to the vinaigrette; yellow mustard works in a pinch for milder taste.
  • Extra Virgin Olive Oil – Provides richness and a smooth texture; light olive oil offers a milder flavor, while avocado oil is a healthy option.
  • Salt & Pepper – Enhance overall flavor to taste; adjust based on your personal preference.

Get ready to whip up a delicious, easy homemade honey lemon vinaigrette that will transform your salads!

Step‑by‑Step Instructions for Honey Lemon Vinaigrette

Step 1: Gather Ingredients
Begin by collecting all the ingredients for your Honey Lemon Vinaigrette. You’ll need fresh lemon juice, lemon zest, honey, white vinegar, Dijon mustard, extra virgin olive oil, salt, and pepper. Measure out the ingredients and place them in a clean 16 oz mason jar. This simple and fresh dressing will transform your salads, so ensure everything is ready for easy mixing.

Step 2: Combine Ingredients
Add the fresh lemon juice, lemon zest, honey, white vinegar, and Dijon mustard into the mason jar first. This order helps with the emulsification process. Use a spoon to give everything a gentle stir, ensuring the honey incorporates well with the liquids. The combination of these fresh ingredients provides a zesty flavor that’s perfect for salads!

Step 3: Add Olive Oil
Next, pour in the extra virgin olive oil into the jar, which will bring richness to your Honey Lemon Vinaigrette. Secure the lid tightly, ensuring a snug fit to avoid spills. Now, you are ready to emulsify the dressing; this is the key to a smooth texture that beautifully clings to your greens.

Step 4: Shake Vigorously
Shake the jar vigorously for about 1–2 minutes until the mixture is well combined and creamy. You should see the ingredients emulsifying—look for a slight thickening in the vinaigrette. This step is essential for achieving that delightful consistency that elevates any dish you choose to drizzle it on.

Step 5: Taste and Adjust
After shaking, remove the lid and taste the vinaigrette. Adjust the seasoning by adding salt and pepper according to your preference. You may also want to tweak the flavors further by adding more honey for sweetness or additional lemon juice for tanginess. Each taste will bring you closer to the perfect balance for your salads.

Step 6: Store for Later
If you’re not using the Honey Lemon Vinaigrette immediately, transfer it to an airtight container. Seal it tightly and refrigerate for up to one week. Always give it a gentle shake before each use to recombine the ingredients, ensuring that every drizzle is as fresh and vibrant as the first!

Make Ahead Options

These Honey Lemon Vinaigrette preparations are ideal for busy cooks looking to save time during the week! You can easily prepare the vinaigrette up to 7 days in advance by combining all the ingredients in a mason jar and shaking it to emulsify. Store it in the refrigerator in an airtight container to keep the flavors fresh. When it’s time to serve, simply give the jar a vigorous shake to recombine the ingredients before drizzling over your favorite salads or dishes. This make-ahead option ensures you always have a zesty dressing on hand, making meal planning a breeze while maintaining its delicious quality!

Expert Tips for Honey Lemon Vinaigrette

  • Choose Fresh Ingredients: Fresh lemon juice and zest are key to a vibrant honey lemon vinaigrette. Bottled lemon juice lacks the brightness that fresh lemons provide.

  • Emulsification Matters: Ensure the jar lid is tightly secured before shaking. This prevents spills and helps achieve a smooth, creamy consistency.

  • Adjust to Taste: Don’t hesitate to taste as you go! Add more honey for sweetness or additional mustard for thickness. This helps create a uniquely tailored honey lemon vinaigrette.

  • Storage Savvy: Refrigerate in an airtight container for up to a week. Always shake well before use; ingredients may separate, but this ensures freshness every time!

  • Experiment with Flavor: Try adding minced garlic or fresh herbs to enhance your honey lemon vinaigrette even further, bringing personalized flair to your salads.

What to Serve with Honey Lemon Vinaigrette?

The magic of Honey Lemon Vinaigrette makes every meal a burst of flavor, turning simple dishes into extraordinary ones.

  • Crispy Mixed Greens: The bright vinaigrette adds a zesty kick to peppery arugula and crunchy romaine, enhancing their natural flavors. A light drizzle can elevate even the simplest salads.

  • Grilled Chicken: Marinate chicken breasts in the vinaigrette for a tangy, flavorful twist before grilling. The marinade brings out the juiciness of the meat, making it an irresistible dish.

  • Roasted Vegetables: Toss crispy roasted carrots and bell peppers in Honey Lemon Vinaigrette for a delightful sweet-sour contrast that brightens earthy flavors.

  • Fresh Fruit Salad: Complement sweet fruits like strawberries and oranges with a drizzle of vinaigrette. This unexpected pairing adds a refreshing zing to your fruit medley, leaving your guests wondering about your secret ingredient.

  • Quinoa Salad: Mix cooked quinoa with diced cucumbers, cherry tomatoes, and feta cheese, then dress with the vinaigrette. This hearty, healthy salad takes on a whole new level of flavor.

  • Herbed Couscous: Coat fluffy couscous with this zesty vinaigrette for a side dish that perfectly balances savory herbs and natural sweetness.

  • Crusty Bread: Serve as a dip alongside a loaf of warm, crusty bread. The vinaigrette’s rich, complex flavors invite guests to indulge in an interactive dining experience.

  • Sparkling Water: Pair your meal with a glass of sparkling water with a lemon slice. The effervescence and citrus notes complement the vinaigrette beautifully, enhancing the overall dining experience.

With these pairings, your Honey Lemon Vinaigrette will shine in countless delightful dishes!

Honey Lemon Vinaigrette Variations

Feel free to get creative with your Honey Lemon Vinaigrette and make it uniquely yours!

  • Garlic Infusion: Add minced garlic for an earthy depth that pairs beautifully with the zesty flavors.
  • Herb Garden: Stir in fresh herbs like parsley or basil for a lovely aromatic twist that brightens your greens.
  • Vegan Delight: Substitute honey with maple syrup to create a deliciously sweet vegan vinaigrette that everyone can enjoy.
  • Spicy Kick: Try adding a pinch of red pepper flakes or a dash of hot sauce for a delightful heat that’s sure to excite your taste buds.
  • Nutty Flavor: Whisk in a teaspoon of sesame oil for a nutty undertone that adds a wonderful complexity to your dressing.
  • Citrus Blast: Mix in a splash of orange or lime juice for a vibrant citrus explosion that elevates the vinaigrette even more.
  • Creamy Variation: Blend with a dollop of Greek yogurt or avocado for a thicker, creamier dressing that's rich and indulgent.
  • Fruit Forward: Incorporate pureed fruits like strawberries or peaches for a sweet and fruity twist that pairs perfectly with summer salads.

Each of these variations is a chance to infuse your personality into the vinaigrette, making it a versatile staple in your kitchen. Looking for more tips on how to spice up your salads? Check out how this delightful vinaigrette enhances other fresh dishes, including marinated vegetables and grilled proteins!

How to Store and Freeze Honey Lemon Vinaigrette

Fridge: Store your Honey Lemon Vinaigrette in an airtight container for up to one week. Always give it a good shake before using, as ingredients may separate over time.

Freezer: For longer storage, you can freeze the vinaigrette in ice cube trays, transferring the cubes to a zip-top bag afterwards. Use within 3 months for best flavor.

Room Temperature: Avoid leaving the vinaigrette at room temperature for more than 2 hours to maintain safety, especially during warmer months.

Reheating: While you don't need to heat this vinaigrette, if it's been frozen, allow it to thaw in the fridge overnight before giving it a shake and enjoying it fresh over your favorite dishes.

Honey Lemon Vinaigrette Recipe FAQs

How do I choose the best lemons for my vinaigrette?
Absolutely! Look for lemons that are firm and heavy for their size, which indicates juiciness. The skin should be smooth and free of dark spots. Fresh lemons yield the best flavor, so avoid those that are dull or have dry skin.

How long can I store Honey Lemon Vinaigrette?
You can keep your Honey Lemon Vinaigrette stored in an airtight container in the fridge for up to one week. Make sure to give it a good shake before each use, as the ingredients may separate over time.

Can I freeze Honey Lemon Vinaigrette?
Yes, you can freeze the vinaigrette! I recommend pouring it into ice cube trays and freezing until solid. Once frozen, transfer the cubes to a zip-top bag and use them within 3 months for the best flavor. Simply thaw a cube in the fridge overnight for fresh use.

What should I do if my vinaigrette is too thick?
If your Honey Lemon Vinaigrette turns out too thick for your liking, don't worry! Simply add a splash of warm water or a little extra olive oil to thin it out. Secure the lid and shake again until you reach your desired consistency.

Is this vinaigrette safe for those with allergies?
Definitely! However, it’s crucial to note that this recipe contains honey, which should be avoided if you're allergic to bees. For those following a vegan diet or avoiding honey, you can easily substitute it with maple syrup without compromising flavor.

Can I make this vinaigrette in advance for a party?
Yes, making your Honey Lemon Vinaigrette a day ahead is a fantastic idea! It allows the flavors to meld beautifully. Just store it in an airtight container in the fridge, and remember to give it a good shake before serving to recombine the ingredients.

Honey Lemon Vinaigrette

Easy Honey Lemon Vinaigrette That Transforms Your Salads

This Honey Lemon Vinaigrette recipe effortlessly transforms your salads into a vibrant medley of flavors.
Print Recipe Pin Recipe
Prep Time 10 minutes mins
Total Time 10 minutes mins
Servings: 8 servings
Course: Condiment
Cuisine: American
Calories: 60
Ingredients Equipment Method Nutrition Notes

Ingredients
  

For the Vinaigrette
  • ¼ cup Fresh Lemon Juice Use fresh-squeezed juice for best flavor
  • 1 teaspoon Fresh Lemon Zest Use a microplane for fine zesting
  • 2 tablespoons Honey Can swap with maple syrup for a vegan alternative
  • 1 tablespoon White Vinegar Can substitute with apple cider vinegar
  • 1 teaspoon Dijon Mustard Yellow mustard works in a pinch
  • ½ cup Extra Virgin Olive Oil Light olive oil is a milder flavor
  • to taste Salt
  • to taste Pepper

Equipment

  • 16 oz mason jar

Method
 

Step-by-Step Instructions for Honey Lemon Vinaigrette
  1. Gather all the ingredients for your Honey Lemon Vinaigrette in a clean 16 oz mason jar.
  2. Combine the fresh lemon juice, lemon zest, honey, white vinegar, and Dijon mustard into the mason jar.
  3. Add extra virgin olive oil into the jar, then secure the lid tightly.
  4. Shake the jar vigorously for about 1–2 minutes until well combined and creamy.
  5. Taste the vinaigrette and adjust seasoning with salt and pepper as needed.
  6. If not using immediately, transfer to an airtight container and refrigerate for up to one week.

Nutrition

Serving: 1tablespoonCalories: 60kcalCarbohydrates: 7gFat: 4gSaturated Fat: 0.5gPolyunsaturated Fat: 0.5gMonounsaturated Fat: 3gSodium: 15mgPotassium: 20mgSugar: 6gVitamin C: 2mgCalcium: 1mg

Notes

This vinaigrette is a perfect blend for enhancing salads, marinating proteins, or using as a dip. Shake well before each use.

Tried this recipe?

Let us know how it was!

Creamy Tuscan Rigatoni

July 18, 2025 by grace bellamy Leave a Comment

As I stood in my cozy kitchen, the aroma of sun-dried tomatoes mingled with garlic, instantly transporting me to a rustic Italian trattoria. This is the essence of my Creamy Tuscan Rigatoni, where each bite feels like a warm embrace on a busy weeknight. Creamy, comforting, and oh-so-satisfying, this dish marries tender rigatoni with a luscious tomato sauce and perfectly grilled chicken, creating a meal you'll want to indulge in time and again. Not only is it quick to prepare (hello, easy weeknight meal!), but it also promises to be a crowd-pleaser, making it perfect for family dinners or cozy gatherings. Are you ready to make magic in your kitchen? Let’s dive into the recipe!

Why is Creamy Tuscan Rigatoni a Must-Try?

Comfort: This dish wraps you in a warm hug, perfect for those chilly evenings.
Flavor Explosion: The harmonious blend of sun-dried tomatoes, garlic, and creamy sauce creates an irresistible taste sensation.
Quick Preparation: Ready in under 30 minutes, it’s ideal for busy weeknights without sacrificing flavor.
Versatile: Feel free to substitute the chicken with shrimp or veggies for a different twist!
Crowd-Pleasing: It's a hit with both kids and adults, making it perfect for family dinners or friendly get-togethers. Whether you pair it with a refreshing salad or some garlic bread, this dish guarantees satisfaction on every plate.

Creamy Tuscan Rigatoni Ingredients

• Here’s what you’ll need to create this delectable dish!

For the Chicken
• 2 chicken breasts – A vital protein source that anchors this dish; for different proteins, turkey breasts or plant-based alternatives work wonders.
• 1 teaspoon garlic powder – Deepens the flavor profile; for a fresher taste, use minced garlic instead.
• 1 teaspoon onion powder – Adds savory notes; fresh chopped onions can substitute, adjusting to your preference.
• 1 teaspoon paprika – Provides mild sweetness and beautiful color.
• 1 teaspoon chili powder – Introduces a subtle kick; omit if a milder flavor is desired.
• 1 teaspoon oregano – Essential for that authentic Tuscan flavor.
• Salt & pepper (to taste) – Fundamental seasonings to balance everything.

For the Pasta
• 4 cups rigatoni – This shape holds the sauce beautifully; penne or fusilli work just as well if needed.

For the Sauce
• 1 shallot – Adds a mild onion flavor to enrich your sauce; in a pinch, onion or green onions are great substitutes.
• 4 cloves garlic – Provides aromatic strength; a must for flavor.
• Pinch red pepper flakes – Adds heat; adjust according to your spice preference.
• 2-3 tablespoon sun-dried tomatoes – Adds concentrated, robust tomato goodness; fresh tomatoes can be used, but the flavor will differ.
• 2 tablespoon tomato paste – Thicken your sauce while boosting umami richness.
• 2 cups heavy cream – Gives that luscious, creamy texture; for a lighter option, consider half-and-half or a plant-based alternative.
• 2 handfuls spinach – A great way to incorporate nutrition and color; will wilt beautifully in the sauce.
• 2 small handfuls cherry tomatoes – Brightens up the dish with fresh bursts of flavor.
• Parmesan to taste – The finishing touch to elevate flavor; Pecorino Romano or nutritional yeast work for dairy-free options.

For Garnish
• Parsley (for topping) – Adds a pop of color and freshness to your dish.

Prepare these ingredients, and you’re on your way to creating a delicious bowl of Creamy Tuscan Rigatoni that will warm the hearts of your family and friends!

Step‑by‑Step Instructions for Creamy Tuscan Rigatoni

Step 1: Prepare the Chicken
Begin by slicing each chicken breast in half horizontally to promote even cooking. Season both sides generously with garlic powder, onion powder, paprika, chili powder, oregano, salt, and pepper. Heat a drizzle of olive oil in a large skillet over medium-high heat, providing a sizzle as the chicken cooks.

Step 2: Cook the Chicken
Place the seasoned chicken in the hot skillet, cooking for about 5-7 minutes on each side until they are golden brown and cooked through to an internal temperature of 165°F. Once done, transfer the chicken to a cutting board to rest, allowing the juices to settle for maximum moistness.

Step 3: Boil the Pasta
In a large pot, bring heavily salted water to a rolling boil. Add 4 cups of rigatoni and cook according to package instructions for about 8-10 minutes, until al dente. Reserve ½ cup of pasta water before draining the rigatoni, ensuring the noodles are firm yet tender—this will keep their texture intact when combined with the sauce.

Step 4: Create the Sauce
In the same skillet used for the chicken, reduce heat to medium and add minced garlic and finely chopped shallot into the residual oil. Sauté for 2-3 minutes, stirring frequently until fragrant and translucent. Add a pinch of red pepper flakes and the tomato paste, cooking for an additional minute, allowing the flavors to meld.

Step 5: Finish the Sauce
Pour in the heavy cream and add the sun-dried tomatoes, spinach, and halved cherry tomatoes. Stir gently and let the mixture simmer for about 5 minutes. As the spinach wilts and the tomatoes soften, stir in grated parmesan cheese and season with salt and pepper to taste; this creates a luxuriously creamy sauce for your Creamy Tuscan Rigatoni.

Step 6: Combine Everything
Gently fold the drained rigatoni into the sauce, ensuring each piece of pasta is coated in the creamy goodness. If the sauce appears thick, gradually add some of the reserved pasta water, about a tablespoon at a time, until reaching desired consistency.

Step 7: Serve the Dish
Slice the rested chicken into strips and arrange atop the pasta. Serve the creamy rigatoni in bowls, garnishing with extra parmesan and a sprinkle of fresh parsley for a pop of color. Enjoy the delightful warmth and flavors of your freshly prepared Creamy Tuscan Rigatoni!

What to Serve with Creamy Tuscan Chicken Pasta

Pairing your delicious plate of creamy goodness creates a complete dining experience. Consider these satisfying appetizers and sides to enhance your meal.

  • Garlic Bread: A crunchy, buttery indulgence that complements the creamy sauce perfectly. The rich flavors are irresistible when dipped into the sauce.

  • Caesar Salad: Crisp romaine, crunchy croutons, and creamy dressing provide a fresh contrast to the hearty pasta. The tang from the dressing adds a delightful zing.

  • Roasted Veggies: A mix of seasonal vegetables tossed in olive oil and herbs. Their caramelized sweetness provides a lovely texture contrast and enhances the meal’s color.

  • White Wine: A chilled glass of Sauvignon Blanc or Pinot Grigio elevates the dining mood. The crisp acidity of white wine balances the dish’s richness beautifully.

  • Pesto Bruschetta: Toasted bread topped with vibrant basil pesto. This dish introduces fresh flavors that harmonize with the creamy Tuscan chicken’s savory notes.

  • Lemon Sorbet: Light and refreshing, lemon sorbet serves as a delightful palate cleanser after the rich pasta. It’s a perfect ending to your comforting meal.

Creamy Tuscan Rigatoni Variations

Feel free to play with flavors and textures, making this dish uniquely yours!

  • Shrimp Option: Substitute grilled chicken with sautéed shrimp for a delightful seafood twist. The sweetness of shrimp pairs beautifully with the creamy sauce.
  • Veggie Lovers: Toss in vegetables like zucchini or bell peppers for extra nutrition and vibrant color. Their natural sweetness complements the creamy sauce wonderfully.
  • Spicy Kick: Add chopped jalapeños or spicy Italian sausage to amp up the heat if you’re a spice enthusiast. The extra kick brings a new dimension to every bite.
  • Herb Boost: Experiment with fresh herbs like basil or thyme for a fresh twist. These can enhance the dish's aromatic profile, making it even more fragrant.
  • Dairy-Free Delight: Use coconut milk or almond milk in place of heavy cream for a lighter, dairy-free version. This adds a subtle nutty flavor while keeping the creaminess intact.
  • Noodle Alternatives: Try brown rice pasta or zucchini noodles for a gluten-free option. These will provide a slight change in texture while keeping the dish satisfying.
  • Creamy Variation: Swap heavy cream for cream cheese or ricotta for an even richer, velvety sauce. This twist is perfect for those who enjoy indulgent pasta dishes.
  • Tomato Swap: For a fresher twist, substitute canned or sun-dried tomatoes with fresh sliced tomatoes during peak summer. This will create a lighter, brighter dish.

Every variation invites you to explore a delicious new experience with your Creamy Tuscan Rigatoni. ✨ Enjoy experimenting with these ideas, and make this dish truly yours!

Storage Tips for Creamy Tuscan Rigatoni

  • Fridge: Store leftovers in an airtight container in the fridge for up to 3 days. Make sure to let the pasta cool before sealing to avoid condensation.
  • Freezer: If needed, you can freeze your Creamy Tuscan Rigatoni for up to 2 months. Divide into single portions, wrap tightly, and use freezer-safe containers.
  • Reheating: When ready to enjoy, thaw overnight in the fridge if frozen. Reheat gently on the stove over low heat, adding a splash of cream or reserved pasta water to revive the sauce’s creamy consistency.
  • Avoiding Separation: To prevent the sauce from separating during reheating, stir constantly and monitor the temperature closely, removing it from heat once warmed through.

Make Ahead Options

Preparing your Creamy Tuscan Chicken Pasta in advance is a game-changer for busy weeknights! You can marinate and cook the chicken up to 24 hours ahead and store it in the refrigerator. The sauce can also be prepared up to 3 days in advance; simply refrigerate it in an airtight container. To ensure the chicken stays juicy and the sauce remains creamy, avoid reheating on high heat; instead, warm gently on the stove while stirring in a splash of reserved pasta water if needed. When it's time to enjoy your meal, just boil the rigatoni and combine with the warmed sauce and sliced chicken for a quick, comforting dinner that's just as delicious as when freshly made!

Expert Tips for Creamy Tuscan Rigatoni

  • Chicken Prep: Ensure the chicken breasts are thinly sliced to cook evenly and form a beautiful, golden crust without drying out.
  • Pasta Perfection: Always cook the rigatoni to al dente; undercooking it slightly helps maintain texture when mixing with the creamy sauce.
  • Sauce Consistency: Reserve extra pasta water; it's a fabulous secret to adjust the sauce thickness to your liking—too thick can be fixed with just a splash!
  • Flavor Boost: For a more robust flavor, let the garlic and shallots sauté until deeply aromatic before adding the cream and other ingredients.
  • Herb Freshness: Don’t skip the fresh parsley garnish; it elevates both presentation and flavor, bringing brightness to this creamy dish.

Creamy Tuscan Rigatoni Recipe FAQs

What is Tuscan rigatoni?
Tuscan rigatoni refers to a delicious, comforting pasta dish typically made with a creamy tomato-based sauce that embodies the flavors of Tuscany. The rigatoni pasta shape is perfect for holding onto the sauce, ensuring each bite is rich and flavorful, often combined with ingredients like chicken, sun-dried tomatoes, and fresh herbs for an authentic Italian experience.

What is Tuscan chicken sauce made of?
Tuscan chicken sauce is typically made with heavy cream, sun-dried tomatoes, garlic, shallots, and fresh spinach. It's enhanced with spices like oregano, red pepper flakes, and parmesan cheese, delivering an irresistibly creamy and savory flavor profile that complements the tender chicken beautifully. This sauce works perfectly with various pasta shapes, especially rigatoni!

How long can I store Creamy Tuscan Rigatoni in the fridge?
Absolutely! You can store leftover Creamy Tuscan Rigatoni in an airtight container in the refrigerator for up to 3 days. Make sure to let it cool down to room temperature before sealing to prevent condensation, which can make the pasta soggy.

Can I freeze Creamy Tuscan Rigatoni?
Yes! Freezing Creamy Tuscan Rigatoni is a great option. To do this, divide it into single portions and wrap them tightly in plastic wrap. Then, place the wrapped portions into a freezer-safe container or bag. You can store it in the freezer for up to 2 months. When you're ready to enjoy, simply thaw in the fridge overnight and reheat gently on the stove, adding a splash of cream or reserved pasta water to restore the creamy texture.

What should I do if the sauce is too thick?
If you find that your creamy sauce has become too thick while cooking or reheating, don’t worry! Simply add a tablespoon of reserved pasta water at a time while stirring continuously until you reach your desired consistency. This method not only balances the thickness but also ensures your sauce remains flavorful and creamy!

Can I customize this recipe for dietary restrictions?
Very! If you have dietary considerations, feel free to make some easy alterations. For a dairy-free version, substitute heavy cream with plant-based cream or coconut milk. If you’re looking for a chicken alternative, use turkey breasts, shrimp, or even mix it up with assorted vegetables like mushrooms or bell peppers. This ensures that everyone can indulge in this delightful Creamy Tuscan Rigatoni recipe!

Creamy Tuscan Rigatoni

Indulgent Creamy Tuscan Rigatoni for Comforting Nights

Creamy Tuscan Rigatoni is a comforting and quick meal, perfect for busy weeknights and sure to please the whole family.
Print Recipe Pin Recipe
Prep Time 10 minutes mins
Cook Time 20 minutes mins
Total Time 30 minutes mins
Servings: 4 plates
Course: Main Dishes
Cuisine: Italian
Calories: 550
Ingredients Equipment Method Nutrition Notes

Ingredients
  

For the Chicken
  • 2 pieces chicken breasts for different proteins, turkey breasts or plant-based alternatives work wonders.
  • 1 teaspoon garlic powder for a fresher taste, use minced garlic instead.
  • 1 teaspoon onion powder fresh chopped onions can substitute, adjusting to your preference.
  • 1 teaspoon paprika provides mild sweetness and beautiful color.
  • 1 teaspoon chili powder omit if a milder flavor is desired.
  • 1 teaspoon oregano essential for that authentic Tuscan flavor.
  • Salt & pepper to taste
For the Pasta
  • 4 cups rigatoni penne or fusilli work just as well if needed.
For the Sauce
  • 1 piece shallot in a pinch, onion or green onions are great substitutes.
  • 4 cloves garlic provides aromatic strength; a must for flavor.
  • 1 pinch red pepper flakes adjust according to your spice preference.
  • 2-3 tablespoon sun-dried tomatoes fresh tomatoes can be used, but the flavor will differ.
  • 2 tablespoon tomato paste thicken your sauce while boosting umami richness.
  • 2 cups heavy cream for a lighter option, consider half-and-half or a plant-based alternative.
  • 2 handfuls spinach will wilt beautifully in the sauce.
  • 2 small handfuls cherry tomatoes brightens up the dish with fresh bursts of flavor.
  • Parmesan to taste; Pecorino Romano or nutritional yeast work for dairy-free options.
For Garnish
  • Parsley for topping; adds a pop of color and freshness to your dish.

Equipment

  • large skillet
  • Pot
  • cutting board
  • Knife

Method
 

Step-by-Step Instructions
  1. Begin by slicing each chicken breast in half horizontally to promote even cooking. Season both sides generously with garlic powder, onion powder, paprika, chili powder, oregano, salt, and pepper.
  2. Heat a drizzle of olive oil in a large skillet over medium-high heat, providing a sizzle as the chicken cooks.
  3. Place the seasoned chicken in the hot skillet, cooking for about 5-7 minutes on each side until they are golden brown and cooked through to an internal temperature of 165°F. Once done, transfer the chicken to a cutting board to rest.
  4. In a large pot, bring heavily salted water to a rolling boil. Add 4 cups of rigatoni and cook according to package instructions for about 8-10 minutes, until al dente. Reserve ½ cup of pasta water before draining the rigatoni.
  5. In the same skillet used for the chicken, reduce heat to medium and add minced garlic and finely chopped shallot into the residual oil. Sauté for 2-3 minutes until fragrant and translucent.
  6. Add a pinch of red pepper flakes and the tomato paste, cooking for an additional minute.
  7. Pour in the heavy cream and add the sun-dried tomatoes, spinach, and halved cherry tomatoes. Stir gently and let the mixture simmer for about 5 minutes.
  8. Stir in grated parmesan cheese and season with salt and pepper to taste.
  9. Gently fold the drained rigatoni into the sauce. If the sauce appears thick, gradually add some of the reserved pasta water.
  10. Slice the rested chicken into strips and arrange atop the pasta. Serve garnished with extra parmesan and fresh parsley.

Nutrition

Serving: 1plateCalories: 550kcalCarbohydrates: 60gProtein: 30gFat: 20gSaturated Fat: 10gPolyunsaturated Fat: 1gMonounsaturated Fat: 5gCholesterol: 100mgSodium: 600mgPotassium: 800mgFiber: 4gSugar: 3gVitamin A: 750IUVitamin C: 10mgCalcium: 250mgIron: 2mg

Notes

This dish is perfect for family dinners, crowd-pleasing and easy to make, with the option to substitute proteins. Store leftovers for up to 3 days or freeze for 2 months.

Tried this recipe?

Let us know how it was!

Creamy Southern Potato Salad for a Perfect Summer Side

July 18, 2025 by grace bellamy Leave a Comment

In the heart of Southern kitchens, a classic dish quietly steals the spotlight: Classic Southern Potato Salad. It’s hard to resist the creamy texture and zesty flavors that remind me of lazy summer days spent savoring backyard barbecues with family. This homemade gem, packed with crunchy dill pickles, hard-boiled eggs, and a tangy hint of yellow mustard, is not just a side dish—it's a nostalgic journey to the welcoming embrace of Southern hospitality. With the ability to whip this salad together in less than 30 minutes, it’s perfect for any gathering, from potlucks to picnics. Trust me, the unassuming charm of this potato salad will have everyone asking for seconds. Ready to dive into a dish that feels like a warm hug? Let’s get cooking!

Why is Southern Potato Salad a Must-Try?

Creamy, Dreamy Texture: The combination of russet potatoes and mayonnaise creates a rich base that’s hard to resist.

Zesty & Flavorful: With crunchy dill pickles and a splash of yellow mustard, each bite is bursting with tangy goodness, a true nod to Southern flavors.

Quick & Easy: Whipping this up takes less than 30 minutes, making it an ideal choice for spontaneous gatherings or busy weeknights.

Perfect for Any Occasion: Pair it with fried chicken, or serve alongside a delicious Chicken Caesar Salad; its versatility makes it a crowd-pleaser.

Make-Ahead Marvel: This potato salad tastes even better the next day, so feel free to prepare it in advance for your next BBQ or picnic!

When you bring this dish to the table, watch as it captures the essence of Southern hospitality with every creamy spoonful.

Southern Potato Salad Ingredients

• A delightful array to create your creamy masterpiece:

  • Russet Potatoes: – Base of the salad, providing a starchy and creamy texture. Substitution/Prep Note: Yukon Gold or red potatoes can be used, but the texture slightly varies; always peel Russets.

  • Kosher Salt: – Enhances flavor during potato cooking. Use for salting water and seasoning the salad mixture.

  • Hard-Boiled Eggs: – Add creaminess and richness. For convenience, pre-cooked eggs can be purchased.

  • Hamburger Dill Pickles: – Provide crunch and a tangy flavor element. Substitution: Sweet pickles can be used for those preferring a sweeter taste.

  • Hamburger Dill Pickle Juice: – Adds acidity and flavor. Optional if prefer less tang.

  • Vidalia or Sweet Yellow Onion: – Introduces a mild yet savory taste. Omit if avoiding onions.

  • Mayonnaise: – Key ingredient for creaminess, binds the salad. Preferred brands: Dukes or Hellman’s; for lighter versions, Greek yogurt could substitute.

  • Yellow Mustard: – Adds a distinct tang. No substitutes suggested; essential for traditional taste.

  • Ground Black Pepper: – Provides seasoning. Adjust according to taste.

  • Paprika: – Used as a garnish for color and flavor enhancement. Use smoked paprika for a deeper flavor profile.

Step‑by‑Step Instructions for Southern Potato Salad

Step 1: Prepare Potatoes
Fill a large pot with water and bring it to a boil over high heat. Once boiling, generously salt the water, then add cubed russet potatoes. Cook the potatoes for about 10 minutes, or until they are easily pierced with a fork but not falling apart. Once cooked, drain the potatoes and set them aside to cool slightly.

Step 2: Mash Potatoes
Return the drained potatoes to the pot and let them sit for a minute to allow excess steam to escape. Using a potato masher, gently mash the potatoes 3-4 times; you want a creamy texture without completely breaking them down. Allow the mashed potatoes to cool while you prepare the dressing for your Southern Potato Salad.

Step 3: Mix Dressing
In a large mixing bowl, combine mayonnaise, yellow mustard, finely chopped onion, diced hamburger dill pickles, and their juice. Add chopped hard-boiled eggs, salt, and ground black pepper to the mixture. Stir everything together thoroughly until you achieve a smooth, well-combined dressing that captures the essence of Southern flavors.

Step 4: Combine
Once the potatoes have cooled, gently fold them into the dressing mixture. Use a spatula or wooden spoon to ensure each potato cube is evenly coated with the creamy dressing. Be careful not to overmix, as you want the potatoes to retain their shape for a delightful texture in your Southern Potato Salad.

Step 5: Chill and Serve
Transfer the potato salad to a serving bowl and sprinkle with paprika for a lovely garnish. Cover it tightly with plastic wrap or a lid and refrigerate for at least 30 minutes, allowing the flavors to meld beautifully. Serve your Southern Potato Salad chilled or at room temperature for the best taste experience.

Southern Potato Salad Variations & Substitutions

Imagine the joy of personalizing your Southern Potato Salad to perfectly suit your taste buds—let's explore some tasty twists!

  • Spicy Twist: Replace yellow mustard with spicy mustard for an extra kick that adds a delightful heat to each bite.

  • Sweet Flair: Swap dill pickles for sweet pickle relish to introduce a delightful sweetness that balances the tangy flavors beautifully.

  • Crunchy Add-Ins: Toss in some finely chopped celery or bell peppers for an extra crunchy texture that elevates this classic dish. They bring not only flavor but also a burst of color!

  • Herb-Infusion: Mix in fresh herbs like dill or parsley to infuse a refreshing and aromatic dimension into the creamy salad. These herbs complement the overall profile while elevating freshness.

  • Dairy Swap: To lighten things up, substitute the mayonnaise with Greek yogurt for a tangy alternative without sacrificing creaminess. Your waistline will thank you!

  • Vegan Option: For a plant-based twist, use vegan mayonnaise and replace the hard-boiled eggs with diced avocado. This gives a creamy texture while keeping it entirely plant-based.

  • Fiery Heat: If you’re a fan of spice, add chopped jalapeños or a dash of hot sauce to kick up the heat level for those who love a bit of a zing.

  • Smoky Flavor Boost: Use smoked paprika instead of regular paprika for an additional layer of depth in flavor, turning out each bite irresistible.

Feel inspired to experiment with these variations, and soon you’ll have a Southern Potato Salad that echoes your culinary personality! Pair your dish with something like Pomegranate Rocket Salad for a delightful balance of flavors and textures at your next gathering.

Storage Tips for Southern Potato Salad

  • Fridge: Keep your Southern Potato Salad in an airtight container, where it will stay fresh for up to 5 days. The flavors even improve after a day!

  • Room Temperature: Serve at room temperature if desired, but aim to limit it to 2 hours outside the fridge to ensure food safety.

  • Freezer: It's best not to freeze this salad, as the creamy texture can change upon thawing, making it less enjoyable.

  • Reheating: If you garnish with paprika, do this just before serving for best results. No reheating necessary; it's delicious chilled!

Expert Tips for Southern Potato Salad

  • Cook Potatoes Just Right: Avoid mushiness by testing potatoes with a fork; they should be tender yet firm. Overcooking will ruin the salad’s delightful texture.

  • Use Hot Potatoes: Mixing the hot mashed potatoes with the dressing enhances flavor absorption, making your Southern Potato Salad taste even better.

  • Chill Before Serving: Let the salad chill in the fridge for at least 30 minutes before serving. This helps the flavors meld beautifully together, creating a comforting classic.

  • Make Ahead Magic: Prepare your Southern Potato Salad a day in advance; it tastes amazing the next day and is perfect for busy schedules or last-minute gatherings.

  • Adjust for Preference: Feel free to customize with additional ingredients like celery or bell peppers for extra crunch, catering to everyone's tastes!

Make Ahead Options

These creamy Southern Potato Salad preparations are perfect for busy cooks looking to save time during weeknight meal planning! You can peel and cube the russet potatoes up to 24 hours in advance; just store them submerged in cold water in the refrigerator to prevent browning. Additionally, you can mix the dressing (mayonnaise, mustard, onions, pickles, pickle juice, eggs, salt, and pepper) up to 3 days ahead, keeping it sealed tight in an airtight container. When it’s time to serve, simply combine the chilled potatoes with the dressing, fold gently, and let the flavors blend for about 30 minutes in the fridge. This approach maintains the salad’s delicious quality while freeing up your time!

What to Serve with Classic Southern Potato Salad

Elevate your meal with delightful pairings that complement the creamy, tangy wonder of this classic dish.

  • Fried Chicken: Crispy, juicy fried chicken and creamy potato salad create a Southern classic that's hard to resist. A match made in comfort food heaven, each mouthful transports you to a sunny backyard picnic.

  • Barbecue Ribs: The smoky, tender flavors of barbecued ribs balance perfectly with the coolness of potato salad. This duo brings quintessential Southern warmth to any gathering.

  • Coleslaw: A refreshing, crunchy slaw adds brightness and texture alongside your potato salad. The vibrant colors and crunch will make your plate a feast for the eyes and the palate.

  • Grilled Corn on the Cob: Sweet, grilled corn brings a smoky char that pairs delightfully with the creamy richness of potato salad. This combination captures summertime on a plate!

  • Lemonade: Ice-cold lemonade provides a refreshing zest that cuts through the creaminess of potato salad, making each bite and sip a delightful experience.

  • Deviled Eggs: These classic bites echo the flavors of the potato salad while offering a different texture. They're a nostalgic nod to Southern gatherings, perfect for sharing.

  • Peach Cobbler: Finish your meal with a slice of warm peach cobbler. Its sweet, gooey filling and buttery crust are a heartwarming end to a traditional Southern feast.

  • Crispy Green Beans: Lightly fried or sautéed green beans offer a satisfying crunch that contrasts nicely with the creamy salad. Their fresh taste retains the essence of home-cooked goodness.

  • Sweet Tea: Pair with a glass of sweet tea to capture the true Southern experience; it’s the ultimate beverage to wash down a plateful of deliciousness.

Each of these pairings enhances the comforting vibe of the classic Southern potato salad, creating a meal that feels both special and homely. Enjoy!

Classic Southern Potato Salad Recipe FAQs

What is in southern style potato salad?
Southern Potato Salad typically includes the rich and creamy base of russet potatoes, hard-boiled eggs for added richness, crunchy dill pickles for a tangy twist, and a flavorful dressing made of mayonnaise and yellow mustard. This combination embodies the delightful flavors of Southern cuisine, creating a nostalgic dish that’s perfect for gatherings.

How long can I store Southern Potato Salad in the fridge?
You can store your Southern Potato Salad in an airtight container in the refrigerator for up to 5 days. For best flavor, let it chill for at least 30 minutes before serving. The tastes meld beautifully over time, making this a perfect make-ahead dish.

Can I freeze Southern Potato Salad?
It’s not recommended to freeze Southern Potato Salad. The creamy texture from the mayonnaise and potatoes tends to separate upon thawing, which affects both the flavor and mouthfeel. Instead, prepare it fresh and enjoy the flavors that come together after a day in the fridge.

What should I avoid when making potato salad?
To ensure your Southern Potato Salad has the ideal texture, avoid overcooking your potatoes—cooking them just until tender but not falling apart is key. Additionally, make sure to mix the hot potatoes with the dressing; this helps them absorb the flavors better. Lastly, avoid under-seasoning; a little salt and pepper can elevate the dish significantly.

Are there any dietary considerations for Southern Potato Salad?
Absolutely! If you’re catering to dietary restrictions, you can easily customize your Southern Potato Salad. For a lighter version, consider substituting mayonnaise with Greek yogurt. If you need a vegetarian option, confirm that pickles and other ingredients align with your dietary needs. Always check for allergies concerning eggs, mayonnaise, and any additional ingredients you may add, such as celery or onions.

Southern Potato Salad

Creamy Southern Potato Salad for a Perfect Summer Side

This Southern Potato Salad is a classic side dish that's creamy, zesty, and perfect for summer gatherings.
Print Recipe Pin Recipe
Prep Time 10 minutes mins
Cook Time 10 minutes mins
Chill Time 30 minutes mins
Total Time 50 minutes mins
Servings: 6 servings
Course: Salad
Cuisine: Southern
Calories: 250
Ingredients Equipment Method Nutrition Notes

Ingredients
  

Potatoes
  • 2 pounds russet potatoes Peeled and cubed
Seasoning
  • 1 teaspoon kosher salt For cooking potatoes and dressing
  • ¼ teaspoon ground black pepper Adjust to taste
Other Ingredients
  • 4 large hard-boiled eggs Chopped
  • 1 cup hamburger dill pickles Diced
  • ¼ cup hamburger dill pickle juice Optional
  • 1 small Vidalia or sweet yellow onion Finely chopped
  • 1 cup mayonnaise Dukes or Hellman’s preferred
  • 2 tablespoons yellow mustard Essential for traditional taste
  • 1 teaspoon paprika For garnish

Equipment

  • Large Pot
  • potato masher
  • Mixing Bowl
  • spatula

Method
 

Preparation
  1. Fill a large pot with water and bring it to a boil over high heat. Add salt and then the cubed potatoes. Cook for about 10 minutes until tender. Drain and set aside to cool.
  2. Return the cooled potatoes to the pot and gently mash them a few times, allowing them to cool.
  3. In a large bowl, combine mayonnaise, yellow mustard, onion, diced pickles, pickle juice, chopped eggs, salt, and pepper. Mix well.
  4. Fold in the cooled potatoes until evenly coated with the dressing. Be careful not to overmix.
  5. Transfer to a serving bowl, garnish with paprika, cover tightly, and chill in the refrigerator for at least 30 minutes before serving.

Nutrition

Serving: 1cupCalories: 250kcalCarbohydrates: 30gProtein: 5gFat: 12gSaturated Fat: 2gPolyunsaturated Fat: 1gMonounsaturated Fat: 8gCholesterol: 100mgSodium: 400mgPotassium: 600mgFiber: 3gSugar: 2gVitamin A: 500IUVitamin C: 10mgCalcium: 30mgIron: 1mg

Notes

This salad tastes even better the next day, making it a great make-ahead option for gatherings.

Tried this recipe?

Let us know how it was!

One Pot Taco Pasta

July 18, 2025 by grace bellamy Leave a Comment

As I stirred the bubbling pot on my stovetop, a wave of nostalgia washed over me. There’s something undeniably comforting about combining classic taco flavors with the convenience of pasta, and my One-Pot Taco Pasta captures that perfect blend. This dish is a busy weeknight savior—whipping up in just 25 minutes, it’s not only gluten-free but also a sure hit with the kids! Picture this: hearty ground beef mingling with zesty spices, all while cooking together in a single pot. It minimizes cleanup and maximizes flavor, turning a typical dinner into a delightful family feast. Are you ready to bring a twist to taco night? Let’s dive into this easy, satisfying recipe that promises to brighten your week!

Why Is One-Pot Taco Pasta So Special?

Simplicity: This dish is delightfully easy to prepare with just one pot required, making cleanup a breeze.

Quick Dinner Solution: In just 25 minutes, you can serve a memorable meal that's perfect for busy weeknights.

Kid-Approved Flavor: The zesty taco spices and hearty beef are sure to win over even the pickiest eaters in your family.

Versatile: Customize it with your favorite add-ins like bell peppers or even swap the beef for shredded chicken for a unique twist. Pair it with a fresh side salad or some Pasta Salad to complete your dinner!

Healthy Options: Gluten-free and adaptable, it can easily cater to various dietary needs without sacrificing taste. What’s not to love?

One Pot Taco Pasta Ingredients

• Gather everything you need for a scrumptious meal!

For the Base
• Olive or Avocado Oil – Choose avocado oil for a higher smoke point, making it perfect for sautéing.
• Grass-Fed Beef – Rich in flavor; substitute with ground turkey for a lighter dish.
• Onion (½, diced fine) – Infuse your dish with aromatic sweetness; shallots can be a milder alternative.

For the Seasoning
• Chili Powder (1 tsp) – Adds warmth and depth; modify based on your family's spice tolerance.
• Cumin (½ tsp) – This spice brings earthiness; feel free to omit for a tamer flavor.
• Dried Oregano (½ tsp) – Enhances the overall taste with herbal tones; can be replaced with Italian seasoning.
• Salt & Pepper – Essential for balancing flavors; adjust to your preference.

For the Sauce
• Tomato Paste (2 tbsp) – Provides a rich umami boost; crushed tomatoes can lighten the texture.
• Diced Tomatoes & Jalapenos (10 oz can) – Offers moisture and a spicy kick for that taco flavor; brands like Rotel are ideal for authenticity.

For the Pasta
• Brown Rice Pasta (12 oz box) – This gluten-free pasta holds up nicely in the dish; any small pasta shape will work.
• Chicken Broth (4 cups) – Infuses flavor into the dish; mix with milk for extra creaminess if desired.

Optional Add-Ons
• Shredded Cheese (1 cup) – Mix in for an extra creamy finish; skip it for a dairy-free option.
• Garnishes (optional) – Fresh cilantro, avocado, jalapeños, and radishes add a burst of flavor and visual appeal.

Enjoy this One Pot Taco Pasta that’s bound to become a family favorite!

Step‑by‑Step Instructions for One Pot Taco Pasta

Step 1: Heat the Oil
In a large pot, heat 2 tablespoons of olive or avocado oil over medium-high heat. Look for the shimmering surface of the oil, which indicates it's hot enough for cooking. This will serve as the base for your One Pot Taco Pasta, creating a flavorful foundation to sauté the ingredients.

Step 2: Brown the Meat and Onion
Add 1 pound of grass-fed beef and ½ diced onion to the hot oil. Cook for about 7 minutes, stirring occasionally to break up the beef into small pieces. The meat should be browned and the onion translucent before moving on. This step builds rich flavors essential for your taco-inspired pasta.

Step 3: Season the Mixture
Once the beef and onion are fully cooked, drain any excess fat from the pot. Season the mixture with salt, pepper, 1 teaspoon of chili powder, ½ teaspoon of cumin, and ½ teaspoon of dried oregano. Stir in 2 tablespoons of tomato paste, ensuring it coats the meat evenly and enhances the dish’s taco flavor profile.

Step 4: Add the Pasta and Broth
Next, incorporate 12 ounces of brown rice pasta, a 10-ounce can of diced tomatoes and jalapeños, and 4 cups of chicken broth into the pot. Stir everything together until combined. You’ll want to see the broth bubbling slightly, preparing to bring the pasta to life with the rich flavors of One Pot Taco Pasta.

Step 5: Simmer to Cook the Pasta
Bring the mixture to a boiling point, then reduce the heat to a simmer. Let it cook for about 13 minutes, stirring occasionally to prevent the pasta from sticking. The pasta should be tender and cooked through, absorbing the amalgamated flavors while remaining al dente.

Step 6: Stir in Cheese
After the pasta is cooked, turn off the heat and, if desired, stir in 1 cup of shredded cheese until it melts smoothly into the pasta. Allow the dish to sit for a few minutes, letting the flavors mesh even further and the cheese to finish melting, adding a creamy texture to your One Pot Taco Pasta.

Step 7: Garnish and Serve
To finish, garnish your One Pot Taco Pasta with fresh cilantro, diced avocado, jalapeños, or thinly sliced radishes as desired. This adds a vibrant color and fresh taste to each serving. Serve this hearty dish immediately for the best texture and flavor.

Storage Tips for One-Pot Taco Pasta

Room Temperature: Allow the One-Pot Taco Pasta to cool for no more than 2 hours before storing to prevent bacterial growth.

Fridge: Store leftovers in an airtight container in the refrigerator for up to 3 days. It helps retain the flavors and texture!

Freezer: For longer storage, freeze in an airtight container for up to 2 months. Thaw in the fridge overnight before reheating.

Reheating: Reheat gently on the stove with a splash of chicken broth to bring back moisture and flavor, ensuring a satisfying second serving!

Make Ahead Options

One-Pot Taco Pasta is a fantastic choice for meal prep, allowing you to enjoy its deliciousness even on the busiest nights! You can prepare the beef, onion, and spices mixture up to 24 hours in advance, storing it in an airtight container in the refrigerator. Additionally, you can cook the pasta separately and refrigerate it for up to 3 days to maintain its texture. When you're ready to serve, simply reheat the beef mixture in a pot, stir in the cooked pasta and broth, and simmer until heated through. This way, you can whip up an effortlessly satisfying meal that's just as flavorful, saving you precious time without sacrificing quality!

Expert Tips for One Pot Taco Pasta

  • Choose Lean Beef: Opt for lean ground beef to cut down on grease. Drain any excess fat after browning to keep your dish light and enjoyable.
  • Customize Spice Levels: Adjust the chili powder based on your family's spice tolerance. Start with less if you have young kids, and add more for a kick!
  • Perfect Pasta Texture: Stir occasionally while simmering to prevent the pasta from sticking together. This ensures a perfect, cohesive texture throughout your One Pot Taco Pasta.
  • Add Veggies: Boost nutrition by including chopped bell peppers, corn, or spinach. These can add color and freshness while enhancing the flavors.
  • Store Smart: Leftovers can be stored in an airtight container for up to 3 days. Reheat gently on the stove, adding a splash of broth if it seems dry.

What to Serve with One-Pot Taco Pasta

Create a deliciously engaging meal that stirs the heart and satisfies the palate.

  • Fresh Side Salad: A vibrant salad provides a crisp crunch, balancing the hearty flavors of the pasta with refreshing vegetables.
  • Corn Tortillas: Warm, soft tortillas add a delightful texture, perfect for scooping up the taco-inspired pasta.
  • Guacamole: Creamy avocado dip enhances the dish's richness while adding a burst of fresh flavor, making each bite even more enjoyable.
  • Mexican Street Corn: Grilled and slathered with cheese and spices, this sweet and savory side pairs perfectly with the taco pasta's flavor profile.
  • Quick Salsa: A zesty tomato salsa sprinkled on top can elevate your meal, adding brightness and freshness to every bite.
  • Lime Wedges: A squeeze of fresh lime boosts the dish's flavor, offering a tangy twist that harmonizes beautifully with taco flavors.

One Pot Taco Pasta: Endless Customization

Dive into the delicious world of One Pot Taco Pasta, and let your creativity shine with these tasty twists!

  • Dairy-Free: Swap shredded cheese with a dairy-free alternative or simply omit it for a light and fresh dish. This keeps the flavors bright without the heaviness!
  • Vegetarian Delight: Use black beans or lentils in place of meat for a hearty vegetarian version. Packed with protein and fiber, this option is just as satisfying.
  • Spicy Kick: If you're craving heat, add diced serrano peppers or a few dashes of your favorite hot sauce right before serving. It’s a simple way to elevate the flavor!
  • Veggie Boost: Toss in some spinach, bell peppers, or zucchini during the last few minutes of cooking for a nutritious boost. It’s a great way to sneak in more veggies!
  • Citrus Zing: A squeeze of fresh lime juice just before serving brings a zesty brightening note to this comforting dish. Trust me; it’s a game-changer!
  • Gluten-Free Twists: Try using quinoa or zucchini noodles for a lower-carb, gluten-free alternative that doesn’t compromise on taste. The possibilities are endless!
  • One-Pot Variation: Make it a complete meal by adding corn or olives to the pot during cooking. They’ll enhance the flavors while keeping prep simple!
  • Taco Night Theme: Pair your One Pot Taco Pasta with a side of your favorite taco toppings, like guacamole or salsa, to create a fun taco night experience!

For more enjoyable pasta dishes, check out this comforting Chicken Feta Pasta or dive into a Mexican twist with Taco Lasagna. Your family's taste buds are just a dish away from delight!

One-Pot Taco Pasta Recipe FAQs

What type of pasta should I use for One-Pot Taco Pasta?
I recommend using brown rice pasta for a gluten-free option that holds up well in the dish. However, you can also use any small pasta shape like fusilli, elbow, or penne—just keep an eye on the cooking time, as it may vary slightly.

How should I store leftovers of One-Pot Taco Pasta?
Allow the pasta to cool for no more than 2 hours before transferring it to an airtight container. You can keep it in the refrigerator for up to 3 days. Just remember to look for any signs of spoilage like off smells or changes in texture before reheating!

Can I freeze One-Pot Taco Pasta?
Absolutely! To freeze, let it cool completely, then transfer it to an airtight container. It can be frozen for up to 2 months. When ready to enjoy, thaw in the refrigerator overnight and reheat gently on the stove, adding a splash of broth to maintain moisture.

What can I do if my pasta is mushy after cooking?
If the pasta turns out mushy, it might be due to overcooking. To avoid this in the future, make sure to check the pasta a minute or two early during your cooking time. It should be al dente—firm to the bite. Also, stirring occasionally can help keep the pasta from clumping and overcooking.

Is One-Pot Taco Pasta suitable for kids with allergies?
This dish can be adapted for various dietary needs! If you're concerned about gluten, be sure to use certified gluten-free pasta and chicken broth. You can also swap out the ground beef for black beans or turkey if there are concerns about red meat allergies.

How can I customize my One-Pot Taco Pasta?
The more the merrier! You can add chopped bell peppers, corn, or spinach for extra nutrition. For those who love a spice kick, consider adding diced jalapeños or a splash of lime juice just before serving to freshen up the flavors. Don’t hesitate to mix and match according to your family's preferences!

One Pot Taco Pasta

One Pot Taco Pasta: Quick and Easy Family Favorite

A quick and easy One Pot Taco Pasta that blends classic taco flavors and pasta, perfect for busy weeknights.
Print Recipe Pin Recipe
Prep Time 10 minutes mins
Cook Time 25 minutes mins
Total Time 35 minutes mins
Servings: 6 servings
Course: Main Dishes
Cuisine: Tex-Mex
Calories: 550
Ingredients Equipment Method Nutrition Notes

Ingredients
  

For the Base
  • 2 tablespoon olive or avocado oil Choose avocado oil for a higher smoke point.
  • 1 lb grass-fed beef Can substitute with ground turkey.
  • ½ pieces onion Diced fine; shallots can be used as a milder alternative.
For the Seasoning
  • 1 teaspoon chili powder Adjust based on spice tolerance.
  • ½ teaspoon cumin Can be omitted for a tamer flavor.
  • ½ teaspoon dried oregano Replace with Italian seasoning if preferred.
  • salt & pepper Adjust to taste.
For the Sauce
  • 2 tablespoon tomato paste Provides umami; crushed tomatoes can lighten the texture.
  • 10 oz diced tomatoes & jalapeños Can use brands like Rotel for authenticity.
For the Pasta
  • 12 oz brown rice pasta Any small pasta shape will work.
  • 4 cups chicken broth Mix with milk for extra creaminess if desired.
Optional Add-Ons
  • 1 cup shredded cheese Skip for a dairy-free option.
  • garnishes Fresh cilantro, avocado, jalapeños, and radishes.

Equipment

  • Large Pot

Method
 

Step-by-Step Instructions
  1. In a large pot, heat 2 tablespoons of olive or avocado oil over medium-high heat.
  2. Add 1 pound of grass-fed beef and ½ diced onion to the hot oil. Cook for about 7 minutes.
  3. Drain any excess fat, then season the mixture with salt, pepper, 1 teaspoon of chili powder, ½ teaspoon of cumin, and ½ teaspoon of dried oregano. Stir in 2 tablespoons of tomato paste.
  4. Incorporate 12 ounces of brown rice pasta, a 10-ounce can of diced tomatoes and jalapeños, and 4 cups of chicken broth into the pot.
  5. Bring to a boil, then reduce heat and simmer for about 13 minutes, stirring occasionally.
  6. Turn off the heat and stir in 1 cup of shredded cheese until it melts smoothly.
  7. Garnish with fresh cilantro, avocado, jalapeños, or radishes as desired and serve immediately.

Nutrition

Serving: 1servingCalories: 550kcalCarbohydrates: 60gProtein: 30gFat: 20gSaturated Fat: 8gPolyunsaturated Fat: 1gMonounsaturated Fat: 10gCholesterol: 70mgSodium: 600mgPotassium: 800mgFiber: 5gSugar: 4gVitamin A: 15IUVitamin C: 25mgCalcium: 10mgIron: 20mg

Notes

Leftovers can be stored in an airtight container for up to 3 days. Reheat gently on the stove with a splash of broth if it seems dry.

Tried this recipe?

Let us know how it was!

Easy Lemon Cobbler

July 18, 2025 by grace bellamy Leave a Comment

As I stood in the kitchen, a sudden craving for something sweet and zesty hit me—something that could brighten up the dreariest of days. Enter my easiest magic lemon cobbler, a dessert that practically makes itself and brings a burst of sunshine into any gathering. Using simple pantry staples, this quick dessert is not only a delightful way to satisfy your sweet tooth but also an impressive option for impromptu get-togethers. With its airy texture and refreshing lemon flavor, this cobbler is sure to become your go-to recipe when you're looking to whip up something delicious without the fuss. Can you resist the allure of warm, lemony goodness?

Why is This Lemon Cobbler a Must-Try?

Simplicity at Its Best: You only need a few pantry staples and about an hour to create this stunning dessert.

Bright, Zesty Flavor: The refreshing burst of lemon brightens your spirits and complements any gathering perfectly.

Effortless Preparation: No complicated techniques or fancy equipment—simply mix and bake!

Crowd-Pleasing Appeal: It’s a guaranteed hit among family and friends, rivaling even a classic Peach Cobbler.

Versatile Options: Customize it easily by switching up the lemon pie filling or adding fresh berries for a fruity twist.

Indulging in this lemon cobbler not only satisfies your cravings but also brings a touch of sunshine to your dessert table!

Lemon Cobbler Ingredients

For the Batter

  • Unsalted Butter – Adds richness and moisture to the cobbler; for a dairy-free option, use margarine.
  • All-purpose Flour – Provides structure; can be replaced with gluten-free flour for a gluten-free version.
  • Baking Powder – A leavening agent that helps the cobbler rise; ensure it's fresh for best results.
  • Salt – Enhances flavors and balances sweetness.
  • Sugar – Sweetens the batter; consider using brown sugar for a deeper flavor.
  • Whole Milk – Adds moisture; any plant-based milk works well as a substitute.
  • Vanilla Extract – Imparts depth of flavor; don’t skip this for that warm undertone.
  • Lemon Extract – Elevates the citrus flavor; for fresh intensity, use lemon zest instead.

For the Filling

  • Lemon Pie Filling – Provides moisture and tanginess; opt for store-bought or homemade.

For Garnishing

  • Powdered Sugar (optional) – For a sweet finish and visual appeal; it adds a lovely touch when dusted before serving.

Step‑by‑Step Instructions for Easiest Magic Lemon Cobbler

Step 1: Preheat the Oven
Begin by preheating your oven to 350°F (175°C). This crucial step ensures that the heat is just right for your lemon cobbler, allowing it to rise and develop that golden, crispy top you’ll love. As the oven warms up, gather your ingredients and baking dish, so you’re ready for the next steps.

Step 2: Melt the Butter
Place the unsalted butter in a baking dish and slide it into the preheated oven. Allow it to melt for about 5-10 minutes, keeping a close eye to ensure it doesn’t brown. You’ll know it’s ready when it's fully liquid and bubbly, creating the perfect foundation for your lemon cobbler to develop its magical layers.

Step 3: Mix the Dry Ingredients
In a large mixing bowl, whisk together the all-purpose flour, baking powder, salt, and sugar until well combined. This dry mix is vital for creating the structure of your lemon cobbler. Set aside for a moment, and prepare to add the wet ingredients, ensuring your cobbler will be both fluffy and flavorful.

Step 4: Incorporate Wet Ingredients
Pour in the whole milk, vanilla extract, and lemon extract into the dry ingredients. Stir gently until just combined; the batter should be lumpy but cohesive. This mixture will contribute to the airy texture of your lemon cobbler, blending seamlessly with the buttery base prepared earlier.

Step 5: Assemble the Cobbler
Once your batter is ready, pour it over the melted butter in the baking dish without stirring. This key step allows the batter to float atop the butter, forming delicious layers as it bakes. The anticipation builds as you prepare for the wonderful transformation that will occur in the oven.

Step 6: Add the Lemon Filling
Dollop the lemon pie filling evenly around the batter, sprinkling it generously across the surface. Don’t stir again! The lemon pie filling adds a delightful citrus tang and moisture that complements the cobbler. You’ll see how these layers create the lovely, gooey texture that makes this dessert so special.

Step 7: Bake the Cobbler
Slide your baking dish into the oven and bake for 45-55 minutes. Keep an eye on it, and look for the cobbler to become golden brown and puffed. Your kitchen will be filled with a heavenly aroma, signaling that your magic lemon cobbler is almost ready to be enjoyed.

Step 8: Cool and Garnish
Once baked, allow the lemon cobbler to cool for a few minutes before serving. This short resting period helps it set slightly. For a beautiful finishing touch, dust it with powdered sugar, enhancing both flavor and presentation, ready to impress your family and friends with this delightful treat.

Lemon Cobbler Variations & Substitutions

Feel free to add your own twist to this delightful dessert! Your creativity can make this lemon cobbler even more special.

  • Dairy-Free: Replace unsalted butter with coconut oil or margarine for a deliciously dairy-free version.
  • Gluten-Free: Swap all-purpose flour for a gluten-free flour blend to cater to gluten-sensitive friends. The result will still be just as magical!
  • Berry Bliss: Sprinkle fresh raspberries or blueberries over the lemon pie filling before baking for a fruity explosion of flavor. Adding these vibrant fruits not only enhances taste but also offers a pop of colors.
  • Nuts for Crunch: Incorporate chopped walnuts or almonds into the batter for added texture and a nutty flavor that complements citrus beautifully. Each bite will surprise you with a delightful crunch!
  • Light & Airy: For a more delicate cobbler, replace half of the sugar with a sugar substitute, such as Stevia or monk fruit, ensuring everyone can indulge without guilt.
  • Almond Hints: Swap out vanilla extract for almond extract for a subtle nutty flavor that pairs wonderfully with lemon. This will add a new layer of complexity to your cobbler.
  • Zesty Lemon Lovers: Use freshly grated lemon zest instead of lemon extract to intensify the lemon flavor and brighten the dessert even more! It’s the perfect punch of freshness you won't want to miss.
  • Spicy Surprise: Spice it up with a pinch of cayenne or ginger in the batter for a warm kick that perfectly complements the tartness of lemons. Just a hint will do, and it might just become your new favorite combination!

Let your creativity shine with these variations, and enjoy a comforting slice of lemon cobbler made just the way you like it!

How to Store and Freeze Lemon Cobbler

  • Refrigerator: Store the lemon cobbler covered with plastic wrap or in an airtight container for up to 5 days to keep it fresh and flavorful.
  • Freezer: For longer preservation, wrap tightly in plastic wrap and aluminum foil, then freeze for up to 3 months. Thaw in the fridge before reheating.
  • Reheating: To enjoy your magical lemon cobbler again, gently reheat in the oven at 350°F (175°C) for about 10-15 minutes until warmed throughout; this maintains the delightful texture.
  • Serving After Storage: Always consider serving warm with a dusting of powdered sugar to enhance the flavor and presentation of your cobbler.

What to Serve with Easiest Magic Lemon Cobbler

Imagine the warm, zesty aroma filling your kitchen as you prepare a delightful meal to accompany this enchanting dessert.

  • Creamy Mashed Potatoes: Their rich, buttery goodness provides a comforting contrast to the bright flavors of lemon cobbler.

  • Grilled Lemon Herb Chicken: This juicy chicken, infused with zest, pairs perfectly with the tangy sweetness of the cobbler, creating a lovely harmony on your plate. A touch of grilled herbs elevates both dishes, making for an unforgettable meal.

  • Seasonal Mixed Greens Salad: Tossed with a light lemon vinaigrette, this salad adds a refreshing crunch, balancing the sweetness of the cobbler beautifully.

  • Steamed Asparagus with Lemon Butter: The earthy green tones of asparagus drizzled with lemon butter offer a lovely complement to the bright citrus notes in your dessert.

  • Vanilla Ice Cream: A scoop of creamy vanilla ice cream served alongside your cobbler creates a delightful melt-in-your-mouth experience, enhancing that tangy sweetness with a touch of creaminess.

  • Iced Tea with Mint: Serve a refreshing chilled mint iced tea, its herbal notes cutting through the sweetness, ensuring a balanced dining experience.

  • Lemon Sorbet: For a double dose of citrus, lemon sorbet will refresh the palate and echo the flavors of the cobbler, perfect for those who crave an extra zing.

  • Meringue Cookies: Light, airy, and subtly sweet, these cookies offer a delightful texture alongside the moist lemon cobbler, making for a whimsical dessert spread.

Expert Tips for Lemon Cobbler

  • Butter Melting: Make sure the butter is melted but not browned—burnt butter can ruin the dish's flavor and texture.
  • No Stirring: Avoid stirring after pouring the batter over the melted butter; this is essential for achieving the signature magical layers in your lemon cobbler.
  • Oven Check: Baking times may vary; start checking at 45 minutes. Look for a golden brown top to determine doneness.
  • Serve Warm: Enjoy the cobbler warm for the best experience; it enhances the gooey texture and vibrant lemon flavor.
  • Garnish Right: Dust with powdered sugar just before serving for an elegant touch that adds sweetness and visual appeal.

Make Ahead Options

These easiest magic lemon cobblers are perfect for meal prep, allowing you to enjoy this delightful dessert without last-minute fuss! You can prepare the batter and store it covered in the refrigerator for up to 24 hours. Just keep the lemon pie filling separate until you're ready to bake. When you’re prepared to serve, pour the batter over the melted butter and dollop the lemon pie filling as instructed. Bake it fresh for that golden, puffy texture that makes this lemon cobbler so irresistible. By prepping ahead, you save time and ensure a scrumptious dessert that's just as delicious as when made on the spot!

Easiest Magic Lemon Cobbler Recipe FAQs

Is lemon curd the same as lemon pie filling?
Not quite! Lemon curd is made by cooking lemon juice, sugar, eggs, and butter together until thickened, resulting in a creamy texture. Lemon pie filling, on the other hand, is often pre-made and usually gel-like, making it easier to use in recipes like this cobbler. They both add a delightful lemon flavor but can have different consistencies.

Why put lemon juice in cobbler?
Lemon juice is essential in this cobbler for its bright, zesty flavor that cuts through the sweetness. It elevates the overall taste, giving each bite a refreshing lift that balances the richness of the butter and sugar in the cobbler. It’s the key ingredient that transforms an ordinary dessert into a vibrant, refreshing treat!

What’s the difference between a cobbler and a dump cake?
While both desserts are easy to prepare and bake, cobblers generally feature a biscuit-like topping placed over fruit or filling, creating a more textured layer. Dump cakes, however, typically involve pouring a cake mix over fruit or filling, resulting in a denser, cake-like consistency. Cobblers generally offer a more homemade, rustic feel, while dump cakes are quick and simple, often needing just a few ingredients.

What is the British version of cobbler?
In the UK, the term "cobbler" often refers to a traditional dessert made with fruit, topped with a scone-like dough. However, you might also find "crumble" or "crisp" which involve fruit with a crumbly topping made from flour, butter, and sugar, resembling the cobbler but with a different texture and flavor profile.

How should I store leftover lemon cobbler?
Store your lemon cobbler covered in the refrigerator for up to 5 days to maintain freshness. If you want to save it longer, wrap it tightly in plastic wrap and aluminum foil and freeze it for up to 3 months. When you're ready to enjoy it again, simply thaw it in the fridge overnight and reheat in the oven at 350°F (175°C) for 10-15 minutes until it’s warmed through. This way, you'll have its delightful texture and flavor preserved for your next sweet craving!

Can I add any dietary alternatives to this recipe?
Absolutely! For a dairy-free option, substitute the unsalted butter with margarine or coconut oil. You can also replace whole milk with any plant-based milk, like almond or oat milk. If you're looking for gluten-free options, use a certified gluten-free flour blend in place of all-purpose flour. These substitutions allow you to enjoy a delicious lemon cobbler while accommodating various dietary needs or preferences.

lemon cobbler

Easy Lemon Cobbler That Will Brighten Your Day

This easy lemon cobbler is a delightful dessert that will brighten your day with its zesty flavor and simple preparation.
Print Recipe Pin Recipe
Prep Time 15 minutes mins
Cook Time 50 minutes mins
Cooling Time 5 minutes mins
Total Time 1 hour hr 10 minutes mins
Servings: 8 pieces
Course: Dessert
Cuisine: American
Calories: 350
Ingredients Equipment Method Nutrition Notes

Ingredients
  

For the Batter
  • ½ cup Unsalted Butter Melted
  • 1 cup All-purpose Flour Can be replaced with gluten-free flour
  • 1 tablespoon Baking Powder Ensure it's fresh
  • ¼ teaspoon Salt
  • 1 cup Sugar Brown sugar for deeper flavor
  • 1 cup Whole Milk Any plant-based milk is a substitute
  • 1 teaspoon Vanilla Extract Essential for flavor
  • 1 teaspoon Lemon Extract Or use lemon zest for freshness
For the Filling
  • 1 can Lemon Pie Filling Store-bought or homemade
For Garnishing
  • 1 cup Powdered Sugar Optional, for dusting before serving

Equipment

  • Oven
  • Mixing Bowl
  • Baking Dish

Method
 

Step-by-Step Instructions
  1. Preheat your oven to 350°F (175°C).
  2. Melt the butter in a baking dish in the preheated oven for about 5-10 minutes.
  3. In a mixing bowl, whisk together the flour, baking powder, salt, and sugar.
  4. Mix in the milk, vanilla extract, and lemon extract until just combined.
  5. Pour the batter over the melted butter without stirring.
  6. Dollop the lemon pie filling on top of the batter without stirring.
  7. Bake in the oven for 45-55 minutes until golden brown.
  8. Allow to cool for a few minutes and dust with powdered sugar before serving.

Nutrition

Serving: 1pieceCalories: 350kcalCarbohydrates: 55gProtein: 5gFat: 15gSaturated Fat: 10gCholesterol: 30mgSodium: 150mgPotassium: 100mgFiber: 1gSugar: 30gVitamin A: 200IUVitamin C: 3mgCalcium: 100mgIron: 1mg

Notes

For best flavor, serve warm and dust with powdered sugar just before serving.

Tried this recipe?

Let us know how it was!

Soft Churro Cookies

July 18, 2025 by grace bellamy Leave a Comment

As the sweet aroma of cinnamon fills my kitchen, I can't help but smile, knowing that these Soft and Chewy Churro Cookies are just moments away from perfection. Inspired by the beloved fair treat, this delightful recipe gives you all the gooey goodness of traditional churros without the fuss of deep frying. The best part? They come together in just 35 minutes with no dough chilling required, making them a perfect last-minute dessert or a warm treat for unexpected guests. Plus, with an optional churro buttercream frosting, you have the freedom to indulge just the way you like! Are you ready to experience the joy of homemade churros in cookie form? Let’s dive in!

Why are churro cookies a must-try?

Irresistible Flavor: The warm combination of cinnamon and sugar transforms your typical cookie into a sweet delight that’s hard to resist.

Quick and Easy: With no chilling time required, you can whip these up in just 35 minutes—perfect for when you need a speedy dessert!

Dairy-Free Option: Enjoy the joy of baking cookies that cater to everyone’s needs by easily substituting ingredients to make them dairy-free.

Crowd-Pleaser: These churro cookies are sure to impress family and friends at gatherings. Imagine the smiles when they take a bite of this delightful twist on a classic treat!

Versatile Treat: Whether served plain or topped with optional churro buttercream, they deliver deliciousness in every bite, allowing you to customize as you wish. If you’re looking for more tasty ideas, check out my guide on quick dessert recipes!

Churro Cookies Ingredients

• For the Cookies

  • Butter – ¾ cup, softened; adds richness and moisture to the cookies, perfect for a chewy texture.
  • Light Brown Sugar – ¾ cup; provides sweetness and a slight caramel flavor, or use dark brown sugar for a more robust taste.
  • Granulated Sugar – ¼ cup; adds sweetness and slight crispness; can be reduced for a less sweet cookie.
  • Egg – 1; provides structure and moisture, or substitute with a flax egg for a vegan option.
  • Vanilla Extract – ½ tablespoon; enhances flavor, best to use pure extract for richer taste.
  • Salt – ¾ teaspoon; balances sweetness and enhances overall flavor; adjust based on dietary needs.
  • Baking Soda – ¾ teaspoon; acts as a leavening agent for a good rise; ensure it’s fresh for optimal results.
  • All-purpose Flour – 2 cups + 2 tablespoons; provides structure; substitute with a 1:1 gluten-free flour blend if needed.
  • Ground Cinnamon – 1½ teaspoons; adds that signature churro flavor, can be adjusted to taste.
  • Cinnamon Sugar – ¼ cup granulated sugar + 1 teaspoon ground cinnamon; use for rolling the cookies to give them that authentic churro effect.

Optional Churro Buttercream

  • Butter – ½ cup, softened; serves as the base for the frosting, or use dairy-free butter if preferred.
  • Ground Cinnamon – 1 tablespoon + 1 teaspoon; flavors the frosting, mimicking the churro taste.
  • Powdered Sugar – 2-2¼ cups; sweetens and thickens the frosting, adjust for your desired consistency.
  • Light Brown Sugar – ½ cup; adds depth to flavor; can be omitted for a less sweet option.
  • Vanilla Extract – 1 teaspoon; enhances the overall flavor of the frosting.
  • Milk – 1-2 tablespoons, as needed; adjust the frosting consistency; feel free to use dairy-free milk.

Dive into the cozy delight of Churro Cookies, and whip these up in your kitchen today!

Step‑by‑Step Instructions for Churro Cookies

Step 1: Preheat and Prepare
Begin by preheating your oven to 350°F (175°C). While the oven warms up, line two baking sheets with parchment paper, ensuring a non-stick surface for your churro cookies. This setup is essential for a smooth transfer of your freshly baked treats.

Step 2: Cream the Butters and Sugars
In a large mixing bowl, use an electric mixer to beat together ¾ cup of softened butter, ¾ cup of light brown sugar, and ¼ cup of granulated sugar. Continue mixing until the mixture becomes light and fluffy, which should take about 2-3 minutes. The sugars should be well incorporated, giving your churro cookies a rich flavor.

Step 3: Add Wet Ingredients
Now, add in ½ tablespoon of vanilla extract and 1 egg to the sugar mixture. Mix until everything is fully combined and smooth, which will take about 1 minute. This step ensures the cookies have a delightful, soft texture and a fragrant aroma, setting the stage for delicious churro cookies.

Step 4: Combine Dry Ingredients
Gradually sift in 2 cups plus 2 tablespoons of all-purpose flour, ¾ teaspoon of baking soda, ¾ teaspoon of salt, and 1½ teaspoons of ground cinnamon. Gently mix until just combined, being careful not to over-mix the dough. You want to maintain a light and airy texture that’s characteristic of churro cookies.

Step 5: Form the Cookie Dough Balls
Using a cookie scoop or a tablespoon, measure out dough portions of about 1½ tablespoons each. Roll the dough into balls, ensuring they are uniform in size for even baking. This step is crucial as it ensures that all the churro cookies bake perfectly together, creating a delightful batch.

Step 6: Coat in Cinnamon Sugar
Prepare the cinnamon sugar by combining ¼ cup of granulated sugar with 1 teaspoon of ground cinnamon in a small bowl. Roll each cookie dough ball in this mixture until fully coated, giving them that iconic churro flavor. This coating will create a sweet and crispy outer layer once baked.

Step 7: Bake the Cookies
Place the coated cookie balls on the lined baking sheets, leaving enough space in between for spreading. Bake in the preheated oven for 8-10 minutes. Look for edges that are set but not browned, and when they come out, they should be soft to the touch.

Step 8: Make the Optional Buttercream
While the cookies are cooling, prepare the churro buttercream if desired. In a mixing bowl, beat together ½ cup of softened butter, 2-2¼ cups of powdered sugar, 1 tablespoon plus 1 teaspoon of ground cinnamon, ½ cup of brown sugar, and 1-2 tablespoons of milk. Mix until creamy and smooth, adjusting for thickness to achieve your preferred frosting consistency.

Step 9: Frost and Serve
Once the churro cookies have cooled completely, you can spread or pipe the churro buttercream on top of each cookie. This added touch enhances the churro experience and adds to the sweetness of each bite. Your delectable churro cookies are now ready to be enjoyed!

Make Ahead Options

These Soft and Chewy Churro Cookies are perfect for meal prep, allowing you to enjoy delicious treats with minimal last-minute effort. You can prepare the cookie dough up to 24 hours in advance; simply roll the dough balls and refrigerate them covered to maintain freshness and prevent drying out. When you’re ready to bake, allow the dough to sit at room temperature for about 10 minutes before rolling in cinnamon sugar and proceeding to bake. The cookies will still turn out just as delightful! If you opt for the churro buttercream frosting, prepare that in advance too and store it in an airtight container in the fridge for up to 3 days; just give it a quick mix before spreading or piping onto your cookies. These make-ahead strategies save you precious time while ensuring your churro cookies remain irresistibly tasty!

What to Serve with Churro Cookies

Nothing beats the sweet joy of churro cookies when paired with delightful accompaniments that elevate your dessert experience.

  • Vanilla Ice Cream: The creamy richness balances the sweet cinnamon flavor, creating a comforting dessert sensation. A scoop of ice cream melting over warm cookies? Yes, please!
  • Coffee or Espresso: The robust notes of coffee enhance the warm, sweet spice of churro cookies, making them an ideal pairing for cozy evenings. A perfect coffee break treat!
  • Chocolate Sauce: Drizzling chocolate over churro cookies adds a rich, decadent twist that contrasts beautifully with their sweetness. It’s a dreamy combination that’s hard to resist.
  • Fruit Salsa: A fresh fruit salsa, like peaches or strawberries with lime, brightens each bite and introduces a zesty flair. The sweet and tart flavors create a refreshing balance.
  • Whipped Cream: Light and airy whipped cream adds a luxurious touch alongside churro cookies, perfect for those who love a creamy addition. It enhances the overall dessert experience wonderfully.
  • Churro Buttercream (Optional): Spread some of the leftover churro buttercream frosting on top for an extra sweet layer, elevating your cookie indulgence to new heights. You'll be in churro heaven!
  • Hot Chocolate: For a cozy night in, serve churro cookies with a steaming mug of hot chocolate. The rich flavors complement each other beautifully, wrapping you in warmth.

Churro Cookies Variations & Substitutions

Feel free to personalize these churro cookies with exciting twists that will spark joy in your kitchen!

  • Dairy-Free: Swap regular butter for a dairy-free alternative like coconut or vegan butter for a delicious lactose-free treat.
  • Nutty Flavor: Add ½ cup of chopped nuts, such as pecans or walnuts, to the dough for delightful crunch and extra flavor.
  • Chocolate Lover's Delight: Fold in ½ cup of chocolate chips into the cookie dough for a rich, decadent touch that perfectly complements the cinnamon.
  • Gluten-Free: Replace all-purpose flour with a gluten-free 1:1 flour blend to cater to gluten-sensitive friends while keeping the chewy texture.
  • Cinnamon Sugar Boost: Increase the cinnamon in your rolling sugar to 2 teaspoons for a bolder, spiced flavor that will make your senses dance.
  • Fruity Twist: Incorporate ½ cup of dried fruits, like raisins or cranberries, for added sweetness and a chewy texture packed with flavor surprises.
  • Chili Kick: For a spicy twist, add a pinch of cayenne pepper to the cookie dough or the cinnamon sugar for a surprising zing that enhances the sweet.
  • Extra Layer: Top your churro cookies with a drizzle of caramel or chocolate sauce for an irresistible finishing touch that turns dessert into a masterpiece.

Feel inspired? Check out these ideas, and let your creativity shine as you bake! If you’re hunting for more delightful dessert recipes, don’t miss my collection of easy dessert ideas and delectable sweet treats.

Helpful Tricks for Churro Cookies

Measure Flour Correctly: Ensuring accurate flour measurement is critical for achieving the right texture; always fluff it up and spoon it into your measuring cup.

Beaten to Perfection: Mix the softened butter and sugars thoroughly to create a light and airy mixture; this is key for soft churro cookies.

Uniform Size Matters: Roll your cookie dough into uniform balls; this allows for even baking, resulting in perfectly shaped cookies every time.

Monitor Baking Time: Keep an eye on the cookies while baking; they should be set at the edges but soft in the center to maintain their chewy texture.

Optional Frosting Tip: If you're using the churro buttercream, apply it once the cookies have cooled completely; this prevents them from becoming soggy.

How to Store and Freeze Churro Cookies

Room Temperature: Store unfrosted churro cookies in an airtight container at room temperature for up to 3 days to maintain their soft and chewy texture.

Fridge: If you've decorated your churro cookies with frosting, they can last up to 5 days in the fridge. Be sure to keep them in an airtight container to prevent drying out.

Freezer: For longer storage, freeze cookies in a freezer-safe bag for up to 2 months. Layer them between parchment paper to avoid sticking together.

Reheating: To enjoy them warm again, simply pop frozen churro cookies in the oven at 350°F for about 5-7 minutes. This will revive their gooey goodness!

Churro Cookies Recipe FAQs

How do I select the right ripeness and quality of ingredients?
Absolutely! For the best flavor, use fresh butter that’s just softened—not melted. Light brown sugar should be moist and sticky, while your egg should be at room temperature for a smoother batter. If you're going for a dairy-free version, opt for quality dairy-free butter that you love.

What is the best way to store churro cookies, and how long will they last?
Unfrosted churro cookies can be stored in an airtight container at room temperature for up to 3 days. If you add the churro buttercream frosting, they can be kept at room temperature for up to 3 days or refrigerated for up to 5 days. Just be sure to keep them covered!

Can I freeze my churro cookies, and if so, how?
Very! To freeze churro cookies, place them in a single layer on a baking sheet and freeze until solid. Then, transfer them to a freezer-safe bag, layering parchment paper between them to prevent sticking. They’ll stay delicious for up to 2 months. When you're ready to enjoy, just reheat them in the oven at 350°F for about 5-7 minutes.

What if my churro cookies turn out too hard?
It happens sometimes! If your churro cookies are hard, it could be due to overbaking. Make sure to keep an eye on them in the last minutes of baking; they should be set at the edges but still soft in the center when you take them out. Baking times may vary slightly depending on your oven.

Are there any dietary considerations I should be aware of?
Absolutely! If you’re accommodating allergies, ensure you use gluten-free flour if needed and substitute dairy ingredients with dairy-free options. Additionally, if you have pets, remember that chocolate can be harmful to dogs, so skip any chocolate chip additions that may not be pet-friendly.

What’s the difference between churro cookies and snickerdoodles?
Great question! Although they both share a cinnamon-sugar coating, churro cookies are typically softer and have a richer flavor profile due to the vanilla and brown sugar base, while snickerdoodles are characterized by their tartness from cream of tartar and have a chewier texture.

Churro Cookies

Irresistibly Soft Churro Cookies You'll Want to Share

These Churro Cookies deliver the delicious flavors of traditional churros in an easy-to-make cookie form, perfect for sharing.
Print Recipe Pin Recipe
Prep Time 15 minutes mins
Cook Time 10 minutes mins
Total Time 35 minutes mins
Servings: 24 cookies
Course: Dessert
Cuisine: American
Calories: 150
Ingredients Equipment Method Nutrition Notes

Ingredients
  

For the Cookies
  • ¾ cup Butter softened
  • ¾ cup Light Brown Sugar
  • ¼ cup Granulated Sugar
  • 1 Egg or flax egg for vegan option
  • ½ tablespoon Vanilla Extract preferably pure
  • ¾ teaspoon Salt
  • ¾ teaspoon Baking Soda
  • 2 cups + 2 tablespoons All-purpose Flour or gluten-free blend
  • 1½ teaspoons Ground Cinnamon
  • ¼ cup Cinnamon Sugar for rolling cookies
Optional Churro Buttercream
  • ½ cup Butter softened, or dairy-free butter
  • 1 tablespoon + 1 teaspoon Ground Cinnamon
  • 2-2¼ cups Powdered Sugar adjust for consistency
  • ½ cup Light Brown Sugar optional
  • 1 teaspoon Vanilla Extract
  • 1-2 tablespoons Milk dairy-free option available

Equipment

  • Electric mixer
  • Mixing bowls
  • Cookie scoop
  • Baking sheets
  • parchment paper

Method
 

Step-by-Step Instructions
  1. Preheat your oven to 350°F (175°C) and line two baking sheets with parchment paper.
  2. In a large mixing bowl, beat together softened butter, light brown sugar, and granulated sugar until light and fluffy.
  3. Add vanilla extract and egg to the mixture and mix until fully combined.
  4. Gradually sift in flour, baking soda, salt, and ground cinnamon, mixing until just combined.
  5. Measure out dough portions of about 1½ tablespoons each and roll into uniform balls.
  6. Combine granulated sugar and ground cinnamon to make cinnamon sugar, then roll each dough ball in the mixture.
  7. Place cookie balls on lined baking sheets and bake for 8-10 minutes until edges are set but cookies are soft.
  8. For optional buttercream, beat together softened butter, powdered sugar, ground cinnamon, light brown sugar, and milk until creamy.
  9. Once cookies are cooled, frost them with churro buttercream and enjoy!

Nutrition

Serving: 1cookieCalories: 150kcalCarbohydrates: 22gProtein: 1gFat: 7gSaturated Fat: 4gPolyunsaturated Fat: 0.5gMonounsaturated Fat: 2gCholesterol: 20mgSodium: 100mgPotassium: 50mgSugar: 10gVitamin A: 200IUCalcium: 10mgIron: 0.5mg

Notes

Ensure proper flour measurement and monitor baking time for best results.

Tried this recipe?

Let us know how it was!

Delicious Pan Fried Zucchini with Lemon and Parmesan Bliss

July 17, 2025 by grace bellamy Leave a Comment

I still recall the first time I found myself with a bounty of zucchinis from the garden, wondering how to showcase their delicate taste. Enter my beloved Pan Fried Zucchini with Lemon and Parmesan—a quick side dish bursting with sunshine! In just 20 minutes, you can transform fresh zucchini into a tender, vibrant delight that pairs so well with any main dish. The zingy lemon and rich Parmesan elevate this simple vegetable into a culinary star. Plus, it's a fantastic vegetarian option that even meat lovers will crave. Whether you enjoy it alongside grilled meats or as a light centerpiece for a weekday dinner, this recipe is sure to become a go-to in your kitchen. Curious about how to whip up this delightful dish? Let’s dive into the recipe!

Why is Pan Fried Zucchini a Must-Try?

Quick and Easy: Ready in just 20 minutes, this dish is perfect for busy weeknights when you want something delicious without the fuss.

Bursting with Flavor: The zesty lemon and rich Parmesan create a delightful combination that elevates the natural taste of zucchini, making it irresistible.

Versatile Side Dish: Whether paired with grilled meats, a light salad, or enjoyed on its own, this dish adapts beautifully to various meals.

Crowd-Pleasing Appeal: Even the pickiest of eaters will love this simple recipe, ideal for impressing guests at your next dinner gathering.

For more exciting ways to enjoy vegetables, check out our blueberry lemon bread with lemon glaze, which also highlights fresh, vibrant flavors!

Pan Fried Zucchini with Lemon and Parmesan Ingredients

For the Zucchini
• Zucchini – Freshness is key to achieving that tender texture; you can swap it with yellow squash if you prefer.
• Salt – Enhances the zucchini's natural flavor; always adjust to your taste.
• Pepper – A little spice to jazz up the dish; feel free to use your favorite blend.

For Cooking
• Olive Oil – The cooking fat that adds richness; butter makes for a richer flavor alternative.

For the Zesty Finish
• Lemon – Brings bright acidity to the dish; using fresh juice from half a lemon is ideal.
• Grated Parmesan Cheese – Adds that umami flavor punch; substitute with asiago or romano for a twist.

Now you’re all set to create this delightful Pan Fried Zucchini with Lemon and Parmesan! Let’s head to the next step and turn these ingredients into something magical.

Step‑by‑Step Instructions for Pan Fried Zucchini with Lemon and Parmesan

Step 1: Prepare the Zucchini
Start by washing and drying the zucchinis thoroughly. Then, slice them into ¼-inch thick rounds. Ensure each slice is uniform in size to allow for even cooking and to achieve that delightful tender texture. Set your prepared zucchini aside as you get your skillet ready for frying.

Step 2: Season the Zucchini
Lightly season both sides of the zucchini slices with salt and pepper, adjusting the amount to your taste. This will enhance their natural flavor while complementing the richness of the subsequent ingredients. The seasoning will bring out the best in your Pan Fried Zucchini with Lemon and Parmesan.

Step 3: Heat the Skillet
Place a non-stick skillet over medium-high heat and pour in half the olive oil. Allow the oil to heat up until it shimmers, which usually takes about 1-2 minutes. This step is crucial for achieving that perfectly crisp browning on the zucchini slices.

Step 4: Fry the Zucchini
Carefully add the zucchini slices to the hot skillet, ensuring they do not overlap to prevent steaming. Let them cook for about 2-3 minutes, or until the undersides are golden brown. Flip each slice gently and allow the other side to crisp up for another 2-3 minutes.

Step 5: Keep the Zucchini Warm
Once the zucchini slices are beautifully browned, remove them from the skillet and transfer them to a baking sheet. Place the sheet in a low oven (around 200°F) to keep the zucchini warm while you continue frying the remaining batches. Add more olive oil to the skillet as necessary to maintain even frying.

Step 6: Add the Finishing Touches
When all the zucchini slices are cooked and warmed, transfer them to a serving plate. Squeeze fresh lemon juice over the top, allowing the zesty flavor to infuse. Finally, sprinkle generously with grated Parmesan cheese, letting it cling to the warm zucchini in a melt-in-your-mouth finish.

Step 7: Serve and Enjoy
Your Pan Fried Zucchini with Lemon and Parmesan is now ready to delight! Serve it immediately as a vibrant side dish, enjoying the wonderful combination of flavors and textures. This dish pairs beautifully with grilled meats or can stand alone as the star of a light vegetarian meal.

Make Ahead Options

These Pan Fried Zucchini with Lemon and Parmesan are perfect for busy weeknights, allowing you to prep in advance! You can slice the zucchini and season them up to 24 hours ahead of time; just store them in an airtight container in the refrigerator to maintain their crispness. When you’re ready to cook, simply heat the olive oil in your skillet and fry the zucchini slices until they’re golden brown. To keep the delightful flavor intact, squeeze fresh lemon juice and sprinkle with Parmesan just before serving. With this make-ahead approach, you’ll enjoy a delicious side dish without the last-minute rush!

Variations & Substitutions for Pan Fried Zucchini

Make this delightful dish your own by exploring these fun variations that can enhance both flavor and texture!

  • Dairy-Free: Use nutritional yeast instead of Parmesan for a cheesy flavor without the dairy. It adds a nutty essence to the dish!

  • Herb-Infused: Stir in fresh chopped basil or parsley before serving for a fragrant touch. Herbs are an excellent way to elevate the freshness!

  • Spicy Kick: Sprinkle red pepper flakes over the zucchini while frying for a delightful heat. This twist will awaken your taste buds and add excitement!

  • Italian Style: Add a pinch of Italian seasoning or fresh oregano for a burst of Mediterranean flavor. This variation transforms the dish into an herbaceous delight!

  • Nutty Finish: Top with toasted pine nuts or chopped almonds for added crunch and richness. This not only enhances texture but brings a roasted flavor that’s irresistible!

  • Cheesy Twist: Substitute Parmesan with aged cheddar or crumbled feta for a unique flavor profile. Each cheese offers its character and will surprise your palate!

  • Lemon Zest Boost: Add lemon zest to the dish before serving for an extra zing. It's a simple way to intensify that citrusy brightness!

  • Sweet Addition: Try drizzling a little honey or maple syrup over the cooked zucchini for a sweet-savory balance. This contrast can add a surprising depth to your dish!

How to Store and Freeze Pan Fried Zucchini

Fridge: Store leftovers in an airtight container for up to 2 days. Reheat gently in a skillet over low heat to maintain the texture and flavor.

Freezer: It’s best to avoid freezing Pan Fried Zucchini, as this can result in a mushy texture upon thawing. Enjoy fresh to savor its vibrant taste!

Reheating: For optimal results, reheat in a skillet instead of the microwave, making sure to keep the heat low to preserve the zucchini's tenderness.

What to Serve with Pan Fried Zucchini with Lemon and Parmesan

Looking to create the perfect meal around this vibrant side? Let’s explore delightful pairings that enhance its fresh, zesty goodness!

  • Grilled Chicken: Tender, smoky chicken adds a satisfying contrast, harmonizing beautifully with the zucchini's brightness. This combination works wonders, whether marinated in herbs or simply seasoned with salt and pepper.

  • Quinoa Salad: A light, fluffy quinoa salad with vegetables offers a nutty bite that balances the zucchini's tender texture. Toss in some cherry tomatoes and cucumbers for a refreshing crunch.

  • Lemon Herb Rice: The zesty flavors of lemon-infused rice mirror the zesty notes of the zucchini, creating a cohesive dining experience. Pairing this dish gives each bite a burst of aromatic goodness!

  • Roasted Salmon: Rich and flaky salmon complements the lightness of the zucchini while providing healthy omega-3s. Drizzle with a bit of lemon to unify these flavors perfectly.

  • Fresh Gazpacho: A chilled tomato-based gazpacho brings a refreshing contrast and enhances the meal's overall brightness, making it a superb summer pairing.

  • Garlic Bread: Crunchy, buttery garlic bread adds a comforting finish—perfect for scooping up any leftover zucchini. The savory notes from garlic balance the dish’s zesty kick pleasantly.

  • Mixed Green Salad: A sprinkle of fresh herbs, such as basil or parsley, in a variety of greens provides a fresh, crunchy element that complements the zucchini’s tenderness without overpowering it.

  • Iced Herbal Tea: Refreshing herbal tea, particularly with notes of lemon or mint, makes for a delightful beverage, enhancing the meal with its cooling effects.

  • Lemon Sorbet: For dessert, a light lemon sorbet rounds out the meal perfectly, echoing flavors from the zucchini while offering a refreshing finish that feels indulgent yet light!

Expert Tips for Pan Fried Zucchini

Single Layer Cooking: Ensure zucchini slices are placed in a single layer for even browning; overcrowding may lead to steaming instead of frying.

Keep Warm: After frying each batch, keep cooked zucchini warm in a low oven to maintain temperature without sogginess.

Choose Fresh Ingredients: Use fresh zucchinis for the best flavor and texture; avoid limp or overly large zucchinis that may lack tenderness.

Adjust Seasoning: Don’t be afraid to adjust salt and pepper to your taste; remember that Parmesan adds saltiness, so taste as you go.

Experiment with Cheese: Try swapping out Parmesan for asiago or romano for a different flavor profile in your Pan Fried Zucchini.

Pan Fried Zucchini with Lemon and Parmesan Recipe FAQs

How to fry zucchini without it getting mushy?
Absolutely! To prevent mushy zucchini, ensure the slices are cut evenly at ¼-inch thick and cooked in a single layer. This allows for even browning while preventing steaming. Make sure your skillet is preheated to medium-high before adding the zucchini, and don’t forget to flip them only once!

How do you make lemon parmesan zucchini?
Making lemon parmesan zucchini is simple! Start by frying sliced zucchini in olive oil until golden brown. Then, once cooked, squeeze fresh lemon juice over the top and sprinkle with generous amounts of grated Parmesan cheese for that zesty, savory finish. Enjoy this delightful combination of flavors on its own or as a side dish!

How to get zucchini crispy?
To achieve that desired crispiness, make sure the zucchini slices are not overcrowded in the skillet; a single layer is key to avoid steaming. Cook in small batches, allowing each piece to brown properly for 2-3 minutes on each side. Additionally, using a non-stick skillet can help prevent moisture buildup, leading to perfectly crisp zucchini.

Why does my fried zucchini taste bitter?
If your fried zucchini tastes bitter, it could be due to the use of overly ripe zucchinis. Look for fresh, firm zucchinis that are medium-sized with smooth skin, avoiding ones that have dark spots or are overly large, as they can have a bitter flavor. Cooking them with sufficient seasoning and olive oil can also help balance the flavors.

How do you store leftover pan fried zucchini?
Store any leftover Pan Fried Zucchini in an airtight container in the refrigerator for up to 2 days. To reheat, use a non-stick skillet over low heat, adding a touch of olive oil if needed. This will help restore some of the original texture and prevent sogginess. Enjoy it again as a delicious side dish!

Pan Fried Zucchini with Lemon and Parmesan

Delicious Pan Fried Zucchini with Lemon and Parmesan Bliss

This Pan Fried Zucchini with Lemon and Parmesan is a quick and flavorful side dish bursting with sunshine.
Print Recipe Pin Recipe
Prep Time 10 minutes mins
Cook Time 10 minutes mins
Total Time 20 minutes mins
Servings: 4 servings
Course: Side Dishes
Cuisine: American
Calories: 150
Ingredients Equipment Method Nutrition Notes

Ingredients
  

For the Zucchini
  • 4 medium Zucchini Freshness is key; you can swap it with yellow squash.
  • 1 teaspoon Salt Adjust to your taste.
  • 1 teaspoon Pepper Feel free to use your favorite blend.
For Cooking
  • 2 tablespoons Olive Oil Butter can be used for richer flavor.
For the Zesty Finish
  • ½ large Lemon Fresh juice is ideal.
  • ½ cup Grated Parmesan Cheese Substitute with asiago or romano if preferred.

Equipment

  • Non-stick skillet

Method
 

Step-by-Step Instructions
  1. Start by washing and drying the zucchinis thoroughly. Then, slice them into ¼-inch thick rounds.
  2. Lightly season both sides of the zucchini slices with salt and pepper, adjusting the amount to your taste.
  3. Place a non-stick skillet over medium-high heat and pour in half the olive oil. Allow the oil to heat up until it shimmers.
  4. Carefully add the zucchini slices to the hot skillet, ensuring they do not overlap. Let them cook for about 2-3 minutes, then flip each slice gently.
  5. Once the zucchini slices are beautifully browned, remove them from the skillet and transfer them to a baking sheet.
  6. When all the zucchini slices are cooked and warmed, transfer them to a serving plate. Squeeze fresh lemon juice over the top and sprinkle with grated Parmesan.
  7. Serve immediately and enjoy this vibrant side dish!

Nutrition

Serving: 1servingCalories: 150kcalCarbohydrates: 8gProtein: 4gFat: 12gSaturated Fat: 3gPolyunsaturated Fat: 1gMonounsaturated Fat: 8gCholesterol: 10mgSodium: 300mgPotassium: 400mgFiber: 2gSugar: 3gVitamin A: 500IUVitamin C: 25mgCalcium: 200mgIron: 1mg

Notes

Single layer cooking ensures even frying; avoid overcooking for best texture.

Tried this recipe?

Let us know how it was!

Indulgent Hasselback Sweet Potatoes with Herb Butter Bliss

July 17, 2025 by grace bellamy Leave a Comment

The aroma of roasting sweet potatoes wafts through my kitchen, instantly transporting me to a cozy bistro. When you slice those vibrant Hasselback Sweet Potatoes just right, you’re not just preparing a dish—you’re creating a stunning centerpiece for your table that impresses without the fuss. This recipe is quick and easy, making it the perfect comfort food, while optional toppings like Gouda and fresh herbs add a gourmet twist. Plus, the beautiful presentation guarantees compliments from everyone around the dinner table. Who knew that elevating a humble potato could be this much fun? Are you ready to try your hand at these delightful sweet potato masterpieces?

Why Are Hasselback Sweet Potatoes So Special?

Crispy exterior: The unique slicing technique allows for a beautifully crispy outer layer that contrasts perfectly with the fluffy inner flesh.

Gourmet presentation: Hasselback Sweet Potatoes not only taste divine but also look stunning, making them a showstopper at any gathering.

Versatile toppings: Whether you prefer melted Gouda, zesty herbs, or creamy sour cream, this dish welcomes your favorite flavors for a personalized touch.

Quick and easy: With minimal prep and cooking time, this recipe fits seamlessly into your busy schedule.

Explore the creative potential of unique toppings like herb goat cheese or even sweet potato variations to keep the meal exciting!

Nutrition-packed: Packed with vitamins A and C, these sweet potatoes make for a wholesome comfort food choice that doesn’t skimp on flavor.

Hasselback Sweet Potatoes Ingredients

Unlock the secret to gourmet delight with this simple ingredient list.

For the Sweet Potatoes

  • Sweet Potatoes – The star of the dish, offering a natural sweetness and creamy texture; Garnet yams make a tasty substitute.
  • Olive Oil – Adds moisture and richness to the potatoes; avocado oil can work as a healthy swap.

For the Herb Butter

  • Unsalted Butter – Provides a luscious base for the herb mixture; vegan butter can replace it for a dairy-free option.
  • Garlic – Elevates flavor; if fresh garlic isn’t on hand, use ½ teaspoon of garlic powder.
  • Parsley & Chives – Fresh herbs for that aromatic touch; dried herbs can be used in a pinch.
  • Rosemary & Thyme – Adds depth to the dish; Italian seasoning is a handy alternative.
  • Paprika – Infuses warmth; adjust to taste and consider omitting nutmeg if it's not your favorite.

For the Cheesy Topping

  • Gouda Cheese – Melts beautifully between sweet potato slices for added creaminess; feel free to substitute with cheddar or mozzarella.

For the Optional Creamy Finish

  • Sour Cream / Herb Goat Cheese – Perfect topping for serving; Greek yogurt offers a lighter choice with similar flavor.

Elevate your meals with these Hasselback Sweet Potatoes, a vegetarian comfort food that is oh-so-satisfying!

Step‑by‑Step Instructions for Hasselback Sweet Potatoes

Step 1: Preheat Your Oven
Begin by preheating your oven to 400°F (200°C). This ensures that your Hasselback Sweet Potatoes bake evenly, developing that mouthwatering, crispy exterior as they cook. While the oven heats up, gather your ingredients and prepare your baking sheet lined with parchment paper or foil for easier cleanup.

Step 2: Prepare the Sweet Potatoes
Wash and thoroughly dry the sweet potatoes under running water. This step is crucial, as it removes any dirt while ensuring a clean surface for your delicious Hasselback Sweet Potatoes. Once dried, lay each potato horizontally on a cutting board, ready for the next step.

Step 3: Slice the Sweet Potatoes
Carefully make a series of ⅛-inch deep slices along the top of each sweet potato, being careful to stop about ½ inch from the bottom. This unique slicing technique creates the signature Hasselback shape, allowing for delightful crispy edges while keeping the potato intact for easy serving.

Step 4: Drizzle with Olive Oil
Place the sliced sweet potatoes on your prepared baking sheet and drizzle them generously with olive oil. With your hands or a brush, rub the oil across the surface, making sure to coat the skin and drizzle a little between the slices. This not only enhances flavor but mitigates dryness during baking.

Step 5: First Bake
Bake the sweet potatoes in the preheated oven for about 40 minutes, or until they begin to soften. Keep an eye on them during baking; the skin will turn slightly crispy, and the edges will start to caramelize, signaling that your Hasselback Sweet Potatoes are well on their way to perfection.

Step 6: Prepare the Herb Butter
While the sweet potatoes are baking, whisk together the unsalted butter, minced garlic, chopped parsley, chives, rosemary, thyme, paprika, and a sprinkle of salt in a small bowl. This herb butter will lend incredible flavor to your Hasselback Sweet Potatoes when brushed in between the delicious slices.

Step 7: Brush with Herb Butter
After the initial baking time, carefully remove the sweet potatoes from the oven. Use a brush to generously apply the herb butter mixture between the slices of each potato, ensuring that the flavors seep into those delectable crevices. This step is key to infusing the sweet potatoes with aromatic goodness.

Step 8: Final Bake
Return the herb butter-coated sweet potatoes to the oven for an additional 10-20 minutes. Keep an eye on them; they should be tender when poked with a fork, and the edges will take on a lovely golden hue. This final bake perfectly melds the flavors and softens the insides.

Step 9: Add the Cheese (Optional)
For a gooey finishing touch, during the last 5 minutes of baking, distribute Gouda cheese between the slices of each potato. This indulgent layer of melted cheese will take your Hasselback Sweet Potatoes to a whole new level of comfort and flavor, creating a harmonious blend of textures.

Step 10: Serve and Enjoy
Remove the sweet potatoes from the oven and let them cool slightly before serving. Feel free to top them with sour cream or herb goat cheese for an extra creamy finish. Set your stunning Hasselback Sweet Potatoes on the table and prepare for compliments as everyone digs in!

How to Store and Freeze Hasselback Sweet Potatoes

Fridge: Store leftovers in an airtight container for up to 3 days. Keep the sweet potatoes within the container's moisture-absorbing limits to maintain their texture.

Freezer: For longer storage, freeze the unbaked Hasselback Sweet Potatoes. Prepare them up to the first baking step, then wrap tightly in plastic wrap and aluminum foil. They can be frozen for up to 3 months.

Refrigerate: Reheat leftover sweet potatoes in the oven at 350°F (175°C) for about 15-20 minutes, ensuring they retain their crispy edges and delectable flavors.

Airtight Storage: Make sure to use airtight containers or heavy-duty freezer bags to prevent freezer burn and preserve the delicious taste of your Hasselback Sweet Potatoes.

Hasselback Sweet Potatoes Customizations

Feel free to get creative and make this dish truly your own! The possibilities are endless with these delightful sweet potatoes.

  • Dairy-Free: Substitute unsalted butter with vegan butter for a rich, plant-based alternative. Enjoy the herb butter bliss without sacrificing taste!
  • Cheese Variety: Swap Gouda for sharp cheddar or rich blue cheese to add a tangy twist. Each cheese brings its own unique flavor profile to elevate your dish.
  • Bacon Lovers: Sprinkle crispy bacon bits on top after baking for a savory crunch. The salty bites perfectly balance the sweetness of the potatoes.
  • Herb Boost: Experiment with fresh basil or cilantro as toppings for a burst of flavor. These fresh herbs will add brightness and a refreshing touch.
  • Heat It Up: Add diced jalapeño or a pinch of cayenne pepper to the herb butter for a kick of heat. Spice lovers will relish the exciting contrast!
  • Nutty Flavor: Drizzle with tahini or crushed nuts for added texture and richness. This gives your side dish another layer of sophistication.
  • Citrus Zing: Top with a squeeze of lemon or lime juice before serving for a zesty finish. The citrus notes will elevate the dish and brighten the flavors.
  • Sweet & Savory: Sprinkle brown sugar or drizzle maple syrup between the slices before baking for a delightful sweet contrast. Pairing sweetness with savory brings a comforting harmony.

Remember, cooking is a joyful adventure! Embrace the art of personalizing your Hasselback Sweet Potatoes, and savor the smiles around your dinner table.

Expert Tips for Hasselback Sweet Potatoes

Slice Carefully: Ensure each cut stops ½ inch from the bottom to keep the slices intact, preventing them from falling apart during baking.

Use a Sharp Knife: A sharp knife is crucial for even slices, giving your Hasselback Sweet Potatoes that beautiful presentation—don’t rush this step!

Baking Time Matters: Adjust the baking time based on the size of your sweet potatoes; larger ones may require a little extra love to achieve tenderness.

Flavor Infusion: Don’t skimp on the herb butter; brush it generously between the slices to infuse flavor throughout your Hasselback Sweet Potatoes.

Mix and Match: Feel free to explore different cheeses or colorful toppings to make your dish uniquely yours. This versatility adds even more delight to every bite!

Watch Closely: During the final bake, keep an eye on the potatoes to ensure the cheese melts just right without burning. Enjoy!

What to Serve with Hasselback Sweet Potatoes

Create an unforgettable meal by pairing these delicious, crispy sweet potatoes with wonderful sides that enhance their gourmet allure.

  • Creamy Mashed Potatoes: Serve creamy mashed potatoes as a luxurious side, providing a smooth contrast to the crispy edges of Hasselback Sweet Potatoes.

  • Garlic Green Beans: These sautéed green beans, with garlic and olive oil, add a delightful crunch and fresh flavor that complements the sweetness.

  • Herb Roasted Chicken: A herb-roasted chicken brings a savory depth, making for a balanced meal that pairs beautifully with the sweet and aromatic potatoes.

  • Fresh Garden Salad: A bright garden salad with mixed greens, cherry tomatoes, and a tangy vinaigrette offers a refreshing bite, enhancing the meal's overall richness.

  • Balsamic Glazed Brussels Sprouts: These sprouts, with their sweet glaze, echo the sweet notes of the potatoes, while their slight bitterness adds complexity to the dish.

  • Feta and Olive Tapenade: A zesty tapenade dolloped on the side can provide a salty and briny punch that contrasts appealingly with the sweet potatoes' flavors.

  • Spiced Apple Cider: Pair your sweet potatoes with a warm cup of spiced apple cider to complement their sweetness and add a comforting touch.

  • Chocolate Chip Cookies: Finish your meal with chocolate chip cookies for a cozy, nostalgic dessert that rounds out the flavors perfectly.

Make Ahead Options

These Hasselback Sweet Potatoes are perfect for meal prep enthusiasts! You can slice the sweet potatoes and prepare the herb butter mix up to 24 hours in advance, allowing the flavors to meld beautifully. Simply store the sliced sweet potatoes submerged in water in the refrigerator to prevent browning, and keep the herb butter in an airtight container. When you're ready to serve, drain the potatoes, brush them with olive oil, and follow the baking instructions. Finish by brushing them with the herb butter and adding Gouda during the last 5 minutes of baking for an effortless yet impressive dish that’s just as delicious as when made fresh!

Hasselback Sweet Potatoes Recipe FAQs

Can you do Hasselback potatoes with sweet potatoes?
Absolutely! Sweet potatoes are a fantastic alternative for Hasselback potatoes. Their natural sweetness and creamy texture pair perfectly with the crispy edges created by the slicing technique, making them a delightful option for this dish.

What's the point of Hasselback potatoes?
The Hasselback method beautifully marries texture and presentation. By slicing the potatoes but leaving them intact, you achieve a crispy exterior while keeping the insides tender. This technique allows for enhanced flavor absorption and creates a visually stunning dish that elevates any meal.

Why do you soak sweet potatoes before roasting?
Soaking sweet potatoes can help remove excess starch, yielding a fluffier and crispier texture when roasted. However, for Hasselback Sweet Potatoes, soaking is typically not necessary. The key is to make even slices and ensure a good oil coating for optimal results.

Does garlic taste good on sweet potatoes?
Very! Garlic complements the sweetness of sweet potatoes beautifully, adding depth and aroma to the dish. Whether incorporated into the herb butter or sprinkled as a seasoning, garlic enhances the overall flavor profile of your Hasselback Sweet Potatoes in an exquisite way.

When not to cook sweet potatoes?
Avoid cooking sweet potatoes that show signs of spoilage, such as dark spots, mushiness, or a shriveled appearance. These indicators often mean the potatoes are past their prime and won't yield the best flavor or texture for your Hasselback Sweet Potatoes.

Are Hasselback potatoes worth the effort?
Absolutely! The presentation alone makes them a showstopper, and the delicious textures created from the slicing process make them worth the little extra time invested. Plus, they are surprisingly simple to prepare, making them a rewarding and fun experience in the kitchen!

Hasselback Sweet Potatoes

Indulgent Hasselback Sweet Potatoes with Herb Butter Bliss

Delight in Hasselback Sweet Potatoes, beautifully sliced for crispy texture and topped with herb butter for a gourmet side dish.
Print Recipe Pin Recipe
Prep Time 20 minutes mins
Cook Time 1 hour hr
Total Time 1 hour hr 20 minutes mins
Servings: 4 potatoes
Course: Side Dishes
Cuisine: American
Calories: 250
Ingredients Equipment Method Nutrition Notes

Ingredients
  

For the Sweet Potatoes
  • 4 medium Sweet Potatoes Garnet yams are a tasty substitute.
  • 3 tablespoons Olive Oil Avocado oil can be used as a healthy swap.
For the Herb Butter
  • 4 tablespoons Unsalted Butter Vegan butter can replace for a dairy-free option.
  • 2 cloves Garlic Use ½ teaspoon of garlic powder as an alternative.
  • 2 tablespoons Parsley Fresh herbs add aromatic touch.
  • 1 tablespoon Chives Dried herbs can be used in a pinch.
  • 1 teaspoon Rosemary Italian seasoning is a handy alternative.
  • 1 teaspoon Thyme Dried herbs can be used in a pinch.
  • ½ teaspoon Paprika Adjust to taste.
For the Cheesy Topping
  • 1 cup Gouda Cheese Feel free to substitute with cheddar or mozzarella.
For the Optional Creamy Finish
  • ½ cup Sour Cream Greek yogurt offers a lighter choice.
  • ½ cup Herb Goat Cheese

Equipment

  • Oven
  • Baking Sheet
  • cutting board
  • Knife
  • small bowl
  • Brush

Method
 

Step-by-Step Instructions for Hasselback Sweet Potatoes
  1. Preheat your oven to 400°F (200°C).
  2. Wash and thoroughly dry the sweet potatoes.
  3. Carefully slice the sweet potatoes ⅛-inch deep, stopping ½ inch from the bottom.
  4. Drizzle olive oil over the sweet potatoes and rub it in.
  5. Bake sweet potatoes for about 40 minutes, until they start to soften.
  6. Whisk together the herb butter ingredients in a small bowl.
  7. Brush the herb butter mixture between the slices of each potato.
  8. Return to the oven for an additional 10-20 minutes until fork-tender.
  9. Distribute Gouda cheese between the slices during the last 5 minutes of baking.
  10. Serve topped with sour cream or herb goat cheese.

Nutrition

Serving: 1potatoCalories: 250kcalCarbohydrates: 40gProtein: 5gFat: 10gSaturated Fat: 6gPolyunsaturated Fat: 1gMonounsaturated Fat: 3gCholesterol: 25mgSodium: 350mgPotassium: 500mgFiber: 4gSugar: 7gVitamin A: 18000IUVitamin C: 20mgCalcium: 150mgIron: 1mg

Notes

Enhance your Hasselback Sweet Potatoes with various toppings for a personalized culinary experience.

Tried this recipe?

Let us know how it was!

Indulgent No Bake Strawberry Heaven Dessert You'll Love

July 17, 2025 by grace bellamy Leave a Comment

As I was savoring the bright flavors of spring, the refreshing Spinach Strawberry Salad with Balsamic Poppy Seed Dressing came into my mind—perfect for turning any meal into a celebration. Each bite of this delightful salad mixes the sweetness of strawberries with the crunch of pecans and the creamy touch of feta, creating a harmonious balance that even salad skeptics can't resist. Not only is this recipe a breeze to whip up, but it’s also customizable to suit your taste, making it ideal for gatherings or a quick lunch at home. Plus, it's a healthy option that packs a punch of nutrients and fresh flavors. Are you ready to elevate your salad game? Let's dive into this culinary delight!

Why Is This Salad a Must-Try?

Vibrant Flavors: The combination of sweet strawberries and tangy feta delivers a refreshing punch that brightens up any meal.
Easy to Prepare: Enjoy the simplicity of assembling this salad—no cooking required!
Customizable: Personalize with your favorite ingredients; swap pecans for seeds or try different cheeses!
Healthy Option: Packed with nutrients from fresh produce, it’s a guilt-free indulgence for any occasion.
Crowd-Pleasing: Perfect for gatherings, this salad is sure to impress guests and family alike. Elevate your meal with this delightful Spinach Strawberry Salad, or for a sweet treat, check out my No Bake Strawberry Heaven Dessert!

Spinach Strawberry Salad Ingredients

• Dive into the deliciousness with these essential components!

For the Salad

  • Fresh Baby Spinach – The perfect base that offers a burst of green, nutrient-rich goodness.
  • Strawberries – Sweet, juicy, and colorful; ensure they’re fresh, hulled, and quartered for the best taste.
  • Red Onion – Adds a sharpness that balances the sweetness; soak lightly in water to mellow its flavor.
  • Pecans – Toast for extra crunch and depth; swap with sunflower seeds for a nut-free version!
  • Feta Cheese – Creamy and tangy, block-style works best; feel free to substitute with goat cheese for variety.

For the Dressing

  • Balsamic Vinegar – Infuses that signature tang and brightness essential for the flavor profile.
  • Extra-Virgin Olive Oil – Richness for the dressing, enhancing the overall taste of the salad.
  • Poppy Seeds – For delightful crunch and an elegant touch; they add a visual appeal as well!
  • Honey – Naturally sweetens the dressing; feel free to adjust the amount to your taste.
  • Dijon Mustard – Helps emulsify the dressing while adding a bit of depth; a must-have for flavor!
  • Kosher Salt – Elevates all the flavors, bringing everything together harmoniously.
  • Ground Black Pepper – A sprinkle adds just the right amount of subtle heat to the dish.

Make this Spinach Strawberry Salad with Balsamic Poppy Seed Dressing your go-to recipe for any occasion!

Step‑by‑Step Instructions for Spinach Strawberry Salad with Balsamic Poppy Seed Dressing

Step 1: Toast the Pecans
Preheat your oven to 350°F (175°C). Spread the pecans evenly on a baking sheet, ensuring they have some space to toast. Place them in the oven for 8–10 minutes, or until they become fragrant and slightly golden. Keep an eye on them to avoid burning! Once toasted, remove from the oven and let them cool before roughly chopping.

Step 2: Prepare the Dressing
In a medium bowl, whisk together ¼ cup of balsamic vinegar and ½ cup of extra-virgin olive oil until well combined. Add 1 tablespoon of honey, 1 tablespoon of Dijon mustard, and 1 tablespoon of poppy seeds to the mixture. Season with kosher salt and ground black pepper to taste. Whisk vigorously until the dressing is emulsified and glossy, then set aside.

Step 3: Assemble the Salad
In a large salad bowl, combine 6 cups of fresh baby spinach, 2 cups of quartered fresh strawberries, and about ½ cup of red onion soaked in water and drained. Drizzle half of your prepared balsamic poppy seed dressing over the salad and toss gently to ensure even coating without bruising the spinach.

Step 4: Finish & Serve
To the tossed salad, add 1 cup of crumbled feta cheese and the toasted pecans. Gently toss again, being careful not to break the feta too much. Serve the salad immediately, garnished with additional dressing on the side for those who prefer extra flavor. Enjoy this vibrant Spinach Strawberry Salad that’s sure to delight your guests!

Expert Tips for Spinach Strawberry Salad

  • Fresh Ingredients: Always use high-quality, fresh ingredients; they make a significant difference to the flavor of your Spinach Strawberry Salad.
  • Soak Red Onion: To reduce bitterness, soak the red onion in cold water for about 10 minutes before adding it to the salad.
  • Add Dressing Gradually: Start with half the dressing and toss gently, adding more to taste. This prevents the salad from becoming soggy!
  • Customize Wisely: Don’t hesitate to substitute ingredients; try different cheeses or nuts to create your perfect variation without losing the essence of the salad.
  • Serving Tips: Serve immediately after assembling for the best texture and taste. If you need to prepare ahead, keep dressing and nuts separate until serving to maintain freshness.

What to Serve with Spinach Strawberry Salad with Balsamic Poppy Seed Dressing

Transform your delightful salad into a full meal by pairing it with mouthwatering accompaniments that enhance its vibrant flavors.

  • Grilled Chicken: Juicy, tender chicken adds a satisfying protein contrast to the fresh textures of the salad, making it a delightful main course.
  • Quinoa Pilaf: Nutty and fluffy quinoa complements the salad's crunch while infusing additional nutrients, creating a satisfying vegetarian side.
  • Garlic Bread: The warm, crispy texture of garlic bread provides a comforting contrast to the crisp salad, making every bite a delight. It’s simply irresistible when dipped in remaining dressing!
  • Roasted Vegetables: The earthy flavors of roasted seasonal veggies bring warmth and depth, balancing the salad’s lightness beautifully.
  • Fruity White Wine: Refreshing and crisp, a glass of chilled white wine enhances the salad's sweetness and complements the dressing's tangy notes.
  • Lemon Sorbet: Light and refreshing, this dessert cleanses the palate after a savory meal, providing a perfect ending to your dining experience.
  • Cheese Platter: Offer a variety of cheeses such as brie, cheddar, and goat cheese, allowing guests to create their own combinations that complement the salad’s flavor profile.

These pairings elevate the Spinach Strawberry Salad with Balsamic Poppy Seed Dressing into a memorable feast that celebrates the essence of spring!

Make Ahead Options

These Spinach Strawberry Salad with Balsamic Poppy Seed Dressing components are perfect for meal prep! You can wash and chop the spinach (up to 3 days in advance) and store it in an airtight container with a paper towel to absorb moisture, keeping it fresh and crisp. Slice the strawberries and soak the red onion (up to 24 hours in advance) for a milder flavor, then refrigerate them separately. The dressing can be made and stored in the refrigerator for up to 1 week; just give it a quick whisk before serving. When it’s time to enjoy your salad, simply combine all the components in a bowl, toss with dressing, and you'll have a bright, delicious dish that's just as delightful as if it were freshly made!

How to Store and Freeze Spinach Strawberry Salad

Room Temperature: This salad is best enjoyed fresh. If left out, consume within 2 hours to maintain quality and safety.

Fridge: Store any leftover salad in an airtight container for up to 3 days. For best results, keep the dressing separate until ready to serve to prevent sogginess.

Freezer: Freezing is not recommended for this salad due to the delicate textures of the greens and strawberries. Freshness is key to enjoying this vibrant dish!

Reheating: Since this is a cold salad, there’s no need to reheat. Simply toss and serve cold when ready to enjoy again!

Spinach Strawberry Salad Variations

Feel free to explore these delightful twists to make your salad uniquely yours!

  • Nut-Free: Substitute pecans with toasted sunflower seeds for a satisfying crunch without allergens. This makes the salad more accessible for everyone, especially at family gatherings.
  • Cheese Swap: Replace feta with creamy goat cheese or sharp blue cheese to change up the flavor profile. Each cheese offers a different texture and taste to complement the sweetness of strawberries.
  • Add Avocado: Incorporate creamy avocado slices for an extra layer of richness and healthy fats. This addition elevates the creaminess and brings a vibrant color contrast to the dish.
  • Herby Dressing: Boost flavor by adding fresh herbs like basil or mint to the balsamic dressing. These herbs not only enhance the freshness but also provide a fragrant aroma, making each bite a delightful experience.
  • Citrus Twist: Mix in some zesty orange or lemon juice to the dressing for a citrusy kick that brightens up the entire salad. This twist adds a refreshing zing that perfectly complements the strawberries.
  • Spicy Kick: For those who love some heat, add thinly sliced jalapeños or a sprinkle of red pepper flakes. The heat beautifully balances the sweetness of the strawberries, creating an exciting flavor contrast.
  • Roasted Veggies: Toss in some roasted sweet potatoes or beets for an unexpected twist that adds warmth and earthiness. Roasted veggies not only taste fantastic but also change the salad’s texture and visual appeal.
  • Grains Addition: Mix in cooked quinoa or farro for a heartier version that transforms this salad into a complete meal. This variation adds a satisfying chewiness and additional nutrients, perfect for lunch or dinner!

Spinach Strawberry Salad with Balsamic Poppy Seed Dressing Recipe FAQs

What type of strawberries should I use for the salad?
Absolutely! Look for fresh, ripe strawberries that are vibrant red and free of dark spots or blemishes. You want them to be sweet and juicy, ideally hulled and quartered just before you assemble the salad for the best flavor and texture.

How long can I store leftovers in the fridge?
You can keep any leftover salad in an airtight container in the refrigerator for up to 3 days. Just make sure to store the dressing separately until you’re ready to serve to avoid sogginess.

Can I freeze the Spinach Strawberry Salad?
Freezing this salad isn't recommended since the delicate spinach and strawberries do not hold up well in cold temperatures. Instead, prepare the salad fresh for that delightful crunch and vibrant flavors!

What should I do if my dressing separates?
No worries! If your dressing separates, simply give it a good whisk or shake in a jar before using it again. If it still doesn’t emulsify, try adding a bit more Dijon mustard or honey. This can help bind the ingredients together better.

Are there any dietary considerations for this salad?
Very much so! This salad can be made gluten-free and is nut-free if you substitute pecans with sunflower seeds. If allergies are a concern, always check labels for your ingredients. Additionally, you can easily adjust the cheese type for lactose-free versions or personal preferences!

How can I customize the ingredients in this salad?
The more the merrier when it comes to customization! Feel free to swap nuts, add fruits like blueberries or raspberries, or try different cheeses like goat or blue cheese. Just remember to keep the key components like spinach and strawberries for that perfect balance of flavors. Adjusting the dressing can also make for exciting variations!

No Bake Strawberry Heaven Dessert

Indulgent No Bake Strawberry Heaven Dessert You'll Love

A delightful No Bake Strawberry Heaven Dessert packed with fresh flavors for a perfect treat.
Print Recipe Pin Recipe
Prep Time 15 minutes mins
Total Time 15 minutes mins
Servings: 8 slices
Course: Dessert
Cuisine: American
Calories: 250
Ingredients Equipment Method Nutrition Notes

Ingredients
  

For the Base
  • 2 cups Graham Cracker Crumbs
  • ½ cup Unsalted Butter Melted
  • ¼ cup Granulated Sugar
For the Filling
  • 2 cups Fresh Strawberries Sliced
  • 1 cup Cream Cheese Softened
  • ½ cup Powdered Sugar
  • 1 cup Whipped Topping
  • 1 teaspoon Vanilla Extract
For the Topping
  • 1 cup Fresh Strawberries Halved
  • 1 cup Whipped Topping

Equipment

  • Mixing Bowl
  • Whisk
  • Baking Dish

Method
 

Preparation Steps
  1. In a mixing bowl, combine graham cracker crumbs, melted butter, and sugar.
  2. Press the mixture into the bottom of a baking dish to form the base.
  3. In another bowl, beat the cream cheese and powdered sugar until smooth.
  4. Fold in the whipped topping and vanilla extract until well combined.
  5. Add sliced strawberries into the cream mixture and gently combine.
  6. Spread the filling over the graham cracker base evenly.
  7. Top with halved strawberries and additional whipped topping.
  8. Refrigerate for at least 2 hours before serving.

Nutrition

Serving: 1sliceCalories: 250kcalCarbohydrates: 30gProtein: 2gFat: 14gSaturated Fat: 8gCholesterol: 20mgSodium: 150mgPotassium: 100mgFiber: 1gSugar: 14gVitamin A: 200IUVitamin C: 35mgCalcium: 60mgIron: 1mg

Notes

For best flavor, use fresh strawberries and prepare shortly before serving. Keep refrigerated. This dessert is not suitable for freezing as textures may change.

Tried this recipe?

Let us know how it was!

Irresistibly Crispy Pan Fried Maple Pecan Brussels Sprouts

July 17, 2025 by grace bellamy Leave a Comment

As I stood in the kitchen, the rich aroma of roasted Brussels sprouts mingled with the sweet scent of maple syrup, drawing me in like a cozy hug. These Crispy Pan Fried Maple Pecan Brussels Sprouts have become my go-to side dish, especially during the hustle and bustle of the holiday season. With a quick prep time that lets you spend less time cooking and more time enjoying, this recipe is not just a crowd-pleaser; it perfectly marries the nutty crunch of pecans with the sweet glaze of maple syrup. The result? A vibrant, flavorful addition to your table that elevates any meal, whether for a festive feast or a casual dinner. Curious about how to transform your simple Brussels sprouts into a delightful treat? Let’s dive in!

Why are these Brussels sprouts irresistible?

Quick Preparation: This dish comes together in a flash, making it perfect for busy weeknights or festive gatherings.

Sweet-Savory Delight: The combination of maple syrup and crunchy pecans creates a taste that dances on your palate, leaving you craving more.

Healthy Indulgence: Packed with nutrients, these Brussels sprouts offer a guilt-free indulgence, rich in vitamins and healthy fats.

Versatile Pairing: They complement a variety of mains, whether roasted meats or vegan dishes, making them a favorite for any occasion.

Crowd Appeal: Serve them at your next gathering, and watch how they enchant everyone at the table—you may just want to double the recipe!

For more exciting variations, check out the delicious twists in my Japanese BBQ Chicken Fried Rice Extravaganza.

Pan Fried Maple Pecan Brussels Sprouts Ingredients

For the Sprouts
• Brussels Sprouts – Use fresh and firm Brussels sprouts for the best flavor; trim and halve them for even cooking.
• Salt – Adjust the amount based on your taste preference to enhance the overall flavor.
• Black Pepper – Adds a hint of mild spice that can be adjusted according to your liking.
• Chili Flakes (optional) – These can give your dish a nice kick; omit if you prefer a milder taste.

For the Sweet Glaze
• Maple Syrup – This is the star ingredient that provides the sweet glaze; alternative sweeteners may be used, but they may alter the flavor profile.

For the Crunch
• Pecans – These add a deliciously crunchy texture and nutty flavor; feel free to substitute with walnuts, chestnuts, or pine nuts for a twist.

Discover how these delightful Pan Fried Maple Pecan Brussels Sprouts can enhance your next meal experience!

Step‑by‑Step Instructions for Pan Fried Maple Pecan Brussels Sprouts

Step 1: Prep the Brussels Sprouts
Begin by trimming the ends off the fresh Brussels sprouts, then slice them in half to ensure even cooking. Remove any dry outer leaves to keep them looking vibrant. Rinse the sprouts thoroughly under cool water and pat them dry with a clean kitchen towel; moisture can prevent them from getting crispy when pan-fried.

Step 2: Heat the Pan
In a large skillet, heat 1.5 tablespoons of vegetable oil over medium-high heat until it shimmers, indicating it's hot enough. Carefully add the halved Brussels sprouts to the pan, cut side down. Allow them to fry undisturbed for about 2 to 3 minutes until they develop a lovely golden-brown color and start to caramelize, enhancing their flavor.

Step 3: Add Pecans and Seasonings
Once the Brussels sprouts are nicely browned, stir in the chopped pecans, ensuring they evenly coat the sprouts. Drizzle the maple syrup over the mixture, then sprinkle in salt, black pepper, and chili flakes if using. Stir everything together well and continue to sauté for another 3 to 5 minutes until the sprouts are beautifully caramelized and just beginning to char.

Step 4: Serve Immediately
Once the Brussels sprouts and pecans reach a crispy finish, remove the pan from heat. Serve the Pan Fried Maple Pecan Brussels Sprouts immediately for the best texture and flavor. These delightful bites are perfect as a side dish or a festive addition to your holiday table, bursting with a balance of sweetness and crunch.

Expert Tips for Pan Fried Maple Pecan Brussels Sprouts

Crispiness Matters: Avoid overcrowding the pan to ensure your Brussels sprouts get that perfect crispy finish—cook them in batches if needed.

Nutty Flavor Boost: For an extra layer of flavor, toast the pecans separately before adding them to the dish. This enhances their nuttiness beautifully.

Sweet Balance: If you find the maple syrup too sweet, consider adding a splash of balsamic vinegar to balance the flavors.

Storage Tip: Leftovers can be stored in an airtight container in the fridge for up to 3 days, but for best results, reheat in a skillet to maintain their crunch.

Serving Warm: These Pan Fried Maple Pecan Brussels Sprouts are best served immediately, so coordinate with your meal timing for maximum flavor!

How to Store and Freeze Pan Fried Maple Pecan Brussels Sprouts

Fridge: Store leftover Brussels sprouts in an airtight container for up to 3 days. This helps to maintain their flavor, though they are best enjoyed fresh.

Freezer: For freezing, allow the sprouts to cool completely, then place them in a freezer-safe bag. They can be frozen for up to 3 months; however, the texture may change upon thawing.

Reheating: To reheat, warm the Brussels sprouts in a skillet over medium heat for 3-5 minutes. This will help restore their crispy texture, making them enjoyable again.

Avoid sogginess: If you plan to make them ahead, leave the pecans out until serving to prevent them from losing their delightful crunch.

Pan Fried Maple Pecan Brussels Sprouts Variations

Feel free to make these Brussels sprouts your own by exploring creative twists that will delight your taste buds!

  • Nut-Free: Omit pecans and add crispy fried onions for a delicious crunch and new flavor profile.
  • Spicy Kick: Include sliced jalapeños or crushed red pepper flakes for a fiery twist that elevates your dish.
  • Garlic Lovers: Sauté minced garlic along with the Brussels sprouts for an aromatic depth that complements the sweetness.
  • Maple-Free: Substitute honey or agave syrup for a different sweetener that pairs just as well with the sprouts.
  • Citrus Zing: Squeeze fresh lemon or orange juice over the finished dish to brighten the flavors and add a refreshing twist.
  • Savory Depth: Mix in vegan bacon bits for an extra savory element, enriching the dish with smoky undertones.
  • Herb Infusion: Toss in fresh thyme or rosemary during cooking for a fragrant herbal note that enhances every bite.
  • Balsamic Bliss: Drizzle balsamic glaze on top before serving for an added layer of flavor that balances sweetness and acidity.

Let your imagination guide you to create variations that your family will love!

What to Serve with Pan Fried Maple Pecan Brussels Sprouts?

Transform your festive meal with delightful pairings that enhance the sweetness and crunch of your favorite side dish.

  • Roasted Chicken: The savory, tender meat beautifully complements the sweet and nutty flavors of the Brussels sprouts, creating a balanced plate.

  • Vegan Mushroom Stroganoff: Earthy mushrooms in a creamy sauce provide a hearty contrast to the crunchy sprouts, making for a filling vegan dinner.

  • Quinoa Salad: Light and refreshing, a colorful quinoa salad adds nutty tones and fresh ingredients that harmonize perfectly with the sweetness of the dish.

  • Garlic Mashed Potatoes: Creamy and buttery, these mashed potatoes offer a comforting texture that pairs wonderfully with the crispy Brussels sprouts.

  • Grilled Tofu Steaks: The smoky flavors from grilled tofu match well with the sweet maple glaze, making it a delicious plant-based option for your table.

  • Cranberry Sauce: A tangy cranberry sauce provides a burst of acidity that cuts through the sweetness of the maple syrup, enhancing the overall flavor profile of your meal.

  • Chardonnay: A chilled glass of Chardonnay elegantly balances the richness of the Brussels sprouts, making it a delightful pairing for your holiday feast.

  • Pecan Pie: For dessert, a slice of pecan pie echoes the nutty elements of the Brussels sprouts, creating a cohesive theme that delights the palate.

Make Ahead Options

These Crispy Pan Fried Maple Pecan Brussels Sprouts are perfect for meal prep enthusiasts! You can wash and trim the Brussels sprouts up to 24 hours in advance, storing them in an airtight container in the refrigerator to keep them fresh. You can also chop the pecans and prepare the glaze (maple syrup, salt, and spices) ahead of time, making your cooking time even shorter. On the day you plan to serve them, simply sauté the Brussels sprouts as instructed until golden, then add in the pecans and maple mixture. This way, you'll enjoy that delightful crunch and flavor while saving valuable time on busy weeknights!

Pan Fried Maple Pecan Brussels Sprouts Recipe FAQs

What type of Brussels sprouts should I use?
Absolutely! Always choose fresh and firm Brussels sprouts for the best flavor. Look for bright green sprouts without dark spots all over, as those are signs of overripeness. Trim the ends, halve them for even cooking, and remove any dry outer layers to enhance your dish.

How should I store leftover Pan Fried Maple Pecan Brussels Sprouts?
You can store leftover Brussels sprouts in an airtight container in the fridge for up to 3 days. This will help maintain their flavor. However, they’re best served fresh, so I recommend consuming them soon after cooking.

Can I freeze Pan Fried Maple Pecan Brussels Sprouts?
Yes, you can freeze them! Allow the sprouts to cool completely, then place them in a freezer-safe bag. They can be frozen for up to 3 months. Just remember that the texture may change once you thaw them, so reheat them gently in a skillet to help restore some of their original crunch.

What if my Brussels sprouts are soggy after cooking?
Very! If your Brussels sprouts end up soggy, this often happens when the pan is overcrowded. To avoid this, make sure there’s enough space in the pan for them to fry evenly. Cook them in batches if necessary, which will yield crispy results. And if they’re already cooked and soggy, briefly sautéing them in a hot pan can help crisp them up again.

Are these Brussels sprouts safe for people with nut allergies?
It's worth noting that this recipe includes pecans, which can be problematic for those with nut allergies. If you're preparing this dish for someone with a nut allergy, feel free to substitute the pecans with seeds like pumpkin or sunflower seeds for a safe and crunchy alternative. Always check ingredient labels to ensure safety!

Pan Fried Maple Pecan Brussels Sprouts

Irresistibly Crispy Pan Fried Maple Pecan Brussels Sprouts

These Pan Fried Maple Pecan Brussels Sprouts combine nutty pecans and sweet maple syrup into an irresistible side dish.
Print Recipe Pin Recipe
Prep Time 10 minutes mins
Cook Time 10 minutes mins
Total Time 20 minutes mins
Servings: 4 servings
Course: Side Dishes
Cuisine: American
Calories: 210
Ingredients Equipment Method Nutrition Notes

Ingredients
  

For the Sprouts
  • 1 lb Brussels Sprouts Fresh and firm, trimmed and halved
  • 1 teaspoon Salt Adjust to taste
  • 1 teaspoon Black Pepper Adjust to taste
  • ¼ teaspoon Chili Flakes Optional, for added heat
For the Sweet Glaze
  • ¼ cup Maple Syrup Primary sweetener
For the Crunch
  • ½ cup Pecans Chopped; can substitute with other nuts

Equipment

  • large skillet

Method
 

Step‑by‑Step Instructions
  1. Trim the ends off the Brussels sprouts, slice them in half, and rinse them under cool water. Pat dry.
  2. Heat vegetable oil over medium-high heat in a large skillet. Add halved Brussels sprouts cut side down and fry for 2-3 minutes.
  3. Stir in chopped pecans, drizzle with maple syrup, and add salt, black pepper, and chili flakes. Sauté for another 3-5 minutes.
  4. Remove from heat and serve immediately for best texture and flavor.

Nutrition

Serving: 1cupCalories: 210kcalCarbohydrates: 20gProtein: 3gFat: 14gSaturated Fat: 2gPolyunsaturated Fat: 3gMonounsaturated Fat: 8gSodium: 200mgPotassium: 400mgFiber: 5gSugar: 6gVitamin A: 500IUVitamin C: 100mgCalcium: 40mgIron: 1mg

Notes

For best results, do not overcrowd the pan during cooking to maintain crispiness. Store leftovers in an airtight container for up to 3 days, reheating in a skillet to restore crunch.

Tried this recipe?

Let us know how it was!

Indulgent Apple Pie French Toast Roll Ups for Easy Mornings

July 17, 2025 by grace bellamy Leave a Comment

As I grabbed my morning coffee, the enticing aroma of cinnamon wafted from the kitchen, instantly transporting me to cozy autumn days. Today, I’m whipping up Apple Pie French Toast Roll Ups—a delightful breakfast that captures the essence of warm apple pie in each golden bite. These little treasures are not only a crowd-pleaser but also incredibly easy to prepare, making them perfect for busy mornings or when you’re craving a sweet treat any time of day. With options for both homemade and canned apple filling, these customizable rolls can cater to your taste while adding a touch of nostalgia to your breakfast table. Are you ready to find out how to make this scrumptious grab-and-go delight?

Why You'll Adore This Recipe

Simplicity: These Apple Pie French Toast Roll Ups are a breeze to make, even for beginner cooks! Just roll, dip, and fry for a delicious breakfast.

Versatile: Customize your fillings with any fruits or jams you love, ensuring each batch is uniquely yours!

Grab-and-Go: Perfect for those busy mornings, these roll ups can be enjoyed on your way out the door.

Sweet Nostalgia: The warm apple filling and cinnamon aroma evoke cozy memories of fresh-baked pies, making breakfast feel special.

Crowd-Pleasing: Whether for family brunch or a cozy gathering, these roll ups are sure to delight everyone at the table! For another delicious breakfast idea, check out Hawaiian Roll French Toast Casserole.

Apple Pie French Toast Roll Ups Ingredients

  • For the Roll Ups

  • Toast Bread Slices – Use thick slices for easier rolling.

  • Cream Cheese – Adds a creamy texture; substitute dairy-free for vegan.

  • Eggs – Binds the rolls; flaxseed eggs work for a vegan option.

  • Milk – Choose any milk (dairy or plant-based) for added moisture.

  • Sugar – Sweetens your roll ups; opt for coconut sugar for a healthier choice.

  • Ground Cinnamon – Compliments the apple filling beautifully; consider nutmeg for extra warmth.

  • Butter – For frying, gives a rich flavor; use coconut oil for a dairy-free alternative.

  • For the Homemade Apple Filling

  • Butter – Use to sauté the apples to create a rich base.

  • Apples – Any variety works; tart apples add a delightful bite.

  • Brown Sugar – Provides depth; maple syrup is a healthier substitute.

  • Water – Keeps the filling moist while cooking.

  • Cinnamon & Nutmeg – Classic spices that elevate the flavor; adjust to taste.

  • Cornstarch – Thickens your filling; arrowroot powder is a good alternative.

  • For the Canned Apple Pie Filling

  • Canned Apple Pie Filling – A quick alternative; look for low-sugar options to keep it light.

Step‑by‑Step Instructions for Apple Pie French Toast Roll Ups

Step 1: Make the Filling
In a medium skillet, melt 2 tablespoons of butter over medium heat. Add 2 cups of diced apples, ¼ cup of brown sugar, 1 teaspoon of cinnamon, and 2 tablespoons of water. Stir well and cook for about 4–6 minutes, until the apples are slightly softened and fragrant. This apple filling will be the heart of your Apple Pie French Toast Roll Ups.

Step 2: Thicken the Filling
In a small bowl, mix 1 tablespoon of cornstarch with 1 tablespoon of water until smooth. Pour this mixture into the apple filling, stirring constantly for 4-5 minutes until it thickens and coats the apples beautifully. Remove from the heat and let it cool while you prepare the bread, ensuring the filling doesn’t make the roll ups soggy.

Step 3: Prepare Sugar Mixture
In a shallow bowl, combine ¼ cup of sugar and 1 teaspoon of cinnamon. Mix well to create a cinnamon sugar mixture that will coat your finished Apple Pie French Toast Roll Ups. Set this aside; the sweet crunch it adds will perfectly complement the warm, spiced apple filling.

Step 4: Prep Bread
Begin by trimming the crusts off 8 slices of thick bread and then flatten each slice with a rolling pin for easy rolling. Spread a thin layer of cream cheese over one side of each slice. This creamy layer not only enhances the flavor but also helps to bind the roll ups together.

Step 5: Fill the Rolls
On one edge of each prepared bread slice, place a spoonful of the cooled apple filling. Roll the bread tightly, starting from the filled edge and tucking in the sides as you go. Make sure to seal the rolls tightly to prevent any filling from escaping while cooking.

Step 6: Cook the Rolls
Heat 3 tablespoons of butter in a non-stick skillet over medium heat. In a separate bowl, whisk together 2 eggs and ½ cup of milk. Dip each roll carefully in the egg mixture, coating it well, then place it seam-side down in the hot skillet. Cook for about 2-3 minutes on each side until golden brown and crispy.

Step 7: Coat with Cinnamon Sugar
Once cooked, immediately roll each warm Apple Pie French Toast Roll Up in the prepared cinnamon sugar mixture, ensuring an even coating. This sweet touch adds a delightful crunch and flavor. Serve your delectable creations warm, perhaps adding a drizzle of syrup for an extra indulgent treat!

Apple Pie French Toast Roll Ups: Delicious Variations

Feel free to let your creativity shine by customizing these delightful roll ups! With every tweak, you can explore new flavors and textures that suit your cravings.

  • Berry Twist: Substitute apples for fresh strawberries or blueberries for a refreshing change. These berries add a bright pop of flavor and color!

  • Jam-Packed Goodness: Use your favorite fruit jam, like apricot or raspberry, for a sweet and fruity filling. It’s a quick way to add variety without the prep.

  • Caramel Drizzle: For an indulgent touch, drizzle warm caramel sauce over the finished roll ups instead of syrup. The rich sweetness elevates this breakfast to dessert status.

  • Cinnamon Swirl: Mix a bit of cinnamon into the cream cheese before spreading for an extra layer of warmth and spice. It’s a delightful surprise in every bite!

  • Nutty Crunch: Add crushed nuts like walnuts or pecans to the apple filling for a delightful crunch. The added texture brings a whole new element to these rolls.

  • Heat Factor: Sprinkle in a bit of cayenne or chopped jalapeños to your apple filling for a surprising kick. The heat contrasts deliciously with the sweetness.

  • Gluten-Free Delight: Swap regular bread for gluten-free alternatives to cater to dietary needs while keeping the flavors intact. Everyone can enjoy this treat!

  • Flavored Cream Cheese: Try using flavored cream cheese, like honey or cinnamon, adding a hint of extra sweetness and flavor that complements the apple filling beautifully.

Make Ahead Options

These Apple Pie French Toast Roll Ups are perfect for meal prep lovers! You can prepare the apple filling up to 3 days in advance. Simply follow the steps for making the filling and let it cool completely before storing it in an airtight container in the refrigerator. You can also roll and assemble the French toast roll ups up to 24 hours ahead of time; just be sure to keep them covered to prevent them from drying out. When you’re ready to enjoy, dip the cold roll ups in the egg mixture and fry them as instructed. This way, you’ll have a delectable breakfast treat with minimal effort, making your busy mornings a lot easier!

What to Serve with Apple Pie French Toast Roll Ups

Creating a delightful breakfast is easy when you pair these tasty rolls with complementary sides that enhance their warmth and sweetness.

  • Fresh Berries: The tartness of strawberries and blueberries adds a refreshing balance to the sweet cinnamon rolls.

  • Maple Syrup Delight: Drizzling real maple syrup over the roll ups amplifies their sweetness and brings a rich, maple flavor to each bite.

  • Greek Yogurt: A dollop of creamy Greek yogurt provides a tangy contrast, adding a protein boost while keeping the meal light and satisfying.

Pairing these rolls with creamy yogurt not only rounds out the breakfast’s texture but also makes it undeniably indulgent.

  • Sautéed Apples: For an extra apple touch, garnish with warm sautéed apples, enhancing the pie experience with caramelized sweetness.

  • Whipped Cream Topping: A light, fluffy whipped cream adds a lovely decadence, transforming your plate into a dessert-like breakfast experience.

  • Cinnamon Sugar Dusting: Dusting the rolls with a bit of extra cinnamon sugar right before serving keeps the flavor profile consistent and inviting.

  • Iced Coffee: A chilled or iced coffee on the side complements the warmth of the roll ups and offers a refreshing energy boost to start the day.

  • Cheese Platter: For an elevated brunch, consider adding a small cheese platter with sharp cheddar or creamy brie to contrast the sweet flavors from the rolls.

How to Store and Freeze Apple Pie French Toast Roll Ups

Fridge: Store leftovers in an airtight container for up to 3 days. Reheat in a skillet to restore their crispy texture and warmth.

Freezer: For longer storage, freeze the cooked roll ups in a single layer on a baking sheet. Once solid, transfer them to a freezer-safe bag for up to 2 months.

Reheating: Thaw frozen Apple Pie French Toast Roll Ups in the fridge overnight. Reheat in a skillet or oven until heated through, ensuring they regain their delightful crunch.

Wrapping: Wrap each roll individually in plastic wrap or parchment before freezing to avoid freezer burn and retain flavor.

Expert Tips for Apple Pie French Toast Roll Ups

  • Flatten Thoroughly: Ensure your bread slices are well-flattened to avoid tearing during rolling. This step is critical for perfect Apple Pie French Toast Roll Ups.

  • Mind the Butter: Use just enough butter for frying to achieve a golden crisp without excess greasiness. Less is more for the best flavor!

  • Cream Cheese is Key: Don’t skip the cream cheese! It creates a delicious binding layer that keeps the rolls intact while cooking.

  • Chill the Filling: Allow your apple filling to cool properly before using it in the rolls; this prevents sogginess and helps maintain the crispy exterior.

  • Store Right: Keep leftovers in an airtight container in the fridge for up to three days. Reheat in a skillet to preserve crispness before serving.

Apple Pie French Toast Roll Ups Recipe FAQs

What type of bread works best for Apple Pie French Toast Roll Ups?
I recommend using thick slices of bread like Texas toast or brioche. This provides a sturdy base that can hold the filling and allows for easier rolling. If you’re looking for a gluten-free option, you can absolutely use gluten-free bread that’s sliced thick enough to roll.

How long can you store Apple Pie French Toast Roll Ups in the fridge?
You can store these delicious roll ups in an airtight container in the fridge for up to 3 days. Just remember to reheat them in a skillet for the best texture; this will help to restore their crispy exterior and warmth.

Can you freeze Apple Pie French Toast Roll Ups and how?
Absolutely! To freeze, lay the cooked roll ups in a single layer on a baking sheet and freeze until solid. Then, transfer them to a freezer-safe bag. They can be stored for up to 2 months. When you're ready to enjoy, just thaw them in the fridge overnight and reheat in a skillet or oven until warmed through and crispy.

What are common mistakes to avoid when making French toast?
One common mistake is not allowing the filling to cool before assembling the roll ups. A hot filling can make the bread soggy. Additionally, make sure your bread is thoroughly flattened before rolling to prevent tearing. Lastly, frying at too high a temperature can lead to a burnt exterior while leaving the inside uncooked.

How do you ensure the filling doesn’t leak out during cooking?
To prevent leakage, be sure to roll your bread slices tightly and tuck in the sides as you roll. Also, sealing the edges properly will hold everything together. The creamy layer of cream cheese acts as a great binder, keeping your filling secure during cooking.

What can I use as a dairy-free option in this recipe?
You can substitute regular cream cheese with dairy-free cream cheese, use almond or coconut milk instead of regular milk, and replace the eggs with flaxseed eggs for a fully vegan version. The flavor and texture will still be delightful!

Apple Pie French Toast Roll Ups

Indulgent Apple Pie French Toast Roll Ups for Easy Mornings

Delightful Apple Pie French Toast Roll Ups capture the essence of warm apple pie in each golden bite, perfect for busy mornings.
Print Recipe Pin Recipe
Prep Time 15 minutes mins
Cook Time 15 minutes mins
Total Time 30 minutes mins
Servings: 4 rolls
Course: Breakfast
Cuisine: American
Calories: 220
Ingredients Equipment Method Nutrition Notes

Ingredients
  

For the Roll Ups
  • 8 slices thick toast bread Use thick slices for easier rolling.
  • 8 oz cream cheese Adds a creamy texture; substitute dairy-free for vegan.
  • 2 large eggs Binds the rolls; flaxseed eggs work for a vegan option.
  • ½ cup milk Choose any milk (dairy or plant-based) for added moisture.
  • ¼ cup sugar Sweetens your roll ups; opt for coconut sugar for a healthier choice.
  • 1 teaspoon ground cinnamon Compliments the apple filling beautifully; consider nutmeg for extra warmth.
  • 3 tablespoon butter For frying, gives a rich flavor; use coconut oil for a dairy-free alternative.
For the Homemade Apple Filling
  • 2 tablespoon butter Use to sauté the apples to create a rich base.
  • 2 cups apples Any variety works; tart apples add a delightful bite.
  • ¼ cup brown sugar Provides depth; maple syrup is a healthier substitute.
  • 2 tablespoon water Keeps the filling moist while cooking.
  • 1 teaspoon cinnamon Classic spice that elevates the flavor; adjust to taste.
  • 1 teaspoon nutmeg Classic spice that elevates the flavor; adjust to taste.
  • 1 tablespoon cornstarch Thickens your filling; arrowroot powder is a good alternative.
For the Canned Apple Pie Filling
  • 1 can canned apple pie filling A quick alternative; look for low-sugar options to keep it light.

Equipment

  • skillet
  • shallow bowl
  • Rolling Pin
  • medium skillet

Method
 

Preparation Steps
  1. In a medium skillet, melt 2 tablespoons of butter over medium heat. Add 2 cups of diced apples, ¼ cup of brown sugar, 1 teaspoon of cinnamon, and 2 tablespoons of water. Stir well and cook for about 4–6 minutes, until the apples are slightly softened and fragrant.
  2. In a small bowl, mix 1 tablespoon of cornstarch with 1 tablespoon of water until smooth. Pour this mixture into the apple filling, stirring constantly for 4-5 minutes until it thickens and coats the apples beautifully.
  3. In a shallow bowl, combine ¼ cup of sugar and 1 teaspoon of cinnamon. Mix well to create a cinnamon sugar mixture.
  4. Trim the crusts off 8 slices of thick bread and then flatten each slice with a rolling pin. Spread a thin layer of cream cheese over one side of each slice.
  5. On one edge of each prepared bread slice, place a spoonful of the cooled apple filling. Roll the bread tightly, starting from the filled edge and tucking in the sides.
  6. Heat 3 tablespoons of butter in a non-stick skillet over medium heat. In a separate bowl, whisk together 2 eggs and ½ cup of milk. Dip each roll carefully in the egg mixture, then place it seam-side down in the hot skillet.
  7. Once cooked, immediately roll each warm Apple Pie French Toast Roll Up in the cinnamon sugar mixture, ensuring an even coating.

Nutrition

Serving: 1rollCalories: 220kcalCarbohydrates: 28gProtein: 4gFat: 10gSaturated Fat: 5gPolyunsaturated Fat: 1gMonounsaturated Fat: 3gCholesterol: 70mgSodium: 180mgPotassium: 120mgFiber: 1gSugar: 9gVitamin A: 200IUVitamin C: 1mgCalcium: 50mgIron: 1mg

Notes

These rolls can be stored in an airtight container in the fridge for up to 3 days, or frozen for longer storage.

Tried this recipe?

Let us know how it was!

Delicious Spinach and Mushroom Ricotta Stromboli Made Easy

July 17, 2025 by grace bellamy Leave a Comment

As the aroma of sautéing mushrooms and fresh spinach wafts through my kitchen, I can’t help but feel a spark of joy. This Easy Spinach and Mushroom Ricotta Stromboli transforms a simple night into something special, effortlessly blending comfort food with a delightful twist on pizza night. Packed with creamy ricotta, gooey mozzarella, and vibrant veggies, it’s not just quick to whip up but also fully customizable—add your favorite meats or throw in whatever vegetables are lingering in your fridge! Imagine a golden, flaky crust encapsulating all that goodness, perfect for feeding your hungry crew or impressing unexpected guests. Are you ready to roll up your sleeves and create the ultimate crowd-pleaser? Let's dive into this delicious journey together!

Why Make Spinach and Mushroom Ricotta Stromboli?

Comforting Experience: This stromboli offers a warm, satisfying meal that’s perfect for cozy nights in with family or friends.
Quick Preparation: With a prep time of just 30 minutes, you can have a delicious homemade dish ready in no time!
Customizable Delight: Feel free to mix and match ingredients; whether you want to add meat or swap vegetables, this recipe adapts beautifully, just like my Scrambled Eggs with Spinach and Mushrooms!
A Winning Flavor Combo: Creamy ricotta, gooey mozzarella, and earthy mushrooms create a flavor profile that is simply irresistible.
Crowd-Pleasing Appeal: This dish brings people together—everyone loves a good stromboli!

Spinach and Mushroom Ricotta Stromboli Ingredients

For the Dough
• Refrigerated Pizza Dough – This is the main structure; consider using homemade dough for an even fresher taste.

For the Filling
• Fresh Baby Spinach (10 oz. bag) – Adds vibrant color and essential nutrients; frozen spinach is a great substitute if fresh isn’t available.
• Baby Bella Mushrooms (1 cup, sliced thin) – Offers an earthy depth to the filling; white button mushrooms work just as well.
• Onion (½ cup, sliced thin) – Enhances the overall flavor; shallots can be utilized for a milder alternative.
• Garlic Powder (¼ tsp) – Adds a punch of flavor; fresh minced garlic is a suitable substitute if you prefer.
• Salt and Pepper – Essential for seasoning; adjust according to your taste preferences.
• Ricotta Cheese (1 cup) – This creamy base makes the filling luscious; feel free to swap for cottage cheese for a lighter option.
• Shredded Mozzarella (1 cup) – Delivers that ooey-gooey texture; other melted cheeses like provolone can also shine here.
• Italian Seasoning (¼ tsp) – Imparts wonderful flavor; any dried herb mix or single herbs like oregano can suffice.

For the Topping
• Egg (1, beaten) – Used for an egg wash, helping to achieve a lovely golden crust; skip for a vegan-friendly option.
• Water (2 tbsp) – Mix with the egg to create the perfect egg wash.

For Serving
• Marinara Sauce – A delicious dip option; use homemade or your favorite store-bought version to accompany your Spinach and Mushroom Ricotta Stromboli.

Step‑by‑Step Instructions for Spinach and Mushroom Ricotta Stromboli

Step 1: Preheat and Prepare Dough
Begin by preheating your oven to 400°F (200°C). While the oven heats, take your refrigerated pizza dough out of the fridge and allow it to come to room temperature for about 15 minutes. This step is crucial for easier stretching and rolling later on.

Step 2: Sauté Vegetables
In a large skillet, heat a drizzle of olive oil over medium heat. Once the oil is shimmering, add in the sliced onions, followed by the mushrooms and fresh spinach. Sauté everything together for about 5-7 minutes until the vegetables are softened and vibrant. Season the mixture with salt and pepper to taste.

Step 3: Prepare the Baking Pan
Drizzle a bit more olive oil into a 9x13-inch baking pan. Use your hands or a brush to spread it evenly, preventing the dough from sticking. Once the pan is prepared, stretch the pizza dough into a large rectangle that fits the pan. Make sure the edges are slightly thicker to hold in the filling.

Step 4: Add the Filling
Spread a generous layer of ricotta cheese evenly over the dough, leaving a 1-1.5 inch border around the edges. Next, layer the sautéed spinach and mushroom mixture on top, followed by a sprinkle of garlic powder and shredded mozzarella cheese for that gooey finish. The combination will create a savory filling for your Spinach and Mushroom Ricotta Stromboli.

Step 5: Roll the Stromboli
Carefully start rolling the dough from one edge to the other, tucking in the sides as you go to envelop the filling securely. Aim for a tight roll to ensure the stromboli holds its shape during baking. Once rolled, pinch the seams to seal and tuck the ends tightly.

Step 6: Apply the Egg Wash
In a small bowl, mix the beaten egg with 2 tablespoons of water to create the egg wash. Use a pastry brush to coat the entire surface of the stromboli with this mixture, giving it a beautiful golden color when baked. Sprinkle the top with Italian seasoning to enhance the flavor even further.

Step 7: Bake the Stromboli
Carefully place the assembled Stromboli in the preheated oven. Bake for 35-40 minutes, or until the dough turns a gorgeous golden brown and becomes crispy. Keep an eye on the stromboli during the last few minutes to avoid over-browning.

Step 8: Cool and Serve
Once baked, remove the Spinach and Mushroom Ricotta Stromboli from the oven and allow it to cool for about 5 minutes. This resting period makes it easier to slice. Serve your delicious creation warm with marinara sauce on the side for dipping, and enjoy the delightful flavors!

Expert Tips for Spinach and Mushroom Ricotta Stromboli

  • Room Temperature Dough: Ensure the pizza dough is at room temperature before rolling it out; this makes stretching easier and avoids tearing.
  • Sauté Thoroughly: Don't rush the sautéing process; properly cooked mushrooms and spinach enhance flavor and avoid excess moisture in your stromboli.
  • Grease Well: Drizzle enough olive oil in your baking pan to prevent sticking; this helps achieve that perfect golden crust on your Spinach and Mushroom Ricotta Stromboli.
  • Seal the Edges: Pinch the seams tightly after rolling to prevent the filling from leaking during baking, ensuring each bite is full of delicious goodness.
  • Check for Doneness: Keep an eye on your stromboli in the oven; it’s best to check a few minutes early to ensure it doesn’t over-brown.
  • Rest Before Slicing: Allow the baked stromboli to cool for a few minutes before slicing to maintain its shape and make for cleaner pieces.

How to Store and Freeze Spinach and Mushroom Ricotta Stromboli

  • Room Temperature: It’s best to enjoy your stromboli fresh. If you need to leave it out, it can stay at room temperature for up to 2 hours before it should be refrigerated.
  • Fridge: Store leftovers in an airtight container in the refrigerator for up to 3 days. Reheat in the oven to recapture that crispy exterior.
  • Freezer: If you want to keep your Spinach and Mushroom Ricotta Stromboli for longer, wrap it tightly in plastic wrap and aluminum foil before freezing for up to 3 months.
  • Reheating: To reheat from frozen, thaw overnight in the fridge, then bake at 350°F (175°C) for about 20 minutes, or until heated through.

Make Ahead Options

These Spinach and Mushroom Ricotta Stromboli are perfect for busy weeknights and meal prep! You can prepare the filling up to 24 hours in advance by sautéing the spinach, mushrooms, and onions, then storing it in an airtight container. Additionally, you can roll the stromboli and place it in the baking pan—just cover it tightly with plastic wrap and refrigerate for up to 3 days. When ready to bake, simply brush the top with the egg wash, sprinkle with Italian seasoning, and bake as instructed. This approach not only saves time but guarantees that your stromboli will be just as delicious and fresh when you serve it!

Spinach and Mushroom Ricotta Stromboli Variations

Feel free to express your culinary creativity by making this dish your own—your taste buds will thank you!

  • Meat Lovers: Add cooked Italian sausage or slices of pepperoni to boost the flavor and heartiness of your stromboli. You'll create a delightful mix of savory goodness that will satisfy any meat lover!

  • Veggie Delight: Incorporate other vegetables like bell peppers, zucchini, or artichokes for an extra crunch and flavor burst. This is a wonderful way to clean out your fridge while also adding vibrant colors to your dish.

  • Dairy-Free Option: Use a dairy-free ricotta made from nuts or tofu combined with nutritional yeast for that cheesy flavor. You won’t miss traditional cheese as you enjoy every flavorful bite!

  • Cheese Variations: Swap out ricotta or mozzarella for feta, gouda, or even pepper jack for a kicked-up flavor. Each cheese brings a unique twist that can transport your taste buds on an exciting journey.

  • Spicy Kick: Add crushed red pepper flakes or jalapeños to the filling for those who crave heat. Just a little spice can elevate your stromboli to a whole new level—perfect for adventurous eaters!

  • Vegan-Friendly: Substitute the egg wash with plant-based milk or aquafaba for brushing, and use a vegan cheese alternative. You won't believe how delicious and inclusive this recipe can be for everyone!

  • Herbal Boost: Try adding fresh herbs like basil or parsley to the filling for an aromatic lift. The fragrant addition will enhance the overall experience, making each bite feel like a fresh garden delight.

  • Saucy Interior: For an extra burst of flavor, incorporate a layer of marinara sauce inside the stromboli before rolling it up. The sauce will create a lovely, juicy filling that pairs beautifully with the cheeses and veggies.

Mix and match these variations to create a custom Spinach and Mushroom Ricotta Stromboli that reflects your personal taste while delighting those you share it with!

What to Serve with Spinach and Mushroom Ricotta Stromboli

Creating a memorable meal is all about the perfect pairing, enhancing every bite of your delicious creation.

  • Garlic Bread: Crispy on the outside and soft within, garlic bread complements the savory stromboli, providing extra crunch with rich flavors.

  • Fresh Side Salad: A vibrant mix of greens, tomatoes, and cucumbers dressed in a light vinaigrette brings brightness and balances the hearty flavors of the stromboli.

  • Zesty Marinara Sauce: Serve extra marinara on the side for dipping; its tangy notes elevate the rich cheesiness of the filling.

  • Roasted Vegetables: Seasonal roasted veggies add a lovely touch of smokiness and texture, perfect for those looking to add warmth to the meal.

  • Antipasto Platter: A selection of olives, cheese, and cured meats creates a delightful appetizer that pairs beautifully with your stromboli’s flavors.

  • Wine Pairing: A glass of Chianti or a light Pinot Grigio can beautifully complement the creamy and earthy flavors within the stromboli.

  • Dessert Option: Consider serving a light sorbet or gelato afterward—its chill and sweetness rounds out the meal without being too filling.

Spinach and Mushroom Ricotta Stromboli Recipe FAQs

Can we eat spinach and mushroom together in the morning?
Absolutely! Spinach and mushrooms make for a nutritious, protein-packed breakfast option. Their earthy flavors blend wonderfully and can be enjoyed in omelets, scrambles, or even in a breakfast stromboli!

What is a good filling for a stromboli?
A good filling for a stromboli is not limited to just veggies. Aside from the spinach and mushroom in my recipe, you can include cooked meats like pepperoni, sausage, or ham. Try adding cheeses like provolone, mozzarella, or even feta for a delicious contrast. Mix in roasted peppers, zucchini, or any vegetables you love!

What kind of cheese goes in a stromboli?
Traditionally, mozzarella cheese is a favorite for its melting quality, but you can also combine it with ricotta for creaminess or use provolone for a sharper taste. Don't hesitate to experiment with other cheeses like gouda or cheddar depending on what flavors you fancy!

Should stromboli have sauce inside?
It depends on your preference! While the classic preparation keeps the sauce for dipping, you can absolutely add marinara, pesto, or a cheese sauce inside if you love that extra burst of flavor. Just be cautious with moisture; too much sauce may make the dough soggy.

Why shouldn't you eat raw spinach every day?
Raw spinach contains oxalic acid, which can interfere with calcium absorption and potentially lead to kidney stones if consumed in excessive amounts. It's best to enjoy it in moderation. Cooking the spinach helps reduce oxalate levels, allowing for easier digestion.

What should not be eaten with spinach every day?
It’s recommended to limit combining spinach with high-oxalate foods like rhubarb, beets, and nuts in everyday meals, especially for those prone to kidney stones. Balance is key – enjoy spinach along with a variety of other vegetables for optimal health benefits.

Spinach and Mushroom Ricotta Stromboli

Delicious Spinach and Mushroom Ricotta Stromboli Made Easy

This Spinach and Mushroom Ricotta Stromboli is a comforting, customizable dish perfect for pizza night.
Print Recipe Pin Recipe
Prep Time 30 minutes mins
Cook Time 40 minutes mins
Cooling Time 5 minutes mins
Total Time 1 hour hr 15 minutes mins
Servings: 4 slices
Course: Main Dishes
Cuisine: Italian
Calories: 350
Ingredients Equipment Method Nutrition Notes

Ingredients
  

For the Dough
  • 1 package Refrigerated Pizza Dough Store-bought or homemade
For the Filling
  • 10 oz Fresh Baby Spinach Can use frozen as substitute
  • 1 cup Baby Bella Mushrooms Sliced thin
  • ½ cup Onion Sliced thin, shallots can be used
  • ¼ teaspoon Garlic Powder Fresh minced garlic is a substitute
  • Salt and Pepper To taste
  • 1 cup Ricotta Cheese Cottage cheese can be used for lighter option
  • 1 cup Shredded Mozzarella Other melted cheeses can be used
  • ¼ teaspoon Italian Seasoning Any dried herb mix can suffice
For the Topping
  • 1 Egg Beaten, for egg wash
  • 2 tablespoon Water To mix with egg
For Serving
  • Marinara Sauce For dipping

Equipment

  • large skillet
  • baking pan

Method
 

Step-by-Step Instructions
  1. Preheat your oven to 400°F (200°C) and allow the refrigerated pizza dough to come to room temperature for about 15 minutes.
  2. In a large skillet, heat olive oil over medium heat, add sliced onions, mushrooms, and fresh spinach, sauté for 5-7 minutes, then season with salt and pepper.
  3. Drizzle more olive oil into a 9x13-inch baking pan and evenly spread it. Stretch the pizza dough into a large rectangle that fits the pan.
  4. Spread ricotta cheese over the dough, leaving a 1-1.5 inch border. Layer on sautéed vegetables, sprinkle with garlic powder and shredded mozzarella.
  5. Roll the dough tightly from one edge to the other, sealing sides and ends.
  6. Mix beaten egg with water and brush the entire stromboli, then and sprinkle with Italian seasoning.
  7. Bake assembled stromboli in the oven for 35-40 minutes until golden brown and crispy. Monitor closely in the last few minutes.
  8. Allow to cool for 5 minutes before slicing and serve warm with marinara sauce.

Nutrition

Serving: 1sliceCalories: 350kcalCarbohydrates: 30gProtein: 15gFat: 18gSaturated Fat: 9gPolyunsaturated Fat: 2gMonounsaturated Fat: 6gCholesterol: 45mgSodium: 500mgPotassium: 300mgFiber: 2gSugar: 3gVitamin A: 2500IUVitamin C: 15mgCalcium: 200mgIron: 3mg

Notes

Ensure pizza dough is at room temperature to avoid tearing and enhance flavor by sautéing vegetables properly. Allow the dish to rest before slicing for cleaner pieces.

Tried this recipe?

Let us know how it was!

Indulgent Lemon Ricotta Pancakes with Blueberry Bliss

July 17, 2025 by grace bellamy Leave a Comment

As I flipped my first pancake of the morning, the delightful fragrance of lemon and sweetness wafted through the kitchen, proving that brunch isn’t just a meal; it’s a celebration. These Fluffy Lemon Ricotta Pancakes with Blueberry Compote transform a typical weekend into a special occasion, reminiscent of sun-drenched spring mornings. Embracing a tangy twist from fresh lemon juice and zest, these pancakes strike the perfect balance between soft and hearty, thanks to the ricotta cheese. Not only are they a joy to prepare, but they also make for a crowd-pleasing dish that will impress your family and friends alike. Plus, the blueberry compote adds an irresistible burst of flavor, making this recipe not just family-friendly but an inviting centerpiece for any brunch gathering. How do you plan to elevate your next brunch?

Why Are Lemon Ricotta Pancakes Irresistible?

Fluffy Texture: These pancakes are delightfully airy, thanks to the ricotta cheese, achieving a unique fluffiness that will leave you craving more.
Zesty Kick: Infused with vibrant lemon zest and juice, they bring bright flavors that perfectly complement the sweetness of the blueberry compote.
Versatile Option: Perfect for spring breakfast or a weekend brunch, feel free to swap out blueberries for your favorite berries for a new twist!
Crowd-Pleasing Delight: Impress your guests with this gourmet-style dish that’s simple to prepare yet beautiful to serve. For an extra special treat, consider pairing your pancakes with a refreshing side like fresh fruit or yogurt.
Make-Ahead Friendly: Prepare the blueberry compote in advance for maximum convenience, ensuring a stress-free brunch experience.

Lemon Ricotta Pancakes with Blueberry Ingredients

For the Blueberry Compote
• Fresh Blueberries – Adds sweetness and a juicy burst; use fresh or frozen, but do not thaw if using frozen.
• Lemon Zest and Juice – Provides brightness and flavor; fresh lemons offer the best taste.
• Granulated Sugar – Sweetens both the pancake batter and blueberry compote; adjust to taste depending on blueberry sweetness.

For the Pancakes
• All-Purpose Flour – Acts as the base for structure; can substitute with gluten-free flour for a gluten-free option.
• Baking Powder – Leavens the pancakes, ensuring they stay fluffy.
• Ground Nutmeg – Adds warm spice notes; can be omitted for a simpler flavor.
• Salt – Balances sweetness and enhances overall flavors.
• Ricotta Cheese – Adds moisture and richness, creating hearty pancakes; cottage cheese can substitute in a pinch.
• Eggs – Provides structure and stability to the batter.
• Whole Milk – Enriches the batter; almond milk can be used for a dairy-free version.
• Baking Spray – Used for greasing the pan to prevent sticking.

Step‑by‑Step Instructions for Lemon Ricotta Pancakes with Blueberry

Step 1: Make the Blueberry Compote
In a small saucepan, combine fresh blueberries, the juice and zest of a lemon, and granulated sugar over medium-low heat. Stir gently and allow the mixture to simmer until the blueberries soften and release their juices, thickening into a compote, about 10-15 minutes. Once done, remove it from the heat and let it cool while you prepare the pancakes.

Step 2: Prepare the Pancake Batter
In a large mixing bowl, whisk together all-purpose flour, baking powder, ground nutmeg, salt, and sugar until evenly combined. In another bowl, mix ricotta cheese, eggs, whole milk, and the lemon juice and zest until smooth. Gently fold the wet ingredients into the dry mix, being careful not to overmix; a few lumps are okay for fluffy Lemon Ricotta Pancakes.

Step 3: Preheat the Griddle
Heat a non-stick griddle or large skillet over medium heat and lightly grease it with baking spray or butter to prevent sticking. Allow the surface to get hot, which should take about 2-3 minutes. Once it’s ready, you’ll know it’s hot enough when a few drops of water sizzle upon contact.

Step 4: Cook the Pancakes
Pour approximately ¼ cup of pancake batter onto the hot griddle for each pancake. Let them cook for about 3-4 minutes, or until small bubbles form on the surface and the edges look set. Carefully flip the pancakes and cook for an additional 2-3 minutes until both sides are golden brown.

Step 5: Serve the Pancakes
Stack your fluffy Lemon Ricotta Pancakes on a warm plate and generously top them with the blueberry compote you prepared earlier. For a buttery touch, add a pat of butter on top and drizzle with maple syrup if desired. Serve these delicious pancakes warm to enjoy their delightful flavors!

How to Store and Freeze Lemon Ricotta Pancakes

Fridge: Store leftover pancakes in an airtight container in the refrigerator for up to 3 days. Reheat in a toaster or microwave for a quick breakfast fix!

Freezer: For longer storage, place pancakes in a single layer on a baking sheet, freeze until solid, then stack with parchment paper between layers in a freezer-safe bag. They can be kept for up to 2 months.

Blueberry Compote: Keep the blueberry compote in a sealed jar in the fridge for up to a week. It can be reheated gently on the stove or in the microwave when serving with your pancakes.

Reheating: To enjoy your frozen Lemon Ricotta Pancakes, simply pop them in the toaster or microwave until warmed through. Add a fresh topping of blueberry compote for an extra burst of flavor!

Lemon Ricotta Pancakes with Blueberry Variations

Feel free to explore your creativity by customizing this delightful pancake recipe in delightful ways!

  • Berry Bliss: Swap blueberries for fresh raspberries or diced strawberries for a different flavor profile. Each berry brings its sweetness, making pancakes unique.
  • Nutty Crunch: Add poppy seeds or chia seeds into the pancake batter for an added crunch and a nutty flavor twist. It's a simple way to upgrade your breakfast!
  • Dairy-Free Delight: Use almond milk instead of whole milk for a lactose-free alternative or try coconut milk for a tropical flair. You'll still get those fluffy results!
  • Healthier Option: Substitute whole grain flour for all-purpose flour to boost fiber content while keeping that delicious taste. You'll enjoy a wholesome pancake experience!
  • Savory Twist: Incorporate fresh herbs like thyme or rosemary into the batter for a surprising savory pancake version that's great for brunch. Serve with a poached egg for more excitement!
  • Extra Sweetness: Top with a dollop of whipped cream or a drizzle of maple syrup for a luxurious touch that takes your pancakes over the top. Because who can resist a little indulgence?
  • Zesty Finish: Mix in orange zest along with the lemon zest for a citrus duo that elevates the layer of flavor to new heights. Bright and cheerful, perfect for springtime!
  • Fiery Variant: Add a pinch of cayenne pepper to the batter for a hint of heat, creating a bold contrast with the sweet blueberry compote. It's a deliciously daring choice!

Expert Tips for Lemon Ricotta Pancakes

  • Whisk Smoothly: Ensure your ricotta is whisked until smooth before mixing to avoid any lumps in your pancake batter. This creates a luxurious texture!
  • Don’t Overmix: Gently combine the wet and dry ingredients to keep your pancakes fluffy. Overmixing can lead to dense Lemon Ricotta Pancakes.
  • Fresh Ingredients Matter: Use fresh eggs and lemons for the best flavor. Old baking powder can hinder the rising; always check its freshness before use.
  • Control the Heat: Maintain medium heat to achieve golden-brown pancakes. Too high a temperature can lead to burnt outsides and raw insides.
  • Customize the Compote: Feel free to swap blueberries with raspberries or strawberries; just adjust the sugar accordingly based on the sweetness of the berries.
  • Make Ahead: Prepare the blueberry compote a day in advance for a quick and hassle-free brunch with delicious Lemon Ricotta Pancakes!

What to Serve with Lemon Ricotta Pancakes with Blueberry Compote

There's nothing like a delightful spread to elevate your pancake experience while bringing smiles all around the table.

  • Crispy Bacon: The salty crunch of crispy bacon contrasts beautifully with the sweetness of the pancakes, creating a satisfying flavor balance everyone will love.
  • Fresh Fruit Salad: A medley of vibrant, seasonal fruits adds a refreshing touch that complements the zesty pancakes while enhancing their spring vibe. This combination not only tastes great but also looks beautiful on the plate!
  • Greek Yogurt: Creamy, tangy Greek yogurt offers a protein-packed companion that balances the sweetness of syrup and blueberry compote, providing a lightness to your meal.
  • Honey Drizzle: For an extra touch of sweetness, a drizzle of honey amplifies the flavors of the pancakes and offers a delightful floral note that plays perfectly with the lemon and blueberries.
  • Vanilla Ice Cream: Indulging in a scoop of vanilla ice cream on top of warm pancakes is a decadent treat that transforms breakfast into dessert. The melting creaminess is an irresistible pairing!
  • Iced Coffee: A chilled glass of iced coffee is an energizing companion to your brunch; its smooth bitterness pairs nicely with the sweet and tangy flavors of the pancakes.
  • Lemonade Sparkler: A refreshing lemonade spritzer can brighten up the meal, adding a bubbly zest to your brunch and enhancing the lemony goodness of your pancakes.
  • Maple Syrup: A classic! Rich maple syrup adds a comforting sweetness, beautifully drenching the pancakes while tying together all elements of the meal.
  • Whipped Cream: Light and airy whipped cream rounds out the flavor profile, adding a luscious creaminess that works beautifully with the blueberry compote.

Make Ahead Options

These Lemon Ricotta Pancakes with Blueberry Compote are perfect for meal prep, allowing you to enjoy a delicious breakfast without the morning rush! You can prepare the blueberry compote up to 3 days in advance; simply store it in an airtight container in the refrigerator. To make the pancakes ahead of time, whip up the batter the night before and refrigerate (just be sure to cover it well to maintain freshness). When you're ready to enjoy your breakfast, stir the batter gently, and cook the pancakes as directed. They'll be just as fluffy and flavorful, saving you precious time on busy mornings.

Lemon Ricotta Pancakes with Blueberry Recipe FAQs

What to serve with lemon ricotta pancakes?
These pancakes pair wonderfully with a variety of sides! Consider serving them with fresh fruit like strawberries, banana slices, or even some crispy bacon for a sweet and savory combination. A dollop of Greek yogurt or whipped cream can add extra creaminess, while a light salad can complement the richness of the pancakes splendidly.

What does ricotta do to pancakes?
Ricotta cheese transforms pancakes by adding moisture and richness, which creates a delightful, fluffy texture. Its creamy consistency helps achieve a soft interior while providing a slight tang that balances the sweetness. The result is a pancake that feels hearty without being dense, making them a truly indulgent breakfast treat!

Are lemon ricotta pancakes healthy?
Absolutely! These lemon ricotta pancakes offer a good source of protein thanks to the ricotta cheese, making them a hearty breakfast option. You can boost their health benefits by reducing the sugar content or using whole-grain flour instead of all-purpose flour. Pairing with fruit not only adds flavor nutritional value but also keeps the dish balanced and satisfying.

Can you reheat ricotta pancakes?
Yes! To reheat leftover ricotta pancakes, simply place them in a toaster or microwave until warmed through. If you want to keep them crispy, the toaster works best! Adding a fresh topping of blueberry compote upon reheating can revive the flavors and give you that fresh-made taste.

What pairs well with lemon pancakes?
Lemon pancakes are delightful with a variety of toppings. Fresh berries, like strawberries or raspberries, enhance the citrus notes beautifully. A drizzle of honey or maple syrup can add sweetness, while a sprinkle of powdered sugar or a dollop of ricotta on top elevates the dish further. Try pairing with a light syrup made from citrus juices for a zesty twist!

What is the difference between ricotta pancakes and regular pancakes?
The primary difference lies in the texture and taste. Ricotta pancakes are typically fluffier and more moist due to the addition of ricotta cheese, which also infuses a subtle creaminess. Regular pancakes are lighter and denser, often relying solely on flour and liquid for consistency. The ricotta gives these pancakes a unique richness that elevates them from standard breakfast fare!

Lemon Ricotta Pancakes with Blueberry

Indulgent Lemon Ricotta Pancakes with Blueberry Bliss

These Lemon Ricotta Pancakes with Blueberry are fluffy, flavorful, and perfect for brunch.
Print Recipe Pin Recipe
Prep Time 15 minutes mins
Cook Time 20 minutes mins
Cooling Time 15 minutes mins
Total Time 50 minutes mins
Servings: 4 pancakes
Course: Breakfast
Cuisine: American
Calories: 320
Ingredients Equipment Method Nutrition Notes

Ingredients
  

Blueberry Compote
  • 2 cups Fresh Blueberries Use fresh or frozen, do not thaw if using frozen.
  • 1 tablespoon Lemon Zest Fresh lemons offer the best taste.
  • 2 tablespoon Lemon Juice Fresh lemons offer the best taste.
  • 1 cup Granulated Sugar Adjust to taste depending on blueberry sweetness.
Pancakes
  • 1 cup All-Purpose Flour Can substitute with gluten-free flour.
  • 2 tablespoon Baking Powder Leavens the pancakes.
  • 1 teaspoon Ground Nutmeg Can be omitted.
  • ½ teaspoon Salt
  • 1 cup Ricotta Cheese Cottage cheese can substitute.
  • 2 pcs Eggs
  • 1 cup Whole Milk Almond milk can be used.
  • 1 tablespoon Baking Spray For greasing the pan.

Equipment

  • Saucepan
  • Mixing Bowl
  • Griddle
  • Whisk

Method
 

Blueberry Compote
  1. In a small saucepan, combine fresh blueberries, lemon juice, lemon zest, and granulated sugar over medium-low heat. Stir gently and allow the mixture to simmer until blueberries soften, about 10-15 minutes.
  2. Remove from heat and let it cool.
Pancake Preparation
  1. In a mixing bowl, whisk together flour, baking powder, nutmeg, salt, and sugar until combined.
  2. In another bowl, mix ricotta cheese, eggs, milk, lemon juice, and zest until smooth.
  3. Gently fold the wet ingredients into the dry mix.
Cooking Pancakes
  1. Heat a non-stick griddle over medium heat and lightly grease with baking spray.
  2. Pour ¼ cup of batter onto the hot griddle. Cook for 3-4 minutes until bubbles form, then flip and cook for another 2-3 minutes.
Serving
  1. Stack pancakes on a warm plate, top with blueberry compote, and serve warm.

Nutrition

Serving: 2pancakesCalories: 320kcalCarbohydrates: 50gProtein: 8gFat: 10gSaturated Fat: 5gCholesterol: 70mgSodium: 300mgPotassium: 180mgFiber: 1gSugar: 14gVitamin A: 500IUVitamin C: 3mgCalcium: 160mgIron: 1.2mg

Notes

For best results, whisk ricotta until smooth and don't overmix the batter. Fresh ingredients are key for optimal flavor.

Tried this recipe?

Let us know how it was!

Creamy Spinach Artichoke Tortellini for Cozy Nights

July 17, 2025 by grace bellamy Leave a Comment

As I stirred the pot, the rich aroma of garlic and creamy sauce wafted through the kitchen, transporting me to my favorite Italian bistro. Today, I'm all about serving up a delightful spin on comfort food with my Creamy Spinach Artichoke Tortellini. This scrumptious dish blends tender tortellini with vibrant spinach and tangy artichokes, creating a satisfying meal that’s both quick to whip up and a real family favorite. In just 20 minutes, you'll have a wholesome dinner that feels indulgent without the fuss—perfect for busy weeknights or cozy gatherings. So, what twist will you add to elevate this simple joy?

Why is this dish a family favorite?

Quick preparation: With just 20 minutes from start to finish, you'll have a delicious meal on the table in no time!
Creamy indulgence: The rich, velvety sauce made from parmesan and mozzarella is utterly satisfying and comforting.
Nutrient-packed: Loaded with fresh spinach and artichokes, it’s a delicious way to sneak in those greens.
Customizable: Add your favorite ingredients like rotisserie chicken or sun-dried tomatoes for a personal touch. This Creamy Spinach Artichoke Tortellini can be your go-to recipe that adapts to your cravings!

Spinach Artichoke Tortellini Ingredients

Ready to whip up this creamy delight? Here’s what you need!

For the Tortellini
• 20 ounces cheese tortellini – This is the heart of the dish, offering a delightful cheesy bite.

For the Veggies
• 6 cups fresh spinach – Brings vibrant color and nutrients; frozen spinach can work if fresh isn’t available.
• 14-ounce can artichoke hearts, chopped – Adds a tangy kick; be sure to drain them well before use.

For the Sauce
• 4 tablespoons salted butter – A staple for creating that rich, creamy sauce. You can use unsalted butter if preferred.
• ¼ cup flour – Essential for thickening the sauce, creating that luscious texture. Gluten-free flour is a great alternative.
• 1 teaspoon kosher salt – Enhances the overall flavor; feel free to adjust based on your taste.
• ¼ teaspoon pepper – Provides a subtle hint of heat; modify to your liking.
• 4 cloves minced garlic – This aromatic gem infuses the dish with deep flavor; garlic powder (1 teaspoon) is a handy substitute.
• 4 cups milk – Forms the base of your creamy sauce; any dairy or plant-based milk can be used for a lighter version.
• 1 cup shredded parmesan cheese – Adds depth and richness; Pecorino cheese can be a nice swap.
• 1 cup shredded mozzarella cheese – Delivers that melty goodness, perfect for a cozy meal. Other melting cheeses like Monterey Jack can work just as well.

Now that you have everything ready, you’re just steps away from enjoying the rich, creamy indulgence of Spinach Artichoke Tortellini!

Step‑by‑Step Instructions for Spinach Artichoke Tortellini

Step 1: Cook the Tortellini
Begin by bringing a large pot of salted water to a rolling boil. Add 20 ounces of cheese tortellini and cook according to the package instructions, usually about 3–5 minutes until they float to the surface and are al dente. Once cooked, drain the tortellini in a colander and set aside, allowing time for excess water to remove.

Step 2: Sauté the Garlic
In a medium saucepan, melt 4 tablespoons of salted butter over medium-low heat. Add 4 cloves of minced garlic and sauté for about 1–2 minutes until fragrant but not browned. The warm aroma will fill your kitchen as the butter bubbles gently, creating the flavorful base for your creamy sauce.

Step 3: Create the Roux
Sprinkle in ¼ cup of flour, 1 teaspoon of kosher salt, and ¼ teaspoon of pepper into the pan. Whisk continually for 3-5 minutes, allowing the mixture to bubble and turn a light golden color. This roux will help thicken the sauce and provide a rich texture to your Spinach Artichoke Tortellini.

Step 4: Whisk in the Milk
Gradually pour in 4 cups of milk while whisking vigorously to prevent any lumps. Increase the heat to medium and keep stirring until the sauce thickens and begins to bubble, about 5-7 minutes. The mixture should take on a creamy consistency that will envelop your tortellini beautifully.

Step 5: Melt the Cheeses
Remove the saucepan from the heat and stir in 1 cup of shredded parmesan and 1 cup of shredded mozzarella cheese. Mix until all the cheese is melted and incorporated, creating a luscious, creamy sauce. If the sauce appears too thick, add a splash of milk to reach your desired consistency.

Step 6: Combine Ingredients
Gently fold in the cooked tortellini, 6 cups of fresh spinach, and the chopped artichoke hearts from a 14-ounce can. Stir until the spinach wilts and everything is well combined, showcasing the vibrant colors of the ingredients. This step brings together all the textures and flavors of your Spinach Artichoke Tortellini.

Step 7: Season and Serve
Taste the dish and adjust seasoning with more salt and pepper if necessary. Once everything is warm and evenly mixed, serve hot in bowls, garnished with extra cheese if desired. Enjoy this comforting dish of Spinach Artichoke Tortellini, perfect for family dinners or cozy nights in.

Spinach Artichoke Tortellini Variations

Feel free to explore your creativity and personalize this dish with delightful twists that play with flavor and texture!

  • Protein-Packed: Add cooked chicken or shrimp to increase protein while keeping the dish hearty and fulfilling. It transforms a simple pasta into a complete meal.

  • Burst of Flavor: Incorporate sun-dried tomatoes for a sweet and tangy touch that enriches the creamy sauce. The added color makes for a beautiful presentation too!

  • Cheesy Blend: Experiment with feta or goat cheese for a tangy kick that contrasts wonderfully with the creaminess of mozzarella and parmesan. Each bite will have a surprising depth.

  • Herbed Goodness: Toss in some fresh herbs like basil or parsley for a vibrant, garden-fresh flavor. A sprinkle of lemon zest can also brighten the whole dish!

  • Nutty Addition: Stir in toasted pine nuts or walnuts for a delightful crunch and nutty undertone. It adds an unexpected texture that elevates the dish.

  • Spicy Kick: For those who enjoy heat, sprinkle in red pepper flakes or diced jalapeños. This little zing creates an exciting twist that enlivens the creamy contours.

  • Vegetable Medley: Include sautéed mushrooms or bell peppers for an added earthy flavor and colorful presentation. It’s a beautiful way to sneak in more veggies!

  • Subtle Sweetness: Add a hint of cream cheese to the sauce for an irresistible creaminess that also provides a touch of sweetness. A comforting favorite that feels extra indulgent!

How to Store and Freeze Spinach Artichoke Tortellini

Fridge: Store leftover Spinach Artichoke Tortellini in an airtight container for up to 3 days. Reheat gently on the stovetop with a splash of milk to restore creaminess.

Freezer: To freeze, portion the cooked tortellini in freezer-safe bags or containers. It keeps well for up to 3 months. Thaw overnight in the fridge before reheating.

Reheating: When ready to enjoy your frozen tortellini, reheat on the stovetop over low heat, adding a touch of milk to keep the sauce silky. Stir frequently to avoid sticking.

Make-Ahead: You can assemble the Spinach Artichoke Tortellini ahead of time and store it in the fridge unbaked for up to 2 days; then, bake when you're ready to serve!

Expert Tips for Spinach Artichoke Tortellini

  • Stir Continuously: Ensure to stir the sauce continuously after adding milk to prevent lumps from forming, resulting in a smooth creaminess.
  • Don’t Overcook Spinach: Keep an eye on the spinach—it should wilt but remain bright green for optimal flavor and nutrition.
  • Adjusting Thickness: If your sauce gets too thick, gradually add more milk while stirring until you reach the creamy consistency you desire.
  • Quality Cheese Matters: Use good quality cheeses for a more flavorful Spinach Artichoke Tortellini; they’ll melt better and taste richer.
  • Prep Ahead: For a quicker dinner, prep your ingredients in advance; chop artichokes and garlic so you can whip this dish up in no time!
  • Personalize It: Feel free to get creative with add-ins; roasted chicken or sun-dried tomatoes can enhance your Spinach Artichoke Tortellini experience!

Make Ahead Options

These Creamy Spinach Artichoke Tortellini are perfect for meal prep enthusiasts! You can cook the tortellini and prepare the creamy sauce up to 24 hours in advance, allowing busy nights to run smoother. Simply cook the tortellini according to the package instructions, sauté the garlic, create the roux, and mix in the spinach and artichokes, but do not bake. Store the components separately in airtight containers in the refrigerator to maintain quality. When you're ready to enjoy, simply reheat the sauce gently over medium heat, fold in the cooked tortellini, and serve for a delicious meal that's just as delightful as when freshly made!

What to Serve With Spinach Artichoke Tortellini

Pair your creamy dish with delicious sides for a well-rounded meal experience.

  • Garlic Bread: The warm, buttery flavors of garlic bread provide a perfect companion, soaking up those creamy sauce remnants with every bite. Plus, who can resist the aroma of freshly baked bread wafting through the air?
  • Caesar Salad: Crisp romaine, crunchy croutons, and a zesty dressing add a refreshing contrast to the richness of the tortellini, creating a delightful balance on your plate. A sprinkle of parmesan ties the meal together beautifully.
  • Roasted Vegetables: Seasonal veggies like asparagus or bell peppers, lightly seasoned and roasted to perfection, offer a hearty texture along with vibrant colors that enhance the meal's appeal.
  • Mimosa: Light and refreshing, a glass of mimosa pairs beautifully with the creamy flavors, adding a burst of citrus that awakens the palate while keeping the atmosphere festive.
  • Lemon Sorbet: Serve this chilled, zesty sorbet for dessert as a refreshing palate cleanser after savoring the rich tortellini. It's an elegant way to end the meal, leaving a bright note to remember.
  • Wine Pairing: A crisp Pinot Grigio lifts the dish with its fruity notes while complementing the creaminess, making every mouthful even more enjoyable.

Spinach Artichoke Tortellini Recipe FAQs

How do I know if the spinach is fresh enough to use?
Absolutely! Fresh spinach should be vibrant green and crisp. Avoid any leaves that are wilting or have dark spots all over. When selecting, look for the leaves that are firm to the touch and have no yellowing—these are the ones that will make your Spinach Artichoke Tortellini shine!

How should I store leftovers of Spinach Artichoke Tortellini?
To keep your creamy creation fresh, store your Spinach Artichoke Tortellini in an airtight container in the refrigerator for up to 3 days. When reheating, add a splash of milk to restore that delightful creaminess. Gently warm it on the stovetop over low heat while stirring occasionally.

Can I freeze Spinach Artichoke Tortellini?
Absolutely! Freezing your Spinach Artichoke Tortellini is a great way to have a quick dinner ready in advance. Portion the cooked tortellini into freezer-safe bags or containers, ensuring you remove as much air as possible. It can be stored for up to 3 months. When ready to enjoy, thaw overnight in the fridge and reheat on the stovetop, adding a little milk to maintain creaminess.

What should I do if my sauce becomes too thick?
Very! If your sauce thickens up more than you’d like while cooking, don’t worry! Gradually whisk in additional milk until you achieve your desired consistency. I often add a splash at a time, stirring continuously until it's silky smooth again. Just taste and adjust the seasoning as you go!

Can I make this dish ahead of time?
You definitely can! If preparing for a busy evening, you can assemble the Spinach Artichoke Tortellini ahead of time and store it in the fridge unbaked for up to 2 days. When you’re ready to serve, simply pop it in the oven or stovetop to heat up. It’ll taste just as delicious while saving you time!

Is it necessary to rinse tortellini after cooking?
It's best not to rinse tortellini after cooking, as rinsing can wash away some of the flavor and increase the chance of the sauce not adhering properly. The starch left on the tortellini is what helps the sauce cling beautifully when you combine them for your Spinach Artichoke Tortellini!

Spinach Artichoke Tortellini

Creamy Spinach Artichoke Tortellini for Cozy Nights

This Creamy Spinach Artichoke Tortellini blends tender tortellini, vibrant spinach, and tangy artichokes for a comforting family favorite.
Print Recipe Pin Recipe
Prep Time 10 minutes mins
Cook Time 10 minutes mins
Total Time 20 minutes mins
Servings: 4 servings
Course: Main Dishes
Cuisine: Italian
Calories: 540
Ingredients Equipment Method Nutrition Notes

Ingredients
  

For the Tortellini
  • 20 ounces cheese tortellini This is the heart of the dish, offering a delightful cheesy bite.
For the Veggies
  • 6 cups fresh spinach Brings vibrant color and nutrients; frozen spinach can work if fresh isn’t available.
  • 14 ounces artichoke hearts, chopped Adds a tangy kick; be sure to drain them well before use.
For the Sauce
  • 4 tablespoons salted butter A staple for creating that rich, creamy sauce. You can use unsalted butter if preferred.
  • ¼ cup flour Essential for thickening the sauce, creating that luscious texture. Gluten-free flour is a great alternative.
  • 1 teaspoon kosher salt Enhances the overall flavor; feel free to adjust based on your taste.
  • ¼ teaspoon pepper Provides a subtle hint of heat; modify to your liking.
  • 4 cloves minced garlic This aromatic gem infuses the dish with deep flavor; garlic powder (1 teaspoon) is a handy substitute.
  • 4 cups milk Forms the base of your creamy sauce; any dairy or plant-based milk can be used for a lighter version.
  • 1 cup shredded parmesan cheese Adds depth and richness; Pecorino cheese can be a nice swap.
  • 1 cup shredded mozzarella cheese Delivers that melty goodness, perfect for a cozy meal. Other melting cheeses like Monterey Jack can work just as well.

Equipment

  • Large Pot
  • Medium saucepan
  • Colander
  • Whisk

Method
 

Step-by-Step Instructions
  1. Begin by bringing a large pot of salted water to a rolling boil. Add 20 ounces of cheese tortellini and cook according to the package instructions, usually about 3–5 minutes until they float to the surface and are al dente. Once cooked, drain the tortellini in a colander and set aside.
  2. In a medium saucepan, melt 4 tablespoons of salted butter over medium-low heat. Add 4 cloves of minced garlic and sauté for about 1–2 minutes until fragrant but not browned.
  3. Sprinkle in ¼ cup of flour, 1 teaspoon of kosher salt, and ¼ teaspoon of pepper into the pan. Whisk continually for 3-5 minutes, allowing the mixture to bubble and turn a light golden color.
  4. Gradually pour in 4 cups of milk while whisking vigorously to prevent any lumps. Increase the heat to medium and keep stirring until the sauce thickens and begins to bubble, about 5-7 minutes.
  5. Remove the saucepan from the heat and stir in 1 cup of shredded parmesan and 1 cup of shredded mozzarella cheese. Mix until all the cheese is melted and incorporated.
  6. Gently fold in the cooked tortellini, 6 cups of fresh spinach, and the chopped artichoke hearts from a 14-ounce can. Stir until the spinach wilts and everything is well combined.
  7. Taste the dish and adjust seasoning with more salt and pepper if necessary. Once everything is warm and evenly mixed, serve hot in bowls, garnished with extra cheese if desired.

Nutrition

Serving: 1servingCalories: 540kcalCarbohydrates: 70gProtein: 20gFat: 25gSaturated Fat: 15gPolyunsaturated Fat: 1gMonounsaturated Fat: 10gCholesterol: 75mgSodium: 800mgPotassium: 800mgFiber: 5gSugar: 4gVitamin A: 2000IUVitamin C: 30mgCalcium: 600mgIron: 3mg

Notes

Tips for better results include stirring continuously after adding milk to prevent lumps, and ensuring spinach wilts but remains bright green for optimal flavor and nutrition.

Tried this recipe?

Let us know how it was!

Indulge in Balsamic Caprese Stuffed Chicken Breasts Today

July 17, 2025 by grace bellamy Leave a Comment

As I sat at a cozy café in Tuscany, a burst of flavors enveloped me—juicy chicken paired with the freshest tomatoes and fragrant basil. I couldn’t help but think of how I could recreate that magical Caprese experience at home. Enter my Balsamic Caprese Stuffed Chicken Breasts! This recipe is not only simple to whip up after a long day but also a crowd-pleaser that will impress guests and family alike. The combination of melted mozzarella, sun-dried tomatoes, and a luscious balsamic reduction is an explosion of flavor you won’t want to miss. Perfect for weeknight dinners or special occasions, this dish brings a taste of Italy to your kitchen. Are you ready to elevate your dinner game?

Why is this chicken recipe a winner?

Simplicity: The preparation process is straightforward, perfect for busy weeknights or novice cooks. Flavor Explosion: With fresh tomatoes, fragrant basil, and melty mozzarella, every bite bursts with the essence of a classic Caprese. Savory Sweet Balance: The balsamic reduction ties it all together, creating a perfect harmony of sweet and tangy flavors. Versatile Pairing: Serve it alongside a light salad or sautéed veggies for a complete meal. Crowd-Pleasing: This dish guarantees rave reviews, making it your go-to recipe for entertaining. For an extra boost of freshness, pair it with a delightful light salad like Spinach Strawberry Salad with Balsamic Poppy Seed Dressing.

Balsamic Caprese Stuffed Chicken Breasts Ingredients

• Elevate your dinner with these must-have ingredients!

For the Chicken

  • Chicken Breasts – Boneless, skinless ensures juicy, tender meat.
  • Salt & Pepper – Essential for enhancing the chicken's natural flavors.
  • Dried Oregano – Adds a lovely herbal depth; fresh works even better!
  • Dried Basil – Complements the tomatoes well; fresh basil can intensify flavor.

For the Stuffing

  • Roma Tomatoes – Provides delicious moisture and acidity; any ripe tomato can substitute.
  • Sun-Dried Tomato Strips – Infuses rich umami flavor; pick ones in oil for extra taste.
  • Mozzarella Cheese – Melty goodness that makes the stuffing creamy; try provolone for variety.
  • Basil Leaves – Fresh and aromatic, perfect for stuffing; chop them for manageable portions.
  • Garlic – Freshly minced offers a robust flavor compared to pre-packaged.

For the Balsamic Reduction

  • Balsamic Vinegar – The star of the sauce; use high-quality for the best flavor impact.
  • Brown Sugar – Balances the vinegar's acidity; white sugar works in a pinch.

These flavorful ingredients come together beautifully to craft your own Balsamic Caprese Stuffed Chicken Breasts right at home!

Step‑by‑Step Instructions for Balsamic Caprese Stuffed Chicken Breasts

Step 1: Preheat the Oven
Begin by preheating your oven to 180°C (350°F). This ensures your Balsamic Caprese Stuffed Chicken Breasts will cook evenly and thoroughly. While the oven heats up, prepare your chicken breasts for stuffing by securing a cutting board and a sharp knife at hand.

Step 2: Prepare the Chicken
Carefully create a pocket in each chicken breast by slicing about three-quarters of the way through the thickest side. Take your time to ensure the pocket is large enough for the stuffing, but be cautious not to cut all the way through. This step will become the flavorful canvas for your stuffing ingredients.

Step 3: Season the Chicken
Generously season the chicken breasts with salt, pepper, dried oregano, and dried basil. Be sure to rub the seasonings into the meat to enhance the flavor throughout. After seasoning, drizzle a bit of oil from the sun-dried tomatoes over the breasts to add moisture and richness before moving on to the next step.

Step 4: Stuff the Chicken
Start stuffing each chicken breast with a delightful mix of slices of fresh Roma tomato, sun-dried tomato strips, gooey mozzarella cheese, and fragrant basil leaves. Pack the ingredients in well, but don’t overstuff! Once filled, use toothpicks to seal each pocket securely, ensuring all those delicious flavors stay tucked inside.

Step 5: Sear the Chicken
In a large skillet, heat some remaining sun-dried tomato oil over medium-high heat. Once hot, place your stuffed chicken breasts in the skillet and sear for about 2 minutes on each side, or until they achieve a lovely golden brown color. This step adds texture and enhances flavor before they jump into the oven.

Step 6: Prepare the Balsamic Sauce
While the chicken is searing, mix together minced garlic, balsamic vinegar, and brown sugar in a separate jug. Stir until well combined, creating a rich sauce that will complement your stuffed chicken perfectly. Once your chicken is seared, carefully pour this tangy mixture around the breasts in the skillet.

Step 7: Bake the Chicken
Now it's time to transform your skillet into the oven! Transfer the skillet directly into your preheated oven and bake for 10 to 15 minutes, or until the chicken is cooked through and reaches an internal temperature of 165°F (74°C). The cheese should be melted, bubbling, and begging to be enjoyed.

Step 8: Serve and Drizzle
After baking, carefully remove the skillet from the oven and let the chicken rest for a few minutes. Remove the toothpicks, then drizzle the pan's juices generously over each stuffed chicken breast. This luscious finish not only adds flavor but elevates the presentation of your Balsamic Caprese Stuffed Chicken Breasts for a delightful meal.

Make Ahead Options

These Balsamic Caprese Stuffed Chicken Breasts are perfect for meal prep enthusiasts looking to save time during busy weeknights! You can prepare the chicken breasts by creating the pockets and seasoning them up to 24 hours in advance, simply refrigerate until ready to stuff. The stuffing ingredients, including the fresh and sun-dried tomatoes, can also be chopped and stored separately in airtight containers for up to 3 days. When you're ready to cook, just stuff the breasts, sear, and bake as directed. This approach ensures your chicken stays juicy and delicious, allowing you to enjoy restaurant-quality results with minimal effort!

What to Serve with Caprese Stuffed Balsamic Chicken?

Elevate your dining experience with irresistible sides that beautifully complement your flavorful chicken.

  • Creamy Mashed Potatoes: The velvety texture contrasts nicely with the chicken's juiciness, soaking up the balsamic reduction perfectly.
  • Garlic Roasted Asparagus: This vibrant side adds a fresh, crunchy element that balances the richness of the stuffed chicken. Simply toss asparagus with olive oil, garlic, and a sprinkle of salt before roasting until tender.
  • Mixed Green Salad: A light salad with lemon vinaigrette offers a refreshing crunch that cuts through the savory richness of the dish. Add cherry tomatoes and cucumbers for extra color and flavor!
  • Balsamic Glazed Brussels Sprouts: The sweet-tart glaze echoes the flavors in the chicken, making for a cohesive meal that excites the palate. Roast until caramelized for an extra depth of flavor.
  • Quinoa Pilaf: Nutty quinoa offers a wholesome grain option that adds a fun texture, along with the vibrant flavors of bell peppers and herbs.
  • Italian Ciabatta Bread: Crusty bread to soak up the delicious balsamic sauce adds authenticity, making each bite feel like a trip to Italy.
  • Chardonnay: A glass of chilled Chardonnay pairs beautifully, enhancing the dish's flavors with its crisp, fruity notes.

Expert Tips for Balsamic Caprese Stuffed Chicken

  • Choose Quality Chicken: Opt for organic or free-range chicken breasts when possible. It enhances flavor and ensures a better texture throughout your dish.

  • Avoid Overstuffing: Be mindful of how much stuffing you add to each chicken breast. Overstuffing can prevent them from cooking evenly and may cause your delicious filling to spill out during baking.

  • Use Fresh Ingredients: Fresh basil and ripe tomatoes offer a vibrant flavor that dried or canned counterparts cannot match. They will take your Balsamic Caprese Stuffed Chicken to the next level.

  • Monitor Cooking Time: Chicken sizes can vary, so always check the internal temperature. Ensure it reaches 165°F (74°C) to prevent dryness while keeping it juicy.

  • Rest Before Serving: Allow the chicken to rest for a few minutes after baking. This helps retain moisture and makes for a beautifully tender bite.

  • Enhance the Sauce: Experiment with adding a splash of honey or balsamic glaze to the sauce before pouring it around the chicken for an extra layer of flavor.

Balsamic Caprese Stuffed Chicken Variations

Feel free to unleash your culinary creativity and customize this dish to your taste buds!

  • Spinach Twist: Replace fresh basil with fresh spinach leaves for a milder flavor that still adds a delightful green touch to your stuffing.
  • Smoky Flavor: Substitute mozzarella cheese with smoked cheese for a rich, campfire-inspired twist that infuses the chicken with unexpected depth.
  • Vegan Option: Swap chicken breasts for large portobello mushrooms—stuff them the same way for a hearty vegetarian alternative bursting with flavors!
  • Gluten-Free: Ensure all ingredients, especially any sauces or seasonings, are marked gluten-free to accommodate those with gluten sensitivities.
  • Zesty Kick: Add chopped jalapeños or crushed red pepper flakes to the stuffing for a refreshing heat that'll tantalize your taste buds.
  • Fruit Fusion: Introduce diced fresh peaches or apricots into the stuffing for a touch of sweetness that beautifully contrasts the tangy balsamic.
  • Herb Mix: Mix in other herbs like thyme or rosemary with your stuffing for a fragrant bouquet that elevates the overall flavor profile.
  • Creamy Addition: Consider adding a dollop of cream cheese into the stuffing for an extra layer of creaminess that pairs perfectly with the tomatoes and herbs.

How to Store and Freeze Balsamic Caprese Stuffed Chicken

Fridge: Store leftovers in an airtight container in the refrigerator for up to 3 days. This helps maintain flavor and moisture while keeping your delicious Balsamic Caprese Stuffed Chicken fresh.

Freezer: If you want to save it longer, freeze the stuffed chicken in a freezer-safe container for up to 3 months. Thaw in the fridge overnight before reheating.

Reheating: For the best texture, reheat the chicken in the oven at 180°C (350°F) for about 15-20 minutes, covered with foil to keep it moist. Avoid microwaving, as this can dry it out.

Wraps: If you plan to freeze, individually wrap each chicken breast in plastic wrap before placing them in a container to prevent freezer burn.

Balsamic Caprese Stuffed Chicken Breasts Recipe FAQs

What should I look for when selecting chicken breasts?
Absolutely! When selecting chicken breasts, look for boneless and skinless pieces for the best results. Ensure the meat is pink, firm, and free of dark spots or any unusual odors. Fresh chicken should feel moist but not slimy, indicating it's still good to cook with.

How can I store leftovers of Balsamic Caprese Stuffed Chicken?
Very! To store leftovers, place them in an airtight container in the refrigerator for up to 3 days. Be sure the container is well sealed to preserve flavor and moisture. Alternatively, you can freeze the chicken in a freezer-safe container for up to 3 months.

What’s the best way to reheat stuffed chicken?
I often recommend reheating stuffed chicken in the oven for the best texture! Preheat your oven to 180°C (350°F). Place the chicken in a baking dish, cover with foil to trap moisture, and heat for about 15-20 minutes or until warmed through. This keeps the chicken juicy and delicious.

Can I freeze Balsamic Caprese Stuffed Chicken? If so, what is the best method?
Absolutely! You can freeze Balsamic Caprese Stuffed Chicken. Start by individually wrapping each stuffed breast in plastic wrap, then place them in a freezer-safe container or resealable bag. This method prevents freezer burn and keeps them fresh for up to 3 months. When ready to eat, thaw overnight in the refrigerator before reheating.

Does balsamic vinegar make chicken tender?
Very! Balsamic vinegar can help tenderize chicken because it contains acids that break down proteins. Marinating the chicken in balsamic vinegar for 30 minutes to an hour before cooking will enhance its tenderness and infuse it with a rich flavor. Pair it with some oil and herbs to create an extra delightful marinade!

What side dishes pair well with Caprese stuffed chicken?
Oh, the more, the merrier! To complement the flavors of your Balsamic Caprese Stuffed Chicken, consider serving it with a light salad, such as a mixed greens salad with a lemon vinaigrette. Grilled vegetables or a side of garlic bread also makes for a delightful pairing, balancing the richness of the cheese and sauce perfectly.

Balsamic Caprese Stuffed Chicken Breasts

Indulge in Balsamic Caprese Stuffed Chicken Breasts Today

Experience the explosion of flavors in Balsamic Caprese Stuffed Chicken Breasts—juicy chicken, fresh tomatoes, and a balsamic reduction.
Print Recipe Pin Recipe
Prep Time 15 minutes mins
Cook Time 25 minutes mins
Resting Time 5 minutes mins
Total Time 45 minutes mins
Servings: 4 breasts
Course: Main Dishes
Cuisine: Italian
Calories: 350
Ingredients Equipment Method Nutrition Notes

Ingredients
  

For the Chicken
  • 4 pieces Boneless Skinless Chicken Breasts Ensures juicy, tender meat.
  • 1 teaspoon Salt Essential for enhancing flavor.
  • 1 teaspoon Pepper Essential for enhancing flavor.
  • 1 teaspoon Dried Oregano Adds herbal depth.
  • 1 teaspoon Dried Basil Complements the flavors.
For the Stuffing
  • 2 cups Roma Tomatoes Provides moisture and acidity.
  • 1 cup Sun-Dried Tomato Strips Pick ones in oil for taste.
  • 1 cup Mozzarella Cheese Melty goodness.
  • ½ cup Basil Leaves Fresh and aromatic.
  • 2 cloves Garlic Freshly minced for better flavor.
For the Balsamic Reduction
  • ½ cup Balsamic Vinegar High-quality for best flavor.
  • 1 tablespoon Brown Sugar Balances acidity.

Equipment

  • skillet
  • Oven
  • Knife
  • cutting board

Method
 

Step-by-Step Instructions
  1. Preheat the oven to 180°C (350°F).
  2. Create a pocket in each chicken breast by slicing about three-quarters of the way through.
  3. Season the chicken breasts with salt, pepper, dried oregano, and dried basil. Drizzle with sun-dried tomato oil.
  4. Stuff chicken breasts with Roma tomato slices, sun-dried tomatoes, mozzarella cheese, and basil leaves. Use toothpicks to seal.
  5. Sear stuffed chicken in a skillet over medium-high heat until golden brown, about 2 minutes per side.
  6. Mix minced garlic, balsamic vinegar, and brown sugar in a separate jug and stir to combine. Pour around chicken in the skillet.
  7. Transfer the skillet to the oven and bake for 10 to 15 minutes until chicken is cooked through and cheese is melted.
  8. Let chicken rest for a few minutes before serving. Drizzle pan juices over each breast.

Nutrition

Serving: 1breastCalories: 350kcalCarbohydrates: 10gProtein: 30gFat: 20gSaturated Fat: 8gPolyunsaturated Fat: 1gMonounsaturated Fat: 5gCholesterol: 90mgSodium: 600mgPotassium: 600mgFiber: 2gSugar: 4gVitamin A: 500IUVitamin C: 15mgCalcium: 250mgIron: 2mg

Notes

Opt for quality ingredients for the best results. Allow the chicken to rest post-baking for better texture.

Tried this recipe?

Let us know how it was!

Delicious Honey Garlic Butter Shrimp & Broccoli in 30 Minutes

July 17, 2025 by grace bellamy Leave a Comment

Is there anything quite as satisfying as a quick weeknight dinner that feels like a special treat? Enter my Honey Garlic Butter Shrimp & Broccoli, a dish that takes the hassle out of cooking while delivering on flavor in a big way. With tender shrimp bathed in a sweet and savory glaze that’s complemented by crisp broccoli, this recipe is not just a feast for the taste buds—it’s also a healthier alternative to takeout. Plus, it comes together in a flash, making it perfect for those busy evenings when the last thing you want is to face a long lineup at your favorite restaurant. Could dinner be any easier? Let’s dive into this culinary delight that’s sure to win over your family and awaken your inner chef!

Why is this dish a weeknight winner?

Quick and Easy: This recipe is designed for busy evenings, allowing you to whip up a delicious meal in just 30 minutes.

Flavor Explosion: The harmonious blend of honey and garlic creates a mouthwatering glaze that elevates the shrimp and broccoli in every bite.

Healthy Alternative: Packed with protein and nutrition, this dish is a guilt-free indulgence compared to takeout options.

Versatile: Feel free to switch up the veggies! Substitute with snap peas or bell peppers for a twist on flavors.

Crowd-Pleasing: Whether cooking for family or entertaining guests, this dish will impress everyone at the table, akin to my Garlic Butter Chicken Bites with Creamy Parmesan Pasta.

Minimum Mess, Maximum Impact: With just one skillet needed, cleanup is a breeze—leaving more time to enjoy your meal!

Honey Garlic Butter Shrimp & Broccoli Ingredients

• For the Sauce

  • Honey – Adds sweetness and a sticky texture; can substitute with agave syrup or maple syrup.
  • Low Sodium Soy Sauce – Contributes saltiness and umami flavor; use tamari for a gluten-free option.
  • Fresh Grated Ginger – Provides zing and warmth; ground ginger can be used as a substitute.
  • Minced Garlic – Offers aromatic flavor depth; adjust garlic amount to taste.
  • Red Pepper Flakes – Adds a hint of heat; omit for a milder dish or use fresh chili.
  • Cornstarch – Acts as a thickening agent for the sauce; can replace with arrowroot starch for a gluten-free option.

• For the Shrimp and Broccoli

  • Large Shrimp (peeled & deveined) – Main protein source, tender and quick to cook; may use assorted seafood if desired.
  • Butter – Enhances richness and flavor; substitute with olive oil for a lighter option.
  • Chopped Broccoli – Adds color, nutrition, and crunch; frozen broccoli can be used but must be thawed.
  • Olive Oil – Used for cooking, adds flavor; can replace with vegetable oil.

Enjoy this delightful combination of Honey Garlic Butter Shrimp & Broccoli that’s bound to be a staple for quick and satisfying weeknight meals!

Step‑by‑Step Instructions for Honey Garlic Butter Shrimp & Broccoli

Step 1: Prepare the Sauce
In a small mixing bowl, combine ¼ cup of honey, ¼ cup of low sodium soy sauce, 1 tablespoon of freshly grated ginger, 3 cloves of minced garlic, and a pinch of red pepper flakes. Whisk together until well blended, creating a smooth glaze. This sweet and savory sauce will infuse your Honey Garlic Butter Shrimp & Broccoli with incredible flavor.

Step 2: Marinate the Shrimp
Place 1 pound of peeled and deveined large shrimp in a medium bowl. Pour about one-third of the prepared sauce over the shrimp, ensuring they’re evenly coated. Allow the shrimp to marinate for 30 minutes at room temperature, deepening their flavor while you prep the remaining ingredients.

Step 3: Cook the Broccoli
Meanwhile, heat 1 tablespoon of olive oil in a large skillet over high heat. Add 2 cups of chopped broccoli and season with salt and freshly cracked pepper. Stir-fry for about 5-6 minutes, or until the broccoli is bright green and tender-crisp. Once cooked, remove the broccoli from the skillet and set it aside on a plate.

Step 4: Cook the Shrimp
In the same skillet, melt 2 tablespoons of butter over medium-high heat. Add the marinated shrimp (discard the marinade) in a single layer and cook for 2 minutes per side, or until they turn pink and opaque. Be careful not to overcook; the shrimp should curl slightly but remain tender.

Step 5: Thicken the Sauce
Pour in the remaining honey-garlic sauce while stirring in 1 tablespoon of cornstarch mixed with 1 tablespoon of water. Allow the mixture to simmer for 2-3 minutes, stirring occasionally, until the sauce thickens and becomes glossy. This tasty sauce will beautifully envelop the shrimp.

Step 6: Combine the Ingredients
Return the sautéed broccoli to the skillet, tossing gently to combine with the honey garlic butter shrimp. Cook for an additional 1-2 minutes, allowing the flavors to meld together and the broccoli to warm through. The vibrant colors and aromas will have your kitchen buzzing.

Step 7: Serve the Dish
Transfer your delicious Honey Garlic Butter Shrimp & Broccoli onto plates, serving it over a bed of rice or pasta. Drizzle any extra sauce over the top for added flavor. This delightful meal is ready to be enjoyed, providing a satisfying, healthy alternative to takeout!

What to Serve with Honey Garlic Butter Shrimp & Broccoli

Create a memorable meal by pairing this delightful dish with complementary sides that enhance its flavors and textures.

  • Steamed Jasmine Rice: The fluffy, aromatic rice is perfect for soaking up the honey-garlic sauce, making every bite a delight.

  • Crispy Sweet Potato Fries: Their natural sweetness and crunchy texture contrast beautifully with succulent shrimp, adding a fun twist to your meal.

  • Garlic Noodles: The buttery, garlicky noodles echo the dish's flavors while providing a satisfying alternative to plain rice.

  • Asian Cucumber Salad: A refreshing counterpoint, this crisp salad with a tangy dressing brightens the meal with crunch and acidity.

  • Lemon Garlic Asparagus: The bright citrus notes and tender crunch of asparagus create a vibrant side, balancing the rich shrimp and buttery sauce.

  • Chilled Sake or White Wine: An elegant drink choice, both will enhance the meal with their crisp notes, making each sip as enjoyable as the dish itself.

  • Fruit Sorbet: For dessert, a light and fruity sorbet cleanses the palate, providing a sweet finish to this hearty meal.

How to Store and Freeze Honey Garlic Butter Shrimp & Broccoli

Fridge: Store leftovers in an airtight container for up to 2 days. Reheat gently on the stovetop to maintain the shrimp's tenderness.

Freezer: If freezing, separate the shrimp and broccoli before placing in a freezer-safe bag. They can be frozen for up to 2 months; however, the texture may change when reheated.

Reheating: For best results, thaw overnight in the fridge before reheating. Warm gently in a skillet over low heat while adding a splash of water or broth to revive moisture.

Avoid Excess Water: If you've used frozen broccoli, ensure it’s fully thawed and drained before adding it to the dish to prevent watery results upon reheating.

Expert Tips for Honey Garlic Butter Shrimp & Broccoli

  • Marinate for Flavor: Let the shrimp marinate for at least 30 minutes; this step enhances the overall taste, making the dish more irresistible.

  • Avoid Overcooking: Shrimp cooks quickly—only 2 minutes per side. Once they are pink and curled, remove them to maintain tenderness.

  • Proper Broccoli Prep: If using frozen broccoli, ensure it is completely thawed and dry to prevent excess water in your dish.

  • Customize Your Veggies: Feel free to substitute broccoli with other veggies like snap peas or bell peppers for added variety and flavor in your Honey Garlic Butter Shrimp & Broccoli.

  • Use a Non-stick Pan: This helps to avoid sticking and makes the cooking process smoother, especially when cooking shrimp and broccoli together.

  • Serve Immediately: For the best texture and flavor, serve this dish right after cooking. It’s when the shrimp are juicy and the broccoli is crisp!

Honey Garlic Butter Shrimp & Broccoli Variations

Feel free to explore new flavors and textures in this delightful dish!

  • Colorful Veggies: Swap the broccoli for snap peas or bell peppers to add a burst of color and unique crunch.
  • Low-Carb Twist: Replace rice with zucchini noodles or cauliflower rice for a lighter, low-carb option that still satisfies.
  • Spicy Kick: Add sliced jalapeños or a dash of sriracha to the sauce for an extra layer of heat that will awaken your taste buds.
  • Nutty Crunch: Sprinkle toasted sesame seeds or chopped peanuts over the finished dish for a delightful crunch and nutty flavor.
  • Coconut Flavor: Use coconut oil instead of butter for a tropical twist that brings a whole new dimension to the sauce.
  • Asian Flair: Add a splash of rice vinegar or sesame oil for a deeper umami flavor in the sauce that enhances the overall dish.
  • Flavor Boost: Toss in a handful of fresh herbs like cilantro or Thai basil before serving for a bright, aromatic finish that elevates every bite.

Explore these variations to customize your Honey Garlic Butter Shrimp & Broccoli into something uniquely yours—perfect for any mood or occasion!

Make Ahead Options

These Honey Garlic Butter Shrimp & Broccoli are perfect for busy home cooks looking to streamline their meal prep! You can marinate the shrimp in the honey garlic sauce up to 24 hours in advance to enhance the flavor. Additionally, chop the broccoli and store it in an airtight container in the refrigerator for up to 3 days. When you're ready to enjoy this dish, simply sauté the shrimp and broccoli as directed, making sure to discard the marinade before cooking the shrimp to maintain their tenderness. This approach not only saves you time but also ensures a delicious, restaurant-quality meal with minimal effort on those hectic weeknights!

Honey Garlic Butter Shrimp & Broccoli Recipe FAQs

Should I cook broccoli before putting it in stir-fry?
Absolutely! Cooking broccoli beforehand can enhance its texture and taste. However, in this recipe, we stir-fry the broccoli directly, which allows it to retain a nice crunch and vibrant color. Just ensure to sauté it until it’s tender, as specified in the instructions.

Is honey garlic good for stir-fry?
Very! The honey garlic combination brings a sweet and savory element that perfectly complements the shrimp and broccoli in this dish. It not only enhances the overall flavor, but also creates a glossy sauce that clings beautifully to the ingredients, making every bite delightful.

How do Chinese restaurants make shrimp so tender?
Chinese restaurants often use a technique called "velveting." To achieve that tender texture, marinate the shrimp in a mix of cornstarch, egg white, and a dash of oil for about 30 minutes before cooking. This process creates a protective layer, preventing the shrimp from becoming rubbery and helping to keep them juicy during cooking.

What veggies go with honey garlic shrimp?
You can transform your dish by using a variety of veggies! Snap peas, bell peppers, or even carrots will complement the honey garlic sauce wonderfully. Experimenting with these options will not only add different flavors but also a rainbow of colors to your plate, making it even more appetizing!

Can you stir-fry broccoli without boiling it first?
Certainly! In fact, for this Honey Garlic Butter Shrimp & Broccoli recipe, it's best to directly sauté the broccoli. Cook it on high heat in olive oil for about 5-6 minutes until it’s bright green and tender-crisp—this ensures you keep all the nutrients and the beautiful crunch that pairs so well with the shrimp.

Do I need to boil carrots before stir-frying?
No boiling necessary! Simply chop them into thin slices or julienne them, and add them to the stir-fry. Carrots can cook quickly when cut small, and this method retains their flavor and texture, adding a lovely crunch to your dish.

When to add garlic and ginger to stir fry?
Add minced garlic and grated ginger toward the end of your sautéing process. They should be added just after the proteins or veggies are cooked through, allowing their essential oils to release and impart their flavors without burning. This is key in achieving that aromatic kick that makes your stir-fry irresistible.

Should you marinate vegetables for stir fry?
Marinating veggies is a great way to infuse extra flavor, but it’s not always necessary. For quick-cooking vegetables like broccoli in this recipe, simply seasoning them before cooking is usually sufficient. If you have heartier veggies, you can marinate them briefly in a soy sauce mixture to enhance their taste before adding to the stir-fry.

Enjoy these Honey Garlic Butter Shrimp & Broccoli Recipe FAQs to take your cooking experience to the next level!

Honey Garlic Butter Shrimp & Broccoli

Delicious Honey Garlic Butter Shrimp & Broccoli in 30 Minutes

A quick and satisfying Honey Garlic Butter Shrimp & Broccoli dish that is flavorful and a healthier alternative to takeout.
Print Recipe Pin Recipe
Prep Time 30 minutes mins
Cook Time 15 minutes mins
Total Time 45 minutes mins
Servings: 4 servings
Course: Main Dishes
Cuisine: Asian
Calories: 300
Ingredients Equipment Method Nutrition Notes

Ingredients
  

For the Sauce
  • ¼ cup honey can substitute with agave syrup or maple syrup
  • ¼ cup low sodium soy sauce use tamari for gluten-free
  • 1 tablespoon fresh grated ginger ground ginger can be used as a substitute
  • 3 cloves minced garlic adjust to taste
  • pinch red pepper flakes omit for milder dish
  • 1 tablespoon cornstarch can use arrowroot starch for gluten-free
For the Shrimp and Broccoli
  • 1 pound large shrimp (peeled & deveined) may use assorted seafood
  • 2 tablespoons butter substitute with olive oil for lighter option
  • 2 cups chopped broccoli use thawed frozen broccoli if needed
  • 1 tablespoon olive oil can replace with vegetable oil

Equipment

  • skillet
  • Mixing Bowl

Method
 

Step-by-Step Instructions
  1. In a small mixing bowl, combine the honey, soy sauce, grated ginger, minced garlic, and red pepper flakes. Whisk together to create a smooth glaze.
  2. In a medium bowl, place the shrimp and pour one-third of the sauce over. Marinate for 30 minutes.
  3. Heat olive oil in a large skillet over high heat. Add broccoli, season with salt and pepper, and stir-fry for 5-6 minutes. Remove from skillet.
  4. In the same skillet, melt butter. Add marinated shrimp and cook for 2 minutes per side until pink and opaque.
  5. Pour in remaining sauce and add cornstarch mixed with water. Simmer for 2-3 minutes until the sauce thickens.
  6. Return broccoli to the skillet and toss gently with the shrimp. Cook for an additional 1-2 minutes.
  7. Serve over rice or pasta and drizzle extra sauce on top.

Nutrition

Serving: 1servingCalories: 300kcalCarbohydrates: 35gProtein: 25gFat: 10gSaturated Fat: 5gPolyunsaturated Fat: 1gMonounsaturated Fat: 3gCholesterol: 220mgSodium: 500mgPotassium: 500mgFiber: 4gSugar: 15gVitamin A: 500IUVitamin C: 70mgCalcium: 80mgIron: 2mg

Notes

Serve immediately for the best texture and flavor. Customize with other vegetables if desired.

Tried this recipe?

Let us know how it was!

Irresistibly Delicious Toasted Caprese Garlic Bread Recipe

July 16, 2025 by grace bellamy Leave a Comment

As I pulled the golden, crusty bread out of the oven, the air was filled with a tantalizing aroma of garlic and fresh basil—if only you could catch a whiff yourself! This Toasted Caprese Garlic Bread perfectly embodies the essence of summer with its vibrant colors and irresistible flavors. With juicy tomatoes, creamy mozzarella, and a drizzle of balsamic reduction, it transforms into a delightful appetizer or side dish that’s just as perfect for a gathering as it is for a cozy night in. Plus, it’s quick to prep, letting you spend less time cooking and more time enjoying those summer evenings. Curious to find out how to bring this zesty creation to your table? Let’s dive into the magic of this simple yet satisfying recipe!

Why is Toasted Caprese Garlic Bread a Must-Try?

Fresh Ingredients: This recipe highlights vibrant, seasonal produce like juicy tomatoes and aromatic basil, making every bite burst with summer flavor.
Quick Prep: Ready in under 15 minutes, it’s the ideal solution for busy weeknights or spontaneous gatherings.
Crowd-Pleaser: Loved by all, it’s a guaranteed hit at parties, serving as a delightful appetizer or side dish.
Versatile: Customize it with toppings like avocado or olives, giving it your unique twist.
Simple Steps: Even novice cooks can whip this up with ease. For more flavorful ideas, check out my cheese and garlic crack bread recipe.

Toasted Caprese Garlic Bread Ingredients

For the Bread

  • Italian loaf – A crusty Italian loaf serves as the perfect base for this Toasted Caprese Garlic Bread.

For the Toppings

  • Fresh tomatoes – Use juicy, ripe tomatoes for maximum flavor; vine-ripened or heirloom varieties are excellent alternatives.
  • Fresh basil – Aromatic and fragrant, basil adds freshness; substitute with pesto for a quick alternative.
  • Mozzarella cheese – Opt for fresh mozzarella to achieve that gooey, creamy texture that makes this dish irresistible.
  • Garlic – Minced fresh garlic will elevate the flavor profile; for convenience, garlic powder works well too.
  • Olive oil – Extra virgin olive oil not only adds richness but also ensures the bread toasts beautifully.

For the Drizzle

  • Balsamic reduction – This drizzle contributes the essential acidity and sweetness to balance the rich flavors of the cheese and bread.

Step‑by‑Step Instructions for Toasted Caprese Garlic Bread

Step 1: Prep the Bread
Start by slicing your crusty Italian loaf in half lengthwise. Place both halves cut side up on a baking sheet lined with parchment paper. This will help the Toasted Caprese Garlic Bread become deliciously crispy as it bakes. Preheat your oven to 400°F (200°C) to get ready for the perfect golden finish.

Step 2: Mix Toppings
In a small bowl, combine 2 tablespoons of minced garlic with 3 tablespoons of extra virgin olive oil. Stir well until mixed, then spread this aromatic mixture evenly over the cut sides of the bread. You want to ensure every bite of your Toasted Caprese Garlic Bread is packed with that rich garlic flavor, so spread generously!

Step 3: Add Cheeses and Vegetables
Layer slices of fresh mozzarella evenly over the garlic-coated bread, ensuring each slice is luxuriously covered. Next, add juicy fresh tomatoes—sliced thinly and arranged beautifully on top of the cheese. Finally, sprinkle fresh basil leaves generously over the tomatoes, creating a colorful and fragrant topping for your Toasted Caprese Garlic Bread.

Step 4: Toast the Bread
Place your baking sheet under the preheated broiler, keeping a close eye on it. Broil for about 2-5 minutes, or until the cheese begins to melt and bubble with a golden brown color. Be vigilant during this step to prevent burning; you want that gooey, irresistible layer of cheese on your Toasted Caprese Garlic Bread.

Step 5: Drizzle & Serve
Once the cheese is beautifully melted and bubbly, carefully remove the baking sheet from the oven. Drizzle a generous amount of balsamic reduction over the hot bread to add a sweet and tangy finish. Allow it to cool slightly before slicing into pieces, making it easy to serve as a delightful appetizer or side dish for any gathering.

Toasted Caprese Garlic Bread Variations

Feel free to let your creativity flow and customize this delicious Toasted Caprese Garlic Bread to suit your taste!

  • Gluten-Free: Use a gluten-free bread option, like almond flour bread, to enjoy this dish without the gluten.
  • Pesto Boost: Spread a layer of homemade or store-bought pesto under the cheese for an extra burst of flavor.
  • Spicy Kick: Add red pepper flakes or sliced jalapeños to introduce a delightful heat that will wake up your taste buds.
  • Herb Infusion: Mix fresh or dried Italian herbs, like oregano or thyme, into your olive oil for a fragrant twist.
  • Vegan Options: Substitute mozzarella with cashew cheese or a vegan mozzarella alternative for a plant-based delight.
  • Cheesy Delight: Use a blend of cheeses, like gouda or parmesan, alongside mozzarella for richer, more complex flavors.
  • Toasty Texture: For an extra crunch, add a layer of toasted breadcrumbs on top before broiling.
  • Seasonal Variations: Experiment with seasonal toppings, such as roasted bell peppers in the fall or fresh arugula in the spring, to keep it fresh and exciting.

Make Ahead Options

These Toasted Caprese Garlic Bread slices are perfect for meal prep, allowing you to enjoy that delightful summer flavor even on the busiest of days! You can prepare the bread and toppings—garlic mixture, cheese, tomatoes, and basil—up to 24 hours in advance. Simply slice the Italian loaf, mix the garlic and olive oil, and spread it on the bread. Layer the mozzarella, tomatoes, and basil, then cover tightly with plastic wrap and refrigerate. When you’re ready to enjoy, just pop the assembled bread under the broiler for about 2-5 minutes until everything is melted and bubbly. Following this method ensures your Toasted Caprese Garlic Bread is just as delicious, saving you precious time without compromising on flavor!

What to Serve with Toasted Caprese Garlic Bread?

Transform your gathering into a culinary celebration with a delightful spread that complements every slice of this Italian-inspired treat.

  • Fresh Arugula Salad: The peppery bite of arugula with a light lemon vinaigrette adds a refreshing contrast, balancing the richness of the bread. Toss in some cherry tomatoes for a pop of color!

  • Grilled Vegetables: Smoky, charred veggies like zucchini, bell peppers, and eggplant bring an earthy flavor that pairs beautifully with the bright tomato and basil of the Toasted Caprese Garlic Bread.

  • Pasta Primavera: A light, veggie-stuffed pasta dish makes for a hearty main course, ensuring your feast retains that fresh summer vibe. The vibrant flavors of seasonal vegetables are a perfect match.

  • Chilled White Wine: A crisp Pinot Grigio or a Sauvignon Blanc enhances the meal, cutting through the richness and elevating your dining experience. The acidity complements the balsamic drizzle beautifully.

  • Caprese Salad: Keep the theme going with a classic caprese salad; fresh mozzarella, basil, and tomatoes drizzled with olive oil echo the flavors of the bread for a cohesive meal.

  • Lemon Sorbet: End your meal on a light note with a refreshing lemon sorbet. Its tart sweetness cleanses the palate after the savory delights, making it an inviting finale to any gathering.

Each of these pairings enhances the experience of enjoying your Toasted Caprese Garlic Bread, ensuring your table is filled with summer flavors and cherished memories.

Storage Tips for Toasted Caprese Garlic Bread

Fridge: Store leftover Toasted Caprese Garlic Bread in an airtight container for up to 1 day to maintain its freshness.

Freezer: To freeze, wrap individual slices tightly in plastic wrap or foil, then place them in a freezer-safe bag. They'll keep for up to 2 months, ready for a quick snack!

Reheating: To revive the crispiness before serving, reheat in the oven at 350°F (175°C) for about 10 minutes, or until heated through and the cheese is melty again.

Best When Fresh: For the tastiest experience, enjoy your Toasted Caprese Garlic Bread fresh from the oven. Typically, it’s best consumed within a few hours of making it for optimal flavor and texture.

Expert Tips for Toasted Caprese Garlic Bread

  • Ingredient Quality: Use high-quality, fresh ingredients like ripe tomatoes and mozzarella; they significantly enhance the overall flavor of your Toasted Caprese Garlic Bread.

  • Watch Closely: Keep an eye on the bread while broiling to prevent burning. It’s best to remove it as soon as the cheese is melted and bubbly.

  • Cool Before Slicing: Allow the bread to cool slightly after baking. This helps maintain its structure for easier slicing and serving.

  • Perfect Garlic Mix: When mixing garlic and olive oil, you can customize the amount to your preference. Too much garlic can overpower the dish, so start with less if unsure.

  • Experiment with Toppings: Don’t hesitate to try different toppings. Adding slices of avocado or olives can introduce delightful new flavors to your Toasted Caprese Garlic Bread.

Toasted Caprese Garlic Bread Recipe FAQs

What type of bread is best for Toasted Caprese Garlic Bread?
A crusty Italian loaf is ideal for this recipe, providing a sturdy base that balances the toppings perfectly. If you prefer a different flavor, you can also use sourdough or whole-grain bread for a unique twist.

How should I store leftover Toasted Caprese Garlic Bread?
Store any leftover Toasted Caprese Garlic Bread in an airtight container in the fridge for up to 1 day. For longer storage, wrap individual slices tightly in plastic wrap or foil and place them in a freezer bag, where they will keep for up to 2 months.

Can I make Toasted Caprese Garlic Bread ahead of time?
Absolutely! You can prep the bread with the garlic and oil topping, layer on the cheese and toppings, then cover it with plastic wrap and refrigerate for a few hours. When you’re ready to serve, simply place it under the broiler, and voila!

Is it okay to use pre-shredded cheese for this recipe?
While fresh mozzarella is preferred for its creaminess and texture, you can definitely use pre-shredded mozzarella in a pinch. However, be aware that it might not melt as perfectly as fresh cheese will.

Can I substitute for allergies or dietary restrictions?
Sure! For dairy-free options, consider using a plant-based cheese that melts well. If you're avoiding gluten, you can use gluten-free bread as a tasty alternative, ensuring your Toasted Caprese Garlic Bread is accessible for everyone!

How do I ensure my bread doesn’t burn while broiling?
Keep a close eye on the bread while it’s under the broiler, checking it every minute. Broil for about 2-5 minutes, removing it as soon as the cheese is melted and bubbly but not burnt. A preheated broiler can be intense, so monitoring is key!

Toasted Caprese Garlic Bread

Irresistibly Delicious Toasted Caprese Garlic Bread Recipe

This Toasted Caprese Garlic Bread is a quick and flavorful appetizer featuring fresh tomatoes, basil, garlic, and mozzarella.
Print Recipe Pin Recipe
Prep Time 15 minutes mins
Cook Time 5 minutes mins
Total Time 20 minutes mins
Servings: 4 slices
Course: Appetizer
Cuisine: Italian
Calories: 200
Ingredients Equipment Method Nutrition Notes

Ingredients
  

For the Bread
  • 1 loaf Italian loaf A crusty Italian loaf serves as the perfect base for this dish.
For the Toppings
  • 2 medium Fresh tomatoes Use juicy, ripe tomatoes; vine-ripened or heirloom varieties are excellent alternatives.
  • 1 cup Fresh basil Aromatic and fragrant; substitute with pesto for a quick alternative.
  • 8 oz Mozzarella cheese Opt for fresh mozzarella for a gooey texture.
  • 2 tablespoons Garlic Minced fresh garlic will elevate the flavor; garlic powder can work too.
  • 3 tablespoons Olive oil Extra virgin olive oil ensures the bread toasts beautifully.
For the Drizzle
  • 1 tablespoon Balsamic reduction Adds essential acidity and sweetness.

Equipment

  • Baking Sheet
  • small bowl
  • parchment paper
  • Oven

Method
 

Step‑by‑Step Instructions for Toasted Caprese Garlic Bread
  1. Slice the Italian loaf in half lengthwise and place both halves cut side up on a baking sheet lined with parchment paper. Preheat your oven to 400°F (200°C).
  2. Combine minced garlic with olive oil in a small bowl. Spread this mixture evenly over the cut sides of the bread.
  3. Layer slices of fresh mozzarella over the garlic-coated bread, then add thinly sliced fresh tomatoes, and finally sprinkle fresh basil leaves over the top.
  4. Place the baking sheet under the preheated broiler for about 2-5 minutes or until the cheese is melted and bubbling.
  5. Drizzle balsamic reduction over the hot bread and allow it to cool slightly before slicing for serving.

Nutrition

Serving: 1sliceCalories: 200kcalCarbohydrates: 20gProtein: 8gFat: 10gSaturated Fat: 4gPolyunsaturated Fat: 1gMonounsaturated Fat: 5gCholesterol: 20mgSodium: 300mgPotassium: 200mgFiber: 1gSugar: 2gVitamin A: 500IUVitamin C: 10mgCalcium: 200mgIron: 1mg

Notes

Store leftover Toasted Caprese Garlic Bread in an airtight container for up to 1 day. To freeze, wrap individual slices tightly and place in a freezer-safe bag for up to 2 months. Reheat in the oven at 350°F (175°C) for about 10 minutes before serving.

Tried this recipe?

Let us know how it was!

Irresistibly Cheesy Bacon Wrapped Jalapeno Poppers Recipe

July 16, 2025 by grace bellamy Leave a Comment

As I opened my fridge one afternoon, the vibrant green of jalapeños caught my eye, and an idea sparked—why not turn these spicy beauties into creamy baked bacon-wrapped jalapeno poppers? This easy appetizer is sure to impress anyone you serve them to, offering a crunchy bite of savory bacon paired with a luxuriously cheesy filling. The delightful combination not only satisfies cravings but also comes together quickly, making it ideal for last-minute gatherings or game days. Baked instead of fried, these poppers offer a low-carb, gluten-free twist on a classic favorite, so you can indulge without a hint of guilt. Are you ready to tantalize your taste buds with a mouthwatering recipe that will have everyone asking for seconds?

Why Are Bacon Wrapped Jalapeno Poppers Irresistible?

Flavorful, Crunchy Perfection: These poppers bring together crispy bacon and creamy cheese, creating a winning flavor combination that’s hard to resist.

Guilt-Free Indulgence: Baked instead of fried, they offer a lower carb and gluten-free option, making them perfect for health-conscious snack lovers.

Crowd-Pleasing Appetizer: Ideal for parties, game days, or casual get-togethers, their festive presentation is sure to impress your guests.

Quick to Prepare: You can whip them up easily in about 30 minutes, saving you time while delivering big on flavor.

For a delicious accompaniment, consider serving these with ranch dressing or a spicy dipping sauce! Don't forget to check out my bacon fried rice for another tasty treat that's sure to become a favorite.

Bacon Wrapped Jalapeno Poppers Ingredients

For the Poppers
• Jalapeno Peppers – Choose 3-4 inches long for easy stuffing and a perfect balance of spice.
• Cream Cheese – Make sure it’s softened for a smooth, creamy filling that blends easily.
• Cheddar Cheese – Adds great flavor; substitute with pepper jack for a spicier kick!
• Onion Powder – Boosts the overall flavor with its savory essence.
• Salt – Essential for seasoning; consider using lower sodium alternatives to adjust to taste.
• Pepper – Just a pinch adds a mild heat to complement the dish.
• Bacon – Opt for regular-cut bacon for optimal crispiness around the poppers.
• Cooking Spray – This helps your poppers cook evenly and prevents them from sticking to the baking sheet.

Feel free to dive into this delightful recipe for Bacon Wrapped Jalapeno Poppers that are sure to wow everyone at your next gathering!

Step‑by‑Step Instructions for Creamy Baked Bacon Wrapped Jalapeno Poppers

Step 1: Preheat the Oven
Begin by preheating your oven to 400°F (200°C). While the oven heats up, line a baking sheet with aluminum foil for easy cleanup and spray it lightly with cooking spray. This prevents the bacon wrapped jalapeno poppers from sticking during baking, ensuring they come out crispy and delicious.

Step 2: Prepare the Jalapenos
Carefully wash the jalapeno peppers and slice them in half lengthwise. Using a spoon, scoop out the seeds and ribs to reduce the heat for a milder flavor. Aim for jalapenos that are about 3-4 inches long for easy stuffing, and set them aside on a cutting board to make room for the filling.

Step 3: Make the Cheese Filling
In a medium-sized bowl, combine softened cream cheese, shredded cheddar cheese, onion powder, salt, and pepper. Use a fork to blend everything until you achieve a smooth and creamy consistency. This filling will be the heart of your bacon wrapped jalapeno poppers, so ensure all ingredients are well mixed for the best flavor.

Step 4: Stuff the Jalapenos
Generously fill each halved jalapeno with the creamy cheese mixture, ensuring they are well-loaded but not overflowing. The poppers should be filled to the edge, showcasing that delicious filling. This step is essential for achieving that ultimate combination of spicy and creamy in your bacon wrapped jalapeno poppers.

Step 5: Wrap with Bacon
Take your bacon strips and cut them in half, creating shorter pieces that will fit snugly around the jalapenos. Wrap each stuffed jalapeno half tightly with a piece of bacon, securing it with a toothpick if necessary. This will help the bacon adhere during baking and give your poppers a beautiful presentation.

Step 6: Bake the Poppers
Arrange the bacon wrapped jalapeno poppers on the prepared baking sheet, leaving a little space between each one for even cooking. Bake them in the preheated oven for 20 to 25 minutes, until the bacon is crispy and golden brown. Keep an eye on them; they should be bubbling and delicious by the end of baking time.

Step 7: Serve and Enjoy
Once they are perfectly baked, carefully remove the bacon wrapped jalapeno poppers from the oven and let them cool for a few minutes. Serve them warm as a delightful appetizer at your next gathering, and watch as everyone dives in for a taste of that creamy filling and crispy bacon.

How to Store and Freeze Bacon Wrapped Jalapeno Poppers

Fridge: Store leftovers in an airtight container and refrigerate for up to 3 days. Reheat in the oven at 350°F (175°C) for about 10 minutes to restore crispiness.

Freezer: For longer storage, freeze the baked poppers in a single layer on a baking sheet. Once frozen, transfer them to a freezer-safe bag for up to 2 months.

Thawing: When ready to enjoy, thaw in the fridge overnight, then reheat in the oven at 350°F (175°C) until heated through and crispy.

Avoid Room Temperature: Do not leave bacon wrapped jalapeno poppers at room temperature for more than 2 hours, as this can lead to food safety issues.

What to Serve with Bacon Wrapped Jalapeno Poppers

Elevate your gathering with the perfect accompaniments for these savory, baked delights that entice both the eyes and the palate.

  • Creamy Ranch Dressing: This cool, tangy dip complements the spicy poppers beautifully, balancing heat with creaminess. It's a classic pairing that everyone will love.

  • Spicy Siracha Sauce: For those who crave a kick, drizzling this fiery sauce adds an extra layer of flavor to each bite. It’s the perfect match for thrill-seekers!

  • Refreshing Guacamole: The smooth, rich texture of guacamole brings a nice contrast to the crispy poppers, enhancing the overall taste experience with every scoop.

  • Crunchy Vegetable Platter: Crisp carrots, celery, and bell peppers add freshness to the table, providing a light alternative that pairs well with the poppers' rich flavors.

  • Sweet Corn Salsa: This vibrant salsa adds a pop of sweetness and freshness that beautifully complements the savory bacon and creamy filling, creating a delightful contrast.

  • Cold Brewed Iced Tea: A refreshing drink choice, its lightness balances the rich and bold flavors of the poppers, making it a perfect companion for warm gatherings.

  • Chocolate Chip Cookies: End your meal on a sweet note! These beloved cookies provide a comforting touch and create a balance with the spicy bite of the jalapeno poppers.

Each of these pairings brings their own delightful flair, helping you create a memorable meal that will have friends and family lingering around the table!

Bacon Wrapped Jalapeno Poppers Variations

Feel free to unleash your creativity and tailor these poppers to your taste!

  • Spicy Pepper Jack: Substitute cheddar with pepper jack for a fiery kick that keeps your taste buds buzzing with excitement. This twist is perfect for spice enthusiasts!

  • Turkey Bacon: Use turkey bacon instead of regular bacon for a leaner, heart-healthy option. You’ll still enjoy that awesome flavor, just a little lighter!

  • Creamy Goat Cheese: Swap cream cheese for tangy goat cheese for a unique flavor profile that's both creamy and slightly tangy. This variation adds an elegant twist to the classic here!

  • Sweet Maple Glaze: Brush a little maple syrup over the bacon before baking for a sweet twist that beautifully contrasts with the spicy peppers. This touch makes each bite sing in delightful harmony!

  • Vegetarian Delight: Replace the bacon with thin slices of zucchini wrapped around the stuffed jalapenos for a vegetarian-friendly popper that still offers a satisfying bite. This version is full of flavor and fun!

  • Herbed Feta: Mix crumbled feta and fresh herbs like dill or chives into the filling for a Mediterranean-inspired version. This adds brightness and freshness that your guests will adore!

  • Stuffed with Chorizo: For an extra flavor boost, mix cooked chorizo into your cheese filling for a smoky, savory popper. This will definitely amp up the flavor profile and satisfy hearty cravings!

  • Cheesy Bacon Explosion: Double the cheese by incorporating mozzarella alongside cheddar or cream cheese for a cheesier adventure. This twist will be a melting delight that keeps everyone coming back for more!

Expert Tips for Bacon Wrapped Jalapeno Poppers

  • Choose the Right Peppers: Opt for jalapenos that are firm and about 3-4 inches long for perfect stuffing, avoiding overripe ones.
  • Soften the Cheese: Make sure your cream cheese is softened to room temperature; this ensures easy mixing and a creamy filling.
  • Avoid Overstuffing: Fill the jalapenos generously but not excessively, as too much filling can spill out during baking.
  • Watch the Bacon: Bake until crispy but not burnt; bacon should be golden brown to ensure a delightful crunch for your bacon wrapped jalapeno poppers.
  • Prep in Advance: Consider prepping the jalapenos an hour or up to 8 hours ahead; simply refrigerate them until you’re ready to bake for easy hosting.
  • Experiment with Variations: Don't hesitate to try different cheeses or spice levels; substituting cheddar for pepper jack adds unique flavor to the poppers.

Make Ahead Options

These Bacon Wrapped Jalapeno Poppers are perfect for meal prep and can save you valuable time on busy days! You can prepare the poppers up to 8 hours in advance by filling and wrapping them, then refrigerating before baking. Ensure they are covered tightly with plastic wrap to maintain freshness and prevent drying out. When you’re ready to enjoy these tasty bites, simply preheat your oven and bake them from the fridge—it’s as easy as that! This way, you’ll have creamy, spicy poppers on the table in no time, delivering all the flavor with minimal last-minute effort.

Bacon Wrapped Jalapeno Poppers Recipe FAQs

Should you pre-cook bacon for jalapeño poppers?
Absolutely! Pre-cooking the bacon slightly can help reduce the overall baking time. You can microwave the bacon for about 2-3 minutes until it's partially cooked but still pliable. This way, you'll ensure that the bacon becomes crispy without drying out the jalapeños during the baking process.

How to cook bacon wrapped jalapeños without being soggy?
To prevent sogginess, make sure to remove all the seeds and ribs from the jalapeños, as they contain moisture. Also, when baking, line your baking sheet with foil and coat it lightly with cooking spray. This promotes airflow around the bacon, allowing it to crisp up nicely while the jalapeños cook.

How long to bake jalapeño wrapped in bacon?
Bake your bacon-wrapped jalapeño poppers at 400°F (200°C) for 20-25 minutes. Keep an eye on them as they cook; you’ll want them to be golden brown and crispy. Every oven is different, so the key is to watch for that lovely crispy finish!

What are some common mistakes when making jalapeño poppers and how to avoid them?
One common mistake is overstuffing the jalapeños, which can make it difficult for the bacon to adhere. To avoid this, fill the jalapeños generously but leave a little space at the top. Another error is not properly removing the seeds and ribs, which can lead to an overwhelming heat. Always taste a small piece of your jalapeño first to gauge its spiciness level. Lastly, remember to let the poppers cool for a few minutes after baking to prevent burns from the hot filling.

How long to smoke jalapeño poppers wrapped in bacon?
If you're using a smoker, it typically takes about 1 to 1.5 hours to smoke bacon-wrapped jalapeño poppers at 225°F (107°C). This low-and-slow method infuses fantastic smoky flavors, so feel free to experiment with different wood chips like hickory or applewood for a unique twist. Just keep a close watch on them towards the end of cooking to ensure they don't burn.

How to prevent jalapeño poppers from getting soggy?
To prevent sogginess, ensure your bacon is not overly thick, as this can trap moisture. Additionally, bake the poppers rather than frying them for a healthier alternative, as frying can introduce extra moisture. Finally, follow proper baking techniques: preheat your oven, let the poppers cool slightly before serving, and avoid covering them while they cool so steam can escape.

Bacon Wrapped Jalapeno Poppers

Irresistibly Cheesy Bacon Wrapped Jalapeno Poppers Recipe

Enjoy these Bacon Wrapped Jalapeno Poppers, a delightful appetizer filled with creamy cheese and crispy bacon.
Print Recipe Pin Recipe
Prep Time 10 minutes mins
Cook Time 25 minutes mins
Total Time 35 minutes mins
Servings: 8 poppers
Course: Appetizer
Cuisine: American
Calories: 150
Ingredients Equipment Method Nutrition Notes

Ingredients
  

For the Poppers
  • 4 pieces Jalapeno Peppers Choose 3-4 inches long for easy stuffing.
  • 8 oz Cream Cheese Softened for a smooth filling.
  • 1 cup Cheddar Cheese Shredded; substitute with pepper jack for a spicier kick.
  • 1 teaspoon Onion Powder
  • 0.5 teaspoon Salt Consider using lower sodium alternatives.
  • 0.25 teaspoon Pepper Just a pinch for mild heat.
  • 8 slices Bacon Regular-cut for optimal crispiness.
  • 1 teaspoon Cooking Spray To prevent sticking.

Equipment

  • Oven
  • Baking Sheet
  • Aluminum Foil
  • Mixing Bowl
  • spoon
  • fork
  • Toothpicks

Method
 

Step-by-Step Instructions
  1. Preheat your oven to 400°F (200°C). Line a baking sheet with aluminum foil and spray with cooking spray.
  2. Wash the jalapeno peppers and slice them in half lengthwise. Scoop out the seeds and ribs.
  3. In a bowl, combine softened cream cheese, shredded cheddar cheese, onion powder, salt, and pepper. Mix until smooth.
  4. Fill each halved jalapeno with the creamy cheese mixture.
  5. Cut bacon strips in half and wrap each stuffed jalapeno with a piece of bacon, securing with a toothpick if needed.
  6. Arrange poppers on the baking sheet and bake for 20 to 25 minutes until the bacon is crispy.
  7. Remove from the oven and let cool slightly before serving warm.

Nutrition

Serving: 1popperCalories: 150kcalCarbohydrates: 3gProtein: 6gFat: 12gSaturated Fat: 5gPolyunsaturated Fat: 0.5gMonounsaturated Fat: 3gCholesterol: 30mgSodium: 300mgPotassium: 120mgFiber: 1gSugar: 1gVitamin A: 500IUVitamin C: 15mgCalcium: 100mgIron: 1mg

Notes

Store leftovers in an airtight container in the fridge for up to 3 days. Reheat in the oven at 350°F (175°C) for about 10 minutes to restore crispiness.

Tried this recipe?

Let us know how it was!

Velvety Vegan Coconut Curry Pumpkin Soup You'll Love

July 16, 2025 by grace bellamy Leave a Comment

The first sip of Coconut Curry Pumpkin Soup transports me to cozy fall evenings, where the leaves crunch underfoot and the air is infused with warm spices. This vegan soup is not just a meal; it’s a hug in a bowl, ready in just over 35 minutes to brighten your busy weeknights. Packed with rich flavors and creamy coconut goodness, it’s an ideal choice for anyone looking to make a healthy, gluten-free dish that feels indulgent without all the fuss. Plus, the delightful aroma wafting through your kitchen will have your loved ones gathering at the table, eager for the first ladleful. Curious to learn how to whip up this comforting fall favorite? Let’s dive into the recipe!

Why is Coconut Curry Pumpkin Soup Perfect?

Quick and Easy Preparation: This soup comes together in just over 35 minutes, making it perfect for those busy weeknights when you crave something comforting without hours of cooking.

Vegan and Gluten-Free: Not only is it suitable for vegans, but it also accommodates gluten-free diets, appealing to a wide array of preferences and dietary needs.

Rich, Creamy Texture: With a velvety base made from coconut milk and pumpkin puree, each spoonful delivers a delightful creaminess that feels indulgent yet healthy.

Flavor Explosion: The combination of spices such as curry powder and garam masala infuses this soup with a warm, aromatic flair that will surely impress your guests.

Versatile and Customizable: Feel free to get creative! Add your favorite veggies or proteins for a personal touch, or serve it alongside crusty bread or a fresh salad for a complete meal.

If you’re looking for additional inspiration, consider trying out a flavorful Thai Chicken Curry Soup for a different twist.

Coconut Curry Pumpkin Soup Ingredients

• Here’s everything you need to create a cozy pot of Coconut Curry Pumpkin Soup that’s sure to warm your heart!

For the Soup Base

  • Olive Oil – Adds richness and helps sauté vegetables; substitute with coconut oil for a tropical twist.
  • Onion – Provides aroma and natural sweetness; use shallots for a more delicate flavor.
  • Garlic – Deepens the overall flavor; fresh garlic is recommended, but garlic powder can be an easy substitute.
  • Ginger – Offers a warm, spicy note; fresh ginger creates the best flavor, while powdered ginger can save time.
  • Mild Curry Powder – Key spice blend for that signature soup taste; adjust the amount based on desired heat level.
  • Garam Masala – Enhances warmth and complexity; optional but adds wonderful depth to the flavor profile.
  • Vegetable Stock – Forms the soup's base; for non-vegan options, chicken stock works well, or use homemade for better taste.
  • Coconut Milk – Provides creaminess and a hint of sweetness; consider light coconut milk for a lower-calorie version.
  • Pumpkin Puree – The star ingredient thickening the soup; can be swapped with butternut squash puree if needed.
  • Salt and Pepper – Elevates all flavors; adjust according to your taste preferences.

Optional Toppings

  • Pumpkin Seeds – For a delightful crunch; can substitute with sunflower seeds or eliminate for a nut-free dish.
  • Fresh Cilantro – Adds a burst of fresh flavor as a garnish; parsley works too if preferred, or omit altogether.

With this collection of ingredients, you're all set to craft a heartwarming Coconut Curry Pumpkin Soup that is as nutritious as it is delicious! Enjoy the process, and let the cozy aromas envelop your kitchen.

Step‑by‑Step Instructions for Coconut Curry Pumpkin Soup

Step 1: Sauté Aromatics
In a medium pot, heat 2 tablespoons of olive oil over medium heat. Once hot, add 1 diced onion and sauté for about 5 minutes until it turns translucent and fragrant. This will create a flavorful base for your Coconut Curry Pumpkin Soup, ensuring the aroma fills your kitchen with warmth.

Step 2: Add Garlic and Ginger
Next, add 2 minced garlic cloves and 1 tablespoon of grated fresh ginger to the pot. Cook for another minute, stirring frequently until the garlic becomes fragrant and golden, taking care not to let it burn. This step enhances the depth of flavor in your soup, making it even more comforting.

Step 3: Stir in Spices
Sprinkle in 1 tablespoon of mild curry powder and 1 teaspoon of garam masala, allowing them to toast in the pan. Cook for 1-2 minutes, stirring often to release the natural oils and scents. Your kitchen will begin to smell incredible, setting the stage for the rich flavors of the Coconut Curry Pumpkin Soup.

Step 4: Add Liquid Ingredients
Pour in 4 cups of vegetable stock and 1 can of coconut milk, followed by 1 can of pumpkin puree. Stir everything together, ensuring a smooth blend of flavors. Season with salt and pepper to taste, letting the mixture come together to form a rich base for your creamy soup.

Step 5: Simmer the Soup
Bring the soup to a gentle simmer over medium heat, then reduce the temperature slightly. Allow it to cook for 15-20 minutes, stirring occasionally. Watch as the soup thickens and the flavors meld, creating a beautiful, vibrant orange hue perfect for the fall season.

Step 6: Blend Until Smooth
Using an immersion blender, purée the soup until silky smooth, taking care to avoid splashes. If you don’t have an immersion blender, transfer the soup in batches to a standard blender. Blend until completely smooth, creating that velvety texture that defines your Coconut Curry Pumpkin Soup.

Step 7: Final Touches and Serve
Taste and adjust seasoning as needed, adding a pinch more salt or a touch of sugar if the pumpkin lacks sweetness. Serve the soup hot, drizzling additional coconut milk on top for an elegant finish. Garnish with pumpkin seeds and fresh cilantro, if desired, welcoming everyone to enjoy this delicious, creamy bowl of warmth.

What to Serve with Coconut Curry Pumpkin Soup

Creating a well-rounded meal around your delicious soup can elevate your dining experience. Here are some wonderful pairings to consider.

  • Crusty Bread: A warm, crusty baguette is perfect for dipping into the velvety soup, enhancing its creaminess while adding a satisfying crunch.

  • Simple Green Salad: A vibrant mix of greens with a light vinaigrette brings freshness that balances the rich, spiced flavors of the soup. Toss in some sliced apples or pears for a sweet touch.

  • Roasted Brussels Sprouts: These crispy, caramelized bites offer a nutty flavor that complements the sweetness of the pumpkin, making for a delightful contrast in textures.

  • Spicy Chickpeas: Roasted chickpeas seasoned with paprika or cumin add a crunchy, protein-packed element to your meal, perfectly blending with the curry notes.

  • Coconut Rice: Prepare a fluffy batch of coconut rice to soak up the delicious soup, marrying those tropical flavors in a truly comforting way.

  • Dessert Wine: A chilled glass of Riesling or a sweet white wine can beautifully offset the warmth and spices of the soup, making for a lovely finish to the meal.

Each of these options brings its own unique flair, enhancing the comforting essence of your Coconut Curry Pumpkin Soup. Enjoy the delightful symphony of flavors!

How to Store and Freeze Coconut Curry Pumpkin Soup

Fridge: Store cooled Coconut Curry Pumpkin Soup in an airtight container for up to 4 days. Reheat on the stovetop over low heat or in the microwave until warmed through.

Freezer: For longer storage, freeze the soup for up to 3 months. Portion it into freezer-safe containers or bags, ensuring you leave space for expansion.

Thawing: To enjoy the soup later, transfer it to the refrigerator overnight to thaw. It's a simple way to have this delightful dish ready when needed!

Reheating: When reheating, stir well to combine any separated ingredients. Heat on the stovetop or microwave until piping hot, making it a comforting meal any day!

Coconut Curry Pumpkin Soup Variations

Embrace your culinary creativity with these delightful twists on the classic Coconut Curry Pumpkin Soup.

  • Extra Veggies: Add diced sweet potatoes or carrots for a touch of natural sweetness and bonus nutrition. They’ll complement the soup’s creamy base beautifully.

  • Protein Boost: Include chickpeas to ramp up the protein content. They're not only nutritious but also pair perfectly with the flavors of the curry.

  • Different Squash: Swap pumpkin puree for butternut squash or cooked carrots. Each offers a unique sweetness and flavor profile for a fun twist.

  • Spicy Kick: For those who enjoy heat, toss in diced jalapeños or a splash of your favorite hot sauce. It's a fantastic way to warm up the flavor further!

  • Coconut Kick: Use coconut cream instead of coconut milk for an ultra-rich texture. This adds a decadent touch that will make your soup even more luscious.

  • Herb Twist: Replace fresh cilantro with basil or mint to give an unexpected herbaceous note that brightens the soup’s profile.

  • Nut-Free Crunch: Swap pumpkin seeds for sunflower seeds or omit them entirely to cater to nut allergies while still offering a delightful textural contrast.

  • Sour Note: Drizzle in a bit of lime juice just before serving to brighten and cut through the richness, adding a touch of freshness to every spoonful.

Feel free to mix and match these variations to craft your perfect bowl of Coconut Curry Pumpkin Soup!

Make Ahead Options

These Coconut Curry Pumpkin Soup make ahead options are perfect for busy cooks looking to simplify their meal prep! You can chop the onion, garlic, and ginger up to 24 hours in advance and store them in an airtight container in the refrigerator to save time during your busy week. Additionally, the soup itself can be prepared and refrigerated for up to 4 days, just allow it to cool completely before transferring to a container. When ready to serve, gently reheat the soup on the stovetop until warmed through, and for the best quality, add extra coconut milk just before serving for that creamy finish. Enjoy restaurant-quality flavors with minimal effort!

Expert Tips for Coconut Curry Pumpkin Soup

  • Simmer for Thickness: Allow the soup to simmer longer if you prefer a thicker consistency. Adjust by adding more vegetable stock for a lighter soup.

  • Mind the Sweetness: Taste the pumpkin before cooking! If it's not sweet enough, add a tablespoon of sugar to balance the flavors in your Coconut Curry Pumpkin Soup.

  • Blending Technique: Use a high-quality immersion blender for the smoothest texture, but be cautious not to over-blend if you like a bit of texture in your soup.

  • Season to Perfection: Always taste and adjust the seasoning at the end; a small pinch of salt can elevate the entire dish.

  • Ingredient Swaps: Feel free to mix in your favorite veggies or proteins, like chickpeas, for added nutrition and customization in your Coconut Curry Pumpkin Soup.

Coconut Curry Pumpkin Soup Recipe FAQs

How do I choose the best pumpkin for this soup?
Absolutely! When selecting a pumpkin, look for one that feels heavy for its size and has a hard, blemish-free skin. Avoid pumpkins with any dark spots or soft areas, as these could indicate spoilage. Sugar pumpkins or canned pumpkin puree are your best bets for a rich flavor without being overly fibrous.

How long can I store leftover Coconut Curry Pumpkin Soup?
You can store your cooled Coconut Curry Pumpkin Soup in an airtight container in the refrigerator for up to 4 days. Just remember to let it cool completely before sealing it up! Reheat gently on the stove or in the microwave until thoroughly warmed through.

Can I freeze this Coconut Curry Pumpkin Soup?
Yes, you can freeze Coconut Curry Pumpkin Soup for up to 3 months! To do so, transfer the cooled soup into freezer-safe containers or bags, leaving a little extra space at the top to allow for expansion. When you're ready to enjoy, simply thaw it overnight in the refrigerator before reheating.

What should I do if my soup is too thin?
If your soup is too thin for your liking, don't fret! You can let it simmer uncovered for a bit longer on the stovetop; this will help it thicken naturally. Alternatively, blend in a spoonful of canned pumpkin puree or a cornstarch slurry (mix cornstarch with water, then whisk it into the soup) until you achieve your desired consistency.

Are there any dietary considerations I should be aware of?
Very! This Coconut Curry Pumpkin Soup is naturally vegan and gluten-free, making it suitable for a variety of diets. However, if you or your guests have nut allergies, make sure to omit any nuts, like pumpkin seeds, from the topping. Always double-check labels for broth or canned products to ensure they meet your dietary needs.

How can I add more flavor to the soup?
To enhance the flavor of your soup, consider sautéing additional veggies like bell peppers or carrots with the onion. You can also experiment with spices; adding a pinch of cayenne pepper or a dash of soy sauce can introduce a lovely depth. Don't forget to taste at the end; sometimes, just a little more salt or a squeeze of lime juice can elevate the flavors significantly!

Coconut Curry Pumpkin Soup

Velvety Vegan Coconut Curry Pumpkin Soup You'll Love

Coconut Curry Pumpkin Soup is a rich, creamy, and comforting vegan dish full of warm flavors, ready in just over 35 minutes.
Print Recipe Pin Recipe
Prep Time 10 minutes mins
Cook Time 25 minutes mins
Total Time 35 minutes mins
Servings: 4 bowls
Course: Soup
Cuisine: Vegan
Calories: 250
Ingredients Equipment Method Nutrition Notes

Ingredients
  

Soup Base
  • 2 tablespoons Olive Oil or coconut oil for a tropical twist
  • 1 medium Onion diced
  • 2 cloves Garlic minced
  • 1 tablespoon Ginger grated fresh
  • 1 tablespoon Mild Curry Powder adjust based on heat preference
  • 1 teaspoon Garam Masala optional
  • 4 cups Vegetable Stock or chicken stock for non-vegan options
  • 1 can Coconut Milk consider light for lower calories
  • 1 can Pumpkin Puree or butternut squash puree
  • to taste Salt
  • to taste Pepper
Optional Toppings
  • ¼ cup Pumpkin Seeds or sunflower seeds for nut-free
  • ¼ cup Fresh Cilantro or parsley

Equipment

  • Medium pot
  • Immersion blender

Method
 

Step-by-Step Instructions
  1. In a medium pot, heat 2 tablespoons of olive oil over medium heat. Add 1 diced onion and sauté for about 5 minutes until translucent.
  2. Add 2 minced garlic cloves and 1 tablespoon of grated fresh ginger. Cook for another minute until fragrant.
  3. Sprinkle in 1 tablespoon of mild curry powder and 1 teaspoon of garam masala, cooking for 1-2 minutes.
  4. Pour in 4 cups of vegetable stock and 1 can of coconut milk, then 1 can of pumpkin puree. Season with salt and pepper.
  5. Bring the soup to a gentle simmer, reduce temperature slightly, and cook for 15-20 minutes, stirring occasionally.
  6. Using an immersion blender, purée the soup until silky smooth. Alternatively, transfer to a standard blender in batches.
  7. Taste and adjust seasoning. Serve hot, drizzling more coconut milk on top, and garnish with pumpkin seeds and cilantro.

Nutrition

Serving: 4bowlsCalories: 250kcalCarbohydrates: 30gProtein: 5gFat: 12gSaturated Fat: 10gPolyunsaturated Fat: 1gMonounsaturated Fat: 4gSodium: 500mgPotassium: 600mgFiber: 5gSugar: 6gVitamin A: 6000IUVitamin C: 15mgCalcium: 50mgIron: 3mg

Notes

Store cooled soup in an airtight container for up to 4 days in the fridge or freeze for up to 3 months. Thaw overnight in the refrigerator before reheating.

Tried this recipe?

Let us know how it was!

Irresistibly Creamy Roasted Cauliflower Soup to Warm Your Soul

July 16, 2025 by grace bellamy Leave a Comment

A gust of winter air slipped through my kitchen window as I prepared for a cozy night in. There's something magical about a bowl of creamy roasted cauliflower soup that warms not just the body but the soul. Made simply yet brimming with flavor, this velvety soup has become my go-to comfort dish, especially on chilly evenings. It’s gluten-free and offers a delightful, dairy-free option for those looking to lighten things up without sacrificing taste. Imagine curling up with a bowl of this luscious soup, accompanied by some crusty bread, as the world outside turns chilly. Ready to discover how this creamy roasted cauliflower soup can transform your weeknight dinners?

Why Is This Soup So Irresistible?

Comforting Warmth: This irresistibly creamy soup wraps you in a cozy hug, perfect for cold evenings.
Flavorful Simplicity: With just a few ingredients, you get an explosion of taste that belies its simplicity.
Dairy-Free Option: For those seeking lighter fare, this recipe offers a delicious vegan adaptation—you won't miss the cream!
Versatile Delight: Pair it with crusty bread or a hearty salad for a fulfilling meal that suits any occasion.
Freezer-Friendly: Make a big batch and store extra for a quick, satisfying lunch or dinner on busy days.

Roasted Cauliflower Soup Ingredients

For the Soup Base
• Cauliflower – The heart of this roasted cauliflower soup, choose a fresh head for the best flavor and texture.
• Butter – Adds luxurious creaminess; substitute with soaked cashews for a vegan option.
• Onion – Enhances the soup's flavor; use yellow or white onions for a sweeter taste.
• Garlic – Infuses aromatic complexity; opt for fresh cloves for maximum flavor impact.

For the Liquid
• Vegetable Broth – Serves as the base, contributing rich flavors; opt for low-sodium if watching your salt intake.

For the Finishing Touches
• Nutmeg – Just a pinch elevates the overall flavor profile; can be omitted for a milder taste.
• Lemon Juice – Brightens and adds acidity; fresh juice is recommended for the best taste.
• Salt & Pepper – Essential for seasoning; adjust to taste for a balanced flavor.

Optional Additions
• Crushed Red Pepper Flakes or Smoked Paprika – For those who crave a spicy kick, add these during sautéing.
• Sautéed Greens (e.g., Kale or Spinach) – Incorporate for added nutrition and texture.
• Truffle Oil – A drizzling of truffle oil before serving transforms this soup into a gourmet delight.

Step‑by‑Step Instructions for Creamy Roasted Cauliflower Soup

Step 1: Preheat and Prepare
Preheat your oven to 425°F (220°C) and line a baking sheet with parchment paper. This will help the cauliflower roast evenly, creating that delightful caramelization. While the oven heats, wash and cut a fresh head of cauliflower into florets, ensuring they are all roughly the same size for uniform roasting.

Step 2: Roast the Cauliflower
In a bowl, toss the cauliflower florets with olive oil until well coated. Spread them in a single layer on the prepared baking sheet and sprinkle with salt and pepper. Roast in the preheated oven for about 25-30 minutes, flipping halfway, until they are golden brown and tender, which enhances the flavor for your roasted cauliflower soup.

Step 3: Sauté the Aromatics
While the cauliflower is roasting, grab a large pot and melt butter over medium heat. Add finely chopped onion and sauté for 5-7 minutes, stirring occasionally, until the onion becomes translucent and fragrant. This will form a flavorful base for your soup, creating a wonderful depth that pairs perfectly with the roasted cauliflower.

Step 4: Add Garlic and Broth
Next, add minced garlic to the pot and cook for 1-2 minutes until it becomes aromatic. Then, pour in vegetable broth, scraping up any bits stuck to the bottom of the pot for added flavor. Bring the mixture to a gentle simmer, allowing the flavors to meld together beautifully for about 5 minutes while your roasted cauliflower finishes.

Step 5: Combine and Simmer
Once the cauliflower is roasted, carefully add it to the pot with the broth and onions. Stir to combine and let everything simmer together for an additional 20 minutes. This will ensure the roasted cauliflower soup is infused with the rich flavors from the garlic and onion, making every spoonful delightful.

Step 6: Blend Until Smooth
After simmering, allow the mixture to cool slightly, then carefully transfer it to a blender. Add the butter (or soaked cashews for a vegan option) and blend until completely smooth, which should take about 1-2 minutes. For the creamiest texture, a stand blender works best, giving your roasted cauliflower soup the luxurious consistency you desire.

Step 7: Season and Finish
Return the blended soup to the pot over low heat, adding a pinch of nutmeg and fresh lemon juice. Stir everything together and taste for seasoning, adjusting salt and pepper as needed. Allow it to warm through on the stove for a few minutes, ensuring that your creamy roasted cauliflower soup is served hot and ready to impress.

Step 8: Serve and Enjoy
Ladle your beautifully creamy roasted cauliflower soup into bowls, garnishing with fresh herbs if desired. Pair it with crusty bread or a fresh salad for a comforting meal. Whether it's for a chilly evening or a cozy dinner party, this soup will surely warm your heart and soul!

What to Serve with Creamy Roasted Cauliflower Soup

Imagine the comforting warmth of a luxurious bowl of soup, paired perfectly with delightful side dishes to create a complete meal experience.

  • Crusty Bread: The perfect accompaniment for dipping, its crunchy texture contrasts beautifully with the smoothness of the soup.
  • Mixed Greens Salad: Fresh greens with a light vinaigrette add a refreshing crunch, balancing the rich flavors of the soup.
  • Grilled Cheese Sandwich: This classic pairing brings together gooey melted cheese and crispy bread, a delightful textural contrast against creamy roasted cauliflower soup.
  • Savory Quiche: A slice of quiche with seasonal vegetables offers a hearty option, making your meal feel extra special.
  • Roasted Vegetables: Seasonal roasted veggies add a sweet, caramelized flavor that complements the earthiness of the cauliflower.
  • Herbed Rice: Light and fragrant, herbed rice provides a subtle flavor that enhances the overall dining experience.
  • Chardonnay: A glass of chilled Chardonnay elevates your meal, its crisp acidity cutting through the creaminess of the soup.
  • Apple Crisp: Finish with a warm apple crisp; its sweet, tart flavor is a perfect contrast to the savory soup.

Roasted Cauliflower Soup Variations & Substitutions

Feel free to get creative and tailor this creamy roasted cauliflower soup to your taste and dietary preferences!

  • Dairy-Free: Substitute butter with soaked cashews blended into the soup for a luxurious vegan alternative.

  • Spicy Kick: Add crushed red pepper flakes or smoked paprika to the sautéed onions to ignite your taste buds with warmth.

  • Chicken Broth: For a non-vegetarian twist, swap vegetable broth for chicken broth to deepen the flavor profile of the soup.

  • Loaded Greens: Stir in sautéed kale or spinach just before blending for an extra pop of color and nutrition.

  • Lemon Zest: For added brightness, include a teaspoon of lemon zest along with the lemon juice to enhance the citrus flavor.

  • Herb Infusion: Add fresh herbs like thyme or rosemary during the simmering stage for an aromatic depth that will elevate your soup.

  • Truffle Oil Garnish: Drizzle a little truffle oil over each bowl just before serving to infuse a gourmet touch that impresses every guest.

  • Nutty Texture: Toss in roasted walnuts or pine nuts just before serving for a delightful crunch that contrasts with the creamy soup.

Expert Tips for Creamy Roasted Cauliflower Soup

• Choose Fresh Cauliflower: Ensure you select a firm, fresh head of cauliflower. Older cauliflower can affect the flavor and consistency of your roasted cauliflower soup.

• Perfect Roasting: Aim for caramelization without burning. Check your cauliflower halfway through roasting to flip and ensure even cooking for richer flavor.

• Smooth Texture: For the creamiest outcome, use a high-speed stand blender. Immersion blenders may lead to a less smooth consistency, impacting your soup's velvety finish.

• Taste as You Go: Don’t rush the seasoning! Start with a small amount of salt and pepper, tasting as you adjust to avoid over-seasoning your delicious roasted cauliflower soup.

• Custom Flavor Additions: Experiment with spices like smoked paprika or crushed red pepper for a warm kick, enhancing the flavors of your creamy soup.

Make Ahead Options

Preparing this creamy roasted cauliflower soup in advance can save you valuable time on busy weeknights! You can roast the cauliflower and sauté the onions up to 24 hours ahead. Simply cool both components completely and store them in separate airtight containers in the refrigerator. When you're ready to enjoy your soup, combine the roasted cauliflower and aromatics with the broth as directed, then simmer for about 20 minutes to develop the flavors. Don't forget to add the finishing touches, like blending until smooth, seasoning, and incorporating the lemon juice just before serving for that fresh taste. This way, your flavorful roasted cauliflower soup will be just as delicious and easy to make!

How to Store and Freeze Roasted Cauliflower Soup

Fridge: Store leftover roasted cauliflower soup in an airtight container for up to 3 days. Reheat gently on the stove or in the microwave, adding a splash of broth if needed.

Freezer: This soup freezes beautifully! Allow it to cool completely, then portion into airtight containers or freezer bags for up to 3 months.

Reheating: Thaw overnight in the fridge before reheating. Warm on the stove over low heat, stirring occasionally until heated through.

Avoid Overfilling: When freezing, leave some space at the top of the container for expansion as the soup freezes.

Creamy Roasted Cauliflower Soup Recipe FAQs

Should you roast cauliflower for soup?
Absolutely! Roasting cauliflower enhances its natural sweetness and depth of flavor, creating a richer, more satisfying soup. This process caramelizes the sugars, giving your creamy roasted cauliflower soup a delightful taste and aroma that boiling alone simply can't achieve.

What is the 2 ingredient cauliflower soup?
A quick two-ingredient cauliflower soup typically consists of just cauliflower and broth. While simple, it lacks the rich flavors and creaminess of a roasted version. If you're looking for a comforting twist, consider adding aromatics like onion and garlic, and finishing with butter or plant-based cream for a depth that elevates the dish.

What brings out the flavor of cauliflower soup?
To enhance the flavor of your cauliflower soup, consider adding roasted garlic, sautéed onions, and spices like nutmeg or cumin. A splash of fresh lemon juice before serving brightens the soup, while herbs such as thyme or parsley can provide freshness and additional complexity.

What spices go well in cauliflower soup?
Many spices complement cauliflower beautifully! Nutmeg adds a warm undertone, while crushed red pepper flakes introduce a spicy kick. Try smoked paprika for a subtly smoky flavor. Experimenting with these spices can elevate your creamy roasted cauliflower soup to a gourmet delight!

Why do you soak cauliflower before cooking?
Soaking cauliflower helps remove dirt and any potential pesticides, ensuring a cleaner veggie for cooking. While not mandatory, soaking also softens the cauliflower slightly, leading to a more tender texture when cooked. Just remember to rinse it well before use for the best results.

Why is my cauliflower soup so bitter?
If your cauliflower soup tastes bitter, it could be due to overcooking or using older cauliflower. Fresh, well-roasted cauliflower typically has a pleasant, mild taste. To counteract bitterness, try adding a pinch of sugar to balance the flavors, or incorporating a splash of lemon to brighten the soup!

Roasted Cauliflower Soup

Irresistibly Creamy Roasted Cauliflower Soup to Warm Your Soul

This creamy roasted cauliflower soup is a comforting dish that warms the soul, perfect for chilly evenings.
Print Recipe Pin Recipe
Prep Time 15 minutes mins
Cook Time 45 minutes mins
Total Time 1 hour hr
Servings: 4 bowls
Course: Appetizer
Cuisine: American
Calories: 250
Ingredients Equipment Method Nutrition Notes

Ingredients
  

For the Soup Base
  • 1 head Cauliflower Fresh for best flavor and texture
  • 2 tablespoons Butter Or soaked cashews for a vegan option
  • 1 medium Onion Yellow or white for sweetness
  • 3 cloves Garlic Fresh cloves for maximum flavor
For the Liquid
  • 4 cups Vegetable Broth Low-sodium if preferred
For the Finishing Touches
  • 1 pinch Nutmeg Can be omitted for milder taste
  • 2 tablespoons Lemon Juice Fresh juice recommended
  • to taste Salt Essential for seasoning
  • to taste Pepper Essential for seasoning
Optional Additions
  • 1 teaspoon Crushed Red Pepper Flakes For a spicy kick
  • 1 cup Sautéed Greens e.g., Kale or Spinach
  • 1 tablespoon Truffle Oil Transforms soup into a gourmet delight

Equipment

  • Oven
  • Pot
  • Blender
  • Baking Sheet

Method
 

Step-by-Step Instructions
  1. Preheat your oven to 425°F (220°C) and line a baking sheet with parchment paper.
  2. Toss the cauliflower florets with olive oil, spread on the baking sheet, and season with salt and pepper. Roast for 25-30 minutes.
  3. Melt butter in a large pot over medium heat. Add chopped onion and sauté for 5-7 minutes until translucent.
  4. Add minced garlic to the pot and cook for 1-2 minutes. Pour in vegetable broth and let simmer for 5 minutes.
  5. Add the roasted cauliflower to the pot, stir, and let it simmer for an additional 20 minutes.
  6. Allow the mixture to cool slightly, then transfer to a blender, add butter or cashews, and blend until smooth.
  7. Return the blended soup to the pot, add nutmeg and lemon juice, and adjust seasoning as needed. Warm through.
  8. Ladle the soup into bowls, garnish with fresh herbs, and serve with crusty bread or salad.

Nutrition

Serving: 1bowlCalories: 250kcalCarbohydrates: 15gProtein: 6gFat: 18gSaturated Fat: 10gMonounsaturated Fat: 8gCholesterol: 40mgSodium: 450mgPotassium: 600mgFiber: 4gSugar: 3gVitamin A: 500IUVitamin C: 85mgCalcium: 100mgIron: 1mg

Notes

Store leftovers in an airtight container for up to 3 days. This soup freezes well for up to 3 months. Thaw and reheat gently.

Tried this recipe?

Let us know how it was!

One Pan Cajun Chicken Alfredo Orzo: Easy Family Favorite

July 16, 2025 by grace bellamy Leave a Comment

The aroma of Cajun spices wafting through the kitchen is enough to make anyone's mouth water. As I toss together a satisfying dinner, my mind wanders to the countless nights spent scrambling for options that are quick, flavor-packed, and easy on cleanup. Enter my One Pan Cajun Chicken Alfredo Orzo—a deliciously creamy dish that checks all those boxes. Not only is it a breeze to whip up on busy evenings, but the combination of tender chicken and zesty sauce transforms a simple one-pan meal into a family-favorite delight. Plus, the magic happens right in one pot, saving you from the dreaded mountain of dirty dishes. Intrigued about how to turn your weeknight dinners into something extraordinary? Let’s dive in!

Why is One Pan Cajun Chicken Alfredo Orzo Amazing?

Bold flavors: The unique Cajun seasoning elevates traditional Alfredo to a whole new level, giving your taste buds a spicy kick.
Quick & easy: With everything cooked in one pan, you can enjoy a satisfying meal without the fuss of multiple pots and pans.
Creamy goodness: Every bite is enveloped in a luscious sauce that pairs perfectly with the tender orzo, making it utterly comforting.
Family-friendly: Kids and adults alike will fall in love with this delightful dish, turning even the pickiest eaters into fans!
Versatile option: Feel free to customize with your choice of protein or add veggies—it's perfect for using up what you have. Transform your weeknight meals with this incredible dish from the comfort of your kitchen!

One Pan Cajun Chicken Alfredo Orzo Ingredients

For the Cajun Seasoning
• Cajun Seasoning Blend – Adds a smoky, spicy flavor; substitute with store-bought Cajun seasoning if short on time.

For the Chicken and Sauce
• Thin Chicken Breast (1 lb) – Provides protein and substance to the dish; can substitute with turkey breast for a leaner option.
• Extra Virgin Olive Oil (1 tbsp) – Used for cooking chicken to enhance flavor.
• Butter (2 tbsp) – Adds richness to the sauce; can be replaced with margarine for a lighter version.
• Garlic (4 cloves, minced) – Adds aromatic flavor; fresh garlic is preferred for the best taste.
• Milk (1.5 cups) – Creates creaminess in the sauce; use whole milk for a richer flavor or almond milk for a dairy-free option.
• Chicken Broth (1 cup) – Provides depth of flavor; vegetable broth can be used for a vegetarian version.
• Orzo (1 cup, uncooked) – The main carbohydrate that absorbs the sauce; other small pasta shapes can be substituted.
• Heavy Cream (¼ cup) – Adds a rich, creamy consistency; use half-and-half for a lighter sauce.
• Parmesan Cheese (¾ cup, freshly grated) – Adds savory umami flavor; nutritional yeast can be used as a vegan alternative.
• Fresh Parsley (¼ cup, chopped) – For garnish and a fresh flavor contrast.

Step‑by‑Step Instructions for One Pan Cajun Chicken Alfredo Orzo

Step 1: Prepare Cajun Seasoning
In a small bowl, combine the Cajun seasoning ingredients to create your homemade blend. This flavorful mixture will elevate your One Pan Cajun Chicken Alfredo Orzo. Give it a good stir to ensure the spices are evenly mixed and set it aside for later use.

Step 2: Marinate the Chicken
Take your thin chicken breasts and coat them with olive oil and half of the prepared Cajun seasoning. Allow the chicken to marinate for about 30 minutes to absorb those robust flavors. While waiting, you can prepare and gather your other ingredients, making the next steps even smoother.

Step 3: Cook the Chicken
Heat a large high-rimmed sauté pan over medium heat and add a drizzle of olive oil. Once hot, place the marinated chicken in the pan and cook for about 5 minutes on each side until golden brown and cooked through. The chicken should feel firm to the touch. Remove it from the pan and let it rest while you continue with the sauce.

Step 4: Sauté the Garlic
In the same pan, melt the butter over medium heat and add the minced garlic. Sauté for about 1 minute until fragrant, making sure the garlic doesn’t burn. This step will infuse your One Pan Cajun Chicken Alfredo Orzo with rich, aromatic flavors that set the stage for the creamy sauce.

Step 5: Add Liquids and Orzo
Pour in the milk and chicken broth, stirring well to combine and scraping any browned bits off the bottom of the pan. This will enhance the depth of flavor. Once everything is mixed, add in the uncooked orzo to the bubbling liquids. Adjust the seasoning with additional Cajun seasoning if desired, then bring it to a vigorous boil.

Step 6: Cook the Orzo
Lower the heat to a gentle simmer and cook the orzo, stirring frequently to prevent sticking. Over the next 20 minutes, add water in ½ cup increments as needed, ensuring the orzo stays saucy and tender while absorbing all those flavors from the Cajun spices.

Step 7: Incorporate the Chicken
Once the orzo is cooked to al dente, cut the rested chicken into bite-sized pieces and return it to the pan. Stir gently to combine, allowing the chicken to warm through and blend with the creamy orzo.

Step 8: Create the Creamy Sauce
Reduce the heat to low and stir in the heavy cream and freshly grated Parmesan cheese. Mix continuously until the cheese is melted and everything is creamy. The final result should be a luscious, rich sauce enveloping the orzo, elevating your One Pan Cajun Chicken Alfredo Orzo to a comforting masterpiece.

Step 9: Garnish and Serve
Once the sauce is silky and well combined, remove the pan from the heat. Serve your One Pan Cajun Chicken Alfredo Orzo immediately, garnished with a sprinkle of fresh parsley for a burst of color and flavor. Enjoy the satisfaction of a quick, hearty meal that everyone will love!

One Pan Cajun Chicken Alfredo Orzo Variations

Feel free to explore these delightful twists on the classic dish, enhancing flavors and accommodating your family's tastes.

  • Seafood Swap: Replace chicken with shrimp or sautéed scallops for a luxurious seafood version. The briny notes of shrimp complement the Cajun spices beautifully.

  • Vegetarian Delight: Swap the chicken for sautéed mushrooms and add extra veggies like bell peppers or zucchini. This version is just as satisfying and colorful!

  • Spicy Kick: For a heat infusion, add diced jalapeños or a dash of hot sauce while cooking. It’ll crank up the flavor complexity and heat levels.

  • Dairy-Free: Use almond or coconut milk instead of regular milk and choose a vegan cheese alternative for a creamy texture. Perfect for those with dairy intolerances!

  • Whole Grain Option: Swap regular orzo for whole wheat orzo to add fiber and nutrients. It maintains the dish's integrity while being a healthier choice.

  • Creamy Alternative: For a lighter sauce, substitute heavy cream with Greek yogurt mixed with a bit of reserved pasta water. This will still give you creaminess without the calories.

  • Herbaceous Twist: Incorporate fresh basil or cilantro during mixing for a refreshing herbal touch that brightens the dish.

  • Cheese Explosion: Experiment with different cheeses like gouda or a spicy pepper jack instead of Parmesan for a unique flavor profile. Every bite will surprise you!

What to Serve with One Pan Cajun Chicken Alfredo Orzo

Transform your spicy, creamy creation into a full meal that delights every palate and brings everyone to the table.

  • Garlic Bread: The buttery, garlicky taste is a perfect contrast to the rich orzo, making for a satisfying, hearty combination.
  • Simple Green Salad: A refreshing medley of crisp greens and vinaigrette cuts through the creaminess, adding a lightness that compliments the dish beautifully.
  • Roasted Vegetables: Seasonal veggies like bell peppers or zucchini not only add color but also introduce a delightful texture to balance the creamy dish.
  • Corn on the Cob: Sweet and juicy, corn on the cob brings a delightful crunch and pairs wonderfully with the bold flavors of the Cajun seasoning.
  • Sparkling Lemonade: A fizzy, citrusy drink refreshes the palate and adds a zesty twist to your meal, elevating the overall dining experience.
  • Chocolate Mousse: For dessert, this rich, airy treat offers a sweet finish without overpowering the meal's spicy notes, creating a perfect ending to the evening.

Expert Tips for One Pan Cajun Chicken Alfredo Orzo

  • Spice Adjustment: Adjust the level of Cajun seasoning based on your family's spice tolerance to keep every palate in mind.

  • Liquid Balance: Ensure the orzo has enough liquid throughout cooking to achieve a creamy texture; it should look saucy and not dry.

  • Marinade Time: Marinate the chicken longer for a deeper flavor absorption if you can. If short on time, a quick coat will still do!

  • Ingredient Swaps: Feel free to swap the chicken for shrimp or even add veggies, allowing for your One Pan Cajun Chicken Alfredo Orzo to remain versatile and fun!

Make Ahead Options

Making the One Pan Cajun Chicken Alfredo Orzo ahead of time is a fantastic strategy for busy weeknights! You can marinate the chicken with olive oil and half of the Cajun seasoning up to 24 hours in advance, allowing those flavors to truly penetrate. Additionally, you can prepare the Cajun seasoning and store it in an airtight container for up to 3 days to save time on cooking day. When you're ready to serve, simply cook the marinated chicken as instructed and complete the recipe with the orzo and sauce ingredients. For optimal quality, be sure to stir the dish frequently to prevent sticking, and feel free to sprinkle a little extra milk before serving to restore that creamy consistency. Enjoy quick, delicious meals without the hassle!

How to Store and Freeze One Pan Cajun Chicken Alfredo Orzo

Fridge: Store leftovers in an airtight container for up to 3 days, ensuring the creamy sauce stays fresh.

Freezer: Freeze in a tightly sealed container for up to 2 months. When ready to enjoy, thaw overnight in the fridge.

Reheating: Reheat gently on the stovetop, adding a splash of water or milk to restore the creamy texture of your One Pan Cajun Chicken Alfredo Orzo.

Serving Tip: It's best to reheat slowly to maintain the quality and richness of the dish—just like when it was freshly made!

One Pan Cajun Chicken Alfredo Orzo Recipe FAQs

What kind of Cajun seasoning should I use?
Absolutely! You can use a homemade Cajun seasoning blend for the best flavor, or you can save time by opting for store-bought Cajun seasoning. If you're making your own, combine spices like paprika, cayenne pepper, garlic powder, onion powder, thyme, oregano, and black pepper in a small bowl for a smoky and spicy kick.

How should I store leftovers of One Pan Cajun Chicken Alfredo Orzo?
Very simple! Store any leftovers in an airtight container in the refrigerator for up to 3 days. When you're ready to enjoy it again, gently reheat on the stovetop over low heat, adding a splash of water or milk to maintain that creamy texture.

Can I freeze One Pan Cajun Chicken Alfredo Orzo?
Yes, you can! Place the dish in a tightly sealed container and freeze it for up to 2 months. To reheat, simply thaw overnight in the refrigerator, and then warm it on the stovetop, ensuring to add a splash of liquid to keep it creamy.

What if my orzo seems dry while cooking?
No worries at all! If you notice that your orzo is looking dry, just add water in ½ cup increments as needed during cooking. Stir frequently and keep an eye on the texture; it should be saucy and tender, absorbing all those delicious flavors.

Is there a way to make this dish healthier?
Certainly! You can lighten up the One Pan Cajun Chicken Alfredo Orzo by using less heavy cream and cheese, or swap in half-and-half. You can also add plenty of colorful veggies such as spinach, bell peppers, or peas to boost the nutritional value without sacrificing flavor!

Can I make this recipe suitable for dietary restrictions?
Absolutely! For a dairy-free option, substitute heavy cream and milk with almond milk or a dairy-free cream alternative. You can also swap chicken for tofu or shrimp if you wish for a different protein, particularly making sure to adjust cooking times accordingly.

One Pan Cajun Chicken Alfredo Orzo

One Pan Cajun Chicken Alfredo Orzo: Easy Family Favorite

Discover the delightful flavors of One Pan Cajun Chicken Alfredo Orzo, a creamy and quick meal perfect for family dinners.
Print Recipe Pin Recipe
Prep Time 30 minutes mins
Cook Time 20 minutes mins
Total Time 50 minutes mins
Servings: 4 servings
Course: Main Dishes
Cuisine: Cajun
Calories: 680
Ingredients Equipment Method Nutrition Notes

Ingredients
  

Cajun Seasoning
  • 1 tablespoon Cajun Seasoning Blend Add smoky, spicy flavor; substitute with store-bought if short on time.
Chicken and Sauce
  • 1 lb Thin Chicken Breast Can substitute with turkey breast for a leaner option.
  • 1 tablespoon Extra Virgin Olive Oil Used for cooking chicken to enhance flavor.
  • 2 tablespoons Butter Can be replaced with margarine for a lighter version.
  • 4 cloves Garlic, minced Fresh garlic is preferred for the best taste.
  • 1.5 cups Milk Use whole milk for a richer flavor or almond milk for dairy-free option.
  • 1 cup Chicken Broth Vegetable broth can be used for a vegetarian version.
  • 1 cup Orzo, uncooked The main carbohydrate; other small pasta shapes can be substituted.
  • ¼ cup Heavy Cream Use half-and-half for a lighter sauce.
  • ¾ cup Parmesan Cheese, freshly grated Nutritional yeast can be used as a vegan alternative.
  • ¼ cup Fresh Parsley, chopped For garnish and fresh flavor contrast.

Equipment

  • sauté pan

Method
 

Step-by-Step Instructions
  1. Prepare Cajun Seasoning: Combine the Cajun seasoning ingredients to create your homemade blend. Stir to ensure spices are evenly mixed, and set aside.
  2. Marinate the Chicken: Coat thin chicken breasts with olive oil and half of the prepared Cajun seasoning. Marinate for about 30 minutes.
  3. Cook the Chicken: Heat a sauté pan over medium heat, add olive oil, and cook the marinated chicken for about 5 minutes on each side until golden brown. Remove and let rest.
  4. Sauté the Garlic: In the same pan, melt butter over medium heat and add minced garlic. Sauté for about 1 minute until fragrant.
  5. Add Liquids and Orzo: Pour in milk and chicken broth, stir well, add uncooked orzo and adjust seasoning. Bring to a vigorous boil.
  6. Cook the Orzo: Lower heat, simmer, and cook orzo for about 20 minutes, adding water in ½ cup increments as needed to keep it saucy.
  7. Incorporate the Chicken: Cut rested chicken into bite-sized pieces and return to the pan. Stir gently to combine.
  8. Create the Creamy Sauce: Reduce heat, stir in heavy cream and Parmesan cheese, mixing continuously until creamy.
  9. Garnish and Serve: Remove from heat, serve immediately garnished with fresh parsley.

Nutrition

Serving: 1servingCalories: 680kcalCarbohydrates: 56gProtein: 36gFat: 34gSaturated Fat: 17gPolyunsaturated Fat: 2gMonounsaturated Fat: 12gCholesterol: 120mgSodium: 840mgPotassium: 650mgFiber: 2gSugar: 4gVitamin A: 800IUVitamin C: 6mgCalcium: 330mgIron: 2mg

Notes

Store leftovers in an airtight container for up to 3 days in the fridge. Freeze for up to 2 months. Reheat gently and add a splash of water or milk to restore creaminess.

Tried this recipe?

Let us know how it was!

Delicious Lemon Ricotta Pasta & Spinach in 15 Minutes!

July 16, 2025 by grace bellamy Leave a Comment

The tantalizing aroma of lemon zest mingling with garlic wafts through my kitchen, immediately lifting my spirits as I prepare one of my go-to weeknight meals: Lemon Ricotta Pasta with Spinach. In under 15 minutes, you'll find yourself twirling pasta that’s creamy, tangy, and packed with vibrant greens, making it a delightful vegetarian dish that satisfies both the taste buds and the soul. This quick dinner is perfect when you're craving comfort without the fuss, and the best part? It’s endlessly customizable! You can easily swap in your favorite protein or seasonal veggies to make it your own. So, what are you waiting for? Let’s dive into this refreshing recipe that promises to be a family favorite!

Why is this Lemon Ricotta Pasta special?

Quick and Easy: This delightful dish comes together in under 15 minutes, making it ideal for busy weeknights.

Creamy and Zesty: The combination of smooth ricotta and bright lemon creates a deliciously tangy sauce that elevates the simple pasta to gourmet status.

Nutrient-Packed: Loaded with fresh spinach, this recipe not only tastes great but is also a healthy choice that leaves you feeling satisfied.

Endless Versatility: Feel free to customize with proteins like shrimp or chicken, or swap out the spinach for broccoli or peas to suit your family's preferences.

Crowd-Pleaser: Whether cooking for your family or entertaining guests, this dish is sure to impress with its vibrant colors and flavors.

For a well-rounded weeknight meal, you might enjoy serving it alongside a refreshing salad like Fresh Spinach and Tomato Pasta to complement the zesty notes!

Lemon Ricotta Pasta Ingredients

• Whip up this delightful dish with fresh ingredients that truly shine!

For the Pasta

  • Pasta – ½ lb (8oz/220 grams); use spaghetti or penne for perfect texture.

For the Sauce

  • Whole-Milk Ricotta – 1 cup (9oz/250 grams); creamy richness that makes this lemon ricotta pasta irresistible.
  • Lemon – 1 unwaxed lemon, zest and juice; adds the perfect bright acidity to balance the creamy sauce.
  • Grated Parmesan Cheese – ⅓ cup (35 grams); gives that umami depth; feel free to use a vegan substitute.
  • Extra Virgin Olive Oil – 1 Tbsp; enhances richness; drizzle a little extra for serving.
  • Garlic Clove – 1, grated or pressed; aromatic flavor that rounds out the dish perfectly.
  • Salt and Black Pepper – To taste; essential seasonings to elevate all the flavors.

For the Greens

  • Fresh Baby Spinach – 8 oz (230 grams); a vibrant, nutritious addition that makes this dish pop!

Step‑by‑Step Instructions for LEMON RICOTTA PASTA & SPINACH

Step 1: Cook the Pasta
In a large pot, bring salted water to a boil. Add your choice of pasta, cooking it according to the package instructions until al dente, usually about 8-10 minutes. Stir occasionally to prevent sticking. Once cooked, reserve ½ cup of the pasta water, then drain the pasta, allowing the steam to escape, which will help it stay firm.

Step 2: Mix the Sauce
While your pasta is cooking, grab a medium-sized bowl and combine the whole-milk ricotta, olive oil, grated Parmesan cheese, and the freshly grated garlic. Zest the unwaxed lemon directly into the bowl, then squeeze in the juice, adding a pinch of salt and black pepper to taste. Mix everything together until it’s smooth and creamy, setting the flavorful sauce aside.

Step 3: Add Spinach to Pasta
In the final minute of cooking your pasta, add the fresh baby spinach directly into the pot, allowing it to wilt quickly. The vibrant green leaves should turn bright and tender in about 30-60 seconds. Drain both the pasta and spinach together, shaking off excess water, while keeping your reserved pasta water close by for the next step.

Step 4: Combine and Toss
Return the drained pasta and wilted spinach to the pot, creating a warm base for your Lemon Ricotta Pasta & Spinach. Gradually spoon in the creamy ricotta mixture, tossing everything together. If the sauce feels too thick, drizzle in some reserved pasta water a little at a time until you achieve a luscious consistency that clings nicely to the pasta.

Step 5: Serve with Flair
Serve your delightful Lemon Ricotta Pasta immediately in warm bowls. Finish with a sprinkle of extra Parmesan cheese, a drizzle of olive oil for added richness, and optional red pepper flakes for a hint of heat. The dish should look inviting, with vibrant colors and creamy texture that beckons everyone to dig in!

What to Serve with Lemon Ricotta Pasta with Spinach

Elevate your weeknight dinner by creating a delightful spread that balances flavors and textures beautifully.

  • Garlic Bread: Slathered in buttery garlic goodness, this classic side is perfect for sopping up the creamy sauce.
  • Mixed Green Salad: A refreshing salad with tangy vinaigrette adds brightness, cutting through the richness of the pasta.
  • Roasted Asparagus: Tender asparagus spears drizzled with olive oil bring a satisfying crunch and vibrant color that complements the dish.
  • Grilled Chicken: Opt for marinated grilled chicken to add a hearty protein source that harmonizes with the lemony notes.
  • Chardonnay: This crisp white wine offers a fruity balance that enhances the lemon ricotta's brightness while pairing effortlessly with the spinach.
  • Lemon Sorbet: A light, icy dessert mercifully cools the palate while echoing the zesty lemon, making for a refreshing finish.
  • Parmesan Crisps: These crunchy, cheesy bites provide an addictive snack while pairing perfectly with the pasta's creamy texture.
  • Zucchini Noodles: A healthier, low-carb option, these noodles add texture and a subtle flavor that goes fantastically well with the sauce.
  • Caprese Skewers: Fresh mozzarella, tomatoes, and basil drizzled with balsamic reduction create a visually stunning appetizer that leads to a delectable meal.

How to Store and Freeze Lemon Ricotta Pasta

Fridge: Store leftovers in an airtight container for up to 2 days to keep the flavors fresh. Allow to cool completely before sealing.

Freezer: For longer storage, freeze the pasta without spinach for up to 2 months. When ready to enjoy, thaw in the fridge overnight.

Reheating: Reheat gently in a pan over low heat, adding a splash of water or olive oil to maintain creaminess. Avoid high heat to prevent the pasta from becoming mushy.

Serving: If prepped ahead, serve the lemon ricotta pasta warm, garnished with freshly grated Parmesan and a squeeze of lemon for that zesty kick!

Make Ahead Options

These Lemon Ricotta Pasta & Spinach are perfect for busy home cooks who love to meal prep! You can prepare the ricotta sauce and store it in the refrigerator for up to 3 days. Simply mix the ricotta, olive oil, Parmesan, garlic, lemon zest, and juice (seasoned with salt and pepper), then keep it in an airtight container. Additionally, cook your pasta and spinach, drain them, and refrigerate them in a separate container for up to 24 hours. When you're ready to serve, reheat everything in a pan over low heat, adding reserved pasta water as needed to refresh the sauce and ensure it remains creamy. With these make-ahead tips, you'll enjoy delicious Lemon Ricotta Pasta with Spinach with minimal effort during your busy week!

Expert Tips for Lemon Ricotta Pasta

Avoid Overcooking: Ensure the pasta remains al dente to maintain texture. Overcooking can make the lemon ricotta pasta mushy and less enjoyable.

Perfect Sauce Consistency: Gradually add reserved pasta water to the sauce; it helps achieve a creamy texture without overpowering the flavors.

Prep Ahead: Chop garlic and measure cheese beforehand for a smoother cooking experience when making this quick dinner.

Taste as You Go: Season gradually with salt and pepper, tasting the sauce to ensure the lemon ricotta pasta shines with its zesty flavors.

Consider Variations: Feel free to customize by swapping spinach for other greens like arugula or kale, ensuring your dish is both nutritious and exciting!

LEMON RICOTTA PASTA Variations & Substitutions

Feel free to personalize your dish with these fun twists that bring new flavors to your bowl!

  • Protein Boost: Add grilled chicken or shrimp for a heartier meal. Simply toss them in during the last minute to warm through.

  • Creamy Vegan: Substitute whole-milk ricotta with cashew cream or a vegan spinach dip for a delightful plant-based version. Creamy and surprisingly satisfying!

  • Zesty Greens: Swap spinach for kale or arugula to introduce different textures and flavors. Each leafy green brings a distinct brightness to the dish.

  • Extra Veggie: Incorporate roasted cherry tomatoes or zucchini for a burst of color and nutrition. These veggies add sweetness and a lovely caramelized flavor.

  • Whole Grain: Choose whole-grain or chickpea pasta for a wholesome twist, offering more fiber and a nutty taste that complements the creamy sauce beautifully.

  • Heat It Up: Add a pinch of red pepper flakes or a drizzle of hot sauce for a spicy kick that perfectly contrasts the creamy richness.

  • Herb Infusion: Fresh herbs like basil or parsley can elevate your flavors. Chopped and tossed in, they provide a vibrant freshness you won’t want to miss!

  • Pasta Shape Change: Experiment with different pasta shapes like orecchiette or fusilli for fun bites that hold onto the sauce differently and bring new textures to each forkful.

Lemon Ricotta Pasta with Spinach Recipe FAQs

Can I mix lemon with ricotta?
Absolutely! Mixing lemon with ricotta creates a delightful tangy flavor that enhances the creaminess of the cheese. The lemon juice also adds brightness to the dish, balancing its richness beautifully.

What does adding lemon juice to pasta sauce do?
Adding lemon juice to pasta sauce elevates the flavor profile by introducing acidity, which cuts through the richness of creamy sauces. It brings a refreshing brightness that enhances the overall taste and makes each ingredient shine. In the Lemon Ricotta Pasta, this zesty addition transforms the dish into something truly special!

Will lemon juice make ricotta curdle?
No worries! Lemon juice won’t cause ricotta to curdle. Instead, it blends smoothly with the cheese, enhancing its creamy texture while providing a nice tang. Just be sure to mix it well, like in our Lemon Ricotta Pasta recipe, for a harmoniously creamy sauce.

How should I store leftover Lemon Ricotta Pasta?
Store any leftovers in an airtight container in the refrigerator for up to 2 days. It's best to let it cool completely before sealing. Reheat gently on the stove over low heat; adding a splash of water or olive oil will help to revive its creamy consistency.

How do I freeze Lemon Ricotta Pasta?
To freeze Lemon Ricotta Pasta, it's best to omit the spinach before freezing. Store in an airtight container or freezer bag for up to 2 months. When you're ready to enjoy it again, thaw overnight in the refrigerator and reheat slowly on the stove. You can reintroduce fresh spinach at the end for that vibrant touch!

Can I customize Lemon Ricotta Pasta for dietary needs?
Definitely! This dish is versatile and easy to adapt. You can switch whole-milk ricotta for low-fat or dairy-free alternatives if you're avoiding dairy. Additionally, feel free to incorporate gluten-free pasta or add different veggies like zucchini or peas to make it more exciting and suitable for personal dietary preferences.

LEMON RICOTTA PASTA & SPINACH

Delicious Lemon Ricotta Pasta & Spinach in 15 Minutes!

A quick and delightful Lemon Ricotta Pasta & Spinach recipe that combines creamy ricotta with zesty lemon, perfect for a busy weeknight dinner.
Print Recipe Pin Recipe
Prep Time 5 minutes mins
Cook Time 10 minutes mins
Total Time 15 minutes mins
Servings: 4 servings
Course: Main Dishes
Cuisine: Italian
Calories: 450
Ingredients Equipment Method Nutrition Notes

Ingredients
  

For the Pasta
  • ½ lb Pasta use spaghetti or penne for perfect texture
For the Sauce
  • 1 cup Whole-Milk Ricotta creamy richness that makes this lemon ricotta pasta irresistible
  • 1 Lemon unwaxed, zest and juice
  • ⅓ cup Grated Parmesan Cheese feel free to use a vegan substitute
  • 1 tablespoon Extra Virgin Olive Oil drizzle a little extra for serving
  • 1 Garlic Clove grated or pressed
  • Salt and Black Pepper to taste
For the Greens
  • 8 oz Fresh Baby Spinach a vibrant, nutritious addition

Equipment

  • Large Pot
  • Medium-Sized Bowl

Method
 

Step-by-Step Instructions
  1. In a large pot, bring salted water to a boil. Add your choice of pasta, cooking it according to the package instructions until al dente, usually about 8-10 minutes.
  2. While your pasta is cooking, combine the whole-milk ricotta, olive oil, grated Parmesan cheese, and freshly grated garlic in a medium-sized bowl. Zest the unwaxed lemon into the bowl, then squeeze in the juice, and add a pinch of salt and black pepper to taste. Mix together until smooth and creamy.
  3. In the final minute of cooking, add the fresh baby spinach directly into the pot, allowing it to wilt quickly. The leaves should be bright and tender in about 30-60 seconds.
  4. Return the drained pasta and wilted spinach to the pot, then gradually spoon in the creamy ricotta mixture, tossing everything together. If the sauce feels too thick, drizzle in some reserved pasta water until you achieve a desired consistency.
  5. Serve your Lemon Ricotta Pasta immediately in warm bowls. Finish with extra Parmesan cheese, a drizzle of olive oil, and optional red pepper flakes for heat.

Nutrition

Serving: 4servingsCalories: 450kcalCarbohydrates: 50gProtein: 15gFat: 20gSaturated Fat: 8gPolyunsaturated Fat: 2gMonounsaturated Fat: 7gCholesterol: 30mgSodium: 350mgPotassium: 600mgFiber: 3gSugar: 2gVitamin A: 1500IUVitamin C: 25mgCalcium: 250mgIron: 2mg

Notes

Store leftovers in an airtight container for up to 2 days. For longer storage, freeze the pasta without spinach for up to 2 months. Reheat gently in a pan over low heat, adding a splash of water or olive oil to maintain creaminess.

Tried this recipe?

Let us know how it was!

Delicious Banana Bread Overnight Oats for Busy Mornings

July 16, 2025 by grace bellamy Leave a Comment

As I stood in my kitchen one busy morning, the familiar aroma of ripe bananas hit my senses, instantly transporting me back to lazy weekend breakfasts filled with homemade banana bread. This nostalgia inspired my creation of Easy Vegan Banana Bread Overnight Oats, a delightful twist on that cherished classic. With just a quick 5 minutes of prep, these oats combine the rich flavors of banana bread into a creamy, satisfying breakfast perfect for on-the-go meals. Not only are they a healthier choice compared to drive-thru options, but they're also completely customizable—mix in your favorite nuts or sweeteners for extra flair! Whether you savor them chilled from the fridge or warm them up for comfort, these Banana Bread Overnight Oats will elevate your mornings. What’s your favorite way to jazz them up?

Why Choose Banana Bread Overnight Oats?

Quick and Easy: With just 5 minutes of prep, these oats are a time-saver for busy mornings.

Nostalgic Flavor: Enjoy the beloved taste of banana bread without the baking hassle.

Healthy and Satisfying: Each serving is packed with nutrients while keeping you full, making it a fantastic breakfast option.

Customizable Delight: You can mix in your favorite nuts or sweeteners to make them your own! Try adding chia seeds or a scoop of nut butter for extra flavor.

No-Cook Convenience: Just refrigerate overnight, and you’re ready to go in the morning.

Crafted for those who appreciate delicious homemade food, these overnight oats are a perfect alternative to fast food. Don’t forget, if you're craving something equally delightful, check out my Double Chocolate Banana Bread for another indulgent treat!

Banana Bread Overnight Oats Ingredients

For the Oats

  • Mashed Ripe Banana – This forms the sweet and flavorful base of your overnight oats; consider swapping with mashed avocado for a unique twist.
  • Rolled Oats – The main structure of the dish; ensure they're gluten-free if required for dietary needs.
  • Milk of Choice (½ cup) – Provides creaminess and moisture; use almond, soy, or oat milk for a dairy-free option.
  • Chopped Pecans or Walnuts (2 tablespoons) – Adds a delightful crunch and nutty flavor; almonds work just as well if you’re looking for variety.
  • Vanilla Extract (1 teaspoon) – Boosts sweetness and aroma; almond extract can be a lovely alternative.
  • Cinnamon (½ teaspoon) – Infuses a warm spice flavor that's optional but highly recommended for that cozy taste.
  • Dash of Sea Salt – A crucial element that balances the sweetness; feel free to adjust based on your preference.
  • Ground Flax (1 tablespoon, optional) – Adds a nutritional boost; chia seeds are a great substitute if flax isn't on hand.
  • 100% Pure Maple Syrup (2 teaspoons) – Sweetens the oats naturally, adjust the amount to suit your sweetness craving.

Craft these Banana Bread Overnight Oats as a wholesome start to your morning, and enjoy every bite of the nostalgia they bring!

Step‑by‑Step Instructions for Banana Bread Overnight Oats

Step 1: Mash the Banana
Begin by gathering a medium-sized bowl or a jar. Take one ripe banana and use a fork to mash it thoroughly at the bottom, ensuring it’s creamy with minimal lumps. This will serve as the flavor base for your Banana Bread Overnight Oats. The sweet, ripe banana will transform as it mixes with the other ingredients.

Step 2: Combine the Dry Ingredients
Next, add ½ cup of rolled oats, 1 tablespoon of ground flax (if using), and a dash of sea salt to the same bowl. Sprinkle in ½ teaspoon of cinnamon and stir the mixture gently with your fork until everything is evenly distributed. This step builds the wholesome texture and flavor for your oats, ensuring a delightful balance.

Step 3: Add the Wet Ingredients
Pour in ½ cup of your milk of choice—dairy, almond, or oat milk—along with 1 teaspoon of vanilla extract and 2 teaspoons of pure maple syrup. Blend all the ingredients together using a whisk or a spoon until the oats are fully coated and a luscious mixture develops. This will create a creamy consistency reminiscent of banana bread batter.

Step 4: Mix in Nuts
Now, fold in 2 tablespoons of chopped pecans or walnuts. These add a lovely crunch and nutty flavor to your Banana Bread Overnight Oats. Ensure the nuts are mixed in evenly, distributing their delightful texture throughout the entire mixture, which will enhance the overall experience of your breakfast.

Step 5: Refrigerate Overnight
Cover the bowl or jar tightly with a lid or plastic wrap, sealing in all that deliciousness. Place it in the refrigerator and let it chill overnight, or for at least 4 hours. This soaking process allows the oats to absorb the moisture and flavors, resulting in thick, creamy oats that are ready to be savored.

Step 6: Serve and Garnish
In the morning, give your Banana Bread Overnight Oats a good stir, checking the consistency. If desired, gently warm it in the microwave for about 30 seconds for a comforting touch. Serve cold or warm, and top with additional sliced banana, a sprinkling of nuts, or even a dollop of nut butter for extra flavor and nutrition!

What to Serve with Banana Bread Overnight Oats

Start your morning off in a delightful way by complementing these creamy oats with some perfect pairings.

  • Fresh Fruit: Adding a medley of berries or sliced bananas brings a burst of brightness and freshness that enhances the beloved banana flavor.

  • Nut Butter Swirl: A dollop of almond or peanut butter not only adds protein but also a creamy richness that harmonizes beautifully with the oats.

  • Yogurt: A scoop of Greek or dairy-free yogurt offers tanginess, creating a luxurious balance in texture and flavor while boosting protein content.

  • Chia Seed Pudding: On the side, a small cup of chia seed pudding introduces a lovely crunch and a nutrient boost, making your breakfast feel even more indulgent.

  • Honey Drizzle: For those with a sweet tooth, a light drizzle of honey or agave syrup enhances the oats' natural sweetness while providing a touch of elegance.

  • Herbal Tea or Smoothie: Pair with a warming cup of herbal tea or a refreshing smoothie to round out your meal, giving a flavorful beverage choice that matches your breakfast vibe.

Experiment with these serving ideas to tailor your Banana Bread Overnight Oats experience to your taste and make mornings a little sweeter!

Expert Tips for Banana Bread Overnight Oats

Seal it Right: Always use a sealed jar or bowl to prevent drying out. This ensures your Banana Bread Overnight Oats stay creamy and delicious.

Storage Advice: For the best flavor and texture, consume within three days. Consider adding fresh mashed banana just before serving to refresh the taste.

Mix & Match: Feel free to explore different nuts, sweeteners, or even fruits to customize your oats. This versatility keeps your breakfasts exciting and satisfying!

Try Different Textures: If you prefer creamier oats, use less milk or mash the banana into a smoother consistency before mixing. Adjust to your taste for an ideal breakfast experience.

Make it Vegan: For a fully vegan option, always opt for plant-based milk and ensure any added sweeteners are also vegan-friendly, like maple syrup.

How to Store and Freeze Banana Bread Overnight Oats

Fridge: Store your prepared Banana Bread Overnight Oats in a sealed container in the refrigerator for up to 4-5 days. This will keep them fresh and ready for busy mornings.

Freezer: If you want to make them ahead of time, freeze individual portions of the mixture in airtight containers for up to 3 months. Thaw overnight in the fridge before serving.

Reheating: When you're ready to enjoy, you can serve the oats cold or microwave for about 30 seconds to warm them. Stir well after reheating for the best texture.

Reminder: For optimal freshness, consider adding fresh toppings like sliced bananas or nuts right before serving.

Banana Bread Overnight Oats Variations

Customize your Banana Bread Overnight Oats with these delightful twists that will elevate your breakfast experience!

  • Dairy-Free: Swap regular milk for almond, soy, or oat milk to keep it completely vegan!
  • Nut-Free: Leave out the nuts or replace them with sunflower seeds to avoid allergens while still adding crunch.
  • Fruit Twist: Substitute the mashed banana with applesauce or pumpkin puree for a unique flavor profile.
  • Spiced Up: Add a dash of nutmeg or ginger to complement the cinnamon and create a warm, spicy kick.
  • Chocolate Delight: Mix in chocolate chips or cacao nibs for a deliciously indulgent breakfast treat.
  • Protein Boost: Stir in a scoop of your favorite protein powder to make your oats more filling and nutritious.
  • Sweetness Swap: Experiment with different sweeteners like agave syrup or honey according to your taste preference.
  • Tropical Flavor: Add shredded coconut and diced pineapple for a fun, tropical twist that brightens your morning!

Make Ahead Options

These Banana Bread Overnight Oats are perfect for meal prep, allowing you to enjoy a hearty breakfast with minimal morning effort! You can prepare the oats up to 3 days in advance by following the initial steps, mixing the ingredients, and sealing them in a jar or a bowl in the refrigerator. To maintain their luscious texture, be sure to cover them tightly. When you're ready to indulge, simply give them a stir and add any fresh toppings, like sliced bananas or nuts, before serving. With this prep, your delicious Banana Bread Overnight Oats will be just as delightful and convenient for busy weekdays!

Banana Bread Overnight Oats Recipe FAQs

Is overnight oats with bananas healthy?
Absolutely! Overnight oats made with bananas are not only delicious but also packed with nutrients. Bananas provide dietary fiber, essential vitamins, and minerals, making them a fantastic choice for a healthy breakfast option. Combined with rolled oats, which offer complex carbohydrates and additional fiber, this dish supports sustained energy and digestive health.

What not to add in overnight oats?
Be cautious with high-sugar ingredients and overly perishable items. Avoid adding excessive sweeteners like honey or agave syrup if you want to keep it healthy. Also, steer clear of dairy-based yogurts that might spoil quickly unless you plan to consume the oats within a day. Ingredients with a very high fat content, such as heavy cream, can alter the texture and flavor negatively.

What is the number one mistake made when making banana bread?
The most common mistake people make is using overripe bananas! For banana bread or banana-flavored recipes like these overnight oats, you want your bananas to be perfectly ripe—meaning they should have dark spots but not be completely black. This ensures maximum sweetness and flavor without an unpleasant bitter taste from overly ripe fruit.

Is oats overnight actually healthy?
Very! Overnight oats provide a convenient way to incorporate whole grains into your diet. They retain all the fiber and nutrients found in traditional oats and can be tailored to your dietary needs. By using wholesome ingredients like bananas, nuts, and plant-based milk, you can create a balanced meal that is both satisfying and nutritious, perfect for busy lifestyles.

How do I properly store and freeze Banana Bread Overnight Oats?
To keep your Banana Bread Overnight Oats fresh, store them in a sealed container in the refrigerator for up to 4-5 days. For longer storage, you can freeze individual portions in airtight containers. To freeze, simply portion out the oats, seal tightly, and label with the date. When ready to enjoy, thaw overnight in the fridge and stir well before serving. This keeps the oats creamy and delicious!

Banana Bread Overnight Oats

Delicious Banana Bread Overnight Oats for Busy Mornings

A quick and easy recipe for Banana Bread Overnight Oats perfect for busy mornings.
Print Recipe Pin Recipe
Prep Time 5 minutes mins
Total Time 8 hours hrs
Servings: 2 servings
Course: Breakfast
Cuisine: Vegan
Calories: 300
Ingredients Equipment Method Nutrition Notes

Ingredients
  

For the Oats
  • 1 large ripe banana mashed
  • ½ cup rolled oats ensure gluten-free if required
  • ½ cup milk of choice dairy, almond, or oat milk
  • 2 tablespoons chopped pecans or walnuts or use almonds
  • 1 teaspoon vanilla extract almond extract can be an alternative
  • ½ teaspoon cinnamon optional but recommended
  • 1 dash sea salt to balance sweetness
  • 1 tablespoon ground flax optional; chia seeds are a substitute
  • 2 teaspoons 100% pure maple syrup adjust for sweetness

Equipment

  • bowl
  • fork
  • Whisk
  • sealed container

Method
 

Step‑by‑Step Instructions for Banana Bread Overnight Oats
  1. Mash the banana in a medium-sized bowl or jar until creamy with minimal lumps.
  2. Combine the dry ingredients: add rolled oats, ground flax (if using), sea salt, and cinnamon to the same bowl. Stir until evenly distributed.
  3. Add the wet ingredients: pour in milk, vanilla extract, and maple syrup. Blend until oats are coated.
  4. Fold in chopped nuts evenly throughout the mixture.
  5. Cover the bowl or jar tightly and refrigerate overnight or for at least 4 hours.
  6. In the morning, stir the oats and warm in the microwave if desired. Serve with additional toppings.

Nutrition

Serving: 1servingsCalories: 300kcalCarbohydrates: 50gProtein: 8gFat: 10gSaturated Fat: 1gPolyunsaturated Fat: 5gMonounsaturated Fat: 4gSodium: 150mgPotassium: 500mgFiber: 8gSugar: 10gVitamin C: 3mgCalcium: 100mgIron: 1mg

Notes

Store in a sealed container in the refrigerator for up to 4-5 days. Freeze individual portions for up to 3 months. Add fresh toppings just before serving.

Tried this recipe?

Let us know how it was!
  • « Previous Page
  • 1
  • …
  • 9
  • 10
  • 11
  • 12
  • 13
  • …
  • 17
  • Next Page »

Footer

Copyright © 2025 · recipecrown.com Privacy Policy Disclaimer Terms & Conditions