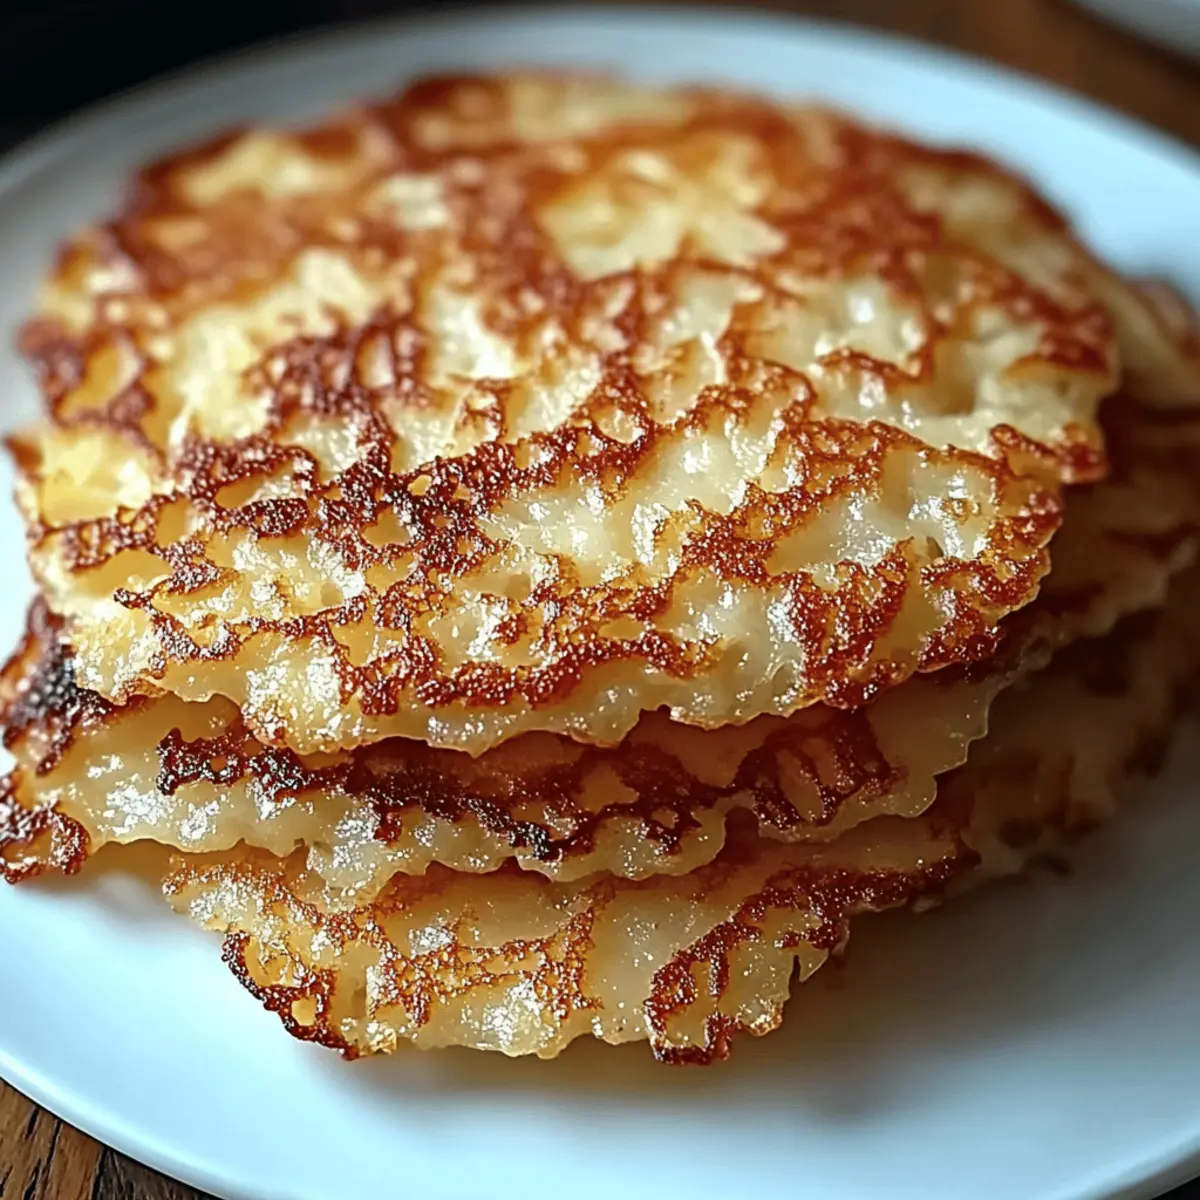
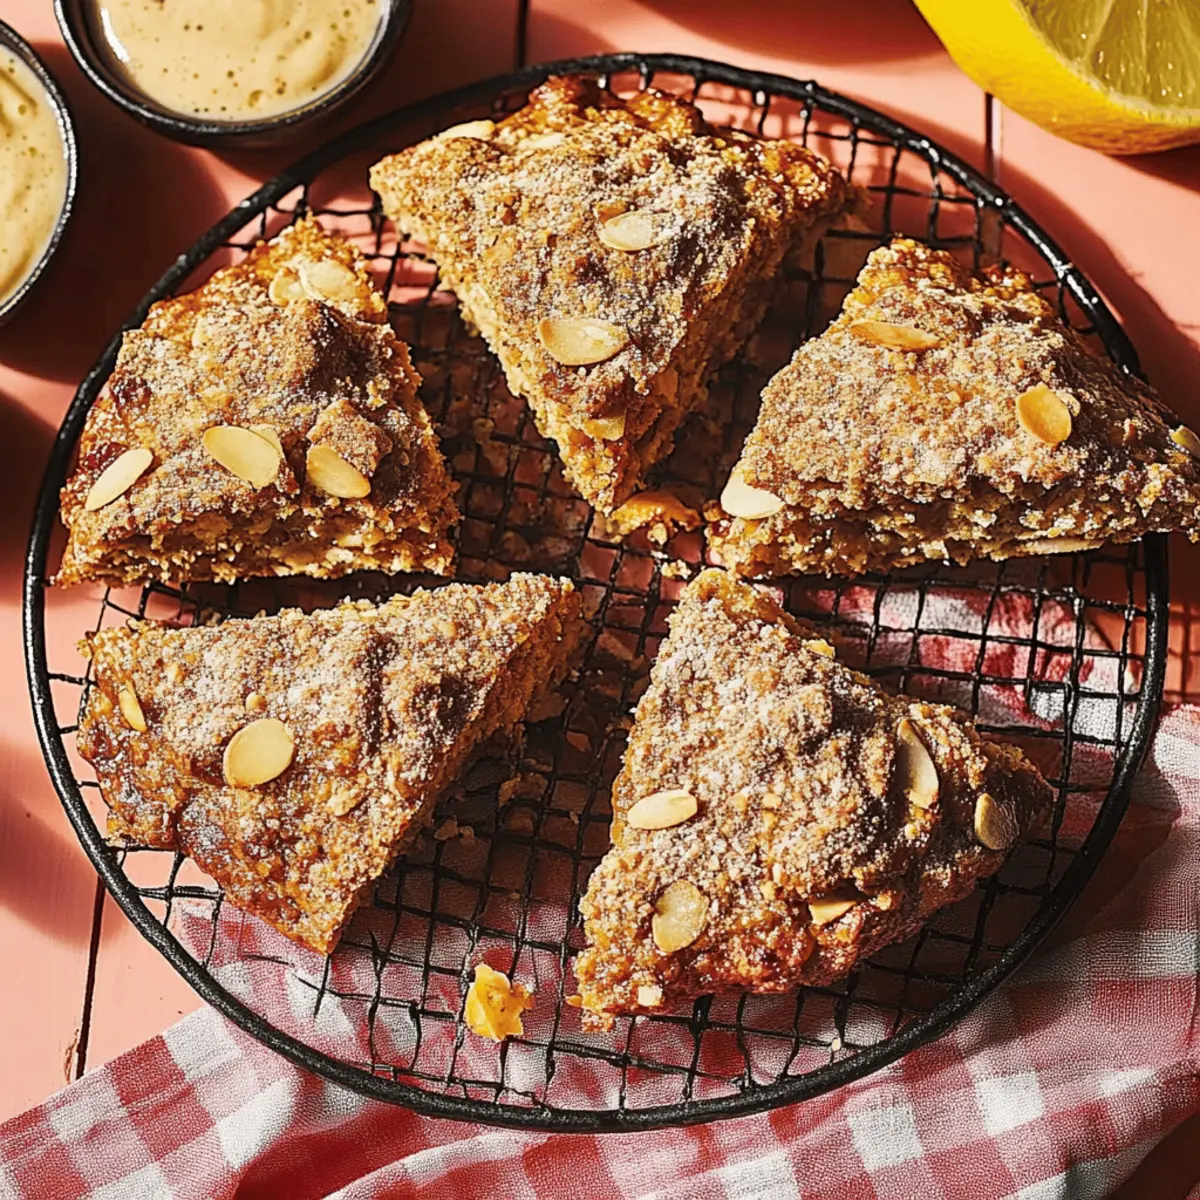
RecipeCrown

  • Home
  • Breakfast
  • Main Dishes
  • Dessert
  • About
  • Contact
menu icon
go to homepage
  • Home
  • Breakfast
  • Main Dishes
  • Dessert
  • About
  • Contact
search icon
Homepage link
  • Home
  • Breakfast
  • Main Dishes
  • Dessert
  • About
  • Contact
×

Cozy Tomato and White Bean Soup for Heartwarming Meals

August 20, 2025 by grace bellamy Leave a Comment

As I stood in my kitchen, the scent of sautéed garlic and shallots dancing in the air, I realized there’s something truly magical about homemade soup. This Tomato and White Bean Soup is a cozy hug in a bowl, offering a nourishing escape from the chaos of fast food. With just 30 minutes of your time, this recipe delivers hearty satisfaction that's both quick to prepare and perfect for meal prep. Imagine coming home to a warm, comforting dish filled with wholesome ingredients—like creamy cannellini beans and vibrant tomatoes—that not only warms your belly but also nourishes your spirit. It’s a versatile, flavor-packed soup that can easily become a weeknight favorite or a delightful gathering centerpiece. Ready to discover how to make this delicious Tomato and White Bean Soup? Let’s dive in!

Why is Tomato and White Bean Soup a Must-Try?

Nourishing Comfort: This soup is like a cozy blanket for your soul, blending creamy beans with rich tomatoes for a deliciously heartwarming dish.

Quick & Easy: In just 30 minutes, you can whip up a satisfying meal perfect for any busy weeknight or leisurely weekend.

Flavorful Depth: With aromatic garlic, sautéed shallots, and a hint of red pepper flakes, each spoonful delivers a burst of comforting flavor.

Versatile Ingredients: Customize it with different beans or seasonal veggies, making this soup a flexible option for any pantry.

Crowd-Pleasing Delight: Serve it at gatherings, and watch as your friends and family savor every bowl—perfect alongside fresh crusty bread!

Feeling inspired? This Tomato and White Bean Soup is a fantastic way to bring homemade warmth back to your kitchen, especially if you're tired of fast food. Want more cozy soup ideas? Check out our other comforting recipes like Hearty Vegetable Soup or Creamy Mushroom Soup.

Tomato and White Bean Soup Ingredients

For the Base

  • Olive oil – This adds richness and helps sauté the aromatics.
  • Carrots – Diced for natural sweetness and a pop of color.
  • Shallots – Offer a milder onion flavor to enhance the base.
  • Garlic – Minced for that aromatic kick that fills your kitchen with warmth.

For the Soup

  • Italian seasoning – A delightful combination of herbs that elevates the soup's flavor.
  • Dried thyme – Adds an earthy note that complements the tomatoes and beans.
  • Crushed red pepper flakes – Adjust to taste for a little heat and depth.
  • Tomato paste – Gives a concentrated tomato flavor, enhancing the overall richness.
  • Chicken bouillon cubes – Dissolve in water or use broth for a savory depth.
  • Cannellini or Great Northern beans – These creamy beans make the soup hearty without rinsing them.
  • Fire-roasted diced tomatoes – Adds a smoky zest that uplifts the dish.
  • Bay leaf – Infuses a subtle flavor that simmers beautifully throughout the cooking.

Finishing Touches

  • Parmesan rind – Optional but adds a lovely umami kick to the soup.
  • Kosher salt and ground black pepper – Adjust these to bring out the soup's flavors.
  • Heavy cream – For a touch of indulgence, making it creamy (optional).
  • Grated Parmesan cheese – Sprinkle on top for a cheesy finish (optional).
  • Fresh herbs, pesto, croutons, lemon wedges – Use these as garnishes for a burst of flavor and texture!

With these ingredients, you’re well on your way to creating a delightful Tomato and White Bean Soup that will surely satisfy!

Step‑by‑Step Instructions for Tomato and White Bean Soup

Step 1: Heat the Oil
In a large heavy-bottomed saucepan, heat 2 tablespoons of olive oil over medium heat. Allow the oil to shimmer, indicating it’s ready. This will help create a base for your Tomato and White Bean Soup that’s rich in flavor.

Step 2: Sauté the Vegetables
Add 2 medium diced carrots to the pan and sauté for 3 minutes until softened and slightly golden. Lower the heat slightly, then add 2 diced large shallots, cooking for an additional 2 minutes. You want them to become translucent and fragrant.

Step 3: Aromatic Mix
Stir in 4 minced garlic cloves, 2 teaspoons of Italian seasoning, ½ teaspoon of dried thyme, and ¼ teaspoon of crushed red pepper flakes. Sauté this mixture for about 1 minute until the garlic is fragrant but not burned, filling your kitchen with a warm aroma.

Step 4: Incorporate Tomato Paste
Mix in 1 tablespoon of tomato paste and let it cook for 1-2 minutes, stirring constantly. This step is essential for deepening the flavors of your Tomato and White Bean Soup, as caramelizing the paste enhances its taste.

Step 5: Add the Broth
Pour in 4 cups of boiling water with 4 dissolved chicken bouillon cubes, scraping any brown bits from the bottom of the pan. This will deglaze the saucepan, ensuring none of the delicious flavors are left behind, creating a cohesive broth.

Step 6: Stir in the Beans and Tomatoes
Add both cans of cannellini beans (with their liquid), the 14-ounce can of fire-roasted diced tomatoes, 1 dry bay leaf, and a Parmesan rind if you’re using one. Stir the mixture well, allowing the flavors to mingle and create the base of your soup.

Step 7: Bring to a Boil
Increase the heat to bring the soup to a gentle boil, then immediately reduce the heat to a simmer. Cover the saucepan and let it cook for 10 minutes. This allows all the ingredients to marry beautifully while keeping the soup hearty and warm.

Step 8: Uncover and Simmer
Remove the lid and give the soup a good stir. Let it simmer uncovered for an additional 10 minutes, allowing the flavors to deepen and the soup to thicken slightly as it bubbles gently.

Step 9: Final Touches
Discard the bay leaf and Parmesan rind, then stir in ¼ cup of heavy cream and ¼ cup of grated Parmesan cheese, if desired. This introduces a creamy richness to your Tomato and White Bean Soup, making it irresistibly comforting.

Step 10: Season and Serve
Taste the soup, adjusting the seasoning with kosher salt and pepper as needed. If you like, add some fresh spinach, herbs, or a splash of vinegar or lemon juice for brightness. Serve hot with optional garnishes like croutons, pesto, or fresh herbs for a delightful finish.

How to Store and Freeze Tomato and White Bean Soup

Fridge: Store the Tomato and White Bean Soup in an airtight container for up to 3 days; let it cool completely before refrigerating to maintain freshness.

Freezer: For longer storage, freeze the soup in individual portions in freezer-safe bags or containers for up to 3 months. Be sure to leave space for expansion.

Reheating: Thaw overnight in the fridge and reheat on the stovetop or in the microwave until warmed through. Add a splash of broth or water if the soup thickens too much upon reheating.

Serving Tips: Garnish the reheated soup with fresh herbs or a sprinkle of Parmesan cheese for a delicious touch, enhancing the comforting flavors of your Tomato and White Bean Soup.

Tomato and White Bean Soup Variations

Feel free to get creative and tailor this soup to suit your taste buds!

  • Dairy-Free: Substitute heavy cream with coconut milk for a velvety, plant-based creaminess without dairy. It's a delicious twist that adds a hint of sweetness!

  • Spicy Kick: If you love heat, add diced jalapeños or more crushed red pepper flakes for that extra fire. This elevates the flavor profile and spices up your meal.

  • Vegetable-Packed: Toss in some chopped kale, spinach, or bell peppers for a nutrient boost. These vibrant additions not only enhance nutrition but also bring a lovely color contrast!

  • Smoky Flavor: Use smoked paprika instead of red pepper flakes to infuse a warm, smoky depth to the soup. It's a great way to add a new dimension without overshadowing the main flavors.

  • Herb-Infused: Try swapping your seasonings with fresh herbs like thyme, basil, or parsley for a brighter, fresher taste. Fresh herbs can take the flavor to new heights, especially when added towards the end!

  • Protein Boost: Add shredded rotisserie chicken or cooked sausage for a heartier version, perfect for meat lovers. This not only enhances the protein content but also makes it more filling for a robust dinner.

  • International Twist: Incorporate spices like curry powder or cumin to give the soup an exotic flair. This can transform your Tomato and White Bean Soup into something reminiscent of a delightful global dish!

  • Garnish Variety: Serve with interesting toppings like avocado slices, crispy bacon bits, or a dollop of yogurt for added texture and flavor. These small additions can elevate each bowl into a unique experience!

By experimenting with these variations, you can make this comforting soup your own! If you’re looking for more creative recipes, check out our Hearty Vegetable Soup or Creamy Mushroom Soup for more inspiration.

Make Ahead Options

These Tomato and White Bean Soup is perfect for meal prep enthusiasts! You can chop the vegetables (carrots and shallots) up to 24 hours in advance and store them in an airtight container in the refrigerator to save precious prep time on busy nights. Additionally, you can cook the entire soup and refrigerate it for up to 3 days, which allows the flavors to meld beautifully. Just before serving, gently reheat the soup on the stove, stirring in any fresh ingredients like cream or Parmesan to maintain their creamy texture. This way, you'll enjoy a heartwarming meal with minimal effort—just as delicious as when first made!

What to Serve with Tomato and White Bean Soup

As the inviting aroma of Tomato and White Bean Soup lingers in the air, it’s the perfect moment to complement it with delightful sides that enhance your meal.

  • Crusty Bread: The ideal companion for dipping, this bread adds a satisfying crunch and soaks up the flavorful broth.

  • Mixed Green Salad: A refreshing blend of greens with a light vinaigrette balances the heartiness of the soup, adding a crisp texture contrast.

  • Garlic Loaf: Rich and buttery, this loaf enhances the soup’s flavor, making every bite an indulgent experience. Imagine biting into warm bread with fragrant garlic butter cascading down.

  • Roasted Vegetables: Their caramelized sweetness pairs beautifully with the savory soup, providing an additional layer of flavor while contributing vibrant colors to your plate.

  • Parmesan Crisps: These crunchy, cheesy delights add a salty, savory element that complements the creamy beans in the soup wonderfully. They are perfect for adding extra texture and indulgence.

  • Refreshing Lemonade: A chilled glass of tangy lemonade cleanses the palate and adds a bright note to your meal, enhancing the soup's comforting flavors.

  • Chocolate Chip Cookies: To round out the evening, a sweet treat like warm chocolate chip cookies offers a cozy way to finish off your meal. The contrast between savory and sweet will leave everyone smiling.

With these satisfying accompaniments, your Tomato and White Bean Soup becomes the heart of a warm and inviting meal. Enjoy!

Expert Tips for Tomato and White Bean Soup

  • Perfect Texture: Achieve a creamy soup by blending a part of the beans after the cooking time. This adds thickness without needing additional cream.

  • Season Smartly: Start with less salt and adjust at the end; flavors concentrate as the soup simmers. This is crucial for a well-balanced Tomato and White Bean Soup.

  • Fresh vs. Dried Herbs: If using fresh herbs, add them towards the end for maximum flavor. Dried herbs can overpower the dish if added too early.

  • Customizable Beans: Feel free to substitute cannellini beans with chickpeas or even black beans for a unique twist. Just keep in mind the cooking time might vary.

  • Add Green Goodness: Incorporate spinach or kale during the last few minutes for added nutrition and vibrant color without overwhelming the soup's flavor.

Tomato and White Bean Soup Recipe FAQs

How do I select ripe tomatoes for this soup?
Absolutely! For the best flavor, go for tomatoes that are slightly soft to the touch and have a rich red color. If you're using canned fire-roasted tomatoes, check the labels for low-sodium or all-natural options to avoid extra preservatives.

What’s the best way to store leftovers of Tomato and White Bean Soup?
This soup can be stored in an airtight container in the fridge for up to 3 days. Make sure the soup has cooled completely before you place it in the refrigerator to keep it fresh and flavorful.

Can I freeze Tomato and White Bean Soup?
Yes, you can! Just pour your cooled soup into freezer-safe bags or containers, leaving a little room for expansion. It will keep well in the freezer for up to 3 months. To reheat, thaw overnight in the fridge and heat on the stovetop, adding a splash of broth if it thickens.

What should I do if my soup is too thick?
If you find that your soup is thicker than you’d like, don’t worry! Simply add a little warm broth or water, stirring until it reaches your desired consistency. Taste and adjust the seasoning afterward to keep flavors balanced.

Is this Tomato and White Bean Soup suitable for vegetarians?
Yes, absolutely! Just swap the chicken bouillon cubes for vegetable bouillon or broth. The beans provide plenty of protein, making it a satisfying option for vegetarians. If any family members have specific dietary restrictions, you can also easily make adjustments as needed.

Can I use any other types of beans in this recipe?
Very much so! While cannellini beans are traditional for this soup, you can certainly use chickpeas, black beans, or even kidney beans as alternatives. Just keep an eye on cooking times, as different beans may require slight adjustments.

Tomato and White Bean Soup

Cozy Tomato and White Bean Soup for Heartwarming Meals

This Tomato and White Bean Soup is a quick, nourishing dish perfect for cozy meals.
Print Recipe Pin Recipe
Prep Time 10 minutes mins
Cook Time 20 minutes mins
Total Time 30 minutes mins
Servings: 4 bowls
Course: Soup
Cuisine: Italian
Calories: 350
Ingredients Equipment Method Nutrition Notes

Ingredients
  

For the Base
  • 2 tablespoons Olive oil Adds richness and helps sauté the aromatics.
  • 2 medium Carrots Diced for natural sweetness.
  • 2 large Shallots Diced for enhanced flavor.
  • 4 cloves Garlic Minced for aromatic kick.
For the Soup
  • 2 teaspoons Italian seasoning Elevates the soup's flavor.
  • 0.5 teaspoon Dried thyme Adds earthiness.
  • 0.25 teaspoon Crushed red pepper flakes Adjust to taste.
  • 1 tablespoon Tomato paste Gives concentrated tomato flavor.
  • 4 cubes Chicken bouillon Dissolve in water for savory depth.
  • 2 cans Cannellini or Great Northern beans Do not rinse.
  • 1 14-ounce can Fire-roasted diced tomatoes Adds smoky zest.
  • 1 leaf Bay leaf Infuses subtle flavor while simmering.
Finishing Touches
  • 1 piece Parmesan rind Optional, adds umami.
  • to taste Kosher salt Adjust to taste.
  • to taste Ground black pepper Adjust to taste.
  • 0.25 cup Heavy cream Optional for creaminess.
  • 0.25 cup Grated Parmesan cheese Optional for garnish.
  • Fresh herbs, pesto, croutons, lemon wedges Use as garnishes.

Equipment

  • Large heavy-bottomed saucepan

Method
 

Step-by-Step Instructions
  1. Heat 2 tablespoons of olive oil in a large saucepan over medium heat.
  2. Add 2 diced carrots and sauté for 3 minutes until softened.
  3. Lower heat and add 2 diced shallots, cooking for 2 minutes.
  4. Stir in 4 minced garlic cloves, 2 teaspoons of Italian seasoning, 0.5 teaspoon of dried thyme, and 0.25 teaspoon of crushed red pepper flakes. Sauté for 1 minute.
  5. Mix in 1 tablespoon of tomato paste, cooking for 1-2 minutes.
  6. Pour in 4 cups of boiling water with 4 chicken bouillon cubes, deglazing the pan.
  7. Add 2 cans of cannellini beans, 1 can of fire-roasted diced tomatoes, 1 bay leaf, and Parmesan rind if using. Stir well.
  8. Bring to a gentle boil, then reduce heat and simmer for 10 minutes.
  9. Uncover and simmer for an additional 10 minutes.
  10. Discard bay leaf and Parmesan rind, stir in 0.25 cup of heavy cream and 0.25 cup of grated Parmesan cheese if desired.
  11. Taste and adjust seasoning with kosher salt and pepper. Serve hot with optional garnishes.

Nutrition

Serving: 1bowlCalories: 350kcalCarbohydrates: 45gProtein: 15gFat: 12gSaturated Fat: 3gPolyunsaturated Fat: 1gMonounsaturated Fat: 8gCholesterol: 10mgSodium: 800mgPotassium: 800mgFiber: 10gSugar: 3gVitamin A: 1500IUVitamin C: 20mgCalcium: 150mgIron: 3mg

Notes

Customize beans and add greens for extra nutrition and flavor.

Tried this recipe?

Let us know how it was!

Irresistibly Creamy Frozen Hot Chocolate for Instant Bliss

August 20, 2025 by grace bellamy Leave a Comment

As I blended the ingredients for Frozen Hot Chocolate, the soft whir of the blender filled my kitchen, whisking me away to memories of warm summer days and sweet indulgences. This delightful treat, perfect for quenching any chocolate craving, takes just five minutes to whip up. Not only is it a quick fix for those moments when you’re longing for a refreshing dessert, but it’s also incredibly customizable—ideal for impressing guests or simply spoiling yourself. Picture yourself serving this frosty, decadent drink, topped with whipped cream and decadent sprinkles, creating mini moments of joy with each sip. Are you ready to freeze your chocolate dreams? Let’s dive into this indulgent recipe that’s sure to become a favorite!

Why is Frozen Hot Chocolate a Must-Try?

Refreshing Bliss: This frozen delight offers a cool escape from the ordinary, combining the classic flavors of hot chocolate with an icy twist.

Effortless Preparation: With only 5 minutes needed to whip this up, it’s the perfect solution for last-minute cravings or unexpected guests!

Customizable Fun: Tailor each serving with toppings like whipped cream, sprinkles, or even creative chocolate shavings for a personal touch.

Crowd-Pleasing Treat: Whether for a summer gathering or a cozy night in, this drink ensures everyone leaves with a smile and a satisfied taste bud!

Versatile Ingredients: Use dairy or non-dairy milk to suit your lifestyle—hint: a splash of vanilla almond milk works wonders! Delight your friends by organizing a frozen hot chocolate bar for interactive fun.

Frozen Hot Chocolate Ingredients

For the Base
• Ice – 3 cups of ice are essential for that frosty texture!
• Milk – ½ cup; use dairy or non-dairy for your preference.
• Hot chocolate mix – 2 packets bring all the chocolaty goodness to this frozen hot chocolate.
• Chocolate syrup – 1 tablespoon adds an extra layer of rich flavor.

For the Topping
• Whipped cream – Generously pile it on for that classic finish!
• Chocolate shavings or sprinkles – Optional, but these add a fancy touch and extra sweetness.

Step‑by‑Step Instructions for Frozen Hot Chocolate

Step 1: Combine the Ingredients
In a high-powered blender, add 3 cups of ice, ½ cup of milk, 2 packets of hot chocolate mix, and 1 tablespoon of chocolate syrup. Ensure that your blender is properly assembled to prevent any spills. Blend the mixture on high for about 30 seconds, or until you see a smooth, creamy consistency form, with no chunks of ice remaining.

Step 2: Check the Texture
After blending, pause the machine and check the texture of your frozen hot chocolate. It should resemble a thick, slushy drink. If it appears too thick, add a splash more milk and blend for an additional 15 seconds. Once satisfied with the creamy texture, prepare to serve this delicious Frozen Hot Chocolate.

Step 3: Pour and Garnish
Next, take your prepared glasses and carefully pour the frozen hot chocolate mixture into each glass, filling them to the brim for an inviting presentation. To create an indulgent finish, generously top each drink with whipped cream, allowing it to cascade over the edges, inviting your guests in for a refreshing sip.

Step 4: Add Final Touches
For an extra decadent treat, sprinkle chocolate shavings or colorful sprinkles on top of the whipped cream. These optional garnishes will not only enhance the visual appeal but also add a delightful burst of texture and sweetness to your Frozen Hot Chocolate.

Step 5: Serve Immediately
Enjoy your homemade Frozen Hot Chocolate right away for the best frosty experience. Offer fun straws or decorative spoons for an added touch. As you serve, watch the smiles light up as everyone enjoys this cool, chocolaty bliss that is perfect for any occasion!

Frozen Hot Chocolate Variations

Feel free to let your creativity shine as you customize this delightful treat!

  • Dairy-Free: Use a non-dairy milk like almond or oat milk for a creamy, vegan option. Dairy doesn’t have to be a must-have here!

  • Chocolate Heaven: Add a tablespoon of cocoa powder for a richer chocolate flavor. This extra boost will satisfy the most devoted chocolate lovers.

  • Minty Fresh: Mix in a few drops of peppermint extract to create a refreshing mint chocolate version. It's a festive twist that brings holiday cheer any time of the year!

  • Nutty Delight: Incorporate a tablespoon of hazelnut spread while blending for a nutty flavor that complements the chocolate beautifully. It adds a whole new depth of decadence!

  • Spiced Twist: Sprinkle in a pinch of cinnamon or a dash of cayenne pepper for a subtle heat kick. This unexpected warmth can transform your frozen drink into a cozy indulgence.

  • Fruity Addition: Blend in a banana or a handful of berries for a fruity variation that adds natural sweetness and an extra layer of flavor to your drink. It's like dessert and breakfast in one!

  • Ice Cream Indulgence: Swap the ice for frozen yogurt or ice cream for a genuinely over-the-top treat! Trust me, it will be an ice-cold desert worthy of any celebration.

  • Gourmet Toppings: Elevate with gourmet toppings like crushed toffee bits or caramel drizzle alongside your whipped cream. These little luxuries will have your guests swooning.

With these delightful variations, you can match the flavors to the seasons, occasions, or even your mood! And don’t forget that adding a twist might just inspire you to create your own signature frozen hot chocolate masterpiece!

What to Serve with Frozen Hot Chocolate?

Imagine indulging in a silky, creamy drink, perfectly balanced with sweet treats and savory bites to elevate your dessert experience.

  • Chocolate Chip Cookies: Their warm, gooey texture contrasts beautifully with the icy chocolate, making every bite unforgettable.
    Indulge your senses with freshly baked chocolate chip cookies, the ultimate companion to our Frozen Hot Chocolate. Each bite creates a delightful blend of textures and flavors!

  • Mini Brownies: These fudgy bites offer a rich chocolate flavor that pairs harmoniously with your frosty drink. The decadent combination satisfies chocolate cravings on every level.

  • Fresh Berry Salad: A medley of strawberries and blueberries adds a vibrant, tangy freshness, balancing the sweetness of the hot chocolate and providing a refreshing contrast.

  • Creamy Peanut Butter Dip: This nutty dip, served with crunchy apple slices, brings a delightful texture that complements the drink's smoothness. It also adds a fun twist to your dessert experience.

  • Marshmallow Skewers: Skewers filled with roasted marshmallows for dipping create a fun, interactive treat that mirrors the flavors of your drink while adding a toasted sweetness to every sip.

  • Vanilla Ice Cream: On a hot day, a scoop of vanilla ice cream floating in the drink creates a dreamy, milkshake-like experience that elevates frozen hot chocolate to heavenly heights.

  • Sparkling Water: Refreshing bubbles cut through the creaminess, cleansing your palate between the rich sips of your chocolate delight. Plus, it pairs nicely for lighter sipping at summer gatherings.

Make Ahead Options

These Frozen Hot Chocolate treats are perfect for busy home cooks looking to save time! You can prep the base by blending the ice, milk, hot chocolate mix, and chocolate syrup up to 24 hours in advance. Simply pour the mixture into an airtight container and refrigerate it until ready to serve. This way, you’ll have your frosty treat ready and waiting! When it’s time to enjoy, just give the mixture a quick blend to restore the creamy texture and pour it into glasses, topping with whipped cream and any desired garnishes. This makes serving a breeze, ensuring your delicious Frozen Hot Chocolate is just as lovely and refreshing as if made on the spot!

How to Store and Freeze Frozen Hot Chocolate

Fridge: Store any leftover frozen hot chocolate in an airtight container in the refrigerator for up to 3 days. However, be mindful that it may separate, so give it a good stir before enjoying.

Freezer: For extended storage, pour the mixture into ice cube trays and freeze. Once solid, transfer the cubes to a freezer bag and enjoy them within 1 month. Blend again with a splash of milk for a fresh drink!

Reheating: If you prefer it warm, gently heat the refrigerated frozen hot chocolate in a saucepan over low heat, stirring continuously until warm.

Serving Suggestion: It’s best to enjoy your frozen hot chocolate fresh to maintain that delightful texture, but if you’re storing leftovers, keep in mind that they may not have the same frosty charm.

Tips for the Best Frozen Hot Chocolate

• Use a Powerful Blender: Make sure your blender is up for the task. A high-powered one will ensure a smooth, creamy consistency without any ice chunks.

• Adjust Milk Level: If your mixture is too thick, simply add a splash more milk to achieve your desired slushy texture while blending your frozen hot chocolate.

• Garnish Generously: Don't skimp on the whipped cream! Pile it high for that irresistible, indulgent look that makes each drink feel like a special treat.

• Customize Your Flavors: Experiment with different flavored syrups or add a dash of vanilla extract to elevate your frozen hot chocolate experience; the possibilities are endless!

• Serve Immediately: For the best experience, serve your frozen hot chocolate right away to avoid separation and maintain that delightful icy texture.

Frozen Hot Chocolate Recipe FAQs

How do I select the best ice for my Frozen Hot Chocolate?
Absolutely! When choosing ice, use fresh, clear ice cubes for the best results. Avoid using ice that has been in the freezer for a long time, as it can affect the taste and texture due to freezer odors. Freshly made ice cubes will provide the purest flavor and contribute to that ideal creamy consistency.

What’s the best way to store Frozen Hot Chocolate leftovers?
You can store any leftover frozen hot chocolate in an airtight container in the fridge for up to 3 days. However, keep in mind that there may be some separation, so be sure to stir it thoroughly before you enjoy it again. If you want it to last longer, pour the mixture into ice cube trays and freeze! Once they’re solid, transfer the cubes to a freezer bag—these can be enjoyed within 1 month. To make a fresh drink again, simply blend the cubes with a splash of milk.

Can you freeze Frozen Hot Chocolate?
Indeed! Freezing is a fantastic way to prolong your frozen hot chocolate experience. After blending, pour the drink into ice cube trays and let it freeze completely. Once set, transfer the frozen cubes to a freezer-safe bag. Whenever you're ready for a delightful treat, just blend a few cubes with a bit of milk for that refreshing chocolatey delight again. This method keeps the flavor intact and allows for an adorable icy drink that's ready in a flash!

What should I do if my Frozen Hot Chocolate is too thick?
Not to worry! If your frosty drink turns out too thick, this is an easy fix. Simply add a splash of milk to the blender and mix for 15 seconds or until you achieve that perfect slushy consistency. The goal is to create a creamy texture without any ice chunks, so don't hesitate to adjust as needed. The more the merrier, after all!

Is Frozen Hot Chocolate safe for pets?
No, it's best to keep frozen hot chocolate away from pets. Ingredients like chocolate and certain milk products can be harmful to them. If you're looking for a forgiving treat for your furry friends, consider making a pet-friendly "frozen treat" with pureed fruit and plain yogurt instead! Always opt for recipes designed for pets to ensure their health and safety.

Can I make Frozen Hot Chocolate dairy-free?
Absolutely! You can easily make this frozen treat dairy-free by swapping the milk with your favorite non-dairy alternatives, such as oat milk, almond milk, or coconut milk. If you'd like to add a little extra flavor, try using a vanilla-flavored non-dairy milk. This way, everyone can indulge in this creamy delight without compromising their dietary preferences.

Frozen Hot Chocolate

Irresistibly Creamy Frozen Hot Chocolate for Instant Bliss

Enjoy a refreshing and customizable Frozen Hot Chocolate that's perfect for any chocolate craving.
Print Recipe Pin Recipe
Prep Time 5 minutes mins
Total Time 5 minutes mins
Servings: 2 glasses
Course: Dessert
Cuisine: American
Calories: 250
Ingredients Equipment Method Nutrition Notes

Ingredients
  

For the Base
  • 3 cups ice essential for frosty texture
  • 0.5 cups milk use dairy or non-dairy
  • 2 packets hot chocolate mix for chocolaty goodness
  • 1 tablespoon chocolate syrup adds rich flavor
For the Topping
  • 1 cup whipped cream generously pile on
  • chocolate shavings or sprinkles optional for garnish

Equipment

  • High-powered blender

Method
 

Step-by-Step Instructions
  1. In a high-powered blender, add ice, milk, hot chocolate mix, and chocolate syrup. Blend on high for about 30 seconds until smooth.
  2. Check the texture; it should be thick and slushy. If too thick, add a splash more milk and blend for another 15 seconds.
  3. Pour the frozen hot chocolate mixture into glasses. Top each drink with whipped cream.
  4. Sprinkle chocolate shavings or colorful sprinkles on top as a garnish.
  5. Serve immediately for the best experience with fun straws or decorative spoons.

Nutrition

Serving: 1glassCalories: 250kcalCarbohydrates: 30gProtein: 4gFat: 12gSaturated Fat: 7gCholesterol: 30mgSodium: 150mgPotassium: 300mgFiber: 1gSugar: 20gVitamin A: 200IUVitamin C: 2mgCalcium: 200mgIron: 1mg

Notes

For a powerful blend, use a high-powered blender. Serve immediately for the best icy texture.

Tried this recipe?

Let us know how it was!

Magical Mermaid Ice Cream Recipe That's Perfect for Summer

August 19, 2025 by grace bellamy Leave a Comment

An unexpected splash of color took over my kitchen last weekend, and I couldn’t help but smile as I whipped up a batch of Mermaid Ice Cream. This delightful treat not only brings a touch of whimsy to any gathering but also lets your creativity shine. With its three shimmering colors, this homemade ice cream is a feast for the eyes and a fantastic way to impress family and friends. Plus, it requires only 10 minutes of prep time! Imagine serving a delicious, guilt-free dessert that's perfect for summer parties or quiet evenings at home, drawing everyone to the table. Trust me, once you dive into this colorful concoction, you'll be dreaming up other vibrant variations. Are you ready to make your kitchen feel like a magical undersea adventure?

Why is Mermaid Ice Cream so delightful?

Whimsical Colors: This ice cream's vibrant pink, purple, and teal swirls create a visual treat that instantly brightens up any gathering.

Quick Prep: In just 10 minutes of hands-on time, you can whip up this delightful dessert, leaving plenty of time for summer fun!

Crowd-Pleasing: Whether you’re hosting a party or just enjoying a sunny day, everyone will be enchanted by the magical colors and flavors.

Creative Freedom: Feel free to experiment! You can add your favorite flavors or switch up the color theme for any occasion.

No Ice Cream Maker Needed: This simple recipe doesn’t require special equipment, making it easily accessible for everyone.

Perfect for Any Occasion: From birthday celebrations to quiet family nights, this Mermaid Ice Cream adds a sprinkle of joy to your dessert table. Plus, if you're looking for more fun summer treats, check out my recipe for Coconut Ice Slice or Garlic Butter Chicken for a delicious meal!

Mermaid Ice Cream Ingredients

• Make this colorful dessert a reality with these simple ingredients!

For the Ice Cream Base

  • Heavy cream – perfect for achieving that luscious, creamy texture.
  • Sweetened condensed milk – adds sweetness and a velvety richness.
  • Vanilla extract – enhances the flavor profile with a warm, inviting touch.

For the Colors

  • Pink gel food coloring – injects a playful vibe, reminiscent of cotton candy dreams.
  • Purple gel food coloring – evokes the enchanting hues of twilight seas.
  • Teal gel food coloring – captures the refreshing hue of ocean waves, making your Mermaid Ice Cream pop.

For the Decor

  • Edible glitter or sprinkles – elevates the charm, truly making your dessert sparkle!

Dive into this dreamy Mermaid Ice Cream that'll delight everyone as a visual and tasty treasure! 🧜‍♀️

Step‑by‑Step Instructions for Mermaid Ice Cream

Step 1: Whip the Cream
In a large mixing bowl, use an electric mixer to whip 2 cups of heavy cream on medium-high speed until stiff peaks form, about 3–4 minutes. Look for a glossy, fluffy texture that holds its shape. This creamy base is essential for the luscious mouthfeel of your Mermaid Ice Cream.

Step 2: Combine Condensed Milk and Vanilla
In a separate bowl, mix together one 14-ounce can of sweetened condensed milk with 1 teaspoon of vanilla extract until well combined. The mixture should have a smooth and creamy consistency, which will enhance the overall flavor of your ice cream. This step adds a delightful sweetness to your frozen treat.

Step 3: Fold in the Whipped Cream
Gently fold the whipped cream into the condensed milk mixture using a rubber spatula. Be careful not to deflate the whipped cream; this will ensure your Mermaid Ice Cream remains light and airy. The mixture should be uniform in color without any visible streaks, creating the perfect base for your colorful creation.

Step 4: Divide and Color the Mixture
Split the ice cream mixture evenly into three bowls. To each bowl, add a few drops of pink, purple, and teal gel food coloring, respectively. Mix each bowl just until the colors are well incorporated, creating beautifully vibrant shades. This step ensures that your Mermaid Ice Cream is as visually stunning as it is delicious.

Step 5: Assemble the Ice Cream
In a standard loaf pan, alternate dollops of each colored mixture, layering them side by side. Once the pan is filled, use a butter knife to gently swirl through the colors to create a marbled effect. Avoid overmixing; you want the colors to remain distinct and magical, just like the ocean!

Step 6: Add the Finishing Touches
Sprinkle a generous amount of edible glitter or colorful sprinkles over the top of your Mermaid Ice Cream. This last touch not only adds a whimsical sparkle but makes your dessert even more inviting. It's a wonderful way to make your dish stand out at any gathering.

Step 7: Freeze Until Firm
Cover the loaf pan with plastic wrap or a lid, and place it in the freezer for at least 6 hours, or until it is completely firm. The longer it sits, the better the flavors meld together. Your patience will pay off as you anticipate indulging in your stunning Mermaid Ice Cream!

How to Store and Freeze Mermaid Ice Cream

Fridge: Keep your Mermaid Ice Cream in the refrigerator for up to 3 days if it happens to be unwrapped. To maintain quality, store it in an airtight container.

Freezer: For long-term storage, place the ice cream in a sealed container and freeze for up to 2 weeks. To prevent freezer burn, smooth the surface and cover with plastic wrap before sealing the lid.

Reheating: Allow the ice cream to sit at room temperature for about 5 minutes before scooping, making it easier to serve. Enjoy the vibrant colors and flavors of your Mermaid Ice Cream any time!

Decor: If using edible glitter or sprinkles, add them right before serving to keep them fresh and crunchy.

What to Serve with Mermaid Ice Cream

Imagine a sunny afternoon where vibrant colors pair perfectly with sweet treats, creating a delightful experience for everyone.

  • Fluffy Waffles: Crispy on the outside and soft inside, these waffles provide a comforting base for your creamy ice cream delight.

  • Fresh Berries: Bright, tart berries like strawberries or blueberries add a refreshing contrast, balancing the sweetness of the ice cream beautifully.

  • Crispy Coconut Cookies: The chewy, toasted coconut flavor complements the richness of the Mermaid Ice Cream while adding a satisfying crunch.

  • Chocolate Sauce: A drizzle of warm chocolate sauce creates an irresistible combination, enriching every bite with deep, cocoa deliciousness.

  • Sparkling Lemonade: This bubbly beverage offers a citrusy zing that refreshes the palate, making it a perfect pairing with your whimsical dessert.

  • Pineapple Sorbet: Adding another layer of fruity sweetness, this light and refreshing sorbet enhances the playful nature of your Mermaid Ice Cream.

  • Mixed Fruit Salad: A medley of seasonal fruits adds freshness, allowing the vibrant colors and flavors of the Mermaid Ice Cream to stand out even more.

  • Macarons: These delicate, colorful treats not only echo the charm of your ice cream but also introduce delightful textures and flavors to your dessert table.

Mermaid Ice Cream Variations

Feel free to let your creativity shine with these delightful twists on the classic Mermaid Ice Cream!

  • Dairy-Free: Substitute heavy cream with coconut cream and sweetened condensed milk with a dairy-free version for a vegan delight. The tropical flavor of coconut adds a wonderful brightness!

  • Flavor Boost: Add a teaspoon of mint extract or almond extract to the base mixture for an exciting flavor complexity. This will surprise your taste buds and elevate the ice cream to a whole new level!

  • Fruity Swirls: Incorporate pureed fruits like strawberries or blueberries into the colorful layers for a fruity burst. The natural sweetness and vibrant colors will make your Mermaid Ice Cream even more enchanting.

  • Crunchy Texture: Fold in some crushed nuts or chocolate chips for added texture and richness. This creates a delightful contrast in every spoonful that enhances the overall experience.

  • Spicy Kick: If you love a bit of heat, add a pinch of cayenne pepper or cinnamon to the ice cream base. This unexpected twist can create a fascinating fusion of flavors that keeps everyone guessing!

  • Nutty Varieties: Mix in a couple of tablespoons of nut butter like almond or hazelnut for a creamy, nutty infusion. This variation pairs beautifully with the sweet and colorful base you’ve created.

  • Grown-Up Treat: For an adult twist, mix in a splash of your favorite liqueur like amaretto or rum before freezing. This makes it a fun dessert option for summer parties where you want to impress your guests.

  • Chocolate Lovers: Swirl in melted chocolate or fudge sauce during assembly for a decadent chocolate-fueled delight. Just imagine the delicious gooey swirls cradled within those beautiful colors!

Now that you have all these whimsical variations, your creative sea of flavors knows no bounds! If you're inspired to explore more vibrant recipes, check out my Cream Peas or dive into the rich flavors of Creamy Chicken and Mushroom for a hearty dinner!

Make Ahead Options

Preparing your Mermaid Ice Cream in advance is a brilliant way to save time and keep the magic alive during busy summer days! You can whip up the ice cream base—consisting of the whipped cream, sweetened condensed milk, and vanilla extract—up to 24 hours before serving. Just store this mixture in the refrigerator in an airtight container until you're ready to add the colors. When you're ready to continue, simply divide the chilled base into three bowls, add the gel food coloring, assemble in the loaf pan, and freeze for at least 6 hours. This way, you'll have a delightful, ready-to-serve dessert that’s just as scrumptious, and everyone will be captivated by the vibrant swirl of colors!

Expert Tips for Mermaid Ice Cream

• Choose the Right Cream: Use heavy whipping cream with at least 36% fat for the best texture. This ensures your Mermaid Ice Cream is rich and creamy.

• Gentle Folding: When combining the whipped cream and condensed milk, fold gently to maintain airiness. Overmixing can deflate the whipped cream, leading to a denser ice cream.

• Vibrant Colors: Use gel food coloring for bold hues without adding extra liquid. Liquid coloring can alter consistency, affecting the creamy texture of your Mermaid Ice Cream.

• Swirling Technique: When creating the marbled effect, swirl just enough to blend colors lightly. Too much mixing can result in a muddled look, losing that whimsical charm!

• Freezing Time: For the best flavor and texture, let your ice cream freeze for a full 6 hours. This gives it time to set properly and allows flavors to develop delightfully.

• Edible Decor: Don't skimp on the edible glitter or sprinkles! They not only enhance visual appeal but can also add a fun crunch to your dreamy treat.

Mermaid Ice Cream Recipe FAQs

How do I select ripe ingredients for Mermaid Ice Cream?
Absolutely! For the best results, ensure the heavy cream you choose is fresh and has a fat content of at least 36%. This will provide a rich, indulgent texture that makes your ice cream truly special. The sweetened condensed milk should be intact and unexpired for optimal sweetness and creaminess.

How should I store Mermaid Ice Cream?
Very! To keep your Mermaid Ice Cream fresh and delicious, store it in an airtight container in the freezer for up to 2 weeks. For maximum quality, smooth the surface of the ice cream and cover it with plastic wrap before sealing the lid. This helps prevent freezer burn, keeping those vibrant colors and enchanting flavors intact!

Can I freeze Mermaid Ice Cream for future enjoyment?
Absolutely! You can freeze your Mermaid Ice Cream for up to 2 weeks. Make sure to store it in a sealed container to lock in that delicious taste. If you're feeling creative, you can even freeze the mixture in individual portions for an on-the-go treat!

What should I do if my whipped cream doesn’t reach stiff peaks?
If your whipped cream isn’t forming stiff peaks, ensure that your mixing bowl and beaters are completely clean and dry, as any grease can affect the whipping process. Start at a lower speed and gradually increase to medium-high; this allows the cream to incorporate air effectively. If it's still not thickening after a few minutes, you might need to try using a different brand of heavy cream.

Can I adjust this recipe for dietary restrictions?
Very much so! If you're accommodating dairy allergies, you might experiment with a dairy-free heavy cream alternative, like coconut cream or cashew cream. Remember, though, this may yield different textures and flavors. For vegan options, you could also explore using vegan condensed milk to create your colorful treat. Just be sure to check for any added sugars or ingredients that may pose an issue for those with specific allergies.

How long can I keep Mermaid Ice Cream in the fridge?
In the fridge, your Mermaid Ice Cream can last for about 3 days. However, I recommend keeping it tightly sealed in an airtight container to maintain its deliciousness. If you plan to keep it longer, the freezer is your best friend for preserving that creamy magic!

Mermaid Ice Cream

Magical Mermaid Ice Cream Recipe That's Perfect for Summer

This Magical Mermaid Ice Cream is a colorful treat that adds whimsy to any summer gathering.
Print Recipe Pin Recipe
Prep Time 10 minutes mins
Freezing Time 6 hours hrs
Total Time 6 hours hrs 10 minutes mins
Servings: 6 cups
Course: Dessert
Calories: 280
Ingredients Equipment Method Nutrition Notes

Ingredients
  

For the Ice Cream Base
  • 2 cups heavy cream perfect for achieving that luscious, creamy texture.
  • 1 can sweetened condensed milk adds sweetness and velvety richness.
  • 1 teaspoon vanilla extract enhances the flavor profile.
For the Colors
  • to taste pink gel food coloring injects a playful vibe.
  • to taste purple gel food coloring evokes enchanting hues.
  • to taste teal gel food coloring captures the refreshing hue of ocean waves.
For the Decor
  • to taste edible glitter or sprinkles elevates the charm.

Equipment

  • Electric mixer
  • Mixing bowls
  • loaf pan

Method
 

Step-by-Step Instructions
  1. In a large mixing bowl, use an electric mixer to whip 2 cups of heavy cream on medium-high speed until stiff peaks form, about 3–4 minutes.
  2. In a separate bowl, mix together one 14-ounce can of sweetened condensed milk with 1 teaspoon of vanilla extract until well combined.
  3. Gently fold the whipped cream into the condensed milk mixture using a rubber spatula.
  4. Split the ice cream mixture evenly into three bowls. To each bowl, add a few drops of pink, purple, and teal gel food coloring.
  5. In a standard loaf pan, alternate dollops of each colored mixture, layering them side by side.
  6. Sprinkle a generous amount of edible glitter or colorful sprinkles over the top of your Mermaid Ice Cream.
  7. Cover the loaf pan with plastic wrap or a lid, and place it in the freezer for at least 6 hours, or until it is completely firm.

Nutrition

Serving: 1cupCalories: 280kcalCarbohydrates: 28gProtein: 3gFat: 18gSaturated Fat: 11gPolyunsaturated Fat: 0.5gMonounsaturated Fat: 5gCholesterol: 70mgSodium: 90mgPotassium: 100mgSugar: 20gVitamin A: 500IUCalcium: 150mgIron: 0.5mg

Notes

Perfect for summer parties or quiet evenings at home, this Mermaid Ice Cream is a colorful delight that everyone will enjoy.

Tried this recipe?

Let us know how it was!

Irresistible Spicy Shrimp Sushi Stacks for a Flavor Burst

August 19, 2025 by grace bellamy Leave a Comment

As I sliced through the creamy avocado, the vivid colors of my Spicy Shrimp Sushi Stacks began to take shape, instantly transporting me to my favorite sushi bar. This homemade delight combines the bold flavors of succulent shrimp and a spicy mayo that packs a punch, all while being easy enough for a weeknight dinner. What I love most about these stacks is their impressive presentation—perfect for wowing guests or indulging on a cozy night in. Plus, they’re fun to assemble, making cooking feel like an adventure rather than a chore! So, whether you're a seasoned chef or just starting your culinary journey, I promise these Spicy Shrimp Sushi Stacks will become a staple in your kitchen. Ready to dive into this deliciousness? Let’s get cooking!

Why Are Spicy Shrimp Sushi Stacks Amazing?

Flavor Explosion: Each layer bursts with flavor—juicy shrimp, creamy avocado, and a spicy kick that will tantalize your taste buds.

Eye-catching Presentation: Impress your guests with stunning stacks that look as good as they taste. Perfect for entertaining!

Quick and Easy: With just 25 minutes of prep and cook time, you can enjoy gourmet quality at home without the fuss.

Customizable Delight: Feel free to swap out ingredients—tweak the spice level or add your favorite toppings.

Fun to Assemble: Get creative in the kitchen! Layering can be a deliciously fun experience, perfect for cooking with loved ones.

Dive into these Spicy Shrimp Sushi Stacks, and for a side dish, why not try some easy sushi rolls that complement this recipe beautifully? Enjoy!

Spicy Shrimp Sushi Stacks Ingredients

For the Shrimp

  • Large shrimp – 1 lb, peeled and deveined for the star of this dish.
  • Olive oil – 2 tablespoons, used for perfect pan-seared shrimp.
  • Soy sauce – 2 tablespoons, adds a savory depth to the flavor.
  • Rice vinegar – 1 tablespoon, balances the sweetness with tang.
  • Sugar – 2 teaspoons, enhances the sauce’s richness.
  • Sesame oil – 1 tablespoon, imparts a nutty aroma.
  • Sriracha sauce – 2 tablespoons, for that fiery kick you crave.

For the Spicy Mayo

  • Mayonnaise – ½ cup, creamy base for your zesty sauce.
  • Sriracha – 1 tablespoon, mix in for extra heat—adjust to taste!

For the Sushi Rice

  • Sushi rice – 1 cup, the foundation of your delightful stacks.
  • Water – 1½ cups, needed to cook the sushi rice perfectly.
  • Rice vinegar – 1 tablespoon (for rice), adds flavor to the rice.
  • Salt – ½ teaspoon, enhances the overall taste.

For Toppings

  • Avocado – 1, sliced for creamy layers of goodness.
  • Cucumber – 1 small, julienned for a refreshing crunch.
  • Sesame seeds – 1 tablespoon (optional), sprinkle for a lovely garnish.
  • Fresh cilantro or green onions – optional, a fresh touch to finish your stacks.

Now that you're equipped with all the essential ingredients for these Spicy Shrimp Sushi Stacks, you're just steps away from an exciting culinary adventure!

Step‑by‑Step Instructions for Spicy Shrimp Sushi Stacks

Step 1: Rinse and Cook the Sushi Rice
Begin by rinsing the sushi rice in cold water until the water runs clear, ensuring less starch for better texture. In a medium pot, combine the rinsed rice with 1½ cups of water and bring to a boil over medium-high heat. Once boiling, cover the pot, reduce the heat to low, and simmer for 15 minutes. Afterward, remove it from heat, stir in 1 tablespoon of rice vinegar and ½ teaspoon of salt, then let it sit covered for 10 minutes.

Step 2: Sauté the Shrimp
While the rice is resting, heat 2 tablespoons of olive oil in a skillet over medium-high heat. Add the peeled and deveined shrimp to the hot skillet, cooking for about 2–3 minutes on each side or until they turn opaque and slightly golden. In a separate bowl, whisk together the soy sauce, rice vinegar, sesame oil, sugar, and sriracha, then drizzle this mixture over the shrimp. Cook for an additional minute to soak in the flavors.

Step 3: Prepare the Spicy Mayo
In a small mixing bowl, combine ½ cup of mayonnaise with 1 tablespoon of sriracha sauce to create a delightful spicy mayo. Stir thoroughly until the ingredients are well blended. Taste and adjust the spice level according to your preference. This creamy sauce will add a flavorful kick to your Spicy Shrimp Sushi Stacks, enhancing your overall dish.

Step 4: Assemble the Sushi Stacks
Using a round mold or a cleaned can, begin layering your Spicy Shrimp Sushi Stacks. Start with a generous layer of sushi rice at the bottom, gently pressing it down to form a compact base. Next, add an even layer of the sautéed spicy shrimp, followed by slices of creamy avocado and julienned cucumber. Make sure to press each layer moderately to keep everything intact.

Step 5: Garnish and Serve
Once your stacks are assembled, sprinkle the tops with sesame seeds and freshly chopped cilantro or green onions for an extra burst of flavor. Just before serving, drizzle some of the spicy mayo over the assembled stacks for a beautiful finish. These vibrant Spicy Shrimp Sushi Stacks are now ready to be enjoyed; their impressive presentation is sure to wow anyone at your table!

Expert Tips for Spicy Shrimp Sushi Stacks

  • Fresh Shrimp: Use the freshest shrimp possible for the best flavor and texture. Frozen shrimp is an option but ensure it’s properly thawed before cooking.

  • Rice Rinsing: Don’t skip rinsing the sushi rice! This step removes excess starch, leading to perfectly sticky rice that holds your stacks together beautifully.

  • Spicy Mayo Balance: Adjust the sriracha in the spicy mayo based on your heat preference; start with less if you’re unsure to cater to all guests’ tastes.

  • Layer Evenly: When stacking, press each layer gently but securely. This keeps your Spicy Shrimp Sushi Stacks from toppling over and ensures even bites.

  • Garnish Generously: Don’t skip the garnishes! They not only add visual appeal but enhance flavors and freshness, making your dish truly spectacular.

  • Practice Makes Perfect: If your first stack doesn’t look perfect, don’t worry! Keep practicing your layering technique; it’s all part of the fun of creating these delightful Spicy Shrimp Sushi Stacks.

Make Ahead Options

These Spicy Shrimp Sushi Stacks are perfect for meal prep enthusiasts looking to save time on busy weeknights! You can prepare the sushi rice and spicy mayo up to 24 hours in advance; simply refrigerate them separately in airtight containers. The shrimp can be cooked and stored for up to 3 days in the fridge, though I recommend adding the sriracha sauce just before serving to maintain its vibrant flavor. When you’re ready to assemble, layer the rice, shrimp, avocado, and cucumber using a mold, and drizzle with spicy mayo right before enjoying. You’ll still achieve that impressively delicious taste and presentation, making your weeknight dinners effortlessly extraordinary!

What to Serve with Spicy Shrimp Sushi Stacks

The perfect accompaniment will elevate your dining experience by harmonizing flavors and textures, allowing you to savor every bite.

  • Creamy Avocado Salad: This refreshing side adds smoothness and a burst of flavor that complements the sushi stacks beautifully.

  • Edamame with Sea Salt: These tender soybeans deliver a delightful crunch, enhancing your meal's texture and providing a healthy snack.

  • Miso Soup: Warm and savory, this classic addition is perfect for warming up during a cozy dinner, balancing the heat of the shrimp.

  • Crispy Tempura Vegetables: With a light, crunchy batter, these veggies add a fun textural contrast while remaining light and sharing the spotlight with your stacks.

  • Pickled Ginger: This tangy palate cleanser cuts through the richness of the shrimp, brightening up your meal with its sharp flavor.

  • Chilled Sake or White Wine: A crisp chilled beverage, whether sake or a fresh white wine, enhances the flavors of the seafood while promoting a sophisticated dining atmosphere.

Pair these options with your Spicy Shrimp Sushi Stacks for an unforgettable culinary experience!

How to Store and Freeze Spicy Shrimp Sushi Stacks

Fridge: Store any leftover Spicy Shrimp Sushi Stacks in an airtight container in the fridge for up to 2 days to maintain freshness.

Freezer: Although not ideal, you can freeze assembled stacks by tightly wrapping them in plastic wrap; consume within a month for the best flavor.

Reheating: For frozen stacks, thaw in the fridge overnight, then gently reheat in the microwave for 30 seconds, being careful not to overcook the shrimp.

Garnishes: Keep garnishes (like avocado and cucumber) separate until serving to avoid sogginess and preserve their freshness.

Variations & Substitutions for Spicy Shrimp Sushi Stacks

Discover how to put a personal spin on your Spicy Shrimp Sushi Stacks, elevating them to a whole new level of deliciousness!

  • Vegetarian: Swap the shrimp for marinated tofu, allowing it to soak up the flavors for a satisfying texture. Tofu works wonderfully here; just ensure it's pressed well before cooking.

  • Gluten-Free: Use tamari in place of soy sauce, making these stacks safe for gluten-intolerant friends while not compromising on flavor.

  • Spicy-Heat: Increase the sriracha or add a pinch of cayenne pepper to your spicy mayo if you're feeling adventurous. Just a little can amplify the heat and give your stacks an exciting kick!

  • Add Crunch: Incorporate shredded carrots or radish for an extra crunch. These ingredients not only enhance the texture but also add vibrant color to your presentation.

  • Citrus Zest: A sprinkle of lime or lemon juice over the assembled stacks brightens the flavors, adding a refreshing twist that awakens your tastebuds.

  • Creamy Alternative: For a twist on spicy mayo, mix mashed avocado with lime juice and a hint of garlic instead. This swap introduces a smooth, delectable layer while keeping things fresh.

  • Fruit Fusion: Top your stacks with mango slices for a hint of sweetness that pairs beautifully with the spicy shrimp. The contrasting flavors create a delightful balance!

  • Herb Variation: Experiment with different herbs! Swap cilantro for fresh basil or mint to give your stacks an unexpected but refreshing flavor profile.

Don’t forget to explore the delightful pairing of these stacks with some easy sushi rolls or a refreshing cucumber salad to complete your meal! Enjoy the endless possibilities!

Spicy Shrimp Sushi Stacks Recipe FAQs

How do I choose the best shrimp for my Spicy Shrimp Sushi Stacks?
Absolutely! When selecting shrimp, look for large, fresh shrimp that are firm and have a clean scent of the ocean. You can also choose shrimp that is bright pink without any dark spots or strong odors—those are signs of freshness. If using frozen shrimp, ensure they are properly thawed in the fridge overnight before cooking for the best texture.

How long can I store leftover Spicy Shrimp Sushi Stacks in the fridge?
Very! You can store any leftover Spicy Shrimp Sushi Stacks in an airtight container in the fridge for up to 2 days. Make sure to enjoy them within that timeframe for the best taste and texture. If they start to look dry or lose flavor, it’s best to toss them.

Can I freeze my Spicy Shrimp Sushi Stacks?
Of course! While freezing sushi stacks isn't recommended for optimal quality, you can wrap them tightly in plastic wrap and store in a freezer-safe container for up to a month. To thaw, simply place them in the fridge overnight. Reheat gently in the microwave for about 30 seconds, but be careful not to overcook the shrimp as it can become rubbery.

What should I do if my sushi rice is too sticky?
No worries! If your sushi rice turns out too sticky, it might be due to not rinsing enough starch from the rice before cooking. Next time, rinse it under cold water until the water runs clear. If you’re already at that stage, try adding a splash of rice vinegar while fluffing the rice with a fork, which can help reduce stickiness without compromising flavor.

Are there any dietary considerations I should keep in mind when making Spicy Shrimp Sushi Stacks?
Absolutely! If you're serving these to guests or family members with dietary restrictions, be mindful of allergies. Shrimp is a common allergen, and the soy sauce contains gluten unless you choose a gluten-free version. For a dairy-free option, you can replace mayonnaise with an avocado-based alternative. Always ask your guests about their dietary needs before whipping up these delicious stacks!

Spicy Shrimp Sushi Stacks

Irresistible Spicy Shrimp Sushi Stacks for a Flavor Burst

Enjoy a flavor explosion with Spicy Shrimp Sushi Stacks that are quick and impressive, perfect for any occasion.
Print Recipe Pin Recipe
Prep Time 25 minutes mins
Cook Time 25 minutes mins
Total Time 50 minutes mins
Servings: 4 stacks
Course: Main Dishes
Cuisine: Japanese
Calories: 300
Ingredients Equipment Method Nutrition Notes

Ingredients
  

For the Shrimp
  • 1 lb large shrimp, peeled and deveined
  • 2 tablespoons olive oil for cooking
  • 2 tablespoons soy sauce
  • 1 tablespoon rice vinegar
  • 2 teaspoons sugar
  • 1 tablespoon sesame oil
  • 2 tablespoons sriracha sauce for heat
For the Spicy Mayo
  • 0.5 cup mayonnaise base for sauce
  • 1 tablespoon sriracha adjust to taste
For the Sushi Rice
  • 1 cup sushi rice
  • 1.5 cups water for cooking rice
  • 1 tablespoon rice vinegar for flavor
  • 0.5 teaspoon salt to enhance taste
For Toppings
  • 1 avocado, sliced
  • 1 small cucumber, julienned for crunch
  • 1 tablespoon sesame seeds optional, for garnish
  • fresh cilantro or green onions optional for garnish

Equipment

  • Medium pot
  • skillet
  • Mixing Bowl
  • round mold

Method
 

Step-by-Step Instructions
  1. Rinse the sushi rice until the water runs clear. In a pot, combine rice with 1½ cups water; bring to a boil. Cover, reduce heat, and simmer for 15 minutes. Remove from heat, stir in rice vinegar and salt, let sit covered for 10 minutes.
  2. Heat olive oil in a skillet over medium-high heat. Cook shrimp for 2-3 minutes on each side until opaque. Mix soy sauce, rice vinegar, sesame oil, sugar, and sriracha in a bowl; drizzle over shrimp, cooking for an additional minute.
  3. In a bowl, combine mayonnaise and sriracha to create spicy mayo. Stir well and adjust spice level according to preference.
  4. Begin layering sushi stacks using a round mold. Start with sushi rice at the base, followed by shrimp, avocado, and cucumber. Press each layer gently to maintain structure.
  5. Sprinkle with sesame seeds and chopped cilantro or green onions. Drizzle spicy mayo over assembled stacks before serving.

Nutrition

Serving: 1stackCalories: 300kcalCarbohydrates: 35gProtein: 20gFat: 12gSaturated Fat: 2gPolyunsaturated Fat: 1gMonounsaturated Fat: 8gCholesterol: 150mgSodium: 800mgPotassium: 600mgFiber: 4gSugar: 3gVitamin A: 10IUVitamin C: 15mgCalcium: 2mgIron: 8mg

Notes

Use fresh shrimp for optimal flavor. Rinse rice to ensure better texture.

Tried this recipe?

Let us know how it was!

Blueberry Cheesecake Protein Bites for Guilt-Free Indulgence

August 19, 2025 by grace bellamy Leave a Comment

As I stood in my kitchen, the sweet aroma of fresh blueberries filled the air, instantly transporting me back to carefree summer days. Today, I’m excited to share my recipe for Blueberry Cheesecake Protein Bites—an irresistible way to indulge your sweet tooth while staying on track with your health goals. With just 10 minutes of prep and a fun chilling time, these protein-packed delights offer a quick and satisfying alternative to those sugary snacks that tempt us all too often. Plus, they store perfectly for an easy grab-and-go option throughout the week. So, are you ready to transform your snack time into a nourishing experience? Let’s dive in!

Why are Blueberry Cheesecake Protein Bites a Must-Try?

Simple to prepare: Whip these up in just 10 minutes for a quick and easy snack.
Nourishing ingredients: Packed with protein, fiber, and the goodness of blueberries, they’re guilt-free and filling.
Versatile treats: Perfect for pre- or post-workout fuel, or a delightful afternoon pick-me-up.
Crowd-pleaser potential: These bites are a hit with family and friends, making them the ideal party snack.
Storage-friendly: Keep them fresh in the fridge for an entire week, ensuring you always have a healthy option on hand. Try pairing these with a refreshing fruit smoothie from our collection for a wholesome treat!

Blueberry Cheesecake Protein Bites Ingredients

For the Bites

  • Oat flour – a gluten-free alternative to traditional flour that adds a wholesome texture.
  • Vanilla protein powder – boosts the protein content and complements the sweet, creamy flavor of the bites.
  • Powdered sweetener – adjust the sweetness to your liking; options like erythritol or monk fruit work well.
  • Almond butter – adds healthy fats and a rich, nutty flavor to enrich your Blueberry Cheesecake Protein Bites.
  • Softened cream cheese – provides a creamy texture and a touch of tanginess that mirrors classic cheesecake.
  • Vanilla extract – enhances the overall flavor profile with a splash of warmth and sweetness.
  • Fresh or freeze-dried blueberries – vibrant bursts of flavor that give these bites their signature taste and nutrition.
  • Milk – use as needed to achieve the perfect consistency; any milk variety works, including plant-based options.

Step‑by‑Step Instructions for Blueberry Cheesecake Protein Bites

Step 1: Mix Dry Ingredients
In a spacious mixing bowl, combine 1 cup of oat flour, ½ cup of vanilla protein powder, and 2 tablespoons of powdered sweetener. Use a whisk to blend these dry ingredients thoroughly until evenly combined, which should take about 1-2 minutes. This will create a solid base for your Blueberry Cheesecake Protein Bites.

Step 2: Add Wet Ingredients
Next, incorporate ¼ cup of almond butter, 2 tablespoons of softened cream cheese, and ¼ teaspoon of vanilla extract into the dry mixture. Stir with a spatula or wooden spoon for about 3-4 minutes until a cohesive dough begins to form. Ensure the mixture is smooth and well combined, with no dry pockets remaining.

Step 3: Fold in Blueberries
Gently fold in ½ cup of fresh or freeze-dried blueberries into the dough. Take your time here to avoid smashing the blueberries, which can release unwanted juices. This step will add bursts of flavor and nutrition to your Blueberry Cheesecake Protein Bites, enhancing their overall appeal.

Step 4: Adjust Consistency
If the dough feels too dry, add 1 tablespoon of milk slowly, mixing well after each addition. Continue adding milk one tablespoon at a time until you reach a slightly sticky yet manageable consistency that holds together. This step is crucial for achieving the perfect texture in your protein bites.

Step 5: Shape the Bites
With clean hands, scoop out portions of the dough and roll them into bite-sized balls, approximately 1 inch in diameter. Place each rolled ball onto a parchment-lined tray, ensuring they are spaced evenly apart. This step should take around 5-7 minutes. You’ll love watching your Blueberry Cheesecake Protein Bites form!

Step 6: Chill to Set
Refrigerate the tray of protein bites for at least 30 minutes to firm up. This chilling time allows the bites to become more cohesive and easier to handle. Plan to make room in your fridge as your bites will need space to chill and solidify nicely.

Step 7: Store Properly
Once chilled, transfer your Blueberry Cheesecake Protein Bites to an airtight container. Store them in the refrigerator, where they can stay fresh for up to one week. This makes them a fantastic grab-and-go snack for busy days, ensuring you always have a nutritious option right at hand.

How to Store and Freeze Blueberry Cheesecake Protein Bites

Fridge: Store your Blueberry Cheesecake Protein Bites in an airtight container in the fridge for up to one week, keeping them fresh and ready to enjoy anytime.

Freezer: For longer storage, freeze the bites in a single layer on a baking tray, then transfer to an airtight container, where they can last for up to 3 months.

Thawing: To enjoy a frozen bite, simply remove it from the freezer and let it thaw in the fridge overnight or at room temperature for about 30 minutes.

Reheating: These bites are best enjoyed cold or at room temperature, but you can gently warm them in the microwave for about 10-15 seconds if desired.

Make Ahead Options

These Blueberry Cheesecake Protein Bites are perfect for meal prep, making your busy weeknights much easier! You can prepare the mixture up to 24 hours in advance; simply follow the steps until shaping the bites, then store the dough in an airtight container in the fridge. This keeps the flavors fresh and ensures the consistency remains intact. On the day you plan to enjoy them, roll the dough into bite-sized balls before chilling in the refrigerator for at least 30 minutes to firm them up. This way, you'll have delightful, nutritious snacks ready to go at a moment's notice!

Expert Tips for Blueberry Cheesecake Protein Bites

  • Fresh Ingredients: Use high-quality fresh or freeze-dried blueberries to enhance flavor, as their natural sweetness is key to delicious Blueberry Cheesecake Protein Bites.

  • Watch the Dough: Avoid overmixing after adding blueberries; folding gently preserves their shape, preventing unwanted mushiness in your bites.

  • Consistency Check: If your dough appears too dry, gradually add the milk one tablespoon at a time until you achieve a sticky yet manageable consistency.

  • Chilling is Key: Ensure you refrigerate your bites for at least 30 minutes. This step helps them firm up, making them easier to handle and enhancing their texture.

  • Customize for Taste: Feel free to experiment with different nut butters or sweeteners to tailor the flavor of your Blueberry Cheesecake Protein Bites to your liking!

Blueberry Cheesecake Protein Bites Variations

Feel free to get creative and give your Blueberry Cheesecake Protein Bites a personal twist that tempts your taste buds!

  • Nut-Free: Substitute almond butter with sunflower seed butter for a delightful nut-free option. This keeps it creamy and delicious!

  • Vegan: Use plant-based protein powder and swap cream cheese for a nut-based cream cheese. These bites will still pack a punch of flavor!

  • Extra Crunch: Add ¼ cup of chopped nuts, like walnuts or pecans, to introduce a satisfying crunch. It adds textural contrast that’s irresistible!

  • Chocolate-Covered: Drizzle melted dark chocolate over the bites before refrigerating. It transforms them into decadent treats that you’ll crave!

  • Spicy Kick: Incorporate a dash of cinnamon or ginger to the dough. This spicy twist elevates the flavor profile for those who enjoy a hint of warmth.

  • Berry Bonanza: Mix in other dried fruits, like cranberries or raspberries, along with blueberries for a flavor explosion. Each bite becomes a delightful surprise!

  • Protein Boost: Add an extra scoop of vanilla protein powder for a heartier bite. This provides even more post-workout fuel for your busy day ahead!

  • Frozen Delight: Pop these protein bites in the freezer instead of the fridge. They turn into a refreshing treat for hot days, perfect for a cool snack!

For a complete treat experience, consider pairing these bites with a refreshing fruit smoothie from our collection. They make a perfect protein-packed combo!

What to Serve with Blueberry Cheesecake Protein Bites

Elevate your snack time with these delightful bites that harmonize beautifully with fresh and comforting accompaniments.

  • Greek Yogurt Parfait: The creaminess of Greek yogurt layered with fruits and granola makes a perfect, nutritious pairing. Together they create a delectable balance of textures and flavors.

  • Nutty Granola: A serving of crunchy granola sprinkled on top adds a satisfying crunch and complements the soft, chewy protein bites perfectly.

  • Fresh Fruit Salad: A vibrant mix of seasonal fruits brings brightness and a refreshing taste that enhances the sweetness of the bites.

  • Smoothie Bowl: Blend up your favorite fruits and greens for a smoothie bowl that mirrors the flavors of your protein bites and adds nutritional diversity.

  • Chai Latte: The warmth and aromatic spices of a chai latte create a cozy pairing with your protein bites, perfect for a dreamy afternoon treat.

  • Coconut Milk Shake: A creamy shake made with coconut milk and vanilla can amplify the tropical notes in the bites, offering a sweet, guilt-free indulgence.

  • Dark Chocolate Drizzle: Drizzling dark chocolate over the bites adds a rich, decadent touch that elevates the overall experience with every bite.

  • Iced Matcha: The earthy tones of iced matcha provide a refreshing contrast that balances the sweetness of your blueberry bites, making for a delightful afternoon treat.

Blueberry Cheesecake Protein Bites Recipe FAQs

What type of blueberries should I use?
For the best flavor, I recommend using fresh or freeze-dried blueberries. Fresh blueberries offer juicy bursts in each bite, while freeze-dried ones add a concentrated sweetness without affecting the dough's consistency.

How should I store my Blueberry Cheesecake Protein Bites?
After preparing your protein bites, place them in an airtight container in the fridge. They’ll stay fresh for up to one week, making them perfect for snacking throughout the week!

Can I freeze Blueberry Cheesecake Protein Bites?
Absolutely! To freeze, lay your protein bites in a single layer on a baking tray. Once hardened, transfer them to an airtight container or freeze-safe bag. They can last in the freezer for up to 3 months! When you’re ready to enjoy, just thaw them in the fridge overnight or at room temperature for about 30 minutes.

What if my dough is too dry?
If you find the dough too dry after mixing, don’t worry! Just add milk, 1 tablespoon at a time, mixing well after each addition until you reach a slightly sticky consistency. This step is important to help the bites hold together well.

Are these protein bites suitable for people with nut allergies?
If you're concerned about nut allergies, you can substitute almond butter with sunflower seed butter or another nut-free option. Just be sure to double-check that your protein powder and other ingredients are nut-free as well!

Can I change the sweetness level?
Yes, you can customize the sweetness! Use any powdered sweetener of your choice, like erythritol or monk fruit, adjusting the amount to match your taste preference. Feel free to add a little more or less depending on how sweet you’d like your Blueberry Cheesecake Protein Bites!

Blueberry Cheesecake Protein Bites

Blueberry Cheesecake Protein Bites for Guilt-Free Indulgence

These Blueberry Cheesecake Protein Bites are a guilt-free indulgence perfect for satisfying your sweet tooth while staying healthy.
Print Recipe Pin Recipe
Prep Time 10 minutes mins
Chilling Time 30 minutes mins
Total Time 40 minutes mins
Servings: 12 bites
Course: Dessert
Cuisine: Healthy
Calories: 90
Ingredients Equipment Method Nutrition Notes

Ingredients
  

For the Bites
  • 1 cup oat flour gluten-free alternative
  • ½ cup vanilla protein powder boosts protein content
  • 2 tablespoons powdered sweetener adjust sweetness to taste
  • ¼ cup almond butter adds healthy fats
  • 2 tablespoons softened cream cheese adds creaminess
  • ¼ teaspoon vanilla extract
  • ½ cup fresh or freeze-dried blueberries for flavor
  • 1 tablespoon milk use as needed for consistency

Equipment

  • Mixing Bowl
  • Whisk
  • spatula
  • parchment paper
  • Airtight Container

Method
 

Step-by-Step Instructions
  1. In a mixing bowl, combine oat flour, vanilla protein powder, and powdered sweetener. Whisk until evenly combined.
  2. Add almond butter, softened cream cheese, and vanilla extract to the dry ingredients. Stir until a cohesive dough forms.
  3. Fold in blueberries gently to avoid smashing them.
  4. If the dough is dry, add milk gradually until the desired consistency is achieved.
  5. Roll the dough into bite-sized balls and place them on a parchment-lined tray.
  6. Refrigerate for at least 30 minutes to firm up the bites.
  7. Store in an airtight container in the fridge for up to a week.

Nutrition

Serving: 1biteCalories: 90kcalCarbohydrates: 8gProtein: 4gFat: 5gSaturated Fat: 1gPolyunsaturated Fat: 0.5gMonounsaturated Fat: 4gCholesterol: 5mgSodium: 50mgPotassium: 100mgFiber: 2gSugar: 3gVitamin A: 100IUVitamin C: 2mgCalcium: 30mgIron: 0.5mg

Notes

These bites are best enjoyed chilled and can be frozen for longer storage.

Tried this recipe?

Let us know how it was!

Cedar Plank Grilled Salmon: Flavorful & Easy Summer Delight

August 19, 2025 by grace bellamy Leave a Comment

As I was flipping through my cookbooks, a wave of nostalgia washed over me, transporting me to sun-kissed gatherings by the grill. Of all the dishes that dance through my mind, nothing beckons like Cedar Plank Grilled Salmon. This recipe is a delightful fusion of smoky cedar and tender fish, elevating your everyday dinner into a culinary adventure. It’s not just quick to prep—in a mere 55 minutes, you can serve a restaurant-quality dish that’s perfect for summer cookouts and cozy dinners alike. Plus, the marinade adds a depth of flavor that will leave everyone begging for more. Wondering how to master this delectable grilled salmon that impresses every time? Let’s dive in!

Why is Cedar Plank Grilled Salmon a Must-Try?

Irresistible Taste: The infusion of cedar smoke gives the salmon a unique, rich flavor that will transport your taste buds to a summer retreat.

Quick and Easy: With just 10 minutes of prep and 15 minutes on the grill, this dish is a breeze, allowing you to enjoy more time with family and friends.

Healthy & Wholesome: Packed with omega-3 fatty acids, this salmon recipe offers a nutritious option that still satisfies those comfort food cravings!

Versatile Pairing: Serve with grilled vegetables or even a chilled cucumber salad for a light, refreshing meal that appeals to everyone. Don’t forget to check out my other summer favorites that balance taste and health!

Stunning Presentation: As the salmon nestled on cedar planks comes off the grill, it’s sure to impress your guests, making it perfect for gatherings or intimate dinners.

This Cedar Plank Grilled Salmon recipe will not only satisfy your cravings but also elevate your cooking game.

Cedar Plank Grilled Salmon Ingredients

Unlock the secrets to the perfect Cedar Plank Grilled Salmon with these flavorful ingredients!

For the Marinade

  • Soy Sauce – Use coconut aminos for a gluten-free alternative that doesn’t compromise flavor.
  • Rice Vinegar – Adds a hint of tang that balances the richness of the salmon.
  • Olive Oil – Helps to tenderize the fish while adding a fruity depth.
  • Balsamic Vinegar – Just a touch enhances the sweetness and complexity of the marinade.
  • Lime Juice – Freshens the dish, bringing a citrusy brightness to the table.
  • Garlic (minced) – Infuses the marinade with a warm, savory aroma.
  • Fresh Ginger (grated) – Offers a zesty punch that pairs perfectly with the salmon.
  • Sesame Oil – A little goes a long way in giving a nutty finish to your grilled salmon.
  • Fish Sauce – Adds umami depth; use sparingly to enhance the overall flavor.
  • Honey – Adjust to taste for the perfect balance of sweet and savory.
  • Salt – Enhances all the flavors in your marinade; don’t skip this!

For the Salmon

  • Salmon Fillets – Opt for skin-on or skin-off, depending on your preference; both are delicious!
  • Cedar Planks – Soaked for at least 30 minutes to impart that signature smoky flavor.

Optional Garnishes

  • Lemon Slices – A fresh and zesty addition for serving.
  • Fresh Dill – Brightens the dish with its herbal notes and a pop of color.

Embrace the warmth of home cooking with this Cedar Plank Grilled Salmon that's sure to become a favorite at your summer gatherings!

Step‑by‑Step Instructions for Cedar Plank Grilled Salmon

Step 1: Soak the Cedar Planks
Begin by submerging your cedar planks in water for at least 30 minutes, or up to 2 hours. This soaking process prevents the planks from catching fire on the grill and allows them to impart a delightful flavor to your Cedar Plank Grilled Salmon. Ensure they are fully submerged, weighing them down if necessary, while you prepare the marinade.

Step 2: Prepare the Marinade
In a small bowl, whisk together the soy sauce, rice vinegar, olive oil, balsamic vinegar, lime juice, minced garlic, grated ginger, sesame oil, fish sauce, honey, and a pinch of salt until well combined. This fragrant marinade will infuse your salmon with a medley of flavors. Set it aside while you get the salmon ready.

Step 3: Marinate the Salmon
Transfer the salmon fillets into a silicone bag or a zip-top bag, and pour the prepared marinade over them, ensuring that all fillets are coated. Seal the bag, pushing out any excess air, and place it in the fridge to marinate for 30 minutes. This step allows the salmon to absorb all those mouthwatering flavors.

Step 4: Preheat the Grill
While the salmon marinates, preheat your grill to medium-high heat, around 375°F to 400°F. Make sure to clean the grill grates thoroughly for a perfect sear. This step is crucial as it will ensure an even cook and prevent sticking when you place the plank on the grill.

Step 5: Prepare the Planks and Salmon
After the cedar planks have soaked, remove them from the water and pat them dry with a clean towel. Carefully take the salmon out of the marinade, letting any excess liquid drip off, and place the fillets skin-side down on the cedar plank. Arrange them neatly, ready for grilling.

Step 6: Grill the Salmon
Gently place the cedar plank with the salmon on the preheated grill over direct heat. Close the lid promptly to maintain temperature and let the salmon grill for 10 to 15 minutes. You'll know it's ready when the fish flakes easily with a fork and the internal temperature reads 145°F, ensuring it's perfectly cooked.

Step 7: Serve and Enjoy
Once your Cedar Plank Grilled Salmon is done, carefully remove the plank from the grill and let it rest for a couple of minutes. Optionally garnish with lemon slices and fresh dill for an extra touch of flavor and presentation. Serve alongside grilled vegetables or brown rice for a delightful summer meal!

Make Ahead Options

These Cedar Plank Grilled Salmon fillets are perfect for meal prep enthusiasts! You can marinate the salmon in the delicious soy and ginger-infused marinade up to 24 hours in advance—just seal the marinated fillets in a zip-top bag and refrigerate. Additionally, you can soak the cedar planks in water for that crucial 30 minutes (or up to 2 hours) ahead of time. To maintain quality, be sure to keep the salmon refrigerated until you’re ready to grill. When you’re set to serve, simply preheat your grill, arrange the salmon on the soaked planks, and grill for 10–15 minutes. This way, you'll enjoy a flavorful, hassle-free dinner, even on the busiest nights!

Storage Tips for Cedar Plank Grilled Salmon

Fridge: Store leftover Cedar Plank Grilled Salmon in an airtight container for up to 3 days. This helps retain its delicious flavor and prevents spoilage.

Freezer: For longer storage, wrap the salmon tightly in plastic wrap and then in aluminum foil, freezing for up to 3 months. Thaw in the fridge before reheating.

Reheating: When ready to enjoy leftovers, gently reheat the salmon in a 300°F oven, wrapped in foil. This keeps the fish moist and tender, preventing dryness.

Serving Suggestions: Enjoy cold over salads for a light meal or warm it up for an easy weeknight dinner alongside your favorite sides.

What to Serve with Cedar Plank Grilled Salmon

Transform your Cedar Plank Grilled Salmon into a complete culinary experience with these delightful pairings.

  • Grilled Vegetables: Bright, charred zucchini, bell peppers, or asparagus provide a perfect contrast with the tender salmon, adding vibrant color and flavor to your plate. They soak up some of the smoky flavors from the grill, enhancing the overall experience.

  • Chilled Cucumber Salad: Refreshing and light, this salad brings a crisp texture alongside the buttery salmon. Tossed in a tangy vinaigrette, it's a delightful way to cleanse the palate.

  • Brown Rice: Nutty and wholesome, brown rice serves as a hearty base for this dish, soaking up the marinade's delicious undertones. It provides a satisfying chew that balances the flaky salmon perfectly.

  • Grilled Corn on the Cob: Sweet, caramelized kernels from the grill enhance each bite with a touch of summer sweetness. Drizzled with lime and sprinkled with chili powder, it becomes a crowd-pleaser that completes your meal.

  • Potato Wedges: Crispy and golden, these wedges add a comforting texture that pairs beautifully with the freshness of the salmon. A sprinkle of garlic and herbs elevates them to restaurant-quality comfort food.

  • Sauvignon Blanc: This zesty wine complements the citrus and herb notes in your salmon, enhancing its flavors while providing a refreshing balance to the meal. Its acidity cuts through the richness perfectly.

  • Lemon-Dill Quinoa: This fragrant side dish features the same citrus and herb accents found in the marinade. Fluffy and nutrient-packed, quinoa offers a nice contrast to the tender salmon and fills the plate with color and health.

  • Pineapple Salsa: Bright, sweet pineapple salsa adds a delightful tropical twist with each bite. It provides a sweet and spicy kick that contrasts beautifully with the savory marinade of the salmon.

Each pairing enhances your Cedar Plank Grilled Salmon, transforming an already delicious dish into a memorable meal. Enjoy!

Cedar Plank Grilled Salmon Variations

Feel free to explore your culinary creativity with these tempting twists on Cedar Plank Grilled Salmon!

  • Dairy-Free: Substitute honey with maple syrup for a vegan-friendly, sweet twist that complements the smoky salmon perfectly.

  • Spicy Kick: Add a teaspoon of sriracha or red pepper flakes to the marinade for a fiery sensation that elevates each bite.

  • Herb-Infused: Experiment with fresh herbs like rosemary or thyme in the marinade to infuse your salmon with aromatic flavor notes.

  • Citrus Burst: Swap lime juice for orange or grapefruit juice to create a sweet and citrusy variation that brightens up the dish.

  • Asian Flair: Spice up the marinade with a dash of hoisin sauce or sesame seeds for an extra layer of umami goodness. This will take your grilling to an exciting new level!

  • Sweet & Spicy: Mix in some crushed pineapple or mango to the marinade, offering a unique tropical sweetness that pairs delightfully with the cedar smoke.

  • Woodsy Mix: Blend different wood chips, like cherry or hickory, with the cedar to create an even richer, smoky profile that intrigues the palate.

  • Salmon Alternatives: If you prefer a different protein, try this marinade on chicken or firm tofu for a similar flavor experience that everyone will love!

Don't hesitate to add your own signature touches, inspired by other refreshing sides like grilled corn or a vibrant cucumber salad for a balanced, delightful meal!

Tips for the Best Cedar Plank Grilled Salmon

Soak Properly: Ensure cedar planks are soaked for at least 30 minutes; this prevents burning and enhances the smoky flavor in your Cedar Plank Grilled Salmon.

Marinate Time: For optimal flavor, allow salmon to marinate for 30 minutes in the fridge. Don't skimp on this step—it infuses the fish with deliciousness!

Grill Temp: Preheat the grill to medium-high (375°F to 400°F). Too low a temperature can result in uneven cooking, while too high can burn the plank.

Watch the Time: Grill the salmon for 10 to 15 minutes, checking for flakiness and an internal temperature of 145°F. Overcooking will dry out the fish.

Garnish Gently: Use fresh lemon slices and dill to elevate presentation and flavor. Just a sprinkle adds a lovely fresh touch without overwhelming the dish!

Cedar Plank Grilled Salmon Recipe FAQs

What kind of cedar planks should I use?
For the best flavor, opt for untreated cedar planks specifically designed for grilling. Avoid chemically treated wood, as it may release harmful toxins when heated. You can find them in most kitchen supply stores or online.

How do I know if my salmon is fresh?
Fresh salmon should have a vibrant color and a gentle, ocean-like scent. Look for fillets that are moist and firm to the touch, avoiding any with dark spots or a strong fishy odor. A quick tip: if it smells like the sea, you’re good to go!

Can I store leftover cedar plank grilled salmon?
Absolutely! Store leftover Cedar Plank Grilled Salmon in an airtight container in the refrigerator for up to 3 days. You can enjoy it cold on salads or gently reheat it in a 300°F oven, wrapped in foil, which helps keep it moist.

Is it possible to freeze leftover salmon?
Yes! For longer storage, wrap the grilled salmon tightly in plastic wrap and then in aluminum foil, placing it in the freezer for up to 3 months. To use, simply thaw it overnight in the fridge before reheating.

What if my salmon is overcooked?
If your salmon turns out overcooked and dry, don’t despair! You can try adding a squeeze of fresh lime juice or a drizzle of olive oil to revive its tenderness. Additionally, serving it over a moisture-rich salad can help balance the dryness and enhance flavor.

Is there a gluten-free alternative for soy sauce?
Yes, you can easily substitute soy sauce with coconut aminos in this recipe for a gluten-free option. Coconut aminos provide a slightly sweeter taste and will still bring a delightful depth of flavor to your Cedar Plank Grilled Salmon!

Cedar Plank Grilled Salmon

Cedar Plank Grilled Salmon: Flavorful & Easy Summer Delight

Cedar Plank Grilled Salmon is a delicious and easy recipe perfect for summer cookouts, offering a rich smoky flavor in just 55 minutes.
Print Recipe Pin Recipe
Prep Time 10 minutes mins
Cook Time 15 minutes mins
Marinating Time 30 minutes mins
Total Time 55 minutes mins
Servings: 4 fillets
Course: Main Dishes
Cuisine: American
Calories: 250
Ingredients Equipment Method Nutrition Notes

Ingredients
  

For the Marinade
  • ¼ cup Soy Sauce Use coconut aminos for gluten-free option
  • 2 tablespoons Rice Vinegar
  • 2 tablespoons Olive Oil
  • 1 tablespoon Balsamic Vinegar
  • 2 tablespoons Lime Juice
  • 2 cloves Garlic minced
  • 1 tablespoon Fresh Ginger grated
  • 1 teaspoon Sesame Oil
  • 1 teaspoon Fish Sauce use sparingly
  • 1 tablespoon Honey adjust to taste
  • 1 teaspoon Salt
For the Salmon
  • 4 fillets Salmon Fillets Skin-on or skin-off
  • 2 pieces Cedar Planks Soaked for at least 30 minutes
Optional Garnishes
  • 4 slices Lemon for serving
  • 1 bunch Fresh Dill for garnish

Equipment

  • grill
  • Cedar planks
  • Mixing Bowl
  • Silicone bag or zip-top bag

Method
 

Step-by-Step Instructions
  1. Soak the cedar planks in water for at least 30 minutes to prevent burning and enhance flavor.
  2. Prepare the marinade by whisking soy sauce, rice vinegar, olive oil, balsamic vinegar, lime juice, minced garlic, grated ginger, sesame oil, fish sauce, honey, and salt in a bowl until well combined.
  3. Marinate the salmon fillets in a bag with the marinade for 30 minutes in the fridge.
  4. Preheat the grill to medium-high heat, about 375°F to 400°F, cleaning the grill grates well.
  5. Remove cedar planks from water, pat dry, and place salmon skin-side down on the planks.
  6. Place the cedar plank with salmon on the grill, close the lid, and grill for 10 to 15 minutes until the salmon flakes easily.
  7. Remove the plank from the grill, let the salmon rest for a couple of minutes, and garnish with lemon slices and fresh dill before serving.

Nutrition

Serving: 1filletCalories: 250kcalCarbohydrates: 7gProtein: 22gFat: 15gSaturated Fat: 3gPolyunsaturated Fat: 4gMonounsaturated Fat: 7gCholesterol: 60mgSodium: 600mgPotassium: 350mgSugar: 4gVitamin A: 50IUVitamin C: 5mgCalcium: 20mgIron: 0.8mg

Notes

Leftover salmon can be stored in an airtight container for up to 3 days or wrapped and frozen for up to 3 months.

Tried this recipe?

Let us know how it was!

Delicious Thai Steak Salad with Fresh Herbs and Zesty Flavor

August 19, 2025 by grace bellamy Leave a Comment

As I chopped fresh mint and cilantro, the vibrant scents wafted through my kitchen, transporting me straight to the bustling street markets of Thailand. Our recipe for Thai Steak Salad combines the robust flavors of perfectly marinated flank steak with a refreshing medley of crunchy vegetables and aromatic herbs. It’s a quick, satisfying dish that's not only a feast for the eyes but also a guaranteed crowd-pleaser. You’ll love how this salad embraces the spirit of homemade cooking while offering a healthy twist that keeps those takeout temptations at bay. With just 25 minutes from start to finish, you can treat yourself and your loved ones to a delightful dining experience without spending hours in the kitchen. Are you ready to dive into the vibrant world of Thai cuisine?

Why is This Thai Steak Salad a Must-Try?

Quick and Easy: With just 25 minutes from prep to plate, this recipe is perfect for those busy weeknights when you're craving something fresh.

Flavor Explosion: The marinade boasts a delightful mix of soy sauce, lime, and sriracha that elevates the flank steak to new heights.

Refreshing Greens: Crisp romaine and juicy cherry tomatoes harmonize beautifully with fresh herbs, creating a vibrant, colorful salad that's a feast for the eyes.

Customizable: Feel free to add your favorite veggies or swap the protein—this salad is versatile enough to cater to all tastes!

Health-Conscious Choice: At only 370 calories per serving, this dish satisfies without the guilt, making it a perfect alternative to fast food.

Discover more recipes that balance flavor and health, making cooking fun again, like this zesty quinoa salad. Enjoy!

Thai Steak Salad Ingredients

For the Marinade

  • Flank steak – a lean cut that absorbs flavors beautifully, perfect for this Thai Steak Salad.
  • Soy sauce – adds a savory depth; consider low-sodium if you’re watching your salt intake.
  • Lime juice – fresh lime brightens the marinade and enhances the flavors of the steak.
  • Fish sauce – brings umami richness; if you're avoiding fish, coconut aminos work as a substitute.
  • Brown sugar – balances the saltiness and acidity with a touch of sweetness.
  • Sriracha – adds a delightful kick; adjust the amount for your desired spice level.
  • Garlic – minced garlic infuses aromatic earthiness that rounds out the marinade.

For the Salad

  • Vegetable oil – necessary for grilling the steak, but feel free to use your favorite oil.
  • Romaine lettuce – crisp and refreshing; it serves as the perfect base for this vibrant salad.
  • Cherry tomatoes – juicy and sweet, these add bursts of flavor in every bite.
  • Red onion – thinly sliced for a mild yet sharp crunch that complements the salad.
  • Cucumber – adds a cool, refreshing crunch; consider English cucumbers for less seeds.
  • Fresh cilantro leaves – impart bright, citrusy notes, essential in Thai cuisine.
  • Fresh mint leaves – enhance freshness and aromatic complexity in the salad.
  • Chopped roasted peanuts – provide a satisfying crunch and extra protein; swap with cashews for a twist.

For Serving

  • Lime wedges – squeeze over the finished salad for an extra burst of zesty flavor.

This Thai Steak Salad is not only a culinary delight, but packed with fresh ingredients that come together to create an unforgettable meal. Enjoy every colorful, flavorful layer!

Step‑by‑Step Instructions for Thai Steak Salad

Step 1: Prepare the Marinade
In a small bowl, whisk together the soy sauce, lime juice, fish sauce, brown sugar, sriracha, and minced garlic until the sugar dissolves and the mixture is well-combined. This flavorful marinade will elevate your Thai Steak Salad, so ensure it’s mixed thoroughly for an even distribution of flavors.

Step 2: Marinate the Steak
Pour the marinade over the flank steak in a resealable plastic bag. Seal the bag and gently massage the marinade into the steak to coat it evenly. Allow it to marinate in the refrigerator for at least 30 minutes, or overnight for a deeper flavor.

Step 3: Grill the Steak
Heat a grill pan or skillet over medium-high heat, adding the vegetable oil to prevent sticking. Once the oil is shimmering, place the marinated steak in the pan. Grill for about 3–5 minutes on each side, or until the steak achieves a medium-rare doneness, indicated by a warm red center.

Step 4: Rest and Slice the Steak
Once grilled, remove the steak from the heat and let it rest on a cutting board for 5 minutes. This resting time allows the juices to redistribute, ensuring tenderness. Afterward, slice the steak thinly against the grain to maximize each bite's tenderness.

Step 5: Assemble the Salad
In a large bowl, combine the chopped romaine lettuce, halved cherry tomatoes, thinly sliced red onion, cucumber slices, cilantro, and mint leaves. Gently toss the ingredients together to mix them evenly—this vibrant, fresh mix is the essence of your Thai Steak Salad.

Step 6: Serve and Garnish
Transfer the salad onto a serving platter, making space in the center for the sliced steak. Arrange the steak on top, then sprinkle with chopped roasted peanuts for added crunch. Serve the dish immediately, accompanied by lime wedges for an extra zesty kick.

What to Serve with Thai Steak Salad

Create a memorable dining experience by pairing delightful flavors and textures that will enhance your Thai Steak Salad.

  • Coconut Rice: This fluffy, subtly sweet rice balances the savory and spicy elements of the salad, creating a comforting side.
  • Grilled Veggies: Asparagus, bell peppers, or zucchini, lightly charred and seasoned, add a smoky flavor that complements the fresh ingredients beautifully.
  • Thai Spring Rolls: Crispy with a fresh herb filling, these rolls offer a delightful crunch that brightens each bite of the salad.
  • Tropical Fruit Salad: A refreshing mix of mango, pineapple, and kiwi provides a sweet contrast, enhancing the vibrant flavors of your main dish.
  • Chilled Lemongrass Tea: This aromatic drink is not only refreshing but also herbal, enhancing the flavors of the Thai cuisine.
  • Peanut Sauce: Drizzle or serve this creamy sauce on the side for those who want an extra layer of nutty richness with every bite.

Each of these pairings complements the myriad flavors found within your Thai Steak Salad, creating a well-rounded meal that you'll return to time and time again.

Storage Tips for Thai Steak Salad

Fridge: Store leftover Thai Steak Salad in an airtight container for up to 2 days. Keep the steak separate from the salad ingredients to maintain freshness.

Freezer: While freezing is not ideal for this salad due to the vegetables' texture, you can freeze marinated steak in a resealable bag for up to 3 months. Thaw before grilling.

Reheating: If you've frozen the marinated steak, thaw overnight in the fridge and grill as directed. For any leftover salad, eat cold for the best flavor!

Freshness Reminder: Remember that the herbs and veggies are best enjoyed fresh. If making ahead, consider keeping the dressing separate until ready to serve.

Make Ahead Options

These Thai Steak Salad components are perfect for meal prep enthusiasts! You can marinate the flank steak up to 24 hours in advance, allowing the flavors to deepen (simply store it in the refrigerator in a resealable plastic bag). Additionally, you can chop the vegetables—romaine lettuce, cherry tomatoes, red onion, cucumber, cilantro, and mint—up to 3 days ahead. Keep the chopped veggies in airtight containers to maintain their freshness and prevent wilting. When it's time to serve, simply grill the marinated steak, let it rest, slice it, and assemble everything together for a refreshing salad that's just as delicious as when made fresh. This makes your busy weeknights significantly easier!

Thai Steak Salad Variations

Feel free to explore these variations and substitutions for your Thai Steak Salad, making it truly yours!

  • Dairy-Free: Simply omit any cheese or dairy-based toppings. This salad is naturally delicious as is!
  • Protein Swap: Replace flank steak with chicken, shrimp, or tofu for a delightful twist that suits your taste preferences. Each protein adds its unique flavor profile!
  • Extra Spicy: Boost the heat by adding more sriracha or including sliced jalapeños for a fiery kick that adventurous eaters will love. Embrace the heat!
  • Crunch Factor: Swap roasted peanuts for toasted sesame seeds or crispy fried onions to change up the texture while ensuring a satisfying crunch in every bite.
  • Vegan Delight: Use marinated tempeh or jackfruit instead of steak, and swap fish sauce for soy or mushroom sauce for a rich, umami flavor.
  • Herb Mix: Experiment with fresh basil or parsley alongside the cilantro and mint for an aromatic garden earthy flavor that enhances the freshness of the dish.
  • Grain Upgrade: Serve your salad over a bed of quinoa or brown rice to make it heartier. Adding grains brings in a nice nutty flavor!
  • Fruit Addition: Chop up some mango or pineapple to mix in for a sweet and tropical twist. The fruit balances the savory elements perfectly!

Embrace your creativity, and enjoy experimenting with flavors and ingredients! For another refreshing option, you might also like this zesty quinoa salad. Cooking at home is all about making recipes your own!

Expert Tips for Thai Steak Salad

Marinate Longer: Allow the flank steak to marinate overnight for maximum flavor. A quick 30-minute soak won’t yield the same depth you might desire.

Grill Temperature: Ensure your grill pan is hot before adding the steak; this prevents sticking and helps achieve that perfect sear for your Thai Steak Salad.

Slice Against the Grain: Always slice the steak against the grain for tender bites. This simple trick makes a significant difference in texture and enjoyment.

Veggie Variations: Feel free to customize your salad; add colorful bell peppers, shredded carrots, or your favorite spring vegetables to keep things fresh and exciting.

Serve Fresh: Enjoy this salad immediately after assembling to keep the vegetables crisp and vibrant, making your Thai Steak Salad all the more appealing.

Thai Steak Salad Recipe FAQs

How do I choose the best flank steak for this Thai Steak Salad?
Absolutely! Look for flank steak that is bright red with some marbling. This marbling helps keep the steak flavorful and tender during cooking. Avoid pieces with dark spots or excessive fat, as they might not cook as well.

How should I store leftovers of the Thai Steak Salad?
Very! Place any leftovers in an airtight container, ensuring you keep the salad and steak separate to maintain their textures. Enjoy them within 2 days for the best taste. For longer storage, it's best to refrigerate the salad and grill any leftover steak for a fresh flavor.

Can I freeze the marinated steak for my Thai Steak Salad?
Absolutely! To freeze, place the marinated steak in a resealable plastic bag, squeezing out all the air. Lay it flat in the freezer for up to 3 months. When ready to use, thaw in the refrigerator overnight before grilling. This keeps the texture intact.

What if I have dietary restrictions regarding fish sauce?
No problem! If you’re avoiding fish sauce, you can substitute it with coconut aminos or soy sauce for a similar umami flavor. It’s a great alternative for those following a plant-based diet or managing allergies.

What should I do if my steak turns out tough?
Very! To ensure tender steak, always slice against the grain after resting. If the steak was tough before cooking, marinating for longer next time can help infuse more flavor and tenderness. Avoid overcooking, too; 3-5 minutes per side is ideal for medium-rare.

How fresh should the vegetables be for the best tasting Thai Steak Salad?
Absolutely! Choose vibrant, crisp vegetables that are free from blemishes or wilt. Fresh ingredients will not only enhance the salad's flavor but also provide a visual feast. Look for bright greens and firm tomatoes for the ultimate crunch!

Thai Steak Salad

Delicious Thai Steak Salad with Fresh Herbs and Zesty Flavor

This Thai Steak Salad combines vibrant flavors and fresh ingredients, making it a must-try dish for salad lovers.
Print Recipe Pin Recipe
Prep Time 25 minutes mins
Cook Time 10 minutes mins
Marinating Time 30 minutes mins
Total Time 1 hour hr 5 minutes mins
Servings: 4 servings
Course: Salad
Cuisine: Thai
Calories: 370
Ingredients Equipment Method Nutrition Notes

Ingredients
  

For the Marinade
  • 1 pound flank steak a lean cut that absorbs flavors beautifully
  • ¼ cup soy sauce consider low-sodium if watching salt intake
  • 2 tablespoons lime juice fresh lime brightens the marinade
  • 1 tablespoon fish sauce brings umami richness; coconut aminos can be a substitute
  • 1 tablespoon brown sugar balances saltiness and acidity
  • 1 tablespoon sriracha adjust for desired spice level
  • 2 cloves garlic minced for aromatic earthiness
For the Salad
  • 2 tablespoons vegetable oil for grilling the steak
  • 4 cups romaine lettuce crisp and refreshing base
  • 1 cup cherry tomatoes halved for bursts of flavor
  • ½ medium red onion thinly sliced for mild crunch
  • 1 medium cucumber adds coolness, consider English cucumbers
  • ½ cup fresh cilantro leaves impart bright, citrusy notes
  • ¼ cup fresh mint leaves enhances freshness
  • ¼ cup chopped roasted peanuts provides crunch and extra protein
For Serving
  • 2 wedge lime for squeezing over the salad

Equipment

  • grill pan
  • small bowl
  • resealable plastic bag
  • cutting board

Method
 

Preparation
  1. In a small bowl, whisk together the soy sauce, lime juice, fish sauce, brown sugar, sriracha, and minced garlic until well-combined.
  2. Pour the marinade over the flank steak in a resealable plastic bag. Seal the bag and gently massage the marinade into the steak.
  3. Heat a grill pan or skillet over medium-high heat and add vegetable oil.
  4. Grill the marinated steak for about 3–5 minutes on each side for medium-rare.
  5. Let the steak rest on a cutting board for 5 minutes, then slice thinly against the grain.
  6. In a large bowl, combine chopped romaine, halved cherry tomatoes, sliced red onion, cucumber, cilantro, and mint. Toss to mix.
  7. Transfer the salad to a serving platter, arrange the sliced steak on top, and sprinkle with chopped peanuts.
  8. Serve immediately with lime wedges on the side.

Nutrition

Serving: 1servingCalories: 370kcalCarbohydrates: 12gProtein: 27gFat: 24gSaturated Fat: 5gPolyunsaturated Fat: 6gMonounsaturated Fat: 9gCholesterol: 76mgSodium: 870mgPotassium: 600mgFiber: 3gSugar: 5gVitamin A: 2500IUVitamin C: 22mgCalcium: 50mgIron: 3mg

Notes

Allow the flank steak to marinate overnight for maximum flavor. Enjoy this salad immediately for the best freshness.

Tried this recipe?

Let us know how it was!

Creamy Bacon Ranch Pasta Salad: A Flavorful Crowd-Pleaser

August 19, 2025 by grace bellamy Leave a Comment

As I stirred the pot of bubbling rotini, a warm wave of nostalgia washed over me, recalling sunny afternoons spent sharing laughter with friends and family. Nothing beats the comforting embrace of a good pasta salad, especially when it's a Creamy Bacon Ranch Pasta Salad. This dish is more than just a side—it's a crowd-pleaser that transforms any meal into a celebration. With a prep time of just 15 minutes and a chilling period that allows the flavors to really come alive, it’s the perfect solution for busy weeknights or casual get-togethers. The combination of crispy bacon, sharp cheddar, and zesty ranch dressing creates a comforting yet refreshing bite that will keep everyone coming back for seconds. Who wouldn’t want to enjoy a homemade dish that’s quick, easy, and bursting with flavor? Ready to dive into the recipe and create some delicious memories?

Why is this pasta salad irresistible?

Simplicity makes it perfect for any occasion: With just a 15-minute prep time and simple ingredients, you can whip up this crowd-pleaser effortlessly. Creamy, tangy flavor from the ranch dressing balances beautifully with the salty crunch of bacon. Versatile enough to serve as a main dish or a side, it pairs well with grilled meats and summer barbecues. Chilling time enhances the flavors, making it ideal for meal prep or potlucks where tastes come together in delicious harmony. You'll be asking yourself why you haven’t made this Creamy Bacon Ranch Pasta Salad sooner!

Creamy Bacon Ranch Pasta Salad Ingredients

For the Pasta
• Rotini pasta – This fun shape holds the creamy dressing perfectly for a delightful bite!

For the Dressing
• Mayonnaise – The base that adds richness and creaminess, making it the ultimate comfort dish.
• Sour cream – Provides a tangy flavor that complements the ranch seasoning beautifully.
• Ranch seasoning mix – One packet brings the signature zesty flavor of your favorite salads right into your bowl.
• Garlic powder – Just a bit adds depth and warmth to the dressing.
• Onion powder – Enhances the savory flavor profile of this Creamy Bacon Ranch Pasta Salad.
• Black pepper – A dash of this spice raises the flavor level without overpowering the dish.

For the Add-Ins
• Bacon – Cooked and crumbled, it adds a crispy, salty crunch that everyone will love.
• Shredded cheddar cheese – Melts beautifully into the salad, providing a cheesy richness that’s hard to resist.
• Cherry tomatoes – Their juicy sweetness adds a burst of freshness with each bite.
• Red onion – Finely diced for a bit of colorful crunch and zesty flavor.
• Green onions – Adds a mild pungency that brightens the salad.
• Diced celery (optional) – Adds a nice crunch and freshness if you like a bit more texture.
• Fresh parsley – Chopped and sprinkled on top just before serving for a pop of color and herbaceous note.

Step‑by‑Step Instructions for Creamy Bacon Ranch Pasta Salad

Step 1: Cook the Pasta
Begin by bringing a large pot of salted water to a boil over high heat. Once boiling, add 1 pound of rotini pasta and cook according to package instructions, usually about 8-10 minutes, until al dente. Drain the pasta in a colander, and then rinse it under cold running water for a minute to cool it down and stop the cooking process.

Step 2: Prepare the Dressing
In a large mixing bowl, combine 1 cup of mayonnaise, ½ cup of sour cream, 1 ounce of ranch seasoning mix, ½ teaspoon of garlic powder, ½ teaspoon of onion powder, and ¼ teaspoon of black pepper. Whisk these ingredients together vigorously until the mixture is smooth and creamy, ensuring there are no lumps for your Creamy Bacon Ranch Pasta Salad.

Step 3: Combine Pasta and Dressing
Once your pasta is cool, add it to the bowl with the dressing. Gently toss the rotini in the creamy mixture until it’s thoroughly coated, making sure every curve of the pasta is enveloped in that delicious ranch flavor. This step is crucial for getting that creamy texture throughout the salad.

Step 4: Add the Mix-Ins
Carefully fold in 8 slices of crumbled bacon, 1 cup of shredded cheddar cheese, 1 cup of halved cherry tomatoes, ½ finely diced red onion, ½ cup of chopped green onions, and ½ cup of diced celery if you desire extra crunch. Make sure to mix it well but gently to keep the ingredients intact, enhancing the overall flavor and texture of your Creamy Bacon Ranch Pasta Salad.

Step 5: Chill the Salad
Cover the bowl with plastic wrap or a lid to keep the flavors from wandering, and place it in the refrigerator for at least 1 hour. This chilling time allows the ingredients to meld together beautifully, enhancing the flavor of your pasta salad. You’ll notice the refreshing flavors developing as it cools.

Step 6: Serve with Fresh Parsley
Just before serving, take the salad out of the fridge and sprinkle ¼ cup of chopped fresh parsley on top for a bright, fresh finish. Give it one last gentle toss to incorporate the parsley and serve your Creamy Bacon Ranch Pasta Salad in a large bowl or individual plates.

What to Serve with Creamy Bacon Ranch Pasta Salad

Looking to create a memorable meal that perfectly complements your creamy, delicious creation?

  • Grilled Chicken Breast: Juicy and tender, grilled chicken adds a protein-packed option alongside the pasta salad, enhancing the meal's satisfying nature.

  • Fresh Garden Salad: Crisp greens with a tangy vinaigrette provide a refreshing counterbalance to the richness of the salad, brightening each bite.

  • Garlic Bread: Warm, toasted garlic bread offers a crispy texture that perfectly contrasts the creamy pasta, making for a delightful carb duo.

  • Roasted Vegetables: Seasonal roasted veggies add earthy flavors and nutrients, creating a wholesome balance to your plate while elevating the meal's aesthetic.

  • Sweet Corn on the Cob: Buttery corn, with its natural sweetness, brings a summer vibe to the table and pairs beautifully with the savory elements of your salad.

  • Sparkling Lemonade: A refreshing drink that echoes the zesty flavors in your Creamy Bacon Ranch Pasta Salad, making each sip a delightful treat.

  • Chocolate Chip Cookies: For dessert, the classic cookie's sweetness rounds off the meal perfectly, leaving everyone with a smile and a satisfied palate.

Create a full dining experience that resonates warmth and happiness—just like those precious gatherings with loved ones!

How to Store and Freeze Creamy Bacon Ranch Pasta Salad

Fridge: Keep your Creamy Bacon Ranch Pasta Salad in an airtight container for up to 3 days. This ensures the flavors stay fresh and vibrant.

Freezer: Freezing is not recommended as the creamy dressing may separate upon thawing, affecting the texture and flavor of the pasta salad.

Reheating: If serving leftovers, it's best enjoyed cold from the fridge, as the flavors blend nicely over time. Simply mix before serving and enjoy!

Expert Tips for Creamy Bacon Ranch Pasta Salad

• Pasta Cooking: Make sure not to overcook the rotini; al dente is best for texture and flavor in your Creamy Bacon Ranch Pasta Salad.

• Cooling Method: Rinse the cooked pasta under cold water thoroughly. This stops the cooking process and prevents it from becoming mushy.

• Dress Right: Mix the dressing ingredients well to avoid clumps and ensure every pasta piece is generously coated for a creamy finish.

• Chill Time: Don’t skip the chilling step! Allowing the salad to rest for at least an hour enhances flavor and texture, making it even more delicious.

• Mix-In Variations: Feel free to customize by adding vegetables like bell peppers or using different cheeses for a unique twist on your Creamy Bacon Ranch Pasta Salad.

Creamy Bacon Ranch Pasta Salad Variations

Feel free to get creative and personalize your dish with these fun twists and swaps!

  • Gluten-Free: Use gluten-free pasta to make this pasta salad accessible for everyone without sacrificing flavor.

  • Vegetarian: Replace bacon with grilled veggies like zucchini or bell peppers for a delightful, hearty salad devoid of meat.

  • Spicy Kick: Add diced jalapeños or a splash of sriracha for an exciting heat that liven up each bite!

  • Cream Cheese: Swap sour cream for cream cheese to achieve an even richer, creamy texture that’s simply irresistible.

  • Herbed Delight: Blend in fresh herbs like dill or basil for an aromatic touch that enhances the classic ranch flavor.

  • Extra Crunch: Toss in sunflower seeds or toasted walnuts to create a delightful crunch and nutty flavor in your salad.

  • Ranch Swap: Experiment with different dressing flavors like Caesar or blue cheese to give this salad a bold twist that excites your palate.

  • Protein Booster: Mix in diced chicken or tuna to turn this lively salad into a satisfying main dish that’s perfect for lunch or dinner.

With these variations, you'll discover endless possibilities to make your Creamy Bacon Ranch Pasta Salad uniquely yours! If you're drawn to fresh veggie options, consider incorporating some delicious grilled veggies to elevate your dish even further. Enjoy experimenting!

Make Ahead Options

These Creamy Bacon Ranch Pasta Salad ingredients are perfect for meal prep enthusiasts! You can prepare the dressing (mayonnaise, sour cream, ranch seasoning mix, garlic powder, onion powder, and black pepper) up to 24 hours in advance, allowing the flavors to deepen. Additionally, you can cook and crumble the bacon ahead of time—store it in an airtight container in the refrigerator for up to 3 days. Just before serving, combine the chilled pasta, dressing, and mix-ins (cheddar cheese, cherry tomatoes, red onion, and green onions) and give it a gentle toss. To maintain quality, avoid adding fresh parsley until serving, ensuring a vibrant pop of flavor and color. With these make ahead tips, you’ll have a delicious and stress-free pasta salad ready in no time!

Creamy Bacon Ranch Pasta Salad Recipe FAQs

How do I know if my rotini pasta is cooked properly?
Absolutely! To achieve the perfect al dente texture, taste a piece of pasta just before the cooking time on the package is up. It should be firm to the bite yet cooked through.

How should I store leftover Creamy Bacon Ranch Pasta Salad?
To keep your pasta salad fresh, store it in an airtight container in the fridge for up to 3 days. This will maintain its vibrancy and flavor while ensuring the creamy dressing remains delightful.

Can I freeze Creamy Bacon Ranch Pasta Salad?
Freezing is not recommended for this recipe. The creamy dressing may separate when thawed, leading to an unappetizing texture and taste. Instead, enjoy it fresh or within 3 days in the fridge for the best experience.

What if my pasta salad seems too dry after chilling?
If you find your Creamy Bacon Ranch Pasta Salad feels a bit dry after chilling, simply stir in a tablespoon or two of additional mayonnaise or sour cream. This will reinvigorate the creamy consistency and enhance the flavor delightfully.

Are there any dietary considerations I should be aware of?
Great question! This recipe contains dairy and bacon, which can be allergens for some individuals. Consider substituting the mayonnaise with a vegan alternative for a dairy-free version, and you can try omitting bacon for a vegetarian option. Always check ingredient labels for potential allergens!

When is the best time to serve this salad?
Very! This salad is best served cold after chilling for at least an hour, allowing the flavors to meld together beautifully. It makes an excellent dish for potlucks, picnics, or simple weeknight dinners, bringing that touch of comfort food to your table.

Creamy Bacon Ranch Pasta Salad

Creamy Bacon Ranch Pasta Salad: A Flavorful Crowd-Pleaser

Creamy Bacon Ranch Pasta Salad is a quick, tasty dish featuring rotini, crispy bacon, and tangy ranch dressing, perfect for gatherings.
Print Recipe Pin Recipe
Prep Time 15 minutes mins
Cook Time 10 minutes mins
Chilling Time 1 hour hr
Total Time 1 hour hr 25 minutes mins
Servings: 8 servings
Course: Salad
Cuisine: American
Calories: 350
Ingredients Equipment Method Nutrition Notes

Ingredients
  

For the Pasta
  • 1 pound rotini pasta This fun shape holds the creamy dressing perfectly for a delightful bite!
For the Dressing
  • 1 cup mayonnaise The base that adds richness and creaminess.
  • ½ cup sour cream Provides tangy flavor.
  • 1 ounce ranch seasoning mix Brings the signature zesty flavor.
  • ½ teaspoon garlic powder Adds depth and warmth.
  • ½ teaspoon onion powder Enhances savory flavor.
  • ¼ teaspoon black pepper Raises flavor level.
For the Add-Ins
  • 8 slices bacon Cooked and crumbled for crispy, salty crunch.
  • 1 cup shredded cheddar cheese Adds cheesy richness.
  • 1 cup cherry tomatoes Juicy sweetness.
  • ½ red onion Finely diced for crunch and flavor.
  • ½ cup green onions Adds mild pungency.
  • ½ cup diced celery Optional for extra crunch.
  • ¼ cup fresh parsley Chopped, for garnish.

Equipment

  • Large Pot
  • Mixing Bowl
  • Colander
  • Whisk

Method
 

Step-by-Step Instructions
  1. Bring a large pot of salted water to a boil. Add rotini pasta and cook for 8-10 minutes until al dente. Drain and rinse under cold water.
  2. In a mixing bowl, combine mayonnaise, sour cream, ranch seasoning, garlic powder, onion powder, and black pepper. Whisk until smooth.
  3. Add cooled pasta to the dressing and gently toss to coat.
  4. Fold in crumbled bacon, cheddar cheese, cherry tomatoes, red onion, green onions, and celery. Mix gently.
  5. Cover the bowl and chill in the refrigerator for at least 1 hour to meld flavors.
  6. Before serving, sprinkle chopped parsley on top and give a gentle toss. Serve in a large bowl or individual plates.

Nutrition

Serving: 1cupCalories: 350kcalCarbohydrates: 35gProtein: 10gFat: 22gSaturated Fat: 5gCholesterol: 50mgSodium: 800mgPotassium: 200mgFiber: 2gSugar: 2gVitamin A: 500IUVitamin C: 2mgCalcium: 200mgIron: 1mg

Notes

Make sure not to overcook the pasta; al dente is best. Rinse pasta under cold water to stop the cooking process. Mix dressing well to avoid clumps. Chilling the salad enhances flavor and texture. Customize with additional vegetables or cheeses if desired.

Tried this recipe?

Let us know how it was!

Savor Roasted Garlic Parmesan Potatoes for Irresistible Flavor

August 19, 2025 by grace bellamy Leave a Comment

The aroma of garlic roasting in the oven instantly transports me to cozy family gatherings, and it’s moments like these that remind me why homemade food reigns supreme. Today, I’m excited to share my recipe for Roasted Garlic Parmesan Potatoes, a comforting side dish that’s not only gluten-free but also vegetarian-friendly, making it a hit for everyone at the table. With just a handful of simple ingredients, you’ll create crispy, golden potatoes that are perfect for grilled meats, seafood, or even enjoyed solo with a sprinkle of fresh parsley. Plus, they come together in under an hour—ideal for those busy weeknights when you crave something homemade without the fuss. Ready to elevate your side dish game with these irresistible potatoes? Let’s dive into the recipe!

Why Are These Potatoes So Irresistible?

Simplicity at its finest: With just a few pantry staples, these Roasted Garlic Parmesan Potatoes come together effortlessly.

Heavenly aromas fill your kitchen while they roast, creating a cozy atmosphere that elevates any meal.

Versatility shines through; they pair perfectly with grilled meats or can stand alone as a satisfying snack.

Crowd-pleaser: Whether it’s a family gathering or a cozy dinner for two, these potatoes are bound to impress everyone at the table.

Quick and easy: In under an hour, you’ll have this flavorful dish ready to enjoy, making it perfect for busy weeknights.

Elevate your side dish game with these delightful potatoes that everyone will adore. For more ideas, check out our serving suggestions to complement this tasty recipe!

Roasted Garlic Parmesan Potatoes Ingredients

For the Potatoes

  • Baby potatoes – Choose tender, small varieties for a delightful texture.
  • Olive oil – Adds richness and helps achieve that golden crispy finish.
  • Garlic – Freshly minced garlic infuses the dish with a robust aroma.
  • Salt – Enhances the natural flavors of the potatoes for a delicious taste.
  • Black pepper – Provides a mild kick and pairs wonderfully with garlic.
  • Italian seasoning – A blend of herbs adds warmth and depth to the flavor profile.
  • Parmesan cheese – Grated for a salty, nutty finish that complements the potatoes beautifully.

For Garnishing

  • Fresh parsley – Brightens the dish with a pop of color and fresh flavor.

Get ready to enjoy these Roasted Garlic Parmesan Potatoes that are gluten-free and a true delight at any gathering!

Step‑by‑Step Instructions for Roasted Garlic Parmesan Potatoes

Step 1: Preheat the Oven
Begin by preheating your oven to 400°F (200°C). This temperature is perfect for roasting, ensuring your Roasted Garlic Parmesan Potatoes get that beautiful golden crust. While the oven warms up, gather your ingredients and prepare a large baking sheet lined with parchment paper or foil for easy cleanup.

Step 2: Prepare the Potatoes
In a large mixing bowl, add the halved baby potatoes. Pour in the olive oil, then sprinkle in the minced garlic, salt, pepper, and Italian seasoning. Toss everything together until the potatoes are thoroughly coated with the flavorful mixture; you'll want them glistening and ready for roasting.

Step 3: Arrange the Potatoes
Spread the seasoned potatoes in a single layer on your prepared baking sheet. This allows them to roast evenly and become crispy. Keep them spaced apart to ensure proper airflow; they’ll cook beautifully if left with some room to breathe.

Step 4: First Roast
Slide the baking sheet into your preheated oven and roast the potatoes for 25 minutes. Halfway through, you can give them a gentle toss to encourage even browning. They should start to turn golden and become fragrant, filling your kitchen with inviting aromas.

Step 5: Add Cheese
Once the initial roast is complete, carefully remove the potatoes from the oven. Sprinkle the grated Parmesan cheese generously over the hot potatoes, allowing it to melt and create a deliciously crusty topping. Return them to the oven for an additional 10-15 minutes, or until the cheese is bubbly and golden.

Step 6: Final Touches
After roasting, the potatoes should be crispy and golden brown. Remove them from the oven and let them cool for a few minutes. For a fresh, vibrant touch, garnish with chopped parsley, adding a burst of color to your Roasted Garlic Parmesan Potatoes before serving.

What to Serve with Roasted Garlic Parmesan Potatoes

Roasted Garlic Parmesan Potatoes create a comforting family meal that pairs wonderfully with various flavors and textures.

  • Grilled Lemon Herb Chicken: This succulent chicken adds zesty brightness that complements the rich, cheesy potatoes perfectly.

  • Seared Salmon Fillets: The light, flaky fish balances the hearty potatoes, offering a delightful contrast in flavors and textures.

  • Garlic Butter Shrimp: Adding a touch of seafood elegance, the garlic butter enhances the aromatic experience while keeping it savory.

  • Fresh Garden Salad: A crisp salad introduces a refreshing element, with vibrant greens providing a nice crunch against the creamy potatoes.

  • Vegetable Stir-Fry: Colorful veggies stir-fried in a light sauce create a nutritional balance and a pop of freshness alongside your dish.

  • Creamy Coleslaw: The cool, creamy texture of coleslaw contrasts beautifully with the crispy garlic potatoes, making each bite satisfying.

  • Chardonnay or Sauvignon Blanc: These wines add a fruity note to the meal, enhancing the roasted flavors of the potatoes while keeping your palate refreshed.

Elevate your dining experience with these pairings, ensuring a delightful balance of flavors and textures with your Roasted Garlic Parmesan Potatoes.

Expert Tips for Roasted Garlic Parmesan Potatoes

  • Prepping Potatoes: Choose uniform-sized baby potatoes for even cooking; larger pieces may roast unevenly.

  • Oil Coating: Don’t skimp on olive oil; it’s essential for achieving that crispy texture in your Roasted Garlic Parmesan Potatoes.

  • Watch the Cheese: Add Parmesan towards the end of roasting to prevent it from burning; it should melt and brown lightly for the best flavor.

  • Avoid Overcrowding: Spread potatoes in a single layer with enough space; this allows them to brown correctly and stay crispy.

  • Fresh Garlic Means More Flavor: Use freshly minced garlic instead of pre-minced for a more vibrant and aromatic taste.

  • Garnish Wisely: A sprinkle of fresh parsley not only adds color but freshens the dish—don’t skip this final touch!

Make Ahead Options

These Roasted Garlic Parmesan Potatoes are perfect for meal prep, allowing you to spend less time in the kitchen during busy weeknights! You can wash and halve the baby potatoes up to 24 hours in advance; simply store them submerged in cold water in the refrigerator to prevent browning. Additionally, you can mix the olive oil, minced garlic, salt, pepper, and Italian seasoning and keep it in an airtight container for up to 3 days. When you're ready to serve, just toss the potatoes with the mixture, roast them per the original instructions, and sprinkle with Parmesan cheese for that crispy topping. These make-ahead tips ensure your potatoes remain just as delicious, saving you precious time and effort!

How to Store and Freeze Roasted Garlic Parmesan Potatoes

Fridge: Store your Roasted Garlic Parmesan Potatoes in an airtight container for up to 4 days. This keeps them fresh and ready to enjoy.

Reheating: For the best results, reheat potatoes in a hot oven or air fryer to restore their crispiness. Aim for about 10-15 minutes at 375°F (190°C).

Freezer: If you have leftovers, you can freeze the potatoes for up to 2 months. Spread them out on a baking sheet to freeze individually before transferring to a freezer-safe bag.

Thawing: When you're ready to enjoy your frozen Roasted Garlic Parmesan Potatoes, thaw in the fridge overnight and reheat as desired.

Roasted Garlic Parmesan Potatoes Variations

Feel free to get creative and customize your Roasted Garlic Parmesan Potatoes with these delicious twists!

  • Dairy-Free: Substitute nutritional yeast for Parmesan for a cheesy flavor without the dairy. It adds a lovely umami punch!

  • Spicy Kick: Add a pinch of red pepper flakes to the seasoning mix for a delightful heat that will awaken your taste buds. Perfect for those who enjoy a bit of sizzle!

  • Herb Infusion: Swap Italian seasoning with fresh herbs like rosemary or thyme for an aromatic twist. These fragrant herbs elevate the dish to a whole new level!

  • Herb-Infused Olive Oil: Use herb-infused olive oil for a nuanced flavor profile. It's like adding a secret ingredient that makes each bite more special!

  • Lemon Zest Brightener: Incorporate lemon zest before roasting to add a refreshing zing that complements the garlic beautifully. It’s the secret to a brighter, happier flavor!

  • Cheesy Variations: Mix in a blend of different cheeses like cheddar or feta along with Parmesan for a tasty fusion of flavors. The more cheese, the merrier!

  • Veggie Loaded: Toss in some halved Brussels sprouts or sweet potatoes to your mix for extra flavor and texture. It transforms this side dish into a veggie extravaganza!

  • Balsamic Drizzle: Finish with a balsamic glaze after baking for a sweet and tangy finish that pairs beautifully with the savory potatoes. It elevates the whole meal!

With these variations, you can keep your Roasted Garlic Parmesan Potatoes lively and exciting, perfect for enchanting family and friends with each delicious bite!

Roasted Garlic Parmesan Potatoes Recipe FAQs

How do I choose the right potatoes?
Absolutely! For the best flavor and texture, select firm baby potatoes that are smooth without dark spots or blemishes. The tender, small varieties will roast beautifully and allow for even cooking, ensuring that each bite is delightful.

What is the best way to store leftover potatoes?
Very! Store your Roasted Garlic Parmesan Potatoes in an airtight container in the fridge for up to 4 days. This way, they stay fresh and tasty! When you're ready to enjoy them again, simply reheat in a hot oven or air fryer for about 10-15 minutes at 375°F (190°C) to restore their crispiness.

Can I freeze Roasted Garlic Parmesan Potatoes?
Absolutely! If you find yourself with leftovers, you can freeze them for up to 2 months. To do this, start by spreading the cooled potatoes on a baking sheet in a single layer and freeze until solid. Then, transfer them to a freezer-safe bag or container. When ready to enjoy, simply thaw in the fridge overnight and reheat to your preference!

What should I do if my potatoes are not crispy?
Ah, I understand the frustration! To achieve that perfect crispy texture, make sure not to overcrowd your baking sheet, as this prevents proper air circulation. Additionally, ensure you're using enough olive oil to coat them well. If they’re still not crispy after the initial roast, let them roast a bit longer (but keep an eye on them to avoid burning!). Giving them a gentle toss halfway through cooking can help too.

Are Roasted Garlic Parmesan Potatoes suitable for vegetarians or those with gluten sensitivities?
Absolutely! These delectable potatoes are made with gluten-free and vegetarian-friendly ingredients, making them a wonderful choice for anyone at your table. Just be sure to check your chosen Parmesan cheese, as some brands may add non-vegetarian ingredients. You're in good shape with this recipe!

What can I serve with Roasted Garlic Parmesan Potatoes?
Very good question! These irresistible potatoes pair beautifully with grilled meats, seafood, or even as a complement to hearty vegetarian dishes. Feel free to get creative! They can also be enjoyed solo as a satisfying snack. The more the merrier!

Roasted Garlic Parmesan Potatoes

Savor Roasted Garlic Parmesan Potatoes for Irresistible Flavor

Roasted Garlic Parmesan Potatoes are a comforting, gluten-free, and vegetarian-friendly side dish full of flavor.
Print Recipe Pin Recipe
Prep Time 10 minutes mins
Cook Time 35 minutes mins
Total Time 45 minutes mins
Servings: 4 servings
Course: Side Dishes
Cuisine: American
Calories: 210
Ingredients Equipment Method Nutrition Notes

Ingredients
  

For the Potatoes
  • 1.5 pounds baby potatoes Choose tender, small varieties for a delightful texture.
  • 2 tablespoons olive oil Adds richness and helps achieve that golden crispy finish.
  • 3 cloves garlic Freshly minced garlic infuses the dish with a robust aroma.
  • 1 teaspoon salt Enhances the natural flavors of the potatoes for a delicious taste.
  • 0.5 teaspoon black pepper Provides a mild kick and pairs wonderfully with garlic.
  • 1 teaspoon Italian seasoning A blend of herbs adds warmth and depth to the flavor profile.
  • 0.5 cup Parmesan cheese Grated for a salty, nutty finish that complements the potatoes beautifully.
For Garnishing
  • 2 tablespoons fresh parsley Brightens the dish with a pop of color and fresh flavor.

Equipment

  • Oven
  • Baking Sheet
  • Mixing Bowl
  • parchment paper

Method
 

Step‑by‑Step Instructions for Roasted Garlic Parmesan Potatoes
  1. Preheat your oven to 400°F (200°C). Prepare a large baking sheet lined with parchment paper or foil.
  2. In a large mixing bowl, add the halved baby potatoes. Pour in the olive oil, then sprinkle in the minced garlic, salt, pepper, and Italian seasoning. Toss until coated.
  3. Spread the seasoned potatoes in a single layer on the prepared baking sheet.
  4. Roast the potatoes for 25 minutes, giving them a gentle toss halfway through.
  5. Sprinkle the grated Parmesan cheese over the hot potatoes. Return to the oven for an additional 10-15 minutes until the cheese is bubbly and golden.
  6. Remove from the oven, let cool for a few minutes, and garnish with chopped parsley before serving.

Nutrition

Serving: 1servingCalories: 210kcalCarbohydrates: 32gProtein: 4gFat: 8gSaturated Fat: 2gPolyunsaturated Fat: 1gMonounsaturated Fat: 5gCholesterol: 5mgSodium: 400mgPotassium: 600mgFiber: 3gSugar: 1gVitamin A: 350IUVitamin C: 15mgCalcium: 90mgIron: 1mg

Notes

Store in an airtight container for up to 4 days. Reheat in the oven or air fryer for the best results.

Tried this recipe?

Let us know how it was!

Melt-in-Your-Mouth Cheesy Pizza Pockets Ready in 25 Minutes

August 19, 2025 by grace bellamy Leave a Comment

The moment I took my first bite of a warm, cheesy pizza pocket, I was transported back to carefree childhood days, savoring snack time after school. These delightful Cheesy Pizza Pockets are an easy and fun way to bring that nostalgic joy into your kitchen. With just 10 minutes of prep and a golden-brown finish in under 20, this recipe allows you to whip up a crowd-pleasing treat that's perfect for any occasion. Whether you’re on a weeknight dinner mission or hosting friends for game day, these pockets promise to satisfy even the pickiest eaters. Plus, you can customize them with your favorite toppings, making them a versatile dish for anyone passionate about homemade food. Ready to create a tasty twist on pizza night? Let's dive into the world of cheesy goodness!

Why are these Pizza Pockets irresistible?

Quick and Easy: In just 25 minutes, you'll have hot, cheesy pockets ready to enjoy. Perfect for busy weeknights or spontaneous gatherings!
Customizable Delight: Whether you're a veggie lover or a meat enthusiast, you can easily tailor these pockets with your favorite fillings.
Nostalgic Comfort: These Cheesy Pizza Pockets evoke the joy of childhood snacks, making them an unbeatable comfort food choice!
Crowd-Pleasing Appeal: No matter the occasion, this dish is a guaranteed hit with friends and family who love homemade food.
Fun to Make: Get the kids involved for a fun kitchen experience! It's a great way to bond while whipping up something delicious.
Dive deeper into homemade goodness with our easy pizza roll variations for even more delicious ideas!

Cheesy Pizza Pockets Ingredients

• Dive into the magic of homemade Cheesy Pizza Pockets with these simple and delicious ingredients!

For the Dough
• Refrigerated pizza dough – A convenient base that saves time; crescent roll dough works too if you want a flakier texture.

For the Sauce
• Marinara or pizza sauce – Choose your favorite brand for a rich flavor; homemade sauce can elevate this dish!

For the Cheese
• Shredded mozzarella cheese – This classic choice provides that gooey, melty goodness we all love.
• Grated Parmesan cheese – Adds a salty, nutty flavor that complements the mozzarella.

For the Fillings
• Mini pepperoni or cooked sausage (optional) – For meat lovers, these add a delightful zing to every bite.
• Chopped bell peppers, mushrooms, or olives (optional) – Fresh vegetables create a colorful and healthy twist.

For Seasoning
• Italian seasoning – A blend of herbs that infuses rich Italian flavors into your pockets.
• Red pepper flakes (optional) – For those who like a little kick!

For the Egg Wash
• Egg, beaten – This gives your pockets a golden-brown finish and helps seal the edges.

For Garnish
• Dried oregano or garlic powder – Sprinkle on top for added flavor and aroma before baking.

With these Cheesy Pizza Pockets ingredients at your fingertips, you're one step closer to creating a delicious homemade treat!

Step‑by‑Step Instructions for Cheesy Pizza Pockets

Step 1: Preheat the Oven
Begin by preheating your oven to 400°F (or set your air fryer to 375°F). While the oven warms up, line a baking sheet with parchment paper to prevent sticking and ensure easy cleanup. This preparation is key to achieving those perfectly golden and crispy Cheesy Pizza Pockets in no time!

Step 2: Prepare the Dough
On a lightly floured surface, roll out your refrigerated pizza dough. Using a sharp knife or pizza cutter, slice the dough into 4×6 inch rectangles. Aim for consistency in size so that all your pockets cook evenly. This step sets the foundation for each delicious, cheesy pocket you’re about to create.

Step 3: Add the Sauce
Take a tablespoon of marinara sauce and spoon it onto the center of each rectangle, leaving a little space around the edges for sealing. The sauce will provide moisture and flavor, ensuring that your Cheesy Pizza Pockets are bursting with deliciousness. Be sure not to overfill, or they may leak during baking!

Step 4: Sprinkle the Cheese
Generously sprinkle shredded mozzarella and grated Parmesan cheese over the sauce on each rectangle. If you’re using any optional fillings like mini pepperoni or veggies, add them now. This melty cheese acts as the star of your Cheesy Pizza Pockets, promising gooey indulgence with every bite.

Step 5: Seal the Pockets
Fold the dough over the filling to create a pocket. Press the edges together firmly, then use a fork to crimp the edges for an extra-tight seal. This ensures that the cheesy goodness stays tucked inside while baking, creating delightful bites free from leaks.

Step 6: Brush with Egg Wash
In a small bowl, beat an egg and use a pastry brush to apply a light layer over the tops of the pockets. This egg wash will give your Cheesy Pizza Pockets a beautiful golden-brown finish. For an added flavor twist, sprinkle some dried oregano or garlic powder on top before baking.

Step 7: Bake to Perfection
Carefully place your prepared pockets on the lined baking sheet and bake in the preheated oven for 15–18 minutes. If using an air fryer, arrange them in a single layer and air fry for 8–10 minutes, flipping halfway. Watch for them to turn golden and crispy—this is the moment of cheesy magic!

Step 8: Cool and Serve
Once baked, remove your Cheesy Pizza Pockets from the oven and allow them to cool for about 5 minutes. This brief resting period ensures that the cheese sets slightly and prevents burns. Serve warm with extra marinara on the side for dipping—a delicious way to enhance every savory bite!

Expert Tips for Cheesy Pizza Pockets

Avoid Overfilling: Don't be tempted to load your pockets too full! Overfilling can lead to leaks while baking, ruining the cheesy experience.

Seal It Well: Ensure you seal the edges tightly with a fork. A good seal keeps all that delicious cheese inside and prevents any spills during baking.

Choose Quality Ingredients: Opt for fresh shredded mozzarella and high-quality marinara sauce. This enhances the flavor and elevates your Cheesy Pizza Pockets to the next level.

Watch the Oven Time: Baking times can vary based on the thickness of your dough—keep an eye on them and remove when golden brown for the best results!

Customize with Ease: Feel free to experiment with your favorite fillings. Just remember to maintain the balance of flavors so each pocket remains delicious and satisfying!

How to Store and Freeze Cheesy Pizza Pockets

Room Temperature: Enjoy your Cheesy Pizza Pockets within 2 hours of baking for optimal taste. If you need to keep them longer, they'll stay fresh for up to 3 hours at room temperature, covered loosely.

Fridge: Store any leftovers in an airtight container in the fridge for up to 3 days. Reheat in the oven or air fryer for that crispy texture again!

Freezer: For longer storage, freeze the uncooked pizza pockets. Wrap each in plastic wrap and place in a freezer-safe bag for up to 2 months. Bake from frozen, adding a few extra minutes to the cooking time.

Reheating: To reheat cooked pockets, pop them in the oven at 350°F for about 10 minutes, or until warmed through, keeping that yummy cheese melted!

What to Serve with Cheesy Pizza Pockets

Create the perfect meal experience that will leave everyone craving more.

  • Garlic Bread: The buttery, garlicky flavor of this classic side complements the cheesy goodness beautifully and adds satisfying crunch.
  • Caesar Salad: Crisp romaine lettuce tossed in creamy dressing provides a refreshing contrast to the hot, cheesy pizza pockets. A sprinkle of Parmesan ties the flavors together.
  • Vegetable Crudités: A colorful assortment of fresh veggies with dip brings a burst of freshness, balancing the richness of the pizza pockets. It's a delightful way to add texture to your meal.
  • Marinara Dipping Sauce: Serve extra marinara on the side for dipping! The extra sauce enhances the flavor and keeps the bites exciting and interactive.
  • Stuffed Mushrooms: These bite-sized delights are filled with creamy cheese and herbs, making them a delicious accompaniment to the cheesy pockets. Their earthy flavor adds depth and sophistication to your meal.
  • Sparkling Water or Lemonade: A refreshing drink with a hint of citrus will cleanse your palate and highlight the flavors of your meal, keeping things light and enjoyable.
  • Chocolate Chip Cookies: End on a sweet note! These warm, gooey cookies offer a nostalgic touch, rounding out your homemade pizza night perfectly.

Make Ahead Options

These Cheesy Pizza Pockets are perfect for busy home cooks looking to save time during the week! You can prepare the pockets up to 24 hours in advance by assembling them and then storing them in an airtight container in the refrigerator. To maintain their quality, be sure to keep the pockets uncooked until you're ready to bake them, which helps ensure that they stay fresh and don’t get soggy. When you're ready to serve, simply pop them in the preheated oven or air fryer directly from the fridge, adding an extra 2-3 minutes to the cooking time if needed. You'll have hot, cheesy delights ready in no time!

Cheesy Pizza Pockets Variations

Get ready to embrace your culinary creativity with these exciting twists that will make your Cheesy Pizza Pockets even more delightful!

  • Veggie Lovers: Swap in a medley of chopped zucchini, spinach, or artichokes. These fresh veggies add a burst of color and nutrition. Plus, they complement the melty cheese perfectly!

  • Spicy Kick: Add a teaspoon of diced jalapeños or a swirl of sriracha in the filling. This option creates a fiery flavor that spice enthusiasts will adore. You can adjust the heat level to your preference!

  • Gluten-Free: Use gluten-free pizza dough or crescent roll dough for a tasty alternative. This ensures everyone can join in on the fun, regardless of dietary needs!

  • Cheese Explosion: Incorporate different types of cheese, like provolone, cheddar, or gorgonzola, for a flavor-packed experience. A mix of cheeses can elevate your pockets to gourmet level!

  • Sweet Delight: Create a dessert version by using Nutella and banana slices as filling. This sweet twist makes for a delightful treat that's perfect for the kids or dessert lovers.

  • Herb Infusion: Blend fresh herbs like basil or thyme into your filling for a refreshing taste. This will elevate the flavor profile, adding an aromatic touch that’s simply irresistible.

  • Balsamic Glaze Drizzle: Don’t forget to drizzle some balsamic glaze over the baked pockets for a gourmet touch. The sweet and tangy flavor will enhance every bite beautifully.

  • Meat Lover's Delight: Stuff with a mix of cooked bacon, ham, or shredded chicken to create a hearty filling. This combination turns each pocket into a protein-packed meal.

Embrace these variations, and make each batch of your Cheesy Pizza Pockets uniquely yours! For even more inspiration, check out our delicious pizza roll tips or explore creative filling ideas to take your cooking game to the next level!

Cheesy Pizza Pockets Recipe FAQs

How do I choose the right pizza dough?
Absolutely! If you're using refrigerated pizza dough, look for packages that don't have dark spots or any damage; it should feel fresh and pliable. Crescent roll dough is also a fabulous alternative for a flakier bite; just ensure you roll it out slightly before cutting it into rectangles.

What’s the best way to store leftover Cheesy Pizza Pockets?
Very! To keep the flavor and texture intact, store any leftovers in an airtight container in the fridge for up to 3 days. When you’re ready to enjoy them again, simply reheat in the oven at 350°F for about 10 minutes, and they’ll taste almost as fresh as when they came out of the oven!

Can I freeze Cheesy Pizza Pockets for later?
Absolutely! To freeze them, wrap each uncooked pizza pocket tightly in plastic wrap, then place them into a freezer-safe resealable bag. They can be stored this way for up to 2 months. When you're ready to cook, there’s no need to thaw—the baking time will just need a few extra minutes!

What if my pizza pockets are leaking cheese while baking?
Ah, a common hiccup! To prevent leaks, make sure you seal the pockets firmly with a fork and avoid overfilling them with sauce and cheese. If they do start leaking, it’s usually a sign they were overstuffed. Next time, use just a spoonful of sauce to keep the pockets from bursting during baking.

Are Cheesy Pizza Pockets safe for my pet?
No, it's best to avoid giving Cheesy Pizza Pockets to pets. Ingredients like cheese can be high in fat and not suitable for them. If you’re looking to treat your furry friend, I recommend sticking with pet-safe treats or simple cooked meats and veggies instead!

Can I customize these pizza pockets for dietary restrictions?
Very! These Cheesy Pizza Pockets lend themselves beautifully to customization. You can easily swap the pizza sauce for a dairy-free alternative, use gluten-free pizza dough, or load them with a variety of veggies or plant-based protein options to suit dietary needs. The more the merrier—make them your own!

Cheesy Pizza Pockets

Melt-in-Your-Mouth Cheesy Pizza Pockets Ready in 25 Minutes

Delicious Cheesy Pizza Pockets that evoke childhood nostalgia, perfect for any occasion.
Print Recipe Pin Recipe
Prep Time 10 minutes mins
Cook Time 15 minutes mins
Cooling Time 5 minutes mins
Total Time 25 minutes mins
Servings: 4 pockets
Course: Main Dishes
Cuisine: Italian
Calories: 250
Ingredients Equipment Method Nutrition Notes

Ingredients
  

For the Dough
  • 1 package refrigerated pizza dough Crescent roll dough works too for a flakier texture.
For the Sauce
  • 1 cup marinara or pizza sauce Choose your favorite brand or homemade.
For the Cheese
  • 1 cup shredded mozzarella cheese Classic choice for gooey goodness.
  • ½ cup grated Parmesan cheese Adds a salty, nutty flavor.
For the Fillings
  • 1 cup mini pepperoni or cooked sausage Optional for meat lovers.
  • 1 cup chopped bell peppers, mushrooms, or olives Optional for a veggie twist.
For Seasoning
  • 1 teaspoon Italian seasoning Infuses rich Italian flavors.
  • ¼ teaspoon red pepper flakes Optional for added spice.
For the Egg Wash
  • 1 large egg Beaten for a golden-brown finish.
For Garnish
  • 1 teaspoon dried oregano or garlic powder Sprinkle on top before baking.

Equipment

  • Oven
  • Baking Sheet
  • parchment paper
  • Pastry Brush
  • Knife or pizza cutter

Method
 

Step-by-Step Instructions
  1. Preheat your oven to 400°F (or air fryer to 375°F). Line a baking sheet with parchment paper.
  2. Roll out refrigerated pizza dough and slice into 4×6 inch rectangles.
  3. Spoon a tablespoon of marinara sauce onto the center of each rectangle.
  4. Sprinkle mozzarella and Parmesan cheese over the sauce, adding optional fillings if desired.
  5. Fold the dough over the filling, press edges together, and crimp with a fork.
  6. Brush the tops with beaten egg and sprinkle with dried oregano or garlic powder.
  7. Bake for 15–18 minutes or air fry for 8–10 minutes until golden and crispy.
  8. Cool for 5 minutes before serving with extra marinara on the side.

Nutrition

Serving: 1pocketCalories: 250kcalCarbohydrates: 30gProtein: 10gFat: 12gSaturated Fat: 6gPolyunsaturated Fat: 1gMonounsaturated Fat: 3gCholesterol: 70mgSodium: 500mgPotassium: 150mgFiber: 1gSugar: 2gVitamin A: 200IUVitamin C: 5mgCalcium: 200mgIron: 1mg

Notes

Ensure you seal the edges tightly to prevent leaking while baking. Feel free to customize with your preferred fillings.

Tried this recipe?

Let us know how it was!

Vintage Meatloaf with Sweet & Spicy Glaze That Will Wow You

August 19, 2025 by grace bellamy Leave a Comment

As I pulled the sizzling meatloaf from the oven, a wave of nostalgia hit me. The aroma wafted through my kitchen, instantly transporting me back to family nights filled with laughter and love, all centered around my mom's classic Vintage Meatloaf with Sweet & Spicy Glaze. This dish is more than just comfort food; it’s a quick triumph that turns even the busiest weeknight into a celebration. With its savory blend of ground beef and a glaze that balances sweetness with just the right kick, this meatloaf is not only simple to make but also a guaranteed crowd-pleaser. Let’s revive those cherished moments together with this timeless recipe—who’s ready to dig into some homemade goodness?

Why is this meatloaf a must-try?

Nostalgic flavors: This Vintage Meatloaf brings back memories with every bite, making it a delightful centerpiece for family dinners.
Unique glaze: The sweet spicy glaze elevates the dish, adding a perfect punch of flavor that balances the savory meat.
Quick and easy: With just 15 minutes of prep, you can have this meal ready to serve in an hour or less—great for busy nights!
Versatile side pairings: Serve it with light options like garlicky green beans or hearty classics such as fluffy mashed potatoes for a satisfying feast.
Make-ahead magic: Prep ahead and store in the fridge or freezer—your future self will thank you when dinner is just a quick heat away!

Vintage Meatloaf with Sweet Spicy Glaze Ingredients

• Prepare to indulge in a classic favorite with these must-have ingredients!

For the Meatloaf

  • Ground beef – A rich base that gives the dish its heartiness and flavor.
  • Breadcrumbs – Helps bind the meatloaf together for a lovely texture.
  • Milk – Adds moisture, ensuring the meatloaf is tender and juicy.
  • Large egg – Acts as a binding agent, keeping everything together.
  • Salt – Enhances the overall flavor, bringing all the ingredients to life.
  • Black pepper – Adds a subtle warmth without overpowering the dish.
  • Onion, diced – Provides sweetness and a hint of crunch, elevating every bite.
  • Worcestershire sauce – Infuses deep umami flavor for that classic meatloaf taste.
  • Hot sauce – Just a dash adds a mild kick to the mix.
  • Garlic, minced – Brings aromatic goodness that complements the beef beautifully.

For the Glaze

  • Brown sugar – Creates sweetness that melds perfectly with the spicy notes.
  • Ketchup – Forms the base of the glaze, giving it that tangy richness.
  • Worcestershire sauce – Adds an extra layer of flavor that deepens the glaze.
  • Hot sauce – A splash for balancing the sweetness with a delightful heat.

Now you have everything you need to whip up this Vintage Meatloaf with Sweet Spicy Glaze and craft some unforgettable memories around the dinner table!

Step‑by‑Step Instructions for Vintage Meatloaf with Sweet & Spicy Glaze

Step 1: Preheat the Oven
Begin by preheating your oven to 350°F (175°C). This temperature is perfect for achieving that golden-brown crust while keeping the inside of the Vintage Meatloaf tender and juicy. Meanwhile, gather your ingredients to prepare for assembling this delightful dish.

Step 2: Mix the Meatloaf Ingredients
In a large mixing bowl, combine the ground beef, breadcrumbs, milk, egg, salt, black pepper, diced onion, Worcestershire sauce, hot sauce, and minced garlic. Use your hands or a spatula to blend everything until well incorporated, ensuring the flavors meld together beautifully. This step should take about 3-5 minutes.

Step 3: Shape the Meatloaf
Once your meat mixture is thoroughly mixed, form it into a loaf shape. Place the shaped meatloaf onto a parchment-lined baking sheet or in a loaf pan, which will help with cleanup later. Aim for a uniform thickness to ensure even cooking throughout the Vintage Meatloaf with Sweet & Spicy Glaze.

Step 4: Prepare the Glaze
In a separate bowl, whisk together the brown sugar, ketchup, Worcestershire sauce, and hot sauce to create the sweet and spicy glaze. The glaze should be smooth and slightly thick, perfect for brushing later. Set it aside while you bake the meatloaf, letting those flavors meld.

Step 5: First Glazing and Baking
Brush half of the glaze generously over the meatloaf, ensuring it coats the surface well. Place the meatloaf in the preheated oven and bake for 30 minutes. You’ll know it’s working when the kitchen fills with a mouthwatering aroma!

Step 6: Final Glaze and Continue Baking
After 30 minutes have passed, take the meatloaf out and brush on the remaining glaze. Return it to the oven and continue baking for an additional 15-20 minutes, or until the internal temperature reaches 160°F (70°C). At this point, the meatloaf should be nicely caramelized and fragrant.

Step 7: Rest Before Slicing
Once cooked, remove the Vintage Meatloaf from the oven and let it rest for 10 minutes. This resting period allows the juices to redistribute throughout the meatloaf, resulting in tender slices. After resting, you’re ready to serve your delicious creation!

How to Store and Freeze Vintage Meatloaf with Sweet & Spicy Glaze

Fridge: Keep your leftovers in an airtight container or wrap tightly in foil/plastic wrap for up to 3 days to maintain freshness.

Freezer: Slice the meatloaf into portions and wrap each slice in plastic wrap, then place them in a freezer-safe bag for up to 1 month.

Reheating: For best results, reheat in the oven at 350°F (175°C) for about 15-20 minutes, or until warmed through, keeping the meatloaf juicy and flavorful.

Make Ahead Options

These Vintage Meatloaf with Sweet & Spicy Glaze are perfect for meal prep enthusiasts! You can mix the meatloaf ingredients and shape the loaf up to 24 hours in advance, keeping it covered in the refrigerator to maintain its freshness. Additionally, prepare the glaze and store it separately in an airtight container for up to 3 days. When you're ready to serve, simply brush on the glaze and bake as instructed; your meatloaf will be just as delicious and full of flavor! This makes it an ideal choice for busy weeknights when you need a homemade meal without the hassle of starting from scratch.

Helpful Tricks for Vintage Meatloaf

  • Don’t Overmix: Mix just until ingredients are combined. Overmixing can lead to a dense meatloaf, so handle gently to keep it tender.

  • Resting Time Matters: Letting the meatloaf rest after baking is crucial. This step enhances juiciness, ensuring each slice stays moist and flavorful.

  • Uniform Shape: Shape the meatloaf evenly for consistent cooking. A more uniform loaf cooks more evenly, preventing any dry edges.

  • Perfect Glaze Application: Brush the glaze on in layers, applying half before baking and the other half midway. This layering creates a mouthwatering caramelized crust.

  • Use a Meat Thermometer: For best results, check the internal temperature with a thermometer; it should reach 160°F (70°C) to ensure it's fully cooked.

  • Versatile Storage: Store leftovers in an airtight container for up to three days, or freeze individual slices to enjoy your Vintage Meatloaf with Sweet & Spicy Glaze later!

What to Serve with Vintage Meatloaf with Sweet Spicy Glaze

Imagine a hearty meal that warms the soul while bringing everyone to the table, all enhanced by delightful side dishes.

  • Fluffy Mashed Potatoes: Creamy and buttery, these potatoes soak up the savory juices from the meatloaf, providing the perfect comfort food experience.

  • Garlicky Green Beans: Crisp-tender green beans sautéed with garlic add a fresh pop of color and a bright flavor contrast that balances the richness of the meatloaf.

  • Roasted Carrots: Sweet, caramelized carrots complement the savory glaze beautifully, adding a sweet burst to your meal and a lovely pastel hue to your plate.

  • Coleslaw: A crunchy, tangy coleslaw offers an excellent refreshing crunch, providing the perfect contrast to the soft, hearty meatloaf.

  • Cornbread: Moist and slightly sweet cornbread adds warmth to your meal, serving as a deliciously rustic side that pairs beautifully with the meatloaf’s glaze.

  • Red Wine: A smooth glass of Merlot or Cabernet Sauvignon elevates your dining experience with rich berry notes to enhance the flavors of the meatloaf.

With these delightful accompaniments, your Vintage Meatloaf with Sweet Spicy Glaze transforms into a complete and memorable family meal!

Vintage Meatloaf with Sweet Spicy Glaze Variations

Feel free to explore your culinary creativity with these delightful twists on the classic meatloaf, transforming it into your family’s new favorite.

  • Turkey Twist: Substitute ground turkey for a leaner option that still packs in the flavor. It's perfect for a lighter take on a beloved classic!

  • Vegetarian Delight: Use a blend of lentils and chopped mushrooms instead of ground beef. This hearty mixture maintains a satisfying texture while being plant-based.

  • Spicy Kick: Add chopped jalapeños to the meat mixture for an extra layer of heat. This will make your vintage meatloaf soar to new flavor heights!

  • Cheesy Goodness: Mix in shredded cheddar or mozzarella into the meat mixture. It adds a delightful melty surprise that elevates each slice.

  • Herb Infusion: Incorporate fresh herbs like parsley or basil into your meat mix for a burst of freshness. This will lighten the dish while enhancing its depth of flavor.

  • BBQ Glaze: Replace the sweet spicy glaze with your favorite BBQ sauce for a smoky twist. The balance of sweet and rich tanginess will surely impress your guests!

  • Nutty Crunch: Add chopped walnuts or pecans to the meat mixture for unexpected texture. This delightful crunch complements the savory elements beautifully.

  • Cottage Pie Style: Top the fully cooked meatloaf with creamy mashed potatoes and then bake until golden. This cozy variation combines two comfort food favorites into one sumptuous dish!

Each of these variations can help you put your unique stamp on this classic dish. Remember, the joy of cooking lies in personalizing your meals—and who knows, you might just stumble upon a new family favorite! Don't forget to pair it with some of those versatile side pairings we mentioned earlier for a truly complete meal!

Vintage Meatloaf with Sweet Spicy Glaze Recipe FAQs

How do I select the right ground beef for this meatloaf?
Absolutely! When choosing ground beef, look for a mix of 80% lean meat and 20% fat for a juicy texture. The fat helps keep the meatloaf moist and flavorful—too lean might make it dry. If you prefer a healthier option, you can use ground turkey or chicken, adjusting cooking times as needed.

What’s the best way to store leftovers?
Very! After enjoying your meatloaf, let any leftovers cool completely before transferring to an airtight container. You can keep it in the fridge for up to 3 days. Just ensure it’s tightly sealed to maintain freshness.

Can I freeze Vintage Meatloaf with Sweet Spicy Glaze?
Absolutely! To freeze, slice the meatloaf into individual portions and wrap each slice in plastic wrap. Then, place them in a freezer-safe bag or container. This way, you can enjoy your meatloaf for up to 1 month. When you’re ready to eat, simply reheat in the oven for best results!

What are some common issues when making meatloaf?
One common problem is a dry meatloaf. To combat this, make sure not to overmix your ingredients, as that can lead to tough texture. Also, ensuring you use the right fat content in your ground beef will help. If you notice cracks on the top while baking, don’t worry—it happens! Simply brush on more glaze, and it will look beautiful and delicious.

Are there any dietary considerations I should be aware of?
Very! If you're cooking for someone with allergies, be cautious with ingredients like Worcestershire sauce, as it can contain soy or fish. For a gluten-free version, swap out breadcrumbs for gluten-free alternatives like crushed rice crackers or oats. Always double-check labels if you're uncertain about allergens!

How long should I let the meatloaf rest before slicing?
Resting is crucial! After baking, allow the meatloaf to rest for about 10 minutes before slicing. This step permits the juices to redistribute, ensuring each slice is juicy and tender. Patience pays off, trust me!

Vintage Meatloaf with Sweet & Spicy Glaze

Vintage Meatloaf with Sweet & Spicy Glaze That Will Wow You

This Vintage Meatloaf with Sweet & Spicy Glaze combines nostalgia with easy preparation for a perfect weeknight dinner.
Print Recipe Pin Recipe
Prep Time 15 minutes mins
Cook Time 45 minutes mins
Resting Time 10 minutes mins
Total Time 1 hour hr 10 minutes mins
Servings: 6 slices
Course: Main Dishes
Cuisine: American
Calories: 250
Ingredients Equipment Method Nutrition Notes

Ingredients
  

For the Meatloaf
  • 1 pound ground beef
  • 1 cup breadcrumbs
  • ½ cup milk
  • 1 large egg
  • 1 teaspoon salt
  • ½ teaspoon black pepper
  • 1 small onion, diced
  • 1 tablespoon Worcestershire sauce
  • 1 teaspoon hot sauce
  • 2 cloves garlic, minced
For the Glaze
  • ⅓ cup brown sugar
  • ½ cup ketchup
  • 1 tablespoon Worcestershire sauce
  • 1 teaspoon hot sauce

Equipment

  • Oven
  • Mixing Bowl
  • loaf pan
  • Baking Sheet
  • parchment paper

Method
 

Step-by-Step Instructions
  1. Preheat your oven to 350°F (175°C).
  2. In a large mixing bowl, combine the ground beef, breadcrumbs, milk, egg, salt, black pepper, diced onion, Worcestershire sauce, hot sauce, and minced garlic.
  3. Form the meat mixture into a loaf shape and place it on a parchment-lined baking sheet or in a loaf pan.
  4. In a separate bowl, whisk together the brown sugar, ketchup, Worcestershire sauce, and hot sauce to create the glaze.
  5. Brush half of the glaze over the meatloaf and bake for 30 minutes.
  6. After 30 minutes, brush on the remaining glaze and bake for an additional 15-20 minutes or until the internal temperature reaches 160°F (70°C).
  7. Remove from the oven and let the meatloaf rest for 10 minutes before slicing.

Nutrition

Serving: 1sliceCalories: 250kcalCarbohydrates: 20gProtein: 20gFat: 10gSaturated Fat: 4gPolyunsaturated Fat: 1gMonounsaturated Fat: 3gCholesterol: 70mgSodium: 500mgPotassium: 400mgFiber: 2gSugar: 5gVitamin A: 300IUVitamin C: 2mgCalcium: 30mgIron: 3mg

Notes

Allowing the meatloaf to rest enhances juiciness. Store leftovers in an airtight container for up to three days or freeze for later use.

Tried this recipe?

Let us know how it was!

Fluffy Pecan Pancakes That’ll Brighten Your Breakfast Bliss

August 18, 2025 by grace bellamy Leave a Comment

As I flipped the last pancake off the griddle, the warm nutty aroma of pecans filled my kitchen, instantly igniting a deliciously cozy atmosphere. These fluffy pecan pancakes are not just a breakfast option; they're a delightful way to kickstart your day with a comforting homemade touch. With just a few simple ingredients, you can whip up a batch in no time, making them perfect for busy weekday mornings or a leisurely weekend brunch. They also cater to everyone’s taste—light, fluffy, and irresistibly satisfying. Trust me, giving up fast food has never been easier! Are you ready to savor a breakfast that’s as delightful to make as it is to eat? Let’s dive into this wonderful recipe together!

Why Are These Pancakes So Irresistible?

Fluffy, Comforting Texture: Each bite of these pancakes is like a cloud, thanks to the perfect blend of buttermilk and whipped egg whites.

Nutty Flavor Burst: The addition of roasted pecans adds a warm, nutty crunch that complements the softness beautifully.

Quick and Easy: With straightforward steps, these pancakes come together in a flash, making breakfast a breeze.

Perfect for Any Occasion: Whether you're hosting a brunch or enjoying a quiet breakfast at home, they’re a crowd-pleaser.

Customizable Delight: Top with fresh fruit, syrup, or even a dollop of Greek yogurt to suit your taste.

Make sure to explore other delightful recipes like our Fluffy Banana Pancakes and Classic Buttermilk Pancakes for more breakfast inspiration!

Fluffy Pecan Pancake Ingredients

• Get ready to create magic in your kitchen with these tasty ingredients!

For the Pancake Batter

  • All-purpose flour – This forms the base for your fluffy pecan pancakes, ensuring they rise beautifully.
  • Brown sugar – Adds a touch of sweetness and depth, enhancing the overall flavor.
  • Baking powder – Essential for that light, airy texture you’ll love.
  • Baking soda – Works alongside baking powder to promote fluffiness; don't skip it!
  • Cinnamon – A hint of spice that transforms your pancakes into a warm, cozy treat.
  • Salt – Just a pinch elevates all the flavors, balancing sweetness and richness.
  • Buttermilk – Key for moisture and that soft, fluffy texture you crave in pancakes.
  • Large eggs – Help bind ingredients together while also contributing to the fluffiness.
  • Butter, melted and cooled – Adds richness to your batter, making each bite a delight.
  • Vanilla extract – A splash brings a wonderful aromatic sweetness that brightens the overall flavor.
  • Pecans, finely chopped – These nuts not only add crunch but also a delightful nutty flavor that complements the fluffiness perfectly.

Get ready to indulge in fluffy pecan pancakes that are sure to brighten your breakfast bliss!

Step‑by‑Step Instructions for Fluffy Pecan Pancakes

Step 1: Whisk the Dry Ingredients
In a large mixing bowl, combine 2 cups of all-purpose flour, 2 tablespoons brown sugar, 2 teaspoons baking powder, 1 teaspoon baking soda, 1 teaspoon cinnamon, and ½ teaspoon salt. Whisk together until fully blended, ensuring there are no lumps. This dry mixture will form the foundation of your fluffy pecan pancakes, so take a moment to mix well for even flavor distribution.

Step 2: Blend the Wet Ingredients
In another bowl, pour 2 cups of buttermilk, add 2 large eggs, ¼ cup of melted and cooled butter, and 1 teaspoon of vanilla extract. Use a whisk or hand mixer to blend until smooth and fully integrated. This mixture is essential for creating the light, fluffy texture of your pancakes, and the rich aroma will permeate your kitchen.

Step 3: Combine the Batter
Gradually pour the wet mixture into the bowl of dry ingredients. Gently stir with a spatula until just combined; a few lumps are perfectly fine—overmixing can lead to dense pancakes. Before the batter is fully mixed, carefully fold in 1 cup of finely chopped pecans, which adds delightful crunch and warmth to your fluffy pecan pancakes.

Step 4: Rest the Batter
Allow your pancake batter to rest for about 10 minutes. During this time, the gluten will relax, leading to an even fluffer texture once cooked. Meanwhile, preheat your griddle or non-stick skillet over medium heat, allowing it to reach the perfect cooking temperature for golden-brown pancakes.

Step 5: Cook the Pancakes
Once your griddle is hot, pour ¼ cup portions of the pancake batter onto the surface. Cook for about 3-4 minutes, or until you notice bubbles forming on the surface and the edges look set. Gently flip each pancake and cook for another 1-2 minutes, until both sides are golden brown and beautifully fluffy.

Step 6: Serve and Enjoy
Transfer the fluffy pecan pancakes to a warming plate and serve them immediately, or keep warm in a low oven. Pair them with your favorite toppings—maple syrup, fresh fruit, or a dollop of Greek yogurt—for a delightful breakfast experience. Enjoy the warmth and comfort of each bite as you savor your homemade masterpiece!

What to Serve with Fluffy Pecan Pancakes

Indulge in a breakfast spread that tantalizes the taste buds and warms the soul.

  • Fresh Berries: Sweet, juicy berries like strawberries and blueberries add a bright pop of flavor and a refreshing contrast to the rich pancakes. Their natural sweetness complements the nutty pecans beautifully.

  • Maple Syrup: A classic companion, drizzling warm maple syrup over the pancakes enhances their sweetness and brings out the cozy, comforting flavors. It’s a timeless pairing that never fails to delight.

  • Greek Yogurt: Creamy and tangy, a dollop of Greek yogurt adds a lovely contrast in texture while also providing a protein boost, making your breakfast a bit more wholesome.

  • Crispy Bacon: The salty, savory crunch of crispy bacon brings a delightful contrast to the sweet pancakes, creating a harmonious blend of flavors on your plate.

  • Whipped Cream: Light and airy, a generous swirl of whipped cream makes the pancakes feel extra indulgent, turning your breakfast into a delightful treat.

  • Chai Tea: For a warming drink, serve chai tea. Its blend of spices mimics the warmth of cinnamon in the pancakes, offering a soothing sip alongside a hearty breakfast.

  • Peach Compote: Homemade peach compote adds a luscious, fruity dimension that elevates your pancakes. Its warm, sweet flavor pairs perfectly with the nuttiness of the pecans.

  • Almond Milk: A velvety glass of almond milk provides a nutty flavor that ties in seamlessly with your pancakes, keeping the breakfast light and refreshing.

How to Store and Freeze Fluffy Pecan Pancakes

Fridge: Store any leftover fluffy pecan pancakes in an airtight container for up to 3 days. Reheat in a toaster or microwave for a quick breakfast.

Freezer: For longer storage, freeze pancakes in a single layer until firm, then transfer to a freezer-safe bag for up to 2 months. Reheat directly from frozen using your toaster, or warm in the microwave.

Room Temperature: If served immediately, pancakes can sit out for about 2 hours before needing to be refrigerated. Cover them to prevent drying out.

Reheating: When reheating, consider adding a splash of milk when warming in the microwave to restore moisture and fluffiness in your fluffy pecan pancakes.

Fluffy Pecan Pancakes Variations

Feel free to get creative and tailor these pancakes to your taste for a delightful breakfast experience!

  • Gluten-Free: Swap all-purpose flour for a gluten-free blend to enjoy fluffy pancakes suitable for gluten-sensitive diners.

  • Dairy-Free: Replace buttermilk with almond milk and use a dairy-free butter alternative for a light and fluffy texture without dairy.

  • Spicy Kick: Add a pinch of cayenne pepper or a dash of nutmeg to the dry ingredients for a warming twist—perfect for spice lovers!

  • Fruit-Filled: Fold in chopped apples or mashed bananas along with the pecans for fruity, sweet flavor bursts. Just adjust cooking time slightly for the added moisture.

  • Chocolate Chips: Toss in some chocolate chips to satisfy your sweet tooth; they melt beautifully into the pancakes for a decadent treat.

  • Savory Option: Swap pecans for crispy bacon bits and a sprinkle of cheddar cheese for a hearty twist, creating a perfect brunch dish.

  • Cinnamon Swirl: Create a cinnamon sugar swirl by mixing brown sugar and cinnamon together and drizzling it onto the pancake batter while cooking for a sweet surprise!

Make every breakfast special by trying these variations or explore more ideas like our delicious Fluffy Banana Pancakes or Savory Cornmeal Pancakes to further elevate your morning experience!

Make Ahead Options

These Fluffy Pecan Pancakes are a fantastic choice for meal prep enthusiasts! You can prepare the pancake batter up to 24 hours in advance and keep it refrigerated in an airtight container. To maintain quality, gently stir the batter before using, as it may thicken slightly in the fridge. The finely chopped pecans can also be prepped ahead and stored separately for up to 3 days to retain their crunch. When you're ready to enjoy your pancakes, simply cook them fresh on the griddle as directed for a delightful, homemade breakfast that saves you precious time during busy mornings. Just follow the final cooking steps, and you'll be savoring delicious pancakes in no time!

Expert Tips for Fluffy Pecan Pancakes

  • Don’t Overmix: Gently combine wet and dry ingredients to keep your pancakes airy. Overmixing can lead to dense, chewy pancakes instead of fluffy pecan pancakes.

  • Rest is Key: Allow the batter to rest for 10 minutes before cooking. This helps the gluten relax, improving the texture and fluffiness.

  • Monitor Heat: Keep your griddle at medium heat. Too high can burn the pancakes before they cook through, while too low makes them dense.

  • Fresh Ingredients: Use fresh baking powder and baking soda. Old leavening agents may not give the desired rise, resulting in flat pancakes.

  • Customization is Fun: Feel free to substitute pecans with other nuts or add chocolate chips for a twist. Just fold in right before cooking for best results!

  • Perfect Portioning: Use a measuring cup for even-sized pancakes. This makes them cook uniformly and look appealing on the plate!

Fluffy Pecan Pancakes Recipe FAQs

How do I choose ripe pecans?
Absolutely! When selecting pecans, look for those that are firm, free from dark spots, and have a rich aroma. Avoid nuts with a rancid smell or any signs of moisture, as these can indicate spoilage. Fresh pecans will enhance the flavor of your fluffy pecan pancakes.

How should I store leftover pancakes?
Very easy! Leftover fluffy pecan pancakes can be stored in an airtight container in the fridge for up to 3 days. Just make sure they cool completely before sealing them. When ready to enjoy again, a quick reheat in the toaster or microwave will bring back that delightful fluffiness!

Can I freeze fluffy pecan pancakes?
Absolutely! To freeze your pancakes, first place them in a single layer on a baking sheet to freeze until firm, about 1-2 hours. Then, transfer them to a freezer-safe bag for up to 2 months. When you're ready to indulge, you can reheat them straight from frozen in the toaster or warm them in the microwave, maybe adding a splash of milk for moisture.

What should I do if my pancakes are too dense?
Don't worry! If your fluffy pecan pancakes turn out dense, it might be due to overmixing. Make sure to mix the dry and wet ingredients until just combined and let the batter rest for at least 10 minutes. This helps with the fluffiness. Also, ensure your baking powder and soda are fresh!

Are these pancakes suitable for those with nut allergies?
Oftentimes, yes! If anyone in your family has nut allergies, simply omit the pecans or replace them with seeds like sunflower or pumpkin seeds for crunch. You can still enjoy the delicious fluffiness of the fluffy pecan pancakes while keeping it safe for everyone.

How long can I leave pancakes at room temperature?
Pancakes can be left out at room temperature for about 2 hours before they need to be refrigerated. Make sure to cover them to prevent them from drying out. After this timeframe, they should be refrigerated to maintain freshness!

Fluffy Pecan Pancakes

Fluffy Pecan Pancakes That’ll Brighten Your Breakfast Bliss

Fluffy Pecan Pancakes are a delightful way to kickstart your day, featuring a warm nutty aroma and comforting texture.
Print Recipe Pin Recipe
Prep Time 15 minutes mins
Cook Time 10 minutes mins
Resting Time 10 minutes mins
Total Time 35 minutes mins
Servings: 4 pancakes
Course: Breakfast
Cuisine: American
Calories: 180
Ingredients Equipment Method Nutrition Notes

Ingredients
  

Pancake Batter
  • 2 cups all-purpose flour
  • 2 tablespoons brown sugar
  • 2 teaspoons baking powder
  • 1 teaspoon baking soda
  • 1 teaspoon cinnamon
  • ½ teaspoon salt
  • 2 cups buttermilk
  • 2 large eggs
  • ¼ cup butter, melted and cooled
  • 1 teaspoon vanilla extract
  • 1 cup pecans, finely chopped

Equipment

  • Mixing Bowl
  • Whisk
  • spatula
  • Griddle

Method
 

Cooking Steps
  1. Whisk together the dry ingredients in a large mixing bowl until fully blended, ensuring there are no lumps.
  2. In another bowl, blend the wet ingredients until smooth and fully integrated.
  3. Gradually combine the wet mixture into the dry ingredients and gently stir. Fold in the pecans.
  4. Allow the batter to rest for about 10 minutes and preheat your griddle to medium heat.
  5. Pour portions of the batter onto the griddle and cook until bubbles form, then flip and cook until golden brown.
  6. Serve immediately with toppings of your choice.

Nutrition

Serving: 1pancakeCalories: 180kcalCarbohydrates: 25gProtein: 4gFat: 7gSaturated Fat: 4gPolyunsaturated Fat: 2gMonounsaturated Fat: 2gCholesterol: 40mgSodium: 300mgPotassium: 150mgFiber: 1gSugar: 5gVitamin A: 500IUCalcium: 150mgIron: 1.5mg

Notes

These pancakes can be customized with various toppings and stored in the fridge for up to 3 days or frozen for 2 months.

Tried this recipe?

Let us know how it was!

Creamy Mushroom Chicken for Cozy Nights In

August 18, 2025 by grace bellamy Leave a Comment

There’s a comforting ritual I love—sautéing garlic and mushrooms that fills the kitchen with warmth and anticipation. Today, I’m excited to share my Mushroom Chicken recipe, a delightful dish that always earns rave reviews at the dinner table. This meal is as satisfying as it is simple; the tender chicken pairs beautifully with a rich, velvety sauce, making it a perfect choice for both weeknight dinners and special occasions. Plus, you’ll be thrilled to know it’s quick to prepare, allowing you more time to connect with loved ones over a delicious homemade meal. Ready to transform your dinner routine with this hearty delight? Let’s dive into the recipe!

Why is Mushroom Chicken a must-try?

Comforting flavors: This dish harmoniously combines the savoriness of mushrooms with the succulence of chicken, creating a meal that warms the soul.

Quick preparation: With just 15 minutes of prep, you'll have a delicious, homemade dinner on the table in no time!

Crowd-pleaser: Its rich, creamy sauce makes this recipe a total winner at family gatherings or dinner parties.

Versatile sides: Pair it with your favorite sides like mashed potatoes or buttered noodles for a well-rounded meal.

Elevate your weeknight dinners with this comforting Mushroom Chicken dish that combines ease with gourmet flavors, making it an instant family favorite!

Mushroom Chicken Ingredients

For the Chicken

  • Boneless skinless chicken breasts – Tender and juicy, they create the perfect base for our creamy sauce.
  • Salt/Pepper – Enhances the chicken's flavor; don’t be shy—season generously!

For the Sauce

  • Salted butter – Adds a rich, creamy texture when sautéing the mushrooms.
  • Mushrooms (button or baby bella) – They bring an earthy flavor that complements the dish beautifully.
  • All-purpose flour – Helps to thicken the sauce while adding a gentle coating to the chicken.
  • Olive oil – Use this for sautéing; it adds flavor and prevents sticking.
  • Beef broth – Provides a deep flavor; substitute with vegetable broth for a lighter option.
  • Chicken bouillon cube or better than bouillon – These boost the umami richness of the broth.
  • Soy sauce (or Worcestershire sauce) – Adds a salty, savory kick; both are great options.
  • Onion powder – Infuses a subtle sweetness and depth of flavor.
  • Mustard powder – Adds a mild tang, enhancing the overall taste of the sauce.
  • Dried thyme – Its herbal notes balance the richness of the dish.
  • Dry white wine – Incorporates acidity and depth; make sure it’s something you’d enjoy drinking!
  • Garlic – Minced fresh for maximum flavor, it’s a must-have in this recipe.
  • Cornstarch – Used for thickening the sauce; be sure to mix with water first for a smooth finish.
  • Heavy cream – Creates the luscious texture that makes this Mushroom Chicken unforgettable.

Elevate your cooking game with these Mushroom Chicken ingredients, carefully selected to bring warmth and joy to your dining table!

Step‑by‑Step Instructions for Mushroom Chicken

Step 1: Prepare the Broth Mixture
In a medium bowl, combine 2 ½ cups of beef broth, 1 chicken bouillon cube, 1 teaspoon soy sauce, 1 teaspoon onion powder, ½ teaspoon mustard powder, and ½ teaspoon dried thyme. Stir until the bouillon cube dissolves fully, setting this flavorful broth mixture aside for later. The rich aroma will soon fill your kitchen, setting the stage for your delightful Mushroom Chicken.

Step 2: Mix the Cornstarch
In a sealable container, combine 3 tablespoons of cornstarch with 3 tablespoons of cold water. Secure the lid tightly and shake vigorously until well mixed without any lumps. Set this cornstarch mixture aside as it will help thicken our sauce perfectly later on, ensuring a luscious finish to the Mushroom Chicken.

Step 3: Prepare the Mushrooms
Gently rinse 10 ounces of mushrooms and pat them dry with a paper towel to remove any excess moisture. If they are large, slice them into even pieces to encourage uniform cooking. This initial step is vital for achieving beautifully sautéed mushrooms that will add depth and flavor to your Mushroom Chicken dish.

Step 4: Slice the Chicken
Take your two large boneless skinless chicken breasts and slice them lengthwise into 2-3 thinner portions. If they appear too thick, pound the slices gently with a meat tenderizer until they reach about ½ inch in thickness. This technique ensures even cooking, allowing your chicken to stay juicy and tender as it absorbs the rich flavors later on.

Step 5: Sauté the Mushrooms
In a large skillet over medium-high heat, melt 2 tablespoons of salted butter. Once the butter is bubbling, add the mushrooms and sauté them for roughly 3-4 minutes on each side, until they turn golden brown and caramelized. Remove the mushrooms from the skillet and set them aside, as they’ll rejoin the Mushroom Chicken later, adding an earthy richness to the dish.

Step 6: Dredge the Chicken
Lightly season each piece of chicken with salt and pepper, enhancing its natural flavors. Then, dredge the chicken pieces in all-purpose flour, making sure to tap off any excess. This flour coating not only adds flavor but also helps create a delightful crust when you sauté the chicken.

Step 7: Cook the Chicken
Using the same skillet, heat a few tablespoons of olive oil over medium-high heat. Add in the chicken, cooking 3 pieces at a time for about 4-5 minutes on each side, until they are beautifully golden brown. Remove the cooked chicken and repeat with any remaining pieces, making sure to maintain that sizzling, high heat for a perfect sear.

Step 8: Create the Sauce Base
Once all the chicken is cooked and set aside, turn off the heat momentarily and carefully remove any excess oil from the skillet, leaving the browning bits intact. Pour in ½ cup of dry white wine and add 3 cloves of minced garlic. Set heat to medium, cooking until the wine is reduced by half, about 4 minutes, which will enhance the depth of your Mushroom Chicken sauce wonderfully.

Step 9: Add the Broth Mixture
Next, pour in your prepared broth mixture from Step 1 into the skillet and increase the heat to bring it to a gentle boil. Allow the sauce to reduce for approximately 10 minutes, stirring occasionally. This step intensifies the flavors and creates a hearty sauce to nestle your delicious Mushroom Chicken into.

Step 10: Thicken the Sauce
Once the sauce has reduced, take your cornstarch mixture from Step 2 and slowly add it to the pan while continuously stirring. This should take only a few minutes until the sauce thickens to your desired consistency; reduce the heat to low while you prepare to add in the final ingredients for your Mushroom Chicken.

Step 11: Stir in the Cream and Mushrooms
Gradually pour in ⅓ cup of heavy cream, stirring continuously until it's fully incorporated into the sauce. Then, add the sautéed mushrooms back into the skillet, allowing them to mingle in the creamy goodness. The warmth and scent of the Mushroom Chicken will envelop your kitchen, creating an inviting atmosphere.

Step 12: Combine Everything and Heat Through
Return the cooked chicken to the skillet along with any juices that have gathered on the plate. Spoon the luscious sauce over the chicken and partially cover the pan. Heat this heavenly mixture over low heat for about 5 minutes, ensuring the chicken heats through and absorbs all those delightful sauce flavors.

Step 13: Serve and Enjoy
Now that your Mushroom Chicken is complete, serve it warm over comforting sides like mashed potatoes or buttered noodles, accompanied by roasted green beans or asparagus. The harmony of flavors in this dish will undoubtedly bring smiles to your dinner table and make for a memorable meal.

Mushroom Chicken Variations & Substitutions

Feel free to mix things up with these tasty adaptations that will suit your palate and dietary preferences beautifully!

  • Gluten-Free: Use a gluten-free flour blend for dredging the chicken and thicken the sauce with cornstarch alone.
    A simple swap that doesn't compromise on flavor!

  • Dairy-Free: Substitute heavy cream with full-fat coconut milk and use vegan butter for a rich, creamy texture.
    This variation keeps the dish luscious while catering to dairy sensitivities.

  • Herb-Lovers: Add fresh herbs like parsley or basil towards the end for a burst of freshness.
    Their vibrant notes elevate the dish and enhance its appearance!

  • Spicy Kick: Incorporate red pepper flakes or a dash of cayenne pepper for an exciting heat level.
    Your Mushroom Chicken will transform into a comforting dish with a fiery twist!

  • Vegetarian: Swap out the chicken for hearty chickpeas or tofu, and use vegetable broth instead.
    This scrumptious variation offers a fulfilling meal without sacrificing richness!

  • Wine-Free: Omit the wine and use additional broth with a splash of apple cider vinegar for tang.
    A delightful option that yields an equally flavorful sauce without alcohol.

  • Mushroom Medley: Experiment with different mushroom varieties like shiitake or portobello for diverse flavors and textures.
    A medley creates a more exciting dish, turning up the gourmet notch!

  • One-Pan Wonder: Cook everything in the oven—season the chicken and mushrooms, then roast for a hands-off approach.
    This method keeps the chicken juicy while allowing the flavors to meld beautifully!

Each variation allows you to personalize this dish, ensuring it's perfect for your family's mealtime. Don’t forget to pair it with delicious sides like roasted green beans or buttered noodles to round out your meal!

Storage Tips for Mushroom Chicken

  • Fridge: Store leftover Mushroom Chicken in an airtight container for up to 3 days to maintain its creamy texture and flavor.

  • Freezer: Freeze the dish in a freezer-safe container for up to 3 months. To prevent freezer burn, use plastic wrap to tightly cover the surface before sealing.

  • Reheating: To reheat, thaw overnight in the fridge if frozen, then gently warm in a saucepan over low heat, adding a splash of broth or cream to restore moisture.

What to Serve with Mushroom Chicken

Transform your dinner table into a cozy retreat with these delightful pairings that elevate your Mushroom Chicken experience.

  • Creamy Mashed Potatoes: Their buttery smoothness soaks up the rich sauce, making every bite a comforting journey for your taste buds.

  • Buttered Noodles: Simple yet satisfying, these noodles provide a neutral backdrop that allows the bold flavors of the Mushroom Chicken to shine bright.

  • Roasted Green Beans: Their crispness contrasts perfectly with the creaminess of the chicken, adding a refreshing crunch to your plate.

  • Garlic Bread: These golden slices are perfect for sopping up any remaining sauce, turning your meal into a delightful indulgence.

  • Herb Salad: A light salad with fresh greens and a tangy vinaigrette offers a refreshing contrast and balances the richness of the dish beautifully.

  • Sauvignon Blanc: This crisp white wine enhances the flavors of the Mushroom Chicken while refreshing your palate between bites.

Indulge in these flavorful companions that turn your Mushroom Chicken into a complete, heartwarming meal worthy of a special occasion!

Expert Tips for Mushroom Chicken

  • Perfectly Cooked Chicken: Make sure your chicken is pounded to an even thickness; this ensures it cooks evenly and stays juicy throughout the recipe.

  • Flavorful Mushrooms: Use fresh mushrooms for the best texture and flavor. Avoid pre-sliced ones, as they can lose moisture quickly and affect the sauce’s richness.

  • Sauce Consistency: To avoid lumps in your sauce, always mix the cornstarch with cold water thoroughly before adding it to the broth mixture while stirring continuously.

  • Wine Selection: Choose a dry white wine that you enjoy drinking. Avoid overly sweet wines, as they can alter the flavor profile of your Mushroom Chicken.

  • Resting the Chicken: Allow the chicken to rest for a few minutes after cooking to retain moisture before incorporating it back into the sauce. This helps keep it tender and juicy.

Enjoy creating your delicious Mushroom Chicken while avoiding these common mishaps!

Make Ahead Options

These Mushroom Chicken meal prep options are perfect for busy home cooks looking to save time during the week! You can prepare the entire sauce (including the broth mixture and cornstarch slurry) up to 24 hours in advance. Simply store them in airtight containers in the refrigerator. You can also slice the chicken and mushrooms ahead of time; keep them in separate containers for optimal freshness. When you're ready to enjoy your Mushroom Chicken, just sauté the chicken fresh and then add it to your prepped sauce, heating it over low until warmed through for a dish that tastes just as delicious, even when made ahead!

Mushroom Chicken Recipe FAQs

How do I choose the right mushrooms for Mushroom Chicken?
Absolutely! For this recipe, I recommend using fresh button or baby bella mushrooms. Look for firm mushrooms that are free from dark spots, which can indicate spoilage. They should be plump and have a smooth surface for the best flavor and texture in your dish.

What’s the best way to store leftover Mushroom Chicken?
You can store leftover Mushroom Chicken in an airtight container in the fridge for up to 3 days. This helps retain the dish's creamy texture and delicious flavors. Just make sure to let it cool to room temperature before sealing for storage to avoid condensation.

Can I freeze Mushroom Chicken, and how should I do it?
Yes, you can freeze Mushroom Chicken! To freeze, place the dish in a freezer-safe container, being careful to leave some space for expansion. Seal the container tightly and cover the surface of the food with plastic wrap to prevent freezer burn. It can be stored for up to 3 months. When you’re ready to enjoy it, thaw it overnight in the fridge before reheating.

What do I do if the sauce becomes too thick?
Very! If your sauce turns out too thick, simply add a splash of broth or a bit of cream while stirring over low heat. This will help loosen the sauce to your desired consistency. If it’s still too thick, gradually add more liquid until it reaches your ideal texture. It happens, so don’t worry!

Are there any dietary considerations for this dish?
Yes, while Mushroom Chicken is a delicious option for many, it's important to consider dietary restrictions. This recipe contains gluten from the flour and cornstarch, as well as dairy from the cream. For a gluten-free version, substitute with gluten-free flour, and for a dairy-free option, you might use a non-dairy cream alternative and check broth ingredients for gluten. Always be sure to check food labels for allergens!

Mushroom Chicken

Creamy Mushroom Chicken for Cozy Nights In

This Mushroom Chicken recipe features tender chicken and a rich, creamy sauce, perfect for a comforting meal.
Print Recipe Pin Recipe
Prep Time 15 minutes mins
Cook Time 30 minutes mins
Total Time 45 minutes mins
Servings: 4 servings
Course: Main Dishes
Cuisine: American
Calories: 450
Ingredients Equipment Method Nutrition Notes

Ingredients
  

For the Chicken
  • 2 large boneless skinless chicken breasts Tender and juicy.
  • to taste salt Enhances the chicken's flavor.
  • to taste pepper Enhances the chicken's flavor.
For the Sauce
  • 2 tablespoons salted butter Adds a rich, creamy texture.
  • 10 ounces mushrooms (button or baby bella) Earthy flavor.
  • 3 tablespoons all-purpose flour Helps thicken the sauce.
  • 3 tablespoons olive oil For sautéing.
  • 2.5 cups beef broth Provides deep flavor.
  • 1 cube chicken bouillon Boosts umami richness.
  • 1 teaspoon soy sauce Adds salty, savory kick.
  • 1 teaspoon onion powder Infuses sweetness.
  • ½ teaspoon mustard powder Adds mild tang.
  • ½ teaspoon dried thyme Herbal notes.
  • ½ cup dry white wine Incorporates acidity.
  • 3 cloves garlic Minced fresh for flavor.
  • 3 tablespoons cornstarch Used for thickening.
  • ⅓ cup heavy cream Creates luscious texture.

Equipment

  • skillet
  • Medium bowl
  • Seal Container
  • Meat Tenderizer

Method
 

Step-by-Step Instructions
  1. In a medium bowl, combine 2 ½ cups of beef broth, 1 chicken bouillon cube, 1 teaspoon soy sauce, 1 teaspoon onion powder, ½ teaspoon mustard powder, and ½ teaspoon dried thyme. Stir until the bouillon cube dissolves.
  2. In a sealable container, combine 3 tablespoons of cornstarch with 3 tablespoons of cold water. Shake until well mixed.
  3. Gently rinse 10 ounces of mushrooms and pat dry. Slice large mushrooms if necessary.
  4. Slice the chicken breasts lengthwise into 2-3 thinner portions; pound if they are too thick.
  5. In a skillet, melt 2 tablespoons of salted butter over medium-high heat. Sauté the mushrooms for 3-4 minutes on each side until golden brown.
  6. Season chicken with salt and pepper, then dredge in all-purpose flour.
  7. In the same skillet, heat olive oil over medium-high heat and cook chicken for 4-5 minutes on each side until golden brown.
  8. Remove excess oil from the skillet, pour in ½ cup dry white wine and add minced garlic. Cook until the wine reduces by half.
  9. Add the broth mixture to the skillet and bring to a gentle boil. Reduce sauce for 10 minutes, stirring occasionally.
  10. Add cornstarch mixture while stirring, and cook until the sauce thickens.
  11. Stir in ⅓ cup heavy cream and add sautéed mushrooms back into the skillet.
  12. Return cooked chicken to the skillet, spoon sauce over, and heat for about 5 minutes.
  13. Serve warm over mashed potatoes or buttered noodles.

Nutrition

Serving: 1servingCalories: 450kcalCarbohydrates: 30gProtein: 35gFat: 25gSaturated Fat: 10gPolyunsaturated Fat: 2gMonounsaturated Fat: 8gCholesterol: 120mgSodium: 800mgPotassium: 700mgFiber: 1gSugar: 3gVitamin A: 500IUVitamin C: 2mgCalcium: 20mgIron: 2mg

Notes

Allow chicken to rest after cooking for moisture retention. Use fresh mushrooms for best flavor and texture.

Tried this recipe?

Let us know how it was!

Delicious Million Dollar Chicken Casserole for Family Comfort

August 18, 2025 by grace bellamy Leave a Comment

As I stood in my kitchen, the comforting aroma of melting cheese and seasoned chicken began to swirl around me like a warm embrace. That’s the magic behind my Million Dollar Chicken Casserole—it transforms the ordinary into something extraordinary with just a handful of simple ingredients. This casserole is not only a breeze to prepare, taking just 15 minutes of your time, but it also packs a delightful punch of creamy goodness that will have everyone asking for seconds. Perfect for busy weeknights or cozy family gatherings, this dish is designed to please both adults and kids alike. Plus, the joy of leftovers makes it perfect for meal prep! Are you ready to unlock this flavor treasure that will leave your taste buds dancing?

Why is this casserole a game-changer?

Comforting and Creamy: This Million Dollar Chicken Casserole is packed with creamy goodness that will warm your heart.

Quick Prep Time: With just 15 minutes of prep, you can have a delicious meal ready for your family without the fuss.

Crowd-Pleasing Appeal: Thrown together with simple ingredients, it’s perfect for gatherings or cozy family dinners.

Flavor Explosion: The combination of cheeses and seasonings creates a mouthwatering dish that’s unbelievably satisfying.

Make-Ahead Marvel: Prepare it in advance and store it in the fridge, so you can simply pop it in the oven after a busy day.

You won’t just be serving dinner; you’ll be sharing a warm hug from your kitchen! Don't forget to enjoy it with a side of simple green salad for a perfect balance.

Million Dollar Chicken Casserole Ingredients

Get ready to create a dish that's comfort food at its finest!

For the Casserole
• 3 cups cooked chicken, shredded – Using leftover rotisserie chicken makes this dish even easier!
• 8 oz cream cheese, softened – This adds a rich, velvety texture that everyone will love.
• 1 cup sour cream – Adds tang and moisture, making each bite wonderfully creamy.
• 1 cup cheddar cheese, shredded – A must-have for that cheesy goodness that melts beautifully!
• 1 teaspoon garlic powder – Infuses the casserole with a lovely aroma and flavor depth.
• 1 teaspoon onion powder – Enhances the overall taste with a savory sweetness.
• 1 teaspoon salt – Essential for bringing all the flavors together in this Million Dollar Chicken Casserole.
• ½ teaspoon black pepper – Adds a hint of spice and warmth without overpowering the dish.

For the Topping
• 1 cup Ritz crackers, crushed – These bring a delightful crunch that contrasts perfectly with the creamy filling.
• ¼ cup butter, melted – Coating the crackers adds richness and helps them crisp up beautifully in the oven.

Gather these ingredients and prepare to impress your family with a delicious meal that will become a new favorite!

Step‑by‑Step Instructions for Million Dollar Chicken Casserole

Step 1: Preheat the Oven
Begin by preheating your oven to 350°F (175°C). This temperature will ensure that your Million Dollar Chicken Casserole bakes evenly, providing a deliciously bubbly filling and a beautifully golden top. As the oven warms, gather your ingredients to streamline the prep process and keep your cooking area organized.

Step 2: Mix the Filling
In a large mixing bowl, combine the shredded chicken, softened cream cheese, sour cream, and shredded cheddar cheese. Sprinkle in the garlic powder, onion powder, salt, and black pepper. Use a spatula to mix all the ingredients together until fully incorporated, creating a rich and creamy mixture that highlights the flavors of your Million Dollar Chicken Casserole.

Step 3: Transfer to Baking Dish
Once your filling is combined, transfer it into a greased baking dish, spreading it evenly for optimal cooking. This will help the casserole heat thoroughly and brown nicely. Ensure every corner is filled with that delicious chicken mixture, which will make for a hearty and satisfying casserole.

Step 4: Prepare the Topping
In a separate bowl, combine the crushed Ritz crackers with the melted butter, mixing until the crackers are fully coated. This mixture provides a delightful crunch that contrasts beautifully with the creaminess of the casserole. Make sure all the crumbs are well combined to ensure an even topping across your Million Dollar Chicken Casserole.

Step 5: Add Cracker Topping
Sprinkle the buttery Ritz cracker mixture evenly over the chicken filling in your baking dish. This layer will turn golden brown as it bakes, adding texture and flavor to your casserole. Make sure each bite promises that satisfying crunch while still being enveloped in creamy goodness.

Step 6: Bake the Casserole
Place the baking dish in the preheated oven and bake for 30 to 35 minutes. Keep an eye on the casserole as it bakes; you’re looking for a bubbly filling and a golden, crispy top. The aroma will fill your kitchen, promising a comforting meal that everyone will love!

Step 7: Let It Rest
Once your Million Dollar Chicken Casserole is out of the oven, let it sit for about 5 minutes before serving. This resting period allows the filling to set slightly, making it easier to scoop and serve. Pair it with a green salad for a delightful meal everyone can enjoy!

What to Serve with Million Dollar Chicken Casserole

Elevate your dining experience with delightful sides that balance creaminess and add depth to your meal.

  • Simple Green Salad: A fresh salad with mixed greens, cherry tomatoes, and a light vinaigrette cuts through the richness of the casserole. The crispness of the greens provides a refreshing contrast that will energize your palate.

  • Garlic Breadsticks: Warm, buttery garlic breadsticks offer a satisfying crunch. Perfect for sopping up any leftover creamy goodness, they turn each bite into a decadent experience.

  • Steamed Broccoli: Bright green broccoli adds a pop of color and essential nutrients. Its tender-crisp texture harmonizes beautifully with the casserole, balancing the richness with a hint of earthiness.

  • Roasted Brussels Sprouts: Caramelized Brussels sprouts deliver a crispy outer layer and tender inside. Their slight bitterness pairs wonderfully with the creamy richness of the Million Dollar Chicken Casserole.

  • Mashed Potatoes: Creamy mashed potatoes are the ultimate comfort food companion. Their smoothness complements the casserole, making for a cozy and hearty meal that warms the soul.

  • Apple Pie: For dessert, a classic apple pie with a flaky crust and warm spices offers a sweet ending. The tartness of the apples contrasts playfully with the casserole's creamy richness, providing a delightful finish to the meal.

  • Sparkling Lemonade: A glass of fizzy lemonade provides a refreshing burst of citrus that cleanses the palate. Its brightness complements the savory flavors in the casserole wonderfully.

Storage Tips for Million Dollar Chicken Casserole

  • Room Temperature: Allow your casserole to cool completely before storing. It can sit at room temperature for up to 2 hours before refrigerating to ensure food safety.

  • Fridge: Store leftover Million Dollar Chicken Casserole in an airtight container in the refrigerator for up to 3 days. Reheat individual portions in the microwave or cover the entire dish with foil and warm it in the oven at 350°F (175°C) until heated through.

  • Freezer: This casserole can be frozen for up to 3 months. Freeze it unbaked for best quality. Thaw overnight in the fridge before baking; if baking from frozen, add a few extra minutes to the cooking time.

  • Reheating: For best results, reheat the casserole in the oven at 350°F (175°C) covered with foil to retain moisture, then uncover for the last 10 minutes to crisp the topping.

Expert Tips for Million Dollar Chicken Casserole

  • Use Rotisserie Chicken: Shredded rotisserie chicken saves time and adds incredible flavor, making your Million Dollar Chicken Casserole even more delightful.

  • Room Temperature Cream Cheese: Make sure your cream cheese is softened to room temperature; this ensures a smooth mixture without lumps, enhancing the creaminess of your casserole.

  • Check for Doneness: Keep an eye on your casserole while it's baking. Look for a golden top and bubbling edges, which indicate it's perfectly cooked.

  • Add Custom Veggies: For an extra health boost, consider throwing in some cooked broccoli or spinach into the mix; they add color and nutrition without compromising the flavor.

  • Resting Period: Don’t skip the 5-minute resting period before serving. This crucial step allows the filling to set, making it easier to serve and enjoy.

  • Storage Tips: If you have leftovers, store them in an airtight container. The flavors meld beautifully, making them a joy to reheat for future lunches or dinners!

Million Dollar Chicken Casserole Variations

Feel free to let your creativity shine and customize this casserole to suit your taste and dietary needs!

  • Dairy-Free: Substitute cream cheese and sour cream with dairy-free alternatives, like cashew cream or coconut yogurt, for a creamy texture.
  • Veggie-Loaded: Add cooked broccoli or spinach to the chicken mixture. It boosts nutrition and brings vibrancy to the dish!
  • Spicy Kick: Mix in diced jalapeños or a splash of hot sauce for a mouthwatering heat that excites the palate.
  • Herb-Infused: Stir in fresh herbs like thyme or parsley before baking to amp up the flavor profile with aromatic freshness.
  • Protein Twist: Swap chicken for shredded turkey or even chickpeas for a hearty vegetarian option; each brings unique texture and taste.
  • Gluten-Free: Use gluten-free crackers instead of Ritz for the topping to enjoy a crunchy finish without gluten.
  • Flavorful Cheese Swap: Try blending in different cheeses, such as pepper jack or gouda, for a delightful twist with each serving.
  • Crispy Onions: Top your casserole with crispy fried onions for an added crunch that complements the creamy base beautifully.

Each variation invites you to embrace new flavors and textures while creating your own unforgettable version of this beloved recipe. If you’re in need of some fresh greens on the side, consider pairing it with a light simple green salad to balance the richness of your dish!

Make Ahead Options

These Million Dollar Chicken Casserole is a fantastic option for meal prep, saving you precious time on busy weeknights! You can assemble the casserole up to 24 hours in advance; simply cover it tightly with plastic wrap and refrigerate until you're ready to bake. To maintain its delicious quality, ensure the cream cheese is fully softened before mixing, as this helps achieve a smooth filling that won’t clump. When you're prepared to serve, remove it from the fridge, sprinkle on the Ritz cracker topping, and bake it for about 35-40 minutes if chilled, until it's bubbly and golden. This way, you can enjoy hearty comfort food without the last-minute rush!

Million Dollar Chicken Casserole Recipe FAQs

What type of chicken should I use for this casserole?
Absolutely! You can use any cooked chicken you have on hand, but for simplicity and flavor, I highly recommend using shredded rotisserie chicken. It adds a great depth of taste and saves you time on cooking.

How long can I store the Million Dollar Chicken Casserole in the fridge?
This comforting dish can be stored in an airtight container in the refrigerator for up to 3 days. Just make sure to let it cool completely before sealing it up to maintain the best flavors and textures.

Can I freeze the leftover casserole?
Yes, you can freeze the Million Dollar Chicken Casserole for up to 3 months! For the best results, I suggest freezing it unbaked. Simply wrap it tightly in foil or plastic wrap, and when you're ready to bake it, thaw overnight in the fridge and then pop it in the oven. If baking directly from frozen, be prepared to add a few extra minutes to the cooking time!

What do I do if my casserole doesn’t seem to be cooking through?
Great question! If you find that the casserole is golden brown on top but still cool in the middle, try covering it loosely with foil and baking for an additional 10 minutes or so. This will help it heat more evenly without over-browning the top.

Is this casserole suitable for people with gluten allergies?
To make the Million Dollar Chicken Casserole gluten-free, substitute the Ritz crackers with gluten-free breadcrumbs or crushed gluten-free crackers. Always check the labels to ensure the other ingredients, like cream cheese and sour cream, are also gluten-free.

Can I add vegetables to the recipe?
Very! You can enhance the nutrition and flavor of your casserole by adding cooked vegetables like broccoli, spinach, or bell peppers. Just make sure to chop them finely and consider reducing the amount of chicken slightly to keep the balance right. Adding veggies brings extra color and health benefits without sacrificing taste!

Million Dollar Chicken Casserole

Delicious Million Dollar Chicken Casserole for Family Comfort

Experience the comforting flavors of Million Dollar Chicken Casserole, perfect for family dinners and quick weeknight meals.
Print Recipe Pin Recipe
Prep Time 15 minutes mins
Cook Time 35 minutes mins
Resting Time 5 minutes mins
Total Time 55 minutes mins
Servings: 6 servings
Course: Main Dishes
Cuisine: American
Calories: 400
Ingredients Equipment Method Nutrition Notes

Ingredients
  

For the Casserole
  • 3 cups cooked chicken, shredded Using leftover rotisserie chicken makes this dish even easier!
  • 8 oz cream cheese, softened This adds a rich, velvety texture that everyone will love.
  • 1 cup sour cream Adds tang and moisture, making each bite wonderfully creamy.
  • 1 cup cheddar cheese, shredded A must-have for that cheesy goodness that melts beautifully!
  • 1 teaspoon garlic powder Infuses the casserole with a lovely aroma and flavor depth.
  • 1 teaspoon onion powder Enhances the overall taste with a savory sweetness.
  • 1 teaspoon salt Essential for bringing all the flavors together in this Million Dollar Chicken Casserole.
  • ½ teaspoon black pepper Adds a hint of spice and warmth without overpowering the dish.
For the Topping
  • 1 cup Ritz crackers, crushed These bring a delightful crunch that contrasts perfectly with the creamy filling.
  • ¼ cup butter, melted Coating the crackers adds richness and helps them crisp up beautifully in the oven.

Equipment

  • Mixing Bowl
  • Baking Dish
  • spatula

Method
 

Step-by-Step Instructions
  1. Preheat your oven to 350°F (175°C) to ensure even baking.
  2. In a large mixing bowl, combine shredded chicken, cream cheese, sour cream, and cheddar cheese with garlic powder, onion powder, salt, and black pepper.
  3. Transfer the filling to a greased baking dish, spreading it evenly.
  4. In a separate bowl, mix crushed Ritz crackers with melted butter until fully coated.
  5. Sprinkle the buttery Ritz cracker mixture evenly over the chicken filling in your baking dish.
  6. Bake in the preheated oven for 30 to 35 minutes until bubbly and golden brown.
  7. Let it rest for about 5 minutes before serving.

Nutrition

Serving: 1servingCalories: 400kcalCarbohydrates: 20gProtein: 30gFat: 25gSaturated Fat: 12gPolyunsaturated Fat: 1gMonounsaturated Fat: 5gCholesterol: 90mgSodium: 800mgPotassium: 600mgFiber: 2gSugar: 3gVitamin A: 20IUCalcium: 25mgIron: 10mg

Notes

For best results, use room temperature cream cheese and consider adding custom veggies for extra nutrition.

Tried this recipe?

Let us know how it was!

Savory Shrimp Fried Rice Your New Comfort Food Favorite

August 18, 2025 by grace bellamy Leave a Comment

There's something truly magical about the sizzling sounds of shrimp frying in a hot wok, especially when that aroma wafts through the kitchen, instantly transporting me to a bustling street market in Asia. Today, I’m excited to share my beloved Shrimp Fried Rice recipe, which perfectly balances ease and flavor. Not only is this dish a quick weeknight solution, but it's also a wonderfully adaptable recipe that lets you clear out leftover veggies or switch up the proteins. In just 30 minutes, you can enjoy a hearty and satisfying meal that's sure to impress your dinner guests or serve as a cozy family dinner. Are you ready to dive into this delicious adventure, and learn how to create a dish that’s both comforting and vibrant?

Why is This Shrimp Fried Rice a Must-Try?

Simplicity at Its Best: The recipe requires minimal prep and cooking skills, making it perfect for both novice cooks and seasoned chefs.

Flavor Explosion: With tender shrimp, fresh veggies, and savory soy sauce, it’s a delightful mix of vibrant flavors that will have everyone coming back for seconds.

Quick and Easy: In just 30 minutes, you can serve a hearty meal that’s far from ordinary, ideal for busy weeknights.

Versatile Choice: You can easily adapt this Shrimp Fried Rice using leftover ingredients or swapping proteins to fit your cravings – a fantastic way to reduce waste!

Crowd-Pleasing Appeal: Whether you’re hosting friends or enjoying a family dinner, this dish is sure to please all palates. Add a side of homemade spring rolls for an even more incredible meal!

If you’re looking for another quick recipe to complement your homemade meals, check out my Easy Chicken Stir Fry or explore more ideas with Delicious Vegetable Fried Rice.

Shrimp Fried Rice Ingredients

For the Oil
• Sesame oil – Adds a rich, nutty flavor that elevates the dish.
• Vegetable oil or canola oil – A neutral base that helps cook the shrimp without overpowering flavors.

For the Protein
• Shrimp – Peeled and deveined for easy cooking and a delightful seafood flavor.

For the Veggies
• Frozen veggie blend – A convenient mix of peas and carrots, saving time while adding color and nutrients.
• Frozen sweet corn – Sweet pops of flavor that blend beautifully with the other ingredients.
• Green onions – Freshly chopped, they offer a bright, crisp contrast to the other elements.
• Garlic – Minced for that aromatic, savory base every great dish starts with.
• Fresh ginger – Adds a warm, zesty kick that enhances the overall flavor profile.

For the Egg Mixture
• Large eggs – Lightly beaten to create a fluffy texture that binds the fried rice together.

For the Rice
• Cooked rice (white or brown) – The heart of the dish; ensure it's cold and day-old for the best texture.

For the Sauce
• Low-sodium soy sauce – Provides the essential umami flavor without excessive saltiness.
• Mirin – A hint of sweetness that counterbalances the savory elements of the fried rice.

To Taste
• Salt and pepper – Adjust to your preference for the perfect flavor finish.

This Shrimp Fried Rice recipe invites you into the kitchen to experience a delightful balance of flavors that will have you reminiscing about the best meals shared with loved ones.

Step‑by‑Step Instructions for Shrimp Fried Rice

Step 1: Heat the Oils
In a large pan or wok, heat 2 tablespoons of sesame oil and 2 tablespoons of vegetable oil over medium-high heat. Allow the oil to shimmer for about 1 minute, indicating it's hot enough. This combination of oils creates a fragrant base, perfect for kicking off your Shrimp Fried Rice.

Step 2: Cook the Shrimp
Add 1 pound of peeled and deveined shrimp to the hot oil. Sauté the shrimp for 2-3 minutes until they turn pink and opaque. Stir occasionally to ensure even cooking. Once done, remove the shrimp from the pan and set them aside, keeping that flavorful oil in the pan for the next steps.

Step 3: Sauté Garlic and Ginger
In the same pan, add 4 minced garlic cloves and 1 teaspoon of minced fresh ginger. Sauté for about 30 seconds until fragrant, stirring continuously. This quick step enhances the aroma of the dish, infusing the oil with the bold flavors that will elevate your shrimp fried rice.

Step 4: Stir-Fry the Veggies
Next, toss in 1 ½ cups of frozen veggie blend (peas and carrots) and 1 cup of frozen sweet corn. Stir-fry these vibrant vegetables for 3-4 minutes until heated through and slightly tender. The colors will brighten, signaling that your Shrimp Fried Rice is well on its way to deliciousness.

Step 5: Scramble the Eggs
Push the veggie mix to one side of the pan. Pour in 3 lightly beaten eggs into the other side, allowing them to sit for a few seconds. Scramble the eggs gently until fully cooked, which will take about 2 minutes. This step adds protein and a fluffy texture to your Shrimp Fried Rice.

Step 6: Combine Rice and Ingredients
Add 4 cups of cooked rice, the previously cooked shrimp, 4 tablespoons of low-sodium soy sauce, and 1 tablespoon of mirin to the pan. Stir everything together thoroughly, breaking up any clumps of rice. Heat through for about 3-4 minutes, allowing all the flavors to meld beautifully in your Shrimp Fried Rice.

Step 7: Season and Serve
Finally, taste your dish and season with salt and pepper to your preference. For that extra burst of freshness, garnish with ½ cup of chopped green onions. Serve your Shrimp Fried Rice hot, enjoying the warm, inviting flavors that make this dish a comforting favorite!

Make Ahead Options

These Shrimp Fried Rice is perfect for busy home cooks who want to save time during the week! You can prepare the shrimp, veggies, and even the rice up to 3 days in advance. Simply cook the shrimp until pink, then refrigerate them alongside the chopped veggies and cooked rice in airtight containers. To maintain their quality, ensure the shrimp are cooled before refrigerating to prevent a rubbery texture. When you’re ready to enjoy, just heat the oils, sauté the garlic and ginger, then add everything back into the pan. It’s a quick process that ensures your Shrimp Fried Rice remains just as delicious, making dinner a breeze without the fuss!

How to Store and Freeze Shrimp Fried Rice

Fridge: Store any leftover Shrimp Fried Rice in an airtight container in the fridge for up to 3 days. Reheat in a pan with a splash of water over medium heat for even warming.

Freezer: For longer storage, freeze the Shrimp Fried Rice in an airtight, freezer-safe container for up to 3 months. To reheat, thaw overnight in the fridge before warming in a skillet.

Airtight Guidance: Always ensure your container is airtight to prevent freezer burn or spoilage in the refrigerator.

Reheating: When reheating, add a little vegetable broth or water to keep the rice moist and prevent drying out for delicious, comforting bites!

Shrimp Fried Rice Variations & Substitutions

Feel invited to explore unique twists and swaps to make this Shrimp Fried Rice truly your own!

  • Vegetable Medley: Swap the frozen veggie blend for a mix of bell peppers, broccoli, and snap peas for a colorful crunch. These fresh options will bring vibrant flavors and textures as you enjoy the dish even more.

  • Protein Boost: Substitute shrimp with chicken, beef, or tofu for a hearty alternative. Each protein option adds its own flavor twist, ensuring everyone at your table finds something they love.

  • Gluten-Free: Use tamari or coconut aminos instead of soy sauce to enjoy a gluten-free version of this tasty dish. This simple replacement ensures that everyone can partake in the delicious experience.

  • Heat Level: For a spicy kick, mix in diced jalapeños or a drizzle of sriracha to the finished dish. Just a touch of heat takes the flavor on an exciting adventure.

  • Herbal Infusion: Add fresh cilantro or basil at the end for a burst of freshness and an aromatic touch. These herbs elevate the flavors, creating a delightful combination you’ll want to savor.

  • Coconut Rice: Cook your rice in coconut milk instead of water for a creamy, tropical twist. The richness enhances the dish’s overall taste and makes it feel like a mini-vacation on your plate.

  • Nutty Flavor: Include a handful of cashews or slivered almonds for a satisfying crunch. The nuts add texture and a heartiness that perfectly complements the other ingredients.

If you want more delightful rice ideas to mix and match, why not give my Delicious Vegetable Fried Rice a try? This way, you can keep the creativity flowing and make mealtime ever so enjoyable!

Expert Tips for Shrimp Fried Rice

Use Cold Rice: Ensure your rice is cold and preferably a day old. Freshly cooked rice can become mushy, while cold rice fries perfectly.

Don’t Overcook Shrimp: Keep an eye on your shrimp! Cook just until they're pink and opaque, or they can become rubbery.

Customize Your Veggies: Feel free to substitute the veggie blend with what you have on hand. Just remember to keep them relatively chopped for even cooking in your Shrimp Fried Rice.

Mind the Heat: Maintain medium-high heat throughout cooking to achieve a quick fry. This keeps your ingredients vibrant, minimizing water content.

Season Gradually: Add the soy sauce and mirin gradually, tasting as you go. This way, you can adjust flavors without overwhelming your dish.

Garnish for Color: Don’t skip the green onion garnish. It not only enhances the visual appeal of your Shrimp Fried Rice but also adds a crisp texture!

What to Serve with Shrimp Fried Rice

There's nothing quite like the delightful harmony of flavors from a well-rounded meal that makes every bite memorable.

  • Crispy Spring Rolls: These crunchy delights add a satisfying texture and a burst of flavor, complementing the flavorful rice perfectly.
  • Garlic Broccoli: Lightly sautéed in sesame oil, it offers a vibrant crunch and a healthy touch, balancing the richness of the fried rice.
  • Thai Mango Salad: The sweet-tartness of fresh mango paired with refreshing herbs creates a perfect contrast, brightening up the meal.
  • Wontons: Filled with savory goodness, these bite-sized treats are perfect for dipping and add an exciting element to your dining experience.
  • Chili Garlic Edamame: A spicy, salty snack that pairs wonderfully with the mild flavors of the shrimp fried rice, making each bite more enjoyable.
  • Cold Beer: A light lager or refreshing brew cuts through the savory richness, making your meal even more enjoyable with a fizzy finish.
  • Green Tea: This aromatic beverage is the perfect light drink to cleanse the palate and enhance the dining experience.
  • Chocolate Chip Cookies: Finish off your meal on a sweet note with warm, gooey cookies, creating a delightful contrast to the savory rice.

Each of these sides adds new dimensions of flavor and texture, enhancing your dining adventure with delicious shrimp fried rice as the star!

Shrimp Fried Rice Recipe FAQs

How do I choose the right shrimp for this recipe?
Absolutely! Look for shrimp that are firm and translucent and avoid any with dark spots or strong odors. Fresh shrimp should have a clean, sea-like scent. If you're buying frozen, ensure they are well-iced and not clumped together. Jumbo shrimp work well for a meaty bite, but medium shrimp can also be used if that’s what you have on hand!

How should I store leftover Shrimp Fried Rice?
After enjoying your delicious meal, store any leftover Shrimp Fried Rice in an airtight container in the fridge. It will stay fresh for about 3 days. When you're ready to enjoy it again, simply reheat it in a skillet over medium heat with a splash of water to help revive its moisture!

Can I freeze Shrimp Fried Rice for later?
Certainly! To freeze Shrimp Fried Rice, place it in an airtight, freezer-safe container after it has cooled completely. It can be stored in the freezer for up to 3 months. When you’re ready to enjoy it, the best method is to thaw it overnight in the fridge, then reheat in a pan over medium heat, adding a touch of water or broth to keep it moist!

What should I do if my Shrimp Fried Rice ends up mushy?
If your rice has turned mushy, it might have been too fresh (not day-old) or overcooked. Next time, use day-old, cold rice, as it maintains its texture better. If you find yourself in a predicament with mushy rice, you can try adding an additional splash of soy sauce or mirin and quickly frying the mix on high heat to evaporate some moisture.

Are there any dietary considerations with this recipe?
Definitely! This Shrimp Fried Rice is not only packed with flavor but can also be customized for dietary needs. If anyone has shellfish allergies, you can substitute the shrimp with tofu, chicken, or a variety of vegetables. Also, for a gluten-free version, opt for gluten-free soy sauce or tamari instead of regular soy sauce!

Shrimp Fried Rice

Savory Shrimp Fried Rice Your New Comfort Food Favorite

Experience the delightful flavors of Shrimp Fried Rice, a quick and versatile dish that brings comfort to your dining table.
Print Recipe Pin Recipe
Prep Time 10 minutes mins
Cook Time 20 minutes mins
Total Time 30 minutes mins
Servings: 4 servings
Course: Main Dishes
Cuisine: Asian
Calories: 400
Ingredients Equipment Method Nutrition Notes

Ingredients
  

For the Oil
  • 2 tablespoons sesame oil Adds a rich, nutty flavor.
  • 2 tablespoons vegetable oil A neutral base.
For the Protein
  • 1 pound peeled and deveined shrimp
For the Veggies
  • 1.5 cups frozen veggie blend Mix of peas and carrots.
  • 1 cup frozen sweet corn
  • 4 each green onions Freshly chopped.
  • 4 cloves garlic Minced.
  • 1 teaspoon fresh ginger Minced.
For the Egg Mixture
  • 3 large eggs Lightly beaten.
For the Rice
  • 4 cups cooked rice (white or brown) Ensure it's cold and day-old.
For the Sauce
  • 4 tablespoons low-sodium soy sauce
  • 1 tablespoon mirin
To Taste
  • salt
  • pepper

Equipment

  • large pan or wok

Method
 

Step-by-Step Instructions
  1. In a large pan or wok, heat 2 tablespoons of sesame oil and 2 tablespoons of vegetable oil over medium-high heat.
  2. Add 1 pound of peeled and deveined shrimp to the hot oil. Sauté for 2-3 minutes until they turn pink and opaque.
  3. In the same pan, add 4 minced garlic cloves and 1 teaspoon of minced fresh ginger. Sauté for about 30 seconds.
  4. Toss in 1 ½ cups of frozen veggie blend (peas and carrots) and 1 cup of frozen sweet corn. Stir-fry for 3-4 minutes.
  5. Push the veggie mix to one side of the pan and pour in 3 lightly beaten eggs into the other side.
  6. Add 4 cups of cooked rice, the cooked shrimp, 4 tablespoons of low-sodium soy sauce, and 1 tablespoon of mirin. Stir everything thoroughly.
  7. Taste and season with salt and pepper. Garnish with ½ cup of chopped green onions and serve hot.

Nutrition

Serving: 1servingCalories: 400kcalCarbohydrates: 50gProtein: 20gFat: 15gSaturated Fat: 2gPolyunsaturated Fat: 5gMonounsaturated Fat: 5gCholesterol: 200mgSodium: 600mgPotassium: 300mgFiber: 3gSugar: 2gVitamin A: 10IUVitamin C: 20mgCalcium: 5mgIron: 10mg

Notes

Ensure your rice is cold and preferably a day old. Customize your veggies as needed.

Tried this recipe?

Let us know how it was!

Creamy Lemon Chicken Pasta That'll Brighten Your Dinner Time

August 18, 2025 by grace bellamy Leave a Comment

Caught in the whirlwind of a busy week, I longed for something comforting yet refreshing—then I stumbled upon my delightful Lemon Chicken Pasta. This dish is perfect for anyone yearning for a vibrant meal that feels like a warm hug on a plate. With a quick prep time of just 15 minutes and a total cook time of 20, it effortlessly transforms ordinary evenings into something special. What’s even better? It combines tender chicken, luscious cream, and zesty lemon, all tossed with your favorite pasta, creating a bright and enticing medley that's sure to please any palate. So, are you ready to elevate your dinner game and impress your loved ones with this mouthwatering recipe? Let’s dive in!

Why is Lemon Chicken Pasta a Must-Try?

Quick and Easy: This dish comes together in just 35 minutes, perfect for weeknight dinners after a long day.

Fresh, Bright Flavors: The zesty lemon and creamy sauce create a delightful balance that’s refreshing and comforting.

Crowd Pleaser: With its rich flavors and gorgeous presentation, it’s bound to impress family and friends alike.

Versatile and Adaptable: Swap the pasta or add your favorite veggies for a personalized touch.

Nutrition-Friendly: Packed with protein and satisfying, this Lemon Chicken Pasta is a delicious way to enjoy a wholesome meal. For more quick dinner ideas, don’t miss my post on Easy Weeknight Meals.

Lemon Chicken Pasta Ingredients

• Here’s everything you’ll need for a delicious dish!

For the Pasta

  • 8 oz pasta – Use spaghetti or your favorite variety for a comforting base.

For the Chicken

  • 2 boneless, skinless chicken breasts – Perfectly tender for slicing and enhancing your Lemon Chicken Pasta.
  • 1 teaspoon garlic powder – Adds a savory depth that complements the lemon beautifully.
  • 1 teaspoon onion powder – A touch of sweetness to balance the dish.
  • Salt and pepper, to taste – Essential for bringing out all the flavors.

For the Sauce

  • 1 cup heavy cream – Creates a luxurious, creamy texture that coats the pasta perfectly.
  • ½ cup chicken broth – Adds richness and a slight acidity to the sauce.
  • Zest of 1 lemon – Brightens up the dish with a burst of citrus flavor.
  • Juice of 1 lemon – Fresh acidity that elevates the entire meal.
  • ¼ cup grated Parmesan cheese – Adds a nutty, salty taste that enhances the creamy sauce.
  • 2 tablespoon butter – Offers richness and silkiness to the sauce.

For Garnish

  • Fresh parsley, chopped – Adds a pop of color and freshness to finish your Lemon Chicken Pasta beautifully.

Step‑by‑Step Instructions for Lemon Chicken Pasta

Step 1: Cook the Pasta
Begin by boiling a large pot of salted water over high heat. Add your choice of 8 oz pasta and cook according to the package instructions, usually around 8-10 minutes, until al dente. Once cooked, drain the pasta in a colander and give it a quick rinse under cold water to stop the cooking process. Set aside while you prepare the rest of your Lemon Chicken Pasta.

Step 2: Season the Chicken
While the pasta is cooking, take 2 boneless, skinless chicken breasts and place them on a cutting board. Evenly sprinkle 1 teaspoon garlic powder, 1 teaspoon onion powder, salt, and freshly cracked pepper on both sides, allowing the flavors to meld. This seasoning will enhance the overall taste of your creamy Lemon Chicken Pasta.

Step 3: Cook the Chicken
Heat 1 tablespoon of olive oil in a large skillet over medium-high heat. Once heated, add the seasoned chicken breasts and cook for 6-7 minutes per side, or until the chicken is golden brown and cooked through, reaching an internal temperature of 165°F. Remove the chicken from the skillet and let it rest for a few minutes before slicing it into strips.

Step 4: Prepare the Sauce
In the same skillet, melt 2 tablespoon of butter over medium heat. Once melted, pour in ½ cup chicken broth and 1 cup heavy cream, stirring constantly. Allow the mixture to simmer gently for 3-4 minutes, until slightly thickened and creamy. This base will bring a rich flavor to your Lemon Chicken Pasta.

Step 5: Add Lemon and Cheese
Stir in the zest and juice of 1 lemon, along with ¼ cup grated Parmesan cheese. Continue to cook, stirring frequently, until the cheese has melted and the sauce is smooth and well combined. The vibrant citrus will brighten your creamy sauce, perfectly complementing the chicken and pasta.

Step 6: Combine Pasta and Sauce
Now it's time to bring your Lemon Chicken Pasta together! Add the cooked pasta to the skillet and gently toss it in the creamy sauce until well coated. Layer the sliced chicken on top, allowing the flavors to meld beautifully. This step will ensure that every piece of pasta is bursting with rich taste.

Step 7: Garnish and Serve
Finally, remove the skillet from heat and sprinkle freshly chopped parsley over the dish for a touch of color and freshness. Serve your Lemon Chicken Pasta warm, and revel in the delightful blend of creamy, zesty flavors. Enjoy every delicious bite with your loved ones!

Expert Tips for Lemon Chicken Pasta

  • Perfect Pasta Texture: Use plenty of salt in the water when cooking the pasta; it should taste like the sea to ensure flavor.

  • Chicken Doneness: Use a meat thermometer to check if chicken reaches 165°F to avoid undercooking or drying it out.

  • Creamy Consistency: If the sauce thickens too much, add a splash of chicken broth to achieve the desired texture for your Lemon Chicken Pasta.

  • Zest and Juice: Always zest the lemon before juicing; this maximizes flavor and ensures you get the fresh aroma into the dish.

  • Garnish Smartly: Add parsley just before serving to retain its bright color and fresh flavor. Avoid adding it too soon to prevent wilting.

  • Make it Yours: Feel free to add a handful of spinach or cherry tomatoes for extra nutrition and flavor while cooking the pasta!

What to Serve with Lemon Chicken Pasta

Elevate your dining experience by pairing your Lemon Chicken Pasta with delightful side dishes and beverages that complement its vibrant flavors.

  • Garlic Bread: The warm and crispy texture adds a satisfying crunch, while its buttery, garlicky flavor pairs harmoniously with the creamy sauce.

  • Caesar Salad: Crisp romaine, crunchy croutons, and tangy dressing create a refreshing contrast to the rich pasta, balancing every bite beautifully.

  • Roasted Asparagus: Tender and lightly charred, asparagus provides a lovely freshness that enhances the lemon notes within the pasta.

  • Lemon-Infused Water: Keep the citrus theme going with this refreshing drink, making your meal feel even lighter and more vibrant as you sip.

  • Grilled Vegetables: A medley of seasonal veggies, grilled to perfection, adds a smoky depth that complements the creaminess of the dish, making each mouthful exciting.

  • Cheesecake with Berry Sauce: End the meal on a sweet note! The creamy cheesecake with a tart berry sauce echoes the lemony notes and offers a delightful finish to your dining experience.

Make Ahead Options

These Lemon Chicken Pasta are perfect for busy home cooks! You can cook the pasta and store it in an airtight container up to 3 days in advance; be sure to toss it with a little olive oil to prevent sticking. The chicken can also be seasoned and cooked up to 24 hours beforehand; simply slice it and refrigerate until ready to assemble. To maintain quality, reheat the chicken gently before combining it with the creamy sauce. When you're ready to serve, prepare the sauce as directed, tossing in the pre-cooked pasta and sliced chicken for a quick, delicious meal that tastes just as fresh as if you made it all in one go!

Lemon Chicken Pasta Variations

Feel free to make this dish your own with these fun twists and substitutions!

  • Gluten-Free: Substitute regular pasta with gluten-free pasta for a delicious option that everyone can enjoy.
  • Dairy-Free: Replace heavy cream with coconut milk and omit the cheese for a creamy texture without dairy.
  • Lemon Herb: Add fresh thyme or basil along with the lemon for a fragrant flavor boost that elevates the dish.
  • Vegetable-Loaded: Toss in sautéed spinach, zucchini, or cherry tomatoes for extra nutrition and color.
  • Spicy Twist: Add a pinch of red pepper flakes or a drizzle of hot sauce to the cream sauce for a delightful kick.

Imagine the warmth of a family dinner with a creamy sauce enveloping your favorite pasta, brightened by the freshness of herbs and veggies. Each variation invites different flavors and textures, making your Lemon Chicken Pasta a truly unique masterpiece!

How to Store and Freeze Lemon Chicken Pasta

Fridge: Store any leftovers in an airtight container in the refrigerator for up to 3 days to maintain freshness.

Freezer: For longer storage, freeze portions of Lemon Chicken Pasta in freezer-safe bags or containers for up to 2 months.

Reheating: Thaw in the refrigerator overnight and reheat gently on the stovetop, adding a splash of chicken broth or cream to revive the sauce's creamy texture.

Lemon Chicken Pasta Recipe FAQs

How do I choose the best chicken for my Lemon Chicken Pasta?
Absolutely! When selecting chicken breasts, look for ones that are plump and firm to the touch. Avoid any that are discolored or have dark spots, as these can indicate poor quality. If you have the option, organic or free-range chicken tends to have a richer flavor and better texture, making your dish truly shine.

What are the best methods for storing leftover Lemon Chicken Pasta?
Very important! After cooking, let the pasta cool completely before transferring it to an airtight container. You can store your Lemon Chicken Pasta in the refrigerator for up to 3 days. Just ensure that it’s sealed tightly to prevent drying out or absorbing other odors from the fridge. If you're planning on saving it for later, freezing is a great option too!

How should I freeze Lemon Chicken Pasta properly?
Certainly! To freeze your Lemon Chicken Pasta, first let it cool to room temperature. Then, portion it into freezer-safe bags or containers, removing as much air as possible to prevent freezer burn. Label with the date, and it can be stored for up to 2 months. When you're ready to enjoy it again, thaw it overnight in the refrigerator and reheat gently on the stovetop, adding a splash of chicken broth for creaminess.

What if my sauce is too thick when making Lemon Chicken Pasta?
Oh, that happens! If you find that your sauce has thickened more than you'd like, simply add a splash of chicken broth or a bit more cream while stirring over low heat. This will help you achieve that smooth, luscious consistency you’re after. Remember to do this gradually to avoid making it too thin!

Can I make this recipe suitable for gluten-free or dairy-free diets?
Yes, indeed! For a gluten-free version of Lemon Chicken Pasta, substitute traditional pasta with gluten-free pasta options, like rice or quinoa pasta. If you need a dairy-free alternative, you can use full-fat coconut milk instead of heavy cream and nutritional yeast for that cheesy flavor. It’s amazing how adaptable this dish can be!

Is Lemon Chicken Pasta safe for pets?
Great question! While the ingredients in Lemon Chicken Pasta are generally safe for pets, it’s best to avoid giving them any pasta or cream. The seasonings like garlic and onion powder can be harmful to dogs, so it’s wise to keep this dish as a human-only delight!

Lemon Chicken Pasta

Creamy Lemon Chicken Pasta That'll Brighten Your Dinner Time

A delightful Lemon Chicken Pasta recipe that's refreshing, comforting, and perfect for busy weeknights.
Print Recipe Pin Recipe
Prep Time 15 minutes mins
Cook Time 20 minutes mins
Total Time 35 minutes mins
Servings: 4 servings
Course: Main Dishes
Cuisine: Italian
Calories: 550
Ingredients Equipment Method Nutrition Notes

Ingredients
  

For the Pasta
  • 8 oz pasta Use spaghetti or your favorite variety.
For the Chicken
  • 2 boneless, skinless chicken breasts Perfectly tender for slicing.
  • 1 teaspoon garlic powder Adds savory depth.
  • 1 teaspoon onion powder A touch of sweetness.
  • salt and pepper To taste.
For the Sauce
  • 1 cup heavy cream Creates a luxurious texture.
  • ½ cup chicken broth Adds richness.
  • 1 zest lemon Brightens the dish.
  • 1 juice lemon Provides fresh acidity.
  • ¼ cup grated Parmesan cheese Enhances the creamy sauce.
  • 2 tablespoon butter Offers richness.
For Garnish
  • Fresh parsley, chopped Adds color and freshness.

Equipment

  • Large Pot
  • Colander
  • cutting board
  • large skillet
  • Meat Thermometer

Method
 

Step-by-Step Instructions
  1. Boil a large pot of salted water over high heat. Cook 8 oz pasta according to package instructions, usually around 8-10 minutes, until al dente. Drain and rinse under cold water. Set aside.
  2. While the pasta is cooking, season 2 boneless, skinless chicken breasts with 1 teaspoon garlic powder, 1 teaspoon onion powder, salt, and pepper on both sides.
  3. Heat 1 tablespoon of olive oil in a large skillet over medium-high heat. Cook seasoned chicken for 6-7 minutes per side until golden brown and cooked through. Remove and slice.
  4. In the same skillet, melt 2 tablespoon of butter over medium heat. Pour in ½ cup chicken broth and 1 cup heavy cream, stirring constantly. Simmer gently for 3-4 minutes.
  5. Stir in the zest and juice of 1 lemon, along with ¼ cup grated Parmesan cheese. Cook until cheese is melted and sauce is smooth.
  6. Add the cooked pasta to the skillet and toss in the creamy sauce. Layer the sliced chicken on top.
  7. Sprinkle chopped parsley over the dish and serve warm.

Nutrition

Serving: 1servingCalories: 550kcalCarbohydrates: 55gProtein: 30gFat: 25gSaturated Fat: 15gPolyunsaturated Fat: 2gMonounsaturated Fat: 5gCholesterol: 100mgSodium: 500mgPotassium: 600mgFiber: 2gSugar: 1gVitamin A: 800IUVitamin C: 15mgCalcium: 250mgIron: 2mg

Notes

Store leftovers in an airtight container in the refrigerator for up to 3 days. Freeze portions for up to 2 months.

Tried this recipe?

Let us know how it was!

Hearty Tater Tot Casserole: Cozy Comfort Food Delight

August 18, 2025 by grace bellamy Leave a Comment

There’s something about cozy casseroles that instantly brings to mind warm family gatherings and the laughter shared over a delicious meal. Today, I’m excited to share my delightful Tater Tot Casserole recipe, a perfect blend of hearty ground beef, colorful veggies, and crispy tater tots that everyone will love. With quick prep and minimal cleanup, this crowd-pleaser makes weeknight dinners a breeze and is even great for freezing leftovers! The creamy texture paired with gooey cheese creates a comforting dish that’s bound to become a staple in your home. Are you ready to whip up a meal that will satisfy both your taste buds and your family’s cravings? Let’s dive in!

Why is Tater Tot Casserole a Hit?

Comforting Warmth: This dish delivers a cozy vibe that feels like a warm hug.

Quick & Easy: With just 10 minutes of prep, it's perfect for busy weeknights.

Crowd-Pleasing Flavor: The hearty mix of beef, creamy sauce, and melt-in-your-mouth cheese brings everyone to the table.

Versatile Ingredients: Feel free to swap in your favorite veggies or cheeses. It's a customizable recipe that can adapt to your taste!

Freezer Friendly: Make a big batch and save some for later—perfect for effortless meals down the line.

Taste this delicious Tater Tot Casserole and you’ll understand why it’s loved by families everywhere!

Tater Tot Casserole Ingredients

For the Meat Mixture
• Ground beef – a savory base that adds heartiness to the casserole.
• Onion – enhances flavor with its natural sweetness when cooked.
• Salt and pepper – essential seasonings to elevate the dish's overall taste.
• Garlic powder – provides an aromatic kick that pairs well with beef and veggies.

For the Sauce
• Cream of mushroom soup – adds creaminess and depth of flavor to the casserole.
• Sour cream (optional) – brings a tangy richness; feel free to omit if desired.
• Milk or broth – use to adjust consistency if the mixture is too thick.

For the Casserole Assembly
• Frozen tater tots – the star of the dish that delivers a crispy topping everyone loves.
• Shredded cheese – choose cheddar or your favorite; it’s a gooey, melty necessity!
• Frozen mixed vegetables – no thawing needed, and they contribute vibrant color and nutrition.
• Extra cheese (for topping) – because who can resist more cheese?

Embrace the coziness of this Tater Tot Casserole and gather your ingredients for a delightful meal!

Step‑by‑Step Instructions for Tater Tot Casserole

Step 1: Brown the Beef
In a large skillet, heat a splash of oil over medium heat and add 1 pound of ground beef. Cook until it’s browned, stirring occasionally for about 5-7 minutes. Once cooked, add 1 diced onion and continue cooking until it softens, about 3-4 minutes. Sprinkle with salt, pepper, and garlic powder to taste, then drain any excess grease.

Step 2: Create the Casserole Base
Stir in a 10.5 oz can of cream of mushroom soup, 1-1½ cups of frozen mixed vegetables, and ½ cup of sour cream if you’re using it. Combine everything well over the heat for a couple of minutes, adding a splash of milk or broth if the mixture appears too thick. Remove it from the heat and let it cool for about 10 minutes to prevent soggy tater tots.

Step 3: Assemble the Casserole
Preheat your oven to 375°F (190°C) while spreading the cooled meat mixture evenly into a greased 9x13 baking dish. Top with 1-2 cups of shredded cheese, sprinkling it generously over the meat. This cheesy layer will melt beautifully, enriching your Tater Tot Casserole’s flavor.

Step 4: Add the Tater Tots
Take a bag of frozen tater tots and poke holes in them to prevent steam buildup during cooking. Carefully arrange the tater tots evenly over the cheesy layer in the baking dish, ensuring full coverage for that delightful crispy topping.

Step 5: Bake the Casserole
Place the assembled casserole in your preheated oven and bake for 30-35 minutes. Keep an eye on it; the tater tots should become golden brown and crispy while the cheese melts into a bubbly delight. The aroma will fill your kitchen, signaling that dinner is almost ready!

Step 6: Rest and Serve
Once baked, remove the Tater Tot Casserole from the oven and let it rest for 5 minutes. This brief resting time allows the layers to set. Afterward, serve warm and enjoy this hearty dish that’s perfect for family gatherings or a cozy night in!

How to Store and Freeze Tater Tot Casserole

Fridge: Store leftover Tater Tot Casserole in an airtight container in the fridge for up to 3 days for the best flavor and texture.

Freezer: To freeze, cut the casserole into portions and wrap tightly in plastic wrap followed by aluminum foil. It will keep in the freezer for up to 3 months.

Reheating: For optimal results, reheat frozen portions in the oven at 350°F (175°C) until heated through, about 25-30 minutes. Cover with foil if the top is browning too quickly.

Thawing: If saving for later, thaw the casserole overnight in the fridge before reheating for even cooking and a deliciously crispy topping.

Expert Tips for Tater Tot Casserole

• Choose Lean Beef: Opt for lean ground beef to reduce grease; it keeps the casserole lighter without sacrificing flavor.

• Don’t Skip Cooling: Allow the meat mixture to cool for 10 minutes. This crucial step prevents the tater tots from becoming soggy.

• Customize Veggies: Feel free to include your favorite frozen veggies. Just ensure they're bite-sized to blend perfectly in the casserole.

• Perfect Cheese Melt: Use freshly shredded cheese instead of pre-shredded for a creamier, meltier topping that enhances your Tater Tot Casserole.

• Watch the Baking Time: Ovens vary, so check your casserole around the 30-minute mark to achieve that ideal crispy topping without burning.

• Reheat with Care: If you're enjoying leftovers, reheat in the oven to maintain that crispy texture instead of using the microwave.

Make Ahead Options

These Tater Tot Casserole preparations are a game-changer for busy home cooks! You can prepare the meat mixture (ground beef, onion, and sauce components) up to 24 hours in advance; just let it cool completely before storing in an airtight container in the fridge. The mixture can also be frozen for up to 3 months. When you're ready to bake, simply spread the prepped meat mixture into a greased baking dish, top with the cheese, and add the frozen tater tots just before baking. This way, you’ll achieve that delightful crispy texture. By prepping ahead, you’re not just saving time, but ensuring a delicious family meal is ready with minimal effort when you need it most!

Tater Tot Casserole Variations

Feel free to get creative and make this dish your own with these delightful twists!

  • Vegetarian Delight: Swap the ground beef for canned beans or lentils for a hearty, meatless option. Add spices like cumin and chili powder for extra flavor!

  • Spicy Kick: Incorporate diced jalapeños or crushed red pepper flakes to the meat mixture for a zesty burst of heat. Adjust according to your heat tolerance for the perfect taste.

  • Dairy-Free: Use dairy-free cheese and a coconut milk-based cream of mushroom soup to make this casserole suitable for lactose-intolerant family members without losing creaminess. You’ll still enjoy the rich flavor!

  • Extra Veggie Boost: Add in chopped bell peppers, spinach, or zucchini to the mixture for added nutrition and a burst of color. Your family will love the extra veggies, and you’ll feel great about it!

  • Herb Infusion: Sprinkle in some fresh herbs like parsley, thyme, or rosemary for an aromatic upgrade. They’ll add a delightful touch that elevates the comforting flavors!

  • Buffalo Style: Mix in buffalo sauce with the meat and top with blue cheese crumbles for a spicy twist that’s sure to impress fans of bold flavors. Serve it with a side of celery sticks for that classic pairing!

  • Cheesy Three-Way: Combine different cheeses like mozzarella, pepper jack, or gouda for a melty, gooey topping that's bursting with flavor. Each bite will be a cheesy surprise!

  • Sweet Potato Tots: Switch regular tater tots for sweet potato tots for a unique flavor profile. This twist adds an intriguing sweetness and brings a slight nutritious edge to the dish.

These variations allow you to tailor the Tater Tot Casserole to your mood and the preferences of your loved ones. Enjoy crafting your perfect cozy meal! If you want more options or inspiration, check out my delicious Vegetable Casserole or explore ways to make your casseroles even richer with homemade sauces!

What to Serve with Tater Tot Casserole

Enjoying a delightful Tater Tot Casserole is just the beginning—let’s elevate your meal with these perfect pairings!

  • Garlic Bread: Fluffy and buttery, garlic bread adds a crunchy contrast to the creamy casserole. Don’t forget to enjoy it with a dip in that cheesy goodness!

  • Simple Side Salad: A fresh, crisp salad with mixed greens and vinaigrette balances the richness of the casserole, bringing vibrancy to your plate. Toss in some cherry tomatoes for a pop of color!

  • Roasted Vegetables: Seasoned and lightly charred vegetables, such as carrots and bell peppers, provide a nutritious and colorful addition that complements the hearty casserole beautifully.

  • Coleslaw: The crunch of coleslaw offers a refreshing contrast to the warm casserole. Plus, its tangy flavor cuts through the richness, making each bite more exciting.

  • Creamy Mashed Potatoes: If you're looking for ultimate comfort, pair it with creamy mashed potatoes. The smooth texture harmonizes wonderfully with the Tater Tot Casserole.

  • Corn on the Cob: Sweet, juicy corn on the cob adds a joyful bite to your meal. Slathered in butter, it’s a fun, nostalgic side that everyone will enjoy!

  • Apple Pie: For dessert, a slice of warm apple pie brings sweetness and nostalgia, making your meal a full-circle experience that nobody can resist!

  • Iced Tea or Lemonade: Complement your hearty meal with a refreshing drink like sweet iced tea or tangy lemonade. Both offer a delightful way to cleanse your palate.

Embrace the warmth of a luscious Tater Tot Casserole paired with these fabulous sides, and transform your dinner into an unforgettable feast!

Tater Tot Casserole Recipe FAQs

How do I choose the best ingredients for Tater Tot Casserole?
Absolutely! When selecting frozen tater tots, look for those that are golden and have no dark spots. For ground beef, I recommend choosing lean cuts (at least 80% lean) for a balance of flavor without too much grease. Always check the expiration date on canned soup and dairy products to ensure freshness.

What’s the best storage method for leftover Tater Tot Casserole?
Store leftover Tater Tot Casserole in an airtight container in the fridge for up to 3 days. If you'd like to keep it longer, wrapping individual portions in plastic wrap and then aluminum foil will allow you to freeze it for up to 3 months.

Can I freeze Tater Tot Casserole? If so, how?
Yes, you can freeze Tater Tot Casserole! Cut it into portions for easier thawing. Wrap each portion tightly in plastic wrap, then cover with aluminum foil. This protects against freezer burn. When you're ready to enjoy it, thaw slices in the refrigerator overnight, then reheat them in the oven at 350°F (175°C) for about 25-30 minutes.

What’s the best way to reheat leftovers?
For the best textures, reheat your leftover Tater Tot Casserole in the oven rather than the microwave. Preheat your oven to 350°F (175°C) and cover the dish with aluminum foil to prevent excess browning. Heat for about 25-30 minutes or until warmed through. If tackling a frozen portion, you might need up to 45 minutes total.

Are there any dietary considerations I should keep in mind?
Absolutely! For those with dairy allergies, you can substitute the sour cream with a dairy-free alternative like cashew cream. If you're looking to make a gluten-free version, ensure that the soup is labeled gluten-free. Always check ingredient labels for allergens, especially if serving it to guests or family members with specific dietary restrictions.

What should I do if my casserole is too watery?
If you find that your Tater Tot Casserole is too watery, try adding a bit of dry breadcrumbs or additional shredded cheese to absorb excess moisture. You could also bake it a little longer to let some liquid evaporate. Adjusting the balance of soup to meat and veggies can help prevent this issue next time!

Tater Tot Casserole

Hearty Tater Tot Casserole: Cozy Comfort Food Delight

This Tater Tot Casserole is a delicious blend of hearty beef, veggies, and crispy tater tots that brings comfort to family meals.
Print Recipe Pin Recipe
Prep Time 10 minutes mins
Cook Time 35 minutes mins
Cooling Time 10 minutes mins
Total Time 55 minutes mins
Servings: 6 servings
Course: Main Dishes
Cuisine: American
Calories: 350
Ingredients Equipment Method Nutrition Notes

Ingredients
  

Meat Mixture
  • 1 pound ground beef a savory base that adds heartiness to the casserole.
  • 1 medium onion enhances flavor with its natural sweetness when cooked.
  • to taste salt essential seasonings to elevate the dish's overall taste.
  • to taste pepper essential seasonings to elevate the dish's overall taste.
  • 1 teaspoon garlic powder provides an aromatic kick that pairs well with beef and veggies.
Sauce
  • 10.5 ounces cream of mushroom soup adds creaminess and depth of flavor to the casserole.
  • 0.5 cup sour cream brings a tangy richness; feel free to omit if desired.
  • 0.5 cup milk or broth use to adjust consistency if the mixture is too thick.
Casserole Assembly
  • 32 ounces frozen tater tots the star of the dish that delivers a crispy topping everyone loves.
  • 1-2 cups shredded cheese choose cheddar or your favorite; it’s a gooey, melty necessity!
  • 1-1.5 cups frozen mixed vegetables no thawing needed, and they contribute vibrant color and nutrition.
  • 1 cup extra cheese for topping; who can resist more cheese?

Equipment

  • large skillet
  • 9x13 Baking Dish
  • Oven

Method
 

Cooking Instructions
  1. In a large skillet, heat a splash of oil over medium heat and add 1 pound of ground beef. Cook until it’s browned, stirring occasionally for about 5-7 minutes. Add 1 diced onion and continue cooking until it softens, about 3-4 minutes. Sprinkle with salt, pepper, and garlic powder to taste, then drain any excess grease.
  2. Stir in a 10.5 oz can of cream of mushroom soup, 1-1½ cups of frozen mixed vegetables, and ½ cup of sour cream if you’re using it. Combine over the heat for a couple of minutes, adding a splash of milk or broth if the mixture appears too thick. Remove it from the heat and let it cool for about 10 minutes.
  3. Preheat your oven to 375°F (190°C) and spread the cooled meat mixture evenly into a greased 9x13 baking dish. Top with 1-2 cups of shredded cheese, sprinkling it generously over the meat.
  4. Poke holes in the frozen tater tots to prevent steam buildup during cooking. Arrange them evenly over the cheesy layer in the baking dish, ensuring full coverage.
  5. Place the assembled casserole in your preheated oven and bake for 30-35 minutes, until the tater tots are golden brown and crispy.
  6. Once baked, remove the casserole from the oven and let it rest for 5 minutes before serving warm.

Nutrition

Serving: 1sliceCalories: 350kcalCarbohydrates: 30gProtein: 18gFat: 22gSaturated Fat: 10gPolyunsaturated Fat: 2gMonounsaturated Fat: 8gTrans Fat: 1gCholesterol: 70mgSodium: 800mgPotassium: 600mgFiber: 2gSugar: 3gVitamin A: 10IUVitamin C: 8mgCalcium: 15mgIron: 15mg

Notes

Allowing the meat mixture to cool prevents the tater tots from becoming soggy. Use freshly shredded cheese for a creamier topping.

Tried this recipe?

Let us know how it was!

Decadent Oreo Pancakes that Will Sweeten Your Mornings

August 18, 2025 by grace bellamy Leave a Comment

As I flipped the first pancake, a rich aroma filled my kitchen, hinting at scrumptious bites to come. These Oreo Pancakes not only satisfy a sweet tooth but also transform breakfast into a delightful treat for all ages. With just 20 minutes of your time, you can whip up these fluffy delights that are irresistibly easy and a perfect crowd-pleaser. Each bite reveals gooey pieces of Oreo, making them a fun twist on a classic breakfast staple. Whether you're fueling up for a busy day or indulging over the weekend, I promise these pancakes will leave you craving more. So, are you ready to elevate your breakfast game and impress your friends and family with this delectable recipe?

Why Are Oreo Pancakes a Must-Try?

Decadent flavor awaits you with these treats! Each fluffy pancake is bursting with crushed Oreos, creating a delightful twist on a classic breakfast. Quick and easy to prepare, you can satisfy morning cravings in just 20 minutes. Kid-friendly and fun, these pancakes are sure to be a hit with the whole family. Whether served with syrup or whipped cream, they bring a sweet joy that turns any morning into a celebration! Try pairing with fruit toppings for added freshness, or explore more delightful breakfast options like our Banana Pancakes.

Oreo Pancake Ingredients

Let’s gather the goodies that make these Oreo Pancakes a delectable breakfast treat!

For the Pancake Batter

  • All-purpose flour – This is the foundation for fluffy pancakes; sift it for a lighter texture!
  • Baking powder – A vital leavening agent that helps the pancakes rise beautifully.
  • Granulated sugar – Adds just the right amount of sweetness to balance the rich flavor of the Oreos.
  • Salt – Enhances all the flavors and balances the sweetness.
  • Whole milk – Gives the batter creaminess; feel free to substitute with almond milk for a dairy-free option.
  • Large egg – Binds the ingredients together and adds moisture.
  • Melted butter – Provides a rich flavor and helps create a tender pancake.
  • Crushed Oreos – The star of the show! These add a delightful crunch and decadent taste to each bite.

Each bite of these Oreo Pancakes is a sweet surprise, and with these simple ingredients, you can create a breakfast that feels like a special treat any day of the week!

Step‑by‑Step Instructions for Oreo Pancakes

Step 1: Prepare the Dry Ingredients
In a large mixing bowl, whisk together 1 cup of all-purpose flour, 2 teaspoons of baking powder, 2 tablespoons of granulated sugar, and ¼ teaspoon of salt. Make sure the mixture is free of lumps, ensuring a smooth batter. This step is crucial for achieving fluffy Oreo Pancakes, as it sets the foundation for your pancake batter.

Step 2: Combine the Wet Ingredients
In a separate bowl, mix 1 cup of whole milk, 1 large egg, and 2 tablespoons of melted butter until well combined. Use a whisk to ensure the egg is fully incorporated, resulting in a creamy mixture. This is an essential stage for blending flavors that will bring your Oreo Pancakes to life, so take a moment to make sure it’s smooth.

Step 3: Mix the Batter
Gradually add the wet mixture to the dry ingredients, gently stirring with a spatula. Be careful not to overmix; leaving some lumps in the batter is key for fluffy pancakes. Once combined, fold in 6 crushed Oreos, ensuring they are evenly distributed throughout the batter for that delightful Oreo flavor in every bite.

Step 4: Heat the Skillet
Preheat a non-stick skillet over medium heat for about 2 minutes. It’s important to ensure the pan is properly heated, as this helps create a beautiful golden crust on your Oreo Pancakes. If desired, lightly grease the skillet with a bit of butter to prevent sticking for easy flipping.

Step 5: Cook the Pancakes
Pour half a cup of batter for each pancake onto the skillet, allowing space in between for spreading. Cook for approximately 2 minutes, or until small bubbles form on the surface and the edges appear slightly set. This bubbling action indicates that it’s time to flip your Oreo Pancakes and cook them to perfection.

Step 6: Flip and Finish Cooking
Gently flip the pancakes using a spatula, and cook for an additional 1-2 minutes until they are golden brown. Keep an eye on them during this time, as each stove may vary in heat. Once cooked, transfer the pancakes to a warm plate while you finish the remaining batter, ensuring a warm treat for everyone.

Step 7: Serve and Enjoy
When all the Oreo Pancakes are cooked, serve them warm with your choice of toppings, such as syrup or whipped cream. The crushed Oreos blend beautifully into the fluffy pancakes, creating a deliciously sweet breakfast experience. Gather your family around the table and savor each delightful bite of your homemade Oreo Pancakes!

Expert Tips for Oreo Pancakes

• Whisk Well: Ensure the dry ingredients are thoroughly mixed without lumps for fluffy pancakes. Over-mixing the wet and dry can lead to dense results.

• Use Fresh Ingredients: Check that your baking powder is fresh for optimal rise. Expired baking powder can leave you with flat pancakes.

• Heat Control: Keep your skillet at medium heat. Too hot can burn the pancakes before they cook through, while too cool can lead to pale, undercooked pancakes.

• Perfect Lumps: When combining wet and dry ingredients, leave some lumps for texture. This helps the Oreo Pancakes become airy and fluffy, enhancing the overall experience.

• Serving Suggestions: Experiment with toppings beyond syrup. Fresh fruit, nuts, or even a scoop of ice cream can elevate your Oreo Pancakes to a special occasion treat!

How to Store and Freeze Oreo Pancakes

Room Temperature: Keep leftover Oreo Pancakes out for up to 2 hours if it’s a warm day; otherwise, refrigerate to maintain freshness.

Fridge: Store uneaten pancakes in an airtight container in the fridge for up to 3 days. Reheat in the microwave for about 30 seconds, or on a skillet over medium heat until warmed through.

Freezer: For longer storage, freeze pancakes in a single layer on a baking sheet for 1 hour, then transfer to a freezer-safe bag for up to 2 months. Reheat directly from the freezer in the microwave or toaster.

Reheating: For best results, reheat frozen Oreo Pancakes in the microwave for 1–2 minutes or in a toaster for a crispy finish!

Make Ahead Options

These Oreo Pancakes are a fantastic option for meal prep, making busy mornings a breeze! You can prepare the pancake batter up to 24 hours in advance, simply mixing the dry ingredients (flour, baking powder, sugar, and salt) in one bowl and the wet ingredients (milk, egg, and melted butter) in another. Store the combined batter in an airtight container in the refrigerator, and remember to fold in the crushed Oreos just before cooking to keep them fresh and crunchy. For the best quality, cook the pancakes and serve them right after mixing; they’ll still be just as delicious and fluffy! Enjoy more time with your family while savoring a delightful homemade breakfast!

Oreo Pancakes Variations & Substitutions

Feel free to customize these delightful Oreo Pancakes to suit your taste and dietary needs!

  • Dairy-Free: Swap whole milk for almond milk or coconut milk for a creamy, non-dairy alternative.
  • Gluten-Free: Use a 1:1 gluten-free flour blend in place of all-purpose flour to make these pancakes suitable for gluten-sensitive diets.
  • Extra Crunchy: Add a handful of chopped nuts or additional crushed Oreos for a delightful crunch in every bite. Nuts like walnuts or pecans pair beautifully!
  • Minty Fresh: Mix in a few drops of peppermint extract for a festive twist reminiscent of mint cookies. It’s refreshing and adds a holiday flair!
  • Chocolate Lovers: Sprinkle in some mini chocolate chips for an extra rich chocolate flavor that will send your taste buds to paradise. Who can resist double chocolate?
  • Spicy Kick: Add a pinch of cinnamon or a dash of cayenne pepper for a subtle spicy twist that complements the sweetness of the Oreos. It's a surprisingly delightful combination!
  • Fruitier Fun: Top your pancakes with fresh berries or banana slices to brighten up the flavor and add a fruity touch for a balanced breakfast.
  • Healthier Option: Replace some of the sugar with mashed bananas or applesauce for a naturally sweetened version that’s still deliciously indulgent.

With these variations, you can make each pancake breakfast unique and tasty! For more scrumptious options, check out our Banana Pancakes or experiment with classic toppings like fruit toppings to further elevate your meal. Happy cooking!

What to Serve with Oreo Pancakes

Indulging in Oreo Pancakes creates a breakfast moment worth savoring, so let’s elevate your meal with delicious pairings!

  • Creamy Greek Yogurt: This tangy delight adds a refreshing contrast, balancing the sweetness of the pancakes beautifully. A dollop on the side makes every bite more exciting!

  • Fresh Fruit Salad: Light and vibrant, a medley of strawberries, blueberries, and bananas introduces a burst of freshness, complementing the rich flavors of the Oreos perfectly.

  • Maple Syrup: Classic and sweet, a drizzle of pure maple syrup amplifies the comfort of your fluffy pancakes, enhancing the overall indulgence.

  • Chocolate Hazelnut Spread: For the chocolate lovers, spreading a layer of this nutty decadence on top is a heavenly match with the Oreo Pancakes. Don't forget the sprinkles!

  • Whipped Cream: Light and airy, this fluffy topping adds a luscious creaminess. It beautifully contrasts the crunchy Oreos, making every bite a delightful treat.

  • Coffee or Hot Chocolate: Pairing your pancakes with a warm beverage makes for a cozy breakfast experience, providing a delightful balance to the sweetness you’re enjoying.

Imagine enjoying a comforting breakfast spread where each bite brings together the rich chocolate flavors of your pancakes with fresh, vibrant sides – breakfast has never been this good!

Oreo Pancakes Recipe FAQs

How do I choose the best Oreos for the recipe?
Absolutely! When selecting Oreos, look for those without any broken cookies and check the expiration date. You want them to be fresh to achieve the best flavor and texture. Feel free to get creative with different Oreo flavors, like double stuff or peanut butter, for a fun twist!

What is the best way to store leftover pancakes?
You can store uneaten pancakes in an airtight container in the fridge for up to 3 days. Just ensure they cool to room temperature first to avoid condensation. When ready to enjoy, reheat them in the microwave for about 30 seconds or on a skillet over medium heat for a few minutes. Perfect for quick breakfasts!

Can I freeze Oreo Pancakes?
Absolutely! To freeze pancakes, place them in a single layer on a baking sheet and freeze for 1 hour. Once they're frozen, transfer them into a freezer-safe bag, separating each pancake with parchment paper, and they’ll stay good for up to 2 months! When ready to eat, you can microwave them straight from the freezer for 1-2 minutes or pop them in a toaster for a crispy finish.

What should I do if the pancake batter is too thick?
If your batter is too thick, add a tablespoon of milk at a time until you reach the desired consistency. It should be pourable but still thick enough to hold its shape when spooned onto the skillet. Remember, some lumps are okay—this adds to the fluffiness!

Are Oreo Pancakes suitable for those with food allergies?
If you're concerned about allergies, these pancakes contain gluten and dairy. To make them gluten-free, substitute the all-purpose flour with a gluten-free alternative and use dairy-free milk and butter as replacements. Always check product labels to ensure they meet your dietary needs.

How do I prevent the Oreos from sinking to the bottom?
To prevent the crushed Oreos from sinking, make sure to fold them into the batter gently and not overmix. Additionally, adding them just before you start cooking can help them distribute more evenly throughout the pancake batter, giving you that fun Oreo experience in every bite!

Oreo Pancakes

Decadent Oreo Pancakes that Will Sweeten Your Mornings

Delight your mornings with Oreo Pancakes that are fluffy, sweet, and perfect for all ages.
Print Recipe Pin Recipe
Prep Time 10 minutes mins
Cook Time 10 minutes mins
Total Time 20 minutes mins
Servings: 4 pancakes
Course: Breakfast
Calories: 250
Ingredients Equipment Method Nutrition Notes

Ingredients
  

For the Pancake Batter
  • 1 cup all-purpose flour sifted for a lighter texture
  • 2 teaspoons baking powder vital leavening agent
  • 2 tablespoons granulated sugar adds sweetness
  • ¼ teaspoon salt enhances flavors
  • 1 cup whole milk can substitute with almond milk
  • 1 large egg binds ingredients
  • 2 tablespoons melted butter adds richness
  • 6 pieces crushed Oreos adds crunch and flavor

Equipment

  • Non-stick skillet
  • Mixing bowls
  • Whisk
  • spatula

Method
 

Step-by-Step Instructions for Oreo Pancakes
  1. In a large mixing bowl, whisk together the dry ingredients: flour, baking powder, sugar, and salt until free of lumps.
  2. In another bowl, mix the wet ingredients: milk, egg, and melted butter until smooth.
  3. Gradually add the wet mixture to the dry mixture, stirring gently and folding in the crushed Oreos.
  4. Preheat the non-stick skillet over medium heat for about 2 minutes.
  5. Pour half a cup of batter for each pancake and cook until bubbles form, about 2 minutes.
  6. Flip the pancakes and cook for an additional 1-2 minutes until golden brown.
  7. Serve warm with toppings like syrup or whipped cream.

Nutrition

Serving: 1pancakeCalories: 250kcalCarbohydrates: 35gProtein: 6gFat: 10gSaturated Fat: 5gPolyunsaturated Fat: 1gMonounsaturated Fat: 4gCholesterol: 40mgSodium: 300mgPotassium: 150mgFiber: 1gSugar: 5gVitamin A: 300IUCalcium: 150mgIron: 1mg

Notes

Ensure ingredients are fresh for best results and enjoy experimenting with toppings beyond syrup.

Tried this recipe?

Let us know how it was!

Cranberry Brie Stuffed Chicken: A Cozy Flavor Adventure

August 18, 2025 by grace bellamy Leave a Comment

As I stood in my kitchen, the sweet and tangy scent of simmering cranberries enveloped me like a warm hug. Right then, I decided to transform a simple chicken dinner into something special: Cranberry Brie Stuffed Chicken. This dish is not just a feast for the senses, but a superb combination of flavors that will impress your family or guests. With only 15 minutes of prep time, it’s perfect for busy weeknights or intimate gatherings. Plus, the melty brie paired with the tart cranberries creates a delightful experience that elevates the everyday chicken breast into a gourmet meal. Are you ready to fill your kitchen with the aroma of this delicious dish? Let’s dive into the recipe!

Why is this dish a delightful surprise?

Unique combination: The Cranberry Brie Stuffed Chicken marries savory chicken with sweet, tangy cranberries and creamy brie, creating a flavor profile that dazzles.

Quick and easy: With just 15 minutes of prep time, you can whip up an impressive meal that takes minimal effort, perfect for busy weeknights.

Gourmet appeal: This dish offers a show-stopping presentation that’s sure to impress guests at dinner parties or cozy family meals.

Versatile ingredients: Feel free to substitute the cranberries with your favorite seasonal fruit or experiment with different cheeses for a unique twist.

Crowd-pleaser: It’s hard to resist the combination of warm, melted brie and a crispy panko topping; your family will be asking for seconds!

Elevate your chicken dinner with this mouthwatering recipe, making any occasion special. Plus, for more quick meal ideas, check out our Easy Weeknight Dinners.

Cranberry Brie Stuffed Chicken Ingredients

For the Chicken
• 2 boneless, skinless chicken breasts – Choose high-quality chicken for the best flavor and tenderness.
• 1 tablespoon olive oil – This will help to sear the chicken perfectly, adding depth to your dish.
• ¼ teaspoon salt – Enhances the overall flavor, making your chicken sing!
• ¼ teaspoon black pepper – A pinch brings a hint of warmth that complements the stuffing.

For the Stuffing
• ½ cup fresh cranberries – Provides a tart and juicy contrast that elevates each bite of chicken.
• ¼ cup honey – This balances the cranberries with its natural sweetness.
• ¼ cup orange juice – Adds a citrusy zing, brightening the stuffing.
• ¼ teaspoon ground cinnamon – Infuses warmth and coziness into the dish.
• ¼ teaspoon ground ginger – Offers a subtle zest that pairs beautifully with cranberries.
• 4 ounces brie cheese – The star of the show, bringing creamy richness as it melts.
• ¼ cup chopped fresh parsley – For garnish, adding freshness and a pop of color.

For the Topping
• ½ cup panko breadcrumbs – Gives a delightful crunch and texture to the finishing touch.
• 1 tablespoon butter, melted – Helps to achieve that golden, crispy finish on the breadcrumbs.

Get ready to create a stunning dinner with these ingredients, and prepare to savor the deliciousness of Cranberry Brie Stuffed Chicken!

Step‑by‑Step Instructions for Cranberry Brie Stuffed Chicken

Step 1: Preheat the Oven
Start by preheating your oven to 375°F (190°C). This ensures that the heat is just right for baking the chicken, allowing it to cook evenly while achieving that perfect golden color. While the oven warms up, gather all your ingredients so that everything is easily accessible as you make your delicious Cranberry Brie Stuffed Chicken.

Step 2: Prepare the Cranberry Mixture
In a medium saucepan, heat 1 tablespoon of olive oil over medium heat. Once the oil is hot, add ½ cup of fresh cranberries and cook for about 5 minutes, stirring occasionally, until they soften and burst. The cranberries will begin to release their juices, creating a lovely base for your stuffing.

Step 3: Add the Sweet and Spicy Flavors
Next, stir in ¼ cup of honey, ¼ cup of orange juice, ¼ teaspoon of ground cinnamon, ¼ teaspoon of ground ginger, ¼ teaspoon of salt, and ¼ teaspoon of black pepper into the saucepan. Continue cooking for an additional 3-4 minutes, stirring occasionally, until the mixture thickens slightly and the flavors meld beautifully. Once done, remove it from the heat and let it cool.

Step 4: Prepare the Chicken Breasts
While the cranberry mixture cools, take your 2 boneless, skinless chicken breasts and carefully cut a pocket in the center of each one. Be cautious not to slice all the way through; you want a generous pocket to hold all that flavorful stuffing. This is essential for creating the perfect Cranberry Brie Stuffed Chicken that's packed with deliciousness.

Step 5: Stuff the Chicken
Now it’s time to fill each chicken breast! Start by placing small pieces of 4 ounces of brie cheese into each pocket. Then, spoon a portion of the cooled cranberry mixture over the brie in each chicken breast, evenly distributing it to ensure every bite is bursting with flavor. This combination is what makes your dish uniquely mouthwatering.

Step 6: Secure the Filling
To keep the stuffing intact while cooking, secure the opening of each chicken breast with toothpicks. This step is crucial in ensuring that none of your tasty filling escapes during cooking, allowing the flavors to meld beautifully inside your Cranberry Brie Stuffed Chicken.

Step 7: Sear the Chicken
Heat a large oven-safe skillet over medium-high heat. Once the skillet is hot, carefully add the stuffed chicken breasts and sear them for about 2-3 minutes on each side, until they turn a lovely golden brown. This initial searing adds a beautiful crust and locks in the juices, making your chicken extra tender and flavorful.

Step 8: Prepare the Topping
While the chicken is searing, in a small bowl, combine ½ cup of panko breadcrumbs with 1 tablespoon of melted butter. Mix it well until the breadcrumbs are evenly coated. This buttery breadcrumb mixture will give your Cranberry Brie Stuffed Chicken that crunchy, delightful topping that you and your family will love.

Step 9: Add the Topping and Bake
Once the chicken is golden brown, remove it from the skillet and spread the panko mixture evenly over the top of each stuffed chicken breast. Return the chicken to the skillet, ensuring it is safely nestled, then transfer the skillet to your preheated oven. Bake for 20-25 minutes or until the chicken reaches an internal temperature of 165°F (74°C).

Step 10: Rest Before Serving
After baking, carefully remove the skillet from the oven and let the chicken rest for about 5 minutes. This resting period allows the juices to redistribute throughout the chicken, ensuring each bite is juicy and flavorful. While it rests, you can prep your serving plates.

Step 11: Garnish and Serve
Finally, just before serving your delectable Cranberry Brie Stuffed Chicken, sprinkle chopped fresh parsley over the top for an added burst of color and freshness. This finishing touch will not only enhance the visual appeal but also elevate the flavor profile of your dish, making it truly irresistible.

Make Ahead Options

These Cranberry Brie Stuffed Chicken breasts are perfect for meal prep, allowing you to enjoy gourmet flavors with minimal effort on busy weeknights! You can prepare the cranberry mixture and stuff the chicken breasts up to 24 hours in advance. Simply follow the steps up to securing the filling with toothpicks, then cover and refrigerate. This will help keep the chicken moist and flavorful. When you're ready to cook, just sear and bake as instructed, adding a few extra minutes to the cooking time if the chicken is chilled. With these steps, you'll have a delicious, hassle-free meal on hand, ready to impress your family or guests!

What to Serve with Cranberry Brie Stuffed Chicken

Elevate your dining experience with delightful sides that complement the juicy, savory flavors of your stuffed chicken.

  • Garlic Mashed Potatoes: Creamy and buttery, these mashed potatoes provide a comforting foundation that pairs beautifully with the richness of the dish.
  • Honey Glazed Carrots: Sweet and vibrant, their caramelized edges bring a touch of color and a natural sweetness that enhances the cranberries.
  • Sautéed Green Beans: Crisp-tender green beans tossed in lemon and garlic add a fresh crunch, balancing the richness of the chicken perfectly.
  • Cranberry Sauce: For those who adore a little extra zing, a side of cranberry sauce amplifies those sweet-tart notes of the stuffing, creating a harmonious flavor experience.
  • Roasted Brussels Sprouts: With their slightly bitter notes, roasted Brussels sprouts contrast beautifully with the sweet brie and cranberry filling, offering a diversity of taste.
  • Caesar Salad: Crisp romaine with creamy dressing and crunchy croutons adds a refreshing touch and a delightful crunch to the meal.
  • Sparkling Cider: A glass of sparkling cider brings a fruity fizziness, making it the perfect sipping companion for your beautiful chicken dish.
  • Chocolate Mousse: For dessert, a rich, airy chocolate mousse provides a decadent ending that balances the tangy sweetness of the meal.

How to Store and Freeze Cranberry Brie Stuffed Chicken

Fridge: Store leftover Cranberry Brie Stuffed Chicken in an airtight container for up to 3 days. Make sure they’re completely cool before sealing to prevent condensation.

Freezer: For longer storage, freeze the stuffed chicken in airtight freezer bags for up to 3 months. Label and date the bags for easy reference.

Reheating: Thaw frozen chicken in the fridge overnight. Reheat in the oven at 350°F (175°C) until warmed through, about 20-25 minutes.

Leftover Use: Consider slicing the cold chicken for salads or wraps if you have any leftovers; it adds a gourmet touch to your meals!

Cranberry Brie Stuffed Chicken Variations

Feel free to get creative and customize your dish with these delightful ideas that will elevate your Cranberry Brie Stuffed Chicken!

  • Dairy-Free: Swap the brie cheese for vegan cheese or a rich cashew cream for a creamy alternative. You'll still enjoy a deliciously indulgent flavor.

  • Fruit Swap: Use fresh blueberries or chopped apples instead of cranberries for a sweeter twist. This adds not only different flavor notes but also wonderful color to the dish!

  • Spicy Kick: Add a pinch of crushed red pepper flakes to the cranberry mixture to heat things up a notch. Your adventurous eaters will love the added thrill!

  • Herb Infusion: Mix in fresh thyme or rosemary to the panko topping for an aromatic flavor boost. It will release a wonderfully fragrant scent while baking.

  • Nutty Crunch: Combine chopped pecans or walnuts with the panko breadcrumbs for added texture and flavor. This gives your chicken a delightful crunch and nutty profile.

  • Stuffing Variations: Try adding sautéed spinach or other sautéed vegetables to the stuffing mix for a more wholesome take. The added greens bring color and nutrients to the plate.

  • Zesty Citrus: Squeeze some fresh lemon or lime juice over the stuffing for an extra citrusy zing. This brightens the flavors and adds a refreshing contrast to the richness of brie.

  • Double the Cheese: For true cheese lovers, combine brie with a bit of sharp cheddar for a bold flavor. This duo introduces a balance of smoothness and sharpness that’s out of this world!

Explore these variations and find your favorite twist that speaks to your culinary heart! And if you’re looking for even more inspiration, be sure to check out our Easy Weeknight Dinners.

Expert Tips for Cranberry Brie Stuffed Chicken

Season the Chicken: Always season your chicken breasts with salt and pepper before cooking; this enhances their flavors and builds a delicious foundation for your meal.

Cranberry Cooling: Allow the cranberry mixture to cool slightly before stuffing; this prevents the brie from melting too quickly and ensures a gooey center.

Avoid Overstuffing: Be careful not to overfill the chicken breasts; too much stuffing can cause it to spill out, making a mess and diminishing the flavor of your Cranberry Brie Stuffed Chicken.

Searing Time: Don’t skip the searing step! Browning the chicken for 2-3 minutes on each side locks in moisture, resulting in a tender and juicy dish.

Check Internal Temperature: Use a meat thermometer to ensure the chicken reaches an internal temperature of 165°F (74°C) for safe and perfectly cooked chicken.

Garnish Wisely: Fresh parsley not only brightens the dish but also adds a fresh flavor; sprinkle it on just before serving for the best presentation!

Cranberry Brie Stuffed Chicken Recipe FAQs

What kind of cranberries should I use?
Absolutely, fresh cranberries are ideal for this recipe as they provide a tart flavor that balances perfectly with the sweetness of honey. Look for firm berries with a vibrant color; avoid any that are soft or have dark spots. If fresh cranberries aren’t available, you could substitute with dried cranberries, but note that they are sweeter and would change the flavor profile slightly.

How do I store leftover Cranberry Brie Stuffed Chicken?
Store your leftover Cranberry Brie Stuffed Chicken in an airtight container in the refrigerator for up to 3 days. To maintain texture, ensure the chicken is completely cooled before sealing it. When ready to eat, gently reheat in the oven for the best results, as this will keep the panko topping crispy.

Can I freeze Cranberry Brie Stuffed Chicken?
Definitely! To freeze, place the stuffed chicken in airtight freezer bags, removing as much air as possible to prevent freezer burn. Label and date the bags; they’ll last up to 3 months. When you’re ready to enjoy, thaw overnight in the refrigerator and reheat in the oven at 350°F (175°C) until warmed through, about 20-25 minutes.

What if the chicken breasts are too thick?
If your chicken breasts are thicker than an inch, they may take longer to cook through and can be tough. I recommend using a meat mallet to gently pound the chicken to an even thickness before stuffing. This ensures even cooking and tender meat. Also, check the internal temperature; it should reach 165°F (74°C) for safety.

Is this recipe suitable for gluten-free diets?
Very! You can easily make this dish gluten-free by substituting panko breadcrumbs with gluten-free breadcrumbs or crushed gluten-free crackers. Ensure that all other ingredients, like the cheese and honey, are also gluten-free to accommodate dietary restrictions.

Can pets eat the Cranberry Brie Stuffed Chicken leftovers?
While chicken itself is generally safe for pets, it's best to avoid giving them this dish. The seasoning, particularly the honey and salt, may not be suitable for your furry friends. If you'd like to share some plain, cooked chicken with them, just remove any stuffing and seasoning first!

Cranberry Brie Stuffed Chicken

Cranberry Brie Stuffed Chicken: A Cozy Flavor Adventure

Cranberry Brie Stuffed Chicken is a delicious blend of savory chicken, sweet cranberries, and creamy brie for a gourmet experience.
Print Recipe Pin Recipe
Prep Time 15 minutes mins
Cook Time 25 minutes mins
Resting Time 5 minutes mins
Total Time 45 minutes mins
Servings: 2 chicken breasts
Course: Main Dishes
Cuisine: American
Calories: 400
Ingredients Equipment Method Nutrition Notes

Ingredients
  

For the Chicken
  • 2 pieces boneless, skinless chicken breasts Choose high-quality chicken
  • 1 tablespoon olive oil For searing the chicken
  • ¼ teaspoon salt Enhances overall flavor
  • ¼ teaspoon black pepper Adds warmth
For the Stuffing
  • ½ cup fresh cranberries Provides tartness
  • ¼ cup honey Natural sweetness
  • ¼ cup orange juice Adds citrusy zing
  • ¼ teaspoon ground cinnamon Infuses warmth
  • ¼ teaspoon ground ginger Subtle zest
  • 4 ounces brie cheese Brings creamy richness
  • ¼ cup chopped fresh parsley For garnish
For the Topping
  • ½ cup panko breadcrumbs Gives crunch
  • 1 tablespoon butter, melted Achieves golden finish

Equipment

  • Oven
  • Medium saucepan
  • large oven-safe skillet
  • Mixing Bowl
  • Meat Thermometer

Method
 

Preparation
  1. Preheat your oven to 375°F (190°C).
  2. Heat 1 tablespoon of olive oil in a medium saucepan over medium heat.
  3. Add fresh cranberries and cook for about 5 minutes, stirring occasionally.
  4. Stir in honey, orange juice, ground cinnamon, ground ginger, salt, and black pepper. Cook for an additional 3-4 minutes until thickened.
  5. Let the mixture cool.
  6. Cut a pocket in the center of each chicken breast.
  7. Stuff each chicken breast with brie cheese pieces and the cooled cranberry mixture.
  8. Secure the opening with toothpicks.
  9. Sear the stuffed chicken breasts in a hot skillet for 2-3 minutes on each side.
  10. Combine panko breadcrumbs and melted butter in a small bowl.
  11. Spread the breadcrumb mixture over the stuffed chicken breasts.
  12. Bake in the preheated oven for 20-25 minutes until the internal temperature reaches 165°F (74°C).
  13. Let the chicken rest for 5 minutes before serving.
  14. Garnish with chopped fresh parsley before serving.

Nutrition

Serving: 1chicken breastCalories: 400kcalCarbohydrates: 20gProtein: 32gFat: 22gSaturated Fat: 10gPolyunsaturated Fat: 1gMonounsaturated Fat: 8gCholesterol: 90mgSodium: 400mgPotassium: 500mgFiber: 2gSugar: 14gVitamin A: 800IUVitamin C: 15mgCalcium: 200mgIron: 2mg

Notes

To enhance flavors, season chicken breasts prior to cooking and allow the stuffing to cool slightly before filling the chicken.

Tried this recipe?

Let us know how it was!

Cheesy Beef and Potato Soup for Cozy Comfort Food Nights

August 18, 2025 by grace bellamy Leave a Comment

Stepping into the cozy warmth of my kitchen, the rich aroma of browning beef intertwines with the earthy scent of diced Yukon Gold potatoes. This sensory moment ignites nostalgia for cold evenings spent enjoying hearty meals with loved ones. Today, I’m excited to share my beloved Cheesy Beef and Potato Soup, a recipe that marries comfort and satisfaction in every spoonful. Not only is this dish incredibly quick to whip up—taking just 40 minutes from start to finish—but it's also a crowd-pleaser that warms the hearts of anyone who has a bowl. Plus, with its creamy texture and cheesy goodness, it’s an excellent way to transform ordinary ingredients into an unforgettable meal. Are you ready to dive into a delightful culinary adventure that will have everyone asking for seconds? Let's get cooking!

Why Is This Soup So Irresistible?

Comforting Warmth: Each spoonful of this Cheesy Beef and Potato Soup wraps you in a cozy embrace, making it perfect for chilly nights.

Quick Prep: With just 10 minutes of prep time, it's an ideal weeknight dinner.

Rich Flavor: The combination of beef and cheddar creates a savory depth that delights the palate.

Crowd Favorite: Whether for family or friends, everyone will be coming back for more after just one taste.

Versatile Enjoyment: Serve it with crusty bread or a fresh salad for a full meal, or pair it with your favorite side dish for added variety!

Cheesy Beef and Potato Soup Ingredients

For the Soup Base

  • Ground beef – This ingredient adds rich flavor, making your Cheesy Beef and Potato Soup hearty and satisfying.
  • Yellow onion – A finely diced onion enhances the sweetness and depth of the soup.
  • Garlic – Minced garlic gives an aromatic essence that elevates the dish.
  • Beef broth – Use a good-quality broth to provide a solid foundation of savory flavor.
  • Yukon Gold potatoes – These creamy potatoes add a delightful texture and heartiness to the soup.
  • Paprika – This spice adds a mild smokiness that compliments the dish beautifully.
  • Kosher salt – Essential for bringing out the flavors of all the ingredients.
  • Black pepper – A touch of pepper adds warmth and enhances the overall taste.

For the Creamy Addition

  • Mild cheddar cheese – Embrace the melt-in-your-mouth goodness; shredded cheese creates a wonderfully creamy soup.
  • Heavy whipping cream – This ingredient enriches the soup, giving it a luscious, velvety texture.

For Thickening

  • Cornstarch – Mixed with water, this helps achieve the perfect consistency for your soup.
  • Water – Used to create a slurry with cornstarch, ensuring a smooth texture.

For Garnish

  • Parsley – Chopped fresh parsley not only adds a pop of color but also brings a hint of freshness to the soup.
  • Extra cheddar cheese – A sprinkle of cheese on top provides an extra layer of deliciousness and visual appeal.

Step‑by‑Step Instructions for Cheesy Beef and Potato Soup

Step 1: Sauté Ground Beef and Onions
In a large pot or Dutch oven over medium heat, add 1 pound of ground beef and 1 ½ cups of finely diced yellow onion. Cook for 8–10 minutes, breaking apart the beef with a spatula as it browns. Once the beef is fully cooked and the onions are softened, remove any excess grease from the pot for a cleaner flavor.

Step 2: Add Garlic
Stir in 1 teaspoon of minced garlic and cook for an additional minute, allowing the garlic to release its aromatic fragrance. The mixture should become more fragrant, enhancing the savory base of your Cheesy Beef and Potato Soup.

Step 3: Incorporate Broth and Potatoes
Pour in 4 cups of beef broth and add 2 pounds of diced Yukon Gold potatoes, followed by 1 teaspoon of paprika, ½ teaspoon of kosher salt, and ¼ teaspoon of black pepper. Increase the heat to bring the mixture to a boil, then reduce it to medium-low. Simmer for 15–20 minutes until the potatoes are fork-tender, taking care to stir occasionally.

Step 4: Melt in the Cheese
Gradually incorporate 1 ½ cups of shredded mild cheddar cheese into the soup. Stir continuously, allowing the cheese to melt completely before adding more. This step creates that delightful creamy texture synonymous with Cheesy Beef and Potato Soup, ensuring no clumps remain.

Step 5: Stir in Heavy Cream
Gently pour in 1 cup of heavy whipping cream, stirring well to combine the ingredients. Allow the soup to heat through for an additional 3–5 minutes over medium-low heat, ensuring it becomes warm and comforting without boiling.

Step 6: Thicken the Soup
In a small bowl, mix 1 tablespoon of cornstarch with 2 tablespoons of water to create a slurry. Slowly pour this mixture into the soup while continuously stirring. Let it simmer for an additional 2–3 minutes, until the soup thickens to your desired consistency.

Step 7: Garnish and Serve
Once your Cheesy Beef and Potato Soup has reached the right thickness, remove it from heat. Garnish with freshly chopped parsley and a sprinkle of extra cheddar cheese. Serve immediately, and enjoy this comforting dish that's sure to bring smiles to your dining table.

What to Serve with Cheesy Beef and Potato Soup

When the rich aroma of Cheesy Beef and Potato Soup fills the air, it’s the perfect opportunity to gather your loved ones around the table and create a memorable meal experience.

  • Crusty Bread: This warm, crusty delight makes the perfect partner for dipping into the creamy soup, soaking up every last drop of flavor.

  • Mixed Green Salad: A fresh salad with a tangy vinaigrette offers a delightful contrast to the richness of the soup, refreshing each bite. Toss in some cherry tomatoes and sliced cucumbers for a colorful touch.

  • Roasted Vegetables: Enhance your meal with roasted carrots and Brussels sprouts, adding a touch of sweetness and earthiness that elevates the dish.

  • Garlic Breadsticks: Soft, buttery breadsticks brushed with garlic and herbs are an indulgent side that complements the comforting nature of the Cheesy Beef and Potato Soup.

  • Pickles: A side of crunchy dill pickles offers a zesty, tangy punch that cuts through the creamy texture, balancing flavors wonderfully.

  • Red Wine: A smooth red wine, like a Cabernet Sauvignon, pairs beautifully with the savory notes of the beef, providing a warm finish to the meal as you savor each sip.

Let these delightful pairings transform your simple soup into a feast that warms both hearts and bellies!

Expert Tips for Cheesy Beef and Potato Soup

Avoid Greasy Soup: Drain excess grease after browning the beef to keep the soup light and prevent unwanted fat.

Cheese Melting: Add cheddar cheese gradually, stirring continuously to achieve a smooth, creamy texture and prevent clumping in your Cheesy Beef and Potato Soup.

Check Potato Doneness: Ensure potatoes are fork-tender before adding cheese and cream, which guarantees the best texture in your soup.

Adjust Thickness: If the soup is too thick, add a splash of beef broth or water to reach your desired consistency easily.

Garnish Smartly: Don't skip the fresh parsley and extra cheese garnish; they elevate the presentation and enhance the overall flavor experience.

Make Ahead Options

Preparing your Cheesy Beef and Potato Soup in advance is a fantastic way to save time during busy weeknights! You can cook the entire soup up to 3 days ahead and refrigerate it in an airtight container. To maintain that creamy, delicious flavor, let the soup cool completely before sealing. When you're ready to enjoy it, simply reheat on the stove over medium heat, adding a splash of heavy cream if needed to restore its silky texture. For meal prepping, consider chopping the potatoes and onions up to 24 hours ahead and store them in water to prevent browning. This way, you’ll have everything ready for a quick cook when hunger strikes!

Cheesy Beef and Potato Soup Variations

Feel free to explore these delightful twists to customize your Cheesy Beef and Potato Soup just the way you like it!

  • Dairy-Free: Substitute cheddar and cream with vegan cheese and coconut milk for a creamy alternative everyone can enjoy.

  • Spicy Kick: Add diced jalapeños or a dash of cayenne pepper for a bold heat that dances on your taste buds.

  • Vegetable Boost: Toss in extra veggies like diced carrots or celery to add color and nutrients, making the soup even heartier.

  • Herb Infusion: Enhance the soup's aroma by mixing in fresh herbs like thyme or rosemary, which add a fragrant touch to every bowl.

  • Texture Twist: For added crunch, top your soup with crispy fried onions or croutons—everyone loves that satisfying texture!

  • Protein Alternatives: Swap ground beef for turkey or chicken for a leaner option while still maintaining flavor and satisfaction.

  • Slow Cooker Method: For ultimate convenience, try cooking the soup in a slow cooker. Let it simmer all day, and come home to a deliciously rich meal.

  • Global Flavor: Experiment with spices like curry powder or cumin for a unique flavor profile that transports your taste buds around the world.

With these variations, each bowl of your Cheesy Beef and Potato Soup can offer a new adventure, ensuring that every meal is as exciting as the last!

How to Store and Freeze Cheesy Beef and Potato Soup

Fridge: Store leftover Cheesy Beef and Potato Soup in an airtight container for up to 3 days. Reheat gently on the stove or in the microwave until warmed through.

Freezer: Freeze in portion-sized airtight containers for up to 3 months. To thaw, transfer to the fridge overnight, then reheat on the stove, adding a splash of broth if needed for consistency.

Reheating: When reheating, stir frequently to prevent sticking, and adjust seasoning if necessary, as flavors may mellow during storage. Enjoy a cozy bowl anytime!

Cheesy Beef and Potato Soup Recipe FAQs

What type of potatoes should I use for Cheesy Beef and Potato Soup?
I recommend using Yukon Gold potatoes as they offer a creamy texture and hold their shape well when cooked. They're perfect for this soup, adding heartiness and a delightful mouthfeel.

How long can I store leftover Cheesy Beef and Potato Soup in the fridge?
Leftover Cheesy Beef and Potato Soup can be stored in an airtight container for up to 3 days. Just remember to reheat it gently on the stove or in the microwave until it's warmed through, stirring occasionally.

Can I freeze Cheesy Beef and Potato Soup, and if so, how?
Absolutely! Pour your cooled Cheesy Beef and Potato Soup into portion-sized airtight containers, leaving a little space at the top for expansion. It can be frozen for up to 3 months. When you're ready to enjoy it, thaw overnight in the fridge, then reheat on the stove, adding a splash of beef broth or water if needed to adjust the consistency.

How can I adjust the thickness of the soup after it has cooled?
If your soup has thickened more than you'd like after storage, simply add a splash of beef broth or water on low heat. Stir well to incorporate, and adjust the seasoning if necessary. This will help bring it back to that delightful creamy consistency!

Is there a dairy-free option for Cheesy Beef and Potato Soup?
Absolutely! You can substitute the heavy cream with coconut milk or a plant-based cream alternative and use dairy-free cheese for the cheddar. Just keep an eye on the flavors, as these substitutions may slightly change the taste.

What should I do if I encounter clumping when adding the cheese?
To avoid clumping when adding cheese to your Cheesy Beef and Potato Soup, it's helpful to grate the cheese finely and incorporate it gradually, stirring constantly until it's fully melted before adding more. If clumping does occur, you can try lowering the heat and stirring vigorously, or an immersion blender can help smooth it out!

Cheesy Beef and Potato Soup

Cheesy Beef and Potato Soup for Cozy Comfort Food Nights

This Cheesy Beef and Potato Soup is a comforting meal perfect for chilly nights, ready in just 40 minutes.
Print Recipe Pin Recipe
Prep Time 10 minutes mins
Cook Time 30 minutes mins
Total Time 40 minutes mins
Servings: 6 bowls
Course: Main Dishes
Cuisine: American
Calories: 400
Ingredients Equipment Method Nutrition Notes

Ingredients
  

For the Soup Base
  • 1 pound ground beef
  • 1.5 cups yellow onion finely diced
  • 1 teaspoon garlic minced
  • 4 cups beef broth good-quality
  • 2 pounds Yukon Gold potatoes diced
  • 1 teaspoon paprika
  • 0.5 teaspoon kosher salt
  • 0.25 teaspoon black pepper
For the Creamy Addition
  • 1.5 cups mild cheddar cheese shredded
  • 1 cup heavy whipping cream
For Thickening
  • 1 tablespoon cornstarch
  • 2 tablespoons water
For Garnish
  • 0.25 cups parsley chopped fresh
  • 0.5 cups extra cheddar cheese for topping

Equipment

  • Large Pot
  • Dutch oven

Method
 

Preparation Steps
  1. In a large pot or Dutch oven over medium heat, add 1 pound of ground beef and 1 ½ cups of finely diced yellow onion. Cook for 8–10 minutes, breaking apart the beef with a spatula as it browns. Once the beef is fully cooked and the onions are softened, remove any excess grease from the pot for a cleaner flavor.
  2. Stir in 1 teaspoon of minced garlic and cook for an additional minute, allowing the garlic to release its aromatic fragrance.
  3. Pour in 4 cups of beef broth and add 2 pounds of diced Yukon Gold potatoes, followed by 1 teaspoon of paprika, ½ teaspoon of kosher salt, and ¼ teaspoon of black pepper. Increase the heat to bring the mixture to a boil, then reduce it to medium-low. Simmer for 15–20 minutes until the potatoes are fork-tender.
  4. Gradually incorporate 1 ½ cups of shredded mild cheddar cheese into the soup, stirring continuously until melted.
  5. Gently pour in 1 cup of heavy whipping cream, stirring well to combine. Heat through for an additional 3–5 minutes.
  6. Mix 1 tablespoon of cornstarch with 2 tablespoons of water to create a slurry and pour into the soup while stirring. Simmer for an additional 2–3 minutes to thicken.
  7. Garnish with freshly chopped parsley and a sprinkle of extra cheddar cheese. Serve immediately.

Nutrition

Serving: 1bowlCalories: 400kcalCarbohydrates: 30gProtein: 25gFat: 25gSaturated Fat: 12gPolyunsaturated Fat: 2gMonounsaturated Fat: 9gTrans Fat: 0.5gCholesterol: 90mgSodium: 800mgPotassium: 800mgFiber: 3gSugar: 2gVitamin A: 500IUVitamin C: 10mgCalcium: 200mgIron: 3mg

Notes

Store leftover soup in an airtight container for up to 3 days. Reheat gently on the stove or in the microwave.

Tried this recipe?

Let us know how it was!

Roasted Sweet Potatoes with Cinnamon & Honey for Cozy Nights

August 18, 2025 by grace bellamy Leave a Comment

As the first crisp notes of fall drift in, the kitchen becomes my cozy retreat. One of my favorite ways to celebrate the season is with Roasted Sweet Potatoes with Cinnamon & Honey. This delightful recipe combines the earthy sweetness of tender sweet potatoes with a touch of warm cinnamon and the natural sweetness of honey, making it a perfect side dish or a comforting snack. Not only is it quick to prepare—taking just 10 minutes of hands-on time—but it also offers a healthy, satisfying alternative to processed foods that often fill our pantries. With minimal ingredients and maximum flavor, you’ll find it’s a true crowd-pleaser. Ready to transform your dinner into something wonderfully warm and inviting? Let’s dive in!

Why are these sweet potatoes irresistible?

Simplicity: With just a handful of ingredients, this recipe is perfect for any home cook, even those just starting out.

Time-Saving: In just 40 minutes, you can whip up a delicious side dish that pairs beautifully with any meal.

Aromatic Flavor: The combination of honey and cinnamon creates an inviting aroma that fills your kitchen, making it feel like home.

Versatile Delights: These sweet potatoes shine at fall gatherings or cozy weeknight dinners, pleasing both adults and kids alike.

Health-Conscious: Offering a nutritious alternative to fried sides, they’re both satisfying and guilt-free! If you're on the hunt for quick yet delectable side dishes, you might also enjoy our tips for easy homemade flavors.

Roasted Sweet Potatoes with Cinnamon & Honey Ingredients

For the Sweet Potatoes
• Sweet potatoes – choose medium-sized ones for even cooking and natural sweetness.
• Olive oil – enhances the flavor and helps achieve that crispy outer layer.
• Honey – adds a delightful sweetness that balances the dish beautifully.
• Ground cinnamon – provides warm, aromatic notes that transport you to cozy fall days.
• Salt – just a pinch elevates the natural flavors and enhances the sweetness of the sweet potatoes.

This recipe for Roasted Sweet Potatoes with Cinnamon & Honey is simple yet packed with flavor, making it a must-try for your next meal!

Step‑by‑Step Instructions for Roasted Sweet Potatoes with Cinnamon & Honey

Step 1: Preheat the Oven
Begin by preheating your oven to 425°F (220°C). This ensures that the oven reaches the perfect temperature for roasting and helps create that delightful caramelization on the sweet potatoes. A properly preheated oven not only cooks evenly but also enhances the flavor, making your Roasted Sweet Potatoes with Cinnamon & Honey irresistibly tasty.

Step 2: Prepare the Sweet Potatoes
While the oven is heating, peel and chop your sweet potatoes into uniform cubes. Aim for about 1-inch pieces to ensure even cooking. In a large mixing bowl, combine these sweet potato cubes with 3 tablespoons of olive oil, 2 tablespoons of honey, 1 teaspoon of ground cinnamon, and a pinch of salt. Toss everything until the sweet potatoes are well coated and glistening with all the delicious ingredients.

Step 3: Arrange on a Baking Sheet
Next, spread the coated sweet potatoes in a single layer on a baking sheet lined with parchment paper. This allows for optimal airflow and helps the sweet potatoes to roast evenly, creating a perfect crispy exterior. Make sure they aren't overcrowded, as this will help them brown beautifully, ensuring your Roasted Sweet Potatoes with Cinnamon & Honey are perfectly tender inside and golden brown outside.

Step 4: Roast the Sweet Potatoes
Place the baking sheet in the preheated oven and roast the sweet potatoes for about 25-30 minutes. Halfway through the roasting time, take a moment to stir the sweet potatoes gently to ensure they cook evenly. You’ll know they’re done when they're tender enough to pierce with a fork and have taken on a lovely golden brown hue, exuding delightful aromas that fill your kitchen.

Step 5: Serve and Garnish
Once the sweet potatoes are roasted to perfection, carefully transfer them to a serving dish. For a touch of color and freshness, sprinkle with chopped fresh parsley before serving. These Roasted Sweet Potatoes with Cinnamon & Honey can be enjoyed warm as a comforting side dish or a satisfying snack, perfect for any occasion!

What to Serve with Roasted Sweet Potatoes with Cinnamon & Honey

Imagine the warm, inviting aromas wafting through your kitchen as you create a comforting meal to share with loved ones.

  • Savory Grilled Chicken: The tender, juicy chicken offers a satisfying protein contrast to the sweet and warm flavors of the roasted sweet potatoes.

  • Crisp Green Salad: A fresh salad with mixed greens, cucumbers, and a tangy vinaigrette brings a refreshing crunch that balances the sweetness of the dish, enhancing each bite.

  • Creamy Coleslaw: The creamy, zesty coleslaw complements the sweet potatoes perfectly, adding a delightful crunch and tang that invites a joyful harmony on your plate.

  • Herb-Roasted Salmon: The rich flavors of herb-roasted salmon provide a hearty depth, perfectly complementing the soothing sweetness of the roasted sweet potatoes for a well-rounded meal.

  • Quinoa Pilaf: A light quinoa pilaf, rich in texture and flavor, can serve as a complementary grain dish, harmonizing beautifully with the sweetness.

  • Cinnamon-Infused Hot Apple Cider: Warm up your meal with a cozy drink of cinnamon-infused hot apple cider, matching the key flavors in your roasted sweet potatoes while adding a layer of warmth.

Don’t forget to experiment and create a meal that warms your heart and delights your family!

How to Store and Freeze Roasted Sweet Potatoes with Cinnamon & Honey

Room Temperature: Keep any leftover sweet potatoes covered at room temperature for up to 2 hours. Beyond that, it's best to refrigerate them to maintain freshness.

Fridge: Store leftover Roasted Sweet Potatoes with Cinnamon & Honey in an airtight container in the fridge for up to 3 days. They taste best when reheated, but can be enjoyed cold in salads!

Freezer: To freeze, let the sweet potatoes cool completely, then place them in a freezer-safe bag or container. They can be stored for up to 3 months.

Reheating: Reheat leftovers in the oven at 375°F (190°C) for about 10-15 minutes, or until warmed through, to regain their crispy texture. Enjoy your delightful sweet potatoes!

Roasted Sweet Potatoes with Cinnamon & Honey Variations

Feel free to add your personal twist to this wonderful recipe and make it your own!

  • Maple Syrup: Swap honey for maple syrup for a unique flavor twist that’s equally sweet and delightful.

  • Spicy Kick: Add a pinch of cayenne pepper or chili powder for a warm spicy note that complements the sweetness beautifully. It’s like a dance of flavors that adds excitement to each bite!

  • Nutty Crunch: Toss in some chopped pecans or walnuts before roasting for an extra crunchy texture and nutty flavor that brings satisfaction to your palate.

  • Herb Infusion: Try adding fresh thyme or rosemary to the sweet potatoes before roasting for an aromatic infusion that elevates the dish instantly. These herbs add a fragrant touch, making each bite feel gourmet!

  • Coconut Flavors: Use coconut oil instead of olive oil and sprinkle with unsweetened shredded coconut for a tropical surprise that adds a lovely chewy texture.

  • Sweet Potato Medley: Mix in cubed carrots or parsnips for a colorful medley of flavors and textures that kids will adore as much as the adults do.

  • Syrupy Drizzling: After roasting, drizzle with a balsamic glaze for a tangy, sweet finish that brightens the dish and offers a beautiful presentation.

  • Dairy-Free Alternative: For a creamier texture, mix in a dollop of unsweetened coconut yogurt before serving for a luscious, vegan-friendly alternative that's both refreshing and satisfying.

Each variation invites your creativity and adds layers of flavor. If you are on a journey to discover exciting side dishes, you might also enjoy our guide on easy homemade flavors!

Make Ahead Options

These Roasted Sweet Potatoes with Cinnamon & Honey are a fantastic choice for meal prep! You can peel and cube the sweet potatoes up to 24 hours in advance; simply store them in an airtight container submerged in water in the refrigerator to prevent browning. You can also mix the olive oil, honey, cinnamon, and salt in a separate bowl and keep it covered in the fridge for a couple of days. When you’re ready to cook, combine the sweet potatoes with the prepared seasoning, spread them on a baking sheet, and roast as directed. This approach not only saves time but ensures your sweet potatoes are just as delicious and comforting as if you made them fresh!

Tips for the Best Roasted Sweet Potatoes

Choosing Sweet Potatoes: Use medium-sized sweet potatoes for even cooking and natural sweetness. Avoid overly large ones as they may need longer cooking time.

Even Coating: Ensure the sweet potato cubes are well coated with olive oil, honey, and cinnamon. This prevents drying out and enhances flavor in your Roasted Sweet Potatoes with Cinnamon & Honey.

Single Layer: Spread the sweet potatoes in a single layer on your baking sheet. Overcrowding can lead to steaming rather than roasting and prevents achieving that desired crispiness.

Stirring Technique: Stir the sweet potatoes halfway through roasting to promote even cooking. This will ensure all sides become beautifully golden and tender.

Garnish for Freshness: Don’t forget to sprinkle fresh parsley before serving. It adds a pop of color and a hint of freshness that elevates your dish!

Roasted Sweet Potatoes with Cinnamon & Honey Recipe FAQs

How do I choose the best sweet potatoes for this recipe?
Absolutely! When selecting sweet potatoes, aim for medium-sized ones that feel firm to the touch. Look for smooth skin without any dark spots or blemishes. These characteristics indicate freshness and sweetness, which are essential for achieving that perfect flavor in your Roasted Sweet Potatoes with Cinnamon & Honey.

How should I store leftover roasted sweet potatoes?
Very good question! You can keep any leftover Roasted Sweet Potatoes with Cinnamon & Honey in an airtight container in the fridge for up to 3 days. If you’re planning to enjoy them later, it's best to reheat them in the oven for that delightful crispiness instead of the microwave.

Can I freeze roasted sweet potatoes? If so, how?
Absolutely! Freezing is a great way to preserve your roasted sweet potatoes. First, let them cool completely. Next, transfer them to a freezer-safe bag or an airtight container, ensuring you remove as much air as possible. They can be stored in the freezer for up to 3 months. When you're ready to enjoy them, simply thaw overnight in the fridge and reheat them in a preheated oven at 375°F (190°C) for about 10-15 minutes or until heated through.

What should I do if the sweet potatoes are too soft after roasting?
Not to worry! If your sweet potatoes come out too soft, it could be due to overcooking or the size of your cubes being too small. To avoid this, ensure you cut them into 1-inch pieces for even cooking. If they are still too soft after roasting, you can try tossing them with a little more oil and roasting them at a higher temperature for a few more minutes to help them firm up.

Can my dog eat roasted sweet potatoes?
Absolutely! Sweet potatoes are generally safe for dogs when cooked without excessive seasoning or additives. However, always consult your vet before introducing new foods into your pet's diet. Keep portion sizes small to avoid any digestive upset. Make sure to save them some Roasted Sweet Potatoes with Cinnamon & Honey without the honey and cinnamon for a tasty and healthy treat!

Roasted Sweet Potatoes with Cinnamon & Honey

Roasted Sweet Potatoes with Cinnamon & Honey for Cozy Nights

This Roasted Sweet Potatoes with Cinnamon & Honey recipe is a quick and healthy side dish, perfect for fall gatherings.
Print Recipe Pin Recipe
Prep Time 10 minutes mins
Cook Time 30 minutes mins
Total Time 40 minutes mins
Servings: 4 servings
Course: Side Dishes
Cuisine: American
Calories: 180
Ingredients Equipment Method Nutrition Notes

Ingredients
  

For the Sweet Potatoes
  • 3 medium Sweet potatoes choose medium-sized for even cooking
  • 3 tablespoons Olive oil enhances flavor and helps achieve crispy texture
  • 2 tablespoons Honey adds delightful sweetness
  • 1 teaspoon Ground cinnamon provides warm, aromatic flavor
  • 1 pinch Salt enhances natural flavors

Equipment

  • Oven
  • Baking Sheet
  • Mixing Bowl

Method
 

Step‑by‑Step Instructions
  1. Preheat your oven to 425°F (220°C) to ensure proper roasting.
  2. Peel and chop sweet potatoes into 1-inch cubes, then mix with olive oil, honey, cinnamon, and salt.
  3. Spread the sweet potatoes on a baking sheet lined with parchment paper.
  4. Roast in the oven for 25-30 minutes, stirring halfway through.
  5. Once roasted, transfer to a serving dish and sprinkle with fresh parsley before serving.

Nutrition

Serving: 1servingCalories: 180kcalCarbohydrates: 37gProtein: 2gFat: 5gSaturated Fat: 1gPolyunsaturated Fat: 0.5gMonounsaturated Fat: 3gSodium: 150mgPotassium: 400mgFiber: 5gSugar: 10gVitamin A: 18400IUVitamin C: 30mgCalcium: 40mgIron: 1mg

Notes

These sweet potatoes are perfect served warm as a side dish or snack. Store leftovers in an airtight container in the fridge for up to 3 days.

Tried this recipe?

Let us know how it was!

Irresistible Doritos Casserole with Chicken for a Cozy Night

August 18, 2025 by grace bellamy Leave a Comment

As I stood in my kitchen, the delightful crunch of Doritos reminded me of lazy weekends filled with family, laughter, and comfort food. That’s when I realized it was time to whip up my creamy, indulgent Doritos Casserole with Chicken. This dish brilliantly combines beloved flavors into a simple, crowd-pleasing meal that’s perfect for any weeknight or special gathering. With just 15 minutes of prep and no fuss, you’ll transform pantry staples into a cheesy marvel that will have everyone asking for seconds. Plus, it’s not only satisfying but also freezer-friendly, making it an ideal choice for busy days. Ready to dive into this deliciously nostalgic recipe? Let’s get cooking!

Why is this casserole a winner?

Quick and Easy: In just 15 minutes of prep, you can create a comforting meal that’s ready to impress!

Creamy Goodness: The blend of cream cheese and chicken soup gives this casserole a delectable, rich texture.

Flavor Explosion: With seasoned chicken and crispy Doritos, each bite is packed with unique flavors that everyone will love.

Versatile Dish: This casserole is not only perfect for family dinners but also a great addition to game day or potlucks, ensuring you always have a crowd-pleaser on hand.

Freezer Friendly: Prepare a batch ahead of time and simply pop it in the oven when you’re ready for an easy meal! Want to make it even faster? Check out my tips for easy weeknight meals.

Doritos Casserole with Chicken Ingredients

For the Casserole
• 8 oz Philadelphia Chive Whipped Cream Cheese – Adds a delightful creaminess with a hint of flavor.
• 10.5 oz condensed cream of chicken soup – Acts as a savory base, enhancing the overall richness.
• 1 bunch green onions, chopped – Provides a fresh, mild onion taste that elevates the dish.
• 3 cups chicken, cooked, shredded – A key protein component, ensuring each bite is hearty and fulfilling.
• 8.75 oz canned corn – Brings a sweet crunch that balances the creaminess of the casserole.
• 3 cups shredded Mexican cheese blend – Melts beautifully on top, adding that gooey, cheesy goodness we all crave.
• ½ teaspoon salt – Enhances all the flavors for a well-rounded taste.
• ½ teaspoon pepper – Adds a kick of flavor without overwhelming the dish.
• 1 teaspoon garlic powder – Infuses a warm, aromatic quality that makes every bite irresistible.
• 3 cups Doritos, crumbled – The star of the show, giving a satisfying crunch and nostalgic flavor to the casserole.

For the Topping
• 1 cup shredded Mexican cheese blend – A great finishing touch to create a crispy, golden crust.
• ¼ cup chopped green onions – Reserved for garnishing, they provide a pop of color and a fresh bite.

Step‑by‑Step Instructions for Doritos Casserole with Chicken

Step 1: Preheat the Oven
Begin by preheating your oven to 400°F (200°C). This ensures your Doritos Casserole with Chicken cooks evenly and achieves that golden, bubbly top you're looking for. While the oven heats up, gather your ingredients so everything is ready to mix.

Step 2: Mix Creamy Base
In a large mixing bowl, combine the 8 oz of Philadelphia Chive Whipped Cream Cheese and 10.5 oz of condensed cream of chicken soup. Using an electric mixer, whip these ingredients together on medium speed until the mixture is smooth and creamy, which usually takes about 2-3 minutes. This will be the luscious base for your casserole.

Step 3: Add Flavorful Ingredients
Set aside ¼ cup of the chopped green onions for garnish. Add the remaining green onions, shredded chicken, drained canned corn, 2 cups of the shredded Mexican cheese blend, ½ teaspoon salt, ½ teaspoon pepper, and 1 teaspoon garlic powder into the mixing bowl. Stir everything together gently until fully combined, ensuring every bite of the Doritos Casserole with Chicken is packed with flavor.

Step 4: Transfer to Baking Dish
Grease a 9 x 13 inch baking dish with a little cooking spray or butter. Carefully dump the creamy mixture into the dish, using a spatula to spread it out evenly across the bottom. This layer of filling will create a hearty foundation before the toppings are added.

Step 5: Top with Doritos
Now, sprinkle the 3 cups of crumbled Doritos evenly over the mixture in the baking dish. Press them down slightly to ensure they enjoy the flavors while baking. These crunchy bits will provide an irresistible texture and nostalgic flavor to your Doritos Casserole with Chicken.

Step 6: Final Cheese and Onion Layer
Finish by sprinkling the remaining cup of shredded Mexican cheese blend on top of the Doritos, followed by the reserved ¼ cup of chopped green onions. This toppings layer will melt and create a beautiful, cheesy crust during baking, making your dish visually appealing and delicious.

Step 7: Bake the Casserole
Place the baking dish into the preheated oven. Let your Doritos Casserole with Chicken bake for about 17-20 minutes, or until the cheese is bubbly and lightly browned. Keep an eye on it, as the delightful aroma will build as it cooks!

Step 8: Serve and Enjoy
Once baked, remove the dish from the oven and allow it to cool for a few minutes. Serve your delectable Doritos Casserole with Chicken warm, allowing everyone to dig in and relish the creamy, cheesy goodness.

Doritos Casserole with Chicken Variations

Feel free to let your creativity shine and customize this dish to match your taste preferences or dietary needs!

  • Spicy Twist: Add diced jalapeños or a sprinkle of cayenne for a delightful kick of heat.
    Try mixing in a little hot sauce for an exciting flavor boost that enlivens every bite.

  • Vegetarian Version: Substitute shredded chicken with cooked lentils or black beans for a protein-packed, meat-free option.
    You’ll still enjoy the same creamy texture and flavors without the meat!

  • Dairy-Free Delight: Use dairy-free cream cheese and soup for a lactose-free alternative that doesn’t skimp on creaminess.
    With some vegan cheese on top, you can still savor that gooey goodness!

  • Add Veggies: Mix in sautéed bell peppers, spinach, or zucchini for a fresh, colorful veggie medley.
    These additions not only enhance the flavor but also boost the nutritional value of your casserole.

  • Crunchy Topping: Top with crushed tortilla chips or panko breadcrumbs for an extra layer of crunch.
    This will elevate the texture and give your casserole a delightful, crisp finish.

  • Herb Infusion: Incorporate fresh herbs such as cilantro or parsley for a bright, refreshing lift in flavor.
    A sprinkle on top before serving can add visual appeal and a burst of freshness.

  • Cheesy Variation: Experiment with different cheese blends, such as pepper jack or gouda, for a unique taste experience.
    Each cheese contributes its own character, making the casserole even more indulgent.

For more delicious ideas and ways to elevate your meals, check out my guide on easy weeknight meals or discover how to use your pantry staples in thrilling new ways with 30-minute dinners.

Expert Tips for Doritos Casserole with Chicken

• Mixing Smoothly: Ensure the cream cheese is at room temperature for easier blending with the chicken soup, avoiding lumps in your creamy base.

• Flavor Boost: Consider adding your favorite spices or hot sauce for a personalized twist on the traditional flavors in this Doritos Casserole with Chicken.

• Ditch the Moisture: Drain canned corn thoroughly to prevent excess moisture, which could make your casserole soggy.

• Topping Crunch: Add the Doritos towards the end of cooking to maintain their crunch, ensuring a satisfying texture in every bite.

• Serving Suggestion: Let the casserole cool slightly before serving for better structure, making it easier to slice and serve.

What to Serve with Doritos Casserole with Chicken

Transform your hearty casserole into a full-fledged meal that tantalizes every taste bud and satisfies everyone at the table.

  • Garlic Bread: The warm, buttery garlic bread adds a comforting contrast to the creamy casserole while perfect for saucing up those rich flavors.

  • Caesar Salad: Crisp romaine and tangy dressing offer a refreshing crunch, balancing the richness of the casserole beautifully with every bite.

  • Roasted Vegetables: Colorful, caramelized veggies bring a delicious earthiness, providing a delightful texture that complements the creamy and cheesy elements.

  • Corn on the Cob: Juicy, sweet corn enhances the corn in the dish, adding a fun, seasonal touch to your culinary lineup.

Pairing this casserole with these sides not only enhances the flavors but creates a delightful feast that will have everyone returning for more!

  • Sliced Avocado: Creamy avocado slices add a healthy richness that contrasts the casserole’s crunch, creating a perfect bite every time.

  • Chocolate Chip Cookies: For dessert, warm cookies provide a nostalgic finish to your meal. Their sweetness makes a lovely ending after the savory casserole.

  • Sparkling Lemonade: This bright, fizzy drink not only refreshes but also cuts through the richness of the casserole, making it the perfect sip for your meal.

Make Ahead Options

These do-ahead Doritos Casserole with Chicken prep steps are perfect for busy weeknights! You can mix the creamy filling (cream cheese, soup, chicken, corn, and spices) up to 24 hours in advance; just cover it tightly and refrigerate until you're ready to bake. For optimal flavor, keep the Doritos separate until you're about to pop it in the oven. When ready to serve, simply transfer the mixture into a greased dish, add the crumbled Doritos and cheese, then bake in a preheated oven for about 17-20 minutes. This way, you'll have a delicious, comforting meal with minimal fuss!

Storage Tips for Doritos Casserole with Chicken

Fridge: Keep any leftovers stored in an airtight container in the fridge for up to 3 days. This helps maintain the casserole’s creamy texture and flavors.

Freezer: For longer storage, freeze the Doritos Casserole with Chicken in a freezer-safe container for up to 3 months. Be sure to cover it tightly with plastic wrap or foil to prevent freezer burn.

Reheating: To reheat, thaw overnight in the refrigerator, then bake at 350°F (175°C) for about 20-25 minutes until heated through. You can also microwave individual portions if you're short on time.

Serving Freshness: Always sprinkle fresh Doritos on top just before serving to ensure that delightful crunch is intact, elevating the flavor each time you dig in!

Doritos Casserole with Chicken Recipe FAQs

What kind of chicken should I use?
Absolutely! I recommend using shredded rotisserie chicken for a quick and tasty option. Alternatively, you can use leftover chicken or quickly poach and shred boneless, skinless chicken breasts.

How can I tell if my ingredients are fresh?
Very! Check the cream cheese for a smooth texture without any dark spots or an off smell. For the canned corn, ensure there's no bulging at the lid and check the expiration date. Fresh green onions should be firm with bright green tops.

What is the best way to store leftovers?
Keep any leftovers stored in an airtight container in the fridge for up to 3 days. This helps maintain the casserole’s creamy texture and flavors. To reheat, simply pop it in the oven at 350°F (175°C) for about 15-20 minutes.

Can I freeze Doritos Casserole with Chicken?
Yes! For longer storage, freeze the casserole in a freezer-safe container for up to 3 months. Ensure to cover it tightly with plastic wrap or foil to prevent freezer burn. When you're ready to enjoy it, thaw overnight in the fridge, then bake at 350°F (175°C) for 20-25 minutes until heated through.

How do I keep the Doritos from getting soggy?
To maintain that delightful crunch, I suggest adding the crumbled Doritos during the last 5 minutes of baking. This way, they get a little toasty but don’t lose their satisfying crunch when you dig in.

Are there any dietary considerations for this recipe?
Definitely! If you're accommodating food allergies, you can swap the cream of chicken soup for a gluten-free version, and check the cheese for lactose-free options if needed. Additionally, the recipe can be adjusted for lower sodium by using low-sodium canned corn and cream soup without sacrificing flavor!

Doritos Casserole with Chicken

Irresistible Doritos Casserole with Chicken for a Cozy Night

This Doritos Casserole with Chicken is a creamy, indulgent dish perfect for family dinners and gatherings.
Print Recipe Pin Recipe
Prep Time 15 minutes mins
Cook Time 20 minutes mins
Total Time 35 minutes mins
Servings: 6 servings
Course: Main Dishes
Cuisine: American
Calories: 400
Ingredients Equipment Method Nutrition Notes

Ingredients
  

For the Casserole
  • 8 oz Philadelphia Chive Whipped Cream Cheese Adds a delightful creaminess with a hint of flavor.
  • 10.5 oz condensed cream of chicken soup Acts as a savory base, enhancing the overall richness.
  • 1 bunch green onions, chopped Provides a fresh, mild onion taste that elevates the dish.
  • 3 cups chicken, cooked, shredded A key protein component, ensuring each bite is hearty and fulfilling.
  • 8.75 oz canned corn Brings a sweet crunch that balances the creaminess of the casserole.
  • 3 cups shredded Mexican cheese blend Melts beautifully on top, adding that gooey, cheesy goodness we all crave.
  • ½ teaspoon salt Enhances all the flavors for a well-rounded taste.
  • ½ teaspoon pepper Adds a kick of flavor without overwhelming the dish.
  • 1 teaspoon garlic powder Infuses a warm, aromatic quality that makes every bite irresistible.
  • 3 cups Doritos, crumbled The star of the show, giving a satisfying crunch and nostalgic flavor to the casserole.
For the Topping
  • 1 cup shredded Mexican cheese blend A great finishing touch to create a crispy, golden crust.
  • ¼ cup chopped green onions Reserved for garnishing, they provide a pop of color and a fresh bite.

Equipment

  • Mixing Bowl
  • Electric mixer
  • Baking Dish

Method
 

Step‑by‑Step Instructions
  1. Preheat your oven to 400°F (200°C). Gather your ingredients while the oven heats up.
  2. In a large mixing bowl, combine cream cheese and chicken soup. Beat until smooth and creamy.
  3. Add green onions (reserve some for garnish), shredded chicken, corn, 2 cups of cheese, salt, pepper, and garlic powder. Stir until combined.
  4. Grease a 9 x 13 inch baking dish and spread the mixture evenly at the bottom.
  5. Sprinkle the crumbled Doritos over the mixture, pressing them down slightly.
  6. Top with remaining cheese and reserved green onions for a beautiful crust.
  7. Bake for 17-20 minutes until cheese is bubbly and lightly browned.
  8. Let cool briefly, then serve warm and enjoy.

Nutrition

Serving: 1servingCalories: 400kcalCarbohydrates: 30gProtein: 25gFat: 22gSaturated Fat: 10gPolyunsaturated Fat: 3gMonounsaturated Fat: 6gCholesterol: 60mgSodium: 800mgPotassium: 400mgFiber: 3gSugar: 2gVitamin A: 10IUVitamin C: 2mgCalcium: 15mgIron: 10mg

Notes

Ensure the cream cheese is at room temperature for easier blending. Drain canned corn thoroughly to avoid sogginess. Add fresh Doritos before serving for a delightful crunch.

Tried this recipe?

Let us know how it was!

Comforting Creamy Parmesan Tomato and Cannellini Bean Soup

August 17, 2025 by grace bellamy Leave a Comment

As I stood in my kitchen, the aroma of sautéed garlic and onions swirled around me, instantly igniting a cozy feeling in my heart. There's something undeniably magical about preparing a bowl of Creamy Parmesan Tomato and Cannellini Bean Soup. This delightful dish not only warms you from the inside out but also brings a satisfying twist on everyday comfort food. With its quick prep and wholesome ingredients, it’s an easy crowd-pleaser for any occasion. Whether you're serving it for a weeknight dinner or delighting friends at a weekend gathering, this soup effortlessly combines creamy richness with nutritious goodness. Are you ready to create a comforting masterpiece that will make your taste buds cheer?

Why is this soup a must-try?

Comforting warmth fills every bowl of this Creamy Parmesan Tomato and Cannellini Bean Soup, making it an instant favorite on chilly nights. Quick and easy, this recipe takes only 40 minutes from start to finish, perfect for busy weeknights. Nutritious and hearty, packed with fiber-rich beans and vibrant tomatoes, it nourishes both body and soul. Crowd-pleasing flavors mean it’s great for family dinners or impressing guests at gatherings. Plus, you can easily customize it by adding your favorite veggies or herbs! Enjoy it as a standalone meal or pair it with a simple side salad or crusty homemade bread.

Creamy Parmesan Tomato and Cannellini Bean Soup Ingredients

For the Soup Base
• Olive oil – adds richness and helps sauté the aromatics.
• Onion – enhances the flavor base; use yellow or sweet onions for sweetness.
• Garlic – brings a depth of flavor; feel free to increase for a stronger garlic taste.
• Diced tomatoes – provides the soup’s tangy base; canned tomatoes work beautifully for convenience.
• Cannellini beans – add creaminess and a hearty texture; you can substitute with navy beans if needed.
• Vegetable broth – adds a savory depth; chicken broth can be used for non-vegetarian options.

For Seasoning
• Dried basil – imparts a sweet and aromatic layer; fresh basil can be used for a brighter flavor.
• Dried oregano – gives a hint of Mediterranean flavor; feel free to use Italian seasoning as a substitute.

For the Creaminess
• Grated Parmesan cheese – adds a deliciously rich finish; use freshly grated for a robust flavor.

To Taste
• Salt and pepper – essential for balancing flavors; adjust according to preference.

For Garnish
• Fresh basil leaves – brightens the dish with freshness; chop or leave whole for elegance.
• Additional Parmesan cheese – sprinkle on top for an extra cheesy delight; great for cheese lovers!

Prepare your ingredients, and let’s embark on this comforting culinary journey of making Creamy Parmesan Tomato and Cannellini Bean Soup that will warm your heart and delight your taste buds!

Step‑by‑Step Instructions for Creamy Parmesan Tomato and Cannellini Bean Soup

Step 1: Sauté the Aromatics
In a large pot, heat 2 tablespoons of olive oil over medium heat. Once the oil shimmers, add the diced onion and minced garlic, sautéing for about 5 minutes until the onion is translucent and fragrant. This aromatic base adds depth to your Creamy Parmesan Tomato and Cannellini Bean Soup and sets the stage for the other flavors.

Step 2: Add the Core Ingredients
Stir in a can of diced tomatoes, 2 cans of drained and rinsed cannellini beans, and 4 cups of vegetable broth into the pot. Sprinkle in the dried basil and oregano, giving everything a good stir to combine. Allow the mixture to heat through for about 2 minutes, bringing the comforting flavors of your soup to life.

Step 3: Bring to a Boil
Increase the heat to high and bring the soup to a rolling boil. Once boiling, reduce the heat to low to let it simmer gently for about 15 minutes. This simmering time allows the flavors of the Creamy Parmesan Tomato and Cannellini Bean Soup to meld beautifully, making each bowl a comforting delight.

Step 4: Blend Until Smooth
Carefully puree the soup using an immersion blender until it is silky and smooth. If using a regular blender, allow the soup to cool slightly before blending in batches; be cautious with hot liquids! The creamy texture will elevate your soup, creating a luxurious mouthfeel.

Step 5: Stir in the Cheese
Return the smooth soup to the pot over low heat and gently stir in ½ cup of grated Parmesan cheese. Season with salt and pepper to taste, creating a rich and flavorful base for your creamy soup. The cheese will melt rapidly, giving it that signature creamy consistency.

Step 6: Final Cook and Serve
Let the soup cook for an additional 5 minutes over low heat, allowing the flavors to develop further. As it warms, ladle the Creamy Parmesan Tomato and Cannellini Bean Soup into bowls and garnish with fresh basil leaves and extra Parmesan cheese, if desired, for an added touch of freshness and richness.

What to Serve with Creamy Parmesan Tomato and Cannellini Bean Soup

As the divine aroma of this comforting soup lingers in the air, it’s time to think about delightful pairings that round out your meal.

  • Crusty Artisan Bread: Perfect for dipping, its chewy texture contrasts beautifully with the creamy soup. Enjoy a slice warm, straight from the oven to soak up every last drop of flavor.

  • Garlic Breadsticks: Their buttery, garlicky crispness elevates the dish while offering a satisfying crunch. Serve them on the side for that extra comfort factor, making each bite a heavenly experience.

  • Simple Green Salad: A fresh salad with mixed greens, cucumber, and a light vinaigrette adds a refreshing crunch. This balance between the rich soup and zesty salad creates a harmonious meal.

  • Roasted Vegetables: Caramelized seasonal veggies like zucchini and bell peppers bring a lovely sweetness that complements the savory notes of the soup. The contrasting textures delight the palate with every bite.

  • Cheesy Risotto: Creamy and indulgent, a cheesy risotto provides a rich, luxurious side that mirrors the soup’s texture. This pairing creates a truly comforting Italian-inspired feast.

  • Sparkling Water with Lemon: A thirst-quenching drink, its effervescence cleanses the palate between bites, enhancing the overall dining experience. Add a sprig of fresh mint for a refreshing twist.

  • Chocolate Chip Cookies: End your meal on a sweet note with warm, gooey cookies. The warm chocolate melting in contrast to the soup’s savory flavors leaves you with an unforgettable finish.

  • Herbal Iced Tea: A chilled herbal tea with mint or chamomile adds a refreshing and light touch, ideal for balancing the richness of the Creamy Parmesan Tomato and Cannellini Bean Soup.

  • Fruit Tart: A fruity dessert like a tart filled with fresh berries offers seasonal sweetness, rounding out the meal and adding brightness to your dinner table.

Each pairing brings its unique flavor and texture, ensuring every meal is something special, coaxing joy and warmth from the very first bite!

Expert Tips for Creamy Parmesan Tomato and Cannellini Bean Soup

  • Fresh Ingredients Matter: Using fresh garlic and onions enhances flavor. If you opt for dried herbs, don't forget they're more potent, so adjust quantities accordingly.

  • Blending Safely: When using a regular blender, let the soup cool slightly before blending hot liquids in batches to avoid splattering. An immersion blender is ideal for a safe, mess-free option.

  • Adjust the Creaminess: Feel free to add more Parmesan cheese for a richer soup if desired. But remember, you can also balance it with more broth for lighter texture options!

  • Season to Taste: Always taste your soup before serving. Adjust salt and pepper to enhance flavors, especially after adding Parmesan, which can be salty.

  • Add Veggie Variety: For an extra nutritional boost, consider adding spinach or kale during the last few minutes of simmering. It not only adds colors but also enhances the healthy profile of your Creamy Parmesan Tomato and Cannellini Bean Soup.

Creamy Parmesan Tomato and Cannellini Bean Soup Variations

Get ready to delight your taste buds with these customizable twists on the classic creamy soup!

  • Dairy-Free: Replace Parmesan cheese with nutritional yeast and use a plant-based milk for creaminess.
  • Extra Veggies: Stir in chopped spinach or kale during the last few minutes for vibrant color and nutrients.
  • Spicy Kick: Add a pinch of red pepper flakes or a dash of hot sauce to spice things up and elevate the flavor.
  • Herb Variations: Swap basil and oregano with thyme or rosemary for a fragrant twist that brings new dimensions.
  • Smoky Flavor: Toss in some smoked paprika for a hint of smokiness that pairs beautifully with the sweetness of tomatoes.
  • Creamy Richness: Incorporate a splash of coconut milk or heavy cream for an even creamier texture that feels indulgent!
  • Protein-Packed: Add shredded rotisserie chicken or crispy bacon for a heartier version, perfect for meat lovers.
  • Lentil Boost: Substitute half of the cannellini beans with cooked lentils for a different texture and an extra protein punch.

Feel free to mix and match these variations based on your mood and preferences! Each twist preserves the comforting essence of the original recipe while adding a delightful surprise.

How to Store and Freeze Creamy Parmesan Tomato and Cannellini Bean Soup

Fridge: Store leftover soup in an airtight container in the fridge for up to 3 days. Make sure it's cooled down before sealing to preserve freshness.

Freezer: For longer storage, freeze the soup in individual portions for up to 3 months. Use freezer-safe bags or containers and leave space for expansion.

Reheating: Reheat frozen soup in the fridge overnight or directly in a saucepan over low heat. Stir in a little extra vegetable broth or water to reach your desired consistency.

Thawing: Always thaw frozen soup in the fridge for 12–24 hours before reheating for best texture.

Make Ahead Options

These Creamy Parmesan Tomato and Cannellini Bean Soup preparations are perfect for busy weeknights! You can chop the onion and garlic, and even combine the canned tomatoes and beans in advance, storing them in the refrigerator for up to 3 days. This pre-prep greatly reduces your cooking time when you’re ready to whip up the soup. To maintain quality, ensure you store all ingredients in airtight containers, and avoid adding the cheese until you are ready to serve, keeping it fresh and creamy. When you're set to enjoy your meal, simply sauté the aromatics, combine your prepared ingredients, and blend. In a flash, you'll have a heartwarming bowl of soup ready to delight!

Creamy Parmesan Tomato and Cannellini Bean Soup Recipe FAQs

How do I choose ripe tomatoes?
Absolutely! For the best flavor, choose tomatoes that are vibrant red and free from blemishes. They should feel slightly firm but yield a little to pressure, indicating ripeness. If relying on canned tomatoes, vibrant, high-quality options will work wonders in your soup.

Can I store leftovers, and for how long?
Very! Store your leftover Creamy Parmesan Tomato and Cannellini Bean Soup in an airtight container in the fridge for up to 3 days. Be sure to let it cool before sealing to retain its delicious flavor.

How do I freeze this soup properly?
Of course! To freeze your soup, first, allow it to cool completely. Then, transfer it into freezer-safe bags or containers, leaving a little space at the top for expansion. It will keep well for up to 3 months! When you're ready to enjoy, thaw it in the fridge overnight and reheating gently on the stovetop, adding extra broth to adjust the consistency as needed.

What should I do if my soup is too thick?
No worries! If you find your Creamy Parmesan Tomato and Cannellini Bean Soup is thicker than you'd like, simply stir in some vegetable broth or water to thin it out to your desired consistency. Heat it gently on low, stirring frequently until it reaches the perfect texture.

Are there any dietary considerations for this soup?
Very! This soup contains gluten-free ingredients, making it a delightful option for gluten-sensitive individuals. However, if you have a dairy allergy, you can substitute the Parmesan with a dairy-free cheese alternative or nutritional yeast for a cheesy flavor without the milk. Always double-check the labels on any pre-packaged ingredients for any hidden allergens.

Can I add extra veggies to the soup?
Absolutely! Feel free to enhance the nutrition and texture by adding chopped spinach, kale, or zucchini during the last few minutes of simmering. This not only boosts the dietary value but also adds beautiful colors and freshness to your Creamy Parmesan Tomato and Cannellini Bean Soup!

Creamy Parmesan Tomato and Cannellini Bean Soup

Comforting Creamy Parmesan Tomato and Cannellini Bean Soup

Creamy Parmesan Tomato and Cannellini Bean Soup is a warm, comforting dish with wholesome ingredients, perfect for any occasion.
Print Recipe Pin Recipe
Prep Time 10 minutes mins
Cook Time 30 minutes mins
Total Time 40 minutes mins
Servings: 4 servings
Course: Soup
Cuisine: Italian
Calories: 300
Ingredients Equipment Method Nutrition Notes

Ingredients
  

Soup Base
  • 2 tablespoons Olive oil adds richness and helps sauté the aromatics
  • 1 medium Onion use yellow or sweet onions for sweetness
  • 3 cloves Garlic feel free to increase for a stronger garlic taste
  • 1 can Diced tomatoes canned tomatoes work beautifully for convenience
  • 2 cans Cannellini beans you can substitute with navy beans if needed
  • 4 cups Vegetable broth chicken broth can be used for non-vegetarian options
Seasoning
  • 1 teaspoon Dried basil fresh basil can be used for a brighter flavor
  • 1 teaspoon Dried oregano feel free to use Italian seasoning as a substitute
Creaminess
  • ½ cup Grated Parmesan cheese use freshly grated for a robust flavor
To Taste
  • 1 teaspoon Salt adjust according to preference
  • 1 teaspoon Pepper adjust according to preference
Garnish
  • ¼ cup Fresh basil leaves chop or leave whole for elegance
  • 2 tablespoons Additional Parmesan cheese great for cheese lovers

Equipment

  • Large Pot
  • Immersion blender

Method
 

Step-by-Step Instructions
  1. In a large pot, heat 2 tablespoons of olive oil over medium heat. Once the oil shimmers, add the diced onion and minced garlic, sautéing for about 5 minutes until the onion is translucent and fragrant.
  2. Stir in a can of diced tomatoes, 2 cans of drained and rinsed cannellini beans, and 4 cups of vegetable broth into the pot. Sprinkle in the dried basil and oregano, giving everything a good stir to combine.
  3. Increase the heat to high and bring the soup to a rolling boil. Once boiling, reduce the heat to low to let it simmer gently for about 15 minutes.
  4. Carefully puree the soup using an immersion blender until it is silky and smooth.
  5. Return the smooth soup to the pot over low heat and gently stir in ½ cup of grated Parmesan cheese. Season with salt and pepper to taste.
  6. Let the soup cook for an additional 5 minutes over low heat, allowing the flavors to develop further. Ladle the soup into bowls and garnish with fresh basil leaves and extra Parmesan cheese.

Nutrition

Serving: 1bowlCalories: 300kcalCarbohydrates: 35gProtein: 15gFat: 10gSaturated Fat: 4gPolyunsaturated Fat: 2gMonounsaturated Fat: 4gCholesterol: 15mgSodium: 600mgPotassium: 800mgFiber: 10gSugar: 6gVitamin A: 700IUVitamin C: 15mgCalcium: 200mgIron: 3mg

Notes

For an extra nutritional boost, consider adding spinach or kale during the last few minutes of simmering.

Tried this recipe?

Let us know how it was!

Decadent Loaded Cheeseburger Alfredo Pasta You’ll Love

August 17, 2025 by grace bellamy Leave a Comment

As I stirred the pot of creamy sauce bubbling away, a wave of nostalgia hit me—memories of summer cookouts and sizzling hamburgers danced in my mind. That's when it struck me: why not combine those beloved flavors into a single bowl of comfort? Enter my Loaded Cheeseburger Alfredo Pasta, a delightful twist on traditional pasta dishes that’s perfect for busy weeknights or casual gatherings. Not only is it a crowd-pleaser that takes just 30 minutes to whip up, but it also offers a fun twist on classic flavors that everyone loves. With gooey cheese, savory bacon, and crunchy pickles, this dish is bound to make your taste buds rejoice. Ready to transform your dinner routine? Let’s dive in!

Why is Loaded Cheeseburger Alfredo Pasta a must-try?

Decadent, comforting dish: This Loaded Cheeseburger Alfredo Pasta melds all your favorite burger flavors into a creamy, dreamy pasta dish, making it an instant favorite for any gathering.

Saves you time: In just 30 minutes, you can serve up a delicious meal that rivals any restaurant's, perfect for busy weeknights or last-minute dinner plans.

Crowd-pleaser: With its cheesy goodness and savory bacon, it's guaranteed to impress family and friends at your next get-together—just like my other easy pasta recipes.

Versatile toppings: Customize each serving with fresh tomatoes or lettuce for added crunch, making it adaptable for even the pickiest eaters.

Simple ingredients: You'll love that this recipe requires a handful of everyday ingredients, making it easy to whip up without a trip to the grocery store.

Loaded Cheeseburger Alfredo Pasta Ingredients

For the Pasta
• 1 pound ground beef – Use 85/15 ground beef for the ideal balance of flavor and moisture.
• 8 ounces pasta – Elbow, penne, rotini, or shells are excellent choices for capturing that creamy sauce.

For the Flavor
• 1 tablespoon olive oil – This helps to brown the beef beautifully and adds a layer of richness.
• 1 teaspoon onion powder – Enhances the savory depth of the dish without needing fresh onions.
• 1 teaspoon garlic powder – Easily infuses the sauce with garlicky goodness!
• ½ teaspoon smoked paprika – Adds a subtle smokiness reminiscent of the grill.
• Salt and pepper – Season to taste; don’t be shy with these essentials!

For the Sauce
• 1½ cups Alfredo sauce – You can use homemade for freshness or store-bought for convenience.

For the Cheese
• 1 cup shredded cheddar cheese – Provides that classic cheeseburger flavor and creaminess you love.
• ½ cup mozzarella cheese (optional) – For extra melty goodness, layer it on top!

For the Extras
• 4 slices cooked bacon, crumbled – Because everything's better with bacon; adds crunch!
• ⅓ cup diced dill pickles – Brings an unexpected tanginess that complements the dish perfectly.

Optional Toppings
• Chopped tomatoes – Freshness that brightens up every bite.
• Shredded lettuce – A crisp stand-in for those classic burger toppings!

This Loaded Cheeseburger Alfredo Pasta is all about comforting flavors and quick prep, so gather your ingredients and let’s get cooking!

Step‑by‑Step Instructions for Loaded Cheeseburger Alfredo Pasta

Step 1: Boil the Pasta
Bring a large pot of salted water to a rapid boil over high heat. Once boiling, add the pasta of your choice—elbow, penne, rotini, or shells. Cook according to the package instructions until al dente, usually around 8–10 minutes. Drain the pasta in a colander, shaking off excess water before setting it aside for later.

Step 2: Cook the Ground Beef
While the pasta is cooking, heat 1 tablespoon of olive oil in a large skillet over medium-high heat. Add the pound of ground beef, breaking it apart with a spoon. Cook until it’s nicely browned and fully cooked, approximately 5–7 minutes. Once browned, carefully drain any excess grease from the skillet to keep the dish rich yet not overly greasy.

Step 3: Season the Beef
Sprinkle the cooked ground beef with 1 teaspoon each of onion powder and garlic powder, along with ½ teaspoon of smoked paprika, and season with salt and pepper to taste. Stir well to distribute the seasonings evenly, ensuring every bite of your Loaded Cheeseburger Alfredo Pasta is packed with flavor. Cook for another minute to revive the spices’ aroma.

Step 4: Add the Alfredo Sauce
Reduce the heat to low and pour in 1½ cups of Alfredo sauce, mixing it thoroughly with the seasoned beef. Allow the mixture to simmer gently for 2–3 minutes, stirring occasionally until it is heated through and the flavors meld beautifully. This rich base will bring creamy comfort to your pasta.

Step 5: Combine Pasta and Sauce
Next, add the drained pasta to the skillet, gently tossing it with the creamy beef mixture. Stir in 1 cup of shredded cheddar cheese and, if desired, ½ cup of mozzarella cheese for extra meltiness. Mix until the cheeses are thoroughly melted and everything is creamy and well combined, creating a delightful Loaded Cheeseburger Alfredo Pasta.

Step 6: Top and Serve
Once combined, remove the skillet from heat and generously top your meal with 4 slices of crumbled bacon and ⅓ cup of diced dill pickles for that iconic cheeseburger flavor. Feel free to add chopped tomatoes or shredded lettuce on top for a burst of freshness. Serve warm and enjoy the delicious creations of your Loaded Cheeseburger Alfredo Pasta!

How to Store and Freeze Loaded Cheeseburger Alfredo Pasta

Fridge: Store leftovers in an airtight container and keep them in the refrigerator for up to 3 days. Reheat gently on the stovetop or in the microwave.

Freezer: For longer storage, freeze individual portions in freezer-safe containers for up to 2 months. Allow to thaw overnight in the fridge before reheating.

Reheating: When reheating, consider adding a splash of milk or cream to restore creaminess. Heat until warmed through, stirring occasionally.

Use Fresh Ingredients: If possible, add fresh toppings like lettuce and tomatoes just before serving to maintain their crunch and flavor.

Expert Tips for Loaded Cheeseburger Alfredo Pasta

Perfect Beef Browning: Ensure the ground beef is well-browned; this adds a depth of flavor. Avoid overcrowding the pan, which can prevent proper browning.

Cheese Choices: Using freshly shredded cheese melts better than pre-shredded packs, which often contain anti-caking agents. Stick to your cheddar and mozzarella for that creamy texture!

Seasoning Savvy: Taste as you go! Adjust your salt and seasoning according to your personal preference to truly enhance the flavors in your Loaded Cheeseburger Alfredo Pasta.

Pasta Cooking: Aim for al dente pasta; it should retain a bit of bite. Overcooked pasta can turn mushy when mixed into the sauce.

Sauce Substitution: If you're short on Alfredo sauce, a mix of cream and Parmesan can substitute well, giving you a rich, creamy base for the pasta.

Make Ahead Options

These Loaded Cheeseburger Alfredo Pasta is perfect for meal prep enthusiasts! You can cook the pasta and ground beef mixture up to 24 hours in advance, storing them separately in airtight containers in the refrigerator. To maintain quality, ensure the pasta is slightly undercooked (al dente) so it doesn't become mushy when reheated. When you're ready to serve, simply reheat the beef sauce in a skillet over low heat, adding the cooked pasta, Alfredo sauce, and cheese until everything is heated through and creamy. Top with crumbled bacon and pickles just before serving for that fresh, delicious taste! This allows you to enjoy a comforting meal without the last-minute rush.

What to Serve with Loaded Cheeseburger Alfredo Pasta

Looking to create a full meal that complements the rich, creamy goodness of your Loaded Cheeseburger Alfredo Pasta?

  • Garlic Bread: The crispy, buttery texture of garlic bread adds a delightful crunch and pairs beautifully with the creamy, cheesy pasta.
  • Caesar Salad: A crisp and tangy Caesar salad offers a refreshing contrast, making each bite of pasta feel even more indulgent.
  • Roasted Vegetables: Colorful roasted veggies bring a touch of sweetness and a satisfying texture that balances the richness of the dish.
  • Sweet Potato Fries: These sweet, crispy fries serve as a hearty side that echoes the familiar comfort of classic cheeseburgers.
  • Coleslaw: A tangy, crunchy coleslaw provides refreshing acidity that cuts through the creaminess of your pasta beautifully. It’s a classic picnic side that brightens any meal!
  • Fruit Salad: For a sweet finish, a light fruit salad brings vibrant flavor and refreshment, perfect for cleansing your palate after a savory main dish.
  • Wine Pairing: A chilled glass of Sauvignon Blanc enhances the meal, offering a crisp, citrusy note that complements the creamy textures wonderfully.

Feel free to mix and match these sides to create a meal your family will love!

Loaded Cheeseburger Alfredo Pasta Variations

Feel free to get creative and make this Loaded Cheeseburger Alfredo Pasta your own with these delightful twists!

  • Gluten-Free: Substitute regular pasta with gluten-free options like chickpea or brown rice pasta for a delicious alternative. Your taste buds won’t feel left out!

  • Vegetarian: Swap out the ground beef for lentils or plant-based meat alternatives. This keeps the creamy goodness while being kinder to your herbivore friends!

  • Spicy Kick: Add a teaspoon of red pepper flakes or a splash of hot sauce to the Alfredo sauce for a bold kick. This can elevate the comfort dish into a fiery delight!

  • Herb Infusion: Toss in fresh herbs like basil or parsley towards the end of cooking to brighten up the flavors. A sprinkle of fresh herbs can easily take this dish from ordinary to extraordinary!

  • Creamy Spin: Substitute the Alfredo sauce with a creamy ranch dressing or even a cheesy nacho sauce for a zesty twist. The flavor profile shifts, but the comfort remains!

  • Extra Crunch: Incorporate crispy fried onions or crushed tortilla chips on top for a delightful crunch. These little surprises add texture and a big wow factor to your dish!

  • Beefy Mix: Combine ground beef with Italian sausage for a richer flavor profile. It’s a meaty mash-up that will surely make your dish stand out!

Why not explore these variations and create a new favorite while enjoying the nostalgic flavors? Cooking is about joy and experimentation—so dive in! Plus, if you're looking for more ideas, check out my easy pasta recipes for even greater inspiration!

Loaded Cheeseburger Alfredo Pasta Recipe FAQs

How do I choose the right ground beef?
Absolutely! For the best flavor and texture, I recommend using 85/15 ground beef. This fat content provides a perfect balance, ensuring your Loaded Cheeseburger Alfredo Pasta is juicy and full of flavor without being overly greasy.

How should I store leftover Loaded Cheeseburger Alfredo Pasta?
To keep your delicious pasta fresh, store leftovers in an airtight container in the refrigerator for up to 3 days. If you're reheating it, do so gently on the stovetop or in the microwave to preserve its creamy goodness.

Can I freeze Loaded Cheeseburger Alfredo Pasta?
Very! You can freeze individual portions in freezer-safe containers for up to 2 months. Just be sure to cool the pasta completely before placing it in the freezer. When you’re ready to enjoy, thaw it overnight in the fridge, then reheat, adding a splash of milk if needed to restore creaminess!

What if my pasta seems too dry after reheating?
If your Loaded Cheeseburger Alfredo Pasta has dried out during storage, don't worry! Simply add a splash of cream or milk while reheating to bring it back to a creamy consistency. Stir frequently as it warms for the best results.

Are there any dietary considerations for this recipe?
You can easily adapt this recipe for dietary restrictions! For gluten-free options, use gluten-free pasta and check the Alfredo sauce for gluten content. Additionally, if you or a loved one has allergies, consider using dairy-free cheese or a sauce alternative to enjoy this dish without worry.

How can I enhance the flavor profile?
Feel free to experiment with your seasonings! Adding a pinch of cayenne for a little heat or some Italian herbs for depth can elevate your Loaded Cheeseburger Alfredo Pasta. Also, mixing in some sautéed onions or bell peppers can add a fantastic crunch and boost the overall flavor!

Loaded Cheeseburger Alfredo Pasta

Decadent Loaded Cheeseburger Alfredo Pasta You’ll Love

This Loaded Cheeseburger Alfredo Pasta combines comforting flavors of burgers with creamy pasta, perfect for a quick meal.
Print Recipe Pin Recipe
Prep Time 10 minutes mins
Cook Time 20 minutes mins
Total Time 30 minutes mins
Servings: 4 servings
Course: Main Dishes
Cuisine: American
Calories: 650
Ingredients Equipment Method Nutrition Notes

Ingredients
  

For the Pasta
  • 1 pound ground beef Use 85/15 ground beef for the ideal balance of flavor and moisture.
  • 8 ounces pasta Elbow, penne, rotini, or shells.
For the Flavor
  • 1 tablespoon olive oil Helps to brown the beef beautifully.
  • 1 teaspoon onion powder Enhances savory depth.
  • 1 teaspoon garlic powder Infuses the sauce with garlicky goodness.
  • ½ teaspoon smoked paprika Adds a subtle smokiness.
  • salt Season to taste.
  • pepper Season to taste.
For the Sauce
  • 1 ½ cups Alfredo sauce Homemade or store-bought.
For the Cheese
  • 1 cup shredded cheddar cheese Provides cheeseburger flavor.
  • ½ cup mozzarella cheese Optional for extra meltiness.
For the Extras
  • 4 slices cooked bacon Crumble for topping.
  • ⅓ cup diced dill pickles Adds tanginess.
Optional Toppings
  • chopped tomatoes Freshness.
  • shredded lettuce Crisp stand-in for burger toppings.

Equipment

  • Large Pot
  • large skillet
  • Colander

Method
 

Cooking Steps
  1. Bring a large pot of salted water to a rapid boil. Add the pasta and cook according to package instructions until al dente, usually around 8–10 minutes. Drain and set aside.
  2. Heat olive oil in a large skillet over medium-high heat. Add the ground beef, breaking it apart. Cook until browned, about 5–7 minutes. Drain excess grease.
  3. Season the beef with onion powder, garlic powder, smoked paprika, salt and pepper. Cook for another minute.
  4. Reduce heat to low and add Alfredo sauce to the beef, mixing thoroughly. Simmer gently for 2–3 minutes.
  5. Add the drained pasta to the skillet, tossing it with the beef mixture. Stir in cheddar and optional mozzarella cheese until melted and creamy.
  6. Top with crumbled bacon and diced pickles. Optional: Add tomatoes and lettuce before serving. Serve warm.

Nutrition

Serving: 1servingCalories: 650kcalCarbohydrates: 55gProtein: 40gFat: 30gSaturated Fat: 15gPolyunsaturated Fat: 4gMonounsaturated Fat: 10gTrans Fat: 1gCholesterol: 90mgSodium: 800mgPotassium: 600mgFiber: 3gSugar: 4gVitamin A: 15IUVitamin C: 2mgCalcium: 25mgIron: 15mg

Notes

Store leftovers in an airtight container for up to 3 days in the fridge. Add a splash of milk when reheating for creaminess.

Tried this recipe?

Let us know how it was!

Creamy Cacio E Pepe Chicken That'll Wow Your Taste Buds

August 17, 2025 by grace bellamy Leave a Comment

As I stood in my kitchen, the aroma of freshly cracked black pepper and Pecorino Romano filled the air, transporting me to a cozy trattoria in Rome. That’s the magic of Cacio E Pepe Chicken—it's a comforting dish that transforms the simple into something extraordinary. In just 30 minutes, you can create a creamy, rich feast that's not only a crowd-pleaser but also the perfect antidote to those rushed days and uninspiring fast-food meals. This recipe combines tender chicken breasts with a luscious cheese and cream sauce that wraps around each bite, making every forkful feel like a warm hug. It's easy enough for a weeknight dinner but elegant enough to impress guests. Ready to delve into this delicious adventure? Let’s get cooking!

Why is Cacio E Pepe Chicken irresistible?

Simplicity shines through in this quick recipe, perfect for busy nights or leisurely weekends. Bold flavors from Pecorino Romano and cracked black pepper elevate ordinary chicken to gourmet status. Creamy, rich sauce envelops each bite, making it a comforting choice for any occasion. Versatile pairing options allow you to serve it with your favorite sides, whether a fresh salad or hearty pasta. And best of all, you'll have a delightful meal ready in just 30 minutes! Want to save more time? Check out my tips for quick weeknight dinners!

Cacio E Pepe Chicken Ingredients

For the Chicken
• Boneless, skinless chicken breasts – the stars of this dish, they soak up all the delicious flavors!
• Salt – enhances the chicken's natural flavor, so don’t skip this!

For the Sauce
• Grated Pecorino Romano cheese – adds a sharp, tangy richness that defines Cacio E Pepe chicken.
• Freshly cracked black pepper – for that signature kick; feel free to add more for extra spice!
• Heavy cream – contributes creaminess and balances the flavors beautifully.
• Unsalted butter – adds richness and a silky texture to the sauce.
• Olive oil – helps achieve that perfect golden sear on the chicken.

For Garnish
• Fresh parsley, chopped – brightens up the dish and adds a lovely touch of color.
• Extra black pepper – a final sprinkle for those who love a bit more heat!

Prepare yourself for a wonderful culinary journey with this straightforward yet luxurious Cacio E Pepe Chicken!

Step‑by‑Step Instructions for Cacio E Pepe Chicken

Step 1: Season the Chicken
Start by seasoning the four boneless, skinless chicken breasts generously with salt on both sides. This enhances the natural flavors and ensures a savory bite. Set the seasoned chicken aside while you prepare the skillet. You'll want to have your salt handy; this step sets the foundation for your Cacio E Pepe Chicken.

Step 2: Heat the Skillet
Grab a large skillet and place it over medium-high heat. Add 1 tablespoon of olive oil and allow it to heat for about a minute until shimmering. This temperature is perfect for a lovely sear on your chicken. The oil will help achieve that golden-brown crust, which is crucial for flavor in this delicious dish.

Step 3: Sauté the Chicken
Carefully add the seasoned chicken breasts to the hot skillet. Sauté for approximately 6-7 minutes on each side until they're golden and fully cooked through, reaching an internal temperature of 165°F. This will ensure they’re tender and juicy, creating the perfect base for your Cacio E Pepe sauce.

Step 4: Keep Chicken Warm
Once your chicken is beautifully browned, transfer it to a plate and cover it with foil to keep warm. This resting period allows the juices to redistribute in the chicken, preserving its moisture. Meanwhile, you’ll be creating a rich and creamy sauce that will take your dish to another level.

Step 5: Make the Sauce
In the same skillet, reduce the heat to medium and add 2 tablespoons of unsalted butter. Allow it to melt fully, then pour in 1 cup of heavy cream. Stir the mixture gently, combining the flavors left in the pan with the creamy goodness. The butter and cream will form the luscious base for your Cacio E Pepe Chicken sauce.

Step 6: Incorporate Cheese and Pepper
Once the cream is heated through, stir in 1 cup of grated Pecorino Romano cheese and 2 tablespoons of freshly cracked black pepper. Mix well until the cheese melts completely, creating a smooth, creamy sauce. The mixture should be thick and rich, enveloping your chicken perfectly; this is what makes this dish so tempting!

Step 7: Coat the Chicken
Return the warm chicken breasts to the skillet, allowing them to swim in that cheesy sauce. Simmer everything together for another 2-3 minutes, letting the flavors meld beautifully. As the chicken soaks up the creamy sauce, it transforms into the star of your Cacio E Pepe Chicken dish, ready to impress your taste buds.

Step 8: Adjust the Seasoning
Taste the sauce and adjust the seasoning with additional salt if needed. The right balance of flavors is essential for your Cacio E Pepe Chicken, and a quick taste test ensures it’s just right for serving. If you like it extra peppery, feel free to add more freshly cracked black pepper at this stage.

Step 9: Plate and Garnish
Finally, plate your succulent chicken and generously spoon the creamy sauce over each piece. To add a touch of freshness, garnish with chopped fresh parsley and a sprinkle of extra black pepper. This not only enhances the presentation but also reinforces those beautiful, bold flavors of the dish.

Step 10: Serve Immediately
Serve your Cacio E Pepe Chicken warm with your favorite sides, such as a fresh salad or pasta. Enjoy the hug of rich flavors and creamy textures that make this dish a delightful favorite. Your warm and inviting meal is now ready to enjoy, sure to impress both family and guests alike!

What to Serve with Cacio E Pepe Chicken

Elevate your mealtime experience with delightful pairings that beautifully complement the creamy richness of this dish.

  • Garlic Bread: The crispy, buttery crunch of garlic bread perfectly contrasts the creamy sauce and offers a satisfying bite.
  • Arugula Salad: A fresh, peppery arugula salad adds brightness, balancing the richness of the chicken with vibrant flavors.

Pair your Cacio E Pepe Chicken with a classic side. Crisp greens, juicy tomatoes, and a tangy vinaigrette will awaken your palate and make each forkful exciting.

  • Roasted Vegetables: Root vegetables like carrots and Brussels sprouts, caramelized to perfection, provide a hearty appeal and lovely textures.
  • Pasta Aglio e Olio: The simple flavors of olive oil, garlic, and red pepper flakes enhance the dish while keeping the spotlight on the chicken.

Think about simplicity with your choices. The flavors of pasta aglio e olio bring warmth and comfort, making it an ideal companion.

  • Lemon Risotto: A creamy, zesty risotto adds a touch of indulgence, enhancing the overall dining experience while maintaining a light profile.
  • Pinot Grigio: A glass of chilled Pinot Grigio will lift the flavors, making it a refreshing choice to sip alongside your meal.

Make sure to enjoy a delightful dessert afterward. Perhaps a light sorbet or fruit tart would perfectly conclude this flavorful gathering!

How to Store and Freeze Cacio E Pepe Chicken

Room Temperature: Keep Cacio E Pepe Chicken at room temperature for no more than 2 hours to ensure food safety.

Fridge: Store leftovers in an airtight container in the fridge for up to 3 days. Reheat gently on the stove or in the microwave, adding a splash of cream if needed.

Freezer: Freeze Cacio E Pepe Chicken in a freezer-safe container for up to 2 months. To reheat, thaw overnight in the fridge and warm it in a skillet over low heat, stirring in a bit of cream to revive the sauce.

Reheating: When reheating, do so slowly over medium heat to preserve the creaminess of the sauce. Stir frequently for even warming!

Cacio E Pepe Chicken Variations

Feel free to put your own spin on this delightful Cacio E Pepe Chicken recipe and make it truly yours!

  • Whole Wheat Pasta: Serve the chicken over whole wheat pasta for added fiber and a nutty flavor. This pairing not only becomes heartier but also enhances the dish's nutritional profile.

  • Vegetable Medley: Incorporate sautéed seasonal vegetables like zucchini, bell peppers, or asparagus. These will add color and texture, turning your meal into a vibrant feast.

  • Gluten-Free: Use gluten-free pasta or serve with quinoa instead. This not only makes it suitable for gluten-sensitive diners but also adds a delightful nutty flavor.

  • Spicy Kick: For those who crave heat, add crushed red pepper flakes to the sauce. The extra spice gives the dish a delightful twist, enriching every bite with a warm zing.

  • Herb-Infused: Mix in fresh herbs like basil or thyme into your sauce for a fragrant lift. These herbs will provide a fresh taste and enhance the overall flavor profile beautifully.

  • Lemon Zest: Add a sprinkle of fresh lemon zest before serving to brighten the dish. This small touch infuses a refreshing burst that complements the richness of the sauce perfectly.

  • Smoky Flavors: Introduce smoked paprika to the sauce for a subtle smokiness. It adds a pep to your meal and enhances its complexity without overpowering the classic flavors.

  • Cauliflower Rice: Serve your chicken on a bed of cauliflower rice for a low-carb option. Not only will this lighten up the dish, but it also allows the creamy sauce to shine through against a delicate backdrop.

Every variation opens the door to new flavors, making your Cacio E Pepe Chicken experience exciting and tailored to your taste!

Expert Tips for Cacio E Pepe Chicken

• Quality Ingredients: Use fresh, high-quality Pecorino Romano cheese and heavy cream. The flavors elevate your Cacio E Pepe Chicken significantly!

• Perfectly Seasoned Chicken: Don’t skimp on the salt when seasoning the chicken; this creates a solid flavor base for your dish.

• Adjust Pepper to Taste: If you love a spicy kick, add extra freshly cracked black pepper, but start with 2 tablespoons to avoid overpowering flavors.

• Watch the Cooking Time: Ensure the chicken reaches an internal temperature of 165°F for juicy, tender breasts; overcooking can lead to dryness.

• Garnish Smartly: A sprinkle of fresh parsley not only adds color but also freshness to your dish. Don’t forget the final touch of extra black pepper!

• Serve Immediately: Enjoy your Cacio E Pepe Chicken right after plating for the best creamy experience—waiting too long can lead to a thickened sauce!

Make Ahead Options

These Cacio E Pepe Chicken preparations are perfect for busy home cooks looking to save time during the week! You can season the chicken breasts and refrigerate them up to 24 hours ahead, allowing the flavors to meld beautifully. The creamy sauce can also be prepared and stored in an airtight container for up to 3 days; just reheat gently on the stove before serving to ensure it remains smooth and creamy. When you're ready to serve, simply sauté the chicken as directed, coat it in the reheated sauce, and enjoy restaurant-quality results with minimal effort. This meal prep will help you reclaim your evenings while still delivering a cozy, delicious dinner!

Cacio E Pepe Chicken Recipe FAQs

How do I choose the best chicken for this recipe?
Absolutely! When selecting chicken breasts, look for ones that are plump and free of any dark spots or unusual discoloration. The skinless, boneless variety ensures a quick cook and allows the rich flavors of the Cacio E Pepe sauce to shine through. I often say, "the fresher, the better!"

What’s the best way to store leftover Cacio E Pepe Chicken?
Very simply! After allowing the chicken to cool to room temperature (no more than 2 hours), transfer it to an airtight container. It will stay fresh in the fridge for up to 3 days. When you're ready to enjoy leftovers, gently reheat them on the stove or microwave, adding a splash of cream to keep the sauce luscious.

Can I freeze Cacio E Pepe Chicken? If so, how?
Absolutely, freezing is a great option! Make sure you let the chicken cool completely, then place it in a freezer-safe container. If you're stacking pieces, separate them with freezer paper to prevent sticking. It can be stored for up to 2 months. To reheat, thaw it in the fridge overnight and warm it gently in a skillet over low heat, stirring in a splash of cream to restore that creamy texture.

What should I do if my sauce is too thick after reheating?
If the sauce thickens while reheating, don’t worry—it's a common occurrence! Simply add a splash of heavy cream or chicken broth, and stir over low heat until it's smooth and creamy again. This will help bring back that delightful consistency that makes Cacio E Pepe Chicken so irresistible.

Are there any dietary considerations for this recipe?
For those with dietary restrictions, it's essential to know that Cacio E Pepe Chicken contains dairy from the cheese and cream, which may not be suitable for lactose-intolerant individuals. You could substitute with lactose-free alternatives, like lactose-free cream or a creamy non-dairy option. Also, ensure that your Pecorino Romano cheese is made to suit dietary preferences. Always check ingredient labels if allergies are a concern!

Cacio E Pepe Chicken

Creamy Cacio E Pepe Chicken That'll Wow Your Taste Buds

Experience Cacio E Pepe Chicken, a creamy and comforting dish that transforms simple ingredients into gourmet delight in just 30 minutes.
Print Recipe Pin Recipe
Prep Time 10 minutes mins
Cook Time 20 minutes mins
Resting Time 5 minutes mins
Total Time 30 minutes mins
Servings: 4 chicken breasts
Course: Main Dishes
Cuisine: Italian
Calories: 450
Ingredients Equipment Method Nutrition Notes

Ingredients
  

For the Chicken
  • 4 boneless, skinless chicken breasts the stars of this dish, they soak up all the delicious flavors!
  • 1 teaspoon salt enhances the chicken's natural flavor
For the Sauce
  • 1 cup grated Pecorino Romano cheese adds sharp, tangy richness
  • 2 tablespoons freshly cracked black pepper for that signature kick
  • 1 cup heavy cream contributes creaminess to balance flavors
  • 2 tablespoons unsalted butter adds richness and silky texture
  • 1 tablespoon olive oil helps achieve a perfect golden sear
For Garnish
  • 2 tablespoons fresh parsley, chopped brightens up the dish
  • to taste extra black pepper for those who love a bit more heat

Equipment

  • large skillet

Method
 

Step‑by‑Step Instructions for Cacio E Pepe Chicken
  1. Season the chicken generously with salt on both sides and set aside.
  2. Heat a large skillet over medium-high heat and add olive oil for a golden sear.
  3. Sauté the seasoned chicken for approximately 6-7 minutes on each side until fully cooked through.
  4. Transfer the chicken to a plate and cover with foil to keep warm.
  5. In the same skillet, melt unsalted butter, then add heavy cream and stir until combined.
  6. Stir in grated Pecorino Romano cheese and cracked black pepper until cheese melts completely.
  7. Coat the warm chicken in the creamy sauce, simmering together for 2-3 minutes.
  8. Adjust seasoning to taste with additional salt and black pepper as needed.
  9. Plate the chicken, spoon the creamy sauce over, and garnish with parsley and extra black pepper.
  10. Serve immediately with your favorite sides and enjoy!

Nutrition

Serving: 1chicken breastCalories: 450kcalCarbohydrates: 3gProtein: 35gFat: 35gSaturated Fat: 20gPolyunsaturated Fat: 0.5gMonounsaturated Fat: 10gCholesterol: 150mgSodium: 800mgPotassium: 600mgSugar: 1gVitamin A: 800IUVitamin C: 2mgCalcium: 400mgIron: 2mg

Notes

Use fresh, high-quality ingredients for the best flavor experience. Serve warm for optimal creaminess.

Tried this recipe?

Let us know how it was!

Savory Sweet Healthy Zucchini Oatmeal Cookies You'll Love

August 17, 2025 by grace bellamy Leave a Comment

As I rummaged through my kitchen one sunny afternoon, a bounty of fresh zucchini caught my eye. With a hint of inspiration, I decided to blend it into a batch of Healthy Zucchini Oatmeal Cookies. These delightful treats are not only a fantastic way to sneak in some veggies but also a wholesome alternative to traditional cookies. With just a few simple ingredients, you’ll whip up something that’s quick, satisfying, and sure to impress family and friends. The combination of oats and the natural sweetness from pure maple syrup transforms every bite into a chewy, satisfying experience. Ready to indulge guilt-free? Let’s dive into this easy recipe that will leave you craving more!

Why are these Zucchini Cookies special?

Healthy ingredients come together beautifully to create a guilt-free treat. Quick and easy to whip up, they'll become a go-to recipe for your busy days. Deliciously moist, the zucchini adds a surprising twist to the classic cookie, blending perfectly with oats and cinnamon. Perfect for any occasion, these cookies appeal to all ages—making them an excellent choice for cookie swaps or snack time! For more delightful recipes, don’t miss my healthy snack ideas or explore quick dessert recipes.

Healthy Zucchini Oatmeal Cookies Ingredients

• Get ready to bake scrumptious treats!

For the Cookie Base

  • Instant oats – Provides a hearty texture while being a great source of fiber.
  • Whole wheat flour or gluten-free flour – Whole wheat flour adds nuttiness, while gluten-free flour accommodates dietary needs.
  • Baking powder – Ensures your cookies puff up nicely for that perfect chewy bite.
  • Ground cinnamon – Infuses warmth and sweetness, enhancing the cookies' delightful flavor.
  • Ground nutmeg – A pinch will elevate the taste, offering a cozy spice note.
  • Salt – Balances flavors and enhances sweetness without overpowering it.

For the Wet Ingredients

  • Coconut oil or unsalted butter – Adds richness and moisture; choose coconut oil for a dairy-free twist!
  • Large egg – Binds the ingredients together, creating a soft and chewy cookie.
  • Vanilla extract – Introduces a lovely aromatic depth and sweetness to the dough.
  • Pure maple syrup – Naturally sweetens these Healthy Zucchini Oatmeal Cookies while adding a unique flavor.

For the Star Ingredient

  • Freshly grated zucchini – Not only hides veggies in a tasty treat but keeps the cookies moist and chewy; just remember to pat it dry!

Dive into this simple list and gather your ingredients for an irresistible baking experience. Enjoy every bite of these nourishing cookies!

Step‑by‑Step Instructions for Healthy Zucchini Oatmeal Cookies

Step 1: Whisk the Dry Ingredients
Begin by grabbing a medium mixing bowl and whisking together 1 cup of instant oats, ¾ cup of whole wheat flour, 1 ½ teaspoons of baking powder, 1 ½ teaspoons of ground cinnamon, ¼ teaspoon of ground nutmeg, and ¼ teaspoon of salt. Ensure there are no lumps, as this will provide a uniform texture for your Healthy Zucchini Oatmeal Cookies.

Step 2: Mix the Wet Ingredients
In a separate bowl, combine 2 tablespoons of melted coconut oil or unsalted butter, 1 large room-temperature egg, and 1 teaspoon of vanilla extract. Use a whisk to blend them thoroughly until the mixture is smooth and glossy, which should take about 2 minutes. This creamy base is key to achieving the moist texture of your cookies.

Step 3: Sweeten It Up
Next, slowly stir in ½ cup of pure maple syrup into your wet mixture. Make sure it’s well combined; the syrup not only adds sweetness but also enhances the flavor profile of your Healthy Zucchini Oatmeal Cookies. You should have a thick, sweet batter at this point, ready to merge with the dry ingredients.

Step 4: Combine the Mixtures
Add the dry oat mixture to the wet ingredients, mixing gently until just incorporated. Be careful not to overmix, as this can lead to tough cookies. The dough should be slightly sticky and chunky, which is perfect for folding in the star of the show – the zucchini!

Step 5: Fold in the Zucchini
Carefully fold in 1 cup of freshly grated zucchini, ensuring it’s patted dry to avoid excess moisture. This step is essential as the zucchini provides a delightful burst of flavor and keeps your cookies chewy. Your dough will now have a beautiful green speckle throughout, which will tempt your taste buds even more!

Step 6: Chill the Dough
Cover the dough with plastic wrap and chill it in the refrigerator for 30 minutes. This resting period allows the flavors to meld and helps the cookies hold their shape while baking—a crucial step for your Healthy Zucchini Oatmeal Cookies to turn out perfectly.

Step 7: Preheat the Oven
While the dough chills, preheat your oven to 325°F (163°C). Prepare a baking sheet by lining it with parchment paper, which will keep your cookies from sticking and ensure even baking. Get ready for that lovely warm aroma to fill your kitchen soon!

Step 8: Scoop the Dough
After chilling, use a spoon and spatula to drop 15 rounded scoops of dough onto the prepared baking sheet, spacing them about 2 inches apart. Gently flatten each mound to a thickness of about ⅜ inches with the spatula; this will help them bake evenly into delightful cookie shapes.

Step 9: Bake the Cookies
Place the baking sheet in the preheated oven and bake for 11-14 minutes. Keep an eye out for slightly soft centers that feel underdone—this ensures your Healthy Zucchini Oatmeal Cookies remain chewy and tender. The edges will have a light golden color when they’re ready!

Step 10: Cool Before Serving
Once baked, remove the cookies from the oven and let them cool on the sheet for 10 minutes. This step is crucial as it allows the cookies to set up properly before transferring them to a wire rack. Enjoy the anticipation as you prepare to indulge in these scrumptious treats!

Make Ahead Options

These Healthy Zucchini Oatmeal Cookies are perfect for meal prep enthusiasts! You can make the cookie dough up to 24 hours in advance and store it covered in the refrigerator. For the best quality, remember to pat the grated zucchini dry before mixing to prevent excess moisture. When you're ready to bake, simply scoop the chilled dough onto a baking sheet and bake as directed. If you'd like to freeze the cookie dough, you can portion it out into scoops and freeze on a baking sheet, then transfer to a bag for up to 3 months. Just bake from frozen, adding a couple of extra minutes to the baking time for delicious, freshly baked cookies anytime!

How to Store and Freeze Healthy Zucchini Oatmeal Cookies

Room Temperature: Store cookies in an airtight container for up to 3 days to maintain their chewy texture and freshness.

Fridge: For longer storage, place the container in the refrigerator, where they can last up to 1 week without losing flavor.

Freezer: Freeze cookies in a single layer on a baking sheet before transferring them to a freezer-safe bag for up to 3 months.

Reheating: To enjoy warm cookies, simply pop them in the microwave for 10-15 seconds or warm them in the oven for a few minutes at 300°F (150°C).

What to Serve with Healthy Zucchini Oatmeal Cookies

Looking to create a complete meal or snack experience that perfectly complements these delightful cookies?

  • Creamy Yogurt: A dollop of Greek yogurt adds a tangy contrast and boosts protein, making your treat even more satisfying. It’s a perfect pairing that balances the sweetness of the cookies.

  • Fresh Fruit Salad: Bright and refreshing, a mix of seasonal fruits enhances the cookies’ flavors and brings a burst of natural sweetness to your snack.

  • Nutty Granola: A sprinkle of crunchy granola elevates the textures in your meal, adding an extra layer of flavor that resonates with the wholesome ingredients in the cookies.

  • Herbal Tea: A warm cup of herbal tea can provide a gentle soothing complement, enhancing your cookie enjoyment and creating a cozy afternoon moment.

  • Milk or Almond Milk: A classic choice, a glass of cold milk, or creamy almond milk can perfectly wash down the chewy cookies, making each bite feel indulgent yet wholesome.

  • Dark Chocolate Drizzle: Elevate your cookies with a light drizzle of dark chocolate. It complements the flavors and adds a rich, luxurious touch to each bite.

  • Mint Leaves: A few fresh mint leaves can add a refreshing twist. The cool flavor contrasts beautifully with the warm, sweet notes of the cookies, making for an uplifting experience.

  • Spiced Chai: Infuse your cookie treat with aromatic spiced chai for a comforting drink that enriches the flavors of the cookies and transports you to a cozy café vibe.

  • Vanilla Ice Cream: For a dessert twist, serve the cookies with a scoop of vanilla ice cream. The creaminess and coldness create a delightful contrast with the warm, chewy cookies.

Mix and match these pairings to create a harmonious and satisfying experience that highlights your Healthy Zucchini Oatmeal Cookies!

Expert Tips for Healthy Zucchini Oatmeal Cookies

  • Zucchini Prep: Ensure you pat the grated zucchini dry before adding it to the mix, as excess moisture can make the cookies soggy.
  • Chill the Dough: Don’t skip the chilling step; this helps the cookies maintain their shape and enhances overall flavor.
  • Baking Time: Keep an eye on your cookies while baking; underbaking slightly will keep them chewy and delicious instead of dry.
  • Swaps & Variations: Feel free to substitute coconut oil with unsalted butter for a richer flavor, or add chocolate chips for an indulgent touch!
  • Freshness: Store any leftover cookies in an airtight container—this keeps your Healthy Zucchini Oatmeal Cookies soft and fresh for days.

Healthy Zucchini Oatmeal Cookies Variations

Feel free to get creative and make these cookies uniquely yours with these delightful twists!

  • Gluten-Free: Use certified gluten-free oats and a gluten-free flour blend to enjoy the same delicious taste while catering to dietary needs.
  • Dairy-Free: Swap unsalted butter for coconut oil to keep your cookies dairy-free without sacrificing moisture or flavor.
  • Low-Sugar: Replace maple syrup with a sugar-free syrup or a mashed ripe banana for a naturally sweet, low-sugar version.
  • Nutty Crunch: Add ½ cup of chopped nuts, like walnuts or almonds, for an extra crunchy texture and a nutritious boost. The added nuts will complement the chewy oats beautifully!
  • Chocolate Delight: Fold in ½ cup of dark chocolate chips or cacao nibs for a decadent treat that chocolate lovers will adore. The melted chocolate adds richness that pairs perfectly with zucchini.
  • Spice It Up: Enhance the flavor by adding a pinch of cayenne pepper or ginger for a hint of warmth. This subtle kick can take your cookies to the next level of deliciousness.
  • Fruit Infusion: Mix in ½ cup of dried cranberries or raisins for a fruity touch that provides both sweetness and chewiness. They’ll add a pop of color and extra flavor!
  • Cinnamon Roll Twist: Swirl in a mixture of cinnamon and brown sugar before baking to mimic your favorite cinnamon rolls in cookie form. This will create a sweetly spiced surprise in every bite!

Explore these variations to give your Healthy Zucchini Oatmeal Cookies a new spin each time you bake. And don’t forget to check out my healthy snack ideas and quick dessert recipes for more scrumptious inspirations!

Healthy Zucchini Oatmeal Cookies Recipe FAQs

How do I choose the right zucchini for these cookies?
Absolutely! Look for zucchini that is firm and shiny with a vibrant green color. Avoid any with dark spots or soft patches. Smaller zucchinis are usually sweeter and have fewer seeds, making them perfect for these cookies.

Can I store Healthy Zucchini Oatmeal Cookies at room temperature?
Very! Store your cookies in an airtight container for up to 3 days at room temperature. This helps maintain their delightful chewy texture. Just ensure they're completely cooled before you seal them up to lock in freshness.

How should I freeze these cookies?
Of course! To freeze, first chill the cookies on a baking sheet until firm. Once chilled, transfer them to a freezer-safe bag or container, separating layers with parchment paper, and freeze for up to 3 months. When you're ready to enjoy, just reheat in the microwave or a low oven until warmed through.

What if my cookies turn out too dry?
If your Healthy Zucchini Oatmeal Cookies end up a bit dry, it might be due to overbaking. Next time, keep an eye on them towards the end of the baking time. Baking them until the centers are still slightly soft will help keep them moist. Also, make sure to pat the grated zucchini dry but not remove all moisture, so it helps keep them chewy.

Are these cookies suitable for gluten-free diets?
Absolutely! You can easily substitute the whole wheat flour with a gluten-free flour blend. I often recommend using a 1-to-1 gluten-free flour for the best results. Also, double-check that all other ingredients, like oats, are certified gluten-free to ensure they are safe for your dietary needs.

How can I enhance the flavor of my cookies?
Great question! Adding a handful of chocolate chips or nuts can elevate these already delicious Healthy Zucchini Oatmeal Cookies. Also, consider a sprinkle of sea salt on top before baking to enhance the sweetness even further—it's a delightful twist!

Healthy Zucchini Oatmeal Cookies

Savory Sweet Healthy Zucchini Oatmeal Cookies You'll Love

Healthy Zucchini Oatmeal Cookies are a delicious, guilt-free treat that combines veggies with wholesome ingredients for a chewy dessert.
Print Recipe Pin Recipe
Prep Time 10 minutes mins
Cook Time 14 minutes mins
Chilling Time 30 minutes mins
Total Time 54 minutes mins
Servings: 15 cookies
Course: Dessert
Cuisine: American
Calories: 120
Ingredients Equipment Method Nutrition Notes

Ingredients
  

For the Cookie Base
  • 1 cup instant oats Provides texture and fiber.
  • ¾ cup whole wheat flour or gluten-free flour Choose based on dietary needs.
  • 1 ½ teaspoons baking powder Helps cookies puff up.
  • 1 ½ teaspoons ground cinnamon Adds warmth and sweetness.
  • ¼ teaspoon ground nutmeg Enhances flavor.
  • ¼ teaspoon salt Balances flavors.
For the Wet Ingredients
  • 2 tablespoons coconut oil or unsalted butter Adds richness.
  • 1 large egg Binds ingredients.
  • 1 teaspoon vanilla extract Adds aromatic depth.
  • ½ cup pure maple syrup Natural sweetness.
For the Star Ingredient
  • 1 cup freshly grated zucchini Keeps cookies moist; pat dry.

Equipment

  • Mixing Bowl
  • Whisk
  • Baking Sheet
  • parchment paper
  • spatula

Method
 

Step-by-Step Instructions
  1. Whisk together the dry ingredients in a medium bowl until there are no lumps.
  2. In a separate bowl, mix the wet ingredients until smooth.
  3. Slowly stir in maple syrup until well incorporated.
  4. Combine the dry and wet mixtures gently to avoid overmixing.
  5. Fold in the grated zucchini until evenly distributed.
  6. Chill the dough for 30 minutes.
  7. Preheat the oven to 325°F (163°C) and prepare a baking sheet with parchment paper.
  8. Drop rounded scoops of dough onto the baking sheet, flattening slightly.
  9. Bake for 11-14 minutes until edges are golden and centers are soft.
  10. Cool on the baking sheet for 10 minutes before transferring to a wire rack.

Nutrition

Serving: 1cookieCalories: 120kcalCarbohydrates: 18gProtein: 2gFat: 5gSaturated Fat: 3gPolyunsaturated Fat: 0.5gMonounsaturated Fat: 1.5gCholesterol: 25mgSodium: 100mgPotassium: 75mgFiber: 2gSugar: 6gVitamin A: 50IUVitamin C: 1mgCalcium: 20mgIron: 0.5mg

Notes

For best results, remember to pat the zucchini dry before adding to the mixture. Store leftovers in an airtight container to maintain freshness.

Tried this recipe?

Let us know how it was!

Savory Creamy Smothered Chicken and Rice for Cozy Nights

August 17, 2025 by grace bellamy Leave a Comment

There’s something mesmerizing about the way a warm, creamy sauce envelops tender chicken, isn’t there? Today, I’m excited to share my beloved recipe for Creamy Smothered Chicken and Rice. This dish is pure comfort food, a quick triumph that transforms a simple weeknight meal into a heartwarming feast. With just 40 minutes to prep and cook, you’ll delight in the easy steps that come together effortlessly. The rich, cheesy sauce adds a delightful twist, while the rice soaks up every bit of that luscious flavor, making it a true crowd-pleaser. Trust me, whether you’re a seasoned home chef or just starting out, this recipe will brighten your table and your heart. So, are you ready to whip up something delicious? Let’s dive in!

Why is Creamy Smothered Chicken a must-try?

Comforting warmth: This dish wraps you in cozy flavors, making it perfect for chilly evenings.
Quick and easy: With just 40 minutes from start to finish, it’s an ideal solution for busy weeknights.
Flavor-packed sauce: The creamy cheese blend and herbs create an indulgent sauce you’ll crave again and again.
Versatile ingredients: Easily swap in chicken thighs or serve with your favorite veggies for a personalized twist.
Crowd-pleaser appeal: Whether you’re cooking for family or entertaining friends, this dish is sure to impress! If you're looking for ways to enhance your meal, check out my tips on serving suggestions and storage tips.

Creamy Smothered Chicken and Rice Ingredients

• Dive into these essential ingredients that make this dish irresistibly creamy and comforting!

For the Chicken

  • 2 chicken breasts – Use fresh, high-quality chicken for the most tender result.
  • 1 teaspoon garlic powder – Adds a delightful depth of flavor to the dish.
  • 1 teaspoon onion powder – A classic ingredient that complements the garlic beautifully.
  • 1 teaspoon smoked paprika – Gives a subtle smokiness that enhances the overall taste.
  • ½ teaspoon salt – Essential for seasoning the chicken perfectly.
  • ½ teaspoon black pepper – Adds a gentle kick and balances the flavors.
  • 2 tablespoons olive oil – Helps to achieve that golden, crispy exterior.

For the Rice

  • 1 cup chicken broth – Swaps water for rich flavor – essential for creamy smothered chicken and rice.
  • 1 cup long-grain white rice – Fluffy rice that's perfect for soaking up the luscious sauce.
  • ½ teaspoon salt (for rice) – Enhances the flavor of the rice while cooking.

For the Creamy Sauce

  • 2 tablespoons butter – Creates a smooth base for the sauce.
  • 2 tablespoons flour – Thickens the sauce to the perfect consistency.
  • 1 ½ cups whole milk – Adds richness and creaminess to the sauce.
  • ½ teaspoon garlic powder (for sauce) – Extra garlic flavor elevates the creaminess.
  • ½ teaspoon thyme – An aromatic herb that perfectly complements the chicken.
  • ½ cup cheddar cheese – Melts beautifully for a rich, cheesy flavor.
  • ½ cup Parmesan cheese – Adds a nutty complexity that enhances the sauce's richness.
  • Fresh parsley (for garnish) – A touch of freshness to brighten up the dish.

With these ingredients, you’re on your way to creating a comforting meal that feels like a warm embrace. Don't forget to gather everything before you start – it makes the cooking process a breeze! Happy cooking!

Step‑by‑Step Instructions for Creamy Smothered Chicken and Rice

Step 1: Season the Chicken
Begin by seasoning both sides of the chicken breasts with garlic powder, onion powder, smoked paprika, salt, and black pepper. This flavorful blend will enhance the taste of your Creamy Smothered Chicken and Rice. Make sure to coat the chicken evenly, allowing the spices to infuse the meat as it cooks.

Step 2: Sear the Chicken
In a large skillet, heat 2 tablespoons of olive oil over medium-high heat until shimmering. Carefully add the seasoned chicken breasts and sear for 6-7 minutes on each side, aiming for a golden-brown crust. Once cooked through and the juices run clear, remove the chicken from the skillet and set aside on a plate.

Step 3: Cook the Rice
In the same skillet, pour in 1 cup of chicken broth and bring it to a gentle simmer. Add 1 cup of long-grain white rice along with ½ teaspoon of salt, stirring briefly. Cover the skillet with a lid, reduce the heat to low, and let it cook for 15-20 minutes until the rice is tender and has absorbed all the liquid. Fluff the rice with a fork and set aside.

Step 4: Make the Roux
Return the skillet to medium heat and add 2 tablespoons of butter. Once melted, whisk in 2 tablespoons of flour, stirring constantly for about 1-2 minutes until it forms a roux. This step is crucial as it will thicken your sauce, giving it that creamy consistency everyone loves in Creamy Smothered Chicken and Rice.

Step 5: Prepare the Creamy Sauce
Gradually pour in 1 ½ cups of whole milk while whisking continuously to combine smoothly. Cook the sauce for about 5 minutes, or until it thickens and begins to bubble gently. Stir in ½ teaspoon of garlic powder, ½ teaspoon of thyme, and both cheeses—½ cup of cheddar and ½ cup of Parmesan—until they melt thoroughly, creating a luscious and cheesy sauce.

Step 6: Finish Cooking the Chicken
Now, return the seared chicken breasts to the skillet with the creamy sauce. Spoon some sauce over the chicken, ensuring it's well coated. Let it simmer for 5 minutes, allowing the chicken to absorb those rich flavors while keeping it warm and juicy.

Step 7: Serve and Garnish
To serve, create a cozy bed with the fluffy rice on a plate. Place the creamy smothered chicken on top and generously drizzle with the remaining sauce from the skillet. For a delightful finish, sprinkle freshly chopped parsley over the dish, adding a touch of color and freshness to your Creamy Smothered Chicken and Rice. Enjoy this comforting meal with family and friends!

Make Ahead Options

These Creamy Smothered Chicken and Rice are perfect for busy weeknights! You can season and sear the chicken up to 24 hours in advance, then simply refrigerate until you’re ready to cook. The rice can also be made ahead and stored in the fridge for up to 3 days. When it’s time to serve, reheat the chicken in a skillet over medium heat and prepare the creamy sauce as described, ensuring the cheese melts beautifully for that rich flavor. Just follow these steps, and you’ll have a comforting, home-cooked meal with minimal effort, perfect for when life gets hectic!

Creamy Smothered Chicken and Rice Variations

Feel free to play around with this recipe, creating delightful twists that suit your taste buds!

  • Dairy-Free: Substitute whole milk with unsweetened almond or coconut milk for a lighter version. You can still achieve that creamy texture with the right milk alternative!

  • Spicy Kick: Add a dash of cayenne pepper or crushed red pepper flakes to the sauce for an exciting heat. Just a little spice can elevate your creamy dish to a whole new level!

  • Vegetable Twist: Incorporate sautéed bell peppers, broccoli, or peas for added nutrition and vibrant color. These veggies not only enhance the flavor but also create a beautiful plate.

  • Herb Boost: Swap thyme for fresh rosemary or basil for a fragrant twist. Fresh herbs bring a bright, fresh taste that will keep everyone coming back for seconds.

  • Cheese Variations: Use mozzarella, gouda, or feta instead of cheddar and Parmesan for unique flavor profiles. Each cheese adds its own character, letting you customize the dish to your liking!

  • Quinoa Alternative: Replace white rice with quinoa for a protein-packed option. Quinoa's nutty flavor and texture blend beautifully with the creamy sauce.

  • Ingredient Swaps: Try chicken thighs instead of breasts for a richer flavor. They remain incredibly moist and tender, making your dish even more delicious!

  • Add Protein: Toss in some cooked shrimp or cooked sausage for an extra protein boost. This gives a hearty twist to your comforting smothered chicken and rice while enhancing the overall flavor.

Explore these variations to find your favorite version of this beloved dish, and don't forget to enjoy the culinary journey along the way. Happy cooking!

Storage Tips for Creamy Smothered Chicken and Rice

Fridge: Store leftovers in an airtight container for up to 3-4 days. This helps maintain the creamy texture and flavors of the chicken and rice.

Freezer: Creamy Smothered Chicken and Rice can be frozen for 2-3 months. Allow it to cool completely before transferring to a freezer-safe container.

Reheating: To reheat, thaw overnight in the fridge, then warm gently in a skillet over low heat, adding a splash of milk or chicken broth to restore creaminess.

Portioning: Consider portioning the dish into individual servings for easy reheating, making weekday meals even simpler!

Expert Tips for Creamy Smothered Chicken and Rice

• Chicken Choice: Use skinless, boneless chicken breasts or thighs for juicy, tender results, avoiding overcooking to keep the meat moist.

• Flavor Boost: Consider adding sautéed mushrooms or spinach to the cream sauce for added depth and nutritional value in your creamy smothered chicken and rice.

• Roux Consistency: Take care not to cook the roux too long; just a couple of minutes is enough. This will ensure your sauce thickens without burning.

• Cheese Options: Feel free to mix up the cheeses! Cream cheese or gruyere can be delicious substitutes, adding unique flavors to your creamy sauce.

• Rice Texture: Allowing the rice to rest for a few minutes after cooking can enhance its fluffiness, ensuring it pairs perfectly with the creamy chicken.

• Storage Tips: Store leftovers in an airtight container, ensuring the creamy smothered chicken and rice stays fresh for 3-4 days, and reheat gently to maintain its creaminess.

What to Serve with Creamy Smothered Chicken and Rice

Transform your delicious dish into a full meal experience with these delightful pairings that will tantalize your taste buds.

  • Steamed Broccoli: A vibrant contrast in color and crunch, tender broccoli adds a fresh element, lightening up the creamy richness.

  • Garlic Bread: Crispy, buttery, and bursting with flavor, garlic bread is perfect for soaking up every drop of that luscious sauce.

  • Crisp Green Salad: A refreshing salad with mixed greens and a zesty vinaigrette balances the heartiness of the creamy smothered chicken and rice.

  • Roasted Asparagus: The earthy notes of roasted asparagus create a wonderfully sophisticated side that pairs beautifully with the cheesy sauce.

  • Mashed Potatoes: Creamy mashed potatoes add an extra layer of comfort, harmonizing with the dish’s decadent flavors, making every bite a warm embrace.

  • Sautéed Spinach: Lightly sautéed spinach sprinkled with lemon zest brings a touch of vibrancy that complements the chicken perfectly, adding some green goodness to your plate.

  • Chardonnay: A glass of chilled Chardonnay adds a light, citrusy touch; it plays on the creaminess of the sauce while cleansing the palate.

  • Lemon Sorbet: As a refreshing dessert, lemon sorbet will cleanse your palate after the rich meal, transitioning your dining experience to a light, sweet finish.

Creamy Smothered Chicken and Rice Recipe FAQs

How do I choose the right chicken for this recipe?
Absolutely! Opt for fresh, high-quality chicken breasts for the most succulent result. Look for meat that is pink, without dark spots or signs of freezer burn. If you prefer, skinless boneless chicken thighs can be a great alternative, providing extra moisture and flavor.

How should I store leftovers of Creamy Smothered Chicken and Rice?
After enjoying your meal, allow the leftovers to cool completely. Store them in an airtight container in the refrigerator for up to 3-4 days. Remember to keep the chicken and rice together for maximum flavor retention!

Can I freeze Creamy Smothered Chicken and Rice?
Certainly! This dish can be frozen for 2-3 months. Make sure it’s completely cooled before transferring to a freezer-safe container. Label it with the date, and when you're ready to enjoy it, thaw it overnight in the fridge.

What if my sauce isn’t thickening properly?
If your sauce seems too thin, don’t worry! Simply let it simmer a bit longer over medium heat, stirring continuously. If you need a quick fix, you can mix 1 tablespoon of cornstarch with 2 tablespoons of cold water to form a slurry, then stir it into the sauce while it simmers until it thickens to your desired consistency.

Are there any dietary considerations for this dish?
Definitely! If you have lactose intolerance, consider substituting the whole milk with lactose-free milk, and use dairy-free cheese options to create a deliciously creamy sauce. If cooking for friends with specific allergies, ensure the chicken and sauces are free of gluten and dairy if that's a concern; there are many great alternatives available.

How long will the rice take to cook?
The rice typically takes about 15-20 minutes to cook in the chicken broth. Make sure to cover the skillet with a lid while it cooks; this keeps the steam in and helps the rice absorb all the rich flavors. After it’s cooked, let it sit for a few minutes before fluffing with a fork for that perfect texture!

Creamy Smothered Chicken and Rice Recipe FAQs

Creamy Smothered Chicken and Rice

Savory Creamy Smothered Chicken and Rice for Cozy Nights

This Creamy Smothered Chicken and Rice is pure comfort food that transforms a simple weeknight meal into a heartwarming feast.
Print Recipe Pin Recipe
Prep Time 20 minutes mins
Cook Time 20 minutes mins
Total Time 40 minutes mins
Servings: 4 servings
Course: Main Dishes
Cuisine: American
Calories: 450
Ingredients Equipment Method Nutrition Notes

Ingredients
  

For the Chicken
  • 2 breasts chicken Use fresh, high-quality chicken for the most tender result.
  • 1 teaspoon garlic powder Adds a delightful depth of flavor to the dish.
  • 1 teaspoon onion powder A classic ingredient that complements the garlic beautifully.
  • 1 teaspoon smoked paprika Gives a subtle smokiness that enhances the overall taste.
  • ½ teaspoon salt Essential for seasoning the chicken perfectly.
  • ½ teaspoon black pepper Adds a gentle kick and balances the flavors.
  • 2 tablespoons olive oil Helps to achieve that golden, crispy exterior.
For the Rice
  • 1 cup chicken broth Swaps water for rich flavor.
  • 1 cup long-grain white rice Fluffy rice that's perfect for soaking up the luscious sauce.
  • ½ teaspoon salt Enhances the flavor of the rice while cooking.
For the Creamy Sauce
  • 2 tablespoons butter Creates a smooth base for the sauce.
  • 2 tablespoons flour Thickens the sauce to the perfect consistency.
  • 1 ½ cups whole milk Adds richness and creaminess to the sauce.
  • ½ teaspoon garlic powder Extra garlic flavor elevates the creaminess.
  • ½ teaspoon thyme An aromatic herb that perfectly complements the chicken.
  • ½ cup cheddar cheese Melts beautifully for a rich, cheesy flavor.
  • ½ cup Parmesan cheese Adds a nutty complexity that enhances the sauce's richness.
  • Fresh garnish parsley A touch of freshness to brighten up the dish.

Equipment

  • large skillet

Method
 

Step-by-Step Instructions
  1. Season both sides of the chicken breasts with garlic powder, onion powder, smoked paprika, salt, and black pepper.
  2. In a large skillet, heat olive oil over medium-high heat and sear the chicken for 6-7 minutes on each side.
  3. Pour chicken broth into the skillet and bring to a simmer. Add rice and salt, then cover and cook for 15-20 minutes.
  4. Add butter to the skillet and whisk in flour to create a roux.
  5. Gradually pour in whole milk while whisking. Cook until the sauce thickens, then stir in cheeses and seasonings.
  6. Return chicken to the skillet and simmer for 5 minutes.
  7. Serve the chicken on a bed of rice, drizzled with sauce and garnished with parsley.

Nutrition

Serving: 1servingCalories: 450kcalCarbohydrates: 38gProtein: 32gFat: 20gSaturated Fat: 10gPolyunsaturated Fat: 2gMonounsaturated Fat: 8gCholesterol: 90mgSodium: 600mgPotassium: 400mgFiber: 1gSugar: 2gVitamin A: 500IUVitamin C: 2mgCalcium: 300mgIron: 2mg

Notes

Store leftovers in an airtight container for up to 3-4 days to maintain freshness.

Tried this recipe?

Let us know how it was!

Creamy Italian Ground Chicken Soup That Warms Your Soul

August 17, 2025 by grace bellamy Leave a Comment

There’s something magical about the cozy comfort of a warm soup on a chilly evening. Today, I'm thrilled to share my recipe for Creamy Italian Ground Chicken Soup—a delightful dish that not only warms the soul but is also incredibly quick to prepare. This savory soup marries ground chicken with rich cream, vibrant vegetables, and aromatic herbs, making it a hearty crowd-pleaser. You’ll love how it combines wholesome ingredients and bold flavors, perfect for settling in after a long day or impressing guests at your next gathering. Plus, it’s so simple to whip up that you might find it becoming a regular in your meal rotation. Ready to dive into a bowl of warmth? Let’s get cooking!

Why Is This Soup So Irresistible?

Creamy goodness: This soup boasts a luxurious blend of heavy cream and whole milk, creating an irresistible texture that's both rich and comforting.

Nutrient-packed: The addition of fresh spinach, carrots, and celery ensures every spoonful is brimming with vitamins and minerals, making it a wholesome choice for your family.

Quick and easy: In just about 50 minutes, you can whip up this satisfying meal, saving you time on busy nights.

Flavorsome herbs: The combination of dried basil and oregano infuses the soup with authentic Italian flavors, transporting your taste buds to the heart of Italy.

Crowd-pleaser: Perfect for family dinners or gatherings, this creamy Italian ground chicken soup is bound to impress all your guests—especially when paired with some delicious homemade bread or a fresh salad.

For those looking to mix things up, consider exploring other comforting options like my Classic Tomato Basil Soup or enhancing your meal with a side of Garlic Bread.

Creamy Italian Ground Chicken Soup Ingredients

• Dive into making the ultimate cozy dish with these simple ingredients!

For the Soup Base

  • Olive oil – A source of healthy fats that enhances flavor as it gives a nice golden touch to your vegetables.
  • Ground chicken – Leaner than beef, this star ingredient keeps the soup hearty while adding protein.
  • Medium onion – Sweetens the soup and adds depth to the overall flavor profile.
  • Garlic – Adds an aromatic punch, elevating the taste to a whole new level!
  • Chicken broth – The foundation of the soup, bringing all the flavors together beautifully.

For the Creaminess

  • Heavy cream – Delivers that luscious texture, making the soup irresistibly creamy.
  • Whole milk – Balances the richness of the cream, ensuring a luscious and smooth mouthfeel.

For the Seasoning

  • Dried basil – Infuses the soup with a fragrant touch of Italian essence, reminiscent of lovely summer gardens.
  • Dried oregano – Enhances the savory notes, rounding out the whole dish and making it taste homemade.
  • Salt – Essential for bringing out the natural flavors of the ingredients.
  • Black pepper – A dash adds warmth and a little kick to the soup.
  • Red pepper flakes (optional) – A great way to introduce a bit of heat for those who prefer a spicy kick.

For the Cheesy Finish

  • Grated Parmesan cheese – Sprinkled in at the end, it melts beautifully, enhancing the creamy soup with umami goodness.
  • Shredded mozzarella cheese – Creates a delightful stringy texture that’s simply irresistible in every bite.

For the Veggie Boost

  • Fresh spinach – Brightens the soup with color and nutrients, ensuring every serving is a wholesome delight.
  • Medium carrot – Adds sweetness and a pleasing crunch to the mix.
  • Celery stalk – Provides a crisp texture and subtle flavor that complements the other veggies beautifully.

With these ingredients for your Creamy Italian Ground Chicken Soup, you're sure to create a dish that's as wholesome as it is heartwarming! Now, let’s get those wonderful flavors simmering!

Step‑by‑Step Instructions for Creamy Italian Ground Chicken Soup

Step 1: Heat the Oil
In a large pot or Dutch oven, heat 1 tablespoon of olive oil over medium heat. Wait for the oil to shimmer slightly, indicating it's hot enough to start cooking. This step sets the stage for the wonderful flavors of your Creamy Italian Ground Chicken Soup.

Step 2: Cook the Ground Chicken
Add 1 pound of ground chicken to the hot pot. Use a wooden spoon to break it apart and cook for about 5-7 minutes until the chicken is browned and no longer pink. This ensures a hearty base for your soup, packed with protein.

Step 3: Set Aside the Chicken
Once the chicken is cooked through, carefully remove it from the pot and set it aside on a plate. This allows the flavors to develop without overcrowding the pot, making your Creamy Italian Ground Chicken Soup even more delicious.

Step 4: Sauté the Onion
In the same pot, add 1 medium chopped onion and sauté for about 3-4 minutes. Stir occasionally until the onion becomes translucent and softened, releasing its sweet aroma to complement the chicken.

Step 5: Add the Garlic
Next, stir in 2 minced garlic cloves and sauté for an additional 1-2 minutes. Keep a close eye on the garlic to ensure it doesn't burn, as this can change the flavor profile of your soup.

Step 6: Combine Ingredients
Return the cooked ground chicken to the pot, stirring to combine it with the softened onion and garlic. This blending of flavors will create the tasty foundation of your Creamy Italian Ground Chicken Soup.

Step 7: Pour in Chicken Broth
Add 4 cups of chicken broth to the pot, stirring well to mix everything together. Let this come to a gentle simmer, which may take about 2-3 minutes, enhancing the soup's rich flavors.

Step 8: Add Cream and Milk
Pour in 1 cup of heavy cream and 1 cup of whole milk, stirring until the mixture is fully combined. This is where the creamy texture of your soup really starts to shine, making it irresistibly comforting.

Step 9: Season the Soup
Sprinkle in 1 teaspoon of dried basil, 1 teaspoon of dried oregano, ½ teaspoon of salt, and ¼ teaspoon of black pepper, along with red pepper flakes if desired. Stir the soup well to incorporate the seasonings, enriching its flavor profile.

Step 10: Simmer to Meld Flavors
Bring your Creamy Italian Ground Chicken Soup to a gentle simmer over medium heat. Allow it to cook for about 10-15 minutes, which helps the flavors meld together beautifully for a deliciously harmonious dish.

Step 11: Add the Parmesan Cheese
Stir in ½ cup of grated Parmesan cheese and watch it melt into the soup, enhancing its creamy, savory notes. This step adds a greater depth of flavor that elevates your soup even further.

Step 12: Melt the Mozzarella
Next, add ½ cup of shredded mozzarella cheese and stir until it melts completely into the soup. The mozzarella provides a fantastic stringy texture that adds to the decadence of your Creamy Italian Ground Chicken Soup.

Step 13: Incorporate the Vegetables
Add 2 cups of fresh chopped spinach, 1 medium diced carrot, and 1 diced celery stalk into the pot. Cook for an additional 5-7 minutes, until the vegetables are tender and vibrant, adding essential nutrients to your hearty soup.

Step 14: Adjust the Seasoning
Take a moment to taste your soup. Feel free to adjust the seasoning by adding more salt, pepper, or red pepper flakes based on your preference. This ensures that every bowl of your Creamy Italian Ground Chicken Soup is perfectly seasoned.

Step 15: Serve Hot
Once everything is ready, ladle the warm soup into bowls and serve immediately. The Creamy Italian Ground Chicken Soup is best enjoyed hot, bringing a cozy warmth to your dining experience!

How to Store and Freeze Creamy Italian Ground Chicken Soup

Fridge: Store leftovers in an airtight container for up to 3 days. Allow the soup to cool before sealing to maintain the best flavor and texture.

Freezer: Freeze the soup in a freezer-safe container for up to 3 months. Leave some space at the top, as the soup will expand while freezing.

Reheating: Thaw overnight in the fridge before reheating. Gently warm on the stove over low heat, stirring occasionally, until heated through to enjoy its creamy goodness again.

Fresh Spinach: Add fresh spinach just before serving to maintain its vibrant color and texture, ensuring every bite of your Creamy Italian Ground Chicken Soup is delightful.

Expert Tips for Creamy Italian Ground Chicken Soup

Perfect Texture: Use a combination of heavy cream and whole milk for a luxuriously creamy texture; this balance avoids a overly thick soup that can be too rich.

Veggie Variations: Feel free to swap the spinach with kale or add bell peppers for extra flavor—just remember to adjust cook times for denser vegetables.

Avoid Overcooking: Don’t skip simmering; it’s key for melding flavors. Skipping might result in a bland soup lacking depth.

Season Last: Always taste and adjust seasoning at the end. This step ensures your Creamy Italian Ground Chicken Soup is perfectly balanced, as flavors may intensify during cooking.

Storage Tip: If you plan to store leftovers, consider adding fresh spinach just before serving to keep it vibrant. Otherwise, it may wilt and lose its color in the fridge.

Creamy Italian Ground Chicken Soup Variations

Feel free to explore these delightful twists and substitutions that will take your soup to the next level!

  • Dairy-Free: Substitute the heavy cream and whole milk with coconut milk or a blend of cashew cream for creamy goodness without dairy.
  • Vegetable-Loaded: Add in extra veggies like zucchini or bell peppers for more texture and nutrition. These additions will boost the vibrancy and keep the soup hearty.
  • Spicy Kick: Increase the red pepper flakes or add a dash of sriracha for a zesty and fiery flavor profile that warms you from the inside out.
  • Herbaceous Boost: Fresh herbs like thyme or rosemary can replace dried basil and oregano, providing a fresh aromatic finish that complements the creamy base wonderfully.
  • Protein Swap: For a different protein punch, try using ground turkey or even lentils as a meat alternative for a delicious vegetarian option that still brings satisfying heartiness.
  • Cheesy Delight: Experiment with different types of cheese, like Gouda or fontina, to diversify the flavor and provide a unique taste experience. The melted textures will surprise your palate!
  • Creamy Variations: For an ultra-rich soup, mix in cream cheese or mascarpone cheese with the grated Parmesan for an added layer of creaminess that is hard to resist.
  • Pasta Addition: Stir in some cooked small pasta like orzo or ditalini near the end for a filling twist that turns your soup into a delightful meal—perfect for family or guests!

With these variations, the Creamy Italian Ground Chicken Soup can become an endless canvas for flavor and creativity. Whether you're in the mood for something spicy or herbaceous, there's no limit to how you can customize this dish! Enjoy experimenting, and don't forget to pair your soup with some mouthwatering sides like Garlic Bread or a refreshing Mediterranean Salad.

Make Ahead Options

These Creamy Italian Ground Chicken Soup is perfect for meal prep enthusiasts! You can chop the vegetables (spinach, carrots, and celery) and store them in airtight containers for up to 3 days in the refrigerator, making it effortless to assemble when you're ready to cook. Additionally, you can cook the ground chicken and sauté the onions and garlic up to 24 hours in advance, leaving you with just the final steps to complete the soup. When ready to serve, simply combine the prepped ingredients with the broth, cream, and seasonings, simmer, and melt in the cheeses for a delightful and comforting dish that’s just as delicious as fresh!

What to Serve with Creamy Italian Ground Chicken Soup

There’s nothing quite like a warm, hearty soup to create the perfect cozy meal experience.

  • Garlic Bread: The crispy, buttery texture of garlic bread contrasts wonderfully with the creamy soup, making each bite unforgettable. Perfect for dipping!

  • Caesar Salad: Crisp romaine lettuce, crunchy croutons, and tangy dressing provide a fresh, zesty balance to the richness of the soup. Add some freshly grated Parmesan for extra flavor.

  • Roasted Vegetables: A medley of seasoned, caramelized vegetables adds a delightful crunch and complements the savory notes of the soup perfectly. Think bell peppers, zucchini, and carrots!

  • Cheesy Breadsticks: Soft, warm breadsticks filled with gooey cheese offer an irresistible, indulgent side that pairs beautifully with any creamy dish. Great for sharing!

  • Pasta Primaveras: Bright, colorful pasta tossed with seasonal vegetables provides a refreshing contrast to the hearty soup while enriching your meal with wholesome goodness.

  • Crisp White Wine: A chilled glass of Sauvignon Blanc or Pinot Grigio can elevate your dining experience by complementing the flavors of your creamy Italian ground chicken soup while adding a refreshing finish.

  • Chocolate Mousse: For dessert, a light, airy chocolate mousse creates the perfect sweet ending that contrasts the savory soup. It’s a playful way to finish your meal!

  • Fresh Fruit Salad: A bowl of mixed seasonal fruits adds a refreshing, sweet touch to balance the rich flavors of your soup. It’s both light and satisfying.

  • Homemade Croutons: Tossed in garlic and olive oil, fresh croutons can be sprinkled over the soup for an added crunchy texture that makes each spoonful even more delightful.

Creamy Italian Ground Chicken Soup Recipe FAQs

How do I choose the right ground chicken for this soup?
Absolutely! When selecting ground chicken, look for a package that has a pinkish color without any dark spots or a strong odor. Aim for lean ground chicken, as it will reduce excess fat in the soup while keeping it tender and flavorful.

How should I store leftover Creamy Italian Ground Chicken Soup?
Very! Store your leftover soup in an airtight container in the fridge for up to 3 days. Allow the soup to cool completely before sealing it to preserve its creamy texture and flavor. If you're unsure how to store it properly, simply split it into separate portions for easy access.

Can I freeze Creamy Italian Ground Chicken Soup?
Of course! To freeze this soup, place it in a freezer-safe container, leaving about an inch of space at the top to allow for expansion. It will stay fresh for up to 3 months. When you're ready to enjoy it again, thaw it overnight in the fridge, and then gently reheat it on the stove over low heat.

My soup turned out too thick. How can I fix it?
No worries! This can happen sometimes. If your soup is too thick, simply add a bit more chicken broth or milk, a little at a time, while stirring until you reach your desired consistency. Just remember to let it simmer briefly after adding liquid to ensure that everything is warm and melded together.

Is this soup safe for people with allergies?
Absolutely! However, if you or someone you are serving has specific allergies, be sure to check all ingredient labels. The soup contains dairy and can be adapted for lactose-free diets by substituting with lactose-free cream and milk. Always consult with your healthcare professional to ensure it’s appropriate for your needs.

Can I make this soup in advance?
Very! You can definitely make Creamy Italian Ground Chicken Soup a day in advance. Just follow the recipe, let it cool, and store it in the fridge. Reheat before serving, and consider adding fresh spinach right before serving to keep it vibrant and nutritious. It's the perfect way to make meal prep easy while enjoying a comforting dish!

Creamy Italian Ground Chicken Soup

Creamy Italian Ground Chicken Soup That Warms Your Soul

This Creamy Italian Ground Chicken Soup is a delightful dish that warms your soul and is incredibly quick to prepare.
Print Recipe Pin Recipe
Prep Time 10 minutes mins
Cook Time 40 minutes mins
Total Time 50 minutes mins
Servings: 6 servings
Course: Main Dishes
Cuisine: Italian
Calories: 320
Ingredients Equipment Method Nutrition Notes

Ingredients
  

For the Soup Base
  • 1 tablespoon olive oil for sautéing
  • 1 pound ground chicken lean protein source
  • 1 medium onion chopped
  • 2 cloves garlic minced
  • 4 cups chicken broth for soup base
For the Creaminess
  • 1 cup heavy cream for richness
  • 1 cup whole milk to balance the cream
For the Seasoning
  • 1 teaspoon dried basil
  • 1 teaspoon dried oregano
  • ½ teaspoon salt
  • ¼ teaspoon black pepper
  • to taste red pepper flakes optional
For the Cheesy Finish
  • ½ cup grated Parmesan cheese for flavor
  • ½ cup shredded mozzarella cheese for stringy texture
For the Veggie Boost
  • 2 cups fresh spinach chopped
  • 1 medium carrot diced
  • 1 stalk celery diced

Equipment

  • Large Pot
  • Dutch oven

Method
 

Steps
  1. In a large pot or Dutch oven, heat olive oil over medium heat until shimmering.
  2. Add ground chicken, breaking it apart and cooking for 5-7 minutes until browned.
  3. Remove cooked chicken from the pot and set aside.
  4. Sauté chopped onion for 3-4 minutes until translucent.
  5. Stir in minced garlic and sauté for 1-2 minutes.
  6. Return cooked ground chicken to the pot.
  7. Add chicken broth, stirring well and letting it come to a gentle simmer.
  8. Pour in heavy cream and whole milk, stirring until combined.
  9. Sprinkle in dried basil, oregano, salt, black pepper, and optional red pepper flakes.
  10. Allow to simmer for 10-15 minutes to meld flavors.
  11. Stir in grated Parmesan cheese until melted.
  12. Add shredded mozzarella cheese and stir until melted.
  13. Incorporate fresh spinach, diced carrot, and diced celery, and cook for 5-7 minutes.
  14. Taste and adjust seasoning as needed.
  15. Serve hot, ladling soup into bowls.

Nutrition

Serving: 1bowlCalories: 320kcalCarbohydrates: 12gProtein: 24gFat: 22gSaturated Fat: 12gPolyunsaturated Fat: 2gMonounsaturated Fat: 8gCholesterol: 95mgSodium: 850mgPotassium: 600mgFiber: 2gSugar: 3gVitamin A: 1000IUVitamin C: 15mgCalcium: 200mgIron: 2mg

Notes

Feel free to adjust seasonings and add vegetables as desired. This creamy soup is great for impressing guests or enjoying a cozy night in.

Tried this recipe?

Let us know how it was!

Irresistibly Sweet Apple Bubble Up Casserole Delight

August 17, 2025 by grace bellamy Leave a Comment

As the sweet, spiced aroma of apples fills my kitchen, a wave of warmth sweeps over me, instantly bringing back memories of fall gatherings and family dinners. This Apple Bubble Up Casserole combines the comforting tastes of classic apple pie with a fun twist that eager home chefs will adore. With just a handful of ingredients and minimal prep time, this recipe is not only a crowd-pleaser but also a delightful way to savor every last bite of those juicy apples. Whether enjoyed as a dessert or a cozy breakfast treat, this casserole offers an irresistible mix of flavors and textures that will make your taste buds sing. Ready to elevate your next meal? Let’s dive into the deliciousness together!

Why is this casserole a must-try?

Comforting warmth fills your home with this delightful dish, perfect for chilly evenings. Easy and quick to make, it’s designed for everyone, from busy moms to passionate chefs. Sweet and Spicy flavors burst from the juicy apples and cinnamon, satisfying your cravings. Versatile enough for breakfast or dessert, this casserole will charm friends and family alike. And if you're looking for more cozy recipes, don't miss out on our delicious banana bread or festive pumpkin spice cookies.

Apple Bubble Up Casserole Ingredients

• Get ready for a sweet treat!

For the Casserole

  • Diced apples – Granny Smith or Fuji adds a tart crunch, making this Apple Bubble Up Casserole extra delicious!
  • Refrigerated biscuit dough – Perfectly fluffy when baked, this dough forms delightful bubbles in the casserole.
  • Granulated sugar – Balances the tartness of the apples for a perfectly sweet flavor.
  • Ground cinnamon – Adds a warm spice that complements the apples beautifully.
  • Unsalted butter – Melting this over the top enhances richness and helps create a golden crust.
  • Brown sugar – Brings depth and a hint of caramel flavor to your dish.
  • Vanilla extract – A splash of this fragrant addition elevates the overall sweetness and flavor profile.
  • Chopped pecans (optional) – These add a delightful crunch and nutty flavor that pairs wonderfully with the sweet apples.

Step‑by‑Step Instructions for Apple Bubble Up Casserole

Step 1: Preheat and Prepare
Start by preheating your oven to 350°F (175°C) to create the perfect baking environment for your Apple Bubble Up Casserole. While the oven warms, lightly grease a 9×13-inch baking dish with butter or non-stick spray to prevent any sticking. Set it aside and gather your ingredients for easy access, ensuring a smooth cooking experience.

Step 2: Mix the Main Ingredients
In a large mixing bowl, combine the diced apples, pieces of refrigerated biscuit dough, granulated sugar, and ground cinnamon. Use a spatula or wooden spoon to gently stir the mixture until all the biscuit pieces are thoroughly coated with the apples, sugar, and cinnamon, creating a deliciously fragrant medley. This mixture should resemble a chunky, sweet cobbler.

Step 3: Assemble the Casserole
Carefully pour the apple and biscuit mixture into the greased baking dish, spreading it out evenly. Drizzle the melted butter generously over the top, allowing it to seep into the layers for added richness. Next, sprinkle brown sugar evenly across the surface, followed by a handful of chopped pecans if desired, adding a delightful crunch to the Apple Bubble Up Casserole.

Step 4: Bake to Perfection
Place the baking dish in the preheated oven and bake for 25-30 minutes. Keep an eye on the casserole as it bakes; you're looking for a heavenly golden-brown hue on top and the biscuit dough to be fully cooked through. The sweet aroma of baked apples and warm spices should fill your kitchen as you wait for it to finish.

Step 5: Cool and Serve
Once baked to perfection, remove the casserole from the oven and allow it to cool slightly for about 10 minutes. This brief cooling period helps the flavors meld together beautifully and makes serving easier. Scoop out warm portions of your Apple Bubble Up Casserole into bowls, ready to delight your family and friends with this heartwarming dish.

What to Serve with Apple Bubble Up Casserole

As you prepare to share this delightful dish, consider the various flavors and textures that will elevate your meal and impress your loved ones.

  • Vanilla Ice Cream: The creamy sweetness of vanilla ice cream melts beautifully over warm casserole, making each bite a decadent experience.
    Add a scoop on top for a delightful contrast that enhances the cinnamon and apple flavors.

  • Caramel Sauce: Drizzling warm caramel sauce adds an inviting richness, complementing the sweetness of the apples with a luxurious touch.
    This pairing will revive memories of caramel-drenched desserts enjoyed during family gatherings.

  • Whipped Cream: Light and fluffy whipped cream provides a delightful contrast, making each bite feel airy and indulgent.
    Top your casserole with a generous dollop for a simple yet elegant finish.

  • Coffee: A warm cup of coffee balances the sweetness while providing a comforting warmth, perfect for breakfast or dessert settings.
    Pair this casserole with a rich brew to enhance the cozy, heartwarming experience.

  • Fresh Fruit Salad: A bright medley of seasonal fruits cuts through the richness of the casserole, adding freshness and color to your table.
    This vibrant option introduces a refreshing and crisp texture that beautifully complements the warm, gooey casserole.

  • Pecan Pie Bars: For those who crave more sweetness, these bars echo the flavors of the casserole while introducing a delightful crunch.
    Pairing them side by side offers a dual dessert experience that is bound to impress!

  • Chai Tea: Spiced chai tea, with its warming spices, complements the cinnamon in the casserole beautifully.
    This drink adds an aromatic touch, enhancing the overall cozy vibe of your gathering.

  • Cinnamon Rolls: Another layer of sweetness with gooey frosting, cinnamon rolls will satisfy any sweet tooth while echoing the comforting spices of the casserole.
    This duo makes for a brunch spread that will have everyone coming back for seconds!

How to Store and Freeze Apple Bubble Up Casserole

Fridge: Store leftover casserole in an airtight container for up to 3 days. This keeps the flavors fresh and ready for a cozy treat whenever you crave it!

Freezer: For longer storage, freeze portions in airtight containers for up to 2 months. Make sure to label them with the date, so you can relish this Apple Bubble Up Casserole later!

Reheating: To enjoy, thaw in the fridge overnight. Reheat in the oven at 350°F (175°C) until warmed through, about 15-20 minutes, or until bubbly and delicious again.

Room Temperature: If serving warm, allow it to cool slightly before enjoying. Consume any leftovers within 2 hours to maintain food safety and deliciousness!

Apple Bubble Up Casserole Variations

Feel free to make this delightful casserole your own with these fun twists and substitutions!

  • Gluten-Free: Use gluten-free biscuit dough to cater to dietary needs while keeping that fluffy texture intact.
  • Nut-Free: Simply skip the pecans or replace them with sunflower seeds for a similar crunch without the nuts.
  • Dairy-Free: Swap out the butter for coconut oil and use a dairy-free biscuit alternative for a delicious vegan option.
  • Extra Fruity: Toss in a cup of diced pears or berries along with the apples for a vibrant, fruity burst in every bite!
  • Caramel Drizzle: Top the finished casserole with a drizzle of caramel sauce for an extra sweet and decadent touch.
  • Spicy Kick: Add a pinch of cayenne pepper to the apple mixture for those who love a deliciously unexpected heat!
  • Cinnamon Roll Twist: Instead of biscuit dough, use canned cinnamon rolls, cutting them into pieces for a richer flavor. Enjoy a truly decadent dessert experience!
  • Chia Seed Boost: Stir in a tablespoon of chia seeds for added texture and nutrition without changing the taste.

Embrace your creativity! This casserole is designed to be as adaptable as your cravings. For more ideas, try pairing it with a warm bowl of our comforting banana bread or serve it alongside some delightful pumpkin spice cookies for the ultimate fall dessert experience!

Expert Tips for Apple Bubble Up Casserole

  • Choose the Right Apples: For the best flavor, use tart apples like Granny Smith or Fuji, which balance the sweetness beautifully in your Apple Bubble Up Casserole.
  • Don’t Overmix: When combining ingredients, stir until just coated. Overmixing will result in doughy clumps instead of delightful bubbles.
  • Check for Doneness: Baking times can vary by oven. Keep an eye on your casserole to ensure it’s golden brown and the dough is fully cooked.
  • Let It Cool: Allowing the casserole to cool for 10 minutes before serving helps it set, making it easier to dish out and enhancing the overall flavor.
  • Experiment with Nuts: While pecans are optional, feel free to experiment with walnuts or almonds for a unique crunchy twist in your Apple Bubble Up Casserole!

Make Ahead Options

These Apple Bubble Up Casserole delights are perfect for meal prep enthusiasts! You can prepare the apple and biscuit mixture up to 24 hours in advance by combining the diced apples, sugar, and cinnamon in a bowl but leave the melted butter and brown sugar for later. Simply cover the bowl and refrigerate it overnight to keep the apples fresh and prevent browning. When you're ready to bake, pour the mixture into your greased dish, drizzle the melted butter, and sprinkle brown sugar on top before popping it in the oven. This way, you can achieve the same warm, comforting results—making your busy weeknights a little sweeter!

Apple Bubble Up Casserole Recipe FAQs

What type of apples should I use for this casserole?
Absolutely! I recommend using tart apples like Granny Smith or Fuji. They provide a crunchy texture and perfectly balance the sweetness of the sugars, making your Apple Bubble Up Casserole extra delightful!

How should I store leftover Apple Bubble Up Casserole?
You can store leftover casserole in an airtight container in the fridge for up to 3 days. This method keeps the flavors fresh and allows you to enjoy a cozy treat anytime. Just make sure the casserole has cooled completely before sealing it up!

Can I freeze Apple Bubble Up Casserole?
Yes, you can! To freeze, portion the casserole into airtight containers and label them with the date. It can be frozen for up to 2 months. When you're ready to enjoy it again, simply thaw it in the fridge overnight, then reheat it in the oven at 350°F (175°C) for about 15-20 minutes, until it's warmed through and bubbling.

What if my casserole is browning too quickly while baking?
If you notice your casserole browning too quickly, it's a good idea to cover it loosely with aluminum foil during the last 10-15 minutes of baking. This will help prevent the top from overcooking while allowing the rest of the dish to finish baking through, leading to a perfectly balanced Apple Bubble Up Casserole!

Are there any dietary considerations for this recipe, like allergies?
Definitely! This recipe contains gluten from the biscuit dough and nuts if you choose to add pecans. For gluten-free modifications, look for gluten-free biscuit dough alternatives. If nut allergies are a concern, simply omit the pecans altogether—your Apple Bubble Up Casserole will still be wonderfully delicious without them!

Apple Bubble Up Casserole

Irresistibly Sweet Apple Bubble Up Casserole Delight

Enjoy the delightful flavors of Apple Bubble Up Casserole, where classic apple pie meets a fun twist.
Print Recipe Pin Recipe
Prep Time 15 minutes mins
Cook Time 30 minutes mins
Cooling Time 10 minutes mins
Total Time 55 minutes mins
Servings: 8 servings
Course: Dessert
Cuisine: American
Calories: 290
Ingredients Equipment Method Nutrition Notes

Ingredients
  

For the Casserole
  • 4 cups Diced apples Granny Smith or Fuji preferred
  • 1 can Refrigerated biscuit dough Perfectly fluffy when baked
  • 1 cup Granulated sugar
  • 1 teaspoon Ground cinnamon
  • ¼ cup Unsalted butter Melted, for drizzling
  • ½ cup Brown sugar
  • 1 teaspoon Vanilla extract
  • ½ cup Chopped pecans Optional

Equipment

  • Oven
  • 9x13-inch baking dish
  • Mixing Bowl
  • spatula

Method
 

Step-by-Step Instructions
  1. Preheat the oven to 350°F (175°C) and grease a 9×13-inch baking dish.
  2. In a large bowl, mix together diced apples, biscuit dough, granulated sugar, and cinnamon until well combined.
  3. Pour the mixture into the baking dish, drizzle with melted butter, and sprinkle with brown sugar and chopped pecans.
  4. Bake for 25-30 minutes until golden brown and the biscuit dough is cooked through.
  5. Allow to cool for 10 minutes before serving warm.

Nutrition

Serving: 1sliceCalories: 290kcalCarbohydrates: 45gProtein: 3gFat: 12gSaturated Fat: 7gPolyunsaturated Fat: 1gMonounsaturated Fat: 4gCholesterol: 25mgSodium: 180mgPotassium: 150mgFiber: 2gSugar: 20gVitamin A: 300IUVitamin C: 5mgCalcium: 20mgIron: 0.5mg

Notes

For best flavor, choose tart apples. Adjust baking time based on your oven for perfect results.

Tried this recipe?

Let us know how it was!

Crispy Parmesan Zucchini Muffins: Deliciously Guilt-Free Bites

August 17, 2025 by grace bellamy Leave a Comment

As I stood in my kitchen, the warm aroma of baking filled the air, instantly lifting my spirits. Today, I’m thrilled to share my latest creation: Crispy Parmesan Zucchini Muffins. These delightful treats are perfect for anyone looking to add a healthy twist to their snack game without sacrificing flavor. With just 15 minutes of prep time and packed with nutrient-rich zucchini, they make for a quick, guilt-free indulge that even the pickiest eaters will love. Plus, these muffins are freezer-friendly, so you can whip up a batch and enjoy them whenever those flavor cravings strike. Are you ready to make your kitchen smell divine? Let’s dive into this deliciousness together!

Why Are These Muffins a Must-Try?

Crispy, Each bite offers a delightful crunch on the outside while remaining soft and fluffy inside – the perfect contrast that will keep you reaching for more.

Flavor-Packed, With the rich blend of Parmesan and mozzarella cheeses, these muffins deliver a savory experience that excites the taste buds without feeling heavy.

Vegetable Boost, Zucchini is a hidden gem, adding moisture and nutrients, turning a classic snack into a healthy option that even the kids will love.

Quick and Easy, With just 15 minutes of prep time, you can have a delicious snack ready in no time, making these muffins perfect for busy days or unexpected guests.

Freezer-Friendly, Bake a big batch and store them for later – enjoy the convenience of homemade goodness on demand!

For more delicious and easy recipes, check out my healthy snack ideas to keep your kitchen adventures vibrant!

Crispy Parmesan Zucchini Muffin Ingredients

Get ready to whip up these delicious treats!

For the Muffin Batter

  • 2 medium zucchinis – Grating these adds moisture without lots of calories.
  • 1 teaspoon salt – Enhances the natural flavors of the vegetables and cheeses.
  • 1 cup all-purpose flour – Provides the structure necessary for the muffins.
  • 1 teaspoon baking powder – Helps the muffins rise and become fluffy.
  • ½ teaspoon baking soda – Balances the acidity in the batter for perfect texture.
  • ½ teaspoon garlic powder – Adds a subtle garlic flavor that complements the cheeses.
  • ½ teaspoon onion powder – Infuses a depth of savory goodness into each bite.
  • ¼ teaspoon black pepper – A dash of spice to elevate the overall flavor.
  • ½ cup grated Parmesan cheese – Key to the crispy and cheesy crust that makes these muffins irresistible!
  • ¼ cup shredded mozzarella cheese – Adds gooeyness that melts beautifully.
  • 2 large eggs – Bind the ingredients together while adding protein.
  • ¼ cup milk (or a non-dairy alternative) – Keeps the muffins moist and delicious.
  • ¼ cup olive oil – Provides healthy fats and contributes to a tender crumb.
  • 1 tablespoon fresh parsley, chopped (optional) – A fresh burst of color and flavor if desired.
  • ¼ cup breadcrumbs – Creates a delightful crispy topping that takes these muffins to the next level!

With these ingredients at your fingertips, you're well on your way to creating mouthwatering Crispy Parmesan Zucchini Muffins that everyone will adore!

Step‑by‑Step Instructions for Crispy Parmesan Zucchini Muffins

Step 1: Prep the Zucchini
Start by washing the zucchinis thoroughly under cold water, ensuring they are clean. Next, grate the zucchinis using a box grater or food processor, then place the grated zucchini into a kitchen towel or cheesecloth. Squeeze out the excess moisture over the sink to prevent soggy muffins later on; set aside for the next steps.

Step 2: Mix the Dry Ingredients
In a large mixing bowl, whisk together the all-purpose flour, baking powder, baking soda, garlic powder, onion powder, black pepper, and salt until they are evenly combined. This step is crucial for incorporating air into the mixture, which will help your Crispy Parmesan Zucchini Muffins rise beautifully as they bake.

Step 3: Whisk the Wet Ingredients
In a separate bowl, whisk the two large eggs until frothy, then pour in the milk and olive oil. Mix well until fully combined, and if you like, stir in the chopped fresh parsley for an extra flavor boost. This wet mixture will bring all the ingredients together for your muffins.

Step 4: Combine Wet and Dry Ingredients
Pour the wet ingredient mixture into the bowl of dry ingredients, gently folding with a spatula until just combined. Take care not to overmix, as this can lead to dense muffins instead of the light and airy Crispy Parmesan Zucchini Muffins you desire.

Step 5: Fold in Cheese and Zucchini
Now, carefully fold in the grated zucchini along with the grated Parmesan and shredded mozzarella cheese. This will create a lovely cheesy flavor throughout the batter, contributing to the delightful taste of your muffins. Make sure the zucchini is evenly distributed without overworking the batter.

Step 6: Preheat the Oven
Preheat your oven to 375°F (190°C) while you prepare the muffin tin. This temperature is perfect for achieving that golden-brown exterior on your Crispy Parmesan Zucchini Muffins. Preheating ensures even baking, which is essential for the best results.

Step 7: Prepare the Muffin Tin
Grease a muffin tin with oil or line it with paper liners to prevent sticking. This step not only helps with easy removal once baked but also keeps the muffins intact while retaining their delightful crispy tops. You're now ready to fill them!

Step 8: Fill Muffin Cups
Scoop the batter into the prepared muffin cups, filling each about ¾ full to allow for rising. Once filled, sprinkle a little breadcrumbs on top of each muffin for an extra crispy layer that complements the cheesy goodness inside.

Step 9: Bake the Muffins
Place the muffin tin in the preheated oven and bake for 20-25 minutes. Keep an eye on them; they should turn golden brown, and when a toothpick inserted in the center comes out clean, your muffins are perfectly done and ready to be enjoyed!

Step 10: Cool and Serve
Once baked, let the muffins cool in the tin for about 5 minutes before carefully transferring them to a wire rack. This cooling period allows them to set and maintain their structure. Serve warm or at room temperature to savor the delightful flavors of your Crispy Parmesan Zucchini Muffins!

Make Ahead Options

These Crispy Parmesan Zucchini Muffins are perfect for meal prep! You can grate the zucchinis and mix the dry ingredients up to 24 hours in advance to save time on busy days. Simply store the grated zucchini in an airtight container in the refrigerator to keep it fresh and prevent browning. When you're ready to bake, combine the wet ingredients with the prepped dry mixture, fold in the zucchini and cheeses, and follow the baking instructions as usual. This way, you can enjoy homemade goodness with minimal effort, ensuring each muffin remains just as delicious as if you made it fresh!

How to Store and Freeze Crispy Parmesan Zucchini Muffins

Room Temperature: Store any leftover muffins in an airtight container for up to 2 days to maintain their freshness and crispy tops.

Fridge: For extended freshness, keep the muffins in the refrigerator for up to 5 days. Just be sure to wrap them well to prevent drying out.

Freezer: These Crispy Parmesan Zucchini Muffins freeze beautifully! Place them in a freezer-safe bag or container for up to 3 months. Make sure to label the date for easy tracking.

Reheating: To enjoy, simply reheat frozen muffins in the oven at 350°F (175°C) for about 10-15 minutes until warmed through, restoring their delightful crispiness.

Crispy Parmesan Zucchini Muffins Variations

Feel free to explore these creative twists and substitutions that elevate your Crispy Parmesan Zucchini Muffins to new delightful levels!

  • Gluten-Free: Substitute all-purpose flour with a gluten-free flour blend to enjoy these muffins without the gluten.
  • Spicy Kick: Add a pinch of red pepper flakes or a diced jalapeño for a zesty heat that brings the flavor to life.

For a fun change, mix in some finely chopped sun-dried tomatoes and crumbled feta cheese. This combination adds a Mediterranean flair that's both unique and tasty.

  • Dairy-Free: Swap out dairy cheese for vegan cheese alternatives and replace milk with almond or oat milk to cater to dairy-free diets.
  • Herb-Infused: Incorporate fresh herbs, like basil or dill, into the batter to introduce a fragrant, garden-fresh flavor that brightens each bite.

Feeling adventurous? Try replacing half of the zucchini with grated carrots for a colorful muffin packed with even more nutrients.

  • Bacon Lovers: Add crispy crumbled bacon or turkey bacon for a savory, smoky touch that pairs beautifully with the cheesy goodness.

For a sweet twist, mix in a teaspoon of honey or maple syrup; it complements the savory flavors while giving a hint of sweetness that will surprise your palate.

By customizing your muffins, you can enjoy a delicious, guilt-free treat that suits your taste preferences and dietary needs. And don't forget to check out my healthy snack ideas for more inspiration while you're at it!

What to Serve with Crispy Parmesan Zucchini Muffins?

These delightful muffins are a versatile treat, perfect for creating a cozy, mouthwatering meal that satisfies every palate.

  • Garden Salad: A fresh, crisp salad with mixed greens and a tangy vinaigrette balances the rich flavors of the muffins. Add some cherry tomatoes and cucumber for a pop of color and crunch.

  • Roasted Vegetables: Tender roasted seasonal vegetables enhance your meal with a smokey, savory flavor that pairs wonderfully with the cheesy muffins. Try carrots, bell peppers, and broccoli for a delightful medley.

  • Herb Quinoa: Fluffy quinoa cooked with fresh herbs delivers a nutritious side that complements the muffins beautifully, absorbing their savory flavors while adding wholesome goodness.

  • Creamy Soup: A bowl of warm, creamy tomato or butternut squash soup provides a comforting contrast to the crispy muffins. Serve them together for a satisfying, cozy dinner experience.

  • Garlic Butter Rice: Buttery garlic rice adds a savory twist that perfectly harmonizes with the cheesy texture of the muffins, delivering a satisfying, heartwarming meal.

  • Refreshing Lemonade: A tall glass of homemade lemonade brings a refreshing tang to your culinary experience, enhancing the meal with a zesty kick against the savory muffins.

  • Apple Crisp: End your meal with a warm apple crisp topped with vanilla ice cream. The sweet, fruity dessert contrasts nicely with the savory muffins and rounds out your dining experience pleasingly.

Tips for the Best Crispy Parmesan Zucchini Muffins

  • Drain Well: Squeeze out as much moisture from the grated zucchini as possible. Excess moisture can lead to mushy muffins instead of the desired crispiness.

  • Mix Gently: When combining wet and dry ingredients, fold gently. Overmixing can result in dense muffins; you want them light and fluffy.

  • Use Fresh Ingredients: Opt for fresh zucchini and quality cheeses. Fresh ingredients make a significant difference in flavor and texture of your Crispy Parmesan Zucchini Muffins.

  • Check for Doneness: Baking times may vary. Start checking at the 20-minute mark. A toothpick inserted into the center should come out clean for perfectly baked muffins.

  • Customize Toppings: Feel free to experiment with different cheese blends or add herbs like thyme or basil for unique flavor twists.

Crispy Parmesan Zucchini Muffins Recipe FAQs

How do I choose the best zucchinis for this recipe?
Absolutely! Look for zucchinis that are firm, smooth, and unblemished. Ideally, they should be bright green with no dark spots or soft spots, which can indicate overripeness. Sizing is flexible; small to medium zucchinis are perfect as they tend to be more flavorful.

How should I store leftover muffins?
Great question! To keep your muffins fresh, store them in an airtight container at room temperature for up to 2 days. If you’re planning to enjoy them later, pop them in the fridge, where they’ll stay good for up to 5 days—just be sure to wrap them well to maintain moisture!

Can I freeze the muffins? How should I do that?
Absolutely! Freezing these Crispy Parmesan Zucchini Muffins is a fantastic idea. To freeze, let them cool completely, then place them in a single layer on a baking sheet and freeze for about an hour. Once frozen, transfer them into a freezer-safe bag or container, labeling with the date. They can be stored for up to 3 months. To reheat, just pop them in a preheated oven at 350°F (175°C) for about 10-15 minutes until heated through.

What if my muffins turn out soggy?
Very! If your muffins turned out soggy, it might be due to excess moisture in the grated zucchini. Always remember to squeeze out the moisture well using a kitchen towel or cheesecloth before combining it into the batter. Additionally, make sure your oven temperature is accurate—using an oven thermometer can help with that. If they still aren’t perfect, don’t fret! They’ll still taste delicious.

Are these muffins suitable for dietary restrictions?
Yes! You can easily modify these muffins to suit various dietary needs. For a gluten-free option, swap out the all-purpose flour for a gluten-free blend. For dairy-free preferences, simply use a dairy-free milk alternative and omit the cheese or use a dairy-free cheese option. Just keep an eye on ingredients to accommodate any allergies!

Crispy Parmesan Zucchini Muffins

Crispy Parmesan Zucchini Muffins: Deliciously Guilt-Free Bites

Crispy Parmesan Zucchini Muffins are a deliciously guilt-free snack packed with flavor and nutrition.
Print Recipe Pin Recipe
Prep Time 15 minutes mins
Cook Time 25 minutes mins
Total Time 40 minutes mins
Servings: 12 muffins
Course: Breakfast
Cuisine: American
Calories: 150
Ingredients Equipment Method Nutrition Notes

Ingredients
  

For the Muffin Batter
  • 2 medium zucchinis Grating these adds moisture without lots of calories.
  • 1 teaspoon salt Enhances the natural flavors of the vegetables and cheeses.
  • 1 cup all-purpose flour Provides the structure necessary for the muffins.
  • 1 teaspoon baking powder Helps the muffins rise and become fluffy.
  • ½ teaspoon baking soda Balances the acidity in the batter for perfect texture.
  • ½ teaspoon garlic powder Adds a subtle garlic flavor that complements the cheeses.
  • ½ teaspoon onion powder Infuses a depth of savory goodness into each bite.
  • ¼ teaspoon black pepper A dash of spice to elevate the overall flavor.
  • ½ cup grated Parmesan cheese Key to the crispy and cheesy crust that makes these muffins irresistible!
  • ¼ cup shredded mozzarella cheese Adds gooeyness that melts beautifully.
  • 2 large eggs Bind the ingredients together while adding protein.
  • ¼ cup milk (or a non-dairy alternative) Keeps the muffins moist and delicious.
  • ¼ cup olive oil Provides healthy fats and contributes to a tender crumb.
  • 1 tablespoon fresh parsley, chopped (optional) A fresh burst of color and flavor if desired.
  • ¼ cup breadcrumbs Creates a delightful crispy topping that takes these muffins to the next level!

Equipment

  • Muffin tin
  • box grater
  • Mixing bowls
  • spatula
  • Whisk

Method
 

Step‑by‑Step Instructions for Crispy Parmesan Zucchini Muffins
  1. Start by washing the zucchinis thoroughly under cold water, ensuring they are clean. Next, grate the zucchinis using a box grater or food processor, then place the grated zucchini into a kitchen towel or cheesecloth. Squeeze out the excess moisture over the sink to prevent soggy muffins later on; set aside for the next steps.
  2. In a large mixing bowl, whisk together the all-purpose flour, baking powder, baking soda, garlic powder, onion powder, black pepper, and salt until they are evenly combined.
  3. In a separate bowl, whisk the two large eggs until frothy, then pour in the milk and olive oil. Mix well until fully combined, and if you like, stir in the chopped fresh parsley for an extra flavor boost.
  4. Pour the wet ingredient mixture into the bowl of dry ingredients, gently folding with a spatula until just combined. Take care not to overmix.
  5. Carefully fold in the grated zucchini along with the grated Parmesan and shredded mozzarella cheese.
  6. Preheat your oven to 375°F (190°C) while you prepare the muffin tin.
  7. Grease a muffin tin with oil or line it with paper liners to prevent sticking.
  8. Scoop the batter into the prepared muffin cups, filling each about ¾ full to allow for rising. Once filled, sprinkle a little breadcrumbs on top of each muffin.
  9. Place the muffin tin in the preheated oven and bake for 20-25 minutes until golden brown.
  10. Once baked, let the muffins cool in the tin for about 5 minutes before carefully transferring them to a wire rack.

Nutrition

Serving: 1muffinCalories: 150kcalCarbohydrates: 15gProtein: 5gFat: 8gSaturated Fat: 2gPolyunsaturated Fat: 0.5gMonounsaturated Fat: 5gCholesterol: 50mgSodium: 200mgPotassium: 150mgFiber: 1gSugar: 1gVitamin A: 200IUVitamin C: 5mgCalcium: 100mgIron: 1mg

Notes

Drain well the grated zucchini before mixing to avoid soggy muffins. Use fresh ingredients for better flavor and texture.

Tried this recipe?

Let us know how it was!

Deliciously Crispy Cheesy Zucchini Fritters You’ll Love

August 15, 2025 by grace bellamy Leave a Comment

As I was slicing through the tender, green flesh of fresh zucchini, I stumbled upon a recipe that has quickly become a household favorite: Cheesy Zucchini Fritters. These delightful bites are not only a fantastic way to sneak in some veggies but also a perfect solution for those hectic weeknight dinners. With just 25 minutes from start to finish, you can whip up these crispy fritters that please everyone at the table. What sets them apart is their irresistible combination of cheesy goodness and comforting texture, making them a delicious appetizer or even a light main dish. Plus, they’re freezer-friendly, ensuring you always have a tasty snack on hand. Ready to savor something extraordinary? Let’s get cooking!

Why Are Cheesy Zucchini Fritters a Must-Try?

Irresistible Taste: These fritters burst with cheesy flavor, combining Parmesan and mozzarella for a gooey, satisfying bite.

Quick and Easy: In just 25 minutes, from grating to golden perfection, you can have these on your table.

Versatile Appeal: Enjoy them as a savory appetizer, a perfect side dish, or even as a light main.

Healthy Twist: Packed with zucchini, they’re a delicious way to add veggies to your diet. For more veggie inspiration, check out this vegetarian-friendly recipe collection.

Crowd-Pleaser: These fritters are a hit with family and friends, making them ideal for gatherings.

Freezer-Friendly: Make a big batch and store them! They freeze beautifully, so you'll always be ready for a tasty snack or quick meal.

Cheesy Zucchini Fritters Ingredients

Unlock the secret to these deliciously crispy bites!

For the Fritters

  • Zucchinis – 2 medium, finely grated to provide that lovely green goodness.
  • Sea Salt – 1 teaspoon; this draws out moisture and boosts flavor.
  • All-Purpose Flour – ½ cup, or substitute with almond flour for a gluten-free twist!
  • Parmesan Cheese – ½ cup, freshly grated for that rich, tangy flavor.
  • Mozzarella Cheese – ½ cup, shredded for melty, gooey goodness.
  • Eggs – 2 large, lightly beaten; they help bind the fritters together.
  • Green Onions – 2, finely sliced to add a fresh, mild onion flavor.
  • Garlic – 2 cloves, minced for a warm, aromatic depth of flavor.
  • Black Pepper – ½ teaspoon, freshly ground for a hint of spice.
  • Crushed Red Pepper Flakes – ¼ teaspoon (optional); add for a kick of heat!
  • Olive Oil – Enough for frying, ensuring crispy, golden edges.

These Cheesy Zucchini Fritters can easily become a staple in your kitchen. Enjoy the process and watch how they come to life with delightful flavors!

Step‑by‑Step Instructions for Cheesy Zucchini Fritters

Step 1: Prepare the Zucchini
Start by grating the zucchinis into a large mixing bowl. Then, transfer the grated zucchini to a clean kitchen towel or cheesecloth. Twist the towel and squeeze out as much moisture as possible; this is crucial for crispy Cheesy Zucchini Fritters. The drier your zucchini, the better your fritters will turn out!

Step 2: Salt and Rest
Return the drained zucchini to the bowl and sprinkle in 1 teaspoon of sea salt. Let the mixture sit for about 10 minutes. This resting period allows the salt to draw out any remaining moisture from the zucchini, enhancing the flavor and making the fritters even more delightful and crispy.

Step 3: Combine Ingredients
After the 10-minute resting period, add ½ cup of all-purpose flour, ½ cup of freshly grated Parmesan cheese, and ½ cup of shredded mozzarella cheese to the zucchini. Then, pour in the 2 lightly beaten eggs, along with the finely sliced green onions, minced garlic, ½ teaspoon of freshly ground black pepper, and optional ¼ teaspoon of crushed red pepper flakes. Mix everything together until well combined; this forms the tasty batter for your Cheesy Zucchini Fritters.

Step 4: Preheat the Skillet
While you're mixing the batter, preheat a non-stick skillet over medium heat. Add a generous layer of olive oil to the skillet, ensuring the bottom is well-coated. This oil will help achieve that coveted golden-brown crispiness on your fritters. Allow the oil to heat for a couple of minutes until shimmering before adding the fritters.

Step 5: Cook the Fritters
Using a heaping tablespoon, scoop some of the zucchini mixture and gently place it into the skillet. Flatten the mixture slightly with the back of the spoon to shape it into a fritter. Repeat with the remaining mixture, ensuring there’s space between each fritter to allow proper cooking and browning.

Step 6: Flip for Golden Crispiness
Cook each fritter for about 3 to 4 minutes on one side until they turn golden brown and crispy. Carefully flip them over using a spatula, and cook for another 3 to 4 minutes on the other side. You want a delightful crunch on the outside while the inside remains soft and cheesy—just like the perfect Cheesy Zucchini Fritters!

Step 7: Drain Excess Oil
Once cooked, transfer the fritters to a plate lined with paper towels to absorb any excess oil. This step helps maintain their crispy texture, making them even more enjoyable. Let them rest for a minute or two while you cook any remaining fritters.

Step 8: Serve and Enjoy
Serve your Cheesy Zucchini Fritters warm, garnished with chopped herbs or a dollop of sour cream if desired. They make a fantastic appetizer, side dish, or even a light main meal. Enjoy the delicious flavors and crispy texture of these irresistible fritters with your loved ones!

Make Ahead Options

These Cheesy Zucchini Fritters are perfect for meal prep! You can prepare the fritter mixture up to 24 hours in advance. After mixing all the ingredients, simply cover the bowl with plastic wrap and refrigerate it. This allows the flavors to meld beautifully while ensuring your fritters are just as delicious when you cook them. Additionally, once cooked, these fritters can be stored in an airtight container for up to 3 days in the fridge. To enjoy them, just reheat in a skillet over medium heat for 2-3 minutes on each side, restoring their crispy texture with minimal effort. Having these on hand is a delightful way to save time during those hectic weeknights!

Cheesy Zucchini Fritters: Exciting Variations

Feel free to personalize these delicious fritters with these fun twists and swaps to suit your taste!

  • Gluten-Free: Substitute all-purpose flour with almond flour or a gluten-free blend for a safe, yummy option.

  • Herb-Infused: Add 1-2 tablespoons of freshly chopped herbs like basil or cilantro to elevate the flavor and give it a fresh kick.

  • Cheese Change-Up: Experiment with different cheeses! Try feta for a tangy twist or cheddar for a richer taste.

  • Veggie Boost: Stir in grated carrots or finely chopped bell peppers for added color and crunch. These extra veggies bring sweetness and great texture!

  • Spicy Touch: Crank up the heat by doubling the red pepper flakes or adding chopped jalapeños to the mixture for a delightful spicy zing.

  • Baking Option: For a healthier twist, bake the fritters on a parchment-lined baking sheet at 400°F (200°C) for about 20 minutes, flipping halfway through for even cooking without frying.

  • Creamy Dips: Serve with tangy yogurt dip or a zesty lemon aioli to complement the rich flavors of the fritters. These dips can enhance every bite, making them even more irresistible!

  • Meal Prep: Make a double batch and freeze half before frying. This allows you to enjoy fresh, homemade Cheesy Zucchini Fritters on busy days. For more make-ahead recipes, check out my freezer-friendly favorites.

So go ahead, mix and match these exciting suggestions to create your unforgettable version of these cheesy delights!

What to Serve with Cheesy Zucchini Fritters

There's something magical about pairing crispy fritters with delightful sides that enhance their flavor and texture.

  • Creamy Avocado Dip: This luscious dip brings a rich creaminess that perfectly complements the crunchy fritters.
  • Fresh Garden Salad: A light salad of mixed greens and cherry tomatoes adds a refreshing crunch that balances the cheesiness.
  • Herbed Yogurt Sauce: A tangy yogurt sauce with fresh herbs adds brightness, making each bite of fritter even more irresistible.
  • Grilled Corn on the Cob: Sweet, smoky corn elevates the meal with its vibrant flavors, offering a delightful contrast to the fritters.
  • Savory Quinoa Pilaf: This nutritious side adds a nutty depth, and its fluffy texture contrasts beautifully with the crispy fritters.
  • Sparkling Lemonade: A glass of fizzy lemonade offers a zesty refreshment that cuts through the richness, making it the ideal drink choice.
  • Garlic Breadsticks: Crunchy, buttery breadsticks add a complementing savory flavor, perfect for those who love to indulge.
  • Chocolate Mousse: End the meal on a sweet note with a light chocolate mousse, which contrasts the savory profile of the fritters.
  • Sautéed Spinach: Tender, garlicky spinach creates a beautiful, earthy balance while adding a healthy green element to your plate.

Tips for the Best Cheesy Zucchini Fritters

Moisture Management: Squeeze out as much moisture from the grated zucchini as possible. Excess moisture can lead to soggy fritters.

Season Generously: Don’t skimp on the sea salt when salting the zucchini. It enhances flavor and helps draw out moisture for a crispier fritter.

Optimal Heat: Ensure your skillet is truly hot before adding the fritters. A well-heated pan promotes an even golden-brown crust on your Cheesy Zucchini Fritters.

Space it Out: When placing fritters in the skillet, leave enough room between them. This allows for even cooking and helps avoid steaming.

Store Smartly: Let cooked fritters cool completely before storing in an airtight container. They stay fresh in the fridge for about 3 days, helping you enjoy them longer!

Storage Tips for Cheesy Zucchini Fritters

Fridge: Allow the cooked Cheesy Zucchini Fritters to cool completely, then store them in an airtight container. They will stay fresh for up to 3 days.

Freezer: These fritters can be frozen both cooked and uncooked. Place them in a single layer on a baking sheet until firm, then transfer to a freezer-safe container. They last up to 3 months.

Reheating: For the best results, reheat cooked fritters in a skillet over medium heat for 2-3 minutes on each side until heated through and crispy.

Precooking Tip: If you choose to freeze uncooked fritters, simply thaw them in the fridge before frying, and you'll enjoy fresh crispy fritters anytime!

Cheesy Zucchini Fritters Recipe FAQs

How do I choose the right zucchini?
Absolutely! When selecting zucchinis, look for firm, bright green ones with a smooth skin. Avoid any that have dark spots all over or feel soft to the touch, as these can indicate overripeness. Medium-sized zucchinis are ideal as they tend to have the best flavor and texture for fritters.

How should I store leftover fritters?
Very straightforward! Allow your Cheesy Zucchini Fritters to cool completely before placing them in an airtight container. They will stay fresh in the fridge for up to 3 days—making your next snack easy and ready to enjoy!

Can I freeze Cheesy Zucchini Fritters?
Yes, you can! For freezing, first lay the uncooked fritters out on a baking sheet in a single layer and freeze them until solid. Then, transfer them to a freezer-safe container or bag, layering parchment paper between them to prevent sticking. They can be frozen for up to 3 months. When you're ready to enjoy them, just thaw in the fridge before frying.

What should I do if my fritters are soggy?
Soggy fritters can be a disappointment, but don’t worry! Make sure to squeeze out as much moisture as possible from the grated zucchini before mixing. If they’re still lackluster, try frying them in a hotter skillet to help them crisp up nicely. Remember to space them out in the pan and avoid overcrowding, as this can lead to steaming rather than frying.

Are Cheesy Zucchini Fritters safe for pets?
Generally, the ingredients in these fritters—zucchini, eggs, and cheese—are safe for pets in small amounts. However, garlic is a common ingredient in these fritters and can be harmful to dogs. It’s best to keep those scraps away from your furry friends to ensure their safety and health.

Can I substitute the flour for a gluten-free option?
Absolutely! You can use almond flour as a delicious alternative. This not only makes the fritters gluten-free but also adds a lovely nutty flavor. Just replace the ½ cup of all-purpose flour with the same amount of almond flour, and you’re good to go!

Cheesy Zucchini Fritters

Deliciously Crispy Cheesy Zucchini Fritters You’ll Love

Cheesy Zucchini Fritters are crispy, flavorful bites that combine zucchini with cheesy goodness, perfect for appetizers or quick meals.
Print Recipe Pin Recipe
Prep Time 10 minutes mins
Cook Time 15 minutes mins
Resting Time 10 minutes mins
Total Time 25 minutes mins
Servings: 4 fritters
Course: Appetizer
Cuisine: Vegetarian
Calories: 150
Ingredients Equipment Method Nutrition Notes

Ingredients
  

For the Fritters
  • 2 medium Zucchinis finely grated
  • 1 teaspoon Sea Salt
  • ½ cup All-Purpose Flour or almond flour for gluten-free
  • ½ cup Parmesan Cheese freshly grated
  • ½ cup Mozzarella Cheese shredded
  • 2 large Eggs lightly beaten
  • 2 Green Onions finely sliced
  • 2 cloves Garlic minced
  • ½ teaspoon Black Pepper freshly ground
  • ¼ teaspoon Crushed Red Pepper Flakes optional
  • Olive Oil enough for frying

Equipment

  • Mixing Bowl
  • Non-stick skillet
  • Kitchen Towel

Method
 

Step-by-Step Instructions
  1. Start by grating the zucchinis into a large mixing bowl. Then, transfer the grated zucchini to a clean kitchen towel or cheesecloth. Twist the towel and squeeze out as much moisture as possible.
  2. Return the drained zucchini to the bowl and sprinkle in 1 teaspoon of sea salt. Let the mixture sit for about 10 minutes.
  3. After the resting period, add ½ cup of all-purpose flour, ½ cup of freshly grated Parmesan cheese, ½ cup of shredded mozzarella cheese, 2 lightly beaten eggs, green onions, minced garlic, black pepper, and crushed red pepper flakes. Mix until well combined.
  4. Preheat a non-stick skillet over medium heat with a generous layer of olive oil until shimmering.
  5. Using a heaping tablespoon, scoop some of the zucchini mixture into the skillet. Flatten slightly to shape into a fritter.
  6. Cook each fritter for about 3 to 4 minutes until golden brown and crispy. Flip and cook the other side for another 3 to 4 minutes.
  7. Transfer the fritters to a plate lined with paper towels to absorb excess oil.
  8. Serve warm, garnished with herbs or sour cream, and enjoy!

Nutrition

Serving: 1fritterCalories: 150kcalCarbohydrates: 18gProtein: 5gFat: 7gSaturated Fat: 3gPolyunsaturated Fat: 1gMonounsaturated Fat: 3gCholesterol: 70mgSodium: 300mgPotassium: 200mgFiber: 1gSugar: 2gVitamin A: 500IUVitamin C: 20mgCalcium: 200mgIron: 1mg

Notes

For best results, manage moisture, season generously, and ensure optimal heat when cooking.

Tried this recipe?

Let us know how it was!

Savory Cashew Chicken: A Crunchy Twist on Comfort Food

August 15, 2025 by grace bellamy Leave a Comment

As the aroma of sizzling ginger and garlic fills the kitchen, my heart skips a beat. It's time for one of my favorite comfort meals: Cashew Chicken. This dish is not just a feast for the senses; it's a delightful blend of crispy chicken and crunchy cashews, bathed in a sweet and savory sauce that will make your taste buds sing. In just 20 minutes, you can transform simple ingredients into a vibrant meal that's perfect for both busy weeknights and special gatherings. Plus, it's a crowd-pleaser, ensuring that everyone at the table will be coming back for seconds. Are you ready to whip up a batch that will rival your favorite takeout? Let's dive into this delicious adventure together!

What makes this Cashew Chicken unforgettable?

Simplicity: This recipe comes together in just 20 minutes, making it the perfect solution for busy weeknights.

Deliciously Crunchy: The combination of crispy chicken and roasted cashews provides a delightful crunch that keeps every bite exciting.

Flavor Explosion: The sweet and savory sauce—with hints of honey and ginger—creates a mouthwatering symphony of flavors that dances on your palate.

Versatile Base: Whether served with rice, quinoa, or veggies, this dish is easily adaptable to suit your taste preferences or dietary needs.

Crowd-Pleasing Delight: Guaranteed to impress, this dish is a fantastic option for dinner parties, ensuring your guests will be asking for the recipe.

Don’t forget to check out my tips for pairing it with some delicious sides in my post on homemade fried rice!

Cashew Chicken Ingredients

Get ready to create a dish that will satisfy your cravings!

For the Chicken

  • Chicken thighs (or breasts) – cut into bite-sized pieces for tender bites throughout the dish.
  • Cornstarch – gives the chicken that irresistible crispy texture when cooked.

For the Sauce

  • Chicken stock – provides a rich, savory base that brings all the flavors together.
  • Soy sauce – adds depth of flavor with its umami richness, perfect for your Cashew Chicken!
  • Honey – a touch of sweetness that balances the savory elements beautifully.
  • Hoisin sauce – enriches the sauce with its sweet and tangy notes.
  • Rice wine vinegar – gives a hint of acidity that brightens the overall flavor.
  • Cornstarch (for thickening) – helps your sauce achieve that perfect velvety consistency.

For the Aromatics

  • Ginger (minced) – infuses the dish with a warm, aromatic essence that elevates it.
  • Garlic (minced) – imparts a robust flavor that makes every bite irresistible.

For the Garnish

  • Unsalted roasted cashews – add a crunchy element that complements the tender chicken.
  • Green onions (sliced) – provide a fresh, vibrant touch that elevates the presentation and flavor.

Step‑by‑Step Instructions for Cashew Chicken

Step 1: Prepare the Sauce
In a medium bowl, combine the chicken stock, soy sauce, honey, hoisin sauce, cornstarch, and rice wine vinegar. Whisk these ingredients together until the cornstarch is fully dissolved, creating a smooth mixture. Set the sauce aside while you work on the chicken, allowing the flavors to meld together as you prepare the rest of the Cashew Chicken.

Step 2: Coat the Chicken
In another bowl, add the bite-sized pieces of chicken along with the cornstarch. Toss the chicken pieces gently until each piece is evenly coated. This coating helps to achieve that irresistible crispy texture once cooked. Take a moment to ensure each piece is well-covered, enhancing the final crunch of your Cashew Chicken.

Step 3: Cook the Chicken
Heat the oil in a deep fryer to 350°F, or alternatively, use a large skillet and heat over medium-high heat. Carefully add the chicken pieces in batches, frying for 2–3 minutes until they are golden brown and crispy on the outside. Once cooked through, transfer the chicken to a paper towel-lined plate to drain off excess oil, allowing it to stay crunchy.

Step 4: Sauté the Aromatics
In a large pan, heat 1 tablespoon of oil over medium heat. Add the minced garlic and ginger, cooking for about 1 minute until they become fragrant and tender. Then, toss in the roasted cashews, stirring them with the garlic and ginger until they are lightly toasted, which enhances the overall flavor of your Cashew Chicken.

Step 5: Combine the Sauce
Pour the prepared sauce mixture into the pan with the aromatics and cashews. Increase the heat to medium-high and cook the sauce for 2–3 minutes, or until it starts to bubble and thicken. Stir continuously to prevent sticking, ensuring that the flavors combine beautifully, and the sauce reaches a creamy texture that will coat the chicken perfectly.

Step 6: Mix in the Chicken
Once the sauce has thickened, return the crispy chicken to the pan. Use a spatula to toss the chicken pieces gently in the sauce, making sure that each piece is generously coated. Allow it to cook for an additional minute so the chicken can absorb the amazing flavors of the sauce, enhancing your delicious Cashew Chicken dish.

Step 7: Garnish and Serve
Remove the pan from heat and add the sliced green onions, tossing again to distribute them throughout the dish. This final touch adds a fresh, vibrant note to your Cashew Chicken. Serve immediately while hot, either on its own or alongside your favorite rice or vegetables for a complete meal.

Make Ahead Options

These Cashew Chicken preparations are perfect for busy weeknights, saving you valuable time when you're juggling tasks! You can prep the sauce up to 3 days in advance; simply mix the chicken stock, soy sauce, honey, hoisin sauce, cornstarch, and rice wine vinegar, then store it in an airtight container in the refrigerator. Additionally, you can coat the chicken pieces with cornstarch up to 24 hours ahead—just keep them in the fridge as well. To maintain quality, store the cooked cashews separately to retain their crunch. When you’re ready to finish, sauté the aromatics, heat the sauce, fry the chicken, and toss everything together for a delightful dinner that feels just as fresh as if you made it all at once!

How to Store and Freeze Cashew Chicken

Fridge: Store any leftover Cashew Chicken in an airtight container for up to 3 days. Reheat in a skillet over medium heat, adding a splash of water or broth to keep it moist.

Freezer: For longer storage, place the cooled Cashew Chicken in a freezer-safe container. It can be frozen for up to 3 months. Thaw overnight in the fridge before reheating.

Reheating: When ready to enjoy again, reheat in a skillet over low heat, stirring occasionally until heated through. Avoid microwaving to preserve the chicken's texture.

Reviving Leftovers: If the sauce seems thick after freezing, add a little chicken stock while reheating to restore its creamy consistency.

What to Serve with Cashew Chicken

Creating the perfect meal to accompany your chicken masterpiece can elevate the entire dining experience.

  • Fluffy Jasmine Rice: This aromatic rice is perfect for soaking up the delicious sauce, offering a soft texture that balances the crunch of the chicken.

  • Stir-Fried Veggies: A colorful mix of bell peppers, broccoli, and snap peas provides a crisp, fresh contrast, enhancing the dish with vibrant flavors.

  • Egg Fried Rice: Rich, savory, and slightly indulgent, this classic side complements the sweetness of the Cashew Chicken beautifully, creating a satisfying experience.

  • Spring Rolls: Light and crispy, these fresh rolls filled with veggies bring a refreshing touch, making the meal engaging and delightful for your taste buds.

  • Sweet and Sour Pineapple Salad: The tangy pineapple salad offers a refreshing contrast to the savory chicken, adding a burst of flavor and a bright, colorful presentation.

  • Chilled Soba Noodles: With their nutty flavor and chewy texture, these noodles make a wonderful alternative to rice and pair surprisingly well with the dish’s rich sauce.

  • Mango Lassi: This fruity yogurt drink brings its coolness and sweetness to the meal, enhancing the flavors of the Cashew Chicken while perfectly quenching your thirst.

Tips for the Best Cashew Chicken

  • Chicken Choice: Use chicken thighs for a juicier texture. If using breasts, be careful not to overcook them to avoid dryness.

  • Perfect Coating: Ensure each piece of chicken is well-coated with cornstarch for a crunchy exterior. This prevents sogginess after frying.

  • Consistent Heat: Maintain the oil temperature at 350°F when frying. If the oil is too cool, the chicken will absorb too much oil; too hot can burn the coating.

  • Sauce Timing: Add the chicken back to the sauce immediately after it thickens. This allows the crispy chicken to soak up the flavors without losing its crunch.

  • Garnish Freshness: Toss in the green onions right at the end to preserve their vibrant flavor and color. They elevate your Cashew Chicken beautifully!

Cashew Chicken Variations & Substitutions

Feel free to let your creativity shine as you customize your Cashew Chicken to match your cravings!

  • Dairy-Free: Substitute any condiments containing dairy with non-dairy alternatives to maintain that rich flavor without the dairy.

  • Vegetarian Delight: Replace chicken with tofu or tempeh for a hearty plant-based option that still delivers on flavor and texture.

  • Nut-Free: Omit the cashews and use sunflower seeds for a delightful crunch, while keeping the dish just as satisfying.

  • Spicy Kick: Add red pepper flakes or sriracha to the sauce for a fiery twist that’ll awaken your taste buds.

  • Crispy Veggies: Toss in some bell peppers or snap peas during the sautéing step for extra color, flavor, and nutrition in your dish.

  • Brown Sugar Swap: If you're out of honey, brown sugar can add that sweet dimension to the sauce with a deeper flavor profile.

  • Zesty Citrus: Squeeze in some fresh lime or lemon juice just before serving to give a lively brightness to your dish.

  • Cooking Method: Try baking the chicken coated with cornstarch for a healthier take, while maintaining that satisfying crispiness.

Each of these variations opens new doors to your culinary journey. And if you're in the mood for something to complement your Cashew Chicken, check out my guide on perfect homemade fried rice for an ideal pairing that brings everything together beautifully!

Cashew Chicken Recipe FAQs

How do I choose the right chicken for Cashew Chicken?
Absolutely! I recommend using chicken thighs for a juicier texture, but chicken breasts can also work if you cook them carefully to avoid dryness. When selecting chicken, look for pieces that are plump and have a nice pink color without any dark spots or excessive liquid in the packaging.

How should I store leftover Cashew Chicken?
Very simply! Store any leftover Cashew Chicken in an airtight container in the fridge for up to 3 days. When reheating, use a skillet over medium heat and add a splash of water or broth to help maintain moisture and revive that delicious flavor.

Can I freeze Cashew Chicken?
Yes, you can! Allow the dish to cool completely, then transfer it to a freezer-safe container. It can be frozen for up to 3 months. When you're ready to enjoy it again, thaw it overnight in the fridge before reheating. I often suggest reheating it slowly in a skillet over low heat to preserve the amazing texture of the chicken.

What are some common troubleshooting tips for Cashew Chicken?
If your chicken isn't turning out as crispy as you'd like, ensure that it is properly coated in cornstarch before frying. Maintaining an oil temperature of 350°F is crucial; too low will result in greasy chicken, while too high can burn the coating. If your sauce turns out too thick, simply whisk in a bit of chicken stock while reheating to regain that creamy, luscious texture.

Are there any dietary considerations I should keep in mind?
Of course! For those with allergies, be mindful that this recipe contains soy from the soy sauce and nuts from the roasted cashews. For a gluten-free alternative, consider using tamari instead of soy sauce. If cooking for pets, be cautious, as ingredients like garlic and onions can be harmful. Always consult your veterinarian if unsure!

What makes the cashews stay crunchy in the dish?
To keep your cashews crunchy, add them to the pan with the aromatics just before pouring in the sauce. This way, they get toasted and maintain their texture when mixed with the sauce. Tossing in the sliced green onions at the end also adds that final touch of freshness and crunch!

Cashew Chicken

Savory Cashew Chicken: A Crunchy Twist on Comfort Food

Savory Cashew Chicken is a delightful blend of crispy chicken and crunchy cashews, bathed in a sweet and savory sauce.
Print Recipe Pin Recipe
Prep Time 10 minutes mins
Cook Time 10 minutes mins
Total Time 20 minutes mins
Servings: 4 servings
Course: Main Dishes
Cuisine: Asian
Calories: 380
Ingredients Equipment Method Nutrition Notes

Ingredients
  

For the Chicken
  • 1 pound Chicken thighs cut into bite-sized pieces
  • ¼ cup Cornstarch for coating
For the Sauce
  • 1 cup Chicken stock
  • ¼ cup Soy sauce
  • 2 tablespoons Honey
  • 2 tablespoons Hoisin sauce
  • 2 tablespoons Rice wine vinegar
  • 1 tablespoon Cornstarch for thickening
For the Aromatics
  • 1 tablespoon Ginger minced
  • 2 cloves Garlic minced
For the Garnish
  • ½ cup Unsalted roasted cashews
  • 3 tablespoons Green onions sliced

Equipment

  • Medium bowl
  • large skillet
  • Fryer or large skillet
  • spatula

Method
 

Step-by-Step Instructions
  1. In a medium bowl, combine chicken stock, soy sauce, honey, hoisin sauce, cornstarch, and rice wine vinegar. Whisk together until smooth and set aside.
  2. In another bowl, add chicken pieces and cornstarch. Toss until evenly coated.
  3. Heat oil in a fryer or large skillet to 350°F. Fry chicken in batches for 2–3 minutes until golden brown. Transfer to a paper towel-lined plate.
  4. In a large pan, heat 1 tablespoon of oil over medium heat. Add garlic and ginger, cooking until fragrant. Add roasted cashews and stir until toasted.
  5. Pour the prepared sauce mixture into the pan. Increase heat and cook for 2–3 minutes until bubbling and thickened.
  6. Return the crispy chicken to the pan and toss gently to coat in the sauce. Cook for an additional minute.
  7. Remove from heat and toss in sliced green onions. Serve immediately.

Nutrition

Serving: 1servingCalories: 380kcalCarbohydrates: 25gProtein: 30gFat: 15gSaturated Fat: 3gPolyunsaturated Fat: 5gMonounsaturated Fat: 6gCholesterol: 70mgSodium: 800mgPotassium: 400mgFiber: 3gSugar: 6gVitamin A: 50IUVitamin C: 5mgCalcium: 30mgIron: 2mg

Notes

Use chicken thighs for a juicier texture, ensure each piece is well-coated with cornstarch for crunch, and maintain oil temperature for optimal frying results.

Tried this recipe?

Let us know how it was!

Crispy Garlic Parmesan Potatoes for Irresistible Crunch

August 15, 2025 by grace bellamy Leave a Comment

As I reached into the pantry, I discovered a 2-pound bag of baby potatoes begging to be transformed into something special. Enter my Crispy Garlic Parmesan Potatoes—a delightful side that’s not only outrageously simple but also irresistibly satisfying. With golden exteriors and a cheesy finish, these crispy bites are the perfect antidote to fast food fatigue. The best part? They’re ready in less than an hour and require only a handful of ingredients, making them a great go-to for busy weeknights or weekend gatherings. Imagine the smiles around the table as everyone digs into these mouthwatering gems! So, are you ready to elevate your potato game? Let’s dive into this delightful recipe!

Why Are These Potatoes So Irresistible?

Crispy, golden perfection: You’ll achieve a delightful crunch on the outside while keeping the insides tender and fluffy.

Simple ingredients: With just a few pantry staples, you can whip up a side dish that elevates any meal.

Versatile serving: Perfect as a side for any protein or enjoyed as a snack on their own with your favorite dipping sauce.

Quick and easy: Ready in under an hour, these potatoes are ideal for busy weeknights or last-minute gatherings.

Flavor-packed goodness: The garlic and Parmesan combo creates a savory explosion that satisfies even the pickiest eaters.

Why not try pairing them with a refreshing salad or some grilled vegetables for a complete meal? Enjoy the lively crunch of these Crispy Garlic Parmesan Potatoes—we promise they’ll become a staple in your kitchen!

Crispy Garlic Parmesan Potatoes Ingredients

For the Potatoes
• Baby potatoes – 2 pounds of these small gems ensure even cooking and a delightful texture.
• Olive oil – 4 tablespoons help achieve that crispy, golden exterior everyone loves.
• Garlic, minced – 4 cloves add a fragrant kick that elevates the dish to pure deliciousness.
• Garlic powder – 1 teaspoon enhances the garlic flavor, giving you a robust taste in every bite.
• Onion powder – 1 teaspoon adds depth and sweetness, perfectly complementing the garlic.
• Smoked paprika – 1 teaspoon introduces a subtle smokiness that rounds out the flavor profile.
• Dried oregano – 1 teaspoon provides an aromatic touch that brings a hint of earthiness to the dish.
• Salt – 1 teaspoon can be adjusted to your taste; it’s essential for enhancing all the flavors.
• Black pepper – ½ teaspoon for a touch of heat that balances the richness of the cheese.

For the Topping
• Parmesan cheese – ½ cup grated adds a decadent cheesy crust that’s simply irresistible on these crispy bites.
• Fresh parsley – 2 tablespoons, chopped, offer a fresh, vibrant garnish that brightens up your dish.

These Crispy Garlic Parmesan Potatoes are sure to be a hit, turning any meal into a moment of joy!

Step‑by‑Step Instructions for Crispy Garlic Parmesan Potatoes

Step 1: Preheat the Oven
Start by preheating your oven to 425°F (220°C). This temperature is perfect for achieving that desired crispy texture. While your oven heats up, gather your ingredients and get ready to whip up these delightful Crispy Garlic Parmesan Potatoes!

Step 2: Prepare the Potatoes
Wash the 2 pounds of baby potatoes under cold water, scrubbing away any dirt. Pat them dry with a towel, and if using larger Yukon Gold potatoes, cut them into quarters. Keep the baby potatoes whole or halved for a lovely bite-sized treat that’s easy to prepare!

Step 3: Boil the Potatoes
In a large pot, cover the prepared potatoes with cold water and add a pinch of salt. Bring the water to a boil over high heat, then reduce to a simmer for 10-15 minutes until the potatoes are fork-tender. This step ensures your potatoes are soft inside while remaining firm on the outside.

Step 4: Drain and Steam
After boiling, drain the potatoes in a colander and let them sit for a few minutes. This steaming process helps eliminate excess moisture, which is key to achieving that perfect crispy finish when you roast the potatoes in the oven.

Step 5: Mix the Seasoning
In a large mixing bowl, combine 4 tablespoons of olive oil, 4 cloves of minced garlic, 1 teaspoon of garlic powder, 1 teaspoon of onion powder, 1 teaspoon of smoked paprika, 1 teaspoon of dried oregano, 1 teaspoon of salt, and ½ teaspoon of black pepper. Whisk until everything is well combined and fragrant.

Step 6: Coat the Potatoes
Once your potatoes have cooled slightly, add them to the bowl with the seasoning mixture. Gently toss the potatoes until they are evenly coated in the flavorful marinade, ensuring every bite of your Crispy Garlic Parmesan Potatoes is bursting with taste.

Step 7: Prepare the Baking Sheet
Line a large baking sheet with parchment paper or lightly grease it to prevent sticking. This step is crucial for ensuring even roasting and easy cleanup. Spread the seasoned potatoes out in a single layer, making sure they have plenty of space to crisp up.

Step 8: Roast the Potatoes
Place the baking sheet in your preheated oven and roast the potatoes for 25-30 minutes. Flip them halfway through for even browning. You’ll know they’re ready when they start to turn golden brown and you can already smell the wonderful aroma filling your kitchen!

Step 9: Add the Parmesan
Once the potatoes are golden and crispy, carefully remove them from the oven. Immediately sprinkle ½ cup of grated Parmesan cheese over the hot potatoes. This cheese will melt slightly, creating a deliciously gooey, savory topping that is the highlight of these Crispy Garlic Parmesan Potatoes.

Step 10: Finish Baking
Return the baking sheet to the oven for an additional 5 minutes, allowing the Parmesan to melt and bubble. Keep an eye on them during this time to prevent the cheese from burning, as you want that perfect melt without any charred bits.

Step 11: Garnish and Serve
Once the cheese is bubbling, remove the baking sheet from the oven. Transfer your crispy garlic Parmesan potatoes to a serving dish and sprinkle them with 2 tablespoons of chopped fresh parsley for a pop of color and added freshness.

Step 12: Enjoy the Goodness
Serve your hot, crispy garlic Parmesan potatoes as a delightful side dish or snack. They are perfect on their own or paired with your favorite dipping sauce, bringing smiles to everyone at the table!

What to Serve with Crispy Garlic Parmesan Potatoes

Imagine a bustling kitchen filled with the heavenly aroma of roasting garlic and melting cheese—perfectly paired with these delightful potatoes.

  • Grilled Chicken: Juicy, herb-marinated chicken complements the crispy, garlicky bites while adding a protein boost to your meal.
  • Caesar Salad: Crisp romaine and creamy dressing balance out the warm, cheesy potatoes, creating a vibrant plate that delights the senses.
  • Roasted Vegetables: A medley of seasonal vegetables, like bell peppers and zucchini, adds color and freshness to your table, enhancing the overall experience.
  • Creamy Coleslaw: Chill your meal with crunchy, tangy coleslaw, providing a refreshing contrast to the hot, crispy Parmesan potatoes.
  • Steamed Asparagus: Tender asparagus spears, lightly seasoned, enrich the dish with their vibrant green color and delicate flavor.
  • Beef Tenderloin: Savory, perfectly cooked beef tenderloin pairs beautifully with the flavor-packed potatoes, elevating your dining experience to gourmet status.
  • Sparkling Lemonade: This refreshing beverage brightens your palate while its citrus notes enhance the flavors of the garlic and spices.
  • Chocolate Mousse: End your meal on a sweet note with luscious chocolate mousse—a creamy dessert that perfectly rounds out the savory goodness of your main dishes.

Expert Tips for Crispy Garlic Parmesan Potatoes

• Choose the Right Potatoes: Opt for baby potatoes or small Yukon Golds for even cooking and the ideal texture. Larger potatoes can be cut into smaller chunks for uniformity.

• Don't Skip the Steaming: After boiling, let the potatoes sit in the colander to steam off excess moisture. This step is key to achieving the perfect crispy exterior without sogginess.

• Even Coating is Key: When tossing the potatoes with the seasoning mix, ensure they are evenly coated. This allows every delightful bite of your Crispy Garlic Parmesan Potatoes to be flavor-packed.

• Space Them Out: Arrange the potatoes in a single layer on the baking sheet without overcrowding. Crowded potatoes can lead to steaming instead of roasting, hindering that golden crispiness.

• Watch the Cheese: Add the Parmesan towards the end of the baking time to prevent burning. A gently melted layer of cheese will provide that irresistible flavor without the char.

• Serve Hot and Fresh: Enjoy these potatoes right after baking for maximum crispness. Pair them with a dipping sauce for an even more delightful experience!

How to Store and Freeze Crispy Garlic Parmesan Potatoes

Room Temperature: These potatoes are best enjoyed fresh, but if you need to store them, keep them at room temperature for up to 2 hours after cooking.

Fridge: Store leftover Crispy Garlic Parmesan Potatoes in an airtight container in the fridge for up to 3 days. To reheat, place them in a preheated oven at 375°F (190°C) for 10-15 minutes until warmed through.

Freezer: For longer storage, freeze the cooked potatoes in a single layer on a baking sheet, then transfer to a freezer-safe container after they're solid. They can be stored for up to 2 months. Reheat directly from the freezer!

Reheating: For the best results, reheat in the oven to regain that crispiness. Avoid microwaving, as it can make the potatoes soggy. Enjoy your crispy goodness!

Make Ahead Options

These Crispy Garlic Parmesan Potatoes are perfect for meal prep! You can wash, cut, and boil the baby potatoes up to 24 hours in advance. Just store them in an airtight container in the refrigerator to keep them fresh. When you're ready to enjoy this delightful dish, simply transfer the cooled potatoes to a mixing bowl, toss them in the seasoning mixture, and roast as directed. This approach not only saves time during a busy weeknight but also ensures your potatoes retain their delicious texture and flavor. Just remember, they'll be just as crispy and cheesy as if you made them from scratch!

Crispy Garlic Parmesan Potatoes Variations

Feel free to get creative and customize these potatoes to suit your taste and dietary needs!

  • Dairy-Free: Substitute nutritional yeast for Parmesan to achieve a cheesy flavor without dairy. You'll still enjoy lots of savory goodness in each bite.

  • Spicy Kick: Add a pinch of red pepper flakes or cayenne pepper to the seasoning mix. This twist will elevate the potatoes to a fiery delight that spice lovers crave!

  • Herb-Infused: Experiment with fresh herbs like rosemary or thyme in place of oregano. This fresh, aromatic touch gives your potatoes a delightful new dimension of flavor.

  • Sweet Potato Delight: Swap half or all of the baby potatoes for diced sweet potatoes. Their natural sweetness will create a lovely contrast to the savory seasonings.

  • Lemon Zest Boost: Incorporate the zest of one lemon into the seasoning mix for a bright, citrusy flavor that lifts the dish. A hint of lemon freshness can work wonders!

  • Crunchy Toppings: For added texture, sprinkle breadcrumbs or crushed crackers over the top before the final bake. This will add an extra crunch that is simply irresistible.

  • Garlic Lovers' Dream: Increase the minced garlic to 6 or more cloves and eliminate the garlic powder for an extra garlicky punch. Perfect for those who can’t resist that bold flavor!

Why not pair your Crispy Garlic Parmesan Potatoes with a hearty salad, like a refreshing Caesar or a zesty Mediterranean mix, to bring even more flavor to your meal? These variations offer endless possibilities to make this dish uniquely yours!

Crispy Garlic Parmesan Potatoes Recipe FAQs

How do I choose ripe baby potatoes?
Absolutely! For the best flavor and texture, look for firm baby potatoes without any dark spots or blemishes. They should feel smooth and have a vibrant color. If any are soft or have sprouted, it's best to avoid those.

What’s the best way to store leftovers?
Store your leftover Crispy Garlic Parmesan Potatoes in an airtight container in the fridge for up to 3 days. When you’re ready to enjoy them again, simply reheat in a preheated oven at 375°F (190°C) for about 10-15 minutes. This will help restore their lovely crispiness!

Can I freeze the Crispy Garlic Parmesan Potatoes?
Yes! To freeze, first allow them to cool completely. Then arrange the cooked potatoes in a single layer on a baking sheet and place them in the freezer until solid. Once frozen, transfer them to a freezer-safe container or bag and store for up to 2 months. When you're ready to eat, you can reheat them directly from the freezer!

What if my potatoes aren’t getting crispy?
If your potatoes aren't achieving that desired crispiness, double-check that you thoroughly steamed them after boiling—the moisture can trap steam and lead to soggy potatoes. Additionally, make sure to spread them out in a single layer when roasting. Crowding the pan can result in steaming rather than roasting.

Are these potatoes safe for my pet?
While potatoes are safe for dogs in small amounts, avoid using any seasonings or additives when preparing them for your furry friends. Unfortunately, the garlic and onion present here can be harmful to pets, so it’s best to keep these Crispy Garlic Parmesan Potatoes just for human enjoyment!

Can I modify the recipe for dietary restrictions?
Absolutely! For a dairy-free version, you can substitute the Parmesan cheese with a plant-based alternative or nutritional yeast for a cheesy flavor without the dairy. If you need to avoid gluten, rest assured this recipe is naturally gluten-free—just make sure any additional sauces or dips you choose are also gluten-free!

Crispy Garlic Parmesan Potatoes

Crispy Garlic Parmesan Potatoes for Irresistible Crunch

Crispy Garlic Parmesan Potatoes are a delightful side that’s simple, satisfying, and irresistibly crunchy.
Print Recipe Pin Recipe
Prep Time 10 minutes mins
Cook Time 30 minutes mins
Total Time 40 minutes mins
Servings: 4 servings
Course: Side Dishes
Cuisine: American
Calories: 250
Ingredients Equipment Method Nutrition Notes

Ingredients
  

For the Potatoes
  • 2 pounds baby potatoes small gems ensure even cooking
  • 4 tablespoons olive oil helps achieve crispy exterior
  • 4 cloves garlic, minced adds fragrant kick
  • 1 teaspoon garlic powder enhances garlic flavor
  • 1 teaspoon onion powder adds depth and sweetness
  • 1 teaspoon smoked paprika introduces subtle smokiness
  • 1 teaspoon dried oregano provides aromatic touch
  • 1 teaspoon salt essential for enhancing flavors
  • 0.5 teaspoon black pepper adds touch of heat
For the Topping
  • 0.5 cup Parmesan cheese grated adds cheesy crust
  • 2 tablespoons fresh parsley chopped, for garnish

Equipment

  • Large Pot
  • Mixing Bowl
  • Baking Sheet
  • Colander
  • Whisk

Method
 

Step-by-Step Instructions for Crispy Garlic Parmesan Potatoes
  1. Preheat your oven to 425°F (220°C).
  2. Wash the baby potatoes under cold water and pat dry.
  3. In a large pot, cover potatoes with cold water and add a pinch of salt. Boil, then simmer for 10-15 minutes until fork-tender.
  4. Drain the potatoes in a colander and let them sit to steam off excess moisture.
  5. In a mixing bowl, combine olive oil, minced garlic, garlic powder, onion powder, smoked paprika, dried oregano, salt, and black pepper. Whisk until well combined.
  6. Add the cooled potatoes to the bowl with seasoning and toss until evenly coated.
  7. Line a baking sheet with parchment paper or grease it. Spread potatoes in a single layer.
  8. Roast the potatoes for 25-30 minutes, flipping halfway through.
  9. Remove from oven and sprinkle grated Parmesan cheese over hot potatoes.
  10. Return to oven for an additional 5 minutes until Parmesan is melted.
  11. Garnish with chopped fresh parsley before serving.
  12. Serve hot with your favorite dipping sauce or as a side dish.

Nutrition

Serving: 1servingCalories: 250kcalCarbohydrates: 30gProtein: 5gFat: 12gSaturated Fat: 3gPolyunsaturated Fat: 2gMonounsaturated Fat: 7gCholesterol: 10mgSodium: 500mgPotassium: 800mgFiber: 3gSugar: 1gVitamin C: 20mgCalcium: 15mgIron: 8mg

Notes

For maximum crispness, enjoy these potatoes right after baking. Pair with a dipping sauce for added flavor.

Tried this recipe?

Let us know how it was!

Irresistibly Creamy Pesto Pasta Sauce in Just 10 Minutes

August 15, 2025 by grace bellamy Leave a Comment

As I tossed the pasta into boiling water, a wave of nostalgia washed over me—reminding me of sun-drenched afternoons spent in my grandmother's kitchen, where simplicity and flavor reigned supreme. My 10 Minute Creamy Pesto Pasta Sauce captures just that essence, perfect for those days when you crave comfort without the fuss. With just a handful of ingredients, this sauce transforms ordinary pasta into an irresistible meal that’s both quick to whip up and utterly delicious. The best part? It's a crowd-pleaser that allows you to savor homemade goodness without spending hours in the kitchen. Why settle for fast food when you can bring this creamy, herb-infused delight to your table in mere minutes? Are you ready to dive into a dish that’s sure to impress?

Why Is This Pesto Sauce a Must-Try?

Quick Preparation: In just 10 minutes, you can indulge in a creamy pasta dish that feels like a culinary masterpiece.

Fresh Flavor Explosion: The homemade or store-bought basil pesto adds a vibrant herbal note, creating a deliciously unique taste that will brighten any meal.

Versatile Pairing: Works wonders with any pasta of your choice, making it perfect for all preferences—whether you're using dried or fresh pasta!

Crowd-Pleasing Appeal: Easy to make for family dinners or entertaining guests, this sauce will leave everyone asking for seconds!

Simple Ingredients: Combining easy-to-find ingredients, this recipe celebrates the beauty of simplicity while offering rich, comforting flavors.

Transform your pasta night with this delightful 10 Minute Creamy Pesto Pasta Sauce, and for more delicious options, don’t miss out on my ultimate homemade pesto recipe.

Creamy Pesto Pasta Sauce Ingredients

• You won’t believe how simple it is!

For the Sauce

  • Olive oil – 1 tablespoon; adds a wonderful richness to the dish and helps sauté the garlic.
  • Garlic – 2 cloves, minced; gives depth of flavor and a fragrant aroma to brighten the sauce.
  • Single or light cream – ¾ cup; creates a luscious, creamy texture that perfectly coats the pasta.
  • Parmesan – 25 grams, finely grated; enhances the sauce with a nutty flavor that complements the pesto wonderfully.
  • Basil pesto – ⅓ cup (homemade or store-bought); this key ingredient provides that fresh, herbal burst essential for a Creamy Pesto Pasta Sauce.
  • Black pepper – ¼ teaspoon; adds a subtle kick and balances the creaminess of the sauce.
  • Fresh lemon juice – ½ tablespoon; brightens the flavors and adds a refreshing zing.
  • Salt – to taste; enhances all the flavors in the dish beautifully.
  • Pasta – 100 grams dried per person or 150 grams fresh; choose your favorite pasta to create your perfect creamy bowl of comfort.

Step‑by‑Step Instructions for Creamy Pesto Pasta Sauce

Step 1: Sauté the Garlic
In a large skillet, heat 1 tablespoon of olive oil over medium heat. Once shimmering, add 2 cloves of minced garlic and sauté for 1-2 minutes until fragrant and lightly golden, taking care not to let it burn. This will create a flavorful base for your Creamy Pesto Pasta Sauce.

Step 2: Add the Cream
Lower the heat and pour in ¾ cup of single or light cream, stirring gently. Bring the mixture to a very gentle simmer while watching carefully for small bubbles. This will ensure your sauce thickens beautifully without curdling, creating a luscious texture to coat your pasta.

Step 3: Incorporate the Parmesan
Gradually add 25 grams of finely grated parmesan cheese in two halves, stirring well after each addition. Allow the cheese to melt completely before adding more. This step is crucial for achieving that rich, creamy consistency that makes your Creamy Pesto Pasta Sauce irresistible.

Step 4: Mix in the Pesto
Whisk in ⅓ cup of basil pesto, whether homemade or store-bought, into the creamy mixture. Stir vigorously until fully combined, allowing the vibrant green color and fresh herbal flavors to infuse throughout the sauce. You'll start to see a beautiful transformation into a velvety sauce.

Step 5: Season the Sauce
Add ½ tablespoon of fresh lemon juice and ¼ teaspoon of black pepper to the sauce, mixing well. Let it simmer gently for a few more minutes to allow the flavors to marry and thicken slightly. You’ll know it’s ready when it coats the back of a spoon beautifully.

Step 6: Combine with Pasta
Toss your cooked pasta, approximately 100 grams of dried or 150 grams of fresh per person, directly into the sauce. Let it bubble for 1-2 minutes, gently mixing to fully coat the pasta. If the sauce feels too thick, add a splash of reserved pasta water to achieve your desired consistency.

Creamy Pesto Pasta Sauce Variations

Feel free to customize this creamy pesto pasta sauce to match your tastes or dietary needs!

  • Dairy-Free: Substitute the light cream with coconut cream or cashew cream for a rich, plant-based alternative.

  • Extra Veggie Boost: Add steamed or roasted veggies like cherry tomatoes or spinach for a nourishing touch. These vibrant additions not only enhance nutrition but also bring color to your dish!

  • Protein Punch: Toss in grilled shrimp or roasted chicken pieces to create a heartier meal that’s perfect for hungry appetites. The added protein makes it a complete dish!

  • Nut-Free Pesto: If you're allergic to nuts, blend sunflower seeds or hemp hearts into your basil pesto for a similar texture and flavor. You'll still enjoy that herbaceous delight without the worry!

  • Spicy Kick: Incorporate a pinch of red pepper flakes or diced fresh chili for an unexpected heat that complements the creaminess beautifully. Just a little spice can transform the dish into a flavor explosion!

  • Herb Swaps: Experiment with different herbs like cilantro or arugula for your pesto base. Each herb brings its own unique flair, taking your creamy sauce on a totally different culinary journey.

  • Gluten-Free Option: Use gluten-free pasta to cater to dietary restrictions while maintaining the pasta's comforting charm. It’s a delicious way to keep everyone at the table happy!

  • Lemon Zing: Add an extra splash of lemon juice or some lemon zest for a brighter flavor profile that will really elevate your creamy pesto pasta sauce. The zing will dance on your taste buds!

Explore these delightful variations and make this creamy pesto pasta sauce truly your own. For a fresh twist on homemade sauces, try my ultimate homemade pesto recipe or a scrumptious creamy garlic pasta dish that will leave your loved ones wanting more!

Make Ahead Options

These Creamy Pesto Pasta Sauce preparations are a lifesaver for busy home cooks! You can make the creamy sauce up to 3 days in advance and store it in an airtight container in the refrigerator. To maintain its luscious quality, allow the sauce to cool before refrigerating, as this prevents condensation. When you're ready to enjoy, simply reheat the sauce gently on the stove over low heat, stirring constantly. If it appears too thick, just add a splash of cream or pasta water to loosen. Finally, combine it with freshly cooked pasta right before serving for a delightful meal that feels just as fresh and satisfying as when you first made it!

How to Store and Freeze Creamy Pesto Pasta Sauce

Fridge: Store any leftover sauce in an airtight container for up to 3 days. Let it cool completely before sealing to maintain freshness and flavor.

Freezer: If you want to save it for later, freeze the sauce in a freezer-safe container for up to 3 months. Be sure to leave space for expansion.

Reheating: To reheat, thaw overnight in the fridge and gently warm on the stove, adding a splash of cream or pasta water to restore its creamy consistency.

Pairing Notes: When ready to serve, toss the reheated sauce with freshly cooked pasta of your choice for an instant delicious meal!

What to Serve with 10 Minute Creamy Pesto Pasta Sauce

Transform your meal into a delightful feast by pairing it with these delicious sides and accompaniments.

  • Garlic Bread: This crispy, buttery delight perfectly complements the creamy sauce, ideal for soaking up every delicious drop. The aroma wafting from the oven adds an extra layer of comfort to your dining experience.

  • Mixed Green Salad: A refreshing salad, topped with cherry tomatoes and a light vinaigrette, balances the richness of the sauce. The crunch of fresh greens will invigorate your palate while providing a colorful contrast on your plate.

  • Roasted Vegetables: Seasonal roasted veggies like zucchini, bell peppers, or asparagus bring a hearty texture and earthy flavor that pairs wonderfully with your creamy pesto pasta. Their caramelized sweetness and vibrant colors elevate the entire meal.

  • Grilled Chicken: Tender, seasoned grilled chicken adds a protein punch, making your dish more filling while complementing the pasta's creamy texture. The smoky char of the chicken harmonizes beautifully with the herbal notes of the pesto.

  • Wine Pairing: A glass of crisp Sauvignon Blanc or a light Pinot Grigio enhances the flavors of your sauce, cutting through the creaminess with zesty acidity. It’s the perfect sipping companion for a relaxed evening.

  • Lemon Sorbet: For dessert, finish your meal with a refreshing lemon sorbet. It cleanses the palate and offers a bright, zesty contrast that rounds off the richness of the pasta, leaving you feeling uplifted and satisfied.

Expert Tips for Creamy Pesto Pasta Sauce

  • Quality Ingredients: Use fresh garlic and high-quality parmesan for the best flavor. Cheap substitutes can lead to a bland sauce, affecting your creamy pesto pasta sauce's overall appeal.

  • Avoid Overheating: When adding the cream, keep the heat low to prevent curdling. A gentle simmer is key to achieving that smooth, rich texture.

  • Pasta Perfection: Reserve a cup of pasta water before draining. This starchy water can help adjust the sauce's thickness and bind it to the pasta beautifully.

  • Balance is Key: Taste as you go! Adjust the lemon juice and salt to your liking—too much can overpower the herbaceous notes of the pesto.

  • Make it Your Own: Feel free to customize this sauce by adding cooked vegetables or proteins like chicken or shrimp to boost your creamy pesto pasta sauce to the next level.

Creamy Pesto Pasta Sauce Recipe FAQs

How do I select the best basil pesto for this recipe?
Absolutely! Whether homemade or store-bought, look for fresh, vibrant green basil pesto. If using store-bought, check the ingredient list for minimal preservatives. A good-quality pesto will have basil, olive oil, garlic, and parmesan as the main ingredients, ensuring maximum flavor for your Creamy Pesto Pasta Sauce.

How can I store leftover Creamy Pesto Pasta Sauce?
Store any leftover sauce in an airtight container in the fridge for up to 3 days. Be sure to let it cool completely before sealing, to maintain freshness and flavor. If you plan to enjoy it later, consider freezing it!

What is the best way to freeze Creamy Pesto Pasta Sauce?
To freeze, pour the sauce into a freezer-safe container, leaving about half an inch for expansion as it freezes. I recommend portioning into smaller containers or even ice cube trays for easy thawing later. Your sauce should stay delicious in the freezer for up to 3 months. When you’re ready to use it, thaw overnight in the fridge and reheat over low heat, adding a splash of cream or pasta water to restore its texture.

What should I do if the sauce is too thick?
Very common! If your Creamy Pesto Pasta Sauce turns out too thick, no worries! Simply add a splash of reserved pasta water or a little bit more cream while stirring gently on low heat. This not only adjusts the consistency but also helps bind the sauce to the pasta, creating that luscious finish we love.

Can I make this dairy-free or vegan?
Absolutely! You can easily modify this recipe to fit dietary restrictions. Substitute the cream with a plant-based cream (like coconut cream or cashew cream) and use nutritional yeast instead of parmesan for that cheesy flavor. This way, you can enjoy a deliciously creamy pesto pasta sauce without dairy!

Creamy Pesto Pasta Sauce

Irresistibly Creamy Pesto Pasta Sauce in Just 10 Minutes

This Creamy Pesto Pasta Sauce is a quick and delicious way to elevate your pasta dishes!
Print Recipe Pin Recipe
Prep Time 5 minutes mins
Cook Time 5 minutes mins
Total Time 10 minutes mins
Servings: 4 servings
Course: Sauce
Cuisine: Italian
Calories: 250
Ingredients Equipment Method Nutrition Notes

Ingredients
  

Sauce Ingredients
  • 1 tablespoon Olive oil adds richness and helps sauté the garlic
  • 2 cloves Garlic minced, adds depth of flavor
  • ¾ cup Single or light cream creates a luscious, creamy texture
  • 25 grams Parmesan finely grated, enhances flavor
  • ⅓ cup Basil pesto provides the fresh, herbal burst
  • ¼ teaspoon Black pepper adds a subtle kick
  • ½ tablespoon Fresh lemon juice brightens flavors
  • Salt to taste, enhances flavors
  • 100 grams Dried pasta per person, or 150 grams fresh

Equipment

  • skillet
  • Wooden Spoon
  • Measuring Cups
  • Measuring Spoons

Method
 

Cooking Instructions
  1. In a large skillet, heat 1 tablespoon of olive oil over medium heat. Add 2 cloves of minced garlic and sauté for 1-2 minutes until fragrant and lightly golden.
  2. Lower the heat and pour in ¾ cup of single or light cream, stirring gently. Bring to a gentle simmer.
  3. Gradually add 25 grams of finely grated parmesan cheese in two halves, stirring well after each addition until melted.
  4. Whisk in ⅓ cup of basil pesto into the mixture, stirring until fully combined.
  5. Add ½ tablespoon of fresh lemon juice and ¼ teaspoon of black pepper, mixing well. Let it simmer for a few more minutes.
  6. Toss your cooked pasta into the sauce, letting it bubble for 1-2 minutes to fully coat.

Nutrition

Serving: 1servingCalories: 250kcalCarbohydrates: 30gProtein: 8gFat: 12gSaturated Fat: 7gPolyunsaturated Fat: 0.5gMonounsaturated Fat: 2.5gCholesterol: 30mgSodium: 200mgPotassium: 200mgFiber: 2gSugar: 1gVitamin A: 500IUVitamin C: 2mgCalcium: 150mgIron: 1mg

Notes

Store leftover sauce in an airtight container for up to 3 days. Freeze for up to 3 months, thaw before reheating.

Tried this recipe?

Let us know how it was!

Irresistible Marry Me Chicken Soup for Cozy Nights

August 15, 2025 by grace bellamy Leave a Comment

As I stirred the bubbling pot, the rich aroma of Marry Me Chicken Soup wafted through my kitchen, instantly transporting me to a cozy Italian bistro. This soul-nourishing dish combines tender pieces of rotisserie chicken, comforting pasta, and a luscious cream base, making it a perfect evening treat for anyone tired of fast food. Not only is this soup quick to prepare, but it’s also a one-pot wonder that's bound to impress guests or elevate a simple weeknight dinner. Toss in some vibrant spinach and fresh basil for an added pop of color and nutrition. Trust me, every spoonful is an invitation to savor the moment—ask anyone who’s tasted it! Ready to dive into a recipe that’s sure to become a new favorite in your home?

Why is Marry Me Chicken Soup so special?

Comforting, This recipe warms your heart with every spoonful, making it a go-to for cozy nights.
Quick prep, Ready in just 40 minutes, this dish is perfect for busy weeknights.
One-pot wonder, Cleanup is a breeze, allowing you to enjoy your meal without hassle.
Flavorful depth, The combo of sun-dried tomatoes and fresh herbs gives it a unique twist that will impress even the pickiest eaters.
Crowd-pleaser, Perfect for gatherings, it’s sure to make your guests begging for seconds.
Plus, for those wanting to level up their pasta game, try this noodle innovation for a fun variation! Enjoy every bite of your new favorite soup!

Marry Me Chicken Soup Ingredients

This delightful recipe combines everything you love about comfort food.

For the Base
• Olive oil – A smooth, rich oil that adds depth to your soup's flavor.
• Butter – Enhances the creaminess and richness of the dish.
• Medium onion, chopped – Provides a sweet and aromatic foundation for the soup.
• Garlic, minced – Adds an unforgettable layer of flavor; use fresh for the best results.
• Tomato paste – Intensifies the tomato flavor and gives the soup a lovely color.
• Sun-dried tomatoes – Contributes a sweet and tangy bite that elevates the dish.
• Italian seasoning – A perfect blend of herbs that brings an authentic touch to your soup.
• Dried oregano – Adds a warm, earthy flavor; great for enhancing the Italian essence.
• Crushed red pepper flakes (optional) – For those who enjoy a little heat to balance the creamy base.

For the Liquid
• Dry white wine – Adds richness and acidity, enhancing the overall flavor profile.
• Chicken broth – The heart of any good soup, providing depth and nourishment.

For the Heartiness
• Cooked/rotisserie chicken – A tender, juicy element that makes this soup filling and satisfying.
• Uncooked rotini or fusilli pasta – Perfect for soaking up the delicious broth and adding texture.

For the Creaminess
• Heavy/whipping cream – Creates a luxurious texture that makes every bite a treat.
• Freshly grated parmesan cheese – Melts beautifully and adds a salty, umami flavor.

For the Freshness
• Fresh baby spinach – Packs a nutritional punch and adds a vibrant green color.
• Fresh basil, torn/sliced – Enhances the soup's aroma and adds a lovely herbal note.
• Salt and pepper – Essential for seasoning; adjust to your taste for the perfect finish.

This Marry Me Chicken Soup not only warms the soul, but it’s also a delightful culinary experience that’s set to become a staple in your kitchen!

Step‑by‑Step Instructions for Marry Me Chicken Soup

Step 1: Sauté the Aromatics
In a large soup pot, heat 1 tablespoon of olive oil and 1 tablespoon of butter over medium-high heat. Once the butter melts and starts bubbling, add 1 chopped medium onion. Sauté for about 5 minutes, stirring occasionally, until the onion turns translucent and fragrant, laying a flavorful foundation for your Marry Me Chicken Soup.

Step 2: Add Flavor Boosters
Stir in 4 minced garlic cloves, 2 tablespoons of tomato paste, and ½ cup of sun-dried tomatoes along with ½ teaspoon each of Italian seasoning and dried oregano. If you enjoy a bit of spice, toss in ½ teaspoon of crushed red pepper flakes. Cook this mixture for about 1 minute until the aroma fills your kitchen, blending the flavors beautifully.

Step 3: Deglaze the Pot
Pour in ½ cup of dry white wine, stirring well to lift any browned bits from the bottom of the pot. Allow it to bubble for 1-2 minutes, watching as the mixture thickens slightly. This step enriches your Marry Me Chicken Soup with depth and complexity, enhancing the overall taste.

Step 4: Combine the Broth and Pasta
Add 4 cups of chicken broth to the pot and increase the heat to high. Once the soup reaches a roaring boil, stir in 1.5 cups of uncooked rotini or fusilli pasta. Quickly reduce the heat and cover the pot with the lid slightly ajar, letting it simmer for 10 minutes. Stir occasionally, observing how the pasta absorbs the flavors.

Step 5: Finish with Cream and Chicken
After 10 minutes of simmering, gently stir in 1 cup of heavy cream and 2 cups of cooked or rotisserie chicken. Continue cooking for another 4-5 minutes, allowing the pasta to become tender and the chicken to warm through. The soup should appear creamy and inviting, a true comfort food sensation.

Step 6: Add Freshness and Season
Turn off the burner and fold in 2-3 cups of fresh baby spinach and ½ cup of torn or sliced fresh basil. Mix in ½ cup of freshly grated parmesan cheese, stirring until it melts completely. Taste and season with salt and pepper as needed, ensuring each bite of your Marry Me Chicken Soup is perfectly balanced.

Step 7: Serve and Enjoy
Ladle the soup into bowls, watching as the vibrant colors of the spinach and basil pop. Top each serving with extra grated parmesan cheese for a delightful finish. Serve right away while it's hot, and relish the warmth of this cozy dish that’s bound to impress friends and family alike!

Make Ahead Options

These Marry Me Chicken Soup options are a game changer for busy home cooks! You can prepare the flavorful base (steps 1-3) up to 24 hours in advance; just sauté your aromatics and let the mixture cool before refrigerating. When it's time to serve, bring the soup back to a simmer, add your chicken and cream (steps 5-6), and cook until heated through. This way, you maintain all those delicious flavors! If you're looking to prep even further ahead, the soup can be frozen for up to 3 months; just thaw overnight in the fridge before reheating and adding the fresh spinach and basil before serving. Embrace the convenience and enjoy a warm bowl of comfort with minimal effort!

Marry Me Chicken Soup Variations

Feel free to customize this Marry Me Chicken Soup recipe to suit your taste preferences and dietary needs!

  • Gluten-Free: Substitute the pasta with gluten-free rotini or zucchini noodles for a lighter, gluten-free version. Enjoy the same comforting flavors minus the gluten!

  • Spicy Kick: Amp up the heat by adding diced jalapeños or a splash of hot sauce to the soup base. This small twist makes it perfect for spice lovers looking for that extra kick!

  • Creamy Vegan: Swap the chicken broth with vegetable broth and use coconut cream instead of heavy cream for a delightful vegan version that’s rich and fulfilling. Pair it with hearty chickpeas for added protein!

  • Herbaceous Boost: Mix in a variety of fresh herbs like thyme or rosemary, either in addition to or instead of basil. It adds a lovely aroma that takes your soup to a whole new level!

  • Cheesy Explosion: Add a mix of sharp cheddar or gouda cheese for a cheesy twist that melts beautifully into the soup. This option is perfect for those looking for a heartier flavor contrast!

  • Veggie-Packed: Load up the soup with more veggies like carrots, bell peppers, or zucchini. Adding a rainbow of vegetables not only enhances nutrition but also adds vibrant color to your dish.

  • Lemon Zest: Finish off your soup with a squeeze of fresh lemon juice before serving. The acidity brightens all the flavors, making each spoonful refreshing and zesty.

  • Herby Croutons: Top your soup with homemade croutons seasoned with Italian herbs for an extra crunchy texture, adding delightful contrast to the creamy goodness of the soup.

Your Marry Me Chicken Soup can become a unique masterpiece with these variations! Whether you’re exploring flavors or accommodating dietary needs, enjoy every comforting spoonful! You might also love pairing it with this delicious Garlic Bread for a truly harmonious meal.

How to Store and Freeze Marry Me Chicken Soup

Fridge: Store leftovers in an airtight container for up to 3 days. Reheat on the stove over low heat, adding a splash of chicken broth if necessary to restore creaminess.

Freezer: Freeze in portions for up to 3 months. Make sure to use freezer-safe containers, leaving space for expansion. Thaw overnight in the fridge before reheating.

Reheating: For best results, reheat the Marry Me Chicken Soup on the stovetop, stirring gently until warmed through. Avoid boiling to keep the creamy texture intact.

Airtight Storage: Ensure to seal tightly before freezing to prevent freezer burn, maintaining the soup's delicious flavors for a satisfying meal later.

Expert Tips for Marry Me Chicken Soup

• Use Fresh Ingredients: Fresh garlic, herbs, and quality chicken elevate flavors significantly—don’t skimp on freshness!
• Perfectly Cooked Pasta: To avoid mushy pasta, check for 'al dente' doneness before adding to the soup. Stir occasionally while it simmers.
• Add Cream Gradually: Stir in the cream slowly to ensure it blends well and creates a silky texture in your Marry Me Chicken Soup.
• Balance Seasoning: Always taste before serving! Adjust salt and pepper to fit your flavor preferences—each broth varies in sodium content.
• Meal Prep Friendly: This soup stores well! Make a larger batch and keep leftovers in the fridge for up to 3 days for easy meals.

What to Serve with Marry Me Chicken Soup

There's nothing quite like a cozy meal, and these delightful pairings will complement your soup beautifully.

  • Garlic Bread: This crunchy, buttery favorite soaks up every drop of soup, enhancing the comforting experience. It’s perfectly fragrant and will fill your kitchen with a delicious aroma.

  • Green Salad: A fresh, crisp salad adds a refreshing contrast to the creamy soup. Toss together mixed greens, cherry tomatoes, and a zesty vinaigrette for a vibrant side.

  • Steamed Broccoli: The tender crunch of broccoli brings a lovely balance to the soft textures of the soup. It's light yet hearty, offering a nutritious touch to your meal.

  • Cheesy Biscuits: Fluffy, cheesy biscuits are a treat that everyone will love. Their warm, savory goodness pairs well with the creaminess of the soup, making each bite delightful.

  • Roasted Vegetables: Seasonal vegetables, roasted for caramelization, offer a delightful sweetness that complements the flavors in the soup. Enjoy an extra layer of crunch and flavor!

  • Chardonnay: A chilled glass of Chardonnay adds elegance to your dinner table. Its bright acidity and fruity profile beautifully enhance the rich flavors in your Marry Me Chicken Soup.

  • Tiramisu: End your meal on a sweet note with this classic Italian dessert. Its creamy and coffee-infused layers make for a luxurious finish after a hearty soup.

These pairings promise to elevate your Marry Me Chicken Soup into a complete dining experience that will please anyone gathered around your table!

Marry Me Chicken Soup Recipe FAQs

What type of chicken should I use?
I recommend using cooked or rotisserie chicken, as it adds incredible flavor and saves time. If you’re feeling adventurous, you can cook your own chicken breasts prior to adding them to the soup.

How long can I store Marry Me Chicken Soup in the fridge?
Absolutely! You can store leftovers in an airtight container for up to 3 days. Just reheat on the stove over low heat; adding a splash of chicken broth will help restore its creaminess.

Can I freeze Marry Me Chicken Soup?
Very much so! You can freeze the soup in portions for up to 3 months. Use freezer-safe containers, leaving space for expansion. Thaw overnight in the fridge before reheating it to enjoy later.

Why does my pasta become mushy in the soup?
To prevent mushy pasta, ensure you cook it 'al dente' before adding it to the soup. Stir occasionally while it simmers to achieve the perfect texture. If needed, cook the pasta separately and add it in at the end.

Is there a way to make Marry Me Chicken Soup healthier?
Of course! You can use whole wheat pasta to boost fiber content. Additionally, adding more fresh vegetables like carrots or bell peppers can enhance the nutritional profile without sacrificing flavor.

Are there any ingredient substitutions I can make?
Absolutely! If you have dietary restrictions, you can use vegetable broth instead of chicken broth for a vegetarian version. Coconut cream makes a great dairy-free alternative to heavy cream, and gluten-free pasta works well if you’re avoiding gluten.

Marry Me Chicken Soup

Irresistible Marry Me Chicken Soup for Cozy Nights

This Marry Me Chicken Soup combines tender chicken, creamy broth, and vibrant spinach, making it the perfect cozy meal.
Print Recipe Pin Recipe
Prep Time 10 minutes mins
Cook Time 30 minutes mins
Total Time 40 minutes mins
Servings: 6 bowls
Course: Main Dishes
Cuisine: Italian
Calories: 450
Ingredients Equipment Method Nutrition Notes

Ingredients
  

For the Base
  • 1 tablespoon Olive oil
  • 1 tablespoon Butter
  • 1 medium Onion, chopped
  • 4 cloves Garlic, minced use fresh for best results
  • 2 tablespoons Tomato paste
  • ½ cup Sun-dried tomatoes
  • ½ teaspoon Italian seasoning
  • ½ teaspoon Dried oregano
  • ½ teaspoon Crushed red pepper flakes optional
For the Liquid
  • ½ cup Dry white wine
  • 4 cups Chicken broth
For the Heartiness
  • 2 cups Cooked rotisserie chicken
  • 1.5 cups Uncooked rotini or fusilli pasta
For the Creaminess
  • 1 cup Heavy cream
  • ½ cup Freshly grated parmesan cheese
For the Freshness
  • 2-3 cups Fresh baby spinach
  • ½ cup Fresh basil, torn/sliced
  • Salt to taste
  • Pepper to taste

Equipment

  • Large soup pot

Method
 

Step-by-Step Instructions
  1. In a large soup pot, heat olive oil and butter over medium-high heat. Add chopped onion and sauté until translucent.
  2. Stir in minced garlic, tomato paste, sun-dried tomatoes, Italian seasoning, oregano, and crushed red pepper. Cook until fragrant.
  3. Pour in dry white wine and deglaze the pot, stirring well. Allow to bubble and thicken slightly.
  4. Add chicken broth and increase heat to high. Stir in uncooked pasta and simmer for 10 minutes.
  5. Stir in heavy cream and cooked chicken, cooking for another 4-5 minutes until warmed through.
  6. Turn off the burner, fold in fresh spinach and basil, and mix in grated parmesan cheese. Season with salt and pepper to taste.
  7. Ladle the soup into bowls and top with extra parmesan cheese. Serve hot.

Nutrition

Serving: 1bowlCalories: 450kcalCarbohydrates: 35gProtein: 25gFat: 25gSaturated Fat: 15gCholesterol: 90mgSodium: 800mgPotassium: 700mgFiber: 2gSugar: 3gVitamin A: 2500IUVitamin C: 30mgCalcium: 300mgIron: 2mg

Notes

Fresh ingredients enhance flavors significantly. Adjust salt and pepper according to taste.

Tried this recipe?

Let us know how it was!

Ultimate Pull Apart Pizza Bread for Fun Family Feasts

August 15, 2025 by grace bellamy Leave a Comment

As I pulled the golden-brown Pull Apart Pizza Bread out of the oven, the tantalizing aroma of garlic and melted cheese enveloped my kitchen. This fun twist on traditional pizza is perfect for both casual gatherings and cozy nights in, and it’s a total crowd-pleaser that brings everyone together around the table. With just a few simple ingredients and a little love, you can create a dish that delights without the hassle of fast food. Prep time is quick, making it an ideal choice for impromptu get-togethers or family movie nights. And the best part? You can customize it with your favorite herbs and toppings to reflect your personal taste. So, why not grab your favorite pizza dough and let’s make something memorable together? What special flavors would you add to your own version of this delicious pull-apart bread?

Why is Pull Apart Pizza Bread so Special?

Irresistible, cheesy goodness: This Pull Apart Pizza Bread is all about layers of gooey mozzarella and savory Parmesan cheese, creating a stretchy, melty delight that will satisfy your cravings.

Simple to make: With just a few ingredients and easy steps, you can whip up this dish in no time, leaving your kitchen smelling heavenly!

Perfect for sharing: Whether it's game night or a family gathering, this bread encourages everyone to dig in and enjoy together.

Endless customization: Add your favorite toppings or spices for a unique twist, making it an excellent choice for any palate.

Make ahead: Assemble it in advance and store it in the fridge—perfect for busy weeknights or unexpected guests! Plus, it pairs beautifully with a fresh side salad or a warm bowl of soup.

Pull Apart Pizza Bread Ingredients

Create your own easy Pull Apart Pizza Bread with these must-have ingredients!

For the Dough
• Pizza dough – 1 pound, store-bought or homemade, at room temperature for easy handling.

For the Garlic Herb Oil
• Olive oil – ½ cup, plus more for brushing, which adds richness and flavor to the bread.
• Garlic – 4 cloves, minced; fresh garlic gives a delightful aroma and taste.
• Dried oregano – 1 teaspoon, for that classic Italian herb flavor.
• Dried basil – ½ teaspoon, enhances the overall taste profile with its fragrant notes.
• Red pepper flakes – ¼ teaspoon (optional), adds a touch of heat if you enjoy a spicy kick!

For the Cheesy Filling
• Grated Parmesan cheese – ½ cup, providing a sharp contrast to the meltiness of mozzarella.
• Shredded mozzarella cheese – 2 cups, the star ingredient that makes this bread irresistibly gooey.

For Garnishing
• Chopped fresh parsley – ¼ cup, adds a burst of freshness and color on top.
• Pizza sauce – for serving (optional); perfect for dipping and a little extra flavor!

Step‑by‑Step Instructions for Pull Apart Pizza Bread

Step 1: Prepare Garlic Herb Oil
In a small bowl, combine the ½ cup olive oil, minced garlic, oregano, basil, and red pepper flakes if desired. Stir the mixture well to ensure all the flavors meld together. Allow it to sit for at least 15 minutes, allowing the garlic to infuse the oil, creating a tantalizing garlic herb oil that will elevate your Pull Apart Pizza Bread.

Step 2: Preheat and Grease Pan
Preheat your oven to 375°F (190°C). While the oven heats up, take a 9-inch springform pan or a deep oven-safe skillet and generously grease it with olive oil. This will help prevent the Pull Apart Pizza Bread from sticking, ensuring a beautiful golden-brown finish you'll love once it’s baked.

Step 3: Roll Out Pizza Dough
On a lightly floured surface, roll out the pizza dough into a large rectangle, about 12x18 inches in size. This creates the perfect canvas for layering flavors. Aim for an even thickness to ensure that your Pull Apart Pizza Bread cooks evenly. Once rolled out, you're ready to add that delicious garlic herb oil.

Step 4: Brush Dough with Garlic Herb Oil
Using a brush, generously coat the entire surface of the rolled-out dough with the garlic herb oil you prepared earlier, making sure to leave about 2 tablespoons aside for later. This is what infuses your Pull Apart Pizza Bread with that irresistible garlic flavor that everyone will love!

Step 5: Add Cheese Layers
Sprinkle the grated Parmesan cheese evenly over the oiled dough, ensuring that every bite will have that sharp, rich taste. Follow this by adding the shredded mozzarella cheese, creating a decadent layer of goodness. These cheesy layers are what make the Pull Apart Pizza Bread truly satisfying and delicious.

Step 6: Cut Dough into Strips
Using a pizza cutter or sharp knife, cut the dough into 1-inch wide strips. For ease of handling, stack 6-8 strips on top of each other. This method creates perfect bite-sized pieces for your Pull Apart Pizza Bread. Preparing them this way also helps ensure even cooking and easy sharing!

Step 7: Cut Stacked Strips into Pieces
Now, cut the stacked strips into 1-inch pieces. These small squares will easily pull apart and invite everyone to dig in. Once cut, you’ll have the ideal individual portions for your Pull Apart Pizza Bread, enhancing the overall presentation and enjoyment of your creation.

Step 8: Arrange Dough Squares in the Pan
Carefully transfer the dough squares to your prepared springform pan or skillet. Arrange them standing up with the cut sides facing up, packing them tightly for best results. This will create a beautifully layered Pull Apart Pizza Bread that’s both visually appealing and packed with flavor.

Step 9: Repeat with Remaining Dough
For the remaining dough strips, repeat the cutting and stacking process as detailed in Steps 6 and 7 until your pan is filled to the brim. This ensures that every piece of your Pull Apart Pizza Bread is equally delicious and ooey-gooey. Keep a close eye on the arrangement to maximize that pull-apart effect.

Step 10: Brush with Remaining Oil
Using the remaining garlic herb oil, brush the top of the assembled bread. This extra layer of flavor is essential for achieving that beautiful golden-brown crust. It will also keep the cheese from drying out as the Pull Apart Pizza Bread bakes, ensuring a delightful and flavorful outcome.

Step 11: Bake Covered
Loosely cover the pan with aluminum foil and place it in the preheated oven. Bake for 25 minutes, which allows the bread to rise while starting to set. This covered baking will create steam, ensuring your Pull Apart Pizza Bread is light and fluffy.

Step 12: Bake Uncovered for Color
After 25 minutes, carefully remove the foil and continue baking for an additional 15-20 minutes. Watch closely as the top turns golden brown and the cheese becomes bubbly and melty. This step is crucial for that inviting look and texture that everyone loves in a homemade Pull Apart Pizza Bread.

Step 13: Cool Before Serving
Once baked, remove the bread from the oven and let it cool in the pan for about 10 minutes. This allows the cheese to set slightly, making it easier to pull apart without falling apart. This is the moment to catch your breath and appreciate the delicious aroma wafting through your kitchen!

Step 14: Garnish and Serve
Finally, sprinkle chopped fresh parsley over the top of your baked Pull Apart Pizza Bread for a pop of color and freshness. Carefully remove the bread from the pan and serve it warm, accompanied by pizza sauce for dipping if desired. Enjoy the joyful experience of sharing this flavorful creation with friends and family!

What to Serve with Pull Apart Pizza Bread

This delightful bread is not just a snack; it's the star of any gathering, begging to be paired with equally delicious accompaniments.

  • Garlic Butter Dipping Sauce: A luscious garlic butter sauce brings a rich flavor that perfectly complements the cheesy goodness of the bread. It offers a creamy contrast that takes each bite to the next level.

  • Fresh Green Salad: A crisp, vibrant salad brings a refreshing crunch, balancing the warm, gooey bread. Toss in seasonal vegetables for a colorful and healthy side.

  • Tomato Basil Soup: Serve with a warm bowl of tomato basil soup for a comforting combination. The acidity of the soup beautifully cuts through the richness of the cheese.

  • Roasted Vegetables: Seasoned roasted veggies add a savory touch and a hearty texture, enriching the meal while providing a touch of sweetness and smokiness.

  • Antipasto Platter: Offer a selection of cured meats, olives, and cheeses for an Italian-inspired spread. These bold flavors create a wonderful contrast, making your feast even more enjoyable.

  • Sparkling Lemonade: A refreshing glass of sparkling lemonade or a light Italian spritzer complements the flavors and adds a playful touch to your meal.

  • Chocolate Fondue: For dessert, consider a simple chocolate fondue. The sweet, melting chocolate dipped with berries or marshmallows will create a memorable finish after the savory bread.

Make Ahead Options

These Pull Apart Pizza Bread preparations are perfect for busy cooks looking to save time! You can assemble the entire bread up to 24 hours in advance. Simply follow the recipe instructions up to Step 10, then cover tightly with plastic wrap or aluminum foil and refrigerate until you're ready to bake. This storage method helps maintain the bread's quality and ensures it remains just as delicious when baked. When you're ready to serve, bake as directed in the recipe, adding a few extra minutes to the baking time if it’s come straight from the fridge. With these make-ahead options, you'll have a delightful, cheesy treat with minimal effort, perfect for weeknight dinners or gatherings!

Expert Tips for Pull Apart Pizza Bread

Flavor infusion: Let the garlic herb oil sit for at least 15 minutes before using; this enhances the garlic flavor throughout the Pull Apart Pizza Bread.

Pack it tight: Ensure to arrange the dough squares tightly in the pan; this helps maintain the shape and makes it easier to pull apart without falling apart.

Watch the baking: Keep an eye on the last 15-20 minutes of baking; every oven is different, and you want that gorgeous golden brown without overcooking.

Cool before serving: Allow the Pull Apart Pizza Bread to cool for 10 minutes after baking; this allows the cheese to set, making it easier to serve.

Customize boldly: Don’t hesitate to experiment with spices or toppings; this bread is versatile, and adding your favorite ingredients can make it truly your own!

Pull Apart Pizza Bread Variations

Feel free to get creative and put your own spin on this delightful Pull Apart Pizza Bread!

  • Dairy-Free: Use a dairy-free cheese alternative to keep it creamy without dairy. Deliciously unique and kid-approved!

  • Herb Explosion: Swap out the dried herbs for fresh ones like basil or thyme to amplify the flavors. Fresh herbs bring vibrant aromas and tastes to life!

  • Veggie Delight: Add chopped bell peppers, mushrooms, or spinach between the cheese layers for extra nutrition. This twist is a great way to sneak in veggies for picky eaters!

  • Meat Lover’s: Incorporate layers of pepperoni, sausage, or cooked bacon for a hearty version. Each pull will be filled with savory goodness.

  • Spicy Kick: Mix in jalapeños or a touch of sriracha into the garlic herb oil if you love heat. It's a fiery option for those who enjoy spice!

  • Sweet Twist: Drizzle a bit of honey or maple syrup on top before baking for a sweet-savory contrast. This unexpected variation will surprise and delight your taste buds!

  • Cheesy Overload: Upgrade to a mix of cheeses like gouda or cheddar along with mozzarella. More cheese equals more cheesy magic with every pull!

  • Nutty Crunch: Sprinkle chopped nuts such as walnuts or pine nuts among the layers for a satisfying texture twist. This addition not only adds crunch but also a nutty flavor that complements the richness of the cheese.

Don't forget, you can easily pair this Pull Apart Pizza Bread with a crisp side salad or a flavorful soup, creating a meal that’s both satisfying and comforting. Enjoy the journey of flavor creation!

How to Store and Freeze Pull Apart Pizza Bread

Room Temperature: Store airtight at room temperature for up to 3 days. This keeps the bread fresh and soft—perfect for a snack or side dish!

Fridge: If you expect to keep it longer, wrap the bread tightly and store in the fridge for up to 5 days. Reheat gently in the oven for the best texture.

Freezer: To freeze, cut the bread into pieces, wrap tightly in plastic wrap, and then in aluminum foil. Freeze for up to 3 months. Thaw overnight before reheating.

Reheating: Reheat in the oven at 350°F (175°C) for about 10–15 minutes, or until warmed through, to regain that melty goodness in your Pull Apart Pizza Bread.

Pull Apart Pizza Bread Recipe FAQs

What is the best type of pizza dough to use?
Absolutely! You can use either store-bought or homemade pizza dough, depending on your preference and time. If you're short on time, a quality store-bought dough works wonders while homemade dough brings an extra touch of love and flavor.

How should I store my Pull Apart Pizza Bread?
For best results, store your Pull Apart Pizza Bread in an airtight container at room temperature for up to 3 days. If you plan to have it longer, wrap it tightly and refrigerate for up to 5 days. Gently reheat in the oven to restore its soft texture.

Can I freeze Pull Apart Pizza Bread?
Yes! To freeze, cut the bread into individual pieces, wrap each piece tightly in plastic wrap, and then in aluminum foil. This way, you can enjoy it later without compromising flavor. It can stay fresh in the freezer for up to 3 months. When ready to enjoy, simply thaw it overnight in the fridge and reheat in the oven at 350°F (175°C) for about 10-15 minutes.

What should I do if my bread is overcooked or crusty?
If you find your Pull Apart Pizza Bread is too crusty, it's likely that it was baked too long without a cover. Make sure to loosely cover it with aluminum foil for the first half of the baking time to keep moisture in. If it’s already baked, serve it with a warm pizza sauce to add moisture back into each bite.

Is this recipe safe for my pets?
You’ll want to avoid sharing Pull Apart Pizza Bread with your furry friends. Ingredients like garlic are toxic to dogs and cats, so it’s best to keep this delight for the humans in your life!

Can I modify the ingredients to accommodate allergies?
Very much! Feel free to substitute the cheeses with dairy-free alternatives if you have lactose intolerance, or swap out the pizza dough for a gluten-free version. Additionally, you can adjust the spices or omit the red pepper flakes if sensitivity to heat is a concern! Adjusting the recipe allows everyone to enjoy this delicious Pull Apart Pizza Bread.

Pull Apart Pizza Bread

Ultimate Pull Apart Pizza Bread for Fun Family Feasts

This Pull Apart Pizza Bread is an irresistible dish filled with gooey cheese and perfect for family gatherings.
Print Recipe Pin Recipe
Prep Time 15 minutes mins
Cook Time 40 minutes mins
Cooling Time 10 minutes mins
Total Time 1 hour hr 5 minutes mins
Servings: 8 pieces
Course: Appetizer
Cuisine: Italian
Calories: 250
Ingredients Equipment Method Nutrition Notes

Ingredients
  

For the Dough
  • 1 pound Pizza dough store-bought or homemade, at room temperature
For the Garlic Herb Oil
  • ½ cup Olive oil plus more for brushing
  • 4 cloves Garlic minced
  • 1 teaspoon Dried oregano
  • ½ teaspoon Dried basil
  • ¼ teaspoon Red pepper flakes optional
For the Cheesy Filling
  • ½ cup Grated Parmesan cheese
  • 2 cups Shredded mozzarella cheese
For Garnishing
  • ¼ cup Chopped fresh parsley
  • Pizza sauce for serving (optional)

Equipment

  • 9-inch springform pan
  • Pizza Cutter
  • small bowl
  • Brush

Method
 

Step‑by‑Step Instructions
  1. Prepare Garlic Herb Oil: In a small bowl, combine the olive oil, minced garlic, oregano, basil, and red pepper flakes if desired. Stir well and let it sit for at least 15 minutes.
  2. Preheat and Grease Pan: Preheat your oven to 375°F (190°C). Grease a 9-inch springform pan with olive oil.
  3. Roll Out Pizza Dough: Roll the pizza dough into a large rectangle, about 12x18 inches in size.
  4. Brush Dough with Garlic Herb Oil: Coat the dough with the garlic herb oil, leaving about 2 tablespoons aside.
  5. Add Cheese Layers: Sprinkle grated Parmesan cheese and then shredded mozzarella cheese evenly over the oiled dough.
  6. Cut Dough into Strips: Cut the dough into 1-inch wide strips and stack 6-8 on top of each other.
  7. Cut Stacked Strips into Pieces: Cut the stacked strips into 1-inch pieces.
  8. Arrange Dough Squares in the Pan: Transfer the dough squares to the prepared pan, standing them up with the cut sides facing up.
  9. Repeat with Remaining Dough: Continue cutting and stacking the remaining dough as before.
  10. Brush with Remaining Oil: Brush the top of the assembled bread with the remaining garlic herb oil.
  11. Bake Covered: Cover loosely with aluminum foil and bake for 25 minutes.
  12. Bake Uncovered for Color: Remove the foil and bake for an additional 15-20 minutes until golden brown.
  13. Cool Before Serving: Let the bread cool in the pan for about 10 minutes before serving.
  14. Garnish and Serve: Sprinkle chopped parsley over the top and serve warm with pizza sauce.

Nutrition

Serving: 1pieceCalories: 250kcalCarbohydrates: 30gProtein: 10gFat: 12gSaturated Fat: 3gPolyunsaturated Fat: 1gMonounsaturated Fat: 8gCholesterol: 15mgSodium: 300mgPotassium: 200mgFiber: 1gVitamin A: 200IUVitamin C: 1mgCalcium: 200mgIron: 1mg

Notes

Customize with your favorite toppings and spices for a unique twist.

Tried this recipe?

Let us know how it was!

Heavenly Bread Pudding with Irresistible Vanilla Sauce

August 15, 2025 by grace bellamy Leave a Comment

As I stood in my kitchen, the sweet scent of cinnamon and vanilla wafted in from the oven, instantly transporting me to my grandmother’s cozy home. Today, I’m excited to share a recipe that holds a special place in my heart: Grandma’s Classic Bread Pudding with Vanilla Sauce. This heartwarming dessert not only brings comfort and nostalgia but also offers a delightful way to use up leftover bread—making it both practical and indulgent. With its rich, custardy texture and a drizzle of velvety vanilla sauce, it’s a foolproof crowd-pleaser that satisfies cravings for something warm and sweet. Whether you’re hosting a family dinner or simply treating yourself, this bread pudding recipe is sure to become a cherished favorite. Ready to whip up a slice of nostalgia? Let’s dive into this deliciously simple treat!

Why is This Bread Pudding So Special?

Comforting flavors that evoke fond memories: This recipe captures the essence of home with its rich vanilla and warm spices.

Easy to make: With just 15 minutes of prep time, you can whip up a comforting dessert that’s perfect for any occasion.

Crowd-pleaser: Whether it's a family gathering or a cozy night in, this dish appeals to all ages and tastes.

Versatile: Swap in your favorite dried fruits or even add nuts to personalize your pudding!

Timeless treat: Reminiscent of grandma's baking, this classic recipe is sure to delight your loved ones and create new memories around the table.

Bread Pudding Ingredients

Dive into the delicious details of this comforting dish!

For the Pudding

  • Cubed white bread – 4 cups cut into 1-inch pieces; it’s the foundation that soaks up all the creamy goodness.
  • Raisins – ¼ cup; they add sweetness and a delightful chew that contrasts beautifully with the soft bread.
  • Milk – 2 cups; choose whole milk for a richer flavor, or substitute with a plant-based milk for a lighter option.
  • Butter – ¼ cup; melted, this adds richness and enhances the dessert's comforting texture.
  • Sugar – ¼ cup; adjust to taste for your level of sweetness—feel free to replace with brown sugar for deeper flavor.
  • Eggs – 2, slightly beaten; these act as the binding agent, creating a luscious custard-like consistency.
  • Vanilla extract – 1 tablespoon; look for pure vanilla for the best aroma and taste.
  • Ground nutmeg – ¼ teaspoon; just a pinch adds warmth and a hint of spice that elevates the entire dessert.

For the Vanilla Sauce

  • Butter – ½ cup; this is the base of your creamy sauce, adding richness to each drizzle.
  • Sugar – ½ cup; offers sweetness to balance the sauce's creaminess—feel free to use less if desired.
  • Brown sugar – ½ cup packed; it contributes a deeper, caramel-like flavor that complements the vanilla perfectly.
  • Heavy whipping cream – ½ cup; a luxurious addition that makes the sauce irresistibly smooth.
  • Vanilla extract – 1 tablespoon; for that extra burst of vanilla flavor in the silky sauce, ensuring every bite is heavenly.

This bread pudding recipe is simple yet unforgettable, promising to fill your kitchen with warmth and nostalgia!

Step‑by‑Step Instructions for Grandma’s Classic Bread Pudding with Vanilla Sauce

Step 1: Preheat the Oven
Begin by preheating your oven to 350°F (175°C). This step is crucial as it ensures your bread pudding bakes evenly, developing a beautifully golden brown top. While the oven warms up, gather your ingredients and equipment, including a large mixing bowl and a suitable casserole dish.

Step 2: Combine Bread and Raisins
In a large mixing bowl, combine 4 cups of cubed white bread and ¼ cup of raisins. Gently toss these ingredients together until they are well mixed. The bread should be evenly coated with the raisins, which will infuse delightful sweetness into your bread pudding as it bakes.

Step 3: Warm the Milk and Butter
Using a small saucepan over medium heat, warm 2 cups of milk and ¼ cup of butter. Stir the mixture occasionally, allowing the butter to melt fully—a process that should take about 4-7 minutes. This warm mixture will help to soak the bread, creating a luscious texture for your bread pudding.

Step 4: Soak the Bread Mixture
Once the milk and butter are warm, pour this mixture over the combined bread and raisins. Stir gently to ensure the bread is well soaked, then let it sit for 10 minutes. During this time, the bread will absorb the rich flavors, setting the stage for a deliciously custardy pudding.

Step 5: Add Remaining Ingredients
After soaking, add ¼ cup of sugar, 2 slightly beaten eggs, 1 tablespoon of vanilla extract, and ¼ teaspoon of ground nutmeg to the bowl. Stir thoroughly until all the ingredients are well incorporated. This mixture should become uniform and aromatic, reflecting the comforting essence of a classic bread pudding.

Step 6: Prepare the Casserole Dish
Grease a casserole dish (at least 1.5 quarts) with a little butter or non-stick spray. This prevents the bread pudding from sticking and makes for a cleaner serving experience. Pour the pudding mixture evenly into the prepared dish, smoothing the top with a spatula for even baking.

Step 7: Bake the Bread Pudding
Place the casserole dish in the preheated oven and bake for 40-50 minutes. The bread pudding is ready when the center is firm, and the top is beautifully golden brown. To check for doneness, insert a knife into the center; if it comes out clean, your delicious masterpiece is complete.

Step 8: Make the Caramel Sauce
While the bread pudding is baking, prepare the vanilla sauce. In a small saucepan, combine ½ cup of butter, ½ cup of sugar, and ½ cup of packed brown sugar. Cook over medium heat, stirring occasionally for about 5-8 minutes, until the mixture thickens into a smooth caramel-like consistency.

Step 9: Incorporate the Heavy Cream
Once the sauce is boiling, slowly add ½ cup of heavy whipping cream while stirring frequently. This addition will create a rich, velvety sauce that complements the bread pudding perfectly. Continue to stir until your desired consistency is reached.

Step 10: Finish the Sauce with Vanilla
Remove the caramel sauce from heat and mix in 1 tablespoon of vanilla extract. This last step enhances the flavor, rounding out the rich notes of your sauce. Set it aside until you're ready to serve your warm bread pudding, adding the sauce for a heavenly experience.

Expert Tips for Bread Pudding

Perfect Bread: Use slightly stale bread; it absorbs the moisture better, resulting in a creamier, more custardy bread pudding. Fresh bread may become too mushy.

Even Baking: Spread the pudding mixture evenly in the dish and consider using a water bath for gentle baking. This helps control the temperature and avoids uneven cooking.

Check Doneness: Always use a knife to check the center for doneness. If it comes out with some custard clinging to it, that’s okay; it will continue to set as it cools.

Customize Flavors: Experiment with different flavors like adding spices (cinnamon, cardamom) or switching raisins for your favorite dried fruits or nuts.

Serve Warm: For the best experience, serve your bread pudding warm with vanilla sauce drizzled on top. It enhances flavor and creates a comforting sweetness.

Storage Matters: Leftover bread pudding can be stored in the fridge for up to 3 days. Reheat gently in the oven or microwave to maintain texture.

Bread Pudding Variations & Substitutions

Feeling adventurous in the kitchen? Here are some delightful twists to elevate your bread pudding experience!

  • Gluten-Free: Use gluten-free bread to make this dish suitable for those with dietary restrictions.
  • Nutty Delight: Add ½ cup of chopped nuts like pecans or walnuts for added crunch and flavor.
  • Fruit Forward: Swap raisins for dried cranberries or chopped apples for a fresh, fruity spin on the classic.
  • Chocolate Lovers: Fold in ½ cup of chocolate chips before baking for a rich, decadent dessert.
  • Coconut Twist: Incorporate shredded coconut for a tropical flair that pairs beautifully with vanilla sauce.
  • Spicy Kick: Add a pinch of cayenne pepper to the custard mixture for a surprising hint of heat that elevates the flavor profile.
  • Lighter Version: Substitute half of the milk with a lower-fat milk or unsweetened almond milk to create a lighter dessert.
  • Syrupy Goodness: Drizzle maple syrup into the soaking mixture for a sweet, earthy flavor that complements the vanilla sauce beautifully.

Feel free to mix and match these variations to craft a bread pudding that speaks to your taste buds! For more inspiration, why not explore a buttery vanilla sauce to accompany your creation? Or add a touch of cinnamon for an aromatic boost. The possibilities are endless and delicious!

Make Ahead Options

These delicious Grandma's Classic Bread Pudding can easily be made ahead, saving you precious time on busy weeknights! You can prepare the bread and raisin mixture, soak it in the milk and butter for up to 24 hours in advance; simply cover the bowl and refrigerate it overnight. For added convenience, the vanilla sauce can also be made ahead and stored in the refrigerator for up to 3 days—just reheat it gently before serving to maintain its velvety texture. When you’re ready to bake, pour the pudding mixture into your greased casserole dish and bake as directed. This way, you’ll enjoy a warm, comforting dessert with minimal effort!

How to Store and Freeze Bread Pudding

Fridge: Store bread pudding in an airtight container for up to 3 days. This keeps it fresh and ready to be enjoyed at a moment's notice!

Freezer: If you want to keep it longer, wrap the bread pudding tightly in plastic wrap and aluminum foil. You can freeze it for up to 2 months.

Reheating: To reheat, place the thawed or refrigerated bread pudding in a preheated oven at 350°F (175°C) for about 15-20 minutes, covered with foil, until warmed through. For best results, drizzle with a bit of milk before heating!

Serving Tip: Serve with freshly made vanilla sauce for that homemade touch and maximum comfort after storage!

What to Serve with Grandma’s Classic Bread Pudding?

When it comes to creating the perfect meal, complementing a generous slice of warm, rich pudding can elevate your dining experience.

  • Creamy Mashed Potatoes: Their buttery and velvety texture provides a delightful contrast to the softness of the bread pudding. Plus, they’re a comfort food favorite!
  • Roasted Seasonal Vegetables: Tossed in olive oil and herbs, these veggies add a burst of color and freshness to balance the rich sweetness of the dessert.
  • Simple Green Salad: A light salad with mixed greens, vinaigrette, and perhaps some fruit adds a refreshing note, creating a harmonious balance with the bread pudding.
  • Spiced Apple Cider: This warm, aromatic drink brings out the flavors of cinnamon and nutmeg, perfectly enhancing the nostalgic essence of the pudding.
  • Decadent Chocolate Cake: For the sweets lovers, pairing your bread pudding with a rich slice of chocolate cake introduces a delightful richness and complexity to the dessert table.
  • Vanilla Ice Cream: A scoop of creamy vanilla ice cream melting over the warm bread pudding takes dessert to a heavenly level, creating a deliciously indulgent moment.
  • Coffee or Espresso: A robust cup paired with bread pudding enhances the flavor experience—its bitterness balances the sweetness beautifully, making each bite memorable.
  • Bourbon Sauce: Drizzling a homemade bourbon sauce over the pudding adds a unique character and a hint of warmth that perfectly complements the traditional flavors.
  • Caramelized Bananas: The sweet, buttery taste of caramelized bananas adds another touch of comfort and complements the creamy vanilla sauce splendidly.
  • Mixed Berry Compote: Bright, tart berries drizzled over the pudding offer a refreshing contrast, cutting through the richness and adding a pop of flavor.

Grandma’s Classic Bread Pudding with Vanilla Sauce Recipe FAQs

How do I choose the right bread for the pudding?
Absolutely! The best bread for this recipe is slightly stale white bread. Using bread that's a day or two old allows it to absorb the milk mixture better, resulting in a creamier texture. If you don't have old bread, you can toast fresh bread in the oven for a few minutes to dry it out slightly.

How should I store leftover bread pudding?
Very simply! Store leftover bread pudding in an airtight container in the fridge for up to 3 days. Just make sure it’s cooled completely before sealing. This will keep it fresh and ready for a comforting treat at any time!

Can I freeze bread pudding?
Of course! To freeze your bread pudding, wrap it tightly in plastic wrap and then in aluminum foil to prevent freezer burn. It can be kept frozen for up to 2 months. When you're ready to enjoy it, let it thaw in the refrigerator overnight, then reheat in a preheated oven at 350°F (175°C) for about 15-20 minutes.

What should I do if my bread pudding is too dry?
If you find your bread pudding is a little dry, it may need more liquid next time. To troubleshoot, try adding a little more milk or cream to the mixture before baking. If it’s already baked, serve it warm with an extra drizzle of the vanilla sauce, which will help add moisture and flavor!

Are there any dietary restrictions I should consider?
Yes, keep in mind that this recipe contains eggs, dairy, and gluten. If you're cooking for someone with allergies, consider using alternative ingredients: almond milk or coconut cream can replace regular milk, and that works well for a dairy-free option. You can also use gluten-free bread if needed. Always double-check ingredients to ensure safety!

Can I customize the flavors in the bread pudding?
Absolutely! The more the merrier when it comes to flavors! You can mix in different dried fruits like cranberries or apricots, and even add nuts for a delightful crunch. Consider throwing in a pinch of cinnamon or cardamom for an extra layer of warmth.

Bread Pudding

Heavenly Bread Pudding with Irresistible Vanilla Sauce

This Heavenly Bread Pudding is a comforting dessert that uses leftover bread, topped with a rich vanilla sauce.
Print Recipe Pin Recipe
Prep Time 15 minutes mins
Cook Time 50 minutes mins
Total Time 1 hour hr 5 minutes mins
Servings: 8 slices
Course: Dessert
Cuisine: American
Calories: 350
Ingredients Equipment Method Nutrition Notes

Ingredients
  

For the Pudding
  • 4 cups cubed white bread cut into 1-inch pieces
  • ¼ cup raisins
  • 2 cups milk whole or plant-based
  • ¼ cup butter melted
  • ¼ cup sugar adjust to taste
  • 2 eggs slightly beaten
  • 1 tablespoon vanilla extract pure vanilla recommended
  • ¼ teaspoon ground nutmeg
For the Vanilla Sauce
  • ½ cup butter
  • ½ cup sugar adjust if desired
  • ½ cup brown sugar packed
  • ½ cup heavy whipping cream
  • 1 tablespoon vanilla extract for extra flavor

Equipment

  • large mixing bowl
  • Casserole dish
  • small saucepan

Method
 

Step-by-Step Instructions
  1. Preheat your oven to 350°F (175°C).
  2. In a large mixing bowl, combine 4 cups of cubed white bread and ¼ cup of raisins.
  3. Warm 2 cups of milk and ¼ cup of butter in a small saucepan over medium heat.
  4. Pour the warm milk and butter mixture over the bread and raisins; let it sit for 10 minutes.
  5. Add ¼ cup of sugar, 2 slightly beaten eggs, 1 tablespoon of vanilla extract, and ¼ teaspoon of ground nutmeg to the soaked mixture.
  6. Grease a casserole dish with butter and pour the pudding mixture into it, smoothing the top.
  7. Bake for 40-50 minutes, until the top is golden brown and the center is firm.
  8. Prepare the vanilla sauce by combining ½ cup of butter, ½ cup of sugar, and ½ cup of packed brown sugar in a small saucepan over medium heat.
  9. Once the sauce is boiling, stir in ½ cup of heavy whipping cream.
  10. Finish the sauce with 1 tablespoon of vanilla extract before serving.

Nutrition

Serving: 1sliceCalories: 350kcalCarbohydrates: 45gProtein: 6gFat: 15gSaturated Fat: 9gPolyunsaturated Fat: 1gMonounsaturated Fat: 4gCholesterol: 90mgSodium: 200mgPotassium: 150mgFiber: 2gSugar: 15gVitamin A: 500IUVitamin C: 1mgCalcium: 150mgIron: 1mg

Notes

Serve the bread pudding warm with the homemade vanilla sauce drizzled on top for the best experience.

Tried this recipe?

Let us know how it was!

Ultimate Grilled Cheese Burrito That's Crispy and Satisfying

August 15, 2025 by grace bellamy Leave a Comment

As I pulled the crispy, gooey Grilled Cheese Burrito from the skillet, the sizzle danced around my kitchen, calling everyone to the table. This fun twist on a classic combines the comforting flavors of cheesy goodness with the bold zest of taco night, all wrapped up in a warm tortilla. Not only is this recipe quick to whip up in just 25 minutes, but it also transforms humble ingredients into a crowd-pleasing feast that even the pickiest eaters will adore. Picture your family gathered around, their eyes gleaming with anticipation as they dive into this cheesy extravagance. Whether you’re mixing it up for a busy weeknight dinner or treating yourself to a homemade gourmet experience, this Grilled Cheese Burrito will certainly become a favorite. Ready to spice up your mealtime? Let’s get cooking!

Why is this Grilled Cheese Burrito special?

Crispy Delight: Each bite of the Grilled Cheese Burrito features a mouthwatering, crispy crust that contrasts perfectly with the gooey cheese and savory filling.

Quick and Easy: With just 25 minutes from start to finish, you can create this delicious meal with minimal effort - perfect for a busy weeknight!

Family-Friendly Flavor: Packed with ground beef, nacho cheese, and bold chipotle sauce, this recipe appeals to both kids and adults alike, ensuring everyone leaves the table satisfied.

Versatile Customizations: Feel free to customize your burrito by adding black beans or jalapeños, making it a versatile option that caters to different taste preferences.

Comfort Food Reinvented: This dish uniquely combines comfort food with a zesty twist, making it a standout choice that transforms ordinary ingredients into a memorable feast.

Grilled Cheese Burrito Ingredients

A delicious journey awaits with these flavorful components!

For the Filling
• Ground beef – a savory base that carries all the delicious flavors of taco seasoning.
• Taco seasoning – brings a burst of bold flavor to transform ordinary beef into something special.
• Cooked white rice – adds hearty texture, making the burrito filling more filling and satisfying.
• Sour cream – provides a creamy richness that balances the spiciness of other ingredients.
• Nacho cheese sauce – infuses a cheesy goodness that enhances the overall flavor profile.
• Chipotle sauce – adds a smoky kick that elevates the dish with depth and warmth.

For the Cheese
• Shredded cheddar cheese – contributes a sharp flavor that pairs perfectly with the other ingredients.
• Shredded mozzarella – melts beautifully, providing that gooey texture we all love in a grilled treat.

For the Burrito
• Flour tortillas – the perfect wrap that holds all the goodness together while adding a soft bite.
• Butter or oil for grilling – ensures a delightful crispiness on the outside of your burrito.

This tasty combination is bound to make your Grilled Cheese Burrito a hit at home!

Step‑by‑Step Instructions for Grilled Cheese Burrito

Step 1: Cook the Ground Beef
Begin by browning 1 pound of ground beef in a large skillet over medium heat for 8–10 minutes. As it cooks, break apart the meat with a spatula until it's no longer pink and crumbly. Once browned, drain any excess grease and add 1 packet of taco seasoning along with ¼ cup of water. Let the mixture simmer for 5 minutes, stirring occasionally, until the flavors meld together.

Step 2: Prepare the Tortillas
While the beef simmers, prepare 4 large flour tortillas to ensure they are pliable for rolling. You can warm them gently in a dry skillet over low heat for 30-60 seconds on each side or place them in the microwave for about 10-15 seconds. This softening will make it easier to assemble your Grilled Cheese Burrito without cracking.

Step 3: Assemble the Burrito
On each warmed tortilla, layer in this order: a scoop of cooked white rice, followed by the seasoned ground beef, a drizzle of nacho cheese sauce, a spoonful of chipotle sauce, and a dollop of sour cream. Finish with a generous sprinkle of both shredded cheddar and mozzarella cheese. Be kind but don’t overload, as you’ll need to fold the burrito securely!

Step 4: Grill the Burrito
Heat a clean skillet over medium heat and add a small amount of butter or oil. Once hot, place 2 tablespoons of shredded cheese directly on the skillet, letting it melt slightly. Next, carefully lay the prepared burrito seam-side down on top of the melted cheese. Cook for about 3–4 minutes, or until the bottom crisps up and forms a golden-brown crust.

Step 5: Flip and Finish
Gently flip the burrito using a spatula, being cautious not to lose any of the filling. Cook for an additional 3–4 minutes until the other side is equally golden and crispy. The melted cheese will help seal the burrito, ensuring that every bite of your Grilled Cheese Burrito is filled with delicious, gooey goodness.

Step 6: Serve and Savor
Once both sides are crispy and golden brown, remove the burrito from the skillet and let it rest for a minute before slicing it in half. This allows the cheese and filling to set slightly, making it perfect for serving. Plate it up with your favorite dipping sauces, and enjoy this delightful twist on a classic comfort food!

How to Store and Freeze Grilled Cheese Burrito

Fridge: Store leftover Grilled Cheese Burritos in an airtight container for up to 3 days to maintain freshness and flavor.

Freezer: Wrap burritos individually in plastic wrap and place in a freezer-safe bag. They can be frozen for up to 3 months.

Reheating: Thaw in the fridge overnight, then reheat on the stovetop for about 5 minutes to restore crispiness, or microwave for 60–90 seconds.

Wrapping: For best results, use parchment paper before the airtight wrap to help prevent freezer burn and keep the delicious flavors intact.

Make Ahead Options

These Grilled Cheese Burritos are perfect for busy weeknights and meal prep enthusiasts! You can prepare the filling—seasoned ground beef, rice, and sauces—up to 3 days in advance, storing it in an airtight container in the refrigerator to maintain freshness. The tortillas can be warmed when you’re ready to assemble, ensuring they remain pliable. When it's time to serve, simply layer the filling onto each tortilla, add cheese, and grill as directed. This make-ahead strategy not only saves precious time but guarantees that your Grilled Cheese Burrito will taste just as delicious, allowing you to savor cozy family dinners without the last-minute rush!

Expert Tips for the Best Grilled Cheese Burrito

Texture Matters: Ensure your tortillas are warmed properly before assembling. Cold tortillas can crack and ruin the texture of your Grilled Cheese Burrito.

Layer Wisely: Don’t overcrowd your filling! Too much can make it difficult to roll and seal the burrito, leading to messy outcomes.

Cheesy Crust: For a perfect crispy exterior, melt extra cheese on the skillet before placing the burrito. This creates a golden, crunchy layer that enhances flavor.

Cooking Heat: Keep the skillet on medium heat to avoid burning while still ensuring a beautifully crispy finish. Patience is key!

Customize Flavor: Personalize your burrito by adding ingredients like black beans or jalapeños. This will infuse even more flavor into your Grilled Cheese Burrito.

Grilled Cheese Burrito Variations

Feel free to let your culinary creativity shine with these delightful twists on the classic Grilled Cheese Burrito!

  • Vegetarian: Substitute ground beef with black beans or sautéed vegetables for a hearty, meatless option.
    Adding grilled bell peppers and onion will enhance the flavor while keeping everything satisfying.

  • Spicy Kick: Mix in diced jalapeños or add extra chipotle sauce to amp up the heat level.
    This fiery combination is perfect for those who enjoy a little zest in their meals!

  • Cheesy Explosion: Layer in a variety of cheeses such as Pepper Jack or Gouda for extra richness.
    Experimenting with different cheese blends can elevate your burrito to gooey greatness.

  • Gluten-Free: Use gluten-free tortillas to make this dish accessible for gluten-sensitive friends.
    With tasty fillings still combined in a crispy package, nobody will miss the gluten!

  • Creamy Avocado: Spread mashed avocado on your tortilla before adding fillings for a creamy texture.
    This will bring a fresh and creamy dimension to your Grilled Cheese Burrito experience.

  • Breakfast Burrito: Swap ground beef for scrambled eggs and add breakfast sausage, cheese, and salsa.
    Start your day with a delightful breakfast twist that’s just as crispy and satisfying!

  • Baked Version: Instead of frying, bake wrapped burritos in the oven for a healthier alternative.
    Brush with a little oil for extra crispiness on a baking sheet, and note how the flavors meld beautifully.

  • Tex-Mex Style: Enhance with ingredients like corn, cilantro, and pico de gallo for a fresh twist.
    These vibrant additions will make each bite pop with summer flavors and freshness.

Let your imagination run wild with these variations for an unforgettable Grilled Cheese Burrito experience!

What to Serve with Grilled Cheese Burrito

Elevate your mealtime by complementing your cheesy creation with delightful sides and treats that will please every palate.

  • Crispy Potato Wedges: The crunchiness enhances the texture contrast, making for a satisfying bite alongside the burrito.

  • Guacamole Dip: Creamy and rich, this addition offers a fresh, cooling flavor that balances the burrito's spiciness perfectly. Serve with tortilla chips for added fun!

  • Mexican Street Corn Salad: This vibrant dish is packed with sweetness and smokiness, providing a delightful contrast to the savory burrito. Its fresh ingredients will brighten your meal like a fiesta!

  • Zesty Tomato Salsa: A classic pairing, this fresh salsa adds a tangy, juicy element that complements the grilled cheese burrito's flavors beautifully.

  • Refried Beans: Smooth and hearty, refried beans offer a deliciously comforting side that pairs exceptionally well with the flavors in the burrito.

  • Iced Horchata: This sweet, cinnamon-infused rice drink serves as a refreshing counterpart, soothing any heat from the chipotle sauce while enhancing your dining experience.

Grilled Cheese Burrito Recipe FAQs

How do I choose the best ground beef for my burrito?
Absolutely! Look for lean ground beef, around 80/20 or 85/15 fat content, as it provides the right balance of flavor and juiciness. Avoid beef that has dark spots or an off smell. Freshness is key!

What’s the best way to store leftover Grilled Cheese Burritos?
To keep your Grilled Cheese Burritos fresh, store them in an airtight container in the fridge for up to 3 days. Make sure they’re fully cooled before sealing them to prevent moisture build-up.

Can I freeze my Grilled Cheese Burritos?
Yes, you can! Wrap each burrito individually in plastic wrap, then place them in a freezer-safe bag. They can be stored in the freezer for up to 3 months. This method helps keep them fresh while preventing freezer burn. When you’re ready to eat, thaw in the fridge overnight and reheat gently.

What should I do if my burrito filling keeps spilling?
Very! To prevent filling from spilling out, make sure to layer your ingredients wisely. Start with a thin layer of rice, then add the beef and other ingredients, but don’t overload them. Also, ensure your tortilla is warmed properly, as this will make it more flexible for rolling.

Is this burrito recipe suitable for people with dietary restrictions?
Certainly! You can customize your Grilled Cheese Burrito by substituting ingredients based on dietary needs. For a dairy-free version, use dairy-free cheese and plain vegan sour cream. If you're keeping it gluten-free, opt for gluten-free tortillas and ensure the taco seasoning is gluten-free also.

Can I use frozen ground beef for this recipe?
Yes! If using frozen ground beef, thaw it completely in the refrigerator or use the defrost setting on your microwave. Once thawed, ensure it’s browned well in the skillet for optimal flavor before adding the taco seasoning.

Grilled Cheese Burrito

Ultimate Grilled Cheese Burrito That's Crispy and Satisfying

This Grilled Cheese Burrito combines cheesy goodness with taco flavors, creating a crispy and satisfying meal everyone will love.
Print Recipe Pin Recipe
Prep Time 15 minutes mins
Cook Time 10 minutes mins
Total Time 25 minutes mins
Servings: 4 burritos
Course: Main Dishes
Cuisine: Mexican
Calories: 550
Ingredients Equipment Method Nutrition Notes

Ingredients
  

For the Filling
  • 1 pound ground beef
  • 1 packet taco seasoning
  • ¼ cup water
  • 1 cup cooked white rice
  • ½ cup sour cream
  • ½ cup nacho cheese sauce
  • 2 tablespoons chipotle sauce
For the Cheese
  • 1 cup shredded cheddar cheese
  • 1 cup shredded mozzarella
For the Burrito
  • 4 large flour tortillas
  • 1 tablespoon butter or oil for grilling

Equipment

  • large skillet
  • spatula
  • Microwave
  • measuring cup

Method
 

Step-by-Step Instructions
  1. Begin by browning 1 pound of ground beef in a large skillet over medium heat for 8–10 minutes. Break apart the meat until no longer pink. Drain excess grease, add taco seasoning and water, and simmer for 5 minutes.
  2. Prepare 4 large flour tortillas by warming them gently in a dry skillet over low heat for 30-60 seconds on each side or microwave for about 10-15 seconds.
  3. On each tortilla, layer in the following order: cooked white rice, seasoned ground beef, nacho cheese sauce, chipotle sauce, sour cream, shredded cheddar, and mozzarella cheese.
  4. Heat a clean skillet over medium heat and add butter or oil. Melt 2 tablespoons of shredded cheese on the skillet, then place the burrito seam-side down on top. Cook for 3–4 minutes until the bottom crisps up.
  5. Carefully flip the burrito and cook for an additional 3–4 minutes until the other side is golden brown and crispy.
  6. Remove the burrito from the skillet and let it rest for a minute before slicing in half. Serve with your favorite dipping sauces.

Nutrition

Serving: 1burritoCalories: 550kcalCarbohydrates: 50gProtein: 30gFat: 25gSaturated Fat: 10gPolyunsaturated Fat: 2gMonounsaturated Fat: 10gCholesterol: 80mgSodium: 1000mgPotassium: 600mgFiber: 3gSugar: 2gVitamin A: 10IUVitamin C: 2mgCalcium: 20mgIron: 15mg

Notes

For a perfect crispy exterior, melt extra cheese on the skillet before placing the burrito. Customize your burrito by adding ingredients like black beans or jalapeños.

Tried this recipe?

Let us know how it was!

Indulge in Fruity Pebbles Cheesecake Tacos for Sweet Fun

August 15, 2025 by grace bellamy Leave a Comment

As I sift through the colorful cereal aisle, a wave of nostalgia washes over me—echoes of childhood mornings spent devouring my favorite fruity cereal. Today, I’m taking that vibrant taste and transforming it into something utterly delicious: Fruity Pebbles Cheesecake Tacos. Not only are these sweet bites a playful twist on traditional cheesecake, but they come together in under an hour, making them the perfect go-to dessert for any occasion. With the delightful crunch of cereal shells cradling a creamy, dreamy filling, you'll find them irresistible and ideal for impressing guests or treating yourself on a cozy evening. Are you ready to unlock a delightful flavor adventure that’ll have everyone begging for seconds? Let's dive into this cheerful recipe!

Why are Fruity Pebbles Cheesecake Tacos irresistible?

Colorful, Fun Presentation: These Fruity Pebbles Cheesecake Tacos not only look fantastic but also bring joy to any dessert table.

Creative Twist: Merging two beloved treats into one stunning dessert provides a unique way to enjoy cheesecake.

Quick and Easy: With a total preparation time of just 50 minutes, they’re perfect for last-minute gatherings or when you want something sweet without the fuss.

Endless Customization: Feel free to experiment with your favorite cereals or toppings to create delightful variations that suit every taste!

Crowd-Pleasing Delight: These mini tacos are sure to impress friends and family, making them a hit at parties or family dinners.

Experience the joy of homemade desserts again with these playful treats—your tastebuds will thank you!

Fruity Pebbles Cheesecake Tacos Ingredients

For the Cereal Shells

  • Fruity cereal – 3 cups will create that delightful crunch and colorful exterior that’s a nostalgic throwback.
  • Unsalted butter – ½ cup, melted helps bind the cereal together for a sturdy shell that holds all the goodness inside.

For the Cheesecake Filling

  • Cream cheese – 8 oz, softened to room temperature ensures a smooth and creamy texture for the filling.
  • Powdered sugar – ½ cup, sifted adds just the right sweetness without grittiness.
  • Pure vanilla extract – 1 teaspoon infuses the filling with a lovely depth of flavor.
  • Whipped cream – 1 cup, which lightens the mixture, creating an airy texture that's simply irresistible.

For Garnish

  • Additional fruity cereal – a sprinkle on top adds a delightful crunch and even more color, making these Fruity Pebbles Cheesecake Tacos pop!

Step‑by‑Step Instructions for Fruity Pebbles Cheesecake Tacos

Step 1: Prepare the Cereal Mixture
In a large mixing bowl, combine 3 cups of fruity cereal with ½ cup of melted unsalted butter. Stir the mixture thoroughly until every piece of cereal is evenly coated in the buttery goodness, turning bright colors into a cohesive, glistening blend. This step should take about 5 minutes, and the mixture will have a wet, shiny appearance.

Step 2: Form the Cereal Shells
Using small taco-shaped molds or muffin tins, press the cereal mixture firmly into the shapes, ensuring to compact them tightly. This creates sturdy shells that will hold the creamy filling later. Once shaped, place the molds in the refrigerator and chill for at least 30 minutes, allowing them to set properly until firm.

Step 3: Beat the Cream Cheese
While the cereal shells chill, grab a mixing bowl and a hand mixer. Beat 8 oz of softened cream cheese until it's light and fluffy, which should take about 3-5 minutes. The mixture should appear smooth and creamy, perfect for blending in the other ingredients for your Fruity Pebbles Cheesecake Tacos.

Step 4: Mix in Sweetness and Flavor
Gradually add ½ cup of sifted powdered sugar and 1 teaspoon of pure vanilla extract to the beaten cream cheese. Continue mixing until everything is blended smoothly, with no lumps remaining. This step will enhance the flavor profile while ensuring a sweet, rich filling, taking about 2-3 minutes.

Step 5: Fold in the Whipped Cream
Gently fold in 1 cup of whipped cream into the cream cheese mixture using a spatula. Be careful to maintain the airiness of the whipped cream, which adds a light texture to your filling. This step should take about 2 minutes, and you’ll know it’s ready once the mixture is uniformly fluffy and delightful.

Step 6: Fill the Cereal Shells
Once the cereal shells have set firmly in the refrigerator, carefully remove them from the molds. Spoon the creamy cheesecake filling generously into each shell. As you fill, aim for a visually appealing, heaping portion that showcases the color and richness of your Fruity Pebbles Cheesecake Tacos.

Step 7: Garnish and Serve
To finish, sprinkle additional fruity cereal over the filled shells for a pop of color and added crunch. These mini tacos are best served immediately, but if you prefer a firmer texture, feel free to chill them in the refrigerator for an extra 10-15 minutes before serving. Enjoy the fun and joy these treats bring!

What to Serve with Fruity Pebbles Cheesecake Tacos

Imagine the joy of delighting your loved ones with a full meal that complements every creamy bite of these colorful tacos.

  • Fruit Salad: A vibrant medley of fresh fruits enhances the sweet flavors, adding a refreshing crunch to your dessert spread.
  • Vanilla Ice Cream: Creamy vanilla ice cream acts as a perfect contrast, balancing the sweetness of the cheesecake tacos with its rich, smooth texture.
  • Chocolate Fondue: Dive into indulgence! Dipping fresh fruits or biscuits in warm chocolate adds a luxurious touch to the meal.
  • Sparkling Water with Lime: A bubbly drink with a twist of lime refreshes the palate and brightens the overall experience of your sweet dessert.
  • Mini Cookies: Pairing with mini cookies provides additional crunch and flavor variety, making the dessert table even more inviting.
  • Coffee or Espresso: A shot of rich coffee can beautifully cut through the sweetness, adding balance and warmth to your dessert.
  • Peanut Butter Dipping Sauce: For an unexpected twist, a creamy peanut butter sauce can enhance the tropical feel and add a savory note.
  • Pineapple Coconut Smoothie: This creamy and dreamy smoothie serves as a fun drink option, enhancing the tropical vibe of the Fruity Pebbles Cheesecake Tacos.
  • Rainbow Sprinkles: A sprinkle of colorful fun on top not only adds a touch of whimsy but also complements the dessert’s vibrant presentation.
  • Almond Biscotti: This crunchy treat offers a nutty flavor that contrasts nicely with the creaminess of the cheesecake, making it a delightful combination.

Make Ahead Options

These Fruity Pebbles Cheesecake Tacos are perfect for busy home cooks looking to save time! You can prepare the cereal shells up to 24 hours in advance by pressing the mixture into molds and refrigerating them. The cheesecake filling can also be made up to 3 days ahead; simply store it in an airtight container in the fridge to maintain its luscious quality. When you’re ready to serve, fill the shells with the cream cheese mixture and garnish with additional fruity cereal. By prepping in advance, you’ll have a delightful dessert ready to impress with minimal effort—just as delicious as when freshly made!

Fruity Pebbles Cheesecake Tacos Variations

Feel free to unleash your creativity and personalize your Fruity Pebbles Cheesecake Tacos with these delightful twists!

  • Gluten-Free: Swap fruity cereal for gluten-free varieties or use homemade gluten-free granola for added crunch and flavor.

  • Vegan: Replace cream cheese with a vegan cream cheese alternative and use coconut whipped cream instead—just as creamy with a tropical twist.

  • Chocolate Drizzle: Add a decadent chocolate drizzle over the top before serving for an irresistibly sweet touch that plays beautifully with fruity flavors.

  • Extra Fruity: Toss in some chopped fresh fruits like strawberries or bananas into the cheesecake filling for a refreshing burst of flavor.

  • Spicy Kick: Mix in a pinch of cayenne pepper or chili powder into the cream cheese mixture to create a surprising yet delightful contrast.

  • Nutty Crunch: Stir in crushed nuts or granola into the cereal mixture for an exciting texture and nutty flavor that elevates the overall dish.

  • Frozen Treats: Freeze the filled tacos for a refreshing, creamy dessert that’s perfect for hot days—just let them sit for a few minutes before serving.

  • Seasonal Flavors: Experiment with seasonal spices like pumpkin spice in the filling for fall or peppermint extract for a festive winter twist—endless possibilities await!

These variations are just the beginning; feel free to mix and match to find your perfect version. If you want a different take on dessert, try out my No-Bake Cheesecake or take a closer look at some delightful Homemade Ice Cream. Your kitchen is the canvas—let your imagination run wild!

Expert Tips for Fruity Pebbles Cheesecake Tacos

  • Cereal Coating: Ensure every cereal piece is coated in melted butter for a sturdy shell. Avoid skipping this step to prevent crumbling.
  • Chilling Time: Don’t rush the chilling process! Waiting at least 30 minutes gives the shells their structure, so be patient for the best Fruity Pebbles Cheesecake Tacos.
  • Whipped Cream Technique: Gently fold in the whipped cream to keep the mixture airy. Overmixing can lead to a dense filling—trust the lightness!
  • Serving Suggestions: For an extra fun touch, consider serving with colorful sprinkles or a drizzle of chocolate sauce to elevate your dessert's appeal.
  • Storage Tips: If you have leftovers, store the filling separately from the shells to prevent them from becoming soggy. Assemble just before serving for maximum crunch!

How to Store and Freeze Fruity Pebbles Cheesecake Tacos

Fridge: Store assembled Fruity Pebbles Cheesecake Tacos in an airtight container for up to 2 days. This keeps the shells crunchy and the filling fresh.

Freezer: For longer storage, freeze the cheesecake filling separately in a sealed container for up to 1 month. Thaw it in the fridge before assembling.

Cereal Shells: If you want to make the shells ahead of time, they can be stored at room temperature in a sealed container for short-term freshness, but best consumed within 3 days.

Reheating: Avoid reheating the filled tacos, as it may make the shells soggy. Just enjoy them chilled straight from the fridge for the best experience!

Fruity Pebbles Cheesecake Tacos Recipe FAQs

What type of fruity cereal should I use?
Absolutely! For the best results, I recommend using classic Fruity Pebbles cereal. It offers that iconic flavor and vibrant color. You can also experiment with similar fruity cereals, but try to avoid those with overly large pieces, as they won’t create the same delightful texture in the shells.

How should I store the leftover Fruity Pebbles Cheesecake Tacos?
Very importantly, store any remaining assembled Fruity Pebbles Cheesecake Tacos in an airtight container in the refrigerator for up to 2 days. To maintain the crunch of the shells, it’s best to keep the filling separate if you anticipate leftovers. Simply assemble right before serving to enjoy the perfect texture!

Can I freeze the cheesecake filling for later use?
Certainly! To freeze the cheesecake filling, place it in a sealed container and store it in the freezer for up to 1 month. When you're ready to use it, just transfer the container to the refrigerator to thaw overnight. Once thawed, give it a good stir before spooning it into your cereal shells for a quick and delightful treat.

What if my cereal shells are too crumbly?
If your cereal shells are crumbling, it usually means they weren't compressed tightly enough during molding. Next time, ensure that you pack the mixture firmly into the molds. You can also try adding a bit more melted butter to help bind the cereal better—aim for a wet, shiny mixture before pressing it into shape!

Are these Fruity Pebbles Cheesecake Tacos suitable for kids?
Absolutely! These colorful treats are not only fun to eat but also kid-approved due to their vibrant appearance and delicious flavors. Just keep an eye on any allergies to dairy or gluten that your little ones may have, and feel free to swap out ingredients as needed to cater to dietary restrictions.

Can I make these tacos ahead of time?
Yes, you can prepare the cereal shells the day before and store them at room temperature until you're ready to fill them. Just be sure to assemble the Fruity Pebbles Cheesecake Tacos no more than a few hours before serving for the best crunchy texture. Enjoy the sweet fun!

Fruity Pebbles Cheesecake Tacos

Fruity Pebbles Cheesecake Tacos

Indulge in these Fruity Pebbles Cheesecake Tacos for a colorful and fun dessert experience that is quick and easy to enjoy.
Print Recipe Pin Recipe
Prep Time 50 minutes mins
Chilling Time 30 minutes mins
Total Time 50 minutes mins
Servings: 12 tacos
Course: Dessert
Cuisine: American
Calories: 250
Ingredients Equipment Method Nutrition Notes

Ingredients
  

For the Cereal Shells
  • 3 cups Fruity cereal for crunch and vibrant color
  • ½ cup Unsalted butter melted
For the Cheesecake Filling
  • 8 oz Cream cheese softened to room temperature
  • ½ cup Powdered sugar sifted
  • 1 teaspoon Pure vanilla extract
  • 1 cup Whipped cream
For Garnish
  • Additional fruity cereal for sprinkling on top

Equipment

  • Mixing Bowl
  • hand mixer
  • Taco-shaped molds or muffin tins

Method
 

Preparation Steps
  1. In a large mixing bowl, combine 3 cups of fruity cereal with ½ cup of melted unsalted butter. Stir until evenly coated.
  2. Using taco-shaped molds or muffin tins, press the cereal mixture firmly into shapes. Chill for at least 30 minutes.
  3. Beat 8 oz of softened cream cheese until light and fluffy, about 3-5 minutes.
  4. Gradually add ½ cup of sifted powdered sugar and 1 teaspoon of vanilla extract to the cream cheese. Mix until smooth.
  5. Gently fold in 1 cup of whipped cream until uniformly fluffy.
  6. Carefully remove the cereal shells from the molds and spoon the cheesecake filling generously into each shell.
  7. Sprinkle additional fruity cereal on top before serving. Enjoy!

Nutrition

Serving: 1tacoCalories: 250kcalCarbohydrates: 35gProtein: 3gFat: 12gSaturated Fat: 7gPolyunsaturated Fat: 0.5gMonounsaturated Fat: 2gCholesterol: 30mgSodium: 150mgPotassium: 100mgFiber: 1gSugar: 15gVitamin A: 500IUCalcium: 80mgIron: 0.5mg

Notes

Store assembled tacos in an airtight container for up to 2 days. For longer storage, freeze the cheesecake filling separately.

Tried this recipe?

Let us know how it was!

Delicious Cowboy Butter Chicken Linguine Ready in 30 Minutes

August 15, 2025 by grace bellamy Leave a Comment

While rummaging through my fridge one evening, I stumbled upon a few staples that begged to be transformed into something extraordinary. That's when the idea for Cowboy Butter Chicken Linguine sparked to life! This dish combines tender chicken, vibrant spices, and creamy goodness that plays nicely with al dente linguine. In just 30 minutes, you can craft a meal that’s not only quick to prepare but also a surefire crowd-pleaser. Plus, it’s a fantastic way to impress family or friends without enduring a long day in the kitchen. With flavors that will sweep you off your feet and minimal fuss, this dish has quickly become a weeknight favorite in my home. Curious about how to whip up this delightful pasta creation? Let’s dive in!

Why is Cowboy Butter Chicken Linguine a Must-Try?

Quick preparation: This dish comes together in just 30 minutes, making it perfect for busy weeknights.
Creamy, bold flavors: The rich blend of garlic, Dijon mustard, and Parmesan creates an irresistible sauce.
Versatile ingredients: You likely have most of the ingredients already in your kitchen, making it easy to whip up anytime!
Crowd-pleaser: Whether it's for family dinner or entertaining friends, this meal is sure to impress.
Comfort food twist: It's a delightful take on traditional pasta, ensuring everyone will go back for seconds! Pair it with other favorites like Garlic Butter Chicken for a complete feast!

Cowboy Butter Chicken Linguine Ingredients

For the Pasta
• Linguine – 8 ounces of this pasta adds a wonderful texture to coat with the creamy sauce.

For the Chicken
• Chicken breast – 1 pound, cubed; the star of the show that provides protein and heartiness.
• Garlic powder – 1 teaspoon; adds depth to the seasoning blend.
• Onion powder – 1 teaspoon; complements the garlic for a fuller flavor.
• Paprika – 1 teaspoon; brings a subtle smokiness that enhances the chicken.
• Cayenne pepper (optional) – ¼ teaspoon; gives a kick for those who like a bit of heat.
• Salt – 1 teaspoon; enhances all the flavors in this Cowboy Butter Chicken Linguine.
• Black pepper – ½ teaspoon; offers a bit of sharpness to round out the dish.

For the Cooking
• Olive oil – 2 tablespoons; ensures the chicken sears beautifully without sticking.
• Butter – 2 tablespoons, divided; the secret to creating that rich and creamy sauce.

For the Sauce
• Garlic – 3 cloves, minced; for an aromatic and flavorful base.
• Chicken broth – ½ cup; infuses the sauce with savory goodness.
• Lemon juice – 2 tablespoons; brightens the flavor profile with a zesty kick.
• Dijon mustard – 1 tablespoon; adds a tangy depth that perfectly complements the cream.
• Heavy cream – ½ cup; makes the sauce luxuriously creamy and velvety.
• Parmesan cheese – ½ cup, grated; a delicious cheesy finish that holds the sauce together.

For Garnish
• Fresh parsley – chopped; brightens the dish and adds a pop of color.
• Cracked black pepper – for garnish; offers an inviting aroma and flavor.
• Red pepper flakes – for garnish; a sprinkle adds both color and heat.
• Lemon slices or wedges – for serving; the perfect tangy companion.

Step‑by‑Step Instructions for Cowboy Butter Chicken Linguine

Step 1: Cook the Linguine
Bring a large pot of generously salted water to a boil over high heat. Add the linguine and cook until al dente, about 9–11 minutes, stirring occasionally. Before draining, reserve ¼ cup of the pasta water for later use. Drain the linguine and toss it lightly with olive oil to prevent sticking. Set aside while you prepare the chicken.

Step 2: Season the Chicken
In a medium bowl, combine garlic powder, onion powder, paprika, cayenne pepper (if using), salt, and black pepper. Mix well and then toss this spice blend over the cubed chicken, ensuring each piece is thoroughly coated in the seasoning. This step adds flavor to the Cowboy Butter Chicken Linguine, making it extra delicious.

Step 3: Sear the Chicken
In a large skillet, heat 2 tablespoons of olive oil and 1 tablespoon of butter over medium-high heat. Once the oil is shimmering, add the seasoned chicken in a single layer and sear for 3–4 minutes on each side, or until golden brown and fully cooked (internal temperature of 165°F). Once cooked, transfer the chicken to a plate and cover it with foil to keep warm.

Step 4: Prepare the Sauce
Without cleaning the skillet, reduce the heat to medium-low and add the remaining tablespoon of butter. Allow it to melt gently, then stir in the minced garlic, sautéing for about 30–60 seconds until fragrant, making the base for your creamy sauce. The flavors will start to build, preparing for the next steps.

Step 5: Combine the Sauce Ingredients
Add the chicken broth, lemon juice, and Dijon mustard to the skillet, whisking together. Let this simmer for 2 minutes to blend the flavors. Then, stir in the heavy cream and grated Parmesan cheese until the mixture is smooth and creamy. Continue simmering gently, allowing the sauce to thicken slightly—this should take only a few minutes without boiling.

Step 6: Combine Chicken and Pasta
Return the seared chicken along with any collected juices to the skillet, then add the cooked linguine. Using tongs, toss everything together until the pasta is well coated with the creamy sauce. If it's too thick, add a splash of the reserved pasta water to loosen it up. Let this simmer for 1–2 minutes, allowing the flavors to meld beautifully.

Step 7: Garnish and Serve
Once cooked, turn off the heat and stir in freshly chopped parsley for a burst of color and freshness. Plate your Cowboy Butter Chicken Linguine, garnishing with additional parsley, cracked black pepper, and red pepper flakes if desired. Serve immediately, accompanied by lemon slices or wedges for that extra zesty touch.

How to Store and Freeze Cowboy Butter Chicken Linguine

Fridge: Store leftovers in an airtight container for up to 3 days. Just reheat gently on the stove or in the microwave, adding a splash of water or broth to maintain creaminess.

Freezer: If you want to freeze Cowboy Butter Chicken Linguine, do so in a freezer-safe container for up to 2 months. To reheat, thaw overnight in the fridge, then heat on the stove, adding cream or pasta water as needed.

Reheating: For best results, reheat on low heat to prevent the sauce from curdling. Stir frequently and add a bit of extra cream or broth for that original creamy texture.

Portioning: Consider dividing into single servings before freezing. This way, you can enjoy a quick, reheated meal anytime you crave this delicious dish!

Make Ahead Options

Cowboy Butter Chicken Linguine is a fantastic choice for meal prep that saves you time on busy nights! You can season the cubed chicken and refrigerate it up to 24 hours in advance, allowing those flavors to really infuse. Additionally, the garlic and butter can be prepped ahead; simply sauté the garlic, then refrigerate the mixture. When you're ready to serve, sauté the chicken and continue with steps to create the sauce and combine everything. If made ahead, the finished dish can be stored in the fridge for up to 3 days. Just reheat gently on the stove, adding a splash of reserved pasta water to revive that creamy texture, and you'll enjoy just as delightful a meal as if made fresh!

What to Serve with Cowboy Butter Chicken Linguine?

Imagine the laughter and warmth surrounding your dinner table as you create an unforgettable meal experience!

  • Garlic Bread: The perfect crusty side to soak up every drop of that creamy sauce, elevating your dining experience.

  • Caesar Salad: Crisp romaine, tangy dressing, and crunchy croutons balance the richness of the linguine brilliantly.

  • Steamed Asparagus: Tender crispness adds freshness and a vibrant color contrast that brings the whole plate to life.

  • Roasted Veggies: A medley of seasonal vegetables roasted to perfection provides nutty flavors and delightful textures to complement the pasta.

  • Wine Pairing – Chardonnay: A chilled glass enhances the meal with its buttery notes, making each bite even more indulgent.

  • Chocolate Mousse: End the meal on a sweet note with this rich and airy dessert; it’s sure to impress even the most discerning palates.

  • Lemon Sorbet: This refreshing option cleanses the palate and echoes the bright flavors of lemon from the dish, making for a delightful finish.

Expert Tips for Cowboy Butter Chicken Linguine

Prep Ahead: Ensure all ingredients are prepped before starting; this helps streamline the cooking process and keeps things organized.

Season Generously: Don't skimp on the seasoning for the chicken! The blend of spices enhances the flavor in your Cowboy Butter Chicken Linguine.

Creamy Consistency: If your sauce is too thick, add reserved pasta water gradually to achieve the desired creaminess while still keeping it shiny.

Don’t Overcook: Keep an eye on the linguine; cooking it al dente ensures a good texture that holds up well against the creamy sauce.

Rest the Chicken: Allow the seared chicken to rest covered with foil; this keeps it tender and juicy while you prepare the sauce.

Fresh Garnishes: For an extra pop of flavor, don’t skip the lemon garnish! It brightens the dish and adds a delightful tang.

Cowboy Butter Chicken Linguine Variations

Feel free to play with this recipe and make it your own—the possibilities are as delicious as the dish itself!

  • Pasta Swap: Substitute linguine with fettuccine or penne for a different bite and texture.
  • Chicken Options: Use shrimp or tofu as protein alternatives for a delightful twist! Both bring unique flavors and pair well with the creamy sauce.
  • Veggie Boost: Add your favorite vegetables like spinach or cherry tomatoes for extra nutrition and a pop of color. They'll add a fresh layer of flavor to this creamy dish!
  • Spicy Kick: Increase the cayenne pepper or add sliced jalapeños to elevate the heat level. This additional spice will make your taste buds dance with excitement!
  • Cheese Variation: Swap out the Parmesan for an aged gouda or a vegan cheese to cater to dairy preferences while keeping the creamy nature intact.
  • Broth Choices: Use vegetable broth instead of chicken broth for a vegetarian-friendly option that still packs a savory punch.
  • Zesty Flavor: Incorporate lime juice instead of lemon juice to give the dish a refreshing citrus twist. It's a fun change that adds bright, zesty notes!
  • Herb Infusion: Experiment with different herbs such as basil or cilantro for garnish. They bring a whole new flavor profile, perfect for those seeking something unique!

Why not pair your Cowboy Butter Chicken Linguine with some flavorful side dishes? Try one of my favorites like Hawaiian Chicken Sheet to round out your meal. Enjoy your culinary adventure!

Cowboy Butter Chicken Linguine Recipe FAQs

How do I choose the right chicken breast?
When selecting chicken breast, look for pieces that are pink, firm, and free from dark spots. Fresh chicken should have a mild odor, while avoid any packages with leaks or excessive moisture. Frozen chicken can also work; just ensure it's fully thawed before cooking to achieve even results.

How should I store leftovers?
Store any Cowboy Butter Chicken Linguine leftovers in an airtight container in the refrigerator for up to 3 days. When you're ready to enjoy it again, simply reheat on the stove or in the microwave, adding a splash of chicken broth or cream to revive the creamy texture.

Can I freeze Cowboy Butter Chicken Linguine?
Absolutely! To freeze this dish, transfer it into a freezer-safe container and it will keep for up to 2 months. For reheating, thaw it overnight in the fridge; then warm it in a skillet on low heat while stirring frequently. Add a bit of cream or reserved pasta water if the sauce seems thick.

What if my sauce is too thick?
If you find your sauce is a bit thicker than desired, don't worry! Simply add a splash of the reserved pasta cooking water or chicken broth while stirring over low heat. Start with small amounts and gradually mix until you reach the desired creamy consistency.

Is this recipe suitable for dietary restrictions?
This Cowboy Butter Chicken Linguine contains gluten from the linguine and dairy from the heavy cream and cheese. For a gluten-free option, use your favorite gluten-free pasta. You can replace heavy cream with a dairy-free alternative, like coconut milk, for a lighter, lactose-free dish.

Cowboy Butter Chicken Linguine

Delicious Cowboy Butter Chicken Linguine Ready in 30 Minutes

Cowboy Butter Chicken Linguine is a quick, flavorful pasta dish with tender chicken and creamy sauce, perfect for a weeknight meal.
Print Recipe Pin Recipe
Prep Time 10 minutes mins
Cook Time 20 minutes mins
Total Time 30 minutes mins
Servings: 4 servings
Course: Main Dishes
Cuisine: American
Calories: 650
Ingredients Equipment Method Nutrition Notes

Ingredients
  

For the Pasta
  • 8 ounces Linguine adds a wonderful texture to coat with the creamy sauce.
For the Chicken
  • 1 pound Chicken breast cubed; the star of the show that provides protein and heartiness.
  • 1 teaspoon Garlic powder adds depth to the seasoning blend.
  • 1 teaspoon Onion powder complements the garlic for a fuller flavor.
  • 1 teaspoon Paprika brings a subtle smokiness that enhances the chicken.
  • ¼ teaspoon Cayenne pepper (optional) gives a kick for those who like a bit of heat.
  • 1 teaspoon Salt enhances all the flavors.
  • ½ teaspoon Black pepper offers a bit of sharpness to round out the dish.
For the Cooking
  • 2 tablespoons Olive oil ensures the chicken sears beautifully without sticking.
  • 2 tablespoons Butter divided; the secret to creating that rich and creamy sauce.
For the Sauce
  • 3 cloves Garlic minced; for an aromatic and flavorful base.
  • ½ cup Chicken broth infuses the sauce with savory goodness.
  • 2 tablespoons Lemon juice brightens the flavor profile.
  • 1 tablespoon Dijon mustard adds a tangy depth that perfectly complements the cream.
  • ½ cup Heavy cream makes the sauce luxuriously creamy and velvety.
  • ½ cup Parmesan cheese grated; a delicious cheesy finish.
For Garnish
  • Fresh parsley chopped; brightens the dish and adds a pop of color.
  • Cracked black pepper for garnish; offers an inviting aroma and flavor.
  • Red pepper flakes for garnish; a sprinkle adds both color and heat.
  • Lemon slices or wedges for serving; the perfect tangy companion.

Equipment

  • Large Pot
  • Medium bowl
  • large skillet
  • Whisk
  • tongs

Method
 

Step‑by‑Step Instructions for Cowboy Butter Chicken Linguine
  1. Bring a large pot of generously salted water to a boil over high heat. Add the linguine and cook until al dente, about 9–11 minutes, stirring occasionally. Reserve ¼ cup of the pasta water before draining.
  2. In a medium bowl, combine garlic powder, onion powder, paprika, cayenne pepper (if using), salt, and black pepper. Toss the spice blend over the cubed chicken.
  3. In a large skillet, heat 2 tablespoons of olive oil and 1 tablespoon of butter over medium-high heat. Once the oil is shimmering, add the seasoned chicken and sear for 3–4 minutes on each side, until golden brown and cooked through. Transfer to a plate and cover with foil.
  4. Without cleaning the skillet, reduce heat to medium-low and add the remaining tablespoon of butter. Allow to melt gently, then stir in the minced garlic and sauté for about 30–60 seconds.
  5. Add chicken broth, lemon juice, and Dijon mustard to the skillet. Let simmer for 2 minutes, then stir in heavy cream and grated Parmesan until smooth. Continue simmering gently to thicken.
  6. Return the seared chicken and any collected juices to the skillet, then add the cooked linguine. Toss until well coated with the sauce. If too thick, add a splash of reserved pasta water.
  7. Turn off the heat and stir in freshly chopped parsley. Plate your Cowboy Butter Chicken Linguine, garnishing with additional parsley, cracked black pepper, and red pepper flakes. Serve with lemon slices.

Nutrition

Serving: 1servingCalories: 650kcalCarbohydrates: 60gProtein: 40gFat: 30gSaturated Fat: 15gPolyunsaturated Fat: 8gMonounsaturated Fat: 10gCholesterol: 150mgSodium: 800mgPotassium: 700mgFiber: 3gSugar: 2gVitamin A: 800IUVitamin C: 10mgCalcium: 200mgIron: 3mg

Notes

Ensure all ingredients are prepped before starting for an organized cooking process.

Tried this recipe?

Let us know how it was!

Savory Greek Chicken Bowls for a Fresh Flavor Adventure

August 15, 2025 by grace bellamy Leave a Comment

As I prepped for dinner one evening, a craving for something fresh and vibrant swept over me. That’s when I decided to whip up these delightful Greek Chicken Bowls, a dish that’s as colorful as it is comforting. Packed with juicy marinated chicken and fragrant lemon-herb rice, this recipe not only delivers a flavor explosion but also takes less than an hour to prepare—perfect for those busy weeknights. Plus, it’s a crowd-pleaser that can easily be customized with your favorite toppings. Whether you're cooking for family or planning a meal prep session, these Greek Chicken Bowls will definitely become a staple in your home. What’s your favorite twist on this Mediterranean delight?

Why Are Greek Chicken Bowls So Great?

Fresh, Bold Flavors: Each bite bursts with vibrant Mediterranean tastes from the marinated chicken and zesty tzatziki sauce.

Quick and Easy: With just 55 minutes from prep to plate, you'll earn extra time on bustling weeknights without sacrificing flavor.

Customizable Delight: Perfect for mixing it up—try adding roasted veggies or a quinoa base for a fun twist.

Nourishing Ingredients: Packed with lean protein and whole grains, these bowls are not just delicious; they're also a healthy choice.

Crowd-Pleasing Appeal: Ideal for family dinners or gatherings—your guests will rave about this gorgeous, colorful dish! If you're interested in more ways to spice it up, consider experimenting with our suggestions for serving variations to keep it exciting.

Greek Chicken Bowls Ingredients

Explore the essentials for an unforgettable meal!

For the Chicken Marinade:

  • Boneless, skinless chicken breasts – the star protein, juicy and tender when marinated well.
  • Olive oil – enhances moisture and adds richness to the chicken.
  • Lemon juice – freshly squeezed for a zesty kick that brightens the dish.
  • Garlic – minced to infuse a savory depth that complements the marinade.
  • Dried oregano – a must-have for that authentic Greek flavor profile.
  • Dried thyme – adds earthy notes to round out the seasoning.
  • Salt – balances flavors and enhances the natural taste of the chicken.
  • Black pepper – for a hint of spice that perfectly complements the marinade.

For the Lemon-Herb Rice:

  • Olive oil – warms the grains and adds a subtle richness.
  • Long-grain rice – fluffy and perfect for soaking up those delicious flavors.
  • Chicken broth – using broth instead of water gives the rice an extra savory depth.
  • Lemon juice – a splash for brightness that ties back to the chicken marinade.
  • Fresh parsley – chopped for a burst of freshness and color.
  • Fresh dill – offers a fragrant note that works beautifully with the other ingredients.
  • Salt and pepper – to taste, for an extra layer of seasoning.

For the Tzatziki Sauce:

  • Plain Greek yogurt – the creamy base that provides a tangy twist.
  • Cucumber – grated for a refreshing crunch and hydrating goodness.
  • Garlic – adds flavor that pairs perfectly with yogurt’s creaminess.
  • Lemon juice – brightens up the sauce and complements the chicken beautifully.
  • Olive oil – enriches the sauce, making it luscious and smooth.
  • Fresh dill – to echo the flavors in the rice and add herbaceous notes.
  • Salt and pepper – necessary for enhancing the sauce's overall taste.

For the Bowl Assembly:

  • Cherry tomatoes – halved for a pop of sweetness and color.
  • Cucumber – diced for a crisp texture that adds freshness to each bite.
  • Red onion – thinly sliced for a sharp bite that contrasts nicely with the other components.
  • Kalamata olives – pitted and halved to introduce a briny flavor that's quintessentially Greek.
  • Feta cheese – crumbled for creamy richness that pairs well with all ingredients.
  • Fresh parsley – chopped for a final flourish to brighten up the serving.
  • Pita bread or naan – warmed for optional dipping and a delightful side.

Dive into this recipe for Greek Chicken Bowls and savor each fresh, bold flavor!

Step‑by‑Step Instructions for Greek Chicken Bowls

Step 1: Marinate the Chicken
In a bowl, whisk together ¼ cup olive oil, ¼ cup freshly squeezed lemon juice, minced garlic, oregano, thyme, salt, and black pepper until well combined. Add the 2 pounds of cubed chicken breasts, tossing to coat each piece thoroughly. Cover the bowl and refrigerate for at least 30 minutes to allow the flavors to meld beautifully.

Step 2: Prepare the Lemon-Herb Rice
While the chicken marinates, heat 1 tablespoon of olive oil in a medium saucepan over medium heat. Add 1 cup of rinsed long-grain rice and sauté for 1-2 minutes until the rice is lightly toasted and fragrant. Pour in 2 cups of chicken broth and ¼ cup of lemon juice, then add chopped parsley, dill, salt, and pepper. Bring the mixture to a boil, reduce the heat to low, cover, and simmer for 15-20 minutes, or until the liquid is absorbed and the rice is fluffy.

Step 3: Make the Tzatziki Sauce
In a mixing bowl, combine 1 cup of plain Greek yogurt with ½ cup of grated cucumber, minced garlic, lemon juice, olive oil, and chopped dill. Season with salt and pepper to taste, then mix well until creamy and smooth. Cover and refrigerate the tzatziki sauce to let the flavors blend while the chicken cooks and the rice finishes.

Step 4: Cook the Chicken
Preheat your grill, oven, or skillet to medium-high heat. Remove the marinated chicken from the refrigerator, allowing it to come to room temperature for 5 minutes. Cook the chicken for about 6-8 minutes per side, or until fully cooked and golden brown, ensuring it reaches an internal temperature of 165°F. Let it rest for a few moments after cooking.

Step 5: Assemble the Greek Chicken Bowls
To create your Greek Chicken Bowls, start by placing a generous scoop of lemon-herb rice at the bottom of each bowl. Arrange the cooked chicken on top, and then artfully add halved cherry tomatoes, diced cucumber, thinly sliced red onion, pitted Kalamata olives, and crumbled feta cheese. Drizzle each bowl with tzatziki sauce and garnish with fresh parsley. Serve with warmed pita or naan on the side for an authentic Mediterranean experience.

How to Store and Freeze Greek Chicken Bowls

Refrigerator: Store leftover Greek Chicken Bowls components separately in airtight containers for up to 3 days. This helps maintain freshness and flavor in each ingredient.

Freezer: Freeze marinated chicken before cooking for up to 3 months. Thaw in the refrigerator overnight before grilling or baking to preserve its juicy texture.

Tzatziki Sauce: You can prepare Tzatziki sauce up to 2 days in advance; store it in the fridge in an airtight container for the best results.

Reheating: Reheat the chicken in a skillet over medium heat until heated through. The lemon-herb rice can be warmed in the microwave with a splash of water for moisture.

Expert Tips for Greek Chicken Bowls

  • Marinate for Flavor: Ensure you marinate the chicken for at least 30 minutes, but longer is even better! This helps the flavors in your Greek Chicken Bowls truly shine.

  • Mind Your Rice: Rinsing your long-grain rice removes excess starch, preventing it from becoming gummy. Perfectly fluffy rice is crucial for this dish!

  • Chill the Tzatziki: Allow the tzatziki sauce to sit in the fridge for at least 30 minutes. This helps the flavors meld together, enhancing the overall taste of your Greek Chicken Bowls.

  • Don’t Overcook: Keep an eye on your chicken while cooking! Overcooking can lead to dryness. Cook until it reaches an internal temperature of 165°F.

  • Garnish Generously: Fresh parsley brightens up the dish, both visually and flavor-wise. Don’t skip this final touch on your Greek Chicken Bowls!

Greek Chicken Bowls Variations

Feel free to get creative and make these Greek Chicken Bowls your own delightful masterpiece!

  • Quinoa Base: Swap the rice for cooked quinoa for a protein-packed twist. It adds a nutty flavor and fluffy texture that complements all the toppings beautifully.

  • Zoodles: For a fun, low-carb option, replace rice with spiralized zucchini. Light and refreshing, they soak up the tzatziki sauce and add a unique flair.

  • Spicy Kick: Add a pinch of red pepper flakes or diced jalapeños to the chicken marinade for an extra kick. This will awaken your taste buds and entice spice lovers!

  • Herbed Rice: Swap the parsley and dill for fresh basil and mint in the rice for a fragrant update. The aromatic herbs will transport you straight to a sun-soaked Mediterranean garden.

  • Vegan Option: Substitute the chicken with marinated tofu or chickpeas for a satisfying, plant-based alternative. This still delivers on protein and adds a lovely earthiness to the bowls.

  • Crispy Chickpeas: Add roasted chickpeas for a delightful crunch. Season them with your favorite spices before roasting for an irresistible texture contrast.

  • Sweetened Yogurt: Enhance the tzatziki by mixing in a touch of honey or maple syrup for a subtle sweetness. This creates a lovely balance with the rest of the savory ingredients.

  • Roasted Veggies: Toss in some roasted bell peppers, zucchini, or eggplant for added depth. Sweet and caramelized, they will harmonize perfectly with the other bold flavors.

By mixing and matching these variations, you can make each meal a unique culinary journey. For more ingenious ideas, check out the serving suggestions for Greek Chicken Bowls and endless possibilities!

What to Serve with Greek Chicken Bowls

Add delightful companions to your Greek Chicken Bowls and create a harmonious dining experience.

  • Creamy Hummus: A velvety dip made from chickpeas that adds a rich texture and balances the bright flavors of the bowls.
  • Greek Salad: A refreshing tomato and cucumber salad dressed with olive oil and olives, enhancing those Mediterranean vibes while infusing more freshness.
  • Roasted Vegetables: Seasonal vegetables roasted to caramelized perfection; their sweetness complements the tangy chicken and tzatziki sauce beautifully.
  • Pita Bread: Warm, soft pita for scooping up every last bite of chicken, tzatziki, and rice, adding a delightful chewy texture.
  • Chilled White Wine: A crisp, chilled Sauvignon Blanc pairs wonderfully with the chicken's zesty marinade, bringing a lovely acidity that brightens each bite.
  • Lemon Sorbet: As a light dessert, this frozen treat refreshes the palate after enjoying the full-bodied flavors of the Greek Chicken Bowls. Perfect for cleansing between bites!
  • Stuffed Grape Leaves: Savory and aromatic, these little bundles add a unique texture and traditional flair that complements the overall meal experience.

Make Ahead Options

These Greek Chicken Bowls are perfect for meal prep enthusiasts! You can marinate the chicken up to 24 hours in advance, allowing the flavors to deepen beautifully. Additionally, the tzatziki sauce can be prepared up to 2 days ahead; just store it in an airtight container in the refrigerator to keep it fresh and creamy. To save even more time, cook the lemon-herb rice up to 3 days before serving and reheat it gently on the stove with a splash of broth or water to prevent it from drying out. When you’re ready to enjoy your Greek Chicken Bowls, simply grill or bake the marinated chicken, assemble the bowls with your prepped ingredients, and savor this vibrant dish without the weekday stress!

Greek Chicken Bowls Recipe FAQs

What type of chicken should I use for Greek Chicken Bowls?
I recommend using boneless, skinless chicken breasts for their juicy texture and ability to absorb the marinade. Ensure the chicken is fresh and free of any dark spots or blemishes to guarantee the best flavor in your dish.

How should I store leftovers from Greek Chicken Bowls?
Store leftover components separately in airtight containers in the refrigerator for up to 3 days. This helps retain the freshness of each ingredient and prevents sogginess, especially for the tzatziki sauce and vegetables.

Can I freeze the marinated chicken for Greek Chicken Bowls?
Absolutely! You can freeze the marinated chicken for up to 3 months. Just place the chicken and marinade in a freezer-safe bag or container, press out excess air, and seal tightly. When ready to use, thaw it overnight in the refrigerator before cooking to keep that juicy texture intact.

What if my tzatziki sauce is too watery?
If your tzatziki sauce turns out watery, try straining the grated cucumber through a cheesecloth or a fine mesh sieve to remove excess moisture. You can also add a bit more Greek yogurt to thicken it up. Let it sit in the refrigerator for a little while to let the flavors develop—this usually helps enhance the taste too!

Is this recipe suitable for those with allergies?
The Greek Chicken Bowls contain common allergens like dairy from the Greek yogurt and cheese, and gluten if you choose to serve it with pita or naan. If you’re cooking for someone with specific allergies, consider substituting with dairy-free yogurt and making homemade gluten-free pita or serving it over greens instead.

How do I know when the chicken is cooked through?
To ensure that your chicken is fully cooked, use a meat thermometer to check that it reaches an internal temperature of 165°F. This is the safest way to guarantee that your chicken is juicy and perfectly done without any risk of undercooking!

Greek Chicken Bowls

Savory Greek Chicken Bowls for a Fresh Flavor Adventure

Enjoy these Greek Chicken Bowls packed with vibrant flavors and healthy ingredients for a delightful meal.
Print Recipe Pin Recipe
Prep Time 30 minutes mins
Cook Time 25 minutes mins
Total Time 55 minutes mins
Servings: 4 bowls
Course: Main Dishes
Cuisine: Mediterranean
Calories: 600
Ingredients Equipment Method Nutrition Notes

Ingredients
  

For the Chicken Marinade
  • 2 pounds boneless, skinless chicken breasts cubed
  • ¼ cup olive oil
  • ¼ cup lemon juice freshly squeezed
  • 3 cloves garlic minced
  • 1 tablespoon dried oregano
  • 1 teaspoon dried thyme
  • 1 teaspoon salt
  • 1 teaspoon black pepper
For the Lemon-Herb Rice
  • 1 tablespoon olive oil
  • 1 cup long-grain rice rinsed
  • 2 cups chicken broth
  • ¼ cup lemon juice
  • ¼ cup fresh parsley chopped
  • 1 tablespoon fresh dill chopped
For the Tzatziki Sauce
  • 1 cup plain Greek yogurt
  • ½ cup cucumber grated
  • 1 clove garlic minced
  • 1 tablespoon lemon juice
  • 1 tablespoon olive oil
  • 1 tablespoon fresh dill chopped
For the Bowl Assembly
  • 1 cup cherry tomatoes halved
  • 1 cup cucumber diced
  • 1 small red onion thinly sliced
  • ½ cup Kalamata olives pitted and halved
  • ½ cup feta cheese crumbled
  • ¼ cup fresh parsley chopped
  • 4 pieces pita bread or naan warmed

Equipment

  • grill
  • Medium saucepan
  • Mixing Bowl

Method
 

Chicken Preparation
  1. In a bowl, whisk together olive oil, lemon juice, minced garlic, oregano, thyme, salt, and black pepper until well combined. Add the cubed chicken breasts, tossing to coat each piece thoroughly. Cover and refrigerate for at least 30 minutes.
Rice Preparation
  1. While the chicken marinates, heat olive oil in a medium saucepan over medium heat. Add rinsed rice and sauté for 1-2 minutes. Pour in chicken broth and lemon juice, then add chopped parsley, dill, salt, and pepper. Bring to a boil, reduce heat, cover, and simmer for 15-20 minutes.
Sauce Preparation
  1. In a mixing bowl, combine Greek yogurt, grated cucumber, minced garlic, lemon juice, olive oil, and chopped dill. Season with salt and pepper, mix until creamy and smooth. Cover and refrigerate to let flavors meld.
Chicken Cooking
  1. Preheat your grill or skillet to medium-high heat. Remove marinated chicken from the fridge, allow to come to room temperature for 5 minutes. Cook for about 6-8 minutes per side until fully cooked and golden brown.
Assembly
  1. To create the bowls, start by placing a scoop of lemon-herb rice at the bottom. Arrange the cooked chicken on top and add halved cherry tomatoes, diced cucumber, sliced red onion, halved Kalamata olives, and crumbled feta. Drizzle with tzatziki and garnish with parsley. Serve with warmed pita or naan.

Nutrition

Serving: 1bowlCalories: 600kcalCarbohydrates: 55gProtein: 40gFat: 25gSaturated Fat: 5gPolyunsaturated Fat: 4gMonounsaturated Fat: 16gCholesterol: 80mgSodium: 800mgPotassium: 800mgFiber: 4gSugar: 3gVitamin A: 1500IUVitamin C: 20mgCalcium: 150mgIron: 3mg

Notes

Marinate the chicken longer for enhanced flavor. Rinse rice to prevent gumminess. Chill tzatziki to let flavors blend. Don't overcook chicken.

Tried this recipe?

Let us know how it was!

Delicious Berry Croissant Bake to Delight Your Mornings

August 15, 2025 by grace bellamy Leave a Comment

The aroma of freshly baked pastries wafting through the kitchen often ignites my fondest memories of cozy brunches with family and friends. Today, I’m thrilled to share my delightful Berry Croissant Bake, a dish that transforms simple ingredients into an extraordinary morning treat. This crowd-pleaser not only showcases the sweet juiciness of mixed berries but also takes advantage of slightly stale croissants, making it a clever way to reduce waste. With its quick prep time and ability to be made ahead, this dish is perfect for those busy mornings when you want to impress without the stress. Curious about how to elevate your breakfast game with this luscious bake? Let's dive in!

Why Will You Love This Bake?

Simplicity at its finest: This Berry Croissant Bake is incredibly easy to prepare, perfect for both ambitious home cooks and those just starting out.

Flavor explosion: The delightful mix of fresh berries and buttery croissants creates an irresistible medley that will make your taste buds dance.

Make-ahead friendly: Prep it the night before! Just assemble, refrigerate, and bake in the morning for a stress-free, show-stopping breakfast.

Crowd-pleaser: Serve it at brunch or a family gathering, and watch as it disappears—everyone will be reaching for seconds!

Adaptable: Whether you’re looking for a decadent treat or a dairy-free version, this recipe can easily accommodate your needs. Why not serve it with some whipped cream or a drizzle of maple syrup for extra indulgence?

Berry Croissant Bake Ingredients

For the Base
• 6 croissants – A little stale or toasted croissants give the best texture for soaking up the custard.
• 2 cups mixed berries – A colorful combination of blueberries, raspberries, strawberries, or blackberries adds sweetness and freshness to your bake.

For the Custard
• 1½ cups whole milk – Creamy whole milk enhances the richness of the custard; you can use almond milk for a dairy-free option.
• 1½ cups heavy cream – This contributes to a luscious, velvety texture; feel free to substitute with coconut cream if needed.
• 4 large eggs – Eggs are key for binding, giving the bake structure and richness.
• 1 teaspoon vanilla extract – Vanilla adds comforting warmth and enhances the overall flavor.
• ⅓ cup granulated sugar – Sweeten your custard to balance the tartness of the berries.

For Garnish
• 2 tablespoon powdered sugar – A light dusting of powdered sugar adds a touch of elegance and sweetness.
• Optional: 1 tablespoon lemon zest – Brighten flavors with lemon zest for a zesty twist in your Berry Croissant Bake.

Step‑by‑Step Instructions for Berry Croissant Bake

Step 1: Preheat and Prepare
Preheat your oven to 350°F (175°C) while you prepare your baking dish. Grease a 9×13-inch baking dish generously with butter or cooking spray to prevent sticking. This simple step ensures that your delicious Berry Croissant Bake comes out beautifully without any hassle.

Step 2: Layer the Croissants
Cut the croissants into halves or quarters, depending on your preference, and layer them in the greased baking dish. Make sure to distribute the pieces evenly for consistent baking. Next, scatter the mixed berries generously over the croissant pieces, creating a vibrant and colorful base that will burst with flavor.

Step 3: Whisk the Custard
In a large mixing bowl, whisk together the eggs, whole milk, heavy cream, vanilla extract, and granulated sugar until smooth. Ensure all ingredients are fully combined, creating a creamy custard mixture. This step is essential for achieving the rich, velvety texture that will elevate your Berry Croissant Bake.

Step 4: Combine and Soak
Pour the prepared custard evenly over the layered croissants and berries, ensuring they are well-coated. Gently press down on the croissants with a spatula or your hands to help them absorb the custard. Allow the mixture to sit for 15-20 minutes at room temperature, or refrigerate it overnight for a make-ahead option that deepens the flavors.

Step 5: Bake to Perfection
Place the dish in your preheated oven and bake for 35-40 minutes, or until the top is golden brown and the custard is set with a slight jiggle in the center. Keep an eye on it during the last few minutes to achieve that lovely golden finish, making your Berry Croissant Bake irresistible.

Step 6: Cool and Garnish
Once baked, remove the dish from the oven and let it cool for a few minutes to set further. Dust the top generously with powdered sugar for a simple yet elegant finish. This final touch not only enhances its appearance but adds an extra sweetness to your decadent breakfast treat.

Berry Croissant Bake Variations

Feel free to customize this delightful dish and make it your own with these fun variations!

  • Gluten-Free: Use gluten-free croissants or sliced gluten-free bread as a substitute to cater to your dietary needs. It’s just as delicious!
  • Plant-Based: Swap the whole milk and heavy cream for almond milk and coconut cream along with flax eggs for a vegan-friendly version that doesn’t skimp on flavor.
  • Chocolate Delight: Add chocolate chips or chunks to the croissant layers before pouring the custard for a rich and luxurious twist that chocolate lovers will adore.
  • Nuts & Crunch: Sprinkle in a handful of chopped nuts like pecans or almonds for an appealing crunch that contrasts beautifully with the soft custard and berries.
  • Extra Zing: Enhance the flavor profile by adding a teaspoon of almond extract alongside the vanilla. This adds a lovely twist that will surprise your taste buds!
  • Spicy Kick: For something a bit different, sprinkle in some cinnamon or nutmeg into the custard. This aromatics will deepen the flavor and add warmth, especially lovely in cooler months.
  • Berry Medley: Incorporate other fruits such as peach slices or cherries for extra dimension. Each fruit brings its unique flavor, transforming the bake into a fruity fiesta!
  • Citrus Boost: Add a few tablespoons of orange or lemon juice into the custard mix for an invigorating burst of citrus that brightens the overall taste of your bake.

Explore these options, and let your creativity shine in the kitchen!

Storage Tips for Berry Croissant Bake

Fridge: Leftovers can be stored in an airtight container in the refrigerator for up to 3 days. Reheat individual portions in the microwave for a quick breakfast fix.

Freezer: For longer storage, this Berry Croissant Bake can be frozen for up to one month. Wrap servings tightly in plastic wrap and place them in a freezer-safe bag.

Thawing: Thaw the frozen bake overnight in the refrigerator before reheating. Warm in a low oven until heated through for the best texture.

Reheating: To reheat, place in a preheated oven at 350°F (175°C) for about 10-15 minutes or until warmed thoroughly, bringing back that fresh-baked goodness.

Make Ahead Options

These Berry Croissant Bake is perfect for busy home cooks looking to streamline their meal prep! You can assemble the entire dish up to 24 hours in advance, simply cover it tightly with plastic wrap after soaking it in the custard and refrigerate overnight. This not only saves you prep time but also allows the flavors to deepen beautifully. If you find yourself with leftovers, they can be stored in the fridge for up to 3 days—just reheat in the oven or microwave before serving for that fresh-baked feel. When you're ready to enjoy your Berry Croissant Bake, simply pop it in the preheated oven and bake as directed for a delicious breakfast with minimal effort!

Expert Tips for the Best Berry Croissant Bake

• Use Stale Croissants: Slightly stale croissants absorb the custard better, resulting in a moist, flavorful bake. Fresh croissants may not give you the same texture.

• Berry Selection: Feel free to mix and match berries based on your preference or seasonal availability. Just ensure they are ripe for an energizing flavor burst in your Berry Croissant Bake.

• Soaking Time Matters: Let the assembled croissant and berry mixture soak for at least 15–20 minutes at room temperature or overnight in the fridge. This allows for optimal flavor infusion.

• Watch Baking Time: Every oven is different! Keep an eye on your bake during the last few minutes to prevent overcooking. A slightly jiggly center is perfect for that creamy consistency.

• Serving Suggestions: Serve warm or at room temperature, and don’t forget the options for whipped cream or maple syrup! They make wonderful accompaniments to elevate each bite of your dish.

What to Serve with Berry Croissant Bake

Indulge in a world of flavors that complement the luscious, creamy goodness of this delectable morning dish.

  • Creamy Mashed Potatoes: The smooth, buttery texture of mashed potatoes creates a delightful contrast to the fluffy croissant bake, perfect for a hearty brunch.

  • Fresh Fruit Salad: A vibrant mix of seasonal fruits adds a refreshing crunch that balances the rich custard and sweet berries beautifully.

  • Crispy Bacon or Sausages: The salty, savory elements of crispy bacon or sausages create a satisfying counterpoint to the sweet flavors, making breakfast feel complete.

  • Sparkling Mimosa: A bubbly sparkling mimosa with fresh orange juice adds a cheerful, festive touch, enhancing the overall brunch experience with its bright flavors.

  • Maple Syrup Dip: Drizzle a side of warm maple syrup for an added layer of sweetness that will elevate each bite of this charming bake.

  • Butter Croissant: For the croissant lovers, serving warm butter croissants on the side enriches the buttery flavor and offers variety to your meal.

Each of these pairings beautifully enhances the Berry Croissant Bake, weaving together textures and tastes for an unforgettable morning feast.

Berry Croissant Bake Recipe FAQs

How do I choose ripe berries for my bake?
Absolutely! When selecting berries, look for ones that are plump, firm, and brightly colored. Avoid any that have dark spots or appear mushy, as these indicate overripeness. Fresh berries should also have a sweet aroma, inviting you to use them in your delectable Berry Croissant Bake!

How should I store leftovers?
Very simply! Leftovers can be stored in an airtight container in the refrigerator for up to 3 days. Make sure to let your Berry Croissant Bake cool completely before transferring it to the container for optimal freshness. When you're ready to enjoy another slice, just pop it in the microwave for a quick warm-up!

Can I freeze this dish for later?
You sure can! To freeze your Berry Croissant Bake, wrap individual portions tightly in plastic wrap and place them in a freezer-safe bag. This helps prevent freezer burn, so you can enjoy your delicious dish later! It can be frozen for up to one month. When you're ready to indulge, thaw overnight in the refrigerator and reheat in a preheated oven at 350°F (175°C) until warmed through, about 10-15 minutes.

What if my custard doesn’t set properly during baking?
No worries at all! If the custard isn’t setting as you’d like, it may need a little more time in the oven—just keep an eye on it. You’re looking for a golden brown top with a center that’s just slightly jiggly. If your edges are browning too quickly, you can cover the dish loosely with aluminum foil. This baking technique ensures that the custard has time to firm up beautifully without overcooking!

Can I make a dairy-free version?
Absolutely! To create a dairy-free Berry Croissant Bake, substitute the whole milk and heavy cream with almond milk or coconut milk, and use dairy-free croissants. This way, you can accommodate various dietary needs while still savoring the delicious flavors. Just remember to check the labels for any potential allergens!

Berry Croissant Bake

Delicious Berry Croissant Bake to Delight Your Mornings

This Berry Croissant Bake transforms simple ingredients into an extraordinary morning treat, making it a crowd-pleaser for brunch.
Print Recipe Pin Recipe
Prep Time 20 minutes mins
Cook Time 40 minutes mins
Soaking Time 15 minutes mins
Total Time 1 hour hr 15 minutes mins
Servings: 8 slices
Course: Breakfast
Cuisine: American
Calories: 350
Ingredients Equipment Method Nutrition Notes

Ingredients
  

For the Base
  • 6 croissants croissants A little stale or toasted croissants give the best texture for soaking up the custard.
  • 2 cups mixed berries A colorful combination of blueberries, raspberries, strawberries, or blackberries adds sweetness and freshness.
For the Custard
  • 1.5 cups whole milk Creamy whole milk enhances the richness of the custard; you can use almond milk for a dairy-free option.
  • 1.5 cups heavy cream This contributes to a luscious, velvety texture; feel free to substitute with coconut cream if needed.
  • 4 large eggs Eggs are key for binding, giving the bake structure and richness.
  • 1 teaspoon vanilla extract Vanilla adds comforting warmth and enhances the overall flavor.
  • 0.33 cup granulated sugar Sweeten your custard to balance the tartness of the berries.
For Garnish
  • 2 tablespoon powdered sugar A light dusting adds a touch of elegance and sweetness.
  • 1 tablespoon lemon zest Optional: Brighten flavors with lemon zest for a zesty twist.

Equipment

  • 9x13-inch baking dish
  • Mixing Bowl
  • Whisk

Method
 

Step-by-Step Instructions
  1. Preheat your oven to 350°F (175°C) while you prepare your baking dish. Grease a 9×13-inch baking dish generously with butter or cooking spray.
  2. Cut the croissants into halves or quarters and layer them in the greased baking dish. Scatter the mixed berries generously over the croissant pieces.
  3. In a large mixing bowl, whisk together the eggs, whole milk, heavy cream, vanilla extract, and granulated sugar until smooth.
  4. Pour the custard evenly over the layered croissants and berries, ensuring they are well-coated. Allow the mixture to sit for 15-20 minutes at room temperature, or refrigerate overnight.
  5. Place the dish in your preheated oven and bake for 35-40 minutes, or until the top is golden brown and the custard is set with a slight jiggle in the center.
  6. Once baked, remove the dish from the oven and let it cool for a few minutes. Dust the top generously with powdered sugar.

Nutrition

Serving: 1sliceCalories: 350kcalCarbohydrates: 30gProtein: 6gFat: 25gSaturated Fat: 15gCholesterol: 180mgSodium: 200mgPotassium: 100mgFiber: 2gSugar: 10gVitamin A: 500IUVitamin C: 4mgCalcium: 150mgIron: 1.5mg

Notes

Serve warm or at room temperature, optionally with whipped cream or maple syrup for extra indulgence.

Tried this recipe?

Let us know how it was!
  • « Previous Page
  • 1
  • …
  • 28
  • 29
  • 30
  • 31
  • 32
  • …
  • 40
  • Next Page »

Footer

Copyright © 2026 · recipecrown.com Privacy Policy Disclaimer Terms & Conditions