RecipeCrown

  • Home
  • Breakfast
  • Main Dishes
  • Dessert
  • About
  • Contact
menu icon
go to homepage
  • Home
  • Breakfast
  • Main Dishes
  • Dessert
  • About
  • Contact
search icon
Homepage link
  • Home
  • Breakfast
  • Main Dishes
  • Dessert
  • About
  • Contact
×

Delicious Marinated Cheese Appetizer with Salami & Olives

December 16, 2025 by grace bellamy Leave a Comment

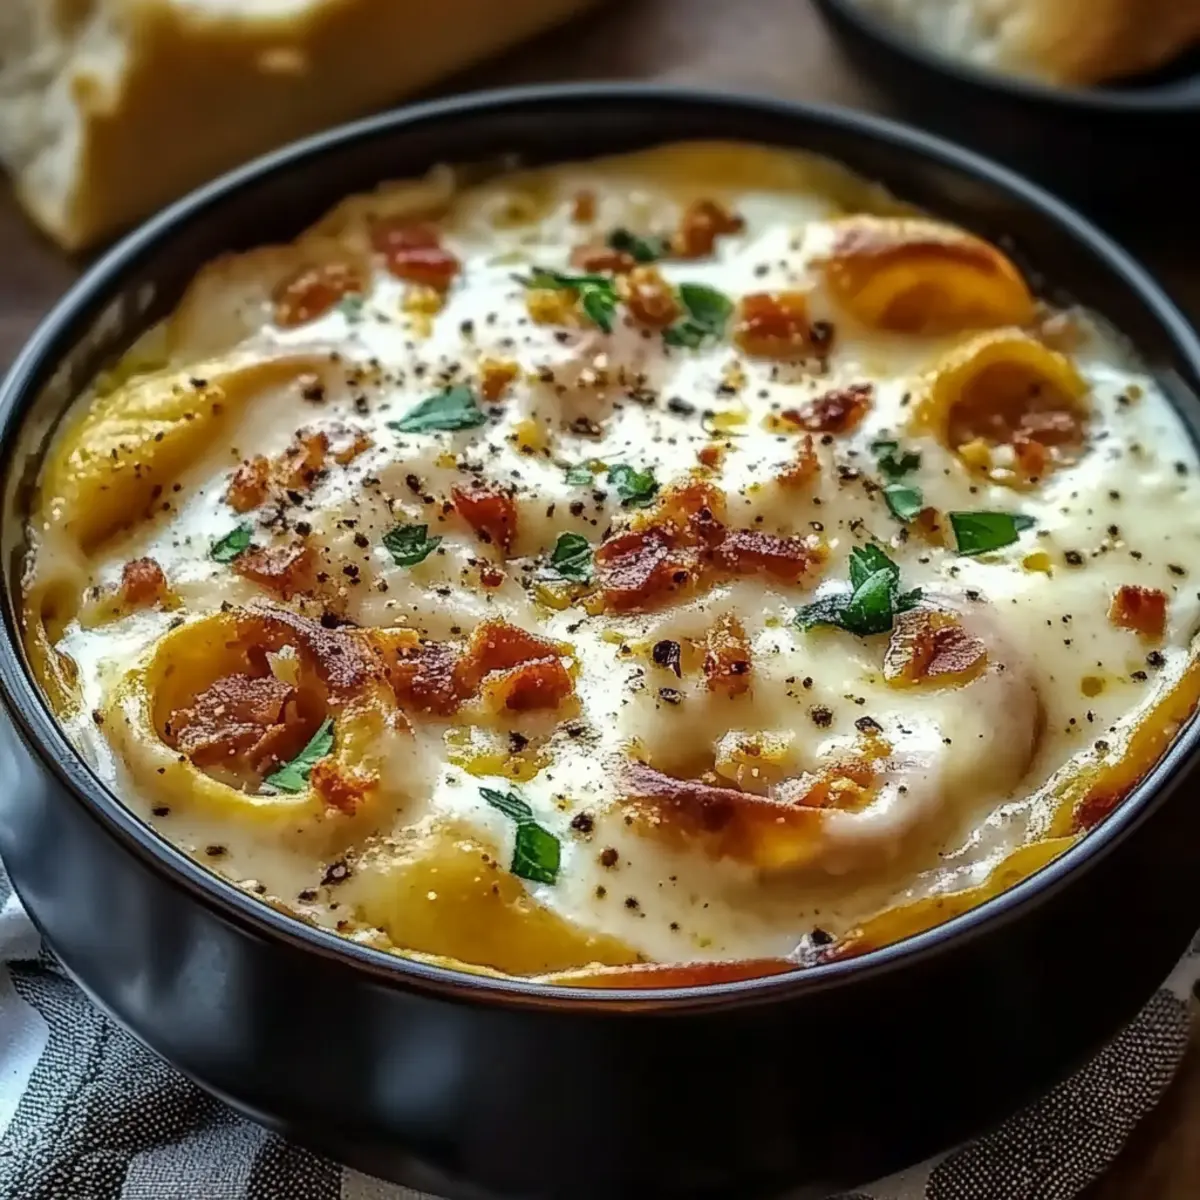
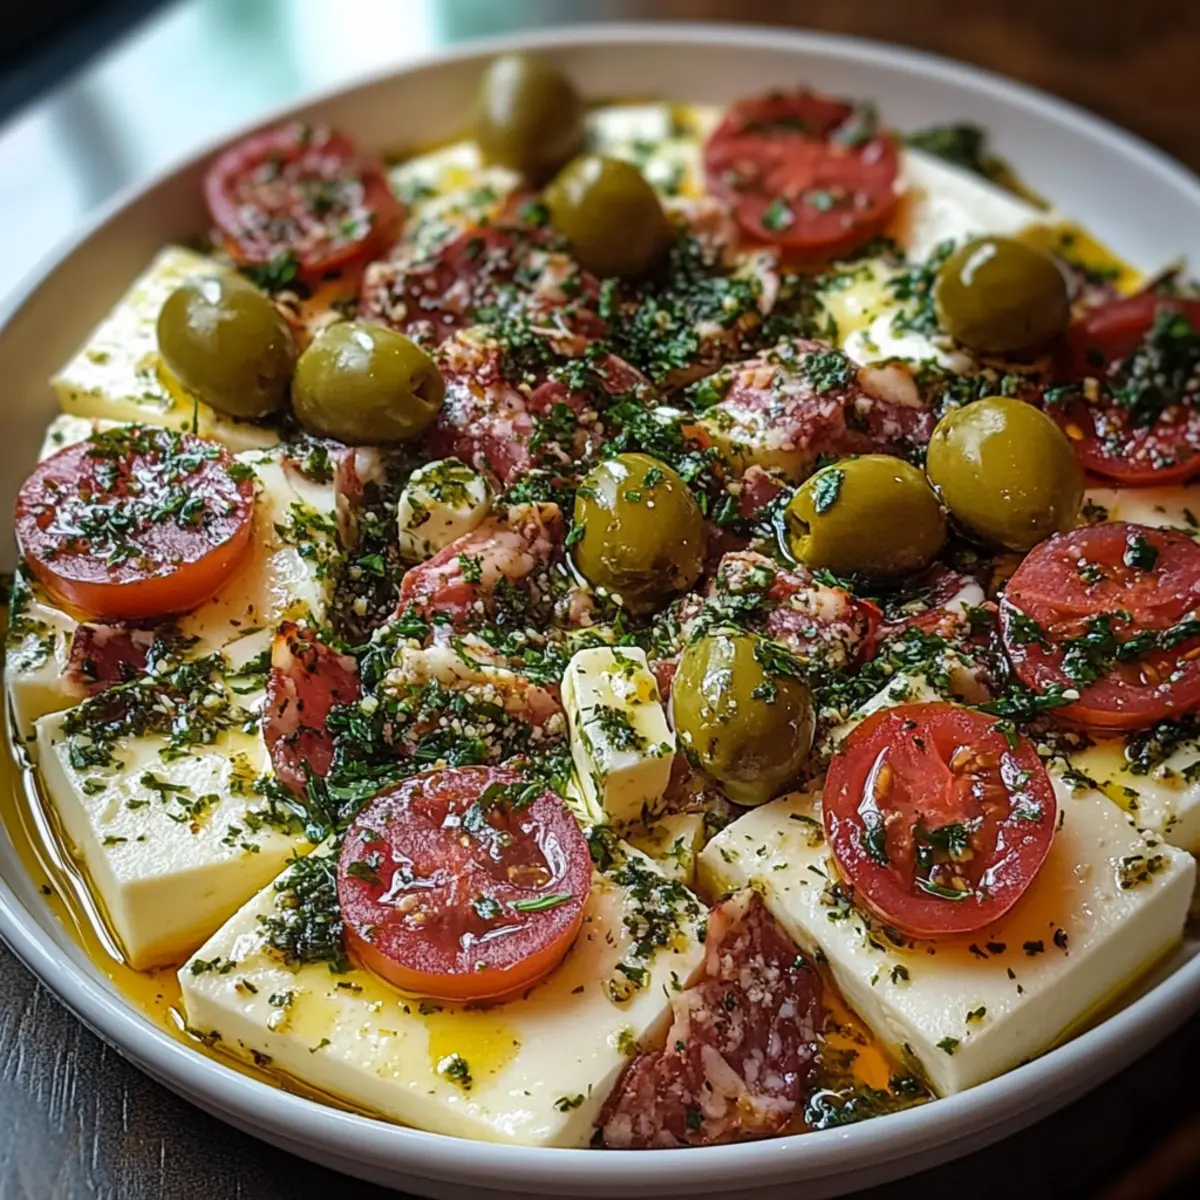
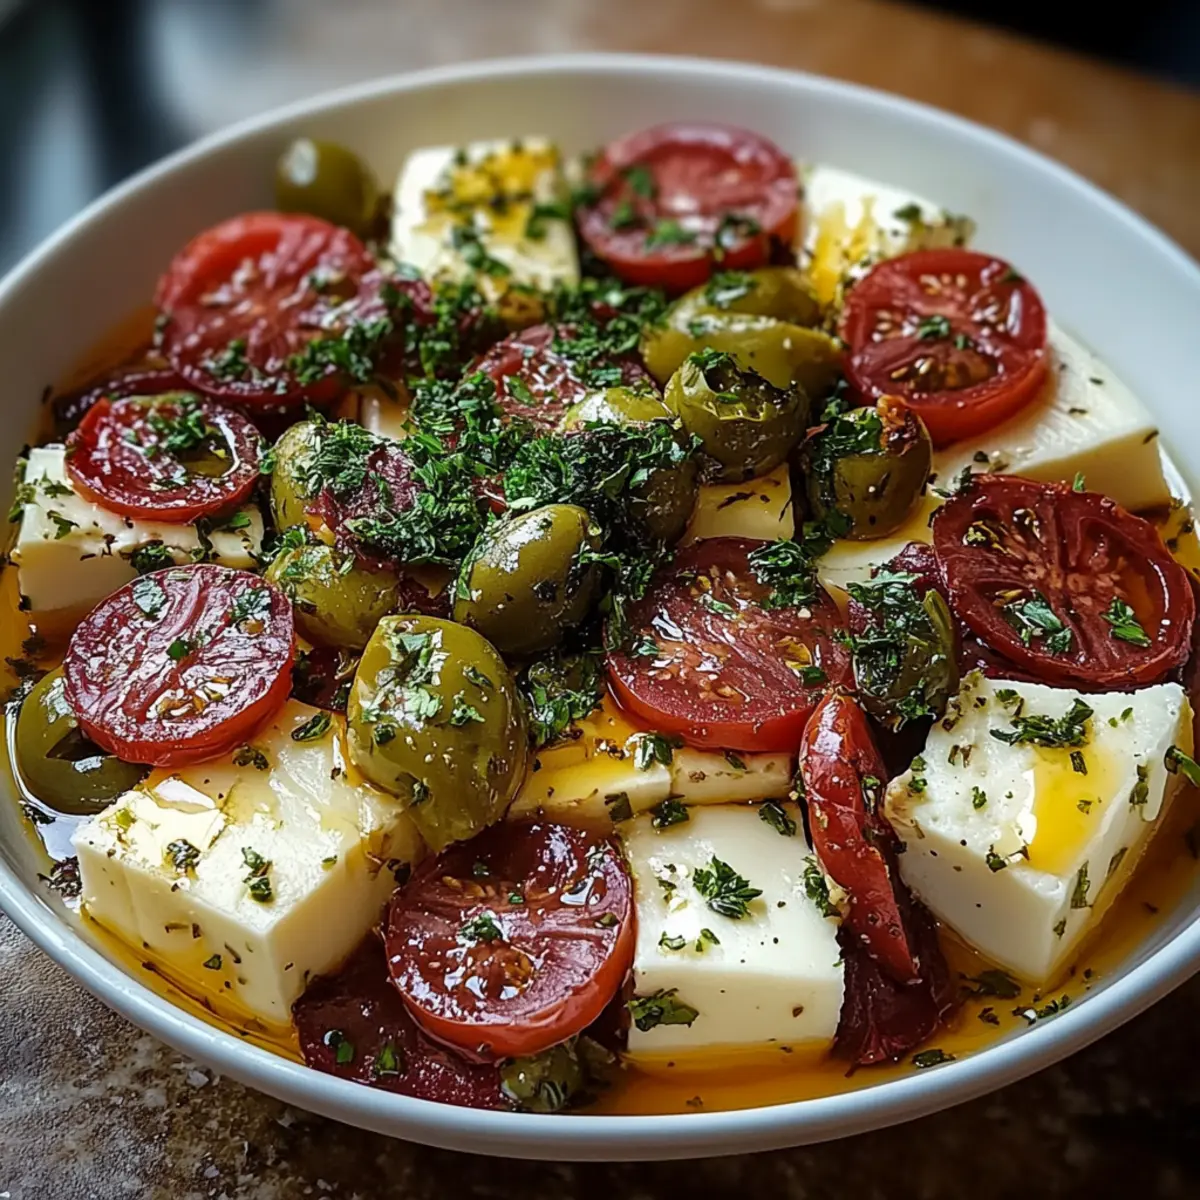
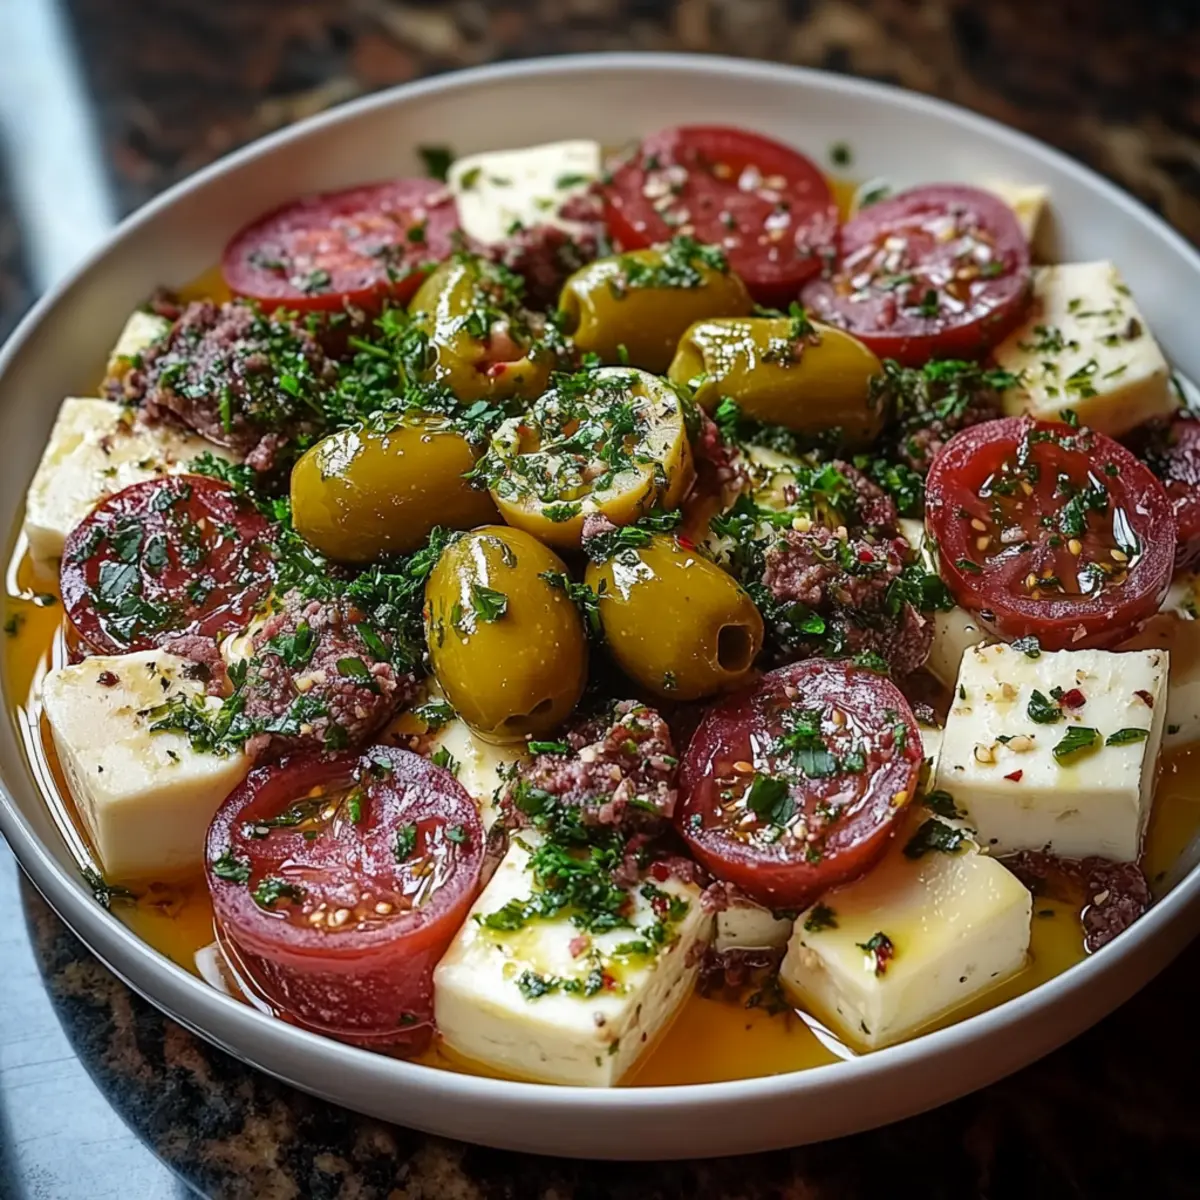
As I prepared for a gathering with friends last weekend, an idea sparked: how about a centerpiece that feels like an indulgent escape? Enter the Marinated Cheese Appetizer with Salami & Green Olives, a perfect blend of creamy, tangy, and savory flavors that elevates any occasion. In just 20 minutes of prep, you can impress your guests with this sophisticated yet simple dish that requires no cooking. It’s not only a crowd-pleaser but also a delightful option for those looking to add a touch of elegance to their snacking routine. Plus, it can easily be prepped ahead of time, freeing you up to enjoy the party! How can you resist a recipe that combines such rich ingredients into an aesthetically pleasing spread? Let’s dive into this delicious journey!

Marinated Cheese Appetizer with Salami & Green Olives

Why is this appetizer a must-try?

Irresistible Flavor: The unique blend of mozzarella and feta brings rich creaminess, while the salami adds a savory punch and the olives contribute a briny twist.

Effortless Preparation: With just 20 minutes of active prep time, this dish is both simple and stress-free, making it perfect for hosting.

Make-Ahead Magic: A treat that only gets better with time! Prepare it hours or even a day ahead of your gathering and let the flavors meld.

Versatile Serving: Whether you're hosting a party or enjoying a quiet night in, this Marinated Cheese Appetizer pairs beautifully with crackers, bread, or even a salad.

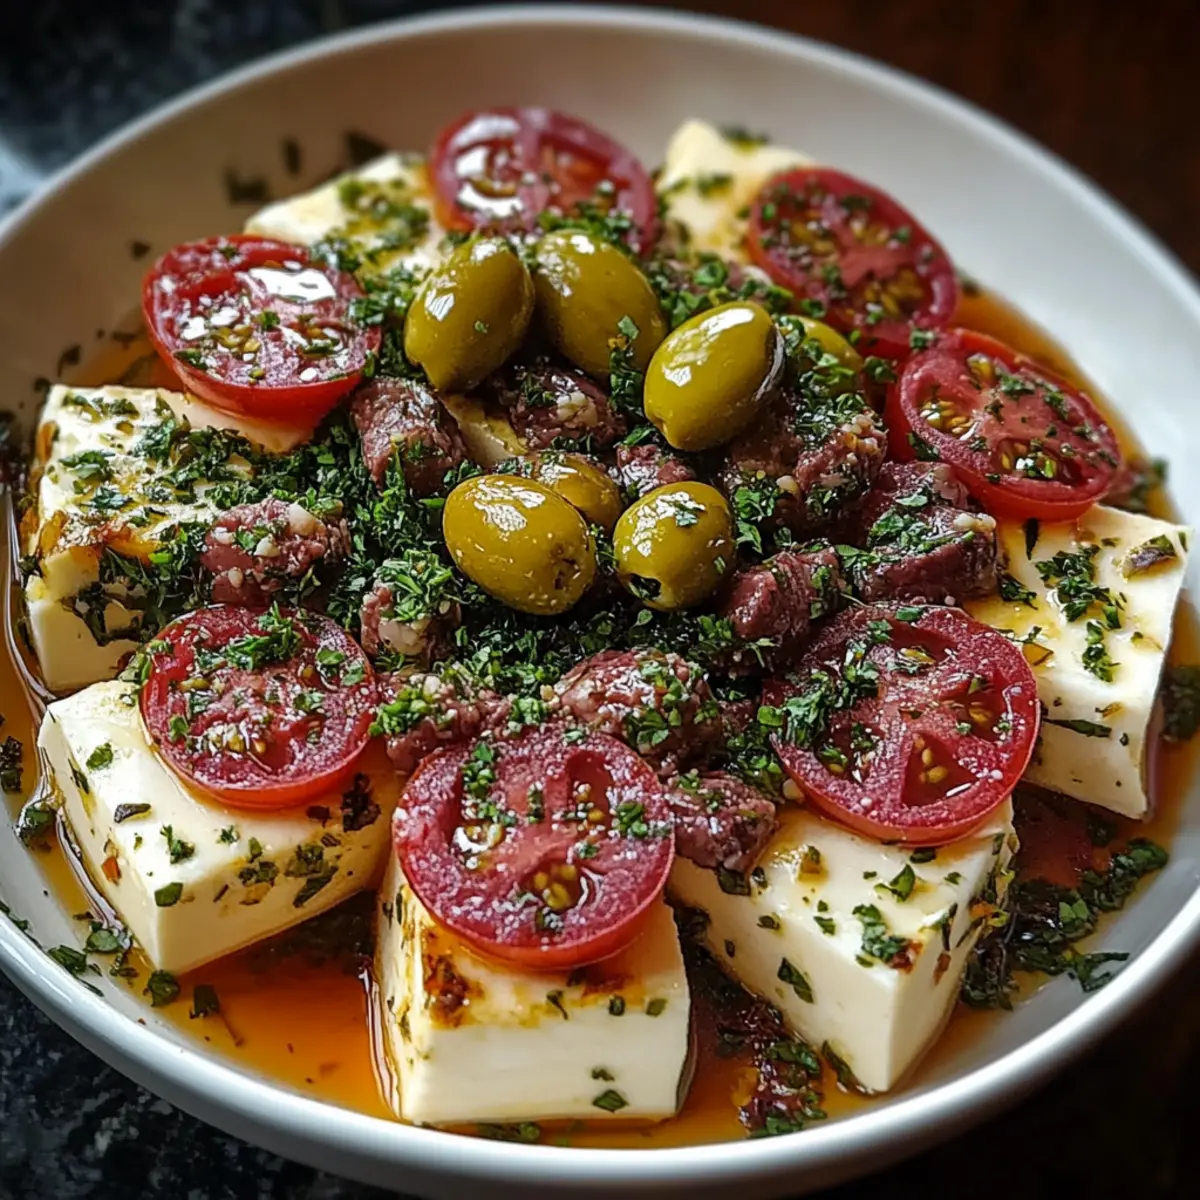
Elegant Presentation: Serve it on a beautiful platter, garnished with parsley, and watch it steal the spotlight at your next get-together!

Trust me, this appetizer will be a hit; once you try it, you’ll want to make it again and again for every occasion!

Marinated Cheese Appetizer Ingredients

For the Cheese and Meat
• Mozzarella cheese – cubed to ensure a creamy texture that absorbs the marinade beautifully.
• Feta cheese – provides a tangy kick that perfectly complements the salami.
• Salami – adds a savory depth; choose a spicy variety for an extra kick!
• Green olives – their briny flavor balances the richness of the cheeses.

For the Marinade
• Extra virgin olive oil – the base of the marinade that enhances all flavors; opt for high-quality for the best taste.
• Garlic – minced for a robust aroma and savory depth.
• Dried oregano – a classic herb that adds a Mediterranean flair.
• Red pepper flakes (optional) – sprinkle in for a touch of heat that elevates the dish.
• Lemon zest – brightens the flavors and adds a refreshing twist.
• Lemon juice – balances richness with its tanginess; fresh juice is always best.

For Garnishing
• Fresh parsley – chopped for a pop of color and added freshness on the serving platter.

This Marinated Cheese Appetizer with Salami & Green Olives is not only delicious but incredibly easy to prepare, making it a must-have for your next gathering!

Step‑by‑Step Instructions for Marinated Cheese Appetizer with Salami & Green Olives

Step 1: Prepare the Cheese
Begin by cutting the mozzarella and feta cheese into uniform cubes, aiming for bite-sized pieces. This ensures that each cube absorbs the marinade equally, enhancing the flavors. Set the cubed cheeses aside on a clean cutting board, creating a vibrant base for your Marinated Cheese Appetizer with Salami & Green Olives.

Step 2: Combine Ingredients
In a large mixing bowl, add the cubed mozzarella and feta cheeses, along with the salami strips and halved green olives. Gently toss these ingredients together using a spatula or spoon, allowing the textures and colors to intermingle beautifully. This step is crucial for a balanced flavor profile in your marinated appetizer.

Step 3: Whisk the Marinade
In a separate small bowl, whisk together the extra virgin olive oil, minced garlic, dried oregano, red pepper flakes (if desired), lemon zest, and lemon juice. Ensure the mixture is well combined and glossy. This fragrant marinade will infuse your cheeses and salami, creating a delightful depth of flavor for the Marinated Cheese Appetizer.

Step 4: Coat the Ingredients
Pour the prepared marinade over the cheese, salami, and olives mixture in the larger bowl. Use a spatula to gently fold and coat each ingredient thoroughly in the oil and herb mixture. Watch as the colors deepen and the ingredients become saturated, promising a deliciously rich appetizer.

Step 5: Seal for Flavor
Cover the bowl with plastic wrap or transfer the mixture to a glass jar with a lid, sealing tightly to keep the flavors intact. This step is essential for ensuring the ingredients marinate effectively. Place the covered bowl or jar in the refrigerator to let them mingle for at least 2 hours, or ideally, overnight for maximum flavor absorption.

Step 6: Serve with Style
When you’re ready to serve, remove the marinated cheese appetizer from the refrigerator. Using a slotted spoon, carefully transfer the contents onto a beautiful serving platter, allowing any excess marinade to remain behind. The vibrant colors and enticing aromas will surely capture your guests' attention.

Step 7: Garnish for Freshness
Finish the platter by garnishing it with freshly chopped parsley, sprinkling it over the top to add a pop of color and vibrant freshness. This final touch not only enhances the visual appeal of your Marinated Cheese Appetizer with Salami & Green Olives but also complements the savory flavors beautifully.

Step 8: Pair and Enjoy
Serve your delicious creation with toothpicks for convenient snacking, or lay it out alongside an assortment of crackers and slices of bread. Your marinated appetizer is now ready to delight taste buds and elevate any gathering or casual evening at home.

Marinated Cheese Appetizer with Salami & Green Olives

What to Serve with Marinated Cheese Appetizer with Salami & Green Olives

Elevate your entertaining by pairing delectable bites that complement the rich flavors of this indulgent appetizer.

  • Crunchy Breadsticks: Their crisp texture provides a delightful contrast to the creamy cheeses, adding a satisfying crunch with every bite.

  • Tangy Antipasto Salad: A mixture of fresh veggies, cheeses, and olives enhances the Mediterranean vibes, offering a refreshing palate cleanser between bites.

  • Artisan Crackers: Offering varying flavors and textures, these crunchy companions are perfect for delivering the marinated goodness straight to your taste buds.

  • Savory Roasted Nuts: A mix of salty almonds and cashews complements the appetizers' flavors while adding a nutty crunch that guests will love.

  • Sweet Fig Jam: A spoonful of fig jam drizzled atop the cheese brings out a delightful sweetness that balances the savory notes beautifully.

  • Zesty White Wine Spritzers: Their light and refreshing qualities cut through the richness, making them the perfect sip alongside your marinated creation.

  • Dark Chocolate Squares: For a sweet twist, offer high-quality dark chocolate; its bitterness pairs surprisingly well with the savory appetizer, creating a delightful end to the meal.

Expert Tips for Marinated Cheese Appetizer

Cube Uniformly: Make sure all cheese cubes are similar in size to ensure even marination, which enhances the overall taste of your Marinated Cheese Appetizer with Salami & Green Olives.

Quality Ingredients: Invest in high-quality extra virgin olive oil and fresh herbs to elevate the flavor profile of your dish dramatically.

Marinate Longer: For the best flavor, let your appetizer marinate overnight. The longer the ingredients sit together, the more flavorful the mix will become.

Avoid Overcooking: Although this appetizer doesn't require cooking, be careful with ingredients like salami. Choosing a good quality, pre-sliced salami helps avoid any overly greasy textures.

Garnish for Appeal: Don’t skip the fresh parsley! It adds a burst of color and freshens up the rich flavors, making your Marinated Cheese Appetizer even more inviting.

Marinated Cheese Appetizer Variations

Feel free to unleash your creativity and customize this recipe to suit your tastes and dietary needs!

  • Vegan Option: Swap the mozzarella and feta for dairy-free alternatives. Cashew cheese or almond-based feta work beautifully for a plant-based twist.

  • Spicy Kick: Add a tablespoon of harissa or sriracha to the marinade for an extra kick of heat. This gives the appetizer a lovely depth and exciting flavors.

  • Herb Infusion: Experiment with fresh herbs like basil or thyme instead of dried oregano. Fresh herbs elevate the taste and appearance, creating a garden-fresh vibe.

  • Nutty Crunch: Toss in some toasted pine nuts or walnuts for added texture. Their crunch complements the creaminess of the cheeses and offers delightful contrast.

  • Olive Varieties: Swap green olives for kalamata or mixed olives. Each type brings its own unique flavor, making your appetizer a delightful surprise!

  • Citrusy Brightness: Experiment with lime juice and zest instead of lemon for a zesty, tropical flavor. It adds a refreshing zing that pairs beautifully with the savory elements.

  • Fruit Fusion: Include sun-dried tomatoes or roasted red peppers for a sweet, tangy twist. These additions will create a lovely color contrast and a burst of flavor in every bite.

  • Sweet Touch: A drizzle of honey before serving can balance the savory ingredients wonderfully. This unexpected sweetness creates a delicious harmonious mix!

By mixing and matching these variations, you can adapt the Marinated Cheese Appetizer with Salami & Green Olives to suit any occasion or guest preference. Remember, the sky's the limit when you let your culinary imagination run wild! If you’re intrigued by this appetizer, you might also enjoy exploring a refreshing Mediterranean Salad or a tasty Meat and Cheese Board for your gatherings.

How to Store and Freeze Marinated Cheese Appetizer

Fridge: Keep the marinated cheese appetizer in an airtight container in the refrigerator for up to 5 days. This helps maintain its flavor and texture.

Freezer: You can freeze the mixture for up to 3 months, but be aware that the texture of the cheese may change. Thaw in the fridge before serving.

Reheating: This appetizer is best enjoyed chilled or at room temperature. Avoid reheating, as it can alter the flavor and texture of the cheeses.

Serving Tip: If you plan to serve the marinated cheese later, give it a gentle stir after refrigeration and freshen with chopped parsley just before serving for a lovely presentation!

Make Ahead Options

These Marinated Cheese Appetizer with Salami & Green Olives are perfect for busy cooks looking to save time without sacrificing flavor! You can prepare the cheese, salami, and olive mixture up to 24 hours in advance, allowing them to marinate and deepen in flavor. Simply combine all the ingredients and cover tightly before refrigerating. To maintain the quality and flavors, be sure to keep the appetizer sealed – this prevents any absorption of other smells in the fridge. When you’re ready to serve, just garnish with fresh parsley and transfer to a platter. You’ll have a delectable, crowd-pleasing appetizer on hand with minimal effort!

Marinated Cheese Appetizer with Salami & Green Olives

Marinated Cheese Appetizer with Salami & Green Olives Recipe FAQs

How do I choose ripe ingredients for the marinated cheese appetizer?
Absolutely! For the best flavor experience, choose fresh mozzarella that feels slightly soft to the touch. The feta should be creamy without any dark spots. Select green olives that are firm and vibrant in color—this ensures they have a lovely briny flavor.

How should I store the marinated cheese appetizer?
You’ll want to keep it in an airtight container in the refrigerator. It will stay fresh for up to 5 days. Just make sure to seal it tightly to retain those delicious flavors. Give it a gentle stir before serving to mix the oils that may settle.

Can I freeze the marinated cheese appetizer?
Yes! You can freeze the mixture for up to 3 months. To freeze, transfer it into a freezer-safe container, leaving some space at the top for expansion. When you're ready to enjoy, thaw it in the fridge overnight. Keep in mind that the texture of the cheese might change slightly upon thawing, but the flavors will still be delightful!

What do I do if my marinated cheese is too salty?
If your marinated cheese appetizer turns out saltier than you’d like, consider adding additional sliced olives or even some cucumber slices to balance the flavors. Letting it rest in the marinade for a bit longer can also help meld and soften the salty taste.

Are there any dietary considerations for the ingredients?
Absolutely! If you're serving this appetizer to guests with dietary restrictions, be sure to check for allergies regarding cheese and salami. Additionally, for a vegetarian alternative, you can replace the salami with marinated sun-dried tomatoes or roasted red peppers. Just ensure all other ingredients align with your guests' dietary preferences.

How can I make the marinated cheese appetizer unique?
The more the merrier when it comes to customization! You can add roasted garlic for a deeper flavor or introduce fresh herbs like basil or thyme for a twist. Experimenting with different cured meats, like prosciutto or pepperoni, can also bring a fresh perspective to this classic dish.

Marinated Cheese Appetizer with Salami & Green Olives

Delicious Marinated Cheese Appetizer with Salami & Olives

This Marinated Cheese Appetizer with Salami & Green Olives is a delightful blend of flavors that impresses guests with minimal effort.
Print Recipe Pin Recipe
Prep Time 20 minutes mins
Marinating Time 2 hours hrs
Total Time 2 hours hrs 20 minutes mins
Servings: 6 people
Course: Appetizer
Cuisine: Mediterranean
Calories: 150
Ingredients Equipment Method Nutrition Notes

Ingredients
  

For the Cheese and Meat
  • 8 ounces Mozzarella cheese cubed
  • 4 ounces Feta cheese cubed
  • 6 ounces Salami sliced
  • 1 cup Green olives halved
For the Marinade
  • ½ cup Extra virgin olive oil high-quality
  • 2 cloves Garlic minced
  • 1 teaspoon Dried oregano
  • ¼ teaspoon Red pepper flakes optional
  • 1 tablespoon Lemon zest
  • 2 tablespoons Lemon juice fresh
For Garnishing
  • ¼ cup Fresh parsley chopped

Equipment

  • Mixing Bowl
  • spatula
  • Plastic wrap
  • Serving platter

Method
 

Preparation Steps
  1. Prepare the Mozzarella and Feta by cutting them into uniform cubes.
  2. In a large mixing bowl, combine the cubed mozzarella, feta, salami, and halved green olives, tossing gently.
  3. In a small bowl, whisk together the olive oil, garlic, oregano, red pepper flakes, lemon zest, and lemon juice.
  4. Pour the marinade over the cheese, salami, and olives mixture, and mix gently to coat thoroughly.
  5. Seal the mixture in a bowl or glass jar and refrigerate for at least 2 hours or overnight.
  6. When ready to serve, transfer the marinated mix onto a serving platter, leaving excess marinade behind.
  7. Garnish with chopped parsley before serving.
  8. Serve with toothpicks or alongside crackers and slices of bread.

Nutrition

Serving: 1servingCalories: 150kcalCarbohydrates: 5gProtein: 8gFat: 12gSaturated Fat: 4gPolyunsaturated Fat: 1gMonounsaturated Fat: 7gCholesterol: 30mgSodium: 400mgPotassium: 150mgFiber: 1gSugar: 1gVitamin A: 500IUVitamin C: 2mgCalcium: 200mgIron: 1mg

Notes

This appetizer can be prepared ahead of time and stored in an airtight container. Best enjoyed chilled or at room temperature.

Tried this recipe?

Let us know how it was!

Irresistible Little Debbie Cake Cookies for Sweet Moments

December 16, 2025 by grace bellamy Leave a Comment

As I rummaged through my pantry looking for a sweet escape, I stumbled upon a box of yellow cake mix, and an idea sparked—what if I transformed that humble mix into something utterly delightful? Enter Little Debbie Cake Cookies, the perfect fusion of nostalgia and creativity that brings the iconic flavors of childhood right into your kitchen. These cookies not only come together in just 10 minutes of prep but are also a guaranteed crowd-pleaser, making them ideal for any gathering or a simple afternoon treat. With gooey chocolate chips and fluffy mini marshmallows, they’re as comforting as a home-cooked hug. Ready to impress your friends or indulge your sweet tooth? Let’s get baking!

Little Debbie Cake Cookies

Why are Little Debbie Cake Cookies so irresistible?

Nostalgic Flavors: These cookies capture the cherished essence of childhood treats, bringing back fond memories with every bite.

Quick and Easy: In just 27 minutes total, you can whip up a batch, making them perfect for spontaneous cravings or last-minute gatherings.

Versatile Fun: Whether you choose to add sprinkles or keep them classic, you can customize these cookies to suit every occasion.

Gooey Goodness: The combination of chocolate chips and mini marshmallows ensures a rich, melty center that makes every bite an indulgent delight.

Crowd-Pleaser: Ideal for both kids and adults, they’re sure to satisfy everyone at any gathering—making them the star at parties or just a cozy evening at home.

Little Debbie Cake Cookies Ingredients

Unleash the magic of these nostalgic delights with simple pantry staples!

For the Cookies

  • Yellow cake mix – this acts as the base, delivering that signature flavor and texture found in classic Little Debbie treats.
  • Vegetable oil – helps keep the cookies moist and tender.
  • Large eggs – provide structure and richness to the dough.
  • Semi-sweet chocolate chips – their melty goodness brings a delightful burst of chocolate flavor.
  • Mini marshmallows – add a fun, gooey element that evokes sweet memories.
  • Sprinkles (optional) – for a pop of color, making your cookies festive and fun!
  • Vanilla extract – enhances the overall sweetness and flavor profile.
  • A pinch of salt – balances the sweetness and elevates all the flavors.

Enjoy baking these Little Debbie Cake Cookies and relish in the sweet nostalgia they bring to your kitchen!

Step‑by‑Step Instructions for Little Debbie Cake Cookies

Step 1: Preheat and Prepare
Begin your cookie adventure by preheating your oven to 350°F (175°C). While that heats up, grab a baking sheet and line it with parchment paper, ensuring an easy release for your cookie creations. This setup will help you bake the perfect batch of Little Debbie Cake Cookies with just the right amount of space for spreading.

Step 2: Mix the Base
In a large mixing bowl, combine the yellow cake mix, vegetable oil, and eggs. Using a sturdy whisk or spatula, mix these ingredients together until you achieve a smooth, lump-free batter. This is a crucial step, as the cake mix serves as the foundation that will give your cookies their delightful flavor and texture.

Step 3: Enhance the Flavor
Next, add in the vanilla extract and a pinch of salt to the batter, stirring gently until thoroughly combined. The vanilla will elevate the sweetness, while the salt offers a lovely contrast to the sugary flavors. This step ensures that your Little Debbie Cake Cookies will be bursting with nostalgia and rich taste.

Step 4: Fold in the Goodies
Now, it’s time for the fun part! Carefully fold in the semi-sweet chocolate chips, mini marshmallows, and sprinkles if you’re using them. Be gentle to maintain the fluffy texture of the batter, leaving those delicious morsels evenly distributed throughout, ready to create gooey pockets of goodness in each cookie.

Step 5: Scoop the Dough
Using a tablespoon or cookie scoop, drop rounded balls of dough onto your prepared baking sheet. Ensure you leave enough space between each mound to allow for spreading during baking. This will help achieve those perfect Little Debbie Cake Cookies, each with a soft center and slightly crisp edges.

Step 6: Bake to Perfection
Pop your baking sheet into the preheated oven and let the cookies bake for 10-12 minutes. Keep an eye on them; the edges should be lightly golden, while the centers might appear soft. This is perfectly fine as they will continue to firm up while cooling, ensuring a blissfully chewy texture.

Step 7: Cool and Transfer
Once baked, remove the cookies from the oven and allow them to cool on the baking sheet for about 5 minutes. This resting time helps them set up properly. Afterward, gently transfer the Little Debbie Cake Cookies to a wire rack, allowing them to cool completely. Soon, you’ll have a delightful batch ready for sharing—or indulging!

Little Debbie Cake Cookies

Little Debbie Cake Cookies Variations

Feel free to get creative as you transform these cookies into your own unique masterpieces!

  • Gluten-Free: Substitute the yellow cake mix with a gluten-free blend for a delightful cookie that everyone can enjoy.

  • Nutty Delight: Add ½ cup of chopped walnuts or pecans for a satisfying crunch that complements the soft sweetness of the cookies.
    Nuts bring a lovely contrast to the gooey marshmallows, making every bite even more enjoyable.

  • Cinnamon Twist: Mix in 1 teaspoon of ground cinnamon for a warm, spiced flavor that adds depth to these nostalgic cookies.

  • Choco-Mint: Use mint chocolate chips instead of semi-sweet for a refreshing variation that’s perfect for mint lovers.
    The coolness of mint paired with chocolate creates a synergy that will tickle your taste buds.

  • Fruit Fusion: Incorporate ½ cup of dried cranberries or chopped strawberries for a fruity twist that brightens up the traditional flavor.
    The burst of fruitiness against the backdrop of cake fluff creates a delightful medley in every bite!

  • Spicy Kick: Add a pinch of cayenne pepper or chili powder for a subtle heat that beautifully contrasts the sweetness.
    This unexpected twist will surprise and intrigue your guests, making the cookies truly unforgettable.

  • Caramel Drizzle: Before eating, drizzle melted caramel over the cooled cookies for an extra layer of indulgence that will have everyone coming back for seconds.
    The rich sweetness melds perfectly with the chocolate and marshmallow, adding a fulfilling finish.

  • S'mores Style: Mix in crushed graham crackers with your batter and top with mini chocolate squares before baking for a s'mores-inspired treat that’s sure to delight!
    This variation transforms each cookie into a delightful campfire reminder, combining all the beloved flavors in one bite.

Explore these variations and let your imagination guide you as you create the Little Debbie Cake Cookies of your dreams! For more delightful recipes, don’t forget to check out our Expert Tips for Little Debbie Cake Cookies and learn how to craft the perfect cookie experience.

How to Store and Freeze Little Debbie Cake Cookies

Room Temperature: Keep your Little Debbie Cake Cookies in an airtight container at room temperature for up to 3 days to maintain their soft texture.

Fridge: If you prefer a chilled treat, you can store the cookies in the fridge for up to a week. Just be sure to seal them well to avoid drying out.

Freezer: For longer storage, freeze the cookies in a single layer on a baking sheet, then transfer them to a freezer-safe bag. They will stay fresh for up to 3 months.

Reheating: When ready to enjoy, just pop the cookies in the microwave for about 10-15 seconds to return them to their gooey, delightful state!

What to Serve with Little Debbie Cake Cookies

Indulge in a delightful meal that perfectly complements the sweet magic of these cookie creations.

  • Milkshake: A creamy chocolate or vanilla milkshake pairs beautifully, enhancing the dessert experience with its smooth and rich flavor.

  • Vanilla Ice Cream: Scoop some vanilla ice cream on the side for an irresistible a la mode treat that adds a cool, creamy contrast.

  • Fresh Fruit Salad: A refreshing mix of berries and citrus balances the sweetness, providing a light and vibrant element to your dessert spread.

  • Chocolate Dipping Sauce: Drizzling warm chocolate sauce over the cookies takes them to another level, offering an extra layer of indulgence.

  • Coffee or Espresso: Rich coffee or a shot of espresso perfectly balances the sweetness and adds a touch of sophistication to your treat.

  • Caramel Sauce: A drizzle of warm caramel provides a delightful contrast in flavor, enhancing the rich taste of the cookies while making them extra gooey.

  • Sparkling Water: For a refreshing non-sweet option, chilled sparkling water cleanses the palate between bites while adding a fun fizz.

  • Pecan Pie Brownies: For an extra treat, serve these alongside mini pecan pie brownies; the nutty flavor complements the softness of the cookies beautifully.

Expert Tips for Little Debbie Cake Cookies

  • Measure Accurately: Ensure you measure your cake mix and other ingredients accurately to achieve the perfect cookie texture. Too much mix can lead to dryness.

  • Chill the Dough: For thicker cookies, consider chilling the dough for about 30 minutes before scooping. This helps maintain the shape and enhances flavor.

  • Don’t Overbake: Keep an eye on your cookies towards the end of the baking time. They should be lightly golden at the edges while still soft in the center, resulting in that gooey goodness.

  • Quality Ingredients: Use high-quality chocolate chips and fresh eggs for the best taste. It makes a noticeable difference in the flavor of your Little Debbie Cake Cookies.

  • Store Properly: To keep your cookies soft and fresh, store them in an airtight container at room temperature. Add a slice of bread to keep them moist longer!

Make Ahead Options

These Little Debbie Cake Cookies are perfect for meal prep enthusiasts who want to save time on busy weeknights! You can mix the cookie dough up to 24 hours in advance and refrigerate it (this helps the flavors meld together, enhancing the overall taste). To do this, simply prepare the dough up to Step 4, then cover it tightly with plastic wrap or transfer it to an airtight container. When you're ready to bake, scoot the dough onto a baking sheet and proceed with Steps 5-7 right before serving. You'll end up with delicious cookies that taste just as fresh, without the last-minute rush!

Little Debbie Cake Cookies

Little Debbie Cake Cookies Recipe FAQs

What type of yellow cake mix should I use?
Absolutely! A standard 15.25 oz box of yellow cake mix is perfect for these cookies. I recommend using a brand that you trust for consistent results. If you want to experiment, you could also try a gluten-free yellow cake mix to make these cookies gluten-free.

How should I store my cookies?
To keep your Little Debbie Cake Cookies soft and fresh, store them in an airtight container at room temperature for up to 3 days. If you have a bigger batch, you can also refrigerate them for up to a week. Just be sure to wrap them tightly!

Can I freeze these cookies?
Yes, you can absolutely freeze your cookies! First, arrange them in a single layer on a baking sheet and freeze for about 2 hours until solid. Then, transfer the cookies to a freezer-safe bag, removing as much air as possible. They can be stored for up to 3 months! When you're ready to enjoy, just pop them in the microwave for 10-15 seconds to warm them up.

What should I do if my cookies spread too much while baking?
Very common! If your cookies spread too much, it may be due to warmer dough or inadequate chilling. To prevent this, chill your dough for 30 minutes before scooping it onto the baking sheet. Also, be sure to check your oven temperature with a thermometer, as an oven that runs hot can cause excess spreading.

Are these cookies safe for pets?
No, it's best to keep these cookies away from pets. Chocolate is toxic to dogs (and other pets), so even though Little Debbie Cake Cookies are delightful for humans, please don’t let your furry friends nibble on them! Always store them in a place that pets can’t access.

Little Debbie Cake Cookies

Irresistible Little Debbie Cake Cookies for Sweet Moments

These Little Debbie Cake Cookies are a nostalgic treat combining childhood flavors with gooey chocolate chips and mini marshmallows.
Print Recipe Pin Recipe
Prep Time 10 minutes mins
Cook Time 12 minutes mins
Cooling Time 5 minutes mins
Total Time 27 minutes mins
Servings: 12 cookies
Course: Dessert
Cuisine: American
Calories: 120
Ingredients Equipment Method Nutrition Notes

Ingredients
  

For the Cookies
  • 1 box yellow cake mix
  • ½ cup vegetable oil
  • 2 large eggs
  • 1 cup semi-sweet chocolate chips
  • 1 cup mini marshmallows
  • ¼ cup sprinkles optional
  • 1 teaspoon vanilla extract
  • 1 pinch salt

Equipment

  • Oven
  • Mixing Bowl
  • Baking Sheet
  • parchment paper
  • Whisk
  • Cookie scoop

Method
 

Step-by-Step Instructions
  1. Preheat your oven to 350°F (175°C) and line a baking sheet with parchment paper.
  2. In a large mixing bowl, combine yellow cake mix, vegetable oil, and eggs until smooth.
  3. Add vanilla extract and salt, stirring gently until well combined.
  4. Fold in chocolate chips, mini marshmallows, and sprinkles.
  5. Drop rounded balls of dough onto the prepared baking sheet, leaving space for spreading.
  6. Bake for 10-12 minutes until edges are lightly golden and centers soft.
  7. Allow to cool on the baking sheet for 5 minutes, then transfer to a wire rack to cool completely.

Nutrition

Serving: 1cookieCalories: 120kcalCarbohydrates: 17gProtein: 1gFat: 6gSaturated Fat: 1gCholesterol: 20mgSodium: 150mgPotassium: 60mgSugar: 10gCalcium: 1mgIron: 2mg

Notes

Store cookies in an airtight container to keep them soft. Consider chilling the dough for thicker cookies.

Tried this recipe?

Let us know how it was!

Delicious Baked Pears with Goat Cheese, Honey, and Cranberries

December 16, 2025 by grace bellamy Leave a Comment

As I was experimenting in my kitchen one calm afternoon, a wave of enticing aromas began to swirl around me, teasing my senses. That’s when I created these delightful Baked Pears with Goat Cheese, Honey, and Cranberries. This recipe is a wonderful way to transform simple, ripe pears into a delightful dish that combines savory and sweet flavors perfectly. Plus, it's quick to whip up, making it an ideal choice for busy weeknights or unexpected guests. The comforting blend of creamy goat cheese and tangy cranberries, drizzled with honey, elevates this fruit into a sophisticated yet easy-to-make dessert. And let’s not forget—these baked pears are wonderfully versatile, too; they can be served warm or at room temperature, allowing you to impress your family or friends with minimal effort. Curious how to create this cozy dish that’s sure to warm any heart? Let’s dive in!

Baked Pears with Goat Cheese, Honey, and Cranberries

Why are Baked Pears the Perfect Dessert?

Simplicity is key with this recipe; you only need a handful of ingredients to create something impressive. Flavorful combination of creamy goat cheese, sweet honey, and tart cranberries will leave your taste buds dancing. Versatile serving options allow you to enjoy them warm or at room temperature. Plus, 30 minutes baking time makes it a great choice for busy weeknights or surprise guests. Looking for a more sweet twist? Consider pairing it with vanilla ice cream for a decadent treat—an idea inspired by many easy dessert recipes.

Baked Pears with Goat Cheese Ingredients

• Let’s gather everything you need to create these delightful baked pears!

For the Pears

  • 4 ripe pears – Choose pears that yield slightly when pressed to ensure they’re perfectly ripe for baking.

For the Cheesecake Filling

  • 4 ounces goat cheese – Soften this ingredient for easy mixing and a creamy texture that complements the pears beautifully.
  • ¼ cup honey – Provides a natural sweetness to balance the tanginess of the goat cheese and cranberries.
  • 1 tablespoon fresh lemon juice – Adds a zesty brightness that enhances the overall flavor of the dish.
  • 1 teaspoon ground cinnamon – Brings warmth and depth to the flavors in the baked pears.
  • ¼ teaspoon nutmeg (optional) – A little hint of nutmeg can elevate the flavor, making it cozy and inviting.

For the Toppings

  • ½ cup fresh cranberries – These give a lovely tartness; if you prefer, you may use dried cranberries for a sweeter twist.
  • ¼ cup chopped walnuts or pecans (optional) – Adds a delightful crunch and nutty flavor that harmonizes with the softness of the pears.
  • Fresh mint leaves for garnish (optional) – A sprig of mint adds a refreshing touch to your finished dessert.

Feel free to mix and match or substitute ingredients according to your taste, but I promise this classic Baked Pears with Goat Cheese, Honey, and Cranberries combination will not disappoint!

Step‑by‑Step Instructions for Baked Pears with Goat Cheese, Honey, and Cranberries

Step 1: Preheat the Oven
Begin by preheating your oven to 350°F (175°C). This will ensure that your baked pears cook evenly and develop a lovely, tender texture. While the oven heats up, gather all your ingredients and have your baking dish ready for the next steps.

Step 2: Prepare the Baking Dish
Lightly grease a baking dish with cooking spray or a small amount of butter to prevent the pears from sticking. This step is crucial for easy serving later on. Having your dish ready will streamline the process, allowing you to move seamlessly to the next step in preparing your delectable baked pears.

Step 3: Make the Goat Cheese Mixture
In a mixing bowl, combine the softened goat cheese, honey, fresh lemon juice, ground cinnamon, and nutmeg if you're using it. Mix these ingredients until they form a smooth and creamy consistency. The delightful aroma of the mixture will already hint at the deliciousness to come in your baked pears with goat cheese, honey, and cranberries.

Step 4: Arrange the Pear Halves
Carefully cut the ripe pears in half and remove the cores. Place the pear halves cut-side up in your prepared baking dish, creating a lovely arrangement. This step not only looks beautiful but also ensures that each pear half will soak up the flavors as they bake to perfection.

Step 5: Fill the Pears
Using a spoon or small spatula, generously fill each pear half with your creamy goat cheese mixture. Make sure to add plenty of filling for a rich taste that perfectly balances the sweetness of the honey and the tang of the cranberries. This step is where the magic truly begins for your baked pears.

Step 6: Add the Cranberries
Scatter fresh or dried cranberries evenly over the filled pear halves. This tart addition brings a vibrant color and a delightful contrast to the sweetness, complementing the creamy goat cheese beautifully. You’ll want to make sure each pear gets a taste of those tangy bursts.

Step 7: Sprinkle the Nuts
If you’re adding nuts, now is the time to sprinkle chopped walnuts or pecans over the pears. This adds a wonderful crunch that contrasts nicely with the soft, baked fruit and creamy filling. As you layer the toppings, envision the warm, nutty flavor that will enhance your baked pears with goat cheese, honey, and cranberries.

Step 8: Drizzle with Honey
For an extra touch of sweetness and flavor, drizzle a little honey over the tops of the pears. The honey will caramelize slightly while baking, creating a beautiful glaze and enhancing the overall dish. This not only looks tempting but also promises a heavenly experience when you finally dig in.

Step 9: Bake the Pears
Cover the baking dish with aluminum foil and place it in the preheated oven. Bake for 25-30 minutes, or until the pears are tender but still maintain their shape. You’ll know they’re ready when they yield slightly to a fork while still holding their lovely form.

Step 10: Finish Baking Uncovered
Remove the foil during the last 5-10 minutes of baking to allow the tops of the pears to brown and become golden. This step enhances the visual appeal and adds a slight crisp to the edges, making the baked pears even more enticing as you prepare to serve them.

Step 11: Cool the Pears
Once done, take the baking dish out of the oven and let the pears cool for a few minutes. This brief resting period helps the flavors settle and makes handling easier when serving your gourmet dessert. You’ll be treated to the warm, inviting aroma as they cool.

Step 12: Garnish and Serve
Before serving, garnish your baked pears with fresh mint leaves for an extra pop of color and freshness. This final touch enhances the presentation of your baked pears with goat cheese, honey, and cranberries, making them as visually appealing as they are delicious. Enjoy the delightful combination of flavors!

Baked Pears with Goat Cheese, Honey, and Cranberries

Make Ahead Options

These Baked Pears with Goat Cheese, Honey, and Cranberries are perfect for meal prep enthusiasts! You can prepare the goat cheese mixture and fill the pear halves up to 24 hours in advance. Simply cover the filled pears tightly with plastic wrap and refrigerate to keep them fresh. When you’re ready to serve, just sprinkle the cranberries and nuts on top, drizzle with honey, and bake directly from the refrigerator. This time-saving approach not only allows you to enjoy a cozy dessert with minimal effort but also ensures the pears remain just as delicious and tender when baked. Perfect for busy weeknights or impromptu gatherings!

How to Store and Freeze Baked Pears with Goat Cheese, Honey, and Cranberries

Fridge: Store leftover baked pears in an airtight container for up to 3 days. This keeps them fresh, and the flavors meld beautifully overnight!

Freezer: If you want to keep them longer, freeze the baked pears individually wrapped in plastic wrap, then placed in a freezer-safe bag for up to 2 months.

Reheating: To reheat, simply thaw in the fridge overnight, then warm in the oven at 350°F (175°C) for about 10 minutes, until heated through. Enjoy your delicious Baked Pears with Goat Cheese, Honey, and Cranberries!

Serving Tips: You can serve the reheated pears with a drizzle of fresh honey or a scoop of ice cream for an indulgent treat.

What to Serve with Baked Pears with Goat Cheese, Honey, and Cranberries

Imagine enjoying a sweet and savory experience that perfectly complements the warm, tender pears dressed in creamy cheese and tart cranberries.

  • Creamy Mashed Potatoes: Their velvety texture provides a delightful contrast to the baked pears, making for a well-rounded meal.

  • Arugula Salad: The peppery crunch of arugula drizzled with a light vinaigrette adds brightness, cutting through the richness of the cheese. A refreshing choice that elevates the plate.

  • Roasted Brussels Sprouts: The caramelization of Brussels sprouts brings out their natural sweetness, pairing beautifully with the honey and cheese.

  • Quinoa Pilaf: This nutty grain dish mixed with herbs adds a wholesome element, providing a chewy texture that complements the softness of the pears.

  • Sparkling Apple Cider: A bubbly drink that captures the essence of fall, its crispness contrasts with the warm baked dish, creating a symphony of flavors.

  • Vanilla Ice Cream: A classic pairing—its creamy sweetness paired with the warm fruits is simply irresistible and perfect for dessert lovers!

Expert Tips for Baked Pears

Choose Ripe Pears: Ensure your pears are ripe yet firm to prevent them from becoming mushy during baking. Firmness helps keep their shape in your baked pears with goat cheese, honey, and cranberries.

Avoid Too Much Honey: While honey adds delightful sweetness, be cautious with the amount; excess can make the dish overly sweet. Start with less and adjust based on your preferences.

Mix It Well: Thoroughly combine the goat cheese mixture until smooth. This ensures even flavor distribution and a creamy texture that complements the pears perfectly.

Use Fresh Ingredients: Fresh cranberries bring vibrant tartness; if using dried, choose unsweetened for a better balance. Your baked pears will taste more delightful with fresh ingredients!

Watch the Baking Time: Keep an eye on your pears as they bake; overcooking can lead to mushiness. Check for tenderness while ensuring they maintain their lovely shape.

Baked Pears with Goat Cheese Variations

Feel free to get creative with your baked pears by adding your own personal touch, making this delightful recipe even more enjoyable.

  • Dairy-Free: Substitute goat cheese with dairy-free cheese alternatives for a vegan-friendly twist. Rich nut-based cheeses can add depth of flavor.

  • Sweetener Swap: Use maple syrup or agave nectar instead of honey to cater to different sweetness preferences. This provides a distinct flavor profile while keeping it sticky and sweet.

  • Nutty Crunch: Experiment with almond slivers or pistachios in place of walnuts or pecans for a different crunch. This changes the flavor and texture for a delightful surprise!

  • Fruitful Variants: Replace cranberries with slices of ripe figs or pomegranate seeds for a luxurious burst of flavor. These fruits deliver a unique sweetness that complements the pears beautifully.

  • Spice It Up: Add a pinch of cayenne or chili flakes to the goat cheese mixture for a sweet and spicy kick. This unexpected heat can really elevate the dish!

  • Herb Infusion: Toss in some fresh rosemary or thyme with the goat cheese for an aromatic twist. This adds an earthy depth that enhances the fruit flavors.

  • Citrus Burst: Mix in orange or lime zest into the cheese filling for a bright, zesty flavor. The citrus notes pair harmoniously with the sweetness of the pears.

  • Chocolate Drizzle: Top your baked pears with a warm dark chocolate drizzle before serving for an irresistible indulgence. This rich addition transforms the dish into a decadent dessert treat!

Whichever variation you choose, remember that the joy of cooking is all about exploring and discovering new favorites in your culinary journey. For more inspirations, check out these wonderful dessert ideas to complement your meal!

Baked Pears with Goat Cheese, Honey, and Cranberries

Baked Pears with Goat Cheese, Honey, and Cranberries Recipe FAQs

How do I choose ripe pears for baking?
Absolutely! When selecting pears, look for ones that yield slightly when pressed; this indicates ripeness. Avoid pears with dark spots all over, as this can signal overripeness or spoilage. Bartlett and Anjou pears are excellent choices for baking as they become wonderfully soft when cooked.

How should I store leftover baked pears?
Very! Store any leftover baked pears in an airtight container in the fridge for up to 3 days. This helps retain moisture and allows the flavors to meld beautifully overnight. If you plan to eat them later, just make sure to let them cool completely before sealing.

Can I freeze baked pears, and if so, how?
Certainly! To freeze your baked pears, first allow them to cool completely. Individually wrap each pear in plastic wrap, then place them in a freezer-safe bag. They can be stored this way for up to 2 months. When you're ready to enjoy, thaw them overnight in the fridge and reheat in the oven at 350°F (175°C) for about 10 minutes.

What if my pears are mushy after baking?
Oh no! If your pears turn mushy, it might be due to using overly ripe ones or baking them too long. To avoid this, make sure to choose firm but ripe pears and keep an eye on the baking time. Aim for just tender pears, and remember to use the fork test – they should yield slightly but maintain their shape.

Are there any dietary considerations for this dish?
Definitely! If you’re concerned about allergies, please note that goat cheese may contain lactose, so consider a lactose-free cheese if necessary. For vegetarian diets, this recipe is a hit since all the ingredients are plant-based. Additionally, keep in mind that cranberries can be tart; if you prefer sweeter options, go for dried cranberries instead. Enjoy these delightful Baked Pears with Goat Cheese, Honey, and Cranberries without worry!

Baked Pears with Goat Cheese, Honey, and Cranberries

Delicious Baked Pears with Goat Cheese, Honey, and Cranberries

A sophisticated dessert featuring ripe pears, creamy goat cheese, sweet honey, and tart cranberries.
Print Recipe Pin Recipe
Prep Time 15 minutes mins
Cook Time 30 minutes mins
Cooling Time 5 minutes mins
Total Time 50 minutes mins
Servings: 4 servings
Course: Dessert
Cuisine: American
Calories: 210
Ingredients Equipment Method Nutrition Notes

Ingredients
  

For the Pears
  • 4 ripe pears Choose pears that yield slightly when pressed.
For the Cheesecake Filling
  • 4 ounces goat cheese Soften for easy mixing.
  • ¼ cup honey Natural sweetness to balance flavors.
  • 1 tablespoon fresh lemon juice Adds zesty brightness.
  • 1 teaspoon ground cinnamon Brings warmth to the dish.
  • ¼ teaspoon nutmeg Optional, for added warmth.
For the Toppings
  • ½ cup fresh cranberries Tartness balances sweetness.
  • ¼ cup chopped walnuts or pecans Optional, for crunch.
  • Fresh mint leaves for garnish Optional, for freshness.

Equipment

  • Baking Dish
  • Mixing Bowl
  • Spoon or spatula

Method
 

Step-by-Step Instructions
  1. Preheat your oven to 350°F (175°C).
  2. Lightly grease a baking dish with cooking spray or butter.
  3. In a mixing bowl, combine goat cheese, honey, lemon juice, cinnamon, and nutmeg.
  4. Cut the pears in half and remove the cores; place cut-side up in the baking dish.
  5. Fill each pear half with the goat cheese mixture.
  6. Scatter cranberries over the filled pear halves.
  7. If using, sprinkle nuts over the pears.
  8. Drizzle honey over the tops of the pears.
  9. Cover with aluminum foil and bake for 25-30 minutes.
  10. Remove foil during the last 5-10 minutes of baking to brown the tops.
  11. Allow pears to cool for a few minutes before serving.
  12. Garnish with fresh mint leaves before serving.

Nutrition

Serving: 1pear halfCalories: 210kcalCarbohydrates: 32gProtein: 4gFat: 9gSaturated Fat: 5gPolyunsaturated Fat: 1gMonounsaturated Fat: 3gCholesterol: 15mgSodium: 50mgPotassium: 180mgFiber: 3gSugar: 19gVitamin A: 400IUVitamin C: 7mgCalcium: 50mgIron: 0.5mg

Notes

Serve warm or at room temperature. Consider pairing with vanilla ice cream.

Tried this recipe?

Let us know how it was!

Delicious BLT Wraps With Sauce for a Flavorful Twist

December 16, 2025 by grace bellamy Leave a Comment

As I stood in my kitchen, a delicious aroma wafted through the air, instantly transporting me to a summer picnic with friends. That’s the magic of these BLT Wraps With Secret Sauce—each bite captures the essence of classic comfort while offering a fresh twist. With just 30 minutes of your time, you can whip up a satisfying meal that’s not only easy to prepare but also a guaranteed crowd-pleaser. These wraps are perfect for those busy weeknights or a fun weekend lunch, and the secret sauce ties everything together, elevating the usual bacon, lettuce, and tomato into something extraordinary. Ready to discover your new favorite recipe? Let's roll up those tortillas!

Blt Wraps With Sauce

Why are BLT Wraps with Sauce a Must-Try?

Flavor Explosion: The addition of the secret sauce elevates the classic BLT to new heights, blending creamy, tangy, and sweet notes in every bite.

Quick and Easy: With only 30 minutes from prep to plate, these wraps are perfect for hectic weeknights or a delightful lunch.

Crowd-Pleasing Appeal: Both kids and adults will rave about these delicious wraps, making them an ideal choice for gatherings or family meals.

Versatile Ingredients: Feel free to mix and match veggies or use different proteins to suit your taste—turkey or chicken can be delightful substitutes!

Fresh and Healthy: With ingredients like romaine lettuce, avocado, and tomatoes, these wraps offer a satisfying crunch and nutrients, keeping your meals wholesome.

For more exciting variations, check out our recipe for Chicken Caesar Wraps that can also add some flair to your lunch rotation!

BLT Wraps With Sauce Ingredients

• Discover what makes these wraps delightful!

For the Wraps

  • Flour tortillas – Use large ones for enough filling and easy rolling.
  • Bacon – Adds that irresistible crunch and savory flavor, a must for classic BLT wraps.
  • Romaine lettuce – Offers a fresh, crisp texture, balancing the richness of the bacon.
  • Tomato – A juicy addition that brings brightness and moisture to each bite.
  • Avocado – Provides creaminess and healthy fats, making the wraps extra satisfying.

For the Secret Sauce

  • Mayonnaise – The base for creaminess; consider using light mayo for a healthier option.
  • Greek yogurt – Adds tang and thickens the sauce without extra calories.
  • Dijon mustard – Contributes a hint of sharpness that elevates the overall flavor.
  • Honey – Balances the acidity with a touch of sweetness.
  • Garlic powder – Brings depth and warmth; use fresh garlic for an extra punch.
  • Onion powder – Enhances flavor without the bite of raw onions.
  • Salt and pepper – Essential for seasoning; adjust to your taste to make those flavors pop!

Enjoy customizing these BLT wraps with sauce to fit your preferences; they're bound to be a hit!

Step‑by‑Step Instructions for Blt Wraps With Sauce

Step 1: Prepare the Secret Sauce
In a mixing bowl, combine ½ cup of mayonnaise, 2 tablespoons of Greek yogurt, 1 tablespoon of Dijon mustard, 1 tablespoon of honey, 1 teaspoon of garlic powder, and 1 teaspoon of onion powder. Season with a sprinkle of salt and pepper, then whisk the mixture until it's smooth and well incorporated. Set the sauce aside as you start preparing the other ingredients for the BLT wraps.

Step 2: Cook the Bacon
Heat a large skillet over medium heat. Add the 8 ounces of crumbled bacon and cook for about 6-8 minutes, or until the bacon is crispy and golden brown. Keep an eye on it to prevent burning, adjusting the heat as necessary. Once done, remove the bacon from the skillet and place it on a plate lined with paper towels to drain excess grease.

Step 3: Warm the Tortillas
While the bacon cools, take your flour tortillas and warm them. You can either heat them in a dry skillet over low heat for about 1-2 minutes per side or microwave them for 15-20 seconds until pliable. Keeping the tortillas warm will make it easier to roll the BLT wraps with sauce without tearing.

Step 4: Assemble the Wraps
Spread a generous layer of the secret sauce you've prepared on each tortilla. Be sure to cover the surface entirely, allowing the sauce to enhance the flavors of the ingredients. This is the foundation of your delicious BLT wraps with sauce, elevating the taste to new heights.

Step 5: Layer the Vegetables
Next, evenly sprinkle a handful of chopped romaine lettuce over the sauce on each tortilla. Follow this with a layer of diced tomato and a few slices of avocado. Ensure that you distribute the ingredients evenly, so each bite of your BLT wraps has a burst of flavor and texture.

Step 6: Add the Bacon
Now, take the crispy crumbled bacon and sprinkle it generously over the vegetables in each tortilla. The savory crunch of the bacon is crucial to the classic BLT experience. Make sure every wrap gets a good amount of bacon goodness for that unforgettable taste.

Step 7: Roll the Tortillas
Begin rolling each tortilla tightly from the bottom, folding in the sides as you go to secure the filling. This method will help keep all the delicious ingredients inside. Roll until completely closed, ensuring that the wrap holds its shape. Repeat this process for the remaining tortillas to complete your BLT wraps with sauce.

Step 8: Slice and Serve
For easier handling, cut each wrap in half diagonally. You can serve them whole if you prefer, but slicing gives a better presentation and makes them simpler to enjoy. Accompany your wraps with extra secret sauce on the side for dipping to enhance the flavor in every bite.

Blt Wraps With Sauce

Variations & Substitutions for Blt Wraps With Sauce

Embrace your culinary creativity and customize these wraps to fit your mood and taste!

  • Whole Wheat Tortillas: Swap regular flour tortillas for whole wheat to add a nutty flavor and extra fiber.
  • Turkey Bacon: For a leaner option, substitute bacon with turkey bacon; it infuses a savory quality while staying lighter.
  • Spicy Kick: Add sliced jalapeños or a dash of hot sauce to the secret sauce for a delightful heat that complements the creamy balance.
  • Vegetarian Delight: Replace bacon with crispy chickpeas or roasted vegetables for a delicious vegetarian twist that’s packed with flavor.
  • Herbaceous Freshness: Incorporate fresh herbs like basil or cilantro into the filling for an aromatic touch that brightens each bite.

Imagine biting into a wrap bursting with vibrant colors and flavors; your taste buds will thank you!

  • Avocado Variations: Try using guacamole instead of sliced avocado for a creamy texture and zesty flair—it’s a game changer!
  • Crunchy Additions: Toss in some crunchy veggies like cucumber or bell peppers for added texture and freshness—it's a fantastic way to kick up the crunch factor.

These wraps are incredibly adaptable! For more delightful ideas, check out our recipe for Healthy Turkey Wraps that can inspire a wholesome lunch option you’ll love!

Expert Tips for BLT Wraps With Sauce

  • Choose Fresh Ingredients: Always opt for fresh produce; ripe tomatoes and avocados will elevate your BLT wraps with sauce's flavor and texture.

  • Crisp Bacon Is Key: Ensure your bacon is crispy before adding it to the wraps; soggy bacon can detract from the overall enjoyment.

  • Warm Tortillas Properly: Heat your flour tortillas just enough to make them pliable. Overheating can cause them to tear when rolling.

  • Layer Wisely: Spread the secret sauce evenly and layer vegetables without overstuffing the tortilla, which could lead to messy wraps.

  • Customize Your Wraps: Feel free to swap or add ingredients like cooked chicken or different greens to make your BLT wraps with sauce uniquely yours!

Make Ahead Options

These BLT Wraps With Secret Sauce are a fantastic choice for meal prep, allowing you to save precious time during busy weeknights! You can prepare the secret sauce up to 24 hours in advance—simply store it in an airtight container in the refrigerator to maintain its freshness. For the wraps, assemble the tortillas with all the fillings (bacon, lettuce, tomato, and avocado) but hold off on rolling them until just before serving. This method helps prevent any sogginess, keeping your wraps crisp. Once you're ready to dine, roll them up, slice, and enjoy that delicious burst of flavor just as fresh as if they were made right away!

How to Store and Freeze BLT Wraps With Sauce

Fridge: Store wrapped BLT wraps with sauce in an airtight container to keep them fresh for up to 2-3 days. Enjoy them within this timeframe for the best texture and flavor.

Freezer: If you want to store them longer, wrap each BLT wrap tightly in plastic wrap, then place in a freezer bag. They can be frozen for up to 2 months.

Reheating: For best results, reheat thawed wraps in the microwave for about 30 seconds or in a warm skillet until heated through. Add fresh veggies after reheating for added crunch!

Enjoy Immediately: While they can last in the fridge and freezer, these wraps are best enjoyed fresh. Don't hesitate to whip up a new batch if you're craving that perfect combination!

What to Serve with BLT Wraps With Secret Sauce?

Enjoy your wraps alongside these delightful pairings that enhance your meal experience!

  • Sweet Potato Fries: Their crispy texture and natural sweetness complement the savory bacon beautifully, creating a satisfying contrast.

  • Classic Coleslaw: Crunchy and tangy, coleslaw adds a refreshing bite that balances the richness of the BLT wraps with sauce.

  • Fresh Fruit Salad: A medley of seasonal fruits brings a burst of flavor and natural sweetness, perfectly offsetting the savory wraps.

  • Corn on the Cob: This summer favorite offers a juicy, sweet crunch that pairs wonderfully with the flavors of the wraps.

  • Garlic Butter Green Beans: Tender green beans sautéed in garlic and butter provide an elegant touch, enhancing the overall meal with their vibrant color.

  • Zesty Lemonade: A glass of chilled lemonade adds a refreshing citrus kick, brightening up each bite of your delicious wraps.

Creating the perfect meal is about balance, and these pairings will elevate your BLT wraps to new delicious heights!

Blt Wraps With Sauce

BLT Wraps With Sauce Recipe FAQs

How do I choose the best ingredients for my BLT wraps?
Absolutely! When selecting ingredients, look for fresh, ripe tomatoes and avocados, as they will enhance the flavor of your BLT wraps with sauce. Make sure your romaine lettuce is crisp and free from brown spots. For bacon, choose thick-cut varieties for optimal crunch.

How should I store leftover BLT wraps, and how long do they last?
To keep your wraps fresh, store them in an airtight container in the refrigerator. They can last for up to 2-3 days, but I recommend enjoying them sooner for the best taste and texture.

Can I freeze my BLT wraps, and how do I do it correctly?
Very! You can freeze your BLT wraps by individually wrapping each one in plastic wrap before placing them in a freezer bag. They can last up to 2 months in the freezer. To reheat, simply thaw them overnight in the fridge, then microwave for about 30 seconds or heat in a skillet until warmed through.

What should I do if my wrap is falling apart?
If you're having trouble with your BLT wraps with sauce falling apart, try layering your fillings strategically. Start with a layer of secret sauce, followed by lettuce, then add the drier ingredients like bacon and tomatoes last. Rolling tightly from the bottom, while folding in the sides as you go, can also help secure everything inside.

Are there any dietary considerations for making BLT wraps?
Certainly! If you or your guests have dietary restrictions, feel free to swap out bacon for turkey or a plant-based alternative. Use gluten-free wraps for those with gluten sensitivities. Always double-check ingredient labels on sauces and toppings for potential allergens like eggs or dairy, ensuring everyone's safe to enjoy these delicious wraps!

Blt Wraps With Sauce

Delicious BLT Wraps With Sauce for a Flavorful Twist

These BLT Wraps With Sauce offer a delightful twist on a classic sandwich, perfect for busy weeknights or fun lunches.
Print Recipe Pin Recipe
Prep Time 15 minutes mins
Cook Time 15 minutes mins
Total Time 30 minutes mins
Servings: 4 wraps
Course: Sandwiches
Cuisine: American
Calories: 350
Ingredients Equipment Method Nutrition Notes

Ingredients
  

For the Wraps
  • 4 large Flour tortillas For enough filling and easy rolling.
  • 8 ounces Bacon Crumble before cooking.
  • 1 cup Romaine lettuce Chopped.
  • 1 medium Tomato Diced.
  • 1 medium Avocado Sliced.
For the Secret Sauce
  • ½ cup Mayonnaise Use light mayo for a healthier option.
  • 2 tablespoons Greek yogurt Adds tang.
  • 1 tablespoon Dijon mustard
  • 1 tablespoon Honey
  • 1 teaspoon Garlic powder Or fresh garlic for more flavor.
  • 1 teaspoon Onion powder
  • to taste Salt
  • to taste Pepper

Equipment

  • skillet
  • Mixing Bowl
  • Whisk
  • serving plate

Method
 

Step-by-Step Instructions for Blt Wraps With Sauce
  1. In a mixing bowl, combine mayonnaise, Greek yogurt, Dijon mustard, honey, garlic powder, and onion powder. Season with salt and pepper and whisk until smooth.
  2. Heat a large skillet over medium heat. Add the crumbled bacon and cook for about 6-8 minutes until crispy. Drain on paper towels.
  3. Warm the flour tortillas in a dry skillet or microwave until pliable.
  4. Spread a layer of secret sauce on each tortilla.
  5. Sprinkle chopped romaine lettuce, diced tomato, and slices of avocado over the sauce.
  6. Add the crispy bacon on top of the vegetables.
  7. Roll each tortilla tightly, folding in the sides as you go.
  8. Slice each wrap in half diagonally and serve with extra sauce on the side.

Nutrition

Serving: 1wrapCalories: 350kcalCarbohydrates: 30gProtein: 15gFat: 20gSaturated Fat: 5gPolyunsaturated Fat: 3gMonounsaturated Fat: 10gCholesterol: 30mgSodium: 600mgPotassium: 300mgFiber: 4gSugar: 2gVitamin A: 720IUVitamin C: 10mgCalcium: 50mgIron: 1.5mg

Notes

Customize these wraps by adding different proteins or veggies to suit your taste.

Tried this recipe?

Let us know how it was!

Crunchy Apple Carrot Salad with Creamy Citrus Dressing Delight

December 15, 2025 by grace bellamy Leave a Comment

As I tossed fresh carrots, crisp apples, and vibrant red cabbage together for my Crunchy Apple Carrot Salad with Creamy Citrus Dressing, a wave of nostalgia washed over me—a reminder of family gatherings and sunny picnics. This delightful salad isn’t just a feast for the eyes; it’s a perfect blend of textures and flavors that ensures your taste buds will be tantalized with every bite. One of the best parts? It's a breeze to whip up, taking only 30 minutes from start to finish, making it an ideal choice for both busy weeknights and impromptu gatherings. Plus, this powerhouse dish is not only delicious but also packed with nutrients, making it a guilt-free indulgence. So, are you ready to discover the secret to elevating your side dishes with a splash of citrusy goodness?

Crunchy Apple Carrot Salad with Creamy Citrus Dressing

What makes this salad a must-try?

Vibrant, Fresh Ingredients: The combination of crunchy apples and grated carrots creates a refreshing, colorful dish that excites the palate.
Creamy Citrus Dressing: This salad features a zesty, creamy dressing that enhances the natural flavors and brings balance to the crunch.
Quick to Prepare: With just 30 minutes from prep to plate, it’s the ideal solution for busy days or surprise guests.
Nutritional Powerhouse: Packed with vitamins and antioxidants, this salad is a healthy choice for any meal.
Versatile and Adaptable: Swap in your favorite nuts or dried fruits for a personalized touch, making it perfect for any gathering or season.

Elevate your cooking game and delight your family with this irresistible Crunchy Apple Carrot Salad with Creamy Citrus Dressing!

Crunchy Apple Carrot Salad Ingredients

For the Salad
• Carrots – 2 large, peeled and grated for a sweet crunch.
• Apples – 2 medium (like Granny Smith or Honeycrisp), cored and diced for tartness and sweetness.
• Red Cabbage – 1 cup, finely shredded to add color and a satisfying crunch.
• Raisins/Dried Cranberries – ½ cup to introduce a chewy sweetness.
• Walnuts/Pecans – ½ cup, chopped for nutty flavor and added texture.
• Fresh Parsley – ¼ cup, chopped for a pop of freshness.

For the Creamy Dressing
• Plain Greek Yogurt – ¼ cup for a creamy base with added protein.
• Mayonnaise – ¼ cup to enhance the dressing’s richness.
• Fresh Orange Juice – 2 tablespoons for a zesty citrus kick.
• Lemon Juice – 1 tablespoon to brighten the flavors.
• Honey – 1 teaspoon (or to taste) to balance the dressing's tartness.
• Salt and Pepper – to taste, ensuring all flavors shine through.

Get ready to prepare a delightful Crunchy Apple Carrot Salad with Creamy Citrus Dressing that is bursting with flavor and nutrition!

Step‑by‑Step Instructions for Crunchy Apple Carrot Salad with Creamy Citrus Dressing

Step 1: Prepare the Carrots
Peel the two large carrots and grate them using a box grater or a food processor. Place the grated carrots into a large mixing bowl, ensuring they are fluffy and well-separated. This step is crucial for the texture of the Crunchy Apple Carrot Salad with Creamy Citrus Dressing, providing that sweet crunch that you’ll love.

Step 2: Chop the Apples
Core the two medium apples and chop them into small, bite-sized pieces, aiming for a uniform size for even texture. Add the diced apples directly into the bowl with the carrots to prevent any browning. The crisp apples will not only enhance the salad's flavor but also add a refreshing sweetness that complements the other ingredients.

Step 3: Shred the Cabbage
Finely shred one cup of red cabbage using a sharp knife or a mandoline for even slices. Once shredded, add the cabbage to the bowl along with the carrots and apples. This addition will introduce a vibrant color and a satisfying crunch to your salad, making the Crunchy Apple Carrot Salad not just tasty, but also visually appealing.

Step 4: Add Dried Fruits and Nuts
Stir in the ½ cup of raisins or dried cranberries along with the ½ cup of chopped walnuts or pecans into the mixing bowl. These ingredients bring a chewy sweetness and nutty depth, creating a delightful contrast in textures. Give everything a gentle toss to ensure the fruits and nuts are evenly distributed across the salad.

Step 5: Prepare the Creamy Dressing
In a separate small bowl, whisk together the ¼ cup of plain Greek yogurt, ¼ cup of mayonnaise, 2 tablespoons of fresh orange juice, 1 tablespoon of lemon juice, and 1 teaspoon of honey until smooth and creamy. This dressing will be the star of the Crunchy Apple Carrot Salad, amplifying the flavors with its zesty and rich profile.

Step 6: Combine Salad and Dressing
Pour the creamy dressing over the salad mixture in the large bowl. Gently toss everything together using tongs or a large spoon until all components are evenly coated with the dressing. This step is vital to achieving the perfect blend of flavors in your Crunchy Apple Carrot Salad with Creamy Citrus Dressing.

Step 7: Adjust Seasoning
Taste the salad and adjust the seasoning by adding more salt, pepper, or honey if needed, giving it a flavorful balance. This step will ensure that each bite of the Crunchy Apple Carrot Salad hits all the right notes for your palate, making it a delightful dish for you and your guests.

Step 8: Chill Before Serving
If time allows, cover the salad and refrigerate it for about 15 minutes before serving. This resting time will allow the flavors to meld beautifully, enhancing the taste of your Crunchy Apple Carrot Salad with Creamy Citrus Dressing. A chilled salad is refreshing and perfect for warm days!

Step 9: Serve and Garnish
When you're ready to serve, dish out the salad either chilled or at room temperature. Add a sprinkle of additional chopped nuts or parsley on top for an elegant touch. This final flourish makes the Crunchy Apple Carrot Salad both inviting and appetizing, ready to impress at any gathering.

Crunchy Apple Carrot Salad with Creamy Citrus Dressing

How to Store and Freeze Crunchy Apple Carrot Salad

Fridge: Store the salad in an airtight container in the refrigerator for up to 3 days. This keeps the ingredients fresh and crunchy, ensuring each bite is delightful.

Freezer: It's best not to freeze the Crunchy Apple Carrot Salad due to the textures involved, especially the apples and carrots, which may become mushy upon thawing.

Reheating: This salad is meant to be enjoyed cold or at room temperature. If it’s been chilled, simply toss it again before serving. Enjoy the refreshing flavors!

Crunchy Apple Carrot Salad with Creamy Citrus Dressing Variations

Feel free to get creative and tailor this delightful salad to your taste and dietary needs!

  • Nut-Free: Substitute the walnuts or pecans with sunflower seeds or omit nuts entirely for those with allergies.
    This swap maintains the crunch while keeping your salad allergy-friendly. You’ll still enjoy that satisfying texture!

  • Vegan Delight: Use plant-based yogurt and mayonnaise instead of traditional dairy for a vegan version.
    Both alternatives offer a creamy base and ensure everyone can join in on the deliciousness of this salad.

  • Fruit Alternatives: Swap apples for pears or even diced mango for a tropical twist.
    This will bring a new layer of sweetness and freshness. Imagine savoring every bite packed with different fruity flavors!

  • Spicy Kick: Add finely chopped jalapeños or a pinch of cayenne pepper for a surprising heat.
    The combination of flavors will awaken your taste buds and add an exciting punch to the crunch!

  • Crunchy Texture: Incorporate crispy chickpeas or toasted quinoa for an extra crunch.
    These additions elevate the texture experience, transforming your salad into a textural masterpiece.

  • Herb Infusion: Try using fresh mint or cilantro in place of parsley to change the flavor profile.
    These herbs add a refreshing burst that beautifully complements the other ingredients, making each bite memorable.

  • Dressing Variations: Replace the honey with maple syrup or agave for a different sweet note in the dressing.
    Experimentation is key! Each choice brings its unique sweetness, adding a personal touch to the creamy dressing.

  • Heating Up: Toss in some spicy roasted vegetables like bell peppers or zucchini for a warm salad option.
    The heat will create a cozy dish perfect for gatherings—imagine serving it up with a smile on chilly evenings!

Remember, the possibilities are endless! Feel free to explore and make this salad your very own masterpiece, just like trying one of my best comforting soups!

What to Serve with Crunchy Apple Carrot Salad with Creamy Citrus Dressing

Add a burst of flavor and color to your meal with these delightful pairings that elevate your dining experience!

  • Grilled Chicken: Juicy, well-seasoned chicken complements the crunch of the salad, creating a satisfying contrast. Serve it warm for a delightful warmth against the crispness of the salad.

  • Quinoa Pilaf: This nutty, fluffy dish provides a lovely texture, while its earthy flavors harmonize beautifully with the zesty salad. A scoop of quinoa makes your meal hearty and nutritious.

  • Garlic Bread: Crispy, buttery garlic bread adds a comforting touch. The rich flavors of the bread balance the salad's brightness, creating a perfect side for family gatherings.

  • Roasted Vegetables: Sweet, caramelized veggies like carrots and bell peppers boost the salinity and sweetness, enriching your meal with their roasted allure. Their rustic charm invites you to enjoy the fresh salad even more.

  • Fruit Smoothie: A refreshing, fruity smoothie could brighten your table and serve as a lovely palate cleanser. Consider a mix of berries and banana, which will resonate with the fruity notes in the salad.

  • Lemon Sorbet: For dessert, a light lemon sorbet can charm your guests with a refreshing end to the meal. Its citrus brightness mirrors the salad’s creamy dressing, offering delightful cohesion.

  • Herbal Iced Tea: Serve a cool cup of herbal iced tea, with a hint of mint, to enhance the fresh flavors of the salad while providing a soothing accompaniment on warm days.

These pairings not only bring balanced textures but also accentuate the vibrant flavors of the Crunchy Apple Carrot Salad with Creamy Citrus Dressing, making your meal a memorable experience!

Make Ahead Options

These Crunchy Apple Carrot Salad with Creamy Citrus Dressing is perfect for meal prep, allowing you to save time during busy weekdays! You can prepare the salad components, such as grating the carrots, chopping the apples, and shredding the cabbage, up to 24 hours in advance. Simply store these ingredients in airtight containers in the refrigerator to maintain freshness. The dressing can also be made ahead and stored separately for up to 3 days. When you’re ready to enjoy, just combine everything, give it a gentle toss, and adjust the seasoning if necessary before serving. This way, you’ll have a vibrant, delicious salad that tastes just as fresh as when you first made it!

Tips for the Best Crunchy Apple Carrot Salad

Keep Apples Fresh: Add chopped apples to the carrot mixture immediately to prevent browning. It keeps your Crunchy Apple Carrot Salad vibrant and appealing.

Perfectly Shredded Cabbage: Use a sharp knife or mandoline for fine red cabbage shreds, which add both texture and color. A rough cut can make the salad less enjoyable.

Dress Right Before Serving: Dress the salad just before serving to maintain the crispness of the ingredients. If prepped in advance, try to chill the salad separately without the dressing.

Adjust Sweetness as Needed: Taste as you go! If the dressing is too tart, add a little extra honey until you find your perfect balance for the Crunchy Apple Carrot Salad.

Experiment with Variations: Feel free to swap out nuts or dried fruits based on your preferences or what's on hand; you can create endless versions of this refreshing salad.

Crunchy Apple Carrot Salad with Creamy Citrus Dressing

Crunchy Apple Carrot Salad with Creamy Citrus Dressing Recipe FAQs

How do I select the best apples for this salad?
Absolutely! When choosing apples, opt for varieties like Granny Smith or Honeycrisp, which bring a nice balance of sweetness and tartness. Look for firm apples with smooth skin and no visible bruising. If you're unsure, give them a gentle squeeze—if they feel hard to the touch, they’re perfect for your Crunchy Apple Carrot Salad with Creamy Citrus Dressing.

How should I store leftovers of the Crunchy Apple Carrot Salad?
Store any leftovers in an airtight container in the refrigerator for up to 3 days. To maintain the salad's crispness, try to layer the ingredients carefully so that wet items don’t sit on drier ones. If possible, keep the dressing separate and add it just before serving.

Can I freeze the Crunchy Apple Carrot Salad?
I recommend against freezing this salad. Freezing can affect the texture of the crunchy carrots and apples, causing them to become mushy when thawed. Instead, aim to make this salad fresh to relish its delightful crunchiness!

What if I have allergies to nuts?
No worries! You can easily substitute the walnuts or pecans with sunflower seeds or pumpkin seeds for a nut-free version. This will still provide that delightful crunch and keep your Crunchy Apple Carrot Salad with Creamy Citrus Dressing both safe and enjoyable.

How do I ensure the salad doesn’t brown after prep?
To prevent the apples from browning, always add them to the bowl with grated carrots immediately after chopping. You can also toss them with a little lemon juice to keep them vibrant for a longer time. This technique helps maintain that fresh appeal in your Crunchy Apple Carrot Salad, perfect for gatherings!

Crunchy Apple Carrot Salad with Creamy Citrus Dressing

Crunchy Apple Carrot Salad with Creamy Citrus Dressing Delight

This Crunchy Apple Carrot Salad with Creamy Citrus Dressing is a refreshing blend of textures and flavors, perfect for any gathering.
Print Recipe Pin Recipe
Prep Time 30 minutes mins
Chill Time 15 minutes mins
Total Time 45 minutes mins
Servings: 4 servings
Course: Salad
Cuisine: American
Calories: 180
Ingredients Equipment Method Nutrition Notes

Ingredients
  

For the Salad
  • 2 large Carrots peeled and grated
  • 2 medium Apples cored and diced
  • 1 cup Red Cabbage finely shredded
  • ½ cup Raisins/Dried Cranberries
  • ½ cup Walnuts/Pecans chopped
  • ¼ cup Fresh Parsley chopped
For the Creamy Dressing
  • ¼ cup Plain Greek Yogurt for creaminess
  • ¼ cup Mayonnaise for richness
  • 2 tablespoons Fresh Orange Juice for citrus kick
  • 1 tablespoon Lemon Juice to brighten flavors
  • 1 teaspoon Honey or to taste
  • Salt to taste
  • Pepper to taste

Equipment

  • Mixing Bowl
  • box grater
  • sharp knife
  • mandoline
  • Whisk

Method
 

Step-by-Step Instructions
  1. Peel the two large carrots and grate them using a box grater or a food processor. Place the grated carrots into a large mixing bowl.
  2. Core the two medium apples and chop them into small, bite-sized pieces. Add the diced apples directly into the bowl with the carrots.
  3. Finely shred one cup of red cabbage and add it to the bowl along with the carrots and apples.
  4. Stir in the ½ cup of raisins or dried cranberries along with the ½ cup of chopped walnuts or pecans into the mixing bowl.
  5. In a separate small bowl, whisk together the ¼ cup of plain Greek yogurt, ¼ cup of mayonnaise, 2 tablespoons of fresh orange juice, 1 tablespoon of lemon juice, and 1 teaspoon of honey until smooth.
  6. Pour the creamy dressing over the salad mixture in the large bowl and gently toss everything together.
  7. Taste the salad and adjust the seasoning by adding more salt, pepper, or honey if needed.
  8. If time allows, cover the salad and refrigerate it for about 15 minutes before serving.
  9. When you're ready to serve, dish out the salad either chilled or at room temperature, adding a sprinkle of chopped nuts or parsley on top.

Nutrition

Serving: 1cupCalories: 180kcalCarbohydrates: 25gProtein: 4gFat: 8gSaturated Fat: 1gPolyunsaturated Fat: 3gMonounsaturated Fat: 4gCholesterol: 5mgSodium: 150mgPotassium: 300mgFiber: 4gSugar: 8gVitamin A: 180IUVitamin C: 15mgCalcium: 4mgIron: 6mg

Notes

To maintain the freshness of the salad, dress it just before serving. Feel free to customize with your favorite nuts or dried fruits.

Tried this recipe?

Let us know how it was!

Decadent Spiced Gingerbread Truffles with Chocolate Bliss

December 15, 2025 by grace bellamy Leave a Comment

The moment I unwrapped that gingerbread cookie at a holiday party, a delicious memory washed over me. I couldn’t help but think of how lovely it would be to bring those cozy spices into something a bit more indulgent. Enter my Decadent Spiced Gingerbread Truffles with Creamy Chocolate Coating! These delightful bites combine the warm, familiar flavors of gingerbread with a rich, creamy finish that can turn any gathering into a festive occasion. They’re not just a treat; they’re a conversation starter and a perfect way to impress your friends. Plus, with just 30 minutes of prep and a touch of refrigeration, they're a simple yet elegant addition to your dessert table. Ready to make the holidays—or any day—a little sweeter? Let's dive into this cozy, mouthwatering recipe!

Decadent Spiced Gingerbread Truffles with Creamy Chocolate Coating

Why Are These Gingerbread Truffles Irresistible?

Decadent flavors come together in these truffles, where rich chocolate meets the warm spices of gingerbread. Simplicity at its best means you’ll only need about an hour to whip up a batch that will impress any guest. Versatile delights like these can be enjoyed during holidays or as an everyday treat. Perfect for sharing, they're bound to become the highlight of your next gathering. For more chocolate inspirations, check out my Ultimate Chocolate Treats Collection!

Decadent Spiced Gingerbread Truffles Ingredients

Get ready to delight your taste buds with these rich, festive flavors!

For the Truffles

  • Gingerbread cookies – 1 cup finely crushed for that unmistakable spiced flavor in every bite.
  • Cream cheese – ½ cup softened to create a smooth and creamy filling.
  • Powdered sugar – ¼ cup for added sweetness without any grittiness.
  • Ground ginger – 1 teaspoon gives a warm kick that defines gingerbread.
  • Ground cinnamon – 1 teaspoon brings warmth and depth to the truffle mixture.
  • Ground nutmeg – ¼ teaspoon adds a cozy, aromatic essence.
  • Ground cloves – ¼ teaspoon introduces a slightly sweet, spicy touch.
  • Molasses – 1 tablespoon enhances the rich, deep flavors of classic gingerbread.
  • Vanilla extract – 1 teaspoon for a hint of sweetness and warmth that binds all the flavors together.

For the Chocolate Coating

  • Semisweet chocolate – 8 ounces chopped for a luscious, creamy coating that perfectly complements the truffles.
  • Coconut oil (optional) – 1 tablespoon keeps the chocolate coating smooth and glossy for an elegant finish.

For Rolling

  • Extra crushed gingerbread cookies (optional) – sprinkle on top for added texture and flavor after dipping.
  • Cocoa powder (optional) – for a classic elegant touch to roll your truffles in, offering a bittersweet contrast.

These Decadent Spiced Gingerbread Truffles with Creamy Chocolate Coating are sure to become a holiday favorite!

Step‑by‑Step Instructions for Decadent Spiced Gingerbread Truffles with Creamy Chocolate Coating

Step 1: Prepare the Gingerbread Crumbs
Start by finely crushing the gingerbread cookies to create a flavorful base for your truffles. Use a food processor for a quick and even texture, or place the cookies in a zip-top bag and crush them with a rolling pin until you have fine crumbs. This step should take about 5 minutes.

Step 2: Mix the Cream Cheese and Crumbs
In a medium mixing bowl, combine the finely crushed gingerbread cookies with the softened cream cheese. Using a spatula or fork, blend these ingredients together until well incorporated and smooth, creating a rich base for your decadent spiced gingerbread truffles. This mixing should take another 5 minutes.

Step 3: Add the Flavorful Spices
To your creamy gingerbread mixture, add the powdered sugar, ground ginger, ground cinnamon, ground nutmeg, ground cloves, molasses, and vanilla extract. Stir continuously until all ingredients are well combined, resulting in a smooth and fragrant mixture. This will take about 3–5 minutes, so be sure to incorporate fully for maximum flavor.

Step 4: Chill the Mixture
Cover the bowl with plastic wrap and place it in the refrigerator for about 30 minutes. This chilling time is crucial, as it allows the mixture to firm up, making it easier to roll into truffle shapes later. Keep an eye on the consistency; it should be slightly firm but malleable.

Step 5: Form the Truffles
Once chilled, take the mixture out of the fridge. Using a cookie scoop or your hands, portion the mixture into balls that are about 1 inch in diameter. Place each truffle onto a parchment-lined baking sheet, providing enough space in between to avoid sticking. This step should take roughly 10 minutes.

Step 6: Prepare the Chocolate Coating
In a microwave-safe bowl, combine the chopped semisweet chocolate and coconut oil (if using) for a smoother coating. Microwave the mixture in 30-second intervals, stirring in between until the chocolate is melted and glossy. This process should take about 1–2 minutes, but be careful not to overheat the chocolate.

Step 7: Dip the Truffles
Using a fork or toothpick, dip each chilled truffle into the melted chocolate, ensuring it's fully coated. Allow any excess chocolate to drip off before placing the truffles back onto the parchment-lined baking sheet. This step may take another 10 minutes, and don’t rush it—make sure each truffle is beautifully coated.

Step 8: Add Optional Toppings
If desired, before the chocolate sets, sprinkle the tops of the coated truffles with extra crushed gingerbread cookies or a dusting of cocoa powder for a lovely finishing touch. This adds both texture and flavor to your decadent spiced gingerbread truffles.

Step 9: Chill to Set
Return the coated truffles to the refrigerator for about 30 minutes to allow the chocolate shell to harden completely. This will ensure that each truffle has a perfect coating when you’re ready to serve or enjoy them yourself.

Step 10: Store the Truffles
Once the chocolate has set, store your decadent spiced gingerbread truffles in an airtight container in the refrigerator. They will stay fresh for up to a week, making them a delightful treat for any occasion!

Decadent Spiced Gingerbread Truffles with Creamy Chocolate Coating

Make Ahead Options

These Decadent Spiced Gingerbread Truffles with Creamy Chocolate Coating are perfect for those busy weeks when you need to save time! You can prepare the truffle mixture up to 24 hours in advance; simply mix everything and refrigerate it in an airtight container. Portion and roll the truffles into balls the day before serving, and refrigerate them again for a firmer texture. For the best chocolate coating, melt the chocolate just before dipping; this ensures a smooth finish. When ready to impress your guests, dip the chilled truffles in chocolate and refrigerate them for about 30 minutes to set. You'll have delicious, homemade treats without the last-minute rush!

What to Serve with Decadent Spiced Gingerbread Truffles with Creamy Chocolate Coating

Looking to elevate your dessert experience with something sweet, rich, and delightfully festive?

  • Rich Hot Chocolate: A warm mug of rich hot chocolate pairs perfectly, balancing the sweetness of the truffles and adding to your cozy experience.
  • Cinnamon Sugar Cookies: These classic cookies offer a delightful texture contrast while continuing the warm spice theme, making them an excellent companion.
  • Vanilla Ice Cream: A scoop of creamy vanilla ice cream creates a beautiful juxtaposition to the spiced truffles, cooling down the rich flavors.
  • Spiced Chai Latte: Sipping on a spiced chai latte not only complements the ginger and cinnamon notes but also warms the soul during chilly months.
  • Fresh Berries: A handful of fresh raspberries or strawberries adds a pop of color and tanginess, refreshing your palate between each indulgent bite.
  • Nutty Charcuterie Board: Pair these truffles with a selection of salted nuts, cheese, and dried fruits for a delightful sweet and savory contrast that friends will love.
  • Peppermint Coffee: This festive drink brings an invigorating flavor to the table, enhancing the holiday spirit while offsetting the richness of the truffles.
  • Chocolate Fondue: For an interactive dessert experience, offer a chocolate fondue where guests can dip fruits and cookies, creating endless flavor combinations.

Expert Tips for Decadent Spiced Gingerbread Truffles

  • Chill Properly: Ensure the mixture is well-chilled before rolling into balls. This prevents the truffles from being too sticky and makes shaping easier.

  • Choose Quality Chocolate: Use high-quality semisweet chocolate for coating. It creates a luxurious flavor and texture that perfectly complements the truffles.

  • Avoid Overheating: When melting chocolate, heat in short intervals and stir often to avoid burning. Overheated chocolate can seize up, ruining your coating.

  • Optional Toppings: Don’t skip the crushed gingerbread or cocoa powder on top! They add an extra layer of flavor and visual appeal to your decadent spiced gingerbread truffles.

  • Storage Matters: Keep in an airtight container in the refrigerator to maintain freshness and prevent the truffles from drying out. Enjoy them within a week!

Decadent Spiced Gingerbread Truffles Variations

Feel free to get creative and customize these delightful truffles to match your tastes and dietary needs!

  • Gluten-Free: Substitute regular gingerbread cookies with gluten-free options to enjoy without worries.
  • Nut-Free: Use a dairy-free cream cheese alternative to make these truffles safe for nut allergies! Textures will remain rich and creamy.
  • Vegan: Replace cream cheese with a vegan cream cheese or nut butter for a completely plant-based treat. Trust me, your taste buds will love the result!
  • Spicy Kick: Add a pinch of cayenne pepper or some crushed red pepper flakes to introduce a delightful heat that contrasts beautifully with the sweetness.
  • Flavor Boost: For an extra layer of flavor, try adding a tablespoon of orange zest into the mixture. This brightens the flavors and adds an alluring aroma.
  • Chocolate Varieties: Experiment with dark chocolate or white chocolate for the coating—each offers a unique and delightful twist. You might find a new favorite!
  • Crunch Factor: Roll the truffles in crushed nuts, like walnuts or pecans, instead of gingerbread crumbs for added texture and flavor. It transforms these treats from good to extraordinary!
  • Fruity Delight: Add some finely chopped dried fruits, like cranberries or apricots, into the mixture for a chewy surprise in every bite.

Each variation opens a world of flavor—mix it up and enjoy the delicious journey. And if you're looking for more sweet inspirations, don’t miss my lovely Christmas Dessert Ideas and Chocolate Treats for Every Occasion!

How to Store and Freeze Decadent Spiced Gingerbread Truffles

Fridge: Store the truffles in an airtight container in the refrigerator for up to 1 week to keep them fresh and delicious.

Freezer: To freeze, place truffles in a single layer on a baking sheet for about 1 hour until firm. Transfer to a freezer-safe container for up to 2 months.

Thawing: When ready to enjoy frozen truffles, simply transfer them to the fridge for a few hours to thaw gently without compromising their creamy texture.

Reheating: These truffles don't require reheating, but if desired, you can let them come to room temperature for about 15 minutes for the best taste experience.

Decadent Spiced Gingerbread Truffles with Creamy Chocolate Coating

Decadent Spiced Gingerbread Truffles with Creamy Chocolate Coating Recipe FAQs

How can I select the best gingerbread cookies for this recipe?
Absolutely! When choosing gingerbread cookies, look for ones that are crisp yet not overly brittle. They should have a rich, spicy aroma and a fine texture, ensuring they blend seamlessly into your truffle mixture. If possible, opt for homemade cookies or renowned brands for a more authentic flavor.

How long can I store the truffles in the refrigerator?
You can store these decadent spiced gingerbread truffles in an airtight container in the refrigerator for up to 1 week. This allows the flavors to meld beautifully while keeping them fresh and delicious!

Can I freeze the gingerbread truffles?
Yes, indeed! To freeze, lay the truffles in a single layer on a baking sheet and freeze for about 1 hour until firm. Then, transfer them to a freezer-safe container, separating layers with parchment paper, and they will last for up to 2 months. This way, you can enjoy them anytime!

What should I do if my chocolate coating isn’t smooth?
If your chocolate coating has become thick or clumpy, here’s what you can do: Add a little more coconut oil (1 teaspoon at a time) to the melted chocolate and gently stir until it becomes smooth again. Make sure you're microwaving in 30-second intervals to avoid overheating, which can cause clumping.

Are these truffles safe for pets?
Definitely not! The chocolate used in these decadent spiced gingerbread truffles is toxic to pets, particularly dogs and cats. Always keep these treats out of reach of your furry friends to ensure their safety.

How can I modify the truffles for dietary restrictions, like gluten-free options?
Very easily! To make them gluten-free, simply substitute the gingerbread cookies with gluten-free gingerbread cookies or even a gluten-free cookie mix. Ensure all other ingredients, especially the chocolate, are certified gluten-free. Just follow the same steps, and you’ll end up with delightful gluten-free truffles!

Decadent Spiced Gingerbread Truffles with Creamy Chocolate Coating

Decadent Spiced Gingerbread Truffles with Chocolate Bliss

Indulge in these Decadent Spiced Gingerbread Truffles with Creamy Chocolate Coating, a delightful treat for any occasion!
Print Recipe Pin Recipe
Prep Time 30 minutes mins
Cook Time 2 minutes mins
Chilling Time 30 minutes mins
Total Time 1 hour hr 2 minutes mins
Servings: 12 truffles
Course: Dessert
Cuisine: American
Calories: 120
Ingredients Equipment Method Nutrition Notes

Ingredients
  

For the Truffles
  • 1 cup finely crushed gingerbread cookies
  • ½ cup softened cream cheese
  • ¼ cup powdered sugar
  • 1 teaspoon ground ginger
  • 1 teaspoon ground cinnamon
  • ¼ teaspoon ground nutmeg
  • ¼ teaspoon ground cloves
  • 1 tablespoon molasses
  • 1 teaspoon vanilla extract
For the Chocolate Coating
  • 8 ounces chopped semisweet chocolate
  • 1 tablespoon coconut oil optional
For Rolling
  • extra crushed gingerbread cookies optional
  • cocoa powder optional

Equipment

  • Food Processor
  • Microwave-safe bowl
  • parchment paper
  • Mixing Bowl
  • Cookie scoop

Method
 

Step-by-Step Instructions
  1. Finely crush the gingerbread cookies to create a flavorful base for your truffles.
  2. In a medium mixing bowl, combine the crushed gingerbread cookies with softened cream cheese and mix until smooth.
  3. Add powdered sugar, ground ginger, ground cinnamon, ground nutmeg, ground cloves, molasses, and vanilla extract to the mixture and stir until combined.
  4. Cover the bowl with plastic wrap and refrigerate for about 30 minutes.
  5. Take the chilled mixture out and form into balls about 1 inch in diameter.
  6. Combine chopped chocolate and coconut oil in a microwave-safe bowl and melt in intervals until smooth.
  7. Dip each truffle into the melted chocolate and allow excess to drip off.
  8. Sprinkle with optional toppings before the chocolate sets.
  9. Return truffles to the fridge for about 30 minutes to set the chocolate.
  10. Store in an airtight container in the refrigerator for up to a week.

Nutrition

Serving: 1truffleCalories: 120kcalCarbohydrates: 15gProtein: 1gFat: 7gSaturated Fat: 4gPolyunsaturated Fat: 0.5gMonounsaturated Fat: 1.5gCholesterol: 5mgSodium: 50mgPotassium: 50mgFiber: 0.5gSugar: 10gVitamin A: 50IUCalcium: 20mgIron: 0.5mg

Notes

Use high-quality semisweet chocolate for the best flavor. The truffles can be stored in the fridge for a week or frozen for up to 2 months.

Tried this recipe?

Let us know how it was!

Delicious Shiroi Koibito Cookies to Sweeten Your Day

December 15, 2025 by grace bellamy Leave a Comment

While browsing through a quaint bakery during a recent trip to Japan, I stumbled upon a delightfully unique treat that immediately captured my heart: Shiroi Koibito. These white chocolate sandwich cookies are not only eye-catching but incredibly satisfying, making them perfect for any occasion. What I love most about this recipe is how approachable it is, with just a handful of ingredients and a prep time of only 30 minutes, you can whip up a batch that will impress friends and family. Plus, the creamy filling inside these cookies turns them into a sweet indulgence that everyone will adore. Ready to bring a taste of Japan into your kitchen? Let’s dive in and create these scrumptious Shiroi Koibito cookies together!

Shiroi Koibito

Why are Shiroi Koibito cookies irresistible?

Decadent creaminess: The rich white chocolate filling takes each bite to new heights, delighting your taste buds with every sandwich.

Quick & easy: With just 30 minutes of prep time, these cookies are a breeze to make, perfect for busy days.

Impressive treat: Share them at gatherings or enjoy them as a special dessert—your friends and family will be wowed!

Versatile base: Use this simple cookie dough as a foundation for all kinds of flavor additions or fillings, allowing you to customize each batch.

Elevate your baking: If you're a fan of homemade delights, enjoy reading about my other quick cookie recipes that show just how fun baking can be!

Shiroi Koibito Ingredients

Here’s everything you need to whip up these delightful cookies!

For the Dough

  • All-purpose flour – gives the cookies their perfect structure.
  • Unsalted butter – provides richness and ensures a tender bite.
  • Granulated sugar – sweetens the dough to balance the creamy filling.
  • Egg – acts as a binding agent, keeping the cookies together.
  • Baking powder – helps the cookies rise for a light texture.
  • Vanilla extract – adds a warm, aromatic flavor to enhance the sweetness.

For the White Chocolate Filling

  • White chocolate, melted – creates a luscious filling that brings the sandwich cookies together.
  • White chocolate, for filling – use quality chocolate for a rich flavor experience.
  • Heavy cream – adds creaminess to the filling, making it irresistible.

These Shiroi Koibito cookies combine simple ingredients into a symphony of textures and flavors that will definitely sweeten your day!

Step‑by‑Step Instructions for Shiroi Koibito

Step 1: Preheat the Oven
Begin by preheating your oven to 350°F (175°C). While that's warming up, line a baking sheet with parchment paper. This will ensure that your Shiroi Koibito cookies bake evenly and won't stick, making cleanup a breeze!

Step 2: Combine Dry Ingredients
In a mixing bowl, sift together 2 cups of all-purpose flour, 1 teaspoon of baking powder, and ¼ cup of granulated sugar. Stir these dry ingredients until they are fully blended, ensuring a consistent texture in your cookie dough. Set this bowl aside as you move to the next step.

Step 3: Cream Butter and Egg
In another bowl, use an electric mixer to cream together ½ cup of unsalted butter and 1 beaten egg until the mixture is smooth and light. This step is essential for incorporating air into the dough, which aids in achieving that perfect, tender texture in your Shiroi Koibito cookies.

Step 4: Mix Wet and Dry Ingredients
Gradually add your flour mixture to the creamed butter and egg mixture. Mix on low speed until just combined, forming a soft dough. Be careful not to overmix; you want to maintain a light texture that will allow the cookies to rise beautifully in the oven.

Step 5: Shape the Cookies
With your dough ready, roll it into small balls, about 1 inch in diameter. Place them on the prepared baking sheet, making sure to flatten them slightly. This will give your Shiroi Koibito cookies a nice, even shape as they bake—a visual cue for perfection!

Step 6: Bake the Cookies
Pop the baking sheet into your preheated oven and bake the cookies for 15-20 minutes. Keep an eye on them, looking for a light golden brown color to signal they are ready. The smell wafting through your kitchen will be irresistible!

Step 7: Cool the Cookies
Once baked, remove the cookies from the oven and let them cool on the baking sheet for a few minutes. Then, transfer the cookies to a wire rack and allow them to cool completely. This step is critical for achieving the right texture before you add the delicious filling.

Step 8: Prepare the Filling
While the cookies cool, melt the remaining white chocolate. Combine it with ½ cup of heavy cream in a mixing bowl, whisking until it forms a creamy filling. This luscious mixture will be the star of your Shiroi Koibito cookies, adding that decadent taste everyone loves.

Step 9: Assemble the Cookies
Take one cooled cookie and spread a generous amount of the melted white chocolate filling on its flat side. Top it with another cookie, creating a delightful sandwich. Press gently to allow the filling to ooze slightly, adding to the indulgent nature of your Shiroi Koibito treats.

Step 10: Set the Cookies
Let the assembled cookies sit at room temperature for about 30 minutes. This allows the chocolate filling to set properly and adhere the cookies together. While you wait, resist the temptation to nibble—your delicious Shiroi Koibito cookies will be worth it!

Shiroi Koibito

Tips for the Best Shiroi Koibito

  • Measure Accurately: Ensure your flour and sugar are measured properly. Too much flour can lead to dry cookies, while too little might affect their structure.

  • Chill the Dough: If your dough is too soft, chill it for 15-20 minutes before shaping. This prevents overly flat cookies during baking.

  • Watch the Bake Time: Every oven is different! Keep an eye on your Shiroi Koibito cookies after 15 minutes to achieve the perfect golden brown without overbaking.

  • Cool Completely: Allow cookies to cool fully before adding the filling. This step is crucial for achieving a delicious texture and prevents the filling from melting too quickly.

  • Quality Ingredients Matter: Use high-quality white chocolate and fresh butter. The flavor of your finished cookies relies heavily on the ingredients you choose!

How to Store and Freeze Shiroi Koibito

Room Temperature: Store Shiroi Koibito cookies in an airtight container at room temperature for up to 3 days. This keeps them fresh and maintains their delightful texture.

Fridge: If you want the cookies to last longer, you can refrigerate them for up to a week in a sealed container. Just let them sit at room temperature for a few minutes before enjoying!

Freezer: For even longer storage, freeze the assembled cookies by wrapping them tightly in plastic wrap and placing them in a freezer-safe bag. They can last for up to 2 months.

Reheating: To enjoy warm cookies from the freezer, simply thaw them in the fridge overnight, then warm them in the microwave for about 10-15 seconds for that freshly baked taste!

Make Ahead Options

These Shiroi Koibito cookies are perfect for busy home cooks looking to save time during the week! You can prepare the cookie dough up to 24 hours in advance by shaping it into balls and refrigerating them on a baking sheet covered with plastic wrap. This helps maintain texture and flavor, ensuring they'll be just as delicious when baked. Additionally, the creamy filling can be made ahead and refrigerated for up to 3 days; just give it a quick whisk before using. When ready to serve, simply bake the cookies directly from the fridge and assemble with the filling for fresh, delightful Shiroi Koibito cookies that feel like a special treat—even on the busiest of days!

What to Serve with Shiroi Koibito

Indulge in a delightful culinary experience by pairing these sweet treats with complementary dishes and drinks that elevate your dessert spread.

  • Fresh Berries: Sweet, juicy berries add a refreshing contrast to the creamy cookies, balancing rich flavors with natural acidity.

  • Vanilla Ice Cream: The creamy texture and subtle sweetness of vanilla ice cream makes a heavenly match, creating a dessert duo everyone will crave.

  • Matcha Green Tea: A warm cup of matcha offers an earthy bitterness that contrasts beautifully with the sweetness, enhancing the overall experience.

  • Coffee: A rich brew, whether hot or iced, provides a delightful bitterness to counterbalance the sweetness of the cookies, making it an ideal pairing.

  • Chocolate Fondue: Serve alongside melted chocolate for dipping, allowing guests to enhance their cookies with an extra layer of indulgence.

  • Lemon Sorbet: The zesty bright notes of lemon sorbet awaken the palate, refreshing your taste buds while complementing the flavors of the sandwich cookies.

  • Pistachio Muffins: With a touch of saltiness and nutty flavor, these muffins add a unique twist that pairs well with the creamy filled Shiroi Koibito.

  • Sparkling Water with Lime: A bubbly, citrusy drink like sparkling water with a squeeze of lime cleanses the palate, ensuring every bite of your sweet treat remains a pleasure.

Shiroi Koibito Variations & Substitutions

Feel free to personalize your Shiroi Koibito cookies with these delightful tweaks that enhance flavors and textures!

  • Gluten-Free: Substitute all-purpose flour with a 1:1 gluten-free baking blend for a friendly alternative that everyone can enjoy.

  • Dark Chocolate Twist: Replace white chocolate with bittersweet or dark chocolate for a richer flavor profile that adds depth to each bite.

  • Nutty Addition: Stir in ½ cup of finely chopped nuts, such as almonds or hazelnuts, for delightful crunch and a subtle nutty taste.

  • Coconut Delight: Incorporate shredded coconut into the filling for a tropical flair that harmonizes beautifully with the white chocolate.

  • Spicy Kick: Add a pinch of cinnamon or cayenne pepper to the dough for a warm, surprising twist that dances on your palate.

  • Fruit Fusion: Introduce dried fruit, like cranberries or cherries, into the dough for a burst of sweetness that complements the creamy filling perfectly.

  • Easy Egg-Free: Use ¼ cup of unsweetened applesauce or a flaxseed egg as an egg substitute for a delightful vegan version without sacrificing flavor.

  • Infused Flavors: Experiment with flavored extracts, like almond or orange, to enrich the taste and give your cookies a unique signature flair.

With these creative variations, you'll always have room to experiment, ensuring your Shiroi Koibito cookies remain fresh and exciting! And if you're interested in other baking inspirations, don't miss out on my delightful quick cookie recipes!

Shiroi Koibito

Shiroi Koibito Recipe FAQs

What kind of flour should I use for Shiroi Koibito?
Absolutely! All-purpose flour is best for these cookies as it provides the right structure and texture. Avoid using cake flour or bread flour, as they may alter the consistency you're aiming for.

How should I store Shiroi Koibito cookies?
To keep your Shiroi Koibito cookies fresh, store them in an airtight container at room temperature for up to 3 days. If you want them to last longer, you can refrigerate them for about a week, just make sure they're sealed well to prevent them from drying out.

Can Shiroi Koibito cookies be frozen?
Yes, you can freeze them! Wrap the assembled cookies tightly in plastic wrap and put them in a freezer-safe bag. They can last for up to 2 months in the freezer. When you're ready to enjoy, thaw them in the fridge overnight and warm them in the microwave for a delightful treat!

What if my Shiroi Koibito dough is too soft?
If your cookie dough feels too soft and sticky to work with, don't worry! Simply chill it in the fridge for about 15-20 minutes. This will firm up the dough, making it easier to roll into balls and shape into cookies without them spreading too much while baking.

Can I make Shiroi Koibito cookies nut-free?
Yes, indeed! This recipe is naturally nut-free as it doesn't include any nuts or nut-based ingredients. However, always double-check that the chocolate you use is also free of cross-contamination if allergies are a concern.

What if I can’t find white chocolate for filling?
You can easily substitute the white chocolate for a creamy vanilla frosting or even a white chocolate ganache made from heavy cream and chocolate chips. Simply melt them together similar to the original filling method to create a luscious alternative!

Shiroi Koibito

Delicious Shiroi Koibito Cookies to Sweeten Your Day

Delightful Shiroi Koibito cookies are white chocolate sandwich treats from Japan that will sweeten your day.
Print Recipe Pin Recipe
Prep Time 30 minutes mins
Cook Time 20 minutes mins
Cooling Time 30 minutes mins
Total Time 1 hour hr 20 minutes mins
Servings: 12 cookies
Course: Dessert
Cuisine: Japanese
Calories: 200
Ingredients Equipment Method Nutrition Notes

Ingredients
  

For the Dough
  • 2 cups all-purpose flour
  • ½ cup unsalted butter
  • ¼ cup granulated sugar
  • 1 egg beaten
  • 1 teaspoon baking powder
  • 1 teaspoon vanilla extract
For the White Chocolate Filling
  • 1 cup white chocolate, melted
  • ½ cup heavy cream for filling

Equipment

  • Oven
  • Mixing Bowl
  • Electric mixer
  • Baking Sheet
  • parchment paper
  • wire rack

Method
 

Step-by-Step Instructions for Shiroi Koibito
  1. Preheat your oven to 350°F (175°C) and line a baking sheet with parchment paper.
  2. In a bowl, sift together flour, baking powder, and sugar.
  3. Cream together butter and beaten egg until smooth and light.
  4. Gradually mix the flour mixture into the creamed mixture until just combined.
  5. Roll the dough into balls, about 1 inch in diameter, and place on the baking sheet, flattening slightly.
  6. Bake for 15-20 minutes until lightly golden brown.
  7. Cool on the baking sheet for a few minutes, then transfer to a wire rack to cool completely.
  8. Melt white chocolate and mix with heavy cream until creamy.
  9. Spread the filling on one cookie, top with another cookie to form a sandwich.
  10. Let the assembled cookies sit for about 30 minutes to set the filling.

Nutrition

Serving: 1cookieCalories: 200kcalCarbohydrates: 25gProtein: 2gFat: 10gSaturated Fat: 6gPolyunsaturated Fat: 1gMonounsaturated Fat: 3gCholesterol: 30mgSodium: 100mgPotassium: 50mgFiber: 1gSugar: 12gVitamin A: 200IUCalcium: 30mgIron: 1mg

Notes

Use high-quality ingredients for the best flavor and measure accurately to ensure the right texture.

Tried this recipe?

Let us know how it was!

Cozy Cranberry Orange Shortbread for a Sweet Snack Attack

December 15, 2025 by grace bellamy Leave a Comment

As I stood in my kitchen, the scent of citrus filled the air, instantly transporting me to sunlit orchards brimming with ripening oranges. This is the magic of my Cozy Cranberry Orange Shortbread—it’s like a warm embrace that beckons friends and family to gather around the table. With just a handful of simple ingredients, this recipe brings joy in every buttery bite, making it an ideal choice for those evenings when you crave something sweet yet effortless. Not only is it a delightful treat that pairs perfectly with a steaming cup of tea, but its quick prep time will have you in and out of the kitchen faster than you can say “home-baked goodness.” Are you ready to join me on this delicious adventure?

Cozy Cranberry Orange Shortbread

Why is this shortbread so irresistible?

Heavenly Aroma: The zest of fresh oranges mingles with the sweetness of cranberries, filling your kitchen with a delightful fragrance.
Quick and Easy: With just 20 minutes of hands-on time, you’ll have these scrumptious cookies ready to bake in no time.
Versatile Treat: Perfect for holiday gatherings or a cozy afternoon snack, these cookies will win over anyone who takes a bite!
Flexible Ingredients: Feel free to swap in various add-ins, like chopped nuts or different dried fruits, to tailor this recipe to your liking.
Crowd-Pleaser: Whether served at a party or gifted to a friend, these little bites of joy are sure to impress! Dive into this tasty adventure and discover more ways to enjoy your homemade treats!

Cozy Cranberry Orange Shortbread Ingredients

For the Cookie Dough
• Unsalted butter – helps create a rich, creamy texture that’s essential for shortbread.
• Powdered sugar – gives the cookies a melt-in-your-mouth sweetness and smooth finish.
• All-purpose flour – provides the perfect structure for your cookies, allowing them to hold their shape.
• Salt – enhances the flavors and balances the sweetness in the dough.
• Vanilla extract – adds a warm, comforting flavor that complements the citrus notes beautifully.
• Orange zest – brings a vibrant burst of fresh citrus flavor that makes these cookies truly cozy.
• Dried cranberries – contribute a delightful chewiness and tartness, perfect for balancing the sweetness.
• Almond extract (optional) – using this can add a subtle depth of flavor that nicely complements the other ingredients.

For the Finishing Touch
• Extra powdered sugar for dusting (optional) – adds a beautiful presentation and a touch of sweetness to the final cookies.

These Cozy Cranberry Orange Shortbread ingredients come together to create mouthwatering cookies that are quick to make and bursting with flavor!

Step‑by‑Step Instructions for Cozy Cranberry Orange Shortbread

Step 1: Preheat and Prepare
Begin by preheating your oven to 350°F (175°C). While it warms up, take a baking sheet and line it with parchment paper. This will prevent the Cozy Cranberry Orange Shortbread from sticking and make cleanup a breeze.

Step 2: Cream the Butter and Sugar
In a large mixing bowl, cream together 1 cup of softened unsalted butter and ½ cup of powdered sugar. Using an electric mixer, whip the mixture on medium speed for about 3–4 minutes until it becomes light and fluffy, signaling that the shortbread will be wonderfully tender.

Step 3: Add Flavor
Next, add in 1 teaspoon of vanilla extract and, if desired, ¼ teaspoon of almond extract. Mix well until these flavors are fully incorporated into the butter-sugar mixture. The aroma should be heavenly, hinting at the warmth and comfort of the Cozy Cranberry Orange Shortbread to come.

Step 4: Combine Dry Ingredients
In a separate bowl, whisk together 2 cups of all-purpose flour and ¼ teaspoon of salt. Gradually incorporate this dry mixture into the butter mixture, mixing on low speed until just combined. Avoid overmixing; you want the dough to remain tender for the perfect texture.

Step 5: Fold in the Goodness
Gently fold in 1 tablespoon of freshly grated orange zest and ½ cup of chopped dried cranberries using a spatula or wooden spoon. This step adds a delightful burst of flavor and color to your Cozy Cranberry Orange Shortbread, creating a vibrant, inviting dough.

Step 6: Chill the Dough
Turn the dough out onto a lightly floured surface and shape it into a rectangle or log about 1 inch thick. Wrap it tightly in plastic wrap and refrigerate for at least 30 minutes to firm up. Chilling the dough helps retain its shape while baking, ensuring each cookie turns out perfectly.

Step 7: Slice and Arrange
After chilling, remove the dough from the refrigerator and slice it into ¼ inch thick rounds. Carefully arrange the cookies on the prepared baking sheet, ensuring there’s enough space between each one to allow for spreading during baking. This anticipation will only add to the excitement of enjoying your baked treats.

Step 8: Bake to Perfection
Place the baking sheet in the preheated oven and bake for 12-15 minutes. You’ll know the Cozy Cranberry Orange Shortbread is done when the edges turn lightly golden. Keep an eye on the cookies, as baking times may vary based on your oven.

Step 9: Cool and Transfer
Once baked, remove the cookies from the oven and let them cool on the baking sheet for a few minutes. This resting time allows them to set perfectly before you transfer the goodies to a wire rack, where they’ll cool completely and ready to be enjoyed.

Step 10: Finish and Serve
Once the cookies are cool, feel free to dust them with extra powdered sugar for an elegant finish. Serve your Cozy Cranberry Orange Shortbread alongside a warm mug of tea or coffee, inviting friends and family to indulge in the delicious warmth of homemade joy.

Cozy Cranberry Orange Shortbread

Make Ahead Options

These Cozy Cranberry Orange Shortbread cookies are perfect for meal prep, saving you precious time on busy days! You can prepare the dough and refrigerate it for up to 24 hours before baking. Simply follow the steps through chilling the shaped log, then wrap it tightly in plastic wrap. When you're ready to bake, slice the dough into rounds and bake as instructed for deliciously fresh cookies that are just as delightful as if made from scratch. Alternatively, you can freeze the unbaked rounds for up to 3 months; when the cookie cravings hit, bake them directly from the freezer, adding an extra minute or two to the baking time for a quick treat.

Expert Tips for Cozy Cranberry Orange Shortbread

  • Chill the Dough Well: Make sure to refrigerate the dough for a full 30 minutes to help maintain shape during baking, avoiding flat cookies.
  • Don’t Overmix: When combining dry and wet ingredients, mix until just combined. Overmixing can result in tough cookies rather than the tender shortbread you desire.
  • Optimal Slicing: Ensure to slice the dough into evenly sized rounds for uniform baking. Uneven slices can lead to some cookies being overbaked while others are underbaked.
  • Use Fresh Ingredients: For the best flavor, opt for fresh orange zest and quality dried cranberries. Fresher ingredients yield a more vibrant, cozy taste.
  • Perfect Dusting: Dust with powdered sugar right before serving to keep the presentation looking fresh and beautiful. Enjoy your Cozy Cranberry Orange Shortbread!

What to Serve with Cozy Cranberry Orange Shortbread

Imagine settling down with a plate of these heavenly shortbread cookies paired with delightful companions that enhance their flavors.

  • Cardamom-Spiced Tea: This warm, aromatic tea complements the citrus notes of the shortbread beautifully, creating a cozy flavor harmony.

  • Rich Espresso: The boldness of espresso balances the sweetness of the cookies, making for a delightful contrast that’s simply irresistible.

  • Fresh Berries: Serve a mix of juicy strawberries and raspberries to add a burst of freshness, making each bite of shortbread even more special.

  • Vanilla Ice Cream: A scoop of creamy vanilla ice cream offers a cool, contrasting texture, perfect for melting into the warm cookies.

  • Chocolate Dipping Sauce: A warm, rich chocolate sauce adds a decadent twist, inviting you to indulge in every buttery morsel.

  • Cheese Platter: Creamy brie with a sprinkle of orange zest or a sharp cheddar can elevate the experience, offering a savory contrast to the sweet cookies.

  • Orange Mojito: For a refreshing drink option, a sparkle of mint and lime paired with orange juice captures the cozy flavor profile of the shortbread.

Each pairing not only enhances the cozy essence of your Cranberry Orange Shortbread but also creates a memorable experience for you and your loved ones!

How to Store and Freeze Cozy Cranberry Orange Shortbread

Airtight Container: Store fully cooled cookies in an airtight container at room temperature for up to one week to maintain their buttery texture and delightful flavor.

Refrigeration: For longer freshness, keep the cookies in the refrigerator for up to two weeks. Just ensure they’re well wrapped to prevent them from drying out.

Freezing: To freeze, wrap each cookie individually in plastic wrap, then place them in a freezer-safe bag or container. They can be frozen for up to three months!

Reheating: When ready to enjoy, simply thaw at room temperature or warm in a preheated oven at 300°F (150°C) for about 10 minutes. Treat yourself to the cozy taste of cranberry orange bliss!

Cozy Cranberry Orange Shortbread Variations

Feel free to get creative with this Cozy Cranberry Orange Shortbread recipe and explore delightful twists that suit your taste preferences!

  • Gluten-Free: Substitute all-purpose flour with a gluten-free flour blend for a gluten-free version that everyone can enjoy. Ensure your blend contains xanthan gum for the right texture.

  • Sugar-Free: Use a sugar substitute like erythritol to make these cookies a healthier choice without sacrificing sweetness. Your senses will still revel in that pleasant taste!

  • Citrus Combo: Mix in a teaspoon of lemon zest along with the orange zest for a bright, tangy explosion of flavors. This variation adds vibrant layers to each buttery bite that are simply irresistible.

  • Nutty Delight: Fold in ½ cup of finely chopped walnuts or pecans for a rich, crunchy texture. The nuttiness pairs beautifully with the sweetness of cranberries, providing a delightful contrast in each mouthful.

  • Spiced Up: Add a touch of cinnamon or nutmeg to the flour mixture for a cozy, spiced flavor boost that warms the soul. The aromatic spices dance alongside the citrus, creating a warm and inviting treat.

  • Chocolate Lovers: Incorporate chocolate chips or chunks for an indulgent twist that complements the tartness of cranberries. Imagine biting into a soft, buttery cookie that surprises you with a melty chocolate center!

  • Dried Fruit Medley: Swap cranberries for a blend of dried fruits like apricots and cherries for a colorful, fruity experience. Each bite will be bursting with varied tastes that keep things exciting!

  • Merry Mint: For a festive flair, add a few drops of peppermint extract to the dough. This refreshing addition transforms your shortbread into an aromatic delight, perfect for holiday gatherings!

Feel free to explore these variations to make this Cozy Cranberry Orange Shortbread your very own. Whether you're serving it with a cozy cup of cardamom-spiced tea or packing it as a lovely gift, you'll discover countless ways to enjoy this timeless treat!

Cozy Cranberry Orange Shortbread

Cozy Cranberry Orange Shortbread Recipe FAQs

How do I select ripe oranges for the zest?
Absolutely! Look for firm oranges with vibrant, smooth skin, and avoid those with dark spots all over. Fresh, juicy oranges typically have a fragrant aroma, which is a sign of their ripeness and will enhance your Cozy Cranberry Orange Shortbread.

What’s the best way to store these cookies?
For the best flavor and texture, store fully cooled cookies in an airtight container at room temperature for up to one week. If you wish to keep them longer, refrigerate them wrapped tightly for up to two weeks.

Can I freeze my Cozy Cranberry Orange Shortbread?
Yes, indeed! To freeze, wrap each cookie individually in plastic wrap and place them in a freezer-safe bag or container. They can be frozen for up to three months. When ready, thaw at room temperature or warm them in a preheated oven at 300°F (150°C) for about 10 minutes.

What should I do if my dough is too crumbly?
If your dough feels too crumbly, it may need additional moisture. Try adding a teaspoon of milk or water, one at a time, mixing until it comes together. Make sure you don't overmix, as that can lead to tough cookies, which we certainly want to avoid!

Is it safe for my pets to eat these cookies?
I recommend not sharing your Cozy Cranberry Orange Shortbread with pets. While butter and flour are generally safe in small amounts, the sugar and extracts like vanilla and almond can be harmful to animals. It's always best to keep sweet treats safely out of their reach!

Can I substitute ingredients for dietary restrictions?
Of course! For a dairy-free version, use a plant-based butter substitute, and for gluten-free cookies, opt for a gluten-free all-purpose flour blend. These swaps can maintain the delicious flavors while accommodating dietary needs!

Cozy Cranberry Orange Shortbread

Cozy Cranberry Orange Shortbread for a Sweet Snack Attack

Enjoy these Cozy Cranberry Orange Shortbread cookies, a delightful blend of citrus and sweetness in each buttery bite.
Print Recipe Pin Recipe
Prep Time 20 minutes mins
Cook Time 15 minutes mins
Chill Time 30 minutes mins
Total Time 1 hour hr 5 minutes mins
Servings: 12 cookies
Course: Dessert
Cuisine: American
Calories: 120
Ingredients Equipment Method Nutrition Notes

Ingredients
  

For the Cookie Dough
  • 1 cup Unsalted butter softened
  • ½ cup Powdered sugar
  • 2 cups All-purpose flour
  • ¼ teaspoon Salt
  • 1 teaspoon Vanilla extract
  • 1 tablespoon Orange zest freshly grated
  • ½ cup Dried cranberries chopped
  • ¼ teaspoon Almond extract optional
For the Finishing Touch
  • Extra powdered sugar for dusting optional

Equipment

  • Mixing Bowl
  • Electric mixer
  • Baking Sheet
  • parchment paper
  • Plastic wrap
  • wire rack

Method
 

Step-by-Step Instructions
  1. Preheat your oven to 350°F (175°C) and line a baking sheet with parchment paper.
  2. In a large mixing bowl, cream together the softened unsalted butter and powdered sugar until light and fluffy.
  3. Add in the vanilla extract and almond extract if desired, mixing well.
  4. In a separate bowl, whisk together all-purpose flour and salt. Gradually mix into the butter mixture until just combined.
  5. Fold in the freshly grated orange zest and chopped dried cranberries.
  6. Shape the dough into a rectangle or log about 1 inch thick, wrap in plastic wrap, and refrigerate for at least 30 minutes.
  7. Slice the chilled dough into ¼ inch thick rounds and arrange on the prepared baking sheet.
  8. Bake for 12-15 minutes or until the edges are lightly golden.
  9. Let the cookies cool on the baking sheet for a few minutes before transferring to a wire rack.
  10. Dust with extra powdered sugar before serving, if desired.

Nutrition

Serving: 1cookieCalories: 120kcalCarbohydrates: 18gProtein: 1gFat: 6gSaturated Fat: 4gPolyunsaturated Fat: 0.5gMonounsaturated Fat: 1.5gCholesterol: 25mgSodium: 50mgPotassium: 30mgSugar: 5gVitamin A: 5IUIron: 1mg

Notes

To keep the cookies fresh, store them in an airtight container at room temperature for up to one week.

Tried this recipe?

Let us know how it was!

Melt-in-Your-Mouth Red Velvet Cinnamon Rolls Recipe

December 15, 2025 by grace bellamy Leave a Comment

As the sweet scent of freshly baked bread fills the air, I can’t help but feel a little giddy. Today, I'm sharing my ultimate indulgence: Red Velvet Cinnamon Rolls from scratch. These show-stopping rolls are not just a feast for the eyes; they offer a delightful twist on the classic that will turn any breakfast or brunch into a celebration. With their soft, pillowy texture and a hint of cocoa, they’re equally comforting and delightful. Plus, they come together in just a couple of hours, making them perfect for any weekend gathering or special occasion. Believe me, your family and friends will be begging for the recipe! Ready to roll up your sleeves and discover the magic of these impressive treats? Let’s dive in!

Red Velvet Cinnamon Rolls

Why are these cinnamon rolls irresistible?

Indulgent Flavor: Red Velvet meets cinnamon spice for an unforgettable taste that wows at first bite.
Creamy Frosting: Rich cream cheese frosting adds a delightful creaminess that complements the rolls perfectly.
Easy to Make: Simple steps make crafting these treats enjoyable, even for novice bakers!
Perfect for Celebrations: Great for brunch or special occasions, they’re sure to impress guests and family alike.
Quick Satisfaction: Ready in just a couple of hours, you can treat your loved ones to a gourmet experience without spending all day in the kitchen.
For more delicious variations, check out my Ultimate Cinnamon Roll Guide and explore other lavish recipes!

Red Velvet Cinnamon Rolls Ingredients

• Here's everything you need for those delightful rolls!

For the Dough

  • 4 cups all-purpose flour – key for that soft, pillowy texture.
  • 1 cup milk – helps activate the yeast for the perfect rise.
  • ½ cup sugar – adds sweetness that balances the cocoa flavor.
  • ¼ cup unsweetened cocoa powder – gives the rolls their signature red velvet twist.
  • ½ cup unsalted butter, softened – enriches the dough and creates a tender bite.
  • 2 large eggs – provide structure and richness for the rolls.
  • 1 teaspoon vanilla extract – adds a warm, inviting flavor that complements the rolls.
  • ½ teaspoon salt – enhances the sweetness and overall flavor.
  • ¼ teaspoon baking soda – assists in achieving that perfectly light and fluffy texture.
  • 1 tablespoon active dry yeast – the star ingredient that makes these Red Velvet Cinnamon Rolls rise beautifully.

For the Cream Cheese Frosting

  • ½ cup cream cheese, softened – creates a creamy base that makes your frosting extra indulgent.
  • 2 tablespoons butter, softened – adds smooth richness to the frosting.
  • ½ cup powdered sugar – sweetens the frosting to balance the tanginess of the cream cheese.

Now that you have your ingredients ready, get excited—your kitchen is about to smell heavenly!

Step‑by‑Step Instructions for Red Velvet Cinnamon Rolls

Step 1: Activate the Yeast
In a small bowl, combine warm milk (about 110°F) with a pinch of sugar and the tablespoon of active dry yeast. Stir gently and let the mixture sit for about 5–10 minutes until it becomes frothy on top, signaling that the yeast is activated and ready to elevate your Red Velvet Cinnamon Rolls.

Step 2: Mix the Dry Ingredients
In a large mixing bowl, whisk together 4 cups of all-purpose flour, ½ cup of sugar, ¼ cup of unsweetened cocoa powder, ½ teaspoon of salt, and ¼ teaspoon of baking soda. This blend of dry ingredients will create the foundation for your dough, adding both flavor and structure as you prepare to combine them with the wet ingredients.

Step 3: Incorporate the Wet Ingredients
Add ½ cup of softened unsalted butter, 2 large eggs, and 1 teaspoon of vanilla extract to the dry mixture. Stir until all the ingredients come together smoothly. The dough will be slightly sticky at this stage, creating a delightful texture that sets the stage for your amazing Red Velvet Cinnamon Rolls.

Step 4: Combine and Knead the Dough
Pour the activated yeast mixture into the bowl with the dough ingredients. Using your hands or a stand mixer with a dough hook, knead the dough for about 5–7 minutes until it becomes smooth and elastic. This step is crucial for developing the texture of your cinnamon rolls, so keep kneading until you achieve that perfect consistency.

Step 5: Let the Dough Rise
Transfer the dough to a greased bowl and cover it with a clean kitchen towel. Place it in a warm, draft-free area for about 1 hour, or until it has doubled in size. This rising time is essential for creating fluffy and tender Red Velvet Cinnamon Rolls, so be patient as the dough works its magic.

Step 6: Roll Out the Dough
Once the dough has risen, turn it out onto a floured surface and roll it into a rectangle about ¼ inch thick. Ensure an even thickness to allow for consistent baking. The vibrant color of the dough will start to show, hinting at the delicious Red Velvet Cinnamon Rolls you’re about to create.

Step 7: Add the Filling
Spread a layer of softened butter over the rolled-out dough. Next, sprinkle a generous mixture of cinnamon and sugar evenly across the surface, creating a fragrant filling that will take your Red Velvet Cinnamon Rolls to the next level. Be sure to cover the entire area for maximum flavor in each bite.

Step 8: Roll and Cut the Dough
Carefully roll the dough tightly from one long side to the other, forming a log. Use a sharp knife to slice the rolled dough into 12 equal pieces. Each cut will reveal the mesmerizing swirls inside, setting the stage for the beautiful Red Velvet Cinnamon Rolls that will soon rise in your oven.

Step 9: Second Rise
Place the cut rolls into a greased baking dish, leaving space for them to expand. Cover with a towel and let them rise for an additional 30 minutes, allowing the rolls to become light and fluffy before baking. You’ll know they’re ready when they’ve noticeably puffed up.

Step 10: Bake the Rolls
Preheat your oven to 350°F (175°C). Once preheated, bake the rolls for 25–30 minutes, or until they are golden brown and a toothpick inserted comes out clean. Keep an eye on the color to ensure the perfect bake for your stunning Red Velvet Cinnamon Rolls.

Step 11: Prepare the Frosting
While the rolls are baking, make the cream cheese frosting by mixing together ½ cup of softened cream cheese, 2 tablespoons of softened butter, and ½ cup of powdered sugar in a bowl. Beat until the mixture is smooth and creamy, ready to slather over the warm rolls for an indulgent finish.

Step 12: Frost and Serve
Remove the rolls from the oven and allow them to cool slightly. Once warm, generously spread the cream cheese frosting over the top, letting it melt into the warm layers of your Red Velvet Cinnamon Rolls. Serve them warm for a delightful treat that your family and friends will love!

Red Velvet Cinnamon Rolls

How to Store and Freeze Red Velvet Cinnamon Rolls

Room Temperature: Store leftover rolls in an airtight container at room temperature for up to 3 days to maintain freshness and softness.

Fridge: If you prefer a longer shelf life, refrigerate the sealed rolls for up to 1 week. Gently reheat in the microwave for a few seconds before serving.

Freezer: Freeze wrapped rolls individually in plastic wrap and then in foil for up to 2 months. Thaw overnight in the fridge and reheat, ensuring they remain delicious!

Frosting Storage: Store any leftover cream cheese frosting in the fridge for up to 1 week in an airtight container. Just mix it again before using it on your thawed Red Velvet Cinnamon Rolls.

Expert Tips for Red Velvet Cinnamon Rolls

  • Temperature Matters: Ensure your milk is warm but not hot when activating the yeast; too hot can kill it, leading to dense rolls.
  • Knead Properly: Knead the dough until smooth and elastic; this develops gluten, which is essential for the soft texture of your Red Velvet Cinnamon Rolls.
  • Don’t Rush the Rise: Allow the dough to double in size during the first rise; rushing it will result in less fluffy rolls.
  • Check for Doneness: Bake until golden brown at the edges; removing too soon can leave you with doughy centers, so trust your eyes!
  • Frost After Cooling: Cool the rolls slightly before frosting to prevent the cream cheese frosting from melting too much; you want that perfect creamy layer on top.

Red Velvet Cinnamon Rolls Variations

Customize these delightful rolls to your heart's content, and let your creativity shine through every bite!

  • Gluten-Free: Substitute all-purpose flour with a gluten-free flour blend to accommodate dietary needs.
  • Nutty Addition: Add ½ cup of finely chopped walnuts or pecans to the filling for a satisfying crunch.
  • Chocolate Chips: Sprinkle 1 cup of chocolate chips inside the dough before rolling for an extra indulgent treat.
  • Spiced Twist: Mix in 1 teaspoon of pumpkin pie spice to the filling for a cozy fall-inspired flavor.
  • Lighter Option: Use low-fat cream cheese in the frosting for a lighter but still creamy finish.
  • Different Frostings: Try a vanilla or chocolate ganache for a decadent twist—just pour it over the warm rolls.
  • Cinnamon-Maple Glaze: Replace the cream cheese frosting with a glaze made from powdered sugar, maple syrup, and a touch of cinnamon for a sweet alternative.

Feel free to play around with these variations, and don't forget to check out my Ultimate Cinnamon Roll Guide for even more inspiration! Enjoy experimenting, and let your kitchen fill with joy!

Make Ahead Options

These Red Velvet Cinnamon Rolls are perfect for busy cooks looking to save time during hectic mornings! You can prepare the dough up to 24 hours in advance by completing steps 1-5, then refrigerate it in a greased bowl covered with plastic wrap. The next day, let the dough come to room temperature before rolling it out and proceeding with step 6. To enjoy freshly baked rolls later in the week, you can also slice and freeze the rolled cinnamon rolls (steps 8-9) for up to 3 days; just cover them tightly with plastic wrap. When you're ready to bake, place them into a greased dish and let them rise for about 30-45 minutes before baking as directed. This way, you can indulge in delicious, homemade Red Velvet Cinnamon Rolls with minimal effort!

What to Serve with Red Velvet Cinnamon Rolls?

The magic of these soft, sumptuous rolls is best enjoyed when paired with delightful accompaniments that elevate your meal experience.

  • Fresh Fruit Salad: A vibrant mix of berries and citrus brings a refreshing contrast that balances the sweetness of the rolls. The juiciness of fresh fruit adds an inviting brightness to the table.

  • Maple Bacon: Crispy, savory bacon drizzled with maple syrup introduces a delectable savory-sweet harmony, making each bite even more pleasurable. It's a classic breakfast duo that will excite everyone's taste buds.

  • Scrambled Eggs: Fluffy, buttery scrambled eggs offer a creamy texture that complements the soft rolls beautifully. Their subtle flavor allows the star of the show to shine while adding protein to your meal.

  • Coffee or Tea: A warm cup of your favorite brew enhances the flavor of the Red Velvet Cinnamon Rolls, creating a cozy ambiance. The slight bitterness of coffee or tea contrasts beautifully with the sweetness of the frosting.

  • Creamy Oatmeal: A bowl of oatmeal topped with nuts or fruits can serve as a hearty side that balances the indulgence of the cinnamon rolls. Choose toppings that echo the flavors of your rolls, like cinnamon or chocolate.

  • Caramel Sauce Drizzle: For an extra touch of indulgence, serve a side of warm caramel sauce. Dip your rolls or drizzle them for a syrupy kick that takes the experience to new heights. It’s decadence at its best!

  • Vanilla Ice Cream: Pairing warm cinnamon rolls with a scoop of creamy ice cream creates a melty, sweet experience that’s perfect for dessert lovers. The cooling ice cream will contrast nicely with the warm, freshly baked rolls.

  • Nutty Granola: Crunchy granola sprinkled on top or served alongside adds texture, harmonizing wonderfully with the soft consistency of the rolls. This is a great way to incorporate some wholesome goodness into your breakfast or brunch.

Red Velvet Cinnamon Rolls

Red Velvet Cinnamon Rolls Recipe FAQs

How do I select the best ingredients for my Red Velvet Cinnamon Rolls?
When preparing your Red Velvet Cinnamon Rolls, the quality of your ingredients matters! Choose all-purpose flour that feels soft and fresh. For the milk, aim for whole or 2% to ensure a rich dough. It’s also important to use unsweetened cocoa powder for an authentic flavor; check the expiration date for freshness!

How should I store leftover Red Velvet Cinnamon Rolls?
Absolutely! To keep your leftover rolls fresh, store them in an airtight container at room temperature for about 3 days. If you have leftovers after that, you can refrigerate them for up to 1 week—just remember to warm them up gently in the microwave for a few seconds before devouring!

Can I freeze my Red Velvet Cinnamon Rolls?
Yes, you can freeze them! Once they’re completely cooled, wrap each roll individually in plastic wrap, then place them in a freezer-safe bag or container. This method works beautifully for keeping them fresh for up to 3 months. To enjoy, simply thaw them overnight in the fridge and reheat in the microwave or oven for that freshly baked taste!

What if my Red Velvet Cinnamon Roll dough doesn't rise properly?
If you find that your dough isn’t rising, it could be due to expired yeast or milk that’s too hot or too cold when activating the yeast. To troubleshoot, check that your yeast is fresh by sprinkling it into warm milk with some sugar; it should foam within 5-10 minutes. If the dough still doesn't rise after that, try placing it in a warmer spot—like an oven with the light on—to encourage leavening.

Are there any dietary considerations with Red Velvet Cinnamon Rolls?
Yes, definitely! These rolls contain gluten and dairy. If you need to cater to gluten sensitivities, you might consider using a gluten-free flour blend and ensuring that your other ingredients are gluten-free as well. To accommodate lactose intolerance, plant-based substitutes such as almond milk and nut cream cheese could work wonderfully, while still keeping those indulgent flavors intact!

Can I make these rolls ahead of time?
Certainly! You can prepare the rolls up to the second rise, then cover and refrigerate them overnight. The next morning, bring them to room temperature for about 30 minutes before baking. This method allows you to enjoy freshly baked Red Velvet Cinnamon Rolls without the rush!

Red Velvet Cinnamon Rolls

Melt-in-Your-Mouth Red Velvet Cinnamon Rolls Recipe

Delight in these Red Velvet Cinnamon Rolls, a sweet treat that effortlessly combines rich flavors and a soft texture.
Print Recipe Pin Recipe
Prep Time 1 hour hr
Cook Time 30 minutes mins
Rising Time 1 hour hr 30 minutes mins
Total Time 3 hours hrs
Servings: 12 rolls
Course: Dessert
Cuisine: American
Calories: 250
Ingredients Equipment Method Nutrition Notes

Ingredients
  

For the Dough
  • 4 cups all-purpose flour key for that soft, pillowy texture.
  • 1 cup milk helps activate the yeast for the perfect rise.
  • ½ cup sugar adds sweetness that balances the cocoa flavor.
  • ¼ cup unsweetened cocoa powder gives the rolls their signature red velvet twist.
  • ½ cup unsalted butter, softened enriches the dough and creates a tender bite.
  • 2 large eggs provide structure and richness for the rolls.
  • 1 teaspoon vanilla extract adds a warm, inviting flavor that complements the rolls.
  • ½ teaspoon salt enhances the sweetness and overall flavor.
  • ¼ teaspoon baking soda assists in achieving that perfectly light and fluffy texture.
  • 1 tablespoon active dry yeast the star ingredient that makes these Red Velvet Cinnamon Rolls rise beautifully.
For the Cream Cheese Frosting
  • ½ cup cream cheese, softened creates a creamy base that makes your frosting extra indulgent.
  • 2 tablespoons butter, softened adds smooth richness to the frosting.
  • ½ cup powdered sugar sweetens the frosting to balance the tanginess of the cream cheese.

Equipment

  • Mixing Bowl
  • Rolling Pin
  • Baking Dish
  • Oven

Method
 

Step-by-Step Instructions for Red Velvet Cinnamon Rolls
  1. In a small bowl, combine warm milk (about 110°F) with a pinch of sugar and the tablespoon of active dry yeast. Stir gently and let sit for about 5-10 minutes until frothy.
  2. In a large mixing bowl, whisk together flour, sugar, cocoa powder, salt, and baking soda.
  3. Add softened butter, eggs, and vanilla extract to the dry mixture. Stir until all ingredients come together.
  4. Pour the activated yeast mixture into the bowl and knead the dough for about 5-7 minutes until smooth and elastic.
  5. Transfer the dough to a greased bowl, cover with a clean towel, and let it rise in a warm area for about 1 hour.
  6. Once risen, turn the dough onto a floured surface and roll it into a ¼ inch thick rectangle.
  7. Spread softened butter over the rolled-out dough, then sprinkle cinnamon and sugar evenly on top.
  8. Roll the dough tightly from one long side to the other, forming a log and slice into 12 equal pieces.
  9. Place cut rolls into a greased baking dish, cover with a towel, and let rise for an additional 30 minutes.
  10. Preheat oven to 350°F (175°C) and bake rolls for 25-30 minutes until golden brown.
  11. While baking, prepare the cream cheese frosting by mixing cream cheese, butter, and powdered sugar until smooth.
  12. Remove rolls from the oven, let cool slightly, then frost generously with cream cheese frosting.

Nutrition

Serving: 1rollCalories: 250kcalCarbohydrates: 36gProtein: 3gFat: 10gSaturated Fat: 6gPolyunsaturated Fat: 1gMonounsaturated Fat: 2gCholesterol: 50mgSodium: 200mgPotassium: 150mgFiber: 1gSugar: 10gVitamin A: 5IUCalcium: 2mgIron: 8mg

Notes

For the best results, ensure your milk is warm but not hot, and allow dough to rise fully for fluffy rolls.

Tried this recipe?

Let us know how it was!

Sweet Honey Roasted Carrots with Thyme to Brighten Your Meal

December 15, 2025 by grace bellamy Leave a Comment

Stepping into the kitchen, I often find inspiration in the simplest ingredients—like fresh carrots just waiting to shine. Today, I'm excited to share my recipe for Honey Roasted Carrots with Thyme, a delightful dish that marries sweetness and earthy notes for a vibrant side that steals the show. Not only is this recipe incredibly easy to prepare, but it also transforms humble carrots into a crowd-pleaser, making it perfect for weeknight dinners or festive gatherings. With just a handful of pantry staples, you can create a dish that's not only comforting but also bursting with wholesome goodness. So, are you ready to elevate your vegetable game and savor that glorious caramelization? Let’s get cooking!

Honey Roasted Carrots with Thyme

Why are Honey Roasted Carrots a Must-Try?

Incredibly Easy: With just a few wholesome ingredients, you can whip up this dish in under 40 minutes. Perfect for busy weeknights or special occasions!
Sweet and Savory: The harmonious blend of honey and thyme brings a delightful sweetness that perfectly balances the natural earthiness of the carrots.
Versatile Side Dish: These Honey Roasted Carrots with Thyme complement many main courses—from roasted chicken to a vegetarian quinoa bowl.
Crowd-Pleaser: Whether for a family dinner or a holiday gathering, this dish is sure to impress and satisfy your guests.
Nutrient-Rich: Packed with vitamins and antioxidants, these carrots are not just tasty but also a healthy addition to your meals.
For more delicious veggie recipes, check out my post on Roasted Vegetables with Garlic to keep those taste buds excited!

Honey Roasted Carrots with Thyme Ingredients

For the Carrots
• Carrots – 1 pound of vibrant carrots, peeled and cut to enhance their natural sweetness.
• Olive Oil – 2 tablespoons for a lovely, golden roast and to help the honey adhere.
• Honey – 2 tablespoons to bring that irresistible sweetness to the carrots.
• Fresh Thyme Leaves – 1 teaspoon adds a fragrant touch that complements the honey beautifully.
• Salt and Pepper – To taste, helping to elevate the flavors of this delicious dish.

Optional Additions
• Balsamic Vinegar – 1 tablespoon for a tangy kick if you crave something extra!
• Butter – 1 tablespoon to add a layer of richness right at the end of roasting.

Get ready to enjoy your delightful Honey Roasted Carrots with Thyme!

Step‑by‑Step Instructions for Honey Roasted Carrots with Thyme

Step 1: Preheat the Oven
Begin by preheating your oven to 400°F (200°C). While the oven warms up, line a baking sheet with parchment paper to prevent the carrots from sticking and to make cleanup easier. This initial preparation sets the stage for your delicious Honey Roasted Carrots with Thyme.

Step 2: Prepare the Carrots
In a large mixing bowl, combine the peeled and cut carrots. Drizzle 2 tablespoons of olive oil and 2 tablespoons of honey over the carrots. Sprinkle in 1 teaspoon of fresh thyme leaves along with salt and pepper to taste. If you’re using balsamic vinegar, add it now to enhance the flavor profile of your dish.

Step 3: Toss to Coat
Gently toss the carrots in the bowl, ensuring every piece is evenly coated with the olive oil and honey mixture. This step is crucial to achieving those caramelized edges that make Honey Roasted Carrots so irresistible. Take a moment to admire the vibrant colors as they blend together beautifully.

Step 4: Arrange on Baking Sheet
Spread the coated carrots in a single layer on the prepared baking sheet. Be sure to leave some space between each carrot piece, allowing hot air to circulate for even roasting. This simple step ensures that all your carrots cook uniformly and achieve a lovely golden-brown finish.

Step 5: Roast in the Oven
Place the baking sheet in the preheated oven and roast the carrots for 20-25 minutes. About halfway through, give them a good stir to promote even cooking and browning. Keep an eye out for a tender texture and a caramelized surface; they should look vibrant and inviting by the end of roasting.

Step 6: Add Butter for Richness
If you prefer a richer flavor, add 1 tablespoon of butter to the carrots during the last 5 minutes of roasting. Let it melt and mingle with the honey and thyme, enhancing the overall taste and presentation of your Honey Roasted Carrots with Thyme as they finish cooking.

Step 7: Season to Taste
Once the roasting time is up, carefully remove the baking sheet from the oven. Taste your beautifully roasted carrots and adjust the seasoning with additional salt and pepper if needed. This final touch allows you to personalize the flavors to your liking before serving.

Step 8: Garnish and Serve
Before serving, garnish your Honey Roasted Carrots with a sprinkle of additional fresh thyme leaves for a burst of color and fragrance. Enjoy them warm as a delightful side dish that not only complements your meal but also brings smiles to the table!

Honey Roasted Carrots with Thyme

Honey Roasted Carrots with Thyme Variations

Feel free to get creative with this recipe and make it your own with these delightful twists!

  • Dijon Mustard: Add 1 tablespoon of Dijon mustard to the olive oil and honey mix for a tangy kick that enhances the sweetness of the carrots. It’s a zesty addition that brings a whole new flavor profile!

  • Spicy Kick: Sprinkle in a pinch of red pepper flakes for a gentle heat that contrasts beautifully with the sweet glaze. If you love a little heat, this tweak is a must-try!

  • Maple Syrup: Swap honey for maple syrup to create a distinct flavor with a warm, earthy sweetness. The combination of maple and thyme gives a lovely fall-inspired twist.

  • Herb Medley: Mix in extra herbs like rosemary or parsley alongside thyme for a fragrant boost. Adding different herbs can enhance the overall depth of flavor and make your dish even more aromatic.

  • Caramelized Garlic: Toss in a few minced garlic cloves before roasting for a deliciously savory complement to the honey. Roasted garlic will add a rich layer of flavor that pairs perfectly with the sweet carrots.

  • Nutty Crunch: Top with chopped toasted nuts, like pecans or walnuts, after roasting for a delightful crunch and an extra layer of texture. This adds a lovely contrast to the tender, caramelized carrots.

  • Citrus Zest: Add the zest of an orange or lemon before serving for a bright, refreshing finish. This zingy hint of citrus will elevate your roasted carrots and add a burst of flavor.

  • Creamy Feta: Crumble some feta cheese on top just before serving for a creamy, tangy garnish. The addition of feta creates a delicious balance with the sweetness of the carrots, making each bite unforgettable.

Looking for more veggie inspiration? Don't miss out on my Essential Roasted Vegetable Guide for tips on creating perfectly roasted veggies every time!

Expert Tips for Honey Roasted Carrots

  • Choosing Carrots: Use fresh, vibrant carrots for the best flavor. Baby carrots or rainbow varieties can add a visual appeal to your Honey Roasted Carrots with Thyme.

  • Even Brewing: Ensure the carrots are cut into uniform sizes; this promotes even cooking, preventing some from burning while others are undercooked.

  • Careful with Honey: Watch the honey during roasting—it can caramelize quickly. Stir halfway through to avoid sticking or burning.

  • Butter Boost: Adding butter in the last five minutes creates a depth of flavor, but if you're looking to keep it lighter, feel free to skip it.

  • Avoid Overcrowding: Give the carrots enough space on the baking sheet. Crowding leads to steaming instead of roasting, compromising that beautiful caramelization.

  • Season Adjustment: Taste before serving! Adjust with more salt or pepper to ensure the flavors of your Honey Roasted Carrots are perfectly balanced.

How to Store and Freeze Honey Roasted Carrots

Fridge: Store your leftover Honey Roasted Carrots in an airtight container for up to 3 days. This ensures they stay fresh and flavorful for your next meal.

Freezer: If you want to save them for later, freeze your roasted carrots in a single layer on a baking sheet until firm. Then, transfer to a freezer bag for up to 3 months.

Reheating: To reheat, simply toss the frozen or refrigerated carrots in the oven at 350°F (175°C) for about 10-15 minutes until warmed through, or microwave until hot.

Tip: Consider adding a little drizzle of honey or a splash of balsamic vinegar when reheating to revive that delicious flavor in your Honey Roasted Carrots with Thyme!

What to Serve with Honey Roasted Carrots with Thyme

These vibrant, sweet-savory carrots can elevate any meal, making them a delightful companion for your table.

  • Creamy Mashed Potatoes: Their smooth texture and buttery flavor beautifully contrast the roasted carrots, creating a comforting combination that feels like a warm hug.

  • Grilled Lemon Chicken: The zesty brightness of lemon-infused chicken complements the sweet honey glaze, creating a balanced plate that sings of summer bliss.

  • Quinoa Salad: A refreshing, colorful quinoa salad layered with crunchy veggies offers a wholesome, nutritious element that plays nicely with the carrots’ sweetness.

  • Garlic Sauteed Spinach: This dish brings a burst of vibrant green and a garlicky depth, enhancing the earthy notes of thyme without overshadowing it.

  • Crusty Bread: A warm, rustic loaf allows you to soak up the leftover honey glaze on your plate, making every bite satisfying and delightful.

  • Red Wine: A light, fruity red wine can enhance the meal's flavors, creating a perfect pairing alongside the earthy carrots and savory dishes.

  • Chocolate Mousse: For a sweet finish, the richness of chocolate mousse provides a luxurious contrast to the honey’s sweetness, wrapping up the meal on a decadent note.

  • Apple Crisp: A warm apple crisp with a scoop of vanilla ice cream brings a delightful end to your dining experience, beautifully complementing the earlier courses.

Make Ahead Options

These Honey Roasted Carrots with Thyme are a fantastic option for meal prep! You can peel and cut the carrots, then toss them with olive oil, honey, thyme, salt, and pepper up to 24 hours in advance. Simply store the coated carrots in an airtight container in the refrigerator to preserve their freshness. When you’re ready to enjoy this delightful side dish, spread the carrots on a baking sheet and roast them as directed, adjusting the cooking time if needed. This way, you’ll save precious time on busy weeknights while still serving a dish that’s just as delicious as if it were made fresh!

Honey Roasted Carrots with Thyme

Honey Roasted Carrots with Thyme Recipe FAQs

How do I choose the best carrots for roasting?
Absolutely, selecting the right carrots can enhance your dish! Look for carrots that are firm, brightly colored, and free from dark spots or blemishes. If you can get your hands on baby carrots or even rainbow carrots, they not only taste great but also add a vibrant visual appeal to your Honey Roasted Carrots with Thyme.

How should I store leftover Honey Roasted Carrots?
To keep your leftover Honey Roasted Carrots fresh, store them in an airtight container in the refrigerator for up to 3 days. Make sure they cool down to room temperature before sealing them, as this prevents condensation and keeps them from getting soggy.

Can I freeze Honey Roasted Carrots?
Absolutely! Freezing is a great option for preserving your Honey Roasted Carrots. First, spread them in a single layer on a baking sheet and freeze until firm, about 1-2 hours. Then, transfer them to a freezer bag or airtight container and store for up to 3 months. When you're ready to enjoy them again, simply reheat in the oven at 350°F (175°C) for 10-15 minutes or until warmed through!

What should I do if my carrots are overcooked and mushy?
If you find your Honey Roasted Carrots are a bit mushy, don't despair! You can try giving them a quick sauté in a hot pan to help regain some texture. Alternatively, you could turn them into a delicious purée, blending with a bit of olive oil, salt, and thyme to transform them into a creamy side dish.

Are Honey Roasted Carrots safe for my dog to eat?
While carrots are generally safe for dogs and can be a healthy treat in moderation, you should avoid adding any honey, salt, or seasoning if you're sharing this dish. It's best to offer plain, cooked carrots cut into small pieces to prevent any choking hazards.

Can I make this recipe with other vegetables?
Very! Feel free to experiment with other root vegetables like parsnips, sweet potatoes, or even beets. Just adjust the cooking time as needed, since different veggies may roast at different rates. It's all about finding the perfect blend of flavors that you enjoy!

Honey Roasted Carrots with Thyme

Sweet Honey Roasted Carrots with Thyme to Brighten Your Meal

Honey Roasted Carrots with Thyme is a delightful side dish that perfectly blends sweetness and earthiness, transforming humble carrots into a crowd-pleaser.
Print Recipe Pin Recipe
Prep Time 10 minutes mins
Cook Time 25 minutes mins
Total Time 35 minutes mins
Servings: 4 servings
Course: Side Dishes
Cuisine: American
Calories: 120
Ingredients Equipment Method Nutrition Notes

Ingredients
  

For the Carrots
  • 1 pound Carrots peeled and cut
  • 2 tablespoons Olive Oil for roasting
  • 2 tablespoons Honey for sweetness
  • 1 teaspoon Fresh Thyme Leaves adds fragrance
  • Salt and Pepper to taste
Optional Additions
  • 1 tablespoon Balsamic Vinegar for a tangy kick
  • 1 tablespoon Butter for richness

Equipment

  • Oven
  • Baking Sheet
  • parchment paper
  • Mixing Bowl

Method
 

Preparation Steps
  1. Preheat your oven to 400°F (200°C) and line a baking sheet with parchment paper.
  2. In a large mixing bowl, combine the peeled and cut carrots with olive oil, honey, thyme, salt, and pepper.
  3. Toss the carrots to ensure they are evenly coated with the mixture.
  4. Spread the carrots in a single layer on the prepared baking sheet.
  5. Roast the carrots in the oven for 20-25 minutes, stirring halfway through.
  6. Add butter during the last 5 minutes of roasting if desired.
  7. Once cooked, remove from the oven and adjust seasoning with salt and pepper.
  8. Garnish with fresh thyme before serving.

Nutrition

Serving: 1servingCalories: 120kcalCarbohydrates: 27gProtein: 1gFat: 2gSaturated Fat: 0.5gPolyunsaturated Fat: 0.1gMonounsaturated Fat: 1gSodium: 100mgPotassium: 400mgFiber: 4gSugar: 10gVitamin A: 18400IUVitamin C: 7mgCalcium: 40mgIron: 0.5mg

Notes

Store leftovers in an airtight container for up to 3 days. For longer storage, freeze them for up to 3 months.

Tried this recipe?

Let us know how it was!

Savory Japanese Egg Sandwich (Tamago Sando) Made Easy

December 15, 2025 by grace bellamy Leave a Comment

Stumbling across a cozy café in Tokyo, I was captivated by the intricate simplicity of a Japanese Egg Sandwich, or Tamago Sando. This delightful portable meal combines creamy eggs with subtly sweet Japanese mayonnaise, wrapped in soft, pillowy bread. It's a perfect recipe for those of us who crave comfort food without the hassle. In just 25 minutes, you can whip up this classic dish that not only satisfies the taste buds but also fits seamlessly into a busy lifestyle. Whether you’re looking for a quick lunch or a unique brunch option, this Tamago Sando is sure to be a hit. Ready to elevate your sandwich game? Let’s dive into this culinary experience together!

Japanese Egg Sandwich (Tamago Sando)

What makes Tamago Sando so special?

Simplicity, this recipe requires only a few ingredients and minimal cooking skills, making it an ideal choice for busy days. Creamy filling, the perfect blend of boiled eggs and Japanese mayonnaise creates a luscious texture that you won't be able to resist. Quick prep time, ready in just 25 minutes, it’s perfect for a satisfying meal without the wait. Versatile option, enjoy it for breakfast, lunch, or a snack, fueling your day with delightful flavors. Café-quality taste at home, bring that cozy café experience into your kitchen and impress friends and family with this delicious sandwich. Try serving it alongside a refreshing cucumber salad or a cup of miso soup to complete the meal.

Japanese Egg Sandwich Ingredients

For the Egg Filling

  • 4 large eggs – the star ingredient, providing protein and richness.
  • 2 tablespoons Japanese mayonnaise – adds creaminess and a slight sweetness for the perfect texture.
  • 1 teaspoon sugar – balances the savory flavors and enhances the overall taste.
  • 1 teaspoon salt – brings out the flavors and elevates the egg filling's profile.

For the Sandwich

  • 4 slices soft white bread – ideally, use fluffy bread for that delightful, melt-in-your-mouth experience.

Elevate your next meal with these essential Japanese Egg Sandwich (Tamago Sando) ingredients and enjoy a taste of Japan right at home!

Step‑by‑Step Instructions for Japanese Egg Sandwich (Tamago Sando)

Step 1: Boil the Eggs
Begin by placing 4 large eggs in a pot and covering them with cold water. Bring the water to a rolling boil over medium-high heat and let the eggs boil for exactly 10 minutes. Once the time is up, carefully transfer the eggs to an ice bath to cool for about 5 minutes. This cooling process makes peeling them much easier while ensuring they stay tender.

Step 2: Mash the Boiled Eggs
Once the eggs have cooled, gently tap them on the counter to crack the shells and peel them under running water to facilitate the process. Next, place the peeled eggs in a mixing bowl and mash them with a fork until they reach a chunky yet creamy consistency. This will provide the perfect base for your Japanese Egg Sandwich filling.

Step 3: Mix the Filling
Add 2 tablespoons of Japanese mayonnaise, 1 teaspoon of sugar, and 1 teaspoon of salt to the mashed eggs in the bowl. Use a spatula or a fork to blend these ingredients together until the mixture is well combined and creamy. Taste the filling and adjust the seasoning if desired, enhancing the delicious flavor profile of your Tamago Sando.

Step 4: Prepare the Bread
While the egg mixture settles, take 4 slices of soft white bread and lay them on a clean surface or cutting board. This type of bread is essential for achieving the fluffy texture associated with authentic Japanese Egg Sandwiches. Ensure the slices are fresh and free of crust if you prefer a softer bite.

Step 5: Assemble the Sandwiches
Spread the egg filling evenly across two slices of bread, ensuring a generous layer for that delectable bite. Place the remaining two slices of bread on top to create two complete sandwiches. Gently press them together to secure the filling while maintaining the puffiness of the bread, ready for slicing.

Step 6: Cut and Serve
Using a sharp knife, cut each sandwich into halves or quarters, depending on your preference for serving sizes. Arrange the pieces neatly on a plate, showcasing the creamy filling. Your Japanese Egg Sandwich (Tamago Sando) is now ready to be served, offering a delightful taste of Japan that’s perfect for any occasion.

Japanese Egg Sandwich (Tamago Sando)

Japanese Egg Sandwich Variations

Feel free to get creative with this delightful Tamago Sando and explore variations that brighten your taste buds!

  • Spicy Twist: Add chopped pickled jalapeños to the egg mixture for a zesty kick. It’s a fantastic way to introduce some heat without overpowering the delicate flavors.

  • Herb Infusion: Mix in finely chopped fresh herbs like chives or dill into the egg filling for a refreshing twist. A hint of green elevates the savoriness, turning your sandwich into a garden delight!

  • Avocado Love: Add sliced avocado on top of the egg mix for an extra creamy layer. The velvety texture complements the filling beautifully, making each bite feel indulgent.

  • Whole Grain Bread: Switch out the white bread for whole grain or sourdough for added texture and flavor. This not only enhances the sandwich but also infuses a wholesome touch, ideal for health-conscious eaters.

  • Smoked Salmon Addition: Layer in slices of smoked salmon alongside the egg filling for a luxurious upgrade. It transforms your Tamago Sando into a delectable brunch option that your guests will adore!

  • Vegan Style: Substitute the eggs with a mix of mashed chickpeas and vegan mayonnaise for a plant-based version. This swap captures the heartiness of the original sandwich while keeping it light and refreshing.

  • Asian Flair: Incorporate a dash of soy sauce or furikake seasoning into the egg mixture for an umami boost. This adds a unique depth, reminiscent of flavors often enjoyed in Japanese kitchens.

  • Crunch Factor: Include thinly sliced cucumbers or radishes in the sandwich for extra crunch. They provide a fresh contrast to the creamy filling, making it a satisfying bite through varying textures.

Make Ahead Options

These Japanese Egg Sandwiches (Tamago Sando) are perfect for meal prep enthusiasts looking to save time on busy weeknights! You can prepare the egg filling up to 24 hours in advance by boiling and mashing the eggs, then mixing them with Japanese mayonnaise, sugar, and salt. To keep the filling fresh, store it in an airtight container in the refrigerator. When you're ready to assemble, simply spread the prepared egg mixture between the slices of soft white bread. For the best taste and texture, enjoy the sandwiches within 1-2 days, cutting them just before serving to ensure they remain fluffy and delicious. With these make ahead tips, you'll have a delightful meal ready with minimal effort!

How to Store and Freeze Japanese Egg Sandwich

Fridge: Keep leftover Japanese Egg Sandwich in an airtight container for up to 3 days to maintain freshness and prevent the bread from getting soggy.

Freezer: If you want to freeze, wrap the assembled sandwiches tightly in plastic wrap and place them in a freezer-safe bag for up to 1 month.

Thawing: To enjoy frozen Tamago Sando, thaw in the refrigerator overnight and enjoy cold, or reheat briefly in a microwave for a warm treat.

Reheating: If preferred warm, microwave for 15-20 seconds, ensuring not to overheat to maintain bread's softness.

What to Serve with Japanese Egg Sandwich (Tamago Sando)

Imagine enjoying the delightful simplicity of a Japanese Egg Sandwich paired with fresh flavors and comforting sides that create a beautiful meal experience.

  • Cucumber Salad: Light and refreshing, this salad adds a crisp bite that complements the creamy sandwich perfectly.

  • Miso Soup: Warm and savory, a delicate bowl of miso soup offers a comforting balance to the dish, making your meal truly satisfying.

  • Avocado Slices: Creamy avocado slices not only enhance the richness but also add a delightful green color to your plate.

  • Potato Chips: For a satisfying crunch, crispy potato chips add texture, making every bite of your sandwich even more enjoyable.

  • Green Tea: This aromatic drink complements the flavors of the sandwich, offering a harmonious finish to your meal.

  • Fruit Salad: A medley of fresh fruits brings a burst of sweetness, cleansing your palate and enhancing the overall dining experience.

  • Pickled Vegetables: Tangy pickles provide a zesty contrast to the softness of the Tamago Sando, elevating the meal to new flavor heights.

Enjoy these pairings that make your Japanese Egg Sandwich experience not just a meal, but a delightful culinary journey!

Expert Tips for Japanese Egg Sandwich

  • Perfect Egg Boiling: Ensure your eggs are at room temperature before boiling to prevent cracking. Using a timer helps achieve the ideal 10-minute cook time for creamy yolks.

  • Choosing Mayonnaise: Opt for authentic Japanese mayonnaise like Kewpie for an unmatched flavor; its richer taste enhances your Japanese Egg Sandwich, making it distinctly delicious.

  • Mashed to Perfection: Avoid over-mashing the eggs! Aim for a chunky consistency that provides texture, ensuring your Tamago Sando is light and airy instead of dense.

  • Bread Selection: Use fresh, soft white bread without crust. This choice is crucial for that authentic Japanese experience and keeps your sandwich irresistibly fluffy.

  • Season to Taste: Don’t hesitate to adjust seasoning in your egg mixture. A little extra salt or sugar can elevate the flavors of your Japanese Egg Sandwich, making it uniquely yours.

Japanese Egg Sandwich (Tamago Sando)

Japanese Egg Sandwich (Tamago Sando) Recipe FAQs

What type of eggs should I use for the filling?
Absolutely! I recommend using large, fresh eggs to create a rich and creamy filling for your Japanese Egg Sandwich (Tamago Sando). Fresh eggs have a better texture and flavor, making your sandwich truly delicious. Look for eggs without any cracks, and check the expiration date for the best results.

How long can I store leftover sandwiches, and how should I do it?
You can keep your Japanese Egg Sandwich in the fridge for up to 3 days! Just make sure to place it in an airtight container to maintain its freshness. This helps keep the bread from getting soggy while ensuring the delicious filling stays intact.

Can I freeze my Tamago Sando?
Yes, the more the merrier! Wrap each assembled sandwich tightly in plastic wrap, then place them into a freezer-safe bag. You can enjoy them frozen for up to 1 month. It's a great way to have quick and tasty meals on hand.

How do I thaw and reheat my frozen sandwiches?
To savor your frozen Tamago Sando, simply transfer them to your refrigerator overnight to thaw. If you’d like a warm treat, you can reheat them in the microwave for about 15-20 seconds. Just make sure to check that it’s not overheating, or the bread may lose its lovely softness.

What if my egg filling seems too wet or dry?
Very good question! If your egg filling is too wet, consider adding a bit more mashed egg or a touch of breadcrumbs. On the other hand, if it’s too dry, simply mix in a tad more Japanese mayonnaise to achieve the creamy consistency that makes this sandwich so delightful. Always taste as you go; it’ll help you find that perfect balance!

Are there any dietary restrictions I should be aware of?
Great consideration! If you're serving this to others, keep in mind that Japanese mayonnaise contains eggs, which may not be suitable for those with egg allergies. Additionally, the bread might contain gluten, so opt for gluten-free varieties if needed. Always check the ingredient labels to ensure everyone's dietary needs are met.

Japanese Egg Sandwich (Tamago Sando)

Savory Japanese Egg Sandwich (Tamago Sando) Made Easy

A delightful Japanese Egg Sandwich (Tamago Sando) combines creamy eggs and sweet mayonnaise wrapped in soft bread, perfect for a quick meal.
Print Recipe Pin Recipe
Prep Time 15 minutes mins
Cook Time 10 minutes mins
Cooling Time 5 minutes mins
Total Time 25 minutes mins
Servings: 2 sandwiches
Course: Sandwiches
Cuisine: Japanese
Calories: 300
Ingredients Equipment Method Nutrition Notes

Ingredients
  

For the Egg Filling
  • 4 large eggs the star ingredient, providing protein and richness.
  • 2 tablespoons Japanese mayonnaise adds creaminess and a slight sweetness.
  • 1 teaspoon sugar balances the savory flavors.
  • 1 teaspoon salt brings out the flavors.
For the Sandwich
  • 4 slices soft white bread ideally, use fluffy bread for the best texture.

Equipment

  • Pot
  • Mixing Bowl
  • fork
  • spatula
  • Knife
  • ice bath

Method
 

Step-by-Step Instructions
  1. Begin by placing 4 large eggs in a pot and covering them with cold water. Bring the water to a rolling boil over medium-high heat and let the eggs boil for exactly 10 minutes. Once the time is up, carefully transfer the eggs to an ice bath to cool for about 5 minutes.
  2. Once the eggs have cooled, gently tap them on the counter to crack the shells and peel them under running water. Place the peeled eggs in a mixing bowl and mash them with a fork until they reach a chunky yet creamy consistency.
  3. Add 2 tablespoons of Japanese mayonnaise, 1 teaspoon of sugar, and 1 teaspoon of salt to the mashed eggs in the bowl. Use a spatula or a fork to blend these ingredients together until well combined.
  4. While the egg mixture settles, take 4 slices of soft white bread and lay them on a clean surface. Ensure the slices are fresh and free of crust for a softer bite.
  5. Spread the egg filling evenly across two slices of bread. Place the remaining two slices of bread on top to create two complete sandwiches.
  6. Using a sharp knife, cut each sandwich into halves or quarters. Arrange the pieces neatly on a plate and serve.

Nutrition

Serving: 1sandwichCalories: 300kcalCarbohydrates: 30gProtein: 12gFat: 15gSaturated Fat: 3gPolyunsaturated Fat: 1gMonounsaturated Fat: 10gCholesterol: 210mgSodium: 400mgPotassium: 150mgFiber: 1gSugar: 2gVitamin A: 500IUCalcium: 20mgIron: 1mg

Notes

Enjoy with a side of cucumber salad or miso soup for a complete meal. Adjust seasoning in the filling to your taste for perfect flavor balance.

Tried this recipe?

Let us know how it was!

Sweet and Savory Glazed Pigs In a Blanket Delight

December 15, 2025 by grace bellamy Leave a Comment

As I stood in my kitchen, the sweet aroma of honey and brown sugar wafted through the air, instantly capturing my attention. That’s when I realized it was time to create something delightfully different: Glazed Pigs In a Blanket! This charming twist on a classic appetizer brings together mini hot dogs and buttery crescent roll dough, all drizzled with a mouthwatering glaze that takes only minutes to prepare. Not only is this recipe a crowd-pleaser that kids and adults rave about, but it’s also freezer-friendly, meaning you can whip up a batch in advance and enjoy the joy of homemade goodness whenever the craving strikes. So, are you ready to impress your friends and family while infusing your kitchen with irresistible scents? Let’s dive into this delicious adventure!

Glazed Pigs In a Blanket

Why are Glazed Pigs In a Blanket irresistible?

Amazingly Quick: With just 35 minutes from start to finish, these treats fit perfectly into any busy schedule.

Versatile Flavor: The unique glaze of honey and Dijon mustard adds a sweet and tangy kick that elevates the classic taste of mini hot dogs.

Crowd Favorite: Perfect for parties, game day, or simple family gatherings, everyone will ask for seconds—trust me!

Freezer-Friendly: Make a big batch ahead of time and store them for a quick snack or appetizer that’s always ready.

Effortless Preparation: Even beginner cooks can master this recipe without breaking a sweat. If you’re looking for more easy snacks, check out my guide on quick party appetizers!

Glazed Pigs In a Blanket Ingredients

• Let’s gather what you need for this delectable treat!

For the Dough
• Mini hot dogs – these bite-sized wonders are the star of our Glazed Pigs In a Blanket; approximately 28 will do the trick.
• Crescent roll dough – this flaky dough wraps around the hot dogs, creating the perfect base for our snacks.

For the Glaze
• Honey – brings a delightful sweetness that contrasts with savory ingredients perfectly.
• Brown sugar – deepens the sweetness while adding a hint of caramel flavor to the glaze.
• Dijon mustard – provides a zesty punch that balances the sweetness of honey and brown sugar.
• Soy sauce – enhances umami flavors in the glaze, making it irresistibly delicious!
• Garlic powder – adds warmth and depth to the flavor profile.
• Black pepper – just a touch gives the glaze a subtle kick.

For Preparation
• Cooking spray or oil – use this for greasing the baking sheet to prevent sticking.
• Optional garnish: fresh parsley – adds a pop of color and freshness when serving.

Step‑by‑Step Instructions for Glazed Pigs In a Blanket

Step 1: Preheat the Oven
Begin by preheating your oven to 375°F (190°C). While the oven warms up, prepare your baking sheet by lining it with parchment paper or spraying it lightly with cooking spray. This ensures that your Glazed Pigs In a Blanket won’t stick and will bake evenly, leading to that perfect golden-brown finish.

Step 2: Prepare the Dough
Open the package of crescent roll dough and carefully unroll it on a clean surface. Pinch the seams together to form a solid sheet; this will help keep your mini hot dogs snug as you wrap them. Take a moment to admire your dough sheet before slicing it into strips approximately 1-inch wide for easy wrapping.

Step 3: Wrap the Mini Hot Dogs
Grab each mini hot dog and place it at one end of a dough strip. Starting from that end, tightly wrap the dough around the hot dog, ensuring it's fully encased. This step is crucial for keeping the delicious fillings secure inside, and it should look like a little package ready for baking!

Step 4: Arrange on the Baking Sheet
Transfer the wrapped hot dogs onto the prepared baking sheet. Make sure to space them about an inch apart to allow for some expansion as they bake. This ensures that your Glazed Pigs In a Blanket cook evenly and achieve that delightful crispy exterior everyone loves.

Step 5: Create the Glaze
In a small bowl, whisk together the honey, brown sugar, Dijon mustard, soy sauce, garlic powder, and black pepper until everything is fully combined. This glaze brings an irresistible sweet and savory flavor to your Glazed Pigs In a Blanket that will impress everyone at your gathering.

Step 6: Brush the Glaze
Using a pastry brush, generously apply the glaze over each wrapped hot dog. Make sure to coat them well to enhance their flavor and caramelize beautifully while baking. The glaze not only adds taste but also a glossy finish that makes these treats even more inviting.

Step 7: Bake to Perfection
Place the baking sheet in the preheated oven and bake for about 12-15 minutes. Keep an eye on them as they cook; you’ll know they’re done when the dough turns a lovely golden brown and is cooked through. The aroma wafting through your kitchen will be a sure sign that your Glazed Pigs In a Blanket are almost ready!

Step 8: Cool Before Serving
Once baked, carefully remove the tray from the oven and let the Glazed Pigs In a Blanket cool for a few minutes. This brief cooling period will make them easier to handle and allow the glaze to set, creating a delightful sticky outer layer that enhances each bite.

Step 9: Garnish and Serve
If you’d like to add a fresh touch, sprinkle chopped parsley over the cooled Glazed Pigs In a Blanket. This optional garnish adds a pop of color and freshness that elevates your presentation. Now it’s time to serve these tasty treats and watch everyone enjoy them!

Glazed Pigs In a Blanket

How to Store and Freeze Glazed Pigs In a Blanket

Room Temperature: Enjoy your Glazed Pigs In a Blanket within 2 hours of baking for the best taste; if they're out longer, store in the fridge.

Fridge: Keep leftovers in an airtight container in the fridge for up to 3 days. Reheat in the oven at 350°F (175°C) for about 10 minutes to regain crispness.

Freezer: These tasty bites freeze beautifully! Store cooled Glazed Pigs In a Blanket in a single layer in a freezer-safe bag for up to 3 months.

Reheating: For the best results, bake frozen Glazed Pigs In a Blanket at 350°F (175°C) for 15-20 minutes until heated through and crispy again.

What to Serve with Glazed Pigs In a Blanket

Creating the perfect meal around these sweet and savory bites will elevate your dining experience and impress your guests.

  • Crispy Coleslaw: A crunchy, tangy slaw complements the savory richness of the pigs in a blanket, offering a refreshing contrast. The creaminess balances the sweetness of the glaze, creating a delightful harmony.

  • Spicy Baked Beans: Their hearty flavor and slight spice bring a smoky depth that pairs beautifully with the sweetness of the glaze. This classic combo adds a comforting vibe to your gathering, making it feel warm and nostalgic.

  • Savory Potato Wedges: Crispy on the outside and fluffy on the inside, these wedges provide the perfect starch to soak up any leftover glaze. Pairing them with your pigs in a blanket feels like a cozy hug on a plate.

  • Honey Mustard Dipping Sauce: Enhance the flavors with a tangy honey mustard. Its smooth texture and zesty flavor echo the glaze, giving a delightful twist that everyone will enjoy.

  • Vegetable Platter: Brighten the table with fresh veggies like carrots, cucumbers, and bell peppers. They add color and crunch, making for a light, refreshing bite between those indulgent treats.

  • Chilled Lemonade: A bright, citrusy drink balances the richness of your dish and offers a refreshing palate cleanser. Plus, the sweetness complements the glaze and makes for a cheerful addition to any gathering.

  • Chocolate Chip Cookies: End on a sweet note with warm, gooey cookies. Their classic flavor contrasts with the savory sweetness of the pigs in a blanket, creating a delightful finish to your meal.

Glazed Pigs In a Blanket Variations

Feel free to sprinkle your very own flair on these delightful bites for an irresistible twist!

  • Vegan Option: Swap mini hot dogs for plant-based sausages and use vegan crescent roll dough for a cruelty-free version.
    Try a smoky-flavored sausage for an extra kick! They won’t just taste good; they’ll look good on your appetizer table too.

  • Spice It Up: Add diced jalapeños or a splash of hot sauce to the glaze for a fiery take.
    This will tantalize taste buds and add an exciting flavor burst that everyone will be talking about!

  • Cheesy Delight: Before wrapping, place a thin slice of cheese inside the dough with the hot dog.
    The melted cheese will transform your Glazed Pigs In a Blanket into a gooey, cheesy wonder that’s hard to resist!

  • Sweet & Savory: Include a sprinkle of cinnamon in the glaze for a unique flavor profile.
    This unexpected addition adds a warmth and complexity that will surprise and delight your guests!

  • Herb-Infused: Mix fresh herbs like rosemary or thyme into the glaze for an aromatic twist.
    These fresh flavors can elevate the entire dish, making it both fragrant and deliciously different!

  • Garlic Lovers: Increase garlic powder to 1 teaspoon for an extra punch of flavor.
    For those who adore garlic, this will create a mouthwatering aroma that fills the kitchen, drawing everyone in!

  • Gluten-Free: Use gluten-free crescent dough to accommodate those with dietary restrictions.
    They can join the fun without missing out on the deliciousness of these classic appetizers!

  • Asian-Inspired: Brush with teriyaki sauce instead of the glaze for a tasty twist on flavors.
    This gives a sweet and savory combination that's reminiscent of popular Asian dishes and will be a hit at any gathering!

And remember, if you're on the lookout for even more exciting finger foods, why not explore my tips on quick party appetizers? You'll find a world of delectable dishes just waiting to be made!

Make Ahead Options

These Glazed Pigs In a Blanket are perfect for meal prep enthusiasts looking to save time during busy weeknights! You can prepare the wrapped mini hot dogs up to 24 hours in advance. Simply follow the wrapping instructions, then place them on the baking sheet and cover them tightly with plastic wrap before refrigerating. The glaze can also be made up to 3 days ahead; store it in the refrigerator in an airtight container. When you're ready to serve, simply brush the glaze over the wrapped hot dogs and bake at 375°F for about 12-15 minutes for delightful, fresh-out-of-the-oven results that are just as delicious!

Expert Tips for Glazed Pigs In a Blanket

Perfect Dough Thickness: Make sure your crescent roll strips are evenly cut to avoid uneven baking. Too thin may lead to bursting, while too thick can be doughy.

Coat Generously: Don’t skimp on the glaze! Generously brushing it over each wrapped hot dog ensures maximum flavor and a glossy finish for your Glazed Pigs In a Blanket.

Watch the Oven: Keep a close eye during the last few minutes of baking. Every oven is different, and you don’t want them to burn; remove them once they reach golden perfection.

Resting Time: Allow the wrapped hot dogs to sit for a few minutes after baking to set the glaze properly. This makes them easier to pick up and eat, enhancing the overall experience!

Freezing Tips: If prepping in advance, allow the Glazed Pigs In a Blanket to cool completely before freezing. This prevents ice crystals from forming, helping retain their delicious texture and flavor.

Glazed Pigs In a Blanket

Glazed Pigs In a Blanket Recipe FAQs

How do I choose the best mini hot dogs for my Glazed Pigs In a Blanket?
Absolutely! Look for mini hot dogs that are made with quality meat and don’t contain too many fillers. I often prefer ones that are pre-cooked, as they save additional cooking time. If you're conscious about health, opt for turkey or chicken versions for a lighter option.

How long can I store my Glazed Pigs In a Blanket in the fridge?
You can keep your delicious treats in an airtight container in the fridge for up to 3 days. They taste best when consumed fresh, but reheating them can bring back that beautiful crispiness. Just pop them in the oven at 350°F (175°C) for about 10 minutes, and you’re good to go!

Can I freeze Glazed Pigs In a Blanket and how?
Yes, indeed! To freeze, allow your Glazed Pigs In a Blanket to cool completely after baking. Then, arrange them in a single layer on a baking sheet and freeze them for about 1-2 hours. After they’re frozen, transfer them into a freezer-safe bag, ensuring to remove as much air as possible. They’ll last in the freezer for up to 3 months!

What should I do if my dough doesn't seal properly around the hot dogs?
Very! If your dough isn't sealing well, try pinching the seams together more firmly. You can also coat the edges with a bit of water to help them stick better. If you find your dough tearing, simply patch it up with another small piece of crescent dough to ensure your mini hot dogs stay cozy inside.

Can these Glazed Pigs In a Blanket be made gluten-free?
Definitely! If you or someone at your gathering has gluten intolerance, you can use gluten-free crescent roll dough available in most grocery stores. Just be sure to check that the mini hot dogs are also gluten-free. It’s all about adapting to your guests’ needs and ensuring everyone can enjoy this delicious dish!

Glazed Pigs In a Blanket

Sweet and Savory Glazed Pigs In a Blanket Delight

Delightful Glazed Pigs In a Blanket that combine mini hot dogs and crescent roll dough with a honey-brown sugar glaze.
Print Recipe Pin Recipe
Prep Time 20 minutes mins
Cook Time 15 minutes mins
Cooling Time 5 minutes mins
Total Time 40 minutes mins
Servings: 28 pieces
Course: Appetizer
Cuisine: American
Calories: 150
Ingredients Equipment Method Nutrition Notes

Ingredients
  

For the Dough
  • 28 pieces mini hot dogs bite-sized wonders
  • 1 tube crescent roll dough flaky dough
For the Glaze
  • ¼ cup honey delightful sweetness
  • ¼ cup brown sugar adds caramel flavor
  • 2 tablespoons Dijon mustard provides a zesty punch
  • 2 tablespoons soy sauce enhances umami flavors
  • 1 teaspoon garlic powder adds warmth
  • ¼ teaspoon black pepper adds a subtle kick
For Preparation
  • 1 can cooking spray or oil for greasing the baking sheet
  • as needed optional garnish: fresh parsley for serving

Equipment

  • Oven
  • Baking Sheet
  • parchment paper
  • Whisk
  • Pastry Brush

Method
 

Steps
  1. Preheat the oven to 375°F (190°C) and prepare a baking sheet by lining it with parchment paper or lightly greasing it.
  2. Open the crescent roll dough package and unroll it on a clean surface, pinching seams together to form a solid sheet. Cut into strips approximately 1-inch wide.
  3. Take each mini hot dog and place it at one end of a dough strip, wrapping it tightly around the hot dog.
  4. Transfer the wrapped hot dogs to the prepared baking sheet, spaced about an inch apart.
  5. In a small bowl, whisk together honey, brown sugar, Dijon mustard, soy sauce, garlic powder, and black pepper until well combined.
  6. Brush the glaze generously over each wrapped hot dog.
  7. Bake in the preheated oven for about 12-15 minutes or until the dough turns golden brown.
  8. Remove from the oven and let cool for a few minutes before serving.
  9. Sprinkle chopped parsley over the cooled treats for garnish if desired.

Nutrition

Serving: 1pieceCalories: 150kcalCarbohydrates: 10gProtein: 4gFat: 10gSaturated Fat: 3gPolyunsaturated Fat: 0.5gMonounsaturated Fat: 1gCholesterol: 20mgSodium: 250mgPotassium: 100mgSugar: 5gVitamin A: 200IUCalcium: 20mgIron: 0.5mg

Notes

These Glazed Pigs In a Blanket are best served warm and can be frozen for later enjoyment.

Tried this recipe?

Let us know how it was!

Crispy Peppermint Meringues with Chocolate Drizzle Delight

December 15, 2025 by grace bellamy Leave a Comment

As I stood in my kitchen experimenting with egg whites and sugar, a delightful idea took flight: Crispy Peppermint Meringues with Chocolate Drizzle. The airy texture of these meringues perfectly complements the festive peppermint flavor, making them a standout treat for any gathering or a sweet surprise for yourself. Not only are they a visual showstopper, but their deceptively simple preparation means you’ll have more time to enjoy the festivities. With little effort required and a crowd-pleasing outcome, these meringues are bound to become a staple in your dessert repertoire. Are you ready to whip up a batch of these light, crispy delights and dive into the holiday spirit?

Crispy Peppermint Meringues with Chocolate Drizzle

Why Are These Meringues So Irresistible?

Delicate Texture: Each bite offers a light, airy crunch that dissolves in your mouth.
Festive Flavor: The vibrant peppermint essence brings holiday cheer to any occasion.
Chocolate Drizzle: A rich, luscious chocolate coating adds indulgence to this already delightful treat.
Easy Preparation: With just a few steps, you can create stunning meringues that will impress family and friends. Perfect as a standalone dessert or as a beautiful addition to your holiday cookie platter, these Crispy Peppermint Meringues with Chocolate Drizzle will surely win hearts!

Crispy Peppermint Meringues Ingredients

• Get ready to create the ultimate festive treat with this simple ingredients list.

For the Meringue:

  • 4 large egg whites – Make sure they are at room temperature for optimal whipping.
  • 1 cup granulated sugar – This sweetener helps create those glossy, stable peaks.
  • 1 teaspoon pure peppermint extract – Infuses the meringues with a refreshing, holiday flavor.
  • ¼ teaspoon cream of tartar – Stabilizes the egg whites, ensuring they whip up perfectly.
  • ¼ teaspoon salt – Enhances the sweetness and balances the flavors.

For the Chocolate Drizzle:

  • 1 cup semi-sweet chocolate chips – Provides a rich and smooth chocolate layer that complements the meringues.
  • 1 tablespoon vegetable oil (optional) – Use this to thin the chocolate for easier drizzling if desired.

For the Garnish:

  • ¼ cup crushed peppermint candies – Adds a festive touch and a nice crunch atop the chocolate drizzle.

Prepare to fall in love with these Crispy Peppermint Meringues with Chocolate Drizzle as you gather these ingredients and bring magic to your kitchen!

Step‑by‑Step Instructions for Crispy Peppermint Meringues with Chocolate Drizzle

Step 1: Preheat the Oven and Prepare Baking Sheets
Begin by preheating your oven to 200°F (93°C) to create the perfect environment for your meringues. While the oven warms, line two baking sheets with parchment paper, ensuring a nonstick surface for the delicate Crispy Peppermint Meringues. This preparation is crucial as it sets the stage for achieving that lovely crisp texture.

Step 2: Whip the Egg Whites
In a clean, dry mixing bowl, combine the room-temperature egg whites, cream of tartar, and salt. Using an electric mixer, beat the mixture on medium speed until it becomes frothy, which will take about 2-3 minutes. This step is essential to create the light base for your meringues, so keep an eye on those bubbles forming!

Step 3: Add Sugar and Achieve Stiff Peaks
Gradually increase the mixer speed to high and carefully add the granulated sugar, one tablespoon at a time. Continue beating for about 5-7 minutes, until you achieve stiff, glossy peaks that hold their shape. This gives your Crispy Peppermint Meringues that beautiful structure, so be patient and watch for that shiny meringue magic!

Step 4: Incorporate Peppermint Extract
Once the meringue is glossy, gently fold in the peppermint extract using a spatula. Take care not to deflate the mixture as you combine the flavors; this adds a delightful holiday essence to your meringues. The mixture should remain fluffy while incorporating the extract smoothly.

Step 5: Pipe Meringue onto Baking Sheets
Transfer the prepared meringue mixture into a piping bag fitted with a large star tip. Pipe small mounds, about 1 inch in diameter, onto the lined baking sheets, leaving enough space between them to allow for slight expansion. This step is where you shape your Crispy Peppermint Meringues into those charming little peaks!

Step 6: Bake the Meringues
Carefully place the baking sheets in your preheated oven and bake for 1.5 to 2 hours. The meringues are ready when they feel dry to the touch and can be easily lifted off the parchment paper. Turn off the oven and let them cool inside for at least an hour, ensuring they maintain their delightful crispness.

Step 7: Melt the Chocolate
While your meringues cool, melt the semi-sweet chocolate chips in a microwave-safe bowl in 30-second intervals, stirring after each session until smooth. If you wish for a thinner consistency for drizzling, add the optional vegetable oil now. This decadent chocolate layer will pair beautifully with your crispy treats!

Step 8: Drizzle and Garnish
Once the meringues are completely cool, use a fork or piping bag to drizzle the melted chocolate over each meringue. Let your creativity shine here as you create tempting patterns! Immediately sprinkle the crushed peppermint candies on top for that festive touch, making each piece a visual delight.

Step 9: Allow to Set and Store
Finally, let the chocolate drizzle set before serving your stunning Crispy Peppermint Meringues with Chocolate Drizzle. Once set, store any leftovers in an airtight container at room temperature, ensuring they remain deliciously crispy for whenever you crave a sweet treat!

Crispy Peppermint Meringues with Chocolate Drizzle

Make Ahead Options

These Crispy Peppermint Meringues with Chocolate Drizzle are excellent for meal prep, allowing you to impress your guests without the last-minute rush! You can prepare the meringue mixture up to 24 hours in advance; simply store it in an airtight container in the refrigerator to maintain its freshness. When ready to serve, follow the baking instructions, and then melt the chocolate for drizzling. To keep the meringues crisp, avoid combining the chocolate with the meringues until just before serving. This way, you’ll enjoy delightful, airy meringues with a luscious chocolate topping that feels fresh and homemade, perfect for busy holiday gatherings!

Crispy Peppermint Meringues with Chocolate Drizzle: Variations & Substitutions

Feel free to play around with these delightful meringues, adding your own twist to elevate the experience!

  • Dairy-Free: Substitute semi-sweet chocolate chips with dairy-free chocolate chips to keep it vegan-friendly.

  • Flavor Fun: Experiment with different extracts like almond or vanilla for a unique flavor profile that'll impress your guests.

  • Crunchy Twist: Add finely chopped nuts such as almonds or hazelnuts into the meringue mixture for added texture and a nutty taste. This adds great depth to the experience!

  • Holiday Spice: Mix in a pinch of cinnamon or nutmeg to the meringue for additional warmth that perfectly complements the peppermint essence during festive gatherings.

  • Personal Heat: For a kick, incorporate a tiny pinch of cayenne pepper into the chocolate drizzle. This creates an intriguing flavor contrast that excites the palate!

  • Fruit Flavors: Add a few drops of fruit extract, like raspberry or orange, to the meringue for a delightful fruity twist. It’s a fresh take that’s sure to surprise.

  • Chocolate Variety: Use white chocolate or dark chocolate instead of semi-sweet for a different sweetness level, giving the meringues a deeper chocolatey flavor.

  • Peppermint Variance: For a minty adventure, mix in crushed candy canes to the meringue before baking, intensifying that peppermint crunch in each bite.

Play with these variations and take your Crispy Peppermint Meringues with Chocolate Drizzle to new heights. They might just inspire other holiday treats, like the Chocolate-Covered Candy Cane Cookies or a festive Peppermint Bark to share!

How to Store and Freeze Crispy Peppermint Meringues with Chocolate Drizzle

Room Temperature: Store the meringues in an airtight container at room temperature for up to 3 days. This keeps them crispy and delicious, perfect for snacking!

Fridge: Avoid refrigerating the meringues, as the humidity can make them soft. Keeping them in a cool, dry place is best for maintaining that delightful crunch.

Freezer: If you need to store them longer, freeze the meringues in a single layer on a baking sheet, then transfer to an airtight container. They can last up to 2 months in the freezer.

Reheating: For a quick refresh, let frozen meringues thaw at room temperature for about 30 minutes before enjoying. This will ensure your Crispy Peppermint Meringues with Chocolate Drizzle taste as good as fresh!

What to Serve with Crispy Peppermint Meringues with Chocolate Drizzle

Indulge your senses and elevate your dessert experience alongside these delightful meringues, perfect for any occasion.

  • Rich Hot Chocolate: The creamy texture and chocolatey goodness complement the airy meringues, creating a cozy dessert duo. Picture yourself cozying up with a warm cup of hot cocoa, each sip enhancing the peppermint notes from the meringues.

  • Fresh Berries: Strawberries or raspberries provide a burst of freshness and acidity, balancing the sweetness of the meringues. Their vibrant colors also add a stunning visual contrast, perfect for impressing guests.

  • Vanilla Ice Cream: A scoop of this creamy delight melts against the crispy meringues, creating a delicious textural contrast that takes your dessert to the next level. Vanilla’s subtle sweetness enhances the overall flavor while providing a luscious base.

  • Peppermint Tea: This soothing drink serves as a delightful pairing, adding a warming herbal note to the festive peppermint flavor of the meringues. Enjoy it for a cozy afternoon treat that pairs perfectly with sweet delights.

  • Chocolate Dipped Fruit: Strawberries, bananas, or orange segments dipped in chocolate mimic the rich chocolate drizzle on the meringues, creating a beautifully harmonious dessert spread. This is a fun and elegant way to add variety to your dessert table.

  • Coconut Macaroons: These chewy delights create a textural contrast that balances the crispiness of your meringues. The hint of coconut pairs well with peppermint, offering a tropical twist to your holiday dessert platter.

  • Coffee or Espresso: The bold, rich flavor of a well-brewed cup of coffee cuts through the sweetness. This pairing transforms the meringues into an elegant end to a meal, perfect for coffee lovers.

  • Whipped Cream: A dollop of freshly whipped cream adds creaminess and richness, beautifully complementing the lightness of your crispy peppermint meringues. This classic pairing offers a simple yet decadent touch.

Expert Tips for Crispy Peppermint Meringues

  • Room Temperature Eggs: Ensure your egg whites are at room temperature for optimal volume and stability when whipping. Cold egg whites may not whip up properly.

  • Avoid Grease: Make sure your mixing bowl and utensils are free from grease; even a tiny bit can prevent the egg whites from achieving the stiff peaks needed for perfect meringues.

  • Slow Sugar Addition: Add the granulated sugar slowly, one tablespoon at a time, during whipping. This gradual approach helps the sugar dissolve properly and creates a glossy meringue.

  • Cooling Time: Don’t skip the cooling period! Allow the meringues to cool in the oven after baking to maintain their texture and prevent any humidity from making them soft.

  • Creative Drizzle: Make your presentation pop by using a piping bag to drizzle the chocolate creatively over the meringues. This adds an extra layer of elegance to your Crispy Peppermint Meringues with Chocolate Drizzle.

Crispy Peppermint Meringues with Chocolate Drizzle

Crispy Peppermint Meringues with Chocolate Drizzle Recipe FAQs

What is the best way to select egg whites for meringue?
Absolutely! For the best results, choose large egg whites that are at room temperature. This helps them whip up to a greater volume and creates those beautiful, stable peaks in your meringue. If you can, use fresh eggs, as the older the egg, the less volume you may achieve.

How should I store leftover meringues?
Very straightforward! Store leftover Crispy Peppermint Meringues with Chocolate Drizzle in an airtight container at room temperature. They’ll last up to 3 days while keeping their delightful crispy texture, just make sure they’re in a cool, dry area to avoid any moisture.

Can I freeze meringues?
Of course! Freezing is a great option. To freeze, place the meringues in a single layer on a baking sheet and allow them to freeze until solid, about 1-2 hours. Once frozen, transfer them to an airtight container or freezer bag. They can last up to 2 months in the freezer. When you’re ready to enjoy them, let them thaw at room temperature for about 30 minutes.

What if my meringue doesn’t hold stiff peaks?
No worries! If your meringue isn’t forming stiff peaks, it could be due to grease on your mixing bowl or utensils. Make sure everything is squeaky clean. Also, ensure that your egg whites are fresh and properly whipped. If it’s still not working, you might want to try adding a bit more sugar gradually, as this helps stabilize the mixture.

Are there any dietary considerations for the meringues?
Yes! These meringues are naturally gluten-free and can be made dairy-free, as they don’t contain any dairy ingredients. However, keep in mind that they do include egg whites, so they’re not suitable for vegans or those with egg allergies. If you want to avoid common allergens, you can skip the chocolate drizzle or use a vegan chocolate alternative!

How long will the chocolate drizzle stay intact on the meringues?
Great question! The chocolate drizzle will generally remain intact for up to 3 days if stored as mentioned. However, if left exposed to air, the chocolate may start to lose its shine and become dull. To maintain its appearance, serve them soon after drizzling!

Crispy Peppermint Meringues with Chocolate Drizzle

Crispy Peppermint Meringues with Chocolate Drizzle Delight

Crispy Peppermint Meringues with Chocolate Drizzle are a delightful treat perfect for any gathering filled with festive peppermint flavor and a luscious chocolate coating.
Print Recipe Pin Recipe
Prep Time 15 minutes mins
Cook Time 2 hours hrs
Cooling Time 1 hour hr
Total Time 3 hours hrs 15 minutes mins
Servings: 12 pieces
Course: Dessert
Cuisine: American
Calories: 60
Ingredients Equipment Method Nutrition Notes

Ingredients
  

For the Meringue
  • 4 large egg whites Make sure they are at room temperature for optimal whipping.
  • 1 cup granulated sugar This sweetener helps create those glossy, stable peaks.
  • 1 teaspoon pure peppermint extract Infuses the meringues with a refreshing, holiday flavor.
  • ¼ teaspoon cream of tartar Stabilizes the egg whites, ensuring they whip up perfectly.
  • ¼ teaspoon salt Enhances the sweetness and balances the flavors.
For the Chocolate Drizzle
  • 1 cup semi-sweet chocolate chips Provides a rich and smooth chocolate layer that complements the meringues.
  • 1 tablespoon vegetable oil Use this to thin the chocolate for easier drizzling if desired.
For the Garnish
  • ¼ cup crushed peppermint candies Adds a festive touch and a nice crunch atop the chocolate drizzle.

Equipment

  • Electric mixer
  • piping bag
  • Baking sheets
  • parchment paper
  • Microwave-safe bowl

Method
 

Crispy Peppermint Meringues Instructions
  1. Preheat your oven to 200°F (93°C) and line two baking sheets with parchment paper.
  2. In a clean mixing bowl, combine egg whites, cream of tartar, and salt. Beat on medium speed until frothy (2-3 minutes).
  3. Gradually increase speed to high, adding sugar one tablespoon at a time. Beat until stiff, glossy peaks form (5-7 minutes).
  4. Gently fold in peppermint extract without deflating the meringue.
  5. Transfer the mixture to a piping bag and pipe small mounds onto the baking sheets.
  6. Bake for 1.5 to 2 hours until dry to the touch. Let cool in the oven for an hour.
  7. Melt chocolate chips in a bowl in the microwave, stirring after 30-second intervals. Add oil if desired.
  8. Drizzle melted chocolate over cooled meringues and sprinkle crushed peppermint candies on top.
  9. Allow the chocolate to set before serving and store leftovers in an airtight container.

Nutrition

Serving: 1pieceCalories: 60kcalCarbohydrates: 10gProtein: 1gFat: 2gSaturated Fat: 1gMonounsaturated Fat: 1gSodium: 10mgPotassium: 30mgSugar: 9gIron: 2mg

Notes

Ensure egg whites are at room temperature and that your equipment is grease-free for optimal results.

Tried this recipe?

Let us know how it was!

Decadent Espresso Chocolate Fudge Cookies You'll Love

December 15, 2025 by grace bellamy Leave a Comment

In the midst of a bustling kitchen, the scent of warm chocolate and rich espresso wafts through the air, instantly elevating my mood. This is the magic of my Espresso Chocolate Fudge Cookies, where gooey chocolate meets a delightful coffee kick. They come together in just 30 minutes, making them the ideal quick treat for any occasion—from casual family gatherings to cozy evenings at home. Not only do these cookies satisfy your sweet tooth, but they also have a secret weapon: the espresso powder, which adds depth and enhances the chocolate flavor beautifully. Grab your mixing bowl and join me; your taste buds are about to be delighted! What’s your favorite way to enjoy a homemade cookie?

Espresso Chocolate Fudge Cookies

Why Are These Cookies So Irresistible?

Decadent flavors: The rich chocolate combined with espresso creates an irresistible depth of flavor that coffee and chocolate lovers will crave.
Quick and easy: With just a 15-minute prep time, you can satisfy your sweet tooth in no time. Perfect for unexpected guests or a cravings fix!
Versatile: Customize with nuts or chocolate chunks—these cookies adapt to your taste and are sure to impress.
Perfectly chewy: The generous chocolate chips create a gooey, fudgy texture that melts in your mouth, leaving you wanting more.
Crowd-pleaser: Whether you're sharing them at a party or enjoying them solo with your favorite coffee, these Espresso Chocolate Fudge Cookies are guaranteed to become a favorite! For delightful pairings, consider serving suggestions.

Espresso Chocolate Fudge Cookies Ingredients

• Prepare to bake these delightful Espresso Chocolate Fudge Cookies with ease!

For the Dough

  • 1 cup all-purpose flour – a key ingredient for creating the perfect chewy texture.
  • 2 cups chocolate chips – choose bittersweet or semisweet for that rich chocolate flavor.
  • 2 large eggs – they help bind the ingredients together and add moisture.
  • 1 tablespoon espresso powder – enhances the chocolate flavor and adds a delightful coffee kick.
  • 1 tablespoon vanilla extract – a splash of purity, enhancing overall flavor depth.
  • 1 ½ cups brown sugar – gives cookies their moist texture and a hint of caramel flavor.
  • ½ cup unsalted butter – ensures a rich and buttery base for the cookies.
  • ½ teaspoon baking powder – helps the cookies rise for that perfect lift.
  • ¼ teaspoon salt – balances sweetness and intensifies the flavors.
  • 1 cup walnuts (optional) – add a satisfying crunch and flavor contrast if you choose to include them.

Baking these Espresso Chocolate Fudge Cookies is truly an experience filled with warmth and comfort. Enjoy every delightful moment!

Step‑by‑Step Instructions for Espresso Chocolate Fudge Cookies

Step 1: Preheat the Oven
Begin by preheating your oven to 350°F (175°C). This ensures that the environment is hot enough to create those perfectly chewy Espresso Chocolate Fudge Cookies. While waiting for the oven to reach the desired temperature, gather your mixing bowls, measuring cups, and a baking sheet lined with parchment paper.

Step 2: Mix Sugar and Butter
In a medium bowl, combine 1 ½ cups of brown sugar with ½ cup of melted unsalted butter. Using a whisk or spatula, blend them together until the mixture is smooth and creamy. This should take about 2-3 minutes, and you'll notice a lovely gloss developing, signaling it’s ready for the next ingredients.

Step 3: Add Eggs and Extracts
Next, crack 2 large eggs into the bowl along with 1 tablespoon of vanilla extract and 1 tablespoon of espresso powder. Mix these ingredients thoroughly until everything is combined well, creating a rich, fragrant batter. This should take another 1-2 minutes, and the mixture will take on a glossy appearance.

Step 4: Prepare the Dry Ingredients
In a separate bowl, whisk together 1 cup of all-purpose flour, ½ teaspoon of baking powder, and ¼ teaspoon of salt. This step helps to evenly distribute the leavening agent and salt, which are crucial for the structure and flavor of your Espresso Chocolate Fudge Cookies. Aim for a homogenous mixture to ensure uniformity when added to the wet ingredients.

Step 5: Combine Wet and Dry Mixtures
Gradually add the dry ingredient mixture to the bowl of wet ingredients, stirring gently until just combined. It’s important not to overmix, as you want the batter to remain thick and fudgy. The final dough should be thick and slightly sticky with a rich chocolate aroma wafting up as you work.

Step 6: Fold in Chocolate Chips and Nuts
Now it’s time to add your 2 cups of chocolate chips and 1 cup of walnuts (if using) to the cookie dough. Carefully fold them in using a spatula until evenly distributed, which will result in delicious chunks of chocolate and a nutty crunch in each bite of your Espresso Chocolate Fudge Cookies.

Step 7: Prepare for Baking
Using a tablespoon or cookie scoop, drop spoonfuls of your cookie dough onto the prepared baking sheet, spacing them about 2 inches apart to allow for spreading. This should yield about 24 cookies, and you’ll want to ensure each scoop is roughly the same size for even baking.

Step 8: Bake the Cookies
Place the baking sheet in the preheated oven and bake the cookies for 10-12 minutes. Keep an eye on them; you’ll know they’re ready when the edges are set but the centers remain soft. Once done, remove the cookies from the oven and let the heavenly scent fill your kitchen!

Step 9: Cool and Transfer
After baking, allow the cookies to cool on the baking sheet for about 5 minutes. This helps them firm up slightly before transferring to a wire rack. Once they are cool enough to handle, gently move them to the rack and let them cool completely as you admire your beautiful batch of Espresso Chocolate Fudge Cookies.

Espresso Chocolate Fudge Cookies

Storage Tips for Espresso Chocolate Fudge Cookies

Room Temperature: Store cookies in an airtight container at room temperature for up to 1 week. This keeps them soft and chewy, ready for whenever a craving strikes!

Refrigerator: If you want to extend their lifespan, you can refrigerate the cookies for up to 2 weeks. Just ensure they are well-wrapped to prevent them from drying out.

Freezer: For longer storage, place cookies in a freezer-safe container, separated by parchment paper, and freeze for up to 3 months. Thaw in the fridge overnight before enjoying!

Reheating: To restore that fresh-from-the-oven allure, microwave a cookie for 10-15 seconds. This warms them up perfectly, making the chocolate gooey and delicious once more.

Espresso Chocolate Fudge Cookies Variations

Feel free to let your creativity shine by customizing these cookies to suit your taste buds and dietary needs!

  • Gluten-Free: Substitute all-purpose flour with a gluten-free flour blend for a delightful alternative everyone can enjoy.
  • Nut-Free: Omit the walnuts or replace them with sunflower seeds for a crunchy option that's safe for nut allergies.
  • Dairy-Free: Use dairy-free chocolate chips and coconut oil instead of butter for a vegan-friendly treat that’s still full of flavor.
  • Spicy Twist: Add a pinch of cayenne pepper or a few dashes of cinnamon to the batter for a warm, spicy kick that complements the chocolate beautifully.
  • Chunky Style: Instead of using only chocolate chips, opt for coarsely chopped chocolate bars for a chunkier texture and gourmet look.
  • Dessert Bars: Press the dough into a baking dish for fudgy espresso chocolate fudge cookie bars. Adjust the baking time to about 20-25 minutes for a gooey center.
  • Coffee Infusion: Replace water with strong brewed coffee in place of espresso powder for an intensified coffee flavor that lovers won’t want to miss.
  • Mini Cookies: Make smaller cookies by scooping out half the dough size, reducing the baking time to about 8-10 minutes. Perfect for a bite-sized indulgence!

Discover just how versatile these cookies can be, and feel free to have a little fun in the kitchen! If you're looking to elevate your culinary experience further, consider serving them with a rich cup of coffee or a refreshing glass of milk. Don’t forget to explore the love behind each ingredient with our expert tips or check out the perfect serving suggestions for your next gathering!

Make Ahead Options

These Espresso Chocolate Fudge Cookies are perfect for busy cooks looking to save time! You can prepare the dough up to 2 days in advance by mixing all the ingredients and then refrigerating it in an airtight container. This not only allows the flavors to meld beautifully but also makes the baking process a breeze when you’re ready to indulge. Simply scoop the cold dough onto your baking sheet straight from the fridge and bake for the same amount of time (10-12 minutes). To maintain their delightful texture, it's essential to let them cool completely before storing. When you’re ready to serve, you’ll have warm, gooey cookies that are just as delicious as when freshly baked!

Expert Tips for Espresso Chocolate Fudge Cookies

• Use Quality Chocolate: Choose high-quality chocolate chips for a richer flavor. Your cookies will taste like a gourmet treat with this little upgrade!

• Don’t Overmix: When combining wet and dry ingredients, mix until just combined to keep the cookies chewy and soft. Overmixing can lead to tougher cookies.

• Chill the Dough: For even thicker cookies, refrigerate the dough for about 30 minutes before baking. This prevents excessive spreading and enhances the fudge-like center.

• Watch the Baking Time: Every oven behaves differently. Check your cookies after 10 minutes to achieve that perfect gooey center; they may need an extra minute or two depending on your oven.

• Storage Solution: Keep your freshly baked Espresso Chocolate Fudge Cookies in an airtight container to maintain their soft, chewy texture for up to a week!

What to Serve with Espresso Chocolate Fudge Cookies?

Indulge in the bliss of a delightful dessert spread that perfectly complements the rich flavors of your freshly baked cookies.

  • Rich Vanilla Ice Cream: A scoop of creamy vanilla ice cream creates a delightful contrast to the warm, fudgy texture, making each bite melt in your mouth.
  • Fresh Berries Salad: Juicy strawberries and raspberries add a refreshing element that balances the sweetness of the cookies beautifully. Their tartness is the perfect counterpoint to the rich chocolate.
  • Espresso or Coffee: Enhance the coffee notes in the cookies with a cup of espresso or a fresh brew. The warm drink amplifies the cookie’s flavors, creating a perfect harmony.
  • Chocolate Dipping Sauce: For an extra decadence, serve with a warm chocolate sauce for dipping. This adds an exciting layer of texture and flavor that chocolate lovers will adore.
  • Milk or Nut Milk: A classic pairing, either cold or warm, perfectly complements the cookies, creating a nostalgic comfort that takes you back to childhood.
  • Salted Caramel Sauce: Drizzle your cookies with a rich salted caramel sauce for an added flair. The sweet and salty notes enhance the chocolate, creating a symphony of flavors.
  • Whipped Cream Topping: Light and fluffy whipped cream makes a delicious and airy counterbalance to the rich, dense cookies. A dollop on top of each cookie can elevate your treat!

The possibilities are endless, as these pairings create a warm and inviting atmosphere around your cookie experience.

Espresso Chocolate Fudge Cookies

Espresso Chocolate Fudge Cookies Recipe FAQs

How can I tell if my chocolate and espresso powder are fresh?
Absolutely! For the best flavor, check your chocolate chips for any dull appearance or a whitish coating, which indicates they may have gone stale. As for espresso powder, it should have a strong, aromatic scent; if it’s lost its fragrance, it’s time to replace it!

What's the best way to store Espresso Chocolate Fudge Cookies?
For optimal freshness, place your cookies in an airtight container at room temperature for up to a week. If you want them to last longer, refrigerate them for up to 2 weeks or freeze them in a freezer-safe container separated by parchment paper for up to 3 months.

Can I freeze the dough instead of the baked cookies?
Yes! To freeze the dough for later use, scoop the cookie dough onto a parchment-lined baking sheet and freeze until solid. Once frozen, transfer the dough balls to a freezer-safe container. You can bake the cookies straight from the freezer; just add a minute or two to your baking time for perfectly chewy Espresso Chocolate Fudge Cookies!

What should I do if my cookies come out too dry or crumbly?
Very! If your cookies turn out dry, it may be due to overmixing or too much flour. Make sure to measure the flour correctly—spooning it into the measuring cup rather than scooping directly can help. For next time, incorporating a little more butter or an extra egg yolk can add moisture back into the dough.

Are these cookies safe for people with nut allergies?
If you’re catering to someone with nut allergies, definitely omit the walnuts or any nuts entirely. These Espresso Chocolate Fudge Cookies will still taste delicious without them. Always remember to check other packaging for potential cross-contamination from nuts.

How do I make adjustments for dietary restrictions, like gluten-free?
To make these cookies gluten-free, substitute all-purpose flour with a 1-to-1 gluten-free flour blend. Make sure the blend contains xanthan gum, which helps mimic the texture of traditional baked goods. Enjoying delicious Espresso Chocolate Fudge Cookies can be easy with just a few adjustments!

Espresso Chocolate Fudge Cookies

Decadent Espresso Chocolate Fudge Cookies You'll Love

Savor the irresistible flavors of Espresso Chocolate Fudge Cookies, perfectly chewy with a delightful coffee kick.
Print Recipe Pin Recipe
Prep Time 15 minutes mins
Cook Time 12 minutes mins
Cooling Time 5 minutes mins
Total Time 30 minutes mins
Servings: 24 cookies
Course: Dessert
Calories: 150
Ingredients Equipment Method Nutrition Notes

Ingredients
  

For the Dough
  • 1 cup all-purpose flour a key ingredient for creating the perfect chewy texture.
  • 2 cups chocolate chips choose bittersweet or semisweet for that rich chocolate flavor.
  • 2 large eggs help bind the ingredients together and add moisture.
  • 1 tablespoon espresso powder enhances the chocolate flavor and adds a delightful coffee kick.
  • 1 tablespoon vanilla extract a splash of purity, enhancing overall flavor depth.
  • 1.5 cups brown sugar gives cookies their moist texture and a hint of caramel flavor.
  • 0.5 cup unsalted butter ensures a rich and buttery base for the cookies.
  • 0.5 teaspoon baking powder helps the cookies rise for that perfect lift.
  • 0.25 teaspoon salt balances sweetness and intensifies the flavors.
  • 1 cup walnuts (optional) add a satisfying crunch and flavor contrast if you choose to include them.

Equipment

  • Mixing bowls
  • Whisk
  • spatula
  • Baking Sheet
  • parchment paper

Method
 

Step-by-Step Instructions
  1. Preheat your oven to 350°F (175°C).
  2. In a medium bowl, combine 1 ½ cups of brown sugar with ½ cup of melted unsalted butter. Blend until smooth and creamy, about 2-3 minutes.
  3. Crack 2 large eggs into the bowl along with 1 tablespoon of vanilla extract and 1 tablespoon of espresso powder. Mix thoroughly until combined.
  4. In a separate bowl, whisk together 1 cup of all-purpose flour, ½ teaspoon of baking powder, and ¼ teaspoon of salt.
  5. Gradually add the dry ingredient mixture to the wet ingredients, stirring gently until just combined.
  6. Fold in 2 cups of chocolate chips and 1 cup of walnuts (if using) until evenly distributed.
  7. Drop spoonfuls of cookie dough onto the prepared baking sheet, spacing them about 2 inches apart.
  8. Bake the cookies for 10-12 minutes until edges are set but centers remain soft. Allow to cool on sheet for 5 minutes before transferring to a wire rack.

Nutrition

Serving: 1cookieCalories: 150kcalCarbohydrates: 20gProtein: 2gFat: 7gSaturated Fat: 4gPolyunsaturated Fat: 0.5gMonounsaturated Fat: 2gCholesterol: 30mgSodium: 50mgPotassium: 100mgFiber: 1gSugar: 10gVitamin A: 100IUCalcium: 20mgIron: 1mg

Notes

For the best texture, avoid overmixing and consider chilling the dough before baking.

Tried this recipe?

Let us know how it was!

Comforting Vegetarian Lasagna with Ricotta That's Pure Bliss

December 15, 2025 by grace bellamy Leave a Comment

As I stood in the kitchen, the aroma of sautéed vegetables and marinara began to weave its magic, reminding me just how comforting a slice of homemade Vegetarian Lasagna with Ricotta can be. This dish not only sings of nostalgia but also brings a wealth of benefits to the table: it's quick to prepare, making it a perfect weeknight meal, while also being a crowd-pleaser that even the non-vegetarians rave about. Think layers of rich ricotta nestled alongside fresh spinach, mushrooms, and a medley of colorful peppers, all embraced by those warm noodles. It’s the ultimate upgrade from takeout and just as fun to make as it is to devour. Ready to dive into a wholesome indulgence that’s sure to become a staple in your kitchen? Let’s gather those ingredients!

Vegetarian Lasagna with Ricotta

Why Is This Lasagna So Irresistible?

Comforting Layers: With layers of rich ricotta, fresh vegetables, and melty mozzarella, this lasagna is a cozy embrace on a plate.

Time-Saving Delight: Prepping this dish takes just 15 minutes, allowing you to spend more time enjoying it with loved ones instead of slaving away in the kitchen.

Nutrient-Packed Goodness: Featuring wholesome ingredients like spinach and zucchini, it’s a delicious way to sneak in extra veggies without compromising on flavor.

Make-Ahead Convenience: You can easily assemble the Vegetarian Lasagna with Ricotta a day in advance, making weeknight dinners a breeze!

Crowd-Pleaser: This dish turns even the staunchest meat-lovers into fans, proving that vegetarian meals can be just as satisfying.

Overall, this lasagna elevates any meal, and for more exciting ideas, check out our cooking tips for homemade comfort food.

Vegetarian Lasagna with Ricotta Ingredients

• Dive into the delicious world of homemade vegetarian lasagna!

For the Noodles

  • Lasagna noodles – Choose oven-ready noodles for even easier layering.

For the Cheese Mixture

  • Ricotta cheese – This creamy base brings richness to each layer.
  • Mozzarella cheese – Adds that quintessential gooey, melty texture everyone loves.

For the Sauce

  • Marinara sauce – Use a high-quality brand or homemade for robust flavor.

For the Vegetables

  • Fresh spinach – This leafy green packs a nutritious punch while adding vibrant color.
  • Zucchini – Offers a light, subtle flavor; you can substitute with eggplant if desired.
  • Mushrooms – Enhance the umami factor in your lasagna; choose button or cremini mushrooms.
  • Bell peppers – Use a mix of colors for visual appeal and added sweetness.

Seasonings

  • Dried oregano – This herb infuses a delightful aroma and flavor, making it perfect for Italian dishes.
  • Salt – Essential for enhancing overall flavors in your lasagna.
  • Black pepper – A dash brings out the sweetness of the vegetables.

This Vegetarian Lasagna with Ricotta is not only delicious but also a fantastic way to create comforting home-cooked meals!

Step‑by‑Step Instructions for Vegetarian Lasagna with Ricotta

Step 1: Preheat the Oven
Begin your journey to homemade bliss by preheating your oven to 375°F (190°C). This temperature is perfect for baking the Vegetarian Lasagna with Ricotta, ensuring it turns perfectly bubbly and golden. While the oven warms up, gather your ingredients so you can dive right into the next steps!

Step 2: Cook the Noodles
Prepare a pot of salted water and bring it to a boil. Add the lasagna noodles and cook according to package instructions until they are al dente. This typically takes about 8-10 minutes. Once done, drain the noodles and rinse them briefly under cold water to stop the cooking process and prevent sticking, then set aside for layering.

Step 3: Mix the Ricotta Filling
In a mixing bowl, combine the creamy ricotta cheese, salt, black pepper, and dried oregano. Stir well to create a luscious filling that will bring vibrant flavor to your Vegetarian Lasagna with Ricotta. This mixture adds both richness and a delightful herbaceous note; you’ll want to make sure it’s thoroughly blended before spreading it onto the noodles.

Step 4: Prepare the Baking Dish
Take a 9x13 inch baking dish and spread a thin layer of marinara sauce evenly on the bottom. This first layer not only adds flavor but also prevents the noodles from sticking to the dish. As you work, take a moment to admire the luscious red sauce—it sets the stage for the comforting layers to follow in your lasagna.

Step 5: Layer the Noodles
Next, arrange three lasagna noodles over the marinara sauce in the baking dish. Make sure they slightly overlap for a solid base. The noodles will serve as the foundation for the layers of flavor in your Vegetarian Lasagna with Ricotta, so make sure they fit snugly together.

Step 6: Spread the Ricotta Mixture
Take half of the ricotta mixture and gently spread it over the noodles, covering them completely. This adds a creamy richness that complements the sauce. You want to ensure each noodle is well-coated, as this is a key layer in creating that perfect balance of flavor and texture in your lasagna.

Step 7: Add the Vegetables
Sprinkle half of your chopped zucchini, sliced mushrooms, and diced bell peppers over the ricotta layer. This is where the nutrients and colors come alive! Follow this with another layer of marinara sauce to keep the vegetables moist and enhance their flavors, ready for the next layers of deliciousness.

Step 8: Repeat the Layers
Repeat the layering process by adding three more noodles, another spread of the ricotta mixture, and the remaining sautéed vegetables. Top this with another layer of marinara sauce. Building these layers contributes to the comforting texture of your Vegetarian Lasagna with Ricotta, making it truly irresistible.

Step 9: Finish with Noodles and Sauce
For the final touch, lay the last three noodles on top, and generously pour the remaining marinara sauce over them. Use a spatula to spread it evenly, covering all areas, ensuring a delightful and saucy top layer that will keep everything moist during baking.

Step 10: Add Mozzarella Topping
Sprinkle shredded mozzarella cheese evenly over the entire lasagna. This will create a beautifully gooey and golden crust as it bakes. The melty cheese will act as the crowning glory on your Vegetarian Lasagna with Ricotta, promising a satisfying finish to this homemade delight.

Step 11: Bake the Lasagna
Cover the baking dish tightly with aluminum foil to trap moisture and prevent drying out, then place it in the preheated oven. Bake for 30 minutes, allowing the flavors to meld and the noodles to cook through. The aroma wafting through your kitchen will be captivating!

Step 12: Uncover and Final Bake
After 30 minutes, carefully remove the foil and continue to bake for an additional 15 minutes or until the top is bubbling and golden brown. This final step ensures your Vegetarian Lasagna with Ricotta has that enticing look and texture we all crave.

Step 13: Cool and Serve
Once out of the oven, let your lasagna cool for about 10 minutes before slicing. This cooling period will help the layers settle, making it easier to serve. As you cut into this delicious creation, the layers of cheese and vegetables will reveal themselves, promising a delightful meal awaits!

Vegetarian Lasagna with Ricotta

How to Store and Freeze Vegetarian Lasagna with Ricotta

Fridge: Leftovers can be stored in an airtight container for up to 4–5 days. It’s best to reheat individual portions in the microwave or oven for optimal texture.

Freezer: For longer storage, wrap the assembled (unbaked) lasagna tightly in plastic wrap and then aluminum foil. It can be frozen for up to 3 months.

Reheating: To reheat frozen Vegetarian Lasagna with Ricotta, thaw overnight in the fridge and bake in a preheated oven at 350°F (175°C) for about 45 minutes, or until heated through.

Make-Ahead: Feel free to assemble the lasagna a day in advance. Simply cover and refrigerate without baking until you're ready to enjoy!

Vegetarian Lasagna with Ricotta Variations

Feel free to add your unique twist to this comforting classic and make it truly your own!

  • Gluten-Free: Use gluten-free lasagna noodles to cater to dietary needs without skimping on flavor.

  • Dairy-Free: Swap ricotta and mozzarella for lactose-free alternatives or vegan cheeses for a delightful plant-based option. This allows for a wonderfully creamy texture that everyone can enjoy.

  • Added Protein: Mix in cooked lentils or chickpeas to the vegetable layers for a nutritious boost. They will blend seamlessly, adding heartiness and depth to your lasagna.

  • Extra Greens: Incorporate kale or Swiss chard in place of spinach for a more robust flavor that still adds nutritional value. These greens will enhance the dish with a delightful earthiness.

  • Flavor Boost: Add a sprinkle of red pepper flakes or smoked paprika for a hint of heat and a smoky dimension that elevates the overall flavor profile wonderfully.

  • Veggie Variety: Don't hesitate to use seasonal vegetables like eggplant or butternut squash. Not only do they taste delicious, but they also add a colorful, gourmet touch to your lasagna.

  • Herbed Oil Drizzle: Finish your lasagna with a drizzle of herbed olive oil or balsamic glaze before serving to bring out all the fresh, vibrant flavors for a touch of elegance.

  • Layering with Pesto: Add a layer of basil pesto between the ricotta and vegetables for a burst of fresh herb flavor. This simple addition will turn your lasagna into a truly gourmet dish.

Explore these variations to discover your perfect comfort food creation! For more delicious ideas, check out our helpful tricks for making the best vegetarian dishes.

What to Serve with Vegetarian Lasagna with Ricotta

Elevate your meal with delightful sides that perfectly complement the layers of flavor in your comforting masterpiece.

  • Garlic Bread: This classic pairing adds a crunchy, buttery contrast; perfect for mopping up that extra marinara sauce. A sprinkle of parsley makes it inviting.
  • Caesar Salad: Crisp romaine, parmesan, and zesty dressing provide a refreshing balance to the rich lasagna, brightening each bite. The crunch enhances the overall texture of the meal.
  • Roasted Vegetables: A medley of seasonal veggies seasoned with olive oil and herbs brings an earthy element; their natural sweetness beautifully contrasts the savory lasagna.
  • Bruschetta: Fresh tomatoes, basil, and a drizzle of balsamic glaze over toasted bread create a light, flavorful appetizer that whets the appetite. The vibrant colors are visually appealing too!
  • Antipasto Platter: A selection of olives, artichokes, and roasted peppers rounds out the meal, offering varied flavors and textures that enhance the dining experience.
  • Sparkling Water or Wine: A refreshing drink, such as sparkling water with lemon or a light pinot grigio, pairs seamlessly with the rich flavors, cleansing the palate beautifully.
  • Tiramisu: This classic Italian dessert concludes the meal with a sweet, creamy finish; the coffee notes echo the heartiness of the lasagna, bringing the meal full circle.
  • Herbed Quinoa Salad: A light and nutritious side that introduces a nutty flavor and fluffy texture, making it a wholesome complement. The herbs tie everything together nicely!

Helpful Tricks for Vegetarian Lasagna

Parboil the Noodles: Don’t skip this step! Cooking the noodles just a bit before layering helps them absorb sauce without becoming mushy.

Layer Smartly: Alternate the vegetable and ricotta layers, ensuring an even distribution of flavor. This technique will enhance the taste of your Vegetarian Lasagna with Ricotta.

Use Fresh Veggies: Opt for fresh, seasonal vegetables to amplify flavor. Avoid overcooking them before layering; they should stay vibrant and slightly crisp.

Check for Doneness: Make sure to bake covered initially to retain moisture, and uncover it at the end for that glorious golden top.

Let It Rest: Allow the lasagna to rest after baking for firmer slices. This prevents it from falling apart when served.

Make Ahead Options

These Vegetarian Lasagna with Ricotta are perfect for busy home cooks looking to simplify meal planning! You can assemble the entire lasagna up to 24 hours in advance—just cover it tightly with aluminum foil and refrigerate. This allows the flavors to meld beautifully overnight. To maintain quality, be sure to store it in an airtight container or wrap it well, as this helps prevent any moisture loss during refrigeration. When you're ready to enjoy, simply preheat your oven and bake from the fridge for about 45 minutes until hot and bubbly. This means you can have a comforting, homemade dinner ready with minimal effort after a long day!

Vegetarian Lasagna with Ricotta

Vegetarian Lasagna with Ricotta Recipe FAQs

What type of marinara sauce should I use?
Absolutely! A high-quality marinara sauce, whether store-bought or homemade, will greatly enhance the flavor of your Vegetarian Lasagna with Ricotta. If using store-bought, look for one with no added sugars and a good balance of herbs. Homemade marinara, simmered with garlic, onions, and fresh herbs, creates a deliciously robust finish that really sets this dish apart.

How do I choose fresh vegetables for my lasagna?
Very simple! Look for bright-colored vegetables that feel firm to the touch. Spinach should be vibrant green without wilting, zucchini should be smooth and shiny, and bell peppers should be crisp and free of dark spots. If you ever see signs of spoilage, like soft spots or wrinkles, it's best to opt for fresher options to keep your lasagna delicious and appealing.

Can I freeze leftover Vegetarian Lasagna with Ricotta?
Excellent question! Yes, you can! If you have leftover lasagna, wrap it tightly in plastic wrap or aluminum foil and place it in the freezer, where it will keep well for up to 3 months. To reheat, simply thaw it overnight in the fridge before baking in a preheated oven at 350°F (175°C) for about 45 minutes, making sure it's heated through and bubbly.

How should I store the lasagna in the fridge?
Try to consume leftovers within 4-5 days for optimal freshness! Store your vegetarian lasagna in an airtight container to help maintain moisture and flavors. When you're ready to enjoy a piece, I recommend reheating individual portions in the microwave or oven to retain that delightful texture and warmth.

What if my noodles break or get stuck together?
Don't worry, this can happen! If your noodles are sticking together, make sure to briefly rinse them under cold water after cooking to stop the cooking process and to make them easier to handle. If they break, simply layer them as best as you can—after baking, the delicious layers will meld together, creating a comforting lasagna despite minor hiccups.

Is this recipe suitable for vegetarians and pets?
For sure! This Vegetarian Lasagna with Ricotta is perfect for vegetarians, packed with veggies and no meat ingredients. However, it’s important to keep this dish away from pets, especially due to the cheese and high sodium content. If you have any allergies, be sure to check each ingredient and substitute as needed, like using dairy-free cheese for those with lactose intolerance!

Vegetarian Lasagna with Ricotta

Comforting Vegetarian Lasagna with Ricotta That's Pure Bliss

A delicious Vegetarian Lasagna with Ricotta that's quick to prepare and a crowd-pleaser.
Print Recipe Pin Recipe
Prep Time 15 minutes mins
Cook Time 45 minutes mins
Cooling Time 10 minutes mins
Total Time 1 hour hr 10 minutes mins
Servings: 6 slices
Course: Main Dishes
Cuisine: Italian
Calories: 350
Ingredients Equipment Method Nutrition Notes

Ingredients
  

For the Noodles
  • 12 oz Lasagna noodles Choose oven-ready noodles for even easier layering.
For the Cheese Mixture
  • 15 oz Ricotta cheese This creamy base brings richness to each layer.
  • 8 oz Mozzarella cheese Adds that quintessential gooey, melty texture everyone loves.
For the Sauce
  • 24 oz Marinara sauce Use a high-quality brand or homemade for robust flavor.
For the Vegetables
  • 4 cups Fresh spinach This leafy green packs a nutritious punch while adding vibrant color.
  • 1 medium Zucchini Offers a light, subtle flavor; you can substitute with eggplant if desired.
  • 8 oz Mushrooms Enhance the umami factor in your lasagna; choose button or cremini mushrooms.
  • 1 cup Bell peppers Use a mix of colors for visual appeal and added sweetness.
Seasonings
  • 1 teaspoon Dried oregano Infuses a delightful aroma and flavor, making it perfect for Italian dishes.
  • 1 teaspoon Salt Essential for enhancing overall flavors in your lasagna.
  • ½ teaspoon Black pepper A dash brings out the sweetness of the vegetables.

Equipment

  • 9x13-inch baking dish
  • Pot
  • Mixing Bowl

Method
 

Step-by-Step Instructions for Vegetarian Lasagna with Ricotta
  1. Preheat the oven to 375°F (190°C).
  2. Cook the lasagna noodles in a pot of salted boiling water according to package instructions until al dente, about 8-10 minutes. Drain and rinse briefly under cold water.
  3. In a mixing bowl, combine ricotta cheese, salt, black pepper, and dried oregano. Stir well to create a filling.
  4. Spread a thin layer of marinara sauce on the bottom of a 9x13 inch baking dish.
  5. Arrange three lasagna noodles over the marinara sauce in the baking dish, slightly overlapping.
  6. Spread half of the ricotta mixture over the noodles.
  7. Sprinkle half of the zucchini, mushrooms, and bell peppers over the ricotta layer, followed by another layer of marinara sauce.
  8. Repeat the layering process with three more noodles, another spread of the ricotta mixture, and the remaining vegetables, topped with marinara sauce.
  9. Lay the last three noodles on top, and pour the remaining marinara sauce over them, spreading evenly.
  10. Sprinkle shredded mozzarella cheese evenly over the lasagna.
  11. Cover the baking dish tightly with aluminum foil and bake for 30 minutes.
  12. Remove the foil and bake for an additional 15 minutes until the top is bubbling and golden brown.
  13. Let cool for 10 minutes before slicing and serving.

Nutrition

Serving: 1sliceCalories: 350kcalCarbohydrates: 35gProtein: 18gFat: 15gSaturated Fat: 7gPolyunsaturated Fat: 1gMonounsaturated Fat: 6gCholesterol: 40mgSodium: 800mgPotassium: 450mgFiber: 4gSugar: 5gVitamin A: 1200IUVitamin C: 40mgCalcium: 200mgIron: 2.5mg

Notes

Assemble the lasagna a day in advance and refrigerate without baking until ready to enjoy.

Tried this recipe?

Let us know how it was!

Savory Crispy Fried False with Zesty Herb Infusion Bliss

December 15, 2025 by grace bellamy Leave a Comment

As I sipped my morning coffee, the chatter of my friends reminiscing about flavorful meals sparked a craving for something unique. That's when I decided to dive into the kitchen and whip up my Savory Crispy Fried False with Zesty Herb Infusion—a delightful twist that transforms simple ingredients into a culinary masterpiece. This recipe not only delivers a satisfying crunch but is also a breeze to prepare, taking just under an hour from start to finish. Whether you’re trying to impress guests or simply indulge in a comfort food treat without the guilt of fast food, this dish offers both wholesome goodness and vibrant flavor. Ready to elevate your dinner game? Let’s dive into this crispy delight!

Savory Crispy Fried False with Zesty Herb Infusion

Why is this dish a must-try?

Deliciously Unique: The Savory Crispy Fried False with zesty herb infusion takes your dinner routine to new heights, offering a mouthwatering twist on traditional fried dishes.

Quick and Easy: With just 45 minutes from prep to table, this recipe is perfect for busy weeknights or spontaneous gatherings.

Crowd-Pleaser: Impress your family and friends with its irresistible crunch and vibrant flavors—it's sure to become a favorite at any get-together.

Versatile Ingredients: Using ingredients like tofu or tempeh makes it a fantastic option for both vegetarians and meat lovers alike, allowing everyone to enjoy.

Guilt-Free Indulgence: Savor that crispy delight without resorting to fast food, and feel good about what you’re eating. Pair this dish with a fresh side salad or some zesty dipping sauces to really elevate the experience!

Savory Crispy Fried False Ingredients

• Discover the harmonious flavors of this delightful dish!

For the False

  • 1 pound false – You can substitute it with tofu or tempeh for a deliciously adaptable meal.

For the Breading

  • 1 cup all-purpose flour – This creates the perfect base for that irresistible crunch.
  • 1 cup breadcrumbs – Panko offers extra crispiness, but regular breadcrumbs work too!
  • 2 large eggs – Essential for binding the breading to the false.

For the Seasoning

  • 1 teaspoon salt – Enhances the overall flavor of the dish.
  • 1 teaspoon black pepper – Adds a touch of heat for depth.
  • 1 teaspoon garlic powder – Infuses a savory aroma with each bite.
  • 1 teaspoon onion powder – Complements the garlic perfectly.
  • 1 teaspoon smoked paprika – Introduces a warm, smoky flavor that elevates the dish.
  • 1 teaspoon dried oregano – Widely recognized for its aromatic qualities.
  • 1 teaspoon dried thyme – Offers an earthy, fragrant note.

For the Zesty Herb Infusion

  • ½ cup fresh parsley – Finely chopped, it brings a fresh burst of color and taste.
  • ¼ cup fresh basil – This herb adds an aromatic essence that brightens the dish.
  • ¼ cup fresh lemon juice – The acidity balances the richness of the fried false.

For the Frying

  • ½ cup buttermilk – Or substitute with milk mixed with a teaspoon of vinegar for a tangy touch.
  • Vegetable oil for frying – Necessary for achieving that golden, crispy exterior.

Get ready to indulge in this Savory Crispy Fried False with Zesty Herb Infusion!

Step‑by‑Step Instructions for Savory Crispy Fried False with Zesty Herb Infusion

Step 1: Prepare the False
Start by pressing the false, tofu, or tempeh to remove excess moisture, which helps achieve a crispy finish. Cut it into bite-sized pieces, about 1-inch cubes, ensuring they're all uniform for even cooking. Set them aside on a plate as you prepare your breading stations.

Step 2: Mix Dry Ingredients
In a medium-sized bowl, whisk together the flour, salt, black pepper, garlic powder, onion powder, and smoked paprika. This flavorful dry mixture will form the first layer of breading. Make sure everything is well combined and then set this bowl aside to proceed with the next steps.

Step 3: Prepare the Egg Wash and Breadcrumbs
In another bowl, crack the two large eggs and beat them lightly until mixed. In a third bowl, combine the breadcrumbs with the dried oregano and thyme to add aromatic depth. These mixtures are your assembly line for coating the false, so have them ready for easy access.

Step 4: Bread the False
Now it's time to bread the pieces! First, take a piece of false and dip it into the flour mixture, ensuring it's fully coated. Next, immerse it in the egg wash, allowing any excess to drip off, before finally coating it in the breadcrumb mixture. Press gently to ensure the breadcrumbs adhere well, creating a perfect crunchy shell.

Step 5: Heat the Oil
In a large skillet or deep fryer, heat enough vegetable oil over medium-high heat until it reaches 350°F (175°C). You can test the oil's readiness by dropping in a small piece of breadcrumb; it should sizzle immediately. This temperature is key for achieving that golden, crispy texture you're aiming for in the Savory Crispy Fried False.

Step 6: Fry in Batches
Carefully add the breaded false to the hot oil, making sure not to overcrowd the pan, which can lead to uneven cooking. Fry them in batches for about 3-4 minutes per side, or until they turn a beautiful golden brown and crisp up nicely. Use a slotted spoon to remove them and transfer to paper towels to drain any excess oil.

Step 7: Make the Zesty Herb Infusion
In a small bowl, combine the freshly chopped parsley, basil, and lemon juice. Stir well to create a vibrant zesty herb infusion that will elevate your fried false. This infusion adds a refreshing contrast to the richness of the fried dish, enhancing the overall flavor experience.

Step 8: Serve and Enjoy
Serve the crispy fried false hot, drizzling the zesty herb infusion generously over the top. This finishing touch not only adds color but also brings out the freshness of the herbs, completing your Savory Crispy Fried False with Zesty Herb Infusion. Enjoy this delightful dish with your favorite sides for a satisfying meal!

Savory Crispy Fried False with Zesty Herb Infusion

Tips for the Best Savory Crispy Fried False

Ingredient Prep: Make sure to press tofu or tempeh adequately to remove moisture; this helps achieve a truly crispy texture when frying.

Breading Technique: Don’t rush the coating process. Ensure each piece of false is well-coated in flour, egg, and breadcrumbs to prevent them from getting soggy during frying.

Temperature Check: Always fry at the right temperature, around 350°F (175°C). If the oil is too cool, your false will absorb more oil, becoming greasy rather than crispy.

Batch Cooking: Avoid overcrowding the pan; fry in small batches to maintain consistent temperature and fry time for each piece of savory crispy fried false.

Drain Well: After frying, place the cooked pieces on paper towels to absorb excess oil, ensuring they remain light and crispy when served.

Savory Crispy Fried False with Zesty Herb Infusion Variations

Feel free to put your own twist on this delicious recipe and explore exciting options that will tantalize your taste buds!

  • Gluten-Free: Substitute all-purpose flour and breadcrumbs with gluten-free alternatives like almond flour and gluten-free panko for a crunchy delight.

  • Spicy Kick: Add a teaspoon of cayenne pepper or red pepper flakes to the flour mixture to turn up the heat—a fun way to awaken your senses!

  • Italian Style: Incorporate Italian seasoning into the breadcrumb mix for a savory infusion that complements the herbs perfectly, creating a new flavor dimension.

  • Sweet and Spicy Glaze: Drizzle a touch of honey mixed with sriracha over the crispy fried false for a sweet heat combo that’ll surprise your palate.

  • Cheesy Addition: Mix some grated Parmesan cheese into your breadcrumb coating for an extra cheesy crunch that pairs beautifully with the zesty herb infusion.

Elevate your mealtime experience by serving it alongside zesty dipping sauces for a burst of flavor with every bite!

  • Pickled Veggies: Serve with a side of pickled vegetables for a tangy contrast that enhances the richness of the fried dish and adds vibrant color to your plate.

  • Herb Variations: Switch up the herbs in the zesty infusion by experimenting with cilantro or mint, which can provide a refreshing twist that livens up the dish.

Let your culinary creativity shine as you mix and match these ideas!

What to Serve with Savory Crispy Fried False with Zesty Herb Infusion

Picture a vibrant table laden with complementary flavors that elevate your main dish into a memorable meal experience.

  • Creamy Mashed Potatoes: The velvety texture of mashed potatoes balances the crispy bites, adding comfort and richness.

  • Zesty Coleslaw: This crunchy, tangy salad brings a refreshing contrast to the savory fried goodness, enhancing each bite.

  • Garlic Bread: A warm, toasty accompaniment that’s perfect for soaking up extra herb infusion, delivering layers of flavor with every piece.

  • Roasted Vegetables: A medley of seasonal veggies brings color, texture, and earthiness, beautifully complementing the dish's crispy exterior.

  • Quinoa Salad: Light, fluffy quinoa mixed with fresh herbs and citrus creates a healthy, zesty side that pairs wonderfully with the fried false. The protein boost also rounds out your meal.

  • Caesar Salad: Crisp romaine topped with parmesan and croutons brings a classic touch and a delightful crunch that pairs well with the dish's herbaceous infusion.

  • Chilled White Wine: A glass of light, zesty white wine amplifies the fresh herb flavors, making for a refreshing sip alongside your meal.

Embrace these delightful pairings, and watch how your Savory Crispy Fried False with Zesty Herb Infusion becomes the star of an unforgettable dining experience.

How to Store and Freeze Savory Crispy Fried False

Fridge: Store leftover Savory Crispy Fried False in an airtight container for up to 3 days to maintain its flavor and freshness.

Freezer: If you want to freeze, place the cooled fried false in a single layer on a baking sheet and freeze until solid, then transfer to a zip-top bag for up to 2 months.

Reheating: To reheat, bake in a preheated oven at 375°F (190°C) for 10-15 minutes. This helps restore the crispy texture without making them soggy.

Room Temperature: If left out on the counter, consume within 2 hours to ensure food safety.

Make Ahead Options

These Savory Crispy Fried False with Zesty Herb Infusion are perfect for busy home cooks looking to save time during hectic weeknights! You can bread the false (or your choice of tofu or tempeh) up to 24 hours in advance; simply coat the pieces in flour, egg, and breadcrumbs, then store them in a single layer on parchment paper in the refrigerator to prevent sticking. Additionally, you can prepare the zesty herb infusion and keep it in the fridge for up to 3 days. When you’re ready to enjoy, just heat the oil and fry the breaded pieces until golden. This allows you to serve a freshly made, delicious dish with minimal effort!

Savory Crispy Fried False with Zesty Herb Infusion

Savory Crispy Fried False with Zesty Herb Infusion Recipe FAQs

How do I choose the best false for this recipe?
Absolutely! When selecting false, particularly tofu, look for a firm variety that holds its shape well. For tempeh, choose one that's fresh with a clean smell and no dark spots. These visual cues can help ensure you're using a quality ingredient that will fry up nicely.

How should I store leftovers?
Once the Savory Crispy Fried False has cooled, place it in an airtight container in the fridge. It will stay fresh for up to 3 days. Just remember to layer paper towels in between to avoid sogginess and help absorb moisture!

Can I freeze the fried false?
Yes, you can! To freeze the Savory Crispy Fried False, first let them cool completely. Place the pieces in a single layer on a baking sheet and freeze for about an hour until solid. Then, transfer them to a zip-top bag, ensuring to remove as much air as possible to prevent freezer burn. They can be stored for up to 2 months.

What’s the best way to reheat the leftovers?
For the best results, I recommend reheating in the oven. Preheat your oven to 375°F (190°C), and place the fried false on a baking sheet. Heat for about 10-15 minutes; this method helps keep them crisp instead of soggy, bringing back that delightful crunch!

Are there any dietary considerations I should be aware of?
Very! If you're serving this dish to anyone with allergies, make sure to inform them of the ingredients, especially the eggs and gluten in the flour and breadcrumbs. For a gluten-free version, you can substitute the all-purpose flour with a gluten-free blend and use gluten-free breadcrumbs. Additionally, if serving to pets, it's best to avoid feeding them any fried foods, as they can upset their stomachs. Always check for individual dietary needs!

Savory Crispy Fried False with Zesty Herb Infusion

Savory Crispy Fried False with Zesty Herb Infusion Bliss

Experience the mouthwatering Savory Crispy Fried False with Zesty Herb Infusion, a delightful and crispy dish perfect for any occasion.
Print Recipe Pin Recipe
Prep Time 15 minutes mins
Cook Time 30 minutes mins
Total Time 45 minutes mins
Servings: 4 servings
Course: Appetizer
Cuisine: Fusion
Calories: 350
Ingredients Equipment Method Nutrition Notes

Ingredients
  

For the False
  • 1 pound false Can substitute with tofu or tempeh
For the Breading
  • 1 cup all-purpose flour Base for crunch
  • 1 cup breadcrumbs Panko preferred for extra crispiness
  • 2 large eggs For binding
For the Seasoning
  • 1 teaspoon salt
  • 1 teaspoon black pepper
  • 1 teaspoon garlic powder
  • 1 teaspoon onion powder
  • 1 teaspoon smoked paprika
  • 1 teaspoon dried oregano
  • 1 teaspoon dried thyme
For the Zesty Herb Infusion
  • ½ cup fresh parsley Finely chopped
  • ¼ cup fresh basil
  • ¼ cup fresh lemon juice Balances richness
For the Frying
  • ½ cup buttermilk Or substitute with milk mixed with vinegar
  • vegetable oil for frying For achieving crispy texture

Equipment

  • skillet
  • Medium-Sized Bowl
  • large plate
  • Deep fryer

Method
 

Step-by-Step Instructions
  1. Step 1: Prepare the False - Press and cut the false into 1-inch cubes.
  2. Step 2: Mix Dry Ingredients - Whisk together flour, salt, pepper, garlic powder, onion powder, and smoked paprika.
  3. Step 3: Prepare Egg Wash and Breadcrumbs - Beat eggs in one bowl and mix breadcrumbs with oregano and thyme in another.
  4. Step 4: Bread the False - Coat pieces first in flour, then egg wash, then breadcrumbs.
  5. Step 5: Heat the Oil - Heat oil in a skillet to 350°F (175°C) for frying.
  6. Step 6: Fry in Batches - Fry breaded pieces for 3-4 minutes per side until golden brown.
  7. Step 7: Make the Zesty Herb Infusion - Combine parsley, basil, and lemon juice in a small bowl.
  8. Step 8: Serve and Enjoy - Drizzle herb infusion over crispy fried false and serve hot.

Nutrition

Serving: 1servingCalories: 350kcalCarbohydrates: 32gProtein: 10gFat: 20gSaturated Fat: 5gPolyunsaturated Fat: 2gMonounsaturated Fat: 12gCholesterol: 150mgSodium: 600mgPotassium: 350mgFiber: 2gSugar: 1gVitamin A: 250IUVitamin C: 5mgCalcium: 50mgIron: 2mg

Notes

Serve with a fresh side salad or zesty dipping sauces for a delightful addition.

Tried this recipe?

Let us know how it was!

Savory Rustic Ratatouille Soup with Fresh Basil Bliss

December 15, 2025 by grace bellamy Leave a Comment

As the summer sun begins to set, the vibrant colors of seasonal vegetables inspire a craving for something hearty yet light. That's when I turn to my Savory Rustic Ratatouille Soup with Fresh Basil. This delightful recipe combines the freshness of summer produce with robust flavors, making it a nourishing option for those tired of mundane meals or fast food. Not only is it vegetarian and packed with nutrients, but this soup also offers a comforting warmth that makes it perfect for any occasion. Whether you're gathering around the table with loved ones or simply enjoying a cozy night in, this dish promises to be a crowd-pleaser! Curious how to capture the essence of summer in a bowl? Let’s dive into the delicious details!

Savory Rustic Ratatouille Soup with Fresh Basil

Why is This Ratatouille Soup a Must-Try?

Heavenly Flavor: The fusion of ripe tomatoes, fresh basil, and vibrant veggies brings a rich depth of flavor that dances on your palate.

Easy Preparation: This soup comes together effortlessly in just an hour, making it perfect for busy weeknights or relaxing weekends.

Versatile Delight: Enjoy it as a light main course or a hearty side, easily fitting into any meal plan while keeping it vegetarian-friendly and health-conscious.

Seasonal Freshness: Use whatever summer vegetables you have on hand to make this dish uniquely yours—zucchini, bell peppers, or even kale!

Crowd-Pleasing Comfort: Ideal for family dinners or gatherings, it’s a soul-warming bowl of goodness that everyone will love. Get more inspiration by exploring other vegetarian recipes on our blog!

Savory Rustic Ratatouille Soup Ingredients

• Gather these fresh ingredients to make your Savory Rustic Ratatouille Soup with Fresh Basil come alive!

For the Soup

  • Medium eggplant – cut into ½-inch cubes for a tender texture.
  • Medium zucchinis – diced to soak up all the delicious flavors.
  • Bell pepper (red or yellow) – chopped to add sweetness and color.
  • Medium onion – diced for a flavorful base that enhances the soup.
  • Garlic cloves – minced for an aromatic kick that brightens the dish.
  • Ripe tomatoes – peeled and diced, or one 14 oz can, for richness.
  • Vegetable broth – 1 cup to create a comforting, savory base.
  • Water – 1 cup to balance the flavors and maintain the perfect consistency.
  • Dried thyme – 1 teaspoon to infuse the soup with earthy warmth.
  • Dried basil – 1 teaspoon to complement the fresh basil garnish beautifully.
  • Crushed red pepper flakes (optional) – ½ teaspoon to add a bit of gentle heat.
  • Olive oil – 2 tablespoons for sautéing and rich flavor.
  • Salt and black pepper – to taste, enhancing all the wonderful ingredients.
  • Fresh basil leaves – ¼ cup, chopped for a burst of freshness at the end.

Step‑by‑Step Instructions for Savory Rustic Ratatouille Soup with Fresh Basil

Step 1: Sauté the Onions
In a large pot, heat 2 tablespoons of olive oil over medium heat. Add the diced onions and sauté them for about 5 minutes until they turn translucent. Stir occasionally to prevent sticking, ensuring the onions soften beautifully, which will build a flavorful base for your Savory Rustic Ratatouille Soup with Fresh Basil.

Step 2: Add the Garlic
Stir in the minced garlic and continue cooking for an additional minute. The garlic should be fragrant but not browned, so keep an eye on it. This aromatic step enhances the richness of flavors for your dish, ensuring that every spoonful bursts with delightful taste.

Step 3: Incorporate the Bell Pepper
Add the chopped bell pepper into the pot, stirring well with the onions and garlic. Sauté for another 3-4 minutes until the peppers begin to soften and their sweet aroma fills your kitchen. This colorful addition will bring both visual appeal and an extra layer of flavor to your Savory Rustic Ratatouille Soup.

Step 4: Cook the Eggplant
Next, incorporate the eggplant cubes and cook for about 5 minutes, stirring occasionally. Allow the eggplant to soften and absorb the flavors of the sautéed vegetables. You'll know it's ready when it becomes tender, which is essential for the hearty texture of your Ratatouille Soup.

Step 5: Add Zucchini
Stir in the diced zucchini and cook for another 3 minutes, gently mixing everything together. Watch as the zucchini cooks down while maintaining a hint of crunch, adding further freshness to your dish. This step ensures a delightful contrast in textures in your Savory Rustic Ratatouille Soup with Fresh Basil.

Step 6: Combine the Tomatoes and Liquids
Add the peeled and diced tomatoes, along with 1 cup of vegetable broth and 1 cup of water. Mix everything thoroughly, bringing together all those vibrant flavors. The liquid will create a comforting base that allows the ingredients to meld beautifully as they simmer together.

Step 7: Season the Soup
Now, sprinkle in 1 teaspoon of dried thyme, 1 teaspoon of dried basil, and optionally, ½ teaspoon of crushed red pepper flakes for a touch of heat. Season generously with salt and black pepper to taste. Stir well to distribute the seasonings, and increase the heat until the soup reaches a steady boil, filling your kitchen with inviting aromas.

Step 8: Let it Simmer
Once boiling, reduce the heat to low, cover the pot, and let the soup simmer for 30-35 minutes. Stir occasionally to prevent anything from sticking to the bottom. This gentle simmer will allow the flavors of your Savory Rustic Ratatouille Soup with Fresh Basil to harmonize beautifully.

Step 9: Adjust and Blend
After simmering, taste the soup and adjust the seasoning as needed, adding more salt or pepper if desired. For a smoother texture, carefully blend the soup to your preferred consistency using an immersion blender or in batches with a countertop blender. This step can transform the soup into a creamy delight or keep it chunky, depending on your preference.

Step 10: Serve and Garnish
To serve, ladle the warm soup into bowls, making sure to have some of those colorful veggies in each serving. Garnish generously with the freshly chopped basil leaves, adding a burst of flavor and a lovely visual touch. Your Savory Rustic Ratatouille Soup with Fresh Basil is now ready to be enjoyed!

Savory Rustic Ratatouille Soup with Fresh Basil

Expert Tips for Savory Rustic Ratatouille Soup

Fresh Ingredients: Use seasonal vegetables for the best flavor; ripe summer produce elevates your Savory Rustic Ratatouille Soup beautifully.

Avoid Overcooking: Keep an eye on your veggies as you sauté. Overcooking can lead to mushy textures, so aim for tender but not falling apart.

Taste as You Go: Regularly taste and adjust seasoning while simmering. This ensures a perfectly balanced flavor in your Savory Rustic Ratatouille Soup.

Blending Options: For a smoother texture, use an immersion blender or regular blender. Blend to your preference for a creamy or chunky finish.

Garnish Generously: Adding fresh basil right before serving enhances the soup’s aroma and flavor. Don't skip this delightful final touch!

Make Ahead Options

Preparing your Savory Rustic Ratatouille Soup with Fresh Basil in advance is a smart move for busy weeknights! You can chop and refrigerate the vegetables—such as eggplant, zucchini, bell pepper, and onion—up to 24 hours ahead to save time. For best results, store them in an airtight container to prevent browning. Additionally, you can sauté the vegetables and store the soup base in the fridge for up to 3 days. Just reheat it on the stove when you're ready to serve. To finish, blend to your desired consistency, adjust the seasoning if necessary, and garnish with fresh basil right before enjoying this comforting bowl of goodness!

What to Serve with Savory Rustic Ratatouille Soup with Fresh Basil

Creating a delightful meal around this soup can transform your dining experience into an extraordinary event full of flavor and warmth.

  • Garlic Bread: The crispy, buttery texture of garlic bread perfectly complements the soup’s rich and hearty flavors while giving a satisfying crunch. Enjoy dipping it into the warm broth for a cozy combination.

  • Simple Green Salad: Fresh mixed greens tossed with a light lemon vinaigrette brings brightness and a crisp contrast, making each bite of your soup feel even more refreshing. The acidity will cut through the richness beautifully.

  • Quinoa Salad: A tangy quinoa salad mixed with diced cucumbers, cherry tomatoes, and a hint of feta adds protein and texture, making it a wholesome addition to your meal. The nuttiness of quinoa pairs well with the rustic flavors of the soup.

  • Herbed Couscous: Light and fluffy couscous infused with fresh herbs like parsley or mint creates a delectable side that absorbs the soup's vibrant broth, making for a heavenly bite full of summer’s bounty.

  • Roasted Vegetables: Roasted seasonal veggies tossed in olive oil and herbs not only enhance your meal’s visual appeal but also create an earthy side that resonates with the comforting flavors of Ratatouille.

  • Wine Pairing: A chilled glass of Sauvignon Blanc or a light red wine beautifully complements the earthy tones of your dish, enhancing the overall dining experience as you savor each spoonful of the soup.

  • Fruit Tart: For dessert, a light fruit tart with a buttery crust offers a refreshing finish to the meal, cleansing the palate and sweetening the experience after the savory soup.

Let these pairing ideas inspire you to create a memorable dining occasion centered around your Savory Rustic Ratatouille Soup with Fresh Basil.

How to Store and Freeze Savory Rustic Ratatouille Soup

Fridge: Store any leftover Savory Rustic Ratatouille Soup in an airtight container in the refrigerator for up to 3 days to maintain freshness and flavor.

Freezer: Cool the soup completely before transferring it to freezer-safe containers or bags. You can freeze it for up to 3 months, making it easy to enjoy later.

Reheating: Thaw overnight in the fridge before reheating. Gently warm the soup on the stovetop over low heat, stirring occasionally. Add a splash of water or broth if it’s too thick.

Enjoying Later: For best results, consume frozen soup within 3 months. Mark containers with the date, so you know when to savor this delightful dish again!

Savory Rustic Ratatouille Soup Variations

Feel free to explore these delightful twists for your Savory Rustic Ratatouille Soup and make it even more special!

  • Spicy Kick: Add 1 teaspoon of harissa or your favorite hot sauce for a fiery flavor that excites the palate. Not only does it elevate the heat level, but it also enriches the aromatic experience, making each spoonful vibrant and thrilling.

  • Creamy Texture: Stir in a splash of coconut milk or a dollop of sour cream just before serving for a luxurious creaminess. This twist will give your soup a delightful richness while balancing the acidity of the tomatoes beautifully.

  • Protein Boost: Toss in a can of chickpeas or white beans for extra protein. They’ll not only add heartiness but also bring an earthy flavor that complements the veggies wonderfully.

  • Herb Swap: Experiment with fresh oregano or parsley instead of basil for a unique herbaceous note. Different herbs can completely transform the aroma and feel of the dish, giving it a new life every time you make it.

  • Veggie Swap: Try adding a cup of spinach, kale, or even butternut squash for added nutrients and texture. The variations in color and flavor will keep things exciting, making this soup adaptable to any season and personal preference.

  • Zesty Citrus: A squeeze of lemon or lime juice brightens the flavors and adds a refreshing twist. This small addition can truly elevate the taste, making the soup even more invigorating, especially on warm summer days.

  • Pasta Addition: Throw in some small pasta shapes or quinoa for a heartier meal. This will transform your soup into a complete dish that’s comforting and filling, while still being light and satisfying.

  • Smoky Flavor: Add smoked paprika for an earthy, smoky touch that will deepen the flavor profile fantastically. Each bowl will sing with flavorful complexity, perfect for those who enjoy bold taste experiences.

Enjoy experimenting with these variations! For more ways to brighten your cooking routine, explore other inspiring vegetarian recipes on our blog!

Savory Rustic Ratatouille Soup with Fresh Basil

Savory Rustic Ratatouille Soup with Fresh Basil Recipe FAQs

How do I choose ripe vegetables for this soup?
Absolutely! For the best flavor, select vibrant, firm vegetables. Look for eggplants with smooth, shiny skin free of dark spots, zucchinis that are tender yet firm, and tomatoes that feel heavy with a fragrant aroma. A bell pepper should be brightly colored and free of blemishes for a sweet, crunchy addition to your Savory Rustic Ratatouille Soup with Fresh Basil.

How should I store leftover Savory Rustic Ratatouille Soup?
Very! Store any leftover soup in an airtight container in the refrigerator for up to 3 days. If you’d like to keep it longer, consider freezing it. Cooling the soup completely before storing is essential to maintain its flavors.

Can I freeze Savory Rustic Ratatouille Soup?
Absolutely! To freeze, cool the soup fully, then transfer it to freezer-safe containers or bags, leaving some space at the top for expansion. You can freeze it for up to 3 months. When you’re ready to enjoy it again, thaw it overnight in the fridge and reheat on the stovetop over low heat, adding a splash of water or broth if it appears too thick.

What should I do if my soup is too thick after cooking?
Not a problem! If your Savory Rustic Ratatouille Soup is thicker than you’d like, simply add a little hot vegetable broth or water while heating it up. Stir well and allow it to reach your desired consistency, making sure to taste and adjust the seasonings again if necessary.

Are there any dietary considerations for this recipe?
Definitely! This soup is naturally vegetarian and vegan-friendly, making it suitable for various dietary preferences. If you’re concerned about allergies, check that the vegetable broth does not contain any allergens. For pets, avoid sharing any soup that contains onion or garlic, as these can be harmful to them.

How can I enhance the flavor of the soup?
For a richer flavor, try adding a splash of balsamic vinegar or a tablespoon of pesto in the last few minutes of cooking. These additions can elevate the taste, making your Savory Rustic Ratatouille Soup even more delightful!

Savory Rustic Ratatouille Soup with Fresh Basil

Savory Rustic Ratatouille Soup with Fresh Basil Bliss

A hearty yet light Savory Rustic Ratatouille Soup with Fresh Basil, combining seasonal vegetables for a nourishing vegetarian dish.
Print Recipe Pin Recipe
Prep Time 15 minutes mins
Cook Time 45 minutes mins
Total Time 1 hour hr
Servings: 4 bowls
Course: Main Dishes
Cuisine: Vegetarian
Calories: 180
Ingredients Equipment Method Nutrition Notes

Ingredients
  

For the Soup
  • 1 medium eggplant cut into ½-inch cubes
  • 2 medium zucchinis diced
  • 1 1 bell pepper red or yellow, chopped
  • 1 medium onion diced
  • 2 cloves garlic minced
  • 4 cups ripe tomatoes peeled and diced, or one 14 oz can
  • 1 cup vegetable broth
  • 1 cup water
  • 1 teaspoon dried thyme
  • 1 teaspoon dried basil to complement fresh basil
  • ½ teaspoon crushed red pepper flakes optional
  • 2 tablespoons olive oil for sautéing
  • salt and black pepper to taste
  • ¼ cup fresh basil leaves chopped for garnish

Equipment

  • Large Pot

Method
 

Preparation Steps
  1. In a large pot, heat 2 tablespoons of olive oil over medium heat. Add the diced onions and sauté them for about 5 minutes until they turn translucent.
  2. Stir in the minced garlic and continue cooking for an additional minute.
  3. Add the chopped bell pepper into the pot, stirring well with the onions and garlic. Sauté for another 3-4 minutes until the peppers begin to soften.
  4. Incorporate the eggplant cubes and cook for about 5 minutes, stirring occasionally until tender.
  5. Stir in the diced zucchini and cook for another 3 minutes, gently mixing everything together.
  6. Add the peeled and diced tomatoes, along with the vegetable broth and water. Mix everything thoroughly.
  7. Sprinkle in the dried thyme, dried basil, and optionally, crushed red pepper flakes. Season with salt and black pepper to taste.
  8. Once boiling, reduce the heat to low, cover the pot, and let the soup simmer for 30-35 minutes.
  9. Taste the soup and adjust the seasoning as needed. For a smoother texture, blend the soup to your preferred consistency.
  10. Ladle the warm soup into bowls and garnish with the freshly chopped basil leaves before serving.

Nutrition

Serving: 1bowlCalories: 180kcalCarbohydrates: 30gProtein: 4gFat: 6gSaturated Fat: 1gPolyunsaturated Fat: 1gMonounsaturated Fat: 3gSodium: 500mgPotassium: 600mgFiber: 7gSugar: 5gVitamin A: 2800IUVitamin C: 75mgCalcium: 60mgIron: 2mg

Notes

Use seasonal vegetables for the best flavor. Regularly taste the soup and adjust seasoning while simmering.

Tried this recipe?

Let us know how it was!

Delight in Christmas Cookie Lush: A Festive Dessert Dream

December 15, 2025 by grace bellamy Leave a Comment

The scent of sweet, freshly baked cookies wafts through the air, instantly transporting me back to my childhood kitchen, where holiday magic came alive. This Christmas Cookie Lush is not just a festive dessert; it’s a delightful treat that brings loved ones together around the table. With its creamy layers and a fun twist on traditional cookies, this recipe is sure to become a seasonal staple. Not only is it incredibly simple to prepare, but it also works as a crowd-pleaser that satisfies sweet cravings without the fuss of complicated baking. Who wouldn’t want to indulge in a dessert that combines the classic taste of sugar cookies with rich cream cheese and a sprinkle of holiday cheer? So, grab your mixing bowl and let’s create a sweet masterpiece that will leave everyone asking for seconds! What’s your favorite holiday memory tied to baking?

Christmas Cookie Lush

Why You'll Love Christmas Cookie Lush

Irresistible layers: This festive dessert features a decadent cookie crust topped with smooth cream cheese and vanilla pudding layers that melt in your mouth.

Quick preparation: In just 20 minutes of active time, you can have this beauty in the fridge, saving you hours of holiday baking chaos.

Crowd-pleaser: Its pastel colors and festive sprinkles make it not just tasty but also a showstopper at any gathering.

No-bake convenience: After the initial baking, you simply chill it—meaning less time in the kitchen and more time to enjoy the season!

Perfect for those who appreciate homemade delights over fast food, this Christmas Cookie Lush will surely evoke fond memories, reminding you of cherished moments spent baking with loved ones. If you’re looking for more festive goodies, check out our Classic Christmas Sugar Cookies for another delightful treat!

Christmas Cookie Lush Ingredients

For the Crust

  • Sugar cookie mix – a convenient base that brings a sweet and buttery flavor.
  • Unsalted butter – adds richness; make sure it’s melted for easy mixing.
  • Egg – binds the ingredients together for a firm yet tender crust.

For the Cream Layer

  • Cream cheese – provides creamy texture and a tangy contrast to the sweetness.
  • Powdered sugar – sweetens the cream cheese layer perfectly; you can adjust the amount to taste.
  • Whipped topping – lightens the cream cheese and makes it extra fluffy; feel free to use a different brand if preferred.

For the Pudding Layer

  • Instant vanilla pudding mix – the star of this layer, adding richness and a touch of vanilla flavor for that classic creaminess.
  • Milk – helps activate the pudding mix; choose whole milk for a creamier texture.
  • Vanilla extract – enhances the pudding flavor; try using pure vanilla for a more robust taste.

For the Topping

  • Additional whipped topping – for a fluffy finish, creating that inviting, creamy layer.
  • Festive sprinkles – adds a whimsical touch and holiday spirit; choose your favorite colors!
  • Optional: crushed peppermint candies – adds a delightful crunch and minty freshness to elevate this festive dessert even more.

This delectable Christmas Cookie Lush is not just a treat; it’s a joyful celebration of flavors that will make your holidays even sweeter. Enjoy the process of layering these delightful ingredients and watch as everyone gathers around to indulge!

Step‑by‑Step Instructions for Christmas Cookie Lush

Step 1: Preheat and Prepare
Preheat your oven to 350°F (175°C) and grease a 9×13 inch baking dish with cooking spray or butter. This ensures your Christmas Cookie Lush crust releases easily after baking. While the oven heats up, gather your ingredients so everything is within reach for smooth mixing.

Step 2: Mix the Cookie Dough
In a medium bowl, combine the sugar cookie mix, melted unsalted butter, and the egg. Using a spatula or mixing spoon, stir these ingredients together until a uniform dough forms, which should take about 1-2 minutes. The dough will be slightly sticky, but that's perfect for pressing into the dish later.

Step 3: Form the Cookie Crust
Press the cookie dough evenly into the bottom of your prepared baking dish, creating a smooth layer that covers the entire base. Bake in your preheated oven for 12-15 minutes, or until the edges turn a light golden brown. Once baked, remove the dish and allow it to cool completely before adding the cream cheese layer.

Step 4: Prepare the Cream Cheese Layer
In a mixing bowl, beat the softened cream cheese and powdered sugar together with a hand mixer or whisk until you achieve a smooth and creamy texture. This will take about 3-4 minutes. The mixture should be free of lumps; once done, set it aside as you begin to fold in the whipped topping.

Step 5: Fold in the Whipped Topping
Gently fold in 1 cup of whipped topping into the cream cheese mixture until fully incorporated, using a spatula for a light and fluffy texture. Aim for a homogenous blend without over-mixing, which will help keep the cream layer airy. Once combined, spread this luscious layer evenly over the cooled cookie crust.

Step 6: Whisk the Pudding Mixture
In another bowl, whisk together the instant vanilla pudding mix and 2 cups of milk for about 2 minutes until it thickens visibly. The pudding should be smooth and creamy. Stir in ½ teaspoon of vanilla extract until well combined, then gently pour this delectable pudding over the cream cheese layer, spreading it evenly.

Step 7: Add the Whipped Topping
Top the pudding layer with the additional cup of whipped topping, spreading it out to create a smooth, even finish. This fluffy layer will enhance the dessert's overall lightness and appeal, making your Christmas Cookie Lush even more irresistible. Be sure to cover the entire surface for a beautiful presentation.

Step 8: Decorate and Chill
Sprinkle the top of your Christmas Cookie Lush with festive sprinkles, adding a joyful touch to this holiday treat. If desired, garnish with crushed peppermint candies for a delightful crunch and extra festive flair. Cover the dish with plastic wrap and refrigerate for at least 4 hours, or preferably overnight, to allow all layers to set properly.

Step 9: Slice and Serve
When you’re ready to enjoy your Christmas Cookie Lush, remove it from the fridge and slice into squares. The delightful layers, from the cookie crust to the creamy toppings, will reveal themselves beautifully. Serve chilled and watch as everyone indulges in this festive dessert dream!

Christmas Cookie Lush

How to Store and Freeze Christmas Cookie Lush

Fridge: Store your Christmas Cookie Lush in the refrigerator, covered with plastic wrap or a lid, for up to 3 days. This keeps it fresh and the layers intact.

Freezer: If you want to make it ahead of time, freeze the dessert before adding the whipped topping and sprinkles. Wrap tightly in plastic wrap and freeze for up to 2 months.

Thawing: When ready to enjoy, move the frozen Christmas Cookie Lush to the fridge overnight to thaw. Once thawed, add the whipped topping and festive toppings just before serving for the best presentation.

Slicing: For clean cuts, slice the chilled dessert with a warm knife. Wipe the knife between each slice for perfect squares that showcase those delicious layers!

Christmas Cookie Lush Variations

Feel free to get creative and customize your Christmas Cookie Lush with these delightful twists to suit your taste!

  • Dairy-Free: Substitute non-dairy cream cheese and whipped topping for a deliciously creamy option all can enjoy.
  • Gluten-Free: Use a gluten-free sugar cookie mix to make this festive recipe suitable for gluten-sensitive guests.
  • Minty Twist: Add a teaspoon of peppermint extract to the cream cheese layer for a refreshing holiday flavor.
  • Chocolate Lovers: Swirl in some chocolate ganache between layers or use chocolate pudding instead of vanilla for a richer taste.

For a truly festive experience, consider adding a layer of crushed gingerbread cookies atop the cream cheese layer. This will add a delightful spiced crunch that complements the sweetness beautifully!

  • Nutty Boost: Fold in chopped nuts like pecans or walnuts into the whipped topping for added texture and flavor.
  • Fruit-Filled Delight: Layer in some fresh berries, like raspberries or strawberries, between the creamy layers for a fruity burst.

Don’t hesitate to explore other festive themes! If you want to add even more festivity, why not sprinkle some edible glitter on top, making your Christmas Cookie Lush shine as bright as your holiday spirit?

For more tasty dessert ideas, check out our Chocolate Cherry Cheesecake Bars for another delightful treat worth trying!

Make Ahead Options

These Christmas Cookie Lush layers are perfect for busy home cooks who want to save time during the festive season! You can prepare the cookie crust and the cream cheese layer up to 24 hours in advance. Simply bake the crust and refrigerate it until you're ready to add the cream cheese mixture. The pudding layer can also be made ahead and stored in the fridge for up to 3 days. To maintain quality, be sure to cover all layers tightly with plastic wrap to prevent them from drying out. When you're ready to serve, simply add the whipped topping and festive sprinkles before slicing into squares, and you'll have a delightful dessert ready to impress with minimal effort!

Expert Tips for Christmas Cookie Lush

Chill Properly: Allow your Christmas Cookie Lush to chill for at least 4 hours, or overnight for the best texture; this ensures the layers set well.

Don’t Skip the Crust: Make sure your cookie crust is baked until light golden brown; underbaking may lead to a soggy base that affects the dessert's overall structure.

Smooth Layers: When mixing the cream cheese and powdered sugar, beat until completely smooth to prevent lumps that may ruin the creamy layers.

Gentle Folding: Carefully fold in the whipped topping to maintain the airiness of the cream layer; overmixing can result in a dense texture.

Personalize Toppings: Feel free to switch up the festive sprinkles or add favorite holiday candies; you're encouraged to get creative with your Christmas Cookie Lush!

What to Serve with Christmas Cookie Lush

The festive magic of this dessert is just the beginning; pair it with delightful accompaniments to elevate your holiday feast.

  • Rich Hot Cocoa: This cozy drink is perfect for warming up alongside the lush dessert, adding a chocolatey depth to each bite.

  • Minty Fresh Fruit Salad: A refreshing mix of melons, berries, and a hint of mint balances the sweetness of the Christmas Cookie Lush beautifully.

  • Spiced Chai Latte: With cozy spices like cinnamon and nutmeg, this aromatic beverage complements the creamy layers while adding an extra holiday vibe.

  • Gingerbread Cake: The warm spices of gingerbread enhance the festive experience, creating a delightful contrast to the creamy, cool texture of the lush.

  • Christmas Cookie Platter: Pairing with an assortment of classic cookies adds variety, allowing guests to indulge in different festive flavors.

  • Pecan or Pumpkin Pie: Adding a slice of these traditional holiday desserts rounds out the meal and offers a comforting taste of nostalgia.

  • Holiday Cheeseboard: Incorporating creamy cheeses and nuts alongside the dessert can create a sweet and savory pairing that excites the palate.

  • Eggnog: Enjoying this creamy, spiced drink will enhance the holiday cheer, making it a delightful accompaniment to your Christmas Cookie Lush.

  • Cranberry Spritzer: This refreshing fizzy drink adds a tart contrast that brightens the sweetness and makes for a festive toast.

  • Chocolate-Dipped Strawberries: These elegant treats add a fresh element and a rich chocolate flavor that pairs beautifully with the creamy layers of the lush.

Christmas Cookie Lush

Christmas Cookie Lush Recipe FAQs

How do I choose the right ripeness for the cream cheese?
Absolutely! For the best texture in your Christmas Cookie Lush, use cream cheese that is softened to room temperature. This usually takes about 30 minutes outside the fridge. If it's too cold or too soft, it can affect the smoothness of your cream layer, leading to lumps rather than a delightful creamy consistency.

How should I store my Christmas Cookie Lush?
Very! Store any leftovers in the refrigerator, covering the dish tightly with plastic wrap or using an airtight container. It will last for up to 3 days while remaining delicious and fresh. The creamy layers will set beautifully, making it a perfect make-ahead dessert for gatherings.

Can I freeze my Christmas Cookie Lush?
Of course! To freeze it, make your Christmas Cookie Lush up until the point of adding the whipped topping and sprinkles. Wrap it tightly in plastic wrap and place it in the freezer for up to 2 months. When ready to serve, transfer it to the fridge overnight to let it thaw and then add the toppings just before serving.

What should I do if my cookie crust is too soft?
If your cookie crust turns out too soft, don’t worry! This can happen if it’s underbaked. Ensure that you bake it just until the edges are light golden brown, about 12-15 minutes in a preheated oven at 350°F (175°C). If it already baked, try to let it cool for longer before adding the creamy layers. Additionally, chilling it longer in the fridge can help stabilize the layers.

Can I make this dessert dairy-free?
Absolutely! You can substitute the cream cheese with a dairy-free cream cheese alternative and use plant-based whipped topping made from coconut or almond milk. Ensure that the pudding mix used is dairy-free as well, and replace milk with a non-dairy alternative. This way, everyone can indulge in your delicious Christmas Cookie Lush!

Christmas Cookie Lush

Delight in Christmas Cookie Lush: A Festive Dessert Dream

Experience the joy of Christmas with this Christmas Cookie Lush, a delightful dessert perfect for festive gatherings.
Print Recipe Pin Recipe
Prep Time 20 minutes mins
Cook Time 15 minutes mins
Chilling Time 4 hours hrs
Total Time 4 hours hrs 35 minutes mins
Servings: 12 slices
Course: Dessert
Cuisine: American
Calories: 250
Ingredients Equipment Method Nutrition Notes

Ingredients
  

For the Crust
  • 1 package sugar cookie mix a convenient base that brings a sweet and buttery flavor
  • ½ cup unsalted butter melted for easy mixing
  • 1 large egg binds the ingredients together
For the Cream Layer
  • 8 oz cream cheese softened for easy mixing
  • 2 cups powdered sugar adjust to taste
  • 1 cup whipped topping lightens the cream cheese layer
For the Pudding Layer
  • 1 package instant vanilla pudding mix adds richness and a touch of vanilla flavor
  • 2 cups milk use whole milk for creamier texture
  • ½ teaspoon vanilla extract enhances pudding flavor
For the Topping
  • 1 cup additional whipped topping for a fluffy finish
  • 1 cup festive sprinkles adds a whimsical touch
  • optional: crushed peppermint candies for extra crunch and minty freshness

Equipment

  • Mixing Bowl
  • 9x13-inch baking dish
  • Whisk
  • spatula
  • hand mixer

Method
 

Preparation Steps
  1. Preheat your oven to 350°F (175°C) and grease a 9×13 inch baking dish.
  2. In a medium bowl, combine the sugar cookie mix, melted unsalted butter, and the egg. Stir until a uniform dough forms.
  3. Press the cookie dough into the bottom of your prepared baking dish and bake for 12-15 minutes until golden brown.
  4. Allow the crust to cool completely before adding the cream cheese layer.
  5. Beat the softened cream cheese and powdered sugar together until smooth. Fold in whipped topping and spread over crust.
  6. Whisk together the instant pudding mix and milk for about 2 minutes, then stir in vanilla extract. Pour over cream cheese layer.
  7. Top with additional whipped topping and spread evenly.
  8. Sprinkle with festive sprinkles and optional crushed peppermint candies. Cover and refrigerate for at least 4 hours.
  9. Slice and serve chilled, enjoying the layers of this festive dessert.

Nutrition

Serving: 1sliceCalories: 250kcalCarbohydrates: 30gProtein: 3gFat: 12gSaturated Fat: 7gPolyunsaturated Fat: 1gMonounsaturated Fat: 3gCholesterol: 30mgSodium: 200mgPotassium: 100mgSugar: 20gVitamin A: 10IUVitamin C: 1mgCalcium: 8mgIron: 3mg

Notes

Chill overnight for the best texture and flavor. Personalize toppings as desired.

Tried this recipe?

Let us know how it was!

Hearty Cheesy Italian Lasagna Soup for Cozy Comfort Nights

December 15, 2025 by grace bellamy Leave a Comment

As the aroma of simmering tomatoes and savory herbs wafts through my kitchen, it always sparks a warm feeling of nostalgia. Today, I’m excited to share my Hearty Cheesy Italian Lasagna Soup, a cozy twist on the classic lasagna that comes together quickly without sacrificing any of that comforting goodness. Packed with layers of flavor and cheesy delight, this comforting soup is perfect for those busy weeknights when you crave something hearty yet easy. In just 50 minutes, you can create a dish that’s sure to impress your family or guests, and it freezes beautifully for meal prep. Are you ready to dive into a bowl of this flavorful delight? Let’s get cooking!

Hearty Cheesy Italian Lasagna Soup

Why is this lasagna soup a must-try?

Comforting, this Hearty Cheesy Italian Lasagna Soup envelops you in warmth and flavor, making it perfect for cozy nights in. Quick to make, you can whip up a satisfying meal in just 50 minutes, ideal for busy weeknights. Rich flavors from fresh herbs and cheeses elevate this dish beyond standard soups, while versatile ingredients allow for easy substitutions—feel free to switch out the proteins or use vegetables for a meatless version. Crowd-pleaser status is guaranteed; even picky eaters love this delightful soup! For more easy dinner ideas, check out our weeknight meals section!

Hearty Cheesy Italian Lasagna Soup Ingredients

• Dive into a bowl of flavor with these simple components!

For the Soup Base

  • Olive oil – a splash helps build a rich foundation of flavor.
  • Medium onion – diced, it adds sweetness and depth to the soup.
  • Garlic cloves – minced for an aromatic kick that elevates every bite.
  • Ground beef or Italian sausage – choose your favorite protein for that hearty touch.
  • Crushed tomatoes – a 28 oz can packs in vibrant tomato goodness.
  • Chicken or vegetable broth – 4 cups ensures a comforting, flavorful base.
  • Tomato paste – 1 tablespoon thickens and intensifies the flavor.
  • Dried basil – 2 teaspoons bring that classic Italian flavor to life.
  • Dried oregano – 1 teaspoon adds a fragrant touch that complements the tomatoes.
  • Dried thyme – 1 teaspoon enhances the herbaceous notes.
  • Red pepper flakes (optional) – ½ teaspoon for those who enjoy a little heat.
  • Salt and pepper – to taste, essential for bringing out all the flavors.

For the Noodles and Cheeses

  • Uncooked lasagna noodles – 8 ounces, broken into pieces, for a fun twist on tradition.
  • Ricotta cheese – 1 cup adds a creamy layer of richness.
  • Shredded mozzarella cheese – 2 cups make this soup irresistibly cheesy.
  • Grated Parmesan cheese – ½ cup for that nutty finish.

Garnish

  • Fresh basil leaves – for a pop of color and fresh flavor on top!

Let your taste buds celebrate with this Hearty Cheesy Italian Lasagna Soup that brings together the warmth of home cooking and the charm of Italian flavors!

Step‑by‑Step Instructions for Hearty Cheesy Italian Lasagna Soup

Step 1: Sauté the Aromatics
In a large pot or Dutch oven, heat 2 tablespoons of olive oil over medium heat. Add 1 medium diced onion and sauté until it becomes translucent and fragrant, approximately 5 minutes. Stir in 3 minced garlic cloves and cook for an additional minute, allowing the garlic to release its aromatic goodness.

Step 2: Brown the Meat
Increase the heat to medium-high and add 1 pound of ground beef or Italian sausage to the pot. Cook for about 6–8 minutes, stirring frequently until the meat is well browned and crumbled. Once browned, drain any excess fat to keep the Hearty Cheesy Italian Lasagna Soup light and flavorful.

Step 3: Build the Soup Base
Stir in 1 can of crushed tomatoes, 4 cups of chicken or vegetable broth, and 1 tablespoon of tomato paste. Mix everything well until combined, as the tomatoes and broth will serve as the flavorful base of your soup. Allow the mixture to come to a gentle boil over medium-high heat, which should take a few minutes.

Step 4: Add the Seasonings
Once boiling, add 2 teaspoons of dried basil, 1 teaspoon of dried oregano, 1 teaspoon of dried thyme, and ½ teaspoon of red pepper flakes, if desired. Season with salt and pepper to taste, enhancing the Hearty Cheesy Italian Lasagna Soup with robust flavors. Reduce the heat to low, cover the pot, and let it simmer for about 15 minutes, allowing the flavors to meld beautifully.

Step 5: Incorporate the Noodles
Stir in the broken pieces of 8 ounces of uncooked lasagna noodles, ensuring that they are fully submerged in the bubbling broth. Continue cooking for 10–12 minutes, stirring occasionally, until the noodles are tender and have absorbed the delicious flavors from the soup base.

Step 6: Prepare the Cheese Mixture
In a separate bowl, combine 1 cup of ricotta cheese, half of the shredded mozzarella cheese (1 cup), and half of the grated Parmesan cheese (¼ cup). Stir until the cheeses are evenly mixed, creating a creamy, cheesy filling that will top your warm soup and elevate the flavors of the Hearty Cheesy Italian Lasagna Soup.

Step 7: Serve the Soup
To serve, ladle the steaming Hearty Cheesy Italian Lasagna Soup into individual bowls. Add a generous spoonful of the creamy cheese mixture to each bowl, allowing it to melt slightly into the warm broth. Top with the remaining mozzarella and Parmesan cheeses, creating a rich, cheesy layer that will delight family and friends.

Step 8: Garnish and Enjoy
Finish off your masterpiece by garnishing with fresh basil leaves for a pop of color and freshness. For an extra touch of flavor, drizzle a little olive oil over the soup before serving. This cozy dish is now ready to enjoy, perfect for cold nights or any time you crave a comforting, home-cooked meal!

Hearty Cheesy Italian Lasagna Soup

Hearty Cheesy Italian Lasagna Soup Variations

Feel free to mix and match these fun twists to make this recipe truly your own!

  • Vegetarian: Substitute the meat with lentils or mushrooms for a plant-based delight. The earthy flavors will surprise you!
  • Spicy Kick: Add a chopped jalapeño or more red pepper flakes if you love heat. It's a fantastic way to elevate the flavor!
  • Creamy Twist: Incorporate heavy cream or a splash of half-and-half for an ultra-rich texture. The creaminess will wrap you in comfort.
  • Gluten-Free: Use gluten-free lasagna noodles or spiralized zucchini for a wholesome, low-carb version. Delicious and accommodating for gluten sensitivities!
  • Cheese Lovers: Swap in different cheeses, like gouda or pepper jack, for a unique flavor experience. Cheese can be a delightful adventure!
  • Herb Infusion: Fresh herbs, such as parsley or thyme, can elevate the aroma and taste. They add a fresh dimension that dances on the palate.
  • Minestrone Style: Toss in extra veggies, like diced carrots or bell peppers, for added color and nutrition. It’s a feast for your eyes and taste buds!
  • Protein Boost: Add cannellini beans or chickpeas for extra heartiness and protein. They complement the flavors beautifully, making it more filling!

Explore these variations to create your perfect bowl of Hearty Cheesy Italian Lasagna Soup, ensuring it delights everyone who gathers around your table!

Make Ahead Options

These Hearty Cheesy Italian Lasagna Soup options are perfect for busy home cooks looking to save time during the week! You can prepare the soup base (steps 1-5) up to 3 days in advance and refrigerate it in an airtight container. Additionally, you can mix the ricotta, mozzarella, and Parmesan cheese (step 6) and store it separately for the best flavor. To maintain the soup's quality and prevent the noodles from becoming soggy, combine them with the broth only when you're ready to serve. When it’s time to enjoy your delicious creation, simply reheat the soup base, stir in the noodles, cook until tender, and top with your cheese mixture for a cozy, stress-free meal!

Expert Tips for Hearty Cheesy Italian Lasagna Soup

  • Flavor Depth: Adding fresh herbs to the soup, like basil or parsley, enhances the taste and brings extra vibrancy to this Hearty Cheesy Italian Lasagna Soup.

  • Meat Options: For a lighter option, consider using ground turkey or chicken instead of beef or Italian sausage. Adjust cooking time if needed.

  • Noodle Cooking: Be sure to stir the broken lasagna noodles occasionally while they cook to prevent them from sticking together, ensuring a smooth texture in your soup.

  • Cheese Mix: For a creamier soup, feel free to add an extra dollop of ricotta cheese to each bowl before serving. It makes each spoonful heavenly!

  • Meal Prep: This soup freezes well, so consider making a double batch. Just portion it out in airtight containers for quick meals on busy nights.

  • Serving Suggestions: Pair your Hearty Cheesy Italian Lasagna Soup with crusty bread or a fresh salad for a complete, comforting meal.

What to Serve with Hearty Cheesy Italian Lasagna Soup

Cozy up your meal with delightful pairings that enhance every spoonful of warmth.

  • Garlic Bread: The crispy, buttery goodness of garlic bread is perfect for soaking up that cheesy broth, adding a satisfying crunch to each bite.

  • Mixed Green Salad: A fresh salad with a zingy vinaigrette cuts through the richness of the soup, providing a refreshing contrast that brightens the meal.

  • Parmesan Crusted Zucchini: Baked zucchini rounds topped with Parmesan bring a savory, crunchy element that complements the flavors of the lasagna soup beautifully.

  • Italian Antipasto Platter: A variety of olives, marinated artichokes, and sliced cured meats offer a delightful selection of bites to enjoy alongside your hearty soup.

  • Roasted Vegetables: Seasonal roasted veggies add a hearty element, enhancing the nutritional profile while providing a natural sweetness that pairs well with the savory soup.

  • Red Wine: A glass of Chianti or Merlot enriches the dining experience with its rich tannins, perfectly balancing the comforting flavors of the Hearty Cheesy Italian Lasagna Soup.

  • Tiramisu: Finish your meal on a sweet note with this classic Italian dessert; its creamy layers and coffee flavor create a lovely finish after a warm soup.

How to Store and Freeze Hearty Cheesy Italian Lasagna Soup

Fridge: Store leftovers of your Hearty Cheesy Italian Lasagna Soup in an airtight container for up to 3 days, ensuring it stays fresh and flavorful.

Freezer: This soup freezes beautifully! Allow it to cool completely before transferring to freezer-safe containers. It will keep for up to 3 months.

Reheating: When ready to enjoy, thaw overnight in the fridge and reheat on the stovetop over medium heat, adding a splash of broth if needed to restore its creamy consistency.

Portioning: For easy meal prep, consider freezing individual servings in smaller containers. This makes for quick and satisfying meals on busy weeknights!

Hearty Cheesy Italian Lasagna Soup

Hearty Cheesy Italian Lasagna Soup Recipe FAQs

How do I select the best ingredients for this soup?
When choosing fresh ingredients for your Hearty Cheesy Italian Lasagna Soup, opt for vegetables that feel firm and have vibrant colors. For instance, select an onion that feels heavy for its size and has a smooth skin. The tomatoes should be bright and free from blemishes; avoid those with dark spots all over. As for the ground beef or sausage, look for high-quality meat with a good ratio of fat to keep the soup rich and flavorful.

How should I store leftover lasagna soup?
Absolutely! You can store leftover Hearty Cheesy Italian Lasagna Soup in an airtight container in the fridge for up to 3 days. Be sure to let it cool completely before sealing it up. This way, you maintain all those delicious flavors, making it easy to reheat without compromising quality!

Can I freeze this soup, and if so, how?
Yes, this soup freezes beautifully! Allow the Hearty Cheesy Italian Lasagna Soup to cool completely. Then, transfer it into freezer-safe containers, leaving about an inch of space at the top for expansion. It can be frozen for up to 3 months. To reheat, simply thaw it overnight in the fridge, then warm it on the stovetop over medium heat, adding a splash of broth if needed for a creamy texture.

What are some common issues I might run into while making the soup?
If your Hearty Cheesy Italian Lasagna Soup turns out too thick, don't worry! You can easily remedy this by adding a bit more broth or water until it reaches your desired consistency. If the flavors seem flat, try adjusting with a bit more salt, pepper, or dried herbs. And remember to stir the pasta frequently as it cooks; this helps prevent it from sticking together.

Are there any dietary considerations I should keep in mind?
Absolutely! For those watching their gluten intake, you can use gluten-free lasagna noodles to accommodate dietary needs. Additionally, if you're cooking for anyone with dairy allergies, consider alternatives like cashew cheese or nutritional yeast instead of ricotta, mozzarella, and Parmesan for a dairy-free version. If preparing for pets, always check for any specific food allergies or restrictions before sharing any human food with them!

How do I know when my lasagna noodles are perfectly cooked in the soup?
To achieve perfectly tender lasagna noodles in your Hearty Cheesy Italian Lasagna Soup, stir in the broken pieces and let them simmer for about 10–12 minutes. They should be al dente—firm to the bite—submerged in the rich broth. Test a piece after about 10 minutes, and if it feels tender without being mushy, you’re good to go! This balance ensures your soup remains hearty and satisfying.

Hearty Cheesy Italian Lasagna Soup

Hearty Cheesy Italian Lasagna Soup for Cozy Comfort Nights

This Hearty Cheesy Italian Lasagna Soup is a cozy twist on the classic recipe that offers comforting goodness in just 50 minutes.
Print Recipe Pin Recipe
Prep Time 10 minutes mins
Cook Time 40 minutes mins
Total Time 50 minutes mins
Servings: 6 bowls
Course: Main Dishes
Cuisine: Italian
Calories: 450
Ingredients Equipment Method Nutrition Notes

Ingredients
  

For the Soup Base
  • 2 tablespoons olive oil a splash helps build a rich foundation of flavor
  • 1 medium onion diced, adds sweetness and depth
  • 3 cloves garlic minced for an aromatic kick
  • 1 pound ground beef or Italian sausage choose your favorite protein
  • 28 ounces crushed tomatoes packs in vibrant tomato goodness
  • 4 cups chicken or vegetable broth ensures a comforting, flavorful base
  • 1 tablespoon tomato paste thickens and intensifies the flavor
  • 2 teaspoons dried basil brings classic Italian flavor to life
  • 1 teaspoon dried oregano adds a fragrant touch
  • 1 teaspoon dried thyme enhances the herbaceous notes
  • ½ teaspoon red pepper flakes optional for a little heat
  • salt and pepper to taste, essential for flavor
For the Noodles and Cheeses
  • 8 ounces uncooked lasagna noodles broken into pieces
  • 1 cup ricotta cheese adds a creamy layer of richness
  • 2 cups shredded mozzarella cheese makes this soup irresistibly cheesy
  • ½ cup grated Parmesan cheese for a nutty finish
Garnish
  • fresh basil leaves for fresh flavor and color

Equipment

  • large pot or Dutch oven

Method
 

Step-by-Step Instructions
  1. Heat 2 tablespoons of olive oil in a large pot over medium heat. Add 1 medium diced onion and sauté until translucent, about 5 minutes. Stir in 3 minced garlic cloves and cook for an additional minute.
  2. Increase heat to medium-high and add 1 pound of ground beef or Italian sausage. Cook for 6-8 minutes until well browned, then drain excess fat.
  3. Stir in 1 can of crushed tomatoes, 4 cups of broth, and 1 tablespoon of tomato paste. Combine well and allow to gently boil.
  4. Once boiling, add seasonings: 2 teaspoons basil, 1 teaspoon oregano, 1 teaspoon thyme, ½ teaspoon red pepper flakes, salt and pepper to taste. Reduce heat to low and simmer for 15 minutes.
  5. Add broken pieces of 8 ounces of uncooked lasagna noodles, ensuring they are submerged. Cook for 10-12 minutes until noodles are tender.
  6. In a separate bowl, mix 1 cup of ricotta, 1 cup of mozzarella, and ¼ cup of Parmesan until well combined.
  7. To serve, ladle soup into bowls, add a spoonful of the cheese mixture, and top with remaining cheeses.
  8. Garnish with fresh basil leaves and drizzle very lightly with olive oil before serving.

Nutrition

Serving: 1bowlCalories: 450kcalCarbohydrates: 40gProtein: 28gFat: 24gSaturated Fat: 10gPolyunsaturated Fat: 1gMonounsaturated Fat: 9gTrans Fat: 1gCholesterol: 70mgSodium: 900mgPotassium: 800mgFiber: 5gSugar: 6gVitamin A: 600IUVitamin C: 10mgCalcium: 350mgIron: 3mg

Notes

This soup freezes well, just cool before storing in airtight containers. Reheat on the stovetop, adding broth if needed.

Tried this recipe?

Let us know how it was!

Melt-in-Your-Mouth Slow Cooker Pot Roast for Cozy Nights

December 15, 2025 by grace bellamy Leave a Comment

As I stood in the kitchen, the aroma of savory spices and slow-cooked beef wafted through the air, instantly transporting me to a cozy family gathering. There’s something magical about a Slow Cooker Pot Roast—it’s the ultimate comfort food, perfect for busy weeknights or special occasions. With just a bit of prep, you can whip up a hearty meal that not only fills the belly but also warms the heart. This recipe shines in its simplicity, allowing those tender chunks of beef to simmer low and slow until they practically melt in your mouth. Plus, the collection of vegetables adds a vibrant touch and makes it a wholesome choice. Best of all? You can set it and forget it, giving you time to savor life's little moments while dinner cooks itself. Are you ready to dive into this deliciously satisfying dish? Let’s explore the secrets that make this pot roast unforgettable!

Slow Cooker Pot Roast

Why is Slow Cooker Pot Roast Irresistible?

Unmatched flavor: This recipe is packed with rich, hearty flavors that come from slow-cooking, allowing the beef to absorb all the goodness from herbs and broth.

Effortless preparation: With just 20 minutes of prep, you can set the stage for a meal that cooks itself while you go about your day.

Family-friendly: Everyone loves a comforting pot roast, making it perfect for both weeknight dinners and holiday feasts—your loved ones will be asking for seconds!

Versatile veggies: Feel free to customize the ingredients—add your favorite vegetables or even some mushrooms for extra flavor and texture.

Tender perfection: After hours of slow cooking, the meat is fork-tender and bursting with flavor, ensuring a melt-in-your-mouth experience.

No more bland fast food—transform your weeknight dinners into something special with this delightful Slow Cooker Pot Roast.

Slow Cooker Pot Roast Ingredients

• Discover everything you need to create a mouthwatering experience!

For the Roast
• Beef chuck roast – 3 to 4 pounds; this cut becomes incredibly tender when slow cooked.
• Olive oil – 2 tablespoons; helps create a beautiful sear for added flavor.

For the Aromatics
• Onion – 1 medium, chopped; it adds a sweet depth to the dish.
• Garlic – 4 cloves, minced; a touch of this ingredient enriches the flavors significantly.

For the Vegetables
• Carrots – 4 large, cut into 1-inch pieces; they bring natural sweetness to the pot roast.
• Potatoes – 4 medium, cut into chunks; these will soak up all the delicious juices.
• Mushrooms (optional) – 1 cup, sliced; they offer an earthy taste and texture to the dish.

For the Broth
• Beef broth – 2 cups; essential for tenderizing the meat and adding moisture.
• Worcestershire sauce – 1 tablespoon; it gives an umami boost that enhances the overall flavor.

For Seasoning
• Dried thyme – 1 teaspoon; a classic herb that complements the beef beautifully.
• Dried rosemary – 1 teaspoon; it adds a fragrant touch that elevates the dish.
• Salt and pepper – to taste; always adjust based on your preference for enhanced flavor.
• Bay leaves – 2; use these to infuse a subtle aromatic note during cooking.

Add this beloved recipe to your collection and delight in the warmth it brings to your table with this unforgettable Slow Cooker Pot Roast!

Step‑by‑Step Instructions for Slow Cooker Pot Roast

Step 1: Prepare the Roast
Begin by patting the beef chuck roast dry with paper towels to remove excess moisture. Season it generously with salt and pepper on all sides. This step guarantees a flavorful crust once seared. Let the roast sit for a few moments while you prepare the skillet.

Step 2: Sear the Roast
In a large skillet, heat 2 tablespoons of olive oil over medium-high heat until shimmering. Carefully add the roast and sear for about 3–4 minutes on each side, until a golden-brown crust forms. This enhances the flavor of your Slow Cooker Pot Roast by locking in juices before it’s simmered to perfection.

Step 3: Transfer to the Slow Cooker
Once the roast is beautifully browned, remove it from the skillet and carefully place it in the slow cooker. This appliance will work its magic over several hours, transforming the roast into a melt-in-your-mouth delight. Ensure it’s positioned in the center for even cooking.

Step 4: Sauté Aromatics
In the same skillet, add the chopped onion and sauté for about 2–3 minutes, stirring occasionally until softened. Then, mix in the minced garlic and cook for an additional minute until fragrant. This aromatic mixture will amplify the flavors of your Slow Cooker Pot Roast.

Step 5: Combine Aromatics with the Roast
Pour the sautéed onion and garlic mixture directly over the roast in the slow cooker. Spread it evenly, allowing those flavorful bits to mingle with the meat as it cooks. This builds a depth of flavor that will make your pot roast truly irresistible.

Step 6: Add Vegetables
Layer 4 large carrots and 4 medium potatoes, both cut into chunks, around the roast in the slow cooker. If you're opting for mushrooms, add them now for an additional flavor boost. These veggies will absorb the savory juices, making every bite delightful.

Step 7: Prepare the Broth Mixture
In a separate bowl, whisk together 2 cups of beef broth, 1 tablespoon of Worcestershire sauce, 1 teaspoon of dried thyme, 1 teaspoon of dried rosemary, and 2 bay leaves. This mixture is the heart of your Slow Cooker Pot Roast, providing moisture and flavor as it slowly cooks.

Step 8: Pour over Roast and Vegetables
Gently pour the prepared broth mixture over the roast and vegetables in the slow cooker, ensuring everything is well-coated. The liquid should nearly cover the ingredients, which will create a tender and flavorful dish during cooking.

Step 9: Cook It Slow
Cover the slow cooker with its lid and set it to cook on low for 8–10 hours, or on high for 4–5 hours. This gentle heat will gradually break down the meat, making it fork-tender and infusing the vegetables with rich flavor.

Step 10: Rest and Serve
Once the cooking time is complete, carefully remove the roast and vegetables from the slow cooker. Let the roast rest for at least 10 minutes before slicing. Serve it with the vegetables and a generous spoonful of the cooking liquid drizzled on top for extra flavor.

Slow Cooker Pot Roast

How to Store and Freeze Slow Cooker Pot Roast

Fridge: Store leftover Slow Cooker Pot Roast in an airtight container for up to 3 days. Allow it to cool completely before sealing to maintain freshness.

Freezer: If you want to enjoy it later, freeze portions in airtight containers or heavy-duty freezer bags for up to 3 months. Be sure to label with the date for easy tracking!

Reheating: To reheat, thaw overnight in the fridge, then warm in a pot over low heat or microwave until steaming. Add a splash of broth to keep the meat moist!

Storage Tips: Always portion out leftovers to avoid frequent opening of the container, which can affect the quality of your Slow Cooker Pot Roast.

What to Serve with Slow Cooker Pot Roast

Transform your comforting pot roast into a complete meal with these delightful pairings that burst with flavor and heartwarming goodness.

  • Creamy Mashed Potatoes: These fluffy potatoes are a classic side that soak up the rich gravy from the pot roast beautifully.

  • Roasted Brussels Sprouts: Their crispy, caramelized edges provide a lovely contrast to the tender meat, balancing flavors perfectly. Toss them with olive oil, salt, and pepper, then roast until golden for a delicious addition.

  • Garlic Bread: Perfect for scooping up any leftover sauce, this crispy and buttery bread enhances the comfort of your meal. Toast it until golden-brown for added crunch.

  • Garden Salad: A fresh salad with mixed greens and a light vinaigrette adds a refreshing contrast to the hearty pot roast. Consider adding sliced apples or nuts for an extra crunch.

  • Steamed Green Beans: Their vibrant color and crisp texture complement the richness of the pot roast while adding a nutritious element. Steam until just tender and brighten them with a squeeze of lemon.

  • Red Wine: A glass of cabernet or merlot pairs exquisitely with the robust flavors of the pot roast, enhancing the overall dining experience. The tannins in red wine help cut through the richness for a balanced sip.

  • Apple Crisp: To finish your meal on a sweet note, consider serving a warm apple crisp with a scoop of vanilla ice cream. It’s a comforting dessert that rounds out your cozy dinner perfectly.

Each pairing brings its own unique texture and flavor, making your Slow Cooker Pot Roast an inviting centerpiece of a deliciously satisfying meal.

Make Ahead Options

These Slow Cooker Pot Roast preparations are perfect for busy home cooks looking to streamline their meal planning! You can chop the vegetables (onion, carrots, potatoes, and optional mushrooms) and store them in an airtight container in the refrigerator for up to 3 days. Additionally, you can sear the beef chuck roast and assemble all ingredients in the slow cooker insert, then cover and refrigerate for up to 24 hours. To maintain quality, ensure the roast is well-seasoned and that vegetables are fresh before storing. When it’s time to cook, simply add the broth mixture and set the slow cooker, and you'll enjoy the convenience of a delicious, hearty dinner easily!

Expert Tips for Slow Cooker Pot Roast

Searing is Key: Always sear the roast beforehand to lock in juices and create a rich flavor base for your Slow Cooker Pot Roast.

Season Generously: Don't be shy with the salt and pepper—season all sides of the beef chuck roast well for the best taste.

Layer Vegetables Wisely: Place heartier vegetables like potatoes at the bottom and lighter ones, such as carrots, on top to ensure even cooking.

Use Quality Broth: Opt for low-sodium beef broth and fresh herbs to elevate the flavor of your pot roast significantly.

Don’t Rush: Patience is essential; avoid lifting the lid during cooking to keep the moisture locked in, ensuring a fork-tender result.

Rest Before Slicing: Allow the roast to rest for 10 minutes after cooking to retain juices, enhancing the flavor and tenderness of your Slow Cooker Pot Roast.

Slow Cooker Pot Roast Variations

Feel free to tailor this Slow Cooker Pot Roast to your taste with these mouthwatering twists and delectable substitutions!

  • Dairy-Free: Replace Worcestershire sauce with coconut aminos for a gluten-free option that's still flavorful.
  • Herb Infusion: Add fresh herbs like parsley or thyme for a bright, vibrant flavor—a true garden-to-table experience!
  • Spice it Up: Toss in a pinch of red pepper flakes for a subtle kick, perfect for those who enjoy a bit of heat as the flavors meld.
  • Veggie Boost: Incorporate sweet potatoes or parsnips instead of regular potatoes for a healthier twist with natural sweetness.
  • Mushroom Delight: Add different types of mushrooms, such as cremini or shiitake, to enhance the umami flavor and provide an exciting texture.
  • Asian Flair: Mix in soy sauce and ginger for an Asian-inspired flavor, creating a unique take on the classic pot roast.
  • Vegan Option: Swap the beef for hearty vegetables like jackfruit or tempeh marinated in balsamic vinegar to create a plant-based pot roast.
  • Cranberry Twist: Introduce a cup of cranberry sauce during cooking for a seasonal sweetness that pairs beautifully with the savory flavors.

Let your kitchen creativity soar while whipping up this beloved dish, and don't hesitate to explore loved combinations that resonate with you! And, for another effortless comfort meal, try out my recipe for Creamy Chicken and Rice Casserole—it’s perfect to share with family and friends!

Slow Cooker Pot Roast

Slow Cooker Pot Roast Recipe FAQs

How do I select the right beef for my pot roast?
Absolutely! When choosing a beef chuck roast, look for a cut that's well-marbled with some fat for the best flavor and tenderness. The marbling breaks down during the slow cooking process, giving your Slow Cooker Pot Roast that melt-in-your-mouth texture. Aim for a roast that has a deep red color and minimal dark spots for freshness.

What’s the best way to store leftovers?
Very! Allow your leftover Slow Cooker Pot Roast to cool completely before transferring it to an airtight container. It can be safely stored in the refrigerator for up to 3 days. For optimal taste and texture, label with the date and enjoy it within that time.

Can I freeze Slow Cooker Pot Roast?
Definitely! To freeze, portion your Slow Cooker Pot Roast into airtight containers or heavy-duty freezer bags. Make sure to remove as much air as possible to prevent freezer burn. It can stay fresh in the freezer for up to 3 months. When you're ready to enjoy it, thaw it overnight in the fridge before reheating.

What should I do if my roast is tough after cooking?
If your Slow Cooker Pot Roast turns out tough, don’t worry! It might need a little more time. Return it to the slow cooker with some additional beef broth, cover it, and let it cook for another 1-2 hours on low. This will help further tenderize the meat and give you that desirable fork-tender result.

Are there any dietary considerations I should be aware of?
Absolutely! If you’re serving this pot roast to guests with dietary restrictions, be mindful of ingredients like Worcestershire sauce, which may contain gluten or anchovies. Consider substituting with a gluten-free version or simply omitting it. Always check food labels and, when in doubt, ask beforehand!

How should I reheat the leftovers?
To reheat your Slow Cooker Pot Roast, first thaw it in the fridge overnight if frozen. Then, warm it gently in a pot over low heat, adding a splash of broth to maintain its moisture. If you prefer, you can also microwave it in short intervals, stirring in between, until steaming hot. Enjoy your delicious second round!

Slow Cooker Pot Roast

Melt-in-Your-Mouth Slow Cooker Pot Roast for Cozy Nights

This Slow Cooker Pot Roast is the ultimate comfort food, perfect for busy weeknights or special occasions, with tender chunks of beef that melt in your mouth.
Print Recipe Pin Recipe
Prep Time 20 minutes mins
Cook Time 8 hours hrs
Resting Time 10 minutes mins
Total Time 8 hours hrs 10 minutes mins
Servings: 8 slices
Course: Main Dishes
Cuisine: American
Calories: 350
Ingredients Equipment Method Nutrition Notes

Ingredients
  

For the Roast
  • 3-4 pounds Beef chuck roast this cut becomes incredibly tender when slow cooked
  • 2 tablespoons Olive oil helps create a beautiful sear for added flavor
For the Aromatics
  • 1 medium Onion, chopped adds a sweet depth to the dish
  • 4 cloves Garlic, minced enriches the flavors significantly
For the Vegetables
  • 4 large Carrots, cut into 1-inch pieces bring natural sweetness to the pot roast
  • 4 medium Potatoes, cut into chunks soak up all the delicious juices
  • 1 cup Mushrooms, sliced optional for extra flavor and texture
For the Broth
  • 2 cups Beef broth essential for tenderizing the meat and adding moisture
  • 1 tablespoon Worcestershire sauce gives an umami boost that enhances the overall flavor
For Seasoning
  • 1 teaspoon Dried thyme a classic herb that complements the beef beautifully
  • 1 teaspoon Dried rosemary adds a fragrant touch that elevates the dish
  • Salt and pepper to taste
  • 2 Bay leaves infuse a subtle aromatic note during cooking

Equipment

  • Slow Cooker
  • skillet

Method
 

Preparation
  1. Begin by patting the beef chuck roast dry with paper towels to remove excess moisture. Season it generously with salt and pepper on all sides.
  2. In a large skillet, heat olive oil over medium-high heat until shimmering. Carefully add the roast and sear for about 3-4 minutes on each side until golden-brown.
  3. Once the roast is beautifully browned, remove it from the skillet and place it in the slow cooker.
  4. In the same skillet, sauté the onion for 2-3 minutes until softened, then add the garlic and cook for an additional minute until fragrant.
  5. Pour the sautéed onion and garlic mixture over the roast in the slow cooker.
  6. Layer the carrots and potatoes around the roast in the slow cooker. If using mushrooms, add them now.
  7. In a separate bowl, whisk together beef broth, Worcestershire sauce, dried thyme, dried rosemary, and bay leaves.
  8. Pour the prepared broth mixture over the roast and vegetables in the slow cooker.
  9. Cover the slow cooker and set it to cook on low for 8-10 hours, or on high for 4-5 hours.
  10. Once cooking time is complete, carefully remove the roast and vegetables from the slow cooker and let the roast rest for 10 minutes before slicing.

Nutrition

Serving: 1sliceCalories: 350kcalCarbohydrates: 30gProtein: 45gFat: 10gSaturated Fat: 4gPolyunsaturated Fat: 0.5gMonounsaturated Fat: 3.5gCholesterol: 120mgSodium: 450mgPotassium: 800mgFiber: 4gSugar: 2gVitamin A: 700IUVitamin C: 15mgCalcium: 40mgIron: 3mg

Notes

Allow the roast to rest for 10 minutes after cooking to retain juices. Don't rush the cooking process for best results.

Tried this recipe?

Let us know how it was!

Decadently Thick Bakery Style Chocolate Chip Cookies to Savor

December 14, 2025 by grace bellamy Leave a Comment

As I pulled the first batch of Thick Bakery Style Chocolate Chip Cookies from the oven, the aroma of melted chocolate and buttery goodness wrapped around me like a warm embrace. There's something inherently comforting about the act of baking cookies—it's a moment to escape the chaos of everyday life and indulge in a sweet treat that feels like a hug from the inside. This recipe not only yields cookies that are incredibly thick and chewy but also offers a delightful twist to the classic favorite. With a quick prep time and just a short bake, you’ll have a warm cookie in hand before you know it. Whether for a cozy evening in or to impress guests at your next gathering, these cookies are a sure crowd-pleaser. Are you ready to fill your kitchen with that nostalgic, mouthwatering scent? Let’s get baking!

Thick Bakery Style Chocolate Chip Cookies

Why are these cookies a must-try?

Decadent flavors combine to create an irresistible treat that brings warmth to any kitchen. Simple to make, this recipe requires minimal fuss and delivers thick cookies in less time than you might think. Versatile as well, they can be enjoyed warm with a glass of milk or shared as a delightful gift. Time-saving tips, like chilling the dough, help achieve the perfect texture—thick and chewy, just as you love! Each bite will leave you craving more, making them a true crowd-pleaser at any gathering. Not sure how to store these treats? Check out my helpful storage tips.

Thick Bakery Style Chocolate Chip Cookies

Delve into the delightful world of home baking with these luscious cookies!

For the Dough
• All-purpose flour – This forms the base of your cookies, ensuring they are thick and chewy.
• Baking soda – A must for lift; it helps the cookies rise perfectly.
• Salt – Just a pinch enhances all the flavors for a balanced taste.
• Unsalted butter – Using room temperature butter creates a creamy texture that's essential for rich cookies.
• Granulated sugar – Sweetens and provides a nice crisp edge to each cookie.
• Brown sugar – Adds moisture and a lovely caramel flavor, crucial for thick bakery style chocolate chip cookies.
• Large eggs – Bind the ingredients together for a hearty cookie structure.
• Vanilla extract – Infuses a warm flavor, making the cookies irresistibly fragrant.
• Semi-sweet chocolate chips – The star of the cookies, providing that classic sweet and gooey chocolate experience.

Optional Add-ins
• Nuts (e.g., walnuts or pecans) – Add for a delightful crunch and depth of flavor if desired.
• Flaky sea salt – Sprinkle on top before baking for an extra burst of flavor!

Indulge in the simple joy of baking with these Thick Bakery Style Chocolate Chip Cookies!

Step‑by‑Step Instructions for Thick Bakery Style Chocolate Chip Cookies

Step 1: Preheat the Oven
Begin by preheating your oven to 350°F (175°C). While it warms up, prepare your baking sheet by lining it with parchment paper. This will prevent the cookies from sticking and ensure a perfectly baked bottom. Set the prepared sheet aside for later use as you move on to mixing the dry ingredients.

Step 2: Mix the Dry Ingredients
In a medium bowl, whisk together 2 ½ cups of all-purpose flour, 1 teaspoon of baking soda, and 1 teaspoon of salt until well combined. This mixture is essential for the perfect texture of your Thick Bakery Style Chocolate Chip Cookies, ensuring they rise and have a balanced flavor. Once combined, set this bowl aside so you can focus on creating the dough.

Step 3: Cream the Butter and Sugars
In a separate large bowl, use an electric mixer to cream together 1 cup of room temperature unsalted butter, ¾ cup of granulated sugar, and ¾ cup of packed brown sugar. Beat on medium speed for about 2-3 minutes until the mixture is smooth and fluffy. This step is crucial for incorporating air into your cookies, resulting in a delightful, chewy texture.

Step 4: Add Eggs and Vanilla
Next, beat in 2 large eggs one at a time, ensuring each is fully incorporated before adding the next. Then, stir in 2 teaspoons of vanilla extract. The vanilla will create a rich aroma and deepen the flavor of your Thick Bakery Style Chocolate Chip Cookies. Mix until everything is combined and the mixture is smooth.

Step 5: Combine Dry and Wet Mixtures
Gradually add the flour mixture to the butter and sugar mixture, mixing on low speed until just combined. Be careful not to overmix, as this can make your cookies tough. The dough should be thick and slightly sticky—this is a good sign that your cookies will turn out thick and chewy!

Step 6: Fold in Chocolate Chips
Gently fold in 2 cups of semi-sweet chocolate chips using a spatula or wooden spoon. Ensure the chocolate chips are evenly distributed throughout the dough for an irresistible gooey bite in every Thick Bakery Style Chocolate Chip Cookie. Once the chips are mixed in, it’s time to chill the dough.

Step 7: Chill the Dough
Cover the bowl with plastic wrap and place it in the refrigerator for at least 30 minutes. Chilling the dough is key to preventing the cookies from spreading too much and achieving that thick texture everyone loves. During this time, the flavors will meld, and the dough will firm up nicely.

Step 8: Scoop the Dough
After chilling, use a rounded tablespoon to drop cookie dough balls onto the prepared baking sheet, leaving about 2 inches of space between each one. Aim for uniform sizes to ensure even baking. The rounded mounds should be thick, which will give you that perfect bakery-style appearance and texture once baked.

Step 9: Bake the Cookies
Place your baking sheet in the preheated oven and bake the cookies for 10-12 minutes. Keep an eye on them—the edges should be set and lightly golden brown, while the centers should look slightly soft. This contrast is what gives your Thick Bakery Style Chocolate Chip Cookies their irresistible chewiness.

Step 10: Cool the Cookies
Once baked, remove the baking sheet from the oven and let the cookies cool on the sheet for about 5 minutes. This allows the cookies to firm up a bit before transferring them to a wire rack to cool completely. The lingering heat will continue to melt the chocolate chips, creating a decadent treat while they cool down.

Thick Bakery Style Chocolate Chip Cookies

How to Store and Freeze Thick Bakery Style Chocolate Chip Cookies

Room Temperature: Store cookies in an airtight container at room temperature for up to 1 week. This keeps them fresh and chewy, perfect for enjoying any time of the day!

Fridge: If you want to extend their life, refrigerate your cookies in an airtight container for up to 2 weeks. Just allow them to come back to room temperature before serving for optimal taste.

Freezer: Freeze your Thick Bakery Style Chocolate Chip Cookies in a single layer on a baking sheet. Once frozen, transfer them to a freezer-safe bag or container for up to 3 months.

Reheating: To bring back the fresh-baked taste, reheat frozen cookies in a preheated oven at 350°F (175°C) for about 5-7 minutes, or until warm and gooey.

Make Ahead Options

These Thick Bakery Style Chocolate Chip Cookies are ideal for meal prep enthusiasts! You can prepare the cookie dough and refrigerate it for up to 3 days in advance, ensuring you always have a delightful treat on hand. Simply follow the steps all the way to chilling the dough; cover it tightly with plastic wrap to keep it fresh. When you're ready to enjoy your cookies, just scoop the chilled dough onto a baking sheet and bake for 10-12 minutes. This method not only saves time on busy weeknights but also allows the flavors to develop further, resulting in cookies that are just as delicious as freshly baked ones!

Expert Tips for Thick Bakery Style Chocolate Chip Cookies

  • Chill Your Dough: Always chill the dough for at least 30 minutes. This crucial step prevents spreading and ensures you achieve those thick bakery style chocolate chip cookies you desire.

  • Room Temperature Butter: Make sure your unsalted butter is at room temperature. This helps create a creamy batter that traps air for a chewy texture.

  • Don't Overmix: When combining the flour mixture with the wet ingredients, mix just until combined. Overmixing can lead to tough cookies, while gentle folding encourages tenderness.

  • Even Sized Cookies: Use a cookie scoop for uniform dough balls, ensuring even baking. This will result in consistent thickness and a delightful bakery appearance.

  • Watch the Oven: Keep a close eye on your cookies while they're baking. The centers should look slightly soft when you remove them for that perfect chewy bite.

  • Experiment with Add-ins: Feel free to customize! Adding nuts or a sprinkle of flaky sea salt enhances flavor and texture, making your thick bakery style chocolate chip cookies even more irresistible.

Thick Bakery Style Chocolate Chip Cookies Variations

Feel free to get creative with your cookies and make them uniquely yours; let your culinary imagination run wild!

  • Gluten-Free: Substitute all-purpose flour with a 1:1 gluten-free flour blend for an equally thick texture. Just be sure to pick a blend with xanthan gum included for best results.

  • Vegan: Swap the eggs for flaxseed meal (1 tablespoon flaxseed + 3 tablespoon water per egg) and use coconut oil instead of butter. These cookies won't lack in flavor or moisture!

  • Nutty Crunch: Add 1 cup of chopped walnuts or pecans for a delicious crunch and to enhance the flavor profile. The added texture provides a lovely contrast to the gooey chocolate.

  • Chunky: Replace chocolate chips with chunks of your favorite chocolate bars for an extra gooey bite. Each cookie can be a delightful surprise! Try a mix of milk, dark, and white chocolate for a beautiful flavor medley.

  • Spiced Up: Incorporate 1 teaspoon of ground cinnamon or a pinch of cayenne pepper for a warm spice twist. You'll awaken your taste buds with a comforting yet exciting flavor!

  • Stuffed Cookies: Create cookie sandwiches with a layer of cookie dough stuffed with marshmallows or Nutella in the middle for an indulgent treat that keeps you coming back for more.

  • Elegant Finishing Touch: Drizzle melted chocolate over the cooled cookies or sprinkle them with flaky sea salt for a gourmet touch. The contrasting flavors will elevate the eating experience!

  • Loaded Cookies: Mix in ½ cup of dried fruits or coconut flakes for a burst of chewiness and flavor. This is a wonderful way to incorporate extra nutrients into your treat.

Enjoy embarking on your journey of baking—these variations will surely add extra joy and excitement to your kitchen! If you need some guidance on how to best store your delicious creations, don't forget to check my helpful storage tips. You’ll want to keep these treats in prime condition for maximum enjoyment!

What to Serve with Ultra Thick Bakery Style Chocolate Chip Cookies

Imagine a cozy evening with friends, warmth filling the room as the sweet aroma of baked cookies invites everyone to gather around.

  • Chilled Milk: A classic pairing, ice-cold milk balances the sweetness of the cookies and enhances their chocolatey richness.

  • Rich Coffee: Brew a cup of bold coffee to complement the cookies’ sweetness; the bitter notes create a delightful contrast to the chocolate.

  • Vanilla Ice Cream: A scoop of creamy vanilla ice cream on the side adds a luscious texture that melds beautifully with each warm cookie bite.

  • Decaf Tea: For a lighter option, serve herbal tea, providing a soothing experience that perfectly offsets the sweetness of the cookies.

  • Nutty Trail Mix: Introduce crunch and protein with a mix of nuts and dried fruit; it adds an element of surprise alongside the cookies' softness.

  • Fresh Berries: Brighten the platter with juicy strawberries or raspberries, their tartness beautifully balancing the sweet, rich cookie.

  • Caramel Sauce: Drizzle warm caramel over the cookies for an indulgent twist; its buttery sweetness pairs perfectly with the chocolate chips.

  • Salted Pretzels: The salty crunch of pretzels creates a fun texture contrast, enhancing the chocolate flavor without overpowering it.

Thick Bakery Style Chocolate Chip Cookies

Thick Bakery Style Chocolate Chip Cookies Recipe FAQs

What is the best way to choose ripe ingredients for this recipe?
Absolutely! For the best flavor and texture in your Thick Bakery Style Chocolate Chip Cookies, use room temperature unsalted butter and large eggs. This helps create a smooth batter that incorporates air well, ensuring your cookies achieve that thick, chewy texture. Additionally, choose high-quality semi-sweet chocolate chips for a rich chocolate flavor. Look for chips that are glossy and firm, without any visible white spots.

How should I store my cookies and for how long?
To keep your cookies fresh, store them in an airtight container at room temperature for up to 1 week. If you can resist them longer, they’ll last in the fridge for up to 2 weeks. Just be sure to let them come back to room temperature before indulging for the best taste!

Can I freeze the cookie dough or baked cookies?
Very! To freeze the cookie dough, scoop rounded tablespoons onto a baking sheet lined with parchment paper and freeze until solid. Then, transfer them to a freezer-safe bag or container and store for up to 3 months. Simply bake from frozen, adding an extra minute to the baking time. If freezing baked cookies, let them cool completely first. Then, freeze in a single layer on a baking sheet before transferring to a bag or container for up to 3 months.

What if my cookies turn out flat?
If your cookies spread too thin, it’s likely that the dough wasn't chilled long enough, or perhaps the butter was too warm or melted. To ensure your cookies maintain thickness, always chill the dough for at least 30 minutes and make sure the butter is just softened, not melted. If necessary, you could also add an extra tablespoon of flour to the dough to help it hold shape!

Are there any dietary considerations I should be aware of?
Yes! These cookies contain common allergens such as wheat (from the flour) and dairy (from the butter). If you’re looking for alternatives, you can use gluten-free flour blends and consider dairy-free butter or chocolate chips for a suitable option. Always make sure to check the labels of the ingredients used for any specific allergens if serving to guests or family members with food sensitivities.

Thick Bakery Style Chocolate Chip Cookies

Decadently Thick Bakery Style Chocolate Chip Cookies to Savor

These Thick Bakery Style Chocolate Chip Cookies are a decadent treat with a chewy texture and rich flavor, perfect for any occasion.
Print Recipe Pin Recipe
Prep Time 30 minutes mins
Cook Time 12 minutes mins
Chilling Time 30 minutes mins
Total Time 1 hour hr 12 minutes mins
Servings: 24 cookies
Course: Dessert
Cuisine: American
Calories: 180
Ingredients Equipment Method Nutrition Notes

Ingredients
  

For the Dough
  • 2.5 cups all-purpose flour
  • 1 teaspoon baking soda
  • 1 teaspoon salt
  • 1 cup unsalted butter room temperature
  • 0.75 cup granulated sugar
  • 0.75 cup brown sugar packed
  • 2 large eggs
  • 2 teaspoons vanilla extract
  • 2 cups semi-sweet chocolate chips
Optional Add-ins
  • nuts (e.g., walnuts or pecans) optional
  • flaky sea salt for sprinkling on top

Equipment

  • Oven
  • Mixing bowls
  • Electric mixer
  • Baking Sheet
  • parchment paper
  • spatula

Method
 

Step-by-Step Instructions for Thick Bakery Style Chocolate Chip Cookies
  1. Preheat your oven to 350°F (175°C) and line a baking sheet with parchment paper.
  2. In a medium bowl, whisk together all-purpose flour, baking soda, and salt.
  3. In a large bowl, cream together room temperature butter, granulated sugar, and brown sugar until smooth and fluffy.
  4. Beat in eggs one at a time, then stir in vanilla extract.
  5. Gradually mix in the flour mixture until just combined.
  6. Fold in chocolate chips until evenly distributed.
  7. Cover the bowl with plastic wrap and refrigerate for at least 30 minutes.
  8. Scoop dough onto prepared baking sheet, leaving space between each.
  9. Bake for 10-12 minutes until edges are set and lightly golden.
  10. Let cookies cool on the baking sheet for 5 minutes before transferring to a wire rack.

Nutrition

Serving: 1cookieCalories: 180kcalCarbohydrates: 22gProtein: 2gFat: 9gSaturated Fat: 5gPolyunsaturated Fat: 1gMonounsaturated Fat: 3gCholesterol: 20mgSodium: 120mgPotassium: 80mgFiber: 1gSugar: 10gVitamin A: 200IUCalcium: 20mgIron: 0.5mg

Notes

Chill your dough for best results and allow cookies to cool to maintain their chewy texture.

Tried this recipe?

Let us know how it was!

Moist Greek Yogurt Banana Bread You'll Want Every Morning

December 14, 2025 by grace bellamy Leave a Comment

There's something magical about the scent of baking bread wafting through the kitchen, an aroma that instantly feels like a warm hug. Today, I'm excited to share my recipe for Greek Yogurt Banana Bread—a delightful twist on a classic that promises both moistness and a nutritional boost. Using just a handful of simple ingredients, this recipe stands out not only for its irresistible flavor but also for its quick prep time, making it the perfect option for busy days. With the luscious creaminess of Greek yogurt, each bite delivers a slice of comfort that's secretly healthier than traditional recipes. Plus, you can customize it with your favorite mix-ins, whether that's crunchy walnuts or decadent chocolate chips. Are you ready to elevate your baking game and fill your home with the warm aromas of freshly baked bread?

Greek Yogurt Banana Bread

Why is Greek Yogurt Banana Bread a Must-Try?

Irresistible Moisture: This banana bread is exceptionally moist thanks to the addition of Greek yogurt, ensuring every slice is soft and flavorful.

Nutritious Twist: Packed with protein from the yogurt, this recipe delivers a guilt-free treat that feels indulgent.

Quick Prep: With just 15 minutes of prep time, you can whip up this delicious bread in no time, perfect for busy mornings.

Versatile Mix-Ins: Customize your loaf with walnuts for a crunchy texture or chocolate chips for a sweet surprise—choose your preference!

Crowd Pleaser: Serve it for breakfast, dessert, or a snack, and watch it disappear at gatherings; it's a sure hit! This recipe reminds me of easy banana bread recipes I love making for family gatherings!

Greek Yogurt Banana Bread Ingredients

For the Bread
• 3 ripe bananas – the riper, the sweeter; perfect for mashing!
• 1 cup Greek yogurt – adds a moist texture and boosts protein content.
• ½ cup sugar – sweetens the bread; consider using brown sugar for a richer flavor.
• ⅓ cup vegetable oil – keeps the bread moist; you can substitute with melted coconut oil for added flavor.
• 2 large eggs – bind the ingredients together for a fluffy loaf.
• 1 teaspoon vanilla extract – enhances the flavor and scent of the bread.

For the Dry Ingredients
• 1 ½ cups all-purpose flour – creates the bread structure; spoon and level for accuracy.
• 1 teaspoon baking soda – helps the bread rise for that soft, airy texture.
• ¼ teaspoon salt – balances the sweetness and enhances the flavor.
• ¼ teaspoon ground cinnamon – adds a warm spice that pairs perfectly with bananas.

Optional Mix-Ins
• ½ cup walnuts – provide a crunchy texture; toasted for extra flavor if desired.
• ½ cup chocolate chips – add a deliciously sweet twist; use dark chocolate for a richer taste.

Discover the joy of baking with this Greek Yogurt Banana Bread that everyone in your family will love!

Step‑by‑Step Instructions for Greek Yogurt Banana Bread

Step 1: Preheat and Prepare
Start by preheating your oven to 350°F (175°C) to ensure it's hot enough for baking. While the oven warms, grease a 9x5-inch loaf pan with non-stick spray or butter, ensuring it’s evenly coated to prevent sticking. This step sets the stage for your delightful Greek Yogurt Banana Bread.

Step 2: Mash the Bananas
In a mixing bowl, take your ripe bananas and use a fork to mash them until they reach a smooth consistency. Aim for a creamy texture, with small lumps still visible, as it adds character to the bread. This should take about 2-3 minutes—don't rush, as the bananas are the star of your loaf!

Step 3: Mix Wet Ingredients
Add the Greek yogurt, sugar, vegetable oil, eggs, and vanilla extract to the mashed bananas. With a whisk or spatula, mix these ingredients together until fully combined and smooth. This process will take about 2 minutes, and you'll notice the mixture becoming creamy and slightly fluffy, creating a beautiful base for your Greek Yogurt Banana Bread.

Step 4: Combine Dry Ingredients
In a separate bowl, whisk together the flour, baking soda, salt, and ground cinnamon until evenly distributed. This should take roughly 1-2 minutes. Be sure to break up any clumps of flour, which will help create a uniform texture in your Greek Yogurt Banana Bread and ensure even rising while baking.

Step 5: Blend Wet and Dry Ingredients
Gradually fold the dry ingredients into the wet mixture, stirring gently until just combined. Avoid overmixing, as this can lead to a denser bread; around 1-2 minutes of folding should suffice. As you mix, you'll see the batter come together, showing the promise of a moist and delicious loaf.

Step 6: Add Mix-Ins
If you’re choosing to include optional mix-ins like walnuts or chocolate chips, now is the time! Carefully fold them into the batter for about 30 seconds, ensuring an even distribution without overworking the batter. This step will not only enhance flavor but add delightful textures to your Greek Yogurt Banana Bread.

Step 7: Pour and Smooth
Carefully pour the batter into the prepared loaf pan, using a spatula to scrape every last bit from the mixing bowl. Spread the batter evenly in the pan to promote even baking. Watching the luscious mixture fill the pan will make you eager for the delicious aroma that’s to come!

Step 8: Bake the Bread
Place the loaf pan in the preheated oven and bake for 50-60 minutes. Check for doneness by inserting a toothpick into the center; when it comes out clean or with just a few crumbs, the bread is ready! Your kitchen will soon be filled with a warm, inviting scent, signaling that your Greek Yogurt Banana Bread is baking beautifully.

Step 9: Cool and Serve
Once baked, remove the loaf from the oven and let it cool in the pan for about 10 minutes. Then, gently transfer it to a wire rack to cool completely. The moment you slice it open, the rich flavors will entice everyone in the house, making this Greek Yogurt Banana Bread a delightful addition to any meal.

Greek Yogurt Banana Bread

Expert Tips for Greek Yogurt Banana Bread

Choose Ripe Bananas: Use bananas that are mostly brown; they’re sweeter and easier to mash, ensuring a deliciously moist bread.

Measure Accurately: Spoon and level your flour—too much flour can lead to a dry loaf. Use a kitchen scale for best results!

Don’t Overmix: Mix until just combined to avoid dense bread; a few lumps are perfectly fine for a light, airy texture.

Check for Doneness: Insert a toothpick into the center; if it comes out clean or with few crumbs, your Greek Yogurt Banana Bread is ready.

Cool Before Slicing: Allow the bread to cool completely on a wire rack to maintain its moisture and prevent it from becoming gummy when sliced.

Experiment with Mix-Ins: Try different combinations like nuts, dried fruits, or spices to make this Greek Yogurt Banana Bread your own.

How to Store and Freeze Greek Yogurt Banana Bread

Room Temperature: Keep the Greek Yogurt Banana Bread covered at room temperature for up to 3 days. Use a cake dome or plastic wrap to maintain moisture.

Fridge: To extend freshness, store in the refrigerator in an airtight container for up to 1 week. This may slightly alter the texture but will keep it deliciously edible.

Freezer: Wrap the cooled bread tightly in plastic wrap and aluminum foil for freezing. It can be stored for up to 3 months—perfect for those busy mornings!

Reheating: To enjoy, thaw at room temperature, then warm slices in the microwave for 10-15 seconds or in a toaster for a fresh-baked taste.

Greek Yogurt Banana Bread Variations

Feel free to explore these delightful twists and swaps that will make your Greek Yogurt Banana Bread uniquely yours!

  • Gluten-Free: Use a gluten-free flour blend instead of all-purpose flour for a deliciously safe treat that still holds moisture.

  • Low-Sugar: Substitute half the sugar with unsweetened applesauce for a naturally sweetened version that doesn’t compromise flavor. This swap is perfect for health-conscious bakers!

  • Dairy-Free: Replace the Greek yogurt with coconut yogurt and use a non-dairy milk to keep the bread rich and creamy, just without the dairy.

  • Nut-Free: Omit walnuts or replace them with sunflower seeds for a delightful crunch while keeping it safe for nut allergies.

  • Spiced Up: Add ½ teaspoon of nutmeg or cardamom for a warm, fragrant twist that complements the banana beautifully with every mouthful.

  • Fruit-Infused: Fold in ½ cup of mixed berries or dried fruits like raisins or cranberries for a fruity explosion of taste that transforms the entire loaf.

  • Chocolate Lovers: Swirl in some cocoa powder or use chocolate yogurt for an even richer chocolatey flavor—perfect for dessert!

  • Baked Mini Loaves: Divide the batter into mini loaf pans for quick snacks; they’re great for portion control and make wonderful gifts!

These variations can enhance your baking experience and create new family favorites. If you love experimenting in the kitchen, you'll also enjoy these easy banana bread recipes that offer even more creative ideas!

What to Serve with Greek Yogurt Banana Bread

There's something special about pairing warm, fragrant banana bread with delightful sides, transforming a simple snack into a memorable meal.

  • Creamy Greek Yogurt: A dollop on the side adds a tangy contrast, enhancing each sweet slice while keeping it indulgently creamy.

  • Fresh Berries: Juicy strawberries or tart raspberries provide a burst of freshness, balancing the richness of the banana bread beautifully.

  • Honey Drizzle: Drizzling honey over the loaf elevates its sweetness and adds a glossy finish, making each bite a bit more luxurious.

Elevating your brunch table with these fresh elements can turn a sweet treat into a gorgeously balanced meal. The combination of flavors stays true to the homemade essence while offering a delightful experience for your taste buds.

  • Nutty Granola: Sprinkle crunchy granola with nuts for added texture. It creates a lovely contrast with the soft, moist bread, providing delightful crunch in every mouthful.

  • Herbal Tea: A warm cup of chamomile or mint tea complements the sweetness of the banana bread, creating a soothing experience perfect for any time of day.

  • Chocolate Spread: For the chocolate lovers, a side of smooth chocolate spread can turn your banana bread into a decadent dessert option, indulgent and irresistible!

Make Ahead Options

Preparing Greek Yogurt Banana Bread ahead of time is a game changer for busy home cooks! You can mash the ripe bananas and mix together the wet ingredients (Greek yogurt, sugar, vegetable oil, eggs, and vanilla) up to 24 hours in advance; simply cover and refrigerate them until you're ready to bake. The dry ingredients (flour, baking soda, salt, and cinnamon) can also be measured and stored in an airtight container, allowing for easy assembly when you're ready to whip it up. Just remember to let the wet mixture come to room temperature before mixing in the dry ingredients to maintain that delectable moisture. When you're ready to bake, combine the wet and dry mixtures, add any desired mix-ins, and follow the baking instructions, ensuring you enjoy fresh, homemade Greek Yogurt Banana Bread with minimal effort!

Greek Yogurt Banana Bread

Greek Yogurt Banana Bread Recipe FAQs

How do I choose the right bananas for this recipe?
Absolutely! Look for bananas that are heavily speckled or mostly brown, as these are at their ripest stage and will yield the sweetest flavor. The more ripe they are, the easier they will mash and incorporate into your batter, leading to that irresistible moist texture everyone loves.

How do I store Greek Yogurt Banana Bread?
Very easily! For storing at room temperature, keep the bread covered with plastic wrap or inside a cake dome for up to 3 days. If you'd like to extend its freshness, store it in an airtight container in the refrigerator for up to 1 week. While refrigerator storage may alter the texture slightly, your bread will remain deliciously edible.

Can I freeze Greek Yogurt Banana Bread?
Absolutely! To freeze your Greek Yogurt Banana Bread, first, let it cool completely. Wrap it tightly in plastic wrap and then in aluminum foil to prevent freezer burn. You can store it this way for up to 3 months. When ready to enjoy, simply thaw at room temperature, and for that fresh-out-of-the-oven experience, warm slices in the microwave for 10-15 seconds or pop them into a toaster.

What should I do if my bread turns out too dense?
If you find your Greek Yogurt Banana Bread is denser than expected, it's likely due to overmixing the batter or measuring flour incorrectly. Always measure your flour accurately by spooning it into the measuring cup and leveling it off. Additionally, mix the ingredients just until combined—don't worry about a few lumps; they're perfectly fine!

Is there a way to make this recipe gluten-free?
Very much so! You can substitute the all-purpose flour with a 1:1 gluten-free flour blend. I recommend ensuring that the blend contains xanthan gum for better texture and structure. Follow the same proportions as the original recipe, and you'll enjoy a delightful gluten-free version of this Greek Yogurt Banana Bread without compromising on taste.

Can I give Greek Yogurt Banana Bread to pets?
While it's charming to want to share with your furry friends, it’s best to avoid giving them this bread. Ingredients like sugar can be harmful to pets, especially dogs. If you'd like to make a pet-friendly treat, consider pureed bananas or special pet-safe recipes designed for them!

Greek Yogurt Banana Bread

Moist Greek Yogurt Banana Bread You'll Want Every Morning

This Greek Yogurt Banana Bread is a delightful twist on a classic recipe, offering irresistible moistness and a guilt-free treat for breakfast or snack.
Print Recipe Pin Recipe
Prep Time 15 minutes mins
Cook Time 1 hour hr
Cooling Time 10 minutes mins
Total Time 1 hour hr 25 minutes mins
Servings: 10 slices
Course: Breakfast
Cuisine: Greek
Calories: 150
Ingredients Equipment Method Nutrition Notes

Ingredients
  

For the Bread
  • 3 medium ripe bananas the riper, the sweeter
  • 1 cup Greek yogurt adds moisture and boosts protein
  • ½ cup sugar consider using brown sugar for richness
  • ⅓ cup vegetable oil can substitute with melted coconut oil
  • 2 large eggs bind ingredients together
  • 1 teaspoon vanilla extract
For the Dry Ingredients
  • 1 ½ cups all-purpose flour spoon and level for accuracy
  • 1 teaspoon baking soda
  • ¼ teaspoon salt
  • ¼ teaspoon ground cinnamon
Optional Mix-Ins
  • ½ cup walnuts toasted for extra flavor
  • ½ cup chocolate chips use dark chocolate for richness

Equipment

  • loaf pan
  • Mixing Bowl
  • Whisk
  • spatula

Method
 

Step-by-Step Instructions
  1. Preheat your oven to 350°F (175°C) and grease a 9x5-inch loaf pan.
  2. In a mixing bowl, mash the ripe bananas until smooth with small lumps.
  3. Add Greek yogurt, sugar, vegetable oil, eggs, and vanilla to the mashed bananas and mix until smooth.
  4. In a separate bowl, whisk together flour, baking soda, salt, and cinnamon.
  5. Fold the dry ingredients into the wet mixture until just combined.
  6. If using, fold in walnuts or chocolate chips for about 30 seconds.
  7. Pour the batter into the greased loaf pan and smooth the top.
  8. Bake for 50-60 minutes, checking doneness with a toothpick.
  9. Let the bread cool in the pan for 10 minutes before transferring it to a wire rack.

Nutrition

Serving: 1sliceCalories: 150kcalCarbohydrates: 25gProtein: 4gFat: 5gSaturated Fat: 1gPolyunsaturated Fat: 1gMonounsaturated Fat: 2gCholesterol: 35mgSodium: 150mgPotassium: 300mgFiber: 1gSugar: 8gVitamin A: 100IUVitamin C: 3mgCalcium: 50mgIron: 1mg

Notes

Use overripe bananas for the best flavor and moisture in your banana bread.

Tried this recipe?

Let us know how it was!

Creamy Crab and Shrimp Seafood Bisque to Warm Your Soul

December 14, 2025 by grace bellamy Leave a Comment

The unmistakable aroma of simmering seafood wrapped me in a cozy embrace as I prepared this Crab and Shrimp Seafood Bisque. Known for its rich, velvety texture and the ocean's best treasures, this comforting soup blends the sweet flavor of crab and shrimp with a hint of Old Bay seasoning. What I love most about this recipe is its simplicity—ready in just about an hour, it’s the perfect remedy for those evenings when you crave something special without the fuss. Plus, this bisque makes excellent leftovers, perfect for meal prep or surprise guests. Ready to bring a taste of the coast to your kitchen? Let’s dive into the creamy goodness that awaits!

Crab and Shrimp Seafood Bisque

Why is This Bisque a Game Changer?

Comforting, Heartwarming Flavor: The combination of fresh crab and succulent shrimp in this bisque brings a taste of the sea right to your bowl.

Rich, Creamy Texture: With heavy cream adding velvety richness, you'll savor every spoonful of this luxurious dish.

Quick and Easy: Prepared in just one hour, it's perfect for busy weeknights or spontaneous gatherings.

Meal Prep Friendly: Make it ahead of time and enjoy the convenience of delicious leftovers for a hearty lunch.

Satisfying for Everyone: Whether you’re hosting friends or enjoying a quiet night in, this bisque pleases seafood lovers and skeptics alike. For more creaminess, don’t forget to check out my easy guide for How to Make Stock from Scratch!

Crab and Shrimp Seafood Bisque Ingredients

For the Base

  • Seafood stock – 4 cups of this flavorful base gives the bisque its rich ocean taste.
  • Heavy cream – 1 cup adds velvety smoothness; a light version can be used for a healthier twist.

For the Protein

  • Crab meat – 1 cup of succulent crab meat for a sweet flavor; opt for lump crab for the best texture.
  • Shrimp – 1 cup, peeled and deveined; fresh or frozen shrimp both work beautifully.

For the Vegetables

  • Onion – ½ cup, chopped; this aromatic veggie builds the foundation of flavor.
  • Celery – ¼ cup, chopped; adds a subtle crunch and fresh taste to the bisque.
  • Garlic – 1 teaspoon, minced; a must for that aromatic essence that enhances the overall dish.

For Seasoning

  • Old Bay seasoning – 1 teaspoon; this classic seafood spice blends perfectly with the crab and shrimp for an authentic taste.
  • Olive oil – 1 tablespoon for sautéing; feel free to substitute with butter for a richer flavor.

Step‑by‑Step Instructions for Crab and Shrimp Seafood Bisque

Step 1: Sauté the Vegetables
In a large pot, heat 1 tablespoon of olive oil over medium heat. Add the chopped onion, celery, and minced garlic, sautéing for about 5–7 minutes until they become tender and aromatic. You'll know they’re ready when the onions turn translucent and the garlic releases its savory scent, creating a flavorful base for your Crab and Shrimp Seafood Bisque.

Step 2: Simmer the Stock
Pour 4 cups of seafood stock into the pot with the sautéed vegetables. Increase the heat slightly to bring the mixture to a gentle simmer. Allow it to cook for about 10 minutes, stirring occasionally. You'll see bubbles forming, indicating it's time to add more flavor to your bisque.

Step 3: Add Seasoning
Stir in 1 teaspoon of Old Bay seasoning to the simmering stock. Let it cook for an additional 5 minutes, allowing the spices to infuse their tantalizing flavors into the broth. The aroma will be irresistible, promising a delicious Crab and Shrimp Seafood Bisque that's just around the corner.

Step 4: Incorporate Seafood
Gently fold in 1 cup of crab meat and 1 cup of peeled and deveined shrimp. Continue to simmer for 5–7 minutes until the shrimp turn opaque and curl up, indicating they are cooked through. This step is crucial for achieving the perfect texture while letting the seafood flavors meld beautifully.

Step 5: Add Cream for Richness
Once the shrimp are cooked, pour in 1 cup of heavy cream and stir well to combine all the ingredients. Let the bisque simmer for an additional 5 minutes over low heat, allowing it to thicken slightly. This creamy addition enhances the overall richness of your Crab and Shrimp Seafood Bisque, turning it into a heartwarming bowl of goodness.

Step 6: Final Adjustments and Serve
Remove the pot from heat and taste the bisque, adjusting seasoning with salt and pepper as needed. If desired, give it a gentle stir to ensure everything is evenly blended. Ladle the luxurious Crab and Shrimp Seafood Bisque into bowls, and enjoy the comforting flavors of this classic dish!

Crab and Shrimp Seafood Bisque

Crab and Shrimp Seafood Bisque Variations

Feel free to adjust this delicious bisque to fit your preferences and dietary needs—let your creativity shine!

  • Dairy-Free: Swap the heavy cream for coconut milk for a unique twist that still delivers creaminess. This adds a hint of tropical flavor to the dish.

  • Spicy Kick: Add a dash of cayenne pepper or a few dashes of your favorite hot sauce to the bisque for a delightful heat that contrasts beautifully with the seafood's sweetness.

  • Broth Base: Use homemade Seafood Stock instead of store-bought for an ultra-rich flavor that elevates your bisque to gourmet levels.

  • Vegetable Medley: Toss in a cup of diced potatoes or carrots to add heartiness and sweetness to the bisque, creating extra texture and making it even more satisfying!

  • Lemon Zest: Grate some fresh lemon zest into the bisque right before serving for a citrusy brightness that balances the creaminess and enhances the seafood flavors beautifully.

  • Herb Infusion: Experiment with different herbs, like fresh dill or parsley, stirred in at the end for an aromatic twist that adds freshness to each spoonful.

  • Lobster Option: Replace some or all of the crab with lobster meat for an extravagant seafood experience that will impress your guests on special occasions.

  • Whole Wheat Option: Serve the bisque over whole wheat pasta for a heartier meal, transforming it into a creamy pasta dish that everyone will love!

What to Serve with Crab and Shrimp Seafood Bisque

Transform your cozy dinner into a delightful feast with vibrant side dishes that enhance this rich seafood delight.

  • Garlic Bread: Warm and crispy, garlic bread is perfect for dipping into the creamy bisque, soaking up every delicious drop.

  • Mixed Green Salad: A fresh salad with crunchy greens, cucumbers, and a zesty vinaigrette balances the bisque's richness while adding a refreshing crunch.

A classic dish deserves classic sides. You might also consider a fresh, tangy coleslaw to provide a satisfying contrast!

  • Roasted Asparagus: Tender, roasted asparagus drizzled with lemon complements the seafood flavors beautifully, adding a touch of elegance to your meal.

  • White Wine: Pair your bisque with a chilled glass of Sauvignon Blanc; its crisp acidity cuts through the creaminess beautifully.

  • Lemon Tart: For dessert, serve a light lemon tart to cleanse the palate with its bright citrus flavors, making for a harmonious finish to your seafood feast.

How to Store and Freeze Crab and Shrimp Seafood Bisque

Fridge: Store leftover Crab and Shrimp Seafood Bisque in an airtight container for up to 3 days. Simply reheat on the stovetop or microwave until warm.

Freezer: For longer storage, freeze the bisque in an airtight container for up to 3 months. When ready to enjoy, thaw overnight in the refrigerator and reheat gently.

Reheating: Reheat slowly on the stovetop over low heat, stirring occasionally to maintain smoothness. If the bisque is too thick after freezing, add a splash of seafood stock or cream to adjust the consistency.

Serving: Always serve the bisque fresh and hot for the best flavor experience. Add a sprinkle of fresh herbs or a squeeze of lemon right before serving for a vibrant finish!

Make Ahead Options

These Crab and Shrimp Seafood Bisque is perfect for busy home cooks looking to save time during the week! You can prepare the base (steps 1-3) up to 24 hours in advance. Simply sauté the vegetables, add the seafood stock, and season, then refrigerate the mixture in an airtight container. On the day you plan to serve, reheat the bisque gently on the stove before adding the crab and shrimp (step 4) to keep those ingredients fresh and avoid overcooking. Finish by stirring in the heavy cream and simmering for an additional 5 minutes for delicious, restaurant-quality results that are just as comforting and flavorful as if made fresh. Enjoy the convenience of having a warm, hearty meal ready in no time!

Expert Tips for Crab and Shrimp Seafood Bisque

  • Use Fresh Ingredients: Fresh seafood enhances the overall flavor of your bisque. Whenever possible, buy fresh crab and shrimp for a truly delightful dish.

  • Control the Heat: Keep the simmer gentle to prevent the cream from curdling when you add it; this ensures a smooth, creamy Crab and Shrimp Seafood Bisque.

  • Taste as You Go: Always taste the bisque before serving. Adjust the seasonings to achieve a perfect balance of flavors, especially with salt and Old Bay.

  • Avoid Overcooking: Just keep an eye on the shrimp as they cook; overcooked shrimp can become rubbery. They should turn opaque and curl up—perfectly tender!

  • Enhance with Extras: Feel free to add veggies like bell peppers or even a splash of white wine. These additions can elevate your bisque's flavor even further!

Crab and Shrimp Seafood Bisque

Crab and Shrimp Seafood Bisque Recipe FAQs

How do I select and store fresh crab and shrimp?
Absolutely! When choosing fresh crab, look for sweet scent and firm texture; avoid any that smell fishy or have dark spots. For shrimp, opt for firm flesh that's slightly translucent. Store fresh seafood in the coldest part of your refrigerator and use within 1-2 days for the best flavor.

How long can I keep leftovers of the Crab and Shrimp Seafood Bisque?
You can store leftovers in an airtight container in the refrigerator for up to 3 days. Just reheat the bisque on the stovetop or microwave until it's warmed through. Make sure to stir it well for even heating!

Can I freeze Crab and Shrimp Seafood Bisque?
Absolutely! To freeze, allow the bisque to cool completely, then transfer it to an airtight container. It can be frozen for up to 3 months. When you're ready to enjoy, thaw it overnight in the fridge, then gently reheat on the stovetop, adding a splash of seafood stock or cream if needed to restore the creamy texture.

What should I do if my bisque is too thick after freezing?
No worries! If your bisque is too thick after freezing, just add a little seafood stock or cream while gently reheating it. Stir to combine and bring it to your desired consistency. This will also add extra creaminess that enhances the flavors of your Crab and Shrimp Seafood Bisque.

Is this bisque suitable for those with seafood allergies?
It's essential to be cautious! If you or your guests have seafood allergies, this bisque is not suitable due to the crab and shrimp. For a delicious alternative, try substituting the seafood with hearty vegetables like mushrooms and zucchini for a delightful vegetable bisque instead.

How can I enhance the flavor of my Crab and Shrimp Seafood Bisque?
To elevate the flavor, consider adding a splash of white wine during the simmering process or tossing in fresh herbs like thyme or dill before serving. These simple additions bring a vibrant kick to the creamy base that truly makes your Crab and Shrimp Seafood Bisque shine!

Crab and Shrimp Seafood Bisque

Creamy Crab and Shrimp Seafood Bisque to Warm Your Soul

Enjoy the rich and comforting Crab and Shrimp Seafood Bisque, perfect for cozy evenings and quick meal prep.
Print Recipe Pin Recipe
Prep Time 15 minutes mins
Cook Time 45 minutes mins
Total Time 1 hour hr
Servings: 4 bowls
Course: Appetizer
Cuisine: Seafood
Calories: 350
Ingredients Equipment Method Nutrition Notes

Ingredients
  

For the Base
  • 4 cups seafood stock this flavorful base gives the bisque its rich ocean taste
  • 1 cup heavy cream adds velvety smoothness; a light version can be used for a healthier twist
For the Protein
  • 1 cup crab meat opt for lump crab for the best texture
  • 1 cup shrimp peeled and deveined; fresh or frozen shrimp both work beautifully
For the Vegetables
  • ½ cup onion chopped; this aromatic veggie builds the foundation of flavor
  • ¼ cup celery chopped; adds a subtle crunch and fresh taste to the bisque
  • 1 teaspoon garlic minced; a must for that aromatic essence that enhances the overall dish
For Seasoning
  • 1 teaspoon Old Bay seasoning this classic seafood spice blends perfectly with the crab and shrimp for an authentic taste
  • 1 tablespoon olive oil for sautéing; feel free to substitute with butter for a richer flavor

Equipment

  • Large Pot

Method
 

Step-by-Step Instructions for Crab and Shrimp Seafood Bisque
  1. In a large pot, heat 1 tablespoon of olive oil over medium heat. Add the chopped onion, celery, and minced garlic, sautéing for about 5–7 minutes until they become tender and aromatic.
  2. Pour 4 cups of seafood stock into the pot with the sautéed vegetables. Increase the heat slightly to bring the mixture to a gentle simmer. Allow it to cook for about 10 minutes, stirring occasionally.
  3. Stir in 1 teaspoon of Old Bay seasoning to the simmering stock. Let it cook for an additional 5 minutes, allowing the spices to infuse their tantalizing flavors into the broth.
  4. Gently fold in 1 cup of crab meat and 1 cup of peeled and deveined shrimp. Continue to simmer for 5–7 minutes until the shrimp turn opaque and curl up.
  5. Pour in 1 cup of heavy cream and stir well to combine all the ingredients. Let the bisque simmer for an additional 5 minutes over low heat.
  6. Remove the pot from heat and taste the bisque, adjusting seasoning with salt and pepper as needed. Serve hot.

Nutrition

Serving: 1bowlCalories: 350kcalCarbohydrates: 10gProtein: 25gFat: 25gSaturated Fat: 15gPolyunsaturated Fat: 1gMonounsaturated Fat: 9gCholesterol: 100mgSodium: 800mgPotassium: 400mgFiber: 1gSugar: 2gVitamin A: 500IUVitamin C: 5mgCalcium: 200mgIron: 2mg

Notes

Store leftover bisque in an airtight container for up to 3 days or freeze for up to 3 months. Reheat gently on the stovetop or microwave.

Tried this recipe?

Let us know how it was!

Irresistibly Creamy French Custard Pie with Apples Recipe

December 14, 2025 by grace bellamy Leave a Comment

You know that blissful feeling when the scent of baked apples wafts through your kitchen? That's precisely what happens when I whip up this delightful French Custard Pie with Apples. This recipe not only captures the comforting essence of homemade desserts, but it also brings a touch of sophistication to your table. With a crunchy crust cradling tender slices of Granny Smith apples, the custard filling creates a wonderfully creamy texture that feels like a warm hug in every bite. Plus, it's surprisingly quick to prepare and perfect for impressing guests or enjoying a cozy evening at home. Ready to treat yourself to this delicious twist on a classic? Let's dive into the recipe and discover together how easy it is to create this showstopper!

French Custard Pie with Apples

Why Is This Pie So Irresistible?

Simplicity makes this pie a breeze to whip up! With just a handful of ingredients, you can effortlessly create a stunning dessert. Comforting flavors of apples and custard blend together for a delightful treat that's hard to resist. Versatility shines through—serve it warm or chilled, plain or topped with whipped cream. Perfect for gatherings, this pie is sure to impress your guests while offering a slice of homey goodness. Plus, if you're ever in the mood for a quick recipe, be sure to check out our guide on easy homemade desserts.

French Custard Pie with Apples Ingredients

• Here’s what you need to create this luscious dessert!

For the Crust

  • 1 ½ cups all-purpose flour – essential for a tender and flaky crust.
  • ½ cup unsalted butter – use cold for a rich and buttery flavor.
  • ¼ cup granulated sugar – adds a hint of sweetness to the crust.
  • ¼ teaspoon salt – enhances the flavor of the crust.
  • 1 large egg – helps bind the ingredients together.

For the Filling

  • 3 cups sliced apples (e.g., Granny Smith) – their tartness balances the sweetness of the custard.
  • ¾ cup milk – adds creaminess to the custard.
  • 2 large eggs – contributes to the structure of the custard.
  • 1 teaspoon vanilla extract – infuses a beautiful flavor that complements the apples.
  • ¼ teaspoon ground cinnamon – brings warmth and spice to the pie.
  • ¼ teaspoon ground nutmeg – adds a nutty depth to the custard.
  • 1 tablespoon lemon juice – prevents the apples from browning and adds acidity.
  • 1 tablespoon sugar (for topping) – caramelizes to form a lovely crust on top.

Feel free to gather these ingredients and embrace the delightful journey of creating your French Custard Pie with Apples!

Step‑by‑Step Instructions for French Custard Pie with Apples

Step 1: Preheat the Oven
Begin by preheating your oven to 375°F (190°C). This step is crucial as it ensures your French Custard Pie with Apples will bake evenly, creating a golden crust and perfectly set custard. Grab an oven thermometer to confirm the temperature if you're unsure, and heat your kitchen with the inviting aroma of baking.

Step 2: Prepare the Pie Crust
In a mixing bowl, combine 1 ½ cups of all-purpose flour, ½ cup of cold unsalted butter, ¼ cup of granulated sugar, and ¼ teaspoon of salt. Mix until the mixture resembles coarse crumbs. Add a large egg to bind the mixture, then mix until just combined. Press your dough into a pie dish and refrigerate for 30 minutes to firm up before rolling.

Step 3: Roll Out the Dough
Once chilled, remove the dough from the refrigerator and roll it out on a lightly floured surface. Aim for a circle that's about 12 inches in diameter. Carefully transfer the rolled dough into your pie plate, gently fitting it into the edges. Trim any excess dough, leaving a slight overhang to crimp later, which will enhance the pie's visual appeal.

Step 4: Arrange the Apples
Peel, core, and slice 3 cups of Granny Smith apples, then arrange them evenly in the prepared pie crust. Drizzle 1 tablespoon of lemon juice over the apples to keep them fresh and vibrant. They should be slightly overlapping to create a beautiful layered look. This step brings a fresh, tart balance to the creamy custard filling.

Step 5: Whisk the Custard Filling
In a separate bowl, whisk together ¾ cup of milk, 2 large eggs, 1 teaspoon of vanilla extract, ¼ teaspoon of ground cinnamon, ¼ teaspoon of ground nutmeg, and the remaining ¼ cup of sugar. Make sure to mix until smooth and fully blended. This custard mixture adds a rich, velvety layer to your French Custard Pie with Apples, enveloping those tender apples.

Step 6: Pour the Custard Over Apples
Carefully pour the prepared custard mixture over the arranged apples. Try to ensure an even distribution so every slice offers a delightful flavor explosion. The custard should cover the apples well but not overflow. This step is key to achieving that luscious, creamy texture that defines the pie.

Step 7: Bake the Pie
Place your pie into the preheated oven and bake for about 50 minutes. Keep an eye on it; the custard should be set and the top golden brown. A gentle jiggle in the center is a good sign that it’s perfectly done. If the edges brown too quickly, shield them with aluminum foil as the pie bakes.

Step 8: Allow to Cool
Once baked, remove the pie from the oven and let it cool for at least 30 minutes on a wire rack. This cooling process allows the custard to firm up further, making it easier to slice. The sweet smell of apples and spices will fill your kitchen, enticing everyone to gather around for a delicious slice of your French Custard Pie with Apples.

French Custard Pie with Apples

How to Store and Freeze French Custard Pie with Apples

Fridge: Store leftover pie in the fridge, covered with plastic wrap or in an airtight container, for up to 3 days. This keeps the custard creamy and flavors intact.

Freezer: To freeze, wrap the cooled pie tightly in plastic wrap and then in aluminum foil. It can be frozen for up to 2 months. Thaw in the fridge overnight before serving.

Reheating: For best results, reheat slices in the oven at 350°F (175°C) for about 10 minutes, or until warmed through. This helps regain that fresh-baked goodness of the custard pie.

Room Temperature: If serving immediately, you can leave the pie at room temperature for up to 2 hours. Avoid letting it sit longer to maintain freshness and safety.

French Custard Pie with Apples Variations

Feel free to get creative with this recipe and make it your own by exploring these delightful options!

  • Gluten-Free: Substitute all-purpose flour with a gluten-free blend for a tasty, gluten-friendly crust.

  • Dairy-Free: Use plant-based butter and almond milk for a dairy-free alternative that maintains flavor.

  • Sweeten It Up: Add ¼ cup of brown sugar to the filling for a deeper, caramel-like sweetness in every bite.

  • Spice It Up: Toss in a pinch of ground ginger or allspice to the custard for an aromatic flavor twist that warms the soul.

  • Nutty Crunch: Sprinkle slivered almonds or chopped walnuts on top before baking for added texture and a nutty flavor that elevates the dish.

  • Fruit Fusion: Mix 1 cup of blueberries or raspberries with the sliced apples for a burst of fruity sweetness that takes it to another level.

  • Creamy Dream: For an ultra-rich custard, replace half of the milk with heavy cream to enhance that luscious mouthfeel we adore in custard pies.

  • Savory Twist: Add cooked bacon bits or sautéed onions for a surprising savory twist that plays beautifully against the sweet apples and custard.

Don’t forget, with such versatile options, you can easily adapt this French Custard Pie with Apples to fit your taste preferences or dietary needs! For even more delightful ideas, check out our post on creative dessert variations.

Make Ahead Options

These French Custard Pie with Apples are perfect for those busy days when you need to meal prep! You can prepare the pie crust and refrigerate it for up to 3 days in advance. Simply follow the crust instructions, press it into the pie dish, and wrap tightly in plastic wrap to keep it fresh. The apples can be sliced and tossed with lemon juice, storing them in an airtight container in the refrigerator for up to 24 hours as well. When you're ready to bake, layer the apples in the crust, whisk the custard filling, pour it over, and bake as per the recipe. This way, you’ll enjoy the same delectable taste with less stress, bringing warmth and joy to your table without the last-minute rush!

What to Serve with French Custard Pie with Apples

Imagine gathering around the table with loved ones, sharing flavors that warm the heart and soul.

  • Crisp Green Salad: A refreshing mix of greens with a light vinaigrette cuts through the richness of the pie.

  • Vanilla Ice Cream: The creamy sweetness adds a delightful contrast, melting beautifully on warm pie slices.

  • Caramel Sauce: Drizzling this over the pie creates an indulgent touch that elevates each bite, perfect for caramel lovers.

  • Whipped Cream: Light and fluffy, it enhances the custard's texture while complementing the apple's flavors for an elegant finish.

  • Hot Tea or Herbal Infusion: The warmth and subtle flavors of chamomile or cinnamon tea refresh the palate between bites, offering a calming experience.

  • Cheese Plate: A selection of mild cheeses like Brie or Gouda provides a savory element that balances the pie's sweetness.

Pairing the French Custard Pie with Apples with these delightful accompaniments transforms your dessert into a memorable meal that will linger in your heart long after the last bite!

Expert Tips for French Custard Pie with Apples

  • Use Cold Ingredients: Start with cold butter and eggs to create a flakier crust. Warmer ingredients can result in a denser pie, compromising that light texture you want.

  • Apple Variety Matters: Choose tart varieties like Granny Smith for the best flavor contrast. Sweet apples may make your pie too sugary.

  • Don’t Overmix: When blending your dough or custard, mix just until combined. Overmixing can lead to a tough crust and rubbery custard texture.

  • Cool Before Serving: Allow the pie to cool for at least 30 minutes after baking. This helps the custard set well and makes slicing easier, ensuring the best presentation.

  • Watch for Doneness: Use a toothpick to check if the custard is set; it should come out clean. If the edges of your pie are browning too quickly, cover them with foil to prevent burning.

Enjoy baking your delightful French Custard Pie with Apples!

French Custard Pie with Apples

French Custard Pie with Apples Recipe FAQs

What type of apples should I use for this pie?
For the best flavor, I highly recommend using tart varieties like Granny Smith apples. Their natural acidity balances the sweetness of the custard beautifully. You can also mix in some sweeter apples, like Honeycrisp or Fuji, to add complex flavors, but keep most of the filling tart for an excellent sweet-tart contrast.

How should I store my leftover French Custard Pie with Apples?
Store any leftover pie in the refrigerator, covered with plastic wrap or kept in an airtight container, for up to 3 days. This method helps keep the custard creamy and the flavors intact. Be sure to let it cool completely before storing to prevent excess moisture from accumulating.

Can I freeze the French Custard Pie with Apples?
Absolutely! To freeze, allow the pie to cool completely, then wrap it tightly in plastic wrap followed by aluminum foil. This nested wrapping protects it from freezer burn. It can be frozen for up to 2 months. When you're ready to enjoy a slice, thaw it in the refrigerator overnight before serving.

What if my custard doesn't set properly during baking?
If your custard is still wobbly after the baking time, give it an additional 5-10 minutes in the oven. Make sure you keep an eye on the pie to avoid over-browning! A gentle jiggle in the center indicates it’s close to being done. If the edges are browning too quickly, shield them with aluminum foil.

Can I use alternatives for dietary restrictions?
Certainly! If you're looking for dairy-free options, you can substitute the milk with almond milk or coconut milk, and use a plant-based butter for the crust. For egg replacements, try using a flax egg (1 tablespoon ground flaxseed mixed with 2.5 tablespoons water) per egg needed, which can work well in custard recipes.

How long can I keep the pie at room temperature?
If you plan to serve the pie immediately, it's safe to leave it at room temperature for up to 2 hours. This way, everyone can enjoy it fresh! However, to maintain quality and safety, avoid letting it sit out for longer than that, especially in warm weather.

French Custard Pie with Apples

Irresistibly Creamy French Custard Pie with Apples Recipe

Delight in this French Custard Pie with Apples, blending creamy custard and tart apples in a flaky crust.
Print Recipe Pin Recipe
Prep Time 30 minutes mins
Cook Time 50 minutes mins
Cooling Time 30 minutes mins
Total Time 1 hour hr 50 minutes mins
Servings: 8 slices
Course: Dessert
Cuisine: French
Calories: 230
Ingredients Equipment Method Nutrition Notes

Ingredients
  

For the Crust
  • 1.5 cups all-purpose flour essential for a tender and flaky crust.
  • 0.5 cups unsalted butter use cold for a rich and buttery flavor.
  • 0.25 cups granulated sugar adds a hint of sweetness to the crust.
  • 0.25 teaspoon salt enhances the flavor of the crust.
  • 1 large egg helps bind the ingredients together.
For the Filling
  • 3 cups sliced apples (e.g., Granny Smith) their tartness balances the sweetness of the custard.
  • 0.75 cups milk adds creaminess to the custard.
  • 2 large eggs contributes to the structure of the custard.
  • 1 teaspoon vanilla extract infuses a beautiful flavor that complements the apples.
  • 0.25 teaspoon ground cinnamon brings warmth and spice to the pie.
  • 0.25 teaspoon ground nutmeg adds a nutty depth to the custard.
  • 1 tablespoon lemon juice prevents the apples from browning and adds acidity.
  • 1 tablespoon sugar (for topping) caramelizes to form a lovely crust on top.

Equipment

  • Mixing Bowl
  • Pie dish
  • Whisk
  • Rolling Pin

Method
 

Step-by-Step Instructions
  1. Preheat your oven to 375°F (190°C) to ensure even baking.
  2. In a mixing bowl, combine all-purpose flour, cold unsalted butter, granulated sugar, and salt. Mix until it resembles coarse crumbs. Add an egg and mix until just combined. Press dough into a pie dish and refrigerate for 30 minutes.
  3. Roll out the chilled dough on a floured surface to about 12 inches in diameter. Transfer it into the pie plate, fitting it gently into the edges. Trim excess dough.
  4. Peel, core, and slice Granny Smith apples and arrange them in the pie crust. Drizzle lemon juice over the apples.
  5. In a separate bowl, whisk together milk, eggs, vanilla extract, ground cinnamon, ground nutmeg, and sugar until smooth. This custard will envelop the apples.
  6. Pour the custard over the arranged apples, ensuring even distribution to cover them well.
  7. Bake in the preheated oven for about 50 minutes, until the custard is set and the top is golden. Cover edges with foil if they brown too quickly.
  8. Allow the pie to cool on a wire rack for at least 30 minutes before slicing.

Nutrition

Serving: 1sliceCalories: 230kcalCarbohydrates: 32gProtein: 3gFat: 10gSaturated Fat: 6gMonounsaturated Fat: 4gCholesterol: 100mgSodium: 150mgPotassium: 100mgFiber: 2gSugar: 12gVitamin A: 250IUVitamin C: 5mgCalcium: 30mgIron: 1mg

Notes

For best results, use cold ingredients and allow the pie to cool for optimal texture before serving.

Tried this recipe?

Let us know how it was!

Warm and Cozy Lasagna Soup for Ultimate Comfort Food

December 14, 2025 by grace bellamy Leave a Comment

As the wind howls outside and the chill settles in, there's nothing quite like a steaming bowl of Warm and Cozy Lasagna Soup to transform a dreary day into a comforting retreat. This recipe not only has the delightful essence of your favorite traditional lasagna but is also a breeze to whip up—ready in just 45 minutes! It's the perfect solution for those of us who crave homemade goodness without spending hours in the kitchen. Packed with hearty ingredients and topped with creamy ricotta and gooey mozzarella, each spoonful warms you from the inside out. So, are you ready to cozy up with a bowl of deliciousness that feels like a warm hug?

Warm and Cozy Lasagna Soup

Why Is This Lasagna Soup So Irresistible?

Comforting, hearty goodness: Each bowl is loaded with savory flavors and tender noodles, making it an ideal meal for a chilly evening.
Quick preparation: In just 45 minutes, you can serve up a comforting dish that feels like it took all day to prepare!
Versatile ingredients: Use ground beef or turkey and customize it with your favorite veggies; this soup adapts beautifully to what you have on hand.
Crowd-pleaser: It’s a family-friendly dish that’s sure to satisfy both adults and kids alike, perfect for cozy gatherings.
Creamy-rich toppings: The blend of ricotta and mozzarella gives a decadent finish that elevates this soup to comfort food stardom.

So why not get cozy and enjoy a bowl of this Warm and Cozy Lasagna Soup that warms the heart and soul?

Warm and Cozy Lasagna Soup Ingredients

For the Soup Base
• 4 cups chicken or vegetable broth – A flavorful foundation that brings the essence of a traditional lasagna into your bowl.
• 1 teaspoon olive oil – Adds richness and helps enhance the flavors of garlic and onion.
• 1 teaspoon minced garlic – Infuses the soup with aromatic warmth that beckons your taste buds.
• 1 teaspoon diced onion – Brings sweetness and depth, making every bite comforting.
• 1 teaspoon Italian seasoning – A blend that captures the essence of classic lasagna flavors.
• ½ teaspoon salt – Enhances all the other ingredients and balances the richness of the soup.

For the Noodles & Protein
• 8 oz lasagna noodles – Provides the heartiness you crave in a lasagna, easily broken for quicker cooking.
• 1 cup ground meat (beef or turkey) – Offers a dose of protein and adds a savory richness to the soup.

For the Creamy Finish
• 1 cup ricotta cheese – Adds a creamy, luxurious texture that makes you feel all warm inside.
• ½ cup shredded mozzarella cheese – Melts beautifully into the soup, giving it a gooey, cheesy goodness.

For the Veggie Kick
• 1 cup diced tomatoes – Brightens the dish with a pop of flavor and freshness that cuts through the richness.

Now that you have all the ingredients ready, it’s time to dive into making this delightful Warm and Cozy Lasagna Soup!

Step‑by‑Step Instructions for Warm and Cozy Lasagna Soup

Step 1: Sauté the Aromatics
In a large pot, heat 1 teaspoon of olive oil over medium heat. Once shimmering, add 1 teaspoon of minced garlic and 1 teaspoon of diced onion. Sauté them for about 3–4 minutes until softened and fragrant, stirring occasionally to avoid browning. This will create a delightful base for your Warm and Cozy Lasagna Soup.

Step 2: Brown the Meat
Add 1 cup of ground meat (beef or turkey) to the pot, stirring it into the sautéed garlic and onion. Cook for approximately 5–7 minutes until the meat is browned and cooked through, breaking it into smaller pieces with a spatula. The aroma will be irresistible, promising a hearty bowl of soup ahead.

Step 3: Season the Mixture
Stir in 1 teaspoon of Italian seasoning and ½ teaspoon of salt, followed by 1 cup of diced tomatoes. Mix everything well and let it cook for another 2 minutes to allow the flavors to meld together. The vibrant colors and fragrant spices will start to bring your Warm and Cozy Lasagna Soup to life!

Step 4: Add the Broth
Pour in 4 cups of chicken or vegetable broth and increase the heat to bring the mixture to a rolling boil. Once boiling, lower the heat slightly and let it simmer for about 5 minutes. The broth will create a savory backdrop that enhances the taste of the soup, making it even more comforting.

Step 5: Cook the Noodles
Break 8 oz of lasagna noodles into smaller pieces, about 2–3 inches long, and add them to the boiling soup. Stir gently and cook for 10–12 minutes, or until the noodles are tender. Keep an eye on the pot, as it will transform into a hearty, noodle-filled Warm and Cozy Lasagna Soup.

Step 6: Incorporate the Cheeses
Once the noodles are tender, turn off the heat and gently stir in 1 cup of ricotta cheese along with ½ cup of shredded mozzarella cheese. Mix until the cheeses are melted and well combined, offering a creamy finish. Your Warm and Cozy Lasagna Soup is now bursting with richness and ready to be enjoyed!

Warm and Cozy Lasagna Soup

Expert Tips for Warm and Cozy Lasagna Soup

  • Perfect Noodle Texture: Avoid mushy noodles by breaking the lasagna noodles into smaller pieces and adding them with enough time to cook, usually around 10–12 minutes.

  • Broth Matters: For a richer flavor, use homemade broth or a high-quality store-bought one. It enhances the taste and elevates your Warm and Cozy Lasagna Soup.

  • Cheese Switching: If you're out of ricotta, cream cheese or cottage cheese can be fantastic substitutes, giving you a creamy finish without compromising taste.

  • Season to Taste: Always taste your soup before serving. You can adjust the Italian seasoning or salt to match your family's preference for flavor intensity.

  • Add Veggies: Don’t hesitate to toss in your favorite vegetables, like spinach or zucchini, for an added nutritional boost and vibrant color without losing the essence of lasagna.

What to Serve with Warm and Cozy Lasagna Soup

As you savor each spoonful of this luxurious soup, consider balancing the meal with complementary sides that enhance its delightful flavors.

  • Garlic Bread: A crispy, buttery loaf helps soak up every last drop of soup, enhancing the overall comfort experience.
  • Caesar Salad: The crisp romaine, creamy dressing, and crunchy croutons provide a refreshing contrast to the warm, hearty soup.
  • Roasted Vegetables: Seasonal veggies like Brussels sprouts or zucchini add a delightful burst of flavor and color, making your meal feel wholesome.
  • Parmesan Biscuits: Fluffy and cheesy, these biscuits are perfect for dipping and add an indulgent touch to your cozy dinner.
  • Italian Red Wine: A glass of Chianti or a smooth Sangiovese elevates the meal, enhancing the rich Italian flavors of the soup.
  • Chocolate Chip Cookies: For dessert, the warm, gooey cookies are a sweet finish, reminding you of family gatherings and childhood comfort.

Each of these pairings creates a symphony of textures and tastes, allowing you to fully embrace the warmth and comfort of your Warm and Cozy Lasagna Soup.

Warm and Cozy Lasagna Soup Variations

Feel free to let your creativity shine by customizing your Warm and Cozy Lasagna Soup to match your unique tastes!

  • Vegetarian: Substitute ground meat with lentils or mushrooms for a hearty plant-based option without losing flavor.
    Elevate your soup's heartiness by adding a medley of chopped veggies, such as bell peppers or spinach, to enhance both texture and nutrients.

  • Spicy Kick: Add red pepper flakes or diced jalapeños to spice things up!
    This will introduce a delightful heat that beautifully complements the creamy cheese, transforming your dish into a warming delight that dances on your palate.

  • Dairy-Free: Swapping ricotta and mozzarella for cashew cream and dairy-free cheese creates a cozy comfort dish for everyone.
    Mix soaked cashews blended with nutritional yeast and garlic powder to capture that rich, lasagna-like essence without dairy.

  • Herb-Infused: Fresh herbs like basil or parsley can elevate the flavor significantly!
    Simply toss in a handful towards the end of cooking to impart a delightful freshness that brightens every spoonful of your soup.

  • Noodle Alternatives: Try using zucchini or spiralized vegetables instead of traditional lasagna noodles for a lower-carb option.
    This twist not only accommodates dietary preferences but also offers a lovely crunch that pairs wonderfully with the soup's richness.

  • Hearty Beans: Add a can of your favorite beans, like cannellini or kidney beans, for an extra protein boost and a fulfilling texture.
    This addition will make your lasagna soup even more satisfying, ensuring it keeps you cozy all evening long.

  • Extra Veggie Boost: Incorporate diced carrots or celery when sautéing the onion and garlic for extra nutrients and a hint of sweetness.
    These additions contribute flavor complexity that makes each bowl an exciting adventure in taste.

  • Baked Version: For a twist, transfer your soup to a baking dish, top with additional cheese, and bake until bubbly and golden.
    This transforms your Warm and Cozy Lasagna Soup into a hearty casserole that will impress at gatherings!

Whichever variation you choose, you'll still be left with a delectable bowl of comfort that warms both the body and soul. Why not explore more enhancements with ingredients like roasted garlic or even a splash of red wine for depth? Each tweak makes this dish uniquely yours!

How to Store and Freeze Warm and Cozy Lasagna Soup

Fridge: Store your Warm and Cozy Lasagna Soup in an airtight container for up to 3 days. Make sure it cools to room temperature before sealing for best results.

Freezer: For longer storage, freeze the soup in individual portions for up to 3 months. Use freezer-safe containers or bags, ensuring to leave space for expansion.

Reheating: When ready to enjoy, thaw overnight in the fridge and reheat on the stove over medium heat until warmed through. You can add a splash of broth to restore creaminess if needed.

Extra Tip: Avoid freezing the cheese toppings separately, as they can change texture upon thawing. Mix them in after reheating for optimal flavor!

Make Ahead Options

Preparing your Warm and Cozy Lasagna Soup in advance can save you precious time on busy weeknights! You can chop the onions, garlic, and tomatoes and store them in an airtight container in the refrigerator for up to 3 days. Additionally, cook the ground meat, let it cool, and refrigerate separately for up to 24 hours. When you’re ready to whip up the soup, simply sauté the prepped aromatics, add the meat along with the broth, and follow the recipe as usual. As a critical tip, avoid adding the noodles until you’re ready to serve to keep them from becoming mushy. With these make-ahead steps, you’ll enjoy the warm, comforting flavors of this soup with minimal effort!

Warm and Cozy Lasagna Soup

Warm and Cozy Lasagna Soup Recipe FAQs

How do I choose the best lasagna noodles?
Absolutely! Look for lasagna noodles that are firm without any dark spots or cracks. Opt for whole wheat or gluten-free versions if you prefer a healthier or gluten-free option. Remember, fresh pasta can cook faster, so adjust the cooking time accordingly!

What’s the best way to store leftovers of Warm and Cozy Lasagna Soup?
After your soup has cooled to room temperature, transfer it into an airtight container. You can keep it in the fridge for up to 3 days. Just reheat it over medium heat, adding a splash of broth if it thickens too much!

Can I freeze Warm and Cozy Lasagna Soup?
Yes! For freezing, portion the soup into freezer-safe bags or containers, leaving some space for expansion as it freezes. It can be frozen for up to 3 months. When ready to enjoy, thaw in the fridge overnight, then reheat on the stove until warmed through. This makes for a ready-to-go homemade meal!

What should I do if my soup is too thick?
If you find that your Warm and Cozy Lasagna Soup has become too thick after cooking, simply stir in a bit of broth or water until you reach your desired consistency. The additional liquid will not only help thin the soup but will also refresh the flavors.

Is this recipe suitable for those with dairy allergies?
If you're catering to dairy allergies, you can substitute the ricotta and mozzarella with non-dairy alternatives, which are widely available these days. Look for vegan cream cheese or cashew cheese for a creamy texture and flavor. Enjoy the comforting taste without worry!

By having these handy FAQs, you’ll be well-prepared to make the most out of your Warm and Cozy Lasagna Soup experience!

Warm and Cozy Lasagna Soup

Warm and Cozy Lasagna Soup for Ultimate Comfort Food

Warm and Cozy Lasagna Soup is the ultimate comfort food for chilly days, packed with hearty ingredients and topped with creamy cheese.
Print Recipe Pin Recipe
Prep Time 15 minutes mins
Cook Time 30 minutes mins
Total Time 45 minutes mins
Servings: 4 bowls
Course: Main Dishes
Cuisine: Italian
Calories: 450
Ingredients Equipment Method Nutrition Notes

Ingredients
  

For the Soup Base
  • 4 cups chicken or vegetable broth A flavorful foundation.
  • 1 teaspoon olive oil Adds richness.
  • 1 teaspoon minced garlic Infuses aromatic warmth.
  • 1 teaspoon diced onion Brings sweetness.
  • 1 teaspoon Italian seasoning Captures classic flavors.
  • ½ teaspoon salt Enhances flavor.
For the Noodles & Protein
  • 8 oz lasagna noodles Provides heartiness.
  • 1 cup ground meat (beef or turkey) Offers protein.
For the Creamy Finish
  • 1 cup ricotta cheese Adds creamy texture.
  • ½ cup shredded mozzarella cheese Melts beautifully.
For the Veggie Kick
  • 1 cup diced tomatoes Brightens the dish.

Equipment

  • Large Pot

Method
 

Step-by-Step Instructions
  1. In a large pot, heat olive oil over medium heat. Add garlic and onion, sauté for 3–4 minutes.
  2. Add ground meat, cook for 5–7 minutes until browned, breaking into smaller pieces.
  3. Stir in Italian seasoning, salt, and diced tomatoes. Cook for 2 minutes.
  4. Pour in the broth, bring to a boil, then simmer for 5 minutes.
  5. Break lasagna noodles into pieces and add to soup, cook for 10–12 minutes until tender.
  6. Turn off heat, stir in ricotta and mozzarella until melted, then serve.

Nutrition

Serving: 1bowlCalories: 450kcalCarbohydrates: 45gProtein: 28gFat: 18gSaturated Fat: 10gPolyunsaturated Fat: 2gMonounsaturated Fat: 4gCholesterol: 70mgSodium: 800mgPotassium: 650mgFiber: 3gSugar: 6gVitamin A: 900IUVitamin C: 10mgCalcium: 250mgIron: 3.5mg

Notes

Store in an airtight container for up to 3 days or freeze for up to 3 months.

Tried this recipe?

Let us know how it was!

Savory Beef Osso Buco: Tender Perfection for Dinner Tonight

December 14, 2025 by grace bellamy Leave a Comment

As I watch the golden-brown beef shanks sizzle in the pot, the tantalizing aroma fills my kitchen, transporting me straight to a quaint trattoria in Italy. Beef Osso Buco—this classic dish isn’t just a culinary delight; it’s a heartwarming experience that fills your home with warmth and comfort. What I love most about this recipe is that it introduces a touch of elegance to your dinner table while remaining surprisingly simple to make. With just 15 minutes of prep time, this dish transforms into a melt-in-your-mouth wonder after a few hours in the oven. Plus, it’s a fantastic way to impress friends or family without spending all day in the kitchen. Are you ready to dive into the world of slow-cooked perfection? Let’s get started!

Beef Osso Buco

Why is Beef Osso Buco a Must-Try?

Tender, Melt-in-Your-Mouth beef shanks become the star of your dinner. Rich, Layered Flavors develop as the ingredients meld together in a savory sauce. Elegance Without Fuss: Impress your guests with minimal effort thanks to easy preparation. Perfect for Sharing: This dish brings everyone to the table for a memorable experience. Classic Comfort Food: Each bite reminds you of warm family gatherings and celebrations. Don’t forget to check out our tips on serving sides for a complete meal!

Beef Osso Buco Ingredients

For the Osso Buco
• 4 bone-in beef shanks – they provide rich flavor and tenderness as they cook.
• ¼ cup olive oil – for searing the meat and enhancing flavor.
• 3 tablespoons flour – helps create a nice crust while searing the beef.
• 1 onion, chopped – adds sweetness and depth to the dish.
• 1 carrot, chopped – provides natural sweetness and balances the flavors.
• 1 celery stalk, chopped – contributes an aromatic base to the sauce.

For the Braising Liquid
• 1 cup dried white wine – deglazes the pot and adds acidity to brighten the dish.
• 1 cup beef broth – helps keep the meat moist while infusing it with savory flavor.
• 2 cups diced tomatoes (canned or fresh) – provide body and a touch of acidity to the sauce.
• 1 teaspoon dried thyme – adds an earthy depth that complements the beef.
• 1 bay leaf – infuses a subtle aromatic flavor as the dish simmers.

For Finishing Touches
• 1 tablespoon chopped fresh parsley – gives a fresh burst of color and flavor before serving.
• 1 tablespoon fresh lemon zest – brightens the dish and adds a zesty twist.
• Salt to taste – enhances all the flavors harmoniously.
• Pepper to taste – adds a gentle kick to your Beef Osso Buco.

With these ingredients, you're well on your way to crafting a heavenly Beef Osso Buco that will leave everyone raving at your dinner table!

Step‑by‑Step Instructions for Beef Osso Buco

Step 1: Preheat the Oven
Start by preheating your oven to 350°F (175°C). This temperature is ideal for slow cooking, ensuring that your Beef Osso Buco turns out tender and flavorful. While the oven heats, gather your ingredients to streamline the cooking process and create an inviting atmosphere in your kitchen.

Step 2: Heat the Olive Oil
In a large Dutch oven, pour in ¼ cup of olive oil and place it over medium heat. Once the oil shimmers, you'll know it's hot enough to begin. Take your time to ensure the oil is properly heated; this step is crucial for achieving the perfect sear on those beef shanks.

Step 3: Sear the Beef Shanks
Dredge the 4 bone-in beef shanks in 3 tablespoons of flour, shaking off any excess. Carefully add them to the hot oil, searing each side for about 3-4 minutes until they are beautifully browned. This caramelization adds depth to your Beef Osso Buco’s flavor. Once done, remove the shanks from the pot and set them aside.

Step 4: Sauté the Vegetables
Using the same pot, add the chopped onion, carrot, and celery. Sauté the mixture over medium heat for about 5-7 minutes until the vegetables soften and the onion becomes translucent. This aromatic base sets the stage for rich flavors to develop in your Beef Osso Buco.

Step 5: Deglaze with Wine
Pour in 1 cup of dried white wine, using a wooden spoon to scrape the browned bits from the bottom of the pot. Let it simmer for about 2-3 minutes until the wine reduces slightly. This deglazing step not only enhances the flavor of your sauce but also keeps the beef shanks moist as they cook.

Step 6: Return the Beef and Add Liquids
Return the seared beef shanks to the pot, nestling them among the sautéed vegetables. Pour in 1 cup of beef broth and 2 cups of diced tomatoes. Sprinkle in the dried thyme and bay leaf, then season with salt and pepper to taste. Stir gently to combine everything, allowing those lovely flavors to mingle.

Step 7: Simmer and Braise
Bring the mixture to a gentle simmer, then cover the Dutch oven with its lid. Transfer the pot to your preheated oven and let it cook for about 2 hours. This slow-braising method will work its magic, tenderizing the beef so that it falls right off the bone, allowing the rich aromas to fill your kitchen.

Step 8: Finish with Freshness
Once the cooking time is complete, carefully remove the pot from the oven and uncover it. Discard the bay leaf and stir in 1 tablespoon of fresh parsley and 1 tablespoon of lemon zest. This final touch adds brightness, balancing the deep flavors of your Beef Osso Buco for a delightful finish before serving.

Beef Osso Buco

How to Store and Freeze Beef Osso Buco

Fridge: Store leftover Beef Osso Buco in an airtight container for up to 3 days. This keeps the flavors fresh, making it easy to reheat during the week.

Freezer: For longer storage, freeze portions of Beef Osso Buco in freezer-safe containers for up to 3 months. This ensures that you can enjoy this delicious dish even on busy days!

Reheating: Thaw frozen Beef Osso Buco in the fridge overnight before gently reheating in a saucepan over low heat, adding a splash of broth or water to maintain moisture.

Airtight Storage: Always ensure that your cooked dish is sealed tightly to prevent freezer burn and to preserve the mouthwatering flavors that make this recipe a standout!

What to Serve with Classic Beef Osso Buco?

Creating a delightful meal is all about complementing and contrasting flavors, textures, and aromas around that tender, luscious centerpiece.

  • Creamy Polenta: It’s a warm, comforting side that soaks up the savory sauce perfectly, enhancing every bite of the beef.
  • Garlic Mashed Potatoes: Rich and buttery, these potatoes provide a delightful, creamy contrast to the hearty Osso Buco.
  • Roasted Vegetables: A medley of seasonal veggies brings vibrant color and a slightly sweet note, balancing the richness of the dish.
  • Herb Risotto: This creamy, flavor-packed risotto adds a touch of elegance, hugging the meat with every creamy spoonful.
  • Crusty Bread: Perfect for soaking up the delectable sauce, nothing beats a warm loaf to accompany your meal.
  • Green Salad with Vinaigrette: A bright, crisp salad cuts through the richness of the meat, refreshing your palate between bites.
  • Italian Red Wine: A bold Chianti or Barolo complements the deeply savory flavors and enhances the overall dining experience.
  • Tiramisu: This luscious dessert finishes the meal with a sweet note and a delightful caffeine kick—an Italian classic!
  • Panna Cotta: Light and creamy, this dessert offers a subtly sweet ending that won't weigh you down after such a hearty meal.

With these pairings, your Beef Osso Buco dinner will be nothing short of spectacular!

Make Ahead Options

These Beef Osso Buco are perfect for meal prep enthusiasts looking to save time during the week! You can sear and prepare all the ingredients up to 24 hours in advance. Simply follow the first three steps of the recipe, then refrigerate the seared beef shanks and vegetable mixture in an airtight container. When you’re ready to cook, return the ingredients to the pot, add the remaining liquids, and transfer everything to the oven as directed. This way, you retain the rich, savory flavors just as if you had made it fresh. Meal prepping makes your busy weeknights much smoother, allowing you to enjoy this classic dish with minimal effort!

Tips for the Best Beef Osso Buco

Sear Well: Make sure to sear each side of the beef shanks thoroughly to develop a rich brown crust, enhancing the overall flavor.

Deglaze Properly: Don’t skip the deglazing step! Scraping the browned bits off the pot gives your Beef Osso Buco a depth of flavor that’s hard to resist.

Check Temperature: For tender meat, ensure your oven maintains a steady 350°F (175°C) during cooking. This is key in achieving that fall-off-the-bone texture!

Avoid Overcrowding: If you're making a larger batch, use two pots instead of crowding the Dutch oven. Overcrowding can result in uneven cooking.

Serve Warm: To fully enjoy the flavors, serve your Beef Osso Buco warm. Pair it with creamy polenta or crusty bread for a complete experience!

Beef Osso Buco Variations and Substitutions

Feel free to explore these exciting variations and substitutions to make this Beef Osso Buco truly your own masterpiece!

  • Dairy-Free: Omit any dairy in the cooking process and substitute beef broth with a low-sodium chicken broth for lighter flavor.
  • Vegetable Twist: Add diced mushrooms or zucchini for extra veggies and a satisfying texture that complements the rich beef.
  • Wine-Free: Swap out white wine with additional beef broth or apple cider vinegar for a zesty kick without the alcohol.
  • Herb Infusion: Experiment with fresh herbs like rosemary or oregano for a fragrant twist that brightens the flavor profile of your dish.
  • Heat Level: Add red pepper flakes or a dollop of crushed hot peppers for those who love a spicy kick in their comfort food.
  • Slow Cooker Method: For ease, adapt the recipe to your slow cooker, cooking the dish on low for 6-8 hours for that fall-off-the-bone tenderness.
  • Citrus Delight: Incorporate orange zest along with the lemon zest to enhance the citrus notes in the sauce for a playful variation.
  • Whole Grain Upgrade: Serve over farro or quinoa instead of mashed potatoes for a nutty, wholesome grain option that boosts the nutrition.

With these variations, you’ll create a personalized Beef Osso Buco that tantalizes your taste buds and adds your special touch to this beloved dish! If you want to elevate your meal even further, don't forget to check out our delightful ideas on serving sides for a well-rounded feast!

Beef Osso Buco

Classic Beef Osso Buco Recipe FAQs

How do I choose the best beef shanks for osso buco?
Absolutely! Look for bone-in beef shanks with a good amount of marbling and a shiny, moist appearance. The beef should have a nice layer of fat and collagen for that melt-in-your-mouth texture. The bones should have a nice marrow-filled center, which adds richness to the dish.

How should I store leftover Beef Osso Buco?
To keep your delicious Beef Osso Buco fresh, transfer it to an airtight container and store it in the fridge for up to 3 days. If you have a large portion, separating it into smaller containers makes reheating easier and faster for those busy weeknight dinners!

Can I freeze Beef Osso Buco, and how do I do it correctly?
Yes! You can freeze Beef Osso Buco for up to 3 months. Allow the dish to cool completely, then portion it into freezer-safe containers, leaving a little space at the top to allow for expansion. To reheat, thaw in the refrigerator overnight and warm it gently on the stovetop with a splash of broth to keep it moist.

What should I do if my Beef Osso Buco turns out tough?
Very! If your osso buco is tough, it likely needs more cooking time. Make sure the beef is submerged in liquid and covered properly during braising. I recommend continuing to cook it for an additional 30 minutes to 1 hour while checking for tenderness. If you’re using a thicker cut, it may just need some extra love and warmth!

Is Beef Osso Buco suitable for certain dietary restrictions?
Absolutely! While this dish is not gluten-free due to the flour, you can easily adapt it. Substitute with gluten-free flour or simply skip the dredging step altogether. Additionally, if you have allergies to certain ingredients, like sulfites in wine, feel free to use low-sodium beef broth and extra tomatoes or vegetable broth for the braising liquid.

How do I know when Beef Osso Buco is fully cooked?
You can tell your Beef Osso Buco is ready when the meat is fork-tender and pulls away from the bone easily. It typically takes around 2 hours at 350°F (175°C) in the oven. I always check for the texture; if it’s still holding together tightly, give it a little more time!

Beef Osso Buco

Savory Beef Osso Buco: Tender Perfection for Dinner Tonight

Beef Osso Buco is a classic dish that offers tender flavors and a heartwarming experience, perfect for sharing.
Print Recipe Pin Recipe
Prep Time 15 minutes mins
Cook Time 2 hours hrs
Total Time 2 hours hrs 15 minutes mins
Servings: 4 servings
Course: Main Dishes
Cuisine: Italian
Calories: 450
Ingredients Equipment Method Nutrition Notes

Ingredients
  

For the Osso Buco
  • 4 pieces bone-in beef shanks provides rich flavor and tenderness
  • ¼ cup olive oil for searing the meat
  • 3 tablespoons flour helps create a crust
  • 1 medium onion chopped
  • 1 medium carrot chopped
  • 1 stalk celery chopped
For the Braising Liquid
  • 1 cup dried white wine deglazes the pot
  • 1 cup beef broth keeps meat moist
  • 2 cups diced tomatoes canned or fresh
  • 1 teaspoon dried thyme adds earthy depth
  • 1 leaf bay leaf subtle aromatic flavor
For Finishing Touches
  • 1 tablespoon chopped fresh parsley for garnish
  • 1 tablespoon fresh lemon zest adds brightness
  • Salt to taste
  • Pepper to taste

Equipment

  • Dutch oven

Method
 

Step-by-Step Instructions
  1. Preheat your oven to 350°F (175°C).
  2. In a large Dutch oven, heat the olive oil over medium heat.
  3. Dredge the beef shanks in flour and sear each side for 3-4 minutes.
  4. Sauté the chopped onion, carrot, and celery until softened.
  5. Deglaze the pot with white wine, scraping up browned bits.
  6. Return the beef and add beef broth, diced tomatoes, thyme, and bay leaf.
  7. Simmer gently, cover, and transfer to the oven for 2 hours.
  8. Stir in parsley and lemon zest before serving.

Nutrition

Serving: 1servingCalories: 450kcalCarbohydrates: 20gProtein: 35gFat: 25gSaturated Fat: 10gPolyunsaturated Fat: 3gMonounsaturated Fat: 5gCholesterol: 100mgSodium: 800mgPotassium: 800mgFiber: 3gSugar: 6gVitamin A: 300IUVitamin C: 5mgCalcium: 50mgIron: 5mg

Notes

Serve with creamy polenta or crusty bread for a complete meal.

Tried this recipe?

Let us know how it was!

Mutton Masala: A Comforting, Flavor-Packed Delight

December 14, 2025 by grace bellamy Leave a Comment

As the spices dance in the warmth of the pan, a wave of nostalgia washes over me, transporting me to bustling kitchens filled with laughter and the comforting aromas of home-cooked meals. Today, I'm thrilled to share my treasured Mutton Masala recipe, a dish that's not only a true crowd-pleaser but also a fantastic way to elevate your weeknight dinners. With minimal prep time and a rich, satisfying flavor that warms the soul, this recipe transforms everyday ingredients into a feast that feels special. Whether you're feeding a family or impressing friends, the tender mutton simmered in fragrant spices is sure to make everyone feel right at home. Curious how to bring your own kitchen to life with this delectable dish? Let’s dive in!

Mutton Masala

Why Is Mutton Masala So Irresistible?

Flavor Explosion: The blend of fragrant spices harmonizes beautifully, delivering a rich and savory experience.

Tender Mutton: Slow-cooked to perfection, the meat becomes melt-in-your-mouth tender, making every bite a delight.

Nostalgic Comfort: This dish brings the warmth of home-cooked meals, evoking memories and creating new ones.

Versatile Pairing: Perfect with rice, naan, or even stuffed in wraps, Mutton Masala suits any mealtime, making it a crowd favorite!

Time-Saving: With just 30 minutes of prep and 60 minutes of cooking, this recipe fits seamlessly into your busy schedule, giving you more time to enjoy your culinary masterpiece.

Whether you're looking for a delightful family dinner or a dish to impress guests, this Mutton Masala is your go-to option!

Mutton Masala Ingredients

Unlock the secrets to creating this flavorful dish with these essential ingredients!

For the Base
• Oil – 3 tablespoons – Use vegetable or mustard oil for a distinct flavor.
• Onions – 2 medium, finely chopped – Sauté until golden for deep sweetness.
• Ginger-Garlic Paste – 2 tablespoons – Adds aromatic depth to the dish.

For the Spices
• Cumin Seeds – 2 teaspoons – They lend a warm, earthy flavor.
• Mustard Seeds – 1 teaspoon – Adds a pungent kick when they splutter.
• Red Chili Powder – 1 tablespoon – Adjust quantity for desired heat.
• Turmeric Powder – 1 teaspoon – Provides vibrant color and health benefits.
• Coriander Powder – 2 teaspoons – Offers a citrusy undertone.
• Garam Masala – 2 teaspoons – This condiment ties all the flavors together beautifully.

For the Mutton
• Mutton – 500 grams, cut into pieces – Opt for bone-in for more flavor.

For the Sauce
• Tomatoes – 2 medium, pureed – Use ripe tomatoes for a luscious texture.
• Water – 1 cup – Adjust to your desired gravy consistency.
• Salt – To taste – Essential for enhancing all flavors in the dish.

For Garnish
• Fresh Coriander Leaves – For a burst of freshness on top.

With these ingredients at hand, you're just moments away from savoring a warm bowl of Mutton Masala, transforming every meal into a celebration!

Step‑by‑Step Instructions for Mutton Masala

Step 1: Heat the Oil
In a large pot, heat 3 tablespoons of oil over medium heat. Once the oil is shimmering, add 2 teaspoons of cumin seeds and 1 teaspoon of mustard seeds. Allow them to sizzle and pop for about 30 seconds, releasing their aromatic fragrance.

Step 2: Sauté the Onions
Add 2 medium finely chopped onions to the pot and sauté them until they turn golden brown, which should take around 5-7 minutes. Stir occasionally to ensure even cooking and to prevent any burning, allowing the onions to caramelize for deeper flavor.

Step 3: Incorporate the Ginger-Garlic Paste
Next, stir in 2 tablespoons of ginger-garlic paste and cook for another 2-3 minutes. Keep stirring until the raw aroma dissipates, and the paste melds beautifully with the onions, creating a fragrant base for your Mutton Masala.

Step 4: Add the Spices
Now, add in 1 tablespoon of red chili powder, 1 teaspoon of turmeric powder, 2 teaspoons of coriander powder, and salt to taste. Mix these spices with the sautéed onions and ginger-garlic paste, allowing the spices to bloom for about 2 minutes, which will enhance the flavors.

Step 5: Brown the Mutton
Introduce 500 grams of mutton, cut into pieces, into the pot. Sauté for approximately 5-8 minutes, until the mutton is browned on all sides. This step locks in the juices and deepens the flavors, setting the stage for a rich Mutton Masala.

Step 6: Add the Tomatoes
Pour in the pureed tomatoes made from 2 medium tomatoes and stir well to combine with the mutton mixture. Cook this for about 10 minutes, observing as the oil starts to separate from the mixture, indicating the sauce is developing a rich base.

Step 7: Simmer the Mixture
Add 1 cup of water to the pot, ensuring the mutton is submerged in liquid. Cover the pot, reduce the heat to low, and let it simmer for 45-60 minutes. Check occasionally, and when the mutton is tender and falls apart easily, you know it’s ready.

Step 8: Finish with Garam Masala
Once the mutton is tender, stir in 2 teaspoons of garam masala, allowing the spices to infuse for another 5 minutes. This final touch enhances the depth of flavor, ensuring your Mutton Masala is aromatic and satisfying.

Step 9: Garnish and Serve
Remove the pot from the heat and garnish your Mutton Masala with fresh coriander leaves. Serve hot, pairing it with rice, naan, or your favorite bread, for a delightful and comforting meal that is sure to impress!

Mutton Masala

Mutton Masala Variations & Substitutions

Feel free to personalize your Mutton Masala by trying out these exciting variations to match your taste buds!

  • Dairy-Free: Substitute any yogurt with coconut yogurt or skip it entirely for a lighter version.
    This swap keeps the dish creamy while embracing a richer, tropical flavor, perfect for dairy allergies.

  • Vegetarian Alternative: Swap mutton for chickpeas or paneer for a vegetarian twist.
    Both options absorb the flavorful spices beautifully and turn this classic recipe into a delightful meat-free meal.

  • Spicy Kick: Increase red chili powder or add diced green chilies for a fiery version.
    If you love heat, these changes will bring a whole new level of excitement to each bite!

  • Herb Infusion: Substitute coriander leaves with fresh mint for a refreshing flavor profile.
    The mint adds a bright touch that complements the rich spices nicely, perfect for a summer meal!

  • Slow Cooker Companion: Convert this recipe for use in a slow cooker for tender, effortless mutton.
    Cooking on low for 6-8 hours will yield succulent meat and allow flavors to deepen wonderfully.

  • Tomato-Free Option: Replace the pureed tomatoes with a splash of tamarind paste for a tangy version.
    This twist adds a delightful tartness, balancing the spice and sweetness wonderfully in each mouthful!

  • Nutty Addition: Stir in a couple of tablespoons of almond flour during cooking for extra richness.
    This subtle change not only thickens the sauce but adds a unique depth of flavor to your dish.

  • Coconut Cream: For a creamy and luscious texture, incorporate coconut cream towards the end.
    This addition will wrap the spices in a velvet smoothness, making it a comforting dish perfect for any occasion.

Remember, the joy of cooking lies in experimentation, so make this Mutton Masala your very own! If you’re intrigued by more flavorful twists to classic meals, check out my recipes for Mutton Curry or Chicken Masala to keep the good times rolling!

Expert Tips for Mutton Masala

Perfect Oil Temperature: Ensure the oil is hot enough before adding spices to prevent them from becoming bitter.

Onion Caramelization: Don't rush the process—golden-brown onions add depth and sweetness to your Mutton Masala.

Spice Blooming: Let the spices cook for at least 2 minutes after adding them for maximum flavor infusion.

Tender Meat: If you're short on time, consider pressure cooking the mutton for quicker tenderness.

Garnish Freshly: Always add the coriander leaves just before serving to retain their vibrant color and fresh flavor.

Make Ahead Options

These Mutton Masala preparations are perfect for meal prep enthusiasts! You can chop the onions, prepare the ginger-garlic paste, and mix the spices up to 24 hours in advance. Simply refrigerate these components in airtight containers to maintain freshness. Additionally, you can marinate the mutton pieces with spices and refrigerate them up to 3 days ahead—this not only saves you time but also enhances the flavor as the spices infuse into the meat. When you're ready to cook, just follow the final steps: sauté the prepped ingredients, add your tomatoes, and simmer until tender for that warm, comforting Mutton Masala experience, just as delicious as if made fresh!

How to Store and Freeze Mutton Masala

Fridge: Store your Mutton Masala in an airtight container in the fridge for up to 3 days. Make sure to let it cool completely before sealing to avoid condensation.

Freezer: For longer storage, freeze the dish in a freezer-safe container for up to 3 months. Double-wrap it with plastic wrap before sealing to prevent freezer burn.

Reheating: When ready to enjoy, thaw in the fridge overnight. Reheat on the stovetop over low heat, adding a splash of water if needed, until heated through.

Serving Freshness: Freezing may slightly affect the texture, so make sure to savor it freshly prepared whenever possible for the best flavor experience!

What to Serve with Mutton Masala

Elevate your Mutton Masala experience with these delightful accompaniments that balance flavors and textures perfectly.

  • Fluffy Basmati Rice: Its delicate grains soak up the rich sauce, making every bite a comforting delight. Pairing Mutton Masala with fluffy rice creates a satisfying contrast.

  • Garlic Naan: This soft, fragrant bread is perfect for sopping up the delicious sauce, making it an irresistible addition to your meal.

  • Cucumber Raita: A cooling yogurt side that spices up the heat of the Mutton Masala, providing a refreshing and tangy counterpoint.

  • Roasted Vegetables: Seasonal veggies tossed in olive oil and herbs add a crispy texture and vibrant colors, enhancing your plate beautifully.

  • Mint Chutney: A zesty condiment that elevates your meal with its fresh, bright flavors, perfectly complementing the spices in the Mutton Masala.

  • Spiced Lemonade: This refreshing drink with a hint of spice enriches the overall dining experience, lightening the rich flavors of the meal.

  • Mango Lassi: A sweet and creamy yogurt drink that adds a delightful fruity note, balancing out the warmth and spices on your plate.

  • Gulab Jamun: For dessert, these soft, syrup-soaked balls offer a sweet finish to your meal that's truly special and memorable!

Mutton Masala

Mutton Masala Recipe FAQs

How do I select ripe tomatoes for Mutton Masala?
Absolutely! When looking for ripe tomatoes, choose ones that are firm yet yield slightly to gentle pressure. Look for vibrant color, preferably a deep red without dark spots or blemishes. If available, heirloom varieties offer great flavor!

What’s the best way to store Mutton Masala?
You can store your Mutton Masala in an airtight container in the fridge for up to 3 days. Be sure to let it cool completely before sealing; this prevents condensation that can lead to sogginess.

Can I freeze Mutton Masala for later?
Very much! To freeze Mutton Masala, pour it into a freezer-safe container and seal it well. It should keep well for about 3 months. To thaw, move it to the fridge overnight. Reheat on the stovetop, adding a splash of water to restore its luscious consistency.

What if my mutton doesn't seem tender after cooking?
If your mutton isn’t tender after simmering for 45-60 minutes, try continuing to cook it on low heat. If you're in a hurry, this is where a pressure cooker can be a game-changer—pressure cook it for about 20-25 minutes, which tenderizes the meat beautifully!

Can I modify this recipe for dietary restrictions?
Absolutely! If you or someone you’re cooking for is allergic to certain spices, feel free to adjust as needed. Replace specific spices or control the heat by reducing the quantity of red chili powder. Just remember, the heart of this Mutton Masala is its warmth and comfort, so make it your own!

Is Mutton Masala safe for pets?
It's wise to keep this dish away from pets! Ingredients like onions and spices can be harmful to animals. Always stick to pet-friendly foods when treating your furry friends to snacks.

Mutton Masala

Mutton Masala: A Comforting, Flavor-Packed Delight

Mutton Masala is a comforting, flavor-packed delight that brings warmth and nostalgia to your meals.
Print Recipe Pin Recipe
Prep Time 30 minutes mins
Cook Time 1 hour hr
Total Time 1 hour hr 30 minutes mins
Servings: 4 servings
Course: Main Dishes
Cuisine: Indian
Calories: 350
Ingredients Equipment Method Nutrition Notes

Ingredients
  

For the Base
  • 3 tablespoons Oil Use vegetable or mustard oil for a distinct flavor.
  • 2 medium Onions Finely chopped, sauté until golden for deep sweetness.
  • 2 tablespoons Ginger-Garlic Paste Adds aromatic depth to the dish.
For the Spices
  • 2 teaspoons Cumin Seeds They lend a warm, earthy flavor.
  • 1 teaspoon Mustard Seeds Adds a pungent kick when they splutter.
  • 1 tablespoon Red Chili Powder Adjust quantity for desired heat.
  • 1 teaspoon Turmeric Powder Provides vibrant color and health benefits.
  • 2 teaspoons Coriander Powder Offers a citrusy undertone.
  • 2 teaspoons Garam Masala This condiment ties all the flavors together beautifully.
For the Mutton
  • 500 grams Mutton Cut into pieces, opt for bone-in for more flavor.
For the Sauce
  • 2 medium Tomatoes Pureed, use ripe tomatoes for a luscious texture.
  • 1 cup Water Adjust to your desired gravy consistency.
  • Salt To taste, essential for enhancing all flavors in the dish.
For Garnish
  • Fresh Coriander Leaves For a burst of freshness on top.

Equipment

  • Large Pot

Method
 

Directions
  1. Heat 3 tablespoons of oil in a large pot over medium heat. Add 2 teaspoons of cumin seeds and 1 teaspoon of mustard seeds. Allow to sizzle for about 30 seconds.
  2. Add 2 medium finely chopped onions and sauté until golden brown for 5-7 minutes.
  3. Stir in 2 tablespoons of ginger-garlic paste and cook for another 2-3 minutes.
  4. Add 1 tablespoon of red chili powder, 1 teaspoon of turmeric powder, 2 teaspoons of coriander powder, and salt to taste. Mix well.
  5. Introduce 500 grams of mutton and sauté for about 5-8 minutes until browned.
  6. Pour in the pureed tomatoes and cook for about 10 minutes, until oil separates.
  7. Add 1 cup of water, cover, and simmer for 45-60 minutes until the mutton is tender.
  8. Stir in 2 teaspoons of garam masala and allow to simmer for another 5 minutes.
  9. Garnish with fresh coriander leaves and serve hot.

Nutrition

Serving: 1bowlCalories: 350kcalCarbohydrates: 10gProtein: 30gFat: 20gSaturated Fat: 8gPolyunsaturated Fat: 2gMonounsaturated Fat: 8gCholesterol: 70mgSodium: 600mgPotassium: 500mgFiber: 2gSugar: 3gVitamin A: 500IUVitamin C: 15mgCalcium: 40mgIron: 3mg

Notes

Always add coriander leaves just before serving to retain their vibrant color and fresh flavor.

Tried this recipe?

Let us know how it was!

Warm and Cozy Dumplings Curry Soup for Easy Comfort Food

December 12, 2025 by grace bellamy Leave a Comment

As the aroma of warming spices wafts through my kitchen, there's something undeniably comforting about a bowl of Dumplings Curry Soup. This delightful recipe seamlessly blends tender dumplings with a rich, creamy curry broth, creating a cozy dish perfect for chilly evenings or when you're seeking a moment of culinary magic. It’s not just a kitchen triumph; it's a quick-prep wonder that transforms your dinner routine into something extraordinary. Plus, it’s an excellent way to sneak in all those vibrant veggies you’ve been meaning to enjoy. Ready to spice up your weeknight meals? Let’s dive into the comforting world of Dumplings Curry Soup together!

Dumplings Curry Soup

Why is Dumplings Curry Soup so special?

Comforting, warm flavors: This soup combines the richness of coconut milk with the zest of curry, creating a bowl of pure bliss for your taste buds.

Quick and easy: With just 15 minutes of prep, you'll have a delightful meal simmering in no time. Perfect for weeknights!

Versatility: Feel free to customize by adding your favorite vegetables or using whatever dumplings you have on hand. It’s a dish that adapts to your pantry!

Crowd-pleaser: Whether it’s a cozy family dinner or entertaining friends, this Dumplings Curry Soup is guaranteed to impress and satisfy everyone at the table. Serve it with some crusty bread for a heartier meal!

Nutrition-packed: With plenty of veggies and protein-rich dumplings, it’s not just comfort food—it supports your healthy eating goals too! You can explore more hearty recipes in our guide to perfect weeknight dinners.

Dumplings Curry Soup Ingredients

Unlock the flavors of Dumplings Curry Soup with these simple yet tasty ingredients!

For the Soup Base

  • Curry powder – a key ingredient that gives the dish its warm, aromatic flavor.
  • Vegetable oil – helps sauté the garlic and curry for a fragrant base.
  • Garlic, minced – adds a delightful depth of flavor to your soup.
  • Broth (chicken or vegetable) – adds rich, savory depth to this comforting soup.
  • Coconut milk – brings creaminess and balances the spices beautifully.

For the Dumpling Addition

  • Frozen or fresh dumplings – use your favorites for added texture and heartiness.

For the Veggie Boost

  • Vegetables (e.g., spinach, green beans, or bell peppers) – infuse extra nutrients and color, making the soup even more delightful.

For Flavor Enhancement

  • Salt and pepper to taste – essential for rounding out the flavors in your Dumplings Curry Soup.

For the Finishing Touch

  • Fresh herbs for garnish (optional) – elevate the presentation and add a pop of freshness.

Step‑by‑Step Instructions for Dumplings Curry Soup

Step 1: Heat the Base
Begin by heating a tablespoon of vegetable oil in a large pot over medium heat. Allow the oil to shimmer, then add the minced garlic and curry powder, sautéing for about 1-2 minutes until fragrant. This will wake up the spices and create a lovely aromatic base for your Dumplings Curry Soup.

Step 2: Create the Broth
Once the garlic and curry are aromatic, pour in 4 cups of broth—either chicken or vegetable—along with 1 cup of coconut milk. Stir gently to combine the ingredients. Increase the heat and bring the mixture to a gentle simmer, observing for small bubbles forming along the edges of the pot, which should take about 5 minutes.

Step 3: Add the Dumplings
After the broth has simmered, it's time to add your dumplings. Stir in 1 cup of frozen or fresh dumplings, ensuring they're fully submerged in the broth. Cook according to package instructions or about 6-8 minutes until the dumplings are tender and fluffy, enjoying the rich aroma wafting from the pot.

Step 4: Incorporate the Vegetables
Once the dumplings have cooked through, stir in your choice of veggies—such as spinach, green beans, or bell peppers—to the soup. Allow everything to cook together for an additional 3-5 minutes until the vegetables are just tender and vibrant, adding a wonderful pop of color and nutrients to your Dumplings Curry Soup.

Step 5: Season to Perfection
Taste your soup and season with salt and pepper to your liking. This final touch is crucial for balancing the flavors and enhancing the rich curry and creamy coconut notes. Stir well and allow the soup to heat through for another minute or two before serving.

Step 6: Serve and Garnish
Ladle the Dumplings Curry Soup into warm bowls, letting its comforting steam rise. If desired, sprinkle over some fresh herbs for an added burst of flavor and a beautiful presentation. Serve hot with crusty bread or over rice for a heartier meal, and enjoy the cozy warmth of your homemade creation.

Dumplings Curry Soup

Make Ahead Options

These Dumplings Curry Soup ingredients are excellent for meal prep, saving you precious time during busy weeknights! You can prepare the broth (steps 1 and 2) up to 24 hours in advance by simmering the garlic, curry powder, broth, and coconut milk, then refrigerating it in an airtight container. The dumplings and vegetables can also be measured and stored separately in the fridge for up to 3 days. To maintain their quality, ensure the dumplings are well-sealed to avoid freezer burn if you choose to freeze them instead. When you’re ready to serve, just reheat the broth mixture on the stove, add the dumplings and vegetables, and cook until everything is heated through. Enjoy the comforting flavors of homemade Dumplings Curry Soup with minimal effort!

Dumplings Curry Soup Variations

Feel free to elevate your Dumplings Curry Soup with these delicious twists and options!

  • Vegan Option: Substitute coconut milk with a plant-based alternative like almond or soy milk for a vegan-friendly version.

  • Spice It Up: Add a splash of sriracha or red pepper flakes for a delightful kick of heat that’ll warm you from the inside out.

  • Herb-Enhanced: Experiment with fresh herbs like cilantro or Thai basil for a fresh burst of flavor that complements the curry beautifully.

  • Protein-Packed: Toss in some shredded chicken or firm tofu to boost the protein content while making the soup even heartier.

  • Noodle Boost: Consider adding rice noodles for a satisfying twist; they absorb the flavors and create a delightful texture.

  • Seasonal Veggies: Switch up the vegetables with seasonal picks like corn during summer or cauliflower in winter for that farm-to-table freshness.

  • Creamy Addition: A spoonful of cream cheese or a splash of heavy cream stirred in at the end creates an ultra-creamy consistency that’s utterly indulgent.

  • Curry Varieties: Try out different curry blends—like Thai red or green curry paste—for alternate flavor profiles that transport your taste buds to new realms of deliciousness!

With these variations, you're all set to make this soup uniquely yours! And if you're ready to take your culinary adventures even further, explore our guide to hearty soup recipes for more inspiration.

Expert Tips for Dumplings Curry Soup

  • Perfect Dumplings: Ensure your dumplings are cooked according to package instructions to achieve that tender, fluffy texture. Undercooking can lead to a doughy taste.

  • Aroma Boost: Sauté garlic with the curry powder for a few minutes to unlock their flavors; this step is vital for a fragrant Dumplings Curry Soup.

  • Veggie Variety: Don’t hesitate to mix in different vegetables based on your preference or what's in season. But avoid overcooking them; add them towards the end for a vibrant crunch.

  • Season Smartly: Always taste before seasoning. Start with a pinch of salt and pepper, adjusting gradually to enhance the flavors without overpowering the delicate balance in your Dumplings Curry Soup.

  • Garnish Delight: Fresh herbs like cilantro or basil not only brighten the soup but also add freshness. Add them just before serving to maintain their flavor and color.

What to Serve with Dumplings Curry Soup

Imagine a cozy evening where the warmth of a bowl of soup envelops you, inviting you to unwind and enjoy every spoonful.

  • Crusty Bread: Its crunchy exterior and soft inside make it perfect for dipping into the creamy broth, adding a delightful contrast.
  • Steamed Jasmine Rice: The fluffy rice soaks up the rich curry flavors, creating a complete and satisfying meal experience.
  • Fresh Salad: A mixed greens salad with a zesty vinaigrette adds a refreshing crunch that complements the warm soup perfectly.
  • Spicy Chili Oil: Drizzle a bit on top for an extra kick. It adds a nice heat that plays beautifully with the flavor profile of the soup.
  • Coconut Rice: The subtle coconut flavor echoes the essence of the soup, enhancing its tropical vibes and adding a creamy backdrop.
  • Mango Chutney: This sweet and tangy condiment pairs wonderfully with the spices in the soup, brightening each spoonful.
  • Crispy Spring Rolls: Their crunchiness brings a fun texture element to your meal, and dipping them in the broth is truly delightful.

Together, these options can transform a simple Dumplings Curry Soup into an unforgettable, heartwarming feast!

How to Store and Freeze Dumplings Curry Soup

Fridge: Store leftovers in an airtight container for up to 3 days. Make sure the soup has cooled to room temperature before sealing to maintain freshness.

Freezer: For longer storage, freeze the soup in individual portions for up to 3 months. Use freezer-safe containers or bags, removing as much air as possible to prevent freezer burn.

Reheating: When ready to enjoy, thaw overnight in the refrigerator, then gently reheat on the stove over low heat, adding a splash of broth or coconut milk if it’s too thick.

Serving Tip: Dumplings may absorb some liquid while stored, so add additional broth as needed to restore the soup's creamy texture when reheating your Dumplings Curry Soup.

Dumplings Curry Soup

Dumplings Curry Soup Recipe FAQs

How do I select the best dumplings for my soup?
Absolutely! If you’re using fresh dumplings, look for ones that are well-sealed and free of any dark spots. If you’re opting for frozen dumplings, ensure there are no signs of freezer burn, which can impact flavor and texture. Check the expiration date to guarantee freshness!

What’s the best way to store leftover Dumplings Curry Soup?
After enjoying this delightful dish, store any leftovers in a sealed container in the refrigerator for up to 3 days. Make sure the soup has cooled completely before sealing to preserve its flavor. When reheating, use low heat on the stove to gently warm it up.

Can I freeze Dumplings Curry Soup?
Very! To freeze your soup, use freezer-safe containers or bags. Portion it into individual servings for easy thawing, and make sure to remove as much air as possible to avoid freezer burn. Your soup will stay fresh for up to 3 months! When reheating, thaw overnight in the fridge, then gently heat on the stove, adding a bit of broth if it thickens too much during storage.

What should I do if my soup tastes bland?
Don’t fret! A simple way to boost the flavor is to add a pinch of salt and pepper gradually, tasting as you go. In addition, you can enhance the flavor profile by adding a splash of lemon juice, a dash of soy sauce, or even a dollop of chili paste for some heat. Just remember to mix well and adjust slowly—every ingredient matters!

Is this soup safe for those with dietary restrictions?
Absolutely! This Dumplings Curry Soup can be tailored to accommodate various dietary needs. For gluten-free options, choose gluten-free dumplings and ensure your broth is certified gluten-free. If you're dealing with allergies, you can substitute coconut milk with almond or soy milk, but do consider the nut allergies of those you're serving. Always check labels to be sure everyone can enjoy a comforting bowl!

Dumplings Curry Soup

Warm and Cozy Dumplings Curry Soup for Easy Comfort Food

Enjoy a comforting bowl of Dumplings Curry Soup with rich flavors and vibrant veggies, perfect for cozy evenings.
Print Recipe Pin Recipe
Prep Time 15 minutes mins
Cook Time 20 minutes mins
Total Time 35 minutes mins
Servings: 4 bowls
Course: Main Dishes
Cuisine: Asian
Calories: 300
Ingredients Equipment Method Nutrition Notes

Ingredients
  

For the Soup Base
  • 1 tablespoon vegetable oil
  • 4 cups broth (chicken or vegetable)
  • 1 cup coconut milk
  • 1 tablespoon curry powder
  • 2 cloves garlic, minced
For the Dumpling Addition
  • 1 cup frozen or fresh dumplings
For the Veggie Boost
  • 1 cup vegetables (e.g., spinach, green beans, or bell peppers)
For Flavor Enhancement
  • to taste salt
  • to taste pepper
For the Finishing Touch
  • optional fresh herbs for garnish

Equipment

  • Large Pot

Method
 

Step-by-Step Instructions for Dumplings Curry Soup
  1. Heat vegetable oil in a large pot over medium heat. Add minced garlic and curry powder, sauté for 1-2 minutes until fragrant.
  2. Pour in broth and coconut milk, stir to combine, increase heat and bring to a gentle simmer for about 5 minutes.
  3. Add dumplings to the broth, ensuring they are fully submerged. Cook for 6-8 minutes until tender.
  4. Stir in your choice of veggies and cook for an additional 3-5 minutes until they are tender.
  5. Season the soup with salt and pepper to taste. Heat through for another minute or two.
  6. Ladle the soup into warm bowls, garnish with fresh herbs if desired, and serve hot.

Nutrition

Serving: 1bowlCalories: 300kcalCarbohydrates: 35gProtein: 10gFat: 15gSaturated Fat: 8gPolyunsaturated Fat: 1gMonounsaturated Fat: 6gCholesterol: 5mgSodium: 600mgPotassium: 450mgFiber: 5gSugar: 3gVitamin A: 50IUVitamin C: 30mgCalcium: 8mgIron: 10mg

Notes

Storage: Refrigerate in an airtight container for up to 3 days; freeze for up to 3 months. Reheat gently with added broth if necessary.

Tried this recipe?

Let us know how it was!

Cozy Up with Amish Snow Day Soup for Ultimate Comfort

December 12, 2025 by grace bellamy Leave a Comment

Snowflakes danced outside, blanketing the world in white, while warmth enveloped my kitchen—I had just the remedy for such a cozy day: Amish Snow Day Soup. This hearty dish is an emotional embrace in a bowl, offering the perfect antidote to the chill with its rich beef broth and vibrant vegetables. What makes this recipe stand out is not only its comforting flavors but also the fact that it’s simple to prepare and perfect for freezing. Whether you’re whipping it up after a long day or freezing a batch for future cravings, this soup will quickly become a family favorite. Are you ready to fill your home with delightful aromas and a sense of nostalgia? Let’s dive into the recipe!

Amish Snow Day Soup

Why is Amish Snow Day Soup a must-try?

Comforting warmth: This soup wraps you in a cozy blanket of flavor, perfect for chilly days.
Hearty ingredients: With ground beef and fresh veggies, it's packed with wholesome goodness.
Quick prep: Ready in just over an hour, this recipe fits into even the busiest schedules.
Freezer-friendly: Make extra and stock your freezer for quick weeknight meals.
Crowd-pleaser: Whether for family dinners or gatherings, it’s a dish everyone will love!

Amish Snow Day Soup Ingredients

• Dive into this heartwarming recipe!

For the Soup Base

  • Vegetable oil – a little oil helps sauté your veggies for deeper flavor.
  • Onion – the aromatic base that adds sweetness and depth.
  • Carrots – bring a pop of color and natural sweetness to the soup.
  • Celery – enhances the flavor profile with its refreshing crunch.
  • Garlic – infuses the dish with a delightful, savory kick.
  • Ground beef – the hearty protein that makes this soup satisfying.

For the Broth

  • Beef broth – using quality broth elevates the richness of the Amish Snow Day Soup.

For the Vegetables

  • Corn – fresh or frozen, it adds sweetness and texture to each spoonful.
  • Green beans – chop them for a burst of green that complements the other flavors.

For Seasoning

  • Dried thyme – its earthy tones pair perfectly with the beef and veggies.
  • Dried parsley – brightens the flavor and adds a fresh finish.
  • Salt – enhances all the other flavors and brings the dish together.
  • Black pepper – adds a hint of heat to every comforting bowl.

Now that you have all the essential Amish Snow Day Soup ingredients, you're ready to warm up your kitchen and create some magic! Let’s move on to the preparation!

Step‑by‑Step Instructions for Amish Snow Day Soup

Step 1: Sauté the Vegetables
In a large pot, heat 1 tablespoon of vegetable oil over medium heat until it shimmers. Add the chopped onion, diced carrots, diced celery, and minced garlic, stirring frequently for about 5-7 minutes until the vegetables soften and the onion turns translucent. This fragrant base is key to the amazing flavors of your Amish Snow Day Soup.

Step 2: Brown the Beef
Add 1 pound of ground beef to the pot, breaking it apart with a wooden spoon. Cook for 6-8 minutes, stirring occasionally, until the beef is browned and no longer pink. As the meat cooks, it will release savory juices that enhance the depth of your soup. Drain any excess fat if necessary.

Step 3: Add the Broth
Pour in 6 cups of beef broth, stirring to combine all the ingredients. Increase the heat to high and bring the mixture to a gentle boil, allowing for 5-6 minutes. This step is crucial as it melds the flavors together, creating a rich base for your Amish Snow Day Soup.

Step 4: Incorporate the Vegetables
Once boiling, add 1 cup of corn and 1 cup of chopped green beans to the pot. Then, sprinkle in 1 teaspoon of dried thyme, 1 teaspoon of dried parsley, 1 teaspoon of salt, and 1 teaspoon of black pepper. Stir well to distribute evenly, and watch as the vibrant colors brighten your soup.

Step 5: Simmer to Perfection
Reduce the heat to low, covering the pot to let your soup simmer gently for 30-40 minutes. This not only allows the flavors to deepen but also helps the vegetables become tender and infused with the savory broth. Occasionally stir and check for doneness; the Amish Snow Day Soup should be hearty yet inviting!

Step 6: Serve Warm
Once the soup has reached your desired flavor and tenderness, ladle the warm Amish Snow Day Soup into bowls. Consider serving it with crusty bread on the side for dipping. Enjoy the comforting warmth that fills both your kitchen and your heart!

Amish Snow Day Soup

Expert Tips for Amish Snow Day Soup

  • Quality Broth Matters: Use good-quality beef broth for a richer flavor. Homemade broth is ideal if you have the time!
  • Don’t Rush Vegetables: Sauté the onions and veggies until tender; this step enhances their natural sweetness and flavor depth in your Amish Snow Day Soup.
  • Watch the Beef: Make sure to break up the ground beef well while cooking. This ensures it browns evenly and infuses the soup with flavor.
  • Simmer Safely: Keep the soup at a low simmer; this prevents overcooking the veggies while allowing flavors to meld beautifully.
  • Season Correctly: Adjust seasoning at the end of cooking. Taste and add more salt or pepper if needed for the perfect balance.

How to Store and Freeze Amish Snow Day Soup

Fridge: Store leftover Amish Snow Day Soup in an airtight container for up to 3 days, ensuring it remains fresh and delicious.

Freezer: For longer storage, freeze the soup in freezer-safe containers for up to 3 months. Thaw overnight in the fridge before reheating.

Reheating: Reheat on the stovetop over low heat for 15-20 minutes, or microwave in a suitable container until warmed through. Stir occasionally for even heating.

Portion Control: Consider freezing in individual servings for quick meals later on; it makes weeknight dinners a breeze!

What to Serve with Amish Snow Day Soup

Warm up your dining table with delightful accompaniments that elevate this nourishing bowl of comfort.

  • Crusty Bread: Perfect for dipping, this hearty bread complements the flavors of the soup and adds a satisfying crunch.
  • Mixed Green Salad: A light salad with fresh greens and a zesty vinaigrette balances the richness of the soup, bringing brightness to your meal.
  • Savory Biscuits: Flaky, buttery biscuits would be a delicious side, offering a delightful contrast in texture and plenty of butter to spread.
  • Garlic Breadsticks: These soft, garlicky breadsticks provide a streetside café vibe, perfect for soaking up that lovely broth.
  • Roasted Root Vegetables: Caramelized veggies like carrots, parsnips, and sweet potatoes add natural sweetness, echoing the soup's hearty flavors.
  • Apple Crisp: A warm, cinnamon-spiced dessert to finish off the meal brings comforting nostalgia, making it a sweet way to end a cozy day.
  • Herbal Tea: A soothing cup of herbal tea, like chamomile or peppermint, will warm you up and leave you feeling relaxed after your meal.

Make Ahead Options

Amish Snow Day Soup is an excellent choice for busy cooks looking to save time during the week! You can chop the vegetables (onion, carrots, celery, and garlic) and store them in an airtight container in the refrigerator for up to 3 days. If you're planning to make the soup itself ahead of time, prepare the entire dish and allow it to cool completely before refrigerating for up to 3 days or freezing for up to 3 months. When ready to serve, just reheat the soup on the stove until it’s warmed through, stirring occasionally to maintain consistency. This way, you'll enjoy the same comforting flavors with minimal effort when mealtime rolls around!

Amish Snow Day Soup Variations

Embrace your creativity in the kitchen and customize this soup to suit your taste buds!

  • Vegetarian Version: Swap ground beef for lentils or chickpeas for a protein-packed, meat-free delight. The heartiness of the lentils will make you forget all about meat!

  • Spicy Kick: Add a tablespoon of red pepper flakes or fresh jalapeños to the soup while sautéing the vegetables for a flavorful heat that warms you from the inside out. It’s perfect for those who love a little fire in their dish!

  • Creamy Twist: Stir in a splash of heavy cream or coconut milk right before serving to deepen the flavors and provide a rich, comforting texture. This variation offers a luxurious twist that elevates the entire dish.

  • Extra Veggies: Feel free to toss in additional vegetables like zucchini or bell peppers for added nutrition and texture. The more colors, the better – and the taste will only improve!

  • Herbaceous Infusion: Fresh herbs like oregano or basil can be added during simmering to bring fresh, vibrant flavors to the pot. Don’t be shy – a handful of fresh herbs makes a world of difference!

  • Sourdough Croutons: Top each bowl with homemade sourdough croutons for added crunch and flavor. Simply toss cubes of bread with olive oil and seasoning, then bake until crispy. Crispy contrast in every bite!

  • Instant Pot Friendly: You can make this soup in an Instant Pot for even quicker prep and cooking time. Just sauté your veggies in the pot, add other ingredients, and cook on high pressure for about 15 minutes. Convenience meets deliciousness!

  • Smoky Flavor: Add a smoky twist with smoked paprika or a splash of liquid smoke to the broth. It perfectly complements the beef’s richness and adds a delightful depth of flavor to your soup.

Exploring these variations not only makes this Amish Snow Day Soup your own but also elevates the experience of each comforting bowl! Don't forget to check out Expert Tips for Amish Snow Day Soup for more helpful hints to perfect your meal.

Amish Snow Day Soup

Amish Snow Day Soup Recipe FAQs

What type of beef is best for Amish Snow Day Soup?
Absolutely! For this recipe, I recommend using ground beef with a fat content of around 80% lean to 20% fat. This blend ensures your soup is rich and flavorful while keeping it comforting and hearty. If you're looking for a lighter option, ground turkey or chicken can also work beautifully!

How should I store leftovers of Amish Snow Day Soup?
Very simple! Store your leftover soup in an airtight container in the refrigerator for up to 3 days. Make sure it cools down before placing it directly in the fridge to maintain optimal freshness.

Can I freeze Amish Snow Day Soup?
Definitely! This soup freezes wonderfully. I suggest portioning it into freezer-safe containers or resealable bags, squeezing out as much air as possible before sealing. It can be kept in the freezer for up to 3 months. To reheat, simply thaw overnight in the refrigerator and heat on the stovetop over low heat or in the microwave until piping hot.

What if I don't have fresh vegetables? Can I use frozen ones instead?
Absolutely! I often use frozen vegetables like corn and green beans when I’m in a pinch, and they perform just as beautifully in the Amish Snow Day Soup. Just remember to add them frozen without thawing, as they’ll help cool the pot and may require a few extra minutes to fully heat through.

How can I adjust the seasoning if it's too bland?
If you find your soup could use a little more flavor, start by adding an extra pinch of salt or pepper. Taste after each addition to avoid over-seasoning. Alternatively, a splash of Worcestershire sauce or a sprinkle of your favorite herbs can take the flavors up a notch without overwhelming the dish. Enjoy personalizing your Amish Snow Day Soup!

Is this soup suitable for freezing ahead of time?
Absolutely! It’s one of my go-to meal prep recipes. Just make sure to let the soup cool to room temperature before transferring it to freezer-safe containers. You can even make double the batch to stock your freezer—perfect for those busy weeknights when you crave that warm, hearty goodness!

Amish Snow Day Soup

Cozy Up with Amish Snow Day Soup for Ultimate Comfort

Amish Snow Day Soup is a comforting dish perfect for chilly days, packed with rich flavors and healthy ingredients.
Print Recipe Pin Recipe
Prep Time 15 minutes mins
Cook Time 45 minutes mins
Total Time 1 hour hr
Servings: 6 bowls
Course: Main Dishes
Cuisine: Amish
Calories: 320
Ingredients Equipment Method Nutrition Notes

Ingredients
  

For the Soup Base
  • 1 tablespoon vegetable oil a little oil helps sauté your veggies for deeper flavor
  • 1 medium onion the aromatic base that adds sweetness and depth
  • 2 medium carrots bring a pop of color and natural sweetness to the soup
  • 2 stalks celery enhances the flavor profile with its refreshing crunch
  • 2 cloves garlic infuses the dish with a delightful, savory kick
  • 1 pound ground beef the hearty protein that makes this soup satisfying
For the Broth
  • 6 cups beef broth using quality broth elevates the richness of the soup
For the Vegetables
  • 1 cup corn fresh or frozen adds sweetness and texture
  • 1 cup green beans chop for a burst of green that complements other flavors
For Seasoning
  • 1 teaspoon dried thyme its earthy tones pair perfectly with the beef and veggies
  • 1 teaspoon dried parsley brightens the flavor and adds a fresh finish
  • 1 teaspoon salt enhances all the other flavors
  • 1 teaspoon black pepper adds a hint of heat to every comforting bowl

Equipment

  • Large Pot

Method
 

Step-by-Step Instructions
  1. In a large pot, heat vegetable oil over medium heat until it shimmers. Add the chopped onion, diced carrots, diced celery, and minced garlic, stirring frequently for about 5-7 minutes until the vegetables soften and the onion turns translucent.
  2. Add ground beef to the pot, breaking it apart with a wooden spoon. Cook for 6-8 minutes, stirring occasionally, until browned and no longer pink.
  3. Pour in beef broth, stirring to combine. Increase heat to high and bring to a gentle boil for 5-6 minutes.
  4. Once boiling, add corn and chopped green beans. Sprinkle in dried thyme, dried parsley, salt, and black pepper. Stir well to distribute evenly.
  5. Reduce heat to low, cover pot, and let soup simmer gently for 30-40 minutes.
  6. Ladle warm soup into bowls and serve, ideally with crusty bread for dipping.

Nutrition

Serving: 1bowlCalories: 320kcalCarbohydrates: 27gProtein: 22gFat: 14gSaturated Fat: 5gPolyunsaturated Fat: 1gMonounsaturated Fat: 7gCholesterol: 70mgSodium: 800mgPotassium: 600mgFiber: 4gSugar: 4gVitamin A: 500IUVitamin C: 10mgCalcium: 50mgIron: 3mg

Notes

Use good-quality beef broth for a richer flavor. Letting the vegetables sauté enhances their natural sweetness.

Tried this recipe?

Let us know how it was!

Irresistibly Creamy Banana Pudding That Reminds You of Home

December 12, 2025 by grace bellamy Leave a Comment

There’s something delightfully enchanting about the way certain foods can transport us to our childhood, isn’t there? One bite of this Old-Fashioned Homemade Banana Pudding and I’m instantly back in my grandmother's cozy kitchen, where every spoonful was served with a side of love. This recipe not only brings comfort to our taste buds but also offers a quick prep time, making it a perfect choice for busy weeknights. With its creamy custard layered over ripe bananas and crispy vanilla wafers, this banana pudding is bound to be a crowd-pleaser at any gathering. So, are you ready to create a dessert that’s as nostalgic as it is delicious? Let’s dive in and bring a taste of tradition to your table!

Banana Pudding

Why is Banana Pudding So Irresistible?

Nostalgic flavors: This recipe takes you on a journey back to your childhood, evoking sweet memories of family gatherings.
Simplicity reigns: With just a few simple ingredients, you can whip up a creamy dessert that impresses without the fuss.
Layered perfection: The combination of soft bananas, crunchy vanilla wafers, and silky custard creates a delightful texture that keeps everyone coming back for more.
Versatile serving: Whether it's a casual weeknight or a festive occasion, this banana pudding is easily adaptable to suit any setting.
Make-ahead magic: Designed to chill, this dish allows you to prepare it in advance, freeing up your time for other important tasks. Dive into a delicious memory with this fantastic old-fashioned banana pudding!

Banana Pudding Ingredients

For the Pudding

  • Milk – 2 cups of whole milk adds a rich creaminess that makes the pudding irresistible.
  • Granulated Sugar – ½ cup sweetens the custard perfectly, balancing the flavors of the bananas.
  • Cornstarch – ⅓ cup thickens the pudding, ensuring it has the right velvety texture.
  • Salt – ¼ teaspoon enhances the sweetness, bringing out the flavors of the pudding.
  • Egg Yolks – 3 large yolks contribute to the pudding's rich flavor and custard-like texture.
  • Unsalted Butter – 2 tablespoons add a velvety smoothness at the end, making it truly decadent.
  • Vanilla Extract – 1 tablespoon infuses the pudding with a lovely aroma and flavor that complements the bananas.

For the Layers

  • Ripe Bananas – 3 bananas need to be perfectly ripe to provide the sweetest, most flavorful bites in this classic banana pudding.
  • Vanilla Wafers – 12 ounces offer a delightful crunch that contrasts beautifully with the creamy layers of the pudding.

Step‑by‑Step Instructions for Old-Fashioned Homemade Banana Pudding

Step 1: Prepare the Pudding Base
In a medium saucepan, combine 2 cups milk, ½ cup granulated sugar, ⅓ cup cornstarch, and ¼ teaspoon salt. Heat over medium heat, stirring constantly until the mixture starts to thicken, which should take about 10 minutes. You'll know it's ready when it begins to bubble gently and coats the back of a spoon.

Step 2: Temper the Egg Yolks
While the pudding base is thickening, whisk together 3 large egg yolks in a separate bowl. Gradually add a scoop of the hot pudding mixture to the yolks, whisking vigorously to avoid curdling. This process takes about 2 minutes and will help the yolks adjust to the heat before combining them with the main mixture.

Step 3: Combine the Mixtures
Pour the tempered egg yolks back into the saucepan containing the thickened pudding. Continue cooking on medium-low heat while stirring for about 3–5 minutes, until the custard thickens further and is smooth. You’ll notice it’s ready when it has a creamy consistency and gently clings to the spatula.

Step 4: Add Butter and Vanilla
Remove the saucepan from the heat and stir in 2 tablespoons of unsalted butter and 1 tablespoon of vanilla extract until both are fully melted and incorporated. This step enhances the richness of your banana pudding, making it delightfully creamy and fragrant.

Step 5: Create the Layers
In a ceramic or glass serving dish, start layering your old-fashioned banana pudding. Begin with a layer of vanilla wafers followed by sliced ripe bananas, and then spoon over some of the custard mixture. Repeat this process until all the ingredients are used, making sure to end with a layer of custard on top for that beautiful finish.

Step 6: Chill the Pudding
Once you’ve built your delicious layers, cover the dish with plastic wrap and place it in the refrigerator. Allow the pudding to chill for at least 2 hours before serving. This chilling time helps meld the flavors and ensures a refreshing, creamy texture that everyone will love.

Banana Pudding

Banana Pudding Variations & Substitutions

Feel free to customize your banana pudding for a delightful twist that tickles your taste buds!

  • Dairy-Free: Substitute the milk with almond or coconut milk for a lighter version that’s still creamy.
  • Sugar-Free: Use a sugar substitute like stevia or erythritol to satisfy sweet cravings without added sugar.
  • Flavor Infusion: Add a splash of rum or bourbon to the custard for a rich depth of flavor, perfect for adult gatherings.
  • Chocolate Twist: Mix in cocoa powder or layer with chocolate wafers for a luscious chocolate-banana fusion that everyone will love.
  • Nutty Crunch: Sprinkle chopped nuts, like walnuts or pecans, between the layers for an added crunch that complements the creamy pudding beautifully.
  • Fruit Addition: Layer in chopped strawberries or blueberries alongside the bananas for a vibrant burst of flavor and color.
  • Spiced Up: Incorporate a pinch of cinnamon or nutmeg in the custard for a warm, cozy spice that dances on your palate.
  • Banana Alternatives: Try using other fruits, such as peaches or mangoes, when bananas aren't in season for a fresh, fruity twist.

No matter how you choose to adapt your banana pudding, each version will create new memories and moments around the table. Enjoy!

What to Serve with Old-Fashioned Homemade Banana Pudding

Creating a memorable meal goes beyond just dessert—it’s about building beautiful moments around the table.

  • Whipped Cream: The light, airy texture of freshly whipped cream adds a delightful contrast to the creamy banana pudding.
  • Espresso or Coffee: A warm cup brings out the sweetness of the pudding, creating a comforting pairing that's perfect for any time of day.
  • Chocolate Chip Cookies: The slight crunch and sweetness of cookies balance beautifully with the softness of banana pudding, making a dynamic duo.
  • Fresh Berries: A handful of tart raspberries or strawberries provides a refreshing burst of color and flavor, enhancing the overall presentation.
  • Peanut Butter Cookies: Their nutty flavor adds a rich, savory twist that complements the sweetness of the banana pudding in an unexpected way.
  • Milkshake: A classic vanilla or chocolate milkshake transforms dessert time into a whimsical treat, perfect for both kids and adults.
  • Caramel Sauce: Drizzling a little homemade caramel on top of each serving elevates the indulgence, creating sweet contrasts with the bananas.
  • Pineapple Slices: The juicy, tropical flavor of pineapple offers a refreshing surprise and balances the richness of the custard perfectly.
  • Vanilla Ice Cream: A scoop of ice cream alongside warm banana pudding turns it into a sundae-style treat, adding creamy loveliness to each bite.

Expert Tips for the Best Banana Pudding

• Perfectly Ripe Bananas: Use bananas that are ripe but not overripe to ensure a sweet flavor without any brown spots.

• Don’t Rush the Cooking: Stir continuously while cooking the pudding on medium heat to prevent lumps and ensure a smooth, velvety texture.

• Temper the Yolks Carefully: Gradually introducing hot pudding into the egg yolks is key to avoiding curdling. Whisk vigorously for the best results.

• Chill Thoroughly: Allow the banana pudding to chill for a minimum of 2 hours. This time is essential for flavors to develop and achieve a creamy consistency.

• Layer with Care: When assembling, make sure to completely coat the bananas with custard to prevent browning and maintain a fresh look.

• Store Properly: If you have leftovers, cover them tightly and store in the refrigerator for up to 2 days, but be aware the wafers may lose their crunch.

Make Ahead Options

These delightful Old-Fashioned Homemade Banana Pudding layers are perfect for meal prep enthusiasts! You can prepare the creamy custard up to 24 hours in advance; simply follow the recipe through to the layering step. To maintain quality, wait to slice the bananas and layer them with the custard until just before serving—this keeps them fresh and prevents browning. When you're ready to impress your family or guests, simply layer the sliced bananas with the custard and vanilla wafers, then refrigerate for a final chilling of at least 2 hours. With this make ahead approach, you'll enjoy restaurant-quality banana pudding with minimal effort, freeing up precious time for other tasks!

How to Store and Freeze Banana Pudding

Fridge: Store your banana pudding in an airtight container for up to 2 days. Make sure it's well-covered to prevent the bananas from browning and to keep the layers intact.

Freezer: Banana pudding can be frozen, but keep in mind that the texture may change. Freeze for up to 1 month in a tightly sealed container. Thaw in the fridge overnight before serving.

Reheating: It's not recommended to reheat banana pudding, as it is best served chilled. If desired, you can briefly chill the pudding again for a refreshing treat.

Leftovers: To maintain crunch, if you plan to store leftovers, consider keeping the vanilla wafers separate until you're ready to serve for the best texture.

Banana Pudding

Old-Fashioned Homemade Banana Pudding Recipe FAQs

What type of bananas should I use for banana pudding?
Absolutely, you want to use perfectly ripe bananas! Look for ones that are bright yellow with a few small brown spots. They should be firm but yield slightly when pressed—this ensures they're sweet and flavorful without being overly mushy.

How long can I store banana pudding in the fridge?
Banana pudding can be stored in an airtight container in the refrigerator for up to 2 days. To keep the bananas from browning, make sure the pudding is tightly covered and avoid exposing it to air. The longer it sits, the more the wafers may lose their crunch, so it's best enjoyed fresh!

Can I freeze banana pudding?
Yes, you can freeze banana pudding, but keep in mind that the texture might change slightly once thawed. To freeze, scoop your banana pudding into a tightly sealed container and place it in the freezer for up to 1 month. When you're ready to enjoy it, transfer it to the refrigerator to thaw overnight—this helps it regain some of its creamy consistency.

What should I do if my pudding doesn’t thicken properly?
If your pudding isn’t thickening after cooking, there are a couple of things you can check. First, make sure you're cooking over medium heat and stirring constantly. If you notice lumps, you can whisk it vigorously to help break them up. If it still isn’t thickening after about 10 minutes, you might need to cook it a bit longer. If your base is too thin, you can also create a slurry with a bit of cornstarch and water, adding it back to the pot while continuing to stir until it thickens.

Is this banana pudding recipe safe for pets?
It’s best to avoid feeding banana pudding to pets, especially dogs or cats. While bananas are safe for them to eat in moderation, the sugar and other ingredients in the pudding, like vanilla and eggs, can upset their stomachs or be harmful. Always stick to pet-friendly treats for your furry companions!

Banana Pudding

Irresistibly Creamy Banana Pudding That Reminds You of Home

This banana pudding is a nostalgic dessert bringing you back to childhood with its creamy layers and delightful crunch.
Print Recipe Pin Recipe
Prep Time 15 minutes mins
Cook Time 10 minutes mins
Chilling Time 2 hours hrs
Total Time 2 hours hrs 25 minutes mins
Servings: 6 servings
Course: Dessert
Cuisine: American
Calories: 350
Ingredients Equipment Method Nutrition Notes

Ingredients
  

For the Pudding
  • 2 cups whole milk adds a rich creaminess
  • ½ cup granulated sugar sweetens the custard perfectly
  • ⅓ cup cornstarch thickens the pudding
  • ¼ teaspoon salt enhances the sweetness
  • 3 large egg yolks contributes to rich flavor
  • 2 tablespoons unsalted butter adds velvety smoothness
  • 1 tablespoon vanilla extract infuses the pudding with aroma
For the Layers
  • 3 bananas ripe bananas need to be perfectly ripe
  • 12 ounces vanilla wafers offers delightful crunch

Equipment

  • Medium saucepan
  • Whisk
  • ceramic or glass serving dish

Method
 

Step-by-Step Instructions for Old-Fashioned Homemade Banana Pudding
  1. In a medium saucepan, combine 2 cups milk, ½ cup granulated sugar, ⅓ cup cornstarch, and ¼ teaspoon salt. Heat over medium heat, stirring constantly until thickened, about 10 minutes.
  2. Whisk together 3 large egg yolks in a separate bowl. Gradually add a scoop of the hot pudding mixture to the yolks, whisking vigorously for about 2 minutes.
  3. Pour the tempered egg yolks back into the saucepan. Continue cooking on medium-low heat while stirring for another 3-5 minutes until smooth.
  4. Remove from heat and stir in 2 tablespoons of unsalted butter and 1 tablespoon of vanilla extract until incorporated.
  5. In a serving dish, layer vanilla wafers, sliced bananas, and custard mixture. Repeat until ingredients are used, ending with custard.
  6. Cover with plastic wrap and refrigerate for at least 2 hours before serving.

Nutrition

Serving: 1servingCalories: 350kcalCarbohydrates: 50gProtein: 5gFat: 15gSaturated Fat: 9gPolyunsaturated Fat: 1gMonounsaturated Fat: 5gCholesterol: 220mgSodium: 150mgPotassium: 400mgFiber: 1gSugar: 25gVitamin A: 500IUVitamin C: 10mgCalcium: 150mgIron: 1mg

Notes

Use ripe bananas for the best flavor. Store leftovers in an airtight container for up to 2 days. If desired, keep vanilla wafers separate from the pudding until ready to serve to maintain their crunch.

Tried this recipe?

Let us know how it was!

Deliciously Simple Chicken Ramen for a Cozy Night In

December 12, 2025 by grace bellamy Leave a Comment

As the afternoon sun began to dip, I found myself craving something warm, inviting, and utterly satisfying. That's when I decided to whip up my Simple Chicken Ramen, a dish that effortlessly blends comfort with flavor. This recipe not only comes together in just 35 minutes, making it a perfect weeknight meal, but it’s also family-friendly, ensuring everyone around the table will leave happy. Plus, with a gluten-free option available, it caters to various dietary needs without sacrificing taste. The delightful combination of tender chicken, savory broth, and fresh toppings creates a nourishing bowl that warms both the heart and soul. Are you ready to dive into a bowl of homemade goodness?

Chicken Ramen

Why is Chicken Ramen the ultimate comfort dish?

Simplicity: This recipe is uncomplicated—perfect for cooks of any level, you can enjoy homemade ramen without the fuss.
Flavor Explosion: The blend of chicken broth, soy sauce, and sesame oil creates a delightful taste that’s sure to satisfy your cravings.
Quick and Easy: In just 35 minutes, you can have a steaming bowl ready—ideal for busy weeknights!
Family-Friendly: Kids and adults alike will love customizing their bowls with fresh toppings like green onions and boiled eggs. Try it with a gluten-free option to accommodate everyone at the table. You might also enjoy enhancing your meal with serving suggestions for extra flair!
Versatile: This ramen can be easily tweaked to fit your taste—add your favorite veggies or protein for a personal touch!

Chicken Ramen Ingredients

Discover the essentials for the perfect bowl of homemade comfort!

For the Broth
• 4 cups chicken broth – Use rich homemade broth for the best flavor.
• 1 tablespoon soy sauce – Adds depth and umami to the broth.
• 1 teaspoon sesame oil – A drizzle brings a nutty aroma to your ramen.

For the Chicken
• 2 boneless chicken breasts – Cook until tender, then shred for the perfect texture.

For the Noodles
• 1 pack ramen noodles – Opt for gluten-free noodles if dietary needs require.

For Toppings
• 1 cup fresh toppings – Choose from green onions, boiled eggs, or your favorite vegetables to customize your bowl!

With these chicken ramen ingredients, you’re just a step away from a cozy, satisfying meal that brings everyone together. Enjoy the warmth of home-cooked goodness!

Step‑by‑Step Instructions for Simple Chicken Ramen

Step 1: Prepare the Broth
In a large pot, pour in 4 cups of chicken broth and bring it to a gentle simmer over medium heat. You'll know it's ready when small bubbles begin to break the surface. This flavorful base will set the stage for your delicious Simple Chicken Ramen.

Step 2: Cook the Chicken
Add 2 boneless chicken breasts to the simmering broth. Cook them for about 15-20 minutes, or until they reach an internal temperature of 165°F. As the chicken cooks, it will infuse the broth with savory goodness—just wait until you catch a whiff!

Step 3: Shred the Chicken
Once the chicken is thoroughly cooked, carefully remove it from the pot using tongs. Place it on a cutting board and let it cool for a moment, then shred it into bite-sized pieces with two forks. Return the shredded chicken to the pot, stirring it into the broth.

Step 4: Add Flavor Enhancements
Stir in 1 tablespoon of soy sauce and 1 teaspoon of sesame oil into the pot with the broth and chicken. Allow the mixture to bubble gently for another 2-3 minutes to blend the flavors together beautifully. You’ll start to smell the enticing aroma of your Simple Chicken Ramen!

Step 5: Cook the Ramen Noodles
Next, throw in your ramen noodles directly into the broth. Cook them according to package instructions, typically about 2-4 minutes, stirring occasionally to separate them. Watch as they soften and soak up the flavorful broth!

Step 6: Serve and Garnish
Once the noodles are cooked through, serve your Simple Chicken Ramen in warm bowls. Top each bowl with your choice of fresh ingredients, such as green onions, boiled eggs, and vibrant vegetables. Each colorful addition will enhance the dish, making it visually inviting and absolutely delicious!

Chicken Ramen

Make Ahead Options

These Simple Chicken Ramen are perfect for meal prep enthusiasts! You can prepare the chicken broth and shredded chicken up to 3 days in advance—simply store them in separate airtight containers in the refrigerator to maintain their textures and flavors. The ramen noodles can be cooked ahead of time but are best added fresh just before serving to avoid mushiness. When ready to enjoy your ramen, simply reheat the broth and chicken on the stove, and cook the noodles for 2-4 minutes. With these make-ahead options, you'll have a delicious, comforting meal ready for busy weeknights without compromising on taste!

Chicken Ramen Variations to Try

Feel free to explore these delightful twists that will take your comforting bowl of ramen to new heights!

  • Spicy Kick: Add a teaspoon of chili paste or sriracha for a heat that warms you to your core. Spice lovers will appreciate how this simple addition transforms flavors!

  • Vegetarian Delight: Replace chicken with tofu or tempeh for a hearty vegetarian alternative. This swap brings protein and enhances the dish’s texture without losing its comforting essence.

  • Gluten-Free Noodles: Use rice noodles or gluten-free ramen to enjoy this dish without gluten. Everyone can savor a bowl of warmth, regardless of dietary needs!

  • Creamy Topping: Stir in a dollop of miso paste into the broth for a creamy texture and rich flavor. This variation adds depth and complexity, giving you a delightful twist on the classic.

  • Rich Umami: Introduce shiitake mushrooms for an earthy flavor boost. Not only do they enrich the broth, but they also provide added nutrients—a perfect gourmet touch!

  • Herbal Freshness: Toss in a handful of fresh spinach or bok choy just before serving. This vibrant addition brightens the dish, making it both nutritious and visually stunning.

  • Noodle Swap: Try udon noodles instead of ramen for a heartier experience. The thicker noodles provide a delightful chewiness that pairs beautifully with the savory broth.

  • Protein Variety: Mix in shrimp or leftover rotisserie chicken for a flavorful protein upgrade. These additions elevate your ramen, inviting all to dig in happily!

With these variations, your Chicken Ramen can become a signature dish that always brings joy and warmth to your table. Embrace the fun of mixing and matching until you find your perfect bowl!

Expert Tips for the Best Chicken Ramen

  • Broth Quality: Use homemade chicken broth for a richer flavor. Store-bought options can be high in sodium, so choose low-sodium varieties if possible.
  • Avoid Overcooking: Don’t let the chicken sit in the broth too long; it can become dry. Aim for an internal temp of 165°F, then shred and return it to the pot.
  • Noodle Timing: Add ramen noodles towards the end of cooking to prevent them from getting too mushy. They should be tender yet firm, soaking up the delicious broth without losing texture.
  • Customize Toppings: Get creative with your toppings! Adding varied textures like crunchy vegetables or rich boiled eggs can elevate your chicken ramen to new heights.
  • Gluten-Free Alternative: For a gluten-free option, look for rice noodles or gluten-free ramen noodles that can blend seamlessly with the flavors of this dish.

Storage Tips for Chicken Ramen

Fridge: Store leftover Chicken Ramen in an airtight container for up to 3 days. Keep broth and noodles separate to maintain texture and flavor.

Freezer: Freeze the broth separately in freezer-safe containers for up to 3 months. Noodles are best made fresh, so freeze only if necessary.

Reheating: Reheat the broth gently on the stove or in the microwave until steaming, then add freshly cooked ramen noodles to restore that delicious, comforting texture.

What to Serve with Simple Chicken Ramen

As you savor each slurp of this comforting dish, consider these delightful additions to create a complete meal experience.

  • Steamed Edamame: A light and nutritious side that adds a pop of color and flavor, complementing the savory broth beautifully.

  • Crispy Tempura Vegetables: The light crunch of tempura enhances the overall meal, making for a satisfying contrast to the soft noodles.

  • Spicy Ginger Salad: A refreshing salad with a touch of zing that cleanses the palate and adds a vibrant crunch to your meal.

  • Miso Soup: This warm, umami-rich soup adds depth to your dinner and keeps the comforting vibes flowing throughout the night.

  • Fried Rice: Flavor-packed and filling, fried rice serves as a hearty side dish that pairs perfectly with your Chicken Ramen for an unforgettable meal.

  • Green Tea: A warm cup of green tea helps balance the richness of the ramen, providing a soothing and refreshing drink option.

Enjoy the journey of flavors as you craft the perfect meal around your comforting bowl of Chicken Ramen!

Chicken Ramen

Simple Chicken Ramen Recipe FAQs

How do I select ripe ingredients for my Chicken Ramen?
Absolutely! When choosing your fresh toppings, look for vibrant green onions without any wilting or browning. For vegetables, opt for crisp and colorful options like carrots or spinach; they should feel firm and not have dark spots. If you're adding boiled eggs, pick the freshest ones possible—check the carton for a recent sell-by date for the best quality!

What’s the best way to store leftover Chicken Ramen?
Very good question! For storage, placing your leftover Chicken Ramen in an airtight container will keep it fresh in the fridge for up to 3 days. To maintain the noodles’ perfect texture, it's best to store the broth and noodles separately. Just ensure that each container is sealed well to prevent drying out!

Can I freeze Chicken Ramen?
Yes! You can freeze the broth, but I recommend doing this separately from the noodles. Pour the cooled broth into freezer-safe containers, leaving some room at the top for expansion. It will keep in the freezer for up to 3 months. When you're ready to enjoy some ramen again, thaw the broth in the refrigerator overnight and gently heat it on the stove, adding in freshly cooked noodles for that delightful homemade touch!

What should I do if my Chicken Ramen is too salty?
Very common! If you find your broth too salty, you can dilute it with a bit of water or low-sodium chicken broth to balance the flavor. Another neat trick is to add a peeled potato to the pot while gently simmering; it can absorb some of the saltiness. Just remember to remove the potato once it’s cooked!

Is there a gluten-free option for Chicken Ramen?
Absolutely! You can easily make this dish gluten-free by substituting traditional ramen noodles with rice noodles or gluten-free ramen, which are widely available. This way, everyone can enjoy the comforting taste of Chicken Ramen without any worries. Always check labels for assurance, as some sauces or noodles might contain gluten.

Can my pets enjoy Chicken Ramen?
While it may look tempting, it’s best not to share your Chicken Ramen with pets! The soy sauce and sesame oil can be harmful to them, so it’s better to avoid any human food. However, shredded chicken without seasoning is usually fine for dogs—always double-check with your veterinarian though!

Chicken Ramen

Deliciously Simple Chicken Ramen for a Cozy Night In

This Chicken Ramen recipe is warm, inviting, and family-friendly, perfect for a cozy night in.
Print Recipe Pin Recipe
Prep Time 15 minutes mins
Cook Time 20 minutes mins
Total Time 35 minutes mins
Servings: 4 bowls
Course: Main Dishes
Cuisine: Japanese
Calories: 350
Ingredients Equipment Method Nutrition Notes

Ingredients
  

For the Broth
  • 4 cups chicken broth Use rich homemade broth for the best flavor.
  • 1 tablespoon soy sauce Adds depth and umami to the broth.
  • 1 teaspoon sesame oil A drizzle brings a nutty aroma to your ramen.
For the Chicken
For the Noodles
  • 1 pack ramen noodles Opt for gluten-free noodles if dietary needs require.
For Toppings
  • 1 cup fresh toppings Choose from green onions, boiled eggs, or your favorite vegetables to customize your bowl!

Equipment

  • Large Pot

Method
 

Step-by-Step Instructions
  1. In a large pot, pour in 4 cups of chicken broth and bring it to a gentle simmer over medium heat.
  2. Add 2 boneless chicken breasts to the simmering broth. Cook them for about 15-20 minutes, or until they reach an internal temperature of 165°F.
  3. Once the chicken is thoroughly cooked, carefully remove it from the pot and shred it into bite-sized pieces. Return the shredded chicken to the pot.
  4. Stir in 1 tablespoon of soy sauce and 1 teaspoon of sesame oil into the pot with the broth and chicken. Allow the mixture to bubble gently for another 2-3 minutes.
  5. Next, throw in your ramen noodles directly into the broth. Cook them according to package instructions, about 2-4 minutes.
  6. Once the noodles are cooked through, serve your Simple Chicken Ramen in warm bowls topped with your choice of fresh ingredients.

Nutrition

Serving: 1bowlCalories: 350kcalCarbohydrates: 40gProtein: 25gFat: 10gSaturated Fat: 2gPolyunsaturated Fat: 0.5gMonounsaturated Fat: 4gCholesterol: 75mgSodium: 900mgPotassium: 500mgFiber: 2gSugar: 2gVitamin A: 500IUVitamin C: 5mgCalcium: 50mgIron: 2mg

Notes

Use homemade chicken broth for a richer flavor. Customize toppings for added texture and taste.

Tried this recipe?

Let us know how it was!

Savory Ground Beef Stovetop Chili for Cozy Nights In

December 12, 2025 by grace bellamy Leave a Comment

The rich, warm aroma of simmering spices fills my kitchen as I prep for one of my favorite weeknight dinners: Ground Beef Stovetop Chili. This dish is not only a satisfying comfort food but also a delightful way to gather loved ones around the table, creating moments filled with laughter and shared stories. With just 15 minutes of prep time, you'll find satisfaction in this quick and easy recipe that's perfect for those evenings when you want delicious homemade food without the fuss. Each spoonful offers a hearty blend of flavors, making it a sure crowd-pleaser for both family and friends alike. Curious about how to whip up this flavorful chili? Grab your ingredients and let’s dive in!

Ground Beef Stovetop Chili

Why Is This Chili So Irresistible?

Bold flavors of spices come together effortlessly, creating a comforting warmth that wraps you in a cozy hug. Easy to make, this Ground Beef Stovetop Chili takes only 15 minutes of prep time, making it perfect for busy weeknights. Crowd-pleaser status is assured as it serves 4-6, ideal for gathering friends or family around the table. Versatile too, enjoy it over rice, in a bowl, or with crusty bread for a filling meal. Plus, leftovers can be refrigerated up to 3 days or even frozen for future easy dinners! If you’re craving more hearty meals, you might also enjoy my Cheesy Ground Beef or Sweet Chili Chicken.

Ground Beef Stovetop Chili Ingredients

Get ready for a flavor explosion with these essential ingredients!

For the Chili Base
• 1 pound ground beef – a juicy foundation that brings rich flavor and texture.
• 1 cup chopped onions – adds sweetness and depth to your chili.
• 1 cup chopped bell peppers – provides a vibrant crunch and color.
• 2 cloves garlic, minced – infuses your dish with aromatic goodness.
• 1 can (15 ounces) diced tomatoes – offers a tangy zest that balances the flavors.
• 1 can (15 ounces) kidney beans, rinsed and drained – enriches the chili with protein and fiber.
• 1 cup beef broth – keeps the chili moist and enhances its savory profile.

For the Spice Blend
• 1 tablespoon chili powder – delivers that signature spicy kick that defines this Ground Beef Stovetop Chili.
• 1 teaspoon cumin – infuses warmth and earthiness into the mix.
• 1 teaspoon paprika – adds a sweet, smoky flavor for depth.
• ½ teaspoon cayenne pepper – gives an extra heat boost for the spice lovers!
• ½ teaspoon salt – essential for enhancing all the delicious flavors.

For Cooking
• 1 tablespoon olive oil – helps to sauté the vegetables and beef to perfection.

Step‑by‑Step Instructions for Ground Beef Stovetop Chili

Step 1: Sauté the Vegetables
In a large pot, heat 1 tablespoon of olive oil over medium heat until shimmering. Add 1 cup of chopped onions and 1 cup of chopped bell peppers, sautéing for about 5 minutes until they become tender and translucent. Stir occasionally to prevent sticking and release their natural sweetness, creating a flavorful base for your Ground Beef Stovetop Chili.

Step 2: Cook the Ground Beef
Next, add 2 cloves of minced garlic and 1 pound of ground beef to the pot. Break the meat apart with a wooden spoon and cook for approximately 6-8 minutes, or until the beef is browned and no longer pink. Keep stirring until everything is evenly cooked, allowing the rich flavors to meld together beautifully while the aroma fills your kitchen.

Step 3: Toast the Spices
Once the beef is cooked through, stir in 1 tablespoon of chili powder, 1 teaspoon of cumin, 1 teaspoon of paprika, ½ teaspoon of cayenne pepper, and ½ teaspoon of salt. Let the spices cook for about 1 minute, allowing them to toast and develop their flavors. You’ll know it’s ready when the mixture is fragrant, which will elevate the taste of your Ground Beef Stovetop Chili.

Step 4: Add the Tomato and Beans
Pour in 1 can (15 ounces) of diced tomatoes, including the juices, along with 1 can (15 ounces) of kidney beans that have been rinsed and drained. Add 1 cup of beef broth as well. Stir everything together thoroughly to ensure a uniform mixture of ingredients, creating a vibrant color that invites you to dig in.

Step 5: Simmer to Perfection
Bring the chili mixture to a gentle simmer over medium heat. Once simmering, reduce the heat to low, allowing it to cook uncovered for 30-40 minutes, stirring occasionally. Watch as the flavors deepen and the chili thickens, creating a comforting and hearty consistency that embodies what a good Ground Beef Stovetop Chili should be.

Step 6: Final Taste Adjustment
After the simmering time is up, taste the chili and adjust the seasoning if necessary, adding more salt or spices according to your preference. Let it rest for a few minutes to enhance the flavors further, and prepare for serving this delicious Ground Beef Stovetop Chili that’s sure to warm your heart and satisfy your hunger.

Ground Beef Stovetop Chili

Tips for the Best Ground Beef Stovetop Chili

  • Don’t Rush the Sauté: Sauté the onions and bell peppers until they’re fully softened. This builds a flavorful base for your Ground Beef Stovetop Chili.

  • Cook Beef Thoroughly: Ensure the ground beef is fully browned. Undercooked meat can lead to a less appetizing texture and flavor.

  • Spice It Up: If you prefer less heat, adjust the cayenne pepper to your liking. Remember, you can always add more spice, but it’s hard to tone it down!

  • Simmer for Flavor: Allow the chili to simmer for the full 30-40 minutes. This patience pays off, as flavors meld beautifully with time.

  • Taste Before Serving: Always taste your chili before serving. Adjust seasoning as needed for a personalized flavor just right for your family.

How to Store and Freeze Ground Beef Stovetop Chili

Fridge: Store leftover Ground Beef Stovetop Chili in an airtight container for up to 3 days. This keeps it fresh while you enjoy those delightful flavors over several days.

Freezer: If you’d like to keep it longer, freeze the chili for up to 3 months. Use individual portions in freezer-safe bags to make reheating easier later.

Reheating: When you're ready to enjoy, thaw in the fridge overnight and reheat on the stove over low heat until warmed through, stirring occasionally for even heating.

Airtight Containers: For the best results, ensure your containers are airtight to prevent freezer burn and maintain the chili’s rich taste.

Make Ahead Options

These savory Ground Beef Stovetop Chili portions are perfect for meal prep enthusiasts! You can chop your onions, bell peppers, and mince your garlic up to 24 hours in advance, storing them in an airtight container in the refrigerator. The spice blend can also be pre-mixed and stored separately, ensuring your flavors are ready to go. When you're ready to serve, simply cook the beef and add the prepped ingredients, then follow the final steps of the recipe for a quick and hearty dish. This makes busy weeknights a breeze and keeps your chili just as delicious!

What to Serve with Ground Beef Stovetop Chili

As you relish each warm and hearty bite of chili, why not complement it with delightful sides that elevate your meal experience?

  • Creamy Cornbread: This rich, buttery bread captures the essence of comfort food, making it a perfect pairing with the spicy chili.
  • Zesty Coleslaw: A refreshing crunch balances the warmth of the chili, adding a cheerful, tangy element to your dinner plate.
  • Rice Pilaf: Fluffy rice serves as a subtle backdrop, soaking up the robust flavors of the chili for a satisfying meal.
  • Guacamole: Creamy and rich, this avocado dip adds a cooling contrast that enhances every spoonful of the chili.
  • Spicy Nachos: Crispy tortilla chips smothered in cheese and jalapeños add an exciting crunch, perfect for scooping up that savory chili.
  • Cilantro Lime Rice: The bright, zesty flavors of cilantro and lime enliven the richness of the chili, creating a delightful harmony.
  • Hot Sauce: A few dashes of hot sauce can take the chili to another level, adding individuality and personal flair to each bowl.
  • Chocolate Brownies: For dessert, these fudgy treats offer a sweet finish, balancing the spice of the chili with velvety chocolate goodness.
  • Margaritas: A refreshing drink option that brings a festive touch to your meal, complementing the flavors beautifully.
  • Iced Tea: A cool glass of iced tea provides a soothing complement, making it a wonderful beverage choice for this cozy dish.

Ground Beef Stovetop Chili Variations

Feel free to unleash your creativity and make this Ground Beef Stovetop Chili uniquely yours with these fun twists!

  • Vegetarian: Substitute ground beef with lentils or chickpeas for a hearty, plant-based alternative. Perfect for those who love veggie goodness!

  • Spicy Kick: Add fresh jalapeños or additional cayenne pepper to amp up the heat. This will wake up your taste buds with every sip!

  • Smoky Flavor: Incorporate a tablespoon of smoked paprika to introduce a delightful smoky undertone that makes each bite truly memorable.

  • Creamy Delight: Stir in a splash of heavy cream or cream cheese just before serving to give your chili a luscious, creamy texture.

  • Tex-Mex Style: Top with shredded cheese, diced avocado, and cilantro for a fresh, vibrant spin on your classic chili. It turns an ordinary bowl into a fiesta!

  • Bean Variety: Swap kidney beans with black beans or pinto beans, or mix them for a surprising medley of flavors and textures.

  • Sweet & Spicy: Add a tablespoon of brown sugar or maple syrup to balance the spices with a touch of sweetness. This contrast makes your chili irresistibly complex.

  • Herb Infusion: Fresh herbs like cilantro or parsley stirred in right before serving can brighten the dish and add a refreshing finish.

Each of these variations allows you to customize your Ground Beef Stovetop Chili, ensuring every bowl is just right for you. If you want more hearty ideas, why not explore my Sweet Chili Chicken or Slow Cooker Barbequed Beef Ribs? Enjoy the cooking adventure!

Ground Beef Stovetop Chili

Ground Beef Stovetop Chili Recipe FAQs

How do I choose the best ground beef for my chili?
Absolutely! When selecting ground beef, look for 80/20 or 85/15 lean-to-fat ratios. This blend keeps your chili juicy without being excessively greasy. Freshness is key, so if you see bright red color and no excessive packaging liquid, you're in good shape!

How should I store leftover Ground Beef Stovetop Chili?
For optimal freshness, store your chili in an airtight container in the refrigerator for up to 3 days. I often recommend labeling it with the date for easy meal planning. If you want to keep it longer, you can freeze the chili for up to 3 months—just make sure it cools down before transferring to a freezer-safe bag.

Can I freeze my Ground Beef Stovetop Chili, and how?
Yes, indeed! To freeze your chili, let it cool completely. Portion it into freezer-safe bags or containers, leaving some space for expansion. Seal tightly to prevent freezer burn and label with the date. When you’re ready to enjoy it again, simply thaw in the fridge overnight, and reheat on the stove over low heat, stirring to warm evenly.

What can I do if my chili turns out too spicy?
If you find your chili a bit too fiery, don't worry! One effective way to tone down the heat is to add a spoonful of sugar or a splash of cream to mellow the spice. Alternatively, you can incorporate additional kidney beans or diced tomatoes to dilute the spiciness—this also enhances the texture!

Is Ground Beef Stovetop Chili safe for pets?
It’s best to avoid giving your pets any chili—even unseasoned ground beef can pose tummy troubles for them. Ingredients like onions and garlic can be toxic to dogs and cats. Sticking to a plain meat mixture or vet-approved pet foods is always the safest route.

How can I enhance the flavor of my Ground Beef Stovetop Chili?
To elevate your chili, consider browning the beef with a splash of Worcestershire sauce or some chopped chipotle peppers in adobo for an extra smoky flavor. Fresh herbs like cilantro or a squeeze of lime just before serving can brighten the dish even more, making it a delightful treat for everyone at the table!

Ground Beef Stovetop Chili

Savory Ground Beef Stovetop Chili for Cozy Nights In

Enjoy a delicious Ground Beef Stovetop Chili that's perfect for cozy nights in, filling gatherings with warmth and great flavor.
Print Recipe Pin Recipe
Prep Time 15 minutes mins
Cook Time 40 minutes mins
Resting Time 5 minutes mins
Total Time 1 hour hr
Servings: 6 servings
Course: Main Dishes
Cuisine: American
Calories: 350
Ingredients Equipment Method Nutrition Notes

Ingredients
  

Chili Base
  • 1 pound ground beef a juicy foundation that brings rich flavor and texture
  • 1 cup chopped onions adds sweetness and depth
  • 1 cup chopped bell peppers provides vibrant crunch and color
  • 2 cloves garlic, minced infuses your dish with aromatic goodness
  • 1 can (15 ounces) diced tomatoes offers a tangy zest
  • 1 can (15 ounces) kidney beans, rinsed and drained enriches the chili with protein and fiber
  • 1 cup beef broth keeps the chili moist
Spice Blend
  • 1 tablespoon chili powder delivers the signature spicy kick
  • 1 teaspoon cumin infuses warmth and earthiness
  • 1 teaspoon paprika adds a sweet, smoky flavor
  • ½ teaspoon cayenne pepper gives extra heat
  • ½ teaspoon salt enhances all the delicious flavors
Cooking
  • 1 tablespoon olive oil helps sauté the vegetables and beef

Equipment

  • Large Pot

Method
 

Preparation Steps
  1. In a large pot, heat 1 tablespoon of olive oil over medium heat until shimmering.
  2. Add 1 cup of chopped onions and 1 cup of chopped bell peppers, sauté for about 5 minutes until tender.
  3. Next, add 2 cloves of minced garlic and 1 pound of ground beef to the pot. Cook for 6-8 minutes until browned.
  4. Stir in 1 tablespoon of chili powder, 1 teaspoon cumin, 1 teaspoon paprika, ½ teaspoon cayenne pepper, and ½ teaspoon salt.
  5. Pour in 1 can (15 ounces) of diced tomatoes along with 1 can (15 ounces) of kidney beans, and add 1 cup of beef broth.
  6. Bring to a gentle simmer then reduce heat to low, cooking uncovered for 30-40 minutes, stirring occasionally.
  7. Taste the chili and adjust seasoning if necessary before serving.

Nutrition

Serving: 1cupCalories: 350kcalCarbohydrates: 25gProtein: 28gFat: 15gSaturated Fat: 6gPolyunsaturated Fat: 1gMonounsaturated Fat: 7gCholesterol: 70mgSodium: 800mgPotassium: 800mgFiber: 6gSugar: 4gVitamin A: 1000IUVitamin C: 20mgCalcium: 40mgIron: 3.5mg

Notes

For best results, sauté the vegetables fully and allow the chili to simmer adequately to deepen the flavors.

Tried this recipe?

Let us know how it was!

Cozy Up with Creamy Alfredo Lasagna Soup for Comfort Food Bliss

December 12, 2025 by grace bellamy Leave a Comment

The first time I made Creamy Alfredo Lasagna Soup, my kitchen transformed into a haven of warmth and comfort. It came together so effortlessly; who knew a bit of chicken broth, rich cream, and gooey cheeses could create such a cozy masterpiece? This recipe is not just a delightful bowl of deliciousness; it's a crowd-pleaser that comes together in under an hour, perfect for those busy weeknights or special gatherings with loved ones. As I ladle this creamy soup into bowls, I can't help but smile, knowing it’s like serving a hug in a dish. Curious how to whip up this creamy dream that’s both satisfying and comforting? Let’s dive in!

Creamy Alfredo Lasagna Soup

Why is Creamy Alfredo Lasagna Soup a Must-Try?

Comfort in a Bowl: This recipe brings all the cozy vibes, delivering a classic lasagna experience in a heartwarming soup form.
Rich and Creamy: With a luscious blend of heavy cream and ricotta, every spoonful is pure bliss.
Quick Preparation: Ready in just 50 minutes, it's perfect for busy chefs looking for homemade goodness.
Crowd-Pleasing Delight: Ideal for family gatherings or cozy dinners, everyone will be asking for seconds!
Versatile Comfort Food: Customize it with your favorite proteins or veggies for a personalized touch.
Easy Clean-Up: One-pot cooking means less time washing dishes and more time enjoying your meal! Explore more comforting soups like Chicken Noodle Soup or Tomato Basil Soup to keep your cozy nights going.

Creamy Alfredo Lasagna Soup Ingredients

For the Soup Base
• 4 cups chicken broth – a savory foundation that adds depth to the creamy flavor.
• 2 cups heavy cream – for that rich, velvety texture that makes this soup irresistible.

For the Cheese Mixture
• 1 cup ricotta cheese – adds creaminess and a slight tang that complements the sauces beautifully.
• 1 cup shredded mozzarella cheese – use for both melting into the soup and for topping, lending a gooey goodness.

For the Noodles
• 2 cups cooked lasagna noodles, broken into pieces – bring that classic lasagna texture into each hearty bowl.

For Seasoning
• 1 tablespoon Italian seasoning – enhances the flavors with a delightful herbal note; perfect for a comforting dish like creamy Alfredo lasagna soup.

Make sure to gather these ingredients before diving into this easy and satisfying recipe!

Step‑by‑Step Instructions for Creamy Alfredo Lasagna Soup

Step 1: Prepare the Soup Base
In a large pot, combine 4 cups of chicken broth and 2 cups of heavy cream. Place the pot over medium heat and bring it to a gentle simmer, stirring occasionally. You’ll know it’s ready when little bubbles start to form around the edges, creating a rich and inviting aroma. This creamy base is the heart of your Creamy Alfredo Lasagna Soup.

Step 2: Incorporate the Cheeses
Once the mixture is simmering, stir in 1 cup of ricotta cheese and half of the 1 cup of shredded mozzarella cheese. Mix everything together until the cheeses are fully blended into the cream and broth, creating a smooth and velvety texture, which will enhance the creaminess of your soup. This should take about 2-3 minutes over medium heat.

Step 3: Add the Noodles and Seasonings
Next, add the broken lasagna noodles along with 1 tablespoon of Italian seasoning to your pot. Stir well to combine all ingredients thoroughly, ensuring the noodles are submerged in the creamy soup. Allow this mixture to cook for about 10-12 minutes, or until the noodles are tender and cooked through, stirring occasionally to prevent sticking.

Step 4: Serve and Garnish
When the noodles are perfectly tender, ladle the steaming Creamy Alfredo Lasagna Soup into bowls. Sprinkle the remaining mozzarella cheese generously over the top of each serving. The cheese will melt beautifully from the heat of the soup, creating a delightful gooey topping. Serve it hot, and enjoy the comforting flavors that fill your kitchen!

Creamy Alfredo Lasagna Soup

Expert Tips for Creamy Alfredo Lasagna Soup

  • Use Fresh Ingredients: Fresh mozzarella and ricotta cheese enhance flavor and texture. Avoid pre-shredded cheese for a creamier soup.

  • Avoid Overcooking Noodles: Cook the noodles just until tender. They’ll continue to absorb the soup’s liquid if left too long, leading to a mushy texture.

  • Control Thickness: To adjust the thickness, add more chicken broth or cream based on your preferred consistency. This will impact the final flavor, so balance is key.

  • Season to Taste: Don’t hesitate to taste and adjust seasonings as you cook. A pinch more Italian seasoning can elevate your creamy Alfredo lasagna soup.

  • Storage Tips: If you have leftovers, store noodles separately from the soup. This helps maintain the soup's creaminess and prevents the noodles from getting soggy.

These tips will help ensure your Creamy Alfredo Lasagna Soup turns out perfectly each time!

Make Ahead Options

These Creamy Alfredo Lasagna Soup preparations are perfect for those busy nights when you crave comfort without spending too much time in the kitchen! You can prepare the soup base (chicken broth, heavy cream, ricotta cheese, and half of the mozzarella) up to 24 hours in advance. Simply store it in an airtight container in the refrigerator to maintain its creamy texture. Cook the lasagna noodles separately, and keep them refrigerated until you’re ready to combine everything. When you’re set to serve, reheat the soup gently, add the noodles and Italian seasoning, and finish by sprinkling on the remaining mozzarella. This way, your soup will be just as delicious as when freshly made, giving you the perfect weeknight meal with minimal effort!

What to Serve with Creamy Alfredo Lasagna Soup

As you savor each spoonful of this creamy delight, consider these perfect pairings to elevate your meal experience.

  • Garlic Bread: The crispy, buttery texture beautifully contrasts the smooth soup, making it a perfect accompaniment to soak up every last drop.

  • Caesar Salad: Crisp romaine, crunchy croutons, and tangy dressing provide a refreshing balance to the richness of the soup.

  • Roasted Vegetables: A medley of colorful, caramelized veggies adds earthy flavors and a satisfying bite, enhancing the heartiness of the dish.

  • Bruschetta: Tomato, basil, and garlic on toasted bread offer a fresh pop of flavor that complements the creamy richness wonderfully.

  • Wine Pairing: A light white wine, such as Pinot Grigio, lifts the creamy profile of the soup, balancing indulgence with refreshing acidity.

  • Lemon Sorbet: A scoop of this fruity treat cleanses the palate and provides a refreshing end to your comforting meal experience.

Each of these pairings adds a unique touch, allowing you to create a warm and inviting dining experience that your loved ones will cherish.

How to Store and Freeze Creamy Alfredo Lasagna Soup

Fridge: Store any leftover Creamy Alfredo Lasagna Soup in an airtight container for up to 3 days, preserving its creamy goodness.

Freezer: For longer storage, freeze the soup in freezer-safe containers for up to 3 months. Leave some space at the top, as the soup will expand when frozen.

Thawing: When ready to enjoy, thaw in the refrigerator overnight. Reheat on the stove over low heat, stirring occasionally until hot throughout.

Reheating: Avoid boiling the soup when reheating, as this can cause the cream to separate. Gentle warming is key to maintaining that luscious texture!

Creamy Alfredo Lasagna Soup Variations

Feel free to personalize this cozy soup to match your tastes and dietary needs!

  • Dairy-Free: Substitute heavy cream with coconut cream and ricotta with cashew cream for a creamy vegan delight.
    For a lighter twist, use almond milk as your soup base, adding more spices to maintain rich flavor.

  • Protein-Packed: Add cooked chicken or turkey for extra heartiness.
    Simply mix in shredded rotisserie chicken just before serving for a quick protein boost that will satisfy everyone at the table.

  • Vegetable Boost: Toss in seasonal veggies like spinach, zucchini, or bell peppers.
    This adds delightful color and nutrition while complementing the soup's creamy texture beautifully.

  • Whole Wheat Noodles: Swap traditional lasagna noodles for whole wheat or gluten-free varieties.
    This makes the dish a bit healthier while still capturing all that comforting goodness.

  • Extra Flavor Punch: Incorporate sautéed garlic or caramelized onions for deep umami flavor.
    These small additions can transform your soup, making each spoonful a flavorful experience.

  • Spicy Kick: Add a pinch of red pepper flakes for a warm, zesty flavor.
    This slight heat elevates the dish from the typical comfort food to something exciting.

  • Herb Infusion: Swap Italian seasoning for fresh herbs like basil or parsley for a vibrant taste.
    Freshly chopped herbs can really brighten up the creamy richness of the soup.

  • Creamy Spinach: Blend baby spinach into the soup for a nutrient boost.
    This not only enhances the color but adds a subtle earthy flavor that pairs wonderfully with the creaminess.

Each of these variations brings a unique twist to your Creamy Alfredo Lasagna Soup. Don't hesitate to mix and match to create your perfect bowl of comfort! For additional ideas, consider serving it alongside a warm Garlic Bread or a refreshing Caesar Salad to round out your cozy meal!

Creamy Alfredo Lasagna Soup

Creamy Alfredo Lasagna Soup Recipe FAQs

What type of chicken broth should I use for this recipe?
Absolutely! I recommend using a low-sodium chicken broth to control the saltiness of your Creamy Alfredo Lasagna Soup. If you prefer homemade, that's even better! A nice golden broth from a rotisserie chicken can enhance the flavors beautifully.

How long can I store leftovers of Creamy Alfredo Lasagna Soup?
You can store any leftover Creamy Alfredo Lasagna Soup in an airtight container in the refrigerator for up to 3 days. If you're feeling generous, just remember to give it a little stir before serving to revive its creamy texture!

Can I freeze Creamy Alfredo Lasagna Soup?
Yes! To freeze, let the soup cool completely. Then, spoon it into freezer-safe containers, leaving about an inch of space at the top for expansion. This soup can be frozen for up to 3 months. When you’re ready to enjoy, simply thaw it in the refrigerator overnight, and reheat gently on the stove—around medium-low heat works perfectly!

What should I do if my noodles become mushy after storage?
If you find that the noodles in your Creamy Alfredo Lasagna Soup have become mushy, don’t worry! You can prevent this next time by storing the noodles separately from the soup. When reheating, cook some additional noodles and stir them in at the last minute for that perfect texture.

Are there any dairy-free alternatives for this recipe?
Very! If you're looking for a dairy-free option, try using coconut milk or almond milk in place of heavy cream and a dairy-free cream cheese alternative instead of ricotta. Nutritional yeast can also give your Creamy Alfredo Lasagna Soup that cheesy flavor without the dairy.

Is this recipe safe for pets?
I advise against sharing this Creamy Alfredo Lasagna Soup with pets, especially due to the inclusion of heavy cream and possibly high sodium levels in store-bought broth. Always stick to pet-friendly foods to keep your furry friends happy and healthy!

Creamy Alfredo Lasagna Soup

Cozy Up with Creamy Alfredo Lasagna Soup for Comfort Food Bliss

Creamy Alfredo Lasagna Soup is a comforting dish that combines the rich flavors of lasagna in a warm, cozy soup.
Print Recipe Pin Recipe
Prep Time 10 minutes mins
Cook Time 40 minutes mins
Total Time 50 minutes mins
Servings: 6 bowls
Course: Main Dishes
Cuisine: Italian
Calories: 450
Ingredients Equipment Method Nutrition Notes

Ingredients
  

For the Soup Base
  • 4 cups chicken broth a savory foundation that adds depth to the creamy flavor.
  • 2 cups heavy cream for that rich, velvety texture that makes this soup irresistible.
For the Cheese Mixture
  • 1 cup ricotta cheese adds creaminess and a slight tang that complements the sauces beautifully.
  • 1 cup shredded mozzarella cheese use for both melting into the soup and for topping.
For the Noodles
  • 2 cups cooked lasagna noodles, broken into pieces bring that classic lasagna texture into each hearty bowl.
For Seasoning
  • 1 tablespoon Italian seasoning enhances the flavors with a delightful herbal note.

Equipment

  • Large Pot

Method
 

Step-by-Step Instructions for Creamy Alfredo Lasagna Soup
  1. In a large pot, combine 4 cups of chicken broth and 2 cups of heavy cream. Place the pot over medium heat and bring it to a gentle simmer, stirring occasionally.
  2. Once the mixture is simmering, stir in 1 cup of ricotta cheese and half of 1 cup of shredded mozzarella cheese. Mix until fully blended.
  3. Add the broken lasagna noodles along with 1 tablespoon of Italian seasoning to your pot. Stir well and cook for about 10-12 minutes.
  4. Ladle the steaming Creamy Alfredo Lasagna Soup into bowls and sprinkle the remaining mozzarella cheese over each serving.

Nutrition

Serving: 1bowlCalories: 450kcalCarbohydrates: 30gProtein: 20gFat: 30gSaturated Fat: 15gPolyunsaturated Fat: 1gMonounsaturated Fat: 7gCholesterol: 80mgSodium: 800mgPotassium: 600mgFiber: 2gSugar: 3gVitamin A: 800IUVitamin C: 2mgCalcium: 300mgIron: 2mg

Notes

Use fresh ingredients for the best flavor, avoid overcooking noodles, and adjust soup thickness to your liking. Store leftovers in an airtight container for up to 3 days in the fridge or freeze for up to 3 months.

Tried this recipe?

Let us know how it was!

Irresistibly Sweet Burnt Honey Pie for Cozy Evenings

December 12, 2025 by grace bellamy Leave a Comment

As I stirred the bubbling pot of honey on my stovetop, a sweet nostalgia washed over me, reminding me of my childhood days spent in my grandmother's kitchen. This Burnt Honey Pie is a delightful homage to those moments, transforming simple ingredients into an unforgettable dessert experience. Not only is it a show-stopping centerpiece for any gathering, but this recipe is also surprisingly easy to whip up—perfect for those of us who want to impress without the stress. With a luscious filling enriched by the depth of burnt honey and a touch of warm nutmeg, it's a comforting dessert that's bound to melt hearts. Are you ready to dive into the divine sweetness of this pie? Let’s get baking!

Burnt Honey Pie

Why is Burnt Honey Pie so special?

Unique Flavor Explosion: The burnt honey gives this pie its distinctive, rich flavor that sets it apart from ordinary desserts.

Simple Ingredients: With just a few pantry staples like honey, cream, and eggs, this pie is an accessible treat for all skill levels.

Effortless Elegance: Impress your guests with a gourmet dessert that looks and tastes incredible, yet requires minimal effort.

Nostalgic Comfort: Reminiscent of cherished family gatherings, this pie brings warmth and delight to any table, making it perfect for cozy evenings.

Whether you're enjoying it solo or sharing it with loved ones, just like my favorite Chicken Pot Pie, this Burnt Honey Pie is bound to be a crowd-pleaser!

Burnt Honey Pie Ingredients

• Here's everything you need to create this delightful dessert!

For the Filling
• Honey – The star ingredient that gives this pie its unique, deep flavor; burnt to perfection for an irresistible sweetness.
• Heavy cream – Adds a rich, velvety texture that makes each bite melt in your mouth.
• Whole milk – Balances the richness of the cream and helps to create a light custard consistency.
• Large eggs – Essential for binding the filling together, giving it that lovely, custardy structure.
• Granulated sugar – A pinch of sweetness that enhances the flavors and helps to caramelize the honey.
• Sea salt – Just the right amount complements the sweetness and elevates the overall flavor.
• Ground nutmeg – Adds a warm, spiced note that perfectly offsets the sweetness of the honey.
• All-purpose flour – Thickens the filling slightly, ensuring it sets beautifully in the crust.

For the Crust
• Pre-made pie crust – A time-saver, giving you a perfectly baked base without the fuss of making it from scratch!

Gather these ingredients, and you're well on your way to creating a stunning Burnt Honey Pie that will make your taste buds dance!

Step‑by‑Step Instructions for Burnt Honey Pie

Step 1: Preheat the Oven
Begin by preheating your oven to 350°F (175°C) so it's perfectly ready for baking your Burnt Honey Pie. This ensures even cooking for that delightful custard filling. Set a timer for later as you’ll want to keep track of the baking time.

Step 2: Burn the Honey
In a medium saucepan over medium heat, pour in 1 cup of honey and let it bubble away for about 10–15 minutes. Stir occasionally until the honey transforms into a deep amber color and smells fragrant. This caramelization process is crucial for developing the rich flavor that will define your pie.

Step 3: Mix the Cream and Milk
Once your honey has reached that gorgeous amber hue, remove the saucepan from heat. Carefully whisk in 1 cup of heavy cream and 1 cup of whole milk, mixing until well combined. You’ll notice a luscious mixture developing; this is the base for your Burnt Honey Pie filling.

Step 4: Whisk the Eggs
In a separate mixing bowl, whisk together 3 large eggs, ½ cup of granulated sugar, ½ teaspoon of sea salt, ¼ teaspoon of ground nutmeg, and 1 tablespoon of all-purpose flour until smooth and frothy. This mixture will add structure and sweetness to your filling, balancing the flavors.

Step 5: Combine Mixtures
Gradually pour the warm honey mixture into the egg mixture while whisking continuously. This step incorporates the rich flavors without scrambling the eggs. Aim for a smooth, well-blended filling that combines the sweet and savory elements.

Step 6: Pour into Crust
Next, take your pre-made pie crust and carefully pour the luscious filling into it, ensuring no bubbles form. The crust will cradle the filling as it bakes, creating a delightful dessert that outdoor gatherings and cozy nights alike will savor.

Step 7: Bake the Pie
Place your pie in the preheated oven and bake for 35–40 minutes. You'll know it’s done when the edges are set, and the center has a slight jiggle. The aroma of burnt honey will fill your kitchen, adding to the anticipation of enjoying this treat.

Step 8: Cool Before Serving
After removing the Burnt Honey Pie from the oven, allow it to cool completely at room temperature. This helps the filling firm up for easier slicing. Once it’s cool, you can either serve it right away or refrigerate it for later, enhancing that sweet flavor.

Burnt Honey Pie

How to Store and Freeze Burnt Honey Pie

Fridge: Store your Burnt Honey Pie in an airtight container in the refrigerator for up to 3 days. This keeps the pie fresh and prevents it from absorbing other odors.

Freezer: If you need to store it for longer, wrap individual slices tightly in plastic wrap and then in aluminum foil. It will last in the freezer for up to 2 months.

Reheating: To enjoy your Burnt Honey Pie again, thaw it in the fridge overnight and reheat slices in a preheated oven at 350°F (175°C) for about 10 minutes, or until warm.

Let it Cool: Always allow the pie to cool completely at room temperature before storing, as this helps maintain its texture and taste.

What to Serve with Burnt Honey Pie

As the sweet aroma of burnt honey fills your kitchen, it’s time to curate a delightful feast that enhances this scrumptious dessert.

  • Creamy Vanilla Ice Cream: The cool creaminess of vanilla ice cream beautifully contrasts the warm, rich flavors of the pie, creating a classic pairing.
  • Fresh Berries: Juicy strawberries or blueberries add a burst of freshness, balancing the pie’s sweetness with tart, fruity notes. They also bring a vibrant pop of color to your plate.
  • Whipped Cream: A fluffy dollop of lightly sweetened whipped cream offers a light texture that complements the dense filling, making each bite heavenly. It’s a must-have for indulgent decadence!
  • Salted Caramel Sauce: Drizzling salted caramel over each slice elevates the flavor profile, adding a savory twist to the sweetness. It's a decadent touch that will impress your guests.
  • Coffee or Espresso: A warm mug of rich coffee or a shot of espresso pairs perfectly, cutting through the sweetness with its bold flavors. Enjoy this classic combination!
  • Chocolate Tart: For a more sophisticated finish, serve alongside a dark chocolate tart. The chocolaty bitterness pairs harmoniously with the honey’s sweetness for a delightful dessert experience.

Make Ahead Options

These Burnt Honey Pies are perfect for meal prep enthusiasts looking to save time on busy weeknights! You can prepare the filling up to 24 hours in advance by making it and placing it in an airtight container in the refrigerator; this allows the flavors to meld beautifully while maintaining that rich taste. The pre-made pie crust can also be assembled and stored, covered with plastic wrap, for up to 3 days in the fridge. When you're ready to serve, simply pour your filling into the crust and bake as directed. This method keeps your pie just as delicious, ensuring you can enjoy delightful homemade dessert with minimal fuss!

Expert Tips for the Best Burnt Honey Pie

• Honey Quality Matters: Use high-quality, flavorful honey for a more pronounced taste. Avoid cheap or overly processed honey that lacks richness.

• Watch the Color: Keep an eye on the honey as it heats; if it turns too dark too quickly, it may taste bitter. You want a deep amber, not black!

• Temperature Control: Allow the honey mixture to cool slightly before adding it to the eggs. This prevents cooking the eggs, ensuring a smooth filling.

• Bake with Love: Don’t skip the cooling step! Allowing the pie to cool completely will help it set properly—your patience will be rewarded with perfect slices.

• Serve with Flair: For an extra touch, drizzle some fresh honey or add a dollop of whipped cream on top when serving your Burnt Honey Pie.

Burnt Honey Pie Variations & Substitutions

Feel free to let your creativity shine by customizing this delightful pie with these tempting twists!

  • Dairy-Free: Substitute the heavy cream and whole milk with coconut milk and a plant-based cream for a creamy, dairy-free alternative.
  • Spiced Delight: Add a teaspoon of cinnamon or ginger to the filling for a warm, spiced kick that complements the burnt honey beautifully.
  • Nutty Crust: Swap the pre-made pie crust for a crushed almond or pecan crust for an extra layer of flavor and crunch.
  • Chocolate Indulgence: Drizzle melted dark chocolate on top before serving to transform the pie into an elegant dessert that chocolate lovers will adore.
  • Fruit Fusion: Incorporate fresh berries into the filling for a pop of color and added freshness. Raspberries or blueberries work particularly well with the sweetness of the honey.

For a truly special dessert experience, consider pairing it with a scoop of vanilla ice cream to enhance that luscious filling. Or, if you're in the mood for a warm combination, try serving it with a side of Chicken Pot Pie to make the meal even cozier.

  • Reduced Sugar: Reduce the granulated sugar or omit it entirely for a less sweet pie, letting the honey's sweetness shine through on its own.
  • Zesty Twist: Add a tablespoon of lemon juice to the filling for a hint of citrus that beautifully balances the sweet richness of the pie.

With these variations, your Burnt Honey Pie will always be a unique treat, perfect for sharing or savoring all by yourself!

Burnt Honey Pie

Burnt Honey Pie Recipe FAQs

What is the best honey to use for Burnt Honey Pie?
Absolutely, the quality of honey matters greatly! I recommend using a high-quality, flavorful honey like wildflower or clover honey. These options have rich, complex flavors that will shine through in your pie, offering a delightful contrast to the creamy filling. Avoid overly processed honeys, which can lack the depth of flavor.

How do I store Burnt Honey Pie?
For maximum freshness, store your Burnt Honey Pie in an airtight container in the refrigerator where it will last for up to 3 days. If possible, keep it on a pie plate covered tightly with plastic wrap. This method helps prevent it from absorbing other odors, maintaining its sweet flavor and creamy texture for when you’re ready to indulge.

Can I freeze Burnt Honey Pie?
Yes, you can! To freeze your Burnt Honey Pie, I recommend wrapping individual slices tightly in plastic wrap, followed by aluminum foil to prevent freezer burn. This way, it will keep well for up to 2 months. When you’re ready to enjoy, thaw them in the fridge overnight, and then reheat at 350°F (175°C) for about 10 minutes.

What should I do if my Burnt Honey filling doesn’t set?
Oh no! If your filling doesn’t set properly, it might be due to a couple of reasons. First, make sure you didn’t skip the whisking step while adding the honey mixture to the egg mixture; continuous whisking is crucial to prevent scrambling. If it still doesn't set, next time, try baking it a little longer. An extra 5-10 minutes in the oven can often help firm up the custard. Always ensure that the edges are set and the filling has only a slight jiggle in the center before removing it from the oven.

Is Burnt Honey Pie safe for those with allergies?
A great question! This pie contains common allergens like eggs and dairy. If you or your guests have allergies, consider substitutions: use a dairy-free cream, like coconut cream, and an egg replacer, such as flaxseed meal or applesauce, to cater to dietary restrictions. Always be sure to check the specific allergy lists relevant to those you'll be serving, as safety first is key in any kitchen!

Burnt Honey Pie

Irresistibly Sweet Burnt Honey Pie for Cozy Evenings

This Burnt Honey Pie is a delightful dessert that brings nostalgic comfort and unique flavors to your table.
Print Recipe Pin Recipe
Prep Time 15 minutes mins
Cook Time 40 minutes mins
Cooling Time 30 minutes mins
Total Time 1 hour hr 25 minutes mins
Servings: 8 slices
Course: Dessert
Cuisine: American
Calories: 250
Ingredients Equipment Method Nutrition Notes

Ingredients
  

For the Filling
  • 1 cup honey burnt to perfection
  • 1 cup heavy cream rich and velvety
  • 1 cup whole milk balances creaminess
  • 3 large eggs for binding the filling
  • ½ cup granulated sugar adds sweetness
  • ½ teaspoon sea salt enhances flavor
  • ¼ teaspoon ground nutmeg adds warmth
  • 1 tablespoon all-purpose flour thickens the filling
For the Crust
  • 1 piece pre-made pie crust time-saver

Equipment

  • Medium saucepan
  • Mixing bowls
  • Whisk
  • Oven

Method
 

Step-by-Step Instructions
  1. Preheat your oven to 350°F (175°C).
  2. In a medium saucepan, heat honey over medium heat for 10–15 minutes until deep amber and fragrant.
  3. Remove from heat and whisk in heavy cream and whole milk until well combined.
  4. In another bowl, whisk together eggs, sugar, sea salt, nutmeg, and flour until smooth.
  5. Gradually pour the warm honey mixture into the egg mixture while whisking continuously.
  6. Pour the filling into the pre-made pie crust carefully.
  7. Bake for 35–40 minutes until the edges are set and the center has a slight jiggle.
  8. Allow the pie to cool completely at room temperature before serving.

Nutrition

Serving: 1sliceCalories: 250kcalCarbohydrates: 32gProtein: 4gFat: 12gSaturated Fat: 7gPolyunsaturated Fat: 0.5gMonounsaturated Fat: 2gCholesterol: 80mgSodium: 150mgPotassium: 150mgFiber: 1gSugar: 20gVitamin A: 400IUCalcium: 80mgIron: 1mg

Notes

Serve with a drizzle of fresh honey or a dollop of whipped cream for an extra touch.

Tried this recipe?

Let us know how it was!

Delightful Vanilla Custard Puff Pastry Cake to Savor

December 12, 2025 by grace bellamy Leave a Comment

As I watched the golden pastry rise in the oven, I couldn’t help but feel a sense of triumph—it’s amazing how something so simple can transform into a stunning masterpiece. This Vanilla Custard Puff Pastry Cake is not only a delightful treat for the eyes but also an absolute crowd-pleaser; it brings a touch of elegance to any gathering. With its creamy custard nestled between layers of flaky puff pastry, it strikes the perfect balance between indulgence and comfort. The best part? You can whip it up in under two hours, making it an easy choice for a weeknight dessert or a weekend showstopper. Curious about how to create this sweet sensation in your own kitchen? Let’s dive in!

Vanilla Custard Puff Pastry Cake

Why is This Cake So Irresistible?

Deliciously creamy custard: The rich vanilla custard offers a velvety texture that complements the flaky pastry beautifully.

Easy to prepare: With just a few simple steps, you can create this impressive dessert even as a beginner baker!

Versatile for any occasion: Perfect for dinner parties, holidays, or casual family dinners; it fits seamlessly into any celebration.

Eye-catching presentation: The golden puff pastry rising in the oven not only shines but also invites everyone to indulge in a slice.

This Vanilla Custard Puff Pastry Cake will become your go-to dessert, impressing guests and pleasing taste buds alike! If you love comforting homemade sweets, check out our easy homemade pastries for more delectable ideas.

Vanilla Custard Puff Pastry Cake Ingredients

Unlock the secrets to this delightful dessert!

For the Custard

  • Milk – 2 cups; the base of your creamy custard, enhancing flavor and texture.
  • Sugar – ½ cup; adds sweet richness to balance the custard's creaminess.
  • Cornstarch – ¼ cup; thickens the custard beautifully, giving it that perfect silky consistency.
  • Eggs – 3 large; the key for richness and structure in your custard.
  • Vanilla extract – 1 teaspoon; infuses exquisite flavor, making the custard truly irresistible.
  • Butter – 2 tablespoons; adds a touch of richness and smoothness to the custard.

For the Pastry

  • Puff pastry – 1-2 sheets; this flaky layer creates a delightful contrast to the creamy filling.

This Vanilla Custard Puff Pastry Cake is a wonderful treat you can master in your kitchen!

Step‑by‑Step Instructions for Vanilla Custard Puff Pastry Cake

Step 1: Preheat and Prepare
Preheat your oven to 375°F (190°C), ensuring it's hot and ready for baking. Meanwhile, grease a baking dish with butter or non-stick spray, allowing your Vanilla Custard Puff Pastry Cake to easily release once baked. Set the prepared dish aside as you gather the ingredients for the custard.

Step 2: Create the Custard Base
In a medium saucepan, combine 2 cups of milk, ½ cup of sugar, ¼ cup of cornstarch, and 1 teaspoon of vanilla extract over medium heat. Continuously stir the mixture until it becomes smooth and thickens, which should take about 5-7 minutes. You’ll know it’s ready when it coats the back of a spoon and bubbles gently.

Step 3: Temper the Eggs
In a separate bowl, whisk together 3 large eggs. Gradually add a small amount of the hot custard mixture to the eggs, whisking constantly to prevent curdling. This process, known as tempering, should take about a minute, ensuring the eggs blend smoothly without scrambling.

Step 4: Combine and Cook Further
Pour the egg mixture back into the saucepan with the remaining custard and cook over medium heat for an additional 3-5 minutes. Stir frequently until the custard is thick and glossy, reaching a consistency that falls softly from a spoon. Then, remove it from the heat.

Step 5: Add Butter for Richness
Stir in 2 tablespoons of butter into the hot custard until it melts completely, creating a smooth, luxurious texture. Taste the custard for sweetness and vanilla infusion; this creamy blend will be the heart of your Vanilla Custard Puff Pastry Cake.

Step 6: Roll Out the Puff Pastry
On a lightly floured surface, roll out the puff pastry sheets until they are slightly larger than your baking dish. The goal is to create a flaky, golden crust that will perfectly encase the creamy custard. You can use 1 or 2 sheets, depending on your desired thickness.

Step 7: Assemble the Cake
Gently place the rolled puff pastry into your prepared baking dish, making sure to press it against the sides. Pour the luscious custard filling into the pastry shell, spreading it evenly. If desired, cover the custard with another layer of puff pastry for an extra crunchy top.

Step 8: Bake to Perfection
Place your assembled Vanilla Custard Puff Pastry Cake into the preheated oven and bake for 30-35 minutes, or until the pastry is golden brown and puffs up beautifully. Keep an eye on it during the last few minutes of baking to achieve that perfect color.

Step 9: Cool Before Serving
Once baked, take the cake out of the oven and allow it to cool for about 15-20 minutes. This cooling period lets the custard set up slightly, making it easier to slice and serve. Your Vanilla Custard Puff Pastry Cake is now ready to enjoy warm or at room temperature!

Vanilla Custard Puff Pastry Cake

How to Store and Freeze Vanilla Custard Puff Pastry Cake

Room Temperature: Allow your Vanilla Custard Puff Pastry Cake to cool completely before covering it. It can be stored at room temperature for up to 2 days, keeping it fresh and delightful.

Fridge: For longer storage, refrigerate the cake in an airtight container for up to 4 days. This keeps the custard creamy and prevents the pastry from getting soggy.

Freezer: If you wish to save some for later, freeze the cake for up to 2 months. Wrap individual slices tightly in plastic wrap and place them in a freezer-safe container to maintain freshness.

Reheating: To enjoy, thaw in the fridge overnight and reheat in a preheated oven at 350°F (175°C) for 10-15 minutes to restore its flaky pastry texture.

Expert Tips for Vanilla Custard Puff Pastry Cake

Perfect Custard Texture: Use a thermometer to monitor the custard temperature; it should reach about 170°F for the ideal thickness without curdling.

Don't Rush Tempering: When adding hot custard to the eggs, take your time and whisk slowly to prevent scrambling. This ensures a smooth custard for your Vanilla Custard Puff Pastry Cake.

Chill the Puff Pastry: Keep puff pastry cold before baking to ensure it puffs up beautifully. A quick chill in the fridge for 10-15 minutes can work wonders.

Watch the Baking Time: Check for doneness a few minutes before the suggested baking time. Every oven is different, and you want that golden perfection!

Let It Cool: Allow the cake to cool for at least 15 minutes before slicing. This helps the custard firm up and makes serving easier without compromising creaminess.

Following these tips will help you craft the perfect Vanilla Custard Puff Pastry Cake that's sure to impress!

What to Serve with Vanilla Custard Puff Pastry Cake

As the sweet aroma of the Vanilla Custard Puff Pastry Cake wafts through your kitchen, it’s time to consider some delightful pairings to create a memorable meal.

  • Fresh Berries: Their vibrant tartness contrasts beautifully with the creamy custard, adding a burst of freshness to every bite. A medley of strawberries, blueberries, and raspberries can elevate the dessert experience.

  • Whipped Cream: Light and airy, homemade whipped cream complements the richness of the cake. Consider flavoring it with a hint of vanilla or almond for a delightful twist.

  • Mint Tea: This soothing herbal tea offers a refreshing palate cleanser after indulging in the richness of the cake. Its minty notes will awaken your senses and leave you feeling refreshed.

  • Chocolate Sauce: Drizzling warm chocolate sauce over each slice provides a decadent touch. The richness of chocolate pairs harmoniously with the cake’s light custard, creating an irresistible combination.

  • Caramel Sauce: A sweet and buttery caramel drizzle adds a touch of lavishness. Its sticky texture works wonderfully alongside the flaky pastry, creating a delightful contrast in textures.

  • Ice Cream: A scoop of vanilla or caramel ice cream takes this dessert to the next level. The cold creaminess balances the warm cake, creating a delightful experience with every bite.

Consider these delightful accompaniments to enhance your Vanilla Custard Puff Pastry Cake and create a full sensory experience for you and your loved ones!

Make Ahead Options

These Vanilla Custard Puff Pastry Cakes are perfect for meal prep enthusiasts! You can prepare the custard up to 24 hours in advance; simply store it in an airtight container in the refrigerator to keep it fresh and avoid any skin forming on the surface. Additionally, roll out your puff pastry and line the baking dish up to 3 days ahead. Just be sure to wrap it well in plastic wrap to prevent drying out. When you're ready to enjoy your dessert, pour the chilled custard into the prepared pastry, cover with any additional pastry if desired, and bake according to the original recipe. This way, you’ll have a delightful treat with minimal effort on busy weeknights!

Vanilla Custard Puff Pastry Cake Variations

Feel free to explore different takes on this delightful Vanilla Custard Puff Pastry Cake—your creativity is the secret ingredient!

  • Dairy-Free: Substitute almond or oat milk for a creamy non-dairy version. Add a splash of coconut cream for an exotic twist!
  • Chocolate Delight: Mix in cocoa powder to the custard for a rich chocolate flavor. This adds a decadent vibe that's sure to please chocolate lovers.
  • Fruit Fusion: Top the custard with fresh berries or sliced bananas before baking for a burst of natural sweetness. The fruits introduce a refreshing contrast to the silky custard.
  • Nutty Crunch: Incorporate crushed nuts into the custard mixture or sprinkle on top before baking. This enhances the texture and completes the flavor profile beautifully.
  • Spicy Kick: Add a pinch of cinnamon or a dash of nutmeg to the custard for a warm, aromatic flavor. This creates a cozy, comforting dessert perfect for chilly nights.
  • Lemon Zest: Incorporate some lemon zest into the custard for a bright and zesty twist. The citrusy notes pair perfectly with the vanilla, enhancing the overall taste.
  • Savory Take: Swap out the sugar and vanilla, and add cheese and herbs for a unique savory pastry. This unexpected version makes for a delightful brunch item!
  • Mini Pastries: Create individual pastries by cutting out smaller puff pastry rounds and filling them with custard. These bite-sized delights are perfect for gatherings or as a simple treat.

Experimenting with these variations can make your Vanilla Custard Puff Pastry Cake even more special! If you’re curious about other delightful desserts, be sure to check out our easy homemade pastries and add more sweet inspiration to your baking endeavors.

Vanilla Custard Puff Pastry Cake

Vanilla Custard Puff Pastry Cake Recipe FAQs

How do I choose the right ripe ingredients for this recipe?
Absolutely! When selecting your ingredients, opt for fresh, whole milk for a rich custard. The eggs should be large and at room temperature, which aids in mixing smoothly. If you're using vanilla extract, make sure it’s real vanilla for the most fragrant flavor. As for the puff pastry, look for a brand that’s labeled as “all-butter” for the best flakiness and taste.

How should I store the Vanilla Custard Puff Pastry Cake?
Very good question! Once your Vanilla Custard Puff Pastry Cake has completely cooled, cover it with plastic wrap and store it at room temperature for up to 2 days. For longer freshness, transfer it to an airtight container and refrigerate for up to 4 days. This will keep the custard creamy while preventing the pastry from becoming soggy.

Can I freeze the Vanilla Custard Puff Pastry Cake?
Yes, you can! To freeze, slice the cake into individual portions. Wrap each slice tightly with plastic wrap to prevent freezer burn, then place them in a freezer-safe container or zip-top bag. It can be stored for up to 2 months. To enjoy, simply thaw overnight in the fridge and reheat in a preheated oven at 350°F (175°C) for about 10-15 minutes for that freshly baked feel.

What should I do if my custard doesn’t thicken properly?
If your custard doesn’t thicken, don’t worry! First, ensure that you’ve stirred the mixture continuously over medium heat until it coats the back of a spoon; this usually takes about 5-7 minutes. If it’s still not thickening, increase the heat slightly and keep stirring. If all else fails, you can sprinkle in a little more cornstarch mixed with a teaspoon of water to boost thickness. Remember, patience is key, so give it a moment to transform!

Can my pets eat any of the ingredients in this recipe?
It's best to keep this delectable treat away from pets. While ingredients like milk and eggs are generally safe, the sugar and butter can be unhealthy for them. Plus, the custard's rich nature and potential for dairy intolerance could lead to tummy troubles for furry friends. Stick to their specially formulated treats to keep them happy and healthy!

Are there any allergy considerations I should keep in mind?
Definitely! This Vanilla Custard Puff Pastry Cake contains common allergens like milk, eggs, and possibly gluten from the puff pastry. If you're preparing it for someone with dietary restrictions, consider using dairy-free milk alternatives, egg substitutes, and gluten-free puff pastry. There are many fantastic alternatives available to help everyone enjoy this delightful dessert!

Vanilla Custard Puff Pastry Cake

Delightful Vanilla Custard Puff Pastry Cake to Savor

This Vanilla Custard Puff Pastry Cake combines creamy custard and flaky pastry for a delightful dessert experience.
Print Recipe Pin Recipe
Prep Time 30 minutes mins
Cook Time 35 minutes mins
Cooling Time 20 minutes mins
Total Time 1 hour hr 25 minutes mins
Servings: 8 slices
Course: Dessert
Cuisine: French
Calories: 350
Ingredients Equipment Method Nutrition Notes

Ingredients
  

For the Custard
  • 2 cups milk the base of your creamy custard, enhancing flavor and texture.
  • ½ cup sugar adds sweet richness to balance the custard's creaminess.
  • ¼ cup cornstarch thickens the custard beautifully, giving it that perfect silky consistency.
  • 3 large eggs the key for richness and structure in your custard.
  • 1 teaspoon vanilla extract infuses exquisite flavor, making the custard truly irresistible.
  • 2 tablespoons butter adds a touch of richness and smoothness to the custard.
For the Pastry
  • 1-2 sheets puff pastry this flaky layer creates a delightful contrast to the creamy filling.

Equipment

  • Medium saucepan
  • Baking Dish
  • Whisk
  • Measuring Cups
  • Measuring Spoons
  • Rolling Pin

Method
 

Step-by-Step Instructions
  1. Preheat your oven to 375°F (190°C) and grease a baking dish.
  2. In a medium saucepan, combine 2 cups of milk, ½ cup of sugar, ¼ cup of cornstarch, and 1 teaspoon of vanilla extract over medium heat, stirring until thickened.
  3. In a separate bowl, whisk 3 large eggs and gradually add a small amount of hot custard mixture to temper the eggs.
  4. Pour the tempered egg mixture back into the saucepan with the custard and cook further until thick and glossy.
  5. Stir in 2 tablespoons of butter until melted and smooth.
  6. Roll out the puff pastry sheets on a floured surface until slightly larger than your baking dish.
  7. Place the rolled puff pastry into the prepared baking dish and pour in the custard filling.
  8. Bake for 30-35 minutes until the pastry is golden and puffed up.
  9. Cool for 15-20 minutes before slicing and serving.

Nutrition

Serving: 1sliceCalories: 350kcalCarbohydrates: 40gProtein: 6gFat: 18gSaturated Fat: 10gPolyunsaturated Fat: 1gMonounsaturated Fat: 5gCholesterol: 120mgSodium: 150mgPotassium: 200mgFiber: 1gSugar: 12gVitamin A: 500IUCalcium: 150mgIron: 1mg

Notes

Use a thermometer for the custard temperature; it should reach about 170°F. Keep puff pastry cold before baking for optimal results.

Tried this recipe?

Let us know how it was!

Decadent Japanese Sweet Potato Crème Brûlée You’ll Love

December 12, 2025 by grace bellamy Leave a Comment

As I was sifting through my pantry one lazy afternoon, I stumbled upon the vibrant orange jewel that is the Japanese sweet potato. Its natural sweetness and creamy texture had me dreaming of a delightful twist on a classic favorite. Enter my Japanese Sweet Potato Crème Brûlée—a stunning dessert that not only elevates dinner parties but also brings a touch of warmth to any gathering. This recipe boasts the irresistible perks of being both simple to prepare and a guaranteed crowd-pleaser. With just a handful of ingredients, you'll create a velvety custard that pairs beautifully with that satisfyingly crisp caramel topping. Are you ready to impress your guests and treat yourself to a taste of something truly special? Let's dive into this one-of-a-kind dessert adventure!

Japanese Sweet Potato Crème Brûlée

Why is this dessert a must-try?

Unique Flavor: The Japanese sweet potato brings a sweet, earthy taste that elevates the classic crème brûlée.
Effortlessly Elegant: Impress your friends and family with this chic dessert that looks like it belongs in a restaurant!
Quick Prep: With just 15 minutes of hands-on time, you can have a gourmet dessert ready for any occasion.
Versatile: Perfect for any gathering, this recipe fits right in, whether it's a cozy dinner or a festive holiday party!
Crowd-Pleaser: You won't just be satisfying your sweet tooth; this dessert is sure to wow your guests and spark conversation!
Embrace the beauty of homemade desserts and check out other delightful treats for your next culinary adventure!

Japanese Sweet Potato Crème Brûlée Ingredients

• Get ready to create a culinary masterpiece with these simple yet stunning ingredients!

For the Custard
• Japanese sweet potatoes – these add a natural sweetness and creamy texture that makes the crème brûlée delightful.
• Heavy cream – it contributes to the rich and luxurious mouthfeel of the custard.
• Granulated sugar – sweetens the mixture and helps create that delicious caramelized top.
• Large egg yolks – these provide structure and a smooth texture to the custard.
• Vanilla extract – enhances the flavor profile, adding warmth and depth to every bite.

For Caramelizing the Top
• Granulated sugar – a thin layer sprinkled on top that transforms into a crispy, golden crust when torched.

Let this decadent and unique Japanese Sweet Potato Crème Brûlée bring joy to your kitchen and delight to your table!

Step‑by‑Step Instructions for Japanese Sweet Potato Crème Brûlée

Step 1: Preheat and Prepare
Begin by preheating your oven to 325°F (165°C). While the oven warms, gather your ingredients and tools: a mixing bowl, whisk, ramekins, and a deep baking dish. The anticipation builds as you prepare to create your Japanese Sweet Potato Crème Brûlée, which will soon become a dessert favorite.

Step 2: Mix the Custard
In your mixing bowl, combine the mashed Japanese sweet potatoes, heavy cream, granulated sugar, egg yolks, and vanilla extract. Whisk vigorously for about 3–4 minutes until the mixture is smooth and creamy. Ensure all ingredients are well blended to create a luscious custard that will elevate your crème brûlée to new heights.

Step 3: Pour and Prepare for Baking
Carefully pour the custard mixture evenly into your prepared ramekins. Then, place the filled ramekins into a deep baking dish. This is an essential step for the Japanese Sweet Potato Crème Brûlée: fill the baking dish with hot water until it reaches halfway up the sides of the ramekins, creating a gentle water bath for baking.

Step 4: Bake to Perfection
Slide the baking dish into your preheated oven and bake for about 45 minutes. You’ll know your custard is ready when it is set but still slightly wobbly in the center—this is the perfect texture for a crème brûlée. The gentle baking will help develop the custard's rich flavor and silky consistency.

Step 5: Cool and Chill
Once baked, carefully remove the ramekins from the water bath and allow them to cool at room temperature for about 30 minutes. After cooling, cover the ramekins with plastic wrap and refrigerate for at least 2 hours. Chilling the custard allows the flavors to meld beautifully, ensuring a delightful taste in every spoonful.

Step 6: Caramelize the Sugar Topping
Just before serving, take your chilled crème brûlée and sprinkle a thin, even layer of granulated sugar over the top of each custard. Using a kitchen torch, gently caramelize the sugar until it turns golden brown and forms a crisp shell. This final touch creates a delightful contrast with the creamy custard underneath, making your Japanese Sweet Potato Crème Brûlée irresistible!

Japanese Sweet Potato Crème Brûlée

Japanese Sweet Potato Crème Brûlée Variations

Feel free to unleash your creativity and adjust this delightful dessert to your taste and dietary needs!

  • Dairy-Free: Substitute heavy cream with coconut cream for a luscious vegan alternative that adds a tropical twist.
    The richness of coconut pairs wonderfully with the sweet potato. Plus, your guests may not even notice the difference!

  • Sweetener Swap: Use maple syrup or honey instead of granulated sugar for a natural sweetness.
    This variation not only enhances the flavor but also adds a lovely caramel note that complements the sweet potatoes beautifully.

  • Spicy Kick: Add a pinch of cinnamon or nutmeg to the custard mixture for a warm, comforting flavor.
    These spices elevate the dessert, making it perfect for chilly evenings or festive occasions.

  • Nutty Texture: Stir in crushed pecans or almonds for a delightful crunch that contrasts with the smooth custard.
    This adds a whole new layer of flavor and can make each spoonful a little adventure!

  • Fruit Infusion: Incorporate pureed fruits like mango or passionfruit into the custard for a fruity twist.
    The tanginess will balance nicely with the sweetness of the sweet potato, creating a refreshing finish.

  • Chocolate Lovers: Fold in melted dark chocolate for a decadent chocolate sweet potato crème brûlée.
    You’ll enjoy a rich, creamy flavor that’s simply irresistible, especially for chocolate aficionados!

  • Extra Caramelization: For a deeper, richer top, use brown sugar instead of white for caramelizing.
    This gives the sugar a more robust flavor that beautifully complements the sweet potato custard, making each bite a blissful experience.

Explore these variations and let your culinary curiosity lead the way! If you're eager for more dessert inspiration, don’t forget to check out Effortlessly Elegant and Unique Flavor options for a truly satisfying treat!

Make Ahead Options

These Japanese Sweet Potato Crème Brûlée are perfect for meal prep enthusiasts! You can prepare the custard mixture up to 24 hours in advance by following the initial mixing steps and then pouring the mixture into ramekins. Cover and refrigerate the uncooked custard to keep it fresh. When you're ready to serve, simply bake the custards as directed, then chill them for at least 2 hours before caramelizing the sugar on top. This method not only saves you time on busy days but also allows the flavors to meld beautifully, ensuring each spoonful is just as delicious as if you made it fresh on the day. Enjoy your stress-free dessert!

Expert Tips for Japanese Sweet Potato Crème Brûlée

  • Choose Quality Potatoes: Use fresh and firm Japanese sweet potatoes for the best flavor, as their natural sweetness is key to a delicious crème brûlée.

  • Temperature Matters: Bring your heavy cream to room temperature before mixing; this helps create a smoother custard and prevents curdling.

  • Water Bath Importance: Don’t skip the water bath! It ensures even cooking, preventing the custard from cracking or becoming rubbery while baking.

  • Watch Baking Time: Keep an eye on the baking time. Pull the ramekins when the center is slightly wobbly—overbaking will lead to a dry texture.

  • Perfectly Caramelize: For the ideal sugar crust, use a kitchen torch to caramelize the sugar slowly, moving in circles until it turns a beautiful golden brown.

  • Patience is Key: Allow enough chilling time! The flavors of your Japanese Sweet Potato Crème Brûlée will develop beautifully in the fridge, so resist the urge to skip this step.

What to Serve with Japanese Sweet Potato Crème Brûlée?

Indulging in dessert is a wonderful experience. Pair it with complementary flavors and textures for a memorable meal!

  • Espresso or Coffee: A rich, fragrant cup of coffee beautifully balances the sweetness of the crème brûlée, enhancing its creamy texture.
  • Poached Pears: Tender, subtly spiced pears add a fresh element that contrasts wonderfully with the decadent sweet potato custard.
  • Vanilla Ice Cream: Creamy vanilla ice cream brings a classic creaminess, enhancing the dessert's rich flavors while adding a delightful chill.
  • Chocolate Fondant: The warm, gooey center of a chocolate fondant creates an elegant contrast against the cool, crisp edges of the caramelized crème brûlée.
  • Coconut Macaroons: These crisp, chewy bites introduce a tropical flair, harmonizing with the sweet potato's earthy tones and adding texture.
  • Mandarin Sorbet: A refreshing sorbet cuts through the richness, cleansing the palate with its bright citrus notes—perfect to round out the flavors.
  • Savory Cheese Platter: A selection of robust cheeses, like aged gouda or brie, introduces intriguing savory notes that play nicely alongside the sweet dessert.
  • Bubbly Champagne: Celebrate with a glass of bubbly—it sparkles and complements the crème brûlée's rich caramel flavors with its refreshing acidity.

How to Store and Freeze Japanese Sweet Potato Crème Brûlée

Fridge: The custard can be stored in the fridge for up to 3 days. Keep it covered with plastic wrap or in airtight containers to maintain freshness.

Freezer: You can freeze the uncaramelized custards for up to 2 months. Just ensure they are well-wrapped in plastic and stored in an airtight container.

Reheating: To enjoy after freezing, thaw in the fridge overnight and then caramelize the sugar on top just before serving for that delightful crisp.

Cooked Topping: Avoid freezing once the sugar is caramelized, as it can become soggy. Always add the crisp topping just before serving to keep it deliciously crunchy.

Japanese Sweet Potato Crème Brûlée

Japanese Sweet Potato Crème Brûlée Recipe FAQs

What should I look for when selecting Japanese sweet potatoes?
Absolutely! When choosing Japanese sweet potatoes, look for firm ones with smooth skin and no dark spots or cracks. The vibrant purple-brown skin often indicates freshness, while the flesh should be a bright orange hue. Avoid potatoes that feel soft or have blemishes, as these may affect the quality of your Japanese Sweet Potato Crème Brûlée.

How should I store leftover crème brûlée?
Very simple! Store any leftover Japanese Sweet Potato Crème Brûlée in the refrigerator for up to 3 days. Make sure to cover the ramekins with plastic wrap or transfer the custard into airtight containers to keep it fresh and prevent it from absorbing any odors from the fridge.

Can I freeze Japanese Sweet Potato Crème Brûlée?
Yes, you can! To freeze your crème brûlée, be sure to do so before caramelizing the sugar topping. Wrap each ramekin tightly in plastic wrap, then place them in an airtight container. They can be frozen for up to 2 months. When you're ready to enjoy, thaw them in the refrigerator overnight and finish with the caramelized sugar just before serving.

What if my custard isn’t setting properly?
Don't worry! If your Japanese Sweet Potato Crème Brûlée isn't setting after baking, it may be that the water bath was too shallow or the oven temperature was too low. Ensure the water bath reaches halfway up the ramekins and is at the right temperature. If the custard is still undercooked, return it to the oven for an additional 5-10 minutes. Remember, the custard should be set but still slightly wobbly in the center for the perfect texture!

Is this recipe suitable for those with egg allergies?
Unfortunately, the Japanese Sweet Potato Crème Brûlée recipe includes egg yolks, which provide the custard's creamy texture. However, you can experiment with egg substitutes like silken tofu or a commercial egg replacer in a different custard recipe—though it may not yield the exact flavor or texture. Be sure to check with your guests regarding allergies before serving!

Can pets eat Japanese sweet potatoes?
Yes, dogs can enjoy cooked Japanese sweet potatoes in moderation, as they are a healthy treat! However, avoid giving them any sugar or the caramelized topping. As always, check with your veterinarian to ensure it fits within your pet's dietary needs.

Japanese Sweet Potato Crème Brûlée

Decadent Japanese Sweet Potato Crème Brûlée You’ll Love

This Japanese Sweet Potato Crème Brûlée offers an exquisite twist on a classic dessert, guaranteed to impress your guests.
Print Recipe Pin Recipe
Prep Time 15 minutes mins
Cook Time 45 minutes mins
Chilling Time 2 hours hrs
Total Time 3 hours hrs
Servings: 4 ramekins
Course: Dessert
Cuisine: Japanese
Calories: 320
Ingredients Equipment Method Nutrition Notes

Ingredients
  

For the Custard
  • 2 cups mashed Japanese sweet potatoes adds natural sweetness and creamy texture
  • 1 cup heavy cream contributes to rich mouthfeel
  • ½ cup granulated sugar sweetens custard and helps caramelize
  • 4 large egg yolks provides structure and texture
  • 1 teaspoon vanilla extract enhances flavor profile
For Caramelizing the Top
  • ¼ cup granulated sugar for crisp topping

Equipment

  • Mixing Bowl
  • Whisk
  • Ramekins
  • deep baking dish
  • kitchen torch

Method
 

Step-by-Step Instructions
  1. Preheat your oven to 325°F (165°C) and gather your ingredients and tools: a mixing bowl, whisk, ramekins, and a deep baking dish.
  2. In a mixing bowl, combine the mashed Japanese sweet potatoes, heavy cream, granulated sugar, egg yolks, and vanilla extract. Whisk vigorously for about 3–4 minutes until smooth and creamy.
  3. Pour the custard mixture evenly into your prepared ramekins and place the ramekins into a deep baking dish. Fill the baking dish with hot water until it reaches halfway up the sides of the ramekins.
  4. Bake for about 45 minutes until the custard is set but slightly wobbly in the center.
  5. Remove the ramekins from the water bath and let cool at room temperature for about 30 minutes. Then cover the ramekins with plastic wrap and refrigerate for at least 2 hours.
  6. Sprinkle a thin layer of granulated sugar over each custard and caramelize with a kitchen torch until golden brown.

Nutrition

Serving: 1ramekinCalories: 320kcalCarbohydrates: 40gProtein: 4gFat: 15gSaturated Fat: 9gPolyunsaturated Fat: 0.5gMonounsaturated Fat: 3gCholesterol: 130mgSodium: 120mgPotassium: 250mgFiber: 2gSugar: 25gVitamin A: 3000IUVitamin C: 20mgCalcium: 80mgIron: 1.5mg

Notes

Use fresh Japanese sweet potatoes for best flavor and allow enough chilling time for flavors to meld beautifully.

Tried this recipe?

Let us know how it was!

Fluffy Japanese Cotton Cheesecake Cupcakes for a Dreamy Treat

December 12, 2025 by grace bellamy Leave a Comment

As I opened my oven door, the gentle waft of sweetness enveloped my kitchen, igniting a sense of nostalgia that transported me to cozy afternoons in Japan. Today, I’m excited to share my recipe for Fluffy Japanese Cotton Cheesecake Cupcakes, a delightful twist on the classic cheesecake that’s light and airy, yet completely satisfying. Not only are they incredibly easy to whip up in just about an hour, but they’re also a guaranteed crowd-pleaser—perfect for everything from casual family gatherings to special occasions. The best part? Each bite feels like a little cloud of joy, making it almost impossible to have just one. Are you ready to elevate your dessert game with this enchanting recipe that will have everyone asking for seconds? Let’s dive into the magic of these cupcakes together!

Fluffy Japanese Cotton Cheesecake Cupcakes

What Makes These Cupcakes So Special?

Light, Airy Texture: Each bite melts in your mouth, thanks to the whipped egg whites that create a featherlike quality.

Easy to Prepare: This recipe is uncomplicated and requires minimal baking skills, making it perfect for both beginners and seasoned home chefs.

Versatile Treat: Whether enjoyed with coffee, green tea, or a drizzle of fresh fruit, these cupcakes are the ideal sweet ending to any meal.

Impressive Presentation: Your guests will be awed by these delicate, fluffy creations that look as gorgeous as they taste.

Crowd-Pleasing Delight: With their delightful sweetness and unique texture, these cupcakes are bound to steal the spotlight at any gathering! Try pairing them with a dollop of whipped cream for an extra indulgent experience.

Fluffy Japanese Cotton Cheesecake Cupcake Ingredients

• For the Batter

  • Cream Cheese – 8 oz (225g); this rich base provides a creamy texture that’s essential for a delectable cheesecake flavor.
  • Granulated Sugar – ¼ cup (50g); this sweetness balances the tangy cream cheese perfectly.
  • Milk – ¼ cup (60g); helps to achieve a smooth and pourable batter.
  • Large Eggs – 2; these add richness and structure to your cupcakes.
  • Vanilla Extract – 1 tsp; a splash of vanilla enhances the overall flavor of the cupcakes.
  • All-Purpose Flour – ½ cup (60g); this creates stability while keeping the texture light.
  • Baking Powder – ½ tsp; a must for that lovely rise and fluff to your cupcakes.

• For the Egg Whites

  • Large Egg Whites – 2; whipped until stiff peaks form to provide an airy structure.
  • Granulated Sugar (for egg whites) – ¼ cup (50g); gradually added to achieve that perfect meringue consistency.

These Fluffy Japanese Cotton Cheesecake Cupcakes are not only a treat for the taste buds but also a delight to prepare. So gather these ingredients, and let’s dive into the bakery magic!

Step‑by‑Step Instructions for Fluffy Japanese Cotton Cheesecake Cupcakes

Step 1: Preheat the Oven
Begin by preheating your oven to 320°F (160°C) to create the perfect environment for baking. While it warms up, line a muffin tin with cupcake liners, ensuring each liner is snugly fitted. This will prepare your space for the delightful batter to come.

Step 2: Mix the Base Ingredients
In a mixing bowl, combine 8 oz of cream cheese, ¼ cup of granulated sugar, ¼ cup of milk, 2 large eggs, and 1 teaspoon of vanilla extract. Use an electric mixer to blend these ingredients until smooth and creamy, about 2-3 minutes. The mixture should be free of lumps and have a velvety texture, setting the stage for your Fluffy Japanese Cotton Cheesecake Cupcakes.

Step 3: Incorporate the Dry Ingredients
Next, sift in ½ cup of all-purpose flour and ½ teaspoon of baking powder to the cream cheese mixture. Stir gently with a spatula or wooden spoon until just combined; avoid overmixing to keep the batter light and airy. The mixture should be homogenous and slightly thicker than pancake batter, ensuring the cupcakes are fluffy as they bake.

Step 4: Whip the Egg Whites
In a separate, clean bowl, beat 2 large egg whites using an electric mixer. Begin on low speed and increase to medium-high until soft peaks form, about 2-3 minutes. Gradually add ¼ cup of granulated sugar, continuing to beat until stiff peaks form. The whites should be glossy and hold firm peaks, creating the perfect airy structure for your cupcakes.

Step 5: Fold in the Egg Whites
Gently fold the whipped egg whites into the cream cheese batter in three batches. Use a spatula to carefully combine, ensuring you maintain the volume of the egg whites. This folding technique is key to achieving the signature fluffiness of your Fluffy Japanese Cotton Cheesecake Cupcakes—be patient and gentle!

Step 6: Fill the Cupcake Liners
Once the batter is fully combined, carefully pour it into the prepared cupcake liners, filling each about ¾ full. Use a scoop or measuring cup for even distribution. This will help your cupcakes rise beautifully, creating that perfect cloud-like texture as they bake.

Step 7: Bake to Perfection
Slide the muffin tin into your preheated oven and bake for 25-30 minutes. Keep an eye on your cupcakes; they should rise and turn a delightful golden hue. A gentle poke should reveal that they spring back lightly, indicating they are cooked through yet fluffy—exactly how you want your Fluffy Japanese Cotton Cheesecake Cupcakes.

Step 8: Cool Before Serving
Once baked, remove the cupcakes from the oven and allow them to cool in the tin for about 10 minutes. Then, transfer them to a wire rack to cool completely. This step is crucial to keeping their light texture and allows you to enjoy them at their best—fluffy and delicious!

Fluffy Japanese Cotton Cheesecake Cupcakes

How to Store and Freeze Fluffy Japanese Cotton Cheesecake Cupcakes

Airtight Container: Store your cupcakes in an airtight container at room temperature for up to 3 days to maintain their fluffy texture and prevent drying out.

Refrigeration: If you prefer, keep them in the fridge for up to 5 days. Just be sure to let them come to room temperature before serving for the best taste.

Freezing: For longer storage, freeze the cupcakes for up to 2 months. Place them in a single layer on a baking sheet to freeze first, then transfer to a freezer bag or airtight container.

Thawing Tips: When ready to enjoy, thaw them overnight in the fridge or at room temperature for a couple of hours. They’ll be just as delightful as the day you baked them!

What to Serve with Fluffy Japanese Cotton Cheesecake Cupcakes

Indulging in these light and airy treats opens up a world of delightful pairings to enhance your dessert experience.

  • Fresh Berries: The tartness of strawberries or blueberries complements the sweetness of the cupcakes, bringing a refreshing contrast to each bite.

  • Dollop of Whipped Cream: A cloud of whipped cream adds creamy richness and a touch of decadence, elevating the elegance of your dessert.

  • Green Tea: This soothing beverage offers a gentle, earthy flavor that beautifully balances the sweetness of the cupcakes, making for a serene dessert experience.

  • Iced Coffee: The bold flavors of iced coffee contrast wonderfully with the lightness of the Fluffy Japanese Cotton Cheesecake Cupcakes, creating a satisfying afternoon treat.

  • Light Dessert Wine: A glass of sweet Riesling or sparkling wine pairs nicely, enhancing the flavors and giving your gathering a touch of sophistication.

  • Coconut Sorbet: A scoop of refreshing coconut sorbet introduces tropical notes and a creamy texture that mingles perfectly with the cupcakes' fluffiness.

  • Pistachio Crumble: Adding a sprinkle of crushed pistachios on top offers a delightful crunch and earthy flavor that beautifully contrasts with the soft texture of the cupcakes.

  • Chocolate Drizzle: A simple drizzle of melted chocolate provides a rich, decadent touch, making each bite an even more divine experience.

Make Ahead Options

These Fluffy Japanese Cotton Cheesecake Cupcakes are the perfect treat for meal prep enthusiasts! You can prepare the batter up to 24 hours in advance by mixing the cream cheese, sugar, milk, eggs, and vanilla, then sifting in the flour and baking powder. Store it covered in the refrigerator to maintain its freshness. The egg whites can be whipped and folded in just before baking to ensure they remain airy and fluffy. When you're ready to bake, simply fill the cupcake liners and pop them in the oven for that light, dreamy texture that your family will love. Enjoy the time savings, especially on busy weeknights!

Fluffy Japanese Cotton Cheesecake Cupcakes Variations

Feel free to experiment with these delightful twists on the classic recipe to suit your taste and dietary needs!

  • Gluten-Free: Substitute all-purpose flour with a gluten-free flour blend for a deliciously fluffy variation, perfect for gluten-sensitive friends.

  • Sugar-Free: Try using a sugar substitute, such as erythritol or stevia, to cater to a lower-sugar diet without sacrificing sweetness.

  • Add Zest: For a bright flavor, incorporate lemon or orange zest into the batter, adding a refreshing citrus note to every bite.

  • Chocolate Lovers: Fold in cocoa powder or chocolate chips for a chocolatey twist that will satisfy any chocoholic craving.

  • Fruit-Infused: Add a swirl of pureed berries or mango to the batter before baking to create a lovely marbled effect and a fruity flavor boost.

  • Dairy-Free: Swap cream cheese for a dairy-free alternative, like cashew cream, and use plant-based milk to cater to lactose intolerant guests.

  • Mini Versions: Pour the batter into mini muffin tins for bite-sized cupcakes, perfect for parties or gatherings where you want to offer a variety of treats.

  • Savory Spin: Introduce a pinch of herbs like rosemary or thyme to the batter for a savory take, pairing unexpectedly well with cheese platters.

Each of these variations adds a personal touch to your Fluffy Japanese Cotton Cheesecake Cupcakes, ensuring every batch is uniquely yours. If you’re looking for more inspiration, consider how their delightful sweetness pairs beautifully with a warm beverage like coffee or green tea. Trust me, your taste buds will thank you!

Tips for the Best Fluffy Japanese Cotton Cheesecake Cupcakes

  • Whip Carefully: Ensure egg whites are beaten to stiff peaks; this is crucial for the airy texture of your cupcakes. Avoid overmixing them into the batter to keep that fluffiness.

  • Prepped Ingredients: Make sure all your ingredients, especially the cream cheese, are at room temperature before you start. This helps achieve a smoother batter without lumps.

  • Watch Your Bake Time: Keep an eye on your cupcakes in the oven! Overbaking can lead to a denser texture, ruining the lightness of your Fluffy Japanese Cotton Cheesecake Cupcakes.

  • Cool Completely: Allow the cupcakes to cool before serving. This helps maintain their fluffy structure and enhances the flavors as they firm up a bit.

  • Use Fresh Ingredients: Fresh eggs and quality cream cheese will make a noticeable difference in texture and flavor, elevating your cupcakes from good to extraordinary!

Fluffy Japanese Cotton Cheesecake Cupcakes

Fluffy Japanese Cotton Cheesecake Cupcakes Recipe FAQs

How do I select the best cream cheese for this recipe?
Absolutely! When choosing cream cheese, look for a block cream cheese rather than a spreadable kind. This will yield a richer flavor and better texture. Opt for one that’s fresh and, if possible, full-fat for a more decadent result. Always check the expiration date to ensure optimal taste!

How should I store the cupcakes for freshness?
Very important! Store your Fluffy Japanese Cotton Cheesecake Cupcakes in an airtight container at room temperature for up to 3 days. If you want them to last longer, keep them in the refrigerator for up to 5 days. Just remember to let them sit at room temperature for a bit before serving; this brings back their delightful texture!

Can I freeze these cupcakes, and how should I do it?
Absolutely, you can freeze them! First, freeze the cupcakes on a baking sheet in a single layer until solid—this prevents them from sticking together. After they’re frozen, transfer them into a freezer bag or airtight container. They can last for up to 2 months in the freezer. When you're ready to enjoy, simply thaw them overnight in the fridge or at room temperature for a couple of hours. They'll taste just as amazing as fresh!

What should I do if my egg whites aren’t forming stiff peaks?
No worries, this can happen! Make sure your mixing bowl and beaters are completely clean and free of any grease or yolk, as even a small amount can hinder the egg whites' ability to whip. Start on low speed, gradually increasing to medium-high. If they still won’t stiffen, try adding a pinch of cream of tartar; this helps stabilize the meringue. Keep beating until those beautiful peaks form!

Are these cupcakes suitable for gluten-free diets?
While the original recipe includes all-purpose flour, you can easily make these Fluffy Japanese Cotton Cheesecake Cupcakes gluten-free by substituting it with a 1:1 gluten-free flour blend. Just ensure the blend contains xanthan gum for the best texture. Always check your other ingredients for gluten contamination if you're cooking for someone with celiac disease or gluten sensitivity!

Can my pets enjoy these cupcakes?
Not at all! While your Fluffy Japanese Cotton Cheesecake Cupcakes are delicious for humans, they aren't safe for pets, especially the cream cheese and sugar. Always keep these sweet treats away from your furry friends to avoid any tummy troubles.

Fluffy Japanese Cotton Cheesecake Cupcakes

Fluffy Japanese Cotton Cheesecake Cupcakes for a Dreamy Treat

Fluffy Japanese Cotton Cheesecake Cupcakes are light, airy, and perfect for any dessert occasion.
Print Recipe Pin Recipe
Prep Time 15 minutes mins
Cook Time 30 minutes mins
Cooling Time 10 minutes mins
Total Time 55 minutes mins
Servings: 12 cupcakes
Course: Dessert
Cuisine: Japanese
Calories: 140
Ingredients Equipment Method Nutrition Notes

Ingredients
  

For the Batter
  • 8 oz Cream Cheese this rich base provides a creamy texture that’s essential for a delectable cheesecake flavor.
  • ¼ cup Granulated Sugar this sweetness balances the tangy cream cheese perfectly.
  • ¼ cup Milk helps to achieve a smooth and pourable batter.
  • 2 large Eggs these add richness and structure to your cupcakes.
  • 1 teaspoon Vanilla Extract a splash of vanilla enhances the overall flavor of the cupcakes.
  • ½ cup All-Purpose Flour this creates stability while keeping the texture light.
  • ½ teaspoon Baking Powder a must for that lovely rise and fluff to your cupcakes.
For the Egg Whites
  • 2 large Egg Whites whipped until stiff peaks form to provide an airy structure.
  • ¼ cup Granulated Sugar (for egg whites) gradually added to achieve that perfect meringue consistency.

Equipment

  • Muffin tin
  • Electric mixer
  • spatula

Method
 

Step-by-Step Instructions
  1. Preheat your oven to 320°F (160°C) and line a muffin tin with cupcake liners.
  2. In a mixing bowl, combine cream cheese, granulated sugar, milk, eggs, and vanilla extract. Blend until smooth and creamy.
  3. Sift in all-purpose flour and baking powder, stirring gently until just combined.
  4. In a separate bowl, beat egg whites to soft peaks, then gradually add granulated sugar until stiff peaks form.
  5. Gently fold the whipped egg whites into the cream cheese batter in three batches.
  6. Pour the combined batter into the cupcake liners, filling each about ¾ full.
  7. Bake for 25-30 minutes, until golden and springy to the touch.
  8. Allow the cupcakes to cool in the tin for 10 minutes before transferring to a wire rack.

Nutrition

Serving: 1cupcakeCalories: 140kcalCarbohydrates: 14gProtein: 3gFat: 7gSaturated Fat: 4gMonounsaturated Fat: 2gCholesterol: 50mgSodium: 100mgPotassium: 70mgSugar: 6gVitamin A: 300IUCalcium: 50mgIron: 0.4mg

Notes

Ensure egg whites are beaten to stiff peaks for airy texture. All ingredients should be at room temperature for a smoother batter.

Tried this recipe?

Let us know how it was!

Savory Beef Ribs with Tomato Sauce and Chipotle Delight

December 12, 2025 by grace bellamy Leave a Comment

As I stood in my kitchen, the savory scent of slow-cooking beef ribs mingling with the smoky allure of chipotle powder filled the air, I knew I was onto something special. My recipe for Beef Ribs with Tomato Sauce and Chipotle is a culinary masterpiece that has become a family favorite, captivating our hearts and taste buds. This dish not only promises you a delightful experience with minimal prep but also rewards you with tender, fall-off-the-bone ribs that leave everyone craving more. Plus, the sweet and tangy tomato sauce brings a satisfying depth of flavor that elevates every bite. Are you ready to indulge in a comforting meal that will have your loved ones showering you with compliments? Let's dive into this scrumptious adventure!

Beef Ribs with Tomato Sauce and Chipotle

Why Are These Ribs So Irresistible?

Savory, Smoky Indulgence: The rich flavor of chipotle blends perfectly with the tomato sauce, creating a sauce that is both sweet and smoky, elevating the beef ribs to a whole new level.

Tender & Juicy: Slow-cooked to perfection, these ribs become incredibly tender and flavorful. Just a fork is all you need to enjoy this delightful dish.

Minimal Prep, Maximum Flavor: With just 15 minutes of hands-on time, you can enjoy a crowd-pleasing meal without spending all day in the kitchen. Perfect for busy weeknights or special occasions!

Versatile Serving Options: Serve these ribs with a side of cornbread or a fresh garden salad for the ultimate dining experience. They fit effortlessly into any meal setting.

Guaranteed Compliments: Your family and friends won't be able to resist complimenting your culinary skills after they taste this dish. For additional side ideas, check out my guide on perfectly paired side dishes.

Beef Ribs with Tomato Sauce and Chipotle Ingredients

For the Ribs
• 4 pounds beef ribs – Choose well-marbled ribs for the best flavor and tenderness.
• 1 tablespoon chipotle powder – Adds a smoky heat that enhances the savory depth of the dish.
• 1 tablespoon salt – Essential for seasoning and enhancing the natural flavors of the meat.
• 1 teaspoon black pepper – A pinch of spice to balance the rich flavors.
• 1 teaspoon garlic powder – Infuses a delicious, aromatic undertone.
• 1 teaspoon onion powder – Adds subtle sweetness and depth to the seasoning mix.
• 1 tablespoon olive oil – Helps with browning the ribs for added flavor during searing.

For the Sauce
• 2 cups tomato sauce – The base of the sauce that brings sweet and tangy freshness.
• 1 tablespoon brown sugar – Balances the acidity of the tomatoes and enhances sweetness.
• 2 tablespoons apple cider vinegar – Introduces a tangy brightness to the sauce.
• 1 teaspoon smoked paprika – Contributes an additional layer of smokiness, complementing the chipotle.
• ½ teaspoon cumin – Offers a warm earthiness that rounds out the flavors beautifully.

These ingredients combine to create my famous Beef Ribs with Tomato Sauce and Chipotle, which your family will rave about!

Step‑by‑Step Instructions for Beef Ribs with Tomato Sauce and Chipotle

Step 1: Preheat the Oven
Begin your culinary adventure by preheating your oven to 300°F (150°C). This low and slow cooking temperature is crucial for achieving that tender fall-off-the-bone effect that makes the Beef Ribs with Tomato Sauce and Chipotle irresistibly delicious. Allow your oven to reach the desired temperature while you prepare the ribs.

Step 2: Season the Ribs
Generously rub the beef ribs with chipotle powder, salt, black pepper, garlic powder, and onion powder. Ensure each rib is well-coated to enhance its flavor profile. Feel free to massage the spices into the meat for an even distribution. This process should take you about 5 minutes, setting the stage for those boldly flavored ribs.

Step 3: Sear the Ribs
Heat a large skillet over medium heat and pour in the olive oil, letting it warm for about a minute. Carefully place the seasoned ribs into the skillet, searing each side for about 3-4 minutes until you achieve a rich, golden-brown crust. This step not only adds flavor but also deepens the visual appeal of your Beef Ribs with Tomato Sauce and Chipotle.

Step 4: Prepare the Sauce
In a mixing bowl, combine the tomato sauce, brown sugar, apple cider vinegar, smoked paprika, and cumin. Stir the ingredients together until the mixture is smooth and cohesive. This robust sauce balances sweetness with acidity, enhancing the overall flavor of the dish. Allow it to sit for a couple of minutes while the ribs finish searing, letting the flavors meld together.

Step 5: Combine Ribs and Sauce
Transfer the seared beef ribs into a roasting pan, ensuring they are spaced apart for even cooking. Pour the luscious tomato sauce mixture generously over the ribs, ensuring they're completely covered. This integration of flavors will create a mouthwatering experience as the beef ribs cook in the sauce, developing incredible depth during the baking process.

Step 6: Cover and Bake
Cover the roasting pan tightly with aluminum foil to trap in the moisture. Place it in the preheated oven and let the Beef Ribs with Tomato Sauce and Chipotle bake for 3 to 4 hours. The low temperature allows the connective tissue to break down, resulting in tender, flavorful ribs that practically melt in your mouth.

Step 7: Broil for a Glaze
Once the ribs are tender, carefully remove the foil and switch the oven to broil. Broil the ribs for an additional 10-15 minutes, keeping a close eye on them. This step creates a caramelized, golden layer of sauce on top, enhancing both texture and flavor for your Beef Ribs with Tomato Sauce and Chipotle.

Step 8: Rest and Serve
After broiling, take the ribs out of the oven and let them rest for about 10 minutes. This allow the juices to redistribute within the meat, ensuring each bite is succulent. Once rested, serve your delicious ribs with a side of cornbread or salad, and watch as your family and friends rave over your culinary creation!

Beef Ribs with Tomato Sauce and Chipotle

Expert Tips for Beef Ribs with Tomato Sauce and Chipotle

Searing is Key: Make sure to sear the beef ribs well for a nice crust; it adds depth and flavor that shines through in the final dish.

Balance the Heat: If you prefer a milder sauce, reduce the chipotle powder or add more brown sugar to achieve the perfect balance for your Beef Ribs with Tomato Sauce and Chipotle.

Resting Time: Allow the ribs to rest after removing them from the oven. This step ensures the juices are sealed in, making every bite tender and juicy.

Foil Technique: When covering the roasting pan, ensure it’s tightly sealed to trap moisture. This is vital for producing ribs that fall off the bone.

Watch While Broiling: Keep an eye on the ribs during the broiling process to prevent burning. Just a few minutes can make a big difference in achieving that perfect caramelization.

How to Store and Freeze Beef Ribs with Tomato Sauce and Chipotle

Fridge: Store leftover Beef Ribs with Tomato Sauce and Chipotle in an airtight container for up to 3 days. Make sure the sauce covers the ribs to keep them moist.

Freezer: For long-term storage, freeze the ribs in a vacuum-sealed bag or airtight container for up to 3 months. Portion them for easy meal planning.

Reheating: Thaw in the fridge overnight before reheating. Warm in the oven at 350°F (175°C) for about 20 minutes or until heated through, keeping the sauce intact for extra flavor.

Tip: When storing, ensure that the ribs are cooled to room temperature before sealing to prevent condensation and maintain quality.

What to Serve with Beef Ribs with Tomato Sauce and Chipotle

Transform your meal into a feast by pairing these juicy ribs with vibrant, delicious sides.

  • Creamy Coleslaw: A crunchy, tangy contrast to the savory ribs that refreshes the palate after each rich bite.

  • Garlic Bread: Crispy, buttery slices that soak up the rich tomato sauce, offering a delightful flavor combination with every swath.

  • Cornbread Muffins: Sweet and soft, these muffins add a warm touch to the meal while complementing the smoky flavors brilliantly.

  • Grilled Vegetables: Colorful seasonal veggies bring a smoky char and freshness, making them a balanced counterpart to the rich beef.

  • Potato Salad: Creamy and hearty, this cool side provides a textural contrast while enhancing the comfort food appeal of the meal.

  • Spicy Pickles: A zesty bite of pickled veggies adds a refreshing twist, cutting through the richness of the ribs and enhancing your dining experience.

  • Homemade Mac and Cheese: Creamy, cheesy goodness that perfectly pairs with the bold flavors of the beef, creating a satisfying, indulgent feast.

  • Red Wine: A medium-bodied red, like Merlot, beautifully complements the smoky and savory notes of the beef, enhancing your tasting experience.

Enjoy these pairings that will elevate your Beef Ribs with Tomato Sauce and Chipotle into a memorable and comforting meal!

Beef Ribs with Tomato Sauce and Chipotle Variations

Feel free to embrace your creative side and customize this dish to suit your taste or dietary needs!

  • Spicy Kick: Add extra chipotle powder or some diced jalapeños to the sauce for a fiery boost of heat. You can adjust the amount to suit your spice tolerance; just a little can go a long way!

  • Smoky BBQ Twist: Swap half of the tomato sauce for your favorite barbecue sauce to give the ribs a sweet, smoky layer. This twist adds a delightful barbecue flavor that’s perfect for summer gatherings.

  • Herb Infusion: Incorporate fresh herbs like thyme or rosemary into the sauce for an aromatic touch. These herbs infuse the dish with fresh flavors and enhance the savory notes of the ribs.

  • Vegetarian Option: Substitute the beef ribs with portobello mushrooms for a hearty and flavorful vegetarian option. Marinate them in the same seasoning before roasting for rich flavor.

  • Citrus Zing: Add the juice and zest of one orange to the sauce for a bright, citrusy undertone. The citrus enhances the sweetness and adds a refreshing balance to the dish.

  • Low-Sodium Version: Substitute salt with a salt-free seasoning blend to reduce sodium intake without sacrificing taste. This way, the dish remains health-conscious while still being delicious.

  • Sweet and Tangy Combo: Mix in some chopped olives or capers to your sauce for a unique savory flavor burst. Together, they bring a delightful brininess and complexity that complements the sweetness of the tomato.

  • Mushroom Medley: Add sautéed mushrooms to the sauce just before serving for an extra layer of umami. They contribute a lovely earthy flavor that pairs well with the ribs and sauce.

Exploring these variations will bring new life to your Beef Ribs with Tomato Sauce and Chipotle, ensuring that every meal feels fresh and exciting!

Make Ahead Options

These Beef Ribs with Tomato Sauce and Chipotle are perfect for busy cooks looking to streamline their meal preparation! You can season and sear the ribs up to 24 hours in advance; simply cover them tightly and refrigerate to maintain their flavor. The savory tomato sauce can also be prepared ahead of time and stored in the fridge for up to 3 days. When you're ready to enjoy your delicious ribs, just place the seared ribs in a roasting pan, pour the chilled sauce over them, cover, and bake as usual. By prepping ahead, you'll enjoy all the comforting flavors without the last-minute rush!

Beef Ribs with Tomato Sauce and Chipotle

Beef Ribs with Tomato Sauce and Chipotle Recipe FAQs

How do I choose the best beef ribs?
Absolutely! When selecting beef ribs, look for those with good marbling—this means the fat is evenly distributed throughout the meat. Marbled ribs will be juicier and more flavorful once cooked. Avoid ribs that have dark spots all over, as this can indicate poor quality.

What is the best way to store leftover beef ribs?
Store leftover Beef Ribs with Tomato Sauce and Chipotle in an airtight container in the fridge for up to 3 days. Make sure the sauce covers the ribs to prevent them from drying out. You can also wrap them tightly in plastic wrap followed by aluminum foil for extra protection against air.

Can I freeze the beef ribs?
Certainly! For freezing, allow the ribs to cool completely before packaging. Place them in a vacuum-sealed bag or an airtight container and they can be frozen for up to 3 months. If using a freezer bag, try to remove as much air as possible to prevent freezer burn.

How can I reheat frozen beef ribs?
To reheat, first, thaw the ribs in the fridge overnight. Once thawed, preheat your oven to 350°F (175°C). Place the ribs in a baking dish with the sauce, cover with foil, and warm them for about 20 minutes or until heated through. This will help maintain the moisture and flavors.

What are some common issues when cooking ribs?
Very! One common issue is overcooking, which can lead to dry ribs. To avoid this, keep an eye on the ribs during the last hour of baking and ensure you're cooking at the recommended temperature. Another issue is the sauce burning during broiling; keep the oven door slightly ajar to monitor closely, and adjust timing as needed.

Are there any dietary considerations for this recipe?
If you're cooking for guests with dietary restrictions, it's important to remember that the chipotle powder has some heat, which might not be suitable for everyone. You could reduce the amount or offer a milder option for those sensitive to spice. Additionally, ensure that none of the seasonings contain allergens for your guests.

Beef Ribs with Tomato Sauce and Chipotle

Savory Beef Ribs with Tomato Sauce and Chipotle Delight

This Beef Ribs with Tomato Sauce and Chipotle recipe offers tender, flavorful ribs that are a family favorite.
Print Recipe Pin Recipe
Prep Time 15 minutes mins
Cook Time 4 hours hrs
Resting Time 10 minutes mins
Total Time 4 hours hrs 25 minutes mins
Servings: 4 ribs
Course: Main Dishes
Cuisine: American
Calories: 540
Ingredients Equipment Method Nutrition Notes

Ingredients
  

For the Ribs
  • 4 pounds beef ribs Choose well-marbled ribs for the best flavor and tenderness.
  • 1 tablespoon chipotle powder Adds a smoky heat that enhances the savory depth of the dish.
  • 1 tablespoon salt Essential for seasoning and enhancing the natural flavors of the meat.
  • 1 teaspoon black pepper A pinch of spice to balance the rich flavors.
  • 1 teaspoon garlic powder Infuses a delicious, aromatic undertone.
  • 1 teaspoon onion powder Adds subtle sweetness and depth to the seasoning mix.
  • 1 tablespoon olive oil Helps with browning the ribs for added flavor during searing.
For the Sauce
  • 2 cups tomato sauce The base of the sauce that brings sweet and tangy freshness.
  • 1 tablespoon brown sugar Balances the acidity of the tomatoes and enhances sweetness.
  • 2 tablespoons apple cider vinegar Introduces a tangy brightness to the sauce.
  • 1 teaspoon smoked paprika Contributes an additional layer of smokiness, complementing the chipotle.
  • ½ teaspoon cumin Offers a warm earthiness that rounds out the flavors beautifully.

Equipment

  • skillet
  • roasting pan
  • Mixing Bowl
  • Aluminum Foil

Method
 

Cooking Steps
  1. Preheat the oven to 300°F (150°C).
  2. Generously rub the beef ribs with chipotle powder, salt, black pepper, garlic powder, and onion powder.
  3. Heat olive oil in a large skillet over medium heat and sear the seasoned ribs for 3-4 minutes on each side until golden-brown.
  4. In a mixing bowl, combine tomato sauce, brown sugar, apple cider vinegar, smoked paprika, and cumin. Stir until smooth.
  5. Transfer seared ribs to a roasting pan, cover with tomato sauce mixture, and space apart for even cooking.
  6. Cover the pan tightly with aluminum foil and bake for 3 to 4 hours.
  7. Remove foil and broil ribs for 10-15 minutes for a caramelized glaze.
  8. Let the ribs rest for 10 minutes before serving.

Nutrition

Serving: 1ribsCalories: 540kcalCarbohydrates: 12gProtein: 40gFat: 36gSaturated Fat: 12gPolyunsaturated Fat: 2gMonounsaturated Fat: 18gCholesterol: 120mgSodium: 900mgPotassium: 800mgFiber: 2gSugar: 6gVitamin A: 500IUVitamin C: 5mgCalcium: 50mgIron: 4mg

Notes

For added indulgence, serve with cornbread or a garden salad. Adjust chipotle powder for heat preference.

Tried this recipe?

Let us know how it was!

Delicious Vanilla Custard Cream Squares for Sweet Moments

December 12, 2025 by grace bellamy Leave a Comment

The soft, velvety texture of vanilla custard cream squares can transport you to a world of sweet nostalgia with every bite. As I took my first slice, it brought back memories of family gatherings where this delightful treat always stole the spotlight. This Vanilla Custard Cream Squares recipe not only showcases an exquisite balance of flavors, but it also offers a simple yet rewarding baking experience that’s sure to impress. Not only is it crowd-pleaser, but it's also a make-ahead dessert that allows you to savor your time with loved ones. With just a few straightforward steps, you can create a stunning dessert that’s guaranteed to be a hit. Ready to create your own masterpiece and bring a taste of comfort into your home? Dive into the recipe below!

Vanilla Custard Cream Squares

Why Make Vanilla Custard Cream Squares?

Irresistible Creaminess: Each square features a luscious custard layer that melts in your mouth, making it a comforting dessert that brightens any occasion.
Easy Baking Process: With just a few simple steps, even novice bakers can whip up these delightful treats without stress.
Versatile Serving Options: Serve chilled with a sprinkle of powdered sugar or alongside fresh fruit for an elegant touch.
Make Ahead Convenience: Prepare these squares a day in advance for a hassle-free dessert that’s sure to impress. For more make-ahead ideas, check out our best make-ahead desserts.
Nostalgic Appeal: The taste and texture will remind you of childhood events and family gatherings, bringing back precious memories with every bite.

Vanilla Custard Cream Squares Ingredients

Here's everything you need to create these delightful squares that are sure to impress!

For the Crust

  • All-purpose flour – 1 ½ cups; this forms the base of your delicious dessert.
  • Unsalted butter – ½ cup; for added richness and a tender crust.
  • Granulated sugar – ½ cup; sweetness to balance the savory notes.
  • Large egg – 1; helps bind the crust together.
  • Vanilla extract – 1 teaspoon; enhances the flavor of the crust.

For the Custard Filling

  • Whole milk – 2 cups; creates a creamy consistency that's simply irresistible.
  • Granulated sugar – ½ cup; ensures the custard is sweet and delightful.
  • Large egg yolks – 4; adds a rich, velvety texture to the custard.
  • Cornstarch – 3 tablespoons; thickens the custard perfectly for slicing into squares.
  • Unsalted butter – 2 tablespoons; enriches the custard with silky smoothness.
  • Vanilla extract – 1 tablespoon; the star flavor that defines these Vanilla Custard Cream Squares!

Enjoy creating this delectable treat that brings warmth to your kitchen!

Step‑by‑Step Instructions for Vanilla Custard Cream Squares

Step 1: Prepare the Oven and Baking Pan
Preheat your oven to 350°F (175°C) to ensure a perfect bake for your Vanilla Custard Cream Squares. While the oven heats, grease a square baking pan to prevent the crust from sticking. You can use butter or non-stick spray for this step, making it easier to remove the squares later on.

Step 2: Make the Crust Dough
In a mixing bowl, combine 1 ½ cups of all-purpose flour, ½ cup of unsalted butter, ½ cup of granulated sugar, 1 large egg, and 1 teaspoon of vanilla extract. Mix these ingredients until a smooth dough forms. It should be cohesive and slightly tacky, which will give your squares a wonderful base.

Step 3: Press the Dough into the Pan
Take the dough and evenly press it into the bottom of the prepared baking pan, ensuring it covers the entire surface. Use your fingers or the back of a spatula to create a uniform layer, which will provide the foundation for your delicious custard filling.

Step 4: Bake the Crust
Place the baking pan in the preheated oven and bake the crust for 15 to 20 minutes, or until it turns lightly golden. Keep an eye on it to avoid overbaking, as a golden hue signifies it's ready for the custard. Remove it and set aside to cool slightly.

Step 5: Heat the Milk
In a saucepan over medium heat, pour in 2 cups of whole milk. Stir occasionally until the milk is steaming but not boiling; this usually takes about 5-7 minutes. Heating the milk is crucial for creating that smooth custard texture later on, so be attentive!

Step 6: Whisk the Egg Mixture
In a separate bowl, whisk together ½ cup of granulated sugar, 4 large egg yolks, and 3 tablespoons of cornstarch until the mixture is smooth and well-combined. This will be the base for your custard filling, so make sure there are no lumps before proceeding.

Step 7: Combine the Milk with the Egg Mixture
Gradually pour the steaming milk into the egg mixture while whisking constantly. This helps temper the eggs and prevents them from curdling, resulting in a silky custard. Mix until the mixture is fully incorporated and smooth, without any clumps.

Step 8: Cook the Custard
Return the combined mixture to the saucepan and cook over medium heat, stirring constantly with a wooden spoon or whisk. As it heats, the custard will thicken—this should take about 5-7 minutes. You’ll know it’s ready when it coats the back of the spoon.

Step 9: Add Butter and Vanilla
Once thickened, remove the custard from the heat and stir in 2 tablespoons of unsalted butter and 1 tablespoon of vanilla extract. Mix until both ingredients are completely melted and incorporated, offering a luscious finish to your Vanilla Custard Cream Squares.

Step 10: Pour Custard Over the Crust
Carefully pour the custard filling over the baked crust, using a spatula to spread it evenly. Make sure the custard reaches all corners of the pan for uniform texture in every square. This is where the magic happens, transforming your crust into a creamy delight.

Step 11: Cool and Chill
Allow the assembled Vanilla Custard Cream Squares to cool at room temperature for about 30 minutes. After that, refrigerate for at least 2 hours to let the custard set properly. Chilling is vital for clean slicing later on, so be patient!

Step 12: Slice and Serve
Once chilled, remove the squares from the fridge and slice them into equal squares with a sharp knife. Serve each square chilled, optionally dusting with powdered sugar or adding fresh fruit for a delightful finishing touch. Your Vanilla Custard Cream Squares are now ready to wow your family and friends!

Vanilla Custard Cream Squares

Vanilla Custard Cream Squares Variations

Feel free to let your culinary creativity shine as you customize these delightful squares with these tasty twists!

  • Dairy-Free: Substitute whole milk with almond or coconut milk for a creamy, lactose-free version. Embrace the distinct flavor that these alternatives bring to each bite!

  • Gluten-Free: Use a 1:1 gluten-free flour blend in place of all-purpose flour to craft a crust suitable for everyone. It's a wonderful way to enjoy the same flavors and textures without sacrificing taste!

  • Chocolatey Delight: Swirl in some melted dark chocolate into the custard mixture before pouring it over the crust. This rich addition will elevate your squares into a heavenly chocolate custard dream!

  • Fruit Infusion: Fold in fresh berries like raspberries or blueberries into the custard before pouring it over the crust. Their vibrant colors and tartness will add a delightful contrast to the sweetness!

  • Zesty Lemon: Add the zest of one lemon to the custard mixture for a bright, citrusy kick. This refreshing twist can invoke memories of sunny summer days and will be appreciated by all.

  • Nutty Texture: Sprinkle finely chopped nuts like almonds or hazelnuts on top of the custard before chilling. This enhances the creaminess with a pleasing crunch, making each bite more exciting!

  • Spice It Up: Incorporate a dash of cinnamon or nutmeg into the custard for a warm, spiced flavor realm. This aromatic twist will remind you of cozy fall days and family gatherings.

  • Caramel Drizzle: Once the squares are set, drizzle homemade or store-bought caramel sauce over each square for an indulgent finish. The combination of flavors will have everyone coming back for seconds!

For more delightful ideas, you might enjoy our tips on serving suggestions or explore other scrumptious desserts that can be made in advance!

What to Serve with Vanilla Custard Cream Squares

Indulging in these delightful squares can be even more special with the perfect companions that elevate flavors and textures.

  • Fresh Berries: The tartness of berries like strawberries or raspberries adds a refreshing contrast to the creamy sweetness of the custard. Serve them alongside for a burst of color and flavor.

  • Whipped Cream: A dollop of lightly sweetened whipped cream creates an airy companion that complements the richness of the squares beautifully.

  • Chocolate Sauce: Drizzling a rich chocolate sauce over the custard squares brings a decadent touch that chocolate lovers will adore. It enhances the dessert's sweetness and adds depth.

  • Lemon Zest: Adding a sprinkle of fresh lemon zest brightens the overall flavor profile, creating a zesty contrast that uplifts the sweetness of the vanilla.

  • Coffee or Espresso: A smooth cup of coffee or a shot of espresso provides a lovely counterbalance to the rich custard while also serving as a comforting way to finish your meal.

  • Chocolate Chip Cookies: The crunch and softness of chocolate chip cookies invite a nostalgic vibe that pairs wonderfully with the custard’s creaminess. Enjoy both for a delightful tasting experience that feels like home!

Expert Tips for Vanilla Custard Cream Squares

  • Perfect Crust: Make sure the crust is evenly pressed into the pan to avoid uneven baking. A well-baked crust is crucial for holding the custard filling!

  • Temperature Control: When heating the milk, avoid boiling it. Steaming is enough, as overheating can lead to a grainy custard. Patience is key here!

  • Whisk Constantly: When combining the hot milk with the egg mixture, whisk continuously to prevent the egg yolks from cooking too quickly. Smooth custard is your goal!

  • Chill Properly: Don’t skip the chilling time. Allowing the Vanilla Custard Cream Squares to set in the refrigerator is essential for clean slices and enhanced flavor.

  • Presentation Matters: Consider garnishing with fresh fruit or a sprinkle of powdered sugar before serving to elevate the visual appeal and the taste!

Make Ahead Options

These Vanilla Custard Cream Squares are perfect for busy cooks looking to streamline their dessert prep! You can prepare the crust and custard filling up to 24 hours in advance for a hassle-free experience. Simply bake the crust, let it cool, and then pour the custard over it. Once assembled, cover the pan tightly with plastic wrap to keep the custard fresh and prevent any odors from the fridge. When you're ready to serve, allow the squares to chill in the refrigerator for at least 2 hours (or overnight) for the best flavor and texture. With these make-ahead options, you’ll have a delightful treat ready to enjoy without the last-minute rush!

Storage Tips for Vanilla Custard Cream Squares

  • Room Temperature: Best enjoyed chilled, do not leave out for more than 2 hours to maintain flavor and freshness.

  • Fridge: Store uneaten squares in an airtight container in the refrigerator for up to 3 days. This helps maintain the creamy texture of the custard filling.

  • Freezer: For longer storage, freeze cut squares in a single layer, then transfer to a freezer-safe container. They can be frozen for up to 2 months. Thaw overnight in the fridge before serving.

  • Reheating: These squares are best served cold. If desired, bring to room temperature before serving for a softer custard experience. Enjoy your Vanilla Custard Cream Squares!

Vanilla Custard Cream Squares

Vanilla Custard Cream Squares Recipe FAQs

How do I choose ripe ingredients for my Vanilla Custard Cream Squares?
Absolutely! Selecting quality ingredients is key. For the egg yolks, choose large, fresh eggs for optimal flavor and richness. The vanilla extract should be pure for the best aroma and taste. With the milk, whole milk offers the creamy consistency needed for the custard, but if you're using alternatives like almond or soy milk, make sure they're unsweetened for balanced sweetness.

How should I store my Vanilla Custard Cream Squares?
Very! Store any uneaten squares in an airtight container in the refrigerator for up to 3 days. This helps maintain the creamy texture of the custard and keep the crust fresh. If they’re out for more than two hours at room temperature, it’s best to refrigerate them to ensure food safety.

Can I freeze Vanilla Custard Cream Squares?
Yes, absolutely! To freeze, cut your Vanilla Custard Cream Squares into individual portions. Place them in a single layer on a baking sheet to flash freeze for about 1-2 hours. Afterward, transfer them to a freezer-safe container or zip-top bag. These squares can be frozen for up to 2 months. When you’re ready to enjoy, simply thaw them overnight in the refrigerator.

What if my custard doesn’t thicken properly?
Great question! If your custard doesn't thicken, it may be due to undercooking or not whisking enough. Make sure to keep stirring constantly while cooking the custard over medium heat to prevent clumping. If it’s still too runny, you can return the mixture to the heat and continue cooking for a few more minutes until it’s thickened to your liking.

Are Vanilla Custard Cream Squares suitable for people with dietary restrictions?
Absolutely! These squares can cater to various dietary needs. They can be made with dairy-free alternatives, like almond or soy milk, making them accessible to those who are lactose intolerant. If you have egg allergies, consider using an egg substitute designed for custards, such as a mixture of cornstarch and water as a thickening agent. Always check ingredient labels for allergens and feel free to customize to suit your needs!

How do I serve my Vanilla Custard Cream Squares?
Very well! Serve these delicious squares chilled, dusted with powdered sugar, or accompanied by fresh fruit for an elegant presentation. You can even add a dollop of whipped cream or a fresh mint sprig for a touch of color. The more the merrier; make it a dessert centerpiece!

Vanilla Custard Cream Squares

Delicious Vanilla Custard Cream Squares for Sweet Moments

Indulge in Vanilla Custard Cream Squares, a nostalgic dessert that brings comfort and sweetness to any occasion.
Print Recipe Pin Recipe
Prep Time 30 minutes mins
Cook Time 25 minutes mins
Chilling Time 2 hours hrs
Total Time 2 hours hrs 55 minutes mins
Servings: 12 squares
Course: Dessert
Cuisine: American
Calories: 200
Ingredients Equipment Method Nutrition Notes

Ingredients
  

For the Crust
  • 1.5 cups All-purpose flour this forms the base of your delicious dessert.
  • 0.5 cups Unsalted butter for added richness and a tender crust.
  • 0.5 cups Granulated sugar sweetness to balance the savory notes.
  • 1 pcs Large egg helps bind the crust together.
  • 1 teaspoon Vanilla extract enhances the flavor of the crust.
For the Custard Filling
  • 2 cups Whole milk creates a creamy consistency that's simply irresistible.
  • 0.5 cups Granulated sugar ensures the custard is sweet and delightful.
  • 4 pcs Large egg yolks adds a rich, velvety texture to the custard.
  • 3 tablespoons Cornstarch thickens the custard perfectly for slicing into squares.
  • 2 tablespoons Unsalted butter enriches the custard with silky smoothness.
  • 1 tablespoon Vanilla extract the star flavor that defines these Vanilla Custard Cream Squares!

Equipment

  • Mixing Bowl
  • Saucepan
  • baking pan
  • Whisk
  • spatula

Method
 

Step-by-Step Instructions
  1. Preheat your oven to 350°F (175°C) and grease a square baking pan.
  2. In a mixing bowl, combine the crust ingredients to form a smooth dough.
  3. Evenly press the dough into the bottom of the prepared baking pan.
  4. Bake the crust for 15 to 20 minutes or until lightly golden, then cool slightly.
  5. Heat the milk in a saucepan over medium heat until steaming.
  6. In a separate bowl, whisk together the sugar, egg yolks, and cornstarch.
  7. Gradually pour the hot milk into the egg mixture while whisking constantly.
  8. Return the mixture to the saucepan and cook over medium heat, stirring until thickened.
  9. Remove from heat and stir in butter and vanilla extract.
  10. Pour custard over the baked crust, spreading it evenly.
  11. Allow to cool at room temperature for 30 minutes, then refrigerate for at least 2 hours.
  12. Slice into squares and serve chilled, optionally garnished with powdered sugar or fresh fruit.

Nutrition

Serving: 1squareCalories: 200kcalCarbohydrates: 25gProtein: 3gFat: 10gSaturated Fat: 6gMonounsaturated Fat: 4gCholesterol: 70mgSodium: 150mgPotassium: 100mgFiber: 1gSugar: 10gVitamin A: 5IUVitamin C: 1mgCalcium: 10mgIron: 3mg

Notes

Ensure the crust is evenly pressed for a uniform texture. Follow the chilling step for perfect slices.

Tried this recipe?

Let us know how it was!

Hearty Beef Sausage Casserole for Cozy Nights In

December 12, 2025 by grace bellamy Leave a Comment

As I stirred the bubbling pot of Mary Berry Beef Sausage Casserole, the aroma filled my kitchen like a warm hug on a chilly evening. This hearty dish is my go-to for those weeknights when I crave comfort without spending hours in the kitchen. With just 15 minutes of prep, this casserole is not only quick to make but also a delightful crowd-pleaser that the whole family will love. The combination of succulent beef sausages and vibrant vegetables simmering together creates a symphony of flavors that dances on the palate. Plus, it’s a fantastic meal for batch cooking—perfect for those busy days when you need a nourishing option waiting in the fridge. Are you ready to dive into this cozy recipe that’s sure to become a family favorite?

Beef Sausage Casserole

Why is this casserole a must-try?

Simplicity at its finest: With just 15 minutes of prep time, this recipe is perfect for anyone looking to whip up a comforting meal without fuss.

Flavor packed: The juicy beef sausages paired with the savory vegetables create a delicious medley that tantalizes the taste buds.

Versatile for any occasion: Whether it's a cozy weeknight dinner or a gathering with friends, this casserole is sure to impress.

Batch cooking: Make a generous portion and enjoy leftovers throughout the week. It’s the ultimate time-saving solution for busy schedules!

Crowd-pleaser: Everyone will be coming back for seconds, making it an ideal dish for family gatherings or cozy nights in. Don’t miss out on this warm, hearty delight!

Beef Sausage Casserole Ingredients

• Here's everything you need for this cozy dish!

For the Casserole
• 6 beef sausages – use quality sausages for a richer flavor in your beef sausage casserole.
• 1 tablespoon olive oil – this helps sauté the vegetables to perfection without sticking.
• 1 large onion, chopped – adds sweetness and depth to the casserole.
• 2 carrots, diced – bring a touch of natural sweetness and color to the dish.
• 2 celery sticks, diced – adds a nice crunch and aromatic flavor.
• 400g canned chopped tomatoes – a must for that tangy base that brings everything together.
• 250ml beef stock – enhances the savory flavors and adds moisture.
• 1 tablespoon Worcestershire sauce – deepens the umami flavor that makes this casserole irresistible.
• 1 teaspoon dried oregano – adds a hint of earthiness and freshness to the blend.
• Salt, to taste – brings out all the flavors, so adjust according to preference.
• Black pepper, to taste – a sprinkle adds warmth, enhancing the overall taste of the dish.

This hearty beef sausage casserole is perfect for cozy nights in, and its simplicity makes it a must-try for everyone craving home-cooked goodness!

Step‑by‑Step Instructions for Beef Sausage Casserole

Step 1: Preheat Your Oven
Start by preheating your oven to 180°C (350°F). This temperature is essential for ensuring that your Beef Sausage Casserole cooks evenly and the flavors meld beautifully. While the oven warms up, gather all your ingredients so you’re ready to create this comforting dish!

Step 2: Sauté the Vegetables
In a large oven-safe pot or casserole dish, heat 1 tablespoon of olive oil over medium heat. Once the oil is shimmering, add the chopped onion, diced carrots, and diced celery. Stir frequently for about 5–7 minutes until the vegetables soften and the onion turns translucent, creating a fragrant base for your casserole.

Step 3: Brown the Sausages
Next, add the 6 beef sausages to the pot, making sure to turn them occasionally. Brown the sausages on all sides, which should take about 6–8 minutes. This step not only enhances the flavor but also gives the sausages a lovely golden color, adding richness to your Beef Sausage Casserole.

Step 4: Combine the Ingredients
Once the sausages are nicely browned, stir in the 400g canned chopped tomatoes, 250ml beef stock, 1 tablespoon Worcestershire sauce, and 1 teaspoon dried oregano. Season your mixture with salt and black pepper to taste. The rich colors and fragrances will fill your kitchen, indicating that the casserole is coming together beautifully.

Step 5: Simmer and Cover
Bring the mixture to a gentle simmer, allowing all those mouth-watering flavors to merge. After about 3-4 minutes of simmering, cover the pot with a lid securely and make sure to retain the heat. This step is crucial before transferring it to the oven to finish cooking.

Step 6: Bake to Perfection
Place the covered pot into your preheated oven and bake for 1 hour. During this time, the beef sausage casserole will bubble away, and the sausages will cook through, absorbing all the savory juices. When done, the dish should be fragrant and bubbling, signaling that it’s ready to serve.

Beef Sausage Casserole

How to Store and Freeze Beef Sausage Casserole

Room Temperature: Enjoy your beef sausage casserole fresh out of the oven, but if you have leftovers, let them cool completely before storing.

Fridge: Store any leftover casserole in an airtight container for up to 3 days. Reheat thoroughly before serving for optimal flavor.

Freezer: For longer storage, freeze the casserole in an airtight container or freezer bag for up to 3 months. Thaw overnight in the fridge before reheating.

Reheating: When ready to enjoy, reheat in the oven at 180°C (350°F) for about 25 minutes or until heated through, ensuring the casserole retains its delicious taste and texture.

Expert Tips for Beef Sausage Casserole

• Use Quality Sausages: Opt for premium beef sausages to enhance the flavor of your casserole dramatically. Cheap sausages often contain fillers that can affect taste and texture.

• Don’t Rush the Browning: Take your time browning the sausages well. This step locks in flavor and gives your beef sausage casserole a deep, rich taste that makes all the difference.

• Season Wisely: Be cautious with salt as Worcestershire sauce and stock can already have high sodium levels. Adjust seasoning to taste after everything is combined for the best results.

• Experiment with Veggies: Feel free to add extras like bell peppers or potatoes. They enhance nutrition and make your beef sausage casserole even heartier.

• Check for Doneness: After baking, ensure the sausages are thoroughly cooked. Use a meat thermometer; they should reach an internal temperature of at least 75°C (165°F).

What to Serve with Mary Berry Beef Sausage Casserole

Indulge in a delightful dining experience as you explore these perfect pairings that will elevate your meal to new heights.

  • Creamy Mashed Potatoes: The rich, buttery potatoes provide a luxurious contrast to the savory casserole, making each bite irresistible. Their creaminess will soak up the sauce, creating a heavenly mouthfeel.

  • Garlic Bread: This crispy, buttery side offers a wonderful crunch that complements the soft textures of the casserole. It’s perfect for sopping up every last droplet of flavorful sauce left on your plate.

  • Steamed Green Beans: Their subtle crunch and fresh taste add a vibrant touch that brightens the hearty casserole. Toss with a bit of lemon zest for an extra zing!

  • Mixed Green Salad: A light and zesty salad can be a refreshing counterpart to your casserole, adding essential greens and a burst of flavor. Dress with a tangy vinaigrette to enhance the experience.

  • Conduct a Wine Pairing: Try pairing with a robust red wine like a Malbec or Shiraz. The wine's deep flavors harmonize beautifully with the savory notes of your beef sausage casserole.

  • Apple Crisp for Dessert: End the meal on a sweet note with a warm apple crisp. Its comforting spices will echo the warmth in your casserole, making for a fitting conclusion to a cozy feast.

Explore these pairings and discover how they enhance your culinary adventure!

Make Ahead Options

These Beef Sausage Casseroles are a lifesaver for meal prep enthusiasts! You can chop the vegetables and brown the sausages up to 24 hours in advance, storing them separately in the refrigerator. For an even quicker option, assemble the entire casserole (without baking) and cover tightly; it can sit in the fridge for up to 3 days. To maintain the flavors, be sure to cover the casserole well with plastic wrap. When you’re ready to cook, simply remove the cover and bake straight from the fridge for about 15-20 minutes longer than the original cooking time. This way, you’ll enjoy a delicious, homemade meal with minimal effort, perfect for those busy weeknights!

Beef Sausage Casserole Variations

Let your creativity shine as you tailor this beef sausage casserole to suit your taste buds and dietary needs!

  • Spicy Kick: Add sliced jalapeños or a dash of cayenne pepper to bring heat and excitement to your dish.

  • Vegetarian Delight: Swap beef sausages for plant-based sausages, making this casserole a hearty vegetarian-friendly option.

  • Herbed Variation: Incorporate fresh herbs like thyme or rosemary for a fragrant twist that lightens up the casserole beautifully.

  • Creamy Addition: Stir in a tablespoon of sour cream or crème fraîche before serving for a rich and creamy finish.

  • Extra Veggies: Toss in bell peppers, zucchini, or spinach to boost the nutritional value without sacrificing flavor—it’s nutritious and colorful!

  • Sweeten It Up: Adding a chopped apple or some sweet peas can introduce a delightful sweet note that complements the savory flavors.

  • Cheesy Top: Sprinkle some shredded cheese on top before baking for a deliciously gooey and melty finish that everyone will love.

Explore these variations to customize your beef sausage casserole, ensuring every bite is a comforting delight. For even more creative ideas, check out my suggestions on batch cooking for easy meal planning or learn how to enhance your dishes with seasoning tips that will have your family coming back for more!

Beef Sausage Casserole

Beef Sausage Casserole Recipe FAQs

How do I know if my sausages are fresh enough for the casserole?
Absolutely! When selecting beef sausages, look for ones that have a firm texture and a vibrant color. Fresh sausages should have no discolorations, such as dark spots, and should smell pleasant—not off or sour. If you can, check the sell-by date to ensure they’re within the freshness window!

What’s the best way to store leftover beef sausage casserole?
To keep your leftover beef sausage casserole fresh, let it cool completely before transferring it to an airtight container. Store it in the refrigerator, where it’ll stay good for about 3 days. Make sure to reheat it thoroughly before serving, so each bite is as delightful as the first!

Can I freeze beef sausage casserole? How?
Certainly! Freezing your beef sausage casserole is a great way to preserve it for future meals. To do this, first let the casserole cool down. Then, transfer it to an airtight container or a heavy-duty freezer bag, ensuring to remove as much air as possible. Label the container with the date, and it’s good for up to 3 months. When you’re ready to enjoy it, thaw it overnight in the fridge and reheat it in the oven at 180°C (350°F) for approximately 25 minutes or until thoroughly heated.

What do I do if the casserole is too salty?
Very! If your beef sausage casserole comes out too salty, don’t panic. You can balance the flavors by adding additional chopped vegetables like carrots or celery. These will not only absorb some of the saltiness but will also add more texture. Alternatively, stirring in some additional canned tomatoes or even a small amount of sugar can help to counterbalance the saltiness.

Is this recipe safe for my pets?
While beef sausage casserole is delicious for us, it's not safe for pets. Ingredients like onions and excessive salt can be harmful to pets, especially dogs. It's best to stick to pet-friendly options if you want to share some love with your furry family members. Always check with your vet before introducing new foods into your pet’s diet!

Can I use different types of sausages in this casserole?
The more the merrier! Feel free to experiment with different types of sausages, such as chicken, turkey, or even veggie sausages for a different flavor profile. Just keep in mind that cooking times may vary slightly depending on the type of meat, so adjust accordingly to ensure everything is thoroughly cooked.

Beef Sausage Casserole

Hearty Beef Sausage Casserole for Cozy Nights In

This beef sausage casserole is a quick, comforting dish perfect for cozy nights in, packed with flavor and ideal for batch cooking.
Print Recipe Pin Recipe
Prep Time 15 minutes mins
Cook Time 1 hour hr
Total Time 1 hour hr 15 minutes mins
Servings: 4 servings
Course: Main Dishes
Cuisine: American
Calories: 450
Ingredients Equipment Method Nutrition Notes

Ingredients
  

For the Casserole
  • 6 pieces beef sausages use quality sausages for a richer flavor
  • 1 tablespoon olive oil helps sauté the vegetables
  • 1 large onion, chopped adds sweetness and depth
  • 2 pieces carrots, diced brings natural sweetness and color
  • 2 sticks celery, diced adds crunch and aromatic flavor
  • 400 g canned chopped tomatoes provides a tangy base
  • 250 ml beef stock enhances savory flavors
  • 1 tablespoon Worcestershire sauce deepens umami flavor
  • 1 teaspoon dried oregano adds earthiness
  • Salt, to taste
  • Black pepper, to taste

Equipment

  • Oven-safe pot or casserole dish

Method
 

Step-by-Step Instructions
  1. Preheat your oven to 180°C (350°F). Gather all your ingredients as the oven warms up.
  2. In a large oven-safe pot, heat the olive oil over medium heat. Add the chopped onion, diced carrots, and diced celery and sauté for about 5–7 minutes until softened.
  3. Add the beef sausages to the pot, turning them occasionally. Brown the sausages on all sides for about 6–8 minutes.
  4. Stir in the chopped tomatoes, beef stock, Worcestershire sauce, and dried oregano. Season with salt and black pepper to taste.
  5. Bring the mixture to a gentle simmer. Cover the pot with a lid securely and retain the heat before transferring to the oven.
  6. Bake in the preheated oven for 1 hour until bubbling and fragrant.

Nutrition

Serving: 1servingCalories: 450kcalCarbohydrates: 30gProtein: 25gFat: 25gSaturated Fat: 10gPolyunsaturated Fat: 1gMonounsaturated Fat: 5gCholesterol: 80mgSodium: 900mgPotassium: 800mgFiber: 5gSugar: 5gVitamin A: 1500IUVitamin C: 10mgCalcium: 50mgIron: 3mg

Notes

For best results, use quality sausages and be cautious with seasoning. Feel free to experiment with additional vegetables.

Tried this recipe?

Let us know how it was!

Sweet and Spicy Crockpot Fireball Whisky Candied Pecans

December 11, 2025 by grace bellamy Leave a Comment

It’s amazing how a simple twist on an everyday snack can transform it into something utterly delightful. When making these Crockpot Fireball Whisky Candied Pecans, I discovered the joy of combining sweet, crunchy pecans with a hint of whisky warmth. This recipe is not just a crowd-pleaser; it’s the kind of irresistible treat that can effortlessly elevate your next gathering or cozy night in. With just 15 minutes of prep time and your trusty crockpot doing the heavy lifting, you’ll have a tasty snack that’s perfect for sharing—or keeping all to yourself! Ready to savor the sweet and spicy goodness? Let’s dive in!

Crockpot Fireball Whisky Candied Pecans

Why are these pecans so irresistible?

Unique Flavor Fusion: The addition of Fireball Whisky adds a delightful zing that sets these candied pecans apart from ordinary snacks.
Crockpot Convenience: Just toss everything into your crockpot, and let it work its magic while you relax!
Perfectly Balanced Sweetness: The combination of sugar and cinnamon perfectly coats each pecan, creating a heavenly crunch.
Versatile Treat: Great for parties, movie nights, or simply satisfying your snack cravings. Serve them warm or store for later—if they last!
Quick Prep Time: With only 15 minutes of prep, you’ll have a standout treat ready in no time. Enjoy these with a glass of your favorite drink, and feel free to explore other delicious recipes like Caramelized Spiced Nuts for even more nutty delights!

Crockpot Fireball Whisky Candied Pecans Ingredients

For the Pecans
• Pecan halves – 4 cups of these nutty gems provide a delicious, crunchy base.
• Cooking spray – A light coat to prevent sticking in the crockpot.

For the Sweet Mixture
• Granulated sugar – 1 cup to create that sweet candy coating that envelops each pecan.
• Fireball Whisky – ½ cup for a hint of warmth and excitement in your candied pecans.
• Unsalted butter – ¼ cup, melted, to help bind the ingredients together.
• Vanilla extract – 1 teaspoon to enhance the overall flavor with a warm, inviting aroma.
• Ground cinnamon – ½ teaspoon for that classic warm spice note that complements the sweetness.
• Salt – ¼ teaspoon to balance the flavors and elevate the taste of the candied pecans.

With these Crockpot Fireball Whisky Candied Pecans ingredients at your fingertips, you’re ready to embark on a delightful snacking adventure. Happy cooking!

Step‑by‑Step Instructions for Crockpot Fireball Whisky Candied Pecans

Step 1: Prepare the Crockpot
Begin by prepping your crockpot—spray the inside generously with cooking spray to ensure your Crockpot Fireball Whisky Candied Pecans won’t stick. This simple step is crucial for easy cleanup. While you’re at it, plug in your crockpot so it’s ready to go once the pecans are mixed.

Step 2: Mix the Sweet Coating
In a large mixing bowl, combine 1 cup of granulated sugar, ½ cup of Fireball Whisky, ¼ cup of melted unsalted butter, 1 teaspoon of vanilla extract, ½ teaspoon of ground cinnamon, and ¼ teaspoon of salt. Stir the mixture thoroughly until smooth and well-blended, creating a luscious base that will coat your pecans perfectly.

Step 3: Coat the Pecans
Add 4 cups of pecan halves to the sweet mixture in the bowl. Gently toss the pecans with the sugar mixture until each piece is fully coated. Take your time to ensure every pecan is enveloped in the deliciously sweet blend—that’s what makes the Crockpot Fireball Whisky Candied Pecans so irresistible!

Step 4: Transfer to the Crockpot
Carefully transfer the coated pecans into the prepared crockpot, spreading them out in a single layer for even cooking. This allows the heat to circulate effectively, ensuring your pecans cook evenly. The anticipation of their sweet aroma filling your kitchen will make this step well worth it.

Step 5: Cook Low and Slow
Cover the crockpot with its lid and set it to low heat. Let the pecans cook for about 2 to 2.5 hours, carefully stirring every 30 minutes. This slow cooking process allows the flavors to meld beautifully, resulting in perfectly candied pecans that are crunchy and sweet with a kick.

Step 6: Cool the Pecans
Once the cooking time is up, remove the lid and let the pecans cool in the crockpot for about 10 minutes. This cooling period allows them to set slightly while retaining that perfect warmth, ensuring that each pecan stays delightful and flavorful.

Step 7: Transfer to a Baking Sheet
Using a spatula, transfer the pecans onto a parchment-lined baking sheet, spreading them out in a single layer. This step is essential for allowing them to cool completely without clumping together, so you can enjoy each pecan as a standalone treat once they are ready.

Step 8: Final Cooling and Hardening
Allow the pecans to cool and harden completely for an additional 30 to 45 minutes before serving or storing. This final step is crucial for achieving that satisfying crunch. Once cool, your Crockpot Fireball Whisky Candied Pecans are ready to be enjoyed or stored for later snacking!

Crockpot Fireball Whisky Candied Pecans

Crockpot Fireball Whisky Candied Pecans Variations

Feel free to embrace your culinary creativity and customize these delicious candied pecans with these enticing variations!

  • Nut-Free: Substitute pecans with 4 cups of sunflower seeds for a nut-free, crunchy snack.

  • Vegan-Friendly: Use coconut oil in place of butter and swap granulated sugar for coconut sugar to keep it plant-based.

  • Extra Spicy: Add a pinch of cayenne pepper to the sugar mixture for a delightful spicy kick that complements the sweetness.

  • Maple Infusion: Replace Fireball Whisky with maple syrup for a rich, sweetly addictive flavor profile that adds warmth.

  • Chocolate Drizzle: After cooling, drizzle melted dark chocolate over the pecans for a sweet and indulgent twist.

  • Sweet & Salty: Incorporate ½ teaspoon of flaky sea salt in the sugar mixture for a tempting sweet-and-salty combination.

  • Fruitful Addition: Toss in 1 cup of dried cranberries or cherries with the pecans before cooking for a flavorful burst that pairs perfectly with the spices.

  • Herbaceous Note: Experiment by adding ½ teaspoon of rosemary or thyme to the sugar mixture for an aromatic touch that elevates the classic sweetness.

Once you’ve whisked these variations into your cooking repertoire, you may want to explore additional nutty delights like Caramelized Spiced Nuts or even a crunchy twist with some Savory Maple Nut Clusters. Happy experimenting!

Make Ahead Options

These Crockpot Fireball Whisky Candied Pecans are a fantastic choice for busy home cooks looking to save time during the week! You can prep the sweet mixture (sugar, whisky, butter, vanilla, cinnamon, and salt) and keep it in the refrigerator for up to 24 hours before you're ready to cook. Simply combine this prepped mixture with the pecans and toss them just before transferring everything to the crockpot. This method not only streamlines your cooking process but also ensures maximum flavor infusion. When ready to serve, follow the cooking instructions as normal, allowing those delightful candied pecans to come out just as delicious and crunchy as if they were made fresh that day!

What to Serve with Crockpot Fireball Whisky Candied Pecans

Transform your snack time into a delightful spread that captivates all the senses.

  • Creamy Brie Cheese: The rich, buttery flavor of brie balances the sweet, spiced pecans. Serve with crispy crackers for an elegant touch.

  • Honey-Glazed Carrots: The warm sweetness of honey-glazed carrots pairs beautifully, making them a vibrant side dish that complements any gathering.

  • Freshly Baked Bread: A warm baguette or sourdough provides a comforting contrast, perfect for scooping the rich flavor of pecans or enjoying on its own.

  • Spicy Cranberry Sauce: The tartness and heat of spicy cranberry sauce create a delightful contrast, elevating your snacking experience with a burst of flavor.

  • Apple Slices with Cinnamon: Crisp apple slices sprinkled with cinnamon offer a refreshing, crunchy element that balances the sweetness of the pecans perfectly.

  • Mulled Wine: The warm spices of mulled wine enhance the flavor of the Fireball whisky, making it an inviting drink for fall and winter gatherings.

  • Dark Chocolate: Pair the pecans with a side of dark chocolate for a sophisticated touch; the bitterness of the chocolate harmonizes beautifully with the sweetness of the candied pecans.

  • Vanilla Ice Cream: Serve the pecans warm over a scoop of vanilla ice cream for an indulgent dessert that brings warmth and creaminess together delightfully.

Expert Tips for Crockpot Fireball Whisky Candied Pecans

  • Use Fresh Pecans: Always opt for fresh pecan halves to enhance the flavor and ensure they are crunchy. Old nuts can be stale and affect the taste.

  • Don't Rush the Cooking: Stick to the recommended cooking time of 2 to 2.5 hours on low heat. Rushing can lead to uneven coating and texture.

  • Stir Regularly: Make sure to stir the pecans every 30 minutes while they cook. This helps coat them evenly and prevents burning.

  • Cool Completely: Allow the pecans to cool and harden for at least 30–45 minutes. This ensures they have a satisfying crunch and prevents clumping together.

  • Storage Matters: Store your Crockpot Fireball Whisky Candied Pecans in an airtight container to maintain their freshness and crunchiness. Enjoy your delicious snack for weeks!

Storage Tips for Crockpot Fireball Whisky Candied Pecans

Room Temperature: Store your cooled Crockpot Fireball Whisky Candied Pecans in an airtight container at room temperature for up to 1 week.

Fridge: If you want them to last a bit longer, they can be kept in the fridge for up to 2 weeks in an airtight container, though this may affect their crunchiness.

Freezer: For longer storage, freeze the pecans in a freezer-safe bag for up to 3 months. Thaw them at room temperature before enjoying their deliciousness.

Reheating: To refresh the crunch, you can reheat cold pecans in a 350°F (175°C) oven for about 5-10 minutes. Just check to prevent burning!

Crockpot Fireball Whisky Candied Pecans

Crockpot Fireball Whisky Candied Pecans Recipe FAQs

What type of pecans should I use?
Absolutely! Always opt for fresh pecan halves to enhance flavor and maintain crunchiness. Stale nuts can dull the taste and texture, so choose high-quality, fresh pecans for the best results.

How should I store my candied pecans?
To keep your Crockpot Fireball Whisky Candied Pecans fresh, store them in an airtight container at room temperature for up to 1 week. If you wish to extend their shelf life, they can be placed in the fridge for up to 2 weeks, but keep in mind that refrigeration may affect their crunchiness.

Can I freeze these candied pecans?
Yes, you can freeze your candied pecans! Simply place them in a freezer-safe bag, ensuring to squeeze out as much air as possible to prevent freezer burn. They will stay fresh for up to 3 months. To enjoy, thaw them at room temperature before serving.

What if my pecans aren't coating evenly?
No worries! If you notice that some of your candied pecans aren't coating evenly, try gently tossing them again in the bowl before cooking. Additionally, ensure that you’re stirring the pecans every 30 minutes while cooking in the crockpot; this helps ensure each piece is properly coated and evenly cooked.

Are these pecans safe for pets?
Very! While pecans themselves are generally safe in moderation for dogs, they can be high in fat and may not be suitable for all pets. It’s best to enjoy them yourself or consult your veterinarian before sharing with furry family members.

How can I refresh leftover pecans?
If your pecans have lost their crunch after being stored, you can easily refresh them. Preheat your oven to 350°F (175°C) and spread the pecans on a baking sheet. Warm them for about 5 to 10 minutes, checking frequently to ensure they don’t burn. This will bring back their delightful crunch!

Crockpot Fireball Whisky Candied Pecans

Sweet and Spicy Crockpot Fireball Whisky Candied Pecans

Crockpot Fireball Whisky Candied Pecans are a delightful blend of sweet and spicy flavors, perfect for any gathering.
Print Recipe Pin Recipe
Prep Time 15 minutes mins
Cook Time 2 hours hrs 30 minutes mins
Cooling Time 45 minutes mins
Total Time 3 hours hrs 30 minutes mins
Servings: 8 cups
Course: Dessert
Cuisine: American
Calories: 150
Ingredients Equipment Method Nutrition Notes

Ingredients
  

For the Pecans
  • 4 cups Pecan halves
  • 1 serving Cooking spray to prevent sticking
For the Sweet Mixture
  • 1 cup Granulated sugar
  • 0.5 cup Fireball Whisky
  • 0.25 cup Unsalted butter melted
  • 1 teaspoon Vanilla extract
  • 0.5 teaspoon Ground cinnamon
  • 0.25 teaspoon Salt

Equipment

  • Crockpot

Method
 

Step-by-Step Instructions
  1. Prepare the Crockpot: Spray the inside of the crockpot with cooking spray.
  2. Mix the Sweet Coating: Combine sugar, Fireball Whisky, melted butter, vanilla, cinnamon, and salt in a bowl.
  3. Coat the Pecans: Add pecans to the sweet mixture and toss until fully coated.
  4. Transfer to the Crockpot: Spread the coated pecans in a single layer in the crockpot.
  5. Cook Low and Slow: Cover and cook on low for 2 to 2.5 hours, stirring every 30 minutes.
  6. Cool the Pecans: Let the pecans cool in the crockpot for about 10 minutes.
  7. Transfer to a Baking Sheet: Use a spatula to place pecans on a parchment-lined baking sheet.
  8. Final Cooling and Hardening: Cool and harden for 30 to 45 minutes before serving.

Nutrition

Serving: 30gramsCalories: 150kcalCarbohydrates: 14gProtein: 1gFat: 9gSaturated Fat: 3gPolyunsaturated Fat: 2gMonounsaturated Fat: 4gCholesterol: 15mgSodium: 50mgPotassium: 200mgFiber: 1gSugar: 8gCalcium: 15mgIron: 1mg

Notes

Store in an airtight container at room temperature for up to 1 week, or in the fridge for up to 2 weeks.

Tried this recipe?

Let us know how it was!

Indulge in Creamy Thick Italian Hot Chocolate Bliss

December 11, 2025 by grace bellamy Leave a Comment

There’s something magical about curling up with a mug of rich, velvety hot chocolate after a long day. My Thick Italian Hot Chocolate captures that warmth and comfort perfectly, combining whole milk and bittersweet chocolate for an indulgent treat that feels like a big hug in a cup. This recipe isn’t just a cozy companion; it’s also incredibly quick to prepare, taking less than 20 minutes from start to finish. Whether you’re treating yourself on a chilly afternoon or impressing guests at your next gathering, this thick hot chocolate is guaranteed to be a showstopper. Have you ever thought about how one simple recipe could transform your afternoon? Let’s dive into this delightful concoction together!

Thick Italian Hot Chocolate

Why is Thick Italian Hot Chocolate Irresistible?

Comforting warmth: This rich beverage wraps you in cozy bliss, making it perfect for chilly days.
Decadent texture: A luscious blend of whole milk and bittersweet chocolate results in an indulgently thick experience that’s simply divine.
Quick to make: In just 20 minutes, you can whip up this delightful treat, ideal for those sudden cravings.
Versatile pairings: Top with whipped cream, chocolate shavings, or even a sprinkle of cinnamon for a personalized touch.
Crowd-pleaser: Serve it at gatherings or treat yourself—it’s a drink that’s sure to impress everyone!

Thick Italian Hot Chocolate Ingredients

• Dive into the key elements for this luxurious treat!

For the Base

  • Whole milk – A creamy foundation that adds richness to your hot chocolate.
  • Cocoa powder – For that deep chocolate flavor; look for high-quality brands.
  • Sugar – Balances the bitterness of the chocolate, making it a sweet delight.

For the Chocolate Bliss

  • Bittersweet chocolate – Finely chopped for easy melting; it’s essential for achieving that indulgent thickness in your thick Italian hot chocolate.
  • Vanilla extract – A dash of this adds aromatic warmth to the overall flavor profile.

For Thickening

  • Cornstarch – This ingredient helps give your hot chocolate its luscious, velvety consistency.
  • Cold water – Used to create a slurry with cornstarch for easy incorporation without clumping.

For Finishing Touches

  • Pinch of salt – Enhances all the flavors, making your hot chocolate even more delicious!

Step‑by‑Step Instructions for Thick Italian Hot Chocolate

Step 1: Heat the Milk
In a medium saucepan, pour in 2 cups of whole milk and set it over medium-low heat. Stir occasionally to ensure the milk warms evenly without scalding, and remove it from heat as soon as it starts to steam, about 3–5 minutes, but make sure it doesn’t boil.

Step 2: Mix Cocoa and Sugar
Once the milk is warm, add 2 tablespoons of cocoa powder and 2 tablespoons of sugar directly into the saucepan. Whisk the mixture vigorously until both ingredients are fully dissolved and the mixture becomes smooth and glossy, creating a deliciously rich base for your Thick Italian Hot Chocolate.

Step 3: Melt the Bittersweet Chocolate
Now, add 4 ounces of finely chopped bittersweet chocolate to the saucepan. Continue whisking to help the chocolate melt completely into the warm mixture, ensuring there are no lumps left behind. This should take about 2-3 minutes, resulting in a velvety texture.

Step 4: Prepare the Cornstarch Slurry
In a small bowl, mix 1 tablespoon of cornstarch with 1 tablespoon of cold water to create a smooth slurry. This step will help thicken your hot chocolate, so make sure there are no lumps in the mixture before it’s added.

Step 5: Thicken the Hot Chocolate
Gradually pour the cornstarch slurry into the hot chocolate while whisking continuously to avoid clumps. Keep whisking for about 2-3 minutes over low heat until the mixture thickens to your desired consistency, making your Thick Italian Hot Chocolate luxuriously creamy.

Step 6: Add Flavorings
Remove the saucepan from the heat and stir in ½ teaspoon of vanilla extract and a pinch of salt. These ingredients elevate the overall flavor profile, enhancing the sweetness and richness of your Thick Italian Hot Chocolate, making each sip delightful.

Step 7: Serve and Garnish
Pour the thick hot chocolate into your favorite mugs while it’s still hot. For an indulgent finishing touch, top each serving with whipped cream and consider garnishing with chocolate shavings or a light dusting of cocoa powder, enhancing the treat visually and tastefully.

Thick Italian Hot Chocolate

How to Store and Freeze Thick Italian Hot Chocolate

Fridge: Store any leftover thick Italian hot chocolate in an airtight container in the refrigerator for up to 3 days. Reheat gently on the stove or in the microwave, stirring well to restore its creaminess.

Freezer: For longer storage, freeze the thick hot chocolate in an ice cube tray or freezer-safe container for up to 2 months. Thaw in the fridge overnight, then reheat and enjoy!

Serving Tip: When reheating, you may want to add a splash of milk to restore its velvety texture. Enjoy your indulgent treat!

Thick Italian Hot Chocolate Variations

Feel free to explore these delightful twists on your hot chocolate, each promising to elevate your cozy experience!

  • Dairy-Free: Substitute whole milk with almond, soy, or oat milk for a vegan-friendly option. Choose dairy-free chocolate for a fully plant-based treat.

  • Minty Fresh: Add a few drops of peppermint extract to bring a refreshing twist. This variation brings a festive vibe, perfect for the holidays!

  • Spiced Delight: Stir in a dash of ground cinnamon or nutmeg while heating. This adds warmth and depth, making your drink perfect for chilly winter days.

  • Nutty Flavor: Consider adding a spoonful of hazelnut syrup or almond extract. A touch of nuttiness complements the chocolate beautifully, creating a delightful flavor profile.

  • Chili Kick: For those who enjoy heat, add a pinch of cayenne pepper. This unexpected kick will awaken your senses and make every sip exciting.

  • Rich Caramel: Drizzle a bit of caramel sauce into your hot chocolate for a silky sweetness. It perfectly enhances the chocolate experience, creating an indulgent treat.

  • Marshmallow Heaven: Top with miniature marshmallows or toasted marshmallow fluff for a fun and sweet finish. It’s like a warm hug in a cup!

  • Double Chocolate: Amp up the chocolate intensity by adding an extra ounce of bittersweet chocolate. This deliciously rich combination is a dream for chocolate lovers!

These variations not only personalize your hot chocolate but might inspire you to discover new favorites, just like in my Classic Italian Risotto or a comforting bowl of Creamy Tomato Basil Soup! Enjoy your cozy moments with these delightful twists on a timeless classic.

Make Ahead Options

These Thick Italian Hot Chocolate preparations are perfect for busy home cooks looking to save time! You can prepare the hot chocolate base (milk, cocoa powder, sugar, and chocolate melted together) up to 24 hours in advance. Simply store it in an airtight container in the fridge to maintain its creamy quality. When you're ready to enjoy, reheat the mixture gently over low heat while whisking. Add the cornstarch slurry and cook until thickened for just a couple of minutes before adding your vanilla extract and salt. This way, you can indulge in a rich hot chocolate without any fuss on a chilly evening!

What to Serve with Thick Italian Hot Chocolate

There’s no better way to elevate your cozy hot chocolate experience than with delightful accompaniments that satisfy both the palate and the heart.

  • Crispy Italian Biscotti: These crunchy cookies are perfect for dipping, adding a satisfying texture contrast to your creamy drink. Their flavors can range from almond to chocolate, enhancing your overall indulgence.

  • Marshmallow Topping: Soft, fluffy marshmallows melt delightfully into your hot chocolate, providing a sweet and gooey contrast that feels like a warm hug in every sip.

  • Spiced Churros: Freshly fried churros dusted with cinnamon sugar are a delicious treat to accompany your thick Italian hot chocolate and offer a delightful crunch.

  • Creamy Whipped Cream: A classic topping for a reason! Whipped cream adds a light and airy element that perfectly complements the deep flavors of your hot chocolate.

  • Dark Chocolate Shavings: Sprinkling chocolate shavings on top adds an extra touch of decadence and intensifies the chocolate experience with rich, creamy bites.

  • Fresh Berries: Strawberries or raspberries provide a tart contrast that balances the sweetness of your thick Italian hot chocolate, brightening each sip.

  • Peppermint Candy Canes: Perfect for the holiday season! Stir one into your hot chocolate for a festive twist that adds a refreshing minty flavor.

  • Nutty Panforte: This chewy Italian dessert packed with nuts and dried fruit pairs wonderfully with the warmth of your thick hot chocolate, adding depth and an additional flavor layer.

Expert Tips for Thick Italian Hot Chocolate

  • Use Quality Chocolate: Always opt for high-quality bittersweet chocolate. This greatly enhances the depth of flavor and creaminess of your Thick Italian Hot Chocolate.

  • Whisk Vigorously: Ensure you whisk well during each step, especially when mixing cocoa and sugar. This helps prevent lumps and maintains a smooth texture throughout.

  • Perfect Heating: Heat the milk gently and avoid boiling. Scalded milk can alter the flavor and texture, so keep an eye on it while it warms.

  • Adjust Sweetness: Taste before serving and adjust the sugar to your preference. Some like it sweeter, while others appreciate a more bittersweet profile in their Thick Italian Hot Chocolate.

  • Cornstarch Care: When mixing the cornstarch with cold water, make sure there are no lumps. A smooth slurry is key to achieving that coveted thick consistency without clumps.

Thick Italian Hot Chocolate

Thick Italian Hot Chocolate Recipe FAQs

How do I select the best chocolate for my Thick Italian Hot Chocolate?
Absolutely! When choosing your bittersweet chocolate, look for quality brands with a cocoa content of at least 60%. Avoid chocolate bars with added ingredients like preservatives, as they can affect the flavor. A good rule of thumb is to choose chocolate that you enjoy eating on its own.

How should I store leftover Thick Italian Hot Chocolate?
If you have any thick Italian hot chocolate left over, store it in an airtight container in the fridge for up to 3 days. When you’re ready to enjoy it again, gently reheat on the stove or in the microwave, stirring well to restore its creamy texture. This little step makes all the difference!

Can I freeze Thick Italian Hot Chocolate?
Very! To freeze your thick Italian hot chocolate, pour it into an ice cube tray or a freezer-safe container. It can be stored this way for up to 2 months. When you're ready to enjoy it, simply thaw overnight in the fridge, then reheat on the stove. For added creaminess, consider adding a splash of milk when reheating.

Are there any common issues I should watch for while making Thick Italian Hot Chocolate?
Absolutely! One common issue is having lumps when adding the cocoa powder or cornstarch. Make sure to whisk vigorously and dissolve these ingredients completely in the warm milk before adding the chocolate. If your hot chocolate is too thick, don’t worry—just thin it out with a bit of extra milk!

Can I make this recipe vegan?
Yes, you can! To make a vegan version of this thick Italian hot chocolate, simply substitute whole milk with your favorite plant-based milk like almond, soy, or oat milk. Additionally, be sure to use dairy-free chocolate that fits your dietary preferences. This way, everyone can indulge in this delightful treat!

What’s the best way to enhance the flavor of my Thick Italian Hot Chocolate?
I often recommend adding a splash of vanilla extract, as it works beautifully to elevate the drink's overall flavor. You could also experiment with flavors like peppermint extract or hazelnut syrup for a twist! Topping it off with whipped cream and chocolate shavings can turn your hot chocolate into an irresistible masterpiece.

Thick Italian Hot Chocolate

Indulge in Creamy Thick Italian Hot Chocolate Bliss

Enjoy the comforting magic of Thick Italian Hot Chocolate, a quick and indulgent delight perfect for chilly days.
Print Recipe Pin Recipe
Prep Time 5 minutes mins
Cook Time 15 minutes mins
Total Time 20 minutes mins
Servings: 2 mugs
Course: Drink
Cuisine: Italian
Calories: 350
Ingredients Equipment Method Nutrition Notes

Ingredients
  

For the Base
  • 2 cups whole milk A creamy foundation that adds richness to your hot chocolate.
  • 2 tablespoons cocoa powder For deep chocolate flavor; look for high-quality brands.
  • 2 tablespoons sugar Balances the bitterness of the chocolate.
For the Chocolate Bliss
  • 4 ounces bittersweet chocolate Finely chopped for easy melting.
  • ½ teaspoon vanilla extract Adds aromatic warmth to the overall flavor profile.
For Thickening
  • 1 tablespoon cornstarch Helps give your hot chocolate its luscious, velvety consistency.
  • 1 tablespoon cold water Used to create a slurry with cornstarch.
For Finishing Touches
  • 1 pinch salt Enhances all the flavors.

Equipment

  • Medium saucepan
  • small bowl
  • Whisk

Method
 

Step-by-Step Instructions
  1. In a medium saucepan, pour in 2 cups of whole milk and set it over medium-low heat. Stir occasionally to ensure the milk warms evenly without scalding.
  2. Once the milk is warm, add 2 tablespoons of cocoa powder and 2 tablespoons of sugar directly into the saucepan. Whisk until fully dissolved.
  3. Add 4 ounces of finely chopped bittersweet chocolate and continue whisking until melted and smooth.
  4. In a small bowl, mix 1 tablespoon of cornstarch with 1 tablespoon of cold water to create a smooth slurry.
  5. Gradually pour the cornstarch slurry into the hot chocolate while whisking continuously until thickened.
  6. Remove from heat and stir in ½ teaspoon of vanilla extract and a pinch of salt.
  7. Pour into mugs while hot and top with whipped cream and chocolate shavings if desired.

Nutrition

Serving: 1mugCalories: 350kcalCarbohydrates: 40gProtein: 8gFat: 17gSaturated Fat: 10gPolyunsaturated Fat: 0.5gMonounsaturated Fat: 5gCholesterol: 40mgSodium: 150mgPotassium: 400mgFiber: 2gSugar: 30gVitamin A: 800IUVitamin C: 1mgCalcium: 300mgIron: 2mg

Notes

Store leftovers in the fridge for up to 3 days or freeze for up to 2 months. Reheat with a splash of milk for restoring creaminess.

Tried this recipe?

Let us know how it was!
  • « Previous Page
  • 1
  • …
  • 15
  • 16
  • 17
  • 18
  • 19
  • …
  • 46
  • Next Page »

Footer

Copyright © 2026 · recipecrown.com Privacy Policy Disclaimer Terms & Conditions