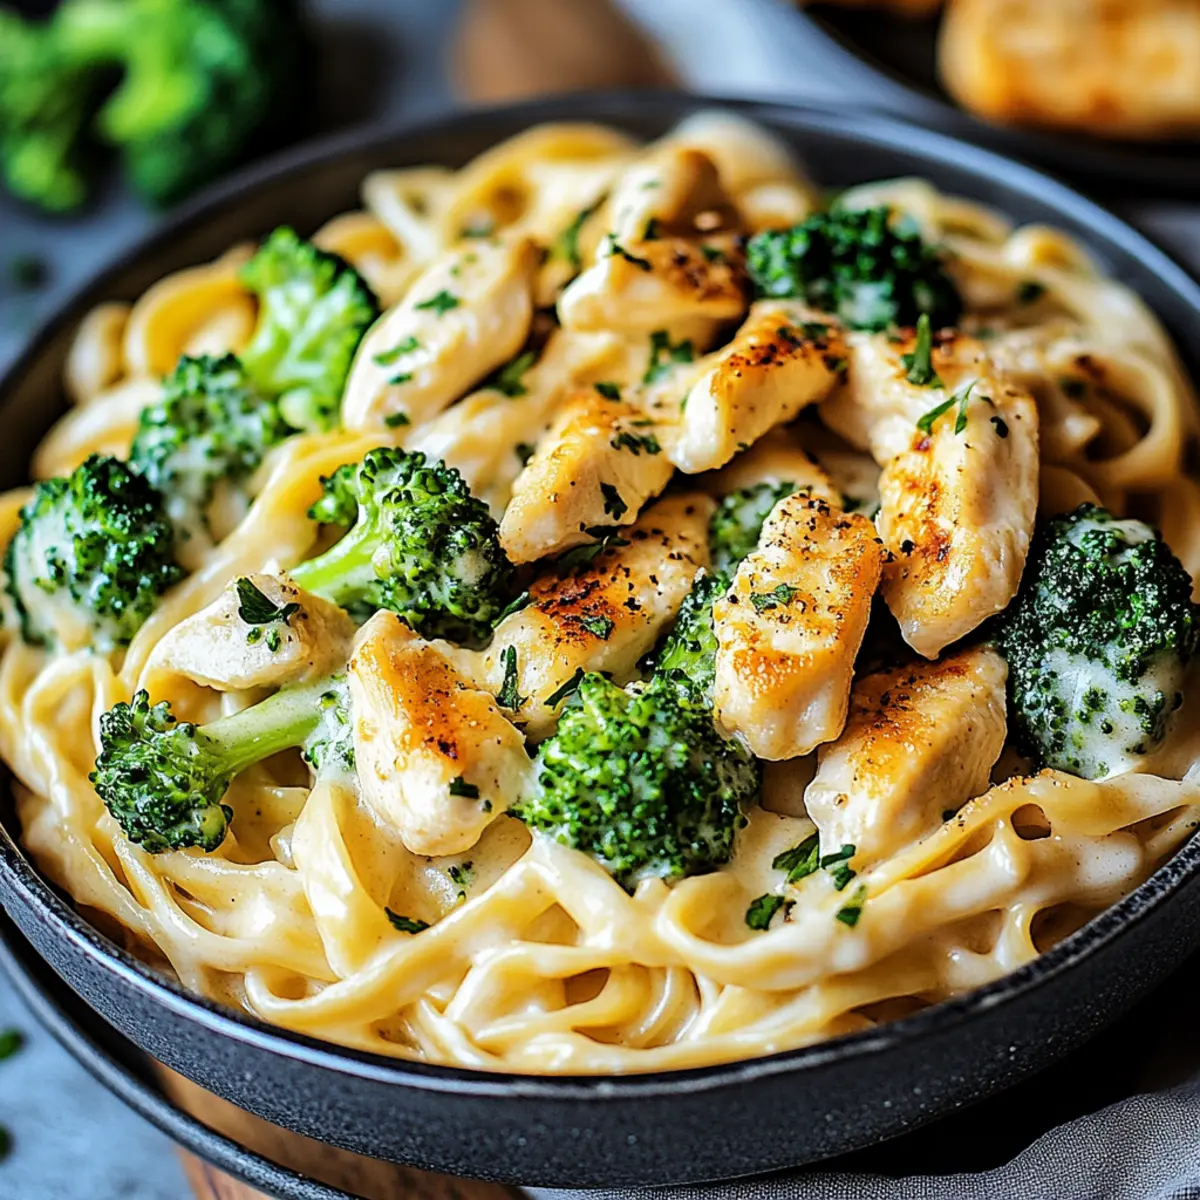
As I whisked the creamy sauce in my skillet, the rich aroma of garlic filled the air, instantly transporting me to my favorite Italian bistro. This Creamy Chicken Broccoli Alfredo is not just a quick meal; it’s a delightful hug in a bowl, perfectly balancing flavorful chicken and vibrant broccoli in a luscious sauce that can be whipped up in just 25 minutes. Whether you’re navigating a hectic weeknight or simply craving comfort without the fuss, this recipe is a true lifesaver. Plus, it’s versatile enough to cater to dietary needs—simply swap in gluten-free pasta or even tofu for a delicious vegan twist. Ready to dive into a dish that’s both comforting and satisfying? Let’s get cooking!
Why is Chicken Broccoli Alfredo a Must-Try?
Comforting, Indulgent Taste: Each bite delivers rich and creamy flavors that feel like a warm embrace on a plate.
Quick and Easy: Ready in just 25 minutes, making it perfect for busy weeknights when you need a satisfying meal without the hassle.
Versatile Variations: Feel free to swap chicken for tofu or tempeh, or use gluten-free pasta to accommodate different dietary preferences—this recipe adapts effortlessly!
Colorful and Nutritious: Packed with vibrant broccoli, this dish not only pleases the palate but also adds a nourishing touch to your table.
Crowd-Pleasing Appeal: From family dinners to casual gatherings, everyone loves this classic Italian-American staple. Why not pair it with a crisp green salad or a side of warm garlic bread for a full meal? Enjoy the comfort of great food without spending hours in the kitchen!
Chicken Broccoli Alfredo Ingredients
• Perfect essentials for a creamy delight.
For the Chicken
- Boneless, Skinless Chicken Breasts – The lean protein base for this dish, ensuring tenderness in every bite.
For the Sauce
- Heavy Cream – Creates that rich, luxurious texture; substitute with half-and-half for a lighter option.
- Parmesan Cheese – Freshly grated for the best melt and flavor; the key to your Chicken Broccoli Alfredo's creaminess.
- Butter – Adds richness to the sauce; consider reducing for a lighter alternative.
- Garlic – Freshly minced for a robust flavor; garlic powder works in a pinch but won’t provide the same punch.
For the Pasta and Broccoli
- Pasta – Any shape is perfect; gluten-free pasta can make this dish suitable for those with dietary needs.
- Broccoli – Fresh or frozen, this veggie adds color and nutrients to the dish; toss in frozen a bit earlier for even cooking.
For Cooking
- Olive Oil – Used to sauté the chicken, enhancing the overall flavor profile.
- Salt and Pepper – Essential seasonings to enhance all flavors; adjust to suit your personal taste!
This simple yet delightful ingredient list paves the way for a Chicken Broccoli Alfredo experience that’s not just fast but fantastic!
Step‑by‑Step Instructions for Creamy Chicken Broccoli Alfredo
Step 1: Prepare Ingredients
Begin by preparing your ingredients to ensure a smooth cooking process. Chop boneless, skinless chicken breasts into bite-sized pieces, and cut fresh broccoli into small florets. Grate about a cup of Parmesan cheese for optimal melting, and mince 2-3 cloves of garlic. Gather your pasta, as well, so everything is ready to go when you start cooking.
Step 2: Boil Pasta
In a large pot, bring salted water to a boil, and add your chosen pasta. Cook it until it's nearly al dente, following package instructions—typically about 7–10 minutes. Just 3 minutes before the pasta is done, toss in the broccoli florets to blanch them. Once cooked, drain the pasta and broccoli together in a colander, allowing them to steam slightly while you prepare the sauce.
Step 3: Cook Chicken
Heat 1-2 tablespoons of olive oil in a large skillet over medium-high heat. Season the bite-sized chicken pieces with salt and pepper, then add them to the skillet. Sauté for about 5-7 minutes, stirring occasionally, until the chicken is golden brown and cooked through. This adds a rich flavor to your Chicken Broccoli Alfredo. Remove the chicken from the skillet and set aside while you make the sauce.
Step 4: Make Sauce
In the same skillet, melt 2 tablespoons of butter over medium heat, leaving the leftover oil for flavor. Add the minced garlic and sauté for about 30 seconds until fragrant—avoid browning it! Pour in 1 cup of heavy cream and allow it to simmer gently for about 2-3 minutes to thicken. Stir in the grated Parmesan cheese, mixing until the sauce is smooth and creamy.
Step 5: Combine
Return the drained pasta and broccoli to the skillet with the Alfredo sauce. Add the cooked chicken back in, tossing everything gently to coat it in the rich sauce. Let it cook together for another minute or two over low heat to blend the flavors, ensuring every piece is beautifully enveloped in the luscious Chicken Broccoli Alfredo.
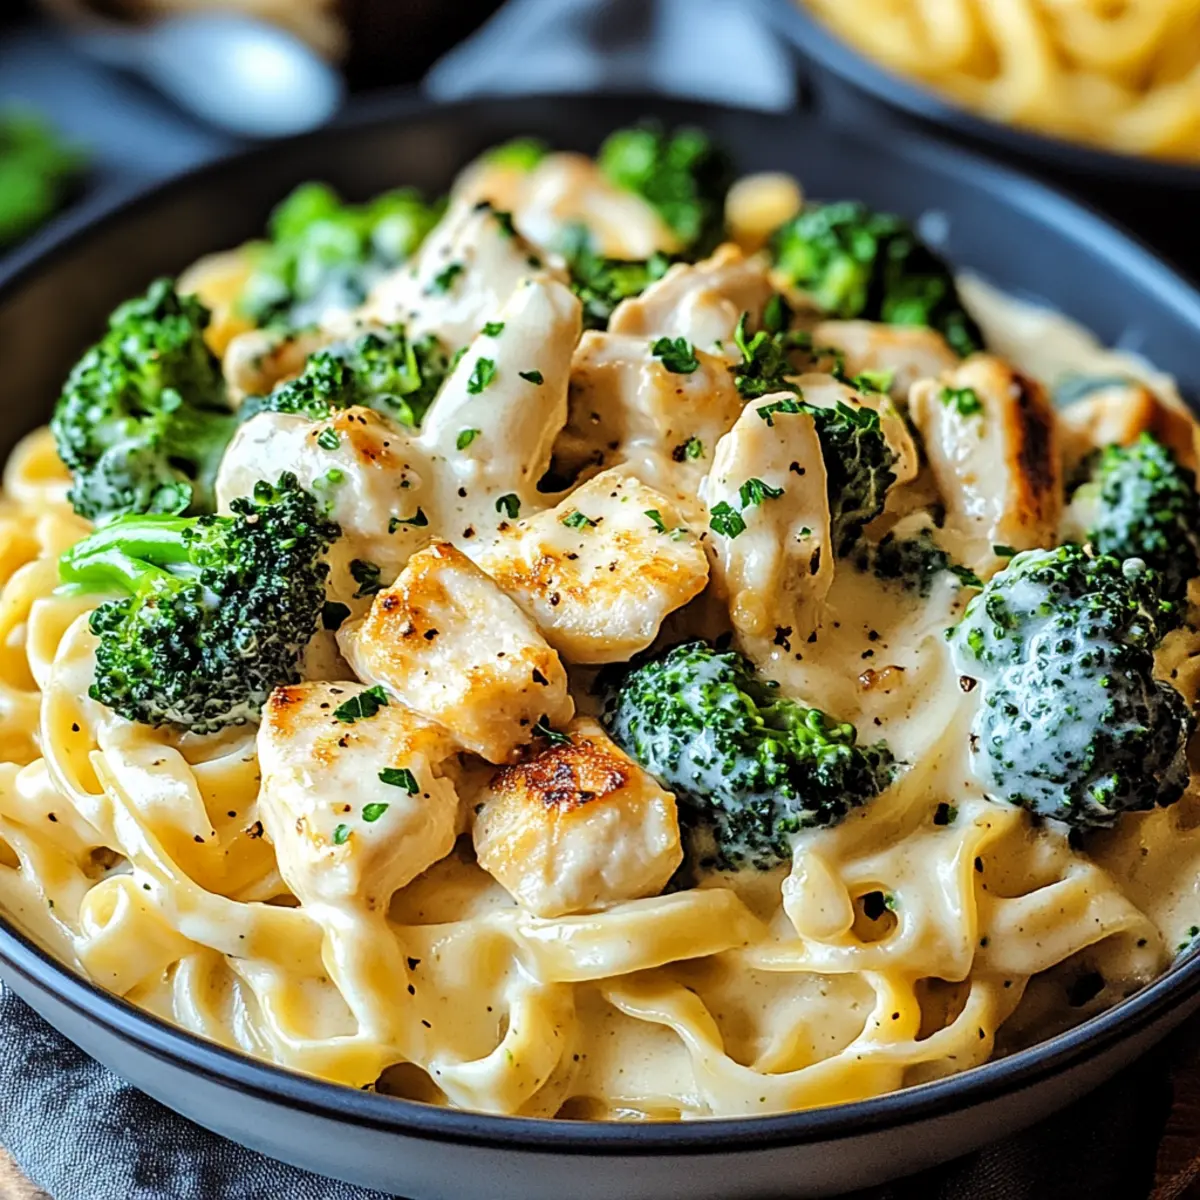
Step 6: Serve
Once well combined, serve the Chicken Broccoli Alfredo in warm bowls. Garnish with a sprinkle of freshly chopped parsley or basil for added freshness. For extra indulgence, you can top with more grated Parmesan or a pinch of red pepper flakes to enhance the flavors. Enjoy your comforting and satisfying meal!
Make Ahead Options
These Creamy Chicken Broccoli Alfredo meals are perfect for busy cooks seeking to save time during the week! You can cook the chicken and prepare the Alfredo sauce up to 3 days in advance. Simply sauté your chicken and allow it to cool before storing it in an airtight container in the refrigerator. The sauce can also be made ahead; just reheat gently on the stove while adding a splash of cream to restore its luscious texture. Cook the pasta and broccoli just before serving for optimal freshness, or refrigerate them together. With these prep steps, you’ll have a comforting meal ready in a fraction of the time!
What to Serve with Creamy Chicken Broccoli Alfredo
Looking to complete your meal with delightful pairings? Here are some perfect accompaniments that enhance the flavors of this creamy comfort dish.
-
Garlic Bread: This warm, toasty bread adds a hint of buttery richness, perfect for soaking up the Alfredo sauce. The aroma alone is mouthwatering!
-
Crisp Caesar Salad: A fresh Caesar salad brings a crunchy contrast to the creamy pasta. The tangy dressing and crisp romaine lighten the meal beautifully.
-
Steamed Green Beans: These tender, crunchy veggies offer a refreshing palette cleanse, elevating the dish's overall taste experience.
-
Roasted Vegetable Medley: Colorful seasonal vegetables bring depth and additional nutrients, balancing the richness of the Alfredo sauce with vibrant flavors.
-
Red Wine: A glass of Merlot or Chianti pairs perfectly, complementing the dish's savory flavors while adding a touch of elegance to your dinner night.
-
Lemon Sorbet: For dessert, a light lemon sorbet cleanses your palate. Its tartness is the perfect refreshing finish after your rich Chicken Broccoli Alfredo.
Chicken Broccoli Alfredo Variations
Nothing makes a recipe more exciting than a little customization! Embrace your culinary creativity and elevate your Chicken Broccoli Alfredo with these delightful twists.
-
Vegan Substitute: Swap chicken for tofu or tempeh for a delicious plant-based option. Just make sure to season it well for flavor!
-
Gluten-Free Option: Use gluten-free pasta instead of traditional pasta to make this dish suitable for gluten-sensitive diners. It maintains the comfort without sacrificing taste.
-
Extra Veggies: Add bell peppers, spinach, or even mushrooms for a colorful vegetable medley. Each bite bursts with added nutrients and unique textures.
-
Spicy Kick: Sprinkle in some red pepper flakes or sauté jalapeños with the chicken for a spicy kick. This enhances the flavor profile and adds excitement!
-
Creamy Variants: Use half-and-half instead of heavy cream for a lighter sauce while still keeping it creamy and delicious. Your tastebuds won't even notice the difference!
-
Cheesy Delight: Experiment with different cheeses like fontina or mozzarella for an added depth of flavor. Each extra cheese brings its own unique character to the dish.
-
Herb Infusion: Incorporate fresh herbs like basil or thyme for an added layer of freshness. They not only enhance the aroma but also elevate the dish's visual appeal.
-
Nutty Flavor: Top your dish with toasted pine nuts or walnuts for a crunchy texture and a touch of nuttiness that complements the creamy sauce beautifully.
Feeling inspired? Make sure to check out other tempting recipes like Hawaiian Chicken Sheet or Crock Pot Chicken and Rice for more culinary adventures! Enjoy your creative cooking journey!
Expert Tips for Chicken Broccoli Alfredo
Drain Queue: Always drain pasta and broccoli together to save time and ensure perfect cooking.
Restoring Creaminess: When reheating leftovers, add a splash of milk or cream to restore the dish's creamy texture.
Grate Well: Use a microplane for finely grating Parmesan cheese; it enhances melt quality and ensures a smooth sauce.
Mind the Garlic: Don’t overcook garlic! Burning it can add bitterness, ruining the overall flavor of your Chicken Broccoli Alfredo.
Vegetarian Swap: For a vegan twist, replace chicken with tofu or tempeh, and use plant-based cream for a delightful alternative.
How to Store and Freeze Chicken Broccoli Alfredo
Fridge: Store leftover Chicken Broccoli Alfredo in an airtight container for up to 3 days. Reheat gently on the stove or microwave, adding a splash of milk to regain creaminess.
Freezer: Freezing is not recommended due to potential texture changes in the sauce. However, cooked chicken and broccoli can be frozen separately for up to 3 months.
Thawing: To enjoy frozen chicken and broccoli, thaw overnight in the fridge before reheating. Combine with freshly made Alfredo sauce for the best experience.
Reheating Tip: When reheating leftovers, consider adding a little more cream or milk to help restore the dish's original rich and creamy flavor.
Chicken Broccoli Alfredo Recipe FAQs
What type of chicken should I use?
I recommend using boneless, skinless chicken breasts for the best texture and flavor in your Chicken Broccoli Alfredo. You'll achieve tender results that blend perfectly with the creamy sauce.
How should I store leftover Chicken Broccoli Alfredo?
Stored in an airtight container in the refrigerator, your Chicken Broccoli Alfredo will stay fresh for up to 3 days. When you're ready to enjoy it again, reheat gently on the stove or in the microwave, adding a splash of milk or cream to restore its creamy goodness.
Can I freeze Chicken Broccoli Alfredo?
Freezing the entire dish isn't recommended as it can alter the sauce's texture. However, you can freeze the cooked chicken and broccoli separately for up to 3 months. Thaw them overnight in the fridge before reheating and combine with freshly made Alfredo sauce for the best results!
How do I prevent the garlic from burning in the sauce?
When cooking garlic, sauté it for no more than 30 seconds in the butter over medium heat. If it starts to brown, simply add your cream right away to halt the cooking process. This way, you’ll avoid that bitter taste that can ruin your Chicken Broccoli Alfredo.
Can I make Chicken Broccoli Alfredo vegan?
Absolutely! You can easily substitute chicken with tofu or tempeh, and use plant-based cream instead of heavy cream. This adaptation still allows for that creamy texture and delightful taste, becoming a comforting vegan option without sacrificing flavor.
Are there any alternatives for Parmesan cheese?
If you're looking for a dairy-free option, you can use nutritional yeast for a cheesy flavor. For those with lactose intolerance or allergy concerns, opt for a lactose-free Parmesan or a dairy-free cheese alternative that melts well, ensuring everyone can enjoy a delicious Chicken Broccoli Alfredo!
Indulgent Chicken Broccoli Alfredo Ready in 25 Minutes
Ingredients
Equipment
Method
- Prepare Ingredients: Chop chicken into bite-sized pieces and cut broccoli into florets. Grate Parmesan cheese and mince garlic.
- Boil Pasta: In a pot, bring salted water to boil, add pasta and cook until nearly al dente. Add broccoli in the last 3 minutes of cooking.
- Cook Chicken: Heat olive oil in a skillet. Season chicken with salt and pepper, sauté until golden brown and cooked through, about 5-7 minutes.
- Make Sauce: In the same skillet, melt butter, add garlic, and sauté briefly. Add heavy cream and simmer, then stir in Parmesan until smooth.
- Combine: Return pasta and broccoli to skillet, add chicken, and gently toss everything with the sauce.
- Serve: Dish out into bowls and garnish with parsley or basil. Add more Parmesan if desired.