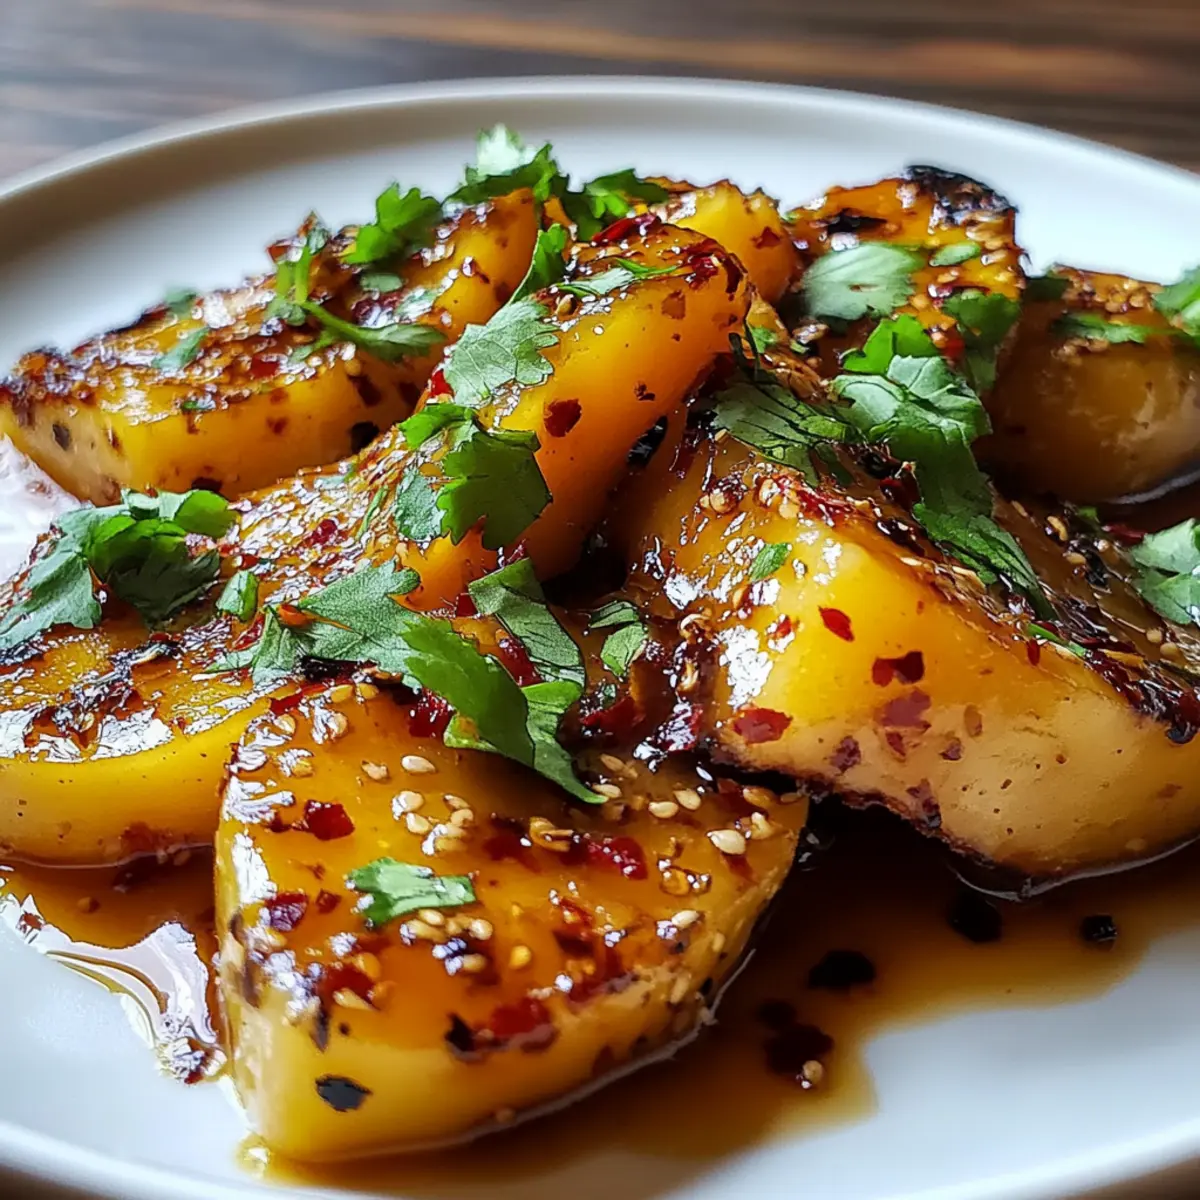
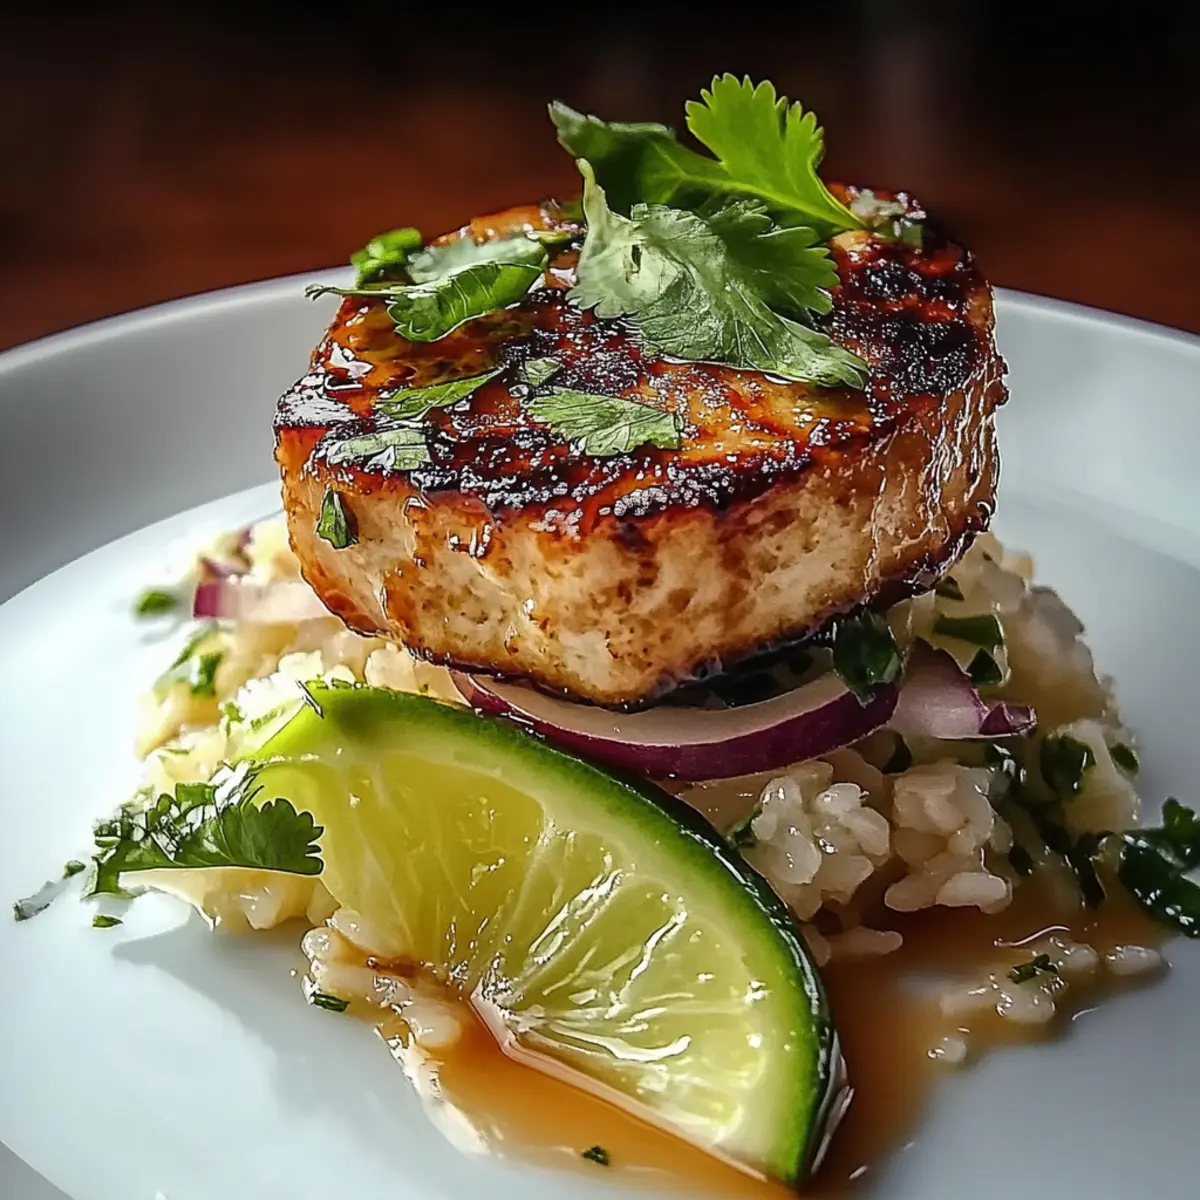
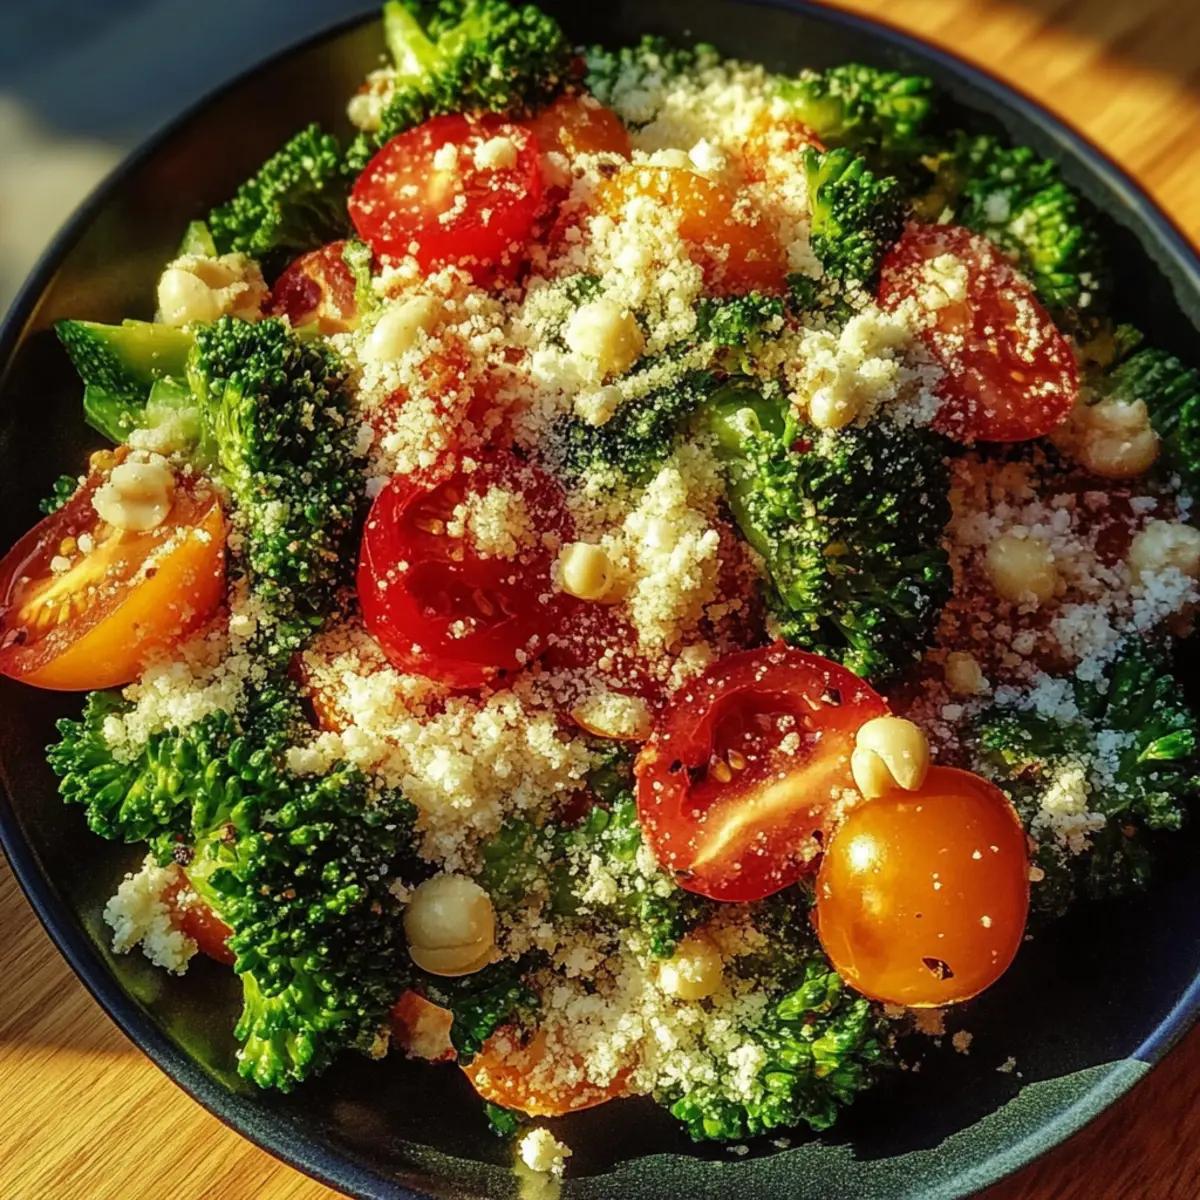
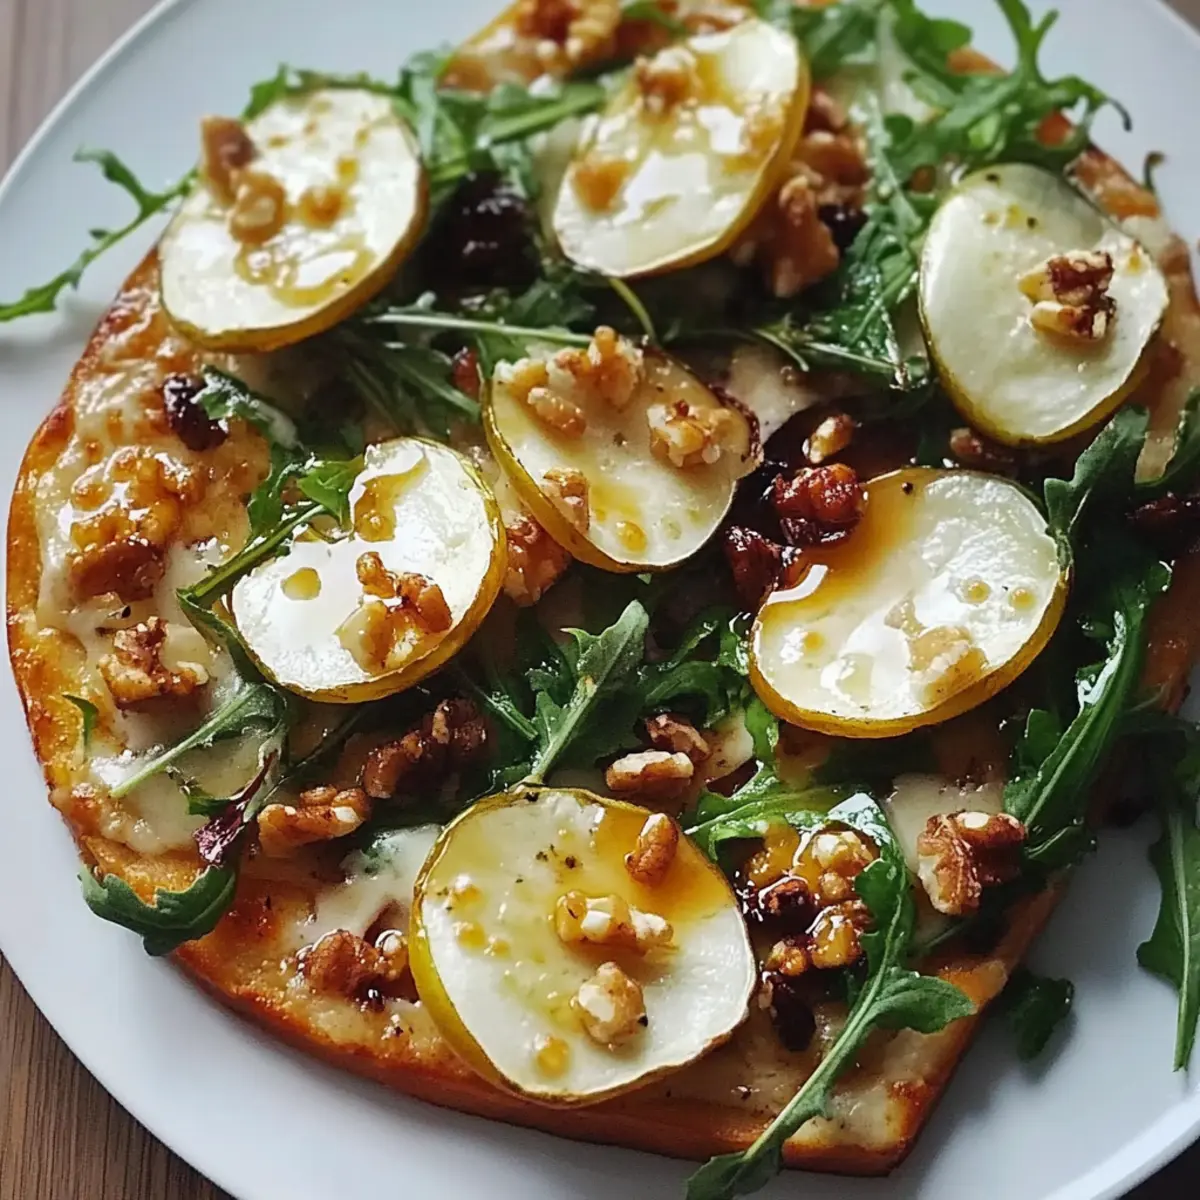
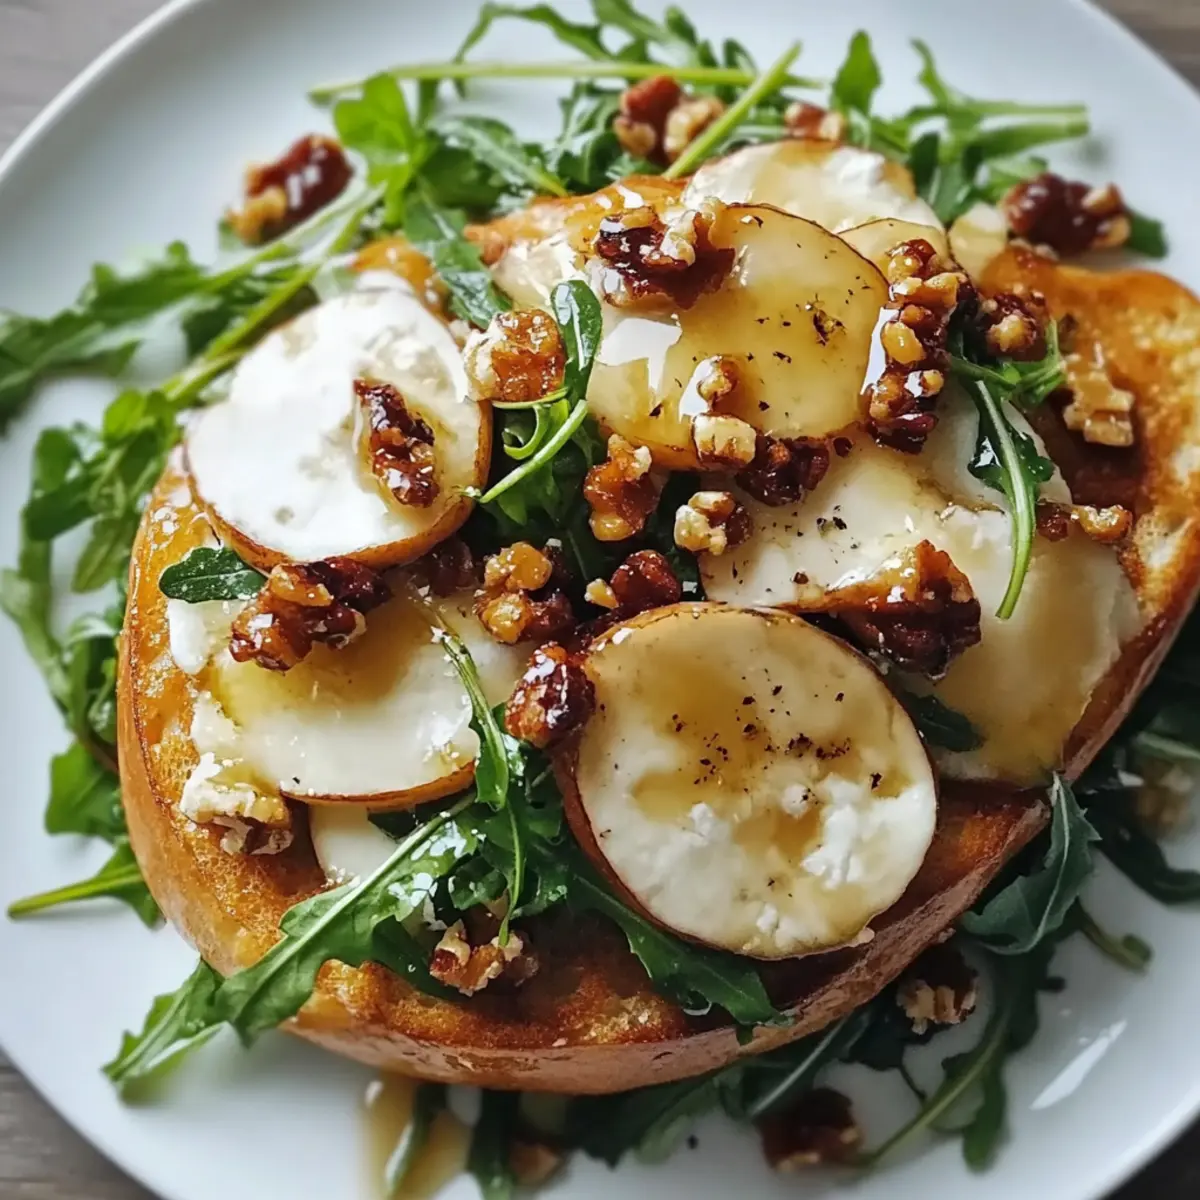
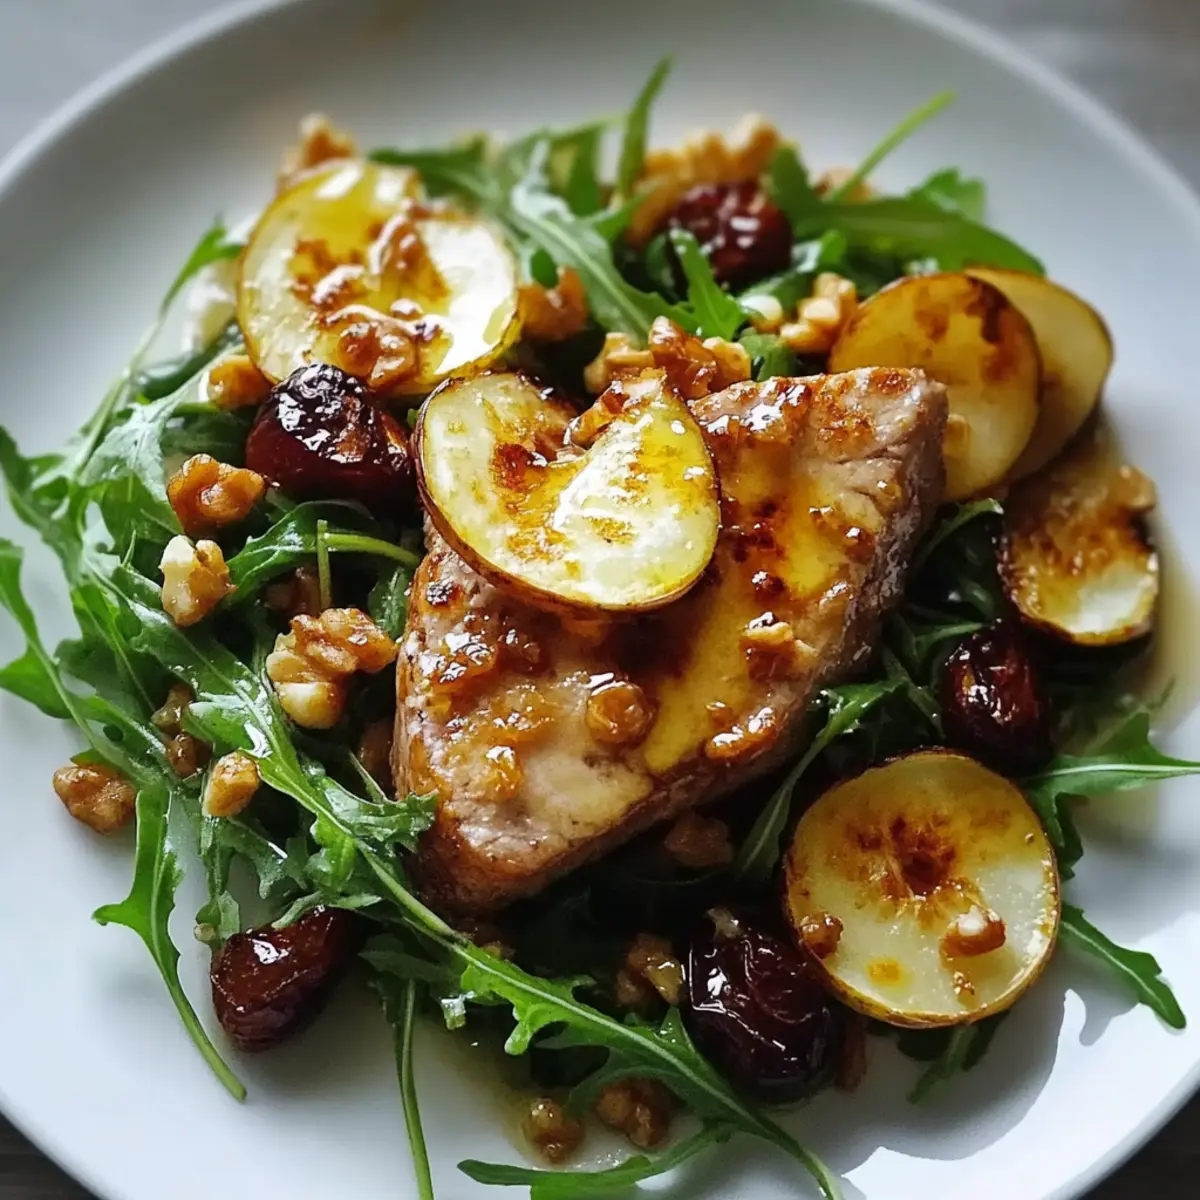
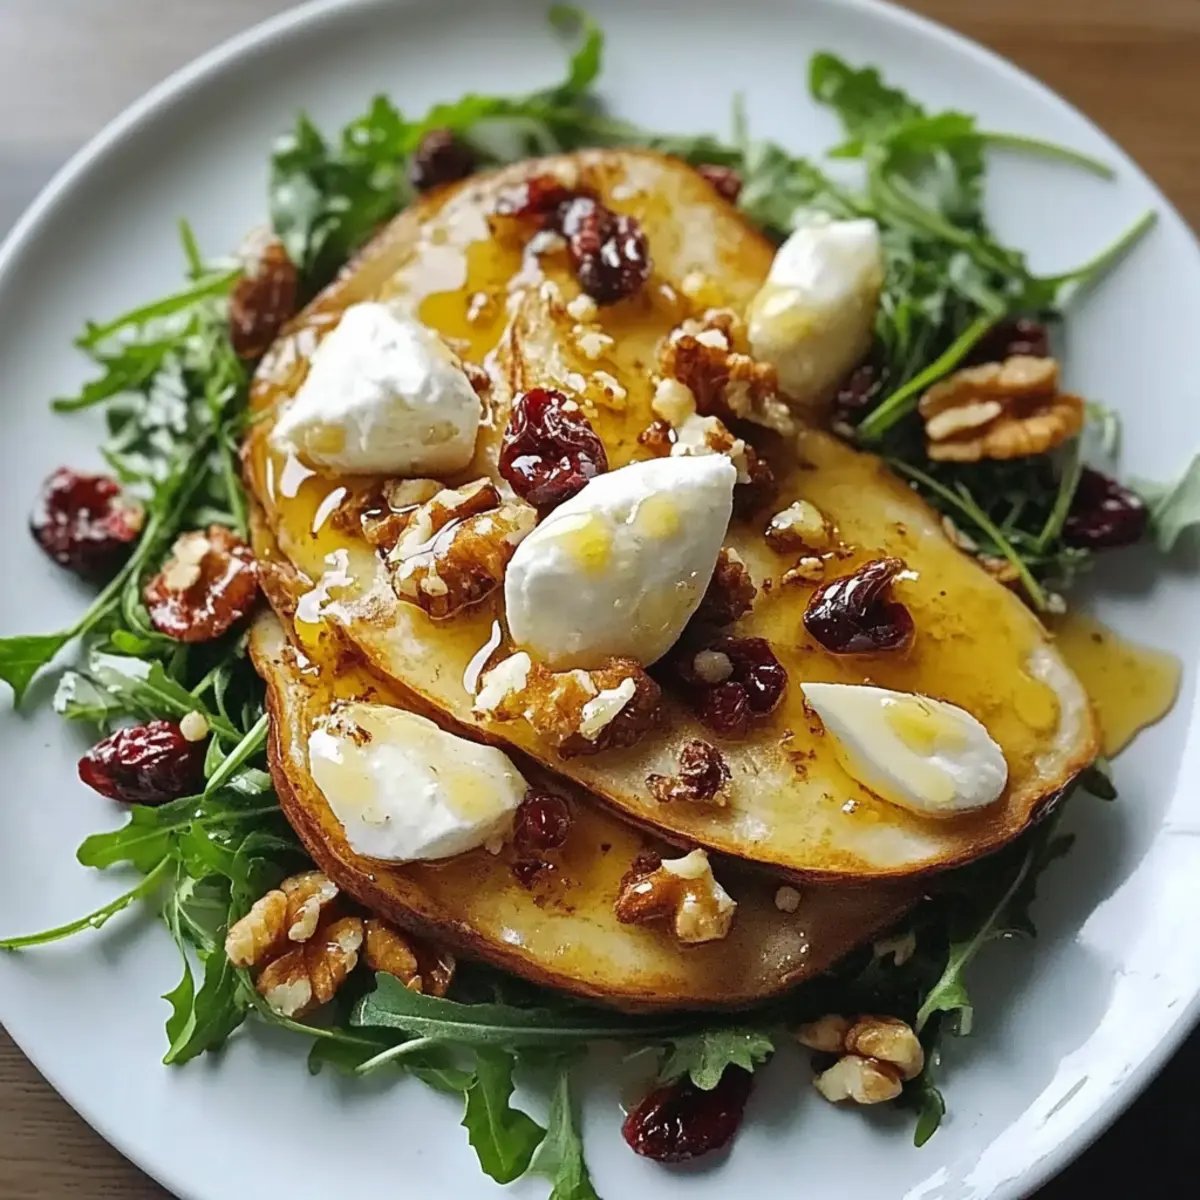
RecipeCrown

  • Home
  • Breakfast
  • Main Dishes
  • Dessert
  • About
  • Contact
menu icon
go to homepage
  • Home
  • Breakfast
  • Main Dishes
  • Dessert
  • About
  • Contact
search icon
Homepage link
  • Home
  • Breakfast
  • Main Dishes
  • Dessert
  • About
  • Contact
×

Slow Cooker Barbequed Beef Ribs

January 11, 2025 by grace bellamy Leave a Comment

Slow Cooker Barbequed Beef Ribs: Tender, Flavorful Delight

A close-up of tender barbequed beef ribs glistening with a rich, smoky sauce, placed on a rustic wooden table.

The ribs are garnished with fresh parsley, surrounded by a vibrant array of colorful sides like coleslaw and cornbread.

Soft, warm lighting enhances the mouthwatering texture and shine of the meat, creating an inviting, homestyle atmosphere.

The smell of slow cooker barbequed beef ribs in the kitchen reminds us of family times and summer barbecues. It's amazing how a tough piece of meat can turn into a soft, delicious dish that everyone loves.

Picture biting into bbq beef ribs that are so soft they almost fall apart. They have a deep, smoky taste that shows the effort put into cooking and seasoning. These slow cooker ribs are more than just food; they bring us closer to the joy of home cooking.

Whether you're an experienced cook or just starting out, this guide will help you make amazing ribs at home. You'll learn the secrets to making slow-cooked beef ribs that your family will love.

Key Takeaways

  • Slow cooking turns tough beef ribs into incredibly tender meat
  • Perfect for family dinners and special gatherings
  • Minimal preparation time with maximum flavor impact
  • Versatile recipe that can be customized to personal taste
  • Nutritious meal with high protein content
  • Easy clean-up with slow cooker method

Why Slow Cooker Barbequed Beef Ribs Are Your Next Family Favorite

Imagine turning tough beef ribs into a delicious meal with little effort. Slow cooker recipes have changed home cooking, making crockpot ribs tender and flavorful.

A close-up of succulent barbequed beef ribs glistening with a rich, sticky sauce, garnished with fresh parsley, served on a rustic wooden platter, accompanied by a side of creamy coleslaw and golden cornbread, with steam rising in the warm kitchen atmosphere.

Understanding the Magic of Slow Cooking

Slow cooking makes tough meat cuts into tasty dishes. Cooking ribs at low heat for a long time breaks down the meat. This makes it fall-off-the-bone tender and soft.

Benefits of Using a Crockpot for Ribs

  • Even heat distribution ensures consistent cooking
  • Locks in natural meat juices and flavors
  • Requires minimal supervision
  • Prevents meat from drying out

Time-Saving Advantages

Crockpot ribs are great for busy cooks. They cook in 4-6 hours on high or 8-12 hours on low. This means you can make a top-notch meal with just a few minutes of prep.

"Slow cooking transforms ordinary ingredients into extraordinary meals with minimal effort."

Your family will love the tender ribs from your slow cooker. It's perfect for making special meals without spending hours cooking.

Essential Ingredients for Perfect BBQ Beef Ribs

Creating mouth-watering bbq beef ribs starts with selecting the right ingredients. Your slow cooker can transform ordinary meat into a culinary masterpiece when you choose the perfect components.

Selecting the Right Cut of Beef Ribs

When preparing smoked beef ribs, choose high-quality cuts that guarantee exceptional flavor. The recommended options include:

  • Beef back ribs (3-5 pounds per rack)
  • Short ribs (most recommended for tenderness)
  • Chuck ribs as an alternative cut

A rustic kitchen countertop with a slow cooker filled with succulent beef ribs, coated in a rich, glossy barbecue sauce, surrounded by fresh herbs, garlic cloves, and a variety of colorful spices; the warm light highlighting the tender meat and vibrant ingredients, evoking a sense of mouthwatering anticipation.

Seasoning and Spice Blend Components

Your spice blend can elevate smoked beef ribs from good to extraordinary. Consider these essential seasonings:

  • Smoked salt
  • Freshly ground black pepper
  • Garlic powder
  • Smoked paprika
  • Ground cumin
  • Dried thyme

"The secret to great bbq beef ribs lies in the perfect balance of spices and slow cooking technique."

BBQ Sauce Options and Variations

A delicious BBQ sauce can make or break your ribs. For the ultimate flavor, consider these ingredients:

  • 1 cup ketchup
  • 6 oz tomato paste
  • ¾ cup brown sugar
  • ½ cup white distilled vinegar
  • 2 tablespoons Dijon mustard

Experiment with sweet, tangy, or spicy variations to find your signature bbq beef ribs recipe. The right combination will ensure your ribs are the star of any meal.

Preparing Your Ribs for Slow Cooking

Getting ready to make delicious slow cooker barbequed beef ribs is key. The secret to tender, flavorful ribs is in the prep work before cooking.

Start by picking high-quality beef back ribs. Most racks have 7 ribs. You'll need about 3-5 pounds for a tasty meal. Here's what to do first:

  • Trim excess fat from the ribs
  • Optional: Remove the thin membrane from the bone side
  • Prepare a signature dry rub blend
  • Season ribs generously

Your dry rub is essential for adding flavor to the ribs. Mix together:

  1. Brown sugar
  2. Garlic powder
  3. Onion powder
  4. Mustard powder

"The secret to incredible slow cooker barbequed beef ribs is in the preparation" - BBQ Experts

Pro tip: Gently press the spices into the meat to help them adhere. This ensures maximum flavor absorption during slow cooking. Remember, these ribs will shrink by about 30% while cooking, so plan your portions.

With careful prep, you're on your way to making slow cooker barbequed beef ribs that will wow your guests.

The Perfect Slow Cooker BBQ Sauce From Scratch

Making your own BBQ sauce for smoky beef ribs turns a simple meal into a work of art. With just a few ingredients, you can make a sauce that makes your ribs irresistible.

Base Ingredients for Classic BBQ Sauce

Your BBQ sauce starts with a mix of key ingredients. Here's a classic recipe that will make your taste buds dance:

  • ½ cup ketchup
  • ¼ cup brown sugar
  • 2 tablespoons tomato paste
  • 2 tablespoons apple cider vinegar
  • 1 tablespoon prepared mustard
  • 1 ½ teaspoons kosher salt
  • ½ cup water

Customizing Your Sauce Flavors

Feel free to try new things with your smoky beef ribs sauce! Add unique ingredients to make a flavor that's all your own:

  • Bourbon for depth
  • Chipotle peppers for heat
  • Honey for sweetness
  • Liquid smoke for extra smokiness

Storage and Make-Ahead Tips

Store your homemade BBQ sauce in an airtight container in the fridge for up to 5 days. Pro tip: Make a big batch and freeze some for later bbq beef ribs fun!

"The secret to great BBQ is in the sauce!" - Pit Master's Wisdom

Step-by-Step Slow Cooking Process

Getting your slow cooker beef ribs just right takes some effort. The secret to tender, delicious ribs is in the cooking method. Follow these steps to make a meal that will wow your loved ones.

  1. Prepare the Slow Cooker: Start by adding a bit of water to the bottom of your slow cooker. This helps keep things moist.
  2. Layer the Ribs: Place the seasoned ribs in the slow cooker, making sure they have enough room.
  3. Set Cooking Time: For the best results, cook on LOW for 7 hours. Or, use HIGH heat for 3-4 hours.

"The secret to fall-off-the-bone ribs is patience and low, slow cooking."

Once the ribs are cooked, it's time to make them look great. Move them to a baking sheet. Then, soak them in the pan juices to keep them moist and flavorful.

  • Broil the ribs for 3-5 minutes to get a crispy, caramelized top
  • Keep an eye on them to avoid burning
  • Brush with more BBQ sauce for extra taste

Pro tip: Save about ½ cup of barbecue sauce for serving. This lets everyone add their own flavor to their ribs, making your dish even more special.

Tips for Achieving Fall-Off-The-Bone Tenderness

Making tender beef ribs that melt in your mouth needs care and patience. The secret is in slow cooking and managing the temperature.

Getting perfect tender beef ribs involves key techniques. These turn regular meat into a dish to remember:

Temperature Control Guidelines

For the best tenderness, control the temperature well. Follow these tips to cook your ribs just right:

  • Keep the temperature steady at 190-203°F (88-95°C)
  • Cook ribs slowly for 6 hours on LOW in your slow cooker
  • Make sure the meat's internal temperature hits at least 145°F (63°C)

Moisture Management Techniques

Keeping ribs juicy is key for that tender feel. Try these tips to keep them moist:

  • Baste ribs often with their own juices
  • Use a cover to keep steam in and moisture in
  • Add a bit of liquid (water or broth) to keep it humid

Final Broiling Methods

The last step for irresistible tender beef ribs is quick broiling:

  • Move ribs to a broiler pan after slow cooking
  • Brush with BBQ sauce for a caramelized look
  • Broil for 3-5 minutes to get a crispy outside

Pro tip: Let your ribs rest for 10-15 minutes after cooking. This lets juices spread, making them even more tender.

Conclusion

Your journey with slow cooker barbequed beef ribs has given you top-notch cooking skills. You now know how to make tough beef ribs tender and delicious. This skill will wow your family and friends.

Storing your slow cooker ribs is easy. You can keep them in the fridge for 3-4 days or freeze them for up to three months. When you reheat them, use gentle methods like the microwave or oven. This helps keep the ribs tender and flavorful.

Every time you make these ribs, you'll get better. Try new seasonings and different cuts of beef. Slow cooking turns tough meat into a juicy treat. Your cooking skills will shine, making your dishes unforgettable.

Remember, making slow cooker ribs better takes practice. Be patient, trust your cooking, and enjoy making a meal that's truly special.

FAQ

How long should I cook beef ribs in a slow cooker?

Beef ribs need 6-8 hours on low heat to get tender. This slow cooking breaks down tough fibers, making the meat tender and flavorful. Make sure the ribs reach 145°F for safety.

Do I need to remove the membrane from beef ribs before cooking?

Yes, removing the membrane is key. It stops seasonings from getting in and makes the ribs tough. Use a knife to remove it before seasoning and cooking.

Can I make these ribs ahead of time?

Absolutely! These ribs are great for meal prep. Cook them ahead and store in the fridge for 3-4 days. Reheat in the oven or slow cooker with more BBQ sauce for moisture.

What's the best cut of beef ribs for slow cooking?

Short ribs or beef back ribs are best for slow cooking. Short ribs are top choice because of their fat, keeping the meat moist and flavorful. Choose cuts with a good mix of meat and fat.

How can I get a crispy exterior on my slow cooker ribs?

For a crispy exterior, broil the ribs for 3-5 minutes after slow cooking. Or, brush with BBQ sauce and grill or bake briefly for a crispy surface.

Can I freeze slow cooker barbequed beef ribs?

Yes, these ribs freeze well. Cool them, then store in an airtight container or bag for up to 3 months. Thaw in the fridge and reheat gently to keep them tender.

What if I don't have a slow cooker?

Oven-braising works well without a slow cooker. Cook in a covered Dutch oven at 275°F for 2.5-3 hours. Or, use an instant pot's slow cook function. Keep the heat low for tender meat.

How can I make the BBQ sauce less sweet?

To make BBQ sauce less sweet, add more vinegar or mustard. Spicy elements like cayenne pepper or hot sauce also help balance the sweetness.

Print

Slow Cooker Barbequed Beef Ribs

Slow Cooker Barbequed Beef Ribs
Print Recipe
Pin Recipe

5 Stars 4 Stars 3 Stars 2 Stars 1 Star

No reviews

These Slow Cooker Barbequed Beef Ribs are a true comfort food classic! With just a few simple ingredients and a slow cooker, you’ll have a delicious, melt-in-your-mouth dish that’s loaded with smoky, tangy BBQ flavors. Serve with your favorite sides for a complete meal.

  • Author: grace bellamy
  • Prep Time: 10 minutes
  • Cook Time: 7-8 hours (LOW) / 4-5 hours (HIGH)
  • Total Time: 7 hours 10 minutes
  • Yield: Serves 4
  • Category: Main Dish
  • Method: Slow Cooking
  • Cuisine: American
  • Diet: Gluten Free

Ingredients

  • 🍖 3 lbs beef ribs
  • 🧂 1 teaspoon salt
  • 🧂 1 teaspoon black pepper
  • 🧄 1 teaspoon garlic powder
  • 🧅 1 teaspoon onion powder
  • 🥄 1 cup BBQ sauce (your favorite brand or homemade)
  • 🥤 ¼ cup apple cider vinegar
  • 🍯 2 tablespoon honey or brown sugar
  • 🌶️ Optional: ½ teaspoon smoked paprika or chili powder for extra flavor

Instructions

  • Prep the ribs: Season beef ribs with salt, pepper, garlic powder, onion powder, and optional smoked paprika.
  • Layer the slow cooker: Place the seasoned ribs in the slow cooker.
  • Prepare the sauce: In a small bowl, mix BBQ sauce, apple cider vinegar, and honey (or brown sugar). Pour the mixture over the ribs, ensuring they’re well-coated.
  • Cook: Cover and cook on LOW for 7-8 hours or HIGH for 4-5 hours, until the ribs are tender and the meat easily pulls away from the bone.
  • Broil for caramelization (optional): For a caramelized finish, transfer the cooked ribs to a baking sheet, brush with extra BBQ sauce, and broil in the oven for 2-3 minutes.
  • Serve: Enjoy your tender BBQ beef ribs with your favorite sides like coleslaw, mashed potatoes, or cornbread!

Notes

  • Use a BBQ sauce that matches your preferred flavor profile (sweet, smoky, spicy).
  • For extra depth of flavor, marinate the ribs overnight with the seasonings and sauce.
  • Leftovers can be stored in the fridge for up to 3 days.

Did you make this recipe?

Share a photo and tag us — we'd love to see your creation!

Recipe

Mini Pineapple Upside-Down Cakes

December 17, 2024 by grace bellamy Leave a Comment

Mini Pineapple Upside-Down Cakes: A Perfect Dessert for Any Occasion

Mini Pineapple Upside-Down Cakes are the perfect blend of nostalgia and convenience. These adorable, individual-sized treats take the beloved pineapple upside-down cake and make it easy to enjoy anywhere. Whether hosting a gathering, preparing a family treat, or satisfying a dessert craving, these mini cakes will surely impress.

In this guide, you'll discover everything you need to know to create mini pineapple upside-down cakes from scratch or with the help of a boxed cake mix. This article has you covered from essential tools to step-by-step instructions, serving suggestions, and creative variations. Let's get baking!

What You'll Need to Make Mini Pineapple Upside-Down Cakes

Before starting, let'sgather the tools and ingredients required for this recipe. These simple essentials will make the process seamless.

Tools Required

To bake perfect mini pineapple upside-down cakes, you'll need:

  • A muffin pan or jumbo muffin tin (nonstick preferred)
  • Mixing bowls and a spatula to prepare the batter
  • Measuring cups and spoons for precision
  • A small saucepan for melting butter and brown sugar
  • A toothpick to test for doneness
  • A cooling rack for easy flipping and cooling

Key Ingredients

These simple yet flavorful ingredients will make your cakes irresistibly delicious:

  • Pineapple slices: Use canned pineapple rings or cut fresh pineapple into smaller pieces.
  • Maraschino cherries: A bright, sweet addition to the center of each cake.
  • Brown sugar and butter: These create the signature caramelized topping.
  • Yellow cake mix: A boxed mix makes this recipe quick and easy, but homemade cake batter works just as well.
  • Pineapple juice: Replace water in the cake mix for an extra burst of pineapple flavor.
  • Eggs and vegetable oil: Essential for creating a moist and fluffy cake texture.

With these ingredients and tools ready, you're set to make these delicious mini pineapple upside-down cakes.

Step-by-Step Instructions for Mini Pineapple Upside-Down Cakes

Follow these easy steps to create flavorful, caramelized mini cakes.

1. Preparing the Topping

  1. Preheat your oven to 350°F (175°C). Proper oven temperature ensures even baking.
  2. Melt ¼ cup butter in a small saucepan. Once melted, stir in ½ cup packed brown sugar until the mixture is smooth.
  3. Lightly grease your muffin pan with nonstick cooking spray.
  4. Spoon 1-1.5 teaspoons of the butter and brown sugar mixture into the bottom of each muffin cup.
  5. Place a small pineapple slice in each muffin cup, then add a maraschino cherry in the middle of the pineapple slice.

2. Preparing the Cake Batter

  1. In a large mixing bowl, combine:
    • One box yellow cake mix
    • 1 cup pineapple juice (replace the water in the cake mix instructions)
    • Three large eggs
    • ½ cup vegetable oil
  2. Blend the batter with an electric mixer or whisk until smooth. It should be creamy and free of lumps.

3. Assembling and Baking the Cakes

  1. Pour the cake batter evenly into each muffin cup, filling them about two-thirds full. Avoid overfilling to prevent overflow.
  2. Bake for 20-25 minutes. To check for doneness, insert a toothpick into the center of a cake. If the toothpick comes out clean, the cakes are ready.
  3. Let the cakes cool for 5 minutes before flipping. Place a cooling rack or tray on top of the muffin pan and carefully flip the pan upside down to release the cakes.

Serving Suggestions for Mini Pineapple Upside-Down Cakes

These mini cakes are best served warmly and versatile enough for any occasion.

1. Serve Warm for the Best Flavor

Warm cakes highlight the gooey brown sugar topping and juicy pineapple slices. For an extra treat, drizzle reserved pineapple juice before serving.

2. Pair with Vanilla Ice Cream or Whipped Cream

For a decadent dessert, serve these cakes with a scoop of vanilla ice cream or a dollop of whipped cream. The cold, creamy texture perfectly complements the warm cake.

3. Add a Decorative Touch

Garnish with fresh mint leaves, a sprinkle of powdered sugar, or additional pineapple tidbits for a polished presentation.

How to Store Mini Pineapple Upside-Down Cakes

To keep your mini pineapple upside-down cakes fresh, follow these simple storage tips:

  1. At Room Temperature: Store in an airtight container for 2 days. Ensure the cakes are completely cooled before storing to avoid condensation.
  2. Refrigerator: Keep in a sealed container for up to 4 days. Reheat the cakes for 15-20 seconds in the microwave before serving.
  3. Freezer: Wrap each cake individually in plastic wrap or foil and freeze for up to 2 months. Thaw at room temperature and reheat as desired.

Creative Variations to Try

If you want to get creative, try these fun variations on the classic recipe:

1. Mini Pineapple Upside-Down Bundt Cakes

Use a mini bundt pan for a decorative, elegant look. Follow the same steps, adjusting the baking time to 25-30 minutes.

2. Pineapple Upside-Down Muffins

Fold pineapple tidbits into the batter for a muffin-like texture with bursts of pineapple flavor throughout.

3. Chocolate-Pineapple Twist

Add two tablespoons of cocoa powder to the cake batter for a decadent, chocolatey twist on this fruity dessert.

4. Coconut-Pineapple Mini Cakes

Mix ½ cup shredded coconut into the batter and sprinkle coconut flakes on top for a tropical flair.

Frequently Asked Questions (FAQs)

1. Do You Flip Pineapple Upside-Down Cakes While Hot or Cold?

Flip the cakes while they are still warm (5-10 minutes after baking) to prevent the topping from sticking.

2. Can I Use Fresh Pineapple Instead of Canned?

Yes! Fresh pineapple works perfectly but cut it into small rings or chunks to fit the muffin cups.

3. Why Is My Cake Soggy?

Too much liquid or underbaking can make the cakes soggy. Always drain excess pineapple juice and bake until a toothpick comes out clean.

4. Can I Make These Cakes Gluten-Free?

Use a gluten-free cake mix and follow the same steps for an equally delicious treat.

Conclusion: A Delightful Mini Dessert for Every Occasion

Mini Pineapple Upside-Down Cakes are perfect for parties, family treats, or special occasions. Their size makes them convenient, while the rich caramelized topping and juicy pineapple provide flavor in every bite.

Whether you stick with the classic recipe or try creative variations like chocolate, coconut, or bundt cake styles, these mini cakes are guaranteed to impress. Plus, they're easy to make, store, and serve, making them ideal for bakers of all skill levels.

Ready to explore more delicious recipes? Try our Mini Lemon Bundt Cakes for another individual-sized dessert that's sure to please!

Print

Mini Pineapple Upside-Down Cakes

Mini Pineapple Upside-Down Cakes
Print Recipe
Pin Recipe

5 Stars 4 Stars 3 Stars 2 Stars 1 Star

No reviews

These Mini Pineapple Upside-Down Cakes are a fun, individual-sized twist on a classic dessert. Moist yellow cake meets a caramelized brown sugar topping with juicy pineapple slices and sweet maraschino cherries. Perfect for any occasion, they’re easy to make and serve beautifully!

  • Author: grace bellamy
  • Prep Time: 10 minutes
  • Cook Time: 20-25 minutes
  • Total Time: 30-35 minutes
  • Yield: 12 mini cakes 1x
  • Category: Dessert
  • Method: Baking
  • Cuisine: American

Ingredients

Scale

For the Topping:

  • ¼ cup melted butter
  • ½ cup packed brown sugar
  • 6-8 pineapple slices (cut into smaller pieces or rings)
  • 12 maraschino cherries

For the Cake Batter:

  • 1 box yellow cake mix (or homemade yellow cake batter)
  • 1 cup pineapple juice (substitute for water in cake mix)
  • 3 large eggs
  • ½ cup vegetable oil

Instructions

  • Prepare the Topping:
    • Preheat your oven to 350°F (175°C).
    • Melt butter in a small saucepan and stir in the brown sugar until smooth.
    • Grease a 12-cup muffin pan with cooking spray. Spoon about 1-1.5 teaspoons of the butter and brown sugar mixture into the bottom of each muffin cup.
    • Place a pineapple slice (or smaller pieces) in each cup and add a maraschino cherry in the center.
  • Make the Cake Batter:
    • In a large bowl, combine the yellow cake mix, pineapple juice (instead of water), eggs, and vegetable oil.
    • Mix until smooth and lump-free, following the box instructions (approximately 2 minutes).
  • Assemble and Bake:
    • Pour the batter evenly into each muffin cup, filling about two-thirds full.
    • Bake for 20-25 minutes, or until a toothpick inserted in the center comes out clean.
    • Let the cakes cool for 5 minutes in the pan. Place a cooling rack or tray over the pan and flip the cakes to release them.
  • Serve and Enjoy:
    • Serve warm with whipped cream or a scoop of vanilla ice cream.

Notes

  • Replace pineapple slices with pineapple tidbits for a different texture.
  • Flip the cakes while they are still warm to prevent sticking.
    • You can store these cakes at room temperature for 2 days, in the refrigerator for 4 days, or freeze them for up to 2 months.

Did you make this recipe?

Share a photo and tag us — we'd love to see your creation!

Recipe

Christmas Cracker Candy

December 15, 2024 by grace bellamy Leave a Comment

Christmas Cracker Candy: The Ultimate Holiday Treat

Summary: Christmas Cracker Candy, also known as Christmas Crack or Saltine Toffee Bark, is an irresistibly simple and delicious holiday treat. This article dives into why this easy recipe is perfect for festive celebrations, breaking down step-by-step instructions, variations, and tips to make this addictive cracker candy a hit at any gathering.

What Is Christmas Cracker Candy and Why You'll Love It?

What Makes Christmas Cracker Candy So Irresistible?

Christmas Cracker Candy, also called Christmas Crack or Saltine Toffee Bark, is the ultimate holiday treat. This delightful mix of sweet, salty, and crunchy flavors makes it impossible to eat just one piece. The combination of saltine crackers, rich toffee, and smooth chocolate creates a unique texture and flavor that feels nostalgic and indulgent.

What’s even better is how quick and easy it is to make. With just a few pantry staples like butter, brown sugar, and chocolate chips, you can whip up a batch in under 30 minutes. This easy recipe is perfect for last-minute gatherings or holiday gift-giving.

Why Is It Called Christmas Crack?

The name "Christmas Crack" comes from the candy’s addictive nature—it’s nearly impossible to stop at one bite! The simple recipe results in a perfect balance of sweet toffee, salty crackers, and rich chocolate. Additionally, "crack" playfully refers to the sound the candy makes when broken into pieces after it hardens.

This cracker candy has become a holiday favorite because it’s versatile, festive, and can be customized with various toppings. Whether you prefer nuts, sprinkles, or candy bits, there’s a version of this Christmas Crack Recipe for everyone to enjoy.

What You’ll Need to Make Christmas Cracker Candy

Essential Tools & Supplies for Cracker Candy

To make Christmas Cracker Candy, you’ll need just a few basic tools, most of which are already in your kitchen:

  1. Baking Sheet: A sturdy sheet pan ensures even baking and supports the cracker layer.
  2. Parchment Paper or Foil: This prevents the candy from sticking and makes cleanup a breeze.
  3. Saucepan: Heat the butter and brown sugar mixture evenly using a medium saucepan.
  4. Spatula: A silicone or wooden spatula helps spread the toffee and melted chocolate.

Each tool is vital in simplifying the candy recipe and ensuring perfect results. For instance, lining the baking sheet with foil or parchment paper ensures the candy doesn’t stick, and a proper saucepan helps you bring the toffee mixture to a boil without burning it.

Key Ingredients for Christmas Cracker Candy

Here are the essential ingredients you’ll need for this cracker candy recipe:

  1. Saltine Crackers: These act as the crunchy base. Their salty flavor balances the sweetness of the toffee and chocolate.
  2. Butter: Butter gives the toffee its rich, indulgent flavor. Use unsalted butter to control the saltiness.
  3. Brown Sugar: Dark brown sugar works best for a deeper caramelized flavor, but light brown sugar also works well.
  4. Chocolate Chips: Semi-sweet or milk chocolate chips are perfect for creating the chocolate topping.
  5. Toppings: Optional toppings include chopped nuts, sprinkles, crushed candy canes, or M&Ms.

Combining saltine crackers, butter, brown sugar, and chocolate chips perfectly balances textures and flavors. The crackers crunch, the toffee adds a rich caramel flavor, and the chocolate topping ties it together.

Step-by-Step Instructions to Make Christmas Cracker Candy

Prepare the Base

Start by preheating your oven to 350°F (175°C).

  1. Line a baking sheet with parchment paper or foil to prevent sticking. If using foil, lightly spray it with non-stick spray.
  2. Arrange the saltine crackers in a single layer on the prepared baking sheet, ensuring they fit snugly together.

Make the Toffee Layer

  1. Combine butter and brown sugar in a medium saucepan. Heat over medium heat, stirring occasionally, until the butter melts and the sugar dissolves.
  2. Once the mixture begins to boil, allow it to bubble for 3 minutes without stirring. This helps create a smooth toffee consistency.
  3. Carefully pour the toffee mixture over the cracker layer, spreading it evenly with a spatula.

Bake and Add Chocolate

  1. Bake the crackers and toffee in the preheated oven for 5–7 minutes or until the toffee is bubbly.
  2. Remove the pan from the oven and immediately sprinkle chocolate chips evenly over the hot toffee. Let the chocolate sit for 2–3 minutes to soften.
  3. Use a spatula to spread the melted chocolate evenly over the toffee.

Add Toppings and Cool

  1. Sprinkle your favorite toppings—such as chopped nuts, festive sprinkles, or crushed candy canes—over the melted chocolate.
  2. Allow the candy to cool completely at room temperature or in the refrigerator until it hardens.
  3. Once hardened, break the candy into pieces.

Tips to Perfect Your Christmas Cracker Candy

How to Achieve the Perfect Toffee Layer

  • Boil Consistently: Let the toffee come to a boil for exactly 3 minutes without stirring. This ensures a smooth texture.
  • Use a Candy Thermometer: The toffee should reach 285°F for the best consistency.
  • Spread Quickly: Work fast to spread the toffee evenly over the crackers before it hardens.

Avoid Common Mistakes

  1. Over-Baking: Baking for 5–7 minutes is sufficient. Longer baking can burn the toffee or crackers.
  2. Skipping Lining: Always line the pan with foil or parchment paper for easy removal.
  3. Uneven Chocolate: Let the chocolate chips melt fully before spreading to avoid clumps.

Delicious Variations of Christmas Cracker Candy

Graham Cracker Toffee

Replace saltine crackers with graham crackers for a sweeter base. Follow the same steps for a delightful twist.

Chocolate Peppermint Crack

Sprinkle crushed candy canes over the melted chocolate for a refreshing, festive flavor.

Nut-Free Option

Skip the nuts and use sprinkles, M&Ms, or a white chocolate drizzle for an allergy-friendly version.

Serving Ideas for Christmas Cracker Candy

Serve at Holiday Gatherings

  • Add to a festive dessert tray alongside cookies and brownies.
  • Pair with hot cocoa or spiced eggnog for a cozy treat.

Perfect for Gifting

  • Package in decorative tins or cellophane bags tied with ribbons.
  • Mix with fudge or gingerbread cookies for a holiday gift basket.

How to Store Christmas Cracker Candy

  • Fridge: Store in an airtight container for up to 2 weeks.
  • Freezer: Freeze for up to 3 months. Use parchment paper between layers.

Frequently Asked Questions About Christmas Cracker Candy

Why Is It Called Christmas Crack?

The name comes from its addictive flavor and the “crack” sound when broken.

How Long Is It Good in the Fridge?

It stays fresh for up to 2 weeks in an airtight container.

Can I Make It Without Chocolate?

Yes, skip the chocolate chips for a toffee-only version.

Final Thoughts: Make Christmas Cracker Candy Your Holiday Favorite

Christmas Cracker Candy is the perfect blend of salty, sweet, and crunchy—a treat your family and friends will adore. Its simplicity, versatility, and addictive flavor make it a holiday must-have.

Key Takeaways

  • Use saltine crackers for a crisp, salty base.
  • Customize with toppings like nuts, sprinkles, or candy canes.
  • Store in the fridge or freezer for long-lasting freshness.

Print

Christmas Cracker Candy

Christmas Cracker Candy
Print Recipe
Pin Recipe

5 Stars 4 Stars 3 Stars 2 Stars 1 Star

No reviews

Christmas Cracker Candy, also known as Christmas Crack or Saltine Toffee Bark, is a quick, festive, and addictive holiday treat. Made with saltine crackers, buttery toffee, and a smooth chocolate topping, this easy recipe combines sweet, salty, and crunchy flavors—perfect for gifting or serving during the holidays.

  • Author: grace bellamy
  • Prep Time: 10 minutes
  • Cooling Time: 7 minutes
  • Cook Time: 1 hour
  • Total Time: 1 hour 20 minutes
  • Yield: 12–16 servings
  • Category: Dessert, Snack
  • Method: Baking
  • Cuisine: American
  • Diet: Vegetarian

Ingredients

  • Saltine Crackers – 1 sleeve (about 40 crackers)
  • Butter – 1 cup (unsalted)
  • Brown Sugar – 1 cup (dark brown sugar preferred)
  • Chocolate Chips – 2 cups (semi-sweet or milk chocolate)
  • Toppings – Chopped nuts, festive sprinkles, crushed candy canes, or M&Ms (optional)

Instructions

  • Prepare the Base
    • Preheat oven to 350°F (175°C).
    • Line a baking sheet with parchment paper or foil.
    • Arrange the saltine crackers in a single layer on the sheet.
  • Make the Toffee Layer
    • In a medium saucepan, melt butter and brown sugar over medium heat, stirring occasionally.
    • Bring the mixture to a boil and let it bubble for 3 minutes without stirring.
    • Pour the toffee mixture evenly over the crackers, spreading with a spatula.
  • Bake and Add Chocolate
    • Bake for 5–7 minutes, until the toffee is bubbling.
    • Remove from the oven and sprinkle chocolate chips evenly over the hot toffee.
    • Let the chocolate chips sit for 2–3 minutes, then spread the melted chocolate smoothly with a spatula.
  • Add Toppings and Cool
    • Sprinkle desired toppings (nuts, sprinkles, crushed candy canes) over the melted chocolate.
    • Allow the candy to cool completely at room temperature or in the refrigerator.
    • Once hardened, break into pieces and serve.

Notes

  • For a nut-free option, use festive sprinkles or candy bits.
  • Store in an airtight container in the fridge for up to 2 weeks or freeze for up to 3 months.
  • Swap saltines for graham crackers or club crackers for a variation in flavor.

Nutrition

  • Calories: 180 kcal

Did you make this recipe?

Share a photo and tag us — we'd love to see your creation!

Recipe

Cheesy Scalloped Potatoes Recipe

December 14, 2024 by grace bellamy Leave a Comment

The Ultimate Cheesy Scalloped Potatoes Recipe – A Comforting Potato Classic

If you’re searching for a creamy, cheesy, and comforting potato dish, this cheesy scalloped potatoes recipe is your perfect match. This article will guide you step-by-step through the process of making the best-scalloped potato recipe, which features layers of tender potatoes, creamy cheese sauce, and a golden brown finish. Whether it’s for a holiday feast, a family gathering, or an easy weeknight side dish, this recipe is worth saving.

Outline of the Article

  1. What Are Scalloped Potatoes?
  2. Scalloped Potatoes vs Au Gratin: What’s the Difference?
  3. How to Make Cheesy Scalloped Potatoes from Scratch
  4. Ingredients Needed for the Best Cheesy Scalloped Potatoes
  5. Step-by-Step Instructions to Make Scalloped Potatoes
  6. Which Potatoes Work Best for Scalloped Potatoes?
  7. Cheesy Scalloped Potato Recipe with Ham: A Hearty Twist
  8. Make-Ahead and Leftover Cheesy Scalloped Potatoes
  9. Tips for Perfect Cheesy Scalloped Potatoes Every Time
  10. Frequently Asked Questions About Scalloped Potatoes

What Are Scalloped Potatoes?

Scalloped potatoes are a classic comfort food featuring sliced potatoes baked in a creamy sauce until tender and delicious. Unlike mashed potatoes, this dish highlights potato slices layered in a baking dish with sauce and optional toppings, such as cheese or breadcrumbs.

Why Are Scalloped Potatoes Popular?

Scalloped potatoes are a timeless side dish loved for their versatility and ease of preparation. You can serve them for casual dinners or pair them with meats for a festive meal. Plus, variations like adding ham make scalloped potatoes a satisfying main course.

Scalloped Potatoes vs Au Gratin: What’s the Difference?

It’s easy to confuse scalloped potatoes and au gratin potatoes because both dishes involve layering potatoes in a casserole. However, there’s a key difference:

What Defines Scalloped Potatoes?

Traditional scalloped potatoes use a creamy sauce made from heavy cream or milk, often thickened with a roux. They do not necessarily include cheese, although many modern recipes (like this one) add cheddar cheese or other varieties for a cheesy twist.

What Are Potatoes Au Gratin?

Potatoes au gratin go a step further by layering cheese between the potato slices and sometimes breadcrumbs for a crunchy topping. This method delivers a dish that’s richer and cheesier compared to scalloped potatoes.

In this recipe, we combine the best of both worlds for cheesy scalloped potatoes that are tender, creamy, and packed with flavor.

How to Make Cheesy Scalloped Potatoes from Scratch

Making cheesy scalloped potatoes at home is easier than you might think. You just need simple ingredients, a baking dish, and a little patience while the potatoes bake until tender.

What Makes This Recipe Special?

This recipe combines sliced potatoes, a creamy cheese sauce made from cheddar, and a hint of garlic for extra flavor. You’ll also learn tips to thicken the sauce and achieve that perfect golden brown top layer.

Ingredients Needed for the Best Cheesy Scalloped Potatoes

To make this comforting dish, gather the following ingredients:

Potatoes:

  • 3 pounds of russet potatoes or Yukon Gold potatoes

Cheese Sauce:

  • 4 tablespoons butter
  • 2 tablespoons flour (to make a roux)
  • 1 cup milk
  • 1 cup heavy cream
  • 2 cups sharp cheddar cheese, shredded (plus extra for topping)
  • 2 garlic cloves, minced (optional)
  • Salt and pepper to taste

Optional:

  • 1 to 2 cups diced or sliced cooked ham for a heartier version

Step-by-Step Instructions to Make Scalloped Potatoes

Follow these simple steps for perfect cheesy scalloped potatoes:

  1. Preheat the Oven:
    • Preheat your oven to 350°F.
  2. Prepare the Potatoes:
    • Wash, peel, and thinly slice 3 pounds of potatoes. Using a mandoline ensures uniform slices.
  3. Make the Cheese Sauce:
    • In a saucepan over medium heat, melt 4 tablespoons of butter.
    • Whisk in 2 tablespoons of flour to create a roux. Cook for about 1 minute, stirring continuously.
    • Gradually whisk in 1 cup of milk and 1 cup of heavy cream, allowing the mixture to thicken.
    • Stir in 2 cups of shredded sharp cheddar cheese until melted. Season with garlic, salt, and pepper to taste.
  4. Assemble the Dish:
    • Grease a baking dish with butter or cooking spray.
    • Arrange half of the potato slices in the baking dish. Pour half of the cheese sauce evenly over the potatoes.
    • Repeat with the remaining potato slices and cheese sauce.
  5. Bake the Potatoes:
    • Cover the baking dish with foil and bake for 45 minutes.
    • Remove the foil, sprinkle with extra cheese, and bake for another 15–20 minutes until the potatoes are tender and the top is golden brown.
  6. Cool and Serve:
    • Let the dish cool for a few minutes before serving. This allows the sauce to set for easy serving.

Which Potatoes Work Best for Scalloped Potatoes?

Russet Potatoes vs Yukon Gold Potatoes

  • Russet potatoes: Known for their starchiness, russet potatoes make the sauce creamy as they cook. They’re also easy to slice uniformly.
  • Yukon Gold potatoes: These have a buttery texture that complements the cheese sauce. Yukon Gold potatoes hold their shape well, making them ideal for a more structured dish.

For the best results, use a mandoline to ensure thinly sliced potatoes. This guarantees even cooking and tender layers of potatoes.

Cheesy Scalloped Potato Recipe with Ham: A Hearty Twist

Want to turn your cheesy scalloped potatoes into a complete meal? Add ham!

Why Add Ham to Scalloped Potatoes?

Adding ham makes this dish heartier, perfect for brunch or dinner. Simply layer diced or sliced ham between the potatoes and cheese sauce for a flavorful variation.

Leftover Ham? Use It!

If you have leftover ham from a holiday meal, this is an excellent way to repurpose it into something delicious.

Make-Ahead and Leftover Cheesy Scalloped Potatoes

Make-Ahead Instructions

To make ahead, assemble the dish up to the point of baking, cover tightly, and refrigerate for up to 24 hours. When ready, preheat the oven and bake as directed.

How to Store Leftovers

Store any leftover potatoes in an airtight container in the fridge for up to 4 days. To reheat, place them in a 350°F oven until warm.

Tips for Perfect Cheesy Scalloped Potatoes Every Time

  1. Use a Mandoline: This ensures your potatoes are evenly sliced for consistent cooking.
  2. Thicken the Sauce: Cook the roux and add cheddar cheese slowly to create a creamy texture.
  3. Avoid Overbaking: Check to see if the potatoes are tender with a fork to prevent mushy results.
  4. Experiment with Cheese: Try blending cheeses like white cheddar, gouda, or mozzarella for depth of flavor.

Frequently Asked Questions About Scalloped Potatoes

How Do I Make Scalloped Potatoes Without Cheese?

If you prefer traditional scalloped potatoes, omit the cheese and rely on a creamy milk-based sauce.

Can I Freeze Cheesy Scalloped Potatoes?

Yes, you can freeze them! Allow the dish to cool completely, cover with foil, and freeze for up to 2 months. Thaw overnight in the fridge before baking.

What’s the Best Way to Reheat Scalloped Potatoes?

To reheat, place the potatoes in a 350°F oven until warm. Avoid microwaving, as it can affect the texture.

Print

Cheesy Scalloped Potatoes Recipe

Cheesy Scalloped Potatoes Recipe
Print Recipe
Pin Recipe

5 Stars 4 Stars 3 Stars 2 Stars 1 Star

No reviews

These cheesy scalloped potatoes are the ultimate comfort food, featuring layers of tender, thinly sliced potatoes baked in a creamy cheese sauce. With a golden brown, bubbly top, this dish is perfect as a side for family dinners, holiday feasts, or potlucks. Add ham for a hearty twist or enjoy it as a standalone dish. It’s simple to make and delivers a rich, indulgent flavor that everyone will love!

  • Author: grace bellamy
  • Prep Time: 20 minutes
  • Cook Time: 1 hour 5 minutes
  • Total Time: 1 hour 25 minutes
  • Yield: 8 servings 1x
  • Category: Side Dish
  • Method: Baking
  • Cuisine: American

Ingredients

Scale

For the Potatoes:

  • 3 pounds russet potatoes or Yukon Gold potatoes (peeled and thinly sliced)
  • 2 cups sharp cheddar cheese, shredded (plus extra for topping)

For the Cheese Sauce:

  • 4 tablespoons butter
  • 2 tablespoons all-purpose flour
  • 1 cup milk
  • 1 cup heavy cream
  • 2 cloves garlic, minced (optional)
  • Salt and pepper, to taste

Optional Additions:

  • 1 to 2 cups diced or sliced cooked ham (optional for a heartier dish)
  • Additional cheeses like jack cheese or white cheddar

Instructions

Prepare the Ingredients:

  • Preheat your oven to 350°F.
  • Wash, peel, and thinly slice the potatoes using a mandoline or a sharp knife. Set them aside.

2. Make the Cheese Sauce:

  • In a medium saucepan, melt the butter over medium heat.
  • Whisk in the flour and cook for about 1 minute to make a roux.
  • Gradually add the milk and heavy cream, whisking constantly to avoid lumps. Cook until the sauce begins to thicken.
  • Stir in the shredded cheddar cheese and whisk until fully melted. Add garlic (optional), salt, and pepper to taste. Remove the sauce from heat.

3. Layer the Potatoes:

  • Grease a baking dish (9x13-inch works well) with butter or cooking spray.
  • Arrange half of the potato slices evenly at the bottom of the dish. Pour half of the cheese sauce over the potatoes.
  • Repeat with the remaining potatoes and cheese sauce, spreading it evenly.

4. Bake the Dish:

  • Cover the baking dish with foil and place it in the preheated oven. Bake for 45 minutes.
  • After 45 minutes, remove the foil and sprinkle additional shredded cheese on top. Bake uncovered for another 15–20 minutes, or until the potatoes are tender and the top is golden brown and bubbly.

5. Cool and Serve:

  • Allow the dish to cool for about 5–10 minutes before serving. This helps the layers set for easier serving.

Notes

  • Potato Type: Use russet potatoes for a creamy texture or Yukon Gold potatoes for firmer layers and a buttery flavor.
  • Even Slicing: Use a mandoline for thin, uniform slices to ensure even cooking.
  • Cheese Variations: Experiment with other cheeses like white cheddar, gouda, or mozzarella for a unique flavor profile.
  • Adding Ham: Layer cooked ham between the potatoes and cheese sauce for a more filling, protein-packed dish.
  • Make Ahead: Assemble the dish up to 24 hours in advance, cover tightly, and refrigerate. Bake when ready.
  • Storage: Leftovers can be stored in an airtight container in the refrigerator for up to 4 days. To reheat, bake in a 350°F oven until warmed through.

Nutrition

  • Calories: 320 calories per serving

Did you make this recipe?

Share a photo and tag us — we'd love to see your creation!

Recipe

  • « Previous Page
  • 1
  • …
  • 7
  • 8
  • 9

Footer

Copyright © 2025 · recipecrown.com Privacy Policy Disclaimer Terms & Conditions