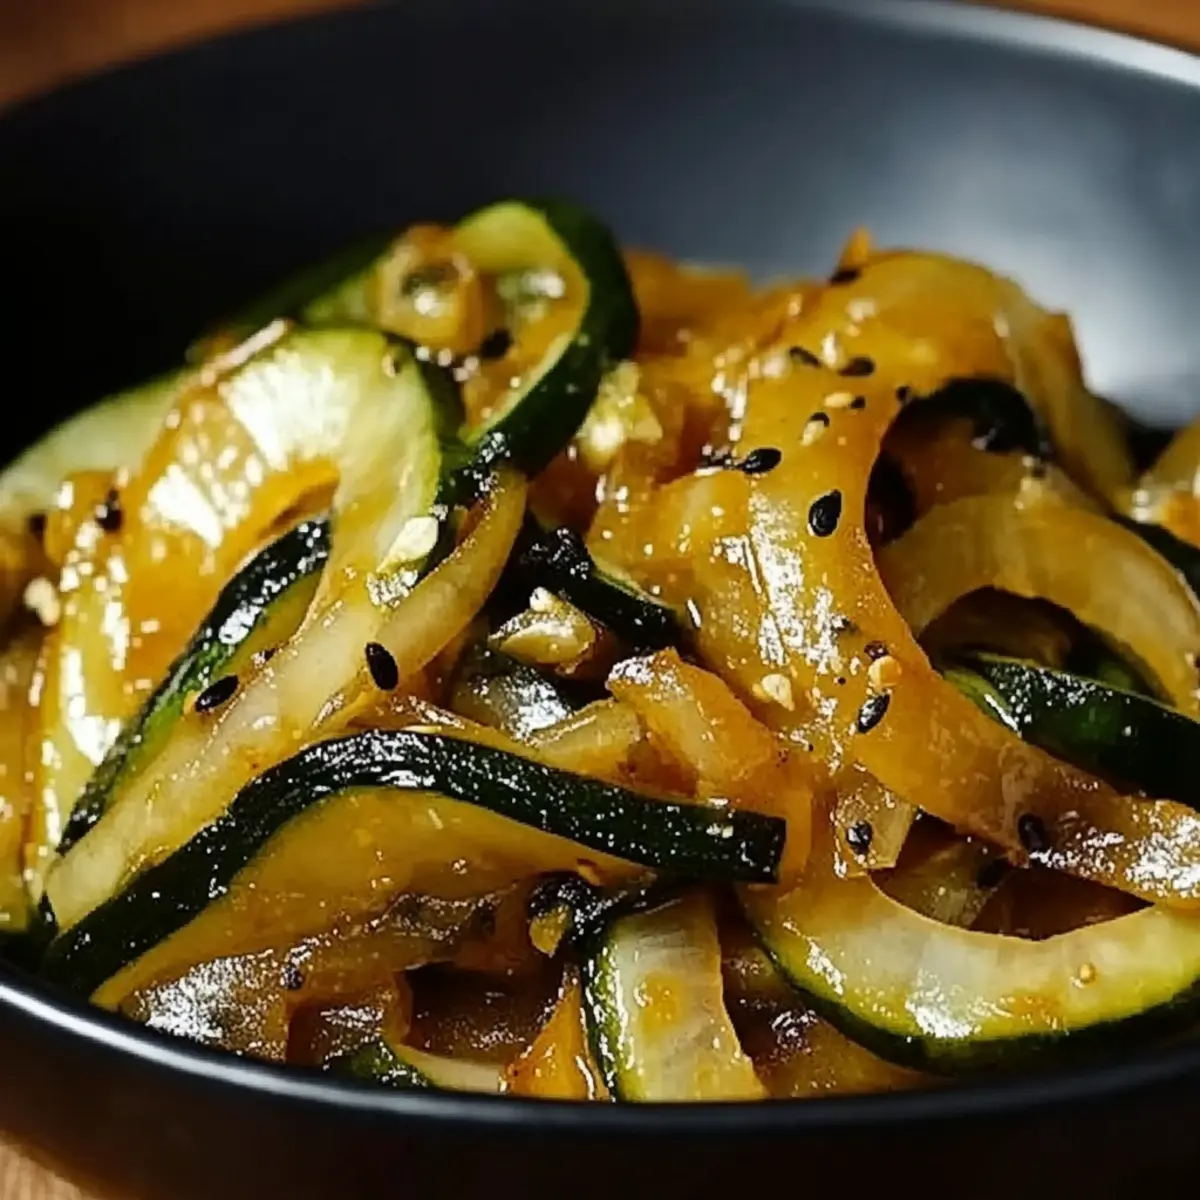
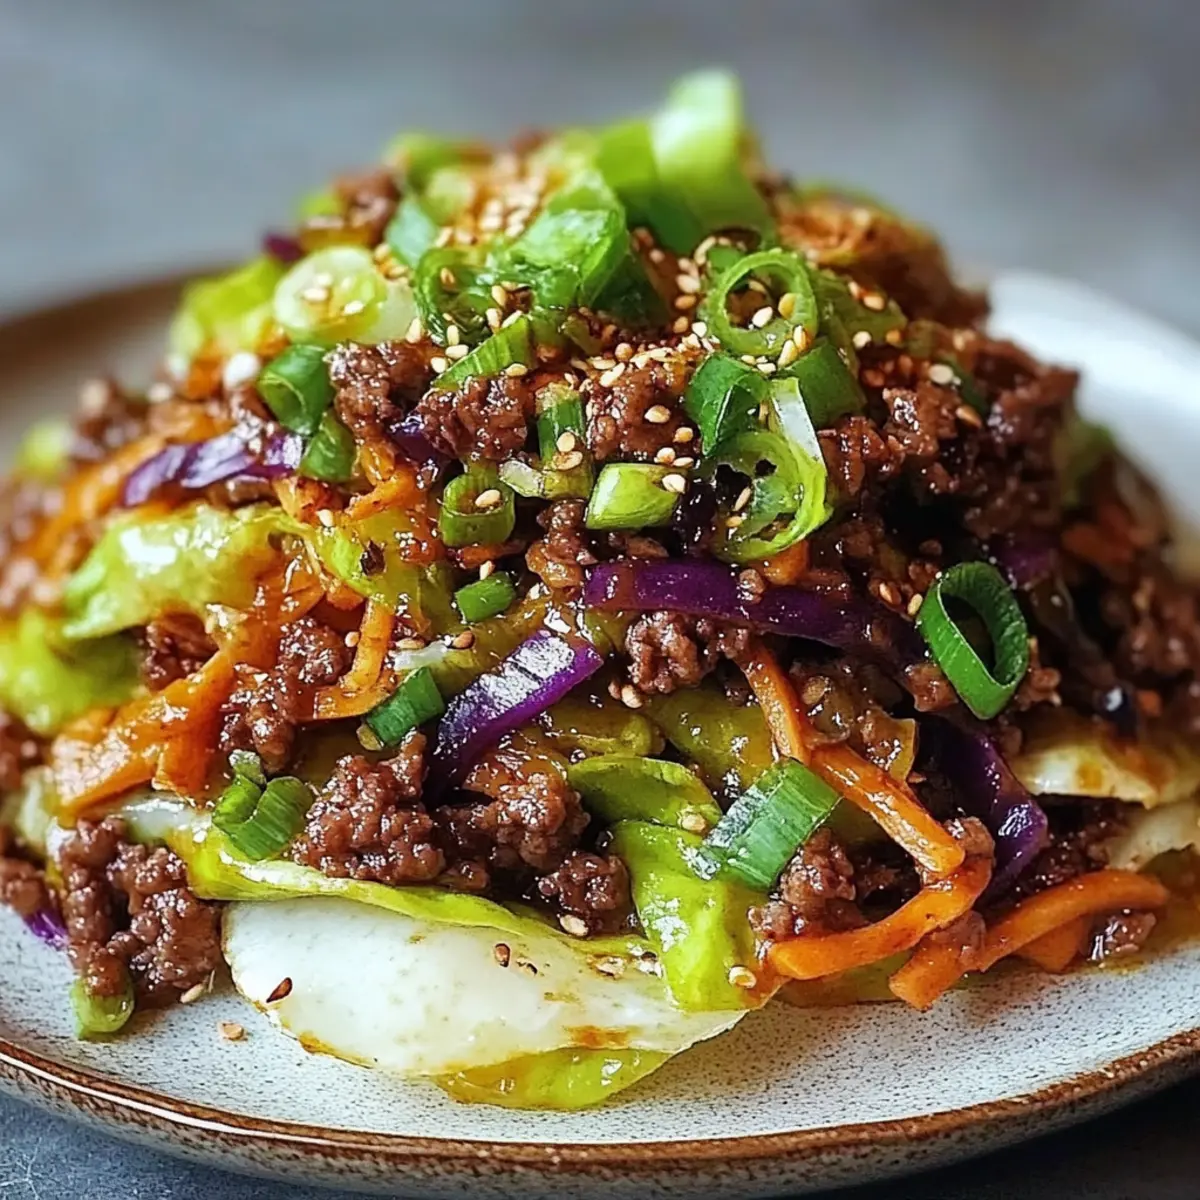
RecipeCrown

  • Home
  • Breakfast
  • Main Dishes
  • Dessert
  • About
  • Contact
menu icon
go to homepage
  • Home
  • Breakfast
  • Main Dishes
  • Dessert
  • About
  • Contact
search icon
Homepage link
  • Home
  • Breakfast
  • Main Dishes
  • Dessert
  • About
  • Contact
×

Irresistible Strawberry Topped Cheesecake for Sweet Moments

January 16, 2026 by grace bellamy Leave a Comment

As I stood in my kitchen, the sun streaming through the window, I felt a rush of excitement—the kind that only comes when you're about to create something special. Today, I’m thrilled to share my Strawberry Topped Cheesecake recipe, a perfect blend of creamy indulgence and fresh, fruity vibrance. What I love about this dessert is its incredible versatility: it’s not only a delightful crowd-pleaser but also impressively simple to whip up in just 30 minutes of active prep time. Plus, it can be made ahead, giving you more time to savor the company of friends and family. Whether you’re a seasoned home-chef or just looking to impress at your next gathering, this cheesecake is sure to become a beloved staple. Are you ready to dive into a slice of bliss?

Strawberry Topped Cheesecake

Why is this cheesecake so irresistible?

Creamy, Dreamy Delight: The combination of rich cream cheese and fluffy whipped cream creates a luscious texture that melts in your mouth.
Fresh Flavor Explosion: Topping it with vibrant strawberries adds a burst of freshness that perfectly complements the cheesecake's sweetness.
Easy to Make: With just 30 minutes of prep, you can have this showstopper ready to chill, making it a great option for any occasion.
Perfect for Any Gathering: Whether it’s a holiday, birthday, or simply a family dinner, this dessert is guaranteed to impress your guests!
Make-Ahead Magic: Free up your time by preparing this cheesecake in advance, allowing the flavors to meld beautifully while you relax with your loved ones.
Customization Potential: Feel free to swap in different toppings, like blueberries or raspberries, to match the season or your taste preferences. If you love desserts that elevate your home-cooking game, check out my No-Bake Cheesecake for another fantastic recipe!

Strawberry Topped Cheesecake Ingredients

• Here’s what you’ll need to create this delightful dessert!

For the Crust
• Graham cracker crumbs – A buttery base that adds a satisfying crunch to each slice.
• Granulated sugar – Sweetens the crust and helps it hold together.
• Unsalted butter – Adds richness that complements the other flavors perfectly.

For the Cheesecake Filling
• Cream cheese – The star ingredient that gives the cheesecake its creamy texture.
• Powdered sugar – Ensures a smooth, sweet finish for the filling.
• Vanilla extract – Infuses delicious warmth and aroma into the cheesecake.

For the Whipped Topping
• Heavy whipping cream – Whips up luxuriously to create that light, airy texture.
• Powdered sugar (for whipped cream) – Adds sweetness and stability to the whipped cream.

For the Fruit Topping
• Fresh strawberries – Provides a juicy, flavorful burst that brightens the cheesecake.
• Strawberry preserves (optional) – Enhances the strawberry flavor and adds a glossy finish to the topping.

Using these simple ingredients, you can whip up an unforgettable Strawberry Topped Cheesecake that will be the star of your next gathering!

Step‑by‑Step Instructions for Strawberry Topped Cheesecake

Step 1: Prepare the crust
In a medium bowl, combine 1 ½ cups of graham cracker crumbs, ½ cup of granulated sugar, and ½ cup of melted unsalted butter. Mix thoroughly until the crumbs resemble wet sand, ensuring everything is well-coated. Press this mixture firmly into the bottom of a 9x13 inch baking dish to create an even layer. Chill the crust in the refrigerator for about 30 minutes until firm.

Step 2: Make the cheesecake filling
In a large mixing bowl, beat 16 ounces of softened cream cheese using an electric mixer on medium speed until creamy and smooth, approximately 2-3 minutes. Gradually add in 1 cup of powdered sugar and 1 teaspoon of vanilla extract, continuing to mix until the mixture is fully combined and has a silky texture. This creates the luscious base for your Strawberry Topped Cheesecake.

Step 3: Whip the cream
In a separate clean bowl, whip 2 cups of heavy whipping cream with an electric mixer set to high speed until soft peaks form, which should take around 2-3 minutes. Next, add 2 tablespoons of powdered sugar and continue whipping until stiff peaks form, ensuring your whipped cream is airy and fluffy. This will elevate the cheesecake filling and give it that light texture.

Step 4: Fold the whipped cream
Carefully fold the whipped cream into the cream cheese mixture using a spatula, combining gently to maintain the airy consistency of the whipped cream. Use a circular motion to incorporate the whipped cream until the mixture is well combined and fluffy. This step is crucial for achieving the creamy texture that defines your Strawberry Topped Cheesecake.

Step 5: Assemble the dessert
Pour the light and fluffy cheesecake filling over the prepared crust, using a spatula to spread it evenly and create a smooth top. Make sure the filling reaches the edges and has no air pockets. Once assembled, cover the dessert with plastic wrap and refrigerate for at least 4 hours, or until the cheesecake is set and firm to the touch.

Step 6: Prepare the strawberries
While the cheesecake is chilling, take 2 cups of fresh strawberries and hull and slice them. In a small bowl, mix the strawberries with optional 2 tablespoons of strawberry preserves. Allow the strawberries to soak for about 15 minutes, which will enhance their flavor and create a vibrant topping for your cheesecake.

Step 7: Serve the dessert
When the cheesecake is fully set, remove it from the refrigerator and carefully take off the plastic wrap. Generously top the cheesecake with the macerated strawberries, spreading them evenly for a beautiful presentation. Cut the cheesecake into squares and serve chilled for a delightful Strawberry Topped Cheesecake experience that everyone will love.

Strawberry Topped Cheesecake

Make Ahead Options

These Strawberry Topped Cheesecake bars are perfect for meal prep enthusiasts looking to save time during busy days! You can prepare the crust and cheesecake filling up to 24 hours in advance. Simply complete steps 1 through 5, cover the assembled dessert with plastic wrap, and refrigerate it until ready to serve. This way, the flavors can meld beautifully, making each bite just as delicious the next day. When it’s time to enjoy, prepare the strawberries as instructed in step 6, right before serving, to ensure they are fresh and vibrant. With these make-ahead tips, you can impress your guests with minimal last-minute effort!

Strawberry Topped Cheesecake Variations

Feel inspired to make this delightful dessert your own with these creative twists and substitutions!

  • Gluten-Free Crust: Substitute graham cracker crumbs with gluten-free cookies or almond flour mixed with a bit of coconut oil for a delicious, crumbly base.
  • Berry Medley: Swap strawberries for your favorite seasonal berries like blueberries, raspberries, or blackberries to create a vibrant mixed berry topping that excites the palate.
  • Chocolate Drizzle: Add a rich touch by drizzling melted dark chocolate over the cheesecake before adding the fruit. The combination of chocolate and strawberries is a classic that’s hard to resist.
  • Nutty Surprise: For added texture, fold in crushed nuts like pecans or walnuts into the cheesecake filling or sprinkle them flat on the crust before adding the filling for an extra crunch.
  • Coconut Cream: Substitute half of the heavy cream with coconut cream for a tropical flair that pairs beautifully with strawberries. The hint of coconut elevates the dessert to a new level of flavor.
  • Caramel Swirl: Create a decadent twist by swirling caramel sauce into the cheesecake filling before chilling. The sweet, gooey ribbons add an unforgettable richness.
  • Lemon Zest: Brighten the cheesecake with a teaspoon of lemon zest or juice mixed into the cream cheese filling. The zesty notes beautifully contrast with the sweetness of the strawberries.
  • Spiced Vanilla: Add a dash of cinnamon or nutmeg to the filling for a warm, spiced flavor that adds depth. Just a pinch can take your cheesecake experience to delightful new heights.

Feel free to mix and match as you create your own unforgettable version of this Strawberry Topped Cheesecake. If you're intrigued by other variations or want more inspiration, check out my Lemon Blueberry Cheesecake—it’s another favorite in our family!

What to Serve with Strawberry Topped Cheesecake?

Creating a memorable meal is all about pairing flavors and textures that elevate each dish and delight your senses.

  • Light Berry Salad: A colorful mix of fresh berries and greens adds a refreshing contrast, balancing the richness of the cheesecake.

  • Soft Vanilla Ice Cream: This classic pairing offers a creamy, cool counterpart, enhancing the dessert’s delightful strawberry notes with a touch of warmth.

  • Zesty Lemon Curd: The bright acidity cuts through the richness beautifully, making every bite of cheesecake feel lighter and more refreshing.

  • Chewy Brownies: Rich, fudgy brownies provide a delightful chocolate contrast that creates a fun flavor dynamics when served alongside. The combination of flavors is always a crowd favorite!

  • Sparkling Berry Lemonade: This fizzy drink complements the sweetness of the cheesecake, adding an extra burst of fruity flavor to your dessert experience.

  • Chocolate-Covered Strawberries: A luxurious treat that marries the flavors perfectly; the chocolate enhances the sweetness of the berries in the cheesecake!

  • Rich Coffee: A bold cup of coffee or espresso complements dessert perfectly, enhancing the overall experience and grounding the sweetness with its warmth.

  • Mint Infused Iced Tea: This refreshing drink adds a hint of herbal brightness that pairs wonderfully with the sweet notes of cheesecake, making for an enjoyable sip between bites.

Transform your gathering into a delightful experience with these pairings that cater to various tastes, textures, and flavors!

How to Store and Freeze Strawberry Topped Cheesecake

Fridge: Keep your Strawberry Topped Cheesecake covered in plastic wrap or an airtight container in the refrigerator for up to 3 days to maintain its freshness and creamy texture.

Freezer: For longer storage, freeze the cheesecake for up to 2 months. Wrap individual slices tightly in plastic wrap, followed by aluminum foil, to prevent freezer burn.

Reheating: When you're ready to enjoy the cheesecake, thaw it overnight in the fridge. Serve chilled, and feel free to freshen up the strawberry topping just before serving!

Leftovers: If you have any leftover strawberries after topping, store them in a separate container in the fridge for up to 2 days.

Tips for the Best Strawberry Topped Cheesecake

  • Chill properly: Always refrigerate for at least 4 hours. This helps the cheesecake set perfectly, ensuring a stable, well-formed dessert.
  • Room temperature ingredients: Let your cream cheese soften at room temperature for better mixing. This avoids lumps and creates a smoother filling for your Strawberry Topped Cheesecake.
  • Avoid over-mixing: When folding the whipped cream into the cheesecake mixture, do so gently. Over-mixing can deflate the whipped cream, compromising the fluffy texture.
  • Fresh strawberries: Select ripe, juicy strawberries for the best flavor. This will enhance the overall taste and visual appeal of your cheesecake topping.
  • Customize easily: Feel free to swap strawberries for other fruits, or experiment with flavored extracts to personalize your dessert, keeping it fresh every time!

Strawberry Topped Cheesecake

Strawberry Topped Cheesecake Recipe FAQs

What are the best strawberries to use for this recipe?
Absolutely! Fresh, ripe strawberries are key for flavor and presentation. Look for berries that are deep red, firm, and free from dark spots. They should be bright and shiny, which indicates freshness and sweetness.

How should I store my Strawberry Topped Cheesecake?
To keep your cheesecake tasting fresh, store it covered in plastic wrap or in an airtight container in the refrigerator for up to 3 days. This will help maintain its creamy texture and prevent it from absorbing other odors in the fridge.

Can I freeze leftovers of the Strawberry Topped Cheesecake?
Yes! You can freeze the cheesecake for up to 2 months. To do this, wrap individual slices tightly in plastic wrap, then in aluminum foil to prevent freezer burn. When you're ready to enjoy a slice, simply thaw it overnight in the fridge.

What should I do if my whipped cream deflates?
If your whipped cream loses its fluffy texture, don’t worry! You can always whip up a fresh batch. Use cold heavy whipping cream, and beat it with an electric mixer on high speed until you achieve stiff peaks. Then, carefully fold it back into your existing cheesecake mixture to restore that airy quality.

Can this recipe be adapted for dietary restrictions?
Very! You can easily make this Strawberry Topped Cheesecake gluten-free by using gluten-free graham cracker crumbs for the crust. For dairy-free options, consider using vegan cream cheese and coconut cream in place of heavy whipping cream. Just be sure to check labels for any allergens that may be present.

How long does it take the cheesecake to set?
Your cheesecake needs a good 4 hours in the refrigerator to set properly. This chilling time allows the flavors to meld and ensures the cheesecake firms up beautifully for slicing. Try to resist the temptation to dig in too early—it’s worth the wait!

Strawberry Topped Cheesecake

Irresistible Strawberry Topped Cheesecake for Sweet Moments

Indulge in a creamy Strawberry Topped Cheesecake, a dessert that's perfect for any occasion and easy to make.
Print Recipe Pin Recipe
Prep Time 30 minutes mins
Chill Time 4 hours hrs
Total Time 4 hours hrs 30 minutes mins
Servings: 12 slices
Course: Dessert
Cuisine: American
Calories: 350
Ingredients Equipment Method Nutrition Notes

Ingredients
  

For the Crust
  • 1.5 cups graham cracker crumbs A buttery base that adds a satisfying crunch to each slice.
  • 0.5 cups granulated sugar Sweetens the crust and helps it hold together.
  • 0.5 cups unsalted butter Adds richness that complements the other flavors perfectly.
For the Cheesecake Filling
  • 16 ounces cream cheese The star ingredient that gives the cheesecake its creamy texture.
  • 1 cups powdered sugar Ensures a smooth, sweet finish for the filling.
  • 1 teaspoon vanilla extract Infuses delicious warmth and aroma into the cheesecake.
For the Whipped Topping
  • 2 cups heavy whipping cream Whips up luxuriously to create that light, airy texture.
  • 2 tablespoons powdered sugar Adds sweetness and stability to the whipped cream.
For the Fruit Topping
  • 2 cups fresh strawberries Provides a juicy, flavorful burst that brightens the cheesecake.
  • 2 tablespoons strawberry preserves Enhances the strawberry flavor and adds a glossy finish to the topping.

Equipment

  • Mixing Bowl
  • Electric mixer
  • spatula
  • 9x13-inch baking dish

Method
 

Preparation Steps
  1. In a medium bowl, combine graham cracker crumbs, granulated sugar, and melted unsalted butter. Mix until resembling wet sand, then press into the bottom of a 9x13 inch baking dish. Chill for 30 minutes.
  2. Beat softened cream cheese until creamy. Gradually add powdered sugar and vanilla extract, mixing until fully combined.
  3. In a separate bowl, whip heavy whipping cream until soft peaks form. Add powdered sugar and continue whipping until stiff peaks form.
  4. Fold the whipped cream into the cream cheese mixture gently to maintain airiness.
  5. Spread cheesecake filling over the prepared crust and refrigerate for at least 4 hours until set.
  6. Hull and slice strawberries, mixing with strawberry preserves and letting sit for 15 minutes.
  7. Top cheesecake with strawberries after it's set, cut into squares, and serve chilled.

Nutrition

Serving: 1sliceCalories: 350kcalCarbohydrates: 30gProtein: 4gFat: 24gSaturated Fat: 14gPolyunsaturated Fat: 1gMonounsaturated Fat: 8gCholesterol: 70mgSodium: 250mgPotassium: 120mgFiber: 1gSugar: 18gVitamin A: 800IUVitamin C: 20mgCalcium: 100mgIron: 1mg

Notes

For best results, refrigerate cheesecake properly, use room temperature ingredients, and avoid over-mixing the whipped cream. You can customize with different fruits or flavors as desired.

Tried this recipe?

Let us know how it was!

Deliciously Moist Coffee And Walnut Loaf for Cozy Evenings

January 16, 2026 by grace bellamy Leave a Comment

As the aroma of freshly brewed coffee fills my kitchen, I can’t help but think of the cozy moments shared over a comforting slice of Coffee And Walnut Loaf. This delightful recipe combines the rich depth of coffee with the crunchiness of walnuts, creating a perfect pairing for breakfast or a midday snack. What I love most about this loaf is not just its deliciousness but also its effortless preparation — you can whip it up in just 20 minutes of hands-on time! Plus, it’s a fantastic crowd-pleaser, impressing family and friends alike without the fuss. Once you pull it out of the oven and let the warm scents envelop your home, I promise you’ll want to slice into it right away. Ready to indulge in this delightful treat? Let’s dive in!

Coffee And Walnut Loaf

Why is Coffee And Walnut Loaf Irresistible?

Irresistible Aroma: The moment you start baking, your kitchen will fill with the delightful scent of coffee and toasted walnuts, captivating everyone around.

Easy Preparation: With just 20 minutes of prep time, this loaf is perfect for bakers of all skill levels!

Rich Flavor: The rich coffee flavor coupled with crunchy walnuts creates a taste experience that’s hard to resist.

Perfect Texture: Moist and fluffy, each slice offers a wonderful combination of soft crumb and nutty bits.

Versatile Treat: Enjoy it for breakfast, a midday snack, or even as a dessert; it’s a hit any time of day! For variations, you might want to check out Apple Goats Cheese Autumn Salad to balance this loaf with some fresh flavors.

Crowd-Pleaser: This recipe is bound to become a favorite among friends and family, ensuring the compliments keep coming!

Coffee And Walnut Loaf Ingredients

• Gather everything you need for this delightful Coffee And Walnut Loaf!

For the Batter

  • 225 g all-purpose flour – a versatile base for your loaf, providing the perfect structure.
  • 225 g sugar – sweetens the loaf while enhancing its moistness.
  • 225 g unsalted butter – gives richness and a tender texture to the final product.
  • 4 large eggs – binds all the ingredients together for a fluffy crumb.
  • 2 tablespoons instant coffee granules – infuses the loaf with a bold coffee flavor.
  • 4 tablespoons hot water – helps dissolve the coffee granules for an even distribution.
  • 1 teaspoon baking powder – ensures your loaf rises beautifully while baking.
  • 1 teaspoon vanilla extract – adds a depth of flavor that complements the coffee.

For the Topping

  • 100 g walnuts, chopped – provide a delightful crunch and nutty richness that balances the loaf's sweetness.

Step‑by‑Step Instructions for Coffee And Walnut Loaf

Step 1: Preheat Your Oven
Start by preheating your oven to 350°F (175°C) to ensure it's perfectly heated when the batter is ready. While the oven warms up, grease a loaf pan with butter or line it with parchment paper for easy removal. This step is essential, as it creates a beautifully baked Coffee And Walnut Loaf that won’t stick.

Step 2: Prepare the Coffee Mixture
In a small bowl, dissolve 2 tablespoons of instant coffee granules in 4 tablespoons of hot water. Stir until the coffee is fully dissolved and set this mixture aside to allow the flavor to deepen. This step enhances the coffee’s richness, contributing to the delightful aroma when baking.

Step 3: Cream Butter and Sugar
In a large mixing bowl, combine 225 g of unsalted butter and 225 g of sugar. Using an electric mixer, cream them together on medium speed for about 3-5 minutes until the mixture is light, fluffy, and pale in color. This process is crucial, as it incorporates air, giving your Coffee And Walnut Loaf a tender texture.

Step 4: Add Eggs
Next, add 4 large eggs, one at a time, mixing well after each addition. Beat the eggs with the creamed butter and sugar for about a minute, ensuring they are fully incorporated before adding the next egg. This gradual addition helps create a smooth and cohesive batter for your delicious loaf.

Step 5: Mix in Coffee and Vanilla
Once the eggs are well combined, gently stir in the dissolved coffee mixture and 1 teaspoon of vanilla extract. Mix until just combined, allowing the rich coffee and vanilla flavors to infuse into the batter. Be careful not to overmix at this stage so that your Coffee And Walnut Loaf remains light.

Step 6: Combine Dry Ingredients
In another bowl, whisk together 225 g of all-purpose flour, 1 teaspoon of baking powder, and 100 g of chopped walnuts. This dry mixture should be free of lumps for even distribution, ensuring the loaf rises beautifully. The walnuts will add a delightful crunch, complementing the soft crumb of the Coffee And Walnut Loaf.

Step 7: Fold Dry into Wet Ingredients
Gradually fold the dry ingredients into the wet batter, using a spatula. Mix gently until just combined; the flour should be barely visible. This folding technique ensures you preserve the batter’s lightness, resulting in a perfectly moist Coffee And Walnut Loaf as it bakes.

Step 8: Pour and Bake
Carefully pour the batter into the prepared loaf pan, smoothing the top with a spatula. Place it in the preheated oven and bake for 45-50 minutes, or until a toothpick inserted into the center comes out clean. Keep an eye on it towards the end, as the golden-brown crust signals it's time to check for doneness.

Step 9: Cool the Loaf
Once baked, remove your Coffee And Walnut Loaf from the oven and let it cool in the pan for about 10 minutes. This allows it to set slightly and makes it easier to remove. After that, transfer the loaf to a wire rack to cool completely, which helps prevent sogginess on the bottom.

Coffee And Walnut Loaf

Coffee And Walnut Loaf Variations

Feel free to get creative with your Coffee And Walnut Loaf and personalize it to suit your taste!

  • Gluten-Free: Substitute all-purpose flour with a gluten-free blend to make it suitable for those with gluten sensitivities. Just ensure the blend includes xanthan gum for the right texture!

  • Nut-Free: Omit the walnuts and add chocolate chips instead for a sweet twist. The melty chocolate will complement the coffee beautifully!

  • Dairy-Free: Use coconut oil in place of butter and a dairy-free milk alternative. This makes your loaf rich and moist while being friendly to lactose-intolerant guests.

  • Extra Coffee: Increase the coffee granules to 3 tablespoons for an enhanced coffee flavor, making every bite a delightful jolt of energy!

  • Spice it Up: Add cinnamon or nutmeg for a warm, cozy flavor. Just a teaspoon can transform the loaf into a spiced delight that’s perfect for cool evenings.

  • Fruity Addition: Toss in some dried cherries or cranberries to introduce a tart flavor that perfectly balances the richness of coffee and walnuts.

  • Rich Glaze: Drizzle a simple espresso glaze over the top once cooled. Just mix powdered sugar with a bit of brewed espresso for a sweet, aromatic finishing touch!

  • Caramel Swirl: For a decadent twist, swirl in some caramel sauce before baking. The gooey caramel will meld beautifully with the coffee and walnuts, creating a luscious loaf.

Let your imagination run wild with these variations, and make this recipe your own! You might love to enjoy your creations alongside a refreshing Pomegranate Rocket Salad for a well-rounded treat.

Expert Tips for Coffee And Walnut Loaf

  • Use Room Temperature Ingredients: Ensure your butter and eggs are at room temperature for a smoother batter. This helps achieve a light and fluffy Coffee And Walnut Loaf.

  • Don’t Overmix: When incorporating dry ingredients, fold gently until just combined. Overmixing can lead to a dense loaf, so treat your mixture with care!

  • Check for Doneness: Avoid opening the oven door too soon. Use a toothpick to check doneness at the 45-minute mark; it should come out clean for perfect baking.

  • Cool Properly: Allow your loaf to cool in the pan for a few minutes before transferring it to a wire rack. This helps maintain the loaf's structure and avoids sogginess.

  • Storage Tips: To keep your Coffee And Walnut Loaf fresh, wrap it tightly in plastic wrap and store it in an airtight container. It can also be frozen for up to three months!

Make Ahead Options

These Coffee And Walnut Loaf preparations are perfect for busy home cooks looking to save time! You can mix the batter and store it in the refrigerator for up to 24 hours before baking; just make sure to cover it tightly to prevent drying out. Alternatively, you can bake the loaf ahead, let it cool completely, and then wrap it in plastic wrap or aluminum foil. This way, it can be refrigerated for up to 3 days or frozen for up to 3 months! When you're ready to enjoy, simply thaw the frozen loaf in the refrigerator overnight, then slice and serve at room temperature for that just-baked taste. With these make-ahead tips, your Coffee And Walnut Loaf will be just as delicious as if you had baked it fresh!

How to Store and Freeze Coffee And Walnut Loaf

Room Temperature: Store your Coffee And Walnut Loaf at room temperature for up to 3 days, wrapped in plastic wrap or in an airtight container to keep it moist.

Fridge: For longer freshness, keep it in the fridge for up to 1 week. Make sure it is tightly wrapped to prevent it from absorbing other odors.

Freezer: You can freeze your loaf for up to 3 months! Wrap it well in plastic wrap and then in aluminum foil to protect it from freezer burn.

Reheating: To enjoy your Coffee And Walnut Loaf, either let it thaw in the fridge overnight or use a microwave for quick reheating. A few seconds on low should do the trick!

What to Serve with Coffee And Walnut Loaf?

Indulging in a slice of this comforting loaf is made even better with the right pairings to enhance your experience.

  • Creamy Mashed Potatoes: The smoothness of mashed potatoes offers a delightful contrast to the nutty loaf, making for a comforting dish. Perfect for a cozy dinner!

  • Fresh Fruit Salad: Bright and juicy fruits like strawberries and oranges provide a refreshing contrast, cleansing the palate between bites of dense loaf.

  • Vanilla Ice Cream: A scoop of creamy vanilla ice cream pairs wonderfully with the warm loaf, creating a delightful temperature and flavor contrast.

  • Nutty Granola: Serve with a sprinkle of nutty granola for a crunchy texture that complements the loaf’s walnuts, elevating your breakfast or snack time!

  • Hazelnut Coffee: Enhance the coffee notes of your loaf with a cup of hazelnut coffee; the flavors marry beautifully while offering a warm hug in a mug.

  • Dark Chocolate Drizzle: A light drizzle of dark chocolate on top of each slice adds a decadent touch, making this loaf feel even more special.

Coffee And Walnut Loaf

Coffee And Walnut Loaf Recipe FAQs

How do I select the best walnuts for my Coffee And Walnut Loaf?
When selecting walnuts, look for those that are firm and light in color. Avoid any with dark spots or a rancid smell, as these indicate staleness. Fresh walnuts will have a pleasant nutty aroma and crisp texture, contributing beautifully to your loaf.

How should I store my Coffee And Walnut Loaf to keep it fresh?
To keep your Coffee And Walnut Loaf fresh at room temperature, wrap it tightly in plastic wrap or place it in an airtight container. It can last up to 3 days this way. If you want to extend its life, store it in the fridge for up to 1 week, ensuring it's well wrapped to avoid absorbing other odors.

Can I freeze Coffee And Walnut Loaf, and if so, how?
Absolutely! You can freeze your Coffee And Walnut Loaf for up to 3 months. Wrap it tightly in plastic wrap, followed by aluminum foil to protect it from freezer burn. When you're ready to enjoy it, let it thaw in the fridge overnight or pop it in the microwave for a few seconds on low to warm it up.

What should I do if my loaf doesn’t rise properly?
If your Coffee And Walnut Loaf doesn’t rise as expected, it could be due to expired baking powder or overmixing the batter. Make sure your baking powder is fresh — it usually has a shelf life of 6-12 months. Also, if you overmix the batter, this can lead to a denser loaf, so gently fold dry ingredients in until just combined.

Is this recipe suitable for people with nut allergies?
This Coffee And Walnut Loaf contains walnuts, which may not be suitable for those with nut allergies. If you need to avoid nuts completely, consider substituting with chocolate chips for a delicious twist! Always check with guests about dietary restrictions before serving.

Coffee And Walnut Loaf

Deliciously Moist Coffee And Walnut Loaf for Cozy Evenings

This Coffee And Walnut Loaf combines rich coffee and crunchy walnuts, perfect for breakfast or a comforting snack.
Print Recipe Pin Recipe
Prep Time 20 minutes mins
Cook Time 50 minutes mins
Cooling Time 10 minutes mins
Total Time 1 hour hr 20 minutes mins
Servings: 8 slices
Course: Dessert
Cuisine: Baking
Calories: 250
Ingredients Equipment Method Nutrition Notes

Ingredients
  

For the Batter
  • 225 g all-purpose flour providing the perfect structure.
  • 225 g sugar sweetens the loaf while enhancing its moistness.
  • 225 g unsalted butter gives richness and a tender texture.
  • 4 large eggs binds all the ingredients together.
  • 2 tablespoons instant coffee granules infuses the loaf with coffee flavor.
  • 4 tablespoons hot water helps dissolve the coffee granules.
  • 1 teaspoon baking powder ensures your loaf rises beautifully.
  • 1 teaspoon vanilla extract adds a depth of flavor.
For the Topping
  • 100 g walnuts, chopped provides a delightful crunch.

Equipment

  • loaf pan
  • Mixing bowls
  • Electric mixer
  • spatula

Method
 

Step-by-Step Instructions
  1. Preheat your oven to 350°F (175°C) and grease a loaf pan.
  2. Dissolve 2 tablespoons of instant coffee granules in 4 tablespoons of hot water and set aside.
  3. Cream together 225 g of unsalted butter and 225 g of sugar until light and fluffy.
  4. Add 4 large eggs one at a time, mixing well after each addition.
  5. Stir in the dissolved coffee mixture and 1 teaspoon of vanilla extract.
  6. Whisk together 225 g of all-purpose flour, 1 teaspoon of baking powder, and 100 g of chopped walnuts.
  7. Fold the dry ingredients into the wet batter until just combined.
  8. Pour the batter into the loaf pan and bake for 45-50 minutes.
  9. Allow the loaf to cool in the pan for 10 minutes before transferring to a wire rack.

Nutrition

Serving: 1sliceCalories: 250kcalCarbohydrates: 30gProtein: 3gFat: 12gSaturated Fat: 7gPolyunsaturated Fat: 2gMonounsaturated Fat: 3gCholesterol: 70mgSodium: 150mgPotassium: 120mgFiber: 1gSugar: 15gVitamin A: 250IUCalcium: 20mgIron: 1mg

Notes

Use room temperature ingredients for a smoother batter. Avoid overmixing for best results. Store wrapped in plastic wrap or in an airtight container.

Tried this recipe?

Let us know how it was!

Keto Christmas Saltine Toffee: A Festive Sweet Treat

January 16, 2026 by grace bellamy Leave a Comment

There’s something magical about the holidays, isn’t there? The aroma of sweet treats wafting through the air, the warmth of gatherings with loved ones—it's a time that calls for special recipes that delight everyone. This Keto Christmas Saltine Toffee is not just a festive dessert; it’s a quick and incredibly simple treat that fits perfectly into your keto lifestyle while satisfying those sweet cravings. Imagine indulging in a delightful combination of sweet, salty, and crunchy with minimal effort—that’s exactly what this recipe delivers! In just 15 minutes of prep time, you’ll have a stunning dessert that will have friends and family coming back for more. Are you ready to elevate your holiday baking game with this deliciously easy creation?

Keto Christmas Saltine Toffee

Why is this toffee a holiday favorite?

Simplicity in preparation makes this Keto Christmas Saltine Toffee a go-to dessert, requiring only 15 minutes of hands-on time! Decadent flavors come alive with the rich butter, sweet erythritol, and luscious chocolate, delivering a delightful taste experience. Versatile toppings allow you to customize with your favorite nuts or a sprinkle of sea salt, adding a personal touch. Crowd-pleasing appeal ensures this treat will be a hit at gatherings, perfectly balancing sweet and salty. Plus, it fits seamlessly into your keto lifestyle, proving that festive indulgence can be guilt-free. If you love easy recipes, don’t miss our Christmas Cracker Candy for another sweet holiday option!

Keto Christmas Saltine Toffee Ingredients

• Here’s what you’ll need to create this delightful holiday treat!

For the Base

  • Keto-friendly saltine crackers – These are essential for that satisfying crunch while keeping it low-carb.
  • Unsalted butter – Adds richness and depth to the toffee, so go for the good stuff!

For the Sweet Top

  • Granulated erythritol – This keto sweetener mimics sugar perfectly, making it ideal for your Keto Christmas Saltine Toffee.
  • Sugar-free chocolate chips – Choose high-quality chocolate chips for a decadent finish that stays guilt-free.

For the Crunchy Topping

  • Chopped nuts (walnuts, pecans, or almonds) – Choose your favorite nuts to add texture and healthy fats.
  • Sea salt – A sprinkle enhances the flavors and balances the sweetness.

Enjoy crafting this easy and delectable dessert that will leave your guests wanting more!

Step‑by‑Step Instructions for Keto Christmas Saltine Toffee

Step 1: Preheat the Oven
Begin by preheating your oven to 400°F (200°C). This will ensure that your Keto Christmas Saltine Toffee bakes evenly and achieves that delightful bubbly texture. While the oven heats, gather your ingredients to streamline the cooking process and keep everything organized.

Step 2: Prepare the Baking Sheet
Line a baking sheet with parchment paper, creating a non-stick surface for your toffee. Arrange the keto-friendly saltine crackers in a single layer on the parchment, making sure they do not overlap. This layout is crucial for even distribution of the toffee coating later on.

Step 3: Melt the Butter
In a medium saucepan, add the unsalted butter and place it over medium heat. Stir occasionally until the butter has completely melted and is bubbling gently. This will take about 2–3 minutes. Once you see the bubbling, you’re ready to mix in the sweetener.

Step 4: Combine with Sweetener
Add the granulated erythritol to the melted butter in the saucepan. Stir the mixture continuously until it becomes smooth and fully combined, about 1–2 minutes. This step is essential to create a rich base that will caramelize beautifully over the crackers.

Step 5: Boil the Mixture
Increase the heat slightly, allowing the butter and sweetener mixture to come to a gentle boil. Let it boil without stirring for 3 minutes. You’ll notice the mixture will bubble up significantly. Keep an eye on it to prevent burning—look for a slight golden color.

Step 6: Pour Over Crackers
Remove the saucepan from the heat and take careful steps to pour the hot toffee mixture evenly over the arranged saltine crackers. Use a spatula to spread it if necessary, ensuring all crackers are covered. This step is where the magic begins, turning simple crackers into sweet toffee.

Step 7: Bake the Toffee
Transfer the baking sheet to the preheated oven and bake for 5–7 minutes. Watch closely for the edges to start turning a golden brown and the toffee to become bubbly. The aroma will be heavenly, signaling that your Keto Christmas Saltine Toffee is nearly ready.

Step 8: Add Chocolate Chips
Once baked, remove the toffee from the oven and immediately sprinkle the sugar-free chocolate chips over the hot layer. Allow them to sit for about 2–3 minutes, so they melt into a luscious layer, creating the perfect topping for your toffee masterpiece.

Step 9: Spread the Chocolate
Using a spatula, gently spread the melted chocolate into an even layer across the toffee. Take your time with this step to ensure every bit of toffee is covered in rich chocolate, adding to the deliciousness of your Keto Christmas Saltine Toffee.

Step 10: Top with Nuts and Salt
Sprinkle your choice of chopped nuts over the chocolate layer, distributing them evenly. Follow this with a light dusting of sea salt to enhance all the flavors. The combination of sweet and salty will make this treat irresistible during the holidays!

Step 11: Let it Set
Allow the toffee to cool completely at room temperature—this may take about 30 minutes. If you want to speed things up, place it in the refrigerator for an additional 30 minutes to fully set. Your patience here will result in a perfectly firm texture.

Step 12: Break into Pieces
Once set, break the Keto Christmas Saltine Toffee into irregular pieces to serve. Store any leftovers in an airtight container at room temperature. This sweet treat is a festive delight that combines ease and flavor, perfect for sharing!

Keto Christmas Saltine Toffee

How to Store and Freeze Keto Christmas Saltine Toffee

Room Temperature: Store your Keto Christmas Saltine Toffee in an airtight container at room temperature for up to 1 week to maintain its crunchy texture.

Fridge: If you prefer a firmer texture, you can refrigerate the toffee. It will keep well for up to 2 weeks, but it may become slightly harder.

Freezer: For longer storage, freeze the pieces in a single layer on a baking sheet, then transfer to a freezer-safe bag. It can be frozen for up to 3 months.

Reheating: To enjoy, thaw at room temperature for a few hours or overnight. If you want to refresh the texture, briefly warm in the oven at low heat (about 200°F) for a few minutes.

Make Ahead Options

These Keto Christmas Saltine Toffee treats are perfect for meal prep enthusiasts! You can prepare the toffee base (steps 1 through 10) up to 24 hours in advance, allowing you to create the delicious layers without the last-minute rush. Simply let the toffee cool and then cover it tightly with plastic wrap or foil to prevent any air from getting in, ensuring it stays fresh. When you're ready to serve, just melt the sugar-free chocolate chips (step 8) and spread them on top, then finish with chopped nuts and salt (steps 9 and 10). Your treat will be just as delightful, saving you precious time during the busy holiday season!

Expert Tips for Keto Christmas Saltine Toffee

  • Cracker Choice: Use high-quality keto-friendly saltine crackers for the best crunch and flavor, keeping your Keto Christmas Saltine Toffee delightful.

  • Butter Melting: Ensure the butter is fully melted before adding the sweetener; this helps blend the ingredients smoothly for a rich toffee texture.

  • Boil Carefully: When boiling the butter and erythritol mixture, watch closely to prevent burning. A light golden color indicates it’s ready!

  • Chocolate Chips: Let the chocolate chips sit for a few minutes after baking to melt perfectly. This makes spreading easier and ensures an even, glossy layer.

  • Storage Tips: Store leftovers in an airtight container at room temperature; if you refrigerate, it may get too hard. Enjoy the perfect balance of flavors!

What to Serve with Keto Christmas Saltine Toffee

Indulging in a sweet treat is delightful, but pairing it with the right sides can elevate your holiday experience to new heights.

  • Creamy Vanilla Ice Cream: A scoop of vanilla ice cream adds a rich creaminess that contrasts beautifully with the crunchy toffee. The cold melt-in-your-mouth experience enhances the overall dessert heaven.

  • Festive Cheese Platter: Pairing with a selection of soft cheeses, nuts, and dried fruits brings a savory touch that balances the sweetness. Try mixing creamy Brie with a hint of cranberry for a delicious combo.

  • Hot Chocolate: A warm cup of decadent hot chocolate topped with whipped cream creates a cozy vibe perfect for the holidays. The comforting chocolate experience complements the toffee like a warm hug!

  • Spiced Apple Cider: The sweetness and spiced notes of apple cider will add a festive warmth. This drink can elevate the moment, making it perfect for gatherings around the fire.

  • Chewy Gingerbread Cookies: The warmth and spice of gingerbread cookies enhance the holiday spirit while offering a delightful chew to accompany the crispy toffee. These two make for an irresistible combo!

  • Pecans or Walnuts: A handful of roasted pecans or walnuts can add an extra crunch and nutty flavor that ties back to the toffee’s toppings. Serve them alongside for a delightful munching experience.

  • White Chocolate Raspberry Cheesecake Bars: These luscious bars are a wonderful contrast between the tanginess of raspberries and the richness of cheesecake, aligning perfectly with the varied sweetness of the toffee.

  • Peppermint Bark: A piece of crunchy peppermint bark adds a festive flair on your dessert table. The contrasting flavors provide a refreshing lift to the sweetness of your Keto Christmas Saltine Toffee.

Keto Christmas Saltine Toffee Variations

Feel free to shake things up and make this delightful treat your own with these fun and simple variations!

  • Nut-Free: Replace the chopped nuts with more chocolate or a sprinkle of keto-friendly coconut flakes for texture.
  • Lower Calorie: Swap the erythritol with a blended sweetener like monk fruit for a different flavor profile and fewer calories.
  • Spicy Touch: Add a pinch of cayenne pepper to the chocolate layer for a sweet heat that elevates the flavor experience.
  • Vegan Version: Use coconut oil instead of butter and dairy-free chocolate chips to create a delicious vegan alternative.
  • Flavor Infusion: Incorporate a few drops of vanilla or almond extract into the butter mixture for a tantalizing twist that enhances the aroma and flavor.
  • Candied Citrus: Top with finely chopped dried orange or lemon peel for a burst of citrusy zing that brightens up each piece.
  • Chocolate Drizzle: After spreading the chocolate, add a drizzle of melted white chocolate for a stunning presentation and additional sweetness.
  • Chunky Texture: Instead of chopping the nuts, leave them in larger pieces for added crunch and to highlight their flavor against the chocolate.

Think of these as a starting point for endless creativity! Try pairing this treat with a warm cup of tea or coffee, or explore more exciting recipes like our luscious Christmas Cracker Candy for festive inspiration!

Keto Christmas Saltine Toffee

Keto Christmas Saltine Toffee Recipe FAQs

What type of saltine crackers should I use for this toffee?
Absolutely! For this Keto Christmas Saltine Toffee, it's best to use high-quality keto-friendly saltine crackers. Look for ones that are low in carbs and free from added sugars. This ensures your dessert maintains its baked-to-perfection crunch and delicious flavor.

How should I store leftover Keto Christmas Saltine Toffee?
I often recommend storing your Keto Christmas Saltine Toffee in an airtight container at room temperature for optimal freshness. It will stay crunchy for about a week. If you’d like it to last longer, you can refrigerate it for up to two weeks, but be aware it may become firmer in texture.

Can I freeze Keto Christmas Saltine Toffee?
Yes, you can! To freeze, first, lay the broken pieces in a single layer on a baking sheet, ensuring they aren’t touching. Freeze for about 1-2 hours until firm, then transfer them to a freezer-safe bag, squeezing out the air. This method will keep your toffee good for up to 3 months! When ready to enjoy, simply thaw at room temperature for a few hours.

What if my toffee isn't bubbling during baking?
Very! If your toffee isn't bubbling while baking, it could be that your butter-sweetener mixture wasn't boiled long enough. Ensure you let it boil for 3 full minutes to achieve the right caramelization. Next time, closely monitor for that exciting bubbling action in the oven, as that's a key indicator of success!

Is this recipe safe for keto diets and any allergies?
Absolutely! This Keto Christmas Saltine Toffee is designed specifically for those following a keto lifestyle, using erythritol as a sugar substitute. However, be cautious if anyone has nut allergies, as the recipe includes nuts as a topping. You can easily modify it by omitting the nuts or using seeds instead for a nut-free version.

How can I achieve the best texture for my toffee?
For the best texture, ensure that you melt the butter completely and combine it smoothly with the sweetener before boiling. During baking, watch for the edges to turn golden and bubbly, which indicates that it’s time to add the chocolate chips. Remember, patience is key during the cooling process—allowing it to set completely before breaking it into pieces results in a firmer, more enjoyable treat!

Keto Christmas Saltine Toffee

Keto Christmas Saltine Toffee: A Festive Sweet Treat

Keto Christmas Saltine Toffee is a quick and simple festive dessert that fits perfectly into your keto lifestyle.
Print Recipe Pin Recipe
Prep Time 15 minutes mins
Cook Time 10 minutes mins
Cooling Time 30 minutes mins
Total Time 55 minutes mins
Servings: 10 pieces
Course: Dessert
Cuisine: American
Calories: 180
Ingredients Equipment Method Nutrition Notes

Ingredients
  

For the Base
  • 1 box Keto-friendly saltine crackers
  • 1 cup Unsalted butter Use high-quality butter
For the Sweet Top
  • 1 cup Granulated erythritol Keto sweetener
  • 1 cup Sugar-free chocolate chips Choose high-quality
For the Crunchy Topping
  • 1 cup Chopped nuts Walnuts, pecans, or almonds
  • 1 teaspoon Sea salt For sprinkling

Equipment

  • Oven
  • Medium saucepan
  • Baking Sheet
  • parchment paper
  • spatula

Method
 

Step-by-Step Instructions
  1. Preheat your oven to 400°F (200°C).
  2. Line a baking sheet with parchment paper and arrange saltine crackers in a single layer.
  3. Melt the butter in a medium saucepan over medium heat until bubbling gently (2-3 minutes).
  4. Add granulated erythritol to the melted butter and stir until smooth (1-2 minutes).
  5. Increase heat and bring the mixture to a gentle boil. Boil without stirring for 3 minutes.
  6. Pour the hot toffee mixture evenly over the arranged crackers.
  7. Bake for 5-7 minutes until the edges are golden brown and bubbly.
  8. Remove from the oven and sprinkle chocolate chips over the hot layer for 2-3 minutes.
  9. Spread the melted chocolate into an even layer across the toffee.
  10. Sprinkle chopped nuts and sea salt over the chocolate layer.
  11. Allow to cool completely at room temperature (about 30 minutes) before breaking into pieces.

Nutrition

Serving: 1pieceCalories: 180kcalCarbohydrates: 10gProtein: 3gFat: 16gSaturated Fat: 7gPolyunsaturated Fat: 2gMonounsaturated Fat: 7gCholesterol: 30mgSodium: 150mgPotassium: 60mgFiber: 2gVitamin A: 500IUCalcium: 20mgIron: 1mg

Notes

Store leftovers in an airtight container at room temperature for up to 1 week.

Tried this recipe?

Let us know how it was!

Lemon Sugar Cookies That Spark Joy With Every Bite

January 16, 2026 by grace bellamy Leave a Comment

The other day, while whisking up a batch of lemon sugar cookies, I was struck by how a simple zest could transform a room. The bright aroma of fresh lemons danced through the air, promising a sweet treat that’s both refreshing and indulgent. If you’re craving a delightful dessert that’s quick to whip up, these Lemon Sugar Cookies are your go-to recipe. With just a 30-minute total time from start to finish, they're perfect for a spontaneous baking session or a cozy weekend treat. Plus, they’re an instant crowd-pleaser, whether you’re sharing them at a gathering or enjoying them all by yourself! Curious about how a bit of citrus can elevate your cookie game? Let’s dive into the recipe!

Lemon Sugar Cookies

Why You'll Love These Lemon Sugar Cookies

Simplicity at its finest: You only need a few basic ingredients to create these delightful cookies.
Bright, Tangy Flavor: The combination of fresh lemon juice and zest infuses each cookie with a zesty brightness that will have your taste buds singing.
Quick to Make: In just 30 minutes, you can have a batch of warm cookies ready to share, making them ideal for last-minute cravings.
Versatile Treat: Perfect for any occasion, these cookies are equally delightful for a casual snack or a festive gathering.
Crowd Pleaser: Their delightful sweetness and refreshing flavor mean they’re sure to charm both family and friends! So why not explore more delicious cookie options with our fantastic chocolate chip cookies?

Lemon Sugar Cookies Ingredients

• Curious about what goes into these zesty delights?

For the Cookie Dough

  • 2 ¾ cups all-purpose flour – a key base for that perfect cookie structure.
  • 1 teaspoon baking soda – helps the cookies rise and become fluffy.
  • ½ teaspoon baking powder – works in tandem with baking soda for extra lift.
  • 1 cup unsalted butter, softened – provides rich flavor; make sure it’s at room temperature for easy mixing.
  • 1 ½ cups white sugar – adds sweetness and helps create that delightful cookie exterior.
  • 1 egg – binds the ingredients together while adding richness.
  • 1 teaspoon vanilla extract – enhances the sweet flavors in each cookie.
  • 1 tablespoon lemon zest – brings a burst of aromatic freshness to every bite.
  • 2 tablespoons lemon juice – infuses tanginess that complements the sweetness beautifully.
  • ¼ teaspoon salt – balances out the sweetness and enhances flavor.

For Coating

  • ½ cup sugar – for rolling the cookies, giving them a sugary sparkle on the outside.

Now that you have all the ingredients for your Lemon Sugar Cookies, let’s get baking!

Step‑by‑Step Instructions for Lemon Sugar Cookies

Step 1: Preheat the Oven
Begin by preheating your oven to 350°F (175°C). While the oven heats up, prepare a baking sheet by lining it with parchment paper. This will ensure that your Lemon Sugar Cookies bake evenly and don’t stick to the pan, making cleanup a breeze!

Step 2: Mix Dry Ingredients
In a medium bowl, whisk together 2 ¾ cups of all-purpose flour, 1 teaspoon of baking soda, ½ teaspoon of baking powder, and ¼ teaspoon of salt. Combine these ingredients thoroughly until well blended. Setting these dry components aside will help in creating the perfect texture for your cookies later on.

Step 3: Cream Butter and Sugar
In a large mixing bowl, cream together 1 cup of softened unsalted butter and 1 ½ cups of white sugar using an electric mixer. Beat the mixture until it turns light and fluffy, which takes about 2-3 minutes. This step is crucial for creating airy, delicious Lemon Sugar Cookies.

Step 4: Add Wet Ingredients
Now, it's time to incorporate the wet ingredients! Beat in 1 egg, followed by 1 teaspoon of vanilla extract, 1 tablespoon of freshly grated lemon zest, and 2 tablespoons of freshly squeezed lemon juice. Mix these thoroughly until the mixture is smooth and fully combined, infusing your cookies with a bright, citrusy flavor.

Step 5: Combine the Mixtures
Gradually add the dry ingredient mixture to your wet ingredients, stirring gently until just combined. Be careful not to overmix, as this can lead to tough cookies. You want the dough to be slightly sticky but well-combined; this will contribute to the tender texture of your Lemon Sugar Cookies.

Step 6: Form the Cookie Dough Balls
Using a cookie scoop or tablespoon, portion out the dough and roll each piece into a ball. Aim for uniformity in size to ensure even baking. The dough should be manageable and easy to roll; if it’s too sticky, consider chilling it in the fridge for a few minutes before rolling.

Step 7: Coat with Sugar
Roll each dough ball in the ½ cup of sugar to coat them generously. This step not only gives your Lemon Sugar Cookies a beautiful sugary exterior but also enhances their sweetness and creates a delightful crunch on the outside as they bake.

Step 8: Bake the Cookies
Place the sugar-coated dough balls onto your prepared baking sheet, leaving about 2 inches of space between each ball. Bake in the preheated oven for 8-10 minutes. Keep an eye on them; look for lightly golden edges while the centers remain soft, which is key for that perfect chewy texture.

Step 9: Cool on Baking Sheet
After baking, allow your Lemon Sugar Cookies to cool on the baking sheet for approximately 5 minutes. This initial cooling time helps them set perfectly before you transfer them to a wire rack. You’ll see the cookies continue to firm up a little as they cool.

Step 10: Transfer to Wire Rack
Finally, carefully transfer the cookies to a wire rack to cool completely. This step ensures that they don’t get soggy and allows air to circulate freely around them. Once cooled, enjoy your delicious Lemon Sugar Cookies with a refreshing glass of milk or your favorite beverage!

Lemon Sugar Cookies

Make Ahead Options

These Lemon Sugar Cookies are perfect for meal prep enthusiasts! You can prepare the dough up to 24 hours in advance, simply cover it tightly and refrigerate to keep it fresh. For even easier baking, you can also scoop and roll the dough balls, then coat them in sugar, and freeze for up to 3 months; when you're ready to enjoy your cookies, just bake them directly from the freezer, adding an extra minute or two to the baking time. This way, you can always have a delicious batch of Lemon Sugar Cookies on hand with minimal effort! By prepping ahead, you'll save valuable time and enjoy just-as-delicious cookies whenever a sweet craving strikes.

Tips for the Best Lemon Sugar Cookies

Use Room Temperature Butter: Ensure your butter is softened to room temperature for easy creaming, leading to fluffier, better-textured cookies.

Don't Overmix the Dough: Gently mix the dry and wet ingredients until just combined. Overmixing can result in tough Lemon Sugar Cookies.

Chill the Dough if Necessary: If your dough feels too sticky, refrigerate it for 15-30 minutes. This makes rolling easier and helps maintain shape during baking.

Watch the Baking Time: Keep an eye on the cookies while baking; don’t overbake them. The edges should be lightly golden, while the centers should remain soft for the perfect chewy bite.

Store Properly: To keep your cookies fresh, store them in an airtight container at room temperature for up to a week or freeze for longer storage.

Lemon Sugar Cookies Variations

Feel free to get creative and adapt these lemon sugar cookies to match your taste and dietary needs!

  • Gluten-Free: Swap the all-purpose flour with a gluten-free blend for a delightful alternative that everyone can enjoy.

  • Vegan: Replace the egg with ¼ cup of unsweetened applesauce and use vegan butter to keep it dairy-free but just as scrumptious.

  • Coconut Twist: Add ½ cup of shredded coconut to the batter for a tropical touch that pairs beautifully with lemon's brightness.

  • Lemon Blueberry Delight: Fold in 1 cup of fresh blueberries to bring a juicy contrast to the tangy lemon flavor. These cookies become a fruity sensation!

  • Zesty Lime Sugar Cookies: Substitute lime juice and zest for lemon to create a tangy, refreshing twist that’s just as delicious.

  • Spicy Kick: Mix in ½ teaspoon of cayenne pepper or chili powder for unexpected heat that complements the cookies’ sweetness beautifully.

  • Herb-Infused: Experiment with 1 tablespoon of finely chopped fresh basil or rosemary for a herbaceous note that elevates the classic lemon taste.

  • Chocolate Drizzle: Melt some dark chocolate and drizzle it over cooled cookies for a decadent finish. It adds a delightful contrast to the lemon's brightness.

Your baking journey is filled with possibilities! Whether you’re in the mood for a classic treat or something new and exciting, transforming these cookies is an easy way to satisfy every craving. And if you're intrigued by other delicious cookie options, don’t forget to try our fantastic oatmeal raisin cookies for a wholesome twist or the classic peanut butter cookies for a nutty delight!

What to Serve with Lemon Sugar Cookies

Baking a batch of these delightful cookies? Let’s create a full meal experience around them that will tantalize the taste buds.

  • Creamy Lemon Sorbet: The cool, refreshing sorbet complements the cookies’ bright citrus flavor, perfect for a summer dessert.
  • Brewed Iced Tea: A glass of sweetened iced tea balances the sweet and tangy notes of the cookies, creating a classic pairing.
  • Vanilla Ice Cream: Creamy ice cream adds lusciousness to your cookie experience, while the vanilla flavor harmonizes beautifully with lemon.
  • Fruit Salad: Tossing together fresh berries and citrus brings a fresh vibrancy, balancing the sweetness of the cookies with tartness.
  • Lemonade: Bright, zesty lemonade echoes the cookie's lemony goodness, making it a thirst-quenching and delightful drink option.
  • Cheese Platter: Soft cheeses like brie or mascarpone provide a rich backdrop that pairs wonderfully with the cookies' sweetness.
  • Chocolate Dipped Strawberries: The combination of fresh berries and rich chocolate adds a luxurious touch to your lemon cookies.
  • Biscotti: These crunchy delights bring a different texture and flavor depth that complements the softness of the lemon sugar cookies.
  • Sparkling Wine: A light, bubbly wine brings a festive feel, enhancing the sweet, citrusy experience of the meal.

How to Store and Freeze Lemon Sugar Cookies

  • Room Temperature: Store your Lemon Sugar Cookies in an airtight container at room temperature for up to 1 week. This keeps them soft and fresh, ready for enjoyment anytime!

  • Fridge: If you'd like them to last a bit longer, you can refrigerate the cookies in an airtight container for up to 2 weeks. Just allow them to come to room temperature before serving.

  • Freezer: For longer storage, freeze the cookies in a single layer on a baking sheet, then transfer them to a zip-top bag or airtight container. They’ll hold their quality for up to 3 months. Thaw overnight in the fridge before enjoying again.

  • Reheating: If frozen, you can reheat the cookies directly from the freezer in a 350°F (175°C) oven for about 5-7 minutes. This revives their delightful flavor and texture!

Lemon Sugar Cookies

Lemon Sugar Cookies Recipe FAQs

What’s the best way to choose lemons for this recipe?
Absolutely! When selecting lemons, look for those that feel firm and heavy for their size. A shiny, bright yellow skin is ideal—avoid ones with dark spots or wrinkles. Freshly grated zest from these lemons will definitely make your Lemon Sugar Cookies shine!

How should I store my Lemon Sugar Cookies?
Store your Lemon Sugar Cookies in an airtight container at room temperature for up to 1 week. This keeps them soft and delightful! If you want them to last a bit longer, you can refrigerate them for up to 2 weeks, just allow them to come to room temperature before enjoying.

Can I freeze Lemon Sugar Cookies?
Absolutely! For longer storage, freeze your cookies in a single layer on a baking sheet until firm. Then, transfer them to a zip-top bag or airtight container, where they can stay fresh for up to 3 months. To enjoy, simply thaw them overnight in the fridge or heat them directly from the freezer in a 350°F (175°C) oven for about 5-7 minutes.

What should I do if my cookie dough is too sticky?
Very! If your cookie dough feels too sticky to roll into balls, chill it in the refrigerator for about 15-30 minutes. This will make it easier to handle, allowing for perfectly shaped Lemon Sugar Cookies. Remember, a little patience goes a long way in achieving that desired texture!

Can I make these cookies allergen-friendly?
Yes! To make these Lemon Sugar Cookies more allergen-friendly, consider substituting all-purpose flour with an alternative like almond flour or a gluten-free blend. For a vegan option, replace the egg with a flaxseed meal (1 tablespoon flaxseed meal mixed with 2.5 tablespoons water) and use plant-based butter. Just keep in mind the flavor and texture may vary slightly!

How do I know if my cookies are done baking?
Great question! The key is to look for lightly golden edges while the centers remain soft. Bake them in the preheated oven for 8-10 minutes. If you gently press on the cookie, it should spring back slightly, indicating they are baked to perfection!

Lemon Sugar Cookies

Lemon Sugar Cookies That Spark Joy With Every Bite

Delight in these Lemon Sugar Cookies that are quick, refreshing, and perfect for every occasion.
Print Recipe Pin Recipe
Prep Time 15 minutes mins
Cook Time 10 minutes mins
Cooling Time 5 minutes mins
Total Time 30 minutes mins
Servings: 24 cookies
Course: Dessert
Cuisine: American
Calories: 150
Ingredients Equipment Method Nutrition Notes

Ingredients
  

For the Cookie Dough
  • 2 ¾ cups all-purpose flour a key base for that perfect cookie structure
  • 1 teaspoon baking soda helps the cookies rise and become fluffy
  • ½ teaspoon baking powder works in tandem with baking soda for extra lift
  • 1 cup unsalted butter, softened provides rich flavor; make sure it’s at room temperature
  • 1 ½ cups white sugar adds sweetness and helps create that delightful cookie exterior
  • 1 count egg binds the ingredients together while adding richness
  • 1 teaspoon vanilla extract enhances the sweet flavors in each cookie
  • 1 tablespoon lemon zest brings a burst of aromatic freshness to every bite
  • 2 tablespoons lemon juice infuses tanginess that complements the sweetness beautifully
  • ¼ teaspoon salt balances out the sweetness and enhances flavor
For Coating
  • ½ cup sugar for rolling the cookies, giving them a sugary sparkle on the outside

Equipment

  • Mixing Bowl
  • Electric mixer
  • Cookie scoop
  • Baking Sheet
  • parchment paper

Method
 

Step-by-Step Instructions
  1. Preheat your oven to 350°F (175°C). Prepare a baking sheet by lining it with parchment paper.
  2. In a medium bowl, whisk together flour, baking soda, baking powder, and salt until well blended.
  3. In a large mixing bowl, cream together butter and sugar until light and fluffy, about 2-3 minutes.
  4. Beat in egg, vanilla extract, lemon zest, and lemon juice until smooth.
  5. Gradually add the dry mixture to the wet mixture, stirring gently until just combined.
  6. Using a scoop or tablespoon, portion out the dough and roll into balls.
  7. Roll each dough ball in sugar to coat generously.
  8. Place on a baking sheet leaving space between each ball and bake for 8-10 minutes.
  9. Allow cookies to cool on the baking sheet for 5 minutes before transferring them to a wire rack.
  10. Enjoy your delicious Lemon Sugar Cookies with a refreshing glass of milk.

Nutrition

Serving: 1cookieCalories: 150kcalCarbohydrates: 22gProtein: 1gFat: 7gSaturated Fat: 4gCholesterol: 25mgSodium: 90mgPotassium: 50mgSugar: 10gVitamin A: 200IUVitamin C: 1mgCalcium: 10mgIron: 0.5mg

Notes

For best results, use room temperature butter, avoid overmixing, and chill the dough if it feels too sticky.

Tried this recipe?

Let us know how it was!

Savory Mushroom & Gruyère Puff Pastry Braid for Cozy Nights

January 16, 2026 by grace bellamy Leave a Comment

One evening, as I rummaged through my pantry, I stumbled upon a lonely sheet of puff pastry. It sparked a little excitement — what could I create? That’s when the notion of a Savory Mushroom & Gruyère Puff Pastry Braid came to life. This dish isn't just a visual masterpiece; it's the ultimate crowd-pleaser and can be whipped up in just 40 minutes! Imagine crispy, flaky pastry enveloping tender mushrooms and luscious Gruyère cheese, perfect for impressing guests or simply treating yourself. Whether you’re gearing up for dinner or need a fabulous appetizer for a gathering, this braid brings heartfelt homemade comfort right to your table. Ready to delve into this delightful culinary adventure?

Savory Mushroom & Gruyère Puff Pastry Braid

Why is this braid a must-try?

Irresistible Flavors: The harmony of savory mushrooms and creamy Gruyère creates a mouthwatering taste explosion that delightfully satisfies every palate.

Easy Preparation: With just a few ingredients and minimal effort, this recipe is perfect for aspiring home chefs or anyone looking to break free from fast food routines.

Visual Appeal: Its braided design not only makes a stunning presentation but also stimulates excitement at your dinner table.

Versatility: This dish shines as either a delectable appetizer or a satisfying main course, making it perfect for any occasion.

Time-Saving Delight: Ready in only 40 minutes, it’s a fantastic choice for those busy weeknights or spontaneous gatherings. Experience this Make-Ahead Tip to expertly plan your meal!

Savory Mushroom & Gruyère Puff Pastry Braid Ingredients

• Discover the simple components of this delightful dish!

For the Filling

  • Mushrooms – Sautéed mushrooms bring a rich, earthy flavor that elevates the entire braid.
  • Gruyère Cheese – This creamy cheese melts beautifully, adding delicious depth to your savory pastry.

For the Pastry

  • Olive Oil – A bit of olive oil ensures your mushrooms are perfectly sautéed and flavorful.
  • Puff Pastry – Use thawed puff pastry for a flaky, golden exterior that wraps around the savory filling.

Embrace the art of cooking with this Savory Mushroom & Gruyère Puff Pastry Braid—you won't regret it!

Step‑by‑Step Instructions for Savory Mushroom & Gruyère Puff Pastry Braid

Step 1: Preheat the Oven
Begin by preheating your oven to 400°F (200°C). This step is crucial as it ensures a crispy, golden exterior on your Savory Mushroom & Gruyère Puff Pastry Braid once it’s ready to bake. While the oven heats, you can prepare the filling, making the most of your time.

Step 2: Sauté the Mushrooms
In a skillet, heat 2 tablespoons of olive oil over medium heat. Once the oil glistens, add 1 cup of sliced mushrooms and sauté for about 5-7 minutes until they become tender and turn golden brown. Stir occasionally to prevent sticking and maximize flavor. The aroma will signal they are done!

Step 3: Roll Out the Puff Pastry
On a lightly floured surface, roll out your thawed sheet of puff pastry to about ¼ inch thick. This creates a perfect canvas for your filling. Ensuring an even thickness will help the pastry bake uniformly, resulting in that delectable flakiness we all love in the Savory Mushroom & Gruyère Puff Pastry Braid.

Step 4: Create the Braid Effect
Next, with a sharp knife or pizza cutter, make slits about 1 inch apart along the long sides of the pastry, leaving the center untouched for your filling. These slits will create the braided effect, allowing the pastry to beautifully overlap when folded.

Step 5: Add the Filling
Spread the sautéed mushrooms evenly along the center of the pastry. Then, sprinkle 1 cup of shredded Gruyère cheese over the mushrooms. This combination of savory mushrooms and rich, melted Gruyère is what makes your Savory Mushroom & Gruyère Puff Pastry Braid irresistible!

Step 6: Braid the Pastry
Gently fold the slits over the filling, alternating sides to form a braid. Start folding from the top, pressing gently to seal the edges and prevent any filling from spilling out. This technique not only creates a beautiful design but also locks in moisture and flavor.

Step 7: Bake Until Golden
Transfer the braided pastry onto a baking sheet lined with parchment paper for easier cleanup. Bake in the preheated oven for 25 minutes or until the pastry is puffed up and beautifully golden brown. Keep an eye on it; the enticing aroma will let you know it’s almost time to enjoy your delicious creation!

Savory Mushroom & Gruyère Puff Pastry Braid

Make Ahead Options

These Savory Mushroom & Gruyère Puff Pastry Braids are perfect for meal prep, allowing you to enjoy this delightful dish with minimal stress during busy weeknights! You can prepare the filling (sautéed mushrooms and cheese) up to 3 days in advance, simply refrigerating it until you’re ready to assemble. To maintain the quality of the puff pastry, it's best to braid it no more than 24 hours ahead of time; if you do, wrap it tightly in plastic wrap to prevent drying out. When you’re ready to bake, just pop the braid in the oven for 25 minutes, and you'll have a gorgeous appetizer or main course that’s just as delicious as if it were freshly made!

What to Serve with Savory Mushroom & Gruyère Puff Pastry Braid

Is your mouth watering with anticipation for a full, delightful meal to accompany this irresistible dish?

  • Fresh Garden Salad: A crisp salad with mixed greens and a tangy vinaigrette balances the rich flavors of the braid delightfully.
  • Creamy Mashed Potatoes: The smooth texture and buttery flavor create a comforting contrast to the flaky pastry, making it truly satisfying. Add a sprinkle of garlic for an extra kick!
  • Roasted Vegetables: A medley of colorful roasted veggies adds both nutrition and a touch of sweetness, complementing the savory filling perfectly.
  • Garlic Bread: This simple side enhances the meal by bringing in that beloved garlic flavor, perfect for dipping in any extra melted cheese!
  • Chardonnay: The crispness of a chilled Chardonnay pairs well, highlighting the cheese while countering the pastry’s richness with refreshing acidity.
  • Apple Crisp: For dessert, a warm apple crisp with a scoop of vanilla ice cream offers a lovely contrast of textures, leaving everyone with a sweet finish.

Elevate your dinner table experience while enjoying the heartwarming flavors of this delightful braid!

Savory Mushroom & Gruyère Puff Pastry Braid Variations

Feel free to explore these delightful twists on the classic recipe, igniting your culinary creativity!

  • Dairy-Free: Swap Gruyère with a dairy-free cheese alternative for a creamy, plant-based twist.
  • Add Spinach: Mix in a cup of fresh spinach with the mushrooms for a pop of color and added nutrients.
  • Spicy Kick: Add a pinch of red pepper flakes when sautéing mushrooms to turn up the heat and excite your taste buds.
  • Mushroom Medley: Use a variety of mushrooms like shiitake and portobello for more complex flavors and unique textures.
  • Herb Infusion: Incorporate fresh herbs, such as thyme or rosemary, into the mushrooms for a fragrant touch that elevates the dish.
  • Caramelized Onions: Sauté sliced onions until caramelized and mix them with the mushrooms for a sweet, savory flavor boost.
  • Nutty Crunch: Top the filling with chopped walnuts or pecans for an added layer of texture and earthy taste.
  • Garlic Lover's Twist: Mix minced garlic into the sautéed mushrooms for a bold aroma and deep, savory richness that can't be resisted.

Storage Tips for Savory Mushroom & Gruyère Puff Pastry Braid

Room Temperature: Consume the braid within 2 hours of baking for the best flavor and texture. Store any leftovers wrapped in foil at room temperature.

Fridge: If you have leftovers, store the Savory Mushroom & Gruyère Puff Pastry Braid in an airtight container in the fridge for up to 3 days. Reheat in the oven for optimal crispiness.

Freezer: To freeze, wrap individual slices tightly in plastic wrap and place in a freezer-safe bag. They can be frozen for up to 2 months. Thaw overnight in the fridge before reheating.

Reheating: Reheat in the oven at 350°F (175°C) for about 15-20 minutes until warmed through and crispy. Avoid the microwave to maintain the pastry's flakiness.

Expert Tips for Savory Mushroom & Gruyère Puff Pastry Braid

Avoid Soggy Pastry: Ensure your mushrooms are well sautéed and moisture is cooked off to prevent sogginess in your Savory Mushroom & Gruyère Puff Pastry Braid.

Even Thickness: When rolling out your puff pastry, aim for an even thickness to guarantee uniform cooking and that perfect flaky texture.

Seal the Edges: Press the edges of the braid firmly to seal, ensuring the delicious filling stays inside and doesn't ooze out during baking.

Check for Doneness: Keep an eye on the braid in the oven; the golden brown color is your cue that it’s ready to be taken out and savored!

Make It Your Own: Feel free to customize with additional fillings like spinach or garlic, adding personal flair to your already delightful Savory Mushroom & Gruyère Puff Pastry Braid!

Savory Mushroom & Gruyère Puff Pastry Braid

Savory Mushroom & Gruyère Puff Pastry Braid Recipe FAQs

What type of mushrooms should I use for this recipe?
I recommend using cremini or button mushrooms for their rich flavor and quick cooking time. If you're feeling adventurous, try shiitake mushrooms for a deeper, earthy taste! Just make sure they’re fresh and free of any dark spots or mushiness.

How do I store leftovers from the Savory Mushroom & Gruyère Puff Pastry Braid?
You can store leftovers in an airtight container in the fridge for up to 3 days. For the best taste and texture, enjoy it within this time frame! Simply reheat in the oven at 350°F (175°C) for about 15-20 minutes to revive its crispy exterior.

Can I freeze the Savory Mushroom & Gruyère Puff Pastry Braid?
Absolutely! To freeze, wrap individual slices tightly in plastic wrap, then place them in a freezer-safe bag. They can be frozen for up to 2 months. When you're ready to enjoy, thaw overnight in the fridge, then reheat in the oven for the perfect flaky crust.

What should I do if my pastry isn't baking evenly?
If you notice uneven baking, it could be due to the puff pastry thickness. Make sure it’s evenly rolled out to about ¼ inch thick, and remember to keep an eye on it while baking. If one side is browning too quickly, you can rotate the baking sheet halfway through for even results.

Is this recipe suitable for people with dairy allergies?
This Savory Mushroom & Gruyère Puff Pastry Braid contains cheese, which is not suitable for dairy allergies. To make a dairy-free version, you can use a plant-based cheese substitute or simply omit the cheese while adding more sautéed vegetables or herbs to enhance the flavor.

Can I prepare the filling in advance?
Yes, you can absolutely prep the filling ahead of time! Sauté the mushrooms and let them cool before storing them in the refrigerator for up to 3 days. This makes it super convenient when you're ready to assemble and bake the braid—just roll out your pastry and fill it up when you’re ready!

Savory Mushroom & Gruyère Puff Pastry Braid

Savory Mushroom & Gruyère Puff Pastry Braid for Cozy Nights

Indulge in this Savory Mushroom & Gruyère Puff Pastry Braid, perfect for cozy nights and gatherings.
Print Recipe Pin Recipe
Prep Time 15 minutes mins
Cook Time 25 minutes mins
Total Time 40 minutes mins
Servings: 6 slices
Course: Appetizer
Cuisine: French
Calories: 250
Ingredients Equipment Method Nutrition Notes

Ingredients
  

Filling
  • 1 cup sliced mushrooms sautéed
  • 1 cup shredded Gruyère cheese
Pastry
  • 2 tablespoons olive oil
  • 1 sheet thawed puff pastry

Equipment

  • skillet
  • Baking Sheet
  • parchment paper
  • Knife
  • Pizza Cutter

Method
 

Step-by-Step Instructions
  1. Preheat your oven to 400°F (200°C).
  2. In a skillet, heat 2 tablespoons of olive oil over medium heat. Add 1 cup of sliced mushrooms and sauté for about 5-7 minutes until tender and golden brown.
  3. On a lightly floured surface, roll out your thawed sheet of puff pastry to about ¼ inch thick.
  4. Make slits about 1 inch apart along the long sides of the pastry, leaving the center untouched for your filling.
  5. Spread the sautéed mushrooms evenly along the center of the pastry. Sprinkle 1 cup of shredded Gruyère cheese over the mushrooms.
  6. Fold the slits over the filling, alternating sides to form a braid.
  7. Transfer the braided pastry onto a baking sheet lined with parchment paper. Bake for 25 minutes or until golden brown.

Nutrition

Serving: 1sliceCalories: 250kcalCarbohydrates: 20gProtein: 5gFat: 18gSaturated Fat: 7gPolyunsaturated Fat: 1gMonounsaturated Fat: 8gCholesterol: 25mgSodium: 400mgPotassium: 200mgFiber: 1gSugar: 1gVitamin A: 300IUVitamin C: 5mgCalcium: 150mgIron: 1.5mg

Notes

Ensure the mushrooms are well sautéed to avoid sogginess. Customize the filling with additional ingredients if desired.

Tried this recipe?

Let us know how it was!

Savor the Flavors of Caribbean-Style Plantain Curry at Home

January 16, 2026 by grace bellamy Leave a Comment

What if I told you that the perfect balance of sweet and savory could be captured in just one dish? Welcome to my kitchen, where we’ll be whipping up a Caribbean-Style Plantain Curry that will transport your taste buds straight to tropical shores. This recipe is not only a delightful crowd-pleaser but also a breeze to prepare, taking just 40 minutes from start to finish. Whether you’re a busy parent or a passionate home-chef, the combination of ripe plantains and coconut milk creates a creamy, rich flavor experience that feels indulgent but is also incredibly satisfying. Ready to dive into a world where homemade goodness reigns supreme? Let’s get cooking and explore this tropical gem together!

Caribbean-Style Plantain Curry

Why is Caribbean-Style Plantain Curry a Must-Try?

Irresistible Flavor: The blend of sweet plantains and creamy coconut milk creates a dish that dances on your palate.

Quick and Easy: This recipe can be prepared in just 40 minutes, making it perfect for busy weeknights.

Crowd-Pleaser: Serve it at your next gathering, and watch as it disappears! Everyone loves the tropical twist it brings.

Versatile Delight: Pair it with rice, quinoa, or even naan for a well-rounded meal.

Make-Ahead Friendly: Prepare it a day in advance to enhance the flavors further—just heat it up when you're ready to serve.

Dive into this Caribbean-Style Plantain Curry and enjoy a taste of the islands right at home!

Caribbean-Style Plantain Curry Ingredients

For the Curry
• Ripe plantains – Choose ones with yellow skins for the perfect sweetness.
• Coconut oil – Enhances flavor and adds a tropical touch to the curry.
• Coconut milk – The creaminess balances with the sweetness of the plantains, making the curry rich and decadent.
• Curry powder – Provides a warm, aromatic spice that pairs beautifully with the other flavors.
• Salt – Enhances all the tastes in this Caribbean-Style Plantain Curry, bringing them together.

Feel free to experiment and add your favorite spices or proteins to this delicious dish as you make it your own!

Step‑by‑Step Instructions for Caribbean-Style Plantain Curry

Step 1: Prepare the Plantains
Begin by peeling the two ripe plantains. Cut them into rounds about half an inch thick, ensuring a uniform size for even cooking. The plantains should have a bright yellow color with a few dark spots, indicating sweetness. Set them aside as you prepare to sauté.

Step 2: Heat the Coconut Oil
In a large skillet, heat 1 tablespoon of coconut oil over medium heat. Allow the oil to melt and shimmer, which usually takes about 1–2 minutes. This tropical oil will lend a rich flavor to your Caribbean-Style Plantain Curry and help prevent sticking as you cook your plantains.

Step 3: Sauté the Plantains
Add the sliced plantains to the pan, spreading them in an even layer. Cook for about 5–7 minutes, flipping occasionally until they are lightly browned and softened. They should develop a little caramelization, giving them a lovely golden hue. This step enhances their natural sweetness and sets the stage for the curry.

Step 4: Add Spices for Flavor
Once the plantains are beautifully sautéed, stir in 1 teaspoon of curry powder and 1 teaspoon of salt. Mix thoroughly for about 1–2 minutes, allowing the spices to coat the plantains evenly. This aromatic blend will elevate the dish, infusing the plantains with vibrant flavor.

Step 5: Incorporate the Coconut Milk
Pour in the 400 ml can of coconut milk, stirring to combine with the plantains and spices. Increase the heat slightly to bring the mixture to a gentle simmer. Allow it to cook undisturbed for approximately 15 minutes, letting the flavors meld together beautifully while the sauce thickens slightly.

Step 6: Serve Your Curry Delight
Once the curry has simmered and is aromatic, it’s time to serve! Spoon the warm Caribbean-Style Plantain Curry over a bed of rice or quinoa if desired. The creamy coconut sauce, combined with sweet plantains, makes for a comforting meal that is sure to delight.

Caribbean-Style Plantain Curry

What to Serve with Caribbean-Style Plantain Curry

Transform your meal into a vibrant feast with delightful dishes that enhance every bite.

  • Coconut Rice: The nutty flavor and creamy texture of coconut rice pairs perfectly with the curry, creating a harmonious, tropical experience.

  • Naan Bread: Soft and pillowy, naan is great for scooping up the curry, adding a satisfying chewy contrast that complements the dish.

  • Quinoa Salad: A fresh quinoa salad with diced vegetables provides a crunchy texture and lightness, balancing the richness of the curry beautifully.

  • Crispy Papadum: These thin, crunchy lentil wafers add an exciting crunch, offering a delightful contrast to the creamy plantains.

  • Mango Chutney: A tangy and sweet mango chutney provides a fruity burst that cuts through the richness, waking up your taste buds with each bite.

  • Spiced Pineapple Juice: Refreshing and lightly spiced, this drink enhances your meal's tropical vibes, providing a sweet note that pairs well with the curry flavors.

Elevate your dining experience by exploring these enticing combinations, ensuring your Caribbean-Style Plantain Curry is the star of a truly memorable meal.

How to Store and Freeze Caribbean-Style Plantain Curry

Fridge: Store any leftovers in an airtight container in the fridge for up to 3 days. This way, the delectable flavors of your Caribbean-Style Plantain Curry will remain fresh.

Freezer: If you want to save it for later, freeze the curry in a freezer-safe container for up to 2 months. Remember to leave a little space for expansion.

Reheating: To enjoy again, thaw overnight in the fridge and reheat on the stovetop or in the microwave, adding a splash of coconut milk to maintain creaminess.

Avoid sogginess: When storing, avoid letting too much moisture build-up in the container to keep the texture delightful.

Expert Tips for Caribbean-Style Plantain Curry

  • Ripe Plantains: Always choose plantains that are yellow with some brown spots for the perfect sweetness; underripe ones can be too starchy.

  • Controlled Heat: Sauté the plantains over medium heat to avoid burning; keep an eye on them for a beautiful golden color without bitterness.

  • Mix it Up: Feel free to personalize this Caribbean-Style Plantain Curry by adding vegetables like bell peppers or spinach for extra nutrition and color.

  • Thickening the Sauce: If you prefer a thicker sauce, let it simmer for a bit longer or mash a few plantain slices into the curry for added creaminess.

  • Serve Right: Enjoy the dish fresh! When reheating leftovers, add a splash of water to revive the consistency of the sauce if it thickens.

Variations & Substitutions for Caribbean-Style Plantain Curry

Feel free to get creative and let your taste buds guide you as you personalize this dish!

  • Dairy-Free: Swap coconut milk with almond or oat milk for a lighter base. Just make sure to adjust the seasoning to enhance flavor.

  • Spice Level: Add a pinch of cayenne pepper or diced jalapeños for an exciting kick. The heat pairs wonderfully with the sweetness of the plantains.

  • Vegetable Boost: Toss in chopped kale or spinach while simmering for a delightful extra layer of nutrition. This adds vibrant color and even more health benefits!

  • Flavor Infusion: Experiment by adding fresh ginger or garlic for a fragrant twist. These ingredients can elevate the overall aroma and taste of the curry.

  • Protein-Packed: Stir in canned chickpeas or cooked chicken for a heartier meal. This transforms your curry into a complete dinner option that satisfies those who love a little extra substance.

  • Curry Powder Variety: Try using different curry powders like madras or Thai red curry for a whole new flavor profile. Each variety carries its own unique spice blend that’ll tantalize your taste buds.

  • Nutty Addition: Garnish with toasted coconut flakes or crushed cashews before serving for a delightful crunch. This adds texture and makes every bite even more enjoyable.

  • Sweetness Variation: For an adventurous twist, add a tablespoon of maple syrup or a dash of lime juice to enhance the overall flavor complexity. This simple change can elevate the dish to new heights!

Feel inspired? Your Caribbean-Style Plantain Curry can be as diverse as your culinary dreams! Whether you choose to add extra vegetables from your garden or go bold with spices, the possibilities are endless. Enjoy your delicious journey, and don’t forget to explore our expert tips for additional guidance!

Make Ahead Options

These Caribbean-Style Plantain Curry delights are ideal for meal prep and can save you precious time on busy weeknights! You can sauté and season the plantains (Steps 1-4) up to 24 hours in advance, allowing them to soak in those aromatic flavors. Simply refrigerate them in an airtight container to maintain freshness. When you're ready to enjoy the curry, just reheat the plantains in a skillet, stir in the coconut milk (Step 5), and let everything simmer together for about 15 minutes. This method ensures that your meal is just as delicious, making it a stress-free option for your family dinner or a cozy night in!

Caribbean-Style Plantain Curry

Caribbean-Style Plantain Curry Recipe FAQs

What type of plantains should I use for the curry?
Absolutely! Look for ripe plantains with yellow skins and a few dark spots—they're sweet and perfect for this dish. Avoid green or overly brown plantains, as the flavor will differ significantly.

How should I store leftover Caribbean-Style Plantain Curry?
Store any leftovers in an airtight container in the fridge for up to 3 days. This will help keep the flavors intact. When reheating, you may want to add a splash of coconut milk to bring back the creaminess!

Can I freeze Caribbean-Style Plantain Curry?
Yes! This curry freezes wonderfully. Simply pour it into a freezer-safe container and store it for up to 2 months. Remember to leave a little space at the top for expansion. To thaw, place it in the fridge overnight and reheat on the stovetop or microwave.

How can I troubleshoot common issues with my curry?
If your curry turns out too thin, let it simmer a bit longer to thicken, or mash a few plantain slices into the sauce. If it's too salty, add a little more coconut milk or a few slices of raw potato to absorb some saltiness—just remove the potato before serving!

Is this recipe suitable for those with dietary restrictions?
Yes! This Caribbean-Style Plantain Curry is naturally gluten-free and vegan, making it suitable for a variety of dietary preferences. However, if you have allergies, always check that your coconut milk and curry powder are allergy-friendly.

Can I add extra ingredients to my Caribbean-Style Plantain Curry?
Very much so! Feel free to get creative by adding vegetables like bell peppers or spinach. Just sauté them along with the plantains for extra nutrition and a burst of color! The more, the merrier—make this dish truly yours!

Caribbean-Style Plantain Curry

Savor the Flavors of Caribbean-Style Plantain Curry at Home

Experience the perfect balance of sweet and savory with this Caribbean-Style Plantain Curry that delights your taste buds.
Print Recipe Pin Recipe
Prep Time 20 minutes mins
Cook Time 20 minutes mins
Total Time 40 minutes mins
Servings: 4 servings
Course: Main Dishes
Cuisine: Caribbean
Calories: 250
Ingredients Equipment Method Nutrition Notes

Ingredients
  

For the Curry
  • 2 pieces ripe plantains Choose ones with yellow skins for perfect sweetness.
  • 1 tablespoon coconut oil Enhances flavor and adds tropical touch.
  • 400 ml coconut milk Provides creaminess and balances sweetness.
  • 1 teaspoon curry powder Adds warm, aromatic spice.
  • 1 teaspoon salt Enhances overall flavor.

Equipment

  • large skillet

Method
 

Step-by-Step Instructions for Caribbean-Style Plantain Curry
  1. Begin by peeling the two ripe plantains. Cut them into rounds about half an inch thick and set aside.
  2. In a large skillet, heat 1 tablespoon of coconut oil over medium heat until melted.
  3. Add the sliced plantains to the pan and cook for about 5–7 minutes, flipping occasionally until lightly browned.
  4. Stir in 1 teaspoon of curry powder and 1 teaspoon of salt, mixing thoroughly for about 1–2 minutes.
  5. Pour in the 400 ml can of coconut milk, stirring to combine, and let it cook undisturbed for approximately 15 minutes.
  6. Serve the warm Caribbean-Style Plantain Curry over a bed of rice or quinoa.

Nutrition

Serving: 1servingCalories: 250kcalCarbohydrates: 40gProtein: 3gFat: 10gSaturated Fat: 8gPolyunsaturated Fat: 0.5gMonounsaturated Fat: 1.5gSodium: 200mgPotassium: 600mgFiber: 4gSugar: 10gVitamin A: 5IUVitamin C: 15mgCalcium: 2mgIron: 10mg

Notes

Ripe plantains should be yellow with some brown spots for sweetness; consider adding vegetables for extra nutrition and color.

Tried this recipe?

Let us know how it was!

Creamy Cottage Cheese Peanut Butter Smoothie Bliss

January 16, 2026 by grace bellamy Leave a Comment

As I stood in my kitchen, surrounded by the quiet hum of morning light, I felt a craving for something both energizing and wholesome. That’s when I stumbled upon the perfect solution: a Cottage Cheese Peanut Butter Smoothie. Packed with protein, this delightful blend not only takes just five minutes to whip up but also serves as a creamy canvas for your favorite flavors. Combining cottage cheese with rich peanut butter and ripe banana creates a dreamy, satisfying drink that will kickstart your day like nothing else. Whether you’re rushing out the door or looking to refuel after that evening workout, this smoothie is a guilt-free indulgence that marries convenience with deliciousness. Curious to see how this quick blend can transform your mornings?

Cottage Cheese Peanut Butter Smoothie

Why Choose This Smoothie Recipe?

Quick and Easy: This smoothie requires just five minutes to prepare, making it ideal for busy mornings when time is of the essence.

Protein-Packed: With cottage cheese and peanut butter at its core, you'll enjoy a wholesome boost of energy, essential for an active lifestyle.

Flavorful Fusion: The combination of peanut butter and banana creates a sweet, satisfying flavor that’s sure to delight your taste buds.

Versatile Delight: Customize your smoothie by adding different fruits or toppings, making it a fun option for the whole family. Whether you prefer almond milk or a drizzle of honey, the possibilities are endless!

Nutrient-Rich: This drink isn’t just yummy; it’s also packed with nutrients providing a guilt-free indulgence you can enjoy any time of the day.

Try this Cottage Cheese Peanut Butter Smoothie for a delicious and satisfying start!

Cottage Cheese Peanut Butter Smoothie Ingredients

For the Smoothie
• Cottage cheese – A creamy base that's rich in protein to keep you full longer.
• Peanut butter – Adds a nutty flavor and healthy fats that can keep your energy up!
• Banana – Provides natural sweetness and creaminess for a smooth texture.
• Dairy or plant-based milk – Use your favorite milk to adjust the creaminess and flavor to your liking.
• Honey or sweetener of choice (optional) – Customize the sweetness to match your taste preferences.
• Vanilla extract – A splash enhances the flavor profile, making your Cottage Cheese Peanut Butter Smoothie a treat!

Step‑by‑Step Instructions for Cottage Cheese Peanut Butter Smoothie

Step 1: Gather Your Ingredients
Start by gathering all your ingredients for the Cottage Cheese Peanut Butter Smoothie. You’ll need cottage cheese, peanut butter, a ripe banana, milk of your choice, honey, and vanilla extract. Ensure your banana is perfectly ripe for that natural sweetness. Once everything is ready, grab your blender and prepare for a delicious blend.

Step 2: Combine Ingredients in Blender
In your blender, combine 1 cup of cottage cheese, 2 tablespoons of peanut butter, 1 banana, and 1 cup of milk. If you opted for honey, add 1 tablespoon to sweeten your mixture. Finally, splash in ½ teaspoon of vanilla extract for a delightful flavor boost. Secure the lid tightly on the blender to avoid any spills during blending.

Step 3: Blend Until Smooth
Blend your mixture on high speed for about 30 seconds or until it reaches a silky smooth consistency. You want to ensure there are no lumps from the cottage cheese or banana. Pause briefly to check the texture, then blend for an additional 10–15 seconds if necessary, creating a creamy Cottage Cheese Peanut Butter Smoothie that is simply irresistible.

Step 4: Taste and Adjust Sweetness
Once blended, take a quick taste of your smoothie. If you prefer it sweeter, feel free to add more honey or your chosen sweetener. Blend again for about 10 seconds to incorporate any additional sweetness. Your smoothie should be perfectly balanced and rich in flavor, ready to fuel your day.

Step 5: Serve Immediately
Pour your luscious Cottage Cheese Peanut Butter Smoothie into a tall glass. The creamy texture should flow beautifully, showcasing its rich color. Consider garnishing it with a sprinkle of nuts or seeds for added crunch, if you like. Serve your smoothie immediately for the best flavor and texture!

Cottage Cheese Peanut Butter Smoothie

Make Ahead Options

These Cottage Cheese Peanut Butter Smoothies are perfect for meal prep enthusiasts! You can prepare the ingredients up to 24 hours in advance by measuring out the cottage cheese, peanut butter, banana, and vanilla extract, and storing them in an airtight container in the refrigerator. Just keep your milk separate until you're ready to blend, to maintain freshness. When you're ready to enjoy, simply add the prepped ingredients to your blender with the milk and blend until smooth. This method ensures your smoothies are just as delicious, providing you with a quick, energizing option on busy mornings.

What to Serve with Cottage Cheese Peanut Butter Smoothie

Elevate your smoothie experience with delicious pairings that balance flavors and textures, crafting a wonderfully satisfying meal.

  • Granola Parfait: Layered with Greek yogurt and your favorite fruits, this parfait adds a delightful crunch and freshness, complementing the creamy smoothie perfectly.

  • Almond Butter Toast: Crunchy whole-grain toast spread with almond butter creates a crunchy contrast and nutty flavor that harmonizes with the smoothie.

  • Chia Seed Pudding: This light, nutritious treat offers a subtly sweet flavor and delightful texture, making it an excellent sidekick to your smoothie.

  • Fresh Berries: A mix of strawberries, blueberries, and raspberries brings a burst of flavor and refreshing juiciness that brightens each sip.

  • Spiced Roasted Nuts: The savory crunch of spiced nuts adds satisfying texture and flavor, enriching the overall snacking experience.

  • Mint Tea: A glass of cool mint tea refreshes the palate, offering a soothing contrast to the rich creaminess of the Cottage Cheese Peanut Butter Smoothie.

  • Chocolate Protein Bites: Rich and chocolatey, these bites are a perfect sweet addition to your meal, boosting energy while satisfying your sweet tooth.

How to Store and Freeze Cottage Cheese Peanut Butter Smoothie

Fridge: Store any leftover Cottage Cheese Peanut Butter Smoothie in an airtight container for up to 2 days. To maintain freshness, give it a good shake or blend before serving again.

Freezer: You can freeze your smoothie for up to 1 month. Pour it into ice cube trays or freezer-safe containers for easy portions. Thaw in the fridge overnight when ready to enjoy.

Reheating: Although it's best enjoyed cold, if you prefer a warm version, gently heat the smoothie in a saucepan over low heat, stirring frequently until warmed through.

Serving Suggestion: For the best taste experience, consume your smoothie fresh. However, if freezing, blend again with a splash of milk for that creamy consistency!

Expert Tips for Cottage Cheese Peanut Butter Smoothie

• Choose Ripened Bananas: A ripe banana enhances sweetness and creaminess. Avoid green bananas for better texture and flavor.

• Blend Thoroughly: Blend until completely smooth; lumps from cottage cheese or banana can ruin the experience. Check consistency before serving.

• Adjust to Taste: Always taste before pouring! If it's not sweet enough, add more honey or a dash of cinnamon for extra flavor.

• Chill Your Ingredients: For a refreshing twist, chill your cottage cheese and milk beforehand, maximizing that cool, creamy texture.

• Experiment with Add-Ins: Mix in spinach, flaxseeds, or protein powder for added nutrition without sacrificing taste in your Cottage Cheese Peanut Butter Smoothie.

Cottage Cheese Peanut Butter Smoothie Variations

Feel free to have fun with this recipe and let your creativity shine in the kitchen!

  • Dairy-Free: Substitute cottage cheese with a dairy-free alternative like almond or coconut yogurt for a creamy, plant-based twist.
    Elevate the flavors with a sprinkle of cinnamon to add warmth and complexity to your smoothie.

  • Add Greens: Toss in a handful of spinach or kale for a nutritious boost, blending seamlessly with the other flavors.
    This green goodness will pack an extra punch without altering the delicious taste you adore.

  • Chocolate Delight: Mix in a tablespoon of cocoa powder or add some dark chocolate chips for a rich and indulgent treat.
    Chocolate and peanut butter is a classic pairing, perfect for satisfying those sweet cravings!

  • Protein Boost: For an extra protein punch, add a scoop of your favorite protein powder to keep you full longer.
    This simple addition can transform your smoothie into a post-workout powerhouse without compromising flavor.

  • Nutty Variations: Switch peanut butter for almond or cashew butter for a delightful change while still enjoying that nutty creaminess.
    Each nut butter brings its unique flavor profile, opening up new taste adventures in every sip!

  • Spicy Kick: Spice things up by adding a pinch of cayenne pepper or a slice of fresh ginger for a zesty twist.
    The heat will awaken your taste buds, transforming your smoothie into an exciting fusion of flavors.

  • Sweeten Naturally: Use ripe dates or pure maple syrup as natural sweeteners instead of honey for a different sweet profile.
    Trying these alternatives can redefine your smoothie experience, giving it a distinctively rich sweetness.

  • Fruity Fusion: Incorporate other fruits like strawberries or mango to create a vibrant blend bursting with different flavors.
    Each fruit brings its own refreshing essence, making every smoothie a delightful surprise for your palate!

For more delicious inspiration, consider checking out our recipe for Blueberry Cottage Cheese Smoothie or explore the refreshing mix in our Tropical Cottage Cheese Smoothie. Enjoy blending!

Cottage Cheese Peanut Butter Smoothie

Cottage Cheese Peanut Butter Smoothie Recipe FAQs

What type of banana should I use?
Absolutely! For the best flavor and texture in your Cottage Cheese Peanut Butter Smoothie, choose a ripe banana. A banana with a few brown spots on the peel indicates it's sweet and perfect for blending. Avoid green bananas, as they can be starchy and firm, resulting in a less enjoyable smoothie.

How should I store leftover smoothie?
You can store any leftover Cottage Cheese Peanut Butter Smoothie in an airtight container in the fridge for up to 2 days. To keep it fresh and maintain the creamy texture, give it a shake or blend it again before serving. If you're like me, you’d want that silky consistency every time!

Can I freeze this smoothie?
Yes, indeed! You can freeze your Cottage Cheese Peanut Butter Smoothie for up to 1 month. Pour it into ice cube trays or freezer-safe containers, making portion control a breeze. When you're ready to enjoy it, thaw overnight in the fridge or blend with a splash of milk for a refreshing, creamy delight!

What if my smoothie is too thick?
If your Cottage Cheese Peanut Butter Smoothie ends up thicker than you’d like, don’t worry! Simply add a little more milk (dairy or plant-based) to the blender and blend again until you reach your desired consistency. Remember, it's all about personal preference—adjust it until it feels just right for you.

Are there any dietary considerations I should be aware of?
Certainly! If you're making this smoothie for someone with allergies, be mindful of the peanut butter, which can be a common allergen. You can replace peanut butter with almond butter or sunflower seed butter for those with nut allergies. Always check labels for any added ingredients that may not align with dietary restrictions.

Cottage Cheese Peanut Butter Smoothie

Creamy Cottage Cheese Peanut Butter Smoothie Bliss

Experience the energizing and wholesome Cottage Cheese Peanut Butter Smoothie, packed with protein and flavor.
Print Recipe Pin Recipe
Prep Time 5 minutes mins
Total Time 5 minutes mins
Servings: 1 smoothie
Course: Drink
Calories: 350
Ingredients Equipment Method Nutrition Notes

Ingredients
  

For the Smoothie
  • 1 cup cottage cheese A creamy base that's rich in protein
  • 2 tablespoons peanut butter Adds nutty flavor and healthy fats
  • 1 banana Provides natural sweetness and creaminess
  • 1 cup dairy or plant-based milk Use your favorite milk
  • 1 tablespoon honey or sweetener of choice Optional, customize sweetness
  • ½ teaspoon vanilla extract Enhances flavor profile

Equipment

  • Blender

Method
 

Step-by-Step Instructions
  1. Gather all your ingredients for the smoothie.
  2. Combine cottage cheese, peanut butter, banana, milk, honey, and vanilla extract in your blender.
  3. Blend on high speed for about 30 seconds until smooth.
  4. Taste and adjust sweetness as needed, blend again if necessary.
  5. Pour into a glass and serve immediately.

Nutrition

Serving: 1smoothieCalories: 350kcalCarbohydrates: 40gProtein: 20gFat: 12gSaturated Fat: 3gPolyunsaturated Fat: 2gMonounsaturated Fat: 7gCholesterol: 10mgSodium: 200mgPotassium: 600mgFiber: 5gSugar: 20gVitamin A: 500IUVitamin C: 10mgCalcium: 300mgIron: 1mg

Notes

For a creamy texture, chill your cottage cheese and milk beforehand or add ice for a cold smoothie.

Tried this recipe?

Let us know how it was!

Decadent Butter Pecan Cake Loaf with Cream Cheese Icing

January 16, 2026 by grace bellamy Leave a Comment

There’s something undeniably magical about the aroma of a cake baking in the oven, and my Butter Pecan Cake Loaf with Cream Cheese Icing is no exception. As the warmth envelops your kitchen, it invites both sweet nostalgia and mouthwatering anticipation. What I love most about this cake loaf is not just its tender crumb and delightful pecan crunch, but also the fact that it’s a perfect treat for any occasion—whether you’re hosting friends or simply indulging after a long day. With just 15 minutes of prep time, you can whip up a crowd-pleaser that will have everyone coming back for seconds. And let’s not forget the creamy icing that takes it to another level! Are you ready to dive into this slice of heaven?

Butter Pecan Cake Loaf with Cream Cheese Icing

Why is This Cake Loaf Irresistible?

Decadent flavors: Each bite of this Butter Pecan Cake Loaf bursts with rich vanilla and nutty goodness, making it an unforgettable treat.

Easy to make: With just 15 minutes of prep, this loaf fits perfectly into your busy schedule.

Perfect for sharing: Bring it to potlucks or serve it at brunch; it’s a guaranteed hit that keeps guests smiling!

Creamy icing: The luscious cream cheese icing adds a delightful tang that balances the sweetness, elevating the overall experience.

Versatile enjoyment: Whether enjoyed warm or at room temperature, this cake surprises with its incredible flavor at any time of day!

Try serving it alongside a warm cup of coffee or even with a scoop of ice cream for an indulgent dessert! Don't forget to pair it with delightful inspirations like Cottage Cheese Blueberry Cake for a sweet spread!

Butter Pecan Cake Loaf Ingredients

• Here’s everything you need to create this delightful Butter Pecan Cake Loaf with Cream Cheese Icing from scratch!

For the Cake

  • Chopped pecans – these add a delicious crunch and a nutty flavor to the batter.
  • All-purpose flour – gives the cake structure, ensuring it rises beautifully.
  • Granulated sugar – sweetens the loaf and contributes to its moist texture.
  • Baking powder – helps the cake rise, resulting in a light and fluffy loaf.
  • Baking soda – enhances the cake’s rise and complements the acidity of the buttermilk.
  • Salt – balances sweetness, elevating the overall flavor profile.
  • Vanilla extract – infuses the batter with a warm, aromatic flavor that is simply irresistible.
  • Buttermilk – adds tanginess and moisture, making each slice tender.
  • Unsalted butter – creates a rich flavor and buttery crumb in the cake.
  • Large eggs – provide structure and help bind all the ingredients together.

For the Cream Cheese Icing

  • Cream cheese – offers a creamy, tangy base for the icing that pairs perfectly with the sweet cake.
  • Powdered sugar – sweetens the icing while giving it a smooth texture that's easy to spread.
  • Milk – a splash helps achieve the desired consistency for the icing, making it easy to drizzle over the cake.

Get your ingredients ready and prepare for a baking adventure that will fill your home with the warm, inviting scent of butter and pecans!

Step‑by‑Step Instructions for Butter Pecan Cake Loaf with Cream Cheese Icing

Step 1: Preheat and Prepare
Begin by preheating your oven to 350°F (175°C). While the oven heats, take a moment to grease a loaf pan generously with butter or non-stick spray, ensuring the corners are well-coated. This preparation is crucial for the perfect release of your Butter Pecan Cake Loaf once it’s baked.

Step 2: Cream the Butter and Sugar
In a mixing bowl, use an electric mixer to cream together ½ cup of softened unsalted butter and 2 cups of granulated sugar until the mixture is light and fluffy, which should take about 3-5 minutes. This step is key for achieving that rich texture in your cake. Scrape down the sides of the bowl as needed to incorporate all the ingredients.

Step 3: Add Eggs and Vanilla
Next, beat in 2 large eggs, one at a time, and ensure each egg is fully incorporated before adding the next. Then, mix in 1 teaspoon of vanilla extract. This will add a delightful aroma to your Butter Pecan Cake Loaf, making it even more inviting as it bakes.

Step 4: Mix Dry Ingredients
In a separate bowl, whisk together 1 cup of all-purpose flour, 1 teaspoon of baking powder, ½ teaspoon of baking soda, and ½ teaspoon of salt. This dry mixture is essential for the right texture and flavor, so make sure to combine the ingredients well before proceeding.

Step 5: Combine Wet and Dry Mixtures
Gradually add the dry ingredients to the wet mixture, alternating with 1 cup of buttermilk. Start with the flour mixture and finish with flour. Mix until just combined, being careful not to overmix; you want the batter to be smooth but not completely uniform, which will help create a delightful texture in your Butter Pecan Cake Loaf.

Step 6: Fold in the Pecans
Gently fold in 1 cup of chopped pecans using a spatula, ensuring they are evenly distributed throughout the batter. This step adds a lovely crunch and nutty flavor that perfectly complements your cake. Be gentle to maintain the airiness of the batter while doing this.

Step 7: Pour and Smooth
Carefully pour the batter into the prepared loaf pan, using a spatula to smooth the top for an even bake. Aim for a level surface, as this helps the butter pecan cake rise uniformly. Visualize a smooth, glossy batter without any lumps to guide you.

Step 8: Bake to Perfection
Place the loaf pan in the preheated oven and bake for 50-60 minutes. Keep an eye on the cake, and once it turns a golden brown, perform a toothpick test; it should come out clean or with a few crumbs attached, indicating your Butter Pecan Cake Loaf is perfectly baked.

Step 9: Cool the Cake
After baking, remove the loaf from the oven and set it aside to cool in the pan for about 10-15 minutes. Then, invert the cake onto a wire rack to cool completely before icing. This cooling process is important as it prevents the icing from melting away.

Step 10: Prepare the Cream Cheese Icing
While the cake cools, make the cream cheese icing. In a mixing bowl, combine 8 oz of softened cream cheese, ½ cup of powdered sugar, and 1 teaspoon of milk. Mix until the mixture is smooth and creamy, ensuring no lumps remain, which will create a beautiful glaze for your cake.

Step 11: Icing the Cake
Once the cake is completely cooled, take your cream cheese icing and spread it generously over the top of the Butter Pecan Cake Loaf. Use a spatula to create swirls and peaks, giving it a homemade touch that’s as delightful to look at as it is to taste.

Step 12: Serve and Delight
With your Butter Pecan Cake Loaf beautifully iced, it's time to slice and serve. Whether enjoyed warm or at room temperature, this cake is sure to become a favorite at any gathering. Just imagine the smiles as you offer this delicious treat!

Butter Pecan Cake Loaf with Cream Cheese Icing

Make Ahead Options

Planning ahead? This Butter Pecan Cake Loaf with Cream Cheese Icing is an excellent choice for meal prep! You can prepare the cake batter up to 24 hours in advance. Simply mix the ingredients and store the batter in an airtight container in the refrigerator to maintain its freshness. Bake it when you’re ready; just remember to give it a few extra minutes in the oven if it’s chilled. The cream cheese icing can be made ahead as well; it stays good in the fridge for 3 days. When you're set to serve, let it warm to room temperature for 30 minutes before icing for that perfect creamy finish. Enjoy hassle-free baking while delighting your family with this delicious treat!

What to Serve with Butter Pecan Cake Loaf with Cream Cheese Icing

There's nothing quite like the comfort of pairing your delightful cake loaf with complementary dishes that elevate your meal experience.

  • Rich Coffee: A cup of hot coffee perfectly balances the sweet flavors of the cake, creating a cozy pairing for any time of day.
  • Vanilla Ice Cream: A scoop of creamy vanilla ice cream adds a delectable contrast to the warm pecan loaf, making each bite divine.
  • Fresh Berries: Juicy strawberries or raspberries offer a refreshing burst of flavor that cuts through the sweetness—a delightful contrast!
  • Homemade Whipped Cream: Light and airy, whipped cream adds a delicate touch that complements the creamy icing beautifully.

For a brunch gathering, consider serving it with Cinnamon Buns to create a sweet atmosphere. The warmth and spice will harmonize with your Butter Pecan Cake Loaf, making for a memorable experience.

  • Sparkling Lemonade: A fizzy, citrus drink adds zest to your dessert table, cleansing the palate and pairing wonderfully with the richness of the loaf.
  • Chocolate Ganache: Drizzle some velvety ganache over the cake for an extra indulgent treat. Its richness echoes the ice cream and enhances the pecans.
  • Creamy Coleslaw: A side of tangy coleslaw provides a crunchy texture and refreshing flavor, balancing the sweetness of your cake.
  • Caramel Sauce: Drizzle warm caramel sauce over each slice for an extra layer of decadence that will leave your taste buds tingling!

Butter Pecan Cake Loaf Substitutions

Feel free to get creative and customize this recipe to suit your taste preferences or dietary needs!

  • Gluten-Free: Substitute all-purpose flour with a 1:1 gluten-free flour blend for a deliciously tender cake.
    You won't lose the rich texture and flavor with this swap!

  • Nut-Free: Omit the pecans and try adding chocolate chips or dried fruit instead. This twist will maintain that delightful sweetness!

  • Dairy-Free: Use almond milk and a dairy-free butter substitute to make the cake completely plant-based and still irresistibly moist.
    Your friends won't even notice the difference!

  • Lower Sugar: Reduce the granulated sugar to 1 ½ cups or use a sugar alternative like coconut sugar for a healthier option.
    This will ease up the sweetness while keeping the cake deliciously enjoyable.

  • Spiced Delight: Add 1 teaspoon of cinnamon or nutmeg to the flour mixture for a warm spice infusion that complements the pecans beautifully.
    This is perfect for cozy fall gatherings!

  • Cream Cheese Substitutes: Swap the cream cheese icing for a simple glaze made of powdered sugar and lemon juice if you prefer something tangy on top.
    It’ll bring a whole new flavor profile to your cake!

  • Fudge Topping: Drizzle hot fudge sauce instead of icing for a decadent dessert experience that sweetens the deal.
    Just imagine that rich chocolate contrasting with the pecans!

Don’t forget to pair your slice with a steaming cup of coffee or a creamy scoop of vanilla ice cream for an indulgent treat, and consider serving it alongside delightful inspirations like Garlic Butter Chicken for a full culinary experience!

Expert Tips for Butter Pecan Cake Loaf

  • Toast Pecans: Toasting your chopped pecans for a few minutes enhances their flavor and adds a delightful crunch to your Butter Pecan Cake Loaf.

  • Room Temperature Ingredients: Ensure your butter, eggs, and cream cheese are at room temperature. This helps them mix together smoothly, resulting in a tender crumb.

  • Avoid Overmixing: Mix just until combined, especially after adding the dry ingredients. Overmixing can lead to a dense loaf instead of the light and fluffy texture you desire.

  • Check for Doneness: Use a toothpick to check doneness; it should come out clean or with a few moist crumbs, but not wet batter. This ensures your cake is perfectly baked every time.

  • Let It Cool: Allow the cake to cool in the pan for about 10-15 minutes before transferring it to a wire rack. This prevents it from breaking and helps retain moisture.

How to Store and Freeze Butter Pecan Cake Loaf

Fridge: Keep your Butter Pecan Cake Loaf covered in an airtight container or wrapped in plastic wrap for up to 3 days to maintain its moist texture and flavor.

Freezer: For longer storage, wrap the cooled cake loaf tightly in plastic wrap and then in aluminum foil. It can be frozen for up to 3 months. Thaw in the fridge overnight before serving.

Slicing: Consider slicing the loaf before freezing, so you can easily eat just one piece at a time without having to defrost the whole cake.

Reheating: To enjoy a warm slice, gently warm in the microwave for about 10-15 seconds or in a toaster oven until it’s heated through, enhancing that fresh-baked feel!

Butter Pecan Cake Loaf with Cream Cheese Icing

Butter Pecan Cake Loaf with Cream Cheese Icing Recipe FAQs

How do I choose the best pecans for the recipe?
Absolutely! Look for fresh, plump pecans that are slightly oily to the touch. Avoid any with dark spots or off smells, as these indicate spoilage. Buying pecans in bulk or from a trusted grocery store can ensure you get the best quality for your Butter Pecan Cake Loaf.

What is the best way to store the Butter Pecan Cake Loaf?
To maintain its delicious moisture and flavor, store your Butter Pecan Cake Loaf in an airtight container at room temperature for up to 3 days. If you prefer it chilled, you can refrigerate it, but be sure to wrap it well in plastic wrap to prevent it from drying out.

Can I freeze the Butter Pecan Cake Loaf?
Very much so! To freeze, wrap the cooled cake tightly in plastic wrap followed by aluminum foil. It can stay fresh for up to 3 months. For easy serving, consider slicing the loaf before freezing; this way, you can thaw just what you need! When you're ready to enjoy, simply move it to the fridge overnight to defrost.

What should I do if my cake sinks in the middle?
Don't worry, it happens to the best bakers! A cake sinking can be due to several factors: overmixing the batter, too much leavening agent, or opening the oven door too soon. To troubleshoot, make sure to mix gently, measure your ingredients accurately, and let the cake bake undisturbed for the full time. If you're unsure, a toothpick test for doneness should be your guide; it should come out clean or with a few moist crumbs.

Is this recipe suitable for those with nut allergies?
It's best to avoid this Butter Pecan Cake Loaf for anyone with nut allergies, as it contains pecans. If you’re looking to make a nut-free version, you could substitute the nuts with chocolate chips or additional spices like cinnamon for flavor. Just make sure to watch for other ingredients that might contain traces of nuts or allergens.

Butter Pecan Cake Loaf with Cream Cheese Icing

Decadent Butter Pecan Cake Loaf with Cream Cheese Icing

A delightful Butter Pecan Cake Loaf with Cream Cheese Icing that's perfect for any occasion.
Print Recipe Pin Recipe
Prep Time 15 minutes mins
Cook Time 1 hour hr
Cooling Time 15 minutes mins
Total Time 1 hour hr 30 minutes mins
Servings: 12 slices
Course: Dessert
Cuisine: American
Calories: 350
Ingredients Equipment Method Nutrition Notes

Ingredients
  

For the Cake
  • 1 cup chopped pecans these add a delicious crunch and nutty flavor
  • 2 cups all-purpose flour gives the cake structure
  • 2 cups granulated sugar sweetens the loaf
  • 1 teaspoon baking powder helps the cake rise
  • ½ teaspoon baking soda enhances the cake’s rise
  • ½ teaspoon salt balances sweetness
  • 1 teaspoon vanilla extract infuses the batter with flavor
  • 1 cup buttermilk adds tanginess and moisture
  • ½ cup unsalted butter creates a rich flavor
  • 2 large eggs provide structure
For the Cream Cheese Icing
  • 8 oz cream cheese offers a creamy base
  • ½ cup powdered sugar sweetens the icing
  • 1 teaspoon milk helps achieve desired consistency

Equipment

  • loaf pan
  • Mixing Bowl
  • Electric mixer
  • Whisk
  • spatula

Method
 

Step-by-Step Instructions
  1. Preheat your oven to 350°F (175°C) and grease a loaf pan.
  2. Cream together ½ cup of softened unsalted butter and 2 cups of granulated sugar until light and fluffy.
  3. Beat in 2 large eggs one at a time and mix in 1 teaspoon of vanilla extract.
  4. Whisk together 1 cup of all-purpose flour, 1 teaspoon of baking powder, ½ teaspoon of baking soda, and ½ teaspoon of salt.
  5. Gradually add dry ingredients to wet mixture, alternating with 1 cup of buttermilk.
  6. Fold in 1 cup of chopped pecans gently.
  7. Pour batter into the prepared loaf pan and smooth the top.
  8. Bake for 50-60 minutes until golden brown.
  9. Cool the cake in the pan for 10-15 minutes, then invert onto a wire rack.
  10. Prepare the icing by mixing 8 oz of softened cream cheese, ½ cup of powdered sugar, and 1 teaspoon of milk until smooth.
  11. Spread the icing over the cooled cake.
  12. Slice and serve, enjoying warm or at room temperature.

Nutrition

Serving: 1sliceCalories: 350kcalCarbohydrates: 45gProtein: 4gFat: 18gSaturated Fat: 10gPolyunsaturated Fat: 2gMonounsaturated Fat: 4gCholesterol: 80mgSodium: 230mgPotassium: 120mgFiber: 1gSugar: 25gVitamin A: 600IUCalcium: 60mgIron: 1mg

Notes

Toast pecans for enhanced flavor. Use room temperature ingredients for better mixing. Avoid overmixing for a light texture. Allow cooling to prevent icing from melting.

Tried this recipe?

Let us know how it was!

Delicious Taqueria Style Creamy Jalapeno Salsa Unleashed

January 16, 2026 by grace bellamy Leave a Comment

As I stood in my kitchen, the unmistakable aroma of fresh jalapeños filled the air, igniting a spark of inspiration. Today, I am thrilled to share my recipe for Taqueria Style Creamy Jalapeno Salsa—a perfect blend of heat and creaminess that elevates any dish. This mouthwatering salsa isn’t just quick to whip up; it also doubles as a versatile dip or sauce, easily brightening up tacos, burritos, or even grilled meats. The best part? It’s a crowd-pleaser, guaranteed to impress both family and friends at your next gathering. With just a handful of ingredients, you’ll have a tantalizing salsa that invites everyone to come back for more. Curious how to create this delightful treat? Let’s dive in!

Taqueria Style Creamy Jalapeno Salsa

Why is this salsa so irresistible?

Versatile and adaptable, this Taqueria Style Creamy Jalapeno Salsa complements a variety of dishes—from tacos to grilled meats, making it perfect for any meal or gathering. Quick and easy, you can whip it up in under 10 minutes, offering a delicious homemade option without the hassle. Bold flavor packs a punch from fresh jalapeños, while the creamy blend of sour cream and mayonnaise softens the heat, appealing to all taste buds. Perfect for sharing, it’s a crowd favorite that will keep your guests coming back for more, whether served with chips or as a zesty topping. Don’t forget to check out my tips on serving homemade tortilla chips for the ultimate pairing!

Taqueria Style Creamy Jalapeno Salsa Ingredients

Unlock the delicious flavors with these simple ingredients!

For the Salsa
• Fresh jalapeno peppers – 3 to 4, stems removed; adjust the number for desired heat level.
• Sour cream – 1 cup; brings a rich creaminess that balances the salsa's spice.
• Mayonnaise – ½ cup; adds a velvety texture that enhances the overall mouthfeel.
• Chopped fresh cilantro – ¼ cup; contributes a fresh herbal note that brightens the flavors.
• Lime juice – 1 tablespoon; adds acidity, essential for elevating the salsa's taste.
• Garlic powder – 1 teaspoon; provides depth and savory flavor that rounds out the dish.
• Onion powder – 1 teaspoon; complements the garlic with a mild sweetness.
• Salt – ½ teaspoon (or to taste); enhances all the flavors in this Taqueria Style Creamy Jalapeno Salsa.
• Black pepper – ¼ teaspoon (or to taste); introduces a slight kick without overpowering the salsa.

For Extra Heat
• Pickled jalapeno juice – Optional: 1 to 2 tablespoons; stir in for a more intense flavor profile.

Step‑by‑Step Instructions for Taqueria Style Creamy Jalapeno Salsa

Step 1: Prepare the Jalapenos
Start by washing 3 to 4 fresh jalapeno peppers and removing their stems. For a milder salsa, slice the peppers open and scoop out the seeds. If you prefer a spicier kick, leave the seeds intact. Cut the jalapenos into smaller pieces to make blending easier and set them aside.

Step 2: Combine Ingredients in Blender
Next, transfer the chopped jalapenos to a blender or food processor. If using pickled jalapeno juice for extra heat, add it now. Then, introduce 1 cup of sour cream, ½ cup of mayonnaise, and ¼ cup of chopped fresh cilantro into the blender along with 1 tablespoon of lime juice, 1 teaspoon each of garlic powder and onion powder, plus ½ teaspoon of salt and ¼ teaspoon of black pepper.

Step 3: Blend Until Smooth
With all ingredients in the blender, blend on high speed for about 30 to 60 seconds, or until the mixture is smooth and creamy. You might need to stop and scrape down the sides with a spatula to ensure all ingredients are fully incorporated. The vibrant green color and creamy texture signify that your Taqueria Style Creamy Jalapeno Salsa is nearly ready.

Step 4: Taste and Adjust Seasoning
After blending, taste your salsa to see if it needs any adjustments. You may want to add a pinch more salt, a splash of lime juice, or a bit more jalapeno juice for added heat. Blend again for a few seconds after each addition to ensure the flavors meld perfectly together, creating your desired flavor profile.

Step 5: Transfer to Serving Bowl
Once you’re satisfied with the flavor, pour the creamy jalapeno salsa into a serving bowl or an airtight container. This is the time when the vibrant colors and smooth texture will shine, making it visually inviting for serving.

Step 6: Refrigerate for Flavor Development
To enhance the overall taste of the salsa, refrigerate it for at least 30 minutes. This allows the flavors of the Taqueria Style Creamy Jalapeno Salsa to meld together beautifully, resulting in a more harmonious flavor profile and a refreshing chill.

Step 7: Serve and Enjoy
After the salsa has chilled, serve it cold as a delicious dip with crispy tortilla chips or use it as a zesty sauce for tacos, burritos, or grilled meats. The creamy texture and balanced heat will have everyone reaching for more at your next gathering.

Taqueria Style Creamy Jalapeno Salsa

Make Ahead Options

These Taqueria Style Creamy Jalapeno Salsa are perfect for busy weeknights and meal prep! You can prepare the salsa up to 3 days in advance, storing it in an airtight container in the refrigerator. Simply blend all the ingredients as instructed, and then refrigerate for at least 30 minutes to allow the flavors to develop. To maintain the salsa's freshness, ensure it’s well-covered to prevent any moisture loss or flavor dullness. When you’re ready to serve, just give it a quick stir and enjoy it with chips or as a zesty sauce for your favorite dishes. With these make-ahead tips, you’ll have a delightful, crowd-pleasing treat ready with minimal effort!

Storage Tips for Taqueria Style Creamy Jalapeno Salsa

Fridge: Store your Taqueria Style Creamy Jalapeno Salsa in an airtight container for up to 3 days. This preserves its freshness and flavor.

Freezer: For longer storage, freeze the salsa in a freezer-safe container for up to 2 months. Allow it to thaw in the refrigerator before use for the best texture.

Reheating: If you've frozen the salsa, simply thaw it overnight in the fridge. Give it a good stir before serving to restore its creamy consistency.

What to Serve with Taqueria Style Creamy Jalapeno Salsa

Picture a vibrant gathering filled with laughter, chips, and the creamy kick of homemade salsa that everyone loves.

  • Crispy Tortilla Chips: The perfect crunchy vessel for scooping up that rich, zesty salsa, enhancing the flavor experience.
  • Grilled Chicken Tacos: Tender, smoky grilled chicken complements the creamy jalapeno salsa, offering a delicious contrast in textures.
  • Fresh Guacamole: Creamy and rich, guacamole pairs beautifully with the kick of the salsa, creating a delightful flavor fiesta.

For an elevated experience, consider serving these dishes together for a full spread that will tantalize your taste buds. Enjoy the harmony of flavors created by the spicy, creamy salsa alongside these savory options.

  • Veggie Platter: Crisp, colorful veggies add freshness and crunch, balancing the richness of the salsa perfectly.
  • Chilled Beer: A refreshing beer offers a crisp, thirst-quenching contrast to the spicy intensity, making it the ultimate pairing.
  • Margaritas: The tangy sweetness of a classic margarita enhances the salsa's flavors while providing a celebratory touch to your meal.
  • Brownies: For dessert, fudgy brownies provide a sweet finish to the meal, rounding out the flavor contrasts beautifully.

Expert Tips for Taqueria Style Creamy Jalapeno Salsa

• Heat Control: Adjust the heat level by removing the jalapeno seeds for a milder flavor. Incorporate them if you’re craving a spicy kick!

• Flavor Boost: For an extra zesty flavor, consider adding fresh lime zest alongside the lime juice. It intensifies the taste and freshness of your Taqueria Style Creamy Jalapeno Salsa.

• Blend Thoroughly: Ensure you blend the salsa long enough to achieve a smooth, creamy consistency. Stop occasionally to scrape down the sides to incorporate all ingredients evenly.

• Chill Time Matters: Don’t skip refrigeration! Allow the salsa to chill for at least 30 minutes so the flavors meld together beautifully, enhancing your serving experience.

• Serving Suggestions: This salsa is a fantastic dip for tortilla chips but can also serve as a zesty sauce for tacos, burritos, or grilled meats, making it incredibly versatile!

Taqueria Style Creamy Jalapeno Salsa Variations

Feel free to elevate your salsa game with these delightful twists that can cater to your taste buds!

  • Dairy-Free: Swap sour cream with coconut yogurt for a creamy yet dairy-free version that adds a hint of sweetness.
  • Spicy Salsa: For extra heat, include finely chopped habaneros alongside the jalapeños; this will wake up your taste buds! Adjust the heat level to your liking, and enjoy the bold flavors that come through.
  • Herb-Infused: Add fresh dill or chives to the cilantro for a fragrant herb twist. It gives your salsa a refreshing taste that beautifully complements grilled meats.
  • Smoky Flavor: Incorporate smoked paprika into the blend for a subtle smokiness that enhances the jalapeño's flavor. It’s an exciting way to add depth without overwhelming the original taste.
  • Avocado Bliss: Blend in half a ripe avocado for a richer texture and a luscious, creamy flavor. This adds a delicious depth that both kids and adults will love.
  • Citrus Burst: For a zesty twist, add orange or grapefruit juice along with lime. This unique combination brightens the salsa and brings out the sweetness of the peppers!
  • Sweet and Spicy: Mix in a tablespoon of honey or agave syrup for a hint of sweetness that balances out the heat of the jalapeños. This unexpected burst can transform your salsa into a flavor sensation.
  • Roasted Option: Roast the jalapeños before blending for a deeper, charred flavor. This adds complexity and a deliciously smoky note to your Taqueria Style Creamy Jalapeno Salsa.

These flavorful twists will make your homemade salsa an irresistible hit at any gathering. Enjoy experimenting!

Taqueria Style Creamy Jalapeno Salsa

Taqueria Style Creamy Jalapeno Salsa Recipe FAQs

How do I select the right jalapeno peppers?
Look for fresh jalapeno peppers that are firm to the touch and free of dark spots or blemishes. The skin should be vibrant green, indicating ripeness. The more vibrant the color, the fresher the pepper will be! If you prefer a milder salsa, choose peppers that are glossy and firm, whereas those with more dullness or slight wrinkling may pack a spicier punch.

How should I store the Taqueria Style Creamy Jalapeno Salsa?
To keep your salsa fresh, store it in an airtight container in the refrigerator for up to 3 days. Ensure the container is sealed tightly to prevent air exposure, which can lead to spoilage. If you want to keep it longer, you can freeze it in a freezer-safe container for up to 2 months. When ready to enjoy it, thaw it in the refrigerator overnight, then stir well before serving!

Can I freeze my salsa? If so, how?
Absolutely! To freeze your Taqueria Style Creamy Jalapeno Salsa, pour it into a freezer-safe container, leaving some space at the top for expansion. Seal it tightly, and label it with the date. When you’re ready to use it, place the salsa in the refrigerator for approximately 8 hours or overnight to thaw. Once thawed, give it a good stir to restore its creamy consistency.

What if my salsa is too spicy or too bland?
If your salsa turns out too spicy, you can soften the heat by adding more sour cream or mayonnaise to balance the flavors. This will give it that creamy texture while mellowing the spice. On the flip side, if it’s bland, sprinkle in a little extra salt or more lime juice to brighten it up. Taste as you go, adjusting a little at a time until you find the perfect balance!

Taqueria Style Creamy Jalapeno Salsa

Delicious Taqueria Style Creamy Jalapeno Salsa Unleashed

Discover the irresistible Taqueria Style Creamy Jalapeno Salsa that's quick to prepare and perfect for dipping or as a sauce.
Print Recipe Pin Recipe
Prep Time 10 minutes mins
Refrigeration Time 30 minutes mins
Total Time 40 minutes mins
Servings: 8 servings
Course: Condiment
Cuisine: Mexican
Calories: 120
Ingredients Equipment Method Nutrition Notes

Ingredients
  

For the Salsa
  • 3-4 Fresh jalapeno peppers Stems removed; adjust for desired heat level.
  • 1 cup Sour cream Brings rich creaminess.
  • ½ cup Mayonnaise Adds velvety texture.
  • ¼ cup Chopped fresh cilantro Contributes a fresh herbal note.
  • 1 tablespoon Lime juice Adds acidity.
  • 1 teaspoon Garlic powder Provides depth of flavor.
  • 1 teaspoon Onion powder Complements garlic.
  • ½ teaspoon Salt Enhances flavors.
  • ¼ teaspoon Black pepper Introduces slight kick.
For Extra Heat
  • 1-2 tablespoons Pickled jalapeno juice Optional; stir in for more flavor.

Equipment

  • Blender
  • spatula
  • Airtight Container

Method
 

Step-by-Step Instructions
  1. Wash 3 to 4 fresh jalapeno peppers and remove their stems. For milder salsa, slice open and scoop out seeds. Cut into smaller pieces.
  2. Transfer chopped jalapenos to a blender. If using pickled jalapeno juice, add it now. Add 1 cup sour cream, ½ cup mayonnaise, and ¼ cup chopped cilantro, along with 1 tablespoon lime juice, 1 teaspoon garlic powder, 1 teaspoon onion powder, ½ teaspoon salt, and ¼ teaspoon black pepper.
  3. Blend on high speed for about 30 to 60 seconds or until smooth and creamy.
  4. Taste and adjust seasoning if needed.
  5. Pour into a serving bowl or an airtight container.
  6. Refrigerate for at least 30 minutes to enhance flavors.
  7. Serve cold with tortilla chips or as a sauce for tacos, burritos, or grilled meats.

Nutrition

Serving: 1cupCalories: 120kcalCarbohydrates: 5gProtein: 2gFat: 10gSaturated Fat: 2gPolyunsaturated Fat: 0.5gMonounsaturated Fat: 6gCholesterol: 10mgSodium: 200mgPotassium: 150mgFiber: 1gSugar: 1gVitamin A: 500IUVitamin C: 10mgCalcium: 50mgIron: 0.5mg

Notes

Adjust heat by removing jalapeno seeds for a milder flavor or incorporating them for more spice. Consider adding fresh lime zest for extra flavor.

Tried this recipe?

Let us know how it was!

Cinnamon Roll Protein Shake: A Creamy, Guilt-Free Delight

January 16, 2026 by grace bellamy Leave a Comment

As I stood in the kitchen, the aroma of warm cinnamon rolls wafted through my imagination, teasing my taste buds. What if I could capture that blissful flavor in a convenient drink? Enter the Cinnamon Roll Protein Shake, a delightful fusion that transforms this classic treat into a powerhouse of nutrition. Perfect for those bustling mornings or a post-workout boost, this shake not only offers a deliciously creamy texture but also packs a punch with 22 grams of protein to keep you energized. Plus, it’s dairy-free, making it a fantastic choice for anyone navigating dietary restrictions. Ready to blend up a healthier version of your favorite indulgence? Let’s dive into this delightful recipe!

Cinnamon Roll Protein Shake

Why is this shake a must-try?

Deliciously Creamy: This Cinnamon Roll Protein Shake perfectly captures the essence of warm cinnamon rolls, blending flavors that are simply irresistible.

Quick and Easy: With just five minutes of prep, you can whip up a nutritious shake that fits perfectly into your busy lifestyle.

Nutritious Boost: Packed with 22 grams of protein, this shake not only satisfies your sweet tooth but also fuels your body post-workout.

Dairy-Free Delight: A fantastic option for lactose-intolerant or vegan diets, offering everyone a chance to indulge without the guilt.

Versatile Enjoyment: Enjoy it breakfast-style or as a delightful snack; it’s the ideal pick-me-up anytime. Dive into this delightful shake, and don’t forget to check out other delicious lactose-free recipes for more inspiration!

Cinnamon Roll Protein Shake Ingredients

Unlock the secret to this delectable shake!

For the Shake

  • Almond milk – A creamy base that keeps this shake dairy-free and delicious.
  • Banana – Adds natural sweetness and a creamy texture.
  • Protein powder – Choose either plant-based or whey for a protein boost; this is key for enhancing the shake's nutrition.
  • Almond butter – Provides healthy fats and a nutty flavor that complements the cinnamon.
  • Ground cinnamon – The star spice that gives the shake its signature flavor reminiscent of cinnamon rolls.
  • Maple syrup – Use this optional sweetener for an extra touch of sweetness that pairs beautifully with cinnamon.
  • Ice cubes – Adjusts the thickness to your liking, making your Cinnamon Roll Protein Shake refreshingly cool.

Step‑by‑Step Instructions for Cinnamon Roll Protein Shake

Step 1: Combine Ingredients
In a blender, add 1 cup of almond milk as your creamy base. Then, slice in one ripe banana for natural sweetness along with 1 scoop of your favorite protein powder, whether plant-based or whey. Next, spoon in 1 tablespoon of almond butter and sprinkle in 1 teaspoon of ground cinnamon. If you desire additional sweetness, drizzle in a tablespoon of maple syrup, and prepare for a deliciously indulgent Cinnamon Roll Protein Shake.

Step 2: Blend Until Smooth
Secure the blender lid and blend all the ingredients on high for about 30-45 seconds. Keep an eye on the texture; you want it to be smooth and creamy without any lumps. This step is essential for achieving that rich consistency reminiscent of decadent cinnamon rolls—just close your eyes, and you’ll almost smell them baking!

Step 3: Adjust Thickness
Once your mixture is smooth, it's time to customize your shake’s thickness. Add a handful of ice cubes—start with 3-4 and blend again for an additional 15 seconds, checking in between. If you prefer a thicker Cinnamon Roll Protein Shake, feel free to add more ice and blend until you reach your desired consistency. It should be refreshing and cool!

Step 4: Serve and Enjoy
With your shake perfectly blended, pour the creamy goodness into a tall glass. For an added touch, you can sprinkle a little extra ground cinnamon on top or drizzle with a bit of maple syrup if you want to indulge even more. Now, it's time to savor every sip of this delightful Cinnamon Roll Protein Shake—perfect for breakfast or a post-workout treat!

Cinnamon Roll Protein Shake

Cinnamon Roll Protein Shake Variations

Feel free to get creative and customize this shake to suit your taste and dietary needs!

  • Nut-Free: Substitute almond butter with sunflower seed butter for a nut-free option that’s just as creamy.
  • Lower Sugar: Swap out the maple syrup for a few drops of stevia or monk fruit sweetener for a sugar-free alternative. This way, you still enjoy a touch of sweetness without the calories!
  • Extra Spice: Add a pinch of nutmeg or a dash of vanilla extract to enhance the flavor depth. It's like turning your shake into a festive treat!
  • Oatmeal Blend: Toss in a handful of rolled oats for added fiber and a heartier texture; this delicious twist keeps you fuller for longer.
  • Chocolate Lovers: Mix in a scoop of chocolate protein powder alongside the other ingredients for a delightful chocolate-cinnamon combination. It’s an adventure for your taste buds!
  • Green Goodness: Add a handful of spinach or kale for a nutrient boost without compromising flavor. The greens are practically invisible but add lots of vitamins!
  • Creamy Coconut: For a tropical twist, swap out almond milk for coconut milk and add shredded coconut. You'll feel like you’re on a beach vacation with each sip!
  • Spicy Kick: If you enjoy a bit of heat, include a pinch of cayenne pepper or ginger for an unexpected kick! The contrast with the sweet cinnamon is simply divine.

For more vibrant variations, be sure to check out our tasty banana-centric options or creative smoothie takes, each waiting to inspire your culinary adventure!

Storage Tips for Cinnamon Roll Protein Shake

Fridge: For the best taste, consume your Cinnamon Roll Protein Shake fresh. However, it can be stored in an airtight container in the fridge for up to 24 hours.

Reheating: If you prefer it warm, gently reheat your shake in the microwave for 15-30 seconds. Stir well and enjoy the creamy goodness!

Separation: If stored, you may notice some separation; simply give it a quick shake or stir before enjoying.

Freezer: For longer storage, pour the shake into ice cube trays and freeze. Blend a few cubes later for a quick, creamy treat!

What to Serve with Cinnamon Roll Protein Shake

Picture enjoying a creamy shake that mimics the warmth of freshly baked cinnamon rolls while surrounding it with delightful pairings that enhance the experience.

  • Avocado Toast: This hearty option adds healthy fats and a satisfying crunch, perfectly balancing the shake's creamy texture.
    The richness of avocado beautifully complements the sweetness of the shake, creating a harmonious breakfast experience.

  • Fresh Berries: A burst of tartness from strawberries or blueberries cuts through the shake's sweetness, refreshing your palate.
    These vibrant fruits not only look beautiful alongside the shake but also provide a boost of antioxidants.

  • Nutty Granola: A sprinkle of homemade or store-bought granola offers a delightful crunch and adds a layer of flavor to your meal.
    With each bite of granola, you’ll enjoy a contrast in texture that pairs wonderfully with the smooth shake.

  • Egg Muffins: Savory egg muffins packed with veggies make for a balanced and filling option alongside the shake.
    These protein-rich muffins provide a hearty counterpart, making your breakfast truly satisfying.

  • Chia Seed Pudding: This creamy and nutty pudding is a delightful addition that complements the shake's cinnamon tones.
    It provides an extra nutrition boost while maintaining a light and refreshing quality on your breakfast table.

  • Iced Coffee: If you're in need of a caffeine boost, pairing your shake with a refreshing iced coffee can elevate your morning ritual.
    The slight bitterness will balance the sweetness of the shake, creating a perfect morning beverage combo.

  • Dark Chocolate Square: For a touch of indulgence, a piece of dark chocolate elevates the experience with its rich and bitter notes.
    The semi-sweet chocolate adds a luxurious twist, making your breakfast feel extra special without the guilt.

  • Coconut Yogurt: Creamy coconut yogurt topped with nuts or seeds is a refreshing addition with tropical vibes to complement the shake.
    Its tanginess harmonizes beautifully with the shake’s sweetness, creating a delightful contrast in flavors.

Expert Tips for Cinnamon Roll Protein Shake

  • Choose the Right Protein: Select a protein powder that you enjoy. Both plant-based and whey options work well in this Cinnamon Roll Protein Shake.
  • Banana Ripeness Matters: Use a ripe banana for optimal sweetness and creaminess. Overripe bananas can add an extra flavor depth that enhances your shake.
  • Adjust to Your Taste: Feel free to modify the amount of maple syrup used based on your sweetness preference. Start with a little, and add more if needed to suit your palate.
  • Ice It Right: Don’t overcrowd with ice. Start with a small amount and blend to achieve your desired thickness; you can always add more if necessary.
  • Blend Thoroughly: Ensure all ingredients are well-blended to avoid lumps. A smooth texture is key to mimicking that beloved cinnamon roll experience.

Make Ahead Options

These Cinnamon Roll Protein Shake preparations are perfect for busy mornings or quick post-workout snacks! You can combine the dry ingredients—protein powder, ground cinnamon, and almond butter—up to 3 days in advance into a container for easy access. Simply store this mix in an airtight container to maintain freshness. When you’re ready to make your shake, add the dry mixture to the blender with 1 cup of almond milk and 1 banana, then blend until smooth. If you prefer, you can also prepare the shake itself and refrigerate it for up to 24 hours; just give it a quick stir or re-blend before serving to keep it creamy and delicious. Enjoy time-saving convenience without compromising taste!

Cinnamon Roll Protein Shake

Cinnamon Roll Protein Shake Recipe FAQs

How do I choose the right banana for this shake?
Absolutely! It's best to use a ripe banana for your Cinnamon Roll Protein Shake. Look for one that has a few brown spots but isn’t overly mushy. A ripe banana will add natural sweetness and a creamy texture that enhances the shake's flavor, making it reminiscent of fresh cinnamon rolls.

How long can I store my shake in the fridge?
The Cinnamon Roll Protein Shake is best enjoyed fresh, but if you need to store it, you can keep it in an airtight container in the refrigerator for up to 24 hours. Just remember that some separation may occur, so give it a good shake or stir before you enjoy it again!

Can I freeze the shake for later use?
Absolutely! If you want to save your Cinnamon Roll Protein Shake for later, pour it into ice cube trays and freeze. When you're ready for a quick treat, simply blend a few of those ice cubes together. This method also allows you to enjoy a creamy, chilled shake without any fuss.

What should I do if my shake turns out too thick or too thin?
No worries! If your shake is too thick, simply add a splash more almond milk and blend again until you reach your desired consistency. Conversely, if it’s too thin, toss in a handful of ice cubes and blend again. The more you adjust, the merrier your shake will be!

Are there any dietary considerations I should keep in mind?
Very! This Cinnamon Roll Protein Shake is not only dairy-free but also suitable for those with lactose intolerance or those following a vegan diet. If you have nut allergies, consider substituting almond butter with sunflower seed butter or peanut butter for a safe, yet delicious alternative.

Can I use a different type of protein powder?
Certainly! You have the flexibility to use either plant-based or whey protein powder based on your preference. If you're looking for a vegan option, make sure the protein powder is marked as dairy-free. Either choice will add a great protein boost, so it’s all about what suits your taste buds!

Cinnamon Roll Protein Shake

Cinnamon Roll Protein Shake: A Creamy, Guilt-Free Delight

The Cinnamon Roll Protein Shake offers a creamy, guilt-free delight packed with flavor and 22 grams of protein.
Print Recipe Pin Recipe
Prep Time 5 minutes mins
Total Time 5 minutes mins
Servings: 1 shake
Course: Drink
Cuisine: American
Calories: 300
Ingredients Equipment Method Nutrition Notes

Ingredients
  

For the Shake
  • 1 cup Almond milk A creamy base that keeps this shake dairy-free and delicious.
  • 1 Banana Adds natural sweetness and a creamy texture.
  • 1 scoop Protein powder Choose either plant-based or whey for a protein boost.
  • 1 tablespoon Almond butter Provides healthy fats and a nutty flavor.
  • 1 teaspoon Ground cinnamon The star spice that gives the shake its signature flavor.
  • 1 tablespoon Maple syrup Optional sweetener for an extra touch of sweetness.
  • 3-4 Ice cubes Adjusts the thickness to your liking.

Equipment

  • Blender

Method
 

Step‑by‑Step Instructions
  1. In a blender, add almond milk as your creamy base. Then, slice in one ripe banana, add protein powder, almond butter, and ground cinnamon. If desired, drizzle in maple syrup.
  2. Secure the blender lid and blend all the ingredients on high for about 30-45 seconds until smooth and creamy.
  3. Add a handful of ice cubes to adjust thickness; blend again for 15 seconds until you reach desired consistency.
  4. Pour the creamy shake into a tall glass. Optionally, sprinkle extra ground cinnamon or drizzle with maple syrup before serving.

Nutrition

Serving: 1shakeCalories: 300kcalCarbohydrates: 35gProtein: 22gFat: 10gSaturated Fat: 1gPolyunsaturated Fat: 2gMonounsaturated Fat: 7gSodium: 150mgPotassium: 500mgFiber: 4gSugar: 15gVitamin C: 10mgCalcium: 30mgIron: 10mg

Notes

Best consumed fresh, but can be stored in an airtight container in the fridge for up to 24 hours.

Tried this recipe?

Let us know how it was!

Savor the Sweet Heat of Hot Honey Chicken Bowl

January 16, 2026 by grace bellamy Leave a Comment

As the aroma of sizzling chicken fills my kitchen, I can't help but smile at the magic of home cooking. Today, I'm excited to share my recipe for a Hot Honey Chicken Bowl that’s perfect for anyone looking to elevate their dinner game while keeping it simple and satisfying. With just a handful of fresh ingredients, this dish not only delivers a balanced meal with vibrant veggies and tender chicken but also boasts the delightful kick of sweet heat that brings comfort to the table. Plus, it’s a great option for meal prep or a crowd-pleaser at your next gathering. So, are you ready to dive into a deliciously wholesome bowl that everyone will rave about? Let’s get cooking!

Hot Honey Chicken Bowl

Why is the Hot Honey Chicken Bowl a Must-Try?

Unique Flavor Fusion: This dish brings together the sweet heat of hot honey with savory chicken for a taste that’s hard to resist.

Quick and Easy: With just 15 minutes of prep, you can whip up a nutritious meal that's less fuss and more flavor.

Recipe Versatility: Great for adapting; try swapping in your favorite veggies or adding spices to make it your own!

Crowd-Pleasing Meal: Whether it’s a cozy family dinner or a potluck, this bowl is sure to impress everyone at your table.

Perfect for Meal Prep: Make it ahead and simply reheat for a quick lunchtime fix during your busy week. For more easy meal prep ideas, check out our roundup!

Get ready to enjoy this vibrant bowl that hits all the marks on flavor, nutrition, and satisfaction!

Hot Honey Chicken Bowl Ingredients

• Let's gather what you need to create this delicious bowl!

For the Chicken

  • Chicken breasts – A versatile protein that stays juicy when marinated with the hot honey.
  • Hot honey – Adds a sweet, spicy touch that elevates the entire dish; try homemade for an extra kick.
  • Soy sauce – Brings a savory depth to the marinade, enhancing the overall flavor profile.
  • Apple cider vinegar – Adds tanginess that balances the sweetness of the hot honey.

For the Rice and Veggies

  • Jasmine rice – Fluffy and fragrant, it's the perfect base for this colorful bowl.
  • Broccoli florets – Offers crunch and vibrant color, plus a healthy dose of nutrients.
  • Red bell pepper – Sweet and colorful, it brightens up your meal and adds vitamins.
  • Red onion – Provides a lovely sweetness once sautéed, complementing the other flavors nicely.

For Seasoning

  • Olive oil – Used for cooking; it adds richness and prevents sticking.
  • Garlic powder – Gives that aromatic pop to the chicken seasoning that everyone loves.
  • Onion powder – Enhances the savory flavor of the dish without overpowering other ingredients.
  • Smoked paprika – Adds a subtle smokiness that pairs beautifully with the hot honey.

For Garnish and Serving

  • Fresh cilantro – Brightens up the dish with fresh flavor and a pop of color.
  • Sesame seeds – Offers a delightful crunch and adds visual appeal to your bowl.
  • Lime wedges – A squeeze of lime right before you dig in elevates the flavors to new heights!

With these ingredients gathered, you're on your way to creating a heartwarming Hot Honey Chicken Bowl that will tantalize your taste buds and make meal times memorable!

Step‑by‑Step Instructions for Hot Honey Chicken Bowl

Step 1: Marinate the Chicken
In a medium bowl, whisk together the hot honey, soy sauce, and apple cider vinegar until combined. Place the chicken breasts in a zip-lock bag or shallow dish, pour the marinade over them, and seal or cover tightly. Refrigerate the chicken for at least 30 minutes, or up to 2 hours, allowing the flavors to meld beautifully for the Hot Honey Chicken Bowl.

Step 2: Prep the Vegetables
While the chicken marinates, rinse the broccoli florets under cool water and pat dry. Slice the red bell pepper and red onion into thin strips, making them visually appealing and easy to sauté. Set the prepped vegetables aside, ready to add a colorful crunch to your Hot Honey Chicken Bowl.

Step 3: Cook the Jasmine Rice
Prepare the jasmine rice according to package instructions, typically involving rinsing and simmering in water for about 15 minutes until fluffy and tender. Once it's cooked, remove it from heat and keep it warm, as this will serve as the hearty base for your delicious Hot Honey Chicken Bowl.

Step 4: Sear the Chicken
In a large skillet, heat 2 tablespoons of olive oil over medium-high heat until shimmering. Take the marinated chicken out of the fridge, discarding the leftover marinade. Season both sides of the chicken with garlic powder, onion powder, smoked paprika, salt, and black pepper. Cook for about 6-7 minutes per side, until the chicken is golden-brown and reaches an internal temperature of 165°F (75°C). Remove it from the skillet and allow it to rest.

Step 5: Sauté the Vegetables
Using the same skillet, add the remaining 1 tablespoon of olive oil. As the oil heats, toss in the sliced red onion, bell pepper, and broccoli florets. Sauté for 5-6 minutes, stirring occasionally, until the vegetables are tender yet still crisp. They will add a delightful freshness and color to your Hot Honey Chicken Bowl.

Step 6: Thicken the Marinade
While the vegetables are cooking, return to the reserved marinade. Pour it into a small saucepan and heat over medium heat until it begins to simmer. Let it cook for about 2-3 minutes or until slightly thickened. This will create a delicious drizzle for your Hot Honey Chicken Bowl, enhancing every bite.

Step 7: Assemble the Bowls
To create your Hot Honey Chicken Bowl, start by placing a scoop of warm jasmine rice in each bowl as the base. Top it generously with the sautéed vegetables and sliced chicken, ensuring a colorful presentation that invites everyone to dig in.

Step 8: Drizzle and Garnish
Finally, pour the thickened hot honey marinade over the chicken and vegetables, allowing the sweet heat to coat everything. Sprinkle fresh cilantro and sesame seeds for a vibrant finish, and serve with lime wedges on the side for an extra burst of flavor. Enjoy your beautifully crafted Hot Honey Chicken Bowl!

Hot Honey Chicken Bowl

Expert Tips for the Hot Honey Chicken Bowl

  • Marinate Wisely: Ensure the chicken is marinated for at least 30 minutes; this helps the flavors penetrate deeper for a tastier Hot Honey Chicken Bowl.
  • Cooking Temp: Use medium-high heat when searing the chicken to achieve a perfect golden-brown crust without drying it out.
  • Crisp Veggies: Avoid overcooking the vegetables; they should remain tender yet crisp for the perfect texture contrast in your bowl.
  • Thickening Marinade: Simmer the reserved marinade gently on medium heat to thicken it without burning; this adds depth to your dish!
  • Garnish Generously: Don’t skip on the fresh cilantro and sesame seeds—they enhance both the flavor and presentation of your Hot Honey Chicken Bowl.

Make Ahead Options

These Hot Honey Chicken Bowls are a fantastic meal prep solution for busy home cooks! You can marinate the chicken up to 24 hours in advance, just be sure to keep it sealed in the refrigerator to lock in that delicious flavor. Additionally, the vegetables can be chopped and stored in an airtight container for up to 3 days, which preserves their freshness and crunch. When you're ready to serve, simply cook the marinated chicken and sauté the prepped vegetables, following the remaining instructions. This way, you’ll have a warm, satisfying meal ready in no time, perfect for those hectic weeknights!

How to Store and Freeze Hot Honey Chicken Bowl

Fridge: Store leftover Hot Honey Chicken Bowl in an airtight container in the fridge for up to 3 days. Make sure to keep the rice, chicken, and veggies separate to maintain texture.

Freezer: If you want to freeze, place the chicken and veggies in a freezer-safe bag or container without the rice. It will keep well for up to 2 months.

Reheating: To reheat, thaw in the fridge overnight, then warm up in a skillet over low heat or in the microwave until heated through. Add a splash of water to the rice to keep it moist.

Assemble Fresh: For the best flavor and texture, it's recommended to cook fresh rice when you reheat the chicken and veggies for your Hot Honey Chicken Bowl.

What to Serve with Hot Honey Chicken Bowl

Elevate your dining experience with delicious sides that bring out the best flavors in this hearty meal.

  • Crispy Garlic Roasted Potatoes: Crunchy on the outside, soft inside, these potatoes add a delightful contrast to the bowl’s tender ingredients. The garlic flavor introduces an aromatic richness.

  • Sautéed Green Beans: Their vibrant color and crisp freshness balance the sweetness of the hot honey, adding a healthful crunch that’s hard to resist. They're quick to prepare and perfect for any occasion.

  • Asian Cucumber Salad: This light and refreshing salad made with thinly sliced cucumbers and rice vinegar creates a cool counterpart to the bowl’s heat, stimulating your palate.

  • Mango Salsa: The sweet and juicy flavors of fresh mango combined with lime and cilantro provide a fruity zing, enhancing your bowl's overall taste while embracing those tropical vibes.

  • Creamy Avocado Toast: Smooth and rich, avocado on warm toasted bread offers a wonderful textural contrast and adds healthy fats that complement the protein-rich bowl beautifully.

  • Lime-infused Water: Staying hydrated with this refreshing drink enhances the meal's flavor profile and helps cleanse the palate between bites of hearty goodness in your Hot Honey Chicken Bowl.

  • Chocolate Lava Cake: For dessert, imagine breaking into a warm, molten chocolate cake. Its decadence is a lovely way to end your meal on a sweet note, balancing the spice of the chicken bowl perfectly.

Hot Honey Chicken Bowl Variations

Feel free to customize your bowl and unleash your culinary creativity with these tempting twists and substitutions!

  • Dairy-Free: Replace the traditional garnishes with avocado slices for creaminess that complements the sweetness.

  • Spicy Kick: Add sliced jalapeños or a dash of cayenne pepper to the marinade to bring an extra layer of heat that spice-loving pals will adore.

  • Vegetarian: Swap out chicken for marinated tofu or tempeh to create a plant-based version bursting with flavor; marinated tofu absorbs the sweet heat beautifully.

  • Whole Grain Base: Use quinoa or brown rice instead of jasmine rice to amp up the nutty flavors and nutritional benefits of your Hot Honey Chicken Bowl.

  • Crunchy Add-In: Toss in some roasted chickpeas or crushed peanuts for a delightful crunch that contrasts with the tender chicken and veggies.

  • Zestier Finish: Opt for a sprinkle of lime zest along with lime wedges to really brighten the flavor profile; it adds a refreshing zing!

  • Sweet & Tart: Include diced mango or pineapple as a topping; their sweetness perfectly balances out the spicy notes of the hot honey.

  • Heat Level: For a milder taste, use regular honey instead of hot honey for those who prefer a softer touch of sweetness.

Creating your own Hot Honey Chicken Bowl allows for endless possibilities. Experimenting here means you’ll find a flavor combination you'll fall in love with! If you’re searching for more dinner ideas to keep tummies happy, check out my collection of easy dinner recipes for more inspiration.

Hot Honey Chicken Bowl

Hot Honey Chicken Bowl Recipe FAQs

How do I select the best chicken for my Hot Honey Chicken Bowl?
When choosing chicken breasts, look for ones that are plump and have a pinkish color. Avoid any that have dark spots or seem slimy. Fresh chicken should not have an off smell, so trust your nose! If you're using frozen chicken, make sure to thaw it completely before marinating for even flavor absorption.

How can I store leftovers of the Hot Honey Chicken Bowl?
Absolutely! Store your leftover Hot Honey Chicken Bowl in an airtight container in the fridge for up to 3 days. It’s best to separate the components: keep the rice, chicken, and veggies stored individually. This way, everything maintains its freshness, and you can reheat them without making the chicken soggy.

Can I freeze the Hot Honey Chicken Bowl?
Yes! For freezing, place the cooked chicken and sautéed vegetables in a freezer-safe bag or container for up to 2 months. However, I recommend cooking fresh rice when you're ready to enjoy it again for better taste and texture. To reheat, thaw the mixture in the fridge overnight and warm it gently in a skillet or microwave.

What should I do if my chicken isn’t cooking evenly?
If you find that your chicken isn’t cooking evenly, it could be due to uneven thickness. To tackle this, I suggest pounding the chicken breasts to an even thickness before marinating. This ensures they cook at the same rate and avoids overcooking the thinner parts while waiting for the thicker parts to cook through.

Are there any allergy considerations for the Hot Honey Chicken Bowl?
If you or others at your table have allergies, it's good to know that this recipe features several common allergens. Be cautious with soy sauce, as it contains gluten. You can use a gluten-free soy sauce alternative if needed. If you’re serving this to pets, avoid giving them the hot honey, as sugary foods aren't ideal for them.

How can I make the Hot Honey Chicken Bowl healthier?
Very! To enhance the health factor, consider adding more veggies like spinach or red cabbage for added nutrients. You can also swap jasmine rice for quinoa or cauliflower rice for a lower-carb option. Lastly, reduce the amount of hot honey in the marinade if you're looking to cut back on sugar, then drizzle just enough for flavor.

Hot Honey Chicken Bowl

Savor the Sweet Heat of Hot Honey Chicken Bowl

Elevate your dinner with this Hot Honey Chicken Bowl, combining sweet heat and savory chicken for a satisfying meal.
Print Recipe Pin Recipe
Prep Time 15 minutes mins
Cook Time 30 minutes mins
Marinating Time 30 minutes mins
Total Time 1 hour hr 15 minutes mins
Servings: 4 bowls
Course: Main Dishes
Cuisine: American
Calories: 450
Ingredients Equipment Method Nutrition Notes

Ingredients
  

For the Chicken
  • 2 pieces Chicken breasts A versatile protein that stays juicy when marinated with hot honey.
  • ½ cup Hot honey Adds a sweet, spicy touch.
  • ¼ cup Soy sauce Brings savory depth to the marinade.
  • 2 tablespoons Apple cider vinegar Adds tanginess to balance the sweetness.
For the Rice and Veggies
  • 1 cup Jasmine rice The perfect base for this colorful bowl.
  • 2 cups Broccoli florets Offers crunch and vibrant color.
  • 1 piece Red bell pepper Adds sweetness and brightens the meal.
  • 1 piece Red onion Provides sweetness when sautéed.
For Seasoning
  • 3 tablespoons Olive oil Used for cooking; adds richness.
  • 1 teaspoon Garlic powder Gives an aromatic pop.
  • 1 teaspoon Onion powder Enhances savory flavor.
  • 1 teaspoon Smoked paprika Adds subtle smokiness.
For Garnish and Serving
  • ¼ cup Fresh cilantro Adds fresh flavor and a pop of color.
  • 2 tablespoons Sesame seeds Offers crunch and visual appeal.
  • 2 pieces Lime wedges For an extra burst of flavor.

Equipment

  • Medium bowl
  • skillet
  • small saucepan
  • Rice cooker

Method
 

Preparation Steps
  1. In a medium bowl, whisk together the hot honey, soy sauce, and apple cider vinegar until combined. Place the chicken breasts in a zip-lock bag or shallow dish, pour the marinade over them, and seal or cover tightly. Refrigerate for at least 30 minutes.
  2. Rinse the broccoli florets under cool water and pat dry. Slice the red bell pepper and red onion into thin strips.
  3. Prepare the jasmine rice according to package instructions, typically involving rinsing and simmering in water for about 15 minutes until fluffy and tender.
  4. In a large skillet, heat 2 tablespoons of olive oil over medium-high heat. Take the marinated chicken out of the fridge, discarding the leftover marinade. Season both sides with garlic powder, onion powder, smoked paprika, salt, and black pepper. Cook for about 6-7 minutes per side until golden-brown and cooked through.
  5. In the same skillet, add the remaining 1 tablespoon of olive oil. Toss in the sliced red onion, bell pepper, and broccoli florets. Sauté for 5-6 minutes until tender yet crisp.
  6. Pour the reserved marinade into a small saucepan and heat over medium heat until it simmers. Cook for about 2-3 minutes or until slightly thickened.
  7. To assemble, place warm jasmine rice as the base in each bowl. Top with sautéed vegetables and sliced chicken, ensuring a colorful presentation.
  8. Drizzle the thickened hot honey marinade over the chicken and vegetables. Sprinkle with fresh cilantro and sesame seeds, and serve with lime wedges.

Nutrition

Serving: 1bowlCalories: 450kcalCarbohydrates: 55gProtein: 30gFat: 14gSaturated Fat: 2gPolyunsaturated Fat: 3gMonounsaturated Fat: 8gCholesterol: 80mgSodium: 800mgPotassium: 700mgFiber: 5gSugar: 9gVitamin A: 2500IUVitamin C: 80mgCalcium: 70mgIron: 2mg

Notes

Marinate the chicken for at least 30 minutes for deeper flavor. Cook fresh rice when reheating leftovers for best results.

Tried this recipe?

Let us know how it was!

Gingerbread Cake with Cinnamon Molasses Frosting Magic

January 16, 2026 by grace bellamy Leave a Comment

As I sifted through my spice cabinet, the warm scents of ginger and cinnamon enveloped me like a cozy blanket, transporting me straight to the holidays. There’s something incredibly special about making a Gingerbread Cake with Cinnamon Molasses Frosting—a delightful twist on the traditional gingerbread that captures the essence of festive baking. Not only is this recipe easy to whip together for unexpected guests, but its rich, spiced layers draped in creamy frosting make it an instant crowd-pleaser. Moreover, the joy of crafting this cake can turn any ordinary day into a holiday celebration, no matter the season. Are you ready to fill your kitchen with the comforting aroma of spices and indulge in a slice of nostalgia? Let’s get baking!

Gingerbread Cake with Cinnamon Molasses Frosting

Why is Gingerbread Cake a Holiday Favorite?

Irresistible Aroma: As it bakes, the spiced scent fills your home, making it impossible to resist.

Delightful Frosting: The Cinnamon Molasses Frosting adds a creamy, sweet layer that's perfect for any gingerbread lover.

Versatile Treat: Whether it's a festive gathering or a cozy night in, this cake fits every occasion beautifully.

Simple Preparation: With just a handful of ingredients and straightforward steps, you’ll have this cake ready in no time!

Crowd-Pleasing Flavor: Packed with traditional spices, it's a dessert that appeals to all ages, making it a guaranteed hit.

Experience the magic of holiday baking with this show-stopping Gingerbread Cake with Cinnamon Molasses Frosting.

Gingerbread Cake with Cinnamon Molasses Frosting Ingredients

• Dive into baking magic with these delightful ingredients!

For the Cake

  • All-purpose flour – Essential for the cake's structure, ensuring a light and fluffy texture.
  • Ground ginger – Provides that warm, spicy kick we all love in gingerbread cake.
  • Ground cinnamon – Adds a sweet aroma that's synonymous with holiday baking.
  • Ground nutmeg – A pinch brings a hint of warmth to complement the ginger and cinnamon.
  • Ground cloves – Enhances the spiciness, making every bite a flavorful experience.
  • Baking soda – Helps the cake rise, giving it that perfect fluffy consistency.
  • Baking powder – Works alongside baking soda to ensure the cake rises beautifully.
  • Salt – Balances the sweetness and enhances the overall flavor profile.
  • Unsalted butter – Adds richness and moisture; ensure it's softened for easy mixing.
  • Brown sugar – For a deep, caramel-like sweetness that pairs perfectly with molasses.
  • Large eggs – Adds moisture and acts as a binding agent for the cake.
  • Unsulfured molasses – The star of this recipe, giving the cake its characteristic flavor and moisture.
  • Hot water – Helps blend the batter smoothly, making it easier to combine with dry ingredients.

For the Cinnamon Molasses Frosting

  • Unsalted butter – Softened to create a creamy base for the frosting.
  • Cream cheese – Adds a tangy flavor that perfectly complements the sweetness.
  • Powdered sugar – Sweetens the frosting while providing a smooth texture.
  • Unsulfured molasses – Deepens the flavor and creates that luscious, gooey goodness.
  • Ground cinnamon – Infuses warmth and pairs beautifully with the molasses.
  • Vanilla extract – A classic addition that enhances all the flavors beautifully.
  • Milk – Only add as needed to adjust frosting consistency to your liking.

Let the baking adventure begin with this Gingerbread Cake that’s sure to impress your family and friends!

Step‑by‑Step Instructions for Gingerbread Cake with Cinnamon Molasses Frosting

Step 1: Preheat the Oven
Begin by preheating your oven to 350°F (175°C). While the oven is warming up, take a 9x13 inch baking pan or two 9-inch round cake pans, and generously grease and flour them. This ensures that your Gingerbread Cake with Cinnamon Molasses Frosting will come out perfectly and not stick to the pan.

Step 2: Prepare the Dry Ingredients
In a large mixing bowl, combine 2 ½ cups of all-purpose flour, 2 teaspoons of ground ginger, 1 teaspoon of ground cinnamon, ½ teaspoon of ground nutmeg, ½ teaspoon of ground cloves, 1 teaspoon of baking soda, 1 teaspoon of baking powder, and ½ teaspoon of salt. Sift these dry ingredients together thoroughly, then set the bowl aside. This step helps evenly distribute the spices, giving your cake a lovely flavor.

Step 3: Cream Butter and Sugar
In another large mixing bowl, take 1 cup of softened unsalted butter and 1 ½ cups of packed brown sugar, and beat them together until light and fluffy. This should take about 3 to 5 minutes using a hand mixer or stand mixer on medium speed. You’ll know it’s ready when the mixture is pale and creamy, indicating air has been whipped in for a light texture.

Step 4: Add Eggs
Next, crack in 2 large eggs one at a time, mixing well after each addition to ensure they are fully incorporated. Use a spatula to scrape down the sides of the bowl as needed. This process enriches the batter, providing moisture and binding the ingredients for your Gingerbread Cake.

Step 5: Incorporate Molasses
Now, mix in 1 cup of unsulfured molasses until fully combined. The deep, rich flavor of the molasses is what makes this Gingerbread Cake so delightful. Blend well until the batter achieves a smooth consistency, wrapping those spices within the mixture.

Step 6: Combine Wet and Dry Ingredients
Gradually add the dry mixture to the wet ingredients, alternating with 1 cup of hot water. Start and end with the flour mixture. Mix gently until just combined—be careful not to overmix, as this can lead to a denser cake. The batter should appear thick but smooth and shiny.

Step 7: Prepare to Bake
Pour the batter into your prepared baking pan(s), smoothing the top with a spatula. Make sure the batter is evenly distributed to promote even baking. Your Gingerbread Cake is now ready to go into the oven.

Step 8: Bake the Cake
Place the pan in the preheated oven and bake for 30 to 35 minutes. Keep an eye on it, and test for doneness by inserting a toothpick into the center; it should come out clean when the cake is ready. The top will appear slightly domed and will spring back when gently pressed.

Step 9: Cool the Cake
Once baked, allow the cake to cool in the pan for about 10 minutes. This resting period lets the cake firm up. Afterward, carefully transfer it to a wire rack to cool completely. Patience is key here, as frosting a warm cake may result in melted frosting.

Step 10: Make the Frosting
While the cake cools, prepare your Cinnamon Molasses Frosting. In a mixing bowl, beat together ½ cup of softened butter and ¼ cup of cream cheese until the mixture is smooth and creamy. This frosting will add a luscious layer to your cake, enhancing its warmth and flavors.

Step 11: Add Sugar and Molasses
Now, gradually incorporate 2 cups of powdered sugar and ¼ cup of unsulfured molasses, mixing until the frosting is smooth and creamy. If you find the frosting to be too thick, add milk 1 tablespoon at a time until you achieve your desired consistency. This will ensure every bite is perfectly sweet and fluffy.

Step 12: Frost the Cake
Once your Gingerbread Cake has cooled completely, spread the cinnamon molasses frosting evenly over the top of the cake. If you baked layers, feel free to frost between them as well. Let the frosting set a bit before serving, allowing those lovely flavors to meld beautifully.

Gingerbread Cake with Cinnamon Molasses Frosting

Expert Tips for Gingerbread Cake

  • Avoid Overmixing: When combining wet and dry ingredients, mix gently until just combined to keep your Gingerbread Cake light and fluffy.

  • Temperature Matters: Ensure your butter and eggs are at room temperature for easy incorporation, leading to a smoother batter.

  • Measure Accurately: Use a kitchen scale or proper measuring cups for flour and sugar; inaccurate measurements can alter the cake’s texture.

  • Cool Completely: Let your cake cool fully before adding the frosting; warm cake can cause the frosting to melt and lose its shape.

  • Frosting Consistency: If your Cinnamon Molasses Frosting is too thick, slowly add milk until you reach a spreadable consistency for perfect coverage.

Embrace the joy of baking with this flavorful Gingerbread Cake with Cinnamon Molasses Frosting!

Make Ahead Options

These Gingerbread Cakes with Cinnamon Molasses Frosting are perfect for meal prep, allowing you to savor the holiday spirit without the last-minute rush! You can bake the cake up to 3 days in advance; simply allow it to cool completely, then tightly wrap it in plastic wrap and refrigerate to maintain moisture. The frosting can also be prepared a day ahead—store it in an airtight container in the refrigerator. When you’re ready to serve, simply let the cake and frosting sit at room temperature for about 30 minutes before frosting. This way, you'll have your Gingerbread Cake just as delicious, ready to impress your loved ones while saving precious time on busy weeknights!

What to Serve with Gingerbread Cake with Cinnamon Molasses Frosting

Elevate your holiday meal with delightful pairings that amplify the cozy flavors of your gingerbread creation.

  • Rich Hot Cocoa: The creamy texture melds beautifully with the spiced cake, creating a comforting, festive beverage. A sprinkle of marshmallows on top adds that extra touch of sweetness.

  • Vanilla Ice Cream: A scoop of rich ice cream contrasts beautifully with the warm spices, enhancing each slice with a luscious creaminess that balances flavors beautifully.

  • Spiced Apple Cider: This warm drink blossoms with flavors of cinnamon and cloves, complementing your cake’s spices and filling your home with festive cheer.

  • Candied Pecans: These add a sweet crunch that contrasts perfectly with the cake’s soft texture, providing a delightful texture combination that elevates your dessert experience.

  • Maple Whipped Cream: A dollop of this lightly sweetened cream adds a light texture and impressive flavor pair, complimenting the richness of the frosting so well.

  • Caramel Sauce Drizzle: A sweet and gooey enhancement over the frosting adds indulgence to each bite, taking this classic dessert to a new level of decadence.

  • Fresh Fruit Salad: Bright, juicy fruits like apples, pears, and citrus offer refreshing flavors that cleanse the palate while enhancing the spices in your gingerbread.

  • Nutty Black Tea: A warm cup enhances the spiced notes of your cake, making a cozy pairing to enjoy as you savor sweet memories together.

Indulging in these pairings will surely create a memorable feast for you and your loved ones!

How to Store and Freeze Gingerbread Cake

Room Temperature: Store the Gingerbread Cake covered at room temperature for up to 3 days, ensuring it's kept in a cool, dry place to maintain its moist texture.

Fridge: If you desire longer freshness, place the cake in an airtight container in the fridge for up to 5 days. The spiced flavors will continue to develop, but bring it to room temperature before serving for the best taste.

Freezer: For longer storage, wrap the cooled Gingerbread Cake tightly in plastic wrap and foil, then freeze for up to 3 months. Thaw in the fridge overnight before enjoying it again!

Reheating: To warm individual slices, microwave for about 15-20 seconds. For the best texture, reheat any frosted cake in a 300°F (150°C) oven for 10-15 minutes until warm.

Gingerbread Cake with Cinnamon Molasses Frosting Variations

Feel free to put your own spin on this deliciously spiced cake with these fun and thoughtful variations!

  • Gluten-Free: Substitute all-purpose flour with a 1:1 gluten-free flour blend to accommodate gluten sensitivities.

  • Dairy-Free: For a dairy-free option, replace the butter with coconut oil and use a dairy-free cream cheese for the frosting.

  • Nutty Delight: Add ½ cup of finely chopped walnuts or pecans to the batter for a delightful crunch and earthy flavor.

  • Extra Spicy: Amp up the flavors by adding an extra teaspoon of ground ginger or a splash of fresh ginger juice for a zesty kick.

  • Fruitiness: Fold in 1 cup of dried fruit, like raisins or cranberries, for added sweetness and texture in every bite.

  • Cacao Twist: Mix in ¼ cup of cocoa powder to give the cake a chocolatey depth that pairs beautifully with the spices.

  • Citrus Zest: Add the zest of an orange or lemon for a refreshing brightness that balances the warm spices perfectly.

  • Heat Level: For those who enjoy a bit of heat, incorporate a pinch of cayenne pepper into the batter for a surprising and delightful warmth.

These variations not only enhance the cake but also allow you to tailor it to your family and friends' preferences! Don't forget to check out the lovely additions such as Cinnamon Molasses Frosting that can elevate this cake further!

Gingerbread Cake with Cinnamon Molasses Frosting

Gingerbread Cake with Cinnamon Molasses Frosting Recipe FAQs

How do I select the right molasses for this cake?
Absolutely! When making Gingerbread Cake with Cinnamon Molasses Frosting, it's best to use unsulfured molasses for its sweet, robust flavor. Look for a brand labeled "unsulfured" in the baking aisle; it’s generally the most accessible and works perfectly for baking. Avoid blackstrap molasses if you desire a sweeter taste, as it can be quite bitter.

How long can I store the gingerbread cake?
You can keep your Gingerbread Cake covered at room temperature for up to 3 days. If you'd like it to last a bit longer, storing it in an airtight container in the fridge can extend its shelf life up to 5 days. Just remember to let it come to room temperature before serving, to really showcase those delightful spiced flavors!

Can I freeze the gingerbread cake?
Yes, indeed! To freeze your Gingerbread Cake, first allow it to cool completely. Then, wrap it tightly in plastic wrap, followed by a layer of aluminum foil to prevent freezer burn. This way, it can last in the freezer for up to 3 months. When you’re ready to enjoy it, just thaw it overnight in the fridge and then warm it up if you prefer a cozy slice.

What should I do if my cake sinks or is too dense?
If your Gingerbread Cake sinks in the center or turns out denser than expected, it may be due to overmixing the batter, which can lead to tough cake. To avoid this, mix until just combined, and be cautious with your oven temperature—ensure it's calibrated correctly. It's also vital to check the fresh state of your baking powder and baking soda, as expired leavening agents can impede the cake’s rise.

Is this gingerbread cake safe for people with allergies?
Good question! The Gingerbread Cake contains common allergens such as eggs and gluten from the flour. Always confirm that your ingredients are free from cross-contaminants if you're baking for someone with specific allergies. For a gluten-free version, consider substituting all-purpose flour with a 1:1 gluten-free baking blend. Additionally, you can replace the eggs with flaxseed meal or applesauce for a vegan option.

How should I store the frosting?
If you have leftover Cinnamon Molasses Frosting, store it in an airtight container in the fridge for up to 1 week. When ready to use it again, give it a good stir and let it come to room temperature before spreading it on your cake for that smooth, delightful finish!

Gingerbread Cake with Cinnamon Molasses Frosting

Gingerbread Cake with Cinnamon Molasses Frosting Magic

A delightful Gingerbread Cake with Cinnamon Molasses Frosting that captures the essence of festive baking.
Print Recipe Pin Recipe
Prep Time 20 minutes mins
Cook Time 35 minutes mins
Cooling Time 10 minutes mins
Total Time 1 hour hr 5 minutes mins
Servings: 12 slices
Course: Dessert
Cuisine: American
Calories: 350
Ingredients Equipment Method Nutrition Notes

Ingredients
  

For the Cake
  • 2.5 cups all-purpose flour Essential for structure
  • 2 teaspoons ground ginger Provides warm, spicy kick
  • 1 teaspoon ground cinnamon Adds a sweet aroma
  • 0.5 teaspoon ground nutmeg Brings warmth
  • 0.5 teaspoon ground cloves Enhances spiciness
  • 1 teaspoon baking soda Helps the cake rise
  • 1 teaspoon baking powder Ensures the cake rises beautifully
  • 0.5 teaspoon salt Balances sweetness
  • 1 cup unsalted butter Ensure softened
  • 1.5 cups brown sugar For deep sweetness
  • 2 large eggs Adds moisture and binding
  • 1 cup unsulfured molasses Gives characteristic flavor
  • 1 cup hot water Helps blend batter
For the Cinnamon Molasses Frosting
  • 0.5 cup unsalted butter Softened
  • 0.25 cup cream cheese Adds tangy flavor
  • 2 cups powdered sugar For sweetness and texture
  • 0.25 cup unsulfured molasses Deepens flavor
  • 1 teaspoon ground cinnamon Infuses warmth
  • 1 teaspoon vanilla extract Enhances flavors
  • tablespoon milk Add as needed for consistency

Equipment

  • Mixing bowls
  • 9x13 inch baking pan or two 9-inch round cake pans
  • Electric mixer
  • spatula
  • sifter

Method
 

Baking Instructions
  1. Preheat your oven to 350°F (175°C) and grease and flour your baking pan.
  2. In a large bowl, combine the dry ingredients and sift together thoroughly.
  3. Cream butter and brown sugar until light and fluffy in another bowl.
  4. Add the eggs one at a time, mixing well after each addition.
  5. Incorporate the molasses until fully combined.
  6. Gradually add the dry ingredients and hot water, mixing gently.
  7. Pour the batter into prepared pans and smooth the top.
  8. Bake for 30 to 35 minutes and test for doneness with a toothpick.
  9. Allow the cake to cool in the pan for 10 minutes then transfer to a wire rack.
  10. Prepare the frosting by beating together butter and cream cheese until creamy.
  11. Add powdered sugar and molasses until smooth, adjusting with milk if thick.
  12. Frost the cooled cake evenly and let set before serving.

Nutrition

Serving: 1sliceCalories: 350kcalCarbohydrates: 45gProtein: 3gFat: 15gSaturated Fat: 9gPolyunsaturated Fat: 0.5gMonounsaturated Fat: 3gCholesterol: 45mgSodium: 200mgPotassium: 150mgFiber: 1gSugar: 25gVitamin A: 500IUCalcium: 20mgIron: 1.5mg

Notes

Ensure all ingredients are at room temperature for best results.

Tried this recipe?

Let us know how it was!

Valentine's Chocolate Chip Cookies: Love in Every Bite

January 16, 2026 by grace bellamy Leave a Comment

As the sweet aroma of cookies wafts through my kitchen, I can’t help but feel a rush of nostalgia. Each batch of these Valentine’s Chocolate Chip Cookies brings back cherished memories of baking with loved ones, where laughter mingled with the irresistible scent of melting chocolate. This recipe not only offers a delightful way to express your affection but also boasts a very quick prep time—perfect for busy schedules or spontaneous treats! Everyone loves a classic cookie, and with this simple recipe, you can create a comforting, homemade gift for that special someone, or even indulge yourself. So, are you ready to fill your kitchen with love and sweetness? Let’s dive in!

Valentine's Chocolate Chip Cookies

Why are these cookies so special?

**Irresistible ** aroma: The scent of fresh-baked cookies is sure to fill your home with warmth and love.
Quick and easy: With simple steps, you can whip these up in no time, making them perfect for unexpected guests or sweet cravings.
Customizable: Feel free to add nuts or different types of chocolate chips for a unique twist.
Perfect gift: Pack them in a decorative box and share with friends or that special someone as a heartfelt treat.
Crowd pleaser: These cookies are a guaranteed hit at any gathering, from family nights to holiday celebrations.
Get ready to create joy in every bite with these Valentine's Chocolate Chip Cookies!

Valentine's Chocolate Chip Cookies Ingredients

• Let’s gather all the sweet essentials!

For the Cookie Dough

  • All-purpose flour – 2 ¼ cups; this forms the base of your delicious cookies.
  • Baking soda – 1 teaspoon; it helps the cookies rise and become fluffy.
  • Salt – ½ teaspoon; enhances the sweetness and balances flavors.
  • Unsalted butter – 1 cup, softened; use high-quality butter for that rich flavor.
  • Granulated sugar – ¾ cup; adds sweetness and a light texture.
  • Brown sugar – ¾ cup, packed; provides a deeper, caramel-like flavor.
  • Vanilla extract – 1 teaspoon; brings a lovely warmth to each bite.
  • Large eggs – 2; they bind the ingredients and add moisture.
  • Semi-sweet chocolate chips – 2 cups; the stars of the show, ensuring every bite is melty and sweet!

Get ready to bake some love with these Valentine's Chocolate Chip Cookies!

Step‑by‑Step Instructions for Valentine's Chocolate Chip Cookies

Step 1: Preheat the Oven
Begin by preheating your oven to 375°F (190°C). This crucial step ensures that your Valentine's Chocolate Chip Cookies bake evenly and come out perfectly chewy. While the oven warms up, prepare your baking sheets by lining them with parchment paper, ready for the dough to be shaped into sweet rounds.

Step 2: Combine Dry Ingredients
In a small mixing bowl, sift together 2 ¼ cups of all-purpose flour, 1 teaspoon of baking soda, and ½ teaspoon of salt. This step is essential as it evenly distributes the baking soda and salt throughout the flour. Once combined, set this mixture aside, allowing you to focus on creating the creamy cookie dough.

Step 3: Cream the Butters and Sugars
In a large mixing bowl, add 1 cup of softened unsalted butter, along with ¾ cup of granulated sugar and ¾ cup of packed brown sugar. Use an electric mixer on medium speed to beat everything together until the mixture is light and creamy, about 2-3 minutes. The luscious texture will serve as a delightful base for your Valentine's Chocolate Chip Cookies.

Step 4: Incorporate Eggs and Vanilla
Once your butter and sugars are fluffy, add 1 teaspoon of vanilla extract and the 2 large eggs, one at a time. Mix on low speed after each addition until well combined, ensuring each egg is fully incorporated before adding the next. The mixture should look smooth and glossy, with a heavenly aroma wafting through your kitchen.

Step 5: Mix in the Dry Ingredients
Gradually add the flour mixture you set aside earlier to the creamy batter, beating on low speed until just combined. Be careful not to overmix, as this can lead to tougher cookies. The dough should be soft and slightly sticky, ready for the star of our cookies: chocolate chips!

Step 6: Fold in Chocolate Chips
Gently fold in 2 cups of semi-sweet chocolate chips using a spatula. Make sure to evenly distribute the chips throughout the dough, as they are the delicious surprise in every bite of your Valentine's Chocolate Chip Cookies. The sight of chocolate glistening in the dough should make you smile.

Step 7: Scoop and Shape the Dough
Using a cookie scoop or two tablespoons, portion the dough onto the prepared baking sheets, leaving about 2 inches of space between each cookie. This spacing allows the cookies to spread while baking, creating that perfect shape and texture. You should have roughly 12 cookies per baking sheet.

Step 8: Bake to Perfection
Place the baking sheets in the preheated oven and bake for 9-11 minutes. Keep an eye on your cookies; they should turn golden brown around the edges, while still being slightly soft in the center. This is the sweet moment when your Valentine's Chocolate Chip Cookies start to fill your home with an enchanting aroma.

Step 9: Cool and Serve
Once baked, remove the cookies from the oven and let them sit on the baking sheet for about 5 minutes. This allows them to set beautifully. Then, transfer the cookies to a wire rack to cool completely. Their lovely warm golden color and melty chocolate bits will be irresistible—perfect for sharing or indulging!

Valentine's Chocolate Chip Cookies

Expert Tips for Valentine's Chocolate Chip Cookies

  • Perfect Butter Temperature: Use softened butter, not melted. If the butter is too soft, your cookies may spread too much, ruining their shape.
  • Don’t Overmix: When adding the dry ingredients, mix just until combined to keep your Valentine's Chocolate Chip Cookies tender and soft, avoiding a dense texture.
  • Chill the Dough: For chewier cookies, refrigerate the dough for 30 minutes before baking. This helps control spread and intensifies flavors.
  • Watch the Time: Ovens vary; check your cookies a minute or two before the suggested time. You want golden edges but slightly soft centers for the perfect bite.
  • Experiment with Add-ins: Feel free to swap chocolate chips with nuts or dried fruits, but ensure your mix-ins are evenly distributed for delightful surprises in every cookie!

Valentine's Chocolate Chip Cookies Variations

Feel free to get creative with these variations to personalize your Valentine's Chocolate Chip Cookies!

  • Gluten-Free: Substitute all-purpose flour with a 1:1 gluten-free flour blend for a deliciously inclusive treat.
  • Nutty Delight: Add 1 cup of chopped walnuts or pecans to add a rich, crunchy texture and a delightful flavor contrast to the sweet chocolate.
  • Choco-Mint Twist: Include 1 teaspoon of peppermint extract and substitute half of the chocolate chips with mint chocolate chips for a refreshing twist!
  • Dairy-Free: Use coconut oil or vegan butter along with dairy-free chocolate chips for a scrumptious cookie without the dairy.
  • Spicy Kick: Sprinkle a pinch of cayenne pepper into the dry ingredients for a surprising spicy twist that pairs beautifully with chocolate.
  • Oatmeal Cookies: Replace 1 cup of flour with rolled oats for a heartier texture. These chewy cookies are wonderfully satisfying!
  • Using Brown Butter: Brown your butter before mixing for a deeper, nutty flavor that elevates your cookies to gourmet status.
  • Add-Ins Galore: Mix in ½ cup of dried cranberries or orange zest for a fruity brightness that complements the sweet chocolate.

Each variation opens the door to explore new flavors and textures, making every batch of your Valentine’s Chocolate Chip Cookies a unique expression of love. Enjoy your baking adventure, and if you're looking for another delicious treat, check out my Nutty Chocolate Chip Cookies or treat yourself to some Classic Sugar Cookies.

How to Store and Freeze Valentine's Chocolate Chip Cookies

Room Temperature: Store your cooled cookies in an airtight container at room temperature for up to 3 days. This keeps them soft and fresh while maintaining that irresistible flavor.

Fridge: If you prefer a chewier texture, place the cookies in the fridge for up to a week. Just make sure they're wrapped well to avoid absorbing any unwanted odors.

Freezer: To enjoy your Valentine's Chocolate Chip Cookies later, freeze individually wrapped cookies in a freezer-safe bag for up to 3 months. Don’t forget to label the bags with the date for easy tracking!

Reheating: When ready to enjoy, warm the cookies in the oven at 350°F (175°C) for about 5-7 minutes until they are soft and the chocolate chips are melty again.

What to Serve with Valentine's Chocolate Chip Cookies?

As you bask in the joy of warm cookies, imagine delighting your loved ones with a scrumptious spread that enhances the sweetness of your treats.

  • Fresh Berries: Serve a mix of raspberries, strawberries, and blueberries for a refreshing, tart contrast to the cookies’ sweetness.
  • Vanilla Ice Cream: A scoop of creamy vanilla ice cream complements the warm, melty chocolate, creating a delightful dessert duo.
  • Milk: Classic and comforting, a tall glass of cold milk is the perfect beverage to wash down those gooey bites.
  • Decadent Hot Chocolate: Elevate your cookie experience with rich hot chocolate, topped with whipped cream and chocolate shavings.
  • Cheese Platter: Include soft brie or sharp cheddar to balance the sweetness of the cookies with some savory richness.
  • Caramel Sauce: Drizzle warm caramel over the cookies for an indulgent addition that enhances the chocolatey goodness.
  • Nutty Biscotti: Serve alongside lightly sweetened biscotti to provide a crunchy, satisfying texture that pairs perfectly with the soft cookies.
  • Herbal Tea: A fragrant herbal tea, like chamomile or mint, offers a soothing pairing that complements the cookie's sweetness.
  • Chocolate-Covered Strawberries: Match the cookies with these delightful fruits for an elegant touch that feels like a special treat.
  • Red Wine: For an indulgent twist, opt for a light red wine that offers deep berry notes, enhancing the cookie's chocolate flavors beautifully.

Make Ahead Options

These Valentine’s Chocolate Chip Cookies are a fantastic choice for meal prep, saving you time on busy days! You can prepare the cookie dough up to 3 days in advance; simply cover it tightly with plastic wrap and refrigerate. Additionally, if you’d like, you can scoop the dough into balls and freeze them for up to 3 months—just place them on a baking sheet until solid, then transfer to a freezer bag. To bake from frozen, add a couple of extra minutes to the baking time. When you’re ready to enjoy, preheat your oven, place the dough on a lined baking sheet, and bake as instructed for cookies that taste just as delicious as if made fresh!

Valentine's Chocolate Chip Cookies

Valentine's Chocolate Chip Cookies Recipe FAQs

How do I choose the right chocolate chips for my cookies?
Absolutely! Look for semi-sweet chocolate chips, as they provide the perfect balance of sweetness. If you're feeling adventurous, try combining dark chocolate or milk chocolate chips for a flavor twist. Just make sure they're high-quality—this ensures a richer taste in every bite!

How long can I store my Valentine's Chocolate Chip Cookies?
You can keep your cookies fresh and delicious in an airtight container at room temperature for up to 3 days. If you prefer them a bit chewier, pop them in the fridge where they can stay good for up to a week. Just remember to wrap them well to prevent any unwanted odors from sneaking in!

Can I freeze Valentine's Chocolate Chip Cookies?
Yes, definitely! To freeze your cookies, first allow them to cool completely. Then, wrap each cookie individually in plastic wrap, or place them in a single layer in a freezer-safe bag, sealing out any air. These delectable treats can last up to 3 months in the freezer. Just label the bags with the date for easy tracking!

What should I do if my cookie dough is too sticky?
If your dough is excessively sticky, don't worry! This can happen sometimes. Try chilling the dough in the refrigerator for about 30 minutes. This cools the butter and makes it easier to handle. You can also add a bit more flour—start with a tablespoon at a time until you reach your desired consistency.

Are there any dietary considerations for these cookies?
Very! If you're baking for someone with dietary restrictions, you have options! For a gluten-free version, substitute all-purpose flour with a gluten-free flour blend. To cater to dairy sensitivities, use dairy-free butter and chocolate chips. Always double-check labels for allergens to ensure safety for everyone enjoying your Valentine's Chocolate Chip Cookies.

Can I use margarine instead of butter?
Of course! While I highly recommend using unsalted butter for the best flavor, margarine can serve as a substitute. Just be aware that cookies made with margarine may have a slightly different texture and taste. If you're using margarine, opt for a stick version instead of a tub to keep the consistency similar to butter during baking.

Valentine's Chocolate Chip Cookies

Valentine's Chocolate Chip Cookies: Love in Every Bite

These Valentine's Chocolate Chip Cookies are a quick and delightful way to express affection, filling your home with the sweet aroma of love.
Print Recipe Pin Recipe
Prep Time 15 minutes mins
Cook Time 11 minutes mins
Cooling Time 5 minutes mins
Total Time 31 minutes mins
Servings: 24 cookies
Course: Dessert
Cuisine: American
Calories: 150
Ingredients Equipment Method Nutrition Notes

Ingredients
  

For the Cookie Dough
  • 2 ¼ cups all-purpose flour this forms the base of your delicious cookies.
  • 1 teaspoon baking soda it helps the cookies rise and become fluffy.
  • ½ teaspoon salt enhances the sweetness and balances flavors.
  • 1 cup unsalted butter use high-quality butter for that rich flavor.
  • ¾ cup granulated sugar adds sweetness and a light texture.
  • ¾ cup brown sugar provides a deeper, caramel-like flavor.
  • 1 teaspoon vanilla extract brings a lovely warmth to each bite.
  • 2 large eggs they bind the ingredients and add moisture.
  • 2 cups semi-sweet chocolate chips the stars of the show, ensuring every bite is melty and sweet!

Equipment

  • Mixing bowls
  • Baking sheets
  • Electric mixer
  • parchment paper
  • Cookie scoop
  • spatula

Method
 

Step-by-Step Instructions for Valentine's Chocolate Chip Cookies
  1. Preheat your oven to 375°F (190°C) and line baking sheets with parchment paper.
  2. In a small bowl, sift together flour, baking soda, and salt.
  3. In a large bowl, cream together the softened butter, granulated sugar, and brown sugar until light and creamy.
  4. Add the vanilla extract and eggs, mixing on low speed until well combined.
  5. Gradually add the flour mixture to the creamy batter, mixing until just combined.
  6. Fold in the semi-sweet chocolate chips gently with a spatula.
  7. Scoop the dough onto prepared baking sheets, leaving space between cookies.
  8. Bake for 9-11 minutes until golden brown around the edges and slightly soft in the center.
  9. Cool on the baking sheet for 5 minutes before transferring to a wire rack to cool completely.

Nutrition

Serving: 1cookieCalories: 150kcalCarbohydrates: 20gProtein: 2gFat: 7gSaturated Fat: 4gPolyunsaturated Fat: 1gMonounsaturated Fat: 2gCholesterol: 25mgSodium: 90mgPotassium: 100mgFiber: 1gSugar: 10gVitamin A: 200IUCalcium: 20mgIron: 0.5mg

Notes

These cookies are perfect for sharing; pack them in a decorative box and give them as a heartfelt treat for Valentine's Day.

Tried this recipe?

Let us know how it was!

Creamy Nutty Noodle Soup That Will Warm Your Soul

January 16, 2026 by grace bellamy Leave a Comment

As I pulled the lid off the pot, the inviting aroma of spices and simmering veggies enveloped me like a warm hug. This Creamy Nutty Noodle Soup has quickly become one of my go-to recipes for those cozy nights or when I’m just too tired to think about dinner. It effortlessly combines the creamy richness of coconut milk with the nutty taste of peanut butter, making it not just comforting, but also a delightful bowl of goodness. Plus, it’s a quick dish to whip up—perfect for busy weeknights—and is a crowd-pleaser that even the pickiest eaters will enjoy. Whether you’re craving a healthy upgrade or looking to indulge in some rich textures, this soup has got you covered. Ready to explore how to make this comforting dish? Let’s dive in!

Creamy Nutty Noodle Soup

Why is this noodle soup a must-try?

Simplicity: This Creamy Nutty Noodle Soup comes together effortlessly in under 40 minutes, making dinner a breeze.

Nutty Richness: The blend of coconut milk and peanut butter creates a velvety soup that tantalizes your taste buds like no other.

Wholesome Ingredients: Packed with fresh veggies, it’s healthful and satisfying, perfect for those wanting to indulge without the guilt.

Versatile: Customize your bowl! Use any type of noodles you prefer and switch up the veggies depending on what you have.

Crowd-Pleaser: Its creamy texture and lovely flavors make it a family favorite, sure to impress even the pickiest of eaters.

Quick Recipe: In just 15 minutes of prep and 25 minutes of cooking, you can enjoy a delightful homemade meal without the fuss.

Creamy Nutty Noodle Soup Ingredients

• Let’s gather everything you need to make this comforting dish!

For the Soup Base

  • Rice noodles – 200 g, or your choice of noodles for a delightful texture.
  • Vegetable oil – 1 tablespoon, for sautéing and adding flavor.
  • Medium onion – 1, finely chopped to create a tasty base.
  • Minced garlic – 3 cloves, for a fragrant boost in flavor.
  • Fresh ginger – 1-inch piece, grated for a warm, zesty kick.

For the Vegetables

  • Carrot – 1, julienned to add both color and crunch.
  • Red bell pepper – 1, thinly sliced, offering sweetness and vibrancy.

For the Creamy Broth

  • Vegetable broth – 4 cups, as the base to bring everything together.
  • Coconut milk – 1 cup, for that creamy, luscious consistency.
  • Peanut butter – 3 tablespoons (or almond butter for a nut-free option) adds nutty depth.
  • Soy sauce – 2 tablespoons to enhance flavor and provide umami.
  • Lime juice – 1 tablespoon for a refreshing brightness.
  • Sesame oil – 1 teaspoon to finish with a hint of nuttiness.

To Taste and Garnish

  • Salt and pepper – to your liking, ensuring a well-seasoned bowl.
  • Fresh cilantro or green onions – for a burst of freshness on top.
  • Crushed peanuts or sesame seeds – for optional crunch and nuttiness.

Enjoy the process of putting together this Creamy Nutty Noodle Soup! Your taste buds—and your family—will thank you.

Step‑by‑Step Instructions for Creamy Nutty Noodle Soup

Step 1: Prepare the Noodles
Start by cooking the rice noodles according to the package instructions, usually about 6-8 minutes until tender yet firm. Once they're perfectly al dente, drain them in a colander and set aside, ready to be mingled into your creamy nutty noodle soup later.

Step 2: Sauté the Aromatics
In a large pot, heat 1 tablespoon of vegetable oil over medium heat. Add the finely chopped onion and sauté for 3-4 minutes, until the onion becomes softened and translucent, filling your kitchen with a delicious aroma. This step establishes a fragrant base for your soup.

Step 3: Add Garlic and Ginger
Introduce 3 cloves of minced garlic and the grated ginger to the pot, stirring for about 1-2 minutes. Allow these potent ingredients to bloom and infuse their enticing flavors into the mixture. You'll know it's time when you can smell their inviting fragrance filling the air.

Step 4: Cook the Vegetables
Now, toss in the julienned carrot and thinly sliced red bell pepper. Stir well to combine all the ingredients, cooking for around 5 minutes until the vegetables soften slightly yet retain some crunch. This vibrant medley adds both color and nutrition to your creamy nutty noodle soup.

Step 5: Simmer with Broth
Pour in 4 cups of vegetable broth, raising the heat until the mixture reaches a gentle boil. Once boiling, reduce the heat to maintain a simmer; this will allow the flavors to meld beautifully over the next few minutes, creating a nourishing base for your soup.

Step 6: Incorporate Coconut Milk and Peanut Butter
Next, stir in 1 cup of coconut milk and 3 tablespoons of peanut butter (or almond butter for an alternative). Mix thoroughly until everything is well incorporated and the soup turns creamy. You’ll see the rich, velvety texture coming together—perfect for a soul-soothing bowl.

Step 7: Season the Broth
Add 2 tablespoons of soy sauce, 1 tablespoon of lime juice, and 1 teaspoon of sesame oil to the pot, enhancing the flavor profile of your creamy nutty noodle soup. Season with salt and pepper to taste. Let the soup simmer for an additional 5-10 minutes, allowing the flavors to deepen.

Step 8: Combine Noodles and Soup
Gently fold the cooked noodles into the pot, stirring carefully to combine all the ingredients. Allow the soup to heat through for about 2 minutes. This step ensures the noodles absorb some of the soup's delightful flavors, transforming each bite into a warm embrace.

Step 9: Serve and Garnish
Remove the pot from heat and ladle the comforting creamy nutty noodle soup into bowls. Garnish with freshly chopped cilantro or green onions, and sprinkle with crushed peanuts or sesame seeds if desired. This final touch adds an element of crunch and flair to your delightful creation.

Creamy Nutty Noodle Soup

Make Ahead Options

These Creamy Nutty Noodle Soups are perfect for meal prep enthusiasts looking to save time during busy weekdays! You can prepare the soup base (without the noodles) up to 3 days in advance; simply refrigerate it in an airtight container. To keep the vibrant vegetables crisp, chop them and store separately, also for up to 3 days. When you’re ready to serve, reheat the soup on the stove until warmed through, then stir in the cooked noodles, letting them heat for just a couple of minutes. This way, you’ll enjoy a delicious, comforting bowl just as rich and flavorful as if you made it fresh!

Creamy Nutty Noodle Soup Variations

Feel free to let your creativity shine as you add an exciting twist to this delicious recipe!

  • Gluten-Free: Swap rice noodles for quinoa or zucchini noodles to make this soup gluten-friendly while keeping a delightful texture.
  • Veggie-Packed: Add additional veggies like spinach, broccoli, or mushrooms for a nourishing boost that’s packed with flavor. A simple trick? Just stir them in during the last few minutes of cooking to perfect their tenderness.
  • Spicy Kick: Adjust the heat by adding red pepper flakes or sriracha to satisfy your cravings for a spicy version. Stir it in gradually until you hit that perfect balance of warmth.
  • Creamier Alternative: Substitute half of the coconut milk with cashew cream for an extra rich and luscious texture, perfect for those cozy evenings. You might find this twist elevates the soup to new creamy heights.
  • Protein Boost: Incorporate cooked chicken, tofu, or shrimp for a satisfying protein punch that turns this soup into a hearty, wholesome meal. They'll absorb the rich flavors and blend seamlessly!
  • Herbal Infusion: Experiment with fresh herbs like basil or mint, stirring them in just before serving for a fresh, aromatic touch that brightens the dish. Trust me; it’s like a breath of fresh air in every spoonful.
  • Sweet Twist: Drizzle a touch of honey or maple syrup for a hint of sweetness that beautifully complements the savory ingredients. You’ll be pleasantly surprised by this unexpected flavor harmony!
  • Noodle Variety: Switch out the rice noodles for soba or udon noodles, offering a delightful texture and a unique twist to the traditional recipe. You can play with different shapes to keep your family excited at the dinner table.

These variations will allow you to make the Creamy Nutty Noodle Soup your own, ensuring it remains a beloved family favorite!

Storage Tips for Creamy Nutty Noodle Soup

Fridge: Store leftovers in an airtight container in the fridge for up to 3 days. Keep the noodles separate from the soup to maintain their texture.

Freezer: For longer storage, freeze the soup (without noodles) in freezer-safe containers for up to 3 months. Thaw in the fridge overnight before reheating.

Reheating: Gently reheat the soup on the stove over low heat, adding a splash of vegetable broth if needed for creaminess. Combine with freshly cooked noodles just before serving.

Keep Fresh: To enjoy the best flavors, consume the creamy nutty noodle soup within a few days of preparation.

What to Serve with Creamy Nutty Noodle Soup

As the tantalizing aroma wafts through your kitchen, consider these delicious pairings to elevate your comforting meal experience.

  • Crispy Spring Rolls: These crunchy delights add a wonderful texture contrast and are perfect for dipping in sweet chili sauce.

  • Steamed Edamame: A light and healthy side, these soybeans contribute subtle flavors and an easy snack that complements the soup's richness.

  • Chili Garlic Cashews: Offering a spicy kick, these nutty bites pair beautifully, enhancing the flavor profile of the creamy nutty noodle soup.

  • Fresh Garden Salad: Crisp greens tossed with a zesty vinaigrette introduce a refreshing element, balancing the hearty warmth of the soup.

  • Coconut Rice: Flavored with coconut milk, this dish embraces the soup's tropical notes, creating a cohesive and delightful meal.

  • Thai Iced Tea: This sweet and creamy beverage cools the palate and echoes the flavors of the soup, making it a perfect match.

  • Lime Sorbet: For dessert, this light and refreshing treat cleanses the palate, finishing your meal with a delightful citrus note.

Consider mixing and matching these ideas to build a spread that's not only pleasing to the eye but also satisfying to the soul!

Expert Tips for Creamy Nutty Noodle Soup

Balance Flavors: Use fresh lime juice and soy sauce sparingly, tasting as you go. This will ensure your broth has that perfect zing without overpowering the nutty richness.

Cook Noodles Separately: Always cook noodles separately and add them at the end to avoid them becoming mushy in the soup. This preserves their texture in your creamy nutty noodle soup.

Customize Veggies: Feel free to swap in your favorite vegetables or what’s in season. Broccoli, snap peas, or bok choy are excellent additions to enhance your soup's nutritious profile.

Perfect Consistency: If the soup is too thick, add extra vegetable broth until you achieve your desired creamy consistency. Adjust before serving for the best results.

Storage Tips: If you have leftovers, store the soup and noodles separately. This prevents the noodles from absorbing all the broth and ensures the best flavor when reheating.

Creamy Nutty Noodle Soup

Creamy Nutty Noodle Soup Recipe FAQs

What type of noodles should I use for the Creamy Nutty Noodle Soup?
You can use rice noodles, but any type of noodles you love will work wonderfully! Just be sure to follow the cooking instructions on the package for the best texture. I often recommend egg noodles or soba for a different twist!

How should I store leftovers of the Creamy Nutty Noodle Soup?
Store any leftovers in an airtight container in the refrigerator for up to 3 days. To keep the noodles from getting mushy, separate them from the soup before storing. This way, they will maintain their delightful texture when you’re ready to enjoy them again!

Can I freeze Creamy Nutty Noodle Soup?
Absolutely! You can freeze the soup (without noodles) in freezer-safe containers for up to 3 months. To do this, cool the soup completely, then pour it into containers leaving some space at the top for expansion. Thaw overnight in the fridge before reheating. Just add freshly cooked noodles when you're ready to serve!

What should I do if the soup is too thick?
If you find your Creamy Nutty Noodle Soup is thicker than you'd like, simply stir in some vegetable broth or water until you reach your desired consistency. Start by adding a little at a time—about half a cup—and mixing well. This keeps your soup creamy while ensuring it’s just the right texture.

Is this Creamy Nutty Noodle Soup suitable for those with nut allergies?
Yes, it can be! You can easily make this soup nut-free by swapping peanut butter for almond butter or sunflower seed butter. Be sure to check all your ingredients for potential allergens, especially soy sauce, and opt for gluten-free versions if necessary. Enjoy worry-free!

How can I enhance the flavor of my Creamy Nutty Noodle Soup?
For an extra flavor kick, consider adding a splash of chili oil for heat or a teaspoon of fresh herbs like basil or mint just before serving. A little extra lime juice can also brighten the flavors beautifully! Remember, cooking with love means tasting as you go—so adjust seasonings to suit your palate!

Creamy Nutty Noodle Soup

Creamy Nutty Noodle Soup That Will Warm Your Soul

This Creamy Nutty Noodle Soup is a quick, comforting recipe combining the creamy richness of coconut milk and nutty peanut butter.
Print Recipe Pin Recipe
Prep Time 15 minutes mins
Cook Time 25 minutes mins
Total Time 40 minutes mins
Servings: 4 bowls
Course: Main Dishes
Cuisine: Asian
Calories: 350
Ingredients Equipment Method Nutrition Notes

Ingredients
  

For the Soup Base
  • 200 g rice noodles or your choice of noodles
  • 1 tablespoon vegetable oil for sautéing
  • 1 medium onion finely chopped
  • 3 cloves minced garlic
  • 1 inch piece fresh ginger grated
For the Vegetables
  • 1 carrot julienned
  • 1 red bell pepper thinly sliced
For the Creamy Broth
  • 4 cups vegetable broth
  • 1 cup coconut milk
  • 3 tablespoons peanut butter or almond butter for a nut-free option
  • 2 tablespoons soy sauce
  • 1 tablespoon lime juice
  • 1 teaspoon sesame oil
To Taste and Garnish
  • salt and pepper to taste
  • fresh cilantro or green onions for garnish
  • crushed peanuts or sesame seeds for optional crunch

Equipment

  • Large Pot
  • Colander

Method
 

Preparation
  1. Cook the rice noodles according to the package instructions, about 6-8 minutes until tender. Drain and set aside.
  2. Heat 1 tablespoon of vegetable oil in a large pot over medium heat. Add the onion and sauté for 3-4 minutes until softened and translucent.
  3. Stir in the minced garlic and grated ginger, cooking for 1-2 minutes until fragrant.
  4. Add the julienned carrot and sliced red bell pepper. Cook for 5 minutes until the vegetables are slightly softened.
  5. Pour in the vegetable broth and bring to a gentle boil. Then reduce the heat to simmer.
  6. Stir in the coconut milk and peanut butter until well combined and the soup turns creamy.
  7. Add soy sauce, lime juice, and sesame oil. Season with salt and pepper to taste, simmer for 5-10 minutes.
  8. Fold the cooked noodles into the soup and heat for 2 minutes.
  9. Serve the soup in bowls and garnish with cilantro or green onions, crushed peanuts or sesame seeds if desired.

Nutrition

Serving: 1bowlCalories: 350kcalCarbohydrates: 45gProtein: 12gFat: 15gSaturated Fat: 8gPolyunsaturated Fat: 2gMonounsaturated Fat: 5gSodium: 800mgPotassium: 600mgFiber: 5gSugar: 3gVitamin A: 800IUVitamin C: 30mgCalcium: 60mgIron: 2mg

Notes

Store leftovers in an airtight container in the fridge for up to 3 days, keeping noodles separate to maintain texture.

Tried this recipe?

Let us know how it was!

Delicious Tinga de Pollo: A Flavorful Twist on Tacos

January 16, 2026 by grace bellamy Leave a Comment

Amazingly rich and smoky, Tinga de Pollo has a way of transforming any ordinary dinner into a fiesta. I recently discovered this delightful Mexican dish, and its complexity belies the simplicity of its preparation. With just a handful of ingredients, you can whip up a recipe that’s not only a crowd-pleaser but also quick to make on busy weeknights. Imagine the scent of roasted tomatoes mingling with the warmth of chipotle peppers as you simmer your shredded chicken. This comforting dish is perfect for serving in soft corn tortillas, making it a fantastic choice for family gatherings or a casual get-together with friends. Plus, it's gluten-free and can easily be prepped ahead of time, allowing the flavors to intensify overnight. Isn’t it exciting to explore how one recipe can bring everyone together around the table? Let’s dive into how you can bring this vibrant taste of Mexico into your kitchen!

Tinga de Pollo

Why is Tinga de Pollo so irresistible?

Unforgettable flavor: The smoky chipotle peppers and savory spices create a symphony of taste that will have you coming back for more.

Quick and easy: With prep taking only 15 minutes, this recipe is perfect for busy weeknights.

Versatile serving options: Enjoy it in soft corn tortillas, or as a filling for burritos or even nachos for a fun twist!

Make-ahead magic: Preparing it the day before allows the flavors to meld beautifully, enhancing your meal experience.

Family-friendly: This dish is a guaranteed hit at the table, pleasing both kids and adults alike, making it an ideal choice for family gatherings. Don't miss out on this vibrant dish that brings the taste of Mexico right to your home!

Tinga de Pollo Ingredients

• Get ready for a flavorful fiesta!

For the Chicken
• Shredded chicken – 2 pounds; leftover rotisserie chicken works perfectly!

For the Sauce
• Olive oil – 1 tablespoon; it adds a rich flavor and helps sauté the onions.
• Large onion – 1, sliced; it creates a sweet base when sautéed.
• Garlic – 2 cloves, minced; enhances the dish with its aromatic qualities.
• Tomatoes – 2, diced; fresh tomatoes add a burst of freshness.
• Chipotle peppers – 2 in adobo sauce; provides that smoky kick that defines Tinga de Pollo.
• Cumin – 1 teaspoon; gives warmth and depth to the overall flavor.
• Oregano – 1 teaspoon; complements the spices with an earthy note.
• Salt – to taste; enhances all the wonderful flavors.
• Pepper – to taste; for a subtle heat that rounds out the dish.

For Serving
• Corn tortillas – for serving; they're traditional and hold everything together beautifully!
• Fresh cilantro – for garnish; adds a pop of color and brightness.
• Avocado slices – for garnish; creamy texture that balances the flavors perfectly!

Step‑by‑Step Instructions for Tinga de Pollo

Step 1: Sauté the Onions
In a large skillet, heat 1 tablespoon of olive oil over medium heat. Once hot, add the sliced onion, stirring occasionally until it becomes translucent and soft, about 5-7 minutes. This step sets a sweet base for your Tinga de Pollo, so watch for a lovely golden hue to develop on the onions.

Step 2: Add Garlic
Next, stir in 2 minced cloves of garlic and sauté for another minute. You’ll know it’s ready when the kitchen fills with its aromatic fragrance. Be careful not to let the garlic brown too much, as it can turn bitter and affect the overall flavor of your dish.

Step 3: Cook the Tomatoes
Add the 2 diced tomatoes to the skillet, mixing well with the garlic and onions. Allow the tomatoes to soften for about 5 minutes, stirring occasionally. You’re looking for a slight breakdown of the tomatoes, releasing their juices and creating a rich sauce that will coat the chicken beautifully.

Step 4: Integrate the Spices
Now, mix in the 2 chipotle peppers in adobo sauce, along with 1 teaspoon each of cumin and oregano, along with salt and pepper to taste. Stir thoroughly to ensure every ingredient is well combined. Cook this mixture for about 2-3 minutes to allow the spices to release their vibrant flavors and infuse the sauce.

Step 5: Combine Chicken and Sauce
Pour in the 2 pounds of shredded chicken, using a spoon or spatula to mix it well with the sauce. Your Tinga de Pollo is now starting to take shape! Cook for about another 2-3 minutes, ensuring the chicken is evenly coated and heated through, allowing it to absorb those rich, smoky flavors.

Step 6: Simmer to Blend Flavors
Reduce the heat and let the mixture simmer for 15 minutes. This step is crucial as it melds all the beautiful flavors of the Tinga de Pollo together. Stir occasionally, and you’ll notice the sauce thickening slightly, adding to the overall yumminess of the dish.

Step 7: Serve and Garnish
To serve, spoon the Tinga de Pollo into warm corn tortillas, allowing each person to create their own taco. Garnish with fresh cilantro and creamy avocado slices for an added burst of flavor. Enjoy the delightful and comforting taste of your homemade Tinga de Pollo!

Tinga de Pollo

How to Store and Freeze Tinga de Pollo

Fridge: Store leftovers in an airtight container for up to 3 days. Make sure the Tinga de Pollo is completely cooled before sealing to maintain freshness.

Freezer: Place Tinga de Pollo in freezer-safe bags or containers, removing excess air. It can be frozen for up to 3 months, preserving its delicious flavor.

Thawing: To thaw, transfer to the fridge overnight or use the microwave's defrost setting. This ensures even thawing and retains the dish's integrity.

Reheating: Warm the Tinga de Pollo on the stovetop over low heat, stirring occasionally until heated through. This will keep the chicken tender and flavorful.

Expert Tips for Tinga de Pollo

  • Chicken Choice: Use rotisserie chicken for quicker prep. It saves time without sacrificing flavor, ensuring your Tinga de Pollo is ready in a flash.

  • Chipotle Control: Adjust the spice by altering the number of chipotle peppers. Start with one if you're unsure about the heat level.

  • Perfect Simmer: Don't rush the simmering step. Let the flavors meld for a full 15 minutes to achieve that rich, deep taste of Tinga de Pollo.

  • Tortilla Tips: Warm your corn tortillas slightly before serving. This enhances their flavor and makes them more pliable for folding.

  • Garnish Generously: Don’t skip the avocado and cilantro! They brighten the dish and provide a refreshing contrast to the smoky chicken.

  • Seasoning Check: Taste and adjust seasoning before serving. This final touch can elevate your Tinga de Pollo from good to unforgettable!

Tinga de Pollo Variations & Substitutions

Feel free to elevate your Tinga de Pollo experience with these fun twists and customizable options!

  • Dairy-Free: Skip the cheese garnish to make this dish completely dairy-free without sacrificing flavor.
    Enjoy the creamy avocado as your rich topping instead.

  • Vegetarian Delight: Substitute shredded chicken with jackfruit or mushrooms for a harmonious plant-based option.
    This will offer a hearty texture and absorb the smoky spices beautifully!

  • Extra Spicy: Boost the heat by adding a few dashes of your favorite hot sauce or an extra chipotle pepper.
    If you're ready for the spice challenge, this is a delicious way to heat things up!

  • Flavorful Broth: Replace the olive oil with chicken broth for sautéing the onions, infusing them with an even richer taste.
    This adds depth without compromising the healthiness of the dish.

  • Smoky BBQ Twist: Mix in a tablespoon of your favorite barbecue sauce for a tantalizing smoky flavor that takes Tinga de Pollo to the next level.
    It’s a creative way to merge Mexican and classic barbecue tastes!

  • Tex-Mex Style: Add black beans or corn to the mixture for a delightful Tex-Mex spin.
    These ingredients bring sweetness and heartiness, making your meal even more enjoyable!

  • Quick Chicken: Use pre-cooked or rotisserie chicken to speed up your meal prep and enjoy the same wonderful flavors.
    This method makes Tinga de Pollo a five-minute wonder on busy nights!

  • Analogue Tacos: For a unique twist, try serving the Tinga de Pollo in crunchy taco shells or over nachos for a fun presentation.
    It’s an adventurous take that’s sure to excite your guests!

Mix and match these variations to make your own signature version of Tinga de Pollo, and don’t forget to explore other Mexican dishes for unique serving ideas! Enjoy every delicious bite!

What to Serve with Tinga de Pollo

A warm, inviting meal awaits as you complement your smoky and savory chicken dish with delightful side options.

  • Cilantro Lime Rice: This zesty side enhances the flavors of Tinga de Pollo, adding freshness and a touch of acidity. Perfect for soaking up the sauce!

  • Black Beans: A hearty, protein-rich side dish that pairs beautifully, offering a creamy texture and earthy flavors that balance the spiciness of the chicken.

  • Pico de Gallo: The freshness of diced tomatoes, onions, and cilantro elevates the meal, adding crunch and refreshing flavors that contrast with the smoky filling.

  • Guacamole: Creamy avocado on the side provides a rich texture that tempers the heat of Tinga de Pollo while adding a buttery note.

  • Grilled Corn on the Cob: Sweet and smoky, this vibrant side brings a delightful crunch and a pop of color to your table, making each bite more enjoyable.

  • Churros with Chocolate Sauce: End the meal on a sweet note with crispy churros. Their warm, sugary goodness pairs perfectly with the rich flavors of the entire dinner.

Make Ahead Options

Preparing Tinga de Pollo is hassle-free, making it a perfect option for meal prep! You can cook the entire dish up to 3 days in advance—just be sure to allow it to cool before transferring to an airtight container for refrigeration. The key is to fully combine the flavors during the simmering stage; this enhances the dish even more when re-heated. When you're ready to serve, simply reheat the Tinga de Pollo in a saucepan over medium heat until warmed through, which takes about 10 minutes. Serve it in warm corn tortillas, and enjoy the convenience of a delicious homemade meal with minimal effort during your busy week!

Tinga de Pollo

Tinga de Pollo Recipe FAQs

What type of chicken should I use for Tinga de Pollo?
Absolutely! You can use shredded rotisserie chicken for a quick and easy meal. If you have raw chicken, consider poaching it first until cooked, then shred for the full homemade experience.

How should I store leftover Tinga de Pollo?
For the fridge, simply place your leftover Tinga de Pollo in an airtight container, and it’ll stay fresh for up to 3 days. Let it cool completely to avoid condensation inside the container which can make your dish soggy!

Can I freeze Tinga de Pollo?
Very! To freeze, pour the cooled Tinga de Pollo into a freezer-safe bag or container. Make sure to remove as much air as possible before sealing. It can be stored for up to 3 months without losing its delicious flavor.

How can I safely reheat frozen Tinga de Pollo?
To reheat, first, thaw it in the fridge overnight. Then, warm it gently on the stovetop over low heat, stirring occasionally until it's heated through. This method keeps the chicken tender and prevents it from drying out.

What if I want to adjust the spiciness of the dish?
You can control the spice by starting with just one chipotle pepper in adobo sauce. Taste as you go! If you find it's not spicy enough after cooking, feel free to add a dash of cayenne pepper or even a bit of hot sauce for an added kick.

Is Tinga de Pollo suitable for diets with specific restrictions?
Absolutely, Tinga de Pollo is gluten-free when served with corn tortillas. You can also customize this dish to be dairy-free by simply not adding cheese in your serving. Be sure to use fresh ingredients to avoid any allergens!

Tinga de Pollo

Delicious Tinga de Pollo: A Flavorful Twist on Tacos

Tinga de Pollo is a delicious Mexican dish featuring smoky flavors and tender chicken, ideal for family gatherings.
Print Recipe Pin Recipe
Prep Time 15 minutes mins
Cook Time 30 minutes mins
Total Time 45 minutes mins
Servings: 6 tacos
Course: Main Dishes
Cuisine: Mexican
Calories: 350
Ingredients Equipment Method Nutrition Notes

Ingredients
  

For the Chicken
  • 2 pounds shredded chicken leftover rotisserie chicken works perfectly!
For the Sauce
  • 1 tablespoon olive oil adds rich flavor and helps sauté the onions
  • 1 large onion sliced
  • 2 cloves garlic minced
  • 2 tomatoes diced
  • 2 chipotle peppers in adobo sauce
  • 1 teaspoon cumin
  • 1 teaspoon oregano
  • salt to taste
  • pepper to taste
For Serving
  • corn tortillas for serving
  • fresh cilantro for garnish
  • avocado slices for garnish

Equipment

  • large skillet

Method
 

Step‑by‑Step Instructions for Tinga de Pollo
  1. In a large skillet, heat 1 tablespoon of olive oil over medium heat. Once hot, add the sliced onion, stirring occasionally until it becomes translucent and soft, about 5-7 minutes.
  2. Next, stir in 2 minced cloves of garlic and sauté for another minute.
  3. Add the 2 diced tomatoes to the skillet, mixing well with the garlic and onions. Allow the tomatoes to soften for about 5 minutes, stirring occasionally.
  4. Now, mix in the 2 chipotle peppers in adobo sauce, along with 1 teaspoon each of cumin and oregano, along with salt and pepper to taste.
  5. Pour in the 2 pounds of shredded chicken, using a spoon or spatula to mix it well with the sauce.
  6. Reduce the heat and let the mixture simmer for 15 minutes.
  7. To serve, spoon the Tinga de Pollo into warm corn tortillas, garnishing with fresh cilantro and avocado slices.

Nutrition

Serving: 1tacoCalories: 350kcalCarbohydrates: 30gProtein: 25gFat: 15gSaturated Fat: 3gPolyunsaturated Fat: 1gMonounsaturated Fat: 10gCholesterol: 75mgSodium: 600mgPotassium: 700mgFiber: 5gSugar: 3gVitamin A: 500IUVitamin C: 15mgCalcium: 50mgIron: 3mg

Notes

This dish is gluten-free and can be made ahead for enhanced flavors. Adjust chipotle based on spice preference.

Tried this recipe?

Let us know how it was!

Indulge in Creamy Sea Scallops Pasta for a Cozy Dinner

January 16, 2026 by grace bellamy Leave a Comment

As I stood at the stove, surrounded by the heavenly scent of garlic and white wine, I felt my spirits lift. There's something transformative about crafting a dish that feels like a luxurious escape, and my Sea Scallops Pasta captures that essence perfectly. This recipe isn’t just about great flavor; it’s a quick-prep showstopper that can elevate any weeknight dinner into a memorable experience. Plus, it’s an impressive way to impress friends or loved ones without spending hours in the kitchen! Just imagine the smiles as you serve up perfectly seared scallops nestled in a creamy, aromatic sauce. Are you ready to bring a touch of the ocean to your dining table? Let’s dive in!

Sea Scallops Pasta

Why is Sea Scallops Pasta a Must-Try?

Decadently Delicious: The creamy sauce, paired with fresh herbs and perfectly seared scallops, offers a rich, irresistible taste experience.

Quick Preparation: In just 35 minutes, you can whip up a restaurant-worthy meal that impresses and satisfies.

Versatile Dish: Whether it's a casual family dinner or a romantic date night, this pasta shines in any setting.

Crowd-Pleasing Flavor: The aromatic blend of garlic and white wine creates a mouthwatering aroma that draws everyone to the table.

Easy to Master: This recipe is perfect for home cooks of all levels, making it a great escape from fast food without much hassle.

Dive into making this delectable dish today, and if you're looking for more inspiration, check out our guide on easy pasta recipes!

Sea Scallops Pasta Ingredients

• The perfect ingredients for a mouthwatering dish.

For the Pasta

  • 8 ounces pasta – Choose your favorite type, like fettuccine or linguine, for a delightful base.

For the Scallops

  • 1 cup scallops – Fresh or frozen, scallops add a sweet and buttery flavor; thaw before use if frozen.
  • 1 tablespoon olive oil – Use high-quality oil for searing; enhances the dish’s richness.

For the Sauce

  • 3 tablespoons garlic, minced – Fresh garlic adds wonderful aroma and flavor to your creamy sauce.
  • 1 cup white wine – A dry white wine works best to balance the richness of the cream.
  • 1 cup heavy cream – Delivers that luscious, creamy texture that makes this pasta special.
  • 2 tablespoons butter – Adds a luxurious finish to the sauce, enriching the overall flavor.

For Freshness and Flavor

  • 1 cup fresh herbs (such as parsley or basil) – Fresh herbs elevate the dish’s flavor and provide a vibrant pop of color.
  • Salt to taste – Season to enhance the flavors of the sauce and scallops.
  • Pepper to taste – Freshly cracked pepper adds a perfect kick.

Now you have everything you need for your Sea Scallops Pasta! Let’s keep the magic flowing as you prepare to impress your guests or indulge in a cozy dinner at home.

Step‑by‑Step Instructions for Sea Scallops Pasta

Step 1: Cook the Pasta
Begin by bringing a large pot of salted water to a boil over high heat. Once boiling, add 8 ounces of your favorite pasta, such as fettuccine or linguine. Cook according to the package instructions until al dente, about 8-10 minutes. Drain the pasta in a colander, then set aside while you prepare the rest of the dish.

Step 2: Sear the Scallops
In a large skillet, heat 1 tablespoon of olive oil over medium heat. Once hot, carefully add 1 cup of scallops in a single layer. Sear for about 2-3 minutes on each side until they are golden brown and opaque in the center. Once done, remove the scallops from the skillet and set them aside on a plate while you make the sauce.

Step 3: Sauté the Garlic
Using the same skillet, add 3 tablespoons of minced garlic and sauté for about 1 minute until fragrant, stirring frequently to prevent burning. You'll notice the lovely aroma filling your kitchen! This step is crucial as it creates a flavorful base for your Sea Scallops Pasta.

Step 4: Add the White Wine
Next, pour in 1 cup of dry white wine into the skillet. Increase the heat to medium-high and allow the wine to reduce for about 2-3 minutes. You'll see the liquid volume decrease slightly, enhancing its flavors and creating a delightful aroma that will have everyone eager to taste your dish.

Step 5: Incorporate Heavy Cream
Lower the heat to medium and stir in 1 cup of heavy cream. Allow the sauce to simmer for another 2-3 minutes, stirring occasionally until it thickens slightly. The creamy blend should become luscious and inviting, creating the perfect coating for your pasta and seared scallops.

Step 6: Combine the Pasta
Add the cooked pasta back into the skillet, tossing gently to coat it well with the creamy sauce. Ensure every strand is enveloped in that rich, decadent mixture. This step is vital for blending all the flavors together in your mouthwatering Sea Scallops Pasta.

Step 7: Finish with Scallops and Herbs
Now, return the seared scallops to the skillet along with 1 cup of fresh herbs, such as parsley or basil. Add 2 tablespoons of butter, and season the dish with salt and pepper to taste. Gently toss everything together until well mixed, allowing the butter to melt and the flavors to meld beautifully.

Step 8: Serve Immediately
Your Sea Scallops Pasta is ready to be served! Plate the pasta generously, and consider garnishing with extra fresh herbs for a pop of color and flavor. Relish in the joy of serving a gourmet meal that’s sure to impress family and friends, all while being perfectly cozy for a night in.

Sea Scallops Pasta

Make Ahead Options

These Sea Scallops Pasta are perfect for meal prep enthusiasts! You can cook the pasta and scallops up to 24 hours in advance. Simply prepare the pasta according to the package instructions and let it cool before tossing it with a little olive oil to prevent sticking. For the scallops, sear them, and store them in an airtight container in the refrigerator. You can also prepare the creamy sauce (white wine, garlic, and heavy cream) up to 3 days ahead—just reheat gently over low heat before combining. When ready to serve, quickly toss the pasta and scallops in the reheated sauce, adding fresh herbs and butter for that just-off-the-stove taste. This makes your meal stress-free while ensuring it's just as delicious!

What to Serve with Sea Scallops Pasta

Create a delightful dining experience by pairing your pasta dish with complementary sides and treats.

  • Garlic Bread: The perfect accompaniment, its buttery, toasted goodness offers a crunchy contrast to creamy pasta while soaking up delicious sauce.
  • Roasted Asparagus: Tender, slightly crisp asparagus adds a pop of color and earthy flavor, enhancing the dish’s sophistication. Drizzle with olive oil and a pinch of salt for maximum flavor.
  • Mixed Green Salad: A bright salad with fresh greens, cherry tomatoes, and a zesty vinaigrette balances the richness of the scallops and creamy sauce, cleansing the palate between bites.
  • Lemon Sorbet: For dessert, this light and refreshing sorbet provides a sweet yet tart finish, perfectly countering the richness of Sea Scallops Pasta.
  • Chardonnay: A chilled glass of dry Chardonnay echoes the wine used in the sauce, beautifully complementing the flavors in the dish.
  • Grilled Vegetable Platter: Vibrant grilled vegetables bring texture and a smoky element to your meal, enriching the overall experience with a variety of flavors.
  • Parmesan Cheese: A sprinkle of freshly grated Parmesan over the dish adds an extra layer of umami and sharpness that pairs beautifully with the creamy sauce.
  • Balsamic Glazed Brussels Sprouts: Savory and sweet, these roasted Brussels sprouts provide a crispy element that enhances the overall dish without overpowering it.
  • Crispy Potato Wedges: Seasoned and baked until golden, these wedges offer a comforting starchy side that can be dipped in the extra sauce.

Expert Tips for Sea Scallops Pasta

Select Quality Scallops: Ensure you use fresh or properly thawed scallops for the best flavor and texture; avoid overcooking them to prevent toughness.

Garlic Magic: Sauté garlic just until fragrant; burnt garlic will ruin the sauce's delicate flavor, so keep an eye on it!

Wine Matters: Opt for a dry white wine that you enjoy drinking—this elevates the sauce and adds depth to your Sea Scallops Pasta.

Perfect Creaminess: Let the heavy cream simmer gently; don’t rush this step to achieve the luscious consistency you desire.

Fresh Herbs Tips: Add herbs at the very end to retain their vibrant flavor; taste as you go to find the perfect balance in seasoning.

How to Store and Freeze Sea Scallops Pasta

Fridge: Store any leftovers in an airtight container in the fridge for up to 3 days. Reheat gently on the stovetop with a splash of water or cream to retain creaminess.

Freezer: For longer storage, freeze portions in airtight containers for up to 2 months. The pasta might become slightly soft upon thawing, but the flavor will remain delightful.

Reheating: When reheating frozen Sea Scallops Pasta, thaw in the refrigerator overnight. Then, warm it up slowly on the stovetop or in the microwave, adding a little cream to restore its luscious texture.

Serving Reminder: Always serve immediately after reheating for the best taste experience; the creamy sauce is best enjoyed fresh!

Sea Scallops Pasta Variations

Feel free to get creative with your dish—these delightful twists will awaken your taste buds!

  • Gluten-Free: Substitute regular pasta with gluten-free options like chickpea or rice noodles for a delicious alternative without compromising flavor.
  • Dairy-Free: Use coconut cream instead of heavy cream to keep it creamy and velvety, while giving a hint of tropical flavor.
  • Herb-Enhanced: Experiment with different fresh herbs such as dill or tarragon for a unique aromatic touch that elevates your scallops.
  • Spicy Kick: Add crushed red pepper flakes or finely chopped jalapeños to the garlic when sautéing for a zesty heat that'll warm you up!
  • Vegetable Boost: Toss in sautéed spinach or asparagus for vibrant color and extra nutrients, making the dish even more appealing and wholesome.
  • Seafood Medley: Combine scallops with shrimp or crab for an indulgent seafood extravaganza that will impress any guest at your dining table.
  • Lemon Zest: Incorporate fresh lemon zest before serving to brighten the dish and add a refreshing citrusy note that perfectly complements the creaminess.
  • Umami Twist: For an extra layer of flavor, add a tablespoon of soy sauce or miso paste into the cream sauce, creating a unique fusion experience!

Each of these variations allows you to tailor your Sea Scallops Pasta to your preferences. Also, if you're looking for more inspiration, don’t miss our guide on easy pasta recipes!

Sea Scallops Pasta

Sea Scallops Pasta Recipe FAQs

What should I look for when selecting scallops?
Absolutely! When choosing scallops, look for those that are firm, slightly moist, and have a sweet, ocean-like aroma. Avoid scallops with dark spots or a strong fishy smell, as these can indicate spoilage. If you're using frozen scallops, ensure they are completely thawed before cooking for even searing.

How should I store leftover Sea Scallops Pasta?
For any leftovers, store them in an airtight container in the fridge for up to 3 days. When you're ready to enjoy your pasta again, gently reheat it on the stovetop with a splash of water or cream to maintain that sumptuous creaminess!

Can I freeze Sea Scallops Pasta?
Very! To freeze your Sea Scallops Pasta, portion it into airtight containers and store it in the freezer for up to 2 months. When you’re ready to savor it again, thaw in the fridge overnight and then reheat slowly on the stovetop, adding a little cream to bring back its luscious texture.

What if my sauce is too thick?
If your sauce turns out thicker than you'd like, don't fret! Simply add a splash of warm water or broth, stirring gently until you achieve the desired consistency. The key is to adjust it slowly, allowing the flavors to balance while maintaining that delightful creaminess.

Are there any dietary considerations with this recipe?
Definitely! If you have seafood allergies, it's best to avoid scallops altogether. Additionally, for those with dairy sensitivities, you can substitute the heavy cream with a plant-based cream alternative, but keep in mind it might slightly alter the flavor and texture. Always check the labels for any potential allergens, especially if serving to guests.

Can I use other types of pasta for this recipe?
The more the merrier! While fettuccine or linguine work beautifully, feel free to experiment with other pasta shapes you love. Just make sure to adjust the cooking time according to the package instructions for your chosen type of pasta! Enjoy your culinary adventure with different textures!

Sea Scallops Pasta

Indulge in Creamy Sea Scallops Pasta for a Cozy Dinner

Experience the luxurious taste of Sea Scallops Pasta, a quick and decadent dish for memorable dinners.
Print Recipe Pin Recipe
Prep Time 10 minutes mins
Cook Time 25 minutes mins
Total Time 35 minutes mins
Servings: 2 plates
Course: Main Dishes
Cuisine: Italian
Calories: 650
Ingredients Equipment Method Nutrition Notes

Ingredients
  

For the Pasta
  • 8 ounces pasta Choose your favorite type, like fettuccine or linguine.
For the Scallops
  • 1 cup scallops Fresh or frozen, thaw if frozen.
  • 1 tablespoon olive oil High-quality oil for searing.
For the Sauce
  • 3 tablespoons garlic, minced Fresh garlic for aroma and flavor.
  • 1 cup white wine A dry white wine works best.
  • 1 cup heavy cream Delivers a luscious texture.
  • 2 tablespoons butter Adds a luxurious finish.
For Freshness and Flavor
  • 1 cup fresh herbs (such as parsley or basil) Elevates flavor and color.
  • salt To taste.
  • pepper Freshly cracked, to taste.

Equipment

  • Large Pot
  • Colander
  • large skillet

Method
 

Step‑by‑Step Instructions
  1. Bring a large pot of salted water to a boil. Add 8 ounces of pasta and cook until al dente, about 8-10 minutes. Drain and set aside.
  2. In a large skillet, heat 1 tablespoon of olive oil over medium heat. Add 1 cup of scallops and sear for about 2-3 minutes on each side until golden brown.
  3. Add 3 tablespoons of minced garlic to the skillet and sauté for about 1 minute until fragrant.
  4. Pour in 1 cup of dry white wine and allow to reduce for about 2-3 minutes.
  5. Reduce heat to medium, stir in 1 cup of heavy cream, and simmer for another 2-3 minutes until it thickens slightly.
  6. Add the cooked pasta back into the skillet and toss gently to coat with the sauce.
  7. Return the seared scallops and add 1 cup of fresh herbs and 2 tablespoons of butter. Season with salt and pepper to taste. Toss to combine.
  8. Serve immediately, garnished with extra fresh herbs if desired.

Nutrition

Serving: 1plateCalories: 650kcalCarbohydrates: 60gProtein: 25gFat: 35gSaturated Fat: 20gMonounsaturated Fat: 15gCholesterol: 120mgSodium: 800mgPotassium: 600mgFiber: 3gSugar: 2gVitamin A: 800IUVitamin C: 5mgCalcium: 60mgIron: 3mg

Notes

This recipe is perfect for home cooks of all levels, making it a great escape from fast food without much hassle.

Tried this recipe?

Let us know how it was!

Melt-In-Your-Mouth Tender Braised Beef Brisket Recipe

January 16, 2026 by grace bellamy Leave a Comment

As the rich aroma of braised beef wafts through my kitchen, I can’t help but feel transported to a cozy family gathering, where laughter and warmth mingle with mouthwatering scents. This Tender Braised Beef Brisket recipe is a beloved tradition that brings everyone to the table, and trust me, it’s worth every minute of the 3-4 hours it takes to prepare. Not only is it a showstopper for any dinner party, but it also offers that ultimate comfort food experience we've all been craving. The best part? You can easily whip it up with just a few ingredients, making it both a delightful and accessible home-cooked meal. So, are you ready to discover a dish that will impress your family and friends while filling your home with unforgettable flavors? Let’s dive in!

Tender Braised Beef Brisket

Why is this brisket so special?

Simplicity shines through this recipe with easily accessible ingredients that combine to create an unforgettable dish. Rich, satisfying flavor from the red wine and seasonings envelops each tender bite of brisket, making it a true crowd-pleaser. Versatile cooking means it’s perfect for dinner parties or cozy family meals. Time-saving convenience allows you to focus on other tasks as it braises slowly to perfection in the oven. This show-stopping dish easily transforms any mundane meal into a gourmet experience, bringing everyone to the table for a delightful feast. For more comforting recipes, check out my Classic Beef Stew or Savory Roast Chicken.

Tender Braised Beef Brisket Ingredients

• Dive into the flavors with this scrumptious recipe!

For the Brisket

  • 4 pounds beef brisket – select a well-marbled cut for maximum tenderness.
  • 2 tablespoons vegetable oil – used for searing; can be substituted with olive oil for a richer taste.

For the Aromatics

  • 1 large onion, chopped – adds sweetness as it caramelizes during cooking.
  • 2-3 sprigs fresh thyme – provides a fragrant herbal note that brightens the dish.
  • 2-3 bay leaves – enhances the overall depth of flavor; make sure to remove before serving.

For the Braising Liquid

  • 2 cups beef broth – essential for moistening the brisket and enriching the sauce.
  • 1 cup red wine – brings out richness in the beef; feel free to substitute with an additional cup of broth for a non-alcoholic version.
  • 2 tablespoons tomato paste – imparts a subtle tang and deep color to the sauce.
  • 2 tablespoons brown sugar – balances the acidity and adds a touch of sweetness.
  • 1 tablespoon Worcestershire sauce – delivers a savory umami punch that elevates the dish.

For the Seasonings

  • 2 teaspoons garlic powder – offers a robust flavor without the prep work of fresh garlic.
  • 1 teaspoon onion powder – complements the fresh onion for added depth.
  • 1 teaspoon smoked paprika – introduces a subtle smokiness that adds complexity.
  • ½ teaspoon black pepper – adjust according to your spice preference.
  • Salt to taste – enhances the overall flavor; always taste before adding more.

This Tender Braised Beef Brisket is sure to become a favorite at your family gatherings, providing both comfort and satisfaction!

Step‑by‑Step Instructions for Tender Braised Beef Brisket

Step 1: Preheat the Oven
Begin your delicious journey by preheating your oven to 350°F (175°C). This ensures the ideal environment for braising, allowing the flavors of the Tender Braised Beef Brisket to meld beautifully during cooking. While the oven warms up, gather your ingredients and equipment to create a smooth workflow in your kitchen.

Step 2: Sear the Brisket
In a large, oven-safe pot, heat 2 tablespoons of vegetable oil over medium-high heat. Once the oil shimmers, carefully place the brisket in the pot, searing it for about 4-5 minutes on each side until a rich brown crust forms. This caramelization adds depth to the flavor. Once both sides are browned, remove the brisket and set it aside on a plate.

Step 3: Sauté the Onions
Using the same pot, add the chopped onion and sauté for about 3-4 minutes, or until the onions are soft and translucent. This step builds the base of your sauce, infusing flavor into what will become the braising liquid for your Tender Braised Beef Brisket. Stir the onions occasionally to prevent sticking and ensure even cooking.

Step 4: Create the Braising Liquid
Now, it's time to elevate those onions! Stir in 2 cups of beef broth, 1 cup of red wine, and mix in the tomato paste, brown sugar, Worcestershire sauce, garlic powder, onion powder, smoked paprika, black pepper, and salt to taste. This fragrant mixture will envelop the brisket while it cooks, so make sure it's well combined, and bring it to a gentle simmer.

Step 5: Submerge the Brisket
Return the seared brisket to the pot, ensuring it is fully submerged in the sauce. This is where the magic happens! The brisket will absorb all those rich flavors as it cooks slowly. Make sure to nestle it right into the liquid for optimal tenderness, setting the stage for a truly succulent dish that your loved ones will rave about.

Step 6: Braise in the Oven
Cover the pot with a lid and place it in your preheated oven. Allow the brisket to braise for 3-4 hours, checking occasionally for tenderness. The brisket should become fork-tender, meaning a gentle pull should easily separate the meat. This long, slow cooking process is key to achieving the sumptuous, melt-in-your-mouth texture that defines a great Tender Braised Beef Brisket.

Step 7: Rest and Slice the Brisket
Once the cooking time is complete, carefully remove the pot from the oven. Let the brisket rest for 15-20 minutes while still covered; this allows the juices to redistribute, resulting in juicy slices. After resting, slice the brisket against the grain for the best texture, and don’t forget to strain the cooking liquid to serve as a rich gravy alongside your tasty creation.

Tender Braised Beef Brisket

Storage Tips for Tender Braised Beef Brisket

Fridge: Store leftover Tender Braised Beef Brisket in an airtight container for up to 3 days. Make sure to keep the meat submerged in the gravy to maintain moisture.

Freezer: For longer storage, wrap the brisket tightly in plastic wrap, then foil, and freeze for up to 3 months. This will help preserve the flavor and tenderness.

Reheating: To reheat, thaw in the fridge overnight, then place in a covered dish in a 325°F (163°C) oven until warmed through, about 20-25 minutes. This will keep the brisket juicy and delicious!

Gravy Storage: Store any leftover gravy in a separate airtight container in the fridge for up to 3 days or freeze for up to 2 months. It’s perfect for adding back moisture when reheating the brisket!

Tender Braised Beef Brisket Variations

Feel free to make this melt-in-your-mouth brisket your own with these creative twists!

  • Dairy-Free: Swap any creamy sides for fresh salads or roasted vegetables for a light pairing.
  • Spicy Kick: Add 1-2 teaspoons of crushed red pepper flakes to the braising liquid for a heat boost.
  • Smoky Flavor: Infuse even more smoky goodness by using smoked salt in place of regular salt.
  • Herbaceous Twist: Experiment with herbs like rosemary or oregano to change the flavor profile entirely. Fresh herbs can elevate the dish beautifully.
  • BBQ Style: Brush the brisket with your favorite BBQ sauce during the last 30 minutes of braising for a luscious glaze.
  • Asian Fusion: Use soy sauce instead of Worcestershire and add ginger for an exciting twist that introduces a whole new flavor dimension.
  • Vegetable Boost: Toss in root vegetables like carrots and potatoes in the last hour of braising for a complete meal in one pot. Their sweetness complements the beef so well!
  • Alcohol-Free Version: Replace red wine with additional beef broth or a splash of grape juice for those avoiding alcohol.

With each variation, you can create a fresh experience while keeping the essence of this beautiful brisket intact. This dish is versatile enough to cater to any palate, much like my other favorites, the Classic Beef Stew and Savory Roast Chicken! Enjoy experimenting!

Expert Tips for Tender Braised Beef Brisket

  • Choose Quality Meat: Opt for a well-marbled brisket to ensure maximum tenderness. Lean cuts can dry out during the long cooking process.

  • Sear Well: Don’t rush the searing step. A good caramelization adds depth of flavor, enhancing your Tender Braised Beef Brisket.

  • Control the Liquid: Ensure the brisket is fully submerged in the braising liquid for even cooking. If necessary, add more broth or wine.

  • Low and Slow: Stick to the recommended braising time. Rushing this step can lead to tough meat, missing that melt-in-your-mouth tenderness.

  • Resting Time: Allow the brisket to rest after cooking. This crucial step helps retain juices, ensuring every slice remains juicy and flavorful.

  • Strain the Gravy: For a smoother sauce, make sure to strain the cooking liquid before serving. It adds a beautiful finish to your meal!

What to Serve with Tender Braised Beef Brisket

As you take in the comforting aroma of this succulent dish, you’ll want to surround it with equally delightful sides that enhance the experience.

  • Creamy Mashed Potatoes: The rich, buttery texture complements the savory brisket, making it the perfect vehicle for soaking up that glorious gravy.

  • Garlic Butter Green Beans: Their crisp-tender texture and garlicky goodness brighten the plate, adding a fresh contrast to the hearty brisket.

  • Roasted Root Vegetables: A medley of carrots, parsnips, and potatoes roasted to caramelized perfection offers sweetness that pairs beautifully with the savory meat.

  • Classic Coleslaw: The crunchy, tangy coleslaw adds a refreshing note, perfectly balancing the richness of the brisket while serving as a delightful palate cleanser.

  • Homemade Dinner Rolls: Warm, fluffy rolls are essential for sopping up gravy, enhancing the meal with a comforting homemade touch that feels like a warm hug.

  • Full-Bodied Red Wine: A glass of the same red wine used for braising elevates the dish and keeps the flavors harmonious; a Cabernet Sauvignon or Merlot works wonders.

  • Decadent Chocolate Cake: Finish the meal on a sweet note with a slice of moist chocolate cake; its richness is the ultimate indulgence after a hearty dinner.

Make Ahead Options

These Tender Braised Beef Brisket preparations are fantastic for the busy home cook seeking convenience without compromising on flavor! You can sear the brisket and prepare the braising liquid up to 24 hours in advance. Simply follow the initial steps, then let the brisket cool, cover it with plastic wrap, and refrigerate. To maintain quality, ensure the brisket is fully submerged in the liquid to prevent drying out. When you're ready to enjoy this dish, simply reheat it in the oven at 350°F (175°C) for about 30-45 minutes, covered with a lid. This way, you'll have a delicious, hearty meal with minimal effort!

Tender Braised Beef Brisket

Tender Braised Beef Brisket Recipe FAQs

What type of beef brisket should I select for this recipe?
Absolutely! A well-marbled beef brisket is key to achieving that melt-in-your-mouth tenderness you desire. Look for a brisket that has even marbling throughout. The fat will render during cooking, keeping the meat juicy and adding excellent flavor.

How long can I store cooked brisket in the fridge?
You can store your leftover Tender Braised Beef Brisket in an airtight container in the fridge for up to 3 days. Be sure to keep the brisket submerged in the gravy to maintain its moisture and tenderness.

Can I freeze my leftover brisket?
Very! For longer storage, wrap the brisket tightly in plastic wrap and then in foil, and freeze it for up to 3 months. When you’re ready to enjoy it again, thaw it in the fridge overnight. To reheat, place it in a covered dish in a preheated oven at 325°F (163°C) for about 20-25 minutes. This method will help to retain the brisket's delicious flavor and juiciness.

What’s the best way to reheat braised brisket without drying it out?
I often recommend reheating in the oven to keep the brisket moist. After thawing the brisket overnight in the fridge, place it in a covered baking dish with a splash of broth or gravy. Heat at 325°F (163°C) for 20-25 minutes. This gentle heat allows it to warm through without drying out, keeping it tender and flavorful.

What should I do if my brisket is tough after cooking?
If you find your Tender Braised Beef Brisket isn’t as tender as expected, it may not have braised long enough. Ensure the pot is covered tightly and that the brisket is fully submerged in liquid. Next time, increase the cooking time by 30 minutes to an hour for improvement. Remember, the longer the brisket cooks at a low temperature, the more tender it becomes!

Is this recipe safe for people with certain dietary restrictions?
Very! While the recipe itself is free from common allergens like gluten and nuts, always check your ingredients for allergens. For low-sodium diets, opt for low-sodium beef broth, and you can substitute red wine with additional broth or grape juice for a non-alcoholic version to suit those preferences. Enjoy worry-free!

Tender Braised Beef Brisket

Melt-In-Your-Mouth Tender Braised Beef Brisket Recipe

This Tender Braised Beef Brisket recipe offers melt-in-your-mouth goodness, perfect for any gathering.
Print Recipe Pin Recipe
Prep Time 15 minutes mins
Cook Time 4 hours hrs
Resting Time 20 minutes mins
Total Time 4 hours hrs 15 minutes mins
Servings: 8 slices
Course: Main Dishes
Cuisine: American
Calories: 350
Ingredients Equipment Method Nutrition Notes

Ingredients
  

For the Brisket
  • 4 pounds beef brisket select a well-marbled cut for maximum tenderness
  • 2 tablespoons vegetable oil can be substituted with olive oil for a richer taste
For the Aromatics
  • 1 large onion, chopped adds sweetness as it caramelizes during cooking
  • 2-3 sprigs fresh thyme provides a fragrant herbal note
  • 2-3 pieces bay leaves enhances the overall flavor; remove before serving
For the Braising Liquid
  • 2 cups beef broth essential for moistening the brisket
  • 1 cup red wine brings out richness in the beef; can substitute with broth
  • 2 tablespoons tomato paste imparts a subtle tang and deep color to the sauce
  • 2 tablespoons brown sugar balances acidity and adds sweetness
  • 1 tablespoon Worcestershire sauce delivers a savory umami punch
For the Seasonings
  • 2 teaspoons garlic powder offers a robust flavor
  • 1 teaspoon onion powder complements the fresh onion
  • 1 teaspoon smoked paprika introduces a subtle smokiness
  • ½ teaspoon black pepper adjust to preference
  • to taste salt enhances flavor; taste before adding

Equipment

  • Oven-safe pot

Method
 

Step-by-Step Instructions for Tender Braised Beef Brisket
  1. Preheat your oven to 350°F (175°C). Gather your ingredients and equipment.
  2. Heat 2 tablespoons of vegetable oil in a large pot. Sear the brisket for 4-5 minutes on each side until brown. Remove and set aside.
  3. Sauté the chopped onion in the same pot for 3-4 minutes until soft and translucent.
  4. Stir in the beef broth, red wine, tomato paste, brown sugar, Worcestershire sauce, garlic powder, onion powder, smoked paprika, black pepper, and salt. Bring to a gentle simmer.
  5. Return the seared brisket to the pot, ensuring it is fully submerged in the sauce.
  6. Cover the pot and braise in the oven for 3-4 hours, checking for tenderness.
  7. After cooking, let the brisket rest for 15-20 minutes before slicing against the grain.

Nutrition

Serving: 1sliceCalories: 350kcalCarbohydrates: 10gProtein: 45gFat: 15gSaturated Fat: 5gPolyunsaturated Fat: 0.5gMonounsaturated Fat: 9gCholesterol: 120mgSodium: 600mgPotassium: 800mgFiber: 1gSugar: 3gVitamin C: 1mgCalcium: 2mgIron: 20mg

Notes

Choose a well-marbled brisket for tenderness. Ensure it remains submerged in the liquid during cooking for best results.

Tried this recipe?

Let us know how it was!

Irresistible Spinach Stuffed Pie: A Comfort Food Delight

January 16, 2026 by grace bellamy Leave a Comment

While flipping through my favorite cookbook last weekend, I stumbled upon a delightful recipe that instantly whisked me back to family gatherings filled with warmth and laughter—the Spinach Stuffed Pie. This dish not only brings comfort to the table but also makes dinner prep a breeze, thanks to the convenience of a pre-made pie crust. Packed with vibrant spinach and creamy cheeses, it’s a healthy yet satisfying choice that will please even the pickiest eaters. Plus, it’s versatile enough for any occasion, from casual weeknight dinners to festive celebrations. Aren’t we all just a little curious about how a single slice can ignite such fond memories? Let’s dive into this recipe and explore its magic!

Spinach Stuffed Pie

Why is Spinach Stuffed Pie a Must-Try?

Flavorful layers: This dish boasts a delightful combination of fresh spinach and three kinds of cheese, creating a rich and satisfying flavor profile that you won't be able to resist.

Quick prep: With a pre-made pie crust, you’ll spend less time in the kitchen and more time enjoying this delicious meal with family and friends.

Versatile option: Perfect for any occasion, whether it's a cozy family dinner or elevating your next gathering. You can even serve it alongside Crab Stuffed Mushrooms for a wonderful appetizer.

Healthful indulgence: Packed with nutrients from spinach, this pie provides a guilt-free way to treat yourself to comfort food.

Crowd pleaser: Its luscious taste and beautiful presentation ensure that it will steal the show at your table!

Spinach Stuffed Pie Ingredients

Get ready to delight your taste buds!

For the Pie Crust
• 1 pre-made pie crust (9-inch) – saves time while delivering delicious flaky layers.

For the Filling
• 2 tablespoons olive oil – enhances flavor and helps sauté the vegetables.
• 1 medium onion, finely chopped – adds sweetness and depth to the filling.
• 2 cloves garlic, minced – infuses aromatic goodness into the dish.
• 4 cups fresh spinach, washed and chopped – essential for that vibrant, nutritious base of the spinach stuffed pie.
• 1 cup ricotta cheese – brings creaminess and balances the flavors.
• 1 cup feta cheese, crumbled – adds a tangy kick to the filling.
• ½ cup grated Parmesan cheese – provides a savory depth to the pie.
• 2 large eggs – binds all the ingredients together for a satisfying texture.
• ¼ teaspoon nutmeg – a warm spice that elevates the flavor profile.
• Salt and pepper, to taste – essential seasonings to enhance all the delicious flavors.
• 1 tablespoon fresh dill or 1 teaspoon dried dill – adds a fresh herbaceous note to the mixture.
• 1 egg (for egg wash) – gives the top crust a beautiful golden finish when baked.

Step‑by‑Step Instructions for Spinach Stuffed Pie

Step 1: Preheat the Oven
Begin by preheating your oven to 375°F (190°C). This ensures a perfectly baked pastry crust and a warm, melty filling. While the oven heats up, it’s the perfect time to gather all your ingredients and prepare your workspace, making your cooking process smooth and enjoyable.

Step 2: Sauté the Vegetables
In a large skillet, heat 2 tablespoons of olive oil over medium heat. Add the finely chopped onion, sautéing until it becomes translucent, about 5 minutes. Stir occasionally to prevent browning. Once the onion is softened, introduce 2 cloves of minced garlic and cook for an additional minute, filling your kitchen with an irresistible aroma.

Step 3: Wilt the Spinach
Gradually add 4 cups of washed and chopped fresh spinach to the skillet. Stir the mixture continuously for about 3 to 4 minutes until the spinach is wilted and bright green. Once done, remove the skillet from heat and let it cool slightly, allowing you to handle the mixture safely for the next step.

Step 4: Mix the Cheese Filling
In a large mixing bowl, combine 1 cup of ricotta cheese, 1 cup of crumbled feta cheese, and ½ cup of grated Parmesan cheese along with 2 large eggs. Use a fork or a spatula to mix these ingredients until they are well blended, forming a creamy base for your filling.

Step 5: Combine Spinach and Seasonings
Fold the cooled spinach and onion mixture into the cheese mixture, incorporating it evenly. To elevate the flavors, add ¼ teaspoon of nutmeg, salt, pepper to taste, and 1 tablespoon of fresh or 1 teaspoon of dried dill. Mix well until all ingredients are thoroughly combined for your Spinach Stuffed Pie.

Step 6: Prepare the Pie Crust
Roll out your pre-made 9-inch pie crust and carefully fit it into a pie dish, gently pressing down to eliminate any air bubbles. If needed, trim the edges for a neat presentation. This forms a lovely base for your rich filling.

Step 7: Add the Filling
Spoon the spinach and cheese filling into the prepared pie crust, spreading it evenly to ensure every slice is packed with flavor. Level the top with the back of a spoon, creating an inviting surface for the top crust to adhere to later.

Step 8: Seal the Pie
Roll out a second pie crust and carefully place it over the filling. Crimp the edges effectively with your fingers or a fork to seal the pie securely. To allow steam to escape while baking, cut a few slits in the top crust, creating a beautiful design as well as function.

Step 9: Add Egg Wash
In a small bowl, beat 1 egg and brush it over the top of the pie. This egg wash will give the Spinach Stuffed Pie a beautiful golden finish when it bakes, making it look as delightful as it tastes.

Step 10: Bake the Pie
Carefully place the pie in your preheated oven and bake for 35 to 40 minutes. Keep an eye on it; you'll know it's ready when the crust is golden brown and the filling appears set and slightly puffed.

Step 11: Cool and Serve
Once baked, remove the Spinach Stuffed Pie from the oven and allow it to cool for about 10 minutes on a wire rack. This cooling period ensures the flavors settle, making it easier to slice. When ready, serve and enjoy the warm, comforting goodness of your homemade pie!

Spinach Stuffed Pie

Tips for the Best Spinach Stuffed Pie

  • Fresh Spinach Tip: Use fresh spinach rather than frozen for a vibrant flavor and better texture. Frozen spinach can lead to a soggy filling if not thoroughly drained.

  • Cheese Balance: Feel free to experiment with different cheeses! Adding a bit of cream cheese can increase creaminess, but avoid overpowering the delicate flavors of the feta and ricotta in your Spinach Stuffed Pie.

  • Prevent Soggy Crust: To avoid a soggy bottom crust, consider pre-baking the bottom crust for 5-10 minutes before adding the filling. This extra step helps keep the crust crispy.

  • Seasoning Mastery: Don’t shy away from adjusting seasoning. Taste your filling before sealing the pie; you can always add a pinch more salt or dill to elevate the flavor.

  • Golden Finish: For an extra glossy finish, brush the egg wash over the edges of the crust as well! This little detail enhances presentation and makes every piece shine on your table.

What to Serve with Spinach Stuffed Pie?

Creating the perfect meal means thinking about those delightful accompaniments that elevate your Spinach Stuffed Pie experience.

  • Crispy Side Salad: A refreshing salad with mixed greens and a zesty lemon dressing cuts through the richness of the pie, balancing flavors beautifully.
  • Garlic Bread Sticks: Warm, buttery garlic bread sticks add a savory touch and are perfect for mopping up the delicious cheese filling.
  • Roasted Vegetables: Colorful roasted vegetables, like bell peppers and zucchini, bring a vibrant touch, enhancing both the visual appeal and flavor harmony.
  • Creamy Mashed Potatoes: Silky, buttery mashed potatoes complement the rich filling, creating a comforting dish that is always a hit at the dinner table.
  • Chilled White Wine: A chilled glass of Sauvignon Blanc or Pinot Grigio makes for a refreshing pairing, enhancing the flavors of the spinach and cheese.
  • Lemon Sorbet: A light lemon sorbet offers a delightful, palate-cleansing dessert that refreshes after the hearty pie.
  • Classic Tzatziki Sauce: This creamy cucumber-yogurt blend adds a cool factor, pairing perfectly with the pie while embracing Mediterranean flavors.
  • Sautéed Green Beans: Tender green beans sautéed with garlic and almonds introduce a crunchy texture that beautifully complements the Spinach Stuffed Pie.

How to Store and Freeze Spinach Stuffed Pie

Fridge: Store any leftover Spinach Stuffed Pie in an airtight container in the fridge for up to 3 days. This helps maintain its flavors and texture while keeping it fresh.

Freezer: You can freeze the pie before or after baking. If freezing unbaked, wrap it tightly in plastic wrap and then aluminum foil for up to 3 months. For baked pies, let them cool completely before freezing.

Reheating: To reheat, thaw the pie in the fridge overnight if frozen. For baked pies, simply warm it in the oven at 350°F (175°C) for 20-25 minutes, or until heated through.

Slice Storage: If you prefer, slice the pie before storing. Wrap individual slices in plastic wrap and place them in a freezer-safe bag; this makes for easy grab-and-go meals!

Make Ahead Options

These Spinach Stuffed Pies are fantastic for meal prep, allowing you to enjoy homemade goodness without the last-minute rush! You can prepare the filling up to 24 hours in advance; simply store it in an airtight container in the refrigerator to maintain freshness. Additionally, you can assemble the entire pie (without baking) and refrigerate it for up to 3 days. To ensure the crust remains crisp, avoid applying the egg wash until you're ready to bake. Just take the pie out, brush it with the egg wash, and pop it in the oven for about 35-40 minutes when you’re ready to serve. You’ll have a delicious, comforting meal with minimal effort on busy weeknights!

Spinach Stuffed Pie Variations

Feel free to let your creativity shine with these delightful twists that will cater to your taste buds!

  • Gluten-Free Crust: Use a gluten-free pie crust to cater to dietary needs while enjoying the same delicious filling.

  • Spicy Kick: Add a pinch of red pepper flakes or chopped jalapeños for a fiery twist that brings the heat to this savory pie. Your guests will love the unexpected warmth in each bite!

  • Meat-Lover's Version: Incorporate cooked, crumbled sausage or bacon into the filling for a heartier dish. This variation adds a satisfying depth that complements the spinach beautifully.

  • Vegan Spinach Stuffed Pie: Swap the cheeses for dairy-free alternatives and replace eggs with flaxseed meal mixed with water. This allows everyone to enjoy the dish without compromising on flavor!

  • Herb Infusion: Experiment with different fresh herbs like basil or thyme instead of dill, creating a new aromatic experience that refreshes the traditional recipe. Each herb brings its own unique flavor notes to the pie.

  • Cheese Explosion: Add a blend of mozzarella along with the feta and ricotta for oozing, melty goodness with every slice. This melty mix adds a delightful texture while maintaining that classic flavor.

  • Zesty Tomato Addition: Mix in sun-dried tomatoes or fresh cherry tomatoes to the filling for a burst of acidity and brightness. The contrast of flavors will elevate this comforting dish.

  • Nuts for Crunch: Add a handful of toasted pine nuts or walnuts to the filling for an unexpected crunch, balancing the creamy texture beautifully. This twist adds an appealing nutty flavor that enhances every bite!

Feel free to explore these variations and customize your Spinach Stuffed Pie to match your family’s preferences. Want more creative ideas on what to serve? Try it alongside Spinach Artichoke Wonton or a comforting Chicken Pot Pie!

Spinach Stuffed Pie

Spinach Stuffed Pie Recipe FAQs

How do I select ripe spinach for my Spinach Stuffed Pie?
Absolutely! When choosing fresh spinach, look for vibrant green leaves without any dark spots or wilting. The leaves should be crisp, as dark spots or yellowing can indicate age or spoilage. I always recommend using baby spinach for its tenderness, but any fresh variety will do wonderfully.

What is the best way to store leftover Spinach Stuffed Pie?
Very! To store your pie, simply place any leftovers in an airtight container and refrigerate them for up to 3 days. This method helps preserve the flavors and keeps the crust from getting too soggy. If you have multiple pieces, I suggest wrapping them in plastic wrap before placing them in the container for added freshness.

Can I freeze Spinach Stuffed Pie, and if so, how?
Yes, you can freeze your pie! To freeze it unbaked, wrap it tightly in plastic wrap and aluminum foil, then store it in the freezer for up to 3 months. If you prefer freezing it after baking, let it cool completely first. Once cooled, wrap it as described and freeze. When you’re ready to enjoy, thaw overnight in the fridge and then bake at 350°F (175°C) for about 20-25 minutes until heated through.

What should I do if my filling seems too watery?
A common issue, but don’t worry! If you find your spinach filling is too watery, make sure to thoroughly drain excess moisture from cooked spinach before mixing it with the cheeses. Also, if you find you’re still having issues, consider adding a tablespoon or two of breadcrumbs or flour to help absorb the moisture and give your filling a nice, consistent texture.

Is there a way to adapt this recipe for dietary restrictions, like gluten or dairy-free?
Definitely! For a gluten-free option, simply use a gluten-free pie crust. To make it dairy-free, substitute ricotta and feta with plant-based options like cashew cheese or silken tofu blended until creamy. You can also use nutritional yeast to add a cheesy flavor without the dairy. Enjoy experimenting with it!

Can I make this Spinach Stuffed Pie ahead of time?
Certainly! You can prepare the filling a day in advance and store it in the refrigerator, which enhances the flavors. Just assemble the pie right before baking. You can also freeze it unbaked as previously mentioned, making it a great make-ahead option for busy weeknights or special occasions.

Spinach Stuffed Pie

Irresistible Spinach Stuffed Pie: A Comfort Food Delight

This Spinach Stuffed Pie is a comforting dish filled with vibrant spinach and creamy cheeses, perfect for any occasion.
Print Recipe Pin Recipe
Prep Time 15 minutes mins
Cook Time 40 minutes mins
Cooling Time 10 minutes mins
Total Time 1 hour hr 5 minutes mins
Servings: 8 slices
Course: Main Dishes
Cuisine: Comfort Food
Calories: 300
Ingredients Equipment Method Nutrition Notes

Ingredients
  

For the Pie Crust
  • 1 9-inch pre-made pie crust saves time while delivering delicious flaky layers.
For the Filling
  • 2 tablespoons olive oil enhances flavor and helps sauté the vegetables.
  • 1 medium onion, finely chopped adds sweetness and depth to the filling.
  • 2 cloves garlic, minced infuses aromatic goodness into the dish.
  • 4 cups fresh spinach, washed and chopped essential for that vibrant, nutritious base of the spinach stuffed pie.
  • 1 cup ricotta cheese brings creaminess and balances the flavors.
  • 1 cup feta cheese, crumbled adds a tangy kick to the filling.
  • ½ cup grated Parmesan cheese provides a savory depth to the pie.
  • 2 large eggs binds all the ingredients together for a satisfying texture.
  • ¼ teaspoon nutmeg a warm spice that elevates the flavor profile.
  • Salt and pepper to taste
  • 1 tablespoon fresh dill or 1 teaspoon dried dill adds a fresh herbaceous note to the mixture.
  • 1 large egg (for egg wash) gives the top crust a beautiful golden finish when baked.

Equipment

  • large skillet
  • Mixing Bowl
  • Pie dish
  • Oven

Method
 

Step-by-Step Instructions for Spinach Stuffed Pie
  1. Preheat your oven to 375°F (190°C) to ensure a perfectly baked crust and warm filling.
  2. Heat 2 tablespoons of olive oil in a large skillet over medium heat. Add the finely chopped onion and sauté for about 5 minutes until translucent.
  3. Add 2 cloves of minced garlic to the skillet and cook for an additional minute until aromatic.
  4. Gradually add 4 cups of washed and chopped fresh spinach, stirring continuously for about 3 to 4 minutes until wilted.
  5. In a large mixing bowl, combine 1 cup of ricotta cheese, 1 cup of crumbled feta cheese, and ½ cup of grated Parmesan cheese with 2 large eggs. Mix until well blended.
  6. Fold the cooled spinach and onion mixture into the cheese mixture. Add ¼ teaspoon of nutmeg, salt, and pepper to taste, and 1 tablespoon of fresh or 1 teaspoon of dried dill. Mix until combined.
  7. Roll out the pre-made 9-inch pie crust and fit it into a pie dish, pressing down to eliminate air bubbles.
  8. Spoon the spinach and cheese filling into the prepared pie crust, spreading it evenly.
  9. Roll out a second pie crust and place it over the filling. Crimp the edges to seal and cut slits in the top crust for steam to escape.
  10. Beat 1 egg and brush it over the top of the pie for a golden finish.
  11. Bake in the preheated oven for 35 to 40 minutes, until the crust is golden brown and the filling is set.
  12. Remove from the oven and let cool for about 10 minutes before serving.

Nutrition

Serving: 1sliceCalories: 300kcalCarbohydrates: 25gProtein: 12gFat: 18gSaturated Fat: 8gPolyunsaturated Fat: 2gMonounsaturated Fat: 6gCholesterol: 80mgSodium: 600mgPotassium: 300mgFiber: 3gSugar: 2gVitamin A: 3000IUVitamin C: 15mgCalcium: 250mgIron: 3mg

Notes

Use fresh spinach for better flavor and texture. Experiment with different cheeses for a unique taste. Pre-bake the crust for a crispy bottom if desired.

Tried this recipe?

Let us know how it was!

Savory Beef Osso Bucco: A Comforting Homemade Delight

January 15, 2026 by grace bellamy Leave a Comment

The aroma of slow-cooked beef wafts through the air like an embrace, beckoning you towards the kitchen. If you're ready to elevate your culinary game, allow me to introduce you to the comforting allure of Beef Osso Bucco. This hearty recipe not only brings together the rich flavors of bone-in beef shanks simmered with aromatic vegetables and a splash of white wine, but it also promises an impressive, melt-in-your-mouth experience that will have everyone asking for seconds. Plus, it’s perfect for those cozy evenings when you want to savor a gourmet meal without spending all day in the kitchen. Just imagine the satisfaction of serving a dish that feels like a warm hug—are you curious to see how it all comes together?

Beef Osso Bucco

Why is Beef Osso Bucco a Must-Try?

Melt-in-your-mouth goodness: The slow-cooking method allows the beef to become tender and succulent, creating a dish that's hard to resist.

Hearty and satisfying: Packed with flavors from fresh vegetables, herbs, and a splash of white wine, this recipe offers a richness that defines comfort food.

Impressive presentation: With the stunning bone-in shanks, it’s a dish that looks as good as it tastes, making it ideal for dinner parties or special occasions.

Time well spent: While it takes a few hours to cook, most of that is hands-off, giving you time to relax or prepare other sides.

Crowd-pleaser: Whether it's a family gathering or a casual dinner, Beef Osso Bucco is sure to impress your guests and leave them craving more!

Beef Osso Bucco Ingredients

Delve into the rich flavors of homemade Beef Osso Bucco with these essential ingredients!

For the Beef
• 4 pieces beef shanks (bone-in) – The bone marrow adds incredible flavor and richness to the dish.

For the Vegetables
• 1 cup onion, chopped – Onions provide a lovely base flavor when sautéed, enhancing overall taste.
• 2 cups carrots, chopped – Carrots bring sweetness and a pop of color to your Beef Osso Bucco.
• 2 stalks celery, chopped – Celery adds a nice crunch and depth of flavor to the vegetable mix.
• 1 tablespoon garlic, minced – Garlic offers that irresistible aroma and taste that complements the meats perfectly.

For the Liquid
• 1 cup dry white wine – A splash of white wine not only deglazes the pot but also adds acidity that brightens the dish.
• 2 cups beef broth – Rich beef broth infuses the dish with flavor, ensuring every bite has a savory punch.

For Seasoning
• 1 teaspoon salt – Salt enhances flavors and brings out the taste in all the ingredients.
• 1 teaspoon black pepper – Freshly cracked pepper provides warmth and a hint of spice.
• 1 teaspoon dried thyme – Dried thyme lends an earthy aroma, perfect for hearty dishes like Beef Osso Bucco.
• 1 bay leaf – A bay leaf adds a subtle depth of flavor during the slow cooking process.
• Zest of 1 lemon – Lemon zest brightens the dish with a refreshing citrus note, balancing the richness.

For Garnish
• 2 tablespoons fresh parsley, chopped – Fresh parsley adds a burst of color and freshness when sprinkled on top before serving.

With these carefully selected ingredients, you're just a step away from making the most delightful Beef Osso Bucco!

Step‑by‑Step Instructions for Beef Osso Bucco

Step 1: Preheat the Oven
Begin by preheating your oven to 350°F (175°C). This temperature is perfect for slow-cooking the Beef Osso Bucco to achieve that tender and succulent texture. Ensuring your oven is fully preheated helps lock in the flavors and warmth once the dish is in.

Step 2: Brown the Beef Shanks
In a large oven-safe pot, heat 2 tablespoons of olive oil over medium-high heat. Season your 4 pieces of beef shanks generously with salt and pepper, and carefully add them to the hot oil. Brown the beef shanks for about 3–4 minutes on each side until they develop a beautiful golden crust, then remove them from the pot and set aside.

Step 3: Sauté the Vegetables
In the same pot, add 1 cup of chopped onion, 2 cups of chopped carrots, 2 stalks of chopped celery, and 1 tablespoon of minced garlic. Sauté the vegetables over medium heat for 5–7 minutes, stirring occasionally until they soften and the onions turn translucent. This creates a flavorful base for your Beef Osso Bucco.

Step 4: Deglaze with Wine
Pour in 1 cup of dry white wine to deglaze the pot, scraping up any browned bits stuck to the bottom with a wooden spoon. Allow the wine to simmer for about 5 minutes, which will help evaporate the alcohol and concentrate the flavors, enriching your dish further.

Step 5: Combine Ingredients
Return the browned beef shanks to the pot. Then add 2 cups of beef broth, 1 teaspoon of dried thyme, 1 bay leaf, and the zest of 1 lemon. Stir to combine everything, allowing the broth to begin simmering gently. This mixture will become the flavorful liquid that infuses the Beef Osso Bucco.

Step 6: Slow Cook in the Oven
Cover the pot with a lid and carefully transfer it to your preheated oven. Cook for 2 to 2.5 hours, checking for tenderness. You’ll know your Beef Osso Bucco is ready when the meat is fork-tender and practically falling off the bone, making it the star of your meal.

Step 7: Rest and Garnish
Once cooked, carefully remove the pot from the oven and allow it to sit for a few minutes. This resting period is key for the flavors to settle. Before serving, garnish your Beef Osso Bucco with 2 tablespoons of freshly chopped parsley to add color and a fresh burst of flavor.

Beef Osso Bucco

Make Ahead Options

These Beef Osso Bucco are a fantastic choice for meal prep enthusiasts! You can chop the onions, carrots, and celery up to 3 days in advance; just store them in an airtight container in the refrigerator to keep them fresh. The beef shanks can also be seasoned and browned a day prior, allowing for even richer flavors when they're cooked. When you’re ready to enjoy, simply sauté the prepared vegetables, deglaze with wine, add the beef and broth, and follow the remaining cooking instructions. This way, you’ll have a delicious, comforting meal with minimal effort, perfect for busy weeknights!

Beef Osso Bucco Variations & Substitutions

Let your creativity shine as you customize your Beef Osso Bucco with these delightful variations!

  • Dairy-Free: Replace any butter or dairy with coconut milk for a creamy, non-dairy alternative that enhances richness.

  • Veggie Boost: Add extra vegetables like mushrooms or parsnips for added flavor and texture, creating a more robust veggie medley.

  • Spicy Kick: Toss in a pinch of red pepper flakes when sautéing the vegetables to bring a fiery twist to the dish. It'll elevate the flavors beautifully.

  • Herb Infusion: Swap dried thyme for fresh herbs like rosemary or oregano; they provide a vibrant and aromatic profile that smells heavenly.

  • Red Wine Version: Substitute the dry white wine with red wine for a deeper, more complex flavor that enriches the beef's natural sweetness.

  • Zesty Variation: For a citrus twist, add orange zest alongside the lemon zest; this adds a bright, refreshing layer to the dish.

  • Thicker Sauce: If you prefer a thicker sauce, mix a tablespoon of cornstarch in water, and stir it in during the last few minutes of cooking.

  • Low-Carb Option: Serve your Beef Osso Bucco over cauliflower puree instead of traditional mashed potatoes for a low-carb delight that still feels indulgent.

These flavorful adjustments can easily transform your Beef Osso Bucco into a dish that truly reflects your taste preferences! For more recipe ideas like this, check out our guide on What to Serve with Beef Osso Bucco.

Expert Tips for Beef Osso Bucco

Browning Matters: Don't rush the browning process; take your time to ensure a deep golden crust. This develops rich flavors that make your Beef Osso Bucco unforgettable.

Deglaze Properly: Use a wooden spoon to scrape up all the flavorful bits stuck to the pot after browning the meat. This step is crucial for a robust sauce.

Check for Tenderness: Keep an eye on the cooking time; the meat should be fork-tender but not falling apart too much. This ensures a perfect texture in your Beef Osso Bucco.

Rest Before Serving: Let the dish rest for a few minutes after cooking. This allows the flavors to meld together beautifully, enhancing the overall experience.

Customize Flavor: Feel free to experiment with herbs and spices that you love! Adding fresh thyme or rosemary can offer a delightful twist to your classic Beef Osso Bucco.

What to Serve with Beef Osso Bucco

There's something incredibly comforting about a well-rounded meal that enhances the richness of your Beef Osso Bucco.

  • Creamy Polenta: This velvety side absorbs the delicious sauce while adding a smooth texture that perfectly contrasts the tender meat.
  • Garlic Roasted Potatoes: Crispy, golden-brown potatoes add earthy notes and a satisfying crunch, making them an ideal companion for your hearty dish.
  • Sauteed Green Beans: Vibrant and fresh, these bright green beans introduce a crisp bite, balancing the richness of the osso bucco beautifully.
  • Caesar Salad: The crunchy romaine, tangy dressing, and nutty parmesan create a refreshing contrast, lightening the overall meal experience.
  • Herbed Couscous: Fluffy couscous infused with fresh herbs adds a delightful fluffy texture and a hint of brightness, enhancing the robust flavors of the dish.
  • Chianti Wine: A lovely glass of this full-bodied red wine pairs beautifully with the depth of the osso bucco, offering a truly Italian dining experience.

How to Store and Freeze Beef Osso Bucco

Fridge: Store your Beef Osso Bucco in an airtight container for up to 3 days. This helps retain its rich flavor and ensures it stays juicy and delicious.

Freezer: If you'd like to keep it longer, beef osso bucco can be frozen for up to 3 months. Make sure to cool it completely before wrapping it tightly in plastic wrap or aluminum foil.

Reheating: To reheat, thaw overnight in the fridge, then warm it slowly on the stove over low heat, adding a splash of beef broth to enhance moisture.

Beef Osso Bucco

Beef Osso Bucco Recipe FAQs

How do I select the best beef shanks for this recipe?
Absolutely! When selecting beef shanks, look for those that are well-marbled with a good amount of fat. The fat will render during cooking, creating a richer, more flavorful dish. Fresh shanks should appear bright red, with no dark spots. It’s also best if the bones have a good amount of marrow inside, as this adds depth to the flavor.

How should I store leftover Beef Osso Bucco?
Very important! Store any leftovers in an airtight container in the fridge for up to 3 days. This helps maintain its rich flavors. If you'd like to keep it longer, you can freeze it for up to 3 months. Just ensure it has cooled completely, then wrap it tightly in plastic wrap or aluminum foil before placing it in a freezer-safe container or bag.

Can I freeze Beef Osso Bucco, and if so, how?
Absolutely, freezing Beef Osso Bucco is straightforward! After cooking, let it cool down to room temperature. Transfer the dish to a sturdy container, or wrap it tightly in plastic wrap followed by aluminum foil. Be sure to label and date the packaging for easy identification. To reheat, simply thaw overnight in the fridge and warm it gently on the stovetop over low heat, adding a splash of beef broth to keep it moist.

What if my Beef Osso Bucco isn't tender after the cooking time?
Don't worry! If your beef isn't fork-tender after 2 to 2.5 hours, simply cover the pot again, return it to the oven, and cook for an additional 30 minutes to an hour. Cooking times can vary depending on the thickness of the meat. Just be patient—the longer the beef simmers, the more tender it becomes!

Are there any dietary considerations for Beef Osso Bucco?
For those with dietary restrictions, consider swapping out the white wine with additional beef broth or a splash of apple cider vinegar for acidity. For gluten sensitivities, double-check your beef broth as some brands may contain gluten. And of course, it’s always a good idea to check for any allergies with guests before serving!

Can I make this dish in a slow cooker instead?
Absolutely! If you prefer using a slow cooker, first brown the beef shanks in a skillet as instructed. Then, transfer the browned shanks and sautéed vegetables to the slow cooker along with your deglazing wine, broth, and spices. Cook on low for 6 to 8 hours or on high for 4 to 5 hours until the meat is tender and flavors have melded beautifully. Enjoy your Beef Osso Bucco hassle-free!

Beef Osso Bucco

Savory Beef Osso Bucco: A Comforting Homemade Delight

A delicious Beef Osso Bucco recipe that delivers melt-in-your-mouth flavor for comfort food enthusiasts.
Print Recipe Pin Recipe
Prep Time 30 minutes mins
Cook Time 2 hours hrs 30 minutes mins
Resting Time 10 minutes mins
Total Time 3 hours hrs 10 minutes mins
Servings: 4 pieces
Course: Main Dishes
Cuisine: Italian
Calories: 420
Ingredients Equipment Method Nutrition Notes

Ingredients
  

For the Beef
  • 4 pieces beef shanks (bone-in) The bone marrow adds incredible flavor and richness to the dish.
For the Vegetables
  • 1 cup onion, chopped Onions provide a lovely base flavor when sautéed, enhancing overall taste.
  • 2 cups carrots, chopped Carrots bring sweetness and a pop of color to your Beef Osso Bucco.
  • 2 stalks celery, chopped Celery adds a nice crunch and depth of flavor to the vegetable mix.
  • 1 tablespoon garlic, minced Garlic offers that irresistible aroma and taste that complements the meats perfectly.
For the Liquid
  • 1 cup dry white wine Adds acidity that brightens the dish.
  • 2 cups beef broth Rich beef broth infuses the dish with flavor.
For Seasoning
  • 1 teaspoon salt Enhances flavors and brings out the taste.
  • 1 teaspoon black pepper Provides warmth and a hint of spice.
  • 1 teaspoon dried thyme Lends an earthy aroma.
  • 1 leaf bay leaf Adds a subtle depth of flavor.
  • 1 zest lemon Brightens the dish with a refreshing citrus note.
For Garnish
  • 2 tablespoons fresh parsley, chopped Adds a burst of color and freshness.

Equipment

  • Oven-safe pot
  • Wooden Spoon

Method
 

Cooking Steps
  1. Preheat your oven to 350°F (175°C).
  2. In a large oven-safe pot, heat 2 tablespoons of olive oil over medium-high heat. Season the beef shanks with salt and pepper and brown for 3–4 minutes on each side. Remove and set aside.
  3. In the same pot, add onion, carrots, celery, and garlic; sauté for 5–7 minutes until softened.
  4. Pour in the white wine to deglaze the pot, scraping up browned bits and allowing it to simmer for 5 minutes.
  5. Return the beef shanks to the pot along with beef broth, thyme, bay leaf, and lemon zest; stir gently to combine.
  6. Cover and transfer the pot to the oven; cook for 2 to 2.5 hours until fork-tender.
  7. Remove from the oven and let sit for a few minutes before garnishing with parsley and serving.

Nutrition

Serving: 1pieceCalories: 420kcalCarbohydrates: 10gProtein: 45gFat: 20gSaturated Fat: 8gPolyunsaturated Fat: 1gMonounsaturated Fat: 10gCholesterol: 130mgSodium: 600mgPotassium: 800mgFiber: 2gSugar: 3gVitamin A: 500IUVitamin C: 4mgCalcium: 50mgIron: 4mg

Notes

Browning the meat and deglazing the pot are crucial steps for developing rich flavors.

Tried this recipe?

Let us know how it was!

Delicious Keto Pecan Square: A Guilt-Free Sweet Treat!

January 15, 2026 by grace bellamy Leave a Comment

As I wandered through the farmers' market last week, the intoxicating scent of roasted nuts snapped me back to my childhood—the memories of sweet treats lovingly made by my grandmother. Inspired by those flavors, I created this Keto Pecan Square, a delectable dessert that captures the essence of that nostalgia while fitting seamlessly into a low-carb lifestyle. With just 15 minutes of prep time, these bars are an ideal option for busy home chefs craving something quick yet indulgent. Plus, they’re guilt-free, rich in healthy fats, and perfect for satisfying your sweet tooth without derailing your diet. Ready to bring a slice of comfort into your kitchen? Let’s dive into this delightful recipe together!

Keto Pecan Square

Why is this Keto Pecan Square unforgettable?

Irresistible Taste: The rich blend of almond flour and cocoa powder works wonders, creating a crust that’s both delightful and guilt-free.

Quick and Easy: With only 15 minutes of prep, you’ll have these bars whipped up in no time, making them perfect for busy weekdays or unexpected guests.

Health-Conscious Indulgence: This recipe not only meets your sweet cravings but also aligns perfectly with your keto goals, enabling you to enjoy a treat without sacrificing your lifestyle.

Nutty Goodness: Packed with pecans, every bite offers a satisfying crunch, combining both texture and flavor spectacularly.

Versatile Delight: Whether paired with coffee or served as a post-dinner dessert, these squares are sure to impress your family and friends, proving that healthy can indeed be delicious.

Plus, if you want to explore more delectable keto options, check out our Healthy Keto Dessert Recipes for a variety of choices that will keep your sweet tooth satisfied!

Keto Pecan Square Ingredients

For the Crust

  • Almond flour – a low-carb alternative to regular flour that gives a delightful nutty flavor.
  • Unsweetened cocoa powder – adds richness and depth to the crust while keeping it keto-friendly.
  • Granulated erythritol – a perfect sugar substitute that helps keep this Keto Pecan Square sweet without the carbs.
  • Unsalted butter – melts beautifully to create a moist base and enhances flavor.
  • Large egg – acts as a binder, ensuring your crust holds together perfectly.
  • Vanilla extract – infuses a warm aroma that elevates the overall taste.
  • Salt – enhances all the flavors and balances the sweetness.

For the Topping

  • Pecans – these offer a satisfying crunch and are packed with healthy fats.
  • Sugar-free maple syrup – adds sweetness and sticky goodness without the carbs, perfect for your Keto Pecan Square!
  • Heavy cream – gives a creamy texture that beautifully ties the topping together.

These ingredients are simple yet bring so much joy to your table. Don't forget, the pecans are what make the Keto Pecan Square irresistible! Enjoy creating this delightful treat!

Step‑by‑Step Instructions for Keto Pecan Square

Step 1: Preheat the Oven
Begin by preheating your oven to 350°F (175°C). While the oven warms up, grease a 9x9-inch square baking pan with butter or line it with parchment paper for easy removal later. This little preparation guarantees that your Keto Pecan Square bakes evenly, resulting in a delightful crust.

Step 2: Mix the Dry Ingredients
In a large mixing bowl, combine 1 ½ cups of almond flour, ¼ cup of unsweetened cocoa powder, ⅓ cup of granulated erythritol, and ¼ teaspoon of salt. Use a whisk or fork to mix thoroughly, ensuring there are no clumps. The dry ingredients set the foundation for our delicious, guilt-free dessert, so take your time to blend them well.

Step 3: Combine Wet Ingredients
Next, pour in the ½ cup of melted unsalted butter, crack in 1 large egg, and add 1 teaspoon of vanilla extract to the dry mixture. Using a spatula, gently stir until the batter is smooth and resembles a cohesive dough. This mixture will become the rich crust of your Keto Pecan Square, ready to support that lovely topping.

Step 4: Press the Crust into the Pan
Take your dough and transfer it to the prepared baking pan. Using the back of a spatula or your hands, press the dough evenly into the bottom. Aim for an even thickness across the pan to ensure that the crust bakes uniformly. This step is crucial for a stable base for your squares.

Step 5: Bake the Crust
Place the pan in the preheated oven and bake the crust for about 12-15 minutes, or until it turns lightly golden. Keep an eye on it; the color gives a visual cue that it's perfect. Once done, carefully remove it from the oven and let it cool slightly while you prepare the topping.

Step 6: Prepare the Pecan Topping
In a separate bowl, mix 1 ½ cups of roughly chopped pecans, ½ cup of sugar-free maple syrup, 2 tablespoons of heavy cream, and a pinch of salt. Stir the mixture until the pecans are well-coated with the syrupy goodness. This mixture will create the perfect topping for your Keto Pecan Square.

Step 7: Assemble the Keto Pecan Square
Pour the pecan mixture evenly over the cooled crust, spreading it gently for uniform coverage. This careful assembly will ensure that every bite of your Keto Pecan Square is packed with delicious toppings. Take your time to make it look nice; presentation matters!

Step 8: Bake Again
Return the pan to the oven and bake for an additional 15-20 minutes. Keep an eye on the pecans; they should turn lightly toasted and the topping should appear set. This final bake melds the layers together, enhancing the flavors of your delightful Keto Pecan Square.

Step 9: Cool and Cut
Once baked, remove the pan from the oven and allow it to cool in the pan for at least 30 minutes. Cooling is important for the squares to hold their shape once cut. Patience is crucial here, as this step ensures perfectly formed squares ready to impress your family and friends.

Step 10: Chill for Best Results
For optimal texture, consider chilling the squares in the refrigerator for a bit before serving. This will not only help them firm up but also create a refreshing bite. When you’re ready to enjoy your Keto Pecan Square, slice them into generous pieces and share the love!

Keto Pecan Square

How to Store and Freeze Keto Pecan Square

Room Temperature: Keep your Keto Pecan Square covered at room temperature for up to 3 days. Use an airtight container to maintain freshness and prevent drying out.

Fridge: For longer storage, place your squares in the refrigerator, where they will stay fresh for up to a week. Wrap them individually in plastic wrap for easy access.

Freezer: If you’d like to store them for an extended period, freeze your Keto Pecan Square in an airtight container or freezer bag. They can last up to 3 months—just thaw in the fridge overnight before enjoying.

Reheating: To enjoy a warm treat, reheat in the microwave for 10-15 seconds or warm in the oven at 350°F (175°C) for about 5-10 minutes.

Expert Tips for Keto Pecan Square

  • Choose Quality Nuts: Opt for fresh, high-quality pecans to enhance flavor and crunch. Stale nuts can ruin the delicate taste of your Keto Pecan Square.

  • Watch Your Baking Time: Keep a close eye on the crust and topping during baking. Overbaking can lead to dryness, while underbaking may yield a soggy texture.

  • Cool Properly: Allow the squares to cool in the pan for at least 30 minutes before cutting. This resting period helps them hold their shape beautifully.

  • Chill for Texture: For the best results, chill your Keto Pecan Square in the refrigerator before serving. The cold enhances the firmness and taste, making every bite a delight.

  • Experiment with Sweeteners: If you prefer, try different keto-friendly sweeteners. Just be aware that each one may have a slightly different sweetness level and texture.

  • Perfect Portion Sizes: Use a sharp knife to cut even squares. Uniform pieces will not only look appealing but also help with portion control!

What to Serve with Keto Pecan Square

Indulging in the rich, nutty goodness of a Keto Pecan Square creates the perfect opportunity for a delightful meal.

  • Fresh Berries: Bright, tart berries like raspberries or strawberries are a refreshing counterpoint to the sweet squares, enhancing the dessert experience. Pairing these vibrant fruits adds a burst of color and freshness.

  • Whipped Cream: A dollop of airy, sugar-free whipped cream complements the dense texture of the square, creating a light and creamy balance. It’s the perfect way to elevate the flavors while keeping things chilled and delicious.

  • Coffee: A steaming cup of black coffee pairs beautifully with Keto Pecan Square, enhancing its richness while balancing sweetness. The warmth and depth of coffee make it a comforting companion for this delightful treat.

  • Keto Ice Cream: For an indulgent twist, serve a scoop of keto-friendly vanilla or chocolate ice cream. This adds a creamy, cold element that contrasts wonderfully with the chewy pecan topping.

  • Chia Seed Pudding: A light and nutritious chia seed pudding can offer a fresh, creamy contrast to your dessert. The subtle flavors allow the pecan square to shine while providing a unique texture.

  • Nutty Tea: A warm cup of nutty herbal tea can enhance the nutty flavor of the Keto Pecan Square, creating a cozy atmosphere. This delightful drink offers a gentle sweetness that pairs well with your treat.

  • Sugar-Free Hot Chocolate: A rich, sugar-free hot chocolate can elevate the experience of enjoying your Keto Pecan Square, adding warmth and a decadent chocolate flavor to your cozy occasion.

  • Dark Chocolate Pieces: Offering a few squares of high-quality dark chocolate alongside heightens the cocoa experience and brings an unexpected depth to the dessert table. Each bite creates a luxurious chocolate symphony!

Keto Pecan Square Variations

Feel free to mix things up with these delightful twists that will tantalize your taste buds!

  • Nut-Free: Substitute a combination of sunflower seed flour and coconut flour for those with nut allergies, ensuring everyone can enjoy a slice of heaven.

  • Chocolate Burst: Add ½ cup of sugar-free chocolate chips to the pecan topping for an extra layer of indulgence, giving your Keto Pecan Square a fabulous chocolatey flair.

  • Spicy Kick: Sprinkle in a few dashes of cayenne or chili powder to the crust for an unexpected heat that beautifully contrasts the sweetness.

  • Maple Delight: Swap the sugar-free maple syrup for a homemade sugar-free caramel sauce, turning your topping into an opulent treat that promises a cozy flavor.

  • Coconut Bliss: Stir in shredded unsweetened coconut to the topping mixture for a tropical twist. It's a wonderful addition that gives your squares a delightful chewiness.

  • Vanilla Almond: Enhance the vanilla extract to 2 teaspoons and toss in a few drops of almond extract to take the flavor profile to a new level.

  • Coffee Infusion: Dissolve 1 tablespoon of instant coffee granules in the melted butter for a delightful coffee flavor that pairs perfectly with the chocolate.

  • Berry Good: Add ½ cup of fresh or frozen berries to the pecan topping before baking. The berries will burst with juicy flavor, adding a refreshing twist.

These variations invite you into a realm of creativity in your kitchen, allowing you to celebrate each bite in a new way! For more fantastic recipes, don't forget to browse our Healthy Keto Dessert Recipes and discover more delightful options that will make your sweet tooth sing!

Make Ahead Options

These Keto Pecan Squares are perfect for busy weeknights and meal prep enthusiasts! You can prepare the crust up to 24 hours in advance by baking it and storing it, covered, in the refrigerator to maintain its texture. Additionally, the pecan topping can be mixed ahead of time and stored in an airtight container in the fridge for up to 3 days. When you’re ready to enjoy your Keto Pecan Squares, simply pour the topping over the pre-baked crust and bake as directed. This thoughtful prep ensures you'll have a delicious dessert ready to serve with minimal effort, keeping your sweet cravings satisfied without the last-minute rush!

Keto Pecan Square

Keto Pecan Square Recipe FAQs

How do I select the right pecans for the Keto Pecan Square?
Absolutely! When choosing pecans, look for fresh, high-quality nuts without dark spots or rancidity. Fresh pecans should be firm and have a sweet, nutty aroma. If they seem soft or you spot any discoloration, they might be stale and won't provide the satisfying crunch your dessert deserves.

How should I store leftover Keto Pecan Square?
Very important! You can store your squares in an airtight container at room temperature for up to 3 days. For longer preservation, keep them in the refrigerator for up to a week. I often wrap them individually in plastic wrap, so they’re easy to grab—perfect for a quick treat!

Can I freeze my Keto Pecan Square?
Absolutely! To freeze your squares, wrap them tightly in plastic wrap or aluminum foil and place them in an airtight container or freezer bag. They can last up to 3 months in the freezer. When you’re ready to enjoy, simply thaw them in the fridge overnight, and they’ll be just as delightful as the day you made them!

What can I do if my crust is too crumbly?
If you find that your crust is too crumbly, it likely needs a bit more moisture. Gently warm a bit more melted butter and incorporate it into the mixture, one tablespoon at a time until the dough holds together better. Press it firmly into the pan for a more cohesive base. It’s all about getting that perfect texture!

Is there a substitute for erythritol in the Keto Pecan Square?
Yes, you can definitely use other keto-friendly sweeteners! Stevia and monk fruit sweetener are excellent alternatives; just remember they may have different sweetness levels, so you might need to adjust the amount accordingly. Always taste your mixture as you go to ensure it’s sweet enough for your liking.

Are there any dietary considerations for my pets or allergies?
Very good question! Since this Keto Pecan Square contains nuts and butter, it's best to keep it out of reach of pets, particularly dogs, as pecans can be harmful if consumed in large quantities. Regarding allergies, always check that your sweetener is gluten-free if someone is sensitive. Always consider consulting with a healthcare provider if you have allergies or dietary restrictions.

Keto Pecan Square

Delicious Keto Pecan Square: A Guilt-Free Sweet Treat!

Enjoy a delectable Keto Pecan Square, a rich dessert that satisfies sweet cravings while staying low-carb and guilt-free.
Print Recipe Pin Recipe
Prep Time 15 minutes mins
Cook Time 35 minutes mins
Cooling Time 30 minutes mins
Total Time 1 hour hr 20 minutes mins
Servings: 12 slices
Course: Dessert
Cuisine: Keto
Calories: 200
Ingredients Equipment Method Nutrition Notes

Ingredients
  

For the Crust
  • 1.5 cups almond flour a low-carb alternative to regular flour
  • 0.25 cups unsweetened cocoa powder adds richness to the crust
  • 0.33 cups granulated erythritol sugar substitute
  • 0.25 teaspoons salt enhances flavor
  • 0.5 cups unsalted butter melts to create a moist base
  • 1 large egg acts as a binder
  • 1 teaspoon vanilla extract infuses aroma
For the Topping
  • 1.5 cups pecans provides crunch and healthy fats
  • 0.5 cups sugar-free maple syrup adds sweetness
  • 2 tablespoons heavy cream gives a creamy texture

Equipment

  • 9x9-inch square baking pan
  • Mixing Bowl
  • Whisk
  • spatula

Method
 

Step-by-Step Instructions
  1. Preheat your oven to 350°F (175°C). Grease a 9x9-inch baking pan with butter or line it with parchment paper.
  2. In a large mixing bowl, combine almond flour, cocoa powder, erythritol, and salt. Mix thoroughly.
  3. Pour in melted butter, crack in the egg, and add vanilla extract. Stir until smooth.
  4. Transfer dough to the prepared baking pan and press evenly into the bottom.
  5. Bake the crust for about 12-15 minutes until lightly golden. Let it cool slightly.
  6. In a separate bowl, mix chopped pecans, maple syrup, heavy cream, and a pinch of salt until well-coated.
  7. Pour the pecan mixture over the cooled crust, spreading gently for uniform coverage.
  8. Return to the oven and bake for an additional 15-20 minutes until pecans are toasted.
  9. Remove from the oven and allow to cool in the pan for at least 30 minutes before cutting.
  10. For best texture, chill the squares in the refrigerator before serving.

Nutrition

Serving: 1sliceCalories: 200kcalCarbohydrates: 4gProtein: 3gFat: 18gSaturated Fat: 8gPolyunsaturated Fat: 4gMonounsaturated Fat: 6gCholesterol: 40mgSodium: 150mgPotassium: 130mgFiber: 2gSugar: 1gVitamin A: 300IUCalcium: 30mgIron: 1.5mg

Notes

Use fresh, high-quality nuts for better flavor. Store covered at room temperature for 3 days or refrigerate for up to a week. Freeze for longer storage.

Tried this recipe?

Let us know how it was!

Irresistible Bacon Brie Crescent Wreath for Cozy Gatherings

January 15, 2026 by grace bellamy Leave a Comment

The aroma of warm crescent dough filling the kitchen can transform even the dullest of days into a culinary celebration. This Bacon Brie Crescent Wreath is not just a dish; it’s an experience that brings family and friends together around the table. With its inviting flaky exterior and the savory combination of creamy brie and crispy bacon, it’s a fantastic choice for any gathering or a cozy night in. Not only does this recipe promise quick prep and easy assembly, but it also allows you to impress your guests with minimal effort. Pair it with a drizzle of honey or fig jam for an additional sweet twist that elevates the entire dish. So, are you ready to create a festive centerpiece that delights both the eyes and the palate? Let’s dive in!

Bacon Brie Crescent Wreath

Why is this wreath a must-try?

Perfect for gatherings: This Bacon Brie Crescent Wreath is not only a crowd-pleaser but also a visual showstopper that will wow your guests.
Simple assembly: With just a few ingredients and minimal prep time, this dish is as easy as it is delicious.
Savory goodness: The combination of gooey brie, crispy bacon, and melted mozzarella creates a delightful taste sensation.
Versatile serving options: Serve it warm with a drizzle of honey or a dollop of fig jam for a burst of flavor that complements the savory elements beautifully.
Great for any occasion: Whether it’s a cozy night in or a festive holiday gathering, this recipe transforms simple ingredients into an unforgettable feast.

Bacon Brie Crescent Wreath Ingredients

Get ready to assemble this delightful dish with these simple ingredients!

For the Dough
• Crescent Dough – 2 cans (8 oz each) will provide the flaky, buttery base.

For the Filling
• Brie Cheese – 8 oz, rind removed and cut into small pieces for a creamy texture that melts beautifully.
• Cooked Bacon – 8 slices, crumbled to add a savory crunch that perfectly complements the brie.
• Mozzarella Cheese – ½ cup, shredded for an extra cheesy pull that enhances the flavor.
• Fresh Parsley – ¼ cup, chopped to add a fresh pop of color and a hint of herby goodness.
• Garlic Powder – ¼ teaspoon for a subtle depth that elevates the dish's flavor profile.

For Finishing Touches
• Egg (beaten) – 1, for the perfect golden-brown crust when brushed over the dough before baking.
• Optional: Honey or Fig Jam – ¼ cup for serving, adding a delightful sweetness that pairs perfectly with the savory elements of the Bacon Brie Crescent Wreath.

Step‑by‑Step Instructions for Bacon Brie Crescent Wreath

Step 1: Preheat and Prepare
Begin by preheating your oven to 375°F (190°C). While the oven warms up, line a baking sheet with parchment paper to ensure easy cleanup later. This setup will help your Bacon Brie Crescent Wreath bake perfectly without sticking, allowing the festive treat to slide right off once it's ready!

Step 2: Unroll the Dough
Open the cans of refrigerated crescent dough and unroll them onto a clean surface. Gently separate the dough into individual triangles along the perforated lines. This will prepare the base for your Bacon Brie Crescent Wreath, ensuring each piece is ready to be filled with that scrumptious cheesy goodness.

Step 3: Form the Wreath Shape
On the prepared baking sheet, arrange the triangles in a circular shape. Position the wide ends of the triangles facing outward while overlapping the pointed ends in the center to create a lovely wreath formation. This visual layout not only looks inviting but also ensures even cooking for all layers of the dough.

Step 4: Make the Filling
In a mixing bowl, combine the crumbled bacon, brie cheese pieces, shredded mozzarella, chopped parsley, and garlic powder. Stir everything together until well mixed. This filling will bring savory delights to your Bacon Brie Crescent Wreath and provide a wonderful burst of flavor with every bite.

Step 5: Fill the Wreath
Spoon the cheese and bacon mixture onto the wide ends of each crescent triangle, making sure to distribute it evenly around your wreath. This step is crucial for ensuring each piece is a generous serving of cheesy, savory goodness!

Step 6: Seal the Wreath
Carefully fold the pointed ends of each crescent triangle over the filling and press to seal them shut. This will contain all the deliciousness inside as it bakes, creating a beautifully puffed and flaky wreath. You'll want to ensure there are no gaps to keep the filling secure.

Step 7: Brush with Egg Wash
Take the beaten egg and brush it over the entire surface of the crescent dough. This egg wash will help give your Bacon Brie Crescent Wreath a beautiful golden-brown color as it bakes. The shine will also enhance its visual appeal when served, making everyone want to dig in!

Step 8: Bake the Wreath
Place the baking sheet in your preheated oven and bake for about 20–25 minutes. Keep a close eye on the wreath, watching for it to turn puffed, flaky, and a lovely golden-brown color. The mouthwatering aroma will fill your kitchen, signaling that it's almost time to enjoy your creation!

Step 9: Cool and Serve
Once baked, remove the Bacon Brie Crescent Wreath from the oven and let it cool for a few minutes on the baking sheet. This cooling time allows it to set slightly, making it easier to cut into pieces. Prepare for everyone to gather around while you serve this delightful dish warm.

Step 10: Add a Sweet Touch (Optional)
For an extra burst of flavor, serve your warm Bacon Brie Crescent Wreath with optional honey or fig jam on the side. This sweet addition pairs beautifully with the rich savory flavors of the wreath, creating a delightful contrast that will leave everyone wanting more!

Bacon Brie Crescent Wreath

What to Serve with Bacon Brie Crescent Wreath

The rich, savory flavors of this festive centerpiece invite a variety of sides that will enhance your meal experience.

  • Fresh Mixed Green Salad: Light yet flavorful, this salad adds a refreshing crunch that balances the creamy filling beautifully. Toss in some cherry tomatoes and a zesty vinaigrette for extra brightness.

  • Roasted Garlic Potatoes: These crispy potatoes have a satisfying, rustic charm that pairs wonderfully with the wreath. The earthy flavors of garlic and herbs will complement the creamy brie.

  • Honey Glazed Carrots: Sweet and slightly caramelized, these carrots provide a lovely contrast to the savory elements. Their vibrant colors will also brighten up your table.

  • Creamy Tomato Soup: A warm bowl of tomato soup is a comforting way to start your meal. The acidity of the tomatoes cuts through the richness of the wreath, creating a harmonious balance.

  • Bruschetta with Balsamic Glaze: This appetizer adds a delightful crunch and burst of flavor to your spread. The sweetness of the balsamic glaze enhances the savory notes of the bacon and brie.

  • Sparkling White Wine: A crisp, refreshing wine elevates the flavors and adds a celebratory touch to the meal. It provides a lovely contrast to the creaminess of the dish.

  • Chocolate Fondue: For a sweet finish, a chocolate fondue station where guests can dip fruits and pastries is a fun and interactive dessert option. The indulgence perfectly rounds out an evening of savory delights.

Embrace these pairings to create a memorable dining experience that brings warmth and joy to your table.

Expert Tips for Bacon Brie Crescent Wreath

Proper Dough Separation: Make sure to separate the crescent dough triangles carefully to prevent tearing, ensuring a perfect wreath shape.

Crumbled Bacon Consistency: Use finely crumbled bacon for even distribution throughout the filling, avoiding clumps that might break the flaky layers.

Sealing Technique: Press the pointed ends tightly over the filling to avoid leaks during baking—this will keep your Bacon Brie Crescent Wreath intact and full of flavor.

Egg Wash Brushing: Don’t skip the egg wash! It’s essential for achieving that beautiful golden-brown crust that makes the wreath look irresistible.

Serving Temperature: Serve the wreath warm for the best taste experience—this maximizes the creamy, melty filling and enhances the overall enjoyment.

Make Ahead Options

These Bacon Brie Crescent Wreaths are perfect for busy home cooks looking to save time during the week! You can prepare the filling (bacon, brie, mozzarella, parsley, and garlic powder) up to 3 days in advance, storing it in an airtight container in the refrigerator. Additionally, you can assemble the wreath entirely, cover it tightly with plastic wrap, and refrigerate for up to 24 hours. When you’re ready to bake, simply brush with the egg wash and pop it in a preheated oven. This method ensures that your creation is just as delicious and fresh, leaving you with a delightful centerpiece for any gathering with minimal last-minute effort!

Bacon Brie Crescent Wreath Variations

Feel free to get creative with this recipe and make it your own with these delightful twists!

  • Vegetarian: Substitute cooked bacon with sautéed mushrooms or spinach for a flavorful, plant-based delight.
  • Spicy: Add diced jalapeños or a sprinkle of red pepper flakes to the filling for a zesty kick that’ll excite your taste buds.
  • Nutty: Incorporate chopped walnuts or pecans into the filling for a crunchy texture and earthy flavor that complements the creamy brie beautifully.
  • Herbed Up: Swap parsley for fresh thyme or rosemary to infuse an aromatic essence that elevates the overall flavor profile.
  • Cheesy Variations: Experiment with different cheeses like goat cheese or cheddar in place of brie for unique flavor combinations that keep things interesting.
  • Sweet Twist: Mix in caramelized onions or a touch of brown sugar into the filling for a delicious sweet-savory contrast that will amaze your guests.
  • Puff Pastry Alternative: For a richer bite, use puff pastry instead of crescent dough; it adds extra flakiness and an elegant touch to your dish.
  • Dipping Sauces: Serve with a variety of dipping sauces like spicy mustard, balsamic glaze, or even homemade marinara for added flavor options that cater to everyone's palate.

These variations invite you to put your spin on this beloved dish, ensuring that each gathering is fresh, exciting, and as memorable as the last. Don't forget to check out other delicious options like our Bacon-Wrapped Jalapeño Poppers or Savory Spinach Artichoke Dip for even more crowd-pleasing recipes!

How to Store and Freeze Bacon Brie Crescent Wreath

Room Temperature: Allow the wreath to cool completely, then cover it lightly and store at room temperature for up to 2 days to keep it fresh and delicious.

Fridge: For longer storage, wrap the cooled wreath in plastic wrap or place it in an airtight container. Store in the refrigerator for up to 3 days.

Freezer: You can freeze the Bacon Brie Crescent Wreath for up to 2 months. Wrap tightly in plastic wrap and then in aluminum foil to prevent freezer burn.

Reheating: To reheat, thaw it in the fridge overnight if frozen, then warm in the oven at 350°F (175°C) for about 15 minutes until heated through.

Bacon Brie Crescent Wreath

Bacon Brie Crescent Wreath Recipe FAQs

How do I choose the best brie cheese for my wreath?
Absolutely! Look for brie that has a soft, creamy texture and a fresh smell. It should be free of dark spots and have a smooth rind. Aim for brie with a sell-by date at least a week away for optimum freshness. It's perfect when you can find it at the cheese counter, where you can often see, smell, and feel the quality.

Can I store leftovers from my Bacon Brie Crescent Wreath?
Very! After your gathering, let the wreath cool completely to room temperature. Then, wrap it in plastic wrap or place it in an airtight container and store it in the refrigerator for up to 3 days. It's best enjoyed warm, so consider reheating it in the oven to restore its flaky goodness!

How do I freeze the Bacon Brie Crescent Wreath?
Yes, freezing is a great option! First, allow the wreath to cool completely. Wrap it tightly in plastic wrap, then in aluminum foil to prevent freezer burn, and store it in the freezer for up to 2 months. When you’re ready to enjoy it, thaw it in the fridge overnight and reheat it in a 350°F oven for about 15 minutes until warmed through. This will bring back that delightful texture!

What if my crescent dough tears while assembling the wreath?
No worries! If you find a tear, simply use a small piece of extra dough to patch it up. Use a bit of water to moisten the edges, then press the patch down to seal it. This will help ensure all your delicious filling stays intact as it bakes. Remember, it’s all about making it look and taste good, no matter how it gets there!

Is there a way to make this recipe gluten-free?
Definitely! You can use gluten-free crescent dough, which is increasingly available in stores. Just ensure to check the labels for cross-contamination if you have severe allergies. The filling remains the same, so go ahead and enjoy the same tasty flavors while accommodating your dietary needs!

Bacon Brie Crescent Wreath

Irresistible Bacon Brie Crescent Wreath for Cozy Gatherings

This Bacon Brie Crescent Wreath is a delicious and visually stunning appetizer perfect for gatherings.
Print Recipe Pin Recipe
Prep Time 15 minutes mins
Cook Time 25 minutes mins
Cooling Time 5 minutes mins
Total Time 45 minutes mins
Servings: 8 pieces
Course: Appetizer
Calories: 250
Ingredients Equipment Method Nutrition Notes

Ingredients
  

For the Dough
  • 2 cans Crescent Dough (8 oz each)
For the Filling
  • 8 oz Brie Cheese rind removed and cut into small pieces
  • 8 slices Cooked Bacon crumbled
  • ½ cup Mozzarella Cheese shredded
  • ¼ cup Fresh Parsley chopped
  • ¼ teaspoon Garlic Powder
For Finishing Touches
  • 1 large Egg beaten
  • ¼ cup Honey or Fig Jam for serving (optional)

Equipment

  • Oven
  • Baking Sheet
  • parchment paper
  • Mixing Bowl

Method
 

Step-by-Step Instructions for Bacon Brie Crescent Wreath
  1. Preheat your oven to 375°F (190°C) and line a baking sheet with parchment paper.
  2. Unroll the crescent dough and separate into individual triangles.
  3. Arrange the triangles in a circular shape on the baking sheet with wide ends facing out.
  4. In a bowl, combine crumbled bacon, brie, mozzarella, parsley, and garlic powder.
  5. Spoon the filling onto the wide ends of each triangle.
  6. Fold the pointed ends over the filling and press to seal.
  7. Brush the dough with beaten egg for a golden finish.
  8. Bake for 20–25 minutes until golden-brown and flaky.
  9. Cool for a few minutes before serving warm.
  10. Serve with honey or fig jam on the side for added sweetness.

Nutrition

Serving: 1pieceCalories: 250kcalCarbohydrates: 15gProtein: 10gFat: 18gSaturated Fat: 8gPolyunsaturated Fat: 0.5gMonounsaturated Fat: 5gCholesterol: 70mgSodium: 600mgPotassium: 150mgFiber: 1gSugar: 1gVitamin A: 8IUVitamin C: 2mgCalcium: 15mgIron: 6mg

Notes

Serve warm for the best taste experience; it maximizes the creamy, melty filling.

Tried this recipe?

Let us know how it was!

Irresistible Stuffed Manicotti with Meat Sauce Delight

January 15, 2026 by grace bellamy Leave a Comment

As I stirred the pot of bubbling tomato sauce, the rich aroma wafted through the kitchen, instantly transporting me to the comforting embrace of my grandmother’s home. This isn't just any recipe—today, I'm excited to share my beloved Stuffed Manicotti with Meat Sauce, a dish that brings warmth and joy to the dinner table. Perfect for family gatherings or cozy weeknights, this recipe combines quick prep with a homemade touch that makes even the busiest days a little sweeter. Picture tender pasta tubes filled with savory meat and gooey cheese, all smothered in a luscious sauce. Whether you're a seasoned home-chef or someone looking to escape the fast-food rut, this dish promises to become a weeknight staple. Are you ready to impress and savor every bite? Let’s dive into this delightful journey of flavors!

Stuffed Manicotti with Meat Sauce

Why is This Dish a Family Favorite?

Satisfying, hearty meals: Stuffed Manicotti offers a depth of flavors that will make your taste buds dance.
Quick prep: With simple steps, it respects your busy schedule while delivering homemade goodness.
Crowd-pleaser: This dish is an instant hit for both kids and adults, making mealtime memorable.
Versatile: Feel free to customize the filling with your favorite ingredients for a personal twist.
Time-saving: Prepare ahead and reheat to enjoy an effortlessly special meal—even on hectic days!

For more amazing ideas, check out my Chocolate Chip Cookies for a sweet ending after your savory feast!

Stuffed Manicotti with Meat Sauce Ingredients

For the Manicotti
• 12 manicotti tubes – choose large, sturdy pasta that can hold the delicious stuffing without breaking.
• 2 cups ricotta cheese – this creamy cheese adds richness to the filling; you can substitute with cottage cheese for a lighter option.
• 1 cup shredded mozzarella cheese – provides that gooey texture; cheese blends work well too!
• ½ cup grated Parmesan cheese – gives a salty, nutty flavor that elevates the dish; feel free to use Pecorino Romano as a substitute.
• 1 large egg – helps bind the filling together for a satisfying bite.
• 1 teaspoon garlic powder – enhances the flavor; alternatively, use fresh minced garlic for a bolder taste.
• 1 teaspoon Italian seasoning – this blend adds warmth and depth; make your own mix if you prefer!

For the Meat Sauce
• 1 pound ground beef – provides a savory base; ground turkey or chicken can be a leaner alternative.
• 1 can (28 ounces) crushed tomatoes – creates the sauce foundation; fresh tomatoes can be used for a fresher taste.
• 1 onion, diced – adds sweetness and texture; shallots work wonderfully too!
• 2 cloves garlic, minced – for aromatic flavor; adjust to your preference for garlic lovers!
• 1 tablespoon olive oil – used to sauté the onions for a rich flavor; feel free to use vegetable oil as a substitute.
• Salt and pepper – season to taste; don’t be shy; this enhances all the flavors!

Dive into this delightful Stuffed Manicotti with Meat Sauce and create a meal that will warm your heart and home as you gather around the table. Enjoy!

Step‑by‑Step Instructions for Stuffed Manicotti with Meat Sauce

Step 1: Preheat and Prepare
Begin by preheating your oven to 375°F (190°C). While the oven is warming up, gather a 9x13-inch baking dish and set it aside. This will hold your assembled Stuffed Manicotti with Meat Sauce. You want your kitchen to feel cozy and inviting, setting the stage for this delightful dish.

Step 2: Cook the Manicotti
In a large pot of boiling salted water, cook the manicotti tubes for about 6 minutes, just until they’re al dente. Stir gently to prevent sticking, then drain and rinse under cold water to stop the cooking process. Set them aside on a clean towel while you prepare the filling.

Step 3: Make the Meat Sauce
In a large skillet, heat 1 tablespoon of olive oil over medium heat, then sauté the diced onion until translucent, about 5 minutes. Next, add the garlic and ground beef, cooking until the meat is no longer pink, which will take about 8 minutes. Stir in the crushed tomatoes, adding salt and pepper to taste, and let the sauce simmer for 10 minutes to deepen the flavors.

Step 4: Prepare the Cheese Filling
In a mixing bowl, combine the ricotta cheese, shredded mozzarella, grated Parmesan, egg, garlic powder, and Italian seasoning. Mix well until fully blended and creamy, giving you a rich filling for your manicotti. This cheese mixture promises to complement the meat sauce beautifully.

Step 5: Stuff the Manicotti
Using a small spoon or piping bag, carefully fill each manicotti tube with the cheese mixture. Aim for a generous amount—each tube should feel plump. Place each stuffed piece in your prepared baking dish, standing them upright. This step is crucial for your Stuffed Manicotti with Meat Sauce to ensure even cooking.

Step 6: Assemble the Dish
Pour the aromatic meat sauce evenly over the stuffed manicotti, ensuring every inch is covered. Sprinkle a bit more shredded mozzarella on top for that melty goodness. It’s time to get the dish ready to bake, and you can already smell the wonderful blend of flavors in your kitchen!

Step 7: Bake to Perfection
Cover the baking dish with aluminum foil and place it in the preheated oven. Bake for 25 minutes to allow the flavors to meld beautifully. After that, remove the foil and bake for an additional 10-15 minutes until the cheese is bubbling and lightly golden. Your Stuffed Manicotti should look irresistible and ready to serve.

Step 8: Serve and Enjoy
Once baked, let the dish sit for 5-10 minutes before serving. This resting time allows the flavors to develop further. Garnish with fresh basil or extra Parmesan if desired, then slice and serve. Your delectable Stuffed Manicotti with Meat Sauce will surely bring smiles to the dinner table!

Stuffed Manicotti with Meat Sauce

What to Serve with Stuffed Manicotti with Meat Sauce

Picture the scene: a cozy dinner table, where the aroma of rich meat sauce wafts through the air, inviting loved ones to gather and savor every bite.

  • Garlic Bread: Perfectly crispy and buttery, garlic bread pairs beautifully, soaking up that luscious sauce while adding a delightful crunch.
  • Caesar Salad: The crisp romaine lettuce and tangy dressing create a textural contrast that balances the hearty manicotti, making each bite a refreshing experience.
  • Roasted Vegetables: A medley of seasonal vegetables roasted to perfection brings a pop of color and earthy flavors that complement the rich meat sauce wonderfully.
  • Grilled Asparagus: Tender and slightly charred, this side dish offers a fresh, bright flavor that cuts through the richness of the pasta and meat. Paired with a drizzle of lemon juice, it’s a delightful addition!
  • Parmesan Risotto: Creamy and cheesy risotto makes for a luxurious side that harmonizes beautifully with the textures of your stuffed manicotti. Each spoonful enhances the overall dining experience.
  • Sangria: For a refreshing drink, a pitcher of fruity sangria brightens the meal, adding a touch of sweetness that complements the savory flavors of your dish.
  • Chocolate Chip Cookies: For dessert, these warm, gooey cookies serve as the perfect sweet ending, their comforting flavors echoing the love put into your main dish. A classic choice that everyone adores!

Tips for the Best Stuffed Manicotti

Perfect Pasta Cooking: Ensure you don’t overcook the manicotti; aim for al dente to prevent sogginess when baking.

Flavorful Sauce: Always let your meat sauce simmer to enhance flavors. Take your time; the longer it simmers, the richer it tastes.

Generous Stuffing: Fill the manicotti tubes generously, but don't overstuff; this maintains the integrity of the pasta while ensuring a balanced bite.

Rest Before Serving: Allow the baked dish to sit for a few minutes before serving. This helps the filling settle, making it easier to slice and serve.

Make Ahead: Consider preparing the dish a day in advance. Refrigerate, then bake when ready for an effortless meal that still tastes fresh!

Make Ahead Options

Preparing your Stuffed Manicotti with Meat Sauce ahead of time is a fantastic way to save valuable moments on busy weeknights! You can assemble the entire dish up to 24 hours in advance by completing steps 1 through 6. Just cover your baking dish tightly with plastic wrap to prevent the pasta from drying out. When you're ready to cook, simply remove the wrap and bake as directed, adding an extra 5-10 minutes to ensure it's heated through. If you’d like to prep even further in advance, you can freeze the assembled manicotti for up to 3 months; just be sure to thaw it in the refrigerator overnight before baking. With this make-ahead method, your delicious Stuffed Manicotti with Meat Sauce will be just as delightful and fresh, ready to impress at the dinner table!

How to Store and Freeze Stuffed Manicotti with Meat Sauce

Fridge: Store any leftover Stuffed Manicotti in an airtight container for up to 3 days. This helps maintain flavor and texture while ensuring easy access for quick meals.

Freezer: To freeze, wrap individual portions tightly in plastic wrap, then place them in a freezer-safe bag or container. They can last up to 3 months for a ready-to-heat, comforting meal.

Reheating: Thaw frozen manicotti in the fridge overnight. Reheat in a preheated oven at 350°F (175°C) for about 20-25 minutes until heated through, ensuring each bite is delicious!

Stuffed Manicotti with Meat Sauce Variations

Feel free to explore these delectable twists that can elevate your Stuffed Manicotti experience beyond the traditional!

  • Vegetarian Delight: Substitute ground beef with lentils or mushrooms for a hearty, meat-free filling. You won’t miss the meat with this flavor-packed option!
  • Cheesy Goodness: Add 1 cup of ricotta or cream cheese to your meat mixture for a creamier and richer texture that will tantalize your taste buds.
  • Spicy Kick: Mix in red pepper flakes or diced jalapeños to your meat sauce for a zesty heat that adds excitement to every bite.
  • Herb Infusion: Swap out Italian seasoning with fresh herbs like basil and parsley for a fragrant twist that brightens up the dish. Fresh ingredients can transform everything!
  • Pasta Alternatives: Use shells or cannelloni if you can't find manicotti. Each pasta shape offers a unique way to enjoy the delicious filling and sauce!
  • Gluten-Free: For a gluten-free option, use gluten-free pasta and make sure your sauces and cheese are also certified gluten-free. Everyone deserves a slice of this goodness!
  • Recipe Optimization: Try adding steamed spinach or shredded zucchini to your cheese filling for an extra boost of nutrition without sacrificing flavor. Green goodness, here we go!
  • Layered Bake: Instead of stuffed, layer the ingredients like a lasagna for a casserole-style dish that’s equally delicious and fun to serve. Your family will love this twist on classic favorites!

Let your creativity shine as you whip up your customized version of Stuffed Manicotti with Meat Sauce! For a sweet end to your meal, don’t forget to try my famous Chocolate Chip Cookies or perhaps serve alongside a crisp Caesar Salad for a refreshing palate cleanser. Enjoy!

Stuffed Manicotti with Meat Sauce

Stuffed Manicotti with Meat Sauce Recipe FAQs

What type of manicotti should I use?
I recommend choosing large, sturdy manicotti tubes to ensure they hold the delicious filling without breaking. Look for those made from good quality semolina flour for a delightful texture!

How long can I store leftover Stuffed Manicotti?
Absolutely! Store any leftover Stuffed Manicotti in an airtight container in the fridge for up to 3 days. This keeps the flavors fresh and allows you to quickly enjoy it for lunch or dinner.

Can I freeze Stuffed Manicotti with Meat Sauce?
Yes, you can! To freeze, wrap individual portions tightly in plastic wrap, then place them in a freezer-safe bag or container. They can last up to 3 months. Just remember to thaw them in the fridge overnight before reheating.

What should I do if the manicotti falls apart while cooking?
If your manicotti falls apart, it might be due to overcooking. Always aim to cook them al dente for about 6 minutes, which helps them retain their shape during baking. Additionally, handle them gently when transferring to the baking dish to keep them intact.

Can I make this dish healthier?
Very! You can easily substitute ricotta cheese with low-fat cottage cheese or use ground turkey instead of beef for a leaner filling. Additionally, adding more veggies, like spinach or zucchini, to the cheese mixture can enhance the nutritional profile!

Is this dish pet-friendly?
No, it’s best to avoid sharing this dish with pets. Ingredients like garlic and onion can be harmful to dogs and cats. Stick to pet-safe treats for your furry friends!

Enjoy making this classic comfort dish and nourishing moments around your dinner table with family!

Stuffed Manicotti with Meat Sauce

Irresistible Stuffed Manicotti with Meat Sauce Delight

This Stuffed Manicotti with Meat Sauce recipe is a warm, comforting dish perfect for family gatherings.
Print Recipe Pin Recipe
Prep Time 30 minutes mins
Cook Time 40 minutes mins
Resting Time 10 minutes mins
Total Time 1 hour hr 20 minutes mins
Servings: 6 servings
Course: Main Dishes
Cuisine: Italian
Calories: 350
Ingredients Equipment Method Nutrition Notes

Ingredients
  

For the Manicotti
  • 12 tubes manicotti choose large, sturdy pasta
  • 2 cups ricotta cheese can substitute with cottage cheese
  • 1 cup shredded mozzarella cheese provides gooey texture
  • ½ cup grated Parmesan cheese Pecorino Romano can be used as a substitute
  • 1 large egg helps bind the filling
  • 1 teaspoon garlic powder or use fresh minced garlic
  • 1 teaspoon Italian seasoning this blend adds warmth and depth
For the Meat Sauce
  • 1 pound ground beef ground turkey or chicken can be a leaner alternative
  • 1 can (28 ounces) crushed tomatoes fresh tomatoes can be used
  • 1 onion diced shallots work wonderfully too
  • 2 cloves garlic minced for aromatic flavor
  • 1 tablespoon olive oil or use vegetable oil
  • Salt to taste
  • Pepper to taste

Equipment

  • 9x13-inch baking dish
  • Large Pot
  • large skillet
  • Mixing Bowl

Method
 

Step-by-Step Instructions
  1. Preheat your oven to 375°F (190°C) and gather a 9x13-inch baking dish.
  2. In a large pot of boiling salted water, cook the manicotti for about 6 minutes until al dente.
  3. In a large skillet, heat olive oil over medium heat and sauté the diced onion until translucent.
  4. Add garlic and ground beef; cook until the meat is no longer pink. Stir in crushed tomatoes and season with salt and pepper. Let simmer for 10 minutes.
  5. In a mixing bowl, combine ricotta cheese, mozzarella, Parmesan, egg, garlic powder, and Italian seasoning. Mix well.
  6. Stuff each manicotti tube with the cheese mixture using a small spoon or piping bag. Place them in the prepared baking dish standing upright.
  7. Pour the meat sauce evenly over the stuffed manicotti and sprinkle with more shredded mozzarella.
  8. Cover with aluminum foil and bake for 25 minutes. Remove foil and bake for an additional 10-15 minutes until the cheese is bubbling and lightly golden.
  9. Let the dish sit for 5-10 minutes before serving. Garnish with fresh basil or extra Parmesan, then slice and serve.

Nutrition

Serving: 1servingCalories: 350kcalCarbohydrates: 30gProtein: 25gFat: 15gSaturated Fat: 7gPolyunsaturated Fat: 1gMonounsaturated Fat: 6gCholesterol: 85mgSodium: 600mgPotassium: 800mgFiber: 3gSugar: 4gVitamin A: 600IUVitamin C: 4mgCalcium: 300mgIron: 3mg

Notes

Ensure you don’t overcook the manicotti; aim for al dente. Always let the meat sauce simmer for enhanced flavors. Consider preparing the dish a day in advance for optimal convenience.

Tried this recipe?

Let us know how it was!

Protein Oatmeal Cookies That Satisfy Your Sweet Cravings

January 15, 2026 by grace bellamy Leave a Comment

As I pulled the first batch of cookies from the oven, a warm, nutty aroma enveloped my kitchen, transporting me back to my childhood—the best memories are often wrapped in the scent of freshly baked goods. Today, I’m excited to share my Protein Oatmeal Cookies, a guilt-free treat that combines nourishment with indulgence. With just 15 minutes of prep time and a crowd-pleasing flavor, they’re perfect for those hectic days when fast food seems tempting, but you crave something homemade. These delightful cookies are not only protein-packed for a satisfying snack but also conveniently freezer-friendly, making them a solid addition to your meal prep arsenal. How can you resist whipping up a batch and sprinkling a little joy into your busy week?

Protein Oatmeal Cookies

Why are Protein Oatmeal Cookies a must-try?

Satisfying your sweet cravings: These cookies hit the spot without sacrificing health.
Quick to make: Ready in just 30 minutes, they fit perfectly into a busy schedule.
Nutritious and delicious: Packed with 6g of protein per cookie, you’ll feel good about indulging.
Versatile options: Swap nut butter or sweeteners for your personal touch; perfect for any palate!
Meal prep friendly: Bake a batch, freeze, and enjoy them anytime for a convenient, wholesome snack.
Elevate your baking game with these Protein Oatmeal Cookies, guaranteed to keep you away from that fast food lane!

Protein Oatmeal Cookies Ingredients

• Whip up these tasty treats with wholesome ingredients!

For the Cookie Base

  • Rolled oats – the backbone of these cookies, adding fiber and a chewy texture.
  • Protein powder – gives a healthy boost, keeping you fuller for longer!
  • Nut butter – adds richness and healthy fats; try almond or peanut for different flavors.
  • Honey (or maple syrup) – a touch of natural sweetness; feel free to switch based on preference.
  • Large egg – binds all ingredients together for a perfect consistency.
  • Vanilla extract – enhances the flavor profile with a lovely aroma.
  • Baking soda – helps the cookies rise and get that lovely golden color.
  • Salt – balances the sweetness and elevates all the flavors.

Indulge in these delicious Protein Oatmeal Cookies that turn snack time into a delightful experience!

Step‑by‑Step Instructions for Protein Oatmeal Cookies

Step 1: Preheat the Oven
Begin by preheating your oven to 350°F (175°C). This ensures the Protein Oatmeal Cookies bake evenly and develop a lovely golden color. While the oven heats up, gather your mixing bowls and baking sheets, so you're ready for the next steps.

Step 2: Combine Dry Ingredients
In a large mixing bowl, combine the rolled oats, protein powder, baking soda, and salt. Stir the dry ingredients together until they are well mixed, bringing a spoonful of the oats to your nose for that delightful nutty scent. This mixture will form the base of your cookies.

Step 3: Mix Wet Ingredients
In another bowl, mix together the nut butter, honey (or maple syrup), egg, and vanilla extract. Whisk these ingredients until smooth and creamy, ensuring that the nut butter is fully incorporated. This luscious blend will provide flavor and moisture, setting the stage for your Protein Oatmeal Cookies.

Step 4: Combine Wet and Dry Mixtures
Gently fold the dry ingredients into the wet mixture, stirring until just combined. Avoid overmixing to keep your cookies tender. Once the dough comes together, you’ll see the delightful oats and protein powder blend seamlessly with the creamy base, creating a wholesome cookie batter.

Step 5: Scoop the Dough
Using a spoon or cookie scoop, drop rounded tablespoons of dough onto a lined baking sheet, leaving about 2 inches of space between each scoop. Aim for uniform sizes to ensure even baking, and watch as your Protein Oatmeal Cookies begin to take shape on the tray.

Step 6: Bake the Cookies
Carefully place the baking sheet in the preheated oven. Bake the cookies for 10-15 minutes, or until the edges are golden brown and the centers look set yet slightly soft. Keep an eye on them as they bake, filling your kitchen with a warm, inviting aroma.

Step 7: Cool on the Baking Sheet
Once baked, remove the cookies from the oven and let them cool on the baking sheet for a few minutes. This initial cooling allows them to firm up before transferring. When they look invitingly golden and slightly puffy, they are ready to move!

Step 8: Transfer to a Wire Rack
Finally, carefully transfer the cookies to a wire rack to cool completely. This step helps maintain the cookies' texture, allowing steam to escape. If you can resist sampling one right away, your Protein Oatmeal Cookies will be even better once cooled!

Protein Oatmeal Cookies

What to Serve with Protein Oatmeal Cookies?

Elevate your family gathering or cozy evening with these delightful pairings that complement every bite of your sweet treats.

  • Fresh Fruit Salad: A vibrant mix of seasonal fruits adds brightness and balances the sweetness of the cookies.
  • Greek Yogurt Parfait: Layered with fresh berries and granola, this creamy option enhances the healthy vibe of your cookies.
  • Nutty Granola: Sprinkle some crunchy granola on top for added texture that echoes the chewy oats in the cookies.
  • Dark Chocolate Drizzle: A drizzle of rich dark chocolate brings a decadent touch, enhancing the sweetness while adding depth.

Pair these cookies with a warm cup of herbal tea or a glass of almond milk for a nourishing evening ritual. Each accompaniment serves to elevate the wholesome experience of your Protein Oatmeal Cookies while keeping the satisfaction levels high!

How to Store and Freeze Protein Oatmeal Cookies

Room Temperature: Store cookies in an airtight container at room temperature for up to 3 days to maintain freshness and softness.

Fridge: For extended freshness, keep your Protein Oatmeal Cookies in the refrigerator for up to a week. Wrap them individually or place them in a sealed container.

Freezer: Freeze your cookies for up to 3 months! Simply place them in a single layer on a baking sheet until solid, then transfer to an airtight container or freezer bag.

Reheating: To enjoy a warm cookie, reheat in the microwave for about 10-15 seconds or in the oven at 350°F (175°C) for 5 minutes. They’ll taste just like fresh out of the oven!

Protein Oatmeal Cookies Variations

Feel free to put your own twist on these delightful cookies, making them truly yours!

  • Vegan: Substitute the egg with a flax egg (1 tablespoon flaxseed meal + 2.5 tablespoons water). These cookies will still turn out deliciously chewy!

  • Gluten-Free: Use certified gluten-free rolled oats and a gluten-free protein powder to make these cookies suitable for gluten-sensitive family members. Everyone can enjoy a treat without worries!

  • Chocolate Chip: Add ½ cup of dark chocolate chips for a decadent chocolatey bite in every cookie. The melty chocolate will complement the nutty flavor perfectly!

  • Nut-Free: Swap out nut butter for sunflower seed butter. They’ll have a slightly different taste but remain just as enjoyable, making a lovely alternative if allergies are a concern.

  • Add Fruits: Mix in ½ cup of dried cranberries or raisins for a touch of natural sweetness and a chewy texture. These fruit-filled cookies will become a family favorite!

  • Spiced Up: Add 1 teaspoon of cinnamon or a dash of nutmeg to the dry ingredients for a warm, inviting spice flavor. A cozy addition that warms the heart!

  • Peanut Butter Swirls: For a richer flavor, try swirling in an additional tablespoon of nut butter on top before baking. This little extra step will take your cookies to the next level!

  • Protein Boost: Use a flavored protein powder, like vanilla or chocolate, to enhance the cookie's overall taste. It’s an easy way to add a punch of flavor and nutrition!

Embrace these variations and customize your Protein Oatmeal Cookies to become your family's beloved recipe. For a complete meal prep experience, check out my guide on making meal prep-friendly snacks! Happy baking!

Expert Tips for Protein Oatmeal Cookies

Use Fresh Ingredients: Always check the freshness of your rolled oats and protein powder to ensure optimal flavor and texture in your Protein Oatmeal Cookies.

Avoid Overmixing: Gently combine the wet and dry ingredients; overmixing can lead to tough cookies. The goal is a tender, chewy texture.

Perfect Scooping: For uniform cookies, use a cookie scoop—this helps them bake evenly and look more appealing.

Watch the Bake Time: Ovens vary—keep an eye on the cookies starting at the 10-minute mark. Remove them when edges are golden and centers are slightly soft.

Cool Completely: Allow cookies to cool on a wire rack; this ensures they hold their shape and gives them the perfect chewy texture. Enjoy your Protein Oatmeal Cookies without the fuss!

Make Ahead Options

These Protein Oatmeal Cookies are perfect for busy home cooks looking to save time! You can prepare the dough up to 24 hours in advance by mixing the dry and wet ingredients and refrigerating the combined dough. This keeps the dough fresh and ready to bake when you need a quick snack. Alternatively, you can scoop the shaped cookies onto the baking sheet, cover them with plastic wrap, and refrigerate them to bake fresh cookies in the morning or whenever you crave them. When you're ready to bake, simply preheat your oven and cook the cookies straight from the fridge for 10-15 minutes. This way, you can enjoy delicious, homemade cookies any time with minimal effort!

Protein Oatmeal Cookies

Protein Oatmeal Cookies Recipe FAQs

How do I choose the right ripeness of oats and nut butter?
Absolutely! For the best results, use whole rolled oats that are fresh and free of rancidity—look for a nutty aroma. As for nut butter, creamy versions work best, but check the expiration date to ensure optimal flavor.

How should I store my Protein Oatmeal Cookies?
Store your cookies in an airtight container at room temperature for up to 3 days. If you want to extend their freshness, refrigerate them for up to a week. Just make sure they're well-wrapped or in a sealed container to maintain their softness.

Can I freeze the Protein Oatmeal Cookies? How?
Yes, you can absolutely freeze them! Place the cookies in a single layer on a baking sheet until they're solid, which takes about 1-2 hours. Then, transfer them to an airtight container or freezer bag. They’ll stay fresh for up to 3 months. To enjoy them later, simply thaw at room temperature or reheat in the microwave for 10-15 seconds.

What can I do if my cookies turn out too crumbly?
If your cookies are crumbly, it may be due to too much dry ingredient or insufficient binding. I recommend adding a little more nut butter or an additional egg next time, as these will help bind everything together and create that chewy texture you’re aiming for. Make sure to measure accurately, as every scoop counts!

Are these cookies safe for people with nut allergies?
If you're catering to someone with nut allergies, I recommend switching nut butter with sunflower seed butter or a blend of tahini. Additionally, double-check that your protein powder is free from allergens. Always prioritize everyone's safety and preferences when baking!

Can I substitute any ingredients in the Protein Oatmeal Cookies?
Very much so! If you want to adjust sweetness, feel free to swap honey for maple syrup or agave syrup. You can also use different types of nut butter or protein powder according to your taste or dietary needs. Variety is the spice of life, so don’t hesitate to mix it up!

Protein Oatmeal Cookies

Protein Oatmeal Cookies That Satisfy Your Sweet Cravings

Enjoy these Protein Oatmeal Cookies, a delicious guilt-free treat that satisfies your sweet cravings while providing nourishment.
Print Recipe Pin Recipe
Prep Time 15 minutes mins
Cook Time 15 minutes mins
Total Time 30 minutes mins
Servings: 12 cookies
Course: Dessert
Calories: 150
Ingredients Equipment Method Nutrition Notes

Ingredients
  

For the Cookie Base
  • 2 cups rolled oats the backbone of these cookies
  • 1 cup protein powder gives a healthy boost
  • ½ cup nut butter try almond or peanut for different flavors
  • ⅓ cup honey or maple syrup for natural sweetness
  • 1 large egg binds all ingredients together
  • 1 teaspoon vanilla extract enhances the flavor profile
  • 1 teaspoon baking soda helps the cookies rise
  • ¼ teaspoon salt balances the sweetness

Equipment

  • Mixing bowls
  • Baking sheets
  • Cookie scoop

Method
 

Step-by-Step Instructions for Protein Oatmeal Cookies
  1. Preheat your oven to 350°F (175°C).
  2. In a large mixing bowl, combine the rolled oats, protein powder, baking soda, and salt.
  3. In another bowl, mix together the nut butter, honey (or maple syrup), egg, and vanilla extract until smooth.
  4. Gently fold the dry ingredients into the wet mixture until just combined.
  5. Drop rounded tablespoons of dough onto a lined baking sheet, leaving about 2 inches of space between each scoop.
  6. Bake the cookies for 10-15 minutes, or until the edges are golden brown.
  7. Let them cool on the baking sheet for a few minutes before transferring to a wire rack.
  8. Transfer the cookies to a wire rack to cool completely.

Nutrition

Serving: 1cookieCalories: 150kcalCarbohydrates: 18gProtein: 6gFat: 7gSaturated Fat: 1gPolyunsaturated Fat: 2gMonounsaturated Fat: 4gCholesterol: 20mgSodium: 120mgPotassium: 150mgFiber: 2gSugar: 5gCalcium: 2mgIron: 6mg

Notes

Store cookies in an airtight container for up to 3 days or freeze for up to 3 months.

Tried this recipe?

Let us know how it was!

Maggiano's Lasagna: A Cozy Taste of Homemade Comfort

January 15, 2026 by grace bellamy Leave a Comment

As I stood in my kitchen, the comforting aroma of simmering marinara wafted through the air, instantly transporting me to a cozy Italian bistro. This is the moment I recreate a cherished favorite: Copycat Maggiano's Lasagna. Not only does this dish satisfy my craving for hearty comfort food, but it also offers the joy of homemade goodness that we all long for, especially when tired of fast food. With layers of rich meat, creamy ricotta, and gooey mozzarella, this recipe not only brings a crowd-pleasing experience to the table but is also surprisingly achievable for weeknight dinners. So why not indulge your inner chef and bring a slice of Italian delight into your home? Are you ready to try making this classic lasagna that will have everyone asking for seconds?

Maggiano's Lasagna

Why is Maggiano's Lasagna a Must-Try?

Satisfying: This Copycat Maggiano's Lasagna delivers a comforting meal that’s perfect for any occasion, making it a great family favorite.
Rich Layers: With a luscious blend of ricotta, mozzarella, and flavorful meats, every bite bursts with savory goodness that’s reminiscent of your favorite restaurant dish.
Easy to Make: The straightforward steps ensure that even novice cooks can achieve impressive results—perfect for those busy weeknights!
Crowd-Pleaser: Serve it at gatherings, and watch your friends and family come back for seconds, eagerly praising your culinary skills!
Endless Versatility: Feel free to adjust the ingredients by adding veggies like spinach or swapping in different meats to make it your own. If you're looking for another cozy dish, don’t miss out on my Classic Baked Ziti for added comfort!

Maggiano's Lasagna Ingredients

For the Noodles

  • Lasagna noodles – Choose oven-ready noodles to save time or use traditional ones for extra texture.

For the Meat Sauce

  • Olive oil – A tablespoon helps sauté the meat to perfection, enhancing the overall flavor.
  • Ground beef – Use lean beef for a balanced taste, or try ground turkey for a lighter version.
  • Italian sausage – Choose sweet or spicy based on your preference for a flavorsome kick.
  • Marinara sauce – This is essential for layering, providing the rich, tangy flavor that defines Maggiano's Lasagna.
  • Dried oregano – Adds a warm, aromatic flavor that enhances the Italian essence.
  • Dried basil – A classic herb that complements the meat sauce beautifully.
  • Garlic powder – For a subtle garlic-infused taste without the hassle of fresh garlic.
  • Salt – Enhances the flavors of the sauce and noodles; adjust to your taste.
  • Black pepper – Freshly ground gives a lovely kick to your sauce.

For the Cheese Mixture

  • Ricotta cheese – This creamy cheese creates a rich, decadent layer that’s essential to the dish.
  • Shredded mozzarella cheese – The melted gooeyness is what lasagna lovers dream of; don’t skimp on this!
  • Grated Parmesan cheese – It adds an extra layer of flavor on top and in the filling, enriching every bite.

For the Topping

  • Additional marinara sauce – Pour this on top just before baking for an extra burst of flavor.
  • Spinach (optional) – A delightful addition that adds color and nutrition; feel free to pack in those greens!

Step‑by‑Step Instructions for Maggiano's Lasagna

Step 1: Preheat the Oven
Begin by preheating your oven to 375°F (190°C). This temperature is key to achieving that beautifully bubbly top layer of your Maggiano's Lasagna. Make sure your oven is ready before you start cooking, ensuring everything bakes evenly and perfectly.

Step 2: Cook the Noodles
In a large pot, bring salted water to a rolling boil. Carefully add the lasagna noodles and cook according to the package instructions, usually around 8-10 minutes, until al dente. Once done, drain the noodles and rinse them under cold water to prevent sticking, setting them aside for layering later.

Step 3: Prepare the Meat Sauce
In a large skillet, heat a tablespoon of olive oil over medium heat. Add the ground beef and Italian sausage, cooking them until browned, approximately 5-7 minutes. Drain any excess fat before stirring in marinara sauce, dried oregano, dried basil, garlic powder, salt, and black pepper. Simmer this hearty sauce for about 10 minutes, allowing the flavors to meld beautifully.

Step 4: Mix the Cheese Filling
In a medium bowl, combine the ricotta cheese, half of the shredded mozzarella, and half of the grated Parmesan cheese. Stir this mixture well until it's smooth and all cheeses are blended. This creamy filling will provide a delightful contrast to the robust meat sauce and will be layered into your Maggiano's Lasagna.

Step 5: Assemble the Lasagna
In a 9x13 inch baking dish, spread a thin layer of the meat sauce over the bottom. Layer 3 cooked noodles on top, then add half of the ricotta mixture, followed by a third of the remaining meat sauce. If desired, sprinkle a handful of spinach over this layer. Repeat the process with another set of noodles, the remaining ricotta mixture, and more meat sauce.

Step 6: Finish Layering
On top of your second layer, place 3 additional noodles followed by the final third of the meat sauce. Finish by layering the last noodles on top. Spread the remaining marinara sauce over these noodles, ensuring an even coverage, and then sprinkle the remaining mozzarella and Parmesan cheese for that ultimate cheesy topping.

Step 7: Bake the Lasagna
Cover the baking dish with foil to prevent over-browning and place it in the preheated oven. Bake your Maggiano's Lasagna for 25 minutes, then carefully remove the foil and continue baking for an additional 10 minutes. This will allow the cheese to become wonderfully bubbly and golden.

Step 8: Let Rest and Serve
Once baked, remove the lasagna from the oven and let it rest for 10-15 minutes. This resting time is crucial, as it allows the layers to set, making it easier to slice. After resting, cut into squares and serve warm, enjoying the layers of rich flavors that your homemade Maggiano's Lasagna has to offer.

Maggiano's Lasagna

Expert Tips for Maggiano's Lasagna

  • Perfect Noodles: Cook lasagna noodles just until al dente; overcooked noodles can lead to a mushy texture. Rinse with cold water to stop cooking.

  • Layer Wisely: Ensure even distribution of cheese and meat sauce in layers. This prevents dry spots and ensures every bite is filled with flavor.

  • Resting Time: Always let the lasagna rest before slicing. This helps the layers set, making serving easier and maintaining the dish's structure.

  • Cheese Choices: Don’t skimp on cheese! Using fresh mozzarella and good quality Parmesan enhances the richness of your Maggiano's Lasagna.

  • Customize: Feel free to add vegetables like spinach for added nutrition or swap out meats. Just keep in mind that varying ingredients may alter the final flavor.

What to Serve with Copycat Maggiano's Lasagna

As you bask in the savory warmth of this delightful dish, consider pairing it with complementary sides that elevate your dining experience.

  • Garlic Bread: The buttery, garlic-infused bread is perfect for soaking up extra marinara sauce, adding a crispy contrast to your meal.

  • Caesar Salad: Crisp romaine, crunchy croutons, and a tangy dressing add brightness to each bite of rich lasagna, balancing flavors beautifully.

  • Roasted Vegetables: Seasoned with herbs and olive oil, roasted seasonal veggies bring a lovely earthy flavor and vibrant colors to your plate.

  • Antipasto Platter: A selection of cured meats, cheeses, olives, and marinated vegetables creates a feast for the senses and sparks conversation.

  • Red Wine: A medium-bodied red wine, like Chianti, pairs wonderfully with the robust flavors of the lasagna, enhancing the overall meal experience.

  • Tiramisu: Finish off on a sweet note with a creamy, coffee-flavored tiramisu; its lightness is a perfect contrast to your hearty main course.

Indulge in these pairings to create a memorable meal that feels like a warm embrace, and watch your family savor every bite!

Make Ahead Options

These Copycat Maggiano's Lasagna are perfect for busy home cooks looking to save time during the week! You can prepare the entire lasagna up to 24 hours in advance. Simply assemble the layers (including the meat sauce, cheese mixture, and noodles) in your baking dish, but keep the additional marinara sauce and cheese topping separate until you're ready to bake. Cover tightly with plastic wrap or foil and refrigerate. To maintain quality, it’s best to bake the lasagna straight from the fridge; just add an extra 5-10 minutes to the baking time. When you're ready to serve, spread the reserved marinara sauce over the top, sprinkle with cheese, and bake as directed. Enjoy restaurant-quality results with minimal effort!

Maggiano's Lasagna Variations

Feel free to get creative with your lasagna; this dish is all about personal touch and flavor.

  • Dairy-Free: Substitute ricotta and mozzarella with vegan cheese alternatives for an equally satisfying bite.
  • Vegetarian: Swap the ground beef and sausage for lentils or mushrooms, providing a hearty texture without meat.
  • Spicy Kick: Add red pepper flakes to the marinara sauce for a lively heat that tickles the taste buds. Picture that zesty flavor bursting forth with each forkful!
  • Extra Greens: Layer in zucchini or bell peppers for additional nutrients and vibrant colors; they add that fresh crunch everyone loves!
  • Herb-Infused: Mix fresh basil or parsley into the ricotta for a bursting flavor that brightens every layer. It's like a little garden in your lasagna!
  • Meat Lovers: Add layers of pepperoni or pancetta for a savory surprise that meat lovers will adore—every bite becomes more indulgent!
  • Cheesy Goodness: Heap on extra layers of your favorite cheeses for an ultra-gooey, cheesy masterpiece that will leave everyone drooling.
  • Nutty Texture: Sprinkle in some pine nuts or walnuts for a rich, crunchy contrast to the soft layers—an element of surprise that will delight!

Don't hesitate to explore these variations and make this comforting dish uniquely yours. Don't forget to pair it with a refreshing side salad or some garlic bread for the perfect meal experience!

How to Store and Freeze Maggiano's Lasagna

Room Temperature: Lasagna can sit out for up to 2 hours before it needs refrigeration, perfect for serving during a gathering.

Fridge: Store leftover Maggiano's Lasagna in an airtight container in the fridge for up to 3 days; this helps maintain the flavor and texture.

Freezer: For longer storage, freeze the lasagna in an airtight container or tightly wrap individual portions in plastic wrap, where it will keep for up to 3 months.

Reheating: Reheat slices in the microwave or bake in a preheated oven at 350°F (175°C) until heated through—about 20 minutes if frozen. Enjoy your comforting meal anytime!

Maggiano's Lasagna

Maggiano's Lasagna Recipe FAQs

How do I select the perfect lasagna noodles?
When choosing lasagna noodles, consider using oven-ready noodles to save time, as they don’t require pre-cooking. If you opt for traditional noodles, look for those labeled “no-boil” for even quicker prep. I recommend selecting high-quality options without any dark spots or breakage. Comforting and sturdy, they should hold up well under the hearty layers of your Maggiano's Lasagna!

How should I store leftover Maggiano's Lasagna?
To store your leftover lasagna, place it in an airtight container and refrigerate for up to 3 days. This keeps it fresh and tasty for later enjoyment. If you want to keep it longer, consider freezing it. Wrap your lasagna tightly in plastic wrap and place it in a freezer-safe container; it will stay good for up to 3 months. When you're ready to enjoy it again, simply reheat in the microwave or bake, making sure it’s heated all the way through!

Can I freeze Maggiano's Lasagna, and how do I do it?
Absolutely! To freeze your lasagna, first, let it cool completely. Then, portion it into individual servings or keep it whole, wrapping tightly in plastic wrap. Place the wrapped lasagna in an airtight container or a heavy-duty freezer bag. For best results, label it with the date; it will maintain quality for up to 3 months. When you're ready to bake it, simply thaw in the refrigerator overnight and heat in a preheated oven at 350°F (175°C) for about 20 minutes.

What do I do if my lasagna is too watery?
If you ever find your lasagna is watery when baked, this is often due to excess moisture from the tomato sauce or vegetables like spinach. To avoid this, make sure to drain any excess liquid from the meat sauce. You can also sauté any frozen spinach beforehand to release water. If you still find it watery, add a little more ricotta to absorb some moisture. With these tips, your Maggiano's Lasagna will turn out perfectly gooey, not soggy!

Is Maggiano's Lasagna suitable for those with dietary restrictions?
If you have dietary considerations, you can easily modify this recipe to suit your needs. For a gluten-free option, look for gluten-free lasagna noodles, and choose gluten-free brands of marinara sauce. Additionally, you can swap the ground meats for plant-based alternatives, making it suitable for vegetarians or those wanting a healthier twist. Always check the labels of pre-packaged ingredients for allergens, especially if serving guests with specific allergies. Enjoy customizable dining!

Maggiano's Lasagna

Maggiano's Lasagna: A Cozy Taste of Homemade Comfort

This Copycat Maggiano's Lasagna is a comforting meal perfect for any occasion, delivering rich flavors reminiscent of your favorite restaurant dish.
Print Recipe Pin Recipe
Prep Time 30 minutes mins
Cook Time 35 minutes mins
Resting Time 15 minutes mins
Total Time 1 hour hr 20 minutes mins
Servings: 8 slices
Course: Main Dishes
Cuisine: Italian
Calories: 400
Ingredients Equipment Method Nutrition Notes

Ingredients
  

For the Noodles
  • 1 package lasagna noodles Oven-ready or traditional
For the Meat Sauce
  • 1 tablespoon olive oil For sautéing
  • 1 pound ground beef Or ground turkey for lighter version
  • 1 pound Italian sausage Sweet or spicy based on preference
  • 24 ounces marinara sauce Essential for layering
  • 1 teaspoon dried oregano
  • 1 teaspoon dried basil
  • 1 teaspoon garlic powder For subtle garlic flavor
  • 1 teaspoon salt To taste
  • 1 teaspoon black pepper Freshly ground
For the Cheese Mixture
  • 15 ounces ricotta cheese Creamy layer essential to the dish
  • 2 cups shredded mozzarella cheese Don't skimp on this!
  • ½ cup grated Parmesan cheese For extra flavor
For the Topping
  • 1 cup additional marinara sauce For pouring on top before baking
  • 2 cups spinach Optional, for added nutrition

Equipment

  • 9x13-inch baking dish
  • Large Pot
  • large skillet
  • Medium bowl

Method
 

Step-by-Step Instructions
  1. Preheat your oven to 375°F (190°C).
  2. In a large pot, bring salted water to a rolling boil. Cook lasagna noodles according to package instructions, then drain and rinse.
  3. In a large skillet, heat olive oil. Add ground beef and Italian sausage, cook until browned. Stir in marinara sauce and spices, simmer for 10 minutes.
  4. In a bowl, combine ricotta, half the mozzarella, and half the Parmesan until smooth.
  5. In a baking dish, layer meat sauce, noodles, cheese mixture, and spinach. Repeat until ingredients are used.
  6. Top with remaining noodles, marinara, mozzarella, and Parmesan.
  7. Cover with foil and bake for 25 minutes, then uncover and bake for another 10 minutes.
  8. Let lasagna rest for 10-15 minutes before slicing and serving.

Nutrition

Serving: 1sliceCalories: 400kcalCarbohydrates: 30gProtein: 25gFat: 20gSaturated Fat: 10gPolyunsaturated Fat: 1gMonounsaturated Fat: 3gCholesterol: 70mgSodium: 900mgPotassium: 400mgFiber: 2gSugar: 5gVitamin A: 15IUVitamin C: 5mgCalcium: 25mgIron: 15mg

Notes

For added versatility, feel free to customize by adding vegetables or changing meats as desired.

Tried this recipe?

Let us know how it was!

Southern Breakfast Enchiladas with Sausage Gravy Bliss

January 15, 2026 by grace bellamy Leave a Comment

As I stirred the bubbling gravy, an undeniable warmth spread through my kitchen, filling the air with nostalgia. There's something undeniably comforting about Southern Breakfast Enchiladas with Sausage Gravy that makes even the earliest mornings feel special. This delightful recipe perfectly combines fluffy tortillas with a savory sausage filling that’s covered in a creamy, spiced gravy, making it a crowd-pleaser for any brunch gathering or a satisfying breakfast at home. It’s not just quick to throw together, but also a fantastic way to elevate your morning meal into something extraordinary. Trust me, each bite feels like a warm hug from the South! Ready to give your taste buds a treat? Let’s dive into this delicious adventure together!

Southern Breakfast Enchiladas with Sausage Gravy

Why Are These Enchiladas So Irresistible?

Flavor Explosion: The combination of savory breakfast sausage, rich cheese, and flavorful spices creates a breakfast experience that's nothing short of heavenly.

Easy Prep: With just 15 minutes of prep time, you’ll have this delicious meal ready in under an hour—perfect for busy mornings or last-minute brunch plans.

Crowd-Pleaser: Whether it’s a lazy Sunday or a festive gathering, these Southern Breakfast Enchiladas will impress everyone at the table, ensuring that no one leaves hungry.

Comforting and Cozy: There’s something magical about wrapping all those flavors in fluffy tortillas, topped with creamy gravy. It’s like a warm hug on a plate!

Versatile Option: Customize with your favorite ingredients or adapt to dietary needs; these enchiladas can easily be made vegetarian or spiced up with your preferred toppings.

Dive deeper into brunch magic by exploring more mouthwatering ideas with delicious breakfast recipes that’ll inspire your culinary creations!

Southern Breakfast Enchiladas Ingredients

For the Gravy
• Butter – adds richness to the gravy, enhancing flavor.
• Olive oil – prevents the butter from burning and contributes to a nice texture.
• Onion – diced for savory depth; sweet onions work beautifully here.
• Garlic – minced to give an aromatic punch and elevate the overall taste.
• Breakfast sausage – brings a hearty, savory element; spicy or mild varieties can be used.
• All-purpose flour – thickens the gravy for a creamy consistency.
• Milk – provides the base for the gravy; whole milk works best for creaminess.
• Salt – enhances the flavors of all the ingredients.
• Black pepper – adds a hint of spice and warmth.
• Cayenne pepper – for those who enjoy an extra kick in their gravy.
• Paprika – introduces a mild and smoky flavor to the mix.

For the Enchiladas
• Flour tortillas – use large ones for easy rolling and maximum filling.
• Cheddar cheese – sharp and melty, this cheese adds tangy flavor.
• Monterey Jack cheese – creamy and smooth, it complements the cheddar beautifully.
• Fresh parsley – chopped and used as a garnish for color and freshness.

For Extra Flavor
• Ground sage – offers a warm, herbal taste that pairs well with sausage.
• Garlic powder – amplifies the garlic flavor without the fuss.
• Onion powder – enhances the overall savory profile discreetly.
• Thyme – brings a subtle earthiness to ground meat dishes.
• Hot sauce – drizzle on top for an exciting spicy finish!

Discover the delightful layers of flavors in these Southern Breakfast Enchiladas with Sausage Gravy!

Step‑by‑Step Instructions for Southern Breakfast Enchiladas with Sausage Gravy

Step 1: Heat the Base
In a large skillet, melt 2 tablespoons of butter alongside 1 tablespoon of olive oil over medium heat. As the butter foams, add the diced onion and sauté until it becomes translucent and fragrant, approximately 4-5 minutes. This forms the savory base of your Southern Breakfast Enchiladas with Sausage Gravy.

Step 2: Add Flavor
Once the onion is softened, stir in 2 minced garlic cloves and continue cooking for an additional minute, stirring occasionally. The garlic will release a wonderful aroma, enhancing the overall flavor profile. Be sure to keep an eye on it to prevent burning.

Step 3: Cook the Sausage
Introduce 1 pound of breakfast sausage to the skillet, breaking it apart with your spatula. Cook the sausage for 8-10 minutes, stirring frequently, until it’s browned and fully cooked through. This savory meat is the heart of your enchiladas and will blend beautifully with the gravy.

Step 4: Thicken the Mixture
Sprinkle ¼ cup of all-purpose flour over the sausage mixture, stirring to combine all ingredients evenly. Cook the flour for about 1-2 minutes, keeping the mixture moving to avoid any burning. This step is crucial for creating a thick and luscious gravy.

Step 5: Create the Gravy
Gradually pour in 2 cups of milk while continuously stirring to prevent lumps from forming. As the gravy begins to come together, mix in ½ teaspoon salt, ¼ teaspoon black pepper, ¼ teaspoon cayenne pepper, and ½ teaspoon paprika for added flavor.

Step 6: Simmer the Gravy
Bring the mixture to a gentle simmer over medium heat, stirring occasionally. Allow it to cook for 5-7 minutes, or until the gravy thickens to your desired consistency. This creamy base will be poured over your Southern Breakfast Enchiladas later.

Step 7: Preheat the Oven
While the gravy simmers, preheat your oven to 375°F (190°C). This ensures that it’s hot and ready for baking your enchiladas once they are assembled, resulting in perfectly melted cheese and bubbling flavors.

Step 8: Prepare the Baking Dish
Lightly grease a 9x13-inch baking dish with butter or cooking spray. This step is essential to prevent sticking and will help achieve a beautifully golden top on your enchiladas.

Step 9: Assemble the Enchiladas
On a clean surface, lay out your 8 large flour tortillas. Spoon about 2-3 tablespoons of the savory sausage gravy into the center of each tortilla, ensuring each one is generously filled.

Step 10: Add Cheese
Top the sausage gravy in each tortilla with a small handful of shredded cheddar and Monterey Jack cheese. This melty goodness will enrich your Southern Breakfast Enchiladas and create a delicious gooey layer.

Step 11: Roll the Enchiladas
Carefully roll up each tortilla tightly, enclosing the filling completely to form a closed enchilada. Place each enchilada seam-side down in the prepared baking dish, lining them up closely together for optimal baking.

Step 12: Cover with Gravy
Pour the remaining sausage gravy evenly over the top of the rolled tortillas, ensuring even coverage of all enchiladas. This will keep them moist and flavorful as they bake in the oven.

Step 13: Add More Cheese
Sprinkle the remaining shredded cheddar and Monterey Jack cheeses over the top of the gravy. This adds an irresistible cheesiness that will melt gloriously as the enchiladas bake.

Step 14: Bake the Enchiladas
Place your assembled dish in the preheated oven and bake for 20-25 minutes, until the cheese is melted, bubbly, and begins to turn golden brown. You'll know they’re ready when you see the cheese just starting to brown.

Step 15: Cool and Garnish
Once baked, carefully remove the dish from the oven and let the enchiladas cool for a few minutes. This will help them set slightly, making them easier to serve and enjoy.

Step 16: Serve with Style
Sprinkle chopped fresh parsley over the top as a cheerful garnish. Drizzle hot sauce evenly over the enchiladas for an extra kick that complements the savory flavors. Now, dig in and relish your warm, comforting Southern Breakfast Enchiladas with Sausage Gravy!

Southern Breakfast Enchiladas with Sausage Gravy

Expert Tips for Southern Breakfast Enchiladas

Ingredient Quality: Use high-quality breakfast sausage and fresh herbs for the best flavor. The quality of your ingredients will shine through in every bite of your Southern Breakfast Enchiladas with Sausage Gravy.

Don’t Overfill: Be careful not to overstuff the tortillas; 2-3 tablespoons of gravy and cheese is perfect. Overfilling can lead to messy enchiladas that burst open while baking.

Gravy Thickness: Adjust the thickness of the gravy to your liking. If it's too thick, add a splash more milk; if it’s too thin, let it simmer a bit longer. Getting the consistency just right will enhance the overall dish.

Cheese Options: Feel free to mix different cheeses! While cheddar and Monterey Jack work beautifully, trying pepper jack or a Mexican blend can add extra flavor and creaminess.

Baking Time: Keep a close eye on the enchiladas in the oven. Baking times can vary based on the oven; look for golden cheese and bubbly gravy to ensure they’re ready.

Make Ahead: These enchiladas can be assembled a day in advance, making them a convenient option for busy mornings. Just cover them and refrigerate before baking!

Make Ahead Options

These Southern Breakfast Enchiladas with Sausage Gravy are perfect for busy home cooks! You can prepare the sausage gravy and assemble the enchiladas up to 24 hours in advance. Simply follow the recipe steps until placing them in the baking dish, then cover tightly with plastic wrap to refrigerate overnight. For the best quality, avoid adding the final cheese layer until just before baking. When you're ready to serve, preheat your oven to 375°F (190°C), sprinkle the remaining cheese on top, and bake for 25-30 minutes or until bubbly and golden. This way, you’ll enjoy all the delicious flavors with minimal effort on the day you plan to serve!

Southern Breakfast Enchiladas Variations

Get ready to explore the many delicious ways to customize your Southern Breakfast Enchiladas and make them uniquely yours!

  • Vegetarian Twist: Substitute breakfast sausage with sautéed mushrooms and spinach for a wholesome veggie version. It’s equally hearty and flavorful!

  • Cheddar Swap: Try pepper jack cheese in place of cheddar for an extra kick. The spiciness will elevate the entire dish, making it more exciting.

  • Gluten-Free: Use corn tortillas instead of flour ones, ensuring everyone can enjoy this delightful meal. They still pack all the comforting flavors and textures.

  • Extra Creaminess: Blend in a splash of cream cheese or sour cream into the gravy for a richer consistency. This will intensify the creamy goodness that coats the enchiladas.

  • Heat Lover’s Delight: Add diced jalapeños to the sausage filling or increase the hot sauce for those who like it spicy. This fiery touch will tantalize your taste buds!

  • Herb Infusion: Experiment with fresh herbs like cilantro or chives instead of parsley for garnish. Their vibrant flavors will brighten up the dish.

  • Savory Scratch: For a richer flavor, use a homemade gravy rather than store-bought. Nothing beats the taste of a well-made sauce—it’s worth the extra effort!

  • Breakfast Fusion: Switch the filling to scrambled eggs and crumbled bacon for a classic breakfast blend. This creates a delightful morning feast that’ll impress everyone at brunch.

Feel inspired to create your own culinary masterpiece? These variations will help you tailor your Southern Breakfast Enchiladas to suit your family’s tastes! If you’re looking for even more delicious ideas, check out these tempting breakfast options like savory breakfast casseroles and easy brunch ideas.

What to Serve with Southern Breakfast Enchiladas with Sausage Gravy

A delightful breakfast spread is just the beginning of bringing your brunch dreams to life.

  • Crispy Hash Browns: These golden, crunchy potatoes contrast beautifully with the creamy enchiladas, providing the perfect crispy sidekick. Paired together, they create a true breakfast feast.

  • Fresh Fruit Salad: A vibrant medley of seasonal fruits adds a refreshing sweetness that cuts through the richness of the enchiladas. The colors and textures will brighten up your table and tantalize your taste buds.

  • Garden Salad: A light, crisp salad with mixed greens, cherry tomatoes, and a tangy vinaigrette offers a refreshing balance to the savory dish. The fresh flavors bring a pop of brightness to each bite.

  • Spicy Jalapeño Cornbread: This slightly sweet cornbread, with a kick from jalapeños, is a fantastic way to complement the hearty enchiladas with a touch of Southern charm. The moist texture pairs splendidly with the creamy gravy.

  • Classic Mimosa: This bubbly blend of orange juice and sparkling wine adds a festive touch to your brunch, making it a delightful treat alongside the hearty enchiladas. It’s the perfect sip to toast with family and friends!

  • Decadent Cinnamon Rolls: Sweet and sticky cinnamon rolls bring a cozy, sweet note to your morning meal, rounding out the flavors perfectly. The combination of savory and sweet is always a crowd-pleaser at brunch gatherings.

  • Iced Coffee: A refreshing glass of iced coffee or a creamy latte enhances the brunch experience while providing a little extra caffeine. This invigorating duo pairs seamlessly with your Southern Breakfast Enchiladas.

Storage Tips for Southern Breakfast Enchiladas

Fridge: Store any leftovers in an airtight container for up to 3 days. Make sure to let them cool completely before storing for best results.

Freezer: Wrap individual enchiladas tightly in plastic wrap and then aluminum foil. They can be frozen for up to 3 months, ensuring your Southern Breakfast Enchiladas with Sausage Gravy are always ready for a cozy meal.

Reheating: To reheat, thaw in the fridge overnight, then bake at 350°F (175°C) for about 20 minutes or until heated through. Cover with foil to keep moisture in.

Serving Freshness: For the best flavor and texture, consider enjoying them freshly baked. However, stored enchiladas can still deliver that comforting taste you love!

Southern Breakfast Enchiladas with Sausage Gravy

Southern Breakfast Enchiladas with Sausage Gravy Recipe FAQs

What type of sausage should I use for the enchiladas?
Absolutely! For the best flavor, I recommend using a hickory-smoked breakfast sausage or a spicy sausage for those who like a kick. You can also choose a leaner turkey sausage if you’re looking for a healthier option. The key is to ensure it’s fully cooked and crumbled into small pieces for even distribution in your enchiladas.

How should I store leftover enchiladas?
Very! Leftover Southern Breakfast Enchiladas with Sausage Gravy can be stored in an airtight container for up to 3 days in the fridge. Be sure to let them cool completely before storing to maintain their texture and flavor. If you’re planning to keep them longer, freezing is a great option!

Can I freeze these enchiladas? How do I do it?
Absolutely! To freeze your Southern Breakfast Enchiladas, wrap each individual enchilada tightly in plastic wrap, followed by a layer of aluminum foil. This helps to prevent freezer burn and keeps them fresh. They can be kept in the freezer for up to 3 months. When you’re ready to enjoy, simply thaw overnight in the fridge and reheat as directed, or bake from frozen at a lower temperature until heated through.

What if my gravy is too thick or too thin?
Not a problem! If your gravy ends up too thick, simply whisk in a little more milk, a tablespoon at a time, until you reach your desired consistency. For thinner gravy, allow it to simmer longer on low heat without stirring, which will help it reduce. Just remember to taste as you go to ensure it meets your flavor expectations!

Do I need to adjust for dietary restrictions?
Very! If you’re preparing these enchiladas for guests with specific dietary needs, you can easily make adjustments. Consider using gluten-free tortillas if needed. For a vegetarian option, substitute the sausage with a plant-based alternative, and increase the amount of vegetables sautéed in the gravy. Just be mindful to use a non-dairy milk if you’re accommodating vegan diets.

Can I make these enchiladas ahead of time?
Absolutely! You can assemble the enchiladas the night before, cover them tightly with foil, and refrigerate. This saves time on busy mornings! Just ensure you give them a few extra minutes in the oven to heat through when baking. Enjoy the convenience without sacrificing deliciousness!

Southern Breakfast Enchiladas with Sausage Gravy

Southern Breakfast Enchiladas with Sausage Gravy Bliss

Delight in Southern Breakfast Enchiladas with Sausage Gravy, featuring fluffy tortillas, savory sausage, and creamy gravy for a comforting breakfast experience.
Print Recipe Pin Recipe
Prep Time 15 minutes mins
Cook Time 30 minutes mins
Total Time 45 minutes mins
Servings: 6 enchiladas
Course: Breakfast
Cuisine: Southern
Calories: 450
Ingredients Equipment Method Nutrition Notes

Ingredients
  

For the Gravy
  • 2 tablespoons butter adds richness to the gravy, enhancing flavor
  • 1 tablespoon olive oil prevents the butter from burning and contributes to a nice texture
  • 1 medium onion diced for savory depth
  • 2 cloves garlic minced for aroma
  • 1 pound breakfast sausage spicy or mild varieties can be used
  • ¼ cup all-purpose flour thickens the gravy
  • 2 cups milk whole milk works best for creaminess
  • ½ teaspoon salt enhances all flavors
  • ¼ teaspoon black pepper adds a hint of spice
  • ¼ teaspoon cayenne pepper for extra kick
  • ½ teaspoon paprika for mild, smoky flavor
For the Enchiladas
  • 8 large flour tortillas for easy rolling
  • 1 cup cheddar cheese sharp and melty
  • 1 cup Monterey Jack cheese creamy and smooth
  • ¼ cup fresh parsley chopped for garnish
For Extra Flavor
  • 1 teaspoon ground sage herbal taste
  • 1 teaspoon garlic powder amplifies garlic flavor
  • 1 teaspoon onion powder enhances savory profile
  • 1 teaspoon thyme adds earthiness
  • to taste hot sauce for an exciting finish

Equipment

  • large skillet
  • 9x13-inch baking dish

Method
 

Step-by-Step Instructions
  1. In a large skillet, melt butter and olive oil over medium heat. Add diced onion and sauté until translucent, about 4-5 minutes.
  2. Stir in minced garlic and cook for an additional minute.
  3. Add the breakfast sausage to the skillet and cook until browned, about 8-10 minutes.
  4. Sprinkle flour over the sausage mixture and cook for 1-2 minutes.
  5. Gradually pour in milk, stirring continuously, and mix in salt, black pepper, cayenne pepper, and paprika.
  6. Bring the mixture to a simmer, stirring occasionally, for 5-7 minutes until it thickens.
  7. Preheat your oven to 375°F (190°C).
  8. Lightly grease a 9x13-inch baking dish.
  9. On a clean surface, lay out the tortillas. Spoon sausage gravy into the center of each tortilla.
  10. Top with shredded cheddar and Monterey Jack cheeses.
  11. Roll each tortilla tightly and place seam-side down in the baking dish.
  12. Pour the remaining gravy over the rolled tortillas.
  13. Sprinkle remaining cheeses over the top.
  14. Bake for 20-25 minutes, until cheese is melted and golden.
  15. Allow to cool for a few minutes before serving.
  16. Garnish with fresh parsley and drizzle with hot sauce before serving.

Nutrition

Serving: 1enchiladaCalories: 450kcalCarbohydrates: 35gProtein: 20gFat: 25gSaturated Fat: 10gPolyunsaturated Fat: 2gMonounsaturated Fat: 8gCholesterol: 70mgSodium: 800mgPotassium: 300mgFiber: 2gSugar: 3gVitamin A: 500IUVitamin C: 5mgCalcium: 250mgIron: 3mg

Notes

Use high-quality ingredients for the best flavor. Enchiladas can be made ahead and refrigerated before baking.

Tried this recipe?

Let us know how it was!

Savory Thai Red Curry Soup that Warms the Soul

January 15, 2026 by grace bellamy Leave a Comment

The vibrant colors of a bustling market stall in Thailand swirl in my memory, where the fragrant scent of lemongrass and spices wafts through the air. That sensory excitement is what inspired me to create this comforting Thai Red Curry Soup. Perfect for busy weeknights, this recipe brings a delightful fusion of flavors into your home without the fuss. With just 30 minutes from start to finish, it’s not only quick to whip up but also a fantastic way to enjoy a nourishing meal that can easily be customized with your favorite protein and vegetables. Imagine cozy nights wrapped in soft blankets, clinking bowls, and comforting conversations over steaming soup. Want to dive into the delicious world of Thai flavors? Let’s get cooking!

Thai Red Curry Soup

Why is Thai Red Curry Soup a Must-Try?

Simplicity: This recipe comes together in just 30 minutes, making it perfect for those busy weeknights.

Bursting with Flavor: The rich, creamy coconut milk combined with the aromatic red curry paste creates a taste explosion in every spoonful.

Customizable: You can easily swap in your favorite vegetables or proteins, allowing each batch to be a unique creation!

Comfort in a Bowl: Enjoy the warm, soothing essence of this soup while staying toasty on a chilly evening—it's like a hug in a bowl!

Meal Prep Friendly: Make a big pot ahead of time; it only gets better the next day as the flavors meld together, ideal for your weekly meal prep!

Crowd-Pleaser: Serve it at gatherings, and you're bound to impress your friends and family while satisfying those cravings for homemade goodness.

Thai Red Curry Soup Ingredients

• Get ready to savor every spoonful!

For the Base

  • Red curry paste – brings a rich, spicy flavor that’s essential for this Thai Red Curry Soup.
  • Vegetable oil – for sautéing the curry paste, enhancing its aromatic qualities.
  • Coconut milk – provides a creamy texture and balances the spice with sweetness.
  • Vegetable broth – adds depth and richness to the soup base.

For the Veggies

  • Mixed vegetables – your choice (e.g., bell peppers, carrots) adds nutritious color and crunch to the dish.

For Protein

  • Protein of choice – such as tofu or chicken, to make the soup heartier and more satisfying.

For Flavor Enhancers

  • Soy sauce – introduces a savory umami kick, elevating the overall flavor profile.
  • Fresh lime juice – a splash brightens the dish and balances the richness.

For Garnish

  • Fresh herbs – such as cilantro or basil for a refreshing finish, adding aroma and visual appeal.

Step‑by‑Step Instructions for Thai Red Curry Soup

Step 1: Sauté the Curry Paste
In a large pot, heat 1 tablespoon of vegetable oil over medium heat. Add 1 tablespoon of red curry paste, stirring continuously for about 1 minute until fragrant. You'll know it's ready when the paste is glossy and its aroma fills the kitchen, setting the perfect foundation for your Thai Red Curry Soup.

Step 2: Combine the Base Ingredients
Pour in 4 cups of coconut milk and 1 cup of vegetable broth, stirring gently until the curry paste is completely dissolved. Heat the mixture over medium-high until it starts to simmer, which should take about 2-3 minutes. As the soup warms, you'll see small bubbles forming on the surface, indicating it's blending beautifully.

Step 3: Add Vegetables and Protein
Add 1 cup of mixed vegetables and 1 cup of your chosen protein (tofu or chicken) to the pot. Stir well to incorporate everything, then reduce the heat to medium-low and let it simmer for about 15 minutes. During this time, the vegetables should become tender and the protein fully cooked, filling the air with a rich aroma that captures the essence of Thai cuisine.

Step 4: Season the Soup
Once the vegetables are tender, stir in 1 tablespoon of soy sauce and 1 tablespoon of fresh lime juice to brighten the flavors. Taste the soup and adjust the seasonings if necessary; you can add more lime juice for a zesty kick. Let the mixture simmer for an additional 2-3 minutes to meld all the flavors together perfectly.

Step 5: Serve and Garnish
Ladle the Thai Red Curry Soup into bowls while it’s hot, making sure to include a good mix of vegetables and protein in each serving. Garnish with fresh herbs like cilantro or basil for a burst of aroma and color. This delightful presentation not only enhances the look but also elevates the flavors, making your cozy meal truly inviting.

Thai Red Curry Soup

Make Ahead Options

These Thai Red Curry Soup preparations are a lifesaver for busy weeknights! You can make the entire soup up to 3 days in advance; just refrigerate it in an airtight container. For optimal flavor, consider prepping the vegetables and protein separately, then combine them when you're ready to heat the soup. To maintain the delicious quality, store the fresh herbs separately and add them just before serving to keep them vibrant. When it’s time to enjoy your meal, simply reheat the soup gently on the stove, stirring occasionally until heated through. This way, you’ll savor the comforting essence of homemade Thai Red Curry Soup without any fuss!

What to Serve with Thai Red Curry Soup

Imagine a cozy gathering where delightful aromas envelop your home, inviting everyone to the table for a heartwarming meal.

  • Jasmine Rice: This fragrant rice absorbs the flavors beautifully and provides a comforting, fluffy base to your soup.

  • Crusty Bread: Perfect for dipping, a warm loaf adds a rustic touch and complements the creamy texture of the soup.

  • Fresh Spring Rolls: These light, crisp rolls bring an exciting crunch and fresh herbs, enhancing the vibrant Thai flavors.

  • Crispy Tofu Bites: For extra protein, consider adding crispy tofu bites on the side. They offer a delightful crunch that contrasts with the soup's creaminess.

  • Cucumber Salad: A refreshing crunchy salad with lime and sesame dressing balances the richness of the soup and adds a burst of freshness.

  • Mango Sticky Rice: As a delightful dessert, this sweet treat rounds out the meal with a tropical flair, leaving everyone with a happy palate.

With these pairings, you're all set for a delightful culinary journey through Thailand, right in your own kitchen!

Variations & Substitutions for Thai Red Curry Soup

Feel free to explore these delightful twists that will make your Thai Red Curry Soup even more exciting!

  • Dairy-Free: Substitute coconut milk with a blend of almond or cashew milk for a lighter option.
  • Spicy Kick: Add fresh sliced chili peppers or a pinch of red pepper flakes to amp up the heat level. Just a dash can turn up the thrill!
  • Vegetable Swap: Replace mixed vegetables with seasonal produce like zucchini or snap peas to keep it fresh and vibrant. Each season brings new flavors to enjoy!
  • Protein Alternatives: Consider swapping tofu for shrimp or chickpeas for a protein-packed and satisfying option. Each choice enhances the soup's character uniquely.
  • Herb Infusion: Experiment with different fresh herbs like mint or Thai basil to give your soup a refreshing twist. A touch of boldness can elevate familiar tastes.
  • Noodle Addition: Stir in cooked rice noodles or soba noodles for an extra hearty and comforting bowl. They will soak up the flavors beautifully!
  • Nutty Flavor: For a richer texture, add a tablespoon of peanut butter or almond butter while simmering. It adds a delicious nuttiness that complements the curry.
  • Citrus Boost: Incorporate zest from lime or lemon for an extra burst of freshness and brightness. It's amazing how citrus can elevate the overall flavor!

If you're looking for ways to make your meal more exciting, read about meal prep tips that can transform leftovers into delightful lunches. Or discover how to pair your favorite dishes with this comforting soup through simple yet immediate suggestions like serving ideas. Enjoy experimenting!

How to Store and Freeze Thai Red Curry Soup

Fridge: Store leftover Thai Red Curry Soup in an airtight container for up to 3 days. Allow the soup to cool before refrigerating to maintain freshness.

Freezer: Freeze the soup in portions for up to 3 months. Use freezer-safe containers, leaving some space for expansion, as the soup will thicken when frozen.

Reheating: Reheat your soup on the stovetop over medium heat, stirring occasionally. You can add a splash of coconut milk or broth to loosen it up as it warms.

Thawing: To thaw, place the frozen Thai Red Curry Soup in the refrigerator overnight before reheating. Avoid microwave thawing to prevent uneven heating.

Expert Tips for Thai Red Curry Soup

  • Use Fresh Ingredients: Fresh vegetables and herbs make a significant difference in flavor. Avoid wilted produce; vibrant veggies lead to a more delicious Thai Red Curry Soup.
  • Adjust Spice Levels: If you're sensitive to heat, start with less red curry paste and gradually add more. You can always spice it up, but it's tough to tone it down!
  • Let It Simmer: Allowing the soup to simmer gently helps the flavors meld beautifully. Don't rush this step; it's worth the wait for a richer taste.
  • Perfect Protein Cooking: Ensure your protein is cooked through before serving. Undercooked tofu or chicken can affect the safety and satisfaction of this comforting dish.
  • Taste as You Go: Always sample your Thai Red Curry Soup before serving. Small tweaks, like an extra dash of soy sauce or lime, can elevate the dish to perfection!

Thai Red Curry Soup

Thai Red Curry Soup Recipe FAQs

How do I know if my vegetables are ripe and ready to use?
Absolutely! When selecting vegetables for your Thai Red Curry Soup, look for vibrant colors and firmness. For bell peppers, ensure they’re shiny and free from blemishes. Carrots should be crisp without dark spots all over. Fresh, high-quality veggies enhance the flavor and texture of your soup!

What is the best way to store leftover Thai Red Curry Soup?
You can store your Thai Red Curry Soup in an airtight container in the fridge for up to 3 days. It's best to let the soup cool before sealing it to keep it fresh. If you’re planning on enjoying it later, simply scoop it into portions to grab a quick meal!

Can I freeze Thai Red Curry Soup, and how do I do that?
Very! You can freeze your Thai Red Curry Soup in freezer-safe containers for up to 3 months. To do this, let the soup cool completely before pouring it into containers, leaving some space at the top for expansion. Label the containers with the date, and when you're ready to enjoy it, simply thaw in the refrigerator overnight and reheat on the stovetop.

What should I do if my soup is too spicy?
If your soup comes out spicier than you intended, don’t fret! Simply stir in a bit more coconut milk or add a small amount of sugar to balance the heat. You can also add more broth or water to dilute the spiciness. Taste as you go until it reaches the flavor you desire!

Are there any dietary considerations I should be aware of?
Definitely! If you or your guests have allergies, it’s important to check the ingredients in your red curry paste and soy sauce, as they may contain allergens like gluten or shellfish. For a vegetarian option, use plant-based protein like tofu, and ensure your vegetable broth is vegan as well. This recipe is versatile, so feel free to customize it to fit various diets!

Can I make Thai Red Curry Soup in advance, and how does it taste the next day?
Yes, you can absolutely make this delicious soup in advance! In fact, I often find that it tastes even better the next day as the flavors meld together beautifully. Just store it properly in the fridge, and when you reheat, add a splash of fresh lime juice for a pop of brightness!

Thai Red Curry Soup

Savory Thai Red Curry Soup that Warms the Soul

This Thai Red Curry Soup brings vibrant flavors and comfort in every spoonful, perfect for busy weeknights.
Print Recipe Pin Recipe
Prep Time 10 minutes mins
Cook Time 20 minutes mins
Total Time 30 minutes mins
Servings: 4 bowls
Course: Main Dishes
Cuisine: Thai
Calories: 300
Ingredients Equipment Method Nutrition Notes

Ingredients
  

For the Base
  • 1 tablespoon red curry paste brings a rich, spicy flavor
  • 1 tablespoon vegetable oil for sautéing the curry paste
  • 4 cups coconut milk provides creamy texture
  • 1 cup vegetable broth adds depth and richness
For the Veggies
  • 1 cup mixed vegetables your choice, e.g., bell peppers, carrots
For Protein
  • 1 cup protein of choice such as tofu or chicken
For Flavor Enhancers
  • 1 tablespoon soy sauce introduces umami kick
  • 1 tablespoon fresh lime juice balances the richness
For Garnish
  • fresh herbs such as cilantro or basil

Equipment

  • Large Pot

Method
 

Instructions
  1. In a large pot, heat 1 tablespoon of vegetable oil over medium heat. Add 1 tablespoon of red curry paste, stirring continuously for about 1 minute until fragrant.
  2. Pour in 4 cups of coconut milk and 1 cup of vegetable broth, stirring gently until the curry paste is completely dissolved. Heat until it starts to simmer.
  3. Add 1 cup of mixed vegetables and 1 cup of your chosen protein to the pot. Stir well to incorporate everything, then reduce heat to medium-low and let it simmer for about 15 minutes.
  4. Once the vegetables are tender, stir in 1 tablespoon of soy sauce and 1 tablespoon of fresh lime juice. Let the mixture simmer for an additional 2-3 minutes.
  5. Ladle the soup into bowls while it’s hot and garnish with fresh herbs.

Nutrition

Serving: 1bowlCalories: 300kcalCarbohydrates: 25gProtein: 10gFat: 20gSaturated Fat: 10gSodium: 500mgPotassium: 800mgFiber: 5gSugar: 5gVitamin A: 20IUVitamin C: 30mgCalcium: 50mgIron: 2mg

Notes

Use fresh ingredients for the best flavor. Adjust spice levels to taste and always sample before serving.

Tried this recipe?

Let us know how it was!

Irresistible Cheesy Pepperoni Pizza Bombs for Easy Snacking

January 15, 2026 by grace bellamy Leave a Comment

It’s the kind of afternoon where the scent of freshly baked dough fills the air, promising something delicious on the horizon. As I roll out the pizza dough for these Cheesy Pepperoni Pizza Bombs, I can’t help but feel a rush of excitement. This recipe is not just a quick fix for dinner; it’s a fun twist on classic pizza that you can whip up in just 32 minutes, making it a perfect solution for busy weeknights or weekend gatherings. Plus, these little bites are a guaranteed crowd-pleaser, especially when paired with warm marinara for dipping. Who wouldn’t want to indulge in these cheesy, pepperoni-filled delights? Are you ready to create a snack that’ll leave everyone asking for seconds?

Cheesy Pepperoni Pizza Bombs

Why Are These Pizza Bombs a Must-Try?

Bold flavors: The rich blend of gooey cheese and savory pepperoni packs each bite with unforgettable taste.

Quick to make: In just 32 minutes from start to finish, you can have these delicious snacks ready for your family or guests.

Perfect for any occasion: Whether it's game day, a party, or a cozy movie night, these pizza bombs are sure to please any crowd.

Customizable: Feel free to swap in your favorite fillings like veggies or different cheeses to make it your own!

Dippable delight: Serve with marinara sauce for a warm, satisfying experience that everyone will love. Exploring more options? Check out these easy appetizers to complement your meal!

Cheesy Pepperoni Pizza Bombs Ingredients

Get ready to whip up these delightful snacks!

For the Dough
• 1 can refrigerated pizza dough – This shortcut saves you time and effort, perfect for busy days!

For the Filling
• 1 cup shredded mozzarella cheese – The star ingredient that ensures each bomb is gooey and cheesy.
• ½ cup sliced pepperoni – Adds a savory kick and classic pizza flavor to the filling.
• ¼ cup grated Parmesan cheese – Enhances the umami and gives a rich, nutty taste.
• 1 teaspoon garlic powder – Infuses a hint of garlicky goodness that enhances the overall flavor.
• ½ teaspoon dried oregano – A touch of herbiness that elevates the pizza experience!

For Baking
• 1 tablespoon olive oil – Brushing the tops adds a beautiful golden color and delicious flavor.

For Dipping
• ¼ cup marinara sauce – The perfect accompaniment that’s essential for a delightful dip! Enjoy those Cheesy Pepperoni Pizza Bombs in every savory bite.

Step‑by‑Step Instructions for Cheesy Pepperoni Pizza Bombs

Step 1: Preheat the Oven
Begin by preheating your oven to 375°F (190°C). This will create the perfect environment for your Cheesy Pepperoni Pizza Bombs to bake evenly and achieve a golden brown finish. Set your timer for a few minutes while you prepare the dough, ensuring everything is ready as soon as the oven reaches the desired temperature.

Step 2: Prepare the Dough
Open the can of refrigerated pizza dough and carefully unroll it onto a clean, floured surface. Make sure to handle the dough gently to keep it intact. Use your hands to smooth it out slightly, allowing for easier cutting in the next step. Prepare to cut the dough into squares, setting the stage for your delicious filling.

Step 3: Cut the Dough
Using a sharp knife or a pizza cutter, cut the pizza dough into 2-inch squares. Aim for even sizes so each Cheesy Pepperoni Pizza Bomb cooks uniformly. After cutting, you can sprinkle a small amount of flour on the surface to prevent the dough from sticking, ensuring easy handling for the next steps.

Step 4: Add the Filling
Take a heaping tablespoon of shredded mozzarella cheese and place it in the center of each dough square. Follow with a slice or two of pepperoni atop the cheese. This combination will create a delightful burst of flavor when biting into your pizza bomb, making it a hit with everyone.

Step 5: Season the Filling
Sprinkle a pinch of grated Parmesan cheese over the mozzarella and pepperoni. Next, dust a light pinch of garlic powder and dried oregano on top for that authentic Italian flavor. This enhances the overall taste profile of your Cheesy Pepperoni Pizza Bombs, ensuring they’re packed with flavor in every bite.

Step 6: Seal the Dough
Gently fold the corners of each dough square towards the center, carefully sealing the filling inside to form a ball. Ensure that no filling escapes, as you want each pizza bomb to be a treasure trove of cheesy goodness. Press the seams firmly to create a tight seal.

Step 7: Roll the Dough Balls
Once sealed, take each dough ball and roll it gently between your hands to make it round and ensure it’s fully sealed. This step helps develop a smooth outer surface that will bake beautifully. Each ball should be about the size of a golf ball, ready for the oven.

Step 8: Arrange on Baking Sheet
Place the dough balls on a baking sheet lined with parchment paper, leaving a little space between each one. This spacing allows the Cheesy Pepperoni Pizza Bombs to puff up and brown nicely as they bake, achieving that desirable crispiness all around.

Step 9: Brush with Olive Oil
Using a pastry brush, lightly brush the tops of the dough balls with olive oil. This step not only gives a golden, crispy finish to your pizza bombs but also adds flavor as they bake. Ensure each ball is evenly coated for the best results.

Step 10: Bake the Pizza Bombs
Slide the baking sheet into your preheated oven and bake for 12-15 minutes. Keep an eye on them, as you'll know they’re ready when they're puffed up and golden brown. The delightful aroma of melted cheese and pepperoni will fill your kitchen—it's hard to resist!

Step 11: Prepare the Dipping Sauce
While your Cheesy Pepperoni Pizza Bombs are baking, pour the marinara sauce into a small dipping bowl. This will be the perfect companion for your warm, cheesy bites, enhancing the overall snacking experience. Set it aside, ready for serving once the pizza bombs are out of the oven.

Step 12: Cool and Serve
Once the pizza bombs are baked to perfection, carefully remove them from the oven and allow them to cool slightly. This will make them easier to handle and enjoy. Serve your Cheesy Pepperoni Pizza Bombs warm alongside the marinara sauce for dipping, inviting everyone to indulge in this delicious treat.

Cheesy Pepperoni Pizza Bombs

How to Store and Freeze Cheesy Pepperoni Pizza Bombs

Room Temperature: Keep leftover pizza bombs at room temperature for up to 2 hours before refrigerating. After that, store in the fridge to maintain freshness.

Fridge: Store in an airtight container in the fridge for up to 3 days. Reheat in the oven or microwave for a quick snack.

Freezer: Freeze individually wrapped pizza bombs in plastic wrap, then place in a freezer bag for up to 2 months. Thaw in the refrigerator before reheating.

Reheating: For best results, reheat in the oven at 350°F (175°C) for about 10 minutes until warmed through and crispy.

What to Serve with Cheesy Pepperoni Pizza Bombs

As you indulge in these cheesy delights, think about adding a few complementary dishes to elevate your meal experience.

  • Crispy Garlic Bread: The buttery garlic flavor pairs perfectly with the marinara dip, offering a satisfying crunch alongside your pizza bombs.

  • Fresh Caesar Salad: A light and refreshing salad cuts through the richness of the cheese, providing a lovely balance of flavors and textures.

  • Roasted Vegetables: Add some seasonal veggies like bell peppers or zucchini, roasted to perfection—it's a colorful and wholesome side that complements the pizza bombs beautifully.

  • Homemade Coleslaw: This tangy and crunchy salad can enhance your meal with its bright flavors, making each bite feel lighter and more vibrant.

  • Stuffed Mushrooms: These savory bites bring an earthy richness that beautifully contrasts the cheesiness of your pizza bombs.

  • Classic Lemonade: A chilled glass of homemade lemonade adds a refreshing zing, quenching thirst and harmonizing with the savory treats.

  • Chocolate Chip Cookies: End the meal on a sweet note with classic cookies, offering a delightful blend of flavors that everyone loves.

Mix and match these suggestions to create a memorable meal that leaves everyone smiling!

Cheesy Pepperoni Pizza Bombs Variations

Feel free to explore these scrumptious twists on the classic recipe and make it uniquely yours!

  • Vegetarian: Substitute pepperoni with your favorite veggies like bell peppers, olives, or mushrooms for a deliciously fresh take. These additions create a colorful and tasty filling that's sure to impress.

  • Spicy Twist: Add some sliced jalapeños or crushed red pepper flakes to the filling for a bit of heat. This spicy version is perfect for those who crave a little kick to their snacks!

  • Extra Cheesy: Use a mix of mozzarella and your favorite cheeses like cheddar or gouda for an indulgent, cheesy explosion. This variation makes each bite more gooey and delightful!

  • Pesto Flavor: Swap out olive oil for a generous drizzle of pesto for a burst of herby flavor. Pesto complements the cheese beautifully and adds a fragrant aroma that'll entice everyone.

  • Crunchy Topping: Before baking, sprinkle breadcrumbs on top of the dough balls for a delightful crunch. This simple twist adds texture and an extra layer of flavor to your pizza bombs.

  • Sweet Surprise: For a delightful twist, add a few pieces of pepperoncini or a drizzle of honey into the filling for a sweet and savory flavor experience. This combo will surprise your taste buds and add a new dimension to the classic!

  • BBQ Chicken: Substitute the pepperoni with shredded barbecue chicken and add a bit of barbecue sauce. This offers a fun, tangy flavor that’s always a hit at gatherings.

  • Herb Infusion: Mix fresh herbs like basil or parsley into the cheese filling for an aromatic upgrade. This addition enhances the taste and brings a vibrant freshness to each bite!

For more delicious ideas, don’t miss these easy appetizers that pair perfectly with your pizza bombs. And if you're looking for something to complement your meal, check out these quick and tasty sides for an unforgettable snacking experience!

Expert Tips for Cheesy Pepperoni Pizza Bombs

Perfectly Sealed: Make sure to seal the dough well by pressing the seams tightly to avoid any filling leaks while baking.

Even Sizes: Cut the dough squares uniformly to ensure they all bake evenly. This prevents some from being undercooked while others are golden brown.

Don’t Overfill: Be mindful not to overload the dough with filling; a heaping tablespoon is just right. This ensures secure sealing and proper cooking of the Cheesy Pepperoni Pizza Bombs.

Bake in Batches: If the dough balls are crowded on the baking sheet, they may not puff up properly. Give them space for optimal baking.

Golden Finish: Brush olive oil lightly over the dough balls before baking. It enhances color and flavor, making them irresistible!

Make Ahead Options

These Cheesy Pepperoni Pizza Bombs are perfect for meal prep enthusiasts! You can prepare the filling—mozzarella, pepperoni, Parmesan, garlic powder, and oregano—up to 3 days in advance. Simply mix these ingredients together and store them in an airtight container in the refrigerator. As for the dough, you can cut it into squares up to 24 hours ahead; keep them covered with a clean kitchen towel to prevent drying out. When you're ready to bake, assemble the pizza bombs and proceed with the remaining steps as directed. They’ll be just as delicious, providing a quick snack or meal option that will save you time and satisfy everyone’s cravings!

Cheesy Pepperoni Pizza Bombs

Cheesy Pepperoni Pizza Bombs Recipe FAQs

How do I choose the right pizza dough?
Absolutely! When selecting refrigerated pizza dough, look for a can that’s well within its expiration date and has little to no dents or damage. Check for a fresh smell and avoid any packaging with dark spots or mold. The dough should be pliable and not overly dry or sticky when unrolled.

How should I store leftovers?
Very simple! Keep your leftover Cheesy Pepperoni Pizza Bombs in an airtight container in the fridge for up to 3 days. Just make sure they cool completely before storing to avoid moisture buildup that could make them soggy. Reheat in the oven at 350°F (175°C) for about 10 minutes to regain that crispy texture.

Can I freeze the pizza bombs?
Of course! To freeze your Cheesy Pepperoni Pizza Bombs, first, let them cool completely after baking. Next, wrap each bomb tightly in plastic wrap to prevent freezer burn. Place the wrapped bombs in a resealable freezer bag, and they’ll last for up to 2 months. When you’re ready to enjoy, simply thaw them in the refrigerator overnight before reheating.

What should I do if my pizza bombs are leaking filling?
If you find your pizza bombs leaking, don’t worry! This usually happens if they were overfilled or not sealed properly. Make sure to use just a heaping tablespoon of filling. When sealing, press the seams together firmly, ensuring no filling can escape. If you already baked them, serve with extra marinara sauce for dipping to balance any lost flavors.

Are these pizza bombs safe for everyone?
Absolutely! However, if you’re considering dietary restrictions, check for common allergens like gluten in the pizza dough and lactose in the cheese. For those with pets, pizza bombs contain ingredients that could be harmful, like garlic powder, so keep those treats out of reach. For a healthier version, swapping mozzarella for a dairy-free alternative works beautifully!

Can I add different fillings to the pizza bombs?
The more the merrier! Feel free to get creative with your fillings. You can add sautéed vegetables like bell peppers or spinach, different meats like sausage, or even change up the cheeses. Just make sure it fits within the space of the dough and maintains a similar moisture content to ensure even cooking. The possibilities are truly endless!

Cheesy Pepperoni Pizza Bombs

Irresistible Cheesy Pepperoni Pizza Bombs for Easy Snacking

Cheesy Pepperoni Pizza Bombs are a fun twist on classic pizza, perfect for snacking.
Print Recipe Pin Recipe
Prep Time 20 minutes mins
Cook Time 12 minutes mins
Total Time 32 minutes mins
Servings: 4 bombs
Course: Appetizer
Cuisine: American
Calories: 250
Ingredients Equipment Method Nutrition Notes

Ingredients
  

For the Dough
  • 1 can refrigerated pizza dough This shortcut saves you time and effort, perfect for busy days!
For the Filling
  • 1 cup shredded mozzarella cheese The star ingredient that ensures each bomb is gooey and cheesy.
  • ½ cup sliced pepperoni Adds a savory kick and classic pizza flavor.
  • ¼ cup grated Parmesan cheese Enhances the umami and gives a rich, nutty taste.
  • 1 teaspoon garlic powder Infuses a hint of garlicky goodness.
  • ½ teaspoon dried oregano A touch of herbiness that elevates the pizza experience!
For Baking
  • 1 tablespoon olive oil Brushing the tops adds a golden color and delicious flavor.
For Dipping
  • ¼ cup marinara sauce The perfect accompaniment for dipping!

Equipment

  • Oven
  • Baking Sheet
  • parchment paper
  • Pastry Brush
  • Knife

Method
 

Step‑by‑Step Instructions
  1. Preheat the oven to 375°F (190°C).
  2. Open the can of refrigerated pizza dough and unroll it onto a floured surface.
  3. Cut the pizza dough into 2-inch squares.
  4. Take a tablespoon of mozzarella cheese and place it in the center of each square.
  5. Sprinkle grated Parmesan, garlic powder, and dried oregano over the filling.
  6. Fold the corners of each dough square towards the center to seal the filling inside.
  7. Gently roll each dough ball to ensure a smooth outer surface and proper sealing.
  8. Arrange the dough balls on a baking sheet lined with parchment paper.
  9. Lightly brush the tops with olive oil for a golden finish.
  10. Bake for 12-15 minutes until puffed up and golden brown.
  11. Prepare the marinara sauce in a dipping bowl.
  12. Allow the pizza bombs to cool slightly before serving with marinara.

Nutrition

Serving: 1bombCalories: 250kcalCarbohydrates: 30gProtein: 10gFat: 12gSaturated Fat: 4gPolyunsaturated Fat: 1gMonounsaturated Fat: 5gCholesterol: 20mgSodium: 600mgPotassium: 150mgFiber: 1gSugar: 1gVitamin A: 5IUVitamin C: 2mgCalcium: 15mgIron: 8mg

Notes

These pizza bombs are customizable; feel free to swap in your favorite fillings like veggies or different cheeses.

Tried this recipe?

Let us know how it was!

Irresistible Cheesy Pepperoni Pizza Bombs for Easy Snacking

January 15, 2026 by grace bellamy Leave a Comment

It’s the kind of afternoon where the scent of freshly baked dough fills the air, promising something delicious on the horizon. As I roll out the pizza dough for these Cheesy Pepperoni Pizza Bombs, I can’t help but feel a rush of excitement. This recipe is not just a quick fix for dinner; it’s a fun twist on classic pizza that you can whip up in just 32 minutes, making it a perfect solution for busy weeknights or weekend gatherings. Plus, these little bites are a guaranteed crowd-pleaser, especially when paired with warm marinara for dipping. Who wouldn’t want to indulge in these cheesy, pepperoni-filled delights? Are you ready to create a snack that’ll leave everyone asking for seconds?

Cheesy Pepperoni Pizza Bombs

Why Are These Pizza Bombs a Must-Try?

Bold flavors: The rich blend of gooey cheese and savory pepperoni packs each bite with unforgettable taste.

Quick to make: In just 32 minutes from start to finish, you can have these delicious snacks ready for your family or guests.

Perfect for any occasion: Whether it's game day, a party, or a cozy movie night, these pizza bombs are sure to please any crowd.

Customizable: Feel free to swap in your favorite fillings like veggies or different cheeses to make it your own!

Dippable delight: Serve with marinara sauce for a warm, satisfying experience that everyone will love. Exploring more options? Check out these easy appetizers to complement your meal!

Cheesy Pepperoni Pizza Bombs Ingredients

Get ready to whip up these delightful snacks!

For the Dough
• 1 can refrigerated pizza dough – This shortcut saves you time and effort, perfect for busy days!

For the Filling
• 1 cup shredded mozzarella cheese – The star ingredient that ensures each bomb is gooey and cheesy.
• ½ cup sliced pepperoni – Adds a savory kick and classic pizza flavor to the filling.
• ¼ cup grated Parmesan cheese – Enhances the umami and gives a rich, nutty taste.
• 1 teaspoon garlic powder – Infuses a hint of garlicky goodness that enhances the overall flavor.
• ½ teaspoon dried oregano – A touch of herbiness that elevates the pizza experience!

For Baking
• 1 tablespoon olive oil – Brushing the tops adds a beautiful golden color and delicious flavor.

For Dipping
• ¼ cup marinara sauce – The perfect accompaniment that’s essential for a delightful dip! Enjoy those Cheesy Pepperoni Pizza Bombs in every savory bite.

Step‑by‑Step Instructions for Cheesy Pepperoni Pizza Bombs

Step 1: Preheat the Oven
Begin by preheating your oven to 375°F (190°C). This will create the perfect environment for your Cheesy Pepperoni Pizza Bombs to bake evenly and achieve a golden brown finish. Set your timer for a few minutes while you prepare the dough, ensuring everything is ready as soon as the oven reaches the desired temperature.

Step 2: Prepare the Dough
Open the can of refrigerated pizza dough and carefully unroll it onto a clean, floured surface. Make sure to handle the dough gently to keep it intact. Use your hands to smooth it out slightly, allowing for easier cutting in the next step. Prepare to cut the dough into squares, setting the stage for your delicious filling.

Step 3: Cut the Dough
Using a sharp knife or a pizza cutter, cut the pizza dough into 2-inch squares. Aim for even sizes so each Cheesy Pepperoni Pizza Bomb cooks uniformly. After cutting, you can sprinkle a small amount of flour on the surface to prevent the dough from sticking, ensuring easy handling for the next steps.

Step 4: Add the Filling
Take a heaping tablespoon of shredded mozzarella cheese and place it in the center of each dough square. Follow with a slice or two of pepperoni atop the cheese. This combination will create a delightful burst of flavor when biting into your pizza bomb, making it a hit with everyone.

Step 5: Season the Filling
Sprinkle a pinch of grated Parmesan cheese over the mozzarella and pepperoni. Next, dust a light pinch of garlic powder and dried oregano on top for that authentic Italian flavor. This enhances the overall taste profile of your Cheesy Pepperoni Pizza Bombs, ensuring they’re packed with flavor in every bite.

Step 6: Seal the Dough
Gently fold the corners of each dough square towards the center, carefully sealing the filling inside to form a ball. Ensure that no filling escapes, as you want each pizza bomb to be a treasure trove of cheesy goodness. Press the seams firmly to create a tight seal.

Step 7: Roll the Dough Balls
Once sealed, take each dough ball and roll it gently between your hands to make it round and ensure it’s fully sealed. This step helps develop a smooth outer surface that will bake beautifully. Each ball should be about the size of a golf ball, ready for the oven.

Step 8: Arrange on Baking Sheet
Place the dough balls on a baking sheet lined with parchment paper, leaving a little space between each one. This spacing allows the Cheesy Pepperoni Pizza Bombs to puff up and brown nicely as they bake, achieving that desirable crispiness all around.

Step 9: Brush with Olive Oil
Using a pastry brush, lightly brush the tops of the dough balls with olive oil. This step not only gives a golden, crispy finish to your pizza bombs but also adds flavor as they bake. Ensure each ball is evenly coated for the best results.

Step 10: Bake the Pizza Bombs
Slide the baking sheet into your preheated oven and bake for 12-15 minutes. Keep an eye on them, as you'll know they’re ready when they're puffed up and golden brown. The delightful aroma of melted cheese and pepperoni will fill your kitchen—it's hard to resist!

Step 11: Prepare the Dipping Sauce
While your Cheesy Pepperoni Pizza Bombs are baking, pour the marinara sauce into a small dipping bowl. This will be the perfect companion for your warm, cheesy bites, enhancing the overall snacking experience. Set it aside, ready for serving once the pizza bombs are out of the oven.

Step 12: Cool and Serve
Once the pizza bombs are baked to perfection, carefully remove them from the oven and allow them to cool slightly. This will make them easier to handle and enjoy. Serve your Cheesy Pepperoni Pizza Bombs warm alongside the marinara sauce for dipping, inviting everyone to indulge in this delicious treat.

Cheesy Pepperoni Pizza Bombs

How to Store and Freeze Cheesy Pepperoni Pizza Bombs

Room Temperature: Keep leftover pizza bombs at room temperature for up to 2 hours before refrigerating. After that, store in the fridge to maintain freshness.

Fridge: Store in an airtight container in the fridge for up to 3 days. Reheat in the oven or microwave for a quick snack.

Freezer: Freeze individually wrapped pizza bombs in plastic wrap, then place in a freezer bag for up to 2 months. Thaw in the refrigerator before reheating.

Reheating: For best results, reheat in the oven at 350°F (175°C) for about 10 minutes until warmed through and crispy.

What to Serve with Cheesy Pepperoni Pizza Bombs

As you indulge in these cheesy delights, think about adding a few complementary dishes to elevate your meal experience.

  • Crispy Garlic Bread: The buttery garlic flavor pairs perfectly with the marinara dip, offering a satisfying crunch alongside your pizza bombs.

  • Fresh Caesar Salad: A light and refreshing salad cuts through the richness of the cheese, providing a lovely balance of flavors and textures.

  • Roasted Vegetables: Add some seasonal veggies like bell peppers or zucchini, roasted to perfection—it's a colorful and wholesome side that complements the pizza bombs beautifully.

  • Homemade Coleslaw: This tangy and crunchy salad can enhance your meal with its bright flavors, making each bite feel lighter and more vibrant.

  • Stuffed Mushrooms: These savory bites bring an earthy richness that beautifully contrasts the cheesiness of your pizza bombs.

  • Classic Lemonade: A chilled glass of homemade lemonade adds a refreshing zing, quenching thirst and harmonizing with the savory treats.

  • Chocolate Chip Cookies: End the meal on a sweet note with classic cookies, offering a delightful blend of flavors that everyone loves.

Mix and match these suggestions to create a memorable meal that leaves everyone smiling!

Make Ahead Options

These Cheesy Pepperoni Pizza Bombs are perfect for meal prep enthusiasts! You can prepare the filling—mozzarella, pepperoni, Parmesan, garlic powder, and oregano—up to 3 days in advance. Simply mix these ingredients together and store them in an airtight container in the refrigerator. As for the dough, you can cut it into squares up to 24 hours ahead; keep them covered with a clean kitchen towel to prevent drying out. When you're ready to bake, assemble the pizza bombs and proceed with the remaining steps as directed. They’ll be just as delicious, providing a quick snack or meal option that will save you time and satisfy everyone’s cravings!

Cheesy Pepperoni Pizza Bombs Variations

Feel free to explore these scrumptious twists on the classic recipe and make it uniquely yours!

  • Vegetarian: Substitute pepperoni with your favorite veggies like bell peppers, olives, or mushrooms for a deliciously fresh take. These additions create a colorful and tasty filling that's sure to impress.

  • Spicy Twist: Add some sliced jalapeños or crushed red pepper flakes to the filling for a bit of heat. This spicy version is perfect for those who crave a little kick to their snacks!

  • Extra Cheesy: Use a mix of mozzarella and your favorite cheeses like cheddar or gouda for an indulgent, cheesy explosion. This variation makes each bite more gooey and delightful!

  • Pesto Flavor: Swap out olive oil for a generous drizzle of pesto for a burst of herby flavor. Pesto complements the cheese beautifully and adds a fragrant aroma that'll entice everyone.

  • Crunchy Topping: Before baking, sprinkle breadcrumbs on top of the dough balls for a delightful crunch. This simple twist adds texture and an extra layer of flavor to your pizza bombs.

  • Sweet Surprise: For a delightful twist, add a few pieces of pepperoncini or a drizzle of honey into the filling for a sweet and savory flavor experience. This combo will surprise your taste buds and add a new dimension to the classic!

  • BBQ Chicken: Substitute the pepperoni with shredded barbecue chicken and add a bit of barbecue sauce. This offers a fun, tangy flavor that’s always a hit at gatherings.

  • Herb Infusion: Mix fresh herbs like basil or parsley into the cheese filling for an aromatic upgrade. This addition enhances the taste and brings a vibrant freshness to each bite!

For more delicious ideas, don’t miss these easy appetizers that pair perfectly with your pizza bombs. And if you're looking for something to complement your meal, check out these quick and tasty sides for an unforgettable snacking experience!

Expert Tips for Cheesy Pepperoni Pizza Bombs

Perfectly Sealed: Make sure to seal the dough well by pressing the seams tightly to avoid any filling leaks while baking.

Even Sizes: Cut the dough squares uniformly to ensure they all bake evenly. This prevents some from being undercooked while others are golden brown.

Don’t Overfill: Be mindful not to overload the dough with filling; a heaping tablespoon is just right. This ensures secure sealing and proper cooking of the Cheesy Pepperoni Pizza Bombs.

Bake in Batches: If the dough balls are crowded on the baking sheet, they may not puff up properly. Give them space for optimal baking.

Golden Finish: Brush olive oil lightly over the dough balls before baking. It enhances color and flavor, making them irresistible!

Cheesy Pepperoni Pizza Bombs

Cheesy Pepperoni Pizza Bombs Recipe FAQs

How do I choose the right pizza dough?
Absolutely! When selecting refrigerated pizza dough, look for a can that’s well within its expiration date and has little to no dents or damage. Check for a fresh smell and avoid any packaging with dark spots or mold. The dough should be pliable and not overly dry or sticky when unrolled.

How should I store leftovers?
Very simple! Keep your leftover Cheesy Pepperoni Pizza Bombs in an airtight container in the fridge for up to 3 days. Just make sure they cool completely before storing to avoid moisture buildup that could make them soggy. Reheat in the oven at 350°F (175°C) for about 10 minutes to regain that crispy texture.

Can I freeze the pizza bombs?
Of course! To freeze your Cheesy Pepperoni Pizza Bombs, first, let them cool completely after baking. Next, wrap each bomb tightly in plastic wrap to prevent freezer burn. Place the wrapped bombs in a resealable freezer bag, and they’ll last for up to 2 months. When you’re ready to enjoy, simply thaw them in the refrigerator overnight before reheating.

What should I do if my pizza bombs are leaking filling?
If you find your pizza bombs leaking, don’t worry! This usually happens if they were overfilled or not sealed properly. Make sure to use just a heaping tablespoon of filling. When sealing, press the seams together firmly, ensuring no filling can escape. If you already baked them, serve with extra marinara sauce for dipping to balance any lost flavors.

Are these pizza bombs safe for everyone?
Absolutely! However, if you’re considering dietary restrictions, check for common allergens like gluten in the pizza dough and lactose in the cheese. For those with pets, pizza bombs contain ingredients that could be harmful, like garlic powder, so keep those treats out of reach. For a healthier version, swapping mozzarella for a dairy-free alternative works beautifully!

Can I add different fillings to the pizza bombs?
The more the merrier! Feel free to get creative with your fillings. You can add sautéed vegetables like bell peppers or spinach, different meats like sausage, or even change up the cheeses. Just make sure it fits within the space of the dough and maintains a similar moisture content to ensure even cooking. The possibilities are truly endless!

Cheesy Pepperoni Pizza Bombs

Irresistible Cheesy Pepperoni Pizza Bombs for Easy Snacking

Cheesy Pepperoni Pizza Bombs are a fun twist on classic pizza, perfect for snacking.
Print Recipe Pin Recipe
Prep Time 20 minutes mins
Cook Time 12 minutes mins
Total Time 32 minutes mins
Servings: 4 bombs
Course: Appetizer
Cuisine: American
Calories: 250
Ingredients Equipment Method Nutrition Notes

Ingredients
  

For the Dough
  • 1 can refrigerated pizza dough This shortcut saves you time and effort, perfect for busy days!
For the Filling
  • 1 cup shredded mozzarella cheese The star ingredient that ensures each bomb is gooey and cheesy.
  • ½ cup sliced pepperoni Adds a savory kick and classic pizza flavor.
  • ¼ cup grated Parmesan cheese Enhances the umami and gives a rich, nutty taste.
  • 1 teaspoon garlic powder Infuses a hint of garlicky goodness.
  • ½ teaspoon dried oregano A touch of herbiness that elevates the pizza experience!
For Baking
  • 1 tablespoon olive oil Brushing the tops adds a golden color and delicious flavor.
For Dipping
  • ¼ cup marinara sauce The perfect accompaniment for dipping!

Equipment

  • Oven
  • Baking Sheet
  • parchment paper
  • Pastry Brush
  • Knife

Method
 

Step‑by‑Step Instructions
  1. Preheat the oven to 375°F (190°C).
  2. Open the can of refrigerated pizza dough and unroll it onto a floured surface.
  3. Cut the pizza dough into 2-inch squares.
  4. Take a tablespoon of mozzarella cheese and place it in the center of each square.
  5. Sprinkle grated Parmesan, garlic powder, and dried oregano over the filling.
  6. Fold the corners of each dough square towards the center to seal the filling inside.
  7. Gently roll each dough ball to ensure a smooth outer surface and proper sealing.
  8. Arrange the dough balls on a baking sheet lined with parchment paper.
  9. Lightly brush the tops with olive oil for a golden finish.
  10. Bake for 12-15 minutes until puffed up and golden brown.
  11. Prepare the marinara sauce in a dipping bowl.
  12. Allow the pizza bombs to cool slightly before serving with marinara.

Nutrition

Serving: 1bombCalories: 250kcalCarbohydrates: 30gProtein: 10gFat: 12gSaturated Fat: 4gPolyunsaturated Fat: 1gMonounsaturated Fat: 5gCholesterol: 20mgSodium: 600mgPotassium: 150mgFiber: 1gSugar: 1gVitamin A: 5IUVitamin C: 2mgCalcium: 15mgIron: 8mg

Notes

These pizza bombs are customizable; feel free to swap in your favorite fillings like veggies or different cheeses.

Tried this recipe?

Let us know how it was!

Savory Black Beans, Sausage and Rice Skillet Delight

January 15, 2026 by grace bellamy Leave a Comment

As I stood in my kitchen, the savory scent of smoked sausage sizzling in olive oil filled the air, inviting me to take a step back in time. This Black Beans, Sausage and Rice Skillet is more than just a meal; it’s a comforting embrace on a busy night and a reminder that homemade flavors can effortlessly rival any takeout. With just one pan needed, this dish not only keeps cleanup quick but also allows rich flavors to meld beautifully, making it a delightful crowd-pleaser. It’s packed with protein, fiber, and some of my favorite spices, transforming simple ingredients into a satisfying feast. Who could resist a dish that’s both heartwarming and easy to prepare? Let’s dive into this delicious recipe that promises warmth and comfort, with a sprinkle of adventure in every bite. What’s your favorite ingredient to include in a one-pan meal?

Black Beans, Sausage and Rice Skillet

Why will you love this skillet dish?

Simplicity: This recipe is easy to whip up, needing just one pan to deliver a delicious meal. In 50 minutes, you’ll have a wholesome dinner ready to serve.

Flavor Fusion: The combination of smoked sausage, spices, and black beans creates an explosion of taste that will have everyone asking for seconds.

Nutritious and Filling: Packed with protein and fiber, this dish is perfect for those looking to satisfy their hunger without reaching for fast food.

Versatile Options: Swap out sausage for chicken or try adding your favorite veggies to customize every bite, ensuring you never get bored!

Whether you’re a fan of comforting meals like Ground Beef Rice or you crave hearty flavors found in a Corn Chicken Rice, this skillet dish is a must-try!

Black Beans, Sausage and Rice Skillet Ingredients

Discover the essential ingredients for a savory experience!

For the Skillet
• 1 cup white or brown rice – Choose brown rice for a nuttier flavor and more fiber!
• 1 pound smoked sausage (such as kielbasa or andouille), sliced – The smokiness adds depth to the dish.
• 1 can (15 ounces) black beans, rinsed and drained – These provide protein and a creamy texture.
• 1 medium onion, chopped – Onion brings sweetness and a savory base to your skillet.
• 2 cloves garlic, minced – Fresh garlic enhances the overall flavor profile.
• 1 bell pepper (any color), chopped – Adds a burst of color and crunch!

For the Spices
• 1 teaspoon paprika – This spice lends a subtle smokiness and beautiful color.
• 1 teaspoon cumin – Earthy and warm, cumin perfectly complements the sausage.
• 1 teaspoon chili powder – Adds a mild kick and rich flavor depth.

For the Cooking Liquid
• 2 cups chicken broth – Enhances the flavor of the rice, making it rich and savory.
• 1 tablespoon olive oil – A healthy fat that helps to brown the sausage and veggies.
• Salt and pepper to taste – Essential for enriching the dish's overall flavor balance.

For Garnish
• Chopped fresh cilantro (optional) – A fresh touch that brightens up this Black Beans, Sausage and Rice Skillet!

Step‑by‑Step Instructions for Black Beans, Sausage and Rice Skillet

Step 1: Rinse the Rice
Begin by rinsing 1 cup of white or brown rice under cold water in a fine mesh strainer until the water runs clear. This step removes excess starch, preventing the rice from becoming gummy. Drain well and set aside as you prepare the rest of the Black Beans, Sausage and Rice Skillet.

Step 2: Heat the Oil
In a large skillet, heat 1 tablespoon of olive oil over medium heat until shimmering. You’ll know it’s ready when the oil glistens and moves easily in the pan. This will create a perfect base to start cooking your smoked sausage, which is the star of this flavorful dish.

Step 3: Brown the Sausage
Add 1 pound of sliced smoked sausage to the skillet and cook for 5–7 minutes, stirring occasionally. Watch for the sausage to become nicely browned and heated through, which will release its delicious smoky aroma that fills the kitchen, setting the stage for your hearty skillet meal.

Step 4: Sauté the Vegetables
Stir in 1 medium chopped onion and 1 chopped bell pepper, cooking for about 3–4 minutes. Keep stirring until the vegetables begin to soften and the onion becomes translucent. This colorful veggie mix enhances the overall flavor of your Black Beans, Sausage and Rice Skillet.

Step 5: Add the Garlic and Spices
Next, mix in 2 cloves of minced garlic, 1 teaspoon of paprika, 1 teaspoon of cumin, and 1 teaspoon of chili powder. Cook for 1–2 minutes, constantly stirring until the spices become fragrant and the garlic turns golden. This step adds an aromatic depth that brings the entire dish to life.

Step 6: Incorporate the Rice
Add the rinsed rice to the skillet, ensuring that each grain gets coated with the oil and spices. Stir well for about a minute, letting the rice absorb some of the flavors from the sausage and veggies. This integration helps create a harmonious blend in your Black Beans, Sausage and Rice Skillet.

Step 7: Pour in the Chicken Broth
Pour in 2 cups of chicken broth and bring the mixture to a lively boil. Once boiling, reduce the heat to low, cover the skillet, and let it simmer for about 15 minutes. You’ll see the rice absorb the broth and become tender; just keep an eye on it!

Step 8: Add the Black Beans
After 15 minutes, remove the skillet from heat and gently fold in 1 can of rinsed and drained black beans. Cover the skillet again and let it rest for 5 minutes to warm the beans through while the flavors meld together beautifully in the Black Beans, Sausage and Rice Skillet.

Step 9: Final Seasoning and Serve
Lastly, season the dish with salt and pepper to taste, adjusting based on your preference. Serve the Black Beans, Sausage and Rice Skillet warm, garnish with chopped fresh cilantro if desired, and enjoy every comforting bite of this fulfilling meal.

Black Beans, Sausage and Rice Skillet

Black Beans, Sausage and Rice Skillet Variations

Feel free to get creative with your skillet dish and make it uniquely yours!

  • Spicy Kick: Add diced jalapeños or red pepper flakes for extra heat. A little spice can elevate the flavors, making each bite exciting!

  • Veggie Boost: Toss in additional chopped vegetables like spinach or mushrooms. This not only adds nutrition but also a vibrant splash of color!

  • Sausage Swap: Replace smoked sausage with grilled chicken or shrimp for a lighter option. Each choice comes with its distinct flair that brings a fresh twist!

  • Herbed Goodness: Experiment with fresh herbs such as parsley or thyme. This addition can introduce a bright, aromatic element to your savory skillet.

  • Coconut Twist: Use coconut milk in place of chicken broth for a creamy texture and subtle sweetness. This unusual twist will surprise and delight your taste buds!

  • Cheesy Indulgence: Stir in shredded cheese like cheddar or pepper jack just before serving. Melting cheese will add richness that’ll make this dish even more comforting!

  • Quinoa Alternative: Swap the rice for quinoa to up the protein content. Quinoa adds a delightful nuttiness and makes the dish gluten-free without losing flavor!

  • Southwestern Flair: Mix in some corn and black olives for a fiesta twist. The added textures and flavors create a vibrant, party-like dish that’s sure to impress!

Experimenting with variations can turn your Black Beans, Sausage and Rice Skillet into a new masterpiece! And if you’re curious for more delicious one-pan ideas, check out Hamburger Rice Casserole or the comforting Newfie Rice Pudding. Happy cooking!

Make Ahead Options

These Black Beans, Sausage and Rice Skillet ingredients can easily be prepped ahead, making your weeknight dinners a breeze! You can chop the onions, bell pepper, and garlic up to 3 days in advance, storing them in an airtight container in the refrigerator. Additionally, you can rinse and drain the black beans a day prior, keeping them ready to go. When it's time to prepare the dish, simply sauté the sausage and cooked veggies, add the rice and chicken broth, and let it simmer as usual. By prepping these components ahead of time, you'll save precious minutes in the kitchen while still enjoying a delicious homemade meal.

How to Store and Freeze Black Beans, Sausage and Rice Skillet

Fridge: Store any leftovers in an airtight container for up to 3 days. Make sure to cool the dish to room temperature before sealing it to maintain freshness.

Freezer: Freeze portions of the Black Beans, Sausage and Rice Skillet in freezer-safe bags or containers for up to 3 months. Label them with the date for easy reference!

Reheating: Reheat in the microwave or a skillet over medium heat. Add a splash of chicken broth to restore moisture and ensure even heat.

Thawing: For best results, thaw frozen portions overnight in the fridge before reheating to preserve flavor and texture.

Expert Tips for Black Beans, Sausage and Rice Skillet

  • Rinse the Rice: Always rinse your rice until the water runs clear. This helps remove excess starch and keeps your skillet dish from being gummy.

  • Flavor Balance: Taste before serving! Adjust salt and pepper according to your preference. The right seasoning can greatly enhance the flavors in your Black Beans, Sausage and Rice Skillet.

  • Sausage Choices: Experiment with different types of smoked sausage, like chorizo or turkey sausage, to change up the flavor profile of your dish.

  • Add Vegetables: Feel free to toss in your favorite vegetables such as zucchini or corn to add more color and nutrients to the skillet while keeping it wholesome.

  • Resting Time: Let the skillet rest for a full 5 minutes after adding the beans. This allows the flavors to meld wonderfully together, resulting in a richer taste.

What to Serve with Black Beans, Sausage and Rice Skillet

Imagine gathering around the table with delicious dishes that perfectly complement your savory skillet creation, creating a feast that warms all hearts.

  • Creamy Avocado Salad: A refreshing balance to the rich skillet, this salad adds creaminess and freshness. The avocado's healthy fats elevate your meal even further.

  • Spicy Cornbread: A delightful side that adds warmth and texture, cornbread soaks up flavors beautifully and provides a comforting crunch.

  • Zesty Coleslaw: This crunchy, tangy slaw adds a fresh contrast, making the whole meal feel lighter. The crisp textures will have everyone reaching for more!

  • Grilled Veggies: Charred bell peppers, zucchini, and asparagus enhance the flavors of your skillet while adding a smoky note that rounds out your meal.

  • Tropical Fruit Salsa: Bright, sweet pineapple and zesty lime will awaken your taste buds and provide a citrusy freshness that counters the savory elements of the dish.

  • Refreshing Lemonade: Pair your hearty skillet with a glass of ice-cold lemonade to cut through the richness. A hint of sweetness complements the spices perfectly.

  • Brownie Sundae: End the meal with a chocolate brownie topped with creamy ice cream, bringing comfort and indulgence after the satisfying main course.

Black Beans, Sausage and Rice Skillet

Black Beans, Sausage and Rice Skillet Recipe FAQs

What type of sausage should I use in this recipe?
I recommend using smoked sausage such as kielbasa or andouille for that rich, smoky flavor. However, you can also experiment with other types like chorizo or turkey sausage, which can offer unique twists to the dish!

How can I tell if my rice is cooked properly?
The rice should be tender and have absorbed most of the liquid after about 15 minutes of simmering. If it's still hard, simply add a little more chicken broth and let it simmer for a few more minutes with the lid on. This will help the rice cook through evenly.

What’s the best way to store leftovers?
Store any leftovers of your Black Beans, Sausage and Rice Skillet in an airtight container in the fridge for up to 3 days. Make sure to cool the dish to room temperature before sealing to maintain freshness – no one likes a soggy meal!

Can I freeze this dish, and if so, how?
Absolutely! To freeze, place portions of the Black Beans, Sausage and Rice Skillet in freezer-safe bags or containers labeled with the date. This way, you can enjoy your delicious creation for up to 3 months. When ready to enjoy, thaw overnight in the fridge and reheat on the stove or in the microwave, adding a splash of chicken broth to keep it juicy.

Are there any dietary considerations for this dish?
If you have dietary restrictions, you can easily modify the recipe. For a gluten-free option, ensure the sausage and chicken broth are certified gluten-free. Additionally, this dish is suitable for vegetarians if you swap the sausage for plant-based alternatives and use vegetable broth.

What can I do if my rice becomes gummy?
If your rice turns out gummy, it might be due to extra starch. To prevent this next time, be sure to rinse your rice until the water runs clear to remove excess starch before cooking. If it's already cooked, you can try fluffing it gently with a fork and serving it with a little more broth, which might help separate the grains.

Black Beans, Sausage and Rice Skillet

Savory Black Beans, Sausage and Rice Skillet Delight

A comforting one-pan meal featuring Black Beans, Sausage and Rice, delivering rich flavors and nutritious goodness.
Print Recipe Pin Recipe
Prep Time 10 minutes mins
Cook Time 40 minutes mins
Total Time 50 minutes mins
Servings: 4 servings
Course: Main Dishes
Cuisine: American
Calories: 450
Ingredients Equipment Method Nutrition Notes

Ingredients
  

For the Skillet
  • 1 cup white or brown rice Choose brown rice for a nuttier flavor and more fiber!
  • 1 pound smoked sausage (such as kielbasa or andouille), sliced
  • 1 can black beans (15 ounces), rinsed and drained
  • 1 medium onion chopped
  • 2 cloves garlic minced
  • 1 each bell pepper (any color), chopped
For the Spices
  • 1 teaspoon paprika
  • 1 teaspoon cumin
  • 1 teaspoon chili powder
For the Cooking Liquid
  • 2 cups chicken broth
  • 1 tablespoon olive oil
  • Salt and pepper to taste
For Garnish
  • Chopped fresh cilantro (optional)

Equipment

  • large skillet

Method
 

Step-by-Step Instructions
  1. Begin by rinsing 1 cup of white or brown rice under cold water in a fine mesh strainer until the water runs clear. Drain well and set aside.
  2. In a large skillet, heat 1 tablespoon of olive oil over medium heat until shimmering.
  3. Add 1 pound of sliced smoked sausage to the skillet and cook for 5–7 minutes, stirring occasionally.
  4. Stir in 1 medium chopped onion and 1 chopped bell pepper, cooking for about 3–4 minutes.
  5. Mix in 2 cloves of minced garlic, 1 teaspoon of paprika, 1 teaspoon of cumin, and 1 teaspoon of chili powder. Cook for 1–2 minutes.
  6. Add the rinsed rice to the skillet and stir well for about a minute.
  7. Pour in 2 cups of chicken broth and bring the mixture to a lively boil. Then, reduce heat to low, cover the skillet, and let it simmer for about 15 minutes.
  8. Remove the skillet from heat and gently fold in 1 can of rinsed and drained black beans. Cover again and let it rest for 5 minutes.
  9. Season with salt and pepper to taste. Serve warm, garnished with chopped fresh cilantro if desired.

Nutrition

Serving: 1servingCalories: 450kcalCarbohydrates: 52gProtein: 24gFat: 15gSaturated Fat: 5gPolyunsaturated Fat: 3gMonounsaturated Fat: 7gCholesterol: 70mgSodium: 800mgPotassium: 500mgFiber: 10gSugar: 2gVitamin A: 15IUVitamin C: 30mgCalcium: 50mgIron: 4mg

Notes

Let the skillet rest for a full 5 minutes after adding the beans to allow the flavors to meld together.

Tried this recipe?

Let us know how it was!

Comforting Broccoli Cheddar Soup Like a Cozy Hug in a Bowl

January 15, 2026 by grace bellamy Leave a Comment

As I stood in my kitchen, the rich scent of melted cheese and fresh broccoli enveloped me, triggering fond memories of café outings with friends. My heart raced with anticipation for a comforting bowl of Broccoli Cheddar Soup, a crowd-pleaser that never fails to warm the soul. This easy Panera Copycat recipe lets you enjoy the same creamy goodness at home, without breaking the bank or resorting to fast food. In just 35 minutes, you’ll create a nourishing, homemade meal that’s both satisfying and packed with veggies. Plus, it’s the perfect partner for a crusty piece of bread or a crisp salad. Are you ready to blend flavors and memories in the kitchen? Let’s dive into this delightful recipe together!

Broccoli Cheddar Soup

Why is this Broccoli Cheddar Soup a Must-Try?

Comforting warmth: Each spoonful feels like a cozy hug, perfect for chilly evenings or whenever you crave something soul-soothing.
Time-saving: With just 35 minutes from prep to plate, you’ll have dinner ready in no time without sacrificing flavor.
Veggie-packed: Broccoli and carrots add nutrition, making this soup a guilt-free indulgence that even picky eaters will love.
Crowd-pleaser: Impress family and friends with this homemade version that rivals any café classic. Serve it with crusty bread or a light salad for a complete meal. If you need more serving ideas, check out our Serving Suggestions.

Broccoli Cheddar Soup Ingredients

For the Soup

  • Broccoli florets – 3 cups, fresh is best for a vibrant color and flavor.
  • Shredded carrots – 1 cup, they add natural sweetness and a beautiful orange hue.
  • Diced onions – ¼ cup, to provide a savory base that enhances the overall flavor.
  • Butter – ¼ cup, used to sauté the vegetables and create a rich, creamy texture.
  • All-purpose flour – ¼ cup, this helps thicken your soup to that perfect consistency.
  • Vegetable broth – 4 cups, choose a low-sodium version for better control over saltiness.
  • Heavy cream – 1 cup, it adds luscious creaminess to your Broccoli Cheddar Soup.
  • Shredded cheddar cheese – 2 cups, for that melty, cheesy goodness we all crave!
  • Salt – ½ teaspoon, elevates all the delicious flavors in your soup.
  • Black pepper – ¼ teaspoon, adds a subtle kick that complements the creamy base.
  • Garlic powder – ¼ teaspoon, for an extra layer of savory goodness.

Serving Accompaniments

  • Crusty bread – perfect for dipping and soaking up every bit of the soup’s richness.
  • Side salad – a refreshing contrast that balances out the creamy soup beautifully.

Step‑by‑Step Instructions for Broccoli Cheddar Soup

Step 1: Melt the Butter
In a large pot, set over medium heat, melt ¼ cup of butter until it bubbles gently. This should take about 2 minutes. Watch for a golden color as the butter froths, signaling it's ready. The rich aroma will start to fill your kitchen, setting the stage for your comforting Broccoli Cheddar Soup.

Step 2: Sauté the Vegetables
Add ¼ cup of diced onions and 1 cup of shredded carrots to the melted butter. Stir the mixture continually for about 5 minutes or until the vegetables soften and the onions become translucent. You'll know they're ready when the carrots are tender but still vibrant in color, enhancing the flavor base of your soup.

Step 3: Incorporate the Flour
Sprinkle ¼ cup of all-purpose flour evenly over the sautéed veggies. Stir continuously for about 1 minute, ensuring the flour fully coats the vegetables. This step will create a roux, which thickens our Broccoli Cheddar Soup once we add the liquid, giving it a rich and creamy texture.

Step 4: Add the Vegetable Broth
Gradually pour in 4 cups of vegetable broth, continuing to stir until the mixture is smooth and fully incorporates the roux. This should take about 2–3 minutes. As you stir, watch for the soup to start thickening slightly and gaining a glossy appearance, which indicates it's ready for the next step.

Step 5: Cook the Broccoli
Stir in 3 cups of fresh broccoli florets, ½ teaspoon salt, ¼ teaspoon black pepper, and ¼ teaspoon garlic powder. Bring the soup to a gentle simmer, letting it cook for about 10 minutes or until the broccoli is tender but still bright green. You'll know it's done when a fork easily pierces the florets without breaking them apart.

Step 6: Mix in Cream and Cheese
Reduce the heat to low and carefully stir in 1 cup of heavy cream and 2 cups of shredded cheddar cheese. Continue cooking, stirring occasionally for about 3–5 minutes, until the cheese melts fully and the soup is heated through. The mixture should become creamy, with all ingredients harmoniously blending, resulting in your appetizing Broccoli Cheddar Soup.

Broccoli Cheddar Soup

Broccoli Cheddar Soup Variations & Substitutions

Feel free to elevate or adapt your Broccoli Cheddar Soup with these fun variations that will delight your taste buds!

  • Dairy-Free: Substitute heavy cream with coconut milk and cheddar cheese with a dairy-free cheese alternative for a lactose-free delight.
  • Spicy Kick: Add a pinch of cayenne pepper or diced jalapeños for those who enjoy a bit of heat in their soup. Just a small amount can transform the flavor!
  • Herb-Infused: Stir in a tablespoon of fresh thyme or dill for a fragrant twist that adds depth to your Broccoli Cheddar Soup. These herbs pair wonderfully with the cheesy flavors!
  • Protein Boost: Kick up the nutrition by adding cooked shredded chicken or white beans, making it a heartier meal perfect for cold nights. It’ll keep you satisfied for hours!
  • Roasted Vegetables: Toss in roasted garlic or cauliflower for a smoky flavor profile. Roasting enhances the sweetness and adds a fantastic layer of complexity.
  • Different Cheese: Experiment with Gruyère or a blend of cheeses for a gourmet touch that adds richness. The blend will melt beautifully and offer a new flavor experience!
  • Nutty Flavor: Sprinkle toasted sunflower seeds or pumpkin seeds on top before serving for a delightful crunch and earthy flavor addition. It leads to an exciting textural contrast!
  • Velvety Smooth: Blend the soup before adding cheese for a silky texture, ideal if you want a smooth and creamy experience without chunks. This simple step transforms the soup into a luxurious treat!

By exploring these variations, you can make this comforting Broccoli Cheddar Soup your very own creation! Need more ideas? Consider pairing it with a lovely side salad or serving it alongside some fresh crusty bread for a satisfying meal.

What to Serve with Broccoli Cheddar Soup?

Imagine the rich, cheesy goodness of broccoli cheddar soup warming your stomach and soul, inviting you to create the perfect meal.

  • Crusty Bread: The ideal dipping companion, soaking in every spoonful of your creamy soup and providing a satisfying crunch.
  • Simple Side Salad: Crisp greens topped with a light vinaigrette balance the richness, refreshing your palate between bites.
  • Garlic Breadsticks: Soft, buttery, and infused with garlic flavor, these are a decadent twist for your soup-sipping experience.
  • Roasted Veggies: Seasoned and caramelized, roasted carrots or Brussels sprouts add delightful crunch and a burst of flavor to your meal.
  • Apple Slices with Cheese: Sweet, crisp apple slices with sharp cheddar are an unexpected delight that complements the savory soup beautifully.
  • Herb-Infused Rice: A side of fluffy rice with fresh herbs provides a great textural contrast while adding heartiness to your meal.
  • Sweet Dessert: End with a light, fruity dessert like sorbet or a slice of cheesecake to cleanse the palate after the savory soup.
  • Iced Herbal Tea: A cool, refreshing drink that pairs well with the warm, creamy soup, enhancing the overall dining experience.
  • Craft Beer: A light ale or wheat beer can balance the richness of the cheddar, making for a sophisticated pairing with your soup.

How to Store and Freeze Broccoli Cheddar Soup

Fridge: Store leftover Broccoli Cheddar Soup in an airtight container for up to 3 days. Reheat gently on the stove, stirring frequently to maintain its creamy texture.

Freezer: For longer storage, freeze the soup in freezer-safe containers for up to 3 months. Thaw in the fridge overnight before reheating for the best results.

Reheating: When reheating, do so slowly over low heat, stirring frequently. If the soup thickens too much, add a splash of vegetable broth or cream to revive its consistency.

Make-Ahead Tips: This delightful soup can be made ahead and stored, making it a convenient option for busy days.

Make Ahead Options

These Broccoli Cheddar Soup deliciousness is perfect for meal prep enthusiasts! You can chop the broccoli florets, dice the onions, and shred the carrots up to 24 hours in advance, storing them in airtight containers in the refrigerator. When you’re ready to enjoy your comforting soup, simply follow the cooking instructions from the point of sautéing the vegetables. If you’d like to prepare the entire soup ahead, you can cook and then cool it before refrigerating for up to 3 days. Just be sure to reheat gently on the stove while stirring to maintain that creamy texture and prevent the cheese from separating. With these make-ahead options, you’ll have a cozy dinner ready in no time!

Tips for the Best Broccoli Cheddar Soup

  • Fresh Ingredients: Always opt for fresh broccoli and carrots to maximize flavor and nutrients in your Broccoli Cheddar Soup. Frozen vegetables can alter the texture.
  • Perfect Roux: Don't rush the flour step; cooking it for at least a minute helps remove raw taste and enhances the soup's creaminess.
  • Cheese Choice: Use a high-quality sharp cheddar! It melts beautifully and gives your soup that rich, cheesy flavor we adore.
  • Simmering Time: Allow enough time to simmer the broccoli until it's just fork-tender. Overcooked broccoli can lose its vibrant color and crunch.
  • Avoid Clumping: When adding cheese, stir continuously to prevent clumps. Gradually introduce it as this ensures a velvety smooth Broccoli Cheddar Soup.

Broccoli Cheddar Soup

Broccoli Cheddar Soup Recipe FAQs

What is the best way to choose fresh broccoli for my soup?
Absolutely! When selecting broccoli, look for tight, bright green florets without any dark spots or signs of wilting. The stems should be firm, and the leaves should be crisp. Fresh broccoli enhances the flavor and texture of your Broccoli Cheddar Soup, making it more vibrant and nutritious.

How should I store leftover Broccoli Cheddar Soup?
Store your leftover soup in an airtight container in the refrigerator. It will stay fresh for up to 3 days. When reheating, gently warm it on the stove while stirring frequently to keep that creamy texture. If you find it thickens too much, simply add a splash of vegetable broth or cream.

Can I freeze Broccoli Cheddar Soup?
Yes! To freeze your soup, let it cool completely, then transfer it into freezer-safe containers. You can store it for up to 3 months. When you're ready to enjoy it, thaw in the fridge overnight and gently reheat on the stove. Stir occasionally, and if needed, add a bit of vegetable broth for the desired consistency.

What if my soup ends up too thick?
No worries! If your Broccoli Cheddar Soup turns out thicker than you’d like, you can remedy this by adding small amounts of vegetable broth or cream while gently heating it. Stir continuously until it's at your preferred consistency. This way, you'll get that luxuriously creamy texture back in no time!

Is this soup suitable for those with allergies?
It's always best to check ingredient labels for allergies. This recipe contains dairy (butter, heavy cream, cheese) and gluten (flour). If you need a gluten-free option, substitute all-purpose flour with a gluten-free blend, and you can also use dairy substitutes like almond milk and coconut cream for a dairy-free version. Always ensure to check individual ingredient portions to avoid any allergic reactions.

Can I make this soup ahead of time?
Absolutely! This Broccoli Cheddar Soup is perfect for making ahead. Prepare it a day in advance and store it in the refrigerator. When you're ready to serve, simply reheat it on the stove. This allows flavors to meld beautifully, making it even tastier the next day!

Broccoli Cheddar Soup

Comforting Broccoli Cheddar Soup Like a Cozy Hug in a Bowl

A delicious Broccoli Cheddar Soup that's easy to make and perfect for cozy meals.
Print Recipe Pin Recipe
Prep Time 10 minutes mins
Cook Time 25 minutes mins
Total Time 35 minutes mins
Servings: 4 bowls
Course: Main Dishes
Cuisine: American
Calories: 350
Ingredients Equipment Method Nutrition Notes

Ingredients
  

For the Soup
  • 3 cups Broccoli florets fresh is best for a vibrant color and flavor
  • 1 cup Shredded carrots they add natural sweetness and a beautiful orange hue
  • ¼ cup Diced onions to provide a savory base that enhances the overall flavor
  • ¼ cup Butter used to sauté the vegetables and create a rich, creamy texture
  • ¼ cup All-purpose flour this helps thicken your soup to that perfect consistency
  • 4 cups Vegetable broth choose a low-sodium version for better control over saltiness
  • 1 cup Heavy cream it adds luscious creaminess to your Broccoli Cheddar Soup
  • 2 cups Shredded cheddar cheese for that melty, cheesy goodness
  • ½ teaspoon Salt elevates all the delicious flavors in your soup
  • ¼ teaspoon Black pepper adds a subtle kick that complements the creamy base
  • ¼ teaspoon Garlic powder for an extra layer of savory goodness
Serving Accompaniments
  • Crusty bread perfect for dipping and soaking up every bit of the soup’s richness
  • Side salad a refreshing contrast that balances out the creamy soup beautifully

Equipment

  • Large Pot

Method
 

Step-by-Step Instructions for Broccoli Cheddar Soup
  1. In a large pot, set over medium heat, melt ¼ cup of butter until it bubbles gently, about 2 minutes.
  2. Add ¼ cup of diced onions and 1 cup of shredded carrots to the melted butter, stirring for about 5 minutes until softened.
  3. Sprinkle ¼ cup of all-purpose flour over the veggies, stirring for 1 minute to create a roux.
  4. Gradually pour in 4 cups of vegetable broth, stirring until smooth, about 2-3 minutes.
  5. Stir in 3 cups of fresh broccoli florets, ½ teaspoon salt, ¼ teaspoon black pepper, and ¼ teaspoon garlic powder. Simmer for 10 minutes.
  6. Reduce heat to low, stir in 1 cup of heavy cream and 2 cups of shredded cheddar cheese, cooking for 3-5 minutes until melted.

Nutrition

Serving: 1bowlCalories: 350kcalCarbohydrates: 30gProtein: 12gFat: 22gSaturated Fat: 13gPolyunsaturated Fat: 2gMonounsaturated Fat: 7gCholesterol: 60mgSodium: 700mgPotassium: 500mgFiber: 4gSugar: 4gVitamin A: 800IUVitamin C: 80mgCalcium: 400mgIron: 1.5mg

Notes

For the best flavor, use fresh ingredients and high-quality cheese. Allow sufficient simmering time for the broccoli to cook perfectly.

Tried this recipe?

Let us know how it was!

Zesty Coconut Lime Fish Curry with Jasmine Rice Delight

January 15, 2026 by grace bellamy Leave a Comment

As I stirred the vibrant, fragrant coconut lime fish curry, the mesmerizing aroma filled my kitchen, offering a tantalizing escape to a tropical paradise. This Coconut Lime Fish Curry with Jasmine Rice is not just a dish; it’s a delightful symphony of flavors that comes together in just under an hour. The beauty of this recipe lies in its quick prep time, making it an ideal choice for busy weeknights while still impressing guests at your dinner table. Plus, the creamy coconut milk paired with zesty lime creates a comforting yet invigorating experience, perfect for those longing for a break from everyday meals. Ready to embark on this culinary adventure? Let’s dive into the flavorful world of homemade goodness together!

Coconut Lime Fish Curry with Jasmine Rice

Why is this fish curry irresistible?

Vibrant flavors: The combination of coconut milk and lime creates a refreshing taste that transports your taste buds to the tropics.
Easy preparation: With just a few simple steps, you can whip up this impressive meal in about 50 minutes – perfect for busy weeknights!
Versatile ingredients: Feel free to substitute your favorite white fish or adjust the spices according to your preference, making it a dish suited for every palate.
Crowd-pleaser: Friends and family will rave about the delightful aroma and burst of flavors, ensuring this dish becomes a staple at your gatherings. Embrace the joy of cooking with your loved ones by trying out our jasmine rice guide for the perfect pairing!

Coconut Lime Fish Curry Ingredients

• This list has everything you need for a delicious Coconut Lime Fish Curry.

For the Curry

  • 1 lb (450g) white fish fillets – cod, tilapia, or snapper work beautifully to absorb the flavors.
  • 1 cup coconut milk – brings creaminess and a tropical flair to the dish.
  • 2 tablespoons coconut oil or olive oil – use coconut oil for a richer flavor.
  • 1 medium onion, finely chopped – adds sweetness and depth to the curry.
  • 2 cloves garlic, minced – enhances the aroma and taste.
  • 1 inch piece of ginger, grated – introduces a warm and zesty kick.
  • 1-2 green chilies, slit – adjust the number based on your spice preference.
  • 1 teaspoon ground turmeric – for its earthy flavor and vibrant color.
  • 1 teaspoon ground cumin – adds a warm, nutty taste.
  • 1 teaspoon coriander powder – complements the spices and brightens the flavor.
  • 1 tablespoon fish sauce or soy sauce – provides umami depth to the dish.
  • Juice and zest of 1 lime – infuses a refreshing, zesty element.
  • Salt, to taste – essential for enhancing all the flavors.
  • Fresh cilantro leaves, for garnish – adds a fresh finish and pops of color.

For the Rice

  • 1 cup jasmine rice – a fragrant foundation for serving the curry.
  • 2 cups water or fish stock – fish stock deepens the flavor of the rice.

Step‑by‑Step Instructions for Coconut Lime Fish Curry with Jasmine Rice

Step 1: Rinse the Rice
Begin by rinsing 1 cup of jasmine rice under cold water. Use a fine-mesh strainer and continue rinsing until the water runs clear, indicating that excess starch has been removed. This process should take about 2-3 minutes and ensures fluffy rice as a perfect base for the Coconut Lime Fish Curry.

Step 2: Cook the Rice
In a medium saucepan, combine the rinsed jasmine rice with 2 cups of water or fish stock for enhanced flavor. Bring the mixture to a rolling boil over medium-high heat. Once boiling, reduce the heat to low, cover, and let it simmer gently for about 15 minutes. The rice is done when it is tender and the liquid is fully absorbed, so fluff it with a fork and set aside.

Step 3: Sauté the Aromatics
While the rice cooks, grab a large pan and heat 2 tablespoons of coconut oil over medium heat. Add the finely chopped onion and sauté for about 5 minutes until it becomes translucent and fragrant. This step lays the foundation for the incredible flavor profile of your Coconut Lime Fish Curry, so keep an eye on those onions!

Step 4: Add Garlic and Ginger
Next, stir in 2 minced garlic cloves, 1 inch of grated ginger, and the slit green chilies. Cook everything together for an additional 2-3 minutes until the garlic is fragrant and golden. The mixture should smell deliciously aromatic by now, setting the stage for the spices and coconut milk to come.

Step 5: Toast the Spices
Sprinkle in 1 teaspoon each of ground turmeric, cumin, and coriander powder. Stir the spices into the onion mixture and toast them for about 1 minute. This step enhances their flavors and aromas, which will beautifully infuse your Coconut Lime Fish Curry as it simmers.

Step 6: Add Coconut Milk
Pour in 1 cup of coconut milk, stirring well to combine all the ingredients. Allow it to come to a gentle simmer on low heat. This should take about 3-5 minutes; the sauce will envelop the spices and aromatics, creating a creamy, vibrant base for your fish curry.

Step 7: Season the Curry
Add in 1 tablespoon of fish sauce or soy sauce, along with the juice and zest of 1 lime. Stir well and taste; adjust salt as needed. Let the mixture simmer for another 5-7 minutes, allowing it to thicken slightly and intensify in flavor, making your plate of Coconut Lime Fish Curry even more irresistible.

Step 8: Cook the Fish
Gently nestle the fish fillets into the coconut curry, making sure they are submerged in the luscious sauce. Cover the pan and cook for about 5-8 minutes or until the fish is opaque and flakes easily with a fork. The transformation of the fish completes this delightful Coconut Lime Fish Curry.

Step 9: Garnish and Serve
Once the fish is cooked, remove the curry from heat and sprinkle fresh cilantro leaves on top for a burst of color and freshness. Serve the warm Coconut Lime Fish Curry generously over a bed of jasmine rice. For an added zing, offer extra lime wedges on the side to squeeze over when serving.

Coconut Lime Fish Curry with Jasmine Rice

What to Serve with Coconut Lime Fish Curry with Jasmine Rice

To truly enhance your meal and create a delightful dining experience, consider these perfect pairings that will complement the vibrant flavors of your curry.

  • Crispy Coconut Tempura: Lightly battered and fried veggies or shrimp add a crunchy texture that contrasts beautifully with the creamy curry. Perfect for scooping up extra sauce!

  • Fresh Garden Salad: A simple mix of greens, cucumber, and cherry tomatoes tossed in a light vinaigrette brings brightness and freshness, balancing the richness of the dish.

  • Garlic Naan Bread: Soft, pillowy naan is perfect for dipping into the fragrant coconut lime sauce, creating a cozy, comforting dining experience.

  • Steamed Bok Choy: This lightly sautéed leafy green provides a delicate crunch and a touch of crispness—ideal to soak up the curry’s vibrant flavors.

  • Mango Chutney: Sweet and tangy chutney adds a delightful contrast to the savory curry, offering a burst of flavor in every bite.

  • Chilled Coconut Water: Refreshing and hydrating, this tropical drink enhances the dish while keeping the meal light and invigorating.

  • Lime Sorbet: A refreshing dessert option that cleanses the palate, making it a perfect ending to the flavorful journey of the Coconut Lime Fish Curry.

With these pairings, your meal becomes a celebration of flavors and textures!

How to Store and Freeze Coconut Lime Fish Curry

Fridge: Store leftover Coconut Lime Fish Curry in an airtight container for up to 3 days, ensuring it maintains its delicious flavors.

Freezer: For longer storage, freeze the curry in a freezer-safe container for up to 2 months. Make sure to cool it completely before freezing to preserve texture.

Reheating: Thaw overnight in the fridge before reheating on the stove over low heat, adding a splash of coconut milk to revive the creaminess, or microwave in short bursts, stirring occasionally.

Serving Suggestions: For the best experience, reheat and serve over freshly cooked jasmine rice, garnished with cilantro and lime wedges to brighten the dish.

Make Ahead Options

These Coconut Lime Fish Curry with Jasmine Rice are perfect for busy home cooks looking to save time during the week! You can prep the curry base (without the fish) up to 3 days ahead by following the sautéing and simmering steps. Allow the mixture to cool before refrigerating it in an airtight container. The jasmine rice can also be cooked up to 24 hours in advance and stored separately. When you're ready to enjoy this delightful dish, simply reheat the curry in a pan, add the fish fillets, and cook until opaque—allowing for those vibrant flavors to meld once more. This way, you'll have a comforting, tropical curry on the table in no time!

Expert Tips for Coconut Lime Fish Curry

  • Choose the Right Fish: Select fresh, high-quality white fish for the best texture and flavor. Frozen fish can work too; just ensure it's fully thawed before cooking.

  • Don't Rush the Aromatics: Sauté the onions, garlic, and ginger until they're truly fragrant. This foundation enhances the overall flavor of your Coconut Lime Fish Curry.

  • Adjust Spice Levels: Feel free to modify the number of green chilies used to get the right level of heat. Start with one and add more as desired to suit your taste.

  • Simmer for Depth: Allow the curry to simmer adequately after adding coconut milk and spices to deepen the flavors. Don’t skip this step!

  • Check for Doneness: Gently flake the fish after cooking. It should be opaque and easily separate with a fork; avoid overcooking to keep it tender.

  • Serve with Lime: Providing extra lime wedges on the side allows guests to personalize their dish, enhancing the zesty flavor of the Coconut Lime Fish Curry.

Coconut Lime Fish Curry Variations

Feel free to put your own spin on this delightful dish—you'll create unique flavors to satisfy every palate!

  • Dairy-Free: Use almond or oat milk instead of coconut milk for a lighter, nutty flavor that still brings richness to the curry.
  • Spicy Kick: Add more green chilies or a dash of red pepper flakes for those who crave a fiery twist. If you're feeling adventurous, throw in a chopped jalapeño!
  • Herb Infusion: Swap cilantro for fresh basil or mint for an aromatic twist that adds a hint of sweetness and brightness to the dish. The aroma will lift your spirits instantly!
  • Vegetable Boost: Incorporate seasonal veggies like bell peppers, spinach, or peas to add extra texture and nutrients. They’ll cook quickly and absorb the delicious curry flavors too.
  • Protein Power: Substitute the white fish with shrimp or chicken for a different protein option, making it just as tempting and satisfying!
  • Zesty Lemongrass: For an extra layer of flavor, add a stalk of chopped lemongrass while simmering the coconut milk. This will infuse your curry with a delightful citrusy aroma that dances on your palate.
  • Fruity Surprise: Toss in diced mango or pineapple to the curry for a tropical sweetness that beautifully balances the heat of the spices.
  • Coconut Rice: Cook the jasmine rice using coconut milk instead of water for a creamier base that echoes the flavors of the curry itself.

With these variations, you can create a new experience each time you make this Coconut Lime Fish Curry. Enjoy experimenting in your kitchen! For more delicious rice ideas, don't forget to check out our jasmine rice guide.

Coconut Lime Fish Curry with Jasmine Rice

Coconut Lime Fish Curry with Jasmine Rice Recipe FAQs

How do I choose the best fish for this curry?
Absolutely! When selecting fish for your Coconut Lime Fish Curry, look for fresh, firm white fish fillets like cod, tilapia, or snapper. If you're opting for frozen fish, make sure it’s fully thawed before cooking to maintain its texture and flavor. Fresh fish should have a mild scent, moist appearance, and no discoloration—your taste buds will thank you!

How should I store leftover Coconut Lime Fish Curry?
Very! To store your delicious Coconut Lime Fish Curry, place it in an airtight container in the fridge. It will keep well for about 3 days. Just make sure to let it cool down to room temperature before sealing to avoid condensation, which can affect the texture.

Can I freeze this fish curry for later?
Of course! Freezing is a great option. Allow your Coconut Lime Fish Curry to cool completely before transferring it into a freezer-safe container. It can be safely frozen for up to 2 months. For the best results, label the container with the date and name, so you can keep track of your culinary creations!

What if my fish isn’t cooking evenly or flakes apart too much?
No worries! If you notice your fish isn’t cooking evenly, make sure the fillets are of uniform thickness for even cooking. Additionally, if they’re flaking apart too much, try reducing the cooking time; the fish should only take about 5-8 minutes until it's opaque and flakes easily with a fork. Remember, it continues to cook after being removed from heat!

Are there any dietary considerations I should keep in mind?
Very! This Coconut Lime Fish Curry contains fish and common allergens like coconut. If you’re cooking for someone with allergies, it’s essential to check the ingredients; for instance, using soy sauce instead of fish sauce can make it suitable for vegetarian diets. Moreover, be mindful of the spice level if serving to those sensitive to heat, as the green chilies can pack a punch!

How can I revive the creaminess of the curry when reheating?
A fantastic question! When reheating your Coconut Lime Fish Curry, add a splash of coconut milk or water to bring back its creamy texture. Heat on the stove over low heat, stirring gently to combine. This will help restore the luscious feel and keep it moist, so you can savor every delightful spoonful as if it were freshly made!

Coconut Lime Fish Curry with Jasmine Rice

Zesty Coconut Lime Fish Curry with Jasmine Rice Delight

This Coconut Lime Fish Curry with Jasmine Rice is a delightful blend of tropical flavors, quick to prepare and perfect for any occasion.
Print Recipe Pin Recipe
Prep Time 10 minutes mins
Cook Time 40 minutes mins
Total Time 50 minutes mins
Servings: 4 servings
Course: Main Dishes
Cuisine: Asian, Tropical
Calories: 400
Ingredients Equipment Method Nutrition Notes

Ingredients
  

Coconut Lime Fish Curry Ingredients
  • 1 lb white fish fillets cod, tilapia, or snapper
  • 1 cup coconut milk
  • 2 tablespoons coconut oil or olive oil use coconut oil for richer flavor
  • 1 medium onion, finely chopped
  • 2 cloves garlic, minced
  • 1 inch ginger, grated
  • 1-2 pieces green chilies, slit adjust to spice preference
  • 1 teaspoon ground turmeric
  • 1 teaspoon ground cumin
  • 1 teaspoon coriander powder
  • 1 tablespoon fish sauce or soy sauce
  • 1 pieces lime, juice and zest
  • to taste salt
  • for garnish fresh cilantro leaves
Rice Ingredients
  • 1 cup jasmine rice
  • 2 cups water or fish stock fish stock deepens the flavor

Equipment

  • Medium saucepan
  • large pan
  • fine-mesh strainer

Method
 

Step‑by‑Step Instructions
  1. Begin by rinsing 1 cup of jasmine rice under cold water until it runs clear.
  2. In a saucepan, combine the rinsed rice with 2 cups of water or fish stock, then bring to a rolling boil.
  3. Once boiling, reduce heat, cover, and simmer for about 15 minutes until liquid is absorbed.
  4. In a large pan, heat 2 tablespoons of coconut oil over medium heat. Add chopped onion and sauté until translucent.
  5. Stir in minced garlic, grated ginger, and slit green chilies, cooking for another 2-3 minutes.
  6. Sprinkle in 1 teaspoon each of ground turmeric, cumin, and coriander powder, toasting for 1 minute.
  7. Add 1 cup of coconut milk and bring to a simmer on low heat for 3-5 minutes.
  8. Mix in 1 tablespoon fish sauce or soy sauce, juice and zest of 1 lime, and adjust salt.
  9. Gently add fish fillets, cover, and cook for 5-8 minutes until fish is opaque and flakes easily.
  10. Remove from heat, garnish with fresh cilantro leaves, and serve over jasmine rice.

Nutrition

Serving: 1servingCalories: 400kcalCarbohydrates: 50gProtein: 25gFat: 15gSaturated Fat: 10gPolyunsaturated Fat: 2gMonounsaturated Fat: 3gCholesterol: 70mgSodium: 800mgPotassium: 600mgFiber: 4gSugar: 2gVitamin A: 400IUVitamin C: 10mgCalcium: 30mgIron: 2mg

Notes

For best results, choose fresh fish and allow the curry to simmer for deeper flavors. Serve with lime wedges for extra zest.

Tried this recipe?

Let us know how it was!

Comforting Cozy Mac and Cheese Meatloaf Casserole Delight

January 15, 2026 by grace bellamy Leave a Comment

As I stood in my kitchen, the familiar scent of sautéed garlic and onions enveloped me, igniting memories of cozy family dinners. This Cozy Mac and Cheese Meatloaf Casserole is my go-to comfort dish that effortlessly combines heartiness with indulgence. With just 15 minutes of prep time, you can whip up a soul-warming meal that will please even the pickiest eaters. It’s a delightful mashup of classic flavors—juicy meatloaf meets creamy macaroni and cheese, all baked to perfection! Plus, it’s perfect for busy nights or meal prep; just slice, serve, and savor. Are you ready to elevate your comfort food game? Let's dive in!

Cozy Mac and Cheese Meatloaf Casserole

Why is this Casserole a Must-Try?

Comforting flavors: This Cozy Mac and Cheese Meatloaf Casserole combines two classics into one irresistible dish.

Quick prep: With only 15 minutes of prep time, it fits seamlessly into your busy schedule.

Cheesy goodness: The melty combination of cheddar and mozzarella on top elevates every bite.

Family favorite: It’s an instant hit, perfect for gatherings or just a cozy night at home.

Versatile at its core: Feel free to add your favorite veggies or swap in different cheeses for a personal touch.

This casserole not only warms the soul but also delights the taste buds, making it a staple for any home cook.

Cozy Mac and Cheese Meatloaf Casserole Ingredients

For the Meatloaf Mixture
• Ground beef – a rich source of protein, giving the casserole its hearty base.
• Elbow macaroni – the classic pasta shape absorbs all the cheesy goodness.
• Shredded cheddar cheese – adds sharpness and richness; feel free to mix with other cheeses for a twist!
• Shredded mozzarella cheese – brings a gooey texture that melts beautifully on top.
• Milk – helps to keep the meatloaf moist and creamy while baking.
• Breadcrumbs – acts as a binder to hold everything together in a delicious loaf.
• Grated Parmesan cheese – enhances flavor and introduces a nutty aspect.

For the Flavor
• Small onion, finely chopped – brings sweetness and depth; sauté for even more flavor.
• Garlic, minced – infuses aromatic warmth that elevates the entire dish.
• Large egg – binds the ingredients together while providing additional moisture.
• Worcestershire sauce – adds umami and a bit of tanginess that ties the flavors together.
• Dried Italian seasoning – a blend that enhances the overall flavor profile.
• Salt and pepper to taste – essential for highlighting the dish's robust flavors.

For Baking
• Cooking spray or olive oil – helps to prevent sticking and ensures an easy clean-up.

Gather these ingredients and experience the magic of this Cozy Mac and Cheese Meatloaf Casserole!

Step‑by‑Step Instructions for Cozy Mac and Cheese Meatloaf Casserole

Step 1: Preheat the Oven
Start by preheating your oven to 375°F (190°C). While it heats, grab a 9x13 inch baking dish and lightly grease it with cooking spray or a drizzle of olive oil. This will keep your delicious Cozy Mac and Cheese Meatloaf Casserole from sticking and ensure easy serving later on.

Step 2: Cook the Macaroni
In a large pot, bring salted water to a rolling boil and add the elbow macaroni. Cook according to the package directions until al dente, about 7-9 minutes, which means they should still have a slight bite. Once done, drain the macaroni thoroughly and set it aside, allowing it to cool slightly while you prepare the meat mixture.

Step 3: Prepare the Meat Mixture
In a spacious mixing bowl, combine the ground beef, cooked elbow macaroni, half of both the cheddar and mozzarella cheeses, milk, breadcrumbs, Parmesan cheese, chopped onion, minced garlic, egg, Worcestershire sauce, Italian seasoning, salt, and pepper. Mix everything together thoroughly until all ingredients are well blended, creating a hearty base for your casserole.

Step 4: Transfer to the Baking Dish
Now, take your meat mixture and transfer it into the greased baking dish. Using a spatula, press it down evenly, ensuring the mixture is packed and smooth on top. This will help the Cozy Mac and Cheese Meatloaf Casserole hold its shape during baking while allowing all the flavors to meld together beautifully.

Step 5: Add the Cheese Topping
Sprinkle the remaining cheddar and mozzarella cheeses generously over the top of the meat mixture in the baking dish. Make sure to cover the surface evenly so every bite of your Cozy Mac and Cheese Meatloaf Casserole is filled with gooey, melty goodness.

Step 6: Bake Covered
Cover the dish tightly with aluminum foil and place it in the preheated oven. Bake for 25 minutes, allowing the casserole to cook through. The foil will help trap moisture, ensuring your meatloaf remains juicy and the cheeses melt nicely.

Step 7: Bake Uncovered for Golden Finish
After 25 minutes, carefully remove the foil and return the dish to the oven. Continue baking for an additional 15-20 minutes or until the cheese is bubbly and turns a beautiful golden brown. This step is crucial for that irresistible cheese crust that makes the Cozy Mac and Cheese Meatloaf Casserole truly comforting.

Step 8: Cool and Serve
Once baked to perfection, remove the casserole from the oven and let it cool for about 10 minutes. This resting period allows the layers to settle, making slicing easier. Cut into squares, serve, and savor the warm, cheesy goodness of your delicious creation!

Cozy Mac and Cheese Meatloaf Casserole

Cozy Mac and Cheese Meatloaf Casserole Variations

Feel free to make this dish your own by exploring exciting twists and substitutions!

  • Dairy-Free: Substitute the cheeses with dairy-free alternatives and use unsweetened almond milk to maintain creaminess.
  • Healthier Option: Swap ground beef for ground turkey or chicken, reducing calories without sacrificing flavor. It’s a lighter take that your family will still love!
  • Veggie Boost: Add a cup of finely chopped spinach or sautéed bell peppers to the meat mixture for a nutritious kick. It’s a great way to sneak in some greens!
  • Spicy Kick: Incorporate diced jalapeños or a dash of hot sauce into the meat mixture for a delightful heat that warms the soul. Adjust based on how fiery you like your meals!
  • Cheese Variety: Experiment with different cheeses like gouda or pepper jack for a unique flavor profile and creamier texture. Each cheese brings its own charming character to the dish!
  • Super Crunchy Top: For an extra crunchy texture, top with crushed tortilla chips or panko breadcrumbs mixed with a bit of melted butter before baking. It’s a satisfying contrast to the creamy filling.
  • Gluten-Free: Replace elbow macaroni with gluten-free pasta and use gluten-free breadcrumbs to accommodate dietary needs without compromising deliciousness.
  • Herb Infusion: Mix in fresh herbs like parsley or thyme to elevate the flavors even further, giving a fragrant touch that complements the casserole beautifully.

Let your creativity flow, and make this Cozy Mac and Cheese Meatloaf Casserole an unforgettable family favorite. If you're interested, consider pairing it with a refreshing salad or some steamed veggies for a well-rounded meal!

How to Store and Freeze Cozy Mac and Cheese Meatloaf Casserole

Fridge: Store leftovers in an airtight container for up to 3 days. Make sure to let the casserole cool completely before sealing to maintain freshness.

Freezer: For longer storage, freeze individual portions in freezer-safe containers for up to 3 months. Reheating from frozen is a breeze!

Reheating: Reheat in the microwave or oven. For the oven, cover with foil and bake at 350°F (175°C) for 20-25 minutes until heated through.

Thawing: If frozen, thaw overnight in the refrigerator before reheating for best results. Enjoy the cozy flavors of your Mac and Cheese Meatloaf Casserole again!

What to Serve with Cozy Mac and Cheese Meatloaf Casserole

Enjoy a complete culinary experience that will satisfy every craving and warm your heart.

  • Garlic Bread: The crispy texture and buttery flavor of garlic bread add the perfect crunch alongside the creamy casserole. It's a classic pairing that mops up every delicious drop!

  • Garden Salad: A fresh garden salad with a light vinaigrette will provide a refreshing contrast to the rich and cheesy dish. The crisp veggies add brightness to your plate.

  • Steamed Broccoli: This vibrant green vegetable brings fiber and nutrients while its tender-crisp texture juxtaposes wonderfully with the dense casserole. Drizzle with lemon for an extra zesty kick.

  • Roasted Brussels Sprouts: Roasted sprouts add a sweet, nutty flavor that balances the savory elements of the meatloaf casserole. A sprinkle of balsamic glaze amplifies their deliciousness.

  • Coleslaw: The crunchy, tangy slaw offers a delightful contrast to the warm, cheesy casserole. It's a fantastic way to add some crunch and balance the flavors of the meal.

  • Apple Sauce: The sweet and tart flavors of apple sauce provide a surprising yet delightful pairing with the cozy casserole. It's a nostalgic touch that complements the heartiness beautifully.

  • Red Wine: A medium-bodied red wine, such as Merlot, pairs nicely with the rich flavors of the casserole, enhancing your meal's overall experience.

  • Chocolate Cream Pie: For a sweet ending, serve a chocolate cream pie. Its rich, creamy layers perfectly contrast the savory casserole, finishing the meal on a sweet note.

Make Ahead Options

These Cozy Mac and Cheese Meatloaf Casserole bites are perfect for those busy weeknights when you need a delicious meal ready to go! You can prepare the entire casserole up to 24 hours in advance. To do this, assemble the casserole up until the baking step, then cover tightly with plastic wrap and refrigerate. This helps maintain its fresh flavors and prevents drying out. When you're ready to cook, remove it from the fridge while preheating the oven, and bake it as directed, adding a few extra minutes if it’s cold. Having this comforting dish prepped ahead will save you time and ensure a family favorite is just minutes away from serving!

Expert Tips for Cozy Mac and Cheese Meatloaf Casserole

Ingredient Substitutions: Use ground turkey or chicken for a lighter version, or try adding spinach or bell peppers for extra nutrients.

Cooking Time Cues: Always check your casserole around the 40-minute mark; if the top is browning too quickly, loosely cover it with foil.

Cheese Mix-Up: Combine different cheeses like gouda or fontina for an extra creamy texture and a unique flavor twist to your Cozy Mac and Cheese Meatloaf Casserole.

Don’t Overmix: When combining the meat mixture, be careful not to overmix as this can lead to a dense casserole instead of a fluffy one.

Rest Before Serving: Allowing the casserole to cool for at least 10 minutes before slicing helps it hold its shape, making for perfect servings.

Cozy Mac and Cheese Meatloaf Casserole

Cozy Mac and Cheese Meatloaf Casserole Recipe FAQs

What type of ground beef should I use for this casserole?
I recommend using ground beef that is 80/20 for the best balance of flavor and moisture. This fat content helps keep your Cozy Mac and Cheese Meatloaf Casserole juicy without being greasy. You can also substitute with ground turkey or chicken if you're looking for a leaner option!

How should I store the leftovers?
To store leftover Cozy Mac and Cheese Meatloaf Casserole, place it in an airtight container and refrigerate for up to 3 days. It's best to let it cool completely before sealing, as this will help preserve its freshness. Just reheat in the oven or microwave when you're ready to enjoy the leftovers!

Can I freeze this casserole?
Absolutely! You can freeze individual portions of the Cozy Mac and Cheese Meatloaf Casserole in freezer-safe containers for up to 3 months. For reheating, let them thaw overnight in the refrigerator, then bake at 350°F (175°C) covered with foil for 20-25 minutes until heated through. Enjoy the cozy flavors all over again!

How can I tell if my casserole is done baking?
To check if your Cozy Mac and Cheese Meatloaf Casserole is done, look for a bubbly cheese top that is golden brown. Additionally, the internal temperature should reach 160°F (70°C) when checked with a meat thermometer. If the top is browning too quickly, loosely cover it with foil to prevent burning.

Are there any allergy concerns with this recipe?
This casserole contains common allergens such as dairy (cheddar, mozzarella, and milk) and gluten (breadcrumbs). For a gluten-free version, you can use gluten-free breadcrumbs. Always check labels for any allergies, especially if you’re serving guests or family with specific dietary restrictions.

What should I do if my meatloaf mixture seems too dry?
If your meatloaf mixture appears to be too dry, you can add a splash more of milk or an extra egg for moisture. It's essential to make sure all the ingredients are evenly mixed but avoid overmixing to maintain the casserole's light and fluffy texture. If the macaroni is cooked perfectly al dente, it should help hold everything together!

Cozy Mac and Cheese Meatloaf Casserole

Comforting Cozy Mac and Cheese Meatloaf Casserole Delight

This Cozy Mac and Cheese Meatloaf Casserole is the ultimate comfort food, blending classic flavors into one delightful dish.
Print Recipe Pin Recipe
Prep Time 15 minutes mins
Cook Time 50 minutes mins
Cooling Time 10 minutes mins
Total Time 1 hour hr 15 minutes mins
Servings: 6 slices
Course: Main Dishes
Cuisine: American
Calories: 400
Ingredients Equipment Method Nutrition Notes

Ingredients
  

For the Meatloaf Mixture
  • 1 lb Ground beef a rich source of protein
  • 2 cups Elbow macaroni the classic pasta shape
  • 1 cup Shredded cheddar cheese adds sharpness and richness
  • 1 cup Shredded mozzarella cheese gives a gooey texture
  • ½ cup Milk keeps the meatloaf moist
  • 1 cup Breadcrumbs acts as a binder
  • ½ cup Grated Parmesan cheese enhances flavor
For the Flavor
  • 1 Small onion, finely chopped beautiful sweetness
  • 2 cloves Garlic, minced infuses aromatic warmth
  • 1 Large egg binds ingredients
  • 2 tablespoon Worcestershire sauce adds umami
  • 1 tablespoon Dried Italian seasoning enhances flavor profile
  • to taste Salt and pepper essential for flavor
For Baking
  • as needed Cooking spray or olive oil prevents sticking

Equipment

  • Oven
  • Baking Dish
  • Mixing Bowl
  • Pot
  • spatula

Method
 

Instructions
  1. Preheat your oven to 375°F (190°C) and grease a 9x13 inch baking dish with cooking spray or olive oil.
  2. In a large pot, bring salted water to a boil and cook the elbow macaroni until al dente, about 7-9 minutes.
  3. In a mixing bowl, combine ground beef, cooked macaroni, half of the cheddar and mozzarella, milk, breadcrumbs, Parmesan, onion, garlic, egg, Worcestershire sauce, Italian seasoning, salt, and pepper.
  4. Transfer the meat mixture to the greased baking dish, pressing it down evenly.
  5. Sprinkle the remaining cheddar and mozzarella cheese over the top.
  6. Cover the dish with aluminum foil and bake for 25 minutes.
  7. Remove the foil and bake for an additional 15-20 minutes until the cheese is bubbly and golden brown.
  8. Let it cool for about 10 minutes, then slice, serve, and enjoy.

Nutrition

Serving: 1sliceCalories: 400kcalCarbohydrates: 30gProtein: 25gFat: 20gSaturated Fat: 10gPolyunsaturated Fat: 0.5gMonounsaturated Fat: 8gCholesterol: 100mgSodium: 800mgPotassium: 500mgFiber: 2gSugar: 2gVitamin A: 15IUVitamin C: 2mgCalcium: 20mgIron: 15mg

Notes

Feel free to customize with veggies or different cheeses for a personal touch.

Tried this recipe?

Let us know how it was!

Irresistible Garlic Herb Dutch Oven Bread for Cozy Evenings

January 13, 2026 by grace bellamy Leave a Comment

There’s something magical about the aroma of freshly baked bread wafting through your kitchen, isn’t there? Enter my Garlic Herb Dutch Oven Bread, an impressive yet simple recipe that transforms just a handful of ingredients into a golden, crusty masterpiece. This bread not only looks stunning but also offers a crowd-pleasing twist with its delightful mix of garlic and herbs. The best part? With minimal hands-on time and a long fermentation process, you can set it and forget it, leaving you free to tend to other tasks or simply enjoy a cup of tea. Whether you’re hosting friends or just craving comfort food, this recipe is sure to steal the show. Ready to dive into the art of bread-making? Let's knead our way to something truly delicious!

Garlic Herb Dutch Oven Bread

What makes this bread recipe special?

Simplicity, this Garlic Herb Dutch Oven Bread requires minimal ingredients and effort, making it perfect for both beginners and seasoned bakers alike.
Flavor explosion, the rich combination of garlic and fresh herbs adds a punch that will have your taste buds dancing.
Versatile, use this bread as a side for soups, as a base for sandwiches, or simply enjoy it warm with butter.
Time-saving, with its long fermentation process, you can prep it and move on to other tasks, returning to a beautifully risen dough.
Crowd-pleasing, serve warm at gatherings, and watch as everyone raves about your homemade masterpiece – they won’t believe it’s so easy!

Garlic Herb Dutch Oven Bread Ingredients

For the Dough
• All-purpose flour – 3 cups provide the perfect base for a chewy, crusty bread.
• Salt – 1 ¼ teaspoons enhances the flavors and balances the richness of the garlic.
• Instant yeast – ½ teaspoon helps the dough rise quickly and easily.
• Warm water – 1 ½ cups (about 110°F) activates the yeast for a fluffy texture.
• Olive oil – 3 tablespoons adds moisture and a hint of richness to the bread.

For the Flavor
• Garlic – 4 cloves minced infuse the bread with an aromatic flavor that’s simply irresistible.
• Fresh rosemary – 1 tablespoon chopped brings a woodsy note that pairs beautifully with garlic.
• Fresh thyme – 1 tablespoon chopped adds a subtle earthiness, balancing the bread's flavors.
• Fresh parsley – 1 tablespoon chopped gives a fresh burst that brightens each bite.

For Dusting
• Additional flour – Use as needed for dusting your work surface to prevent sticking while shaping the dough.

This delicious Garlic Herb Dutch Oven Bread is sure to impress family and friends alike!

Step‑by‑Step Instructions for Garlic Herb Dutch Oven Bread

Step 1: Prepare the Dry Ingredients
In a large mixing bowl, combine 3 cups of all-purpose flour, 1 ¼ teaspoons of salt, and ½ teaspoon of instant yeast. Stir these dry ingredients together until well mixed, ensuring an even distribution of the yeast and salt. This is the foundation for your Garlic Herb Dutch Oven Bread, so take a moment to get it right!

Step 2: Mix the Wet Ingredients
In a separate bowl, whisk together 1 ½ cups of warm water (around 110°F), 4 minced cloves of garlic, and 3 tablespoons of olive oil. Toss in 1 tablespoon each of chopped fresh rosemary, thyme, and parsley. Mix well until the garlic is distributed, infusing the wet mixture with flavorful herbs. This aromatic blend will give your bread a delightful taste.

Step 3: Combine Wet and Dry Mixtures
Pour the wet mixture into the bowl with the dry ingredients. Using a wooden spoon or your hands, stir until a shaggy, somewhat sticky dough forms. Remember, the dough will be wet and messy at this stage, but that’s perfectly fine! The combination of flavors is key to your Garlic Herb Dutch Oven Bread, so embrace the stickiness.

Step 4: Let the Dough Rise
Cover the bowl with plastic wrap or a clean kitchen towel to keep the warmth in. Set it aside at room temperature for 12 to 18 hours, allowing it to rise until it doubles in volume and the surface is bubbly. As it rises, the wonderful aromas will start to fill your kitchen, signaling that delicious homemade bread is on the way!

Step 5: Shape the Dough
Once the dough has risen impressively, dust a clean work surface with flour. Carefully turn out the dough onto the floured surface, while handling it gently to preserve its airy texture. With floured hands, shape the dough into a round loaf. Don’t knead it too much; you want to maintain that light, fluffy quality that defines a great Garlic Herb Dutch Oven Bread.

Step 6: Second Rise
Dust the top of your newly shaped loaf lightly with flour, then cover it with a kitchen towel to prevent drying. Allow it to rest for another 1 to 2 hours, or until it puffs up slightly. Your patience will be rewarded as the dough continues to rise, promising a beautifully airy loaf.

Step 7: Preheat the Dutch Oven
About 30 minutes before you're ready to bake, place a Dutch oven with its lid in the oven and preheat to 450°F (230°C). This step ensures your baking vessel is hot, creating the perfect crust on your Garlic Herb Dutch Oven Bread. Watch the temperature closely, as a properly heated Dutch oven will help achieve that gorgeous golden-brown exterior.

Step 8: Bake the Bread
Once preheated, carefully remove the Dutch oven from the oven and take off the lid. Gently place the shaped bread loaf inside, then cover it with the lid again. Bake the bread for 30 minutes with the lid on, allowing it to steam and create a perfect crust.

Step 9: Finish Baking
After 30 minutes, remove the lid from the Dutch oven. Continue baking for an additional 15 to 20 minutes, or until the bread is beautifully golden brown and crusty. Keep an eye out for that nice color, as this visual cue means your Garlic Herb Dutch Oven Bread is ready to shine.

Step 10: Cool and Slice
Once baked to perfection, transfer the bread to a wire rack to cool slightly before slicing. Letting it cool allows the interior to set, making it easier to slice. Now you have a warm, inviting Garlic Herb Dutch Oven Bread ready to be enjoyed by family and friends!

Garlic Herb Dutch Oven Bread

Make Ahead Options

These Garlic Herb Dutch Oven Bread are perfect for busy home cooks looking to save time during the week! You can prepare the dough up to 24 hours in advance, allowing you to mix the dry ingredients and wet ingredients the night before. Simply follow the first three steps, cover the dough, and let it rise at room temperature. On baking day, just shape your loaf and allow it to rest for another 1 to 2 hours before preheating your Dutch oven. To maintain quality, ensure it's covered with a kitchen towel to prevent drying. This way, you’ll serve warm, fresh Garlic Herb Dutch Oven Bread that’s just as delicious on a busy weeknight!

What to Serve with Garlic Herb Dutch Oven Bread

There's nothing quite like the aroma of warm, crusty bread paired with delightful sides that elevate your meal experience.

  • Creamy Tomato Soup: The tangy richness of this soup contrasts beautifully with the garlic herb bread, creating a cozy pairing that warms the soul.
  • Butter Garlic Shrimp: Juicy shrimp sautéed in butter and garlic marry perfectly with the herbaceous notes of your bread, making every bite a treat.
  • Fresh Green Salad: A light mix of greens, cucumbers, and cherry tomatoes provides a refreshing balance against the warm, hearty bread. Add a zesty vinaigrette for an extra pop!
  • Savory Cheese Platter: Pair with a selection of cheeses—brie, goat, or aged cheddar—to enhance the flavors of both bread and cheese, creating a culinary masterpiece.
  • Roasted Vegetables: Seasonal veggies tossed in olive oil and herbs bring a medley of colors and flavors that complement the aromatic profile of the bread wonderfully.
  • Herb-Infused Olive Oil: For a classic, simple dip, serve a dish of good olive oil infused with rosemary and thyme to truly highlight the herbaceous essence of your Garlic Herb Dutch Oven Bread.
  • Red Wine: A glass of rich, fruity red wine enhances the flavors of both the bread and accompanying dishes, turning your meal into a delightful evening affair.
  • Chocolate Chip Cookies: For dessert, indulge your sweet tooth with warm, gooey cookies that contrast the bread’s savory notes—a perfect way to end a comforting meal!

Garlic Herb Dutch Oven Bread Variations

Feel free to get creative and personalize your bread with these delightful variations that will tantalize your taste buds!

  • Whole Wheat: Substitute half of the all-purpose flour with whole wheat flour for a nuttier flavor and added fiber. This gives a heartier texture without sacrificing that delightful chew!

  • Spicy Twist: Add ½ teaspoon of red pepper flakes to the dry ingredients for a kick of heat. This fiery touch pairs beautifully with the garlic and herbs, perfect for those who love a bit of warmth.

  • Cheesy Goodness: Mix in 1 cup of shredded cheese (like cheddar or mozzarella) into the dough for a savory, cheesy delight. Imagine that melty goodness; it’s simply irresistible!

  • Herb Variations: Experiment with different herbs such as oregano, basil, or even dill to create unique flavor profiles. Each herb brings its own character, allowing for endless culinary adventures!

  • Garlic Lovers: For an extra garlicky bread, incorporate roasted garlic instead of minced garlic. Roasting mellows the flavor and adds a rich sweetness. Your kitchen will smell divine!

  • Olive Oil Infusion: Swap olive oil for flavored oils, such as rosemary or garlic oil, for an extra layer of flavor. This small change will elevate your bread to gourmet status!

  • Nutty Addition: Add a ½ cup of chopped nuts, like walnuts or pecans, to the dough for unexpected texture and taste. These crunchy bites add a delightful surprise to every slice.

  • Sweet Option: Elevate your bread to the breakfast table by adding ¼ cup of honey or maple syrup for a hint of sweetness. This variation works wonders when paired with cream cheese or butter!

Explore these options and let your creativity flow, ensuring each loaf is uniquely yours! Try pairing your Garlic Herb Dutch Oven Bread with a comforting bowl of soup or even as a base for your favorite sandwiches – the possibilities are endless. Don’t forget to check out our tips on how to store and freeze your bread for future indulgence!

How to Store and Freeze Garlic Herb Dutch Oven Bread

Room Temperature: Store the bread in a breadbox or wrapped in a kitchen towel for up to 3 days. This helps retain its crust while keeping the inside soft and delicious.

Fridge: If you want to extend the shelf life, wrap the bread tightly in plastic wrap and place it in the fridge for up to a week. Just remember that refrigeration can make the crust less crispy.

Freezer: To freeze, wrap the cooled Garlic Herb Dutch Oven Bread tightly in aluminum foil or a freezer-safe bag and store it for up to 3 months. Thaw overnight in the fridge before enjoying.

Reheating: For the best results, reheat the bread in a preheated oven at 350°F (175°C) for about 10-15 minutes until warmed through and the crust is crispy again.

Expert Tips for Garlic Herb Dutch Oven Bread

Hydration is Key: Ensure your dough is sticky—this higher hydration level is what creates that airy texture you’re looking for in your Garlic Herb Dutch Oven Bread.

Don’t Rush the Rise: Allow enough time for the dough to rise properly. Rushing this step can lead to dense bread; patience is essential!

Preheat Thoroughly: Make sure the Dutch oven is fully preheated before adding the dough. This maximizes steam and results in a crusty, golden exterior.

Gentle Shaping: When shaping your dough, handle it gently to preserve the bubbles formed during fermentation. Overworking can lead to a tough loaf.

Cool Before Slicing: Allow your bread to cool on a wire rack for at least 30 minutes before slicing. This lets the structure set, giving you perfect slices!

Garlic Herb Dutch Oven Bread

Garlic Herb Dutch Oven Bread Recipe FAQs

How do I choose the right flour for this recipe?
Absolutely! It's best to use all-purpose flour for a perfect balance of chewiness and crustiness. If you want a nuttier flavor, you could try mixing in some whole wheat flour, but keep in mind it may slightly alter the texture.

How should I store Garlic Herb Dutch Oven Bread?
Store your bread at room temperature in a breadbox or wrapped in a kitchen towel for up to 3 days to keep it fresh. For longer storage, wrap tightly in plastic wrap and refrigerate for up to a week. Just remember, refrigeration can soften the crust.

Can I freeze Garlic Herb Dutch Oven Bread?
Absolutely! To freeze your Garlic Herb Dutch Oven Bread, wrap it tightly in aluminum foil or in a freezer-safe bag. It will maintain its quality for up to 3 months. When you're ready to enjoy, thaw it overnight in the fridge, then reheat in a preheated oven at 350°F for about 10-15 minutes to regain that lovely crust.

What should I do if my dough doesn’t rise?
If your dough isn’t rising, check that your yeast is fresh and properly activated. Ensure your water temperature is around 110°F, which is ideal for activation. If your kitchen is too cold, try moving the dough to a warmer spot, like near an oven or in a sunny area, to encourage rising.

Is this bread suitable for people with dietary restrictions?
Yes, this Garlic Herb Dutch Oven Bread can accommodate various dietary needs. It’s vegetarian and can be kept dairy-free if you substitute the olive oil for any other vegetable oil. However, make sure to check for any allergies, particularly with herbs and gluten in the flour.

How can I troubleshoot if my bread is too dense?
If your bread turns out dense, it may be due to insufficient rise time or handling the dough too much while shaping. Make sure to give it ample resting time for the yeast to work its magic—letting it rest for 12 to 18 hours is ideal. When shaping, be gentle; avoid kneading too much as you want to keep that airy structure!

Garlic Herb Dutch Oven Bread

Irresistible Garlic Herb Dutch Oven Bread for Cozy Evenings

This Garlic Herb Dutch Oven Bread combines simple ingredients with aromatic flavors for a delightful homemade experience.
Print Recipe Pin Recipe
Prep Time 15 minutes mins
Cook Time 45 minutes mins
Resting Time 12 hours hrs
Total Time 13 hours hrs
Servings: 8 slices
Course: Side Dishes
Cuisine: American
Calories: 180
Ingredients Equipment Method Nutrition Notes

Ingredients
  

For the Dough
  • 3 cups All-purpose flour provides the perfect base for chewy, crusty bread
  • 1.25 teaspoons Salt enhances flavors and balances garlic richness
  • 0.5 teaspoon Instant yeast helps the dough rise
  • 1.5 cups Warm water activates yeast for fluffy texture
  • 3 tablespoons Olive oil adds moisture and richness
For the Flavor
  • 4 cloves Garlic minced for aromatic flavor
  • 1 tablespoon Fresh rosemary chopped for woodsy note
  • 1 tablespoon Fresh thyme chopped for subtle earthiness
  • 1 tablespoon Fresh parsley chopped for fresh burst of flavor
For Dusting
  • Additional flour use as needed for dusting

Equipment

  • Dutch oven
  • Mixing Bowl
  • Whisk
  • Wooden Spoon
  • wire rack

Method
 

Step-by-Step Instructions for Garlic Herb Dutch Oven Bread
  1. In a large mixing bowl, combine 3 cups of all-purpose flour, 1 ¼ teaspoons of salt, and ½ teaspoon of instant yeast. Stir until well mixed.
  2. In a separate bowl, whisk together 1 ½ cups of warm water, 4 minced cloves of garlic, and 3 tablespoons of olive oil. Add 1 tablespoon each of chopped fresh rosemary, thyme, and parsley, and mix well.
  3. Pour the wet mixture into the bowl with the dry ingredients. Stir until a shaggy, somewhat sticky dough forms.
  4. Cover the bowl with plastic wrap or a clean kitchen towel and set aside at room temperature for 12 to 18 hours.
  5. Dust a clean work surface with flour and turn out the dough onto the floured surface. Shape it into a round loaf without kneading too much.
  6. Dust the top of the shaped loaf lightly with flour, cover with a kitchen towel, and let it rest for another 1 to 2 hours.
  7. About 30 minutes before baking, preheat a Dutch oven to 450°F (230°C).
  8. Carefully remove the Dutch oven, place the shaped loaf inside, cover with the lid, and bake for 30 minutes.
  9. After 30 minutes, remove the lid and continue baking for another 15 to 20 minutes until golden brown.
  10. Transfer the bread to a wire rack to cool slightly before slicing.

Nutrition

Serving: 1sliceCalories: 180kcalCarbohydrates: 34gProtein: 5gFat: 3gSaturated Fat: 0.5gPolyunsaturated Fat: 0.1gMonounsaturated Fat: 2.2gSodium: 200mgPotassium: 120mgFiber: 1gCalcium: 2mgIron: 6mg

Notes

Ensure the dough is sticky for the best airy texture. Don't rush the rise for optimal results.

Tried this recipe?

Let us know how it was!

Indulge in Festive Cinnamon Swirl Eggnog Bread Pudding Delight

January 13, 2026 by grace bellamy Leave a Comment

As the holiday season approaches, the air hangs heavy with the sweet notes of festive baking. This is the perfect time to whip up a delightful dish that hugs your heart and warms the kitchen—my Festive Cinnamon Swirl Eggnog Bread Pudding. Combining the indulgent flavors of cinnamon swirl bread and creamy eggnog, this recipe offers a cozy twist on classic bread pudding. Not only is it an easy-to-make dessert, but it also serves as a beautiful centerpiece for gatherings, enchanting both family and friends alike. Plus, it's wonderfully versatile; feel free to add raisins, cranberries, or your favorite nuts for an extra layer of festive flair. Ready to fill your home with delicious aromas? Let’s dive into this comforting delight that’s sure to bring smiles around the table!

Festive Cinnamon Swirl Eggnog Bread Pudding

Why is this bread pudding a must-try?

Simplicity at its finest: You only need minimal prep time to create this gorgeous dish.

Rich, creamy flavors: The combination of eggnog and cinnamon swirl bread creates a warm, inviting taste that captures the essence of the holidays.

Crowd-pleaser: Whether it's a family gathering or festive party, this pudding is bound to impress and keep everyone coming back for more.

Versatile options: Customize with your choice of nuts or dried fruits for a personal touch. If you're feeling adventurous, check out some of my favorite dessert variations.

Perfectly indulgent: A dusting of powdered sugar on top adds a sweet finish that makes this dessert feel special, whether enjoyed during the holidays or at any cozy gathering.

Festive Cinnamon Swirl Eggnog Bread Pudding Ingredients

For the Bread Pudding
• Cinnamon swirl bread – cut into 1-inch cubes for maximum texture and flavor infusion.
• Eggnog – this creamy base brings that classic holiday taste to your pudding.
• Large eggs – provides structure and richness, essential for binding everything together.
• Granulated sugar – sweetens the mixture, balancing the spices perfectly.
• Vanilla extract – adds a hint of warmth and depth to the overall flavor profile.
• Ground cinnamon – enhances the cozy aroma and ties together the festive theme.
• Ground nutmeg – a touch of nutmeg introduces a warm, spicy nuance.
• Salt – a small amount amplifies the sweetness and round out flavors.

Optional Add-Ins
• Raisins or dried cranberries – toss these in for a delightful burst of sweetness and chew.
• Chopped pecans or walnuts – adds a crunchy texture and nutty flavor to the pudding.

For Topping
• Unsalted butter – drizzled atop to create a golden, crispy layer once baked.
• Powdered sugar – a dusting at the end gives a lovely finishing touch that looks as good as it tastes!

This Festive Cinnamon Swirl Eggnog Bread Pudding is sure to be a hit at your next gathering!

Step‑by‑Step Instructions for Festive Cinnamon Swirl Eggnog Bread Pudding

Step 1: Preheat the Oven
Begin by preheating your oven to 350°F (175°C). While the oven heats, take a moment to lightly grease a 9x13-inch baking dish with butter or cooking spray, ensuring a non-stick surface for the Festive Cinnamon Swirl Eggnog Bread Pudding. This preparation step is key to achieving that perfectly golden, crispy top.

Step 2: Whisk the Mixture
In a large mixing bowl, combine the eggnog, large eggs, granulated sugar, vanilla extract, ground cinnamon, ground nutmeg, and salt. Whisk these ingredients together until the mixture is smooth and well-integrated, creating a creamy base that will infuse the bread with holiday flavors. Set this bowl aside as you address the bread.

Step 3: Prepare the Bread
Take your cinnamon swirl bread and cut it into 1-inch cubes, aiming for uniformity to ensure even soaking. Place the bread cubes evenly into the greased baking dish. If you’re adding optional ingredients like raisins or dried cranberries, sprinkle them over the bread for bursts of sweetness. This step adds texture and enhances the festive nature of your pudding.

Step 4: Combine and Soak
Slowly pour the eggnog mixture over the bread, ensuring that every piece is generously coated. Use your hands or a spoon to gently press down on the bread cubes, helping them absorb the liquid. This process is vital for achieving a moist Festive Cinnamon Swirl Eggnog Bread Pudding that hugs your taste buds with every bite.

Step 5: Add Butter
Drizzle the melted unsalted butter evenly over the top of the bread pudding mixture. This will create a beautiful, crispy layer once baked. Make sure to cover as much surface area as possible for that luscious golden finish that perfectly complements the creamy filling.

Step 6: Allow to Soak
Let the assembled bread pudding sit for 10-15 minutes at room temperature. This resting period allows the bread to soak up all the flavorful eggnog mixture, which enhances the texture and richness of the Festive Cinnamon Swirl Eggnog Bread Pudding. You should see the bread looking fluffy and saturated.

Step 7: Bake the Pudding
Carefully place the baking dish in the preheated oven. Bake the pudding for 40-45 minutes, watching as the top turns golden brown and a delightful aroma fills your kitchen. To check for doneness, insert a knife into the center—if it comes out clean, your bread pudding is ready to savor.

Step 8: Cool and Serve
Once baked, remove the Festive Cinnamon Swirl Eggnog Bread Pudding from the oven and allow it to cool for about 10 minutes. This brief cooling period helps the dessert set perfectly, making it easier to serve. The enticing scent will have everyone eager to dig in!

Step 9: Add Finishing Touches
Before serving, dust your warm bread pudding with powdered sugar for an elegant presentation. This sweet touch not only adds visual appeal but also enhances the overall flavor experience. Serve the pudding warm, alongside additional eggnog or a dollop of whipped cream for an extra treat!

Festive Cinnamon Swirl Eggnog Bread Pudding

What to Serve with Festive Cinnamon Swirl Eggnog Bread Pudding

Nothing enhances the warm, comforting flavors of this holiday favorite like a thoughtfully curated meal accompaniment.

  • Creamy Mashed Potatoes: Their velvety texture creates a lovely contrast to the rich bread pudding, making each bite heavenly.
  • Honey-Glazed Carrots: Sweet, tender carrots add vibrant color and a hint of natural sweetness that perfectly balances the dessert's flavors.
  • Apple Crisp: The warm spices in this dessert echo the flavors of the eggnog pudding, creating a harmonious end to your meal.
  • Festive Salad: A light salad with cranberries and candied pecans offers a refreshing crunch and cleanses the palate between bites.
  • Spiced Chai Latte: This warm, aromatic drink complements the cozy spices in the bread pudding while adding a touch of warmth to your gathering.
  • Vanilla Ice Cream: Serving the warm pudding with a scoop of creamy vanilla ice cream melts beautifully, enhancing flavor while providing a cool contrast.
  • Mulled Wine: The rich spiced flavors of mulled wine elevate the festive spirit and echo the warm notes in your pudding, perfect for a cozy evening.
  • Gingerbread Cookies: Their spiced goodness and crisp texture make them a delightful treat alongside the eggnog bread pudding experience.
  • Whipped Cream: Fluffy, lightly sweetened whipped cream serves as a wonderful topping, adding a cloud-like richness to every slice of pudding.
  • Hot Chocolate: Top off your gathering with a rich cup of hot cocoa that can be enjoyed alongside the dessert, perfect for the holiday warmth.

Expert Tips for Festive Cinnamon Swirl Eggnog Bread Pudding

Choose Quality Bread: Opt for fresh, high-quality cinnamon swirl bread; stale bread will yield a soggier texture.

Soaking Time Matters: Ensure you allow the bread sufficient time to soak up the eggnog mixture, enhancing flavor and moisture in your Festive Cinnamon Swirl Eggnog Bread Pudding.

Check for Doneness: Use the knife test to check if the pudding is done; the knife should come out clean, ensuring it’s perfectly cooked without being dry.

Personalize with Add-Ins: Feel free to customize your pudding with your favorite nuts or dried fruits; just don’t overload to keep a harmonious texture.

Serve Warm: This pudding is at its best when served warm, allowing the flavors to shine and providing a comforting experience perfect for gatherings.

Make Ahead Options

These Festive Cinnamon Swirl Eggnog Bread Pudding bites are perfect for meal prep enthusiasts! You can assemble the entire dish up to 24 hours in advance, making it a fantastic time-saver for busy weeknights. Just prepare the bread pudding mixture up to the soaking step, cover the dish tightly with plastic wrap, and refrigerate. When you're ready to bake, simply let the mixture sit at room temperature for about 10-15 minutes before placing it in the preheated oven. This waiting period helps maintain the pudding’s delicious texture, ensuring every bite is just as delightful as when made fresh. Enjoy the comfort of this festive dessert without the last-minute rush!

How to Store and Freeze Festive Cinnamon Swirl Eggnog Bread Pudding

Fridge: Store any leftovers in an airtight container in the refrigerator for up to 3 days. Reheat gently in the microwave or oven for the best results.

Freezer: You can freeze the bread pudding for up to 2 months. Make sure to wrap it tightly in plastic wrap and aluminum foil to prevent freezer burn.

Reheating: To reheat, thaw overnight in the fridge and then warm in the oven at 350°F (175°C) for about 15-20 minutes until heated through. Enjoy your Festive Cinnamon Swirl Eggnog Bread Pudding any time!

Serving: If desired, dust with powdered sugar just before serving to refresh the presentation and taste.

Festive Cinnamon Swirl Eggnog Bread Pudding Variations

Feel free to make this comforting dessert your own by embracing these delightful twists that will tickle your taste buds!

  • Nut-Free: Omit the nuts for a safe treat for those with allergies without sacrificing flavor.

  • Dairy-Free: Substitute eggnog with coconut milk or almond milk, and use dairy-free butter for a lighter option.

  • Spice it Up: Increase the cinnamon or add a pinch of ground ginger and clove for a warmer spice profile that energizes the dish.

  • Chocolate Lovers: Fold in chocolate chips or cocoa powder to the eggnog mixture for a rich and decadent twist on the classic recipe. Chocolate adds a luscious creaminess that pairs beautifully with the eggnog.

  • Fruit Forward: Experiment with different dried fruits like apricots or figs instead of traditional raisins or cranberries for a unique flavor dimension.

  • Boozy Boost: Add a splash of rum or bourbon to the eggnog mixture to elevate your pudding with a cozy, holiday spirit. Just a little goes a long way in enhancing those warm flavors!

  • Savory Option: Swap out half of the sugar for savory elements like crumbled bacon or cheese for a gourmet bread pudding experience that surprises and delights.

  • Breakfast Treat: Serve as a breakfast dish by adding a handful of blueberries or apples to the bread mix, perfect with a drizzle of maple syrup on top. This makes it suitable for a sunny morning gathering or simply for a little indulgent brunch.

Festive Cinnamon Swirl Eggnog Bread Pudding

Festive Cinnamon Swirl Eggnog Bread Pudding Recipe FAQs

How do I choose the best cinnamon swirl bread for this recipe?
Absolutely! When selecting your cinnamon swirl bread, look for a loaf that has a rich aroma and evenly distributed swirls of cinnamon. Fresh bread works best as stale bread can lead to a soggier texture. You want something that's firm enough to hold together yet soft enough to soak up that delectable eggnog mixture.

How should I store leftovers of the bread pudding?
Very! Once your Festive Cinnamon Swirl Eggnog Bread Pudding is cooled, place any remaining portions in an airtight container in the refrigerator. It’ll stay fresh for up to 3 days. Just reheat gently in the microwave or oven to revive that cozy warmth that makes this dessert so comforting.

Can I freeze the bread pudding for later use?
Definitely! To freeze your leftover bread pudding, tightly wrap it in plastic wrap and then in aluminum foil to prevent freezer burn. It can be stored in the freezer for up to 2 months. When you're ready to enjoy it again, thaw overnight in the fridge and then pop it in the oven at 350°F (175°C) for about 15-20 minutes until heated through.

What can I do if my bread pudding comes out too dry?
Ah, don’t worry! If you find your Festive Cinnamon Swirl Eggnog Bread Pudding has dried out, consider adding a drizzle of eggnog over the top while it’s warming up or serve it alongside a dollop of whipped cream to introduce moisture back into the dish. Next time, be sure to give the bread enough soaking time, and check if the oven temperature is accurate!

Are there any dietary considerations for this dessert?
Very! If you're sharing your pudding, be mindful of allergies and dietary restrictions. The recipe contains eggs, dairy, and gluten. If you need a gluten-free version, swap the cinnamon swirl bread for gluten-free bread, and for lactose-free needs, choose eggnog and butter alternatives accordingly. Always communicate with your guests about ingredients to ensure everyone's safe!

What if I want to add different fruits or nuts?
The more the merrier! Feel free to personalize your Festive Cinnamon Swirl Eggnog Bread Pudding by mixing in your favorite dried fruits or nuts. Just be cautious not to overload it. A good rule of thumb is to stick to half a cup total of add-ins, so that the bread maintains its structure while still offering delightful bursts of flavor.

Festive Cinnamon Swirl Eggnog Bread Pudding

Indulge in Festive Cinnamon Swirl Eggnog Bread Pudding Delight

This Festive Cinnamon Swirl Eggnog Bread Pudding is a cozy dessert that combines cinnamon swirl bread and creamy eggnog, perfect for holiday gatherings.
Print Recipe Pin Recipe
Prep Time 20 minutes mins
Cook Time 45 minutes mins
Soaking Time 15 minutes mins
Total Time 1 hour hr 20 minutes mins
Servings: 8 slices
Course: Dessert
Cuisine: American
Calories: 350
Ingredients Equipment Method Nutrition Notes

Ingredients
  

For the Bread Pudding
  • 6 cups cinnamon swirl bread cut into 1-inch cubes
  • 2 cups eggnog creamy base for pudding
  • 4 large eggs provides structure and richness
  • ¾ cups granulated sugar sweetens the mixture
  • 1 teaspoon vanilla extract adds warmth
  • 1 teaspoon ground cinnamon enhances aroma
  • ½ teaspoon ground nutmeg introduces spiciness
  • ¼ teaspoon salt amplifies sweetness
Optional Add-Ins
  • 1 cup raisins for sweetness
  • 1 cup chopped pecans adds crunch
For Topping
  • ¼ cup unsalted butter melted
  • powdered sugar powdered sugar for dusting

Equipment

  • 9x13-inch baking dish
  • Mixing Bowl
  • Whisk

Method
 

Step-by-Step Instructions
  1. Preheat your oven to 350°F (175°C) and grease a 9x13-inch baking dish.
  2. In a large mixing bowl, whisk together eggnog, eggs, sugar, vanilla, cinnamon, nutmeg, and salt.
  3. Cut cinnamon swirl bread into 1-inch cubes and place in the greased baking dish.
  4. Pour the eggnog mixture over the bread, pressing down to soak evenly.
  5. Drizzle melted butter over the bread pudding mixture.
  6. Let sit for 10-15 minutes to soak.
  7. Bake for 40-45 minutes until golden brown and set.
  8. Allow to cool for 10 minutes before serving.
  9. Dust with powdered sugar and serve warm.

Nutrition

Serving: 1sliceCalories: 350kcalCarbohydrates: 45gProtein: 8gFat: 15gSaturated Fat: 8gPolyunsaturated Fat: 1gMonounsaturated Fat: 6gCholesterol: 120mgSodium: 250mgPotassium: 200mgFiber: 2gSugar: 20gVitamin A: 500IUCalcium: 150mgIron: 1mg

Notes

Serve warm, optionally with additional eggnog or whipped cream. Customize with your favorite add-ins like nuts or dried fruits.

Tried this recipe?

Let us know how it was!

Wholesome High-Protein Breakfast Biscuits for Energized Mornings

January 13, 2026 by grace bellamy Leave a Comment

As I stood by the kitchen counter, the aroma of baked goods wrapped around me like a warm hug. It was time to whip up a batch of High-Protein Breakfast Biscuits, the perfect blend of nourishment and comfort. These delightful treats are not just a crowd-pleaser, but they're also packed with protein to keep you energized throughout the day. With just 15 minutes of prep, you can enjoy these wholesome biscuits that harmoniously combine almond flour, oats, and your favorite dried fruits. Plus, they're incredibly versatile—ideal for a quick breakfast or a satisfying snack anytime. So, who’s ready to bring a little homemade goodness into their morning routine? Let's dive into the recipe!

High-Protein Breakfast Biscuits

Why are these biscuits irresistible?

Wholesome ingredients come together to create High-Protein Breakfast Biscuits that are not just good for you, but also deliciously satisfying. Quick and easy to make, you’ll have them ready in just 15 minutes! Versatile enough for breakfast or a snack, these biscuits pair wonderfully with a dollop of Greek yogurt. Nutty and fruity flavors intertwine beautifully, making each bite a delightful experience. Say goodbye to boring fast food and embrace these homemade heroes—your mornings will thank you! For more delicious ideas, check out our Veggie Loaded Breakfast and Breakfast Enchiladas Kickstart for a wholesome start to your day!

High-Protein Breakfast Biscuits Ingredients

Unlock the secret to a delightful morning treat!

For the Dough

  • Almond flour – A gluten-free base that provides healthy fats and protein.
  • Rolled oats – Adds fiber for lasting energy and a satisfying chew.
  • Protein powder – Boosts the protein content, making these biscuits a nourishing choice.
  • Honey or maple syrup – Choose your sweetener for a natural touch of sweetness.
  • Unsweetened applesauce – Acts as a moistener, keeping biscuits tender and flavorful.
  • Large eggs – Binds the ingredients together and adds more protein.
  • Baking powder – Ensures a light and fluffy texture in your high-protein breakfast biscuits.
  • Baking soda – Helps the biscuits rise and achieve the perfect texture.
  • Salt – Enhances the flavors and balances the sweetness.

For the Mix-ins

  • Chopped nuts (such as almonds or walnuts) – Adds crunch and heart-healthy fats.
  • Dried fruit (such as cranberries or raisins) – Offers bursts of sweetness and chewy texture.
  • Cinnamon (optional) – A warm spice that brings an inviting aroma to your biscuits.

For Serving

  • Greek yogurt – Adds a creaminess and extra protein, perfect for topping!

These ingredients come together to create nourishing and delicious High-Protein Breakfast Biscuits—ideal for energizing your mornings!

Step‑by‑Step Instructions for High-Protein Breakfast Biscuits

Step 1: Preheat the Oven
Begin your delightful journey by preheating your oven to 350°F (175°C). While it warms up, line a baking sheet with parchment paper to prevent sticking and ensure easy cleanup. This is an essential step for properly baking your High-Protein Breakfast Biscuits to golden perfection.

Step 2: Combine Dry Ingredients
In a large mixing bowl, combine the almond flour, rolled oats, protein powder, baking powder, baking soda, salt, and cinnamon (if desired). Use a whisk to blend the ingredients thoroughly, creating a uniform mixture. This ensures that your High-Protein Breakfast Biscuits have a consistent flavor and texture throughout, so take your time here!

Step 3: Mix Wet Ingredients
In a separate bowl, whisk together the honey (or maple syrup), unsweetened applesauce, and the large eggs until the mixture is smooth and well-blended. This combination not only sweetens your biscuits but also keeps them moist. Once combined, you're ready to merge the wet and dry ingredients into a tasty dough.

Step 4: Combine Wet and Dry Ingredients
Pour the wet mixture into the bowl with the dry ingredients and stir until a dough forms. If the dough appears too crumbly, gradually add almond milk, one tablespoon at a time, to achieve the desired consistency. You want a cohesive dough that's slightly sticky but holds together well.

Step 5: Incorporate Mix-Ins
Gently fold the chopped nuts and dried fruit into the dough, making sure they are evenly distributed. These mix-ins will add delightful texture and flavor to your High-Protein Breakfast Biscuits, enhancing both their nutrition and taste. Be careful not to overmix; you want to maintain a fluffy texture.

Step 6: Shape the Biscuits
Using a spoon or cookie scoop, drop tablespoon-sized portions of the dough onto your prepared baking sheet, ensuring they are spaced about 2 inches apart. After you've scooped them out, flatten each biscuit slightly with the back of the spoon. This helps them bake evenly and develop a pleasing shape.

Step 7: Bake the Biscuits
Bake your High-Protein Breakfast Biscuits in the preheated oven for 12-15 minutes. Keep an eye on them; they're ready when the edges turn golden brown and the centers feel set to the touch. Your kitchen will smell amazing as these biscuits rise!

Step 8: Cool the Biscuits
Once baked, remove the sheet from the oven and allow the biscuits to cool for a few minutes. This helps them firm up a bit. Afterward, transfer them to a wire rack to cool completely. This step keeps the bottoms from getting soggy while giving you that perfect biscuit texture.

Step 9: Serve and Enjoy
Serve your delicious High-Protein Breakfast Biscuits warm, optionally topped with creamy Greek yogurt for added protein and richness. These biscuits make a wonderful breakfast or snack option that is both satisfying and nutritious!

High-Protein Breakfast Biscuits

Make Ahead Options

These High-Protein Breakfast Biscuits are perfect for busy mornings and can be effortlessly made ahead of time! You can prepare the dough up to 24 hours in advance—simply combine the dry and wet ingredients separately, store them in the refrigerator, and keep the mix-ins aside until you’re ready to bake. This ensures freshness and prevents sogginess in the nuts and dried fruit. When you’re ready to enjoy, just mix the components and bake as instructed for delightful results that are just as delicious! Alternatively, bake a batch and store them in an airtight container for up to 3 days at room temperature, or freeze for up to a month—just reheat in the oven for that fresh-baked feeling!

High-Protein Breakfast Biscuits Variations

Feel free to customize these delectable biscuits to your taste preferences and dietary needs!

  • Nut-Free: Swap almond flour with oat flour and use sunflower seeds instead of nuts for a delicious, nut-free version.

  • Vegan: Substitute eggs with flaxseed meal mixed with water and use maple syrup for a plant-based sweetener, ensuring everyone can enjoy these biscuits!

  • Gluten-Free: Ensure all ingredients are certified gluten-free, including oats, to enjoy a safe and delightful treat.

  • Low-Sugar: Reduce the amount of honey or maple syrup and add mashed bananas for natural sweetness, creating a lovely fruity flavor.

  • Spiced-Up: Add a pinch of nutmeg or ginger, or even a touch of cayenne pepper for an unexpected kick that livens each bite.

  • Chocolate-Lover: Fold in dark chocolate chips alongside the nuts and fruits for an indulgent twist that satisfies sweet cravings.

  • Savory: Omit the cinnamon and add some grated cheese and herbs for a cheesy breakfast biscuit that pairs perfectly with eggs!

  • Fruity Boost: Incorporate fresh berries like blueberries or diced apples into the dough to infuse an extra burst of flavor and moisture.

These variations make your High-Protein Breakfast Biscuits even more appealing, ensuring there’s a perfect version for everyone at your table! For more wholesome ideas, try our Overnight Breakfast Casserole or explore the delights of a Halloumi Breakfast Sandwich for versatile breakfast inspirations!

Expert Tips for High-Protein Breakfast Biscuits

  • Ingredient Substitutions: If you’re out of almond flour, feel free to swap in oat or coconut flour. Just be mindful of altering the liquid amount as these flours absorb moisture differently.

  • Mix-In Variations: Experiment with your favorite nuts and dried fruits! Try adding dark chocolate chips, pumpkin seeds, or coconut flakes for a delightful twist to your High-Protein Breakfast Biscuits.

  • Avoid Overmixing: When combining the wet and dry ingredients, mix just until combined. Overmixing can lead to dense biscuits instead of light and fluffy ones.

  • Storing Leftovers: Keep your biscuits in an airtight container at room temperature for up to three days or freeze for longer storage. This way, you can enjoy them anytime!

  • Adjusting Sweetness: Taste your dough before baking! If you prefer a sweeter biscuit, add an extra tablespoon of honey or maple syrup to enhance the flavor profile.

  • Perfect Dipping: Serve your biscuits warm with Greek yogurt or nut butter on the side for dipping, adding extra richness and protein to your breakfast experience.

What to Serve with High-Protein Breakfast Biscuits

Start your day right by pairing these delicious bites with complementary flavors and textures that nourish both body and soul.

  • Creamy Greek Yogurt: Add a generous dollop of Greek yogurt on top for extra creaminess and protein that enhances each biscuit’s flavor.
  • Fresh Berries: Bright strawberries or blueberries offer a burst of freshness, balancing the hearty biscuits with natural sweetness.
  • Nut Butter Spread: A rich layer of almond or peanut butter provides a delightful contrast in texture and an extra boost of healthy fats.
  • Smoothie Bowl: Serve alongside a vibrant smoothie bowl packed with greens and fruits for a wholesome breakfast that delights the senses.
  • Avocado Slices: Creamy avocado on the side adds healthy fats and elevates the overall meal to a satisfying brunch experience.
  • Herbal Tea or Coffee: Pair with a warm cup of herbal tea or freshly brewed coffee for a cozy morning ritual that awakens the senses.
  • Granola Crunch: Sprinkle some granola over your biscuits or yogurt for an added crunch that enhances texture and flavor harmoniously.
  • Fruit Salad: A refreshing fruit salad with melons, citrus, and grapes will provide a light and zesty complement to your hearty dish.

How to Store and Freeze High-Protein Breakfast Biscuits

Room Temperature: Store your High-Protein Breakfast Biscuits in an airtight container at room temperature for up to 3 days to maintain freshness.

Fridge: For extended freshness, place the biscuits in the refrigerator where they can last for up to a week. Just remember to seal them well to prevent drying out.

Freezer: Freeze the biscuits in a single layer, then transfer to an airtight freezer bag for up to 3 months. Reheat in the oven for 5-10 minutes at 350°F (175°C) for the best texture.

Reheating: When ready to enjoy your frozen biscuits, let them thaw overnight in the fridge before reheating, ensuring they taste just as delicious as when they were freshly baked!

High-Protein Breakfast Biscuits

High-Protein Breakfast Biscuits Recipe FAQs

How do I choose ripe ingredients for this recipe?
Absolutely! When selecting your ingredients, particularly for the dried fruits, look for those that are soft and plump without any dark spots or signs of hardening. For nuts, choose raw or roasted nuts without added sugar or salt for the best flavor in your High-Protein Breakfast Biscuits.

How should I store my leftover biscuits?
Very! Store your High-Protein Breakfast Biscuits in an airtight container at room temperature for up to 3 days. If you prefer longer storage, place them in the fridge where they can last for about a week. Make sure they’re well-sealed to prevent drying out!

Can I freeze these biscuits? If so, how?
Yes, you can! To freeze your High-Protein Breakfast Biscuits, place them in a single layer on a baking sheet without touching each other until they’re frozen solid—about 1-2 hours. Once frozen, transfer them into an airtight freezer bag and store for up to 3 months. When you’re ready to enjoy them, simply reheat in the oven at 350°F (175°C) for 5-10 minutes.

What should I do if my dough turns out too crumbly?
If your dough is crumbly, don’t worry! Simply add almond milk, one tablespoon at a time, mixing gently until the dough comes together. Aim for a slightly sticky consistency that holds its shape. This step can really make a difference, ensuring your biscuits rise beautifully while keeping them moist.

Are there any dietary considerations for this recipe?
Definitely! If you or someone in your household has nut allergies, you can substitute almond flour with oat flour or a gluten-free all-purpose flour. Additionally, consider using maple syrup instead of honey for a vegan option. Always check labels for any hidden allergens in your add-ins, like dried fruit or protein powder, especially if allergies are a concern.

How can I make these biscuits sweeter?
If you prefer your High-Protein Breakfast Biscuits a touch sweeter, taste the dough before baking! You can mix in additional honey or maple syrup, adding about a tablespoon at a time until it reaches your desired sweetness. Remember, a little goes a long way!

High-Protein Breakfast Biscuits

Wholesome High-Protein Breakfast Biscuits for Energized Mornings

These High-Protein Breakfast Biscuits are a delicious and nutritious way to start your day, packed with protein to keep you energized.
Print Recipe Pin Recipe
Prep Time 15 minutes mins
Cook Time 15 minutes mins
Total Time 30 minutes mins
Servings: 12 biscuits
Course: Breakfast
Cuisine: American
Calories: 150
Ingredients Equipment Method Nutrition Notes

Ingredients
  

For the Dough
  • 2 cups almond flour A gluten-free base that provides healthy fats and protein.
  • 1 cup rolled oats Adds fiber for lasting energy and a satisfying chew.
  • 1 scoop protein powder Boosts the protein content.
  • ¼ cup honey or maple syrup Choose your sweetener.
  • ½ cup unsweetened applesauce Acts as a moistener.
  • 2 large eggs Large eggs Binds the ingredients together.
  • 1 teaspoon baking powder Ensures a light and fluffy texture.
  • ½ teaspoon baking soda Helps the biscuits rise.
  • ½ teaspoon salt Enhances flavors.
For the Mix-ins
  • ½ cup chopped nuts Adds crunch and heart-healthy fats.
  • ½ cup dried fruit Offers bursts of sweetness.
  • 1 teaspoon cinnamon Optional spice for flavor.
For Serving
  • 1 cup Greek yogurt Perfect for topping!

Equipment

  • Oven
  • Mixing bowls
  • Baking Sheet
  • parchment paper
  • Whisk
  • Spoon or cookie scoop

Method
 

Step-by-Step Instructions
  1. Preheat your oven to 350°F (175°C) and line a baking sheet with parchment paper.
  2. In a large bowl, combine almond flour, rolled oats, protein powder, baking powder, baking soda, salt, and cinnamon (if desired) using a whisk.
  3. In another bowl, whisk together honey (or maple syrup), unsweetened applesauce, and large eggs until smooth.
  4. Pour the wet mixture into the dry ingredients and stir until a dough forms. Add almond milk if too crumbly.
  5. Fold in chopped nuts and dried fruit gently.
  6. Drop tablespoon-sized portions of dough onto the baking sheet, flattening slightly with a spoon.
  7. Bake for 12-15 minutes until golden brown around the edges.
  8. Allow to cool for a few minutes before transferring to a wire rack.
  9. Serve warm, optionally topped with Greek yogurt.

Nutrition

Serving: 1biscuitCalories: 150kcalCarbohydrates: 20gProtein: 5gFat: 6gSaturated Fat: 1gPolyunsaturated Fat: 2gMonounsaturated Fat: 3gCholesterol: 30mgSodium: 150mgPotassium: 180mgFiber: 3gSugar: 5gVitamin A: 200IUVitamin C: 1mgCalcium: 50mgIron: 1mg

Notes

Store biscuits in an airtight container at room temperature for up to 3 days or refrigerate for a week. They can also be frozen for up to 3 months.

Tried this recipe?

Let us know how it was!

Cozy One-Pot Egg Roll Soup to Warm Your Soul This Winter

January 13, 2026 by grace bellamy Leave a Comment

As I stirred the bubbling pot of Cozy One-Pot Egg Roll Soup, the tantalizing aroma wrapped around me like a warm hug, instantly transporting me to my favorite Asian bistro. This quick and comforting dish marries familiar flavors with effortless preparation, making it a lifesaver for busy weeknights or a cozy evening in. Using simple ingredients like ground pork, vibrant coleslaw mix, and aromatic ginger, this soup not only comes together in just 30 minutes but can also easily cater to any dietary preferences—substituting with turkey or chicken is a breeze. Plus, it’s a one-pot wonder, which means less cleanup for you! Are you ready to dive into a bowl of delightful warmth and flavor? Let’s get cooking!

Cozy One-Pot Egg Roll Soup

Why is this soup a must-try?

Unique comfort in every bite: This Cozy One-Pot Egg Roll Soup blends traditional egg roll flavors into a heartwarming bowl, perfect for chilly evenings.

Effortless preparation: With just one pot and 30 minutes needed, you can whip up a delicious meal without the fuss.

Flavor explosion: The combination of ginger, garlic, and soy sauce creates a savory depth that you'll crave again and again.

Versatile ingredients: Easily swap ground pork for turkey or chicken for a lighter option without sacrificing flavor—perfect for any dietary preference!

Crowd-pleaser: Serve this hearty soup to family or friends, and watch as it disappears in no time. They’ll be asking for seconds!

Experience the joy of home-cooked meals with this satisfying soup, and check out our other favorite one-pot recipes. You won't want to miss it!

Cozy One-Pot Egg Roll Soup Ingredients

• Let’s gather the essentials for this comforting dish!

For the Soup Base

  • Vegetable oil – essential for sautéing and adding flavor.
  • Ground pork – brings a savory richness; feel free to substitute with ground turkey or chicken.
  • Onion – adds sweetness and depth; diced for even cooking.
  • Garlic – enhances flavor with its aromatic qualities.
  • Fresh ginger – brings a zesty kick and aids digestion.
  • Chicken broth – the flavorful base that ties everything together.

For the Vegetables

  • Coleslaw mix – combines healthy greens and colors; packed with crunch.

For the Seasoning

  • Soy sauce – introduces salty umami notes; adjust to taste for the Cozy One-Pot Egg Roll Soup.
  • Sesame oil – adds rich, nutty undertones for depth of flavor.
  • Rice vinegar – provides a hint of acidity to balance the soup.
  • Red pepper flakes – optional for a touch of heat; sprinkle in as desired.
  • Salt and pepper – season to taste for the perfect balance.

For Garnishing

  • Green onions – sliced for a fresh, crisp finish.
  • Sesame seeds – optional, for texture and visual appeal.
  • Fresh cilantro – optional, adds a pop of freshness and color.

Get ready to enjoy a delightful bowl of Cozy One-Pot Egg Roll Soup that warms your soul!

Step‑by‑Step Instructions for Cozy One-Pot Egg Roll Soup

Step 1: Heat the Oil
In a large pot or Dutch oven, heat 1 tablespoon of vegetable oil over medium heat. Allow the oil to shimmer for about 1-2 minutes, signaling it’s hot enough to sauté. A gentle sizzle will greet you as you prepare to infuse the base of the Cozy One-Pot Egg Roll Soup with flavor.

Step 2: Brown the Pork
Add 1 pound of ground pork to the pot, breaking it apart with a wooden spoon. Cook for 5-7 minutes until the pork is browned and no longer pink. If there's excess fat, drain it carefully. This step is crucial as it builds the rich flavor foundation for the soup.

Step 3: Aromatics in Action
Stir in the diced onion, 3 cloves of minced garlic, and 2 teaspoons of grated ginger. Cook for 2-3 minutes until the onion becomes translucent and fragrant. This aromatic combination not only enhances the flavor profile of your Cozy One-Pot Egg Roll Soup but will also fill your kitchen with a delightful aroma.

Step 4: Deglaze the Pot
Pour in 4 cups of chicken broth, scraping the bottom of the pot with a wooden spoon to deglaze. This process incorporates the flavorful bits stuck to the bottom, adding depth to your soup. Watch as the broth mingles with the sautéed ingredients, creating a rich base for the next steps.

Step 5: Add the Vegetables
Introduce 4 cups of coleslaw mix to the pot, ensuring all the colorful vegetables are submerged in the broth. Stir well as the vegetables soften. This addition not only provides crunch but also transforms the Cozy One-Pot Egg Roll Soup into a hearty, nutritious dish ready to be enhanced.

Step 6: Season to Perfection
Mix in 2 tablespoons of soy sauce, 1 tablespoon of sesame oil, 1 teaspoon of rice vinegar, and, if desired, ½ teaspoon of red pepper flakes. Stir thoroughly to combine all the flavors. This seasoning blend elevates your soup, giving it that signature egg roll taste everyone loves.

Step 7: Simmer and Meld Flavors
Bring the soup to a gentle simmer over medium-high heat, then reduce the heat to low. Let it cook for 10-15 minutes, allowing the flavors to meld and the coleslaw mix to soften. You'll know it's ready when the soup is heated through and the aroma is irresistible!

Step 8: Final Touches
Taste the Cozy One-Pot Egg Roll Soup and adjust the seasoning with salt and pepper. This step is key to achieving the perfect flavor balance. Make sure every spoonful is deliciously satisfying, capturing the essence of comforting homemade soup.

Step 9: Serve and Garnish
Ladle the hot soup into bowls and garnish with sliced green onions, sesame seeds, and chopped fresh cilantro as desired. These finishing touches add brightness and texture to your warm soup, inviting everyone to dig into a delightful bowl of Cozy One-Pot Egg Roll Soup.

Cozy One-Pot Egg Roll Soup

Expert Tips for Cozy One-Pot Egg Roll Soup

  • Ingredient Substitutions: Don’t hesitate to swap the ground pork for ground turkey or chicken if you'd like a leaner option without compromising the flavor of the Cozy One-Pot Egg Roll Soup.

  • Avoid Overcooking: Keep an eye on the coleslaw mix as it simmers; it should be tender but still have a bit of crunch. Overcooking can lead to a mushy texture.

  • Balancing Flavors: Always taste before serving! Adjust the seasoning with salt, pepper, and soy sauce, as this will enhance the overall depth of your soup.

  • Garnish Generously: Adding green onions, sesame seeds, and cilantro not only boosts presentation but also adds fresh flavors that elevate your Cozy One-Pot Egg Roll Soup.

  • Batch Cooking: This recipe is perfect for meal prep. Make a larger batch and store leftovers in the fridge for easy midweek meals—just reheat and enjoy!

Cozy One-Pot Egg Roll Soup Variations

Feel free to put your unique spin on this comforting dish, creating delightful variations to suit your taste or dietary needs!

  • Dairy-Free: Substitute any broth or soup base with coconut milk for a creamy texture without dairy.
  • Spicy Kick: Add a diced jalapeño or extra red pepper flakes for those who crave a fiery finish in their Cozy One-Pot Egg Roll Soup. The added heat can beautifully contrast with the sweetness of the vegetables.
  • Vegetarian Delight: Swap the ground pork with crumbled tofu or tempeh for a hearty vegetarian twist that’s packed with protein.
  • Flavorful Broth: Use homemade chicken broth instead of canned for a richer, more complex flavor profile. The soul of this dish begins with the brew!
  • Crunch Factor: Garnish with crispy wonton strips or fried shallots for an exciting texture variation that will leave your guests reaching for more.
  • Sweet and Savory Blend: Add a tablespoon of hoisin sauce for a slight sweetness to balance the savory notes of the soup. This unique touch elevates the flavor dramatically!
  • Fresh Herbs: Incorporate freshly chopped basil or mint along with cilantro for an even brighter bouquet of flavors. The freshness will enhance every scoop of your soup.
  • Noodle Addition: Toss in some cooked rice noodles or ramen for a heartier meal that feels indulgent yet wholesome. Each bite will be a delightful surprise!

If you're intrigued by more comforting recipes, take a peek at our one-pot pasta dishes or indulge in our cozy chicken soup recipe that's perfect for chilly nights!

What to Serve with Cozy One-Pot Egg Roll Soup

A delightful, warm bowl of soup is just the beginning—here are tasty pairings to elevate your meal experience!

  • Steamed Rice: The soft, fluffy rice soaks up the savory broth, providing a perfect textural contrast that fills you up.
  • Garlic Noodles: These flavorful noodles bring a delicious, garlicky punch to your meal, enhancing the egg roll flavors beautifully.
  • Crisp Spring Rolls: A crunchy side that replicates the classic egg roll experience, they add a delightful texture that your family will love.
  • Kimchi: This spicy, fermented side offers a tangy kick that perfectly complements the soup's rich flavors. The heat balances the broth, making each spoonful exciting.
  • Sesame Spinach Salad: Light and refreshing, this salad introduces a vibrant green element that adds a crunch, providing a contrast to the warm soup.
  • Hot Green Tea: Its subtle flavors and warmth cleanse the palate between each spoonful, making it a lovely drink to enhance your cozy meal.
  • Chilled Sliced Fruit: Bright, fresh fruit can cleanse your palate and add a sweet contrast to the savory soup, making it an ideal light dessert.
  • Mini Cheesecake Bites: For a sweet finish, these luscious treats are a satisfying end to your meal without weighing you down.

Enjoy creating a comforting meal experience that everyone at the table will cherish!

Make Ahead Options

Making Cozy One-Pot Egg Roll Soup ahead of time is a fantastic way to save precious minutes on busy weeknights! You can prep the soup base, including the ground pork, diced onions, garlic, and ginger, up to 24 hours in advance. Store these ingredients in an airtight container in the refrigerator to maintain their freshness. Additionally, mix the coleslaw vegetables together and keep them separately to add just before serving—this keeps their crunch intact! When you're ready to enjoy your soup, simply sauté the prepped ingredients, add the broth, and let it simmer as instructed. The flavors will meld beautifully, delivering that comforting taste you love, just as if you made it fresh!

How to Store and Freeze Cozy One-Pot Egg Roll Soup

Fridge: Store leftover Cozy One-Pot Egg Roll Soup in an airtight container for up to 3 days. This keeps the flavors fresh and ready for a quick reheat.

Freezer: For longer storage, freeze the soup in freezer-safe containers for up to 3 months. Leave a little space at the top of the container for expansion as it freezes.

Reheating: When ready to enjoy, thaw in the fridge overnight, then reheat gently on the stove over low heat, stirring occasionally until warmed through.

Airtight: Ensure containers are sealed tightly to prevent freezer burn, maintaining the soup's delicious flavor and texture.

Cozy One-Pot Egg Roll Soup

Cozy One-Pot Egg Roll Soup Recipe FAQs

How do I choose a ripe onion for the Cozy One-Pot Egg Roll Soup?
Absolutely! When selecting an onion, look for one that is firm, with a papery skin and no soft spots or dark blemishes. A good onion should feel heavy for its size and have a strong, pungent aroma.

How long can I store leftovers in the fridge?
Very! Leftover Cozy One-Pot Egg Roll Soup can be stored in an airtight container in the fridge for up to 3 days. Make sure to cool the soup to room temperature before refrigerating to keep it fresh.

Can I freeze Cozy One-Pot Egg Roll Soup? How?
Absolutely, you can freeze it! First, allow the soup to cool completely. Then, pour it into freezer-safe containers or heavy-duty freezer bags, leaving some space at the top for expansion. Seal tightly, and it will keep in the freezer for up to 3 months. When you're ready to enjoy it, thaw it in the fridge overnight and reheat on the stove over low heat.

What if my coleslaw mix is wilting?
Great question! If your coleslaw mix shows signs of wilting, it's best to discard it, as it can affect the overall texture of your Cozy One-Pot Egg Roll Soup. Instead, grab a fresh pack, or use chopped fresh cabbage, carrots, and bell peppers as substitutes for a crunchy kick!

Is this soup safe for pets or certain dietary allergies?
Indeed! While Cozy One-Pot Egg Roll Soup is full of delicious ingredients for humans, it’s not safe for pets due to the garlic and onion. If you have allergies, be sure to check labels for soy sauce and sesame oil, as they can often contain gluten and allergens. You can also opt for gluten-free soy sauce to adapt the recipe!

How do I adjust for spice levels in this recipe?
The more the merrier! If you prefer less heat, reduce the amount of red pepper flakes or omit them altogether. Conversely, if you adore spice, feel free to add more! You could also toss in some sliced fresh chili or a dash of hot sauce at the end to elevate the flavor even more.

Cozy One-Pot Egg Roll Soup

Cozy One-Pot Egg Roll Soup to Warm Your Soul This Winter

This Cozy One-Pot Egg Roll Soup blends traditional flavors into a quick and comforting dish perfect for chilly nights.
Print Recipe Pin Recipe
Prep Time 10 minutes mins
Cook Time 20 minutes mins
Total Time 30 minutes mins
Servings: 4 bowls
Course: Main Dishes
Cuisine: Asian
Calories: 320
Ingredients Equipment Method Nutrition Notes

Ingredients
  

For the Soup Base
  • 1 tablespoon vegetable oil essential for sautéing
  • 1 pound ground pork can substitute with turkey or chicken
  • 1 medium onion diced
  • 3 cloves garlic minced
  • 2 teaspoons fresh ginger grated
  • 4 cups chicken broth
For the Vegetables
  • 4 cups coleslaw mix packed with crunch
For the Seasoning
  • 2 tablespoons soy sauce adjust to taste
  • 1 tablespoon sesame oil adds nutty undertones
  • 1 teaspoon rice vinegar provides acidity
  • 0.5 teaspoon red pepper flakes optional
  • salt to taste
  • pepper to taste
For Garnishing
  • 2 stalks green onions sliced
  • sesame seeds optional
  • fresh cilantro optional

Equipment

  • large pot or Dutch oven

Method
 

Instructions
  1. Heat the vegetable oil in a large pot over medium heat for about 1-2 minutes.
  2. Add ground pork and cook for 5-7 minutes until browned.
  3. Stir in diced onion, minced garlic, and grated ginger. Cook for 2-3 minutes.
  4. Pour in chicken broth, scraping the bottom of the pot to deglaze.
  5. Introduce coleslaw mix and stir to integrate with the broth.
  6. Mix in soy sauce, sesame oil, rice vinegar, and red pepper flakes, stirring well.
  7. Bring to a simmer, then reduce heat and let it cook for 10-15 minutes.
  8. Adjust seasoning with salt and pepper to taste.
  9. Serve hot, garnished with green onions, sesame seeds, and cilantro if desired.

Nutrition

Serving: 1bowlCalories: 320kcalCarbohydrates: 12gProtein: 20gFat: 22gSaturated Fat: 6gPolyunsaturated Fat: 2gMonounsaturated Fat: 12gCholesterol: 80mgSodium: 720mgPotassium: 680mgFiber: 3gSugar: 4gVitamin A: 5IUVitamin C: 15mgCalcium: 6mgIron: 8mg

Notes

This recipe is perfect for meal prep. Store leftovers in the fridge for up to 3 days or freeze for up to 3 months.

Tried this recipe?

Let us know how it was!

Savory Roasted Potatoes with Baked Feta and Garlic Bliss

January 13, 2026 by grace bellamy Leave a Comment

As I stood in my kitchen, the rich aroma of garlic swirling through the air transported me back to my grandmother’s cozy dining room, where comfort food was served with love. These Roasted Potatoes with Baked Feta and Garlic have quickly become a go-to recipe in my home, thanks to their effortless preparation and the way they elevate any meal. Not only are they a stunning centerpiece on any table, but they also deliver a delightful flavor explosion that feels indulgent without the fuss. Imagine golden, crispy potatoes mingling with creamy, melted feta and sweet roasted garlic—perfection on a plate! Whether you’re hosting a dinner party or simply looking to elevate your weeknight dinner, this dish is sure to impress. Ready to turn your kitchen into a flavor wonderland? Let’s dive into this delicious, easy-to-follow recipe!

Roasted Potatoes with Baked Feta and Garlic

Why are these potatoes a must-try?

Simple preparation: This dish is incredibly easy to make, requiring only 15 minutes of prep time. Perfect for busy weeknights or casual gatherings!

Flavor explosion: The combination of roasted garlic and creamy feta creates an irresistible depth of flavor that’s sure to delight your taste buds.

Crowd-pleaser: Whether you’re hosting friends or enjoying a cozy dinner at home, these potatoes are guaranteed to impress everyone at the table.

Versatile side dish: Pair them with grilled meats or serve them as a hearty vegetarian option; they fit in perfectly with any meal!

Healthier indulgence: With wholesome ingredients like baby potatoes and olive oil, you can enjoy comfort food with a nutritious twist.

Roasted Potatoes with Baked Feta Ingredients

• Discover the magic of flavors!

For the Potatoes

  • Baby potatoes – 2 pounds, halved for a crispy texture.
  • Extra virgin olive oil – ¼ cup, to ensure that every bite is rich and satisfying.
  • Salt – 1 teaspoon, to enhance the natural flavor of the potatoes.
  • Black pepper – ½ teaspoon, adding a subtle kick to the dish.
  • Dried oregano – 1 teaspoon, for a burst of aromatic herbaceous flavor.

For the Feta and Garlic

  • Feta cheese – 1 block (8 ounces), which melts beautifully and creates a creamy sauce.
  • Garlic – 1 head, cloves separated and peeled for delicious roasted sweetness.

For the Garnish

  • Fresh parsley – chopped, to add a pop of color and freshness.
  • Red pepper flakes – optional, for those who love a little heat in their Roasted Potatoes with Baked Feta!

Step‑by‑Step Instructions for Roasted Potatoes with Baked Feta and Garlic

Step 1: Preheat the Oven
Begin by preheating your oven to 425°F (220°C). This step is crucial for achieving those golden, crispy potatoes that you'll crave. Set a reliable timer as you prepare the rest of your ingredients, allowing for a smooth cooking process.

Step 2: Prepare the Potatoes
In a large mixing bowl, combine the halved baby potatoes, extra virgin olive oil, dried oregano, salt, and black pepper. Use your hands to toss everything together, ensuring each potato half is well-coated. The glossy sheen of the oil should coat them evenly, readying them for roasting.

Step 3: Arrange on Baking Sheet
Spread the seasoned potatoes in a single layer on a large baking sheet, making sure to leave a little room between each piece for even roasting. Nestle the peeled garlic cloves among the potatoes, as they will add a sweet, roasted flavor that pairs beautifully with the savory notes of the dish.

Step 4: Add the Feta
Create a small space in the center of the baking sheet and placed the block of feta cheese there. If desired, drizzle a touch more olive oil over the feta to enhance its creaminess as it bakes. This strategic placement ensures the feta melts perfectly while the potatoes roast alongside.

Step 5: Roast in the Oven
Transfer your baking sheet to the preheated oven and roast for 25-30 minutes. Keep an eye on the potatoes; they should turn a lovely golden brown and become crispy around the edges, while the feta starts softening and slightly browning on top.

Step 6: Mash the Feta and Garlic
Once done, carefully remove the baking sheet from the oven and let it cool for a few minutes. Using a fork, gently mash the baked feta cheese with the roasted garlic cloves, creating a creamy and delicious sauce that will coat the potatoes beautifully.

Step 7: Serve and Garnish
Serve your Roasted Potatoes with Baked Feta and Garlic immediately, garnished with fresh chopped parsley for a vibrant touch. If you crave a bit of heat, sprinkle some red pepper flakes over the top and dive into this comforting dish that’s sure to satisfy!

Roasted Potatoes with Baked Feta and Garlic

Roasted Potatoes with Baked Feta Variations

Feel free to put your own spin on these delightful potatoes, enhancing your experience with tasty alternatives!

  • Herb-Infused: Add fresh rosemary or thyme to the olive oil for a fragrant twist. The earthy notes will elevate the dish beautifully.

  • Spicy Kick: Toss in some diced jalapeños before roasting for an added layer of heat. This lively twist pairs perfectly with the creamy feta!

  • Cheesy Upgrade: Swap feta for goat cheese for a tangier flavor. Goat cheese melts luxuriously, creating a delightful creamy texture.

  • Veggie Boost: Incorporate diced bell peppers or zucchini for additional veggies. The color and flavor will create a stunning and healthful side.

  • Citrusy Zing: Drizzle fresh lemon juice over the potatoes and feta before serving. This will add a refreshing brightness to the dish that’s simply irresistible.

  • Smoky Flavor: Sprinkle smoked paprika on the potatoes for a deeper, smoky taste. The richness will complement the creaminess of the feta beautifully.

  • Pesto Infusion: Mix in a few tablespoons of pesto with the olive oil for an herbaceous flavor explosion. The green richness adds a wonderful layer to every bite.

  • Mediterranean Touch: Add kalamata olives or sun-dried tomatoes to the mix before roasting for a Mediterranean flair. These ingredients will harmonize beautifully with the feta and garlic.

Make Ahead Options

These Roasted Potatoes with Baked Feta and Garlic are a fantastic meal prep option for busy home cooks looking to save time without sacrificing flavor! You can prep the seasoned potatoes and store them in an airtight container for up to 24 hours in the refrigerator. Just toss them with olive oil, oregano, salt, and pepper beforehand. To maintain the crispiness, wait until you're ready to bake to add the garlic cloves and feta. When you’re ready to serve, simply spread everything on a baking sheet and roast as directed. This way, you can enjoy your delightful dish with minimal effort and just as much deliciousness!

What to Serve with Roasted Potatoes with Baked Feta and Garlic

Picture a beautifully set table, where the crisp aroma of roasted garlic dances amid hearty dishes, inviting everyone to indulge.

  • Grilled Lemon Chicken: The zesty brightness of lemon-infused chicken perfectly contrasts the creamy feta, creating a balanced and delightful meal.

  • Herbed Quinoa Salad: A vibrant salad with fresh herbs, crunchy veggies, and a lemony dressing adds a refreshing touch that complements the roasted flavors beautifully.

  • Sautéed Green Beans: Crisp-tender green beans sautéed in garlic and olive oil offer a lovely crunch, enhancing the overall textural harmony of your dinner plate.

  • Roasted Beet and Feta Salad: This dish showcases earthy beets with creamy feta, beautifully echoing the flavors in your main dish while adding a pop of color.

  • Creamy Tomato Soup: A bowl of rich tomato bisque adds comfort and warmth, making a lovely dipping companion for the roasted potatoes.

  • Chardonnay or Sauvignon Blanc: A chilled glass of white wine balances the richness of the feta and garlic, elevating the entire dining experience.

  • Chocolate Mousse: For dessert, this silky-smooth treat rounds off a feast with its dreamy texture and sweetness, leaving everyone satisfied.

How to Store and Freeze Roasted Potatoes with Baked Feta and Garlic

Fridge: Store leftovers in an airtight container in the refrigerator for up to 3 days. This will keep the flavors fresh while allowing the potatoes to maintain some of their texture.

Freezer: For longer storage, freeze the roasted potatoes (without the feta) in a single layer on a baking sheet, then transfer to a freezer bag once frozen solid. They can last up to 2 months in the freezer.

Reheating: To reheat frozen potatoes, bake them in a preheated oven at 400°F (200°C) for 20–25 minutes until heated through. Add the feta and garlic back during the last 5 minutes of baking.

Note: It's best to mix the roasted feta and garlic with fresh potatoes only when ready to serve for optimal texture and flavor in your Roasted Potatoes with Baked Feta and Garlic.

Expert Tips for Roasted Potatoes with Baked Feta and Garlic

  • Perfect Potato Size: Aim for even halves, about the same size for consistent cooking. Uneven pieces can lead to some being overcooked while others remain raw.

  • Crispier Potatoes: For extra crispiness, soak the halved potatoes in cold water for 30 minutes before seasoning and roasting. This removes excess starch!

  • Flavor Boost: Don’t skip the freshly chopped parsley! It brightens the dish and complements the roasted flavors beautifully.

  • Feta Choice: Use full-fat feta for creaminess that blends well with the roasted garlic. Low-fat versions can become crumbly.

  • Watch the Heat: Keep an eye on the feta! If it browns too much or begins to burn, cover it with a piece of foil during roasting.

  • Customize Heat: Feel free to adjust the red pepper flakes to your spice preference. Just a pinch can make the Roasted Potatoes with Baked Feta and Garlic sing!

Roasted Potatoes with Baked Feta and Garlic

Roasted Potatoes with Baked Feta and Garlic Recipe FAQs

How do I choose the best baby potatoes for this recipe?
Absolutely! Look for baby potatoes that are firm to the touch, with smooth skin and a uniform size. Avoid any with dark spots or wrinkles, as these indicate age or spoilage. Fresh baby potatoes should feel quite heavy for their size.

What’s the best way to store leftovers?
For optimal freshness, store your Roasted Potatoes with Baked Feta and Garlic in an airtight container in the fridge for up to 3 days. This will help preserve the flavors, but the texture may not be as crispy as when first baked.

Can I freeze the leftovers?
Yes! To freeze the roasted potatoes, start by placing them (without the feta) in a single layer on a baking sheet to freeze solid. Once frozen, transfer them to a freezer bag or an airtight container, and they can last up to 2 months. Just remember to label them for easy identification!

How do I reheat frozen roasted potatoes?
Reheating frozen roasted potatoes is simple! Preheat your oven to 400°F (200°C). Bake the frozen potatoes for about 20-25 minutes until they're heated through. During the last 5 minutes, add the baked feta and garlic back into the oven for a delicious melty topping.

What if I have a food allergy related to this recipe?
If you're allergic to dairy, you can substitute the feta cheese with a dairy-free alternative, like cashew cheese. This will maintain the creamy texture without the allergens. Additionally, make sure to check any pre-packaged spices for hidden allergens.

Why are my potatoes not crispy?
If your potatoes aren’t coming out crispy, there are a couple of things to check! Ensure you’re using enough olive oil and spreading the potatoes out on the baking sheet without crowding them. Crowded potatoes can steam instead of roast, leading to a softer texture. A good soak in cold water before cooking also helps achieve that wonderful crispiness!

Roasted Potatoes with Baked Feta and Garlic

Savory Roasted Potatoes with Baked Feta and Garlic Bliss

Enjoy this delightful Roasted Potatoes with Baked Feta and Garlic, combining golden crispy potatoes, creamy feta, and sweet roasted garlic for a perfect side dish.
Print Recipe Pin Recipe
Prep Time 15 minutes mins
Cook Time 30 minutes mins
Total Time 45 minutes mins
Servings: 4 servings
Course: Side Dishes
Cuisine: Mediterranean
Calories: 250
Ingredients Equipment Method Nutrition Notes

Ingredients
  

For the Potatoes
  • 2 pounds baby potatoes halved for crispy texture
  • ¼ cup extra virgin olive oil to ensure richness
  • 1 teaspoon salt to enhance flavor
  • ½ teaspoon black pepper for subtle kick
  • 1 teaspoon dried oregano for aromatic flavor
For the Feta and Garlic
  • 1 block (8 ounces) feta cheese melts beautifully
  • 1 head garlic cloves separated and peeled
For the Garnish
  • fresh parsley chopped for color
  • red pepper flakes optional for heat

Equipment

  • Oven
  • Baking Sheet
  • Mixing Bowl
  • fork

Method
 

Preparation Steps
  1. Preheat your oven to 425°F (220°C).
  2. In a large mixing bowl, combine halved baby potatoes, olive oil, oregano, salt, and black pepper. Toss together until well-coated.
  3. Spread the seasoned potatoes in a single layer on a baking sheet, leaving room between each piece, and nestle the peeled garlic cloves among them.
  4. Place the block of feta cheese in the center of the baking sheet and optionally drizzle olive oil over it.
  5. Roast in the preheated oven for 25-30 minutes, until potatoes are golden brown and crispy, and feta is softening.
  6. Remove from the oven and let cool for a few minutes. Mash the baked feta and garlic together with a fork.
  7. Serve immediately, garnished with parsley and red pepper flakes if desired.

Nutrition

Serving: 1servingCalories: 250kcalCarbohydrates: 35gProtein: 6gFat: 10gSaturated Fat: 4gPolyunsaturated Fat: 1gMonounsaturated Fat: 5gCholesterol: 15mgSodium: 400mgPotassium: 700mgFiber: 4gSugar: 2gVitamin A: 200IUVitamin C: 20mgCalcium: 150mgIron: 2mg

Notes

For even cooking, ensure potato halves are the same size. For added crispiness, soak potatoes in cold water for 30 minutes before roasting.

Tried this recipe?

Let us know how it was!

Crunchy Raw Carrot Salad with Honey-Lemon Dressing Delight

January 13, 2026 by grace bellamy Leave a Comment

As I mixed the vibrant colors of grated carrots and lively green parsley, it struck me just how simple and satisfying a Raw Carrot Salad can be. This dish not only bursts with fresh flavors but also comes together in a mere 15 minutes—perfect for busy weeknights or a quick lunch. The combination of crunchy walnuts and sweet raisins adds delightful texture and a hint of sweetness that turns this salad into a must-try. It’s the kind of recipe that feels nourishing without skimping on flavor. Plus, it’s completely adaptable; you can make it your own by experimenting with different nuts or herbs. Ready to bring a touch of freshness to your table? Let’s dive into the steps for creating your own Raw Carrot Salad!

Raw Carrot Salad

Why Is This Raw Carrot Salad Special?

Vibrant colors: This salad features bright orange carrots that bring life to your plate.

Nutty crunch: The walnuts add a delightful crunch that perfectly contrasts the soft carrots and chewy raisins.

Zesty dressing: A simple honey-lemon dressing elevates the flavors, making each bite refreshing and satisfying.

Quick prep: Ready in just 15 minutes, this recipe is perfect for those on the go or those who want a healthy meal without the hassle.

Versatile choice: You can easily customize it! Swap out walnuts for your favorite nuts or add different herbs to suit your taste.

This Raw Carrot Salad is not only delicious but also an ideal way to embrace healthy eating without sacrificing flavor. Enjoy it as a side dish or a light lunch!

Raw Carrot Salad Ingredients

• Bring freshness to your table with this delightful recipe!

For the Salad

  • Carrots – 4 large, peeled and grated for a crunchy base.
  • Raisins – ¼ cup; they offer a sweet chewiness that balances the salad.
  • Walnuts – ¼ cup, chopped; these provide nutty crunch and essential healthy fats.
  • Fresh parsley – ¼ cup, chopped; this herb adds a pop of color and freshness.

For the Dressing

  • Olive oil – 2 tablespoons; it serves as a healthy fat that helps absorb flavors.
  • Lemon juice – 1 tablespoon; for a bright, zesty kick that enhances the dish.
  • Honey or maple syrup – 1 teaspoon; this adds a natural sweetness that complements the carrots and raisins.
  • Salt and pepper – to taste; essential for balancing flavors in your Raw Carrot Salad.

Step‑by‑Step Instructions for Raw Carrot Salad

Step 1: Prepare the Carrots
Begin by peeling 4 large carrots to remove their outer layer, ensuring a clean and vibrant base for your Raw Carrot Salad. Once peeled, grate the carrots using either a box grater or a food processor, yielding about 4 cups of beautifully colored, fine shreds. Set the grated carrots aside, allowing their crisp texture to bring freshness to the salad.

Step 2: Combine Salad Ingredients
In a large mixing bowl, combine the grated carrots, ¼ cup of raisins, ¼ cup of chopped walnuts, and ¼ cup of fresh parsley, finely chopped. Stir the mixture gently but thoroughly, making sure each ingredient is evenly distributed to create a harmonious blend of flavors and textures. The vibrant colors will be visually appealing and invite you to continue.

Step 3: Make the Dressing
In a separate small bowl, whisk together 2 tablespoons of olive oil, 1 tablespoon of lemon juice, 1 teaspoon of honey or maple syrup, and a pinch of salt and pepper. Whisk until the dressing is well combined and emulsified, feeling free to adjust the seasoning to your taste. The honey-lemon dressing will bring a zesty and sweet touch to your Raw Carrot Salad.

Step 4: Dress the Salad
Pour the freshly whisked dressing over the carrot mixture in the large bowl. Using salad tongs or two forks, gently toss the ingredients together until the grated carrots and other components are fully coated in the zesty dressing. Take a moment to admire the bright colors and enhanced flavors coming together in your Raw Carrot Salad.

Step 5: Adjust Seasoning
Taste the salad to see if it meets your flavor desires. If needed, add more salt, pepper, or a touch of honey/maple syrup to balance the flavors. Feel free to customize the seasoning—it’s all about making this Raw Carrot Salad the perfect fit for your palate. The flavors should be lively and inviting!

Step 6: Let It Rest
Allow the dressed salad to sit for about 10-15 minutes at room temperature. This resting time is crucial, as it allows the flavors to meld beautifully, enhancing the overall taste of your Raw Carrot Salad. Keep an eye on the vibrant colors as they slightly soften and become even more appetizing.

Step 7: Serve the Salad
Finally, transfer your delicious Raw Carrot Salad into a large serving bowl or individually portioned plates. For an extra touch of freshness, garnish with additional chopped parsley if desired. The bright and colorful presentation will make this dish an eye-catching addition to your table, ready to delight family and friends!

Raw Carrot Salad

What to Serve with Raw Carrot Salad

Brighten your dining table with a medley of complementary flavors that enhance every bite of your refreshing salad.

  • Creamy Hummus: This rich, buttery dip adds a smooth texture that balances the crunch of the salad while offering a protein boost. Perfect for dipping or as a spread!

  • Grilled Chicken: Juicy, seasoned chicken adds heartiness to your meal and pairs beautifully with the sweetness of the carrot salad, creating a satisfying combination.

  • Quinoa Pilaf: Light yet filling, this nutty side dish complements the freshness of the carrots, while providing a wholesome grain to round out the meal.

  • Pita Bread: Soft and warm pita pockets can be filled with salad or enjoyed on the side, providing a lovely contrast in temperature and flavor.

  • Lemonade: A refreshing glass of homemade lemonade ties in with the zesty notes of the dressing, enhancing the overall brightness of your meal.

  • Fresh Fruit Salad: A medley of seasonal fruits introduces a variety of textures and adds a hint of sweetness, making it a delightful dessert option to finish.

  • Crispy Roasted Chickpeas: These crunchy bites add a savory element that complements the sweet and fresh flavors of the salad while delivering an extra crunch.

  • Herbed Couscous: Light and fluffy, this side dish flavored with herbs adds depth and a burst of flavor that pairs perfectly with the crispness of your carrot salad.

Tips for the Best Raw Carrot Salad

  • Choose Fresh Carrots: Opt for vibrant, firm carrots for maximum crunch and sweetness in your Raw Carrot Salad. Avoid soft or wilted ones.

  • Grate for Texture: Use a box grater or food processor for uniform shreds. This ensures an even blend of flavors and the perfect texture.

  • Adjust Dressings: If the dressing feels too tangy, add more honey or maple syrup. Balance is key to elevating your Raw Carrot Salad!

  • Let It Rest: Allowing the salad to sit for 10-15 minutes enhances flavors, ensuring every bite is infused with the delicious dressing.

  • Customize Ingredients: Feel free to swap walnuts for pecans or sunflower seeds. Personalize your Raw Carrot Salad to fit your taste preferences!

How to Store and Freeze Raw Carrot Salad

Fridge: Keep leftovers in an airtight container for up to 3 days. This helps maintain the salad's freshness and crunch while preventing wilting.

Freezer: Avoid freezing the raw carrot salad as the texture of the ingredients may suffer. The grated carrots will become mushy once thawed.

Reheating: If you're serving as part of a larger meal, simply make it fresh each time so it retains that delightful crispness. Enjoy it chilled or at room temperature for the best experience!

Resting Time: If you're planning to eat it later, note that letting the salad rest at room temperature for about 10–15 minutes before serving enhances the flavor.

Make Ahead Options

These Raw Carrot Salads are a fantastic option for meal prep enthusiasts! You can prepare the grated carrots, raisins, walnuts, and chopped parsley up to 24 hours in advance by storing them separately in airtight containers in the refrigerator to maintain freshness and crunch. For optimal flavor, mix the dressing (olive oil, lemon juice, honey, salt, and pepper) ahead of time as well—you can keep it sealed in a jar in the fridge for up to 3 days. When you’re ready to serve, simply combine the prepped salad components, toss with the dressing, and let it rest for about 10-15 minutes to enhance the flavors. This way, you'll have a delightful Raw Carrot Salad ready to enjoy with minimal effort!

Raw Carrot Salad Variations & Substitutions

Feel free to personalize your Raw Carrot Salad with these delightful twists that can elevate flavors and textures!

  • Nut-Free: Omit walnuts entirely or substitute with sunflower seeds for a similar crunch without allergens.
    Consider adding some toasted pumpkin seeds for a unique nutty flavor without any of the nut-based ingredients.

  • Vegan: Swap honey for maple syrup to create a completely plant-based dressing.
    This small adjustment ensures every bite maintains its irresistible sweetness and zesty profile.

  • Spicy Kick: Add a pinch of cayenne pepper or red pepper flakes to the dressing for an exciting heat.
    It adds a subtle warmth that perfectly contrasts with the sweetness of the carrots and raisins.

  • Cheesy Flavor: Incorporate nutritional yeast for a cheesy flavor without dairy.
    This twist not only adds a savory depth but also enhances the dish with nutrients, making it even more wholesome!

  • Citrusy Zing: Along with lemon juice, add orange juice or zest for a citrusy flair.
    This variation brightens the salad, providing an uplifting aroma and taste that dances on your palate.

  • Fruit Medley: Mix in diced apples or pears for extra sweetness and juiciness.
    These fruits add freshness and a delightful crunch, creating a refreshing layering of flavors in each bite.

  • Herb Variety: Experiment with fresh mint or cilantro instead of parsley for an unexpected herbal twist.
    This minor adjustment can transform your Raw Carrot Salad into a new flavor landscape, making every forkful a surprise.

  • Add Protein: Toss in chickpeas or edamame for a protein boost that’ll make your salad more satisfying.
    These additions provide a heartier texture, ensuring that your salad becomes a fulfilling meal on its own.

Feel inspired? For more fresh ideas on healthy eating, check out my guide on how to embrace quick and easy meals and discover ways to keep your cooking fun and flavorful!

Raw Carrot Salad

Raw Carrot Salad Recipe FAQs

How do I choose the best carrots for this salad?
Absolutely! When selecting carrots, look for firm, bright orange ones that are free from dark spots or blemishes. The best carrots are vibrant and crunchy, assuring you they have optimal sweetness. Steer clear of soft or wilted carrots, as they won’t provide the same satisfying crunch in your Raw Carrot Salad.

How should I store leftover Raw Carrot Salad?
To keep your salad fresh, place it in an airtight container in the fridge. It should stay good for about 3 days. This way, you can enjoy the crunch and flavors without worrying about spoilage! Just remember to give it a quick stir before serving to redistribute any settled dressing.

Can I freeze Raw Carrot Salad?
I wouldn't recommend freezing the Raw Carrot Salad. Freezing can adversely affect the texture of the grated carrots, making them mushy when thawed. It's best enjoyed fresh. Instead, consider prepping the ingredients separately and assembling the salad right before serving to retain that delightful crunch!

What if the dressing is too tangy for my taste?
No problem at all! If you find the dressing too tangy, simply whisk in a little more honey or maple syrup to balance the flavors. You can do this a teaspoon at a time, tasting as you go until it meets your preference. Making adjustments is part of the fun and personalization of your Raw Carrot Salad!

Are there any dietary considerations I should know about?
Very! If you or anyone at your table has nut allergies, you can easily substitute the walnuts with pumpkin seeds or sunflower seeds for a safe and tasty alternative. Additionally, if you're serving this to pets, it's best to keep the salad away from them, particularly because of the raisins, which can be harmful to dogs. Always be sure to consider dietary restrictions to make your Raw Carrot Salad inclusive and enjoyable for everyone!

Raw Carrot Salad

Crunchy Raw Carrot Salad with Honey-Lemon Dressing Delight

This Raw Carrot Salad bursts with fresh flavors and comes together in just 15 minutes, making it a quick and satisfying meal.
Print Recipe Pin Recipe
Prep Time 15 minutes mins
Resting Time 15 minutes mins
Total Time 30 minutes mins
Servings: 4 servings
Course: Salad
Cuisine: Healthy
Calories: 150
Ingredients Equipment Method Nutrition Notes

Ingredients
  

For the Salad
  • 4 large carrots peeled and grated
  • ¼ cup raisins for a sweet chewiness
  • ¼ cup walnuts chopped for nutty crunch
  • ¼ cup fresh parsley chopped for freshness
For the Dressing
  • 2 tablespoons olive oil healthy fat
  • 1 tablespoon lemon juice for a zesty kick
  • 1 teaspoon honey or maple syrup adds natural sweetness
  • salt and pepper to taste

Equipment

  • box grater
  • Mixing Bowl
  • Whisk

Method
 

Step-by-Step Instructions
  1. Begin by peeling 4 large carrots to remove their outer layer, ensuring a clean and vibrant base for your Raw Carrot Salad. Once peeled, grate the carrots using either a box grater or a food processor, yielding about 4 cups of beautifully colored, fine shreds. Set the grated carrots aside.
  2. In a large mixing bowl, combine the grated carrots, ¼ cup of raisins, ¼ cup of chopped walnuts, and ¼ cup of fresh parsley, finely chopped. Stir the mixture gently but thoroughly.
  3. In a separate small bowl, whisk together 2 tablespoons of olive oil, 1 tablespoon of lemon juice, 1 teaspoon of honey or maple syrup, and a pinch of salt and pepper until well combined.
  4. Pour the freshly whisked dressing over the carrot mixture and gently toss the ingredients together until fully coated.
  5. Taste the salad and adjust with more salt, pepper, or honey/maple syrup as needed.
  6. Allow the dressed salad to sit for about 10-15 minutes at room temperature for the flavors to meld beautifully.
  7. Transfer your delicious Raw Carrot Salad into a serving bowl or plates, and garnish with additional chopped parsley if desired.

Nutrition

Serving: 1servingCalories: 150kcalCarbohydrates: 15gProtein: 2gFat: 9gSaturated Fat: 1gPolyunsaturated Fat: 2gMonounsaturated Fat: 6gSodium: 30mgPotassium: 250mgFiber: 3gSugar: 8gVitamin A: 8000IUVitamin C: 10mgCalcium: 50mgIron: 0.5mg

Notes

Use fresh carrots for maximum crunch and sweetness, and customize the nuts or herbs to your preference.

Tried this recipe?

Let us know how it was!

Savor the Sweetness of Pink Coconut Snowball Cake Bars

January 12, 2026 by grace bellamy Leave a Comment

The moment I laid eyes on those Pink Coconut Snowball Cake Bars, I felt as if I had just stumbled into a pastel wonderland. With their fluffy, coconut-laden goodness and playful pink frosting, these bars instantly transform any day into a celebration. Made with just a box of white cake mix and a few easy ingredients, whipping up this delightful dessert only takes about an hour, making it a fantastic choice for both novice bakers and seasoned pros. The best part? Not only are they a vibrant crowd-pleaser, but these sweet treats also offer a satisfying twist on classic coconut flavors, perfect for satisfying those homemade cravings. Who can resist a slice of nostalgia wrapped in sugar and color? Curious about how to bring this delightful treat to your kitchen? Let’s dive into the recipe!

Pink Coconut Snowball Cake Bars

Why Are These Cake Bars So Irresistible?

Simplicity is key! These Pink Coconut Snowball Cake Bars are a breeze to make, combining a box cake mix with a few accessible ingredients.

Bursting with flavor, each bite is enhanced by coconut, vanilla, and almond essences, making them wonderfully unique.

Visually stunning, the playful pink hue and fluffy topping are sure to impress guests, making them ideal for parties or potlucks.

Versatile and fun, you can even adjust the pinkness to match your theme or occasion! For a twist, consider pairing these with a slice of Cheese Blueberry Cake for your next gathering.

Quick to whip up, you’ll have sweet treats ready in just an hour! Treat yourself and your loved ones to these delightful bars, you won’t regret it!

Pink Coconut Snowball Cake Bars Ingredients

• Get ready to create magic with these irresistible pink delights!

For the Cake Bars

  • White cake mix – a convenient base that brings fluffy texture and lightness to your bars.
  • Large eggs – these add moisture and structure; always use fresh eggs for the best results.
  • Vegetable oil – keeps the cake bars moist and tender; can be substituted with melted coconut oil for extra flavor.
  • Water – helps blend the ingredients together smoothly.
  • Shredded sweetened coconut – infuses delightful coconut flavor and texture into the bars.
  • Vanilla extract – adds a warm and aromatic essence; feel free to use pure vanilla for a richer flavor.
  • Almond extract – a little splash goes a long way in enhancing the cake’s flavor profile.

For the Frosting

  • Powdered sugar – creates that perfect sweet and silky frosting texture; make sure it’s well sifted to avoid lumps.
  • Milk – adds creaminess to the frosting, making it easy to spread.
  • Shredded coconut (for topping) – provides a fun and crunchy layer that elevates the overall dessert experience.
  • Pink food coloring – adjust this to achieve your desired level of pinkness for those charming visuals; start small and add more as needed.

Now that you have the ingredients for these magical Pink Coconut Snowball Cake Bars, let’s get baking!

Step‑by‑Step Instructions for Pink Coconut Snowball Cake Bars

Step 1: Prepare the Baking Pan
Preheat your oven to 350°F (175°C). While it warms up, grease a 9x13-inch baking pan with non-stick spray or line it with parchment paper for easier removal later. This crucial first step ensures your Pink Coconut Snowball Cake Bars release effortlessly once baked.

Step 2: Mix the Cake Batter
In a large mixing bowl, combine the white cake mix, eggs, vegetable oil, and water. Using an electric mixer, beat the mixture on medium speed for 2 minutes, until it transforms into a smooth and well-blended batter. This is where the magic begins; the anticipation for your delicious bars builds with each swirl!

Step 3: Add Flavorful Elements
Gently fold in the shredded sweetened coconut, vanilla extract, and almond extract into the batter. Ensure these components are evenly distributed, as they will enhance the flavor of your Pink Coconut Snowball Cake Bars. You’ll see the texture of the batter change, becoming more delightful with rich, aromatic notes.

Step 4: Pour and Spread the Batter
Carefully pour the vibrant cake batter into your prepared baking pan. Use a spatula to spread it into an even layer, making sure the corners are filled. This step sets the foundation for your cake bars, ensuring uniform baking and texture throughout.

Step 5: Bake to Perfection
Place the filled pan in your preheated oven and bake for 25-30 minutes. Keep an eye on the bars; they are ready when a toothpick inserted into the center comes out clean. This golden-brown hue will signal that your Pink Coconut Snowball Cake Bars are perfectly baked.

Step 6: Cool the Cake
Once baked, remove the pan from the oven and allow the cake to cool in the pan for about 10 minutes. After this short pause, carefully transfer the cake to a wire rack to cool completely. Patience is key here, as the frosting will adhere better to a cooled surface.

Step 7: Whip Up the Frosting
While your cake cools, prepare the frosting by combining the powdered sugar and milk in a medium bowl. Stir until the mixture is smooth and free of lumps. This delicious frosting is what will elevate your Pink Coconut Snowball Cake Bars to a whole new level of sweetness.

Step 8: Color the Frosting
Add the pink food coloring to the frosting a little at a time, mixing well after each addition. This allows you to achieve your desired shade of pink. Don’t be afraid to play with the color—make it as bright or subtle as you like for those eye-catching Pink Coconut Snowball Cake Bars.

Step 9: Frost the Cooled Cake
Once the cake has cooled completely, spread the pink frosting evenly over the top using a spatula. This step creates a beautiful canvas for the toppings, while the creamy frosting complements the coconut base perfectly.

Step 10: Add the Topping
Sprinkle the remaining shredded coconut over the frosted cake. Gently press the coconut into the frosting to ensure it sticks, adding a delightful texture and visual appeal. This final touch enhances not only the taste but also the charm of your Pink Coconut Snowball Cake Bars.

Step 11: Slice and Store
Cut the cake into bars of your preferred size. Store any leftovers in an airtight container at room temperature for up to 3 days. These bars are perfect for sharing or indulging in when you need a sweet break!

Pink Coconut Snowball Cake Bars

How to Store and Freeze Pink Coconut Snowball Cake Bars

Room Temperature: Store your Pink Coconut Snowball Cake Bars in an airtight container at room temperature for up to 3 days to keep them fresh and delicious.

Fridge: If you prefer to extend their shelf life, keep the bars in the refrigerator for up to a week; just be sure to wrap them tightly to maintain moisture.

Freezer: For longer storage, freeze cut bars in a single layer on a baking sheet, then transfer to an airtight container. They can be frozen for up to 3 months—perfect for future sweet cravings!

Reheating: To enjoy them warm, simply pop a bar in the microwave for about 10-15 seconds. This revitalizes the flavor and texture, making them feel freshly baked!

Make Ahead Options

These Pink Coconut Snowball Cake Bars are perfect for meal prep enthusiasts! You can prepare the cake base up to 24 hours in advance. Simply bake and cool the cake, then wrap it tightly in plastic wrap to prevent moisture loss. The pink frosting can also be made ahead; just store it in an airtight container in the fridge for up to 3 days. When you're ready to serve, simply frost the cooled cake with the prepared frosting, sprinkle with shredded coconut, and slice into bars. This way, you’ll have delightful sweet treats ready to impress, making your busy weeknights a little more special!

What to Serve with Pink Coconut Snowball Cake Bars

Indulging in these delightful pink treats opens the door to creating a bright and joyful meal experience.

  • Tropical Fruit Salad: A refreshing mix of pineapple, mango, and kiwi balances the sweetness of the bars, adding a vibrant splash of color. This fruity side can also elevate your dessert table, echoing the tropical notes in the cake.

  • Vanilla Bean Ice Cream: Creamy and rich, vanilla ice cream complements the cake's flavors perfectly. It offers a delightful contrast with a smooth, velvety texture, creating a luscious mouthfeel with each bite.

  • Coconut Water Lemonade: This refreshing drink, with its zesty twist, pairs beautifully with the coconut flavors in the bars. It adds an invigorating element that brightens the palate after sweet bites.

  • Chocolate Dipped Strawberries: Combining the flavors of chocolate and fresh strawberries creates an indulgent treat to accompany your cake bars. The pairing of sweetness and acidity enhances the overall dessert experience.

  • Minty Green Salad: Fresh greens, cucumbers, and a mint dressing bring a crisp freshness that balances the rich flavors of the cake. This light side is an unexpected yet delightful contrast to the sweet bars.

  • Sparkling Water with Lime: A fizzy drink accented with lime provides a refreshing cleanse between bites, enhancing the cake's sweetness without overwhelm. Its bubbly nature adds a celebratory feel to your meal!

  • Almond Biscotti: Dipping these crunchy cookies into coffee or tea pairs beautifully with the airy cake bars, offering layered textures and flavors. The nutty notes harmonize with the almond extract in your dessert.

  • Chocolate Milk: For a fun and nostalgic twist, serve chilled chocolate milk. The creamy sweetness offers a delightful contrast to the Pink Coconut Snowball Cake Bars and is sure to delight guests of all ages.

All these delicious pairings create a wonderfully joyous occasion, ensuring your Pink Coconut Snowball Cake Bars are the star of a truly delightful meal!

Pink Coconut Snowball Cake Bars Variations

Feel free to get creative with these delightful Pink Coconut Snowball Cake Bars; let your imagination lead the way!

  • Gluten-Free: Substitute the white cake mix with a gluten-free option. This way, everyone can enjoy the sweetness without dietary worries!

  • Dairy-Free: Use almond milk instead of regular milk in the frosting, and replace the powdered sugar with coconut cream for a luscious dairy-free treat.

  • Tropical Twist: Add crushed pineapple to the batter for a refreshing tropical flavor! This twist introduces a juicy surprise that’s sure to excite your palate.

  • Nutty Delight: Incorporate chopped almonds or walnuts into the batter for added crunch. The nutty flavor pairs perfectly with the coconut goodness.

  • Chocolate Lovers: Swirl in some melted dark chocolate into the batter before baking for a rich, decadent chocolate flavor that elevates these bars to a whole new level.

  • Colorful Frosting: Experiment with different food colorings to create multiple shades or rainbow layers. This visual delight is as fun as it is delicious, perfect for kids!

  • Spiced Up: Add a pinch of cinnamon or nutmeg to the batter for a warm, spiced twist that brings cozy vibes to your dessert table.

For a fantastic pairing that balances out the sweetness, consider serving these bars alongside a slice of Carrot Cake. They make an irresistible duo for any gathering or just a delightful treat at home. Enjoy experimenting!

Expert Tips for Pink Coconut Snowball Cake Bars

  • Use Fresh Ingredients: Always use fresh eggs and good-quality extracts for the best flavor. Stale ingredients can lead to dull tasting Pink Coconut Snowball Cake Bars.

  • Don’t Overmix: Once you add the dry to wet ingredients, mix just until combined. Overmixing can make your cake bars dense rather than fluffy.

  • Check for Doneness: Use a toothpick to test not just the center, but also several spots in the cake. If it comes out clean, it's ready to avoid underbaking.

  • Let It Cool: Ensure the cake is completely cooled before frosting. This will help the frosting to set properly and prevent it from melting into the cake.

  • Adjust Color Gradually: When using pink food coloring, add it gradually. It’s easier to darken than to lighten, so start with a small amount for your desired shade!

Pink Coconut Snowball Cake Bars

Pink Coconut Snowball Cake Bars Recipe FAQs

What should I look for when selecting ingredients, like shredded coconut?
Absolutely! When choosing shredded coconut, look for packages that specify "sweetened" if that's the flavor profile you desire. Fresh coconut has a vibrant white color without any dark spots or moisture; avoid any packages with signs of clumping, which indicates age.

How should I store Pink Coconut Snowball Cake Bars, and how long do they last?
You can store your Pink Coconut Snowball Cake Bars in an airtight container at room temperature for up to 3 days. If you're looking to keep them longer, move them into the refrigerator where they'll last for up to a week—just ensure they're well-wrapped to maintain their moisture!

Can I freeze these cake bars, and how do I do it properly?
Very! To freeze your Pink Coconut Snowball Cake Bars, first cut them into your preferred sizes. Arrange them in a single layer on a baking sheet and place them in the freezer for about 1-2 hours until solid. Then transfer the frozen bars to an airtight container or freezer bag, layering parchment paper between them to prevent sticking. They can be frozen for up to 3 months!

What if my cake bars turn out too dense or dry?
If your cake bars come out dense or dry, it could be due to overmixing the batter or using stale ingredients. Remember to mix just until combined and always use fresh ingredients. For a moist fix, you can drizzle a bit of simple syrup (made with equal parts sugar and water) over the cooled bars to add moisture back in.

Are these cake bars suitable for a gluten-free diet?
Absolutely! To make these Pink Coconut Snowball Cake Bars gluten-free, simply use a gluten-free white cake mix. Always double-check the labels to ensure that your other ingredients, like extracts and shredded coconut, are also gluten-free to accommodate dietary needs.

Can I modify the recipe for my pets, like making a coconut treat for them?
While these Pink Coconut Snowball Cake Bars are delightful for humans, they aren't suitable for pets due to ingredients like sugar and food coloring. For a safe treat, try pure unsweetened coconut or homemade coconut-based treats without the additives found in this recipe. Always consult your vet for the best pet snack options!

Pink Coconut Snowball Cake Bars

Savor the Sweetness of Pink Coconut Snowball Cake Bars

Indulge in the vibrant and fluffy Pink Coconut Snowball Cake Bars, a perfect blend of coconut goodness and playful pink frosting.
Print Recipe Pin Recipe
Prep Time 15 minutes mins
Cook Time 30 minutes mins
Cooling Time 10 minutes mins
Total Time 55 minutes mins
Servings: 12 bars
Course: Dessert
Cuisine: American
Calories: 250
Ingredients Equipment Method Nutrition Notes

Ingredients
  

For the Cake Bars
  • 1 box white cake mix a convenient base that brings fluffy texture and lightness to your bars.
  • 3 large eggs fresh eggs are best for moisture and structure.
  • ½ cup vegetable oil can be substituted with melted coconut oil for extra flavor.
  • 1 cup water
  • 1 cup shredded sweetened coconut infuses delightful coconut flavor and texture.
  • 1 teaspoon vanilla extract feel free to use pure vanilla for a richer flavor.
  • ½ teaspoon almond extract enhances the cake’s flavor profile.
For the Frosting
  • 2 cups powdered sugar sifted to avoid lumps.
  • 2 tablespoons milk adds creaminess.
  • ½ cup shredded coconut for topping.
  • as needed pink food coloring adjust to achieve desired level of pinkness.

Equipment

  • 9x13-inch baking pan
  • Mixing Bowl
  • Electric mixer
  • spatula
  • wire rack

Method
 

Step-by-Step Instructions
  1. Preheat your oven to 350°F (175°C) and grease a 9x13-inch baking pan.
  2. In a large mixing bowl, combine the white cake mix, eggs, vegetable oil, and water. Beat on medium speed for 2 minutes.
  3. Fold in the shredded coconut, vanilla extract, and almond extract into the batter.
  4. Pour the batter into the prepared baking pan and spread into an even layer.
  5. Bake for 25-30 minutes, or until a toothpick inserted comes out clean.
  6. Allow the cake to cool in the pan for about 10 minutes, then transfer to a wire rack to cool completely.
  7. In a medium bowl, combine the powdered sugar and milk to make the frosting.
  8. Add pink food coloring to the frosting gradually until desired shade is reached.
  9. Spread the pink frosting evenly over the cooled cake.
  10. Sprinkle shredded coconut over the frosted cake and press gently to adhere.
  11. Slice into bars and store in an airtight container.

Nutrition

Serving: 1barCalories: 250kcalCarbohydrates: 35gProtein: 2gFat: 12gSaturated Fat: 10gPolyunsaturated Fat: 1gCholesterol: 45mgSodium: 180mgPotassium: 50mgFiber: 1gSugar: 20gVitamin A: 200IUCalcium: 15mgIron: 0.5mg

Notes

Use fresh ingredients for the best flavor, and ensure the cake is completely cooled before frosting.

Tried this recipe?

Let us know how it was!

Delicious Oatmeal Cranberry Pecan Cookies for Cozy Nights

January 12, 2026 by grace bellamy Leave a Comment

I can still hear the rich, buttery scent of Oatmeal Cranberry Pecan Cookies wafting through my kitchen, inviting everyone to gather around. There's something magical about baking that fills the home with warmth and creates lasting memories, and these cookies are no exception. Not only are they a great alternative to store-bought snacks, but they also pack a delightful crunch and a hint of sweetness that’s simply irresistible. With just 20 minutes of prep time and an oven timer to guide your baking journey, you’ll produce a batch that’s perfect for sharing or savoring alone. So, who’s ready to indulge in some homemade goodness? Let’s get baking!

Oatmeal Cranberry Pecan Cookies

Why are these cookies a must-try?

Irresistible flavors come together in this cookie, blending buttery richness with tart cranberries and crunchy pecans for a taste sensation. Quick and easy to prepare, you can whip up a batch in just 20 minutes of prep time, making them perfect for surprise guests or cozy nights in. Healthy indulgence is at play here, as the oats add fiber while still delivering that sweet satisfaction. Perfect for sharing, these cookies will have everyone coming back for seconds, much like the favorite Cranberry Jalapeno Dip you love. Enjoy a homemade treat while you savor the moment!

Oatmeal Cranberry Pecan Cookies Ingredients

For the Cookie Dough
• Unsalted butter – provides rich creaminess; make sure it’s softened for easy mixing.
• Brown sugar – adds deep, caramel-like sweetness, enhancing the overall flavor.
• Granulated sugar – helps with texture and sweetness; can be reduced for less sweetness.
• Large eggs – bind the ingredients together and add moisture; room temperature works best.
• Vanilla extract – adds a warm, inviting aroma; pure vanilla is recommended for the best flavor.

For the Dry Ingredients
• All-purpose flour – the foundation of your cookies; always measure correctly for best results.
• Baking soda – acts as a leavening agent for a light texture; don't skip this step!
• Ground cinnamon – brings warmth and spice; feel free to add more for extra flavor.
• Salt – enhances sweetness and balances flavors; a must-have in cookie baking!

For the Flavor Boost
• Old-fashioned rolled oats – provide hearty texture and a chewy bite; this makes the cookies truly oatmeal-inspired.
• Dried cranberries – offer a tart contrast to the sweetness of the cookies; you can substitute with raisins.
• Chopped pecans – lend a delightful crunch; you can replace them with walnuts if desired.

Baking these Oatmeal Cranberry Pecan Cookies not only satisfies sweet cravings but also fills your home with a welcoming aroma!

Step‑by‑Step Instructions for Oatmeal Cranberry Pecan Cookies

Step 1: Preheat Your Oven
Begin by preheating your oven to 350°F (175°C). This crucial step prepares your space for baking, ensuring your cookies bake evenly. While the oven warms, line your baking sheets with parchment paper or silicone baking mats to prevent sticking and to achieve easy cleanup later.

Step 2: Cream the Butter and Sugars
In a large mixing bowl, combine the softened unsalted butter, brown sugar, and granulated sugar. Using an electric mixer, beat the mixture on medium speed for about 3-5 minutes until it transforms into a light and fluffy consistency, signaling that it’s ready for the next ingredients.

Step 3: Incorporate Eggs and Vanilla
With your creamed mixture ready, add the large eggs one at a time, mixing well after each addition to create a smooth blend. Then, pour in the vanilla extract and continue mixing until it’s fully incorporated, filling your kitchen with its inviting aroma that perfectly complements the baking process.

Step 4: Mix the Dry Ingredients
In a separate bowl, whisk together the all-purpose flour, baking soda, ground cinnamon, and salt. This step not only blends your dry ingredients for a consistent dough but also ensures the baking soda activates properly when combined with wet elements, promoting a delightful rise in your Oatmeal Cranberry Pecan Cookies.

Step 5: Combine Wet and Dry Mixtures
Gradually add the dry mixture to the wet ingredients, stirring gently until just combined. It’s essential to avoid overmixing at this stage to maintain the airy texture of the cookies. You should see a thick dough forming with hints of your buttery base and sugar blending beautifully.

Step 6: Fold in Key Ingredients
Now for the fun part! Fold in the old-fashioned rolled oats, dried cranberries, and chopped pecans with a sturdy spatula. Ensure these delightful additions are evenly distributed throughout your cookie dough, creating pockets of chewy oats, tart cranberries, and crunchy pecans in every bite of your Oatmeal Cranberry Pecan Cookies.

Step 7: Shape the Cookies
Using a tablespoon or a cookie scoop, drop rounded balls of dough onto your lined baking sheets, making sure to space them about 2 inches apart. This spacing allows the cookies to spread while baking, resulting in beautifully rounded cookies with a perfect chewy texture.

Step 8: Bake to Perfection
Place your prepared baking sheets in the preheated oven and bake for 10-12 minutes. Watch closely for the edges to turn a light golden brown while the centers remain soft. This is the perfect balance for Oatmeal Cranberry Pecan Cookies, promising a delightful texture that melts in your mouth.

Step 9: Cooling Time
Once baked, remove your cookies from the oven and let them cool on the baking sheets for approximately 5 minutes. This brief resting period allows them to firm up slightly before transferring them to wire racks where they can cool completely, ensuring a perfect cookie that’s ready for enjoyment.

Oatmeal Cranberry Pecan Cookies

Expert Tips for Oatmeal Cranberry Pecan Cookies

  • Use Room Temperature Ingredients: Ensure butter and eggs are at room temperature for a smooth batter, allowing for better mixing and fluffier cookies.

  • Don’t Overmix: When combining dry and wet ingredients, mix until just combined to avoid tough cookies. The key to perfect Oatmeal Cranberry Pecan Cookies is light and airy texture.

  • Watch the Bake Time: Every oven is different; start checking your cookies at the 10-minute mark. Remove them when the edges are golden and the centers are still soft for the best chewy consistency.

  • Cool Properly: Let cookies cool on the baking sheet for 5 minutes before transferring to wire racks. This helps set their shape and ensures they don’t crumble.

  • Customize Your Mix-ins: Feel free to substitute dried cranberries with raisins or chocolate chips for varied flavors. Just keep the overall proportions of oats and nuts consistent for delicious Oatmeal Cranberry Pecan Cookies.

Make Ahead Options

These delightful Oatmeal Cranberry Pecan Cookies are perfect for busy home cooks looking to save time! You can prepare the cookie dough up to 3 days in advance by mixing everything and refrigerating it in an airtight container. This helps maintain the cookies' texture and flavor. When you’re ready to bake, simply scoop the chilled dough onto baking sheets and bake as directed, knowing you’ll enjoy warm, fresh cookies in a flash. If you prefer, you can also freeze the shaped cookie dough balls for up to 3 months. Just ensure to space them on baking sheets and freeze them before transferring to a freezer bag. When you crave a treat, simply bake straight from frozen, adding a couple of extra minutes to the baking time!

What to Serve with Oatmeal Cranberry Pecan Cookies

Indulging in the sweet warmth of freshly baked cookies makes me feel cozy, especially when paired with delightful companions.

  • Warm Milk: A classic choice that creates a nostalgic experience, enhancing the buttery flavors of your cookies.
  • Vanilla Ice Cream: Creamy and cold, it balances the chewy texture and sweet undertones beautifully, making every bite a heavenly treat.
  • Chai Latte: The spicy warmth of chai complements the cinnamon in your cookies, offering a comforting drink to savor alongside.
  • Fresh Fruit Salad: Light and refreshing, a mix of seasonal fruits adds a burst of color and a nutritious contrast to your sweet indulgence.
  • Homemade Hot Chocolate: Rich and velvety, this warm drink enhances the comfort factor while delighting your taste buds with chocolatey goodness.
  • Nutty Granola Bars: Offering a crunchy texture, these bars are a wholesome snack that pairs well with the soft, chewy cookies.
  • Cheese Plate: A surprising yet delightful pairing; the saltiness of cheese like brie or sharp cheddar will elevate the sweetness of your cookies.
  • Cranberry Orange Juice: Bright and zesty, this juice ties in the cranberries from your cookies and refreshes your palate between bites.
  • Chocolate Chip Banana Bread: A sweet, moist loaf that complements the cookies’ chewy texture while adding an extra layer of indulgence.
  • Decaf Coffee or Tea: Sip a warm mug of your favorite beverage, allowing the rich flavors of your drink to enhance each bite of the cookies.

Oatmeal Cranberry Pecan Cookies Variations

Feel free to let your creativity shine by personalizing these cookies with delightful twists and swaps!

  • Gluten-Free: Substitute all-purpose flour with a 1:1 gluten-free flour blend for a deliciously safe version. Your friends with gluten sensitivity will thank you for this thoughtful adjustment!

  • Nut-Free: Replace pecans with sunflower seeds or pumpkin seeds for a crunchy alternative. This swap keeps the texture while making it school-lunch friendly.

  • Vegan: Use coconut oil instead of butter and flax eggs (1 tablespoon ground flax mixed with 2.5 tablespoons water) for a plant-based cookie. The result is just as tasty, with a touch of earthiness.

  • Chocolate Lovers: Add 1 cup of chocolate chips alongside the cranberries for an indulgent twist. The melty chocolate will blend beautifully with the tartness and crunch in each bite!

  • Spicy Kick: Incorporate a pinch of cayenne pepper or a teaspoon of ginger for an unexpected flavor boost. This creates a unique flavor profile that keeps people guessing with every bite.

  • Fruit Fusion: Swap dried cranberries for other dried fruits like cherries or apricots for a delightful change. This gives each cookie a new fruity character while maintaining that chewy goodness.

  • Cinnamon Swirl: For extra cinnamon flavor, mix 2 teaspoons of cinnamon into the dough and also sprinkle some on top before baking. You’ll achieve a warm, fragrant cookie that's hard to resist!

  • Zesty Surprise: Add the zest of one orange or lemon into the dough to brighten the flavors. This citrus twist makes for a refreshing treat that complements the oats wonderfully.

Feel free to explore these options, and don’t hesitate to share your favorite combos! If you love these cookies, you might also enjoy making a batch of Apple Pecan Cake for a sweet and timeless dessert. Happy baking!

How to Store and Freeze Oatmeal Cranberry Pecan Cookies

Room Temperature: Keep your cookies in an airtight container at room temperature for up to 5 days, ensuring they remain soft and delicious.

Fridge: For longer freshness, store the cookies in the fridge, where they can last up to 2 weeks. Make sure to use a well-sealed container to prevent them from drying out.

Freezer: To freeze your Oatmeal Cranberry Pecan Cookies, layer them between parchment paper in a freezer-safe bag or container. They can be kept for up to 3 months.

Reheating: When ready to enjoy, simply pop them in the microwave for 10-15 seconds or reheat in the oven at 350°F (175°C) for 5 minutes to restore their fresh-baked goodness.

Oatmeal Cranberry Pecan Cookies

Oatmeal Cranberry Pecan Cookies Recipe FAQ

How do I select ripe ingredients for Oatmeal Cranberry Pecan Cookies?
Absolutely! When choosing ingredients, ensure your butter is softened but not melted, as this will create a creamy texture. Look for dried cranberries that are plump and vibrant in color; avoid those that are overly hard or discolored. Fresh pecans with no dark spots or unusual odors are best for optimal flavor!

What’s the best way to store Oatmeal Cranberry Pecan Cookies?
Store your cookies in an airtight container at room temperature for up to 5 days. This keeps them soft and delicious! If you prefer to extend freshness, place them in the refrigerator, where they can last up to 2 weeks. Just be sure to use a well-sealed container!

Can I freeze Oatmeal Cranberry Pecan Cookies?
Yes, you can freeze them! First, allow the baked cookies to cool completely. Then, layer them between sheets of parchment paper in a freezer-safe bag or container. You can store them for up to 3 months. To enjoy, simply thaw them at room temperature or microwave them for 10-15 seconds to restore that freshly baked texture.

What should I do if my cookie dough is too dry?
No worries! If you find the dough too dry, it's often due to over-measuring flour or not enough moisture. Start by adding a tablespoon of milk or even water, mixing until the dough comes together. If it's still crumbly, adding another tablespoon should do the trick. Just remember to handle the dough gently to maintain that delightful texture we love.

Are Oatmeal Cranberry Pecan Cookies safe for those with nut allergies?
If anyone around you has nut allergies, it’s best to omit the chopped pecans to ensure safety. You could replace them with seeds like sunflower or pumpkin seeds, which still offer a great crunch without the allergens. Always check with your guests for any dietary considerations before serving!

How can I make these cookies healthier without losing flavor?
Absolutely, a few swaps can make your Oatmeal Cranberry Pecan Cookies healthier! Consider using whole wheat flour instead of all-purpose flour for added fiber. You can also reduce sugar slightly or substitute part of it with mashed banana or unsweetened applesauce. These adjustments will create a delicious cookie while reducing calories and adding nutrients!

Oatmeal Cranberry Pecan Cookies

Delicious Oatmeal Cranberry Pecan Cookies for Cozy Nights

Indulge in homemade Oatmeal Cranberry Pecan Cookies that blend buttery richness with tart cranberries and crunchy pecans for a cozy treat.
Print Recipe Pin Recipe
Prep Time 20 minutes mins
Cook Time 12 minutes mins
Cooling Time 5 minutes mins
Total Time 37 minutes mins
Servings: 24 cookies
Course: Dessert
Cuisine: American
Calories: 150
Ingredients Equipment Method Nutrition Notes

Ingredients
  

For the Cookie Dough
  • 1 cup unsalted butter softened
  • 1 cup brown sugar packed
  • ½ cup granulated sugar
  • 2 large eggs room temperature
  • 2 teaspoons vanilla extract pure recommended
For the Dry Ingredients
  • 2 cups all-purpose flour measured correctly
  • 1 teaspoon baking soda
  • 1 teaspoon ground cinnamon
  • ½ teaspoon salt
For the Flavor Boost
  • 2 cups old-fashioned rolled oats
  • 1 cup dried cranberries can substitute with raisins
  • 1 cup chopped pecans can substitute with walnuts

Equipment

  • Mixing Bowl
  • Electric mixer
  • Baking sheets
  • parchment paper
  • spatula
  • Cookie scoop

Method
 

Step‑by‑Step Instructions for Oatmeal Cranberry Pecan Cookies
  1. Preheat your oven to 350°F (175°C) and line your baking sheets with parchment paper.
  2. In a large mixing bowl, cream together the softened butter, brown sugar, and granulated sugar for 3-5 minutes until fluffy.
  3. Add the eggs one at a time, mixing well after each addition, then stir in the vanilla extract.
  4. In a separate bowl, whisk together the flour, baking soda, cinnamon, and salt.
  5. Gradually add the dry ingredients to the wet mixture and mix until just combined.
  6. Fold in the oats, cranberries, and pecans until evenly distributed.
  7. Drop rounded balls of dough onto prepared baking sheets, spacing them 2 inches apart.
  8. Bake for 10-12 minutes until edges are golden and centers are soft.
  9. Let cookies cool on the baking sheets for 5 minutes before transferring to wire racks.

Nutrition

Serving: 1cookieCalories: 150kcalCarbohydrates: 20gProtein: 2gFat: 7gSaturated Fat: 4gPolyunsaturated Fat: 1gMonounsaturated Fat: 2gCholesterol: 30mgSodium: 70mgPotassium: 50mgFiber: 1gSugar: 10gVitamin A: 300IUCalcium: 20mgIron: 0.5mg

Notes

For best results, use room temperature ingredients and don't overmix the dough. Customize mix-ins for varied flavors.

Tried this recipe?

Let us know how it was!

Heavenly Soft White Bread Recipe You’ll Love to Bake

January 12, 2026 by grace bellamy Leave a Comment

The aroma of freshly baked bread wafting through the kitchen is a memory I cherish deeply. Now, let's elevate our homemade cooking game with this delightful White Bread recipe. This classic loaf is not only simple to make but also serves as a versatile addition to any meal. With just a handful of ingredients and a little patience, you can create a soft, fluffy bread that’s perfect for sandwiches, toast, or simply enjoying with some butter. Plus, it’s a fantastic way to impress friends and family, leaving them wondering how you pulled off such a delicious masterpiece. Are you ready to unlock the secrets of baking your own bread?

White Bread

Why is homemade white bread a must-try?

Heavenly Aroma: The delightful scent of freshly baked bread fills your home, creating an inviting atmosphere that enhances any meal.

Effortless Baking: With just a few basic ingredients and easy steps, you’ll be amazed at how simple it is to create perfect homemade bread.

Endless Versatility: Whether you’re making sandwiches, toasting for breakfast, or pairing it with soups, this white bread is your go-to complement for countless dishes.

Crowd-Pleasing Treat: Serve warm, and watch family and friends savor each slice, wondering how you made such a fantastic loaf! You might also enjoy exploring more about homemade bread techniques for tips on perfecting your craft.

Budget-Friendly: Ditch the store-bought options and prepare an inexpensive, fresher alternative right from your own kitchen!

White Bread Ingredients

For the Dough
• All-purpose flour – 4 cups to create a tender, soft loaf that rises beautifully.
• Sugar – 2 tablespoons acts as food for the yeast, helping it rise and adding a subtle sweetness.
• Salt – 1 tablespoon enhances flavor while controlling yeast activity for perfect texture.
• Active dry yeast – 2 ¼ teaspoons is essential for that wonderful rise and fluffy crumb.
• Warm water – 1 ½ cups (about 110°F) activates the yeast perfectly for fluffy white bread.
• Unsalted butter – 2 tablespoons (melted) adds richness and a delightful flavor to the bread.

By gathering these ingredients, you're set to embark on a baking journey that will charm your family and elevate your cooking skills with this delicious white bread recipe!

Step‑by‑Step Instructions for White Bread

Step 1: Activate the Yeast
In a large mixing bowl, combine 1 ½ cups of warm water (about 110°F) with 2 tablespoons of sugar. Sprinkle 2 ¼ teaspoons of active dry yeast over the surface and let it sit for about 5-10 minutes, until it becomes frothy and bubbly, signaling that the yeast is alive and ready to work its magic in your White Bread.

Step 2: Mix the Ingredients
Once the yeast is activated, add 2 tablespoons of melted unsalted butter and 1 tablespoon of salt to the yeast mixture. Gradually incorporate 4 cups of all-purpose flour, stirring with a wooden spoon until a shaggy dough starts to form. This step allows the flour to absorb the liquids while preparing for the kneading process ahead.

Step 3: Knead the Dough
Turn the dough onto a lightly floured surface and knead it for about 8-10 minutes. Use the heels of your hands to push down and forward, then fold it over and repeat. You'll know the dough is ready when it feels smooth and elastic. This vital process develops the gluten, giving your White Bread its delightful texture.

Step 4: First Rise
Place the kneaded dough into a greased bowl, turning it to coat all sides. Cover the bowl with a clean kitchen towel or plastic wrap, then let it rest in a warm environment until it doubles in size, approximately 1-2 hours. Look for the dough to rise and spread, signaling it's ready for the next step.

Step 5: Shape the Loaf
Once the dough has risen, punch it down gently to release the air and turn it out onto a floured surface. Shape the dough into a loaf by flattening it and rolling it up tightly from one end to the other. Transfer the shaped loaf to a greased bread pan, ensuring it's smooth on top for an even rise.

Step 6: Second Rise
Cover the loaf with a kitchen towel and let it rise again in a warm area until it doubles in size, about 30-60 minutes. During this time, the dough will puff up and fill the pan, promising a fluffy white bread once baked.

Step 7: Preheat the Oven
While the loaf is rising, preheat your oven to 375°F (190°C). This step ensures the oven is hot and ready, allowing the White Bread to bake evenly and achieve that perfect golden brown crust we all love.

Step 8: Bake the Bread
Once the dough has risen enough, place the bread pan in the preheated oven. Bake for 25-30 minutes, or until the top is golden brown and sounds hollow when tapped lightly with a finger. Keep an eye on the loaf as it bakes, relishing the aroma of freshly baked White Bread filling your kitchen.

Step 9: Cool and Slice
After baking, remove the bread from the oven and let it cool in the pan for about 5 minutes. Then, transfer the loaf to a wire rack to cool completely before slicing. This resting stage allows the steam to escape, ensuring clean slices that hold up beautifully for sandwiches or simply enjoying with butter.

White Bread

How to Store and Freeze White Bread

Room Temperature: Store your freshly baked white bread in a bread box or wrapped in a kitchen towel for up to 3 days to maintain its softness and flavor.

Fridge: While refrigeration can extend shelf life, it may dry the bread out. If you choose this method, keep it in an airtight bag for up to 1 week.

Freezer: For longer storage, slice the cooled white bread and wrap it tightly in plastic wrap or aluminum foil, then place it in a freezer bag. It can be frozen for up to 3 months.

Reheating: To enjoy frozen white bread, thaw it overnight in the fridge or at room temperature, then pop slices in the toaster or warm them in the oven for a delicious, fresh-baked taste.

White Bread Variations & Substitutions

Feel free to get creative and customize this recipe to make it your own with these exciting variations!

  • Whole Wheat: Substitute half the all-purpose flour with whole wheat flour for a nutty flavor and added fiber. You might notice a denser texture, but it's a delightful twist!

  • Herb-Infused: Add 1-2 tablespoons of dried herbs such as rosemary or thyme to the flour for an aromatic, savory bread. This variation pairs beautifully with soups and stews, enhancing your culinary experience.

  • Sweet Twist: Mix in ½ cup of honey or maple syrup instead of sugar for a naturally sweeter loaf. The result is a subtly sweet bread that's great for breakfasts or snacks.

  • Nutty Addition: Toss in ½ cup of chopped nuts, like walnuts or pecans, for a delightful crunch and richness. This crunchy texture brings a lovely contrast to the soft crumb of the bread.

  • Cheese Lover's Delight: Fold in 1 cup of shredded cheese, such as cheddar or mozzarella, into the dough for a cheesy, savory delight. It’s perfect for sandwiches or just warm with butter.

  • Spicy Kick: Incorporate ½ teaspoon of red pepper flakes into the dough for a subtle, spicy kick. This variation is perfect for those who enjoy adding heat to their meals.

  • Vegan Option: Replace the unsalted butter with coconut oil or olive oil and use a plant-based milk instead of water for a vegan-friendly version that’s still delicious.

  • Fruit & Nut: Add ½ cup of dried fruits like cranberries or raisins and ¼ cup of chopped nuts for a naturally sweetened bread that’s perfect for breakfast or snacking. The combination is simply divine and adds bursts of flavor.

With these variations, your homemade white bread can become a delightful canvas for countless flavors and textures, making every loaf a new adventure in your kitchen!

Make Ahead Options

These Heavenly Soft White Bread loaves are perfect for meal prep enthusiasts! You can prepare the dough up to 24 hours in advance by letting it rise in the fridge instead of at room temperature. After the first rise, punch down the dough, shape it into a loaf, then cover it tightly with plastic wrap and refrigerate. When you're ready to bake, simply remove the dough from the fridge, let it come to room temperature for about 30 minutes, and continue with the second rise before baking. This method ensures your bread remains just as delicious while saving you precious time on busy days!

Tips for the Best White Bread

Perfect Temperature: Ensure your water is around 110°F; too hot can kill the yeast, while too cold will slow the activation.

Knead Well: Knead the dough long enough (8-10 minutes) until smooth and elastic, ensuring your white bread has a nice rise and texture.

Rising Space: Let your dough rise in a warm environment, such as an oven turned off but slightly warmed. This helps it double in size efficiently.

Punch Down Gently: Be gentle when punching down the dough after the first rise; this helps retain some air for a lighter loaf.

Bake to Perfection: Tap the top of the loaf lightly to check for a hollow sound, a sure sign that your white bread is perfectly baked.

Cooling Time: Allow the bread to cool completely on a wire rack before slicing, preventing it from becoming gummy and ensuring clean, beautiful slices.

What to Serve with White Bread

Freshly baked white bread evokes warmth and comfort, inviting endless culinary possibilities that turn any meal into a delightful experience.

  • Creamy Tomato Soup: A classic pairing that complements the bread’s softness and adds a rich, savory taste.

  • Herbed Olive Oil Dip: Drizzle this fragrant infusion for a decadent appetizer, perfect for tearing and sharing with family.

  • Savory Garlic Butter: Spread this onto warm slices, enhancing each bite with an irresistible buttery, garlic flavor.

  • Classic Meatloaf: Serve alongside a hearty meatloaf for a cozy, wholesome dinner that feels like a warm hug.

  • Crisp Garden Salad: A refreshing mix of greens balances the bread's richness, adding a burst of color and crunch to your plate.

  • Chicken or Tuna Salad Sandwiches: Turn your bread into sandwiches filled with flavorful ingredients, perfect for lunch or picnics.

  • Mixed Berry Jam: Spread on warm slices, this sweet addition transforms simple bread into a delightful breakfast treat.

  • Chilled White Wine: Pair with a crisp white wine to elevate the meal, adding a refreshing touch that complements the bread beautifully.

White Bread

White Bread Recipe FAQs

What is the best way to choose ripe ingredients for white bread?
Absolutely! For the best results, choose flour that is fresh and free from any clumps. Look at expiration dates to ensure its potency. The warm water should be around 110°F, just warm enough to activate the yeast without killing it. You can check this easily with a thermometer or by feeling it—warm but not scalding!

How should I store leftover white bread?
To maintain its delicious softness, store your freshly baked white bread in a bread box or wrapped in a kitchen towel for up to 3 days at room temperature. If you notice any signs of staleness, like a hard crust, try slicing it, and wrapping it tightly to keep it fresh longer!

Can I freeze my white bread?
Yes, you can! For longer storage, slice your cooled white bread and wrap it tightly in plastic wrap or aluminum foil, then place it in a freezer-safe bag. This will protect it from freezer burn and it will stay fresh for up to 3 months. When you're ready to enjoy, simply thaw it overnight in the fridge or at room temperature!

What if my bread dough doesn’t rise well?
Very common question! If your dough doesn’t rise, it could be that the yeast is inactive. Always check the expiration date on your yeast and ensure you activated it correctly. If the dough still appears flat, try placing it in a warmer environment—an oven that's turned off but slightly warmed works wonders!

Is this recipe suitable for those with dietary restrictions?
This white bread recipe contains gluten, so it’s not suitable for those with gluten allergies or celiac disease. However, you can easily substitute the all-purpose flour with a gluten-free flour blend designed for baking. Just make sure to also check for any allergens in your other ingredients, like butter.

Can I make this recipe dairy-free?
Absolutely! You can replace the unsalted butter with a non-dairy alternative, like olive oil or coconut oil, which will yield similar results in flavor and texture. Just be cautious with the measurement as butter adds moisture, and you might want to adjust the liquid content slightly for the best outcome!

White Bread

Heavenly Soft White Bread Recipe You’ll Love to Bake

This Heavenly Soft White Bread is a simple, versatile recipe perfect for sandwiches, toast, or enjoying with butter.
Print Recipe Pin Recipe
Prep Time 15 minutes mins
Cook Time 30 minutes mins
Rising Time 2 hours hrs
Total Time 2 hours hrs 45 minutes mins
Servings: 12 slices
Course: Side Dishes
Cuisine: American
Calories: 120
Ingredients Equipment Method Nutrition Notes

Ingredients
  

For the Dough
  • 4 cups All-purpose flour creates a tender, soft loaf
  • 2 tablespoons Sugar feeds yeast and adds sweetness
  • 1 tablespoon Salt enhances flavor and controls yeast
  • 2.25 teaspoons Active dry yeast essential for rise and texture
  • 1.5 cups Warm water activates yeast at about 110°F
  • 2 tablespoons Unsalted butter adds richness and flavor

Equipment

  • Mixing Bowl
  • Wooden Spoon
  • bread pan
  • wire rack

Method
 

Step-by-Step Instructions for White Bread
  1. In a large mixing bowl, combine 1 ½ cups of warm water with 2 tablespoons of sugar. Sprinkle 2 ¼ teaspoons of active dry yeast over the surface and let it sit for about 5-10 minutes.
  2. Once the yeast is activated, add 2 tablespoons of melted unsalted butter and 1 tablespoon of salt to the yeast mixture. Gradually incorporate 4 cups of all-purpose flour, stirring with a wooden spoon.
  3. Turn the dough onto a lightly floured surface and knead it for about 8-10 minutes until smooth and elastic.
  4. Place the kneaded dough into a greased bowl, cover, and let it rest in a warm environment until it doubles in size, about 1-2 hours.
  5. Gently punch down the dough, shape it into a loaf, and transfer to a greased bread pan.
  6. Cover the shaped loaf and let it rise again in a warm area until doubled in size, about 30-60 minutes.
  7. Preheat your oven to 375°F (190°C).
  8. Bake for 25-30 minutes until the top is golden brown. Remove from the oven and let cool for about 5 minutes.
  9. Transfer to a wire rack to cool completely before slicing.

Nutrition

Serving: 1sliceCalories: 120kcalCarbohydrates: 22gProtein: 4gFat: 2gSaturated Fat: 1gMonounsaturated Fat: 1gCholesterol: 5mgSodium: 150mgPotassium: 40mgFiber: 1gSugar: 1gVitamin A: 50IUCalcium: 10mgIron: 0.8mg

Notes

Ensure your water temperature is around 110°F for best yeast activation. Allow the bread to cool completely before slicing for cleaner cuts.

Tried this recipe?

Let us know how it was!

Mouthwatering Mexican Chopped Cheese Sandwich to Satisfy Cravings

January 12, 2026 by grace bellamy Leave a Comment

Let me tell you about my recent culinary adventure that took a delightful detour to Mexico. I was leaning towards a simple meal when inspiration struck: the Mexican Chopped Cheese Sandwich was calling my name! This sandwich is not just a treat for the taste buds; it’s a quick prep solution that’ll satisfy your cravings for a hearty, homemade meal without the time-consuming fuss. With just a handful of ingredients, you’re only 35 minutes away from a comforting dish that makes for an exciting family dinner or a solo feast after a long day. Are you ready to create a flavor-packed sandwich that’ll make you forget all about fast food? Let’s dive in!

Mexican Chopped Cheese Sandwich

Why is this sandwich a game changer?

Simplicity at Its Best: With just a handful of ingredients, you can create a satisfying meal in only 35 minutes!

Rich, Layered Flavors: The combination of seasoned chopped beef, melted cheese, and fresh toppings delivers a taste explosion that keeps you coming back for more.

Customization Galore: Make it your own with toppings like avocado, salsa, and pickled onions—perfect for picky eaters or adventurous foodies alike!

Crowd-Pleaser: Kids and adults alike will adore this Mexican Chopped Cheese Sandwich, making it an excellent choice for family dinners or gatherings.

Time-Saving Delight: No lengthy prep or cooking times here; this recipe focuses on convenience while delivering robust flavors—check out more time-saving recipes here.

Get ready to impress your friends and family, and even indulge yourself with this easy-to-make yet delicious sandwich that will surely become a go-to in your kitchen!

Mexican Chopped Cheese Sandwich Ingredients

• Dive into the delightful world of flavors with these easy-to-find ingredients!

For the Beef Mixture

  • Chopped beef – makes for a hearty filling that pairs beautifully with melted cheese.
  • Salt – seasoning brings out the natural flavors of the meat.
  • Pepper – adds a nice kick to your beef mix.

For the Sandwich

  • Cheese – choose your favorite type for that creamy, melty goodness.
  • Toasted sandwich rolls – the perfect vessel for this delicious concoction; opt for crusty rolls for extra texture.

For the Toppings

  • Avocado – a creamy addition that balances the richness of the beef and cheese.
  • Salsa – adds a zesty kick that elevates the overall flavor profile.
  • Pickled onions – they lend a tangy crunch that complements the softness of the sandwich.
  • Sour cream (optional) – a velvety dollop can elevate the flavor even more!

Gather these ingredients, and you're just a step away from crafting the irresistible Mexican Chopped Cheese Sandwich. Happy cooking!

Step‑by‑Step Instructions for Mexican Chopped Cheese Sandwich

Step 1: Cook the Beef
Heat a large skillet over medium heat. Add 2 cups of chopped beef and cook for about 8–10 minutes, stirring occasionally, until the beef is browned and fully cooked. Ensure there’s no pink remaining, and it should be nice and sizzled with a golden hue. This will be the hearty base of your Mexican Chopped Cheese Sandwich.

Step 2: Season the Mixture
Once the beef is cooked, sprinkle in 1 teaspoon of salt and 1 teaspoon of pepper. Stir well to combine, letting the beef soak in the flavors for an additional minute. This seasoning will enhance the rich taste, ensuring every bite of the sandwich is packed with flavor.

Step 3: Add the Cheese
With the beef still in the skillet, arrange 4 slices of your favorite cheese on top. Cover the skillet with a lid, and cook for another 2–3 minutes until the cheese melts beautifully and begins to bubble. The sight of gooey, melted cheese is a sure sign this Mexican Chopped Cheese Sandwich is on its way to perfection.

Step 4: Prepare the Sandwich Rolls
While the cheese is melting, take 4 toasted sandwich rolls and place them on a clean cutting board. You can give them a light toast in the oven at 350°F for 5–7 minutes for extra crunch if desired. The toasted rolls will provide a wonderful texture that complements the warm, gooey filling.

Step 5: Assemble the Sandwiches
Once the cheese has melted, use a spatula to scoop generous portions of the beef and cheese mixture onto each toasted sandwich roll. Make sure each roll gets a satisfying helping of this savory filling for a truly indulgent bite.

Step 6: Add Toppings
Now it’s time to elevate your Mexican Chopped Cheese Sandwich! Top each sandwich with creamy avocado slices, fresh salsa, and crunchy pickled onions. Feel free to add a dollop of sour cream to create a rich, tangy contrast. Each topping adds its own unique burst of flavor, making each bite a delightful adventure.

Step 7: Serve and Enjoy
Serve your beautifully assembled Mexican Chopped Cheese Sandwiches immediately while still warm. Place them on a platter for sharing, or enjoy one solo right away. The combination of flavors, textures, and warmth makes this dish a comforting and satisfying homemade meal that beats fast food any day!

Mexican Chopped Cheese Sandwich

How to Store and Freeze Mexican Chopped Cheese Sandwich

Room Temperature: Enjoy your Mexican Chopped Cheese Sandwich fresh! If left out, consume within 2 hours to ensure safety.

Fridge: Store leftover sandwiches in an airtight container for up to 3 days. You can reheat them in the oven or microwave for a delicious meal anytime!

Freezer: For longer storage, wrap individual sandwiches tightly in foil and freeze for up to 1 month. Thaw in the fridge overnight before reheating for best results.

Reheating: When ready to enjoy, reheat the sandwich in the oven at 350°F for about 10–15 minutes until warmed through, ensuring the cheese is melty and delicious!

Mexican Chopped Cheese Sandwich Variations

Feel free to get creative with this recipe and make it your own!

  • Dairy-Free: Substitute cheese with your favorite dairy-free alternative for a delicious, creamy taste without the lactose.
  • Spicy: Add diced jalapeños or a splash of hot sauce to the beef mixture for a fiery kick. Your taste buds will thank you!
  • Veggie-Packed: Mix in sautéed bell peppers and onions with the beef for extra nutrients and flavor in every bite.
  • Herb-Infused: Add fresh cilantro or parsley to the toppings for a burst of freshness, enhancing the overall flavor profile.
  • Gluten-Free: Use gluten-free sandwich rolls to enjoy the feast without compromising your diet. It's delicious and accommodating!
  • Pulled Chicken Version: Swap out chopped beef for shredded chicken, seasoned just the same, for a lighter alternative that still packs a punch.
  • Salsa Verde Twist: Replace regular salsa with salsa verde to give your sandwich a bright, tangy difference that pairs well with the beef.
  • Crunch Factor: Top with crushed tortilla chips or fresh cabbage for an added crunch that contrasts beautifully with the melting cheese.

Transform your Mexican Chopped Cheese Sandwich experience by trying any of these variations and savoring every delightful bite!

Make Ahead Options

These Mexican Chopped Cheese Sandwiches are ideal for meal prep aficionados! You can cook the chopped beef and season it up to 3 days in advance; simply let it cool before placing it in an airtight container in the refrigerator to maintain its juicy goodness. The cheese can also be ready to go—slice it ahead and store it in the fridge. If you want an even easier assembly later, consider toasting the sandwich rolls up to 24 hours before serving. When it's time to enjoy, just reheat the beef mixture in a skillet, melt the cheese over it, assemble the sandwiches, and add your delightful toppings. This way, you’ll have a delicious meal that feels just as fresh with minimal effort!

What to Serve with Mexican Chopped Cheese Sandwich

Looking to create a meal that’s not just delicious but truly memorable? Pairing will elevate this hearty delight!

  • Crispy French Fries: These golden sticks add a satisfying crunch that complements the soft sandwich while balancing flavors perfectly.

  • Zesty Coleslaw: A fresh, tangy slaw brings a crisp texture that contrasts delightfully with the rich meat and cheese, lightening up every bite.

  • Guacamole: The creamy nature of guacamole enhances the avocado topping, while its zesty lime flavor adds an extra layer of brightness.

  • Refried Beans: These rich, savory beans create a hearty side, bringing an authentic Mexican twist to your plate, perfect for a complete meal.

  • Corn on the Cob: Grilled or boiled corn provides a sweet crunch that pairs beautifully with savory flavors, rounding out your meal with vibrant sweetness.

  • Chilled Horchata: This creamy, cinnamon-infused drink offers a refreshing counterpoint to the savory sandwich, making each bite feel festive and fun!

  • Chocolate Flan: For dessert, the rich and velvety texture of chocolate flan is an indulgent way to satisfy your sweet tooth while keeping with the theme.

With these delightful pairings, your Mexican Chopped Cheese Sandwich will shine even brighter on the dinner table!

Expert Tips for Mexican Chopped Cheese Sandwich

Perfect Beef: Use freshly chopped beef for a better texture and flavor. Overcooking can lead to dryness, so watch it closely!

Cheese Choice: Opt for cheeses that melt well, such as cheddar or pepper jack. Avoid non-melting cheeses to ensure gooey goodness.

Toppings Matter: Experiment with fresh toppings to elevate your Mexican Chopped Cheese Sandwich. Avoid soggy ingredients; add toppings just before serving.

Roll Selection: Choose sturdy sandwich rolls that won't collapse under the weight of the filling. A crusty roll adds delightful texture.

Serving Warm: Always serve immediately for the best experience. Allowing the sandwiches to sit leads to sogginess, detracting from their deliciousness!

Mexican Chopped Cheese Sandwich

Mexican Chopped Cheese Sandwich Recipe FAQs

What type of cheese should I use for the Mexican Chopped Cheese Sandwich?
Opt for cheeses that melt beautifully, such as cheddar, pepper jack, or even Monterey Jack. These cheeses will create that gooey, delicious layer you’re looking for. Avoid cheeses that don’t melt, as they won’t provide the desirable texture in your sandwich.

How do I store leftovers of the Mexican Chopped Cheese Sandwich?
Store any leftover sandwiches in an airtight container in the fridge for up to 3 days. If you're reheating, pop them in the oven at 350°F for about 10–15 minutes to maintain that delightful warmth and gooey texture.

Can I freeze the Mexican Chopped Cheese Sandwich?
Absolutely! You can freeze individual sandwiches by wrapping them tightly in foil. Store them in the freezer for up to 1 month. When you're ready to enjoy, thaw the sandwich in the fridge overnight and reheat it in the oven at 350°F for 10–15 minutes.

How can I ensure my chopped beef is perfectly cooked?
Cook the chopped beef in a skillet over medium heat until it’s browned and no longer pink, about 8–10 minutes. Stir occasionally for even cooking. Use a meat thermometer to check; it should reach a minimum internal temperature of 160°F for safety and quality.

What toppings work best with the Mexican Chopped Cheese Sandwich?
Toppings like creamy avocado slices, fresh salsa, and crunchy pickled onions accentuate the flavors wonderfully. Avoid soggy toppings by adding them just before serving. You can also make it your own by trying sour cream or jalapeños for an extra kick!

Can I adapt this recipe for dietary restrictions?
Certainly! For a gluten-free version, use gluten-free sandwich rolls. For a low-carb option, consider lettuce wraps. If you're looking for a vegetarian alternative, substitute the chopped beef with black beans or a plant-based meat alternative to maintain that hearty feel while catering to dietary preferences.

Mexican Chopped Cheese Sandwich

Mouthwatering Mexican Chopped Cheese Sandwich to Satisfy Cravings

Enjoy a Mexican Chopped Cheese Sandwich, a quick and flavorful meal perfect for any occasion!
Print Recipe Pin Recipe
Prep Time 10 minutes mins
Cook Time 25 minutes mins
Total Time 35 minutes mins
Servings: 4 sandwiches
Course: Sandwiches
Cuisine: Mexican
Calories: 500
Ingredients Equipment Method Nutrition Notes

Ingredients
  

For the Beef Mixture
  • 2 cups chopped beef
  • 1 teaspoon salt
  • 1 teaspoon pepper
For the Sandwich
  • 4 slices cheese choose your favorite type
  • 4 pieces toasted sandwich rolls opt for crusty rolls
For the Toppings
  • 1 each avocado sliced
  • 1 cup salsa
  • 1 cup pickled onions
  • 1 cup sour cream optional

Equipment

  • large skillet
  • spatula
  • cutting board

Method
 

Cooking Instructions
  1. Heat a large skillet over medium heat. Add 2 cups of chopped beef and cook for about 8–10 minutes, stirring occasionally, until browned.
  2. Once the beef is cooked, sprinkle in 1 teaspoon of salt and 1 teaspoon of pepper. Stir well to combine and cook for an additional minute.
  3. Arrange 4 slices of your favorite cheese on top of the beef. Cover the skillet and cook for another 2–3 minutes until melted.
  4. While cheese is melting, take 4 toasted sandwich rolls and place them on a cutting board. Optionally toast in the oven at 350°F for 5–7 minutes.
  5. Use a spatula to scoop portions of the beef and cheese mixture onto each toasted sandwich roll.
  6. Top each sandwich with avocado slices, fresh salsa, and pickled onions. Add a dollop of sour cream if desired.
  7. Serve immediately while warm, either on a platter for sharing or individually.

Nutrition

Serving: 1sandwichCalories: 500kcalCarbohydrates: 40gProtein: 25gFat: 30gSaturated Fat: 15gPolyunsaturated Fat: 2gMonounsaturated Fat: 10gCholesterol: 90mgSodium: 800mgPotassium: 600mgFiber: 5gSugar: 3gVitamin A: 10IUVitamin C: 15mgCalcium: 20mgIron: 15mg

Notes

Use freshly chopped beef for better flavor and texture. Serve immediately for the best experience!

Tried this recipe?

Let us know how it was!
  • « Previous Page
  • 1
  • …
  • 3
  • 4
  • 5
  • 6
  • 7
  • …
  • 40
  • Next Page »

Footer

Copyright © 2026 · recipecrown.com Privacy Policy Disclaimer Terms & Conditions